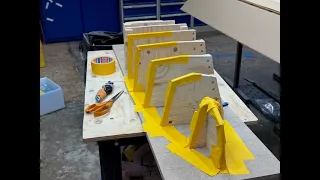
7 June 2024 Making flanges around the bulkhead hatches for the canvas
This Youtube channel is about me an 85 year and one month old dyslectic solo sailor building a 5.7 meter long, 1.2 meter beam twin keel ocean going high latitude cruiser.
If you’re interested in contributing to my experiments links are below.
https://www.paypal.com/donate/?hosted_button_id=53X8NVEA22MBL
Swish 0706200550
Also subscribe
For more see Yrvind.com

Sven Yrvind
At 86, Sven Yrvind is still pushing the limits of small-boat design. Discover the philosophy and technical grit behind his 'Exlex' series.
Channel Information:
Social Media Links:
Support Sven Yrvind
At WeBoating.com, we profoundly acknowledge the unwavering dedication that Sven Yrvind invests in crafting each and every video or voyage. Their passion for delivering exceptional ocean content shines through every frame, and it's a labor of love that deserves your attention.
We invite you to watch their captivating videos here and actively engage with their content, including their social media links above. Liking, commenting, and sharing their work goes a long way in fueling their creative fire.
We're also inviting you to explore the gear, sponsorships, and boat partnerships highlighted in the "7 June 2024 Making flanges around the bulkhead hatches for the canvas" video description, or directly on YouTube. By engaging with these offerings or purchasing services and items, you directly support Sven Yrvind, their collaborators, and the brands they're associated with.
To ensure you never miss an offshore update, consider visiting their official YouTube Channel to subscribe, like, and join their community directly.
If you have any feedback, corrections, or additional information about Sven Yrvind or their videos, please use the comment form below to share your thoughts with us.
Thank you for being a part of our community and supporting the creators we cherish. Your time and support truly matter!
Step 3: Allowing Time to Dry
After securely attaching the first portion of the flange, Sven allows ample time for it to dry before moving forward with additional steps. This patience and precision are key aspects of his successful boatbuilding methods.Step 4: Finishing Touches
Once the flange is fully dried, Sven removes the clamps carefully, ensuring no damage occurs during this process. He then moves on to attaching four more pieces onto these main frames, completing two pairs of flanges for the bulkhead hatches.The Final Touches
While two flanges form the primary support structure around the hatches, Sven mentions there are two additional pieces required at each end to ensure comprehensive protection. This attention to detail highlights his commitment to producing a durable and reliable design. “Sailing is about finding your path, whether it’s across an ocean or within yourself.” – Sven Yrvind In conclusion, making flanges around bulkhead hatches may seem complex at first glance, but by following Sven Yrvind’s meticulous process, enthusiasts can achieve professional-level results. Remember that the journey of boatbuilding is as rewarding as reaching your destination; it tests one’s patience and dedication. For those seeking to embark on this adventure or simply gain more insight into marine craftsmanship, Sven’s wisdom is invaluable.Sven begins by explaining that working on flanges vertically and horizontally is significantly easier than doing so in a flat position. To simplify the process further, he divides the task into two or three steps as suggested by fellow expert “for for.” This approach not only makes it more manageable but also allows for greater precision in crafting each component.Step 2: Applying Glue and Securing
Sven proceeds to apply glue along one edge of the flange, ensuring a secure bond when clamped into place. He emphasizes that this stage is crucial for maintaining the structural integrity of the flange, which in turn safeguards the living area beneath the canvas when hatches are open.Step 3: Allowing Time to Dry
After securely attaching the first portion of the flange, Sven allows ample time for it to dry before moving forward with additional steps. This patience and precision are key aspects of his successful boatbuilding methods.Step 4: Finishing Touches
Once the flange is fully dried, Sven removes the clamps carefully, ensuring no damage occurs during this process. He then moves on to attaching four more pieces onto these main frames, completing two pairs of flanges for the bulkhead hatches.The Final Touches
While two flanges form the primary support structure around the hatches, Sven mentions there are two additional pieces required at each end to ensure comprehensive protection. This attention to detail highlights his commitment to producing a durable and reliable design. “Sailing is about finding your path, whether it’s across an ocean or within yourself.” – Sven Yrvind In conclusion, making flanges around bulkhead hatches may seem complex at first glance, but by following Sven Yrvind’s meticulous process, enthusiasts can achieve professional-level results. Remember that the journey of boatbuilding is as rewarding as reaching your destination; it tests one’s patience and dedication. For those seeking to embark on this adventure or simply gain more insight into marine craftsmanship, Sven’s wisdom is invaluable.Sven Yrvind, a renowned yacht designer and sailor, shares valuable insights on creating flanges around bulkhead hatches for canvas protection in this enlightening video. By following his expert guidance, boat enthusiasts can ensure their living areas remain secure while allowing unhindered access through the hatches.Step 1: Starting with the Flange
Sven begins by explaining that working on flanges vertically and horizontally is significantly easier than doing so in a flat position. To simplify the process further, he divides the task into two or three steps as suggested by fellow expert “for for.” This approach not only makes it more manageable but also allows for greater precision in crafting each component.Step 2: Applying Glue and Securing
Sven proceeds to apply glue along one edge of the flange, ensuring a secure bond when clamped into place. He emphasizes that this stage is crucial for maintaining the structural integrity of the flange, which in turn safeguards the living area beneath the canvas when hatches are open.Step 3: Allowing Time to Dry
After securely attaching the first portion of the flange, Sven allows ample time for it to dry before moving forward with additional steps. This patience and precision are key aspects of his successful boatbuilding methods.Step 4: Finishing Touches
Once the flange is fully dried, Sven removes the clamps carefully, ensuring no damage occurs during this process. He then moves on to attaching four more pieces onto these main frames, completing two pairs of flanges for the bulkhead hatches.The Final Touches
While two flanges form the primary support structure around the hatches, Sven mentions there are two additional pieces required at each end to ensure comprehensive protection. This attention to detail highlights his commitment to producing a durable and reliable design. “Sailing is about finding your path, whether it’s across an ocean or within yourself.” – Sven Yrvind In conclusion, making flanges around bulkhead hatches may seem complex at first glance, but by following Sven Yrvind’s meticulous process, enthusiasts can achieve professional-level results. Remember that the journey of boatbuilding is as rewarding as reaching your destination; it tests one’s patience and dedication. For those seeking to embark on this adventure or simply gain more insight into marine craftsmanship, Sven’s wisdom is invaluable.Making Flanges Around Bulkhead Hatches for Canvas
Sven Yrvind, a renowned yacht designer and sailor, shares valuable insights on creating flanges around bulkhead hatches for canvas protection in this enlightening video. By following his expert guidance, boat enthusiasts can ensure their living areas remain secure while allowing unhindered access through the hatches.Step 1: Starting with the Flange
Sven begins by explaining that working on flanges vertically and horizontally is significantly easier than doing so in a flat position. To simplify the process further, he divides the task into two or three steps as suggested by fellow expert “for for.” This approach not only makes it more manageable but also allows for greater precision in crafting each component.Step 2: Applying Glue and Securing
Sven proceeds to apply glue along one edge of the flange, ensuring a secure bond when clamped into place. He emphasizes that this stage is crucial for maintaining the structural integrity of the flange, which in turn safeguards the living area beneath the canvas when hatches are open.Step 3: Allowing Time to Dry
After securely attaching the first portion of the flange, Sven allows ample time for it to dry before moving forward with additional steps. This patience and precision are key aspects of his successful boatbuilding methods.Step 4: Finishing Touches
Once the flange is fully dried, Sven removes the clamps carefully, ensuring no damage occurs during this process. He then moves on to attaching four more pieces onto these main frames, completing two pairs of flanges for the bulkhead hatches.The Final Touches
While two flanges form the primary support structure around the hatches, Sven mentions there are two additional pieces required at each end to ensure comprehensive protection. This attention to detail highlights his commitment to producing a durable and reliable design. “Sailing is about finding your path, whether it’s across an ocean or within yourself.” – Sven Yrvind In conclusion, making flanges around bulkhead hatches may seem complex at first glance, but by following Sven Yrvind’s meticulous process, enthusiasts can achieve professional-level results. Remember that the journey of boatbuilding is as rewarding as reaching your destination; it tests one’s patience and dedication. For those seeking to embark on this adventure or simply gain more insight into marine craftsmanship, Sven’s wisdom is invaluable.Once the flange is fully dried, Sven removes the clamps carefully, ensuring no damage occurs during this process. He then moves on to attaching four more pieces onto these main frames, completing two pairs of flanges for the bulkhead hatches.The Final Touches
While two flanges form the primary support structure around the hatches, Sven mentions there are two additional pieces required at each end to ensure comprehensive protection. This attention to detail highlights his commitment to producing a durable and reliable design. “Sailing is about finding your path, whether it’s across an ocean or within yourself.” – Sven Yrvind In conclusion, making flanges around bulkhead hatches may seem complex at first glance, but by following Sven Yrvind’s meticulous process, enthusiasts can achieve professional-level results. Remember that the journey of boatbuilding is as rewarding as reaching your destination; it tests one’s patience and dedication. For those seeking to embark on this adventure or simply gain more insight into marine craftsmanship, Sven’s wisdom is invaluable.Making Flanges Around Bulkhead Hatches for Canvas
Sven Yrvind, a renowned yacht designer and sailor, shares valuable insights on creating flanges around bulkhead hatches for canvas protection in this enlightening video. By following his expert guidance, boat enthusiasts can ensure their living areas remain secure while allowing unhindered access through the hatches.Step 1: Starting with the Flange
Sven begins by explaining that working on flanges vertically and horizontally is significantly easier than doing so in a flat position. To simplify the process further, he divides the task into two or three steps as suggested by fellow expert “for for.” This approach not only makes it more manageable but also allows for greater precision in crafting each component.Step 2: Applying Glue and Securing
Sven proceeds to apply glue along one edge of the flange, ensuring a secure bond when clamped into place. He emphasizes that this stage is crucial for maintaining the structural integrity of the flange, which in turn safeguards the living area beneath the canvas when hatches are open.Step 3: Allowing Time to Dry
After securely attaching the first portion of the flange, Sven allows ample time for it to dry before moving forward with additional steps. This patience and precision are key aspects of his successful boatbuilding methods.Step 4: Finishing Touches
Once the flange is fully dried, Sven removes the clamps carefully, ensuring no damage occurs during this process. He then moves on to attaching four more pieces onto these main frames, completing two pairs of flanges for the bulkhead hatches.The Final Touches
While two flanges form the primary support structure around the hatches, Sven mentions there are two additional pieces required at each end to ensure comprehensive protection. This attention to detail highlights his commitment to producing a durable and reliable design. “Sailing is about finding your path, whether it’s across an ocean or within yourself.” – Sven Yrvind In conclusion, making flanges around bulkhead hatches may seem complex at first glance, but by following Sven Yrvind’s meticulous process, enthusiasts can achieve professional-level results. Remember that the journey of boatbuilding is as rewarding as reaching your destination; it tests one’s patience and dedication. For those seeking to embark on this adventure or simply gain more insight into marine craftsmanship, Sven’s wisdom is invaluable.After securely attaching the first portion of the flange, Sven allows ample time for it to dry before moving forward with additional steps. This patience and precision are key aspects of his successful boatbuilding methods.Step 4: Finishing Touches
Once the flange is fully dried, Sven removes the clamps carefully, ensuring no damage occurs during this process. He then moves on to attaching four more pieces onto these main frames, completing two pairs of flanges for the bulkhead hatches.The Final Touches
While two flanges form the primary support structure around the hatches, Sven mentions there are two additional pieces required at each end to ensure comprehensive protection. This attention to detail highlights his commitment to producing a durable and reliable design. “Sailing is about finding your path, whether it’s across an ocean or within yourself.” – Sven Yrvind In conclusion, making flanges around bulkhead hatches may seem complex at first glance, but by following Sven Yrvind’s meticulous process, enthusiasts can achieve professional-level results. Remember that the journey of boatbuilding is as rewarding as reaching your destination; it tests one’s patience and dedication. For those seeking to embark on this adventure or simply gain more insight into marine craftsmanship, Sven’s wisdom is invaluable.Making Flanges Around Bulkhead Hatches for Canvas
Sven Yrvind, a renowned yacht designer and sailor, shares valuable insights on creating flanges around bulkhead hatches for canvas protection in this enlightening video. By following his expert guidance, boat enthusiasts can ensure their living areas remain secure while allowing unhindered access through the hatches.Step 1: Starting with the Flange
Sven begins by explaining that working on flanges vertically and horizontally is significantly easier than doing so in a flat position. To simplify the process further, he divides the task into two or three steps as suggested by fellow expert “for for.” This approach not only makes it more manageable but also allows for greater precision in crafting each component.Step 2: Applying Glue and Securing
Sven proceeds to apply glue along one edge of the flange, ensuring a secure bond when clamped into place. He emphasizes that this stage is crucial for maintaining the structural integrity of the flange, which in turn safeguards the living area beneath the canvas when hatches are open.Step 3: Allowing Time to Dry
After securely attaching the first portion of the flange, Sven allows ample time for it to dry before moving forward with additional steps. This patience and precision are key aspects of his successful boatbuilding methods.Step 4: Finishing Touches
Once the flange is fully dried, Sven removes the clamps carefully, ensuring no damage occurs during this process. He then moves on to attaching four more pieces onto these main frames, completing two pairs of flanges for the bulkhead hatches.The Final Touches
While two flanges form the primary support structure around the hatches, Sven mentions there are two additional pieces required at each end to ensure comprehensive protection. This attention to detail highlights his commitment to producing a durable and reliable design. “Sailing is about finding your path, whether it’s across an ocean or within yourself.” – Sven Yrvind In conclusion, making flanges around bulkhead hatches may seem complex at first glance, but by following Sven Yrvind’s meticulous process, enthusiasts can achieve professional-level results. Remember that the journey of boatbuilding is as rewarding as reaching your destination; it tests one’s patience and dedication. For those seeking to embark on this adventure or simply gain more insight into marine craftsmanship, Sven’s wisdom is invaluable.Sven proceeds to apply glue along one edge of the flange, ensuring a secure bond when clamped into place. He emphasizes that this stage is crucial for maintaining the structural integrity of the flange, which in turn safeguards the living area beneath the canvas when hatches are open.Step 3: Allowing Time to Dry
After securely attaching the first portion of the flange, Sven allows ample time for it to dry before moving forward with additional steps. This patience and precision are key aspects of his successful boatbuilding methods.Step 4: Finishing Touches
Once the flange is fully dried, Sven removes the clamps carefully, ensuring no damage occurs during this process. He then moves on to attaching four more pieces onto these main frames, completing two pairs of flanges for the bulkhead hatches.The Final Touches
While two flanges form the primary support structure around the hatches, Sven mentions there are two additional pieces required at each end to ensure comprehensive protection. This attention to detail highlights his commitment to producing a durable and reliable design. “Sailing is about finding your path, whether it’s across an ocean or within yourself.” – Sven Yrvind In conclusion, making flanges around bulkhead hatches may seem complex at first glance, but by following Sven Yrvind’s meticulous process, enthusiasts can achieve professional-level results. Remember that the journey of boatbuilding is as rewarding as reaching your destination; it tests one’s patience and dedication. For those seeking to embark on this adventure or simply gain more insight into marine craftsmanship, Sven’s wisdom is invaluable.Making Flanges Around Bulkhead Hatches for Canvas
Sven Yrvind, a renowned yacht designer and sailor, shares valuable insights on creating flanges around bulkhead hatches for canvas protection in this enlightening video. By following his expert guidance, boat enthusiasts can ensure their living areas remain secure while allowing unhindered access through the hatches.Step 1: Starting with the Flange
Sven begins by explaining that working on flanges vertically and horizontally is significantly easier than doing so in a flat position. To simplify the process further, he divides the task into two or three steps as suggested by fellow expert “for for.” This approach not only makes it more manageable but also allows for greater precision in crafting each component.Step 2: Applying Glue and Securing
Sven proceeds to apply glue along one edge of the flange, ensuring a secure bond when clamped into place. He emphasizes that this stage is crucial for maintaining the structural integrity of the flange, which in turn safeguards the living area beneath the canvas when hatches are open.Step 3: Allowing Time to Dry
After securely attaching the first portion of the flange, Sven allows ample time for it to dry before moving forward with additional steps. This patience and precision are key aspects of his successful boatbuilding methods.Step 4: Finishing Touches
Once the flange is fully dried, Sven removes the clamps carefully, ensuring no damage occurs during this process. He then moves on to attaching four more pieces onto these main frames, completing two pairs of flanges for the bulkhead hatches.The Final Touches
While two flanges form the primary support structure around the hatches, Sven mentions there are two additional pieces required at each end to ensure comprehensive protection. This attention to detail highlights his commitment to producing a durable and reliable design. “Sailing is about finding your path, whether it’s across an ocean or within yourself.” – Sven Yrvind In conclusion, making flanges around bulkhead hatches may seem complex at first glance, but by following Sven Yrvind’s meticulous process, enthusiasts can achieve professional-level results. Remember that the journey of boatbuilding is as rewarding as reaching your destination; it tests one’s patience and dedication. For those seeking to embark on this adventure or simply gain more insight into marine craftsmanship, Sven’s wisdom is invaluable.Sven begins by explaining that working on flanges vertically and horizontally is significantly easier than doing so in a flat position. To simplify the process further, he divides the task into two or three steps as suggested by fellow expert “for for.” This approach not only makes it more manageable but also allows for greater precision in crafting each component.Step 2: Applying Glue and Securing
Sven proceeds to apply glue along one edge of the flange, ensuring a secure bond when clamped into place. He emphasizes that this stage is crucial for maintaining the structural integrity of the flange, which in turn safeguards the living area beneath the canvas when hatches are open.Step 3: Allowing Time to Dry
After securely attaching the first portion of the flange, Sven allows ample time for it to dry before moving forward with additional steps. This patience and precision are key aspects of his successful boatbuilding methods.Step 4: Finishing Touches
Once the flange is fully dried, Sven removes the clamps carefully, ensuring no damage occurs during this process. He then moves on to attaching four more pieces onto these main frames, completing two pairs of flanges for the bulkhead hatches.The Final Touches
While two flanges form the primary support structure around the hatches, Sven mentions there are two additional pieces required at each end to ensure comprehensive protection. This attention to detail highlights his commitment to producing a durable and reliable design. “Sailing is about finding your path, whether it’s across an ocean or within yourself.” – Sven Yrvind In conclusion, making flanges around bulkhead hatches may seem complex at first glance, but by following Sven Yrvind’s meticulous process, enthusiasts can achieve professional-level results. Remember that the journey of boatbuilding is as rewarding as reaching your destination; it tests one’s patience and dedication. For those seeking to embark on this adventure or simply gain more insight into marine craftsmanship, Sven’s wisdom is invaluable.Making Flanges Around Bulkhead Hatches for Canvas
Sven Yrvind, a renowned yacht designer and sailor, shares valuable insights on creating flanges around bulkhead hatches for canvas protection in this enlightening video. By following his expert guidance, boat enthusiasts can ensure their living areas remain secure while allowing unhindered access through the hatches.Step 1: Starting with the Flange
Sven begins by explaining that working on flanges vertically and horizontally is significantly easier than doing so in a flat position. To simplify the process further, he divides the task into two or three steps as suggested by fellow expert “for for.” This approach not only makes it more manageable but also allows for greater precision in crafting each component.Step 2: Applying Glue and Securing
Sven proceeds to apply glue along one edge of the flange, ensuring a secure bond when clamped into place. He emphasizes that this stage is crucial for maintaining the structural integrity of the flange, which in turn safeguards the living area beneath the canvas when hatches are open.Step 3: Allowing Time to Dry
After securely attaching the first portion of the flange, Sven allows ample time for it to dry before moving forward with additional steps. This patience and precision are key aspects of his successful boatbuilding methods.Step 4: Finishing Touches
Once the flange is fully dried, Sven removes the clamps carefully, ensuring no damage occurs during this process. He then moves on to attaching four more pieces onto these main frames, completing two pairs of flanges for the bulkhead hatches.The Final Touches
While two flanges form the primary support structure around the hatches, Sven mentions there are two additional pieces required at each end to ensure comprehensive protection. This attention to detail highlights his commitment to producing a durable and reliable design. “Sailing is about finding your path, whether it’s across an ocean or within yourself.” – Sven Yrvind In conclusion, making flanges around bulkhead hatches may seem complex at first glance, but by following Sven Yrvind’s meticulous process, enthusiasts can achieve professional-level results. Remember that the journey of boatbuilding is as rewarding as reaching your destination; it tests one’s patience and dedication. For those seeking to embark on this adventure or simply gain more insight into marine craftsmanship, Sven’s wisdom is invaluable.Sven Yrvind, a renowned yacht designer and sailor, shares valuable insights on creating flanges around bulkhead hatches for canvas protection in this enlightening video. By following his expert guidance, boat enthusiasts can ensure their living areas remain secure while allowing unhindered access through the hatches.Step 1: Starting with the Flange
Sven begins by explaining that working on flanges vertically and horizontally is significantly easier than doing so in a flat position. To simplify the process further, he divides the task into two or three steps as suggested by fellow expert “for for.” This approach not only makes it more manageable but also allows for greater precision in crafting each component.Step 2: Applying Glue and Securing
Sven proceeds to apply glue along one edge of the flange, ensuring a secure bond when clamped into place. He emphasizes that this stage is crucial for maintaining the structural integrity of the flange, which in turn safeguards the living area beneath the canvas when hatches are open.Step 3: Allowing Time to Dry
After securely attaching the first portion of the flange, Sven allows ample time for it to dry before moving forward with additional steps. This patience and precision are key aspects of his successful boatbuilding methods.Step 4: Finishing Touches
Once the flange is fully dried, Sven removes the clamps carefully, ensuring no damage occurs during this process. He then moves on to attaching four more pieces onto these main frames, completing two pairs of flanges for the bulkhead hatches.The Final Touches
While two flanges form the primary support structure around the hatches, Sven mentions there are two additional pieces required at each end to ensure comprehensive protection. This attention to detail highlights his commitment to producing a durable and reliable design. “Sailing is about finding your path, whether it’s across an ocean or within yourself.” – Sven Yrvind In conclusion, making flanges around bulkhead hatches may seem complex at first glance, but by following Sven Yrvind’s meticulous process, enthusiasts can achieve professional-level results. Remember that the journey of boatbuilding is as rewarding as reaching your destination; it tests one’s patience and dedication. For those seeking to embark on this adventure or simply gain more insight into marine craftsmanship, Sven’s wisdom is invaluable.Making Flanges Around Bulkhead Hatches for Canvas
Sven Yrvind, a renowned yacht designer and sailor, shares valuable insights on creating flanges around bulkhead hatches for canvas protection in this enlightening video. By following his expert guidance, boat enthusiasts can ensure their living areas remain secure while allowing unhindered access through the hatches.Step 1: Starting with the Flange
Sven begins by explaining that working on flanges vertically and horizontally is significantly easier than doing so in a flat position. To simplify the process further, he divides the task into two or three steps as suggested by fellow expert “for for.” This approach not only makes it more manageable but also allows for greater precision in crafting each component.Step 2: Applying Glue and Securing
Sven proceeds to apply glue along one edge of the flange, ensuring a secure bond when clamped into place. He emphasizes that this stage is crucial for maintaining the structural integrity of the flange, which in turn safeguards the living area beneath the canvas when hatches are open.Step 3: Allowing Time to Dry
After securely attaching the first portion of the flange, Sven allows ample time for it to dry before moving forward with additional steps. This patience and precision are key aspects of his successful boatbuilding methods.Step 4: Finishing Touches
Once the flange is fully dried, Sven removes the clamps carefully, ensuring no damage occurs during this process. He then moves on to attaching four more pieces onto these main frames, completing two pairs of flanges for the bulkhead hatches.The Final Touches
While two flanges form the primary support structure around the hatches, Sven mentions there are two additional pieces required at each end to ensure comprehensive protection. This attention to detail highlights his commitment to producing a durable and reliable design. “Sailing is about finding your path, whether it’s across an ocean or within yourself.” – Sven Yrvind In conclusion, making flanges around bulkhead hatches may seem complex at first glance, but by following Sven Yrvind’s meticulous process, enthusiasts can achieve professional-level results. Remember that the journey of boatbuilding is as rewarding as reaching your destination; it tests one’s patience and dedication. For those seeking to embark on this adventure or simply gain more insight into marine craftsmanship, Sven’s wisdom is invaluable.Once the flange is fully dried, Sven removes the clamps carefully, ensuring no damage occurs during this process. He then moves on to attaching four more pieces onto these main frames, completing two pairs of flanges for the bulkhead hatches.The Final Touches
While two flanges form the primary support structure around the hatches, Sven mentions there are two additional pieces required at each end to ensure comprehensive protection. This attention to detail highlights his commitment to producing a durable and reliable design. “Sailing is about finding your path, whether it’s across an ocean or within yourself.” – Sven Yrvind In conclusion, making flanges around bulkhead hatches may seem complex at first glance, but by following Sven Yrvind’s meticulous process, enthusiasts can achieve professional-level results. Remember that the journey of boatbuilding is as rewarding as reaching your destination; it tests one’s patience and dedication. For those seeking to embark on this adventure or simply gain more insight into marine craftsmanship, Sven’s wisdom is invaluable.Sven Yrvind, a renowned yacht designer and sailor, shares valuable insights on creating flanges around bulkhead hatches for canvas protection in this enlightening video. By following his expert guidance, boat enthusiasts can ensure their living areas remain secure while allowing unhindered access through the hatches.Step 1: Starting with the Flange
Sven begins by explaining that working on flanges vertically and horizontally is significantly easier than doing so in a flat position. To simplify the process further, he divides the task into two or three steps as suggested by fellow expert “for for.” This approach not only makes it more manageable but also allows for greater precision in crafting each component.Step 2: Applying Glue and Securing
Sven proceeds to apply glue along one edge of the flange, ensuring a secure bond when clamped into place. He emphasizes that this stage is crucial for maintaining the structural integrity of the flange, which in turn safeguards the living area beneath the canvas when hatches are open.Step 3: Allowing Time to Dry
After securely attaching the first portion of the flange, Sven allows ample time for it to dry before moving forward with additional steps. This patience and precision are key aspects of his successful boatbuilding methods.Step 4: Finishing Touches
Once the flange is fully dried, Sven removes the clamps carefully, ensuring no damage occurs during this process. He then moves on to attaching four more pieces onto these main frames, completing two pairs of flanges for the bulkhead hatches.The Final Touches
While two flanges form the primary support structure around the hatches, Sven mentions there are two additional pieces required at each end to ensure comprehensive protection. This attention to detail highlights his commitment to producing a durable and reliable design. “Sailing is about finding your path, whether it’s across an ocean or within yourself.” – Sven Yrvind In conclusion, making flanges around bulkhead hatches may seem complex at first glance, but by following Sven Yrvind’s meticulous process, enthusiasts can achieve professional-level results. Remember that the journey of boatbuilding is as rewarding as reaching your destination; it tests one’s patience and dedication. For those seeking to embark on this adventure or simply gain more insight into marine craftsmanship, Sven’s wisdom is invaluable.Making Flanges Around Bulkhead Hatches for Canvas
Sven Yrvind, a renowned yacht designer and sailor, shares valuable insights on creating flanges around bulkhead hatches for canvas protection in this enlightening video. By following his expert guidance, boat enthusiasts can ensure their living areas remain secure while allowing unhindered access through the hatches.Step 1: Starting with the Flange
Sven begins by explaining that working on flanges vertically and horizontally is significantly easier than doing so in a flat position. To simplify the process further, he divides the task into two or three steps as suggested by fellow expert “for for.” This approach not only makes it more manageable but also allows for greater precision in crafting each component.Step 2: Applying Glue and Securing
Sven proceeds to apply glue along one edge of the flange, ensuring a secure bond when clamped into place. He emphasizes that this stage is crucial for maintaining the structural integrity of the flange, which in turn safeguards the living area beneath the canvas when hatches are open.Step 3: Allowing Time to Dry
After securely attaching the first portion of the flange, Sven allows ample time for it to dry before moving forward with additional steps. This patience and precision are key aspects of his successful boatbuilding methods.Step 4: Finishing Touches
Once the flange is fully dried, Sven removes the clamps carefully, ensuring no damage occurs during this process. He then moves on to attaching four more pieces onto these main frames, completing two pairs of flanges for the bulkhead hatches.The Final Touches
While two flanges form the primary support structure around the hatches, Sven mentions there are two additional pieces required at each end to ensure comprehensive protection. This attention to detail highlights his commitment to producing a durable and reliable design. “Sailing is about finding your path, whether it’s across an ocean or within yourself.” – Sven Yrvind In conclusion, making flanges around bulkhead hatches may seem complex at first glance, but by following Sven Yrvind’s meticulous process, enthusiasts can achieve professional-level results. Remember that the journey of boatbuilding is as rewarding as reaching your destination; it tests one’s patience and dedication. For those seeking to embark on this adventure or simply gain more insight into marine craftsmanship, Sven’s wisdom is invaluable.After securely attaching the first portion of the flange, Sven allows ample time for it to dry before moving forward with additional steps. This patience and precision are key aspects of his successful boatbuilding methods.Step 4: Finishing Touches
Once the flange is fully dried, Sven removes the clamps carefully, ensuring no damage occurs during this process. He then moves on to attaching four more pieces onto these main frames, completing two pairs of flanges for the bulkhead hatches.The Final Touches
While two flanges form the primary support structure around the hatches, Sven mentions there are two additional pieces required at each end to ensure comprehensive protection. This attention to detail highlights his commitment to producing a durable and reliable design. “Sailing is about finding your path, whether it’s across an ocean or within yourself.” – Sven Yrvind In conclusion, making flanges around bulkhead hatches may seem complex at first glance, but by following Sven Yrvind’s meticulous process, enthusiasts can achieve professional-level results. Remember that the journey of boatbuilding is as rewarding as reaching your destination; it tests one’s patience and dedication. For those seeking to embark on this adventure or simply gain more insight into marine craftsmanship, Sven’s wisdom is invaluable.Sven Yrvind, a renowned yacht designer and sailor, shares valuable insights on creating flanges around bulkhead hatches for canvas protection in this enlightening video. By following his expert guidance, boat enthusiasts can ensure their living areas remain secure while allowing unhindered access through the hatches.Step 1: Starting with the Flange
Sven begins by explaining that working on flanges vertically and horizontally is significantly easier than doing so in a flat position. To simplify the process further, he divides the task into two or three steps as suggested by fellow expert “for for.” This approach not only makes it more manageable but also allows for greater precision in crafting each component.Step 2: Applying Glue and Securing
Sven proceeds to apply glue along one edge of the flange, ensuring a secure bond when clamped into place. He emphasizes that this stage is crucial for maintaining the structural integrity of the flange, which in turn safeguards the living area beneath the canvas when hatches are open.Step 3: Allowing Time to Dry
After securely attaching the first portion of the flange, Sven allows ample time for it to dry before moving forward with additional steps. This patience and precision are key aspects of his successful boatbuilding methods.Step 4: Finishing Touches
Once the flange is fully dried, Sven removes the clamps carefully, ensuring no damage occurs during this process. He then moves on to attaching four more pieces onto these main frames, completing two pairs of flanges for the bulkhead hatches.The Final Touches
While two flanges form the primary support structure around the hatches, Sven mentions there are two additional pieces required at each end to ensure comprehensive protection. This attention to detail highlights his commitment to producing a durable and reliable design. “Sailing is about finding your path, whether it’s across an ocean or within yourself.” – Sven Yrvind In conclusion, making flanges around bulkhead hatches may seem complex at first glance, but by following Sven Yrvind’s meticulous process, enthusiasts can achieve professional-level results. Remember that the journey of boatbuilding is as rewarding as reaching your destination; it tests one’s patience and dedication. For those seeking to embark on this adventure or simply gain more insight into marine craftsmanship, Sven’s wisdom is invaluable.Making Flanges Around Bulkhead Hatches for Canvas
Sven Yrvind, a renowned yacht designer and sailor, shares valuable insights on creating flanges around bulkhead hatches for canvas protection in this enlightening video. By following his expert guidance, boat enthusiasts can ensure their living areas remain secure while allowing unhindered access through the hatches.Step 1: Starting with the Flange
Sven begins by explaining that working on flanges vertically and horizontally is significantly easier than doing so in a flat position. To simplify the process further, he divides the task into two or three steps as suggested by fellow expert “for for.” This approach not only makes it more manageable but also allows for greater precision in crafting each component.Step 2: Applying Glue and Securing
Sven proceeds to apply glue along one edge of the flange, ensuring a secure bond when clamped into place. He emphasizes that this stage is crucial for maintaining the structural integrity of the flange, which in turn safeguards the living area beneath the canvas when hatches are open.Step 3: Allowing Time to Dry
After securely attaching the first portion of the flange, Sven allows ample time for it to dry before moving forward with additional steps. This patience and precision are key aspects of his successful boatbuilding methods.Step 4: Finishing Touches
Once the flange is fully dried, Sven removes the clamps carefully, ensuring no damage occurs during this process. He then moves on to attaching four more pieces onto these main frames, completing two pairs of flanges for the bulkhead hatches.The Final Touches
While two flanges form the primary support structure around the hatches, Sven mentions there are two additional pieces required at each end to ensure comprehensive protection. This attention to detail highlights his commitment to producing a durable and reliable design. “Sailing is about finding your path, whether it’s across an ocean or within yourself.” – Sven Yrvind In conclusion, making flanges around bulkhead hatches may seem complex at first glance, but by following Sven Yrvind’s meticulous process, enthusiasts can achieve professional-level results. Remember that the journey of boatbuilding is as rewarding as reaching your destination; it tests one’s patience and dedication. For those seeking to embark on this adventure or simply gain more insight into marine craftsmanship, Sven’s wisdom is invaluable.Sven proceeds to apply glue along one edge of the flange, ensuring a secure bond when clamped into place. He emphasizes that this stage is crucial for maintaining the structural integrity of the flange, which in turn safeguards the living area beneath the canvas when hatches are open.Step 3: Allowing Time to Dry
After securely attaching the first portion of the flange, Sven allows ample time for it to dry before moving forward with additional steps. This patience and precision are key aspects of his successful boatbuilding methods.Step 4: Finishing Touches
Once the flange is fully dried, Sven removes the clamps carefully, ensuring no damage occurs during this process. He then moves on to attaching four more pieces onto these main frames, completing two pairs of flanges for the bulkhead hatches.The Final Touches
While two flanges form the primary support structure around the hatches, Sven mentions there are two additional pieces required at each end to ensure comprehensive protection. This attention to detail highlights his commitment to producing a durable and reliable design. “Sailing is about finding your path, whether it’s across an ocean or within yourself.” – Sven Yrvind In conclusion, making flanges around bulkhead hatches may seem complex at first glance, but by following Sven Yrvind’s meticulous process, enthusiasts can achieve professional-level results. Remember that the journey of boatbuilding is as rewarding as reaching your destination; it tests one’s patience and dedication. For those seeking to embark on this adventure or simply gain more insight into marine craftsmanship, Sven’s wisdom is invaluable.Sven Yrvind, a renowned yacht designer and sailor, shares valuable insights on creating flanges around bulkhead hatches for canvas protection in this enlightening video. By following his expert guidance, boat enthusiasts can ensure their living areas remain secure while allowing unhindered access through the hatches.Step 1: Starting with the Flange
Sven begins by explaining that working on flanges vertically and horizontally is significantly easier than doing so in a flat position. To simplify the process further, he divides the task into two or three steps as suggested by fellow expert “for for.” This approach not only makes it more manageable but also allows for greater precision in crafting each component.Step 2: Applying Glue and Securing
Sven proceeds to apply glue along one edge of the flange, ensuring a secure bond when clamped into place. He emphasizes that this stage is crucial for maintaining the structural integrity of the flange, which in turn safeguards the living area beneath the canvas when hatches are open.Step 3: Allowing Time to Dry
After securely attaching the first portion of the flange, Sven allows ample time for it to dry before moving forward with additional steps. This patience and precision are key aspects of his successful boatbuilding methods.Step 4: Finishing Touches
Once the flange is fully dried, Sven removes the clamps carefully, ensuring no damage occurs during this process. He then moves on to attaching four more pieces onto these main frames, completing two pairs of flanges for the bulkhead hatches.The Final Touches
While two flanges form the primary support structure around the hatches, Sven mentions there are two additional pieces required at each end to ensure comprehensive protection. This attention to detail highlights his commitment to producing a durable and reliable design. “Sailing is about finding your path, whether it’s across an ocean or within yourself.” – Sven Yrvind In conclusion, making flanges around bulkhead hatches may seem complex at first glance, but by following Sven Yrvind’s meticulous process, enthusiasts can achieve professional-level results. Remember that the journey of boatbuilding is as rewarding as reaching your destination; it tests one’s patience and dedication. For those seeking to embark on this adventure or simply gain more insight into marine craftsmanship, Sven’s wisdom is invaluable.Making Flanges Around Bulkhead Hatches for Canvas
Sven Yrvind, a renowned yacht designer and sailor, shares valuable insights on creating flanges around bulkhead hatches for canvas protection in this enlightening video. By following his expert guidance, boat enthusiasts can ensure their living areas remain secure while allowing unhindered access through the hatches.Step 1: Starting with the Flange
Sven begins by explaining that working on flanges vertically and horizontally is significantly easier than doing so in a flat position. To simplify the process further, he divides the task into two or three steps as suggested by fellow expert “for for.” This approach not only makes it more manageable but also allows for greater precision in crafting each component.Step 2: Applying Glue and Securing
Sven proceeds to apply glue along one edge of the flange, ensuring a secure bond when clamped into place. He emphasizes that this stage is crucial for maintaining the structural integrity of the flange, which in turn safeguards the living area beneath the canvas when hatches are open.Step 3: Allowing Time to Dry
After securely attaching the first portion of the flange, Sven allows ample time for it to dry before moving forward with additional steps. This patience and precision are key aspects of his successful boatbuilding methods.Step 4: Finishing Touches
Once the flange is fully dried, Sven removes the clamps carefully, ensuring no damage occurs during this process. He then moves on to attaching four more pieces onto these main frames, completing two pairs of flanges for the bulkhead hatches.The Final Touches
While two flanges form the primary support structure around the hatches, Sven mentions there are two additional pieces required at each end to ensure comprehensive protection. This attention to detail highlights his commitment to producing a durable and reliable design. “Sailing is about finding your path, whether it’s across an ocean or within yourself.” – Sven Yrvind In conclusion, making flanges around bulkhead hatches may seem complex at first glance, but by following Sven Yrvind’s meticulous process, enthusiasts can achieve professional-level results. Remember that the journey of boatbuilding is as rewarding as reaching your destination; it tests one’s patience and dedication. For those seeking to embark on this adventure or simply gain more insight into marine craftsmanship, Sven’s wisdom is invaluable.Sven begins by explaining that working on flanges vertically and horizontally is significantly easier than doing so in a flat position. To simplify the process further, he divides the task into two or three steps as suggested by fellow expert “for for.” This approach not only makes it more manageable but also allows for greater precision in crafting each component.Step 2: Applying Glue and Securing
Sven proceeds to apply glue along one edge of the flange, ensuring a secure bond when clamped into place. He emphasizes that this stage is crucial for maintaining the structural integrity of the flange, which in turn safeguards the living area beneath the canvas when hatches are open.Step 3: Allowing Time to Dry
After securely attaching the first portion of the flange, Sven allows ample time for it to dry before moving forward with additional steps. This patience and precision are key aspects of his successful boatbuilding methods.Step 4: Finishing Touches
Once the flange is fully dried, Sven removes the clamps carefully, ensuring no damage occurs during this process. He then moves on to attaching four more pieces onto these main frames, completing two pairs of flanges for the bulkhead hatches.The Final Touches
While two flanges form the primary support structure around the hatches, Sven mentions there are two additional pieces required at each end to ensure comprehensive protection. This attention to detail highlights his commitment to producing a durable and reliable design. “Sailing is about finding your path, whether it’s across an ocean or within yourself.” – Sven Yrvind In conclusion, making flanges around bulkhead hatches may seem complex at first glance, but by following Sven Yrvind’s meticulous process, enthusiasts can achieve professional-level results. Remember that the journey of boatbuilding is as rewarding as reaching your destination; it tests one’s patience and dedication. For those seeking to embark on this adventure or simply gain more insight into marine craftsmanship, Sven’s wisdom is invaluable.Sven Yrvind, a renowned yacht designer and sailor, shares valuable insights on creating flanges around bulkhead hatches for canvas protection in this enlightening video. By following his expert guidance, boat enthusiasts can ensure their living areas remain secure while allowing unhindered access through the hatches.Step 1: Starting with the Flange
Sven begins by explaining that working on flanges vertically and horizontally is significantly easier than doing so in a flat position. To simplify the process further, he divides the task into two or three steps as suggested by fellow expert “for for.” This approach not only makes it more manageable but also allows for greater precision in crafting each component.Step 2: Applying Glue and Securing
Sven proceeds to apply glue along one edge of the flange, ensuring a secure bond when clamped into place. He emphasizes that this stage is crucial for maintaining the structural integrity of the flange, which in turn safeguards the living area beneath the canvas when hatches are open.Step 3: Allowing Time to Dry
After securely attaching the first portion of the flange, Sven allows ample time for it to dry before moving forward with additional steps. This patience and precision are key aspects of his successful boatbuilding methods.Step 4: Finishing Touches
Once the flange is fully dried, Sven removes the clamps carefully, ensuring no damage occurs during this process. He then moves on to attaching four more pieces onto these main frames, completing two pairs of flanges for the bulkhead hatches.The Final Touches
While two flanges form the primary support structure around the hatches, Sven mentions there are two additional pieces required at each end to ensure comprehensive protection. This attention to detail highlights his commitment to producing a durable and reliable design. “Sailing is about finding your path, whether it’s across an ocean or within yourself.” – Sven Yrvind In conclusion, making flanges around bulkhead hatches may seem complex at first glance, but by following Sven Yrvind’s meticulous process, enthusiasts can achieve professional-level results. Remember that the journey of boatbuilding is as rewarding as reaching your destination; it tests one’s patience and dedication. For those seeking to embark on this adventure or simply gain more insight into marine craftsmanship, Sven’s wisdom is invaluable.Making Flanges Around Bulkhead Hatches for Canvas
Sven Yrvind, a renowned yacht designer and sailor, shares valuable insights on creating flanges around bulkhead hatches for canvas protection in this enlightening video. By following his expert guidance, boat enthusiasts can ensure their living areas remain secure while allowing unhindered access through the hatches.Step 1: Starting with the Flange
Sven begins by explaining that working on flanges vertically and horizontally is significantly easier than doing so in a flat position. To simplify the process further, he divides the task into two or three steps as suggested by fellow expert “for for.” This approach not only makes it more manageable but also allows for greater precision in crafting each component.Step 2: Applying Glue and Securing
Sven proceeds to apply glue along one edge of the flange, ensuring a secure bond when clamped into place. He emphasizes that this stage is crucial for maintaining the structural integrity of the flange, which in turn safeguards the living area beneath the canvas when hatches are open.Step 3: Allowing Time to Dry
After securely attaching the first portion of the flange, Sven allows ample time for it to dry before moving forward with additional steps. This patience and precision are key aspects of his successful boatbuilding methods.Step 4: Finishing Touches
Once the flange is fully dried, Sven removes the clamps carefully, ensuring no damage occurs during this process. He then moves on to attaching four more pieces onto these main frames, completing two pairs of flanges for the bulkhead hatches.The Final Touches
While two flanges form the primary support structure around the hatches, Sven mentions there are two additional pieces required at each end to ensure comprehensive protection. This attention to detail highlights his commitment to producing a durable and reliable design. “Sailing is about finding your path, whether it’s across an ocean or within yourself.” – Sven Yrvind In conclusion, making flanges around bulkhead hatches may seem complex at first glance, but by following Sven Yrvind’s meticulous process, enthusiasts can achieve professional-level results. Remember that the journey of boatbuilding is as rewarding as reaching your destination; it tests one’s patience and dedication. For those seeking to embark on this adventure or simply gain more insight into marine craftsmanship, Sven’s wisdom is invaluable.Once the flange is fully dried, Sven removes the clamps carefully, ensuring no damage occurs during this process. He then moves on to attaching four more pieces onto these main frames, completing two pairs of flanges for the bulkhead hatches.The Final Touches
While two flanges form the primary support structure around the hatches, Sven mentions there are two additional pieces required at each end to ensure comprehensive protection. This attention to detail highlights his commitment to producing a durable and reliable design. “Sailing is about finding your path, whether it’s across an ocean or within yourself.” – Sven Yrvind In conclusion, making flanges around bulkhead hatches may seem complex at first glance, but by following Sven Yrvind’s meticulous process, enthusiasts can achieve professional-level results. Remember that the journey of boatbuilding is as rewarding as reaching your destination; it tests one’s patience and dedication. For those seeking to embark on this adventure or simply gain more insight into marine craftsmanship, Sven’s wisdom is invaluable.Sven begins by explaining that working on flanges vertically and horizontally is significantly easier than doing so in a flat position. To simplify the process further, he divides the task into two or three steps as suggested by fellow expert “for for.” This approach not only makes it more manageable but also allows for greater precision in crafting each component.Step 2: Applying Glue and Securing
Sven proceeds to apply glue along one edge of the flange, ensuring a secure bond when clamped into place. He emphasizes that this stage is crucial for maintaining the structural integrity of the flange, which in turn safeguards the living area beneath the canvas when hatches are open.Step 3: Allowing Time to Dry
After securely attaching the first portion of the flange, Sven allows ample time for it to dry before moving forward with additional steps. This patience and precision are key aspects of his successful boatbuilding methods.Step 4: Finishing Touches
Once the flange is fully dried, Sven removes the clamps carefully, ensuring no damage occurs during this process. He then moves on to attaching four more pieces onto these main frames, completing two pairs of flanges for the bulkhead hatches.The Final Touches
While two flanges form the primary support structure around the hatches, Sven mentions there are two additional pieces required at each end to ensure comprehensive protection. This attention to detail highlights his commitment to producing a durable and reliable design. “Sailing is about finding your path, whether it’s across an ocean or within yourself.” – Sven Yrvind In conclusion, making flanges around bulkhead hatches may seem complex at first glance, but by following Sven Yrvind’s meticulous process, enthusiasts can achieve professional-level results. Remember that the journey of boatbuilding is as rewarding as reaching your destination; it tests one’s patience and dedication. For those seeking to embark on this adventure or simply gain more insight into marine craftsmanship, Sven’s wisdom is invaluable.Sven Yrvind, a renowned yacht designer and sailor, shares valuable insights on creating flanges around bulkhead hatches for canvas protection in this enlightening video. By following his expert guidance, boat enthusiasts can ensure their living areas remain secure while allowing unhindered access through the hatches.Step 1: Starting with the Flange
Sven begins by explaining that working on flanges vertically and horizontally is significantly easier than doing so in a flat position. To simplify the process further, he divides the task into two or three steps as suggested by fellow expert “for for.” This approach not only makes it more manageable but also allows for greater precision in crafting each component.Step 2: Applying Glue and Securing
Sven proceeds to apply glue along one edge of the flange, ensuring a secure bond when clamped into place. He emphasizes that this stage is crucial for maintaining the structural integrity of the flange, which in turn safeguards the living area beneath the canvas when hatches are open.Step 3: Allowing Time to Dry
After securely attaching the first portion of the flange, Sven allows ample time for it to dry before moving forward with additional steps. This patience and precision are key aspects of his successful boatbuilding methods.Step 4: Finishing Touches
Once the flange is fully dried, Sven removes the clamps carefully, ensuring no damage occurs during this process. He then moves on to attaching four more pieces onto these main frames, completing two pairs of flanges for the bulkhead hatches.The Final Touches
While two flanges form the primary support structure around the hatches, Sven mentions there are two additional pieces required at each end to ensure comprehensive protection. This attention to detail highlights his commitment to producing a durable and reliable design. “Sailing is about finding your path, whether it’s across an ocean or within yourself.” – Sven Yrvind In conclusion, making flanges around bulkhead hatches may seem complex at first glance, but by following Sven Yrvind’s meticulous process, enthusiasts can achieve professional-level results. Remember that the journey of boatbuilding is as rewarding as reaching your destination; it tests one’s patience and dedication. For those seeking to embark on this adventure or simply gain more insight into marine craftsmanship, Sven’s wisdom is invaluable.Making Flanges Around Bulkhead Hatches for Canvas
Sven Yrvind, a renowned yacht designer and sailor, shares valuable insights on creating flanges around bulkhead hatches for canvas protection in this enlightening video. By following his expert guidance, boat enthusiasts can ensure their living areas remain secure while allowing unhindered access through the hatches.Step 1: Starting with the Flange
Sven begins by explaining that working on flanges vertically and horizontally is significantly easier than doing so in a flat position. To simplify the process further, he divides the task into two or three steps as suggested by fellow expert “for for.” This approach not only makes it more manageable but also allows for greater precision in crafting each component.Step 2: Applying Glue and Securing
Sven proceeds to apply glue along one edge of the flange, ensuring a secure bond when clamped into place. He emphasizes that this stage is crucial for maintaining the structural integrity of the flange, which in turn safeguards the living area beneath the canvas when hatches are open.Step 3: Allowing Time to Dry
After securely attaching the first portion of the flange, Sven allows ample time for it to dry before moving forward with additional steps. This patience and precision are key aspects of his successful boatbuilding methods.Step 4: Finishing Touches
Once the flange is fully dried, Sven removes the clamps carefully, ensuring no damage occurs during this process. He then moves on to attaching four more pieces onto these main frames, completing two pairs of flanges for the bulkhead hatches.The Final Touches
While two flanges form the primary support structure around the hatches, Sven mentions there are two additional pieces required at each end to ensure comprehensive protection. This attention to detail highlights his commitment to producing a durable and reliable design. “Sailing is about finding your path, whether it’s across an ocean or within yourself.” – Sven Yrvind In conclusion, making flanges around bulkhead hatches may seem complex at first glance, but by following Sven Yrvind’s meticulous process, enthusiasts can achieve professional-level results. Remember that the journey of boatbuilding is as rewarding as reaching your destination; it tests one’s patience and dedication. For those seeking to embark on this adventure or simply gain more insight into marine craftsmanship, Sven’s wisdom is invaluable.After securely attaching the first portion of the flange, Sven allows ample time for it to dry before moving forward with additional steps. This patience and precision are key aspects of his successful boatbuilding methods.Step 4: Finishing Touches
Once the flange is fully dried, Sven removes the clamps carefully, ensuring no damage occurs during this process. He then moves on to attaching four more pieces onto these main frames, completing two pairs of flanges for the bulkhead hatches.The Final Touches
While two flanges form the primary support structure around the hatches, Sven mentions there are two additional pieces required at each end to ensure comprehensive protection. This attention to detail highlights his commitment to producing a durable and reliable design. “Sailing is about finding your path, whether it’s across an ocean or within yourself.” – Sven Yrvind In conclusion, making flanges around bulkhead hatches may seem complex at first glance, but by following Sven Yrvind’s meticulous process, enthusiasts can achieve professional-level results. Remember that the journey of boatbuilding is as rewarding as reaching your destination; it tests one’s patience and dedication. For those seeking to embark on this adventure or simply gain more insight into marine craftsmanship, Sven’s wisdom is invaluable.Sven begins by explaining that working on flanges vertically and horizontally is significantly easier than doing so in a flat position. To simplify the process further, he divides the task into two or three steps as suggested by fellow expert “for for.” This approach not only makes it more manageable but also allows for greater precision in crafting each component.Step 2: Applying Glue and Securing
Sven proceeds to apply glue along one edge of the flange, ensuring a secure bond when clamped into place. He emphasizes that this stage is crucial for maintaining the structural integrity of the flange, which in turn safeguards the living area beneath the canvas when hatches are open.Step 3: Allowing Time to Dry
After securely attaching the first portion of the flange, Sven allows ample time for it to dry before moving forward with additional steps. This patience and precision are key aspects of his successful boatbuilding methods.Step 4: Finishing Touches
Once the flange is fully dried, Sven removes the clamps carefully, ensuring no damage occurs during this process. He then moves on to attaching four more pieces onto these main frames, completing two pairs of flanges for the bulkhead hatches.The Final Touches
While two flanges form the primary support structure around the hatches, Sven mentions there are two additional pieces required at each end to ensure comprehensive protection. This attention to detail highlights his commitment to producing a durable and reliable design. “Sailing is about finding your path, whether it’s across an ocean or within yourself.” – Sven Yrvind In conclusion, making flanges around bulkhead hatches may seem complex at first glance, but by following Sven Yrvind’s meticulous process, enthusiasts can achieve professional-level results. Remember that the journey of boatbuilding is as rewarding as reaching your destination; it tests one’s patience and dedication. For those seeking to embark on this adventure or simply gain more insight into marine craftsmanship, Sven’s wisdom is invaluable.Sven Yrvind, a renowned yacht designer and sailor, shares valuable insights on creating flanges around bulkhead hatches for canvas protection in this enlightening video. By following his expert guidance, boat enthusiasts can ensure their living areas remain secure while allowing unhindered access through the hatches.Step 1: Starting with the Flange
Sven begins by explaining that working on flanges vertically and horizontally is significantly easier than doing so in a flat position. To simplify the process further, he divides the task into two or three steps as suggested by fellow expert “for for.” This approach not only makes it more manageable but also allows for greater precision in crafting each component.Step 2: Applying Glue and Securing
Sven proceeds to apply glue along one edge of the flange, ensuring a secure bond when clamped into place. He emphasizes that this stage is crucial for maintaining the structural integrity of the flange, which in turn safeguards the living area beneath the canvas when hatches are open.Step 3: Allowing Time to Dry
After securely attaching the first portion of the flange, Sven allows ample time for it to dry before moving forward with additional steps. This patience and precision are key aspects of his successful boatbuilding methods.Step 4: Finishing Touches
Once the flange is fully dried, Sven removes the clamps carefully, ensuring no damage occurs during this process. He then moves on to attaching four more pieces onto these main frames, completing two pairs of flanges for the bulkhead hatches.The Final Touches
While two flanges form the primary support structure around the hatches, Sven mentions there are two additional pieces required at each end to ensure comprehensive protection. This attention to detail highlights his commitment to producing a durable and reliable design. “Sailing is about finding your path, whether it’s across an ocean or within yourself.” – Sven Yrvind In conclusion, making flanges around bulkhead hatches may seem complex at first glance, but by following Sven Yrvind’s meticulous process, enthusiasts can achieve professional-level results. Remember that the journey of boatbuilding is as rewarding as reaching your destination; it tests one’s patience and dedication. For those seeking to embark on this adventure or simply gain more insight into marine craftsmanship, Sven’s wisdom is invaluable.Making Flanges Around Bulkhead Hatches for Canvas
Sven Yrvind, a renowned yacht designer and sailor, shares valuable insights on creating flanges around bulkhead hatches for canvas protection in this enlightening video. By following his expert guidance, boat enthusiasts can ensure their living areas remain secure while allowing unhindered access through the hatches.Step 1: Starting with the Flange
Sven begins by explaining that working on flanges vertically and horizontally is significantly easier than doing so in a flat position. To simplify the process further, he divides the task into two or three steps as suggested by fellow expert “for for.” This approach not only makes it more manageable but also allows for greater precision in crafting each component.Step 2: Applying Glue and Securing
Sven proceeds to apply glue along one edge of the flange, ensuring a secure bond when clamped into place. He emphasizes that this stage is crucial for maintaining the structural integrity of the flange, which in turn safeguards the living area beneath the canvas when hatches are open.Step 3: Allowing Time to Dry
After securely attaching the first portion of the flange, Sven allows ample time for it to dry before moving forward with additional steps. This patience and precision are key aspects of his successful boatbuilding methods.Step 4: Finishing Touches
Once the flange is fully dried, Sven removes the clamps carefully, ensuring no damage occurs during this process. He then moves on to attaching four more pieces onto these main frames, completing two pairs of flanges for the bulkhead hatches.The Final Touches
While two flanges form the primary support structure around the hatches, Sven mentions there are two additional pieces required at each end to ensure comprehensive protection. This attention to detail highlights his commitment to producing a durable and reliable design. “Sailing is about finding your path, whether it’s across an ocean or within yourself.” – Sven Yrvind In conclusion, making flanges around bulkhead hatches may seem complex at first glance, but by following Sven Yrvind’s meticulous process, enthusiasts can achieve professional-level results. Remember that the journey of boatbuilding is as rewarding as reaching your destination; it tests one’s patience and dedication. For those seeking to embark on this adventure or simply gain more insight into marine craftsmanship, Sven’s wisdom is invaluable.Sven proceeds to apply glue along one edge of the flange, ensuring a secure bond when clamped into place. He emphasizes that this stage is crucial for maintaining the structural integrity of the flange, which in turn safeguards the living area beneath the canvas when hatches are open.Step 3: Allowing Time to Dry
After securely attaching the first portion of the flange, Sven allows ample time for it to dry before moving forward with additional steps. This patience and precision are key aspects of his successful boatbuilding methods.Step 4: Finishing Touches
Once the flange is fully dried, Sven removes the clamps carefully, ensuring no damage occurs during this process. He then moves on to attaching four more pieces onto these main frames, completing two pairs of flanges for the bulkhead hatches.The Final Touches
While two flanges form the primary support structure around the hatches, Sven mentions there are two additional pieces required at each end to ensure comprehensive protection. This attention to detail highlights his commitment to producing a durable and reliable design. “Sailing is about finding your path, whether it’s across an ocean or within yourself.” – Sven Yrvind In conclusion, making flanges around bulkhead hatches may seem complex at first glance, but by following Sven Yrvind’s meticulous process, enthusiasts can achieve professional-level results. Remember that the journey of boatbuilding is as rewarding as reaching your destination; it tests one’s patience and dedication. For those seeking to embark on this adventure or simply gain more insight into marine craftsmanship, Sven’s wisdom is invaluable.Sven begins by explaining that working on flanges vertically and horizontally is significantly easier than doing so in a flat position. To simplify the process further, he divides the task into two or three steps as suggested by fellow expert “for for.” This approach not only makes it more manageable but also allows for greater precision in crafting each component.Step 2: Applying Glue and Securing
Sven proceeds to apply glue along one edge of the flange, ensuring a secure bond when clamped into place. He emphasizes that this stage is crucial for maintaining the structural integrity of the flange, which in turn safeguards the living area beneath the canvas when hatches are open.Step 3: Allowing Time to Dry
After securely attaching the first portion of the flange, Sven allows ample time for it to dry before moving forward with additional steps. This patience and precision are key aspects of his successful boatbuilding methods.Step 4: Finishing Touches
Once the flange is fully dried, Sven removes the clamps carefully, ensuring no damage occurs during this process. He then moves on to attaching four more pieces onto these main frames, completing two pairs of flanges for the bulkhead hatches.The Final Touches
While two flanges form the primary support structure around the hatches, Sven mentions there are two additional pieces required at each end to ensure comprehensive protection. This attention to detail highlights his commitment to producing a durable and reliable design. “Sailing is about finding your path, whether it’s across an ocean or within yourself.” – Sven Yrvind In conclusion, making flanges around bulkhead hatches may seem complex at first glance, but by following Sven Yrvind’s meticulous process, enthusiasts can achieve professional-level results. Remember that the journey of boatbuilding is as rewarding as reaching your destination; it tests one’s patience and dedication. For those seeking to embark on this adventure or simply gain more insight into marine craftsmanship, Sven’s wisdom is invaluable.Sven Yrvind, a renowned yacht designer and sailor, shares valuable insights on creating flanges around bulkhead hatches for canvas protection in this enlightening video. By following his expert guidance, boat enthusiasts can ensure their living areas remain secure while allowing unhindered access through the hatches.Step 1: Starting with the Flange
Sven begins by explaining that working on flanges vertically and horizontally is significantly easier than doing so in a flat position. To simplify the process further, he divides the task into two or three steps as suggested by fellow expert “for for.” This approach not only makes it more manageable but also allows for greater precision in crafting each component.Step 2: Applying Glue and Securing
Sven proceeds to apply glue along one edge of the flange, ensuring a secure bond when clamped into place. He emphasizes that this stage is crucial for maintaining the structural integrity of the flange, which in turn safeguards the living area beneath the canvas when hatches are open.Step 3: Allowing Time to Dry
After securely attaching the first portion of the flange, Sven allows ample time for it to dry before moving forward with additional steps. This patience and precision are key aspects of his successful boatbuilding methods.Step 4: Finishing Touches
Once the flange is fully dried, Sven removes the clamps carefully, ensuring no damage occurs during this process. He then moves on to attaching four more pieces onto these main frames, completing two pairs of flanges for the bulkhead hatches.The Final Touches
While two flanges form the primary support structure around the hatches, Sven mentions there are two additional pieces required at each end to ensure comprehensive protection. This attention to detail highlights his commitment to producing a durable and reliable design. “Sailing is about finding your path, whether it’s across an ocean or within yourself.” – Sven Yrvind In conclusion, making flanges around bulkhead hatches may seem complex at first glance, but by following Sven Yrvind’s meticulous process, enthusiasts can achieve professional-level results. Remember that the journey of boatbuilding is as rewarding as reaching your destination; it tests one’s patience and dedication. For those seeking to embark on this adventure or simply gain more insight into marine craftsmanship, Sven’s wisdom is invaluable.Making Flanges Around Bulkhead Hatches for Canvas
Sven Yrvind, a renowned yacht designer and sailor, shares valuable insights on creating flanges around bulkhead hatches for canvas protection in this enlightening video. By following his expert guidance, boat enthusiasts can ensure their living areas remain secure while allowing unhindered access through the hatches.Step 1: Starting with the Flange
Sven begins by explaining that working on flanges vertically and horizontally is significantly easier than doing so in a flat position. To simplify the process further, he divides the task into two or three steps as suggested by fellow expert “for for.” This approach not only makes it more manageable but also allows for greater precision in crafting each component.Step 2: Applying Glue and Securing
Sven proceeds to apply glue along one edge of the flange, ensuring a secure bond when clamped into place. He emphasizes that this stage is crucial for maintaining the structural integrity of the flange, which in turn safeguards the living area beneath the canvas when hatches are open.Step 3: Allowing Time to Dry
After securely attaching the first portion of the flange, Sven allows ample time for it to dry before moving forward with additional steps. This patience and precision are key aspects of his successful boatbuilding methods.Step 4: Finishing Touches
Once the flange is fully dried, Sven removes the clamps carefully, ensuring no damage occurs during this process. He then moves on to attaching four more pieces onto these main frames, completing two pairs of flanges for the bulkhead hatches.The Final Touches
While two flanges form the primary support structure around the hatches, Sven mentions there are two additional pieces required at each end to ensure comprehensive protection. This attention to detail highlights his commitment to producing a durable and reliable design. “Sailing is about finding your path, whether it’s across an ocean or within yourself.” – Sven Yrvind In conclusion, making flanges around bulkhead hatches may seem complex at first glance, but by following Sven Yrvind’s meticulous process, enthusiasts can achieve professional-level results. Remember that the journey of boatbuilding is as rewarding as reaching your destination; it tests one’s patience and dedication. For those seeking to embark on this adventure or simply gain more insight into marine craftsmanship, Sven’s wisdom is invaluable.Once the flange is fully dried, Sven removes the clamps carefully, ensuring no damage occurs during this process. He then moves on to attaching four more pieces onto these main frames, completing two pairs of flanges for the bulkhead hatches.The Final Touches
While two flanges form the primary support structure around the hatches, Sven mentions there are two additional pieces required at each end to ensure comprehensive protection. This attention to detail highlights his commitment to producing a durable and reliable design. “Sailing is about finding your path, whether it’s across an ocean or within yourself.” – Sven Yrvind In conclusion, making flanges around bulkhead hatches may seem complex at first glance, but by following Sven Yrvind’s meticulous process, enthusiasts can achieve professional-level results. Remember that the journey of boatbuilding is as rewarding as reaching your destination; it tests one’s patience and dedication. For those seeking to embark on this adventure or simply gain more insight into marine craftsmanship, Sven’s wisdom is invaluable.Sven proceeds to apply glue along one edge of the flange, ensuring a secure bond when clamped into place. He emphasizes that this stage is crucial for maintaining the structural integrity of the flange, which in turn safeguards the living area beneath the canvas when hatches are open.Step 3: Allowing Time to Dry
After securely attaching the first portion of the flange, Sven allows ample time for it to dry before moving forward with additional steps. This patience and precision are key aspects of his successful boatbuilding methods.Step 4: Finishing Touches
Once the flange is fully dried, Sven removes the clamps carefully, ensuring no damage occurs during this process. He then moves on to attaching four more pieces onto these main frames, completing two pairs of flanges for the bulkhead hatches.The Final Touches
While two flanges form the primary support structure around the hatches, Sven mentions there are two additional pieces required at each end to ensure comprehensive protection. This attention to detail highlights his commitment to producing a durable and reliable design. “Sailing is about finding your path, whether it’s across an ocean or within yourself.” – Sven Yrvind In conclusion, making flanges around bulkhead hatches may seem complex at first glance, but by following Sven Yrvind’s meticulous process, enthusiasts can achieve professional-level results. Remember that the journey of boatbuilding is as rewarding as reaching your destination; it tests one’s patience and dedication. For those seeking to embark on this adventure or simply gain more insight into marine craftsmanship, Sven’s wisdom is invaluable.Sven begins by explaining that working on flanges vertically and horizontally is significantly easier than doing so in a flat position. To simplify the process further, he divides the task into two or three steps as suggested by fellow expert “for for.” This approach not only makes it more manageable but also allows for greater precision in crafting each component.Step 2: Applying Glue and Securing
Sven proceeds to apply glue along one edge of the flange, ensuring a secure bond when clamped into place. He emphasizes that this stage is crucial for maintaining the structural integrity of the flange, which in turn safeguards the living area beneath the canvas when hatches are open.Step 3: Allowing Time to Dry
After securely attaching the first portion of the flange, Sven allows ample time for it to dry before moving forward with additional steps. This patience and precision are key aspects of his successful boatbuilding methods.Step 4: Finishing Touches
Once the flange is fully dried, Sven removes the clamps carefully, ensuring no damage occurs during this process. He then moves on to attaching four more pieces onto these main frames, completing two pairs of flanges for the bulkhead hatches.The Final Touches
While two flanges form the primary support structure around the hatches, Sven mentions there are two additional pieces required at each end to ensure comprehensive protection. This attention to detail highlights his commitment to producing a durable and reliable design. “Sailing is about finding your path, whether it’s across an ocean or within yourself.” – Sven Yrvind In conclusion, making flanges around bulkhead hatches may seem complex at first glance, but by following Sven Yrvind’s meticulous process, enthusiasts can achieve professional-level results. Remember that the journey of boatbuilding is as rewarding as reaching your destination; it tests one’s patience and dedication. For those seeking to embark on this adventure or simply gain more insight into marine craftsmanship, Sven’s wisdom is invaluable.Sven Yrvind, a renowned yacht designer and sailor, shares valuable insights on creating flanges around bulkhead hatches for canvas protection in this enlightening video. By following his expert guidance, boat enthusiasts can ensure their living areas remain secure while allowing unhindered access through the hatches.Step 1: Starting with the Flange
Sven begins by explaining that working on flanges vertically and horizontally is significantly easier than doing so in a flat position. To simplify the process further, he divides the task into two or three steps as suggested by fellow expert “for for.” This approach not only makes it more manageable but also allows for greater precision in crafting each component.Step 2: Applying Glue and Securing
Sven proceeds to apply glue along one edge of the flange, ensuring a secure bond when clamped into place. He emphasizes that this stage is crucial for maintaining the structural integrity of the flange, which in turn safeguards the living area beneath the canvas when hatches are open.Step 3: Allowing Time to Dry
After securely attaching the first portion of the flange, Sven allows ample time for it to dry before moving forward with additional steps. This patience and precision are key aspects of his successful boatbuilding methods.Step 4: Finishing Touches
Once the flange is fully dried, Sven removes the clamps carefully, ensuring no damage occurs during this process. He then moves on to attaching four more pieces onto these main frames, completing two pairs of flanges for the bulkhead hatches.The Final Touches
While two flanges form the primary support structure around the hatches, Sven mentions there are two additional pieces required at each end to ensure comprehensive protection. This attention to detail highlights his commitment to producing a durable and reliable design. “Sailing is about finding your path, whether it’s across an ocean or within yourself.” – Sven Yrvind In conclusion, making flanges around bulkhead hatches may seem complex at first glance, but by following Sven Yrvind’s meticulous process, enthusiasts can achieve professional-level results. Remember that the journey of boatbuilding is as rewarding as reaching your destination; it tests one’s patience and dedication. For those seeking to embark on this adventure or simply gain more insight into marine craftsmanship, Sven’s wisdom is invaluable.Making Flanges Around Bulkhead Hatches for Canvas
Sven Yrvind, a renowned yacht designer and sailor, shares valuable insights on creating flanges around bulkhead hatches for canvas protection in this enlightening video. By following his expert guidance, boat enthusiasts can ensure their living areas remain secure while allowing unhindered access through the hatches.Step 1: Starting with the Flange
Sven begins by explaining that working on flanges vertically and horizontally is significantly easier than doing so in a flat position. To simplify the process further, he divides the task into two or three steps as suggested by fellow expert “for for.” This approach not only makes it more manageable but also allows for greater precision in crafting each component.Step 2: Applying Glue and Securing
Sven proceeds to apply glue along one edge of the flange, ensuring a secure bond when clamped into place. He emphasizes that this stage is crucial for maintaining the structural integrity of the flange, which in turn safeguards the living area beneath the canvas when hatches are open.Step 3: Allowing Time to Dry
After securely attaching the first portion of the flange, Sven allows ample time for it to dry before moving forward with additional steps. This patience and precision are key aspects of his successful boatbuilding methods.Step 4: Finishing Touches
Once the flange is fully dried, Sven removes the clamps carefully, ensuring no damage occurs during this process. He then moves on to attaching four more pieces onto these main frames, completing two pairs of flanges for the bulkhead hatches.The Final Touches
While two flanges form the primary support structure around the hatches, Sven mentions there are two additional pieces required at each end to ensure comprehensive protection. This attention to detail highlights his commitment to producing a durable and reliable design. “Sailing is about finding your path, whether it’s across an ocean or within yourself.” – Sven Yrvind In conclusion, making flanges around bulkhead hatches may seem complex at first glance, but by following Sven Yrvind’s meticulous process, enthusiasts can achieve professional-level results. Remember that the journey of boatbuilding is as rewarding as reaching your destination; it tests one’s patience and dedication. For those seeking to embark on this adventure or simply gain more insight into marine craftsmanship, Sven’s wisdom is invaluable.After securely attaching the first portion of the flange, Sven allows ample time for it to dry before moving forward with additional steps. This patience and precision are key aspects of his successful boatbuilding methods.Step 4: Finishing Touches
Once the flange is fully dried, Sven removes the clamps carefully, ensuring no damage occurs during this process. He then moves on to attaching four more pieces onto these main frames, completing two pairs of flanges for the bulkhead hatches.The Final Touches
While two flanges form the primary support structure around the hatches, Sven mentions there are two additional pieces required at each end to ensure comprehensive protection. This attention to detail highlights his commitment to producing a durable and reliable design. “Sailing is about finding your path, whether it’s across an ocean or within yourself.” – Sven Yrvind In conclusion, making flanges around bulkhead hatches may seem complex at first glance, but by following Sven Yrvind’s meticulous process, enthusiasts can achieve professional-level results. Remember that the journey of boatbuilding is as rewarding as reaching your destination; it tests one’s patience and dedication. For those seeking to embark on this adventure or simply gain more insight into marine craftsmanship, Sven’s wisdom is invaluable.Sven proceeds to apply glue along one edge of the flange, ensuring a secure bond when clamped into place. He emphasizes that this stage is crucial for maintaining the structural integrity of the flange, which in turn safeguards the living area beneath the canvas when hatches are open.Step 3: Allowing Time to Dry
After securely attaching the first portion of the flange, Sven allows ample time for it to dry before moving forward with additional steps. This patience and precision are key aspects of his successful boatbuilding methods.Step 4: Finishing Touches
Once the flange is fully dried, Sven removes the clamps carefully, ensuring no damage occurs during this process. He then moves on to attaching four more pieces onto these main frames, completing two pairs of flanges for the bulkhead hatches.The Final Touches
While two flanges form the primary support structure around the hatches, Sven mentions there are two additional pieces required at each end to ensure comprehensive protection. This attention to detail highlights his commitment to producing a durable and reliable design. “Sailing is about finding your path, whether it’s across an ocean or within yourself.” – Sven Yrvind In conclusion, making flanges around bulkhead hatches may seem complex at first glance, but by following Sven Yrvind’s meticulous process, enthusiasts can achieve professional-level results. Remember that the journey of boatbuilding is as rewarding as reaching your destination; it tests one’s patience and dedication. For those seeking to embark on this adventure or simply gain more insight into marine craftsmanship, Sven’s wisdom is invaluable.Sven begins by explaining that working on flanges vertically and horizontally is significantly easier than doing so in a flat position. To simplify the process further, he divides the task into two or three steps as suggested by fellow expert “for for.” This approach not only makes it more manageable but also allows for greater precision in crafting each component.Step 2: Applying Glue and Securing
Sven proceeds to apply glue along one edge of the flange, ensuring a secure bond when clamped into place. He emphasizes that this stage is crucial for maintaining the structural integrity of the flange, which in turn safeguards the living area beneath the canvas when hatches are open.Step 3: Allowing Time to Dry
After securely attaching the first portion of the flange, Sven allows ample time for it to dry before moving forward with additional steps. This patience and precision are key aspects of his successful boatbuilding methods.Step 4: Finishing Touches
Once the flange is fully dried, Sven removes the clamps carefully, ensuring no damage occurs during this process. He then moves on to attaching four more pieces onto these main frames, completing two pairs of flanges for the bulkhead hatches.The Final Touches
While two flanges form the primary support structure around the hatches, Sven mentions there are two additional pieces required at each end to ensure comprehensive protection. This attention to detail highlights his commitment to producing a durable and reliable design. “Sailing is about finding your path, whether it’s across an ocean or within yourself.” – Sven Yrvind In conclusion, making flanges around bulkhead hatches may seem complex at first glance, but by following Sven Yrvind’s meticulous process, enthusiasts can achieve professional-level results. Remember that the journey of boatbuilding is as rewarding as reaching your destination; it tests one’s patience and dedication. For those seeking to embark on this adventure or simply gain more insight into marine craftsmanship, Sven’s wisdom is invaluable.Sven Yrvind, a renowned yacht designer and sailor, shares valuable insights on creating flanges around bulkhead hatches for canvas protection in this enlightening video. By following his expert guidance, boat enthusiasts can ensure their living areas remain secure while allowing unhindered access through the hatches.Step 1: Starting with the Flange
Sven begins by explaining that working on flanges vertically and horizontally is significantly easier than doing so in a flat position. To simplify the process further, he divides the task into two or three steps as suggested by fellow expert “for for.” This approach not only makes it more manageable but also allows for greater precision in crafting each component.Step 2: Applying Glue and Securing
Sven proceeds to apply glue along one edge of the flange, ensuring a secure bond when clamped into place. He emphasizes that this stage is crucial for maintaining the structural integrity of the flange, which in turn safeguards the living area beneath the canvas when hatches are open.Step 3: Allowing Time to Dry
After securely attaching the first portion of the flange, Sven allows ample time for it to dry before moving forward with additional steps. This patience and precision are key aspects of his successful boatbuilding methods.Step 4: Finishing Touches
Once the flange is fully dried, Sven removes the clamps carefully, ensuring no damage occurs during this process. He then moves on to attaching four more pieces onto these main frames, completing two pairs of flanges for the bulkhead hatches.The Final Touches
While two flanges form the primary support structure around the hatches, Sven mentions there are two additional pieces required at each end to ensure comprehensive protection. This attention to detail highlights his commitment to producing a durable and reliable design. “Sailing is about finding your path, whether it’s across an ocean or within yourself.” – Sven Yrvind In conclusion, making flanges around bulkhead hatches may seem complex at first glance, but by following Sven Yrvind’s meticulous process, enthusiasts can achieve professional-level results. Remember that the journey of boatbuilding is as rewarding as reaching your destination; it tests one’s patience and dedication. For those seeking to embark on this adventure or simply gain more insight into marine craftsmanship, Sven’s wisdom is invaluable.Making Flanges Around Bulkhead Hatches for Canvas
Sven Yrvind, a renowned yacht designer and sailor, shares valuable insights on creating flanges around bulkhead hatches for canvas protection in this enlightening video. By following his expert guidance, boat enthusiasts can ensure their living areas remain secure while allowing unhindered access through the hatches.Step 1: Starting with the Flange
Sven begins by explaining that working on flanges vertically and horizontally is significantly easier than doing so in a flat position. To simplify the process further, he divides the task into two or three steps as suggested by fellow expert “for for.” This approach not only makes it more manageable but also allows for greater precision in crafting each component.Step 2: Applying Glue and Securing
Sven proceeds to apply glue along one edge of the flange, ensuring a secure bond when clamped into place. He emphasizes that this stage is crucial for maintaining the structural integrity of the flange, which in turn safeguards the living area beneath the canvas when hatches are open.Step 3: Allowing Time to Dry
After securely attaching the first portion of the flange, Sven allows ample time for it to dry before moving forward with additional steps. This patience and precision are key aspects of his successful boatbuilding methods.Step 4: Finishing Touches
Once the flange is fully dried, Sven removes the clamps carefully, ensuring no damage occurs during this process. He then moves on to attaching four more pieces onto these main frames, completing two pairs of flanges for the bulkhead hatches.The Final Touches
While two flanges form the primary support structure around the hatches, Sven mentions there are two additional pieces required at each end to ensure comprehensive protection. This attention to detail highlights his commitment to producing a durable and reliable design. “Sailing is about finding your path, whether it’s across an ocean or within yourself.” – Sven Yrvind In conclusion, making flanges around bulkhead hatches may seem complex at first glance, but by following Sven Yrvind’s meticulous process, enthusiasts can achieve professional-level results. Remember that the journey of boatbuilding is as rewarding as reaching your destination; it tests one’s patience and dedication. For those seeking to embark on this adventure or simply gain more insight into marine craftsmanship, Sven’s wisdom is invaluable.Once the flange is fully dried, Sven removes the clamps carefully, ensuring no damage occurs during this process. He then moves on to attaching four more pieces onto these main frames, completing two pairs of flanges for the bulkhead hatches.The Final Touches
While two flanges form the primary support structure around the hatches, Sven mentions there are two additional pieces required at each end to ensure comprehensive protection. This attention to detail highlights his commitment to producing a durable and reliable design. “Sailing is about finding your path, whether it’s across an ocean or within yourself.” – Sven Yrvind In conclusion, making flanges around bulkhead hatches may seem complex at first glance, but by following Sven Yrvind’s meticulous process, enthusiasts can achieve professional-level results. Remember that the journey of boatbuilding is as rewarding as reaching your destination; it tests one’s patience and dedication. For those seeking to embark on this adventure or simply gain more insight into marine craftsmanship, Sven’s wisdom is invaluable.After securely attaching the first portion of the flange, Sven allows ample time for it to dry before moving forward with additional steps. This patience and precision are key aspects of his successful boatbuilding methods.Step 4: Finishing Touches
Once the flange is fully dried, Sven removes the clamps carefully, ensuring no damage occurs during this process. He then moves on to attaching four more pieces onto these main frames, completing two pairs of flanges for the bulkhead hatches.The Final Touches
While two flanges form the primary support structure around the hatches, Sven mentions there are two additional pieces required at each end to ensure comprehensive protection. This attention to detail highlights his commitment to producing a durable and reliable design. “Sailing is about finding your path, whether it’s across an ocean or within yourself.” – Sven Yrvind In conclusion, making flanges around bulkhead hatches may seem complex at first glance, but by following Sven Yrvind’s meticulous process, enthusiasts can achieve professional-level results. Remember that the journey of boatbuilding is as rewarding as reaching your destination; it tests one’s patience and dedication. For those seeking to embark on this adventure or simply gain more insight into marine craftsmanship, Sven’s wisdom is invaluable.Sven proceeds to apply glue along one edge of the flange, ensuring a secure bond when clamped into place. He emphasizes that this stage is crucial for maintaining the structural integrity of the flange, which in turn safeguards the living area beneath the canvas when hatches are open.Step 3: Allowing Time to Dry
After securely attaching the first portion of the flange, Sven allows ample time for it to dry before moving forward with additional steps. This patience and precision are key aspects of his successful boatbuilding methods.Step 4: Finishing Touches
Once the flange is fully dried, Sven removes the clamps carefully, ensuring no damage occurs during this process. He then moves on to attaching four more pieces onto these main frames, completing two pairs of flanges for the bulkhead hatches.The Final Touches
While two flanges form the primary support structure around the hatches, Sven mentions there are two additional pieces required at each end to ensure comprehensive protection. This attention to detail highlights his commitment to producing a durable and reliable design. “Sailing is about finding your path, whether it’s across an ocean or within yourself.” – Sven Yrvind In conclusion, making flanges around bulkhead hatches may seem complex at first glance, but by following Sven Yrvind’s meticulous process, enthusiasts can achieve professional-level results. Remember that the journey of boatbuilding is as rewarding as reaching your destination; it tests one’s patience and dedication. For those seeking to embark on this adventure or simply gain more insight into marine craftsmanship, Sven’s wisdom is invaluable.Sven begins by explaining that working on flanges vertically and horizontally is significantly easier than doing so in a flat position. To simplify the process further, he divides the task into two or three steps as suggested by fellow expert “for for.” This approach not only makes it more manageable but also allows for greater precision in crafting each component.Step 2: Applying Glue and Securing
Sven proceeds to apply glue along one edge of the flange, ensuring a secure bond when clamped into place. He emphasizes that this stage is crucial for maintaining the structural integrity of the flange, which in turn safeguards the living area beneath the canvas when hatches are open.Step 3: Allowing Time to Dry
After securely attaching the first portion of the flange, Sven allows ample time for it to dry before moving forward with additional steps. This patience and precision are key aspects of his successful boatbuilding methods.Step 4: Finishing Touches
Once the flange is fully dried, Sven removes the clamps carefully, ensuring no damage occurs during this process. He then moves on to attaching four more pieces onto these main frames, completing two pairs of flanges for the bulkhead hatches.The Final Touches
While two flanges form the primary support structure around the hatches, Sven mentions there are two additional pieces required at each end to ensure comprehensive protection. This attention to detail highlights his commitment to producing a durable and reliable design. “Sailing is about finding your path, whether it’s across an ocean or within yourself.” – Sven Yrvind In conclusion, making flanges around bulkhead hatches may seem complex at first glance, but by following Sven Yrvind’s meticulous process, enthusiasts can achieve professional-level results. Remember that the journey of boatbuilding is as rewarding as reaching your destination; it tests one’s patience and dedication. For those seeking to embark on this adventure or simply gain more insight into marine craftsmanship, Sven’s wisdom is invaluable.Sven Yrvind, a renowned yacht designer and sailor, shares valuable insights on creating flanges around bulkhead hatches for canvas protection in this enlightening video. By following his expert guidance, boat enthusiasts can ensure their living areas remain secure while allowing unhindered access through the hatches.Step 1: Starting with the Flange
Sven begins by explaining that working on flanges vertically and horizontally is significantly easier than doing so in a flat position. To simplify the process further, he divides the task into two or three steps as suggested by fellow expert “for for.” This approach not only makes it more manageable but also allows for greater precision in crafting each component.Step 2: Applying Glue and Securing
Sven proceeds to apply glue along one edge of the flange, ensuring a secure bond when clamped into place. He emphasizes that this stage is crucial for maintaining the structural integrity of the flange, which in turn safeguards the living area beneath the canvas when hatches are open.Step 3: Allowing Time to Dry
After securely attaching the first portion of the flange, Sven allows ample time for it to dry before moving forward with additional steps. This patience and precision are key aspects of his successful boatbuilding methods.Step 4: Finishing Touches
Once the flange is fully dried, Sven removes the clamps carefully, ensuring no damage occurs during this process. He then moves on to attaching four more pieces onto these main frames, completing two pairs of flanges for the bulkhead hatches.The Final Touches
While two flanges form the primary support structure around the hatches, Sven mentions there are two additional pieces required at each end to ensure comprehensive protection. This attention to detail highlights his commitment to producing a durable and reliable design. “Sailing is about finding your path, whether it’s across an ocean or within yourself.” – Sven Yrvind In conclusion, making flanges around bulkhead hatches may seem complex at first glance, but by following Sven Yrvind’s meticulous process, enthusiasts can achieve professional-level results. Remember that the journey of boatbuilding is as rewarding as reaching your destination; it tests one’s patience and dedication. For those seeking to embark on this adventure or simply gain more insight into marine craftsmanship, Sven’s wisdom is invaluable.Making Flanges Around Bulkhead Hatches for Canvas
Sven Yrvind, a renowned yacht designer and sailor, shares valuable insights on creating flanges around bulkhead hatches for canvas protection in this enlightening video. By following his expert guidance, boat enthusiasts can ensure their living areas remain secure while allowing unhindered access through the hatches.Step 1: Starting with the Flange
Sven begins by explaining that working on flanges vertically and horizontally is significantly easier than doing so in a flat position. To simplify the process further, he divides the task into two or three steps as suggested by fellow expert “for for.” This approach not only makes it more manageable but also allows for greater precision in crafting each component.Step 2: Applying Glue and Securing
Sven proceeds to apply glue along one edge of the flange, ensuring a secure bond when clamped into place. He emphasizes that this stage is crucial for maintaining the structural integrity of the flange, which in turn safeguards the living area beneath the canvas when hatches are open.Step 3: Allowing Time to Dry
After securely attaching the first portion of the flange, Sven allows ample time for it to dry before moving forward with additional steps. This patience and precision are key aspects of his successful boatbuilding methods.Step 4: Finishing Touches
Once the flange is fully dried, Sven removes the clamps carefully, ensuring no damage occurs during this process. He then moves on to attaching four more pieces onto these main frames, completing two pairs of flanges for the bulkhead hatches.The Final Touches
While two flanges form the primary support structure around the hatches, Sven mentions there are two additional pieces required at each end to ensure comprehensive protection. This attention to detail highlights his commitment to producing a durable and reliable design. “Sailing is about finding your path, whether it’s across an ocean or within yourself.” – Sven Yrvind In conclusion, making flanges around bulkhead hatches may seem complex at first glance, but by following Sven Yrvind’s meticulous process, enthusiasts can achieve professional-level results. Remember that the journey of boatbuilding is as rewarding as reaching your destination; it tests one’s patience and dedication. For those seeking to embark on this adventure or simply gain more insight into marine craftsmanship, Sven’s wisdom is invaluable.After securely attaching the first portion of the flange, Sven allows ample time for it to dry before moving forward with additional steps. This patience and precision are key aspects of his successful boatbuilding methods.Step 4: Finishing Touches
Once the flange is fully dried, Sven removes the clamps carefully, ensuring no damage occurs during this process. He then moves on to attaching four more pieces onto these main frames, completing two pairs of flanges for the bulkhead hatches.The Final Touches
While two flanges form the primary support structure around the hatches, Sven mentions there are two additional pieces required at each end to ensure comprehensive protection. This attention to detail highlights his commitment to producing a durable and reliable design. “Sailing is about finding your path, whether it’s across an ocean or within yourself.” – Sven Yrvind In conclusion, making flanges around bulkhead hatches may seem complex at first glance, but by following Sven Yrvind’s meticulous process, enthusiasts can achieve professional-level results. Remember that the journey of boatbuilding is as rewarding as reaching your destination; it tests one’s patience and dedication. For those seeking to embark on this adventure or simply gain more insight into marine craftsmanship, Sven’s wisdom is invaluable.Once the flange is fully dried, Sven removes the clamps carefully, ensuring no damage occurs during this process. He then moves on to attaching four more pieces onto these main frames, completing two pairs of flanges for the bulkhead hatches.The Final Touches
While two flanges form the primary support structure around the hatches, Sven mentions there are two additional pieces required at each end to ensure comprehensive protection. This attention to detail highlights his commitment to producing a durable and reliable design. “Sailing is about finding your path, whether it’s across an ocean or within yourself.” – Sven Yrvind In conclusion, making flanges around bulkhead hatches may seem complex at first glance, but by following Sven Yrvind’s meticulous process, enthusiasts can achieve professional-level results. Remember that the journey of boatbuilding is as rewarding as reaching your destination; it tests one’s patience and dedication. For those seeking to embark on this adventure or simply gain more insight into marine craftsmanship, Sven’s wisdom is invaluable.After securely attaching the first portion of the flange, Sven allows ample time for it to dry before moving forward with additional steps. This patience and precision are key aspects of his successful boatbuilding methods.Step 4: Finishing Touches
Once the flange is fully dried, Sven removes the clamps carefully, ensuring no damage occurs during this process. He then moves on to attaching four more pieces onto these main frames, completing two pairs of flanges for the bulkhead hatches.The Final Touches
While two flanges form the primary support structure around the hatches, Sven mentions there are two additional pieces required at each end to ensure comprehensive protection. This attention to detail highlights his commitment to producing a durable and reliable design. “Sailing is about finding your path, whether it’s across an ocean or within yourself.” – Sven Yrvind In conclusion, making flanges around bulkhead hatches may seem complex at first glance, but by following Sven Yrvind’s meticulous process, enthusiasts can achieve professional-level results. Remember that the journey of boatbuilding is as rewarding as reaching your destination; it tests one’s patience and dedication. For those seeking to embark on this adventure or simply gain more insight into marine craftsmanship, Sven’s wisdom is invaluable.Sven proceeds to apply glue along one edge of the flange, ensuring a secure bond when clamped into place. He emphasizes that this stage is crucial for maintaining the structural integrity of the flange, which in turn safeguards the living area beneath the canvas when hatches are open.Step 3: Allowing Time to Dry
After securely attaching the first portion of the flange, Sven allows ample time for it to dry before moving forward with additional steps. This patience and precision are key aspects of his successful boatbuilding methods.Step 4: Finishing Touches
Once the flange is fully dried, Sven removes the clamps carefully, ensuring no damage occurs during this process. He then moves on to attaching four more pieces onto these main frames, completing two pairs of flanges for the bulkhead hatches.The Final Touches
While two flanges form the primary support structure around the hatches, Sven mentions there are two additional pieces required at each end to ensure comprehensive protection. This attention to detail highlights his commitment to producing a durable and reliable design. “Sailing is about finding your path, whether it’s across an ocean or within yourself.” – Sven Yrvind In conclusion, making flanges around bulkhead hatches may seem complex at first glance, but by following Sven Yrvind’s meticulous process, enthusiasts can achieve professional-level results. Remember that the journey of boatbuilding is as rewarding as reaching your destination; it tests one’s patience and dedication. For those seeking to embark on this adventure or simply gain more insight into marine craftsmanship, Sven’s wisdom is invaluable.Sven begins by explaining that working on flanges vertically and horizontally is significantly easier than doing so in a flat position. To simplify the process further, he divides the task into two or three steps as suggested by fellow expert “for for.” This approach not only makes it more manageable but also allows for greater precision in crafting each component.Step 2: Applying Glue and Securing
Sven proceeds to apply glue along one edge of the flange, ensuring a secure bond when clamped into place. He emphasizes that this stage is crucial for maintaining the structural integrity of the flange, which in turn safeguards the living area beneath the canvas when hatches are open.Step 3: Allowing Time to Dry
After securely attaching the first portion of the flange, Sven allows ample time for it to dry before moving forward with additional steps. This patience and precision are key aspects of his successful boatbuilding methods.Step 4: Finishing Touches
Once the flange is fully dried, Sven removes the clamps carefully, ensuring no damage occurs during this process. He then moves on to attaching four more pieces onto these main frames, completing two pairs of flanges for the bulkhead hatches.The Final Touches
While two flanges form the primary support structure around the hatches, Sven mentions there are two additional pieces required at each end to ensure comprehensive protection. This attention to detail highlights his commitment to producing a durable and reliable design. “Sailing is about finding your path, whether it’s across an ocean or within yourself.” – Sven Yrvind In conclusion, making flanges around bulkhead hatches may seem complex at first glance, but by following Sven Yrvind’s meticulous process, enthusiasts can achieve professional-level results. Remember that the journey of boatbuilding is as rewarding as reaching your destination; it tests one’s patience and dedication. For those seeking to embark on this adventure or simply gain more insight into marine craftsmanship, Sven’s wisdom is invaluable.Sven Yrvind, a renowned yacht designer and sailor, shares valuable insights on creating flanges around bulkhead hatches for canvas protection in this enlightening video. By following his expert guidance, boat enthusiasts can ensure their living areas remain secure while allowing unhindered access through the hatches.Step 1: Starting with the Flange
Sven begins by explaining that working on flanges vertically and horizontally is significantly easier than doing so in a flat position. To simplify the process further, he divides the task into two or three steps as suggested by fellow expert “for for.” This approach not only makes it more manageable but also allows for greater precision in crafting each component.Step 2: Applying Glue and Securing
Sven proceeds to apply glue along one edge of the flange, ensuring a secure bond when clamped into place. He emphasizes that this stage is crucial for maintaining the structural integrity of the flange, which in turn safeguards the living area beneath the canvas when hatches are open.Step 3: Allowing Time to Dry
After securely attaching the first portion of the flange, Sven allows ample time for it to dry before moving forward with additional steps. This patience and precision are key aspects of his successful boatbuilding methods.Step 4: Finishing Touches
Once the flange is fully dried, Sven removes the clamps carefully, ensuring no damage occurs during this process. He then moves on to attaching four more pieces onto these main frames, completing two pairs of flanges for the bulkhead hatches.The Final Touches
While two flanges form the primary support structure around the hatches, Sven mentions there are two additional pieces required at each end to ensure comprehensive protection. This attention to detail highlights his commitment to producing a durable and reliable design. “Sailing is about finding your path, whether it’s across an ocean or within yourself.” – Sven Yrvind In conclusion, making flanges around bulkhead hatches may seem complex at first glance, but by following Sven Yrvind’s meticulous process, enthusiasts can achieve professional-level results. Remember that the journey of boatbuilding is as rewarding as reaching your destination; it tests one’s patience and dedication. For those seeking to embark on this adventure or simply gain more insight into marine craftsmanship, Sven’s wisdom is invaluable.Making Flanges Around Bulkhead Hatches for Canvas
Sven Yrvind, a renowned yacht designer and sailor, shares valuable insights on creating flanges around bulkhead hatches for canvas protection in this enlightening video. By following his expert guidance, boat enthusiasts can ensure their living areas remain secure while allowing unhindered access through the hatches.Step 1: Starting with the Flange
Sven begins by explaining that working on flanges vertically and horizontally is significantly easier than doing so in a flat position. To simplify the process further, he divides the task into two or three steps as suggested by fellow expert “for for.” This approach not only makes it more manageable but also allows for greater precision in crafting each component.Step 2: Applying Glue and Securing
Sven proceeds to apply glue along one edge of the flange, ensuring a secure bond when clamped into place. He emphasizes that this stage is crucial for maintaining the structural integrity of the flange, which in turn safeguards the living area beneath the canvas when hatches are open.Step 3: Allowing Time to Dry
After securely attaching the first portion of the flange, Sven allows ample time for it to dry before moving forward with additional steps. This patience and precision are key aspects of his successful boatbuilding methods.Step 4: Finishing Touches
Once the flange is fully dried, Sven removes the clamps carefully, ensuring no damage occurs during this process. He then moves on to attaching four more pieces onto these main frames, completing two pairs of flanges for the bulkhead hatches.The Final Touches
While two flanges form the primary support structure around the hatches, Sven mentions there are two additional pieces required at each end to ensure comprehensive protection. This attention to detail highlights his commitment to producing a durable and reliable design. “Sailing is about finding your path, whether it’s across an ocean or within yourself.” – Sven Yrvind In conclusion, making flanges around bulkhead hatches may seem complex at first glance, but by following Sven Yrvind’s meticulous process, enthusiasts can achieve professional-level results. Remember that the journey of boatbuilding is as rewarding as reaching your destination; it tests one’s patience and dedication. For those seeking to embark on this adventure or simply gain more insight into marine craftsmanship, Sven’s wisdom is invaluable.Sven proceeds to apply glue along one edge of the flange, ensuring a secure bond when clamped into place. He emphasizes that this stage is crucial for maintaining the structural integrity of the flange, which in turn safeguards the living area beneath the canvas when hatches are open.Step 3: Allowing Time to Dry
After securely attaching the first portion of the flange, Sven allows ample time for it to dry before moving forward with additional steps. This patience and precision are key aspects of his successful boatbuilding methods.Step 4: Finishing Touches
Once the flange is fully dried, Sven removes the clamps carefully, ensuring no damage occurs during this process. He then moves on to attaching four more pieces onto these main frames, completing two pairs of flanges for the bulkhead hatches.The Final Touches
While two flanges form the primary support structure around the hatches, Sven mentions there are two additional pieces required at each end to ensure comprehensive protection. This attention to detail highlights his commitment to producing a durable and reliable design. “Sailing is about finding your path, whether it’s across an ocean or within yourself.” – Sven Yrvind In conclusion, making flanges around bulkhead hatches may seem complex at first glance, but by following Sven Yrvind’s meticulous process, enthusiasts can achieve professional-level results. Remember that the journey of boatbuilding is as rewarding as reaching your destination; it tests one’s patience and dedication. For those seeking to embark on this adventure or simply gain more insight into marine craftsmanship, Sven’s wisdom is invaluable.Once the flange is fully dried, Sven removes the clamps carefully, ensuring no damage occurs during this process. He then moves on to attaching four more pieces onto these main frames, completing two pairs of flanges for the bulkhead hatches.The Final Touches
While two flanges form the primary support structure around the hatches, Sven mentions there are two additional pieces required at each end to ensure comprehensive protection. This attention to detail highlights his commitment to producing a durable and reliable design. “Sailing is about finding your path, whether it’s across an ocean or within yourself.” – Sven Yrvind In conclusion, making flanges around bulkhead hatches may seem complex at first glance, but by following Sven Yrvind’s meticulous process, enthusiasts can achieve professional-level results. Remember that the journey of boatbuilding is as rewarding as reaching your destination; it tests one’s patience and dedication. For those seeking to embark on this adventure or simply gain more insight into marine craftsmanship, Sven’s wisdom is invaluable.After securely attaching the first portion of the flange, Sven allows ample time for it to dry before moving forward with additional steps. This patience and precision are key aspects of his successful boatbuilding methods.Step 4: Finishing Touches
Once the flange is fully dried, Sven removes the clamps carefully, ensuring no damage occurs during this process. He then moves on to attaching four more pieces onto these main frames, completing two pairs of flanges for the bulkhead hatches.The Final Touches
While two flanges form the primary support structure around the hatches, Sven mentions there are two additional pieces required at each end to ensure comprehensive protection. This attention to detail highlights his commitment to producing a durable and reliable design. “Sailing is about finding your path, whether it’s across an ocean or within yourself.” – Sven Yrvind In conclusion, making flanges around bulkhead hatches may seem complex at first glance, but by following Sven Yrvind’s meticulous process, enthusiasts can achieve professional-level results. Remember that the journey of boatbuilding is as rewarding as reaching your destination; it tests one’s patience and dedication. For those seeking to embark on this adventure or simply gain more insight into marine craftsmanship, Sven’s wisdom is invaluable.Sven proceeds to apply glue along one edge of the flange, ensuring a secure bond when clamped into place. He emphasizes that this stage is crucial for maintaining the structural integrity of the flange, which in turn safeguards the living area beneath the canvas when hatches are open.Step 3: Allowing Time to Dry
After securely attaching the first portion of the flange, Sven allows ample time for it to dry before moving forward with additional steps. This patience and precision are key aspects of his successful boatbuilding methods.Step 4: Finishing Touches
Once the flange is fully dried, Sven removes the clamps carefully, ensuring no damage occurs during this process. He then moves on to attaching four more pieces onto these main frames, completing two pairs of flanges for the bulkhead hatches.The Final Touches
While two flanges form the primary support structure around the hatches, Sven mentions there are two additional pieces required at each end to ensure comprehensive protection. This attention to detail highlights his commitment to producing a durable and reliable design. “Sailing is about finding your path, whether it’s across an ocean or within yourself.” – Sven Yrvind In conclusion, making flanges around bulkhead hatches may seem complex at first glance, but by following Sven Yrvind’s meticulous process, enthusiasts can achieve professional-level results. Remember that the journey of boatbuilding is as rewarding as reaching your destination; it tests one’s patience and dedication. For those seeking to embark on this adventure or simply gain more insight into marine craftsmanship, Sven’s wisdom is invaluable.Sven begins by explaining that working on flanges vertically and horizontally is significantly easier than doing so in a flat position. To simplify the process further, he divides the task into two or three steps as suggested by fellow expert “for for.” This approach not only makes it more manageable but also allows for greater precision in crafting each component.Step 2: Applying Glue and Securing
Sven proceeds to apply glue along one edge of the flange, ensuring a secure bond when clamped into place. He emphasizes that this stage is crucial for maintaining the structural integrity of the flange, which in turn safeguards the living area beneath the canvas when hatches are open.Step 3: Allowing Time to Dry
After securely attaching the first portion of the flange, Sven allows ample time for it to dry before moving forward with additional steps. This patience and precision are key aspects of his successful boatbuilding methods.Step 4: Finishing Touches
Once the flange is fully dried, Sven removes the clamps carefully, ensuring no damage occurs during this process. He then moves on to attaching four more pieces onto these main frames, completing two pairs of flanges for the bulkhead hatches.The Final Touches
While two flanges form the primary support structure around the hatches, Sven mentions there are two additional pieces required at each end to ensure comprehensive protection. This attention to detail highlights his commitment to producing a durable and reliable design. “Sailing is about finding your path, whether it’s across an ocean or within yourself.” – Sven Yrvind In conclusion, making flanges around bulkhead hatches may seem complex at first glance, but by following Sven Yrvind’s meticulous process, enthusiasts can achieve professional-level results. Remember that the journey of boatbuilding is as rewarding as reaching your destination; it tests one’s patience and dedication. For those seeking to embark on this adventure or simply gain more insight into marine craftsmanship, Sven’s wisdom is invaluable.Sven Yrvind, a renowned yacht designer and sailor, shares valuable insights on creating flanges around bulkhead hatches for canvas protection in this enlightening video. By following his expert guidance, boat enthusiasts can ensure their living areas remain secure while allowing unhindered access through the hatches.Step 1: Starting with the Flange
Sven begins by explaining that working on flanges vertically and horizontally is significantly easier than doing so in a flat position. To simplify the process further, he divides the task into two or three steps as suggested by fellow expert “for for.” This approach not only makes it more manageable but also allows for greater precision in crafting each component.Step 2: Applying Glue and Securing
Sven proceeds to apply glue along one edge of the flange, ensuring a secure bond when clamped into place. He emphasizes that this stage is crucial for maintaining the structural integrity of the flange, which in turn safeguards the living area beneath the canvas when hatches are open.Step 3: Allowing Time to Dry
After securely attaching the first portion of the flange, Sven allows ample time for it to dry before moving forward with additional steps. This patience and precision are key aspects of his successful boatbuilding methods.Step 4: Finishing Touches
Once the flange is fully dried, Sven removes the clamps carefully, ensuring no damage occurs during this process. He then moves on to attaching four more pieces onto these main frames, completing two pairs of flanges for the bulkhead hatches.The Final Touches
While two flanges form the primary support structure around the hatches, Sven mentions there are two additional pieces required at each end to ensure comprehensive protection. This attention to detail highlights his commitment to producing a durable and reliable design. “Sailing is about finding your path, whether it’s across an ocean or within yourself.” – Sven Yrvind In conclusion, making flanges around bulkhead hatches may seem complex at first glance, but by following Sven Yrvind’s meticulous process, enthusiasts can achieve professional-level results. Remember that the journey of boatbuilding is as rewarding as reaching your destination; it tests one’s patience and dedication. For those seeking to embark on this adventure or simply gain more insight into marine craftsmanship, Sven’s wisdom is invaluable.Making Flanges Around Bulkhead Hatches for Canvas
Sven Yrvind, a renowned yacht designer and sailor, shares valuable insights on creating flanges around bulkhead hatches for canvas protection in this enlightening video. By following his expert guidance, boat enthusiasts can ensure their living areas remain secure while allowing unhindered access through the hatches.Step 1: Starting with the Flange
Sven begins by explaining that working on flanges vertically and horizontally is significantly easier than doing so in a flat position. To simplify the process further, he divides the task into two or three steps as suggested by fellow expert “for for.” This approach not only makes it more manageable but also allows for greater precision in crafting each component.Step 2: Applying Glue and Securing
Sven proceeds to apply glue along one edge of the flange, ensuring a secure bond when clamped into place. He emphasizes that this stage is crucial for maintaining the structural integrity of the flange, which in turn safeguards the living area beneath the canvas when hatches are open.Step 3: Allowing Time to Dry
After securely attaching the first portion of the flange, Sven allows ample time for it to dry before moving forward with additional steps. This patience and precision are key aspects of his successful boatbuilding methods.Step 4: Finishing Touches
Once the flange is fully dried, Sven removes the clamps carefully, ensuring no damage occurs during this process. He then moves on to attaching four more pieces onto these main frames, completing two pairs of flanges for the bulkhead hatches.The Final Touches
While two flanges form the primary support structure around the hatches, Sven mentions there are two additional pieces required at each end to ensure comprehensive protection. This attention to detail highlights his commitment to producing a durable and reliable design. “Sailing is about finding your path, whether it’s across an ocean or within yourself.” – Sven Yrvind In conclusion, making flanges around bulkhead hatches may seem complex at first glance, but by following Sven Yrvind’s meticulous process, enthusiasts can achieve professional-level results. Remember that the journey of boatbuilding is as rewarding as reaching your destination; it tests one’s patience and dedication. For those seeking to embark on this adventure or simply gain more insight into marine craftsmanship, Sven’s wisdom is invaluable.Sven begins by explaining that working on flanges vertically and horizontally is significantly easier than doing so in a flat position. To simplify the process further, he divides the task into two or three steps as suggested by fellow expert “for for.” This approach not only makes it more manageable but also allows for greater precision in crafting each component.Step 2: Applying Glue and Securing
Sven proceeds to apply glue along one edge of the flange, ensuring a secure bond when clamped into place. He emphasizes that this stage is crucial for maintaining the structural integrity of the flange, which in turn safeguards the living area beneath the canvas when hatches are open.Step 3: Allowing Time to Dry
After securely attaching the first portion of the flange, Sven allows ample time for it to dry before moving forward with additional steps. This patience and precision are key aspects of his successful boatbuilding methods.Step 4: Finishing Touches
Once the flange is fully dried, Sven removes the clamps carefully, ensuring no damage occurs during this process. He then moves on to attaching four more pieces onto these main frames, completing two pairs of flanges for the bulkhead hatches.The Final Touches
While two flanges form the primary support structure around the hatches, Sven mentions there are two additional pieces required at each end to ensure comprehensive protection. This attention to detail highlights his commitment to producing a durable and reliable design. “Sailing is about finding your path, whether it’s across an ocean or within yourself.” – Sven Yrvind In conclusion, making flanges around bulkhead hatches may seem complex at first glance, but by following Sven Yrvind’s meticulous process, enthusiasts can achieve professional-level results. Remember that the journey of boatbuilding is as rewarding as reaching your destination; it tests one’s patience and dedication. For those seeking to embark on this adventure or simply gain more insight into marine craftsmanship, Sven’s wisdom is invaluable.Once the flange is fully dried, Sven removes the clamps carefully, ensuring no damage occurs during this process. He then moves on to attaching four more pieces onto these main frames, completing two pairs of flanges for the bulkhead hatches.The Final Touches
While two flanges form the primary support structure around the hatches, Sven mentions there are two additional pieces required at each end to ensure comprehensive protection. This attention to detail highlights his commitment to producing a durable and reliable design. “Sailing is about finding your path, whether it’s across an ocean or within yourself.” – Sven Yrvind In conclusion, making flanges around bulkhead hatches may seem complex at first glance, but by following Sven Yrvind’s meticulous process, enthusiasts can achieve professional-level results. Remember that the journey of boatbuilding is as rewarding as reaching your destination; it tests one’s patience and dedication. For those seeking to embark on this adventure or simply gain more insight into marine craftsmanship, Sven’s wisdom is invaluable.After securely attaching the first portion of the flange, Sven allows ample time for it to dry before moving forward with additional steps. This patience and precision are key aspects of his successful boatbuilding methods.Step 4: Finishing Touches
Once the flange is fully dried, Sven removes the clamps carefully, ensuring no damage occurs during this process. He then moves on to attaching four more pieces onto these main frames, completing two pairs of flanges for the bulkhead hatches.The Final Touches
While two flanges form the primary support structure around the hatches, Sven mentions there are two additional pieces required at each end to ensure comprehensive protection. This attention to detail highlights his commitment to producing a durable and reliable design. “Sailing is about finding your path, whether it’s across an ocean or within yourself.” – Sven Yrvind In conclusion, making flanges around bulkhead hatches may seem complex at first glance, but by following Sven Yrvind’s meticulous process, enthusiasts can achieve professional-level results. Remember that the journey of boatbuilding is as rewarding as reaching your destination; it tests one’s patience and dedication. For those seeking to embark on this adventure or simply gain more insight into marine craftsmanship, Sven’s wisdom is invaluable.Sven proceeds to apply glue along one edge of the flange, ensuring a secure bond when clamped into place. He emphasizes that this stage is crucial for maintaining the structural integrity of the flange, which in turn safeguards the living area beneath the canvas when hatches are open.Step 3: Allowing Time to Dry
After securely attaching the first portion of the flange, Sven allows ample time for it to dry before moving forward with additional steps. This patience and precision are key aspects of his successful boatbuilding methods.Step 4: Finishing Touches
Once the flange is fully dried, Sven removes the clamps carefully, ensuring no damage occurs during this process. He then moves on to attaching four more pieces onto these main frames, completing two pairs of flanges for the bulkhead hatches.The Final Touches
While two flanges form the primary support structure around the hatches, Sven mentions there are two additional pieces required at each end to ensure comprehensive protection. This attention to detail highlights his commitment to producing a durable and reliable design. “Sailing is about finding your path, whether it’s across an ocean or within yourself.” – Sven Yrvind In conclusion, making flanges around bulkhead hatches may seem complex at first glance, but by following Sven Yrvind’s meticulous process, enthusiasts can achieve professional-level results. Remember that the journey of boatbuilding is as rewarding as reaching your destination; it tests one’s patience and dedication. For those seeking to embark on this adventure or simply gain more insight into marine craftsmanship, Sven’s wisdom is invaluable.Sven begins by explaining that working on flanges vertically and horizontally is significantly easier than doing so in a flat position. To simplify the process further, he divides the task into two or three steps as suggested by fellow expert “for for.” This approach not only makes it more manageable but also allows for greater precision in crafting each component.Step 2: Applying Glue and Securing
Sven proceeds to apply glue along one edge of the flange, ensuring a secure bond when clamped into place. He emphasizes that this stage is crucial for maintaining the structural integrity of the flange, which in turn safeguards the living area beneath the canvas when hatches are open.Step 3: Allowing Time to Dry
After securely attaching the first portion of the flange, Sven allows ample time for it to dry before moving forward with additional steps. This patience and precision are key aspects of his successful boatbuilding methods.Step 4: Finishing Touches
Once the flange is fully dried, Sven removes the clamps carefully, ensuring no damage occurs during this process. He then moves on to attaching four more pieces onto these main frames, completing two pairs of flanges for the bulkhead hatches.The Final Touches
While two flanges form the primary support structure around the hatches, Sven mentions there are two additional pieces required at each end to ensure comprehensive protection. This attention to detail highlights his commitment to producing a durable and reliable design. “Sailing is about finding your path, whether it’s across an ocean or within yourself.” – Sven Yrvind In conclusion, making flanges around bulkhead hatches may seem complex at first glance, but by following Sven Yrvind’s meticulous process, enthusiasts can achieve professional-level results. Remember that the journey of boatbuilding is as rewarding as reaching your destination; it tests one’s patience and dedication. For those seeking to embark on this adventure or simply gain more insight into marine craftsmanship, Sven’s wisdom is invaluable.Sven Yrvind, a renowned yacht designer and sailor, shares valuable insights on creating flanges around bulkhead hatches for canvas protection in this enlightening video. By following his expert guidance, boat enthusiasts can ensure their living areas remain secure while allowing unhindered access through the hatches.Step 1: Starting with the Flange
Sven begins by explaining that working on flanges vertically and horizontally is significantly easier than doing so in a flat position. To simplify the process further, he divides the task into two or three steps as suggested by fellow expert “for for.” This approach not only makes it more manageable but also allows for greater precision in crafting each component.Step 2: Applying Glue and Securing
Sven proceeds to apply glue along one edge of the flange, ensuring a secure bond when clamped into place. He emphasizes that this stage is crucial for maintaining the structural integrity of the flange, which in turn safeguards the living area beneath the canvas when hatches are open.Step 3: Allowing Time to Dry
After securely attaching the first portion of the flange, Sven allows ample time for it to dry before moving forward with additional steps. This patience and precision are key aspects of his successful boatbuilding methods.Step 4: Finishing Touches
Once the flange is fully dried, Sven removes the clamps carefully, ensuring no damage occurs during this process. He then moves on to attaching four more pieces onto these main frames, completing two pairs of flanges for the bulkhead hatches.The Final Touches
While two flanges form the primary support structure around the hatches, Sven mentions there are two additional pieces required at each end to ensure comprehensive protection. This attention to detail highlights his commitment to producing a durable and reliable design. “Sailing is about finding your path, whether it’s across an ocean or within yourself.” – Sven Yrvind In conclusion, making flanges around bulkhead hatches may seem complex at first glance, but by following Sven Yrvind’s meticulous process, enthusiasts can achieve professional-level results. Remember that the journey of boatbuilding is as rewarding as reaching your destination; it tests one’s patience and dedication. For those seeking to embark on this adventure or simply gain more insight into marine craftsmanship, Sven’s wisdom is invaluable.Making Flanges Around Bulkhead Hatches for Canvas
Sven Yrvind, a renowned yacht designer and sailor, shares valuable insights on creating flanges around bulkhead hatches for canvas protection in this enlightening video. By following his expert guidance, boat enthusiasts can ensure their living areas remain secure while allowing unhindered access through the hatches.Step 1: Starting with the Flange
Sven begins by explaining that working on flanges vertically and horizontally is significantly easier than doing so in a flat position. To simplify the process further, he divides the task into two or three steps as suggested by fellow expert “for for.” This approach not only makes it more manageable but also allows for greater precision in crafting each component.Step 2: Applying Glue and Securing
Sven proceeds to apply glue along one edge of the flange, ensuring a secure bond when clamped into place. He emphasizes that this stage is crucial for maintaining the structural integrity of the flange, which in turn safeguards the living area beneath the canvas when hatches are open.Step 3: Allowing Time to Dry
After securely attaching the first portion of the flange, Sven allows ample time for it to dry before moving forward with additional steps. This patience and precision are key aspects of his successful boatbuilding methods.Step 4: Finishing Touches
Once the flange is fully dried, Sven removes the clamps carefully, ensuring no damage occurs during this process. He then moves on to attaching four more pieces onto these main frames, completing two pairs of flanges for the bulkhead hatches.The Final Touches
While two flanges form the primary support structure around the hatches, Sven mentions there are two additional pieces required at each end to ensure comprehensive protection. This attention to detail highlights his commitment to producing a durable and reliable design. “Sailing is about finding your path, whether it’s across an ocean or within yourself.” – Sven Yrvind In conclusion, making flanges around bulkhead hatches may seem complex at first glance, but by following Sven Yrvind’s meticulous process, enthusiasts can achieve professional-level results. Remember that the journey of boatbuilding is as rewarding as reaching your destination; it tests one’s patience and dedication. For those seeking to embark on this adventure or simply gain more insight into marine craftsmanship, Sven’s wisdom is invaluable.Sven Yrvind, a renowned yacht designer and sailor, shares valuable insights on creating flanges around bulkhead hatches for canvas protection in this enlightening video. By following his expert guidance, boat enthusiasts can ensure their living areas remain secure while allowing unhindered access through the hatches.Step 1: Starting with the Flange
Sven begins by explaining that working on flanges vertically and horizontally is significantly easier than doing so in a flat position. To simplify the process further, he divides the task into two or three steps as suggested by fellow expert “for for.” This approach not only makes it more manageable but also allows for greater precision in crafting each component.Step 2: Applying Glue and Securing
Sven proceeds to apply glue along one edge of the flange, ensuring a secure bond when clamped into place. He emphasizes that this stage is crucial for maintaining the structural integrity of the flange, which in turn safeguards the living area beneath the canvas when hatches are open.Step 3: Allowing Time to Dry
After securely attaching the first portion of the flange, Sven allows ample time for it to dry before moving forward with additional steps. This patience and precision are key aspects of his successful boatbuilding methods.Step 4: Finishing Touches
Once the flange is fully dried, Sven removes the clamps carefully, ensuring no damage occurs during this process. He then moves on to attaching four more pieces onto these main frames, completing two pairs of flanges for the bulkhead hatches.The Final Touches
While two flanges form the primary support structure around the hatches, Sven mentions there are two additional pieces required at each end to ensure comprehensive protection. This attention to detail highlights his commitment to producing a durable and reliable design. “Sailing is about finding your path, whether it’s across an ocean or within yourself.” – Sven Yrvind In conclusion, making flanges around bulkhead hatches may seem complex at first glance, but by following Sven Yrvind’s meticulous process, enthusiasts can achieve professional-level results. Remember that the journey of boatbuilding is as rewarding as reaching your destination; it tests one’s patience and dedication. For those seeking to embark on this adventure or simply gain more insight into marine craftsmanship, Sven’s wisdom is invaluable.Once the flange is fully dried, Sven removes the clamps carefully, ensuring no damage occurs during this process. He then moves on to attaching four more pieces onto these main frames, completing two pairs of flanges for the bulkhead hatches.The Final Touches
While two flanges form the primary support structure around the hatches, Sven mentions there are two additional pieces required at each end to ensure comprehensive protection. This attention to detail highlights his commitment to producing a durable and reliable design. “Sailing is about finding your path, whether it’s across an ocean or within yourself.” – Sven Yrvind In conclusion, making flanges around bulkhead hatches may seem complex at first glance, but by following Sven Yrvind’s meticulous process, enthusiasts can achieve professional-level results. Remember that the journey of boatbuilding is as rewarding as reaching your destination; it tests one’s patience and dedication. For those seeking to embark on this adventure or simply gain more insight into marine craftsmanship, Sven’s wisdom is invaluable.After securely attaching the first portion of the flange, Sven allows ample time for it to dry before moving forward with additional steps. This patience and precision are key aspects of his successful boatbuilding methods.Step 4: Finishing Touches
Once the flange is fully dried, Sven removes the clamps carefully, ensuring no damage occurs during this process. He then moves on to attaching four more pieces onto these main frames, completing two pairs of flanges for the bulkhead hatches.The Final Touches
While two flanges form the primary support structure around the hatches, Sven mentions there are two additional pieces required at each end to ensure comprehensive protection. This attention to detail highlights his commitment to producing a durable and reliable design. “Sailing is about finding your path, whether it’s across an ocean or within yourself.” – Sven Yrvind In conclusion, making flanges around bulkhead hatches may seem complex at first glance, but by following Sven Yrvind’s meticulous process, enthusiasts can achieve professional-level results. Remember that the journey of boatbuilding is as rewarding as reaching your destination; it tests one’s patience and dedication. For those seeking to embark on this adventure or simply gain more insight into marine craftsmanship, Sven’s wisdom is invaluable.Sven proceeds to apply glue along one edge of the flange, ensuring a secure bond when clamped into place. He emphasizes that this stage is crucial for maintaining the structural integrity of the flange, which in turn safeguards the living area beneath the canvas when hatches are open.Step 3: Allowing Time to Dry
After securely attaching the first portion of the flange, Sven allows ample time for it to dry before moving forward with additional steps. This patience and precision are key aspects of his successful boatbuilding methods.Step 4: Finishing Touches
Once the flange is fully dried, Sven removes the clamps carefully, ensuring no damage occurs during this process. He then moves on to attaching four more pieces onto these main frames, completing two pairs of flanges for the bulkhead hatches.The Final Touches
While two flanges form the primary support structure around the hatches, Sven mentions there are two additional pieces required at each end to ensure comprehensive protection. This attention to detail highlights his commitment to producing a durable and reliable design. “Sailing is about finding your path, whether it’s across an ocean or within yourself.” – Sven Yrvind In conclusion, making flanges around bulkhead hatches may seem complex at first glance, but by following Sven Yrvind’s meticulous process, enthusiasts can achieve professional-level results. Remember that the journey of boatbuilding is as rewarding as reaching your destination; it tests one’s patience and dedication. For those seeking to embark on this adventure or simply gain more insight into marine craftsmanship, Sven’s wisdom is invaluable.Sven begins by explaining that working on flanges vertically and horizontally is significantly easier than doing so in a flat position. To simplify the process further, he divides the task into two or three steps as suggested by fellow expert “for for.” This approach not only makes it more manageable but also allows for greater precision in crafting each component.Step 2: Applying Glue and Securing
Sven proceeds to apply glue along one edge of the flange, ensuring a secure bond when clamped into place. He emphasizes that this stage is crucial for maintaining the structural integrity of the flange, which in turn safeguards the living area beneath the canvas when hatches are open.Step 3: Allowing Time to Dry
After securely attaching the first portion of the flange, Sven allows ample time for it to dry before moving forward with additional steps. This patience and precision are key aspects of his successful boatbuilding methods.Step 4: Finishing Touches
Once the flange is fully dried, Sven removes the clamps carefully, ensuring no damage occurs during this process. He then moves on to attaching four more pieces onto these main frames, completing two pairs of flanges for the bulkhead hatches.The Final Touches
While two flanges form the primary support structure around the hatches, Sven mentions there are two additional pieces required at each end to ensure comprehensive protection. This attention to detail highlights his commitment to producing a durable and reliable design. “Sailing is about finding your path, whether it’s across an ocean or within yourself.” – Sven Yrvind In conclusion, making flanges around bulkhead hatches may seem complex at first glance, but by following Sven Yrvind’s meticulous process, enthusiasts can achieve professional-level results. Remember that the journey of boatbuilding is as rewarding as reaching your destination; it tests one’s patience and dedication. For those seeking to embark on this adventure or simply gain more insight into marine craftsmanship, Sven’s wisdom is invaluable.Sven Yrvind, a renowned yacht designer and sailor, shares valuable insights on creating flanges around bulkhead hatches for canvas protection in this enlightening video. By following his expert guidance, boat enthusiasts can ensure their living areas remain secure while allowing unhindered access through the hatches.Step 1: Starting with the Flange
Sven begins by explaining that working on flanges vertically and horizontally is significantly easier than doing so in a flat position. To simplify the process further, he divides the task into two or three steps as suggested by fellow expert “for for.” This approach not only makes it more manageable but also allows for greater precision in crafting each component.Step 2: Applying Glue and Securing
Sven proceeds to apply glue along one edge of the flange, ensuring a secure bond when clamped into place. He emphasizes that this stage is crucial for maintaining the structural integrity of the flange, which in turn safeguards the living area beneath the canvas when hatches are open.Step 3: Allowing Time to Dry
After securely attaching the first portion of the flange, Sven allows ample time for it to dry before moving forward with additional steps. This patience and precision are key aspects of his successful boatbuilding methods.Step 4: Finishing Touches
Once the flange is fully dried, Sven removes the clamps carefully, ensuring no damage occurs during this process. He then moves on to attaching four more pieces onto these main frames, completing two pairs of flanges for the bulkhead hatches.The Final Touches
While two flanges form the primary support structure around the hatches, Sven mentions there are two additional pieces required at each end to ensure comprehensive protection. This attention to detail highlights his commitment to producing a durable and reliable design. “Sailing is about finding your path, whether it’s across an ocean or within yourself.” – Sven Yrvind In conclusion, making flanges around bulkhead hatches may seem complex at first glance, but by following Sven Yrvind’s meticulous process, enthusiasts can achieve professional-level results. Remember that the journey of boatbuilding is as rewarding as reaching your destination; it tests one’s patience and dedication. For those seeking to embark on this adventure or simply gain more insight into marine craftsmanship, Sven’s wisdom is invaluable.Making Flanges Around Bulkhead Hatches for Canvas
Sven Yrvind, a renowned yacht designer and sailor, shares valuable insights on creating flanges around bulkhead hatches for canvas protection in this enlightening video. By following his expert guidance, boat enthusiasts can ensure their living areas remain secure while allowing unhindered access through the hatches.Step 1: Starting with the Flange
Sven begins by explaining that working on flanges vertically and horizontally is significantly easier than doing so in a flat position. To simplify the process further, he divides the task into two or three steps as suggested by fellow expert “for for.” This approach not only makes it more manageable but also allows for greater precision in crafting each component.Step 2: Applying Glue and Securing
Sven proceeds to apply glue along one edge of the flange, ensuring a secure bond when clamped into place. He emphasizes that this stage is crucial for maintaining the structural integrity of the flange, which in turn safeguards the living area beneath the canvas when hatches are open.Step 3: Allowing Time to Dry
After securely attaching the first portion of the flange, Sven allows ample time for it to dry before moving forward with additional steps. This patience and precision are key aspects of his successful boatbuilding methods.Step 4: Finishing Touches
Once the flange is fully dried, Sven removes the clamps carefully, ensuring no damage occurs during this process. He then moves on to attaching four more pieces onto these main frames, completing two pairs of flanges for the bulkhead hatches.The Final Touches
While two flanges form the primary support structure around the hatches, Sven mentions there are two additional pieces required at each end to ensure comprehensive protection. This attention to detail highlights his commitment to producing a durable and reliable design. “Sailing is about finding your path, whether it’s across an ocean or within yourself.” – Sven Yrvind In conclusion, making flanges around bulkhead hatches may seem complex at first glance, but by following Sven Yrvind’s meticulous process, enthusiasts can achieve professional-level results. Remember that the journey of boatbuilding is as rewarding as reaching your destination; it tests one’s patience and dedication. For those seeking to embark on this adventure or simply gain more insight into marine craftsmanship, Sven’s wisdom is invaluable.Making Flanges Around Bulkhead Hatches for Canvas
Sven Yrvind, a renowned yacht designer and sailor, shares valuable insights on creating flanges around bulkhead hatches for canvas protection in this enlightening video. By following his expert guidance, boat enthusiasts can ensure their living areas remain secure while allowing unhindered access through the hatches.Step 1: Starting with the Flange
Sven begins by explaining that working on flanges vertically and horizontally is significantly easier than doing so in a flat position. To simplify the process further, he divides the task into two or three steps as suggested by fellow expert “for for.” This approach not only makes it more manageable but also allows for greater precision in crafting each component.Step 2: Applying Glue and Securing
Sven proceeds to apply glue along one edge of the flange, ensuring a secure bond when clamped into place. He emphasizes that this stage is crucial for maintaining the structural integrity of the flange, which in turn safeguards the living area beneath the canvas when hatches are open.Step 3: Allowing Time to Dry
After securely attaching the first portion of the flange, Sven allows ample time for it to dry before moving forward with additional steps. This patience and precision are key aspects of his successful boatbuilding methods.Step 4: Finishing Touches
Once the flange is fully dried, Sven removes the clamps carefully, ensuring no damage occurs during this process. He then moves on to attaching four more pieces onto these main frames, completing two pairs of flanges for the bulkhead hatches.The Final Touches
While two flanges form the primary support structure around the hatches, Sven mentions there are two additional pieces required at each end to ensure comprehensive protection. This attention to detail highlights his commitment to producing a durable and reliable design. “Sailing is about finding your path, whether it’s across an ocean or within yourself.” – Sven Yrvind In conclusion, making flanges around bulkhead hatches may seem complex at first glance, but by following Sven Yrvind’s meticulous process, enthusiasts can achieve professional-level results. Remember that the journey of boatbuilding is as rewarding as reaching your destination; it tests one’s patience and dedication. For those seeking to embark on this adventure or simply gain more insight into marine craftsmanship, Sven’s wisdom is invaluable.Once the flange is fully dried, Sven removes the clamps carefully, ensuring no damage occurs during this process. He then moves on to attaching four more pieces onto these main frames, completing two pairs of flanges for the bulkhead hatches.The Final Touches
While two flanges form the primary support structure around the hatches, Sven mentions there are two additional pieces required at each end to ensure comprehensive protection. This attention to detail highlights his commitment to producing a durable and reliable design. “Sailing is about finding your path, whether it’s across an ocean or within yourself.” – Sven Yrvind In conclusion, making flanges around bulkhead hatches may seem complex at first glance, but by following Sven Yrvind’s meticulous process, enthusiasts can achieve professional-level results. Remember that the journey of boatbuilding is as rewarding as reaching your destination; it tests one’s patience and dedication. For those seeking to embark on this adventure or simply gain more insight into marine craftsmanship, Sven’s wisdom is invaluable.After securely attaching the first portion of the flange, Sven allows ample time for it to dry before moving forward with additional steps. This patience and precision are key aspects of his successful boatbuilding methods.Step 4: Finishing Touches
Once the flange is fully dried, Sven removes the clamps carefully, ensuring no damage occurs during this process. He then moves on to attaching four more pieces onto these main frames, completing two pairs of flanges for the bulkhead hatches.The Final Touches
While two flanges form the primary support structure around the hatches, Sven mentions there are two additional pieces required at each end to ensure comprehensive protection. This attention to detail highlights his commitment to producing a durable and reliable design. “Sailing is about finding your path, whether it’s across an ocean or within yourself.” – Sven Yrvind In conclusion, making flanges around bulkhead hatches may seem complex at first glance, but by following Sven Yrvind’s meticulous process, enthusiasts can achieve professional-level results. Remember that the journey of boatbuilding is as rewarding as reaching your destination; it tests one’s patience and dedication. For those seeking to embark on this adventure or simply gain more insight into marine craftsmanship, Sven’s wisdom is invaluable.Sven proceeds to apply glue along one edge of the flange, ensuring a secure bond when clamped into place. He emphasizes that this stage is crucial for maintaining the structural integrity of the flange, which in turn safeguards the living area beneath the canvas when hatches are open.Step 3: Allowing Time to Dry
After securely attaching the first portion of the flange, Sven allows ample time for it to dry before moving forward with additional steps. This patience and precision are key aspects of his successful boatbuilding methods.Step 4: Finishing Touches
Once the flange is fully dried, Sven removes the clamps carefully, ensuring no damage occurs during this process. He then moves on to attaching four more pieces onto these main frames, completing two pairs of flanges for the bulkhead hatches.The Final Touches
While two flanges form the primary support structure around the hatches, Sven mentions there are two additional pieces required at each end to ensure comprehensive protection. This attention to detail highlights his commitment to producing a durable and reliable design. “Sailing is about finding your path, whether it’s across an ocean or within yourself.” – Sven Yrvind In conclusion, making flanges around bulkhead hatches may seem complex at first glance, but by following Sven Yrvind’s meticulous process, enthusiasts can achieve professional-level results. Remember that the journey of boatbuilding is as rewarding as reaching your destination; it tests one’s patience and dedication. For those seeking to embark on this adventure or simply gain more insight into marine craftsmanship, Sven’s wisdom is invaluable.Sven begins by explaining that working on flanges vertically and horizontally is significantly easier than doing so in a flat position. To simplify the process further, he divides the task into two or three steps as suggested by fellow expert “for for.” This approach not only makes it more manageable but also allows for greater precision in crafting each component.Step 2: Applying Glue and Securing
Sven proceeds to apply glue along one edge of the flange, ensuring a secure bond when clamped into place. He emphasizes that this stage is crucial for maintaining the structural integrity of the flange, which in turn safeguards the living area beneath the canvas when hatches are open.Step 3: Allowing Time to Dry
After securely attaching the first portion of the flange, Sven allows ample time for it to dry before moving forward with additional steps. This patience and precision are key aspects of his successful boatbuilding methods.Step 4: Finishing Touches
Once the flange is fully dried, Sven removes the clamps carefully, ensuring no damage occurs during this process. He then moves on to attaching four more pieces onto these main frames, completing two pairs of flanges for the bulkhead hatches.The Final Touches
While two flanges form the primary support structure around the hatches, Sven mentions there are two additional pieces required at each end to ensure comprehensive protection. This attention to detail highlights his commitment to producing a durable and reliable design. “Sailing is about finding your path, whether it’s across an ocean or within yourself.” – Sven Yrvind In conclusion, making flanges around bulkhead hatches may seem complex at first glance, but by following Sven Yrvind’s meticulous process, enthusiasts can achieve professional-level results. Remember that the journey of boatbuilding is as rewarding as reaching your destination; it tests one’s patience and dedication. For those seeking to embark on this adventure or simply gain more insight into marine craftsmanship, Sven’s wisdom is invaluable.Sven Yrvind, a renowned yacht designer and sailor, shares valuable insights on creating flanges around bulkhead hatches for canvas protection in this enlightening video. By following his expert guidance, boat enthusiasts can ensure their living areas remain secure while allowing unhindered access through the hatches.Step 1: Starting with the Flange
Sven begins by explaining that working on flanges vertically and horizontally is significantly easier than doing so in a flat position. To simplify the process further, he divides the task into two or three steps as suggested by fellow expert “for for.” This approach not only makes it more manageable but also allows for greater precision in crafting each component.Step 2: Applying Glue and Securing
Sven proceeds to apply glue along one edge of the flange, ensuring a secure bond when clamped into place. He emphasizes that this stage is crucial for maintaining the structural integrity of the flange, which in turn safeguards the living area beneath the canvas when hatches are open.Step 3: Allowing Time to Dry
After securely attaching the first portion of the flange, Sven allows ample time for it to dry before moving forward with additional steps. This patience and precision are key aspects of his successful boatbuilding methods.Step 4: Finishing Touches
Once the flange is fully dried, Sven removes the clamps carefully, ensuring no damage occurs during this process. He then moves on to attaching four more pieces onto these main frames, completing two pairs of flanges for the bulkhead hatches.The Final Touches
While two flanges form the primary support structure around the hatches, Sven mentions there are two additional pieces required at each end to ensure comprehensive protection. This attention to detail highlights his commitment to producing a durable and reliable design. “Sailing is about finding your path, whether it’s across an ocean or within yourself.” – Sven Yrvind In conclusion, making flanges around bulkhead hatches may seem complex at first glance, but by following Sven Yrvind’s meticulous process, enthusiasts can achieve professional-level results. Remember that the journey of boatbuilding is as rewarding as reaching your destination; it tests one’s patience and dedication. For those seeking to embark on this adventure or simply gain more insight into marine craftsmanship, Sven’s wisdom is invaluable.Making Flanges Around Bulkhead Hatches for Canvas
Sven Yrvind, a renowned yacht designer and sailor, shares valuable insights on creating flanges around bulkhead hatches for canvas protection in this enlightening video. By following his expert guidance, boat enthusiasts can ensure their living areas remain secure while allowing unhindered access through the hatches.Step 1: Starting with the Flange
Sven begins by explaining that working on flanges vertically and horizontally is significantly easier than doing so in a flat position. To simplify the process further, he divides the task into two or three steps as suggested by fellow expert “for for.” This approach not only makes it more manageable but also allows for greater precision in crafting each component.Step 2: Applying Glue and Securing
Sven proceeds to apply glue along one edge of the flange, ensuring a secure bond when clamped into place. He emphasizes that this stage is crucial for maintaining the structural integrity of the flange, which in turn safeguards the living area beneath the canvas when hatches are open.Step 3: Allowing Time to Dry
After securely attaching the first portion of the flange, Sven allows ample time for it to dry before moving forward with additional steps. This patience and precision are key aspects of his successful boatbuilding methods.Step 4: Finishing Touches
Once the flange is fully dried, Sven removes the clamps carefully, ensuring no damage occurs during this process. He then moves on to attaching four more pieces onto these main frames, completing two pairs of flanges for the bulkhead hatches.The Final Touches
While two flanges form the primary support structure around the hatches, Sven mentions there are two additional pieces required at each end to ensure comprehensive protection. This attention to detail highlights his commitment to producing a durable and reliable design. “Sailing is about finding your path, whether it’s across an ocean or within yourself.” – Sven Yrvind In conclusion, making flanges around bulkhead hatches may seem complex at first glance, but by following Sven Yrvind’s meticulous process, enthusiasts can achieve professional-level results. Remember that the journey of boatbuilding is as rewarding as reaching your destination; it tests one’s patience and dedication. For those seeking to embark on this adventure or simply gain more insight into marine craftsmanship, Sven’s wisdom is invaluable.Once the flange is fully dried, Sven removes the clamps carefully, ensuring no damage occurs during this process. He then moves on to attaching four more pieces onto these main frames, completing two pairs of flanges for the bulkhead hatches.The Final Touches
While two flanges form the primary support structure around the hatches, Sven mentions there are two additional pieces required at each end to ensure comprehensive protection. This attention to detail highlights his commitment to producing a durable and reliable design. “Sailing is about finding your path, whether it’s across an ocean or within yourself.” – Sven Yrvind In conclusion, making flanges around bulkhead hatches may seem complex at first glance, but by following Sven Yrvind’s meticulous process, enthusiasts can achieve professional-level results. Remember that the journey of boatbuilding is as rewarding as reaching your destination; it tests one’s patience and dedication. For those seeking to embark on this adventure or simply gain more insight into marine craftsmanship, Sven’s wisdom is invaluable.Making Flanges Around Bulkhead Hatches for Canvas
Sven Yrvind, a renowned yacht designer and sailor, shares valuable insights on creating flanges around bulkhead hatches for canvas protection in this enlightening video. By following his expert guidance, boat enthusiasts can ensure their living areas remain secure while allowing unhindered access through the hatches.Step 1: Starting with the Flange
Sven begins by explaining that working on flanges vertically and horizontally is significantly easier than doing so in a flat position. To simplify the process further, he divides the task into two or three steps as suggested by fellow expert “for for.” This approach not only makes it more manageable but also allows for greater precision in crafting each component.Step 2: Applying Glue and Securing
Sven proceeds to apply glue along one edge of the flange, ensuring a secure bond when clamped into place. He emphasizes that this stage is crucial for maintaining the structural integrity of the flange, which in turn safeguards the living area beneath the canvas when hatches are open.Step 3: Allowing Time to Dry
After securely attaching the first portion of the flange, Sven allows ample time for it to dry before moving forward with additional steps. This patience and precision are key aspects of his successful boatbuilding methods.Step 4: Finishing Touches
Once the flange is fully dried, Sven removes the clamps carefully, ensuring no damage occurs during this process. He then moves on to attaching four more pieces onto these main frames, completing two pairs of flanges for the bulkhead hatches.The Final Touches
While two flanges form the primary support structure around the hatches, Sven mentions there are two additional pieces required at each end to ensure comprehensive protection. This attention to detail highlights his commitment to producing a durable and reliable design. “Sailing is about finding your path, whether it’s across an ocean or within yourself.” – Sven Yrvind In conclusion, making flanges around bulkhead hatches may seem complex at first glance, but by following Sven Yrvind’s meticulous process, enthusiasts can achieve professional-level results. Remember that the journey of boatbuilding is as rewarding as reaching your destination; it tests one’s patience and dedication. For those seeking to embark on this adventure or simply gain more insight into marine craftsmanship, Sven’s wisdom is invaluable.Once the flange is fully dried, Sven removes the clamps carefully, ensuring no damage occurs during this process. He then moves on to attaching four more pieces onto these main frames, completing two pairs of flanges for the bulkhead hatches.The Final Touches
While two flanges form the primary support structure around the hatches, Sven mentions there are two additional pieces required at each end to ensure comprehensive protection. This attention to detail highlights his commitment to producing a durable and reliable design. “Sailing is about finding your path, whether it’s across an ocean or within yourself.” – Sven Yrvind In conclusion, making flanges around bulkhead hatches may seem complex at first glance, but by following Sven Yrvind’s meticulous process, enthusiasts can achieve professional-level results. Remember that the journey of boatbuilding is as rewarding as reaching your destination; it tests one’s patience and dedication. For those seeking to embark on this adventure or simply gain more insight into marine craftsmanship, Sven’s wisdom is invaluable.After securely attaching the first portion of the flange, Sven allows ample time for it to dry before moving forward with additional steps. This patience and precision are key aspects of his successful boatbuilding methods.Step 4: Finishing Touches
Once the flange is fully dried, Sven removes the clamps carefully, ensuring no damage occurs during this process. He then moves on to attaching four more pieces onto these main frames, completing two pairs of flanges for the bulkhead hatches.The Final Touches
While two flanges form the primary support structure around the hatches, Sven mentions there are two additional pieces required at each end to ensure comprehensive protection. This attention to detail highlights his commitment to producing a durable and reliable design. “Sailing is about finding your path, whether it’s across an ocean or within yourself.” – Sven Yrvind In conclusion, making flanges around bulkhead hatches may seem complex at first glance, but by following Sven Yrvind’s meticulous process, enthusiasts can achieve professional-level results. Remember that the journey of boatbuilding is as rewarding as reaching your destination; it tests one’s patience and dedication. For those seeking to embark on this adventure or simply gain more insight into marine craftsmanship, Sven’s wisdom is invaluable.Sven proceeds to apply glue along one edge of the flange, ensuring a secure bond when clamped into place. He emphasizes that this stage is crucial for maintaining the structural integrity of the flange, which in turn safeguards the living area beneath the canvas when hatches are open.Step 3: Allowing Time to Dry
After securely attaching the first portion of the flange, Sven allows ample time for it to dry before moving forward with additional steps. This patience and precision are key aspects of his successful boatbuilding methods.Step 4: Finishing Touches
Once the flange is fully dried, Sven removes the clamps carefully, ensuring no damage occurs during this process. He then moves on to attaching four more pieces onto these main frames, completing two pairs of flanges for the bulkhead hatches.The Final Touches
While two flanges form the primary support structure around the hatches, Sven mentions there are two additional pieces required at each end to ensure comprehensive protection. This attention to detail highlights his commitment to producing a durable and reliable design. “Sailing is about finding your path, whether it’s across an ocean or within yourself.” – Sven Yrvind In conclusion, making flanges around bulkhead hatches may seem complex at first glance, but by following Sven Yrvind’s meticulous process, enthusiasts can achieve professional-level results. Remember that the journey of boatbuilding is as rewarding as reaching your destination; it tests one’s patience and dedication. For those seeking to embark on this adventure or simply gain more insight into marine craftsmanship, Sven’s wisdom is invaluable.Sven begins by explaining that working on flanges vertically and horizontally is significantly easier than doing so in a flat position. To simplify the process further, he divides the task into two or three steps as suggested by fellow expert “for for.” This approach not only makes it more manageable but also allows for greater precision in crafting each component.Step 2: Applying Glue and Securing
Sven proceeds to apply glue along one edge of the flange, ensuring a secure bond when clamped into place. He emphasizes that this stage is crucial for maintaining the structural integrity of the flange, which in turn safeguards the living area beneath the canvas when hatches are open.Step 3: Allowing Time to Dry
After securely attaching the first portion of the flange, Sven allows ample time for it to dry before moving forward with additional steps. This patience and precision are key aspects of his successful boatbuilding methods.Step 4: Finishing Touches
Once the flange is fully dried, Sven removes the clamps carefully, ensuring no damage occurs during this process. He then moves on to attaching four more pieces onto these main frames, completing two pairs of flanges for the bulkhead hatches.The Final Touches
While two flanges form the primary support structure around the hatches, Sven mentions there are two additional pieces required at each end to ensure comprehensive protection. This attention to detail highlights his commitment to producing a durable and reliable design. “Sailing is about finding your path, whether it’s across an ocean or within yourself.” – Sven Yrvind In conclusion, making flanges around bulkhead hatches may seem complex at first glance, but by following Sven Yrvind’s meticulous process, enthusiasts can achieve professional-level results. Remember that the journey of boatbuilding is as rewarding as reaching your destination; it tests one’s patience and dedication. For those seeking to embark on this adventure or simply gain more insight into marine craftsmanship, Sven’s wisdom is invaluable.Sven Yrvind, a renowned yacht designer and sailor, shares valuable insights on creating flanges around bulkhead hatches for canvas protection in this enlightening video. By following his expert guidance, boat enthusiasts can ensure their living areas remain secure while allowing unhindered access through the hatches.Step 1: Starting with the Flange
Sven begins by explaining that working on flanges vertically and horizontally is significantly easier than doing so in a flat position. To simplify the process further, he divides the task into two or three steps as suggested by fellow expert “for for.” This approach not only makes it more manageable but also allows for greater precision in crafting each component.Step 2: Applying Glue and Securing
Sven proceeds to apply glue along one edge of the flange, ensuring a secure bond when clamped into place. He emphasizes that this stage is crucial for maintaining the structural integrity of the flange, which in turn safeguards the living area beneath the canvas when hatches are open.Step 3: Allowing Time to Dry
After securely attaching the first portion of the flange, Sven allows ample time for it to dry before moving forward with additional steps. This patience and precision are key aspects of his successful boatbuilding methods.Step 4: Finishing Touches
Once the flange is fully dried, Sven removes the clamps carefully, ensuring no damage occurs during this process. He then moves on to attaching four more pieces onto these main frames, completing two pairs of flanges for the bulkhead hatches.The Final Touches
While two flanges form the primary support structure around the hatches, Sven mentions there are two additional pieces required at each end to ensure comprehensive protection. This attention to detail highlights his commitment to producing a durable and reliable design. “Sailing is about finding your path, whether it’s across an ocean or within yourself.” – Sven Yrvind In conclusion, making flanges around bulkhead hatches may seem complex at first glance, but by following Sven Yrvind’s meticulous process, enthusiasts can achieve professional-level results. Remember that the journey of boatbuilding is as rewarding as reaching your destination; it tests one’s patience and dedication. For those seeking to embark on this adventure or simply gain more insight into marine craftsmanship, Sven’s wisdom is invaluable.Making Flanges Around Bulkhead Hatches for Canvas
Sven Yrvind, a renowned yacht designer and sailor, shares valuable insights on creating flanges around bulkhead hatches for canvas protection in this enlightening video. By following his expert guidance, boat enthusiasts can ensure their living areas remain secure while allowing unhindered access through the hatches.Step 1: Starting with the Flange
Sven begins by explaining that working on flanges vertically and horizontally is significantly easier than doing so in a flat position. To simplify the process further, he divides the task into two or three steps as suggested by fellow expert “for for.” This approach not only makes it more manageable but also allows for greater precision in crafting each component.Step 2: Applying Glue and Securing
Sven proceeds to apply glue along one edge of the flange, ensuring a secure bond when clamped into place. He emphasizes that this stage is crucial for maintaining the structural integrity of the flange, which in turn safeguards the living area beneath the canvas when hatches are open.Step 3: Allowing Time to Dry
After securely attaching the first portion of the flange, Sven allows ample time for it to dry before moving forward with additional steps. This patience and precision are key aspects of his successful boatbuilding methods.Step 4: Finishing Touches
Once the flange is fully dried, Sven removes the clamps carefully, ensuring no damage occurs during this process. He then moves on to attaching four more pieces onto these main frames, completing two pairs of flanges for the bulkhead hatches.The Final Touches
While two flanges form the primary support structure around the hatches, Sven mentions there are two additional pieces required at each end to ensure comprehensive protection. This attention to detail highlights his commitment to producing a durable and reliable design. “Sailing is about finding your path, whether it’s across an ocean or within yourself.” – Sven Yrvind In conclusion, making flanges around bulkhead hatches may seem complex at first glance, but by following Sven Yrvind’s meticulous process, enthusiasts can achieve professional-level results. Remember that the journey of boatbuilding is as rewarding as reaching your destination; it tests one’s patience and dedication. For those seeking to embark on this adventure or simply gain more insight into marine craftsmanship, Sven’s wisdom is invaluable.After securely attaching the first portion of the flange, Sven allows ample time for it to dry before moving forward with additional steps. This patience and precision are key aspects of his successful boatbuilding methods.Step 4: Finishing Touches
Once the flange is fully dried, Sven removes the clamps carefully, ensuring no damage occurs during this process. He then moves on to attaching four more pieces onto these main frames, completing two pairs of flanges for the bulkhead hatches.The Final Touches
While two flanges form the primary support structure around the hatches, Sven mentions there are two additional pieces required at each end to ensure comprehensive protection. This attention to detail highlights his commitment to producing a durable and reliable design. “Sailing is about finding your path, whether it’s across an ocean or within yourself.” – Sven Yrvind In conclusion, making flanges around bulkhead hatches may seem complex at first glance, but by following Sven Yrvind’s meticulous process, enthusiasts can achieve professional-level results. Remember that the journey of boatbuilding is as rewarding as reaching your destination; it tests one’s patience and dedication. For those seeking to embark on this adventure or simply gain more insight into marine craftsmanship, Sven’s wisdom is invaluable.Making Flanges Around Bulkhead Hatches for Canvas
Sven Yrvind, a renowned yacht designer and sailor, shares valuable insights on creating flanges around bulkhead hatches for canvas protection in this enlightening video. By following his expert guidance, boat enthusiasts can ensure their living areas remain secure while allowing unhindered access through the hatches.Step 1: Starting with the Flange
Sven begins by explaining that working on flanges vertically and horizontally is significantly easier than doing so in a flat position. To simplify the process further, he divides the task into two or three steps as suggested by fellow expert “for for.” This approach not only makes it more manageable but also allows for greater precision in crafting each component.Step 2: Applying Glue and Securing
Sven proceeds to apply glue along one edge of the flange, ensuring a secure bond when clamped into place. He emphasizes that this stage is crucial for maintaining the structural integrity of the flange, which in turn safeguards the living area beneath the canvas when hatches are open.Step 3: Allowing Time to Dry
After securely attaching the first portion of the flange, Sven allows ample time for it to dry before moving forward with additional steps. This patience and precision are key aspects of his successful boatbuilding methods.Step 4: Finishing Touches
Once the flange is fully dried, Sven removes the clamps carefully, ensuring no damage occurs during this process. He then moves on to attaching four more pieces onto these main frames, completing two pairs of flanges for the bulkhead hatches.The Final Touches
While two flanges form the primary support structure around the hatches, Sven mentions there are two additional pieces required at each end to ensure comprehensive protection. This attention to detail highlights his commitment to producing a durable and reliable design. “Sailing is about finding your path, whether it’s across an ocean or within yourself.” – Sven Yrvind In conclusion, making flanges around bulkhead hatches may seem complex at first glance, but by following Sven Yrvind’s meticulous process, enthusiasts can achieve professional-level results. Remember that the journey of boatbuilding is as rewarding as reaching your destination; it tests one’s patience and dedication. For those seeking to embark on this adventure or simply gain more insight into marine craftsmanship, Sven’s wisdom is invaluable.Once the flange is fully dried, Sven removes the clamps carefully, ensuring no damage occurs during this process. He then moves on to attaching four more pieces onto these main frames, completing two pairs of flanges for the bulkhead hatches.The Final Touches
While two flanges form the primary support structure around the hatches, Sven mentions there are two additional pieces required at each end to ensure comprehensive protection. This attention to detail highlights his commitment to producing a durable and reliable design. “Sailing is about finding your path, whether it’s across an ocean or within yourself.” – Sven Yrvind In conclusion, making flanges around bulkhead hatches may seem complex at first glance, but by following Sven Yrvind’s meticulous process, enthusiasts can achieve professional-level results. Remember that the journey of boatbuilding is as rewarding as reaching your destination; it tests one’s patience and dedication. For those seeking to embark on this adventure or simply gain more insight into marine craftsmanship, Sven’s wisdom is invaluable.After securely attaching the first portion of the flange, Sven allows ample time for it to dry before moving forward with additional steps. This patience and precision are key aspects of his successful boatbuilding methods.Step 4: Finishing Touches
Once the flange is fully dried, Sven removes the clamps carefully, ensuring no damage occurs during this process. He then moves on to attaching four more pieces onto these main frames, completing two pairs of flanges for the bulkhead hatches.The Final Touches
While two flanges form the primary support structure around the hatches, Sven mentions there are two additional pieces required at each end to ensure comprehensive protection. This attention to detail highlights his commitment to producing a durable and reliable design. “Sailing is about finding your path, whether it’s across an ocean or within yourself.” – Sven Yrvind In conclusion, making flanges around bulkhead hatches may seem complex at first glance, but by following Sven Yrvind’s meticulous process, enthusiasts can achieve professional-level results. Remember that the journey of boatbuilding is as rewarding as reaching your destination; it tests one’s patience and dedication. For those seeking to embark on this adventure or simply gain more insight into marine craftsmanship, Sven’s wisdom is invaluable.Sven proceeds to apply glue along one edge of the flange, ensuring a secure bond when clamped into place. He emphasizes that this stage is crucial for maintaining the structural integrity of the flange, which in turn safeguards the living area beneath the canvas when hatches are open.Step 3: Allowing Time to Dry
After securely attaching the first portion of the flange, Sven allows ample time for it to dry before moving forward with additional steps. This patience and precision are key aspects of his successful boatbuilding methods.Step 4: Finishing Touches
Once the flange is fully dried, Sven removes the clamps carefully, ensuring no damage occurs during this process. He then moves on to attaching four more pieces onto these main frames, completing two pairs of flanges for the bulkhead hatches.The Final Touches
While two flanges form the primary support structure around the hatches, Sven mentions there are two additional pieces required at each end to ensure comprehensive protection. This attention to detail highlights his commitment to producing a durable and reliable design. “Sailing is about finding your path, whether it’s across an ocean or within yourself.” – Sven Yrvind In conclusion, making flanges around bulkhead hatches may seem complex at first glance, but by following Sven Yrvind’s meticulous process, enthusiasts can achieve professional-level results. Remember that the journey of boatbuilding is as rewarding as reaching your destination; it tests one’s patience and dedication. For those seeking to embark on this adventure or simply gain more insight into marine craftsmanship, Sven’s wisdom is invaluable.Sven begins by explaining that working on flanges vertically and horizontally is significantly easier than doing so in a flat position. To simplify the process further, he divides the task into two or three steps as suggested by fellow expert “for for.” This approach not only makes it more manageable but also allows for greater precision in crafting each component.Step 2: Applying Glue and Securing
Sven proceeds to apply glue along one edge of the flange, ensuring a secure bond when clamped into place. He emphasizes that this stage is crucial for maintaining the structural integrity of the flange, which in turn safeguards the living area beneath the canvas when hatches are open.Step 3: Allowing Time to Dry
After securely attaching the first portion of the flange, Sven allows ample time for it to dry before moving forward with additional steps. This patience and precision are key aspects of his successful boatbuilding methods.Step 4: Finishing Touches
Once the flange is fully dried, Sven removes the clamps carefully, ensuring no damage occurs during this process. He then moves on to attaching four more pieces onto these main frames, completing two pairs of flanges for the bulkhead hatches.The Final Touches
While two flanges form the primary support structure around the hatches, Sven mentions there are two additional pieces required at each end to ensure comprehensive protection. This attention to detail highlights his commitment to producing a durable and reliable design. “Sailing is about finding your path, whether it’s across an ocean or within yourself.” – Sven Yrvind In conclusion, making flanges around bulkhead hatches may seem complex at first glance, but by following Sven Yrvind’s meticulous process, enthusiasts can achieve professional-level results. Remember that the journey of boatbuilding is as rewarding as reaching your destination; it tests one’s patience and dedication. For those seeking to embark on this adventure or simply gain more insight into marine craftsmanship, Sven’s wisdom is invaluable.Sven Yrvind, a renowned yacht designer and sailor, shares valuable insights on creating flanges around bulkhead hatches for canvas protection in this enlightening video. By following his expert guidance, boat enthusiasts can ensure their living areas remain secure while allowing unhindered access through the hatches.Step 1: Starting with the Flange
Sven begins by explaining that working on flanges vertically and horizontally is significantly easier than doing so in a flat position. To simplify the process further, he divides the task into two or three steps as suggested by fellow expert “for for.” This approach not only makes it more manageable but also allows for greater precision in crafting each component.Step 2: Applying Glue and Securing
Sven proceeds to apply glue along one edge of the flange, ensuring a secure bond when clamped into place. He emphasizes that this stage is crucial for maintaining the structural integrity of the flange, which in turn safeguards the living area beneath the canvas when hatches are open.Step 3: Allowing Time to Dry
After securely attaching the first portion of the flange, Sven allows ample time for it to dry before moving forward with additional steps. This patience and precision are key aspects of his successful boatbuilding methods.Step 4: Finishing Touches
Once the flange is fully dried, Sven removes the clamps carefully, ensuring no damage occurs during this process. He then moves on to attaching four more pieces onto these main frames, completing two pairs of flanges for the bulkhead hatches.The Final Touches
While two flanges form the primary support structure around the hatches, Sven mentions there are two additional pieces required at each end to ensure comprehensive protection. This attention to detail highlights his commitment to producing a durable and reliable design. “Sailing is about finding your path, whether it’s across an ocean or within yourself.” – Sven Yrvind In conclusion, making flanges around bulkhead hatches may seem complex at first glance, but by following Sven Yrvind’s meticulous process, enthusiasts can achieve professional-level results. Remember that the journey of boatbuilding is as rewarding as reaching your destination; it tests one’s patience and dedication. For those seeking to embark on this adventure or simply gain more insight into marine craftsmanship, Sven’s wisdom is invaluable.Making Flanges Around Bulkhead Hatches for Canvas
Sven Yrvind, a renowned yacht designer and sailor, shares valuable insights on creating flanges around bulkhead hatches for canvas protection in this enlightening video. By following his expert guidance, boat enthusiasts can ensure their living areas remain secure while allowing unhindered access through the hatches.Step 1: Starting with the Flange
Sven begins by explaining that working on flanges vertically and horizontally is significantly easier than doing so in a flat position. To simplify the process further, he divides the task into two or three steps as suggested by fellow expert “for for.” This approach not only makes it more manageable but also allows for greater precision in crafting each component.Step 2: Applying Glue and Securing
Sven proceeds to apply glue along one edge of the flange, ensuring a secure bond when clamped into place. He emphasizes that this stage is crucial for maintaining the structural integrity of the flange, which in turn safeguards the living area beneath the canvas when hatches are open.Step 3: Allowing Time to Dry
After securely attaching the first portion of the flange, Sven allows ample time for it to dry before moving forward with additional steps. This patience and precision are key aspects of his successful boatbuilding methods.Step 4: Finishing Touches
Once the flange is fully dried, Sven removes the clamps carefully, ensuring no damage occurs during this process. He then moves on to attaching four more pieces onto these main frames, completing two pairs of flanges for the bulkhead hatches.The Final Touches
While two flanges form the primary support structure around the hatches, Sven mentions there are two additional pieces required at each end to ensure comprehensive protection. This attention to detail highlights his commitment to producing a durable and reliable design. “Sailing is about finding your path, whether it’s across an ocean or within yourself.” – Sven Yrvind In conclusion, making flanges around bulkhead hatches may seem complex at first glance, but by following Sven Yrvind’s meticulous process, enthusiasts can achieve professional-level results. Remember that the journey of boatbuilding is as rewarding as reaching your destination; it tests one’s patience and dedication. For those seeking to embark on this adventure or simply gain more insight into marine craftsmanship, Sven’s wisdom is invaluable.Sven proceeds to apply glue along one edge of the flange, ensuring a secure bond when clamped into place. He emphasizes that this stage is crucial for maintaining the structural integrity of the flange, which in turn safeguards the living area beneath the canvas when hatches are open.Step 3: Allowing Time to Dry
After securely attaching the first portion of the flange, Sven allows ample time for it to dry before moving forward with additional steps. This patience and precision are key aspects of his successful boatbuilding methods.Step 4: Finishing Touches
Once the flange is fully dried, Sven removes the clamps carefully, ensuring no damage occurs during this process. He then moves on to attaching four more pieces onto these main frames, completing two pairs of flanges for the bulkhead hatches.The Final Touches
While two flanges form the primary support structure around the hatches, Sven mentions there are two additional pieces required at each end to ensure comprehensive protection. This attention to detail highlights his commitment to producing a durable and reliable design. “Sailing is about finding your path, whether it’s across an ocean or within yourself.” – Sven Yrvind In conclusion, making flanges around bulkhead hatches may seem complex at first glance, but by following Sven Yrvind’s meticulous process, enthusiasts can achieve professional-level results. Remember that the journey of boatbuilding is as rewarding as reaching your destination; it tests one’s patience and dedication. For those seeking to embark on this adventure or simply gain more insight into marine craftsmanship, Sven’s wisdom is invaluable.Making Flanges Around Bulkhead Hatches for Canvas
Sven Yrvind, a renowned yacht designer and sailor, shares valuable insights on creating flanges around bulkhead hatches for canvas protection in this enlightening video. By following his expert guidance, boat enthusiasts can ensure their living areas remain secure while allowing unhindered access through the hatches.Step 1: Starting with the Flange
Sven begins by explaining that working on flanges vertically and horizontally is significantly easier than doing so in a flat position. To simplify the process further, he divides the task into two or three steps as suggested by fellow expert “for for.” This approach not only makes it more manageable but also allows for greater precision in crafting each component.Step 2: Applying Glue and Securing
Sven proceeds to apply glue along one edge of the flange, ensuring a secure bond when clamped into place. He emphasizes that this stage is crucial for maintaining the structural integrity of the flange, which in turn safeguards the living area beneath the canvas when hatches are open.Step 3: Allowing Time to Dry
After securely attaching the first portion of the flange, Sven allows ample time for it to dry before moving forward with additional steps. This patience and precision are key aspects of his successful boatbuilding methods.Step 4: Finishing Touches
Once the flange is fully dried, Sven removes the clamps carefully, ensuring no damage occurs during this process. He then moves on to attaching four more pieces onto these main frames, completing two pairs of flanges for the bulkhead hatches.The Final Touches
While two flanges form the primary support structure around the hatches, Sven mentions there are two additional pieces required at each end to ensure comprehensive protection. This attention to detail highlights his commitment to producing a durable and reliable design. “Sailing is about finding your path, whether it’s across an ocean or within yourself.” – Sven Yrvind In conclusion, making flanges around bulkhead hatches may seem complex at first glance, but by following Sven Yrvind’s meticulous process, enthusiasts can achieve professional-level results. Remember that the journey of boatbuilding is as rewarding as reaching your destination; it tests one’s patience and dedication. For those seeking to embark on this adventure or simply gain more insight into marine craftsmanship, Sven’s wisdom is invaluable.Once the flange is fully dried, Sven removes the clamps carefully, ensuring no damage occurs during this process. He then moves on to attaching four more pieces onto these main frames, completing two pairs of flanges for the bulkhead hatches.The Final Touches
While two flanges form the primary support structure around the hatches, Sven mentions there are two additional pieces required at each end to ensure comprehensive protection. This attention to detail highlights his commitment to producing a durable and reliable design. “Sailing is about finding your path, whether it’s across an ocean or within yourself.” – Sven Yrvind In conclusion, making flanges around bulkhead hatches may seem complex at first glance, but by following Sven Yrvind’s meticulous process, enthusiasts can achieve professional-level results. Remember that the journey of boatbuilding is as rewarding as reaching your destination; it tests one’s patience and dedication. For those seeking to embark on this adventure or simply gain more insight into marine craftsmanship, Sven’s wisdom is invaluable.After securely attaching the first portion of the flange, Sven allows ample time for it to dry before moving forward with additional steps. This patience and precision are key aspects of his successful boatbuilding methods.Step 4: Finishing Touches
Once the flange is fully dried, Sven removes the clamps carefully, ensuring no damage occurs during this process. He then moves on to attaching four more pieces onto these main frames, completing two pairs of flanges for the bulkhead hatches.The Final Touches
While two flanges form the primary support structure around the hatches, Sven mentions there are two additional pieces required at each end to ensure comprehensive protection. This attention to detail highlights his commitment to producing a durable and reliable design. “Sailing is about finding your path, whether it’s across an ocean or within yourself.” – Sven Yrvind In conclusion, making flanges around bulkhead hatches may seem complex at first glance, but by following Sven Yrvind’s meticulous process, enthusiasts can achieve professional-level results. Remember that the journey of boatbuilding is as rewarding as reaching your destination; it tests one’s patience and dedication. For those seeking to embark on this adventure or simply gain more insight into marine craftsmanship, Sven’s wisdom is invaluable.Sven proceeds to apply glue along one edge of the flange, ensuring a secure bond when clamped into place. He emphasizes that this stage is crucial for maintaining the structural integrity of the flange, which in turn safeguards the living area beneath the canvas when hatches are open.Step 3: Allowing Time to Dry
After securely attaching the first portion of the flange, Sven allows ample time for it to dry before moving forward with additional steps. This patience and precision are key aspects of his successful boatbuilding methods.Step 4: Finishing Touches
Once the flange is fully dried, Sven removes the clamps carefully, ensuring no damage occurs during this process. He then moves on to attaching four more pieces onto these main frames, completing two pairs of flanges for the bulkhead hatches.The Final Touches
While two flanges form the primary support structure around the hatches, Sven mentions there are two additional pieces required at each end to ensure comprehensive protection. This attention to detail highlights his commitment to producing a durable and reliable design. “Sailing is about finding your path, whether it’s across an ocean or within yourself.” – Sven Yrvind In conclusion, making flanges around bulkhead hatches may seem complex at first glance, but by following Sven Yrvind’s meticulous process, enthusiasts can achieve professional-level results. Remember that the journey of boatbuilding is as rewarding as reaching your destination; it tests one’s patience and dedication. For those seeking to embark on this adventure or simply gain more insight into marine craftsmanship, Sven’s wisdom is invaluable.Sven begins by explaining that working on flanges vertically and horizontally is significantly easier than doing so in a flat position. To simplify the process further, he divides the task into two or three steps as suggested by fellow expert “for for.” This approach not only makes it more manageable but also allows for greater precision in crafting each component.Step 2: Applying Glue and Securing
Sven proceeds to apply glue along one edge of the flange, ensuring a secure bond when clamped into place. He emphasizes that this stage is crucial for maintaining the structural integrity of the flange, which in turn safeguards the living area beneath the canvas when hatches are open.Step 3: Allowing Time to Dry
After securely attaching the first portion of the flange, Sven allows ample time for it to dry before moving forward with additional steps. This patience and precision are key aspects of his successful boatbuilding methods.Step 4: Finishing Touches
Once the flange is fully dried, Sven removes the clamps carefully, ensuring no damage occurs during this process. He then moves on to attaching four more pieces onto these main frames, completing two pairs of flanges for the bulkhead hatches.The Final Touches
While two flanges form the primary support structure around the hatches, Sven mentions there are two additional pieces required at each end to ensure comprehensive protection. This attention to detail highlights his commitment to producing a durable and reliable design. “Sailing is about finding your path, whether it’s across an ocean or within yourself.” – Sven Yrvind In conclusion, making flanges around bulkhead hatches may seem complex at first glance, but by following Sven Yrvind’s meticulous process, enthusiasts can achieve professional-level results. Remember that the journey of boatbuilding is as rewarding as reaching your destination; it tests one’s patience and dedication. For those seeking to embark on this adventure or simply gain more insight into marine craftsmanship, Sven’s wisdom is invaluable.Sven Yrvind, a renowned yacht designer and sailor, shares valuable insights on creating flanges around bulkhead hatches for canvas protection in this enlightening video. By following his expert guidance, boat enthusiasts can ensure their living areas remain secure while allowing unhindered access through the hatches.Step 1: Starting with the Flange
Sven begins by explaining that working on flanges vertically and horizontally is significantly easier than doing so in a flat position. To simplify the process further, he divides the task into two or three steps as suggested by fellow expert “for for.” This approach not only makes it more manageable but also allows for greater precision in crafting each component.Step 2: Applying Glue and Securing
Sven proceeds to apply glue along one edge of the flange, ensuring a secure bond when clamped into place. He emphasizes that this stage is crucial for maintaining the structural integrity of the flange, which in turn safeguards the living area beneath the canvas when hatches are open.Step 3: Allowing Time to Dry
After securely attaching the first portion of the flange, Sven allows ample time for it to dry before moving forward with additional steps. This patience and precision are key aspects of his successful boatbuilding methods.Step 4: Finishing Touches
Once the flange is fully dried, Sven removes the clamps carefully, ensuring no damage occurs during this process. He then moves on to attaching four more pieces onto these main frames, completing two pairs of flanges for the bulkhead hatches.The Final Touches
While two flanges form the primary support structure around the hatches, Sven mentions there are two additional pieces required at each end to ensure comprehensive protection. This attention to detail highlights his commitment to producing a durable and reliable design. “Sailing is about finding your path, whether it’s across an ocean or within yourself.” – Sven Yrvind In conclusion, making flanges around bulkhead hatches may seem complex at first glance, but by following Sven Yrvind’s meticulous process, enthusiasts can achieve professional-level results. Remember that the journey of boatbuilding is as rewarding as reaching your destination; it tests one’s patience and dedication. For those seeking to embark on this adventure or simply gain more insight into marine craftsmanship, Sven’s wisdom is invaluable.Making Flanges Around Bulkhead Hatches for Canvas
Sven Yrvind, a renowned yacht designer and sailor, shares valuable insights on creating flanges around bulkhead hatches for canvas protection in this enlightening video. By following his expert guidance, boat enthusiasts can ensure their living areas remain secure while allowing unhindered access through the hatches.Step 1: Starting with the Flange
Sven begins by explaining that working on flanges vertically and horizontally is significantly easier than doing so in a flat position. To simplify the process further, he divides the task into two or three steps as suggested by fellow expert “for for.” This approach not only makes it more manageable but also allows for greater precision in crafting each component.Step 2: Applying Glue and Securing
Sven proceeds to apply glue along one edge of the flange, ensuring a secure bond when clamped into place. He emphasizes that this stage is crucial for maintaining the structural integrity of the flange, which in turn safeguards the living area beneath the canvas when hatches are open.Step 3: Allowing Time to Dry
After securely attaching the first portion of the flange, Sven allows ample time for it to dry before moving forward with additional steps. This patience and precision are key aspects of his successful boatbuilding methods.Step 4: Finishing Touches
Once the flange is fully dried, Sven removes the clamps carefully, ensuring no damage occurs during this process. He then moves on to attaching four more pieces onto these main frames, completing two pairs of flanges for the bulkhead hatches.The Final Touches
While two flanges form the primary support structure around the hatches, Sven mentions there are two additional pieces required at each end to ensure comprehensive protection. This attention to detail highlights his commitment to producing a durable and reliable design. “Sailing is about finding your path, whether it’s across an ocean or within yourself.” – Sven Yrvind In conclusion, making flanges around bulkhead hatches may seem complex at first glance, but by following Sven Yrvind’s meticulous process, enthusiasts can achieve professional-level results. Remember that the journey of boatbuilding is as rewarding as reaching your destination; it tests one’s patience and dedication. For those seeking to embark on this adventure or simply gain more insight into marine craftsmanship, Sven’s wisdom is invaluable.Sven begins by explaining that working on flanges vertically and horizontally is significantly easier than doing so in a flat position. To simplify the process further, he divides the task into two or three steps as suggested by fellow expert “for for.” This approach not only makes it more manageable but also allows for greater precision in crafting each component.Step 2: Applying Glue and Securing
Sven proceeds to apply glue along one edge of the flange, ensuring a secure bond when clamped into place. He emphasizes that this stage is crucial for maintaining the structural integrity of the flange, which in turn safeguards the living area beneath the canvas when hatches are open.Step 3: Allowing Time to Dry
After securely attaching the first portion of the flange, Sven allows ample time for it to dry before moving forward with additional steps. This patience and precision are key aspects of his successful boatbuilding methods.Step 4: Finishing Touches
Once the flange is fully dried, Sven removes the clamps carefully, ensuring no damage occurs during this process. He then moves on to attaching four more pieces onto these main frames, completing two pairs of flanges for the bulkhead hatches.The Final Touches
While two flanges form the primary support structure around the hatches, Sven mentions there are two additional pieces required at each end to ensure comprehensive protection. This attention to detail highlights his commitment to producing a durable and reliable design. “Sailing is about finding your path, whether it’s across an ocean or within yourself.” – Sven Yrvind In conclusion, making flanges around bulkhead hatches may seem complex at first glance, but by following Sven Yrvind’s meticulous process, enthusiasts can achieve professional-level results. Remember that the journey of boatbuilding is as rewarding as reaching your destination; it tests one’s patience and dedication. For those seeking to embark on this adventure or simply gain more insight into marine craftsmanship, Sven’s wisdom is invaluable.Making Flanges Around Bulkhead Hatches for Canvas
Sven Yrvind, a renowned yacht designer and sailor, shares valuable insights on creating flanges around bulkhead hatches for canvas protection in this enlightening video. By following his expert guidance, boat enthusiasts can ensure their living areas remain secure while allowing unhindered access through the hatches.Step 1: Starting with the Flange
Sven begins by explaining that working on flanges vertically and horizontally is significantly easier than doing so in a flat position. To simplify the process further, he divides the task into two or three steps as suggested by fellow expert “for for.” This approach not only makes it more manageable but also allows for greater precision in crafting each component.Step 2: Applying Glue and Securing
Sven proceeds to apply glue along one edge of the flange, ensuring a secure bond when clamped into place. He emphasizes that this stage is crucial for maintaining the structural integrity of the flange, which in turn safeguards the living area beneath the canvas when hatches are open.Step 3: Allowing Time to Dry
After securely attaching the first portion of the flange, Sven allows ample time for it to dry before moving forward with additional steps. This patience and precision are key aspects of his successful boatbuilding methods.Step 4: Finishing Touches
Once the flange is fully dried, Sven removes the clamps carefully, ensuring no damage occurs during this process. He then moves on to attaching four more pieces onto these main frames, completing two pairs of flanges for the bulkhead hatches.The Final Touches
While two flanges form the primary support structure around the hatches, Sven mentions there are two additional pieces required at each end to ensure comprehensive protection. This attention to detail highlights his commitment to producing a durable and reliable design. “Sailing is about finding your path, whether it’s across an ocean or within yourself.” – Sven Yrvind In conclusion, making flanges around bulkhead hatches may seem complex at first glance, but by following Sven Yrvind’s meticulous process, enthusiasts can achieve professional-level results. Remember that the journey of boatbuilding is as rewarding as reaching your destination; it tests one’s patience and dedication. For those seeking to embark on this adventure or simply gain more insight into marine craftsmanship, Sven’s wisdom is invaluable.Once the flange is fully dried, Sven removes the clamps carefully, ensuring no damage occurs during this process. He then moves on to attaching four more pieces onto these main frames, completing two pairs of flanges for the bulkhead hatches.The Final Touches
While two flanges form the primary support structure around the hatches, Sven mentions there are two additional pieces required at each end to ensure comprehensive protection. This attention to detail highlights his commitment to producing a durable and reliable design. “Sailing is about finding your path, whether it’s across an ocean or within yourself.” – Sven Yrvind In conclusion, making flanges around bulkhead hatches may seem complex at first glance, but by following Sven Yrvind’s meticulous process, enthusiasts can achieve professional-level results. Remember that the journey of boatbuilding is as rewarding as reaching your destination; it tests one’s patience and dedication. For those seeking to embark on this adventure or simply gain more insight into marine craftsmanship, Sven’s wisdom is invaluable.After securely attaching the first portion of the flange, Sven allows ample time for it to dry before moving forward with additional steps. This patience and precision are key aspects of his successful boatbuilding methods.Step 4: Finishing Touches
Once the flange is fully dried, Sven removes the clamps carefully, ensuring no damage occurs during this process. He then moves on to attaching four more pieces onto these main frames, completing two pairs of flanges for the bulkhead hatches.The Final Touches
While two flanges form the primary support structure around the hatches, Sven mentions there are two additional pieces required at each end to ensure comprehensive protection. This attention to detail highlights his commitment to producing a durable and reliable design. “Sailing is about finding your path, whether it’s across an ocean or within yourself.” – Sven Yrvind In conclusion, making flanges around bulkhead hatches may seem complex at first glance, but by following Sven Yrvind’s meticulous process, enthusiasts can achieve professional-level results. Remember that the journey of boatbuilding is as rewarding as reaching your destination; it tests one’s patience and dedication. For those seeking to embark on this adventure or simply gain more insight into marine craftsmanship, Sven’s wisdom is invaluable.Sven proceeds to apply glue along one edge of the flange, ensuring a secure bond when clamped into place. He emphasizes that this stage is crucial for maintaining the structural integrity of the flange, which in turn safeguards the living area beneath the canvas when hatches are open.Step 3: Allowing Time to Dry
After securely attaching the first portion of the flange, Sven allows ample time for it to dry before moving forward with additional steps. This patience and precision are key aspects of his successful boatbuilding methods.Step 4: Finishing Touches
Once the flange is fully dried, Sven removes the clamps carefully, ensuring no damage occurs during this process. He then moves on to attaching four more pieces onto these main frames, completing two pairs of flanges for the bulkhead hatches.The Final Touches
While two flanges form the primary support structure around the hatches, Sven mentions there are two additional pieces required at each end to ensure comprehensive protection. This attention to detail highlights his commitment to producing a durable and reliable design. “Sailing is about finding your path, whether it’s across an ocean or within yourself.” – Sven Yrvind In conclusion, making flanges around bulkhead hatches may seem complex at first glance, but by following Sven Yrvind’s meticulous process, enthusiasts can achieve professional-level results. Remember that the journey of boatbuilding is as rewarding as reaching your destination; it tests one’s patience and dedication. For those seeking to embark on this adventure or simply gain more insight into marine craftsmanship, Sven’s wisdom is invaluable.Sven begins by explaining that working on flanges vertically and horizontally is significantly easier than doing so in a flat position. To simplify the process further, he divides the task into two or three steps as suggested by fellow expert “for for.” This approach not only makes it more manageable but also allows for greater precision in crafting each component.Step 2: Applying Glue and Securing
Sven proceeds to apply glue along one edge of the flange, ensuring a secure bond when clamped into place. He emphasizes that this stage is crucial for maintaining the structural integrity of the flange, which in turn safeguards the living area beneath the canvas when hatches are open.Step 3: Allowing Time to Dry
After securely attaching the first portion of the flange, Sven allows ample time for it to dry before moving forward with additional steps. This patience and precision are key aspects of his successful boatbuilding methods.Step 4: Finishing Touches
Once the flange is fully dried, Sven removes the clamps carefully, ensuring no damage occurs during this process. He then moves on to attaching four more pieces onto these main frames, completing two pairs of flanges for the bulkhead hatches.The Final Touches
While two flanges form the primary support structure around the hatches, Sven mentions there are two additional pieces required at each end to ensure comprehensive protection. This attention to detail highlights his commitment to producing a durable and reliable design. “Sailing is about finding your path, whether it’s across an ocean or within yourself.” – Sven Yrvind In conclusion, making flanges around bulkhead hatches may seem complex at first glance, but by following Sven Yrvind’s meticulous process, enthusiasts can achieve professional-level results. Remember that the journey of boatbuilding is as rewarding as reaching your destination; it tests one’s patience and dedication. For those seeking to embark on this adventure or simply gain more insight into marine craftsmanship, Sven’s wisdom is invaluable.Sven Yrvind, a renowned yacht designer and sailor, shares valuable insights on creating flanges around bulkhead hatches for canvas protection in this enlightening video. By following his expert guidance, boat enthusiasts can ensure their living areas remain secure while allowing unhindered access through the hatches.Step 1: Starting with the Flange
Sven begins by explaining that working on flanges vertically and horizontally is significantly easier than doing so in a flat position. To simplify the process further, he divides the task into two or three steps as suggested by fellow expert “for for.” This approach not only makes it more manageable but also allows for greater precision in crafting each component.Step 2: Applying Glue and Securing
Sven proceeds to apply glue along one edge of the flange, ensuring a secure bond when clamped into place. He emphasizes that this stage is crucial for maintaining the structural integrity of the flange, which in turn safeguards the living area beneath the canvas when hatches are open.Step 3: Allowing Time to Dry
After securely attaching the first portion of the flange, Sven allows ample time for it to dry before moving forward with additional steps. This patience and precision are key aspects of his successful boatbuilding methods.Step 4: Finishing Touches
Once the flange is fully dried, Sven removes the clamps carefully, ensuring no damage occurs during this process. He then moves on to attaching four more pieces onto these main frames, completing two pairs of flanges for the bulkhead hatches.The Final Touches
While two flanges form the primary support structure around the hatches, Sven mentions there are two additional pieces required at each end to ensure comprehensive protection. This attention to detail highlights his commitment to producing a durable and reliable design. “Sailing is about finding your path, whether it’s across an ocean or within yourself.” – Sven Yrvind In conclusion, making flanges around bulkhead hatches may seem complex at first glance, but by following Sven Yrvind’s meticulous process, enthusiasts can achieve professional-level results. Remember that the journey of boatbuilding is as rewarding as reaching your destination; it tests one’s patience and dedication. For those seeking to embark on this adventure or simply gain more insight into marine craftsmanship, Sven’s wisdom is invaluable.Making Flanges Around Bulkhead Hatches for Canvas
Sven Yrvind, a renowned yacht designer and sailor, shares valuable insights on creating flanges around bulkhead hatches for canvas protection in this enlightening video. By following his expert guidance, boat enthusiasts can ensure their living areas remain secure while allowing unhindered access through the hatches.Step 1: Starting with the Flange
Sven begins by explaining that working on flanges vertically and horizontally is significantly easier than doing so in a flat position. To simplify the process further, he divides the task into two or three steps as suggested by fellow expert “for for.” This approach not only makes it more manageable but also allows for greater precision in crafting each component.Step 2: Applying Glue and Securing
Sven proceeds to apply glue along one edge of the flange, ensuring a secure bond when clamped into place. He emphasizes that this stage is crucial for maintaining the structural integrity of the flange, which in turn safeguards the living area beneath the canvas when hatches are open.Step 3: Allowing Time to Dry
After securely attaching the first portion of the flange, Sven allows ample time for it to dry before moving forward with additional steps. This patience and precision are key aspects of his successful boatbuilding methods.Step 4: Finishing Touches
Once the flange is fully dried, Sven removes the clamps carefully, ensuring no damage occurs during this process. He then moves on to attaching four more pieces onto these main frames, completing two pairs of flanges for the bulkhead hatches.The Final Touches
While two flanges form the primary support structure around the hatches, Sven mentions there are two additional pieces required at each end to ensure comprehensive protection. This attention to detail highlights his commitment to producing a durable and reliable design. “Sailing is about finding your path, whether it’s across an ocean or within yourself.” – Sven Yrvind In conclusion, making flanges around bulkhead hatches may seem complex at first glance, but by following Sven Yrvind’s meticulous process, enthusiasts can achieve professional-level results. Remember that the journey of boatbuilding is as rewarding as reaching your destination; it tests one’s patience and dedication. For those seeking to embark on this adventure or simply gain more insight into marine craftsmanship, Sven’s wisdom is invaluable.Sven Yrvind, a renowned yacht designer and sailor, shares valuable insights on creating flanges around bulkhead hatches for canvas protection in this enlightening video. By following his expert guidance, boat enthusiasts can ensure their living areas remain secure while allowing unhindered access through the hatches.Step 1: Starting with the Flange
Sven begins by explaining that working on flanges vertically and horizontally is significantly easier than doing so in a flat position. To simplify the process further, he divides the task into two or three steps as suggested by fellow expert “for for.” This approach not only makes it more manageable but also allows for greater precision in crafting each component.Step 2: Applying Glue and Securing
Sven proceeds to apply glue along one edge of the flange, ensuring a secure bond when clamped into place. He emphasizes that this stage is crucial for maintaining the structural integrity of the flange, which in turn safeguards the living area beneath the canvas when hatches are open.Step 3: Allowing Time to Dry
After securely attaching the first portion of the flange, Sven allows ample time for it to dry before moving forward with additional steps. This patience and precision are key aspects of his successful boatbuilding methods.Step 4: Finishing Touches
Once the flange is fully dried, Sven removes the clamps carefully, ensuring no damage occurs during this process. He then moves on to attaching four more pieces onto these main frames, completing two pairs of flanges for the bulkhead hatches.The Final Touches
While two flanges form the primary support structure around the hatches, Sven mentions there are two additional pieces required at each end to ensure comprehensive protection. This attention to detail highlights his commitment to producing a durable and reliable design. “Sailing is about finding your path, whether it’s across an ocean or within yourself.” – Sven Yrvind In conclusion, making flanges around bulkhead hatches may seem complex at first glance, but by following Sven Yrvind’s meticulous process, enthusiasts can achieve professional-level results. Remember that the journey of boatbuilding is as rewarding as reaching your destination; it tests one’s patience and dedication. For those seeking to embark on this adventure or simply gain more insight into marine craftsmanship, Sven’s wisdom is invaluable.Making Flanges Around Bulkhead Hatches for Canvas
Sven Yrvind, a renowned yacht designer and sailor, shares valuable insights on creating flanges around bulkhead hatches for canvas protection in this enlightening video. By following his expert guidance, boat enthusiasts can ensure their living areas remain secure while allowing unhindered access through the hatches.Step 1: Starting with the Flange
Sven begins by explaining that working on flanges vertically and horizontally is significantly easier than doing so in a flat position. To simplify the process further, he divides the task into two or three steps as suggested by fellow expert “for for.” This approach not only makes it more manageable but also allows for greater precision in crafting each component.Step 2: Applying Glue and Securing
Sven proceeds to apply glue along one edge of the flange, ensuring a secure bond when clamped into place. He emphasizes that this stage is crucial for maintaining the structural integrity of the flange, which in turn safeguards the living area beneath the canvas when hatches are open.Step 3: Allowing Time to Dry
After securely attaching the first portion of the flange, Sven allows ample time for it to dry before moving forward with additional steps. This patience and precision are key aspects of his successful boatbuilding methods.Step 4: Finishing Touches
Once the flange is fully dried, Sven removes the clamps carefully, ensuring no damage occurs during this process. He then moves on to attaching four more pieces onto these main frames, completing two pairs of flanges for the bulkhead hatches.The Final Touches
While two flanges form the primary support structure around the hatches, Sven mentions there are two additional pieces required at each end to ensure comprehensive protection. This attention to detail highlights his commitment to producing a durable and reliable design. “Sailing is about finding your path, whether it’s across an ocean or within yourself.” – Sven Yrvind In conclusion, making flanges around bulkhead hatches may seem complex at first glance, but by following Sven Yrvind’s meticulous process, enthusiasts can achieve professional-level results. Remember that the journey of boatbuilding is as rewarding as reaching your destination; it tests one’s patience and dedication. For those seeking to embark on this adventure or simply gain more insight into marine craftsmanship, Sven’s wisdom is invaluable.Once the flange is fully dried, Sven removes the clamps carefully, ensuring no damage occurs during this process. He then moves on to attaching four more pieces onto these main frames, completing two pairs of flanges for the bulkhead hatches.The Final Touches
While two flanges form the primary support structure around the hatches, Sven mentions there are two additional pieces required at each end to ensure comprehensive protection. This attention to detail highlights his commitment to producing a durable and reliable design. “Sailing is about finding your path, whether it’s across an ocean or within yourself.” – Sven Yrvind In conclusion, making flanges around bulkhead hatches may seem complex at first glance, but by following Sven Yrvind’s meticulous process, enthusiasts can achieve professional-level results. Remember that the journey of boatbuilding is as rewarding as reaching your destination; it tests one’s patience and dedication. For those seeking to embark on this adventure or simply gain more insight into marine craftsmanship, Sven’s wisdom is invaluable.After securely attaching the first portion of the flange, Sven allows ample time for it to dry before moving forward with additional steps. This patience and precision are key aspects of his successful boatbuilding methods.Step 4: Finishing Touches
Once the flange is fully dried, Sven removes the clamps carefully, ensuring no damage occurs during this process. He then moves on to attaching four more pieces onto these main frames, completing two pairs of flanges for the bulkhead hatches.The Final Touches
While two flanges form the primary support structure around the hatches, Sven mentions there are two additional pieces required at each end to ensure comprehensive protection. This attention to detail highlights his commitment to producing a durable and reliable design. “Sailing is about finding your path, whether it’s across an ocean or within yourself.” – Sven Yrvind In conclusion, making flanges around bulkhead hatches may seem complex at first glance, but by following Sven Yrvind’s meticulous process, enthusiasts can achieve professional-level results. Remember that the journey of boatbuilding is as rewarding as reaching your destination; it tests one’s patience and dedication. For those seeking to embark on this adventure or simply gain more insight into marine craftsmanship, Sven’s wisdom is invaluable.Sven proceeds to apply glue along one edge of the flange, ensuring a secure bond when clamped into place. He emphasizes that this stage is crucial for maintaining the structural integrity of the flange, which in turn safeguards the living area beneath the canvas when hatches are open.Step 3: Allowing Time to Dry
After securely attaching the first portion of the flange, Sven allows ample time for it to dry before moving forward with additional steps. This patience and precision are key aspects of his successful boatbuilding methods.Step 4: Finishing Touches
Once the flange is fully dried, Sven removes the clamps carefully, ensuring no damage occurs during this process. He then moves on to attaching four more pieces onto these main frames, completing two pairs of flanges for the bulkhead hatches.The Final Touches
While two flanges form the primary support structure around the hatches, Sven mentions there are two additional pieces required at each end to ensure comprehensive protection. This attention to detail highlights his commitment to producing a durable and reliable design. “Sailing is about finding your path, whether it’s across an ocean or within yourself.” – Sven Yrvind In conclusion, making flanges around bulkhead hatches may seem complex at first glance, but by following Sven Yrvind’s meticulous process, enthusiasts can achieve professional-level results. Remember that the journey of boatbuilding is as rewarding as reaching your destination; it tests one’s patience and dedication. For those seeking to embark on this adventure or simply gain more insight into marine craftsmanship, Sven’s wisdom is invaluable.Sven begins by explaining that working on flanges vertically and horizontally is significantly easier than doing so in a flat position. To simplify the process further, he divides the task into two or three steps as suggested by fellow expert “for for.” This approach not only makes it more manageable but also allows for greater precision in crafting each component.Step 2: Applying Glue and Securing
Sven proceeds to apply glue along one edge of the flange, ensuring a secure bond when clamped into place. He emphasizes that this stage is crucial for maintaining the structural integrity of the flange, which in turn safeguards the living area beneath the canvas when hatches are open.Step 3: Allowing Time to Dry
After securely attaching the first portion of the flange, Sven allows ample time for it to dry before moving forward with additional steps. This patience and precision are key aspects of his successful boatbuilding methods.Step 4: Finishing Touches
Once the flange is fully dried, Sven removes the clamps carefully, ensuring no damage occurs during this process. He then moves on to attaching four more pieces onto these main frames, completing two pairs of flanges for the bulkhead hatches.The Final Touches
While two flanges form the primary support structure around the hatches, Sven mentions there are two additional pieces required at each end to ensure comprehensive protection. This attention to detail highlights his commitment to producing a durable and reliable design. “Sailing is about finding your path, whether it’s across an ocean or within yourself.” – Sven Yrvind In conclusion, making flanges around bulkhead hatches may seem complex at first glance, but by following Sven Yrvind’s meticulous process, enthusiasts can achieve professional-level results. Remember that the journey of boatbuilding is as rewarding as reaching your destination; it tests one’s patience and dedication. For those seeking to embark on this adventure or simply gain more insight into marine craftsmanship, Sven’s wisdom is invaluable.Sven Yrvind, a renowned yacht designer and sailor, shares valuable insights on creating flanges around bulkhead hatches for canvas protection in this enlightening video. By following his expert guidance, boat enthusiasts can ensure their living areas remain secure while allowing unhindered access through the hatches.Step 1: Starting with the Flange
Sven begins by explaining that working on flanges vertically and horizontally is significantly easier than doing so in a flat position. To simplify the process further, he divides the task into two or three steps as suggested by fellow expert “for for.” This approach not only makes it more manageable but also allows for greater precision in crafting each component.Step 2: Applying Glue and Securing
Sven proceeds to apply glue along one edge of the flange, ensuring a secure bond when clamped into place. He emphasizes that this stage is crucial for maintaining the structural integrity of the flange, which in turn safeguards the living area beneath the canvas when hatches are open.Step 3: Allowing Time to Dry
After securely attaching the first portion of the flange, Sven allows ample time for it to dry before moving forward with additional steps. This patience and precision are key aspects of his successful boatbuilding methods.Step 4: Finishing Touches
Once the flange is fully dried, Sven removes the clamps carefully, ensuring no damage occurs during this process. He then moves on to attaching four more pieces onto these main frames, completing two pairs of flanges for the bulkhead hatches.The Final Touches
While two flanges form the primary support structure around the hatches, Sven mentions there are two additional pieces required at each end to ensure comprehensive protection. This attention to detail highlights his commitment to producing a durable and reliable design. “Sailing is about finding your path, whether it’s across an ocean or within yourself.” – Sven Yrvind In conclusion, making flanges around bulkhead hatches may seem complex at first glance, but by following Sven Yrvind’s meticulous process, enthusiasts can achieve professional-level results. Remember that the journey of boatbuilding is as rewarding as reaching your destination; it tests one’s patience and dedication. For those seeking to embark on this adventure or simply gain more insight into marine craftsmanship, Sven’s wisdom is invaluable.Making Flanges Around Bulkhead Hatches for Canvas
Sven Yrvind, a renowned yacht designer and sailor, shares valuable insights on creating flanges around bulkhead hatches for canvas protection in this enlightening video. By following his expert guidance, boat enthusiasts can ensure their living areas remain secure while allowing unhindered access through the hatches.Step 1: Starting with the Flange
Sven begins by explaining that working on flanges vertically and horizontally is significantly easier than doing so in a flat position. To simplify the process further, he divides the task into two or three steps as suggested by fellow expert “for for.” This approach not only makes it more manageable but also allows for greater precision in crafting each component.Step 2: Applying Glue and Securing
Sven proceeds to apply glue along one edge of the flange, ensuring a secure bond when clamped into place. He emphasizes that this stage is crucial for maintaining the structural integrity of the flange, which in turn safeguards the living area beneath the canvas when hatches are open.Step 3: Allowing Time to Dry
After securely attaching the first portion of the flange, Sven allows ample time for it to dry before moving forward with additional steps. This patience and precision are key aspects of his successful boatbuilding methods.Step 4: Finishing Touches
Once the flange is fully dried, Sven removes the clamps carefully, ensuring no damage occurs during this process. He then moves on to attaching four more pieces onto these main frames, completing two pairs of flanges for the bulkhead hatches.The Final Touches
While two flanges form the primary support structure around the hatches, Sven mentions there are two additional pieces required at each end to ensure comprehensive protection. This attention to detail highlights his commitment to producing a durable and reliable design. “Sailing is about finding your path, whether it’s across an ocean or within yourself.” – Sven Yrvind In conclusion, making flanges around bulkhead hatches may seem complex at first glance, but by following Sven Yrvind’s meticulous process, enthusiasts can achieve professional-level results. Remember that the journey of boatbuilding is as rewarding as reaching your destination; it tests one’s patience and dedication. For those seeking to embark on this adventure or simply gain more insight into marine craftsmanship, Sven’s wisdom is invaluable.Once the flange is fully dried, Sven removes the clamps carefully, ensuring no damage occurs during this process. He then moves on to attaching four more pieces onto these main frames, completing two pairs of flanges for the bulkhead hatches.The Final Touches
While two flanges form the primary support structure around the hatches, Sven mentions there are two additional pieces required at each end to ensure comprehensive protection. This attention to detail highlights his commitment to producing a durable and reliable design. “Sailing is about finding your path, whether it’s across an ocean or within yourself.” – Sven Yrvind In conclusion, making flanges around bulkhead hatches may seem complex at first glance, but by following Sven Yrvind’s meticulous process, enthusiasts can achieve professional-level results. Remember that the journey of boatbuilding is as rewarding as reaching your destination; it tests one’s patience and dedication. For those seeking to embark on this adventure or simply gain more insight into marine craftsmanship, Sven’s wisdom is invaluable.Sven Yrvind, a renowned yacht designer and sailor, shares valuable insights on creating flanges around bulkhead hatches for canvas protection in this enlightening video. By following his expert guidance, boat enthusiasts can ensure their living areas remain secure while allowing unhindered access through the hatches.Step 1: Starting with the Flange
Sven begins by explaining that working on flanges vertically and horizontally is significantly easier than doing so in a flat position. To simplify the process further, he divides the task into two or three steps as suggested by fellow expert “for for.” This approach not only makes it more manageable but also allows for greater precision in crafting each component.Step 2: Applying Glue and Securing
Sven proceeds to apply glue along one edge of the flange, ensuring a secure bond when clamped into place. He emphasizes that this stage is crucial for maintaining the structural integrity of the flange, which in turn safeguards the living area beneath the canvas when hatches are open.Step 3: Allowing Time to Dry
After securely attaching the first portion of the flange, Sven allows ample time for it to dry before moving forward with additional steps. This patience and precision are key aspects of his successful boatbuilding methods.Step 4: Finishing Touches
Once the flange is fully dried, Sven removes the clamps carefully, ensuring no damage occurs during this process. He then moves on to attaching four more pieces onto these main frames, completing two pairs of flanges for the bulkhead hatches.The Final Touches
While two flanges form the primary support structure around the hatches, Sven mentions there are two additional pieces required at each end to ensure comprehensive protection. This attention to detail highlights his commitment to producing a durable and reliable design. “Sailing is about finding your path, whether it’s across an ocean or within yourself.” – Sven Yrvind In conclusion, making flanges around bulkhead hatches may seem complex at first glance, but by following Sven Yrvind’s meticulous process, enthusiasts can achieve professional-level results. Remember that the journey of boatbuilding is as rewarding as reaching your destination; it tests one’s patience and dedication. For those seeking to embark on this adventure or simply gain more insight into marine craftsmanship, Sven’s wisdom is invaluable.Making Flanges Around Bulkhead Hatches for Canvas
Sven Yrvind, a renowned yacht designer and sailor, shares valuable insights on creating flanges around bulkhead hatches for canvas protection in this enlightening video. By following his expert guidance, boat enthusiasts can ensure their living areas remain secure while allowing unhindered access through the hatches.Step 1: Starting with the Flange
Sven begins by explaining that working on flanges vertically and horizontally is significantly easier than doing so in a flat position. To simplify the process further, he divides the task into two or three steps as suggested by fellow expert “for for.” This approach not only makes it more manageable but also allows for greater precision in crafting each component.Step 2: Applying Glue and Securing
Sven proceeds to apply glue along one edge of the flange, ensuring a secure bond when clamped into place. He emphasizes that this stage is crucial for maintaining the structural integrity of the flange, which in turn safeguards the living area beneath the canvas when hatches are open.Step 3: Allowing Time to Dry
After securely attaching the first portion of the flange, Sven allows ample time for it to dry before moving forward with additional steps. This patience and precision are key aspects of his successful boatbuilding methods.Step 4: Finishing Touches
Once the flange is fully dried, Sven removes the clamps carefully, ensuring no damage occurs during this process. He then moves on to attaching four more pieces onto these main frames, completing two pairs of flanges for the bulkhead hatches.The Final Touches
While two flanges form the primary support structure around the hatches, Sven mentions there are two additional pieces required at each end to ensure comprehensive protection. This attention to detail highlights his commitment to producing a durable and reliable design. “Sailing is about finding your path, whether it’s across an ocean or within yourself.” – Sven Yrvind In conclusion, making flanges around bulkhead hatches may seem complex at first glance, but by following Sven Yrvind’s meticulous process, enthusiasts can achieve professional-level results. Remember that the journey of boatbuilding is as rewarding as reaching your destination; it tests one’s patience and dedication. For those seeking to embark on this adventure or simply gain more insight into marine craftsmanship, Sven’s wisdom is invaluable.Once the flange is fully dried, Sven removes the clamps carefully, ensuring no damage occurs during this process. He then moves on to attaching four more pieces onto these main frames, completing two pairs of flanges for the bulkhead hatches.The Final Touches
While two flanges form the primary support structure around the hatches, Sven mentions there are two additional pieces required at each end to ensure comprehensive protection. This attention to detail highlights his commitment to producing a durable and reliable design. “Sailing is about finding your path, whether it’s across an ocean or within yourself.” – Sven Yrvind In conclusion, making flanges around bulkhead hatches may seem complex at first glance, but by following Sven Yrvind’s meticulous process, enthusiasts can achieve professional-level results. Remember that the journey of boatbuilding is as rewarding as reaching your destination; it tests one’s patience and dedication. For those seeking to embark on this adventure or simply gain more insight into marine craftsmanship, Sven’s wisdom is invaluable.After securely attaching the first portion of the flange, Sven allows ample time for it to dry before moving forward with additional steps. This patience and precision are key aspects of his successful boatbuilding methods.Step 4: Finishing Touches
Once the flange is fully dried, Sven removes the clamps carefully, ensuring no damage occurs during this process. He then moves on to attaching four more pieces onto these main frames, completing two pairs of flanges for the bulkhead hatches.The Final Touches
While two flanges form the primary support structure around the hatches, Sven mentions there are two additional pieces required at each end to ensure comprehensive protection. This attention to detail highlights his commitment to producing a durable and reliable design. “Sailing is about finding your path, whether it’s across an ocean or within yourself.” – Sven Yrvind In conclusion, making flanges around bulkhead hatches may seem complex at first glance, but by following Sven Yrvind’s meticulous process, enthusiasts can achieve professional-level results. Remember that the journey of boatbuilding is as rewarding as reaching your destination; it tests one’s patience and dedication. For those seeking to embark on this adventure or simply gain more insight into marine craftsmanship, Sven’s wisdom is invaluable.Sven proceeds to apply glue along one edge of the flange, ensuring a secure bond when clamped into place. He emphasizes that this stage is crucial for maintaining the structural integrity of the flange, which in turn safeguards the living area beneath the canvas when hatches are open.Step 3: Allowing Time to Dry
After securely attaching the first portion of the flange, Sven allows ample time for it to dry before moving forward with additional steps. This patience and precision are key aspects of his successful boatbuilding methods.Step 4: Finishing Touches
Once the flange is fully dried, Sven removes the clamps carefully, ensuring no damage occurs during this process. He then moves on to attaching four more pieces onto these main frames, completing two pairs of flanges for the bulkhead hatches.The Final Touches
While two flanges form the primary support structure around the hatches, Sven mentions there are two additional pieces required at each end to ensure comprehensive protection. This attention to detail highlights his commitment to producing a durable and reliable design. “Sailing is about finding your path, whether it’s across an ocean or within yourself.” – Sven Yrvind In conclusion, making flanges around bulkhead hatches may seem complex at first glance, but by following Sven Yrvind’s meticulous process, enthusiasts can achieve professional-level results. Remember that the journey of boatbuilding is as rewarding as reaching your destination; it tests one’s patience and dedication. For those seeking to embark on this adventure or simply gain more insight into marine craftsmanship, Sven’s wisdom is invaluable.Sven begins by explaining that working on flanges vertically and horizontally is significantly easier than doing so in a flat position. To simplify the process further, he divides the task into two or three steps as suggested by fellow expert “for for.” This approach not only makes it more manageable but also allows for greater precision in crafting each component.Step 2: Applying Glue and Securing
Sven proceeds to apply glue along one edge of the flange, ensuring a secure bond when clamped into place. He emphasizes that this stage is crucial for maintaining the structural integrity of the flange, which in turn safeguards the living area beneath the canvas when hatches are open.Step 3: Allowing Time to Dry
After securely attaching the first portion of the flange, Sven allows ample time for it to dry before moving forward with additional steps. This patience and precision are key aspects of his successful boatbuilding methods.Step 4: Finishing Touches
Once the flange is fully dried, Sven removes the clamps carefully, ensuring no damage occurs during this process. He then moves on to attaching four more pieces onto these main frames, completing two pairs of flanges for the bulkhead hatches.The Final Touches
While two flanges form the primary support structure around the hatches, Sven mentions there are two additional pieces required at each end to ensure comprehensive protection. This attention to detail highlights his commitment to producing a durable and reliable design. “Sailing is about finding your path, whether it’s across an ocean or within yourself.” – Sven Yrvind In conclusion, making flanges around bulkhead hatches may seem complex at first glance, but by following Sven Yrvind’s meticulous process, enthusiasts can achieve professional-level results. Remember that the journey of boatbuilding is as rewarding as reaching your destination; it tests one’s patience and dedication. For those seeking to embark on this adventure or simply gain more insight into marine craftsmanship, Sven’s wisdom is invaluable.Sven Yrvind, a renowned yacht designer and sailor, shares valuable insights on creating flanges around bulkhead hatches for canvas protection in this enlightening video. By following his expert guidance, boat enthusiasts can ensure their living areas remain secure while allowing unhindered access through the hatches.Step 1: Starting with the Flange
Sven begins by explaining that working on flanges vertically and horizontally is significantly easier than doing so in a flat position. To simplify the process further, he divides the task into two or three steps as suggested by fellow expert “for for.” This approach not only makes it more manageable but also allows for greater precision in crafting each component.Step 2: Applying Glue and Securing
Sven proceeds to apply glue along one edge of the flange, ensuring a secure bond when clamped into place. He emphasizes that this stage is crucial for maintaining the structural integrity of the flange, which in turn safeguards the living area beneath the canvas when hatches are open.Step 3: Allowing Time to Dry
After securely attaching the first portion of the flange, Sven allows ample time for it to dry before moving forward with additional steps. This patience and precision are key aspects of his successful boatbuilding methods.Step 4: Finishing Touches
Once the flange is fully dried, Sven removes the clamps carefully, ensuring no damage occurs during this process. He then moves on to attaching four more pieces onto these main frames, completing two pairs of flanges for the bulkhead hatches.The Final Touches
While two flanges form the primary support structure around the hatches, Sven mentions there are two additional pieces required at each end to ensure comprehensive protection. This attention to detail highlights his commitment to producing a durable and reliable design. “Sailing is about finding your path, whether it’s across an ocean or within yourself.” – Sven Yrvind In conclusion, making flanges around bulkhead hatches may seem complex at first glance, but by following Sven Yrvind’s meticulous process, enthusiasts can achieve professional-level results. Remember that the journey of boatbuilding is as rewarding as reaching your destination; it tests one’s patience and dedication. For those seeking to embark on this adventure or simply gain more insight into marine craftsmanship, Sven’s wisdom is invaluable.Making Flanges Around Bulkhead Hatches for Canvas
Sven Yrvind, a renowned yacht designer and sailor, shares valuable insights on creating flanges around bulkhead hatches for canvas protection in this enlightening video. By following his expert guidance, boat enthusiasts can ensure their living areas remain secure while allowing unhindered access through the hatches.Step 1: Starting with the Flange
Sven begins by explaining that working on flanges vertically and horizontally is significantly easier than doing so in a flat position. To simplify the process further, he divides the task into two or three steps as suggested by fellow expert “for for.” This approach not only makes it more manageable but also allows for greater precision in crafting each component.Step 2: Applying Glue and Securing
Sven proceeds to apply glue along one edge of the flange, ensuring a secure bond when clamped into place. He emphasizes that this stage is crucial for maintaining the structural integrity of the flange, which in turn safeguards the living area beneath the canvas when hatches are open.Step 3: Allowing Time to Dry
After securely attaching the first portion of the flange, Sven allows ample time for it to dry before moving forward with additional steps. This patience and precision are key aspects of his successful boatbuilding methods.Step 4: Finishing Touches
Once the flange is fully dried, Sven removes the clamps carefully, ensuring no damage occurs during this process. He then moves on to attaching four more pieces onto these main frames, completing two pairs of flanges for the bulkhead hatches.The Final Touches
While two flanges form the primary support structure around the hatches, Sven mentions there are two additional pieces required at each end to ensure comprehensive protection. This attention to detail highlights his commitment to producing a durable and reliable design. “Sailing is about finding your path, whether it’s across an ocean or within yourself.” – Sven Yrvind In conclusion, making flanges around bulkhead hatches may seem complex at first glance, but by following Sven Yrvind’s meticulous process, enthusiasts can achieve professional-level results. Remember that the journey of boatbuilding is as rewarding as reaching your destination; it tests one’s patience and dedication. For those seeking to embark on this adventure or simply gain more insight into marine craftsmanship, Sven’s wisdom is invaluable.After securely attaching the first portion of the flange, Sven allows ample time for it to dry before moving forward with additional steps. This patience and precision are key aspects of his successful boatbuilding methods.Step 4: Finishing Touches
Once the flange is fully dried, Sven removes the clamps carefully, ensuring no damage occurs during this process. He then moves on to attaching four more pieces onto these main frames, completing two pairs of flanges for the bulkhead hatches.The Final Touches
While two flanges form the primary support structure around the hatches, Sven mentions there are two additional pieces required at each end to ensure comprehensive protection. This attention to detail highlights his commitment to producing a durable and reliable design. “Sailing is about finding your path, whether it’s across an ocean or within yourself.” – Sven Yrvind In conclusion, making flanges around bulkhead hatches may seem complex at first glance, but by following Sven Yrvind’s meticulous process, enthusiasts can achieve professional-level results. Remember that the journey of boatbuilding is as rewarding as reaching your destination; it tests one’s patience and dedication. For those seeking to embark on this adventure or simply gain more insight into marine craftsmanship, Sven’s wisdom is invaluable.Sven Yrvind, a renowned yacht designer and sailor, shares valuable insights on creating flanges around bulkhead hatches for canvas protection in this enlightening video. By following his expert guidance, boat enthusiasts can ensure their living areas remain secure while allowing unhindered access through the hatches.Step 1: Starting with the Flange
Sven begins by explaining that working on flanges vertically and horizontally is significantly easier than doing so in a flat position. To simplify the process further, he divides the task into two or three steps as suggested by fellow expert “for for.” This approach not only makes it more manageable but also allows for greater precision in crafting each component.Step 2: Applying Glue and Securing
Sven proceeds to apply glue along one edge of the flange, ensuring a secure bond when clamped into place. He emphasizes that this stage is crucial for maintaining the structural integrity of the flange, which in turn safeguards the living area beneath the canvas when hatches are open.Step 3: Allowing Time to Dry
After securely attaching the first portion of the flange, Sven allows ample time for it to dry before moving forward with additional steps. This patience and precision are key aspects of his successful boatbuilding methods.Step 4: Finishing Touches
Once the flange is fully dried, Sven removes the clamps carefully, ensuring no damage occurs during this process. He then moves on to attaching four more pieces onto these main frames, completing two pairs of flanges for the bulkhead hatches.The Final Touches
While two flanges form the primary support structure around the hatches, Sven mentions there are two additional pieces required at each end to ensure comprehensive protection. This attention to detail highlights his commitment to producing a durable and reliable design. “Sailing is about finding your path, whether it’s across an ocean or within yourself.” – Sven Yrvind In conclusion, making flanges around bulkhead hatches may seem complex at first glance, but by following Sven Yrvind’s meticulous process, enthusiasts can achieve professional-level results. Remember that the journey of boatbuilding is as rewarding as reaching your destination; it tests one’s patience and dedication. For those seeking to embark on this adventure or simply gain more insight into marine craftsmanship, Sven’s wisdom is invaluable.Making Flanges Around Bulkhead Hatches for Canvas
Sven Yrvind, a renowned yacht designer and sailor, shares valuable insights on creating flanges around bulkhead hatches for canvas protection in this enlightening video. By following his expert guidance, boat enthusiasts can ensure their living areas remain secure while allowing unhindered access through the hatches.Step 1: Starting with the Flange
Sven begins by explaining that working on flanges vertically and horizontally is significantly easier than doing so in a flat position. To simplify the process further, he divides the task into two or three steps as suggested by fellow expert “for for.” This approach not only makes it more manageable but also allows for greater precision in crafting each component.Step 2: Applying Glue and Securing
Sven proceeds to apply glue along one edge of the flange, ensuring a secure bond when clamped into place. He emphasizes that this stage is crucial for maintaining the structural integrity of the flange, which in turn safeguards the living area beneath the canvas when hatches are open.Step 3: Allowing Time to Dry
After securely attaching the first portion of the flange, Sven allows ample time for it to dry before moving forward with additional steps. This patience and precision are key aspects of his successful boatbuilding methods.Step 4: Finishing Touches
Once the flange is fully dried, Sven removes the clamps carefully, ensuring no damage occurs during this process. He then moves on to attaching four more pieces onto these main frames, completing two pairs of flanges for the bulkhead hatches.The Final Touches
While two flanges form the primary support structure around the hatches, Sven mentions there are two additional pieces required at each end to ensure comprehensive protection. This attention to detail highlights his commitment to producing a durable and reliable design. “Sailing is about finding your path, whether it’s across an ocean or within yourself.” – Sven Yrvind In conclusion, making flanges around bulkhead hatches may seem complex at first glance, but by following Sven Yrvind’s meticulous process, enthusiasts can achieve professional-level results. Remember that the journey of boatbuilding is as rewarding as reaching your destination; it tests one’s patience and dedication. For those seeking to embark on this adventure or simply gain more insight into marine craftsmanship, Sven’s wisdom is invaluable.Once the flange is fully dried, Sven removes the clamps carefully, ensuring no damage occurs during this process. He then moves on to attaching four more pieces onto these main frames, completing two pairs of flanges for the bulkhead hatches.The Final Touches
While two flanges form the primary support structure around the hatches, Sven mentions there are two additional pieces required at each end to ensure comprehensive protection. This attention to detail highlights his commitment to producing a durable and reliable design. “Sailing is about finding your path, whether it’s across an ocean or within yourself.” – Sven Yrvind In conclusion, making flanges around bulkhead hatches may seem complex at first glance, but by following Sven Yrvind’s meticulous process, enthusiasts can achieve professional-level results. Remember that the journey of boatbuilding is as rewarding as reaching your destination; it tests one’s patience and dedication. For those seeking to embark on this adventure or simply gain more insight into marine craftsmanship, Sven’s wisdom is invaluable.After securely attaching the first portion of the flange, Sven allows ample time for it to dry before moving forward with additional steps. This patience and precision are key aspects of his successful boatbuilding methods.Step 4: Finishing Touches
Once the flange is fully dried, Sven removes the clamps carefully, ensuring no damage occurs during this process. He then moves on to attaching four more pieces onto these main frames, completing two pairs of flanges for the bulkhead hatches.The Final Touches
While two flanges form the primary support structure around the hatches, Sven mentions there are two additional pieces required at each end to ensure comprehensive protection. This attention to detail highlights his commitment to producing a durable and reliable design. “Sailing is about finding your path, whether it’s across an ocean or within yourself.” – Sven Yrvind In conclusion, making flanges around bulkhead hatches may seem complex at first glance, but by following Sven Yrvind’s meticulous process, enthusiasts can achieve professional-level results. Remember that the journey of boatbuilding is as rewarding as reaching your destination; it tests one’s patience and dedication. For those seeking to embark on this adventure or simply gain more insight into marine craftsmanship, Sven’s wisdom is invaluable.Sven proceeds to apply glue along one edge of the flange, ensuring a secure bond when clamped into place. He emphasizes that this stage is crucial for maintaining the structural integrity of the flange, which in turn safeguards the living area beneath the canvas when hatches are open.Step 3: Allowing Time to Dry
After securely attaching the first portion of the flange, Sven allows ample time for it to dry before moving forward with additional steps. This patience and precision are key aspects of his successful boatbuilding methods.Step 4: Finishing Touches
Once the flange is fully dried, Sven removes the clamps carefully, ensuring no damage occurs during this process. He then moves on to attaching four more pieces onto these main frames, completing two pairs of flanges for the bulkhead hatches.The Final Touches
While two flanges form the primary support structure around the hatches, Sven mentions there are two additional pieces required at each end to ensure comprehensive protection. This attention to detail highlights his commitment to producing a durable and reliable design. “Sailing is about finding your path, whether it’s across an ocean or within yourself.” – Sven Yrvind In conclusion, making flanges around bulkhead hatches may seem complex at first glance, but by following Sven Yrvind’s meticulous process, enthusiasts can achieve professional-level results. Remember that the journey of boatbuilding is as rewarding as reaching your destination; it tests one’s patience and dedication. For those seeking to embark on this adventure or simply gain more insight into marine craftsmanship, Sven’s wisdom is invaluable.Sven begins by explaining that working on flanges vertically and horizontally is significantly easier than doing so in a flat position. To simplify the process further, he divides the task into two or three steps as suggested by fellow expert “for for.” This approach not only makes it more manageable but also allows for greater precision in crafting each component.Step 2: Applying Glue and Securing
Sven proceeds to apply glue along one edge of the flange, ensuring a secure bond when clamped into place. He emphasizes that this stage is crucial for maintaining the structural integrity of the flange, which in turn safeguards the living area beneath the canvas when hatches are open.Step 3: Allowing Time to Dry
After securely attaching the first portion of the flange, Sven allows ample time for it to dry before moving forward with additional steps. This patience and precision are key aspects of his successful boatbuilding methods.Step 4: Finishing Touches
Once the flange is fully dried, Sven removes the clamps carefully, ensuring no damage occurs during this process. He then moves on to attaching four more pieces onto these main frames, completing two pairs of flanges for the bulkhead hatches.The Final Touches
While two flanges form the primary support structure around the hatches, Sven mentions there are two additional pieces required at each end to ensure comprehensive protection. This attention to detail highlights his commitment to producing a durable and reliable design. “Sailing is about finding your path, whether it’s across an ocean or within yourself.” – Sven Yrvind In conclusion, making flanges around bulkhead hatches may seem complex at first glance, but by following Sven Yrvind’s meticulous process, enthusiasts can achieve professional-level results. Remember that the journey of boatbuilding is as rewarding as reaching your destination; it tests one’s patience and dedication. For those seeking to embark on this adventure or simply gain more insight into marine craftsmanship, Sven’s wisdom is invaluable.Sven Yrvind, a renowned yacht designer and sailor, shares valuable insights on creating flanges around bulkhead hatches for canvas protection in this enlightening video. By following his expert guidance, boat enthusiasts can ensure their living areas remain secure while allowing unhindered access through the hatches.Step 1: Starting with the Flange
Sven begins by explaining that working on flanges vertically and horizontally is significantly easier than doing so in a flat position. To simplify the process further, he divides the task into two or three steps as suggested by fellow expert “for for.” This approach not only makes it more manageable but also allows for greater precision in crafting each component.Step 2: Applying Glue and Securing
Sven proceeds to apply glue along one edge of the flange, ensuring a secure bond when clamped into place. He emphasizes that this stage is crucial for maintaining the structural integrity of the flange, which in turn safeguards the living area beneath the canvas when hatches are open.Step 3: Allowing Time to Dry
After securely attaching the first portion of the flange, Sven allows ample time for it to dry before moving forward with additional steps. This patience and precision are key aspects of his successful boatbuilding methods.Step 4: Finishing Touches
Once the flange is fully dried, Sven removes the clamps carefully, ensuring no damage occurs during this process. He then moves on to attaching four more pieces onto these main frames, completing two pairs of flanges for the bulkhead hatches.The Final Touches
While two flanges form the primary support structure around the hatches, Sven mentions there are two additional pieces required at each end to ensure comprehensive protection. This attention to detail highlights his commitment to producing a durable and reliable design. “Sailing is about finding your path, whether it’s across an ocean or within yourself.” – Sven Yrvind In conclusion, making flanges around bulkhead hatches may seem complex at first glance, but by following Sven Yrvind’s meticulous process, enthusiasts can achieve professional-level results. Remember that the journey of boatbuilding is as rewarding as reaching your destination; it tests one’s patience and dedication. For those seeking to embark on this adventure or simply gain more insight into marine craftsmanship, Sven’s wisdom is invaluable.Making Flanges Around Bulkhead Hatches for Canvas
Sven Yrvind, a renowned yacht designer and sailor, shares valuable insights on creating flanges around bulkhead hatches for canvas protection in this enlightening video. By following his expert guidance, boat enthusiasts can ensure their living areas remain secure while allowing unhindered access through the hatches.Step 1: Starting with the Flange
Sven begins by explaining that working on flanges vertically and horizontally is significantly easier than doing so in a flat position. To simplify the process further, he divides the task into two or three steps as suggested by fellow expert “for for.” This approach not only makes it more manageable but also allows for greater precision in crafting each component.Step 2: Applying Glue and Securing
Sven proceeds to apply glue along one edge of the flange, ensuring a secure bond when clamped into place. He emphasizes that this stage is crucial for maintaining the structural integrity of the flange, which in turn safeguards the living area beneath the canvas when hatches are open.Step 3: Allowing Time to Dry
After securely attaching the first portion of the flange, Sven allows ample time for it to dry before moving forward with additional steps. This patience and precision are key aspects of his successful boatbuilding methods.Step 4: Finishing Touches
Once the flange is fully dried, Sven removes the clamps carefully, ensuring no damage occurs during this process. He then moves on to attaching four more pieces onto these main frames, completing two pairs of flanges for the bulkhead hatches.The Final Touches
While two flanges form the primary support structure around the hatches, Sven mentions there are two additional pieces required at each end to ensure comprehensive protection. This attention to detail highlights his commitment to producing a durable and reliable design. “Sailing is about finding your path, whether it’s across an ocean or within yourself.” – Sven Yrvind In conclusion, making flanges around bulkhead hatches may seem complex at first glance, but by following Sven Yrvind’s meticulous process, enthusiasts can achieve professional-level results. Remember that the journey of boatbuilding is as rewarding as reaching your destination; it tests one’s patience and dedication. For those seeking to embark on this adventure or simply gain more insight into marine craftsmanship, Sven’s wisdom is invaluable.Sven proceeds to apply glue along one edge of the flange, ensuring a secure bond when clamped into place. He emphasizes that this stage is crucial for maintaining the structural integrity of the flange, which in turn safeguards the living area beneath the canvas when hatches are open.Step 3: Allowing Time to Dry
After securely attaching the first portion of the flange, Sven allows ample time for it to dry before moving forward with additional steps. This patience and precision are key aspects of his successful boatbuilding methods.Step 4: Finishing Touches
Once the flange is fully dried, Sven removes the clamps carefully, ensuring no damage occurs during this process. He then moves on to attaching four more pieces onto these main frames, completing two pairs of flanges for the bulkhead hatches.The Final Touches
While two flanges form the primary support structure around the hatches, Sven mentions there are two additional pieces required at each end to ensure comprehensive protection. This attention to detail highlights his commitment to producing a durable and reliable design. “Sailing is about finding your path, whether it’s across an ocean or within yourself.” – Sven Yrvind In conclusion, making flanges around bulkhead hatches may seem complex at first glance, but by following Sven Yrvind’s meticulous process, enthusiasts can achieve professional-level results. Remember that the journey of boatbuilding is as rewarding as reaching your destination; it tests one’s patience and dedication. For those seeking to embark on this adventure or simply gain more insight into marine craftsmanship, Sven’s wisdom is invaluable.Sven Yrvind, a renowned yacht designer and sailor, shares valuable insights on creating flanges around bulkhead hatches for canvas protection in this enlightening video. By following his expert guidance, boat enthusiasts can ensure their living areas remain secure while allowing unhindered access through the hatches.Step 1: Starting with the Flange
Sven begins by explaining that working on flanges vertically and horizontally is significantly easier than doing so in a flat position. To simplify the process further, he divides the task into two or three steps as suggested by fellow expert “for for.” This approach not only makes it more manageable but also allows for greater precision in crafting each component.Step 2: Applying Glue and Securing
Sven proceeds to apply glue along one edge of the flange, ensuring a secure bond when clamped into place. He emphasizes that this stage is crucial for maintaining the structural integrity of the flange, which in turn safeguards the living area beneath the canvas when hatches are open.Step 3: Allowing Time to Dry
After securely attaching the first portion of the flange, Sven allows ample time for it to dry before moving forward with additional steps. This patience and precision are key aspects of his successful boatbuilding methods.Step 4: Finishing Touches
Once the flange is fully dried, Sven removes the clamps carefully, ensuring no damage occurs during this process. He then moves on to attaching four more pieces onto these main frames, completing two pairs of flanges for the bulkhead hatches.The Final Touches
While two flanges form the primary support structure around the hatches, Sven mentions there are two additional pieces required at each end to ensure comprehensive protection. This attention to detail highlights his commitment to producing a durable and reliable design. “Sailing is about finding your path, whether it’s across an ocean or within yourself.” – Sven Yrvind In conclusion, making flanges around bulkhead hatches may seem complex at first glance, but by following Sven Yrvind’s meticulous process, enthusiasts can achieve professional-level results. Remember that the journey of boatbuilding is as rewarding as reaching your destination; it tests one’s patience and dedication. For those seeking to embark on this adventure or simply gain more insight into marine craftsmanship, Sven’s wisdom is invaluable.Making Flanges Around Bulkhead Hatches for Canvas
Sven Yrvind, a renowned yacht designer and sailor, shares valuable insights on creating flanges around bulkhead hatches for canvas protection in this enlightening video. By following his expert guidance, boat enthusiasts can ensure their living areas remain secure while allowing unhindered access through the hatches.Step 1: Starting with the Flange
Sven begins by explaining that working on flanges vertically and horizontally is significantly easier than doing so in a flat position. To simplify the process further, he divides the task into two or three steps as suggested by fellow expert “for for.” This approach not only makes it more manageable but also allows for greater precision in crafting each component.Step 2: Applying Glue and Securing
Sven proceeds to apply glue along one edge of the flange, ensuring a secure bond when clamped into place. He emphasizes that this stage is crucial for maintaining the structural integrity of the flange, which in turn safeguards the living area beneath the canvas when hatches are open.Step 3: Allowing Time to Dry
After securely attaching the first portion of the flange, Sven allows ample time for it to dry before moving forward with additional steps. This patience and precision are key aspects of his successful boatbuilding methods.Step 4: Finishing Touches
Once the flange is fully dried, Sven removes the clamps carefully, ensuring no damage occurs during this process. He then moves on to attaching four more pieces onto these main frames, completing two pairs of flanges for the bulkhead hatches.The Final Touches
While two flanges form the primary support structure around the hatches, Sven mentions there are two additional pieces required at each end to ensure comprehensive protection. This attention to detail highlights his commitment to producing a durable and reliable design. “Sailing is about finding your path, whether it’s across an ocean or within yourself.” – Sven Yrvind In conclusion, making flanges around bulkhead hatches may seem complex at first glance, but by following Sven Yrvind’s meticulous process, enthusiasts can achieve professional-level results. Remember that the journey of boatbuilding is as rewarding as reaching your destination; it tests one’s patience and dedication. For those seeking to embark on this adventure or simply gain more insight into marine craftsmanship, Sven’s wisdom is invaluable.Once the flange is fully dried, Sven removes the clamps carefully, ensuring no damage occurs during this process. He then moves on to attaching four more pieces onto these main frames, completing two pairs of flanges for the bulkhead hatches.The Final Touches
While two flanges form the primary support structure around the hatches, Sven mentions there are two additional pieces required at each end to ensure comprehensive protection. This attention to detail highlights his commitment to producing a durable and reliable design. “Sailing is about finding your path, whether it’s across an ocean or within yourself.” – Sven Yrvind In conclusion, making flanges around bulkhead hatches may seem complex at first glance, but by following Sven Yrvind’s meticulous process, enthusiasts can achieve professional-level results. Remember that the journey of boatbuilding is as rewarding as reaching your destination; it tests one’s patience and dedication. For those seeking to embark on this adventure or simply gain more insight into marine craftsmanship, Sven’s wisdom is invaluable.After securely attaching the first portion of the flange, Sven allows ample time for it to dry before moving forward with additional steps. This patience and precision are key aspects of his successful boatbuilding methods.Step 4: Finishing Touches
Once the flange is fully dried, Sven removes the clamps carefully, ensuring no damage occurs during this process. He then moves on to attaching four more pieces onto these main frames, completing two pairs of flanges for the bulkhead hatches.The Final Touches
While two flanges form the primary support structure around the hatches, Sven mentions there are two additional pieces required at each end to ensure comprehensive protection. This attention to detail highlights his commitment to producing a durable and reliable design. “Sailing is about finding your path, whether it’s across an ocean or within yourself.” – Sven Yrvind In conclusion, making flanges around bulkhead hatches may seem complex at first glance, but by following Sven Yrvind’s meticulous process, enthusiasts can achieve professional-level results. Remember that the journey of boatbuilding is as rewarding as reaching your destination; it tests one’s patience and dedication. For those seeking to embark on this adventure or simply gain more insight into marine craftsmanship, Sven’s wisdom is invaluable.Sven proceeds to apply glue along one edge of the flange, ensuring a secure bond when clamped into place. He emphasizes that this stage is crucial for maintaining the structural integrity of the flange, which in turn safeguards the living area beneath the canvas when hatches are open.Step 3: Allowing Time to Dry
After securely attaching the first portion of the flange, Sven allows ample time for it to dry before moving forward with additional steps. This patience and precision are key aspects of his successful boatbuilding methods.Step 4: Finishing Touches
Once the flange is fully dried, Sven removes the clamps carefully, ensuring no damage occurs during this process. He then moves on to attaching four more pieces onto these main frames, completing two pairs of flanges for the bulkhead hatches.The Final Touches
While two flanges form the primary support structure around the hatches, Sven mentions there are two additional pieces required at each end to ensure comprehensive protection. This attention to detail highlights his commitment to producing a durable and reliable design. “Sailing is about finding your path, whether it’s across an ocean or within yourself.” – Sven Yrvind In conclusion, making flanges around bulkhead hatches may seem complex at first glance, but by following Sven Yrvind’s meticulous process, enthusiasts can achieve professional-level results. Remember that the journey of boatbuilding is as rewarding as reaching your destination; it tests one’s patience and dedication. For those seeking to embark on this adventure or simply gain more insight into marine craftsmanship, Sven’s wisdom is invaluable.Sven begins by explaining that working on flanges vertically and horizontally is significantly easier than doing so in a flat position. To simplify the process further, he divides the task into two or three steps as suggested by fellow expert “for for.” This approach not only makes it more manageable but also allows for greater precision in crafting each component.Step 2: Applying Glue and Securing
Sven proceeds to apply glue along one edge of the flange, ensuring a secure bond when clamped into place. He emphasizes that this stage is crucial for maintaining the structural integrity of the flange, which in turn safeguards the living area beneath the canvas when hatches are open.Step 3: Allowing Time to Dry
After securely attaching the first portion of the flange, Sven allows ample time for it to dry before moving forward with additional steps. This patience and precision are key aspects of his successful boatbuilding methods.Step 4: Finishing Touches
Once the flange is fully dried, Sven removes the clamps carefully, ensuring no damage occurs during this process. He then moves on to attaching four more pieces onto these main frames, completing two pairs of flanges for the bulkhead hatches.The Final Touches
While two flanges form the primary support structure around the hatches, Sven mentions there are two additional pieces required at each end to ensure comprehensive protection. This attention to detail highlights his commitment to producing a durable and reliable design. “Sailing is about finding your path, whether it’s across an ocean or within yourself.” – Sven Yrvind In conclusion, making flanges around bulkhead hatches may seem complex at first glance, but by following Sven Yrvind’s meticulous process, enthusiasts can achieve professional-level results. Remember that the journey of boatbuilding is as rewarding as reaching your destination; it tests one’s patience and dedication. For those seeking to embark on this adventure or simply gain more insight into marine craftsmanship, Sven’s wisdom is invaluable.Sven Yrvind, a renowned yacht designer and sailor, shares valuable insights on creating flanges around bulkhead hatches for canvas protection in this enlightening video. By following his expert guidance, boat enthusiasts can ensure their living areas remain secure while allowing unhindered access through the hatches.Step 1: Starting with the Flange
Sven begins by explaining that working on flanges vertically and horizontally is significantly easier than doing so in a flat position. To simplify the process further, he divides the task into two or three steps as suggested by fellow expert “for for.” This approach not only makes it more manageable but also allows for greater precision in crafting each component.Step 2: Applying Glue and Securing
Sven proceeds to apply glue along one edge of the flange, ensuring a secure bond when clamped into place. He emphasizes that this stage is crucial for maintaining the structural integrity of the flange, which in turn safeguards the living area beneath the canvas when hatches are open.Step 3: Allowing Time to Dry
After securely attaching the first portion of the flange, Sven allows ample time for it to dry before moving forward with additional steps. This patience and precision are key aspects of his successful boatbuilding methods.Step 4: Finishing Touches
Once the flange is fully dried, Sven removes the clamps carefully, ensuring no damage occurs during this process. He then moves on to attaching four more pieces onto these main frames, completing two pairs of flanges for the bulkhead hatches.The Final Touches
While two flanges form the primary support structure around the hatches, Sven mentions there are two additional pieces required at each end to ensure comprehensive protection. This attention to detail highlights his commitment to producing a durable and reliable design. “Sailing is about finding your path, whether it’s across an ocean or within yourself.” – Sven Yrvind In conclusion, making flanges around bulkhead hatches may seem complex at first glance, but by following Sven Yrvind’s meticulous process, enthusiasts can achieve professional-level results. Remember that the journey of boatbuilding is as rewarding as reaching your destination; it tests one’s patience and dedication. For those seeking to embark on this adventure or simply gain more insight into marine craftsmanship, Sven’s wisdom is invaluable.Making Flanges Around Bulkhead Hatches for Canvas
Sven Yrvind, a renowned yacht designer and sailor, shares valuable insights on creating flanges around bulkhead hatches for canvas protection in this enlightening video. By following his expert guidance, boat enthusiasts can ensure their living areas remain secure while allowing unhindered access through the hatches.Step 1: Starting with the Flange
Sven begins by explaining that working on flanges vertically and horizontally is significantly easier than doing so in a flat position. To simplify the process further, he divides the task into two or three steps as suggested by fellow expert “for for.” This approach not only makes it more manageable but also allows for greater precision in crafting each component.Step 2: Applying Glue and Securing
Sven proceeds to apply glue along one edge of the flange, ensuring a secure bond when clamped into place. He emphasizes that this stage is crucial for maintaining the structural integrity of the flange, which in turn safeguards the living area beneath the canvas when hatches are open.Step 3: Allowing Time to Dry
After securely attaching the first portion of the flange, Sven allows ample time for it to dry before moving forward with additional steps. This patience and precision are key aspects of his successful boatbuilding methods.Step 4: Finishing Touches
Once the flange is fully dried, Sven removes the clamps carefully, ensuring no damage occurs during this process. He then moves on to attaching four more pieces onto these main frames, completing two pairs of flanges for the bulkhead hatches.The Final Touches
While two flanges form the primary support structure around the hatches, Sven mentions there are two additional pieces required at each end to ensure comprehensive protection. This attention to detail highlights his commitment to producing a durable and reliable design. “Sailing is about finding your path, whether it’s across an ocean or within yourself.” – Sven Yrvind In conclusion, making flanges around bulkhead hatches may seem complex at first glance, but by following Sven Yrvind’s meticulous process, enthusiasts can achieve professional-level results. Remember that the journey of boatbuilding is as rewarding as reaching your destination; it tests one’s patience and dedication. For those seeking to embark on this adventure or simply gain more insight into marine craftsmanship, Sven’s wisdom is invaluable.Sven begins by explaining that working on flanges vertically and horizontally is significantly easier than doing so in a flat position. To simplify the process further, he divides the task into two or three steps as suggested by fellow expert “for for.” This approach not only makes it more manageable but also allows for greater precision in crafting each component.Step 2: Applying Glue and Securing
Sven proceeds to apply glue along one edge of the flange, ensuring a secure bond when clamped into place. He emphasizes that this stage is crucial for maintaining the structural integrity of the flange, which in turn safeguards the living area beneath the canvas when hatches are open.Step 3: Allowing Time to Dry
After securely attaching the first portion of the flange, Sven allows ample time for it to dry before moving forward with additional steps. This patience and precision are key aspects of his successful boatbuilding methods.Step 4: Finishing Touches
Once the flange is fully dried, Sven removes the clamps carefully, ensuring no damage occurs during this process. He then moves on to attaching four more pieces onto these main frames, completing two pairs of flanges for the bulkhead hatches.The Final Touches
While two flanges form the primary support structure around the hatches, Sven mentions there are two additional pieces required at each end to ensure comprehensive protection. This attention to detail highlights his commitment to producing a durable and reliable design. “Sailing is about finding your path, whether it’s across an ocean or within yourself.” – Sven Yrvind In conclusion, making flanges around bulkhead hatches may seem complex at first glance, but by following Sven Yrvind’s meticulous process, enthusiasts can achieve professional-level results. Remember that the journey of boatbuilding is as rewarding as reaching your destination; it tests one’s patience and dedication. For those seeking to embark on this adventure or simply gain more insight into marine craftsmanship, Sven’s wisdom is invaluable.Sven Yrvind, a renowned yacht designer and sailor, shares valuable insights on creating flanges around bulkhead hatches for canvas protection in this enlightening video. By following his expert guidance, boat enthusiasts can ensure their living areas remain secure while allowing unhindered access through the hatches.Step 1: Starting with the Flange
Sven begins by explaining that working on flanges vertically and horizontally is significantly easier than doing so in a flat position. To simplify the process further, he divides the task into two or three steps as suggested by fellow expert “for for.” This approach not only makes it more manageable but also allows for greater precision in crafting each component.Step 2: Applying Glue and Securing
Sven proceeds to apply glue along one edge of the flange, ensuring a secure bond when clamped into place. He emphasizes that this stage is crucial for maintaining the structural integrity of the flange, which in turn safeguards the living area beneath the canvas when hatches are open.Step 3: Allowing Time to Dry
After securely attaching the first portion of the flange, Sven allows ample time for it to dry before moving forward with additional steps. This patience and precision are key aspects of his successful boatbuilding methods.Step 4: Finishing Touches
Once the flange is fully dried, Sven removes the clamps carefully, ensuring no damage occurs during this process. He then moves on to attaching four more pieces onto these main frames, completing two pairs of flanges for the bulkhead hatches.The Final Touches
While two flanges form the primary support structure around the hatches, Sven mentions there are two additional pieces required at each end to ensure comprehensive protection. This attention to detail highlights his commitment to producing a durable and reliable design. “Sailing is about finding your path, whether it’s across an ocean or within yourself.” – Sven Yrvind In conclusion, making flanges around bulkhead hatches may seem complex at first glance, but by following Sven Yrvind’s meticulous process, enthusiasts can achieve professional-level results. Remember that the journey of boatbuilding is as rewarding as reaching your destination; it tests one’s patience and dedication. For those seeking to embark on this adventure or simply gain more insight into marine craftsmanship, Sven’s wisdom is invaluable.Making Flanges Around Bulkhead Hatches for Canvas
Sven Yrvind, a renowned yacht designer and sailor, shares valuable insights on creating flanges around bulkhead hatches for canvas protection in this enlightening video. By following his expert guidance, boat enthusiasts can ensure their living areas remain secure while allowing unhindered access through the hatches.Step 1: Starting with the Flange
Sven begins by explaining that working on flanges vertically and horizontally is significantly easier than doing so in a flat position. To simplify the process further, he divides the task into two or three steps as suggested by fellow expert “for for.” This approach not only makes it more manageable but also allows for greater precision in crafting each component.Step 2: Applying Glue and Securing
Sven proceeds to apply glue along one edge of the flange, ensuring a secure bond when clamped into place. He emphasizes that this stage is crucial for maintaining the structural integrity of the flange, which in turn safeguards the living area beneath the canvas when hatches are open.Step 3: Allowing Time to Dry
After securely attaching the first portion of the flange, Sven allows ample time for it to dry before moving forward with additional steps. This patience and precision are key aspects of his successful boatbuilding methods.Step 4: Finishing Touches
Once the flange is fully dried, Sven removes the clamps carefully, ensuring no damage occurs during this process. He then moves on to attaching four more pieces onto these main frames, completing two pairs of flanges for the bulkhead hatches.The Final Touches
While two flanges form the primary support structure around the hatches, Sven mentions there are two additional pieces required at each end to ensure comprehensive protection. This attention to detail highlights his commitment to producing a durable and reliable design. “Sailing is about finding your path, whether it’s across an ocean or within yourself.” – Sven Yrvind In conclusion, making flanges around bulkhead hatches may seem complex at first glance, but by following Sven Yrvind’s meticulous process, enthusiasts can achieve professional-level results. Remember that the journey of boatbuilding is as rewarding as reaching your destination; it tests one’s patience and dedication. For those seeking to embark on this adventure or simply gain more insight into marine craftsmanship, Sven’s wisdom is invaluable.Once the flange is fully dried, Sven removes the clamps carefully, ensuring no damage occurs during this process. He then moves on to attaching four more pieces onto these main frames, completing two pairs of flanges for the bulkhead hatches.The Final Touches
While two flanges form the primary support structure around the hatches, Sven mentions there are two additional pieces required at each end to ensure comprehensive protection. This attention to detail highlights his commitment to producing a durable and reliable design. “Sailing is about finding your path, whether it’s across an ocean or within yourself.” – Sven Yrvind In conclusion, making flanges around bulkhead hatches may seem complex at first glance, but by following Sven Yrvind’s meticulous process, enthusiasts can achieve professional-level results. Remember that the journey of boatbuilding is as rewarding as reaching your destination; it tests one’s patience and dedication. For those seeking to embark on this adventure or simply gain more insight into marine craftsmanship, Sven’s wisdom is invaluable.After securely attaching the first portion of the flange, Sven allows ample time for it to dry before moving forward with additional steps. This patience and precision are key aspects of his successful boatbuilding methods.Step 4: Finishing Touches
Once the flange is fully dried, Sven removes the clamps carefully, ensuring no damage occurs during this process. He then moves on to attaching four more pieces onto these main frames, completing two pairs of flanges for the bulkhead hatches.The Final Touches
While two flanges form the primary support structure around the hatches, Sven mentions there are two additional pieces required at each end to ensure comprehensive protection. This attention to detail highlights his commitment to producing a durable and reliable design. “Sailing is about finding your path, whether it’s across an ocean or within yourself.” – Sven Yrvind In conclusion, making flanges around bulkhead hatches may seem complex at first glance, but by following Sven Yrvind’s meticulous process, enthusiasts can achieve professional-level results. Remember that the journey of boatbuilding is as rewarding as reaching your destination; it tests one’s patience and dedication. For those seeking to embark on this adventure or simply gain more insight into marine craftsmanship, Sven’s wisdom is invaluable.Sven proceeds to apply glue along one edge of the flange, ensuring a secure bond when clamped into place. He emphasizes that this stage is crucial for maintaining the structural integrity of the flange, which in turn safeguards the living area beneath the canvas when hatches are open.Step 3: Allowing Time to Dry
After securely attaching the first portion of the flange, Sven allows ample time for it to dry before moving forward with additional steps. This patience and precision are key aspects of his successful boatbuilding methods.Step 4: Finishing Touches
Once the flange is fully dried, Sven removes the clamps carefully, ensuring no damage occurs during this process. He then moves on to attaching four more pieces onto these main frames, completing two pairs of flanges for the bulkhead hatches.The Final Touches
While two flanges form the primary support structure around the hatches, Sven mentions there are two additional pieces required at each end to ensure comprehensive protection. This attention to detail highlights his commitment to producing a durable and reliable design. “Sailing is about finding your path, whether it’s across an ocean or within yourself.” – Sven Yrvind In conclusion, making flanges around bulkhead hatches may seem complex at first glance, but by following Sven Yrvind’s meticulous process, enthusiasts can achieve professional-level results. Remember that the journey of boatbuilding is as rewarding as reaching your destination; it tests one’s patience and dedication. For those seeking to embark on this adventure or simply gain more insight into marine craftsmanship, Sven’s wisdom is invaluable.Sven begins by explaining that working on flanges vertically and horizontally is significantly easier than doing so in a flat position. To simplify the process further, he divides the task into two or three steps as suggested by fellow expert “for for.” This approach not only makes it more manageable but also allows for greater precision in crafting each component.Step 2: Applying Glue and Securing
Sven proceeds to apply glue along one edge of the flange, ensuring a secure bond when clamped into place. He emphasizes that this stage is crucial for maintaining the structural integrity of the flange, which in turn safeguards the living area beneath the canvas when hatches are open.Step 3: Allowing Time to Dry
After securely attaching the first portion of the flange, Sven allows ample time for it to dry before moving forward with additional steps. This patience and precision are key aspects of his successful boatbuilding methods.Step 4: Finishing Touches
Once the flange is fully dried, Sven removes the clamps carefully, ensuring no damage occurs during this process. He then moves on to attaching four more pieces onto these main frames, completing two pairs of flanges for the bulkhead hatches.The Final Touches
While two flanges form the primary support structure around the hatches, Sven mentions there are two additional pieces required at each end to ensure comprehensive protection. This attention to detail highlights his commitment to producing a durable and reliable design. “Sailing is about finding your path, whether it’s across an ocean or within yourself.” – Sven Yrvind In conclusion, making flanges around bulkhead hatches may seem complex at first glance, but by following Sven Yrvind’s meticulous process, enthusiasts can achieve professional-level results. Remember that the journey of boatbuilding is as rewarding as reaching your destination; it tests one’s patience and dedication. For those seeking to embark on this adventure or simply gain more insight into marine craftsmanship, Sven’s wisdom is invaluable.Sven Yrvind, a renowned yacht designer and sailor, shares valuable insights on creating flanges around bulkhead hatches for canvas protection in this enlightening video. By following his expert guidance, boat enthusiasts can ensure their living areas remain secure while allowing unhindered access through the hatches.Step 1: Starting with the Flange
Sven begins by explaining that working on flanges vertically and horizontally is significantly easier than doing so in a flat position. To simplify the process further, he divides the task into two or three steps as suggested by fellow expert “for for.” This approach not only makes it more manageable but also allows for greater precision in crafting each component.Step 2: Applying Glue and Securing
Sven proceeds to apply glue along one edge of the flange, ensuring a secure bond when clamped into place. He emphasizes that this stage is crucial for maintaining the structural integrity of the flange, which in turn safeguards the living area beneath the canvas when hatches are open.Step 3: Allowing Time to Dry
After securely attaching the first portion of the flange, Sven allows ample time for it to dry before moving forward with additional steps. This patience and precision are key aspects of his successful boatbuilding methods.Step 4: Finishing Touches
Once the flange is fully dried, Sven removes the clamps carefully, ensuring no damage occurs during this process. He then moves on to attaching four more pieces onto these main frames, completing two pairs of flanges for the bulkhead hatches.The Final Touches
While two flanges form the primary support structure around the hatches, Sven mentions there are two additional pieces required at each end to ensure comprehensive protection. This attention to detail highlights his commitment to producing a durable and reliable design. “Sailing is about finding your path, whether it’s across an ocean or within yourself.” – Sven Yrvind In conclusion, making flanges around bulkhead hatches may seem complex at first glance, but by following Sven Yrvind’s meticulous process, enthusiasts can achieve professional-level results. Remember that the journey of boatbuilding is as rewarding as reaching your destination; it tests one’s patience and dedication. For those seeking to embark on this adventure or simply gain more insight into marine craftsmanship, Sven’s wisdom is invaluable.Making Flanges Around Bulkhead Hatches for Canvas
Sven Yrvind, a renowned yacht designer and sailor, shares valuable insights on creating flanges around bulkhead hatches for canvas protection in this enlightening video. By following his expert guidance, boat enthusiasts can ensure their living areas remain secure while allowing unhindered access through the hatches.Step 1: Starting with the Flange
Sven begins by explaining that working on flanges vertically and horizontally is significantly easier than doing so in a flat position. To simplify the process further, he divides the task into two or three steps as suggested by fellow expert “for for.” This approach not only makes it more manageable but also allows for greater precision in crafting each component.Step 2: Applying Glue and Securing
Sven proceeds to apply glue along one edge of the flange, ensuring a secure bond when clamped into place. He emphasizes that this stage is crucial for maintaining the structural integrity of the flange, which in turn safeguards the living area beneath the canvas when hatches are open.Step 3: Allowing Time to Dry
After securely attaching the first portion of the flange, Sven allows ample time for it to dry before moving forward with additional steps. This patience and precision are key aspects of his successful boatbuilding methods.Step 4: Finishing Touches
Once the flange is fully dried, Sven removes the clamps carefully, ensuring no damage occurs during this process. He then moves on to attaching four more pieces onto these main frames, completing two pairs of flanges for the bulkhead hatches.The Final Touches
While two flanges form the primary support structure around the hatches, Sven mentions there are two additional pieces required at each end to ensure comprehensive protection. This attention to detail highlights his commitment to producing a durable and reliable design. “Sailing is about finding your path, whether it’s across an ocean or within yourself.” – Sven Yrvind In conclusion, making flanges around bulkhead hatches may seem complex at first glance, but by following Sven Yrvind’s meticulous process, enthusiasts can achieve professional-level results. Remember that the journey of boatbuilding is as rewarding as reaching your destination; it tests one’s patience and dedication. For those seeking to embark on this adventure or simply gain more insight into marine craftsmanship, Sven’s wisdom is invaluable.Once the flange is fully dried, Sven removes the clamps carefully, ensuring no damage occurs during this process. He then moves on to attaching four more pieces onto these main frames, completing two pairs of flanges for the bulkhead hatches.The Final Touches
While two flanges form the primary support structure around the hatches, Sven mentions there are two additional pieces required at each end to ensure comprehensive protection. This attention to detail highlights his commitment to producing a durable and reliable design. “Sailing is about finding your path, whether it’s across an ocean or within yourself.” – Sven Yrvind In conclusion, making flanges around bulkhead hatches may seem complex at first glance, but by following Sven Yrvind’s meticulous process, enthusiasts can achieve professional-level results. Remember that the journey of boatbuilding is as rewarding as reaching your destination; it tests one’s patience and dedication. For those seeking to embark on this adventure or simply gain more insight into marine craftsmanship, Sven’s wisdom is invaluable.Sven begins by explaining that working on flanges vertically and horizontally is significantly easier than doing so in a flat position. To simplify the process further, he divides the task into two or three steps as suggested by fellow expert “for for.” This approach not only makes it more manageable but also allows for greater precision in crafting each component.Step 2: Applying Glue and Securing
Sven proceeds to apply glue along one edge of the flange, ensuring a secure bond when clamped into place. He emphasizes that this stage is crucial for maintaining the structural integrity of the flange, which in turn safeguards the living area beneath the canvas when hatches are open.Step 3: Allowing Time to Dry
After securely attaching the first portion of the flange, Sven allows ample time for it to dry before moving forward with additional steps. This patience and precision are key aspects of his successful boatbuilding methods.Step 4: Finishing Touches
Once the flange is fully dried, Sven removes the clamps carefully, ensuring no damage occurs during this process. He then moves on to attaching four more pieces onto these main frames, completing two pairs of flanges for the bulkhead hatches.The Final Touches
While two flanges form the primary support structure around the hatches, Sven mentions there are two additional pieces required at each end to ensure comprehensive protection. This attention to detail highlights his commitment to producing a durable and reliable design. “Sailing is about finding your path, whether it’s across an ocean or within yourself.” – Sven Yrvind In conclusion, making flanges around bulkhead hatches may seem complex at first glance, but by following Sven Yrvind’s meticulous process, enthusiasts can achieve professional-level results. Remember that the journey of boatbuilding is as rewarding as reaching your destination; it tests one’s patience and dedication. For those seeking to embark on this adventure or simply gain more insight into marine craftsmanship, Sven’s wisdom is invaluable.Sven Yrvind, a renowned yacht designer and sailor, shares valuable insights on creating flanges around bulkhead hatches for canvas protection in this enlightening video. By following his expert guidance, boat enthusiasts can ensure their living areas remain secure while allowing unhindered access through the hatches.Step 1: Starting with the Flange
Sven begins by explaining that working on flanges vertically and horizontally is significantly easier than doing so in a flat position. To simplify the process further, he divides the task into two or three steps as suggested by fellow expert “for for.” This approach not only makes it more manageable but also allows for greater precision in crafting each component.Step 2: Applying Glue and Securing
Sven proceeds to apply glue along one edge of the flange, ensuring a secure bond when clamped into place. He emphasizes that this stage is crucial for maintaining the structural integrity of the flange, which in turn safeguards the living area beneath the canvas when hatches are open.Step 3: Allowing Time to Dry
After securely attaching the first portion of the flange, Sven allows ample time for it to dry before moving forward with additional steps. This patience and precision are key aspects of his successful boatbuilding methods.Step 4: Finishing Touches
Once the flange is fully dried, Sven removes the clamps carefully, ensuring no damage occurs during this process. He then moves on to attaching four more pieces onto these main frames, completing two pairs of flanges for the bulkhead hatches.The Final Touches
While two flanges form the primary support structure around the hatches, Sven mentions there are two additional pieces required at each end to ensure comprehensive protection. This attention to detail highlights his commitment to producing a durable and reliable design. “Sailing is about finding your path, whether it’s across an ocean or within yourself.” – Sven Yrvind In conclusion, making flanges around bulkhead hatches may seem complex at first glance, but by following Sven Yrvind’s meticulous process, enthusiasts can achieve professional-level results. Remember that the journey of boatbuilding is as rewarding as reaching your destination; it tests one’s patience and dedication. For those seeking to embark on this adventure or simply gain more insight into marine craftsmanship, Sven’s wisdom is invaluable.Making Flanges Around Bulkhead Hatches for Canvas
Sven Yrvind, a renowned yacht designer and sailor, shares valuable insights on creating flanges around bulkhead hatches for canvas protection in this enlightening video. By following his expert guidance, boat enthusiasts can ensure their living areas remain secure while allowing unhindered access through the hatches.Step 1: Starting with the Flange
Sven begins by explaining that working on flanges vertically and horizontally is significantly easier than doing so in a flat position. To simplify the process further, he divides the task into two or three steps as suggested by fellow expert “for for.” This approach not only makes it more manageable but also allows for greater precision in crafting each component.Step 2: Applying Glue and Securing
Sven proceeds to apply glue along one edge of the flange, ensuring a secure bond when clamped into place. He emphasizes that this stage is crucial for maintaining the structural integrity of the flange, which in turn safeguards the living area beneath the canvas when hatches are open.Step 3: Allowing Time to Dry
After securely attaching the first portion of the flange, Sven allows ample time for it to dry before moving forward with additional steps. This patience and precision are key aspects of his successful boatbuilding methods.Step 4: Finishing Touches
Once the flange is fully dried, Sven removes the clamps carefully, ensuring no damage occurs during this process. He then moves on to attaching four more pieces onto these main frames, completing two pairs of flanges for the bulkhead hatches.The Final Touches
While two flanges form the primary support structure around the hatches, Sven mentions there are two additional pieces required at each end to ensure comprehensive protection. This attention to detail highlights his commitment to producing a durable and reliable design. “Sailing is about finding your path, whether it’s across an ocean or within yourself.” – Sven Yrvind In conclusion, making flanges around bulkhead hatches may seem complex at first glance, but by following Sven Yrvind’s meticulous process, enthusiasts can achieve professional-level results. Remember that the journey of boatbuilding is as rewarding as reaching your destination; it tests one’s patience and dedication. For those seeking to embark on this adventure or simply gain more insight into marine craftsmanship, Sven’s wisdom is invaluable.Once the flange is fully dried, Sven removes the clamps carefully, ensuring no damage occurs during this process. He then moves on to attaching four more pieces onto these main frames, completing two pairs of flanges for the bulkhead hatches.The Final Touches
While two flanges form the primary support structure around the hatches, Sven mentions there are two additional pieces required at each end to ensure comprehensive protection. This attention to detail highlights his commitment to producing a durable and reliable design. “Sailing is about finding your path, whether it’s across an ocean or within yourself.” – Sven Yrvind In conclusion, making flanges around bulkhead hatches may seem complex at first glance, but by following Sven Yrvind’s meticulous process, enthusiasts can achieve professional-level results. Remember that the journey of boatbuilding is as rewarding as reaching your destination; it tests one’s patience and dedication. For those seeking to embark on this adventure or simply gain more insight into marine craftsmanship, Sven’s wisdom is invaluable.After securely attaching the first portion of the flange, Sven allows ample time for it to dry before moving forward with additional steps. This patience and precision are key aspects of his successful boatbuilding methods.Step 4: Finishing Touches
Once the flange is fully dried, Sven removes the clamps carefully, ensuring no damage occurs during this process. He then moves on to attaching four more pieces onto these main frames, completing two pairs of flanges for the bulkhead hatches.The Final Touches
While two flanges form the primary support structure around the hatches, Sven mentions there are two additional pieces required at each end to ensure comprehensive protection. This attention to detail highlights his commitment to producing a durable and reliable design. “Sailing is about finding your path, whether it’s across an ocean or within yourself.” – Sven Yrvind In conclusion, making flanges around bulkhead hatches may seem complex at first glance, but by following Sven Yrvind’s meticulous process, enthusiasts can achieve professional-level results. Remember that the journey of boatbuilding is as rewarding as reaching your destination; it tests one’s patience and dedication. For those seeking to embark on this adventure or simply gain more insight into marine craftsmanship, Sven’s wisdom is invaluable.Sven proceeds to apply glue along one edge of the flange, ensuring a secure bond when clamped into place. He emphasizes that this stage is crucial for maintaining the structural integrity of the flange, which in turn safeguards the living area beneath the canvas when hatches are open.Step 3: Allowing Time to Dry
After securely attaching the first portion of the flange, Sven allows ample time for it to dry before moving forward with additional steps. This patience and precision are key aspects of his successful boatbuilding methods.Step 4: Finishing Touches
Once the flange is fully dried, Sven removes the clamps carefully, ensuring no damage occurs during this process. He then moves on to attaching four more pieces onto these main frames, completing two pairs of flanges for the bulkhead hatches.The Final Touches
While two flanges form the primary support structure around the hatches, Sven mentions there are two additional pieces required at each end to ensure comprehensive protection. This attention to detail highlights his commitment to producing a durable and reliable design. “Sailing is about finding your path, whether it’s across an ocean or within yourself.” – Sven Yrvind In conclusion, making flanges around bulkhead hatches may seem complex at first glance, but by following Sven Yrvind’s meticulous process, enthusiasts can achieve professional-level results. Remember that the journey of boatbuilding is as rewarding as reaching your destination; it tests one’s patience and dedication. For those seeking to embark on this adventure or simply gain more insight into marine craftsmanship, Sven’s wisdom is invaluable.Sven begins by explaining that working on flanges vertically and horizontally is significantly easier than doing so in a flat position. To simplify the process further, he divides the task into two or three steps as suggested by fellow expert “for for.” This approach not only makes it more manageable but also allows for greater precision in crafting each component.Step 2: Applying Glue and Securing
Sven proceeds to apply glue along one edge of the flange, ensuring a secure bond when clamped into place. He emphasizes that this stage is crucial for maintaining the structural integrity of the flange, which in turn safeguards the living area beneath the canvas when hatches are open.Step 3: Allowing Time to Dry
After securely attaching the first portion of the flange, Sven allows ample time for it to dry before moving forward with additional steps. This patience and precision are key aspects of his successful boatbuilding methods.Step 4: Finishing Touches
Once the flange is fully dried, Sven removes the clamps carefully, ensuring no damage occurs during this process. He then moves on to attaching four more pieces onto these main frames, completing two pairs of flanges for the bulkhead hatches.The Final Touches
While two flanges form the primary support structure around the hatches, Sven mentions there are two additional pieces required at each end to ensure comprehensive protection. This attention to detail highlights his commitment to producing a durable and reliable design. “Sailing is about finding your path, whether it’s across an ocean or within yourself.” – Sven Yrvind In conclusion, making flanges around bulkhead hatches may seem complex at first glance, but by following Sven Yrvind’s meticulous process, enthusiasts can achieve professional-level results. Remember that the journey of boatbuilding is as rewarding as reaching your destination; it tests one’s patience and dedication. For those seeking to embark on this adventure or simply gain more insight into marine craftsmanship, Sven’s wisdom is invaluable.Sven Yrvind, a renowned yacht designer and sailor, shares valuable insights on creating flanges around bulkhead hatches for canvas protection in this enlightening video. By following his expert guidance, boat enthusiasts can ensure their living areas remain secure while allowing unhindered access through the hatches.Step 1: Starting with the Flange
Sven begins by explaining that working on flanges vertically and horizontally is significantly easier than doing so in a flat position. To simplify the process further, he divides the task into two or three steps as suggested by fellow expert “for for.” This approach not only makes it more manageable but also allows for greater precision in crafting each component.Step 2: Applying Glue and Securing
Sven proceeds to apply glue along one edge of the flange, ensuring a secure bond when clamped into place. He emphasizes that this stage is crucial for maintaining the structural integrity of the flange, which in turn safeguards the living area beneath the canvas when hatches are open.Step 3: Allowing Time to Dry
After securely attaching the first portion of the flange, Sven allows ample time for it to dry before moving forward with additional steps. This patience and precision are key aspects of his successful boatbuilding methods.Step 4: Finishing Touches
Once the flange is fully dried, Sven removes the clamps carefully, ensuring no damage occurs during this process. He then moves on to attaching four more pieces onto these main frames, completing two pairs of flanges for the bulkhead hatches.The Final Touches
While two flanges form the primary support structure around the hatches, Sven mentions there are two additional pieces required at each end to ensure comprehensive protection. This attention to detail highlights his commitment to producing a durable and reliable design. “Sailing is about finding your path, whether it’s across an ocean or within yourself.” – Sven Yrvind In conclusion, making flanges around bulkhead hatches may seem complex at first glance, but by following Sven Yrvind’s meticulous process, enthusiasts can achieve professional-level results. Remember that the journey of boatbuilding is as rewarding as reaching your destination; it tests one’s patience and dedication. For those seeking to embark on this adventure or simply gain more insight into marine craftsmanship, Sven’s wisdom is invaluable.Making Flanges Around Bulkhead Hatches for Canvas
Sven Yrvind, a renowned yacht designer and sailor, shares valuable insights on creating flanges around bulkhead hatches for canvas protection in this enlightening video. By following his expert guidance, boat enthusiasts can ensure their living areas remain secure while allowing unhindered access through the hatches.Step 1: Starting with the Flange
Sven begins by explaining that working on flanges vertically and horizontally is significantly easier than doing so in a flat position. To simplify the process further, he divides the task into two or three steps as suggested by fellow expert “for for.” This approach not only makes it more manageable but also allows for greater precision in crafting each component.Step 2: Applying Glue and Securing
Sven proceeds to apply glue along one edge of the flange, ensuring a secure bond when clamped into place. He emphasizes that this stage is crucial for maintaining the structural integrity of the flange, which in turn safeguards the living area beneath the canvas when hatches are open.Step 3: Allowing Time to Dry
After securely attaching the first portion of the flange, Sven allows ample time for it to dry before moving forward with additional steps. This patience and precision are key aspects of his successful boatbuilding methods.Step 4: Finishing Touches
Once the flange is fully dried, Sven removes the clamps carefully, ensuring no damage occurs during this process. He then moves on to attaching four more pieces onto these main frames, completing two pairs of flanges for the bulkhead hatches.The Final Touches
While two flanges form the primary support structure around the hatches, Sven mentions there are two additional pieces required at each end to ensure comprehensive protection. This attention to detail highlights his commitment to producing a durable and reliable design. “Sailing is about finding your path, whether it’s across an ocean or within yourself.” – Sven Yrvind In conclusion, making flanges around bulkhead hatches may seem complex at first glance, but by following Sven Yrvind’s meticulous process, enthusiasts can achieve professional-level results. Remember that the journey of boatbuilding is as rewarding as reaching your destination; it tests one’s patience and dedication. For those seeking to embark on this adventure or simply gain more insight into marine craftsmanship, Sven’s wisdom is invaluable.After securely attaching the first portion of the flange, Sven allows ample time for it to dry before moving forward with additional steps. This patience and precision are key aspects of his successful boatbuilding methods.Step 4: Finishing Touches
Once the flange is fully dried, Sven removes the clamps carefully, ensuring no damage occurs during this process. He then moves on to attaching four more pieces onto these main frames, completing two pairs of flanges for the bulkhead hatches.The Final Touches
While two flanges form the primary support structure around the hatches, Sven mentions there are two additional pieces required at each end to ensure comprehensive protection. This attention to detail highlights his commitment to producing a durable and reliable design. “Sailing is about finding your path, whether it’s across an ocean or within yourself.” – Sven Yrvind In conclusion, making flanges around bulkhead hatches may seem complex at first glance, but by following Sven Yrvind’s meticulous process, enthusiasts can achieve professional-level results. Remember that the journey of boatbuilding is as rewarding as reaching your destination; it tests one’s patience and dedication. For those seeking to embark on this adventure or simply gain more insight into marine craftsmanship, Sven’s wisdom is invaluable.Sven begins by explaining that working on flanges vertically and horizontally is significantly easier than doing so in a flat position. To simplify the process further, he divides the task into two or three steps as suggested by fellow expert “for for.” This approach not only makes it more manageable but also allows for greater precision in crafting each component.Step 2: Applying Glue and Securing
Sven proceeds to apply glue along one edge of the flange, ensuring a secure bond when clamped into place. He emphasizes that this stage is crucial for maintaining the structural integrity of the flange, which in turn safeguards the living area beneath the canvas when hatches are open.Step 3: Allowing Time to Dry
After securely attaching the first portion of the flange, Sven allows ample time for it to dry before moving forward with additional steps. This patience and precision are key aspects of his successful boatbuilding methods.Step 4: Finishing Touches
Once the flange is fully dried, Sven removes the clamps carefully, ensuring no damage occurs during this process. He then moves on to attaching four more pieces onto these main frames, completing two pairs of flanges for the bulkhead hatches.The Final Touches
While two flanges form the primary support structure around the hatches, Sven mentions there are two additional pieces required at each end to ensure comprehensive protection. This attention to detail highlights his commitment to producing a durable and reliable design. “Sailing is about finding your path, whether it’s across an ocean or within yourself.” – Sven Yrvind In conclusion, making flanges around bulkhead hatches may seem complex at first glance, but by following Sven Yrvind’s meticulous process, enthusiasts can achieve professional-level results. Remember that the journey of boatbuilding is as rewarding as reaching your destination; it tests one’s patience and dedication. For those seeking to embark on this adventure or simply gain more insight into marine craftsmanship, Sven’s wisdom is invaluable.Sven Yrvind, a renowned yacht designer and sailor, shares valuable insights on creating flanges around bulkhead hatches for canvas protection in this enlightening video. By following his expert guidance, boat enthusiasts can ensure their living areas remain secure while allowing unhindered access through the hatches.Step 1: Starting with the Flange
Sven begins by explaining that working on flanges vertically and horizontally is significantly easier than doing so in a flat position. To simplify the process further, he divides the task into two or three steps as suggested by fellow expert “for for.” This approach not only makes it more manageable but also allows for greater precision in crafting each component.Step 2: Applying Glue and Securing
Sven proceeds to apply glue along one edge of the flange, ensuring a secure bond when clamped into place. He emphasizes that this stage is crucial for maintaining the structural integrity of the flange, which in turn safeguards the living area beneath the canvas when hatches are open.Step 3: Allowing Time to Dry
After securely attaching the first portion of the flange, Sven allows ample time for it to dry before moving forward with additional steps. This patience and precision are key aspects of his successful boatbuilding methods.Step 4: Finishing Touches
Once the flange is fully dried, Sven removes the clamps carefully, ensuring no damage occurs during this process. He then moves on to attaching four more pieces onto these main frames, completing two pairs of flanges for the bulkhead hatches.The Final Touches
While two flanges form the primary support structure around the hatches, Sven mentions there are two additional pieces required at each end to ensure comprehensive protection. This attention to detail highlights his commitment to producing a durable and reliable design. “Sailing is about finding your path, whether it’s across an ocean or within yourself.” – Sven Yrvind In conclusion, making flanges around bulkhead hatches may seem complex at first glance, but by following Sven Yrvind’s meticulous process, enthusiasts can achieve professional-level results. Remember that the journey of boatbuilding is as rewarding as reaching your destination; it tests one’s patience and dedication. For those seeking to embark on this adventure or simply gain more insight into marine craftsmanship, Sven’s wisdom is invaluable.Making Flanges Around Bulkhead Hatches for Canvas
Sven Yrvind, a renowned yacht designer and sailor, shares valuable insights on creating flanges around bulkhead hatches for canvas protection in this enlightening video. By following his expert guidance, boat enthusiasts can ensure their living areas remain secure while allowing unhindered access through the hatches.Step 1: Starting with the Flange
Sven begins by explaining that working on flanges vertically and horizontally is significantly easier than doing so in a flat position. To simplify the process further, he divides the task into two or three steps as suggested by fellow expert “for for.” This approach not only makes it more manageable but also allows for greater precision in crafting each component.Step 2: Applying Glue and Securing
Sven proceeds to apply glue along one edge of the flange, ensuring a secure bond when clamped into place. He emphasizes that this stage is crucial for maintaining the structural integrity of the flange, which in turn safeguards the living area beneath the canvas when hatches are open.Step 3: Allowing Time to Dry
After securely attaching the first portion of the flange, Sven allows ample time for it to dry before moving forward with additional steps. This patience and precision are key aspects of his successful boatbuilding methods.Step 4: Finishing Touches
Once the flange is fully dried, Sven removes the clamps carefully, ensuring no damage occurs during this process. He then moves on to attaching four more pieces onto these main frames, completing two pairs of flanges for the bulkhead hatches.The Final Touches
While two flanges form the primary support structure around the hatches, Sven mentions there are two additional pieces required at each end to ensure comprehensive protection. This attention to detail highlights his commitment to producing a durable and reliable design. “Sailing is about finding your path, whether it’s across an ocean or within yourself.” – Sven Yrvind In conclusion, making flanges around bulkhead hatches may seem complex at first glance, but by following Sven Yrvind’s meticulous process, enthusiasts can achieve professional-level results. Remember that the journey of boatbuilding is as rewarding as reaching your destination; it tests one’s patience and dedication. For those seeking to embark on this adventure or simply gain more insight into marine craftsmanship, Sven’s wisdom is invaluable.Once the flange is fully dried, Sven removes the clamps carefully, ensuring no damage occurs during this process. He then moves on to attaching four more pieces onto these main frames, completing two pairs of flanges for the bulkhead hatches.The Final Touches
While two flanges form the primary support structure around the hatches, Sven mentions there are two additional pieces required at each end to ensure comprehensive protection. This attention to detail highlights his commitment to producing a durable and reliable design. “Sailing is about finding your path, whether it’s across an ocean or within yourself.” – Sven Yrvind In conclusion, making flanges around bulkhead hatches may seem complex at first glance, but by following Sven Yrvind’s meticulous process, enthusiasts can achieve professional-level results. Remember that the journey of boatbuilding is as rewarding as reaching your destination; it tests one’s patience and dedication. For those seeking to embark on this adventure or simply gain more insight into marine craftsmanship, Sven’s wisdom is invaluable.After securely attaching the first portion of the flange, Sven allows ample time for it to dry before moving forward with additional steps. This patience and precision are key aspects of his successful boatbuilding methods.Step 4: Finishing Touches
Once the flange is fully dried, Sven removes the clamps carefully, ensuring no damage occurs during this process. He then moves on to attaching four more pieces onto these main frames, completing two pairs of flanges for the bulkhead hatches.The Final Touches
While two flanges form the primary support structure around the hatches, Sven mentions there are two additional pieces required at each end to ensure comprehensive protection. This attention to detail highlights his commitment to producing a durable and reliable design. “Sailing is about finding your path, whether it’s across an ocean or within yourself.” – Sven Yrvind In conclusion, making flanges around bulkhead hatches may seem complex at first glance, but by following Sven Yrvind’s meticulous process, enthusiasts can achieve professional-level results. Remember that the journey of boatbuilding is as rewarding as reaching your destination; it tests one’s patience and dedication. For those seeking to embark on this adventure or simply gain more insight into marine craftsmanship, Sven’s wisdom is invaluable.Sven proceeds to apply glue along one edge of the flange, ensuring a secure bond when clamped into place. He emphasizes that this stage is crucial for maintaining the structural integrity of the flange, which in turn safeguards the living area beneath the canvas when hatches are open.Step 3: Allowing Time to Dry
After securely attaching the first portion of the flange, Sven allows ample time for it to dry before moving forward with additional steps. This patience and precision are key aspects of his successful boatbuilding methods.Step 4: Finishing Touches
Once the flange is fully dried, Sven removes the clamps carefully, ensuring no damage occurs during this process. He then moves on to attaching four more pieces onto these main frames, completing two pairs of flanges for the bulkhead hatches.The Final Touches
While two flanges form the primary support structure around the hatches, Sven mentions there are two additional pieces required at each end to ensure comprehensive protection. This attention to detail highlights his commitment to producing a durable and reliable design. “Sailing is about finding your path, whether it’s across an ocean or within yourself.” – Sven Yrvind In conclusion, making flanges around bulkhead hatches may seem complex at first glance, but by following Sven Yrvind’s meticulous process, enthusiasts can achieve professional-level results. Remember that the journey of boatbuilding is as rewarding as reaching your destination; it tests one’s patience and dedication. For those seeking to embark on this adventure or simply gain more insight into marine craftsmanship, Sven’s wisdom is invaluable.Sven begins by explaining that working on flanges vertically and horizontally is significantly easier than doing so in a flat position. To simplify the process further, he divides the task into two or three steps as suggested by fellow expert “for for.” This approach not only makes it more manageable but also allows for greater precision in crafting each component.Step 2: Applying Glue and Securing
Sven proceeds to apply glue along one edge of the flange, ensuring a secure bond when clamped into place. He emphasizes that this stage is crucial for maintaining the structural integrity of the flange, which in turn safeguards the living area beneath the canvas when hatches are open.Step 3: Allowing Time to Dry
After securely attaching the first portion of the flange, Sven allows ample time for it to dry before moving forward with additional steps. This patience and precision are key aspects of his successful boatbuilding methods.Step 4: Finishing Touches
Once the flange is fully dried, Sven removes the clamps carefully, ensuring no damage occurs during this process. He then moves on to attaching four more pieces onto these main frames, completing two pairs of flanges for the bulkhead hatches.The Final Touches
While two flanges form the primary support structure around the hatches, Sven mentions there are two additional pieces required at each end to ensure comprehensive protection. This attention to detail highlights his commitment to producing a durable and reliable design. “Sailing is about finding your path, whether it’s across an ocean or within yourself.” – Sven Yrvind In conclusion, making flanges around bulkhead hatches may seem complex at first glance, but by following Sven Yrvind’s meticulous process, enthusiasts can achieve professional-level results. Remember that the journey of boatbuilding is as rewarding as reaching your destination; it tests one’s patience and dedication. For those seeking to embark on this adventure or simply gain more insight into marine craftsmanship, Sven’s wisdom is invaluable.Sven Yrvind, a renowned yacht designer and sailor, shares valuable insights on creating flanges around bulkhead hatches for canvas protection in this enlightening video. By following his expert guidance, boat enthusiasts can ensure their living areas remain secure while allowing unhindered access through the hatches.Step 1: Starting with the Flange
Sven begins by explaining that working on flanges vertically and horizontally is significantly easier than doing so in a flat position. To simplify the process further, he divides the task into two or three steps as suggested by fellow expert “for for.” This approach not only makes it more manageable but also allows for greater precision in crafting each component.Step 2: Applying Glue and Securing
Sven proceeds to apply glue along one edge of the flange, ensuring a secure bond when clamped into place. He emphasizes that this stage is crucial for maintaining the structural integrity of the flange, which in turn safeguards the living area beneath the canvas when hatches are open.Step 3: Allowing Time to Dry
After securely attaching the first portion of the flange, Sven allows ample time for it to dry before moving forward with additional steps. This patience and precision are key aspects of his successful boatbuilding methods.Step 4: Finishing Touches
Once the flange is fully dried, Sven removes the clamps carefully, ensuring no damage occurs during this process. He then moves on to attaching four more pieces onto these main frames, completing two pairs of flanges for the bulkhead hatches.The Final Touches
While two flanges form the primary support structure around the hatches, Sven mentions there are two additional pieces required at each end to ensure comprehensive protection. This attention to detail highlights his commitment to producing a durable and reliable design. “Sailing is about finding your path, whether it’s across an ocean or within yourself.” – Sven Yrvind In conclusion, making flanges around bulkhead hatches may seem complex at first glance, but by following Sven Yrvind’s meticulous process, enthusiasts can achieve professional-level results. Remember that the journey of boatbuilding is as rewarding as reaching your destination; it tests one’s patience and dedication. For those seeking to embark on this adventure or simply gain more insight into marine craftsmanship, Sven’s wisdom is invaluable.Making Flanges Around Bulkhead Hatches for Canvas
Sven Yrvind, a renowned yacht designer and sailor, shares valuable insights on creating flanges around bulkhead hatches for canvas protection in this enlightening video. By following his expert guidance, boat enthusiasts can ensure their living areas remain secure while allowing unhindered access through the hatches.Step 1: Starting with the Flange
Sven begins by explaining that working on flanges vertically and horizontally is significantly easier than doing so in a flat position. To simplify the process further, he divides the task into two or three steps as suggested by fellow expert “for for.” This approach not only makes it more manageable but also allows for greater precision in crafting each component.Step 2: Applying Glue and Securing
Sven proceeds to apply glue along one edge of the flange, ensuring a secure bond when clamped into place. He emphasizes that this stage is crucial for maintaining the structural integrity of the flange, which in turn safeguards the living area beneath the canvas when hatches are open.Step 3: Allowing Time to Dry
After securely attaching the first portion of the flange, Sven allows ample time for it to dry before moving forward with additional steps. This patience and precision are key aspects of his successful boatbuilding methods.Step 4: Finishing Touches
Once the flange is fully dried, Sven removes the clamps carefully, ensuring no damage occurs during this process. He then moves on to attaching four more pieces onto these main frames, completing two pairs of flanges for the bulkhead hatches.The Final Touches
While two flanges form the primary support structure around the hatches, Sven mentions there are two additional pieces required at each end to ensure comprehensive protection. This attention to detail highlights his commitment to producing a durable and reliable design. “Sailing is about finding your path, whether it’s across an ocean or within yourself.” – Sven Yrvind In conclusion, making flanges around bulkhead hatches may seem complex at first glance, but by following Sven Yrvind’s meticulous process, enthusiasts can achieve professional-level results. Remember that the journey of boatbuilding is as rewarding as reaching your destination; it tests one’s patience and dedication. For those seeking to embark on this adventure or simply gain more insight into marine craftsmanship, Sven’s wisdom is invaluable.Sven proceeds to apply glue along one edge of the flange, ensuring a secure bond when clamped into place. He emphasizes that this stage is crucial for maintaining the structural integrity of the flange, which in turn safeguards the living area beneath the canvas when hatches are open.Step 3: Allowing Time to Dry
After securely attaching the first portion of the flange, Sven allows ample time for it to dry before moving forward with additional steps. This patience and precision are key aspects of his successful boatbuilding methods.Step 4: Finishing Touches
Once the flange is fully dried, Sven removes the clamps carefully, ensuring no damage occurs during this process. He then moves on to attaching four more pieces onto these main frames, completing two pairs of flanges for the bulkhead hatches.The Final Touches
While two flanges form the primary support structure around the hatches, Sven mentions there are two additional pieces required at each end to ensure comprehensive protection. This attention to detail highlights his commitment to producing a durable and reliable design. “Sailing is about finding your path, whether it’s across an ocean or within yourself.” – Sven Yrvind In conclusion, making flanges around bulkhead hatches may seem complex at first glance, but by following Sven Yrvind’s meticulous process, enthusiasts can achieve professional-level results. Remember that the journey of boatbuilding is as rewarding as reaching your destination; it tests one’s patience and dedication. For those seeking to embark on this adventure or simply gain more insight into marine craftsmanship, Sven’s wisdom is invaluable.Sven begins by explaining that working on flanges vertically and horizontally is significantly easier than doing so in a flat position. To simplify the process further, he divides the task into two or three steps as suggested by fellow expert “for for.” This approach not only makes it more manageable but also allows for greater precision in crafting each component.Step 2: Applying Glue and Securing
Sven proceeds to apply glue along one edge of the flange, ensuring a secure bond when clamped into place. He emphasizes that this stage is crucial for maintaining the structural integrity of the flange, which in turn safeguards the living area beneath the canvas when hatches are open.Step 3: Allowing Time to Dry
After securely attaching the first portion of the flange, Sven allows ample time for it to dry before moving forward with additional steps. This patience and precision are key aspects of his successful boatbuilding methods.Step 4: Finishing Touches
Once the flange is fully dried, Sven removes the clamps carefully, ensuring no damage occurs during this process. He then moves on to attaching four more pieces onto these main frames, completing two pairs of flanges for the bulkhead hatches.The Final Touches
While two flanges form the primary support structure around the hatches, Sven mentions there are two additional pieces required at each end to ensure comprehensive protection. This attention to detail highlights his commitment to producing a durable and reliable design. “Sailing is about finding your path, whether it’s across an ocean or within yourself.” – Sven Yrvind In conclusion, making flanges around bulkhead hatches may seem complex at first glance, but by following Sven Yrvind’s meticulous process, enthusiasts can achieve professional-level results. Remember that the journey of boatbuilding is as rewarding as reaching your destination; it tests one’s patience and dedication. For those seeking to embark on this adventure or simply gain more insight into marine craftsmanship, Sven’s wisdom is invaluable.Sven Yrvind, a renowned yacht designer and sailor, shares valuable insights on creating flanges around bulkhead hatches for canvas protection in this enlightening video. By following his expert guidance, boat enthusiasts can ensure their living areas remain secure while allowing unhindered access through the hatches.Step 1: Starting with the Flange
Sven begins by explaining that working on flanges vertically and horizontally is significantly easier than doing so in a flat position. To simplify the process further, he divides the task into two or three steps as suggested by fellow expert “for for.” This approach not only makes it more manageable but also allows for greater precision in crafting each component.Step 2: Applying Glue and Securing
Sven proceeds to apply glue along one edge of the flange, ensuring a secure bond when clamped into place. He emphasizes that this stage is crucial for maintaining the structural integrity of the flange, which in turn safeguards the living area beneath the canvas when hatches are open.Step 3: Allowing Time to Dry
After securely attaching the first portion of the flange, Sven allows ample time for it to dry before moving forward with additional steps. This patience and precision are key aspects of his successful boatbuilding methods.Step 4: Finishing Touches
Once the flange is fully dried, Sven removes the clamps carefully, ensuring no damage occurs during this process. He then moves on to attaching four more pieces onto these main frames, completing two pairs of flanges for the bulkhead hatches.The Final Touches
While two flanges form the primary support structure around the hatches, Sven mentions there are two additional pieces required at each end to ensure comprehensive protection. This attention to detail highlights his commitment to producing a durable and reliable design. “Sailing is about finding your path, whether it’s across an ocean or within yourself.” – Sven Yrvind In conclusion, making flanges around bulkhead hatches may seem complex at first glance, but by following Sven Yrvind’s meticulous process, enthusiasts can achieve professional-level results. Remember that the journey of boatbuilding is as rewarding as reaching your destination; it tests one’s patience and dedication. For those seeking to embark on this adventure or simply gain more insight into marine craftsmanship, Sven’s wisdom is invaluable.Making Flanges Around Bulkhead Hatches for Canvas
Sven Yrvind, a renowned yacht designer and sailor, shares valuable insights on creating flanges around bulkhead hatches for canvas protection in this enlightening video. By following his expert guidance, boat enthusiasts can ensure their living areas remain secure while allowing unhindered access through the hatches.Step 1: Starting with the Flange
Sven begins by explaining that working on flanges vertically and horizontally is significantly easier than doing so in a flat position. To simplify the process further, he divides the task into two or three steps as suggested by fellow expert “for for.” This approach not only makes it more manageable but also allows for greater precision in crafting each component.Step 2: Applying Glue and Securing
Sven proceeds to apply glue along one edge of the flange, ensuring a secure bond when clamped into place. He emphasizes that this stage is crucial for maintaining the structural integrity of the flange, which in turn safeguards the living area beneath the canvas when hatches are open.Step 3: Allowing Time to Dry
After securely attaching the first portion of the flange, Sven allows ample time for it to dry before moving forward with additional steps. This patience and precision are key aspects of his successful boatbuilding methods.Step 4: Finishing Touches
Once the flange is fully dried, Sven removes the clamps carefully, ensuring no damage occurs during this process. He then moves on to attaching four more pieces onto these main frames, completing two pairs of flanges for the bulkhead hatches.The Final Touches
While two flanges form the primary support structure around the hatches, Sven mentions there are two additional pieces required at each end to ensure comprehensive protection. This attention to detail highlights his commitment to producing a durable and reliable design. “Sailing is about finding your path, whether it’s across an ocean or within yourself.” – Sven Yrvind In conclusion, making flanges around bulkhead hatches may seem complex at first glance, but by following Sven Yrvind’s meticulous process, enthusiasts can achieve professional-level results. Remember that the journey of boatbuilding is as rewarding as reaching your destination; it tests one’s patience and dedication. For those seeking to embark on this adventure or simply gain more insight into marine craftsmanship, Sven’s wisdom is invaluable.Once the flange is fully dried, Sven removes the clamps carefully, ensuring no damage occurs during this process. He then moves on to attaching four more pieces onto these main frames, completing two pairs of flanges for the bulkhead hatches.The Final Touches
While two flanges form the primary support structure around the hatches, Sven mentions there are two additional pieces required at each end to ensure comprehensive protection. This attention to detail highlights his commitment to producing a durable and reliable design. “Sailing is about finding your path, whether it’s across an ocean or within yourself.” – Sven Yrvind In conclusion, making flanges around bulkhead hatches may seem complex at first glance, but by following Sven Yrvind’s meticulous process, enthusiasts can achieve professional-level results. Remember that the journey of boatbuilding is as rewarding as reaching your destination; it tests one’s patience and dedication. For those seeking to embark on this adventure or simply gain more insight into marine craftsmanship, Sven’s wisdom is invaluable.After securely attaching the first portion of the flange, Sven allows ample time for it to dry before moving forward with additional steps. This patience and precision are key aspects of his successful boatbuilding methods.Step 4: Finishing Touches
Once the flange is fully dried, Sven removes the clamps carefully, ensuring no damage occurs during this process. He then moves on to attaching four more pieces onto these main frames, completing two pairs of flanges for the bulkhead hatches.The Final Touches
While two flanges form the primary support structure around the hatches, Sven mentions there are two additional pieces required at each end to ensure comprehensive protection. This attention to detail highlights his commitment to producing a durable and reliable design. “Sailing is about finding your path, whether it’s across an ocean or within yourself.” – Sven Yrvind In conclusion, making flanges around bulkhead hatches may seem complex at first glance, but by following Sven Yrvind’s meticulous process, enthusiasts can achieve professional-level results. Remember that the journey of boatbuilding is as rewarding as reaching your destination; it tests one’s patience and dedication. For those seeking to embark on this adventure or simply gain more insight into marine craftsmanship, Sven’s wisdom is invaluable.Sven proceeds to apply glue along one edge of the flange, ensuring a secure bond when clamped into place. He emphasizes that this stage is crucial for maintaining the structural integrity of the flange, which in turn safeguards the living area beneath the canvas when hatches are open.Step 3: Allowing Time to Dry
After securely attaching the first portion of the flange, Sven allows ample time for it to dry before moving forward with additional steps. This patience and precision are key aspects of his successful boatbuilding methods.Step 4: Finishing Touches
Once the flange is fully dried, Sven removes the clamps carefully, ensuring no damage occurs during this process. He then moves on to attaching four more pieces onto these main frames, completing two pairs of flanges for the bulkhead hatches.The Final Touches
While two flanges form the primary support structure around the hatches, Sven mentions there are two additional pieces required at each end to ensure comprehensive protection. This attention to detail highlights his commitment to producing a durable and reliable design. “Sailing is about finding your path, whether it’s across an ocean or within yourself.” – Sven Yrvind In conclusion, making flanges around bulkhead hatches may seem complex at first glance, but by following Sven Yrvind’s meticulous process, enthusiasts can achieve professional-level results. Remember that the journey of boatbuilding is as rewarding as reaching your destination; it tests one’s patience and dedication. For those seeking to embark on this adventure or simply gain more insight into marine craftsmanship, Sven’s wisdom is invaluable.Sven begins by explaining that working on flanges vertically and horizontally is significantly easier than doing so in a flat position. To simplify the process further, he divides the task into two or three steps as suggested by fellow expert “for for.” This approach not only makes it more manageable but also allows for greater precision in crafting each component.Step 2: Applying Glue and Securing
Sven proceeds to apply glue along one edge of the flange, ensuring a secure bond when clamped into place. He emphasizes that this stage is crucial for maintaining the structural integrity of the flange, which in turn safeguards the living area beneath the canvas when hatches are open.Step 3: Allowing Time to Dry
After securely attaching the first portion of the flange, Sven allows ample time for it to dry before moving forward with additional steps. This patience and precision are key aspects of his successful boatbuilding methods.Step 4: Finishing Touches
Once the flange is fully dried, Sven removes the clamps carefully, ensuring no damage occurs during this process. He then moves on to attaching four more pieces onto these main frames, completing two pairs of flanges for the bulkhead hatches.The Final Touches
While two flanges form the primary support structure around the hatches, Sven mentions there are two additional pieces required at each end to ensure comprehensive protection. This attention to detail highlights his commitment to producing a durable and reliable design. “Sailing is about finding your path, whether it’s across an ocean or within yourself.” – Sven Yrvind In conclusion, making flanges around bulkhead hatches may seem complex at first glance, but by following Sven Yrvind’s meticulous process, enthusiasts can achieve professional-level results. Remember that the journey of boatbuilding is as rewarding as reaching your destination; it tests one’s patience and dedication. For those seeking to embark on this adventure or simply gain more insight into marine craftsmanship, Sven’s wisdom is invaluable.Sven Yrvind, a renowned yacht designer and sailor, shares valuable insights on creating flanges around bulkhead hatches for canvas protection in this enlightening video. By following his expert guidance, boat enthusiasts can ensure their living areas remain secure while allowing unhindered access through the hatches.Step 1: Starting with the Flange
Sven begins by explaining that working on flanges vertically and horizontally is significantly easier than doing so in a flat position. To simplify the process further, he divides the task into two or three steps as suggested by fellow expert “for for.” This approach not only makes it more manageable but also allows for greater precision in crafting each component.Step 2: Applying Glue and Securing
Sven proceeds to apply glue along one edge of the flange, ensuring a secure bond when clamped into place. He emphasizes that this stage is crucial for maintaining the structural integrity of the flange, which in turn safeguards the living area beneath the canvas when hatches are open.Step 3: Allowing Time to Dry
After securely attaching the first portion of the flange, Sven allows ample time for it to dry before moving forward with additional steps. This patience and precision are key aspects of his successful boatbuilding methods.Step 4: Finishing Touches
Once the flange is fully dried, Sven removes the clamps carefully, ensuring no damage occurs during this process. He then moves on to attaching four more pieces onto these main frames, completing two pairs of flanges for the bulkhead hatches.The Final Touches
While two flanges form the primary support structure around the hatches, Sven mentions there are two additional pieces required at each end to ensure comprehensive protection. This attention to detail highlights his commitment to producing a durable and reliable design. “Sailing is about finding your path, whether it’s across an ocean or within yourself.” – Sven Yrvind In conclusion, making flanges around bulkhead hatches may seem complex at first glance, but by following Sven Yrvind’s meticulous process, enthusiasts can achieve professional-level results. Remember that the journey of boatbuilding is as rewarding as reaching your destination; it tests one’s patience and dedication. For those seeking to embark on this adventure or simply gain more insight into marine craftsmanship, Sven’s wisdom is invaluable.Making Flanges Around Bulkhead Hatches for Canvas
Sven Yrvind, a renowned yacht designer and sailor, shares valuable insights on creating flanges around bulkhead hatches for canvas protection in this enlightening video. By following his expert guidance, boat enthusiasts can ensure their living areas remain secure while allowing unhindered access through the hatches.Step 1: Starting with the Flange
Sven begins by explaining that working on flanges vertically and horizontally is significantly easier than doing so in a flat position. To simplify the process further, he divides the task into two or three steps as suggested by fellow expert “for for.” This approach not only makes it more manageable but also allows for greater precision in crafting each component.Step 2: Applying Glue and Securing
Sven proceeds to apply glue along one edge of the flange, ensuring a secure bond when clamped into place. He emphasizes that this stage is crucial for maintaining the structural integrity of the flange, which in turn safeguards the living area beneath the canvas when hatches are open.Step 3: Allowing Time to Dry
After securely attaching the first portion of the flange, Sven allows ample time for it to dry before moving forward with additional steps. This patience and precision are key aspects of his successful boatbuilding methods.Step 4: Finishing Touches
Once the flange is fully dried, Sven removes the clamps carefully, ensuring no damage occurs during this process. He then moves on to attaching four more pieces onto these main frames, completing two pairs of flanges for the bulkhead hatches.The Final Touches
While two flanges form the primary support structure around the hatches, Sven mentions there are two additional pieces required at each end to ensure comprehensive protection. This attention to detail highlights his commitment to producing a durable and reliable design. “Sailing is about finding your path, whether it’s across an ocean or within yourself.” – Sven Yrvind In conclusion, making flanges around bulkhead hatches may seem complex at first glance, but by following Sven Yrvind’s meticulous process, enthusiasts can achieve professional-level results. Remember that the journey of boatbuilding is as rewarding as reaching your destination; it tests one’s patience and dedication. For those seeking to embark on this adventure or simply gain more insight into marine craftsmanship, Sven’s wisdom is invaluable.Once the flange is fully dried, Sven removes the clamps carefully, ensuring no damage occurs during this process. He then moves on to attaching four more pieces onto these main frames, completing two pairs of flanges for the bulkhead hatches.The Final Touches
While two flanges form the primary support structure around the hatches, Sven mentions there are two additional pieces required at each end to ensure comprehensive protection. This attention to detail highlights his commitment to producing a durable and reliable design. “Sailing is about finding your path, whether it’s across an ocean or within yourself.” – Sven Yrvind In conclusion, making flanges around bulkhead hatches may seem complex at first glance, but by following Sven Yrvind’s meticulous process, enthusiasts can achieve professional-level results. Remember that the journey of boatbuilding is as rewarding as reaching your destination; it tests one’s patience and dedication. For those seeking to embark on this adventure or simply gain more insight into marine craftsmanship, Sven’s wisdom is invaluable.Sven proceeds to apply glue along one edge of the flange, ensuring a secure bond when clamped into place. He emphasizes that this stage is crucial for maintaining the structural integrity of the flange, which in turn safeguards the living area beneath the canvas when hatches are open.Step 3: Allowing Time to Dry
After securely attaching the first portion of the flange, Sven allows ample time for it to dry before moving forward with additional steps. This patience and precision are key aspects of his successful boatbuilding methods.Step 4: Finishing Touches
Once the flange is fully dried, Sven removes the clamps carefully, ensuring no damage occurs during this process. He then moves on to attaching four more pieces onto these main frames, completing two pairs of flanges for the bulkhead hatches.The Final Touches
While two flanges form the primary support structure around the hatches, Sven mentions there are two additional pieces required at each end to ensure comprehensive protection. This attention to detail highlights his commitment to producing a durable and reliable design. “Sailing is about finding your path, whether it’s across an ocean or within yourself.” – Sven Yrvind In conclusion, making flanges around bulkhead hatches may seem complex at first glance, but by following Sven Yrvind’s meticulous process, enthusiasts can achieve professional-level results. Remember that the journey of boatbuilding is as rewarding as reaching your destination; it tests one’s patience and dedication. For those seeking to embark on this adventure or simply gain more insight into marine craftsmanship, Sven’s wisdom is invaluable.Sven begins by explaining that working on flanges vertically and horizontally is significantly easier than doing so in a flat position. To simplify the process further, he divides the task into two or three steps as suggested by fellow expert “for for.” This approach not only makes it more manageable but also allows for greater precision in crafting each component.Step 2: Applying Glue and Securing
Sven proceeds to apply glue along one edge of the flange, ensuring a secure bond when clamped into place. He emphasizes that this stage is crucial for maintaining the structural integrity of the flange, which in turn safeguards the living area beneath the canvas when hatches are open.Step 3: Allowing Time to Dry
After securely attaching the first portion of the flange, Sven allows ample time for it to dry before moving forward with additional steps. This patience and precision are key aspects of his successful boatbuilding methods.Step 4: Finishing Touches
Once the flange is fully dried, Sven removes the clamps carefully, ensuring no damage occurs during this process. He then moves on to attaching four more pieces onto these main frames, completing two pairs of flanges for the bulkhead hatches.The Final Touches
While two flanges form the primary support structure around the hatches, Sven mentions there are two additional pieces required at each end to ensure comprehensive protection. This attention to detail highlights his commitment to producing a durable and reliable design. “Sailing is about finding your path, whether it’s across an ocean or within yourself.” – Sven Yrvind In conclusion, making flanges around bulkhead hatches may seem complex at first glance, but by following Sven Yrvind’s meticulous process, enthusiasts can achieve professional-level results. Remember that the journey of boatbuilding is as rewarding as reaching your destination; it tests one’s patience and dedication. For those seeking to embark on this adventure or simply gain more insight into marine craftsmanship, Sven’s wisdom is invaluable.Sven Yrvind, a renowned yacht designer and sailor, shares valuable insights on creating flanges around bulkhead hatches for canvas protection in this enlightening video. By following his expert guidance, boat enthusiasts can ensure their living areas remain secure while allowing unhindered access through the hatches.Step 1: Starting with the Flange
Sven begins by explaining that working on flanges vertically and horizontally is significantly easier than doing so in a flat position. To simplify the process further, he divides the task into two or three steps as suggested by fellow expert “for for.” This approach not only makes it more manageable but also allows for greater precision in crafting each component.Step 2: Applying Glue and Securing
Sven proceeds to apply glue along one edge of the flange, ensuring a secure bond when clamped into place. He emphasizes that this stage is crucial for maintaining the structural integrity of the flange, which in turn safeguards the living area beneath the canvas when hatches are open.Step 3: Allowing Time to Dry
After securely attaching the first portion of the flange, Sven allows ample time for it to dry before moving forward with additional steps. This patience and precision are key aspects of his successful boatbuilding methods.Step 4: Finishing Touches
Once the flange is fully dried, Sven removes the clamps carefully, ensuring no damage occurs during this process. He then moves on to attaching four more pieces onto these main frames, completing two pairs of flanges for the bulkhead hatches.The Final Touches
While two flanges form the primary support structure around the hatches, Sven mentions there are two additional pieces required at each end to ensure comprehensive protection. This attention to detail highlights his commitment to producing a durable and reliable design. “Sailing is about finding your path, whether it’s across an ocean or within yourself.” – Sven Yrvind In conclusion, making flanges around bulkhead hatches may seem complex at first glance, but by following Sven Yrvind’s meticulous process, enthusiasts can achieve professional-level results. Remember that the journey of boatbuilding is as rewarding as reaching your destination; it tests one’s patience and dedication. For those seeking to embark on this adventure or simply gain more insight into marine craftsmanship, Sven’s wisdom is invaluable.Making Flanges Around Bulkhead Hatches for Canvas
Sven Yrvind, a renowned yacht designer and sailor, shares valuable insights on creating flanges around bulkhead hatches for canvas protection in this enlightening video. By following his expert guidance, boat enthusiasts can ensure their living areas remain secure while allowing unhindered access through the hatches.Step 1: Starting with the Flange
Sven begins by explaining that working on flanges vertically and horizontally is significantly easier than doing so in a flat position. To simplify the process further, he divides the task into two or three steps as suggested by fellow expert “for for.” This approach not only makes it more manageable but also allows for greater precision in crafting each component.Step 2: Applying Glue and Securing
Sven proceeds to apply glue along one edge of the flange, ensuring a secure bond when clamped into place. He emphasizes that this stage is crucial for maintaining the structural integrity of the flange, which in turn safeguards the living area beneath the canvas when hatches are open.Step 3: Allowing Time to Dry
After securely attaching the first portion of the flange, Sven allows ample time for it to dry before moving forward with additional steps. This patience and precision are key aspects of his successful boatbuilding methods.Step 4: Finishing Touches
Once the flange is fully dried, Sven removes the clamps carefully, ensuring no damage occurs during this process. He then moves on to attaching four more pieces onto these main frames, completing two pairs of flanges for the bulkhead hatches.The Final Touches
While two flanges form the primary support structure around the hatches, Sven mentions there are two additional pieces required at each end to ensure comprehensive protection. This attention to detail highlights his commitment to producing a durable and reliable design. “Sailing is about finding your path, whether it’s across an ocean or within yourself.” – Sven Yrvind In conclusion, making flanges around bulkhead hatches may seem complex at first glance, but by following Sven Yrvind’s meticulous process, enthusiasts can achieve professional-level results. Remember that the journey of boatbuilding is as rewarding as reaching your destination; it tests one’s patience and dedication. For those seeking to embark on this adventure or simply gain more insight into marine craftsmanship, Sven’s wisdom is invaluable.Once the flange is fully dried, Sven removes the clamps carefully, ensuring no damage occurs during this process. He then moves on to attaching four more pieces onto these main frames, completing two pairs of flanges for the bulkhead hatches.The Final Touches
While two flanges form the primary support structure around the hatches, Sven mentions there are two additional pieces required at each end to ensure comprehensive protection. This attention to detail highlights his commitment to producing a durable and reliable design. “Sailing is about finding your path, whether it’s across an ocean or within yourself.” – Sven Yrvind In conclusion, making flanges around bulkhead hatches may seem complex at first glance, but by following Sven Yrvind’s meticulous process, enthusiasts can achieve professional-level results. Remember that the journey of boatbuilding is as rewarding as reaching your destination; it tests one’s patience and dedication. For those seeking to embark on this adventure or simply gain more insight into marine craftsmanship, Sven’s wisdom is invaluable.After securely attaching the first portion of the flange, Sven allows ample time for it to dry before moving forward with additional steps. This patience and precision are key aspects of his successful boatbuilding methods.Step 4: Finishing Touches
Once the flange is fully dried, Sven removes the clamps carefully, ensuring no damage occurs during this process. He then moves on to attaching four more pieces onto these main frames, completing two pairs of flanges for the bulkhead hatches.The Final Touches
While two flanges form the primary support structure around the hatches, Sven mentions there are two additional pieces required at each end to ensure comprehensive protection. This attention to detail highlights his commitment to producing a durable and reliable design. “Sailing is about finding your path, whether it’s across an ocean or within yourself.” – Sven Yrvind In conclusion, making flanges around bulkhead hatches may seem complex at first glance, but by following Sven Yrvind’s meticulous process, enthusiasts can achieve professional-level results. Remember that the journey of boatbuilding is as rewarding as reaching your destination; it tests one’s patience and dedication. For those seeking to embark on this adventure or simply gain more insight into marine craftsmanship, Sven’s wisdom is invaluable.Sven proceeds to apply glue along one edge of the flange, ensuring a secure bond when clamped into place. He emphasizes that this stage is crucial for maintaining the structural integrity of the flange, which in turn safeguards the living area beneath the canvas when hatches are open.Step 3: Allowing Time to Dry
After securely attaching the first portion of the flange, Sven allows ample time for it to dry before moving forward with additional steps. This patience and precision are key aspects of his successful boatbuilding methods.Step 4: Finishing Touches
Once the flange is fully dried, Sven removes the clamps carefully, ensuring no damage occurs during this process. He then moves on to attaching four more pieces onto these main frames, completing two pairs of flanges for the bulkhead hatches.The Final Touches
While two flanges form the primary support structure around the hatches, Sven mentions there are two additional pieces required at each end to ensure comprehensive protection. This attention to detail highlights his commitment to producing a durable and reliable design. “Sailing is about finding your path, whether it’s across an ocean or within yourself.” – Sven Yrvind In conclusion, making flanges around bulkhead hatches may seem complex at first glance, but by following Sven Yrvind’s meticulous process, enthusiasts can achieve professional-level results. Remember that the journey of boatbuilding is as rewarding as reaching your destination; it tests one’s patience and dedication. For those seeking to embark on this adventure or simply gain more insight into marine craftsmanship, Sven’s wisdom is invaluable.Sven begins by explaining that working on flanges vertically and horizontally is significantly easier than doing so in a flat position. To simplify the process further, he divides the task into two or three steps as suggested by fellow expert “for for.” This approach not only makes it more manageable but also allows for greater precision in crafting each component.Step 2: Applying Glue and Securing
Sven proceeds to apply glue along one edge of the flange, ensuring a secure bond when clamped into place. He emphasizes that this stage is crucial for maintaining the structural integrity of the flange, which in turn safeguards the living area beneath the canvas when hatches are open.Step 3: Allowing Time to Dry
After securely attaching the first portion of the flange, Sven allows ample time for it to dry before moving forward with additional steps. This patience and precision are key aspects of his successful boatbuilding methods.Step 4: Finishing Touches
Once the flange is fully dried, Sven removes the clamps carefully, ensuring no damage occurs during this process. He then moves on to attaching four more pieces onto these main frames, completing two pairs of flanges for the bulkhead hatches.The Final Touches
While two flanges form the primary support structure around the hatches, Sven mentions there are two additional pieces required at each end to ensure comprehensive protection. This attention to detail highlights his commitment to producing a durable and reliable design. “Sailing is about finding your path, whether it’s across an ocean or within yourself.” – Sven Yrvind In conclusion, making flanges around bulkhead hatches may seem complex at first glance, but by following Sven Yrvind’s meticulous process, enthusiasts can achieve professional-level results. Remember that the journey of boatbuilding is as rewarding as reaching your destination; it tests one’s patience and dedication. For those seeking to embark on this adventure or simply gain more insight into marine craftsmanship, Sven’s wisdom is invaluable.Sven Yrvind, a renowned yacht designer and sailor, shares valuable insights on creating flanges around bulkhead hatches for canvas protection in this enlightening video. By following his expert guidance, boat enthusiasts can ensure their living areas remain secure while allowing unhindered access through the hatches.Step 1: Starting with the Flange
Sven begins by explaining that working on flanges vertically and horizontally is significantly easier than doing so in a flat position. To simplify the process further, he divides the task into two or three steps as suggested by fellow expert “for for.” This approach not only makes it more manageable but also allows for greater precision in crafting each component.Step 2: Applying Glue and Securing
Sven proceeds to apply glue along one edge of the flange, ensuring a secure bond when clamped into place. He emphasizes that this stage is crucial for maintaining the structural integrity of the flange, which in turn safeguards the living area beneath the canvas when hatches are open.Step 3: Allowing Time to Dry
After securely attaching the first portion of the flange, Sven allows ample time for it to dry before moving forward with additional steps. This patience and precision are key aspects of his successful boatbuilding methods.Step 4: Finishing Touches
Once the flange is fully dried, Sven removes the clamps carefully, ensuring no damage occurs during this process. He then moves on to attaching four more pieces onto these main frames, completing two pairs of flanges for the bulkhead hatches.The Final Touches
While two flanges form the primary support structure around the hatches, Sven mentions there are two additional pieces required at each end to ensure comprehensive protection. This attention to detail highlights his commitment to producing a durable and reliable design. “Sailing is about finding your path, whether it’s across an ocean or within yourself.” – Sven Yrvind In conclusion, making flanges around bulkhead hatches may seem complex at first glance, but by following Sven Yrvind’s meticulous process, enthusiasts can achieve professional-level results. Remember that the journey of boatbuilding is as rewarding as reaching your destination; it tests one’s patience and dedication. For those seeking to embark on this adventure or simply gain more insight into marine craftsmanship, Sven’s wisdom is invaluable.Making Flanges Around Bulkhead Hatches for Canvas
Sven Yrvind, a renowned yacht designer and sailor, shares valuable insights on creating flanges around bulkhead hatches for canvas protection in this enlightening video. By following his expert guidance, boat enthusiasts can ensure their living areas remain secure while allowing unhindered access through the hatches.Step 1: Starting with the Flange
Sven begins by explaining that working on flanges vertically and horizontally is significantly easier than doing so in a flat position. To simplify the process further, he divides the task into two or three steps as suggested by fellow expert “for for.” This approach not only makes it more manageable but also allows for greater precision in crafting each component.Step 2: Applying Glue and Securing
Sven proceeds to apply glue along one edge of the flange, ensuring a secure bond when clamped into place. He emphasizes that this stage is crucial for maintaining the structural integrity of the flange, which in turn safeguards the living area beneath the canvas when hatches are open.Step 3: Allowing Time to Dry
After securely attaching the first portion of the flange, Sven allows ample time for it to dry before moving forward with additional steps. This patience and precision are key aspects of his successful boatbuilding methods.Step 4: Finishing Touches
Once the flange is fully dried, Sven removes the clamps carefully, ensuring no damage occurs during this process. He then moves on to attaching four more pieces onto these main frames, completing two pairs of flanges for the bulkhead hatches.The Final Touches
While two flanges form the primary support structure around the hatches, Sven mentions there are two additional pieces required at each end to ensure comprehensive protection. This attention to detail highlights his commitment to producing a durable and reliable design. “Sailing is about finding your path, whether it’s across an ocean or within yourself.” – Sven Yrvind In conclusion, making flanges around bulkhead hatches may seem complex at first glance, but by following Sven Yrvind’s meticulous process, enthusiasts can achieve professional-level results. Remember that the journey of boatbuilding is as rewarding as reaching your destination; it tests one’s patience and dedication. For those seeking to embark on this adventure or simply gain more insight into marine craftsmanship, Sven’s wisdom is invaluable.After securely attaching the first portion of the flange, Sven allows ample time for it to dry before moving forward with additional steps. This patience and precision are key aspects of his successful boatbuilding methods.Step 4: Finishing Touches
Once the flange is fully dried, Sven removes the clamps carefully, ensuring no damage occurs during this process. He then moves on to attaching four more pieces onto these main frames, completing two pairs of flanges for the bulkhead hatches.The Final Touches
While two flanges form the primary support structure around the hatches, Sven mentions there are two additional pieces required at each end to ensure comprehensive protection. This attention to detail highlights his commitment to producing a durable and reliable design. “Sailing is about finding your path, whether it’s across an ocean or within yourself.” – Sven Yrvind In conclusion, making flanges around bulkhead hatches may seem complex at first glance, but by following Sven Yrvind’s meticulous process, enthusiasts can achieve professional-level results. Remember that the journey of boatbuilding is as rewarding as reaching your destination; it tests one’s patience and dedication. For those seeking to embark on this adventure or simply gain more insight into marine craftsmanship, Sven’s wisdom is invaluable.Sven proceeds to apply glue along one edge of the flange, ensuring a secure bond when clamped into place. He emphasizes that this stage is crucial for maintaining the structural integrity of the flange, which in turn safeguards the living area beneath the canvas when hatches are open.Step 3: Allowing Time to Dry
After securely attaching the first portion of the flange, Sven allows ample time for it to dry before moving forward with additional steps. This patience and precision are key aspects of his successful boatbuilding methods.Step 4: Finishing Touches
Once the flange is fully dried, Sven removes the clamps carefully, ensuring no damage occurs during this process. He then moves on to attaching four more pieces onto these main frames, completing two pairs of flanges for the bulkhead hatches.The Final Touches
While two flanges form the primary support structure around the hatches, Sven mentions there are two additional pieces required at each end to ensure comprehensive protection. This attention to detail highlights his commitment to producing a durable and reliable design. “Sailing is about finding your path, whether it’s across an ocean or within yourself.” – Sven Yrvind In conclusion, making flanges around bulkhead hatches may seem complex at first glance, but by following Sven Yrvind’s meticulous process, enthusiasts can achieve professional-level results. Remember that the journey of boatbuilding is as rewarding as reaching your destination; it tests one’s patience and dedication. For those seeking to embark on this adventure or simply gain more insight into marine craftsmanship, Sven’s wisdom is invaluable.Sven begins by explaining that working on flanges vertically and horizontally is significantly easier than doing so in a flat position. To simplify the process further, he divides the task into two or three steps as suggested by fellow expert “for for.” This approach not only makes it more manageable but also allows for greater precision in crafting each component.Step 2: Applying Glue and Securing
Sven proceeds to apply glue along one edge of the flange, ensuring a secure bond when clamped into place. He emphasizes that this stage is crucial for maintaining the structural integrity of the flange, which in turn safeguards the living area beneath the canvas when hatches are open.Step 3: Allowing Time to Dry
After securely attaching the first portion of the flange, Sven allows ample time for it to dry before moving forward with additional steps. This patience and precision are key aspects of his successful boatbuilding methods.Step 4: Finishing Touches
Once the flange is fully dried, Sven removes the clamps carefully, ensuring no damage occurs during this process. He then moves on to attaching four more pieces onto these main frames, completing two pairs of flanges for the bulkhead hatches.The Final Touches
While two flanges form the primary support structure around the hatches, Sven mentions there are two additional pieces required at each end to ensure comprehensive protection. This attention to detail highlights his commitment to producing a durable and reliable design. “Sailing is about finding your path, whether it’s across an ocean or within yourself.” – Sven Yrvind In conclusion, making flanges around bulkhead hatches may seem complex at first glance, but by following Sven Yrvind’s meticulous process, enthusiasts can achieve professional-level results. Remember that the journey of boatbuilding is as rewarding as reaching your destination; it tests one’s patience and dedication. For those seeking to embark on this adventure or simply gain more insight into marine craftsmanship, Sven’s wisdom is invaluable.Sven Yrvind, a renowned yacht designer and sailor, shares valuable insights on creating flanges around bulkhead hatches for canvas protection in this enlightening video. By following his expert guidance, boat enthusiasts can ensure their living areas remain secure while allowing unhindered access through the hatches.Step 1: Starting with the Flange
Sven begins by explaining that working on flanges vertically and horizontally is significantly easier than doing so in a flat position. To simplify the process further, he divides the task into two or three steps as suggested by fellow expert “for for.” This approach not only makes it more manageable but also allows for greater precision in crafting each component.Step 2: Applying Glue and Securing
Sven proceeds to apply glue along one edge of the flange, ensuring a secure bond when clamped into place. He emphasizes that this stage is crucial for maintaining the structural integrity of the flange, which in turn safeguards the living area beneath the canvas when hatches are open.Step 3: Allowing Time to Dry
After securely attaching the first portion of the flange, Sven allows ample time for it to dry before moving forward with additional steps. This patience and precision are key aspects of his successful boatbuilding methods.Step 4: Finishing Touches
Once the flange is fully dried, Sven removes the clamps carefully, ensuring no damage occurs during this process. He then moves on to attaching four more pieces onto these main frames, completing two pairs of flanges for the bulkhead hatches.The Final Touches
While two flanges form the primary support structure around the hatches, Sven mentions there are two additional pieces required at each end to ensure comprehensive protection. This attention to detail highlights his commitment to producing a durable and reliable design. “Sailing is about finding your path, whether it’s across an ocean or within yourself.” – Sven Yrvind In conclusion, making flanges around bulkhead hatches may seem complex at first glance, but by following Sven Yrvind’s meticulous process, enthusiasts can achieve professional-level results. Remember that the journey of boatbuilding is as rewarding as reaching your destination; it tests one’s patience and dedication. For those seeking to embark on this adventure or simply gain more insight into marine craftsmanship, Sven’s wisdom is invaluable.Making Flanges Around Bulkhead Hatches for Canvas
Sven Yrvind, a renowned yacht designer and sailor, shares valuable insights on creating flanges around bulkhead hatches for canvas protection in this enlightening video. By following his expert guidance, boat enthusiasts can ensure their living areas remain secure while allowing unhindered access through the hatches.Step 1: Starting with the Flange
Sven begins by explaining that working on flanges vertically and horizontally is significantly easier than doing so in a flat position. To simplify the process further, he divides the task into two or three steps as suggested by fellow expert “for for.” This approach not only makes it more manageable but also allows for greater precision in crafting each component.Step 2: Applying Glue and Securing
Sven proceeds to apply glue along one edge of the flange, ensuring a secure bond when clamped into place. He emphasizes that this stage is crucial for maintaining the structural integrity of the flange, which in turn safeguards the living area beneath the canvas when hatches are open.Step 3: Allowing Time to Dry
After securely attaching the first portion of the flange, Sven allows ample time for it to dry before moving forward with additional steps. This patience and precision are key aspects of his successful boatbuilding methods.Step 4: Finishing Touches
Once the flange is fully dried, Sven removes the clamps carefully, ensuring no damage occurs during this process. He then moves on to attaching four more pieces onto these main frames, completing two pairs of flanges for the bulkhead hatches.The Final Touches
While two flanges form the primary support structure around the hatches, Sven mentions there are two additional pieces required at each end to ensure comprehensive protection. This attention to detail highlights his commitment to producing a durable and reliable design. “Sailing is about finding your path, whether it’s across an ocean or within yourself.” – Sven Yrvind In conclusion, making flanges around bulkhead hatches may seem complex at first glance, but by following Sven Yrvind’s meticulous process, enthusiasts can achieve professional-level results. Remember that the journey of boatbuilding is as rewarding as reaching your destination; it tests one’s patience and dedication. For those seeking to embark on this adventure or simply gain more insight into marine craftsmanship, Sven’s wisdom is invaluable.Once the flange is fully dried, Sven removes the clamps carefully, ensuring no damage occurs during this process. He then moves on to attaching four more pieces onto these main frames, completing two pairs of flanges for the bulkhead hatches.The Final Touches
While two flanges form the primary support structure around the hatches, Sven mentions there are two additional pieces required at each end to ensure comprehensive protection. This attention to detail highlights his commitment to producing a durable and reliable design. “Sailing is about finding your path, whether it’s across an ocean or within yourself.” – Sven Yrvind In conclusion, making flanges around bulkhead hatches may seem complex at first glance, but by following Sven Yrvind’s meticulous process, enthusiasts can achieve professional-level results. Remember that the journey of boatbuilding is as rewarding as reaching your destination; it tests one’s patience and dedication. For those seeking to embark on this adventure or simply gain more insight into marine craftsmanship, Sven’s wisdom is invaluable.After securely attaching the first portion of the flange, Sven allows ample time for it to dry before moving forward with additional steps. This patience and precision are key aspects of his successful boatbuilding methods.Step 4: Finishing Touches
Once the flange is fully dried, Sven removes the clamps carefully, ensuring no damage occurs during this process. He then moves on to attaching four more pieces onto these main frames, completing two pairs of flanges for the bulkhead hatches.The Final Touches
While two flanges form the primary support structure around the hatches, Sven mentions there are two additional pieces required at each end to ensure comprehensive protection. This attention to detail highlights his commitment to producing a durable and reliable design. “Sailing is about finding your path, whether it’s across an ocean or within yourself.” – Sven Yrvind In conclusion, making flanges around bulkhead hatches may seem complex at first glance, but by following Sven Yrvind’s meticulous process, enthusiasts can achieve professional-level results. Remember that the journey of boatbuilding is as rewarding as reaching your destination; it tests one’s patience and dedication. For those seeking to embark on this adventure or simply gain more insight into marine craftsmanship, Sven’s wisdom is invaluable.Sven proceeds to apply glue along one edge of the flange, ensuring a secure bond when clamped into place. He emphasizes that this stage is crucial for maintaining the structural integrity of the flange, which in turn safeguards the living area beneath the canvas when hatches are open.Step 3: Allowing Time to Dry
After securely attaching the first portion of the flange, Sven allows ample time for it to dry before moving forward with additional steps. This patience and precision are key aspects of his successful boatbuilding methods.Step 4: Finishing Touches
Once the flange is fully dried, Sven removes the clamps carefully, ensuring no damage occurs during this process. He then moves on to attaching four more pieces onto these main frames, completing two pairs of flanges for the bulkhead hatches.The Final Touches
While two flanges form the primary support structure around the hatches, Sven mentions there are two additional pieces required at each end to ensure comprehensive protection. This attention to detail highlights his commitment to producing a durable and reliable design. “Sailing is about finding your path, whether it’s across an ocean or within yourself.” – Sven Yrvind In conclusion, making flanges around bulkhead hatches may seem complex at first glance, but by following Sven Yrvind’s meticulous process, enthusiasts can achieve professional-level results. Remember that the journey of boatbuilding is as rewarding as reaching your destination; it tests one’s patience and dedication. For those seeking to embark on this adventure or simply gain more insight into marine craftsmanship, Sven’s wisdom is invaluable.Sven begins by explaining that working on flanges vertically and horizontally is significantly easier than doing so in a flat position. To simplify the process further, he divides the task into two or three steps as suggested by fellow expert “for for.” This approach not only makes it more manageable but also allows for greater precision in crafting each component.Step 2: Applying Glue and Securing
Sven proceeds to apply glue along one edge of the flange, ensuring a secure bond when clamped into place. He emphasizes that this stage is crucial for maintaining the structural integrity of the flange, which in turn safeguards the living area beneath the canvas when hatches are open.Step 3: Allowing Time to Dry
After securely attaching the first portion of the flange, Sven allows ample time for it to dry before moving forward with additional steps. This patience and precision are key aspects of his successful boatbuilding methods.Step 4: Finishing Touches
Once the flange is fully dried, Sven removes the clamps carefully, ensuring no damage occurs during this process. He then moves on to attaching four more pieces onto these main frames, completing two pairs of flanges for the bulkhead hatches.The Final Touches
While two flanges form the primary support structure around the hatches, Sven mentions there are two additional pieces required at each end to ensure comprehensive protection. This attention to detail highlights his commitment to producing a durable and reliable design. “Sailing is about finding your path, whether it’s across an ocean or within yourself.” – Sven Yrvind In conclusion, making flanges around bulkhead hatches may seem complex at first glance, but by following Sven Yrvind’s meticulous process, enthusiasts can achieve professional-level results. Remember that the journey of boatbuilding is as rewarding as reaching your destination; it tests one’s patience and dedication. For those seeking to embark on this adventure or simply gain more insight into marine craftsmanship, Sven’s wisdom is invaluable.Sven Yrvind, a renowned yacht designer and sailor, shares valuable insights on creating flanges around bulkhead hatches for canvas protection in this enlightening video. By following his expert guidance, boat enthusiasts can ensure their living areas remain secure while allowing unhindered access through the hatches.Step 1: Starting with the Flange
Sven begins by explaining that working on flanges vertically and horizontally is significantly easier than doing so in a flat position. To simplify the process further, he divides the task into two or three steps as suggested by fellow expert “for for.” This approach not only makes it more manageable but also allows for greater precision in crafting each component.Step 2: Applying Glue and Securing
Sven proceeds to apply glue along one edge of the flange, ensuring a secure bond when clamped into place. He emphasizes that this stage is crucial for maintaining the structural integrity of the flange, which in turn safeguards the living area beneath the canvas when hatches are open.Step 3: Allowing Time to Dry
After securely attaching the first portion of the flange, Sven allows ample time for it to dry before moving forward with additional steps. This patience and precision are key aspects of his successful boatbuilding methods.Step 4: Finishing Touches
Once the flange is fully dried, Sven removes the clamps carefully, ensuring no damage occurs during this process. He then moves on to attaching four more pieces onto these main frames, completing two pairs of flanges for the bulkhead hatches.The Final Touches
While two flanges form the primary support structure around the hatches, Sven mentions there are two additional pieces required at each end to ensure comprehensive protection. This attention to detail highlights his commitment to producing a durable and reliable design. “Sailing is about finding your path, whether it’s across an ocean or within yourself.” – Sven Yrvind In conclusion, making flanges around bulkhead hatches may seem complex at first glance, but by following Sven Yrvind’s meticulous process, enthusiasts can achieve professional-level results. Remember that the journey of boatbuilding is as rewarding as reaching your destination; it tests one’s patience and dedication. For those seeking to embark on this adventure or simply gain more insight into marine craftsmanship, Sven’s wisdom is invaluable.Making Flanges Around Bulkhead Hatches for Canvas
Sven Yrvind, a renowned yacht designer and sailor, shares valuable insights on creating flanges around bulkhead hatches for canvas protection in this enlightening video. By following his expert guidance, boat enthusiasts can ensure their living areas remain secure while allowing unhindered access through the hatches.Step 1: Starting with the Flange
Sven begins by explaining that working on flanges vertically and horizontally is significantly easier than doing so in a flat position. To simplify the process further, he divides the task into two or three steps as suggested by fellow expert “for for.” This approach not only makes it more manageable but also allows for greater precision in crafting each component.Step 2: Applying Glue and Securing
Sven proceeds to apply glue along one edge of the flange, ensuring a secure bond when clamped into place. He emphasizes that this stage is crucial for maintaining the structural integrity of the flange, which in turn safeguards the living area beneath the canvas when hatches are open.Step 3: Allowing Time to Dry
After securely attaching the first portion of the flange, Sven allows ample time for it to dry before moving forward with additional steps. This patience and precision are key aspects of his successful boatbuilding methods.Step 4: Finishing Touches
Once the flange is fully dried, Sven removes the clamps carefully, ensuring no damage occurs during this process. He then moves on to attaching four more pieces onto these main frames, completing two pairs of flanges for the bulkhead hatches.The Final Touches
While two flanges form the primary support structure around the hatches, Sven mentions there are two additional pieces required at each end to ensure comprehensive protection. This attention to detail highlights his commitment to producing a durable and reliable design. “Sailing is about finding your path, whether it’s across an ocean or within yourself.” – Sven Yrvind In conclusion, making flanges around bulkhead hatches may seem complex at first glance, but by following Sven Yrvind’s meticulous process, enthusiasts can achieve professional-level results. Remember that the journey of boatbuilding is as rewarding as reaching your destination; it tests one’s patience and dedication. For those seeking to embark on this adventure or simply gain more insight into marine craftsmanship, Sven’s wisdom is invaluable.After securely attaching the first portion of the flange, Sven allows ample time for it to dry before moving forward with additional steps. This patience and precision are key aspects of his successful boatbuilding methods.Step 4: Finishing Touches
Once the flange is fully dried, Sven removes the clamps carefully, ensuring no damage occurs during this process. He then moves on to attaching four more pieces onto these main frames, completing two pairs of flanges for the bulkhead hatches.The Final Touches
While two flanges form the primary support structure around the hatches, Sven mentions there are two additional pieces required at each end to ensure comprehensive protection. This attention to detail highlights his commitment to producing a durable and reliable design. “Sailing is about finding your path, whether it’s across an ocean or within yourself.” – Sven Yrvind In conclusion, making flanges around bulkhead hatches may seem complex at first glance, but by following Sven Yrvind’s meticulous process, enthusiasts can achieve professional-level results. Remember that the journey of boatbuilding is as rewarding as reaching your destination; it tests one’s patience and dedication. For those seeking to embark on this adventure or simply gain more insight into marine craftsmanship, Sven’s wisdom is invaluable.After securely attaching the first portion of the flange, Sven allows ample time for it to dry before moving forward with additional steps. This patience and precision are key aspects of his successful boatbuilding methods.Step 4: Finishing Touches
Once the flange is fully dried, Sven removes the clamps carefully, ensuring no damage occurs during this process. He then moves on to attaching four more pieces onto these main frames, completing two pairs of flanges for the bulkhead hatches.The Final Touches
While two flanges form the primary support structure around the hatches, Sven mentions there are two additional pieces required at each end to ensure comprehensive protection. This attention to detail highlights his commitment to producing a durable and reliable design. “Sailing is about finding your path, whether it’s across an ocean or within yourself.” – Sven Yrvind In conclusion, making flanges around bulkhead hatches may seem complex at first glance, but by following Sven Yrvind’s meticulous process, enthusiasts can achieve professional-level results. Remember that the journey of boatbuilding is as rewarding as reaching your destination; it tests one’s patience and dedication. For those seeking to embark on this adventure or simply gain more insight into marine craftsmanship, Sven’s wisdom is invaluable.Sven proceeds to apply glue along one edge of the flange, ensuring a secure bond when clamped into place. He emphasizes that this stage is crucial for maintaining the structural integrity of the flange, which in turn safeguards the living area beneath the canvas when hatches are open.Step 3: Allowing Time to Dry
After securely attaching the first portion of the flange, Sven allows ample time for it to dry before moving forward with additional steps. This patience and precision are key aspects of his successful boatbuilding methods.Step 4: Finishing Touches
Once the flange is fully dried, Sven removes the clamps carefully, ensuring no damage occurs during this process. He then moves on to attaching four more pieces onto these main frames, completing two pairs of flanges for the bulkhead hatches.The Final Touches
While two flanges form the primary support structure around the hatches, Sven mentions there are two additional pieces required at each end to ensure comprehensive protection. This attention to detail highlights his commitment to producing a durable and reliable design. “Sailing is about finding your path, whether it’s across an ocean or within yourself.” – Sven Yrvind In conclusion, making flanges around bulkhead hatches may seem complex at first glance, but by following Sven Yrvind’s meticulous process, enthusiasts can achieve professional-level results. Remember that the journey of boatbuilding is as rewarding as reaching your destination; it tests one’s patience and dedication. For those seeking to embark on this adventure or simply gain more insight into marine craftsmanship, Sven’s wisdom is invaluable.Sven begins by explaining that working on flanges vertically and horizontally is significantly easier than doing so in a flat position. To simplify the process further, he divides the task into two or three steps as suggested by fellow expert “for for.” This approach not only makes it more manageable but also allows for greater precision in crafting each component.Step 2: Applying Glue and Securing
Sven proceeds to apply glue along one edge of the flange, ensuring a secure bond when clamped into place. He emphasizes that this stage is crucial for maintaining the structural integrity of the flange, which in turn safeguards the living area beneath the canvas when hatches are open.Step 3: Allowing Time to Dry
After securely attaching the first portion of the flange, Sven allows ample time for it to dry before moving forward with additional steps. This patience and precision are key aspects of his successful boatbuilding methods.Step 4: Finishing Touches
Once the flange is fully dried, Sven removes the clamps carefully, ensuring no damage occurs during this process. He then moves on to attaching four more pieces onto these main frames, completing two pairs of flanges for the bulkhead hatches.The Final Touches
While two flanges form the primary support structure around the hatches, Sven mentions there are two additional pieces required at each end to ensure comprehensive protection. This attention to detail highlights his commitment to producing a durable and reliable design. “Sailing is about finding your path, whether it’s across an ocean or within yourself.” – Sven Yrvind In conclusion, making flanges around bulkhead hatches may seem complex at first glance, but by following Sven Yrvind’s meticulous process, enthusiasts can achieve professional-level results. Remember that the journey of boatbuilding is as rewarding as reaching your destination; it tests one’s patience and dedication. For those seeking to embark on this adventure or simply gain more insight into marine craftsmanship, Sven’s wisdom is invaluable.Sven Yrvind, a renowned yacht designer and sailor, shares valuable insights on creating flanges around bulkhead hatches for canvas protection in this enlightening video. By following his expert guidance, boat enthusiasts can ensure their living areas remain secure while allowing unhindered access through the hatches.Step 1: Starting with the Flange
Sven begins by explaining that working on flanges vertically and horizontally is significantly easier than doing so in a flat position. To simplify the process further, he divides the task into two or three steps as suggested by fellow expert “for for.” This approach not only makes it more manageable but also allows for greater precision in crafting each component.Step 2: Applying Glue and Securing
Sven proceeds to apply glue along one edge of the flange, ensuring a secure bond when clamped into place. He emphasizes that this stage is crucial for maintaining the structural integrity of the flange, which in turn safeguards the living area beneath the canvas when hatches are open.Step 3: Allowing Time to Dry
After securely attaching the first portion of the flange, Sven allows ample time for it to dry before moving forward with additional steps. This patience and precision are key aspects of his successful boatbuilding methods.Step 4: Finishing Touches
Once the flange is fully dried, Sven removes the clamps carefully, ensuring no damage occurs during this process. He then moves on to attaching four more pieces onto these main frames, completing two pairs of flanges for the bulkhead hatches.The Final Touches
While two flanges form the primary support structure around the hatches, Sven mentions there are two additional pieces required at each end to ensure comprehensive protection. This attention to detail highlights his commitment to producing a durable and reliable design. “Sailing is about finding your path, whether it’s across an ocean or within yourself.” – Sven Yrvind In conclusion, making flanges around bulkhead hatches may seem complex at first glance, but by following Sven Yrvind’s meticulous process, enthusiasts can achieve professional-level results. Remember that the journey of boatbuilding is as rewarding as reaching your destination; it tests one’s patience and dedication. For those seeking to embark on this adventure or simply gain more insight into marine craftsmanship, Sven’s wisdom is invaluable.Making Flanges Around Bulkhead Hatches for Canvas
Sven Yrvind, a renowned yacht designer and sailor, shares valuable insights on creating flanges around bulkhead hatches for canvas protection in this enlightening video. By following his expert guidance, boat enthusiasts can ensure their living areas remain secure while allowing unhindered access through the hatches.Step 1: Starting with the Flange
Sven begins by explaining that working on flanges vertically and horizontally is significantly easier than doing so in a flat position. To simplify the process further, he divides the task into two or three steps as suggested by fellow expert “for for.” This approach not only makes it more manageable but also allows for greater precision in crafting each component.Step 2: Applying Glue and Securing
Sven proceeds to apply glue along one edge of the flange, ensuring a secure bond when clamped into place. He emphasizes that this stage is crucial for maintaining the structural integrity of the flange, which in turn safeguards the living area beneath the canvas when hatches are open.Step 3: Allowing Time to Dry
After securely attaching the first portion of the flange, Sven allows ample time for it to dry before moving forward with additional steps. This patience and precision are key aspects of his successful boatbuilding methods.Step 4: Finishing Touches
Once the flange is fully dried, Sven removes the clamps carefully, ensuring no damage occurs during this process. He then moves on to attaching four more pieces onto these main frames, completing two pairs of flanges for the bulkhead hatches.The Final Touches
While two flanges form the primary support structure around the hatches, Sven mentions there are two additional pieces required at each end to ensure comprehensive protection. This attention to detail highlights his commitment to producing a durable and reliable design. “Sailing is about finding your path, whether it’s across an ocean or within yourself.” – Sven Yrvind In conclusion, making flanges around bulkhead hatches may seem complex at first glance, but by following Sven Yrvind’s meticulous process, enthusiasts can achieve professional-level results. Remember that the journey of boatbuilding is as rewarding as reaching your destination; it tests one’s patience and dedication. For those seeking to embark on this adventure or simply gain more insight into marine craftsmanship, Sven’s wisdom is invaluable.Once the flange is fully dried, Sven removes the clamps carefully, ensuring no damage occurs during this process. He then moves on to attaching four more pieces onto these main frames, completing two pairs of flanges for the bulkhead hatches.The Final Touches
While two flanges form the primary support structure around the hatches, Sven mentions there are two additional pieces required at each end to ensure comprehensive protection. This attention to detail highlights his commitment to producing a durable and reliable design. “Sailing is about finding your path, whether it’s across an ocean or within yourself.” – Sven Yrvind In conclusion, making flanges around bulkhead hatches may seem complex at first glance, but by following Sven Yrvind’s meticulous process, enthusiasts can achieve professional-level results. Remember that the journey of boatbuilding is as rewarding as reaching your destination; it tests one’s patience and dedication. For those seeking to embark on this adventure or simply gain more insight into marine craftsmanship, Sven’s wisdom is invaluable.After securely attaching the first portion of the flange, Sven allows ample time for it to dry before moving forward with additional steps. This patience and precision are key aspects of his successful boatbuilding methods.Step 4: Finishing Touches
Once the flange is fully dried, Sven removes the clamps carefully, ensuring no damage occurs during this process. He then moves on to attaching four more pieces onto these main frames, completing two pairs of flanges for the bulkhead hatches.The Final Touches
While two flanges form the primary support structure around the hatches, Sven mentions there are two additional pieces required at each end to ensure comprehensive protection. This attention to detail highlights his commitment to producing a durable and reliable design. “Sailing is about finding your path, whether it’s across an ocean or within yourself.” – Sven Yrvind In conclusion, making flanges around bulkhead hatches may seem complex at first glance, but by following Sven Yrvind’s meticulous process, enthusiasts can achieve professional-level results. Remember that the journey of boatbuilding is as rewarding as reaching your destination; it tests one’s patience and dedication. For those seeking to embark on this adventure or simply gain more insight into marine craftsmanship, Sven’s wisdom is invaluable.Sven proceeds to apply glue along one edge of the flange, ensuring a secure bond when clamped into place. He emphasizes that this stage is crucial for maintaining the structural integrity of the flange, which in turn safeguards the living area beneath the canvas when hatches are open.Step 3: Allowing Time to Dry
After securely attaching the first portion of the flange, Sven allows ample time for it to dry before moving forward with additional steps. This patience and precision are key aspects of his successful boatbuilding methods.Step 4: Finishing Touches
Once the flange is fully dried, Sven removes the clamps carefully, ensuring no damage occurs during this process. He then moves on to attaching four more pieces onto these main frames, completing two pairs of flanges for the bulkhead hatches.The Final Touches
While two flanges form the primary support structure around the hatches, Sven mentions there are two additional pieces required at each end to ensure comprehensive protection. This attention to detail highlights his commitment to producing a durable and reliable design. “Sailing is about finding your path, whether it’s across an ocean or within yourself.” – Sven Yrvind In conclusion, making flanges around bulkhead hatches may seem complex at first glance, but by following Sven Yrvind’s meticulous process, enthusiasts can achieve professional-level results. Remember that the journey of boatbuilding is as rewarding as reaching your destination; it tests one’s patience and dedication. For those seeking to embark on this adventure or simply gain more insight into marine craftsmanship, Sven’s wisdom is invaluable.Sven begins by explaining that working on flanges vertically and horizontally is significantly easier than doing so in a flat position. To simplify the process further, he divides the task into two or three steps as suggested by fellow expert “for for.” This approach not only makes it more manageable but also allows for greater precision in crafting each component.Step 2: Applying Glue and Securing
Sven proceeds to apply glue along one edge of the flange, ensuring a secure bond when clamped into place. He emphasizes that this stage is crucial for maintaining the structural integrity of the flange, which in turn safeguards the living area beneath the canvas when hatches are open.Step 3: Allowing Time to Dry
After securely attaching the first portion of the flange, Sven allows ample time for it to dry before moving forward with additional steps. This patience and precision are key aspects of his successful boatbuilding methods.Step 4: Finishing Touches
Once the flange is fully dried, Sven removes the clamps carefully, ensuring no damage occurs during this process. He then moves on to attaching four more pieces onto these main frames, completing two pairs of flanges for the bulkhead hatches.The Final Touches
While two flanges form the primary support structure around the hatches, Sven mentions there are two additional pieces required at each end to ensure comprehensive protection. This attention to detail highlights his commitment to producing a durable and reliable design. “Sailing is about finding your path, whether it’s across an ocean or within yourself.” – Sven Yrvind In conclusion, making flanges around bulkhead hatches may seem complex at first glance, but by following Sven Yrvind’s meticulous process, enthusiasts can achieve professional-level results. Remember that the journey of boatbuilding is as rewarding as reaching your destination; it tests one’s patience and dedication. For those seeking to embark on this adventure or simply gain more insight into marine craftsmanship, Sven’s wisdom is invaluable.Sven Yrvind, a renowned yacht designer and sailor, shares valuable insights on creating flanges around bulkhead hatches for canvas protection in this enlightening video. By following his expert guidance, boat enthusiasts can ensure their living areas remain secure while allowing unhindered access through the hatches.Step 1: Starting with the Flange
Sven begins by explaining that working on flanges vertically and horizontally is significantly easier than doing so in a flat position. To simplify the process further, he divides the task into two or three steps as suggested by fellow expert “for for.” This approach not only makes it more manageable but also allows for greater precision in crafting each component.Step 2: Applying Glue and Securing
Sven proceeds to apply glue along one edge of the flange, ensuring a secure bond when clamped into place. He emphasizes that this stage is crucial for maintaining the structural integrity of the flange, which in turn safeguards the living area beneath the canvas when hatches are open.Step 3: Allowing Time to Dry
After securely attaching the first portion of the flange, Sven allows ample time for it to dry before moving forward with additional steps. This patience and precision are key aspects of his successful boatbuilding methods.Step 4: Finishing Touches
Once the flange is fully dried, Sven removes the clamps carefully, ensuring no damage occurs during this process. He then moves on to attaching four more pieces onto these main frames, completing two pairs of flanges for the bulkhead hatches.The Final Touches
While two flanges form the primary support structure around the hatches, Sven mentions there are two additional pieces required at each end to ensure comprehensive protection. This attention to detail highlights his commitment to producing a durable and reliable design. “Sailing is about finding your path, whether it’s across an ocean or within yourself.” – Sven Yrvind In conclusion, making flanges around bulkhead hatches may seem complex at first glance, but by following Sven Yrvind’s meticulous process, enthusiasts can achieve professional-level results. Remember that the journey of boatbuilding is as rewarding as reaching your destination; it tests one’s patience and dedication. For those seeking to embark on this adventure or simply gain more insight into marine craftsmanship, Sven’s wisdom is invaluable.Making Flanges Around Bulkhead Hatches for Canvas
Sven Yrvind, a renowned yacht designer and sailor, shares valuable insights on creating flanges around bulkhead hatches for canvas protection in this enlightening video. By following his expert guidance, boat enthusiasts can ensure their living areas remain secure while allowing unhindered access through the hatches.Step 1: Starting with the Flange
Sven begins by explaining that working on flanges vertically and horizontally is significantly easier than doing so in a flat position. To simplify the process further, he divides the task into two or three steps as suggested by fellow expert “for for.” This approach not only makes it more manageable but also allows for greater precision in crafting each component.Step 2: Applying Glue and Securing
Sven proceeds to apply glue along one edge of the flange, ensuring a secure bond when clamped into place. He emphasizes that this stage is crucial for maintaining the structural integrity of the flange, which in turn safeguards the living area beneath the canvas when hatches are open.Step 3: Allowing Time to Dry
After securely attaching the first portion of the flange, Sven allows ample time for it to dry before moving forward with additional steps. This patience and precision are key aspects of his successful boatbuilding methods.Step 4: Finishing Touches
Once the flange is fully dried, Sven removes the clamps carefully, ensuring no damage occurs during this process. He then moves on to attaching four more pieces onto these main frames, completing two pairs of flanges for the bulkhead hatches.The Final Touches
While two flanges form the primary support structure around the hatches, Sven mentions there are two additional pieces required at each end to ensure comprehensive protection. This attention to detail highlights his commitment to producing a durable and reliable design. “Sailing is about finding your path, whether it’s across an ocean or within yourself.” – Sven Yrvind In conclusion, making flanges around bulkhead hatches may seem complex at first glance, but by following Sven Yrvind’s meticulous process, enthusiasts can achieve professional-level results. Remember that the journey of boatbuilding is as rewarding as reaching your destination; it tests one’s patience and dedication. For those seeking to embark on this adventure or simply gain more insight into marine craftsmanship, Sven’s wisdom is invaluable.Sven proceeds to apply glue along one edge of the flange, ensuring a secure bond when clamped into place. He emphasizes that this stage is crucial for maintaining the structural integrity of the flange, which in turn safeguards the living area beneath the canvas when hatches are open.Step 3: Allowing Time to Dry
After securely attaching the first portion of the flange, Sven allows ample time for it to dry before moving forward with additional steps. This patience and precision are key aspects of his successful boatbuilding methods.Step 4: Finishing Touches
Once the flange is fully dried, Sven removes the clamps carefully, ensuring no damage occurs during this process. He then moves on to attaching four more pieces onto these main frames, completing two pairs of flanges for the bulkhead hatches.The Final Touches
While two flanges form the primary support structure around the hatches, Sven mentions there are two additional pieces required at each end to ensure comprehensive protection. This attention to detail highlights his commitment to producing a durable and reliable design. “Sailing is about finding your path, whether it’s across an ocean or within yourself.” – Sven Yrvind In conclusion, making flanges around bulkhead hatches may seem complex at first glance, but by following Sven Yrvind’s meticulous process, enthusiasts can achieve professional-level results. Remember that the journey of boatbuilding is as rewarding as reaching your destination; it tests one’s patience and dedication. For those seeking to embark on this adventure or simply gain more insight into marine craftsmanship, Sven’s wisdom is invaluable.After securely attaching the first portion of the flange, Sven allows ample time for it to dry before moving forward with additional steps. This patience and precision are key aspects of his successful boatbuilding methods.Step 4: Finishing Touches
Once the flange is fully dried, Sven removes the clamps carefully, ensuring no damage occurs during this process. He then moves on to attaching four more pieces onto these main frames, completing two pairs of flanges for the bulkhead hatches.The Final Touches
While two flanges form the primary support structure around the hatches, Sven mentions there are two additional pieces required at each end to ensure comprehensive protection. This attention to detail highlights his commitment to producing a durable and reliable design. “Sailing is about finding your path, whether it’s across an ocean or within yourself.” – Sven Yrvind In conclusion, making flanges around bulkhead hatches may seem complex at first glance, but by following Sven Yrvind’s meticulous process, enthusiasts can achieve professional-level results. Remember that the journey of boatbuilding is as rewarding as reaching your destination; it tests one’s patience and dedication. For those seeking to embark on this adventure or simply gain more insight into marine craftsmanship, Sven’s wisdom is invaluable.Sven proceeds to apply glue along one edge of the flange, ensuring a secure bond when clamped into place. He emphasizes that this stage is crucial for maintaining the structural integrity of the flange, which in turn safeguards the living area beneath the canvas when hatches are open.Step 3: Allowing Time to Dry
After securely attaching the first portion of the flange, Sven allows ample time for it to dry before moving forward with additional steps. This patience and precision are key aspects of his successful boatbuilding methods.Step 4: Finishing Touches
Once the flange is fully dried, Sven removes the clamps carefully, ensuring no damage occurs during this process. He then moves on to attaching four more pieces onto these main frames, completing two pairs of flanges for the bulkhead hatches.The Final Touches
While two flanges form the primary support structure around the hatches, Sven mentions there are two additional pieces required at each end to ensure comprehensive protection. This attention to detail highlights his commitment to producing a durable and reliable design. “Sailing is about finding your path, whether it’s across an ocean or within yourself.” – Sven Yrvind In conclusion, making flanges around bulkhead hatches may seem complex at first glance, but by following Sven Yrvind’s meticulous process, enthusiasts can achieve professional-level results. Remember that the journey of boatbuilding is as rewarding as reaching your destination; it tests one’s patience and dedication. For those seeking to embark on this adventure or simply gain more insight into marine craftsmanship, Sven’s wisdom is invaluable.Sven begins by explaining that working on flanges vertically and horizontally is significantly easier than doing so in a flat position. To simplify the process further, he divides the task into two or three steps as suggested by fellow expert “for for.” This approach not only makes it more manageable but also allows for greater precision in crafting each component.Step 2: Applying Glue and Securing
Sven proceeds to apply glue along one edge of the flange, ensuring a secure bond when clamped into place. He emphasizes that this stage is crucial for maintaining the structural integrity of the flange, which in turn safeguards the living area beneath the canvas when hatches are open.Step 3: Allowing Time to Dry
After securely attaching the first portion of the flange, Sven allows ample time for it to dry before moving forward with additional steps. This patience and precision are key aspects of his successful boatbuilding methods.Step 4: Finishing Touches
Once the flange is fully dried, Sven removes the clamps carefully, ensuring no damage occurs during this process. He then moves on to attaching four more pieces onto these main frames, completing two pairs of flanges for the bulkhead hatches.The Final Touches
While two flanges form the primary support structure around the hatches, Sven mentions there are two additional pieces required at each end to ensure comprehensive protection. This attention to detail highlights his commitment to producing a durable and reliable design. “Sailing is about finding your path, whether it’s across an ocean or within yourself.” – Sven Yrvind In conclusion, making flanges around bulkhead hatches may seem complex at first glance, but by following Sven Yrvind’s meticulous process, enthusiasts can achieve professional-level results. Remember that the journey of boatbuilding is as rewarding as reaching your destination; it tests one’s patience and dedication. For those seeking to embark on this adventure or simply gain more insight into marine craftsmanship, Sven’s wisdom is invaluable.Sven Yrvind, a renowned yacht designer and sailor, shares valuable insights on creating flanges around bulkhead hatches for canvas protection in this enlightening video. By following his expert guidance, boat enthusiasts can ensure their living areas remain secure while allowing unhindered access through the hatches.Step 1: Starting with the Flange
Sven begins by explaining that working on flanges vertically and horizontally is significantly easier than doing so in a flat position. To simplify the process further, he divides the task into two or three steps as suggested by fellow expert “for for.” This approach not only makes it more manageable but also allows for greater precision in crafting each component.Step 2: Applying Glue and Securing
Sven proceeds to apply glue along one edge of the flange, ensuring a secure bond when clamped into place. He emphasizes that this stage is crucial for maintaining the structural integrity of the flange, which in turn safeguards the living area beneath the canvas when hatches are open.Step 3: Allowing Time to Dry
After securely attaching the first portion of the flange, Sven allows ample time for it to dry before moving forward with additional steps. This patience and precision are key aspects of his successful boatbuilding methods.Step 4: Finishing Touches
Once the flange is fully dried, Sven removes the clamps carefully, ensuring no damage occurs during this process. He then moves on to attaching four more pieces onto these main frames, completing two pairs of flanges for the bulkhead hatches.The Final Touches
While two flanges form the primary support structure around the hatches, Sven mentions there are two additional pieces required at each end to ensure comprehensive protection. This attention to detail highlights his commitment to producing a durable and reliable design. “Sailing is about finding your path, whether it’s across an ocean or within yourself.” – Sven Yrvind In conclusion, making flanges around bulkhead hatches may seem complex at first glance, but by following Sven Yrvind’s meticulous process, enthusiasts can achieve professional-level results. Remember that the journey of boatbuilding is as rewarding as reaching your destination; it tests one’s patience and dedication. For those seeking to embark on this adventure or simply gain more insight into marine craftsmanship, Sven’s wisdom is invaluable.Making Flanges Around Bulkhead Hatches for Canvas
Sven Yrvind, a renowned yacht designer and sailor, shares valuable insights on creating flanges around bulkhead hatches for canvas protection in this enlightening video. By following his expert guidance, boat enthusiasts can ensure their living areas remain secure while allowing unhindered access through the hatches.Step 1: Starting with the Flange
Sven begins by explaining that working on flanges vertically and horizontally is significantly easier than doing so in a flat position. To simplify the process further, he divides the task into two or three steps as suggested by fellow expert “for for.” This approach not only makes it more manageable but also allows for greater precision in crafting each component.Step 2: Applying Glue and Securing
Sven proceeds to apply glue along one edge of the flange, ensuring a secure bond when clamped into place. He emphasizes that this stage is crucial for maintaining the structural integrity of the flange, which in turn safeguards the living area beneath the canvas when hatches are open.Step 3: Allowing Time to Dry
After securely attaching the first portion of the flange, Sven allows ample time for it to dry before moving forward with additional steps. This patience and precision are key aspects of his successful boatbuilding methods.Step 4: Finishing Touches
Once the flange is fully dried, Sven removes the clamps carefully, ensuring no damage occurs during this process. He then moves on to attaching four more pieces onto these main frames, completing two pairs of flanges for the bulkhead hatches.The Final Touches
While two flanges form the primary support structure around the hatches, Sven mentions there are two additional pieces required at each end to ensure comprehensive protection. This attention to detail highlights his commitment to producing a durable and reliable design. “Sailing is about finding your path, whether it’s across an ocean or within yourself.” – Sven Yrvind In conclusion, making flanges around bulkhead hatches may seem complex at first glance, but by following Sven Yrvind’s meticulous process, enthusiasts can achieve professional-level results. Remember that the journey of boatbuilding is as rewarding as reaching your destination; it tests one’s patience and dedication. For those seeking to embark on this adventure or simply gain more insight into marine craftsmanship, Sven’s wisdom is invaluable.Once the flange is fully dried, Sven removes the clamps carefully, ensuring no damage occurs during this process. He then moves on to attaching four more pieces onto these main frames, completing two pairs of flanges for the bulkhead hatches.The Final Touches
While two flanges form the primary support structure around the hatches, Sven mentions there are two additional pieces required at each end to ensure comprehensive protection. This attention to detail highlights his commitment to producing a durable and reliable design. “Sailing is about finding your path, whether it’s across an ocean or within yourself.” – Sven Yrvind In conclusion, making flanges around bulkhead hatches may seem complex at first glance, but by following Sven Yrvind’s meticulous process, enthusiasts can achieve professional-level results. Remember that the journey of boatbuilding is as rewarding as reaching your destination; it tests one’s patience and dedication. For those seeking to embark on this adventure or simply gain more insight into marine craftsmanship, Sven’s wisdom is invaluable.After securely attaching the first portion of the flange, Sven allows ample time for it to dry before moving forward with additional steps. This patience and precision are key aspects of his successful boatbuilding methods.Step 4: Finishing Touches
Once the flange is fully dried, Sven removes the clamps carefully, ensuring no damage occurs during this process. He then moves on to attaching four more pieces onto these main frames, completing two pairs of flanges for the bulkhead hatches.The Final Touches
While two flanges form the primary support structure around the hatches, Sven mentions there are two additional pieces required at each end to ensure comprehensive protection. This attention to detail highlights his commitment to producing a durable and reliable design. “Sailing is about finding your path, whether it’s across an ocean or within yourself.” – Sven Yrvind In conclusion, making flanges around bulkhead hatches may seem complex at first glance, but by following Sven Yrvind’s meticulous process, enthusiasts can achieve professional-level results. Remember that the journey of boatbuilding is as rewarding as reaching your destination; it tests one’s patience and dedication. For those seeking to embark on this adventure or simply gain more insight into marine craftsmanship, Sven’s wisdom is invaluable.Sven proceeds to apply glue along one edge of the flange, ensuring a secure bond when clamped into place. He emphasizes that this stage is crucial for maintaining the structural integrity of the flange, which in turn safeguards the living area beneath the canvas when hatches are open.Step 3: Allowing Time to Dry
After securely attaching the first portion of the flange, Sven allows ample time for it to dry before moving forward with additional steps. This patience and precision are key aspects of his successful boatbuilding methods.Step 4: Finishing Touches
Once the flange is fully dried, Sven removes the clamps carefully, ensuring no damage occurs during this process. He then moves on to attaching four more pieces onto these main frames, completing two pairs of flanges for the bulkhead hatches.The Final Touches
While two flanges form the primary support structure around the hatches, Sven mentions there are two additional pieces required at each end to ensure comprehensive protection. This attention to detail highlights his commitment to producing a durable and reliable design. “Sailing is about finding your path, whether it’s across an ocean or within yourself.” – Sven Yrvind In conclusion, making flanges around bulkhead hatches may seem complex at first glance, but by following Sven Yrvind’s meticulous process, enthusiasts can achieve professional-level results. Remember that the journey of boatbuilding is as rewarding as reaching your destination; it tests one’s patience and dedication. For those seeking to embark on this adventure or simply gain more insight into marine craftsmanship, Sven’s wisdom is invaluable.Sven begins by explaining that working on flanges vertically and horizontally is significantly easier than doing so in a flat position. To simplify the process further, he divides the task into two or three steps as suggested by fellow expert “for for.” This approach not only makes it more manageable but also allows for greater precision in crafting each component.Step 2: Applying Glue and Securing
Sven proceeds to apply glue along one edge of the flange, ensuring a secure bond when clamped into place. He emphasizes that this stage is crucial for maintaining the structural integrity of the flange, which in turn safeguards the living area beneath the canvas when hatches are open.Step 3: Allowing Time to Dry
After securely attaching the first portion of the flange, Sven allows ample time for it to dry before moving forward with additional steps. This patience and precision are key aspects of his successful boatbuilding methods.Step 4: Finishing Touches
Once the flange is fully dried, Sven removes the clamps carefully, ensuring no damage occurs during this process. He then moves on to attaching four more pieces onto these main frames, completing two pairs of flanges for the bulkhead hatches.The Final Touches
While two flanges form the primary support structure around the hatches, Sven mentions there are two additional pieces required at each end to ensure comprehensive protection. This attention to detail highlights his commitment to producing a durable and reliable design. “Sailing is about finding your path, whether it’s across an ocean or within yourself.” – Sven Yrvind In conclusion, making flanges around bulkhead hatches may seem complex at first glance, but by following Sven Yrvind’s meticulous process, enthusiasts can achieve professional-level results. Remember that the journey of boatbuilding is as rewarding as reaching your destination; it tests one’s patience and dedication. For those seeking to embark on this adventure or simply gain more insight into marine craftsmanship, Sven’s wisdom is invaluable.Sven Yrvind, a renowned yacht designer and sailor, shares valuable insights on creating flanges around bulkhead hatches for canvas protection in this enlightening video. By following his expert guidance, boat enthusiasts can ensure their living areas remain secure while allowing unhindered access through the hatches.Step 1: Starting with the Flange
Sven begins by explaining that working on flanges vertically and horizontally is significantly easier than doing so in a flat position. To simplify the process further, he divides the task into two or three steps as suggested by fellow expert “for for.” This approach not only makes it more manageable but also allows for greater precision in crafting each component.Step 2: Applying Glue and Securing
Sven proceeds to apply glue along one edge of the flange, ensuring a secure bond when clamped into place. He emphasizes that this stage is crucial for maintaining the structural integrity of the flange, which in turn safeguards the living area beneath the canvas when hatches are open.Step 3: Allowing Time to Dry
After securely attaching the first portion of the flange, Sven allows ample time for it to dry before moving forward with additional steps. This patience and precision are key aspects of his successful boatbuilding methods.Step 4: Finishing Touches
Once the flange is fully dried, Sven removes the clamps carefully, ensuring no damage occurs during this process. He then moves on to attaching four more pieces onto these main frames, completing two pairs of flanges for the bulkhead hatches.The Final Touches
While two flanges form the primary support structure around the hatches, Sven mentions there are two additional pieces required at each end to ensure comprehensive protection. This attention to detail highlights his commitment to producing a durable and reliable design. “Sailing is about finding your path, whether it’s across an ocean or within yourself.” – Sven Yrvind In conclusion, making flanges around bulkhead hatches may seem complex at first glance, but by following Sven Yrvind’s meticulous process, enthusiasts can achieve professional-level results. Remember that the journey of boatbuilding is as rewarding as reaching your destination; it tests one’s patience and dedication. For those seeking to embark on this adventure or simply gain more insight into marine craftsmanship, Sven’s wisdom is invaluable.Making Flanges Around Bulkhead Hatches for Canvas
Sven Yrvind, a renowned yacht designer and sailor, shares valuable insights on creating flanges around bulkhead hatches for canvas protection in this enlightening video. By following his expert guidance, boat enthusiasts can ensure their living areas remain secure while allowing unhindered access through the hatches.Step 1: Starting with the Flange
Sven begins by explaining that working on flanges vertically and horizontally is significantly easier than doing so in a flat position. To simplify the process further, he divides the task into two or three steps as suggested by fellow expert “for for.” This approach not only makes it more manageable but also allows for greater precision in crafting each component.Step 2: Applying Glue and Securing
Sven proceeds to apply glue along one edge of the flange, ensuring a secure bond when clamped into place. He emphasizes that this stage is crucial for maintaining the structural integrity of the flange, which in turn safeguards the living area beneath the canvas when hatches are open.Step 3: Allowing Time to Dry
After securely attaching the first portion of the flange, Sven allows ample time for it to dry before moving forward with additional steps. This patience and precision are key aspects of his successful boatbuilding methods.Step 4: Finishing Touches
Once the flange is fully dried, Sven removes the clamps carefully, ensuring no damage occurs during this process. He then moves on to attaching four more pieces onto these main frames, completing two pairs of flanges for the bulkhead hatches.The Final Touches
While two flanges form the primary support structure around the hatches, Sven mentions there are two additional pieces required at each end to ensure comprehensive protection. This attention to detail highlights his commitment to producing a durable and reliable design. “Sailing is about finding your path, whether it’s across an ocean or within yourself.” – Sven Yrvind In conclusion, making flanges around bulkhead hatches may seem complex at first glance, but by following Sven Yrvind’s meticulous process, enthusiasts can achieve professional-level results. Remember that the journey of boatbuilding is as rewarding as reaching your destination; it tests one’s patience and dedication. For those seeking to embark on this adventure or simply gain more insight into marine craftsmanship, Sven’s wisdom is invaluable.Sven begins by explaining that working on flanges vertically and horizontally is significantly easier than doing so in a flat position. To simplify the process further, he divides the task into two or three steps as suggested by fellow expert “for for.” This approach not only makes it more manageable but also allows for greater precision in crafting each component.Step 2: Applying Glue and Securing
Sven proceeds to apply glue along one edge of the flange, ensuring a secure bond when clamped into place. He emphasizes that this stage is crucial for maintaining the structural integrity of the flange, which in turn safeguards the living area beneath the canvas when hatches are open.Step 3: Allowing Time to Dry
After securely attaching the first portion of the flange, Sven allows ample time for it to dry before moving forward with additional steps. This patience and precision are key aspects of his successful boatbuilding methods.Step 4: Finishing Touches
Once the flange is fully dried, Sven removes the clamps carefully, ensuring no damage occurs during this process. He then moves on to attaching four more pieces onto these main frames, completing two pairs of flanges for the bulkhead hatches.The Final Touches
While two flanges form the primary support structure around the hatches, Sven mentions there are two additional pieces required at each end to ensure comprehensive protection. This attention to detail highlights his commitment to producing a durable and reliable design. “Sailing is about finding your path, whether it’s across an ocean or within yourself.” – Sven Yrvind In conclusion, making flanges around bulkhead hatches may seem complex at first glance, but by following Sven Yrvind’s meticulous process, enthusiasts can achieve professional-level results. Remember that the journey of boatbuilding is as rewarding as reaching your destination; it tests one’s patience and dedication. For those seeking to embark on this adventure or simply gain more insight into marine craftsmanship, Sven’s wisdom is invaluable.After securely attaching the first portion of the flange, Sven allows ample time for it to dry before moving forward with additional steps. This patience and precision are key aspects of his successful boatbuilding methods.Step 4: Finishing Touches
Once the flange is fully dried, Sven removes the clamps carefully, ensuring no damage occurs during this process. He then moves on to attaching four more pieces onto these main frames, completing two pairs of flanges for the bulkhead hatches.The Final Touches
While two flanges form the primary support structure around the hatches, Sven mentions there are two additional pieces required at each end to ensure comprehensive protection. This attention to detail highlights his commitment to producing a durable and reliable design. “Sailing is about finding your path, whether it’s across an ocean or within yourself.” – Sven Yrvind In conclusion, making flanges around bulkhead hatches may seem complex at first glance, but by following Sven Yrvind’s meticulous process, enthusiasts can achieve professional-level results. Remember that the journey of boatbuilding is as rewarding as reaching your destination; it tests one’s patience and dedication. For those seeking to embark on this adventure or simply gain more insight into marine craftsmanship, Sven’s wisdom is invaluable.Sven proceeds to apply glue along one edge of the flange, ensuring a secure bond when clamped into place. He emphasizes that this stage is crucial for maintaining the structural integrity of the flange, which in turn safeguards the living area beneath the canvas when hatches are open.Step 3: Allowing Time to Dry
After securely attaching the first portion of the flange, Sven allows ample time for it to dry before moving forward with additional steps. This patience and precision are key aspects of his successful boatbuilding methods.Step 4: Finishing Touches
Once the flange is fully dried, Sven removes the clamps carefully, ensuring no damage occurs during this process. He then moves on to attaching four more pieces onto these main frames, completing two pairs of flanges for the bulkhead hatches.The Final Touches
While two flanges form the primary support structure around the hatches, Sven mentions there are two additional pieces required at each end to ensure comprehensive protection. This attention to detail highlights his commitment to producing a durable and reliable design. “Sailing is about finding your path, whether it’s across an ocean or within yourself.” – Sven Yrvind In conclusion, making flanges around bulkhead hatches may seem complex at first glance, but by following Sven Yrvind’s meticulous process, enthusiasts can achieve professional-level results. Remember that the journey of boatbuilding is as rewarding as reaching your destination; it tests one’s patience and dedication. For those seeking to embark on this adventure or simply gain more insight into marine craftsmanship, Sven’s wisdom is invaluable.Sven begins by explaining that working on flanges vertically and horizontally is significantly easier than doing so in a flat position. To simplify the process further, he divides the task into two or three steps as suggested by fellow expert “for for.” This approach not only makes it more manageable but also allows for greater precision in crafting each component.Step 2: Applying Glue and Securing
Sven proceeds to apply glue along one edge of the flange, ensuring a secure bond when clamped into place. He emphasizes that this stage is crucial for maintaining the structural integrity of the flange, which in turn safeguards the living area beneath the canvas when hatches are open.Step 3: Allowing Time to Dry
After securely attaching the first portion of the flange, Sven allows ample time for it to dry before moving forward with additional steps. This patience and precision are key aspects of his successful boatbuilding methods.Step 4: Finishing Touches
Once the flange is fully dried, Sven removes the clamps carefully, ensuring no damage occurs during this process. He then moves on to attaching four more pieces onto these main frames, completing two pairs of flanges for the bulkhead hatches.The Final Touches
While two flanges form the primary support structure around the hatches, Sven mentions there are two additional pieces required at each end to ensure comprehensive protection. This attention to detail highlights his commitment to producing a durable and reliable design. “Sailing is about finding your path, whether it’s across an ocean or within yourself.” – Sven Yrvind In conclusion, making flanges around bulkhead hatches may seem complex at first glance, but by following Sven Yrvind’s meticulous process, enthusiasts can achieve professional-level results. Remember that the journey of boatbuilding is as rewarding as reaching your destination; it tests one’s patience and dedication. For those seeking to embark on this adventure or simply gain more insight into marine craftsmanship, Sven’s wisdom is invaluable.Sven Yrvind, a renowned yacht designer and sailor, shares valuable insights on creating flanges around bulkhead hatches for canvas protection in this enlightening video. By following his expert guidance, boat enthusiasts can ensure their living areas remain secure while allowing unhindered access through the hatches.Step 1: Starting with the Flange
Sven begins by explaining that working on flanges vertically and horizontally is significantly easier than doing so in a flat position. To simplify the process further, he divides the task into two or three steps as suggested by fellow expert “for for.” This approach not only makes it more manageable but also allows for greater precision in crafting each component.Step 2: Applying Glue and Securing
Sven proceeds to apply glue along one edge of the flange, ensuring a secure bond when clamped into place. He emphasizes that this stage is crucial for maintaining the structural integrity of the flange, which in turn safeguards the living area beneath the canvas when hatches are open.Step 3: Allowing Time to Dry
After securely attaching the first portion of the flange, Sven allows ample time for it to dry before moving forward with additional steps. This patience and precision are key aspects of his successful boatbuilding methods.Step 4: Finishing Touches
Once the flange is fully dried, Sven removes the clamps carefully, ensuring no damage occurs during this process. He then moves on to attaching four more pieces onto these main frames, completing two pairs of flanges for the bulkhead hatches.The Final Touches
While two flanges form the primary support structure around the hatches, Sven mentions there are two additional pieces required at each end to ensure comprehensive protection. This attention to detail highlights his commitment to producing a durable and reliable design. “Sailing is about finding your path, whether it’s across an ocean or within yourself.” – Sven Yrvind In conclusion, making flanges around bulkhead hatches may seem complex at first glance, but by following Sven Yrvind’s meticulous process, enthusiasts can achieve professional-level results. Remember that the journey of boatbuilding is as rewarding as reaching your destination; it tests one’s patience and dedication. For those seeking to embark on this adventure or simply gain more insight into marine craftsmanship, Sven’s wisdom is invaluable.Making Flanges Around Bulkhead Hatches for Canvas
Sven Yrvind, a renowned yacht designer and sailor, shares valuable insights on creating flanges around bulkhead hatches for canvas protection in this enlightening video. By following his expert guidance, boat enthusiasts can ensure their living areas remain secure while allowing unhindered access through the hatches.Step 1: Starting with the Flange
Sven begins by explaining that working on flanges vertically and horizontally is significantly easier than doing so in a flat position. To simplify the process further, he divides the task into two or three steps as suggested by fellow expert “for for.” This approach not only makes it more manageable but also allows for greater precision in crafting each component.Step 2: Applying Glue and Securing
Sven proceeds to apply glue along one edge of the flange, ensuring a secure bond when clamped into place. He emphasizes that this stage is crucial for maintaining the structural integrity of the flange, which in turn safeguards the living area beneath the canvas when hatches are open.Step 3: Allowing Time to Dry
After securely attaching the first portion of the flange, Sven allows ample time for it to dry before moving forward with additional steps. This patience and precision are key aspects of his successful boatbuilding methods.Step 4: Finishing Touches
Once the flange is fully dried, Sven removes the clamps carefully, ensuring no damage occurs during this process. He then moves on to attaching four more pieces onto these main frames, completing two pairs of flanges for the bulkhead hatches.The Final Touches
While two flanges form the primary support structure around the hatches, Sven mentions there are two additional pieces required at each end to ensure comprehensive protection. This attention to detail highlights his commitment to producing a durable and reliable design. “Sailing is about finding your path, whether it’s across an ocean or within yourself.” – Sven Yrvind In conclusion, making flanges around bulkhead hatches may seem complex at first glance, but by following Sven Yrvind’s meticulous process, enthusiasts can achieve professional-level results. Remember that the journey of boatbuilding is as rewarding as reaching your destination; it tests one’s patience and dedication. For those seeking to embark on this adventure or simply gain more insight into marine craftsmanship, Sven’s wisdom is invaluable.Once the flange is fully dried, Sven removes the clamps carefully, ensuring no damage occurs during this process. He then moves on to attaching four more pieces onto these main frames, completing two pairs of flanges for the bulkhead hatches.The Final Touches
While two flanges form the primary support structure around the hatches, Sven mentions there are two additional pieces required at each end to ensure comprehensive protection. This attention to detail highlights his commitment to producing a durable and reliable design. “Sailing is about finding your path, whether it’s across an ocean or within yourself.” – Sven Yrvind In conclusion, making flanges around bulkhead hatches may seem complex at first glance, but by following Sven Yrvind’s meticulous process, enthusiasts can achieve professional-level results. Remember that the journey of boatbuilding is as rewarding as reaching your destination; it tests one’s patience and dedication. For those seeking to embark on this adventure or simply gain more insight into marine craftsmanship, Sven’s wisdom is invaluable.After securely attaching the first portion of the flange, Sven allows ample time for it to dry before moving forward with additional steps. This patience and precision are key aspects of his successful boatbuilding methods.Step 4: Finishing Touches
Once the flange is fully dried, Sven removes the clamps carefully, ensuring no damage occurs during this process. He then moves on to attaching four more pieces onto these main frames, completing two pairs of flanges for the bulkhead hatches.The Final Touches
While two flanges form the primary support structure around the hatches, Sven mentions there are two additional pieces required at each end to ensure comprehensive protection. This attention to detail highlights his commitment to producing a durable and reliable design. “Sailing is about finding your path, whether it’s across an ocean or within yourself.” – Sven Yrvind In conclusion, making flanges around bulkhead hatches may seem complex at first glance, but by following Sven Yrvind’s meticulous process, enthusiasts can achieve professional-level results. Remember that the journey of boatbuilding is as rewarding as reaching your destination; it tests one’s patience and dedication. For those seeking to embark on this adventure or simply gain more insight into marine craftsmanship, Sven’s wisdom is invaluable.Sven proceeds to apply glue along one edge of the flange, ensuring a secure bond when clamped into place. He emphasizes that this stage is crucial for maintaining the structural integrity of the flange, which in turn safeguards the living area beneath the canvas when hatches are open.Step 3: Allowing Time to Dry
After securely attaching the first portion of the flange, Sven allows ample time for it to dry before moving forward with additional steps. This patience and precision are key aspects of his successful boatbuilding methods.Step 4: Finishing Touches
Once the flange is fully dried, Sven removes the clamps carefully, ensuring no damage occurs during this process. He then moves on to attaching four more pieces onto these main frames, completing two pairs of flanges for the bulkhead hatches.The Final Touches
While two flanges form the primary support structure around the hatches, Sven mentions there are two additional pieces required at each end to ensure comprehensive protection. This attention to detail highlights his commitment to producing a durable and reliable design. “Sailing is about finding your path, whether it’s across an ocean or within yourself.” – Sven Yrvind In conclusion, making flanges around bulkhead hatches may seem complex at first glance, but by following Sven Yrvind’s meticulous process, enthusiasts can achieve professional-level results. Remember that the journey of boatbuilding is as rewarding as reaching your destination; it tests one’s patience and dedication. For those seeking to embark on this adventure or simply gain more insight into marine craftsmanship, Sven’s wisdom is invaluable.Sven begins by explaining that working on flanges vertically and horizontally is significantly easier than doing so in a flat position. To simplify the process further, he divides the task into two or three steps as suggested by fellow expert “for for.” This approach not only makes it more manageable but also allows for greater precision in crafting each component.Step 2: Applying Glue and Securing
Sven proceeds to apply glue along one edge of the flange, ensuring a secure bond when clamped into place. He emphasizes that this stage is crucial for maintaining the structural integrity of the flange, which in turn safeguards the living area beneath the canvas when hatches are open.Step 3: Allowing Time to Dry
After securely attaching the first portion of the flange, Sven allows ample time for it to dry before moving forward with additional steps. This patience and precision are key aspects of his successful boatbuilding methods.Step 4: Finishing Touches
Once the flange is fully dried, Sven removes the clamps carefully, ensuring no damage occurs during this process. He then moves on to attaching four more pieces onto these main frames, completing two pairs of flanges for the bulkhead hatches.The Final Touches
While two flanges form the primary support structure around the hatches, Sven mentions there are two additional pieces required at each end to ensure comprehensive protection. This attention to detail highlights his commitment to producing a durable and reliable design. “Sailing is about finding your path, whether it’s across an ocean or within yourself.” – Sven Yrvind In conclusion, making flanges around bulkhead hatches may seem complex at first glance, but by following Sven Yrvind’s meticulous process, enthusiasts can achieve professional-level results. Remember that the journey of boatbuilding is as rewarding as reaching your destination; it tests one’s patience and dedication. For those seeking to embark on this adventure or simply gain more insight into marine craftsmanship, Sven’s wisdom is invaluable.Sven Yrvind, a renowned yacht designer and sailor, shares valuable insights on creating flanges around bulkhead hatches for canvas protection in this enlightening video. By following his expert guidance, boat enthusiasts can ensure their living areas remain secure while allowing unhindered access through the hatches.Step 1: Starting with the Flange
Sven begins by explaining that working on flanges vertically and horizontally is significantly easier than doing so in a flat position. To simplify the process further, he divides the task into two or three steps as suggested by fellow expert “for for.” This approach not only makes it more manageable but also allows for greater precision in crafting each component.Step 2: Applying Glue and Securing
Sven proceeds to apply glue along one edge of the flange, ensuring a secure bond when clamped into place. He emphasizes that this stage is crucial for maintaining the structural integrity of the flange, which in turn safeguards the living area beneath the canvas when hatches are open.Step 3: Allowing Time to Dry
After securely attaching the first portion of the flange, Sven allows ample time for it to dry before moving forward with additional steps. This patience and precision are key aspects of his successful boatbuilding methods.Step 4: Finishing Touches
Once the flange is fully dried, Sven removes the clamps carefully, ensuring no damage occurs during this process. He then moves on to attaching four more pieces onto these main frames, completing two pairs of flanges for the bulkhead hatches.The Final Touches
While two flanges form the primary support structure around the hatches, Sven mentions there are two additional pieces required at each end to ensure comprehensive protection. This attention to detail highlights his commitment to producing a durable and reliable design. “Sailing is about finding your path, whether it’s across an ocean or within yourself.” – Sven Yrvind In conclusion, making flanges around bulkhead hatches may seem complex at first glance, but by following Sven Yrvind’s meticulous process, enthusiasts can achieve professional-level results. Remember that the journey of boatbuilding is as rewarding as reaching your destination; it tests one’s patience and dedication. For those seeking to embark on this adventure or simply gain more insight into marine craftsmanship, Sven’s wisdom is invaluable.Making Flanges Around Bulkhead Hatches for Canvas
Sven Yrvind, a renowned yacht designer and sailor, shares valuable insights on creating flanges around bulkhead hatches for canvas protection in this enlightening video. By following his expert guidance, boat enthusiasts can ensure their living areas remain secure while allowing unhindered access through the hatches.Step 1: Starting with the Flange
Sven begins by explaining that working on flanges vertically and horizontally is significantly easier than doing so in a flat position. To simplify the process further, he divides the task into two or three steps as suggested by fellow expert “for for.” This approach not only makes it more manageable but also allows for greater precision in crafting each component.Step 2: Applying Glue and Securing
Sven proceeds to apply glue along one edge of the flange, ensuring a secure bond when clamped into place. He emphasizes that this stage is crucial for maintaining the structural integrity of the flange, which in turn safeguards the living area beneath the canvas when hatches are open.Step 3: Allowing Time to Dry
After securely attaching the first portion of the flange, Sven allows ample time for it to dry before moving forward with additional steps. This patience and precision are key aspects of his successful boatbuilding methods.Step 4: Finishing Touches
Once the flange is fully dried, Sven removes the clamps carefully, ensuring no damage occurs during this process. He then moves on to attaching four more pieces onto these main frames, completing two pairs of flanges for the bulkhead hatches.The Final Touches
While two flanges form the primary support structure around the hatches, Sven mentions there are two additional pieces required at each end to ensure comprehensive protection. This attention to detail highlights his commitment to producing a durable and reliable design. “Sailing is about finding your path, whether it’s across an ocean or within yourself.” – Sven Yrvind In conclusion, making flanges around bulkhead hatches may seem complex at first glance, but by following Sven Yrvind’s meticulous process, enthusiasts can achieve professional-level results. Remember that the journey of boatbuilding is as rewarding as reaching your destination; it tests one’s patience and dedication. For those seeking to embark on this adventure or simply gain more insight into marine craftsmanship, Sven’s wisdom is invaluable.Sven Yrvind, a renowned yacht designer and sailor, shares valuable insights on creating flanges around bulkhead hatches for canvas protection in this enlightening video. By following his expert guidance, boat enthusiasts can ensure their living areas remain secure while allowing unhindered access through the hatches.Step 1: Starting with the Flange
Sven begins by explaining that working on flanges vertically and horizontally is significantly easier than doing so in a flat position. To simplify the process further, he divides the task into two or three steps as suggested by fellow expert “for for.” This approach not only makes it more manageable but also allows for greater precision in crafting each component.Step 2: Applying Glue and Securing
Sven proceeds to apply glue along one edge of the flange, ensuring a secure bond when clamped into place. He emphasizes that this stage is crucial for maintaining the structural integrity of the flange, which in turn safeguards the living area beneath the canvas when hatches are open.Step 3: Allowing Time to Dry
After securely attaching the first portion of the flange, Sven allows ample time for it to dry before moving forward with additional steps. This patience and precision are key aspects of his successful boatbuilding methods.Step 4: Finishing Touches
Once the flange is fully dried, Sven removes the clamps carefully, ensuring no damage occurs during this process. He then moves on to attaching four more pieces onto these main frames, completing two pairs of flanges for the bulkhead hatches.The Final Touches
While two flanges form the primary support structure around the hatches, Sven mentions there are two additional pieces required at each end to ensure comprehensive protection. This attention to detail highlights his commitment to producing a durable and reliable design. “Sailing is about finding your path, whether it’s across an ocean or within yourself.” – Sven Yrvind In conclusion, making flanges around bulkhead hatches may seem complex at first glance, but by following Sven Yrvind’s meticulous process, enthusiasts can achieve professional-level results. Remember that the journey of boatbuilding is as rewarding as reaching your destination; it tests one’s patience and dedication. For those seeking to embark on this adventure or simply gain more insight into marine craftsmanship, Sven’s wisdom is invaluable.After securely attaching the first portion of the flange, Sven allows ample time for it to dry before moving forward with additional steps. This patience and precision are key aspects of his successful boatbuilding methods.Step 4: Finishing Touches
Once the flange is fully dried, Sven removes the clamps carefully, ensuring no damage occurs during this process. He then moves on to attaching four more pieces onto these main frames, completing two pairs of flanges for the bulkhead hatches.The Final Touches
While two flanges form the primary support structure around the hatches, Sven mentions there are two additional pieces required at each end to ensure comprehensive protection. This attention to detail highlights his commitment to producing a durable and reliable design. “Sailing is about finding your path, whether it’s across an ocean or within yourself.” – Sven Yrvind In conclusion, making flanges around bulkhead hatches may seem complex at first glance, but by following Sven Yrvind’s meticulous process, enthusiasts can achieve professional-level results. Remember that the journey of boatbuilding is as rewarding as reaching your destination; it tests one’s patience and dedication. For those seeking to embark on this adventure or simply gain more insight into marine craftsmanship, Sven’s wisdom is invaluable.Sven proceeds to apply glue along one edge of the flange, ensuring a secure bond when clamped into place. He emphasizes that this stage is crucial for maintaining the structural integrity of the flange, which in turn safeguards the living area beneath the canvas when hatches are open.Step 3: Allowing Time to Dry
After securely attaching the first portion of the flange, Sven allows ample time for it to dry before moving forward with additional steps. This patience and precision are key aspects of his successful boatbuilding methods.Step 4: Finishing Touches
Once the flange is fully dried, Sven removes the clamps carefully, ensuring no damage occurs during this process. He then moves on to attaching four more pieces onto these main frames, completing two pairs of flanges for the bulkhead hatches.The Final Touches
While two flanges form the primary support structure around the hatches, Sven mentions there are two additional pieces required at each end to ensure comprehensive protection. This attention to detail highlights his commitment to producing a durable and reliable design. “Sailing is about finding your path, whether it’s across an ocean or within yourself.” – Sven Yrvind In conclusion, making flanges around bulkhead hatches may seem complex at first glance, but by following Sven Yrvind’s meticulous process, enthusiasts can achieve professional-level results. Remember that the journey of boatbuilding is as rewarding as reaching your destination; it tests one’s patience and dedication. For those seeking to embark on this adventure or simply gain more insight into marine craftsmanship, Sven’s wisdom is invaluable.Sven begins by explaining that working on flanges vertically and horizontally is significantly easier than doing so in a flat position. To simplify the process further, he divides the task into two or three steps as suggested by fellow expert “for for.” This approach not only makes it more manageable but also allows for greater precision in crafting each component.Step 2: Applying Glue and Securing
Sven proceeds to apply glue along one edge of the flange, ensuring a secure bond when clamped into place. He emphasizes that this stage is crucial for maintaining the structural integrity of the flange, which in turn safeguards the living area beneath the canvas when hatches are open.Step 3: Allowing Time to Dry
After securely attaching the first portion of the flange, Sven allows ample time for it to dry before moving forward with additional steps. This patience and precision are key aspects of his successful boatbuilding methods.Step 4: Finishing Touches
Once the flange is fully dried, Sven removes the clamps carefully, ensuring no damage occurs during this process. He then moves on to attaching four more pieces onto these main frames, completing two pairs of flanges for the bulkhead hatches.The Final Touches
While two flanges form the primary support structure around the hatches, Sven mentions there are two additional pieces required at each end to ensure comprehensive protection. This attention to detail highlights his commitment to producing a durable and reliable design. “Sailing is about finding your path, whether it’s across an ocean or within yourself.” – Sven Yrvind In conclusion, making flanges around bulkhead hatches may seem complex at first glance, but by following Sven Yrvind’s meticulous process, enthusiasts can achieve professional-level results. Remember that the journey of boatbuilding is as rewarding as reaching your destination; it tests one’s patience and dedication. For those seeking to embark on this adventure or simply gain more insight into marine craftsmanship, Sven’s wisdom is invaluable.Sven Yrvind, a renowned yacht designer and sailor, shares valuable insights on creating flanges around bulkhead hatches for canvas protection in this enlightening video. By following his expert guidance, boat enthusiasts can ensure their living areas remain secure while allowing unhindered access through the hatches.Step 1: Starting with the Flange
Sven begins by explaining that working on flanges vertically and horizontally is significantly easier than doing so in a flat position. To simplify the process further, he divides the task into two or three steps as suggested by fellow expert “for for.” This approach not only makes it more manageable but also allows for greater precision in crafting each component.Step 2: Applying Glue and Securing
Sven proceeds to apply glue along one edge of the flange, ensuring a secure bond when clamped into place. He emphasizes that this stage is crucial for maintaining the structural integrity of the flange, which in turn safeguards the living area beneath the canvas when hatches are open.Step 3: Allowing Time to Dry
After securely attaching the first portion of the flange, Sven allows ample time for it to dry before moving forward with additional steps. This patience and precision are key aspects of his successful boatbuilding methods.Step 4: Finishing Touches
Once the flange is fully dried, Sven removes the clamps carefully, ensuring no damage occurs during this process. He then moves on to attaching four more pieces onto these main frames, completing two pairs of flanges for the bulkhead hatches.The Final Touches
While two flanges form the primary support structure around the hatches, Sven mentions there are two additional pieces required at each end to ensure comprehensive protection. This attention to detail highlights his commitment to producing a durable and reliable design. “Sailing is about finding your path, whether it’s across an ocean or within yourself.” – Sven Yrvind In conclusion, making flanges around bulkhead hatches may seem complex at first glance, but by following Sven Yrvind’s meticulous process, enthusiasts can achieve professional-level results. Remember that the journey of boatbuilding is as rewarding as reaching your destination; it tests one’s patience and dedication. For those seeking to embark on this adventure or simply gain more insight into marine craftsmanship, Sven’s wisdom is invaluable.Making Flanges Around Bulkhead Hatches for Canvas
Sven Yrvind, a renowned yacht designer and sailor, shares valuable insights on creating flanges around bulkhead hatches for canvas protection in this enlightening video. By following his expert guidance, boat enthusiasts can ensure their living areas remain secure while allowing unhindered access through the hatches.Step 1: Starting with the Flange
Sven begins by explaining that working on flanges vertically and horizontally is significantly easier than doing so in a flat position. To simplify the process further, he divides the task into two or three steps as suggested by fellow expert “for for.” This approach not only makes it more manageable but also allows for greater precision in crafting each component.Step 2: Applying Glue and Securing
Sven proceeds to apply glue along one edge of the flange, ensuring a secure bond when clamped into place. He emphasizes that this stage is crucial for maintaining the structural integrity of the flange, which in turn safeguards the living area beneath the canvas when hatches are open.Step 3: Allowing Time to Dry
After securely attaching the first portion of the flange, Sven allows ample time for it to dry before moving forward with additional steps. This patience and precision are key aspects of his successful boatbuilding methods.Step 4: Finishing Touches
Once the flange is fully dried, Sven removes the clamps carefully, ensuring no damage occurs during this process. He then moves on to attaching four more pieces onto these main frames, completing two pairs of flanges for the bulkhead hatches.The Final Touches
While two flanges form the primary support structure around the hatches, Sven mentions there are two additional pieces required at each end to ensure comprehensive protection. This attention to detail highlights his commitment to producing a durable and reliable design. “Sailing is about finding your path, whether it’s across an ocean or within yourself.” – Sven Yrvind In conclusion, making flanges around bulkhead hatches may seem complex at first glance, but by following Sven Yrvind’s meticulous process, enthusiasts can achieve professional-level results. Remember that the journey of boatbuilding is as rewarding as reaching your destination; it tests one’s patience and dedication. For those seeking to embark on this adventure or simply gain more insight into marine craftsmanship, Sven’s wisdom is invaluable.Once the flange is fully dried, Sven removes the clamps carefully, ensuring no damage occurs during this process. He then moves on to attaching four more pieces onto these main frames, completing two pairs of flanges for the bulkhead hatches.The Final Touches
While two flanges form the primary support structure around the hatches, Sven mentions there are two additional pieces required at each end to ensure comprehensive protection. This attention to detail highlights his commitment to producing a durable and reliable design. “Sailing is about finding your path, whether it’s across an ocean or within yourself.” – Sven Yrvind In conclusion, making flanges around bulkhead hatches may seem complex at first glance, but by following Sven Yrvind’s meticulous process, enthusiasts can achieve professional-level results. Remember that the journey of boatbuilding is as rewarding as reaching your destination; it tests one’s patience and dedication. For those seeking to embark on this adventure or simply gain more insight into marine craftsmanship, Sven’s wisdom is invaluable.After securely attaching the first portion of the flange, Sven allows ample time for it to dry before moving forward with additional steps. This patience and precision are key aspects of his successful boatbuilding methods.Step 4: Finishing Touches
Once the flange is fully dried, Sven removes the clamps carefully, ensuring no damage occurs during this process. He then moves on to attaching four more pieces onto these main frames, completing two pairs of flanges for the bulkhead hatches.The Final Touches
While two flanges form the primary support structure around the hatches, Sven mentions there are two additional pieces required at each end to ensure comprehensive protection. This attention to detail highlights his commitment to producing a durable and reliable design. “Sailing is about finding your path, whether it’s across an ocean or within yourself.” – Sven Yrvind In conclusion, making flanges around bulkhead hatches may seem complex at first glance, but by following Sven Yrvind’s meticulous process, enthusiasts can achieve professional-level results. Remember that the journey of boatbuilding is as rewarding as reaching your destination; it tests one’s patience and dedication. For those seeking to embark on this adventure or simply gain more insight into marine craftsmanship, Sven’s wisdom is invaluable.Sven proceeds to apply glue along one edge of the flange, ensuring a secure bond when clamped into place. He emphasizes that this stage is crucial for maintaining the structural integrity of the flange, which in turn safeguards the living area beneath the canvas when hatches are open.Step 3: Allowing Time to Dry
After securely attaching the first portion of the flange, Sven allows ample time for it to dry before moving forward with additional steps. This patience and precision are key aspects of his successful boatbuilding methods.Step 4: Finishing Touches
Once the flange is fully dried, Sven removes the clamps carefully, ensuring no damage occurs during this process. He then moves on to attaching four more pieces onto these main frames, completing two pairs of flanges for the bulkhead hatches.The Final Touches
While two flanges form the primary support structure around the hatches, Sven mentions there are two additional pieces required at each end to ensure comprehensive protection. This attention to detail highlights his commitment to producing a durable and reliable design. “Sailing is about finding your path, whether it’s across an ocean or within yourself.” – Sven Yrvind In conclusion, making flanges around bulkhead hatches may seem complex at first glance, but by following Sven Yrvind’s meticulous process, enthusiasts can achieve professional-level results. Remember that the journey of boatbuilding is as rewarding as reaching your destination; it tests one’s patience and dedication. For those seeking to embark on this adventure or simply gain more insight into marine craftsmanship, Sven’s wisdom is invaluable.Sven begins by explaining that working on flanges vertically and horizontally is significantly easier than doing so in a flat position. To simplify the process further, he divides the task into two or three steps as suggested by fellow expert “for for.” This approach not only makes it more manageable but also allows for greater precision in crafting each component.Step 2: Applying Glue and Securing
Sven proceeds to apply glue along one edge of the flange, ensuring a secure bond when clamped into place. He emphasizes that this stage is crucial for maintaining the structural integrity of the flange, which in turn safeguards the living area beneath the canvas when hatches are open.Step 3: Allowing Time to Dry
After securely attaching the first portion of the flange, Sven allows ample time for it to dry before moving forward with additional steps. This patience and precision are key aspects of his successful boatbuilding methods.Step 4: Finishing Touches
Once the flange is fully dried, Sven removes the clamps carefully, ensuring no damage occurs during this process. He then moves on to attaching four more pieces onto these main frames, completing two pairs of flanges for the bulkhead hatches.The Final Touches
While two flanges form the primary support structure around the hatches, Sven mentions there are two additional pieces required at each end to ensure comprehensive protection. This attention to detail highlights his commitment to producing a durable and reliable design. “Sailing is about finding your path, whether it’s across an ocean or within yourself.” – Sven Yrvind In conclusion, making flanges around bulkhead hatches may seem complex at first glance, but by following Sven Yrvind’s meticulous process, enthusiasts can achieve professional-level results. Remember that the journey of boatbuilding is as rewarding as reaching your destination; it tests one’s patience and dedication. For those seeking to embark on this adventure or simply gain more insight into marine craftsmanship, Sven’s wisdom is invaluable.Sven Yrvind, a renowned yacht designer and sailor, shares valuable insights on creating flanges around bulkhead hatches for canvas protection in this enlightening video. By following his expert guidance, boat enthusiasts can ensure their living areas remain secure while allowing unhindered access through the hatches.Step 1: Starting with the Flange
Sven begins by explaining that working on flanges vertically and horizontally is significantly easier than doing so in a flat position. To simplify the process further, he divides the task into two or three steps as suggested by fellow expert “for for.” This approach not only makes it more manageable but also allows for greater precision in crafting each component.Step 2: Applying Glue and Securing
Sven proceeds to apply glue along one edge of the flange, ensuring a secure bond when clamped into place. He emphasizes that this stage is crucial for maintaining the structural integrity of the flange, which in turn safeguards the living area beneath the canvas when hatches are open.Step 3: Allowing Time to Dry
After securely attaching the first portion of the flange, Sven allows ample time for it to dry before moving forward with additional steps. This patience and precision are key aspects of his successful boatbuilding methods.Step 4: Finishing Touches
Once the flange is fully dried, Sven removes the clamps carefully, ensuring no damage occurs during this process. He then moves on to attaching four more pieces onto these main frames, completing two pairs of flanges for the bulkhead hatches.The Final Touches
While two flanges form the primary support structure around the hatches, Sven mentions there are two additional pieces required at each end to ensure comprehensive protection. This attention to detail highlights his commitment to producing a durable and reliable design. “Sailing is about finding your path, whether it’s across an ocean or within yourself.” – Sven Yrvind In conclusion, making flanges around bulkhead hatches may seem complex at first glance, but by following Sven Yrvind’s meticulous process, enthusiasts can achieve professional-level results. Remember that the journey of boatbuilding is as rewarding as reaching your destination; it tests one’s patience and dedication. For those seeking to embark on this adventure or simply gain more insight into marine craftsmanship, Sven’s wisdom is invaluable.Making Flanges Around Bulkhead Hatches for Canvas
Sven Yrvind, a renowned yacht designer and sailor, shares valuable insights on creating flanges around bulkhead hatches for canvas protection in this enlightening video. By following his expert guidance, boat enthusiasts can ensure their living areas remain secure while allowing unhindered access through the hatches.Step 1: Starting with the Flange
Sven begins by explaining that working on flanges vertically and horizontally is significantly easier than doing so in a flat position. To simplify the process further, he divides the task into two or three steps as suggested by fellow expert “for for.” This approach not only makes it more manageable but also allows for greater precision in crafting each component.Step 2: Applying Glue and Securing
Sven proceeds to apply glue along one edge of the flange, ensuring a secure bond when clamped into place. He emphasizes that this stage is crucial for maintaining the structural integrity of the flange, which in turn safeguards the living area beneath the canvas when hatches are open.Step 3: Allowing Time to Dry
After securely attaching the first portion of the flange, Sven allows ample time for it to dry before moving forward with additional steps. This patience and precision are key aspects of his successful boatbuilding methods.Step 4: Finishing Touches
Once the flange is fully dried, Sven removes the clamps carefully, ensuring no damage occurs during this process. He then moves on to attaching four more pieces onto these main frames, completing two pairs of flanges for the bulkhead hatches.The Final Touches
While two flanges form the primary support structure around the hatches, Sven mentions there are two additional pieces required at each end to ensure comprehensive protection. This attention to detail highlights his commitment to producing a durable and reliable design. “Sailing is about finding your path, whether it’s across an ocean or within yourself.” – Sven Yrvind In conclusion, making flanges around bulkhead hatches may seem complex at first glance, but by following Sven Yrvind’s meticulous process, enthusiasts can achieve professional-level results. Remember that the journey of boatbuilding is as rewarding as reaching your destination; it tests one’s patience and dedication. For those seeking to embark on this adventure or simply gain more insight into marine craftsmanship, Sven’s wisdom is invaluable.Making Flanges Around Bulkhead Hatches for Canvas
Sven Yrvind, a renowned yacht designer and sailor, shares valuable insights on creating flanges around bulkhead hatches for canvas protection in this enlightening video. By following his expert guidance, boat enthusiasts can ensure their living areas remain secure while allowing unhindered access through the hatches.Step 1: Starting with the Flange
Sven begins by explaining that working on flanges vertically and horizontally is significantly easier than doing so in a flat position. To simplify the process further, he divides the task into two or three steps as suggested by fellow expert “for for.” This approach not only makes it more manageable but also allows for greater precision in crafting each component.Step 2: Applying Glue and Securing
Sven proceeds to apply glue along one edge of the flange, ensuring a secure bond when clamped into place. He emphasizes that this stage is crucial for maintaining the structural integrity of the flange, which in turn safeguards the living area beneath the canvas when hatches are open.Step 3: Allowing Time to Dry
After securely attaching the first portion of the flange, Sven allows ample time for it to dry before moving forward with additional steps. This patience and precision are key aspects of his successful boatbuilding methods.Step 4: Finishing Touches
Once the flange is fully dried, Sven removes the clamps carefully, ensuring no damage occurs during this process. He then moves on to attaching four more pieces onto these main frames, completing two pairs of flanges for the bulkhead hatches.The Final Touches
While two flanges form the primary support structure around the hatches, Sven mentions there are two additional pieces required at each end to ensure comprehensive protection. This attention to detail highlights his commitment to producing a durable and reliable design. “Sailing is about finding your path, whether it’s across an ocean or within yourself.” – Sven Yrvind In conclusion, making flanges around bulkhead hatches may seem complex at first glance, but by following Sven Yrvind’s meticulous process, enthusiasts can achieve professional-level results. Remember that the journey of boatbuilding is as rewarding as reaching your destination; it tests one’s patience and dedication. For those seeking to embark on this adventure or simply gain more insight into marine craftsmanship, Sven’s wisdom is invaluable.After securely attaching the first portion of the flange, Sven allows ample time for it to dry before moving forward with additional steps. This patience and precision are key aspects of his successful boatbuilding methods.Step 4: Finishing Touches
Once the flange is fully dried, Sven removes the clamps carefully, ensuring no damage occurs during this process. He then moves on to attaching four more pieces onto these main frames, completing two pairs of flanges for the bulkhead hatches.The Final Touches
While two flanges form the primary support structure around the hatches, Sven mentions there are two additional pieces required at each end to ensure comprehensive protection. This attention to detail highlights his commitment to producing a durable and reliable design. “Sailing is about finding your path, whether it’s across an ocean or within yourself.” – Sven Yrvind In conclusion, making flanges around bulkhead hatches may seem complex at first glance, but by following Sven Yrvind’s meticulous process, enthusiasts can achieve professional-level results. Remember that the journey of boatbuilding is as rewarding as reaching your destination; it tests one’s patience and dedication. For those seeking to embark on this adventure or simply gain more insight into marine craftsmanship, Sven’s wisdom is invaluable.Sven proceeds to apply glue along one edge of the flange, ensuring a secure bond when clamped into place. He emphasizes that this stage is crucial for maintaining the structural integrity of the flange, which in turn safeguards the living area beneath the canvas when hatches are open.Step 3: Allowing Time to Dry
After securely attaching the first portion of the flange, Sven allows ample time for it to dry before moving forward with additional steps. This patience and precision are key aspects of his successful boatbuilding methods.Step 4: Finishing Touches
Once the flange is fully dried, Sven removes the clamps carefully, ensuring no damage occurs during this process. He then moves on to attaching four more pieces onto these main frames, completing two pairs of flanges for the bulkhead hatches.The Final Touches
While two flanges form the primary support structure around the hatches, Sven mentions there are two additional pieces required at each end to ensure comprehensive protection. This attention to detail highlights his commitment to producing a durable and reliable design. “Sailing is about finding your path, whether it’s across an ocean or within yourself.” – Sven Yrvind In conclusion, making flanges around bulkhead hatches may seem complex at first glance, but by following Sven Yrvind’s meticulous process, enthusiasts can achieve professional-level results. Remember that the journey of boatbuilding is as rewarding as reaching your destination; it tests one’s patience and dedication. For those seeking to embark on this adventure or simply gain more insight into marine craftsmanship, Sven’s wisdom is invaluable.Sven begins by explaining that working on flanges vertically and horizontally is significantly easier than doing so in a flat position. To simplify the process further, he divides the task into two or three steps as suggested by fellow expert “for for.” This approach not only makes it more manageable but also allows for greater precision in crafting each component.Step 2: Applying Glue and Securing
Sven proceeds to apply glue along one edge of the flange, ensuring a secure bond when clamped into place. He emphasizes that this stage is crucial for maintaining the structural integrity of the flange, which in turn safeguards the living area beneath the canvas when hatches are open.Step 3: Allowing Time to Dry
After securely attaching the first portion of the flange, Sven allows ample time for it to dry before moving forward with additional steps. This patience and precision are key aspects of his successful boatbuilding methods.Step 4: Finishing Touches
Once the flange is fully dried, Sven removes the clamps carefully, ensuring no damage occurs during this process. He then moves on to attaching four more pieces onto these main frames, completing two pairs of flanges for the bulkhead hatches.The Final Touches
While two flanges form the primary support structure around the hatches, Sven mentions there are two additional pieces required at each end to ensure comprehensive protection. This attention to detail highlights his commitment to producing a durable and reliable design. “Sailing is about finding your path, whether it’s across an ocean or within yourself.” – Sven Yrvind In conclusion, making flanges around bulkhead hatches may seem complex at first glance, but by following Sven Yrvind’s meticulous process, enthusiasts can achieve professional-level results. Remember that the journey of boatbuilding is as rewarding as reaching your destination; it tests one’s patience and dedication. For those seeking to embark on this adventure or simply gain more insight into marine craftsmanship, Sven’s wisdom is invaluable.Sven Yrvind, a renowned yacht designer and sailor, shares valuable insights on creating flanges around bulkhead hatches for canvas protection in this enlightening video. By following his expert guidance, boat enthusiasts can ensure their living areas remain secure while allowing unhindered access through the hatches.Step 1: Starting with the Flange
Sven begins by explaining that working on flanges vertically and horizontally is significantly easier than doing so in a flat position. To simplify the process further, he divides the task into two or three steps as suggested by fellow expert “for for.” This approach not only makes it more manageable but also allows for greater precision in crafting each component.Step 2: Applying Glue and Securing
Sven proceeds to apply glue along one edge of the flange, ensuring a secure bond when clamped into place. He emphasizes that this stage is crucial for maintaining the structural integrity of the flange, which in turn safeguards the living area beneath the canvas when hatches are open.Step 3: Allowing Time to Dry
After securely attaching the first portion of the flange, Sven allows ample time for it to dry before moving forward with additional steps. This patience and precision are key aspects of his successful boatbuilding methods.Step 4: Finishing Touches
Once the flange is fully dried, Sven removes the clamps carefully, ensuring no damage occurs during this process. He then moves on to attaching four more pieces onto these main frames, completing two pairs of flanges for the bulkhead hatches.The Final Touches
While two flanges form the primary support structure around the hatches, Sven mentions there are two additional pieces required at each end to ensure comprehensive protection. This attention to detail highlights his commitment to producing a durable and reliable design. “Sailing is about finding your path, whether it’s across an ocean or within yourself.” – Sven Yrvind In conclusion, making flanges around bulkhead hatches may seem complex at first glance, but by following Sven Yrvind’s meticulous process, enthusiasts can achieve professional-level results. Remember that the journey of boatbuilding is as rewarding as reaching your destination; it tests one’s patience and dedication. For those seeking to embark on this adventure or simply gain more insight into marine craftsmanship, Sven’s wisdom is invaluable.Making Flanges Around Bulkhead Hatches for Canvas
Sven Yrvind, a renowned yacht designer and sailor, shares valuable insights on creating flanges around bulkhead hatches for canvas protection in this enlightening video. By following his expert guidance, boat enthusiasts can ensure their living areas remain secure while allowing unhindered access through the hatches.Step 1: Starting with the Flange
Sven begins by explaining that working on flanges vertically and horizontally is significantly easier than doing so in a flat position. To simplify the process further, he divides the task into two or three steps as suggested by fellow expert “for for.” This approach not only makes it more manageable but also allows for greater precision in crafting each component.Step 2: Applying Glue and Securing
Sven proceeds to apply glue along one edge of the flange, ensuring a secure bond when clamped into place. He emphasizes that this stage is crucial for maintaining the structural integrity of the flange, which in turn safeguards the living area beneath the canvas when hatches are open.Step 3: Allowing Time to Dry
After securely attaching the first portion of the flange, Sven allows ample time for it to dry before moving forward with additional steps. This patience and precision are key aspects of his successful boatbuilding methods.Step 4: Finishing Touches
Once the flange is fully dried, Sven removes the clamps carefully, ensuring no damage occurs during this process. He then moves on to attaching four more pieces onto these main frames, completing two pairs of flanges for the bulkhead hatches.The Final Touches
While two flanges form the primary support structure around the hatches, Sven mentions there are two additional pieces required at each end to ensure comprehensive protection. This attention to detail highlights his commitment to producing a durable and reliable design. “Sailing is about finding your path, whether it’s across an ocean or within yourself.” – Sven Yrvind In conclusion, making flanges around bulkhead hatches may seem complex at first glance, but by following Sven Yrvind’s meticulous process, enthusiasts can achieve professional-level results. Remember that the journey of boatbuilding is as rewarding as reaching your destination; it tests one’s patience and dedication. For those seeking to embark on this adventure or simply gain more insight into marine craftsmanship, Sven’s wisdom is invaluable.Once the flange is fully dried, Sven removes the clamps carefully, ensuring no damage occurs during this process. He then moves on to attaching four more pieces onto these main frames, completing two pairs of flanges for the bulkhead hatches.The Final Touches
While two flanges form the primary support structure around the hatches, Sven mentions there are two additional pieces required at each end to ensure comprehensive protection. This attention to detail highlights his commitment to producing a durable and reliable design. “Sailing is about finding your path, whether it’s across an ocean or within yourself.” – Sven Yrvind In conclusion, making flanges around bulkhead hatches may seem complex at first glance, but by following Sven Yrvind’s meticulous process, enthusiasts can achieve professional-level results. Remember that the journey of boatbuilding is as rewarding as reaching your destination; it tests one’s patience and dedication. For those seeking to embark on this adventure or simply gain more insight into marine craftsmanship, Sven’s wisdom is invaluable.After securely attaching the first portion of the flange, Sven allows ample time for it to dry before moving forward with additional steps. This patience and precision are key aspects of his successful boatbuilding methods.Step 4: Finishing Touches
Once the flange is fully dried, Sven removes the clamps carefully, ensuring no damage occurs during this process. He then moves on to attaching four more pieces onto these main frames, completing two pairs of flanges for the bulkhead hatches.The Final Touches
While two flanges form the primary support structure around the hatches, Sven mentions there are two additional pieces required at each end to ensure comprehensive protection. This attention to detail highlights his commitment to producing a durable and reliable design. “Sailing is about finding your path, whether it’s across an ocean or within yourself.” – Sven Yrvind In conclusion, making flanges around bulkhead hatches may seem complex at first glance, but by following Sven Yrvind’s meticulous process, enthusiasts can achieve professional-level results. Remember that the journey of boatbuilding is as rewarding as reaching your destination; it tests one’s patience and dedication. For those seeking to embark on this adventure or simply gain more insight into marine craftsmanship, Sven’s wisdom is invaluable.Sven proceeds to apply glue along one edge of the flange, ensuring a secure bond when clamped into place. He emphasizes that this stage is crucial for maintaining the structural integrity of the flange, which in turn safeguards the living area beneath the canvas when hatches are open.Step 3: Allowing Time to Dry
After securely attaching the first portion of the flange, Sven allows ample time for it to dry before moving forward with additional steps. This patience and precision are key aspects of his successful boatbuilding methods.Step 4: Finishing Touches
Once the flange is fully dried, Sven removes the clamps carefully, ensuring no damage occurs during this process. He then moves on to attaching four more pieces onto these main frames, completing two pairs of flanges for the bulkhead hatches.The Final Touches
While two flanges form the primary support structure around the hatches, Sven mentions there are two additional pieces required at each end to ensure comprehensive protection. This attention to detail highlights his commitment to producing a durable and reliable design. “Sailing is about finding your path, whether it’s across an ocean or within yourself.” – Sven Yrvind In conclusion, making flanges around bulkhead hatches may seem complex at first glance, but by following Sven Yrvind’s meticulous process, enthusiasts can achieve professional-level results. Remember that the journey of boatbuilding is as rewarding as reaching your destination; it tests one’s patience and dedication. For those seeking to embark on this adventure or simply gain more insight into marine craftsmanship, Sven’s wisdom is invaluable.Sven begins by explaining that working on flanges vertically and horizontally is significantly easier than doing so in a flat position. To simplify the process further, he divides the task into two or three steps as suggested by fellow expert “for for.” This approach not only makes it more manageable but also allows for greater precision in crafting each component.Step 2: Applying Glue and Securing
Sven proceeds to apply glue along one edge of the flange, ensuring a secure bond when clamped into place. He emphasizes that this stage is crucial for maintaining the structural integrity of the flange, which in turn safeguards the living area beneath the canvas when hatches are open.Step 3: Allowing Time to Dry
After securely attaching the first portion of the flange, Sven allows ample time for it to dry before moving forward with additional steps. This patience and precision are key aspects of his successful boatbuilding methods.Step 4: Finishing Touches
Once the flange is fully dried, Sven removes the clamps carefully, ensuring no damage occurs during this process. He then moves on to attaching four more pieces onto these main frames, completing two pairs of flanges for the bulkhead hatches.The Final Touches
While two flanges form the primary support structure around the hatches, Sven mentions there are two additional pieces required at each end to ensure comprehensive protection. This attention to detail highlights his commitment to producing a durable and reliable design. “Sailing is about finding your path, whether it’s across an ocean or within yourself.” – Sven Yrvind In conclusion, making flanges around bulkhead hatches may seem complex at first glance, but by following Sven Yrvind’s meticulous process, enthusiasts can achieve professional-level results. Remember that the journey of boatbuilding is as rewarding as reaching your destination; it tests one’s patience and dedication. For those seeking to embark on this adventure or simply gain more insight into marine craftsmanship, Sven’s wisdom is invaluable.Sven Yrvind, a renowned yacht designer and sailor, shares valuable insights on creating flanges around bulkhead hatches for canvas protection in this enlightening video. By following his expert guidance, boat enthusiasts can ensure their living areas remain secure while allowing unhindered access through the hatches.Step 1: Starting with the Flange
Sven begins by explaining that working on flanges vertically and horizontally is significantly easier than doing so in a flat position. To simplify the process further, he divides the task into two or three steps as suggested by fellow expert “for for.” This approach not only makes it more manageable but also allows for greater precision in crafting each component.Step 2: Applying Glue and Securing
Sven proceeds to apply glue along one edge of the flange, ensuring a secure bond when clamped into place. He emphasizes that this stage is crucial for maintaining the structural integrity of the flange, which in turn safeguards the living area beneath the canvas when hatches are open.Step 3: Allowing Time to Dry
After securely attaching the first portion of the flange, Sven allows ample time for it to dry before moving forward with additional steps. This patience and precision are key aspects of his successful boatbuilding methods.Step 4: Finishing Touches
Once the flange is fully dried, Sven removes the clamps carefully, ensuring no damage occurs during this process. He then moves on to attaching four more pieces onto these main frames, completing two pairs of flanges for the bulkhead hatches.The Final Touches
While two flanges form the primary support structure around the hatches, Sven mentions there are two additional pieces required at each end to ensure comprehensive protection. This attention to detail highlights his commitment to producing a durable and reliable design. “Sailing is about finding your path, whether it’s across an ocean or within yourself.” – Sven Yrvind In conclusion, making flanges around bulkhead hatches may seem complex at first glance, but by following Sven Yrvind’s meticulous process, enthusiasts can achieve professional-level results. Remember that the journey of boatbuilding is as rewarding as reaching your destination; it tests one’s patience and dedication. For those seeking to embark on this adventure or simply gain more insight into marine craftsmanship, Sven’s wisdom is invaluable.Making Flanges Around Bulkhead Hatches for Canvas
Sven Yrvind, a renowned yacht designer and sailor, shares valuable insights on creating flanges around bulkhead hatches for canvas protection in this enlightening video. By following his expert guidance, boat enthusiasts can ensure their living areas remain secure while allowing unhindered access through the hatches.Step 1: Starting with the Flange
Sven begins by explaining that working on flanges vertically and horizontally is significantly easier than doing so in a flat position. To simplify the process further, he divides the task into two or three steps as suggested by fellow expert “for for.” This approach not only makes it more manageable but also allows for greater precision in crafting each component.Step 2: Applying Glue and Securing
Sven proceeds to apply glue along one edge of the flange, ensuring a secure bond when clamped into place. He emphasizes that this stage is crucial for maintaining the structural integrity of the flange, which in turn safeguards the living area beneath the canvas when hatches are open.Step 3: Allowing Time to Dry
After securely attaching the first portion of the flange, Sven allows ample time for it to dry before moving forward with additional steps. This patience and precision are key aspects of his successful boatbuilding methods.Step 4: Finishing Touches
Once the flange is fully dried, Sven removes the clamps carefully, ensuring no damage occurs during this process. He then moves on to attaching four more pieces onto these main frames, completing two pairs of flanges for the bulkhead hatches.The Final Touches
While two flanges form the primary support structure around the hatches, Sven mentions there are two additional pieces required at each end to ensure comprehensive protection. This attention to detail highlights his commitment to producing a durable and reliable design. “Sailing is about finding your path, whether it’s across an ocean or within yourself.” – Sven Yrvind In conclusion, making flanges around bulkhead hatches may seem complex at first glance, but by following Sven Yrvind’s meticulous process, enthusiasts can achieve professional-level results. Remember that the journey of boatbuilding is as rewarding as reaching your destination; it tests one’s patience and dedication. For those seeking to embark on this adventure or simply gain more insight into marine craftsmanship, Sven’s wisdom is invaluable.Once the flange is fully dried, Sven removes the clamps carefully, ensuring no damage occurs during this process. He then moves on to attaching four more pieces onto these main frames, completing two pairs of flanges for the bulkhead hatches.The Final Touches
While two flanges form the primary support structure around the hatches, Sven mentions there are two additional pieces required at each end to ensure comprehensive protection. This attention to detail highlights his commitment to producing a durable and reliable design. “Sailing is about finding your path, whether it’s across an ocean or within yourself.” – Sven Yrvind In conclusion, making flanges around bulkhead hatches may seem complex at first glance, but by following Sven Yrvind’s meticulous process, enthusiasts can achieve professional-level results. Remember that the journey of boatbuilding is as rewarding as reaching your destination; it tests one’s patience and dedication. For those seeking to embark on this adventure or simply gain more insight into marine craftsmanship, Sven’s wisdom is invaluable.Making Flanges Around Bulkhead Hatches for Canvas
Sven Yrvind, a renowned yacht designer and sailor, shares valuable insights on creating flanges around bulkhead hatches for canvas protection in this enlightening video. By following his expert guidance, boat enthusiasts can ensure their living areas remain secure while allowing unhindered access through the hatches.Step 1: Starting with the Flange
Sven begins by explaining that working on flanges vertically and horizontally is significantly easier than doing so in a flat position. To simplify the process further, he divides the task into two or three steps as suggested by fellow expert “for for.” This approach not only makes it more manageable but also allows for greater precision in crafting each component.Step 2: Applying Glue and Securing
Sven proceeds to apply glue along one edge of the flange, ensuring a secure bond when clamped into place. He emphasizes that this stage is crucial for maintaining the structural integrity of the flange, which in turn safeguards the living area beneath the canvas when hatches are open.Step 3: Allowing Time to Dry
After securely attaching the first portion of the flange, Sven allows ample time for it to dry before moving forward with additional steps. This patience and precision are key aspects of his successful boatbuilding methods.Step 4: Finishing Touches
Once the flange is fully dried, Sven removes the clamps carefully, ensuring no damage occurs during this process. He then moves on to attaching four more pieces onto these main frames, completing two pairs of flanges for the bulkhead hatches.The Final Touches
While two flanges form the primary support structure around the hatches, Sven mentions there are two additional pieces required at each end to ensure comprehensive protection. This attention to detail highlights his commitment to producing a durable and reliable design. “Sailing is about finding your path, whether it’s across an ocean or within yourself.” – Sven Yrvind In conclusion, making flanges around bulkhead hatches may seem complex at first glance, but by following Sven Yrvind’s meticulous process, enthusiasts can achieve professional-level results. Remember that the journey of boatbuilding is as rewarding as reaching your destination; it tests one’s patience and dedication. For those seeking to embark on this adventure or simply gain more insight into marine craftsmanship, Sven’s wisdom is invaluable.After securely attaching the first portion of the flange, Sven allows ample time for it to dry before moving forward with additional steps. This patience and precision are key aspects of his successful boatbuilding methods.Step 4: Finishing Touches
Once the flange is fully dried, Sven removes the clamps carefully, ensuring no damage occurs during this process. He then moves on to attaching four more pieces onto these main frames, completing two pairs of flanges for the bulkhead hatches.The Final Touches
While two flanges form the primary support structure around the hatches, Sven mentions there are two additional pieces required at each end to ensure comprehensive protection. This attention to detail highlights his commitment to producing a durable and reliable design. “Sailing is about finding your path, whether it’s across an ocean or within yourself.” – Sven Yrvind In conclusion, making flanges around bulkhead hatches may seem complex at first glance, but by following Sven Yrvind’s meticulous process, enthusiasts can achieve professional-level results. Remember that the journey of boatbuilding is as rewarding as reaching your destination; it tests one’s patience and dedication. For those seeking to embark on this adventure or simply gain more insight into marine craftsmanship, Sven’s wisdom is invaluable.Sven proceeds to apply glue along one edge of the flange, ensuring a secure bond when clamped into place. He emphasizes that this stage is crucial for maintaining the structural integrity of the flange, which in turn safeguards the living area beneath the canvas when hatches are open.Step 3: Allowing Time to Dry
After securely attaching the first portion of the flange, Sven allows ample time for it to dry before moving forward with additional steps. This patience and precision are key aspects of his successful boatbuilding methods.Step 4: Finishing Touches
Once the flange is fully dried, Sven removes the clamps carefully, ensuring no damage occurs during this process. He then moves on to attaching four more pieces onto these main frames, completing two pairs of flanges for the bulkhead hatches.The Final Touches
While two flanges form the primary support structure around the hatches, Sven mentions there are two additional pieces required at each end to ensure comprehensive protection. This attention to detail highlights his commitment to producing a durable and reliable design. “Sailing is about finding your path, whether it’s across an ocean or within yourself.” – Sven Yrvind In conclusion, making flanges around bulkhead hatches may seem complex at first glance, but by following Sven Yrvind’s meticulous process, enthusiasts can achieve professional-level results. Remember that the journey of boatbuilding is as rewarding as reaching your destination; it tests one’s patience and dedication. For those seeking to embark on this adventure or simply gain more insight into marine craftsmanship, Sven’s wisdom is invaluable.Sven begins by explaining that working on flanges vertically and horizontally is significantly easier than doing so in a flat position. To simplify the process further, he divides the task into two or three steps as suggested by fellow expert “for for.” This approach not only makes it more manageable but also allows for greater precision in crafting each component.Step 2: Applying Glue and Securing
Sven proceeds to apply glue along one edge of the flange, ensuring a secure bond when clamped into place. He emphasizes that this stage is crucial for maintaining the structural integrity of the flange, which in turn safeguards the living area beneath the canvas when hatches are open.Step 3: Allowing Time to Dry
After securely attaching the first portion of the flange, Sven allows ample time for it to dry before moving forward with additional steps. This patience and precision are key aspects of his successful boatbuilding methods.Step 4: Finishing Touches
Once the flange is fully dried, Sven removes the clamps carefully, ensuring no damage occurs during this process. He then moves on to attaching four more pieces onto these main frames, completing two pairs of flanges for the bulkhead hatches.The Final Touches
While two flanges form the primary support structure around the hatches, Sven mentions there are two additional pieces required at each end to ensure comprehensive protection. This attention to detail highlights his commitment to producing a durable and reliable design. “Sailing is about finding your path, whether it’s across an ocean or within yourself.” – Sven Yrvind In conclusion, making flanges around bulkhead hatches may seem complex at first glance, but by following Sven Yrvind’s meticulous process, enthusiasts can achieve professional-level results. Remember that the journey of boatbuilding is as rewarding as reaching your destination; it tests one’s patience and dedication. For those seeking to embark on this adventure or simply gain more insight into marine craftsmanship, Sven’s wisdom is invaluable.Sven Yrvind, a renowned yacht designer and sailor, shares valuable insights on creating flanges around bulkhead hatches for canvas protection in this enlightening video. By following his expert guidance, boat enthusiasts can ensure their living areas remain secure while allowing unhindered access through the hatches.Step 1: Starting with the Flange
Sven begins by explaining that working on flanges vertically and horizontally is significantly easier than doing so in a flat position. To simplify the process further, he divides the task into two or three steps as suggested by fellow expert “for for.” This approach not only makes it more manageable but also allows for greater precision in crafting each component.Step 2: Applying Glue and Securing
Sven proceeds to apply glue along one edge of the flange, ensuring a secure bond when clamped into place. He emphasizes that this stage is crucial for maintaining the structural integrity of the flange, which in turn safeguards the living area beneath the canvas when hatches are open.Step 3: Allowing Time to Dry
After securely attaching the first portion of the flange, Sven allows ample time for it to dry before moving forward with additional steps. This patience and precision are key aspects of his successful boatbuilding methods.Step 4: Finishing Touches
Once the flange is fully dried, Sven removes the clamps carefully, ensuring no damage occurs during this process. He then moves on to attaching four more pieces onto these main frames, completing two pairs of flanges for the bulkhead hatches.The Final Touches
While two flanges form the primary support structure around the hatches, Sven mentions there are two additional pieces required at each end to ensure comprehensive protection. This attention to detail highlights his commitment to producing a durable and reliable design. “Sailing is about finding your path, whether it’s across an ocean or within yourself.” – Sven Yrvind In conclusion, making flanges around bulkhead hatches may seem complex at first glance, but by following Sven Yrvind’s meticulous process, enthusiasts can achieve professional-level results. Remember that the journey of boatbuilding is as rewarding as reaching your destination; it tests one’s patience and dedication. For those seeking to embark on this adventure or simply gain more insight into marine craftsmanship, Sven’s wisdom is invaluable.Making Flanges Around Bulkhead Hatches for Canvas
Sven Yrvind, a renowned yacht designer and sailor, shares valuable insights on creating flanges around bulkhead hatches for canvas protection in this enlightening video. By following his expert guidance, boat enthusiasts can ensure their living areas remain secure while allowing unhindered access through the hatches.Step 1: Starting with the Flange
Sven begins by explaining that working on flanges vertically and horizontally is significantly easier than doing so in a flat position. To simplify the process further, he divides the task into two or three steps as suggested by fellow expert “for for.” This approach not only makes it more manageable but also allows for greater precision in crafting each component.Step 2: Applying Glue and Securing
Sven proceeds to apply glue along one edge of the flange, ensuring a secure bond when clamped into place. He emphasizes that this stage is crucial for maintaining the structural integrity of the flange, which in turn safeguards the living area beneath the canvas when hatches are open.Step 3: Allowing Time to Dry
After securely attaching the first portion of the flange, Sven allows ample time for it to dry before moving forward with additional steps. This patience and precision are key aspects of his successful boatbuilding methods.Step 4: Finishing Touches
Once the flange is fully dried, Sven removes the clamps carefully, ensuring no damage occurs during this process. He then moves on to attaching four more pieces onto these main frames, completing two pairs of flanges for the bulkhead hatches.The Final Touches
While two flanges form the primary support structure around the hatches, Sven mentions there are two additional pieces required at each end to ensure comprehensive protection. This attention to detail highlights his commitment to producing a durable and reliable design. “Sailing is about finding your path, whether it’s across an ocean or within yourself.” – Sven Yrvind In conclusion, making flanges around bulkhead hatches may seem complex at first glance, but by following Sven Yrvind’s meticulous process, enthusiasts can achieve professional-level results. Remember that the journey of boatbuilding is as rewarding as reaching your destination; it tests one’s patience and dedication. For those seeking to embark on this adventure or simply gain more insight into marine craftsmanship, Sven’s wisdom is invaluable.Once the flange is fully dried, Sven removes the clamps carefully, ensuring no damage occurs during this process. He then moves on to attaching four more pieces onto these main frames, completing two pairs of flanges for the bulkhead hatches.The Final Touches
While two flanges form the primary support structure around the hatches, Sven mentions there are two additional pieces required at each end to ensure comprehensive protection. This attention to detail highlights his commitment to producing a durable and reliable design. “Sailing is about finding your path, whether it’s across an ocean or within yourself.” – Sven Yrvind In conclusion, making flanges around bulkhead hatches may seem complex at first glance, but by following Sven Yrvind’s meticulous process, enthusiasts can achieve professional-level results. Remember that the journey of boatbuilding is as rewarding as reaching your destination; it tests one’s patience and dedication. For those seeking to embark on this adventure or simply gain more insight into marine craftsmanship, Sven’s wisdom is invaluable.After securely attaching the first portion of the flange, Sven allows ample time for it to dry before moving forward with additional steps. This patience and precision are key aspects of his successful boatbuilding methods.Step 4: Finishing Touches
Once the flange is fully dried, Sven removes the clamps carefully, ensuring no damage occurs during this process. He then moves on to attaching four more pieces onto these main frames, completing two pairs of flanges for the bulkhead hatches.The Final Touches
While two flanges form the primary support structure around the hatches, Sven mentions there are two additional pieces required at each end to ensure comprehensive protection. This attention to detail highlights his commitment to producing a durable and reliable design. “Sailing is about finding your path, whether it’s across an ocean or within yourself.” – Sven Yrvind In conclusion, making flanges around bulkhead hatches may seem complex at first glance, but by following Sven Yrvind’s meticulous process, enthusiasts can achieve professional-level results. Remember that the journey of boatbuilding is as rewarding as reaching your destination; it tests one’s patience and dedication. For those seeking to embark on this adventure or simply gain more insight into marine craftsmanship, Sven’s wisdom is invaluable.Sven proceeds to apply glue along one edge of the flange, ensuring a secure bond when clamped into place. He emphasizes that this stage is crucial for maintaining the structural integrity of the flange, which in turn safeguards the living area beneath the canvas when hatches are open.Step 3: Allowing Time to Dry
After securely attaching the first portion of the flange, Sven allows ample time for it to dry before moving forward with additional steps. This patience and precision are key aspects of his successful boatbuilding methods.Step 4: Finishing Touches
Once the flange is fully dried, Sven removes the clamps carefully, ensuring no damage occurs during this process. He then moves on to attaching four more pieces onto these main frames, completing two pairs of flanges for the bulkhead hatches.The Final Touches
While two flanges form the primary support structure around the hatches, Sven mentions there are two additional pieces required at each end to ensure comprehensive protection. This attention to detail highlights his commitment to producing a durable and reliable design. “Sailing is about finding your path, whether it’s across an ocean or within yourself.” – Sven Yrvind In conclusion, making flanges around bulkhead hatches may seem complex at first glance, but by following Sven Yrvind’s meticulous process, enthusiasts can achieve professional-level results. Remember that the journey of boatbuilding is as rewarding as reaching your destination; it tests one’s patience and dedication. For those seeking to embark on this adventure or simply gain more insight into marine craftsmanship, Sven’s wisdom is invaluable.Sven begins by explaining that working on flanges vertically and horizontally is significantly easier than doing so in a flat position. To simplify the process further, he divides the task into two or three steps as suggested by fellow expert “for for.” This approach not only makes it more manageable but also allows for greater precision in crafting each component.Step 2: Applying Glue and Securing
Sven proceeds to apply glue along one edge of the flange, ensuring a secure bond when clamped into place. He emphasizes that this stage is crucial for maintaining the structural integrity of the flange, which in turn safeguards the living area beneath the canvas when hatches are open.Step 3: Allowing Time to Dry
After securely attaching the first portion of the flange, Sven allows ample time for it to dry before moving forward with additional steps. This patience and precision are key aspects of his successful boatbuilding methods.Step 4: Finishing Touches
Once the flange is fully dried, Sven removes the clamps carefully, ensuring no damage occurs during this process. He then moves on to attaching four more pieces onto these main frames, completing two pairs of flanges for the bulkhead hatches.The Final Touches
While two flanges form the primary support structure around the hatches, Sven mentions there are two additional pieces required at each end to ensure comprehensive protection. This attention to detail highlights his commitment to producing a durable and reliable design. “Sailing is about finding your path, whether it’s across an ocean or within yourself.” – Sven Yrvind In conclusion, making flanges around bulkhead hatches may seem complex at first glance, but by following Sven Yrvind’s meticulous process, enthusiasts can achieve professional-level results. Remember that the journey of boatbuilding is as rewarding as reaching your destination; it tests one’s patience and dedication. For those seeking to embark on this adventure or simply gain more insight into marine craftsmanship, Sven’s wisdom is invaluable.Sven Yrvind, a renowned yacht designer and sailor, shares valuable insights on creating flanges around bulkhead hatches for canvas protection in this enlightening video. By following his expert guidance, boat enthusiasts can ensure their living areas remain secure while allowing unhindered access through the hatches.Step 1: Starting with the Flange
Sven begins by explaining that working on flanges vertically and horizontally is significantly easier than doing so in a flat position. To simplify the process further, he divides the task into two or three steps as suggested by fellow expert “for for.” This approach not only makes it more manageable but also allows for greater precision in crafting each component.Step 2: Applying Glue and Securing
Sven proceeds to apply glue along one edge of the flange, ensuring a secure bond when clamped into place. He emphasizes that this stage is crucial for maintaining the structural integrity of the flange, which in turn safeguards the living area beneath the canvas when hatches are open.Step 3: Allowing Time to Dry
After securely attaching the first portion of the flange, Sven allows ample time for it to dry before moving forward with additional steps. This patience and precision are key aspects of his successful boatbuilding methods.Step 4: Finishing Touches
Once the flange is fully dried, Sven removes the clamps carefully, ensuring no damage occurs during this process. He then moves on to attaching four more pieces onto these main frames, completing two pairs of flanges for the bulkhead hatches.The Final Touches
While two flanges form the primary support structure around the hatches, Sven mentions there are two additional pieces required at each end to ensure comprehensive protection. This attention to detail highlights his commitment to producing a durable and reliable design. “Sailing is about finding your path, whether it’s across an ocean or within yourself.” – Sven Yrvind In conclusion, making flanges around bulkhead hatches may seem complex at first glance, but by following Sven Yrvind’s meticulous process, enthusiasts can achieve professional-level results. Remember that the journey of boatbuilding is as rewarding as reaching your destination; it tests one’s patience and dedication. For those seeking to embark on this adventure or simply gain more insight into marine craftsmanship, Sven’s wisdom is invaluable.Making Flanges Around Bulkhead Hatches for Canvas
Sven Yrvind, a renowned yacht designer and sailor, shares valuable insights on creating flanges around bulkhead hatches for canvas protection in this enlightening video. By following his expert guidance, boat enthusiasts can ensure their living areas remain secure while allowing unhindered access through the hatches.Step 1: Starting with the Flange
Sven begins by explaining that working on flanges vertically and horizontally is significantly easier than doing so in a flat position. To simplify the process further, he divides the task into two or three steps as suggested by fellow expert “for for.” This approach not only makes it more manageable but also allows for greater precision in crafting each component.Step 2: Applying Glue and Securing
Sven proceeds to apply glue along one edge of the flange, ensuring a secure bond when clamped into place. He emphasizes that this stage is crucial for maintaining the structural integrity of the flange, which in turn safeguards the living area beneath the canvas when hatches are open.Step 3: Allowing Time to Dry
After securely attaching the first portion of the flange, Sven allows ample time for it to dry before moving forward with additional steps. This patience and precision are key aspects of his successful boatbuilding methods.Step 4: Finishing Touches
Once the flange is fully dried, Sven removes the clamps carefully, ensuring no damage occurs during this process. He then moves on to attaching four more pieces onto these main frames, completing two pairs of flanges for the bulkhead hatches.The Final Touches
While two flanges form the primary support structure around the hatches, Sven mentions there are two additional pieces required at each end to ensure comprehensive protection. This attention to detail highlights his commitment to producing a durable and reliable design. “Sailing is about finding your path, whether it’s across an ocean or within yourself.” – Sven Yrvind In conclusion, making flanges around bulkhead hatches may seem complex at first glance, but by following Sven Yrvind’s meticulous process, enthusiasts can achieve professional-level results. Remember that the journey of boatbuilding is as rewarding as reaching your destination; it tests one’s patience and dedication. For those seeking to embark on this adventure or simply gain more insight into marine craftsmanship, Sven’s wisdom is invaluable.After securely attaching the first portion of the flange, Sven allows ample time for it to dry before moving forward with additional steps. This patience and precision are key aspects of his successful boatbuilding methods.Step 4: Finishing Touches
Once the flange is fully dried, Sven removes the clamps carefully, ensuring no damage occurs during this process. He then moves on to attaching four more pieces onto these main frames, completing two pairs of flanges for the bulkhead hatches.The Final Touches
While two flanges form the primary support structure around the hatches, Sven mentions there are two additional pieces required at each end to ensure comprehensive protection. This attention to detail highlights his commitment to producing a durable and reliable design. “Sailing is about finding your path, whether it’s across an ocean or within yourself.” – Sven Yrvind In conclusion, making flanges around bulkhead hatches may seem complex at first glance, but by following Sven Yrvind’s meticulous process, enthusiasts can achieve professional-level results. Remember that the journey of boatbuilding is as rewarding as reaching your destination; it tests one’s patience and dedication. For those seeking to embark on this adventure or simply gain more insight into marine craftsmanship, Sven’s wisdom is invaluable.Making Flanges Around Bulkhead Hatches for Canvas
Sven Yrvind, a renowned yacht designer and sailor, shares valuable insights on creating flanges around bulkhead hatches for canvas protection in this enlightening video. By following his expert guidance, boat enthusiasts can ensure their living areas remain secure while allowing unhindered access through the hatches.Step 1: Starting with the Flange
Sven begins by explaining that working on flanges vertically and horizontally is significantly easier than doing so in a flat position. To simplify the process further, he divides the task into two or three steps as suggested by fellow expert “for for.” This approach not only makes it more manageable but also allows for greater precision in crafting each component.Step 2: Applying Glue and Securing
Sven proceeds to apply glue along one edge of the flange, ensuring a secure bond when clamped into place. He emphasizes that this stage is crucial for maintaining the structural integrity of the flange, which in turn safeguards the living area beneath the canvas when hatches are open.Step 3: Allowing Time to Dry
After securely attaching the first portion of the flange, Sven allows ample time for it to dry before moving forward with additional steps. This patience and precision are key aspects of his successful boatbuilding methods.Step 4: Finishing Touches
Once the flange is fully dried, Sven removes the clamps carefully, ensuring no damage occurs during this process. He then moves on to attaching four more pieces onto these main frames, completing two pairs of flanges for the bulkhead hatches.The Final Touches
While two flanges form the primary support structure around the hatches, Sven mentions there are two additional pieces required at each end to ensure comprehensive protection. This attention to detail highlights his commitment to producing a durable and reliable design. “Sailing is about finding your path, whether it’s across an ocean or within yourself.” – Sven Yrvind In conclusion, making flanges around bulkhead hatches may seem complex at first glance, but by following Sven Yrvind’s meticulous process, enthusiasts can achieve professional-level results. Remember that the journey of boatbuilding is as rewarding as reaching your destination; it tests one’s patience and dedication. For those seeking to embark on this adventure or simply gain more insight into marine craftsmanship, Sven’s wisdom is invaluable.After securely attaching the first portion of the flange, Sven allows ample time for it to dry before moving forward with additional steps. This patience and precision are key aspects of his successful boatbuilding methods.Step 4: Finishing Touches
Once the flange is fully dried, Sven removes the clamps carefully, ensuring no damage occurs during this process. He then moves on to attaching four more pieces onto these main frames, completing two pairs of flanges for the bulkhead hatches.The Final Touches
While two flanges form the primary support structure around the hatches, Sven mentions there are two additional pieces required at each end to ensure comprehensive protection. This attention to detail highlights his commitment to producing a durable and reliable design. “Sailing is about finding your path, whether it’s across an ocean or within yourself.” – Sven Yrvind In conclusion, making flanges around bulkhead hatches may seem complex at first glance, but by following Sven Yrvind’s meticulous process, enthusiasts can achieve professional-level results. Remember that the journey of boatbuilding is as rewarding as reaching your destination; it tests one’s patience and dedication. For those seeking to embark on this adventure or simply gain more insight into marine craftsmanship, Sven’s wisdom is invaluable.Sven proceeds to apply glue along one edge of the flange, ensuring a secure bond when clamped into place. He emphasizes that this stage is crucial for maintaining the structural integrity of the flange, which in turn safeguards the living area beneath the canvas when hatches are open.Step 3: Allowing Time to Dry
After securely attaching the first portion of the flange, Sven allows ample time for it to dry before moving forward with additional steps. This patience and precision are key aspects of his successful boatbuilding methods.Step 4: Finishing Touches
Once the flange is fully dried, Sven removes the clamps carefully, ensuring no damage occurs during this process. He then moves on to attaching four more pieces onto these main frames, completing two pairs of flanges for the bulkhead hatches.The Final Touches
While two flanges form the primary support structure around the hatches, Sven mentions there are two additional pieces required at each end to ensure comprehensive protection. This attention to detail highlights his commitment to producing a durable and reliable design. “Sailing is about finding your path, whether it’s across an ocean or within yourself.” – Sven Yrvind In conclusion, making flanges around bulkhead hatches may seem complex at first glance, but by following Sven Yrvind’s meticulous process, enthusiasts can achieve professional-level results. Remember that the journey of boatbuilding is as rewarding as reaching your destination; it tests one’s patience and dedication. For those seeking to embark on this adventure or simply gain more insight into marine craftsmanship, Sven’s wisdom is invaluable.Sven begins by explaining that working on flanges vertically and horizontally is significantly easier than doing so in a flat position. To simplify the process further, he divides the task into two or three steps as suggested by fellow expert “for for.” This approach not only makes it more manageable but also allows for greater precision in crafting each component.Step 2: Applying Glue and Securing
Sven proceeds to apply glue along one edge of the flange, ensuring a secure bond when clamped into place. He emphasizes that this stage is crucial for maintaining the structural integrity of the flange, which in turn safeguards the living area beneath the canvas when hatches are open.Step 3: Allowing Time to Dry
After securely attaching the first portion of the flange, Sven allows ample time for it to dry before moving forward with additional steps. This patience and precision are key aspects of his successful boatbuilding methods.Step 4: Finishing Touches
Once the flange is fully dried, Sven removes the clamps carefully, ensuring no damage occurs during this process. He then moves on to attaching four more pieces onto these main frames, completing two pairs of flanges for the bulkhead hatches.The Final Touches
While two flanges form the primary support structure around the hatches, Sven mentions there are two additional pieces required at each end to ensure comprehensive protection. This attention to detail highlights his commitment to producing a durable and reliable design. “Sailing is about finding your path, whether it’s across an ocean or within yourself.” – Sven Yrvind In conclusion, making flanges around bulkhead hatches may seem complex at first glance, but by following Sven Yrvind’s meticulous process, enthusiasts can achieve professional-level results. Remember that the journey of boatbuilding is as rewarding as reaching your destination; it tests one’s patience and dedication. For those seeking to embark on this adventure or simply gain more insight into marine craftsmanship, Sven’s wisdom is invaluable.Sven Yrvind, a renowned yacht designer and sailor, shares valuable insights on creating flanges around bulkhead hatches for canvas protection in this enlightening video. By following his expert guidance, boat enthusiasts can ensure their living areas remain secure while allowing unhindered access through the hatches.Step 1: Starting with the Flange
Sven begins by explaining that working on flanges vertically and horizontally is significantly easier than doing so in a flat position. To simplify the process further, he divides the task into two or three steps as suggested by fellow expert “for for.” This approach not only makes it more manageable but also allows for greater precision in crafting each component.Step 2: Applying Glue and Securing
Sven proceeds to apply glue along one edge of the flange, ensuring a secure bond when clamped into place. He emphasizes that this stage is crucial for maintaining the structural integrity of the flange, which in turn safeguards the living area beneath the canvas when hatches are open.Step 3: Allowing Time to Dry
After securely attaching the first portion of the flange, Sven allows ample time for it to dry before moving forward with additional steps. This patience and precision are key aspects of his successful boatbuilding methods.Step 4: Finishing Touches
Once the flange is fully dried, Sven removes the clamps carefully, ensuring no damage occurs during this process. He then moves on to attaching four more pieces onto these main frames, completing two pairs of flanges for the bulkhead hatches.The Final Touches
While two flanges form the primary support structure around the hatches, Sven mentions there are two additional pieces required at each end to ensure comprehensive protection. This attention to detail highlights his commitment to producing a durable and reliable design. “Sailing is about finding your path, whether it’s across an ocean or within yourself.” – Sven Yrvind In conclusion, making flanges around bulkhead hatches may seem complex at first glance, but by following Sven Yrvind’s meticulous process, enthusiasts can achieve professional-level results. Remember that the journey of boatbuilding is as rewarding as reaching your destination; it tests one’s patience and dedication. For those seeking to embark on this adventure or simply gain more insight into marine craftsmanship, Sven’s wisdom is invaluable.Making Flanges Around Bulkhead Hatches for Canvas
Sven Yrvind, a renowned yacht designer and sailor, shares valuable insights on creating flanges around bulkhead hatches for canvas protection in this enlightening video. By following his expert guidance, boat enthusiasts can ensure their living areas remain secure while allowing unhindered access through the hatches.Step 1: Starting with the Flange
Sven begins by explaining that working on flanges vertically and horizontally is significantly easier than doing so in a flat position. To simplify the process further, he divides the task into two or three steps as suggested by fellow expert “for for.” This approach not only makes it more manageable but also allows for greater precision in crafting each component.Step 2: Applying Glue and Securing
Sven proceeds to apply glue along one edge of the flange, ensuring a secure bond when clamped into place. He emphasizes that this stage is crucial for maintaining the structural integrity of the flange, which in turn safeguards the living area beneath the canvas when hatches are open.Step 3: Allowing Time to Dry
After securely attaching the first portion of the flange, Sven allows ample time for it to dry before moving forward with additional steps. This patience and precision are key aspects of his successful boatbuilding methods.Step 4: Finishing Touches
Once the flange is fully dried, Sven removes the clamps carefully, ensuring no damage occurs during this process. He then moves on to attaching four more pieces onto these main frames, completing two pairs of flanges for the bulkhead hatches.The Final Touches
While two flanges form the primary support structure around the hatches, Sven mentions there are two additional pieces required at each end to ensure comprehensive protection. This attention to detail highlights his commitment to producing a durable and reliable design. “Sailing is about finding your path, whether it’s across an ocean or within yourself.” – Sven Yrvind In conclusion, making flanges around bulkhead hatches may seem complex at first glance, but by following Sven Yrvind’s meticulous process, enthusiasts can achieve professional-level results. Remember that the journey of boatbuilding is as rewarding as reaching your destination; it tests one’s patience and dedication. For those seeking to embark on this adventure or simply gain more insight into marine craftsmanship, Sven’s wisdom is invaluable.Once the flange is fully dried, Sven removes the clamps carefully, ensuring no damage occurs during this process. He then moves on to attaching four more pieces onto these main frames, completing two pairs of flanges for the bulkhead hatches.The Final Touches
While two flanges form the primary support structure around the hatches, Sven mentions there are two additional pieces required at each end to ensure comprehensive protection. This attention to detail highlights his commitment to producing a durable and reliable design. “Sailing is about finding your path, whether it’s across an ocean or within yourself.” – Sven Yrvind In conclusion, making flanges around bulkhead hatches may seem complex at first glance, but by following Sven Yrvind’s meticulous process, enthusiasts can achieve professional-level results. Remember that the journey of boatbuilding is as rewarding as reaching your destination; it tests one’s patience and dedication. For those seeking to embark on this adventure or simply gain more insight into marine craftsmanship, Sven’s wisdom is invaluable.After securely attaching the first portion of the flange, Sven allows ample time for it to dry before moving forward with additional steps. This patience and precision are key aspects of his successful boatbuilding methods.Step 4: Finishing Touches
Once the flange is fully dried, Sven removes the clamps carefully, ensuring no damage occurs during this process. He then moves on to attaching four more pieces onto these main frames, completing two pairs of flanges for the bulkhead hatches.The Final Touches
While two flanges form the primary support structure around the hatches, Sven mentions there are two additional pieces required at each end to ensure comprehensive protection. This attention to detail highlights his commitment to producing a durable and reliable design. “Sailing is about finding your path, whether it’s across an ocean or within yourself.” – Sven Yrvind In conclusion, making flanges around bulkhead hatches may seem complex at first glance, but by following Sven Yrvind’s meticulous process, enthusiasts can achieve professional-level results. Remember that the journey of boatbuilding is as rewarding as reaching your destination; it tests one’s patience and dedication. For those seeking to embark on this adventure or simply gain more insight into marine craftsmanship, Sven’s wisdom is invaluable.Sven proceeds to apply glue along one edge of the flange, ensuring a secure bond when clamped into place. He emphasizes that this stage is crucial for maintaining the structural integrity of the flange, which in turn safeguards the living area beneath the canvas when hatches are open.Step 3: Allowing Time to Dry
After securely attaching the first portion of the flange, Sven allows ample time for it to dry before moving forward with additional steps. This patience and precision are key aspects of his successful boatbuilding methods.Step 4: Finishing Touches
Once the flange is fully dried, Sven removes the clamps carefully, ensuring no damage occurs during this process. He then moves on to attaching four more pieces onto these main frames, completing two pairs of flanges for the bulkhead hatches.The Final Touches
While two flanges form the primary support structure around the hatches, Sven mentions there are two additional pieces required at each end to ensure comprehensive protection. This attention to detail highlights his commitment to producing a durable and reliable design. “Sailing is about finding your path, whether it’s across an ocean or within yourself.” – Sven Yrvind In conclusion, making flanges around bulkhead hatches may seem complex at first glance, but by following Sven Yrvind’s meticulous process, enthusiasts can achieve professional-level results. Remember that the journey of boatbuilding is as rewarding as reaching your destination; it tests one’s patience and dedication. For those seeking to embark on this adventure or simply gain more insight into marine craftsmanship, Sven’s wisdom is invaluable.Sven begins by explaining that working on flanges vertically and horizontally is significantly easier than doing so in a flat position. To simplify the process further, he divides the task into two or three steps as suggested by fellow expert “for for.” This approach not only makes it more manageable but also allows for greater precision in crafting each component.Step 2: Applying Glue and Securing
Sven proceeds to apply glue along one edge of the flange, ensuring a secure bond when clamped into place. He emphasizes that this stage is crucial for maintaining the structural integrity of the flange, which in turn safeguards the living area beneath the canvas when hatches are open.Step 3: Allowing Time to Dry
After securely attaching the first portion of the flange, Sven allows ample time for it to dry before moving forward with additional steps. This patience and precision are key aspects of his successful boatbuilding methods.Step 4: Finishing Touches
Once the flange is fully dried, Sven removes the clamps carefully, ensuring no damage occurs during this process. He then moves on to attaching four more pieces onto these main frames, completing two pairs of flanges for the bulkhead hatches.The Final Touches
While two flanges form the primary support structure around the hatches, Sven mentions there are two additional pieces required at each end to ensure comprehensive protection. This attention to detail highlights his commitment to producing a durable and reliable design. “Sailing is about finding your path, whether it’s across an ocean or within yourself.” – Sven Yrvind In conclusion, making flanges around bulkhead hatches may seem complex at first glance, but by following Sven Yrvind’s meticulous process, enthusiasts can achieve professional-level results. Remember that the journey of boatbuilding is as rewarding as reaching your destination; it tests one’s patience and dedication. For those seeking to embark on this adventure or simply gain more insight into marine craftsmanship, Sven’s wisdom is invaluable.Sven Yrvind, a renowned yacht designer and sailor, shares valuable insights on creating flanges around bulkhead hatches for canvas protection in this enlightening video. By following his expert guidance, boat enthusiasts can ensure their living areas remain secure while allowing unhindered access through the hatches.Step 1: Starting with the Flange
Sven begins by explaining that working on flanges vertically and horizontally is significantly easier than doing so in a flat position. To simplify the process further, he divides the task into two or three steps as suggested by fellow expert “for for.” This approach not only makes it more manageable but also allows for greater precision in crafting each component.Step 2: Applying Glue and Securing
Sven proceeds to apply glue along one edge of the flange, ensuring a secure bond when clamped into place. He emphasizes that this stage is crucial for maintaining the structural integrity of the flange, which in turn safeguards the living area beneath the canvas when hatches are open.Step 3: Allowing Time to Dry
After securely attaching the first portion of the flange, Sven allows ample time for it to dry before moving forward with additional steps. This patience and precision are key aspects of his successful boatbuilding methods.Step 4: Finishing Touches
Once the flange is fully dried, Sven removes the clamps carefully, ensuring no damage occurs during this process. He then moves on to attaching four more pieces onto these main frames, completing two pairs of flanges for the bulkhead hatches.The Final Touches
While two flanges form the primary support structure around the hatches, Sven mentions there are two additional pieces required at each end to ensure comprehensive protection. This attention to detail highlights his commitment to producing a durable and reliable design. “Sailing is about finding your path, whether it’s across an ocean or within yourself.” – Sven Yrvind In conclusion, making flanges around bulkhead hatches may seem complex at first glance, but by following Sven Yrvind’s meticulous process, enthusiasts can achieve professional-level results. Remember that the journey of boatbuilding is as rewarding as reaching your destination; it tests one’s patience and dedication. For those seeking to embark on this adventure or simply gain more insight into marine craftsmanship, Sven’s wisdom is invaluable.Making Flanges Around Bulkhead Hatches for Canvas
Sven Yrvind, a renowned yacht designer and sailor, shares valuable insights on creating flanges around bulkhead hatches for canvas protection in this enlightening video. By following his expert guidance, boat enthusiasts can ensure their living areas remain secure while allowing unhindered access through the hatches.Step 1: Starting with the Flange
Sven begins by explaining that working on flanges vertically and horizontally is significantly easier than doing so in a flat position. To simplify the process further, he divides the task into two or three steps as suggested by fellow expert “for for.” This approach not only makes it more manageable but also allows for greater precision in crafting each component.Step 2: Applying Glue and Securing
Sven proceeds to apply glue along one edge of the flange, ensuring a secure bond when clamped into place. He emphasizes that this stage is crucial for maintaining the structural integrity of the flange, which in turn safeguards the living area beneath the canvas when hatches are open.Step 3: Allowing Time to Dry
After securely attaching the first portion of the flange, Sven allows ample time for it to dry before moving forward with additional steps. This patience and precision are key aspects of his successful boatbuilding methods.Step 4: Finishing Touches
Once the flange is fully dried, Sven removes the clamps carefully, ensuring no damage occurs during this process. He then moves on to attaching four more pieces onto these main frames, completing two pairs of flanges for the bulkhead hatches.The Final Touches
While two flanges form the primary support structure around the hatches, Sven mentions there are two additional pieces required at each end to ensure comprehensive protection. This attention to detail highlights his commitment to producing a durable and reliable design. “Sailing is about finding your path, whether it’s across an ocean or within yourself.” – Sven Yrvind In conclusion, making flanges around bulkhead hatches may seem complex at first glance, but by following Sven Yrvind’s meticulous process, enthusiasts can achieve professional-level results. Remember that the journey of boatbuilding is as rewarding as reaching your destination; it tests one’s patience and dedication. For those seeking to embark on this adventure or simply gain more insight into marine craftsmanship, Sven’s wisdom is invaluable.Sven proceeds to apply glue along one edge of the flange, ensuring a secure bond when clamped into place. He emphasizes that this stage is crucial for maintaining the structural integrity of the flange, which in turn safeguards the living area beneath the canvas when hatches are open.Step 3: Allowing Time to Dry
After securely attaching the first portion of the flange, Sven allows ample time for it to dry before moving forward with additional steps. This patience and precision are key aspects of his successful boatbuilding methods.Step 4: Finishing Touches
Once the flange is fully dried, Sven removes the clamps carefully, ensuring no damage occurs during this process. He then moves on to attaching four more pieces onto these main frames, completing two pairs of flanges for the bulkhead hatches.The Final Touches
While two flanges form the primary support structure around the hatches, Sven mentions there are two additional pieces required at each end to ensure comprehensive protection. This attention to detail highlights his commitment to producing a durable and reliable design. “Sailing is about finding your path, whether it’s across an ocean or within yourself.” – Sven Yrvind In conclusion, making flanges around bulkhead hatches may seem complex at first glance, but by following Sven Yrvind’s meticulous process, enthusiasts can achieve professional-level results. Remember that the journey of boatbuilding is as rewarding as reaching your destination; it tests one’s patience and dedication. For those seeking to embark on this adventure or simply gain more insight into marine craftsmanship, Sven’s wisdom is invaluable.Making Flanges Around Bulkhead Hatches for Canvas
Sven Yrvind, a renowned yacht designer and sailor, shares valuable insights on creating flanges around bulkhead hatches for canvas protection in this enlightening video. By following his expert guidance, boat enthusiasts can ensure their living areas remain secure while allowing unhindered access through the hatches.Step 1: Starting with the Flange
Sven begins by explaining that working on flanges vertically and horizontally is significantly easier than doing so in a flat position. To simplify the process further, he divides the task into two or three steps as suggested by fellow expert “for for.” This approach not only makes it more manageable but also allows for greater precision in crafting each component.Step 2: Applying Glue and Securing
Sven proceeds to apply glue along one edge of the flange, ensuring a secure bond when clamped into place. He emphasizes that this stage is crucial for maintaining the structural integrity of the flange, which in turn safeguards the living area beneath the canvas when hatches are open.Step 3: Allowing Time to Dry
After securely attaching the first portion of the flange, Sven allows ample time for it to dry before moving forward with additional steps. This patience and precision are key aspects of his successful boatbuilding methods.Step 4: Finishing Touches
Once the flange is fully dried, Sven removes the clamps carefully, ensuring no damage occurs during this process. He then moves on to attaching four more pieces onto these main frames, completing two pairs of flanges for the bulkhead hatches.The Final Touches
While two flanges form the primary support structure around the hatches, Sven mentions there are two additional pieces required at each end to ensure comprehensive protection. This attention to detail highlights his commitment to producing a durable and reliable design. “Sailing is about finding your path, whether it’s across an ocean or within yourself.” – Sven Yrvind In conclusion, making flanges around bulkhead hatches may seem complex at first glance, but by following Sven Yrvind’s meticulous process, enthusiasts can achieve professional-level results. Remember that the journey of boatbuilding is as rewarding as reaching your destination; it tests one’s patience and dedication. For those seeking to embark on this adventure or simply gain more insight into marine craftsmanship, Sven’s wisdom is invaluable.After securely attaching the first portion of the flange, Sven allows ample time for it to dry before moving forward with additional steps. This patience and precision are key aspects of his successful boatbuilding methods.Step 4: Finishing Touches
Once the flange is fully dried, Sven removes the clamps carefully, ensuring no damage occurs during this process. He then moves on to attaching four more pieces onto these main frames, completing two pairs of flanges for the bulkhead hatches.The Final Touches
While two flanges form the primary support structure around the hatches, Sven mentions there are two additional pieces required at each end to ensure comprehensive protection. This attention to detail highlights his commitment to producing a durable and reliable design. “Sailing is about finding your path, whether it’s across an ocean or within yourself.” – Sven Yrvind In conclusion, making flanges around bulkhead hatches may seem complex at first glance, but by following Sven Yrvind’s meticulous process, enthusiasts can achieve professional-level results. Remember that the journey of boatbuilding is as rewarding as reaching your destination; it tests one’s patience and dedication. For those seeking to embark on this adventure or simply gain more insight into marine craftsmanship, Sven’s wisdom is invaluable.Sven proceeds to apply glue along one edge of the flange, ensuring a secure bond when clamped into place. He emphasizes that this stage is crucial for maintaining the structural integrity of the flange, which in turn safeguards the living area beneath the canvas when hatches are open.Step 3: Allowing Time to Dry
After securely attaching the first portion of the flange, Sven allows ample time for it to dry before moving forward with additional steps. This patience and precision are key aspects of his successful boatbuilding methods.Step 4: Finishing Touches
Once the flange is fully dried, Sven removes the clamps carefully, ensuring no damage occurs during this process. He then moves on to attaching four more pieces onto these main frames, completing two pairs of flanges for the bulkhead hatches.The Final Touches
While two flanges form the primary support structure around the hatches, Sven mentions there are two additional pieces required at each end to ensure comprehensive protection. This attention to detail highlights his commitment to producing a durable and reliable design. “Sailing is about finding your path, whether it’s across an ocean or within yourself.” – Sven Yrvind In conclusion, making flanges around bulkhead hatches may seem complex at first glance, but by following Sven Yrvind’s meticulous process, enthusiasts can achieve professional-level results. Remember that the journey of boatbuilding is as rewarding as reaching your destination; it tests one’s patience and dedication. For those seeking to embark on this adventure or simply gain more insight into marine craftsmanship, Sven’s wisdom is invaluable.Sven begins by explaining that working on flanges vertically and horizontally is significantly easier than doing so in a flat position. To simplify the process further, he divides the task into two or three steps as suggested by fellow expert “for for.” This approach not only makes it more manageable but also allows for greater precision in crafting each component.Step 2: Applying Glue and Securing
Sven proceeds to apply glue along one edge of the flange, ensuring a secure bond when clamped into place. He emphasizes that this stage is crucial for maintaining the structural integrity of the flange, which in turn safeguards the living area beneath the canvas when hatches are open.Step 3: Allowing Time to Dry
After securely attaching the first portion of the flange, Sven allows ample time for it to dry before moving forward with additional steps. This patience and precision are key aspects of his successful boatbuilding methods.Step 4: Finishing Touches
Once the flange is fully dried, Sven removes the clamps carefully, ensuring no damage occurs during this process. He then moves on to attaching four more pieces onto these main frames, completing two pairs of flanges for the bulkhead hatches.The Final Touches
While two flanges form the primary support structure around the hatches, Sven mentions there are two additional pieces required at each end to ensure comprehensive protection. This attention to detail highlights his commitment to producing a durable and reliable design. “Sailing is about finding your path, whether it’s across an ocean or within yourself.” – Sven Yrvind In conclusion, making flanges around bulkhead hatches may seem complex at first glance, but by following Sven Yrvind’s meticulous process, enthusiasts can achieve professional-level results. Remember that the journey of boatbuilding is as rewarding as reaching your destination; it tests one’s patience and dedication. For those seeking to embark on this adventure or simply gain more insight into marine craftsmanship, Sven’s wisdom is invaluable.Sven Yrvind, a renowned yacht designer and sailor, shares valuable insights on creating flanges around bulkhead hatches for canvas protection in this enlightening video. By following his expert guidance, boat enthusiasts can ensure their living areas remain secure while allowing unhindered access through the hatches.Step 1: Starting with the Flange
Sven begins by explaining that working on flanges vertically and horizontally is significantly easier than doing so in a flat position. To simplify the process further, he divides the task into two or three steps as suggested by fellow expert “for for.” This approach not only makes it more manageable but also allows for greater precision in crafting each component.Step 2: Applying Glue and Securing
Sven proceeds to apply glue along one edge of the flange, ensuring a secure bond when clamped into place. He emphasizes that this stage is crucial for maintaining the structural integrity of the flange, which in turn safeguards the living area beneath the canvas when hatches are open.Step 3: Allowing Time to Dry
After securely attaching the first portion of the flange, Sven allows ample time for it to dry before moving forward with additional steps. This patience and precision are key aspects of his successful boatbuilding methods.Step 4: Finishing Touches
Once the flange is fully dried, Sven removes the clamps carefully, ensuring no damage occurs during this process. He then moves on to attaching four more pieces onto these main frames, completing two pairs of flanges for the bulkhead hatches.The Final Touches
While two flanges form the primary support structure around the hatches, Sven mentions there are two additional pieces required at each end to ensure comprehensive protection. This attention to detail highlights his commitment to producing a durable and reliable design. “Sailing is about finding your path, whether it’s across an ocean or within yourself.” – Sven Yrvind In conclusion, making flanges around bulkhead hatches may seem complex at first glance, but by following Sven Yrvind’s meticulous process, enthusiasts can achieve professional-level results. Remember that the journey of boatbuilding is as rewarding as reaching your destination; it tests one’s patience and dedication. For those seeking to embark on this adventure or simply gain more insight into marine craftsmanship, Sven’s wisdom is invaluable.Making Flanges Around Bulkhead Hatches for Canvas
Sven Yrvind, a renowned yacht designer and sailor, shares valuable insights on creating flanges around bulkhead hatches for canvas protection in this enlightening video. By following his expert guidance, boat enthusiasts can ensure their living areas remain secure while allowing unhindered access through the hatches.Step 1: Starting with the Flange
Sven begins by explaining that working on flanges vertically and horizontally is significantly easier than doing so in a flat position. To simplify the process further, he divides the task into two or three steps as suggested by fellow expert “for for.” This approach not only makes it more manageable but also allows for greater precision in crafting each component.Step 2: Applying Glue and Securing
Sven proceeds to apply glue along one edge of the flange, ensuring a secure bond when clamped into place. He emphasizes that this stage is crucial for maintaining the structural integrity of the flange, which in turn safeguards the living area beneath the canvas when hatches are open.Step 3: Allowing Time to Dry
After securely attaching the first portion of the flange, Sven allows ample time for it to dry before moving forward with additional steps. This patience and precision are key aspects of his successful boatbuilding methods.Step 4: Finishing Touches
Once the flange is fully dried, Sven removes the clamps carefully, ensuring no damage occurs during this process. He then moves on to attaching four more pieces onto these main frames, completing two pairs of flanges for the bulkhead hatches.The Final Touches
While two flanges form the primary support structure around the hatches, Sven mentions there are two additional pieces required at each end to ensure comprehensive protection. This attention to detail highlights his commitment to producing a durable and reliable design. “Sailing is about finding your path, whether it’s across an ocean or within yourself.” – Sven Yrvind In conclusion, making flanges around bulkhead hatches may seem complex at first glance, but by following Sven Yrvind’s meticulous process, enthusiasts can achieve professional-level results. Remember that the journey of boatbuilding is as rewarding as reaching your destination; it tests one’s patience and dedication. For those seeking to embark on this adventure or simply gain more insight into marine craftsmanship, Sven’s wisdom is invaluable.Once the flange is fully dried, Sven removes the clamps carefully, ensuring no damage occurs during this process. He then moves on to attaching four more pieces onto these main frames, completing two pairs of flanges for the bulkhead hatches.The Final Touches
While two flanges form the primary support structure around the hatches, Sven mentions there are two additional pieces required at each end to ensure comprehensive protection. This attention to detail highlights his commitment to producing a durable and reliable design. “Sailing is about finding your path, whether it’s across an ocean or within yourself.” – Sven Yrvind In conclusion, making flanges around bulkhead hatches may seem complex at first glance, but by following Sven Yrvind’s meticulous process, enthusiasts can achieve professional-level results. Remember that the journey of boatbuilding is as rewarding as reaching your destination; it tests one’s patience and dedication. For those seeking to embark on this adventure or simply gain more insight into marine craftsmanship, Sven’s wisdom is invaluable.After securely attaching the first portion of the flange, Sven allows ample time for it to dry before moving forward with additional steps. This patience and precision are key aspects of his successful boatbuilding methods.Step 4: Finishing Touches
Once the flange is fully dried, Sven removes the clamps carefully, ensuring no damage occurs during this process. He then moves on to attaching four more pieces onto these main frames, completing two pairs of flanges for the bulkhead hatches.The Final Touches
While two flanges form the primary support structure around the hatches, Sven mentions there are two additional pieces required at each end to ensure comprehensive protection. This attention to detail highlights his commitment to producing a durable and reliable design. “Sailing is about finding your path, whether it’s across an ocean or within yourself.” – Sven Yrvind In conclusion, making flanges around bulkhead hatches may seem complex at first glance, but by following Sven Yrvind’s meticulous process, enthusiasts can achieve professional-level results. Remember that the journey of boatbuilding is as rewarding as reaching your destination; it tests one’s patience and dedication. For those seeking to embark on this adventure or simply gain more insight into marine craftsmanship, Sven’s wisdom is invaluable.Sven proceeds to apply glue along one edge of the flange, ensuring a secure bond when clamped into place. He emphasizes that this stage is crucial for maintaining the structural integrity of the flange, which in turn safeguards the living area beneath the canvas when hatches are open.Step 3: Allowing Time to Dry
After securely attaching the first portion of the flange, Sven allows ample time for it to dry before moving forward with additional steps. This patience and precision are key aspects of his successful boatbuilding methods.Step 4: Finishing Touches
Once the flange is fully dried, Sven removes the clamps carefully, ensuring no damage occurs during this process. He then moves on to attaching four more pieces onto these main frames, completing two pairs of flanges for the bulkhead hatches.The Final Touches
While two flanges form the primary support structure around the hatches, Sven mentions there are two additional pieces required at each end to ensure comprehensive protection. This attention to detail highlights his commitment to producing a durable and reliable design. “Sailing is about finding your path, whether it’s across an ocean or within yourself.” – Sven Yrvind In conclusion, making flanges around bulkhead hatches may seem complex at first glance, but by following Sven Yrvind’s meticulous process, enthusiasts can achieve professional-level results. Remember that the journey of boatbuilding is as rewarding as reaching your destination; it tests one’s patience and dedication. For those seeking to embark on this adventure or simply gain more insight into marine craftsmanship, Sven’s wisdom is invaluable.Sven begins by explaining that working on flanges vertically and horizontally is significantly easier than doing so in a flat position. To simplify the process further, he divides the task into two or three steps as suggested by fellow expert “for for.” This approach not only makes it more manageable but also allows for greater precision in crafting each component.Step 2: Applying Glue and Securing
Sven proceeds to apply glue along one edge of the flange, ensuring a secure bond when clamped into place. He emphasizes that this stage is crucial for maintaining the structural integrity of the flange, which in turn safeguards the living area beneath the canvas when hatches are open.Step 3: Allowing Time to Dry
After securely attaching the first portion of the flange, Sven allows ample time for it to dry before moving forward with additional steps. This patience and precision are key aspects of his successful boatbuilding methods.Step 4: Finishing Touches
Once the flange is fully dried, Sven removes the clamps carefully, ensuring no damage occurs during this process. He then moves on to attaching four more pieces onto these main frames, completing two pairs of flanges for the bulkhead hatches.The Final Touches
While two flanges form the primary support structure around the hatches, Sven mentions there are two additional pieces required at each end to ensure comprehensive protection. This attention to detail highlights his commitment to producing a durable and reliable design. “Sailing is about finding your path, whether it’s across an ocean or within yourself.” – Sven Yrvind In conclusion, making flanges around bulkhead hatches may seem complex at first glance, but by following Sven Yrvind’s meticulous process, enthusiasts can achieve professional-level results. Remember that the journey of boatbuilding is as rewarding as reaching your destination; it tests one’s patience and dedication. For those seeking to embark on this adventure or simply gain more insight into marine craftsmanship, Sven’s wisdom is invaluable.Sven Yrvind, a renowned yacht designer and sailor, shares valuable insights on creating flanges around bulkhead hatches for canvas protection in this enlightening video. By following his expert guidance, boat enthusiasts can ensure their living areas remain secure while allowing unhindered access through the hatches.Step 1: Starting with the Flange
Sven begins by explaining that working on flanges vertically and horizontally is significantly easier than doing so in a flat position. To simplify the process further, he divides the task into two or three steps as suggested by fellow expert “for for.” This approach not only makes it more manageable but also allows for greater precision in crafting each component.Step 2: Applying Glue and Securing
Sven proceeds to apply glue along one edge of the flange, ensuring a secure bond when clamped into place. He emphasizes that this stage is crucial for maintaining the structural integrity of the flange, which in turn safeguards the living area beneath the canvas when hatches are open.Step 3: Allowing Time to Dry
After securely attaching the first portion of the flange, Sven allows ample time for it to dry before moving forward with additional steps. This patience and precision are key aspects of his successful boatbuilding methods.Step 4: Finishing Touches
Once the flange is fully dried, Sven removes the clamps carefully, ensuring no damage occurs during this process. He then moves on to attaching four more pieces onto these main frames, completing two pairs of flanges for the bulkhead hatches.The Final Touches
While two flanges form the primary support structure around the hatches, Sven mentions there are two additional pieces required at each end to ensure comprehensive protection. This attention to detail highlights his commitment to producing a durable and reliable design. “Sailing is about finding your path, whether it’s across an ocean or within yourself.” – Sven Yrvind In conclusion, making flanges around bulkhead hatches may seem complex at first glance, but by following Sven Yrvind’s meticulous process, enthusiasts can achieve professional-level results. Remember that the journey of boatbuilding is as rewarding as reaching your destination; it tests one’s patience and dedication. For those seeking to embark on this adventure or simply gain more insight into marine craftsmanship, Sven’s wisdom is invaluable.Making Flanges Around Bulkhead Hatches for Canvas
Sven Yrvind, a renowned yacht designer and sailor, shares valuable insights on creating flanges around bulkhead hatches for canvas protection in this enlightening video. By following his expert guidance, boat enthusiasts can ensure their living areas remain secure while allowing unhindered access through the hatches.Step 1: Starting with the Flange
Sven begins by explaining that working on flanges vertically and horizontally is significantly easier than doing so in a flat position. To simplify the process further, he divides the task into two or three steps as suggested by fellow expert “for for.” This approach not only makes it more manageable but also allows for greater precision in crafting each component.Step 2: Applying Glue and Securing
Sven proceeds to apply glue along one edge of the flange, ensuring a secure bond when clamped into place. He emphasizes that this stage is crucial for maintaining the structural integrity of the flange, which in turn safeguards the living area beneath the canvas when hatches are open.Step 3: Allowing Time to Dry
After securely attaching the first portion of the flange, Sven allows ample time for it to dry before moving forward with additional steps. This patience and precision are key aspects of his successful boatbuilding methods.Step 4: Finishing Touches
Once the flange is fully dried, Sven removes the clamps carefully, ensuring no damage occurs during this process. He then moves on to attaching four more pieces onto these main frames, completing two pairs of flanges for the bulkhead hatches.The Final Touches
While two flanges form the primary support structure around the hatches, Sven mentions there are two additional pieces required at each end to ensure comprehensive protection. This attention to detail highlights his commitment to producing a durable and reliable design. “Sailing is about finding your path, whether it’s across an ocean or within yourself.” – Sven Yrvind In conclusion, making flanges around bulkhead hatches may seem complex at first glance, but by following Sven Yrvind’s meticulous process, enthusiasts can achieve professional-level results. Remember that the journey of boatbuilding is as rewarding as reaching your destination; it tests one’s patience and dedication. For those seeking to embark on this adventure or simply gain more insight into marine craftsmanship, Sven’s wisdom is invaluable.Sven begins by explaining that working on flanges vertically and horizontally is significantly easier than doing so in a flat position. To simplify the process further, he divides the task into two or three steps as suggested by fellow expert “for for.” This approach not only makes it more manageable but also allows for greater precision in crafting each component.Step 2: Applying Glue and Securing
Sven proceeds to apply glue along one edge of the flange, ensuring a secure bond when clamped into place. He emphasizes that this stage is crucial for maintaining the structural integrity of the flange, which in turn safeguards the living area beneath the canvas when hatches are open.Step 3: Allowing Time to Dry
After securely attaching the first portion of the flange, Sven allows ample time for it to dry before moving forward with additional steps. This patience and precision are key aspects of his successful boatbuilding methods.Step 4: Finishing Touches
Once the flange is fully dried, Sven removes the clamps carefully, ensuring no damage occurs during this process. He then moves on to attaching four more pieces onto these main frames, completing two pairs of flanges for the bulkhead hatches.The Final Touches
While two flanges form the primary support structure around the hatches, Sven mentions there are two additional pieces required at each end to ensure comprehensive protection. This attention to detail highlights his commitment to producing a durable and reliable design. “Sailing is about finding your path, whether it’s across an ocean or within yourself.” – Sven Yrvind In conclusion, making flanges around bulkhead hatches may seem complex at first glance, but by following Sven Yrvind’s meticulous process, enthusiasts can achieve professional-level results. Remember that the journey of boatbuilding is as rewarding as reaching your destination; it tests one’s patience and dedication. For those seeking to embark on this adventure or simply gain more insight into marine craftsmanship, Sven’s wisdom is invaluable.Making Flanges Around Bulkhead Hatches for Canvas
Sven Yrvind, a renowned yacht designer and sailor, shares valuable insights on creating flanges around bulkhead hatches for canvas protection in this enlightening video. By following his expert guidance, boat enthusiasts can ensure their living areas remain secure while allowing unhindered access through the hatches.Step 1: Starting with the Flange
Sven begins by explaining that working on flanges vertically and horizontally is significantly easier than doing so in a flat position. To simplify the process further, he divides the task into two or three steps as suggested by fellow expert “for for.” This approach not only makes it more manageable but also allows for greater precision in crafting each component.Step 2: Applying Glue and Securing
Sven proceeds to apply glue along one edge of the flange, ensuring a secure bond when clamped into place. He emphasizes that this stage is crucial for maintaining the structural integrity of the flange, which in turn safeguards the living area beneath the canvas when hatches are open.Step 3: Allowing Time to Dry
After securely attaching the first portion of the flange, Sven allows ample time for it to dry before moving forward with additional steps. This patience and precision are key aspects of his successful boatbuilding methods.Step 4: Finishing Touches
Once the flange is fully dried, Sven removes the clamps carefully, ensuring no damage occurs during this process. He then moves on to attaching four more pieces onto these main frames, completing two pairs of flanges for the bulkhead hatches.The Final Touches
While two flanges form the primary support structure around the hatches, Sven mentions there are two additional pieces required at each end to ensure comprehensive protection. This attention to detail highlights his commitment to producing a durable and reliable design. “Sailing is about finding your path, whether it’s across an ocean or within yourself.” – Sven Yrvind In conclusion, making flanges around bulkhead hatches may seem complex at first glance, but by following Sven Yrvind’s meticulous process, enthusiasts can achieve professional-level results. Remember that the journey of boatbuilding is as rewarding as reaching your destination; it tests one’s patience and dedication. For those seeking to embark on this adventure or simply gain more insight into marine craftsmanship, Sven’s wisdom is invaluable.After securely attaching the first portion of the flange, Sven allows ample time for it to dry before moving forward with additional steps. This patience and precision are key aspects of his successful boatbuilding methods.Step 4: Finishing Touches
Once the flange is fully dried, Sven removes the clamps carefully, ensuring no damage occurs during this process. He then moves on to attaching four more pieces onto these main frames, completing two pairs of flanges for the bulkhead hatches.The Final Touches
While two flanges form the primary support structure around the hatches, Sven mentions there are two additional pieces required at each end to ensure comprehensive protection. This attention to detail highlights his commitment to producing a durable and reliable design. “Sailing is about finding your path, whether it’s across an ocean or within yourself.” – Sven Yrvind In conclusion, making flanges around bulkhead hatches may seem complex at first glance, but by following Sven Yrvind’s meticulous process, enthusiasts can achieve professional-level results. Remember that the journey of boatbuilding is as rewarding as reaching your destination; it tests one’s patience and dedication. For those seeking to embark on this adventure or simply gain more insight into marine craftsmanship, Sven’s wisdom is invaluable.Sven proceeds to apply glue along one edge of the flange, ensuring a secure bond when clamped into place. He emphasizes that this stage is crucial for maintaining the structural integrity of the flange, which in turn safeguards the living area beneath the canvas when hatches are open.Step 3: Allowing Time to Dry
After securely attaching the first portion of the flange, Sven allows ample time for it to dry before moving forward with additional steps. This patience and precision are key aspects of his successful boatbuilding methods.Step 4: Finishing Touches
Once the flange is fully dried, Sven removes the clamps carefully, ensuring no damage occurs during this process. He then moves on to attaching four more pieces onto these main frames, completing two pairs of flanges for the bulkhead hatches.The Final Touches
While two flanges form the primary support structure around the hatches, Sven mentions there are two additional pieces required at each end to ensure comprehensive protection. This attention to detail highlights his commitment to producing a durable and reliable design. “Sailing is about finding your path, whether it’s across an ocean or within yourself.” – Sven Yrvind In conclusion, making flanges around bulkhead hatches may seem complex at first glance, but by following Sven Yrvind’s meticulous process, enthusiasts can achieve professional-level results. Remember that the journey of boatbuilding is as rewarding as reaching your destination; it tests one’s patience and dedication. For those seeking to embark on this adventure or simply gain more insight into marine craftsmanship, Sven’s wisdom is invaluable.Sven begins by explaining that working on flanges vertically and horizontally is significantly easier than doing so in a flat position. To simplify the process further, he divides the task into two or three steps as suggested by fellow expert “for for.” This approach not only makes it more manageable but also allows for greater precision in crafting each component.Step 2: Applying Glue and Securing
Sven proceeds to apply glue along one edge of the flange, ensuring a secure bond when clamped into place. He emphasizes that this stage is crucial for maintaining the structural integrity of the flange, which in turn safeguards the living area beneath the canvas when hatches are open.Step 3: Allowing Time to Dry
After securely attaching the first portion of the flange, Sven allows ample time for it to dry before moving forward with additional steps. This patience and precision are key aspects of his successful boatbuilding methods.Step 4: Finishing Touches
Once the flange is fully dried, Sven removes the clamps carefully, ensuring no damage occurs during this process. He then moves on to attaching four more pieces onto these main frames, completing two pairs of flanges for the bulkhead hatches.The Final Touches
While two flanges form the primary support structure around the hatches, Sven mentions there are two additional pieces required at each end to ensure comprehensive protection. This attention to detail highlights his commitment to producing a durable and reliable design. “Sailing is about finding your path, whether it’s across an ocean or within yourself.” – Sven Yrvind In conclusion, making flanges around bulkhead hatches may seem complex at first glance, but by following Sven Yrvind’s meticulous process, enthusiasts can achieve professional-level results. Remember that the journey of boatbuilding is as rewarding as reaching your destination; it tests one’s patience and dedication. For those seeking to embark on this adventure or simply gain more insight into marine craftsmanship, Sven’s wisdom is invaluable.Sven Yrvind, a renowned yacht designer and sailor, shares valuable insights on creating flanges around bulkhead hatches for canvas protection in this enlightening video. By following his expert guidance, boat enthusiasts can ensure their living areas remain secure while allowing unhindered access through the hatches.Step 1: Starting with the Flange
Sven begins by explaining that working on flanges vertically and horizontally is significantly easier than doing so in a flat position. To simplify the process further, he divides the task into two or three steps as suggested by fellow expert “for for.” This approach not only makes it more manageable but also allows for greater precision in crafting each component.Step 2: Applying Glue and Securing
Sven proceeds to apply glue along one edge of the flange, ensuring a secure bond when clamped into place. He emphasizes that this stage is crucial for maintaining the structural integrity of the flange, which in turn safeguards the living area beneath the canvas when hatches are open.Step 3: Allowing Time to Dry
After securely attaching the first portion of the flange, Sven allows ample time for it to dry before moving forward with additional steps. This patience and precision are key aspects of his successful boatbuilding methods.Step 4: Finishing Touches
Once the flange is fully dried, Sven removes the clamps carefully, ensuring no damage occurs during this process. He then moves on to attaching four more pieces onto these main frames, completing two pairs of flanges for the bulkhead hatches.The Final Touches
While two flanges form the primary support structure around the hatches, Sven mentions there are two additional pieces required at each end to ensure comprehensive protection. This attention to detail highlights his commitment to producing a durable and reliable design. “Sailing is about finding your path, whether it’s across an ocean or within yourself.” – Sven Yrvind In conclusion, making flanges around bulkhead hatches may seem complex at first glance, but by following Sven Yrvind’s meticulous process, enthusiasts can achieve professional-level results. Remember that the journey of boatbuilding is as rewarding as reaching your destination; it tests one’s patience and dedication. For those seeking to embark on this adventure or simply gain more insight into marine craftsmanship, Sven’s wisdom is invaluable.Making Flanges Around Bulkhead Hatches for Canvas
Sven Yrvind, a renowned yacht designer and sailor, shares valuable insights on creating flanges around bulkhead hatches for canvas protection in this enlightening video. By following his expert guidance, boat enthusiasts can ensure their living areas remain secure while allowing unhindered access through the hatches.Step 1: Starting with the Flange
Sven begins by explaining that working on flanges vertically and horizontally is significantly easier than doing so in a flat position. To simplify the process further, he divides the task into two or three steps as suggested by fellow expert “for for.” This approach not only makes it more manageable but also allows for greater precision in crafting each component.Step 2: Applying Glue and Securing
Sven proceeds to apply glue along one edge of the flange, ensuring a secure bond when clamped into place. He emphasizes that this stage is crucial for maintaining the structural integrity of the flange, which in turn safeguards the living area beneath the canvas when hatches are open.Step 3: Allowing Time to Dry
After securely attaching the first portion of the flange, Sven allows ample time for it to dry before moving forward with additional steps. This patience and precision are key aspects of his successful boatbuilding methods.Step 4: Finishing Touches
Once the flange is fully dried, Sven removes the clamps carefully, ensuring no damage occurs during this process. He then moves on to attaching four more pieces onto these main frames, completing two pairs of flanges for the bulkhead hatches.The Final Touches
While two flanges form the primary support structure around the hatches, Sven mentions there are two additional pieces required at each end to ensure comprehensive protection. This attention to detail highlights his commitment to producing a durable and reliable design. “Sailing is about finding your path, whether it’s across an ocean or within yourself.” – Sven Yrvind In conclusion, making flanges around bulkhead hatches may seem complex at first glance, but by following Sven Yrvind’s meticulous process, enthusiasts can achieve professional-level results. Remember that the journey of boatbuilding is as rewarding as reaching your destination; it tests one’s patience and dedication. For those seeking to embark on this adventure or simply gain more insight into marine craftsmanship, Sven’s wisdom is invaluable.Once the flange is fully dried, Sven removes the clamps carefully, ensuring no damage occurs during this process. He then moves on to attaching four more pieces onto these main frames, completing two pairs of flanges for the bulkhead hatches.The Final Touches
While two flanges form the primary support structure around the hatches, Sven mentions there are two additional pieces required at each end to ensure comprehensive protection. This attention to detail highlights his commitment to producing a durable and reliable design. “Sailing is about finding your path, whether it’s across an ocean or within yourself.” – Sven Yrvind In conclusion, making flanges around bulkhead hatches may seem complex at first glance, but by following Sven Yrvind’s meticulous process, enthusiasts can achieve professional-level results. Remember that the journey of boatbuilding is as rewarding as reaching your destination; it tests one’s patience and dedication. For those seeking to embark on this adventure or simply gain more insight into marine craftsmanship, Sven’s wisdom is invaluable.After securely attaching the first portion of the flange, Sven allows ample time for it to dry before moving forward with additional steps. This patience and precision are key aspects of his successful boatbuilding methods.Step 4: Finishing Touches
Once the flange is fully dried, Sven removes the clamps carefully, ensuring no damage occurs during this process. He then moves on to attaching four more pieces onto these main frames, completing two pairs of flanges for the bulkhead hatches.The Final Touches
While two flanges form the primary support structure around the hatches, Sven mentions there are two additional pieces required at each end to ensure comprehensive protection. This attention to detail highlights his commitment to producing a durable and reliable design. “Sailing is about finding your path, whether it’s across an ocean or within yourself.” – Sven Yrvind In conclusion, making flanges around bulkhead hatches may seem complex at first glance, but by following Sven Yrvind’s meticulous process, enthusiasts can achieve professional-level results. Remember that the journey of boatbuilding is as rewarding as reaching your destination; it tests one’s patience and dedication. For those seeking to embark on this adventure or simply gain more insight into marine craftsmanship, Sven’s wisdom is invaluable.Sven proceeds to apply glue along one edge of the flange, ensuring a secure bond when clamped into place. He emphasizes that this stage is crucial for maintaining the structural integrity of the flange, which in turn safeguards the living area beneath the canvas when hatches are open.Step 3: Allowing Time to Dry
After securely attaching the first portion of the flange, Sven allows ample time for it to dry before moving forward with additional steps. This patience and precision are key aspects of his successful boatbuilding methods.Step 4: Finishing Touches
Once the flange is fully dried, Sven removes the clamps carefully, ensuring no damage occurs during this process. He then moves on to attaching four more pieces onto these main frames, completing two pairs of flanges for the bulkhead hatches.The Final Touches
While two flanges form the primary support structure around the hatches, Sven mentions there are two additional pieces required at each end to ensure comprehensive protection. This attention to detail highlights his commitment to producing a durable and reliable design. “Sailing is about finding your path, whether it’s across an ocean or within yourself.” – Sven Yrvind In conclusion, making flanges around bulkhead hatches may seem complex at first glance, but by following Sven Yrvind’s meticulous process, enthusiasts can achieve professional-level results. Remember that the journey of boatbuilding is as rewarding as reaching your destination; it tests one’s patience and dedication. For those seeking to embark on this adventure or simply gain more insight into marine craftsmanship, Sven’s wisdom is invaluable.Sven begins by explaining that working on flanges vertically and horizontally is significantly easier than doing so in a flat position. To simplify the process further, he divides the task into two or three steps as suggested by fellow expert “for for.” This approach not only makes it more manageable but also allows for greater precision in crafting each component.Step 2: Applying Glue and Securing
Sven proceeds to apply glue along one edge of the flange, ensuring a secure bond when clamped into place. He emphasizes that this stage is crucial for maintaining the structural integrity of the flange, which in turn safeguards the living area beneath the canvas when hatches are open.Step 3: Allowing Time to Dry
After securely attaching the first portion of the flange, Sven allows ample time for it to dry before moving forward with additional steps. This patience and precision are key aspects of his successful boatbuilding methods.Step 4: Finishing Touches
Once the flange is fully dried, Sven removes the clamps carefully, ensuring no damage occurs during this process. He then moves on to attaching four more pieces onto these main frames, completing two pairs of flanges for the bulkhead hatches.The Final Touches
While two flanges form the primary support structure around the hatches, Sven mentions there are two additional pieces required at each end to ensure comprehensive protection. This attention to detail highlights his commitment to producing a durable and reliable design. “Sailing is about finding your path, whether it’s across an ocean or within yourself.” – Sven Yrvind In conclusion, making flanges around bulkhead hatches may seem complex at first glance, but by following Sven Yrvind’s meticulous process, enthusiasts can achieve professional-level results. Remember that the journey of boatbuilding is as rewarding as reaching your destination; it tests one’s patience and dedication. For those seeking to embark on this adventure or simply gain more insight into marine craftsmanship, Sven’s wisdom is invaluable.Sven Yrvind, a renowned yacht designer and sailor, shares valuable insights on creating flanges around bulkhead hatches for canvas protection in this enlightening video. By following his expert guidance, boat enthusiasts can ensure their living areas remain secure while allowing unhindered access through the hatches.Step 1: Starting with the Flange
Sven begins by explaining that working on flanges vertically and horizontally is significantly easier than doing so in a flat position. To simplify the process further, he divides the task into two or three steps as suggested by fellow expert “for for.” This approach not only makes it more manageable but also allows for greater precision in crafting each component.Step 2: Applying Glue and Securing
Sven proceeds to apply glue along one edge of the flange, ensuring a secure bond when clamped into place. He emphasizes that this stage is crucial for maintaining the structural integrity of the flange, which in turn safeguards the living area beneath the canvas when hatches are open.Step 3: Allowing Time to Dry
After securely attaching the first portion of the flange, Sven allows ample time for it to dry before moving forward with additional steps. This patience and precision are key aspects of his successful boatbuilding methods.Step 4: Finishing Touches
Once the flange is fully dried, Sven removes the clamps carefully, ensuring no damage occurs during this process. He then moves on to attaching four more pieces onto these main frames, completing two pairs of flanges for the bulkhead hatches.The Final Touches
While two flanges form the primary support structure around the hatches, Sven mentions there are two additional pieces required at each end to ensure comprehensive protection. This attention to detail highlights his commitment to producing a durable and reliable design. “Sailing is about finding your path, whether it’s across an ocean or within yourself.” – Sven Yrvind In conclusion, making flanges around bulkhead hatches may seem complex at first glance, but by following Sven Yrvind’s meticulous process, enthusiasts can achieve professional-level results. Remember that the journey of boatbuilding is as rewarding as reaching your destination; it tests one’s patience and dedication. For those seeking to embark on this adventure or simply gain more insight into marine craftsmanship, Sven’s wisdom is invaluable.Making Flanges Around Bulkhead Hatches for Canvas
Sven Yrvind, a renowned yacht designer and sailor, shares valuable insights on creating flanges around bulkhead hatches for canvas protection in this enlightening video. By following his expert guidance, boat enthusiasts can ensure their living areas remain secure while allowing unhindered access through the hatches.Step 1: Starting with the Flange
Sven begins by explaining that working on flanges vertically and horizontally is significantly easier than doing so in a flat position. To simplify the process further, he divides the task into two or three steps as suggested by fellow expert “for for.” This approach not only makes it more manageable but also allows for greater precision in crafting each component.Step 2: Applying Glue and Securing
Sven proceeds to apply glue along one edge of the flange, ensuring a secure bond when clamped into place. He emphasizes that this stage is crucial for maintaining the structural integrity of the flange, which in turn safeguards the living area beneath the canvas when hatches are open.Step 3: Allowing Time to Dry
After securely attaching the first portion of the flange, Sven allows ample time for it to dry before moving forward with additional steps. This patience and precision are key aspects of his successful boatbuilding methods.Step 4: Finishing Touches
Once the flange is fully dried, Sven removes the clamps carefully, ensuring no damage occurs during this process. He then moves on to attaching four more pieces onto these main frames, completing two pairs of flanges for the bulkhead hatches.The Final Touches
While two flanges form the primary support structure around the hatches, Sven mentions there are two additional pieces required at each end to ensure comprehensive protection. This attention to detail highlights his commitment to producing a durable and reliable design. “Sailing is about finding your path, whether it’s across an ocean or within yourself.” – Sven Yrvind In conclusion, making flanges around bulkhead hatches may seem complex at first glance, but by following Sven Yrvind’s meticulous process, enthusiasts can achieve professional-level results. Remember that the journey of boatbuilding is as rewarding as reaching your destination; it tests one’s patience and dedication. For those seeking to embark on this adventure or simply gain more insight into marine craftsmanship, Sven’s wisdom is invaluable.Sven Yrvind, a renowned yacht designer and sailor, shares valuable insights on creating flanges around bulkhead hatches for canvas protection in this enlightening video. By following his expert guidance, boat enthusiasts can ensure their living areas remain secure while allowing unhindered access through the hatches.Step 1: Starting with the Flange
Sven begins by explaining that working on flanges vertically and horizontally is significantly easier than doing so in a flat position. To simplify the process further, he divides the task into two or three steps as suggested by fellow expert “for for.” This approach not only makes it more manageable but also allows for greater precision in crafting each component.Step 2: Applying Glue and Securing
Sven proceeds to apply glue along one edge of the flange, ensuring a secure bond when clamped into place. He emphasizes that this stage is crucial for maintaining the structural integrity of the flange, which in turn safeguards the living area beneath the canvas when hatches are open.Step 3: Allowing Time to Dry
After securely attaching the first portion of the flange, Sven allows ample time for it to dry before moving forward with additional steps. This patience and precision are key aspects of his successful boatbuilding methods.Step 4: Finishing Touches
Once the flange is fully dried, Sven removes the clamps carefully, ensuring no damage occurs during this process. He then moves on to attaching four more pieces onto these main frames, completing two pairs of flanges for the bulkhead hatches.The Final Touches
While two flanges form the primary support structure around the hatches, Sven mentions there are two additional pieces required at each end to ensure comprehensive protection. This attention to detail highlights his commitment to producing a durable and reliable design. “Sailing is about finding your path, whether it’s across an ocean or within yourself.” – Sven Yrvind In conclusion, making flanges around bulkhead hatches may seem complex at first glance, but by following Sven Yrvind’s meticulous process, enthusiasts can achieve professional-level results. Remember that the journey of boatbuilding is as rewarding as reaching your destination; it tests one’s patience and dedication. For those seeking to embark on this adventure or simply gain more insight into marine craftsmanship, Sven’s wisdom is invaluable.Making Flanges Around Bulkhead Hatches for Canvas
Sven Yrvind, a renowned yacht designer and sailor, shares valuable insights on creating flanges around bulkhead hatches for canvas protection in this enlightening video. By following his expert guidance, boat enthusiasts can ensure their living areas remain secure while allowing unhindered access through the hatches.Step 1: Starting with the Flange
Sven begins by explaining that working on flanges vertically and horizontally is significantly easier than doing so in a flat position. To simplify the process further, he divides the task into two or three steps as suggested by fellow expert “for for.” This approach not only makes it more manageable but also allows for greater precision in crafting each component.Step 2: Applying Glue and Securing
Sven proceeds to apply glue along one edge of the flange, ensuring a secure bond when clamped into place. He emphasizes that this stage is crucial for maintaining the structural integrity of the flange, which in turn safeguards the living area beneath the canvas when hatches are open.Step 3: Allowing Time to Dry
After securely attaching the first portion of the flange, Sven allows ample time for it to dry before moving forward with additional steps. This patience and precision are key aspects of his successful boatbuilding methods.Step 4: Finishing Touches
Once the flange is fully dried, Sven removes the clamps carefully, ensuring no damage occurs during this process. He then moves on to attaching four more pieces onto these main frames, completing two pairs of flanges for the bulkhead hatches.The Final Touches
While two flanges form the primary support structure around the hatches, Sven mentions there are two additional pieces required at each end to ensure comprehensive protection. This attention to detail highlights his commitment to producing a durable and reliable design. “Sailing is about finding your path, whether it’s across an ocean or within yourself.” – Sven Yrvind In conclusion, making flanges around bulkhead hatches may seem complex at first glance, but by following Sven Yrvind’s meticulous process, enthusiasts can achieve professional-level results. Remember that the journey of boatbuilding is as rewarding as reaching your destination; it tests one’s patience and dedication. For those seeking to embark on this adventure or simply gain more insight into marine craftsmanship, Sven’s wisdom is invaluable.After securely attaching the first portion of the flange, Sven allows ample time for it to dry before moving forward with additional steps. This patience and precision are key aspects of his successful boatbuilding methods.Step 4: Finishing Touches
Once the flange is fully dried, Sven removes the clamps carefully, ensuring no damage occurs during this process. He then moves on to attaching four more pieces onto these main frames, completing two pairs of flanges for the bulkhead hatches.The Final Touches
While two flanges form the primary support structure around the hatches, Sven mentions there are two additional pieces required at each end to ensure comprehensive protection. This attention to detail highlights his commitment to producing a durable and reliable design. “Sailing is about finding your path, whether it’s across an ocean or within yourself.” – Sven Yrvind In conclusion, making flanges around bulkhead hatches may seem complex at first glance, but by following Sven Yrvind’s meticulous process, enthusiasts can achieve professional-level results. Remember that the journey of boatbuilding is as rewarding as reaching your destination; it tests one’s patience and dedication. For those seeking to embark on this adventure or simply gain more insight into marine craftsmanship, Sven’s wisdom is invaluable.Sven proceeds to apply glue along one edge of the flange, ensuring a secure bond when clamped into place. He emphasizes that this stage is crucial for maintaining the structural integrity of the flange, which in turn safeguards the living area beneath the canvas when hatches are open.Step 3: Allowing Time to Dry
After securely attaching the first portion of the flange, Sven allows ample time for it to dry before moving forward with additional steps. This patience and precision are key aspects of his successful boatbuilding methods.Step 4: Finishing Touches
Once the flange is fully dried, Sven removes the clamps carefully, ensuring no damage occurs during this process. He then moves on to attaching four more pieces onto these main frames, completing two pairs of flanges for the bulkhead hatches.The Final Touches
While two flanges form the primary support structure around the hatches, Sven mentions there are two additional pieces required at each end to ensure comprehensive protection. This attention to detail highlights his commitment to producing a durable and reliable design. “Sailing is about finding your path, whether it’s across an ocean or within yourself.” – Sven Yrvind In conclusion, making flanges around bulkhead hatches may seem complex at first glance, but by following Sven Yrvind’s meticulous process, enthusiasts can achieve professional-level results. Remember that the journey of boatbuilding is as rewarding as reaching your destination; it tests one’s patience and dedication. For those seeking to embark on this adventure or simply gain more insight into marine craftsmanship, Sven’s wisdom is invaluable.Sven begins by explaining that working on flanges vertically and horizontally is significantly easier than doing so in a flat position. To simplify the process further, he divides the task into two or three steps as suggested by fellow expert “for for.” This approach not only makes it more manageable but also allows for greater precision in crafting each component.Step 2: Applying Glue and Securing
Sven proceeds to apply glue along one edge of the flange, ensuring a secure bond when clamped into place. He emphasizes that this stage is crucial for maintaining the structural integrity of the flange, which in turn safeguards the living area beneath the canvas when hatches are open.Step 3: Allowing Time to Dry
After securely attaching the first portion of the flange, Sven allows ample time for it to dry before moving forward with additional steps. This patience and precision are key aspects of his successful boatbuilding methods.Step 4: Finishing Touches
Once the flange is fully dried, Sven removes the clamps carefully, ensuring no damage occurs during this process. He then moves on to attaching four more pieces onto these main frames, completing two pairs of flanges for the bulkhead hatches.The Final Touches
While two flanges form the primary support structure around the hatches, Sven mentions there are two additional pieces required at each end to ensure comprehensive protection. This attention to detail highlights his commitment to producing a durable and reliable design. “Sailing is about finding your path, whether it’s across an ocean or within yourself.” – Sven Yrvind In conclusion, making flanges around bulkhead hatches may seem complex at first glance, but by following Sven Yrvind’s meticulous process, enthusiasts can achieve professional-level results. Remember that the journey of boatbuilding is as rewarding as reaching your destination; it tests one’s patience and dedication. For those seeking to embark on this adventure or simply gain more insight into marine craftsmanship, Sven’s wisdom is invaluable.Sven Yrvind, a renowned yacht designer and sailor, shares valuable insights on creating flanges around bulkhead hatches for canvas protection in this enlightening video. By following his expert guidance, boat enthusiasts can ensure their living areas remain secure while allowing unhindered access through the hatches.Step 1: Starting with the Flange
Sven begins by explaining that working on flanges vertically and horizontally is significantly easier than doing so in a flat position. To simplify the process further, he divides the task into two or three steps as suggested by fellow expert “for for.” This approach not only makes it more manageable but also allows for greater precision in crafting each component.Step 2: Applying Glue and Securing
Sven proceeds to apply glue along one edge of the flange, ensuring a secure bond when clamped into place. He emphasizes that this stage is crucial for maintaining the structural integrity of the flange, which in turn safeguards the living area beneath the canvas when hatches are open.Step 3: Allowing Time to Dry
After securely attaching the first portion of the flange, Sven allows ample time for it to dry before moving forward with additional steps. This patience and precision are key aspects of his successful boatbuilding methods.Step 4: Finishing Touches
Once the flange is fully dried, Sven removes the clamps carefully, ensuring no damage occurs during this process. He then moves on to attaching four more pieces onto these main frames, completing two pairs of flanges for the bulkhead hatches.The Final Touches
While two flanges form the primary support structure around the hatches, Sven mentions there are two additional pieces required at each end to ensure comprehensive protection. This attention to detail highlights his commitment to producing a durable and reliable design. “Sailing is about finding your path, whether it’s across an ocean or within yourself.” – Sven Yrvind In conclusion, making flanges around bulkhead hatches may seem complex at first glance, but by following Sven Yrvind’s meticulous process, enthusiasts can achieve professional-level results. Remember that the journey of boatbuilding is as rewarding as reaching your destination; it tests one’s patience and dedication. For those seeking to embark on this adventure or simply gain more insight into marine craftsmanship, Sven’s wisdom is invaluable.Making Flanges Around Bulkhead Hatches for Canvas
Sven Yrvind, a renowned yacht designer and sailor, shares valuable insights on creating flanges around bulkhead hatches for canvas protection in this enlightening video. By following his expert guidance, boat enthusiasts can ensure their living areas remain secure while allowing unhindered access through the hatches.Step 1: Starting with the Flange
Sven begins by explaining that working on flanges vertically and horizontally is significantly easier than doing so in a flat position. To simplify the process further, he divides the task into two or three steps as suggested by fellow expert “for for.” This approach not only makes it more manageable but also allows for greater precision in crafting each component.Step 2: Applying Glue and Securing
Sven proceeds to apply glue along one edge of the flange, ensuring a secure bond when clamped into place. He emphasizes that this stage is crucial for maintaining the structural integrity of the flange, which in turn safeguards the living area beneath the canvas when hatches are open.Step 3: Allowing Time to Dry
After securely attaching the first portion of the flange, Sven allows ample time for it to dry before moving forward with additional steps. This patience and precision are key aspects of his successful boatbuilding methods.Step 4: Finishing Touches
Once the flange is fully dried, Sven removes the clamps carefully, ensuring no damage occurs during this process. He then moves on to attaching four more pieces onto these main frames, completing two pairs of flanges for the bulkhead hatches.The Final Touches
While two flanges form the primary support structure around the hatches, Sven mentions there are two additional pieces required at each end to ensure comprehensive protection. This attention to detail highlights his commitment to producing a durable and reliable design. “Sailing is about finding your path, whether it’s across an ocean or within yourself.” – Sven Yrvind In conclusion, making flanges around bulkhead hatches may seem complex at first glance, but by following Sven Yrvind’s meticulous process, enthusiasts can achieve professional-level results. Remember that the journey of boatbuilding is as rewarding as reaching your destination; it tests one’s patience and dedication. For those seeking to embark on this adventure or simply gain more insight into marine craftsmanship, Sven’s wisdom is invaluable.Once the flange is fully dried, Sven removes the clamps carefully, ensuring no damage occurs during this process. He then moves on to attaching four more pieces onto these main frames, completing two pairs of flanges for the bulkhead hatches.The Final Touches
While two flanges form the primary support structure around the hatches, Sven mentions there are two additional pieces required at each end to ensure comprehensive protection. This attention to detail highlights his commitment to producing a durable and reliable design. “Sailing is about finding your path, whether it’s across an ocean or within yourself.” – Sven Yrvind In conclusion, making flanges around bulkhead hatches may seem complex at first glance, but by following Sven Yrvind’s meticulous process, enthusiasts can achieve professional-level results. Remember that the journey of boatbuilding is as rewarding as reaching your destination; it tests one’s patience and dedication. For those seeking to embark on this adventure or simply gain more insight into marine craftsmanship, Sven’s wisdom is invaluable.After securely attaching the first portion of the flange, Sven allows ample time for it to dry before moving forward with additional steps. This patience and precision are key aspects of his successful boatbuilding methods.Step 4: Finishing Touches
Once the flange is fully dried, Sven removes the clamps carefully, ensuring no damage occurs during this process. He then moves on to attaching four more pieces onto these main frames, completing two pairs of flanges for the bulkhead hatches.The Final Touches
While two flanges form the primary support structure around the hatches, Sven mentions there are two additional pieces required at each end to ensure comprehensive protection. This attention to detail highlights his commitment to producing a durable and reliable design. “Sailing is about finding your path, whether it’s across an ocean or within yourself.” – Sven Yrvind In conclusion, making flanges around bulkhead hatches may seem complex at first glance, but by following Sven Yrvind’s meticulous process, enthusiasts can achieve professional-level results. Remember that the journey of boatbuilding is as rewarding as reaching your destination; it tests one’s patience and dedication. For those seeking to embark on this adventure or simply gain more insight into marine craftsmanship, Sven’s wisdom is invaluable.Sven proceeds to apply glue along one edge of the flange, ensuring a secure bond when clamped into place. He emphasizes that this stage is crucial for maintaining the structural integrity of the flange, which in turn safeguards the living area beneath the canvas when hatches are open.Step 3: Allowing Time to Dry
After securely attaching the first portion of the flange, Sven allows ample time for it to dry before moving forward with additional steps. This patience and precision are key aspects of his successful boatbuilding methods.Step 4: Finishing Touches
Once the flange is fully dried, Sven removes the clamps carefully, ensuring no damage occurs during this process. He then moves on to attaching four more pieces onto these main frames, completing two pairs of flanges for the bulkhead hatches.The Final Touches
While two flanges form the primary support structure around the hatches, Sven mentions there are two additional pieces required at each end to ensure comprehensive protection. This attention to detail highlights his commitment to producing a durable and reliable design. “Sailing is about finding your path, whether it’s across an ocean or within yourself.” – Sven Yrvind In conclusion, making flanges around bulkhead hatches may seem complex at first glance, but by following Sven Yrvind’s meticulous process, enthusiasts can achieve professional-level results. Remember that the journey of boatbuilding is as rewarding as reaching your destination; it tests one’s patience and dedication. For those seeking to embark on this adventure or simply gain more insight into marine craftsmanship, Sven’s wisdom is invaluable.Sven begins by explaining that working on flanges vertically and horizontally is significantly easier than doing so in a flat position. To simplify the process further, he divides the task into two or three steps as suggested by fellow expert “for for.” This approach not only makes it more manageable but also allows for greater precision in crafting each component.Step 2: Applying Glue and Securing
Sven proceeds to apply glue along one edge of the flange, ensuring a secure bond when clamped into place. He emphasizes that this stage is crucial for maintaining the structural integrity of the flange, which in turn safeguards the living area beneath the canvas when hatches are open.Step 3: Allowing Time to Dry
After securely attaching the first portion of the flange, Sven allows ample time for it to dry before moving forward with additional steps. This patience and precision are key aspects of his successful boatbuilding methods.Step 4: Finishing Touches
Once the flange is fully dried, Sven removes the clamps carefully, ensuring no damage occurs during this process. He then moves on to attaching four more pieces onto these main frames, completing two pairs of flanges for the bulkhead hatches.The Final Touches
While two flanges form the primary support structure around the hatches, Sven mentions there are two additional pieces required at each end to ensure comprehensive protection. This attention to detail highlights his commitment to producing a durable and reliable design. “Sailing is about finding your path, whether it’s across an ocean or within yourself.” – Sven Yrvind In conclusion, making flanges around bulkhead hatches may seem complex at first glance, but by following Sven Yrvind’s meticulous process, enthusiasts can achieve professional-level results. Remember that the journey of boatbuilding is as rewarding as reaching your destination; it tests one’s patience and dedication. For those seeking to embark on this adventure or simply gain more insight into marine craftsmanship, Sven’s wisdom is invaluable.Sven Yrvind, a renowned yacht designer and sailor, shares valuable insights on creating flanges around bulkhead hatches for canvas protection in this enlightening video. By following his expert guidance, boat enthusiasts can ensure their living areas remain secure while allowing unhindered access through the hatches.Step 1: Starting with the Flange
Sven begins by explaining that working on flanges vertically and horizontally is significantly easier than doing so in a flat position. To simplify the process further, he divides the task into two or three steps as suggested by fellow expert “for for.” This approach not only makes it more manageable but also allows for greater precision in crafting each component.Step 2: Applying Glue and Securing
Sven proceeds to apply glue along one edge of the flange, ensuring a secure bond when clamped into place. He emphasizes that this stage is crucial for maintaining the structural integrity of the flange, which in turn safeguards the living area beneath the canvas when hatches are open.Step 3: Allowing Time to Dry
After securely attaching the first portion of the flange, Sven allows ample time for it to dry before moving forward with additional steps. This patience and precision are key aspects of his successful boatbuilding methods.Step 4: Finishing Touches
Once the flange is fully dried, Sven removes the clamps carefully, ensuring no damage occurs during this process. He then moves on to attaching four more pieces onto these main frames, completing two pairs of flanges for the bulkhead hatches.The Final Touches
While two flanges form the primary support structure around the hatches, Sven mentions there are two additional pieces required at each end to ensure comprehensive protection. This attention to detail highlights his commitment to producing a durable and reliable design. “Sailing is about finding your path, whether it’s across an ocean or within yourself.” – Sven Yrvind In conclusion, making flanges around bulkhead hatches may seem complex at first glance, but by following Sven Yrvind’s meticulous process, enthusiasts can achieve professional-level results. Remember that the journey of boatbuilding is as rewarding as reaching your destination; it tests one’s patience and dedication. For those seeking to embark on this adventure or simply gain more insight into marine craftsmanship, Sven’s wisdom is invaluable.Making Flanges Around Bulkhead Hatches for Canvas
Sven Yrvind, a renowned yacht designer and sailor, shares valuable insights on creating flanges around bulkhead hatches for canvas protection in this enlightening video. By following his expert guidance, boat enthusiasts can ensure their living areas remain secure while allowing unhindered access through the hatches.Step 1: Starting with the Flange
Sven begins by explaining that working on flanges vertically and horizontally is significantly easier than doing so in a flat position. To simplify the process further, he divides the task into two or three steps as suggested by fellow expert “for for.” This approach not only makes it more manageable but also allows for greater precision in crafting each component.Step 2: Applying Glue and Securing
Sven proceeds to apply glue along one edge of the flange, ensuring a secure bond when clamped into place. He emphasizes that this stage is crucial for maintaining the structural integrity of the flange, which in turn safeguards the living area beneath the canvas when hatches are open.Step 3: Allowing Time to Dry
After securely attaching the first portion of the flange, Sven allows ample time for it to dry before moving forward with additional steps. This patience and precision are key aspects of his successful boatbuilding methods.Step 4: Finishing Touches
Once the flange is fully dried, Sven removes the clamps carefully, ensuring no damage occurs during this process. He then moves on to attaching four more pieces onto these main frames, completing two pairs of flanges for the bulkhead hatches.The Final Touches
While two flanges form the primary support structure around the hatches, Sven mentions there are two additional pieces required at each end to ensure comprehensive protection. This attention to detail highlights his commitment to producing a durable and reliable design. “Sailing is about finding your path, whether it’s across an ocean or within yourself.” – Sven Yrvind In conclusion, making flanges around bulkhead hatches may seem complex at first glance, but by following Sven Yrvind’s meticulous process, enthusiasts can achieve professional-level results. Remember that the journey of boatbuilding is as rewarding as reaching your destination; it tests one’s patience and dedication. For those seeking to embark on this adventure or simply gain more insight into marine craftsmanship, Sven’s wisdom is invaluable.Once the flange is fully dried, Sven removes the clamps carefully, ensuring no damage occurs during this process. He then moves on to attaching four more pieces onto these main frames, completing two pairs of flanges for the bulkhead hatches.The Final Touches
While two flanges form the primary support structure around the hatches, Sven mentions there are two additional pieces required at each end to ensure comprehensive protection. This attention to detail highlights his commitment to producing a durable and reliable design. “Sailing is about finding your path, whether it’s across an ocean or within yourself.” – Sven Yrvind In conclusion, making flanges around bulkhead hatches may seem complex at first glance, but by following Sven Yrvind’s meticulous process, enthusiasts can achieve professional-level results. Remember that the journey of boatbuilding is as rewarding as reaching your destination; it tests one’s patience and dedication. For those seeking to embark on this adventure or simply gain more insight into marine craftsmanship, Sven’s wisdom is invaluable.Sven Yrvind, a renowned yacht designer and sailor, shares valuable insights on creating flanges around bulkhead hatches for canvas protection in this enlightening video. By following his expert guidance, boat enthusiasts can ensure their living areas remain secure while allowing unhindered access through the hatches.Step 1: Starting with the Flange
Sven begins by explaining that working on flanges vertically and horizontally is significantly easier than doing so in a flat position. To simplify the process further, he divides the task into two or three steps as suggested by fellow expert “for for.” This approach not only makes it more manageable but also allows for greater precision in crafting each component.Step 2: Applying Glue and Securing
Sven proceeds to apply glue along one edge of the flange, ensuring a secure bond when clamped into place. He emphasizes that this stage is crucial for maintaining the structural integrity of the flange, which in turn safeguards the living area beneath the canvas when hatches are open.Step 3: Allowing Time to Dry
After securely attaching the first portion of the flange, Sven allows ample time for it to dry before moving forward with additional steps. This patience and precision are key aspects of his successful boatbuilding methods.Step 4: Finishing Touches
Once the flange is fully dried, Sven removes the clamps carefully, ensuring no damage occurs during this process. He then moves on to attaching four more pieces onto these main frames, completing two pairs of flanges for the bulkhead hatches.The Final Touches
While two flanges form the primary support structure around the hatches, Sven mentions there are two additional pieces required at each end to ensure comprehensive protection. This attention to detail highlights his commitment to producing a durable and reliable design. “Sailing is about finding your path, whether it’s across an ocean or within yourself.” – Sven Yrvind In conclusion, making flanges around bulkhead hatches may seem complex at first glance, but by following Sven Yrvind’s meticulous process, enthusiasts can achieve professional-level results. Remember that the journey of boatbuilding is as rewarding as reaching your destination; it tests one’s patience and dedication. For those seeking to embark on this adventure or simply gain more insight into marine craftsmanship, Sven’s wisdom is invaluable.Making Flanges Around Bulkhead Hatches for Canvas
Sven Yrvind, a renowned yacht designer and sailor, shares valuable insights on creating flanges around bulkhead hatches for canvas protection in this enlightening video. By following his expert guidance, boat enthusiasts can ensure their living areas remain secure while allowing unhindered access through the hatches.Step 1: Starting with the Flange
Sven begins by explaining that working on flanges vertically and horizontally is significantly easier than doing so in a flat position. To simplify the process further, he divides the task into two or three steps as suggested by fellow expert “for for.” This approach not only makes it more manageable but also allows for greater precision in crafting each component.Step 2: Applying Glue and Securing
Sven proceeds to apply glue along one edge of the flange, ensuring a secure bond when clamped into place. He emphasizes that this stage is crucial for maintaining the structural integrity of the flange, which in turn safeguards the living area beneath the canvas when hatches are open.Step 3: Allowing Time to Dry
After securely attaching the first portion of the flange, Sven allows ample time for it to dry before moving forward with additional steps. This patience and precision are key aspects of his successful boatbuilding methods.Step 4: Finishing Touches
Once the flange is fully dried, Sven removes the clamps carefully, ensuring no damage occurs during this process. He then moves on to attaching four more pieces onto these main frames, completing two pairs of flanges for the bulkhead hatches.The Final Touches
While two flanges form the primary support structure around the hatches, Sven mentions there are two additional pieces required at each end to ensure comprehensive protection. This attention to detail highlights his commitment to producing a durable and reliable design. “Sailing is about finding your path, whether it’s across an ocean or within yourself.” – Sven Yrvind In conclusion, making flanges around bulkhead hatches may seem complex at first glance, but by following Sven Yrvind’s meticulous process, enthusiasts can achieve professional-level results. Remember that the journey of boatbuilding is as rewarding as reaching your destination; it tests one’s patience and dedication. For those seeking to embark on this adventure or simply gain more insight into marine craftsmanship, Sven’s wisdom is invaluable.After securely attaching the first portion of the flange, Sven allows ample time for it to dry before moving forward with additional steps. This patience and precision are key aspects of his successful boatbuilding methods.Step 4: Finishing Touches
Once the flange is fully dried, Sven removes the clamps carefully, ensuring no damage occurs during this process. He then moves on to attaching four more pieces onto these main frames, completing two pairs of flanges for the bulkhead hatches.The Final Touches
While two flanges form the primary support structure around the hatches, Sven mentions there are two additional pieces required at each end to ensure comprehensive protection. This attention to detail highlights his commitment to producing a durable and reliable design. “Sailing is about finding your path, whether it’s across an ocean or within yourself.” – Sven Yrvind In conclusion, making flanges around bulkhead hatches may seem complex at first glance, but by following Sven Yrvind’s meticulous process, enthusiasts can achieve professional-level results. Remember that the journey of boatbuilding is as rewarding as reaching your destination; it tests one’s patience and dedication. For those seeking to embark on this adventure or simply gain more insight into marine craftsmanship, Sven’s wisdom is invaluable.Sven proceeds to apply glue along one edge of the flange, ensuring a secure bond when clamped into place. He emphasizes that this stage is crucial for maintaining the structural integrity of the flange, which in turn safeguards the living area beneath the canvas when hatches are open.Step 3: Allowing Time to Dry
After securely attaching the first portion of the flange, Sven allows ample time for it to dry before moving forward with additional steps. This patience and precision are key aspects of his successful boatbuilding methods.Step 4: Finishing Touches
Once the flange is fully dried, Sven removes the clamps carefully, ensuring no damage occurs during this process. He then moves on to attaching four more pieces onto these main frames, completing two pairs of flanges for the bulkhead hatches.The Final Touches
While two flanges form the primary support structure around the hatches, Sven mentions there are two additional pieces required at each end to ensure comprehensive protection. This attention to detail highlights his commitment to producing a durable and reliable design. “Sailing is about finding your path, whether it’s across an ocean or within yourself.” – Sven Yrvind In conclusion, making flanges around bulkhead hatches may seem complex at first glance, but by following Sven Yrvind’s meticulous process, enthusiasts can achieve professional-level results. Remember that the journey of boatbuilding is as rewarding as reaching your destination; it tests one’s patience and dedication. For those seeking to embark on this adventure or simply gain more insight into marine craftsmanship, Sven’s wisdom is invaluable.Sven begins by explaining that working on flanges vertically and horizontally is significantly easier than doing so in a flat position. To simplify the process further, he divides the task into two or three steps as suggested by fellow expert “for for.” This approach not only makes it more manageable but also allows for greater precision in crafting each component.Step 2: Applying Glue and Securing
Sven proceeds to apply glue along one edge of the flange, ensuring a secure bond when clamped into place. He emphasizes that this stage is crucial for maintaining the structural integrity of the flange, which in turn safeguards the living area beneath the canvas when hatches are open.Step 3: Allowing Time to Dry
After securely attaching the first portion of the flange, Sven allows ample time for it to dry before moving forward with additional steps. This patience and precision are key aspects of his successful boatbuilding methods.Step 4: Finishing Touches
Once the flange is fully dried, Sven removes the clamps carefully, ensuring no damage occurs during this process. He then moves on to attaching four more pieces onto these main frames, completing two pairs of flanges for the bulkhead hatches.The Final Touches
While two flanges form the primary support structure around the hatches, Sven mentions there are two additional pieces required at each end to ensure comprehensive protection. This attention to detail highlights his commitment to producing a durable and reliable design. “Sailing is about finding your path, whether it’s across an ocean or within yourself.” – Sven Yrvind In conclusion, making flanges around bulkhead hatches may seem complex at first glance, but by following Sven Yrvind’s meticulous process, enthusiasts can achieve professional-level results. Remember that the journey of boatbuilding is as rewarding as reaching your destination; it tests one’s patience and dedication. For those seeking to embark on this adventure or simply gain more insight into marine craftsmanship, Sven’s wisdom is invaluable.Sven Yrvind, a renowned yacht designer and sailor, shares valuable insights on creating flanges around bulkhead hatches for canvas protection in this enlightening video. By following his expert guidance, boat enthusiasts can ensure their living areas remain secure while allowing unhindered access through the hatches.Step 1: Starting with the Flange
Sven begins by explaining that working on flanges vertically and horizontally is significantly easier than doing so in a flat position. To simplify the process further, he divides the task into two or three steps as suggested by fellow expert “for for.” This approach not only makes it more manageable but also allows for greater precision in crafting each component.Step 2: Applying Glue and Securing
Sven proceeds to apply glue along one edge of the flange, ensuring a secure bond when clamped into place. He emphasizes that this stage is crucial for maintaining the structural integrity of the flange, which in turn safeguards the living area beneath the canvas when hatches are open.Step 3: Allowing Time to Dry
After securely attaching the first portion of the flange, Sven allows ample time for it to dry before moving forward with additional steps. This patience and precision are key aspects of his successful boatbuilding methods.Step 4: Finishing Touches
Once the flange is fully dried, Sven removes the clamps carefully, ensuring no damage occurs during this process. He then moves on to attaching four more pieces onto these main frames, completing two pairs of flanges for the bulkhead hatches.The Final Touches
While two flanges form the primary support structure around the hatches, Sven mentions there are two additional pieces required at each end to ensure comprehensive protection. This attention to detail highlights his commitment to producing a durable and reliable design. “Sailing is about finding your path, whether it’s across an ocean or within yourself.” – Sven Yrvind In conclusion, making flanges around bulkhead hatches may seem complex at first glance, but by following Sven Yrvind’s meticulous process, enthusiasts can achieve professional-level results. Remember that the journey of boatbuilding is as rewarding as reaching your destination; it tests one’s patience and dedication. For those seeking to embark on this adventure or simply gain more insight into marine craftsmanship, Sven’s wisdom is invaluable.Making Flanges Around Bulkhead Hatches for Canvas
Sven Yrvind, a renowned yacht designer and sailor, shares valuable insights on creating flanges around bulkhead hatches for canvas protection in this enlightening video. By following his expert guidance, boat enthusiasts can ensure their living areas remain secure while allowing unhindered access through the hatches.Step 1: Starting with the Flange
Sven begins by explaining that working on flanges vertically and horizontally is significantly easier than doing so in a flat position. To simplify the process further, he divides the task into two or three steps as suggested by fellow expert “for for.” This approach not only makes it more manageable but also allows for greater precision in crafting each component.Step 2: Applying Glue and Securing
Sven proceeds to apply glue along one edge of the flange, ensuring a secure bond when clamped into place. He emphasizes that this stage is crucial for maintaining the structural integrity of the flange, which in turn safeguards the living area beneath the canvas when hatches are open.Step 3: Allowing Time to Dry
After securely attaching the first portion of the flange, Sven allows ample time for it to dry before moving forward with additional steps. This patience and precision are key aspects of his successful boatbuilding methods.Step 4: Finishing Touches
Once the flange is fully dried, Sven removes the clamps carefully, ensuring no damage occurs during this process. He then moves on to attaching four more pieces onto these main frames, completing two pairs of flanges for the bulkhead hatches.The Final Touches
While two flanges form the primary support structure around the hatches, Sven mentions there are two additional pieces required at each end to ensure comprehensive protection. This attention to detail highlights his commitment to producing a durable and reliable design. “Sailing is about finding your path, whether it’s across an ocean or within yourself.” – Sven Yrvind In conclusion, making flanges around bulkhead hatches may seem complex at first glance, but by following Sven Yrvind’s meticulous process, enthusiasts can achieve professional-level results. Remember that the journey of boatbuilding is as rewarding as reaching your destination; it tests one’s patience and dedication. For those seeking to embark on this adventure or simply gain more insight into marine craftsmanship, Sven’s wisdom is invaluable.Once the flange is fully dried, Sven removes the clamps carefully, ensuring no damage occurs during this process. He then moves on to attaching four more pieces onto these main frames, completing two pairs of flanges for the bulkhead hatches.The Final Touches
While two flanges form the primary support structure around the hatches, Sven mentions there are two additional pieces required at each end to ensure comprehensive protection. This attention to detail highlights his commitment to producing a durable and reliable design. “Sailing is about finding your path, whether it’s across an ocean or within yourself.” – Sven Yrvind In conclusion, making flanges around bulkhead hatches may seem complex at first glance, but by following Sven Yrvind’s meticulous process, enthusiasts can achieve professional-level results. Remember that the journey of boatbuilding is as rewarding as reaching your destination; it tests one’s patience and dedication. For those seeking to embark on this adventure or simply gain more insight into marine craftsmanship, Sven’s wisdom is invaluable.After securely attaching the first portion of the flange, Sven allows ample time for it to dry before moving forward with additional steps. This patience and precision are key aspects of his successful boatbuilding methods.Step 4: Finishing Touches
Once the flange is fully dried, Sven removes the clamps carefully, ensuring no damage occurs during this process. He then moves on to attaching four more pieces onto these main frames, completing two pairs of flanges for the bulkhead hatches.The Final Touches
While two flanges form the primary support structure around the hatches, Sven mentions there are two additional pieces required at each end to ensure comprehensive protection. This attention to detail highlights his commitment to producing a durable and reliable design. “Sailing is about finding your path, whether it’s across an ocean or within yourself.” – Sven Yrvind In conclusion, making flanges around bulkhead hatches may seem complex at first glance, but by following Sven Yrvind’s meticulous process, enthusiasts can achieve professional-level results. Remember that the journey of boatbuilding is as rewarding as reaching your destination; it tests one’s patience and dedication. For those seeking to embark on this adventure or simply gain more insight into marine craftsmanship, Sven’s wisdom is invaluable.Sven proceeds to apply glue along one edge of the flange, ensuring a secure bond when clamped into place. He emphasizes that this stage is crucial for maintaining the structural integrity of the flange, which in turn safeguards the living area beneath the canvas when hatches are open.Step 3: Allowing Time to Dry
After securely attaching the first portion of the flange, Sven allows ample time for it to dry before moving forward with additional steps. This patience and precision are key aspects of his successful boatbuilding methods.Step 4: Finishing Touches
Once the flange is fully dried, Sven removes the clamps carefully, ensuring no damage occurs during this process. He then moves on to attaching four more pieces onto these main frames, completing two pairs of flanges for the bulkhead hatches.The Final Touches
While two flanges form the primary support structure around the hatches, Sven mentions there are two additional pieces required at each end to ensure comprehensive protection. This attention to detail highlights his commitment to producing a durable and reliable design. “Sailing is about finding your path, whether it’s across an ocean or within yourself.” – Sven Yrvind In conclusion, making flanges around bulkhead hatches may seem complex at first glance, but by following Sven Yrvind’s meticulous process, enthusiasts can achieve professional-level results. Remember that the journey of boatbuilding is as rewarding as reaching your destination; it tests one’s patience and dedication. For those seeking to embark on this adventure or simply gain more insight into marine craftsmanship, Sven’s wisdom is invaluable.Sven begins by explaining that working on flanges vertically and horizontally is significantly easier than doing so in a flat position. To simplify the process further, he divides the task into two or three steps as suggested by fellow expert “for for.” This approach not only makes it more manageable but also allows for greater precision in crafting each component.Step 2: Applying Glue and Securing
Sven proceeds to apply glue along one edge of the flange, ensuring a secure bond when clamped into place. He emphasizes that this stage is crucial for maintaining the structural integrity of the flange, which in turn safeguards the living area beneath the canvas when hatches are open.Step 3: Allowing Time to Dry
After securely attaching the first portion of the flange, Sven allows ample time for it to dry before moving forward with additional steps. This patience and precision are key aspects of his successful boatbuilding methods.Step 4: Finishing Touches
Once the flange is fully dried, Sven removes the clamps carefully, ensuring no damage occurs during this process. He then moves on to attaching four more pieces onto these main frames, completing two pairs of flanges for the bulkhead hatches.The Final Touches
While two flanges form the primary support structure around the hatches, Sven mentions there are two additional pieces required at each end to ensure comprehensive protection. This attention to detail highlights his commitment to producing a durable and reliable design. “Sailing is about finding your path, whether it’s across an ocean or within yourself.” – Sven Yrvind In conclusion, making flanges around bulkhead hatches may seem complex at first glance, but by following Sven Yrvind’s meticulous process, enthusiasts can achieve professional-level results. Remember that the journey of boatbuilding is as rewarding as reaching your destination; it tests one’s patience and dedication. For those seeking to embark on this adventure or simply gain more insight into marine craftsmanship, Sven’s wisdom is invaluable.Sven Yrvind, a renowned yacht designer and sailor, shares valuable insights on creating flanges around bulkhead hatches for canvas protection in this enlightening video. By following his expert guidance, boat enthusiasts can ensure their living areas remain secure while allowing unhindered access through the hatches.Step 1: Starting with the Flange
Sven begins by explaining that working on flanges vertically and horizontally is significantly easier than doing so in a flat position. To simplify the process further, he divides the task into two or three steps as suggested by fellow expert “for for.” This approach not only makes it more manageable but also allows for greater precision in crafting each component.Step 2: Applying Glue and Securing
Sven proceeds to apply glue along one edge of the flange, ensuring a secure bond when clamped into place. He emphasizes that this stage is crucial for maintaining the structural integrity of the flange, which in turn safeguards the living area beneath the canvas when hatches are open.Step 3: Allowing Time to Dry
After securely attaching the first portion of the flange, Sven allows ample time for it to dry before moving forward with additional steps. This patience and precision are key aspects of his successful boatbuilding methods.Step 4: Finishing Touches
Once the flange is fully dried, Sven removes the clamps carefully, ensuring no damage occurs during this process. He then moves on to attaching four more pieces onto these main frames, completing two pairs of flanges for the bulkhead hatches.The Final Touches
While two flanges form the primary support structure around the hatches, Sven mentions there are two additional pieces required at each end to ensure comprehensive protection. This attention to detail highlights his commitment to producing a durable and reliable design. “Sailing is about finding your path, whether it’s across an ocean or within yourself.” – Sven Yrvind In conclusion, making flanges around bulkhead hatches may seem complex at first glance, but by following Sven Yrvind’s meticulous process, enthusiasts can achieve professional-level results. Remember that the journey of boatbuilding is as rewarding as reaching your destination; it tests one’s patience and dedication. For those seeking to embark on this adventure or simply gain more insight into marine craftsmanship, Sven’s wisdom is invaluable.Making Flanges Around Bulkhead Hatches for Canvas
Sven Yrvind, a renowned yacht designer and sailor, shares valuable insights on creating flanges around bulkhead hatches for canvas protection in this enlightening video. By following his expert guidance, boat enthusiasts can ensure their living areas remain secure while allowing unhindered access through the hatches.Step 1: Starting with the Flange
Sven begins by explaining that working on flanges vertically and horizontally is significantly easier than doing so in a flat position. To simplify the process further, he divides the task into two or three steps as suggested by fellow expert “for for.” This approach not only makes it more manageable but also allows for greater precision in crafting each component.Step 2: Applying Glue and Securing
Sven proceeds to apply glue along one edge of the flange, ensuring a secure bond when clamped into place. He emphasizes that this stage is crucial for maintaining the structural integrity of the flange, which in turn safeguards the living area beneath the canvas when hatches are open.Step 3: Allowing Time to Dry
After securely attaching the first portion of the flange, Sven allows ample time for it to dry before moving forward with additional steps. This patience and precision are key aspects of his successful boatbuilding methods.Step 4: Finishing Touches
Once the flange is fully dried, Sven removes the clamps carefully, ensuring no damage occurs during this process. He then moves on to attaching four more pieces onto these main frames, completing two pairs of flanges for the bulkhead hatches.The Final Touches
While two flanges form the primary support structure around the hatches, Sven mentions there are two additional pieces required at each end to ensure comprehensive protection. This attention to detail highlights his commitment to producing a durable and reliable design. “Sailing is about finding your path, whether it’s across an ocean or within yourself.” – Sven Yrvind In conclusion, making flanges around bulkhead hatches may seem complex at first glance, but by following Sven Yrvind’s meticulous process, enthusiasts can achieve professional-level results. Remember that the journey of boatbuilding is as rewarding as reaching your destination; it tests one’s patience and dedication. For those seeking to embark on this adventure or simply gain more insight into marine craftsmanship, Sven’s wisdom is invaluable.After securely attaching the first portion of the flange, Sven allows ample time for it to dry before moving forward with additional steps. This patience and precision are key aspects of his successful boatbuilding methods.Step 4: Finishing Touches
Once the flange is fully dried, Sven removes the clamps carefully, ensuring no damage occurs during this process. He then moves on to attaching four more pieces onto these main frames, completing two pairs of flanges for the bulkhead hatches.The Final Touches
While two flanges form the primary support structure around the hatches, Sven mentions there are two additional pieces required at each end to ensure comprehensive protection. This attention to detail highlights his commitment to producing a durable and reliable design. “Sailing is about finding your path, whether it’s across an ocean or within yourself.” – Sven Yrvind In conclusion, making flanges around bulkhead hatches may seem complex at first glance, but by following Sven Yrvind’s meticulous process, enthusiasts can achieve professional-level results. Remember that the journey of boatbuilding is as rewarding as reaching your destination; it tests one’s patience and dedication. For those seeking to embark on this adventure or simply gain more insight into marine craftsmanship, Sven’s wisdom is invaluable.Sven Yrvind, a renowned yacht designer and sailor, shares valuable insights on creating flanges around bulkhead hatches for canvas protection in this enlightening video. By following his expert guidance, boat enthusiasts can ensure their living areas remain secure while allowing unhindered access through the hatches.Step 1: Starting with the Flange
Sven begins by explaining that working on flanges vertically and horizontally is significantly easier than doing so in a flat position. To simplify the process further, he divides the task into two or three steps as suggested by fellow expert “for for.” This approach not only makes it more manageable but also allows for greater precision in crafting each component.Step 2: Applying Glue and Securing
Sven proceeds to apply glue along one edge of the flange, ensuring a secure bond when clamped into place. He emphasizes that this stage is crucial for maintaining the structural integrity of the flange, which in turn safeguards the living area beneath the canvas when hatches are open.Step 3: Allowing Time to Dry
After securely attaching the first portion of the flange, Sven allows ample time for it to dry before moving forward with additional steps. This patience and precision are key aspects of his successful boatbuilding methods.Step 4: Finishing Touches
Once the flange is fully dried, Sven removes the clamps carefully, ensuring no damage occurs during this process. He then moves on to attaching four more pieces onto these main frames, completing two pairs of flanges for the bulkhead hatches.The Final Touches
While two flanges form the primary support structure around the hatches, Sven mentions there are two additional pieces required at each end to ensure comprehensive protection. This attention to detail highlights his commitment to producing a durable and reliable design. “Sailing is about finding your path, whether it’s across an ocean or within yourself.” – Sven Yrvind In conclusion, making flanges around bulkhead hatches may seem complex at first glance, but by following Sven Yrvind’s meticulous process, enthusiasts can achieve professional-level results. Remember that the journey of boatbuilding is as rewarding as reaching your destination; it tests one’s patience and dedication. For those seeking to embark on this adventure or simply gain more insight into marine craftsmanship, Sven’s wisdom is invaluable.Making Flanges Around Bulkhead Hatches for Canvas
Sven Yrvind, a renowned yacht designer and sailor, shares valuable insights on creating flanges around bulkhead hatches for canvas protection in this enlightening video. By following his expert guidance, boat enthusiasts can ensure their living areas remain secure while allowing unhindered access through the hatches.Step 1: Starting with the Flange
Sven begins by explaining that working on flanges vertically and horizontally is significantly easier than doing so in a flat position. To simplify the process further, he divides the task into two or three steps as suggested by fellow expert “for for.” This approach not only makes it more manageable but also allows for greater precision in crafting each component.Step 2: Applying Glue and Securing
Sven proceeds to apply glue along one edge of the flange, ensuring a secure bond when clamped into place. He emphasizes that this stage is crucial for maintaining the structural integrity of the flange, which in turn safeguards the living area beneath the canvas when hatches are open.Step 3: Allowing Time to Dry
After securely attaching the first portion of the flange, Sven allows ample time for it to dry before moving forward with additional steps. This patience and precision are key aspects of his successful boatbuilding methods.Step 4: Finishing Touches
Once the flange is fully dried, Sven removes the clamps carefully, ensuring no damage occurs during this process. He then moves on to attaching four more pieces onto these main frames, completing two pairs of flanges for the bulkhead hatches.The Final Touches
While two flanges form the primary support structure around the hatches, Sven mentions there are two additional pieces required at each end to ensure comprehensive protection. This attention to detail highlights his commitment to producing a durable and reliable design. “Sailing is about finding your path, whether it’s across an ocean or within yourself.” – Sven Yrvind In conclusion, making flanges around bulkhead hatches may seem complex at first glance, but by following Sven Yrvind’s meticulous process, enthusiasts can achieve professional-level results. Remember that the journey of boatbuilding is as rewarding as reaching your destination; it tests one’s patience and dedication. For those seeking to embark on this adventure or simply gain more insight into marine craftsmanship, Sven’s wisdom is invaluable.After securely attaching the first portion of the flange, Sven allows ample time for it to dry before moving forward with additional steps. This patience and precision are key aspects of his successful boatbuilding methods.Step 4: Finishing Touches
Once the flange is fully dried, Sven removes the clamps carefully, ensuring no damage occurs during this process. He then moves on to attaching four more pieces onto these main frames, completing two pairs of flanges for the bulkhead hatches.The Final Touches
While two flanges form the primary support structure around the hatches, Sven mentions there are two additional pieces required at each end to ensure comprehensive protection. This attention to detail highlights his commitment to producing a durable and reliable design. “Sailing is about finding your path, whether it’s across an ocean or within yourself.” – Sven Yrvind In conclusion, making flanges around bulkhead hatches may seem complex at first glance, but by following Sven Yrvind’s meticulous process, enthusiasts can achieve professional-level results. Remember that the journey of boatbuilding is as rewarding as reaching your destination; it tests one’s patience and dedication. For those seeking to embark on this adventure or simply gain more insight into marine craftsmanship, Sven’s wisdom is invaluable.Sven proceeds to apply glue along one edge of the flange, ensuring a secure bond when clamped into place. He emphasizes that this stage is crucial for maintaining the structural integrity of the flange, which in turn safeguards the living area beneath the canvas when hatches are open.Step 3: Allowing Time to Dry
After securely attaching the first portion of the flange, Sven allows ample time for it to dry before moving forward with additional steps. This patience and precision are key aspects of his successful boatbuilding methods.Step 4: Finishing Touches
Once the flange is fully dried, Sven removes the clamps carefully, ensuring no damage occurs during this process. He then moves on to attaching four more pieces onto these main frames, completing two pairs of flanges for the bulkhead hatches.The Final Touches
While two flanges form the primary support structure around the hatches, Sven mentions there are two additional pieces required at each end to ensure comprehensive protection. This attention to detail highlights his commitment to producing a durable and reliable design. “Sailing is about finding your path, whether it’s across an ocean or within yourself.” – Sven Yrvind In conclusion, making flanges around bulkhead hatches may seem complex at first glance, but by following Sven Yrvind’s meticulous process, enthusiasts can achieve professional-level results. Remember that the journey of boatbuilding is as rewarding as reaching your destination; it tests one’s patience and dedication. For those seeking to embark on this adventure or simply gain more insight into marine craftsmanship, Sven’s wisdom is invaluable.Sven begins by explaining that working on flanges vertically and horizontally is significantly easier than doing so in a flat position. To simplify the process further, he divides the task into two or three steps as suggested by fellow expert “for for.” This approach not only makes it more manageable but also allows for greater precision in crafting each component.Step 2: Applying Glue and Securing
Sven proceeds to apply glue along one edge of the flange, ensuring a secure bond when clamped into place. He emphasizes that this stage is crucial for maintaining the structural integrity of the flange, which in turn safeguards the living area beneath the canvas when hatches are open.Step 3: Allowing Time to Dry
After securely attaching the first portion of the flange, Sven allows ample time for it to dry before moving forward with additional steps. This patience and precision are key aspects of his successful boatbuilding methods.Step 4: Finishing Touches
Once the flange is fully dried, Sven removes the clamps carefully, ensuring no damage occurs during this process. He then moves on to attaching four more pieces onto these main frames, completing two pairs of flanges for the bulkhead hatches.The Final Touches
While two flanges form the primary support structure around the hatches, Sven mentions there are two additional pieces required at each end to ensure comprehensive protection. This attention to detail highlights his commitment to producing a durable and reliable design. “Sailing is about finding your path, whether it’s across an ocean or within yourself.” – Sven Yrvind In conclusion, making flanges around bulkhead hatches may seem complex at first glance, but by following Sven Yrvind’s meticulous process, enthusiasts can achieve professional-level results. Remember that the journey of boatbuilding is as rewarding as reaching your destination; it tests one’s patience and dedication. For those seeking to embark on this adventure or simply gain more insight into marine craftsmanship, Sven’s wisdom is invaluable.Sven Yrvind, a renowned yacht designer and sailor, shares valuable insights on creating flanges around bulkhead hatches for canvas protection in this enlightening video. By following his expert guidance, boat enthusiasts can ensure their living areas remain secure while allowing unhindered access through the hatches.Step 1: Starting with the Flange
Sven begins by explaining that working on flanges vertically and horizontally is significantly easier than doing so in a flat position. To simplify the process further, he divides the task into two or three steps as suggested by fellow expert “for for.” This approach not only makes it more manageable but also allows for greater precision in crafting each component.Step 2: Applying Glue and Securing
Sven proceeds to apply glue along one edge of the flange, ensuring a secure bond when clamped into place. He emphasizes that this stage is crucial for maintaining the structural integrity of the flange, which in turn safeguards the living area beneath the canvas when hatches are open.Step 3: Allowing Time to Dry
After securely attaching the first portion of the flange, Sven allows ample time for it to dry before moving forward with additional steps. This patience and precision are key aspects of his successful boatbuilding methods.Step 4: Finishing Touches
Once the flange is fully dried, Sven removes the clamps carefully, ensuring no damage occurs during this process. He then moves on to attaching four more pieces onto these main frames, completing two pairs of flanges for the bulkhead hatches.The Final Touches
While two flanges form the primary support structure around the hatches, Sven mentions there are two additional pieces required at each end to ensure comprehensive protection. This attention to detail highlights his commitment to producing a durable and reliable design. “Sailing is about finding your path, whether it’s across an ocean or within yourself.” – Sven Yrvind In conclusion, making flanges around bulkhead hatches may seem complex at first glance, but by following Sven Yrvind’s meticulous process, enthusiasts can achieve professional-level results. Remember that the journey of boatbuilding is as rewarding as reaching your destination; it tests one’s patience and dedication. For those seeking to embark on this adventure or simply gain more insight into marine craftsmanship, Sven’s wisdom is invaluable.Making Flanges Around Bulkhead Hatches for Canvas
Sven Yrvind, a renowned yacht designer and sailor, shares valuable insights on creating flanges around bulkhead hatches for canvas protection in this enlightening video. By following his expert guidance, boat enthusiasts can ensure their living areas remain secure while allowing unhindered access through the hatches.Step 1: Starting with the Flange
Sven begins by explaining that working on flanges vertically and horizontally is significantly easier than doing so in a flat position. To simplify the process further, he divides the task into two or three steps as suggested by fellow expert “for for.” This approach not only makes it more manageable but also allows for greater precision in crafting each component.Step 2: Applying Glue and Securing
Sven proceeds to apply glue along one edge of the flange, ensuring a secure bond when clamped into place. He emphasizes that this stage is crucial for maintaining the structural integrity of the flange, which in turn safeguards the living area beneath the canvas when hatches are open.Step 3: Allowing Time to Dry
After securely attaching the first portion of the flange, Sven allows ample time for it to dry before moving forward with additional steps. This patience and precision are key aspects of his successful boatbuilding methods.Step 4: Finishing Touches
Once the flange is fully dried, Sven removes the clamps carefully, ensuring no damage occurs during this process. He then moves on to attaching four more pieces onto these main frames, completing two pairs of flanges for the bulkhead hatches.The Final Touches
While two flanges form the primary support structure around the hatches, Sven mentions there are two additional pieces required at each end to ensure comprehensive protection. This attention to detail highlights his commitment to producing a durable and reliable design. “Sailing is about finding your path, whether it’s across an ocean or within yourself.” – Sven Yrvind In conclusion, making flanges around bulkhead hatches may seem complex at first glance, but by following Sven Yrvind’s meticulous process, enthusiasts can achieve professional-level results. Remember that the journey of boatbuilding is as rewarding as reaching your destination; it tests one’s patience and dedication. For those seeking to embark on this adventure or simply gain more insight into marine craftsmanship, Sven’s wisdom is invaluable.Once the flange is fully dried, Sven removes the clamps carefully, ensuring no damage occurs during this process. He then moves on to attaching four more pieces onto these main frames, completing two pairs of flanges for the bulkhead hatches.The Final Touches
While two flanges form the primary support structure around the hatches, Sven mentions there are two additional pieces required at each end to ensure comprehensive protection. This attention to detail highlights his commitment to producing a durable and reliable design. “Sailing is about finding your path, whether it’s across an ocean or within yourself.” – Sven Yrvind In conclusion, making flanges around bulkhead hatches may seem complex at first glance, but by following Sven Yrvind’s meticulous process, enthusiasts can achieve professional-level results. Remember that the journey of boatbuilding is as rewarding as reaching your destination; it tests one’s patience and dedication. For those seeking to embark on this adventure or simply gain more insight into marine craftsmanship, Sven’s wisdom is invaluable.After securely attaching the first portion of the flange, Sven allows ample time for it to dry before moving forward with additional steps. This patience and precision are key aspects of his successful boatbuilding methods.Step 4: Finishing Touches
Once the flange is fully dried, Sven removes the clamps carefully, ensuring no damage occurs during this process. He then moves on to attaching four more pieces onto these main frames, completing two pairs of flanges for the bulkhead hatches.The Final Touches
While two flanges form the primary support structure around the hatches, Sven mentions there are two additional pieces required at each end to ensure comprehensive protection. This attention to detail highlights his commitment to producing a durable and reliable design. “Sailing is about finding your path, whether it’s across an ocean or within yourself.” – Sven Yrvind In conclusion, making flanges around bulkhead hatches may seem complex at first glance, but by following Sven Yrvind’s meticulous process, enthusiasts can achieve professional-level results. Remember that the journey of boatbuilding is as rewarding as reaching your destination; it tests one’s patience and dedication. For those seeking to embark on this adventure or simply gain more insight into marine craftsmanship, Sven’s wisdom is invaluable.Sven proceeds to apply glue along one edge of the flange, ensuring a secure bond when clamped into place. He emphasizes that this stage is crucial for maintaining the structural integrity of the flange, which in turn safeguards the living area beneath the canvas when hatches are open.Step 3: Allowing Time to Dry
After securely attaching the first portion of the flange, Sven allows ample time for it to dry before moving forward with additional steps. This patience and precision are key aspects of his successful boatbuilding methods.Step 4: Finishing Touches
Once the flange is fully dried, Sven removes the clamps carefully, ensuring no damage occurs during this process. He then moves on to attaching four more pieces onto these main frames, completing two pairs of flanges for the bulkhead hatches.The Final Touches
While two flanges form the primary support structure around the hatches, Sven mentions there are two additional pieces required at each end to ensure comprehensive protection. This attention to detail highlights his commitment to producing a durable and reliable design. “Sailing is about finding your path, whether it’s across an ocean or within yourself.” – Sven Yrvind In conclusion, making flanges around bulkhead hatches may seem complex at first glance, but by following Sven Yrvind’s meticulous process, enthusiasts can achieve professional-level results. Remember that the journey of boatbuilding is as rewarding as reaching your destination; it tests one’s patience and dedication. For those seeking to embark on this adventure or simply gain more insight into marine craftsmanship, Sven’s wisdom is invaluable.Sven begins by explaining that working on flanges vertically and horizontally is significantly easier than doing so in a flat position. To simplify the process further, he divides the task into two or three steps as suggested by fellow expert “for for.” This approach not only makes it more manageable but also allows for greater precision in crafting each component.Step 2: Applying Glue and Securing
Sven proceeds to apply glue along one edge of the flange, ensuring a secure bond when clamped into place. He emphasizes that this stage is crucial for maintaining the structural integrity of the flange, which in turn safeguards the living area beneath the canvas when hatches are open.Step 3: Allowing Time to Dry
After securely attaching the first portion of the flange, Sven allows ample time for it to dry before moving forward with additional steps. This patience and precision are key aspects of his successful boatbuilding methods.Step 4: Finishing Touches
Once the flange is fully dried, Sven removes the clamps carefully, ensuring no damage occurs during this process. He then moves on to attaching four more pieces onto these main frames, completing two pairs of flanges for the bulkhead hatches.The Final Touches
While two flanges form the primary support structure around the hatches, Sven mentions there are two additional pieces required at each end to ensure comprehensive protection. This attention to detail highlights his commitment to producing a durable and reliable design. “Sailing is about finding your path, whether it’s across an ocean or within yourself.” – Sven Yrvind In conclusion, making flanges around bulkhead hatches may seem complex at first glance, but by following Sven Yrvind’s meticulous process, enthusiasts can achieve professional-level results. Remember that the journey of boatbuilding is as rewarding as reaching your destination; it tests one’s patience and dedication. For those seeking to embark on this adventure or simply gain more insight into marine craftsmanship, Sven’s wisdom is invaluable.Sven Yrvind, a renowned yacht designer and sailor, shares valuable insights on creating flanges around bulkhead hatches for canvas protection in this enlightening video. By following his expert guidance, boat enthusiasts can ensure their living areas remain secure while allowing unhindered access through the hatches.Step 1: Starting with the Flange
Sven begins by explaining that working on flanges vertically and horizontally is significantly easier than doing so in a flat position. To simplify the process further, he divides the task into two or three steps as suggested by fellow expert “for for.” This approach not only makes it more manageable but also allows for greater precision in crafting each component.Step 2: Applying Glue and Securing
Sven proceeds to apply glue along one edge of the flange, ensuring a secure bond when clamped into place. He emphasizes that this stage is crucial for maintaining the structural integrity of the flange, which in turn safeguards the living area beneath the canvas when hatches are open.Step 3: Allowing Time to Dry
After securely attaching the first portion of the flange, Sven allows ample time for it to dry before moving forward with additional steps. This patience and precision are key aspects of his successful boatbuilding methods.Step 4: Finishing Touches
Once the flange is fully dried, Sven removes the clamps carefully, ensuring no damage occurs during this process. He then moves on to attaching four more pieces onto these main frames, completing two pairs of flanges for the bulkhead hatches.The Final Touches
While two flanges form the primary support structure around the hatches, Sven mentions there are two additional pieces required at each end to ensure comprehensive protection. This attention to detail highlights his commitment to producing a durable and reliable design. “Sailing is about finding your path, whether it’s across an ocean or within yourself.” – Sven Yrvind In conclusion, making flanges around bulkhead hatches may seem complex at first glance, but by following Sven Yrvind’s meticulous process, enthusiasts can achieve professional-level results. Remember that the journey of boatbuilding is as rewarding as reaching your destination; it tests one’s patience and dedication. For those seeking to embark on this adventure or simply gain more insight into marine craftsmanship, Sven’s wisdom is invaluable.Making Flanges Around Bulkhead Hatches for Canvas
Sven Yrvind, a renowned yacht designer and sailor, shares valuable insights on creating flanges around bulkhead hatches for canvas protection in this enlightening video. By following his expert guidance, boat enthusiasts can ensure their living areas remain secure while allowing unhindered access through the hatches.Step 1: Starting with the Flange
Sven begins by explaining that working on flanges vertically and horizontally is significantly easier than doing so in a flat position. To simplify the process further, he divides the task into two or three steps as suggested by fellow expert “for for.” This approach not only makes it more manageable but also allows for greater precision in crafting each component.Step 2: Applying Glue and Securing
Sven proceeds to apply glue along one edge of the flange, ensuring a secure bond when clamped into place. He emphasizes that this stage is crucial for maintaining the structural integrity of the flange, which in turn safeguards the living area beneath the canvas when hatches are open.Step 3: Allowing Time to Dry
After securely attaching the first portion of the flange, Sven allows ample time for it to dry before moving forward with additional steps. This patience and precision are key aspects of his successful boatbuilding methods.Step 4: Finishing Touches
Once the flange is fully dried, Sven removes the clamps carefully, ensuring no damage occurs during this process. He then moves on to attaching four more pieces onto these main frames, completing two pairs of flanges for the bulkhead hatches.The Final Touches
While two flanges form the primary support structure around the hatches, Sven mentions there are two additional pieces required at each end to ensure comprehensive protection. This attention to detail highlights his commitment to producing a durable and reliable design. “Sailing is about finding your path, whether it’s across an ocean or within yourself.” – Sven Yrvind In conclusion, making flanges around bulkhead hatches may seem complex at first glance, but by following Sven Yrvind’s meticulous process, enthusiasts can achieve professional-level results. Remember that the journey of boatbuilding is as rewarding as reaching your destination; it tests one’s patience and dedication. For those seeking to embark on this adventure or simply gain more insight into marine craftsmanship, Sven’s wisdom is invaluable.Sven proceeds to apply glue along one edge of the flange, ensuring a secure bond when clamped into place. He emphasizes that this stage is crucial for maintaining the structural integrity of the flange, which in turn safeguards the living area beneath the canvas when hatches are open.Step 3: Allowing Time to Dry
After securely attaching the first portion of the flange, Sven allows ample time for it to dry before moving forward with additional steps. This patience and precision are key aspects of his successful boatbuilding methods.Step 4: Finishing Touches
Once the flange is fully dried, Sven removes the clamps carefully, ensuring no damage occurs during this process. He then moves on to attaching four more pieces onto these main frames, completing two pairs of flanges for the bulkhead hatches.The Final Touches
While two flanges form the primary support structure around the hatches, Sven mentions there are two additional pieces required at each end to ensure comprehensive protection. This attention to detail highlights his commitment to producing a durable and reliable design. “Sailing is about finding your path, whether it’s across an ocean or within yourself.” – Sven Yrvind In conclusion, making flanges around bulkhead hatches may seem complex at first glance, but by following Sven Yrvind’s meticulous process, enthusiasts can achieve professional-level results. Remember that the journey of boatbuilding is as rewarding as reaching your destination; it tests one’s patience and dedication. For those seeking to embark on this adventure or simply gain more insight into marine craftsmanship, Sven’s wisdom is invaluable.Sven Yrvind, a renowned yacht designer and sailor, shares valuable insights on creating flanges around bulkhead hatches for canvas protection in this enlightening video. By following his expert guidance, boat enthusiasts can ensure their living areas remain secure while allowing unhindered access through the hatches.Step 1: Starting with the Flange
Sven begins by explaining that working on flanges vertically and horizontally is significantly easier than doing so in a flat position. To simplify the process further, he divides the task into two or three steps as suggested by fellow expert “for for.” This approach not only makes it more manageable but also allows for greater precision in crafting each component.Step 2: Applying Glue and Securing
Sven proceeds to apply glue along one edge of the flange, ensuring a secure bond when clamped into place. He emphasizes that this stage is crucial for maintaining the structural integrity of the flange, which in turn safeguards the living area beneath the canvas when hatches are open.Step 3: Allowing Time to Dry
After securely attaching the first portion of the flange, Sven allows ample time for it to dry before moving forward with additional steps. This patience and precision are key aspects of his successful boatbuilding methods.Step 4: Finishing Touches
Once the flange is fully dried, Sven removes the clamps carefully, ensuring no damage occurs during this process. He then moves on to attaching four more pieces onto these main frames, completing two pairs of flanges for the bulkhead hatches.The Final Touches
While two flanges form the primary support structure around the hatches, Sven mentions there are two additional pieces required at each end to ensure comprehensive protection. This attention to detail highlights his commitment to producing a durable and reliable design. “Sailing is about finding your path, whether it’s across an ocean or within yourself.” – Sven Yrvind In conclusion, making flanges around bulkhead hatches may seem complex at first glance, but by following Sven Yrvind’s meticulous process, enthusiasts can achieve professional-level results. Remember that the journey of boatbuilding is as rewarding as reaching your destination; it tests one’s patience and dedication. For those seeking to embark on this adventure or simply gain more insight into marine craftsmanship, Sven’s wisdom is invaluable.Making Flanges Around Bulkhead Hatches for Canvas
Sven Yrvind, a renowned yacht designer and sailor, shares valuable insights on creating flanges around bulkhead hatches for canvas protection in this enlightening video. By following his expert guidance, boat enthusiasts can ensure their living areas remain secure while allowing unhindered access through the hatches.Step 1: Starting with the Flange
Sven begins by explaining that working on flanges vertically and horizontally is significantly easier than doing so in a flat position. To simplify the process further, he divides the task into two or three steps as suggested by fellow expert “for for.” This approach not only makes it more manageable but also allows for greater precision in crafting each component.Step 2: Applying Glue and Securing
Sven proceeds to apply glue along one edge of the flange, ensuring a secure bond when clamped into place. He emphasizes that this stage is crucial for maintaining the structural integrity of the flange, which in turn safeguards the living area beneath the canvas when hatches are open.Step 3: Allowing Time to Dry
After securely attaching the first portion of the flange, Sven allows ample time for it to dry before moving forward with additional steps. This patience and precision are key aspects of his successful boatbuilding methods.Step 4: Finishing Touches
Once the flange is fully dried, Sven removes the clamps carefully, ensuring no damage occurs during this process. He then moves on to attaching four more pieces onto these main frames, completing two pairs of flanges for the bulkhead hatches.The Final Touches
While two flanges form the primary support structure around the hatches, Sven mentions there are two additional pieces required at each end to ensure comprehensive protection. This attention to detail highlights his commitment to producing a durable and reliable design. “Sailing is about finding your path, whether it’s across an ocean or within yourself.” – Sven Yrvind In conclusion, making flanges around bulkhead hatches may seem complex at first glance, but by following Sven Yrvind’s meticulous process, enthusiasts can achieve professional-level results. Remember that the journey of boatbuilding is as rewarding as reaching your destination; it tests one’s patience and dedication. For those seeking to embark on this adventure or simply gain more insight into marine craftsmanship, Sven’s wisdom is invaluable.After securely attaching the first portion of the flange, Sven allows ample time for it to dry before moving forward with additional steps. This patience and precision are key aspects of his successful boatbuilding methods.Step 4: Finishing Touches
Once the flange is fully dried, Sven removes the clamps carefully, ensuring no damage occurs during this process. He then moves on to attaching four more pieces onto these main frames, completing two pairs of flanges for the bulkhead hatches.The Final Touches
While two flanges form the primary support structure around the hatches, Sven mentions there are two additional pieces required at each end to ensure comprehensive protection. This attention to detail highlights his commitment to producing a durable and reliable design. “Sailing is about finding your path, whether it’s across an ocean or within yourself.” – Sven Yrvind In conclusion, making flanges around bulkhead hatches may seem complex at first glance, but by following Sven Yrvind’s meticulous process, enthusiasts can achieve professional-level results. Remember that the journey of boatbuilding is as rewarding as reaching your destination; it tests one’s patience and dedication. For those seeking to embark on this adventure or simply gain more insight into marine craftsmanship, Sven’s wisdom is invaluable.Sven proceeds to apply glue along one edge of the flange, ensuring a secure bond when clamped into place. He emphasizes that this stage is crucial for maintaining the structural integrity of the flange, which in turn safeguards the living area beneath the canvas when hatches are open.Step 3: Allowing Time to Dry
After securely attaching the first portion of the flange, Sven allows ample time for it to dry before moving forward with additional steps. This patience and precision are key aspects of his successful boatbuilding methods.Step 4: Finishing Touches
Once the flange is fully dried, Sven removes the clamps carefully, ensuring no damage occurs during this process. He then moves on to attaching four more pieces onto these main frames, completing two pairs of flanges for the bulkhead hatches.The Final Touches
While two flanges form the primary support structure around the hatches, Sven mentions there are two additional pieces required at each end to ensure comprehensive protection. This attention to detail highlights his commitment to producing a durable and reliable design. “Sailing is about finding your path, whether it’s across an ocean or within yourself.” – Sven Yrvind In conclusion, making flanges around bulkhead hatches may seem complex at first glance, but by following Sven Yrvind’s meticulous process, enthusiasts can achieve professional-level results. Remember that the journey of boatbuilding is as rewarding as reaching your destination; it tests one’s patience and dedication. For those seeking to embark on this adventure or simply gain more insight into marine craftsmanship, Sven’s wisdom is invaluable.Sven begins by explaining that working on flanges vertically and horizontally is significantly easier than doing so in a flat position. To simplify the process further, he divides the task into two or three steps as suggested by fellow expert “for for.” This approach not only makes it more manageable but also allows for greater precision in crafting each component.Step 2: Applying Glue and Securing
Sven proceeds to apply glue along one edge of the flange, ensuring a secure bond when clamped into place. He emphasizes that this stage is crucial for maintaining the structural integrity of the flange, which in turn safeguards the living area beneath the canvas when hatches are open.Step 3: Allowing Time to Dry
After securely attaching the first portion of the flange, Sven allows ample time for it to dry before moving forward with additional steps. This patience and precision are key aspects of his successful boatbuilding methods.Step 4: Finishing Touches
Once the flange is fully dried, Sven removes the clamps carefully, ensuring no damage occurs during this process. He then moves on to attaching four more pieces onto these main frames, completing two pairs of flanges for the bulkhead hatches.The Final Touches
While two flanges form the primary support structure around the hatches, Sven mentions there are two additional pieces required at each end to ensure comprehensive protection. This attention to detail highlights his commitment to producing a durable and reliable design. “Sailing is about finding your path, whether it’s across an ocean or within yourself.” – Sven Yrvind In conclusion, making flanges around bulkhead hatches may seem complex at first glance, but by following Sven Yrvind’s meticulous process, enthusiasts can achieve professional-level results. Remember that the journey of boatbuilding is as rewarding as reaching your destination; it tests one’s patience and dedication. For those seeking to embark on this adventure or simply gain more insight into marine craftsmanship, Sven’s wisdom is invaluable.Sven Yrvind, a renowned yacht designer and sailor, shares valuable insights on creating flanges around bulkhead hatches for canvas protection in this enlightening video. By following his expert guidance, boat enthusiasts can ensure their living areas remain secure while allowing unhindered access through the hatches.Step 1: Starting with the Flange
Sven begins by explaining that working on flanges vertically and horizontally is significantly easier than doing so in a flat position. To simplify the process further, he divides the task into two or three steps as suggested by fellow expert “for for.” This approach not only makes it more manageable but also allows for greater precision in crafting each component.Step 2: Applying Glue and Securing
Sven proceeds to apply glue along one edge of the flange, ensuring a secure bond when clamped into place. He emphasizes that this stage is crucial for maintaining the structural integrity of the flange, which in turn safeguards the living area beneath the canvas when hatches are open.Step 3: Allowing Time to Dry
After securely attaching the first portion of the flange, Sven allows ample time for it to dry before moving forward with additional steps. This patience and precision are key aspects of his successful boatbuilding methods.Step 4: Finishing Touches
Once the flange is fully dried, Sven removes the clamps carefully, ensuring no damage occurs during this process. He then moves on to attaching four more pieces onto these main frames, completing two pairs of flanges for the bulkhead hatches.The Final Touches
While two flanges form the primary support structure around the hatches, Sven mentions there are two additional pieces required at each end to ensure comprehensive protection. This attention to detail highlights his commitment to producing a durable and reliable design. “Sailing is about finding your path, whether it’s across an ocean or within yourself.” – Sven Yrvind In conclusion, making flanges around bulkhead hatches may seem complex at first glance, but by following Sven Yrvind’s meticulous process, enthusiasts can achieve professional-level results. Remember that the journey of boatbuilding is as rewarding as reaching your destination; it tests one’s patience and dedication. For those seeking to embark on this adventure or simply gain more insight into marine craftsmanship, Sven’s wisdom is invaluable.Making Flanges Around Bulkhead Hatches for Canvas
Sven Yrvind, a renowned yacht designer and sailor, shares valuable insights on creating flanges around bulkhead hatches for canvas protection in this enlightening video. By following his expert guidance, boat enthusiasts can ensure their living areas remain secure while allowing unhindered access through the hatches.Step 1: Starting with the Flange
Sven begins by explaining that working on flanges vertically and horizontally is significantly easier than doing so in a flat position. To simplify the process further, he divides the task into two or three steps as suggested by fellow expert “for for.” This approach not only makes it more manageable but also allows for greater precision in crafting each component.Step 2: Applying Glue and Securing
Sven proceeds to apply glue along one edge of the flange, ensuring a secure bond when clamped into place. He emphasizes that this stage is crucial for maintaining the structural integrity of the flange, which in turn safeguards the living area beneath the canvas when hatches are open.Step 3: Allowing Time to Dry
After securely attaching the first portion of the flange, Sven allows ample time for it to dry before moving forward with additional steps. This patience and precision are key aspects of his successful boatbuilding methods.Step 4: Finishing Touches
Once the flange is fully dried, Sven removes the clamps carefully, ensuring no damage occurs during this process. He then moves on to attaching four more pieces onto these main frames, completing two pairs of flanges for the bulkhead hatches.The Final Touches
While two flanges form the primary support structure around the hatches, Sven mentions there are two additional pieces required at each end to ensure comprehensive protection. This attention to detail highlights his commitment to producing a durable and reliable design. “Sailing is about finding your path, whether it’s across an ocean or within yourself.” – Sven Yrvind In conclusion, making flanges around bulkhead hatches may seem complex at first glance, but by following Sven Yrvind’s meticulous process, enthusiasts can achieve professional-level results. Remember that the journey of boatbuilding is as rewarding as reaching your destination; it tests one’s patience and dedication. For those seeking to embark on this adventure or simply gain more insight into marine craftsmanship, Sven’s wisdom is invaluable.Once the flange is fully dried, Sven removes the clamps carefully, ensuring no damage occurs during this process. He then moves on to attaching four more pieces onto these main frames, completing two pairs of flanges for the bulkhead hatches.The Final Touches
While two flanges form the primary support structure around the hatches, Sven mentions there are two additional pieces required at each end to ensure comprehensive protection. This attention to detail highlights his commitment to producing a durable and reliable design. “Sailing is about finding your path, whether it’s across an ocean or within yourself.” – Sven Yrvind In conclusion, making flanges around bulkhead hatches may seem complex at first glance, but by following Sven Yrvind’s meticulous process, enthusiasts can achieve professional-level results. Remember that the journey of boatbuilding is as rewarding as reaching your destination; it tests one’s patience and dedication. For those seeking to embark on this adventure or simply gain more insight into marine craftsmanship, Sven’s wisdom is invaluable.After securely attaching the first portion of the flange, Sven allows ample time for it to dry before moving forward with additional steps. This patience and precision are key aspects of his successful boatbuilding methods.Step 4: Finishing Touches
Once the flange is fully dried, Sven removes the clamps carefully, ensuring no damage occurs during this process. He then moves on to attaching four more pieces onto these main frames, completing two pairs of flanges for the bulkhead hatches.The Final Touches
While two flanges form the primary support structure around the hatches, Sven mentions there are two additional pieces required at each end to ensure comprehensive protection. This attention to detail highlights his commitment to producing a durable and reliable design. “Sailing is about finding your path, whether it’s across an ocean or within yourself.” – Sven Yrvind In conclusion, making flanges around bulkhead hatches may seem complex at first glance, but by following Sven Yrvind’s meticulous process, enthusiasts can achieve professional-level results. Remember that the journey of boatbuilding is as rewarding as reaching your destination; it tests one’s patience and dedication. For those seeking to embark on this adventure or simply gain more insight into marine craftsmanship, Sven’s wisdom is invaluable.Sven proceeds to apply glue along one edge of the flange, ensuring a secure bond when clamped into place. He emphasizes that this stage is crucial for maintaining the structural integrity of the flange, which in turn safeguards the living area beneath the canvas when hatches are open.Step 3: Allowing Time to Dry
After securely attaching the first portion of the flange, Sven allows ample time for it to dry before moving forward with additional steps. This patience and precision are key aspects of his successful boatbuilding methods.Step 4: Finishing Touches
Once the flange is fully dried, Sven removes the clamps carefully, ensuring no damage occurs during this process. He then moves on to attaching four more pieces onto these main frames, completing two pairs of flanges for the bulkhead hatches.The Final Touches
While two flanges form the primary support structure around the hatches, Sven mentions there are two additional pieces required at each end to ensure comprehensive protection. This attention to detail highlights his commitment to producing a durable and reliable design. “Sailing is about finding your path, whether it’s across an ocean or within yourself.” – Sven Yrvind In conclusion, making flanges around bulkhead hatches may seem complex at first glance, but by following Sven Yrvind’s meticulous process, enthusiasts can achieve professional-level results. Remember that the journey of boatbuilding is as rewarding as reaching your destination; it tests one’s patience and dedication. For those seeking to embark on this adventure or simply gain more insight into marine craftsmanship, Sven’s wisdom is invaluable.Sven begins by explaining that working on flanges vertically and horizontally is significantly easier than doing so in a flat position. To simplify the process further, he divides the task into two or three steps as suggested by fellow expert “for for.” This approach not only makes it more manageable but also allows for greater precision in crafting each component.Step 2: Applying Glue and Securing
Sven proceeds to apply glue along one edge of the flange, ensuring a secure bond when clamped into place. He emphasizes that this stage is crucial for maintaining the structural integrity of the flange, which in turn safeguards the living area beneath the canvas when hatches are open.Step 3: Allowing Time to Dry
After securely attaching the first portion of the flange, Sven allows ample time for it to dry before moving forward with additional steps. This patience and precision are key aspects of his successful boatbuilding methods.Step 4: Finishing Touches
Once the flange is fully dried, Sven removes the clamps carefully, ensuring no damage occurs during this process. He then moves on to attaching four more pieces onto these main frames, completing two pairs of flanges for the bulkhead hatches.The Final Touches
While two flanges form the primary support structure around the hatches, Sven mentions there are two additional pieces required at each end to ensure comprehensive protection. This attention to detail highlights his commitment to producing a durable and reliable design. “Sailing is about finding your path, whether it’s across an ocean or within yourself.” – Sven Yrvind In conclusion, making flanges around bulkhead hatches may seem complex at first glance, but by following Sven Yrvind’s meticulous process, enthusiasts can achieve professional-level results. Remember that the journey of boatbuilding is as rewarding as reaching your destination; it tests one’s patience and dedication. For those seeking to embark on this adventure or simply gain more insight into marine craftsmanship, Sven’s wisdom is invaluable.Sven Yrvind, a renowned yacht designer and sailor, shares valuable insights on creating flanges around bulkhead hatches for canvas protection in this enlightening video. By following his expert guidance, boat enthusiasts can ensure their living areas remain secure while allowing unhindered access through the hatches.Step 1: Starting with the Flange
Sven begins by explaining that working on flanges vertically and horizontally is significantly easier than doing so in a flat position. To simplify the process further, he divides the task into two or three steps as suggested by fellow expert “for for.” This approach not only makes it more manageable but also allows for greater precision in crafting each component.Step 2: Applying Glue and Securing
Sven proceeds to apply glue along one edge of the flange, ensuring a secure bond when clamped into place. He emphasizes that this stage is crucial for maintaining the structural integrity of the flange, which in turn safeguards the living area beneath the canvas when hatches are open.Step 3: Allowing Time to Dry
After securely attaching the first portion of the flange, Sven allows ample time for it to dry before moving forward with additional steps. This patience and precision are key aspects of his successful boatbuilding methods.Step 4: Finishing Touches
Once the flange is fully dried, Sven removes the clamps carefully, ensuring no damage occurs during this process. He then moves on to attaching four more pieces onto these main frames, completing two pairs of flanges for the bulkhead hatches.The Final Touches
While two flanges form the primary support structure around the hatches, Sven mentions there are two additional pieces required at each end to ensure comprehensive protection. This attention to detail highlights his commitment to producing a durable and reliable design. “Sailing is about finding your path, whether it’s across an ocean or within yourself.” – Sven Yrvind In conclusion, making flanges around bulkhead hatches may seem complex at first glance, but by following Sven Yrvind’s meticulous process, enthusiasts can achieve professional-level results. Remember that the journey of boatbuilding is as rewarding as reaching your destination; it tests one’s patience and dedication. For those seeking to embark on this adventure or simply gain more insight into marine craftsmanship, Sven’s wisdom is invaluable.Making Flanges Around Bulkhead Hatches for Canvas
Sven Yrvind, a renowned yacht designer and sailor, shares valuable insights on creating flanges around bulkhead hatches for canvas protection in this enlightening video. By following his expert guidance, boat enthusiasts can ensure their living areas remain secure while allowing unhindered access through the hatches.Step 1: Starting with the Flange
Sven begins by explaining that working on flanges vertically and horizontally is significantly easier than doing so in a flat position. To simplify the process further, he divides the task into two or three steps as suggested by fellow expert “for for.” This approach not only makes it more manageable but also allows for greater precision in crafting each component.Step 2: Applying Glue and Securing
Sven proceeds to apply glue along one edge of the flange, ensuring a secure bond when clamped into place. He emphasizes that this stage is crucial for maintaining the structural integrity of the flange, which in turn safeguards the living area beneath the canvas when hatches are open.Step 3: Allowing Time to Dry
After securely attaching the first portion of the flange, Sven allows ample time for it to dry before moving forward with additional steps. This patience and precision are key aspects of his successful boatbuilding methods.Step 4: Finishing Touches
Once the flange is fully dried, Sven removes the clamps carefully, ensuring no damage occurs during this process. He then moves on to attaching four more pieces onto these main frames, completing two pairs of flanges for the bulkhead hatches.The Final Touches
While two flanges form the primary support structure around the hatches, Sven mentions there are two additional pieces required at each end to ensure comprehensive protection. This attention to detail highlights his commitment to producing a durable and reliable design. “Sailing is about finding your path, whether it’s across an ocean or within yourself.” – Sven Yrvind In conclusion, making flanges around bulkhead hatches may seem complex at first glance, but by following Sven Yrvind’s meticulous process, enthusiasts can achieve professional-level results. Remember that the journey of boatbuilding is as rewarding as reaching your destination; it tests one’s patience and dedication. For those seeking to embark on this adventure or simply gain more insight into marine craftsmanship, Sven’s wisdom is invaluable.Sven begins by explaining that working on flanges vertically and horizontally is significantly easier than doing so in a flat position. To simplify the process further, he divides the task into two or three steps as suggested by fellow expert “for for.” This approach not only makes it more manageable but also allows for greater precision in crafting each component.Step 2: Applying Glue and Securing
Sven proceeds to apply glue along one edge of the flange, ensuring a secure bond when clamped into place. He emphasizes that this stage is crucial for maintaining the structural integrity of the flange, which in turn safeguards the living area beneath the canvas when hatches are open.Step 3: Allowing Time to Dry
After securely attaching the first portion of the flange, Sven allows ample time for it to dry before moving forward with additional steps. This patience and precision are key aspects of his successful boatbuilding methods.Step 4: Finishing Touches
Once the flange is fully dried, Sven removes the clamps carefully, ensuring no damage occurs during this process. He then moves on to attaching four more pieces onto these main frames, completing two pairs of flanges for the bulkhead hatches.The Final Touches
While two flanges form the primary support structure around the hatches, Sven mentions there are two additional pieces required at each end to ensure comprehensive protection. This attention to detail highlights his commitment to producing a durable and reliable design. “Sailing is about finding your path, whether it’s across an ocean or within yourself.” – Sven Yrvind In conclusion, making flanges around bulkhead hatches may seem complex at first glance, but by following Sven Yrvind’s meticulous process, enthusiasts can achieve professional-level results. Remember that the journey of boatbuilding is as rewarding as reaching your destination; it tests one’s patience and dedication. For those seeking to embark on this adventure or simply gain more insight into marine craftsmanship, Sven’s wisdom is invaluable.Sven Yrvind, a renowned yacht designer and sailor, shares valuable insights on creating flanges around bulkhead hatches for canvas protection in this enlightening video. By following his expert guidance, boat enthusiasts can ensure their living areas remain secure while allowing unhindered access through the hatches.Step 1: Starting with the Flange
Sven begins by explaining that working on flanges vertically and horizontally is significantly easier than doing so in a flat position. To simplify the process further, he divides the task into two or three steps as suggested by fellow expert “for for.” This approach not only makes it more manageable but also allows for greater precision in crafting each component.Step 2: Applying Glue and Securing
Sven proceeds to apply glue along one edge of the flange, ensuring a secure bond when clamped into place. He emphasizes that this stage is crucial for maintaining the structural integrity of the flange, which in turn safeguards the living area beneath the canvas when hatches are open.Step 3: Allowing Time to Dry
After securely attaching the first portion of the flange, Sven allows ample time for it to dry before moving forward with additional steps. This patience and precision are key aspects of his successful boatbuilding methods.Step 4: Finishing Touches
Once the flange is fully dried, Sven removes the clamps carefully, ensuring no damage occurs during this process. He then moves on to attaching four more pieces onto these main frames, completing two pairs of flanges for the bulkhead hatches.The Final Touches
While two flanges form the primary support structure around the hatches, Sven mentions there are two additional pieces required at each end to ensure comprehensive protection. This attention to detail highlights his commitment to producing a durable and reliable design. “Sailing is about finding your path, whether it’s across an ocean or within yourself.” – Sven Yrvind In conclusion, making flanges around bulkhead hatches may seem complex at first glance, but by following Sven Yrvind’s meticulous process, enthusiasts can achieve professional-level results. Remember that the journey of boatbuilding is as rewarding as reaching your destination; it tests one’s patience and dedication. For those seeking to embark on this adventure or simply gain more insight into marine craftsmanship, Sven’s wisdom is invaluable.Making Flanges Around Bulkhead Hatches for Canvas
Sven Yrvind, a renowned yacht designer and sailor, shares valuable insights on creating flanges around bulkhead hatches for canvas protection in this enlightening video. By following his expert guidance, boat enthusiasts can ensure their living areas remain secure while allowing unhindered access through the hatches.Step 1: Starting with the Flange
Sven begins by explaining that working on flanges vertically and horizontally is significantly easier than doing so in a flat position. To simplify the process further, he divides the task into two or three steps as suggested by fellow expert “for for.” This approach not only makes it more manageable but also allows for greater precision in crafting each component.Step 2: Applying Glue and Securing
Sven proceeds to apply glue along one edge of the flange, ensuring a secure bond when clamped into place. He emphasizes that this stage is crucial for maintaining the structural integrity of the flange, which in turn safeguards the living area beneath the canvas when hatches are open.Step 3: Allowing Time to Dry
After securely attaching the first portion of the flange, Sven allows ample time for it to dry before moving forward with additional steps. This patience and precision are key aspects of his successful boatbuilding methods.Step 4: Finishing Touches
Once the flange is fully dried, Sven removes the clamps carefully, ensuring no damage occurs during this process. He then moves on to attaching four more pieces onto these main frames, completing two pairs of flanges for the bulkhead hatches.The Final Touches
While two flanges form the primary support structure around the hatches, Sven mentions there are two additional pieces required at each end to ensure comprehensive protection. This attention to detail highlights his commitment to producing a durable and reliable design. “Sailing is about finding your path, whether it’s across an ocean or within yourself.” – Sven Yrvind In conclusion, making flanges around bulkhead hatches may seem complex at first glance, but by following Sven Yrvind’s meticulous process, enthusiasts can achieve professional-level results. Remember that the journey of boatbuilding is as rewarding as reaching your destination; it tests one’s patience and dedication. For those seeking to embark on this adventure or simply gain more insight into marine craftsmanship, Sven’s wisdom is invaluable.After securely attaching the first portion of the flange, Sven allows ample time for it to dry before moving forward with additional steps. This patience and precision are key aspects of his successful boatbuilding methods.Step 4: Finishing Touches
Once the flange is fully dried, Sven removes the clamps carefully, ensuring no damage occurs during this process. He then moves on to attaching four more pieces onto these main frames, completing two pairs of flanges for the bulkhead hatches.The Final Touches
While two flanges form the primary support structure around the hatches, Sven mentions there are two additional pieces required at each end to ensure comprehensive protection. This attention to detail highlights his commitment to producing a durable and reliable design. “Sailing is about finding your path, whether it’s across an ocean or within yourself.” – Sven Yrvind In conclusion, making flanges around bulkhead hatches may seem complex at first glance, but by following Sven Yrvind’s meticulous process, enthusiasts can achieve professional-level results. Remember that the journey of boatbuilding is as rewarding as reaching your destination; it tests one’s patience and dedication. For those seeking to embark on this adventure or simply gain more insight into marine craftsmanship, Sven’s wisdom is invaluable.Sven proceeds to apply glue along one edge of the flange, ensuring a secure bond when clamped into place. He emphasizes that this stage is crucial for maintaining the structural integrity of the flange, which in turn safeguards the living area beneath the canvas when hatches are open.Step 3: Allowing Time to Dry
After securely attaching the first portion of the flange, Sven allows ample time for it to dry before moving forward with additional steps. This patience and precision are key aspects of his successful boatbuilding methods.Step 4: Finishing Touches
Once the flange is fully dried, Sven removes the clamps carefully, ensuring no damage occurs during this process. He then moves on to attaching four more pieces onto these main frames, completing two pairs of flanges for the bulkhead hatches.The Final Touches
While two flanges form the primary support structure around the hatches, Sven mentions there are two additional pieces required at each end to ensure comprehensive protection. This attention to detail highlights his commitment to producing a durable and reliable design. “Sailing is about finding your path, whether it’s across an ocean or within yourself.” – Sven Yrvind In conclusion, making flanges around bulkhead hatches may seem complex at first glance, but by following Sven Yrvind’s meticulous process, enthusiasts can achieve professional-level results. Remember that the journey of boatbuilding is as rewarding as reaching your destination; it tests one’s patience and dedication. For those seeking to embark on this adventure or simply gain more insight into marine craftsmanship, Sven’s wisdom is invaluable.Sven begins by explaining that working on flanges vertically and horizontally is significantly easier than doing so in a flat position. To simplify the process further, he divides the task into two or three steps as suggested by fellow expert “for for.” This approach not only makes it more manageable but also allows for greater precision in crafting each component.Step 2: Applying Glue and Securing
Sven proceeds to apply glue along one edge of the flange, ensuring a secure bond when clamped into place. He emphasizes that this stage is crucial for maintaining the structural integrity of the flange, which in turn safeguards the living area beneath the canvas when hatches are open.Step 3: Allowing Time to Dry
After securely attaching the first portion of the flange, Sven allows ample time for it to dry before moving forward with additional steps. This patience and precision are key aspects of his successful boatbuilding methods.Step 4: Finishing Touches
Once the flange is fully dried, Sven removes the clamps carefully, ensuring no damage occurs during this process. He then moves on to attaching four more pieces onto these main frames, completing two pairs of flanges for the bulkhead hatches.The Final Touches
While two flanges form the primary support structure around the hatches, Sven mentions there are two additional pieces required at each end to ensure comprehensive protection. This attention to detail highlights his commitment to producing a durable and reliable design. “Sailing is about finding your path, whether it’s across an ocean or within yourself.” – Sven Yrvind In conclusion, making flanges around bulkhead hatches may seem complex at first glance, but by following Sven Yrvind’s meticulous process, enthusiasts can achieve professional-level results. Remember that the journey of boatbuilding is as rewarding as reaching your destination; it tests one’s patience and dedication. For those seeking to embark on this adventure or simply gain more insight into marine craftsmanship, Sven’s wisdom is invaluable.Sven Yrvind, a renowned yacht designer and sailor, shares valuable insights on creating flanges around bulkhead hatches for canvas protection in this enlightening video. By following his expert guidance, boat enthusiasts can ensure their living areas remain secure while allowing unhindered access through the hatches.Step 1: Starting with the Flange
Sven begins by explaining that working on flanges vertically and horizontally is significantly easier than doing so in a flat position. To simplify the process further, he divides the task into two or three steps as suggested by fellow expert “for for.” This approach not only makes it more manageable but also allows for greater precision in crafting each component.Step 2: Applying Glue and Securing
Sven proceeds to apply glue along one edge of the flange, ensuring a secure bond when clamped into place. He emphasizes that this stage is crucial for maintaining the structural integrity of the flange, which in turn safeguards the living area beneath the canvas when hatches are open.Step 3: Allowing Time to Dry
After securely attaching the first portion of the flange, Sven allows ample time for it to dry before moving forward with additional steps. This patience and precision are key aspects of his successful boatbuilding methods.Step 4: Finishing Touches
Once the flange is fully dried, Sven removes the clamps carefully, ensuring no damage occurs during this process. He then moves on to attaching four more pieces onto these main frames, completing two pairs of flanges for the bulkhead hatches.The Final Touches
While two flanges form the primary support structure around the hatches, Sven mentions there are two additional pieces required at each end to ensure comprehensive protection. This attention to detail highlights his commitment to producing a durable and reliable design. “Sailing is about finding your path, whether it’s across an ocean or within yourself.” – Sven Yrvind In conclusion, making flanges around bulkhead hatches may seem complex at first glance, but by following Sven Yrvind’s meticulous process, enthusiasts can achieve professional-level results. Remember that the journey of boatbuilding is as rewarding as reaching your destination; it tests one’s patience and dedication. For those seeking to embark on this adventure or simply gain more insight into marine craftsmanship, Sven’s wisdom is invaluable.Making Flanges Around Bulkhead Hatches for Canvas
Sven Yrvind, a renowned yacht designer and sailor, shares valuable insights on creating flanges around bulkhead hatches for canvas protection in this enlightening video. By following his expert guidance, boat enthusiasts can ensure their living areas remain secure while allowing unhindered access through the hatches.Step 1: Starting with the Flange
Sven begins by explaining that working on flanges vertically and horizontally is significantly easier than doing so in a flat position. To simplify the process further, he divides the task into two or three steps as suggested by fellow expert “for for.” This approach not only makes it more manageable but also allows for greater precision in crafting each component.Step 2: Applying Glue and Securing
Sven proceeds to apply glue along one edge of the flange, ensuring a secure bond when clamped into place. He emphasizes that this stage is crucial for maintaining the structural integrity of the flange, which in turn safeguards the living area beneath the canvas when hatches are open.Step 3: Allowing Time to Dry
After securely attaching the first portion of the flange, Sven allows ample time for it to dry before moving forward with additional steps. This patience and precision are key aspects of his successful boatbuilding methods.Step 4: Finishing Touches
Once the flange is fully dried, Sven removes the clamps carefully, ensuring no damage occurs during this process. He then moves on to attaching four more pieces onto these main frames, completing two pairs of flanges for the bulkhead hatches.The Final Touches
While two flanges form the primary support structure around the hatches, Sven mentions there are two additional pieces required at each end to ensure comprehensive protection. This attention to detail highlights his commitment to producing a durable and reliable design. “Sailing is about finding your path, whether it’s across an ocean or within yourself.” – Sven Yrvind In conclusion, making flanges around bulkhead hatches may seem complex at first glance, but by following Sven Yrvind’s meticulous process, enthusiasts can achieve professional-level results. Remember that the journey of boatbuilding is as rewarding as reaching your destination; it tests one’s patience and dedication. For those seeking to embark on this adventure or simply gain more insight into marine craftsmanship, Sven’s wisdom is invaluable.Once the flange is fully dried, Sven removes the clamps carefully, ensuring no damage occurs during this process. He then moves on to attaching four more pieces onto these main frames, completing two pairs of flanges for the bulkhead hatches.The Final Touches
While two flanges form the primary support structure around the hatches, Sven mentions there are two additional pieces required at each end to ensure comprehensive protection. This attention to detail highlights his commitment to producing a durable and reliable design. “Sailing is about finding your path, whether it’s across an ocean or within yourself.” – Sven Yrvind In conclusion, making flanges around bulkhead hatches may seem complex at first glance, but by following Sven Yrvind’s meticulous process, enthusiasts can achieve professional-level results. Remember that the journey of boatbuilding is as rewarding as reaching your destination; it tests one’s patience and dedication. For those seeking to embark on this adventure or simply gain more insight into marine craftsmanship, Sven’s wisdom is invaluable.After securely attaching the first portion of the flange, Sven allows ample time for it to dry before moving forward with additional steps. This patience and precision are key aspects of his successful boatbuilding methods.Step 4: Finishing Touches
Once the flange is fully dried, Sven removes the clamps carefully, ensuring no damage occurs during this process. He then moves on to attaching four more pieces onto these main frames, completing two pairs of flanges for the bulkhead hatches.The Final Touches
While two flanges form the primary support structure around the hatches, Sven mentions there are two additional pieces required at each end to ensure comprehensive protection. This attention to detail highlights his commitment to producing a durable and reliable design. “Sailing is about finding your path, whether it’s across an ocean or within yourself.” – Sven Yrvind In conclusion, making flanges around bulkhead hatches may seem complex at first glance, but by following Sven Yrvind’s meticulous process, enthusiasts can achieve professional-level results. Remember that the journey of boatbuilding is as rewarding as reaching your destination; it tests one’s patience and dedication. For those seeking to embark on this adventure or simply gain more insight into marine craftsmanship, Sven’s wisdom is invaluable.Sven proceeds to apply glue along one edge of the flange, ensuring a secure bond when clamped into place. He emphasizes that this stage is crucial for maintaining the structural integrity of the flange, which in turn safeguards the living area beneath the canvas when hatches are open.Step 3: Allowing Time to Dry
After securely attaching the first portion of the flange, Sven allows ample time for it to dry before moving forward with additional steps. This patience and precision are key aspects of his successful boatbuilding methods.Step 4: Finishing Touches
Once the flange is fully dried, Sven removes the clamps carefully, ensuring no damage occurs during this process. He then moves on to attaching four more pieces onto these main frames, completing two pairs of flanges for the bulkhead hatches.The Final Touches
While two flanges form the primary support structure around the hatches, Sven mentions there are two additional pieces required at each end to ensure comprehensive protection. This attention to detail highlights his commitment to producing a durable and reliable design. “Sailing is about finding your path, whether it’s across an ocean or within yourself.” – Sven Yrvind In conclusion, making flanges around bulkhead hatches may seem complex at first glance, but by following Sven Yrvind’s meticulous process, enthusiasts can achieve professional-level results. Remember that the journey of boatbuilding is as rewarding as reaching your destination; it tests one’s patience and dedication. For those seeking to embark on this adventure or simply gain more insight into marine craftsmanship, Sven’s wisdom is invaluable.Sven begins by explaining that working on flanges vertically and horizontally is significantly easier than doing so in a flat position. To simplify the process further, he divides the task into two or three steps as suggested by fellow expert “for for.” This approach not only makes it more manageable but also allows for greater precision in crafting each component.Step 2: Applying Glue and Securing
Sven proceeds to apply glue along one edge of the flange, ensuring a secure bond when clamped into place. He emphasizes that this stage is crucial for maintaining the structural integrity of the flange, which in turn safeguards the living area beneath the canvas when hatches are open.Step 3: Allowing Time to Dry
After securely attaching the first portion of the flange, Sven allows ample time for it to dry before moving forward with additional steps. This patience and precision are key aspects of his successful boatbuilding methods.Step 4: Finishing Touches
Once the flange is fully dried, Sven removes the clamps carefully, ensuring no damage occurs during this process. He then moves on to attaching four more pieces onto these main frames, completing two pairs of flanges for the bulkhead hatches.The Final Touches
While two flanges form the primary support structure around the hatches, Sven mentions there are two additional pieces required at each end to ensure comprehensive protection. This attention to detail highlights his commitment to producing a durable and reliable design. “Sailing is about finding your path, whether it’s across an ocean or within yourself.” – Sven Yrvind In conclusion, making flanges around bulkhead hatches may seem complex at first glance, but by following Sven Yrvind’s meticulous process, enthusiasts can achieve professional-level results. Remember that the journey of boatbuilding is as rewarding as reaching your destination; it tests one’s patience and dedication. For those seeking to embark on this adventure or simply gain more insight into marine craftsmanship, Sven’s wisdom is invaluable.Sven Yrvind, a renowned yacht designer and sailor, shares valuable insights on creating flanges around bulkhead hatches for canvas protection in this enlightening video. By following his expert guidance, boat enthusiasts can ensure their living areas remain secure while allowing unhindered access through the hatches.Step 1: Starting with the Flange
Sven begins by explaining that working on flanges vertically and horizontally is significantly easier than doing so in a flat position. To simplify the process further, he divides the task into two or three steps as suggested by fellow expert “for for.” This approach not only makes it more manageable but also allows for greater precision in crafting each component.Step 2: Applying Glue and Securing
Sven proceeds to apply glue along one edge of the flange, ensuring a secure bond when clamped into place. He emphasizes that this stage is crucial for maintaining the structural integrity of the flange, which in turn safeguards the living area beneath the canvas when hatches are open.Step 3: Allowing Time to Dry
After securely attaching the first portion of the flange, Sven allows ample time for it to dry before moving forward with additional steps. This patience and precision are key aspects of his successful boatbuilding methods.Step 4: Finishing Touches
Once the flange is fully dried, Sven removes the clamps carefully, ensuring no damage occurs during this process. He then moves on to attaching four more pieces onto these main frames, completing two pairs of flanges for the bulkhead hatches.The Final Touches
While two flanges form the primary support structure around the hatches, Sven mentions there are two additional pieces required at each end to ensure comprehensive protection. This attention to detail highlights his commitment to producing a durable and reliable design. “Sailing is about finding your path, whether it’s across an ocean or within yourself.” – Sven Yrvind In conclusion, making flanges around bulkhead hatches may seem complex at first glance, but by following Sven Yrvind’s meticulous process, enthusiasts can achieve professional-level results. Remember that the journey of boatbuilding is as rewarding as reaching your destination; it tests one’s patience and dedication. For those seeking to embark on this adventure or simply gain more insight into marine craftsmanship, Sven’s wisdom is invaluable.Making Flanges Around Bulkhead Hatches for Canvas
Sven Yrvind, a renowned yacht designer and sailor, shares valuable insights on creating flanges around bulkhead hatches for canvas protection in this enlightening video. By following his expert guidance, boat enthusiasts can ensure their living areas remain secure while allowing unhindered access through the hatches.Step 1: Starting with the Flange
Sven begins by explaining that working on flanges vertically and horizontally is significantly easier than doing so in a flat position. To simplify the process further, he divides the task into two or three steps as suggested by fellow expert “for for.” This approach not only makes it more manageable but also allows for greater precision in crafting each component.Step 2: Applying Glue and Securing
Sven proceeds to apply glue along one edge of the flange, ensuring a secure bond when clamped into place. He emphasizes that this stage is crucial for maintaining the structural integrity of the flange, which in turn safeguards the living area beneath the canvas when hatches are open.Step 3: Allowing Time to Dry
After securely attaching the first portion of the flange, Sven allows ample time for it to dry before moving forward with additional steps. This patience and precision are key aspects of his successful boatbuilding methods.Step 4: Finishing Touches
Once the flange is fully dried, Sven removes the clamps carefully, ensuring no damage occurs during this process. He then moves on to attaching four more pieces onto these main frames, completing two pairs of flanges for the bulkhead hatches.The Final Touches
While two flanges form the primary support structure around the hatches, Sven mentions there are two additional pieces required at each end to ensure comprehensive protection. This attention to detail highlights his commitment to producing a durable and reliable design. “Sailing is about finding your path, whether it’s across an ocean or within yourself.” – Sven Yrvind In conclusion, making flanges around bulkhead hatches may seem complex at first glance, but by following Sven Yrvind’s meticulous process, enthusiasts can achieve professional-level results. Remember that the journey of boatbuilding is as rewarding as reaching your destination; it tests one’s patience and dedication. For those seeking to embark on this adventure or simply gain more insight into marine craftsmanship, Sven’s wisdom is invaluable.Once the flange is fully dried, Sven removes the clamps carefully, ensuring no damage occurs during this process. He then moves on to attaching four more pieces onto these main frames, completing two pairs of flanges for the bulkhead hatches.The Final Touches
While two flanges form the primary support structure around the hatches, Sven mentions there are two additional pieces required at each end to ensure comprehensive protection. This attention to detail highlights his commitment to producing a durable and reliable design. “Sailing is about finding your path, whether it’s across an ocean or within yourself.” – Sven Yrvind In conclusion, making flanges around bulkhead hatches may seem complex at first glance, but by following Sven Yrvind’s meticulous process, enthusiasts can achieve professional-level results. Remember that the journey of boatbuilding is as rewarding as reaching your destination; it tests one’s patience and dedication. For those seeking to embark on this adventure or simply gain more insight into marine craftsmanship, Sven’s wisdom is invaluable.Sven begins by explaining that working on flanges vertically and horizontally is significantly easier than doing so in a flat position. To simplify the process further, he divides the task into two or three steps as suggested by fellow expert “for for.” This approach not only makes it more manageable but also allows for greater precision in crafting each component.Step 2: Applying Glue and Securing
Sven proceeds to apply glue along one edge of the flange, ensuring a secure bond when clamped into place. He emphasizes that this stage is crucial for maintaining the structural integrity of the flange, which in turn safeguards the living area beneath the canvas when hatches are open.Step 3: Allowing Time to Dry
After securely attaching the first portion of the flange, Sven allows ample time for it to dry before moving forward with additional steps. This patience and precision are key aspects of his successful boatbuilding methods.Step 4: Finishing Touches
Once the flange is fully dried, Sven removes the clamps carefully, ensuring no damage occurs during this process. He then moves on to attaching four more pieces onto these main frames, completing two pairs of flanges for the bulkhead hatches.The Final Touches
While two flanges form the primary support structure around the hatches, Sven mentions there are two additional pieces required at each end to ensure comprehensive protection. This attention to detail highlights his commitment to producing a durable and reliable design. “Sailing is about finding your path, whether it’s across an ocean or within yourself.” – Sven Yrvind In conclusion, making flanges around bulkhead hatches may seem complex at first glance, but by following Sven Yrvind’s meticulous process, enthusiasts can achieve professional-level results. Remember that the journey of boatbuilding is as rewarding as reaching your destination; it tests one’s patience and dedication. For those seeking to embark on this adventure or simply gain more insight into marine craftsmanship, Sven’s wisdom is invaluable.Sven Yrvind, a renowned yacht designer and sailor, shares valuable insights on creating flanges around bulkhead hatches for canvas protection in this enlightening video. By following his expert guidance, boat enthusiasts can ensure their living areas remain secure while allowing unhindered access through the hatches.Step 1: Starting with the Flange
Sven begins by explaining that working on flanges vertically and horizontally is significantly easier than doing so in a flat position. To simplify the process further, he divides the task into two or three steps as suggested by fellow expert “for for.” This approach not only makes it more manageable but also allows for greater precision in crafting each component.Step 2: Applying Glue and Securing
Sven proceeds to apply glue along one edge of the flange, ensuring a secure bond when clamped into place. He emphasizes that this stage is crucial for maintaining the structural integrity of the flange, which in turn safeguards the living area beneath the canvas when hatches are open.Step 3: Allowing Time to Dry
After securely attaching the first portion of the flange, Sven allows ample time for it to dry before moving forward with additional steps. This patience and precision are key aspects of his successful boatbuilding methods.Step 4: Finishing Touches
Once the flange is fully dried, Sven removes the clamps carefully, ensuring no damage occurs during this process. He then moves on to attaching four more pieces onto these main frames, completing two pairs of flanges for the bulkhead hatches.The Final Touches
While two flanges form the primary support structure around the hatches, Sven mentions there are two additional pieces required at each end to ensure comprehensive protection. This attention to detail highlights his commitment to producing a durable and reliable design. “Sailing is about finding your path, whether it’s across an ocean or within yourself.” – Sven Yrvind In conclusion, making flanges around bulkhead hatches may seem complex at first glance, but by following Sven Yrvind’s meticulous process, enthusiasts can achieve professional-level results. Remember that the journey of boatbuilding is as rewarding as reaching your destination; it tests one’s patience and dedication. For those seeking to embark on this adventure or simply gain more insight into marine craftsmanship, Sven’s wisdom is invaluable.Making Flanges Around Bulkhead Hatches for Canvas
Sven Yrvind, a renowned yacht designer and sailor, shares valuable insights on creating flanges around bulkhead hatches for canvas protection in this enlightening video. By following his expert guidance, boat enthusiasts can ensure their living areas remain secure while allowing unhindered access through the hatches.Step 1: Starting with the Flange
Sven begins by explaining that working on flanges vertically and horizontally is significantly easier than doing so in a flat position. To simplify the process further, he divides the task into two or three steps as suggested by fellow expert “for for.” This approach not only makes it more manageable but also allows for greater precision in crafting each component.Step 2: Applying Glue and Securing
Sven proceeds to apply glue along one edge of the flange, ensuring a secure bond when clamped into place. He emphasizes that this stage is crucial for maintaining the structural integrity of the flange, which in turn safeguards the living area beneath the canvas when hatches are open.Step 3: Allowing Time to Dry
After securely attaching the first portion of the flange, Sven allows ample time for it to dry before moving forward with additional steps. This patience and precision are key aspects of his successful boatbuilding methods.Step 4: Finishing Touches
Once the flange is fully dried, Sven removes the clamps carefully, ensuring no damage occurs during this process. He then moves on to attaching four more pieces onto these main frames, completing two pairs of flanges for the bulkhead hatches.The Final Touches
While two flanges form the primary support structure around the hatches, Sven mentions there are two additional pieces required at each end to ensure comprehensive protection. This attention to detail highlights his commitment to producing a durable and reliable design. “Sailing is about finding your path, whether it’s across an ocean or within yourself.” – Sven Yrvind In conclusion, making flanges around bulkhead hatches may seem complex at first glance, but by following Sven Yrvind’s meticulous process, enthusiasts can achieve professional-level results. Remember that the journey of boatbuilding is as rewarding as reaching your destination; it tests one’s patience and dedication. For those seeking to embark on this adventure or simply gain more insight into marine craftsmanship, Sven’s wisdom is invaluable.After securely attaching the first portion of the flange, Sven allows ample time for it to dry before moving forward with additional steps. This patience and precision are key aspects of his successful boatbuilding methods.Step 4: Finishing Touches
Once the flange is fully dried, Sven removes the clamps carefully, ensuring no damage occurs during this process. He then moves on to attaching four more pieces onto these main frames, completing two pairs of flanges for the bulkhead hatches.The Final Touches
While two flanges form the primary support structure around the hatches, Sven mentions there are two additional pieces required at each end to ensure comprehensive protection. This attention to detail highlights his commitment to producing a durable and reliable design. “Sailing is about finding your path, whether it’s across an ocean or within yourself.” – Sven Yrvind In conclusion, making flanges around bulkhead hatches may seem complex at first glance, but by following Sven Yrvind’s meticulous process, enthusiasts can achieve professional-level results. Remember that the journey of boatbuilding is as rewarding as reaching your destination; it tests one’s patience and dedication. For those seeking to embark on this adventure or simply gain more insight into marine craftsmanship, Sven’s wisdom is invaluable.Sven proceeds to apply glue along one edge of the flange, ensuring a secure bond when clamped into place. He emphasizes that this stage is crucial for maintaining the structural integrity of the flange, which in turn safeguards the living area beneath the canvas when hatches are open.Step 3: Allowing Time to Dry
After securely attaching the first portion of the flange, Sven allows ample time for it to dry before moving forward with additional steps. This patience and precision are key aspects of his successful boatbuilding methods.Step 4: Finishing Touches
Once the flange is fully dried, Sven removes the clamps carefully, ensuring no damage occurs during this process. He then moves on to attaching four more pieces onto these main frames, completing two pairs of flanges for the bulkhead hatches.The Final Touches
While two flanges form the primary support structure around the hatches, Sven mentions there are two additional pieces required at each end to ensure comprehensive protection. This attention to detail highlights his commitment to producing a durable and reliable design. “Sailing is about finding your path, whether it’s across an ocean or within yourself.” – Sven Yrvind In conclusion, making flanges around bulkhead hatches may seem complex at first glance, but by following Sven Yrvind’s meticulous process, enthusiasts can achieve professional-level results. Remember that the journey of boatbuilding is as rewarding as reaching your destination; it tests one’s patience and dedication. For those seeking to embark on this adventure or simply gain more insight into marine craftsmanship, Sven’s wisdom is invaluable.Sven begins by explaining that working on flanges vertically and horizontally is significantly easier than doing so in a flat position. To simplify the process further, he divides the task into two or three steps as suggested by fellow expert “for for.” This approach not only makes it more manageable but also allows for greater precision in crafting each component.Step 2: Applying Glue and Securing
Sven proceeds to apply glue along one edge of the flange, ensuring a secure bond when clamped into place. He emphasizes that this stage is crucial for maintaining the structural integrity of the flange, which in turn safeguards the living area beneath the canvas when hatches are open.Step 3: Allowing Time to Dry
After securely attaching the first portion of the flange, Sven allows ample time for it to dry before moving forward with additional steps. This patience and precision are key aspects of his successful boatbuilding methods.Step 4: Finishing Touches
Once the flange is fully dried, Sven removes the clamps carefully, ensuring no damage occurs during this process. He then moves on to attaching four more pieces onto these main frames, completing two pairs of flanges for the bulkhead hatches.The Final Touches
While two flanges form the primary support structure around the hatches, Sven mentions there are two additional pieces required at each end to ensure comprehensive protection. This attention to detail highlights his commitment to producing a durable and reliable design. “Sailing is about finding your path, whether it’s across an ocean or within yourself.” – Sven Yrvind In conclusion, making flanges around bulkhead hatches may seem complex at first glance, but by following Sven Yrvind’s meticulous process, enthusiasts can achieve professional-level results. Remember that the journey of boatbuilding is as rewarding as reaching your destination; it tests one’s patience and dedication. For those seeking to embark on this adventure or simply gain more insight into marine craftsmanship, Sven’s wisdom is invaluable.Sven Yrvind, a renowned yacht designer and sailor, shares valuable insights on creating flanges around bulkhead hatches for canvas protection in this enlightening video. By following his expert guidance, boat enthusiasts can ensure their living areas remain secure while allowing unhindered access through the hatches.Step 1: Starting with the Flange
Sven begins by explaining that working on flanges vertically and horizontally is significantly easier than doing so in a flat position. To simplify the process further, he divides the task into two or three steps as suggested by fellow expert “for for.” This approach not only makes it more manageable but also allows for greater precision in crafting each component.Step 2: Applying Glue and Securing
Sven proceeds to apply glue along one edge of the flange, ensuring a secure bond when clamped into place. He emphasizes that this stage is crucial for maintaining the structural integrity of the flange, which in turn safeguards the living area beneath the canvas when hatches are open.Step 3: Allowing Time to Dry
After securely attaching the first portion of the flange, Sven allows ample time for it to dry before moving forward with additional steps. This patience and precision are key aspects of his successful boatbuilding methods.Step 4: Finishing Touches
Once the flange is fully dried, Sven removes the clamps carefully, ensuring no damage occurs during this process. He then moves on to attaching four more pieces onto these main frames, completing two pairs of flanges for the bulkhead hatches.The Final Touches
While two flanges form the primary support structure around the hatches, Sven mentions there are two additional pieces required at each end to ensure comprehensive protection. This attention to detail highlights his commitment to producing a durable and reliable design. “Sailing is about finding your path, whether it’s across an ocean or within yourself.” – Sven Yrvind In conclusion, making flanges around bulkhead hatches may seem complex at first glance, but by following Sven Yrvind’s meticulous process, enthusiasts can achieve professional-level results. Remember that the journey of boatbuilding is as rewarding as reaching your destination; it tests one’s patience and dedication. For those seeking to embark on this adventure or simply gain more insight into marine craftsmanship, Sven’s wisdom is invaluable.Making Flanges Around Bulkhead Hatches for Canvas
Sven Yrvind, a renowned yacht designer and sailor, shares valuable insights on creating flanges around bulkhead hatches for canvas protection in this enlightening video. By following his expert guidance, boat enthusiasts can ensure their living areas remain secure while allowing unhindered access through the hatches.Step 1: Starting with the Flange
Sven begins by explaining that working on flanges vertically and horizontally is significantly easier than doing so in a flat position. To simplify the process further, he divides the task into two or three steps as suggested by fellow expert “for for.” This approach not only makes it more manageable but also allows for greater precision in crafting each component.Step 2: Applying Glue and Securing
Sven proceeds to apply glue along one edge of the flange, ensuring a secure bond when clamped into place. He emphasizes that this stage is crucial for maintaining the structural integrity of the flange, which in turn safeguards the living area beneath the canvas when hatches are open.Step 3: Allowing Time to Dry
After securely attaching the first portion of the flange, Sven allows ample time for it to dry before moving forward with additional steps. This patience and precision are key aspects of his successful boatbuilding methods.Step 4: Finishing Touches
Once the flange is fully dried, Sven removes the clamps carefully, ensuring no damage occurs during this process. He then moves on to attaching four more pieces onto these main frames, completing two pairs of flanges for the bulkhead hatches.The Final Touches
While two flanges form the primary support structure around the hatches, Sven mentions there are two additional pieces required at each end to ensure comprehensive protection. This attention to detail highlights his commitment to producing a durable and reliable design. “Sailing is about finding your path, whether it’s across an ocean or within yourself.” – Sven Yrvind In conclusion, making flanges around bulkhead hatches may seem complex at first glance, but by following Sven Yrvind’s meticulous process, enthusiasts can achieve professional-level results. Remember that the journey of boatbuilding is as rewarding as reaching your destination; it tests one’s patience and dedication. For those seeking to embark on this adventure or simply gain more insight into marine craftsmanship, Sven’s wisdom is invaluable.Once the flange is fully dried, Sven removes the clamps carefully, ensuring no damage occurs during this process. He then moves on to attaching four more pieces onto these main frames, completing two pairs of flanges for the bulkhead hatches.The Final Touches
While two flanges form the primary support structure around the hatches, Sven mentions there are two additional pieces required at each end to ensure comprehensive protection. This attention to detail highlights his commitment to producing a durable and reliable design. “Sailing is about finding your path, whether it’s across an ocean or within yourself.” – Sven Yrvind In conclusion, making flanges around bulkhead hatches may seem complex at first glance, but by following Sven Yrvind’s meticulous process, enthusiasts can achieve professional-level results. Remember that the journey of boatbuilding is as rewarding as reaching your destination; it tests one’s patience and dedication. For those seeking to embark on this adventure or simply gain more insight into marine craftsmanship, Sven’s wisdom is invaluable.After securely attaching the first portion of the flange, Sven allows ample time for it to dry before moving forward with additional steps. This patience and precision are key aspects of his successful boatbuilding methods.Step 4: Finishing Touches
Once the flange is fully dried, Sven removes the clamps carefully, ensuring no damage occurs during this process. He then moves on to attaching four more pieces onto these main frames, completing two pairs of flanges for the bulkhead hatches.The Final Touches
While two flanges form the primary support structure around the hatches, Sven mentions there are two additional pieces required at each end to ensure comprehensive protection. This attention to detail highlights his commitment to producing a durable and reliable design. “Sailing is about finding your path, whether it’s across an ocean or within yourself.” – Sven Yrvind In conclusion, making flanges around bulkhead hatches may seem complex at first glance, but by following Sven Yrvind’s meticulous process, enthusiasts can achieve professional-level results. Remember that the journey of boatbuilding is as rewarding as reaching your destination; it tests one’s patience and dedication. For those seeking to embark on this adventure or simply gain more insight into marine craftsmanship, Sven’s wisdom is invaluable.Sven proceeds to apply glue along one edge of the flange, ensuring a secure bond when clamped into place. He emphasizes that this stage is crucial for maintaining the structural integrity of the flange, which in turn safeguards the living area beneath the canvas when hatches are open.Step 3: Allowing Time to Dry
After securely attaching the first portion of the flange, Sven allows ample time for it to dry before moving forward with additional steps. This patience and precision are key aspects of his successful boatbuilding methods.Step 4: Finishing Touches
Once the flange is fully dried, Sven removes the clamps carefully, ensuring no damage occurs during this process. He then moves on to attaching four more pieces onto these main frames, completing two pairs of flanges for the bulkhead hatches.The Final Touches
While two flanges form the primary support structure around the hatches, Sven mentions there are two additional pieces required at each end to ensure comprehensive protection. This attention to detail highlights his commitment to producing a durable and reliable design. “Sailing is about finding your path, whether it’s across an ocean or within yourself.” – Sven Yrvind In conclusion, making flanges around bulkhead hatches may seem complex at first glance, but by following Sven Yrvind’s meticulous process, enthusiasts can achieve professional-level results. Remember that the journey of boatbuilding is as rewarding as reaching your destination; it tests one’s patience and dedication. For those seeking to embark on this adventure or simply gain more insight into marine craftsmanship, Sven’s wisdom is invaluable.Sven begins by explaining that working on flanges vertically and horizontally is significantly easier than doing so in a flat position. To simplify the process further, he divides the task into two or three steps as suggested by fellow expert “for for.” This approach not only makes it more manageable but also allows for greater precision in crafting each component.Step 2: Applying Glue and Securing
Sven proceeds to apply glue along one edge of the flange, ensuring a secure bond when clamped into place. He emphasizes that this stage is crucial for maintaining the structural integrity of the flange, which in turn safeguards the living area beneath the canvas when hatches are open.Step 3: Allowing Time to Dry
After securely attaching the first portion of the flange, Sven allows ample time for it to dry before moving forward with additional steps. This patience and precision are key aspects of his successful boatbuilding methods.Step 4: Finishing Touches
Once the flange is fully dried, Sven removes the clamps carefully, ensuring no damage occurs during this process. He then moves on to attaching four more pieces onto these main frames, completing two pairs of flanges for the bulkhead hatches.The Final Touches
While two flanges form the primary support structure around the hatches, Sven mentions there are two additional pieces required at each end to ensure comprehensive protection. This attention to detail highlights his commitment to producing a durable and reliable design. “Sailing is about finding your path, whether it’s across an ocean or within yourself.” – Sven Yrvind In conclusion, making flanges around bulkhead hatches may seem complex at first glance, but by following Sven Yrvind’s meticulous process, enthusiasts can achieve professional-level results. Remember that the journey of boatbuilding is as rewarding as reaching your destination; it tests one’s patience and dedication. For those seeking to embark on this adventure or simply gain more insight into marine craftsmanship, Sven’s wisdom is invaluable.Sven Yrvind, a renowned yacht designer and sailor, shares valuable insights on creating flanges around bulkhead hatches for canvas protection in this enlightening video. By following his expert guidance, boat enthusiasts can ensure their living areas remain secure while allowing unhindered access through the hatches.Step 1: Starting with the Flange
Sven begins by explaining that working on flanges vertically and horizontally is significantly easier than doing so in a flat position. To simplify the process further, he divides the task into two or three steps as suggested by fellow expert “for for.” This approach not only makes it more manageable but also allows for greater precision in crafting each component.Step 2: Applying Glue and Securing
Sven proceeds to apply glue along one edge of the flange, ensuring a secure bond when clamped into place. He emphasizes that this stage is crucial for maintaining the structural integrity of the flange, which in turn safeguards the living area beneath the canvas when hatches are open.Step 3: Allowing Time to Dry
After securely attaching the first portion of the flange, Sven allows ample time for it to dry before moving forward with additional steps. This patience and precision are key aspects of his successful boatbuilding methods.Step 4: Finishing Touches
Once the flange is fully dried, Sven removes the clamps carefully, ensuring no damage occurs during this process. He then moves on to attaching four more pieces onto these main frames, completing two pairs of flanges for the bulkhead hatches.The Final Touches
While two flanges form the primary support structure around the hatches, Sven mentions there are two additional pieces required at each end to ensure comprehensive protection. This attention to detail highlights his commitment to producing a durable and reliable design. “Sailing is about finding your path, whether it’s across an ocean or within yourself.” – Sven Yrvind In conclusion, making flanges around bulkhead hatches may seem complex at first glance, but by following Sven Yrvind’s meticulous process, enthusiasts can achieve professional-level results. Remember that the journey of boatbuilding is as rewarding as reaching your destination; it tests one’s patience and dedication. For those seeking to embark on this adventure or simply gain more insight into marine craftsmanship, Sven’s wisdom is invaluable.Making Flanges Around Bulkhead Hatches for Canvas
Sven Yrvind, a renowned yacht designer and sailor, shares valuable insights on creating flanges around bulkhead hatches for canvas protection in this enlightening video. By following his expert guidance, boat enthusiasts can ensure their living areas remain secure while allowing unhindered access through the hatches.Step 1: Starting with the Flange
Sven begins by explaining that working on flanges vertically and horizontally is significantly easier than doing so in a flat position. To simplify the process further, he divides the task into two or three steps as suggested by fellow expert “for for.” This approach not only makes it more manageable but also allows for greater precision in crafting each component.Step 2: Applying Glue and Securing
Sven proceeds to apply glue along one edge of the flange, ensuring a secure bond when clamped into place. He emphasizes that this stage is crucial for maintaining the structural integrity of the flange, which in turn safeguards the living area beneath the canvas when hatches are open.Step 3: Allowing Time to Dry
After securely attaching the first portion of the flange, Sven allows ample time for it to dry before moving forward with additional steps. This patience and precision are key aspects of his successful boatbuilding methods.Step 4: Finishing Touches
Once the flange is fully dried, Sven removes the clamps carefully, ensuring no damage occurs during this process. He then moves on to attaching four more pieces onto these main frames, completing two pairs of flanges for the bulkhead hatches.The Final Touches
While two flanges form the primary support structure around the hatches, Sven mentions there are two additional pieces required at each end to ensure comprehensive protection. This attention to detail highlights his commitment to producing a durable and reliable design. “Sailing is about finding your path, whether it’s across an ocean or within yourself.” – Sven Yrvind In conclusion, making flanges around bulkhead hatches may seem complex at first glance, but by following Sven Yrvind’s meticulous process, enthusiasts can achieve professional-level results. Remember that the journey of boatbuilding is as rewarding as reaching your destination; it tests one’s patience and dedication. For those seeking to embark on this adventure or simply gain more insight into marine craftsmanship, Sven’s wisdom is invaluable.After securely attaching the first portion of the flange, Sven allows ample time for it to dry before moving forward with additional steps. This patience and precision are key aspects of his successful boatbuilding methods.Step 4: Finishing Touches
Once the flange is fully dried, Sven removes the clamps carefully, ensuring no damage occurs during this process. He then moves on to attaching four more pieces onto these main frames, completing two pairs of flanges for the bulkhead hatches.The Final Touches
While two flanges form the primary support structure around the hatches, Sven mentions there are two additional pieces required at each end to ensure comprehensive protection. This attention to detail highlights his commitment to producing a durable and reliable design. “Sailing is about finding your path, whether it’s across an ocean or within yourself.” – Sven Yrvind In conclusion, making flanges around bulkhead hatches may seem complex at first glance, but by following Sven Yrvind’s meticulous process, enthusiasts can achieve professional-level results. Remember that the journey of boatbuilding is as rewarding as reaching your destination; it tests one’s patience and dedication. For those seeking to embark on this adventure or simply gain more insight into marine craftsmanship, Sven’s wisdom is invaluable.Sven begins by explaining that working on flanges vertically and horizontally is significantly easier than doing so in a flat position. To simplify the process further, he divides the task into two or three steps as suggested by fellow expert “for for.” This approach not only makes it more manageable but also allows for greater precision in crafting each component.Step 2: Applying Glue and Securing
Sven proceeds to apply glue along one edge of the flange, ensuring a secure bond when clamped into place. He emphasizes that this stage is crucial for maintaining the structural integrity of the flange, which in turn safeguards the living area beneath the canvas when hatches are open.Step 3: Allowing Time to Dry
After securely attaching the first portion of the flange, Sven allows ample time for it to dry before moving forward with additional steps. This patience and precision are key aspects of his successful boatbuilding methods.Step 4: Finishing Touches
Once the flange is fully dried, Sven removes the clamps carefully, ensuring no damage occurs during this process. He then moves on to attaching four more pieces onto these main frames, completing two pairs of flanges for the bulkhead hatches.The Final Touches
While two flanges form the primary support structure around the hatches, Sven mentions there are two additional pieces required at each end to ensure comprehensive protection. This attention to detail highlights his commitment to producing a durable and reliable design. “Sailing is about finding your path, whether it’s across an ocean or within yourself.” – Sven Yrvind In conclusion, making flanges around bulkhead hatches may seem complex at first glance, but by following Sven Yrvind’s meticulous process, enthusiasts can achieve professional-level results. Remember that the journey of boatbuilding is as rewarding as reaching your destination; it tests one’s patience and dedication. For those seeking to embark on this adventure or simply gain more insight into marine craftsmanship, Sven’s wisdom is invaluable.Sven Yrvind, a renowned yacht designer and sailor, shares valuable insights on creating flanges around bulkhead hatches for canvas protection in this enlightening video. By following his expert guidance, boat enthusiasts can ensure their living areas remain secure while allowing unhindered access through the hatches.Step 1: Starting with the Flange
Sven begins by explaining that working on flanges vertically and horizontally is significantly easier than doing so in a flat position. To simplify the process further, he divides the task into two or three steps as suggested by fellow expert “for for.” This approach not only makes it more manageable but also allows for greater precision in crafting each component.Step 2: Applying Glue and Securing
Sven proceeds to apply glue along one edge of the flange, ensuring a secure bond when clamped into place. He emphasizes that this stage is crucial for maintaining the structural integrity of the flange, which in turn safeguards the living area beneath the canvas when hatches are open.Step 3: Allowing Time to Dry
After securely attaching the first portion of the flange, Sven allows ample time for it to dry before moving forward with additional steps. This patience and precision are key aspects of his successful boatbuilding methods.Step 4: Finishing Touches
Once the flange is fully dried, Sven removes the clamps carefully, ensuring no damage occurs during this process. He then moves on to attaching four more pieces onto these main frames, completing two pairs of flanges for the bulkhead hatches.The Final Touches
While two flanges form the primary support structure around the hatches, Sven mentions there are two additional pieces required at each end to ensure comprehensive protection. This attention to detail highlights his commitment to producing a durable and reliable design. “Sailing is about finding your path, whether it’s across an ocean or within yourself.” – Sven Yrvind In conclusion, making flanges around bulkhead hatches may seem complex at first glance, but by following Sven Yrvind’s meticulous process, enthusiasts can achieve professional-level results. Remember that the journey of boatbuilding is as rewarding as reaching your destination; it tests one’s patience and dedication. For those seeking to embark on this adventure or simply gain more insight into marine craftsmanship, Sven’s wisdom is invaluable.Making Flanges Around Bulkhead Hatches for Canvas
Sven Yrvind, a renowned yacht designer and sailor, shares valuable insights on creating flanges around bulkhead hatches for canvas protection in this enlightening video. By following his expert guidance, boat enthusiasts can ensure their living areas remain secure while allowing unhindered access through the hatches.Step 1: Starting with the Flange
Sven begins by explaining that working on flanges vertically and horizontally is significantly easier than doing so in a flat position. To simplify the process further, he divides the task into two or three steps as suggested by fellow expert “for for.” This approach not only makes it more manageable but also allows for greater precision in crafting each component.Step 2: Applying Glue and Securing
Sven proceeds to apply glue along one edge of the flange, ensuring a secure bond when clamped into place. He emphasizes that this stage is crucial for maintaining the structural integrity of the flange, which in turn safeguards the living area beneath the canvas when hatches are open.Step 3: Allowing Time to Dry
After securely attaching the first portion of the flange, Sven allows ample time for it to dry before moving forward with additional steps. This patience and precision are key aspects of his successful boatbuilding methods.Step 4: Finishing Touches
Once the flange is fully dried, Sven removes the clamps carefully, ensuring no damage occurs during this process. He then moves on to attaching four more pieces onto these main frames, completing two pairs of flanges for the bulkhead hatches.The Final Touches
While two flanges form the primary support structure around the hatches, Sven mentions there are two additional pieces required at each end to ensure comprehensive protection. This attention to detail highlights his commitment to producing a durable and reliable design. “Sailing is about finding your path, whether it’s across an ocean or within yourself.” – Sven Yrvind In conclusion, making flanges around bulkhead hatches may seem complex at first glance, but by following Sven Yrvind’s meticulous process, enthusiasts can achieve professional-level results. Remember that the journey of boatbuilding is as rewarding as reaching your destination; it tests one’s patience and dedication. For those seeking to embark on this adventure or simply gain more insight into marine craftsmanship, Sven’s wisdom is invaluable.After securely attaching the first portion of the flange, Sven allows ample time for it to dry before moving forward with additional steps. This patience and precision are key aspects of his successful boatbuilding methods.Step 4: Finishing Touches
Once the flange is fully dried, Sven removes the clamps carefully, ensuring no damage occurs during this process. He then moves on to attaching four more pieces onto these main frames, completing two pairs of flanges for the bulkhead hatches.The Final Touches
While two flanges form the primary support structure around the hatches, Sven mentions there are two additional pieces required at each end to ensure comprehensive protection. This attention to detail highlights his commitment to producing a durable and reliable design. “Sailing is about finding your path, whether it’s across an ocean or within yourself.” – Sven Yrvind In conclusion, making flanges around bulkhead hatches may seem complex at first glance, but by following Sven Yrvind’s meticulous process, enthusiasts can achieve professional-level results. Remember that the journey of boatbuilding is as rewarding as reaching your destination; it tests one’s patience and dedication. For those seeking to embark on this adventure or simply gain more insight into marine craftsmanship, Sven’s wisdom is invaluable.Sven proceeds to apply glue along one edge of the flange, ensuring a secure bond when clamped into place. He emphasizes that this stage is crucial for maintaining the structural integrity of the flange, which in turn safeguards the living area beneath the canvas when hatches are open.Step 3: Allowing Time to Dry
After securely attaching the first portion of the flange, Sven allows ample time for it to dry before moving forward with additional steps. This patience and precision are key aspects of his successful boatbuilding methods.Step 4: Finishing Touches
Once the flange is fully dried, Sven removes the clamps carefully, ensuring no damage occurs during this process. He then moves on to attaching four more pieces onto these main frames, completing two pairs of flanges for the bulkhead hatches.The Final Touches
While two flanges form the primary support structure around the hatches, Sven mentions there are two additional pieces required at each end to ensure comprehensive protection. This attention to detail highlights his commitment to producing a durable and reliable design. “Sailing is about finding your path, whether it’s across an ocean or within yourself.” – Sven Yrvind In conclusion, making flanges around bulkhead hatches may seem complex at first glance, but by following Sven Yrvind’s meticulous process, enthusiasts can achieve professional-level results. Remember that the journey of boatbuilding is as rewarding as reaching your destination; it tests one’s patience and dedication. For those seeking to embark on this adventure or simply gain more insight into marine craftsmanship, Sven’s wisdom is invaluable.Sven begins by explaining that working on flanges vertically and horizontally is significantly easier than doing so in a flat position. To simplify the process further, he divides the task into two or three steps as suggested by fellow expert “for for.” This approach not only makes it more manageable but also allows for greater precision in crafting each component.Step 2: Applying Glue and Securing
Sven proceeds to apply glue along one edge of the flange, ensuring a secure bond when clamped into place. He emphasizes that this stage is crucial for maintaining the structural integrity of the flange, which in turn safeguards the living area beneath the canvas when hatches are open.Step 3: Allowing Time to Dry
After securely attaching the first portion of the flange, Sven allows ample time for it to dry before moving forward with additional steps. This patience and precision are key aspects of his successful boatbuilding methods.Step 4: Finishing Touches
Once the flange is fully dried, Sven removes the clamps carefully, ensuring no damage occurs during this process. He then moves on to attaching four more pieces onto these main frames, completing two pairs of flanges for the bulkhead hatches.The Final Touches
While two flanges form the primary support structure around the hatches, Sven mentions there are two additional pieces required at each end to ensure comprehensive protection. This attention to detail highlights his commitment to producing a durable and reliable design. “Sailing is about finding your path, whether it’s across an ocean or within yourself.” – Sven Yrvind In conclusion, making flanges around bulkhead hatches may seem complex at first glance, but by following Sven Yrvind’s meticulous process, enthusiasts can achieve professional-level results. Remember that the journey of boatbuilding is as rewarding as reaching your destination; it tests one’s patience and dedication. For those seeking to embark on this adventure or simply gain more insight into marine craftsmanship, Sven’s wisdom is invaluable.Sven Yrvind, a renowned yacht designer and sailor, shares valuable insights on creating flanges around bulkhead hatches for canvas protection in this enlightening video. By following his expert guidance, boat enthusiasts can ensure their living areas remain secure while allowing unhindered access through the hatches.Step 1: Starting with the Flange
Sven begins by explaining that working on flanges vertically and horizontally is significantly easier than doing so in a flat position. To simplify the process further, he divides the task into two or three steps as suggested by fellow expert “for for.” This approach not only makes it more manageable but also allows for greater precision in crafting each component.Step 2: Applying Glue and Securing
Sven proceeds to apply glue along one edge of the flange, ensuring a secure bond when clamped into place. He emphasizes that this stage is crucial for maintaining the structural integrity of the flange, which in turn safeguards the living area beneath the canvas when hatches are open.Step 3: Allowing Time to Dry
After securely attaching the first portion of the flange, Sven allows ample time for it to dry before moving forward with additional steps. This patience and precision are key aspects of his successful boatbuilding methods.Step 4: Finishing Touches
Once the flange is fully dried, Sven removes the clamps carefully, ensuring no damage occurs during this process. He then moves on to attaching four more pieces onto these main frames, completing two pairs of flanges for the bulkhead hatches.The Final Touches
While two flanges form the primary support structure around the hatches, Sven mentions there are two additional pieces required at each end to ensure comprehensive protection. This attention to detail highlights his commitment to producing a durable and reliable design. “Sailing is about finding your path, whether it’s across an ocean or within yourself.” – Sven Yrvind In conclusion, making flanges around bulkhead hatches may seem complex at first glance, but by following Sven Yrvind’s meticulous process, enthusiasts can achieve professional-level results. Remember that the journey of boatbuilding is as rewarding as reaching your destination; it tests one’s patience and dedication. For those seeking to embark on this adventure or simply gain more insight into marine craftsmanship, Sven’s wisdom is invaluable.Making Flanges Around Bulkhead Hatches for Canvas
Sven Yrvind, a renowned yacht designer and sailor, shares valuable insights on creating flanges around bulkhead hatches for canvas protection in this enlightening video. By following his expert guidance, boat enthusiasts can ensure their living areas remain secure while allowing unhindered access through the hatches.Step 1: Starting with the Flange
Sven begins by explaining that working on flanges vertically and horizontally is significantly easier than doing so in a flat position. To simplify the process further, he divides the task into two or three steps as suggested by fellow expert “for for.” This approach not only makes it more manageable but also allows for greater precision in crafting each component.Step 2: Applying Glue and Securing
Sven proceeds to apply glue along one edge of the flange, ensuring a secure bond when clamped into place. He emphasizes that this stage is crucial for maintaining the structural integrity of the flange, which in turn safeguards the living area beneath the canvas when hatches are open.Step 3: Allowing Time to Dry
After securely attaching the first portion of the flange, Sven allows ample time for it to dry before moving forward with additional steps. This patience and precision are key aspects of his successful boatbuilding methods.Step 4: Finishing Touches
Once the flange is fully dried, Sven removes the clamps carefully, ensuring no damage occurs during this process. He then moves on to attaching four more pieces onto these main frames, completing two pairs of flanges for the bulkhead hatches.The Final Touches
While two flanges form the primary support structure around the hatches, Sven mentions there are two additional pieces required at each end to ensure comprehensive protection. This attention to detail highlights his commitment to producing a durable and reliable design. “Sailing is about finding your path, whether it’s across an ocean or within yourself.” – Sven Yrvind In conclusion, making flanges around bulkhead hatches may seem complex at first glance, but by following Sven Yrvind’s meticulous process, enthusiasts can achieve professional-level results. Remember that the journey of boatbuilding is as rewarding as reaching your destination; it tests one’s patience and dedication. For those seeking to embark on this adventure or simply gain more insight into marine craftsmanship, Sven’s wisdom is invaluable.Once the flange is fully dried, Sven removes the clamps carefully, ensuring no damage occurs during this process. He then moves on to attaching four more pieces onto these main frames, completing two pairs of flanges for the bulkhead hatches.The Final Touches
While two flanges form the primary support structure around the hatches, Sven mentions there are two additional pieces required at each end to ensure comprehensive protection. This attention to detail highlights his commitment to producing a durable and reliable design. “Sailing is about finding your path, whether it’s across an ocean or within yourself.” – Sven Yrvind In conclusion, making flanges around bulkhead hatches may seem complex at first glance, but by following Sven Yrvind’s meticulous process, enthusiasts can achieve professional-level results. Remember that the journey of boatbuilding is as rewarding as reaching your destination; it tests one’s patience and dedication. For those seeking to embark on this adventure or simply gain more insight into marine craftsmanship, Sven’s wisdom is invaluable.After securely attaching the first portion of the flange, Sven allows ample time for it to dry before moving forward with additional steps. This patience and precision are key aspects of his successful boatbuilding methods.Step 4: Finishing Touches
Once the flange is fully dried, Sven removes the clamps carefully, ensuring no damage occurs during this process. He then moves on to attaching four more pieces onto these main frames, completing two pairs of flanges for the bulkhead hatches.The Final Touches
While two flanges form the primary support structure around the hatches, Sven mentions there are two additional pieces required at each end to ensure comprehensive protection. This attention to detail highlights his commitment to producing a durable and reliable design. “Sailing is about finding your path, whether it’s across an ocean or within yourself.” – Sven Yrvind In conclusion, making flanges around bulkhead hatches may seem complex at first glance, but by following Sven Yrvind’s meticulous process, enthusiasts can achieve professional-level results. Remember that the journey of boatbuilding is as rewarding as reaching your destination; it tests one’s patience and dedication. For those seeking to embark on this adventure or simply gain more insight into marine craftsmanship, Sven’s wisdom is invaluable.Sven proceeds to apply glue along one edge of the flange, ensuring a secure bond when clamped into place. He emphasizes that this stage is crucial for maintaining the structural integrity of the flange, which in turn safeguards the living area beneath the canvas when hatches are open.Step 3: Allowing Time to Dry
After securely attaching the first portion of the flange, Sven allows ample time for it to dry before moving forward with additional steps. This patience and precision are key aspects of his successful boatbuilding methods.Step 4: Finishing Touches
Once the flange is fully dried, Sven removes the clamps carefully, ensuring no damage occurs during this process. He then moves on to attaching four more pieces onto these main frames, completing two pairs of flanges for the bulkhead hatches.The Final Touches
While two flanges form the primary support structure around the hatches, Sven mentions there are two additional pieces required at each end to ensure comprehensive protection. This attention to detail highlights his commitment to producing a durable and reliable design. “Sailing is about finding your path, whether it’s across an ocean or within yourself.” – Sven Yrvind In conclusion, making flanges around bulkhead hatches may seem complex at first glance, but by following Sven Yrvind’s meticulous process, enthusiasts can achieve professional-level results. Remember that the journey of boatbuilding is as rewarding as reaching your destination; it tests one’s patience and dedication. For those seeking to embark on this adventure or simply gain more insight into marine craftsmanship, Sven’s wisdom is invaluable.Sven begins by explaining that working on flanges vertically and horizontally is significantly easier than doing so in a flat position. To simplify the process further, he divides the task into two or three steps as suggested by fellow expert “for for.” This approach not only makes it more manageable but also allows for greater precision in crafting each component.Step 2: Applying Glue and Securing
Sven proceeds to apply glue along one edge of the flange, ensuring a secure bond when clamped into place. He emphasizes that this stage is crucial for maintaining the structural integrity of the flange, which in turn safeguards the living area beneath the canvas when hatches are open.Step 3: Allowing Time to Dry
After securely attaching the first portion of the flange, Sven allows ample time for it to dry before moving forward with additional steps. This patience and precision are key aspects of his successful boatbuilding methods.Step 4: Finishing Touches
Once the flange is fully dried, Sven removes the clamps carefully, ensuring no damage occurs during this process. He then moves on to attaching four more pieces onto these main frames, completing two pairs of flanges for the bulkhead hatches.The Final Touches
While two flanges form the primary support structure around the hatches, Sven mentions there are two additional pieces required at each end to ensure comprehensive protection. This attention to detail highlights his commitment to producing a durable and reliable design. “Sailing is about finding your path, whether it’s across an ocean or within yourself.” – Sven Yrvind In conclusion, making flanges around bulkhead hatches may seem complex at first glance, but by following Sven Yrvind’s meticulous process, enthusiasts can achieve professional-level results. Remember that the journey of boatbuilding is as rewarding as reaching your destination; it tests one’s patience and dedication. For those seeking to embark on this adventure or simply gain more insight into marine craftsmanship, Sven’s wisdom is invaluable.Sven Yrvind, a renowned yacht designer and sailor, shares valuable insights on creating flanges around bulkhead hatches for canvas protection in this enlightening video. By following his expert guidance, boat enthusiasts can ensure their living areas remain secure while allowing unhindered access through the hatches.Step 1: Starting with the Flange
Sven begins by explaining that working on flanges vertically and horizontally is significantly easier than doing so in a flat position. To simplify the process further, he divides the task into two or three steps as suggested by fellow expert “for for.” This approach not only makes it more manageable but also allows for greater precision in crafting each component.Step 2: Applying Glue and Securing
Sven proceeds to apply glue along one edge of the flange, ensuring a secure bond when clamped into place. He emphasizes that this stage is crucial for maintaining the structural integrity of the flange, which in turn safeguards the living area beneath the canvas when hatches are open.Step 3: Allowing Time to Dry
After securely attaching the first portion of the flange, Sven allows ample time for it to dry before moving forward with additional steps. This patience and precision are key aspects of his successful boatbuilding methods.Step 4: Finishing Touches
Once the flange is fully dried, Sven removes the clamps carefully, ensuring no damage occurs during this process. He then moves on to attaching four more pieces onto these main frames, completing two pairs of flanges for the bulkhead hatches.The Final Touches
While two flanges form the primary support structure around the hatches, Sven mentions there are two additional pieces required at each end to ensure comprehensive protection. This attention to detail highlights his commitment to producing a durable and reliable design. “Sailing is about finding your path, whether it’s across an ocean or within yourself.” – Sven Yrvind In conclusion, making flanges around bulkhead hatches may seem complex at first glance, but by following Sven Yrvind’s meticulous process, enthusiasts can achieve professional-level results. Remember that the journey of boatbuilding is as rewarding as reaching your destination; it tests one’s patience and dedication. For those seeking to embark on this adventure or simply gain more insight into marine craftsmanship, Sven’s wisdom is invaluable.Making Flanges Around Bulkhead Hatches for Canvas
Sven Yrvind, a renowned yacht designer and sailor, shares valuable insights on creating flanges around bulkhead hatches for canvas protection in this enlightening video. By following his expert guidance, boat enthusiasts can ensure their living areas remain secure while allowing unhindered access through the hatches.Step 1: Starting with the Flange
Sven begins by explaining that working on flanges vertically and horizontally is significantly easier than doing so in a flat position. To simplify the process further, he divides the task into two or three steps as suggested by fellow expert “for for.” This approach not only makes it more manageable but also allows for greater precision in crafting each component.Step 2: Applying Glue and Securing
Sven proceeds to apply glue along one edge of the flange, ensuring a secure bond when clamped into place. He emphasizes that this stage is crucial for maintaining the structural integrity of the flange, which in turn safeguards the living area beneath the canvas when hatches are open.Step 3: Allowing Time to Dry
After securely attaching the first portion of the flange, Sven allows ample time for it to dry before moving forward with additional steps. This patience and precision are key aspects of his successful boatbuilding methods.Step 4: Finishing Touches
Once the flange is fully dried, Sven removes the clamps carefully, ensuring no damage occurs during this process. He then moves on to attaching four more pieces onto these main frames, completing two pairs of flanges for the bulkhead hatches.The Final Touches
While two flanges form the primary support structure around the hatches, Sven mentions there are two additional pieces required at each end to ensure comprehensive protection. This attention to detail highlights his commitment to producing a durable and reliable design. “Sailing is about finding your path, whether it’s across an ocean or within yourself.” – Sven Yrvind In conclusion, making flanges around bulkhead hatches may seem complex at first glance, but by following Sven Yrvind’s meticulous process, enthusiasts can achieve professional-level results. Remember that the journey of boatbuilding is as rewarding as reaching your destination; it tests one’s patience and dedication. For those seeking to embark on this adventure or simply gain more insight into marine craftsmanship, Sven’s wisdom is invaluable.Sven proceeds to apply glue along one edge of the flange, ensuring a secure bond when clamped into place. He emphasizes that this stage is crucial for maintaining the structural integrity of the flange, which in turn safeguards the living area beneath the canvas when hatches are open.Step 3: Allowing Time to Dry
After securely attaching the first portion of the flange, Sven allows ample time for it to dry before moving forward with additional steps. This patience and precision are key aspects of his successful boatbuilding methods.Step 4: Finishing Touches
Once the flange is fully dried, Sven removes the clamps carefully, ensuring no damage occurs during this process. He then moves on to attaching four more pieces onto these main frames, completing two pairs of flanges for the bulkhead hatches.The Final Touches
While two flanges form the primary support structure around the hatches, Sven mentions there are two additional pieces required at each end to ensure comprehensive protection. This attention to detail highlights his commitment to producing a durable and reliable design. “Sailing is about finding your path, whether it’s across an ocean or within yourself.” – Sven Yrvind In conclusion, making flanges around bulkhead hatches may seem complex at first glance, but by following Sven Yrvind’s meticulous process, enthusiasts can achieve professional-level results. Remember that the journey of boatbuilding is as rewarding as reaching your destination; it tests one’s patience and dedication. For those seeking to embark on this adventure or simply gain more insight into marine craftsmanship, Sven’s wisdom is invaluable.Sven begins by explaining that working on flanges vertically and horizontally is significantly easier than doing so in a flat position. To simplify the process further, he divides the task into two or three steps as suggested by fellow expert “for for.” This approach not only makes it more manageable but also allows for greater precision in crafting each component.Step 2: Applying Glue and Securing
Sven proceeds to apply glue along one edge of the flange, ensuring a secure bond when clamped into place. He emphasizes that this stage is crucial for maintaining the structural integrity of the flange, which in turn safeguards the living area beneath the canvas when hatches are open.Step 3: Allowing Time to Dry
After securely attaching the first portion of the flange, Sven allows ample time for it to dry before moving forward with additional steps. This patience and precision are key aspects of his successful boatbuilding methods.Step 4: Finishing Touches
Once the flange is fully dried, Sven removes the clamps carefully, ensuring no damage occurs during this process. He then moves on to attaching four more pieces onto these main frames, completing two pairs of flanges for the bulkhead hatches.The Final Touches
While two flanges form the primary support structure around the hatches, Sven mentions there are two additional pieces required at each end to ensure comprehensive protection. This attention to detail highlights his commitment to producing a durable and reliable design. “Sailing is about finding your path, whether it’s across an ocean or within yourself.” – Sven Yrvind In conclusion, making flanges around bulkhead hatches may seem complex at first glance, but by following Sven Yrvind’s meticulous process, enthusiasts can achieve professional-level results. Remember that the journey of boatbuilding is as rewarding as reaching your destination; it tests one’s patience and dedication. For those seeking to embark on this adventure or simply gain more insight into marine craftsmanship, Sven’s wisdom is invaluable.Sven Yrvind, a renowned yacht designer and sailor, shares valuable insights on creating flanges around bulkhead hatches for canvas protection in this enlightening video. By following his expert guidance, boat enthusiasts can ensure their living areas remain secure while allowing unhindered access through the hatches.Step 1: Starting with the Flange
Sven begins by explaining that working on flanges vertically and horizontally is significantly easier than doing so in a flat position. To simplify the process further, he divides the task into two or three steps as suggested by fellow expert “for for.” This approach not only makes it more manageable but also allows for greater precision in crafting each component.Step 2: Applying Glue and Securing
Sven proceeds to apply glue along one edge of the flange, ensuring a secure bond when clamped into place. He emphasizes that this stage is crucial for maintaining the structural integrity of the flange, which in turn safeguards the living area beneath the canvas when hatches are open.Step 3: Allowing Time to Dry
After securely attaching the first portion of the flange, Sven allows ample time for it to dry before moving forward with additional steps. This patience and precision are key aspects of his successful boatbuilding methods.Step 4: Finishing Touches
Once the flange is fully dried, Sven removes the clamps carefully, ensuring no damage occurs during this process. He then moves on to attaching four more pieces onto these main frames, completing two pairs of flanges for the bulkhead hatches.The Final Touches
While two flanges form the primary support structure around the hatches, Sven mentions there are two additional pieces required at each end to ensure comprehensive protection. This attention to detail highlights his commitment to producing a durable and reliable design. “Sailing is about finding your path, whether it’s across an ocean or within yourself.” – Sven Yrvind In conclusion, making flanges around bulkhead hatches may seem complex at first glance, but by following Sven Yrvind’s meticulous process, enthusiasts can achieve professional-level results. Remember that the journey of boatbuilding is as rewarding as reaching your destination; it tests one’s patience and dedication. For those seeking to embark on this adventure or simply gain more insight into marine craftsmanship, Sven’s wisdom is invaluable.Making Flanges Around Bulkhead Hatches for Canvas
Sven Yrvind, a renowned yacht designer and sailor, shares valuable insights on creating flanges around bulkhead hatches for canvas protection in this enlightening video. By following his expert guidance, boat enthusiasts can ensure their living areas remain secure while allowing unhindered access through the hatches.Step 1: Starting with the Flange
Sven begins by explaining that working on flanges vertically and horizontally is significantly easier than doing so in a flat position. To simplify the process further, he divides the task into two or three steps as suggested by fellow expert “for for.” This approach not only makes it more manageable but also allows for greater precision in crafting each component.Step 2: Applying Glue and Securing
Sven proceeds to apply glue along one edge of the flange, ensuring a secure bond when clamped into place. He emphasizes that this stage is crucial for maintaining the structural integrity of the flange, which in turn safeguards the living area beneath the canvas when hatches are open.Step 3: Allowing Time to Dry
After securely attaching the first portion of the flange, Sven allows ample time for it to dry before moving forward with additional steps. This patience and precision are key aspects of his successful boatbuilding methods.Step 4: Finishing Touches
Once the flange is fully dried, Sven removes the clamps carefully, ensuring no damage occurs during this process. He then moves on to attaching four more pieces onto these main frames, completing two pairs of flanges for the bulkhead hatches.The Final Touches
While two flanges form the primary support structure around the hatches, Sven mentions there are two additional pieces required at each end to ensure comprehensive protection. This attention to detail highlights his commitment to producing a durable and reliable design. “Sailing is about finding your path, whether it’s across an ocean or within yourself.” – Sven Yrvind In conclusion, making flanges around bulkhead hatches may seem complex at first glance, but by following Sven Yrvind’s meticulous process, enthusiasts can achieve professional-level results. Remember that the journey of boatbuilding is as rewarding as reaching your destination; it tests one’s patience and dedication. For those seeking to embark on this adventure or simply gain more insight into marine craftsmanship, Sven’s wisdom is invaluable.After securely attaching the first portion of the flange, Sven allows ample time for it to dry before moving forward with additional steps. This patience and precision are key aspects of his successful boatbuilding methods.Step 4: Finishing Touches
Once the flange is fully dried, Sven removes the clamps carefully, ensuring no damage occurs during this process. He then moves on to attaching four more pieces onto these main frames, completing two pairs of flanges for the bulkhead hatches.The Final Touches
While two flanges form the primary support structure around the hatches, Sven mentions there are two additional pieces required at each end to ensure comprehensive protection. This attention to detail highlights his commitment to producing a durable and reliable design. “Sailing is about finding your path, whether it’s across an ocean or within yourself.” – Sven Yrvind In conclusion, making flanges around bulkhead hatches may seem complex at first glance, but by following Sven Yrvind’s meticulous process, enthusiasts can achieve professional-level results. Remember that the journey of boatbuilding is as rewarding as reaching your destination; it tests one’s patience and dedication. For those seeking to embark on this adventure or simply gain more insight into marine craftsmanship, Sven’s wisdom is invaluable.Sven proceeds to apply glue along one edge of the flange, ensuring a secure bond when clamped into place. He emphasizes that this stage is crucial for maintaining the structural integrity of the flange, which in turn safeguards the living area beneath the canvas when hatches are open.Step 3: Allowing Time to Dry
After securely attaching the first portion of the flange, Sven allows ample time for it to dry before moving forward with additional steps. This patience and precision are key aspects of his successful boatbuilding methods.Step 4: Finishing Touches
Once the flange is fully dried, Sven removes the clamps carefully, ensuring no damage occurs during this process. He then moves on to attaching four more pieces onto these main frames, completing two pairs of flanges for the bulkhead hatches.The Final Touches
While two flanges form the primary support structure around the hatches, Sven mentions there are two additional pieces required at each end to ensure comprehensive protection. This attention to detail highlights his commitment to producing a durable and reliable design. “Sailing is about finding your path, whether it’s across an ocean or within yourself.” – Sven Yrvind In conclusion, making flanges around bulkhead hatches may seem complex at first glance, but by following Sven Yrvind’s meticulous process, enthusiasts can achieve professional-level results. Remember that the journey of boatbuilding is as rewarding as reaching your destination; it tests one’s patience and dedication. For those seeking to embark on this adventure or simply gain more insight into marine craftsmanship, Sven’s wisdom is invaluable.Sven begins by explaining that working on flanges vertically and horizontally is significantly easier than doing so in a flat position. To simplify the process further, he divides the task into two or three steps as suggested by fellow expert “for for.” This approach not only makes it more manageable but also allows for greater precision in crafting each component.Step 2: Applying Glue and Securing
Sven proceeds to apply glue along one edge of the flange, ensuring a secure bond when clamped into place. He emphasizes that this stage is crucial for maintaining the structural integrity of the flange, which in turn safeguards the living area beneath the canvas when hatches are open.Step 3: Allowing Time to Dry
After securely attaching the first portion of the flange, Sven allows ample time for it to dry before moving forward with additional steps. This patience and precision are key aspects of his successful boatbuilding methods.Step 4: Finishing Touches
Once the flange is fully dried, Sven removes the clamps carefully, ensuring no damage occurs during this process. He then moves on to attaching four more pieces onto these main frames, completing two pairs of flanges for the bulkhead hatches.The Final Touches
While two flanges form the primary support structure around the hatches, Sven mentions there are two additional pieces required at each end to ensure comprehensive protection. This attention to detail highlights his commitment to producing a durable and reliable design. “Sailing is about finding your path, whether it’s across an ocean or within yourself.” – Sven Yrvind In conclusion, making flanges around bulkhead hatches may seem complex at first glance, but by following Sven Yrvind’s meticulous process, enthusiasts can achieve professional-level results. Remember that the journey of boatbuilding is as rewarding as reaching your destination; it tests one’s patience and dedication. For those seeking to embark on this adventure or simply gain more insight into marine craftsmanship, Sven’s wisdom is invaluable.Sven Yrvind, a renowned yacht designer and sailor, shares valuable insights on creating flanges around bulkhead hatches for canvas protection in this enlightening video. By following his expert guidance, boat enthusiasts can ensure their living areas remain secure while allowing unhindered access through the hatches.Step 1: Starting with the Flange
Sven begins by explaining that working on flanges vertically and horizontally is significantly easier than doing so in a flat position. To simplify the process further, he divides the task into two or three steps as suggested by fellow expert “for for.” This approach not only makes it more manageable but also allows for greater precision in crafting each component.Step 2: Applying Glue and Securing
Sven proceeds to apply glue along one edge of the flange, ensuring a secure bond when clamped into place. He emphasizes that this stage is crucial for maintaining the structural integrity of the flange, which in turn safeguards the living area beneath the canvas when hatches are open.Step 3: Allowing Time to Dry
After securely attaching the first portion of the flange, Sven allows ample time for it to dry before moving forward with additional steps. This patience and precision are key aspects of his successful boatbuilding methods.Step 4: Finishing Touches
Once the flange is fully dried, Sven removes the clamps carefully, ensuring no damage occurs during this process. He then moves on to attaching four more pieces onto these main frames, completing two pairs of flanges for the bulkhead hatches.The Final Touches
While two flanges form the primary support structure around the hatches, Sven mentions there are two additional pieces required at each end to ensure comprehensive protection. This attention to detail highlights his commitment to producing a durable and reliable design. “Sailing is about finding your path, whether it’s across an ocean or within yourself.” – Sven Yrvind In conclusion, making flanges around bulkhead hatches may seem complex at first glance, but by following Sven Yrvind’s meticulous process, enthusiasts can achieve professional-level results. Remember that the journey of boatbuilding is as rewarding as reaching your destination; it tests one’s patience and dedication. For those seeking to embark on this adventure or simply gain more insight into marine craftsmanship, Sven’s wisdom is invaluable.Making Flanges Around Bulkhead Hatches for Canvas
Sven Yrvind, a renowned yacht designer and sailor, shares valuable insights on creating flanges around bulkhead hatches for canvas protection in this enlightening video. By following his expert guidance, boat enthusiasts can ensure their living areas remain secure while allowing unhindered access through the hatches.Step 1: Starting with the Flange
Sven begins by explaining that working on flanges vertically and horizontally is significantly easier than doing so in a flat position. To simplify the process further, he divides the task into two or three steps as suggested by fellow expert “for for.” This approach not only makes it more manageable but also allows for greater precision in crafting each component.Step 2: Applying Glue and Securing
Sven proceeds to apply glue along one edge of the flange, ensuring a secure bond when clamped into place. He emphasizes that this stage is crucial for maintaining the structural integrity of the flange, which in turn safeguards the living area beneath the canvas when hatches are open.Step 3: Allowing Time to Dry
After securely attaching the first portion of the flange, Sven allows ample time for it to dry before moving forward with additional steps. This patience and precision are key aspects of his successful boatbuilding methods.Step 4: Finishing Touches
Once the flange is fully dried, Sven removes the clamps carefully, ensuring no damage occurs during this process. He then moves on to attaching four more pieces onto these main frames, completing two pairs of flanges for the bulkhead hatches.The Final Touches
While two flanges form the primary support structure around the hatches, Sven mentions there are two additional pieces required at each end to ensure comprehensive protection. This attention to detail highlights his commitment to producing a durable and reliable design. “Sailing is about finding your path, whether it’s across an ocean or within yourself.” – Sven Yrvind In conclusion, making flanges around bulkhead hatches may seem complex at first glance, but by following Sven Yrvind’s meticulous process, enthusiasts can achieve professional-level results. Remember that the journey of boatbuilding is as rewarding as reaching your destination; it tests one’s patience and dedication. For those seeking to embark on this adventure or simply gain more insight into marine craftsmanship, Sven’s wisdom is invaluable.Once the flange is fully dried, Sven removes the clamps carefully, ensuring no damage occurs during this process. He then moves on to attaching four more pieces onto these main frames, completing two pairs of flanges for the bulkhead hatches.The Final Touches
While two flanges form the primary support structure around the hatches, Sven mentions there are two additional pieces required at each end to ensure comprehensive protection. This attention to detail highlights his commitment to producing a durable and reliable design. “Sailing is about finding your path, whether it’s across an ocean or within yourself.” – Sven Yrvind In conclusion, making flanges around bulkhead hatches may seem complex at first glance, but by following Sven Yrvind’s meticulous process, enthusiasts can achieve professional-level results. Remember that the journey of boatbuilding is as rewarding as reaching your destination; it tests one’s patience and dedication. For those seeking to embark on this adventure or simply gain more insight into marine craftsmanship, Sven’s wisdom is invaluable.After securely attaching the first portion of the flange, Sven allows ample time for it to dry before moving forward with additional steps. This patience and precision are key aspects of his successful boatbuilding methods.Step 4: Finishing Touches
Once the flange is fully dried, Sven removes the clamps carefully, ensuring no damage occurs during this process. He then moves on to attaching four more pieces onto these main frames, completing two pairs of flanges for the bulkhead hatches.The Final Touches
While two flanges form the primary support structure around the hatches, Sven mentions there are two additional pieces required at each end to ensure comprehensive protection. This attention to detail highlights his commitment to producing a durable and reliable design. “Sailing is about finding your path, whether it’s across an ocean or within yourself.” – Sven Yrvind In conclusion, making flanges around bulkhead hatches may seem complex at first glance, but by following Sven Yrvind’s meticulous process, enthusiasts can achieve professional-level results. Remember that the journey of boatbuilding is as rewarding as reaching your destination; it tests one’s patience and dedication. For those seeking to embark on this adventure or simply gain more insight into marine craftsmanship, Sven’s wisdom is invaluable.Sven proceeds to apply glue along one edge of the flange, ensuring a secure bond when clamped into place. He emphasizes that this stage is crucial for maintaining the structural integrity of the flange, which in turn safeguards the living area beneath the canvas when hatches are open.Step 3: Allowing Time to Dry
After securely attaching the first portion of the flange, Sven allows ample time for it to dry before moving forward with additional steps. This patience and precision are key aspects of his successful boatbuilding methods.Step 4: Finishing Touches
Once the flange is fully dried, Sven removes the clamps carefully, ensuring no damage occurs during this process. He then moves on to attaching four more pieces onto these main frames, completing two pairs of flanges for the bulkhead hatches.The Final Touches
While two flanges form the primary support structure around the hatches, Sven mentions there are two additional pieces required at each end to ensure comprehensive protection. This attention to detail highlights his commitment to producing a durable and reliable design. “Sailing is about finding your path, whether it’s across an ocean or within yourself.” – Sven Yrvind In conclusion, making flanges around bulkhead hatches may seem complex at first glance, but by following Sven Yrvind’s meticulous process, enthusiasts can achieve professional-level results. Remember that the journey of boatbuilding is as rewarding as reaching your destination; it tests one’s patience and dedication. For those seeking to embark on this adventure or simply gain more insight into marine craftsmanship, Sven’s wisdom is invaluable.Sven begins by explaining that working on flanges vertically and horizontally is significantly easier than doing so in a flat position. To simplify the process further, he divides the task into two or three steps as suggested by fellow expert “for for.” This approach not only makes it more manageable but also allows for greater precision in crafting each component.Step 2: Applying Glue and Securing
Sven proceeds to apply glue along one edge of the flange, ensuring a secure bond when clamped into place. He emphasizes that this stage is crucial for maintaining the structural integrity of the flange, which in turn safeguards the living area beneath the canvas when hatches are open.Step 3: Allowing Time to Dry
After securely attaching the first portion of the flange, Sven allows ample time for it to dry before moving forward with additional steps. This patience and precision are key aspects of his successful boatbuilding methods.Step 4: Finishing Touches
Once the flange is fully dried, Sven removes the clamps carefully, ensuring no damage occurs during this process. He then moves on to attaching four more pieces onto these main frames, completing two pairs of flanges for the bulkhead hatches.The Final Touches
While two flanges form the primary support structure around the hatches, Sven mentions there are two additional pieces required at each end to ensure comprehensive protection. This attention to detail highlights his commitment to producing a durable and reliable design. “Sailing is about finding your path, whether it’s across an ocean or within yourself.” – Sven Yrvind In conclusion, making flanges around bulkhead hatches may seem complex at first glance, but by following Sven Yrvind’s meticulous process, enthusiasts can achieve professional-level results. Remember that the journey of boatbuilding is as rewarding as reaching your destination; it tests one’s patience and dedication. For those seeking to embark on this adventure or simply gain more insight into marine craftsmanship, Sven’s wisdom is invaluable.Sven Yrvind, a renowned yacht designer and sailor, shares valuable insights on creating flanges around bulkhead hatches for canvas protection in this enlightening video. By following his expert guidance, boat enthusiasts can ensure their living areas remain secure while allowing unhindered access through the hatches.Step 1: Starting with the Flange
Sven begins by explaining that working on flanges vertically and horizontally is significantly easier than doing so in a flat position. To simplify the process further, he divides the task into two or three steps as suggested by fellow expert “for for.” This approach not only makes it more manageable but also allows for greater precision in crafting each component.Step 2: Applying Glue and Securing
Sven proceeds to apply glue along one edge of the flange, ensuring a secure bond when clamped into place. He emphasizes that this stage is crucial for maintaining the structural integrity of the flange, which in turn safeguards the living area beneath the canvas when hatches are open.Step 3: Allowing Time to Dry
After securely attaching the first portion of the flange, Sven allows ample time for it to dry before moving forward with additional steps. This patience and precision are key aspects of his successful boatbuilding methods.Step 4: Finishing Touches
Once the flange is fully dried, Sven removes the clamps carefully, ensuring no damage occurs during this process. He then moves on to attaching four more pieces onto these main frames, completing two pairs of flanges for the bulkhead hatches.The Final Touches
While two flanges form the primary support structure around the hatches, Sven mentions there are two additional pieces required at each end to ensure comprehensive protection. This attention to detail highlights his commitment to producing a durable and reliable design. “Sailing is about finding your path, whether it’s across an ocean or within yourself.” – Sven Yrvind In conclusion, making flanges around bulkhead hatches may seem complex at first glance, but by following Sven Yrvind’s meticulous process, enthusiasts can achieve professional-level results. Remember that the journey of boatbuilding is as rewarding as reaching your destination; it tests one’s patience and dedication. For those seeking to embark on this adventure or simply gain more insight into marine craftsmanship, Sven’s wisdom is invaluable.Making Flanges Around Bulkhead Hatches for Canvas
Sven Yrvind, a renowned yacht designer and sailor, shares valuable insights on creating flanges around bulkhead hatches for canvas protection in this enlightening video. By following his expert guidance, boat enthusiasts can ensure their living areas remain secure while allowing unhindered access through the hatches.Step 1: Starting with the Flange
Sven begins by explaining that working on flanges vertically and horizontally is significantly easier than doing so in a flat position. To simplify the process further, he divides the task into two or three steps as suggested by fellow expert “for for.” This approach not only makes it more manageable but also allows for greater precision in crafting each component.Step 2: Applying Glue and Securing
Sven proceeds to apply glue along one edge of the flange, ensuring a secure bond when clamped into place. He emphasizes that this stage is crucial for maintaining the structural integrity of the flange, which in turn safeguards the living area beneath the canvas when hatches are open.Step 3: Allowing Time to Dry
After securely attaching the first portion of the flange, Sven allows ample time for it to dry before moving forward with additional steps. This patience and precision are key aspects of his successful boatbuilding methods.Step 4: Finishing Touches
Once the flange is fully dried, Sven removes the clamps carefully, ensuring no damage occurs during this process. He then moves on to attaching four more pieces onto these main frames, completing two pairs of flanges for the bulkhead hatches.The Final Touches
While two flanges form the primary support structure around the hatches, Sven mentions there are two additional pieces required at each end to ensure comprehensive protection. This attention to detail highlights his commitment to producing a durable and reliable design. “Sailing is about finding your path, whether it’s across an ocean or within yourself.” – Sven Yrvind In conclusion, making flanges around bulkhead hatches may seem complex at first glance, but by following Sven Yrvind’s meticulous process, enthusiasts can achieve professional-level results. Remember that the journey of boatbuilding is as rewarding as reaching your destination; it tests one’s patience and dedication. For those seeking to embark on this adventure or simply gain more insight into marine craftsmanship, Sven’s wisdom is invaluable.Once the flange is fully dried, Sven removes the clamps carefully, ensuring no damage occurs during this process. He then moves on to attaching four more pieces onto these main frames, completing two pairs of flanges for the bulkhead hatches.The Final Touches
While two flanges form the primary support structure around the hatches, Sven mentions there are two additional pieces required at each end to ensure comprehensive protection. This attention to detail highlights his commitment to producing a durable and reliable design. “Sailing is about finding your path, whether it’s across an ocean or within yourself.” – Sven Yrvind In conclusion, making flanges around bulkhead hatches may seem complex at first glance, but by following Sven Yrvind’s meticulous process, enthusiasts can achieve professional-level results. Remember that the journey of boatbuilding is as rewarding as reaching your destination; it tests one’s patience and dedication. For those seeking to embark on this adventure or simply gain more insight into marine craftsmanship, Sven’s wisdom is invaluable.Sven proceeds to apply glue along one edge of the flange, ensuring a secure bond when clamped into place. He emphasizes that this stage is crucial for maintaining the structural integrity of the flange, which in turn safeguards the living area beneath the canvas when hatches are open.Step 3: Allowing Time to Dry
After securely attaching the first portion of the flange, Sven allows ample time for it to dry before moving forward with additional steps. This patience and precision are key aspects of his successful boatbuilding methods.Step 4: Finishing Touches
Once the flange is fully dried, Sven removes the clamps carefully, ensuring no damage occurs during this process. He then moves on to attaching four more pieces onto these main frames, completing two pairs of flanges for the bulkhead hatches.The Final Touches
While two flanges form the primary support structure around the hatches, Sven mentions there are two additional pieces required at each end to ensure comprehensive protection. This attention to detail highlights his commitment to producing a durable and reliable design. “Sailing is about finding your path, whether it’s across an ocean or within yourself.” – Sven Yrvind In conclusion, making flanges around bulkhead hatches may seem complex at first glance, but by following Sven Yrvind’s meticulous process, enthusiasts can achieve professional-level results. Remember that the journey of boatbuilding is as rewarding as reaching your destination; it tests one’s patience and dedication. For those seeking to embark on this adventure or simply gain more insight into marine craftsmanship, Sven’s wisdom is invaluable.Sven begins by explaining that working on flanges vertically and horizontally is significantly easier than doing so in a flat position. To simplify the process further, he divides the task into two or three steps as suggested by fellow expert “for for.” This approach not only makes it more manageable but also allows for greater precision in crafting each component.Step 2: Applying Glue and Securing
Sven proceeds to apply glue along one edge of the flange, ensuring a secure bond when clamped into place. He emphasizes that this stage is crucial for maintaining the structural integrity of the flange, which in turn safeguards the living area beneath the canvas when hatches are open.Step 3: Allowing Time to Dry
After securely attaching the first portion of the flange, Sven allows ample time for it to dry before moving forward with additional steps. This patience and precision are key aspects of his successful boatbuilding methods.Step 4: Finishing Touches
Once the flange is fully dried, Sven removes the clamps carefully, ensuring no damage occurs during this process. He then moves on to attaching four more pieces onto these main frames, completing two pairs of flanges for the bulkhead hatches.The Final Touches
While two flanges form the primary support structure around the hatches, Sven mentions there are two additional pieces required at each end to ensure comprehensive protection. This attention to detail highlights his commitment to producing a durable and reliable design. “Sailing is about finding your path, whether it’s across an ocean or within yourself.” – Sven Yrvind In conclusion, making flanges around bulkhead hatches may seem complex at first glance, but by following Sven Yrvind’s meticulous process, enthusiasts can achieve professional-level results. Remember that the journey of boatbuilding is as rewarding as reaching your destination; it tests one’s patience and dedication. For those seeking to embark on this adventure or simply gain more insight into marine craftsmanship, Sven’s wisdom is invaluable.Sven Yrvind, a renowned yacht designer and sailor, shares valuable insights on creating flanges around bulkhead hatches for canvas protection in this enlightening video. By following his expert guidance, boat enthusiasts can ensure their living areas remain secure while allowing unhindered access through the hatches.Step 1: Starting with the Flange
Sven begins by explaining that working on flanges vertically and horizontally is significantly easier than doing so in a flat position. To simplify the process further, he divides the task into two or three steps as suggested by fellow expert “for for.” This approach not only makes it more manageable but also allows for greater precision in crafting each component.Step 2: Applying Glue and Securing
Sven proceeds to apply glue along one edge of the flange, ensuring a secure bond when clamped into place. He emphasizes that this stage is crucial for maintaining the structural integrity of the flange, which in turn safeguards the living area beneath the canvas when hatches are open.Step 3: Allowing Time to Dry
After securely attaching the first portion of the flange, Sven allows ample time for it to dry before moving forward with additional steps. This patience and precision are key aspects of his successful boatbuilding methods.Step 4: Finishing Touches
Once the flange is fully dried, Sven removes the clamps carefully, ensuring no damage occurs during this process. He then moves on to attaching four more pieces onto these main frames, completing two pairs of flanges for the bulkhead hatches.The Final Touches
While two flanges form the primary support structure around the hatches, Sven mentions there are two additional pieces required at each end to ensure comprehensive protection. This attention to detail highlights his commitment to producing a durable and reliable design. “Sailing is about finding your path, whether it’s across an ocean or within yourself.” – Sven Yrvind In conclusion, making flanges around bulkhead hatches may seem complex at first glance, but by following Sven Yrvind’s meticulous process, enthusiasts can achieve professional-level results. Remember that the journey of boatbuilding is as rewarding as reaching your destination; it tests one’s patience and dedication. For those seeking to embark on this adventure or simply gain more insight into marine craftsmanship, Sven’s wisdom is invaluable.Making Flanges Around Bulkhead Hatches for Canvas
Sven Yrvind, a renowned yacht designer and sailor, shares valuable insights on creating flanges around bulkhead hatches for canvas protection in this enlightening video. By following his expert guidance, boat enthusiasts can ensure their living areas remain secure while allowing unhindered access through the hatches.Step 1: Starting with the Flange
Sven begins by explaining that working on flanges vertically and horizontally is significantly easier than doing so in a flat position. To simplify the process further, he divides the task into two or three steps as suggested by fellow expert “for for.” This approach not only makes it more manageable but also allows for greater precision in crafting each component.Step 2: Applying Glue and Securing
Sven proceeds to apply glue along one edge of the flange, ensuring a secure bond when clamped into place. He emphasizes that this stage is crucial for maintaining the structural integrity of the flange, which in turn safeguards the living area beneath the canvas when hatches are open.Step 3: Allowing Time to Dry
After securely attaching the first portion of the flange, Sven allows ample time for it to dry before moving forward with additional steps. This patience and precision are key aspects of his successful boatbuilding methods.Step 4: Finishing Touches
Once the flange is fully dried, Sven removes the clamps carefully, ensuring no damage occurs during this process. He then moves on to attaching four more pieces onto these main frames, completing two pairs of flanges for the bulkhead hatches.The Final Touches
While two flanges form the primary support structure around the hatches, Sven mentions there are two additional pieces required at each end to ensure comprehensive protection. This attention to detail highlights his commitment to producing a durable and reliable design. “Sailing is about finding your path, whether it’s across an ocean or within yourself.” – Sven Yrvind In conclusion, making flanges around bulkhead hatches may seem complex at first glance, but by following Sven Yrvind’s meticulous process, enthusiasts can achieve professional-level results. Remember that the journey of boatbuilding is as rewarding as reaching your destination; it tests one’s patience and dedication. For those seeking to embark on this adventure or simply gain more insight into marine craftsmanship, Sven’s wisdom is invaluable.After securely attaching the first portion of the flange, Sven allows ample time for it to dry before moving forward with additional steps. This patience and precision are key aspects of his successful boatbuilding methods.Step 4: Finishing Touches
Once the flange is fully dried, Sven removes the clamps carefully, ensuring no damage occurs during this process. He then moves on to attaching four more pieces onto these main frames, completing two pairs of flanges for the bulkhead hatches.The Final Touches
While two flanges form the primary support structure around the hatches, Sven mentions there are two additional pieces required at each end to ensure comprehensive protection. This attention to detail highlights his commitment to producing a durable and reliable design. “Sailing is about finding your path, whether it’s across an ocean or within yourself.” – Sven Yrvind In conclusion, making flanges around bulkhead hatches may seem complex at first glance, but by following Sven Yrvind’s meticulous process, enthusiasts can achieve professional-level results. Remember that the journey of boatbuilding is as rewarding as reaching your destination; it tests one’s patience and dedication. For those seeking to embark on this adventure or simply gain more insight into marine craftsmanship, Sven’s wisdom is invaluable.Sven proceeds to apply glue along one edge of the flange, ensuring a secure bond when clamped into place. He emphasizes that this stage is crucial for maintaining the structural integrity of the flange, which in turn safeguards the living area beneath the canvas when hatches are open.Step 3: Allowing Time to Dry
After securely attaching the first portion of the flange, Sven allows ample time for it to dry before moving forward with additional steps. This patience and precision are key aspects of his successful boatbuilding methods.Step 4: Finishing Touches
Once the flange is fully dried, Sven removes the clamps carefully, ensuring no damage occurs during this process. He then moves on to attaching four more pieces onto these main frames, completing two pairs of flanges for the bulkhead hatches.The Final Touches
While two flanges form the primary support structure around the hatches, Sven mentions there are two additional pieces required at each end to ensure comprehensive protection. This attention to detail highlights his commitment to producing a durable and reliable design. “Sailing is about finding your path, whether it’s across an ocean or within yourself.” – Sven Yrvind In conclusion, making flanges around bulkhead hatches may seem complex at first glance, but by following Sven Yrvind’s meticulous process, enthusiasts can achieve professional-level results. Remember that the journey of boatbuilding is as rewarding as reaching your destination; it tests one’s patience and dedication. For those seeking to embark on this adventure or simply gain more insight into marine craftsmanship, Sven’s wisdom is invaluable.Sven begins by explaining that working on flanges vertically and horizontally is significantly easier than doing so in a flat position. To simplify the process further, he divides the task into two or three steps as suggested by fellow expert “for for.” This approach not only makes it more manageable but also allows for greater precision in crafting each component.Step 2: Applying Glue and Securing
Sven proceeds to apply glue along one edge of the flange, ensuring a secure bond when clamped into place. He emphasizes that this stage is crucial for maintaining the structural integrity of the flange, which in turn safeguards the living area beneath the canvas when hatches are open.Step 3: Allowing Time to Dry
After securely attaching the first portion of the flange, Sven allows ample time for it to dry before moving forward with additional steps. This patience and precision are key aspects of his successful boatbuilding methods.Step 4: Finishing Touches
Once the flange is fully dried, Sven removes the clamps carefully, ensuring no damage occurs during this process. He then moves on to attaching four more pieces onto these main frames, completing two pairs of flanges for the bulkhead hatches.The Final Touches
While two flanges form the primary support structure around the hatches, Sven mentions there are two additional pieces required at each end to ensure comprehensive protection. This attention to detail highlights his commitment to producing a durable and reliable design. “Sailing is about finding your path, whether it’s across an ocean or within yourself.” – Sven Yrvind In conclusion, making flanges around bulkhead hatches may seem complex at first glance, but by following Sven Yrvind’s meticulous process, enthusiasts can achieve professional-level results. Remember that the journey of boatbuilding is as rewarding as reaching your destination; it tests one’s patience and dedication. For those seeking to embark on this adventure or simply gain more insight into marine craftsmanship, Sven’s wisdom is invaluable.Sven Yrvind, a renowned yacht designer and sailor, shares valuable insights on creating flanges around bulkhead hatches for canvas protection in this enlightening video. By following his expert guidance, boat enthusiasts can ensure their living areas remain secure while allowing unhindered access through the hatches.Step 1: Starting with the Flange
Sven begins by explaining that working on flanges vertically and horizontally is significantly easier than doing so in a flat position. To simplify the process further, he divides the task into two or three steps as suggested by fellow expert “for for.” This approach not only makes it more manageable but also allows for greater precision in crafting each component.Step 2: Applying Glue and Securing
Sven proceeds to apply glue along one edge of the flange, ensuring a secure bond when clamped into place. He emphasizes that this stage is crucial for maintaining the structural integrity of the flange, which in turn safeguards the living area beneath the canvas when hatches are open.Step 3: Allowing Time to Dry
After securely attaching the first portion of the flange, Sven allows ample time for it to dry before moving forward with additional steps. This patience and precision are key aspects of his successful boatbuilding methods.Step 4: Finishing Touches
Once the flange is fully dried, Sven removes the clamps carefully, ensuring no damage occurs during this process. He then moves on to attaching four more pieces onto these main frames, completing two pairs of flanges for the bulkhead hatches.The Final Touches
While two flanges form the primary support structure around the hatches, Sven mentions there are two additional pieces required at each end to ensure comprehensive protection. This attention to detail highlights his commitment to producing a durable and reliable design. “Sailing is about finding your path, whether it’s across an ocean or within yourself.” – Sven Yrvind In conclusion, making flanges around bulkhead hatches may seem complex at first glance, but by following Sven Yrvind’s meticulous process, enthusiasts can achieve professional-level results. Remember that the journey of boatbuilding is as rewarding as reaching your destination; it tests one’s patience and dedication. For those seeking to embark on this adventure or simply gain more insight into marine craftsmanship, Sven’s wisdom is invaluable.Making Flanges Around Bulkhead Hatches for Canvas
Sven Yrvind, a renowned yacht designer and sailor, shares valuable insights on creating flanges around bulkhead hatches for canvas protection in this enlightening video. By following his expert guidance, boat enthusiasts can ensure their living areas remain secure while allowing unhindered access through the hatches.Step 1: Starting with the Flange
Sven begins by explaining that working on flanges vertically and horizontally is significantly easier than doing so in a flat position. To simplify the process further, he divides the task into two or three steps as suggested by fellow expert “for for.” This approach not only makes it more manageable but also allows for greater precision in crafting each component.Step 2: Applying Glue and Securing
Sven proceeds to apply glue along one edge of the flange, ensuring a secure bond when clamped into place. He emphasizes that this stage is crucial for maintaining the structural integrity of the flange, which in turn safeguards the living area beneath the canvas when hatches are open.Step 3: Allowing Time to Dry
After securely attaching the first portion of the flange, Sven allows ample time for it to dry before moving forward with additional steps. This patience and precision are key aspects of his successful boatbuilding methods.Step 4: Finishing Touches
Once the flange is fully dried, Sven removes the clamps carefully, ensuring no damage occurs during this process. He then moves on to attaching four more pieces onto these main frames, completing two pairs of flanges for the bulkhead hatches.The Final Touches
While two flanges form the primary support structure around the hatches, Sven mentions there are two additional pieces required at each end to ensure comprehensive protection. This attention to detail highlights his commitment to producing a durable and reliable design. “Sailing is about finding your path, whether it’s across an ocean or within yourself.” – Sven Yrvind In conclusion, making flanges around bulkhead hatches may seem complex at first glance, but by following Sven Yrvind’s meticulous process, enthusiasts can achieve professional-level results. Remember that the journey of boatbuilding is as rewarding as reaching your destination; it tests one’s patience and dedication. For those seeking to embark on this adventure or simply gain more insight into marine craftsmanship, Sven’s wisdom is invaluable.Once the flange is fully dried, Sven removes the clamps carefully, ensuring no damage occurs during this process. He then moves on to attaching four more pieces onto these main frames, completing two pairs of flanges for the bulkhead hatches.The Final Touches
While two flanges form the primary support structure around the hatches, Sven mentions there are two additional pieces required at each end to ensure comprehensive protection. This attention to detail highlights his commitment to producing a durable and reliable design. “Sailing is about finding your path, whether it’s across an ocean or within yourself.” – Sven Yrvind In conclusion, making flanges around bulkhead hatches may seem complex at first glance, but by following Sven Yrvind’s meticulous process, enthusiasts can achieve professional-level results. Remember that the journey of boatbuilding is as rewarding as reaching your destination; it tests one’s patience and dedication. For those seeking to embark on this adventure or simply gain more insight into marine craftsmanship, Sven’s wisdom is invaluable.After securely attaching the first portion of the flange, Sven allows ample time for it to dry before moving forward with additional steps. This patience and precision are key aspects of his successful boatbuilding methods.Step 4: Finishing Touches
Once the flange is fully dried, Sven removes the clamps carefully, ensuring no damage occurs during this process. He then moves on to attaching four more pieces onto these main frames, completing two pairs of flanges for the bulkhead hatches.The Final Touches
While two flanges form the primary support structure around the hatches, Sven mentions there are two additional pieces required at each end to ensure comprehensive protection. This attention to detail highlights his commitment to producing a durable and reliable design. “Sailing is about finding your path, whether it’s across an ocean or within yourself.” – Sven Yrvind In conclusion, making flanges around bulkhead hatches may seem complex at first glance, but by following Sven Yrvind’s meticulous process, enthusiasts can achieve professional-level results. Remember that the journey of boatbuilding is as rewarding as reaching your destination; it tests one’s patience and dedication. For those seeking to embark on this adventure or simply gain more insight into marine craftsmanship, Sven’s wisdom is invaluable.Sven proceeds to apply glue along one edge of the flange, ensuring a secure bond when clamped into place. He emphasizes that this stage is crucial for maintaining the structural integrity of the flange, which in turn safeguards the living area beneath the canvas when hatches are open.Step 3: Allowing Time to Dry
After securely attaching the first portion of the flange, Sven allows ample time for it to dry before moving forward with additional steps. This patience and precision are key aspects of his successful boatbuilding methods.Step 4: Finishing Touches
Once the flange is fully dried, Sven removes the clamps carefully, ensuring no damage occurs during this process. He then moves on to attaching four more pieces onto these main frames, completing two pairs of flanges for the bulkhead hatches.The Final Touches
While two flanges form the primary support structure around the hatches, Sven mentions there are two additional pieces required at each end to ensure comprehensive protection. This attention to detail highlights his commitment to producing a durable and reliable design. “Sailing is about finding your path, whether it’s across an ocean or within yourself.” – Sven Yrvind In conclusion, making flanges around bulkhead hatches may seem complex at first glance, but by following Sven Yrvind’s meticulous process, enthusiasts can achieve professional-level results. Remember that the journey of boatbuilding is as rewarding as reaching your destination; it tests one’s patience and dedication. For those seeking to embark on this adventure or simply gain more insight into marine craftsmanship, Sven’s wisdom is invaluable.Sven begins by explaining that working on flanges vertically and horizontally is significantly easier than doing so in a flat position. To simplify the process further, he divides the task into two or three steps as suggested by fellow expert “for for.” This approach not only makes it more manageable but also allows for greater precision in crafting each component.Step 2: Applying Glue and Securing
Sven proceeds to apply glue along one edge of the flange, ensuring a secure bond when clamped into place. He emphasizes that this stage is crucial for maintaining the structural integrity of the flange, which in turn safeguards the living area beneath the canvas when hatches are open.Step 3: Allowing Time to Dry
After securely attaching the first portion of the flange, Sven allows ample time for it to dry before moving forward with additional steps. This patience and precision are key aspects of his successful boatbuilding methods.Step 4: Finishing Touches
Once the flange is fully dried, Sven removes the clamps carefully, ensuring no damage occurs during this process. He then moves on to attaching four more pieces onto these main frames, completing two pairs of flanges for the bulkhead hatches.The Final Touches
While two flanges form the primary support structure around the hatches, Sven mentions there are two additional pieces required at each end to ensure comprehensive protection. This attention to detail highlights his commitment to producing a durable and reliable design. “Sailing is about finding your path, whether it’s across an ocean or within yourself.” – Sven Yrvind In conclusion, making flanges around bulkhead hatches may seem complex at first glance, but by following Sven Yrvind’s meticulous process, enthusiasts can achieve professional-level results. Remember that the journey of boatbuilding is as rewarding as reaching your destination; it tests one’s patience and dedication. For those seeking to embark on this adventure or simply gain more insight into marine craftsmanship, Sven’s wisdom is invaluable.Sven Yrvind, a renowned yacht designer and sailor, shares valuable insights on creating flanges around bulkhead hatches for canvas protection in this enlightening video. By following his expert guidance, boat enthusiasts can ensure their living areas remain secure while allowing unhindered access through the hatches.Step 1: Starting with the Flange
Sven begins by explaining that working on flanges vertically and horizontally is significantly easier than doing so in a flat position. To simplify the process further, he divides the task into two or three steps as suggested by fellow expert “for for.” This approach not only makes it more manageable but also allows for greater precision in crafting each component.Step 2: Applying Glue and Securing
Sven proceeds to apply glue along one edge of the flange, ensuring a secure bond when clamped into place. He emphasizes that this stage is crucial for maintaining the structural integrity of the flange, which in turn safeguards the living area beneath the canvas when hatches are open.Step 3: Allowing Time to Dry
After securely attaching the first portion of the flange, Sven allows ample time for it to dry before moving forward with additional steps. This patience and precision are key aspects of his successful boatbuilding methods.Step 4: Finishing Touches
Once the flange is fully dried, Sven removes the clamps carefully, ensuring no damage occurs during this process. He then moves on to attaching four more pieces onto these main frames, completing two pairs of flanges for the bulkhead hatches.The Final Touches
While two flanges form the primary support structure around the hatches, Sven mentions there are two additional pieces required at each end to ensure comprehensive protection. This attention to detail highlights his commitment to producing a durable and reliable design. “Sailing is about finding your path, whether it’s across an ocean or within yourself.” – Sven Yrvind In conclusion, making flanges around bulkhead hatches may seem complex at first glance, but by following Sven Yrvind’s meticulous process, enthusiasts can achieve professional-level results. Remember that the journey of boatbuilding is as rewarding as reaching your destination; it tests one’s patience and dedication. For those seeking to embark on this adventure or simply gain more insight into marine craftsmanship, Sven’s wisdom is invaluable.Making Flanges Around Bulkhead Hatches for Canvas
Sven Yrvind, a renowned yacht designer and sailor, shares valuable insights on creating flanges around bulkhead hatches for canvas protection in this enlightening video. By following his expert guidance, boat enthusiasts can ensure their living areas remain secure while allowing unhindered access through the hatches.Step 1: Starting with the Flange
Sven begins by explaining that working on flanges vertically and horizontally is significantly easier than doing so in a flat position. To simplify the process further, he divides the task into two or three steps as suggested by fellow expert “for for.” This approach not only makes it more manageable but also allows for greater precision in crafting each component.Step 2: Applying Glue and Securing
Sven proceeds to apply glue along one edge of the flange, ensuring a secure bond when clamped into place. He emphasizes that this stage is crucial for maintaining the structural integrity of the flange, which in turn safeguards the living area beneath the canvas when hatches are open.Step 3: Allowing Time to Dry
After securely attaching the first portion of the flange, Sven allows ample time for it to dry before moving forward with additional steps. This patience and precision are key aspects of his successful boatbuilding methods.Step 4: Finishing Touches
Once the flange is fully dried, Sven removes the clamps carefully, ensuring no damage occurs during this process. He then moves on to attaching four more pieces onto these main frames, completing two pairs of flanges for the bulkhead hatches.The Final Touches
While two flanges form the primary support structure around the hatches, Sven mentions there are two additional pieces required at each end to ensure comprehensive protection. This attention to detail highlights his commitment to producing a durable and reliable design. “Sailing is about finding your path, whether it’s across an ocean or within yourself.” – Sven Yrvind In conclusion, making flanges around bulkhead hatches may seem complex at first glance, but by following Sven Yrvind’s meticulous process, enthusiasts can achieve professional-level results. Remember that the journey of boatbuilding is as rewarding as reaching your destination; it tests one’s patience and dedication. For those seeking to embark on this adventure or simply gain more insight into marine craftsmanship, Sven’s wisdom is invaluable.After securely attaching the first portion of the flange, Sven allows ample time for it to dry before moving forward with additional steps. This patience and precision are key aspects of his successful boatbuilding methods.Step 4: Finishing Touches
Once the flange is fully dried, Sven removes the clamps carefully, ensuring no damage occurs during this process. He then moves on to attaching four more pieces onto these main frames, completing two pairs of flanges for the bulkhead hatches.The Final Touches
While two flanges form the primary support structure around the hatches, Sven mentions there are two additional pieces required at each end to ensure comprehensive protection. This attention to detail highlights his commitment to producing a durable and reliable design. “Sailing is about finding your path, whether it’s across an ocean or within yourself.” – Sven Yrvind In conclusion, making flanges around bulkhead hatches may seem complex at first glance, but by following Sven Yrvind’s meticulous process, enthusiasts can achieve professional-level results. Remember that the journey of boatbuilding is as rewarding as reaching your destination; it tests one’s patience and dedication. For those seeking to embark on this adventure or simply gain more insight into marine craftsmanship, Sven’s wisdom is invaluable.Once the flange is fully dried, Sven removes the clamps carefully, ensuring no damage occurs during this process. He then moves on to attaching four more pieces onto these main frames, completing two pairs of flanges for the bulkhead hatches.The Final Touches
While two flanges form the primary support structure around the hatches, Sven mentions there are two additional pieces required at each end to ensure comprehensive protection. This attention to detail highlights his commitment to producing a durable and reliable design. “Sailing is about finding your path, whether it’s across an ocean or within yourself.” – Sven Yrvind In conclusion, making flanges around bulkhead hatches may seem complex at first glance, but by following Sven Yrvind’s meticulous process, enthusiasts can achieve professional-level results. Remember that the journey of boatbuilding is as rewarding as reaching your destination; it tests one’s patience and dedication. For those seeking to embark on this adventure or simply gain more insight into marine craftsmanship, Sven’s wisdom is invaluable.Sven proceeds to apply glue along one edge of the flange, ensuring a secure bond when clamped into place. He emphasizes that this stage is crucial for maintaining the structural integrity of the flange, which in turn safeguards the living area beneath the canvas when hatches are open.Step 3: Allowing Time to Dry
After securely attaching the first portion of the flange, Sven allows ample time for it to dry before moving forward with additional steps. This patience and precision are key aspects of his successful boatbuilding methods.Step 4: Finishing Touches
Once the flange is fully dried, Sven removes the clamps carefully, ensuring no damage occurs during this process. He then moves on to attaching four more pieces onto these main frames, completing two pairs of flanges for the bulkhead hatches.The Final Touches
While two flanges form the primary support structure around the hatches, Sven mentions there are two additional pieces required at each end to ensure comprehensive protection. This attention to detail highlights his commitment to producing a durable and reliable design. “Sailing is about finding your path, whether it’s across an ocean or within yourself.” – Sven Yrvind In conclusion, making flanges around bulkhead hatches may seem complex at first glance, but by following Sven Yrvind’s meticulous process, enthusiasts can achieve professional-level results. Remember that the journey of boatbuilding is as rewarding as reaching your destination; it tests one’s patience and dedication. For those seeking to embark on this adventure or simply gain more insight into marine craftsmanship, Sven’s wisdom is invaluable.Sven begins by explaining that working on flanges vertically and horizontally is significantly easier than doing so in a flat position. To simplify the process further, he divides the task into two or three steps as suggested by fellow expert “for for.” This approach not only makes it more manageable but also allows for greater precision in crafting each component.Step 2: Applying Glue and Securing
Sven proceeds to apply glue along one edge of the flange, ensuring a secure bond when clamped into place. He emphasizes that this stage is crucial for maintaining the structural integrity of the flange, which in turn safeguards the living area beneath the canvas when hatches are open.Step 3: Allowing Time to Dry
After securely attaching the first portion of the flange, Sven allows ample time for it to dry before moving forward with additional steps. This patience and precision are key aspects of his successful boatbuilding methods.Step 4: Finishing Touches
Once the flange is fully dried, Sven removes the clamps carefully, ensuring no damage occurs during this process. He then moves on to attaching four more pieces onto these main frames, completing two pairs of flanges for the bulkhead hatches.The Final Touches
While two flanges form the primary support structure around the hatches, Sven mentions there are two additional pieces required at each end to ensure comprehensive protection. This attention to detail highlights his commitment to producing a durable and reliable design. “Sailing is about finding your path, whether it’s across an ocean or within yourself.” – Sven Yrvind In conclusion, making flanges around bulkhead hatches may seem complex at first glance, but by following Sven Yrvind’s meticulous process, enthusiasts can achieve professional-level results. Remember that the journey of boatbuilding is as rewarding as reaching your destination; it tests one’s patience and dedication. For those seeking to embark on this adventure or simply gain more insight into marine craftsmanship, Sven’s wisdom is invaluable.Sven Yrvind, a renowned yacht designer and sailor, shares valuable insights on creating flanges around bulkhead hatches for canvas protection in this enlightening video. By following his expert guidance, boat enthusiasts can ensure their living areas remain secure while allowing unhindered access through the hatches.Step 1: Starting with the Flange
Sven begins by explaining that working on flanges vertically and horizontally is significantly easier than doing so in a flat position. To simplify the process further, he divides the task into two or three steps as suggested by fellow expert “for for.” This approach not only makes it more manageable but also allows for greater precision in crafting each component.Step 2: Applying Glue and Securing
Sven proceeds to apply glue along one edge of the flange, ensuring a secure bond when clamped into place. He emphasizes that this stage is crucial for maintaining the structural integrity of the flange, which in turn safeguards the living area beneath the canvas when hatches are open.Step 3: Allowing Time to Dry
After securely attaching the first portion of the flange, Sven allows ample time for it to dry before moving forward with additional steps. This patience and precision are key aspects of his successful boatbuilding methods.Step 4: Finishing Touches
Once the flange is fully dried, Sven removes the clamps carefully, ensuring no damage occurs during this process. He then moves on to attaching four more pieces onto these main frames, completing two pairs of flanges for the bulkhead hatches.The Final Touches
While two flanges form the primary support structure around the hatches, Sven mentions there are two additional pieces required at each end to ensure comprehensive protection. This attention to detail highlights his commitment to producing a durable and reliable design. “Sailing is about finding your path, whether it’s across an ocean or within yourself.” – Sven Yrvind In conclusion, making flanges around bulkhead hatches may seem complex at first glance, but by following Sven Yrvind’s meticulous process, enthusiasts can achieve professional-level results. Remember that the journey of boatbuilding is as rewarding as reaching your destination; it tests one’s patience and dedication. For those seeking to embark on this adventure or simply gain more insight into marine craftsmanship, Sven’s wisdom is invaluable.Making Flanges Around Bulkhead Hatches for Canvas
Sven Yrvind, a renowned yacht designer and sailor, shares valuable insights on creating flanges around bulkhead hatches for canvas protection in this enlightening video. By following his expert guidance, boat enthusiasts can ensure their living areas remain secure while allowing unhindered access through the hatches.Step 1: Starting with the Flange
Sven begins by explaining that working on flanges vertically and horizontally is significantly easier than doing so in a flat position. To simplify the process further, he divides the task into two or three steps as suggested by fellow expert “for for.” This approach not only makes it more manageable but also allows for greater precision in crafting each component.Step 2: Applying Glue and Securing
Sven proceeds to apply glue along one edge of the flange, ensuring a secure bond when clamped into place. He emphasizes that this stage is crucial for maintaining the structural integrity of the flange, which in turn safeguards the living area beneath the canvas when hatches are open.Step 3: Allowing Time to Dry
After securely attaching the first portion of the flange, Sven allows ample time for it to dry before moving forward with additional steps. This patience and precision are key aspects of his successful boatbuilding methods.Step 4: Finishing Touches
Once the flange is fully dried, Sven removes the clamps carefully, ensuring no damage occurs during this process. He then moves on to attaching four more pieces onto these main frames, completing two pairs of flanges for the bulkhead hatches.The Final Touches
While two flanges form the primary support structure around the hatches, Sven mentions there are two additional pieces required at each end to ensure comprehensive protection. This attention to detail highlights his commitment to producing a durable and reliable design. “Sailing is about finding your path, whether it’s across an ocean or within yourself.” – Sven Yrvind In conclusion, making flanges around bulkhead hatches may seem complex at first glance, but by following Sven Yrvind’s meticulous process, enthusiasts can achieve professional-level results. Remember that the journey of boatbuilding is as rewarding as reaching your destination; it tests one’s patience and dedication. For those seeking to embark on this adventure or simply gain more insight into marine craftsmanship, Sven’s wisdom is invaluable.After securely attaching the first portion of the flange, Sven allows ample time for it to dry before moving forward with additional steps. This patience and precision are key aspects of his successful boatbuilding methods.Step 4: Finishing Touches
Once the flange is fully dried, Sven removes the clamps carefully, ensuring no damage occurs during this process. He then moves on to attaching four more pieces onto these main frames, completing two pairs of flanges for the bulkhead hatches.The Final Touches
While two flanges form the primary support structure around the hatches, Sven mentions there are two additional pieces required at each end to ensure comprehensive protection. This attention to detail highlights his commitment to producing a durable and reliable design. “Sailing is about finding your path, whether it’s across an ocean or within yourself.” – Sven Yrvind In conclusion, making flanges around bulkhead hatches may seem complex at first glance, but by following Sven Yrvind’s meticulous process, enthusiasts can achieve professional-level results. Remember that the journey of boatbuilding is as rewarding as reaching your destination; it tests one’s patience and dedication. For those seeking to embark on this adventure or simply gain more insight into marine craftsmanship, Sven’s wisdom is invaluable.Sven proceeds to apply glue along one edge of the flange, ensuring a secure bond when clamped into place. He emphasizes that this stage is crucial for maintaining the structural integrity of the flange, which in turn safeguards the living area beneath the canvas when hatches are open.Step 3: Allowing Time to Dry
After securely attaching the first portion of the flange, Sven allows ample time for it to dry before moving forward with additional steps. This patience and precision are key aspects of his successful boatbuilding methods.Step 4: Finishing Touches
Once the flange is fully dried, Sven removes the clamps carefully, ensuring no damage occurs during this process. He then moves on to attaching four more pieces onto these main frames, completing two pairs of flanges for the bulkhead hatches.The Final Touches
While two flanges form the primary support structure around the hatches, Sven mentions there are two additional pieces required at each end to ensure comprehensive protection. This attention to detail highlights his commitment to producing a durable and reliable design. “Sailing is about finding your path, whether it’s across an ocean or within yourself.” – Sven Yrvind In conclusion, making flanges around bulkhead hatches may seem complex at first glance, but by following Sven Yrvind’s meticulous process, enthusiasts can achieve professional-level results. Remember that the journey of boatbuilding is as rewarding as reaching your destination; it tests one’s patience and dedication. For those seeking to embark on this adventure or simply gain more insight into marine craftsmanship, Sven’s wisdom is invaluable.Sven begins by explaining that working on flanges vertically and horizontally is significantly easier than doing so in a flat position. To simplify the process further, he divides the task into two or three steps as suggested by fellow expert “for for.” This approach not only makes it more manageable but also allows for greater precision in crafting each component.Step 2: Applying Glue and Securing
Sven proceeds to apply glue along one edge of the flange, ensuring a secure bond when clamped into place. He emphasizes that this stage is crucial for maintaining the structural integrity of the flange, which in turn safeguards the living area beneath the canvas when hatches are open.Step 3: Allowing Time to Dry
After securely attaching the first portion of the flange, Sven allows ample time for it to dry before moving forward with additional steps. This patience and precision are key aspects of his successful boatbuilding methods.Step 4: Finishing Touches
Once the flange is fully dried, Sven removes the clamps carefully, ensuring no damage occurs during this process. He then moves on to attaching four more pieces onto these main frames, completing two pairs of flanges for the bulkhead hatches.The Final Touches
While two flanges form the primary support structure around the hatches, Sven mentions there are two additional pieces required at each end to ensure comprehensive protection. This attention to detail highlights his commitment to producing a durable and reliable design. “Sailing is about finding your path, whether it’s across an ocean or within yourself.” – Sven Yrvind In conclusion, making flanges around bulkhead hatches may seem complex at first glance, but by following Sven Yrvind’s meticulous process, enthusiasts can achieve professional-level results. Remember that the journey of boatbuilding is as rewarding as reaching your destination; it tests one’s patience and dedication. For those seeking to embark on this adventure or simply gain more insight into marine craftsmanship, Sven’s wisdom is invaluable.Sven Yrvind, a renowned yacht designer and sailor, shares valuable insights on creating flanges around bulkhead hatches for canvas protection in this enlightening video. By following his expert guidance, boat enthusiasts can ensure their living areas remain secure while allowing unhindered access through the hatches.Step 1: Starting with the Flange
Sven begins by explaining that working on flanges vertically and horizontally is significantly easier than doing so in a flat position. To simplify the process further, he divides the task into two or three steps as suggested by fellow expert “for for.” This approach not only makes it more manageable but also allows for greater precision in crafting each component.Step 2: Applying Glue and Securing
Sven proceeds to apply glue along one edge of the flange, ensuring a secure bond when clamped into place. He emphasizes that this stage is crucial for maintaining the structural integrity of the flange, which in turn safeguards the living area beneath the canvas when hatches are open.Step 3: Allowing Time to Dry
After securely attaching the first portion of the flange, Sven allows ample time for it to dry before moving forward with additional steps. This patience and precision are key aspects of his successful boatbuilding methods.Step 4: Finishing Touches
Once the flange is fully dried, Sven removes the clamps carefully, ensuring no damage occurs during this process. He then moves on to attaching four more pieces onto these main frames, completing two pairs of flanges for the bulkhead hatches.The Final Touches
While two flanges form the primary support structure around the hatches, Sven mentions there are two additional pieces required at each end to ensure comprehensive protection. This attention to detail highlights his commitment to producing a durable and reliable design. “Sailing is about finding your path, whether it’s across an ocean or within yourself.” – Sven Yrvind In conclusion, making flanges around bulkhead hatches may seem complex at first glance, but by following Sven Yrvind’s meticulous process, enthusiasts can achieve professional-level results. Remember that the journey of boatbuilding is as rewarding as reaching your destination; it tests one’s patience and dedication. For those seeking to embark on this adventure or simply gain more insight into marine craftsmanship, Sven’s wisdom is invaluable.Making Flanges Around Bulkhead Hatches for Canvas
Sven Yrvind, a renowned yacht designer and sailor, shares valuable insights on creating flanges around bulkhead hatches for canvas protection in this enlightening video. By following his expert guidance, boat enthusiasts can ensure their living areas remain secure while allowing unhindered access through the hatches.Step 1: Starting with the Flange
Sven begins by explaining that working on flanges vertically and horizontally is significantly easier than doing so in a flat position. To simplify the process further, he divides the task into two or three steps as suggested by fellow expert “for for.” This approach not only makes it more manageable but also allows for greater precision in crafting each component.Step 2: Applying Glue and Securing
Sven proceeds to apply glue along one edge of the flange, ensuring a secure bond when clamped into place. He emphasizes that this stage is crucial for maintaining the structural integrity of the flange, which in turn safeguards the living area beneath the canvas when hatches are open.Step 3: Allowing Time to Dry
After securely attaching the first portion of the flange, Sven allows ample time for it to dry before moving forward with additional steps. This patience and precision are key aspects of his successful boatbuilding methods.Step 4: Finishing Touches
Once the flange is fully dried, Sven removes the clamps carefully, ensuring no damage occurs during this process. He then moves on to attaching four more pieces onto these main frames, completing two pairs of flanges for the bulkhead hatches.The Final Touches
While two flanges form the primary support structure around the hatches, Sven mentions there are two additional pieces required at each end to ensure comprehensive protection. This attention to detail highlights his commitment to producing a durable and reliable design. “Sailing is about finding your path, whether it’s across an ocean or within yourself.” – Sven Yrvind In conclusion, making flanges around bulkhead hatches may seem complex at first glance, but by following Sven Yrvind’s meticulous process, enthusiasts can achieve professional-level results. Remember that the journey of boatbuilding is as rewarding as reaching your destination; it tests one’s patience and dedication. For those seeking to embark on this adventure or simply gain more insight into marine craftsmanship, Sven’s wisdom is invaluable.Once the flange is fully dried, Sven removes the clamps carefully, ensuring no damage occurs during this process. He then moves on to attaching four more pieces onto these main frames, completing two pairs of flanges for the bulkhead hatches.The Final Touches
While two flanges form the primary support structure around the hatches, Sven mentions there are two additional pieces required at each end to ensure comprehensive protection. This attention to detail highlights his commitment to producing a durable and reliable design. “Sailing is about finding your path, whether it’s across an ocean or within yourself.” – Sven Yrvind In conclusion, making flanges around bulkhead hatches may seem complex at first glance, but by following Sven Yrvind’s meticulous process, enthusiasts can achieve professional-level results. Remember that the journey of boatbuilding is as rewarding as reaching your destination; it tests one’s patience and dedication. For those seeking to embark on this adventure or simply gain more insight into marine craftsmanship, Sven’s wisdom is invaluable.After securely attaching the first portion of the flange, Sven allows ample time for it to dry before moving forward with additional steps. This patience and precision are key aspects of his successful boatbuilding methods.Step 4: Finishing Touches
Once the flange is fully dried, Sven removes the clamps carefully, ensuring no damage occurs during this process. He then moves on to attaching four more pieces onto these main frames, completing two pairs of flanges for the bulkhead hatches.The Final Touches
While two flanges form the primary support structure around the hatches, Sven mentions there are two additional pieces required at each end to ensure comprehensive protection. This attention to detail highlights his commitment to producing a durable and reliable design. “Sailing is about finding your path, whether it’s across an ocean or within yourself.” – Sven Yrvind In conclusion, making flanges around bulkhead hatches may seem complex at first glance, but by following Sven Yrvind’s meticulous process, enthusiasts can achieve professional-level results. Remember that the journey of boatbuilding is as rewarding as reaching your destination; it tests one’s patience and dedication. For those seeking to embark on this adventure or simply gain more insight into marine craftsmanship, Sven’s wisdom is invaluable.Sven proceeds to apply glue along one edge of the flange, ensuring a secure bond when clamped into place. He emphasizes that this stage is crucial for maintaining the structural integrity of the flange, which in turn safeguards the living area beneath the canvas when hatches are open.Step 3: Allowing Time to Dry
After securely attaching the first portion of the flange, Sven allows ample time for it to dry before moving forward with additional steps. This patience and precision are key aspects of his successful boatbuilding methods.Step 4: Finishing Touches
Once the flange is fully dried, Sven removes the clamps carefully, ensuring no damage occurs during this process. He then moves on to attaching four more pieces onto these main frames, completing two pairs of flanges for the bulkhead hatches.The Final Touches
While two flanges form the primary support structure around the hatches, Sven mentions there are two additional pieces required at each end to ensure comprehensive protection. This attention to detail highlights his commitment to producing a durable and reliable design. “Sailing is about finding your path, whether it’s across an ocean or within yourself.” – Sven Yrvind In conclusion, making flanges around bulkhead hatches may seem complex at first glance, but by following Sven Yrvind’s meticulous process, enthusiasts can achieve professional-level results. Remember that the journey of boatbuilding is as rewarding as reaching your destination; it tests one’s patience and dedication. For those seeking to embark on this adventure or simply gain more insight into marine craftsmanship, Sven’s wisdom is invaluable.Sven begins by explaining that working on flanges vertically and horizontally is significantly easier than doing so in a flat position. To simplify the process further, he divides the task into two or three steps as suggested by fellow expert “for for.” This approach not only makes it more manageable but also allows for greater precision in crafting each component.Step 2: Applying Glue and Securing
Sven proceeds to apply glue along one edge of the flange, ensuring a secure bond when clamped into place. He emphasizes that this stage is crucial for maintaining the structural integrity of the flange, which in turn safeguards the living area beneath the canvas when hatches are open.Step 3: Allowing Time to Dry
After securely attaching the first portion of the flange, Sven allows ample time for it to dry before moving forward with additional steps. This patience and precision are key aspects of his successful boatbuilding methods.Step 4: Finishing Touches
Once the flange is fully dried, Sven removes the clamps carefully, ensuring no damage occurs during this process. He then moves on to attaching four more pieces onto these main frames, completing two pairs of flanges for the bulkhead hatches.The Final Touches
While two flanges form the primary support structure around the hatches, Sven mentions there are two additional pieces required at each end to ensure comprehensive protection. This attention to detail highlights his commitment to producing a durable and reliable design. “Sailing is about finding your path, whether it’s across an ocean or within yourself.” – Sven Yrvind In conclusion, making flanges around bulkhead hatches may seem complex at first glance, but by following Sven Yrvind’s meticulous process, enthusiasts can achieve professional-level results. Remember that the journey of boatbuilding is as rewarding as reaching your destination; it tests one’s patience and dedication. For those seeking to embark on this adventure or simply gain more insight into marine craftsmanship, Sven’s wisdom is invaluable.Sven Yrvind, a renowned yacht designer and sailor, shares valuable insights on creating flanges around bulkhead hatches for canvas protection in this enlightening video. By following his expert guidance, boat enthusiasts can ensure their living areas remain secure while allowing unhindered access through the hatches.Step 1: Starting with the Flange
Sven begins by explaining that working on flanges vertically and horizontally is significantly easier than doing so in a flat position. To simplify the process further, he divides the task into two or three steps as suggested by fellow expert “for for.” This approach not only makes it more manageable but also allows for greater precision in crafting each component.Step 2: Applying Glue and Securing
Sven proceeds to apply glue along one edge of the flange, ensuring a secure bond when clamped into place. He emphasizes that this stage is crucial for maintaining the structural integrity of the flange, which in turn safeguards the living area beneath the canvas when hatches are open.Step 3: Allowing Time to Dry
After securely attaching the first portion of the flange, Sven allows ample time for it to dry before moving forward with additional steps. This patience and precision are key aspects of his successful boatbuilding methods.Step 4: Finishing Touches
Once the flange is fully dried, Sven removes the clamps carefully, ensuring no damage occurs during this process. He then moves on to attaching four more pieces onto these main frames, completing two pairs of flanges for the bulkhead hatches.The Final Touches
While two flanges form the primary support structure around the hatches, Sven mentions there are two additional pieces required at each end to ensure comprehensive protection. This attention to detail highlights his commitment to producing a durable and reliable design. “Sailing is about finding your path, whether it’s across an ocean or within yourself.” – Sven Yrvind In conclusion, making flanges around bulkhead hatches may seem complex at first glance, but by following Sven Yrvind’s meticulous process, enthusiasts can achieve professional-level results. Remember that the journey of boatbuilding is as rewarding as reaching your destination; it tests one’s patience and dedication. For those seeking to embark on this adventure or simply gain more insight into marine craftsmanship, Sven’s wisdom is invaluable.Making Flanges Around Bulkhead Hatches for Canvas
Sven Yrvind, a renowned yacht designer and sailor, shares valuable insights on creating flanges around bulkhead hatches for canvas protection in this enlightening video. By following his expert guidance, boat enthusiasts can ensure their living areas remain secure while allowing unhindered access through the hatches.Step 1: Starting with the Flange
Sven begins by explaining that working on flanges vertically and horizontally is significantly easier than doing so in a flat position. To simplify the process further, he divides the task into two or three steps as suggested by fellow expert “for for.” This approach not only makes it more manageable but also allows for greater precision in crafting each component.Step 2: Applying Glue and Securing
Sven proceeds to apply glue along one edge of the flange, ensuring a secure bond when clamped into place. He emphasizes that this stage is crucial for maintaining the structural integrity of the flange, which in turn safeguards the living area beneath the canvas when hatches are open.Step 3: Allowing Time to Dry
After securely attaching the first portion of the flange, Sven allows ample time for it to dry before moving forward with additional steps. This patience and precision are key aspects of his successful boatbuilding methods.Step 4: Finishing Touches
Once the flange is fully dried, Sven removes the clamps carefully, ensuring no damage occurs during this process. He then moves on to attaching four more pieces onto these main frames, completing two pairs of flanges for the bulkhead hatches.The Final Touches
While two flanges form the primary support structure around the hatches, Sven mentions there are two additional pieces required at each end to ensure comprehensive protection. This attention to detail highlights his commitment to producing a durable and reliable design. “Sailing is about finding your path, whether it’s across an ocean or within yourself.” – Sven Yrvind In conclusion, making flanges around bulkhead hatches may seem complex at first glance, but by following Sven Yrvind’s meticulous process, enthusiasts can achieve professional-level results. Remember that the journey of boatbuilding is as rewarding as reaching your destination; it tests one’s patience and dedication. For those seeking to embark on this adventure or simply gain more insight into marine craftsmanship, Sven’s wisdom is invaluable.Sven proceeds to apply glue along one edge of the flange, ensuring a secure bond when clamped into place. He emphasizes that this stage is crucial for maintaining the structural integrity of the flange, which in turn safeguards the living area beneath the canvas when hatches are open.Step 3: Allowing Time to Dry
After securely attaching the first portion of the flange, Sven allows ample time for it to dry before moving forward with additional steps. This patience and precision are key aspects of his successful boatbuilding methods.Step 4: Finishing Touches
Once the flange is fully dried, Sven removes the clamps carefully, ensuring no damage occurs during this process. He then moves on to attaching four more pieces onto these main frames, completing two pairs of flanges for the bulkhead hatches.The Final Touches
While two flanges form the primary support structure around the hatches, Sven mentions there are two additional pieces required at each end to ensure comprehensive protection. This attention to detail highlights his commitment to producing a durable and reliable design. “Sailing is about finding your path, whether it’s across an ocean or within yourself.” – Sven Yrvind In conclusion, making flanges around bulkhead hatches may seem complex at first glance, but by following Sven Yrvind’s meticulous process, enthusiasts can achieve professional-level results. Remember that the journey of boatbuilding is as rewarding as reaching your destination; it tests one’s patience and dedication. For those seeking to embark on this adventure or simply gain more insight into marine craftsmanship, Sven’s wisdom is invaluable.Once the flange is fully dried, Sven removes the clamps carefully, ensuring no damage occurs during this process. He then moves on to attaching four more pieces onto these main frames, completing two pairs of flanges for the bulkhead hatches.The Final Touches
While two flanges form the primary support structure around the hatches, Sven mentions there are two additional pieces required at each end to ensure comprehensive protection. This attention to detail highlights his commitment to producing a durable and reliable design. “Sailing is about finding your path, whether it’s across an ocean or within yourself.” – Sven Yrvind In conclusion, making flanges around bulkhead hatches may seem complex at first glance, but by following Sven Yrvind’s meticulous process, enthusiasts can achieve professional-level results. Remember that the journey of boatbuilding is as rewarding as reaching your destination; it tests one’s patience and dedication. For those seeking to embark on this adventure or simply gain more insight into marine craftsmanship, Sven’s wisdom is invaluable.Sven proceeds to apply glue along one edge of the flange, ensuring a secure bond when clamped into place. He emphasizes that this stage is crucial for maintaining the structural integrity of the flange, which in turn safeguards the living area beneath the canvas when hatches are open.Step 3: Allowing Time to Dry
After securely attaching the first portion of the flange, Sven allows ample time for it to dry before moving forward with additional steps. This patience and precision are key aspects of his successful boatbuilding methods.Step 4: Finishing Touches
Once the flange is fully dried, Sven removes the clamps carefully, ensuring no damage occurs during this process. He then moves on to attaching four more pieces onto these main frames, completing two pairs of flanges for the bulkhead hatches.The Final Touches
While two flanges form the primary support structure around the hatches, Sven mentions there are two additional pieces required at each end to ensure comprehensive protection. This attention to detail highlights his commitment to producing a durable and reliable design. “Sailing is about finding your path, whether it’s across an ocean or within yourself.” – Sven Yrvind In conclusion, making flanges around bulkhead hatches may seem complex at first glance, but by following Sven Yrvind’s meticulous process, enthusiasts can achieve professional-level results. Remember that the journey of boatbuilding is as rewarding as reaching your destination; it tests one’s patience and dedication. For those seeking to embark on this adventure or simply gain more insight into marine craftsmanship, Sven’s wisdom is invaluable.Sven begins by explaining that working on flanges vertically and horizontally is significantly easier than doing so in a flat position. To simplify the process further, he divides the task into two or three steps as suggested by fellow expert “for for.” This approach not only makes it more manageable but also allows for greater precision in crafting each component.Step 2: Applying Glue and Securing
Sven proceeds to apply glue along one edge of the flange, ensuring a secure bond when clamped into place. He emphasizes that this stage is crucial for maintaining the structural integrity of the flange, which in turn safeguards the living area beneath the canvas when hatches are open.Step 3: Allowing Time to Dry
After securely attaching the first portion of the flange, Sven allows ample time for it to dry before moving forward with additional steps. This patience and precision are key aspects of his successful boatbuilding methods.Step 4: Finishing Touches
Once the flange is fully dried, Sven removes the clamps carefully, ensuring no damage occurs during this process. He then moves on to attaching four more pieces onto these main frames, completing two pairs of flanges for the bulkhead hatches.The Final Touches
While two flanges form the primary support structure around the hatches, Sven mentions there are two additional pieces required at each end to ensure comprehensive protection. This attention to detail highlights his commitment to producing a durable and reliable design. “Sailing is about finding your path, whether it’s across an ocean or within yourself.” – Sven Yrvind In conclusion, making flanges around bulkhead hatches may seem complex at first glance, but by following Sven Yrvind’s meticulous process, enthusiasts can achieve professional-level results. Remember that the journey of boatbuilding is as rewarding as reaching your destination; it tests one’s patience and dedication. For those seeking to embark on this adventure or simply gain more insight into marine craftsmanship, Sven’s wisdom is invaluable.Sven Yrvind, a renowned yacht designer and sailor, shares valuable insights on creating flanges around bulkhead hatches for canvas protection in this enlightening video. By following his expert guidance, boat enthusiasts can ensure their living areas remain secure while allowing unhindered access through the hatches.Step 1: Starting with the Flange
Sven begins by explaining that working on flanges vertically and horizontally is significantly easier than doing so in a flat position. To simplify the process further, he divides the task into two or three steps as suggested by fellow expert “for for.” This approach not only makes it more manageable but also allows for greater precision in crafting each component.Step 2: Applying Glue and Securing
Sven proceeds to apply glue along one edge of the flange, ensuring a secure bond when clamped into place. He emphasizes that this stage is crucial for maintaining the structural integrity of the flange, which in turn safeguards the living area beneath the canvas when hatches are open.Step 3: Allowing Time to Dry
After securely attaching the first portion of the flange, Sven allows ample time for it to dry before moving forward with additional steps. This patience and precision are key aspects of his successful boatbuilding methods.Step 4: Finishing Touches
Once the flange is fully dried, Sven removes the clamps carefully, ensuring no damage occurs during this process. He then moves on to attaching four more pieces onto these main frames, completing two pairs of flanges for the bulkhead hatches.The Final Touches
While two flanges form the primary support structure around the hatches, Sven mentions there are two additional pieces required at each end to ensure comprehensive protection. This attention to detail highlights his commitment to producing a durable and reliable design. “Sailing is about finding your path, whether it’s across an ocean or within yourself.” – Sven Yrvind In conclusion, making flanges around bulkhead hatches may seem complex at first glance, but by following Sven Yrvind’s meticulous process, enthusiasts can achieve professional-level results. Remember that the journey of boatbuilding is as rewarding as reaching your destination; it tests one’s patience and dedication. For those seeking to embark on this adventure or simply gain more insight into marine craftsmanship, Sven’s wisdom is invaluable.Making Flanges Around Bulkhead Hatches for Canvas
Sven Yrvind, a renowned yacht designer and sailor, shares valuable insights on creating flanges around bulkhead hatches for canvas protection in this enlightening video. By following his expert guidance, boat enthusiasts can ensure their living areas remain secure while allowing unhindered access through the hatches.Step 1: Starting with the Flange
Sven begins by explaining that working on flanges vertically and horizontally is significantly easier than doing so in a flat position. To simplify the process further, he divides the task into two or three steps as suggested by fellow expert “for for.” This approach not only makes it more manageable but also allows for greater precision in crafting each component.Step 2: Applying Glue and Securing
Sven proceeds to apply glue along one edge of the flange, ensuring a secure bond when clamped into place. He emphasizes that this stage is crucial for maintaining the structural integrity of the flange, which in turn safeguards the living area beneath the canvas when hatches are open.Step 3: Allowing Time to Dry
After securely attaching the first portion of the flange, Sven allows ample time for it to dry before moving forward with additional steps. This patience and precision are key aspects of his successful boatbuilding methods.Step 4: Finishing Touches
Once the flange is fully dried, Sven removes the clamps carefully, ensuring no damage occurs during this process. He then moves on to attaching four more pieces onto these main frames, completing two pairs of flanges for the bulkhead hatches.The Final Touches
While two flanges form the primary support structure around the hatches, Sven mentions there are two additional pieces required at each end to ensure comprehensive protection. This attention to detail highlights his commitment to producing a durable and reliable design. “Sailing is about finding your path, whether it’s across an ocean or within yourself.” – Sven Yrvind In conclusion, making flanges around bulkhead hatches may seem complex at first glance, but by following Sven Yrvind’s meticulous process, enthusiasts can achieve professional-level results. Remember that the journey of boatbuilding is as rewarding as reaching your destination; it tests one’s patience and dedication. For those seeking to embark on this adventure or simply gain more insight into marine craftsmanship, Sven’s wisdom is invaluable.After securely attaching the first portion of the flange, Sven allows ample time for it to dry before moving forward with additional steps. This patience and precision are key aspects of his successful boatbuilding methods.Step 4: Finishing Touches
Once the flange is fully dried, Sven removes the clamps carefully, ensuring no damage occurs during this process. He then moves on to attaching four more pieces onto these main frames, completing two pairs of flanges for the bulkhead hatches.The Final Touches
While two flanges form the primary support structure around the hatches, Sven mentions there are two additional pieces required at each end to ensure comprehensive protection. This attention to detail highlights his commitment to producing a durable and reliable design. “Sailing is about finding your path, whether it’s across an ocean or within yourself.” – Sven Yrvind In conclusion, making flanges around bulkhead hatches may seem complex at first glance, but by following Sven Yrvind’s meticulous process, enthusiasts can achieve professional-level results. Remember that the journey of boatbuilding is as rewarding as reaching your destination; it tests one’s patience and dedication. For those seeking to embark on this adventure or simply gain more insight into marine craftsmanship, Sven’s wisdom is invaluable.Sven proceeds to apply glue along one edge of the flange, ensuring a secure bond when clamped into place. He emphasizes that this stage is crucial for maintaining the structural integrity of the flange, which in turn safeguards the living area beneath the canvas when hatches are open.Step 3: Allowing Time to Dry
After securely attaching the first portion of the flange, Sven allows ample time for it to dry before moving forward with additional steps. This patience and precision are key aspects of his successful boatbuilding methods.Step 4: Finishing Touches
Once the flange is fully dried, Sven removes the clamps carefully, ensuring no damage occurs during this process. He then moves on to attaching four more pieces onto these main frames, completing two pairs of flanges for the bulkhead hatches.The Final Touches
While two flanges form the primary support structure around the hatches, Sven mentions there are two additional pieces required at each end to ensure comprehensive protection. This attention to detail highlights his commitment to producing a durable and reliable design. “Sailing is about finding your path, whether it’s across an ocean or within yourself.” – Sven Yrvind In conclusion, making flanges around bulkhead hatches may seem complex at first glance, but by following Sven Yrvind’s meticulous process, enthusiasts can achieve professional-level results. Remember that the journey of boatbuilding is as rewarding as reaching your destination; it tests one’s patience and dedication. For those seeking to embark on this adventure or simply gain more insight into marine craftsmanship, Sven’s wisdom is invaluable.Sven begins by explaining that working on flanges vertically and horizontally is significantly easier than doing so in a flat position. To simplify the process further, he divides the task into two or three steps as suggested by fellow expert “for for.” This approach not only makes it more manageable but also allows for greater precision in crafting each component.Step 2: Applying Glue and Securing
Sven proceeds to apply glue along one edge of the flange, ensuring a secure bond when clamped into place. He emphasizes that this stage is crucial for maintaining the structural integrity of the flange, which in turn safeguards the living area beneath the canvas when hatches are open.Step 3: Allowing Time to Dry
After securely attaching the first portion of the flange, Sven allows ample time for it to dry before moving forward with additional steps. This patience and precision are key aspects of his successful boatbuilding methods.Step 4: Finishing Touches
Once the flange is fully dried, Sven removes the clamps carefully, ensuring no damage occurs during this process. He then moves on to attaching four more pieces onto these main frames, completing two pairs of flanges for the bulkhead hatches.The Final Touches
While two flanges form the primary support structure around the hatches, Sven mentions there are two additional pieces required at each end to ensure comprehensive protection. This attention to detail highlights his commitment to producing a durable and reliable design. “Sailing is about finding your path, whether it’s across an ocean or within yourself.” – Sven Yrvind In conclusion, making flanges around bulkhead hatches may seem complex at first glance, but by following Sven Yrvind’s meticulous process, enthusiasts can achieve professional-level results. Remember that the journey of boatbuilding is as rewarding as reaching your destination; it tests one’s patience and dedication. For those seeking to embark on this adventure or simply gain more insight into marine craftsmanship, Sven’s wisdom is invaluable.Sven Yrvind, a renowned yacht designer and sailor, shares valuable insights on creating flanges around bulkhead hatches for canvas protection in this enlightening video. By following his expert guidance, boat enthusiasts can ensure their living areas remain secure while allowing unhindered access through the hatches.Step 1: Starting with the Flange
Sven begins by explaining that working on flanges vertically and horizontally is significantly easier than doing so in a flat position. To simplify the process further, he divides the task into two or three steps as suggested by fellow expert “for for.” This approach not only makes it more manageable but also allows for greater precision in crafting each component.Step 2: Applying Glue and Securing
Sven proceeds to apply glue along one edge of the flange, ensuring a secure bond when clamped into place. He emphasizes that this stage is crucial for maintaining the structural integrity of the flange, which in turn safeguards the living area beneath the canvas when hatches are open.Step 3: Allowing Time to Dry
After securely attaching the first portion of the flange, Sven allows ample time for it to dry before moving forward with additional steps. This patience and precision are key aspects of his successful boatbuilding methods.Step 4: Finishing Touches
Once the flange is fully dried, Sven removes the clamps carefully, ensuring no damage occurs during this process. He then moves on to attaching four more pieces onto these main frames, completing two pairs of flanges for the bulkhead hatches.The Final Touches
While two flanges form the primary support structure around the hatches, Sven mentions there are two additional pieces required at each end to ensure comprehensive protection. This attention to detail highlights his commitment to producing a durable and reliable design. “Sailing is about finding your path, whether it’s across an ocean or within yourself.” – Sven Yrvind In conclusion, making flanges around bulkhead hatches may seem complex at first glance, but by following Sven Yrvind’s meticulous process, enthusiasts can achieve professional-level results. Remember that the journey of boatbuilding is as rewarding as reaching your destination; it tests one’s patience and dedication. For those seeking to embark on this adventure or simply gain more insight into marine craftsmanship, Sven’s wisdom is invaluable.Making Flanges Around Bulkhead Hatches for Canvas
Sven Yrvind, a renowned yacht designer and sailor, shares valuable insights on creating flanges around bulkhead hatches for canvas protection in this enlightening video. By following his expert guidance, boat enthusiasts can ensure their living areas remain secure while allowing unhindered access through the hatches.Step 1: Starting with the Flange
Sven begins by explaining that working on flanges vertically and horizontally is significantly easier than doing so in a flat position. To simplify the process further, he divides the task into two or three steps as suggested by fellow expert “for for.” This approach not only makes it more manageable but also allows for greater precision in crafting each component.Step 2: Applying Glue and Securing
Sven proceeds to apply glue along one edge of the flange, ensuring a secure bond when clamped into place. He emphasizes that this stage is crucial for maintaining the structural integrity of the flange, which in turn safeguards the living area beneath the canvas when hatches are open.Step 3: Allowing Time to Dry
After securely attaching the first portion of the flange, Sven allows ample time for it to dry before moving forward with additional steps. This patience and precision are key aspects of his successful boatbuilding methods.Step 4: Finishing Touches
Once the flange is fully dried, Sven removes the clamps carefully, ensuring no damage occurs during this process. He then moves on to attaching four more pieces onto these main frames, completing two pairs of flanges for the bulkhead hatches.The Final Touches
While two flanges form the primary support structure around the hatches, Sven mentions there are two additional pieces required at each end to ensure comprehensive protection. This attention to detail highlights his commitment to producing a durable and reliable design. “Sailing is about finding your path, whether it’s across an ocean or within yourself.” – Sven Yrvind In conclusion, making flanges around bulkhead hatches may seem complex at first glance, but by following Sven Yrvind’s meticulous process, enthusiasts can achieve professional-level results. Remember that the journey of boatbuilding is as rewarding as reaching your destination; it tests one’s patience and dedication. For those seeking to embark on this adventure or simply gain more insight into marine craftsmanship, Sven’s wisdom is invaluable.Once the flange is fully dried, Sven removes the clamps carefully, ensuring no damage occurs during this process. He then moves on to attaching four more pieces onto these main frames, completing two pairs of flanges for the bulkhead hatches.The Final Touches
While two flanges form the primary support structure around the hatches, Sven mentions there are two additional pieces required at each end to ensure comprehensive protection. This attention to detail highlights his commitment to producing a durable and reliable design. “Sailing is about finding your path, whether it’s across an ocean or within yourself.” – Sven Yrvind In conclusion, making flanges around bulkhead hatches may seem complex at first glance, but by following Sven Yrvind’s meticulous process, enthusiasts can achieve professional-level results. Remember that the journey of boatbuilding is as rewarding as reaching your destination; it tests one’s patience and dedication. For those seeking to embark on this adventure or simply gain more insight into marine craftsmanship, Sven’s wisdom is invaluable.After securely attaching the first portion of the flange, Sven allows ample time for it to dry before moving forward with additional steps. This patience and precision are key aspects of his successful boatbuilding methods.Step 4: Finishing Touches
Once the flange is fully dried, Sven removes the clamps carefully, ensuring no damage occurs during this process. He then moves on to attaching four more pieces onto these main frames, completing two pairs of flanges for the bulkhead hatches.The Final Touches
While two flanges form the primary support structure around the hatches, Sven mentions there are two additional pieces required at each end to ensure comprehensive protection. This attention to detail highlights his commitment to producing a durable and reliable design. “Sailing is about finding your path, whether it’s across an ocean or within yourself.” – Sven Yrvind In conclusion, making flanges around bulkhead hatches may seem complex at first glance, but by following Sven Yrvind’s meticulous process, enthusiasts can achieve professional-level results. Remember that the journey of boatbuilding is as rewarding as reaching your destination; it tests one’s patience and dedication. For those seeking to embark on this adventure or simply gain more insight into marine craftsmanship, Sven’s wisdom is invaluable.Sven proceeds to apply glue along one edge of the flange, ensuring a secure bond when clamped into place. He emphasizes that this stage is crucial for maintaining the structural integrity of the flange, which in turn safeguards the living area beneath the canvas when hatches are open.Step 3: Allowing Time to Dry
After securely attaching the first portion of the flange, Sven allows ample time for it to dry before moving forward with additional steps. This patience and precision are key aspects of his successful boatbuilding methods.Step 4: Finishing Touches
Once the flange is fully dried, Sven removes the clamps carefully, ensuring no damage occurs during this process. He then moves on to attaching four more pieces onto these main frames, completing two pairs of flanges for the bulkhead hatches.The Final Touches
While two flanges form the primary support structure around the hatches, Sven mentions there are two additional pieces required at each end to ensure comprehensive protection. This attention to detail highlights his commitment to producing a durable and reliable design. “Sailing is about finding your path, whether it’s across an ocean or within yourself.” – Sven Yrvind In conclusion, making flanges around bulkhead hatches may seem complex at first glance, but by following Sven Yrvind’s meticulous process, enthusiasts can achieve professional-level results. Remember that the journey of boatbuilding is as rewarding as reaching your destination; it tests one’s patience and dedication. For those seeking to embark on this adventure or simply gain more insight into marine craftsmanship, Sven’s wisdom is invaluable.Sven begins by explaining that working on flanges vertically and horizontally is significantly easier than doing so in a flat position. To simplify the process further, he divides the task into two or three steps as suggested by fellow expert “for for.” This approach not only makes it more manageable but also allows for greater precision in crafting each component.Step 2: Applying Glue and Securing
Sven proceeds to apply glue along one edge of the flange, ensuring a secure bond when clamped into place. He emphasizes that this stage is crucial for maintaining the structural integrity of the flange, which in turn safeguards the living area beneath the canvas when hatches are open.Step 3: Allowing Time to Dry
After securely attaching the first portion of the flange, Sven allows ample time for it to dry before moving forward with additional steps. This patience and precision are key aspects of his successful boatbuilding methods.Step 4: Finishing Touches
Once the flange is fully dried, Sven removes the clamps carefully, ensuring no damage occurs during this process. He then moves on to attaching four more pieces onto these main frames, completing two pairs of flanges for the bulkhead hatches.The Final Touches
While two flanges form the primary support structure around the hatches, Sven mentions there are two additional pieces required at each end to ensure comprehensive protection. This attention to detail highlights his commitment to producing a durable and reliable design. “Sailing is about finding your path, whether it’s across an ocean or within yourself.” – Sven Yrvind In conclusion, making flanges around bulkhead hatches may seem complex at first glance, but by following Sven Yrvind’s meticulous process, enthusiasts can achieve professional-level results. Remember that the journey of boatbuilding is as rewarding as reaching your destination; it tests one’s patience and dedication. For those seeking to embark on this adventure or simply gain more insight into marine craftsmanship, Sven’s wisdom is invaluable.Sven Yrvind, a renowned yacht designer and sailor, shares valuable insights on creating flanges around bulkhead hatches for canvas protection in this enlightening video. By following his expert guidance, boat enthusiasts can ensure their living areas remain secure while allowing unhindered access through the hatches.Step 1: Starting with the Flange
Sven begins by explaining that working on flanges vertically and horizontally is significantly easier than doing so in a flat position. To simplify the process further, he divides the task into two or three steps as suggested by fellow expert “for for.” This approach not only makes it more manageable but also allows for greater precision in crafting each component.Step 2: Applying Glue and Securing
Sven proceeds to apply glue along one edge of the flange, ensuring a secure bond when clamped into place. He emphasizes that this stage is crucial for maintaining the structural integrity of the flange, which in turn safeguards the living area beneath the canvas when hatches are open.Step 3: Allowing Time to Dry
After securely attaching the first portion of the flange, Sven allows ample time for it to dry before moving forward with additional steps. This patience and precision are key aspects of his successful boatbuilding methods.Step 4: Finishing Touches
Once the flange is fully dried, Sven removes the clamps carefully, ensuring no damage occurs during this process. He then moves on to attaching four more pieces onto these main frames, completing two pairs of flanges for the bulkhead hatches.The Final Touches
While two flanges form the primary support structure around the hatches, Sven mentions there are two additional pieces required at each end to ensure comprehensive protection. This attention to detail highlights his commitment to producing a durable and reliable design. “Sailing is about finding your path, whether it’s across an ocean or within yourself.” – Sven Yrvind In conclusion, making flanges around bulkhead hatches may seem complex at first glance, but by following Sven Yrvind’s meticulous process, enthusiasts can achieve professional-level results. Remember that the journey of boatbuilding is as rewarding as reaching your destination; it tests one’s patience and dedication. For those seeking to embark on this adventure or simply gain more insight into marine craftsmanship, Sven’s wisdom is invaluable.Making Flanges Around Bulkhead Hatches for Canvas
Sven Yrvind, a renowned yacht designer and sailor, shares valuable insights on creating flanges around bulkhead hatches for canvas protection in this enlightening video. By following his expert guidance, boat enthusiasts can ensure their living areas remain secure while allowing unhindered access through the hatches.Step 1: Starting with the Flange
Sven begins by explaining that working on flanges vertically and horizontally is significantly easier than doing so in a flat position. To simplify the process further, he divides the task into two or three steps as suggested by fellow expert “for for.” This approach not only makes it more manageable but also allows for greater precision in crafting each component.Step 2: Applying Glue and Securing
Sven proceeds to apply glue along one edge of the flange, ensuring a secure bond when clamped into place. He emphasizes that this stage is crucial for maintaining the structural integrity of the flange, which in turn safeguards the living area beneath the canvas when hatches are open.Step 3: Allowing Time to Dry
After securely attaching the first portion of the flange, Sven allows ample time for it to dry before moving forward with additional steps. This patience and precision are key aspects of his successful boatbuilding methods.Step 4: Finishing Touches
Once the flange is fully dried, Sven removes the clamps carefully, ensuring no damage occurs during this process. He then moves on to attaching four more pieces onto these main frames, completing two pairs of flanges for the bulkhead hatches.The Final Touches
While two flanges form the primary support structure around the hatches, Sven mentions there are two additional pieces required at each end to ensure comprehensive protection. This attention to detail highlights his commitment to producing a durable and reliable design. “Sailing is about finding your path, whether it’s across an ocean or within yourself.” – Sven Yrvind In conclusion, making flanges around bulkhead hatches may seem complex at first glance, but by following Sven Yrvind’s meticulous process, enthusiasts can achieve professional-level results. Remember that the journey of boatbuilding is as rewarding as reaching your destination; it tests one’s patience and dedication. For those seeking to embark on this adventure or simply gain more insight into marine craftsmanship, Sven’s wisdom is invaluable.Sven begins by explaining that working on flanges vertically and horizontally is significantly easier than doing so in a flat position. To simplify the process further, he divides the task into two or three steps as suggested by fellow expert “for for.” This approach not only makes it more manageable but also allows for greater precision in crafting each component.Step 2: Applying Glue and Securing
Sven proceeds to apply glue along one edge of the flange, ensuring a secure bond when clamped into place. He emphasizes that this stage is crucial for maintaining the structural integrity of the flange, which in turn safeguards the living area beneath the canvas when hatches are open.Step 3: Allowing Time to Dry
After securely attaching the first portion of the flange, Sven allows ample time for it to dry before moving forward with additional steps. This patience and precision are key aspects of his successful boatbuilding methods.Step 4: Finishing Touches
Once the flange is fully dried, Sven removes the clamps carefully, ensuring no damage occurs during this process. He then moves on to attaching four more pieces onto these main frames, completing two pairs of flanges for the bulkhead hatches.The Final Touches
While two flanges form the primary support structure around the hatches, Sven mentions there are two additional pieces required at each end to ensure comprehensive protection. This attention to detail highlights his commitment to producing a durable and reliable design. “Sailing is about finding your path, whether it’s across an ocean or within yourself.” – Sven Yrvind In conclusion, making flanges around bulkhead hatches may seem complex at first glance, but by following Sven Yrvind’s meticulous process, enthusiasts can achieve professional-level results. Remember that the journey of boatbuilding is as rewarding as reaching your destination; it tests one’s patience and dedication. For those seeking to embark on this adventure or simply gain more insight into marine craftsmanship, Sven’s wisdom is invaluable.Once the flange is fully dried, Sven removes the clamps carefully, ensuring no damage occurs during this process. He then moves on to attaching four more pieces onto these main frames, completing two pairs of flanges for the bulkhead hatches.The Final Touches
While two flanges form the primary support structure around the hatches, Sven mentions there are two additional pieces required at each end to ensure comprehensive protection. This attention to detail highlights his commitment to producing a durable and reliable design. “Sailing is about finding your path, whether it’s across an ocean or within yourself.” – Sven Yrvind In conclusion, making flanges around bulkhead hatches may seem complex at first glance, but by following Sven Yrvind’s meticulous process, enthusiasts can achieve professional-level results. Remember that the journey of boatbuilding is as rewarding as reaching your destination; it tests one’s patience and dedication. For those seeking to embark on this adventure or simply gain more insight into marine craftsmanship, Sven’s wisdom is invaluable.Sven proceeds to apply glue along one edge of the flange, ensuring a secure bond when clamped into place. He emphasizes that this stage is crucial for maintaining the structural integrity of the flange, which in turn safeguards the living area beneath the canvas when hatches are open.Step 3: Allowing Time to Dry
After securely attaching the first portion of the flange, Sven allows ample time for it to dry before moving forward with additional steps. This patience and precision are key aspects of his successful boatbuilding methods.Step 4: Finishing Touches
Once the flange is fully dried, Sven removes the clamps carefully, ensuring no damage occurs during this process. He then moves on to attaching four more pieces onto these main frames, completing two pairs of flanges for the bulkhead hatches.The Final Touches
While two flanges form the primary support structure around the hatches, Sven mentions there are two additional pieces required at each end to ensure comprehensive protection. This attention to detail highlights his commitment to producing a durable and reliable design. “Sailing is about finding your path, whether it’s across an ocean or within yourself.” – Sven Yrvind In conclusion, making flanges around bulkhead hatches may seem complex at first glance, but by following Sven Yrvind’s meticulous process, enthusiasts can achieve professional-level results. Remember that the journey of boatbuilding is as rewarding as reaching your destination; it tests one’s patience and dedication. For those seeking to embark on this adventure or simply gain more insight into marine craftsmanship, Sven’s wisdom is invaluable.Sven begins by explaining that working on flanges vertically and horizontally is significantly easier than doing so in a flat position. To simplify the process further, he divides the task into two or three steps as suggested by fellow expert “for for.” This approach not only makes it more manageable but also allows for greater precision in crafting each component.Step 2: Applying Glue and Securing
Sven proceeds to apply glue along one edge of the flange, ensuring a secure bond when clamped into place. He emphasizes that this stage is crucial for maintaining the structural integrity of the flange, which in turn safeguards the living area beneath the canvas when hatches are open.Step 3: Allowing Time to Dry
After securely attaching the first portion of the flange, Sven allows ample time for it to dry before moving forward with additional steps. This patience and precision are key aspects of his successful boatbuilding methods.Step 4: Finishing Touches
Once the flange is fully dried, Sven removes the clamps carefully, ensuring no damage occurs during this process. He then moves on to attaching four more pieces onto these main frames, completing two pairs of flanges for the bulkhead hatches.The Final Touches
While two flanges form the primary support structure around the hatches, Sven mentions there are two additional pieces required at each end to ensure comprehensive protection. This attention to detail highlights his commitment to producing a durable and reliable design. “Sailing is about finding your path, whether it’s across an ocean or within yourself.” – Sven Yrvind In conclusion, making flanges around bulkhead hatches may seem complex at first glance, but by following Sven Yrvind’s meticulous process, enthusiasts can achieve professional-level results. Remember that the journey of boatbuilding is as rewarding as reaching your destination; it tests one’s patience and dedication. For those seeking to embark on this adventure or simply gain more insight into marine craftsmanship, Sven’s wisdom is invaluable.Sven Yrvind, a renowned yacht designer and sailor, shares valuable insights on creating flanges around bulkhead hatches for canvas protection in this enlightening video. By following his expert guidance, boat enthusiasts can ensure their living areas remain secure while allowing unhindered access through the hatches.Step 1: Starting with the Flange
Sven begins by explaining that working on flanges vertically and horizontally is significantly easier than doing so in a flat position. To simplify the process further, he divides the task into two or three steps as suggested by fellow expert “for for.” This approach not only makes it more manageable but also allows for greater precision in crafting each component.Step 2: Applying Glue and Securing
Sven proceeds to apply glue along one edge of the flange, ensuring a secure bond when clamped into place. He emphasizes that this stage is crucial for maintaining the structural integrity of the flange, which in turn safeguards the living area beneath the canvas when hatches are open.Step 3: Allowing Time to Dry
After securely attaching the first portion of the flange, Sven allows ample time for it to dry before moving forward with additional steps. This patience and precision are key aspects of his successful boatbuilding methods.Step 4: Finishing Touches
Once the flange is fully dried, Sven removes the clamps carefully, ensuring no damage occurs during this process. He then moves on to attaching four more pieces onto these main frames, completing two pairs of flanges for the bulkhead hatches.The Final Touches
While two flanges form the primary support structure around the hatches, Sven mentions there are two additional pieces required at each end to ensure comprehensive protection. This attention to detail highlights his commitment to producing a durable and reliable design. “Sailing is about finding your path, whether it’s across an ocean or within yourself.” – Sven Yrvind In conclusion, making flanges around bulkhead hatches may seem complex at first glance, but by following Sven Yrvind’s meticulous process, enthusiasts can achieve professional-level results. Remember that the journey of boatbuilding is as rewarding as reaching your destination; it tests one’s patience and dedication. For those seeking to embark on this adventure or simply gain more insight into marine craftsmanship, Sven’s wisdom is invaluable.Making Flanges Around Bulkhead Hatches for Canvas
Sven Yrvind, a renowned yacht designer and sailor, shares valuable insights on creating flanges around bulkhead hatches for canvas protection in this enlightening video. By following his expert guidance, boat enthusiasts can ensure their living areas remain secure while allowing unhindered access through the hatches.Step 1: Starting with the Flange
Sven begins by explaining that working on flanges vertically and horizontally is significantly easier than doing so in a flat position. To simplify the process further, he divides the task into two or three steps as suggested by fellow expert “for for.” This approach not only makes it more manageable but also allows for greater precision in crafting each component.Step 2: Applying Glue and Securing
Sven proceeds to apply glue along one edge of the flange, ensuring a secure bond when clamped into place. He emphasizes that this stage is crucial for maintaining the structural integrity of the flange, which in turn safeguards the living area beneath the canvas when hatches are open.Step 3: Allowing Time to Dry
After securely attaching the first portion of the flange, Sven allows ample time for it to dry before moving forward with additional steps. This patience and precision are key aspects of his successful boatbuilding methods.Step 4: Finishing Touches
Once the flange is fully dried, Sven removes the clamps carefully, ensuring no damage occurs during this process. He then moves on to attaching four more pieces onto these main frames, completing two pairs of flanges for the bulkhead hatches.The Final Touches
While two flanges form the primary support structure around the hatches, Sven mentions there are two additional pieces required at each end to ensure comprehensive protection. This attention to detail highlights his commitment to producing a durable and reliable design. “Sailing is about finding your path, whether it’s across an ocean or within yourself.” – Sven Yrvind In conclusion, making flanges around bulkhead hatches may seem complex at first glance, but by following Sven Yrvind’s meticulous process, enthusiasts can achieve professional-level results. Remember that the journey of boatbuilding is as rewarding as reaching your destination; it tests one’s patience and dedication. For those seeking to embark on this adventure or simply gain more insight into marine craftsmanship, Sven’s wisdom is invaluable.After securely attaching the first portion of the flange, Sven allows ample time for it to dry before moving forward with additional steps. This patience and precision are key aspects of his successful boatbuilding methods.Step 4: Finishing Touches
Once the flange is fully dried, Sven removes the clamps carefully, ensuring no damage occurs during this process. He then moves on to attaching four more pieces onto these main frames, completing two pairs of flanges for the bulkhead hatches.The Final Touches
While two flanges form the primary support structure around the hatches, Sven mentions there are two additional pieces required at each end to ensure comprehensive protection. This attention to detail highlights his commitment to producing a durable and reliable design. “Sailing is about finding your path, whether it’s across an ocean or within yourself.” – Sven Yrvind In conclusion, making flanges around bulkhead hatches may seem complex at first glance, but by following Sven Yrvind’s meticulous process, enthusiasts can achieve professional-level results. Remember that the journey of boatbuilding is as rewarding as reaching your destination; it tests one’s patience and dedication. For those seeking to embark on this adventure or simply gain more insight into marine craftsmanship, Sven’s wisdom is invaluable.Sven proceeds to apply glue along one edge of the flange, ensuring a secure bond when clamped into place. He emphasizes that this stage is crucial for maintaining the structural integrity of the flange, which in turn safeguards the living area beneath the canvas when hatches are open.Step 3: Allowing Time to Dry
After securely attaching the first portion of the flange, Sven allows ample time for it to dry before moving forward with additional steps. This patience and precision are key aspects of his successful boatbuilding methods.Step 4: Finishing Touches
Once the flange is fully dried, Sven removes the clamps carefully, ensuring no damage occurs during this process. He then moves on to attaching four more pieces onto these main frames, completing two pairs of flanges for the bulkhead hatches.The Final Touches
While two flanges form the primary support structure around the hatches, Sven mentions there are two additional pieces required at each end to ensure comprehensive protection. This attention to detail highlights his commitment to producing a durable and reliable design. “Sailing is about finding your path, whether it’s across an ocean or within yourself.” – Sven Yrvind In conclusion, making flanges around bulkhead hatches may seem complex at first glance, but by following Sven Yrvind’s meticulous process, enthusiasts can achieve professional-level results. Remember that the journey of boatbuilding is as rewarding as reaching your destination; it tests one’s patience and dedication. For those seeking to embark on this adventure or simply gain more insight into marine craftsmanship, Sven’s wisdom is invaluable.Sven begins by explaining that working on flanges vertically and horizontally is significantly easier than doing so in a flat position. To simplify the process further, he divides the task into two or three steps as suggested by fellow expert “for for.” This approach not only makes it more manageable but also allows for greater precision in crafting each component.Step 2: Applying Glue and Securing
Sven proceeds to apply glue along one edge of the flange, ensuring a secure bond when clamped into place. He emphasizes that this stage is crucial for maintaining the structural integrity of the flange, which in turn safeguards the living area beneath the canvas when hatches are open.Step 3: Allowing Time to Dry
After securely attaching the first portion of the flange, Sven allows ample time for it to dry before moving forward with additional steps. This patience and precision are key aspects of his successful boatbuilding methods.Step 4: Finishing Touches
Once the flange is fully dried, Sven removes the clamps carefully, ensuring no damage occurs during this process. He then moves on to attaching four more pieces onto these main frames, completing two pairs of flanges for the bulkhead hatches.The Final Touches
While two flanges form the primary support structure around the hatches, Sven mentions there are two additional pieces required at each end to ensure comprehensive protection. This attention to detail highlights his commitment to producing a durable and reliable design. “Sailing is about finding your path, whether it’s across an ocean or within yourself.” – Sven Yrvind In conclusion, making flanges around bulkhead hatches may seem complex at first glance, but by following Sven Yrvind’s meticulous process, enthusiasts can achieve professional-level results. Remember that the journey of boatbuilding is as rewarding as reaching your destination; it tests one’s patience and dedication. For those seeking to embark on this adventure or simply gain more insight into marine craftsmanship, Sven’s wisdom is invaluable.Sven Yrvind, a renowned yacht designer and sailor, shares valuable insights on creating flanges around bulkhead hatches for canvas protection in this enlightening video. By following his expert guidance, boat enthusiasts can ensure their living areas remain secure while allowing unhindered access through the hatches.Step 1: Starting with the Flange
Sven begins by explaining that working on flanges vertically and horizontally is significantly easier than doing so in a flat position. To simplify the process further, he divides the task into two or three steps as suggested by fellow expert “for for.” This approach not only makes it more manageable but also allows for greater precision in crafting each component.Step 2: Applying Glue and Securing
Sven proceeds to apply glue along one edge of the flange, ensuring a secure bond when clamped into place. He emphasizes that this stage is crucial for maintaining the structural integrity of the flange, which in turn safeguards the living area beneath the canvas when hatches are open.Step 3: Allowing Time to Dry
After securely attaching the first portion of the flange, Sven allows ample time for it to dry before moving forward with additional steps. This patience and precision are key aspects of his successful boatbuilding methods.Step 4: Finishing Touches
Once the flange is fully dried, Sven removes the clamps carefully, ensuring no damage occurs during this process. He then moves on to attaching four more pieces onto these main frames, completing two pairs of flanges for the bulkhead hatches.The Final Touches
While two flanges form the primary support structure around the hatches, Sven mentions there are two additional pieces required at each end to ensure comprehensive protection. This attention to detail highlights his commitment to producing a durable and reliable design. “Sailing is about finding your path, whether it’s across an ocean or within yourself.” – Sven Yrvind In conclusion, making flanges around bulkhead hatches may seem complex at first glance, but by following Sven Yrvind’s meticulous process, enthusiasts can achieve professional-level results. Remember that the journey of boatbuilding is as rewarding as reaching your destination; it tests one’s patience and dedication. For those seeking to embark on this adventure or simply gain more insight into marine craftsmanship, Sven’s wisdom is invaluable.Making Flanges Around Bulkhead Hatches for Canvas
Sven Yrvind, a renowned yacht designer and sailor, shares valuable insights on creating flanges around bulkhead hatches for canvas protection in this enlightening video. By following his expert guidance, boat enthusiasts can ensure their living areas remain secure while allowing unhindered access through the hatches.Step 1: Starting with the Flange
Sven begins by explaining that working on flanges vertically and horizontally is significantly easier than doing so in a flat position. To simplify the process further, he divides the task into two or three steps as suggested by fellow expert “for for.” This approach not only makes it more manageable but also allows for greater precision in crafting each component.Step 2: Applying Glue and Securing
Sven proceeds to apply glue along one edge of the flange, ensuring a secure bond when clamped into place. He emphasizes that this stage is crucial for maintaining the structural integrity of the flange, which in turn safeguards the living area beneath the canvas when hatches are open.Step 3: Allowing Time to Dry
After securely attaching the first portion of the flange, Sven allows ample time for it to dry before moving forward with additional steps. This patience and precision are key aspects of his successful boatbuilding methods.Step 4: Finishing Touches
Once the flange is fully dried, Sven removes the clamps carefully, ensuring no damage occurs during this process. He then moves on to attaching four more pieces onto these main frames, completing two pairs of flanges for the bulkhead hatches.The Final Touches
While two flanges form the primary support structure around the hatches, Sven mentions there are two additional pieces required at each end to ensure comprehensive protection. This attention to detail highlights his commitment to producing a durable and reliable design. “Sailing is about finding your path, whether it’s across an ocean or within yourself.” – Sven Yrvind In conclusion, making flanges around bulkhead hatches may seem complex at first glance, but by following Sven Yrvind’s meticulous process, enthusiasts can achieve professional-level results. Remember that the journey of boatbuilding is as rewarding as reaching your destination; it tests one’s patience and dedication. For those seeking to embark on this adventure or simply gain more insight into marine craftsmanship, Sven’s wisdom is invaluable.Once the flange is fully dried, Sven removes the clamps carefully, ensuring no damage occurs during this process. He then moves on to attaching four more pieces onto these main frames, completing two pairs of flanges for the bulkhead hatches.The Final Touches
While two flanges form the primary support structure around the hatches, Sven mentions there are two additional pieces required at each end to ensure comprehensive protection. This attention to detail highlights his commitment to producing a durable and reliable design. “Sailing is about finding your path, whether it’s across an ocean or within yourself.” – Sven Yrvind In conclusion, making flanges around bulkhead hatches may seem complex at first glance, but by following Sven Yrvind’s meticulous process, enthusiasts can achieve professional-level results. Remember that the journey of boatbuilding is as rewarding as reaching your destination; it tests one’s patience and dedication. For those seeking to embark on this adventure or simply gain more insight into marine craftsmanship, Sven’s wisdom is invaluable.After securely attaching the first portion of the flange, Sven allows ample time for it to dry before moving forward with additional steps. This patience and precision are key aspects of his successful boatbuilding methods.Step 4: Finishing Touches
Once the flange is fully dried, Sven removes the clamps carefully, ensuring no damage occurs during this process. He then moves on to attaching four more pieces onto these main frames, completing two pairs of flanges for the bulkhead hatches.The Final Touches
While two flanges form the primary support structure around the hatches, Sven mentions there are two additional pieces required at each end to ensure comprehensive protection. This attention to detail highlights his commitment to producing a durable and reliable design. “Sailing is about finding your path, whether it’s across an ocean or within yourself.” – Sven Yrvind In conclusion, making flanges around bulkhead hatches may seem complex at first glance, but by following Sven Yrvind’s meticulous process, enthusiasts can achieve professional-level results. Remember that the journey of boatbuilding is as rewarding as reaching your destination; it tests one’s patience and dedication. For those seeking to embark on this adventure or simply gain more insight into marine craftsmanship, Sven’s wisdom is invaluable.Sven proceeds to apply glue along one edge of the flange, ensuring a secure bond when clamped into place. He emphasizes that this stage is crucial for maintaining the structural integrity of the flange, which in turn safeguards the living area beneath the canvas when hatches are open.Step 3: Allowing Time to Dry
After securely attaching the first portion of the flange, Sven allows ample time for it to dry before moving forward with additional steps. This patience and precision are key aspects of his successful boatbuilding methods.Step 4: Finishing Touches
Once the flange is fully dried, Sven removes the clamps carefully, ensuring no damage occurs during this process. He then moves on to attaching four more pieces onto these main frames, completing two pairs of flanges for the bulkhead hatches.The Final Touches
While two flanges form the primary support structure around the hatches, Sven mentions there are two additional pieces required at each end to ensure comprehensive protection. This attention to detail highlights his commitment to producing a durable and reliable design. “Sailing is about finding your path, whether it’s across an ocean or within yourself.” – Sven Yrvind In conclusion, making flanges around bulkhead hatches may seem complex at first glance, but by following Sven Yrvind’s meticulous process, enthusiasts can achieve professional-level results. Remember that the journey of boatbuilding is as rewarding as reaching your destination; it tests one’s patience and dedication. For those seeking to embark on this adventure or simply gain more insight into marine craftsmanship, Sven’s wisdom is invaluable.Sven begins by explaining that working on flanges vertically and horizontally is significantly easier than doing so in a flat position. To simplify the process further, he divides the task into two or three steps as suggested by fellow expert “for for.” This approach not only makes it more manageable but also allows for greater precision in crafting each component.Step 2: Applying Glue and Securing
Sven proceeds to apply glue along one edge of the flange, ensuring a secure bond when clamped into place. He emphasizes that this stage is crucial for maintaining the structural integrity of the flange, which in turn safeguards the living area beneath the canvas when hatches are open.Step 3: Allowing Time to Dry
After securely attaching the first portion of the flange, Sven allows ample time for it to dry before moving forward with additional steps. This patience and precision are key aspects of his successful boatbuilding methods.Step 4: Finishing Touches
Once the flange is fully dried, Sven removes the clamps carefully, ensuring no damage occurs during this process. He then moves on to attaching four more pieces onto these main frames, completing two pairs of flanges for the bulkhead hatches.The Final Touches
While two flanges form the primary support structure around the hatches, Sven mentions there are two additional pieces required at each end to ensure comprehensive protection. This attention to detail highlights his commitment to producing a durable and reliable design. “Sailing is about finding your path, whether it’s across an ocean or within yourself.” – Sven Yrvind In conclusion, making flanges around bulkhead hatches may seem complex at first glance, but by following Sven Yrvind’s meticulous process, enthusiasts can achieve professional-level results. Remember that the journey of boatbuilding is as rewarding as reaching your destination; it tests one’s patience and dedication. For those seeking to embark on this adventure or simply gain more insight into marine craftsmanship, Sven’s wisdom is invaluable.Sven Yrvind, a renowned yacht designer and sailor, shares valuable insights on creating flanges around bulkhead hatches for canvas protection in this enlightening video. By following his expert guidance, boat enthusiasts can ensure their living areas remain secure while allowing unhindered access through the hatches.Step 1: Starting with the Flange
Sven begins by explaining that working on flanges vertically and horizontally is significantly easier than doing so in a flat position. To simplify the process further, he divides the task into two or three steps as suggested by fellow expert “for for.” This approach not only makes it more manageable but also allows for greater precision in crafting each component.Step 2: Applying Glue and Securing
Sven proceeds to apply glue along one edge of the flange, ensuring a secure bond when clamped into place. He emphasizes that this stage is crucial for maintaining the structural integrity of the flange, which in turn safeguards the living area beneath the canvas when hatches are open.Step 3: Allowing Time to Dry
After securely attaching the first portion of the flange, Sven allows ample time for it to dry before moving forward with additional steps. This patience and precision are key aspects of his successful boatbuilding methods.Step 4: Finishing Touches
Once the flange is fully dried, Sven removes the clamps carefully, ensuring no damage occurs during this process. He then moves on to attaching four more pieces onto these main frames, completing two pairs of flanges for the bulkhead hatches.The Final Touches
While two flanges form the primary support structure around the hatches, Sven mentions there are two additional pieces required at each end to ensure comprehensive protection. This attention to detail highlights his commitment to producing a durable and reliable design. “Sailing is about finding your path, whether it’s across an ocean or within yourself.” – Sven Yrvind In conclusion, making flanges around bulkhead hatches may seem complex at first glance, but by following Sven Yrvind’s meticulous process, enthusiasts can achieve professional-level results. Remember that the journey of boatbuilding is as rewarding as reaching your destination; it tests one’s patience and dedication. For those seeking to embark on this adventure or simply gain more insight into marine craftsmanship, Sven’s wisdom is invaluable.Making Flanges Around Bulkhead Hatches for Canvas
Sven Yrvind, a renowned yacht designer and sailor, shares valuable insights on creating flanges around bulkhead hatches for canvas protection in this enlightening video. By following his expert guidance, boat enthusiasts can ensure their living areas remain secure while allowing unhindered access through the hatches.Step 1: Starting with the Flange
Sven begins by explaining that working on flanges vertically and horizontally is significantly easier than doing so in a flat position. To simplify the process further, he divides the task into two or three steps as suggested by fellow expert “for for.” This approach not only makes it more manageable but also allows for greater precision in crafting each component.Step 2: Applying Glue and Securing
Sven proceeds to apply glue along one edge of the flange, ensuring a secure bond when clamped into place. He emphasizes that this stage is crucial for maintaining the structural integrity of the flange, which in turn safeguards the living area beneath the canvas when hatches are open.Step 3: Allowing Time to Dry
After securely attaching the first portion of the flange, Sven allows ample time for it to dry before moving forward with additional steps. This patience and precision are key aspects of his successful boatbuilding methods.Step 4: Finishing Touches
Once the flange is fully dried, Sven removes the clamps carefully, ensuring no damage occurs during this process. He then moves on to attaching four more pieces onto these main frames, completing two pairs of flanges for the bulkhead hatches.The Final Touches
While two flanges form the primary support structure around the hatches, Sven mentions there are two additional pieces required at each end to ensure comprehensive protection. This attention to detail highlights his commitment to producing a durable and reliable design. “Sailing is about finding your path, whether it’s across an ocean or within yourself.” – Sven Yrvind In conclusion, making flanges around bulkhead hatches may seem complex at first glance, but by following Sven Yrvind’s meticulous process, enthusiasts can achieve professional-level results. Remember that the journey of boatbuilding is as rewarding as reaching your destination; it tests one’s patience and dedication. For those seeking to embark on this adventure or simply gain more insight into marine craftsmanship, Sven’s wisdom is invaluable.Sven Yrvind, a renowned yacht designer and sailor, shares valuable insights on creating flanges around bulkhead hatches for canvas protection in this enlightening video. By following his expert guidance, boat enthusiasts can ensure their living areas remain secure while allowing unhindered access through the hatches.Step 1: Starting with the Flange
Sven begins by explaining that working on flanges vertically and horizontally is significantly easier than doing so in a flat position. To simplify the process further, he divides the task into two or three steps as suggested by fellow expert “for for.” This approach not only makes it more manageable but also allows for greater precision in crafting each component.Step 2: Applying Glue and Securing
Sven proceeds to apply glue along one edge of the flange, ensuring a secure bond when clamped into place. He emphasizes that this stage is crucial for maintaining the structural integrity of the flange, which in turn safeguards the living area beneath the canvas when hatches are open.Step 3: Allowing Time to Dry
After securely attaching the first portion of the flange, Sven allows ample time for it to dry before moving forward with additional steps. This patience and precision are key aspects of his successful boatbuilding methods.Step 4: Finishing Touches
Once the flange is fully dried, Sven removes the clamps carefully, ensuring no damage occurs during this process. He then moves on to attaching four more pieces onto these main frames, completing two pairs of flanges for the bulkhead hatches.The Final Touches
While two flanges form the primary support structure around the hatches, Sven mentions there are two additional pieces required at each end to ensure comprehensive protection. This attention to detail highlights his commitment to producing a durable and reliable design. “Sailing is about finding your path, whether it’s across an ocean or within yourself.” – Sven Yrvind In conclusion, making flanges around bulkhead hatches may seem complex at first glance, but by following Sven Yrvind’s meticulous process, enthusiasts can achieve professional-level results. Remember that the journey of boatbuilding is as rewarding as reaching your destination; it tests one’s patience and dedication. For those seeking to embark on this adventure or simply gain more insight into marine craftsmanship, Sven’s wisdom is invaluable.Once the flange is fully dried, Sven removes the clamps carefully, ensuring no damage occurs during this process. He then moves on to attaching four more pieces onto these main frames, completing two pairs of flanges for the bulkhead hatches.The Final Touches
While two flanges form the primary support structure around the hatches, Sven mentions there are two additional pieces required at each end to ensure comprehensive protection. This attention to detail highlights his commitment to producing a durable and reliable design. “Sailing is about finding your path, whether it’s across an ocean or within yourself.” – Sven Yrvind In conclusion, making flanges around bulkhead hatches may seem complex at first glance, but by following Sven Yrvind’s meticulous process, enthusiasts can achieve professional-level results. Remember that the journey of boatbuilding is as rewarding as reaching your destination; it tests one’s patience and dedication. For those seeking to embark on this adventure or simply gain more insight into marine craftsmanship, Sven’s wisdom is invaluable.Sven proceeds to apply glue along one edge of the flange, ensuring a secure bond when clamped into place. He emphasizes that this stage is crucial for maintaining the structural integrity of the flange, which in turn safeguards the living area beneath the canvas when hatches are open.Step 3: Allowing Time to Dry
After securely attaching the first portion of the flange, Sven allows ample time for it to dry before moving forward with additional steps. This patience and precision are key aspects of his successful boatbuilding methods.Step 4: Finishing Touches
Once the flange is fully dried, Sven removes the clamps carefully, ensuring no damage occurs during this process. He then moves on to attaching four more pieces onto these main frames, completing two pairs of flanges for the bulkhead hatches.The Final Touches
While two flanges form the primary support structure around the hatches, Sven mentions there are two additional pieces required at each end to ensure comprehensive protection. This attention to detail highlights his commitment to producing a durable and reliable design. “Sailing is about finding your path, whether it’s across an ocean or within yourself.” – Sven Yrvind In conclusion, making flanges around bulkhead hatches may seem complex at first glance, but by following Sven Yrvind’s meticulous process, enthusiasts can achieve professional-level results. Remember that the journey of boatbuilding is as rewarding as reaching your destination; it tests one’s patience and dedication. For those seeking to embark on this adventure or simply gain more insight into marine craftsmanship, Sven’s wisdom is invaluable.Sven begins by explaining that working on flanges vertically and horizontally is significantly easier than doing so in a flat position. To simplify the process further, he divides the task into two or three steps as suggested by fellow expert “for for.” This approach not only makes it more manageable but also allows for greater precision in crafting each component.Step 2: Applying Glue and Securing
Sven proceeds to apply glue along one edge of the flange, ensuring a secure bond when clamped into place. He emphasizes that this stage is crucial for maintaining the structural integrity of the flange, which in turn safeguards the living area beneath the canvas when hatches are open.Step 3: Allowing Time to Dry
After securely attaching the first portion of the flange, Sven allows ample time for it to dry before moving forward with additional steps. This patience and precision are key aspects of his successful boatbuilding methods.Step 4: Finishing Touches
Once the flange is fully dried, Sven removes the clamps carefully, ensuring no damage occurs during this process. He then moves on to attaching four more pieces onto these main frames, completing two pairs of flanges for the bulkhead hatches.The Final Touches
While two flanges form the primary support structure around the hatches, Sven mentions there are two additional pieces required at each end to ensure comprehensive protection. This attention to detail highlights his commitment to producing a durable and reliable design. “Sailing is about finding your path, whether it’s across an ocean or within yourself.” – Sven Yrvind In conclusion, making flanges around bulkhead hatches may seem complex at first glance, but by following Sven Yrvind’s meticulous process, enthusiasts can achieve professional-level results. Remember that the journey of boatbuilding is as rewarding as reaching your destination; it tests one’s patience and dedication. For those seeking to embark on this adventure or simply gain more insight into marine craftsmanship, Sven’s wisdom is invaluable.Sven Yrvind, a renowned yacht designer and sailor, shares valuable insights on creating flanges around bulkhead hatches for canvas protection in this enlightening video. By following his expert guidance, boat enthusiasts can ensure their living areas remain secure while allowing unhindered access through the hatches.Step 1: Starting with the Flange
Sven begins by explaining that working on flanges vertically and horizontally is significantly easier than doing so in a flat position. To simplify the process further, he divides the task into two or three steps as suggested by fellow expert “for for.” This approach not only makes it more manageable but also allows for greater precision in crafting each component.Step 2: Applying Glue and Securing
Sven proceeds to apply glue along one edge of the flange, ensuring a secure bond when clamped into place. He emphasizes that this stage is crucial for maintaining the structural integrity of the flange, which in turn safeguards the living area beneath the canvas when hatches are open.Step 3: Allowing Time to Dry
After securely attaching the first portion of the flange, Sven allows ample time for it to dry before moving forward with additional steps. This patience and precision are key aspects of his successful boatbuilding methods.Step 4: Finishing Touches
Once the flange is fully dried, Sven removes the clamps carefully, ensuring no damage occurs during this process. He then moves on to attaching four more pieces onto these main frames, completing two pairs of flanges for the bulkhead hatches.The Final Touches
While two flanges form the primary support structure around the hatches, Sven mentions there are two additional pieces required at each end to ensure comprehensive protection. This attention to detail highlights his commitment to producing a durable and reliable design. “Sailing is about finding your path, whether it’s across an ocean or within yourself.” – Sven Yrvind In conclusion, making flanges around bulkhead hatches may seem complex at first glance, but by following Sven Yrvind’s meticulous process, enthusiasts can achieve professional-level results. Remember that the journey of boatbuilding is as rewarding as reaching your destination; it tests one’s patience and dedication. For those seeking to embark on this adventure or simply gain more insight into marine craftsmanship, Sven’s wisdom is invaluable.Making Flanges Around Bulkhead Hatches for Canvas
Sven Yrvind, a renowned yacht designer and sailor, shares valuable insights on creating flanges around bulkhead hatches for canvas protection in this enlightening video. By following his expert guidance, boat enthusiasts can ensure their living areas remain secure while allowing unhindered access through the hatches.Step 1: Starting with the Flange
Sven begins by explaining that working on flanges vertically and horizontally is significantly easier than doing so in a flat position. To simplify the process further, he divides the task into two or three steps as suggested by fellow expert “for for.” This approach not only makes it more manageable but also allows for greater precision in crafting each component.Step 2: Applying Glue and Securing
Sven proceeds to apply glue along one edge of the flange, ensuring a secure bond when clamped into place. He emphasizes that this stage is crucial for maintaining the structural integrity of the flange, which in turn safeguards the living area beneath the canvas when hatches are open.Step 3: Allowing Time to Dry
After securely attaching the first portion of the flange, Sven allows ample time for it to dry before moving forward with additional steps. This patience and precision are key aspects of his successful boatbuilding methods.Step 4: Finishing Touches
Once the flange is fully dried, Sven removes the clamps carefully, ensuring no damage occurs during this process. He then moves on to attaching four more pieces onto these main frames, completing two pairs of flanges for the bulkhead hatches.The Final Touches
While two flanges form the primary support structure around the hatches, Sven mentions there are two additional pieces required at each end to ensure comprehensive protection. This attention to detail highlights his commitment to producing a durable and reliable design. “Sailing is about finding your path, whether it’s across an ocean or within yourself.” – Sven Yrvind In conclusion, making flanges around bulkhead hatches may seem complex at first glance, but by following Sven Yrvind’s meticulous process, enthusiasts can achieve professional-level results. Remember that the journey of boatbuilding is as rewarding as reaching your destination; it tests one’s patience and dedication. For those seeking to embark on this adventure or simply gain more insight into marine craftsmanship, Sven’s wisdom is invaluable.After securely attaching the first portion of the flange, Sven allows ample time for it to dry before moving forward with additional steps. This patience and precision are key aspects of his successful boatbuilding methods.Step 4: Finishing Touches
Once the flange is fully dried, Sven removes the clamps carefully, ensuring no damage occurs during this process. He then moves on to attaching four more pieces onto these main frames, completing two pairs of flanges for the bulkhead hatches.The Final Touches
While two flanges form the primary support structure around the hatches, Sven mentions there are two additional pieces required at each end to ensure comprehensive protection. This attention to detail highlights his commitment to producing a durable and reliable design. “Sailing is about finding your path, whether it’s across an ocean or within yourself.” – Sven Yrvind In conclusion, making flanges around bulkhead hatches may seem complex at first glance, but by following Sven Yrvind’s meticulous process, enthusiasts can achieve professional-level results. Remember that the journey of boatbuilding is as rewarding as reaching your destination; it tests one’s patience and dedication. For those seeking to embark on this adventure or simply gain more insight into marine craftsmanship, Sven’s wisdom is invaluable.Sven proceeds to apply glue along one edge of the flange, ensuring a secure bond when clamped into place. He emphasizes that this stage is crucial for maintaining the structural integrity of the flange, which in turn safeguards the living area beneath the canvas when hatches are open.Step 3: Allowing Time to Dry
After securely attaching the first portion of the flange, Sven allows ample time for it to dry before moving forward with additional steps. This patience and precision are key aspects of his successful boatbuilding methods.Step 4: Finishing Touches
Once the flange is fully dried, Sven removes the clamps carefully, ensuring no damage occurs during this process. He then moves on to attaching four more pieces onto these main frames, completing two pairs of flanges for the bulkhead hatches.The Final Touches
While two flanges form the primary support structure around the hatches, Sven mentions there are two additional pieces required at each end to ensure comprehensive protection. This attention to detail highlights his commitment to producing a durable and reliable design. “Sailing is about finding your path, whether it’s across an ocean or within yourself.” – Sven Yrvind In conclusion, making flanges around bulkhead hatches may seem complex at first glance, but by following Sven Yrvind’s meticulous process, enthusiasts can achieve professional-level results. Remember that the journey of boatbuilding is as rewarding as reaching your destination; it tests one’s patience and dedication. For those seeking to embark on this adventure or simply gain more insight into marine craftsmanship, Sven’s wisdom is invaluable.Sven begins by explaining that working on flanges vertically and horizontally is significantly easier than doing so in a flat position. To simplify the process further, he divides the task into two or three steps as suggested by fellow expert “for for.” This approach not only makes it more manageable but also allows for greater precision in crafting each component.Step 2: Applying Glue and Securing
Sven proceeds to apply glue along one edge of the flange, ensuring a secure bond when clamped into place. He emphasizes that this stage is crucial for maintaining the structural integrity of the flange, which in turn safeguards the living area beneath the canvas when hatches are open.Step 3: Allowing Time to Dry
After securely attaching the first portion of the flange, Sven allows ample time for it to dry before moving forward with additional steps. This patience and precision are key aspects of his successful boatbuilding methods.Step 4: Finishing Touches
Once the flange is fully dried, Sven removes the clamps carefully, ensuring no damage occurs during this process. He then moves on to attaching four more pieces onto these main frames, completing two pairs of flanges for the bulkhead hatches.The Final Touches
While two flanges form the primary support structure around the hatches, Sven mentions there are two additional pieces required at each end to ensure comprehensive protection. This attention to detail highlights his commitment to producing a durable and reliable design. “Sailing is about finding your path, whether it’s across an ocean or within yourself.” – Sven Yrvind In conclusion, making flanges around bulkhead hatches may seem complex at first glance, but by following Sven Yrvind’s meticulous process, enthusiasts can achieve professional-level results. Remember that the journey of boatbuilding is as rewarding as reaching your destination; it tests one’s patience and dedication. For those seeking to embark on this adventure or simply gain more insight into marine craftsmanship, Sven’s wisdom is invaluable.Sven Yrvind, a renowned yacht designer and sailor, shares valuable insights on creating flanges around bulkhead hatches for canvas protection in this enlightening video. By following his expert guidance, boat enthusiasts can ensure their living areas remain secure while allowing unhindered access through the hatches.Step 1: Starting with the Flange
Sven begins by explaining that working on flanges vertically and horizontally is significantly easier than doing so in a flat position. To simplify the process further, he divides the task into two or three steps as suggested by fellow expert “for for.” This approach not only makes it more manageable but also allows for greater precision in crafting each component.Step 2: Applying Glue and Securing
Sven proceeds to apply glue along one edge of the flange, ensuring a secure bond when clamped into place. He emphasizes that this stage is crucial for maintaining the structural integrity of the flange, which in turn safeguards the living area beneath the canvas when hatches are open.Step 3: Allowing Time to Dry
After securely attaching the first portion of the flange, Sven allows ample time for it to dry before moving forward with additional steps. This patience and precision are key aspects of his successful boatbuilding methods.Step 4: Finishing Touches
Once the flange is fully dried, Sven removes the clamps carefully, ensuring no damage occurs during this process. He then moves on to attaching four more pieces onto these main frames, completing two pairs of flanges for the bulkhead hatches.The Final Touches
While two flanges form the primary support structure around the hatches, Sven mentions there are two additional pieces required at each end to ensure comprehensive protection. This attention to detail highlights his commitment to producing a durable and reliable design. “Sailing is about finding your path, whether it’s across an ocean or within yourself.” – Sven Yrvind In conclusion, making flanges around bulkhead hatches may seem complex at first glance, but by following Sven Yrvind’s meticulous process, enthusiasts can achieve professional-level results. Remember that the journey of boatbuilding is as rewarding as reaching your destination; it tests one’s patience and dedication. For those seeking to embark on this adventure or simply gain more insight into marine craftsmanship, Sven’s wisdom is invaluable.Making Flanges Around Bulkhead Hatches for Canvas
Sven Yrvind, a renowned yacht designer and sailor, shares valuable insights on creating flanges around bulkhead hatches for canvas protection in this enlightening video. By following his expert guidance, boat enthusiasts can ensure their living areas remain secure while allowing unhindered access through the hatches.Step 1: Starting with the Flange
Sven begins by explaining that working on flanges vertically and horizontally is significantly easier than doing so in a flat position. To simplify the process further, he divides the task into two or three steps as suggested by fellow expert “for for.” This approach not only makes it more manageable but also allows for greater precision in crafting each component.Step 2: Applying Glue and Securing
Sven proceeds to apply glue along one edge of the flange, ensuring a secure bond when clamped into place. He emphasizes that this stage is crucial for maintaining the structural integrity of the flange, which in turn safeguards the living area beneath the canvas when hatches are open.Step 3: Allowing Time to Dry
After securely attaching the first portion of the flange, Sven allows ample time for it to dry before moving forward with additional steps. This patience and precision are key aspects of his successful boatbuilding methods.Step 4: Finishing Touches
Once the flange is fully dried, Sven removes the clamps carefully, ensuring no damage occurs during this process. He then moves on to attaching four more pieces onto these main frames, completing two pairs of flanges for the bulkhead hatches.The Final Touches
While two flanges form the primary support structure around the hatches, Sven mentions there are two additional pieces required at each end to ensure comprehensive protection. This attention to detail highlights his commitment to producing a durable and reliable design. “Sailing is about finding your path, whether it’s across an ocean or within yourself.” – Sven Yrvind In conclusion, making flanges around bulkhead hatches may seem complex at first glance, but by following Sven Yrvind’s meticulous process, enthusiasts can achieve professional-level results. Remember that the journey of boatbuilding is as rewarding as reaching your destination; it tests one’s patience and dedication. For those seeking to embark on this adventure or simply gain more insight into marine craftsmanship, Sven’s wisdom is invaluable.Once the flange is fully dried, Sven removes the clamps carefully, ensuring no damage occurs during this process. He then moves on to attaching four more pieces onto these main frames, completing two pairs of flanges for the bulkhead hatches.The Final Touches
While two flanges form the primary support structure around the hatches, Sven mentions there are two additional pieces required at each end to ensure comprehensive protection. This attention to detail highlights his commitment to producing a durable and reliable design. “Sailing is about finding your path, whether it’s across an ocean or within yourself.” – Sven Yrvind In conclusion, making flanges around bulkhead hatches may seem complex at first glance, but by following Sven Yrvind’s meticulous process, enthusiasts can achieve professional-level results. Remember that the journey of boatbuilding is as rewarding as reaching your destination; it tests one’s patience and dedication. For those seeking to embark on this adventure or simply gain more insight into marine craftsmanship, Sven’s wisdom is invaluable.After securely attaching the first portion of the flange, Sven allows ample time for it to dry before moving forward with additional steps. This patience and precision are key aspects of his successful boatbuilding methods.Step 4: Finishing Touches
Once the flange is fully dried, Sven removes the clamps carefully, ensuring no damage occurs during this process. He then moves on to attaching four more pieces onto these main frames, completing two pairs of flanges for the bulkhead hatches.The Final Touches
While two flanges form the primary support structure around the hatches, Sven mentions there are two additional pieces required at each end to ensure comprehensive protection. This attention to detail highlights his commitment to producing a durable and reliable design. “Sailing is about finding your path, whether it’s across an ocean or within yourself.” – Sven Yrvind In conclusion, making flanges around bulkhead hatches may seem complex at first glance, but by following Sven Yrvind’s meticulous process, enthusiasts can achieve professional-level results. Remember that the journey of boatbuilding is as rewarding as reaching your destination; it tests one’s patience and dedication. For those seeking to embark on this adventure or simply gain more insight into marine craftsmanship, Sven’s wisdom is invaluable.Sven proceeds to apply glue along one edge of the flange, ensuring a secure bond when clamped into place. He emphasizes that this stage is crucial for maintaining the structural integrity of the flange, which in turn safeguards the living area beneath the canvas when hatches are open.Step 3: Allowing Time to Dry
After securely attaching the first portion of the flange, Sven allows ample time for it to dry before moving forward with additional steps. This patience and precision are key aspects of his successful boatbuilding methods.Step 4: Finishing Touches
Once the flange is fully dried, Sven removes the clamps carefully, ensuring no damage occurs during this process. He then moves on to attaching four more pieces onto these main frames, completing two pairs of flanges for the bulkhead hatches.The Final Touches
While two flanges form the primary support structure around the hatches, Sven mentions there are two additional pieces required at each end to ensure comprehensive protection. This attention to detail highlights his commitment to producing a durable and reliable design. “Sailing is about finding your path, whether it’s across an ocean or within yourself.” – Sven Yrvind In conclusion, making flanges around bulkhead hatches may seem complex at first glance, but by following Sven Yrvind’s meticulous process, enthusiasts can achieve professional-level results. Remember that the journey of boatbuilding is as rewarding as reaching your destination; it tests one’s patience and dedication. For those seeking to embark on this adventure or simply gain more insight into marine craftsmanship, Sven’s wisdom is invaluable.Sven begins by explaining that working on flanges vertically and horizontally is significantly easier than doing so in a flat position. To simplify the process further, he divides the task into two or three steps as suggested by fellow expert “for for.” This approach not only makes it more manageable but also allows for greater precision in crafting each component.Step 2: Applying Glue and Securing
Sven proceeds to apply glue along one edge of the flange, ensuring a secure bond when clamped into place. He emphasizes that this stage is crucial for maintaining the structural integrity of the flange, which in turn safeguards the living area beneath the canvas when hatches are open.Step 3: Allowing Time to Dry
After securely attaching the first portion of the flange, Sven allows ample time for it to dry before moving forward with additional steps. This patience and precision are key aspects of his successful boatbuilding methods.Step 4: Finishing Touches
Once the flange is fully dried, Sven removes the clamps carefully, ensuring no damage occurs during this process. He then moves on to attaching four more pieces onto these main frames, completing two pairs of flanges for the bulkhead hatches.The Final Touches
While two flanges form the primary support structure around the hatches, Sven mentions there are two additional pieces required at each end to ensure comprehensive protection. This attention to detail highlights his commitment to producing a durable and reliable design. “Sailing is about finding your path, whether it’s across an ocean or within yourself.” – Sven Yrvind In conclusion, making flanges around bulkhead hatches may seem complex at first glance, but by following Sven Yrvind’s meticulous process, enthusiasts can achieve professional-level results. Remember that the journey of boatbuilding is as rewarding as reaching your destination; it tests one’s patience and dedication. For those seeking to embark on this adventure or simply gain more insight into marine craftsmanship, Sven’s wisdom is invaluable.Sven Yrvind, a renowned yacht designer and sailor, shares valuable insights on creating flanges around bulkhead hatches for canvas protection in this enlightening video. By following his expert guidance, boat enthusiasts can ensure their living areas remain secure while allowing unhindered access through the hatches.Step 1: Starting with the Flange
Sven begins by explaining that working on flanges vertically and horizontally is significantly easier than doing so in a flat position. To simplify the process further, he divides the task into two or three steps as suggested by fellow expert “for for.” This approach not only makes it more manageable but also allows for greater precision in crafting each component.Step 2: Applying Glue and Securing
Sven proceeds to apply glue along one edge of the flange, ensuring a secure bond when clamped into place. He emphasizes that this stage is crucial for maintaining the structural integrity of the flange, which in turn safeguards the living area beneath the canvas when hatches are open.Step 3: Allowing Time to Dry
After securely attaching the first portion of the flange, Sven allows ample time for it to dry before moving forward with additional steps. This patience and precision are key aspects of his successful boatbuilding methods.Step 4: Finishing Touches
Once the flange is fully dried, Sven removes the clamps carefully, ensuring no damage occurs during this process. He then moves on to attaching four more pieces onto these main frames, completing two pairs of flanges for the bulkhead hatches.The Final Touches
While two flanges form the primary support structure around the hatches, Sven mentions there are two additional pieces required at each end to ensure comprehensive protection. This attention to detail highlights his commitment to producing a durable and reliable design. “Sailing is about finding your path, whether it’s across an ocean or within yourself.” – Sven Yrvind In conclusion, making flanges around bulkhead hatches may seem complex at first glance, but by following Sven Yrvind’s meticulous process, enthusiasts can achieve professional-level results. Remember that the journey of boatbuilding is as rewarding as reaching your destination; it tests one’s patience and dedication. For those seeking to embark on this adventure or simply gain more insight into marine craftsmanship, Sven’s wisdom is invaluable.Making Flanges Around Bulkhead Hatches for Canvas
Sven Yrvind, a renowned yacht designer and sailor, shares valuable insights on creating flanges around bulkhead hatches for canvas protection in this enlightening video. By following his expert guidance, boat enthusiasts can ensure their living areas remain secure while allowing unhindered access through the hatches.Step 1: Starting with the Flange
Sven begins by explaining that working on flanges vertically and horizontally is significantly easier than doing so in a flat position. To simplify the process further, he divides the task into two or three steps as suggested by fellow expert “for for.” This approach not only makes it more manageable but also allows for greater precision in crafting each component.Step 2: Applying Glue and Securing
Sven proceeds to apply glue along one edge of the flange, ensuring a secure bond when clamped into place. He emphasizes that this stage is crucial for maintaining the structural integrity of the flange, which in turn safeguards the living area beneath the canvas when hatches are open.Step 3: Allowing Time to Dry
After securely attaching the first portion of the flange, Sven allows ample time for it to dry before moving forward with additional steps. This patience and precision are key aspects of his successful boatbuilding methods.Step 4: Finishing Touches
Once the flange is fully dried, Sven removes the clamps carefully, ensuring no damage occurs during this process. He then moves on to attaching four more pieces onto these main frames, completing two pairs of flanges for the bulkhead hatches.The Final Touches
While two flanges form the primary support structure around the hatches, Sven mentions there are two additional pieces required at each end to ensure comprehensive protection. This attention to detail highlights his commitment to producing a durable and reliable design. “Sailing is about finding your path, whether it’s across an ocean or within yourself.” – Sven Yrvind In conclusion, making flanges around bulkhead hatches may seem complex at first glance, but by following Sven Yrvind’s meticulous process, enthusiasts can achieve professional-level results. Remember that the journey of boatbuilding is as rewarding as reaching your destination; it tests one’s patience and dedication. For those seeking to embark on this adventure or simply gain more insight into marine craftsmanship, Sven’s wisdom is invaluable.Making Flanges Around Bulkhead Hatches for Canvas
Sven Yrvind, a renowned yacht designer and sailor, shares valuable insights on creating flanges around bulkhead hatches for canvas protection in this enlightening video. By following his expert guidance, boat enthusiasts can ensure their living areas remain secure while allowing unhindered access through the hatches.Step 1: Starting with the Flange
Sven begins by explaining that working on flanges vertically and horizontally is significantly easier than doing so in a flat position. To simplify the process further, he divides the task into two or three steps as suggested by fellow expert “for for.” This approach not only makes it more manageable but also allows for greater precision in crafting each component.Step 2: Applying Glue and Securing
Sven proceeds to apply glue along one edge of the flange, ensuring a secure bond when clamped into place. He emphasizes that this stage is crucial for maintaining the structural integrity of the flange, which in turn safeguards the living area beneath the canvas when hatches are open.Step 3: Allowing Time to Dry
After securely attaching the first portion of the flange, Sven allows ample time for it to dry before moving forward with additional steps. This patience and precision are key aspects of his successful boatbuilding methods.Step 4: Finishing Touches
Once the flange is fully dried, Sven removes the clamps carefully, ensuring no damage occurs during this process. He then moves on to attaching four more pieces onto these main frames, completing two pairs of flanges for the bulkhead hatches.The Final Touches
While two flanges form the primary support structure around the hatches, Sven mentions there are two additional pieces required at each end to ensure comprehensive protection. This attention to detail highlights his commitment to producing a durable and reliable design. “Sailing is about finding your path, whether it’s across an ocean or within yourself.” – Sven Yrvind In conclusion, making flanges around bulkhead hatches may seem complex at first glance, but by following Sven Yrvind’s meticulous process, enthusiasts can achieve professional-level results. Remember that the journey of boatbuilding is as rewarding as reaching your destination; it tests one’s patience and dedication. For those seeking to embark on this adventure or simply gain more insight into marine craftsmanship, Sven’s wisdom is invaluable.Once the flange is fully dried, Sven removes the clamps carefully, ensuring no damage occurs during this process. He then moves on to attaching four more pieces onto these main frames, completing two pairs of flanges for the bulkhead hatches.The Final Touches
While two flanges form the primary support structure around the hatches, Sven mentions there are two additional pieces required at each end to ensure comprehensive protection. This attention to detail highlights his commitment to producing a durable and reliable design. “Sailing is about finding your path, whether it’s across an ocean or within yourself.” – Sven Yrvind In conclusion, making flanges around bulkhead hatches may seem complex at first glance, but by following Sven Yrvind’s meticulous process, enthusiasts can achieve professional-level results. Remember that the journey of boatbuilding is as rewarding as reaching your destination; it tests one’s patience and dedication. For those seeking to embark on this adventure or simply gain more insight into marine craftsmanship, Sven’s wisdom is invaluable.Sven proceeds to apply glue along one edge of the flange, ensuring a secure bond when clamped into place. He emphasizes that this stage is crucial for maintaining the structural integrity of the flange, which in turn safeguards the living area beneath the canvas when hatches are open.Step 3: Allowing Time to Dry
After securely attaching the first portion of the flange, Sven allows ample time for it to dry before moving forward with additional steps. This patience and precision are key aspects of his successful boatbuilding methods.Step 4: Finishing Touches
Once the flange is fully dried, Sven removes the clamps carefully, ensuring no damage occurs during this process. He then moves on to attaching four more pieces onto these main frames, completing two pairs of flanges for the bulkhead hatches.The Final Touches
While two flanges form the primary support structure around the hatches, Sven mentions there are two additional pieces required at each end to ensure comprehensive protection. This attention to detail highlights his commitment to producing a durable and reliable design. “Sailing is about finding your path, whether it’s across an ocean or within yourself.” – Sven Yrvind In conclusion, making flanges around bulkhead hatches may seem complex at first glance, but by following Sven Yrvind’s meticulous process, enthusiasts can achieve professional-level results. Remember that the journey of boatbuilding is as rewarding as reaching your destination; it tests one’s patience and dedication. For those seeking to embark on this adventure or simply gain more insight into marine craftsmanship, Sven’s wisdom is invaluable.Sven begins by explaining that working on flanges vertically and horizontally is significantly easier than doing so in a flat position. To simplify the process further, he divides the task into two or three steps as suggested by fellow expert “for for.” This approach not only makes it more manageable but also allows for greater precision in crafting each component.Step 2: Applying Glue and Securing
Sven proceeds to apply glue along one edge of the flange, ensuring a secure bond when clamped into place. He emphasizes that this stage is crucial for maintaining the structural integrity of the flange, which in turn safeguards the living area beneath the canvas when hatches are open.Step 3: Allowing Time to Dry
After securely attaching the first portion of the flange, Sven allows ample time for it to dry before moving forward with additional steps. This patience and precision are key aspects of his successful boatbuilding methods.Step 4: Finishing Touches
Once the flange is fully dried, Sven removes the clamps carefully, ensuring no damage occurs during this process. He then moves on to attaching four more pieces onto these main frames, completing two pairs of flanges for the bulkhead hatches.The Final Touches
While two flanges form the primary support structure around the hatches, Sven mentions there are two additional pieces required at each end to ensure comprehensive protection. This attention to detail highlights his commitment to producing a durable and reliable design. “Sailing is about finding your path, whether it’s across an ocean or within yourself.” – Sven Yrvind In conclusion, making flanges around bulkhead hatches may seem complex at first glance, but by following Sven Yrvind’s meticulous process, enthusiasts can achieve professional-level results. Remember that the journey of boatbuilding is as rewarding as reaching your destination; it tests one’s patience and dedication. For those seeking to embark on this adventure or simply gain more insight into marine craftsmanship, Sven’s wisdom is invaluable.Sven Yrvind, a renowned yacht designer and sailor, shares valuable insights on creating flanges around bulkhead hatches for canvas protection in this enlightening video. By following his expert guidance, boat enthusiasts can ensure their living areas remain secure while allowing unhindered access through the hatches.Step 1: Starting with the Flange
Sven begins by explaining that working on flanges vertically and horizontally is significantly easier than doing so in a flat position. To simplify the process further, he divides the task into two or three steps as suggested by fellow expert “for for.” This approach not only makes it more manageable but also allows for greater precision in crafting each component.Step 2: Applying Glue and Securing
Sven proceeds to apply glue along one edge of the flange, ensuring a secure bond when clamped into place. He emphasizes that this stage is crucial for maintaining the structural integrity of the flange, which in turn safeguards the living area beneath the canvas when hatches are open.Step 3: Allowing Time to Dry
After securely attaching the first portion of the flange, Sven allows ample time for it to dry before moving forward with additional steps. This patience and precision are key aspects of his successful boatbuilding methods.Step 4: Finishing Touches
Once the flange is fully dried, Sven removes the clamps carefully, ensuring no damage occurs during this process. He then moves on to attaching four more pieces onto these main frames, completing two pairs of flanges for the bulkhead hatches.The Final Touches
While two flanges form the primary support structure around the hatches, Sven mentions there are two additional pieces required at each end to ensure comprehensive protection. This attention to detail highlights his commitment to producing a durable and reliable design. “Sailing is about finding your path, whether it’s across an ocean or within yourself.” – Sven Yrvind In conclusion, making flanges around bulkhead hatches may seem complex at first glance, but by following Sven Yrvind’s meticulous process, enthusiasts can achieve professional-level results. Remember that the journey of boatbuilding is as rewarding as reaching your destination; it tests one’s patience and dedication. For those seeking to embark on this adventure or simply gain more insight into marine craftsmanship, Sven’s wisdom is invaluable.Making Flanges Around Bulkhead Hatches for Canvas
Sven Yrvind, a renowned yacht designer and sailor, shares valuable insights on creating flanges around bulkhead hatches for canvas protection in this enlightening video. By following his expert guidance, boat enthusiasts can ensure their living areas remain secure while allowing unhindered access through the hatches.Step 1: Starting with the Flange
Sven begins by explaining that working on flanges vertically and horizontally is significantly easier than doing so in a flat position. To simplify the process further, he divides the task into two or three steps as suggested by fellow expert “for for.” This approach not only makes it more manageable but also allows for greater precision in crafting each component.Step 2: Applying Glue and Securing
Sven proceeds to apply glue along one edge of the flange, ensuring a secure bond when clamped into place. He emphasizes that this stage is crucial for maintaining the structural integrity of the flange, which in turn safeguards the living area beneath the canvas when hatches are open.Step 3: Allowing Time to Dry
After securely attaching the first portion of the flange, Sven allows ample time for it to dry before moving forward with additional steps. This patience and precision are key aspects of his successful boatbuilding methods.Step 4: Finishing Touches
Once the flange is fully dried, Sven removes the clamps carefully, ensuring no damage occurs during this process. He then moves on to attaching four more pieces onto these main frames, completing two pairs of flanges for the bulkhead hatches.The Final Touches
While two flanges form the primary support structure around the hatches, Sven mentions there are two additional pieces required at each end to ensure comprehensive protection. This attention to detail highlights his commitment to producing a durable and reliable design. “Sailing is about finding your path, whether it’s across an ocean or within yourself.” – Sven Yrvind In conclusion, making flanges around bulkhead hatches may seem complex at first glance, but by following Sven Yrvind’s meticulous process, enthusiasts can achieve professional-level results. Remember that the journey of boatbuilding is as rewarding as reaching your destination; it tests one’s patience and dedication. For those seeking to embark on this adventure or simply gain more insight into marine craftsmanship, Sven’s wisdom is invaluable.After securely attaching the first portion of the flange, Sven allows ample time for it to dry before moving forward with additional steps. This patience and precision are key aspects of his successful boatbuilding methods.Step 4: Finishing Touches
Once the flange is fully dried, Sven removes the clamps carefully, ensuring no damage occurs during this process. He then moves on to attaching four more pieces onto these main frames, completing two pairs of flanges for the bulkhead hatches.The Final Touches
While two flanges form the primary support structure around the hatches, Sven mentions there are two additional pieces required at each end to ensure comprehensive protection. This attention to detail highlights his commitment to producing a durable and reliable design. “Sailing is about finding your path, whether it’s across an ocean or within yourself.” – Sven Yrvind In conclusion, making flanges around bulkhead hatches may seem complex at first glance, but by following Sven Yrvind’s meticulous process, enthusiasts can achieve professional-level results. Remember that the journey of boatbuilding is as rewarding as reaching your destination; it tests one’s patience and dedication. For those seeking to embark on this adventure or simply gain more insight into marine craftsmanship, Sven’s wisdom is invaluable.Sven proceeds to apply glue along one edge of the flange, ensuring a secure bond when clamped into place. He emphasizes that this stage is crucial for maintaining the structural integrity of the flange, which in turn safeguards the living area beneath the canvas when hatches are open.Step 3: Allowing Time to Dry
After securely attaching the first portion of the flange, Sven allows ample time for it to dry before moving forward with additional steps. This patience and precision are key aspects of his successful boatbuilding methods.Step 4: Finishing Touches
Once the flange is fully dried, Sven removes the clamps carefully, ensuring no damage occurs during this process. He then moves on to attaching four more pieces onto these main frames, completing two pairs of flanges for the bulkhead hatches.The Final Touches
While two flanges form the primary support structure around the hatches, Sven mentions there are two additional pieces required at each end to ensure comprehensive protection. This attention to detail highlights his commitment to producing a durable and reliable design. “Sailing is about finding your path, whether it’s across an ocean or within yourself.” – Sven Yrvind In conclusion, making flanges around bulkhead hatches may seem complex at first glance, but by following Sven Yrvind’s meticulous process, enthusiasts can achieve professional-level results. Remember that the journey of boatbuilding is as rewarding as reaching your destination; it tests one’s patience and dedication. For those seeking to embark on this adventure or simply gain more insight into marine craftsmanship, Sven’s wisdom is invaluable.Sven begins by explaining that working on flanges vertically and horizontally is significantly easier than doing so in a flat position. To simplify the process further, he divides the task into two or three steps as suggested by fellow expert “for for.” This approach not only makes it more manageable but also allows for greater precision in crafting each component.Step 2: Applying Glue and Securing
Sven proceeds to apply glue along one edge of the flange, ensuring a secure bond when clamped into place. He emphasizes that this stage is crucial for maintaining the structural integrity of the flange, which in turn safeguards the living area beneath the canvas when hatches are open.Step 3: Allowing Time to Dry
After securely attaching the first portion of the flange, Sven allows ample time for it to dry before moving forward with additional steps. This patience and precision are key aspects of his successful boatbuilding methods.Step 4: Finishing Touches
Once the flange is fully dried, Sven removes the clamps carefully, ensuring no damage occurs during this process. He then moves on to attaching four more pieces onto these main frames, completing two pairs of flanges for the bulkhead hatches.The Final Touches
While two flanges form the primary support structure around the hatches, Sven mentions there are two additional pieces required at each end to ensure comprehensive protection. This attention to detail highlights his commitment to producing a durable and reliable design. “Sailing is about finding your path, whether it’s across an ocean or within yourself.” – Sven Yrvind In conclusion, making flanges around bulkhead hatches may seem complex at first glance, but by following Sven Yrvind’s meticulous process, enthusiasts can achieve professional-level results. Remember that the journey of boatbuilding is as rewarding as reaching your destination; it tests one’s patience and dedication. For those seeking to embark on this adventure or simply gain more insight into marine craftsmanship, Sven’s wisdom is invaluable.Sven Yrvind, a renowned yacht designer and sailor, shares valuable insights on creating flanges around bulkhead hatches for canvas protection in this enlightening video. By following his expert guidance, boat enthusiasts can ensure their living areas remain secure while allowing unhindered access through the hatches.Step 1: Starting with the Flange
Sven begins by explaining that working on flanges vertically and horizontally is significantly easier than doing so in a flat position. To simplify the process further, he divides the task into two or three steps as suggested by fellow expert “for for.” This approach not only makes it more manageable but also allows for greater precision in crafting each component.Step 2: Applying Glue and Securing
Sven proceeds to apply glue along one edge of the flange, ensuring a secure bond when clamped into place. He emphasizes that this stage is crucial for maintaining the structural integrity of the flange, which in turn safeguards the living area beneath the canvas when hatches are open.Step 3: Allowing Time to Dry
After securely attaching the first portion of the flange, Sven allows ample time for it to dry before moving forward with additional steps. This patience and precision are key aspects of his successful boatbuilding methods.Step 4: Finishing Touches
Once the flange is fully dried, Sven removes the clamps carefully, ensuring no damage occurs during this process. He then moves on to attaching four more pieces onto these main frames, completing two pairs of flanges for the bulkhead hatches.The Final Touches
While two flanges form the primary support structure around the hatches, Sven mentions there are two additional pieces required at each end to ensure comprehensive protection. This attention to detail highlights his commitment to producing a durable and reliable design. “Sailing is about finding your path, whether it’s across an ocean or within yourself.” – Sven Yrvind In conclusion, making flanges around bulkhead hatches may seem complex at first glance, but by following Sven Yrvind’s meticulous process, enthusiasts can achieve professional-level results. Remember that the journey of boatbuilding is as rewarding as reaching your destination; it tests one’s patience and dedication. For those seeking to embark on this adventure or simply gain more insight into marine craftsmanship, Sven’s wisdom is invaluable.Making Flanges Around Bulkhead Hatches for Canvas
Sven Yrvind, a renowned yacht designer and sailor, shares valuable insights on creating flanges around bulkhead hatches for canvas protection in this enlightening video. By following his expert guidance, boat enthusiasts can ensure their living areas remain secure while allowing unhindered access through the hatches.Step 1: Starting with the Flange
Sven begins by explaining that working on flanges vertically and horizontally is significantly easier than doing so in a flat position. To simplify the process further, he divides the task into two or three steps as suggested by fellow expert “for for.” This approach not only makes it more manageable but also allows for greater precision in crafting each component.Step 2: Applying Glue and Securing
Sven proceeds to apply glue along one edge of the flange, ensuring a secure bond when clamped into place. He emphasizes that this stage is crucial for maintaining the structural integrity of the flange, which in turn safeguards the living area beneath the canvas when hatches are open.Step 3: Allowing Time to Dry
After securely attaching the first portion of the flange, Sven allows ample time for it to dry before moving forward with additional steps. This patience and precision are key aspects of his successful boatbuilding methods.Step 4: Finishing Touches
Once the flange is fully dried, Sven removes the clamps carefully, ensuring no damage occurs during this process. He then moves on to attaching four more pieces onto these main frames, completing two pairs of flanges for the bulkhead hatches.The Final Touches
While two flanges form the primary support structure around the hatches, Sven mentions there are two additional pieces required at each end to ensure comprehensive protection. This attention to detail highlights his commitment to producing a durable and reliable design. “Sailing is about finding your path, whether it’s across an ocean or within yourself.” – Sven Yrvind In conclusion, making flanges around bulkhead hatches may seem complex at first glance, but by following Sven Yrvind’s meticulous process, enthusiasts can achieve professional-level results. Remember that the journey of boatbuilding is as rewarding as reaching your destination; it tests one’s patience and dedication. For those seeking to embark on this adventure or simply gain more insight into marine craftsmanship, Sven’s wisdom is invaluable.Once the flange is fully dried, Sven removes the clamps carefully, ensuring no damage occurs during this process. He then moves on to attaching four more pieces onto these main frames, completing two pairs of flanges for the bulkhead hatches.The Final Touches
While two flanges form the primary support structure around the hatches, Sven mentions there are two additional pieces required at each end to ensure comprehensive protection. This attention to detail highlights his commitment to producing a durable and reliable design. “Sailing is about finding your path, whether it’s across an ocean or within yourself.” – Sven Yrvind In conclusion, making flanges around bulkhead hatches may seem complex at first glance, but by following Sven Yrvind’s meticulous process, enthusiasts can achieve professional-level results. Remember that the journey of boatbuilding is as rewarding as reaching your destination; it tests one’s patience and dedication. For those seeking to embark on this adventure or simply gain more insight into marine craftsmanship, Sven’s wisdom is invaluable.After securely attaching the first portion of the flange, Sven allows ample time for it to dry before moving forward with additional steps. This patience and precision are key aspects of his successful boatbuilding methods.Step 4: Finishing Touches
Once the flange is fully dried, Sven removes the clamps carefully, ensuring no damage occurs during this process. He then moves on to attaching four more pieces onto these main frames, completing two pairs of flanges for the bulkhead hatches.The Final Touches
While two flanges form the primary support structure around the hatches, Sven mentions there are two additional pieces required at each end to ensure comprehensive protection. This attention to detail highlights his commitment to producing a durable and reliable design. “Sailing is about finding your path, whether it’s across an ocean or within yourself.” – Sven Yrvind In conclusion, making flanges around bulkhead hatches may seem complex at first glance, but by following Sven Yrvind’s meticulous process, enthusiasts can achieve professional-level results. Remember that the journey of boatbuilding is as rewarding as reaching your destination; it tests one’s patience and dedication. For those seeking to embark on this adventure or simply gain more insight into marine craftsmanship, Sven’s wisdom is invaluable.Sven proceeds to apply glue along one edge of the flange, ensuring a secure bond when clamped into place. He emphasizes that this stage is crucial for maintaining the structural integrity of the flange, which in turn safeguards the living area beneath the canvas when hatches are open.Step 3: Allowing Time to Dry
After securely attaching the first portion of the flange, Sven allows ample time for it to dry before moving forward with additional steps. This patience and precision are key aspects of his successful boatbuilding methods.Step 4: Finishing Touches
Once the flange is fully dried, Sven removes the clamps carefully, ensuring no damage occurs during this process. He then moves on to attaching four more pieces onto these main frames, completing two pairs of flanges for the bulkhead hatches.The Final Touches
While two flanges form the primary support structure around the hatches, Sven mentions there are two additional pieces required at each end to ensure comprehensive protection. This attention to detail highlights his commitment to producing a durable and reliable design. “Sailing is about finding your path, whether it’s across an ocean or within yourself.” – Sven Yrvind In conclusion, making flanges around bulkhead hatches may seem complex at first glance, but by following Sven Yrvind’s meticulous process, enthusiasts can achieve professional-level results. Remember that the journey of boatbuilding is as rewarding as reaching your destination; it tests one’s patience and dedication. For those seeking to embark on this adventure or simply gain more insight into marine craftsmanship, Sven’s wisdom is invaluable.Sven begins by explaining that working on flanges vertically and horizontally is significantly easier than doing so in a flat position. To simplify the process further, he divides the task into two or three steps as suggested by fellow expert “for for.” This approach not only makes it more manageable but also allows for greater precision in crafting each component.Step 2: Applying Glue and Securing
Sven proceeds to apply glue along one edge of the flange, ensuring a secure bond when clamped into place. He emphasizes that this stage is crucial for maintaining the structural integrity of the flange, which in turn safeguards the living area beneath the canvas when hatches are open.Step 3: Allowing Time to Dry
After securely attaching the first portion of the flange, Sven allows ample time for it to dry before moving forward with additional steps. This patience and precision are key aspects of his successful boatbuilding methods.Step 4: Finishing Touches
Once the flange is fully dried, Sven removes the clamps carefully, ensuring no damage occurs during this process. He then moves on to attaching four more pieces onto these main frames, completing two pairs of flanges for the bulkhead hatches.The Final Touches
While two flanges form the primary support structure around the hatches, Sven mentions there are two additional pieces required at each end to ensure comprehensive protection. This attention to detail highlights his commitment to producing a durable and reliable design. “Sailing is about finding your path, whether it’s across an ocean or within yourself.” – Sven Yrvind In conclusion, making flanges around bulkhead hatches may seem complex at first glance, but by following Sven Yrvind’s meticulous process, enthusiasts can achieve professional-level results. Remember that the journey of boatbuilding is as rewarding as reaching your destination; it tests one’s patience and dedication. For those seeking to embark on this adventure or simply gain more insight into marine craftsmanship, Sven’s wisdom is invaluable.Sven Yrvind, a renowned yacht designer and sailor, shares valuable insights on creating flanges around bulkhead hatches for canvas protection in this enlightening video. By following his expert guidance, boat enthusiasts can ensure their living areas remain secure while allowing unhindered access through the hatches.Step 1: Starting with the Flange
Sven begins by explaining that working on flanges vertically and horizontally is significantly easier than doing so in a flat position. To simplify the process further, he divides the task into two or three steps as suggested by fellow expert “for for.” This approach not only makes it more manageable but also allows for greater precision in crafting each component.Step 2: Applying Glue and Securing
Sven proceeds to apply glue along one edge of the flange, ensuring a secure bond when clamped into place. He emphasizes that this stage is crucial for maintaining the structural integrity of the flange, which in turn safeguards the living area beneath the canvas when hatches are open.Step 3: Allowing Time to Dry
After securely attaching the first portion of the flange, Sven allows ample time for it to dry before moving forward with additional steps. This patience and precision are key aspects of his successful boatbuilding methods.Step 4: Finishing Touches
Once the flange is fully dried, Sven removes the clamps carefully, ensuring no damage occurs during this process. He then moves on to attaching four more pieces onto these main frames, completing two pairs of flanges for the bulkhead hatches.The Final Touches
While two flanges form the primary support structure around the hatches, Sven mentions there are two additional pieces required at each end to ensure comprehensive protection. This attention to detail highlights his commitment to producing a durable and reliable design. “Sailing is about finding your path, whether it’s across an ocean or within yourself.” – Sven Yrvind In conclusion, making flanges around bulkhead hatches may seem complex at first glance, but by following Sven Yrvind’s meticulous process, enthusiasts can achieve professional-level results. Remember that the journey of boatbuilding is as rewarding as reaching your destination; it tests one’s patience and dedication. For those seeking to embark on this adventure or simply gain more insight into marine craftsmanship, Sven’s wisdom is invaluable.Making Flanges Around Bulkhead Hatches for Canvas
Sven Yrvind, a renowned yacht designer and sailor, shares valuable insights on creating flanges around bulkhead hatches for canvas protection in this enlightening video. By following his expert guidance, boat enthusiasts can ensure their living areas remain secure while allowing unhindered access through the hatches.Step 1: Starting with the Flange
Sven begins by explaining that working on flanges vertically and horizontally is significantly easier than doing so in a flat position. To simplify the process further, he divides the task into two or three steps as suggested by fellow expert “for for.” This approach not only makes it more manageable but also allows for greater precision in crafting each component.Step 2: Applying Glue and Securing
Sven proceeds to apply glue along one edge of the flange, ensuring a secure bond when clamped into place. He emphasizes that this stage is crucial for maintaining the structural integrity of the flange, which in turn safeguards the living area beneath the canvas when hatches are open.Step 3: Allowing Time to Dry
After securely attaching the first portion of the flange, Sven allows ample time for it to dry before moving forward with additional steps. This patience and precision are key aspects of his successful boatbuilding methods.Step 4: Finishing Touches
Once the flange is fully dried, Sven removes the clamps carefully, ensuring no damage occurs during this process. He then moves on to attaching four more pieces onto these main frames, completing two pairs of flanges for the bulkhead hatches.The Final Touches
While two flanges form the primary support structure around the hatches, Sven mentions there are two additional pieces required at each end to ensure comprehensive protection. This attention to detail highlights his commitment to producing a durable and reliable design. “Sailing is about finding your path, whether it’s across an ocean or within yourself.” – Sven Yrvind In conclusion, making flanges around bulkhead hatches may seem complex at first glance, but by following Sven Yrvind’s meticulous process, enthusiasts can achieve professional-level results. Remember that the journey of boatbuilding is as rewarding as reaching your destination; it tests one’s patience and dedication. For those seeking to embark on this adventure or simply gain more insight into marine craftsmanship, Sven’s wisdom is invaluable.Once the flange is fully dried, Sven removes the clamps carefully, ensuring no damage occurs during this process. He then moves on to attaching four more pieces onto these main frames, completing two pairs of flanges for the bulkhead hatches.The Final Touches
While two flanges form the primary support structure around the hatches, Sven mentions there are two additional pieces required at each end to ensure comprehensive protection. This attention to detail highlights his commitment to producing a durable and reliable design. “Sailing is about finding your path, whether it’s across an ocean or within yourself.” – Sven Yrvind In conclusion, making flanges around bulkhead hatches may seem complex at first glance, but by following Sven Yrvind’s meticulous process, enthusiasts can achieve professional-level results. Remember that the journey of boatbuilding is as rewarding as reaching your destination; it tests one’s patience and dedication. For those seeking to embark on this adventure or simply gain more insight into marine craftsmanship, Sven’s wisdom is invaluable.Making Flanges Around Bulkhead Hatches for Canvas
Sven Yrvind, a renowned yacht designer and sailor, shares valuable insights on creating flanges around bulkhead hatches for canvas protection in this enlightening video. By following his expert guidance, boat enthusiasts can ensure their living areas remain secure while allowing unhindered access through the hatches.Step 1: Starting with the Flange
Sven begins by explaining that working on flanges vertically and horizontally is significantly easier than doing so in a flat position. To simplify the process further, he divides the task into two or three steps as suggested by fellow expert “for for.” This approach not only makes it more manageable but also allows for greater precision in crafting each component.Step 2: Applying Glue and Securing
Sven proceeds to apply glue along one edge of the flange, ensuring a secure bond when clamped into place. He emphasizes that this stage is crucial for maintaining the structural integrity of the flange, which in turn safeguards the living area beneath the canvas when hatches are open.Step 3: Allowing Time to Dry
After securely attaching the first portion of the flange, Sven allows ample time for it to dry before moving forward with additional steps. This patience and precision are key aspects of his successful boatbuilding methods.Step 4: Finishing Touches
Once the flange is fully dried, Sven removes the clamps carefully, ensuring no damage occurs during this process. He then moves on to attaching four more pieces onto these main frames, completing two pairs of flanges for the bulkhead hatches.The Final Touches
While two flanges form the primary support structure around the hatches, Sven mentions there are two additional pieces required at each end to ensure comprehensive protection. This attention to detail highlights his commitment to producing a durable and reliable design. “Sailing is about finding your path, whether it’s across an ocean or within yourself.” – Sven Yrvind In conclusion, making flanges around bulkhead hatches may seem complex at first glance, but by following Sven Yrvind’s meticulous process, enthusiasts can achieve professional-level results. Remember that the journey of boatbuilding is as rewarding as reaching your destination; it tests one’s patience and dedication. For those seeking to embark on this adventure or simply gain more insight into marine craftsmanship, Sven’s wisdom is invaluable.Once the flange is fully dried, Sven removes the clamps carefully, ensuring no damage occurs during this process. He then moves on to attaching four more pieces onto these main frames, completing two pairs of flanges for the bulkhead hatches.The Final Touches
While two flanges form the primary support structure around the hatches, Sven mentions there are two additional pieces required at each end to ensure comprehensive protection. This attention to detail highlights his commitment to producing a durable and reliable design. “Sailing is about finding your path, whether it’s across an ocean or within yourself.” – Sven Yrvind In conclusion, making flanges around bulkhead hatches may seem complex at first glance, but by following Sven Yrvind’s meticulous process, enthusiasts can achieve professional-level results. Remember that the journey of boatbuilding is as rewarding as reaching your destination; it tests one’s patience and dedication. For those seeking to embark on this adventure or simply gain more insight into marine craftsmanship, Sven’s wisdom is invaluable.Sven proceeds to apply glue along one edge of the flange, ensuring a secure bond when clamped into place. He emphasizes that this stage is crucial for maintaining the structural integrity of the flange, which in turn safeguards the living area beneath the canvas when hatches are open.Step 3: Allowing Time to Dry
After securely attaching the first portion of the flange, Sven allows ample time for it to dry before moving forward with additional steps. This patience and precision are key aspects of his successful boatbuilding methods.Step 4: Finishing Touches
Once the flange is fully dried, Sven removes the clamps carefully, ensuring no damage occurs during this process. He then moves on to attaching four more pieces onto these main frames, completing two pairs of flanges for the bulkhead hatches.The Final Touches
While two flanges form the primary support structure around the hatches, Sven mentions there are two additional pieces required at each end to ensure comprehensive protection. This attention to detail highlights his commitment to producing a durable and reliable design. “Sailing is about finding your path, whether it’s across an ocean or within yourself.” – Sven Yrvind In conclusion, making flanges around bulkhead hatches may seem complex at first glance, but by following Sven Yrvind’s meticulous process, enthusiasts can achieve professional-level results. Remember that the journey of boatbuilding is as rewarding as reaching your destination; it tests one’s patience and dedication. For those seeking to embark on this adventure or simply gain more insight into marine craftsmanship, Sven’s wisdom is invaluable.Sven begins by explaining that working on flanges vertically and horizontally is significantly easier than doing so in a flat position. To simplify the process further, he divides the task into two or three steps as suggested by fellow expert “for for.” This approach not only makes it more manageable but also allows for greater precision in crafting each component.Step 2: Applying Glue and Securing
Sven proceeds to apply glue along one edge of the flange, ensuring a secure bond when clamped into place. He emphasizes that this stage is crucial for maintaining the structural integrity of the flange, which in turn safeguards the living area beneath the canvas when hatches are open.Step 3: Allowing Time to Dry
After securely attaching the first portion of the flange, Sven allows ample time for it to dry before moving forward with additional steps. This patience and precision are key aspects of his successful boatbuilding methods.Step 4: Finishing Touches
Once the flange is fully dried, Sven removes the clamps carefully, ensuring no damage occurs during this process. He then moves on to attaching four more pieces onto these main frames, completing two pairs of flanges for the bulkhead hatches.The Final Touches
While two flanges form the primary support structure around the hatches, Sven mentions there are two additional pieces required at each end to ensure comprehensive protection. This attention to detail highlights his commitment to producing a durable and reliable design. “Sailing is about finding your path, whether it’s across an ocean or within yourself.” – Sven Yrvind In conclusion, making flanges around bulkhead hatches may seem complex at first glance, but by following Sven Yrvind’s meticulous process, enthusiasts can achieve professional-level results. Remember that the journey of boatbuilding is as rewarding as reaching your destination; it tests one’s patience and dedication. For those seeking to embark on this adventure or simply gain more insight into marine craftsmanship, Sven’s wisdom is invaluable.Sven Yrvind, a renowned yacht designer and sailor, shares valuable insights on creating flanges around bulkhead hatches for canvas protection in this enlightening video. By following his expert guidance, boat enthusiasts can ensure their living areas remain secure while allowing unhindered access through the hatches.Step 1: Starting with the Flange
Sven begins by explaining that working on flanges vertically and horizontally is significantly easier than doing so in a flat position. To simplify the process further, he divides the task into two or three steps as suggested by fellow expert “for for.” This approach not only makes it more manageable but also allows for greater precision in crafting each component.Step 2: Applying Glue and Securing
Sven proceeds to apply glue along one edge of the flange, ensuring a secure bond when clamped into place. He emphasizes that this stage is crucial for maintaining the structural integrity of the flange, which in turn safeguards the living area beneath the canvas when hatches are open.Step 3: Allowing Time to Dry
After securely attaching the first portion of the flange, Sven allows ample time for it to dry before moving forward with additional steps. This patience and precision are key aspects of his successful boatbuilding methods.Step 4: Finishing Touches
Once the flange is fully dried, Sven removes the clamps carefully, ensuring no damage occurs during this process. He then moves on to attaching four more pieces onto these main frames, completing two pairs of flanges for the bulkhead hatches.The Final Touches
While two flanges form the primary support structure around the hatches, Sven mentions there are two additional pieces required at each end to ensure comprehensive protection. This attention to detail highlights his commitment to producing a durable and reliable design. “Sailing is about finding your path, whether it’s across an ocean or within yourself.” – Sven Yrvind In conclusion, making flanges around bulkhead hatches may seem complex at first glance, but by following Sven Yrvind’s meticulous process, enthusiasts can achieve professional-level results. Remember that the journey of boatbuilding is as rewarding as reaching your destination; it tests one’s patience and dedication. For those seeking to embark on this adventure or simply gain more insight into marine craftsmanship, Sven’s wisdom is invaluable.Making Flanges Around Bulkhead Hatches for Canvas
Sven Yrvind, a renowned yacht designer and sailor, shares valuable insights on creating flanges around bulkhead hatches for canvas protection in this enlightening video. By following his expert guidance, boat enthusiasts can ensure their living areas remain secure while allowing unhindered access through the hatches.Step 1: Starting with the Flange
Sven begins by explaining that working on flanges vertically and horizontally is significantly easier than doing so in a flat position. To simplify the process further, he divides the task into two or three steps as suggested by fellow expert “for for.” This approach not only makes it more manageable but also allows for greater precision in crafting each component.Step 2: Applying Glue and Securing
Sven proceeds to apply glue along one edge of the flange, ensuring a secure bond when clamped into place. He emphasizes that this stage is crucial for maintaining the structural integrity of the flange, which in turn safeguards the living area beneath the canvas when hatches are open.Step 3: Allowing Time to Dry
After securely attaching the first portion of the flange, Sven allows ample time for it to dry before moving forward with additional steps. This patience and precision are key aspects of his successful boatbuilding methods.Step 4: Finishing Touches
Once the flange is fully dried, Sven removes the clamps carefully, ensuring no damage occurs during this process. He then moves on to attaching four more pieces onto these main frames, completing two pairs of flanges for the bulkhead hatches.The Final Touches
While two flanges form the primary support structure around the hatches, Sven mentions there are two additional pieces required at each end to ensure comprehensive protection. This attention to detail highlights his commitment to producing a durable and reliable design. “Sailing is about finding your path, whether it’s across an ocean or within yourself.” – Sven Yrvind In conclusion, making flanges around bulkhead hatches may seem complex at first glance, but by following Sven Yrvind’s meticulous process, enthusiasts can achieve professional-level results. Remember that the journey of boatbuilding is as rewarding as reaching your destination; it tests one’s patience and dedication. For those seeking to embark on this adventure or simply gain more insight into marine craftsmanship, Sven’s wisdom is invaluable.After securely attaching the first portion of the flange, Sven allows ample time for it to dry before moving forward with additional steps. This patience and precision are key aspects of his successful boatbuilding methods.Step 4: Finishing Touches
Once the flange is fully dried, Sven removes the clamps carefully, ensuring no damage occurs during this process. He then moves on to attaching four more pieces onto these main frames, completing two pairs of flanges for the bulkhead hatches.The Final Touches
While two flanges form the primary support structure around the hatches, Sven mentions there are two additional pieces required at each end to ensure comprehensive protection. This attention to detail highlights his commitment to producing a durable and reliable design. “Sailing is about finding your path, whether it’s across an ocean or within yourself.” – Sven Yrvind In conclusion, making flanges around bulkhead hatches may seem complex at first glance, but by following Sven Yrvind’s meticulous process, enthusiasts can achieve professional-level results. Remember that the journey of boatbuilding is as rewarding as reaching your destination; it tests one’s patience and dedication. For those seeking to embark on this adventure or simply gain more insight into marine craftsmanship, Sven’s wisdom is invaluable.Sven proceeds to apply glue along one edge of the flange, ensuring a secure bond when clamped into place. He emphasizes that this stage is crucial for maintaining the structural integrity of the flange, which in turn safeguards the living area beneath the canvas when hatches are open.Step 3: Allowing Time to Dry
After securely attaching the first portion of the flange, Sven allows ample time for it to dry before moving forward with additional steps. This patience and precision are key aspects of his successful boatbuilding methods.Step 4: Finishing Touches
Once the flange is fully dried, Sven removes the clamps carefully, ensuring no damage occurs during this process. He then moves on to attaching four more pieces onto these main frames, completing two pairs of flanges for the bulkhead hatches.The Final Touches
While two flanges form the primary support structure around the hatches, Sven mentions there are two additional pieces required at each end to ensure comprehensive protection. This attention to detail highlights his commitment to producing a durable and reliable design. “Sailing is about finding your path, whether it’s across an ocean or within yourself.” – Sven Yrvind In conclusion, making flanges around bulkhead hatches may seem complex at first glance, but by following Sven Yrvind’s meticulous process, enthusiasts can achieve professional-level results. Remember that the journey of boatbuilding is as rewarding as reaching your destination; it tests one’s patience and dedication. For those seeking to embark on this adventure or simply gain more insight into marine craftsmanship, Sven’s wisdom is invaluable.Sven begins by explaining that working on flanges vertically and horizontally is significantly easier than doing so in a flat position. To simplify the process further, he divides the task into two or three steps as suggested by fellow expert “for for.” This approach not only makes it more manageable but also allows for greater precision in crafting each component.Step 2: Applying Glue and Securing
Sven proceeds to apply glue along one edge of the flange, ensuring a secure bond when clamped into place. He emphasizes that this stage is crucial for maintaining the structural integrity of the flange, which in turn safeguards the living area beneath the canvas when hatches are open.Step 3: Allowing Time to Dry
After securely attaching the first portion of the flange, Sven allows ample time for it to dry before moving forward with additional steps. This patience and precision are key aspects of his successful boatbuilding methods.Step 4: Finishing Touches
Once the flange is fully dried, Sven removes the clamps carefully, ensuring no damage occurs during this process. He then moves on to attaching four more pieces onto these main frames, completing two pairs of flanges for the bulkhead hatches.The Final Touches
While two flanges form the primary support structure around the hatches, Sven mentions there are two additional pieces required at each end to ensure comprehensive protection. This attention to detail highlights his commitment to producing a durable and reliable design. “Sailing is about finding your path, whether it’s across an ocean or within yourself.” – Sven Yrvind In conclusion, making flanges around bulkhead hatches may seem complex at first glance, but by following Sven Yrvind’s meticulous process, enthusiasts can achieve professional-level results. Remember that the journey of boatbuilding is as rewarding as reaching your destination; it tests one’s patience and dedication. For those seeking to embark on this adventure or simply gain more insight into marine craftsmanship, Sven’s wisdom is invaluable.Sven Yrvind, a renowned yacht designer and sailor, shares valuable insights on creating flanges around bulkhead hatches for canvas protection in this enlightening video. By following his expert guidance, boat enthusiasts can ensure their living areas remain secure while allowing unhindered access through the hatches.Step 1: Starting with the Flange
Sven begins by explaining that working on flanges vertically and horizontally is significantly easier than doing so in a flat position. To simplify the process further, he divides the task into two or three steps as suggested by fellow expert “for for.” This approach not only makes it more manageable but also allows for greater precision in crafting each component.Step 2: Applying Glue and Securing
Sven proceeds to apply glue along one edge of the flange, ensuring a secure bond when clamped into place. He emphasizes that this stage is crucial for maintaining the structural integrity of the flange, which in turn safeguards the living area beneath the canvas when hatches are open.Step 3: Allowing Time to Dry
After securely attaching the first portion of the flange, Sven allows ample time for it to dry before moving forward with additional steps. This patience and precision are key aspects of his successful boatbuilding methods.Step 4: Finishing Touches
Once the flange is fully dried, Sven removes the clamps carefully, ensuring no damage occurs during this process. He then moves on to attaching four more pieces onto these main frames, completing two pairs of flanges for the bulkhead hatches.The Final Touches
While two flanges form the primary support structure around the hatches, Sven mentions there are two additional pieces required at each end to ensure comprehensive protection. This attention to detail highlights his commitment to producing a durable and reliable design. “Sailing is about finding your path, whether it’s across an ocean or within yourself.” – Sven Yrvind In conclusion, making flanges around bulkhead hatches may seem complex at first glance, but by following Sven Yrvind’s meticulous process, enthusiasts can achieve professional-level results. Remember that the journey of boatbuilding is as rewarding as reaching your destination; it tests one’s patience and dedication. For those seeking to embark on this adventure or simply gain more insight into marine craftsmanship, Sven’s wisdom is invaluable.Making Flanges Around Bulkhead Hatches for Canvas
Sven Yrvind, a renowned yacht designer and sailor, shares valuable insights on creating flanges around bulkhead hatches for canvas protection in this enlightening video. By following his expert guidance, boat enthusiasts can ensure their living areas remain secure while allowing unhindered access through the hatches.Step 1: Starting with the Flange
Sven begins by explaining that working on flanges vertically and horizontally is significantly easier than doing so in a flat position. To simplify the process further, he divides the task into two or three steps as suggested by fellow expert “for for.” This approach not only makes it more manageable but also allows for greater precision in crafting each component.Step 2: Applying Glue and Securing
Sven proceeds to apply glue along one edge of the flange, ensuring a secure bond when clamped into place. He emphasizes that this stage is crucial for maintaining the structural integrity of the flange, which in turn safeguards the living area beneath the canvas when hatches are open.Step 3: Allowing Time to Dry
After securely attaching the first portion of the flange, Sven allows ample time for it to dry before moving forward with additional steps. This patience and precision are key aspects of his successful boatbuilding methods.Step 4: Finishing Touches
Once the flange is fully dried, Sven removes the clamps carefully, ensuring no damage occurs during this process. He then moves on to attaching four more pieces onto these main frames, completing two pairs of flanges for the bulkhead hatches.The Final Touches
While two flanges form the primary support structure around the hatches, Sven mentions there are two additional pieces required at each end to ensure comprehensive protection. This attention to detail highlights his commitment to producing a durable and reliable design. “Sailing is about finding your path, whether it’s across an ocean or within yourself.” – Sven Yrvind In conclusion, making flanges around bulkhead hatches may seem complex at first glance, but by following Sven Yrvind’s meticulous process, enthusiasts can achieve professional-level results. Remember that the journey of boatbuilding is as rewarding as reaching your destination; it tests one’s patience and dedication. For those seeking to embark on this adventure or simply gain more insight into marine craftsmanship, Sven’s wisdom is invaluable.Once the flange is fully dried, Sven removes the clamps carefully, ensuring no damage occurs during this process. He then moves on to attaching four more pieces onto these main frames, completing two pairs of flanges for the bulkhead hatches.The Final Touches
While two flanges form the primary support structure around the hatches, Sven mentions there are two additional pieces required at each end to ensure comprehensive protection. This attention to detail highlights his commitment to producing a durable and reliable design. “Sailing is about finding your path, whether it’s across an ocean or within yourself.” – Sven Yrvind In conclusion, making flanges around bulkhead hatches may seem complex at first glance, but by following Sven Yrvind’s meticulous process, enthusiasts can achieve professional-level results. Remember that the journey of boatbuilding is as rewarding as reaching your destination; it tests one’s patience and dedication. For those seeking to embark on this adventure or simply gain more insight into marine craftsmanship, Sven’s wisdom is invaluable.After securely attaching the first portion of the flange, Sven allows ample time for it to dry before moving forward with additional steps. This patience and precision are key aspects of his successful boatbuilding methods.Step 4: Finishing Touches
Once the flange is fully dried, Sven removes the clamps carefully, ensuring no damage occurs during this process. He then moves on to attaching four more pieces onto these main frames, completing two pairs of flanges for the bulkhead hatches.The Final Touches
While two flanges form the primary support structure around the hatches, Sven mentions there are two additional pieces required at each end to ensure comprehensive protection. This attention to detail highlights his commitment to producing a durable and reliable design. “Sailing is about finding your path, whether it’s across an ocean or within yourself.” – Sven Yrvind In conclusion, making flanges around bulkhead hatches may seem complex at first glance, but by following Sven Yrvind’s meticulous process, enthusiasts can achieve professional-level results. Remember that the journey of boatbuilding is as rewarding as reaching your destination; it tests one’s patience and dedication. For those seeking to embark on this adventure or simply gain more insight into marine craftsmanship, Sven’s wisdom is invaluable.Sven proceeds to apply glue along one edge of the flange, ensuring a secure bond when clamped into place. He emphasizes that this stage is crucial for maintaining the structural integrity of the flange, which in turn safeguards the living area beneath the canvas when hatches are open.Step 3: Allowing Time to Dry
After securely attaching the first portion of the flange, Sven allows ample time for it to dry before moving forward with additional steps. This patience and precision are key aspects of his successful boatbuilding methods.Step 4: Finishing Touches
Once the flange is fully dried, Sven removes the clamps carefully, ensuring no damage occurs during this process. He then moves on to attaching four more pieces onto these main frames, completing two pairs of flanges for the bulkhead hatches.The Final Touches
While two flanges form the primary support structure around the hatches, Sven mentions there are two additional pieces required at each end to ensure comprehensive protection. This attention to detail highlights his commitment to producing a durable and reliable design. “Sailing is about finding your path, whether it’s across an ocean or within yourself.” – Sven Yrvind In conclusion, making flanges around bulkhead hatches may seem complex at first glance, but by following Sven Yrvind’s meticulous process, enthusiasts can achieve professional-level results. Remember that the journey of boatbuilding is as rewarding as reaching your destination; it tests one’s patience and dedication. For those seeking to embark on this adventure or simply gain more insight into marine craftsmanship, Sven’s wisdom is invaluable.Sven begins by explaining that working on flanges vertically and horizontally is significantly easier than doing so in a flat position. To simplify the process further, he divides the task into two or three steps as suggested by fellow expert “for for.” This approach not only makes it more manageable but also allows for greater precision in crafting each component.Step 2: Applying Glue and Securing
Sven proceeds to apply glue along one edge of the flange, ensuring a secure bond when clamped into place. He emphasizes that this stage is crucial for maintaining the structural integrity of the flange, which in turn safeguards the living area beneath the canvas when hatches are open.Step 3: Allowing Time to Dry
After securely attaching the first portion of the flange, Sven allows ample time for it to dry before moving forward with additional steps. This patience and precision are key aspects of his successful boatbuilding methods.Step 4: Finishing Touches
Once the flange is fully dried, Sven removes the clamps carefully, ensuring no damage occurs during this process. He then moves on to attaching four more pieces onto these main frames, completing two pairs of flanges for the bulkhead hatches.The Final Touches
While two flanges form the primary support structure around the hatches, Sven mentions there are two additional pieces required at each end to ensure comprehensive protection. This attention to detail highlights his commitment to producing a durable and reliable design. “Sailing is about finding your path, whether it’s across an ocean or within yourself.” – Sven Yrvind In conclusion, making flanges around bulkhead hatches may seem complex at first glance, but by following Sven Yrvind’s meticulous process, enthusiasts can achieve professional-level results. Remember that the journey of boatbuilding is as rewarding as reaching your destination; it tests one’s patience and dedication. For those seeking to embark on this adventure or simply gain more insight into marine craftsmanship, Sven’s wisdom is invaluable.Sven Yrvind, a renowned yacht designer and sailor, shares valuable insights on creating flanges around bulkhead hatches for canvas protection in this enlightening video. By following his expert guidance, boat enthusiasts can ensure their living areas remain secure while allowing unhindered access through the hatches.Step 1: Starting with the Flange
Sven begins by explaining that working on flanges vertically and horizontally is significantly easier than doing so in a flat position. To simplify the process further, he divides the task into two or three steps as suggested by fellow expert “for for.” This approach not only makes it more manageable but also allows for greater precision in crafting each component.Step 2: Applying Glue and Securing
Sven proceeds to apply glue along one edge of the flange, ensuring a secure bond when clamped into place. He emphasizes that this stage is crucial for maintaining the structural integrity of the flange, which in turn safeguards the living area beneath the canvas when hatches are open.Step 3: Allowing Time to Dry
After securely attaching the first portion of the flange, Sven allows ample time for it to dry before moving forward with additional steps. This patience and precision are key aspects of his successful boatbuilding methods.Step 4: Finishing Touches
Once the flange is fully dried, Sven removes the clamps carefully, ensuring no damage occurs during this process. He then moves on to attaching four more pieces onto these main frames, completing two pairs of flanges for the bulkhead hatches.The Final Touches
While two flanges form the primary support structure around the hatches, Sven mentions there are two additional pieces required at each end to ensure comprehensive protection. This attention to detail highlights his commitment to producing a durable and reliable design. “Sailing is about finding your path, whether it’s across an ocean or within yourself.” – Sven Yrvind In conclusion, making flanges around bulkhead hatches may seem complex at first glance, but by following Sven Yrvind’s meticulous process, enthusiasts can achieve professional-level results. Remember that the journey of boatbuilding is as rewarding as reaching your destination; it tests one’s patience and dedication. For those seeking to embark on this adventure or simply gain more insight into marine craftsmanship, Sven’s wisdom is invaluable.Making Flanges Around Bulkhead Hatches for Canvas
Sven Yrvind, a renowned yacht designer and sailor, shares valuable insights on creating flanges around bulkhead hatches for canvas protection in this enlightening video. By following his expert guidance, boat enthusiasts can ensure their living areas remain secure while allowing unhindered access through the hatches.Step 1: Starting with the Flange
Sven begins by explaining that working on flanges vertically and horizontally is significantly easier than doing so in a flat position. To simplify the process further, he divides the task into two or three steps as suggested by fellow expert “for for.” This approach not only makes it more manageable but also allows for greater precision in crafting each component.Step 2: Applying Glue and Securing
Sven proceeds to apply glue along one edge of the flange, ensuring a secure bond when clamped into place. He emphasizes that this stage is crucial for maintaining the structural integrity of the flange, which in turn safeguards the living area beneath the canvas when hatches are open.Step 3: Allowing Time to Dry
After securely attaching the first portion of the flange, Sven allows ample time for it to dry before moving forward with additional steps. This patience and precision are key aspects of his successful boatbuilding methods.Step 4: Finishing Touches
Once the flange is fully dried, Sven removes the clamps carefully, ensuring no damage occurs during this process. He then moves on to attaching four more pieces onto these main frames, completing two pairs of flanges for the bulkhead hatches.The Final Touches
While two flanges form the primary support structure around the hatches, Sven mentions there are two additional pieces required at each end to ensure comprehensive protection. This attention to detail highlights his commitment to producing a durable and reliable design. “Sailing is about finding your path, whether it’s across an ocean or within yourself.” – Sven Yrvind In conclusion, making flanges around bulkhead hatches may seem complex at first glance, but by following Sven Yrvind’s meticulous process, enthusiasts can achieve professional-level results. Remember that the journey of boatbuilding is as rewarding as reaching your destination; it tests one’s patience and dedication. For those seeking to embark on this adventure or simply gain more insight into marine craftsmanship, Sven’s wisdom is invaluable.After securely attaching the first portion of the flange, Sven allows ample time for it to dry before moving forward with additional steps. This patience and precision are key aspects of his successful boatbuilding methods.Step 4: Finishing Touches
Once the flange is fully dried, Sven removes the clamps carefully, ensuring no damage occurs during this process. He then moves on to attaching four more pieces onto these main frames, completing two pairs of flanges for the bulkhead hatches.The Final Touches
While two flanges form the primary support structure around the hatches, Sven mentions there are two additional pieces required at each end to ensure comprehensive protection. This attention to detail highlights his commitment to producing a durable and reliable design. “Sailing is about finding your path, whether it’s across an ocean or within yourself.” – Sven Yrvind In conclusion, making flanges around bulkhead hatches may seem complex at first glance, but by following Sven Yrvind’s meticulous process, enthusiasts can achieve professional-level results. Remember that the journey of boatbuilding is as rewarding as reaching your destination; it tests one’s patience and dedication. For those seeking to embark on this adventure or simply gain more insight into marine craftsmanship, Sven’s wisdom is invaluable.Making Flanges Around Bulkhead Hatches for Canvas
Sven Yrvind, a renowned yacht designer and sailor, shares valuable insights on creating flanges around bulkhead hatches for canvas protection in this enlightening video. By following his expert guidance, boat enthusiasts can ensure their living areas remain secure while allowing unhindered access through the hatches.Step 1: Starting with the Flange
Sven begins by explaining that working on flanges vertically and horizontally is significantly easier than doing so in a flat position. To simplify the process further, he divides the task into two or three steps as suggested by fellow expert “for for.” This approach not only makes it more manageable but also allows for greater precision in crafting each component.Step 2: Applying Glue and Securing
Sven proceeds to apply glue along one edge of the flange, ensuring a secure bond when clamped into place. He emphasizes that this stage is crucial for maintaining the structural integrity of the flange, which in turn safeguards the living area beneath the canvas when hatches are open.Step 3: Allowing Time to Dry
After securely attaching the first portion of the flange, Sven allows ample time for it to dry before moving forward with additional steps. This patience and precision are key aspects of his successful boatbuilding methods.Step 4: Finishing Touches
Once the flange is fully dried, Sven removes the clamps carefully, ensuring no damage occurs during this process. He then moves on to attaching four more pieces onto these main frames, completing two pairs of flanges for the bulkhead hatches.The Final Touches
While two flanges form the primary support structure around the hatches, Sven mentions there are two additional pieces required at each end to ensure comprehensive protection. This attention to detail highlights his commitment to producing a durable and reliable design. “Sailing is about finding your path, whether it’s across an ocean or within yourself.” – Sven Yrvind In conclusion, making flanges around bulkhead hatches may seem complex at first glance, but by following Sven Yrvind’s meticulous process, enthusiasts can achieve professional-level results. Remember that the journey of boatbuilding is as rewarding as reaching your destination; it tests one’s patience and dedication. For those seeking to embark on this adventure or simply gain more insight into marine craftsmanship, Sven’s wisdom is invaluable.Once the flange is fully dried, Sven removes the clamps carefully, ensuring no damage occurs during this process. He then moves on to attaching four more pieces onto these main frames, completing two pairs of flanges for the bulkhead hatches.The Final Touches
While two flanges form the primary support structure around the hatches, Sven mentions there are two additional pieces required at each end to ensure comprehensive protection. This attention to detail highlights his commitment to producing a durable and reliable design. “Sailing is about finding your path, whether it’s across an ocean or within yourself.” – Sven Yrvind In conclusion, making flanges around bulkhead hatches may seem complex at first glance, but by following Sven Yrvind’s meticulous process, enthusiasts can achieve professional-level results. Remember that the journey of boatbuilding is as rewarding as reaching your destination; it tests one’s patience and dedication. For those seeking to embark on this adventure or simply gain more insight into marine craftsmanship, Sven’s wisdom is invaluable.Sven proceeds to apply glue along one edge of the flange, ensuring a secure bond when clamped into place. He emphasizes that this stage is crucial for maintaining the structural integrity of the flange, which in turn safeguards the living area beneath the canvas when hatches are open.Step 3: Allowing Time to Dry
After securely attaching the first portion of the flange, Sven allows ample time for it to dry before moving forward with additional steps. This patience and precision are key aspects of his successful boatbuilding methods.Step 4: Finishing Touches
Once the flange is fully dried, Sven removes the clamps carefully, ensuring no damage occurs during this process. He then moves on to attaching four more pieces onto these main frames, completing two pairs of flanges for the bulkhead hatches.The Final Touches
While two flanges form the primary support structure around the hatches, Sven mentions there are two additional pieces required at each end to ensure comprehensive protection. This attention to detail highlights his commitment to producing a durable and reliable design. “Sailing is about finding your path, whether it’s across an ocean or within yourself.” – Sven Yrvind In conclusion, making flanges around bulkhead hatches may seem complex at first glance, but by following Sven Yrvind’s meticulous process, enthusiasts can achieve professional-level results. Remember that the journey of boatbuilding is as rewarding as reaching your destination; it tests one’s patience and dedication. For those seeking to embark on this adventure or simply gain more insight into marine craftsmanship, Sven’s wisdom is invaluable.Sven begins by explaining that working on flanges vertically and horizontally is significantly easier than doing so in a flat position. To simplify the process further, he divides the task into two or three steps as suggested by fellow expert “for for.” This approach not only makes it more manageable but also allows for greater precision in crafting each component.Step 2: Applying Glue and Securing
Sven proceeds to apply glue along one edge of the flange, ensuring a secure bond when clamped into place. He emphasizes that this stage is crucial for maintaining the structural integrity of the flange, which in turn safeguards the living area beneath the canvas when hatches are open.Step 3: Allowing Time to Dry
After securely attaching the first portion of the flange, Sven allows ample time for it to dry before moving forward with additional steps. This patience and precision are key aspects of his successful boatbuilding methods.Step 4: Finishing Touches
Once the flange is fully dried, Sven removes the clamps carefully, ensuring no damage occurs during this process. He then moves on to attaching four more pieces onto these main frames, completing two pairs of flanges for the bulkhead hatches.The Final Touches
While two flanges form the primary support structure around the hatches, Sven mentions there are two additional pieces required at each end to ensure comprehensive protection. This attention to detail highlights his commitment to producing a durable and reliable design. “Sailing is about finding your path, whether it’s across an ocean or within yourself.” – Sven Yrvind In conclusion, making flanges around bulkhead hatches may seem complex at first glance, but by following Sven Yrvind’s meticulous process, enthusiasts can achieve professional-level results. Remember that the journey of boatbuilding is as rewarding as reaching your destination; it tests one’s patience and dedication. For those seeking to embark on this adventure or simply gain more insight into marine craftsmanship, Sven’s wisdom is invaluable.Sven Yrvind, a renowned yacht designer and sailor, shares valuable insights on creating flanges around bulkhead hatches for canvas protection in this enlightening video. By following his expert guidance, boat enthusiasts can ensure their living areas remain secure while allowing unhindered access through the hatches.Step 1: Starting with the Flange
Sven begins by explaining that working on flanges vertically and horizontally is significantly easier than doing so in a flat position. To simplify the process further, he divides the task into two or three steps as suggested by fellow expert “for for.” This approach not only makes it more manageable but also allows for greater precision in crafting each component.Step 2: Applying Glue and Securing
Sven proceeds to apply glue along one edge of the flange, ensuring a secure bond when clamped into place. He emphasizes that this stage is crucial for maintaining the structural integrity of the flange, which in turn safeguards the living area beneath the canvas when hatches are open.Step 3: Allowing Time to Dry
After securely attaching the first portion of the flange, Sven allows ample time for it to dry before moving forward with additional steps. This patience and precision are key aspects of his successful boatbuilding methods.Step 4: Finishing Touches
Once the flange is fully dried, Sven removes the clamps carefully, ensuring no damage occurs during this process. He then moves on to attaching four more pieces onto these main frames, completing two pairs of flanges for the bulkhead hatches.The Final Touches
While two flanges form the primary support structure around the hatches, Sven mentions there are two additional pieces required at each end to ensure comprehensive protection. This attention to detail highlights his commitment to producing a durable and reliable design. “Sailing is about finding your path, whether it’s across an ocean or within yourself.” – Sven Yrvind In conclusion, making flanges around bulkhead hatches may seem complex at first glance, but by following Sven Yrvind’s meticulous process, enthusiasts can achieve professional-level results. Remember that the journey of boatbuilding is as rewarding as reaching your destination; it tests one’s patience and dedication. For those seeking to embark on this adventure or simply gain more insight into marine craftsmanship, Sven’s wisdom is invaluable.Making Flanges Around Bulkhead Hatches for Canvas
Sven Yrvind, a renowned yacht designer and sailor, shares valuable insights on creating flanges around bulkhead hatches for canvas protection in this enlightening video. By following his expert guidance, boat enthusiasts can ensure their living areas remain secure while allowing unhindered access through the hatches.Step 1: Starting with the Flange
Sven begins by explaining that working on flanges vertically and horizontally is significantly easier than doing so in a flat position. To simplify the process further, he divides the task into two or three steps as suggested by fellow expert “for for.” This approach not only makes it more manageable but also allows for greater precision in crafting each component.Step 2: Applying Glue and Securing
Sven proceeds to apply glue along one edge of the flange, ensuring a secure bond when clamped into place. He emphasizes that this stage is crucial for maintaining the structural integrity of the flange, which in turn safeguards the living area beneath the canvas when hatches are open.Step 3: Allowing Time to Dry
After securely attaching the first portion of the flange, Sven allows ample time for it to dry before moving forward with additional steps. This patience and precision are key aspects of his successful boatbuilding methods.Step 4: Finishing Touches
Once the flange is fully dried, Sven removes the clamps carefully, ensuring no damage occurs during this process. He then moves on to attaching four more pieces onto these main frames, completing two pairs of flanges for the bulkhead hatches.The Final Touches
While two flanges form the primary support structure around the hatches, Sven mentions there are two additional pieces required at each end to ensure comprehensive protection. This attention to detail highlights his commitment to producing a durable and reliable design. “Sailing is about finding your path, whether it’s across an ocean or within yourself.” – Sven Yrvind In conclusion, making flanges around bulkhead hatches may seem complex at first glance, but by following Sven Yrvind’s meticulous process, enthusiasts can achieve professional-level results. Remember that the journey of boatbuilding is as rewarding as reaching your destination; it tests one’s patience and dedication. For those seeking to embark on this adventure or simply gain more insight into marine craftsmanship, Sven’s wisdom is invaluable.After securely attaching the first portion of the flange, Sven allows ample time for it to dry before moving forward with additional steps. This patience and precision are key aspects of his successful boatbuilding methods.Step 4: Finishing Touches
Once the flange is fully dried, Sven removes the clamps carefully, ensuring no damage occurs during this process. He then moves on to attaching four more pieces onto these main frames, completing two pairs of flanges for the bulkhead hatches.The Final Touches
While two flanges form the primary support structure around the hatches, Sven mentions there are two additional pieces required at each end to ensure comprehensive protection. This attention to detail highlights his commitment to producing a durable and reliable design. “Sailing is about finding your path, whether it’s across an ocean or within yourself.” – Sven Yrvind In conclusion, making flanges around bulkhead hatches may seem complex at first glance, but by following Sven Yrvind’s meticulous process, enthusiasts can achieve professional-level results. Remember that the journey of boatbuilding is as rewarding as reaching your destination; it tests one’s patience and dedication. For those seeking to embark on this adventure or simply gain more insight into marine craftsmanship, Sven’s wisdom is invaluable.Sven proceeds to apply glue along one edge of the flange, ensuring a secure bond when clamped into place. He emphasizes that this stage is crucial for maintaining the structural integrity of the flange, which in turn safeguards the living area beneath the canvas when hatches are open.Step 3: Allowing Time to Dry
After securely attaching the first portion of the flange, Sven allows ample time for it to dry before moving forward with additional steps. This patience and precision are key aspects of his successful boatbuilding methods.Step 4: Finishing Touches
Once the flange is fully dried, Sven removes the clamps carefully, ensuring no damage occurs during this process. He then moves on to attaching four more pieces onto these main frames, completing two pairs of flanges for the bulkhead hatches.The Final Touches
While two flanges form the primary support structure around the hatches, Sven mentions there are two additional pieces required at each end to ensure comprehensive protection. This attention to detail highlights his commitment to producing a durable and reliable design. “Sailing is about finding your path, whether it’s across an ocean or within yourself.” – Sven Yrvind In conclusion, making flanges around bulkhead hatches may seem complex at first glance, but by following Sven Yrvind’s meticulous process, enthusiasts can achieve professional-level results. Remember that the journey of boatbuilding is as rewarding as reaching your destination; it tests one’s patience and dedication. For those seeking to embark on this adventure or simply gain more insight into marine craftsmanship, Sven’s wisdom is invaluable.Sven begins by explaining that working on flanges vertically and horizontally is significantly easier than doing so in a flat position. To simplify the process further, he divides the task into two or three steps as suggested by fellow expert “for for.” This approach not only makes it more manageable but also allows for greater precision in crafting each component.Step 2: Applying Glue and Securing
Sven proceeds to apply glue along one edge of the flange, ensuring a secure bond when clamped into place. He emphasizes that this stage is crucial for maintaining the structural integrity of the flange, which in turn safeguards the living area beneath the canvas when hatches are open.Step 3: Allowing Time to Dry
After securely attaching the first portion of the flange, Sven allows ample time for it to dry before moving forward with additional steps. This patience and precision are key aspects of his successful boatbuilding methods.Step 4: Finishing Touches
Once the flange is fully dried, Sven removes the clamps carefully, ensuring no damage occurs during this process. He then moves on to attaching four more pieces onto these main frames, completing two pairs of flanges for the bulkhead hatches.The Final Touches
While two flanges form the primary support structure around the hatches, Sven mentions there are two additional pieces required at each end to ensure comprehensive protection. This attention to detail highlights his commitment to producing a durable and reliable design. “Sailing is about finding your path, whether it’s across an ocean or within yourself.” – Sven Yrvind In conclusion, making flanges around bulkhead hatches may seem complex at first glance, but by following Sven Yrvind’s meticulous process, enthusiasts can achieve professional-level results. Remember that the journey of boatbuilding is as rewarding as reaching your destination; it tests one’s patience and dedication. For those seeking to embark on this adventure or simply gain more insight into marine craftsmanship, Sven’s wisdom is invaluable.Sven Yrvind, a renowned yacht designer and sailor, shares valuable insights on creating flanges around bulkhead hatches for canvas protection in this enlightening video. By following his expert guidance, boat enthusiasts can ensure their living areas remain secure while allowing unhindered access through the hatches.Step 1: Starting with the Flange
Sven begins by explaining that working on flanges vertically and horizontally is significantly easier than doing so in a flat position. To simplify the process further, he divides the task into two or three steps as suggested by fellow expert “for for.” This approach not only makes it more manageable but also allows for greater precision in crafting each component.Step 2: Applying Glue and Securing
Sven proceeds to apply glue along one edge of the flange, ensuring a secure bond when clamped into place. He emphasizes that this stage is crucial for maintaining the structural integrity of the flange, which in turn safeguards the living area beneath the canvas when hatches are open.Step 3: Allowing Time to Dry
After securely attaching the first portion of the flange, Sven allows ample time for it to dry before moving forward with additional steps. This patience and precision are key aspects of his successful boatbuilding methods.Step 4: Finishing Touches
Once the flange is fully dried, Sven removes the clamps carefully, ensuring no damage occurs during this process. He then moves on to attaching four more pieces onto these main frames, completing two pairs of flanges for the bulkhead hatches.The Final Touches
While two flanges form the primary support structure around the hatches, Sven mentions there are two additional pieces required at each end to ensure comprehensive protection. This attention to detail highlights his commitment to producing a durable and reliable design. “Sailing is about finding your path, whether it’s across an ocean or within yourself.” – Sven Yrvind In conclusion, making flanges around bulkhead hatches may seem complex at first glance, but by following Sven Yrvind’s meticulous process, enthusiasts can achieve professional-level results. Remember that the journey of boatbuilding is as rewarding as reaching your destination; it tests one’s patience and dedication. For those seeking to embark on this adventure or simply gain more insight into marine craftsmanship, Sven’s wisdom is invaluable.Making Flanges Around Bulkhead Hatches for Canvas
Sven Yrvind, a renowned yacht designer and sailor, shares valuable insights on creating flanges around bulkhead hatches for canvas protection in this enlightening video. By following his expert guidance, boat enthusiasts can ensure their living areas remain secure while allowing unhindered access through the hatches.Step 1: Starting with the Flange
Sven begins by explaining that working on flanges vertically and horizontally is significantly easier than doing so in a flat position. To simplify the process further, he divides the task into two or three steps as suggested by fellow expert “for for.” This approach not only makes it more manageable but also allows for greater precision in crafting each component.Step 2: Applying Glue and Securing
Sven proceeds to apply glue along one edge of the flange, ensuring a secure bond when clamped into place. He emphasizes that this stage is crucial for maintaining the structural integrity of the flange, which in turn safeguards the living area beneath the canvas when hatches are open.Step 3: Allowing Time to Dry
After securely attaching the first portion of the flange, Sven allows ample time for it to dry before moving forward with additional steps. This patience and precision are key aspects of his successful boatbuilding methods.Step 4: Finishing Touches
Once the flange is fully dried, Sven removes the clamps carefully, ensuring no damage occurs during this process. He then moves on to attaching four more pieces onto these main frames, completing two pairs of flanges for the bulkhead hatches.The Final Touches
While two flanges form the primary support structure around the hatches, Sven mentions there are two additional pieces required at each end to ensure comprehensive protection. This attention to detail highlights his commitment to producing a durable and reliable design. “Sailing is about finding your path, whether it’s across an ocean or within yourself.” – Sven Yrvind In conclusion, making flanges around bulkhead hatches may seem complex at first glance, but by following Sven Yrvind’s meticulous process, enthusiasts can achieve professional-level results. Remember that the journey of boatbuilding is as rewarding as reaching your destination; it tests one’s patience and dedication. For those seeking to embark on this adventure or simply gain more insight into marine craftsmanship, Sven’s wisdom is invaluable.Once the flange is fully dried, Sven removes the clamps carefully, ensuring no damage occurs during this process. He then moves on to attaching four more pieces onto these main frames, completing two pairs of flanges for the bulkhead hatches.The Final Touches
While two flanges form the primary support structure around the hatches, Sven mentions there are two additional pieces required at each end to ensure comprehensive protection. This attention to detail highlights his commitment to producing a durable and reliable design. “Sailing is about finding your path, whether it’s across an ocean or within yourself.” – Sven Yrvind In conclusion, making flanges around bulkhead hatches may seem complex at first glance, but by following Sven Yrvind’s meticulous process, enthusiasts can achieve professional-level results. Remember that the journey of boatbuilding is as rewarding as reaching your destination; it tests one’s patience and dedication. For those seeking to embark on this adventure or simply gain more insight into marine craftsmanship, Sven’s wisdom is invaluable.After securely attaching the first portion of the flange, Sven allows ample time for it to dry before moving forward with additional steps. This patience and precision are key aspects of his successful boatbuilding methods.Step 4: Finishing Touches
Once the flange is fully dried, Sven removes the clamps carefully, ensuring no damage occurs during this process. He then moves on to attaching four more pieces onto these main frames, completing two pairs of flanges for the bulkhead hatches.The Final Touches
While two flanges form the primary support structure around the hatches, Sven mentions there are two additional pieces required at each end to ensure comprehensive protection. This attention to detail highlights his commitment to producing a durable and reliable design. “Sailing is about finding your path, whether it’s across an ocean or within yourself.” – Sven Yrvind In conclusion, making flanges around bulkhead hatches may seem complex at first glance, but by following Sven Yrvind’s meticulous process, enthusiasts can achieve professional-level results. Remember that the journey of boatbuilding is as rewarding as reaching your destination; it tests one’s patience and dedication. For those seeking to embark on this adventure or simply gain more insight into marine craftsmanship, Sven’s wisdom is invaluable.Sven proceeds to apply glue along one edge of the flange, ensuring a secure bond when clamped into place. He emphasizes that this stage is crucial for maintaining the structural integrity of the flange, which in turn safeguards the living area beneath the canvas when hatches are open.Step 3: Allowing Time to Dry
After securely attaching the first portion of the flange, Sven allows ample time for it to dry before moving forward with additional steps. This patience and precision are key aspects of his successful boatbuilding methods.Step 4: Finishing Touches
Once the flange is fully dried, Sven removes the clamps carefully, ensuring no damage occurs during this process. He then moves on to attaching four more pieces onto these main frames, completing two pairs of flanges for the bulkhead hatches.The Final Touches
While two flanges form the primary support structure around the hatches, Sven mentions there are two additional pieces required at each end to ensure comprehensive protection. This attention to detail highlights his commitment to producing a durable and reliable design. “Sailing is about finding your path, whether it’s across an ocean or within yourself.” – Sven Yrvind In conclusion, making flanges around bulkhead hatches may seem complex at first glance, but by following Sven Yrvind’s meticulous process, enthusiasts can achieve professional-level results. Remember that the journey of boatbuilding is as rewarding as reaching your destination; it tests one’s patience and dedication. For those seeking to embark on this adventure or simply gain more insight into marine craftsmanship, Sven’s wisdom is invaluable.Sven begins by explaining that working on flanges vertically and horizontally is significantly easier than doing so in a flat position. To simplify the process further, he divides the task into two or three steps as suggested by fellow expert “for for.” This approach not only makes it more manageable but also allows for greater precision in crafting each component.Step 2: Applying Glue and Securing
Sven proceeds to apply glue along one edge of the flange, ensuring a secure bond when clamped into place. He emphasizes that this stage is crucial for maintaining the structural integrity of the flange, which in turn safeguards the living area beneath the canvas when hatches are open.Step 3: Allowing Time to Dry
After securely attaching the first portion of the flange, Sven allows ample time for it to dry before moving forward with additional steps. This patience and precision are key aspects of his successful boatbuilding methods.Step 4: Finishing Touches
Once the flange is fully dried, Sven removes the clamps carefully, ensuring no damage occurs during this process. He then moves on to attaching four more pieces onto these main frames, completing two pairs of flanges for the bulkhead hatches.The Final Touches
While two flanges form the primary support structure around the hatches, Sven mentions there are two additional pieces required at each end to ensure comprehensive protection. This attention to detail highlights his commitment to producing a durable and reliable design. “Sailing is about finding your path, whether it’s across an ocean or within yourself.” – Sven Yrvind In conclusion, making flanges around bulkhead hatches may seem complex at first glance, but by following Sven Yrvind’s meticulous process, enthusiasts can achieve professional-level results. Remember that the journey of boatbuilding is as rewarding as reaching your destination; it tests one’s patience and dedication. For those seeking to embark on this adventure or simply gain more insight into marine craftsmanship, Sven’s wisdom is invaluable.Sven Yrvind, a renowned yacht designer and sailor, shares valuable insights on creating flanges around bulkhead hatches for canvas protection in this enlightening video. By following his expert guidance, boat enthusiasts can ensure their living areas remain secure while allowing unhindered access through the hatches.Step 1: Starting with the Flange
Sven begins by explaining that working on flanges vertically and horizontally is significantly easier than doing so in a flat position. To simplify the process further, he divides the task into two or three steps as suggested by fellow expert “for for.” This approach not only makes it more manageable but also allows for greater precision in crafting each component.Step 2: Applying Glue and Securing
Sven proceeds to apply glue along one edge of the flange, ensuring a secure bond when clamped into place. He emphasizes that this stage is crucial for maintaining the structural integrity of the flange, which in turn safeguards the living area beneath the canvas when hatches are open.Step 3: Allowing Time to Dry
After securely attaching the first portion of the flange, Sven allows ample time for it to dry before moving forward with additional steps. This patience and precision are key aspects of his successful boatbuilding methods.Step 4: Finishing Touches
Once the flange is fully dried, Sven removes the clamps carefully, ensuring no damage occurs during this process. He then moves on to attaching four more pieces onto these main frames, completing two pairs of flanges for the bulkhead hatches.The Final Touches
While two flanges form the primary support structure around the hatches, Sven mentions there are two additional pieces required at each end to ensure comprehensive protection. This attention to detail highlights his commitment to producing a durable and reliable design. “Sailing is about finding your path, whether it’s across an ocean or within yourself.” – Sven Yrvind In conclusion, making flanges around bulkhead hatches may seem complex at first glance, but by following Sven Yrvind’s meticulous process, enthusiasts can achieve professional-level results. Remember that the journey of boatbuilding is as rewarding as reaching your destination; it tests one’s patience and dedication. For those seeking to embark on this adventure or simply gain more insight into marine craftsmanship, Sven’s wisdom is invaluable.Making Flanges Around Bulkhead Hatches for Canvas
Sven Yrvind, a renowned yacht designer and sailor, shares valuable insights on creating flanges around bulkhead hatches for canvas protection in this enlightening video. By following his expert guidance, boat enthusiasts can ensure their living areas remain secure while allowing unhindered access through the hatches.Step 1: Starting with the Flange
Sven begins by explaining that working on flanges vertically and horizontally is significantly easier than doing so in a flat position. To simplify the process further, he divides the task into two or three steps as suggested by fellow expert “for for.” This approach not only makes it more manageable but also allows for greater precision in crafting each component.Step 2: Applying Glue and Securing
Sven proceeds to apply glue along one edge of the flange, ensuring a secure bond when clamped into place. He emphasizes that this stage is crucial for maintaining the structural integrity of the flange, which in turn safeguards the living area beneath the canvas when hatches are open.Step 3: Allowing Time to Dry
After securely attaching the first portion of the flange, Sven allows ample time for it to dry before moving forward with additional steps. This patience and precision are key aspects of his successful boatbuilding methods.Step 4: Finishing Touches
Once the flange is fully dried, Sven removes the clamps carefully, ensuring no damage occurs during this process. He then moves on to attaching four more pieces onto these main frames, completing two pairs of flanges for the bulkhead hatches.The Final Touches
While two flanges form the primary support structure around the hatches, Sven mentions there are two additional pieces required at each end to ensure comprehensive protection. This attention to detail highlights his commitment to producing a durable and reliable design. “Sailing is about finding your path, whether it’s across an ocean or within yourself.” – Sven Yrvind In conclusion, making flanges around bulkhead hatches may seem complex at first glance, but by following Sven Yrvind’s meticulous process, enthusiasts can achieve professional-level results. Remember that the journey of boatbuilding is as rewarding as reaching your destination; it tests one’s patience and dedication. For those seeking to embark on this adventure or simply gain more insight into marine craftsmanship, Sven’s wisdom is invaluable.Sven proceeds to apply glue along one edge of the flange, ensuring a secure bond when clamped into place. He emphasizes that this stage is crucial for maintaining the structural integrity of the flange, which in turn safeguards the living area beneath the canvas when hatches are open.Step 3: Allowing Time to Dry
After securely attaching the first portion of the flange, Sven allows ample time for it to dry before moving forward with additional steps. This patience and precision are key aspects of his successful boatbuilding methods.Step 4: Finishing Touches
Once the flange is fully dried, Sven removes the clamps carefully, ensuring no damage occurs during this process. He then moves on to attaching four more pieces onto these main frames, completing two pairs of flanges for the bulkhead hatches.The Final Touches
While two flanges form the primary support structure around the hatches, Sven mentions there are two additional pieces required at each end to ensure comprehensive protection. This attention to detail highlights his commitment to producing a durable and reliable design. “Sailing is about finding your path, whether it’s across an ocean or within yourself.” – Sven Yrvind In conclusion, making flanges around bulkhead hatches may seem complex at first glance, but by following Sven Yrvind’s meticulous process, enthusiasts can achieve professional-level results. Remember that the journey of boatbuilding is as rewarding as reaching your destination; it tests one’s patience and dedication. For those seeking to embark on this adventure or simply gain more insight into marine craftsmanship, Sven’s wisdom is invaluable.Making Flanges Around Bulkhead Hatches for Canvas
Sven Yrvind, a renowned yacht designer and sailor, shares valuable insights on creating flanges around bulkhead hatches for canvas protection in this enlightening video. By following his expert guidance, boat enthusiasts can ensure their living areas remain secure while allowing unhindered access through the hatches.Step 1: Starting with the Flange
Sven begins by explaining that working on flanges vertically and horizontally is significantly easier than doing so in a flat position. To simplify the process further, he divides the task into two or three steps as suggested by fellow expert “for for.” This approach not only makes it more manageable but also allows for greater precision in crafting each component.Step 2: Applying Glue and Securing
Sven proceeds to apply glue along one edge of the flange, ensuring a secure bond when clamped into place. He emphasizes that this stage is crucial for maintaining the structural integrity of the flange, which in turn safeguards the living area beneath the canvas when hatches are open.Step 3: Allowing Time to Dry
After securely attaching the first portion of the flange, Sven allows ample time for it to dry before moving forward with additional steps. This patience and precision are key aspects of his successful boatbuilding methods.Step 4: Finishing Touches
Once the flange is fully dried, Sven removes the clamps carefully, ensuring no damage occurs during this process. He then moves on to attaching four more pieces onto these main frames, completing two pairs of flanges for the bulkhead hatches.The Final Touches
While two flanges form the primary support structure around the hatches, Sven mentions there are two additional pieces required at each end to ensure comprehensive protection. This attention to detail highlights his commitment to producing a durable and reliable design. “Sailing is about finding your path, whether it’s across an ocean or within yourself.” – Sven Yrvind In conclusion, making flanges around bulkhead hatches may seem complex at first glance, but by following Sven Yrvind’s meticulous process, enthusiasts can achieve professional-level results. Remember that the journey of boatbuilding is as rewarding as reaching your destination; it tests one’s patience and dedication. For those seeking to embark on this adventure or simply gain more insight into marine craftsmanship, Sven’s wisdom is invaluable.Once the flange is fully dried, Sven removes the clamps carefully, ensuring no damage occurs during this process. He then moves on to attaching four more pieces onto these main frames, completing two pairs of flanges for the bulkhead hatches.The Final Touches
While two flanges form the primary support structure around the hatches, Sven mentions there are two additional pieces required at each end to ensure comprehensive protection. This attention to detail highlights his commitment to producing a durable and reliable design. “Sailing is about finding your path, whether it’s across an ocean or within yourself.” – Sven Yrvind In conclusion, making flanges around bulkhead hatches may seem complex at first glance, but by following Sven Yrvind’s meticulous process, enthusiasts can achieve professional-level results. Remember that the journey of boatbuilding is as rewarding as reaching your destination; it tests one’s patience and dedication. For those seeking to embark on this adventure or simply gain more insight into marine craftsmanship, Sven’s wisdom is invaluable.Sven proceeds to apply glue along one edge of the flange, ensuring a secure bond when clamped into place. He emphasizes that this stage is crucial for maintaining the structural integrity of the flange, which in turn safeguards the living area beneath the canvas when hatches are open.Step 3: Allowing Time to Dry
After securely attaching the first portion of the flange, Sven allows ample time for it to dry before moving forward with additional steps. This patience and precision are key aspects of his successful boatbuilding methods.Step 4: Finishing Touches
Once the flange is fully dried, Sven removes the clamps carefully, ensuring no damage occurs during this process. He then moves on to attaching four more pieces onto these main frames, completing two pairs of flanges for the bulkhead hatches.The Final Touches
While two flanges form the primary support structure around the hatches, Sven mentions there are two additional pieces required at each end to ensure comprehensive protection. This attention to detail highlights his commitment to producing a durable and reliable design. “Sailing is about finding your path, whether it’s across an ocean or within yourself.” – Sven Yrvind In conclusion, making flanges around bulkhead hatches may seem complex at first glance, but by following Sven Yrvind’s meticulous process, enthusiasts can achieve professional-level results. Remember that the journey of boatbuilding is as rewarding as reaching your destination; it tests one’s patience and dedication. For those seeking to embark on this adventure or simply gain more insight into marine craftsmanship, Sven’s wisdom is invaluable.Sven begins by explaining that working on flanges vertically and horizontally is significantly easier than doing so in a flat position. To simplify the process further, he divides the task into two or three steps as suggested by fellow expert “for for.” This approach not only makes it more manageable but also allows for greater precision in crafting each component.Step 2: Applying Glue and Securing
Sven proceeds to apply glue along one edge of the flange, ensuring a secure bond when clamped into place. He emphasizes that this stage is crucial for maintaining the structural integrity of the flange, which in turn safeguards the living area beneath the canvas when hatches are open.Step 3: Allowing Time to Dry
After securely attaching the first portion of the flange, Sven allows ample time for it to dry before moving forward with additional steps. This patience and precision are key aspects of his successful boatbuilding methods.Step 4: Finishing Touches
Once the flange is fully dried, Sven removes the clamps carefully, ensuring no damage occurs during this process. He then moves on to attaching four more pieces onto these main frames, completing two pairs of flanges for the bulkhead hatches.The Final Touches
While two flanges form the primary support structure around the hatches, Sven mentions there are two additional pieces required at each end to ensure comprehensive protection. This attention to detail highlights his commitment to producing a durable and reliable design. “Sailing is about finding your path, whether it’s across an ocean or within yourself.” – Sven Yrvind In conclusion, making flanges around bulkhead hatches may seem complex at first glance, but by following Sven Yrvind’s meticulous process, enthusiasts can achieve professional-level results. Remember that the journey of boatbuilding is as rewarding as reaching your destination; it tests one’s patience and dedication. For those seeking to embark on this adventure or simply gain more insight into marine craftsmanship, Sven’s wisdom is invaluable.Sven Yrvind, a renowned yacht designer and sailor, shares valuable insights on creating flanges around bulkhead hatches for canvas protection in this enlightening video. By following his expert guidance, boat enthusiasts can ensure their living areas remain secure while allowing unhindered access through the hatches.Step 1: Starting with the Flange
Sven begins by explaining that working on flanges vertically and horizontally is significantly easier than doing so in a flat position. To simplify the process further, he divides the task into two or three steps as suggested by fellow expert “for for.” This approach not only makes it more manageable but also allows for greater precision in crafting each component.Step 2: Applying Glue and Securing
Sven proceeds to apply glue along one edge of the flange, ensuring a secure bond when clamped into place. He emphasizes that this stage is crucial for maintaining the structural integrity of the flange, which in turn safeguards the living area beneath the canvas when hatches are open.Step 3: Allowing Time to Dry
After securely attaching the first portion of the flange, Sven allows ample time for it to dry before moving forward with additional steps. This patience and precision are key aspects of his successful boatbuilding methods.Step 4: Finishing Touches
Once the flange is fully dried, Sven removes the clamps carefully, ensuring no damage occurs during this process. He then moves on to attaching four more pieces onto these main frames, completing two pairs of flanges for the bulkhead hatches.The Final Touches
While two flanges form the primary support structure around the hatches, Sven mentions there are two additional pieces required at each end to ensure comprehensive protection. This attention to detail highlights his commitment to producing a durable and reliable design. “Sailing is about finding your path, whether it’s across an ocean or within yourself.” – Sven Yrvind In conclusion, making flanges around bulkhead hatches may seem complex at first glance, but by following Sven Yrvind’s meticulous process, enthusiasts can achieve professional-level results. Remember that the journey of boatbuilding is as rewarding as reaching your destination; it tests one’s patience and dedication. For those seeking to embark on this adventure or simply gain more insight into marine craftsmanship, Sven’s wisdom is invaluable.Making Flanges Around Bulkhead Hatches for Canvas
Sven Yrvind, a renowned yacht designer and sailor, shares valuable insights on creating flanges around bulkhead hatches for canvas protection in this enlightening video. By following his expert guidance, boat enthusiasts can ensure their living areas remain secure while allowing unhindered access through the hatches.Step 1: Starting with the Flange
Sven begins by explaining that working on flanges vertically and horizontally is significantly easier than doing so in a flat position. To simplify the process further, he divides the task into two or three steps as suggested by fellow expert “for for.” This approach not only makes it more manageable but also allows for greater precision in crafting each component.Step 2: Applying Glue and Securing
Sven proceeds to apply glue along one edge of the flange, ensuring a secure bond when clamped into place. He emphasizes that this stage is crucial for maintaining the structural integrity of the flange, which in turn safeguards the living area beneath the canvas when hatches are open.Step 3: Allowing Time to Dry
After securely attaching the first portion of the flange, Sven allows ample time for it to dry before moving forward with additional steps. This patience and precision are key aspects of his successful boatbuilding methods.Step 4: Finishing Touches
Once the flange is fully dried, Sven removes the clamps carefully, ensuring no damage occurs during this process. He then moves on to attaching four more pieces onto these main frames, completing two pairs of flanges for the bulkhead hatches.The Final Touches
While two flanges form the primary support structure around the hatches, Sven mentions there are two additional pieces required at each end to ensure comprehensive protection. This attention to detail highlights his commitment to producing a durable and reliable design. “Sailing is about finding your path, whether it’s across an ocean or within yourself.” – Sven Yrvind In conclusion, making flanges around bulkhead hatches may seem complex at first glance, but by following Sven Yrvind’s meticulous process, enthusiasts can achieve professional-level results. Remember that the journey of boatbuilding is as rewarding as reaching your destination; it tests one’s patience and dedication. For those seeking to embark on this adventure or simply gain more insight into marine craftsmanship, Sven’s wisdom is invaluable.After securely attaching the first portion of the flange, Sven allows ample time for it to dry before moving forward with additional steps. This patience and precision are key aspects of his successful boatbuilding methods.Step 4: Finishing Touches
Once the flange is fully dried, Sven removes the clamps carefully, ensuring no damage occurs during this process. He then moves on to attaching four more pieces onto these main frames, completing two pairs of flanges for the bulkhead hatches.The Final Touches
While two flanges form the primary support structure around the hatches, Sven mentions there are two additional pieces required at each end to ensure comprehensive protection. This attention to detail highlights his commitment to producing a durable and reliable design. “Sailing is about finding your path, whether it’s across an ocean or within yourself.” – Sven Yrvind In conclusion, making flanges around bulkhead hatches may seem complex at first glance, but by following Sven Yrvind’s meticulous process, enthusiasts can achieve professional-level results. Remember that the journey of boatbuilding is as rewarding as reaching your destination; it tests one’s patience and dedication. For those seeking to embark on this adventure or simply gain more insight into marine craftsmanship, Sven’s wisdom is invaluable.Sven proceeds to apply glue along one edge of the flange, ensuring a secure bond when clamped into place. He emphasizes that this stage is crucial for maintaining the structural integrity of the flange, which in turn safeguards the living area beneath the canvas when hatches are open.Step 3: Allowing Time to Dry
After securely attaching the first portion of the flange, Sven allows ample time for it to dry before moving forward with additional steps. This patience and precision are key aspects of his successful boatbuilding methods.Step 4: Finishing Touches
Once the flange is fully dried, Sven removes the clamps carefully, ensuring no damage occurs during this process. He then moves on to attaching four more pieces onto these main frames, completing two pairs of flanges for the bulkhead hatches.The Final Touches
While two flanges form the primary support structure around the hatches, Sven mentions there are two additional pieces required at each end to ensure comprehensive protection. This attention to detail highlights his commitment to producing a durable and reliable design. “Sailing is about finding your path, whether it’s across an ocean or within yourself.” – Sven Yrvind In conclusion, making flanges around bulkhead hatches may seem complex at first glance, but by following Sven Yrvind’s meticulous process, enthusiasts can achieve professional-level results. Remember that the journey of boatbuilding is as rewarding as reaching your destination; it tests one’s patience and dedication. For those seeking to embark on this adventure or simply gain more insight into marine craftsmanship, Sven’s wisdom is invaluable.Sven begins by explaining that working on flanges vertically and horizontally is significantly easier than doing so in a flat position. To simplify the process further, he divides the task into two or three steps as suggested by fellow expert “for for.” This approach not only makes it more manageable but also allows for greater precision in crafting each component.Step 2: Applying Glue and Securing
Sven proceeds to apply glue along one edge of the flange, ensuring a secure bond when clamped into place. He emphasizes that this stage is crucial for maintaining the structural integrity of the flange, which in turn safeguards the living area beneath the canvas when hatches are open.Step 3: Allowing Time to Dry
After securely attaching the first portion of the flange, Sven allows ample time for it to dry before moving forward with additional steps. This patience and precision are key aspects of his successful boatbuilding methods.Step 4: Finishing Touches
Once the flange is fully dried, Sven removes the clamps carefully, ensuring no damage occurs during this process. He then moves on to attaching four more pieces onto these main frames, completing two pairs of flanges for the bulkhead hatches.The Final Touches
While two flanges form the primary support structure around the hatches, Sven mentions there are two additional pieces required at each end to ensure comprehensive protection. This attention to detail highlights his commitment to producing a durable and reliable design. “Sailing is about finding your path, whether it’s across an ocean or within yourself.” – Sven Yrvind In conclusion, making flanges around bulkhead hatches may seem complex at first glance, but by following Sven Yrvind’s meticulous process, enthusiasts can achieve professional-level results. Remember that the journey of boatbuilding is as rewarding as reaching your destination; it tests one’s patience and dedication. For those seeking to embark on this adventure or simply gain more insight into marine craftsmanship, Sven’s wisdom is invaluable.Sven Yrvind, a renowned yacht designer and sailor, shares valuable insights on creating flanges around bulkhead hatches for canvas protection in this enlightening video. By following his expert guidance, boat enthusiasts can ensure their living areas remain secure while allowing unhindered access through the hatches.Step 1: Starting with the Flange
Sven begins by explaining that working on flanges vertically and horizontally is significantly easier than doing so in a flat position. To simplify the process further, he divides the task into two or three steps as suggested by fellow expert “for for.” This approach not only makes it more manageable but also allows for greater precision in crafting each component.Step 2: Applying Glue and Securing
Sven proceeds to apply glue along one edge of the flange, ensuring a secure bond when clamped into place. He emphasizes that this stage is crucial for maintaining the structural integrity of the flange, which in turn safeguards the living area beneath the canvas when hatches are open.Step 3: Allowing Time to Dry
After securely attaching the first portion of the flange, Sven allows ample time for it to dry before moving forward with additional steps. This patience and precision are key aspects of his successful boatbuilding methods.Step 4: Finishing Touches
Once the flange is fully dried, Sven removes the clamps carefully, ensuring no damage occurs during this process. He then moves on to attaching four more pieces onto these main frames, completing two pairs of flanges for the bulkhead hatches.The Final Touches
While two flanges form the primary support structure around the hatches, Sven mentions there are two additional pieces required at each end to ensure comprehensive protection. This attention to detail highlights his commitment to producing a durable and reliable design. “Sailing is about finding your path, whether it’s across an ocean or within yourself.” – Sven Yrvind In conclusion, making flanges around bulkhead hatches may seem complex at first glance, but by following Sven Yrvind’s meticulous process, enthusiasts can achieve professional-level results. Remember that the journey of boatbuilding is as rewarding as reaching your destination; it tests one’s patience and dedication. For those seeking to embark on this adventure or simply gain more insight into marine craftsmanship, Sven’s wisdom is invaluable.Making Flanges Around Bulkhead Hatches for Canvas
Sven Yrvind, a renowned yacht designer and sailor, shares valuable insights on creating flanges around bulkhead hatches for canvas protection in this enlightening video. By following his expert guidance, boat enthusiasts can ensure their living areas remain secure while allowing unhindered access through the hatches.Step 1: Starting with the Flange
Sven begins by explaining that working on flanges vertically and horizontally is significantly easier than doing so in a flat position. To simplify the process further, he divides the task into two or three steps as suggested by fellow expert “for for.” This approach not only makes it more manageable but also allows for greater precision in crafting each component.Step 2: Applying Glue and Securing
Sven proceeds to apply glue along one edge of the flange, ensuring a secure bond when clamped into place. He emphasizes that this stage is crucial for maintaining the structural integrity of the flange, which in turn safeguards the living area beneath the canvas when hatches are open.Step 3: Allowing Time to Dry
After securely attaching the first portion of the flange, Sven allows ample time for it to dry before moving forward with additional steps. This patience and precision are key aspects of his successful boatbuilding methods.Step 4: Finishing Touches
Once the flange is fully dried, Sven removes the clamps carefully, ensuring no damage occurs during this process. He then moves on to attaching four more pieces onto these main frames, completing two pairs of flanges for the bulkhead hatches.The Final Touches
While two flanges form the primary support structure around the hatches, Sven mentions there are two additional pieces required at each end to ensure comprehensive protection. This attention to detail highlights his commitment to producing a durable and reliable design. “Sailing is about finding your path, whether it’s across an ocean or within yourself.” – Sven Yrvind In conclusion, making flanges around bulkhead hatches may seem complex at first glance, but by following Sven Yrvind’s meticulous process, enthusiasts can achieve professional-level results. Remember that the journey of boatbuilding is as rewarding as reaching your destination; it tests one’s patience and dedication. For those seeking to embark on this adventure or simply gain more insight into marine craftsmanship, Sven’s wisdom is invaluable.Once the flange is fully dried, Sven removes the clamps carefully, ensuring no damage occurs during this process. He then moves on to attaching four more pieces onto these main frames, completing two pairs of flanges for the bulkhead hatches.The Final Touches
While two flanges form the primary support structure around the hatches, Sven mentions there are two additional pieces required at each end to ensure comprehensive protection. This attention to detail highlights his commitment to producing a durable and reliable design. “Sailing is about finding your path, whether it’s across an ocean or within yourself.” – Sven Yrvind In conclusion, making flanges around bulkhead hatches may seem complex at first glance, but by following Sven Yrvind’s meticulous process, enthusiasts can achieve professional-level results. Remember that the journey of boatbuilding is as rewarding as reaching your destination; it tests one’s patience and dedication. For those seeking to embark on this adventure or simply gain more insight into marine craftsmanship, Sven’s wisdom is invaluable.After securely attaching the first portion of the flange, Sven allows ample time for it to dry before moving forward with additional steps. This patience and precision are key aspects of his successful boatbuilding methods.Step 4: Finishing Touches
Once the flange is fully dried, Sven removes the clamps carefully, ensuring no damage occurs during this process. He then moves on to attaching four more pieces onto these main frames, completing two pairs of flanges for the bulkhead hatches.The Final Touches
While two flanges form the primary support structure around the hatches, Sven mentions there are two additional pieces required at each end to ensure comprehensive protection. This attention to detail highlights his commitment to producing a durable and reliable design. “Sailing is about finding your path, whether it’s across an ocean or within yourself.” – Sven Yrvind In conclusion, making flanges around bulkhead hatches may seem complex at first glance, but by following Sven Yrvind’s meticulous process, enthusiasts can achieve professional-level results. Remember that the journey of boatbuilding is as rewarding as reaching your destination; it tests one’s patience and dedication. For those seeking to embark on this adventure or simply gain more insight into marine craftsmanship, Sven’s wisdom is invaluable.Sven proceeds to apply glue along one edge of the flange, ensuring a secure bond when clamped into place. He emphasizes that this stage is crucial for maintaining the structural integrity of the flange, which in turn safeguards the living area beneath the canvas when hatches are open.Step 3: Allowing Time to Dry
After securely attaching the first portion of the flange, Sven allows ample time for it to dry before moving forward with additional steps. This patience and precision are key aspects of his successful boatbuilding methods.Step 4: Finishing Touches
Once the flange is fully dried, Sven removes the clamps carefully, ensuring no damage occurs during this process. He then moves on to attaching four more pieces onto these main frames, completing two pairs of flanges for the bulkhead hatches.The Final Touches
While two flanges form the primary support structure around the hatches, Sven mentions there are two additional pieces required at each end to ensure comprehensive protection. This attention to detail highlights his commitment to producing a durable and reliable design. “Sailing is about finding your path, whether it’s across an ocean or within yourself.” – Sven Yrvind In conclusion, making flanges around bulkhead hatches may seem complex at first glance, but by following Sven Yrvind’s meticulous process, enthusiasts can achieve professional-level results. Remember that the journey of boatbuilding is as rewarding as reaching your destination; it tests one’s patience and dedication. For those seeking to embark on this adventure or simply gain more insight into marine craftsmanship, Sven’s wisdom is invaluable.Sven begins by explaining that working on flanges vertically and horizontally is significantly easier than doing so in a flat position. To simplify the process further, he divides the task into two or three steps as suggested by fellow expert “for for.” This approach not only makes it more manageable but also allows for greater precision in crafting each component.Step 2: Applying Glue and Securing
Sven proceeds to apply glue along one edge of the flange, ensuring a secure bond when clamped into place. He emphasizes that this stage is crucial for maintaining the structural integrity of the flange, which in turn safeguards the living area beneath the canvas when hatches are open.Step 3: Allowing Time to Dry
After securely attaching the first portion of the flange, Sven allows ample time for it to dry before moving forward with additional steps. This patience and precision are key aspects of his successful boatbuilding methods.Step 4: Finishing Touches
Once the flange is fully dried, Sven removes the clamps carefully, ensuring no damage occurs during this process. He then moves on to attaching four more pieces onto these main frames, completing two pairs of flanges for the bulkhead hatches.The Final Touches
While two flanges form the primary support structure around the hatches, Sven mentions there are two additional pieces required at each end to ensure comprehensive protection. This attention to detail highlights his commitment to producing a durable and reliable design. “Sailing is about finding your path, whether it’s across an ocean or within yourself.” – Sven Yrvind In conclusion, making flanges around bulkhead hatches may seem complex at first glance, but by following Sven Yrvind’s meticulous process, enthusiasts can achieve professional-level results. Remember that the journey of boatbuilding is as rewarding as reaching your destination; it tests one’s patience and dedication. For those seeking to embark on this adventure or simply gain more insight into marine craftsmanship, Sven’s wisdom is invaluable.Sven Yrvind, a renowned yacht designer and sailor, shares valuable insights on creating flanges around bulkhead hatches for canvas protection in this enlightening video. By following his expert guidance, boat enthusiasts can ensure their living areas remain secure while allowing unhindered access through the hatches.Step 1: Starting with the Flange
Sven begins by explaining that working on flanges vertically and horizontally is significantly easier than doing so in a flat position. To simplify the process further, he divides the task into two or three steps as suggested by fellow expert “for for.” This approach not only makes it more manageable but also allows for greater precision in crafting each component.Step 2: Applying Glue and Securing
Sven proceeds to apply glue along one edge of the flange, ensuring a secure bond when clamped into place. He emphasizes that this stage is crucial for maintaining the structural integrity of the flange, which in turn safeguards the living area beneath the canvas when hatches are open.Step 3: Allowing Time to Dry
After securely attaching the first portion of the flange, Sven allows ample time for it to dry before moving forward with additional steps. This patience and precision are key aspects of his successful boatbuilding methods.Step 4: Finishing Touches
Once the flange is fully dried, Sven removes the clamps carefully, ensuring no damage occurs during this process. He then moves on to attaching four more pieces onto these main frames, completing two pairs of flanges for the bulkhead hatches.The Final Touches
While two flanges form the primary support structure around the hatches, Sven mentions there are two additional pieces required at each end to ensure comprehensive protection. This attention to detail highlights his commitment to producing a durable and reliable design. “Sailing is about finding your path, whether it’s across an ocean or within yourself.” – Sven Yrvind In conclusion, making flanges around bulkhead hatches may seem complex at first glance, but by following Sven Yrvind’s meticulous process, enthusiasts can achieve professional-level results. Remember that the journey of boatbuilding is as rewarding as reaching your destination; it tests one’s patience and dedication. For those seeking to embark on this adventure or simply gain more insight into marine craftsmanship, Sven’s wisdom is invaluable.Making Flanges Around Bulkhead Hatches for Canvas
Sven Yrvind, a renowned yacht designer and sailor, shares valuable insights on creating flanges around bulkhead hatches for canvas protection in this enlightening video. By following his expert guidance, boat enthusiasts can ensure their living areas remain secure while allowing unhindered access through the hatches.Step 1: Starting with the Flange
Sven begins by explaining that working on flanges vertically and horizontally is significantly easier than doing so in a flat position. To simplify the process further, he divides the task into two or three steps as suggested by fellow expert “for for.” This approach not only makes it more manageable but also allows for greater precision in crafting each component.Step 2: Applying Glue and Securing
Sven proceeds to apply glue along one edge of the flange, ensuring a secure bond when clamped into place. He emphasizes that this stage is crucial for maintaining the structural integrity of the flange, which in turn safeguards the living area beneath the canvas when hatches are open.Step 3: Allowing Time to Dry
After securely attaching the first portion of the flange, Sven allows ample time for it to dry before moving forward with additional steps. This patience and precision are key aspects of his successful boatbuilding methods.Step 4: Finishing Touches
Once the flange is fully dried, Sven removes the clamps carefully, ensuring no damage occurs during this process. He then moves on to attaching four more pieces onto these main frames, completing two pairs of flanges for the bulkhead hatches.The Final Touches
While two flanges form the primary support structure around the hatches, Sven mentions there are two additional pieces required at each end to ensure comprehensive protection. This attention to detail highlights his commitment to producing a durable and reliable design. “Sailing is about finding your path, whether it’s across an ocean or within yourself.” – Sven Yrvind In conclusion, making flanges around bulkhead hatches may seem complex at first glance, but by following Sven Yrvind’s meticulous process, enthusiasts can achieve professional-level results. Remember that the journey of boatbuilding is as rewarding as reaching your destination; it tests one’s patience and dedication. For those seeking to embark on this adventure or simply gain more insight into marine craftsmanship, Sven’s wisdom is invaluable.Sven begins by explaining that working on flanges vertically and horizontally is significantly easier than doing so in a flat position. To simplify the process further, he divides the task into two or three steps as suggested by fellow expert “for for.” This approach not only makes it more manageable but also allows for greater precision in crafting each component.Step 2: Applying Glue and Securing
Sven proceeds to apply glue along one edge of the flange, ensuring a secure bond when clamped into place. He emphasizes that this stage is crucial for maintaining the structural integrity of the flange, which in turn safeguards the living area beneath the canvas when hatches are open.Step 3: Allowing Time to Dry
After securely attaching the first portion of the flange, Sven allows ample time for it to dry before moving forward with additional steps. This patience and precision are key aspects of his successful boatbuilding methods.Step 4: Finishing Touches
Once the flange is fully dried, Sven removes the clamps carefully, ensuring no damage occurs during this process. He then moves on to attaching four more pieces onto these main frames, completing two pairs of flanges for the bulkhead hatches.The Final Touches
While two flanges form the primary support structure around the hatches, Sven mentions there are two additional pieces required at each end to ensure comprehensive protection. This attention to detail highlights his commitment to producing a durable and reliable design. “Sailing is about finding your path, whether it’s across an ocean or within yourself.” – Sven Yrvind In conclusion, making flanges around bulkhead hatches may seem complex at first glance, but by following Sven Yrvind’s meticulous process, enthusiasts can achieve professional-level results. Remember that the journey of boatbuilding is as rewarding as reaching your destination; it tests one’s patience and dedication. For those seeking to embark on this adventure or simply gain more insight into marine craftsmanship, Sven’s wisdom is invaluable.Making Flanges Around Bulkhead Hatches for Canvas
Sven Yrvind, a renowned yacht designer and sailor, shares valuable insights on creating flanges around bulkhead hatches for canvas protection in this enlightening video. By following his expert guidance, boat enthusiasts can ensure their living areas remain secure while allowing unhindered access through the hatches.Step 1: Starting with the Flange
Sven begins by explaining that working on flanges vertically and horizontally is significantly easier than doing so in a flat position. To simplify the process further, he divides the task into two or three steps as suggested by fellow expert “for for.” This approach not only makes it more manageable but also allows for greater precision in crafting each component.Step 2: Applying Glue and Securing
Sven proceeds to apply glue along one edge of the flange, ensuring a secure bond when clamped into place. He emphasizes that this stage is crucial for maintaining the structural integrity of the flange, which in turn safeguards the living area beneath the canvas when hatches are open.Step 3: Allowing Time to Dry
After securely attaching the first portion of the flange, Sven allows ample time for it to dry before moving forward with additional steps. This patience and precision are key aspects of his successful boatbuilding methods.Step 4: Finishing Touches
Once the flange is fully dried, Sven removes the clamps carefully, ensuring no damage occurs during this process. He then moves on to attaching four more pieces onto these main frames, completing two pairs of flanges for the bulkhead hatches.The Final Touches
While two flanges form the primary support structure around the hatches, Sven mentions there are two additional pieces required at each end to ensure comprehensive protection. This attention to detail highlights his commitment to producing a durable and reliable design. “Sailing is about finding your path, whether it’s across an ocean or within yourself.” – Sven Yrvind In conclusion, making flanges around bulkhead hatches may seem complex at first glance, but by following Sven Yrvind’s meticulous process, enthusiasts can achieve professional-level results. Remember that the journey of boatbuilding is as rewarding as reaching your destination; it tests one’s patience and dedication. For those seeking to embark on this adventure or simply gain more insight into marine craftsmanship, Sven’s wisdom is invaluable.Once the flange is fully dried, Sven removes the clamps carefully, ensuring no damage occurs during this process. He then moves on to attaching four more pieces onto these main frames, completing two pairs of flanges for the bulkhead hatches.The Final Touches
While two flanges form the primary support structure around the hatches, Sven mentions there are two additional pieces required at each end to ensure comprehensive protection. This attention to detail highlights his commitment to producing a durable and reliable design. “Sailing is about finding your path, whether it’s across an ocean or within yourself.” – Sven Yrvind In conclusion, making flanges around bulkhead hatches may seem complex at first glance, but by following Sven Yrvind’s meticulous process, enthusiasts can achieve professional-level results. Remember that the journey of boatbuilding is as rewarding as reaching your destination; it tests one’s patience and dedication. For those seeking to embark on this adventure or simply gain more insight into marine craftsmanship, Sven’s wisdom is invaluable.Sven proceeds to apply glue along one edge of the flange, ensuring a secure bond when clamped into place. He emphasizes that this stage is crucial for maintaining the structural integrity of the flange, which in turn safeguards the living area beneath the canvas when hatches are open.Step 3: Allowing Time to Dry
After securely attaching the first portion of the flange, Sven allows ample time for it to dry before moving forward with additional steps. This patience and precision are key aspects of his successful boatbuilding methods.Step 4: Finishing Touches
Once the flange is fully dried, Sven removes the clamps carefully, ensuring no damage occurs during this process. He then moves on to attaching four more pieces onto these main frames, completing two pairs of flanges for the bulkhead hatches.The Final Touches
While two flanges form the primary support structure around the hatches, Sven mentions there are two additional pieces required at each end to ensure comprehensive protection. This attention to detail highlights his commitment to producing a durable and reliable design. “Sailing is about finding your path, whether it’s across an ocean or within yourself.” – Sven Yrvind In conclusion, making flanges around bulkhead hatches may seem complex at first glance, but by following Sven Yrvind’s meticulous process, enthusiasts can achieve professional-level results. Remember that the journey of boatbuilding is as rewarding as reaching your destination; it tests one’s patience and dedication. For those seeking to embark on this adventure or simply gain more insight into marine craftsmanship, Sven’s wisdom is invaluable.Sven begins by explaining that working on flanges vertically and horizontally is significantly easier than doing so in a flat position. To simplify the process further, he divides the task into two or three steps as suggested by fellow expert “for for.” This approach not only makes it more manageable but also allows for greater precision in crafting each component.Step 2: Applying Glue and Securing
Sven proceeds to apply glue along one edge of the flange, ensuring a secure bond when clamped into place. He emphasizes that this stage is crucial for maintaining the structural integrity of the flange, which in turn safeguards the living area beneath the canvas when hatches are open.Step 3: Allowing Time to Dry
After securely attaching the first portion of the flange, Sven allows ample time for it to dry before moving forward with additional steps. This patience and precision are key aspects of his successful boatbuilding methods.Step 4: Finishing Touches
Once the flange is fully dried, Sven removes the clamps carefully, ensuring no damage occurs during this process. He then moves on to attaching four more pieces onto these main frames, completing two pairs of flanges for the bulkhead hatches.The Final Touches
While two flanges form the primary support structure around the hatches, Sven mentions there are two additional pieces required at each end to ensure comprehensive protection. This attention to detail highlights his commitment to producing a durable and reliable design. “Sailing is about finding your path, whether it’s across an ocean or within yourself.” – Sven Yrvind In conclusion, making flanges around bulkhead hatches may seem complex at first glance, but by following Sven Yrvind’s meticulous process, enthusiasts can achieve professional-level results. Remember that the journey of boatbuilding is as rewarding as reaching your destination; it tests one’s patience and dedication. For those seeking to embark on this adventure or simply gain more insight into marine craftsmanship, Sven’s wisdom is invaluable.Sven Yrvind, a renowned yacht designer and sailor, shares valuable insights on creating flanges around bulkhead hatches for canvas protection in this enlightening video. By following his expert guidance, boat enthusiasts can ensure their living areas remain secure while allowing unhindered access through the hatches.Step 1: Starting with the Flange
Sven begins by explaining that working on flanges vertically and horizontally is significantly easier than doing so in a flat position. To simplify the process further, he divides the task into two or three steps as suggested by fellow expert “for for.” This approach not only makes it more manageable but also allows for greater precision in crafting each component.Step 2: Applying Glue and Securing
Sven proceeds to apply glue along one edge of the flange, ensuring a secure bond when clamped into place. He emphasizes that this stage is crucial for maintaining the structural integrity of the flange, which in turn safeguards the living area beneath the canvas when hatches are open.Step 3: Allowing Time to Dry
After securely attaching the first portion of the flange, Sven allows ample time for it to dry before moving forward with additional steps. This patience and precision are key aspects of his successful boatbuilding methods.Step 4: Finishing Touches
Once the flange is fully dried, Sven removes the clamps carefully, ensuring no damage occurs during this process. He then moves on to attaching four more pieces onto these main frames, completing two pairs of flanges for the bulkhead hatches.The Final Touches
While two flanges form the primary support structure around the hatches, Sven mentions there are two additional pieces required at each end to ensure comprehensive protection. This attention to detail highlights his commitment to producing a durable and reliable design. “Sailing is about finding your path, whether it’s across an ocean or within yourself.” – Sven Yrvind In conclusion, making flanges around bulkhead hatches may seem complex at first glance, but by following Sven Yrvind’s meticulous process, enthusiasts can achieve professional-level results. Remember that the journey of boatbuilding is as rewarding as reaching your destination; it tests one’s patience and dedication. For those seeking to embark on this adventure or simply gain more insight into marine craftsmanship, Sven’s wisdom is invaluable.Making Flanges Around Bulkhead Hatches for Canvas
Sven Yrvind, a renowned yacht designer and sailor, shares valuable insights on creating flanges around bulkhead hatches for canvas protection in this enlightening video. By following his expert guidance, boat enthusiasts can ensure their living areas remain secure while allowing unhindered access through the hatches.Step 1: Starting with the Flange
Sven begins by explaining that working on flanges vertically and horizontally is significantly easier than doing so in a flat position. To simplify the process further, he divides the task into two or three steps as suggested by fellow expert “for for.” This approach not only makes it more manageable but also allows for greater precision in crafting each component.Step 2: Applying Glue and Securing
Sven proceeds to apply glue along one edge of the flange, ensuring a secure bond when clamped into place. He emphasizes that this stage is crucial for maintaining the structural integrity of the flange, which in turn safeguards the living area beneath the canvas when hatches are open.Step 3: Allowing Time to Dry
After securely attaching the first portion of the flange, Sven allows ample time for it to dry before moving forward with additional steps. This patience and precision are key aspects of his successful boatbuilding methods.Step 4: Finishing Touches
Once the flange is fully dried, Sven removes the clamps carefully, ensuring no damage occurs during this process. He then moves on to attaching four more pieces onto these main frames, completing two pairs of flanges for the bulkhead hatches.The Final Touches
While two flanges form the primary support structure around the hatches, Sven mentions there are two additional pieces required at each end to ensure comprehensive protection. This attention to detail highlights his commitment to producing a durable and reliable design. “Sailing is about finding your path, whether it’s across an ocean or within yourself.” – Sven Yrvind In conclusion, making flanges around bulkhead hatches may seem complex at first glance, but by following Sven Yrvind’s meticulous process, enthusiasts can achieve professional-level results. Remember that the journey of boatbuilding is as rewarding as reaching your destination; it tests one’s patience and dedication. For those seeking to embark on this adventure or simply gain more insight into marine craftsmanship, Sven’s wisdom is invaluable.After securely attaching the first portion of the flange, Sven allows ample time for it to dry before moving forward with additional steps. This patience and precision are key aspects of his successful boatbuilding methods.Step 4: Finishing Touches
Once the flange is fully dried, Sven removes the clamps carefully, ensuring no damage occurs during this process. He then moves on to attaching four more pieces onto these main frames, completing two pairs of flanges for the bulkhead hatches.The Final Touches
While two flanges form the primary support structure around the hatches, Sven mentions there are two additional pieces required at each end to ensure comprehensive protection. This attention to detail highlights his commitment to producing a durable and reliable design. “Sailing is about finding your path, whether it’s across an ocean or within yourself.” – Sven Yrvind In conclusion, making flanges around bulkhead hatches may seem complex at first glance, but by following Sven Yrvind’s meticulous process, enthusiasts can achieve professional-level results. Remember that the journey of boatbuilding is as rewarding as reaching your destination; it tests one’s patience and dedication. For those seeking to embark on this adventure or simply gain more insight into marine craftsmanship, Sven’s wisdom is invaluable.Sven proceeds to apply glue along one edge of the flange, ensuring a secure bond when clamped into place. He emphasizes that this stage is crucial for maintaining the structural integrity of the flange, which in turn safeguards the living area beneath the canvas when hatches are open.Step 3: Allowing Time to Dry
After securely attaching the first portion of the flange, Sven allows ample time for it to dry before moving forward with additional steps. This patience and precision are key aspects of his successful boatbuilding methods.Step 4: Finishing Touches
Once the flange is fully dried, Sven removes the clamps carefully, ensuring no damage occurs during this process. He then moves on to attaching four more pieces onto these main frames, completing two pairs of flanges for the bulkhead hatches.The Final Touches
While two flanges form the primary support structure around the hatches, Sven mentions there are two additional pieces required at each end to ensure comprehensive protection. This attention to detail highlights his commitment to producing a durable and reliable design. “Sailing is about finding your path, whether it’s across an ocean or within yourself.” – Sven Yrvind In conclusion, making flanges around bulkhead hatches may seem complex at first glance, but by following Sven Yrvind’s meticulous process, enthusiasts can achieve professional-level results. Remember that the journey of boatbuilding is as rewarding as reaching your destination; it tests one’s patience and dedication. For those seeking to embark on this adventure or simply gain more insight into marine craftsmanship, Sven’s wisdom is invaluable.Sven begins by explaining that working on flanges vertically and horizontally is significantly easier than doing so in a flat position. To simplify the process further, he divides the task into two or three steps as suggested by fellow expert “for for.” This approach not only makes it more manageable but also allows for greater precision in crafting each component.Step 2: Applying Glue and Securing
Sven proceeds to apply glue along one edge of the flange, ensuring a secure bond when clamped into place. He emphasizes that this stage is crucial for maintaining the structural integrity of the flange, which in turn safeguards the living area beneath the canvas when hatches are open.Step 3: Allowing Time to Dry
After securely attaching the first portion of the flange, Sven allows ample time for it to dry before moving forward with additional steps. This patience and precision are key aspects of his successful boatbuilding methods.Step 4: Finishing Touches
Once the flange is fully dried, Sven removes the clamps carefully, ensuring no damage occurs during this process. He then moves on to attaching four more pieces onto these main frames, completing two pairs of flanges for the bulkhead hatches.The Final Touches
While two flanges form the primary support structure around the hatches, Sven mentions there are two additional pieces required at each end to ensure comprehensive protection. This attention to detail highlights his commitment to producing a durable and reliable design. “Sailing is about finding your path, whether it’s across an ocean or within yourself.” – Sven Yrvind In conclusion, making flanges around bulkhead hatches may seem complex at first glance, but by following Sven Yrvind’s meticulous process, enthusiasts can achieve professional-level results. Remember that the journey of boatbuilding is as rewarding as reaching your destination; it tests one’s patience and dedication. For those seeking to embark on this adventure or simply gain more insight into marine craftsmanship, Sven’s wisdom is invaluable.Sven Yrvind, a renowned yacht designer and sailor, shares valuable insights on creating flanges around bulkhead hatches for canvas protection in this enlightening video. By following his expert guidance, boat enthusiasts can ensure their living areas remain secure while allowing unhindered access through the hatches.Step 1: Starting with the Flange
Sven begins by explaining that working on flanges vertically and horizontally is significantly easier than doing so in a flat position. To simplify the process further, he divides the task into two or three steps as suggested by fellow expert “for for.” This approach not only makes it more manageable but also allows for greater precision in crafting each component.Step 2: Applying Glue and Securing
Sven proceeds to apply glue along one edge of the flange, ensuring a secure bond when clamped into place. He emphasizes that this stage is crucial for maintaining the structural integrity of the flange, which in turn safeguards the living area beneath the canvas when hatches are open.Step 3: Allowing Time to Dry
After securely attaching the first portion of the flange, Sven allows ample time for it to dry before moving forward with additional steps. This patience and precision are key aspects of his successful boatbuilding methods.Step 4: Finishing Touches
Once the flange is fully dried, Sven removes the clamps carefully, ensuring no damage occurs during this process. He then moves on to attaching four more pieces onto these main frames, completing two pairs of flanges for the bulkhead hatches.The Final Touches
While two flanges form the primary support structure around the hatches, Sven mentions there are two additional pieces required at each end to ensure comprehensive protection. This attention to detail highlights his commitment to producing a durable and reliable design. “Sailing is about finding your path, whether it’s across an ocean or within yourself.” – Sven Yrvind In conclusion, making flanges around bulkhead hatches may seem complex at first glance, but by following Sven Yrvind’s meticulous process, enthusiasts can achieve professional-level results. Remember that the journey of boatbuilding is as rewarding as reaching your destination; it tests one’s patience and dedication. For those seeking to embark on this adventure or simply gain more insight into marine craftsmanship, Sven’s wisdom is invaluable.Making Flanges Around Bulkhead Hatches for Canvas
Sven Yrvind, a renowned yacht designer and sailor, shares valuable insights on creating flanges around bulkhead hatches for canvas protection in this enlightening video. By following his expert guidance, boat enthusiasts can ensure their living areas remain secure while allowing unhindered access through the hatches.Step 1: Starting with the Flange
Sven begins by explaining that working on flanges vertically and horizontally is significantly easier than doing so in a flat position. To simplify the process further, he divides the task into two or three steps as suggested by fellow expert “for for.” This approach not only makes it more manageable but also allows for greater precision in crafting each component.Step 2: Applying Glue and Securing
Sven proceeds to apply glue along one edge of the flange, ensuring a secure bond when clamped into place. He emphasizes that this stage is crucial for maintaining the structural integrity of the flange, which in turn safeguards the living area beneath the canvas when hatches are open.Step 3: Allowing Time to Dry
After securely attaching the first portion of the flange, Sven allows ample time for it to dry before moving forward with additional steps. This patience and precision are key aspects of his successful boatbuilding methods.Step 4: Finishing Touches
Once the flange is fully dried, Sven removes the clamps carefully, ensuring no damage occurs during this process. He then moves on to attaching four more pieces onto these main frames, completing two pairs of flanges for the bulkhead hatches.The Final Touches
While two flanges form the primary support structure around the hatches, Sven mentions there are two additional pieces required at each end to ensure comprehensive protection. This attention to detail highlights his commitment to producing a durable and reliable design. “Sailing is about finding your path, whether it’s across an ocean or within yourself.” – Sven Yrvind In conclusion, making flanges around bulkhead hatches may seem complex at first glance, but by following Sven Yrvind’s meticulous process, enthusiasts can achieve professional-level results. Remember that the journey of boatbuilding is as rewarding as reaching your destination; it tests one’s patience and dedication. For those seeking to embark on this adventure or simply gain more insight into marine craftsmanship, Sven’s wisdom is invaluable.Once the flange is fully dried, Sven removes the clamps carefully, ensuring no damage occurs during this process. He then moves on to attaching four more pieces onto these main frames, completing two pairs of flanges for the bulkhead hatches.The Final Touches
While two flanges form the primary support structure around the hatches, Sven mentions there are two additional pieces required at each end to ensure comprehensive protection. This attention to detail highlights his commitment to producing a durable and reliable design. “Sailing is about finding your path, whether it’s across an ocean or within yourself.” – Sven Yrvind In conclusion, making flanges around bulkhead hatches may seem complex at first glance, but by following Sven Yrvind’s meticulous process, enthusiasts can achieve professional-level results. Remember that the journey of boatbuilding is as rewarding as reaching your destination; it tests one’s patience and dedication. For those seeking to embark on this adventure or simply gain more insight into marine craftsmanship, Sven’s wisdom is invaluable.After securely attaching the first portion of the flange, Sven allows ample time for it to dry before moving forward with additional steps. This patience and precision are key aspects of his successful boatbuilding methods.Step 4: Finishing Touches
Once the flange is fully dried, Sven removes the clamps carefully, ensuring no damage occurs during this process. He then moves on to attaching four more pieces onto these main frames, completing two pairs of flanges for the bulkhead hatches.The Final Touches
While two flanges form the primary support structure around the hatches, Sven mentions there are two additional pieces required at each end to ensure comprehensive protection. This attention to detail highlights his commitment to producing a durable and reliable design. “Sailing is about finding your path, whether it’s across an ocean or within yourself.” – Sven Yrvind In conclusion, making flanges around bulkhead hatches may seem complex at first glance, but by following Sven Yrvind’s meticulous process, enthusiasts can achieve professional-level results. Remember that the journey of boatbuilding is as rewarding as reaching your destination; it tests one’s patience and dedication. For those seeking to embark on this adventure or simply gain more insight into marine craftsmanship, Sven’s wisdom is invaluable.Sven proceeds to apply glue along one edge of the flange, ensuring a secure bond when clamped into place. He emphasizes that this stage is crucial for maintaining the structural integrity of the flange, which in turn safeguards the living area beneath the canvas when hatches are open.Step 3: Allowing Time to Dry
After securely attaching the first portion of the flange, Sven allows ample time for it to dry before moving forward with additional steps. This patience and precision are key aspects of his successful boatbuilding methods.Step 4: Finishing Touches
Once the flange is fully dried, Sven removes the clamps carefully, ensuring no damage occurs during this process. He then moves on to attaching four more pieces onto these main frames, completing two pairs of flanges for the bulkhead hatches.The Final Touches
While two flanges form the primary support structure around the hatches, Sven mentions there are two additional pieces required at each end to ensure comprehensive protection. This attention to detail highlights his commitment to producing a durable and reliable design. “Sailing is about finding your path, whether it’s across an ocean or within yourself.” – Sven Yrvind In conclusion, making flanges around bulkhead hatches may seem complex at first glance, but by following Sven Yrvind’s meticulous process, enthusiasts can achieve professional-level results. Remember that the journey of boatbuilding is as rewarding as reaching your destination; it tests one’s patience and dedication. For those seeking to embark on this adventure or simply gain more insight into marine craftsmanship, Sven’s wisdom is invaluable.Sven begins by explaining that working on flanges vertically and horizontally is significantly easier than doing so in a flat position. To simplify the process further, he divides the task into two or three steps as suggested by fellow expert “for for.” This approach not only makes it more manageable but also allows for greater precision in crafting each component.Step 2: Applying Glue and Securing
Sven proceeds to apply glue along one edge of the flange, ensuring a secure bond when clamped into place. He emphasizes that this stage is crucial for maintaining the structural integrity of the flange, which in turn safeguards the living area beneath the canvas when hatches are open.Step 3: Allowing Time to Dry
After securely attaching the first portion of the flange, Sven allows ample time for it to dry before moving forward with additional steps. This patience and precision are key aspects of his successful boatbuilding methods.Step 4: Finishing Touches
Once the flange is fully dried, Sven removes the clamps carefully, ensuring no damage occurs during this process. He then moves on to attaching four more pieces onto these main frames, completing two pairs of flanges for the bulkhead hatches.The Final Touches
While two flanges form the primary support structure around the hatches, Sven mentions there are two additional pieces required at each end to ensure comprehensive protection. This attention to detail highlights his commitment to producing a durable and reliable design. “Sailing is about finding your path, whether it’s across an ocean or within yourself.” – Sven Yrvind In conclusion, making flanges around bulkhead hatches may seem complex at first glance, but by following Sven Yrvind’s meticulous process, enthusiasts can achieve professional-level results. Remember that the journey of boatbuilding is as rewarding as reaching your destination; it tests one’s patience and dedication. For those seeking to embark on this adventure or simply gain more insight into marine craftsmanship, Sven’s wisdom is invaluable.Sven Yrvind, a renowned yacht designer and sailor, shares valuable insights on creating flanges around bulkhead hatches for canvas protection in this enlightening video. By following his expert guidance, boat enthusiasts can ensure their living areas remain secure while allowing unhindered access through the hatches.Step 1: Starting with the Flange
Sven begins by explaining that working on flanges vertically and horizontally is significantly easier than doing so in a flat position. To simplify the process further, he divides the task into two or three steps as suggested by fellow expert “for for.” This approach not only makes it more manageable but also allows for greater precision in crafting each component.Step 2: Applying Glue and Securing
Sven proceeds to apply glue along one edge of the flange, ensuring a secure bond when clamped into place. He emphasizes that this stage is crucial for maintaining the structural integrity of the flange, which in turn safeguards the living area beneath the canvas when hatches are open.Step 3: Allowing Time to Dry
After securely attaching the first portion of the flange, Sven allows ample time for it to dry before moving forward with additional steps. This patience and precision are key aspects of his successful boatbuilding methods.Step 4: Finishing Touches
Once the flange is fully dried, Sven removes the clamps carefully, ensuring no damage occurs during this process. He then moves on to attaching four more pieces onto these main frames, completing two pairs of flanges for the bulkhead hatches.The Final Touches
While two flanges form the primary support structure around the hatches, Sven mentions there are two additional pieces required at each end to ensure comprehensive protection. This attention to detail highlights his commitment to producing a durable and reliable design. “Sailing is about finding your path, whether it’s across an ocean or within yourself.” – Sven Yrvind In conclusion, making flanges around bulkhead hatches may seem complex at first glance, but by following Sven Yrvind’s meticulous process, enthusiasts can achieve professional-level results. Remember that the journey of boatbuilding is as rewarding as reaching your destination; it tests one’s patience and dedication. For those seeking to embark on this adventure or simply gain more insight into marine craftsmanship, Sven’s wisdom is invaluable.Making Flanges Around Bulkhead Hatches for Canvas
Sven Yrvind, a renowned yacht designer and sailor, shares valuable insights on creating flanges around bulkhead hatches for canvas protection in this enlightening video. By following his expert guidance, boat enthusiasts can ensure their living areas remain secure while allowing unhindered access through the hatches.Step 1: Starting with the Flange
Sven begins by explaining that working on flanges vertically and horizontally is significantly easier than doing so in a flat position. To simplify the process further, he divides the task into two or three steps as suggested by fellow expert “for for.” This approach not only makes it more manageable but also allows for greater precision in crafting each component.Step 2: Applying Glue and Securing
Sven proceeds to apply glue along one edge of the flange, ensuring a secure bond when clamped into place. He emphasizes that this stage is crucial for maintaining the structural integrity of the flange, which in turn safeguards the living area beneath the canvas when hatches are open.Step 3: Allowing Time to Dry
After securely attaching the first portion of the flange, Sven allows ample time for it to dry before moving forward with additional steps. This patience and precision are key aspects of his successful boatbuilding methods.Step 4: Finishing Touches
Once the flange is fully dried, Sven removes the clamps carefully, ensuring no damage occurs during this process. He then moves on to attaching four more pieces onto these main frames, completing two pairs of flanges for the bulkhead hatches.The Final Touches
While two flanges form the primary support structure around the hatches, Sven mentions there are two additional pieces required at each end to ensure comprehensive protection. This attention to detail highlights his commitment to producing a durable and reliable design. “Sailing is about finding your path, whether it’s across an ocean or within yourself.” – Sven Yrvind In conclusion, making flanges around bulkhead hatches may seem complex at first glance, but by following Sven Yrvind’s meticulous process, enthusiasts can achieve professional-level results. Remember that the journey of boatbuilding is as rewarding as reaching your destination; it tests one’s patience and dedication. For those seeking to embark on this adventure or simply gain more insight into marine craftsmanship, Sven’s wisdom is invaluable.Sven Yrvind, a renowned yacht designer and sailor, shares valuable insights on creating flanges around bulkhead hatches for canvas protection in this enlightening video. By following his expert guidance, boat enthusiasts can ensure their living areas remain secure while allowing unhindered access through the hatches.Step 1: Starting with the Flange
Sven begins by explaining that working on flanges vertically and horizontally is significantly easier than doing so in a flat position. To simplify the process further, he divides the task into two or three steps as suggested by fellow expert “for for.” This approach not only makes it more manageable but also allows for greater precision in crafting each component.Step 2: Applying Glue and Securing
Sven proceeds to apply glue along one edge of the flange, ensuring a secure bond when clamped into place. He emphasizes that this stage is crucial for maintaining the structural integrity of the flange, which in turn safeguards the living area beneath the canvas when hatches are open.Step 3: Allowing Time to Dry
After securely attaching the first portion of the flange, Sven allows ample time for it to dry before moving forward with additional steps. This patience and precision are key aspects of his successful boatbuilding methods.Step 4: Finishing Touches
Once the flange is fully dried, Sven removes the clamps carefully, ensuring no damage occurs during this process. He then moves on to attaching four more pieces onto these main frames, completing two pairs of flanges for the bulkhead hatches.The Final Touches
While two flanges form the primary support structure around the hatches, Sven mentions there are two additional pieces required at each end to ensure comprehensive protection. This attention to detail highlights his commitment to producing a durable and reliable design. “Sailing is about finding your path, whether it’s across an ocean or within yourself.” – Sven Yrvind In conclusion, making flanges around bulkhead hatches may seem complex at first glance, but by following Sven Yrvind’s meticulous process, enthusiasts can achieve professional-level results. Remember that the journey of boatbuilding is as rewarding as reaching your destination; it tests one’s patience and dedication. For those seeking to embark on this adventure or simply gain more insight into marine craftsmanship, Sven’s wisdom is invaluable.Making Flanges Around Bulkhead Hatches for Canvas
Sven Yrvind, a renowned yacht designer and sailor, shares valuable insights on creating flanges around bulkhead hatches for canvas protection in this enlightening video. By following his expert guidance, boat enthusiasts can ensure their living areas remain secure while allowing unhindered access through the hatches.Step 1: Starting with the Flange
Sven begins by explaining that working on flanges vertically and horizontally is significantly easier than doing so in a flat position. To simplify the process further, he divides the task into two or three steps as suggested by fellow expert “for for.” This approach not only makes it more manageable but also allows for greater precision in crafting each component.Step 2: Applying Glue and Securing
Sven proceeds to apply glue along one edge of the flange, ensuring a secure bond when clamped into place. He emphasizes that this stage is crucial for maintaining the structural integrity of the flange, which in turn safeguards the living area beneath the canvas when hatches are open.Step 3: Allowing Time to Dry
After securely attaching the first portion of the flange, Sven allows ample time for it to dry before moving forward with additional steps. This patience and precision are key aspects of his successful boatbuilding methods.Step 4: Finishing Touches
Once the flange is fully dried, Sven removes the clamps carefully, ensuring no damage occurs during this process. He then moves on to attaching four more pieces onto these main frames, completing two pairs of flanges for the bulkhead hatches.The Final Touches
While two flanges form the primary support structure around the hatches, Sven mentions there are two additional pieces required at each end to ensure comprehensive protection. This attention to detail highlights his commitment to producing a durable and reliable design. “Sailing is about finding your path, whether it’s across an ocean or within yourself.” – Sven Yrvind In conclusion, making flanges around bulkhead hatches may seem complex at first glance, but by following Sven Yrvind’s meticulous process, enthusiasts can achieve professional-level results. Remember that the journey of boatbuilding is as rewarding as reaching your destination; it tests one’s patience and dedication. For those seeking to embark on this adventure or simply gain more insight into marine craftsmanship, Sven’s wisdom is invaluable.Once the flange is fully dried, Sven removes the clamps carefully, ensuring no damage occurs during this process. He then moves on to attaching four more pieces onto these main frames, completing two pairs of flanges for the bulkhead hatches.The Final Touches
While two flanges form the primary support structure around the hatches, Sven mentions there are two additional pieces required at each end to ensure comprehensive protection. This attention to detail highlights his commitment to producing a durable and reliable design. “Sailing is about finding your path, whether it’s across an ocean or within yourself.” – Sven Yrvind In conclusion, making flanges around bulkhead hatches may seem complex at first glance, but by following Sven Yrvind’s meticulous process, enthusiasts can achieve professional-level results. Remember that the journey of boatbuilding is as rewarding as reaching your destination; it tests one’s patience and dedication. For those seeking to embark on this adventure or simply gain more insight into marine craftsmanship, Sven’s wisdom is invaluable.Sven proceeds to apply glue along one edge of the flange, ensuring a secure bond when clamped into place. He emphasizes that this stage is crucial for maintaining the structural integrity of the flange, which in turn safeguards the living area beneath the canvas when hatches are open.Step 3: Allowing Time to Dry
After securely attaching the first portion of the flange, Sven allows ample time for it to dry before moving forward with additional steps. This patience and precision are key aspects of his successful boatbuilding methods.Step 4: Finishing Touches
Once the flange is fully dried, Sven removes the clamps carefully, ensuring no damage occurs during this process. He then moves on to attaching four more pieces onto these main frames, completing two pairs of flanges for the bulkhead hatches.The Final Touches
While two flanges form the primary support structure around the hatches, Sven mentions there are two additional pieces required at each end to ensure comprehensive protection. This attention to detail highlights his commitment to producing a durable and reliable design. “Sailing is about finding your path, whether it’s across an ocean or within yourself.” – Sven Yrvind In conclusion, making flanges around bulkhead hatches may seem complex at first glance, but by following Sven Yrvind’s meticulous process, enthusiasts can achieve professional-level results. Remember that the journey of boatbuilding is as rewarding as reaching your destination; it tests one’s patience and dedication. For those seeking to embark on this adventure or simply gain more insight into marine craftsmanship, Sven’s wisdom is invaluable.Sven begins by explaining that working on flanges vertically and horizontally is significantly easier than doing so in a flat position. To simplify the process further, he divides the task into two or three steps as suggested by fellow expert “for for.” This approach not only makes it more manageable but also allows for greater precision in crafting each component.Step 2: Applying Glue and Securing
Sven proceeds to apply glue along one edge of the flange, ensuring a secure bond when clamped into place. He emphasizes that this stage is crucial for maintaining the structural integrity of the flange, which in turn safeguards the living area beneath the canvas when hatches are open.Step 3: Allowing Time to Dry
After securely attaching the first portion of the flange, Sven allows ample time for it to dry before moving forward with additional steps. This patience and precision are key aspects of his successful boatbuilding methods.Step 4: Finishing Touches
Once the flange is fully dried, Sven removes the clamps carefully, ensuring no damage occurs during this process. He then moves on to attaching four more pieces onto these main frames, completing two pairs of flanges for the bulkhead hatches.The Final Touches
While two flanges form the primary support structure around the hatches, Sven mentions there are two additional pieces required at each end to ensure comprehensive protection. This attention to detail highlights his commitment to producing a durable and reliable design. “Sailing is about finding your path, whether it’s across an ocean or within yourself.” – Sven Yrvind In conclusion, making flanges around bulkhead hatches may seem complex at first glance, but by following Sven Yrvind’s meticulous process, enthusiasts can achieve professional-level results. Remember that the journey of boatbuilding is as rewarding as reaching your destination; it tests one’s patience and dedication. For those seeking to embark on this adventure or simply gain more insight into marine craftsmanship, Sven’s wisdom is invaluable.Sven Yrvind, a renowned yacht designer and sailor, shares valuable insights on creating flanges around bulkhead hatches for canvas protection in this enlightening video. By following his expert guidance, boat enthusiasts can ensure their living areas remain secure while allowing unhindered access through the hatches.Step 1: Starting with the Flange
Sven begins by explaining that working on flanges vertically and horizontally is significantly easier than doing so in a flat position. To simplify the process further, he divides the task into two or three steps as suggested by fellow expert “for for.” This approach not only makes it more manageable but also allows for greater precision in crafting each component.Step 2: Applying Glue and Securing
Sven proceeds to apply glue along one edge of the flange, ensuring a secure bond when clamped into place. He emphasizes that this stage is crucial for maintaining the structural integrity of the flange, which in turn safeguards the living area beneath the canvas when hatches are open.Step 3: Allowing Time to Dry
After securely attaching the first portion of the flange, Sven allows ample time for it to dry before moving forward with additional steps. This patience and precision are key aspects of his successful boatbuilding methods.Step 4: Finishing Touches
Once the flange is fully dried, Sven removes the clamps carefully, ensuring no damage occurs during this process. He then moves on to attaching four more pieces onto these main frames, completing two pairs of flanges for the bulkhead hatches.The Final Touches
While two flanges form the primary support structure around the hatches, Sven mentions there are two additional pieces required at each end to ensure comprehensive protection. This attention to detail highlights his commitment to producing a durable and reliable design. “Sailing is about finding your path, whether it’s across an ocean or within yourself.” – Sven Yrvind In conclusion, making flanges around bulkhead hatches may seem complex at first glance, but by following Sven Yrvind’s meticulous process, enthusiasts can achieve professional-level results. Remember that the journey of boatbuilding is as rewarding as reaching your destination; it tests one’s patience and dedication. For those seeking to embark on this adventure or simply gain more insight into marine craftsmanship, Sven’s wisdom is invaluable.Making Flanges Around Bulkhead Hatches for Canvas
Sven Yrvind, a renowned yacht designer and sailor, shares valuable insights on creating flanges around bulkhead hatches for canvas protection in this enlightening video. By following his expert guidance, boat enthusiasts can ensure their living areas remain secure while allowing unhindered access through the hatches.Step 1: Starting with the Flange
Sven begins by explaining that working on flanges vertically and horizontally is significantly easier than doing so in a flat position. To simplify the process further, he divides the task into two or three steps as suggested by fellow expert “for for.” This approach not only makes it more manageable but also allows for greater precision in crafting each component.Step 2: Applying Glue and Securing
Sven proceeds to apply glue along one edge of the flange, ensuring a secure bond when clamped into place. He emphasizes that this stage is crucial for maintaining the structural integrity of the flange, which in turn safeguards the living area beneath the canvas when hatches are open.Step 3: Allowing Time to Dry
After securely attaching the first portion of the flange, Sven allows ample time for it to dry before moving forward with additional steps. This patience and precision are key aspects of his successful boatbuilding methods.Step 4: Finishing Touches
Once the flange is fully dried, Sven removes the clamps carefully, ensuring no damage occurs during this process. He then moves on to attaching four more pieces onto these main frames, completing two pairs of flanges for the bulkhead hatches.The Final Touches
While two flanges form the primary support structure around the hatches, Sven mentions there are two additional pieces required at each end to ensure comprehensive protection. This attention to detail highlights his commitment to producing a durable and reliable design. “Sailing is about finding your path, whether it’s across an ocean or within yourself.” – Sven Yrvind In conclusion, making flanges around bulkhead hatches may seem complex at first glance, but by following Sven Yrvind’s meticulous process, enthusiasts can achieve professional-level results. Remember that the journey of boatbuilding is as rewarding as reaching your destination; it tests one’s patience and dedication. For those seeking to embark on this adventure or simply gain more insight into marine craftsmanship, Sven’s wisdom is invaluable.After securely attaching the first portion of the flange, Sven allows ample time for it to dry before moving forward with additional steps. This patience and precision are key aspects of his successful boatbuilding methods.Step 4: Finishing Touches
Once the flange is fully dried, Sven removes the clamps carefully, ensuring no damage occurs during this process. He then moves on to attaching four more pieces onto these main frames, completing two pairs of flanges for the bulkhead hatches.The Final Touches
While two flanges form the primary support structure around the hatches, Sven mentions there are two additional pieces required at each end to ensure comprehensive protection. This attention to detail highlights his commitment to producing a durable and reliable design. “Sailing is about finding your path, whether it’s across an ocean or within yourself.” – Sven Yrvind In conclusion, making flanges around bulkhead hatches may seem complex at first glance, but by following Sven Yrvind’s meticulous process, enthusiasts can achieve professional-level results. Remember that the journey of boatbuilding is as rewarding as reaching your destination; it tests one’s patience and dedication. For those seeking to embark on this adventure or simply gain more insight into marine craftsmanship, Sven’s wisdom is invaluable.Sven proceeds to apply glue along one edge of the flange, ensuring a secure bond when clamped into place. He emphasizes that this stage is crucial for maintaining the structural integrity of the flange, which in turn safeguards the living area beneath the canvas when hatches are open.Step 3: Allowing Time to Dry
After securely attaching the first portion of the flange, Sven allows ample time for it to dry before moving forward with additional steps. This patience and precision are key aspects of his successful boatbuilding methods.Step 4: Finishing Touches
Once the flange is fully dried, Sven removes the clamps carefully, ensuring no damage occurs during this process. He then moves on to attaching four more pieces onto these main frames, completing two pairs of flanges for the bulkhead hatches.The Final Touches
While two flanges form the primary support structure around the hatches, Sven mentions there are two additional pieces required at each end to ensure comprehensive protection. This attention to detail highlights his commitment to producing a durable and reliable design. “Sailing is about finding your path, whether it’s across an ocean or within yourself.” – Sven Yrvind In conclusion, making flanges around bulkhead hatches may seem complex at first glance, but by following Sven Yrvind’s meticulous process, enthusiasts can achieve professional-level results. Remember that the journey of boatbuilding is as rewarding as reaching your destination; it tests one’s patience and dedication. For those seeking to embark on this adventure or simply gain more insight into marine craftsmanship, Sven’s wisdom is invaluable.Sven begins by explaining that working on flanges vertically and horizontally is significantly easier than doing so in a flat position. To simplify the process further, he divides the task into two or three steps as suggested by fellow expert “for for.” This approach not only makes it more manageable but also allows for greater precision in crafting each component.Step 2: Applying Glue and Securing
Sven proceeds to apply glue along one edge of the flange, ensuring a secure bond when clamped into place. He emphasizes that this stage is crucial for maintaining the structural integrity of the flange, which in turn safeguards the living area beneath the canvas when hatches are open.Step 3: Allowing Time to Dry
After securely attaching the first portion of the flange, Sven allows ample time for it to dry before moving forward with additional steps. This patience and precision are key aspects of his successful boatbuilding methods.Step 4: Finishing Touches
Once the flange is fully dried, Sven removes the clamps carefully, ensuring no damage occurs during this process. He then moves on to attaching four more pieces onto these main frames, completing two pairs of flanges for the bulkhead hatches.The Final Touches
While two flanges form the primary support structure around the hatches, Sven mentions there are two additional pieces required at each end to ensure comprehensive protection. This attention to detail highlights his commitment to producing a durable and reliable design. “Sailing is about finding your path, whether it’s across an ocean or within yourself.” – Sven Yrvind In conclusion, making flanges around bulkhead hatches may seem complex at first glance, but by following Sven Yrvind’s meticulous process, enthusiasts can achieve professional-level results. Remember that the journey of boatbuilding is as rewarding as reaching your destination; it tests one’s patience and dedication. For those seeking to embark on this adventure or simply gain more insight into marine craftsmanship, Sven’s wisdom is invaluable.Sven Yrvind, a renowned yacht designer and sailor, shares valuable insights on creating flanges around bulkhead hatches for canvas protection in this enlightening video. By following his expert guidance, boat enthusiasts can ensure their living areas remain secure while allowing unhindered access through the hatches.Step 1: Starting with the Flange
Sven begins by explaining that working on flanges vertically and horizontally is significantly easier than doing so in a flat position. To simplify the process further, he divides the task into two or three steps as suggested by fellow expert “for for.” This approach not only makes it more manageable but also allows for greater precision in crafting each component.Step 2: Applying Glue and Securing
Sven proceeds to apply glue along one edge of the flange, ensuring a secure bond when clamped into place. He emphasizes that this stage is crucial for maintaining the structural integrity of the flange, which in turn safeguards the living area beneath the canvas when hatches are open.Step 3: Allowing Time to Dry
After securely attaching the first portion of the flange, Sven allows ample time for it to dry before moving forward with additional steps. This patience and precision are key aspects of his successful boatbuilding methods.Step 4: Finishing Touches
Once the flange is fully dried, Sven removes the clamps carefully, ensuring no damage occurs during this process. He then moves on to attaching four more pieces onto these main frames, completing two pairs of flanges for the bulkhead hatches.The Final Touches
While two flanges form the primary support structure around the hatches, Sven mentions there are two additional pieces required at each end to ensure comprehensive protection. This attention to detail highlights his commitment to producing a durable and reliable design. “Sailing is about finding your path, whether it’s across an ocean or within yourself.” – Sven Yrvind In conclusion, making flanges around bulkhead hatches may seem complex at first glance, but by following Sven Yrvind’s meticulous process, enthusiasts can achieve professional-level results. Remember that the journey of boatbuilding is as rewarding as reaching your destination; it tests one’s patience and dedication. For those seeking to embark on this adventure or simply gain more insight into marine craftsmanship, Sven’s wisdom is invaluable.Making Flanges Around Bulkhead Hatches for Canvas
Sven Yrvind, a renowned yacht designer and sailor, shares valuable insights on creating flanges around bulkhead hatches for canvas protection in this enlightening video. By following his expert guidance, boat enthusiasts can ensure their living areas remain secure while allowing unhindered access through the hatches.Step 1: Starting with the Flange
Sven begins by explaining that working on flanges vertically and horizontally is significantly easier than doing so in a flat position. To simplify the process further, he divides the task into two or three steps as suggested by fellow expert “for for.” This approach not only makes it more manageable but also allows for greater precision in crafting each component.Step 2: Applying Glue and Securing
Sven proceeds to apply glue along one edge of the flange, ensuring a secure bond when clamped into place. He emphasizes that this stage is crucial for maintaining the structural integrity of the flange, which in turn safeguards the living area beneath the canvas when hatches are open.Step 3: Allowing Time to Dry
After securely attaching the first portion of the flange, Sven allows ample time for it to dry before moving forward with additional steps. This patience and precision are key aspects of his successful boatbuilding methods.Step 4: Finishing Touches
Once the flange is fully dried, Sven removes the clamps carefully, ensuring no damage occurs during this process. He then moves on to attaching four more pieces onto these main frames, completing two pairs of flanges for the bulkhead hatches.The Final Touches
While two flanges form the primary support structure around the hatches, Sven mentions there are two additional pieces required at each end to ensure comprehensive protection. This attention to detail highlights his commitment to producing a durable and reliable design. “Sailing is about finding your path, whether it’s across an ocean or within yourself.” – Sven Yrvind In conclusion, making flanges around bulkhead hatches may seem complex at first glance, but by following Sven Yrvind’s meticulous process, enthusiasts can achieve professional-level results. Remember that the journey of boatbuilding is as rewarding as reaching your destination; it tests one’s patience and dedication. For those seeking to embark on this adventure or simply gain more insight into marine craftsmanship, Sven’s wisdom is invaluable.Once the flange is fully dried, Sven removes the clamps carefully, ensuring no damage occurs during this process. He then moves on to attaching four more pieces onto these main frames, completing two pairs of flanges for the bulkhead hatches.The Final Touches
While two flanges form the primary support structure around the hatches, Sven mentions there are two additional pieces required at each end to ensure comprehensive protection. This attention to detail highlights his commitment to producing a durable and reliable design. “Sailing is about finding your path, whether it’s across an ocean or within yourself.” – Sven Yrvind In conclusion, making flanges around bulkhead hatches may seem complex at first glance, but by following Sven Yrvind’s meticulous process, enthusiasts can achieve professional-level results. Remember that the journey of boatbuilding is as rewarding as reaching your destination; it tests one’s patience and dedication. For those seeking to embark on this adventure or simply gain more insight into marine craftsmanship, Sven’s wisdom is invaluable.After securely attaching the first portion of the flange, Sven allows ample time for it to dry before moving forward with additional steps. This patience and precision are key aspects of his successful boatbuilding methods.Step 4: Finishing Touches
Once the flange is fully dried, Sven removes the clamps carefully, ensuring no damage occurs during this process. He then moves on to attaching four more pieces onto these main frames, completing two pairs of flanges for the bulkhead hatches.The Final Touches
While two flanges form the primary support structure around the hatches, Sven mentions there are two additional pieces required at each end to ensure comprehensive protection. This attention to detail highlights his commitment to producing a durable and reliable design. “Sailing is about finding your path, whether it’s across an ocean or within yourself.” – Sven Yrvind In conclusion, making flanges around bulkhead hatches may seem complex at first glance, but by following Sven Yrvind’s meticulous process, enthusiasts can achieve professional-level results. Remember that the journey of boatbuilding is as rewarding as reaching your destination; it tests one’s patience and dedication. For those seeking to embark on this adventure or simply gain more insight into marine craftsmanship, Sven’s wisdom is invaluable.Sven proceeds to apply glue along one edge of the flange, ensuring a secure bond when clamped into place. He emphasizes that this stage is crucial for maintaining the structural integrity of the flange, which in turn safeguards the living area beneath the canvas when hatches are open.Step 3: Allowing Time to Dry
After securely attaching the first portion of the flange, Sven allows ample time for it to dry before moving forward with additional steps. This patience and precision are key aspects of his successful boatbuilding methods.Step 4: Finishing Touches
Once the flange is fully dried, Sven removes the clamps carefully, ensuring no damage occurs during this process. He then moves on to attaching four more pieces onto these main frames, completing two pairs of flanges for the bulkhead hatches.The Final Touches
While two flanges form the primary support structure around the hatches, Sven mentions there are two additional pieces required at each end to ensure comprehensive protection. This attention to detail highlights his commitment to producing a durable and reliable design. “Sailing is about finding your path, whether it’s across an ocean or within yourself.” – Sven Yrvind In conclusion, making flanges around bulkhead hatches may seem complex at first glance, but by following Sven Yrvind’s meticulous process, enthusiasts can achieve professional-level results. Remember that the journey of boatbuilding is as rewarding as reaching your destination; it tests one’s patience and dedication. For those seeking to embark on this adventure or simply gain more insight into marine craftsmanship, Sven’s wisdom is invaluable.Sven begins by explaining that working on flanges vertically and horizontally is significantly easier than doing so in a flat position. To simplify the process further, he divides the task into two or three steps as suggested by fellow expert “for for.” This approach not only makes it more manageable but also allows for greater precision in crafting each component.Step 2: Applying Glue and Securing
Sven proceeds to apply glue along one edge of the flange, ensuring a secure bond when clamped into place. He emphasizes that this stage is crucial for maintaining the structural integrity of the flange, which in turn safeguards the living area beneath the canvas when hatches are open.Step 3: Allowing Time to Dry
After securely attaching the first portion of the flange, Sven allows ample time for it to dry before moving forward with additional steps. This patience and precision are key aspects of his successful boatbuilding methods.Step 4: Finishing Touches
Once the flange is fully dried, Sven removes the clamps carefully, ensuring no damage occurs during this process. He then moves on to attaching four more pieces onto these main frames, completing two pairs of flanges for the bulkhead hatches.The Final Touches
While two flanges form the primary support structure around the hatches, Sven mentions there are two additional pieces required at each end to ensure comprehensive protection. This attention to detail highlights his commitment to producing a durable and reliable design. “Sailing is about finding your path, whether it’s across an ocean or within yourself.” – Sven Yrvind In conclusion, making flanges around bulkhead hatches may seem complex at first glance, but by following Sven Yrvind’s meticulous process, enthusiasts can achieve professional-level results. Remember that the journey of boatbuilding is as rewarding as reaching your destination; it tests one’s patience and dedication. For those seeking to embark on this adventure or simply gain more insight into marine craftsmanship, Sven’s wisdom is invaluable.Sven Yrvind, a renowned yacht designer and sailor, shares valuable insights on creating flanges around bulkhead hatches for canvas protection in this enlightening video. By following his expert guidance, boat enthusiasts can ensure their living areas remain secure while allowing unhindered access through the hatches.Step 1: Starting with the Flange
Sven begins by explaining that working on flanges vertically and horizontally is significantly easier than doing so in a flat position. To simplify the process further, he divides the task into two or three steps as suggested by fellow expert “for for.” This approach not only makes it more manageable but also allows for greater precision in crafting each component.Step 2: Applying Glue and Securing
Sven proceeds to apply glue along one edge of the flange, ensuring a secure bond when clamped into place. He emphasizes that this stage is crucial for maintaining the structural integrity of the flange, which in turn safeguards the living area beneath the canvas when hatches are open.Step 3: Allowing Time to Dry
After securely attaching the first portion of the flange, Sven allows ample time for it to dry before moving forward with additional steps. This patience and precision are key aspects of his successful boatbuilding methods.Step 4: Finishing Touches
Once the flange is fully dried, Sven removes the clamps carefully, ensuring no damage occurs during this process. He then moves on to attaching four more pieces onto these main frames, completing two pairs of flanges for the bulkhead hatches.The Final Touches
While two flanges form the primary support structure around the hatches, Sven mentions there are two additional pieces required at each end to ensure comprehensive protection. This attention to detail highlights his commitment to producing a durable and reliable design. “Sailing is about finding your path, whether it’s across an ocean or within yourself.” – Sven Yrvind In conclusion, making flanges around bulkhead hatches may seem complex at first glance, but by following Sven Yrvind’s meticulous process, enthusiasts can achieve professional-level results. Remember that the journey of boatbuilding is as rewarding as reaching your destination; it tests one’s patience and dedication. For those seeking to embark on this adventure or simply gain more insight into marine craftsmanship, Sven’s wisdom is invaluable.Making Flanges Around Bulkhead Hatches for Canvas
Sven Yrvind, a renowned yacht designer and sailor, shares valuable insights on creating flanges around bulkhead hatches for canvas protection in this enlightening video. By following his expert guidance, boat enthusiasts can ensure their living areas remain secure while allowing unhindered access through the hatches.Step 1: Starting with the Flange
Sven begins by explaining that working on flanges vertically and horizontally is significantly easier than doing so in a flat position. To simplify the process further, he divides the task into two or three steps as suggested by fellow expert “for for.” This approach not only makes it more manageable but also allows for greater precision in crafting each component.Step 2: Applying Glue and Securing
Sven proceeds to apply glue along one edge of the flange, ensuring a secure bond when clamped into place. He emphasizes that this stage is crucial for maintaining the structural integrity of the flange, which in turn safeguards the living area beneath the canvas when hatches are open.Step 3: Allowing Time to Dry
After securely attaching the first portion of the flange, Sven allows ample time for it to dry before moving forward with additional steps. This patience and precision are key aspects of his successful boatbuilding methods.Step 4: Finishing Touches
Once the flange is fully dried, Sven removes the clamps carefully, ensuring no damage occurs during this process. He then moves on to attaching four more pieces onto these main frames, completing two pairs of flanges for the bulkhead hatches.The Final Touches
While two flanges form the primary support structure around the hatches, Sven mentions there are two additional pieces required at each end to ensure comprehensive protection. This attention to detail highlights his commitment to producing a durable and reliable design. “Sailing is about finding your path, whether it’s across an ocean or within yourself.” – Sven Yrvind In conclusion, making flanges around bulkhead hatches may seem complex at first glance, but by following Sven Yrvind’s meticulous process, enthusiasts can achieve professional-level results. Remember that the journey of boatbuilding is as rewarding as reaching your destination; it tests one’s patience and dedication. For those seeking to embark on this adventure or simply gain more insight into marine craftsmanship, Sven’s wisdom is invaluable.Once the flange is fully dried, Sven removes the clamps carefully, ensuring no damage occurs during this process. He then moves on to attaching four more pieces onto these main frames, completing two pairs of flanges for the bulkhead hatches.The Final Touches
While two flanges form the primary support structure around the hatches, Sven mentions there are two additional pieces required at each end to ensure comprehensive protection. This attention to detail highlights his commitment to producing a durable and reliable design. “Sailing is about finding your path, whether it’s across an ocean or within yourself.” – Sven Yrvind In conclusion, making flanges around bulkhead hatches may seem complex at first glance, but by following Sven Yrvind’s meticulous process, enthusiasts can achieve professional-level results. Remember that the journey of boatbuilding is as rewarding as reaching your destination; it tests one’s patience and dedication. For those seeking to embark on this adventure or simply gain more insight into marine craftsmanship, Sven’s wisdom is invaluable.Sven Yrvind, a renowned yacht designer and sailor, shares valuable insights on creating flanges around bulkhead hatches for canvas protection in this enlightening video. By following his expert guidance, boat enthusiasts can ensure their living areas remain secure while allowing unhindered access through the hatches.Step 1: Starting with the Flange
Sven begins by explaining that working on flanges vertically and horizontally is significantly easier than doing so in a flat position. To simplify the process further, he divides the task into two or three steps as suggested by fellow expert “for for.” This approach not only makes it more manageable but also allows for greater precision in crafting each component.Step 2: Applying Glue and Securing
Sven proceeds to apply glue along one edge of the flange, ensuring a secure bond when clamped into place. He emphasizes that this stage is crucial for maintaining the structural integrity of the flange, which in turn safeguards the living area beneath the canvas when hatches are open.Step 3: Allowing Time to Dry
After securely attaching the first portion of the flange, Sven allows ample time for it to dry before moving forward with additional steps. This patience and precision are key aspects of his successful boatbuilding methods.Step 4: Finishing Touches
Once the flange is fully dried, Sven removes the clamps carefully, ensuring no damage occurs during this process. He then moves on to attaching four more pieces onto these main frames, completing two pairs of flanges for the bulkhead hatches.The Final Touches
While two flanges form the primary support structure around the hatches, Sven mentions there are two additional pieces required at each end to ensure comprehensive protection. This attention to detail highlights his commitment to producing a durable and reliable design. “Sailing is about finding your path, whether it’s across an ocean or within yourself.” – Sven Yrvind In conclusion, making flanges around bulkhead hatches may seem complex at first glance, but by following Sven Yrvind’s meticulous process, enthusiasts can achieve professional-level results. Remember that the journey of boatbuilding is as rewarding as reaching your destination; it tests one’s patience and dedication. For those seeking to embark on this adventure or simply gain more insight into marine craftsmanship, Sven’s wisdom is invaluable.Making Flanges Around Bulkhead Hatches for Canvas
Sven Yrvind, a renowned yacht designer and sailor, shares valuable insights on creating flanges around bulkhead hatches for canvas protection in this enlightening video. By following his expert guidance, boat enthusiasts can ensure their living areas remain secure while allowing unhindered access through the hatches.Step 1: Starting with the Flange
Sven begins by explaining that working on flanges vertically and horizontally is significantly easier than doing so in a flat position. To simplify the process further, he divides the task into two or three steps as suggested by fellow expert “for for.” This approach not only makes it more manageable but also allows for greater precision in crafting each component.Step 2: Applying Glue and Securing
Sven proceeds to apply glue along one edge of the flange, ensuring a secure bond when clamped into place. He emphasizes that this stage is crucial for maintaining the structural integrity of the flange, which in turn safeguards the living area beneath the canvas when hatches are open.Step 3: Allowing Time to Dry
After securely attaching the first portion of the flange, Sven allows ample time for it to dry before moving forward with additional steps. This patience and precision are key aspects of his successful boatbuilding methods.Step 4: Finishing Touches
Once the flange is fully dried, Sven removes the clamps carefully, ensuring no damage occurs during this process. He then moves on to attaching four more pieces onto these main frames, completing two pairs of flanges for the bulkhead hatches.The Final Touches
While two flanges form the primary support structure around the hatches, Sven mentions there are two additional pieces required at each end to ensure comprehensive protection. This attention to detail highlights his commitment to producing a durable and reliable design. “Sailing is about finding your path, whether it’s across an ocean or within yourself.” – Sven Yrvind In conclusion, making flanges around bulkhead hatches may seem complex at first glance, but by following Sven Yrvind’s meticulous process, enthusiasts can achieve professional-level results. Remember that the journey of boatbuilding is as rewarding as reaching your destination; it tests one’s patience and dedication. For those seeking to embark on this adventure or simply gain more insight into marine craftsmanship, Sven’s wisdom is invaluable.Once the flange is fully dried, Sven removes the clamps carefully, ensuring no damage occurs during this process. He then moves on to attaching four more pieces onto these main frames, completing two pairs of flanges for the bulkhead hatches.The Final Touches
While two flanges form the primary support structure around the hatches, Sven mentions there are two additional pieces required at each end to ensure comprehensive protection. This attention to detail highlights his commitment to producing a durable and reliable design. “Sailing is about finding your path, whether it’s across an ocean or within yourself.” – Sven Yrvind In conclusion, making flanges around bulkhead hatches may seem complex at first glance, but by following Sven Yrvind’s meticulous process, enthusiasts can achieve professional-level results. Remember that the journey of boatbuilding is as rewarding as reaching your destination; it tests one’s patience and dedication. For those seeking to embark on this adventure or simply gain more insight into marine craftsmanship, Sven’s wisdom is invaluable.Sven proceeds to apply glue along one edge of the flange, ensuring a secure bond when clamped into place. He emphasizes that this stage is crucial for maintaining the structural integrity of the flange, which in turn safeguards the living area beneath the canvas when hatches are open.Step 3: Allowing Time to Dry
After securely attaching the first portion of the flange, Sven allows ample time for it to dry before moving forward with additional steps. This patience and precision are key aspects of his successful boatbuilding methods.Step 4: Finishing Touches
Once the flange is fully dried, Sven removes the clamps carefully, ensuring no damage occurs during this process. He then moves on to attaching four more pieces onto these main frames, completing two pairs of flanges for the bulkhead hatches.The Final Touches
While two flanges form the primary support structure around the hatches, Sven mentions there are two additional pieces required at each end to ensure comprehensive protection. This attention to detail highlights his commitment to producing a durable and reliable design. “Sailing is about finding your path, whether it’s across an ocean or within yourself.” – Sven Yrvind In conclusion, making flanges around bulkhead hatches may seem complex at first glance, but by following Sven Yrvind’s meticulous process, enthusiasts can achieve professional-level results. Remember that the journey of boatbuilding is as rewarding as reaching your destination; it tests one’s patience and dedication. For those seeking to embark on this adventure or simply gain more insight into marine craftsmanship, Sven’s wisdom is invaluable.Sven begins by explaining that working on flanges vertically and horizontally is significantly easier than doing so in a flat position. To simplify the process further, he divides the task into two or three steps as suggested by fellow expert “for for.” This approach not only makes it more manageable but also allows for greater precision in crafting each component.Step 2: Applying Glue and Securing
Sven proceeds to apply glue along one edge of the flange, ensuring a secure bond when clamped into place. He emphasizes that this stage is crucial for maintaining the structural integrity of the flange, which in turn safeguards the living area beneath the canvas when hatches are open.Step 3: Allowing Time to Dry
After securely attaching the first portion of the flange, Sven allows ample time for it to dry before moving forward with additional steps. This patience and precision are key aspects of his successful boatbuilding methods.Step 4: Finishing Touches
Once the flange is fully dried, Sven removes the clamps carefully, ensuring no damage occurs during this process. He then moves on to attaching four more pieces onto these main frames, completing two pairs of flanges for the bulkhead hatches.The Final Touches
While two flanges form the primary support structure around the hatches, Sven mentions there are two additional pieces required at each end to ensure comprehensive protection. This attention to detail highlights his commitment to producing a durable and reliable design. “Sailing is about finding your path, whether it’s across an ocean or within yourself.” – Sven Yrvind In conclusion, making flanges around bulkhead hatches may seem complex at first glance, but by following Sven Yrvind’s meticulous process, enthusiasts can achieve professional-level results. Remember that the journey of boatbuilding is as rewarding as reaching your destination; it tests one’s patience and dedication. For those seeking to embark on this adventure or simply gain more insight into marine craftsmanship, Sven’s wisdom is invaluable.Sven Yrvind, a renowned yacht designer and sailor, shares valuable insights on creating flanges around bulkhead hatches for canvas protection in this enlightening video. By following his expert guidance, boat enthusiasts can ensure their living areas remain secure while allowing unhindered access through the hatches.Step 1: Starting with the Flange
Sven begins by explaining that working on flanges vertically and horizontally is significantly easier than doing so in a flat position. To simplify the process further, he divides the task into two or three steps as suggested by fellow expert “for for.” This approach not only makes it more manageable but also allows for greater precision in crafting each component.Step 2: Applying Glue and Securing
Sven proceeds to apply glue along one edge of the flange, ensuring a secure bond when clamped into place. He emphasizes that this stage is crucial for maintaining the structural integrity of the flange, which in turn safeguards the living area beneath the canvas when hatches are open.Step 3: Allowing Time to Dry
After securely attaching the first portion of the flange, Sven allows ample time for it to dry before moving forward with additional steps. This patience and precision are key aspects of his successful boatbuilding methods.Step 4: Finishing Touches
Once the flange is fully dried, Sven removes the clamps carefully, ensuring no damage occurs during this process. He then moves on to attaching four more pieces onto these main frames, completing two pairs of flanges for the bulkhead hatches.The Final Touches
While two flanges form the primary support structure around the hatches, Sven mentions there are two additional pieces required at each end to ensure comprehensive protection. This attention to detail highlights his commitment to producing a durable and reliable design. “Sailing is about finding your path, whether it’s across an ocean or within yourself.” – Sven Yrvind In conclusion, making flanges around bulkhead hatches may seem complex at first glance, but by following Sven Yrvind’s meticulous process, enthusiasts can achieve professional-level results. Remember that the journey of boatbuilding is as rewarding as reaching your destination; it tests one’s patience and dedication. For those seeking to embark on this adventure or simply gain more insight into marine craftsmanship, Sven’s wisdom is invaluable.Making Flanges Around Bulkhead Hatches for Canvas
Sven Yrvind, a renowned yacht designer and sailor, shares valuable insights on creating flanges around bulkhead hatches for canvas protection in this enlightening video. By following his expert guidance, boat enthusiasts can ensure their living areas remain secure while allowing unhindered access through the hatches.Step 1: Starting with the Flange
Sven begins by explaining that working on flanges vertically and horizontally is significantly easier than doing so in a flat position. To simplify the process further, he divides the task into two or three steps as suggested by fellow expert “for for.” This approach not only makes it more manageable but also allows for greater precision in crafting each component.Step 2: Applying Glue and Securing
Sven proceeds to apply glue along one edge of the flange, ensuring a secure bond when clamped into place. He emphasizes that this stage is crucial for maintaining the structural integrity of the flange, which in turn safeguards the living area beneath the canvas when hatches are open.Step 3: Allowing Time to Dry
After securely attaching the first portion of the flange, Sven allows ample time for it to dry before moving forward with additional steps. This patience and precision are key aspects of his successful boatbuilding methods.Step 4: Finishing Touches
Once the flange is fully dried, Sven removes the clamps carefully, ensuring no damage occurs during this process. He then moves on to attaching four more pieces onto these main frames, completing two pairs of flanges for the bulkhead hatches.The Final Touches
While two flanges form the primary support structure around the hatches, Sven mentions there are two additional pieces required at each end to ensure comprehensive protection. This attention to detail highlights his commitment to producing a durable and reliable design. “Sailing is about finding your path, whether it’s across an ocean or within yourself.” – Sven Yrvind In conclusion, making flanges around bulkhead hatches may seem complex at first glance, but by following Sven Yrvind’s meticulous process, enthusiasts can achieve professional-level results. Remember that the journey of boatbuilding is as rewarding as reaching your destination; it tests one’s patience and dedication. For those seeking to embark on this adventure or simply gain more insight into marine craftsmanship, Sven’s wisdom is invaluable.After securely attaching the first portion of the flange, Sven allows ample time for it to dry before moving forward with additional steps. This patience and precision are key aspects of his successful boatbuilding methods.Step 4: Finishing Touches
Once the flange is fully dried, Sven removes the clamps carefully, ensuring no damage occurs during this process. He then moves on to attaching four more pieces onto these main frames, completing two pairs of flanges for the bulkhead hatches.The Final Touches
While two flanges form the primary support structure around the hatches, Sven mentions there are two additional pieces required at each end to ensure comprehensive protection. This attention to detail highlights his commitment to producing a durable and reliable design. “Sailing is about finding your path, whether it’s across an ocean or within yourself.” – Sven Yrvind In conclusion, making flanges around bulkhead hatches may seem complex at first glance, but by following Sven Yrvind’s meticulous process, enthusiasts can achieve professional-level results. Remember that the journey of boatbuilding is as rewarding as reaching your destination; it tests one’s patience and dedication. For those seeking to embark on this adventure or simply gain more insight into marine craftsmanship, Sven’s wisdom is invaluable.Sven proceeds to apply glue along one edge of the flange, ensuring a secure bond when clamped into place. He emphasizes that this stage is crucial for maintaining the structural integrity of the flange, which in turn safeguards the living area beneath the canvas when hatches are open.Step 3: Allowing Time to Dry
After securely attaching the first portion of the flange, Sven allows ample time for it to dry before moving forward with additional steps. This patience and precision are key aspects of his successful boatbuilding methods.Step 4: Finishing Touches
Once the flange is fully dried, Sven removes the clamps carefully, ensuring no damage occurs during this process. He then moves on to attaching four more pieces onto these main frames, completing two pairs of flanges for the bulkhead hatches.The Final Touches
While two flanges form the primary support structure around the hatches, Sven mentions there are two additional pieces required at each end to ensure comprehensive protection. This attention to detail highlights his commitment to producing a durable and reliable design. “Sailing is about finding your path, whether it’s across an ocean or within yourself.” – Sven Yrvind In conclusion, making flanges around bulkhead hatches may seem complex at first glance, but by following Sven Yrvind’s meticulous process, enthusiasts can achieve professional-level results. Remember that the journey of boatbuilding is as rewarding as reaching your destination; it tests one’s patience and dedication. For those seeking to embark on this adventure or simply gain more insight into marine craftsmanship, Sven’s wisdom is invaluable.Sven begins by explaining that working on flanges vertically and horizontally is significantly easier than doing so in a flat position. To simplify the process further, he divides the task into two or three steps as suggested by fellow expert “for for.” This approach not only makes it more manageable but also allows for greater precision in crafting each component.Step 2: Applying Glue and Securing
Sven proceeds to apply glue along one edge of the flange, ensuring a secure bond when clamped into place. He emphasizes that this stage is crucial for maintaining the structural integrity of the flange, which in turn safeguards the living area beneath the canvas when hatches are open.Step 3: Allowing Time to Dry
After securely attaching the first portion of the flange, Sven allows ample time for it to dry before moving forward with additional steps. This patience and precision are key aspects of his successful boatbuilding methods.Step 4: Finishing Touches
Once the flange is fully dried, Sven removes the clamps carefully, ensuring no damage occurs during this process. He then moves on to attaching four more pieces onto these main frames, completing two pairs of flanges for the bulkhead hatches.The Final Touches
While two flanges form the primary support structure around the hatches, Sven mentions there are two additional pieces required at each end to ensure comprehensive protection. This attention to detail highlights his commitment to producing a durable and reliable design. “Sailing is about finding your path, whether it’s across an ocean or within yourself.” – Sven Yrvind In conclusion, making flanges around bulkhead hatches may seem complex at first glance, but by following Sven Yrvind’s meticulous process, enthusiasts can achieve professional-level results. Remember that the journey of boatbuilding is as rewarding as reaching your destination; it tests one’s patience and dedication. For those seeking to embark on this adventure or simply gain more insight into marine craftsmanship, Sven’s wisdom is invaluable.Sven Yrvind, a renowned yacht designer and sailor, shares valuable insights on creating flanges around bulkhead hatches for canvas protection in this enlightening video. By following his expert guidance, boat enthusiasts can ensure their living areas remain secure while allowing unhindered access through the hatches.Step 1: Starting with the Flange
Sven begins by explaining that working on flanges vertically and horizontally is significantly easier than doing so in a flat position. To simplify the process further, he divides the task into two or three steps as suggested by fellow expert “for for.” This approach not only makes it more manageable but also allows for greater precision in crafting each component.Step 2: Applying Glue and Securing
Sven proceeds to apply glue along one edge of the flange, ensuring a secure bond when clamped into place. He emphasizes that this stage is crucial for maintaining the structural integrity of the flange, which in turn safeguards the living area beneath the canvas when hatches are open.Step 3: Allowing Time to Dry
After securely attaching the first portion of the flange, Sven allows ample time for it to dry before moving forward with additional steps. This patience and precision are key aspects of his successful boatbuilding methods.Step 4: Finishing Touches
Once the flange is fully dried, Sven removes the clamps carefully, ensuring no damage occurs during this process. He then moves on to attaching four more pieces onto these main frames, completing two pairs of flanges for the bulkhead hatches.The Final Touches
While two flanges form the primary support structure around the hatches, Sven mentions there are two additional pieces required at each end to ensure comprehensive protection. This attention to detail highlights his commitment to producing a durable and reliable design. “Sailing is about finding your path, whether it’s across an ocean or within yourself.” – Sven Yrvind In conclusion, making flanges around bulkhead hatches may seem complex at first glance, but by following Sven Yrvind’s meticulous process, enthusiasts can achieve professional-level results. Remember that the journey of boatbuilding is as rewarding as reaching your destination; it tests one’s patience and dedication. For those seeking to embark on this adventure or simply gain more insight into marine craftsmanship, Sven’s wisdom is invaluable.Making Flanges Around Bulkhead Hatches for Canvas
Sven Yrvind, a renowned yacht designer and sailor, shares valuable insights on creating flanges around bulkhead hatches for canvas protection in this enlightening video. By following his expert guidance, boat enthusiasts can ensure their living areas remain secure while allowing unhindered access through the hatches.Step 1: Starting with the Flange
Sven begins by explaining that working on flanges vertically and horizontally is significantly easier than doing so in a flat position. To simplify the process further, he divides the task into two or three steps as suggested by fellow expert “for for.” This approach not only makes it more manageable but also allows for greater precision in crafting each component.Step 2: Applying Glue and Securing
Sven proceeds to apply glue along one edge of the flange, ensuring a secure bond when clamped into place. He emphasizes that this stage is crucial for maintaining the structural integrity of the flange, which in turn safeguards the living area beneath the canvas when hatches are open.Step 3: Allowing Time to Dry
After securely attaching the first portion of the flange, Sven allows ample time for it to dry before moving forward with additional steps. This patience and precision are key aspects of his successful boatbuilding methods.Step 4: Finishing Touches
Once the flange is fully dried, Sven removes the clamps carefully, ensuring no damage occurs during this process. He then moves on to attaching four more pieces onto these main frames, completing two pairs of flanges for the bulkhead hatches.The Final Touches
While two flanges form the primary support structure around the hatches, Sven mentions there are two additional pieces required at each end to ensure comprehensive protection. This attention to detail highlights his commitment to producing a durable and reliable design. “Sailing is about finding your path, whether it’s across an ocean or within yourself.” – Sven Yrvind In conclusion, making flanges around bulkhead hatches may seem complex at first glance, but by following Sven Yrvind’s meticulous process, enthusiasts can achieve professional-level results. Remember that the journey of boatbuilding is as rewarding as reaching your destination; it tests one’s patience and dedication. For those seeking to embark on this adventure or simply gain more insight into marine craftsmanship, Sven’s wisdom is invaluable.Once the flange is fully dried, Sven removes the clamps carefully, ensuring no damage occurs during this process. He then moves on to attaching four more pieces onto these main frames, completing two pairs of flanges for the bulkhead hatches.The Final Touches
While two flanges form the primary support structure around the hatches, Sven mentions there are two additional pieces required at each end to ensure comprehensive protection. This attention to detail highlights his commitment to producing a durable and reliable design. “Sailing is about finding your path, whether it’s across an ocean or within yourself.” – Sven Yrvind In conclusion, making flanges around bulkhead hatches may seem complex at first glance, but by following Sven Yrvind’s meticulous process, enthusiasts can achieve professional-level results. Remember that the journey of boatbuilding is as rewarding as reaching your destination; it tests one’s patience and dedication. For those seeking to embark on this adventure or simply gain more insight into marine craftsmanship, Sven’s wisdom is invaluable.After securely attaching the first portion of the flange, Sven allows ample time for it to dry before moving forward with additional steps. This patience and precision are key aspects of his successful boatbuilding methods.Step 4: Finishing Touches
Once the flange is fully dried, Sven removes the clamps carefully, ensuring no damage occurs during this process. He then moves on to attaching four more pieces onto these main frames, completing two pairs of flanges for the bulkhead hatches.The Final Touches
While two flanges form the primary support structure around the hatches, Sven mentions there are two additional pieces required at each end to ensure comprehensive protection. This attention to detail highlights his commitment to producing a durable and reliable design. “Sailing is about finding your path, whether it’s across an ocean or within yourself.” – Sven Yrvind In conclusion, making flanges around bulkhead hatches may seem complex at first glance, but by following Sven Yrvind’s meticulous process, enthusiasts can achieve professional-level results. Remember that the journey of boatbuilding is as rewarding as reaching your destination; it tests one’s patience and dedication. For those seeking to embark on this adventure or simply gain more insight into marine craftsmanship, Sven’s wisdom is invaluable.Sven proceeds to apply glue along one edge of the flange, ensuring a secure bond when clamped into place. He emphasizes that this stage is crucial for maintaining the structural integrity of the flange, which in turn safeguards the living area beneath the canvas when hatches are open.Step 3: Allowing Time to Dry
After securely attaching the first portion of the flange, Sven allows ample time for it to dry before moving forward with additional steps. This patience and precision are key aspects of his successful boatbuilding methods.Step 4: Finishing Touches
Once the flange is fully dried, Sven removes the clamps carefully, ensuring no damage occurs during this process. He then moves on to attaching four more pieces onto these main frames, completing two pairs of flanges for the bulkhead hatches.The Final Touches
While two flanges form the primary support structure around the hatches, Sven mentions there are two additional pieces required at each end to ensure comprehensive protection. This attention to detail highlights his commitment to producing a durable and reliable design. “Sailing is about finding your path, whether it’s across an ocean or within yourself.” – Sven Yrvind In conclusion, making flanges around bulkhead hatches may seem complex at first glance, but by following Sven Yrvind’s meticulous process, enthusiasts can achieve professional-level results. Remember that the journey of boatbuilding is as rewarding as reaching your destination; it tests one’s patience and dedication. For those seeking to embark on this adventure or simply gain more insight into marine craftsmanship, Sven’s wisdom is invaluable.Sven begins by explaining that working on flanges vertically and horizontally is significantly easier than doing so in a flat position. To simplify the process further, he divides the task into two or three steps as suggested by fellow expert “for for.” This approach not only makes it more manageable but also allows for greater precision in crafting each component.Step 2: Applying Glue and Securing
Sven proceeds to apply glue along one edge of the flange, ensuring a secure bond when clamped into place. He emphasizes that this stage is crucial for maintaining the structural integrity of the flange, which in turn safeguards the living area beneath the canvas when hatches are open.Step 3: Allowing Time to Dry
After securely attaching the first portion of the flange, Sven allows ample time for it to dry before moving forward with additional steps. This patience and precision are key aspects of his successful boatbuilding methods.Step 4: Finishing Touches
Once the flange is fully dried, Sven removes the clamps carefully, ensuring no damage occurs during this process. He then moves on to attaching four more pieces onto these main frames, completing two pairs of flanges for the bulkhead hatches.The Final Touches
While two flanges form the primary support structure around the hatches, Sven mentions there are two additional pieces required at each end to ensure comprehensive protection. This attention to detail highlights his commitment to producing a durable and reliable design. “Sailing is about finding your path, whether it’s across an ocean or within yourself.” – Sven Yrvind In conclusion, making flanges around bulkhead hatches may seem complex at first glance, but by following Sven Yrvind’s meticulous process, enthusiasts can achieve professional-level results. Remember that the journey of boatbuilding is as rewarding as reaching your destination; it tests one’s patience and dedication. For those seeking to embark on this adventure or simply gain more insight into marine craftsmanship, Sven’s wisdom is invaluable.Sven Yrvind, a renowned yacht designer and sailor, shares valuable insights on creating flanges around bulkhead hatches for canvas protection in this enlightening video. By following his expert guidance, boat enthusiasts can ensure their living areas remain secure while allowing unhindered access through the hatches.Step 1: Starting with the Flange
Sven begins by explaining that working on flanges vertically and horizontally is significantly easier than doing so in a flat position. To simplify the process further, he divides the task into two or three steps as suggested by fellow expert “for for.” This approach not only makes it more manageable but also allows for greater precision in crafting each component.Step 2: Applying Glue and Securing
Sven proceeds to apply glue along one edge of the flange, ensuring a secure bond when clamped into place. He emphasizes that this stage is crucial for maintaining the structural integrity of the flange, which in turn safeguards the living area beneath the canvas when hatches are open.Step 3: Allowing Time to Dry
After securely attaching the first portion of the flange, Sven allows ample time for it to dry before moving forward with additional steps. This patience and precision are key aspects of his successful boatbuilding methods.Step 4: Finishing Touches
Once the flange is fully dried, Sven removes the clamps carefully, ensuring no damage occurs during this process. He then moves on to attaching four more pieces onto these main frames, completing two pairs of flanges for the bulkhead hatches.The Final Touches
While two flanges form the primary support structure around the hatches, Sven mentions there are two additional pieces required at each end to ensure comprehensive protection. This attention to detail highlights his commitment to producing a durable and reliable design. “Sailing is about finding your path, whether it’s across an ocean or within yourself.” – Sven Yrvind In conclusion, making flanges around bulkhead hatches may seem complex at first glance, but by following Sven Yrvind’s meticulous process, enthusiasts can achieve professional-level results. Remember that the journey of boatbuilding is as rewarding as reaching your destination; it tests one’s patience and dedication. For those seeking to embark on this adventure or simply gain more insight into marine craftsmanship, Sven’s wisdom is invaluable.Making Flanges Around Bulkhead Hatches for Canvas
Sven Yrvind, a renowned yacht designer and sailor, shares valuable insights on creating flanges around bulkhead hatches for canvas protection in this enlightening video. By following his expert guidance, boat enthusiasts can ensure their living areas remain secure while allowing unhindered access through the hatches.Step 1: Starting with the Flange
Sven begins by explaining that working on flanges vertically and horizontally is significantly easier than doing so in a flat position. To simplify the process further, he divides the task into two or three steps as suggested by fellow expert “for for.” This approach not only makes it more manageable but also allows for greater precision in crafting each component.Step 2: Applying Glue and Securing
Sven proceeds to apply glue along one edge of the flange, ensuring a secure bond when clamped into place. He emphasizes that this stage is crucial for maintaining the structural integrity of the flange, which in turn safeguards the living area beneath the canvas when hatches are open.Step 3: Allowing Time to Dry
After securely attaching the first portion of the flange, Sven allows ample time for it to dry before moving forward with additional steps. This patience and precision are key aspects of his successful boatbuilding methods.Step 4: Finishing Touches
Once the flange is fully dried, Sven removes the clamps carefully, ensuring no damage occurs during this process. He then moves on to attaching four more pieces onto these main frames, completing two pairs of flanges for the bulkhead hatches.The Final Touches
While two flanges form the primary support structure around the hatches, Sven mentions there are two additional pieces required at each end to ensure comprehensive protection. This attention to detail highlights his commitment to producing a durable and reliable design. “Sailing is about finding your path, whether it’s across an ocean or within yourself.” – Sven Yrvind In conclusion, making flanges around bulkhead hatches may seem complex at first glance, but by following Sven Yrvind’s meticulous process, enthusiasts can achieve professional-level results. Remember that the journey of boatbuilding is as rewarding as reaching your destination; it tests one’s patience and dedication. For those seeking to embark on this adventure or simply gain more insight into marine craftsmanship, Sven’s wisdom is invaluable.After securely attaching the first portion of the flange, Sven allows ample time for it to dry before moving forward with additional steps. This patience and precision are key aspects of his successful boatbuilding methods.Step 4: Finishing Touches
Once the flange is fully dried, Sven removes the clamps carefully, ensuring no damage occurs during this process. He then moves on to attaching four more pieces onto these main frames, completing two pairs of flanges for the bulkhead hatches.The Final Touches
While two flanges form the primary support structure around the hatches, Sven mentions there are two additional pieces required at each end to ensure comprehensive protection. This attention to detail highlights his commitment to producing a durable and reliable design. “Sailing is about finding your path, whether it’s across an ocean or within yourself.” – Sven Yrvind In conclusion, making flanges around bulkhead hatches may seem complex at first glance, but by following Sven Yrvind’s meticulous process, enthusiasts can achieve professional-level results. Remember that the journey of boatbuilding is as rewarding as reaching your destination; it tests one’s patience and dedication. For those seeking to embark on this adventure or simply gain more insight into marine craftsmanship, Sven’s wisdom is invaluable.Sven Yrvind, a renowned yacht designer and sailor, shares valuable insights on creating flanges around bulkhead hatches for canvas protection in this enlightening video. By following his expert guidance, boat enthusiasts can ensure their living areas remain secure while allowing unhindered access through the hatches.Step 1: Starting with the Flange
Sven begins by explaining that working on flanges vertically and horizontally is significantly easier than doing so in a flat position. To simplify the process further, he divides the task into two or three steps as suggested by fellow expert “for for.” This approach not only makes it more manageable but also allows for greater precision in crafting each component.Step 2: Applying Glue and Securing
Sven proceeds to apply glue along one edge of the flange, ensuring a secure bond when clamped into place. He emphasizes that this stage is crucial for maintaining the structural integrity of the flange, which in turn safeguards the living area beneath the canvas when hatches are open.Step 3: Allowing Time to Dry
After securely attaching the first portion of the flange, Sven allows ample time for it to dry before moving forward with additional steps. This patience and precision are key aspects of his successful boatbuilding methods.Step 4: Finishing Touches
Once the flange is fully dried, Sven removes the clamps carefully, ensuring no damage occurs during this process. He then moves on to attaching four more pieces onto these main frames, completing two pairs of flanges for the bulkhead hatches.The Final Touches
While two flanges form the primary support structure around the hatches, Sven mentions there are two additional pieces required at each end to ensure comprehensive protection. This attention to detail highlights his commitment to producing a durable and reliable design. “Sailing is about finding your path, whether it’s across an ocean or within yourself.” – Sven Yrvind In conclusion, making flanges around bulkhead hatches may seem complex at first glance, but by following Sven Yrvind’s meticulous process, enthusiasts can achieve professional-level results. Remember that the journey of boatbuilding is as rewarding as reaching your destination; it tests one’s patience and dedication. For those seeking to embark on this adventure or simply gain more insight into marine craftsmanship, Sven’s wisdom is invaluable.Making Flanges Around Bulkhead Hatches for Canvas
Sven Yrvind, a renowned yacht designer and sailor, shares valuable insights on creating flanges around bulkhead hatches for canvas protection in this enlightening video. By following his expert guidance, boat enthusiasts can ensure their living areas remain secure while allowing unhindered access through the hatches.Step 1: Starting with the Flange
Sven begins by explaining that working on flanges vertically and horizontally is significantly easier than doing so in a flat position. To simplify the process further, he divides the task into two or three steps as suggested by fellow expert “for for.” This approach not only makes it more manageable but also allows for greater precision in crafting each component.Step 2: Applying Glue and Securing
Sven proceeds to apply glue along one edge of the flange, ensuring a secure bond when clamped into place. He emphasizes that this stage is crucial for maintaining the structural integrity of the flange, which in turn safeguards the living area beneath the canvas when hatches are open.Step 3: Allowing Time to Dry
After securely attaching the first portion of the flange, Sven allows ample time for it to dry before moving forward with additional steps. This patience and precision are key aspects of his successful boatbuilding methods.Step 4: Finishing Touches
Once the flange is fully dried, Sven removes the clamps carefully, ensuring no damage occurs during this process. He then moves on to attaching four more pieces onto these main frames, completing two pairs of flanges for the bulkhead hatches.The Final Touches
While two flanges form the primary support structure around the hatches, Sven mentions there are two additional pieces required at each end to ensure comprehensive protection. This attention to detail highlights his commitment to producing a durable and reliable design. “Sailing is about finding your path, whether it’s across an ocean or within yourself.” – Sven Yrvind In conclusion, making flanges around bulkhead hatches may seem complex at first glance, but by following Sven Yrvind’s meticulous process, enthusiasts can achieve professional-level results. Remember that the journey of boatbuilding is as rewarding as reaching your destination; it tests one’s patience and dedication. For those seeking to embark on this adventure or simply gain more insight into marine craftsmanship, Sven’s wisdom is invaluable.Once the flange is fully dried, Sven removes the clamps carefully, ensuring no damage occurs during this process. He then moves on to attaching four more pieces onto these main frames, completing two pairs of flanges for the bulkhead hatches.The Final Touches
While two flanges form the primary support structure around the hatches, Sven mentions there are two additional pieces required at each end to ensure comprehensive protection. This attention to detail highlights his commitment to producing a durable and reliable design. “Sailing is about finding your path, whether it’s across an ocean or within yourself.” – Sven Yrvind In conclusion, making flanges around bulkhead hatches may seem complex at first glance, but by following Sven Yrvind’s meticulous process, enthusiasts can achieve professional-level results. Remember that the journey of boatbuilding is as rewarding as reaching your destination; it tests one’s patience and dedication. For those seeking to embark on this adventure or simply gain more insight into marine craftsmanship, Sven’s wisdom is invaluable.Sven proceeds to apply glue along one edge of the flange, ensuring a secure bond when clamped into place. He emphasizes that this stage is crucial for maintaining the structural integrity of the flange, which in turn safeguards the living area beneath the canvas when hatches are open.Step 3: Allowing Time to Dry
After securely attaching the first portion of the flange, Sven allows ample time for it to dry before moving forward with additional steps. This patience and precision are key aspects of his successful boatbuilding methods.Step 4: Finishing Touches
Once the flange is fully dried, Sven removes the clamps carefully, ensuring no damage occurs during this process. He then moves on to attaching four more pieces onto these main frames, completing two pairs of flanges for the bulkhead hatches.The Final Touches
While two flanges form the primary support structure around the hatches, Sven mentions there are two additional pieces required at each end to ensure comprehensive protection. This attention to detail highlights his commitment to producing a durable and reliable design. “Sailing is about finding your path, whether it’s across an ocean or within yourself.” – Sven Yrvind In conclusion, making flanges around bulkhead hatches may seem complex at first glance, but by following Sven Yrvind’s meticulous process, enthusiasts can achieve professional-level results. Remember that the journey of boatbuilding is as rewarding as reaching your destination; it tests one’s patience and dedication. For those seeking to embark on this adventure or simply gain more insight into marine craftsmanship, Sven’s wisdom is invaluable.Sven begins by explaining that working on flanges vertically and horizontally is significantly easier than doing so in a flat position. To simplify the process further, he divides the task into two or three steps as suggested by fellow expert “for for.” This approach not only makes it more manageable but also allows for greater precision in crafting each component.Step 2: Applying Glue and Securing
Sven proceeds to apply glue along one edge of the flange, ensuring a secure bond when clamped into place. He emphasizes that this stage is crucial for maintaining the structural integrity of the flange, which in turn safeguards the living area beneath the canvas when hatches are open.Step 3: Allowing Time to Dry
After securely attaching the first portion of the flange, Sven allows ample time for it to dry before moving forward with additional steps. This patience and precision are key aspects of his successful boatbuilding methods.Step 4: Finishing Touches
Once the flange is fully dried, Sven removes the clamps carefully, ensuring no damage occurs during this process. He then moves on to attaching four more pieces onto these main frames, completing two pairs of flanges for the bulkhead hatches.The Final Touches
While two flanges form the primary support structure around the hatches, Sven mentions there are two additional pieces required at each end to ensure comprehensive protection. This attention to detail highlights his commitment to producing a durable and reliable design. “Sailing is about finding your path, whether it’s across an ocean or within yourself.” – Sven Yrvind In conclusion, making flanges around bulkhead hatches may seem complex at first glance, but by following Sven Yrvind’s meticulous process, enthusiasts can achieve professional-level results. Remember that the journey of boatbuilding is as rewarding as reaching your destination; it tests one’s patience and dedication. For those seeking to embark on this adventure or simply gain more insight into marine craftsmanship, Sven’s wisdom is invaluable.Sven Yrvind, a renowned yacht designer and sailor, shares valuable insights on creating flanges around bulkhead hatches for canvas protection in this enlightening video. By following his expert guidance, boat enthusiasts can ensure their living areas remain secure while allowing unhindered access through the hatches.Step 1: Starting with the Flange
Sven begins by explaining that working on flanges vertically and horizontally is significantly easier than doing so in a flat position. To simplify the process further, he divides the task into two or three steps as suggested by fellow expert “for for.” This approach not only makes it more manageable but also allows for greater precision in crafting each component.Step 2: Applying Glue and Securing
Sven proceeds to apply glue along one edge of the flange, ensuring a secure bond when clamped into place. He emphasizes that this stage is crucial for maintaining the structural integrity of the flange, which in turn safeguards the living area beneath the canvas when hatches are open.Step 3: Allowing Time to Dry
After securely attaching the first portion of the flange, Sven allows ample time for it to dry before moving forward with additional steps. This patience and precision are key aspects of his successful boatbuilding methods.Step 4: Finishing Touches
Once the flange is fully dried, Sven removes the clamps carefully, ensuring no damage occurs during this process. He then moves on to attaching four more pieces onto these main frames, completing two pairs of flanges for the bulkhead hatches.The Final Touches
While two flanges form the primary support structure around the hatches, Sven mentions there are two additional pieces required at each end to ensure comprehensive protection. This attention to detail highlights his commitment to producing a durable and reliable design. “Sailing is about finding your path, whether it’s across an ocean or within yourself.” – Sven Yrvind In conclusion, making flanges around bulkhead hatches may seem complex at first glance, but by following Sven Yrvind’s meticulous process, enthusiasts can achieve professional-level results. Remember that the journey of boatbuilding is as rewarding as reaching your destination; it tests one’s patience and dedication. For those seeking to embark on this adventure or simply gain more insight into marine craftsmanship, Sven’s wisdom is invaluable.Making Flanges Around Bulkhead Hatches for Canvas
Sven Yrvind, a renowned yacht designer and sailor, shares valuable insights on creating flanges around bulkhead hatches for canvas protection in this enlightening video. By following his expert guidance, boat enthusiasts can ensure their living areas remain secure while allowing unhindered access through the hatches.Step 1: Starting with the Flange
Sven begins by explaining that working on flanges vertically and horizontally is significantly easier than doing so in a flat position. To simplify the process further, he divides the task into two or three steps as suggested by fellow expert “for for.” This approach not only makes it more manageable but also allows for greater precision in crafting each component.Step 2: Applying Glue and Securing
Sven proceeds to apply glue along one edge of the flange, ensuring a secure bond when clamped into place. He emphasizes that this stage is crucial for maintaining the structural integrity of the flange, which in turn safeguards the living area beneath the canvas when hatches are open.Step 3: Allowing Time to Dry
After securely attaching the first portion of the flange, Sven allows ample time for it to dry before moving forward with additional steps. This patience and precision are key aspects of his successful boatbuilding methods.Step 4: Finishing Touches
Once the flange is fully dried, Sven removes the clamps carefully, ensuring no damage occurs during this process. He then moves on to attaching four more pieces onto these main frames, completing two pairs of flanges for the bulkhead hatches.The Final Touches
While two flanges form the primary support structure around the hatches, Sven mentions there are two additional pieces required at each end to ensure comprehensive protection. This attention to detail highlights his commitment to producing a durable and reliable design. “Sailing is about finding your path, whether it’s across an ocean or within yourself.” – Sven Yrvind In conclusion, making flanges around bulkhead hatches may seem complex at first glance, but by following Sven Yrvind’s meticulous process, enthusiasts can achieve professional-level results. Remember that the journey of boatbuilding is as rewarding as reaching your destination; it tests one’s patience and dedication. For those seeking to embark on this adventure or simply gain more insight into marine craftsmanship, Sven’s wisdom is invaluable.After securely attaching the first portion of the flange, Sven allows ample time for it to dry before moving forward with additional steps. This patience and precision are key aspects of his successful boatbuilding methods.Step 4: Finishing Touches
Once the flange is fully dried, Sven removes the clamps carefully, ensuring no damage occurs during this process. He then moves on to attaching four more pieces onto these main frames, completing two pairs of flanges for the bulkhead hatches.The Final Touches
While two flanges form the primary support structure around the hatches, Sven mentions there are two additional pieces required at each end to ensure comprehensive protection. This attention to detail highlights his commitment to producing a durable and reliable design. “Sailing is about finding your path, whether it’s across an ocean or within yourself.” – Sven Yrvind In conclusion, making flanges around bulkhead hatches may seem complex at first glance, but by following Sven Yrvind’s meticulous process, enthusiasts can achieve professional-level results. Remember that the journey of boatbuilding is as rewarding as reaching your destination; it tests one’s patience and dedication. For those seeking to embark on this adventure or simply gain more insight into marine craftsmanship, Sven’s wisdom is invaluable.Sven proceeds to apply glue along one edge of the flange, ensuring a secure bond when clamped into place. He emphasizes that this stage is crucial for maintaining the structural integrity of the flange, which in turn safeguards the living area beneath the canvas when hatches are open.Step 3: Allowing Time to Dry
After securely attaching the first portion of the flange, Sven allows ample time for it to dry before moving forward with additional steps. This patience and precision are key aspects of his successful boatbuilding methods.Step 4: Finishing Touches
Once the flange is fully dried, Sven removes the clamps carefully, ensuring no damage occurs during this process. He then moves on to attaching four more pieces onto these main frames, completing two pairs of flanges for the bulkhead hatches.The Final Touches
While two flanges form the primary support structure around the hatches, Sven mentions there are two additional pieces required at each end to ensure comprehensive protection. This attention to detail highlights his commitment to producing a durable and reliable design. “Sailing is about finding your path, whether it’s across an ocean or within yourself.” – Sven Yrvind In conclusion, making flanges around bulkhead hatches may seem complex at first glance, but by following Sven Yrvind’s meticulous process, enthusiasts can achieve professional-level results. Remember that the journey of boatbuilding is as rewarding as reaching your destination; it tests one’s patience and dedication. For those seeking to embark on this adventure or simply gain more insight into marine craftsmanship, Sven’s wisdom is invaluable.Sven begins by explaining that working on flanges vertically and horizontally is significantly easier than doing so in a flat position. To simplify the process further, he divides the task into two or three steps as suggested by fellow expert “for for.” This approach not only makes it more manageable but also allows for greater precision in crafting each component.Step 2: Applying Glue and Securing
Sven proceeds to apply glue along one edge of the flange, ensuring a secure bond when clamped into place. He emphasizes that this stage is crucial for maintaining the structural integrity of the flange, which in turn safeguards the living area beneath the canvas when hatches are open.Step 3: Allowing Time to Dry
After securely attaching the first portion of the flange, Sven allows ample time for it to dry before moving forward with additional steps. This patience and precision are key aspects of his successful boatbuilding methods.Step 4: Finishing Touches
Once the flange is fully dried, Sven removes the clamps carefully, ensuring no damage occurs during this process. He then moves on to attaching four more pieces onto these main frames, completing two pairs of flanges for the bulkhead hatches.The Final Touches
While two flanges form the primary support structure around the hatches, Sven mentions there are two additional pieces required at each end to ensure comprehensive protection. This attention to detail highlights his commitment to producing a durable and reliable design. “Sailing is about finding your path, whether it’s across an ocean or within yourself.” – Sven Yrvind In conclusion, making flanges around bulkhead hatches may seem complex at first glance, but by following Sven Yrvind’s meticulous process, enthusiasts can achieve professional-level results. Remember that the journey of boatbuilding is as rewarding as reaching your destination; it tests one’s patience and dedication. For those seeking to embark on this adventure or simply gain more insight into marine craftsmanship, Sven’s wisdom is invaluable.Sven Yrvind, a renowned yacht designer and sailor, shares valuable insights on creating flanges around bulkhead hatches for canvas protection in this enlightening video. By following his expert guidance, boat enthusiasts can ensure their living areas remain secure while allowing unhindered access through the hatches.Step 1: Starting with the Flange
Sven begins by explaining that working on flanges vertically and horizontally is significantly easier than doing so in a flat position. To simplify the process further, he divides the task into two or three steps as suggested by fellow expert “for for.” This approach not only makes it more manageable but also allows for greater precision in crafting each component.Step 2: Applying Glue and Securing
Sven proceeds to apply glue along one edge of the flange, ensuring a secure bond when clamped into place. He emphasizes that this stage is crucial for maintaining the structural integrity of the flange, which in turn safeguards the living area beneath the canvas when hatches are open.Step 3: Allowing Time to Dry
After securely attaching the first portion of the flange, Sven allows ample time for it to dry before moving forward with additional steps. This patience and precision are key aspects of his successful boatbuilding methods.Step 4: Finishing Touches
Once the flange is fully dried, Sven removes the clamps carefully, ensuring no damage occurs during this process. He then moves on to attaching four more pieces onto these main frames, completing two pairs of flanges for the bulkhead hatches.The Final Touches
While two flanges form the primary support structure around the hatches, Sven mentions there are two additional pieces required at each end to ensure comprehensive protection. This attention to detail highlights his commitment to producing a durable and reliable design. “Sailing is about finding your path, whether it’s across an ocean or within yourself.” – Sven Yrvind In conclusion, making flanges around bulkhead hatches may seem complex at first glance, but by following Sven Yrvind’s meticulous process, enthusiasts can achieve professional-level results. Remember that the journey of boatbuilding is as rewarding as reaching your destination; it tests one’s patience and dedication. For those seeking to embark on this adventure or simply gain more insight into marine craftsmanship, Sven’s wisdom is invaluable.Making Flanges Around Bulkhead Hatches for Canvas
Sven Yrvind, a renowned yacht designer and sailor, shares valuable insights on creating flanges around bulkhead hatches for canvas protection in this enlightening video. By following his expert guidance, boat enthusiasts can ensure their living areas remain secure while allowing unhindered access through the hatches.Step 1: Starting with the Flange
Sven begins by explaining that working on flanges vertically and horizontally is significantly easier than doing so in a flat position. To simplify the process further, he divides the task into two or three steps as suggested by fellow expert “for for.” This approach not only makes it more manageable but also allows for greater precision in crafting each component.Step 2: Applying Glue and Securing
Sven proceeds to apply glue along one edge of the flange, ensuring a secure bond when clamped into place. He emphasizes that this stage is crucial for maintaining the structural integrity of the flange, which in turn safeguards the living area beneath the canvas when hatches are open.Step 3: Allowing Time to Dry
After securely attaching the first portion of the flange, Sven allows ample time for it to dry before moving forward with additional steps. This patience and precision are key aspects of his successful boatbuilding methods.Step 4: Finishing Touches
Once the flange is fully dried, Sven removes the clamps carefully, ensuring no damage occurs during this process. He then moves on to attaching four more pieces onto these main frames, completing two pairs of flanges for the bulkhead hatches.The Final Touches
While two flanges form the primary support structure around the hatches, Sven mentions there are two additional pieces required at each end to ensure comprehensive protection. This attention to detail highlights his commitment to producing a durable and reliable design. “Sailing is about finding your path, whether it’s across an ocean or within yourself.” – Sven Yrvind In conclusion, making flanges around bulkhead hatches may seem complex at first glance, but by following Sven Yrvind’s meticulous process, enthusiasts can achieve professional-level results. Remember that the journey of boatbuilding is as rewarding as reaching your destination; it tests one’s patience and dedication. For those seeking to embark on this adventure or simply gain more insight into marine craftsmanship, Sven’s wisdom is invaluable.Once the flange is fully dried, Sven removes the clamps carefully, ensuring no damage occurs during this process. He then moves on to attaching four more pieces onto these main frames, completing two pairs of flanges for the bulkhead hatches.The Final Touches
While two flanges form the primary support structure around the hatches, Sven mentions there are two additional pieces required at each end to ensure comprehensive protection. This attention to detail highlights his commitment to producing a durable and reliable design. “Sailing is about finding your path, whether it’s across an ocean or within yourself.” – Sven Yrvind In conclusion, making flanges around bulkhead hatches may seem complex at first glance, but by following Sven Yrvind’s meticulous process, enthusiasts can achieve professional-level results. Remember that the journey of boatbuilding is as rewarding as reaching your destination; it tests one’s patience and dedication. For those seeking to embark on this adventure or simply gain more insight into marine craftsmanship, Sven’s wisdom is invaluable.After securely attaching the first portion of the flange, Sven allows ample time for it to dry before moving forward with additional steps. This patience and precision are key aspects of his successful boatbuilding methods.Step 4: Finishing Touches
Once the flange is fully dried, Sven removes the clamps carefully, ensuring no damage occurs during this process. He then moves on to attaching four more pieces onto these main frames, completing two pairs of flanges for the bulkhead hatches.The Final Touches
While two flanges form the primary support structure around the hatches, Sven mentions there are two additional pieces required at each end to ensure comprehensive protection. This attention to detail highlights his commitment to producing a durable and reliable design. “Sailing is about finding your path, whether it’s across an ocean or within yourself.” – Sven Yrvind In conclusion, making flanges around bulkhead hatches may seem complex at first glance, but by following Sven Yrvind’s meticulous process, enthusiasts can achieve professional-level results. Remember that the journey of boatbuilding is as rewarding as reaching your destination; it tests one’s patience and dedication. For those seeking to embark on this adventure or simply gain more insight into marine craftsmanship, Sven’s wisdom is invaluable.Sven proceeds to apply glue along one edge of the flange, ensuring a secure bond when clamped into place. He emphasizes that this stage is crucial for maintaining the structural integrity of the flange, which in turn safeguards the living area beneath the canvas when hatches are open.Step 3: Allowing Time to Dry
After securely attaching the first portion of the flange, Sven allows ample time for it to dry before moving forward with additional steps. This patience and precision are key aspects of his successful boatbuilding methods.Step 4: Finishing Touches
Once the flange is fully dried, Sven removes the clamps carefully, ensuring no damage occurs during this process. He then moves on to attaching four more pieces onto these main frames, completing two pairs of flanges for the bulkhead hatches.The Final Touches
While two flanges form the primary support structure around the hatches, Sven mentions there are two additional pieces required at each end to ensure comprehensive protection. This attention to detail highlights his commitment to producing a durable and reliable design. “Sailing is about finding your path, whether it’s across an ocean or within yourself.” – Sven Yrvind In conclusion, making flanges around bulkhead hatches may seem complex at first glance, but by following Sven Yrvind’s meticulous process, enthusiasts can achieve professional-level results. Remember that the journey of boatbuilding is as rewarding as reaching your destination; it tests one’s patience and dedication. For those seeking to embark on this adventure or simply gain more insight into marine craftsmanship, Sven’s wisdom is invaluable.Sven begins by explaining that working on flanges vertically and horizontally is significantly easier than doing so in a flat position. To simplify the process further, he divides the task into two or three steps as suggested by fellow expert “for for.” This approach not only makes it more manageable but also allows for greater precision in crafting each component.Step 2: Applying Glue and Securing
Sven proceeds to apply glue along one edge of the flange, ensuring a secure bond when clamped into place. He emphasizes that this stage is crucial for maintaining the structural integrity of the flange, which in turn safeguards the living area beneath the canvas when hatches are open.Step 3: Allowing Time to Dry
After securely attaching the first portion of the flange, Sven allows ample time for it to dry before moving forward with additional steps. This patience and precision are key aspects of his successful boatbuilding methods.Step 4: Finishing Touches
Once the flange is fully dried, Sven removes the clamps carefully, ensuring no damage occurs during this process. He then moves on to attaching four more pieces onto these main frames, completing two pairs of flanges for the bulkhead hatches.The Final Touches
While two flanges form the primary support structure around the hatches, Sven mentions there are two additional pieces required at each end to ensure comprehensive protection. This attention to detail highlights his commitment to producing a durable and reliable design. “Sailing is about finding your path, whether it’s across an ocean or within yourself.” – Sven Yrvind In conclusion, making flanges around bulkhead hatches may seem complex at first glance, but by following Sven Yrvind’s meticulous process, enthusiasts can achieve professional-level results. Remember that the journey of boatbuilding is as rewarding as reaching your destination; it tests one’s patience and dedication. For those seeking to embark on this adventure or simply gain more insight into marine craftsmanship, Sven’s wisdom is invaluable.Sven Yrvind, a renowned yacht designer and sailor, shares valuable insights on creating flanges around bulkhead hatches for canvas protection in this enlightening video. By following his expert guidance, boat enthusiasts can ensure their living areas remain secure while allowing unhindered access through the hatches.Step 1: Starting with the Flange
Sven begins by explaining that working on flanges vertically and horizontally is significantly easier than doing so in a flat position. To simplify the process further, he divides the task into two or three steps as suggested by fellow expert “for for.” This approach not only makes it more manageable but also allows for greater precision in crafting each component.Step 2: Applying Glue and Securing
Sven proceeds to apply glue along one edge of the flange, ensuring a secure bond when clamped into place. He emphasizes that this stage is crucial for maintaining the structural integrity of the flange, which in turn safeguards the living area beneath the canvas when hatches are open.Step 3: Allowing Time to Dry
After securely attaching the first portion of the flange, Sven allows ample time for it to dry before moving forward with additional steps. This patience and precision are key aspects of his successful boatbuilding methods.Step 4: Finishing Touches
Once the flange is fully dried, Sven removes the clamps carefully, ensuring no damage occurs during this process. He then moves on to attaching four more pieces onto these main frames, completing two pairs of flanges for the bulkhead hatches.The Final Touches
While two flanges form the primary support structure around the hatches, Sven mentions there are two additional pieces required at each end to ensure comprehensive protection. This attention to detail highlights his commitment to producing a durable and reliable design. “Sailing is about finding your path, whether it’s across an ocean or within yourself.” – Sven Yrvind In conclusion, making flanges around bulkhead hatches may seem complex at first glance, but by following Sven Yrvind’s meticulous process, enthusiasts can achieve professional-level results. Remember that the journey of boatbuilding is as rewarding as reaching your destination; it tests one’s patience and dedication. For those seeking to embark on this adventure or simply gain more insight into marine craftsmanship, Sven’s wisdom is invaluable.Making Flanges Around Bulkhead Hatches for Canvas
Sven Yrvind, a renowned yacht designer and sailor, shares valuable insights on creating flanges around bulkhead hatches for canvas protection in this enlightening video. By following his expert guidance, boat enthusiasts can ensure their living areas remain secure while allowing unhindered access through the hatches.Step 1: Starting with the Flange
Sven begins by explaining that working on flanges vertically and horizontally is significantly easier than doing so in a flat position. To simplify the process further, he divides the task into two or three steps as suggested by fellow expert “for for.” This approach not only makes it more manageable but also allows for greater precision in crafting each component.Step 2: Applying Glue and Securing
Sven proceeds to apply glue along one edge of the flange, ensuring a secure bond when clamped into place. He emphasizes that this stage is crucial for maintaining the structural integrity of the flange, which in turn safeguards the living area beneath the canvas when hatches are open.Step 3: Allowing Time to Dry
After securely attaching the first portion of the flange, Sven allows ample time for it to dry before moving forward with additional steps. This patience and precision are key aspects of his successful boatbuilding methods.Step 4: Finishing Touches
Once the flange is fully dried, Sven removes the clamps carefully, ensuring no damage occurs during this process. He then moves on to attaching four more pieces onto these main frames, completing two pairs of flanges for the bulkhead hatches.The Final Touches
While two flanges form the primary support structure around the hatches, Sven mentions there are two additional pieces required at each end to ensure comprehensive protection. This attention to detail highlights his commitment to producing a durable and reliable design. “Sailing is about finding your path, whether it’s across an ocean or within yourself.” – Sven Yrvind In conclusion, making flanges around bulkhead hatches may seem complex at first glance, but by following Sven Yrvind’s meticulous process, enthusiasts can achieve professional-level results. Remember that the journey of boatbuilding is as rewarding as reaching your destination; it tests one’s patience and dedication. For those seeking to embark on this adventure or simply gain more insight into marine craftsmanship, Sven’s wisdom is invaluable.Sven proceeds to apply glue along one edge of the flange, ensuring a secure bond when clamped into place. He emphasizes that this stage is crucial for maintaining the structural integrity of the flange, which in turn safeguards the living area beneath the canvas when hatches are open.Step 3: Allowing Time to Dry
After securely attaching the first portion of the flange, Sven allows ample time for it to dry before moving forward with additional steps. This patience and precision are key aspects of his successful boatbuilding methods.Step 4: Finishing Touches
Once the flange is fully dried, Sven removes the clamps carefully, ensuring no damage occurs during this process. He then moves on to attaching four more pieces onto these main frames, completing two pairs of flanges for the bulkhead hatches.The Final Touches
While two flanges form the primary support structure around the hatches, Sven mentions there are two additional pieces required at each end to ensure comprehensive protection. This attention to detail highlights his commitment to producing a durable and reliable design. “Sailing is about finding your path, whether it’s across an ocean or within yourself.” – Sven Yrvind In conclusion, making flanges around bulkhead hatches may seem complex at first glance, but by following Sven Yrvind’s meticulous process, enthusiasts can achieve professional-level results. Remember that the journey of boatbuilding is as rewarding as reaching your destination; it tests one’s patience and dedication. For those seeking to embark on this adventure or simply gain more insight into marine craftsmanship, Sven’s wisdom is invaluable.Sven Yrvind, a renowned yacht designer and sailor, shares valuable insights on creating flanges around bulkhead hatches for canvas protection in this enlightening video. By following his expert guidance, boat enthusiasts can ensure their living areas remain secure while allowing unhindered access through the hatches.Step 1: Starting with the Flange
Sven begins by explaining that working on flanges vertically and horizontally is significantly easier than doing so in a flat position. To simplify the process further, he divides the task into two or three steps as suggested by fellow expert “for for.” This approach not only makes it more manageable but also allows for greater precision in crafting each component.Step 2: Applying Glue and Securing
Sven proceeds to apply glue along one edge of the flange, ensuring a secure bond when clamped into place. He emphasizes that this stage is crucial for maintaining the structural integrity of the flange, which in turn safeguards the living area beneath the canvas when hatches are open.Step 3: Allowing Time to Dry
After securely attaching the first portion of the flange, Sven allows ample time for it to dry before moving forward with additional steps. This patience and precision are key aspects of his successful boatbuilding methods.Step 4: Finishing Touches
Once the flange is fully dried, Sven removes the clamps carefully, ensuring no damage occurs during this process. He then moves on to attaching four more pieces onto these main frames, completing two pairs of flanges for the bulkhead hatches.The Final Touches
While two flanges form the primary support structure around the hatches, Sven mentions there are two additional pieces required at each end to ensure comprehensive protection. This attention to detail highlights his commitment to producing a durable and reliable design. “Sailing is about finding your path, whether it’s across an ocean or within yourself.” – Sven Yrvind In conclusion, making flanges around bulkhead hatches may seem complex at first glance, but by following Sven Yrvind’s meticulous process, enthusiasts can achieve professional-level results. Remember that the journey of boatbuilding is as rewarding as reaching your destination; it tests one’s patience and dedication. For those seeking to embark on this adventure or simply gain more insight into marine craftsmanship, Sven’s wisdom is invaluable.Making Flanges Around Bulkhead Hatches for Canvas
Sven Yrvind, a renowned yacht designer and sailor, shares valuable insights on creating flanges around bulkhead hatches for canvas protection in this enlightening video. By following his expert guidance, boat enthusiasts can ensure their living areas remain secure while allowing unhindered access through the hatches.Step 1: Starting with the Flange
Sven begins by explaining that working on flanges vertically and horizontally is significantly easier than doing so in a flat position. To simplify the process further, he divides the task into two or three steps as suggested by fellow expert “for for.” This approach not only makes it more manageable but also allows for greater precision in crafting each component.Step 2: Applying Glue and Securing
Sven proceeds to apply glue along one edge of the flange, ensuring a secure bond when clamped into place. He emphasizes that this stage is crucial for maintaining the structural integrity of the flange, which in turn safeguards the living area beneath the canvas when hatches are open.Step 3: Allowing Time to Dry
After securely attaching the first portion of the flange, Sven allows ample time for it to dry before moving forward with additional steps. This patience and precision are key aspects of his successful boatbuilding methods.Step 4: Finishing Touches
Once the flange is fully dried, Sven removes the clamps carefully, ensuring no damage occurs during this process. He then moves on to attaching four more pieces onto these main frames, completing two pairs of flanges for the bulkhead hatches.The Final Touches
While two flanges form the primary support structure around the hatches, Sven mentions there are two additional pieces required at each end to ensure comprehensive protection. This attention to detail highlights his commitment to producing a durable and reliable design. “Sailing is about finding your path, whether it’s across an ocean or within yourself.” – Sven Yrvind In conclusion, making flanges around bulkhead hatches may seem complex at first glance, but by following Sven Yrvind’s meticulous process, enthusiasts can achieve professional-level results. Remember that the journey of boatbuilding is as rewarding as reaching your destination; it tests one’s patience and dedication. For those seeking to embark on this adventure or simply gain more insight into marine craftsmanship, Sven’s wisdom is invaluable.Once the flange is fully dried, Sven removes the clamps carefully, ensuring no damage occurs during this process. He then moves on to attaching four more pieces onto these main frames, completing two pairs of flanges for the bulkhead hatches.The Final Touches
While two flanges form the primary support structure around the hatches, Sven mentions there are two additional pieces required at each end to ensure comprehensive protection. This attention to detail highlights his commitment to producing a durable and reliable design. “Sailing is about finding your path, whether it’s across an ocean or within yourself.” – Sven Yrvind In conclusion, making flanges around bulkhead hatches may seem complex at first glance, but by following Sven Yrvind’s meticulous process, enthusiasts can achieve professional-level results. Remember that the journey of boatbuilding is as rewarding as reaching your destination; it tests one’s patience and dedication. For those seeking to embark on this adventure or simply gain more insight into marine craftsmanship, Sven’s wisdom is invaluable.Sven proceeds to apply glue along one edge of the flange, ensuring a secure bond when clamped into place. He emphasizes that this stage is crucial for maintaining the structural integrity of the flange, which in turn safeguards the living area beneath the canvas when hatches are open.Step 3: Allowing Time to Dry
After securely attaching the first portion of the flange, Sven allows ample time for it to dry before moving forward with additional steps. This patience and precision are key aspects of his successful boatbuilding methods.Step 4: Finishing Touches
Once the flange is fully dried, Sven removes the clamps carefully, ensuring no damage occurs during this process. He then moves on to attaching four more pieces onto these main frames, completing two pairs of flanges for the bulkhead hatches.The Final Touches
While two flanges form the primary support structure around the hatches, Sven mentions there are two additional pieces required at each end to ensure comprehensive protection. This attention to detail highlights his commitment to producing a durable and reliable design. “Sailing is about finding your path, whether it’s across an ocean or within yourself.” – Sven Yrvind In conclusion, making flanges around bulkhead hatches may seem complex at first glance, but by following Sven Yrvind’s meticulous process, enthusiasts can achieve professional-level results. Remember that the journey of boatbuilding is as rewarding as reaching your destination; it tests one’s patience and dedication. For those seeking to embark on this adventure or simply gain more insight into marine craftsmanship, Sven’s wisdom is invaluable.Sven begins by explaining that working on flanges vertically and horizontally is significantly easier than doing so in a flat position. To simplify the process further, he divides the task into two or three steps as suggested by fellow expert “for for.” This approach not only makes it more manageable but also allows for greater precision in crafting each component.Step 2: Applying Glue and Securing
Sven proceeds to apply glue along one edge of the flange, ensuring a secure bond when clamped into place. He emphasizes that this stage is crucial for maintaining the structural integrity of the flange, which in turn safeguards the living area beneath the canvas when hatches are open.Step 3: Allowing Time to Dry
After securely attaching the first portion of the flange, Sven allows ample time for it to dry before moving forward with additional steps. This patience and precision are key aspects of his successful boatbuilding methods.Step 4: Finishing Touches
Once the flange is fully dried, Sven removes the clamps carefully, ensuring no damage occurs during this process. He then moves on to attaching four more pieces onto these main frames, completing two pairs of flanges for the bulkhead hatches.The Final Touches
While two flanges form the primary support structure around the hatches, Sven mentions there are two additional pieces required at each end to ensure comprehensive protection. This attention to detail highlights his commitment to producing a durable and reliable design. “Sailing is about finding your path, whether it’s across an ocean or within yourself.” – Sven Yrvind In conclusion, making flanges around bulkhead hatches may seem complex at first glance, but by following Sven Yrvind’s meticulous process, enthusiasts can achieve professional-level results. Remember that the journey of boatbuilding is as rewarding as reaching your destination; it tests one’s patience and dedication. For those seeking to embark on this adventure or simply gain more insight into marine craftsmanship, Sven’s wisdom is invaluable.Sven Yrvind, a renowned yacht designer and sailor, shares valuable insights on creating flanges around bulkhead hatches for canvas protection in this enlightening video. By following his expert guidance, boat enthusiasts can ensure their living areas remain secure while allowing unhindered access through the hatches.Step 1: Starting with the Flange
Sven begins by explaining that working on flanges vertically and horizontally is significantly easier than doing so in a flat position. To simplify the process further, he divides the task into two or three steps as suggested by fellow expert “for for.” This approach not only makes it more manageable but also allows for greater precision in crafting each component.Step 2: Applying Glue and Securing
Sven proceeds to apply glue along one edge of the flange, ensuring a secure bond when clamped into place. He emphasizes that this stage is crucial for maintaining the structural integrity of the flange, which in turn safeguards the living area beneath the canvas when hatches are open.Step 3: Allowing Time to Dry
After securely attaching the first portion of the flange, Sven allows ample time for it to dry before moving forward with additional steps. This patience and precision are key aspects of his successful boatbuilding methods.Step 4: Finishing Touches
Once the flange is fully dried, Sven removes the clamps carefully, ensuring no damage occurs during this process. He then moves on to attaching four more pieces onto these main frames, completing two pairs of flanges for the bulkhead hatches.The Final Touches
While two flanges form the primary support structure around the hatches, Sven mentions there are two additional pieces required at each end to ensure comprehensive protection. This attention to detail highlights his commitment to producing a durable and reliable design. “Sailing is about finding your path, whether it’s across an ocean or within yourself.” – Sven Yrvind In conclusion, making flanges around bulkhead hatches may seem complex at first glance, but by following Sven Yrvind’s meticulous process, enthusiasts can achieve professional-level results. Remember that the journey of boatbuilding is as rewarding as reaching your destination; it tests one’s patience and dedication. For those seeking to embark on this adventure or simply gain more insight into marine craftsmanship, Sven’s wisdom is invaluable.Making Flanges Around Bulkhead Hatches for Canvas
Sven Yrvind, a renowned yacht designer and sailor, shares valuable insights on creating flanges around bulkhead hatches for canvas protection in this enlightening video. By following his expert guidance, boat enthusiasts can ensure their living areas remain secure while allowing unhindered access through the hatches.Step 1: Starting with the Flange
Sven begins by explaining that working on flanges vertically and horizontally is significantly easier than doing so in a flat position. To simplify the process further, he divides the task into two or three steps as suggested by fellow expert “for for.” This approach not only makes it more manageable but also allows for greater precision in crafting each component.Step 2: Applying Glue and Securing
Sven proceeds to apply glue along one edge of the flange, ensuring a secure bond when clamped into place. He emphasizes that this stage is crucial for maintaining the structural integrity of the flange, which in turn safeguards the living area beneath the canvas when hatches are open.Step 3: Allowing Time to Dry
After securely attaching the first portion of the flange, Sven allows ample time for it to dry before moving forward with additional steps. This patience and precision are key aspects of his successful boatbuilding methods.Step 4: Finishing Touches
Once the flange is fully dried, Sven removes the clamps carefully, ensuring no damage occurs during this process. He then moves on to attaching four more pieces onto these main frames, completing two pairs of flanges for the bulkhead hatches.The Final Touches
While two flanges form the primary support structure around the hatches, Sven mentions there are two additional pieces required at each end to ensure comprehensive protection. This attention to detail highlights his commitment to producing a durable and reliable design. “Sailing is about finding your path, whether it’s across an ocean or within yourself.” – Sven Yrvind In conclusion, making flanges around bulkhead hatches may seem complex at first glance, but by following Sven Yrvind’s meticulous process, enthusiasts can achieve professional-level results. Remember that the journey of boatbuilding is as rewarding as reaching your destination; it tests one’s patience and dedication. For those seeking to embark on this adventure or simply gain more insight into marine craftsmanship, Sven’s wisdom is invaluable.After securely attaching the first portion of the flange, Sven allows ample time for it to dry before moving forward with additional steps. This patience and precision are key aspects of his successful boatbuilding methods.Step 4: Finishing Touches
Once the flange is fully dried, Sven removes the clamps carefully, ensuring no damage occurs during this process. He then moves on to attaching four more pieces onto these main frames, completing two pairs of flanges for the bulkhead hatches.The Final Touches
While two flanges form the primary support structure around the hatches, Sven mentions there are two additional pieces required at each end to ensure comprehensive protection. This attention to detail highlights his commitment to producing a durable and reliable design. “Sailing is about finding your path, whether it’s across an ocean or within yourself.” – Sven Yrvind In conclusion, making flanges around bulkhead hatches may seem complex at first glance, but by following Sven Yrvind’s meticulous process, enthusiasts can achieve professional-level results. Remember that the journey of boatbuilding is as rewarding as reaching your destination; it tests one’s patience and dedication. For those seeking to embark on this adventure or simply gain more insight into marine craftsmanship, Sven’s wisdom is invaluable.Sven proceeds to apply glue along one edge of the flange, ensuring a secure bond when clamped into place. He emphasizes that this stage is crucial for maintaining the structural integrity of the flange, which in turn safeguards the living area beneath the canvas when hatches are open.Step 3: Allowing Time to Dry
After securely attaching the first portion of the flange, Sven allows ample time for it to dry before moving forward with additional steps. This patience and precision are key aspects of his successful boatbuilding methods.Step 4: Finishing Touches
Once the flange is fully dried, Sven removes the clamps carefully, ensuring no damage occurs during this process. He then moves on to attaching four more pieces onto these main frames, completing two pairs of flanges for the bulkhead hatches.The Final Touches
While two flanges form the primary support structure around the hatches, Sven mentions there are two additional pieces required at each end to ensure comprehensive protection. This attention to detail highlights his commitment to producing a durable and reliable design. “Sailing is about finding your path, whether it’s across an ocean or within yourself.” – Sven Yrvind In conclusion, making flanges around bulkhead hatches may seem complex at first glance, but by following Sven Yrvind’s meticulous process, enthusiasts can achieve professional-level results. Remember that the journey of boatbuilding is as rewarding as reaching your destination; it tests one’s patience and dedication. For those seeking to embark on this adventure or simply gain more insight into marine craftsmanship, Sven’s wisdom is invaluable.Sven begins by explaining that working on flanges vertically and horizontally is significantly easier than doing so in a flat position. To simplify the process further, he divides the task into two or three steps as suggested by fellow expert “for for.” This approach not only makes it more manageable but also allows for greater precision in crafting each component.Step 2: Applying Glue and Securing
Sven proceeds to apply glue along one edge of the flange, ensuring a secure bond when clamped into place. He emphasizes that this stage is crucial for maintaining the structural integrity of the flange, which in turn safeguards the living area beneath the canvas when hatches are open.Step 3: Allowing Time to Dry
After securely attaching the first portion of the flange, Sven allows ample time for it to dry before moving forward with additional steps. This patience and precision are key aspects of his successful boatbuilding methods.Step 4: Finishing Touches
Once the flange is fully dried, Sven removes the clamps carefully, ensuring no damage occurs during this process. He then moves on to attaching four more pieces onto these main frames, completing two pairs of flanges for the bulkhead hatches.The Final Touches
While two flanges form the primary support structure around the hatches, Sven mentions there are two additional pieces required at each end to ensure comprehensive protection. This attention to detail highlights his commitment to producing a durable and reliable design. “Sailing is about finding your path, whether it’s across an ocean or within yourself.” – Sven Yrvind In conclusion, making flanges around bulkhead hatches may seem complex at first glance, but by following Sven Yrvind’s meticulous process, enthusiasts can achieve professional-level results. Remember that the journey of boatbuilding is as rewarding as reaching your destination; it tests one’s patience and dedication. For those seeking to embark on this adventure or simply gain more insight into marine craftsmanship, Sven’s wisdom is invaluable.Sven Yrvind, a renowned yacht designer and sailor, shares valuable insights on creating flanges around bulkhead hatches for canvas protection in this enlightening video. By following his expert guidance, boat enthusiasts can ensure their living areas remain secure while allowing unhindered access through the hatches.Step 1: Starting with the Flange
Sven begins by explaining that working on flanges vertically and horizontally is significantly easier than doing so in a flat position. To simplify the process further, he divides the task into two or three steps as suggested by fellow expert “for for.” This approach not only makes it more manageable but also allows for greater precision in crafting each component.Step 2: Applying Glue and Securing
Sven proceeds to apply glue along one edge of the flange, ensuring a secure bond when clamped into place. He emphasizes that this stage is crucial for maintaining the structural integrity of the flange, which in turn safeguards the living area beneath the canvas when hatches are open.Step 3: Allowing Time to Dry
After securely attaching the first portion of the flange, Sven allows ample time for it to dry before moving forward with additional steps. This patience and precision are key aspects of his successful boatbuilding methods.Step 4: Finishing Touches
Once the flange is fully dried, Sven removes the clamps carefully, ensuring no damage occurs during this process. He then moves on to attaching four more pieces onto these main frames, completing two pairs of flanges for the bulkhead hatches.The Final Touches
While two flanges form the primary support structure around the hatches, Sven mentions there are two additional pieces required at each end to ensure comprehensive protection. This attention to detail highlights his commitment to producing a durable and reliable design. “Sailing is about finding your path, whether it’s across an ocean or within yourself.” – Sven Yrvind In conclusion, making flanges around bulkhead hatches may seem complex at first glance, but by following Sven Yrvind’s meticulous process, enthusiasts can achieve professional-level results. Remember that the journey of boatbuilding is as rewarding as reaching your destination; it tests one’s patience and dedication. For those seeking to embark on this adventure or simply gain more insight into marine craftsmanship, Sven’s wisdom is invaluable.Making Flanges Around Bulkhead Hatches for Canvas
Sven Yrvind, a renowned yacht designer and sailor, shares valuable insights on creating flanges around bulkhead hatches for canvas protection in this enlightening video. By following his expert guidance, boat enthusiasts can ensure their living areas remain secure while allowing unhindered access through the hatches.Step 1: Starting with the Flange
Sven begins by explaining that working on flanges vertically and horizontally is significantly easier than doing so in a flat position. To simplify the process further, he divides the task into two or three steps as suggested by fellow expert “for for.” This approach not only makes it more manageable but also allows for greater precision in crafting each component.Step 2: Applying Glue and Securing
Sven proceeds to apply glue along one edge of the flange, ensuring a secure bond when clamped into place. He emphasizes that this stage is crucial for maintaining the structural integrity of the flange, which in turn safeguards the living area beneath the canvas when hatches are open.Step 3: Allowing Time to Dry
After securely attaching the first portion of the flange, Sven allows ample time for it to dry before moving forward with additional steps. This patience and precision are key aspects of his successful boatbuilding methods.Step 4: Finishing Touches
Once the flange is fully dried, Sven removes the clamps carefully, ensuring no damage occurs during this process. He then moves on to attaching four more pieces onto these main frames, completing two pairs of flanges for the bulkhead hatches.The Final Touches
While two flanges form the primary support structure around the hatches, Sven mentions there are two additional pieces required at each end to ensure comprehensive protection. This attention to detail highlights his commitment to producing a durable and reliable design. “Sailing is about finding your path, whether it’s across an ocean or within yourself.” – Sven Yrvind In conclusion, making flanges around bulkhead hatches may seem complex at first glance, but by following Sven Yrvind’s meticulous process, enthusiasts can achieve professional-level results. Remember that the journey of boatbuilding is as rewarding as reaching your destination; it tests one’s patience and dedication. For those seeking to embark on this adventure or simply gain more insight into marine craftsmanship, Sven’s wisdom is invaluable.Once the flange is fully dried, Sven removes the clamps carefully, ensuring no damage occurs during this process. He then moves on to attaching four more pieces onto these main frames, completing two pairs of flanges for the bulkhead hatches.The Final Touches
While two flanges form the primary support structure around the hatches, Sven mentions there are two additional pieces required at each end to ensure comprehensive protection. This attention to detail highlights his commitment to producing a durable and reliable design. “Sailing is about finding your path, whether it’s across an ocean or within yourself.” – Sven Yrvind In conclusion, making flanges around bulkhead hatches may seem complex at first glance, but by following Sven Yrvind’s meticulous process, enthusiasts can achieve professional-level results. Remember that the journey of boatbuilding is as rewarding as reaching your destination; it tests one’s patience and dedication. For those seeking to embark on this adventure or simply gain more insight into marine craftsmanship, Sven’s wisdom is invaluable.After securely attaching the first portion of the flange, Sven allows ample time for it to dry before moving forward with additional steps. This patience and precision are key aspects of his successful boatbuilding methods.Step 4: Finishing Touches
Once the flange is fully dried, Sven removes the clamps carefully, ensuring no damage occurs during this process. He then moves on to attaching four more pieces onto these main frames, completing two pairs of flanges for the bulkhead hatches.The Final Touches
While two flanges form the primary support structure around the hatches, Sven mentions there are two additional pieces required at each end to ensure comprehensive protection. This attention to detail highlights his commitment to producing a durable and reliable design. “Sailing is about finding your path, whether it’s across an ocean or within yourself.” – Sven Yrvind In conclusion, making flanges around bulkhead hatches may seem complex at first glance, but by following Sven Yrvind’s meticulous process, enthusiasts can achieve professional-level results. Remember that the journey of boatbuilding is as rewarding as reaching your destination; it tests one’s patience and dedication. For those seeking to embark on this adventure or simply gain more insight into marine craftsmanship, Sven’s wisdom is invaluable.Sven proceeds to apply glue along one edge of the flange, ensuring a secure bond when clamped into place. He emphasizes that this stage is crucial for maintaining the structural integrity of the flange, which in turn safeguards the living area beneath the canvas when hatches are open.Step 3: Allowing Time to Dry
After securely attaching the first portion of the flange, Sven allows ample time for it to dry before moving forward with additional steps. This patience and precision are key aspects of his successful boatbuilding methods.Step 4: Finishing Touches
Once the flange is fully dried, Sven removes the clamps carefully, ensuring no damage occurs during this process. He then moves on to attaching four more pieces onto these main frames, completing two pairs of flanges for the bulkhead hatches.The Final Touches
While two flanges form the primary support structure around the hatches, Sven mentions there are two additional pieces required at each end to ensure comprehensive protection. This attention to detail highlights his commitment to producing a durable and reliable design. “Sailing is about finding your path, whether it’s across an ocean or within yourself.” – Sven Yrvind In conclusion, making flanges around bulkhead hatches may seem complex at first glance, but by following Sven Yrvind’s meticulous process, enthusiasts can achieve professional-level results. Remember that the journey of boatbuilding is as rewarding as reaching your destination; it tests one’s patience and dedication. For those seeking to embark on this adventure or simply gain more insight into marine craftsmanship, Sven’s wisdom is invaluable.Sven begins by explaining that working on flanges vertically and horizontally is significantly easier than doing so in a flat position. To simplify the process further, he divides the task into two or three steps as suggested by fellow expert “for for.” This approach not only makes it more manageable but also allows for greater precision in crafting each component.Step 2: Applying Glue and Securing
Sven proceeds to apply glue along one edge of the flange, ensuring a secure bond when clamped into place. He emphasizes that this stage is crucial for maintaining the structural integrity of the flange, which in turn safeguards the living area beneath the canvas when hatches are open.Step 3: Allowing Time to Dry
After securely attaching the first portion of the flange, Sven allows ample time for it to dry before moving forward with additional steps. This patience and precision are key aspects of his successful boatbuilding methods.Step 4: Finishing Touches
Once the flange is fully dried, Sven removes the clamps carefully, ensuring no damage occurs during this process. He then moves on to attaching four more pieces onto these main frames, completing two pairs of flanges for the bulkhead hatches.The Final Touches
While two flanges form the primary support structure around the hatches, Sven mentions there are two additional pieces required at each end to ensure comprehensive protection. This attention to detail highlights his commitment to producing a durable and reliable design. “Sailing is about finding your path, whether it’s across an ocean or within yourself.” – Sven Yrvind In conclusion, making flanges around bulkhead hatches may seem complex at first glance, but by following Sven Yrvind’s meticulous process, enthusiasts can achieve professional-level results. Remember that the journey of boatbuilding is as rewarding as reaching your destination; it tests one’s patience and dedication. For those seeking to embark on this adventure or simply gain more insight into marine craftsmanship, Sven’s wisdom is invaluable.Sven Yrvind, a renowned yacht designer and sailor, shares valuable insights on creating flanges around bulkhead hatches for canvas protection in this enlightening video. By following his expert guidance, boat enthusiasts can ensure their living areas remain secure while allowing unhindered access through the hatches.Step 1: Starting with the Flange
Sven begins by explaining that working on flanges vertically and horizontally is significantly easier than doing so in a flat position. To simplify the process further, he divides the task into two or three steps as suggested by fellow expert “for for.” This approach not only makes it more manageable but also allows for greater precision in crafting each component.Step 2: Applying Glue and Securing
Sven proceeds to apply glue along one edge of the flange, ensuring a secure bond when clamped into place. He emphasizes that this stage is crucial for maintaining the structural integrity of the flange, which in turn safeguards the living area beneath the canvas when hatches are open.Step 3: Allowing Time to Dry
After securely attaching the first portion of the flange, Sven allows ample time for it to dry before moving forward with additional steps. This patience and precision are key aspects of his successful boatbuilding methods.Step 4: Finishing Touches
Once the flange is fully dried, Sven removes the clamps carefully, ensuring no damage occurs during this process. He then moves on to attaching four more pieces onto these main frames, completing two pairs of flanges for the bulkhead hatches.The Final Touches
While two flanges form the primary support structure around the hatches, Sven mentions there are two additional pieces required at each end to ensure comprehensive protection. This attention to detail highlights his commitment to producing a durable and reliable design. “Sailing is about finding your path, whether it’s across an ocean or within yourself.” – Sven Yrvind In conclusion, making flanges around bulkhead hatches may seem complex at first glance, but by following Sven Yrvind’s meticulous process, enthusiasts can achieve professional-level results. Remember that the journey of boatbuilding is as rewarding as reaching your destination; it tests one’s patience and dedication. For those seeking to embark on this adventure or simply gain more insight into marine craftsmanship, Sven’s wisdom is invaluable.Making Flanges Around Bulkhead Hatches for Canvas
Sven Yrvind, a renowned yacht designer and sailor, shares valuable insights on creating flanges around bulkhead hatches for canvas protection in this enlightening video. By following his expert guidance, boat enthusiasts can ensure their living areas remain secure while allowing unhindered access through the hatches.Step 1: Starting with the Flange
Sven begins by explaining that working on flanges vertically and horizontally is significantly easier than doing so in a flat position. To simplify the process further, he divides the task into two or three steps as suggested by fellow expert “for for.” This approach not only makes it more manageable but also allows for greater precision in crafting each component.Step 2: Applying Glue and Securing
Sven proceeds to apply glue along one edge of the flange, ensuring a secure bond when clamped into place. He emphasizes that this stage is crucial for maintaining the structural integrity of the flange, which in turn safeguards the living area beneath the canvas when hatches are open.Step 3: Allowing Time to Dry
After securely attaching the first portion of the flange, Sven allows ample time for it to dry before moving forward with additional steps. This patience and precision are key aspects of his successful boatbuilding methods.Step 4: Finishing Touches
Once the flange is fully dried, Sven removes the clamps carefully, ensuring no damage occurs during this process. He then moves on to attaching four more pieces onto these main frames, completing two pairs of flanges for the bulkhead hatches.The Final Touches
While two flanges form the primary support structure around the hatches, Sven mentions there are two additional pieces required at each end to ensure comprehensive protection. This attention to detail highlights his commitment to producing a durable and reliable design. “Sailing is about finding your path, whether it’s across an ocean or within yourself.” – Sven Yrvind In conclusion, making flanges around bulkhead hatches may seem complex at first glance, but by following Sven Yrvind’s meticulous process, enthusiasts can achieve professional-level results. Remember that the journey of boatbuilding is as rewarding as reaching your destination; it tests one’s patience and dedication. For those seeking to embark on this adventure or simply gain more insight into marine craftsmanship, Sven’s wisdom is invaluable.Sven begins by explaining that working on flanges vertically and horizontally is significantly easier than doing so in a flat position. To simplify the process further, he divides the task into two or three steps as suggested by fellow expert “for for.” This approach not only makes it more manageable but also allows for greater precision in crafting each component.Step 2: Applying Glue and Securing
Sven proceeds to apply glue along one edge of the flange, ensuring a secure bond when clamped into place. He emphasizes that this stage is crucial for maintaining the structural integrity of the flange, which in turn safeguards the living area beneath the canvas when hatches are open.Step 3: Allowing Time to Dry
After securely attaching the first portion of the flange, Sven allows ample time for it to dry before moving forward with additional steps. This patience and precision are key aspects of his successful boatbuilding methods.Step 4: Finishing Touches
Once the flange is fully dried, Sven removes the clamps carefully, ensuring no damage occurs during this process. He then moves on to attaching four more pieces onto these main frames, completing two pairs of flanges for the bulkhead hatches.The Final Touches
While two flanges form the primary support structure around the hatches, Sven mentions there are two additional pieces required at each end to ensure comprehensive protection. This attention to detail highlights his commitment to producing a durable and reliable design. “Sailing is about finding your path, whether it’s across an ocean or within yourself.” – Sven Yrvind In conclusion, making flanges around bulkhead hatches may seem complex at first glance, but by following Sven Yrvind’s meticulous process, enthusiasts can achieve professional-level results. Remember that the journey of boatbuilding is as rewarding as reaching your destination; it tests one’s patience and dedication. For those seeking to embark on this adventure or simply gain more insight into marine craftsmanship, Sven’s wisdom is invaluable.Sven Yrvind, a renowned yacht designer and sailor, shares valuable insights on creating flanges around bulkhead hatches for canvas protection in this enlightening video. By following his expert guidance, boat enthusiasts can ensure their living areas remain secure while allowing unhindered access through the hatches.Step 1: Starting with the Flange
Sven begins by explaining that working on flanges vertically and horizontally is significantly easier than doing so in a flat position. To simplify the process further, he divides the task into two or three steps as suggested by fellow expert “for for.” This approach not only makes it more manageable but also allows for greater precision in crafting each component.Step 2: Applying Glue and Securing
Sven proceeds to apply glue along one edge of the flange, ensuring a secure bond when clamped into place. He emphasizes that this stage is crucial for maintaining the structural integrity of the flange, which in turn safeguards the living area beneath the canvas when hatches are open.Step 3: Allowing Time to Dry
After securely attaching the first portion of the flange, Sven allows ample time for it to dry before moving forward with additional steps. This patience and precision are key aspects of his successful boatbuilding methods.Step 4: Finishing Touches
Once the flange is fully dried, Sven removes the clamps carefully, ensuring no damage occurs during this process. He then moves on to attaching four more pieces onto these main frames, completing two pairs of flanges for the bulkhead hatches.The Final Touches
While two flanges form the primary support structure around the hatches, Sven mentions there are two additional pieces required at each end to ensure comprehensive protection. This attention to detail highlights his commitment to producing a durable and reliable design. “Sailing is about finding your path, whether it’s across an ocean or within yourself.” – Sven Yrvind In conclusion, making flanges around bulkhead hatches may seem complex at first glance, but by following Sven Yrvind’s meticulous process, enthusiasts can achieve professional-level results. Remember that the journey of boatbuilding is as rewarding as reaching your destination; it tests one’s patience and dedication. For those seeking to embark on this adventure or simply gain more insight into marine craftsmanship, Sven’s wisdom is invaluable.Making Flanges Around Bulkhead Hatches for Canvas
Sven Yrvind, a renowned yacht designer and sailor, shares valuable insights on creating flanges around bulkhead hatches for canvas protection in this enlightening video. By following his expert guidance, boat enthusiasts can ensure their living areas remain secure while allowing unhindered access through the hatches.Step 1: Starting with the Flange
Sven begins by explaining that working on flanges vertically and horizontally is significantly easier than doing so in a flat position. To simplify the process further, he divides the task into two or three steps as suggested by fellow expert “for for.” This approach not only makes it more manageable but also allows for greater precision in crafting each component.Step 2: Applying Glue and Securing
Sven proceeds to apply glue along one edge of the flange, ensuring a secure bond when clamped into place. He emphasizes that this stage is crucial for maintaining the structural integrity of the flange, which in turn safeguards the living area beneath the canvas when hatches are open.Step 3: Allowing Time to Dry
After securely attaching the first portion of the flange, Sven allows ample time for it to dry before moving forward with additional steps. This patience and precision are key aspects of his successful boatbuilding methods.Step 4: Finishing Touches
Once the flange is fully dried, Sven removes the clamps carefully, ensuring no damage occurs during this process. He then moves on to attaching four more pieces onto these main frames, completing two pairs of flanges for the bulkhead hatches.The Final Touches
While two flanges form the primary support structure around the hatches, Sven mentions there are two additional pieces required at each end to ensure comprehensive protection. This attention to detail highlights his commitment to producing a durable and reliable design. “Sailing is about finding your path, whether it’s across an ocean or within yourself.” – Sven Yrvind In conclusion, making flanges around bulkhead hatches may seem complex at first glance, but by following Sven Yrvind’s meticulous process, enthusiasts can achieve professional-level results. Remember that the journey of boatbuilding is as rewarding as reaching your destination; it tests one’s patience and dedication. For those seeking to embark on this adventure or simply gain more insight into marine craftsmanship, Sven’s wisdom is invaluable.Once the flange is fully dried, Sven removes the clamps carefully, ensuring no damage occurs during this process. He then moves on to attaching four more pieces onto these main frames, completing two pairs of flanges for the bulkhead hatches.The Final Touches
While two flanges form the primary support structure around the hatches, Sven mentions there are two additional pieces required at each end to ensure comprehensive protection. This attention to detail highlights his commitment to producing a durable and reliable design. “Sailing is about finding your path, whether it’s across an ocean or within yourself.” – Sven Yrvind In conclusion, making flanges around bulkhead hatches may seem complex at first glance, but by following Sven Yrvind’s meticulous process, enthusiasts can achieve professional-level results. Remember that the journey of boatbuilding is as rewarding as reaching your destination; it tests one’s patience and dedication. For those seeking to embark on this adventure or simply gain more insight into marine craftsmanship, Sven’s wisdom is invaluable.Sven proceeds to apply glue along one edge of the flange, ensuring a secure bond when clamped into place. He emphasizes that this stage is crucial for maintaining the structural integrity of the flange, which in turn safeguards the living area beneath the canvas when hatches are open.Step 3: Allowing Time to Dry
After securely attaching the first portion of the flange, Sven allows ample time for it to dry before moving forward with additional steps. This patience and precision are key aspects of his successful boatbuilding methods.Step 4: Finishing Touches
Once the flange is fully dried, Sven removes the clamps carefully, ensuring no damage occurs during this process. He then moves on to attaching four more pieces onto these main frames, completing two pairs of flanges for the bulkhead hatches.The Final Touches
While two flanges form the primary support structure around the hatches, Sven mentions there are two additional pieces required at each end to ensure comprehensive protection. This attention to detail highlights his commitment to producing a durable and reliable design. “Sailing is about finding your path, whether it’s across an ocean or within yourself.” – Sven Yrvind In conclusion, making flanges around bulkhead hatches may seem complex at first glance, but by following Sven Yrvind’s meticulous process, enthusiasts can achieve professional-level results. Remember that the journey of boatbuilding is as rewarding as reaching your destination; it tests one’s patience and dedication. For those seeking to embark on this adventure or simply gain more insight into marine craftsmanship, Sven’s wisdom is invaluable.Sven begins by explaining that working on flanges vertically and horizontally is significantly easier than doing so in a flat position. To simplify the process further, he divides the task into two or three steps as suggested by fellow expert “for for.” This approach not only makes it more manageable but also allows for greater precision in crafting each component.Step 2: Applying Glue and Securing
Sven proceeds to apply glue along one edge of the flange, ensuring a secure bond when clamped into place. He emphasizes that this stage is crucial for maintaining the structural integrity of the flange, which in turn safeguards the living area beneath the canvas when hatches are open.Step 3: Allowing Time to Dry
After securely attaching the first portion of the flange, Sven allows ample time for it to dry before moving forward with additional steps. This patience and precision are key aspects of his successful boatbuilding methods.Step 4: Finishing Touches
Once the flange is fully dried, Sven removes the clamps carefully, ensuring no damage occurs during this process. He then moves on to attaching four more pieces onto these main frames, completing two pairs of flanges for the bulkhead hatches.The Final Touches
While two flanges form the primary support structure around the hatches, Sven mentions there are two additional pieces required at each end to ensure comprehensive protection. This attention to detail highlights his commitment to producing a durable and reliable design. “Sailing is about finding your path, whether it’s across an ocean or within yourself.” – Sven Yrvind In conclusion, making flanges around bulkhead hatches may seem complex at first glance, but by following Sven Yrvind’s meticulous process, enthusiasts can achieve professional-level results. Remember that the journey of boatbuilding is as rewarding as reaching your destination; it tests one’s patience and dedication. For those seeking to embark on this adventure or simply gain more insight into marine craftsmanship, Sven’s wisdom is invaluable.Sven Yrvind, a renowned yacht designer and sailor, shares valuable insights on creating flanges around bulkhead hatches for canvas protection in this enlightening video. By following his expert guidance, boat enthusiasts can ensure their living areas remain secure while allowing unhindered access through the hatches.Step 1: Starting with the Flange
Sven begins by explaining that working on flanges vertically and horizontally is significantly easier than doing so in a flat position. To simplify the process further, he divides the task into two or three steps as suggested by fellow expert “for for.” This approach not only makes it more manageable but also allows for greater precision in crafting each component.Step 2: Applying Glue and Securing
Sven proceeds to apply glue along one edge of the flange, ensuring a secure bond when clamped into place. He emphasizes that this stage is crucial for maintaining the structural integrity of the flange, which in turn safeguards the living area beneath the canvas when hatches are open.Step 3: Allowing Time to Dry
After securely attaching the first portion of the flange, Sven allows ample time for it to dry before moving forward with additional steps. This patience and precision are key aspects of his successful boatbuilding methods.Step 4: Finishing Touches
Once the flange is fully dried, Sven removes the clamps carefully, ensuring no damage occurs during this process. He then moves on to attaching four more pieces onto these main frames, completing two pairs of flanges for the bulkhead hatches.The Final Touches
While two flanges form the primary support structure around the hatches, Sven mentions there are two additional pieces required at each end to ensure comprehensive protection. This attention to detail highlights his commitment to producing a durable and reliable design. “Sailing is about finding your path, whether it’s across an ocean or within yourself.” – Sven Yrvind In conclusion, making flanges around bulkhead hatches may seem complex at first glance, but by following Sven Yrvind’s meticulous process, enthusiasts can achieve professional-level results. Remember that the journey of boatbuilding is as rewarding as reaching your destination; it tests one’s patience and dedication. For those seeking to embark on this adventure or simply gain more insight into marine craftsmanship, Sven’s wisdom is invaluable.Making Flanges Around Bulkhead Hatches for Canvas
Sven Yrvind, a renowned yacht designer and sailor, shares valuable insights on creating flanges around bulkhead hatches for canvas protection in this enlightening video. By following his expert guidance, boat enthusiasts can ensure their living areas remain secure while allowing unhindered access through the hatches.Step 1: Starting with the Flange
Sven begins by explaining that working on flanges vertically and horizontally is significantly easier than doing so in a flat position. To simplify the process further, he divides the task into two or three steps as suggested by fellow expert “for for.” This approach not only makes it more manageable but also allows for greater precision in crafting each component.Step 2: Applying Glue and Securing
Sven proceeds to apply glue along one edge of the flange, ensuring a secure bond when clamped into place. He emphasizes that this stage is crucial for maintaining the structural integrity of the flange, which in turn safeguards the living area beneath the canvas when hatches are open.Step 3: Allowing Time to Dry
After securely attaching the first portion of the flange, Sven allows ample time for it to dry before moving forward with additional steps. This patience and precision are key aspects of his successful boatbuilding methods.Step 4: Finishing Touches
Once the flange is fully dried, Sven removes the clamps carefully, ensuring no damage occurs during this process. He then moves on to attaching four more pieces onto these main frames, completing two pairs of flanges for the bulkhead hatches.The Final Touches
While two flanges form the primary support structure around the hatches, Sven mentions there are two additional pieces required at each end to ensure comprehensive protection. This attention to detail highlights his commitment to producing a durable and reliable design. “Sailing is about finding your path, whether it’s across an ocean or within yourself.” – Sven Yrvind In conclusion, making flanges around bulkhead hatches may seem complex at first glance, but by following Sven Yrvind’s meticulous process, enthusiasts can achieve professional-level results. Remember that the journey of boatbuilding is as rewarding as reaching your destination; it tests one’s patience and dedication. For those seeking to embark on this adventure or simply gain more insight into marine craftsmanship, Sven’s wisdom is invaluable.After securely attaching the first portion of the flange, Sven allows ample time for it to dry before moving forward with additional steps. This patience and precision are key aspects of his successful boatbuilding methods.Step 4: Finishing Touches
Once the flange is fully dried, Sven removes the clamps carefully, ensuring no damage occurs during this process. He then moves on to attaching four more pieces onto these main frames, completing two pairs of flanges for the bulkhead hatches.The Final Touches
While two flanges form the primary support structure around the hatches, Sven mentions there are two additional pieces required at each end to ensure comprehensive protection. This attention to detail highlights his commitment to producing a durable and reliable design. “Sailing is about finding your path, whether it’s across an ocean or within yourself.” – Sven Yrvind In conclusion, making flanges around bulkhead hatches may seem complex at first glance, but by following Sven Yrvind’s meticulous process, enthusiasts can achieve professional-level results. Remember that the journey of boatbuilding is as rewarding as reaching your destination; it tests one’s patience and dedication. For those seeking to embark on this adventure or simply gain more insight into marine craftsmanship, Sven’s wisdom is invaluable.Sven proceeds to apply glue along one edge of the flange, ensuring a secure bond when clamped into place. He emphasizes that this stage is crucial for maintaining the structural integrity of the flange, which in turn safeguards the living area beneath the canvas when hatches are open.Step 3: Allowing Time to Dry
After securely attaching the first portion of the flange, Sven allows ample time for it to dry before moving forward with additional steps. This patience and precision are key aspects of his successful boatbuilding methods.Step 4: Finishing Touches
Once the flange is fully dried, Sven removes the clamps carefully, ensuring no damage occurs during this process. He then moves on to attaching four more pieces onto these main frames, completing two pairs of flanges for the bulkhead hatches.The Final Touches
While two flanges form the primary support structure around the hatches, Sven mentions there are two additional pieces required at each end to ensure comprehensive protection. This attention to detail highlights his commitment to producing a durable and reliable design. “Sailing is about finding your path, whether it’s across an ocean or within yourself.” – Sven Yrvind In conclusion, making flanges around bulkhead hatches may seem complex at first glance, but by following Sven Yrvind’s meticulous process, enthusiasts can achieve professional-level results. Remember that the journey of boatbuilding is as rewarding as reaching your destination; it tests one’s patience and dedication. For those seeking to embark on this adventure or simply gain more insight into marine craftsmanship, Sven’s wisdom is invaluable.Sven begins by explaining that working on flanges vertically and horizontally is significantly easier than doing so in a flat position. To simplify the process further, he divides the task into two or three steps as suggested by fellow expert “for for.” This approach not only makes it more manageable but also allows for greater precision in crafting each component.Step 2: Applying Glue and Securing
Sven proceeds to apply glue along one edge of the flange, ensuring a secure bond when clamped into place. He emphasizes that this stage is crucial for maintaining the structural integrity of the flange, which in turn safeguards the living area beneath the canvas when hatches are open.Step 3: Allowing Time to Dry
After securely attaching the first portion of the flange, Sven allows ample time for it to dry before moving forward with additional steps. This patience and precision are key aspects of his successful boatbuilding methods.Step 4: Finishing Touches
Once the flange is fully dried, Sven removes the clamps carefully, ensuring no damage occurs during this process. He then moves on to attaching four more pieces onto these main frames, completing two pairs of flanges for the bulkhead hatches.The Final Touches
While two flanges form the primary support structure around the hatches, Sven mentions there are two additional pieces required at each end to ensure comprehensive protection. This attention to detail highlights his commitment to producing a durable and reliable design. “Sailing is about finding your path, whether it’s across an ocean or within yourself.” – Sven Yrvind In conclusion, making flanges around bulkhead hatches may seem complex at first glance, but by following Sven Yrvind’s meticulous process, enthusiasts can achieve professional-level results. Remember that the journey of boatbuilding is as rewarding as reaching your destination; it tests one’s patience and dedication. For those seeking to embark on this adventure or simply gain more insight into marine craftsmanship, Sven’s wisdom is invaluable.Sven Yrvind, a renowned yacht designer and sailor, shares valuable insights on creating flanges around bulkhead hatches for canvas protection in this enlightening video. By following his expert guidance, boat enthusiasts can ensure their living areas remain secure while allowing unhindered access through the hatches.Step 1: Starting with the Flange
Sven begins by explaining that working on flanges vertically and horizontally is significantly easier than doing so in a flat position. To simplify the process further, he divides the task into two or three steps as suggested by fellow expert “for for.” This approach not only makes it more manageable but also allows for greater precision in crafting each component.Step 2: Applying Glue and Securing
Sven proceeds to apply glue along one edge of the flange, ensuring a secure bond when clamped into place. He emphasizes that this stage is crucial for maintaining the structural integrity of the flange, which in turn safeguards the living area beneath the canvas when hatches are open.Step 3: Allowing Time to Dry
After securely attaching the first portion of the flange, Sven allows ample time for it to dry before moving forward with additional steps. This patience and precision are key aspects of his successful boatbuilding methods.Step 4: Finishing Touches
Once the flange is fully dried, Sven removes the clamps carefully, ensuring no damage occurs during this process. He then moves on to attaching four more pieces onto these main frames, completing two pairs of flanges for the bulkhead hatches.The Final Touches
While two flanges form the primary support structure around the hatches, Sven mentions there are two additional pieces required at each end to ensure comprehensive protection. This attention to detail highlights his commitment to producing a durable and reliable design. “Sailing is about finding your path, whether it’s across an ocean or within yourself.” – Sven Yrvind In conclusion, making flanges around bulkhead hatches may seem complex at first glance, but by following Sven Yrvind’s meticulous process, enthusiasts can achieve professional-level results. Remember that the journey of boatbuilding is as rewarding as reaching your destination; it tests one’s patience and dedication. For those seeking to embark on this adventure or simply gain more insight into marine craftsmanship, Sven’s wisdom is invaluable.Making Flanges Around Bulkhead Hatches for Canvas
Sven Yrvind, a renowned yacht designer and sailor, shares valuable insights on creating flanges around bulkhead hatches for canvas protection in this enlightening video. By following his expert guidance, boat enthusiasts can ensure their living areas remain secure while allowing unhindered access through the hatches.Step 1: Starting with the Flange
Sven begins by explaining that working on flanges vertically and horizontally is significantly easier than doing so in a flat position. To simplify the process further, he divides the task into two or three steps as suggested by fellow expert “for for.” This approach not only makes it more manageable but also allows for greater precision in crafting each component.Step 2: Applying Glue and Securing
Sven proceeds to apply glue along one edge of the flange, ensuring a secure bond when clamped into place. He emphasizes that this stage is crucial for maintaining the structural integrity of the flange, which in turn safeguards the living area beneath the canvas when hatches are open.Step 3: Allowing Time to Dry
After securely attaching the first portion of the flange, Sven allows ample time for it to dry before moving forward with additional steps. This patience and precision are key aspects of his successful boatbuilding methods.Step 4: Finishing Touches
Once the flange is fully dried, Sven removes the clamps carefully, ensuring no damage occurs during this process. He then moves on to attaching four more pieces onto these main frames, completing two pairs of flanges for the bulkhead hatches.The Final Touches
While two flanges form the primary support structure around the hatches, Sven mentions there are two additional pieces required at each end to ensure comprehensive protection. This attention to detail highlights his commitment to producing a durable and reliable design. “Sailing is about finding your path, whether it’s across an ocean or within yourself.” – Sven Yrvind In conclusion, making flanges around bulkhead hatches may seem complex at first glance, but by following Sven Yrvind’s meticulous process, enthusiasts can achieve professional-level results. Remember that the journey of boatbuilding is as rewarding as reaching your destination; it tests one’s patience and dedication. For those seeking to embark on this adventure or simply gain more insight into marine craftsmanship, Sven’s wisdom is invaluable.Once the flange is fully dried, Sven removes the clamps carefully, ensuring no damage occurs during this process. He then moves on to attaching four more pieces onto these main frames, completing two pairs of flanges for the bulkhead hatches.The Final Touches
While two flanges form the primary support structure around the hatches, Sven mentions there are two additional pieces required at each end to ensure comprehensive protection. This attention to detail highlights his commitment to producing a durable and reliable design. “Sailing is about finding your path, whether it’s across an ocean or within yourself.” – Sven Yrvind In conclusion, making flanges around bulkhead hatches may seem complex at first glance, but by following Sven Yrvind’s meticulous process, enthusiasts can achieve professional-level results. Remember that the journey of boatbuilding is as rewarding as reaching your destination; it tests one’s patience and dedication. For those seeking to embark on this adventure or simply gain more insight into marine craftsmanship, Sven’s wisdom is invaluable.After securely attaching the first portion of the flange, Sven allows ample time for it to dry before moving forward with additional steps. This patience and precision are key aspects of his successful boatbuilding methods.Step 4: Finishing Touches
Once the flange is fully dried, Sven removes the clamps carefully, ensuring no damage occurs during this process. He then moves on to attaching four more pieces onto these main frames, completing two pairs of flanges for the bulkhead hatches.The Final Touches
While two flanges form the primary support structure around the hatches, Sven mentions there are two additional pieces required at each end to ensure comprehensive protection. This attention to detail highlights his commitment to producing a durable and reliable design. “Sailing is about finding your path, whether it’s across an ocean or within yourself.” – Sven Yrvind In conclusion, making flanges around bulkhead hatches may seem complex at first glance, but by following Sven Yrvind’s meticulous process, enthusiasts can achieve professional-level results. Remember that the journey of boatbuilding is as rewarding as reaching your destination; it tests one’s patience and dedication. For those seeking to embark on this adventure or simply gain more insight into marine craftsmanship, Sven’s wisdom is invaluable.Sven proceeds to apply glue along one edge of the flange, ensuring a secure bond when clamped into place. He emphasizes that this stage is crucial for maintaining the structural integrity of the flange, which in turn safeguards the living area beneath the canvas when hatches are open.Step 3: Allowing Time to Dry
After securely attaching the first portion of the flange, Sven allows ample time for it to dry before moving forward with additional steps. This patience and precision are key aspects of his successful boatbuilding methods.Step 4: Finishing Touches
Once the flange is fully dried, Sven removes the clamps carefully, ensuring no damage occurs during this process. He then moves on to attaching four more pieces onto these main frames, completing two pairs of flanges for the bulkhead hatches.The Final Touches
While two flanges form the primary support structure around the hatches, Sven mentions there are two additional pieces required at each end to ensure comprehensive protection. This attention to detail highlights his commitment to producing a durable and reliable design. “Sailing is about finding your path, whether it’s across an ocean or within yourself.” – Sven Yrvind In conclusion, making flanges around bulkhead hatches may seem complex at first glance, but by following Sven Yrvind’s meticulous process, enthusiasts can achieve professional-level results. Remember that the journey of boatbuilding is as rewarding as reaching your destination; it tests one’s patience and dedication. For those seeking to embark on this adventure or simply gain more insight into marine craftsmanship, Sven’s wisdom is invaluable.Sven begins by explaining that working on flanges vertically and horizontally is significantly easier than doing so in a flat position. To simplify the process further, he divides the task into two or three steps as suggested by fellow expert “for for.” This approach not only makes it more manageable but also allows for greater precision in crafting each component.Step 2: Applying Glue and Securing
Sven proceeds to apply glue along one edge of the flange, ensuring a secure bond when clamped into place. He emphasizes that this stage is crucial for maintaining the structural integrity of the flange, which in turn safeguards the living area beneath the canvas when hatches are open.Step 3: Allowing Time to Dry
After securely attaching the first portion of the flange, Sven allows ample time for it to dry before moving forward with additional steps. This patience and precision are key aspects of his successful boatbuilding methods.Step 4: Finishing Touches
Once the flange is fully dried, Sven removes the clamps carefully, ensuring no damage occurs during this process. He then moves on to attaching four more pieces onto these main frames, completing two pairs of flanges for the bulkhead hatches.The Final Touches
While two flanges form the primary support structure around the hatches, Sven mentions there are two additional pieces required at each end to ensure comprehensive protection. This attention to detail highlights his commitment to producing a durable and reliable design. “Sailing is about finding your path, whether it’s across an ocean or within yourself.” – Sven Yrvind In conclusion, making flanges around bulkhead hatches may seem complex at first glance, but by following Sven Yrvind’s meticulous process, enthusiasts can achieve professional-level results. Remember that the journey of boatbuilding is as rewarding as reaching your destination; it tests one’s patience and dedication. For those seeking to embark on this adventure or simply gain more insight into marine craftsmanship, Sven’s wisdom is invaluable.Sven Yrvind, a renowned yacht designer and sailor, shares valuable insights on creating flanges around bulkhead hatches for canvas protection in this enlightening video. By following his expert guidance, boat enthusiasts can ensure their living areas remain secure while allowing unhindered access through the hatches.Step 1: Starting with the Flange
Sven begins by explaining that working on flanges vertically and horizontally is significantly easier than doing so in a flat position. To simplify the process further, he divides the task into two or three steps as suggested by fellow expert “for for.” This approach not only makes it more manageable but also allows for greater precision in crafting each component.Step 2: Applying Glue and Securing
Sven proceeds to apply glue along one edge of the flange, ensuring a secure bond when clamped into place. He emphasizes that this stage is crucial for maintaining the structural integrity of the flange, which in turn safeguards the living area beneath the canvas when hatches are open.Step 3: Allowing Time to Dry
After securely attaching the first portion of the flange, Sven allows ample time for it to dry before moving forward with additional steps. This patience and precision are key aspects of his successful boatbuilding methods.Step 4: Finishing Touches
Once the flange is fully dried, Sven removes the clamps carefully, ensuring no damage occurs during this process. He then moves on to attaching four more pieces onto these main frames, completing two pairs of flanges for the bulkhead hatches.The Final Touches
While two flanges form the primary support structure around the hatches, Sven mentions there are two additional pieces required at each end to ensure comprehensive protection. This attention to detail highlights his commitment to producing a durable and reliable design. “Sailing is about finding your path, whether it’s across an ocean or within yourself.” – Sven Yrvind In conclusion, making flanges around bulkhead hatches may seem complex at first glance, but by following Sven Yrvind’s meticulous process, enthusiasts can achieve professional-level results. Remember that the journey of boatbuilding is as rewarding as reaching your destination; it tests one’s patience and dedication. For those seeking to embark on this adventure or simply gain more insight into marine craftsmanship, Sven’s wisdom is invaluable.Making Flanges Around Bulkhead Hatches for Canvas
Sven Yrvind, a renowned yacht designer and sailor, shares valuable insights on creating flanges around bulkhead hatches for canvas protection in this enlightening video. By following his expert guidance, boat enthusiasts can ensure their living areas remain secure while allowing unhindered access through the hatches.Step 1: Starting with the Flange
Sven begins by explaining that working on flanges vertically and horizontally is significantly easier than doing so in a flat position. To simplify the process further, he divides the task into two or three steps as suggested by fellow expert “for for.” This approach not only makes it more manageable but also allows for greater precision in crafting each component.Step 2: Applying Glue and Securing
Sven proceeds to apply glue along one edge of the flange, ensuring a secure bond when clamped into place. He emphasizes that this stage is crucial for maintaining the structural integrity of the flange, which in turn safeguards the living area beneath the canvas when hatches are open.Step 3: Allowing Time to Dry
After securely attaching the first portion of the flange, Sven allows ample time for it to dry before moving forward with additional steps. This patience and precision are key aspects of his successful boatbuilding methods.Step 4: Finishing Touches
Once the flange is fully dried, Sven removes the clamps carefully, ensuring no damage occurs during this process. He then moves on to attaching four more pieces onto these main frames, completing two pairs of flanges for the bulkhead hatches.The Final Touches
While two flanges form the primary support structure around the hatches, Sven mentions there are two additional pieces required at each end to ensure comprehensive protection. This attention to detail highlights his commitment to producing a durable and reliable design. “Sailing is about finding your path, whether it’s across an ocean or within yourself.” – Sven Yrvind In conclusion, making flanges around bulkhead hatches may seem complex at first glance, but by following Sven Yrvind’s meticulous process, enthusiasts can achieve professional-level results. Remember that the journey of boatbuilding is as rewarding as reaching your destination; it tests one’s patience and dedication. For those seeking to embark on this adventure or simply gain more insight into marine craftsmanship, Sven’s wisdom is invaluable.Once the flange is fully dried, Sven removes the clamps carefully, ensuring no damage occurs during this process. He then moves on to attaching four more pieces onto these main frames, completing two pairs of flanges for the bulkhead hatches.The Final Touches
While two flanges form the primary support structure around the hatches, Sven mentions there are two additional pieces required at each end to ensure comprehensive protection. This attention to detail highlights his commitment to producing a durable and reliable design. “Sailing is about finding your path, whether it’s across an ocean or within yourself.” – Sven Yrvind In conclusion, making flanges around bulkhead hatches may seem complex at first glance, but by following Sven Yrvind’s meticulous process, enthusiasts can achieve professional-level results. Remember that the journey of boatbuilding is as rewarding as reaching your destination; it tests one’s patience and dedication. For those seeking to embark on this adventure or simply gain more insight into marine craftsmanship, Sven’s wisdom is invaluable.Sven begins by explaining that working on flanges vertically and horizontally is significantly easier than doing so in a flat position. To simplify the process further, he divides the task into two or three steps as suggested by fellow expert “for for.” This approach not only makes it more manageable but also allows for greater precision in crafting each component.Step 2: Applying Glue and Securing
Sven proceeds to apply glue along one edge of the flange, ensuring a secure bond when clamped into place. He emphasizes that this stage is crucial for maintaining the structural integrity of the flange, which in turn safeguards the living area beneath the canvas when hatches are open.Step 3: Allowing Time to Dry
After securely attaching the first portion of the flange, Sven allows ample time for it to dry before moving forward with additional steps. This patience and precision are key aspects of his successful boatbuilding methods.Step 4: Finishing Touches
Once the flange is fully dried, Sven removes the clamps carefully, ensuring no damage occurs during this process. He then moves on to attaching four more pieces onto these main frames, completing two pairs of flanges for the bulkhead hatches.The Final Touches
While two flanges form the primary support structure around the hatches, Sven mentions there are two additional pieces required at each end to ensure comprehensive protection. This attention to detail highlights his commitment to producing a durable and reliable design. “Sailing is about finding your path, whether it’s across an ocean or within yourself.” – Sven Yrvind In conclusion, making flanges around bulkhead hatches may seem complex at first glance, but by following Sven Yrvind’s meticulous process, enthusiasts can achieve professional-level results. Remember that the journey of boatbuilding is as rewarding as reaching your destination; it tests one’s patience and dedication. For those seeking to embark on this adventure or simply gain more insight into marine craftsmanship, Sven’s wisdom is invaluable.Sven Yrvind, a renowned yacht designer and sailor, shares valuable insights on creating flanges around bulkhead hatches for canvas protection in this enlightening video. By following his expert guidance, boat enthusiasts can ensure their living areas remain secure while allowing unhindered access through the hatches.Step 1: Starting with the Flange
Sven begins by explaining that working on flanges vertically and horizontally is significantly easier than doing so in a flat position. To simplify the process further, he divides the task into two or three steps as suggested by fellow expert “for for.” This approach not only makes it more manageable but also allows for greater precision in crafting each component.Step 2: Applying Glue and Securing
Sven proceeds to apply glue along one edge of the flange, ensuring a secure bond when clamped into place. He emphasizes that this stage is crucial for maintaining the structural integrity of the flange, which in turn safeguards the living area beneath the canvas when hatches are open.Step 3: Allowing Time to Dry
After securely attaching the first portion of the flange, Sven allows ample time for it to dry before moving forward with additional steps. This patience and precision are key aspects of his successful boatbuilding methods.Step 4: Finishing Touches
Once the flange is fully dried, Sven removes the clamps carefully, ensuring no damage occurs during this process. He then moves on to attaching four more pieces onto these main frames, completing two pairs of flanges for the bulkhead hatches.The Final Touches
While two flanges form the primary support structure around the hatches, Sven mentions there are two additional pieces required at each end to ensure comprehensive protection. This attention to detail highlights his commitment to producing a durable and reliable design. “Sailing is about finding your path, whether it’s across an ocean or within yourself.” – Sven Yrvind In conclusion, making flanges around bulkhead hatches may seem complex at first glance, but by following Sven Yrvind’s meticulous process, enthusiasts can achieve professional-level results. Remember that the journey of boatbuilding is as rewarding as reaching your destination; it tests one’s patience and dedication. For those seeking to embark on this adventure or simply gain more insight into marine craftsmanship, Sven’s wisdom is invaluable.Making Flanges Around Bulkhead Hatches for Canvas
Sven Yrvind, a renowned yacht designer and sailor, shares valuable insights on creating flanges around bulkhead hatches for canvas protection in this enlightening video. By following his expert guidance, boat enthusiasts can ensure their living areas remain secure while allowing unhindered access through the hatches.Step 1: Starting with the Flange
Sven begins by explaining that working on flanges vertically and horizontally is significantly easier than doing so in a flat position. To simplify the process further, he divides the task into two or three steps as suggested by fellow expert “for for.” This approach not only makes it more manageable but also allows for greater precision in crafting each component.Step 2: Applying Glue and Securing
Sven proceeds to apply glue along one edge of the flange, ensuring a secure bond when clamped into place. He emphasizes that this stage is crucial for maintaining the structural integrity of the flange, which in turn safeguards the living area beneath the canvas when hatches are open.Step 3: Allowing Time to Dry
After securely attaching the first portion of the flange, Sven allows ample time for it to dry before moving forward with additional steps. This patience and precision are key aspects of his successful boatbuilding methods.Step 4: Finishing Touches
Once the flange is fully dried, Sven removes the clamps carefully, ensuring no damage occurs during this process. He then moves on to attaching four more pieces onto these main frames, completing two pairs of flanges for the bulkhead hatches.The Final Touches
While two flanges form the primary support structure around the hatches, Sven mentions there are two additional pieces required at each end to ensure comprehensive protection. This attention to detail highlights his commitment to producing a durable and reliable design. “Sailing is about finding your path, whether it’s across an ocean or within yourself.” – Sven Yrvind In conclusion, making flanges around bulkhead hatches may seem complex at first glance, but by following Sven Yrvind’s meticulous process, enthusiasts can achieve professional-level results. Remember that the journey of boatbuilding is as rewarding as reaching your destination; it tests one’s patience and dedication. For those seeking to embark on this adventure or simply gain more insight into marine craftsmanship, Sven’s wisdom is invaluable.Once the flange is fully dried, Sven removes the clamps carefully, ensuring no damage occurs during this process. He then moves on to attaching four more pieces onto these main frames, completing two pairs of flanges for the bulkhead hatches.The Final Touches
While two flanges form the primary support structure around the hatches, Sven mentions there are two additional pieces required at each end to ensure comprehensive protection. This attention to detail highlights his commitment to producing a durable and reliable design. “Sailing is about finding your path, whether it’s across an ocean or within yourself.” – Sven Yrvind In conclusion, making flanges around bulkhead hatches may seem complex at first glance, but by following Sven Yrvind’s meticulous process, enthusiasts can achieve professional-level results. Remember that the journey of boatbuilding is as rewarding as reaching your destination; it tests one’s patience and dedication. For those seeking to embark on this adventure or simply gain more insight into marine craftsmanship, Sven’s wisdom is invaluable.Sven proceeds to apply glue along one edge of the flange, ensuring a secure bond when clamped into place. He emphasizes that this stage is crucial for maintaining the structural integrity of the flange, which in turn safeguards the living area beneath the canvas when hatches are open.Step 3: Allowing Time to Dry
After securely attaching the first portion of the flange, Sven allows ample time for it to dry before moving forward with additional steps. This patience and precision are key aspects of his successful boatbuilding methods.Step 4: Finishing Touches
Once the flange is fully dried, Sven removes the clamps carefully, ensuring no damage occurs during this process. He then moves on to attaching four more pieces onto these main frames, completing two pairs of flanges for the bulkhead hatches.The Final Touches
While two flanges form the primary support structure around the hatches, Sven mentions there are two additional pieces required at each end to ensure comprehensive protection. This attention to detail highlights his commitment to producing a durable and reliable design. “Sailing is about finding your path, whether it’s across an ocean or within yourself.” – Sven Yrvind In conclusion, making flanges around bulkhead hatches may seem complex at first glance, but by following Sven Yrvind’s meticulous process, enthusiasts can achieve professional-level results. Remember that the journey of boatbuilding is as rewarding as reaching your destination; it tests one’s patience and dedication. For those seeking to embark on this adventure or simply gain more insight into marine craftsmanship, Sven’s wisdom is invaluable.Sven begins by explaining that working on flanges vertically and horizontally is significantly easier than doing so in a flat position. To simplify the process further, he divides the task into two or three steps as suggested by fellow expert “for for.” This approach not only makes it more manageable but also allows for greater precision in crafting each component.Step 2: Applying Glue and Securing
Sven proceeds to apply glue along one edge of the flange, ensuring a secure bond when clamped into place. He emphasizes that this stage is crucial for maintaining the structural integrity of the flange, which in turn safeguards the living area beneath the canvas when hatches are open.Step 3: Allowing Time to Dry
After securely attaching the first portion of the flange, Sven allows ample time for it to dry before moving forward with additional steps. This patience and precision are key aspects of his successful boatbuilding methods.Step 4: Finishing Touches
Once the flange is fully dried, Sven removes the clamps carefully, ensuring no damage occurs during this process. He then moves on to attaching four more pieces onto these main frames, completing two pairs of flanges for the bulkhead hatches.The Final Touches
While two flanges form the primary support structure around the hatches, Sven mentions there are two additional pieces required at each end to ensure comprehensive protection. This attention to detail highlights his commitment to producing a durable and reliable design. “Sailing is about finding your path, whether it’s across an ocean or within yourself.” – Sven Yrvind In conclusion, making flanges around bulkhead hatches may seem complex at first glance, but by following Sven Yrvind’s meticulous process, enthusiasts can achieve professional-level results. Remember that the journey of boatbuilding is as rewarding as reaching your destination; it tests one’s patience and dedication. For those seeking to embark on this adventure or simply gain more insight into marine craftsmanship, Sven’s wisdom is invaluable.Sven Yrvind, a renowned yacht designer and sailor, shares valuable insights on creating flanges around bulkhead hatches for canvas protection in this enlightening video. By following his expert guidance, boat enthusiasts can ensure their living areas remain secure while allowing unhindered access through the hatches.Step 1: Starting with the Flange
Sven begins by explaining that working on flanges vertically and horizontally is significantly easier than doing so in a flat position. To simplify the process further, he divides the task into two or three steps as suggested by fellow expert “for for.” This approach not only makes it more manageable but also allows for greater precision in crafting each component.Step 2: Applying Glue and Securing
Sven proceeds to apply glue along one edge of the flange, ensuring a secure bond when clamped into place. He emphasizes that this stage is crucial for maintaining the structural integrity of the flange, which in turn safeguards the living area beneath the canvas when hatches are open.Step 3: Allowing Time to Dry
After securely attaching the first portion of the flange, Sven allows ample time for it to dry before moving forward with additional steps. This patience and precision are key aspects of his successful boatbuilding methods.Step 4: Finishing Touches
Once the flange is fully dried, Sven removes the clamps carefully, ensuring no damage occurs during this process. He then moves on to attaching four more pieces onto these main frames, completing two pairs of flanges for the bulkhead hatches.The Final Touches
While two flanges form the primary support structure around the hatches, Sven mentions there are two additional pieces required at each end to ensure comprehensive protection. This attention to detail highlights his commitment to producing a durable and reliable design. “Sailing is about finding your path, whether it’s across an ocean or within yourself.” – Sven Yrvind In conclusion, making flanges around bulkhead hatches may seem complex at first glance, but by following Sven Yrvind’s meticulous process, enthusiasts can achieve professional-level results. Remember that the journey of boatbuilding is as rewarding as reaching your destination; it tests one’s patience and dedication. For those seeking to embark on this adventure or simply gain more insight into marine craftsmanship, Sven’s wisdom is invaluable.Making Flanges Around Bulkhead Hatches for Canvas
Sven Yrvind, a renowned yacht designer and sailor, shares valuable insights on creating flanges around bulkhead hatches for canvas protection in this enlightening video. By following his expert guidance, boat enthusiasts can ensure their living areas remain secure while allowing unhindered access through the hatches.Step 1: Starting with the Flange
Sven begins by explaining that working on flanges vertically and horizontally is significantly easier than doing so in a flat position. To simplify the process further, he divides the task into two or three steps as suggested by fellow expert “for for.” This approach not only makes it more manageable but also allows for greater precision in crafting each component.Step 2: Applying Glue and Securing
Sven proceeds to apply glue along one edge of the flange, ensuring a secure bond when clamped into place. He emphasizes that this stage is crucial for maintaining the structural integrity of the flange, which in turn safeguards the living area beneath the canvas when hatches are open.Step 3: Allowing Time to Dry
After securely attaching the first portion of the flange, Sven allows ample time for it to dry before moving forward with additional steps. This patience and precision are key aspects of his successful boatbuilding methods.Step 4: Finishing Touches
Once the flange is fully dried, Sven removes the clamps carefully, ensuring no damage occurs during this process. He then moves on to attaching four more pieces onto these main frames, completing two pairs of flanges for the bulkhead hatches.The Final Touches
While two flanges form the primary support structure around the hatches, Sven mentions there are two additional pieces required at each end to ensure comprehensive protection. This attention to detail highlights his commitment to producing a durable and reliable design. “Sailing is about finding your path, whether it’s across an ocean or within yourself.” – Sven Yrvind In conclusion, making flanges around bulkhead hatches may seem complex at first glance, but by following Sven Yrvind’s meticulous process, enthusiasts can achieve professional-level results. Remember that the journey of boatbuilding is as rewarding as reaching your destination; it tests one’s patience and dedication. For those seeking to embark on this adventure or simply gain more insight into marine craftsmanship, Sven’s wisdom is invaluable.After securely attaching the first portion of the flange, Sven allows ample time for it to dry before moving forward with additional steps. This patience and precision are key aspects of his successful boatbuilding methods.Step 4: Finishing Touches
Once the flange is fully dried, Sven removes the clamps carefully, ensuring no damage occurs during this process. He then moves on to attaching four more pieces onto these main frames, completing two pairs of flanges for the bulkhead hatches.The Final Touches
While two flanges form the primary support structure around the hatches, Sven mentions there are two additional pieces required at each end to ensure comprehensive protection. This attention to detail highlights his commitment to producing a durable and reliable design. “Sailing is about finding your path, whether it’s across an ocean or within yourself.” – Sven Yrvind In conclusion, making flanges around bulkhead hatches may seem complex at first glance, but by following Sven Yrvind’s meticulous process, enthusiasts can achieve professional-level results. Remember that the journey of boatbuilding is as rewarding as reaching your destination; it tests one’s patience and dedication. For those seeking to embark on this adventure or simply gain more insight into marine craftsmanship, Sven’s wisdom is invaluable.Sven proceeds to apply glue along one edge of the flange, ensuring a secure bond when clamped into place. He emphasizes that this stage is crucial for maintaining the structural integrity of the flange, which in turn safeguards the living area beneath the canvas when hatches are open.Step 3: Allowing Time to Dry
After securely attaching the first portion of the flange, Sven allows ample time for it to dry before moving forward with additional steps. This patience and precision are key aspects of his successful boatbuilding methods.Step 4: Finishing Touches
Once the flange is fully dried, Sven removes the clamps carefully, ensuring no damage occurs during this process. He then moves on to attaching four more pieces onto these main frames, completing two pairs of flanges for the bulkhead hatches.The Final Touches
While two flanges form the primary support structure around the hatches, Sven mentions there are two additional pieces required at each end to ensure comprehensive protection. This attention to detail highlights his commitment to producing a durable and reliable design. “Sailing is about finding your path, whether it’s across an ocean or within yourself.” – Sven Yrvind In conclusion, making flanges around bulkhead hatches may seem complex at first glance, but by following Sven Yrvind’s meticulous process, enthusiasts can achieve professional-level results. Remember that the journey of boatbuilding is as rewarding as reaching your destination; it tests one’s patience and dedication. For those seeking to embark on this adventure or simply gain more insight into marine craftsmanship, Sven’s wisdom is invaluable.Sven begins by explaining that working on flanges vertically and horizontally is significantly easier than doing so in a flat position. To simplify the process further, he divides the task into two or three steps as suggested by fellow expert “for for.” This approach not only makes it more manageable but also allows for greater precision in crafting each component.Step 2: Applying Glue and Securing
Sven proceeds to apply glue along one edge of the flange, ensuring a secure bond when clamped into place. He emphasizes that this stage is crucial for maintaining the structural integrity of the flange, which in turn safeguards the living area beneath the canvas when hatches are open.Step 3: Allowing Time to Dry
After securely attaching the first portion of the flange, Sven allows ample time for it to dry before moving forward with additional steps. This patience and precision are key aspects of his successful boatbuilding methods.Step 4: Finishing Touches
Once the flange is fully dried, Sven removes the clamps carefully, ensuring no damage occurs during this process. He then moves on to attaching four more pieces onto these main frames, completing two pairs of flanges for the bulkhead hatches.The Final Touches
While two flanges form the primary support structure around the hatches, Sven mentions there are two additional pieces required at each end to ensure comprehensive protection. This attention to detail highlights his commitment to producing a durable and reliable design. “Sailing is about finding your path, whether it’s across an ocean or within yourself.” – Sven Yrvind In conclusion, making flanges around bulkhead hatches may seem complex at first glance, but by following Sven Yrvind’s meticulous process, enthusiasts can achieve professional-level results. Remember that the journey of boatbuilding is as rewarding as reaching your destination; it tests one’s patience and dedication. For those seeking to embark on this adventure or simply gain more insight into marine craftsmanship, Sven’s wisdom is invaluable.Sven Yrvind, a renowned yacht designer and sailor, shares valuable insights on creating flanges around bulkhead hatches for canvas protection in this enlightening video. By following his expert guidance, boat enthusiasts can ensure their living areas remain secure while allowing unhindered access through the hatches.Step 1: Starting with the Flange
Sven begins by explaining that working on flanges vertically and horizontally is significantly easier than doing so in a flat position. To simplify the process further, he divides the task into two or three steps as suggested by fellow expert “for for.” This approach not only makes it more manageable but also allows for greater precision in crafting each component.Step 2: Applying Glue and Securing
Sven proceeds to apply glue along one edge of the flange, ensuring a secure bond when clamped into place. He emphasizes that this stage is crucial for maintaining the structural integrity of the flange, which in turn safeguards the living area beneath the canvas when hatches are open.Step 3: Allowing Time to Dry
After securely attaching the first portion of the flange, Sven allows ample time for it to dry before moving forward with additional steps. This patience and precision are key aspects of his successful boatbuilding methods.Step 4: Finishing Touches
Once the flange is fully dried, Sven removes the clamps carefully, ensuring no damage occurs during this process. He then moves on to attaching four more pieces onto these main frames, completing two pairs of flanges for the bulkhead hatches.The Final Touches
While two flanges form the primary support structure around the hatches, Sven mentions there are two additional pieces required at each end to ensure comprehensive protection. This attention to detail highlights his commitment to producing a durable and reliable design. “Sailing is about finding your path, whether it’s across an ocean or within yourself.” – Sven Yrvind In conclusion, making flanges around bulkhead hatches may seem complex at first glance, but by following Sven Yrvind’s meticulous process, enthusiasts can achieve professional-level results. Remember that the journey of boatbuilding is as rewarding as reaching your destination; it tests one’s patience and dedication. For those seeking to embark on this adventure or simply gain more insight into marine craftsmanship, Sven’s wisdom is invaluable.Making Flanges Around Bulkhead Hatches for Canvas
Sven Yrvind, a renowned yacht designer and sailor, shares valuable insights on creating flanges around bulkhead hatches for canvas protection in this enlightening video. By following his expert guidance, boat enthusiasts can ensure their living areas remain secure while allowing unhindered access through the hatches.Step 1: Starting with the Flange
Sven begins by explaining that working on flanges vertically and horizontally is significantly easier than doing so in a flat position. To simplify the process further, he divides the task into two or three steps as suggested by fellow expert “for for.” This approach not only makes it more manageable but also allows for greater precision in crafting each component.Step 2: Applying Glue and Securing
Sven proceeds to apply glue along one edge of the flange, ensuring a secure bond when clamped into place. He emphasizes that this stage is crucial for maintaining the structural integrity of the flange, which in turn safeguards the living area beneath the canvas when hatches are open.Step 3: Allowing Time to Dry
After securely attaching the first portion of the flange, Sven allows ample time for it to dry before moving forward with additional steps. This patience and precision are key aspects of his successful boatbuilding methods.Step 4: Finishing Touches
Once the flange is fully dried, Sven removes the clamps carefully, ensuring no damage occurs during this process. He then moves on to attaching four more pieces onto these main frames, completing two pairs of flanges for the bulkhead hatches.The Final Touches
While two flanges form the primary support structure around the hatches, Sven mentions there are two additional pieces required at each end to ensure comprehensive protection. This attention to detail highlights his commitment to producing a durable and reliable design. “Sailing is about finding your path, whether it’s across an ocean or within yourself.” – Sven Yrvind In conclusion, making flanges around bulkhead hatches may seem complex at first glance, but by following Sven Yrvind’s meticulous process, enthusiasts can achieve professional-level results. Remember that the journey of boatbuilding is as rewarding as reaching your destination; it tests one’s patience and dedication. For those seeking to embark on this adventure or simply gain more insight into marine craftsmanship, Sven’s wisdom is invaluable.Once the flange is fully dried, Sven removes the clamps carefully, ensuring no damage occurs during this process. He then moves on to attaching four more pieces onto these main frames, completing two pairs of flanges for the bulkhead hatches.The Final Touches
While two flanges form the primary support structure around the hatches, Sven mentions there are two additional pieces required at each end to ensure comprehensive protection. This attention to detail highlights his commitment to producing a durable and reliable design. “Sailing is about finding your path, whether it’s across an ocean or within yourself.” – Sven Yrvind In conclusion, making flanges around bulkhead hatches may seem complex at first glance, but by following Sven Yrvind’s meticulous process, enthusiasts can achieve professional-level results. Remember that the journey of boatbuilding is as rewarding as reaching your destination; it tests one’s patience and dedication. For those seeking to embark on this adventure or simply gain more insight into marine craftsmanship, Sven’s wisdom is invaluable.After securely attaching the first portion of the flange, Sven allows ample time for it to dry before moving forward with additional steps. This patience and precision are key aspects of his successful boatbuilding methods.Step 4: Finishing Touches
Once the flange is fully dried, Sven removes the clamps carefully, ensuring no damage occurs during this process. He then moves on to attaching four more pieces onto these main frames, completing two pairs of flanges for the bulkhead hatches.The Final Touches
While two flanges form the primary support structure around the hatches, Sven mentions there are two additional pieces required at each end to ensure comprehensive protection. This attention to detail highlights his commitment to producing a durable and reliable design. “Sailing is about finding your path, whether it’s across an ocean or within yourself.” – Sven Yrvind In conclusion, making flanges around bulkhead hatches may seem complex at first glance, but by following Sven Yrvind’s meticulous process, enthusiasts can achieve professional-level results. Remember that the journey of boatbuilding is as rewarding as reaching your destination; it tests one’s patience and dedication. For those seeking to embark on this adventure or simply gain more insight into marine craftsmanship, Sven’s wisdom is invaluable.Sven proceeds to apply glue along one edge of the flange, ensuring a secure bond when clamped into place. He emphasizes that this stage is crucial for maintaining the structural integrity of the flange, which in turn safeguards the living area beneath the canvas when hatches are open.Step 3: Allowing Time to Dry
After securely attaching the first portion of the flange, Sven allows ample time for it to dry before moving forward with additional steps. This patience and precision are key aspects of his successful boatbuilding methods.Step 4: Finishing Touches
Once the flange is fully dried, Sven removes the clamps carefully, ensuring no damage occurs during this process. He then moves on to attaching four more pieces onto these main frames, completing two pairs of flanges for the bulkhead hatches.The Final Touches
While two flanges form the primary support structure around the hatches, Sven mentions there are two additional pieces required at each end to ensure comprehensive protection. This attention to detail highlights his commitment to producing a durable and reliable design. “Sailing is about finding your path, whether it’s across an ocean or within yourself.” – Sven Yrvind In conclusion, making flanges around bulkhead hatches may seem complex at first glance, but by following Sven Yrvind’s meticulous process, enthusiasts can achieve professional-level results. Remember that the journey of boatbuilding is as rewarding as reaching your destination; it tests one’s patience and dedication. For those seeking to embark on this adventure or simply gain more insight into marine craftsmanship, Sven’s wisdom is invaluable.Sven begins by explaining that working on flanges vertically and horizontally is significantly easier than doing so in a flat position. To simplify the process further, he divides the task into two or three steps as suggested by fellow expert “for for.” This approach not only makes it more manageable but also allows for greater precision in crafting each component.Step 2: Applying Glue and Securing
Sven proceeds to apply glue along one edge of the flange, ensuring a secure bond when clamped into place. He emphasizes that this stage is crucial for maintaining the structural integrity of the flange, which in turn safeguards the living area beneath the canvas when hatches are open.Step 3: Allowing Time to Dry
After securely attaching the first portion of the flange, Sven allows ample time for it to dry before moving forward with additional steps. This patience and precision are key aspects of his successful boatbuilding methods.Step 4: Finishing Touches
Once the flange is fully dried, Sven removes the clamps carefully, ensuring no damage occurs during this process. He then moves on to attaching four more pieces onto these main frames, completing two pairs of flanges for the bulkhead hatches.The Final Touches
While two flanges form the primary support structure around the hatches, Sven mentions there are two additional pieces required at each end to ensure comprehensive protection. This attention to detail highlights his commitment to producing a durable and reliable design. “Sailing is about finding your path, whether it’s across an ocean or within yourself.” – Sven Yrvind In conclusion, making flanges around bulkhead hatches may seem complex at first glance, but by following Sven Yrvind’s meticulous process, enthusiasts can achieve professional-level results. Remember that the journey of boatbuilding is as rewarding as reaching your destination; it tests one’s patience and dedication. For those seeking to embark on this adventure or simply gain more insight into marine craftsmanship, Sven’s wisdom is invaluable.Sven Yrvind, a renowned yacht designer and sailor, shares valuable insights on creating flanges around bulkhead hatches for canvas protection in this enlightening video. By following his expert guidance, boat enthusiasts can ensure their living areas remain secure while allowing unhindered access through the hatches.Step 1: Starting with the Flange
Sven begins by explaining that working on flanges vertically and horizontally is significantly easier than doing so in a flat position. To simplify the process further, he divides the task into two or three steps as suggested by fellow expert “for for.” This approach not only makes it more manageable but also allows for greater precision in crafting each component.Step 2: Applying Glue and Securing
Sven proceeds to apply glue along one edge of the flange, ensuring a secure bond when clamped into place. He emphasizes that this stage is crucial for maintaining the structural integrity of the flange, which in turn safeguards the living area beneath the canvas when hatches are open.Step 3: Allowing Time to Dry
After securely attaching the first portion of the flange, Sven allows ample time for it to dry before moving forward with additional steps. This patience and precision are key aspects of his successful boatbuilding methods.Step 4: Finishing Touches
Once the flange is fully dried, Sven removes the clamps carefully, ensuring no damage occurs during this process. He then moves on to attaching four more pieces onto these main frames, completing two pairs of flanges for the bulkhead hatches.The Final Touches
While two flanges form the primary support structure around the hatches, Sven mentions there are two additional pieces required at each end to ensure comprehensive protection. This attention to detail highlights his commitment to producing a durable and reliable design. “Sailing is about finding your path, whether it’s across an ocean or within yourself.” – Sven Yrvind In conclusion, making flanges around bulkhead hatches may seem complex at first glance, but by following Sven Yrvind’s meticulous process, enthusiasts can achieve professional-level results. Remember that the journey of boatbuilding is as rewarding as reaching your destination; it tests one’s patience and dedication. For those seeking to embark on this adventure or simply gain more insight into marine craftsmanship, Sven’s wisdom is invaluable.Making Flanges Around Bulkhead Hatches for Canvas
Sven Yrvind, a renowned yacht designer and sailor, shares valuable insights on creating flanges around bulkhead hatches for canvas protection in this enlightening video. By following his expert guidance, boat enthusiasts can ensure their living areas remain secure while allowing unhindered access through the hatches.Step 1: Starting with the Flange
Sven begins by explaining that working on flanges vertically and horizontally is significantly easier than doing so in a flat position. To simplify the process further, he divides the task into two or three steps as suggested by fellow expert “for for.” This approach not only makes it more manageable but also allows for greater precision in crafting each component.Step 2: Applying Glue and Securing
Sven proceeds to apply glue along one edge of the flange, ensuring a secure bond when clamped into place. He emphasizes that this stage is crucial for maintaining the structural integrity of the flange, which in turn safeguards the living area beneath the canvas when hatches are open.Step 3: Allowing Time to Dry
After securely attaching the first portion of the flange, Sven allows ample time for it to dry before moving forward with additional steps. This patience and precision are key aspects of his successful boatbuilding methods.Step 4: Finishing Touches
Once the flange is fully dried, Sven removes the clamps carefully, ensuring no damage occurs during this process. He then moves on to attaching four more pieces onto these main frames, completing two pairs of flanges for the bulkhead hatches.The Final Touches
While two flanges form the primary support structure around the hatches, Sven mentions there are two additional pieces required at each end to ensure comprehensive protection. This attention to detail highlights his commitment to producing a durable and reliable design. “Sailing is about finding your path, whether it’s across an ocean or within yourself.” – Sven Yrvind In conclusion, making flanges around bulkhead hatches may seem complex at first glance, but by following Sven Yrvind’s meticulous process, enthusiasts can achieve professional-level results. Remember that the journey of boatbuilding is as rewarding as reaching your destination; it tests one’s patience and dedication. For those seeking to embark on this adventure or simply gain more insight into marine craftsmanship, Sven’s wisdom is invaluable.After securely attaching the first portion of the flange, Sven allows ample time for it to dry before moving forward with additional steps. This patience and precision are key aspects of his successful boatbuilding methods.Step 4: Finishing Touches
Once the flange is fully dried, Sven removes the clamps carefully, ensuring no damage occurs during this process. He then moves on to attaching four more pieces onto these main frames, completing two pairs of flanges for the bulkhead hatches.The Final Touches
While two flanges form the primary support structure around the hatches, Sven mentions there are two additional pieces required at each end to ensure comprehensive protection. This attention to detail highlights his commitment to producing a durable and reliable design. “Sailing is about finding your path, whether it’s across an ocean or within yourself.” – Sven Yrvind In conclusion, making flanges around bulkhead hatches may seem complex at first glance, but by following Sven Yrvind’s meticulous process, enthusiasts can achieve professional-level results. Remember that the journey of boatbuilding is as rewarding as reaching your destination; it tests one’s patience and dedication. For those seeking to embark on this adventure or simply gain more insight into marine craftsmanship, Sven’s wisdom is invaluable.Sven begins by explaining that working on flanges vertically and horizontally is significantly easier than doing so in a flat position. To simplify the process further, he divides the task into two or three steps as suggested by fellow expert “for for.” This approach not only makes it more manageable but also allows for greater precision in crafting each component.Step 2: Applying Glue and Securing
Sven proceeds to apply glue along one edge of the flange, ensuring a secure bond when clamped into place. He emphasizes that this stage is crucial for maintaining the structural integrity of the flange, which in turn safeguards the living area beneath the canvas when hatches are open.Step 3: Allowing Time to Dry
After securely attaching the first portion of the flange, Sven allows ample time for it to dry before moving forward with additional steps. This patience and precision are key aspects of his successful boatbuilding methods.Step 4: Finishing Touches
Once the flange is fully dried, Sven removes the clamps carefully, ensuring no damage occurs during this process. He then moves on to attaching four more pieces onto these main frames, completing two pairs of flanges for the bulkhead hatches.The Final Touches
While two flanges form the primary support structure around the hatches, Sven mentions there are two additional pieces required at each end to ensure comprehensive protection. This attention to detail highlights his commitment to producing a durable and reliable design. “Sailing is about finding your path, whether it’s across an ocean or within yourself.” – Sven Yrvind In conclusion, making flanges around bulkhead hatches may seem complex at first glance, but by following Sven Yrvind’s meticulous process, enthusiasts can achieve professional-level results. Remember that the journey of boatbuilding is as rewarding as reaching your destination; it tests one’s patience and dedication. For those seeking to embark on this adventure or simply gain more insight into marine craftsmanship, Sven’s wisdom is invaluable.Sven Yrvind, a renowned yacht designer and sailor, shares valuable insights on creating flanges around bulkhead hatches for canvas protection in this enlightening video. By following his expert guidance, boat enthusiasts can ensure their living areas remain secure while allowing unhindered access through the hatches.Step 1: Starting with the Flange
Sven begins by explaining that working on flanges vertically and horizontally is significantly easier than doing so in a flat position. To simplify the process further, he divides the task into two or three steps as suggested by fellow expert “for for.” This approach not only makes it more manageable but also allows for greater precision in crafting each component.Step 2: Applying Glue and Securing
Sven proceeds to apply glue along one edge of the flange, ensuring a secure bond when clamped into place. He emphasizes that this stage is crucial for maintaining the structural integrity of the flange, which in turn safeguards the living area beneath the canvas when hatches are open.Step 3: Allowing Time to Dry
After securely attaching the first portion of the flange, Sven allows ample time for it to dry before moving forward with additional steps. This patience and precision are key aspects of his successful boatbuilding methods.Step 4: Finishing Touches
Once the flange is fully dried, Sven removes the clamps carefully, ensuring no damage occurs during this process. He then moves on to attaching four more pieces onto these main frames, completing two pairs of flanges for the bulkhead hatches.The Final Touches
While two flanges form the primary support structure around the hatches, Sven mentions there are two additional pieces required at each end to ensure comprehensive protection. This attention to detail highlights his commitment to producing a durable and reliable design. “Sailing is about finding your path, whether it’s across an ocean or within yourself.” – Sven Yrvind In conclusion, making flanges around bulkhead hatches may seem complex at first glance, but by following Sven Yrvind’s meticulous process, enthusiasts can achieve professional-level results. Remember that the journey of boatbuilding is as rewarding as reaching your destination; it tests one’s patience and dedication. For those seeking to embark on this adventure or simply gain more insight into marine craftsmanship, Sven’s wisdom is invaluable.Making Flanges Around Bulkhead Hatches for Canvas
Sven Yrvind, a renowned yacht designer and sailor, shares valuable insights on creating flanges around bulkhead hatches for canvas protection in this enlightening video. By following his expert guidance, boat enthusiasts can ensure their living areas remain secure while allowing unhindered access through the hatches.Step 1: Starting with the Flange
Sven begins by explaining that working on flanges vertically and horizontally is significantly easier than doing so in a flat position. To simplify the process further, he divides the task into two or three steps as suggested by fellow expert “for for.” This approach not only makes it more manageable but also allows for greater precision in crafting each component.Step 2: Applying Glue and Securing
Sven proceeds to apply glue along one edge of the flange, ensuring a secure bond when clamped into place. He emphasizes that this stage is crucial for maintaining the structural integrity of the flange, which in turn safeguards the living area beneath the canvas when hatches are open.Step 3: Allowing Time to Dry
After securely attaching the first portion of the flange, Sven allows ample time for it to dry before moving forward with additional steps. This patience and precision are key aspects of his successful boatbuilding methods.Step 4: Finishing Touches
Once the flange is fully dried, Sven removes the clamps carefully, ensuring no damage occurs during this process. He then moves on to attaching four more pieces onto these main frames, completing two pairs of flanges for the bulkhead hatches.The Final Touches
While two flanges form the primary support structure around the hatches, Sven mentions there are two additional pieces required at each end to ensure comprehensive protection. This attention to detail highlights his commitment to producing a durable and reliable design. “Sailing is about finding your path, whether it’s across an ocean or within yourself.” – Sven Yrvind In conclusion, making flanges around bulkhead hatches may seem complex at first glance, but by following Sven Yrvind’s meticulous process, enthusiasts can achieve professional-level results. Remember that the journey of boatbuilding is as rewarding as reaching your destination; it tests one’s patience and dedication. For those seeking to embark on this adventure or simply gain more insight into marine craftsmanship, Sven’s wisdom is invaluable.Once the flange is fully dried, Sven removes the clamps carefully, ensuring no damage occurs during this process. He then moves on to attaching four more pieces onto these main frames, completing two pairs of flanges for the bulkhead hatches.The Final Touches
While two flanges form the primary support structure around the hatches, Sven mentions there are two additional pieces required at each end to ensure comprehensive protection. This attention to detail highlights his commitment to producing a durable and reliable design. “Sailing is about finding your path, whether it’s across an ocean or within yourself.” – Sven Yrvind In conclusion, making flanges around bulkhead hatches may seem complex at first glance, but by following Sven Yrvind’s meticulous process, enthusiasts can achieve professional-level results. Remember that the journey of boatbuilding is as rewarding as reaching your destination; it tests one’s patience and dedication. For those seeking to embark on this adventure or simply gain more insight into marine craftsmanship, Sven’s wisdom is invaluable.Sven proceeds to apply glue along one edge of the flange, ensuring a secure bond when clamped into place. He emphasizes that this stage is crucial for maintaining the structural integrity of the flange, which in turn safeguards the living area beneath the canvas when hatches are open.Step 3: Allowing Time to Dry
After securely attaching the first portion of the flange, Sven allows ample time for it to dry before moving forward with additional steps. This patience and precision are key aspects of his successful boatbuilding methods.Step 4: Finishing Touches
Once the flange is fully dried, Sven removes the clamps carefully, ensuring no damage occurs during this process. He then moves on to attaching four more pieces onto these main frames, completing two pairs of flanges for the bulkhead hatches.The Final Touches
While two flanges form the primary support structure around the hatches, Sven mentions there are two additional pieces required at each end to ensure comprehensive protection. This attention to detail highlights his commitment to producing a durable and reliable design. “Sailing is about finding your path, whether it’s across an ocean or within yourself.” – Sven Yrvind In conclusion, making flanges around bulkhead hatches may seem complex at first glance, but by following Sven Yrvind’s meticulous process, enthusiasts can achieve professional-level results. Remember that the journey of boatbuilding is as rewarding as reaching your destination; it tests one’s patience and dedication. For those seeking to embark on this adventure or simply gain more insight into marine craftsmanship, Sven’s wisdom is invaluable.Sven begins by explaining that working on flanges vertically and horizontally is significantly easier than doing so in a flat position. To simplify the process further, he divides the task into two or three steps as suggested by fellow expert “for for.” This approach not only makes it more manageable but also allows for greater precision in crafting each component.Step 2: Applying Glue and Securing
Sven proceeds to apply glue along one edge of the flange, ensuring a secure bond when clamped into place. He emphasizes that this stage is crucial for maintaining the structural integrity of the flange, which in turn safeguards the living area beneath the canvas when hatches are open.Step 3: Allowing Time to Dry
After securely attaching the first portion of the flange, Sven allows ample time for it to dry before moving forward with additional steps. This patience and precision are key aspects of his successful boatbuilding methods.Step 4: Finishing Touches
Once the flange is fully dried, Sven removes the clamps carefully, ensuring no damage occurs during this process. He then moves on to attaching four more pieces onto these main frames, completing two pairs of flanges for the bulkhead hatches.The Final Touches
While two flanges form the primary support structure around the hatches, Sven mentions there are two additional pieces required at each end to ensure comprehensive protection. This attention to detail highlights his commitment to producing a durable and reliable design. “Sailing is about finding your path, whether it’s across an ocean or within yourself.” – Sven Yrvind In conclusion, making flanges around bulkhead hatches may seem complex at first glance, but by following Sven Yrvind’s meticulous process, enthusiasts can achieve professional-level results. Remember that the journey of boatbuilding is as rewarding as reaching your destination; it tests one’s patience and dedication. For those seeking to embark on this adventure or simply gain more insight into marine craftsmanship, Sven’s wisdom is invaluable.Sven Yrvind, a renowned yacht designer and sailor, shares valuable insights on creating flanges around bulkhead hatches for canvas protection in this enlightening video. By following his expert guidance, boat enthusiasts can ensure their living areas remain secure while allowing unhindered access through the hatches.Step 1: Starting with the Flange
Sven begins by explaining that working on flanges vertically and horizontally is significantly easier than doing so in a flat position. To simplify the process further, he divides the task into two or three steps as suggested by fellow expert “for for.” This approach not only makes it more manageable but also allows for greater precision in crafting each component.Step 2: Applying Glue and Securing
Sven proceeds to apply glue along one edge of the flange, ensuring a secure bond when clamped into place. He emphasizes that this stage is crucial for maintaining the structural integrity of the flange, which in turn safeguards the living area beneath the canvas when hatches are open.Step 3: Allowing Time to Dry
After securely attaching the first portion of the flange, Sven allows ample time for it to dry before moving forward with additional steps. This patience and precision are key aspects of his successful boatbuilding methods.Step 4: Finishing Touches
Once the flange is fully dried, Sven removes the clamps carefully, ensuring no damage occurs during this process. He then moves on to attaching four more pieces onto these main frames, completing two pairs of flanges for the bulkhead hatches.The Final Touches
While two flanges form the primary support structure around the hatches, Sven mentions there are two additional pieces required at each end to ensure comprehensive protection. This attention to detail highlights his commitment to producing a durable and reliable design. “Sailing is about finding your path, whether it’s across an ocean or within yourself.” – Sven Yrvind In conclusion, making flanges around bulkhead hatches may seem complex at first glance, but by following Sven Yrvind’s meticulous process, enthusiasts can achieve professional-level results. Remember that the journey of boatbuilding is as rewarding as reaching your destination; it tests one’s patience and dedication. For those seeking to embark on this adventure or simply gain more insight into marine craftsmanship, Sven’s wisdom is invaluable.Making Flanges Around Bulkhead Hatches for Canvas
Sven Yrvind, a renowned yacht designer and sailor, shares valuable insights on creating flanges around bulkhead hatches for canvas protection in this enlightening video. By following his expert guidance, boat enthusiasts can ensure their living areas remain secure while allowing unhindered access through the hatches.Step 1: Starting with the Flange
Sven begins by explaining that working on flanges vertically and horizontally is significantly easier than doing so in a flat position. To simplify the process further, he divides the task into two or three steps as suggested by fellow expert “for for.” This approach not only makes it more manageable but also allows for greater precision in crafting each component.Step 2: Applying Glue and Securing
Sven proceeds to apply glue along one edge of the flange, ensuring a secure bond when clamped into place. He emphasizes that this stage is crucial for maintaining the structural integrity of the flange, which in turn safeguards the living area beneath the canvas when hatches are open.Step 3: Allowing Time to Dry
After securely attaching the first portion of the flange, Sven allows ample time for it to dry before moving forward with additional steps. This patience and precision are key aspects of his successful boatbuilding methods.Step 4: Finishing Touches
Once the flange is fully dried, Sven removes the clamps carefully, ensuring no damage occurs during this process. He then moves on to attaching four more pieces onto these main frames, completing two pairs of flanges for the bulkhead hatches.The Final Touches
While two flanges form the primary support structure around the hatches, Sven mentions there are two additional pieces required at each end to ensure comprehensive protection. This attention to detail highlights his commitment to producing a durable and reliable design. “Sailing is about finding your path, whether it’s across an ocean or within yourself.” – Sven Yrvind In conclusion, making flanges around bulkhead hatches may seem complex at first glance, but by following Sven Yrvind’s meticulous process, enthusiasts can achieve professional-level results. Remember that the journey of boatbuilding is as rewarding as reaching your destination; it tests one’s patience and dedication. For those seeking to embark on this adventure or simply gain more insight into marine craftsmanship, Sven’s wisdom is invaluable.After securely attaching the first portion of the flange, Sven allows ample time for it to dry before moving forward with additional steps. This patience and precision are key aspects of his successful boatbuilding methods.Step 4: Finishing Touches
Once the flange is fully dried, Sven removes the clamps carefully, ensuring no damage occurs during this process. He then moves on to attaching four more pieces onto these main frames, completing two pairs of flanges for the bulkhead hatches.The Final Touches
While two flanges form the primary support structure around the hatches, Sven mentions there are two additional pieces required at each end to ensure comprehensive protection. This attention to detail highlights his commitment to producing a durable and reliable design. “Sailing is about finding your path, whether it’s across an ocean or within yourself.” – Sven Yrvind In conclusion, making flanges around bulkhead hatches may seem complex at first glance, but by following Sven Yrvind’s meticulous process, enthusiasts can achieve professional-level results. Remember that the journey of boatbuilding is as rewarding as reaching your destination; it tests one’s patience and dedication. For those seeking to embark on this adventure or simply gain more insight into marine craftsmanship, Sven’s wisdom is invaluable.Sven proceeds to apply glue along one edge of the flange, ensuring a secure bond when clamped into place. He emphasizes that this stage is crucial for maintaining the structural integrity of the flange, which in turn safeguards the living area beneath the canvas when hatches are open.Step 3: Allowing Time to Dry
After securely attaching the first portion of the flange, Sven allows ample time for it to dry before moving forward with additional steps. This patience and precision are key aspects of his successful boatbuilding methods.Step 4: Finishing Touches
Once the flange is fully dried, Sven removes the clamps carefully, ensuring no damage occurs during this process. He then moves on to attaching four more pieces onto these main frames, completing two pairs of flanges for the bulkhead hatches.The Final Touches
While two flanges form the primary support structure around the hatches, Sven mentions there are two additional pieces required at each end to ensure comprehensive protection. This attention to detail highlights his commitment to producing a durable and reliable design. “Sailing is about finding your path, whether it’s across an ocean or within yourself.” – Sven Yrvind In conclusion, making flanges around bulkhead hatches may seem complex at first glance, but by following Sven Yrvind’s meticulous process, enthusiasts can achieve professional-level results. Remember that the journey of boatbuilding is as rewarding as reaching your destination; it tests one’s patience and dedication. For those seeking to embark on this adventure or simply gain more insight into marine craftsmanship, Sven’s wisdom is invaluable.Sven begins by explaining that working on flanges vertically and horizontally is significantly easier than doing so in a flat position. To simplify the process further, he divides the task into two or three steps as suggested by fellow expert “for for.” This approach not only makes it more manageable but also allows for greater precision in crafting each component.Step 2: Applying Glue and Securing
Sven proceeds to apply glue along one edge of the flange, ensuring a secure bond when clamped into place. He emphasizes that this stage is crucial for maintaining the structural integrity of the flange, which in turn safeguards the living area beneath the canvas when hatches are open.Step 3: Allowing Time to Dry
After securely attaching the first portion of the flange, Sven allows ample time for it to dry before moving forward with additional steps. This patience and precision are key aspects of his successful boatbuilding methods.Step 4: Finishing Touches
Once the flange is fully dried, Sven removes the clamps carefully, ensuring no damage occurs during this process. He then moves on to attaching four more pieces onto these main frames, completing two pairs of flanges for the bulkhead hatches.The Final Touches
While two flanges form the primary support structure around the hatches, Sven mentions there are two additional pieces required at each end to ensure comprehensive protection. This attention to detail highlights his commitment to producing a durable and reliable design. “Sailing is about finding your path, whether it’s across an ocean or within yourself.” – Sven Yrvind In conclusion, making flanges around bulkhead hatches may seem complex at first glance, but by following Sven Yrvind’s meticulous process, enthusiasts can achieve professional-level results. Remember that the journey of boatbuilding is as rewarding as reaching your destination; it tests one’s patience and dedication. For those seeking to embark on this adventure or simply gain more insight into marine craftsmanship, Sven’s wisdom is invaluable.Sven Yrvind, a renowned yacht designer and sailor, shares valuable insights on creating flanges around bulkhead hatches for canvas protection in this enlightening video. By following his expert guidance, boat enthusiasts can ensure their living areas remain secure while allowing unhindered access through the hatches.Step 1: Starting with the Flange
Sven begins by explaining that working on flanges vertically and horizontally is significantly easier than doing so in a flat position. To simplify the process further, he divides the task into two or three steps as suggested by fellow expert “for for.” This approach not only makes it more manageable but also allows for greater precision in crafting each component.Step 2: Applying Glue and Securing
Sven proceeds to apply glue along one edge of the flange, ensuring a secure bond when clamped into place. He emphasizes that this stage is crucial for maintaining the structural integrity of the flange, which in turn safeguards the living area beneath the canvas when hatches are open.Step 3: Allowing Time to Dry
After securely attaching the first portion of the flange, Sven allows ample time for it to dry before moving forward with additional steps. This patience and precision are key aspects of his successful boatbuilding methods.Step 4: Finishing Touches
Once the flange is fully dried, Sven removes the clamps carefully, ensuring no damage occurs during this process. He then moves on to attaching four more pieces onto these main frames, completing two pairs of flanges for the bulkhead hatches.The Final Touches
While two flanges form the primary support structure around the hatches, Sven mentions there are two additional pieces required at each end to ensure comprehensive protection. This attention to detail highlights his commitment to producing a durable and reliable design. “Sailing is about finding your path, whether it’s across an ocean or within yourself.” – Sven Yrvind In conclusion, making flanges around bulkhead hatches may seem complex at first glance, but by following Sven Yrvind’s meticulous process, enthusiasts can achieve professional-level results. Remember that the journey of boatbuilding is as rewarding as reaching your destination; it tests one’s patience and dedication. For those seeking to embark on this adventure or simply gain more insight into marine craftsmanship, Sven’s wisdom is invaluable.Making Flanges Around Bulkhead Hatches for Canvas
Sven Yrvind, a renowned yacht designer and sailor, shares valuable insights on creating flanges around bulkhead hatches for canvas protection in this enlightening video. By following his expert guidance, boat enthusiasts can ensure their living areas remain secure while allowing unhindered access through the hatches.Step 1: Starting with the Flange
Sven begins by explaining that working on flanges vertically and horizontally is significantly easier than doing so in a flat position. To simplify the process further, he divides the task into two or three steps as suggested by fellow expert “for for.” This approach not only makes it more manageable but also allows for greater precision in crafting each component.Step 2: Applying Glue and Securing
Sven proceeds to apply glue along one edge of the flange, ensuring a secure bond when clamped into place. He emphasizes that this stage is crucial for maintaining the structural integrity of the flange, which in turn safeguards the living area beneath the canvas when hatches are open.Step 3: Allowing Time to Dry
After securely attaching the first portion of the flange, Sven allows ample time for it to dry before moving forward with additional steps. This patience and precision are key aspects of his successful boatbuilding methods.Step 4: Finishing Touches
Once the flange is fully dried, Sven removes the clamps carefully, ensuring no damage occurs during this process. He then moves on to attaching four more pieces onto these main frames, completing two pairs of flanges for the bulkhead hatches.The Final Touches
While two flanges form the primary support structure around the hatches, Sven mentions there are two additional pieces required at each end to ensure comprehensive protection. This attention to detail highlights his commitment to producing a durable and reliable design. “Sailing is about finding your path, whether it’s across an ocean or within yourself.” – Sven Yrvind In conclusion, making flanges around bulkhead hatches may seem complex at first glance, but by following Sven Yrvind’s meticulous process, enthusiasts can achieve professional-level results. Remember that the journey of boatbuilding is as rewarding as reaching your destination; it tests one’s patience and dedication. For those seeking to embark on this adventure or simply gain more insight into marine craftsmanship, Sven’s wisdom is invaluable.Once the flange is fully dried, Sven removes the clamps carefully, ensuring no damage occurs during this process. He then moves on to attaching four more pieces onto these main frames, completing two pairs of flanges for the bulkhead hatches.The Final Touches
While two flanges form the primary support structure around the hatches, Sven mentions there are two additional pieces required at each end to ensure comprehensive protection. This attention to detail highlights his commitment to producing a durable and reliable design. “Sailing is about finding your path, whether it’s across an ocean or within yourself.” – Sven Yrvind In conclusion, making flanges around bulkhead hatches may seem complex at first glance, but by following Sven Yrvind’s meticulous process, enthusiasts can achieve professional-level results. Remember that the journey of boatbuilding is as rewarding as reaching your destination; it tests one’s patience and dedication. For those seeking to embark on this adventure or simply gain more insight into marine craftsmanship, Sven’s wisdom is invaluable.After securely attaching the first portion of the flange, Sven allows ample time for it to dry before moving forward with additional steps. This patience and precision are key aspects of his successful boatbuilding methods.Step 4: Finishing Touches
Once the flange is fully dried, Sven removes the clamps carefully, ensuring no damage occurs during this process. He then moves on to attaching four more pieces onto these main frames, completing two pairs of flanges for the bulkhead hatches.The Final Touches
While two flanges form the primary support structure around the hatches, Sven mentions there are two additional pieces required at each end to ensure comprehensive protection. This attention to detail highlights his commitment to producing a durable and reliable design. “Sailing is about finding your path, whether it’s across an ocean or within yourself.” – Sven Yrvind In conclusion, making flanges around bulkhead hatches may seem complex at first glance, but by following Sven Yrvind’s meticulous process, enthusiasts can achieve professional-level results. Remember that the journey of boatbuilding is as rewarding as reaching your destination; it tests one’s patience and dedication. For those seeking to embark on this adventure or simply gain more insight into marine craftsmanship, Sven’s wisdom is invaluable.Sven proceeds to apply glue along one edge of the flange, ensuring a secure bond when clamped into place. He emphasizes that this stage is crucial for maintaining the structural integrity of the flange, which in turn safeguards the living area beneath the canvas when hatches are open.Step 3: Allowing Time to Dry
After securely attaching the first portion of the flange, Sven allows ample time for it to dry before moving forward with additional steps. This patience and precision are key aspects of his successful boatbuilding methods.Step 4: Finishing Touches
Once the flange is fully dried, Sven removes the clamps carefully, ensuring no damage occurs during this process. He then moves on to attaching four more pieces onto these main frames, completing two pairs of flanges for the bulkhead hatches.The Final Touches
While two flanges form the primary support structure around the hatches, Sven mentions there are two additional pieces required at each end to ensure comprehensive protection. This attention to detail highlights his commitment to producing a durable and reliable design. “Sailing is about finding your path, whether it’s across an ocean or within yourself.” – Sven Yrvind In conclusion, making flanges around bulkhead hatches may seem complex at first glance, but by following Sven Yrvind’s meticulous process, enthusiasts can achieve professional-level results. Remember that the journey of boatbuilding is as rewarding as reaching your destination; it tests one’s patience and dedication. For those seeking to embark on this adventure or simply gain more insight into marine craftsmanship, Sven’s wisdom is invaluable.Sven begins by explaining that working on flanges vertically and horizontally is significantly easier than doing so in a flat position. To simplify the process further, he divides the task into two or three steps as suggested by fellow expert “for for.” This approach not only makes it more manageable but also allows for greater precision in crafting each component.Step 2: Applying Glue and Securing
Sven proceeds to apply glue along one edge of the flange, ensuring a secure bond when clamped into place. He emphasizes that this stage is crucial for maintaining the structural integrity of the flange, which in turn safeguards the living area beneath the canvas when hatches are open.Step 3: Allowing Time to Dry
After securely attaching the first portion of the flange, Sven allows ample time for it to dry before moving forward with additional steps. This patience and precision are key aspects of his successful boatbuilding methods.Step 4: Finishing Touches
Once the flange is fully dried, Sven removes the clamps carefully, ensuring no damage occurs during this process. He then moves on to attaching four more pieces onto these main frames, completing two pairs of flanges for the bulkhead hatches.The Final Touches
While two flanges form the primary support structure around the hatches, Sven mentions there are two additional pieces required at each end to ensure comprehensive protection. This attention to detail highlights his commitment to producing a durable and reliable design. “Sailing is about finding your path, whether it’s across an ocean or within yourself.” – Sven Yrvind In conclusion, making flanges around bulkhead hatches may seem complex at first glance, but by following Sven Yrvind’s meticulous process, enthusiasts can achieve professional-level results. Remember that the journey of boatbuilding is as rewarding as reaching your destination; it tests one’s patience and dedication. For those seeking to embark on this adventure or simply gain more insight into marine craftsmanship, Sven’s wisdom is invaluable.Sven Yrvind, a renowned yacht designer and sailor, shares valuable insights on creating flanges around bulkhead hatches for canvas protection in this enlightening video. By following his expert guidance, boat enthusiasts can ensure their living areas remain secure while allowing unhindered access through the hatches.Step 1: Starting with the Flange
Sven begins by explaining that working on flanges vertically and horizontally is significantly easier than doing so in a flat position. To simplify the process further, he divides the task into two or three steps as suggested by fellow expert “for for.” This approach not only makes it more manageable but also allows for greater precision in crafting each component.Step 2: Applying Glue and Securing
Sven proceeds to apply glue along one edge of the flange, ensuring a secure bond when clamped into place. He emphasizes that this stage is crucial for maintaining the structural integrity of the flange, which in turn safeguards the living area beneath the canvas when hatches are open.Step 3: Allowing Time to Dry
After securely attaching the first portion of the flange, Sven allows ample time for it to dry before moving forward with additional steps. This patience and precision are key aspects of his successful boatbuilding methods.Step 4: Finishing Touches
Once the flange is fully dried, Sven removes the clamps carefully, ensuring no damage occurs during this process. He then moves on to attaching four more pieces onto these main frames, completing two pairs of flanges for the bulkhead hatches.The Final Touches
While two flanges form the primary support structure around the hatches, Sven mentions there are two additional pieces required at each end to ensure comprehensive protection. This attention to detail highlights his commitment to producing a durable and reliable design. “Sailing is about finding your path, whether it’s across an ocean or within yourself.” – Sven Yrvind In conclusion, making flanges around bulkhead hatches may seem complex at first glance, but by following Sven Yrvind’s meticulous process, enthusiasts can achieve professional-level results. Remember that the journey of boatbuilding is as rewarding as reaching your destination; it tests one’s patience and dedication. For those seeking to embark on this adventure or simply gain more insight into marine craftsmanship, Sven’s wisdom is invaluable.Making Flanges Around Bulkhead Hatches for Canvas
Sven Yrvind, a renowned yacht designer and sailor, shares valuable insights on creating flanges around bulkhead hatches for canvas protection in this enlightening video. By following his expert guidance, boat enthusiasts can ensure their living areas remain secure while allowing unhindered access through the hatches.Step 1: Starting with the Flange
Sven begins by explaining that working on flanges vertically and horizontally is significantly easier than doing so in a flat position. To simplify the process further, he divides the task into two or three steps as suggested by fellow expert “for for.” This approach not only makes it more manageable but also allows for greater precision in crafting each component.Step 2: Applying Glue and Securing
Sven proceeds to apply glue along one edge of the flange, ensuring a secure bond when clamped into place. He emphasizes that this stage is crucial for maintaining the structural integrity of the flange, which in turn safeguards the living area beneath the canvas when hatches are open.Step 3: Allowing Time to Dry
After securely attaching the first portion of the flange, Sven allows ample time for it to dry before moving forward with additional steps. This patience and precision are key aspects of his successful boatbuilding methods.Step 4: Finishing Touches
Once the flange is fully dried, Sven removes the clamps carefully, ensuring no damage occurs during this process. He then moves on to attaching four more pieces onto these main frames, completing two pairs of flanges for the bulkhead hatches.The Final Touches
While two flanges form the primary support structure around the hatches, Sven mentions there are two additional pieces required at each end to ensure comprehensive protection. This attention to detail highlights his commitment to producing a durable and reliable design. “Sailing is about finding your path, whether it’s across an ocean or within yourself.” – Sven Yrvind In conclusion, making flanges around bulkhead hatches may seem complex at first glance, but by following Sven Yrvind’s meticulous process, enthusiasts can achieve professional-level results. Remember that the journey of boatbuilding is as rewarding as reaching your destination; it tests one’s patience and dedication. For those seeking to embark on this adventure or simply gain more insight into marine craftsmanship, Sven’s wisdom is invaluable.Sven proceeds to apply glue along one edge of the flange, ensuring a secure bond when clamped into place. He emphasizes that this stage is crucial for maintaining the structural integrity of the flange, which in turn safeguards the living area beneath the canvas when hatches are open.Step 3: Allowing Time to Dry
After securely attaching the first portion of the flange, Sven allows ample time for it to dry before moving forward with additional steps. This patience and precision are key aspects of his successful boatbuilding methods.Step 4: Finishing Touches
Once the flange is fully dried, Sven removes the clamps carefully, ensuring no damage occurs during this process. He then moves on to attaching four more pieces onto these main frames, completing two pairs of flanges for the bulkhead hatches.The Final Touches
While two flanges form the primary support structure around the hatches, Sven mentions there are two additional pieces required at each end to ensure comprehensive protection. This attention to detail highlights his commitment to producing a durable and reliable design. “Sailing is about finding your path, whether it’s across an ocean or within yourself.” – Sven Yrvind In conclusion, making flanges around bulkhead hatches may seem complex at first glance, but by following Sven Yrvind’s meticulous process, enthusiasts can achieve professional-level results. Remember that the journey of boatbuilding is as rewarding as reaching your destination; it tests one’s patience and dedication. For those seeking to embark on this adventure or simply gain more insight into marine craftsmanship, Sven’s wisdom is invaluable.Sven begins by explaining that working on flanges vertically and horizontally is significantly easier than doing so in a flat position. To simplify the process further, he divides the task into two or three steps as suggested by fellow expert “for for.” This approach not only makes it more manageable but also allows for greater precision in crafting each component.Step 2: Applying Glue and Securing
Sven proceeds to apply glue along one edge of the flange, ensuring a secure bond when clamped into place. He emphasizes that this stage is crucial for maintaining the structural integrity of the flange, which in turn safeguards the living area beneath the canvas when hatches are open.Step 3: Allowing Time to Dry
After securely attaching the first portion of the flange, Sven allows ample time for it to dry before moving forward with additional steps. This patience and precision are key aspects of his successful boatbuilding methods.Step 4: Finishing Touches
Once the flange is fully dried, Sven removes the clamps carefully, ensuring no damage occurs during this process. He then moves on to attaching four more pieces onto these main frames, completing two pairs of flanges for the bulkhead hatches.The Final Touches
While two flanges form the primary support structure around the hatches, Sven mentions there are two additional pieces required at each end to ensure comprehensive protection. This attention to detail highlights his commitment to producing a durable and reliable design. “Sailing is about finding your path, whether it’s across an ocean or within yourself.” – Sven Yrvind In conclusion, making flanges around bulkhead hatches may seem complex at first glance, but by following Sven Yrvind’s meticulous process, enthusiasts can achieve professional-level results. Remember that the journey of boatbuilding is as rewarding as reaching your destination; it tests one’s patience and dedication. For those seeking to embark on this adventure or simply gain more insight into marine craftsmanship, Sven’s wisdom is invaluable.Sven Yrvind, a renowned yacht designer and sailor, shares valuable insights on creating flanges around bulkhead hatches for canvas protection in this enlightening video. By following his expert guidance, boat enthusiasts can ensure their living areas remain secure while allowing unhindered access through the hatches.Step 1: Starting with the Flange
Sven begins by explaining that working on flanges vertically and horizontally is significantly easier than doing so in a flat position. To simplify the process further, he divides the task into two or three steps as suggested by fellow expert “for for.” This approach not only makes it more manageable but also allows for greater precision in crafting each component.Step 2: Applying Glue and Securing
Sven proceeds to apply glue along one edge of the flange, ensuring a secure bond when clamped into place. He emphasizes that this stage is crucial for maintaining the structural integrity of the flange, which in turn safeguards the living area beneath the canvas when hatches are open.Step 3: Allowing Time to Dry
After securely attaching the first portion of the flange, Sven allows ample time for it to dry before moving forward with additional steps. This patience and precision are key aspects of his successful boatbuilding methods.Step 4: Finishing Touches
Once the flange is fully dried, Sven removes the clamps carefully, ensuring no damage occurs during this process. He then moves on to attaching four more pieces onto these main frames, completing two pairs of flanges for the bulkhead hatches.The Final Touches
While two flanges form the primary support structure around the hatches, Sven mentions there are two additional pieces required at each end to ensure comprehensive protection. This attention to detail highlights his commitment to producing a durable and reliable design. “Sailing is about finding your path, whether it’s across an ocean or within yourself.” – Sven Yrvind In conclusion, making flanges around bulkhead hatches may seem complex at first glance, but by following Sven Yrvind’s meticulous process, enthusiasts can achieve professional-level results. Remember that the journey of boatbuilding is as rewarding as reaching your destination; it tests one’s patience and dedication. For those seeking to embark on this adventure or simply gain more insight into marine craftsmanship, Sven’s wisdom is invaluable.Making Flanges Around Bulkhead Hatches for Canvas
Sven Yrvind, a renowned yacht designer and sailor, shares valuable insights on creating flanges around bulkhead hatches for canvas protection in this enlightening video. By following his expert guidance, boat enthusiasts can ensure their living areas remain secure while allowing unhindered access through the hatches.Step 1: Starting with the Flange
Sven begins by explaining that working on flanges vertically and horizontally is significantly easier than doing so in a flat position. To simplify the process further, he divides the task into two or three steps as suggested by fellow expert “for for.” This approach not only makes it more manageable but also allows for greater precision in crafting each component.Step 2: Applying Glue and Securing
Sven proceeds to apply glue along one edge of the flange, ensuring a secure bond when clamped into place. He emphasizes that this stage is crucial for maintaining the structural integrity of the flange, which in turn safeguards the living area beneath the canvas when hatches are open.Step 3: Allowing Time to Dry
After securely attaching the first portion of the flange, Sven allows ample time for it to dry before moving forward with additional steps. This patience and precision are key aspects of his successful boatbuilding methods.Step 4: Finishing Touches
Once the flange is fully dried, Sven removes the clamps carefully, ensuring no damage occurs during this process. He then moves on to attaching four more pieces onto these main frames, completing two pairs of flanges for the bulkhead hatches.The Final Touches
While two flanges form the primary support structure around the hatches, Sven mentions there are two additional pieces required at each end to ensure comprehensive protection. This attention to detail highlights his commitment to producing a durable and reliable design. “Sailing is about finding your path, whether it’s across an ocean or within yourself.” – Sven Yrvind In conclusion, making flanges around bulkhead hatches may seem complex at first glance, but by following Sven Yrvind’s meticulous process, enthusiasts can achieve professional-level results. Remember that the journey of boatbuilding is as rewarding as reaching your destination; it tests one’s patience and dedication. For those seeking to embark on this adventure or simply gain more insight into marine craftsmanship, Sven’s wisdom is invaluable.Once the flange is fully dried, Sven removes the clamps carefully, ensuring no damage occurs during this process. He then moves on to attaching four more pieces onto these main frames, completing two pairs of flanges for the bulkhead hatches.The Final Touches
While two flanges form the primary support structure around the hatches, Sven mentions there are two additional pieces required at each end to ensure comprehensive protection. This attention to detail highlights his commitment to producing a durable and reliable design. “Sailing is about finding your path, whether it’s across an ocean or within yourself.” – Sven Yrvind In conclusion, making flanges around bulkhead hatches may seem complex at first glance, but by following Sven Yrvind’s meticulous process, enthusiasts can achieve professional-level results. Remember that the journey of boatbuilding is as rewarding as reaching your destination; it tests one’s patience and dedication. For those seeking to embark on this adventure or simply gain more insight into marine craftsmanship, Sven’s wisdom is invaluable.Sven proceeds to apply glue along one edge of the flange, ensuring a secure bond when clamped into place. He emphasizes that this stage is crucial for maintaining the structural integrity of the flange, which in turn safeguards the living area beneath the canvas when hatches are open.Step 3: Allowing Time to Dry
After securely attaching the first portion of the flange, Sven allows ample time for it to dry before moving forward with additional steps. This patience and precision are key aspects of his successful boatbuilding methods.Step 4: Finishing Touches
Once the flange is fully dried, Sven removes the clamps carefully, ensuring no damage occurs during this process. He then moves on to attaching four more pieces onto these main frames, completing two pairs of flanges for the bulkhead hatches.The Final Touches
While two flanges form the primary support structure around the hatches, Sven mentions there are two additional pieces required at each end to ensure comprehensive protection. This attention to detail highlights his commitment to producing a durable and reliable design. “Sailing is about finding your path, whether it’s across an ocean or within yourself.” – Sven Yrvind In conclusion, making flanges around bulkhead hatches may seem complex at first glance, but by following Sven Yrvind’s meticulous process, enthusiasts can achieve professional-level results. Remember that the journey of boatbuilding is as rewarding as reaching your destination; it tests one’s patience and dedication. For those seeking to embark on this adventure or simply gain more insight into marine craftsmanship, Sven’s wisdom is invaluable.Sven begins by explaining that working on flanges vertically and horizontally is significantly easier than doing so in a flat position. To simplify the process further, he divides the task into two or three steps as suggested by fellow expert “for for.” This approach not only makes it more manageable but also allows for greater precision in crafting each component.Step 2: Applying Glue and Securing
Sven proceeds to apply glue along one edge of the flange, ensuring a secure bond when clamped into place. He emphasizes that this stage is crucial for maintaining the structural integrity of the flange, which in turn safeguards the living area beneath the canvas when hatches are open.Step 3: Allowing Time to Dry
After securely attaching the first portion of the flange, Sven allows ample time for it to dry before moving forward with additional steps. This patience and precision are key aspects of his successful boatbuilding methods.Step 4: Finishing Touches
Once the flange is fully dried, Sven removes the clamps carefully, ensuring no damage occurs during this process. He then moves on to attaching four more pieces onto these main frames, completing two pairs of flanges for the bulkhead hatches.The Final Touches
While two flanges form the primary support structure around the hatches, Sven mentions there are two additional pieces required at each end to ensure comprehensive protection. This attention to detail highlights his commitment to producing a durable and reliable design. “Sailing is about finding your path, whether it’s across an ocean or within yourself.” – Sven Yrvind In conclusion, making flanges around bulkhead hatches may seem complex at first glance, but by following Sven Yrvind’s meticulous process, enthusiasts can achieve professional-level results. Remember that the journey of boatbuilding is as rewarding as reaching your destination; it tests one’s patience and dedication. For those seeking to embark on this adventure or simply gain more insight into marine craftsmanship, Sven’s wisdom is invaluable.Sven Yrvind, a renowned yacht designer and sailor, shares valuable insights on creating flanges around bulkhead hatches for canvas protection in this enlightening video. By following his expert guidance, boat enthusiasts can ensure their living areas remain secure while allowing unhindered access through the hatches.Step 1: Starting with the Flange
Sven begins by explaining that working on flanges vertically and horizontally is significantly easier than doing so in a flat position. To simplify the process further, he divides the task into two or three steps as suggested by fellow expert “for for.” This approach not only makes it more manageable but also allows for greater precision in crafting each component.Step 2: Applying Glue and Securing
Sven proceeds to apply glue along one edge of the flange, ensuring a secure bond when clamped into place. He emphasizes that this stage is crucial for maintaining the structural integrity of the flange, which in turn safeguards the living area beneath the canvas when hatches are open.Step 3: Allowing Time to Dry
After securely attaching the first portion of the flange, Sven allows ample time for it to dry before moving forward with additional steps. This patience and precision are key aspects of his successful boatbuilding methods.Step 4: Finishing Touches
Once the flange is fully dried, Sven removes the clamps carefully, ensuring no damage occurs during this process. He then moves on to attaching four more pieces onto these main frames, completing two pairs of flanges for the bulkhead hatches.The Final Touches
While two flanges form the primary support structure around the hatches, Sven mentions there are two additional pieces required at each end to ensure comprehensive protection. This attention to detail highlights his commitment to producing a durable and reliable design. “Sailing is about finding your path, whether it’s across an ocean or within yourself.” – Sven Yrvind In conclusion, making flanges around bulkhead hatches may seem complex at first glance, but by following Sven Yrvind’s meticulous process, enthusiasts can achieve professional-level results. Remember that the journey of boatbuilding is as rewarding as reaching your destination; it tests one’s patience and dedication. For those seeking to embark on this adventure or simply gain more insight into marine craftsmanship, Sven’s wisdom is invaluable.Making Flanges Around Bulkhead Hatches for Canvas
Sven Yrvind, a renowned yacht designer and sailor, shares valuable insights on creating flanges around bulkhead hatches for canvas protection in this enlightening video. By following his expert guidance, boat enthusiasts can ensure their living areas remain secure while allowing unhindered access through the hatches.Step 1: Starting with the Flange
Sven begins by explaining that working on flanges vertically and horizontally is significantly easier than doing so in a flat position. To simplify the process further, he divides the task into two or three steps as suggested by fellow expert “for for.” This approach not only makes it more manageable but also allows for greater precision in crafting each component.Step 2: Applying Glue and Securing
Sven proceeds to apply glue along one edge of the flange, ensuring a secure bond when clamped into place. He emphasizes that this stage is crucial for maintaining the structural integrity of the flange, which in turn safeguards the living area beneath the canvas when hatches are open.Step 3: Allowing Time to Dry
After securely attaching the first portion of the flange, Sven allows ample time for it to dry before moving forward with additional steps. This patience and precision are key aspects of his successful boatbuilding methods.Step 4: Finishing Touches
Once the flange is fully dried, Sven removes the clamps carefully, ensuring no damage occurs during this process. He then moves on to attaching four more pieces onto these main frames, completing two pairs of flanges for the bulkhead hatches.The Final Touches
While two flanges form the primary support structure around the hatches, Sven mentions there are two additional pieces required at each end to ensure comprehensive protection. This attention to detail highlights his commitment to producing a durable and reliable design. “Sailing is about finding your path, whether it’s across an ocean or within yourself.” – Sven Yrvind In conclusion, making flanges around bulkhead hatches may seem complex at first glance, but by following Sven Yrvind’s meticulous process, enthusiasts can achieve professional-level results. Remember that the journey of boatbuilding is as rewarding as reaching your destination; it tests one’s patience and dedication. For those seeking to embark on this adventure or simply gain more insight into marine craftsmanship, Sven’s wisdom is invaluable.After securely attaching the first portion of the flange, Sven allows ample time for it to dry before moving forward with additional steps. This patience and precision are key aspects of his successful boatbuilding methods.Step 4: Finishing Touches
Once the flange is fully dried, Sven removes the clamps carefully, ensuring no damage occurs during this process. He then moves on to attaching four more pieces onto these main frames, completing two pairs of flanges for the bulkhead hatches.The Final Touches
While two flanges form the primary support structure around the hatches, Sven mentions there are two additional pieces required at each end to ensure comprehensive protection. This attention to detail highlights his commitment to producing a durable and reliable design. “Sailing is about finding your path, whether it’s across an ocean or within yourself.” – Sven Yrvind In conclusion, making flanges around bulkhead hatches may seem complex at first glance, but by following Sven Yrvind’s meticulous process, enthusiasts can achieve professional-level results. Remember that the journey of boatbuilding is as rewarding as reaching your destination; it tests one’s patience and dedication. For those seeking to embark on this adventure or simply gain more insight into marine craftsmanship, Sven’s wisdom is invaluable.Sven proceeds to apply glue along one edge of the flange, ensuring a secure bond when clamped into place. He emphasizes that this stage is crucial for maintaining the structural integrity of the flange, which in turn safeguards the living area beneath the canvas when hatches are open.Step 3: Allowing Time to Dry
After securely attaching the first portion of the flange, Sven allows ample time for it to dry before moving forward with additional steps. This patience and precision are key aspects of his successful boatbuilding methods.Step 4: Finishing Touches
Once the flange is fully dried, Sven removes the clamps carefully, ensuring no damage occurs during this process. He then moves on to attaching four more pieces onto these main frames, completing two pairs of flanges for the bulkhead hatches.The Final Touches
While two flanges form the primary support structure around the hatches, Sven mentions there are two additional pieces required at each end to ensure comprehensive protection. This attention to detail highlights his commitment to producing a durable and reliable design. “Sailing is about finding your path, whether it’s across an ocean or within yourself.” – Sven Yrvind In conclusion, making flanges around bulkhead hatches may seem complex at first glance, but by following Sven Yrvind’s meticulous process, enthusiasts can achieve professional-level results. Remember that the journey of boatbuilding is as rewarding as reaching your destination; it tests one’s patience and dedication. For those seeking to embark on this adventure or simply gain more insight into marine craftsmanship, Sven’s wisdom is invaluable.Sven begins by explaining that working on flanges vertically and horizontally is significantly easier than doing so in a flat position. To simplify the process further, he divides the task into two or three steps as suggested by fellow expert “for for.” This approach not only makes it more manageable but also allows for greater precision in crafting each component.Step 2: Applying Glue and Securing
Sven proceeds to apply glue along one edge of the flange, ensuring a secure bond when clamped into place. He emphasizes that this stage is crucial for maintaining the structural integrity of the flange, which in turn safeguards the living area beneath the canvas when hatches are open.Step 3: Allowing Time to Dry
After securely attaching the first portion of the flange, Sven allows ample time for it to dry before moving forward with additional steps. This patience and precision are key aspects of his successful boatbuilding methods.Step 4: Finishing Touches
Once the flange is fully dried, Sven removes the clamps carefully, ensuring no damage occurs during this process. He then moves on to attaching four more pieces onto these main frames, completing two pairs of flanges for the bulkhead hatches.The Final Touches
While two flanges form the primary support structure around the hatches, Sven mentions there are two additional pieces required at each end to ensure comprehensive protection. This attention to detail highlights his commitment to producing a durable and reliable design. “Sailing is about finding your path, whether it’s across an ocean or within yourself.” – Sven Yrvind In conclusion, making flanges around bulkhead hatches may seem complex at first glance, but by following Sven Yrvind’s meticulous process, enthusiasts can achieve professional-level results. Remember that the journey of boatbuilding is as rewarding as reaching your destination; it tests one’s patience and dedication. For those seeking to embark on this adventure or simply gain more insight into marine craftsmanship, Sven’s wisdom is invaluable.Sven Yrvind, a renowned yacht designer and sailor, shares valuable insights on creating flanges around bulkhead hatches for canvas protection in this enlightening video. By following his expert guidance, boat enthusiasts can ensure their living areas remain secure while allowing unhindered access through the hatches.Step 1: Starting with the Flange
Sven begins by explaining that working on flanges vertically and horizontally is significantly easier than doing so in a flat position. To simplify the process further, he divides the task into two or three steps as suggested by fellow expert “for for.” This approach not only makes it more manageable but also allows for greater precision in crafting each component.Step 2: Applying Glue and Securing
Sven proceeds to apply glue along one edge of the flange, ensuring a secure bond when clamped into place. He emphasizes that this stage is crucial for maintaining the structural integrity of the flange, which in turn safeguards the living area beneath the canvas when hatches are open.Step 3: Allowing Time to Dry
After securely attaching the first portion of the flange, Sven allows ample time for it to dry before moving forward with additional steps. This patience and precision are key aspects of his successful boatbuilding methods.Step 4: Finishing Touches
Once the flange is fully dried, Sven removes the clamps carefully, ensuring no damage occurs during this process. He then moves on to attaching four more pieces onto these main frames, completing two pairs of flanges for the bulkhead hatches.The Final Touches
While two flanges form the primary support structure around the hatches, Sven mentions there are two additional pieces required at each end to ensure comprehensive protection. This attention to detail highlights his commitment to producing a durable and reliable design. “Sailing is about finding your path, whether it’s across an ocean or within yourself.” – Sven Yrvind In conclusion, making flanges around bulkhead hatches may seem complex at first glance, but by following Sven Yrvind’s meticulous process, enthusiasts can achieve professional-level results. Remember that the journey of boatbuilding is as rewarding as reaching your destination; it tests one’s patience and dedication. For those seeking to embark on this adventure or simply gain more insight into marine craftsmanship, Sven’s wisdom is invaluable.Making Flanges Around Bulkhead Hatches for Canvas
Sven Yrvind, a renowned yacht designer and sailor, shares valuable insights on creating flanges around bulkhead hatches for canvas protection in this enlightening video. By following his expert guidance, boat enthusiasts can ensure their living areas remain secure while allowing unhindered access through the hatches.Step 1: Starting with the Flange
Sven begins by explaining that working on flanges vertically and horizontally is significantly easier than doing so in a flat position. To simplify the process further, he divides the task into two or three steps as suggested by fellow expert “for for.” This approach not only makes it more manageable but also allows for greater precision in crafting each component.Step 2: Applying Glue and Securing
Sven proceeds to apply glue along one edge of the flange, ensuring a secure bond when clamped into place. He emphasizes that this stage is crucial for maintaining the structural integrity of the flange, which in turn safeguards the living area beneath the canvas when hatches are open.Step 3: Allowing Time to Dry
After securely attaching the first portion of the flange, Sven allows ample time for it to dry before moving forward with additional steps. This patience and precision are key aspects of his successful boatbuilding methods.Step 4: Finishing Touches
Once the flange is fully dried, Sven removes the clamps carefully, ensuring no damage occurs during this process. He then moves on to attaching four more pieces onto these main frames, completing two pairs of flanges for the bulkhead hatches.The Final Touches
While two flanges form the primary support structure around the hatches, Sven mentions there are two additional pieces required at each end to ensure comprehensive protection. This attention to detail highlights his commitment to producing a durable and reliable design. “Sailing is about finding your path, whether it’s across an ocean or within yourself.” – Sven Yrvind In conclusion, making flanges around bulkhead hatches may seem complex at first glance, but by following Sven Yrvind’s meticulous process, enthusiasts can achieve professional-level results. Remember that the journey of boatbuilding is as rewarding as reaching your destination; it tests one’s patience and dedication. For those seeking to embark on this adventure or simply gain more insight into marine craftsmanship, Sven’s wisdom is invaluable.Once the flange is fully dried, Sven removes the clamps carefully, ensuring no damage occurs during this process. He then moves on to attaching four more pieces onto these main frames, completing two pairs of flanges for the bulkhead hatches.The Final Touches
While two flanges form the primary support structure around the hatches, Sven mentions there are two additional pieces required at each end to ensure comprehensive protection. This attention to detail highlights his commitment to producing a durable and reliable design. “Sailing is about finding your path, whether it’s across an ocean or within yourself.” – Sven Yrvind In conclusion, making flanges around bulkhead hatches may seem complex at first glance, but by following Sven Yrvind’s meticulous process, enthusiasts can achieve professional-level results. Remember that the journey of boatbuilding is as rewarding as reaching your destination; it tests one’s patience and dedication. For those seeking to embark on this adventure or simply gain more insight into marine craftsmanship, Sven’s wisdom is invaluable.After securely attaching the first portion of the flange, Sven allows ample time for it to dry before moving forward with additional steps. This patience and precision are key aspects of his successful boatbuilding methods.Step 4: Finishing Touches
Once the flange is fully dried, Sven removes the clamps carefully, ensuring no damage occurs during this process. He then moves on to attaching four more pieces onto these main frames, completing two pairs of flanges for the bulkhead hatches.The Final Touches
While two flanges form the primary support structure around the hatches, Sven mentions there are two additional pieces required at each end to ensure comprehensive protection. This attention to detail highlights his commitment to producing a durable and reliable design. “Sailing is about finding your path, whether it’s across an ocean or within yourself.” – Sven Yrvind In conclusion, making flanges around bulkhead hatches may seem complex at first glance, but by following Sven Yrvind’s meticulous process, enthusiasts can achieve professional-level results. Remember that the journey of boatbuilding is as rewarding as reaching your destination; it tests one’s patience and dedication. For those seeking to embark on this adventure or simply gain more insight into marine craftsmanship, Sven’s wisdom is invaluable.Sven proceeds to apply glue along one edge of the flange, ensuring a secure bond when clamped into place. He emphasizes that this stage is crucial for maintaining the structural integrity of the flange, which in turn safeguards the living area beneath the canvas when hatches are open.Step 3: Allowing Time to Dry
After securely attaching the first portion of the flange, Sven allows ample time for it to dry before moving forward with additional steps. This patience and precision are key aspects of his successful boatbuilding methods.Step 4: Finishing Touches
Once the flange is fully dried, Sven removes the clamps carefully, ensuring no damage occurs during this process. He then moves on to attaching four more pieces onto these main frames, completing two pairs of flanges for the bulkhead hatches.The Final Touches
While two flanges form the primary support structure around the hatches, Sven mentions there are two additional pieces required at each end to ensure comprehensive protection. This attention to detail highlights his commitment to producing a durable and reliable design. “Sailing is about finding your path, whether it’s across an ocean or within yourself.” – Sven Yrvind In conclusion, making flanges around bulkhead hatches may seem complex at first glance, but by following Sven Yrvind’s meticulous process, enthusiasts can achieve professional-level results. Remember that the journey of boatbuilding is as rewarding as reaching your destination; it tests one’s patience and dedication. For those seeking to embark on this adventure or simply gain more insight into marine craftsmanship, Sven’s wisdom is invaluable.Sven begins by explaining that working on flanges vertically and horizontally is significantly easier than doing so in a flat position. To simplify the process further, he divides the task into two or three steps as suggested by fellow expert “for for.” This approach not only makes it more manageable but also allows for greater precision in crafting each component.Step 2: Applying Glue and Securing
Sven proceeds to apply glue along one edge of the flange, ensuring a secure bond when clamped into place. He emphasizes that this stage is crucial for maintaining the structural integrity of the flange, which in turn safeguards the living area beneath the canvas when hatches are open.Step 3: Allowing Time to Dry
After securely attaching the first portion of the flange, Sven allows ample time for it to dry before moving forward with additional steps. This patience and precision are key aspects of his successful boatbuilding methods.Step 4: Finishing Touches
Once the flange is fully dried, Sven removes the clamps carefully, ensuring no damage occurs during this process. He then moves on to attaching four more pieces onto these main frames, completing two pairs of flanges for the bulkhead hatches.The Final Touches
While two flanges form the primary support structure around the hatches, Sven mentions there are two additional pieces required at each end to ensure comprehensive protection. This attention to detail highlights his commitment to producing a durable and reliable design. “Sailing is about finding your path, whether it’s across an ocean or within yourself.” – Sven Yrvind In conclusion, making flanges around bulkhead hatches may seem complex at first glance, but by following Sven Yrvind’s meticulous process, enthusiasts can achieve professional-level results. Remember that the journey of boatbuilding is as rewarding as reaching your destination; it tests one’s patience and dedication. For those seeking to embark on this adventure or simply gain more insight into marine craftsmanship, Sven’s wisdom is invaluable.Sven Yrvind, a renowned yacht designer and sailor, shares valuable insights on creating flanges around bulkhead hatches for canvas protection in this enlightening video. By following his expert guidance, boat enthusiasts can ensure their living areas remain secure while allowing unhindered access through the hatches.Step 1: Starting with the Flange
Sven begins by explaining that working on flanges vertically and horizontally is significantly easier than doing so in a flat position. To simplify the process further, he divides the task into two or three steps as suggested by fellow expert “for for.” This approach not only makes it more manageable but also allows for greater precision in crafting each component.Step 2: Applying Glue and Securing
Sven proceeds to apply glue along one edge of the flange, ensuring a secure bond when clamped into place. He emphasizes that this stage is crucial for maintaining the structural integrity of the flange, which in turn safeguards the living area beneath the canvas when hatches are open.Step 3: Allowing Time to Dry
After securely attaching the first portion of the flange, Sven allows ample time for it to dry before moving forward with additional steps. This patience and precision are key aspects of his successful boatbuilding methods.Step 4: Finishing Touches
Once the flange is fully dried, Sven removes the clamps carefully, ensuring no damage occurs during this process. He then moves on to attaching four more pieces onto these main frames, completing two pairs of flanges for the bulkhead hatches.The Final Touches
While two flanges form the primary support structure around the hatches, Sven mentions there are two additional pieces required at each end to ensure comprehensive protection. This attention to detail highlights his commitment to producing a durable and reliable design. “Sailing is about finding your path, whether it’s across an ocean or within yourself.” – Sven Yrvind In conclusion, making flanges around bulkhead hatches may seem complex at first glance, but by following Sven Yrvind’s meticulous process, enthusiasts can achieve professional-level results. Remember that the journey of boatbuilding is as rewarding as reaching your destination; it tests one’s patience and dedication. For those seeking to embark on this adventure or simply gain more insight into marine craftsmanship, Sven’s wisdom is invaluable.Making Flanges Around Bulkhead Hatches for Canvas
Sven Yrvind, a renowned yacht designer and sailor, shares valuable insights on creating flanges around bulkhead hatches for canvas protection in this enlightening video. By following his expert guidance, boat enthusiasts can ensure their living areas remain secure while allowing unhindered access through the hatches.Step 1: Starting with the Flange
Sven begins by explaining that working on flanges vertically and horizontally is significantly easier than doing so in a flat position. To simplify the process further, he divides the task into two or three steps as suggested by fellow expert “for for.” This approach not only makes it more manageable but also allows for greater precision in crafting each component.Step 2: Applying Glue and Securing
Sven proceeds to apply glue along one edge of the flange, ensuring a secure bond when clamped into place. He emphasizes that this stage is crucial for maintaining the structural integrity of the flange, which in turn safeguards the living area beneath the canvas when hatches are open.Step 3: Allowing Time to Dry
After securely attaching the first portion of the flange, Sven allows ample time for it to dry before moving forward with additional steps. This patience and precision are key aspects of his successful boatbuilding methods.Step 4: Finishing Touches
Once the flange is fully dried, Sven removes the clamps carefully, ensuring no damage occurs during this process. He then moves on to attaching four more pieces onto these main frames, completing two pairs of flanges for the bulkhead hatches.The Final Touches
While two flanges form the primary support structure around the hatches, Sven mentions there are two additional pieces required at each end to ensure comprehensive protection. This attention to detail highlights his commitment to producing a durable and reliable design. “Sailing is about finding your path, whether it’s across an ocean or within yourself.” – Sven Yrvind In conclusion, making flanges around bulkhead hatches may seem complex at first glance, but by following Sven Yrvind’s meticulous process, enthusiasts can achieve professional-level results. Remember that the journey of boatbuilding is as rewarding as reaching your destination; it tests one’s patience and dedication. For those seeking to embark on this adventure or simply gain more insight into marine craftsmanship, Sven’s wisdom is invaluable.After securely attaching the first portion of the flange, Sven allows ample time for it to dry before moving forward with additional steps. This patience and precision are key aspects of his successful boatbuilding methods.Step 4: Finishing Touches
Once the flange is fully dried, Sven removes the clamps carefully, ensuring no damage occurs during this process. He then moves on to attaching four more pieces onto these main frames, completing two pairs of flanges for the bulkhead hatches.The Final Touches
While two flanges form the primary support structure around the hatches, Sven mentions there are two additional pieces required at each end to ensure comprehensive protection. This attention to detail highlights his commitment to producing a durable and reliable design. “Sailing is about finding your path, whether it’s across an ocean or within yourself.” – Sven Yrvind In conclusion, making flanges around bulkhead hatches may seem complex at first glance, but by following Sven Yrvind’s meticulous process, enthusiasts can achieve professional-level results. Remember that the journey of boatbuilding is as rewarding as reaching your destination; it tests one’s patience and dedication. For those seeking to embark on this adventure or simply gain more insight into marine craftsmanship, Sven’s wisdom is invaluable.Sven proceeds to apply glue along one edge of the flange, ensuring a secure bond when clamped into place. He emphasizes that this stage is crucial for maintaining the structural integrity of the flange, which in turn safeguards the living area beneath the canvas when hatches are open.Step 3: Allowing Time to Dry
After securely attaching the first portion of the flange, Sven allows ample time for it to dry before moving forward with additional steps. This patience and precision are key aspects of his successful boatbuilding methods.Step 4: Finishing Touches
Once the flange is fully dried, Sven removes the clamps carefully, ensuring no damage occurs during this process. He then moves on to attaching four more pieces onto these main frames, completing two pairs of flanges for the bulkhead hatches.The Final Touches
While two flanges form the primary support structure around the hatches, Sven mentions there are two additional pieces required at each end to ensure comprehensive protection. This attention to detail highlights his commitment to producing a durable and reliable design. “Sailing is about finding your path, whether it’s across an ocean or within yourself.” – Sven Yrvind In conclusion, making flanges around bulkhead hatches may seem complex at first glance, but by following Sven Yrvind’s meticulous process, enthusiasts can achieve professional-level results. Remember that the journey of boatbuilding is as rewarding as reaching your destination; it tests one’s patience and dedication. For those seeking to embark on this adventure or simply gain more insight into marine craftsmanship, Sven’s wisdom is invaluable.Sven begins by explaining that working on flanges vertically and horizontally is significantly easier than doing so in a flat position. To simplify the process further, he divides the task into two or three steps as suggested by fellow expert “for for.” This approach not only makes it more manageable but also allows for greater precision in crafting each component.Step 2: Applying Glue and Securing
Sven proceeds to apply glue along one edge of the flange, ensuring a secure bond when clamped into place. He emphasizes that this stage is crucial for maintaining the structural integrity of the flange, which in turn safeguards the living area beneath the canvas when hatches are open.Step 3: Allowing Time to Dry
After securely attaching the first portion of the flange, Sven allows ample time for it to dry before moving forward with additional steps. This patience and precision are key aspects of his successful boatbuilding methods.Step 4: Finishing Touches
Once the flange is fully dried, Sven removes the clamps carefully, ensuring no damage occurs during this process. He then moves on to attaching four more pieces onto these main frames, completing two pairs of flanges for the bulkhead hatches.The Final Touches
While two flanges form the primary support structure around the hatches, Sven mentions there are two additional pieces required at each end to ensure comprehensive protection. This attention to detail highlights his commitment to producing a durable and reliable design. “Sailing is about finding your path, whether it’s across an ocean or within yourself.” – Sven Yrvind In conclusion, making flanges around bulkhead hatches may seem complex at first glance, but by following Sven Yrvind’s meticulous process, enthusiasts can achieve professional-level results. Remember that the journey of boatbuilding is as rewarding as reaching your destination; it tests one’s patience and dedication. For those seeking to embark on this adventure or simply gain more insight into marine craftsmanship, Sven’s wisdom is invaluable.Sven Yrvind, a renowned yacht designer and sailor, shares valuable insights on creating flanges around bulkhead hatches for canvas protection in this enlightening video. By following his expert guidance, boat enthusiasts can ensure their living areas remain secure while allowing unhindered access through the hatches.Step 1: Starting with the Flange
Sven begins by explaining that working on flanges vertically and horizontally is significantly easier than doing so in a flat position. To simplify the process further, he divides the task into two or three steps as suggested by fellow expert “for for.” This approach not only makes it more manageable but also allows for greater precision in crafting each component.Step 2: Applying Glue and Securing
Sven proceeds to apply glue along one edge of the flange, ensuring a secure bond when clamped into place. He emphasizes that this stage is crucial for maintaining the structural integrity of the flange, which in turn safeguards the living area beneath the canvas when hatches are open.Step 3: Allowing Time to Dry
After securely attaching the first portion of the flange, Sven allows ample time for it to dry before moving forward with additional steps. This patience and precision are key aspects of his successful boatbuilding methods.Step 4: Finishing Touches
Once the flange is fully dried, Sven removes the clamps carefully, ensuring no damage occurs during this process. He then moves on to attaching four more pieces onto these main frames, completing two pairs of flanges for the bulkhead hatches.The Final Touches
While two flanges form the primary support structure around the hatches, Sven mentions there are two additional pieces required at each end to ensure comprehensive protection. This attention to detail highlights his commitment to producing a durable and reliable design. “Sailing is about finding your path, whether it’s across an ocean or within yourself.” – Sven Yrvind In conclusion, making flanges around bulkhead hatches may seem complex at first glance, but by following Sven Yrvind’s meticulous process, enthusiasts can achieve professional-level results. Remember that the journey of boatbuilding is as rewarding as reaching your destination; it tests one’s patience and dedication. For those seeking to embark on this adventure or simply gain more insight into marine craftsmanship, Sven’s wisdom is invaluable.Making Flanges Around Bulkhead Hatches for Canvas
Sven Yrvind, a renowned yacht designer and sailor, shares valuable insights on creating flanges around bulkhead hatches for canvas protection in this enlightening video. By following his expert guidance, boat enthusiasts can ensure their living areas remain secure while allowing unhindered access through the hatches.Step 1: Starting with the Flange
Sven begins by explaining that working on flanges vertically and horizontally is significantly easier than doing so in a flat position. To simplify the process further, he divides the task into two or three steps as suggested by fellow expert “for for.” This approach not only makes it more manageable but also allows for greater precision in crafting each component.Step 2: Applying Glue and Securing
Sven proceeds to apply glue along one edge of the flange, ensuring a secure bond when clamped into place. He emphasizes that this stage is crucial for maintaining the structural integrity of the flange, which in turn safeguards the living area beneath the canvas when hatches are open.Step 3: Allowing Time to Dry
After securely attaching the first portion of the flange, Sven allows ample time for it to dry before moving forward with additional steps. This patience and precision are key aspects of his successful boatbuilding methods.Step 4: Finishing Touches
Once the flange is fully dried, Sven removes the clamps carefully, ensuring no damage occurs during this process. He then moves on to attaching four more pieces onto these main frames, completing two pairs of flanges for the bulkhead hatches.The Final Touches
While two flanges form the primary support structure around the hatches, Sven mentions there are two additional pieces required at each end to ensure comprehensive protection. This attention to detail highlights his commitment to producing a durable and reliable design. “Sailing is about finding your path, whether it’s across an ocean or within yourself.” – Sven Yrvind In conclusion, making flanges around bulkhead hatches may seem complex at first glance, but by following Sven Yrvind’s meticulous process, enthusiasts can achieve professional-level results. Remember that the journey of boatbuilding is as rewarding as reaching your destination; it tests one’s patience and dedication. For those seeking to embark on this adventure or simply gain more insight into marine craftsmanship, Sven’s wisdom is invaluable.Once the flange is fully dried, Sven removes the clamps carefully, ensuring no damage occurs during this process. He then moves on to attaching four more pieces onto these main frames, completing two pairs of flanges for the bulkhead hatches.The Final Touches
While two flanges form the primary support structure around the hatches, Sven mentions there are two additional pieces required at each end to ensure comprehensive protection. This attention to detail highlights his commitment to producing a durable and reliable design. “Sailing is about finding your path, whether it’s across an ocean or within yourself.” – Sven Yrvind In conclusion, making flanges around bulkhead hatches may seem complex at first glance, but by following Sven Yrvind’s meticulous process, enthusiasts can achieve professional-level results. Remember that the journey of boatbuilding is as rewarding as reaching your destination; it tests one’s patience and dedication. For those seeking to embark on this adventure or simply gain more insight into marine craftsmanship, Sven’s wisdom is invaluable.Sven proceeds to apply glue along one edge of the flange, ensuring a secure bond when clamped into place. He emphasizes that this stage is crucial for maintaining the structural integrity of the flange, which in turn safeguards the living area beneath the canvas when hatches are open.Step 3: Allowing Time to Dry
After securely attaching the first portion of the flange, Sven allows ample time for it to dry before moving forward with additional steps. This patience and precision are key aspects of his successful boatbuilding methods.Step 4: Finishing Touches
Once the flange is fully dried, Sven removes the clamps carefully, ensuring no damage occurs during this process. He then moves on to attaching four more pieces onto these main frames, completing two pairs of flanges for the bulkhead hatches.The Final Touches
While two flanges form the primary support structure around the hatches, Sven mentions there are two additional pieces required at each end to ensure comprehensive protection. This attention to detail highlights his commitment to producing a durable and reliable design. “Sailing is about finding your path, whether it’s across an ocean or within yourself.” – Sven Yrvind In conclusion, making flanges around bulkhead hatches may seem complex at first glance, but by following Sven Yrvind’s meticulous process, enthusiasts can achieve professional-level results. Remember that the journey of boatbuilding is as rewarding as reaching your destination; it tests one’s patience and dedication. For those seeking to embark on this adventure or simply gain more insight into marine craftsmanship, Sven’s wisdom is invaluable.Sven begins by explaining that working on flanges vertically and horizontally is significantly easier than doing so in a flat position. To simplify the process further, he divides the task into two or three steps as suggested by fellow expert “for for.” This approach not only makes it more manageable but also allows for greater precision in crafting each component.Step 2: Applying Glue and Securing
Sven proceeds to apply glue along one edge of the flange, ensuring a secure bond when clamped into place. He emphasizes that this stage is crucial for maintaining the structural integrity of the flange, which in turn safeguards the living area beneath the canvas when hatches are open.Step 3: Allowing Time to Dry
After securely attaching the first portion of the flange, Sven allows ample time for it to dry before moving forward with additional steps. This patience and precision are key aspects of his successful boatbuilding methods.Step 4: Finishing Touches
Once the flange is fully dried, Sven removes the clamps carefully, ensuring no damage occurs during this process. He then moves on to attaching four more pieces onto these main frames, completing two pairs of flanges for the bulkhead hatches.The Final Touches
While two flanges form the primary support structure around the hatches, Sven mentions there are two additional pieces required at each end to ensure comprehensive protection. This attention to detail highlights his commitment to producing a durable and reliable design. “Sailing is about finding your path, whether it’s across an ocean or within yourself.” – Sven Yrvind In conclusion, making flanges around bulkhead hatches may seem complex at first glance, but by following Sven Yrvind’s meticulous process, enthusiasts can achieve professional-level results. Remember that the journey of boatbuilding is as rewarding as reaching your destination; it tests one’s patience and dedication. For those seeking to embark on this adventure or simply gain more insight into marine craftsmanship, Sven’s wisdom is invaluable.Sven Yrvind, a renowned yacht designer and sailor, shares valuable insights on creating flanges around bulkhead hatches for canvas protection in this enlightening video. By following his expert guidance, boat enthusiasts can ensure their living areas remain secure while allowing unhindered access through the hatches.Step 1: Starting with the Flange
Sven begins by explaining that working on flanges vertically and horizontally is significantly easier than doing so in a flat position. To simplify the process further, he divides the task into two or three steps as suggested by fellow expert “for for.” This approach not only makes it more manageable but also allows for greater precision in crafting each component.Step 2: Applying Glue and Securing
Sven proceeds to apply glue along one edge of the flange, ensuring a secure bond when clamped into place. He emphasizes that this stage is crucial for maintaining the structural integrity of the flange, which in turn safeguards the living area beneath the canvas when hatches are open.Step 3: Allowing Time to Dry
After securely attaching the first portion of the flange, Sven allows ample time for it to dry before moving forward with additional steps. This patience and precision are key aspects of his successful boatbuilding methods.Step 4: Finishing Touches
Once the flange is fully dried, Sven removes the clamps carefully, ensuring no damage occurs during this process. He then moves on to attaching four more pieces onto these main frames, completing two pairs of flanges for the bulkhead hatches.The Final Touches
While two flanges form the primary support structure around the hatches, Sven mentions there are two additional pieces required at each end to ensure comprehensive protection. This attention to detail highlights his commitment to producing a durable and reliable design. “Sailing is about finding your path, whether it’s across an ocean or within yourself.” – Sven Yrvind In conclusion, making flanges around bulkhead hatches may seem complex at first glance, but by following Sven Yrvind’s meticulous process, enthusiasts can achieve professional-level results. Remember that the journey of boatbuilding is as rewarding as reaching your destination; it tests one’s patience and dedication. For those seeking to embark on this adventure or simply gain more insight into marine craftsmanship, Sven’s wisdom is invaluable.Making Flanges Around Bulkhead Hatches for Canvas
Sven Yrvind, a renowned yacht designer and sailor, shares valuable insights on creating flanges around bulkhead hatches for canvas protection in this enlightening video. By following his expert guidance, boat enthusiasts can ensure their living areas remain secure while allowing unhindered access through the hatches.Step 1: Starting with the Flange
Sven begins by explaining that working on flanges vertically and horizontally is significantly easier than doing so in a flat position. To simplify the process further, he divides the task into two or three steps as suggested by fellow expert “for for.” This approach not only makes it more manageable but also allows for greater precision in crafting each component.Step 2: Applying Glue and Securing
Sven proceeds to apply glue along one edge of the flange, ensuring a secure bond when clamped into place. He emphasizes that this stage is crucial for maintaining the structural integrity of the flange, which in turn safeguards the living area beneath the canvas when hatches are open.Step 3: Allowing Time to Dry
After securely attaching the first portion of the flange, Sven allows ample time for it to dry before moving forward with additional steps. This patience and precision are key aspects of his successful boatbuilding methods.Step 4: Finishing Touches
Once the flange is fully dried, Sven removes the clamps carefully, ensuring no damage occurs during this process. He then moves on to attaching four more pieces onto these main frames, completing two pairs of flanges for the bulkhead hatches.The Final Touches
While two flanges form the primary support structure around the hatches, Sven mentions there are two additional pieces required at each end to ensure comprehensive protection. This attention to detail highlights his commitment to producing a durable and reliable design. “Sailing is about finding your path, whether it’s across an ocean or within yourself.” – Sven Yrvind In conclusion, making flanges around bulkhead hatches may seem complex at first glance, but by following Sven Yrvind’s meticulous process, enthusiasts can achieve professional-level results. Remember that the journey of boatbuilding is as rewarding as reaching your destination; it tests one’s patience and dedication. For those seeking to embark on this adventure or simply gain more insight into marine craftsmanship, Sven’s wisdom is invaluable.After securely attaching the first portion of the flange, Sven allows ample time for it to dry before moving forward with additional steps. This patience and precision are key aspects of his successful boatbuilding methods.Step 4: Finishing Touches
Once the flange is fully dried, Sven removes the clamps carefully, ensuring no damage occurs during this process. He then moves on to attaching four more pieces onto these main frames, completing two pairs of flanges for the bulkhead hatches.The Final Touches
While two flanges form the primary support structure around the hatches, Sven mentions there are two additional pieces required at each end to ensure comprehensive protection. This attention to detail highlights his commitment to producing a durable and reliable design. “Sailing is about finding your path, whether it’s across an ocean or within yourself.” – Sven Yrvind In conclusion, making flanges around bulkhead hatches may seem complex at first glance, but by following Sven Yrvind’s meticulous process, enthusiasts can achieve professional-level results. Remember that the journey of boatbuilding is as rewarding as reaching your destination; it tests one’s patience and dedication. For those seeking to embark on this adventure or simply gain more insight into marine craftsmanship, Sven’s wisdom is invaluable.Sven proceeds to apply glue along one edge of the flange, ensuring a secure bond when clamped into place. He emphasizes that this stage is crucial for maintaining the structural integrity of the flange, which in turn safeguards the living area beneath the canvas when hatches are open.Step 3: Allowing Time to Dry
After securely attaching the first portion of the flange, Sven allows ample time for it to dry before moving forward with additional steps. This patience and precision are key aspects of his successful boatbuilding methods.Step 4: Finishing Touches
Once the flange is fully dried, Sven removes the clamps carefully, ensuring no damage occurs during this process. He then moves on to attaching four more pieces onto these main frames, completing two pairs of flanges for the bulkhead hatches.The Final Touches
While two flanges form the primary support structure around the hatches, Sven mentions there are two additional pieces required at each end to ensure comprehensive protection. This attention to detail highlights his commitment to producing a durable and reliable design. “Sailing is about finding your path, whether it’s across an ocean or within yourself.” – Sven Yrvind In conclusion, making flanges around bulkhead hatches may seem complex at first glance, but by following Sven Yrvind’s meticulous process, enthusiasts can achieve professional-level results. Remember that the journey of boatbuilding is as rewarding as reaching your destination; it tests one’s patience and dedication. For those seeking to embark on this adventure or simply gain more insight into marine craftsmanship, Sven’s wisdom is invaluable.Sven begins by explaining that working on flanges vertically and horizontally is significantly easier than doing so in a flat position. To simplify the process further, he divides the task into two or three steps as suggested by fellow expert “for for.” This approach not only makes it more manageable but also allows for greater precision in crafting each component.Step 2: Applying Glue and Securing
Sven proceeds to apply glue along one edge of the flange, ensuring a secure bond when clamped into place. He emphasizes that this stage is crucial for maintaining the structural integrity of the flange, which in turn safeguards the living area beneath the canvas when hatches are open.Step 3: Allowing Time to Dry
After securely attaching the first portion of the flange, Sven allows ample time for it to dry before moving forward with additional steps. This patience and precision are key aspects of his successful boatbuilding methods.Step 4: Finishing Touches
Once the flange is fully dried, Sven removes the clamps carefully, ensuring no damage occurs during this process. He then moves on to attaching four more pieces onto these main frames, completing two pairs of flanges for the bulkhead hatches.The Final Touches
While two flanges form the primary support structure around the hatches, Sven mentions there are two additional pieces required at each end to ensure comprehensive protection. This attention to detail highlights his commitment to producing a durable and reliable design. “Sailing is about finding your path, whether it’s across an ocean or within yourself.” – Sven Yrvind In conclusion, making flanges around bulkhead hatches may seem complex at first glance, but by following Sven Yrvind’s meticulous process, enthusiasts can achieve professional-level results. Remember that the journey of boatbuilding is as rewarding as reaching your destination; it tests one’s patience and dedication. For those seeking to embark on this adventure or simply gain more insight into marine craftsmanship, Sven’s wisdom is invaluable.Sven Yrvind, a renowned yacht designer and sailor, shares valuable insights on creating flanges around bulkhead hatches for canvas protection in this enlightening video. By following his expert guidance, boat enthusiasts can ensure their living areas remain secure while allowing unhindered access through the hatches.Step 1: Starting with the Flange
Sven begins by explaining that working on flanges vertically and horizontally is significantly easier than doing so in a flat position. To simplify the process further, he divides the task into two or three steps as suggested by fellow expert “for for.” This approach not only makes it more manageable but also allows for greater precision in crafting each component.Step 2: Applying Glue and Securing
Sven proceeds to apply glue along one edge of the flange, ensuring a secure bond when clamped into place. He emphasizes that this stage is crucial for maintaining the structural integrity of the flange, which in turn safeguards the living area beneath the canvas when hatches are open.Step 3: Allowing Time to Dry
After securely attaching the first portion of the flange, Sven allows ample time for it to dry before moving forward with additional steps. This patience and precision are key aspects of his successful boatbuilding methods.Step 4: Finishing Touches
Once the flange is fully dried, Sven removes the clamps carefully, ensuring no damage occurs during this process. He then moves on to attaching four more pieces onto these main frames, completing two pairs of flanges for the bulkhead hatches.The Final Touches
While two flanges form the primary support structure around the hatches, Sven mentions there are two additional pieces required at each end to ensure comprehensive protection. This attention to detail highlights his commitment to producing a durable and reliable design. “Sailing is about finding your path, whether it’s across an ocean or within yourself.” – Sven Yrvind In conclusion, making flanges around bulkhead hatches may seem complex at first glance, but by following Sven Yrvind’s meticulous process, enthusiasts can achieve professional-level results. Remember that the journey of boatbuilding is as rewarding as reaching your destination; it tests one’s patience and dedication. For those seeking to embark on this adventure or simply gain more insight into marine craftsmanship, Sven’s wisdom is invaluable.Making Flanges Around Bulkhead Hatches for Canvas
Sven Yrvind, a renowned yacht designer and sailor, shares valuable insights on creating flanges around bulkhead hatches for canvas protection in this enlightening video. By following his expert guidance, boat enthusiasts can ensure their living areas remain secure while allowing unhindered access through the hatches.Step 1: Starting with the Flange
Sven begins by explaining that working on flanges vertically and horizontally is significantly easier than doing so in a flat position. To simplify the process further, he divides the task into two or three steps as suggested by fellow expert “for for.” This approach not only makes it more manageable but also allows for greater precision in crafting each component.Step 2: Applying Glue and Securing
Sven proceeds to apply glue along one edge of the flange, ensuring a secure bond when clamped into place. He emphasizes that this stage is crucial for maintaining the structural integrity of the flange, which in turn safeguards the living area beneath the canvas when hatches are open.Step 3: Allowing Time to Dry
After securely attaching the first portion of the flange, Sven allows ample time for it to dry before moving forward with additional steps. This patience and precision are key aspects of his successful boatbuilding methods.Step 4: Finishing Touches
Once the flange is fully dried, Sven removes the clamps carefully, ensuring no damage occurs during this process. He then moves on to attaching four more pieces onto these main frames, completing two pairs of flanges for the bulkhead hatches.The Final Touches
While two flanges form the primary support structure around the hatches, Sven mentions there are two additional pieces required at each end to ensure comprehensive protection. This attention to detail highlights his commitment to producing a durable and reliable design. “Sailing is about finding your path, whether it’s across an ocean or within yourself.” – Sven Yrvind In conclusion, making flanges around bulkhead hatches may seem complex at first glance, but by following Sven Yrvind’s meticulous process, enthusiasts can achieve professional-level results. Remember that the journey of boatbuilding is as rewarding as reaching your destination; it tests one’s patience and dedication. For those seeking to embark on this adventure or simply gain more insight into marine craftsmanship, Sven’s wisdom is invaluable.Once the flange is fully dried, Sven removes the clamps carefully, ensuring no damage occurs during this process. He then moves on to attaching four more pieces onto these main frames, completing two pairs of flanges for the bulkhead hatches.The Final Touches
While two flanges form the primary support structure around the hatches, Sven mentions there are two additional pieces required at each end to ensure comprehensive protection. This attention to detail highlights his commitment to producing a durable and reliable design. “Sailing is about finding your path, whether it’s across an ocean or within yourself.” – Sven Yrvind In conclusion, making flanges around bulkhead hatches may seem complex at first glance, but by following Sven Yrvind’s meticulous process, enthusiasts can achieve professional-level results. Remember that the journey of boatbuilding is as rewarding as reaching your destination; it tests one’s patience and dedication. For those seeking to embark on this adventure or simply gain more insight into marine craftsmanship, Sven’s wisdom is invaluable.After securely attaching the first portion of the flange, Sven allows ample time for it to dry before moving forward with additional steps. This patience and precision are key aspects of his successful boatbuilding methods.Step 4: Finishing Touches
Once the flange is fully dried, Sven removes the clamps carefully, ensuring no damage occurs during this process. He then moves on to attaching four more pieces onto these main frames, completing two pairs of flanges for the bulkhead hatches.The Final Touches
While two flanges form the primary support structure around the hatches, Sven mentions there are two additional pieces required at each end to ensure comprehensive protection. This attention to detail highlights his commitment to producing a durable and reliable design. “Sailing is about finding your path, whether it’s across an ocean or within yourself.” – Sven Yrvind In conclusion, making flanges around bulkhead hatches may seem complex at first glance, but by following Sven Yrvind’s meticulous process, enthusiasts can achieve professional-level results. Remember that the journey of boatbuilding is as rewarding as reaching your destination; it tests one’s patience and dedication. For those seeking to embark on this adventure or simply gain more insight into marine craftsmanship, Sven’s wisdom is invaluable.Sven proceeds to apply glue along one edge of the flange, ensuring a secure bond when clamped into place. He emphasizes that this stage is crucial for maintaining the structural integrity of the flange, which in turn safeguards the living area beneath the canvas when hatches are open.Step 3: Allowing Time to Dry
After securely attaching the first portion of the flange, Sven allows ample time for it to dry before moving forward with additional steps. This patience and precision are key aspects of his successful boatbuilding methods.Step 4: Finishing Touches
Once the flange is fully dried, Sven removes the clamps carefully, ensuring no damage occurs during this process. He then moves on to attaching four more pieces onto these main frames, completing two pairs of flanges for the bulkhead hatches.The Final Touches
While two flanges form the primary support structure around the hatches, Sven mentions there are two additional pieces required at each end to ensure comprehensive protection. This attention to detail highlights his commitment to producing a durable and reliable design. “Sailing is about finding your path, whether it’s across an ocean or within yourself.” – Sven Yrvind In conclusion, making flanges around bulkhead hatches may seem complex at first glance, but by following Sven Yrvind’s meticulous process, enthusiasts can achieve professional-level results. Remember that the journey of boatbuilding is as rewarding as reaching your destination; it tests one’s patience and dedication. For those seeking to embark on this adventure or simply gain more insight into marine craftsmanship, Sven’s wisdom is invaluable.Sven begins by explaining that working on flanges vertically and horizontally is significantly easier than doing so in a flat position. To simplify the process further, he divides the task into two or three steps as suggested by fellow expert “for for.” This approach not only makes it more manageable but also allows for greater precision in crafting each component.Step 2: Applying Glue and Securing
Sven proceeds to apply glue along one edge of the flange, ensuring a secure bond when clamped into place. He emphasizes that this stage is crucial for maintaining the structural integrity of the flange, which in turn safeguards the living area beneath the canvas when hatches are open.Step 3: Allowing Time to Dry
After securely attaching the first portion of the flange, Sven allows ample time for it to dry before moving forward with additional steps. This patience and precision are key aspects of his successful boatbuilding methods.Step 4: Finishing Touches
Once the flange is fully dried, Sven removes the clamps carefully, ensuring no damage occurs during this process. He then moves on to attaching four more pieces onto these main frames, completing two pairs of flanges for the bulkhead hatches.The Final Touches
While two flanges form the primary support structure around the hatches, Sven mentions there are two additional pieces required at each end to ensure comprehensive protection. This attention to detail highlights his commitment to producing a durable and reliable design. “Sailing is about finding your path, whether it’s across an ocean or within yourself.” – Sven Yrvind In conclusion, making flanges around bulkhead hatches may seem complex at first glance, but by following Sven Yrvind’s meticulous process, enthusiasts can achieve professional-level results. Remember that the journey of boatbuilding is as rewarding as reaching your destination; it tests one’s patience and dedication. For those seeking to embark on this adventure or simply gain more insight into marine craftsmanship, Sven’s wisdom is invaluable.Sven Yrvind, a renowned yacht designer and sailor, shares valuable insights on creating flanges around bulkhead hatches for canvas protection in this enlightening video. By following his expert guidance, boat enthusiasts can ensure their living areas remain secure while allowing unhindered access through the hatches.Step 1: Starting with the Flange
Sven begins by explaining that working on flanges vertically and horizontally is significantly easier than doing so in a flat position. To simplify the process further, he divides the task into two or three steps as suggested by fellow expert “for for.” This approach not only makes it more manageable but also allows for greater precision in crafting each component.Step 2: Applying Glue and Securing
Sven proceeds to apply glue along one edge of the flange, ensuring a secure bond when clamped into place. He emphasizes that this stage is crucial for maintaining the structural integrity of the flange, which in turn safeguards the living area beneath the canvas when hatches are open.Step 3: Allowing Time to Dry
After securely attaching the first portion of the flange, Sven allows ample time for it to dry before moving forward with additional steps. This patience and precision are key aspects of his successful boatbuilding methods.Step 4: Finishing Touches
Once the flange is fully dried, Sven removes the clamps carefully, ensuring no damage occurs during this process. He then moves on to attaching four more pieces onto these main frames, completing two pairs of flanges for the bulkhead hatches.The Final Touches
While two flanges form the primary support structure around the hatches, Sven mentions there are two additional pieces required at each end to ensure comprehensive protection. This attention to detail highlights his commitment to producing a durable and reliable design. “Sailing is about finding your path, whether it’s across an ocean or within yourself.” – Sven Yrvind In conclusion, making flanges around bulkhead hatches may seem complex at first glance, but by following Sven Yrvind’s meticulous process, enthusiasts can achieve professional-level results. Remember that the journey of boatbuilding is as rewarding as reaching your destination; it tests one’s patience and dedication. For those seeking to embark on this adventure or simply gain more insight into marine craftsmanship, Sven’s wisdom is invaluable.Making Flanges Around Bulkhead Hatches for Canvas
Sven Yrvind, a renowned yacht designer and sailor, shares valuable insights on creating flanges around bulkhead hatches for canvas protection in this enlightening video. By following his expert guidance, boat enthusiasts can ensure their living areas remain secure while allowing unhindered access through the hatches.Step 1: Starting with the Flange
Sven begins by explaining that working on flanges vertically and horizontally is significantly easier than doing so in a flat position. To simplify the process further, he divides the task into two or three steps as suggested by fellow expert “for for.” This approach not only makes it more manageable but also allows for greater precision in crafting each component.Step 2: Applying Glue and Securing
Sven proceeds to apply glue along one edge of the flange, ensuring a secure bond when clamped into place. He emphasizes that this stage is crucial for maintaining the structural integrity of the flange, which in turn safeguards the living area beneath the canvas when hatches are open.Step 3: Allowing Time to Dry
After securely attaching the first portion of the flange, Sven allows ample time for it to dry before moving forward with additional steps. This patience and precision are key aspects of his successful boatbuilding methods.Step 4: Finishing Touches
Once the flange is fully dried, Sven removes the clamps carefully, ensuring no damage occurs during this process. He then moves on to attaching four more pieces onto these main frames, completing two pairs of flanges for the bulkhead hatches.The Final Touches
While two flanges form the primary support structure around the hatches, Sven mentions there are two additional pieces required at each end to ensure comprehensive protection. This attention to detail highlights his commitment to producing a durable and reliable design. “Sailing is about finding your path, whether it’s across an ocean or within yourself.” – Sven Yrvind In conclusion, making flanges around bulkhead hatches may seem complex at first glance, but by following Sven Yrvind’s meticulous process, enthusiasts can achieve professional-level results. Remember that the journey of boatbuilding is as rewarding as reaching your destination; it tests one’s patience and dedication. For those seeking to embark on this adventure or simply gain more insight into marine craftsmanship, Sven’s wisdom is invaluable.Sven proceeds to apply glue along one edge of the flange, ensuring a secure bond when clamped into place. He emphasizes that this stage is crucial for maintaining the structural integrity of the flange, which in turn safeguards the living area beneath the canvas when hatches are open.Step 3: Allowing Time to Dry
After securely attaching the first portion of the flange, Sven allows ample time for it to dry before moving forward with additional steps. This patience and precision are key aspects of his successful boatbuilding methods.Step 4: Finishing Touches
Once the flange is fully dried, Sven removes the clamps carefully, ensuring no damage occurs during this process. He then moves on to attaching four more pieces onto these main frames, completing two pairs of flanges for the bulkhead hatches.The Final Touches
While two flanges form the primary support structure around the hatches, Sven mentions there are two additional pieces required at each end to ensure comprehensive protection. This attention to detail highlights his commitment to producing a durable and reliable design. “Sailing is about finding your path, whether it’s across an ocean or within yourself.” – Sven Yrvind In conclusion, making flanges around bulkhead hatches may seem complex at first glance, but by following Sven Yrvind’s meticulous process, enthusiasts can achieve professional-level results. Remember that the journey of boatbuilding is as rewarding as reaching your destination; it tests one’s patience and dedication. For those seeking to embark on this adventure or simply gain more insight into marine craftsmanship, Sven’s wisdom is invaluable.Sven proceeds to apply glue along one edge of the flange, ensuring a secure bond when clamped into place. He emphasizes that this stage is crucial for maintaining the structural integrity of the flange, which in turn safeguards the living area beneath the canvas when hatches are open.Step 3: Allowing Time to Dry
After securely attaching the first portion of the flange, Sven allows ample time for it to dry before moving forward with additional steps. This patience and precision are key aspects of his successful boatbuilding methods.Step 4: Finishing Touches
Once the flange is fully dried, Sven removes the clamps carefully, ensuring no damage occurs during this process. He then moves on to attaching four more pieces onto these main frames, completing two pairs of flanges for the bulkhead hatches.The Final Touches
While two flanges form the primary support structure around the hatches, Sven mentions there are two additional pieces required at each end to ensure comprehensive protection. This attention to detail highlights his commitment to producing a durable and reliable design. “Sailing is about finding your path, whether it’s across an ocean or within yourself.” – Sven Yrvind In conclusion, making flanges around bulkhead hatches may seem complex at first glance, but by following Sven Yrvind’s meticulous process, enthusiasts can achieve professional-level results. Remember that the journey of boatbuilding is as rewarding as reaching your destination; it tests one’s patience and dedication. For those seeking to embark on this adventure or simply gain more insight into marine craftsmanship, Sven’s wisdom is invaluable.Sven begins by explaining that working on flanges vertically and horizontally is significantly easier than doing so in a flat position. To simplify the process further, he divides the task into two or three steps as suggested by fellow expert “for for.” This approach not only makes it more manageable but also allows for greater precision in crafting each component.Step 2: Applying Glue and Securing
Sven proceeds to apply glue along one edge of the flange, ensuring a secure bond when clamped into place. He emphasizes that this stage is crucial for maintaining the structural integrity of the flange, which in turn safeguards the living area beneath the canvas when hatches are open.Step 3: Allowing Time to Dry
After securely attaching the first portion of the flange, Sven allows ample time for it to dry before moving forward with additional steps. This patience and precision are key aspects of his successful boatbuilding methods.Step 4: Finishing Touches
Once the flange is fully dried, Sven removes the clamps carefully, ensuring no damage occurs during this process. He then moves on to attaching four more pieces onto these main frames, completing two pairs of flanges for the bulkhead hatches.The Final Touches
While two flanges form the primary support structure around the hatches, Sven mentions there are two additional pieces required at each end to ensure comprehensive protection. This attention to detail highlights his commitment to producing a durable and reliable design. “Sailing is about finding your path, whether it’s across an ocean or within yourself.” – Sven Yrvind In conclusion, making flanges around bulkhead hatches may seem complex at first glance, but by following Sven Yrvind’s meticulous process, enthusiasts can achieve professional-level results. Remember that the journey of boatbuilding is as rewarding as reaching your destination; it tests one’s patience and dedication. For those seeking to embark on this adventure or simply gain more insight into marine craftsmanship, Sven’s wisdom is invaluable.Sven Yrvind, a renowned yacht designer and sailor, shares valuable insights on creating flanges around bulkhead hatches for canvas protection in this enlightening video. By following his expert guidance, boat enthusiasts can ensure their living areas remain secure while allowing unhindered access through the hatches.Step 1: Starting with the Flange
Sven begins by explaining that working on flanges vertically and horizontally is significantly easier than doing so in a flat position. To simplify the process further, he divides the task into two or three steps as suggested by fellow expert “for for.” This approach not only makes it more manageable but also allows for greater precision in crafting each component.Step 2: Applying Glue and Securing
Sven proceeds to apply glue along one edge of the flange, ensuring a secure bond when clamped into place. He emphasizes that this stage is crucial for maintaining the structural integrity of the flange, which in turn safeguards the living area beneath the canvas when hatches are open.Step 3: Allowing Time to Dry
After securely attaching the first portion of the flange, Sven allows ample time for it to dry before moving forward with additional steps. This patience and precision are key aspects of his successful boatbuilding methods.Step 4: Finishing Touches
Once the flange is fully dried, Sven removes the clamps carefully, ensuring no damage occurs during this process. He then moves on to attaching four more pieces onto these main frames, completing two pairs of flanges for the bulkhead hatches.The Final Touches
While two flanges form the primary support structure around the hatches, Sven mentions there are two additional pieces required at each end to ensure comprehensive protection. This attention to detail highlights his commitment to producing a durable and reliable design. “Sailing is about finding your path, whether it’s across an ocean or within yourself.” – Sven Yrvind In conclusion, making flanges around bulkhead hatches may seem complex at first glance, but by following Sven Yrvind’s meticulous process, enthusiasts can achieve professional-level results. Remember that the journey of boatbuilding is as rewarding as reaching your destination; it tests one’s patience and dedication. For those seeking to embark on this adventure or simply gain more insight into marine craftsmanship, Sven’s wisdom is invaluable.Making Flanges Around Bulkhead Hatches for Canvas
Sven Yrvind, a renowned yacht designer and sailor, shares valuable insights on creating flanges around bulkhead hatches for canvas protection in this enlightening video. By following his expert guidance, boat enthusiasts can ensure their living areas remain secure while allowing unhindered access through the hatches.Step 1: Starting with the Flange
Sven begins by explaining that working on flanges vertically and horizontally is significantly easier than doing so in a flat position. To simplify the process further, he divides the task into two or three steps as suggested by fellow expert “for for.” This approach not only makes it more manageable but also allows for greater precision in crafting each component.Step 2: Applying Glue and Securing
Sven proceeds to apply glue along one edge of the flange, ensuring a secure bond when clamped into place. He emphasizes that this stage is crucial for maintaining the structural integrity of the flange, which in turn safeguards the living area beneath the canvas when hatches are open.Step 3: Allowing Time to Dry
After securely attaching the first portion of the flange, Sven allows ample time for it to dry before moving forward with additional steps. This patience and precision are key aspects of his successful boatbuilding methods.Step 4: Finishing Touches
Once the flange is fully dried, Sven removes the clamps carefully, ensuring no damage occurs during this process. He then moves on to attaching four more pieces onto these main frames, completing two pairs of flanges for the bulkhead hatches.The Final Touches
While two flanges form the primary support structure around the hatches, Sven mentions there are two additional pieces required at each end to ensure comprehensive protection. This attention to detail highlights his commitment to producing a durable and reliable design. “Sailing is about finding your path, whether it’s across an ocean or within yourself.” – Sven Yrvind In conclusion, making flanges around bulkhead hatches may seem complex at first glance, but by following Sven Yrvind’s meticulous process, enthusiasts can achieve professional-level results. Remember that the journey of boatbuilding is as rewarding as reaching your destination; it tests one’s patience and dedication. For those seeking to embark on this adventure or simply gain more insight into marine craftsmanship, Sven’s wisdom is invaluable.Once the flange is fully dried, Sven removes the clamps carefully, ensuring no damage occurs during this process. He then moves on to attaching four more pieces onto these main frames, completing two pairs of flanges for the bulkhead hatches.The Final Touches
While two flanges form the primary support structure around the hatches, Sven mentions there are two additional pieces required at each end to ensure comprehensive protection. This attention to detail highlights his commitment to producing a durable and reliable design. “Sailing is about finding your path, whether it’s across an ocean or within yourself.” – Sven Yrvind In conclusion, making flanges around bulkhead hatches may seem complex at first glance, but by following Sven Yrvind’s meticulous process, enthusiasts can achieve professional-level results. Remember that the journey of boatbuilding is as rewarding as reaching your destination; it tests one’s patience and dedication. For those seeking to embark on this adventure or simply gain more insight into marine craftsmanship, Sven’s wisdom is invaluable.Sven proceeds to apply glue along one edge of the flange, ensuring a secure bond when clamped into place. He emphasizes that this stage is crucial for maintaining the structural integrity of the flange, which in turn safeguards the living area beneath the canvas when hatches are open.Step 3: Allowing Time to Dry
After securely attaching the first portion of the flange, Sven allows ample time for it to dry before moving forward with additional steps. This patience and precision are key aspects of his successful boatbuilding methods.Step 4: Finishing Touches
Once the flange is fully dried, Sven removes the clamps carefully, ensuring no damage occurs during this process. He then moves on to attaching four more pieces onto these main frames, completing two pairs of flanges for the bulkhead hatches.The Final Touches
While two flanges form the primary support structure around the hatches, Sven mentions there are two additional pieces required at each end to ensure comprehensive protection. This attention to detail highlights his commitment to producing a durable and reliable design. “Sailing is about finding your path, whether it’s across an ocean or within yourself.” – Sven Yrvind In conclusion, making flanges around bulkhead hatches may seem complex at first glance, but by following Sven Yrvind’s meticulous process, enthusiasts can achieve professional-level results. Remember that the journey of boatbuilding is as rewarding as reaching your destination; it tests one’s patience and dedication. For those seeking to embark on this adventure or simply gain more insight into marine craftsmanship, Sven’s wisdom is invaluable.Sven begins by explaining that working on flanges vertically and horizontally is significantly easier than doing so in a flat position. To simplify the process further, he divides the task into two or three steps as suggested by fellow expert “for for.” This approach not only makes it more manageable but also allows for greater precision in crafting each component.Step 2: Applying Glue and Securing
Sven proceeds to apply glue along one edge of the flange, ensuring a secure bond when clamped into place. He emphasizes that this stage is crucial for maintaining the structural integrity of the flange, which in turn safeguards the living area beneath the canvas when hatches are open.Step 3: Allowing Time to Dry
After securely attaching the first portion of the flange, Sven allows ample time for it to dry before moving forward with additional steps. This patience and precision are key aspects of his successful boatbuilding methods.Step 4: Finishing Touches
Once the flange is fully dried, Sven removes the clamps carefully, ensuring no damage occurs during this process. He then moves on to attaching four more pieces onto these main frames, completing two pairs of flanges for the bulkhead hatches.The Final Touches
While two flanges form the primary support structure around the hatches, Sven mentions there are two additional pieces required at each end to ensure comprehensive protection. This attention to detail highlights his commitment to producing a durable and reliable design. “Sailing is about finding your path, whether it’s across an ocean or within yourself.” – Sven Yrvind In conclusion, making flanges around bulkhead hatches may seem complex at first glance, but by following Sven Yrvind’s meticulous process, enthusiasts can achieve professional-level results. Remember that the journey of boatbuilding is as rewarding as reaching your destination; it tests one’s patience and dedication. For those seeking to embark on this adventure or simply gain more insight into marine craftsmanship, Sven’s wisdom is invaluable.Sven Yrvind, a renowned yacht designer and sailor, shares valuable insights on creating flanges around bulkhead hatches for canvas protection in this enlightening video. By following his expert guidance, boat enthusiasts can ensure their living areas remain secure while allowing unhindered access through the hatches.Step 1: Starting with the Flange
Sven begins by explaining that working on flanges vertically and horizontally is significantly easier than doing so in a flat position. To simplify the process further, he divides the task into two or three steps as suggested by fellow expert “for for.” This approach not only makes it more manageable but also allows for greater precision in crafting each component.Step 2: Applying Glue and Securing
Sven proceeds to apply glue along one edge of the flange, ensuring a secure bond when clamped into place. He emphasizes that this stage is crucial for maintaining the structural integrity of the flange, which in turn safeguards the living area beneath the canvas when hatches are open.Step 3: Allowing Time to Dry
After securely attaching the first portion of the flange, Sven allows ample time for it to dry before moving forward with additional steps. This patience and precision are key aspects of his successful boatbuilding methods.Step 4: Finishing Touches
Once the flange is fully dried, Sven removes the clamps carefully, ensuring no damage occurs during this process. He then moves on to attaching four more pieces onto these main frames, completing two pairs of flanges for the bulkhead hatches.The Final Touches
While two flanges form the primary support structure around the hatches, Sven mentions there are two additional pieces required at each end to ensure comprehensive protection. This attention to detail highlights his commitment to producing a durable and reliable design. “Sailing is about finding your path, whether it’s across an ocean or within yourself.” – Sven Yrvind In conclusion, making flanges around bulkhead hatches may seem complex at first glance, but by following Sven Yrvind’s meticulous process, enthusiasts can achieve professional-level results. Remember that the journey of boatbuilding is as rewarding as reaching your destination; it tests one’s patience and dedication. For those seeking to embark on this adventure or simply gain more insight into marine craftsmanship, Sven’s wisdom is invaluable.Making Flanges Around Bulkhead Hatches for Canvas
Sven Yrvind, a renowned yacht designer and sailor, shares valuable insights on creating flanges around bulkhead hatches for canvas protection in this enlightening video. By following his expert guidance, boat enthusiasts can ensure their living areas remain secure while allowing unhindered access through the hatches.Step 1: Starting with the Flange
Sven begins by explaining that working on flanges vertically and horizontally is significantly easier than doing so in a flat position. To simplify the process further, he divides the task into two or three steps as suggested by fellow expert “for for.” This approach not only makes it more manageable but also allows for greater precision in crafting each component.Step 2: Applying Glue and Securing
Sven proceeds to apply glue along one edge of the flange, ensuring a secure bond when clamped into place. He emphasizes that this stage is crucial for maintaining the structural integrity of the flange, which in turn safeguards the living area beneath the canvas when hatches are open.Step 3: Allowing Time to Dry
After securely attaching the first portion of the flange, Sven allows ample time for it to dry before moving forward with additional steps. This patience and precision are key aspects of his successful boatbuilding methods.Step 4: Finishing Touches
Once the flange is fully dried, Sven removes the clamps carefully, ensuring no damage occurs during this process. He then moves on to attaching four more pieces onto these main frames, completing two pairs of flanges for the bulkhead hatches.The Final Touches
While two flanges form the primary support structure around the hatches, Sven mentions there are two additional pieces required at each end to ensure comprehensive protection. This attention to detail highlights his commitment to producing a durable and reliable design. “Sailing is about finding your path, whether it’s across an ocean or within yourself.” – Sven Yrvind In conclusion, making flanges around bulkhead hatches may seem complex at first glance, but by following Sven Yrvind’s meticulous process, enthusiasts can achieve professional-level results. Remember that the journey of boatbuilding is as rewarding as reaching your destination; it tests one’s patience and dedication. For those seeking to embark on this adventure or simply gain more insight into marine craftsmanship, Sven’s wisdom is invaluable.After securely attaching the first portion of the flange, Sven allows ample time for it to dry before moving forward with additional steps. This patience and precision are key aspects of his successful boatbuilding methods.Step 4: Finishing Touches
Once the flange is fully dried, Sven removes the clamps carefully, ensuring no damage occurs during this process. He then moves on to attaching four more pieces onto these main frames, completing two pairs of flanges for the bulkhead hatches.The Final Touches
While two flanges form the primary support structure around the hatches, Sven mentions there are two additional pieces required at each end to ensure comprehensive protection. This attention to detail highlights his commitment to producing a durable and reliable design. “Sailing is about finding your path, whether it’s across an ocean or within yourself.” – Sven Yrvind In conclusion, making flanges around bulkhead hatches may seem complex at first glance, but by following Sven Yrvind’s meticulous process, enthusiasts can achieve professional-level results. Remember that the journey of boatbuilding is as rewarding as reaching your destination; it tests one’s patience and dedication. For those seeking to embark on this adventure or simply gain more insight into marine craftsmanship, Sven’s wisdom is invaluable.Sven proceeds to apply glue along one edge of the flange, ensuring a secure bond when clamped into place. He emphasizes that this stage is crucial for maintaining the structural integrity of the flange, which in turn safeguards the living area beneath the canvas when hatches are open.Step 3: Allowing Time to Dry
After securely attaching the first portion of the flange, Sven allows ample time for it to dry before moving forward with additional steps. This patience and precision are key aspects of his successful boatbuilding methods.Step 4: Finishing Touches
Once the flange is fully dried, Sven removes the clamps carefully, ensuring no damage occurs during this process. He then moves on to attaching four more pieces onto these main frames, completing two pairs of flanges for the bulkhead hatches.The Final Touches
While two flanges form the primary support structure around the hatches, Sven mentions there are two additional pieces required at each end to ensure comprehensive protection. This attention to detail highlights his commitment to producing a durable and reliable design. “Sailing is about finding your path, whether it’s across an ocean or within yourself.” – Sven Yrvind In conclusion, making flanges around bulkhead hatches may seem complex at first glance, but by following Sven Yrvind’s meticulous process, enthusiasts can achieve professional-level results. Remember that the journey of boatbuilding is as rewarding as reaching your destination; it tests one’s patience and dedication. For those seeking to embark on this adventure or simply gain more insight into marine craftsmanship, Sven’s wisdom is invaluable.Sven begins by explaining that working on flanges vertically and horizontally is significantly easier than doing so in a flat position. To simplify the process further, he divides the task into two or three steps as suggested by fellow expert “for for.” This approach not only makes it more manageable but also allows for greater precision in crafting each component.Step 2: Applying Glue and Securing
Sven proceeds to apply glue along one edge of the flange, ensuring a secure bond when clamped into place. He emphasizes that this stage is crucial for maintaining the structural integrity of the flange, which in turn safeguards the living area beneath the canvas when hatches are open.Step 3: Allowing Time to Dry
After securely attaching the first portion of the flange, Sven allows ample time for it to dry before moving forward with additional steps. This patience and precision are key aspects of his successful boatbuilding methods.Step 4: Finishing Touches
Once the flange is fully dried, Sven removes the clamps carefully, ensuring no damage occurs during this process. He then moves on to attaching four more pieces onto these main frames, completing two pairs of flanges for the bulkhead hatches.The Final Touches
While two flanges form the primary support structure around the hatches, Sven mentions there are two additional pieces required at each end to ensure comprehensive protection. This attention to detail highlights his commitment to producing a durable and reliable design. “Sailing is about finding your path, whether it’s across an ocean or within yourself.” – Sven Yrvind In conclusion, making flanges around bulkhead hatches may seem complex at first glance, but by following Sven Yrvind’s meticulous process, enthusiasts can achieve professional-level results. Remember that the journey of boatbuilding is as rewarding as reaching your destination; it tests one’s patience and dedication. For those seeking to embark on this adventure or simply gain more insight into marine craftsmanship, Sven’s wisdom is invaluable.Sven Yrvind, a renowned yacht designer and sailor, shares valuable insights on creating flanges around bulkhead hatches for canvas protection in this enlightening video. By following his expert guidance, boat enthusiasts can ensure their living areas remain secure while allowing unhindered access through the hatches.Step 1: Starting with the Flange
Sven begins by explaining that working on flanges vertically and horizontally is significantly easier than doing so in a flat position. To simplify the process further, he divides the task into two or three steps as suggested by fellow expert “for for.” This approach not only makes it more manageable but also allows for greater precision in crafting each component.Step 2: Applying Glue and Securing
Sven proceeds to apply glue along one edge of the flange, ensuring a secure bond when clamped into place. He emphasizes that this stage is crucial for maintaining the structural integrity of the flange, which in turn safeguards the living area beneath the canvas when hatches are open.Step 3: Allowing Time to Dry
After securely attaching the first portion of the flange, Sven allows ample time for it to dry before moving forward with additional steps. This patience and precision are key aspects of his successful boatbuilding methods.Step 4: Finishing Touches
Once the flange is fully dried, Sven removes the clamps carefully, ensuring no damage occurs during this process. He then moves on to attaching four more pieces onto these main frames, completing two pairs of flanges for the bulkhead hatches.The Final Touches
While two flanges form the primary support structure around the hatches, Sven mentions there are two additional pieces required at each end to ensure comprehensive protection. This attention to detail highlights his commitment to producing a durable and reliable design. “Sailing is about finding your path, whether it’s across an ocean or within yourself.” – Sven Yrvind In conclusion, making flanges around bulkhead hatches may seem complex at first glance, but by following Sven Yrvind’s meticulous process, enthusiasts can achieve professional-level results. Remember that the journey of boatbuilding is as rewarding as reaching your destination; it tests one’s patience and dedication. For those seeking to embark on this adventure or simply gain more insight into marine craftsmanship, Sven’s wisdom is invaluable.Making Flanges Around Bulkhead Hatches for Canvas
Sven Yrvind, a renowned yacht designer and sailor, shares valuable insights on creating flanges around bulkhead hatches for canvas protection in this enlightening video. By following his expert guidance, boat enthusiasts can ensure their living areas remain secure while allowing unhindered access through the hatches.Step 1: Starting with the Flange
Sven begins by explaining that working on flanges vertically and horizontally is significantly easier than doing so in a flat position. To simplify the process further, he divides the task into two or three steps as suggested by fellow expert “for for.” This approach not only makes it more manageable but also allows for greater precision in crafting each component.Step 2: Applying Glue and Securing
Sven proceeds to apply glue along one edge of the flange, ensuring a secure bond when clamped into place. He emphasizes that this stage is crucial for maintaining the structural integrity of the flange, which in turn safeguards the living area beneath the canvas when hatches are open.Step 3: Allowing Time to Dry
After securely attaching the first portion of the flange, Sven allows ample time for it to dry before moving forward with additional steps. This patience and precision are key aspects of his successful boatbuilding methods.Step 4: Finishing Touches
Once the flange is fully dried, Sven removes the clamps carefully, ensuring no damage occurs during this process. He then moves on to attaching four more pieces onto these main frames, completing two pairs of flanges for the bulkhead hatches.The Final Touches
While two flanges form the primary support structure around the hatches, Sven mentions there are two additional pieces required at each end to ensure comprehensive protection. This attention to detail highlights his commitment to producing a durable and reliable design. “Sailing is about finding your path, whether it’s across an ocean or within yourself.” – Sven Yrvind In conclusion, making flanges around bulkhead hatches may seem complex at first glance, but by following Sven Yrvind’s meticulous process, enthusiasts can achieve professional-level results. Remember that the journey of boatbuilding is as rewarding as reaching your destination; it tests one’s patience and dedication. For those seeking to embark on this adventure or simply gain more insight into marine craftsmanship, Sven’s wisdom is invaluable.Once the flange is fully dried, Sven removes the clamps carefully, ensuring no damage occurs during this process. He then moves on to attaching four more pieces onto these main frames, completing two pairs of flanges for the bulkhead hatches.The Final Touches
While two flanges form the primary support structure around the hatches, Sven mentions there are two additional pieces required at each end to ensure comprehensive protection. This attention to detail highlights his commitment to producing a durable and reliable design. “Sailing is about finding your path, whether it’s across an ocean or within yourself.” – Sven Yrvind In conclusion, making flanges around bulkhead hatches may seem complex at first glance, but by following Sven Yrvind’s meticulous process, enthusiasts can achieve professional-level results. Remember that the journey of boatbuilding is as rewarding as reaching your destination; it tests one’s patience and dedication. For those seeking to embark on this adventure or simply gain more insight into marine craftsmanship, Sven’s wisdom is invaluable.After securely attaching the first portion of the flange, Sven allows ample time for it to dry before moving forward with additional steps. This patience and precision are key aspects of his successful boatbuilding methods.Step 4: Finishing Touches
Once the flange is fully dried, Sven removes the clamps carefully, ensuring no damage occurs during this process. He then moves on to attaching four more pieces onto these main frames, completing two pairs of flanges for the bulkhead hatches.The Final Touches
While two flanges form the primary support structure around the hatches, Sven mentions there are two additional pieces required at each end to ensure comprehensive protection. This attention to detail highlights his commitment to producing a durable and reliable design. “Sailing is about finding your path, whether it’s across an ocean or within yourself.” – Sven Yrvind In conclusion, making flanges around bulkhead hatches may seem complex at first glance, but by following Sven Yrvind’s meticulous process, enthusiasts can achieve professional-level results. Remember that the journey of boatbuilding is as rewarding as reaching your destination; it tests one’s patience and dedication. For those seeking to embark on this adventure or simply gain more insight into marine craftsmanship, Sven’s wisdom is invaluable.Sven proceeds to apply glue along one edge of the flange, ensuring a secure bond when clamped into place. He emphasizes that this stage is crucial for maintaining the structural integrity of the flange, which in turn safeguards the living area beneath the canvas when hatches are open.Step 3: Allowing Time to Dry
After securely attaching the first portion of the flange, Sven allows ample time for it to dry before moving forward with additional steps. This patience and precision are key aspects of his successful boatbuilding methods.Step 4: Finishing Touches
Once the flange is fully dried, Sven removes the clamps carefully, ensuring no damage occurs during this process. He then moves on to attaching four more pieces onto these main frames, completing two pairs of flanges for the bulkhead hatches.The Final Touches
While two flanges form the primary support structure around the hatches, Sven mentions there are two additional pieces required at each end to ensure comprehensive protection. This attention to detail highlights his commitment to producing a durable and reliable design. “Sailing is about finding your path, whether it’s across an ocean or within yourself.” – Sven Yrvind In conclusion, making flanges around bulkhead hatches may seem complex at first glance, but by following Sven Yrvind’s meticulous process, enthusiasts can achieve professional-level results. Remember that the journey of boatbuilding is as rewarding as reaching your destination; it tests one’s patience and dedication. For those seeking to embark on this adventure or simply gain more insight into marine craftsmanship, Sven’s wisdom is invaluable.Sven begins by explaining that working on flanges vertically and horizontally is significantly easier than doing so in a flat position. To simplify the process further, he divides the task into two or three steps as suggested by fellow expert “for for.” This approach not only makes it more manageable but also allows for greater precision in crafting each component.Step 2: Applying Glue and Securing
Sven proceeds to apply glue along one edge of the flange, ensuring a secure bond when clamped into place. He emphasizes that this stage is crucial for maintaining the structural integrity of the flange, which in turn safeguards the living area beneath the canvas when hatches are open.Step 3: Allowing Time to Dry
After securely attaching the first portion of the flange, Sven allows ample time for it to dry before moving forward with additional steps. This patience and precision are key aspects of his successful boatbuilding methods.Step 4: Finishing Touches
Once the flange is fully dried, Sven removes the clamps carefully, ensuring no damage occurs during this process. He then moves on to attaching four more pieces onto these main frames, completing two pairs of flanges for the bulkhead hatches.The Final Touches
While two flanges form the primary support structure around the hatches, Sven mentions there are two additional pieces required at each end to ensure comprehensive protection. This attention to detail highlights his commitment to producing a durable and reliable design. “Sailing is about finding your path, whether it’s across an ocean or within yourself.” – Sven Yrvind In conclusion, making flanges around bulkhead hatches may seem complex at first glance, but by following Sven Yrvind’s meticulous process, enthusiasts can achieve professional-level results. Remember that the journey of boatbuilding is as rewarding as reaching your destination; it tests one’s patience and dedication. For those seeking to embark on this adventure or simply gain more insight into marine craftsmanship, Sven’s wisdom is invaluable.Sven Yrvind, a renowned yacht designer and sailor, shares valuable insights on creating flanges around bulkhead hatches for canvas protection in this enlightening video. By following his expert guidance, boat enthusiasts can ensure their living areas remain secure while allowing unhindered access through the hatches.Step 1: Starting with the Flange
Sven begins by explaining that working on flanges vertically and horizontally is significantly easier than doing so in a flat position. To simplify the process further, he divides the task into two or three steps as suggested by fellow expert “for for.” This approach not only makes it more manageable but also allows for greater precision in crafting each component.Step 2: Applying Glue and Securing
Sven proceeds to apply glue along one edge of the flange, ensuring a secure bond when clamped into place. He emphasizes that this stage is crucial for maintaining the structural integrity of the flange, which in turn safeguards the living area beneath the canvas when hatches are open.Step 3: Allowing Time to Dry
After securely attaching the first portion of the flange, Sven allows ample time for it to dry before moving forward with additional steps. This patience and precision are key aspects of his successful boatbuilding methods.Step 4: Finishing Touches
Once the flange is fully dried, Sven removes the clamps carefully, ensuring no damage occurs during this process. He then moves on to attaching four more pieces onto these main frames, completing two pairs of flanges for the bulkhead hatches.The Final Touches
While two flanges form the primary support structure around the hatches, Sven mentions there are two additional pieces required at each end to ensure comprehensive protection. This attention to detail highlights his commitment to producing a durable and reliable design. “Sailing is about finding your path, whether it’s across an ocean or within yourself.” – Sven Yrvind In conclusion, making flanges around bulkhead hatches may seem complex at first glance, but by following Sven Yrvind’s meticulous process, enthusiasts can achieve professional-level results. Remember that the journey of boatbuilding is as rewarding as reaching your destination; it tests one’s patience and dedication. For those seeking to embark on this adventure or simply gain more insight into marine craftsmanship, Sven’s wisdom is invaluable.Making Flanges Around Bulkhead Hatches for Canvas
Sven Yrvind, a renowned yacht designer and sailor, shares valuable insights on creating flanges around bulkhead hatches for canvas protection in this enlightening video. By following his expert guidance, boat enthusiasts can ensure their living areas remain secure while allowing unhindered access through the hatches.Step 1: Starting with the Flange
Sven begins by explaining that working on flanges vertically and horizontally is significantly easier than doing so in a flat position. To simplify the process further, he divides the task into two or three steps as suggested by fellow expert “for for.” This approach not only makes it more manageable but also allows for greater precision in crafting each component.Step 2: Applying Glue and Securing
Sven proceeds to apply glue along one edge of the flange, ensuring a secure bond when clamped into place. He emphasizes that this stage is crucial for maintaining the structural integrity of the flange, which in turn safeguards the living area beneath the canvas when hatches are open.Step 3: Allowing Time to Dry
After securely attaching the first portion of the flange, Sven allows ample time for it to dry before moving forward with additional steps. This patience and precision are key aspects of his successful boatbuilding methods.Step 4: Finishing Touches
Once the flange is fully dried, Sven removes the clamps carefully, ensuring no damage occurs during this process. He then moves on to attaching four more pieces onto these main frames, completing two pairs of flanges for the bulkhead hatches.The Final Touches
While two flanges form the primary support structure around the hatches, Sven mentions there are two additional pieces required at each end to ensure comprehensive protection. This attention to detail highlights his commitment to producing a durable and reliable design. “Sailing is about finding your path, whether it’s across an ocean or within yourself.” – Sven Yrvind In conclusion, making flanges around bulkhead hatches may seem complex at first glance, but by following Sven Yrvind’s meticulous process, enthusiasts can achieve professional-level results. Remember that the journey of boatbuilding is as rewarding as reaching your destination; it tests one’s patience and dedication. For those seeking to embark on this adventure or simply gain more insight into marine craftsmanship, Sven’s wisdom is invaluable.Sven begins by explaining that working on flanges vertically and horizontally is significantly easier than doing so in a flat position. To simplify the process further, he divides the task into two or three steps as suggested by fellow expert “for for.” This approach not only makes it more manageable but also allows for greater precision in crafting each component.Step 2: Applying Glue and Securing
Sven proceeds to apply glue along one edge of the flange, ensuring a secure bond when clamped into place. He emphasizes that this stage is crucial for maintaining the structural integrity of the flange, which in turn safeguards the living area beneath the canvas when hatches are open.Step 3: Allowing Time to Dry
After securely attaching the first portion of the flange, Sven allows ample time for it to dry before moving forward with additional steps. This patience and precision are key aspects of his successful boatbuilding methods.Step 4: Finishing Touches
Once the flange is fully dried, Sven removes the clamps carefully, ensuring no damage occurs during this process. He then moves on to attaching four more pieces onto these main frames, completing two pairs of flanges for the bulkhead hatches.The Final Touches
While two flanges form the primary support structure around the hatches, Sven mentions there are two additional pieces required at each end to ensure comprehensive protection. This attention to detail highlights his commitment to producing a durable and reliable design. “Sailing is about finding your path, whether it’s across an ocean or within yourself.” – Sven Yrvind In conclusion, making flanges around bulkhead hatches may seem complex at first glance, but by following Sven Yrvind’s meticulous process, enthusiasts can achieve professional-level results. Remember that the journey of boatbuilding is as rewarding as reaching your destination; it tests one’s patience and dedication. For those seeking to embark on this adventure or simply gain more insight into marine craftsmanship, Sven’s wisdom is invaluable.Sven proceeds to apply glue along one edge of the flange, ensuring a secure bond when clamped into place. He emphasizes that this stage is crucial for maintaining the structural integrity of the flange, which in turn safeguards the living area beneath the canvas when hatches are open.Step 3: Allowing Time to Dry
After securely attaching the first portion of the flange, Sven allows ample time for it to dry before moving forward with additional steps. This patience and precision are key aspects of his successful boatbuilding methods.Step 4: Finishing Touches
Once the flange is fully dried, Sven removes the clamps carefully, ensuring no damage occurs during this process. He then moves on to attaching four more pieces onto these main frames, completing two pairs of flanges for the bulkhead hatches.The Final Touches
While two flanges form the primary support structure around the hatches, Sven mentions there are two additional pieces required at each end to ensure comprehensive protection. This attention to detail highlights his commitment to producing a durable and reliable design. “Sailing is about finding your path, whether it’s across an ocean or within yourself.” – Sven Yrvind In conclusion, making flanges around bulkhead hatches may seem complex at first glance, but by following Sven Yrvind’s meticulous process, enthusiasts can achieve professional-level results. Remember that the journey of boatbuilding is as rewarding as reaching your destination; it tests one’s patience and dedication. For those seeking to embark on this adventure or simply gain more insight into marine craftsmanship, Sven’s wisdom is invaluable.Sven begins by explaining that working on flanges vertically and horizontally is significantly easier than doing so in a flat position. To simplify the process further, he divides the task into two or three steps as suggested by fellow expert “for for.” This approach not only makes it more manageable but also allows for greater precision in crafting each component.Step 2: Applying Glue and Securing
Sven proceeds to apply glue along one edge of the flange, ensuring a secure bond when clamped into place. He emphasizes that this stage is crucial for maintaining the structural integrity of the flange, which in turn safeguards the living area beneath the canvas when hatches are open.Step 3: Allowing Time to Dry
After securely attaching the first portion of the flange, Sven allows ample time for it to dry before moving forward with additional steps. This patience and precision are key aspects of his successful boatbuilding methods.Step 4: Finishing Touches
Once the flange is fully dried, Sven removes the clamps carefully, ensuring no damage occurs during this process. He then moves on to attaching four more pieces onto these main frames, completing two pairs of flanges for the bulkhead hatches.The Final Touches
While two flanges form the primary support structure around the hatches, Sven mentions there are two additional pieces required at each end to ensure comprehensive protection. This attention to detail highlights his commitment to producing a durable and reliable design. “Sailing is about finding your path, whether it’s across an ocean or within yourself.” – Sven Yrvind In conclusion, making flanges around bulkhead hatches may seem complex at first glance, but by following Sven Yrvind’s meticulous process, enthusiasts can achieve professional-level results. Remember that the journey of boatbuilding is as rewarding as reaching your destination; it tests one’s patience and dedication. For those seeking to embark on this adventure or simply gain more insight into marine craftsmanship, Sven’s wisdom is invaluable.Sven Yrvind, a renowned yacht designer and sailor, shares valuable insights on creating flanges around bulkhead hatches for canvas protection in this enlightening video. By following his expert guidance, boat enthusiasts can ensure their living areas remain secure while allowing unhindered access through the hatches.Step 1: Starting with the Flange
Sven begins by explaining that working on flanges vertically and horizontally is significantly easier than doing so in a flat position. To simplify the process further, he divides the task into two or three steps as suggested by fellow expert “for for.” This approach not only makes it more manageable but also allows for greater precision in crafting each component.Step 2: Applying Glue and Securing
Sven proceeds to apply glue along one edge of the flange, ensuring a secure bond when clamped into place. He emphasizes that this stage is crucial for maintaining the structural integrity of the flange, which in turn safeguards the living area beneath the canvas when hatches are open.Step 3: Allowing Time to Dry
After securely attaching the first portion of the flange, Sven allows ample time for it to dry before moving forward with additional steps. This patience and precision are key aspects of his successful boatbuilding methods.Step 4: Finishing Touches
Once the flange is fully dried, Sven removes the clamps carefully, ensuring no damage occurs during this process. He then moves on to attaching four more pieces onto these main frames, completing two pairs of flanges for the bulkhead hatches.The Final Touches
While two flanges form the primary support structure around the hatches, Sven mentions there are two additional pieces required at each end to ensure comprehensive protection. This attention to detail highlights his commitment to producing a durable and reliable design. “Sailing is about finding your path, whether it’s across an ocean or within yourself.” – Sven Yrvind In conclusion, making flanges around bulkhead hatches may seem complex at first glance, but by following Sven Yrvind’s meticulous process, enthusiasts can achieve professional-level results. Remember that the journey of boatbuilding is as rewarding as reaching your destination; it tests one’s patience and dedication. For those seeking to embark on this adventure or simply gain more insight into marine craftsmanship, Sven’s wisdom is invaluable.Making Flanges Around Bulkhead Hatches for Canvas
Sven Yrvind, a renowned yacht designer and sailor, shares valuable insights on creating flanges around bulkhead hatches for canvas protection in this enlightening video. By following his expert guidance, boat enthusiasts can ensure their living areas remain secure while allowing unhindered access through the hatches.Step 1: Starting with the Flange
Sven begins by explaining that working on flanges vertically and horizontally is significantly easier than doing so in a flat position. To simplify the process further, he divides the task into two or three steps as suggested by fellow expert “for for.” This approach not only makes it more manageable but also allows for greater precision in crafting each component.Step 2: Applying Glue and Securing
Sven proceeds to apply glue along one edge of the flange, ensuring a secure bond when clamped into place. He emphasizes that this stage is crucial for maintaining the structural integrity of the flange, which in turn safeguards the living area beneath the canvas when hatches are open.Step 3: Allowing Time to Dry
After securely attaching the first portion of the flange, Sven allows ample time for it to dry before moving forward with additional steps. This patience and precision are key aspects of his successful boatbuilding methods.Step 4: Finishing Touches
Once the flange is fully dried, Sven removes the clamps carefully, ensuring no damage occurs during this process. He then moves on to attaching four more pieces onto these main frames, completing two pairs of flanges for the bulkhead hatches.The Final Touches
While two flanges form the primary support structure around the hatches, Sven mentions there are two additional pieces required at each end to ensure comprehensive protection. This attention to detail highlights his commitment to producing a durable and reliable design. “Sailing is about finding your path, whether it’s across an ocean or within yourself.” – Sven Yrvind In conclusion, making flanges around bulkhead hatches may seem complex at first glance, but by following Sven Yrvind’s meticulous process, enthusiasts can achieve professional-level results. Remember that the journey of boatbuilding is as rewarding as reaching your destination; it tests one’s patience and dedication. For those seeking to embark on this adventure or simply gain more insight into marine craftsmanship, Sven’s wisdom is invaluable.Once the flange is fully dried, Sven removes the clamps carefully, ensuring no damage occurs during this process. He then moves on to attaching four more pieces onto these main frames, completing two pairs of flanges for the bulkhead hatches.The Final Touches
While two flanges form the primary support structure around the hatches, Sven mentions there are two additional pieces required at each end to ensure comprehensive protection. This attention to detail highlights his commitment to producing a durable and reliable design. “Sailing is about finding your path, whether it’s across an ocean or within yourself.” – Sven Yrvind In conclusion, making flanges around bulkhead hatches may seem complex at first glance, but by following Sven Yrvind’s meticulous process, enthusiasts can achieve professional-level results. Remember that the journey of boatbuilding is as rewarding as reaching your destination; it tests one’s patience and dedication. For those seeking to embark on this adventure or simply gain more insight into marine craftsmanship, Sven’s wisdom is invaluable.Sven proceeds to apply glue along one edge of the flange, ensuring a secure bond when clamped into place. He emphasizes that this stage is crucial for maintaining the structural integrity of the flange, which in turn safeguards the living area beneath the canvas when hatches are open.Step 3: Allowing Time to Dry
After securely attaching the first portion of the flange, Sven allows ample time for it to dry before moving forward with additional steps. This patience and precision are key aspects of his successful boatbuilding methods.Step 4: Finishing Touches
Once the flange is fully dried, Sven removes the clamps carefully, ensuring no damage occurs during this process. He then moves on to attaching four more pieces onto these main frames, completing two pairs of flanges for the bulkhead hatches.The Final Touches
While two flanges form the primary support structure around the hatches, Sven mentions there are two additional pieces required at each end to ensure comprehensive protection. This attention to detail highlights his commitment to producing a durable and reliable design. “Sailing is about finding your path, whether it’s across an ocean or within yourself.” – Sven Yrvind In conclusion, making flanges around bulkhead hatches may seem complex at first glance, but by following Sven Yrvind’s meticulous process, enthusiasts can achieve professional-level results. Remember that the journey of boatbuilding is as rewarding as reaching your destination; it tests one’s patience and dedication. For those seeking to embark on this adventure or simply gain more insight into marine craftsmanship, Sven’s wisdom is invaluable.Sven begins by explaining that working on flanges vertically and horizontally is significantly easier than doing so in a flat position. To simplify the process further, he divides the task into two or three steps as suggested by fellow expert “for for.” This approach not only makes it more manageable but also allows for greater precision in crafting each component.Step 2: Applying Glue and Securing
Sven proceeds to apply glue along one edge of the flange, ensuring a secure bond when clamped into place. He emphasizes that this stage is crucial for maintaining the structural integrity of the flange, which in turn safeguards the living area beneath the canvas when hatches are open.Step 3: Allowing Time to Dry
After securely attaching the first portion of the flange, Sven allows ample time for it to dry before moving forward with additional steps. This patience and precision are key aspects of his successful boatbuilding methods.Step 4: Finishing Touches
Once the flange is fully dried, Sven removes the clamps carefully, ensuring no damage occurs during this process. He then moves on to attaching four more pieces onto these main frames, completing two pairs of flanges for the bulkhead hatches.The Final Touches
While two flanges form the primary support structure around the hatches, Sven mentions there are two additional pieces required at each end to ensure comprehensive protection. This attention to detail highlights his commitment to producing a durable and reliable design. “Sailing is about finding your path, whether it’s across an ocean or within yourself.” – Sven Yrvind In conclusion, making flanges around bulkhead hatches may seem complex at first glance, but by following Sven Yrvind’s meticulous process, enthusiasts can achieve professional-level results. Remember that the journey of boatbuilding is as rewarding as reaching your destination; it tests one’s patience and dedication. For those seeking to embark on this adventure or simply gain more insight into marine craftsmanship, Sven’s wisdom is invaluable.Sven Yrvind, a renowned yacht designer and sailor, shares valuable insights on creating flanges around bulkhead hatches for canvas protection in this enlightening video. By following his expert guidance, boat enthusiasts can ensure their living areas remain secure while allowing unhindered access through the hatches.Step 1: Starting with the Flange
Sven begins by explaining that working on flanges vertically and horizontally is significantly easier than doing so in a flat position. To simplify the process further, he divides the task into two or three steps as suggested by fellow expert “for for.” This approach not only makes it more manageable but also allows for greater precision in crafting each component.Step 2: Applying Glue and Securing
Sven proceeds to apply glue along one edge of the flange, ensuring a secure bond when clamped into place. He emphasizes that this stage is crucial for maintaining the structural integrity of the flange, which in turn safeguards the living area beneath the canvas when hatches are open.Step 3: Allowing Time to Dry
After securely attaching the first portion of the flange, Sven allows ample time for it to dry before moving forward with additional steps. This patience and precision are key aspects of his successful boatbuilding methods.Step 4: Finishing Touches
Once the flange is fully dried, Sven removes the clamps carefully, ensuring no damage occurs during this process. He then moves on to attaching four more pieces onto these main frames, completing two pairs of flanges for the bulkhead hatches.The Final Touches
While two flanges form the primary support structure around the hatches, Sven mentions there are two additional pieces required at each end to ensure comprehensive protection. This attention to detail highlights his commitment to producing a durable and reliable design. “Sailing is about finding your path, whether it’s across an ocean or within yourself.” – Sven Yrvind In conclusion, making flanges around bulkhead hatches may seem complex at first glance, but by following Sven Yrvind’s meticulous process, enthusiasts can achieve professional-level results. Remember that the journey of boatbuilding is as rewarding as reaching your destination; it tests one’s patience and dedication. For those seeking to embark on this adventure or simply gain more insight into marine craftsmanship, Sven’s wisdom is invaluable.Making Flanges Around Bulkhead Hatches for Canvas
Sven Yrvind, a renowned yacht designer and sailor, shares valuable insights on creating flanges around bulkhead hatches for canvas protection in this enlightening video. By following his expert guidance, boat enthusiasts can ensure their living areas remain secure while allowing unhindered access through the hatches.Step 1: Starting with the Flange
Sven begins by explaining that working on flanges vertically and horizontally is significantly easier than doing so in a flat position. To simplify the process further, he divides the task into two or three steps as suggested by fellow expert “for for.” This approach not only makes it more manageable but also allows for greater precision in crafting each component.Step 2: Applying Glue and Securing
Sven proceeds to apply glue along one edge of the flange, ensuring a secure bond when clamped into place. He emphasizes that this stage is crucial for maintaining the structural integrity of the flange, which in turn safeguards the living area beneath the canvas when hatches are open.Step 3: Allowing Time to Dry
After securely attaching the first portion of the flange, Sven allows ample time for it to dry before moving forward with additional steps. This patience and precision are key aspects of his successful boatbuilding methods.Step 4: Finishing Touches
Once the flange is fully dried, Sven removes the clamps carefully, ensuring no damage occurs during this process. He then moves on to attaching four more pieces onto these main frames, completing two pairs of flanges for the bulkhead hatches.The Final Touches
While two flanges form the primary support structure around the hatches, Sven mentions there are two additional pieces required at each end to ensure comprehensive protection. This attention to detail highlights his commitment to producing a durable and reliable design. “Sailing is about finding your path, whether it’s across an ocean or within yourself.” – Sven Yrvind In conclusion, making flanges around bulkhead hatches may seem complex at first glance, but by following Sven Yrvind’s meticulous process, enthusiasts can achieve professional-level results. Remember that the journey of boatbuilding is as rewarding as reaching your destination; it tests one’s patience and dedication. For those seeking to embark on this adventure or simply gain more insight into marine craftsmanship, Sven’s wisdom is invaluable.After securely attaching the first portion of the flange, Sven allows ample time for it to dry before moving forward with additional steps. This patience and precision are key aspects of his successful boatbuilding methods.Step 4: Finishing Touches
Once the flange is fully dried, Sven removes the clamps carefully, ensuring no damage occurs during this process. He then moves on to attaching four more pieces onto these main frames, completing two pairs of flanges for the bulkhead hatches.The Final Touches
While two flanges form the primary support structure around the hatches, Sven mentions there are two additional pieces required at each end to ensure comprehensive protection. This attention to detail highlights his commitment to producing a durable and reliable design. “Sailing is about finding your path, whether it’s across an ocean or within yourself.” – Sven Yrvind In conclusion, making flanges around bulkhead hatches may seem complex at first glance, but by following Sven Yrvind’s meticulous process, enthusiasts can achieve professional-level results. Remember that the journey of boatbuilding is as rewarding as reaching your destination; it tests one’s patience and dedication. For those seeking to embark on this adventure or simply gain more insight into marine craftsmanship, Sven’s wisdom is invaluable.Sven proceeds to apply glue along one edge of the flange, ensuring a secure bond when clamped into place. He emphasizes that this stage is crucial for maintaining the structural integrity of the flange, which in turn safeguards the living area beneath the canvas when hatches are open.Step 3: Allowing Time to Dry
After securely attaching the first portion of the flange, Sven allows ample time for it to dry before moving forward with additional steps. This patience and precision are key aspects of his successful boatbuilding methods.Step 4: Finishing Touches
Once the flange is fully dried, Sven removes the clamps carefully, ensuring no damage occurs during this process. He then moves on to attaching four more pieces onto these main frames, completing two pairs of flanges for the bulkhead hatches.The Final Touches
While two flanges form the primary support structure around the hatches, Sven mentions there are two additional pieces required at each end to ensure comprehensive protection. This attention to detail highlights his commitment to producing a durable and reliable design. “Sailing is about finding your path, whether it’s across an ocean or within yourself.” – Sven Yrvind In conclusion, making flanges around bulkhead hatches may seem complex at first glance, but by following Sven Yrvind’s meticulous process, enthusiasts can achieve professional-level results. Remember that the journey of boatbuilding is as rewarding as reaching your destination; it tests one’s patience and dedication. For those seeking to embark on this adventure or simply gain more insight into marine craftsmanship, Sven’s wisdom is invaluable.Sven begins by explaining that working on flanges vertically and horizontally is significantly easier than doing so in a flat position. To simplify the process further, he divides the task into two or three steps as suggested by fellow expert “for for.” This approach not only makes it more manageable but also allows for greater precision in crafting each component.Step 2: Applying Glue and Securing
Sven proceeds to apply glue along one edge of the flange, ensuring a secure bond when clamped into place. He emphasizes that this stage is crucial for maintaining the structural integrity of the flange, which in turn safeguards the living area beneath the canvas when hatches are open.Step 3: Allowing Time to Dry
After securely attaching the first portion of the flange, Sven allows ample time for it to dry before moving forward with additional steps. This patience and precision are key aspects of his successful boatbuilding methods.Step 4: Finishing Touches
Once the flange is fully dried, Sven removes the clamps carefully, ensuring no damage occurs during this process. He then moves on to attaching four more pieces onto these main frames, completing two pairs of flanges for the bulkhead hatches.The Final Touches
While two flanges form the primary support structure around the hatches, Sven mentions there are two additional pieces required at each end to ensure comprehensive protection. This attention to detail highlights his commitment to producing a durable and reliable design. “Sailing is about finding your path, whether it’s across an ocean or within yourself.” – Sven Yrvind In conclusion, making flanges around bulkhead hatches may seem complex at first glance, but by following Sven Yrvind’s meticulous process, enthusiasts can achieve professional-level results. Remember that the journey of boatbuilding is as rewarding as reaching your destination; it tests one’s patience and dedication. For those seeking to embark on this adventure or simply gain more insight into marine craftsmanship, Sven’s wisdom is invaluable.Sven Yrvind, a renowned yacht designer and sailor, shares valuable insights on creating flanges around bulkhead hatches for canvas protection in this enlightening video. By following his expert guidance, boat enthusiasts can ensure their living areas remain secure while allowing unhindered access through the hatches.Step 1: Starting with the Flange
Sven begins by explaining that working on flanges vertically and horizontally is significantly easier than doing so in a flat position. To simplify the process further, he divides the task into two or three steps as suggested by fellow expert “for for.” This approach not only makes it more manageable but also allows for greater precision in crafting each component.Step 2: Applying Glue and Securing
Sven proceeds to apply glue along one edge of the flange, ensuring a secure bond when clamped into place. He emphasizes that this stage is crucial for maintaining the structural integrity of the flange, which in turn safeguards the living area beneath the canvas when hatches are open.Step 3: Allowing Time to Dry
After securely attaching the first portion of the flange, Sven allows ample time for it to dry before moving forward with additional steps. This patience and precision are key aspects of his successful boatbuilding methods.Step 4: Finishing Touches
Once the flange is fully dried, Sven removes the clamps carefully, ensuring no damage occurs during this process. He then moves on to attaching four more pieces onto these main frames, completing two pairs of flanges for the bulkhead hatches.The Final Touches
While two flanges form the primary support structure around the hatches, Sven mentions there are two additional pieces required at each end to ensure comprehensive protection. This attention to detail highlights his commitment to producing a durable and reliable design. “Sailing is about finding your path, whether it’s across an ocean or within yourself.” – Sven Yrvind In conclusion, making flanges around bulkhead hatches may seem complex at first glance, but by following Sven Yrvind’s meticulous process, enthusiasts can achieve professional-level results. Remember that the journey of boatbuilding is as rewarding as reaching your destination; it tests one’s patience and dedication. For those seeking to embark on this adventure or simply gain more insight into marine craftsmanship, Sven’s wisdom is invaluable.Making Flanges Around Bulkhead Hatches for Canvas
Sven Yrvind, a renowned yacht designer and sailor, shares valuable insights on creating flanges around bulkhead hatches for canvas protection in this enlightening video. By following his expert guidance, boat enthusiasts can ensure their living areas remain secure while allowing unhindered access through the hatches.Step 1: Starting with the Flange
Sven begins by explaining that working on flanges vertically and horizontally is significantly easier than doing so in a flat position. To simplify the process further, he divides the task into two or three steps as suggested by fellow expert “for for.” This approach not only makes it more manageable but also allows for greater precision in crafting each component.Step 2: Applying Glue and Securing
Sven proceeds to apply glue along one edge of the flange, ensuring a secure bond when clamped into place. He emphasizes that this stage is crucial for maintaining the structural integrity of the flange, which in turn safeguards the living area beneath the canvas when hatches are open.Step 3: Allowing Time to Dry
After securely attaching the first portion of the flange, Sven allows ample time for it to dry before moving forward with additional steps. This patience and precision are key aspects of his successful boatbuilding methods.Step 4: Finishing Touches
Once the flange is fully dried, Sven removes the clamps carefully, ensuring no damage occurs during this process. He then moves on to attaching four more pieces onto these main frames, completing two pairs of flanges for the bulkhead hatches.The Final Touches
While two flanges form the primary support structure around the hatches, Sven mentions there are two additional pieces required at each end to ensure comprehensive protection. This attention to detail highlights his commitment to producing a durable and reliable design. “Sailing is about finding your path, whether it’s across an ocean or within yourself.” – Sven Yrvind In conclusion, making flanges around bulkhead hatches may seem complex at first glance, but by following Sven Yrvind’s meticulous process, enthusiasts can achieve professional-level results. Remember that the journey of boatbuilding is as rewarding as reaching your destination; it tests one’s patience and dedication. For those seeking to embark on this adventure or simply gain more insight into marine craftsmanship, Sven’s wisdom is invaluable.Once the flange is fully dried, Sven removes the clamps carefully, ensuring no damage occurs during this process. He then moves on to attaching four more pieces onto these main frames, completing two pairs of flanges for the bulkhead hatches.The Final Touches
While two flanges form the primary support structure around the hatches, Sven mentions there are two additional pieces required at each end to ensure comprehensive protection. This attention to detail highlights his commitment to producing a durable and reliable design. “Sailing is about finding your path, whether it’s across an ocean or within yourself.” – Sven Yrvind In conclusion, making flanges around bulkhead hatches may seem complex at first glance, but by following Sven Yrvind’s meticulous process, enthusiasts can achieve professional-level results. Remember that the journey of boatbuilding is as rewarding as reaching your destination; it tests one’s patience and dedication. For those seeking to embark on this adventure or simply gain more insight into marine craftsmanship, Sven’s wisdom is invaluable.After securely attaching the first portion of the flange, Sven allows ample time for it to dry before moving forward with additional steps. This patience and precision are key aspects of his successful boatbuilding methods.Step 4: Finishing Touches
Once the flange is fully dried, Sven removes the clamps carefully, ensuring no damage occurs during this process. He then moves on to attaching four more pieces onto these main frames, completing two pairs of flanges for the bulkhead hatches.The Final Touches
While two flanges form the primary support structure around the hatches, Sven mentions there are two additional pieces required at each end to ensure comprehensive protection. This attention to detail highlights his commitment to producing a durable and reliable design. “Sailing is about finding your path, whether it’s across an ocean or within yourself.” – Sven Yrvind In conclusion, making flanges around bulkhead hatches may seem complex at first glance, but by following Sven Yrvind’s meticulous process, enthusiasts can achieve professional-level results. Remember that the journey of boatbuilding is as rewarding as reaching your destination; it tests one’s patience and dedication. For those seeking to embark on this adventure or simply gain more insight into marine craftsmanship, Sven’s wisdom is invaluable.Sven proceeds to apply glue along one edge of the flange, ensuring a secure bond when clamped into place. He emphasizes that this stage is crucial for maintaining the structural integrity of the flange, which in turn safeguards the living area beneath the canvas when hatches are open.Step 3: Allowing Time to Dry
After securely attaching the first portion of the flange, Sven allows ample time for it to dry before moving forward with additional steps. This patience and precision are key aspects of his successful boatbuilding methods.Step 4: Finishing Touches
Once the flange is fully dried, Sven removes the clamps carefully, ensuring no damage occurs during this process. He then moves on to attaching four more pieces onto these main frames, completing two pairs of flanges for the bulkhead hatches.The Final Touches
While two flanges form the primary support structure around the hatches, Sven mentions there are two additional pieces required at each end to ensure comprehensive protection. This attention to detail highlights his commitment to producing a durable and reliable design. “Sailing is about finding your path, whether it’s across an ocean or within yourself.” – Sven Yrvind In conclusion, making flanges around bulkhead hatches may seem complex at first glance, but by following Sven Yrvind’s meticulous process, enthusiasts can achieve professional-level results. Remember that the journey of boatbuilding is as rewarding as reaching your destination; it tests one’s patience and dedication. For those seeking to embark on this adventure or simply gain more insight into marine craftsmanship, Sven’s wisdom is invaluable.Sven begins by explaining that working on flanges vertically and horizontally is significantly easier than doing so in a flat position. To simplify the process further, he divides the task into two or three steps as suggested by fellow expert “for for.” This approach not only makes it more manageable but also allows for greater precision in crafting each component.Step 2: Applying Glue and Securing
Sven proceeds to apply glue along one edge of the flange, ensuring a secure bond when clamped into place. He emphasizes that this stage is crucial for maintaining the structural integrity of the flange, which in turn safeguards the living area beneath the canvas when hatches are open.Step 3: Allowing Time to Dry
After securely attaching the first portion of the flange, Sven allows ample time for it to dry before moving forward with additional steps. This patience and precision are key aspects of his successful boatbuilding methods.Step 4: Finishing Touches
Once the flange is fully dried, Sven removes the clamps carefully, ensuring no damage occurs during this process. He then moves on to attaching four more pieces onto these main frames, completing two pairs of flanges for the bulkhead hatches.The Final Touches
While two flanges form the primary support structure around the hatches, Sven mentions there are two additional pieces required at each end to ensure comprehensive protection. This attention to detail highlights his commitment to producing a durable and reliable design. “Sailing is about finding your path, whether it’s across an ocean or within yourself.” – Sven Yrvind In conclusion, making flanges around bulkhead hatches may seem complex at first glance, but by following Sven Yrvind’s meticulous process, enthusiasts can achieve professional-level results. Remember that the journey of boatbuilding is as rewarding as reaching your destination; it tests one’s patience and dedication. For those seeking to embark on this adventure or simply gain more insight into marine craftsmanship, Sven’s wisdom is invaluable.Sven Yrvind, a renowned yacht designer and sailor, shares valuable insights on creating flanges around bulkhead hatches for canvas protection in this enlightening video. By following his expert guidance, boat enthusiasts can ensure their living areas remain secure while allowing unhindered access through the hatches.Step 1: Starting with the Flange
Sven begins by explaining that working on flanges vertically and horizontally is significantly easier than doing so in a flat position. To simplify the process further, he divides the task into two or three steps as suggested by fellow expert “for for.” This approach not only makes it more manageable but also allows for greater precision in crafting each component.Step 2: Applying Glue and Securing
Sven proceeds to apply glue along one edge of the flange, ensuring a secure bond when clamped into place. He emphasizes that this stage is crucial for maintaining the structural integrity of the flange, which in turn safeguards the living area beneath the canvas when hatches are open.Step 3: Allowing Time to Dry
After securely attaching the first portion of the flange, Sven allows ample time for it to dry before moving forward with additional steps. This patience and precision are key aspects of his successful boatbuilding methods.Step 4: Finishing Touches
Once the flange is fully dried, Sven removes the clamps carefully, ensuring no damage occurs during this process. He then moves on to attaching four more pieces onto these main frames, completing two pairs of flanges for the bulkhead hatches.The Final Touches
While two flanges form the primary support structure around the hatches, Sven mentions there are two additional pieces required at each end to ensure comprehensive protection. This attention to detail highlights his commitment to producing a durable and reliable design. “Sailing is about finding your path, whether it’s across an ocean or within yourself.” – Sven Yrvind In conclusion, making flanges around bulkhead hatches may seem complex at first glance, but by following Sven Yrvind’s meticulous process, enthusiasts can achieve professional-level results. Remember that the journey of boatbuilding is as rewarding as reaching your destination; it tests one’s patience and dedication. For those seeking to embark on this adventure or simply gain more insight into marine craftsmanship, Sven’s wisdom is invaluable.Making Flanges Around Bulkhead Hatches for Canvas
Sven Yrvind, a renowned yacht designer and sailor, shares valuable insights on creating flanges around bulkhead hatches for canvas protection in this enlightening video. By following his expert guidance, boat enthusiasts can ensure their living areas remain secure while allowing unhindered access through the hatches.Step 1: Starting with the Flange
Sven begins by explaining that working on flanges vertically and horizontally is significantly easier than doing so in a flat position. To simplify the process further, he divides the task into two or three steps as suggested by fellow expert “for for.” This approach not only makes it more manageable but also allows for greater precision in crafting each component.Step 2: Applying Glue and Securing
Sven proceeds to apply glue along one edge of the flange, ensuring a secure bond when clamped into place. He emphasizes that this stage is crucial for maintaining the structural integrity of the flange, which in turn safeguards the living area beneath the canvas when hatches are open.Step 3: Allowing Time to Dry
After securely attaching the first portion of the flange, Sven allows ample time for it to dry before moving forward with additional steps. This patience and precision are key aspects of his successful boatbuilding methods.Step 4: Finishing Touches
Once the flange is fully dried, Sven removes the clamps carefully, ensuring no damage occurs during this process. He then moves on to attaching four more pieces onto these main frames, completing two pairs of flanges for the bulkhead hatches.The Final Touches
While two flanges form the primary support structure around the hatches, Sven mentions there are two additional pieces required at each end to ensure comprehensive protection. This attention to detail highlights his commitment to producing a durable and reliable design. “Sailing is about finding your path, whether it’s across an ocean or within yourself.” – Sven Yrvind In conclusion, making flanges around bulkhead hatches may seem complex at first glance, but by following Sven Yrvind’s meticulous process, enthusiasts can achieve professional-level results. Remember that the journey of boatbuilding is as rewarding as reaching your destination; it tests one’s patience and dedication. For those seeking to embark on this adventure or simply gain more insight into marine craftsmanship, Sven’s wisdom is invaluable.Sven Yrvind, a renowned yacht designer and sailor, shares valuable insights on creating flanges around bulkhead hatches for canvas protection in this enlightening video. By following his expert guidance, boat enthusiasts can ensure their living areas remain secure while allowing unhindered access through the hatches.Step 1: Starting with the Flange
Sven begins by explaining that working on flanges vertically and horizontally is significantly easier than doing so in a flat position. To simplify the process further, he divides the task into two or three steps as suggested by fellow expert “for for.” This approach not only makes it more manageable but also allows for greater precision in crafting each component.Step 2: Applying Glue and Securing
Sven proceeds to apply glue along one edge of the flange, ensuring a secure bond when clamped into place. He emphasizes that this stage is crucial for maintaining the structural integrity of the flange, which in turn safeguards the living area beneath the canvas when hatches are open.Step 3: Allowing Time to Dry
After securely attaching the first portion of the flange, Sven allows ample time for it to dry before moving forward with additional steps. This patience and precision are key aspects of his successful boatbuilding methods.Step 4: Finishing Touches
Once the flange is fully dried, Sven removes the clamps carefully, ensuring no damage occurs during this process. He then moves on to attaching four more pieces onto these main frames, completing two pairs of flanges for the bulkhead hatches.The Final Touches
While two flanges form the primary support structure around the hatches, Sven mentions there are two additional pieces required at each end to ensure comprehensive protection. This attention to detail highlights his commitment to producing a durable and reliable design. “Sailing is about finding your path, whether it’s across an ocean or within yourself.” – Sven Yrvind In conclusion, making flanges around bulkhead hatches may seem complex at first glance, but by following Sven Yrvind’s meticulous process, enthusiasts can achieve professional-level results. Remember that the journey of boatbuilding is as rewarding as reaching your destination; it tests one’s patience and dedication. For those seeking to embark on this adventure or simply gain more insight into marine craftsmanship, Sven’s wisdom is invaluable.Sven proceeds to apply glue along one edge of the flange, ensuring a secure bond when clamped into place. He emphasizes that this stage is crucial for maintaining the structural integrity of the flange, which in turn safeguards the living area beneath the canvas when hatches are open.Step 3: Allowing Time to Dry
After securely attaching the first portion of the flange, Sven allows ample time for it to dry before moving forward with additional steps. This patience and precision are key aspects of his successful boatbuilding methods.Step 4: Finishing Touches
Once the flange is fully dried, Sven removes the clamps carefully, ensuring no damage occurs during this process. He then moves on to attaching four more pieces onto these main frames, completing two pairs of flanges for the bulkhead hatches.The Final Touches
While two flanges form the primary support structure around the hatches, Sven mentions there are two additional pieces required at each end to ensure comprehensive protection. This attention to detail highlights his commitment to producing a durable and reliable design. “Sailing is about finding your path, whether it’s across an ocean or within yourself.” – Sven Yrvind In conclusion, making flanges around bulkhead hatches may seem complex at first glance, but by following Sven Yrvind’s meticulous process, enthusiasts can achieve professional-level results. Remember that the journey of boatbuilding is as rewarding as reaching your destination; it tests one’s patience and dedication. For those seeking to embark on this adventure or simply gain more insight into marine craftsmanship, Sven’s wisdom is invaluable.Sven begins by explaining that working on flanges vertically and horizontally is significantly easier than doing so in a flat position. To simplify the process further, he divides the task into two or three steps as suggested by fellow expert “for for.” This approach not only makes it more manageable but also allows for greater precision in crafting each component.Step 2: Applying Glue and Securing
Sven proceeds to apply glue along one edge of the flange, ensuring a secure bond when clamped into place. He emphasizes that this stage is crucial for maintaining the structural integrity of the flange, which in turn safeguards the living area beneath the canvas when hatches are open.Step 3: Allowing Time to Dry
After securely attaching the first portion of the flange, Sven allows ample time for it to dry before moving forward with additional steps. This patience and precision are key aspects of his successful boatbuilding methods.Step 4: Finishing Touches
Once the flange is fully dried, Sven removes the clamps carefully, ensuring no damage occurs during this process. He then moves on to attaching four more pieces onto these main frames, completing two pairs of flanges for the bulkhead hatches.The Final Touches
While two flanges form the primary support structure around the hatches, Sven mentions there are two additional pieces required at each end to ensure comprehensive protection. This attention to detail highlights his commitment to producing a durable and reliable design. “Sailing is about finding your path, whether it’s across an ocean or within yourself.” – Sven Yrvind In conclusion, making flanges around bulkhead hatches may seem complex at first glance, but by following Sven Yrvind’s meticulous process, enthusiasts can achieve professional-level results. Remember that the journey of boatbuilding is as rewarding as reaching your destination; it tests one’s patience and dedication. For those seeking to embark on this adventure or simply gain more insight into marine craftsmanship, Sven’s wisdom is invaluable.Sven Yrvind, a renowned yacht designer and sailor, shares valuable insights on creating flanges around bulkhead hatches for canvas protection in this enlightening video. By following his expert guidance, boat enthusiasts can ensure their living areas remain secure while allowing unhindered access through the hatches.Step 1: Starting with the Flange
Sven begins by explaining that working on flanges vertically and horizontally is significantly easier than doing so in a flat position. To simplify the process further, he divides the task into two or three steps as suggested by fellow expert “for for.” This approach not only makes it more manageable but also allows for greater precision in crafting each component.Step 2: Applying Glue and Securing
Sven proceeds to apply glue along one edge of the flange, ensuring a secure bond when clamped into place. He emphasizes that this stage is crucial for maintaining the structural integrity of the flange, which in turn safeguards the living area beneath the canvas when hatches are open.Step 3: Allowing Time to Dry
After securely attaching the first portion of the flange, Sven allows ample time for it to dry before moving forward with additional steps. This patience and precision are key aspects of his successful boatbuilding methods.Step 4: Finishing Touches
Once the flange is fully dried, Sven removes the clamps carefully, ensuring no damage occurs during this process. He then moves on to attaching four more pieces onto these main frames, completing two pairs of flanges for the bulkhead hatches.The Final Touches
While two flanges form the primary support structure around the hatches, Sven mentions there are two additional pieces required at each end to ensure comprehensive protection. This attention to detail highlights his commitment to producing a durable and reliable design. “Sailing is about finding your path, whether it’s across an ocean or within yourself.” – Sven Yrvind In conclusion, making flanges around bulkhead hatches may seem complex at first glance, but by following Sven Yrvind’s meticulous process, enthusiasts can achieve professional-level results. Remember that the journey of boatbuilding is as rewarding as reaching your destination; it tests one’s patience and dedication. For those seeking to embark on this adventure or simply gain more insight into marine craftsmanship, Sven’s wisdom is invaluable.Making Flanges Around Bulkhead Hatches for Canvas
Sven Yrvind, a renowned yacht designer and sailor, shares valuable insights on creating flanges around bulkhead hatches for canvas protection in this enlightening video. By following his expert guidance, boat enthusiasts can ensure their living areas remain secure while allowing unhindered access through the hatches.Step 1: Starting with the Flange
Sven begins by explaining that working on flanges vertically and horizontally is significantly easier than doing so in a flat position. To simplify the process further, he divides the task into two or three steps as suggested by fellow expert “for for.” This approach not only makes it more manageable but also allows for greater precision in crafting each component.Step 2: Applying Glue and Securing
Sven proceeds to apply glue along one edge of the flange, ensuring a secure bond when clamped into place. He emphasizes that this stage is crucial for maintaining the structural integrity of the flange, which in turn safeguards the living area beneath the canvas when hatches are open.Step 3: Allowing Time to Dry
After securely attaching the first portion of the flange, Sven allows ample time for it to dry before moving forward with additional steps. This patience and precision are key aspects of his successful boatbuilding methods.Step 4: Finishing Touches
Once the flange is fully dried, Sven removes the clamps carefully, ensuring no damage occurs during this process. He then moves on to attaching four more pieces onto these main frames, completing two pairs of flanges for the bulkhead hatches.The Final Touches
While two flanges form the primary support structure around the hatches, Sven mentions there are two additional pieces required at each end to ensure comprehensive protection. This attention to detail highlights his commitment to producing a durable and reliable design. “Sailing is about finding your path, whether it’s across an ocean or within yourself.” – Sven Yrvind In conclusion, making flanges around bulkhead hatches may seem complex at first glance, but by following Sven Yrvind’s meticulous process, enthusiasts can achieve professional-level results. Remember that the journey of boatbuilding is as rewarding as reaching your destination; it tests one’s patience and dedication. For those seeking to embark on this adventure or simply gain more insight into marine craftsmanship, Sven’s wisdom is invaluable.Once the flange is fully dried, Sven removes the clamps carefully, ensuring no damage occurs during this process. He then moves on to attaching four more pieces onto these main frames, completing two pairs of flanges for the bulkhead hatches.The Final Touches
While two flanges form the primary support structure around the hatches, Sven mentions there are two additional pieces required at each end to ensure comprehensive protection. This attention to detail highlights his commitment to producing a durable and reliable design. “Sailing is about finding your path, whether it’s across an ocean or within yourself.” – Sven Yrvind In conclusion, making flanges around bulkhead hatches may seem complex at first glance, but by following Sven Yrvind’s meticulous process, enthusiasts can achieve professional-level results. Remember that the journey of boatbuilding is as rewarding as reaching your destination; it tests one’s patience and dedication. For those seeking to embark on this adventure or simply gain more insight into marine craftsmanship, Sven’s wisdom is invaluable.Sven proceeds to apply glue along one edge of the flange, ensuring a secure bond when clamped into place. He emphasizes that this stage is crucial for maintaining the structural integrity of the flange, which in turn safeguards the living area beneath the canvas when hatches are open.Step 3: Allowing Time to Dry
After securely attaching the first portion of the flange, Sven allows ample time for it to dry before moving forward with additional steps. This patience and precision are key aspects of his successful boatbuilding methods.Step 4: Finishing Touches
Once the flange is fully dried, Sven removes the clamps carefully, ensuring no damage occurs during this process. He then moves on to attaching four more pieces onto these main frames, completing two pairs of flanges for the bulkhead hatches.The Final Touches
While two flanges form the primary support structure around the hatches, Sven mentions there are two additional pieces required at each end to ensure comprehensive protection. This attention to detail highlights his commitment to producing a durable and reliable design. “Sailing is about finding your path, whether it’s across an ocean or within yourself.” – Sven Yrvind In conclusion, making flanges around bulkhead hatches may seem complex at first glance, but by following Sven Yrvind’s meticulous process, enthusiasts can achieve professional-level results. Remember that the journey of boatbuilding is as rewarding as reaching your destination; it tests one’s patience and dedication. For those seeking to embark on this adventure or simply gain more insight into marine craftsmanship, Sven’s wisdom is invaluable.Sven begins by explaining that working on flanges vertically and horizontally is significantly easier than doing so in a flat position. To simplify the process further, he divides the task into two or three steps as suggested by fellow expert “for for.” This approach not only makes it more manageable but also allows for greater precision in crafting each component.Step 2: Applying Glue and Securing
Sven proceeds to apply glue along one edge of the flange, ensuring a secure bond when clamped into place. He emphasizes that this stage is crucial for maintaining the structural integrity of the flange, which in turn safeguards the living area beneath the canvas when hatches are open.Step 3: Allowing Time to Dry
After securely attaching the first portion of the flange, Sven allows ample time for it to dry before moving forward with additional steps. This patience and precision are key aspects of his successful boatbuilding methods.Step 4: Finishing Touches
Once the flange is fully dried, Sven removes the clamps carefully, ensuring no damage occurs during this process. He then moves on to attaching four more pieces onto these main frames, completing two pairs of flanges for the bulkhead hatches.The Final Touches
While two flanges form the primary support structure around the hatches, Sven mentions there are two additional pieces required at each end to ensure comprehensive protection. This attention to detail highlights his commitment to producing a durable and reliable design. “Sailing is about finding your path, whether it’s across an ocean or within yourself.” – Sven Yrvind In conclusion, making flanges around bulkhead hatches may seem complex at first glance, but by following Sven Yrvind’s meticulous process, enthusiasts can achieve professional-level results. Remember that the journey of boatbuilding is as rewarding as reaching your destination; it tests one’s patience and dedication. For those seeking to embark on this adventure or simply gain more insight into marine craftsmanship, Sven’s wisdom is invaluable.Sven Yrvind, a renowned yacht designer and sailor, shares valuable insights on creating flanges around bulkhead hatches for canvas protection in this enlightening video. By following his expert guidance, boat enthusiasts can ensure their living areas remain secure while allowing unhindered access through the hatches.Step 1: Starting with the Flange
Sven begins by explaining that working on flanges vertically and horizontally is significantly easier than doing so in a flat position. To simplify the process further, he divides the task into two or three steps as suggested by fellow expert “for for.” This approach not only makes it more manageable but also allows for greater precision in crafting each component.Step 2: Applying Glue and Securing
Sven proceeds to apply glue along one edge of the flange, ensuring a secure bond when clamped into place. He emphasizes that this stage is crucial for maintaining the structural integrity of the flange, which in turn safeguards the living area beneath the canvas when hatches are open.Step 3: Allowing Time to Dry
After securely attaching the first portion of the flange, Sven allows ample time for it to dry before moving forward with additional steps. This patience and precision are key aspects of his successful boatbuilding methods.Step 4: Finishing Touches
Once the flange is fully dried, Sven removes the clamps carefully, ensuring no damage occurs during this process. He then moves on to attaching four more pieces onto these main frames, completing two pairs of flanges for the bulkhead hatches.The Final Touches
While two flanges form the primary support structure around the hatches, Sven mentions there are two additional pieces required at each end to ensure comprehensive protection. This attention to detail highlights his commitment to producing a durable and reliable design. “Sailing is about finding your path, whether it’s across an ocean or within yourself.” – Sven Yrvind In conclusion, making flanges around bulkhead hatches may seem complex at first glance, but by following Sven Yrvind’s meticulous process, enthusiasts can achieve professional-level results. Remember that the journey of boatbuilding is as rewarding as reaching your destination; it tests one’s patience and dedication. For those seeking to embark on this adventure or simply gain more insight into marine craftsmanship, Sven’s wisdom is invaluable.Making Flanges Around Bulkhead Hatches for Canvas
Sven Yrvind, a renowned yacht designer and sailor, shares valuable insights on creating flanges around bulkhead hatches for canvas protection in this enlightening video. By following his expert guidance, boat enthusiasts can ensure their living areas remain secure while allowing unhindered access through the hatches.Step 1: Starting with the Flange
Sven begins by explaining that working on flanges vertically and horizontally is significantly easier than doing so in a flat position. To simplify the process further, he divides the task into two or three steps as suggested by fellow expert “for for.” This approach not only makes it more manageable but also allows for greater precision in crafting each component.Step 2: Applying Glue and Securing
Sven proceeds to apply glue along one edge of the flange, ensuring a secure bond when clamped into place. He emphasizes that this stage is crucial for maintaining the structural integrity of the flange, which in turn safeguards the living area beneath the canvas when hatches are open.Step 3: Allowing Time to Dry
After securely attaching the first portion of the flange, Sven allows ample time for it to dry before moving forward with additional steps. This patience and precision are key aspects of his successful boatbuilding methods.Step 4: Finishing Touches
Once the flange is fully dried, Sven removes the clamps carefully, ensuring no damage occurs during this process. He then moves on to attaching four more pieces onto these main frames, completing two pairs of flanges for the bulkhead hatches.The Final Touches
While two flanges form the primary support structure around the hatches, Sven mentions there are two additional pieces required at each end to ensure comprehensive protection. This attention to detail highlights his commitment to producing a durable and reliable design. “Sailing is about finding your path, whether it’s across an ocean or within yourself.” – Sven Yrvind In conclusion, making flanges around bulkhead hatches may seem complex at first glance, but by following Sven Yrvind’s meticulous process, enthusiasts can achieve professional-level results. Remember that the journey of boatbuilding is as rewarding as reaching your destination; it tests one’s patience and dedication. For those seeking to embark on this adventure or simply gain more insight into marine craftsmanship, Sven’s wisdom is invaluable.After securely attaching the first portion of the flange, Sven allows ample time for it to dry before moving forward with additional steps. This patience and precision are key aspects of his successful boatbuilding methods.Step 4: Finishing Touches
Once the flange is fully dried, Sven removes the clamps carefully, ensuring no damage occurs during this process. He then moves on to attaching four more pieces onto these main frames, completing two pairs of flanges for the bulkhead hatches.The Final Touches
While two flanges form the primary support structure around the hatches, Sven mentions there are two additional pieces required at each end to ensure comprehensive protection. This attention to detail highlights his commitment to producing a durable and reliable design. “Sailing is about finding your path, whether it’s across an ocean or within yourself.” – Sven Yrvind In conclusion, making flanges around bulkhead hatches may seem complex at first glance, but by following Sven Yrvind’s meticulous process, enthusiasts can achieve professional-level results. Remember that the journey of boatbuilding is as rewarding as reaching your destination; it tests one’s patience and dedication. For those seeking to embark on this adventure or simply gain more insight into marine craftsmanship, Sven’s wisdom is invaluable.Sven proceeds to apply glue along one edge of the flange, ensuring a secure bond when clamped into place. He emphasizes that this stage is crucial for maintaining the structural integrity of the flange, which in turn safeguards the living area beneath the canvas when hatches are open.Step 3: Allowing Time to Dry
After securely attaching the first portion of the flange, Sven allows ample time for it to dry before moving forward with additional steps. This patience and precision are key aspects of his successful boatbuilding methods.Step 4: Finishing Touches
Once the flange is fully dried, Sven removes the clamps carefully, ensuring no damage occurs during this process. He then moves on to attaching four more pieces onto these main frames, completing two pairs of flanges for the bulkhead hatches.The Final Touches
While two flanges form the primary support structure around the hatches, Sven mentions there are two additional pieces required at each end to ensure comprehensive protection. This attention to detail highlights his commitment to producing a durable and reliable design. “Sailing is about finding your path, whether it’s across an ocean or within yourself.” – Sven Yrvind In conclusion, making flanges around bulkhead hatches may seem complex at first glance, but by following Sven Yrvind’s meticulous process, enthusiasts can achieve professional-level results. Remember that the journey of boatbuilding is as rewarding as reaching your destination; it tests one’s patience and dedication. For those seeking to embark on this adventure or simply gain more insight into marine craftsmanship, Sven’s wisdom is invaluable.Sven begins by explaining that working on flanges vertically and horizontally is significantly easier than doing so in a flat position. To simplify the process further, he divides the task into two or three steps as suggested by fellow expert “for for.” This approach not only makes it more manageable but also allows for greater precision in crafting each component.Step 2: Applying Glue and Securing
Sven proceeds to apply glue along one edge of the flange, ensuring a secure bond when clamped into place. He emphasizes that this stage is crucial for maintaining the structural integrity of the flange, which in turn safeguards the living area beneath the canvas when hatches are open.Step 3: Allowing Time to Dry
After securely attaching the first portion of the flange, Sven allows ample time for it to dry before moving forward with additional steps. This patience and precision are key aspects of his successful boatbuilding methods.Step 4: Finishing Touches
Once the flange is fully dried, Sven removes the clamps carefully, ensuring no damage occurs during this process. He then moves on to attaching four more pieces onto these main frames, completing two pairs of flanges for the bulkhead hatches.The Final Touches
While two flanges form the primary support structure around the hatches, Sven mentions there are two additional pieces required at each end to ensure comprehensive protection. This attention to detail highlights his commitment to producing a durable and reliable design. “Sailing is about finding your path, whether it’s across an ocean or within yourself.” – Sven Yrvind In conclusion, making flanges around bulkhead hatches may seem complex at first glance, but by following Sven Yrvind’s meticulous process, enthusiasts can achieve professional-level results. Remember that the journey of boatbuilding is as rewarding as reaching your destination; it tests one’s patience and dedication. For those seeking to embark on this adventure or simply gain more insight into marine craftsmanship, Sven’s wisdom is invaluable.Sven Yrvind, a renowned yacht designer and sailor, shares valuable insights on creating flanges around bulkhead hatches for canvas protection in this enlightening video. By following his expert guidance, boat enthusiasts can ensure their living areas remain secure while allowing unhindered access through the hatches.Step 1: Starting with the Flange
Sven begins by explaining that working on flanges vertically and horizontally is significantly easier than doing so in a flat position. To simplify the process further, he divides the task into two or three steps as suggested by fellow expert “for for.” This approach not only makes it more manageable but also allows for greater precision in crafting each component.Step 2: Applying Glue and Securing
Sven proceeds to apply glue along one edge of the flange, ensuring a secure bond when clamped into place. He emphasizes that this stage is crucial for maintaining the structural integrity of the flange, which in turn safeguards the living area beneath the canvas when hatches are open.Step 3: Allowing Time to Dry
After securely attaching the first portion of the flange, Sven allows ample time for it to dry before moving forward with additional steps. This patience and precision are key aspects of his successful boatbuilding methods.Step 4: Finishing Touches
Once the flange is fully dried, Sven removes the clamps carefully, ensuring no damage occurs during this process. He then moves on to attaching four more pieces onto these main frames, completing two pairs of flanges for the bulkhead hatches.The Final Touches
While two flanges form the primary support structure around the hatches, Sven mentions there are two additional pieces required at each end to ensure comprehensive protection. This attention to detail highlights his commitment to producing a durable and reliable design. “Sailing is about finding your path, whether it’s across an ocean or within yourself.” – Sven Yrvind In conclusion, making flanges around bulkhead hatches may seem complex at first glance, but by following Sven Yrvind’s meticulous process, enthusiasts can achieve professional-level results. Remember that the journey of boatbuilding is as rewarding as reaching your destination; it tests one’s patience and dedication. For those seeking to embark on this adventure or simply gain more insight into marine craftsmanship, Sven’s wisdom is invaluable.Making Flanges Around Bulkhead Hatches for Canvas
Sven Yrvind, a renowned yacht designer and sailor, shares valuable insights on creating flanges around bulkhead hatches for canvas protection in this enlightening video. By following his expert guidance, boat enthusiasts can ensure their living areas remain secure while allowing unhindered access through the hatches.Step 1: Starting with the Flange
Sven begins by explaining that working on flanges vertically and horizontally is significantly easier than doing so in a flat position. To simplify the process further, he divides the task into two or three steps as suggested by fellow expert “for for.” This approach not only makes it more manageable but also allows for greater precision in crafting each component.Step 2: Applying Glue and Securing
Sven proceeds to apply glue along one edge of the flange, ensuring a secure bond when clamped into place. He emphasizes that this stage is crucial for maintaining the structural integrity of the flange, which in turn safeguards the living area beneath the canvas when hatches are open.Step 3: Allowing Time to Dry
After securely attaching the first portion of the flange, Sven allows ample time for it to dry before moving forward with additional steps. This patience and precision are key aspects of his successful boatbuilding methods.Step 4: Finishing Touches
Once the flange is fully dried, Sven removes the clamps carefully, ensuring no damage occurs during this process. He then moves on to attaching four more pieces onto these main frames, completing two pairs of flanges for the bulkhead hatches.The Final Touches
While two flanges form the primary support structure around the hatches, Sven mentions there are two additional pieces required at each end to ensure comprehensive protection. This attention to detail highlights his commitment to producing a durable and reliable design. “Sailing is about finding your path, whether it’s across an ocean or within yourself.” – Sven Yrvind In conclusion, making flanges around bulkhead hatches may seem complex at first glance, but by following Sven Yrvind’s meticulous process, enthusiasts can achieve professional-level results. Remember that the journey of boatbuilding is as rewarding as reaching your destination; it tests one’s patience and dedication. For those seeking to embark on this adventure or simply gain more insight into marine craftsmanship, Sven’s wisdom is invaluable.Once the flange is fully dried, Sven removes the clamps carefully, ensuring no damage occurs during this process. He then moves on to attaching four more pieces onto these main frames, completing two pairs of flanges for the bulkhead hatches.The Final Touches
While two flanges form the primary support structure around the hatches, Sven mentions there are two additional pieces required at each end to ensure comprehensive protection. This attention to detail highlights his commitment to producing a durable and reliable design. “Sailing is about finding your path, whether it’s across an ocean or within yourself.” – Sven Yrvind In conclusion, making flanges around bulkhead hatches may seem complex at first glance, but by following Sven Yrvind’s meticulous process, enthusiasts can achieve professional-level results. Remember that the journey of boatbuilding is as rewarding as reaching your destination; it tests one’s patience and dedication. For those seeking to embark on this adventure or simply gain more insight into marine craftsmanship, Sven’s wisdom is invaluable.After securely attaching the first portion of the flange, Sven allows ample time for it to dry before moving forward with additional steps. This patience and precision are key aspects of his successful boatbuilding methods.Step 4: Finishing Touches
Once the flange is fully dried, Sven removes the clamps carefully, ensuring no damage occurs during this process. He then moves on to attaching four more pieces onto these main frames, completing two pairs of flanges for the bulkhead hatches.The Final Touches
While two flanges form the primary support structure around the hatches, Sven mentions there are two additional pieces required at each end to ensure comprehensive protection. This attention to detail highlights his commitment to producing a durable and reliable design. “Sailing is about finding your path, whether it’s across an ocean or within yourself.” – Sven Yrvind In conclusion, making flanges around bulkhead hatches may seem complex at first glance, but by following Sven Yrvind’s meticulous process, enthusiasts can achieve professional-level results. Remember that the journey of boatbuilding is as rewarding as reaching your destination; it tests one’s patience and dedication. For those seeking to embark on this adventure or simply gain more insight into marine craftsmanship, Sven’s wisdom is invaluable.Sven proceeds to apply glue along one edge of the flange, ensuring a secure bond when clamped into place. He emphasizes that this stage is crucial for maintaining the structural integrity of the flange, which in turn safeguards the living area beneath the canvas when hatches are open.Step 3: Allowing Time to Dry
After securely attaching the first portion of the flange, Sven allows ample time for it to dry before moving forward with additional steps. This patience and precision are key aspects of his successful boatbuilding methods.Step 4: Finishing Touches
Once the flange is fully dried, Sven removes the clamps carefully, ensuring no damage occurs during this process. He then moves on to attaching four more pieces onto these main frames, completing two pairs of flanges for the bulkhead hatches.The Final Touches
While two flanges form the primary support structure around the hatches, Sven mentions there are two additional pieces required at each end to ensure comprehensive protection. This attention to detail highlights his commitment to producing a durable and reliable design. “Sailing is about finding your path, whether it’s across an ocean or within yourself.” – Sven Yrvind In conclusion, making flanges around bulkhead hatches may seem complex at first glance, but by following Sven Yrvind’s meticulous process, enthusiasts can achieve professional-level results. Remember that the journey of boatbuilding is as rewarding as reaching your destination; it tests one’s patience and dedication. For those seeking to embark on this adventure or simply gain more insight into marine craftsmanship, Sven’s wisdom is invaluable.Sven begins by explaining that working on flanges vertically and horizontally is significantly easier than doing so in a flat position. To simplify the process further, he divides the task into two or three steps as suggested by fellow expert “for for.” This approach not only makes it more manageable but also allows for greater precision in crafting each component.Step 2: Applying Glue and Securing
Sven proceeds to apply glue along one edge of the flange, ensuring a secure bond when clamped into place. He emphasizes that this stage is crucial for maintaining the structural integrity of the flange, which in turn safeguards the living area beneath the canvas when hatches are open.Step 3: Allowing Time to Dry
After securely attaching the first portion of the flange, Sven allows ample time for it to dry before moving forward with additional steps. This patience and precision are key aspects of his successful boatbuilding methods.Step 4: Finishing Touches
Once the flange is fully dried, Sven removes the clamps carefully, ensuring no damage occurs during this process. He then moves on to attaching four more pieces onto these main frames, completing two pairs of flanges for the bulkhead hatches.The Final Touches
While two flanges form the primary support structure around the hatches, Sven mentions there are two additional pieces required at each end to ensure comprehensive protection. This attention to detail highlights his commitment to producing a durable and reliable design. “Sailing is about finding your path, whether it’s across an ocean or within yourself.” – Sven Yrvind In conclusion, making flanges around bulkhead hatches may seem complex at first glance, but by following Sven Yrvind’s meticulous process, enthusiasts can achieve professional-level results. Remember that the journey of boatbuilding is as rewarding as reaching your destination; it tests one’s patience and dedication. For those seeking to embark on this adventure or simply gain more insight into marine craftsmanship, Sven’s wisdom is invaluable.Sven Yrvind, a renowned yacht designer and sailor, shares valuable insights on creating flanges around bulkhead hatches for canvas protection in this enlightening video. By following his expert guidance, boat enthusiasts can ensure their living areas remain secure while allowing unhindered access through the hatches.Step 1: Starting with the Flange
Sven begins by explaining that working on flanges vertically and horizontally is significantly easier than doing so in a flat position. To simplify the process further, he divides the task into two or three steps as suggested by fellow expert “for for.” This approach not only makes it more manageable but also allows for greater precision in crafting each component.Step 2: Applying Glue and Securing
Sven proceeds to apply glue along one edge of the flange, ensuring a secure bond when clamped into place. He emphasizes that this stage is crucial for maintaining the structural integrity of the flange, which in turn safeguards the living area beneath the canvas when hatches are open.Step 3: Allowing Time to Dry
After securely attaching the first portion of the flange, Sven allows ample time for it to dry before moving forward with additional steps. This patience and precision are key aspects of his successful boatbuilding methods.Step 4: Finishing Touches
Once the flange is fully dried, Sven removes the clamps carefully, ensuring no damage occurs during this process. He then moves on to attaching four more pieces onto these main frames, completing two pairs of flanges for the bulkhead hatches.The Final Touches
While two flanges form the primary support structure around the hatches, Sven mentions there are two additional pieces required at each end to ensure comprehensive protection. This attention to detail highlights his commitment to producing a durable and reliable design. “Sailing is about finding your path, whether it’s across an ocean or within yourself.” – Sven Yrvind In conclusion, making flanges around bulkhead hatches may seem complex at first glance, but by following Sven Yrvind’s meticulous process, enthusiasts can achieve professional-level results. Remember that the journey of boatbuilding is as rewarding as reaching your destination; it tests one’s patience and dedication. For those seeking to embark on this adventure or simply gain more insight into marine craftsmanship, Sven’s wisdom is invaluable.Making Flanges Around Bulkhead Hatches for Canvas
Sven Yrvind, a renowned yacht designer and sailor, shares valuable insights on creating flanges around bulkhead hatches for canvas protection in this enlightening video. By following his expert guidance, boat enthusiasts can ensure their living areas remain secure while allowing unhindered access through the hatches.Step 1: Starting with the Flange
Sven begins by explaining that working on flanges vertically and horizontally is significantly easier than doing so in a flat position. To simplify the process further, he divides the task into two or three steps as suggested by fellow expert “for for.” This approach not only makes it more manageable but also allows for greater precision in crafting each component.Step 2: Applying Glue and Securing
Sven proceeds to apply glue along one edge of the flange, ensuring a secure bond when clamped into place. He emphasizes that this stage is crucial for maintaining the structural integrity of the flange, which in turn safeguards the living area beneath the canvas when hatches are open.Step 3: Allowing Time to Dry
After securely attaching the first portion of the flange, Sven allows ample time for it to dry before moving forward with additional steps. This patience and precision are key aspects of his successful boatbuilding methods.Step 4: Finishing Touches
Once the flange is fully dried, Sven removes the clamps carefully, ensuring no damage occurs during this process. He then moves on to attaching four more pieces onto these main frames, completing two pairs of flanges for the bulkhead hatches.The Final Touches
While two flanges form the primary support structure around the hatches, Sven mentions there are two additional pieces required at each end to ensure comprehensive protection. This attention to detail highlights his commitment to producing a durable and reliable design. “Sailing is about finding your path, whether it’s across an ocean or within yourself.” – Sven Yrvind In conclusion, making flanges around bulkhead hatches may seem complex at first glance, but by following Sven Yrvind’s meticulous process, enthusiasts can achieve professional-level results. Remember that the journey of boatbuilding is as rewarding as reaching your destination; it tests one’s patience and dedication. For those seeking to embark on this adventure or simply gain more insight into marine craftsmanship, Sven’s wisdom is invaluable.Making Flanges Around Bulkhead Hatches for Canvas
Sven Yrvind, a renowned yacht designer and sailor, shares valuable insights on creating flanges around bulkhead hatches for canvas protection in this enlightening video. By following his expert guidance, boat enthusiasts can ensure their living areas remain secure while allowing unhindered access through the hatches.Step 1: Starting with the Flange
Sven begins by explaining that working on flanges vertically and horizontally is significantly easier than doing so in a flat position. To simplify the process further, he divides the task into two or three steps as suggested by fellow expert “for for.” This approach not only makes it more manageable but also allows for greater precision in crafting each component.Step 2: Applying Glue and Securing
Sven proceeds to apply glue along one edge of the flange, ensuring a secure bond when clamped into place. He emphasizes that this stage is crucial for maintaining the structural integrity of the flange, which in turn safeguards the living area beneath the canvas when hatches are open.Step 3: Allowing Time to Dry
After securely attaching the first portion of the flange, Sven allows ample time for it to dry before moving forward with additional steps. This patience and precision are key aspects of his successful boatbuilding methods.Step 4: Finishing Touches
Once the flange is fully dried, Sven removes the clamps carefully, ensuring no damage occurs during this process. He then moves on to attaching four more pieces onto these main frames, completing two pairs of flanges for the bulkhead hatches.The Final Touches
While two flanges form the primary support structure around the hatches, Sven mentions there are two additional pieces required at each end to ensure comprehensive protection. This attention to detail highlights his commitment to producing a durable and reliable design. “Sailing is about finding your path, whether it’s across an ocean or within yourself.” – Sven Yrvind In conclusion, making flanges around bulkhead hatches may seem complex at first glance, but by following Sven Yrvind’s meticulous process, enthusiasts can achieve professional-level results. Remember that the journey of boatbuilding is as rewarding as reaching your destination; it tests one’s patience and dedication. For those seeking to embark on this adventure or simply gain more insight into marine craftsmanship, Sven’s wisdom is invaluable.Sven proceeds to apply glue along one edge of the flange, ensuring a secure bond when clamped into place. He emphasizes that this stage is crucial for maintaining the structural integrity of the flange, which in turn safeguards the living area beneath the canvas when hatches are open.Step 3: Allowing Time to Dry
After securely attaching the first portion of the flange, Sven allows ample time for it to dry before moving forward with additional steps. This patience and precision are key aspects of his successful boatbuilding methods.Step 4: Finishing Touches
Once the flange is fully dried, Sven removes the clamps carefully, ensuring no damage occurs during this process. He then moves on to attaching four more pieces onto these main frames, completing two pairs of flanges for the bulkhead hatches.The Final Touches
While two flanges form the primary support structure around the hatches, Sven mentions there are two additional pieces required at each end to ensure comprehensive protection. This attention to detail highlights his commitment to producing a durable and reliable design. “Sailing is about finding your path, whether it’s across an ocean or within yourself.” – Sven Yrvind In conclusion, making flanges around bulkhead hatches may seem complex at first glance, but by following Sven Yrvind’s meticulous process, enthusiasts can achieve professional-level results. Remember that the journey of boatbuilding is as rewarding as reaching your destination; it tests one’s patience and dedication. For those seeking to embark on this adventure or simply gain more insight into marine craftsmanship, Sven’s wisdom is invaluable.Sven begins by explaining that working on flanges vertically and horizontally is significantly easier than doing so in a flat position. To simplify the process further, he divides the task into two or three steps as suggested by fellow expert “for for.” This approach not only makes it more manageable but also allows for greater precision in crafting each component.Step 2: Applying Glue and Securing
Sven proceeds to apply glue along one edge of the flange, ensuring a secure bond when clamped into place. He emphasizes that this stage is crucial for maintaining the structural integrity of the flange, which in turn safeguards the living area beneath the canvas when hatches are open.Step 3: Allowing Time to Dry
After securely attaching the first portion of the flange, Sven allows ample time for it to dry before moving forward with additional steps. This patience and precision are key aspects of his successful boatbuilding methods.Step 4: Finishing Touches
Once the flange is fully dried, Sven removes the clamps carefully, ensuring no damage occurs during this process. He then moves on to attaching four more pieces onto these main frames, completing two pairs of flanges for the bulkhead hatches.The Final Touches
While two flanges form the primary support structure around the hatches, Sven mentions there are two additional pieces required at each end to ensure comprehensive protection. This attention to detail highlights his commitment to producing a durable and reliable design. “Sailing is about finding your path, whether it’s across an ocean or within yourself.” – Sven Yrvind In conclusion, making flanges around bulkhead hatches may seem complex at first glance, but by following Sven Yrvind’s meticulous process, enthusiasts can achieve professional-level results. Remember that the journey of boatbuilding is as rewarding as reaching your destination; it tests one’s patience and dedication. For those seeking to embark on this adventure or simply gain more insight into marine craftsmanship, Sven’s wisdom is invaluable.Sven Yrvind, a renowned yacht designer and sailor, shares valuable insights on creating flanges around bulkhead hatches for canvas protection in this enlightening video. By following his expert guidance, boat enthusiasts can ensure their living areas remain secure while allowing unhindered access through the hatches.Step 1: Starting with the Flange
Sven begins by explaining that working on flanges vertically and horizontally is significantly easier than doing so in a flat position. To simplify the process further, he divides the task into two or three steps as suggested by fellow expert “for for.” This approach not only makes it more manageable but also allows for greater precision in crafting each component.Step 2: Applying Glue and Securing
Sven proceeds to apply glue along one edge of the flange, ensuring a secure bond when clamped into place. He emphasizes that this stage is crucial for maintaining the structural integrity of the flange, which in turn safeguards the living area beneath the canvas when hatches are open.Step 3: Allowing Time to Dry
After securely attaching the first portion of the flange, Sven allows ample time for it to dry before moving forward with additional steps. This patience and precision are key aspects of his successful boatbuilding methods.Step 4: Finishing Touches
Once the flange is fully dried, Sven removes the clamps carefully, ensuring no damage occurs during this process. He then moves on to attaching four more pieces onto these main frames, completing two pairs of flanges for the bulkhead hatches.The Final Touches
While two flanges form the primary support structure around the hatches, Sven mentions there are two additional pieces required at each end to ensure comprehensive protection. This attention to detail highlights his commitment to producing a durable and reliable design. “Sailing is about finding your path, whether it’s across an ocean or within yourself.” – Sven Yrvind In conclusion, making flanges around bulkhead hatches may seem complex at first glance, but by following Sven Yrvind’s meticulous process, enthusiasts can achieve professional-level results. Remember that the journey of boatbuilding is as rewarding as reaching your destination; it tests one’s patience and dedication. For those seeking to embark on this adventure or simply gain more insight into marine craftsmanship, Sven’s wisdom is invaluable.Making Flanges Around Bulkhead Hatches for Canvas
Sven Yrvind, a renowned yacht designer and sailor, shares valuable insights on creating flanges around bulkhead hatches for canvas protection in this enlightening video. By following his expert guidance, boat enthusiasts can ensure their living areas remain secure while allowing unhindered access through the hatches.Step 1: Starting with the Flange
Sven begins by explaining that working on flanges vertically and horizontally is significantly easier than doing so in a flat position. To simplify the process further, he divides the task into two or three steps as suggested by fellow expert “for for.” This approach not only makes it more manageable but also allows for greater precision in crafting each component.Step 2: Applying Glue and Securing
Sven proceeds to apply glue along one edge of the flange, ensuring a secure bond when clamped into place. He emphasizes that this stage is crucial for maintaining the structural integrity of the flange, which in turn safeguards the living area beneath the canvas when hatches are open.Step 3: Allowing Time to Dry
After securely attaching the first portion of the flange, Sven allows ample time for it to dry before moving forward with additional steps. This patience and precision are key aspects of his successful boatbuilding methods.Step 4: Finishing Touches
Once the flange is fully dried, Sven removes the clamps carefully, ensuring no damage occurs during this process. He then moves on to attaching four more pieces onto these main frames, completing two pairs of flanges for the bulkhead hatches.The Final Touches
While two flanges form the primary support structure around the hatches, Sven mentions there are two additional pieces required at each end to ensure comprehensive protection. This attention to detail highlights his commitment to producing a durable and reliable design. “Sailing is about finding your path, whether it’s across an ocean or within yourself.” – Sven Yrvind In conclusion, making flanges around bulkhead hatches may seem complex at first glance, but by following Sven Yrvind’s meticulous process, enthusiasts can achieve professional-level results. Remember that the journey of boatbuilding is as rewarding as reaching your destination; it tests one’s patience and dedication. For those seeking to embark on this adventure or simply gain more insight into marine craftsmanship, Sven’s wisdom is invaluable.Once the flange is fully dried, Sven removes the clamps carefully, ensuring no damage occurs during this process. He then moves on to attaching four more pieces onto these main frames, completing two pairs of flanges for the bulkhead hatches.The Final Touches
While two flanges form the primary support structure around the hatches, Sven mentions there are two additional pieces required at each end to ensure comprehensive protection. This attention to detail highlights his commitment to producing a durable and reliable design. “Sailing is about finding your path, whether it’s across an ocean or within yourself.” – Sven Yrvind In conclusion, making flanges around bulkhead hatches may seem complex at first glance, but by following Sven Yrvind’s meticulous process, enthusiasts can achieve professional-level results. Remember that the journey of boatbuilding is as rewarding as reaching your destination; it tests one’s patience and dedication. For those seeking to embark on this adventure or simply gain more insight into marine craftsmanship, Sven’s wisdom is invaluable.Sven proceeds to apply glue along one edge of the flange, ensuring a secure bond when clamped into place. He emphasizes that this stage is crucial for maintaining the structural integrity of the flange, which in turn safeguards the living area beneath the canvas when hatches are open.Step 3: Allowing Time to Dry
After securely attaching the first portion of the flange, Sven allows ample time for it to dry before moving forward with additional steps. This patience and precision are key aspects of his successful boatbuilding methods.Step 4: Finishing Touches
Once the flange is fully dried, Sven removes the clamps carefully, ensuring no damage occurs during this process. He then moves on to attaching four more pieces onto these main frames, completing two pairs of flanges for the bulkhead hatches.The Final Touches
While two flanges form the primary support structure around the hatches, Sven mentions there are two additional pieces required at each end to ensure comprehensive protection. This attention to detail highlights his commitment to producing a durable and reliable design. “Sailing is about finding your path, whether it’s across an ocean or within yourself.” – Sven Yrvind In conclusion, making flanges around bulkhead hatches may seem complex at first glance, but by following Sven Yrvind’s meticulous process, enthusiasts can achieve professional-level results. Remember that the journey of boatbuilding is as rewarding as reaching your destination; it tests one’s patience and dedication. For those seeking to embark on this adventure or simply gain more insight into marine craftsmanship, Sven’s wisdom is invaluable.Sven begins by explaining that working on flanges vertically and horizontally is significantly easier than doing so in a flat position. To simplify the process further, he divides the task into two or three steps as suggested by fellow expert “for for.” This approach not only makes it more manageable but also allows for greater precision in crafting each component.Step 2: Applying Glue and Securing
Sven proceeds to apply glue along one edge of the flange, ensuring a secure bond when clamped into place. He emphasizes that this stage is crucial for maintaining the structural integrity of the flange, which in turn safeguards the living area beneath the canvas when hatches are open.Step 3: Allowing Time to Dry
After securely attaching the first portion of the flange, Sven allows ample time for it to dry before moving forward with additional steps. This patience and precision are key aspects of his successful boatbuilding methods.Step 4: Finishing Touches
Once the flange is fully dried, Sven removes the clamps carefully, ensuring no damage occurs during this process. He then moves on to attaching four more pieces onto these main frames, completing two pairs of flanges for the bulkhead hatches.The Final Touches
While two flanges form the primary support structure around the hatches, Sven mentions there are two additional pieces required at each end to ensure comprehensive protection. This attention to detail highlights his commitment to producing a durable and reliable design. “Sailing is about finding your path, whether it’s across an ocean or within yourself.” – Sven Yrvind In conclusion, making flanges around bulkhead hatches may seem complex at first glance, but by following Sven Yrvind’s meticulous process, enthusiasts can achieve professional-level results. Remember that the journey of boatbuilding is as rewarding as reaching your destination; it tests one’s patience and dedication. For those seeking to embark on this adventure or simply gain more insight into marine craftsmanship, Sven’s wisdom is invaluable.Sven Yrvind, a renowned yacht designer and sailor, shares valuable insights on creating flanges around bulkhead hatches for canvas protection in this enlightening video. By following his expert guidance, boat enthusiasts can ensure their living areas remain secure while allowing unhindered access through the hatches.Step 1: Starting with the Flange
Sven begins by explaining that working on flanges vertically and horizontally is significantly easier than doing so in a flat position. To simplify the process further, he divides the task into two or three steps as suggested by fellow expert “for for.” This approach not only makes it more manageable but also allows for greater precision in crafting each component.Step 2: Applying Glue and Securing
Sven proceeds to apply glue along one edge of the flange, ensuring a secure bond when clamped into place. He emphasizes that this stage is crucial for maintaining the structural integrity of the flange, which in turn safeguards the living area beneath the canvas when hatches are open.Step 3: Allowing Time to Dry
After securely attaching the first portion of the flange, Sven allows ample time for it to dry before moving forward with additional steps. This patience and precision are key aspects of his successful boatbuilding methods.Step 4: Finishing Touches
Once the flange is fully dried, Sven removes the clamps carefully, ensuring no damage occurs during this process. He then moves on to attaching four more pieces onto these main frames, completing two pairs of flanges for the bulkhead hatches.The Final Touches
While two flanges form the primary support structure around the hatches, Sven mentions there are two additional pieces required at each end to ensure comprehensive protection. This attention to detail highlights his commitment to producing a durable and reliable design. “Sailing is about finding your path, whether it’s across an ocean or within yourself.” – Sven Yrvind In conclusion, making flanges around bulkhead hatches may seem complex at first glance, but by following Sven Yrvind’s meticulous process, enthusiasts can achieve professional-level results. Remember that the journey of boatbuilding is as rewarding as reaching your destination; it tests one’s patience and dedication. For those seeking to embark on this adventure or simply gain more insight into marine craftsmanship, Sven’s wisdom is invaluable.Making Flanges Around Bulkhead Hatches for Canvas
Sven Yrvind, a renowned yacht designer and sailor, shares valuable insights on creating flanges around bulkhead hatches for canvas protection in this enlightening video. By following his expert guidance, boat enthusiasts can ensure their living areas remain secure while allowing unhindered access through the hatches.Step 1: Starting with the Flange
Sven begins by explaining that working on flanges vertically and horizontally is significantly easier than doing so in a flat position. To simplify the process further, he divides the task into two or three steps as suggested by fellow expert “for for.” This approach not only makes it more manageable but also allows for greater precision in crafting each component.Step 2: Applying Glue and Securing
Sven proceeds to apply glue along one edge of the flange, ensuring a secure bond when clamped into place. He emphasizes that this stage is crucial for maintaining the structural integrity of the flange, which in turn safeguards the living area beneath the canvas when hatches are open.Step 3: Allowing Time to Dry
After securely attaching the first portion of the flange, Sven allows ample time for it to dry before moving forward with additional steps. This patience and precision are key aspects of his successful boatbuilding methods.Step 4: Finishing Touches
Once the flange is fully dried, Sven removes the clamps carefully, ensuring no damage occurs during this process. He then moves on to attaching four more pieces onto these main frames, completing two pairs of flanges for the bulkhead hatches.The Final Touches
While two flanges form the primary support structure around the hatches, Sven mentions there are two additional pieces required at each end to ensure comprehensive protection. This attention to detail highlights his commitment to producing a durable and reliable design. “Sailing is about finding your path, whether it’s across an ocean or within yourself.” – Sven Yrvind In conclusion, making flanges around bulkhead hatches may seem complex at first glance, but by following Sven Yrvind’s meticulous process, enthusiasts can achieve professional-level results. Remember that the journey of boatbuilding is as rewarding as reaching your destination; it tests one’s patience and dedication. For those seeking to embark on this adventure or simply gain more insight into marine craftsmanship, Sven’s wisdom is invaluable.After securely attaching the first portion of the flange, Sven allows ample time for it to dry before moving forward with additional steps. This patience and precision are key aspects of his successful boatbuilding methods.Step 4: Finishing Touches
Once the flange is fully dried, Sven removes the clamps carefully, ensuring no damage occurs during this process. He then moves on to attaching four more pieces onto these main frames, completing two pairs of flanges for the bulkhead hatches.The Final Touches
While two flanges form the primary support structure around the hatches, Sven mentions there are two additional pieces required at each end to ensure comprehensive protection. This attention to detail highlights his commitment to producing a durable and reliable design. “Sailing is about finding your path, whether it’s across an ocean or within yourself.” – Sven Yrvind In conclusion, making flanges around bulkhead hatches may seem complex at first glance, but by following Sven Yrvind’s meticulous process, enthusiasts can achieve professional-level results. Remember that the journey of boatbuilding is as rewarding as reaching your destination; it tests one’s patience and dedication. For those seeking to embark on this adventure or simply gain more insight into marine craftsmanship, Sven’s wisdom is invaluable.Sven proceeds to apply glue along one edge of the flange, ensuring a secure bond when clamped into place. He emphasizes that this stage is crucial for maintaining the structural integrity of the flange, which in turn safeguards the living area beneath the canvas when hatches are open.Step 3: Allowing Time to Dry
After securely attaching the first portion of the flange, Sven allows ample time for it to dry before moving forward with additional steps. This patience and precision are key aspects of his successful boatbuilding methods.Step 4: Finishing Touches
Once the flange is fully dried, Sven removes the clamps carefully, ensuring no damage occurs during this process. He then moves on to attaching four more pieces onto these main frames, completing two pairs of flanges for the bulkhead hatches.The Final Touches
While two flanges form the primary support structure around the hatches, Sven mentions there are two additional pieces required at each end to ensure comprehensive protection. This attention to detail highlights his commitment to producing a durable and reliable design. “Sailing is about finding your path, whether it’s across an ocean or within yourself.” – Sven Yrvind In conclusion, making flanges around bulkhead hatches may seem complex at first glance, but by following Sven Yrvind’s meticulous process, enthusiasts can achieve professional-level results. Remember that the journey of boatbuilding is as rewarding as reaching your destination; it tests one’s patience and dedication. For those seeking to embark on this adventure or simply gain more insight into marine craftsmanship, Sven’s wisdom is invaluable.Sven begins by explaining that working on flanges vertically and horizontally is significantly easier than doing so in a flat position. To simplify the process further, he divides the task into two or three steps as suggested by fellow expert “for for.” This approach not only makes it more manageable but also allows for greater precision in crafting each component.Step 2: Applying Glue and Securing
Sven proceeds to apply glue along one edge of the flange, ensuring a secure bond when clamped into place. He emphasizes that this stage is crucial for maintaining the structural integrity of the flange, which in turn safeguards the living area beneath the canvas when hatches are open.Step 3: Allowing Time to Dry
After securely attaching the first portion of the flange, Sven allows ample time for it to dry before moving forward with additional steps. This patience and precision are key aspects of his successful boatbuilding methods.Step 4: Finishing Touches
Once the flange is fully dried, Sven removes the clamps carefully, ensuring no damage occurs during this process. He then moves on to attaching four more pieces onto these main frames, completing two pairs of flanges for the bulkhead hatches.The Final Touches
While two flanges form the primary support structure around the hatches, Sven mentions there are two additional pieces required at each end to ensure comprehensive protection. This attention to detail highlights his commitment to producing a durable and reliable design. “Sailing is about finding your path, whether it’s across an ocean or within yourself.” – Sven Yrvind In conclusion, making flanges around bulkhead hatches may seem complex at first glance, but by following Sven Yrvind’s meticulous process, enthusiasts can achieve professional-level results. Remember that the journey of boatbuilding is as rewarding as reaching your destination; it tests one’s patience and dedication. For those seeking to embark on this adventure or simply gain more insight into marine craftsmanship, Sven’s wisdom is invaluable.Sven Yrvind, a renowned yacht designer and sailor, shares valuable insights on creating flanges around bulkhead hatches for canvas protection in this enlightening video. By following his expert guidance, boat enthusiasts can ensure their living areas remain secure while allowing unhindered access through the hatches.Step 1: Starting with the Flange
Sven begins by explaining that working on flanges vertically and horizontally is significantly easier than doing so in a flat position. To simplify the process further, he divides the task into two or three steps as suggested by fellow expert “for for.” This approach not only makes it more manageable but also allows for greater precision in crafting each component.Step 2: Applying Glue and Securing
Sven proceeds to apply glue along one edge of the flange, ensuring a secure bond when clamped into place. He emphasizes that this stage is crucial for maintaining the structural integrity of the flange, which in turn safeguards the living area beneath the canvas when hatches are open.Step 3: Allowing Time to Dry
After securely attaching the first portion of the flange, Sven allows ample time for it to dry before moving forward with additional steps. This patience and precision are key aspects of his successful boatbuilding methods.Step 4: Finishing Touches
Once the flange is fully dried, Sven removes the clamps carefully, ensuring no damage occurs during this process. He then moves on to attaching four more pieces onto these main frames, completing two pairs of flanges for the bulkhead hatches.The Final Touches
While two flanges form the primary support structure around the hatches, Sven mentions there are two additional pieces required at each end to ensure comprehensive protection. This attention to detail highlights his commitment to producing a durable and reliable design. “Sailing is about finding your path, whether it’s across an ocean or within yourself.” – Sven Yrvind In conclusion, making flanges around bulkhead hatches may seem complex at first glance, but by following Sven Yrvind’s meticulous process, enthusiasts can achieve professional-level results. Remember that the journey of boatbuilding is as rewarding as reaching your destination; it tests one’s patience and dedication. For those seeking to embark on this adventure or simply gain more insight into marine craftsmanship, Sven’s wisdom is invaluable.Making Flanges Around Bulkhead Hatches for Canvas
Sven Yrvind, a renowned yacht designer and sailor, shares valuable insights on creating flanges around bulkhead hatches for canvas protection in this enlightening video. By following his expert guidance, boat enthusiasts can ensure their living areas remain secure while allowing unhindered access through the hatches.Step 1: Starting with the Flange
Sven begins by explaining that working on flanges vertically and horizontally is significantly easier than doing so in a flat position. To simplify the process further, he divides the task into two or three steps as suggested by fellow expert “for for.” This approach not only makes it more manageable but also allows for greater precision in crafting each component.Step 2: Applying Glue and Securing
Sven proceeds to apply glue along one edge of the flange, ensuring a secure bond when clamped into place. He emphasizes that this stage is crucial for maintaining the structural integrity of the flange, which in turn safeguards the living area beneath the canvas when hatches are open.Step 3: Allowing Time to Dry
After securely attaching the first portion of the flange, Sven allows ample time for it to dry before moving forward with additional steps. This patience and precision are key aspects of his successful boatbuilding methods.Step 4: Finishing Touches
Once the flange is fully dried, Sven removes the clamps carefully, ensuring no damage occurs during this process. He then moves on to attaching four more pieces onto these main frames, completing two pairs of flanges for the bulkhead hatches.The Final Touches
While two flanges form the primary support structure around the hatches, Sven mentions there are two additional pieces required at each end to ensure comprehensive protection. This attention to detail highlights his commitment to producing a durable and reliable design. “Sailing is about finding your path, whether it’s across an ocean or within yourself.” – Sven Yrvind In conclusion, making flanges around bulkhead hatches may seem complex at first glance, but by following Sven Yrvind’s meticulous process, enthusiasts can achieve professional-level results. Remember that the journey of boatbuilding is as rewarding as reaching your destination; it tests one’s patience and dedication. For those seeking to embark on this adventure or simply gain more insight into marine craftsmanship, Sven’s wisdom is invaluable.Once the flange is fully dried, Sven removes the clamps carefully, ensuring no damage occurs during this process. He then moves on to attaching four more pieces onto these main frames, completing two pairs of flanges for the bulkhead hatches.The Final Touches
While two flanges form the primary support structure around the hatches, Sven mentions there are two additional pieces required at each end to ensure comprehensive protection. This attention to detail highlights his commitment to producing a durable and reliable design. “Sailing is about finding your path, whether it’s across an ocean or within yourself.” – Sven Yrvind In conclusion, making flanges around bulkhead hatches may seem complex at first glance, but by following Sven Yrvind’s meticulous process, enthusiasts can achieve professional-level results. Remember that the journey of boatbuilding is as rewarding as reaching your destination; it tests one’s patience and dedication. For those seeking to embark on this adventure or simply gain more insight into marine craftsmanship, Sven’s wisdom is invaluable.After securely attaching the first portion of the flange, Sven allows ample time for it to dry before moving forward with additional steps. This patience and precision are key aspects of his successful boatbuilding methods.Step 4: Finishing Touches
Once the flange is fully dried, Sven removes the clamps carefully, ensuring no damage occurs during this process. He then moves on to attaching four more pieces onto these main frames, completing two pairs of flanges for the bulkhead hatches.The Final Touches
While two flanges form the primary support structure around the hatches, Sven mentions there are two additional pieces required at each end to ensure comprehensive protection. This attention to detail highlights his commitment to producing a durable and reliable design. “Sailing is about finding your path, whether it’s across an ocean or within yourself.” – Sven Yrvind In conclusion, making flanges around bulkhead hatches may seem complex at first glance, but by following Sven Yrvind’s meticulous process, enthusiasts can achieve professional-level results. Remember that the journey of boatbuilding is as rewarding as reaching your destination; it tests one’s patience and dedication. For those seeking to embark on this adventure or simply gain more insight into marine craftsmanship, Sven’s wisdom is invaluable.Sven proceeds to apply glue along one edge of the flange, ensuring a secure bond when clamped into place. He emphasizes that this stage is crucial for maintaining the structural integrity of the flange, which in turn safeguards the living area beneath the canvas when hatches are open.Step 3: Allowing Time to Dry
After securely attaching the first portion of the flange, Sven allows ample time for it to dry before moving forward with additional steps. This patience and precision are key aspects of his successful boatbuilding methods.Step 4: Finishing Touches
Once the flange is fully dried, Sven removes the clamps carefully, ensuring no damage occurs during this process. He then moves on to attaching four more pieces onto these main frames, completing two pairs of flanges for the bulkhead hatches.The Final Touches
While two flanges form the primary support structure around the hatches, Sven mentions there are two additional pieces required at each end to ensure comprehensive protection. This attention to detail highlights his commitment to producing a durable and reliable design. “Sailing is about finding your path, whether it’s across an ocean or within yourself.” – Sven Yrvind In conclusion, making flanges around bulkhead hatches may seem complex at first glance, but by following Sven Yrvind’s meticulous process, enthusiasts can achieve professional-level results. Remember that the journey of boatbuilding is as rewarding as reaching your destination; it tests one’s patience and dedication. For those seeking to embark on this adventure or simply gain more insight into marine craftsmanship, Sven’s wisdom is invaluable.Sven begins by explaining that working on flanges vertically and horizontally is significantly easier than doing so in a flat position. To simplify the process further, he divides the task into two or three steps as suggested by fellow expert “for for.” This approach not only makes it more manageable but also allows for greater precision in crafting each component.Step 2: Applying Glue and Securing
Sven proceeds to apply glue along one edge of the flange, ensuring a secure bond when clamped into place. He emphasizes that this stage is crucial for maintaining the structural integrity of the flange, which in turn safeguards the living area beneath the canvas when hatches are open.Step 3: Allowing Time to Dry
After securely attaching the first portion of the flange, Sven allows ample time for it to dry before moving forward with additional steps. This patience and precision are key aspects of his successful boatbuilding methods.Step 4: Finishing Touches
Once the flange is fully dried, Sven removes the clamps carefully, ensuring no damage occurs during this process. He then moves on to attaching four more pieces onto these main frames, completing two pairs of flanges for the bulkhead hatches.The Final Touches
While two flanges form the primary support structure around the hatches, Sven mentions there are two additional pieces required at each end to ensure comprehensive protection. This attention to detail highlights his commitment to producing a durable and reliable design. “Sailing is about finding your path, whether it’s across an ocean or within yourself.” – Sven Yrvind In conclusion, making flanges around bulkhead hatches may seem complex at first glance, but by following Sven Yrvind’s meticulous process, enthusiasts can achieve professional-level results. Remember that the journey of boatbuilding is as rewarding as reaching your destination; it tests one’s patience and dedication. For those seeking to embark on this adventure or simply gain more insight into marine craftsmanship, Sven’s wisdom is invaluable.Sven Yrvind, a renowned yacht designer and sailor, shares valuable insights on creating flanges around bulkhead hatches for canvas protection in this enlightening video. By following his expert guidance, boat enthusiasts can ensure their living areas remain secure while allowing unhindered access through the hatches.Step 1: Starting with the Flange
Sven begins by explaining that working on flanges vertically and horizontally is significantly easier than doing so in a flat position. To simplify the process further, he divides the task into two or three steps as suggested by fellow expert “for for.” This approach not only makes it more manageable but also allows for greater precision in crafting each component.Step 2: Applying Glue and Securing
Sven proceeds to apply glue along one edge of the flange, ensuring a secure bond when clamped into place. He emphasizes that this stage is crucial for maintaining the structural integrity of the flange, which in turn safeguards the living area beneath the canvas when hatches are open.Step 3: Allowing Time to Dry
After securely attaching the first portion of the flange, Sven allows ample time for it to dry before moving forward with additional steps. This patience and precision are key aspects of his successful boatbuilding methods.Step 4: Finishing Touches
Once the flange is fully dried, Sven removes the clamps carefully, ensuring no damage occurs during this process. He then moves on to attaching four more pieces onto these main frames, completing two pairs of flanges for the bulkhead hatches.The Final Touches
While two flanges form the primary support structure around the hatches, Sven mentions there are two additional pieces required at each end to ensure comprehensive protection. This attention to detail highlights his commitment to producing a durable and reliable design. “Sailing is about finding your path, whether it’s across an ocean or within yourself.” – Sven Yrvind In conclusion, making flanges around bulkhead hatches may seem complex at first glance, but by following Sven Yrvind’s meticulous process, enthusiasts can achieve professional-level results. Remember that the journey of boatbuilding is as rewarding as reaching your destination; it tests one’s patience and dedication. For those seeking to embark on this adventure or simply gain more insight into marine craftsmanship, Sven’s wisdom is invaluable.Making Flanges Around Bulkhead Hatches for Canvas
Sven Yrvind, a renowned yacht designer and sailor, shares valuable insights on creating flanges around bulkhead hatches for canvas protection in this enlightening video. By following his expert guidance, boat enthusiasts can ensure their living areas remain secure while allowing unhindered access through the hatches.Step 1: Starting with the Flange
Sven begins by explaining that working on flanges vertically and horizontally is significantly easier than doing so in a flat position. To simplify the process further, he divides the task into two or three steps as suggested by fellow expert “for for.” This approach not only makes it more manageable but also allows for greater precision in crafting each component.Step 2: Applying Glue and Securing
Sven proceeds to apply glue along one edge of the flange, ensuring a secure bond when clamped into place. He emphasizes that this stage is crucial for maintaining the structural integrity of the flange, which in turn safeguards the living area beneath the canvas when hatches are open.Step 3: Allowing Time to Dry
After securely attaching the first portion of the flange, Sven allows ample time for it to dry before moving forward with additional steps. This patience and precision are key aspects of his successful boatbuilding methods.Step 4: Finishing Touches
Once the flange is fully dried, Sven removes the clamps carefully, ensuring no damage occurs during this process. He then moves on to attaching four more pieces onto these main frames, completing two pairs of flanges for the bulkhead hatches.The Final Touches
While two flanges form the primary support structure around the hatches, Sven mentions there are two additional pieces required at each end to ensure comprehensive protection. This attention to detail highlights his commitment to producing a durable and reliable design. “Sailing is about finding your path, whether it’s across an ocean or within yourself.” – Sven Yrvind In conclusion, making flanges around bulkhead hatches may seem complex at first glance, but by following Sven Yrvind’s meticulous process, enthusiasts can achieve professional-level results. Remember that the journey of boatbuilding is as rewarding as reaching your destination; it tests one’s patience and dedication. For those seeking to embark on this adventure or simply gain more insight into marine craftsmanship, Sven’s wisdom is invaluable.Once the flange is fully dried, Sven removes the clamps carefully, ensuring no damage occurs during this process. He then moves on to attaching four more pieces onto these main frames, completing two pairs of flanges for the bulkhead hatches.The Final Touches
While two flanges form the primary support structure around the hatches, Sven mentions there are two additional pieces required at each end to ensure comprehensive protection. This attention to detail highlights his commitment to producing a durable and reliable design. “Sailing is about finding your path, whether it’s across an ocean or within yourself.” – Sven Yrvind In conclusion, making flanges around bulkhead hatches may seem complex at first glance, but by following Sven Yrvind’s meticulous process, enthusiasts can achieve professional-level results. Remember that the journey of boatbuilding is as rewarding as reaching your destination; it tests one’s patience and dedication. For those seeking to embark on this adventure or simply gain more insight into marine craftsmanship, Sven’s wisdom is invaluable.Making Flanges Around Bulkhead Hatches for Canvas
Sven Yrvind, a renowned yacht designer and sailor, shares valuable insights on creating flanges around bulkhead hatches for canvas protection in this enlightening video. By following his expert guidance, boat enthusiasts can ensure their living areas remain secure while allowing unhindered access through the hatches.Step 1: Starting with the Flange
Sven begins by explaining that working on flanges vertically and horizontally is significantly easier than doing so in a flat position. To simplify the process further, he divides the task into two or three steps as suggested by fellow expert “for for.” This approach not only makes it more manageable but also allows for greater precision in crafting each component.Step 2: Applying Glue and Securing
Sven proceeds to apply glue along one edge of the flange, ensuring a secure bond when clamped into place. He emphasizes that this stage is crucial for maintaining the structural integrity of the flange, which in turn safeguards the living area beneath the canvas when hatches are open.Step 3: Allowing Time to Dry
After securely attaching the first portion of the flange, Sven allows ample time for it to dry before moving forward with additional steps. This patience and precision are key aspects of his successful boatbuilding methods.Step 4: Finishing Touches
Once the flange is fully dried, Sven removes the clamps carefully, ensuring no damage occurs during this process. He then moves on to attaching four more pieces onto these main frames, completing two pairs of flanges for the bulkhead hatches.The Final Touches
While two flanges form the primary support structure around the hatches, Sven mentions there are two additional pieces required at each end to ensure comprehensive protection. This attention to detail highlights his commitment to producing a durable and reliable design. “Sailing is about finding your path, whether it’s across an ocean or within yourself.” – Sven Yrvind In conclusion, making flanges around bulkhead hatches may seem complex at first glance, but by following Sven Yrvind’s meticulous process, enthusiasts can achieve professional-level results. Remember that the journey of boatbuilding is as rewarding as reaching your destination; it tests one’s patience and dedication. For those seeking to embark on this adventure or simply gain more insight into marine craftsmanship, Sven’s wisdom is invaluable.Sven proceeds to apply glue along one edge of the flange, ensuring a secure bond when clamped into place. He emphasizes that this stage is crucial for maintaining the structural integrity of the flange, which in turn safeguards the living area beneath the canvas when hatches are open.Step 3: Allowing Time to Dry
After securely attaching the first portion of the flange, Sven allows ample time for it to dry before moving forward with additional steps. This patience and precision are key aspects of his successful boatbuilding methods.Step 4: Finishing Touches
Once the flange is fully dried, Sven removes the clamps carefully, ensuring no damage occurs during this process. He then moves on to attaching four more pieces onto these main frames, completing two pairs of flanges for the bulkhead hatches.The Final Touches
While two flanges form the primary support structure around the hatches, Sven mentions there are two additional pieces required at each end to ensure comprehensive protection. This attention to detail highlights his commitment to producing a durable and reliable design. “Sailing is about finding your path, whether it’s across an ocean or within yourself.” – Sven Yrvind In conclusion, making flanges around bulkhead hatches may seem complex at first glance, but by following Sven Yrvind’s meticulous process, enthusiasts can achieve professional-level results. Remember that the journey of boatbuilding is as rewarding as reaching your destination; it tests one’s patience and dedication. For those seeking to embark on this adventure or simply gain more insight into marine craftsmanship, Sven’s wisdom is invaluable.Sven begins by explaining that working on flanges vertically and horizontally is significantly easier than doing so in a flat position. To simplify the process further, he divides the task into two or three steps as suggested by fellow expert “for for.” This approach not only makes it more manageable but also allows for greater precision in crafting each component.Step 2: Applying Glue and Securing
Sven proceeds to apply glue along one edge of the flange, ensuring a secure bond when clamped into place. He emphasizes that this stage is crucial for maintaining the structural integrity of the flange, which in turn safeguards the living area beneath the canvas when hatches are open.Step 3: Allowing Time to Dry
After securely attaching the first portion of the flange, Sven allows ample time for it to dry before moving forward with additional steps. This patience and precision are key aspects of his successful boatbuilding methods.Step 4: Finishing Touches
Once the flange is fully dried, Sven removes the clamps carefully, ensuring no damage occurs during this process. He then moves on to attaching four more pieces onto these main frames, completing two pairs of flanges for the bulkhead hatches.The Final Touches
While two flanges form the primary support structure around the hatches, Sven mentions there are two additional pieces required at each end to ensure comprehensive protection. This attention to detail highlights his commitment to producing a durable and reliable design. “Sailing is about finding your path, whether it’s across an ocean or within yourself.” – Sven Yrvind In conclusion, making flanges around bulkhead hatches may seem complex at first glance, but by following Sven Yrvind’s meticulous process, enthusiasts can achieve professional-level results. Remember that the journey of boatbuilding is as rewarding as reaching your destination; it tests one’s patience and dedication. For those seeking to embark on this adventure or simply gain more insight into marine craftsmanship, Sven’s wisdom is invaluable.Sven Yrvind, a renowned yacht designer and sailor, shares valuable insights on creating flanges around bulkhead hatches for canvas protection in this enlightening video. By following his expert guidance, boat enthusiasts can ensure their living areas remain secure while allowing unhindered access through the hatches.Step 1: Starting with the Flange
Sven begins by explaining that working on flanges vertically and horizontally is significantly easier than doing so in a flat position. To simplify the process further, he divides the task into two or three steps as suggested by fellow expert “for for.” This approach not only makes it more manageable but also allows for greater precision in crafting each component.Step 2: Applying Glue and Securing
Sven proceeds to apply glue along one edge of the flange, ensuring a secure bond when clamped into place. He emphasizes that this stage is crucial for maintaining the structural integrity of the flange, which in turn safeguards the living area beneath the canvas when hatches are open.Step 3: Allowing Time to Dry
After securely attaching the first portion of the flange, Sven allows ample time for it to dry before moving forward with additional steps. This patience and precision are key aspects of his successful boatbuilding methods.Step 4: Finishing Touches
Once the flange is fully dried, Sven removes the clamps carefully, ensuring no damage occurs during this process. He then moves on to attaching four more pieces onto these main frames, completing two pairs of flanges for the bulkhead hatches.The Final Touches
While two flanges form the primary support structure around the hatches, Sven mentions there are two additional pieces required at each end to ensure comprehensive protection. This attention to detail highlights his commitment to producing a durable and reliable design. “Sailing is about finding your path, whether it’s across an ocean or within yourself.” – Sven Yrvind In conclusion, making flanges around bulkhead hatches may seem complex at first glance, but by following Sven Yrvind’s meticulous process, enthusiasts can achieve professional-level results. Remember that the journey of boatbuilding is as rewarding as reaching your destination; it tests one’s patience and dedication. For those seeking to embark on this adventure or simply gain more insight into marine craftsmanship, Sven’s wisdom is invaluable.Making Flanges Around Bulkhead Hatches for Canvas
Sven Yrvind, a renowned yacht designer and sailor, shares valuable insights on creating flanges around bulkhead hatches for canvas protection in this enlightening video. By following his expert guidance, boat enthusiasts can ensure their living areas remain secure while allowing unhindered access through the hatches.Step 1: Starting with the Flange
Sven begins by explaining that working on flanges vertically and horizontally is significantly easier than doing so in a flat position. To simplify the process further, he divides the task into two or three steps as suggested by fellow expert “for for.” This approach not only makes it more manageable but also allows for greater precision in crafting each component.Step 2: Applying Glue and Securing
Sven proceeds to apply glue along one edge of the flange, ensuring a secure bond when clamped into place. He emphasizes that this stage is crucial for maintaining the structural integrity of the flange, which in turn safeguards the living area beneath the canvas when hatches are open.Step 3: Allowing Time to Dry
After securely attaching the first portion of the flange, Sven allows ample time for it to dry before moving forward with additional steps. This patience and precision are key aspects of his successful boatbuilding methods.Step 4: Finishing Touches
Once the flange is fully dried, Sven removes the clamps carefully, ensuring no damage occurs during this process. He then moves on to attaching four more pieces onto these main frames, completing two pairs of flanges for the bulkhead hatches.The Final Touches
While two flanges form the primary support structure around the hatches, Sven mentions there are two additional pieces required at each end to ensure comprehensive protection. This attention to detail highlights his commitment to producing a durable and reliable design. “Sailing is about finding your path, whether it’s across an ocean or within yourself.” – Sven Yrvind In conclusion, making flanges around bulkhead hatches may seem complex at first glance, but by following Sven Yrvind’s meticulous process, enthusiasts can achieve professional-level results. Remember that the journey of boatbuilding is as rewarding as reaching your destination; it tests one’s patience and dedication. For those seeking to embark on this adventure or simply gain more insight into marine craftsmanship, Sven’s wisdom is invaluable.Once the flange is fully dried, Sven removes the clamps carefully, ensuring no damage occurs during this process. He then moves on to attaching four more pieces onto these main frames, completing two pairs of flanges for the bulkhead hatches.The Final Touches
While two flanges form the primary support structure around the hatches, Sven mentions there are two additional pieces required at each end to ensure comprehensive protection. This attention to detail highlights his commitment to producing a durable and reliable design. “Sailing is about finding your path, whether it’s across an ocean or within yourself.” – Sven Yrvind In conclusion, making flanges around bulkhead hatches may seem complex at first glance, but by following Sven Yrvind’s meticulous process, enthusiasts can achieve professional-level results. Remember that the journey of boatbuilding is as rewarding as reaching your destination; it tests one’s patience and dedication. For those seeking to embark on this adventure or simply gain more insight into marine craftsmanship, Sven’s wisdom is invaluable.Sven proceeds to apply glue along one edge of the flange, ensuring a secure bond when clamped into place. He emphasizes that this stage is crucial for maintaining the structural integrity of the flange, which in turn safeguards the living area beneath the canvas when hatches are open.Step 3: Allowing Time to Dry
After securely attaching the first portion of the flange, Sven allows ample time for it to dry before moving forward with additional steps. This patience and precision are key aspects of his successful boatbuilding methods.Step 4: Finishing Touches
Once the flange is fully dried, Sven removes the clamps carefully, ensuring no damage occurs during this process. He then moves on to attaching four more pieces onto these main frames, completing two pairs of flanges for the bulkhead hatches.The Final Touches
While two flanges form the primary support structure around the hatches, Sven mentions there are two additional pieces required at each end to ensure comprehensive protection. This attention to detail highlights his commitment to producing a durable and reliable design. “Sailing is about finding your path, whether it’s across an ocean or within yourself.” – Sven Yrvind In conclusion, making flanges around bulkhead hatches may seem complex at first glance, but by following Sven Yrvind’s meticulous process, enthusiasts can achieve professional-level results. Remember that the journey of boatbuilding is as rewarding as reaching your destination; it tests one’s patience and dedication. For those seeking to embark on this adventure or simply gain more insight into marine craftsmanship, Sven’s wisdom is invaluable.Sven begins by explaining that working on flanges vertically and horizontally is significantly easier than doing so in a flat position. To simplify the process further, he divides the task into two or three steps as suggested by fellow expert “for for.” This approach not only makes it more manageable but also allows for greater precision in crafting each component.Step 2: Applying Glue and Securing
Sven proceeds to apply glue along one edge of the flange, ensuring a secure bond when clamped into place. He emphasizes that this stage is crucial for maintaining the structural integrity of the flange, which in turn safeguards the living area beneath the canvas when hatches are open.Step 3: Allowing Time to Dry
After securely attaching the first portion of the flange, Sven allows ample time for it to dry before moving forward with additional steps. This patience and precision are key aspects of his successful boatbuilding methods.Step 4: Finishing Touches
Once the flange is fully dried, Sven removes the clamps carefully, ensuring no damage occurs during this process. He then moves on to attaching four more pieces onto these main frames, completing two pairs of flanges for the bulkhead hatches.The Final Touches
While two flanges form the primary support structure around the hatches, Sven mentions there are two additional pieces required at each end to ensure comprehensive protection. This attention to detail highlights his commitment to producing a durable and reliable design. “Sailing is about finding your path, whether it’s across an ocean or within yourself.” – Sven Yrvind In conclusion, making flanges around bulkhead hatches may seem complex at first glance, but by following Sven Yrvind’s meticulous process, enthusiasts can achieve professional-level results. Remember that the journey of boatbuilding is as rewarding as reaching your destination; it tests one’s patience and dedication. For those seeking to embark on this adventure or simply gain more insight into marine craftsmanship, Sven’s wisdom is invaluable.Sven Yrvind, a renowned yacht designer and sailor, shares valuable insights on creating flanges around bulkhead hatches for canvas protection in this enlightening video. By following his expert guidance, boat enthusiasts can ensure their living areas remain secure while allowing unhindered access through the hatches.Step 1: Starting with the Flange
Sven begins by explaining that working on flanges vertically and horizontally is significantly easier than doing so in a flat position. To simplify the process further, he divides the task into two or three steps as suggested by fellow expert “for for.” This approach not only makes it more manageable but also allows for greater precision in crafting each component.Step 2: Applying Glue and Securing
Sven proceeds to apply glue along one edge of the flange, ensuring a secure bond when clamped into place. He emphasizes that this stage is crucial for maintaining the structural integrity of the flange, which in turn safeguards the living area beneath the canvas when hatches are open.Step 3: Allowing Time to Dry
After securely attaching the first portion of the flange, Sven allows ample time for it to dry before moving forward with additional steps. This patience and precision are key aspects of his successful boatbuilding methods.Step 4: Finishing Touches
Once the flange is fully dried, Sven removes the clamps carefully, ensuring no damage occurs during this process. He then moves on to attaching four more pieces onto these main frames, completing two pairs of flanges for the bulkhead hatches.The Final Touches
While two flanges form the primary support structure around the hatches, Sven mentions there are two additional pieces required at each end to ensure comprehensive protection. This attention to detail highlights his commitment to producing a durable and reliable design. “Sailing is about finding your path, whether it’s across an ocean or within yourself.” – Sven Yrvind In conclusion, making flanges around bulkhead hatches may seem complex at first glance, but by following Sven Yrvind’s meticulous process, enthusiasts can achieve professional-level results. Remember that the journey of boatbuilding is as rewarding as reaching your destination; it tests one’s patience and dedication. For those seeking to embark on this adventure or simply gain more insight into marine craftsmanship, Sven’s wisdom is invaluable.Making Flanges Around Bulkhead Hatches for Canvas
Sven Yrvind, a renowned yacht designer and sailor, shares valuable insights on creating flanges around bulkhead hatches for canvas protection in this enlightening video. By following his expert guidance, boat enthusiasts can ensure their living areas remain secure while allowing unhindered access through the hatches.Step 1: Starting with the Flange
Sven begins by explaining that working on flanges vertically and horizontally is significantly easier than doing so in a flat position. To simplify the process further, he divides the task into two or three steps as suggested by fellow expert “for for.” This approach not only makes it more manageable but also allows for greater precision in crafting each component.Step 2: Applying Glue and Securing
Sven proceeds to apply glue along one edge of the flange, ensuring a secure bond when clamped into place. He emphasizes that this stage is crucial for maintaining the structural integrity of the flange, which in turn safeguards the living area beneath the canvas when hatches are open.Step 3: Allowing Time to Dry
After securely attaching the first portion of the flange, Sven allows ample time for it to dry before moving forward with additional steps. This patience and precision are key aspects of his successful boatbuilding methods.Step 4: Finishing Touches
Once the flange is fully dried, Sven removes the clamps carefully, ensuring no damage occurs during this process. He then moves on to attaching four more pieces onto these main frames, completing two pairs of flanges for the bulkhead hatches.The Final Touches
While two flanges form the primary support structure around the hatches, Sven mentions there are two additional pieces required at each end to ensure comprehensive protection. This attention to detail highlights his commitment to producing a durable and reliable design. “Sailing is about finding your path, whether it’s across an ocean or within yourself.” – Sven Yrvind In conclusion, making flanges around bulkhead hatches may seem complex at first glance, but by following Sven Yrvind’s meticulous process, enthusiasts can achieve professional-level results. Remember that the journey of boatbuilding is as rewarding as reaching your destination; it tests one’s patience and dedication. For those seeking to embark on this adventure or simply gain more insight into marine craftsmanship, Sven’s wisdom is invaluable.After securely attaching the first portion of the flange, Sven allows ample time for it to dry before moving forward with additional steps. This patience and precision are key aspects of his successful boatbuilding methods.Step 4: Finishing Touches
Once the flange is fully dried, Sven removes the clamps carefully, ensuring no damage occurs during this process. He then moves on to attaching four more pieces onto these main frames, completing two pairs of flanges for the bulkhead hatches.The Final Touches
While two flanges form the primary support structure around the hatches, Sven mentions there are two additional pieces required at each end to ensure comprehensive protection. This attention to detail highlights his commitment to producing a durable and reliable design. “Sailing is about finding your path, whether it’s across an ocean or within yourself.” – Sven Yrvind In conclusion, making flanges around bulkhead hatches may seem complex at first glance, but by following Sven Yrvind’s meticulous process, enthusiasts can achieve professional-level results. Remember that the journey of boatbuilding is as rewarding as reaching your destination; it tests one’s patience and dedication. For those seeking to embark on this adventure or simply gain more insight into marine craftsmanship, Sven’s wisdom is invaluable.Sven proceeds to apply glue along one edge of the flange, ensuring a secure bond when clamped into place. He emphasizes that this stage is crucial for maintaining the structural integrity of the flange, which in turn safeguards the living area beneath the canvas when hatches are open.Step 3: Allowing Time to Dry
After securely attaching the first portion of the flange, Sven allows ample time for it to dry before moving forward with additional steps. This patience and precision are key aspects of his successful boatbuilding methods.Step 4: Finishing Touches
Once the flange is fully dried, Sven removes the clamps carefully, ensuring no damage occurs during this process. He then moves on to attaching four more pieces onto these main frames, completing two pairs of flanges for the bulkhead hatches.The Final Touches
While two flanges form the primary support structure around the hatches, Sven mentions there are two additional pieces required at each end to ensure comprehensive protection. This attention to detail highlights his commitment to producing a durable and reliable design. “Sailing is about finding your path, whether it’s across an ocean or within yourself.” – Sven Yrvind In conclusion, making flanges around bulkhead hatches may seem complex at first glance, but by following Sven Yrvind’s meticulous process, enthusiasts can achieve professional-level results. Remember that the journey of boatbuilding is as rewarding as reaching your destination; it tests one’s patience and dedication. For those seeking to embark on this adventure or simply gain more insight into marine craftsmanship, Sven’s wisdom is invaluable.Sven begins by explaining that working on flanges vertically and horizontally is significantly easier than doing so in a flat position. To simplify the process further, he divides the task into two or three steps as suggested by fellow expert “for for.” This approach not only makes it more manageable but also allows for greater precision in crafting each component.Step 2: Applying Glue and Securing
Sven proceeds to apply glue along one edge of the flange, ensuring a secure bond when clamped into place. He emphasizes that this stage is crucial for maintaining the structural integrity of the flange, which in turn safeguards the living area beneath the canvas when hatches are open.Step 3: Allowing Time to Dry
After securely attaching the first portion of the flange, Sven allows ample time for it to dry before moving forward with additional steps. This patience and precision are key aspects of his successful boatbuilding methods.Step 4: Finishing Touches
Once the flange is fully dried, Sven removes the clamps carefully, ensuring no damage occurs during this process. He then moves on to attaching four more pieces onto these main frames, completing two pairs of flanges for the bulkhead hatches.The Final Touches
While two flanges form the primary support structure around the hatches, Sven mentions there are two additional pieces required at each end to ensure comprehensive protection. This attention to detail highlights his commitment to producing a durable and reliable design. “Sailing is about finding your path, whether it’s across an ocean or within yourself.” – Sven Yrvind In conclusion, making flanges around bulkhead hatches may seem complex at first glance, but by following Sven Yrvind’s meticulous process, enthusiasts can achieve professional-level results. Remember that the journey of boatbuilding is as rewarding as reaching your destination; it tests one’s patience and dedication. For those seeking to embark on this adventure or simply gain more insight into marine craftsmanship, Sven’s wisdom is invaluable.Sven Yrvind, a renowned yacht designer and sailor, shares valuable insights on creating flanges around bulkhead hatches for canvas protection in this enlightening video. By following his expert guidance, boat enthusiasts can ensure their living areas remain secure while allowing unhindered access through the hatches.Step 1: Starting with the Flange
Sven begins by explaining that working on flanges vertically and horizontally is significantly easier than doing so in a flat position. To simplify the process further, he divides the task into two or three steps as suggested by fellow expert “for for.” This approach not only makes it more manageable but also allows for greater precision in crafting each component.Step 2: Applying Glue and Securing
Sven proceeds to apply glue along one edge of the flange, ensuring a secure bond when clamped into place. He emphasizes that this stage is crucial for maintaining the structural integrity of the flange, which in turn safeguards the living area beneath the canvas when hatches are open.Step 3: Allowing Time to Dry
After securely attaching the first portion of the flange, Sven allows ample time for it to dry before moving forward with additional steps. This patience and precision are key aspects of his successful boatbuilding methods.Step 4: Finishing Touches
Once the flange is fully dried, Sven removes the clamps carefully, ensuring no damage occurs during this process. He then moves on to attaching four more pieces onto these main frames, completing two pairs of flanges for the bulkhead hatches.The Final Touches
While two flanges form the primary support structure around the hatches, Sven mentions there are two additional pieces required at each end to ensure comprehensive protection. This attention to detail highlights his commitment to producing a durable and reliable design. “Sailing is about finding your path, whether it’s across an ocean or within yourself.” – Sven Yrvind In conclusion, making flanges around bulkhead hatches may seem complex at first glance, but by following Sven Yrvind’s meticulous process, enthusiasts can achieve professional-level results. Remember that the journey of boatbuilding is as rewarding as reaching your destination; it tests one’s patience and dedication. For those seeking to embark on this adventure or simply gain more insight into marine craftsmanship, Sven’s wisdom is invaluable.Making Flanges Around Bulkhead Hatches for Canvas
Sven Yrvind, a renowned yacht designer and sailor, shares valuable insights on creating flanges around bulkhead hatches for canvas protection in this enlightening video. By following his expert guidance, boat enthusiasts can ensure their living areas remain secure while allowing unhindered access through the hatches.Step 1: Starting with the Flange
Sven begins by explaining that working on flanges vertically and horizontally is significantly easier than doing so in a flat position. To simplify the process further, he divides the task into two or three steps as suggested by fellow expert “for for.” This approach not only makes it more manageable but also allows for greater precision in crafting each component.Step 2: Applying Glue and Securing
Sven proceeds to apply glue along one edge of the flange, ensuring a secure bond when clamped into place. He emphasizes that this stage is crucial for maintaining the structural integrity of the flange, which in turn safeguards the living area beneath the canvas when hatches are open.Step 3: Allowing Time to Dry
After securely attaching the first portion of the flange, Sven allows ample time for it to dry before moving forward with additional steps. This patience and precision are key aspects of his successful boatbuilding methods.Step 4: Finishing Touches
Once the flange is fully dried, Sven removes the clamps carefully, ensuring no damage occurs during this process. He then moves on to attaching four more pieces onto these main frames, completing two pairs of flanges for the bulkhead hatches.The Final Touches
While two flanges form the primary support structure around the hatches, Sven mentions there are two additional pieces required at each end to ensure comprehensive protection. This attention to detail highlights his commitment to producing a durable and reliable design. “Sailing is about finding your path, whether it’s across an ocean or within yourself.” – Sven Yrvind In conclusion, making flanges around bulkhead hatches may seem complex at first glance, but by following Sven Yrvind’s meticulous process, enthusiasts can achieve professional-level results. Remember that the journey of boatbuilding is as rewarding as reaching your destination; it tests one’s patience and dedication. For those seeking to embark on this adventure or simply gain more insight into marine craftsmanship, Sven’s wisdom is invaluable.Once the flange is fully dried, Sven removes the clamps carefully, ensuring no damage occurs during this process. He then moves on to attaching four more pieces onto these main frames, completing two pairs of flanges for the bulkhead hatches.The Final Touches
While two flanges form the primary support structure around the hatches, Sven mentions there are two additional pieces required at each end to ensure comprehensive protection. This attention to detail highlights his commitment to producing a durable and reliable design. “Sailing is about finding your path, whether it’s across an ocean or within yourself.” – Sven Yrvind In conclusion, making flanges around bulkhead hatches may seem complex at first glance, but by following Sven Yrvind’s meticulous process, enthusiasts can achieve professional-level results. Remember that the journey of boatbuilding is as rewarding as reaching your destination; it tests one’s patience and dedication. For those seeking to embark on this adventure or simply gain more insight into marine craftsmanship, Sven’s wisdom is invaluable.After securely attaching the first portion of the flange, Sven allows ample time for it to dry before moving forward with additional steps. This patience and precision are key aspects of his successful boatbuilding methods.Step 4: Finishing Touches
Once the flange is fully dried, Sven removes the clamps carefully, ensuring no damage occurs during this process. He then moves on to attaching four more pieces onto these main frames, completing two pairs of flanges for the bulkhead hatches.The Final Touches
While two flanges form the primary support structure around the hatches, Sven mentions there are two additional pieces required at each end to ensure comprehensive protection. This attention to detail highlights his commitment to producing a durable and reliable design. “Sailing is about finding your path, whether it’s across an ocean or within yourself.” – Sven Yrvind In conclusion, making flanges around bulkhead hatches may seem complex at first glance, but by following Sven Yrvind’s meticulous process, enthusiasts can achieve professional-level results. Remember that the journey of boatbuilding is as rewarding as reaching your destination; it tests one’s patience and dedication. For those seeking to embark on this adventure or simply gain more insight into marine craftsmanship, Sven’s wisdom is invaluable.Sven proceeds to apply glue along one edge of the flange, ensuring a secure bond when clamped into place. He emphasizes that this stage is crucial for maintaining the structural integrity of the flange, which in turn safeguards the living area beneath the canvas when hatches are open.Step 3: Allowing Time to Dry
After securely attaching the first portion of the flange, Sven allows ample time for it to dry before moving forward with additional steps. This patience and precision are key aspects of his successful boatbuilding methods.Step 4: Finishing Touches
Once the flange is fully dried, Sven removes the clamps carefully, ensuring no damage occurs during this process. He then moves on to attaching four more pieces onto these main frames, completing two pairs of flanges for the bulkhead hatches.The Final Touches
While two flanges form the primary support structure around the hatches, Sven mentions there are two additional pieces required at each end to ensure comprehensive protection. This attention to detail highlights his commitment to producing a durable and reliable design. “Sailing is about finding your path, whether it’s across an ocean or within yourself.” – Sven Yrvind In conclusion, making flanges around bulkhead hatches may seem complex at first glance, but by following Sven Yrvind’s meticulous process, enthusiasts can achieve professional-level results. Remember that the journey of boatbuilding is as rewarding as reaching your destination; it tests one’s patience and dedication. For those seeking to embark on this adventure or simply gain more insight into marine craftsmanship, Sven’s wisdom is invaluable.Sven begins by explaining that working on flanges vertically and horizontally is significantly easier than doing so in a flat position. To simplify the process further, he divides the task into two or three steps as suggested by fellow expert “for for.” This approach not only makes it more manageable but also allows for greater precision in crafting each component.Step 2: Applying Glue and Securing
Sven proceeds to apply glue along one edge of the flange, ensuring a secure bond when clamped into place. He emphasizes that this stage is crucial for maintaining the structural integrity of the flange, which in turn safeguards the living area beneath the canvas when hatches are open.Step 3: Allowing Time to Dry
After securely attaching the first portion of the flange, Sven allows ample time for it to dry before moving forward with additional steps. This patience and precision are key aspects of his successful boatbuilding methods.Step 4: Finishing Touches
Once the flange is fully dried, Sven removes the clamps carefully, ensuring no damage occurs during this process. He then moves on to attaching four more pieces onto these main frames, completing two pairs of flanges for the bulkhead hatches.The Final Touches
While two flanges form the primary support structure around the hatches, Sven mentions there are two additional pieces required at each end to ensure comprehensive protection. This attention to detail highlights his commitment to producing a durable and reliable design. “Sailing is about finding your path, whether it’s across an ocean or within yourself.” – Sven Yrvind In conclusion, making flanges around bulkhead hatches may seem complex at first glance, but by following Sven Yrvind’s meticulous process, enthusiasts can achieve professional-level results. Remember that the journey of boatbuilding is as rewarding as reaching your destination; it tests one’s patience and dedication. For those seeking to embark on this adventure or simply gain more insight into marine craftsmanship, Sven’s wisdom is invaluable.Sven Yrvind, a renowned yacht designer and sailor, shares valuable insights on creating flanges around bulkhead hatches for canvas protection in this enlightening video. By following his expert guidance, boat enthusiasts can ensure their living areas remain secure while allowing unhindered access through the hatches.Step 1: Starting with the Flange
Sven begins by explaining that working on flanges vertically and horizontally is significantly easier than doing so in a flat position. To simplify the process further, he divides the task into two or three steps as suggested by fellow expert “for for.” This approach not only makes it more manageable but also allows for greater precision in crafting each component.Step 2: Applying Glue and Securing
Sven proceeds to apply glue along one edge of the flange, ensuring a secure bond when clamped into place. He emphasizes that this stage is crucial for maintaining the structural integrity of the flange, which in turn safeguards the living area beneath the canvas when hatches are open.Step 3: Allowing Time to Dry
After securely attaching the first portion of the flange, Sven allows ample time for it to dry before moving forward with additional steps. This patience and precision are key aspects of his successful boatbuilding methods.Step 4: Finishing Touches
Once the flange is fully dried, Sven removes the clamps carefully, ensuring no damage occurs during this process. He then moves on to attaching four more pieces onto these main frames, completing two pairs of flanges for the bulkhead hatches.The Final Touches
While two flanges form the primary support structure around the hatches, Sven mentions there are two additional pieces required at each end to ensure comprehensive protection. This attention to detail highlights his commitment to producing a durable and reliable design. “Sailing is about finding your path, whether it’s across an ocean or within yourself.” – Sven Yrvind In conclusion, making flanges around bulkhead hatches may seem complex at first glance, but by following Sven Yrvind’s meticulous process, enthusiasts can achieve professional-level results. Remember that the journey of boatbuilding is as rewarding as reaching your destination; it tests one’s patience and dedication. For those seeking to embark on this adventure or simply gain more insight into marine craftsmanship, Sven’s wisdom is invaluable.Making Flanges Around Bulkhead Hatches for Canvas
Sven Yrvind, a renowned yacht designer and sailor, shares valuable insights on creating flanges around bulkhead hatches for canvas protection in this enlightening video. By following his expert guidance, boat enthusiasts can ensure their living areas remain secure while allowing unhindered access through the hatches.Step 1: Starting with the Flange
Sven begins by explaining that working on flanges vertically and horizontally is significantly easier than doing so in a flat position. To simplify the process further, he divides the task into two or three steps as suggested by fellow expert “for for.” This approach not only makes it more manageable but also allows for greater precision in crafting each component.Step 2: Applying Glue and Securing
Sven proceeds to apply glue along one edge of the flange, ensuring a secure bond when clamped into place. He emphasizes that this stage is crucial for maintaining the structural integrity of the flange, which in turn safeguards the living area beneath the canvas when hatches are open.Step 3: Allowing Time to Dry
After securely attaching the first portion of the flange, Sven allows ample time for it to dry before moving forward with additional steps. This patience and precision are key aspects of his successful boatbuilding methods.Step 4: Finishing Touches
Once the flange is fully dried, Sven removes the clamps carefully, ensuring no damage occurs during this process. He then moves on to attaching four more pieces onto these main frames, completing two pairs of flanges for the bulkhead hatches.The Final Touches
While two flanges form the primary support structure around the hatches, Sven mentions there are two additional pieces required at each end to ensure comprehensive protection. This attention to detail highlights his commitment to producing a durable and reliable design. “Sailing is about finding your path, whether it’s across an ocean or within yourself.” – Sven Yrvind In conclusion, making flanges around bulkhead hatches may seem complex at first glance, but by following Sven Yrvind’s meticulous process, enthusiasts can achieve professional-level results. Remember that the journey of boatbuilding is as rewarding as reaching your destination; it tests one’s patience and dedication. For those seeking to embark on this adventure or simply gain more insight into marine craftsmanship, Sven’s wisdom is invaluable.After securely attaching the first portion of the flange, Sven allows ample time for it to dry before moving forward with additional steps. This patience and precision are key aspects of his successful boatbuilding methods.Step 4: Finishing Touches
Once the flange is fully dried, Sven removes the clamps carefully, ensuring no damage occurs during this process. He then moves on to attaching four more pieces onto these main frames, completing two pairs of flanges for the bulkhead hatches.The Final Touches
While two flanges form the primary support structure around the hatches, Sven mentions there are two additional pieces required at each end to ensure comprehensive protection. This attention to detail highlights his commitment to producing a durable and reliable design. “Sailing is about finding your path, whether it’s across an ocean or within yourself.” – Sven Yrvind In conclusion, making flanges around bulkhead hatches may seem complex at first glance, but by following Sven Yrvind’s meticulous process, enthusiasts can achieve professional-level results. Remember that the journey of boatbuilding is as rewarding as reaching your destination; it tests one’s patience and dedication. For those seeking to embark on this adventure or simply gain more insight into marine craftsmanship, Sven’s wisdom is invaluable.Making Flanges Around Bulkhead Hatches for Canvas
Sven Yrvind, a renowned yacht designer and sailor, shares valuable insights on creating flanges around bulkhead hatches for canvas protection in this enlightening video. By following his expert guidance, boat enthusiasts can ensure their living areas remain secure while allowing unhindered access through the hatches.Step 1: Starting with the Flange
Sven begins by explaining that working on flanges vertically and horizontally is significantly easier than doing so in a flat position. To simplify the process further, he divides the task into two or three steps as suggested by fellow expert “for for.” This approach not only makes it more manageable but also allows for greater precision in crafting each component.Step 2: Applying Glue and Securing
Sven proceeds to apply glue along one edge of the flange, ensuring a secure bond when clamped into place. He emphasizes that this stage is crucial for maintaining the structural integrity of the flange, which in turn safeguards the living area beneath the canvas when hatches are open.Step 3: Allowing Time to Dry
After securely attaching the first portion of the flange, Sven allows ample time for it to dry before moving forward with additional steps. This patience and precision are key aspects of his successful boatbuilding methods.Step 4: Finishing Touches
Once the flange is fully dried, Sven removes the clamps carefully, ensuring no damage occurs during this process. He then moves on to attaching four more pieces onto these main frames, completing two pairs of flanges for the bulkhead hatches.The Final Touches
While two flanges form the primary support structure around the hatches, Sven mentions there are two additional pieces required at each end to ensure comprehensive protection. This attention to detail highlights his commitment to producing a durable and reliable design. “Sailing is about finding your path, whether it’s across an ocean or within yourself.” – Sven Yrvind In conclusion, making flanges around bulkhead hatches may seem complex at first glance, but by following Sven Yrvind’s meticulous process, enthusiasts can achieve professional-level results. Remember that the journey of boatbuilding is as rewarding as reaching your destination; it tests one’s patience and dedication. For those seeking to embark on this adventure or simply gain more insight into marine craftsmanship, Sven’s wisdom is invaluable.Sven proceeds to apply glue along one edge of the flange, ensuring a secure bond when clamped into place. He emphasizes that this stage is crucial for maintaining the structural integrity of the flange, which in turn safeguards the living area beneath the canvas when hatches are open.Step 3: Allowing Time to Dry
After securely attaching the first portion of the flange, Sven allows ample time for it to dry before moving forward with additional steps. This patience and precision are key aspects of his successful boatbuilding methods.Step 4: Finishing Touches
Once the flange is fully dried, Sven removes the clamps carefully, ensuring no damage occurs during this process. He then moves on to attaching four more pieces onto these main frames, completing two pairs of flanges for the bulkhead hatches.The Final Touches
While two flanges form the primary support structure around the hatches, Sven mentions there are two additional pieces required at each end to ensure comprehensive protection. This attention to detail highlights his commitment to producing a durable and reliable design. “Sailing is about finding your path, whether it’s across an ocean or within yourself.” – Sven Yrvind In conclusion, making flanges around bulkhead hatches may seem complex at first glance, but by following Sven Yrvind’s meticulous process, enthusiasts can achieve professional-level results. Remember that the journey of boatbuilding is as rewarding as reaching your destination; it tests one’s patience and dedication. For those seeking to embark on this adventure or simply gain more insight into marine craftsmanship, Sven’s wisdom is invaluable.Sven begins by explaining that working on flanges vertically and horizontally is significantly easier than doing so in a flat position. To simplify the process further, he divides the task into two or three steps as suggested by fellow expert “for for.” This approach not only makes it more manageable but also allows for greater precision in crafting each component.Step 2: Applying Glue and Securing
Sven proceeds to apply glue along one edge of the flange, ensuring a secure bond when clamped into place. He emphasizes that this stage is crucial for maintaining the structural integrity of the flange, which in turn safeguards the living area beneath the canvas when hatches are open.Step 3: Allowing Time to Dry
After securely attaching the first portion of the flange, Sven allows ample time for it to dry before moving forward with additional steps. This patience and precision are key aspects of his successful boatbuilding methods.Step 4: Finishing Touches
Once the flange is fully dried, Sven removes the clamps carefully, ensuring no damage occurs during this process. He then moves on to attaching four more pieces onto these main frames, completing two pairs of flanges for the bulkhead hatches.The Final Touches
While two flanges form the primary support structure around the hatches, Sven mentions there are two additional pieces required at each end to ensure comprehensive protection. This attention to detail highlights his commitment to producing a durable and reliable design. “Sailing is about finding your path, whether it’s across an ocean or within yourself.” – Sven Yrvind In conclusion, making flanges around bulkhead hatches may seem complex at first glance, but by following Sven Yrvind’s meticulous process, enthusiasts can achieve professional-level results. Remember that the journey of boatbuilding is as rewarding as reaching your destination; it tests one’s patience and dedication. For those seeking to embark on this adventure or simply gain more insight into marine craftsmanship, Sven’s wisdom is invaluable.Sven Yrvind, a renowned yacht designer and sailor, shares valuable insights on creating flanges around bulkhead hatches for canvas protection in this enlightening video. By following his expert guidance, boat enthusiasts can ensure their living areas remain secure while allowing unhindered access through the hatches.Step 1: Starting with the Flange
Sven begins by explaining that working on flanges vertically and horizontally is significantly easier than doing so in a flat position. To simplify the process further, he divides the task into two or three steps as suggested by fellow expert “for for.” This approach not only makes it more manageable but also allows for greater precision in crafting each component.Step 2: Applying Glue and Securing
Sven proceeds to apply glue along one edge of the flange, ensuring a secure bond when clamped into place. He emphasizes that this stage is crucial for maintaining the structural integrity of the flange, which in turn safeguards the living area beneath the canvas when hatches are open.Step 3: Allowing Time to Dry
After securely attaching the first portion of the flange, Sven allows ample time for it to dry before moving forward with additional steps. This patience and precision are key aspects of his successful boatbuilding methods.Step 4: Finishing Touches
Once the flange is fully dried, Sven removes the clamps carefully, ensuring no damage occurs during this process. He then moves on to attaching four more pieces onto these main frames, completing two pairs of flanges for the bulkhead hatches.The Final Touches
While two flanges form the primary support structure around the hatches, Sven mentions there are two additional pieces required at each end to ensure comprehensive protection. This attention to detail highlights his commitment to producing a durable and reliable design. “Sailing is about finding your path, whether it’s across an ocean or within yourself.” – Sven Yrvind In conclusion, making flanges around bulkhead hatches may seem complex at first glance, but by following Sven Yrvind’s meticulous process, enthusiasts can achieve professional-level results. Remember that the journey of boatbuilding is as rewarding as reaching your destination; it tests one’s patience and dedication. For those seeking to embark on this adventure or simply gain more insight into marine craftsmanship, Sven’s wisdom is invaluable.Making Flanges Around Bulkhead Hatches for Canvas
Sven Yrvind, a renowned yacht designer and sailor, shares valuable insights on creating flanges around bulkhead hatches for canvas protection in this enlightening video. By following his expert guidance, boat enthusiasts can ensure their living areas remain secure while allowing unhindered access through the hatches.Step 1: Starting with the Flange
Sven begins by explaining that working on flanges vertically and horizontally is significantly easier than doing so in a flat position. To simplify the process further, he divides the task into two or three steps as suggested by fellow expert “for for.” This approach not only makes it more manageable but also allows for greater precision in crafting each component.Step 2: Applying Glue and Securing
Sven proceeds to apply glue along one edge of the flange, ensuring a secure bond when clamped into place. He emphasizes that this stage is crucial for maintaining the structural integrity of the flange, which in turn safeguards the living area beneath the canvas when hatches are open.Step 3: Allowing Time to Dry
After securely attaching the first portion of the flange, Sven allows ample time for it to dry before moving forward with additional steps. This patience and precision are key aspects of his successful boatbuilding methods.Step 4: Finishing Touches
Once the flange is fully dried, Sven removes the clamps carefully, ensuring no damage occurs during this process. He then moves on to attaching four more pieces onto these main frames, completing two pairs of flanges for the bulkhead hatches.The Final Touches
While two flanges form the primary support structure around the hatches, Sven mentions there are two additional pieces required at each end to ensure comprehensive protection. This attention to detail highlights his commitment to producing a durable and reliable design. “Sailing is about finding your path, whether it’s across an ocean or within yourself.” – Sven Yrvind In conclusion, making flanges around bulkhead hatches may seem complex at first glance, but by following Sven Yrvind’s meticulous process, enthusiasts can achieve professional-level results. Remember that the journey of boatbuilding is as rewarding as reaching your destination; it tests one’s patience and dedication. For those seeking to embark on this adventure or simply gain more insight into marine craftsmanship, Sven’s wisdom is invaluable.Once the flange is fully dried, Sven removes the clamps carefully, ensuring no damage occurs during this process. He then moves on to attaching four more pieces onto these main frames, completing two pairs of flanges for the bulkhead hatches.The Final Touches
While two flanges form the primary support structure around the hatches, Sven mentions there are two additional pieces required at each end to ensure comprehensive protection. This attention to detail highlights his commitment to producing a durable and reliable design. “Sailing is about finding your path, whether it’s across an ocean or within yourself.” – Sven Yrvind In conclusion, making flanges around bulkhead hatches may seem complex at first glance, but by following Sven Yrvind’s meticulous process, enthusiasts can achieve professional-level results. Remember that the journey of boatbuilding is as rewarding as reaching your destination; it tests one’s patience and dedication. For those seeking to embark on this adventure or simply gain more insight into marine craftsmanship, Sven’s wisdom is invaluable.Sven proceeds to apply glue along one edge of the flange, ensuring a secure bond when clamped into place. He emphasizes that this stage is crucial for maintaining the structural integrity of the flange, which in turn safeguards the living area beneath the canvas when hatches are open.Step 3: Allowing Time to Dry
After securely attaching the first portion of the flange, Sven allows ample time for it to dry before moving forward with additional steps. This patience and precision are key aspects of his successful boatbuilding methods.Step 4: Finishing Touches
Once the flange is fully dried, Sven removes the clamps carefully, ensuring no damage occurs during this process. He then moves on to attaching four more pieces onto these main frames, completing two pairs of flanges for the bulkhead hatches.The Final Touches
While two flanges form the primary support structure around the hatches, Sven mentions there are two additional pieces required at each end to ensure comprehensive protection. This attention to detail highlights his commitment to producing a durable and reliable design. “Sailing is about finding your path, whether it’s across an ocean or within yourself.” – Sven Yrvind In conclusion, making flanges around bulkhead hatches may seem complex at first glance, but by following Sven Yrvind’s meticulous process, enthusiasts can achieve professional-level results. Remember that the journey of boatbuilding is as rewarding as reaching your destination; it tests one’s patience and dedication. For those seeking to embark on this adventure or simply gain more insight into marine craftsmanship, Sven’s wisdom is invaluable.Sven begins by explaining that working on flanges vertically and horizontally is significantly easier than doing so in a flat position. To simplify the process further, he divides the task into two or three steps as suggested by fellow expert “for for.” This approach not only makes it more manageable but also allows for greater precision in crafting each component.Step 2: Applying Glue and Securing
Sven proceeds to apply glue along one edge of the flange, ensuring a secure bond when clamped into place. He emphasizes that this stage is crucial for maintaining the structural integrity of the flange, which in turn safeguards the living area beneath the canvas when hatches are open.Step 3: Allowing Time to Dry
After securely attaching the first portion of the flange, Sven allows ample time for it to dry before moving forward with additional steps. This patience and precision are key aspects of his successful boatbuilding methods.Step 4: Finishing Touches
Once the flange is fully dried, Sven removes the clamps carefully, ensuring no damage occurs during this process. He then moves on to attaching four more pieces onto these main frames, completing two pairs of flanges for the bulkhead hatches.The Final Touches
While two flanges form the primary support structure around the hatches, Sven mentions there are two additional pieces required at each end to ensure comprehensive protection. This attention to detail highlights his commitment to producing a durable and reliable design. “Sailing is about finding your path, whether it’s across an ocean or within yourself.” – Sven Yrvind In conclusion, making flanges around bulkhead hatches may seem complex at first glance, but by following Sven Yrvind’s meticulous process, enthusiasts can achieve professional-level results. Remember that the journey of boatbuilding is as rewarding as reaching your destination; it tests one’s patience and dedication. For those seeking to embark on this adventure or simply gain more insight into marine craftsmanship, Sven’s wisdom is invaluable.Sven Yrvind, a renowned yacht designer and sailor, shares valuable insights on creating flanges around bulkhead hatches for canvas protection in this enlightening video. By following his expert guidance, boat enthusiasts can ensure their living areas remain secure while allowing unhindered access through the hatches.Step 1: Starting with the Flange
Sven begins by explaining that working on flanges vertically and horizontally is significantly easier than doing so in a flat position. To simplify the process further, he divides the task into two or three steps as suggested by fellow expert “for for.” This approach not only makes it more manageable but also allows for greater precision in crafting each component.Step 2: Applying Glue and Securing
Sven proceeds to apply glue along one edge of the flange, ensuring a secure bond when clamped into place. He emphasizes that this stage is crucial for maintaining the structural integrity of the flange, which in turn safeguards the living area beneath the canvas when hatches are open.Step 3: Allowing Time to Dry
After securely attaching the first portion of the flange, Sven allows ample time for it to dry before moving forward with additional steps. This patience and precision are key aspects of his successful boatbuilding methods.Step 4: Finishing Touches
Once the flange is fully dried, Sven removes the clamps carefully, ensuring no damage occurs during this process. He then moves on to attaching four more pieces onto these main frames, completing two pairs of flanges for the bulkhead hatches.The Final Touches
While two flanges form the primary support structure around the hatches, Sven mentions there are two additional pieces required at each end to ensure comprehensive protection. This attention to detail highlights his commitment to producing a durable and reliable design. “Sailing is about finding your path, whether it’s across an ocean or within yourself.” – Sven Yrvind In conclusion, making flanges around bulkhead hatches may seem complex at first glance, but by following Sven Yrvind’s meticulous process, enthusiasts can achieve professional-level results. Remember that the journey of boatbuilding is as rewarding as reaching your destination; it tests one’s patience and dedication. For those seeking to embark on this adventure or simply gain more insight into marine craftsmanship, Sven’s wisdom is invaluable.Making Flanges Around Bulkhead Hatches for Canvas
Sven Yrvind, a renowned yacht designer and sailor, shares valuable insights on creating flanges around bulkhead hatches for canvas protection in this enlightening video. By following his expert guidance, boat enthusiasts can ensure their living areas remain secure while allowing unhindered access through the hatches.Step 1: Starting with the Flange
Sven begins by explaining that working on flanges vertically and horizontally is significantly easier than doing so in a flat position. To simplify the process further, he divides the task into two or three steps as suggested by fellow expert “for for.” This approach not only makes it more manageable but also allows for greater precision in crafting each component.Step 2: Applying Glue and Securing
Sven proceeds to apply glue along one edge of the flange, ensuring a secure bond when clamped into place. He emphasizes that this stage is crucial for maintaining the structural integrity of the flange, which in turn safeguards the living area beneath the canvas when hatches are open.Step 3: Allowing Time to Dry
After securely attaching the first portion of the flange, Sven allows ample time for it to dry before moving forward with additional steps. This patience and precision are key aspects of his successful boatbuilding methods.Step 4: Finishing Touches
Once the flange is fully dried, Sven removes the clamps carefully, ensuring no damage occurs during this process. He then moves on to attaching four more pieces onto these main frames, completing two pairs of flanges for the bulkhead hatches.The Final Touches
While two flanges form the primary support structure around the hatches, Sven mentions there are two additional pieces required at each end to ensure comprehensive protection. This attention to detail highlights his commitment to producing a durable and reliable design. “Sailing is about finding your path, whether it’s across an ocean or within yourself.” – Sven Yrvind In conclusion, making flanges around bulkhead hatches may seem complex at first glance, but by following Sven Yrvind’s meticulous process, enthusiasts can achieve professional-level results. Remember that the journey of boatbuilding is as rewarding as reaching your destination; it tests one’s patience and dedication. For those seeking to embark on this adventure or simply gain more insight into marine craftsmanship, Sven’s wisdom is invaluable.After securely attaching the first portion of the flange, Sven allows ample time for it to dry before moving forward with additional steps. This patience and precision are key aspects of his successful boatbuilding methods.Step 4: Finishing Touches
Once the flange is fully dried, Sven removes the clamps carefully, ensuring no damage occurs during this process. He then moves on to attaching four more pieces onto these main frames, completing two pairs of flanges for the bulkhead hatches.The Final Touches
While two flanges form the primary support structure around the hatches, Sven mentions there are two additional pieces required at each end to ensure comprehensive protection. This attention to detail highlights his commitment to producing a durable and reliable design. “Sailing is about finding your path, whether it’s across an ocean or within yourself.” – Sven Yrvind In conclusion, making flanges around bulkhead hatches may seem complex at first glance, but by following Sven Yrvind’s meticulous process, enthusiasts can achieve professional-level results. Remember that the journey of boatbuilding is as rewarding as reaching your destination; it tests one’s patience and dedication. For those seeking to embark on this adventure or simply gain more insight into marine craftsmanship, Sven’s wisdom is invaluable.Sven proceeds to apply glue along one edge of the flange, ensuring a secure bond when clamped into place. He emphasizes that this stage is crucial for maintaining the structural integrity of the flange, which in turn safeguards the living area beneath the canvas when hatches are open.Step 3: Allowing Time to Dry
After securely attaching the first portion of the flange, Sven allows ample time for it to dry before moving forward with additional steps. This patience and precision are key aspects of his successful boatbuilding methods.Step 4: Finishing Touches
Once the flange is fully dried, Sven removes the clamps carefully, ensuring no damage occurs during this process. He then moves on to attaching four more pieces onto these main frames, completing two pairs of flanges for the bulkhead hatches.The Final Touches
While two flanges form the primary support structure around the hatches, Sven mentions there are two additional pieces required at each end to ensure comprehensive protection. This attention to detail highlights his commitment to producing a durable and reliable design. “Sailing is about finding your path, whether it’s across an ocean or within yourself.” – Sven Yrvind In conclusion, making flanges around bulkhead hatches may seem complex at first glance, but by following Sven Yrvind’s meticulous process, enthusiasts can achieve professional-level results. Remember that the journey of boatbuilding is as rewarding as reaching your destination; it tests one’s patience and dedication. For those seeking to embark on this adventure or simply gain more insight into marine craftsmanship, Sven’s wisdom is invaluable.Sven begins by explaining that working on flanges vertically and horizontally is significantly easier than doing so in a flat position. To simplify the process further, he divides the task into two or three steps as suggested by fellow expert “for for.” This approach not only makes it more manageable but also allows for greater precision in crafting each component.Step 2: Applying Glue and Securing
Sven proceeds to apply glue along one edge of the flange, ensuring a secure bond when clamped into place. He emphasizes that this stage is crucial for maintaining the structural integrity of the flange, which in turn safeguards the living area beneath the canvas when hatches are open.Step 3: Allowing Time to Dry
After securely attaching the first portion of the flange, Sven allows ample time for it to dry before moving forward with additional steps. This patience and precision are key aspects of his successful boatbuilding methods.Step 4: Finishing Touches
Once the flange is fully dried, Sven removes the clamps carefully, ensuring no damage occurs during this process. He then moves on to attaching four more pieces onto these main frames, completing two pairs of flanges for the bulkhead hatches.The Final Touches
While two flanges form the primary support structure around the hatches, Sven mentions there are two additional pieces required at each end to ensure comprehensive protection. This attention to detail highlights his commitment to producing a durable and reliable design. “Sailing is about finding your path, whether it’s across an ocean or within yourself.” – Sven Yrvind In conclusion, making flanges around bulkhead hatches may seem complex at first glance, but by following Sven Yrvind’s meticulous process, enthusiasts can achieve professional-level results. Remember that the journey of boatbuilding is as rewarding as reaching your destination; it tests one’s patience and dedication. For those seeking to embark on this adventure or simply gain more insight into marine craftsmanship, Sven’s wisdom is invaluable.Sven Yrvind, a renowned yacht designer and sailor, shares valuable insights on creating flanges around bulkhead hatches for canvas protection in this enlightening video. By following his expert guidance, boat enthusiasts can ensure their living areas remain secure while allowing unhindered access through the hatches.Step 1: Starting with the Flange
Sven begins by explaining that working on flanges vertically and horizontally is significantly easier than doing so in a flat position. To simplify the process further, he divides the task into two or three steps as suggested by fellow expert “for for.” This approach not only makes it more manageable but also allows for greater precision in crafting each component.Step 2: Applying Glue and Securing
Sven proceeds to apply glue along one edge of the flange, ensuring a secure bond when clamped into place. He emphasizes that this stage is crucial for maintaining the structural integrity of the flange, which in turn safeguards the living area beneath the canvas when hatches are open.Step 3: Allowing Time to Dry
After securely attaching the first portion of the flange, Sven allows ample time for it to dry before moving forward with additional steps. This patience and precision are key aspects of his successful boatbuilding methods.Step 4: Finishing Touches
Once the flange is fully dried, Sven removes the clamps carefully, ensuring no damage occurs during this process. He then moves on to attaching four more pieces onto these main frames, completing two pairs of flanges for the bulkhead hatches.The Final Touches
While two flanges form the primary support structure around the hatches, Sven mentions there are two additional pieces required at each end to ensure comprehensive protection. This attention to detail highlights his commitment to producing a durable and reliable design. “Sailing is about finding your path, whether it’s across an ocean or within yourself.” – Sven Yrvind In conclusion, making flanges around bulkhead hatches may seem complex at first glance, but by following Sven Yrvind’s meticulous process, enthusiasts can achieve professional-level results. Remember that the journey of boatbuilding is as rewarding as reaching your destination; it tests one’s patience and dedication. For those seeking to embark on this adventure or simply gain more insight into marine craftsmanship, Sven’s wisdom is invaluable.Making Flanges Around Bulkhead Hatches for Canvas
Sven Yrvind, a renowned yacht designer and sailor, shares valuable insights on creating flanges around bulkhead hatches for canvas protection in this enlightening video. By following his expert guidance, boat enthusiasts can ensure their living areas remain secure while allowing unhindered access through the hatches.Step 1: Starting with the Flange
Sven begins by explaining that working on flanges vertically and horizontally is significantly easier than doing so in a flat position. To simplify the process further, he divides the task into two or three steps as suggested by fellow expert “for for.” This approach not only makes it more manageable but also allows for greater precision in crafting each component.Step 2: Applying Glue and Securing
Sven proceeds to apply glue along one edge of the flange, ensuring a secure bond when clamped into place. He emphasizes that this stage is crucial for maintaining the structural integrity of the flange, which in turn safeguards the living area beneath the canvas when hatches are open.Step 3: Allowing Time to Dry
After securely attaching the first portion of the flange, Sven allows ample time for it to dry before moving forward with additional steps. This patience and precision are key aspects of his successful boatbuilding methods.Step 4: Finishing Touches
Once the flange is fully dried, Sven removes the clamps carefully, ensuring no damage occurs during this process. He then moves on to attaching four more pieces onto these main frames, completing two pairs of flanges for the bulkhead hatches.The Final Touches
While two flanges form the primary support structure around the hatches, Sven mentions there are two additional pieces required at each end to ensure comprehensive protection. This attention to detail highlights his commitment to producing a durable and reliable design. “Sailing is about finding your path, whether it’s across an ocean or within yourself.” – Sven Yrvind In conclusion, making flanges around bulkhead hatches may seem complex at first glance, but by following Sven Yrvind’s meticulous process, enthusiasts can achieve professional-level results. Remember that the journey of boatbuilding is as rewarding as reaching your destination; it tests one’s patience and dedication. For those seeking to embark on this adventure or simply gain more insight into marine craftsmanship, Sven’s wisdom is invaluable.Once the flange is fully dried, Sven removes the clamps carefully, ensuring no damage occurs during this process. He then moves on to attaching four more pieces onto these main frames, completing two pairs of flanges for the bulkhead hatches.The Final Touches
While two flanges form the primary support structure around the hatches, Sven mentions there are two additional pieces required at each end to ensure comprehensive protection. This attention to detail highlights his commitment to producing a durable and reliable design. “Sailing is about finding your path, whether it’s across an ocean or within yourself.” – Sven Yrvind In conclusion, making flanges around bulkhead hatches may seem complex at first glance, but by following Sven Yrvind’s meticulous process, enthusiasts can achieve professional-level results. Remember that the journey of boatbuilding is as rewarding as reaching your destination; it tests one’s patience and dedication. For those seeking to embark on this adventure or simply gain more insight into marine craftsmanship, Sven’s wisdom is invaluable.After securely attaching the first portion of the flange, Sven allows ample time for it to dry before moving forward with additional steps. This patience and precision are key aspects of his successful boatbuilding methods.Step 4: Finishing Touches
Once the flange is fully dried, Sven removes the clamps carefully, ensuring no damage occurs during this process. He then moves on to attaching four more pieces onto these main frames, completing two pairs of flanges for the bulkhead hatches.The Final Touches
While two flanges form the primary support structure around the hatches, Sven mentions there are two additional pieces required at each end to ensure comprehensive protection. This attention to detail highlights his commitment to producing a durable and reliable design. “Sailing is about finding your path, whether it’s across an ocean or within yourself.” – Sven Yrvind In conclusion, making flanges around bulkhead hatches may seem complex at first glance, but by following Sven Yrvind’s meticulous process, enthusiasts can achieve professional-level results. Remember that the journey of boatbuilding is as rewarding as reaching your destination; it tests one’s patience and dedication. For those seeking to embark on this adventure or simply gain more insight into marine craftsmanship, Sven’s wisdom is invaluable.Sven proceeds to apply glue along one edge of the flange, ensuring a secure bond when clamped into place. He emphasizes that this stage is crucial for maintaining the structural integrity of the flange, which in turn safeguards the living area beneath the canvas when hatches are open.Step 3: Allowing Time to Dry
After securely attaching the first portion of the flange, Sven allows ample time for it to dry before moving forward with additional steps. This patience and precision are key aspects of his successful boatbuilding methods.Step 4: Finishing Touches
Once the flange is fully dried, Sven removes the clamps carefully, ensuring no damage occurs during this process. He then moves on to attaching four more pieces onto these main frames, completing two pairs of flanges for the bulkhead hatches.The Final Touches
While two flanges form the primary support structure around the hatches, Sven mentions there are two additional pieces required at each end to ensure comprehensive protection. This attention to detail highlights his commitment to producing a durable and reliable design. “Sailing is about finding your path, whether it’s across an ocean or within yourself.” – Sven Yrvind In conclusion, making flanges around bulkhead hatches may seem complex at first glance, but by following Sven Yrvind’s meticulous process, enthusiasts can achieve professional-level results. Remember that the journey of boatbuilding is as rewarding as reaching your destination; it tests one’s patience and dedication. For those seeking to embark on this adventure or simply gain more insight into marine craftsmanship, Sven’s wisdom is invaluable.Sven begins by explaining that working on flanges vertically and horizontally is significantly easier than doing so in a flat position. To simplify the process further, he divides the task into two or three steps as suggested by fellow expert “for for.” This approach not only makes it more manageable but also allows for greater precision in crafting each component.Step 2: Applying Glue and Securing
Sven proceeds to apply glue along one edge of the flange, ensuring a secure bond when clamped into place. He emphasizes that this stage is crucial for maintaining the structural integrity of the flange, which in turn safeguards the living area beneath the canvas when hatches are open.Step 3: Allowing Time to Dry
After securely attaching the first portion of the flange, Sven allows ample time for it to dry before moving forward with additional steps. This patience and precision are key aspects of his successful boatbuilding methods.Step 4: Finishing Touches
Once the flange is fully dried, Sven removes the clamps carefully, ensuring no damage occurs during this process. He then moves on to attaching four more pieces onto these main frames, completing two pairs of flanges for the bulkhead hatches.The Final Touches
While two flanges form the primary support structure around the hatches, Sven mentions there are two additional pieces required at each end to ensure comprehensive protection. This attention to detail highlights his commitment to producing a durable and reliable design. “Sailing is about finding your path, whether it’s across an ocean or within yourself.” – Sven Yrvind In conclusion, making flanges around bulkhead hatches may seem complex at first glance, but by following Sven Yrvind’s meticulous process, enthusiasts can achieve professional-level results. Remember that the journey of boatbuilding is as rewarding as reaching your destination; it tests one’s patience and dedication. For those seeking to embark on this adventure or simply gain more insight into marine craftsmanship, Sven’s wisdom is invaluable.Sven Yrvind, a renowned yacht designer and sailor, shares valuable insights on creating flanges around bulkhead hatches for canvas protection in this enlightening video. By following his expert guidance, boat enthusiasts can ensure their living areas remain secure while allowing unhindered access through the hatches.Step 1: Starting with the Flange
Sven begins by explaining that working on flanges vertically and horizontally is significantly easier than doing so in a flat position. To simplify the process further, he divides the task into two or three steps as suggested by fellow expert “for for.” This approach not only makes it more manageable but also allows for greater precision in crafting each component.Step 2: Applying Glue and Securing
Sven proceeds to apply glue along one edge of the flange, ensuring a secure bond when clamped into place. He emphasizes that this stage is crucial for maintaining the structural integrity of the flange, which in turn safeguards the living area beneath the canvas when hatches are open.Step 3: Allowing Time to Dry
After securely attaching the first portion of the flange, Sven allows ample time for it to dry before moving forward with additional steps. This patience and precision are key aspects of his successful boatbuilding methods.Step 4: Finishing Touches
Once the flange is fully dried, Sven removes the clamps carefully, ensuring no damage occurs during this process. He then moves on to attaching four more pieces onto these main frames, completing two pairs of flanges for the bulkhead hatches.The Final Touches
While two flanges form the primary support structure around the hatches, Sven mentions there are two additional pieces required at each end to ensure comprehensive protection. This attention to detail highlights his commitment to producing a durable and reliable design. “Sailing is about finding your path, whether it’s across an ocean or within yourself.” – Sven Yrvind In conclusion, making flanges around bulkhead hatches may seem complex at first glance, but by following Sven Yrvind’s meticulous process, enthusiasts can achieve professional-level results. Remember that the journey of boatbuilding is as rewarding as reaching your destination; it tests one’s patience and dedication. For those seeking to embark on this adventure or simply gain more insight into marine craftsmanship, Sven’s wisdom is invaluable.Making Flanges Around Bulkhead Hatches for Canvas
Sven Yrvind, a renowned yacht designer and sailor, shares valuable insights on creating flanges around bulkhead hatches for canvas protection in this enlightening video. By following his expert guidance, boat enthusiasts can ensure their living areas remain secure while allowing unhindered access through the hatches.Step 1: Starting with the Flange
Sven begins by explaining that working on flanges vertically and horizontally is significantly easier than doing so in a flat position. To simplify the process further, he divides the task into two or three steps as suggested by fellow expert “for for.” This approach not only makes it more manageable but also allows for greater precision in crafting each component.Step 2: Applying Glue and Securing
Sven proceeds to apply glue along one edge of the flange, ensuring a secure bond when clamped into place. He emphasizes that this stage is crucial for maintaining the structural integrity of the flange, which in turn safeguards the living area beneath the canvas when hatches are open.Step 3: Allowing Time to Dry
After securely attaching the first portion of the flange, Sven allows ample time for it to dry before moving forward with additional steps. This patience and precision are key aspects of his successful boatbuilding methods.Step 4: Finishing Touches
Once the flange is fully dried, Sven removes the clamps carefully, ensuring no damage occurs during this process. He then moves on to attaching four more pieces onto these main frames, completing two pairs of flanges for the bulkhead hatches.The Final Touches
While two flanges form the primary support structure around the hatches, Sven mentions there are two additional pieces required at each end to ensure comprehensive protection. This attention to detail highlights his commitment to producing a durable and reliable design. “Sailing is about finding your path, whether it’s across an ocean or within yourself.” – Sven Yrvind In conclusion, making flanges around bulkhead hatches may seem complex at first glance, but by following Sven Yrvind’s meticulous process, enthusiasts can achieve professional-level results. Remember that the journey of boatbuilding is as rewarding as reaching your destination; it tests one’s patience and dedication. For those seeking to embark on this adventure or simply gain more insight into marine craftsmanship, Sven’s wisdom is invaluable.Sven proceeds to apply glue along one edge of the flange, ensuring a secure bond when clamped into place. He emphasizes that this stage is crucial for maintaining the structural integrity of the flange, which in turn safeguards the living area beneath the canvas when hatches are open.Step 3: Allowing Time to Dry
After securely attaching the first portion of the flange, Sven allows ample time for it to dry before moving forward with additional steps. This patience and precision are key aspects of his successful boatbuilding methods.Step 4: Finishing Touches
Once the flange is fully dried, Sven removes the clamps carefully, ensuring no damage occurs during this process. He then moves on to attaching four more pieces onto these main frames, completing two pairs of flanges for the bulkhead hatches.The Final Touches
While two flanges form the primary support structure around the hatches, Sven mentions there are two additional pieces required at each end to ensure comprehensive protection. This attention to detail highlights his commitment to producing a durable and reliable design. “Sailing is about finding your path, whether it’s across an ocean or within yourself.” – Sven Yrvind In conclusion, making flanges around bulkhead hatches may seem complex at first glance, but by following Sven Yrvind’s meticulous process, enthusiasts can achieve professional-level results. Remember that the journey of boatbuilding is as rewarding as reaching your destination; it tests one’s patience and dedication. For those seeking to embark on this adventure or simply gain more insight into marine craftsmanship, Sven’s wisdom is invaluable.Making Flanges Around Bulkhead Hatches for Canvas
Sven Yrvind, a renowned yacht designer and sailor, shares valuable insights on creating flanges around bulkhead hatches for canvas protection in this enlightening video. By following his expert guidance, boat enthusiasts can ensure their living areas remain secure while allowing unhindered access through the hatches.Step 1: Starting with the Flange
Sven begins by explaining that working on flanges vertically and horizontally is significantly easier than doing so in a flat position. To simplify the process further, he divides the task into two or three steps as suggested by fellow expert “for for.” This approach not only makes it more manageable but also allows for greater precision in crafting each component.Step 2: Applying Glue and Securing
Sven proceeds to apply glue along one edge of the flange, ensuring a secure bond when clamped into place. He emphasizes that this stage is crucial for maintaining the structural integrity of the flange, which in turn safeguards the living area beneath the canvas when hatches are open.Step 3: Allowing Time to Dry
After securely attaching the first portion of the flange, Sven allows ample time for it to dry before moving forward with additional steps. This patience and precision are key aspects of his successful boatbuilding methods.Step 4: Finishing Touches
Once the flange is fully dried, Sven removes the clamps carefully, ensuring no damage occurs during this process. He then moves on to attaching four more pieces onto these main frames, completing two pairs of flanges for the bulkhead hatches.The Final Touches
While two flanges form the primary support structure around the hatches, Sven mentions there are two additional pieces required at each end to ensure comprehensive protection. This attention to detail highlights his commitment to producing a durable and reliable design. “Sailing is about finding your path, whether it’s across an ocean or within yourself.” – Sven Yrvind In conclusion, making flanges around bulkhead hatches may seem complex at first glance, but by following Sven Yrvind’s meticulous process, enthusiasts can achieve professional-level results. Remember that the journey of boatbuilding is as rewarding as reaching your destination; it tests one’s patience and dedication. For those seeking to embark on this adventure or simply gain more insight into marine craftsmanship, Sven’s wisdom is invaluable.Sven proceeds to apply glue along one edge of the flange, ensuring a secure bond when clamped into place. He emphasizes that this stage is crucial for maintaining the structural integrity of the flange, which in turn safeguards the living area beneath the canvas when hatches are open.Step 3: Allowing Time to Dry
After securely attaching the first portion of the flange, Sven allows ample time for it to dry before moving forward with additional steps. This patience and precision are key aspects of his successful boatbuilding methods.Step 4: Finishing Touches
Once the flange is fully dried, Sven removes the clamps carefully, ensuring no damage occurs during this process. He then moves on to attaching four more pieces onto these main frames, completing two pairs of flanges for the bulkhead hatches.The Final Touches
While two flanges form the primary support structure around the hatches, Sven mentions there are two additional pieces required at each end to ensure comprehensive protection. This attention to detail highlights his commitment to producing a durable and reliable design. “Sailing is about finding your path, whether it’s across an ocean or within yourself.” – Sven Yrvind In conclusion, making flanges around bulkhead hatches may seem complex at first glance, but by following Sven Yrvind’s meticulous process, enthusiasts can achieve professional-level results. Remember that the journey of boatbuilding is as rewarding as reaching your destination; it tests one’s patience and dedication. For those seeking to embark on this adventure or simply gain more insight into marine craftsmanship, Sven’s wisdom is invaluable.Sven begins by explaining that working on flanges vertically and horizontally is significantly easier than doing so in a flat position. To simplify the process further, he divides the task into two or three steps as suggested by fellow expert “for for.” This approach not only makes it more manageable but also allows for greater precision in crafting each component.Step 2: Applying Glue and Securing
Sven proceeds to apply glue along one edge of the flange, ensuring a secure bond when clamped into place. He emphasizes that this stage is crucial for maintaining the structural integrity of the flange, which in turn safeguards the living area beneath the canvas when hatches are open.Step 3: Allowing Time to Dry
After securely attaching the first portion of the flange, Sven allows ample time for it to dry before moving forward with additional steps. This patience and precision are key aspects of his successful boatbuilding methods.Step 4: Finishing Touches
Once the flange is fully dried, Sven removes the clamps carefully, ensuring no damage occurs during this process. He then moves on to attaching four more pieces onto these main frames, completing two pairs of flanges for the bulkhead hatches.The Final Touches
While two flanges form the primary support structure around the hatches, Sven mentions there are two additional pieces required at each end to ensure comprehensive protection. This attention to detail highlights his commitment to producing a durable and reliable design. “Sailing is about finding your path, whether it’s across an ocean or within yourself.” – Sven Yrvind In conclusion, making flanges around bulkhead hatches may seem complex at first glance, but by following Sven Yrvind’s meticulous process, enthusiasts can achieve professional-level results. Remember that the journey of boatbuilding is as rewarding as reaching your destination; it tests one’s patience and dedication. For those seeking to embark on this adventure or simply gain more insight into marine craftsmanship, Sven’s wisdom is invaluable.Sven Yrvind, a renowned yacht designer and sailor, shares valuable insights on creating flanges around bulkhead hatches for canvas protection in this enlightening video. By following his expert guidance, boat enthusiasts can ensure their living areas remain secure while allowing unhindered access through the hatches.Step 1: Starting with the Flange
Sven begins by explaining that working on flanges vertically and horizontally is significantly easier than doing so in a flat position. To simplify the process further, he divides the task into two or three steps as suggested by fellow expert “for for.” This approach not only makes it more manageable but also allows for greater precision in crafting each component.Step 2: Applying Glue and Securing
Sven proceeds to apply glue along one edge of the flange, ensuring a secure bond when clamped into place. He emphasizes that this stage is crucial for maintaining the structural integrity of the flange, which in turn safeguards the living area beneath the canvas when hatches are open.Step 3: Allowing Time to Dry
After securely attaching the first portion of the flange, Sven allows ample time for it to dry before moving forward with additional steps. This patience and precision are key aspects of his successful boatbuilding methods.Step 4: Finishing Touches
Once the flange is fully dried, Sven removes the clamps carefully, ensuring no damage occurs during this process. He then moves on to attaching four more pieces onto these main frames, completing two pairs of flanges for the bulkhead hatches.The Final Touches
While two flanges form the primary support structure around the hatches, Sven mentions there are two additional pieces required at each end to ensure comprehensive protection. This attention to detail highlights his commitment to producing a durable and reliable design. “Sailing is about finding your path, whether it’s across an ocean or within yourself.” – Sven Yrvind In conclusion, making flanges around bulkhead hatches may seem complex at first glance, but by following Sven Yrvind’s meticulous process, enthusiasts can achieve professional-level results. Remember that the journey of boatbuilding is as rewarding as reaching your destination; it tests one’s patience and dedication. For those seeking to embark on this adventure or simply gain more insight into marine craftsmanship, Sven’s wisdom is invaluable.Making Flanges Around Bulkhead Hatches for Canvas
Sven Yrvind, a renowned yacht designer and sailor, shares valuable insights on creating flanges around bulkhead hatches for canvas protection in this enlightening video. By following his expert guidance, boat enthusiasts can ensure their living areas remain secure while allowing unhindered access through the hatches.Step 1: Starting with the Flange
Sven begins by explaining that working on flanges vertically and horizontally is significantly easier than doing so in a flat position. To simplify the process further, he divides the task into two or three steps as suggested by fellow expert “for for.” This approach not only makes it more manageable but also allows for greater precision in crafting each component.Step 2: Applying Glue and Securing
Sven proceeds to apply glue along one edge of the flange, ensuring a secure bond when clamped into place. He emphasizes that this stage is crucial for maintaining the structural integrity of the flange, which in turn safeguards the living area beneath the canvas when hatches are open.Step 3: Allowing Time to Dry
After securely attaching the first portion of the flange, Sven allows ample time for it to dry before moving forward with additional steps. This patience and precision are key aspects of his successful boatbuilding methods.Step 4: Finishing Touches
Once the flange is fully dried, Sven removes the clamps carefully, ensuring no damage occurs during this process. He then moves on to attaching four more pieces onto these main frames, completing two pairs of flanges for the bulkhead hatches.The Final Touches
While two flanges form the primary support structure around the hatches, Sven mentions there are two additional pieces required at each end to ensure comprehensive protection. This attention to detail highlights his commitment to producing a durable and reliable design. “Sailing is about finding your path, whether it’s across an ocean or within yourself.” – Sven Yrvind In conclusion, making flanges around bulkhead hatches may seem complex at first glance, but by following Sven Yrvind’s meticulous process, enthusiasts can achieve professional-level results. Remember that the journey of boatbuilding is as rewarding as reaching your destination; it tests one’s patience and dedication. For those seeking to embark on this adventure or simply gain more insight into marine craftsmanship, Sven’s wisdom is invaluable.Once the flange is fully dried, Sven removes the clamps carefully, ensuring no damage occurs during this process. He then moves on to attaching four more pieces onto these main frames, completing two pairs of flanges for the bulkhead hatches.The Final Touches
While two flanges form the primary support structure around the hatches, Sven mentions there are two additional pieces required at each end to ensure comprehensive protection. This attention to detail highlights his commitment to producing a durable and reliable design. “Sailing is about finding your path, whether it’s across an ocean or within yourself.” – Sven Yrvind In conclusion, making flanges around bulkhead hatches may seem complex at first glance, but by following Sven Yrvind’s meticulous process, enthusiasts can achieve professional-level results. Remember that the journey of boatbuilding is as rewarding as reaching your destination; it tests one’s patience and dedication. For those seeking to embark on this adventure or simply gain more insight into marine craftsmanship, Sven’s wisdom is invaluable.Sven proceeds to apply glue along one edge of the flange, ensuring a secure bond when clamped into place. He emphasizes that this stage is crucial for maintaining the structural integrity of the flange, which in turn safeguards the living area beneath the canvas when hatches are open.Step 3: Allowing Time to Dry
After securely attaching the first portion of the flange, Sven allows ample time for it to dry before moving forward with additional steps. This patience and precision are key aspects of his successful boatbuilding methods.Step 4: Finishing Touches
Once the flange is fully dried, Sven removes the clamps carefully, ensuring no damage occurs during this process. He then moves on to attaching four more pieces onto these main frames, completing two pairs of flanges for the bulkhead hatches.The Final Touches
While two flanges form the primary support structure around the hatches, Sven mentions there are two additional pieces required at each end to ensure comprehensive protection. This attention to detail highlights his commitment to producing a durable and reliable design. “Sailing is about finding your path, whether it’s across an ocean or within yourself.” – Sven Yrvind In conclusion, making flanges around bulkhead hatches may seem complex at first glance, but by following Sven Yrvind’s meticulous process, enthusiasts can achieve professional-level results. Remember that the journey of boatbuilding is as rewarding as reaching your destination; it tests one’s patience and dedication. For those seeking to embark on this adventure or simply gain more insight into marine craftsmanship, Sven’s wisdom is invaluable.Sven begins by explaining that working on flanges vertically and horizontally is significantly easier than doing so in a flat position. To simplify the process further, he divides the task into two or three steps as suggested by fellow expert “for for.” This approach not only makes it more manageable but also allows for greater precision in crafting each component.Step 2: Applying Glue and Securing
Sven proceeds to apply glue along one edge of the flange, ensuring a secure bond when clamped into place. He emphasizes that this stage is crucial for maintaining the structural integrity of the flange, which in turn safeguards the living area beneath the canvas when hatches are open.Step 3: Allowing Time to Dry
After securely attaching the first portion of the flange, Sven allows ample time for it to dry before moving forward with additional steps. This patience and precision are key aspects of his successful boatbuilding methods.Step 4: Finishing Touches
Once the flange is fully dried, Sven removes the clamps carefully, ensuring no damage occurs during this process. He then moves on to attaching four more pieces onto these main frames, completing two pairs of flanges for the bulkhead hatches.The Final Touches
While two flanges form the primary support structure around the hatches, Sven mentions there are two additional pieces required at each end to ensure comprehensive protection. This attention to detail highlights his commitment to producing a durable and reliable design. “Sailing is about finding your path, whether it’s across an ocean or within yourself.” – Sven Yrvind In conclusion, making flanges around bulkhead hatches may seem complex at first glance, but by following Sven Yrvind’s meticulous process, enthusiasts can achieve professional-level results. Remember that the journey of boatbuilding is as rewarding as reaching your destination; it tests one’s patience and dedication. For those seeking to embark on this adventure or simply gain more insight into marine craftsmanship, Sven’s wisdom is invaluable.Sven Yrvind, a renowned yacht designer and sailor, shares valuable insights on creating flanges around bulkhead hatches for canvas protection in this enlightening video. By following his expert guidance, boat enthusiasts can ensure their living areas remain secure while allowing unhindered access through the hatches.Step 1: Starting with the Flange
Sven begins by explaining that working on flanges vertically and horizontally is significantly easier than doing so in a flat position. To simplify the process further, he divides the task into two or three steps as suggested by fellow expert “for for.” This approach not only makes it more manageable but also allows for greater precision in crafting each component.Step 2: Applying Glue and Securing
Sven proceeds to apply glue along one edge of the flange, ensuring a secure bond when clamped into place. He emphasizes that this stage is crucial for maintaining the structural integrity of the flange, which in turn safeguards the living area beneath the canvas when hatches are open.Step 3: Allowing Time to Dry
After securely attaching the first portion of the flange, Sven allows ample time for it to dry before moving forward with additional steps. This patience and precision are key aspects of his successful boatbuilding methods.Step 4: Finishing Touches
Once the flange is fully dried, Sven removes the clamps carefully, ensuring no damage occurs during this process. He then moves on to attaching four more pieces onto these main frames, completing two pairs of flanges for the bulkhead hatches.The Final Touches
While two flanges form the primary support structure around the hatches, Sven mentions there are two additional pieces required at each end to ensure comprehensive protection. This attention to detail highlights his commitment to producing a durable and reliable design. “Sailing is about finding your path, whether it’s across an ocean or within yourself.” – Sven Yrvind In conclusion, making flanges around bulkhead hatches may seem complex at first glance, but by following Sven Yrvind’s meticulous process, enthusiasts can achieve professional-level results. Remember that the journey of boatbuilding is as rewarding as reaching your destination; it tests one’s patience and dedication. For those seeking to embark on this adventure or simply gain more insight into marine craftsmanship, Sven’s wisdom is invaluable.Making Flanges Around Bulkhead Hatches for Canvas
Sven Yrvind, a renowned yacht designer and sailor, shares valuable insights on creating flanges around bulkhead hatches for canvas protection in this enlightening video. By following his expert guidance, boat enthusiasts can ensure their living areas remain secure while allowing unhindered access through the hatches.Step 1: Starting with the Flange
Sven begins by explaining that working on flanges vertically and horizontally is significantly easier than doing so in a flat position. To simplify the process further, he divides the task into two or three steps as suggested by fellow expert “for for.” This approach not only makes it more manageable but also allows for greater precision in crafting each component.Step 2: Applying Glue and Securing
Sven proceeds to apply glue along one edge of the flange, ensuring a secure bond when clamped into place. He emphasizes that this stage is crucial for maintaining the structural integrity of the flange, which in turn safeguards the living area beneath the canvas when hatches are open.Step 3: Allowing Time to Dry
After securely attaching the first portion of the flange, Sven allows ample time for it to dry before moving forward with additional steps. This patience and precision are key aspects of his successful boatbuilding methods.Step 4: Finishing Touches
Once the flange is fully dried, Sven removes the clamps carefully, ensuring no damage occurs during this process. He then moves on to attaching four more pieces onto these main frames, completing two pairs of flanges for the bulkhead hatches.The Final Touches
While two flanges form the primary support structure around the hatches, Sven mentions there are two additional pieces required at each end to ensure comprehensive protection. This attention to detail highlights his commitment to producing a durable and reliable design. “Sailing is about finding your path, whether it’s across an ocean or within yourself.” – Sven Yrvind In conclusion, making flanges around bulkhead hatches may seem complex at first glance, but by following Sven Yrvind’s meticulous process, enthusiasts can achieve professional-level results. Remember that the journey of boatbuilding is as rewarding as reaching your destination; it tests one’s patience and dedication. For those seeking to embark on this adventure or simply gain more insight into marine craftsmanship, Sven’s wisdom is invaluable.After securely attaching the first portion of the flange, Sven allows ample time for it to dry before moving forward with additional steps. This patience and precision are key aspects of his successful boatbuilding methods.Step 4: Finishing Touches
Once the flange is fully dried, Sven removes the clamps carefully, ensuring no damage occurs during this process. He then moves on to attaching four more pieces onto these main frames, completing two pairs of flanges for the bulkhead hatches.The Final Touches
While two flanges form the primary support structure around the hatches, Sven mentions there are two additional pieces required at each end to ensure comprehensive protection. This attention to detail highlights his commitment to producing a durable and reliable design. “Sailing is about finding your path, whether it’s across an ocean or within yourself.” – Sven Yrvind In conclusion, making flanges around bulkhead hatches may seem complex at first glance, but by following Sven Yrvind’s meticulous process, enthusiasts can achieve professional-level results. Remember that the journey of boatbuilding is as rewarding as reaching your destination; it tests one’s patience and dedication. For those seeking to embark on this adventure or simply gain more insight into marine craftsmanship, Sven’s wisdom is invaluable.Sven proceeds to apply glue along one edge of the flange, ensuring a secure bond when clamped into place. He emphasizes that this stage is crucial for maintaining the structural integrity of the flange, which in turn safeguards the living area beneath the canvas when hatches are open.Step 3: Allowing Time to Dry
After securely attaching the first portion of the flange, Sven allows ample time for it to dry before moving forward with additional steps. This patience and precision are key aspects of his successful boatbuilding methods.Step 4: Finishing Touches
Once the flange is fully dried, Sven removes the clamps carefully, ensuring no damage occurs during this process. He then moves on to attaching four more pieces onto these main frames, completing two pairs of flanges for the bulkhead hatches.The Final Touches
While two flanges form the primary support structure around the hatches, Sven mentions there are two additional pieces required at each end to ensure comprehensive protection. This attention to detail highlights his commitment to producing a durable and reliable design. “Sailing is about finding your path, whether it’s across an ocean or within yourself.” – Sven Yrvind In conclusion, making flanges around bulkhead hatches may seem complex at first glance, but by following Sven Yrvind’s meticulous process, enthusiasts can achieve professional-level results. Remember that the journey of boatbuilding is as rewarding as reaching your destination; it tests one’s patience and dedication. For those seeking to embark on this adventure or simply gain more insight into marine craftsmanship, Sven’s wisdom is invaluable.Sven begins by explaining that working on flanges vertically and horizontally is significantly easier than doing so in a flat position. To simplify the process further, he divides the task into two or three steps as suggested by fellow expert “for for.” This approach not only makes it more manageable but also allows for greater precision in crafting each component.Step 2: Applying Glue and Securing
Sven proceeds to apply glue along one edge of the flange, ensuring a secure bond when clamped into place. He emphasizes that this stage is crucial for maintaining the structural integrity of the flange, which in turn safeguards the living area beneath the canvas when hatches are open.Step 3: Allowing Time to Dry
After securely attaching the first portion of the flange, Sven allows ample time for it to dry before moving forward with additional steps. This patience and precision are key aspects of his successful boatbuilding methods.Step 4: Finishing Touches
Once the flange is fully dried, Sven removes the clamps carefully, ensuring no damage occurs during this process. He then moves on to attaching four more pieces onto these main frames, completing two pairs of flanges for the bulkhead hatches.The Final Touches
While two flanges form the primary support structure around the hatches, Sven mentions there are two additional pieces required at each end to ensure comprehensive protection. This attention to detail highlights his commitment to producing a durable and reliable design. “Sailing is about finding your path, whether it’s across an ocean or within yourself.” – Sven Yrvind In conclusion, making flanges around bulkhead hatches may seem complex at first glance, but by following Sven Yrvind’s meticulous process, enthusiasts can achieve professional-level results. Remember that the journey of boatbuilding is as rewarding as reaching your destination; it tests one’s patience and dedication. For those seeking to embark on this adventure or simply gain more insight into marine craftsmanship, Sven’s wisdom is invaluable.Sven Yrvind, a renowned yacht designer and sailor, shares valuable insights on creating flanges around bulkhead hatches for canvas protection in this enlightening video. By following his expert guidance, boat enthusiasts can ensure their living areas remain secure while allowing unhindered access through the hatches.Step 1: Starting with the Flange
Sven begins by explaining that working on flanges vertically and horizontally is significantly easier than doing so in a flat position. To simplify the process further, he divides the task into two or three steps as suggested by fellow expert “for for.” This approach not only makes it more manageable but also allows for greater precision in crafting each component.Step 2: Applying Glue and Securing
Sven proceeds to apply glue along one edge of the flange, ensuring a secure bond when clamped into place. He emphasizes that this stage is crucial for maintaining the structural integrity of the flange, which in turn safeguards the living area beneath the canvas when hatches are open.Step 3: Allowing Time to Dry
After securely attaching the first portion of the flange, Sven allows ample time for it to dry before moving forward with additional steps. This patience and precision are key aspects of his successful boatbuilding methods.Step 4: Finishing Touches
Once the flange is fully dried, Sven removes the clamps carefully, ensuring no damage occurs during this process. He then moves on to attaching four more pieces onto these main frames, completing two pairs of flanges for the bulkhead hatches.The Final Touches
While two flanges form the primary support structure around the hatches, Sven mentions there are two additional pieces required at each end to ensure comprehensive protection. This attention to detail highlights his commitment to producing a durable and reliable design. “Sailing is about finding your path, whether it’s across an ocean or within yourself.” – Sven Yrvind In conclusion, making flanges around bulkhead hatches may seem complex at first glance, but by following Sven Yrvind’s meticulous process, enthusiasts can achieve professional-level results. Remember that the journey of boatbuilding is as rewarding as reaching your destination; it tests one’s patience and dedication. For those seeking to embark on this adventure or simply gain more insight into marine craftsmanship, Sven’s wisdom is invaluable.Making Flanges Around Bulkhead Hatches for Canvas
Sven Yrvind, a renowned yacht designer and sailor, shares valuable insights on creating flanges around bulkhead hatches for canvas protection in this enlightening video. By following his expert guidance, boat enthusiasts can ensure their living areas remain secure while allowing unhindered access through the hatches.Step 1: Starting with the Flange
Sven begins by explaining that working on flanges vertically and horizontally is significantly easier than doing so in a flat position. To simplify the process further, he divides the task into two or three steps as suggested by fellow expert “for for.” This approach not only makes it more manageable but also allows for greater precision in crafting each component.Step 2: Applying Glue and Securing
Sven proceeds to apply glue along one edge of the flange, ensuring a secure bond when clamped into place. He emphasizes that this stage is crucial for maintaining the structural integrity of the flange, which in turn safeguards the living area beneath the canvas when hatches are open.Step 3: Allowing Time to Dry
After securely attaching the first portion of the flange, Sven allows ample time for it to dry before moving forward with additional steps. This patience and precision are key aspects of his successful boatbuilding methods.Step 4: Finishing Touches
Once the flange is fully dried, Sven removes the clamps carefully, ensuring no damage occurs during this process. He then moves on to attaching four more pieces onto these main frames, completing two pairs of flanges for the bulkhead hatches.The Final Touches
While two flanges form the primary support structure around the hatches, Sven mentions there are two additional pieces required at each end to ensure comprehensive protection. This attention to detail highlights his commitment to producing a durable and reliable design. “Sailing is about finding your path, whether it’s across an ocean or within yourself.” – Sven Yrvind In conclusion, making flanges around bulkhead hatches may seem complex at first glance, but by following Sven Yrvind’s meticulous process, enthusiasts can achieve professional-level results. Remember that the journey of boatbuilding is as rewarding as reaching your destination; it tests one’s patience and dedication. For those seeking to embark on this adventure or simply gain more insight into marine craftsmanship, Sven’s wisdom is invaluable.Once the flange is fully dried, Sven removes the clamps carefully, ensuring no damage occurs during this process. He then moves on to attaching four more pieces onto these main frames, completing two pairs of flanges for the bulkhead hatches.The Final Touches
While two flanges form the primary support structure around the hatches, Sven mentions there are two additional pieces required at each end to ensure comprehensive protection. This attention to detail highlights his commitment to producing a durable and reliable design. “Sailing is about finding your path, whether it’s across an ocean or within yourself.” – Sven Yrvind In conclusion, making flanges around bulkhead hatches may seem complex at first glance, but by following Sven Yrvind’s meticulous process, enthusiasts can achieve professional-level results. Remember that the journey of boatbuilding is as rewarding as reaching your destination; it tests one’s patience and dedication. For those seeking to embark on this adventure or simply gain more insight into marine craftsmanship, Sven’s wisdom is invaluable.After securely attaching the first portion of the flange, Sven allows ample time for it to dry before moving forward with additional steps. This patience and precision are key aspects of his successful boatbuilding methods.Step 4: Finishing Touches
Once the flange is fully dried, Sven removes the clamps carefully, ensuring no damage occurs during this process. He then moves on to attaching four more pieces onto these main frames, completing two pairs of flanges for the bulkhead hatches.The Final Touches
While two flanges form the primary support structure around the hatches, Sven mentions there are two additional pieces required at each end to ensure comprehensive protection. This attention to detail highlights his commitment to producing a durable and reliable design. “Sailing is about finding your path, whether it’s across an ocean or within yourself.” – Sven Yrvind In conclusion, making flanges around bulkhead hatches may seem complex at first glance, but by following Sven Yrvind’s meticulous process, enthusiasts can achieve professional-level results. Remember that the journey of boatbuilding is as rewarding as reaching your destination; it tests one’s patience and dedication. For those seeking to embark on this adventure or simply gain more insight into marine craftsmanship, Sven’s wisdom is invaluable.Sven proceeds to apply glue along one edge of the flange, ensuring a secure bond when clamped into place. He emphasizes that this stage is crucial for maintaining the structural integrity of the flange, which in turn safeguards the living area beneath the canvas when hatches are open.Step 3: Allowing Time to Dry
After securely attaching the first portion of the flange, Sven allows ample time for it to dry before moving forward with additional steps. This patience and precision are key aspects of his successful boatbuilding methods.Step 4: Finishing Touches
Once the flange is fully dried, Sven removes the clamps carefully, ensuring no damage occurs during this process. He then moves on to attaching four more pieces onto these main frames, completing two pairs of flanges for the bulkhead hatches.The Final Touches
While two flanges form the primary support structure around the hatches, Sven mentions there are two additional pieces required at each end to ensure comprehensive protection. This attention to detail highlights his commitment to producing a durable and reliable design. “Sailing is about finding your path, whether it’s across an ocean or within yourself.” – Sven Yrvind In conclusion, making flanges around bulkhead hatches may seem complex at first glance, but by following Sven Yrvind’s meticulous process, enthusiasts can achieve professional-level results. Remember that the journey of boatbuilding is as rewarding as reaching your destination; it tests one’s patience and dedication. For those seeking to embark on this adventure or simply gain more insight into marine craftsmanship, Sven’s wisdom is invaluable.Sven begins by explaining that working on flanges vertically and horizontally is significantly easier than doing so in a flat position. To simplify the process further, he divides the task into two or three steps as suggested by fellow expert “for for.” This approach not only makes it more manageable but also allows for greater precision in crafting each component.Step 2: Applying Glue and Securing
Sven proceeds to apply glue along one edge of the flange, ensuring a secure bond when clamped into place. He emphasizes that this stage is crucial for maintaining the structural integrity of the flange, which in turn safeguards the living area beneath the canvas when hatches are open.Step 3: Allowing Time to Dry
After securely attaching the first portion of the flange, Sven allows ample time for it to dry before moving forward with additional steps. This patience and precision are key aspects of his successful boatbuilding methods.Step 4: Finishing Touches
Once the flange is fully dried, Sven removes the clamps carefully, ensuring no damage occurs during this process. He then moves on to attaching four more pieces onto these main frames, completing two pairs of flanges for the bulkhead hatches.The Final Touches
While two flanges form the primary support structure around the hatches, Sven mentions there are two additional pieces required at each end to ensure comprehensive protection. This attention to detail highlights his commitment to producing a durable and reliable design. “Sailing is about finding your path, whether it’s across an ocean or within yourself.” – Sven Yrvind In conclusion, making flanges around bulkhead hatches may seem complex at first glance, but by following Sven Yrvind’s meticulous process, enthusiasts can achieve professional-level results. Remember that the journey of boatbuilding is as rewarding as reaching your destination; it tests one’s patience and dedication. For those seeking to embark on this adventure or simply gain more insight into marine craftsmanship, Sven’s wisdom is invaluable.Sven Yrvind, a renowned yacht designer and sailor, shares valuable insights on creating flanges around bulkhead hatches for canvas protection in this enlightening video. By following his expert guidance, boat enthusiasts can ensure their living areas remain secure while allowing unhindered access through the hatches.Step 1: Starting with the Flange
Sven begins by explaining that working on flanges vertically and horizontally is significantly easier than doing so in a flat position. To simplify the process further, he divides the task into two or three steps as suggested by fellow expert “for for.” This approach not only makes it more manageable but also allows for greater precision in crafting each component.Step 2: Applying Glue and Securing
Sven proceeds to apply glue along one edge of the flange, ensuring a secure bond when clamped into place. He emphasizes that this stage is crucial for maintaining the structural integrity of the flange, which in turn safeguards the living area beneath the canvas when hatches are open.Step 3: Allowing Time to Dry
After securely attaching the first portion of the flange, Sven allows ample time for it to dry before moving forward with additional steps. This patience and precision are key aspects of his successful boatbuilding methods.Step 4: Finishing Touches
Once the flange is fully dried, Sven removes the clamps carefully, ensuring no damage occurs during this process. He then moves on to attaching four more pieces onto these main frames, completing two pairs of flanges for the bulkhead hatches.The Final Touches
While two flanges form the primary support structure around the hatches, Sven mentions there are two additional pieces required at each end to ensure comprehensive protection. This attention to detail highlights his commitment to producing a durable and reliable design. “Sailing is about finding your path, whether it’s across an ocean or within yourself.” – Sven Yrvind In conclusion, making flanges around bulkhead hatches may seem complex at first glance, but by following Sven Yrvind’s meticulous process, enthusiasts can achieve professional-level results. Remember that the journey of boatbuilding is as rewarding as reaching your destination; it tests one’s patience and dedication. For those seeking to embark on this adventure or simply gain more insight into marine craftsmanship, Sven’s wisdom is invaluable.Making Flanges Around Bulkhead Hatches for Canvas
Sven Yrvind, a renowned yacht designer and sailor, shares valuable insights on creating flanges around bulkhead hatches for canvas protection in this enlightening video. By following his expert guidance, boat enthusiasts can ensure their living areas remain secure while allowing unhindered access through the hatches.Step 1: Starting with the Flange
Sven begins by explaining that working on flanges vertically and horizontally is significantly easier than doing so in a flat position. To simplify the process further, he divides the task into two or three steps as suggested by fellow expert “for for.” This approach not only makes it more manageable but also allows for greater precision in crafting each component.Step 2: Applying Glue and Securing
Sven proceeds to apply glue along one edge of the flange, ensuring a secure bond when clamped into place. He emphasizes that this stage is crucial for maintaining the structural integrity of the flange, which in turn safeguards the living area beneath the canvas when hatches are open.Step 3: Allowing Time to Dry
After securely attaching the first portion of the flange, Sven allows ample time for it to dry before moving forward with additional steps. This patience and precision are key aspects of his successful boatbuilding methods.Step 4: Finishing Touches
Once the flange is fully dried, Sven removes the clamps carefully, ensuring no damage occurs during this process. He then moves on to attaching four more pieces onto these main frames, completing two pairs of flanges for the bulkhead hatches.The Final Touches
While two flanges form the primary support structure around the hatches, Sven mentions there are two additional pieces required at each end to ensure comprehensive protection. This attention to detail highlights his commitment to producing a durable and reliable design. “Sailing is about finding your path, whether it’s across an ocean or within yourself.” – Sven Yrvind In conclusion, making flanges around bulkhead hatches may seem complex at first glance, but by following Sven Yrvind’s meticulous process, enthusiasts can achieve professional-level results. Remember that the journey of boatbuilding is as rewarding as reaching your destination; it tests one’s patience and dedication. For those seeking to embark on this adventure or simply gain more insight into marine craftsmanship, Sven’s wisdom is invaluable.Sven begins by explaining that working on flanges vertically and horizontally is significantly easier than doing so in a flat position. To simplify the process further, he divides the task into two or three steps as suggested by fellow expert “for for.” This approach not only makes it more manageable but also allows for greater precision in crafting each component.Step 2: Applying Glue and Securing
Sven proceeds to apply glue along one edge of the flange, ensuring a secure bond when clamped into place. He emphasizes that this stage is crucial for maintaining the structural integrity of the flange, which in turn safeguards the living area beneath the canvas when hatches are open.Step 3: Allowing Time to Dry
After securely attaching the first portion of the flange, Sven allows ample time for it to dry before moving forward with additional steps. This patience and precision are key aspects of his successful boatbuilding methods.Step 4: Finishing Touches
Once the flange is fully dried, Sven removes the clamps carefully, ensuring no damage occurs during this process. He then moves on to attaching four more pieces onto these main frames, completing two pairs of flanges for the bulkhead hatches.The Final Touches
While two flanges form the primary support structure around the hatches, Sven mentions there are two additional pieces required at each end to ensure comprehensive protection. This attention to detail highlights his commitment to producing a durable and reliable design. “Sailing is about finding your path, whether it’s across an ocean or within yourself.” – Sven Yrvind In conclusion, making flanges around bulkhead hatches may seem complex at first glance, but by following Sven Yrvind’s meticulous process, enthusiasts can achieve professional-level results. Remember that the journey of boatbuilding is as rewarding as reaching your destination; it tests one’s patience and dedication. For those seeking to embark on this adventure or simply gain more insight into marine craftsmanship, Sven’s wisdom is invaluable.Making Flanges Around Bulkhead Hatches for Canvas
Sven Yrvind, a renowned yacht designer and sailor, shares valuable insights on creating flanges around bulkhead hatches for canvas protection in this enlightening video. By following his expert guidance, boat enthusiasts can ensure their living areas remain secure while allowing unhindered access through the hatches.Step 1: Starting with the Flange
Sven begins by explaining that working on flanges vertically and horizontally is significantly easier than doing so in a flat position. To simplify the process further, he divides the task into two or three steps as suggested by fellow expert “for for.” This approach not only makes it more manageable but also allows for greater precision in crafting each component.Step 2: Applying Glue and Securing
Sven proceeds to apply glue along one edge of the flange, ensuring a secure bond when clamped into place. He emphasizes that this stage is crucial for maintaining the structural integrity of the flange, which in turn safeguards the living area beneath the canvas when hatches are open.Step 3: Allowing Time to Dry
After securely attaching the first portion of the flange, Sven allows ample time for it to dry before moving forward with additional steps. This patience and precision are key aspects of his successful boatbuilding methods.Step 4: Finishing Touches
Once the flange is fully dried, Sven removes the clamps carefully, ensuring no damage occurs during this process. He then moves on to attaching four more pieces onto these main frames, completing two pairs of flanges for the bulkhead hatches.The Final Touches
While two flanges form the primary support structure around the hatches, Sven mentions there are two additional pieces required at each end to ensure comprehensive protection. This attention to detail highlights his commitment to producing a durable and reliable design. “Sailing is about finding your path, whether it’s across an ocean or within yourself.” – Sven Yrvind In conclusion, making flanges around bulkhead hatches may seem complex at first glance, but by following Sven Yrvind’s meticulous process, enthusiasts can achieve professional-level results. Remember that the journey of boatbuilding is as rewarding as reaching your destination; it tests one’s patience and dedication. For those seeking to embark on this adventure or simply gain more insight into marine craftsmanship, Sven’s wisdom is invaluable.Sven proceeds to apply glue along one edge of the flange, ensuring a secure bond when clamped into place. He emphasizes that this stage is crucial for maintaining the structural integrity of the flange, which in turn safeguards the living area beneath the canvas when hatches are open.Step 3: Allowing Time to Dry
After securely attaching the first portion of the flange, Sven allows ample time for it to dry before moving forward with additional steps. This patience and precision are key aspects of his successful boatbuilding methods.Step 4: Finishing Touches
Once the flange is fully dried, Sven removes the clamps carefully, ensuring no damage occurs during this process. He then moves on to attaching four more pieces onto these main frames, completing two pairs of flanges for the bulkhead hatches.The Final Touches
While two flanges form the primary support structure around the hatches, Sven mentions there are two additional pieces required at each end to ensure comprehensive protection. This attention to detail highlights his commitment to producing a durable and reliable design. “Sailing is about finding your path, whether it’s across an ocean or within yourself.” – Sven Yrvind In conclusion, making flanges around bulkhead hatches may seem complex at first glance, but by following Sven Yrvind’s meticulous process, enthusiasts can achieve professional-level results. Remember that the journey of boatbuilding is as rewarding as reaching your destination; it tests one’s patience and dedication. For those seeking to embark on this adventure or simply gain more insight into marine craftsmanship, Sven’s wisdom is invaluable.Sven begins by explaining that working on flanges vertically and horizontally is significantly easier than doing so in a flat position. To simplify the process further, he divides the task into two or three steps as suggested by fellow expert “for for.” This approach not only makes it more manageable but also allows for greater precision in crafting each component.Step 2: Applying Glue and Securing
Sven proceeds to apply glue along one edge of the flange, ensuring a secure bond when clamped into place. He emphasizes that this stage is crucial for maintaining the structural integrity of the flange, which in turn safeguards the living area beneath the canvas when hatches are open.Step 3: Allowing Time to Dry
After securely attaching the first portion of the flange, Sven allows ample time for it to dry before moving forward with additional steps. This patience and precision are key aspects of his successful boatbuilding methods.Step 4: Finishing Touches
Once the flange is fully dried, Sven removes the clamps carefully, ensuring no damage occurs during this process. He then moves on to attaching four more pieces onto these main frames, completing two pairs of flanges for the bulkhead hatches.The Final Touches
While two flanges form the primary support structure around the hatches, Sven mentions there are two additional pieces required at each end to ensure comprehensive protection. This attention to detail highlights his commitment to producing a durable and reliable design. “Sailing is about finding your path, whether it’s across an ocean or within yourself.” – Sven Yrvind In conclusion, making flanges around bulkhead hatches may seem complex at first glance, but by following Sven Yrvind’s meticulous process, enthusiasts can achieve professional-level results. Remember that the journey of boatbuilding is as rewarding as reaching your destination; it tests one’s patience and dedication. For those seeking to embark on this adventure or simply gain more insight into marine craftsmanship, Sven’s wisdom is invaluable.Sven Yrvind, a renowned yacht designer and sailor, shares valuable insights on creating flanges around bulkhead hatches for canvas protection in this enlightening video. By following his expert guidance, boat enthusiasts can ensure their living areas remain secure while allowing unhindered access through the hatches.Step 1: Starting with the Flange
Sven begins by explaining that working on flanges vertically and horizontally is significantly easier than doing so in a flat position. To simplify the process further, he divides the task into two or three steps as suggested by fellow expert “for for.” This approach not only makes it more manageable but also allows for greater precision in crafting each component.Step 2: Applying Glue and Securing
Sven proceeds to apply glue along one edge of the flange, ensuring a secure bond when clamped into place. He emphasizes that this stage is crucial for maintaining the structural integrity of the flange, which in turn safeguards the living area beneath the canvas when hatches are open.Step 3: Allowing Time to Dry
After securely attaching the first portion of the flange, Sven allows ample time for it to dry before moving forward with additional steps. This patience and precision are key aspects of his successful boatbuilding methods.Step 4: Finishing Touches
Once the flange is fully dried, Sven removes the clamps carefully, ensuring no damage occurs during this process. He then moves on to attaching four more pieces onto these main frames, completing two pairs of flanges for the bulkhead hatches.The Final Touches
While two flanges form the primary support structure around the hatches, Sven mentions there are two additional pieces required at each end to ensure comprehensive protection. This attention to detail highlights his commitment to producing a durable and reliable design. “Sailing is about finding your path, whether it’s across an ocean or within yourself.” – Sven Yrvind In conclusion, making flanges around bulkhead hatches may seem complex at first glance, but by following Sven Yrvind’s meticulous process, enthusiasts can achieve professional-level results. Remember that the journey of boatbuilding is as rewarding as reaching your destination; it tests one’s patience and dedication. For those seeking to embark on this adventure or simply gain more insight into marine craftsmanship, Sven’s wisdom is invaluable.Making Flanges Around Bulkhead Hatches for Canvas
Sven Yrvind, a renowned yacht designer and sailor, shares valuable insights on creating flanges around bulkhead hatches for canvas protection in this enlightening video. By following his expert guidance, boat enthusiasts can ensure their living areas remain secure while allowing unhindered access through the hatches.Step 1: Starting with the Flange
Sven begins by explaining that working on flanges vertically and horizontally is significantly easier than doing so in a flat position. To simplify the process further, he divides the task into two or three steps as suggested by fellow expert “for for.” This approach not only makes it more manageable but also allows for greater precision in crafting each component.Step 2: Applying Glue and Securing
Sven proceeds to apply glue along one edge of the flange, ensuring a secure bond when clamped into place. He emphasizes that this stage is crucial for maintaining the structural integrity of the flange, which in turn safeguards the living area beneath the canvas when hatches are open.Step 3: Allowing Time to Dry
After securely attaching the first portion of the flange, Sven allows ample time for it to dry before moving forward with additional steps. This patience and precision are key aspects of his successful boatbuilding methods.Step 4: Finishing Touches
Once the flange is fully dried, Sven removes the clamps carefully, ensuring no damage occurs during this process. He then moves on to attaching four more pieces onto these main frames, completing two pairs of flanges for the bulkhead hatches.The Final Touches
While two flanges form the primary support structure around the hatches, Sven mentions there are two additional pieces required at each end to ensure comprehensive protection. This attention to detail highlights his commitment to producing a durable and reliable design. “Sailing is about finding your path, whether it’s across an ocean or within yourself.” – Sven Yrvind In conclusion, making flanges around bulkhead hatches may seem complex at first glance, but by following Sven Yrvind’s meticulous process, enthusiasts can achieve professional-level results. Remember that the journey of boatbuilding is as rewarding as reaching your destination; it tests one’s patience and dedication. For those seeking to embark on this adventure or simply gain more insight into marine craftsmanship, Sven’s wisdom is invaluable.Once the flange is fully dried, Sven removes the clamps carefully, ensuring no damage occurs during this process. He then moves on to attaching four more pieces onto these main frames, completing two pairs of flanges for the bulkhead hatches.The Final Touches
While two flanges form the primary support structure around the hatches, Sven mentions there are two additional pieces required at each end to ensure comprehensive protection. This attention to detail highlights his commitment to producing a durable and reliable design. “Sailing is about finding your path, whether it’s across an ocean or within yourself.” – Sven Yrvind In conclusion, making flanges around bulkhead hatches may seem complex at first glance, but by following Sven Yrvind’s meticulous process, enthusiasts can achieve professional-level results. Remember that the journey of boatbuilding is as rewarding as reaching your destination; it tests one’s patience and dedication. For those seeking to embark on this adventure or simply gain more insight into marine craftsmanship, Sven’s wisdom is invaluable.Sven proceeds to apply glue along one edge of the flange, ensuring a secure bond when clamped into place. He emphasizes that this stage is crucial for maintaining the structural integrity of the flange, which in turn safeguards the living area beneath the canvas when hatches are open.Step 3: Allowing Time to Dry
After securely attaching the first portion of the flange, Sven allows ample time for it to dry before moving forward with additional steps. This patience and precision are key aspects of his successful boatbuilding methods.Step 4: Finishing Touches
Once the flange is fully dried, Sven removes the clamps carefully, ensuring no damage occurs during this process. He then moves on to attaching four more pieces onto these main frames, completing two pairs of flanges for the bulkhead hatches.The Final Touches
While two flanges form the primary support structure around the hatches, Sven mentions there are two additional pieces required at each end to ensure comprehensive protection. This attention to detail highlights his commitment to producing a durable and reliable design. “Sailing is about finding your path, whether it’s across an ocean or within yourself.” – Sven Yrvind In conclusion, making flanges around bulkhead hatches may seem complex at first glance, but by following Sven Yrvind’s meticulous process, enthusiasts can achieve professional-level results. Remember that the journey of boatbuilding is as rewarding as reaching your destination; it tests one’s patience and dedication. For those seeking to embark on this adventure or simply gain more insight into marine craftsmanship, Sven’s wisdom is invaluable.Sven begins by explaining that working on flanges vertically and horizontally is significantly easier than doing so in a flat position. To simplify the process further, he divides the task into two or three steps as suggested by fellow expert “for for.” This approach not only makes it more manageable but also allows for greater precision in crafting each component.Step 2: Applying Glue and Securing
Sven proceeds to apply glue along one edge of the flange, ensuring a secure bond when clamped into place. He emphasizes that this stage is crucial for maintaining the structural integrity of the flange, which in turn safeguards the living area beneath the canvas when hatches are open.Step 3: Allowing Time to Dry
After securely attaching the first portion of the flange, Sven allows ample time for it to dry before moving forward with additional steps. This patience and precision are key aspects of his successful boatbuilding methods.Step 4: Finishing Touches
Once the flange is fully dried, Sven removes the clamps carefully, ensuring no damage occurs during this process. He then moves on to attaching four more pieces onto these main frames, completing two pairs of flanges for the bulkhead hatches.The Final Touches
While two flanges form the primary support structure around the hatches, Sven mentions there are two additional pieces required at each end to ensure comprehensive protection. This attention to detail highlights his commitment to producing a durable and reliable design. “Sailing is about finding your path, whether it’s across an ocean or within yourself.” – Sven Yrvind In conclusion, making flanges around bulkhead hatches may seem complex at first glance, but by following Sven Yrvind’s meticulous process, enthusiasts can achieve professional-level results. Remember that the journey of boatbuilding is as rewarding as reaching your destination; it tests one’s patience and dedication. For those seeking to embark on this adventure or simply gain more insight into marine craftsmanship, Sven’s wisdom is invaluable.Sven Yrvind, a renowned yacht designer and sailor, shares valuable insights on creating flanges around bulkhead hatches for canvas protection in this enlightening video. By following his expert guidance, boat enthusiasts can ensure their living areas remain secure while allowing unhindered access through the hatches.Step 1: Starting with the Flange
Sven begins by explaining that working on flanges vertically and horizontally is significantly easier than doing so in a flat position. To simplify the process further, he divides the task into two or three steps as suggested by fellow expert “for for.” This approach not only makes it more manageable but also allows for greater precision in crafting each component.Step 2: Applying Glue and Securing
Sven proceeds to apply glue along one edge of the flange, ensuring a secure bond when clamped into place. He emphasizes that this stage is crucial for maintaining the structural integrity of the flange, which in turn safeguards the living area beneath the canvas when hatches are open.Step 3: Allowing Time to Dry
After securely attaching the first portion of the flange, Sven allows ample time for it to dry before moving forward with additional steps. This patience and precision are key aspects of his successful boatbuilding methods.Step 4: Finishing Touches
Once the flange is fully dried, Sven removes the clamps carefully, ensuring no damage occurs during this process. He then moves on to attaching four more pieces onto these main frames, completing two pairs of flanges for the bulkhead hatches.The Final Touches
While two flanges form the primary support structure around the hatches, Sven mentions there are two additional pieces required at each end to ensure comprehensive protection. This attention to detail highlights his commitment to producing a durable and reliable design. “Sailing is about finding your path, whether it’s across an ocean or within yourself.” – Sven Yrvind In conclusion, making flanges around bulkhead hatches may seem complex at first glance, but by following Sven Yrvind’s meticulous process, enthusiasts can achieve professional-level results. Remember that the journey of boatbuilding is as rewarding as reaching your destination; it tests one’s patience and dedication. For those seeking to embark on this adventure or simply gain more insight into marine craftsmanship, Sven’s wisdom is invaluable.Making Flanges Around Bulkhead Hatches for Canvas
Sven Yrvind, a renowned yacht designer and sailor, shares valuable insights on creating flanges around bulkhead hatches for canvas protection in this enlightening video. By following his expert guidance, boat enthusiasts can ensure their living areas remain secure while allowing unhindered access through the hatches.Step 1: Starting with the Flange
Sven begins by explaining that working on flanges vertically and horizontally is significantly easier than doing so in a flat position. To simplify the process further, he divides the task into two or three steps as suggested by fellow expert “for for.” This approach not only makes it more manageable but also allows for greater precision in crafting each component.Step 2: Applying Glue and Securing
Sven proceeds to apply glue along one edge of the flange, ensuring a secure bond when clamped into place. He emphasizes that this stage is crucial for maintaining the structural integrity of the flange, which in turn safeguards the living area beneath the canvas when hatches are open.Step 3: Allowing Time to Dry
After securely attaching the first portion of the flange, Sven allows ample time for it to dry before moving forward with additional steps. This patience and precision are key aspects of his successful boatbuilding methods.Step 4: Finishing Touches
Once the flange is fully dried, Sven removes the clamps carefully, ensuring no damage occurs during this process. He then moves on to attaching four more pieces onto these main frames, completing two pairs of flanges for the bulkhead hatches.The Final Touches
While two flanges form the primary support structure around the hatches, Sven mentions there are two additional pieces required at each end to ensure comprehensive protection. This attention to detail highlights his commitment to producing a durable and reliable design. “Sailing is about finding your path, whether it’s across an ocean or within yourself.” – Sven Yrvind In conclusion, making flanges around bulkhead hatches may seem complex at first glance, but by following Sven Yrvind’s meticulous process, enthusiasts can achieve professional-level results. Remember that the journey of boatbuilding is as rewarding as reaching your destination; it tests one’s patience and dedication. For those seeking to embark on this adventure or simply gain more insight into marine craftsmanship, Sven’s wisdom is invaluable.After securely attaching the first portion of the flange, Sven allows ample time for it to dry before moving forward with additional steps. This patience and precision are key aspects of his successful boatbuilding methods.Step 4: Finishing Touches
Once the flange is fully dried, Sven removes the clamps carefully, ensuring no damage occurs during this process. He then moves on to attaching four more pieces onto these main frames, completing two pairs of flanges for the bulkhead hatches.The Final Touches
While two flanges form the primary support structure around the hatches, Sven mentions there are two additional pieces required at each end to ensure comprehensive protection. This attention to detail highlights his commitment to producing a durable and reliable design. “Sailing is about finding your path, whether it’s across an ocean or within yourself.” – Sven Yrvind In conclusion, making flanges around bulkhead hatches may seem complex at first glance, but by following Sven Yrvind’s meticulous process, enthusiasts can achieve professional-level results. Remember that the journey of boatbuilding is as rewarding as reaching your destination; it tests one’s patience and dedication. For those seeking to embark on this adventure or simply gain more insight into marine craftsmanship, Sven’s wisdom is invaluable.Sven proceeds to apply glue along one edge of the flange, ensuring a secure bond when clamped into place. He emphasizes that this stage is crucial for maintaining the structural integrity of the flange, which in turn safeguards the living area beneath the canvas when hatches are open.Step 3: Allowing Time to Dry
After securely attaching the first portion of the flange, Sven allows ample time for it to dry before moving forward with additional steps. This patience and precision are key aspects of his successful boatbuilding methods.Step 4: Finishing Touches
Once the flange is fully dried, Sven removes the clamps carefully, ensuring no damage occurs during this process. He then moves on to attaching four more pieces onto these main frames, completing two pairs of flanges for the bulkhead hatches.The Final Touches
While two flanges form the primary support structure around the hatches, Sven mentions there are two additional pieces required at each end to ensure comprehensive protection. This attention to detail highlights his commitment to producing a durable and reliable design. “Sailing is about finding your path, whether it’s across an ocean or within yourself.” – Sven Yrvind In conclusion, making flanges around bulkhead hatches may seem complex at first glance, but by following Sven Yrvind’s meticulous process, enthusiasts can achieve professional-level results. Remember that the journey of boatbuilding is as rewarding as reaching your destination; it tests one’s patience and dedication. For those seeking to embark on this adventure or simply gain more insight into marine craftsmanship, Sven’s wisdom is invaluable.Sven begins by explaining that working on flanges vertically and horizontally is significantly easier than doing so in a flat position. To simplify the process further, he divides the task into two or three steps as suggested by fellow expert “for for.” This approach not only makes it more manageable but also allows for greater precision in crafting each component.Step 2: Applying Glue and Securing
Sven proceeds to apply glue along one edge of the flange, ensuring a secure bond when clamped into place. He emphasizes that this stage is crucial for maintaining the structural integrity of the flange, which in turn safeguards the living area beneath the canvas when hatches are open.Step 3: Allowing Time to Dry
After securely attaching the first portion of the flange, Sven allows ample time for it to dry before moving forward with additional steps. This patience and precision are key aspects of his successful boatbuilding methods.Step 4: Finishing Touches
Once the flange is fully dried, Sven removes the clamps carefully, ensuring no damage occurs during this process. He then moves on to attaching four more pieces onto these main frames, completing two pairs of flanges for the bulkhead hatches.The Final Touches
While two flanges form the primary support structure around the hatches, Sven mentions there are two additional pieces required at each end to ensure comprehensive protection. This attention to detail highlights his commitment to producing a durable and reliable design. “Sailing is about finding your path, whether it’s across an ocean or within yourself.” – Sven Yrvind In conclusion, making flanges around bulkhead hatches may seem complex at first glance, but by following Sven Yrvind’s meticulous process, enthusiasts can achieve professional-level results. Remember that the journey of boatbuilding is as rewarding as reaching your destination; it tests one’s patience and dedication. For those seeking to embark on this adventure or simply gain more insight into marine craftsmanship, Sven’s wisdom is invaluable.Sven Yrvind, a renowned yacht designer and sailor, shares valuable insights on creating flanges around bulkhead hatches for canvas protection in this enlightening video. By following his expert guidance, boat enthusiasts can ensure their living areas remain secure while allowing unhindered access through the hatches.Step 1: Starting with the Flange
Sven begins by explaining that working on flanges vertically and horizontally is significantly easier than doing so in a flat position. To simplify the process further, he divides the task into two or three steps as suggested by fellow expert “for for.” This approach not only makes it more manageable but also allows for greater precision in crafting each component.Step 2: Applying Glue and Securing
Sven proceeds to apply glue along one edge of the flange, ensuring a secure bond when clamped into place. He emphasizes that this stage is crucial for maintaining the structural integrity of the flange, which in turn safeguards the living area beneath the canvas when hatches are open.Step 3: Allowing Time to Dry
After securely attaching the first portion of the flange, Sven allows ample time for it to dry before moving forward with additional steps. This patience and precision are key aspects of his successful boatbuilding methods.Step 4: Finishing Touches
Once the flange is fully dried, Sven removes the clamps carefully, ensuring no damage occurs during this process. He then moves on to attaching four more pieces onto these main frames, completing two pairs of flanges for the bulkhead hatches.The Final Touches
While two flanges form the primary support structure around the hatches, Sven mentions there are two additional pieces required at each end to ensure comprehensive protection. This attention to detail highlights his commitment to producing a durable and reliable design. “Sailing is about finding your path, whether it’s across an ocean or within yourself.” – Sven Yrvind In conclusion, making flanges around bulkhead hatches may seem complex at first glance, but by following Sven Yrvind’s meticulous process, enthusiasts can achieve professional-level results. Remember that the journey of boatbuilding is as rewarding as reaching your destination; it tests one’s patience and dedication. For those seeking to embark on this adventure or simply gain more insight into marine craftsmanship, Sven’s wisdom is invaluable.Making Flanges Around Bulkhead Hatches for Canvas
Sven Yrvind, a renowned yacht designer and sailor, shares valuable insights on creating flanges around bulkhead hatches for canvas protection in this enlightening video. By following his expert guidance, boat enthusiasts can ensure their living areas remain secure while allowing unhindered access through the hatches.Step 1: Starting with the Flange
Sven begins by explaining that working on flanges vertically and horizontally is significantly easier than doing so in a flat position. To simplify the process further, he divides the task into two or three steps as suggested by fellow expert “for for.” This approach not only makes it more manageable but also allows for greater precision in crafting each component.Step 2: Applying Glue and Securing
Sven proceeds to apply glue along one edge of the flange, ensuring a secure bond when clamped into place. He emphasizes that this stage is crucial for maintaining the structural integrity of the flange, which in turn safeguards the living area beneath the canvas when hatches are open.Step 3: Allowing Time to Dry
After securely attaching the first portion of the flange, Sven allows ample time for it to dry before moving forward with additional steps. This patience and precision are key aspects of his successful boatbuilding methods.Step 4: Finishing Touches
Once the flange is fully dried, Sven removes the clamps carefully, ensuring no damage occurs during this process. He then moves on to attaching four more pieces onto these main frames, completing two pairs of flanges for the bulkhead hatches.The Final Touches
While two flanges form the primary support structure around the hatches, Sven mentions there are two additional pieces required at each end to ensure comprehensive protection. This attention to detail highlights his commitment to producing a durable and reliable design. “Sailing is about finding your path, whether it’s across an ocean or within yourself.” – Sven Yrvind In conclusion, making flanges around bulkhead hatches may seem complex at first glance, but by following Sven Yrvind’s meticulous process, enthusiasts can achieve professional-level results. Remember that the journey of boatbuilding is as rewarding as reaching your destination; it tests one’s patience and dedication. For those seeking to embark on this adventure or simply gain more insight into marine craftsmanship, Sven’s wisdom is invaluable.Once the flange is fully dried, Sven removes the clamps carefully, ensuring no damage occurs during this process. He then moves on to attaching four more pieces onto these main frames, completing two pairs of flanges for the bulkhead hatches.The Final Touches
While two flanges form the primary support structure around the hatches, Sven mentions there are two additional pieces required at each end to ensure comprehensive protection. This attention to detail highlights his commitment to producing a durable and reliable design. “Sailing is about finding your path, whether it’s across an ocean or within yourself.” – Sven Yrvind In conclusion, making flanges around bulkhead hatches may seem complex at first glance, but by following Sven Yrvind’s meticulous process, enthusiasts can achieve professional-level results. Remember that the journey of boatbuilding is as rewarding as reaching your destination; it tests one’s patience and dedication. For those seeking to embark on this adventure or simply gain more insight into marine craftsmanship, Sven’s wisdom is invaluable.After securely attaching the first portion of the flange, Sven allows ample time for it to dry before moving forward with additional steps. This patience and precision are key aspects of his successful boatbuilding methods.Step 4: Finishing Touches
Once the flange is fully dried, Sven removes the clamps carefully, ensuring no damage occurs during this process. He then moves on to attaching four more pieces onto these main frames, completing two pairs of flanges for the bulkhead hatches.The Final Touches
While two flanges form the primary support structure around the hatches, Sven mentions there are two additional pieces required at each end to ensure comprehensive protection. This attention to detail highlights his commitment to producing a durable and reliable design. “Sailing is about finding your path, whether it’s across an ocean or within yourself.” – Sven Yrvind In conclusion, making flanges around bulkhead hatches may seem complex at first glance, but by following Sven Yrvind’s meticulous process, enthusiasts can achieve professional-level results. Remember that the journey of boatbuilding is as rewarding as reaching your destination; it tests one’s patience and dedication. For those seeking to embark on this adventure or simply gain more insight into marine craftsmanship, Sven’s wisdom is invaluable.Sven proceeds to apply glue along one edge of the flange, ensuring a secure bond when clamped into place. He emphasizes that this stage is crucial for maintaining the structural integrity of the flange, which in turn safeguards the living area beneath the canvas when hatches are open.Step 3: Allowing Time to Dry
After securely attaching the first portion of the flange, Sven allows ample time for it to dry before moving forward with additional steps. This patience and precision are key aspects of his successful boatbuilding methods.Step 4: Finishing Touches
Once the flange is fully dried, Sven removes the clamps carefully, ensuring no damage occurs during this process. He then moves on to attaching four more pieces onto these main frames, completing two pairs of flanges for the bulkhead hatches.The Final Touches
While two flanges form the primary support structure around the hatches, Sven mentions there are two additional pieces required at each end to ensure comprehensive protection. This attention to detail highlights his commitment to producing a durable and reliable design. “Sailing is about finding your path, whether it’s across an ocean or within yourself.” – Sven Yrvind In conclusion, making flanges around bulkhead hatches may seem complex at first glance, but by following Sven Yrvind’s meticulous process, enthusiasts can achieve professional-level results. Remember that the journey of boatbuilding is as rewarding as reaching your destination; it tests one’s patience and dedication. For those seeking to embark on this adventure or simply gain more insight into marine craftsmanship, Sven’s wisdom is invaluable.Sven begins by explaining that working on flanges vertically and horizontally is significantly easier than doing so in a flat position. To simplify the process further, he divides the task into two or three steps as suggested by fellow expert “for for.” This approach not only makes it more manageable but also allows for greater precision in crafting each component.Step 2: Applying Glue and Securing
Sven proceeds to apply glue along one edge of the flange, ensuring a secure bond when clamped into place. He emphasizes that this stage is crucial for maintaining the structural integrity of the flange, which in turn safeguards the living area beneath the canvas when hatches are open.Step 3: Allowing Time to Dry
After securely attaching the first portion of the flange, Sven allows ample time for it to dry before moving forward with additional steps. This patience and precision are key aspects of his successful boatbuilding methods.Step 4: Finishing Touches
Once the flange is fully dried, Sven removes the clamps carefully, ensuring no damage occurs during this process. He then moves on to attaching four more pieces onto these main frames, completing two pairs of flanges for the bulkhead hatches.The Final Touches
While two flanges form the primary support structure around the hatches, Sven mentions there are two additional pieces required at each end to ensure comprehensive protection. This attention to detail highlights his commitment to producing a durable and reliable design. “Sailing is about finding your path, whether it’s across an ocean or within yourself.” – Sven Yrvind In conclusion, making flanges around bulkhead hatches may seem complex at first glance, but by following Sven Yrvind’s meticulous process, enthusiasts can achieve professional-level results. Remember that the journey of boatbuilding is as rewarding as reaching your destination; it tests one’s patience and dedication. For those seeking to embark on this adventure or simply gain more insight into marine craftsmanship, Sven’s wisdom is invaluable.Sven Yrvind, a renowned yacht designer and sailor, shares valuable insights on creating flanges around bulkhead hatches for canvas protection in this enlightening video. By following his expert guidance, boat enthusiasts can ensure their living areas remain secure while allowing unhindered access through the hatches.Step 1: Starting with the Flange
Sven begins by explaining that working on flanges vertically and horizontally is significantly easier than doing so in a flat position. To simplify the process further, he divides the task into two or three steps as suggested by fellow expert “for for.” This approach not only makes it more manageable but also allows for greater precision in crafting each component.Step 2: Applying Glue and Securing
Sven proceeds to apply glue along one edge of the flange, ensuring a secure bond when clamped into place. He emphasizes that this stage is crucial for maintaining the structural integrity of the flange, which in turn safeguards the living area beneath the canvas when hatches are open.Step 3: Allowing Time to Dry
After securely attaching the first portion of the flange, Sven allows ample time for it to dry before moving forward with additional steps. This patience and precision are key aspects of his successful boatbuilding methods.Step 4: Finishing Touches
Once the flange is fully dried, Sven removes the clamps carefully, ensuring no damage occurs during this process. He then moves on to attaching four more pieces onto these main frames, completing two pairs of flanges for the bulkhead hatches.The Final Touches
While two flanges form the primary support structure around the hatches, Sven mentions there are two additional pieces required at each end to ensure comprehensive protection. This attention to detail highlights his commitment to producing a durable and reliable design. “Sailing is about finding your path, whether it’s across an ocean or within yourself.” – Sven Yrvind In conclusion, making flanges around bulkhead hatches may seem complex at first glance, but by following Sven Yrvind’s meticulous process, enthusiasts can achieve professional-level results. Remember that the journey of boatbuilding is as rewarding as reaching your destination; it tests one’s patience and dedication. For those seeking to embark on this adventure or simply gain more insight into marine craftsmanship, Sven’s wisdom is invaluable.Making Flanges Around Bulkhead Hatches for Canvas
Sven Yrvind, a renowned yacht designer and sailor, shares valuable insights on creating flanges around bulkhead hatches for canvas protection in this enlightening video. By following his expert guidance, boat enthusiasts can ensure their living areas remain secure while allowing unhindered access through the hatches.Step 1: Starting with the Flange
Sven begins by explaining that working on flanges vertically and horizontally is significantly easier than doing so in a flat position. To simplify the process further, he divides the task into two or three steps as suggested by fellow expert “for for.” This approach not only makes it more manageable but also allows for greater precision in crafting each component.Step 2: Applying Glue and Securing
Sven proceeds to apply glue along one edge of the flange, ensuring a secure bond when clamped into place. He emphasizes that this stage is crucial for maintaining the structural integrity of the flange, which in turn safeguards the living area beneath the canvas when hatches are open.Step 3: Allowing Time to Dry
After securely attaching the first portion of the flange, Sven allows ample time for it to dry before moving forward with additional steps. This patience and precision are key aspects of his successful boatbuilding methods.Step 4: Finishing Touches
Once the flange is fully dried, Sven removes the clamps carefully, ensuring no damage occurs during this process. He then moves on to attaching four more pieces onto these main frames, completing two pairs of flanges for the bulkhead hatches.The Final Touches
While two flanges form the primary support structure around the hatches, Sven mentions there are two additional pieces required at each end to ensure comprehensive protection. This attention to detail highlights his commitment to producing a durable and reliable design. “Sailing is about finding your path, whether it’s across an ocean or within yourself.” – Sven Yrvind In conclusion, making flanges around bulkhead hatches may seem complex at first glance, but by following Sven Yrvind’s meticulous process, enthusiasts can achieve professional-level results. Remember that the journey of boatbuilding is as rewarding as reaching your destination; it tests one’s patience and dedication. For those seeking to embark on this adventure or simply gain more insight into marine craftsmanship, Sven’s wisdom is invaluable.Sven Yrvind, a renowned yacht designer and sailor, shares valuable insights on creating flanges around bulkhead hatches for canvas protection in this enlightening video. By following his expert guidance, boat enthusiasts can ensure their living areas remain secure while allowing unhindered access through the hatches.Step 1: Starting with the Flange
Sven begins by explaining that working on flanges vertically and horizontally is significantly easier than doing so in a flat position. To simplify the process further, he divides the task into two or three steps as suggested by fellow expert “for for.” This approach not only makes it more manageable but also allows for greater precision in crafting each component.Step 2: Applying Glue and Securing
Sven proceeds to apply glue along one edge of the flange, ensuring a secure bond when clamped into place. He emphasizes that this stage is crucial for maintaining the structural integrity of the flange, which in turn safeguards the living area beneath the canvas when hatches are open.Step 3: Allowing Time to Dry
After securely attaching the first portion of the flange, Sven allows ample time for it to dry before moving forward with additional steps. This patience and precision are key aspects of his successful boatbuilding methods.Step 4: Finishing Touches
Once the flange is fully dried, Sven removes the clamps carefully, ensuring no damage occurs during this process. He then moves on to attaching four more pieces onto these main frames, completing two pairs of flanges for the bulkhead hatches.The Final Touches
While two flanges form the primary support structure around the hatches, Sven mentions there are two additional pieces required at each end to ensure comprehensive protection. This attention to detail highlights his commitment to producing a durable and reliable design. “Sailing is about finding your path, whether it’s across an ocean or within yourself.” – Sven Yrvind In conclusion, making flanges around bulkhead hatches may seem complex at first glance, but by following Sven Yrvind’s meticulous process, enthusiasts can achieve professional-level results. Remember that the journey of boatbuilding is as rewarding as reaching your destination; it tests one’s patience and dedication. For those seeking to embark on this adventure or simply gain more insight into marine craftsmanship, Sven’s wisdom is invaluable.Making Flanges Around Bulkhead Hatches for Canvas
Sven Yrvind, a renowned yacht designer and sailor, shares valuable insights on creating flanges around bulkhead hatches for canvas protection in this enlightening video. By following his expert guidance, boat enthusiasts can ensure their living areas remain secure while allowing unhindered access through the hatches.Step 1: Starting with the Flange
Sven begins by explaining that working on flanges vertically and horizontally is significantly easier than doing so in a flat position. To simplify the process further, he divides the task into two or three steps as suggested by fellow expert “for for.” This approach not only makes it more manageable but also allows for greater precision in crafting each component.Step 2: Applying Glue and Securing
Sven proceeds to apply glue along one edge of the flange, ensuring a secure bond when clamped into place. He emphasizes that this stage is crucial for maintaining the structural integrity of the flange, which in turn safeguards the living area beneath the canvas when hatches are open.Step 3: Allowing Time to Dry
After securely attaching the first portion of the flange, Sven allows ample time for it to dry before moving forward with additional steps. This patience and precision are key aspects of his successful boatbuilding methods.Step 4: Finishing Touches
Once the flange is fully dried, Sven removes the clamps carefully, ensuring no damage occurs during this process. He then moves on to attaching four more pieces onto these main frames, completing two pairs of flanges for the bulkhead hatches.The Final Touches
While two flanges form the primary support structure around the hatches, Sven mentions there are two additional pieces required at each end to ensure comprehensive protection. This attention to detail highlights his commitment to producing a durable and reliable design. “Sailing is about finding your path, whether it’s across an ocean or within yourself.” – Sven Yrvind In conclusion, making flanges around bulkhead hatches may seem complex at first glance, but by following Sven Yrvind’s meticulous process, enthusiasts can achieve professional-level results. Remember that the journey of boatbuilding is as rewarding as reaching your destination; it tests one’s patience and dedication. For those seeking to embark on this adventure or simply gain more insight into marine craftsmanship, Sven’s wisdom is invaluable.Sven proceeds to apply glue along one edge of the flange, ensuring a secure bond when clamped into place. He emphasizes that this stage is crucial for maintaining the structural integrity of the flange, which in turn safeguards the living area beneath the canvas when hatches are open.Step 3: Allowing Time to Dry
After securely attaching the first portion of the flange, Sven allows ample time for it to dry before moving forward with additional steps. This patience and precision are key aspects of his successful boatbuilding methods.Step 4: Finishing Touches
Once the flange is fully dried, Sven removes the clamps carefully, ensuring no damage occurs during this process. He then moves on to attaching four more pieces onto these main frames, completing two pairs of flanges for the bulkhead hatches.The Final Touches
While two flanges form the primary support structure around the hatches, Sven mentions there are two additional pieces required at each end to ensure comprehensive protection. This attention to detail highlights his commitment to producing a durable and reliable design. “Sailing is about finding your path, whether it’s across an ocean or within yourself.” – Sven Yrvind In conclusion, making flanges around bulkhead hatches may seem complex at first glance, but by following Sven Yrvind’s meticulous process, enthusiasts can achieve professional-level results. Remember that the journey of boatbuilding is as rewarding as reaching your destination; it tests one’s patience and dedication. For those seeking to embark on this adventure or simply gain more insight into marine craftsmanship, Sven’s wisdom is invaluable.Sven begins by explaining that working on flanges vertically and horizontally is significantly easier than doing so in a flat position. To simplify the process further, he divides the task into two or three steps as suggested by fellow expert “for for.” This approach not only makes it more manageable but also allows for greater precision in crafting each component.Step 2: Applying Glue and Securing
Sven proceeds to apply glue along one edge of the flange, ensuring a secure bond when clamped into place. He emphasizes that this stage is crucial for maintaining the structural integrity of the flange, which in turn safeguards the living area beneath the canvas when hatches are open.Step 3: Allowing Time to Dry
After securely attaching the first portion of the flange, Sven allows ample time for it to dry before moving forward with additional steps. This patience and precision are key aspects of his successful boatbuilding methods.Step 4: Finishing Touches
Once the flange is fully dried, Sven removes the clamps carefully, ensuring no damage occurs during this process. He then moves on to attaching four more pieces onto these main frames, completing two pairs of flanges for the bulkhead hatches.The Final Touches
While two flanges form the primary support structure around the hatches, Sven mentions there are two additional pieces required at each end to ensure comprehensive protection. This attention to detail highlights his commitment to producing a durable and reliable design. “Sailing is about finding your path, whether it’s across an ocean or within yourself.” – Sven Yrvind In conclusion, making flanges around bulkhead hatches may seem complex at first glance, but by following Sven Yrvind’s meticulous process, enthusiasts can achieve professional-level results. Remember that the journey of boatbuilding is as rewarding as reaching your destination; it tests one’s patience and dedication. For those seeking to embark on this adventure or simply gain more insight into marine craftsmanship, Sven’s wisdom is invaluable.Sven Yrvind, a renowned yacht designer and sailor, shares valuable insights on creating flanges around bulkhead hatches for canvas protection in this enlightening video. By following his expert guidance, boat enthusiasts can ensure their living areas remain secure while allowing unhindered access through the hatches.Step 1: Starting with the Flange
Sven begins by explaining that working on flanges vertically and horizontally is significantly easier than doing so in a flat position. To simplify the process further, he divides the task into two or three steps as suggested by fellow expert “for for.” This approach not only makes it more manageable but also allows for greater precision in crafting each component.Step 2: Applying Glue and Securing
Sven proceeds to apply glue along one edge of the flange, ensuring a secure bond when clamped into place. He emphasizes that this stage is crucial for maintaining the structural integrity of the flange, which in turn safeguards the living area beneath the canvas when hatches are open.Step 3: Allowing Time to Dry
After securely attaching the first portion of the flange, Sven allows ample time for it to dry before moving forward with additional steps. This patience and precision are key aspects of his successful boatbuilding methods.Step 4: Finishing Touches
Once the flange is fully dried, Sven removes the clamps carefully, ensuring no damage occurs during this process. He then moves on to attaching four more pieces onto these main frames, completing two pairs of flanges for the bulkhead hatches.The Final Touches
While two flanges form the primary support structure around the hatches, Sven mentions there are two additional pieces required at each end to ensure comprehensive protection. This attention to detail highlights his commitment to producing a durable and reliable design. “Sailing is about finding your path, whether it’s across an ocean or within yourself.” – Sven Yrvind In conclusion, making flanges around bulkhead hatches may seem complex at first glance, but by following Sven Yrvind’s meticulous process, enthusiasts can achieve professional-level results. Remember that the journey of boatbuilding is as rewarding as reaching your destination; it tests one’s patience and dedication. For those seeking to embark on this adventure or simply gain more insight into marine craftsmanship, Sven’s wisdom is invaluable.Making Flanges Around Bulkhead Hatches for Canvas
Sven Yrvind, a renowned yacht designer and sailor, shares valuable insights on creating flanges around bulkhead hatches for canvas protection in this enlightening video. By following his expert guidance, boat enthusiasts can ensure their living areas remain secure while allowing unhindered access through the hatches.Step 1: Starting with the Flange
Sven begins by explaining that working on flanges vertically and horizontally is significantly easier than doing so in a flat position. To simplify the process further, he divides the task into two or three steps as suggested by fellow expert “for for.” This approach not only makes it more manageable but also allows for greater precision in crafting each component.Step 2: Applying Glue and Securing
Sven proceeds to apply glue along one edge of the flange, ensuring a secure bond when clamped into place. He emphasizes that this stage is crucial for maintaining the structural integrity of the flange, which in turn safeguards the living area beneath the canvas when hatches are open.Step 3: Allowing Time to Dry
After securely attaching the first portion of the flange, Sven allows ample time for it to dry before moving forward with additional steps. This patience and precision are key aspects of his successful boatbuilding methods.Step 4: Finishing Touches
Once the flange is fully dried, Sven removes the clamps carefully, ensuring no damage occurs during this process. He then moves on to attaching four more pieces onto these main frames, completing two pairs of flanges for the bulkhead hatches.The Final Touches
While two flanges form the primary support structure around the hatches, Sven mentions there are two additional pieces required at each end to ensure comprehensive protection. This attention to detail highlights his commitment to producing a durable and reliable design. “Sailing is about finding your path, whether it’s across an ocean or within yourself.” – Sven Yrvind In conclusion, making flanges around bulkhead hatches may seem complex at first glance, but by following Sven Yrvind’s meticulous process, enthusiasts can achieve professional-level results. Remember that the journey of boatbuilding is as rewarding as reaching your destination; it tests one’s patience and dedication. For those seeking to embark on this adventure or simply gain more insight into marine craftsmanship, Sven’s wisdom is invaluable.Once the flange is fully dried, Sven removes the clamps carefully, ensuring no damage occurs during this process. He then moves on to attaching four more pieces onto these main frames, completing two pairs of flanges for the bulkhead hatches.The Final Touches
While two flanges form the primary support structure around the hatches, Sven mentions there are two additional pieces required at each end to ensure comprehensive protection. This attention to detail highlights his commitment to producing a durable and reliable design. “Sailing is about finding your path, whether it’s across an ocean or within yourself.” – Sven Yrvind In conclusion, making flanges around bulkhead hatches may seem complex at first glance, but by following Sven Yrvind’s meticulous process, enthusiasts can achieve professional-level results. Remember that the journey of boatbuilding is as rewarding as reaching your destination; it tests one’s patience and dedication. For those seeking to embark on this adventure or simply gain more insight into marine craftsmanship, Sven’s wisdom is invaluable.Sven proceeds to apply glue along one edge of the flange, ensuring a secure bond when clamped into place. He emphasizes that this stage is crucial for maintaining the structural integrity of the flange, which in turn safeguards the living area beneath the canvas when hatches are open.Step 3: Allowing Time to Dry
After securely attaching the first portion of the flange, Sven allows ample time for it to dry before moving forward with additional steps. This patience and precision are key aspects of his successful boatbuilding methods.Step 4: Finishing Touches
Once the flange is fully dried, Sven removes the clamps carefully, ensuring no damage occurs during this process. He then moves on to attaching four more pieces onto these main frames, completing two pairs of flanges for the bulkhead hatches.The Final Touches
While two flanges form the primary support structure around the hatches, Sven mentions there are two additional pieces required at each end to ensure comprehensive protection. This attention to detail highlights his commitment to producing a durable and reliable design. “Sailing is about finding your path, whether it’s across an ocean or within yourself.” – Sven Yrvind In conclusion, making flanges around bulkhead hatches may seem complex at first glance, but by following Sven Yrvind’s meticulous process, enthusiasts can achieve professional-level results. Remember that the journey of boatbuilding is as rewarding as reaching your destination; it tests one’s patience and dedication. For those seeking to embark on this adventure or simply gain more insight into marine craftsmanship, Sven’s wisdom is invaluable.Sven begins by explaining that working on flanges vertically and horizontally is significantly easier than doing so in a flat position. To simplify the process further, he divides the task into two or three steps as suggested by fellow expert “for for.” This approach not only makes it more manageable but also allows for greater precision in crafting each component.Step 2: Applying Glue and Securing
Sven proceeds to apply glue along one edge of the flange, ensuring a secure bond when clamped into place. He emphasizes that this stage is crucial for maintaining the structural integrity of the flange, which in turn safeguards the living area beneath the canvas when hatches are open.Step 3: Allowing Time to Dry
After securely attaching the first portion of the flange, Sven allows ample time for it to dry before moving forward with additional steps. This patience and precision are key aspects of his successful boatbuilding methods.Step 4: Finishing Touches
Once the flange is fully dried, Sven removes the clamps carefully, ensuring no damage occurs during this process. He then moves on to attaching four more pieces onto these main frames, completing two pairs of flanges for the bulkhead hatches.The Final Touches
While two flanges form the primary support structure around the hatches, Sven mentions there are two additional pieces required at each end to ensure comprehensive protection. This attention to detail highlights his commitment to producing a durable and reliable design. “Sailing is about finding your path, whether it’s across an ocean or within yourself.” – Sven Yrvind In conclusion, making flanges around bulkhead hatches may seem complex at first glance, but by following Sven Yrvind’s meticulous process, enthusiasts can achieve professional-level results. Remember that the journey of boatbuilding is as rewarding as reaching your destination; it tests one’s patience and dedication. For those seeking to embark on this adventure or simply gain more insight into marine craftsmanship, Sven’s wisdom is invaluable.Sven Yrvind, a renowned yacht designer and sailor, shares valuable insights on creating flanges around bulkhead hatches for canvas protection in this enlightening video. By following his expert guidance, boat enthusiasts can ensure their living areas remain secure while allowing unhindered access through the hatches.Step 1: Starting with the Flange
Sven begins by explaining that working on flanges vertically and horizontally is significantly easier than doing so in a flat position. To simplify the process further, he divides the task into two or three steps as suggested by fellow expert “for for.” This approach not only makes it more manageable but also allows for greater precision in crafting each component.Step 2: Applying Glue and Securing
Sven proceeds to apply glue along one edge of the flange, ensuring a secure bond when clamped into place. He emphasizes that this stage is crucial for maintaining the structural integrity of the flange, which in turn safeguards the living area beneath the canvas when hatches are open.Step 3: Allowing Time to Dry
After securely attaching the first portion of the flange, Sven allows ample time for it to dry before moving forward with additional steps. This patience and precision are key aspects of his successful boatbuilding methods.Step 4: Finishing Touches
Once the flange is fully dried, Sven removes the clamps carefully, ensuring no damage occurs during this process. He then moves on to attaching four more pieces onto these main frames, completing two pairs of flanges for the bulkhead hatches.The Final Touches
While two flanges form the primary support structure around the hatches, Sven mentions there are two additional pieces required at each end to ensure comprehensive protection. This attention to detail highlights his commitment to producing a durable and reliable design. “Sailing is about finding your path, whether it’s across an ocean or within yourself.” – Sven Yrvind In conclusion, making flanges around bulkhead hatches may seem complex at first glance, but by following Sven Yrvind’s meticulous process, enthusiasts can achieve professional-level results. Remember that the journey of boatbuilding is as rewarding as reaching your destination; it tests one’s patience and dedication. For those seeking to embark on this adventure or simply gain more insight into marine craftsmanship, Sven’s wisdom is invaluable.Making Flanges Around Bulkhead Hatches for Canvas
Sven Yrvind, a renowned yacht designer and sailor, shares valuable insights on creating flanges around bulkhead hatches for canvas protection in this enlightening video. By following his expert guidance, boat enthusiasts can ensure their living areas remain secure while allowing unhindered access through the hatches.Step 1: Starting with the Flange
Sven begins by explaining that working on flanges vertically and horizontally is significantly easier than doing so in a flat position. To simplify the process further, he divides the task into two or three steps as suggested by fellow expert “for for.” This approach not only makes it more manageable but also allows for greater precision in crafting each component.Step 2: Applying Glue and Securing
Sven proceeds to apply glue along one edge of the flange, ensuring a secure bond when clamped into place. He emphasizes that this stage is crucial for maintaining the structural integrity of the flange, which in turn safeguards the living area beneath the canvas when hatches are open.Step 3: Allowing Time to Dry
After securely attaching the first portion of the flange, Sven allows ample time for it to dry before moving forward with additional steps. This patience and precision are key aspects of his successful boatbuilding methods.Step 4: Finishing Touches
Once the flange is fully dried, Sven removes the clamps carefully, ensuring no damage occurs during this process. He then moves on to attaching four more pieces onto these main frames, completing two pairs of flanges for the bulkhead hatches.The Final Touches
While two flanges form the primary support structure around the hatches, Sven mentions there are two additional pieces required at each end to ensure comprehensive protection. This attention to detail highlights his commitment to producing a durable and reliable design. “Sailing is about finding your path, whether it’s across an ocean or within yourself.” – Sven Yrvind In conclusion, making flanges around bulkhead hatches may seem complex at first glance, but by following Sven Yrvind’s meticulous process, enthusiasts can achieve professional-level results. Remember that the journey of boatbuilding is as rewarding as reaching your destination; it tests one’s patience and dedication. For those seeking to embark on this adventure or simply gain more insight into marine craftsmanship, Sven’s wisdom is invaluable.After securely attaching the first portion of the flange, Sven allows ample time for it to dry before moving forward with additional steps. This patience and precision are key aspects of his successful boatbuilding methods.Step 4: Finishing Touches
Once the flange is fully dried, Sven removes the clamps carefully, ensuring no damage occurs during this process. He then moves on to attaching four more pieces onto these main frames, completing two pairs of flanges for the bulkhead hatches.The Final Touches
While two flanges form the primary support structure around the hatches, Sven mentions there are two additional pieces required at each end to ensure comprehensive protection. This attention to detail highlights his commitment to producing a durable and reliable design. “Sailing is about finding your path, whether it’s across an ocean or within yourself.” – Sven Yrvind In conclusion, making flanges around bulkhead hatches may seem complex at first glance, but by following Sven Yrvind’s meticulous process, enthusiasts can achieve professional-level results. Remember that the journey of boatbuilding is as rewarding as reaching your destination; it tests one’s patience and dedication. For those seeking to embark on this adventure or simply gain more insight into marine craftsmanship, Sven’s wisdom is invaluable.Sven proceeds to apply glue along one edge of the flange, ensuring a secure bond when clamped into place. He emphasizes that this stage is crucial for maintaining the structural integrity of the flange, which in turn safeguards the living area beneath the canvas when hatches are open.Step 3: Allowing Time to Dry
After securely attaching the first portion of the flange, Sven allows ample time for it to dry before moving forward with additional steps. This patience and precision are key aspects of his successful boatbuilding methods.Step 4: Finishing Touches
Once the flange is fully dried, Sven removes the clamps carefully, ensuring no damage occurs during this process. He then moves on to attaching four more pieces onto these main frames, completing two pairs of flanges for the bulkhead hatches.The Final Touches
While two flanges form the primary support structure around the hatches, Sven mentions there are two additional pieces required at each end to ensure comprehensive protection. This attention to detail highlights his commitment to producing a durable and reliable design. “Sailing is about finding your path, whether it’s across an ocean or within yourself.” – Sven Yrvind In conclusion, making flanges around bulkhead hatches may seem complex at first glance, but by following Sven Yrvind’s meticulous process, enthusiasts can achieve professional-level results. Remember that the journey of boatbuilding is as rewarding as reaching your destination; it tests one’s patience and dedication. For those seeking to embark on this adventure or simply gain more insight into marine craftsmanship, Sven’s wisdom is invaluable.Sven begins by explaining that working on flanges vertically and horizontally is significantly easier than doing so in a flat position. To simplify the process further, he divides the task into two or three steps as suggested by fellow expert “for for.” This approach not only makes it more manageable but also allows for greater precision in crafting each component.Step 2: Applying Glue and Securing
Sven proceeds to apply glue along one edge of the flange, ensuring a secure bond when clamped into place. He emphasizes that this stage is crucial for maintaining the structural integrity of the flange, which in turn safeguards the living area beneath the canvas when hatches are open.Step 3: Allowing Time to Dry
After securely attaching the first portion of the flange, Sven allows ample time for it to dry before moving forward with additional steps. This patience and precision are key aspects of his successful boatbuilding methods.Step 4: Finishing Touches
Once the flange is fully dried, Sven removes the clamps carefully, ensuring no damage occurs during this process. He then moves on to attaching four more pieces onto these main frames, completing two pairs of flanges for the bulkhead hatches.The Final Touches
While two flanges form the primary support structure around the hatches, Sven mentions there are two additional pieces required at each end to ensure comprehensive protection. This attention to detail highlights his commitment to producing a durable and reliable design. “Sailing is about finding your path, whether it’s across an ocean or within yourself.” – Sven Yrvind In conclusion, making flanges around bulkhead hatches may seem complex at first glance, but by following Sven Yrvind’s meticulous process, enthusiasts can achieve professional-level results. Remember that the journey of boatbuilding is as rewarding as reaching your destination; it tests one’s patience and dedication. For those seeking to embark on this adventure or simply gain more insight into marine craftsmanship, Sven’s wisdom is invaluable.Sven Yrvind, a renowned yacht designer and sailor, shares valuable insights on creating flanges around bulkhead hatches for canvas protection in this enlightening video. By following his expert guidance, boat enthusiasts can ensure their living areas remain secure while allowing unhindered access through the hatches.Step 1: Starting with the Flange
Sven begins by explaining that working on flanges vertically and horizontally is significantly easier than doing so in a flat position. To simplify the process further, he divides the task into two or three steps as suggested by fellow expert “for for.” This approach not only makes it more manageable but also allows for greater precision in crafting each component.Step 2: Applying Glue and Securing
Sven proceeds to apply glue along one edge of the flange, ensuring a secure bond when clamped into place. He emphasizes that this stage is crucial for maintaining the structural integrity of the flange, which in turn safeguards the living area beneath the canvas when hatches are open.Step 3: Allowing Time to Dry
After securely attaching the first portion of the flange, Sven allows ample time for it to dry before moving forward with additional steps. This patience and precision are key aspects of his successful boatbuilding methods.Step 4: Finishing Touches
Once the flange is fully dried, Sven removes the clamps carefully, ensuring no damage occurs during this process. He then moves on to attaching four more pieces onto these main frames, completing two pairs of flanges for the bulkhead hatches.The Final Touches
While two flanges form the primary support structure around the hatches, Sven mentions there are two additional pieces required at each end to ensure comprehensive protection. This attention to detail highlights his commitment to producing a durable and reliable design. “Sailing is about finding your path, whether it’s across an ocean or within yourself.” – Sven Yrvind In conclusion, making flanges around bulkhead hatches may seem complex at first glance, but by following Sven Yrvind’s meticulous process, enthusiasts can achieve professional-level results. Remember that the journey of boatbuilding is as rewarding as reaching your destination; it tests one’s patience and dedication. For those seeking to embark on this adventure or simply gain more insight into marine craftsmanship, Sven’s wisdom is invaluable.Making Flanges Around Bulkhead Hatches for Canvas
Sven Yrvind, a renowned yacht designer and sailor, shares valuable insights on creating flanges around bulkhead hatches for canvas protection in this enlightening video. By following his expert guidance, boat enthusiasts can ensure their living areas remain secure while allowing unhindered access through the hatches.Step 1: Starting with the Flange
Sven begins by explaining that working on flanges vertically and horizontally is significantly easier than doing so in a flat position. To simplify the process further, he divides the task into two or three steps as suggested by fellow expert “for for.” This approach not only makes it more manageable but also allows for greater precision in crafting each component.Step 2: Applying Glue and Securing
Sven proceeds to apply glue along one edge of the flange, ensuring a secure bond when clamped into place. He emphasizes that this stage is crucial for maintaining the structural integrity of the flange, which in turn safeguards the living area beneath the canvas when hatches are open.Step 3: Allowing Time to Dry
After securely attaching the first portion of the flange, Sven allows ample time for it to dry before moving forward with additional steps. This patience and precision are key aspects of his successful boatbuilding methods.Step 4: Finishing Touches
Once the flange is fully dried, Sven removes the clamps carefully, ensuring no damage occurs during this process. He then moves on to attaching four more pieces onto these main frames, completing two pairs of flanges for the bulkhead hatches.The Final Touches
While two flanges form the primary support structure around the hatches, Sven mentions there are two additional pieces required at each end to ensure comprehensive protection. This attention to detail highlights his commitment to producing a durable and reliable design. “Sailing is about finding your path, whether it’s across an ocean or within yourself.” – Sven Yrvind In conclusion, making flanges around bulkhead hatches may seem complex at first glance, but by following Sven Yrvind’s meticulous process, enthusiasts can achieve professional-level results. Remember that the journey of boatbuilding is as rewarding as reaching your destination; it tests one’s patience and dedication. For those seeking to embark on this adventure or simply gain more insight into marine craftsmanship, Sven’s wisdom is invaluable.Once the flange is fully dried, Sven removes the clamps carefully, ensuring no damage occurs during this process. He then moves on to attaching four more pieces onto these main frames, completing two pairs of flanges for the bulkhead hatches.The Final Touches
While two flanges form the primary support structure around the hatches, Sven mentions there are two additional pieces required at each end to ensure comprehensive protection. This attention to detail highlights his commitment to producing a durable and reliable design. “Sailing is about finding your path, whether it’s across an ocean or within yourself.” – Sven Yrvind In conclusion, making flanges around bulkhead hatches may seem complex at first glance, but by following Sven Yrvind’s meticulous process, enthusiasts can achieve professional-level results. Remember that the journey of boatbuilding is as rewarding as reaching your destination; it tests one’s patience and dedication. For those seeking to embark on this adventure or simply gain more insight into marine craftsmanship, Sven’s wisdom is invaluable.After securely attaching the first portion of the flange, Sven allows ample time for it to dry before moving forward with additional steps. This patience and precision are key aspects of his successful boatbuilding methods.Step 4: Finishing Touches
Once the flange is fully dried, Sven removes the clamps carefully, ensuring no damage occurs during this process. He then moves on to attaching four more pieces onto these main frames, completing two pairs of flanges for the bulkhead hatches.The Final Touches
While two flanges form the primary support structure around the hatches, Sven mentions there are two additional pieces required at each end to ensure comprehensive protection. This attention to detail highlights his commitment to producing a durable and reliable design. “Sailing is about finding your path, whether it’s across an ocean or within yourself.” – Sven Yrvind In conclusion, making flanges around bulkhead hatches may seem complex at first glance, but by following Sven Yrvind’s meticulous process, enthusiasts can achieve professional-level results. Remember that the journey of boatbuilding is as rewarding as reaching your destination; it tests one’s patience and dedication. For those seeking to embark on this adventure or simply gain more insight into marine craftsmanship, Sven’s wisdom is invaluable.Sven proceeds to apply glue along one edge of the flange, ensuring a secure bond when clamped into place. He emphasizes that this stage is crucial for maintaining the structural integrity of the flange, which in turn safeguards the living area beneath the canvas when hatches are open.Step 3: Allowing Time to Dry
After securely attaching the first portion of the flange, Sven allows ample time for it to dry before moving forward with additional steps. This patience and precision are key aspects of his successful boatbuilding methods.Step 4: Finishing Touches
Once the flange is fully dried, Sven removes the clamps carefully, ensuring no damage occurs during this process. He then moves on to attaching four more pieces onto these main frames, completing two pairs of flanges for the bulkhead hatches.The Final Touches
While two flanges form the primary support structure around the hatches, Sven mentions there are two additional pieces required at each end to ensure comprehensive protection. This attention to detail highlights his commitment to producing a durable and reliable design. “Sailing is about finding your path, whether it’s across an ocean or within yourself.” – Sven Yrvind In conclusion, making flanges around bulkhead hatches may seem complex at first glance, but by following Sven Yrvind’s meticulous process, enthusiasts can achieve professional-level results. Remember that the journey of boatbuilding is as rewarding as reaching your destination; it tests one’s patience and dedication. For those seeking to embark on this adventure or simply gain more insight into marine craftsmanship, Sven’s wisdom is invaluable.Sven begins by explaining that working on flanges vertically and horizontally is significantly easier than doing so in a flat position. To simplify the process further, he divides the task into two or three steps as suggested by fellow expert “for for.” This approach not only makes it more manageable but also allows for greater precision in crafting each component.Step 2: Applying Glue and Securing
Sven proceeds to apply glue along one edge of the flange, ensuring a secure bond when clamped into place. He emphasizes that this stage is crucial for maintaining the structural integrity of the flange, which in turn safeguards the living area beneath the canvas when hatches are open.Step 3: Allowing Time to Dry
After securely attaching the first portion of the flange, Sven allows ample time for it to dry before moving forward with additional steps. This patience and precision are key aspects of his successful boatbuilding methods.Step 4: Finishing Touches
Once the flange is fully dried, Sven removes the clamps carefully, ensuring no damage occurs during this process. He then moves on to attaching four more pieces onto these main frames, completing two pairs of flanges for the bulkhead hatches.The Final Touches
While two flanges form the primary support structure around the hatches, Sven mentions there are two additional pieces required at each end to ensure comprehensive protection. This attention to detail highlights his commitment to producing a durable and reliable design. “Sailing is about finding your path, whether it’s across an ocean or within yourself.” – Sven Yrvind In conclusion, making flanges around bulkhead hatches may seem complex at first glance, but by following Sven Yrvind’s meticulous process, enthusiasts can achieve professional-level results. Remember that the journey of boatbuilding is as rewarding as reaching your destination; it tests one’s patience and dedication. For those seeking to embark on this adventure or simply gain more insight into marine craftsmanship, Sven’s wisdom is invaluable.Sven Yrvind, a renowned yacht designer and sailor, shares valuable insights on creating flanges around bulkhead hatches for canvas protection in this enlightening video. By following his expert guidance, boat enthusiasts can ensure their living areas remain secure while allowing unhindered access through the hatches.Step 1: Starting with the Flange
Sven begins by explaining that working on flanges vertically and horizontally is significantly easier than doing so in a flat position. To simplify the process further, he divides the task into two or three steps as suggested by fellow expert “for for.” This approach not only makes it more manageable but also allows for greater precision in crafting each component.Step 2: Applying Glue and Securing
Sven proceeds to apply glue along one edge of the flange, ensuring a secure bond when clamped into place. He emphasizes that this stage is crucial for maintaining the structural integrity of the flange, which in turn safeguards the living area beneath the canvas when hatches are open.Step 3: Allowing Time to Dry
After securely attaching the first portion of the flange, Sven allows ample time for it to dry before moving forward with additional steps. This patience and precision are key aspects of his successful boatbuilding methods.Step 4: Finishing Touches
Once the flange is fully dried, Sven removes the clamps carefully, ensuring no damage occurs during this process. He then moves on to attaching four more pieces onto these main frames, completing two pairs of flanges for the bulkhead hatches.The Final Touches
While two flanges form the primary support structure around the hatches, Sven mentions there are two additional pieces required at each end to ensure comprehensive protection. This attention to detail highlights his commitment to producing a durable and reliable design. “Sailing is about finding your path, whether it’s across an ocean or within yourself.” – Sven Yrvind In conclusion, making flanges around bulkhead hatches may seem complex at first glance, but by following Sven Yrvind’s meticulous process, enthusiasts can achieve professional-level results. Remember that the journey of boatbuilding is as rewarding as reaching your destination; it tests one’s patience and dedication. For those seeking to embark on this adventure or simply gain more insight into marine craftsmanship, Sven’s wisdom is invaluable.Making Flanges Around Bulkhead Hatches for Canvas
Sven Yrvind, a renowned yacht designer and sailor, shares valuable insights on creating flanges around bulkhead hatches for canvas protection in this enlightening video. By following his expert guidance, boat enthusiasts can ensure their living areas remain secure while allowing unhindered access through the hatches.Step 1: Starting with the Flange
Sven begins by explaining that working on flanges vertically and horizontally is significantly easier than doing so in a flat position. To simplify the process further, he divides the task into two or three steps as suggested by fellow expert “for for.” This approach not only makes it more manageable but also allows for greater precision in crafting each component.Step 2: Applying Glue and Securing
Sven proceeds to apply glue along one edge of the flange, ensuring a secure bond when clamped into place. He emphasizes that this stage is crucial for maintaining the structural integrity of the flange, which in turn safeguards the living area beneath the canvas when hatches are open.Step 3: Allowing Time to Dry
After securely attaching the first portion of the flange, Sven allows ample time for it to dry before moving forward with additional steps. This patience and precision are key aspects of his successful boatbuilding methods.Step 4: Finishing Touches
Once the flange is fully dried, Sven removes the clamps carefully, ensuring no damage occurs during this process. He then moves on to attaching four more pieces onto these main frames, completing two pairs of flanges for the bulkhead hatches.The Final Touches
While two flanges form the primary support structure around the hatches, Sven mentions there are two additional pieces required at each end to ensure comprehensive protection. This attention to detail highlights his commitment to producing a durable and reliable design. “Sailing is about finding your path, whether it’s across an ocean or within yourself.” – Sven Yrvind In conclusion, making flanges around bulkhead hatches may seem complex at first glance, but by following Sven Yrvind’s meticulous process, enthusiasts can achieve professional-level results. Remember that the journey of boatbuilding is as rewarding as reaching your destination; it tests one’s patience and dedication. For those seeking to embark on this adventure or simply gain more insight into marine craftsmanship, Sven’s wisdom is invaluable.Once the flange is fully dried, Sven removes the clamps carefully, ensuring no damage occurs during this process. He then moves on to attaching four more pieces onto these main frames, completing two pairs of flanges for the bulkhead hatches.The Final Touches
While two flanges form the primary support structure around the hatches, Sven mentions there are two additional pieces required at each end to ensure comprehensive protection. This attention to detail highlights his commitment to producing a durable and reliable design. “Sailing is about finding your path, whether it’s across an ocean or within yourself.” – Sven Yrvind In conclusion, making flanges around bulkhead hatches may seem complex at first glance, but by following Sven Yrvind’s meticulous process, enthusiasts can achieve professional-level results. Remember that the journey of boatbuilding is as rewarding as reaching your destination; it tests one’s patience and dedication. For those seeking to embark on this adventure or simply gain more insight into marine craftsmanship, Sven’s wisdom is invaluable.Sven Yrvind, a renowned yacht designer and sailor, shares valuable insights on creating flanges around bulkhead hatches for canvas protection in this enlightening video. By following his expert guidance, boat enthusiasts can ensure their living areas remain secure while allowing unhindered access through the hatches.Step 1: Starting with the Flange
Sven begins by explaining that working on flanges vertically and horizontally is significantly easier than doing so in a flat position. To simplify the process further, he divides the task into two or three steps as suggested by fellow expert “for for.” This approach not only makes it more manageable but also allows for greater precision in crafting each component.Step 2: Applying Glue and Securing
Sven proceeds to apply glue along one edge of the flange, ensuring a secure bond when clamped into place. He emphasizes that this stage is crucial for maintaining the structural integrity of the flange, which in turn safeguards the living area beneath the canvas when hatches are open.Step 3: Allowing Time to Dry
After securely attaching the first portion of the flange, Sven allows ample time for it to dry before moving forward with additional steps. This patience and precision are key aspects of his successful boatbuilding methods.Step 4: Finishing Touches
Once the flange is fully dried, Sven removes the clamps carefully, ensuring no damage occurs during this process. He then moves on to attaching four more pieces onto these main frames, completing two pairs of flanges for the bulkhead hatches.The Final Touches
While two flanges form the primary support structure around the hatches, Sven mentions there are two additional pieces required at each end to ensure comprehensive protection. This attention to detail highlights his commitment to producing a durable and reliable design. “Sailing is about finding your path, whether it’s across an ocean or within yourself.” – Sven Yrvind In conclusion, making flanges around bulkhead hatches may seem complex at first glance, but by following Sven Yrvind’s meticulous process, enthusiasts can achieve professional-level results. Remember that the journey of boatbuilding is as rewarding as reaching your destination; it tests one’s patience and dedication. For those seeking to embark on this adventure or simply gain more insight into marine craftsmanship, Sven’s wisdom is invaluable.Making Flanges Around Bulkhead Hatches for Canvas
Sven Yrvind, a renowned yacht designer and sailor, shares valuable insights on creating flanges around bulkhead hatches for canvas protection in this enlightening video. By following his expert guidance, boat enthusiasts can ensure their living areas remain secure while allowing unhindered access through the hatches.Step 1: Starting with the Flange
Sven begins by explaining that working on flanges vertically and horizontally is significantly easier than doing so in a flat position. To simplify the process further, he divides the task into two or three steps as suggested by fellow expert “for for.” This approach not only makes it more manageable but also allows for greater precision in crafting each component.Step 2: Applying Glue and Securing
Sven proceeds to apply glue along one edge of the flange, ensuring a secure bond when clamped into place. He emphasizes that this stage is crucial for maintaining the structural integrity of the flange, which in turn safeguards the living area beneath the canvas when hatches are open.Step 3: Allowing Time to Dry
After securely attaching the first portion of the flange, Sven allows ample time for it to dry before moving forward with additional steps. This patience and precision are key aspects of his successful boatbuilding methods.Step 4: Finishing Touches
Once the flange is fully dried, Sven removes the clamps carefully, ensuring no damage occurs during this process. He then moves on to attaching four more pieces onto these main frames, completing two pairs of flanges for the bulkhead hatches.The Final Touches
While two flanges form the primary support structure around the hatches, Sven mentions there are two additional pieces required at each end to ensure comprehensive protection. This attention to detail highlights his commitment to producing a durable and reliable design. “Sailing is about finding your path, whether it’s across an ocean or within yourself.” – Sven Yrvind In conclusion, making flanges around bulkhead hatches may seem complex at first glance, but by following Sven Yrvind’s meticulous process, enthusiasts can achieve professional-level results. Remember that the journey of boatbuilding is as rewarding as reaching your destination; it tests one’s patience and dedication. For those seeking to embark on this adventure or simply gain more insight into marine craftsmanship, Sven’s wisdom is invaluable.Sven proceeds to apply glue along one edge of the flange, ensuring a secure bond when clamped into place. He emphasizes that this stage is crucial for maintaining the structural integrity of the flange, which in turn safeguards the living area beneath the canvas when hatches are open.Step 3: Allowing Time to Dry
After securely attaching the first portion of the flange, Sven allows ample time for it to dry before moving forward with additional steps. This patience and precision are key aspects of his successful boatbuilding methods.Step 4: Finishing Touches
Once the flange is fully dried, Sven removes the clamps carefully, ensuring no damage occurs during this process. He then moves on to attaching four more pieces onto these main frames, completing two pairs of flanges for the bulkhead hatches.The Final Touches
While two flanges form the primary support structure around the hatches, Sven mentions there are two additional pieces required at each end to ensure comprehensive protection. This attention to detail highlights his commitment to producing a durable and reliable design. “Sailing is about finding your path, whether it’s across an ocean or within yourself.” – Sven Yrvind In conclusion, making flanges around bulkhead hatches may seem complex at first glance, but by following Sven Yrvind’s meticulous process, enthusiasts can achieve professional-level results. Remember that the journey of boatbuilding is as rewarding as reaching your destination; it tests one’s patience and dedication. For those seeking to embark on this adventure or simply gain more insight into marine craftsmanship, Sven’s wisdom is invaluable.Sven begins by explaining that working on flanges vertically and horizontally is significantly easier than doing so in a flat position. To simplify the process further, he divides the task into two or three steps as suggested by fellow expert “for for.” This approach not only makes it more manageable but also allows for greater precision in crafting each component.Step 2: Applying Glue and Securing
Sven proceeds to apply glue along one edge of the flange, ensuring a secure bond when clamped into place. He emphasizes that this stage is crucial for maintaining the structural integrity of the flange, which in turn safeguards the living area beneath the canvas when hatches are open.Step 3: Allowing Time to Dry
After securely attaching the first portion of the flange, Sven allows ample time for it to dry before moving forward with additional steps. This patience and precision are key aspects of his successful boatbuilding methods.Step 4: Finishing Touches
Once the flange is fully dried, Sven removes the clamps carefully, ensuring no damage occurs during this process. He then moves on to attaching four more pieces onto these main frames, completing two pairs of flanges for the bulkhead hatches.The Final Touches
While two flanges form the primary support structure around the hatches, Sven mentions there are two additional pieces required at each end to ensure comprehensive protection. This attention to detail highlights his commitment to producing a durable and reliable design. “Sailing is about finding your path, whether it’s across an ocean or within yourself.” – Sven Yrvind In conclusion, making flanges around bulkhead hatches may seem complex at first glance, but by following Sven Yrvind’s meticulous process, enthusiasts can achieve professional-level results. Remember that the journey of boatbuilding is as rewarding as reaching your destination; it tests one’s patience and dedication. For those seeking to embark on this adventure or simply gain more insight into marine craftsmanship, Sven’s wisdom is invaluable.Sven Yrvind, a renowned yacht designer and sailor, shares valuable insights on creating flanges around bulkhead hatches for canvas protection in this enlightening video. By following his expert guidance, boat enthusiasts can ensure their living areas remain secure while allowing unhindered access through the hatches.Step 1: Starting with the Flange
Sven begins by explaining that working on flanges vertically and horizontally is significantly easier than doing so in a flat position. To simplify the process further, he divides the task into two or three steps as suggested by fellow expert “for for.” This approach not only makes it more manageable but also allows for greater precision in crafting each component.Step 2: Applying Glue and Securing
Sven proceeds to apply glue along one edge of the flange, ensuring a secure bond when clamped into place. He emphasizes that this stage is crucial for maintaining the structural integrity of the flange, which in turn safeguards the living area beneath the canvas when hatches are open.Step 3: Allowing Time to Dry
After securely attaching the first portion of the flange, Sven allows ample time for it to dry before moving forward with additional steps. This patience and precision are key aspects of his successful boatbuilding methods.Step 4: Finishing Touches
Once the flange is fully dried, Sven removes the clamps carefully, ensuring no damage occurs during this process. He then moves on to attaching four more pieces onto these main frames, completing two pairs of flanges for the bulkhead hatches.The Final Touches
While two flanges form the primary support structure around the hatches, Sven mentions there are two additional pieces required at each end to ensure comprehensive protection. This attention to detail highlights his commitment to producing a durable and reliable design. “Sailing is about finding your path, whether it’s across an ocean or within yourself.” – Sven Yrvind In conclusion, making flanges around bulkhead hatches may seem complex at first glance, but by following Sven Yrvind’s meticulous process, enthusiasts can achieve professional-level results. Remember that the journey of boatbuilding is as rewarding as reaching your destination; it tests one’s patience and dedication. For those seeking to embark on this adventure or simply gain more insight into marine craftsmanship, Sven’s wisdom is invaluable.Making Flanges Around Bulkhead Hatches for Canvas
Sven Yrvind, a renowned yacht designer and sailor, shares valuable insights on creating flanges around bulkhead hatches for canvas protection in this enlightening video. By following his expert guidance, boat enthusiasts can ensure their living areas remain secure while allowing unhindered access through the hatches.Step 1: Starting with the Flange
Sven begins by explaining that working on flanges vertically and horizontally is significantly easier than doing so in a flat position. To simplify the process further, he divides the task into two or three steps as suggested by fellow expert “for for.” This approach not only makes it more manageable but also allows for greater precision in crafting each component.Step 2: Applying Glue and Securing
Sven proceeds to apply glue along one edge of the flange, ensuring a secure bond when clamped into place. He emphasizes that this stage is crucial for maintaining the structural integrity of the flange, which in turn safeguards the living area beneath the canvas when hatches are open.Step 3: Allowing Time to Dry
After securely attaching the first portion of the flange, Sven allows ample time for it to dry before moving forward with additional steps. This patience and precision are key aspects of his successful boatbuilding methods.Step 4: Finishing Touches
Once the flange is fully dried, Sven removes the clamps carefully, ensuring no damage occurs during this process. He then moves on to attaching four more pieces onto these main frames, completing two pairs of flanges for the bulkhead hatches.The Final Touches
While two flanges form the primary support structure around the hatches, Sven mentions there are two additional pieces required at each end to ensure comprehensive protection. This attention to detail highlights his commitment to producing a durable and reliable design. “Sailing is about finding your path, whether it’s across an ocean or within yourself.” – Sven Yrvind In conclusion, making flanges around bulkhead hatches may seem complex at first glance, but by following Sven Yrvind’s meticulous process, enthusiasts can achieve professional-level results. Remember that the journey of boatbuilding is as rewarding as reaching your destination; it tests one’s patience and dedication. For those seeking to embark on this adventure or simply gain more insight into marine craftsmanship, Sven’s wisdom is invaluable.Once the flange is fully dried, Sven removes the clamps carefully, ensuring no damage occurs during this process. He then moves on to attaching four more pieces onto these main frames, completing two pairs of flanges for the bulkhead hatches.The Final Touches
While two flanges form the primary support structure around the hatches, Sven mentions there are two additional pieces required at each end to ensure comprehensive protection. This attention to detail highlights his commitment to producing a durable and reliable design. “Sailing is about finding your path, whether it’s across an ocean or within yourself.” – Sven Yrvind In conclusion, making flanges around bulkhead hatches may seem complex at first glance, but by following Sven Yrvind’s meticulous process, enthusiasts can achieve professional-level results. Remember that the journey of boatbuilding is as rewarding as reaching your destination; it tests one’s patience and dedication. For those seeking to embark on this adventure or simply gain more insight into marine craftsmanship, Sven’s wisdom is invaluable.Sven proceeds to apply glue along one edge of the flange, ensuring a secure bond when clamped into place. He emphasizes that this stage is crucial for maintaining the structural integrity of the flange, which in turn safeguards the living area beneath the canvas when hatches are open.Step 3: Allowing Time to Dry
After securely attaching the first portion of the flange, Sven allows ample time for it to dry before moving forward with additional steps. This patience and precision are key aspects of his successful boatbuilding methods.Step 4: Finishing Touches
Once the flange is fully dried, Sven removes the clamps carefully, ensuring no damage occurs during this process. He then moves on to attaching four more pieces onto these main frames, completing two pairs of flanges for the bulkhead hatches.The Final Touches
While two flanges form the primary support structure around the hatches, Sven mentions there are two additional pieces required at each end to ensure comprehensive protection. This attention to detail highlights his commitment to producing a durable and reliable design. “Sailing is about finding your path, whether it’s across an ocean or within yourself.” – Sven Yrvind In conclusion, making flanges around bulkhead hatches may seem complex at first glance, but by following Sven Yrvind’s meticulous process, enthusiasts can achieve professional-level results. Remember that the journey of boatbuilding is as rewarding as reaching your destination; it tests one’s patience and dedication. For those seeking to embark on this adventure or simply gain more insight into marine craftsmanship, Sven’s wisdom is invaluable.Sven begins by explaining that working on flanges vertically and horizontally is significantly easier than doing so in a flat position. To simplify the process further, he divides the task into two or three steps as suggested by fellow expert “for for.” This approach not only makes it more manageable but also allows for greater precision in crafting each component.Step 2: Applying Glue and Securing
Sven proceeds to apply glue along one edge of the flange, ensuring a secure bond when clamped into place. He emphasizes that this stage is crucial for maintaining the structural integrity of the flange, which in turn safeguards the living area beneath the canvas when hatches are open.Step 3: Allowing Time to Dry
After securely attaching the first portion of the flange, Sven allows ample time for it to dry before moving forward with additional steps. This patience and precision are key aspects of his successful boatbuilding methods.Step 4: Finishing Touches
Once the flange is fully dried, Sven removes the clamps carefully, ensuring no damage occurs during this process. He then moves on to attaching four more pieces onto these main frames, completing two pairs of flanges for the bulkhead hatches.The Final Touches
While two flanges form the primary support structure around the hatches, Sven mentions there are two additional pieces required at each end to ensure comprehensive protection. This attention to detail highlights his commitment to producing a durable and reliable design. “Sailing is about finding your path, whether it’s across an ocean or within yourself.” – Sven Yrvind In conclusion, making flanges around bulkhead hatches may seem complex at first glance, but by following Sven Yrvind’s meticulous process, enthusiasts can achieve professional-level results. Remember that the journey of boatbuilding is as rewarding as reaching your destination; it tests one’s patience and dedication. For those seeking to embark on this adventure or simply gain more insight into marine craftsmanship, Sven’s wisdom is invaluable.Sven Yrvind, a renowned yacht designer and sailor, shares valuable insights on creating flanges around bulkhead hatches for canvas protection in this enlightening video. By following his expert guidance, boat enthusiasts can ensure their living areas remain secure while allowing unhindered access through the hatches.Step 1: Starting with the Flange
Sven begins by explaining that working on flanges vertically and horizontally is significantly easier than doing so in a flat position. To simplify the process further, he divides the task into two or three steps as suggested by fellow expert “for for.” This approach not only makes it more manageable but also allows for greater precision in crafting each component.Step 2: Applying Glue and Securing
Sven proceeds to apply glue along one edge of the flange, ensuring a secure bond when clamped into place. He emphasizes that this stage is crucial for maintaining the structural integrity of the flange, which in turn safeguards the living area beneath the canvas when hatches are open.Step 3: Allowing Time to Dry
After securely attaching the first portion of the flange, Sven allows ample time for it to dry before moving forward with additional steps. This patience and precision are key aspects of his successful boatbuilding methods.Step 4: Finishing Touches
Once the flange is fully dried, Sven removes the clamps carefully, ensuring no damage occurs during this process. He then moves on to attaching four more pieces onto these main frames, completing two pairs of flanges for the bulkhead hatches.The Final Touches
While two flanges form the primary support structure around the hatches, Sven mentions there are two additional pieces required at each end to ensure comprehensive protection. This attention to detail highlights his commitment to producing a durable and reliable design. “Sailing is about finding your path, whether it’s across an ocean or within yourself.” – Sven Yrvind In conclusion, making flanges around bulkhead hatches may seem complex at first glance, but by following Sven Yrvind’s meticulous process, enthusiasts can achieve professional-level results. Remember that the journey of boatbuilding is as rewarding as reaching your destination; it tests one’s patience and dedication. For those seeking to embark on this adventure or simply gain more insight into marine craftsmanship, Sven’s wisdom is invaluable.Making Flanges Around Bulkhead Hatches for Canvas
Sven Yrvind, a renowned yacht designer and sailor, shares valuable insights on creating flanges around bulkhead hatches for canvas protection in this enlightening video. By following his expert guidance, boat enthusiasts can ensure their living areas remain secure while allowing unhindered access through the hatches.Step 1: Starting with the Flange
Sven begins by explaining that working on flanges vertically and horizontally is significantly easier than doing so in a flat position. To simplify the process further, he divides the task into two or three steps as suggested by fellow expert “for for.” This approach not only makes it more manageable but also allows for greater precision in crafting each component.Step 2: Applying Glue and Securing
Sven proceeds to apply glue along one edge of the flange, ensuring a secure bond when clamped into place. He emphasizes that this stage is crucial for maintaining the structural integrity of the flange, which in turn safeguards the living area beneath the canvas when hatches are open.Step 3: Allowing Time to Dry
After securely attaching the first portion of the flange, Sven allows ample time for it to dry before moving forward with additional steps. This patience and precision are key aspects of his successful boatbuilding methods.Step 4: Finishing Touches
Once the flange is fully dried, Sven removes the clamps carefully, ensuring no damage occurs during this process. He then moves on to attaching four more pieces onto these main frames, completing two pairs of flanges for the bulkhead hatches.The Final Touches
While two flanges form the primary support structure around the hatches, Sven mentions there are two additional pieces required at each end to ensure comprehensive protection. This attention to detail highlights his commitment to producing a durable and reliable design. “Sailing is about finding your path, whether it’s across an ocean or within yourself.” – Sven Yrvind In conclusion, making flanges around bulkhead hatches may seem complex at first glance, but by following Sven Yrvind’s meticulous process, enthusiasts can achieve professional-level results. Remember that the journey of boatbuilding is as rewarding as reaching your destination; it tests one’s patience and dedication. For those seeking to embark on this adventure or simply gain more insight into marine craftsmanship, Sven’s wisdom is invaluable.After securely attaching the first portion of the flange, Sven allows ample time for it to dry before moving forward with additional steps. This patience and precision are key aspects of his successful boatbuilding methods.Step 4: Finishing Touches
Once the flange is fully dried, Sven removes the clamps carefully, ensuring no damage occurs during this process. He then moves on to attaching four more pieces onto these main frames, completing two pairs of flanges for the bulkhead hatches.The Final Touches
While two flanges form the primary support structure around the hatches, Sven mentions there are two additional pieces required at each end to ensure comprehensive protection. This attention to detail highlights his commitment to producing a durable and reliable design. “Sailing is about finding your path, whether it’s across an ocean or within yourself.” – Sven Yrvind In conclusion, making flanges around bulkhead hatches may seem complex at first glance, but by following Sven Yrvind’s meticulous process, enthusiasts can achieve professional-level results. Remember that the journey of boatbuilding is as rewarding as reaching your destination; it tests one’s patience and dedication. For those seeking to embark on this adventure or simply gain more insight into marine craftsmanship, Sven’s wisdom is invaluable.Sven proceeds to apply glue along one edge of the flange, ensuring a secure bond when clamped into place. He emphasizes that this stage is crucial for maintaining the structural integrity of the flange, which in turn safeguards the living area beneath the canvas when hatches are open.Step 3: Allowing Time to Dry
After securely attaching the first portion of the flange, Sven allows ample time for it to dry before moving forward with additional steps. This patience and precision are key aspects of his successful boatbuilding methods.Step 4: Finishing Touches
Once the flange is fully dried, Sven removes the clamps carefully, ensuring no damage occurs during this process. He then moves on to attaching four more pieces onto these main frames, completing two pairs of flanges for the bulkhead hatches.The Final Touches
While two flanges form the primary support structure around the hatches, Sven mentions there are two additional pieces required at each end to ensure comprehensive protection. This attention to detail highlights his commitment to producing a durable and reliable design. “Sailing is about finding your path, whether it’s across an ocean or within yourself.” – Sven Yrvind In conclusion, making flanges around bulkhead hatches may seem complex at first glance, but by following Sven Yrvind’s meticulous process, enthusiasts can achieve professional-level results. Remember that the journey of boatbuilding is as rewarding as reaching your destination; it tests one’s patience and dedication. For those seeking to embark on this adventure or simply gain more insight into marine craftsmanship, Sven’s wisdom is invaluable.Sven begins by explaining that working on flanges vertically and horizontally is significantly easier than doing so in a flat position. To simplify the process further, he divides the task into two or three steps as suggested by fellow expert “for for.” This approach not only makes it more manageable but also allows for greater precision in crafting each component.Step 2: Applying Glue and Securing
Sven proceeds to apply glue along one edge of the flange, ensuring a secure bond when clamped into place. He emphasizes that this stage is crucial for maintaining the structural integrity of the flange, which in turn safeguards the living area beneath the canvas when hatches are open.Step 3: Allowing Time to Dry
After securely attaching the first portion of the flange, Sven allows ample time for it to dry before moving forward with additional steps. This patience and precision are key aspects of his successful boatbuilding methods.Step 4: Finishing Touches
Once the flange is fully dried, Sven removes the clamps carefully, ensuring no damage occurs during this process. He then moves on to attaching four more pieces onto these main frames, completing two pairs of flanges for the bulkhead hatches.The Final Touches
While two flanges form the primary support structure around the hatches, Sven mentions there are two additional pieces required at each end to ensure comprehensive protection. This attention to detail highlights his commitment to producing a durable and reliable design. “Sailing is about finding your path, whether it’s across an ocean or within yourself.” – Sven Yrvind In conclusion, making flanges around bulkhead hatches may seem complex at first glance, but by following Sven Yrvind’s meticulous process, enthusiasts can achieve professional-level results. Remember that the journey of boatbuilding is as rewarding as reaching your destination; it tests one’s patience and dedication. For those seeking to embark on this adventure or simply gain more insight into marine craftsmanship, Sven’s wisdom is invaluable.Sven Yrvind, a renowned yacht designer and sailor, shares valuable insights on creating flanges around bulkhead hatches for canvas protection in this enlightening video. By following his expert guidance, boat enthusiasts can ensure their living areas remain secure while allowing unhindered access through the hatches.Step 1: Starting with the Flange
Sven begins by explaining that working on flanges vertically and horizontally is significantly easier than doing so in a flat position. To simplify the process further, he divides the task into two or three steps as suggested by fellow expert “for for.” This approach not only makes it more manageable but also allows for greater precision in crafting each component.Step 2: Applying Glue and Securing
Sven proceeds to apply glue along one edge of the flange, ensuring a secure bond when clamped into place. He emphasizes that this stage is crucial for maintaining the structural integrity of the flange, which in turn safeguards the living area beneath the canvas when hatches are open.Step 3: Allowing Time to Dry
After securely attaching the first portion of the flange, Sven allows ample time for it to dry before moving forward with additional steps. This patience and precision are key aspects of his successful boatbuilding methods.Step 4: Finishing Touches
Once the flange is fully dried, Sven removes the clamps carefully, ensuring no damage occurs during this process. He then moves on to attaching four more pieces onto these main frames, completing two pairs of flanges for the bulkhead hatches.The Final Touches
While two flanges form the primary support structure around the hatches, Sven mentions there are two additional pieces required at each end to ensure comprehensive protection. This attention to detail highlights his commitment to producing a durable and reliable design. “Sailing is about finding your path, whether it’s across an ocean or within yourself.” – Sven Yrvind In conclusion, making flanges around bulkhead hatches may seem complex at first glance, but by following Sven Yrvind’s meticulous process, enthusiasts can achieve professional-level results. Remember that the journey of boatbuilding is as rewarding as reaching your destination; it tests one’s patience and dedication. For those seeking to embark on this adventure or simply gain more insight into marine craftsmanship, Sven’s wisdom is invaluable.Making Flanges Around Bulkhead Hatches for Canvas
Sven Yrvind, a renowned yacht designer and sailor, shares valuable insights on creating flanges around bulkhead hatches for canvas protection in this enlightening video. By following his expert guidance, boat enthusiasts can ensure their living areas remain secure while allowing unhindered access through the hatches.Step 1: Starting with the Flange
Sven begins by explaining that working on flanges vertically and horizontally is significantly easier than doing so in a flat position. To simplify the process further, he divides the task into two or three steps as suggested by fellow expert “for for.” This approach not only makes it more manageable but also allows for greater precision in crafting each component.Step 2: Applying Glue and Securing
Sven proceeds to apply glue along one edge of the flange, ensuring a secure bond when clamped into place. He emphasizes that this stage is crucial for maintaining the structural integrity of the flange, which in turn safeguards the living area beneath the canvas when hatches are open.Step 3: Allowing Time to Dry
After securely attaching the first portion of the flange, Sven allows ample time for it to dry before moving forward with additional steps. This patience and precision are key aspects of his successful boatbuilding methods.Step 4: Finishing Touches
Once the flange is fully dried, Sven removes the clamps carefully, ensuring no damage occurs during this process. He then moves on to attaching four more pieces onto these main frames, completing two pairs of flanges for the bulkhead hatches.The Final Touches
While two flanges form the primary support structure around the hatches, Sven mentions there are two additional pieces required at each end to ensure comprehensive protection. This attention to detail highlights his commitment to producing a durable and reliable design. “Sailing is about finding your path, whether it’s across an ocean or within yourself.” – Sven Yrvind In conclusion, making flanges around bulkhead hatches may seem complex at first glance, but by following Sven Yrvind’s meticulous process, enthusiasts can achieve professional-level results. Remember that the journey of boatbuilding is as rewarding as reaching your destination; it tests one’s patience and dedication. For those seeking to embark on this adventure or simply gain more insight into marine craftsmanship, Sven’s wisdom is invaluable.Once the flange is fully dried, Sven removes the clamps carefully, ensuring no damage occurs during this process. He then moves on to attaching four more pieces onto these main frames, completing two pairs of flanges for the bulkhead hatches.The Final Touches
While two flanges form the primary support structure around the hatches, Sven mentions there are two additional pieces required at each end to ensure comprehensive protection. This attention to detail highlights his commitment to producing a durable and reliable design. “Sailing is about finding your path, whether it’s across an ocean or within yourself.” – Sven Yrvind In conclusion, making flanges around bulkhead hatches may seem complex at first glance, but by following Sven Yrvind’s meticulous process, enthusiasts can achieve professional-level results. Remember that the journey of boatbuilding is as rewarding as reaching your destination; it tests one’s patience and dedication. For those seeking to embark on this adventure or simply gain more insight into marine craftsmanship, Sven’s wisdom is invaluable.After securely attaching the first portion of the flange, Sven allows ample time for it to dry before moving forward with additional steps. This patience and precision are key aspects of his successful boatbuilding methods.Step 4: Finishing Touches
Once the flange is fully dried, Sven removes the clamps carefully, ensuring no damage occurs during this process. He then moves on to attaching four more pieces onto these main frames, completing two pairs of flanges for the bulkhead hatches.The Final Touches
While two flanges form the primary support structure around the hatches, Sven mentions there are two additional pieces required at each end to ensure comprehensive protection. This attention to detail highlights his commitment to producing a durable and reliable design. “Sailing is about finding your path, whether it’s across an ocean or within yourself.” – Sven Yrvind In conclusion, making flanges around bulkhead hatches may seem complex at first glance, but by following Sven Yrvind’s meticulous process, enthusiasts can achieve professional-level results. Remember that the journey of boatbuilding is as rewarding as reaching your destination; it tests one’s patience and dedication. For those seeking to embark on this adventure or simply gain more insight into marine craftsmanship, Sven’s wisdom is invaluable.Sven proceeds to apply glue along one edge of the flange, ensuring a secure bond when clamped into place. He emphasizes that this stage is crucial for maintaining the structural integrity of the flange, which in turn safeguards the living area beneath the canvas when hatches are open.Step 3: Allowing Time to Dry
After securely attaching the first portion of the flange, Sven allows ample time for it to dry before moving forward with additional steps. This patience and precision are key aspects of his successful boatbuilding methods.Step 4: Finishing Touches
Once the flange is fully dried, Sven removes the clamps carefully, ensuring no damage occurs during this process. He then moves on to attaching four more pieces onto these main frames, completing two pairs of flanges for the bulkhead hatches.The Final Touches
While two flanges form the primary support structure around the hatches, Sven mentions there are two additional pieces required at each end to ensure comprehensive protection. This attention to detail highlights his commitment to producing a durable and reliable design. “Sailing is about finding your path, whether it’s across an ocean or within yourself.” – Sven Yrvind In conclusion, making flanges around bulkhead hatches may seem complex at first glance, but by following Sven Yrvind’s meticulous process, enthusiasts can achieve professional-level results. Remember that the journey of boatbuilding is as rewarding as reaching your destination; it tests one’s patience and dedication. For those seeking to embark on this adventure or simply gain more insight into marine craftsmanship, Sven’s wisdom is invaluable.Sven begins by explaining that working on flanges vertically and horizontally is significantly easier than doing so in a flat position. To simplify the process further, he divides the task into two or three steps as suggested by fellow expert “for for.” This approach not only makes it more manageable but also allows for greater precision in crafting each component.Step 2: Applying Glue and Securing
Sven proceeds to apply glue along one edge of the flange, ensuring a secure bond when clamped into place. He emphasizes that this stage is crucial for maintaining the structural integrity of the flange, which in turn safeguards the living area beneath the canvas when hatches are open.Step 3: Allowing Time to Dry
After securely attaching the first portion of the flange, Sven allows ample time for it to dry before moving forward with additional steps. This patience and precision are key aspects of his successful boatbuilding methods.Step 4: Finishing Touches
Once the flange is fully dried, Sven removes the clamps carefully, ensuring no damage occurs during this process. He then moves on to attaching four more pieces onto these main frames, completing two pairs of flanges for the bulkhead hatches.The Final Touches
While two flanges form the primary support structure around the hatches, Sven mentions there are two additional pieces required at each end to ensure comprehensive protection. This attention to detail highlights his commitment to producing a durable and reliable design. “Sailing is about finding your path, whether it’s across an ocean or within yourself.” – Sven Yrvind In conclusion, making flanges around bulkhead hatches may seem complex at first glance, but by following Sven Yrvind’s meticulous process, enthusiasts can achieve professional-level results. Remember that the journey of boatbuilding is as rewarding as reaching your destination; it tests one’s patience and dedication. For those seeking to embark on this adventure or simply gain more insight into marine craftsmanship, Sven’s wisdom is invaluable.Sven Yrvind, a renowned yacht designer and sailor, shares valuable insights on creating flanges around bulkhead hatches for canvas protection in this enlightening video. By following his expert guidance, boat enthusiasts can ensure their living areas remain secure while allowing unhindered access through the hatches.Step 1: Starting with the Flange
Sven begins by explaining that working on flanges vertically and horizontally is significantly easier than doing so in a flat position. To simplify the process further, he divides the task into two or three steps as suggested by fellow expert “for for.” This approach not only makes it more manageable but also allows for greater precision in crafting each component.Step 2: Applying Glue and Securing
Sven proceeds to apply glue along one edge of the flange, ensuring a secure bond when clamped into place. He emphasizes that this stage is crucial for maintaining the structural integrity of the flange, which in turn safeguards the living area beneath the canvas when hatches are open.Step 3: Allowing Time to Dry
After securely attaching the first portion of the flange, Sven allows ample time for it to dry before moving forward with additional steps. This patience and precision are key aspects of his successful boatbuilding methods.Step 4: Finishing Touches
Once the flange is fully dried, Sven removes the clamps carefully, ensuring no damage occurs during this process. He then moves on to attaching four more pieces onto these main frames, completing two pairs of flanges for the bulkhead hatches.The Final Touches
While two flanges form the primary support structure around the hatches, Sven mentions there are two additional pieces required at each end to ensure comprehensive protection. This attention to detail highlights his commitment to producing a durable and reliable design. “Sailing is about finding your path, whether it’s across an ocean or within yourself.” – Sven Yrvind In conclusion, making flanges around bulkhead hatches may seem complex at first glance, but by following Sven Yrvind’s meticulous process, enthusiasts can achieve professional-level results. Remember that the journey of boatbuilding is as rewarding as reaching your destination; it tests one’s patience and dedication. For those seeking to embark on this adventure or simply gain more insight into marine craftsmanship, Sven’s wisdom is invaluable.Making Flanges Around Bulkhead Hatches for Canvas
Sven Yrvind, a renowned yacht designer and sailor, shares valuable insights on creating flanges around bulkhead hatches for canvas protection in this enlightening video. By following his expert guidance, boat enthusiasts can ensure their living areas remain secure while allowing unhindered access through the hatches.Step 1: Starting with the Flange
Sven begins by explaining that working on flanges vertically and horizontally is significantly easier than doing so in a flat position. To simplify the process further, he divides the task into two or three steps as suggested by fellow expert “for for.” This approach not only makes it more manageable but also allows for greater precision in crafting each component.Step 2: Applying Glue and Securing
Sven proceeds to apply glue along one edge of the flange, ensuring a secure bond when clamped into place. He emphasizes that this stage is crucial for maintaining the structural integrity of the flange, which in turn safeguards the living area beneath the canvas when hatches are open.Step 3: Allowing Time to Dry
After securely attaching the first portion of the flange, Sven allows ample time for it to dry before moving forward with additional steps. This patience and precision are key aspects of his successful boatbuilding methods.Step 4: Finishing Touches
Once the flange is fully dried, Sven removes the clamps carefully, ensuring no damage occurs during this process. He then moves on to attaching four more pieces onto these main frames, completing two pairs of flanges for the bulkhead hatches.The Final Touches
While two flanges form the primary support structure around the hatches, Sven mentions there are two additional pieces required at each end to ensure comprehensive protection. This attention to detail highlights his commitment to producing a durable and reliable design. “Sailing is about finding your path, whether it’s across an ocean or within yourself.” – Sven Yrvind In conclusion, making flanges around bulkhead hatches may seem complex at first glance, but by following Sven Yrvind’s meticulous process, enthusiasts can achieve professional-level results. Remember that the journey of boatbuilding is as rewarding as reaching your destination; it tests one’s patience and dedication. For those seeking to embark on this adventure or simply gain more insight into marine craftsmanship, Sven’s wisdom is invaluable.After securely attaching the first portion of the flange, Sven allows ample time for it to dry before moving forward with additional steps. This patience and precision are key aspects of his successful boatbuilding methods.Step 4: Finishing Touches
Once the flange is fully dried, Sven removes the clamps carefully, ensuring no damage occurs during this process. He then moves on to attaching four more pieces onto these main frames, completing two pairs of flanges for the bulkhead hatches.The Final Touches
While two flanges form the primary support structure around the hatches, Sven mentions there are two additional pieces required at each end to ensure comprehensive protection. This attention to detail highlights his commitment to producing a durable and reliable design. “Sailing is about finding your path, whether it’s across an ocean or within yourself.” – Sven Yrvind In conclusion, making flanges around bulkhead hatches may seem complex at first glance, but by following Sven Yrvind’s meticulous process, enthusiasts can achieve professional-level results. Remember that the journey of boatbuilding is as rewarding as reaching your destination; it tests one’s patience and dedication. For those seeking to embark on this adventure or simply gain more insight into marine craftsmanship, Sven’s wisdom is invaluable.Sven Yrvind, a renowned yacht designer and sailor, shares valuable insights on creating flanges around bulkhead hatches for canvas protection in this enlightening video. By following his expert guidance, boat enthusiasts can ensure their living areas remain secure while allowing unhindered access through the hatches.Step 1: Starting with the Flange
Sven begins by explaining that working on flanges vertically and horizontally is significantly easier than doing so in a flat position. To simplify the process further, he divides the task into two or three steps as suggested by fellow expert “for for.” This approach not only makes it more manageable but also allows for greater precision in crafting each component.Step 2: Applying Glue and Securing
Sven proceeds to apply glue along one edge of the flange, ensuring a secure bond when clamped into place. He emphasizes that this stage is crucial for maintaining the structural integrity of the flange, which in turn safeguards the living area beneath the canvas when hatches are open.Step 3: Allowing Time to Dry
After securely attaching the first portion of the flange, Sven allows ample time for it to dry before moving forward with additional steps. This patience and precision are key aspects of his successful boatbuilding methods.Step 4: Finishing Touches
Once the flange is fully dried, Sven removes the clamps carefully, ensuring no damage occurs during this process. He then moves on to attaching four more pieces onto these main frames, completing two pairs of flanges for the bulkhead hatches.The Final Touches
While two flanges form the primary support structure around the hatches, Sven mentions there are two additional pieces required at each end to ensure comprehensive protection. This attention to detail highlights his commitment to producing a durable and reliable design. “Sailing is about finding your path, whether it’s across an ocean or within yourself.” – Sven Yrvind In conclusion, making flanges around bulkhead hatches may seem complex at first glance, but by following Sven Yrvind’s meticulous process, enthusiasts can achieve professional-level results. Remember that the journey of boatbuilding is as rewarding as reaching your destination; it tests one’s patience and dedication. For those seeking to embark on this adventure or simply gain more insight into marine craftsmanship, Sven’s wisdom is invaluable.Making Flanges Around Bulkhead Hatches for Canvas
Sven Yrvind, a renowned yacht designer and sailor, shares valuable insights on creating flanges around bulkhead hatches for canvas protection in this enlightening video. By following his expert guidance, boat enthusiasts can ensure their living areas remain secure while allowing unhindered access through the hatches.Step 1: Starting with the Flange
Sven begins by explaining that working on flanges vertically and horizontally is significantly easier than doing so in a flat position. To simplify the process further, he divides the task into two or three steps as suggested by fellow expert “for for.” This approach not only makes it more manageable but also allows for greater precision in crafting each component.Step 2: Applying Glue and Securing
Sven proceeds to apply glue along one edge of the flange, ensuring a secure bond when clamped into place. He emphasizes that this stage is crucial for maintaining the structural integrity of the flange, which in turn safeguards the living area beneath the canvas when hatches are open.Step 3: Allowing Time to Dry
After securely attaching the first portion of the flange, Sven allows ample time for it to dry before moving forward with additional steps. This patience and precision are key aspects of his successful boatbuilding methods.Step 4: Finishing Touches
Once the flange is fully dried, Sven removes the clamps carefully, ensuring no damage occurs during this process. He then moves on to attaching four more pieces onto these main frames, completing two pairs of flanges for the bulkhead hatches.The Final Touches
While two flanges form the primary support structure around the hatches, Sven mentions there are two additional pieces required at each end to ensure comprehensive protection. This attention to detail highlights his commitment to producing a durable and reliable design. “Sailing is about finding your path, whether it’s across an ocean or within yourself.” – Sven Yrvind In conclusion, making flanges around bulkhead hatches may seem complex at first glance, but by following Sven Yrvind’s meticulous process, enthusiasts can achieve professional-level results. Remember that the journey of boatbuilding is as rewarding as reaching your destination; it tests one’s patience and dedication. For those seeking to embark on this adventure or simply gain more insight into marine craftsmanship, Sven’s wisdom is invaluable.Sven proceeds to apply glue along one edge of the flange, ensuring a secure bond when clamped into place. He emphasizes that this stage is crucial for maintaining the structural integrity of the flange, which in turn safeguards the living area beneath the canvas when hatches are open.Step 3: Allowing Time to Dry
After securely attaching the first portion of the flange, Sven allows ample time for it to dry before moving forward with additional steps. This patience and precision are key aspects of his successful boatbuilding methods.Step 4: Finishing Touches
Once the flange is fully dried, Sven removes the clamps carefully, ensuring no damage occurs during this process. He then moves on to attaching four more pieces onto these main frames, completing two pairs of flanges for the bulkhead hatches.The Final Touches
While two flanges form the primary support structure around the hatches, Sven mentions there are two additional pieces required at each end to ensure comprehensive protection. This attention to detail highlights his commitment to producing a durable and reliable design. “Sailing is about finding your path, whether it’s across an ocean or within yourself.” – Sven Yrvind In conclusion, making flanges around bulkhead hatches may seem complex at first glance, but by following Sven Yrvind’s meticulous process, enthusiasts can achieve professional-level results. Remember that the journey of boatbuilding is as rewarding as reaching your destination; it tests one’s patience and dedication. For those seeking to embark on this adventure or simply gain more insight into marine craftsmanship, Sven’s wisdom is invaluable.Sven begins by explaining that working on flanges vertically and horizontally is significantly easier than doing so in a flat position. To simplify the process further, he divides the task into two or three steps as suggested by fellow expert “for for.” This approach not only makes it more manageable but also allows for greater precision in crafting each component.Step 2: Applying Glue and Securing
Sven proceeds to apply glue along one edge of the flange, ensuring a secure bond when clamped into place. He emphasizes that this stage is crucial for maintaining the structural integrity of the flange, which in turn safeguards the living area beneath the canvas when hatches are open.Step 3: Allowing Time to Dry
After securely attaching the first portion of the flange, Sven allows ample time for it to dry before moving forward with additional steps. This patience and precision are key aspects of his successful boatbuilding methods.Step 4: Finishing Touches
Once the flange is fully dried, Sven removes the clamps carefully, ensuring no damage occurs during this process. He then moves on to attaching four more pieces onto these main frames, completing two pairs of flanges for the bulkhead hatches.The Final Touches
While two flanges form the primary support structure around the hatches, Sven mentions there are two additional pieces required at each end to ensure comprehensive protection. This attention to detail highlights his commitment to producing a durable and reliable design. “Sailing is about finding your path, whether it’s across an ocean or within yourself.” – Sven Yrvind In conclusion, making flanges around bulkhead hatches may seem complex at first glance, but by following Sven Yrvind’s meticulous process, enthusiasts can achieve professional-level results. Remember that the journey of boatbuilding is as rewarding as reaching your destination; it tests one’s patience and dedication. For those seeking to embark on this adventure or simply gain more insight into marine craftsmanship, Sven’s wisdom is invaluable.Sven Yrvind, a renowned yacht designer and sailor, shares valuable insights on creating flanges around bulkhead hatches for canvas protection in this enlightening video. By following his expert guidance, boat enthusiasts can ensure their living areas remain secure while allowing unhindered access through the hatches.Step 1: Starting with the Flange
Sven begins by explaining that working on flanges vertically and horizontally is significantly easier than doing so in a flat position. To simplify the process further, he divides the task into two or three steps as suggested by fellow expert “for for.” This approach not only makes it more manageable but also allows for greater precision in crafting each component.Step 2: Applying Glue and Securing
Sven proceeds to apply glue along one edge of the flange, ensuring a secure bond when clamped into place. He emphasizes that this stage is crucial for maintaining the structural integrity of the flange, which in turn safeguards the living area beneath the canvas when hatches are open.Step 3: Allowing Time to Dry
After securely attaching the first portion of the flange, Sven allows ample time for it to dry before moving forward with additional steps. This patience and precision are key aspects of his successful boatbuilding methods.Step 4: Finishing Touches
Once the flange is fully dried, Sven removes the clamps carefully, ensuring no damage occurs during this process. He then moves on to attaching four more pieces onto these main frames, completing two pairs of flanges for the bulkhead hatches.The Final Touches
While two flanges form the primary support structure around the hatches, Sven mentions there are two additional pieces required at each end to ensure comprehensive protection. This attention to detail highlights his commitment to producing a durable and reliable design. “Sailing is about finding your path, whether it’s across an ocean or within yourself.” – Sven Yrvind In conclusion, making flanges around bulkhead hatches may seem complex at first glance, but by following Sven Yrvind’s meticulous process, enthusiasts can achieve professional-level results. Remember that the journey of boatbuilding is as rewarding as reaching your destination; it tests one’s patience and dedication. For those seeking to embark on this adventure or simply gain more insight into marine craftsmanship, Sven’s wisdom is invaluable.Making Flanges Around Bulkhead Hatches for Canvas
Sven Yrvind, a renowned yacht designer and sailor, shares valuable insights on creating flanges around bulkhead hatches for canvas protection in this enlightening video. By following his expert guidance, boat enthusiasts can ensure their living areas remain secure while allowing unhindered access through the hatches.Step 1: Starting with the Flange
Sven begins by explaining that working on flanges vertically and horizontally is significantly easier than doing so in a flat position. To simplify the process further, he divides the task into two or three steps as suggested by fellow expert “for for.” This approach not only makes it more manageable but also allows for greater precision in crafting each component.Step 2: Applying Glue and Securing
Sven proceeds to apply glue along one edge of the flange, ensuring a secure bond when clamped into place. He emphasizes that this stage is crucial for maintaining the structural integrity of the flange, which in turn safeguards the living area beneath the canvas when hatches are open.Step 3: Allowing Time to Dry
After securely attaching the first portion of the flange, Sven allows ample time for it to dry before moving forward with additional steps. This patience and precision are key aspects of his successful boatbuilding methods.Step 4: Finishing Touches
Once the flange is fully dried, Sven removes the clamps carefully, ensuring no damage occurs during this process. He then moves on to attaching four more pieces onto these main frames, completing two pairs of flanges for the bulkhead hatches.The Final Touches
While two flanges form the primary support structure around the hatches, Sven mentions there are two additional pieces required at each end to ensure comprehensive protection. This attention to detail highlights his commitment to producing a durable and reliable design. “Sailing is about finding your path, whether it’s across an ocean or within yourself.” – Sven Yrvind In conclusion, making flanges around bulkhead hatches may seem complex at first glance, but by following Sven Yrvind’s meticulous process, enthusiasts can achieve professional-level results. Remember that the journey of boatbuilding is as rewarding as reaching your destination; it tests one’s patience and dedication. For those seeking to embark on this adventure or simply gain more insight into marine craftsmanship, Sven’s wisdom is invaluable.Once the flange is fully dried, Sven removes the clamps carefully, ensuring no damage occurs during this process. He then moves on to attaching four more pieces onto these main frames, completing two pairs of flanges for the bulkhead hatches.The Final Touches
While two flanges form the primary support structure around the hatches, Sven mentions there are two additional pieces required at each end to ensure comprehensive protection. This attention to detail highlights his commitment to producing a durable and reliable design. “Sailing is about finding your path, whether it’s across an ocean or within yourself.” – Sven Yrvind In conclusion, making flanges around bulkhead hatches may seem complex at first glance, but by following Sven Yrvind’s meticulous process, enthusiasts can achieve professional-level results. Remember that the journey of boatbuilding is as rewarding as reaching your destination; it tests one’s patience and dedication. For those seeking to embark on this adventure or simply gain more insight into marine craftsmanship, Sven’s wisdom is invaluable.Sven proceeds to apply glue along one edge of the flange, ensuring a secure bond when clamped into place. He emphasizes that this stage is crucial for maintaining the structural integrity of the flange, which in turn safeguards the living area beneath the canvas when hatches are open.Step 3: Allowing Time to Dry
After securely attaching the first portion of the flange, Sven allows ample time for it to dry before moving forward with additional steps. This patience and precision are key aspects of his successful boatbuilding methods.Step 4: Finishing Touches
Once the flange is fully dried, Sven removes the clamps carefully, ensuring no damage occurs during this process. He then moves on to attaching four more pieces onto these main frames, completing two pairs of flanges for the bulkhead hatches.The Final Touches
While two flanges form the primary support structure around the hatches, Sven mentions there are two additional pieces required at each end to ensure comprehensive protection. This attention to detail highlights his commitment to producing a durable and reliable design. “Sailing is about finding your path, whether it’s across an ocean or within yourself.” – Sven Yrvind In conclusion, making flanges around bulkhead hatches may seem complex at first glance, but by following Sven Yrvind’s meticulous process, enthusiasts can achieve professional-level results. Remember that the journey of boatbuilding is as rewarding as reaching your destination; it tests one’s patience and dedication. For those seeking to embark on this adventure or simply gain more insight into marine craftsmanship, Sven’s wisdom is invaluable.Sven begins by explaining that working on flanges vertically and horizontally is significantly easier than doing so in a flat position. To simplify the process further, he divides the task into two or three steps as suggested by fellow expert “for for.” This approach not only makes it more manageable but also allows for greater precision in crafting each component.Step 2: Applying Glue and Securing
Sven proceeds to apply glue along one edge of the flange, ensuring a secure bond when clamped into place. He emphasizes that this stage is crucial for maintaining the structural integrity of the flange, which in turn safeguards the living area beneath the canvas when hatches are open.Step 3: Allowing Time to Dry
After securely attaching the first portion of the flange, Sven allows ample time for it to dry before moving forward with additional steps. This patience and precision are key aspects of his successful boatbuilding methods.Step 4: Finishing Touches
Once the flange is fully dried, Sven removes the clamps carefully, ensuring no damage occurs during this process. He then moves on to attaching four more pieces onto these main frames, completing two pairs of flanges for the bulkhead hatches.The Final Touches
While two flanges form the primary support structure around the hatches, Sven mentions there are two additional pieces required at each end to ensure comprehensive protection. This attention to detail highlights his commitment to producing a durable and reliable design. “Sailing is about finding your path, whether it’s across an ocean or within yourself.” – Sven Yrvind In conclusion, making flanges around bulkhead hatches may seem complex at first glance, but by following Sven Yrvind’s meticulous process, enthusiasts can achieve professional-level results. Remember that the journey of boatbuilding is as rewarding as reaching your destination; it tests one’s patience and dedication. For those seeking to embark on this adventure or simply gain more insight into marine craftsmanship, Sven’s wisdom is invaluable.Sven Yrvind, a renowned yacht designer and sailor, shares valuable insights on creating flanges around bulkhead hatches for canvas protection in this enlightening video. By following his expert guidance, boat enthusiasts can ensure their living areas remain secure while allowing unhindered access through the hatches.Step 1: Starting with the Flange
Sven begins by explaining that working on flanges vertically and horizontally is significantly easier than doing so in a flat position. To simplify the process further, he divides the task into two or three steps as suggested by fellow expert “for for.” This approach not only makes it more manageable but also allows for greater precision in crafting each component.Step 2: Applying Glue and Securing
Sven proceeds to apply glue along one edge of the flange, ensuring a secure bond when clamped into place. He emphasizes that this stage is crucial for maintaining the structural integrity of the flange, which in turn safeguards the living area beneath the canvas when hatches are open.Step 3: Allowing Time to Dry
After securely attaching the first portion of the flange, Sven allows ample time for it to dry before moving forward with additional steps. This patience and precision are key aspects of his successful boatbuilding methods.Step 4: Finishing Touches
Once the flange is fully dried, Sven removes the clamps carefully, ensuring no damage occurs during this process. He then moves on to attaching four more pieces onto these main frames, completing two pairs of flanges for the bulkhead hatches.The Final Touches
While two flanges form the primary support structure around the hatches, Sven mentions there are two additional pieces required at each end to ensure comprehensive protection. This attention to detail highlights his commitment to producing a durable and reliable design. “Sailing is about finding your path, whether it’s across an ocean or within yourself.” – Sven Yrvind In conclusion, making flanges around bulkhead hatches may seem complex at first glance, but by following Sven Yrvind’s meticulous process, enthusiasts can achieve professional-level results. Remember that the journey of boatbuilding is as rewarding as reaching your destination; it tests one’s patience and dedication. For those seeking to embark on this adventure or simply gain more insight into marine craftsmanship, Sven’s wisdom is invaluable.Making Flanges Around Bulkhead Hatches for Canvas
Sven Yrvind, a renowned yacht designer and sailor, shares valuable insights on creating flanges around bulkhead hatches for canvas protection in this enlightening video. By following his expert guidance, boat enthusiasts can ensure their living areas remain secure while allowing unhindered access through the hatches.Step 1: Starting with the Flange
Sven begins by explaining that working on flanges vertically and horizontally is significantly easier than doing so in a flat position. To simplify the process further, he divides the task into two or three steps as suggested by fellow expert “for for.” This approach not only makes it more manageable but also allows for greater precision in crafting each component.Step 2: Applying Glue and Securing
Sven proceeds to apply glue along one edge of the flange, ensuring a secure bond when clamped into place. He emphasizes that this stage is crucial for maintaining the structural integrity of the flange, which in turn safeguards the living area beneath the canvas when hatches are open.Step 3: Allowing Time to Dry
After securely attaching the first portion of the flange, Sven allows ample time for it to dry before moving forward with additional steps. This patience and precision are key aspects of his successful boatbuilding methods.Step 4: Finishing Touches
Once the flange is fully dried, Sven removes the clamps carefully, ensuring no damage occurs during this process. He then moves on to attaching four more pieces onto these main frames, completing two pairs of flanges for the bulkhead hatches.The Final Touches
While two flanges form the primary support structure around the hatches, Sven mentions there are two additional pieces required at each end to ensure comprehensive protection. This attention to detail highlights his commitment to producing a durable and reliable design. “Sailing is about finding your path, whether it’s across an ocean or within yourself.” – Sven Yrvind In conclusion, making flanges around bulkhead hatches may seem complex at first glance, but by following Sven Yrvind’s meticulous process, enthusiasts can achieve professional-level results. Remember that the journey of boatbuilding is as rewarding as reaching your destination; it tests one’s patience and dedication. For those seeking to embark on this adventure or simply gain more insight into marine craftsmanship, Sven’s wisdom is invaluable.After securely attaching the first portion of the flange, Sven allows ample time for it to dry before moving forward with additional steps. This patience and precision are key aspects of his successful boatbuilding methods.Step 4: Finishing Touches
Once the flange is fully dried, Sven removes the clamps carefully, ensuring no damage occurs during this process. He then moves on to attaching four more pieces onto these main frames, completing two pairs of flanges for the bulkhead hatches.The Final Touches
While two flanges form the primary support structure around the hatches, Sven mentions there are two additional pieces required at each end to ensure comprehensive protection. This attention to detail highlights his commitment to producing a durable and reliable design. “Sailing is about finding your path, whether it’s across an ocean or within yourself.” – Sven Yrvind In conclusion, making flanges around bulkhead hatches may seem complex at first glance, but by following Sven Yrvind’s meticulous process, enthusiasts can achieve professional-level results. Remember that the journey of boatbuilding is as rewarding as reaching your destination; it tests one’s patience and dedication. For those seeking to embark on this adventure or simply gain more insight into marine craftsmanship, Sven’s wisdom is invaluable.Sven proceeds to apply glue along one edge of the flange, ensuring a secure bond when clamped into place. He emphasizes that this stage is crucial for maintaining the structural integrity of the flange, which in turn safeguards the living area beneath the canvas when hatches are open.Step 3: Allowing Time to Dry
After securely attaching the first portion of the flange, Sven allows ample time for it to dry before moving forward with additional steps. This patience and precision are key aspects of his successful boatbuilding methods.Step 4: Finishing Touches
Once the flange is fully dried, Sven removes the clamps carefully, ensuring no damage occurs during this process. He then moves on to attaching four more pieces onto these main frames, completing two pairs of flanges for the bulkhead hatches.The Final Touches
While two flanges form the primary support structure around the hatches, Sven mentions there are two additional pieces required at each end to ensure comprehensive protection. This attention to detail highlights his commitment to producing a durable and reliable design. “Sailing is about finding your path, whether it’s across an ocean or within yourself.” – Sven Yrvind In conclusion, making flanges around bulkhead hatches may seem complex at first glance, but by following Sven Yrvind’s meticulous process, enthusiasts can achieve professional-level results. Remember that the journey of boatbuilding is as rewarding as reaching your destination; it tests one’s patience and dedication. For those seeking to embark on this adventure or simply gain more insight into marine craftsmanship, Sven’s wisdom is invaluable.Sven begins by explaining that working on flanges vertically and horizontally is significantly easier than doing so in a flat position. To simplify the process further, he divides the task into two or three steps as suggested by fellow expert “for for.” This approach not only makes it more manageable but also allows for greater precision in crafting each component.Step 2: Applying Glue and Securing
Sven proceeds to apply glue along one edge of the flange, ensuring a secure bond when clamped into place. He emphasizes that this stage is crucial for maintaining the structural integrity of the flange, which in turn safeguards the living area beneath the canvas when hatches are open.Step 3: Allowing Time to Dry
After securely attaching the first portion of the flange, Sven allows ample time for it to dry before moving forward with additional steps. This patience and precision are key aspects of his successful boatbuilding methods.Step 4: Finishing Touches
Once the flange is fully dried, Sven removes the clamps carefully, ensuring no damage occurs during this process. He then moves on to attaching four more pieces onto these main frames, completing two pairs of flanges for the bulkhead hatches.The Final Touches
While two flanges form the primary support structure around the hatches, Sven mentions there are two additional pieces required at each end to ensure comprehensive protection. This attention to detail highlights his commitment to producing a durable and reliable design. “Sailing is about finding your path, whether it’s across an ocean or within yourself.” – Sven Yrvind In conclusion, making flanges around bulkhead hatches may seem complex at first glance, but by following Sven Yrvind’s meticulous process, enthusiasts can achieve professional-level results. Remember that the journey of boatbuilding is as rewarding as reaching your destination; it tests one’s patience and dedication. For those seeking to embark on this adventure or simply gain more insight into marine craftsmanship, Sven’s wisdom is invaluable.Sven Yrvind, a renowned yacht designer and sailor, shares valuable insights on creating flanges around bulkhead hatches for canvas protection in this enlightening video. By following his expert guidance, boat enthusiasts can ensure their living areas remain secure while allowing unhindered access through the hatches.Step 1: Starting with the Flange
Sven begins by explaining that working on flanges vertically and horizontally is significantly easier than doing so in a flat position. To simplify the process further, he divides the task into two or three steps as suggested by fellow expert “for for.” This approach not only makes it more manageable but also allows for greater precision in crafting each component.Step 2: Applying Glue and Securing
Sven proceeds to apply glue along one edge of the flange, ensuring a secure bond when clamped into place. He emphasizes that this stage is crucial for maintaining the structural integrity of the flange, which in turn safeguards the living area beneath the canvas when hatches are open.Step 3: Allowing Time to Dry
After securely attaching the first portion of the flange, Sven allows ample time for it to dry before moving forward with additional steps. This patience and precision are key aspects of his successful boatbuilding methods.Step 4: Finishing Touches
Once the flange is fully dried, Sven removes the clamps carefully, ensuring no damage occurs during this process. He then moves on to attaching four more pieces onto these main frames, completing two pairs of flanges for the bulkhead hatches.The Final Touches
While two flanges form the primary support structure around the hatches, Sven mentions there are two additional pieces required at each end to ensure comprehensive protection. This attention to detail highlights his commitment to producing a durable and reliable design. “Sailing is about finding your path, whether it’s across an ocean or within yourself.” – Sven Yrvind In conclusion, making flanges around bulkhead hatches may seem complex at first glance, but by following Sven Yrvind’s meticulous process, enthusiasts can achieve professional-level results. Remember that the journey of boatbuilding is as rewarding as reaching your destination; it tests one’s patience and dedication. For those seeking to embark on this adventure or simply gain more insight into marine craftsmanship, Sven’s wisdom is invaluable.Making Flanges Around Bulkhead Hatches for Canvas
Sven Yrvind, a renowned yacht designer and sailor, shares valuable insights on creating flanges around bulkhead hatches for canvas protection in this enlightening video. By following his expert guidance, boat enthusiasts can ensure their living areas remain secure while allowing unhindered access through the hatches.Step 1: Starting with the Flange
Sven begins by explaining that working on flanges vertically and horizontally is significantly easier than doing so in a flat position. To simplify the process further, he divides the task into two or three steps as suggested by fellow expert “for for.” This approach not only makes it more manageable but also allows for greater precision in crafting each component.Step 2: Applying Glue and Securing
Sven proceeds to apply glue along one edge of the flange, ensuring a secure bond when clamped into place. He emphasizes that this stage is crucial for maintaining the structural integrity of the flange, which in turn safeguards the living area beneath the canvas when hatches are open.Step 3: Allowing Time to Dry
After securely attaching the first portion of the flange, Sven allows ample time for it to dry before moving forward with additional steps. This patience and precision are key aspects of his successful boatbuilding methods.Step 4: Finishing Touches
Once the flange is fully dried, Sven removes the clamps carefully, ensuring no damage occurs during this process. He then moves on to attaching four more pieces onto these main frames, completing two pairs of flanges for the bulkhead hatches.The Final Touches
While two flanges form the primary support structure around the hatches, Sven mentions there are two additional pieces required at each end to ensure comprehensive protection. This attention to detail highlights his commitment to producing a durable and reliable design. “Sailing is about finding your path, whether it’s across an ocean or within yourself.” – Sven Yrvind In conclusion, making flanges around bulkhead hatches may seem complex at first glance, but by following Sven Yrvind’s meticulous process, enthusiasts can achieve professional-level results. Remember that the journey of boatbuilding is as rewarding as reaching your destination; it tests one’s patience and dedication. For those seeking to embark on this adventure or simply gain more insight into marine craftsmanship, Sven’s wisdom is invaluable.Once the flange is fully dried, Sven removes the clamps carefully, ensuring no damage occurs during this process. He then moves on to attaching four more pieces onto these main frames, completing two pairs of flanges for the bulkhead hatches.The Final Touches
While two flanges form the primary support structure around the hatches, Sven mentions there are two additional pieces required at each end to ensure comprehensive protection. This attention to detail highlights his commitment to producing a durable and reliable design. “Sailing is about finding your path, whether it’s across an ocean or within yourself.” – Sven Yrvind In conclusion, making flanges around bulkhead hatches may seem complex at first glance, but by following Sven Yrvind’s meticulous process, enthusiasts can achieve professional-level results. Remember that the journey of boatbuilding is as rewarding as reaching your destination; it tests one’s patience and dedication. For those seeking to embark on this adventure or simply gain more insight into marine craftsmanship, Sven’s wisdom is invaluable.After securely attaching the first portion of the flange, Sven allows ample time for it to dry before moving forward with additional steps. This patience and precision are key aspects of his successful boatbuilding methods.Step 4: Finishing Touches
Once the flange is fully dried, Sven removes the clamps carefully, ensuring no damage occurs during this process. He then moves on to attaching four more pieces onto these main frames, completing two pairs of flanges for the bulkhead hatches.The Final Touches
While two flanges form the primary support structure around the hatches, Sven mentions there are two additional pieces required at each end to ensure comprehensive protection. This attention to detail highlights his commitment to producing a durable and reliable design. “Sailing is about finding your path, whether it’s across an ocean or within yourself.” – Sven Yrvind In conclusion, making flanges around bulkhead hatches may seem complex at first glance, but by following Sven Yrvind’s meticulous process, enthusiasts can achieve professional-level results. Remember that the journey of boatbuilding is as rewarding as reaching your destination; it tests one’s patience and dedication. For those seeking to embark on this adventure or simply gain more insight into marine craftsmanship, Sven’s wisdom is invaluable.Sven proceeds to apply glue along one edge of the flange, ensuring a secure bond when clamped into place. He emphasizes that this stage is crucial for maintaining the structural integrity of the flange, which in turn safeguards the living area beneath the canvas when hatches are open.Step 3: Allowing Time to Dry
After securely attaching the first portion of the flange, Sven allows ample time for it to dry before moving forward with additional steps. This patience and precision are key aspects of his successful boatbuilding methods.Step 4: Finishing Touches
Once the flange is fully dried, Sven removes the clamps carefully, ensuring no damage occurs during this process. He then moves on to attaching four more pieces onto these main frames, completing two pairs of flanges for the bulkhead hatches.The Final Touches
While two flanges form the primary support structure around the hatches, Sven mentions there are two additional pieces required at each end to ensure comprehensive protection. This attention to detail highlights his commitment to producing a durable and reliable design. “Sailing is about finding your path, whether it’s across an ocean or within yourself.” – Sven Yrvind In conclusion, making flanges around bulkhead hatches may seem complex at first glance, but by following Sven Yrvind’s meticulous process, enthusiasts can achieve professional-level results. Remember that the journey of boatbuilding is as rewarding as reaching your destination; it tests one’s patience and dedication. For those seeking to embark on this adventure or simply gain more insight into marine craftsmanship, Sven’s wisdom is invaluable.Sven begins by explaining that working on flanges vertically and horizontally is significantly easier than doing so in a flat position. To simplify the process further, he divides the task into two or three steps as suggested by fellow expert “for for.” This approach not only makes it more manageable but also allows for greater precision in crafting each component.Step 2: Applying Glue and Securing
Sven proceeds to apply glue along one edge of the flange, ensuring a secure bond when clamped into place. He emphasizes that this stage is crucial for maintaining the structural integrity of the flange, which in turn safeguards the living area beneath the canvas when hatches are open.Step 3: Allowing Time to Dry
After securely attaching the first portion of the flange, Sven allows ample time for it to dry before moving forward with additional steps. This patience and precision are key aspects of his successful boatbuilding methods.Step 4: Finishing Touches
Once the flange is fully dried, Sven removes the clamps carefully, ensuring no damage occurs during this process. He then moves on to attaching four more pieces onto these main frames, completing two pairs of flanges for the bulkhead hatches.The Final Touches
While two flanges form the primary support structure around the hatches, Sven mentions there are two additional pieces required at each end to ensure comprehensive protection. This attention to detail highlights his commitment to producing a durable and reliable design. “Sailing is about finding your path, whether it’s across an ocean or within yourself.” – Sven Yrvind In conclusion, making flanges around bulkhead hatches may seem complex at first glance, but by following Sven Yrvind’s meticulous process, enthusiasts can achieve professional-level results. Remember that the journey of boatbuilding is as rewarding as reaching your destination; it tests one’s patience and dedication. For those seeking to embark on this adventure or simply gain more insight into marine craftsmanship, Sven’s wisdom is invaluable.Sven Yrvind, a renowned yacht designer and sailor, shares valuable insights on creating flanges around bulkhead hatches for canvas protection in this enlightening video. By following his expert guidance, boat enthusiasts can ensure their living areas remain secure while allowing unhindered access through the hatches.Step 1: Starting with the Flange
Sven begins by explaining that working on flanges vertically and horizontally is significantly easier than doing so in a flat position. To simplify the process further, he divides the task into two or three steps as suggested by fellow expert “for for.” This approach not only makes it more manageable but also allows for greater precision in crafting each component.Step 2: Applying Glue and Securing
Sven proceeds to apply glue along one edge of the flange, ensuring a secure bond when clamped into place. He emphasizes that this stage is crucial for maintaining the structural integrity of the flange, which in turn safeguards the living area beneath the canvas when hatches are open.Step 3: Allowing Time to Dry
After securely attaching the first portion of the flange, Sven allows ample time for it to dry before moving forward with additional steps. This patience and precision are key aspects of his successful boatbuilding methods.Step 4: Finishing Touches
Once the flange is fully dried, Sven removes the clamps carefully, ensuring no damage occurs during this process. He then moves on to attaching four more pieces onto these main frames, completing two pairs of flanges for the bulkhead hatches.The Final Touches
While two flanges form the primary support structure around the hatches, Sven mentions there are two additional pieces required at each end to ensure comprehensive protection. This attention to detail highlights his commitment to producing a durable and reliable design. “Sailing is about finding your path, whether it’s across an ocean or within yourself.” – Sven Yrvind In conclusion, making flanges around bulkhead hatches may seem complex at first glance, but by following Sven Yrvind’s meticulous process, enthusiasts can achieve professional-level results. Remember that the journey of boatbuilding is as rewarding as reaching your destination; it tests one’s patience and dedication. For those seeking to embark on this adventure or simply gain more insight into marine craftsmanship, Sven’s wisdom is invaluable.Making Flanges Around Bulkhead Hatches for Canvas
Sven Yrvind, a renowned yacht designer and sailor, shares valuable insights on creating flanges around bulkhead hatches for canvas protection in this enlightening video. By following his expert guidance, boat enthusiasts can ensure their living areas remain secure while allowing unhindered access through the hatches.Step 1: Starting with the Flange
Sven begins by explaining that working on flanges vertically and horizontally is significantly easier than doing so in a flat position. To simplify the process further, he divides the task into two or three steps as suggested by fellow expert “for for.” This approach not only makes it more manageable but also allows for greater precision in crafting each component.Step 2: Applying Glue and Securing
Sven proceeds to apply glue along one edge of the flange, ensuring a secure bond when clamped into place. He emphasizes that this stage is crucial for maintaining the structural integrity of the flange, which in turn safeguards the living area beneath the canvas when hatches are open.Step 3: Allowing Time to Dry
After securely attaching the first portion of the flange, Sven allows ample time for it to dry before moving forward with additional steps. This patience and precision are key aspects of his successful boatbuilding methods.Step 4: Finishing Touches
Once the flange is fully dried, Sven removes the clamps carefully, ensuring no damage occurs during this process. He then moves on to attaching four more pieces onto these main frames, completing two pairs of flanges for the bulkhead hatches.The Final Touches
While two flanges form the primary support structure around the hatches, Sven mentions there are two additional pieces required at each end to ensure comprehensive protection. This attention to detail highlights his commitment to producing a durable and reliable design. “Sailing is about finding your path, whether it’s across an ocean or within yourself.” – Sven Yrvind In conclusion, making flanges around bulkhead hatches may seem complex at first glance, but by following Sven Yrvind’s meticulous process, enthusiasts can achieve professional-level results. Remember that the journey of boatbuilding is as rewarding as reaching your destination; it tests one’s patience and dedication. For those seeking to embark on this adventure or simply gain more insight into marine craftsmanship, Sven’s wisdom is invaluable.Sven proceeds to apply glue along one edge of the flange, ensuring a secure bond when clamped into place. He emphasizes that this stage is crucial for maintaining the structural integrity of the flange, which in turn safeguards the living area beneath the canvas when hatches are open.Step 3: Allowing Time to Dry
After securely attaching the first portion of the flange, Sven allows ample time for it to dry before moving forward with additional steps. This patience and precision are key aspects of his successful boatbuilding methods.Step 4: Finishing Touches
Once the flange is fully dried, Sven removes the clamps carefully, ensuring no damage occurs during this process. He then moves on to attaching four more pieces onto these main frames, completing two pairs of flanges for the bulkhead hatches.The Final Touches
While two flanges form the primary support structure around the hatches, Sven mentions there are two additional pieces required at each end to ensure comprehensive protection. This attention to detail highlights his commitment to producing a durable and reliable design. “Sailing is about finding your path, whether it’s across an ocean or within yourself.” – Sven Yrvind In conclusion, making flanges around bulkhead hatches may seem complex at first glance, but by following Sven Yrvind’s meticulous process, enthusiasts can achieve professional-level results. Remember that the journey of boatbuilding is as rewarding as reaching your destination; it tests one’s patience and dedication. For those seeking to embark on this adventure or simply gain more insight into marine craftsmanship, Sven’s wisdom is invaluable.Sven Yrvind, a renowned yacht designer and sailor, shares valuable insights on creating flanges around bulkhead hatches for canvas protection in this enlightening video. By following his expert guidance, boat enthusiasts can ensure their living areas remain secure while allowing unhindered access through the hatches.Step 1: Starting with the Flange
Sven begins by explaining that working on flanges vertically and horizontally is significantly easier than doing so in a flat position. To simplify the process further, he divides the task into two or three steps as suggested by fellow expert “for for.” This approach not only makes it more manageable but also allows for greater precision in crafting each component.Step 2: Applying Glue and Securing
Sven proceeds to apply glue along one edge of the flange, ensuring a secure bond when clamped into place. He emphasizes that this stage is crucial for maintaining the structural integrity of the flange, which in turn safeguards the living area beneath the canvas when hatches are open.Step 3: Allowing Time to Dry
After securely attaching the first portion of the flange, Sven allows ample time for it to dry before moving forward with additional steps. This patience and precision are key aspects of his successful boatbuilding methods.Step 4: Finishing Touches
Once the flange is fully dried, Sven removes the clamps carefully, ensuring no damage occurs during this process. He then moves on to attaching four more pieces onto these main frames, completing two pairs of flanges for the bulkhead hatches.The Final Touches
While two flanges form the primary support structure around the hatches, Sven mentions there are two additional pieces required at each end to ensure comprehensive protection. This attention to detail highlights his commitment to producing a durable and reliable design. “Sailing is about finding your path, whether it’s across an ocean or within yourself.” – Sven Yrvind In conclusion, making flanges around bulkhead hatches may seem complex at first glance, but by following Sven Yrvind’s meticulous process, enthusiasts can achieve professional-level results. Remember that the journey of boatbuilding is as rewarding as reaching your destination; it tests one’s patience and dedication. For those seeking to embark on this adventure or simply gain more insight into marine craftsmanship, Sven’s wisdom is invaluable.Making Flanges Around Bulkhead Hatches for Canvas
Sven Yrvind, a renowned yacht designer and sailor, shares valuable insights on creating flanges around bulkhead hatches for canvas protection in this enlightening video. By following his expert guidance, boat enthusiasts can ensure their living areas remain secure while allowing unhindered access through the hatches.Step 1: Starting with the Flange
Sven begins by explaining that working on flanges vertically and horizontally is significantly easier than doing so in a flat position. To simplify the process further, he divides the task into two or three steps as suggested by fellow expert “for for.” This approach not only makes it more manageable but also allows for greater precision in crafting each component.Step 2: Applying Glue and Securing
Sven proceeds to apply glue along one edge of the flange, ensuring a secure bond when clamped into place. He emphasizes that this stage is crucial for maintaining the structural integrity of the flange, which in turn safeguards the living area beneath the canvas when hatches are open.Step 3: Allowing Time to Dry
After securely attaching the first portion of the flange, Sven allows ample time for it to dry before moving forward with additional steps. This patience and precision are key aspects of his successful boatbuilding methods.Step 4: Finishing Touches
Once the flange is fully dried, Sven removes the clamps carefully, ensuring no damage occurs during this process. He then moves on to attaching four more pieces onto these main frames, completing two pairs of flanges for the bulkhead hatches.The Final Touches
While two flanges form the primary support structure around the hatches, Sven mentions there are two additional pieces required at each end to ensure comprehensive protection. This attention to detail highlights his commitment to producing a durable and reliable design. “Sailing is about finding your path, whether it’s across an ocean or within yourself.” – Sven Yrvind In conclusion, making flanges around bulkhead hatches may seem complex at first glance, but by following Sven Yrvind’s meticulous process, enthusiasts can achieve professional-level results. Remember that the journey of boatbuilding is as rewarding as reaching your destination; it tests one’s patience and dedication. For those seeking to embark on this adventure or simply gain more insight into marine craftsmanship, Sven’s wisdom is invaluable.Sven proceeds to apply glue along one edge of the flange, ensuring a secure bond when clamped into place. He emphasizes that this stage is crucial for maintaining the structural integrity of the flange, which in turn safeguards the living area beneath the canvas when hatches are open.Step 3: Allowing Time to Dry
After securely attaching the first portion of the flange, Sven allows ample time for it to dry before moving forward with additional steps. This patience and precision are key aspects of his successful boatbuilding methods.Step 4: Finishing Touches
Once the flange is fully dried, Sven removes the clamps carefully, ensuring no damage occurs during this process. He then moves on to attaching four more pieces onto these main frames, completing two pairs of flanges for the bulkhead hatches.The Final Touches
While two flanges form the primary support structure around the hatches, Sven mentions there are two additional pieces required at each end to ensure comprehensive protection. This attention to detail highlights his commitment to producing a durable and reliable design. “Sailing is about finding your path, whether it’s across an ocean or within yourself.” – Sven Yrvind In conclusion, making flanges around bulkhead hatches may seem complex at first glance, but by following Sven Yrvind’s meticulous process, enthusiasts can achieve professional-level results. Remember that the journey of boatbuilding is as rewarding as reaching your destination; it tests one’s patience and dedication. For those seeking to embark on this adventure or simply gain more insight into marine craftsmanship, Sven’s wisdom is invaluable.Sven begins by explaining that working on flanges vertically and horizontally is significantly easier than doing so in a flat position. To simplify the process further, he divides the task into two or three steps as suggested by fellow expert “for for.” This approach not only makes it more manageable but also allows for greater precision in crafting each component.Step 2: Applying Glue and Securing
Sven proceeds to apply glue along one edge of the flange, ensuring a secure bond when clamped into place. He emphasizes that this stage is crucial for maintaining the structural integrity of the flange, which in turn safeguards the living area beneath the canvas when hatches are open.Step 3: Allowing Time to Dry
After securely attaching the first portion of the flange, Sven allows ample time for it to dry before moving forward with additional steps. This patience and precision are key aspects of his successful boatbuilding methods.Step 4: Finishing Touches
Once the flange is fully dried, Sven removes the clamps carefully, ensuring no damage occurs during this process. He then moves on to attaching four more pieces onto these main frames, completing two pairs of flanges for the bulkhead hatches.The Final Touches
While two flanges form the primary support structure around the hatches, Sven mentions there are two additional pieces required at each end to ensure comprehensive protection. This attention to detail highlights his commitment to producing a durable and reliable design. “Sailing is about finding your path, whether it’s across an ocean or within yourself.” – Sven Yrvind In conclusion, making flanges around bulkhead hatches may seem complex at first glance, but by following Sven Yrvind’s meticulous process, enthusiasts can achieve professional-level results. Remember that the journey of boatbuilding is as rewarding as reaching your destination; it tests one’s patience and dedication. For those seeking to embark on this adventure or simply gain more insight into marine craftsmanship, Sven’s wisdom is invaluable.Sven Yrvind, a renowned yacht designer and sailor, shares valuable insights on creating flanges around bulkhead hatches for canvas protection in this enlightening video. By following his expert guidance, boat enthusiasts can ensure their living areas remain secure while allowing unhindered access through the hatches.Step 1: Starting with the Flange
Sven begins by explaining that working on flanges vertically and horizontally is significantly easier than doing so in a flat position. To simplify the process further, he divides the task into two or three steps as suggested by fellow expert “for for.” This approach not only makes it more manageable but also allows for greater precision in crafting each component.Step 2: Applying Glue and Securing
Sven proceeds to apply glue along one edge of the flange, ensuring a secure bond when clamped into place. He emphasizes that this stage is crucial for maintaining the structural integrity of the flange, which in turn safeguards the living area beneath the canvas when hatches are open.Step 3: Allowing Time to Dry
After securely attaching the first portion of the flange, Sven allows ample time for it to dry before moving forward with additional steps. This patience and precision are key aspects of his successful boatbuilding methods.Step 4: Finishing Touches
Once the flange is fully dried, Sven removes the clamps carefully, ensuring no damage occurs during this process. He then moves on to attaching four more pieces onto these main frames, completing two pairs of flanges for the bulkhead hatches.The Final Touches
While two flanges form the primary support structure around the hatches, Sven mentions there are two additional pieces required at each end to ensure comprehensive protection. This attention to detail highlights his commitment to producing a durable and reliable design. “Sailing is about finding your path, whether it’s across an ocean or within yourself.” – Sven Yrvind In conclusion, making flanges around bulkhead hatches may seem complex at first glance, but by following Sven Yrvind’s meticulous process, enthusiasts can achieve professional-level results. Remember that the journey of boatbuilding is as rewarding as reaching your destination; it tests one’s patience and dedication. For those seeking to embark on this adventure or simply gain more insight into marine craftsmanship, Sven’s wisdom is invaluable.Making Flanges Around Bulkhead Hatches for Canvas
Sven Yrvind, a renowned yacht designer and sailor, shares valuable insights on creating flanges around bulkhead hatches for canvas protection in this enlightening video. By following his expert guidance, boat enthusiasts can ensure their living areas remain secure while allowing unhindered access through the hatches.Step 1: Starting with the Flange
Sven begins by explaining that working on flanges vertically and horizontally is significantly easier than doing so in a flat position. To simplify the process further, he divides the task into two or three steps as suggested by fellow expert “for for.” This approach not only makes it more manageable but also allows for greater precision in crafting each component.Step 2: Applying Glue and Securing
Sven proceeds to apply glue along one edge of the flange, ensuring a secure bond when clamped into place. He emphasizes that this stage is crucial for maintaining the structural integrity of the flange, which in turn safeguards the living area beneath the canvas when hatches are open.Step 3: Allowing Time to Dry
After securely attaching the first portion of the flange, Sven allows ample time for it to dry before moving forward with additional steps. This patience and precision are key aspects of his successful boatbuilding methods.Step 4: Finishing Touches
Once the flange is fully dried, Sven removes the clamps carefully, ensuring no damage occurs during this process. He then moves on to attaching four more pieces onto these main frames, completing two pairs of flanges for the bulkhead hatches.The Final Touches
While two flanges form the primary support structure around the hatches, Sven mentions there are two additional pieces required at each end to ensure comprehensive protection. This attention to detail highlights his commitment to producing a durable and reliable design. “Sailing is about finding your path, whether it’s across an ocean or within yourself.” – Sven Yrvind In conclusion, making flanges around bulkhead hatches may seem complex at first glance, but by following Sven Yrvind’s meticulous process, enthusiasts can achieve professional-level results. Remember that the journey of boatbuilding is as rewarding as reaching your destination; it tests one’s patience and dedication. For those seeking to embark on this adventure or simply gain more insight into marine craftsmanship, Sven’s wisdom is invaluable.Once the flange is fully dried, Sven removes the clamps carefully, ensuring no damage occurs during this process. He then moves on to attaching four more pieces onto these main frames, completing two pairs of flanges for the bulkhead hatches.The Final Touches
While two flanges form the primary support structure around the hatches, Sven mentions there are two additional pieces required at each end to ensure comprehensive protection. This attention to detail highlights his commitment to producing a durable and reliable design. “Sailing is about finding your path, whether it’s across an ocean or within yourself.” – Sven Yrvind In conclusion, making flanges around bulkhead hatches may seem complex at first glance, but by following Sven Yrvind’s meticulous process, enthusiasts can achieve professional-level results. Remember that the journey of boatbuilding is as rewarding as reaching your destination; it tests one’s patience and dedication. For those seeking to embark on this adventure or simply gain more insight into marine craftsmanship, Sven’s wisdom is invaluable.Sven proceeds to apply glue along one edge of the flange, ensuring a secure bond when clamped into place. He emphasizes that this stage is crucial for maintaining the structural integrity of the flange, which in turn safeguards the living area beneath the canvas when hatches are open.Step 3: Allowing Time to Dry
After securely attaching the first portion of the flange, Sven allows ample time for it to dry before moving forward with additional steps. This patience and precision are key aspects of his successful boatbuilding methods.Step 4: Finishing Touches
Once the flange is fully dried, Sven removes the clamps carefully, ensuring no damage occurs during this process. He then moves on to attaching four more pieces onto these main frames, completing two pairs of flanges for the bulkhead hatches.The Final Touches
While two flanges form the primary support structure around the hatches, Sven mentions there are two additional pieces required at each end to ensure comprehensive protection. This attention to detail highlights his commitment to producing a durable and reliable design. “Sailing is about finding your path, whether it’s across an ocean or within yourself.” – Sven Yrvind In conclusion, making flanges around bulkhead hatches may seem complex at first glance, but by following Sven Yrvind’s meticulous process, enthusiasts can achieve professional-level results. Remember that the journey of boatbuilding is as rewarding as reaching your destination; it tests one’s patience and dedication. For those seeking to embark on this adventure or simply gain more insight into marine craftsmanship, Sven’s wisdom is invaluable.Sven begins by explaining that working on flanges vertically and horizontally is significantly easier than doing so in a flat position. To simplify the process further, he divides the task into two or three steps as suggested by fellow expert “for for.” This approach not only makes it more manageable but also allows for greater precision in crafting each component.Step 2: Applying Glue and Securing
Sven proceeds to apply glue along one edge of the flange, ensuring a secure bond when clamped into place. He emphasizes that this stage is crucial for maintaining the structural integrity of the flange, which in turn safeguards the living area beneath the canvas when hatches are open.Step 3: Allowing Time to Dry
After securely attaching the first portion of the flange, Sven allows ample time for it to dry before moving forward with additional steps. This patience and precision are key aspects of his successful boatbuilding methods.Step 4: Finishing Touches
Once the flange is fully dried, Sven removes the clamps carefully, ensuring no damage occurs during this process. He then moves on to attaching four more pieces onto these main frames, completing two pairs of flanges for the bulkhead hatches.The Final Touches
While two flanges form the primary support structure around the hatches, Sven mentions there are two additional pieces required at each end to ensure comprehensive protection. This attention to detail highlights his commitment to producing a durable and reliable design. “Sailing is about finding your path, whether it’s across an ocean or within yourself.” – Sven Yrvind In conclusion, making flanges around bulkhead hatches may seem complex at first glance, but by following Sven Yrvind’s meticulous process, enthusiasts can achieve professional-level results. Remember that the journey of boatbuilding is as rewarding as reaching your destination; it tests one’s patience and dedication. For those seeking to embark on this adventure or simply gain more insight into marine craftsmanship, Sven’s wisdom is invaluable.Sven Yrvind, a renowned yacht designer and sailor, shares valuable insights on creating flanges around bulkhead hatches for canvas protection in this enlightening video. By following his expert guidance, boat enthusiasts can ensure their living areas remain secure while allowing unhindered access through the hatches.Step 1: Starting with the Flange
Sven begins by explaining that working on flanges vertically and horizontally is significantly easier than doing so in a flat position. To simplify the process further, he divides the task into two or three steps as suggested by fellow expert “for for.” This approach not only makes it more manageable but also allows for greater precision in crafting each component.Step 2: Applying Glue and Securing
Sven proceeds to apply glue along one edge of the flange, ensuring a secure bond when clamped into place. He emphasizes that this stage is crucial for maintaining the structural integrity of the flange, which in turn safeguards the living area beneath the canvas when hatches are open.Step 3: Allowing Time to Dry
After securely attaching the first portion of the flange, Sven allows ample time for it to dry before moving forward with additional steps. This patience and precision are key aspects of his successful boatbuilding methods.Step 4: Finishing Touches
Once the flange is fully dried, Sven removes the clamps carefully, ensuring no damage occurs during this process. He then moves on to attaching four more pieces onto these main frames, completing two pairs of flanges for the bulkhead hatches.The Final Touches
While two flanges form the primary support structure around the hatches, Sven mentions there are two additional pieces required at each end to ensure comprehensive protection. This attention to detail highlights his commitment to producing a durable and reliable design. “Sailing is about finding your path, whether it’s across an ocean or within yourself.” – Sven Yrvind In conclusion, making flanges around bulkhead hatches may seem complex at first glance, but by following Sven Yrvind’s meticulous process, enthusiasts can achieve professional-level results. Remember that the journey of boatbuilding is as rewarding as reaching your destination; it tests one’s patience and dedication. For those seeking to embark on this adventure or simply gain more insight into marine craftsmanship, Sven’s wisdom is invaluable.Making Flanges Around Bulkhead Hatches for Canvas
Sven Yrvind, a renowned yacht designer and sailor, shares valuable insights on creating flanges around bulkhead hatches for canvas protection in this enlightening video. By following his expert guidance, boat enthusiasts can ensure their living areas remain secure while allowing unhindered access through the hatches.Step 1: Starting with the Flange
Sven begins by explaining that working on flanges vertically and horizontally is significantly easier than doing so in a flat position. To simplify the process further, he divides the task into two or three steps as suggested by fellow expert “for for.” This approach not only makes it more manageable but also allows for greater precision in crafting each component.Step 2: Applying Glue and Securing
Sven proceeds to apply glue along one edge of the flange, ensuring a secure bond when clamped into place. He emphasizes that this stage is crucial for maintaining the structural integrity of the flange, which in turn safeguards the living area beneath the canvas when hatches are open.Step 3: Allowing Time to Dry
After securely attaching the first portion of the flange, Sven allows ample time for it to dry before moving forward with additional steps. This patience and precision are key aspects of his successful boatbuilding methods.Step 4: Finishing Touches
Once the flange is fully dried, Sven removes the clamps carefully, ensuring no damage occurs during this process. He then moves on to attaching four more pieces onto these main frames, completing two pairs of flanges for the bulkhead hatches.The Final Touches
While two flanges form the primary support structure around the hatches, Sven mentions there are two additional pieces required at each end to ensure comprehensive protection. This attention to detail highlights his commitment to producing a durable and reliable design. “Sailing is about finding your path, whether it’s across an ocean or within yourself.” – Sven Yrvind In conclusion, making flanges around bulkhead hatches may seem complex at first glance, but by following Sven Yrvind’s meticulous process, enthusiasts can achieve professional-level results. Remember that the journey of boatbuilding is as rewarding as reaching your destination; it tests one’s patience and dedication. For those seeking to embark on this adventure or simply gain more insight into marine craftsmanship, Sven’s wisdom is invaluable.After securely attaching the first portion of the flange, Sven allows ample time for it to dry before moving forward with additional steps. This patience and precision are key aspects of his successful boatbuilding methods.Step 4: Finishing Touches
Once the flange is fully dried, Sven removes the clamps carefully, ensuring no damage occurs during this process. He then moves on to attaching four more pieces onto these main frames, completing two pairs of flanges for the bulkhead hatches.The Final Touches
While two flanges form the primary support structure around the hatches, Sven mentions there are two additional pieces required at each end to ensure comprehensive protection. This attention to detail highlights his commitment to producing a durable and reliable design. “Sailing is about finding your path, whether it’s across an ocean or within yourself.” – Sven Yrvind In conclusion, making flanges around bulkhead hatches may seem complex at first glance, but by following Sven Yrvind’s meticulous process, enthusiasts can achieve professional-level results. Remember that the journey of boatbuilding is as rewarding as reaching your destination; it tests one’s patience and dedication. For those seeking to embark on this adventure or simply gain more insight into marine craftsmanship, Sven’s wisdom is invaluable.Sven proceeds to apply glue along one edge of the flange, ensuring a secure bond when clamped into place. He emphasizes that this stage is crucial for maintaining the structural integrity of the flange, which in turn safeguards the living area beneath the canvas when hatches are open.Step 3: Allowing Time to Dry
After securely attaching the first portion of the flange, Sven allows ample time for it to dry before moving forward with additional steps. This patience and precision are key aspects of his successful boatbuilding methods.Step 4: Finishing Touches
Once the flange is fully dried, Sven removes the clamps carefully, ensuring no damage occurs during this process. He then moves on to attaching four more pieces onto these main frames, completing two pairs of flanges for the bulkhead hatches.The Final Touches
While two flanges form the primary support structure around the hatches, Sven mentions there are two additional pieces required at each end to ensure comprehensive protection. This attention to detail highlights his commitment to producing a durable and reliable design. “Sailing is about finding your path, whether it’s across an ocean or within yourself.” – Sven Yrvind In conclusion, making flanges around bulkhead hatches may seem complex at first glance, but by following Sven Yrvind’s meticulous process, enthusiasts can achieve professional-level results. Remember that the journey of boatbuilding is as rewarding as reaching your destination; it tests one’s patience and dedication. For those seeking to embark on this adventure or simply gain more insight into marine craftsmanship, Sven’s wisdom is invaluable.Sven begins by explaining that working on flanges vertically and horizontally is significantly easier than doing so in a flat position. To simplify the process further, he divides the task into two or three steps as suggested by fellow expert “for for.” This approach not only makes it more manageable but also allows for greater precision in crafting each component.Step 2: Applying Glue and Securing
Sven proceeds to apply glue along one edge of the flange, ensuring a secure bond when clamped into place. He emphasizes that this stage is crucial for maintaining the structural integrity of the flange, which in turn safeguards the living area beneath the canvas when hatches are open.Step 3: Allowing Time to Dry
After securely attaching the first portion of the flange, Sven allows ample time for it to dry before moving forward with additional steps. This patience and precision are key aspects of his successful boatbuilding methods.Step 4: Finishing Touches
Once the flange is fully dried, Sven removes the clamps carefully, ensuring no damage occurs during this process. He then moves on to attaching four more pieces onto these main frames, completing two pairs of flanges for the bulkhead hatches.The Final Touches
While two flanges form the primary support structure around the hatches, Sven mentions there are two additional pieces required at each end to ensure comprehensive protection. This attention to detail highlights his commitment to producing a durable and reliable design. “Sailing is about finding your path, whether it’s across an ocean or within yourself.” – Sven Yrvind In conclusion, making flanges around bulkhead hatches may seem complex at first glance, but by following Sven Yrvind’s meticulous process, enthusiasts can achieve professional-level results. Remember that the journey of boatbuilding is as rewarding as reaching your destination; it tests one’s patience and dedication. For those seeking to embark on this adventure or simply gain more insight into marine craftsmanship, Sven’s wisdom is invaluable.Sven Yrvind, a renowned yacht designer and sailor, shares valuable insights on creating flanges around bulkhead hatches for canvas protection in this enlightening video. By following his expert guidance, boat enthusiasts can ensure their living areas remain secure while allowing unhindered access through the hatches.Step 1: Starting with the Flange
Sven begins by explaining that working on flanges vertically and horizontally is significantly easier than doing so in a flat position. To simplify the process further, he divides the task into two or three steps as suggested by fellow expert “for for.” This approach not only makes it more manageable but also allows for greater precision in crafting each component.Step 2: Applying Glue and Securing
Sven proceeds to apply glue along one edge of the flange, ensuring a secure bond when clamped into place. He emphasizes that this stage is crucial for maintaining the structural integrity of the flange, which in turn safeguards the living area beneath the canvas when hatches are open.Step 3: Allowing Time to Dry
After securely attaching the first portion of the flange, Sven allows ample time for it to dry before moving forward with additional steps. This patience and precision are key aspects of his successful boatbuilding methods.Step 4: Finishing Touches
Once the flange is fully dried, Sven removes the clamps carefully, ensuring no damage occurs during this process. He then moves on to attaching four more pieces onto these main frames, completing two pairs of flanges for the bulkhead hatches.The Final Touches
While two flanges form the primary support structure around the hatches, Sven mentions there are two additional pieces required at each end to ensure comprehensive protection. This attention to detail highlights his commitment to producing a durable and reliable design. “Sailing is about finding your path, whether it’s across an ocean or within yourself.” – Sven Yrvind In conclusion, making flanges around bulkhead hatches may seem complex at first glance, but by following Sven Yrvind’s meticulous process, enthusiasts can achieve professional-level results. Remember that the journey of boatbuilding is as rewarding as reaching your destination; it tests one’s patience and dedication. For those seeking to embark on this adventure or simply gain more insight into marine craftsmanship, Sven’s wisdom is invaluable.Making Flanges Around Bulkhead Hatches for Canvas
Sven Yrvind, a renowned yacht designer and sailor, shares valuable insights on creating flanges around bulkhead hatches for canvas protection in this enlightening video. By following his expert guidance, boat enthusiasts can ensure their living areas remain secure while allowing unhindered access through the hatches.Step 1: Starting with the Flange
Sven begins by explaining that working on flanges vertically and horizontally is significantly easier than doing so in a flat position. To simplify the process further, he divides the task into two or three steps as suggested by fellow expert “for for.” This approach not only makes it more manageable but also allows for greater precision in crafting each component.Step 2: Applying Glue and Securing
Sven proceeds to apply glue along one edge of the flange, ensuring a secure bond when clamped into place. He emphasizes that this stage is crucial for maintaining the structural integrity of the flange, which in turn safeguards the living area beneath the canvas when hatches are open.Step 3: Allowing Time to Dry
After securely attaching the first portion of the flange, Sven allows ample time for it to dry before moving forward with additional steps. This patience and precision are key aspects of his successful boatbuilding methods.Step 4: Finishing Touches
Once the flange is fully dried, Sven removes the clamps carefully, ensuring no damage occurs during this process. He then moves on to attaching four more pieces onto these main frames, completing two pairs of flanges for the bulkhead hatches.The Final Touches
While two flanges form the primary support structure around the hatches, Sven mentions there are two additional pieces required at each end to ensure comprehensive protection. This attention to detail highlights his commitment to producing a durable and reliable design. “Sailing is about finding your path, whether it’s across an ocean or within yourself.” – Sven Yrvind In conclusion, making flanges around bulkhead hatches may seem complex at first glance, but by following Sven Yrvind’s meticulous process, enthusiasts can achieve professional-level results. Remember that the journey of boatbuilding is as rewarding as reaching your destination; it tests one’s patience and dedication. For those seeking to embark on this adventure or simply gain more insight into marine craftsmanship, Sven’s wisdom is invaluable.Once the flange is fully dried, Sven removes the clamps carefully, ensuring no damage occurs during this process. He then moves on to attaching four more pieces onto these main frames, completing two pairs of flanges for the bulkhead hatches.The Final Touches
While two flanges form the primary support structure around the hatches, Sven mentions there are two additional pieces required at each end to ensure comprehensive protection. This attention to detail highlights his commitment to producing a durable and reliable design. “Sailing is about finding your path, whether it’s across an ocean or within yourself.” – Sven Yrvind In conclusion, making flanges around bulkhead hatches may seem complex at first glance, but by following Sven Yrvind’s meticulous process, enthusiasts can achieve professional-level results. Remember that the journey of boatbuilding is as rewarding as reaching your destination; it tests one’s patience and dedication. For those seeking to embark on this adventure or simply gain more insight into marine craftsmanship, Sven’s wisdom is invaluable.After securely attaching the first portion of the flange, Sven allows ample time for it to dry before moving forward with additional steps. This patience and precision are key aspects of his successful boatbuilding methods.Step 4: Finishing Touches
Once the flange is fully dried, Sven removes the clamps carefully, ensuring no damage occurs during this process. He then moves on to attaching four more pieces onto these main frames, completing two pairs of flanges for the bulkhead hatches.The Final Touches
While two flanges form the primary support structure around the hatches, Sven mentions there are two additional pieces required at each end to ensure comprehensive protection. This attention to detail highlights his commitment to producing a durable and reliable design. “Sailing is about finding your path, whether it’s across an ocean or within yourself.” – Sven Yrvind In conclusion, making flanges around bulkhead hatches may seem complex at first glance, but by following Sven Yrvind’s meticulous process, enthusiasts can achieve professional-level results. Remember that the journey of boatbuilding is as rewarding as reaching your destination; it tests one’s patience and dedication. For those seeking to embark on this adventure or simply gain more insight into marine craftsmanship, Sven’s wisdom is invaluable.Sven proceeds to apply glue along one edge of the flange, ensuring a secure bond when clamped into place. He emphasizes that this stage is crucial for maintaining the structural integrity of the flange, which in turn safeguards the living area beneath the canvas when hatches are open.Step 3: Allowing Time to Dry
After securely attaching the first portion of the flange, Sven allows ample time for it to dry before moving forward with additional steps. This patience and precision are key aspects of his successful boatbuilding methods.Step 4: Finishing Touches
Once the flange is fully dried, Sven removes the clamps carefully, ensuring no damage occurs during this process. He then moves on to attaching four more pieces onto these main frames, completing two pairs of flanges for the bulkhead hatches.The Final Touches
While two flanges form the primary support structure around the hatches, Sven mentions there are two additional pieces required at each end to ensure comprehensive protection. This attention to detail highlights his commitment to producing a durable and reliable design. “Sailing is about finding your path, whether it’s across an ocean or within yourself.” – Sven Yrvind In conclusion, making flanges around bulkhead hatches may seem complex at first glance, but by following Sven Yrvind’s meticulous process, enthusiasts can achieve professional-level results. Remember that the journey of boatbuilding is as rewarding as reaching your destination; it tests one’s patience and dedication. For those seeking to embark on this adventure or simply gain more insight into marine craftsmanship, Sven’s wisdom is invaluable.Sven begins by explaining that working on flanges vertically and horizontally is significantly easier than doing so in a flat position. To simplify the process further, he divides the task into two or three steps as suggested by fellow expert “for for.” This approach not only makes it more manageable but also allows for greater precision in crafting each component.Step 2: Applying Glue and Securing
Sven proceeds to apply glue along one edge of the flange, ensuring a secure bond when clamped into place. He emphasizes that this stage is crucial for maintaining the structural integrity of the flange, which in turn safeguards the living area beneath the canvas when hatches are open.Step 3: Allowing Time to Dry
After securely attaching the first portion of the flange, Sven allows ample time for it to dry before moving forward with additional steps. This patience and precision are key aspects of his successful boatbuilding methods.Step 4: Finishing Touches
Once the flange is fully dried, Sven removes the clamps carefully, ensuring no damage occurs during this process. He then moves on to attaching four more pieces onto these main frames, completing two pairs of flanges for the bulkhead hatches.The Final Touches
While two flanges form the primary support structure around the hatches, Sven mentions there are two additional pieces required at each end to ensure comprehensive protection. This attention to detail highlights his commitment to producing a durable and reliable design. “Sailing is about finding your path, whether it’s across an ocean or within yourself.” – Sven Yrvind In conclusion, making flanges around bulkhead hatches may seem complex at first glance, but by following Sven Yrvind’s meticulous process, enthusiasts can achieve professional-level results. Remember that the journey of boatbuilding is as rewarding as reaching your destination; it tests one’s patience and dedication. For those seeking to embark on this adventure or simply gain more insight into marine craftsmanship, Sven’s wisdom is invaluable.Sven Yrvind, a renowned yacht designer and sailor, shares valuable insights on creating flanges around bulkhead hatches for canvas protection in this enlightening video. By following his expert guidance, boat enthusiasts can ensure their living areas remain secure while allowing unhindered access through the hatches.Step 1: Starting with the Flange
Sven begins by explaining that working on flanges vertically and horizontally is significantly easier than doing so in a flat position. To simplify the process further, he divides the task into two or three steps as suggested by fellow expert “for for.” This approach not only makes it more manageable but also allows for greater precision in crafting each component.Step 2: Applying Glue and Securing
Sven proceeds to apply glue along one edge of the flange, ensuring a secure bond when clamped into place. He emphasizes that this stage is crucial for maintaining the structural integrity of the flange, which in turn safeguards the living area beneath the canvas when hatches are open.Step 3: Allowing Time to Dry
After securely attaching the first portion of the flange, Sven allows ample time for it to dry before moving forward with additional steps. This patience and precision are key aspects of his successful boatbuilding methods.Step 4: Finishing Touches
Once the flange is fully dried, Sven removes the clamps carefully, ensuring no damage occurs during this process. He then moves on to attaching four more pieces onto these main frames, completing two pairs of flanges for the bulkhead hatches.The Final Touches
While two flanges form the primary support structure around the hatches, Sven mentions there are two additional pieces required at each end to ensure comprehensive protection. This attention to detail highlights his commitment to producing a durable and reliable design. “Sailing is about finding your path, whether it’s across an ocean or within yourself.” – Sven Yrvind In conclusion, making flanges around bulkhead hatches may seem complex at first glance, but by following Sven Yrvind’s meticulous process, enthusiasts can achieve professional-level results. Remember that the journey of boatbuilding is as rewarding as reaching your destination; it tests one’s patience and dedication. For those seeking to embark on this adventure or simply gain more insight into marine craftsmanship, Sven’s wisdom is invaluable.Making Flanges Around Bulkhead Hatches for Canvas
Sven Yrvind, a renowned yacht designer and sailor, shares valuable insights on creating flanges around bulkhead hatches for canvas protection in this enlightening video. By following his expert guidance, boat enthusiasts can ensure their living areas remain secure while allowing unhindered access through the hatches.Step 1: Starting with the Flange
Sven begins by explaining that working on flanges vertically and horizontally is significantly easier than doing so in a flat position. To simplify the process further, he divides the task into two or three steps as suggested by fellow expert “for for.” This approach not only makes it more manageable but also allows for greater precision in crafting each component.Step 2: Applying Glue and Securing
Sven proceeds to apply glue along one edge of the flange, ensuring a secure bond when clamped into place. He emphasizes that this stage is crucial for maintaining the structural integrity of the flange, which in turn safeguards the living area beneath the canvas when hatches are open.Step 3: Allowing Time to Dry
After securely attaching the first portion of the flange, Sven allows ample time for it to dry before moving forward with additional steps. This patience and precision are key aspects of his successful boatbuilding methods.Step 4: Finishing Touches
Once the flange is fully dried, Sven removes the clamps carefully, ensuring no damage occurs during this process. He then moves on to attaching four more pieces onto these main frames, completing two pairs of flanges for the bulkhead hatches.The Final Touches
While two flanges form the primary support structure around the hatches, Sven mentions there are two additional pieces required at each end to ensure comprehensive protection. This attention to detail highlights his commitment to producing a durable and reliable design. “Sailing is about finding your path, whether it’s across an ocean or within yourself.” – Sven Yrvind In conclusion, making flanges around bulkhead hatches may seem complex at first glance, but by following Sven Yrvind’s meticulous process, enthusiasts can achieve professional-level results. Remember that the journey of boatbuilding is as rewarding as reaching your destination; it tests one’s patience and dedication. For those seeking to embark on this adventure or simply gain more insight into marine craftsmanship, Sven’s wisdom is invaluable.Sven begins by explaining that working on flanges vertically and horizontally is significantly easier than doing so in a flat position. To simplify the process further, he divides the task into two or three steps as suggested by fellow expert “for for.” This approach not only makes it more manageable but also allows for greater precision in crafting each component.Step 2: Applying Glue and Securing
Sven proceeds to apply glue along one edge of the flange, ensuring a secure bond when clamped into place. He emphasizes that this stage is crucial for maintaining the structural integrity of the flange, which in turn safeguards the living area beneath the canvas when hatches are open.Step 3: Allowing Time to Dry
After securely attaching the first portion of the flange, Sven allows ample time for it to dry before moving forward with additional steps. This patience and precision are key aspects of his successful boatbuilding methods.Step 4: Finishing Touches
Once the flange is fully dried, Sven removes the clamps carefully, ensuring no damage occurs during this process. He then moves on to attaching four more pieces onto these main frames, completing two pairs of flanges for the bulkhead hatches.The Final Touches
While two flanges form the primary support structure around the hatches, Sven mentions there are two additional pieces required at each end to ensure comprehensive protection. This attention to detail highlights his commitment to producing a durable and reliable design. “Sailing is about finding your path, whether it’s across an ocean or within yourself.” – Sven Yrvind In conclusion, making flanges around bulkhead hatches may seem complex at first glance, but by following Sven Yrvind’s meticulous process, enthusiasts can achieve professional-level results. Remember that the journey of boatbuilding is as rewarding as reaching your destination; it tests one’s patience and dedication. For those seeking to embark on this adventure or simply gain more insight into marine craftsmanship, Sven’s wisdom is invaluable.Sven Yrvind, a renowned yacht designer and sailor, shares valuable insights on creating flanges around bulkhead hatches for canvas protection in this enlightening video. By following his expert guidance, boat enthusiasts can ensure their living areas remain secure while allowing unhindered access through the hatches.Step 1: Starting with the Flange
Sven begins by explaining that working on flanges vertically and horizontally is significantly easier than doing so in a flat position. To simplify the process further, he divides the task into two or three steps as suggested by fellow expert “for for.” This approach not only makes it more manageable but also allows for greater precision in crafting each component.Step 2: Applying Glue and Securing
Sven proceeds to apply glue along one edge of the flange, ensuring a secure bond when clamped into place. He emphasizes that this stage is crucial for maintaining the structural integrity of the flange, which in turn safeguards the living area beneath the canvas when hatches are open.Step 3: Allowing Time to Dry
After securely attaching the first portion of the flange, Sven allows ample time for it to dry before moving forward with additional steps. This patience and precision are key aspects of his successful boatbuilding methods.Step 4: Finishing Touches
Once the flange is fully dried, Sven removes the clamps carefully, ensuring no damage occurs during this process. He then moves on to attaching four more pieces onto these main frames, completing two pairs of flanges for the bulkhead hatches.The Final Touches
While two flanges form the primary support structure around the hatches, Sven mentions there are two additional pieces required at each end to ensure comprehensive protection. This attention to detail highlights his commitment to producing a durable and reliable design. “Sailing is about finding your path, whether it’s across an ocean or within yourself.” – Sven Yrvind In conclusion, making flanges around bulkhead hatches may seem complex at first glance, but by following Sven Yrvind’s meticulous process, enthusiasts can achieve professional-level results. Remember that the journey of boatbuilding is as rewarding as reaching your destination; it tests one’s patience and dedication. For those seeking to embark on this adventure or simply gain more insight into marine craftsmanship, Sven’s wisdom is invaluable.Making Flanges Around Bulkhead Hatches for Canvas
Sven Yrvind, a renowned yacht designer and sailor, shares valuable insights on creating flanges around bulkhead hatches for canvas protection in this enlightening video. By following his expert guidance, boat enthusiasts can ensure their living areas remain secure while allowing unhindered access through the hatches.Step 1: Starting with the Flange
Sven begins by explaining that working on flanges vertically and horizontally is significantly easier than doing so in a flat position. To simplify the process further, he divides the task into two or three steps as suggested by fellow expert “for for.” This approach not only makes it more manageable but also allows for greater precision in crafting each component.Step 2: Applying Glue and Securing
Sven proceeds to apply glue along one edge of the flange, ensuring a secure bond when clamped into place. He emphasizes that this stage is crucial for maintaining the structural integrity of the flange, which in turn safeguards the living area beneath the canvas when hatches are open.Step 3: Allowing Time to Dry
After securely attaching the first portion of the flange, Sven allows ample time for it to dry before moving forward with additional steps. This patience and precision are key aspects of his successful boatbuilding methods.Step 4: Finishing Touches
Once the flange is fully dried, Sven removes the clamps carefully, ensuring no damage occurs during this process. He then moves on to attaching four more pieces onto these main frames, completing two pairs of flanges for the bulkhead hatches.The Final Touches
While two flanges form the primary support structure around the hatches, Sven mentions there are two additional pieces required at each end to ensure comprehensive protection. This attention to detail highlights his commitment to producing a durable and reliable design. “Sailing is about finding your path, whether it’s across an ocean or within yourself.” – Sven Yrvind In conclusion, making flanges around bulkhead hatches may seem complex at first glance, but by following Sven Yrvind’s meticulous process, enthusiasts can achieve professional-level results. Remember that the journey of boatbuilding is as rewarding as reaching your destination; it tests one’s patience and dedication. For those seeking to embark on this adventure or simply gain more insight into marine craftsmanship, Sven’s wisdom is invaluable.Sven proceeds to apply glue along one edge of the flange, ensuring a secure bond when clamped into place. He emphasizes that this stage is crucial for maintaining the structural integrity of the flange, which in turn safeguards the living area beneath the canvas when hatches are open.Step 3: Allowing Time to Dry
After securely attaching the first portion of the flange, Sven allows ample time for it to dry before moving forward with additional steps. This patience and precision are key aspects of his successful boatbuilding methods.Step 4: Finishing Touches
Once the flange is fully dried, Sven removes the clamps carefully, ensuring no damage occurs during this process. He then moves on to attaching four more pieces onto these main frames, completing two pairs of flanges for the bulkhead hatches.The Final Touches
While two flanges form the primary support structure around the hatches, Sven mentions there are two additional pieces required at each end to ensure comprehensive protection. This attention to detail highlights his commitment to producing a durable and reliable design. “Sailing is about finding your path, whether it’s across an ocean or within yourself.” – Sven Yrvind In conclusion, making flanges around bulkhead hatches may seem complex at first glance, but by following Sven Yrvind’s meticulous process, enthusiasts can achieve professional-level results. Remember that the journey of boatbuilding is as rewarding as reaching your destination; it tests one’s patience and dedication. For those seeking to embark on this adventure or simply gain more insight into marine craftsmanship, Sven’s wisdom is invaluable.Sven begins by explaining that working on flanges vertically and horizontally is significantly easier than doing so in a flat position. To simplify the process further, he divides the task into two or three steps as suggested by fellow expert “for for.” This approach not only makes it more manageable but also allows for greater precision in crafting each component.Step 2: Applying Glue and Securing
Sven proceeds to apply glue along one edge of the flange, ensuring a secure bond when clamped into place. He emphasizes that this stage is crucial for maintaining the structural integrity of the flange, which in turn safeguards the living area beneath the canvas when hatches are open.Step 3: Allowing Time to Dry
After securely attaching the first portion of the flange, Sven allows ample time for it to dry before moving forward with additional steps. This patience and precision are key aspects of his successful boatbuilding methods.Step 4: Finishing Touches
Once the flange is fully dried, Sven removes the clamps carefully, ensuring no damage occurs during this process. He then moves on to attaching four more pieces onto these main frames, completing two pairs of flanges for the bulkhead hatches.The Final Touches
While two flanges form the primary support structure around the hatches, Sven mentions there are two additional pieces required at each end to ensure comprehensive protection. This attention to detail highlights his commitment to producing a durable and reliable design. “Sailing is about finding your path, whether it’s across an ocean or within yourself.” – Sven Yrvind In conclusion, making flanges around bulkhead hatches may seem complex at first glance, but by following Sven Yrvind’s meticulous process, enthusiasts can achieve professional-level results. Remember that the journey of boatbuilding is as rewarding as reaching your destination; it tests one’s patience and dedication. For those seeking to embark on this adventure or simply gain more insight into marine craftsmanship, Sven’s wisdom is invaluable.Sven Yrvind, a renowned yacht designer and sailor, shares valuable insights on creating flanges around bulkhead hatches for canvas protection in this enlightening video. By following his expert guidance, boat enthusiasts can ensure their living areas remain secure while allowing unhindered access through the hatches.Step 1: Starting with the Flange
Sven begins by explaining that working on flanges vertically and horizontally is significantly easier than doing so in a flat position. To simplify the process further, he divides the task into two or three steps as suggested by fellow expert “for for.” This approach not only makes it more manageable but also allows for greater precision in crafting each component.Step 2: Applying Glue and Securing
Sven proceeds to apply glue along one edge of the flange, ensuring a secure bond when clamped into place. He emphasizes that this stage is crucial for maintaining the structural integrity of the flange, which in turn safeguards the living area beneath the canvas when hatches are open.Step 3: Allowing Time to Dry
After securely attaching the first portion of the flange, Sven allows ample time for it to dry before moving forward with additional steps. This patience and precision are key aspects of his successful boatbuilding methods.Step 4: Finishing Touches
Once the flange is fully dried, Sven removes the clamps carefully, ensuring no damage occurs during this process. He then moves on to attaching four more pieces onto these main frames, completing two pairs of flanges for the bulkhead hatches.The Final Touches
While two flanges form the primary support structure around the hatches, Sven mentions there are two additional pieces required at each end to ensure comprehensive protection. This attention to detail highlights his commitment to producing a durable and reliable design. “Sailing is about finding your path, whether it’s across an ocean or within yourself.” – Sven Yrvind In conclusion, making flanges around bulkhead hatches may seem complex at first glance, but by following Sven Yrvind’s meticulous process, enthusiasts can achieve professional-level results. Remember that the journey of boatbuilding is as rewarding as reaching your destination; it tests one’s patience and dedication. For those seeking to embark on this adventure or simply gain more insight into marine craftsmanship, Sven’s wisdom is invaluable.Making Flanges Around Bulkhead Hatches for Canvas
Sven Yrvind, a renowned yacht designer and sailor, shares valuable insights on creating flanges around bulkhead hatches for canvas protection in this enlightening video. By following his expert guidance, boat enthusiasts can ensure their living areas remain secure while allowing unhindered access through the hatches.Step 1: Starting with the Flange
Sven begins by explaining that working on flanges vertically and horizontally is significantly easier than doing so in a flat position. To simplify the process further, he divides the task into two or three steps as suggested by fellow expert “for for.” This approach not only makes it more manageable but also allows for greater precision in crafting each component.Step 2: Applying Glue and Securing
Sven proceeds to apply glue along one edge of the flange, ensuring a secure bond when clamped into place. He emphasizes that this stage is crucial for maintaining the structural integrity of the flange, which in turn safeguards the living area beneath the canvas when hatches are open.Step 3: Allowing Time to Dry
After securely attaching the first portion of the flange, Sven allows ample time for it to dry before moving forward with additional steps. This patience and precision are key aspects of his successful boatbuilding methods.Step 4: Finishing Touches
Once the flange is fully dried, Sven removes the clamps carefully, ensuring no damage occurs during this process. He then moves on to attaching four more pieces onto these main frames, completing two pairs of flanges for the bulkhead hatches.The Final Touches
While two flanges form the primary support structure around the hatches, Sven mentions there are two additional pieces required at each end to ensure comprehensive protection. This attention to detail highlights his commitment to producing a durable and reliable design. “Sailing is about finding your path, whether it’s across an ocean or within yourself.” – Sven Yrvind In conclusion, making flanges around bulkhead hatches may seem complex at first glance, but by following Sven Yrvind’s meticulous process, enthusiasts can achieve professional-level results. Remember that the journey of boatbuilding is as rewarding as reaching your destination; it tests one’s patience and dedication. For those seeking to embark on this adventure or simply gain more insight into marine craftsmanship, Sven’s wisdom is invaluable.Once the flange is fully dried, Sven removes the clamps carefully, ensuring no damage occurs during this process. He then moves on to attaching four more pieces onto these main frames, completing two pairs of flanges for the bulkhead hatches.The Final Touches
While two flanges form the primary support structure around the hatches, Sven mentions there are two additional pieces required at each end to ensure comprehensive protection. This attention to detail highlights his commitment to producing a durable and reliable design. “Sailing is about finding your path, whether it’s across an ocean or within yourself.” – Sven Yrvind In conclusion, making flanges around bulkhead hatches may seem complex at first glance, but by following Sven Yrvind’s meticulous process, enthusiasts can achieve professional-level results. Remember that the journey of boatbuilding is as rewarding as reaching your destination; it tests one’s patience and dedication. For those seeking to embark on this adventure or simply gain more insight into marine craftsmanship, Sven’s wisdom is invaluable.Sven proceeds to apply glue along one edge of the flange, ensuring a secure bond when clamped into place. He emphasizes that this stage is crucial for maintaining the structural integrity of the flange, which in turn safeguards the living area beneath the canvas when hatches are open.Step 3: Allowing Time to Dry
After securely attaching the first portion of the flange, Sven allows ample time for it to dry before moving forward with additional steps. This patience and precision are key aspects of his successful boatbuilding methods.Step 4: Finishing Touches
Once the flange is fully dried, Sven removes the clamps carefully, ensuring no damage occurs during this process. He then moves on to attaching four more pieces onto these main frames, completing two pairs of flanges for the bulkhead hatches.The Final Touches
While two flanges form the primary support structure around the hatches, Sven mentions there are two additional pieces required at each end to ensure comprehensive protection. This attention to detail highlights his commitment to producing a durable and reliable design. “Sailing is about finding your path, whether it’s across an ocean or within yourself.” – Sven Yrvind In conclusion, making flanges around bulkhead hatches may seem complex at first glance, but by following Sven Yrvind’s meticulous process, enthusiasts can achieve professional-level results. Remember that the journey of boatbuilding is as rewarding as reaching your destination; it tests one’s patience and dedication. For those seeking to embark on this adventure or simply gain more insight into marine craftsmanship, Sven’s wisdom is invaluable.Sven begins by explaining that working on flanges vertically and horizontally is significantly easier than doing so in a flat position. To simplify the process further, he divides the task into two or three steps as suggested by fellow expert “for for.” This approach not only makes it more manageable but also allows for greater precision in crafting each component.Step 2: Applying Glue and Securing
Sven proceeds to apply glue along one edge of the flange, ensuring a secure bond when clamped into place. He emphasizes that this stage is crucial for maintaining the structural integrity of the flange, which in turn safeguards the living area beneath the canvas when hatches are open.Step 3: Allowing Time to Dry
After securely attaching the first portion of the flange, Sven allows ample time for it to dry before moving forward with additional steps. This patience and precision are key aspects of his successful boatbuilding methods.Step 4: Finishing Touches
Once the flange is fully dried, Sven removes the clamps carefully, ensuring no damage occurs during this process. He then moves on to attaching four more pieces onto these main frames, completing two pairs of flanges for the bulkhead hatches.The Final Touches
While two flanges form the primary support structure around the hatches, Sven mentions there are two additional pieces required at each end to ensure comprehensive protection. This attention to detail highlights his commitment to producing a durable and reliable design. “Sailing is about finding your path, whether it’s across an ocean or within yourself.” – Sven Yrvind In conclusion, making flanges around bulkhead hatches may seem complex at first glance, but by following Sven Yrvind’s meticulous process, enthusiasts can achieve professional-level results. Remember that the journey of boatbuilding is as rewarding as reaching your destination; it tests one’s patience and dedication. For those seeking to embark on this adventure or simply gain more insight into marine craftsmanship, Sven’s wisdom is invaluable.Sven Yrvind, a renowned yacht designer and sailor, shares valuable insights on creating flanges around bulkhead hatches for canvas protection in this enlightening video. By following his expert guidance, boat enthusiasts can ensure their living areas remain secure while allowing unhindered access through the hatches.Step 1: Starting with the Flange
Sven begins by explaining that working on flanges vertically and horizontally is significantly easier than doing so in a flat position. To simplify the process further, he divides the task into two or three steps as suggested by fellow expert “for for.” This approach not only makes it more manageable but also allows for greater precision in crafting each component.Step 2: Applying Glue and Securing
Sven proceeds to apply glue along one edge of the flange, ensuring a secure bond when clamped into place. He emphasizes that this stage is crucial for maintaining the structural integrity of the flange, which in turn safeguards the living area beneath the canvas when hatches are open.Step 3: Allowing Time to Dry
After securely attaching the first portion of the flange, Sven allows ample time for it to dry before moving forward with additional steps. This patience and precision are key aspects of his successful boatbuilding methods.Step 4: Finishing Touches
Once the flange is fully dried, Sven removes the clamps carefully, ensuring no damage occurs during this process. He then moves on to attaching four more pieces onto these main frames, completing two pairs of flanges for the bulkhead hatches.The Final Touches
While two flanges form the primary support structure around the hatches, Sven mentions there are two additional pieces required at each end to ensure comprehensive protection. This attention to detail highlights his commitment to producing a durable and reliable design. “Sailing is about finding your path, whether it’s across an ocean or within yourself.” – Sven Yrvind In conclusion, making flanges around bulkhead hatches may seem complex at first glance, but by following Sven Yrvind’s meticulous process, enthusiasts can achieve professional-level results. Remember that the journey of boatbuilding is as rewarding as reaching your destination; it tests one’s patience and dedication. For those seeking to embark on this adventure or simply gain more insight into marine craftsmanship, Sven’s wisdom is invaluable.Making Flanges Around Bulkhead Hatches for Canvas
Sven Yrvind, a renowned yacht designer and sailor, shares valuable insights on creating flanges around bulkhead hatches for canvas protection in this enlightening video. By following his expert guidance, boat enthusiasts can ensure their living areas remain secure while allowing unhindered access through the hatches.Step 1: Starting with the Flange
Sven begins by explaining that working on flanges vertically and horizontally is significantly easier than doing so in a flat position. To simplify the process further, he divides the task into two or three steps as suggested by fellow expert “for for.” This approach not only makes it more manageable but also allows for greater precision in crafting each component.Step 2: Applying Glue and Securing
Sven proceeds to apply glue along one edge of the flange, ensuring a secure bond when clamped into place. He emphasizes that this stage is crucial for maintaining the structural integrity of the flange, which in turn safeguards the living area beneath the canvas when hatches are open.Step 3: Allowing Time to Dry
After securely attaching the first portion of the flange, Sven allows ample time for it to dry before moving forward with additional steps. This patience and precision are key aspects of his successful boatbuilding methods.Step 4: Finishing Touches
Once the flange is fully dried, Sven removes the clamps carefully, ensuring no damage occurs during this process. He then moves on to attaching four more pieces onto these main frames, completing two pairs of flanges for the bulkhead hatches.The Final Touches
While two flanges form the primary support structure around the hatches, Sven mentions there are two additional pieces required at each end to ensure comprehensive protection. This attention to detail highlights his commitment to producing a durable and reliable design. “Sailing is about finding your path, whether it’s across an ocean or within yourself.” – Sven Yrvind In conclusion, making flanges around bulkhead hatches may seem complex at first glance, but by following Sven Yrvind’s meticulous process, enthusiasts can achieve professional-level results. Remember that the journey of boatbuilding is as rewarding as reaching your destination; it tests one’s patience and dedication. For those seeking to embark on this adventure or simply gain more insight into marine craftsmanship, Sven’s wisdom is invaluable.After securely attaching the first portion of the flange, Sven allows ample time for it to dry before moving forward with additional steps. This patience and precision are key aspects of his successful boatbuilding methods.Step 4: Finishing Touches
Once the flange is fully dried, Sven removes the clamps carefully, ensuring no damage occurs during this process. He then moves on to attaching four more pieces onto these main frames, completing two pairs of flanges for the bulkhead hatches.The Final Touches
While two flanges form the primary support structure around the hatches, Sven mentions there are two additional pieces required at each end to ensure comprehensive protection. This attention to detail highlights his commitment to producing a durable and reliable design. “Sailing is about finding your path, whether it’s across an ocean or within yourself.” – Sven Yrvind In conclusion, making flanges around bulkhead hatches may seem complex at first glance, but by following Sven Yrvind’s meticulous process, enthusiasts can achieve professional-level results. Remember that the journey of boatbuilding is as rewarding as reaching your destination; it tests one’s patience and dedication. For those seeking to embark on this adventure or simply gain more insight into marine craftsmanship, Sven’s wisdom is invaluable.Sven proceeds to apply glue along one edge of the flange, ensuring a secure bond when clamped into place. He emphasizes that this stage is crucial for maintaining the structural integrity of the flange, which in turn safeguards the living area beneath the canvas when hatches are open.Step 3: Allowing Time to Dry
After securely attaching the first portion of the flange, Sven allows ample time for it to dry before moving forward with additional steps. This patience and precision are key aspects of his successful boatbuilding methods.Step 4: Finishing Touches
Once the flange is fully dried, Sven removes the clamps carefully, ensuring no damage occurs during this process. He then moves on to attaching four more pieces onto these main frames, completing two pairs of flanges for the bulkhead hatches.The Final Touches
While two flanges form the primary support structure around the hatches, Sven mentions there are two additional pieces required at each end to ensure comprehensive protection. This attention to detail highlights his commitment to producing a durable and reliable design. “Sailing is about finding your path, whether it’s across an ocean or within yourself.” – Sven Yrvind In conclusion, making flanges around bulkhead hatches may seem complex at first glance, but by following Sven Yrvind’s meticulous process, enthusiasts can achieve professional-level results. Remember that the journey of boatbuilding is as rewarding as reaching your destination; it tests one’s patience and dedication. For those seeking to embark on this adventure or simply gain more insight into marine craftsmanship, Sven’s wisdom is invaluable.Sven begins by explaining that working on flanges vertically and horizontally is significantly easier than doing so in a flat position. To simplify the process further, he divides the task into two or three steps as suggested by fellow expert “for for.” This approach not only makes it more manageable but also allows for greater precision in crafting each component.Step 2: Applying Glue and Securing
Sven proceeds to apply glue along one edge of the flange, ensuring a secure bond when clamped into place. He emphasizes that this stage is crucial for maintaining the structural integrity of the flange, which in turn safeguards the living area beneath the canvas when hatches are open.Step 3: Allowing Time to Dry
After securely attaching the first portion of the flange, Sven allows ample time for it to dry before moving forward with additional steps. This patience and precision are key aspects of his successful boatbuilding methods.Step 4: Finishing Touches
Once the flange is fully dried, Sven removes the clamps carefully, ensuring no damage occurs during this process. He then moves on to attaching four more pieces onto these main frames, completing two pairs of flanges for the bulkhead hatches.The Final Touches
While two flanges form the primary support structure around the hatches, Sven mentions there are two additional pieces required at each end to ensure comprehensive protection. This attention to detail highlights his commitment to producing a durable and reliable design. “Sailing is about finding your path, whether it’s across an ocean or within yourself.” – Sven Yrvind In conclusion, making flanges around bulkhead hatches may seem complex at first glance, but by following Sven Yrvind’s meticulous process, enthusiasts can achieve professional-level results. Remember that the journey of boatbuilding is as rewarding as reaching your destination; it tests one’s patience and dedication. For those seeking to embark on this adventure or simply gain more insight into marine craftsmanship, Sven’s wisdom is invaluable.Sven Yrvind, a renowned yacht designer and sailor, shares valuable insights on creating flanges around bulkhead hatches for canvas protection in this enlightening video. By following his expert guidance, boat enthusiasts can ensure their living areas remain secure while allowing unhindered access through the hatches.Step 1: Starting with the Flange
Sven begins by explaining that working on flanges vertically and horizontally is significantly easier than doing so in a flat position. To simplify the process further, he divides the task into two or three steps as suggested by fellow expert “for for.” This approach not only makes it more manageable but also allows for greater precision in crafting each component.Step 2: Applying Glue and Securing
Sven proceeds to apply glue along one edge of the flange, ensuring a secure bond when clamped into place. He emphasizes that this stage is crucial for maintaining the structural integrity of the flange, which in turn safeguards the living area beneath the canvas when hatches are open.Step 3: Allowing Time to Dry
After securely attaching the first portion of the flange, Sven allows ample time for it to dry before moving forward with additional steps. This patience and precision are key aspects of his successful boatbuilding methods.Step 4: Finishing Touches
Once the flange is fully dried, Sven removes the clamps carefully, ensuring no damage occurs during this process. He then moves on to attaching four more pieces onto these main frames, completing two pairs of flanges for the bulkhead hatches.The Final Touches
While two flanges form the primary support structure around the hatches, Sven mentions there are two additional pieces required at each end to ensure comprehensive protection. This attention to detail highlights his commitment to producing a durable and reliable design. “Sailing is about finding your path, whether it’s across an ocean or within yourself.” – Sven Yrvind In conclusion, making flanges around bulkhead hatches may seem complex at first glance, but by following Sven Yrvind’s meticulous process, enthusiasts can achieve professional-level results. Remember that the journey of boatbuilding is as rewarding as reaching your destination; it tests one’s patience and dedication. For those seeking to embark on this adventure or simply gain more insight into marine craftsmanship, Sven’s wisdom is invaluable.Making Flanges Around Bulkhead Hatches for Canvas
Sven Yrvind, a renowned yacht designer and sailor, shares valuable insights on creating flanges around bulkhead hatches for canvas protection in this enlightening video. By following his expert guidance, boat enthusiasts can ensure their living areas remain secure while allowing unhindered access through the hatches.Step 1: Starting with the Flange
Sven begins by explaining that working on flanges vertically and horizontally is significantly easier than doing so in a flat position. To simplify the process further, he divides the task into two or three steps as suggested by fellow expert “for for.” This approach not only makes it more manageable but also allows for greater precision in crafting each component.Step 2: Applying Glue and Securing
Sven proceeds to apply glue along one edge of the flange, ensuring a secure bond when clamped into place. He emphasizes that this stage is crucial for maintaining the structural integrity of the flange, which in turn safeguards the living area beneath the canvas when hatches are open.Step 3: Allowing Time to Dry
After securely attaching the first portion of the flange, Sven allows ample time for it to dry before moving forward with additional steps. This patience and precision are key aspects of his successful boatbuilding methods.Step 4: Finishing Touches
Once the flange is fully dried, Sven removes the clamps carefully, ensuring no damage occurs during this process. He then moves on to attaching four more pieces onto these main frames, completing two pairs of flanges for the bulkhead hatches.The Final Touches
While two flanges form the primary support structure around the hatches, Sven mentions there are two additional pieces required at each end to ensure comprehensive protection. This attention to detail highlights his commitment to producing a durable and reliable design. “Sailing is about finding your path, whether it’s across an ocean or within yourself.” – Sven Yrvind In conclusion, making flanges around bulkhead hatches may seem complex at first glance, but by following Sven Yrvind’s meticulous process, enthusiasts can achieve professional-level results. Remember that the journey of boatbuilding is as rewarding as reaching your destination; it tests one’s patience and dedication. For those seeking to embark on this adventure or simply gain more insight into marine craftsmanship, Sven’s wisdom is invaluable.Once the flange is fully dried, Sven removes the clamps carefully, ensuring no damage occurs during this process. He then moves on to attaching four more pieces onto these main frames, completing two pairs of flanges for the bulkhead hatches.The Final Touches
While two flanges form the primary support structure around the hatches, Sven mentions there are two additional pieces required at each end to ensure comprehensive protection. This attention to detail highlights his commitment to producing a durable and reliable design. “Sailing is about finding your path, whether it’s across an ocean or within yourself.” – Sven Yrvind In conclusion, making flanges around bulkhead hatches may seem complex at first glance, but by following Sven Yrvind’s meticulous process, enthusiasts can achieve professional-level results. Remember that the journey of boatbuilding is as rewarding as reaching your destination; it tests one’s patience and dedication. For those seeking to embark on this adventure or simply gain more insight into marine craftsmanship, Sven’s wisdom is invaluable.After securely attaching the first portion of the flange, Sven allows ample time for it to dry before moving forward with additional steps. This patience and precision are key aspects of his successful boatbuilding methods.Step 4: Finishing Touches
Once the flange is fully dried, Sven removes the clamps carefully, ensuring no damage occurs during this process. He then moves on to attaching four more pieces onto these main frames, completing two pairs of flanges for the bulkhead hatches.The Final Touches
While two flanges form the primary support structure around the hatches, Sven mentions there are two additional pieces required at each end to ensure comprehensive protection. This attention to detail highlights his commitment to producing a durable and reliable design. “Sailing is about finding your path, whether it’s across an ocean or within yourself.” – Sven Yrvind In conclusion, making flanges around bulkhead hatches may seem complex at first glance, but by following Sven Yrvind’s meticulous process, enthusiasts can achieve professional-level results. Remember that the journey of boatbuilding is as rewarding as reaching your destination; it tests one’s patience and dedication. For those seeking to embark on this adventure or simply gain more insight into marine craftsmanship, Sven’s wisdom is invaluable.Sven proceeds to apply glue along one edge of the flange, ensuring a secure bond when clamped into place. He emphasizes that this stage is crucial for maintaining the structural integrity of the flange, which in turn safeguards the living area beneath the canvas when hatches are open.Step 3: Allowing Time to Dry
After securely attaching the first portion of the flange, Sven allows ample time for it to dry before moving forward with additional steps. This patience and precision are key aspects of his successful boatbuilding methods.Step 4: Finishing Touches
Once the flange is fully dried, Sven removes the clamps carefully, ensuring no damage occurs during this process. He then moves on to attaching four more pieces onto these main frames, completing two pairs of flanges for the bulkhead hatches.The Final Touches
While two flanges form the primary support structure around the hatches, Sven mentions there are two additional pieces required at each end to ensure comprehensive protection. This attention to detail highlights his commitment to producing a durable and reliable design. “Sailing is about finding your path, whether it’s across an ocean or within yourself.” – Sven Yrvind In conclusion, making flanges around bulkhead hatches may seem complex at first glance, but by following Sven Yrvind’s meticulous process, enthusiasts can achieve professional-level results. Remember that the journey of boatbuilding is as rewarding as reaching your destination; it tests one’s patience and dedication. For those seeking to embark on this adventure or simply gain more insight into marine craftsmanship, Sven’s wisdom is invaluable.Sven begins by explaining that working on flanges vertically and horizontally is significantly easier than doing so in a flat position. To simplify the process further, he divides the task into two or three steps as suggested by fellow expert “for for.” This approach not only makes it more manageable but also allows for greater precision in crafting each component.Step 2: Applying Glue and Securing
Sven proceeds to apply glue along one edge of the flange, ensuring a secure bond when clamped into place. He emphasizes that this stage is crucial for maintaining the structural integrity of the flange, which in turn safeguards the living area beneath the canvas when hatches are open.Step 3: Allowing Time to Dry
After securely attaching the first portion of the flange, Sven allows ample time for it to dry before moving forward with additional steps. This patience and precision are key aspects of his successful boatbuilding methods.Step 4: Finishing Touches
Once the flange is fully dried, Sven removes the clamps carefully, ensuring no damage occurs during this process. He then moves on to attaching four more pieces onto these main frames, completing two pairs of flanges for the bulkhead hatches.The Final Touches
While two flanges form the primary support structure around the hatches, Sven mentions there are two additional pieces required at each end to ensure comprehensive protection. This attention to detail highlights his commitment to producing a durable and reliable design. “Sailing is about finding your path, whether it’s across an ocean or within yourself.” – Sven Yrvind In conclusion, making flanges around bulkhead hatches may seem complex at first glance, but by following Sven Yrvind’s meticulous process, enthusiasts can achieve professional-level results. Remember that the journey of boatbuilding is as rewarding as reaching your destination; it tests one’s patience and dedication. For those seeking to embark on this adventure or simply gain more insight into marine craftsmanship, Sven’s wisdom is invaluable.Sven Yrvind, a renowned yacht designer and sailor, shares valuable insights on creating flanges around bulkhead hatches for canvas protection in this enlightening video. By following his expert guidance, boat enthusiasts can ensure their living areas remain secure while allowing unhindered access through the hatches.Step 1: Starting with the Flange
Sven begins by explaining that working on flanges vertically and horizontally is significantly easier than doing so in a flat position. To simplify the process further, he divides the task into two or three steps as suggested by fellow expert “for for.” This approach not only makes it more manageable but also allows for greater precision in crafting each component.Step 2: Applying Glue and Securing
Sven proceeds to apply glue along one edge of the flange, ensuring a secure bond when clamped into place. He emphasizes that this stage is crucial for maintaining the structural integrity of the flange, which in turn safeguards the living area beneath the canvas when hatches are open.Step 3: Allowing Time to Dry
After securely attaching the first portion of the flange, Sven allows ample time for it to dry before moving forward with additional steps. This patience and precision are key aspects of his successful boatbuilding methods.Step 4: Finishing Touches
Once the flange is fully dried, Sven removes the clamps carefully, ensuring no damage occurs during this process. He then moves on to attaching four more pieces onto these main frames, completing two pairs of flanges for the bulkhead hatches.The Final Touches
While two flanges form the primary support structure around the hatches, Sven mentions there are two additional pieces required at each end to ensure comprehensive protection. This attention to detail highlights his commitment to producing a durable and reliable design. “Sailing is about finding your path, whether it’s across an ocean or within yourself.” – Sven Yrvind In conclusion, making flanges around bulkhead hatches may seem complex at first glance, but by following Sven Yrvind’s meticulous process, enthusiasts can achieve professional-level results. Remember that the journey of boatbuilding is as rewarding as reaching your destination; it tests one’s patience and dedication. For those seeking to embark on this adventure or simply gain more insight into marine craftsmanship, Sven’s wisdom is invaluable.Making Flanges Around Bulkhead Hatches for Canvas
Sven Yrvind, a renowned yacht designer and sailor, shares valuable insights on creating flanges around bulkhead hatches for canvas protection in this enlightening video. By following his expert guidance, boat enthusiasts can ensure their living areas remain secure while allowing unhindered access through the hatches.Step 1: Starting with the Flange
Sven begins by explaining that working on flanges vertically and horizontally is significantly easier than doing so in a flat position. To simplify the process further, he divides the task into two or three steps as suggested by fellow expert “for for.” This approach not only makes it more manageable but also allows for greater precision in crafting each component.Step 2: Applying Glue and Securing
Sven proceeds to apply glue along one edge of the flange, ensuring a secure bond when clamped into place. He emphasizes that this stage is crucial for maintaining the structural integrity of the flange, which in turn safeguards the living area beneath the canvas when hatches are open.Step 3: Allowing Time to Dry
After securely attaching the first portion of the flange, Sven allows ample time for it to dry before moving forward with additional steps. This patience and precision are key aspects of his successful boatbuilding methods.Step 4: Finishing Touches
Once the flange is fully dried, Sven removes the clamps carefully, ensuring no damage occurs during this process. He then moves on to attaching four more pieces onto these main frames, completing two pairs of flanges for the bulkhead hatches.The Final Touches
While two flanges form the primary support structure around the hatches, Sven mentions there are two additional pieces required at each end to ensure comprehensive protection. This attention to detail highlights his commitment to producing a durable and reliable design. “Sailing is about finding your path, whether it’s across an ocean or within yourself.” – Sven Yrvind In conclusion, making flanges around bulkhead hatches may seem complex at first glance, but by following Sven Yrvind’s meticulous process, enthusiasts can achieve professional-level results. Remember that the journey of boatbuilding is as rewarding as reaching your destination; it tests one’s patience and dedication. For those seeking to embark on this adventure or simply gain more insight into marine craftsmanship, Sven’s wisdom is invaluable.Once the flange is fully dried, Sven removes the clamps carefully, ensuring no damage occurs during this process. He then moves on to attaching four more pieces onto these main frames, completing two pairs of flanges for the bulkhead hatches.The Final Touches
While two flanges form the primary support structure around the hatches, Sven mentions there are two additional pieces required at each end to ensure comprehensive protection. This attention to detail highlights his commitment to producing a durable and reliable design. “Sailing is about finding your path, whether it’s across an ocean or within yourself.” – Sven Yrvind In conclusion, making flanges around bulkhead hatches may seem complex at first glance, but by following Sven Yrvind’s meticulous process, enthusiasts can achieve professional-level results. Remember that the journey of boatbuilding is as rewarding as reaching your destination; it tests one’s patience and dedication. For those seeking to embark on this adventure or simply gain more insight into marine craftsmanship, Sven’s wisdom is invaluable.Sven begins by explaining that working on flanges vertically and horizontally is significantly easier than doing so in a flat position. To simplify the process further, he divides the task into two or three steps as suggested by fellow expert “for for.” This approach not only makes it more manageable but also allows for greater precision in crafting each component.Step 2: Applying Glue and Securing
Sven proceeds to apply glue along one edge of the flange, ensuring a secure bond when clamped into place. He emphasizes that this stage is crucial for maintaining the structural integrity of the flange, which in turn safeguards the living area beneath the canvas when hatches are open.Step 3: Allowing Time to Dry
After securely attaching the first portion of the flange, Sven allows ample time for it to dry before moving forward with additional steps. This patience and precision are key aspects of his successful boatbuilding methods.Step 4: Finishing Touches
Once the flange is fully dried, Sven removes the clamps carefully, ensuring no damage occurs during this process. He then moves on to attaching four more pieces onto these main frames, completing two pairs of flanges for the bulkhead hatches.The Final Touches
While two flanges form the primary support structure around the hatches, Sven mentions there are two additional pieces required at each end to ensure comprehensive protection. This attention to detail highlights his commitment to producing a durable and reliable design. “Sailing is about finding your path, whether it’s across an ocean or within yourself.” – Sven Yrvind In conclusion, making flanges around bulkhead hatches may seem complex at first glance, but by following Sven Yrvind’s meticulous process, enthusiasts can achieve professional-level results. Remember that the journey of boatbuilding is as rewarding as reaching your destination; it tests one’s patience and dedication. For those seeking to embark on this adventure or simply gain more insight into marine craftsmanship, Sven’s wisdom is invaluable.Sven Yrvind, a renowned yacht designer and sailor, shares valuable insights on creating flanges around bulkhead hatches for canvas protection in this enlightening video. By following his expert guidance, boat enthusiasts can ensure their living areas remain secure while allowing unhindered access through the hatches.Step 1: Starting with the Flange
Sven begins by explaining that working on flanges vertically and horizontally is significantly easier than doing so in a flat position. To simplify the process further, he divides the task into two or three steps as suggested by fellow expert “for for.” This approach not only makes it more manageable but also allows for greater precision in crafting each component.Step 2: Applying Glue and Securing
Sven proceeds to apply glue along one edge of the flange, ensuring a secure bond when clamped into place. He emphasizes that this stage is crucial for maintaining the structural integrity of the flange, which in turn safeguards the living area beneath the canvas when hatches are open.Step 3: Allowing Time to Dry
After securely attaching the first portion of the flange, Sven allows ample time for it to dry before moving forward with additional steps. This patience and precision are key aspects of his successful boatbuilding methods.Step 4: Finishing Touches
Once the flange is fully dried, Sven removes the clamps carefully, ensuring no damage occurs during this process. He then moves on to attaching four more pieces onto these main frames, completing two pairs of flanges for the bulkhead hatches.The Final Touches
While two flanges form the primary support structure around the hatches, Sven mentions there are two additional pieces required at each end to ensure comprehensive protection. This attention to detail highlights his commitment to producing a durable and reliable design. “Sailing is about finding your path, whether it’s across an ocean or within yourself.” – Sven Yrvind In conclusion, making flanges around bulkhead hatches may seem complex at first glance, but by following Sven Yrvind’s meticulous process, enthusiasts can achieve professional-level results. Remember that the journey of boatbuilding is as rewarding as reaching your destination; it tests one’s patience and dedication. For those seeking to embark on this adventure or simply gain more insight into marine craftsmanship, Sven’s wisdom is invaluable.Making Flanges Around Bulkhead Hatches for Canvas
Sven Yrvind, a renowned yacht designer and sailor, shares valuable insights on creating flanges around bulkhead hatches for canvas protection in this enlightening video. By following his expert guidance, boat enthusiasts can ensure their living areas remain secure while allowing unhindered access through the hatches.Step 1: Starting with the Flange
Sven begins by explaining that working on flanges vertically and horizontally is significantly easier than doing so in a flat position. To simplify the process further, he divides the task into two or three steps as suggested by fellow expert “for for.” This approach not only makes it more manageable but also allows for greater precision in crafting each component.Step 2: Applying Glue and Securing
Sven proceeds to apply glue along one edge of the flange, ensuring a secure bond when clamped into place. He emphasizes that this stage is crucial for maintaining the structural integrity of the flange, which in turn safeguards the living area beneath the canvas when hatches are open.Step 3: Allowing Time to Dry
After securely attaching the first portion of the flange, Sven allows ample time for it to dry before moving forward with additional steps. This patience and precision are key aspects of his successful boatbuilding methods.Step 4: Finishing Touches
Once the flange is fully dried, Sven removes the clamps carefully, ensuring no damage occurs during this process. He then moves on to attaching four more pieces onto these main frames, completing two pairs of flanges for the bulkhead hatches.The Final Touches
While two flanges form the primary support structure around the hatches, Sven mentions there are two additional pieces required at each end to ensure comprehensive protection. This attention to detail highlights his commitment to producing a durable and reliable design. “Sailing is about finding your path, whether it’s across an ocean or within yourself.” – Sven Yrvind In conclusion, making flanges around bulkhead hatches may seem complex at first glance, but by following Sven Yrvind’s meticulous process, enthusiasts can achieve professional-level results. Remember that the journey of boatbuilding is as rewarding as reaching your destination; it tests one’s patience and dedication. For those seeking to embark on this adventure or simply gain more insight into marine craftsmanship, Sven’s wisdom is invaluable.Sven proceeds to apply glue along one edge of the flange, ensuring a secure bond when clamped into place. He emphasizes that this stage is crucial for maintaining the structural integrity of the flange, which in turn safeguards the living area beneath the canvas when hatches are open.Step 3: Allowing Time to Dry
After securely attaching the first portion of the flange, Sven allows ample time for it to dry before moving forward with additional steps. This patience and precision are key aspects of his successful boatbuilding methods.Step 4: Finishing Touches
Once the flange is fully dried, Sven removes the clamps carefully, ensuring no damage occurs during this process. He then moves on to attaching four more pieces onto these main frames, completing two pairs of flanges for the bulkhead hatches.The Final Touches
While two flanges form the primary support structure around the hatches, Sven mentions there are two additional pieces required at each end to ensure comprehensive protection. This attention to detail highlights his commitment to producing a durable and reliable design. “Sailing is about finding your path, whether it’s across an ocean or within yourself.” – Sven Yrvind In conclusion, making flanges around bulkhead hatches may seem complex at first glance, but by following Sven Yrvind’s meticulous process, enthusiasts can achieve professional-level results. Remember that the journey of boatbuilding is as rewarding as reaching your destination; it tests one’s patience and dedication. For those seeking to embark on this adventure or simply gain more insight into marine craftsmanship, Sven’s wisdom is invaluable.Sven begins by explaining that working on flanges vertically and horizontally is significantly easier than doing so in a flat position. To simplify the process further, he divides the task into two or three steps as suggested by fellow expert “for for.” This approach not only makes it more manageable but also allows for greater precision in crafting each component.Step 2: Applying Glue and Securing
Sven proceeds to apply glue along one edge of the flange, ensuring a secure bond when clamped into place. He emphasizes that this stage is crucial for maintaining the structural integrity of the flange, which in turn safeguards the living area beneath the canvas when hatches are open.Step 3: Allowing Time to Dry
After securely attaching the first portion of the flange, Sven allows ample time for it to dry before moving forward with additional steps. This patience and precision are key aspects of his successful boatbuilding methods.Step 4: Finishing Touches
Once the flange is fully dried, Sven removes the clamps carefully, ensuring no damage occurs during this process. He then moves on to attaching four more pieces onto these main frames, completing two pairs of flanges for the bulkhead hatches.The Final Touches
While two flanges form the primary support structure around the hatches, Sven mentions there are two additional pieces required at each end to ensure comprehensive protection. This attention to detail highlights his commitment to producing a durable and reliable design. “Sailing is about finding your path, whether it’s across an ocean or within yourself.” – Sven Yrvind In conclusion, making flanges around bulkhead hatches may seem complex at first glance, but by following Sven Yrvind’s meticulous process, enthusiasts can achieve professional-level results. Remember that the journey of boatbuilding is as rewarding as reaching your destination; it tests one’s patience and dedication. For those seeking to embark on this adventure or simply gain more insight into marine craftsmanship, Sven’s wisdom is invaluable.Sven Yrvind, a renowned yacht designer and sailor, shares valuable insights on creating flanges around bulkhead hatches for canvas protection in this enlightening video. By following his expert guidance, boat enthusiasts can ensure their living areas remain secure while allowing unhindered access through the hatches.Step 1: Starting with the Flange
Sven begins by explaining that working on flanges vertically and horizontally is significantly easier than doing so in a flat position. To simplify the process further, he divides the task into two or three steps as suggested by fellow expert “for for.” This approach not only makes it more manageable but also allows for greater precision in crafting each component.Step 2: Applying Glue and Securing
Sven proceeds to apply glue along one edge of the flange, ensuring a secure bond when clamped into place. He emphasizes that this stage is crucial for maintaining the structural integrity of the flange, which in turn safeguards the living area beneath the canvas when hatches are open.Step 3: Allowing Time to Dry
After securely attaching the first portion of the flange, Sven allows ample time for it to dry before moving forward with additional steps. This patience and precision are key aspects of his successful boatbuilding methods.Step 4: Finishing Touches
Once the flange is fully dried, Sven removes the clamps carefully, ensuring no damage occurs during this process. He then moves on to attaching four more pieces onto these main frames, completing two pairs of flanges for the bulkhead hatches.The Final Touches
While two flanges form the primary support structure around the hatches, Sven mentions there are two additional pieces required at each end to ensure comprehensive protection. This attention to detail highlights his commitment to producing a durable and reliable design. “Sailing is about finding your path, whether it’s across an ocean or within yourself.” – Sven Yrvind In conclusion, making flanges around bulkhead hatches may seem complex at first glance, but by following Sven Yrvind’s meticulous process, enthusiasts can achieve professional-level results. Remember that the journey of boatbuilding is as rewarding as reaching your destination; it tests one’s patience and dedication. For those seeking to embark on this adventure or simply gain more insight into marine craftsmanship, Sven’s wisdom is invaluable.Making Flanges Around Bulkhead Hatches for Canvas
Sven Yrvind, a renowned yacht designer and sailor, shares valuable insights on creating flanges around bulkhead hatches for canvas protection in this enlightening video. By following his expert guidance, boat enthusiasts can ensure their living areas remain secure while allowing unhindered access through the hatches.Step 1: Starting with the Flange
Sven begins by explaining that working on flanges vertically and horizontally is significantly easier than doing so in a flat position. To simplify the process further, he divides the task into two or three steps as suggested by fellow expert “for for.” This approach not only makes it more manageable but also allows for greater precision in crafting each component.Step 2: Applying Glue and Securing
Sven proceeds to apply glue along one edge of the flange, ensuring a secure bond when clamped into place. He emphasizes that this stage is crucial for maintaining the structural integrity of the flange, which in turn safeguards the living area beneath the canvas when hatches are open.Step 3: Allowing Time to Dry
After securely attaching the first portion of the flange, Sven allows ample time for it to dry before moving forward with additional steps. This patience and precision are key aspects of his successful boatbuilding methods.Step 4: Finishing Touches
Once the flange is fully dried, Sven removes the clamps carefully, ensuring no damage occurs during this process. He then moves on to attaching four more pieces onto these main frames, completing two pairs of flanges for the bulkhead hatches.The Final Touches
While two flanges form the primary support structure around the hatches, Sven mentions there are two additional pieces required at each end to ensure comprehensive protection. This attention to detail highlights his commitment to producing a durable and reliable design. “Sailing is about finding your path, whether it’s across an ocean or within yourself.” – Sven Yrvind In conclusion, making flanges around bulkhead hatches may seem complex at first glance, but by following Sven Yrvind’s meticulous process, enthusiasts can achieve professional-level results. Remember that the journey of boatbuilding is as rewarding as reaching your destination; it tests one’s patience and dedication. For those seeking to embark on this adventure or simply gain more insight into marine craftsmanship, Sven’s wisdom is invaluable.Once the flange is fully dried, Sven removes the clamps carefully, ensuring no damage occurs during this process. He then moves on to attaching four more pieces onto these main frames, completing two pairs of flanges for the bulkhead hatches.The Final Touches
While two flanges form the primary support structure around the hatches, Sven mentions there are two additional pieces required at each end to ensure comprehensive protection. This attention to detail highlights his commitment to producing a durable and reliable design. “Sailing is about finding your path, whether it’s across an ocean or within yourself.” – Sven Yrvind In conclusion, making flanges around bulkhead hatches may seem complex at first glance, but by following Sven Yrvind’s meticulous process, enthusiasts can achieve professional-level results. Remember that the journey of boatbuilding is as rewarding as reaching your destination; it tests one’s patience and dedication. For those seeking to embark on this adventure or simply gain more insight into marine craftsmanship, Sven’s wisdom is invaluable.Sven proceeds to apply glue along one edge of the flange, ensuring a secure bond when clamped into place. He emphasizes that this stage is crucial for maintaining the structural integrity of the flange, which in turn safeguards the living area beneath the canvas when hatches are open.Step 3: Allowing Time to Dry
After securely attaching the first portion of the flange, Sven allows ample time for it to dry before moving forward with additional steps. This patience and precision are key aspects of his successful boatbuilding methods.Step 4: Finishing Touches
Once the flange is fully dried, Sven removes the clamps carefully, ensuring no damage occurs during this process. He then moves on to attaching four more pieces onto these main frames, completing two pairs of flanges for the bulkhead hatches.The Final Touches
While two flanges form the primary support structure around the hatches, Sven mentions there are two additional pieces required at each end to ensure comprehensive protection. This attention to detail highlights his commitment to producing a durable and reliable design. “Sailing is about finding your path, whether it’s across an ocean or within yourself.” – Sven Yrvind In conclusion, making flanges around bulkhead hatches may seem complex at first glance, but by following Sven Yrvind’s meticulous process, enthusiasts can achieve professional-level results. Remember that the journey of boatbuilding is as rewarding as reaching your destination; it tests one’s patience and dedication. For those seeking to embark on this adventure or simply gain more insight into marine craftsmanship, Sven’s wisdom is invaluable.Sven begins by explaining that working on flanges vertically and horizontally is significantly easier than doing so in a flat position. To simplify the process further, he divides the task into two or three steps as suggested by fellow expert “for for.” This approach not only makes it more manageable but also allows for greater precision in crafting each component.Step 2: Applying Glue and Securing
Sven proceeds to apply glue along one edge of the flange, ensuring a secure bond when clamped into place. He emphasizes that this stage is crucial for maintaining the structural integrity of the flange, which in turn safeguards the living area beneath the canvas when hatches are open.Step 3: Allowing Time to Dry
After securely attaching the first portion of the flange, Sven allows ample time for it to dry before moving forward with additional steps. This patience and precision are key aspects of his successful boatbuilding methods.Step 4: Finishing Touches
Once the flange is fully dried, Sven removes the clamps carefully, ensuring no damage occurs during this process. He then moves on to attaching four more pieces onto these main frames, completing two pairs of flanges for the bulkhead hatches.The Final Touches
While two flanges form the primary support structure around the hatches, Sven mentions there are two additional pieces required at each end to ensure comprehensive protection. This attention to detail highlights his commitment to producing a durable and reliable design. “Sailing is about finding your path, whether it’s across an ocean or within yourself.” – Sven Yrvind In conclusion, making flanges around bulkhead hatches may seem complex at first glance, but by following Sven Yrvind’s meticulous process, enthusiasts can achieve professional-level results. Remember that the journey of boatbuilding is as rewarding as reaching your destination; it tests one’s patience and dedication. For those seeking to embark on this adventure or simply gain more insight into marine craftsmanship, Sven’s wisdom is invaluable.Sven Yrvind, a renowned yacht designer and sailor, shares valuable insights on creating flanges around bulkhead hatches for canvas protection in this enlightening video. By following his expert guidance, boat enthusiasts can ensure their living areas remain secure while allowing unhindered access through the hatches.Step 1: Starting with the Flange
Sven begins by explaining that working on flanges vertically and horizontally is significantly easier than doing so in a flat position. To simplify the process further, he divides the task into two or three steps as suggested by fellow expert “for for.” This approach not only makes it more manageable but also allows for greater precision in crafting each component.Step 2: Applying Glue and Securing
Sven proceeds to apply glue along one edge of the flange, ensuring a secure bond when clamped into place. He emphasizes that this stage is crucial for maintaining the structural integrity of the flange, which in turn safeguards the living area beneath the canvas when hatches are open.Step 3: Allowing Time to Dry
After securely attaching the first portion of the flange, Sven allows ample time for it to dry before moving forward with additional steps. This patience and precision are key aspects of his successful boatbuilding methods.Step 4: Finishing Touches
Once the flange is fully dried, Sven removes the clamps carefully, ensuring no damage occurs during this process. He then moves on to attaching four more pieces onto these main frames, completing two pairs of flanges for the bulkhead hatches.The Final Touches
While two flanges form the primary support structure around the hatches, Sven mentions there are two additional pieces required at each end to ensure comprehensive protection. This attention to detail highlights his commitment to producing a durable and reliable design. “Sailing is about finding your path, whether it’s across an ocean or within yourself.” – Sven Yrvind In conclusion, making flanges around bulkhead hatches may seem complex at first glance, but by following Sven Yrvind’s meticulous process, enthusiasts can achieve professional-level results. Remember that the journey of boatbuilding is as rewarding as reaching your destination; it tests one’s patience and dedication. For those seeking to embark on this adventure or simply gain more insight into marine craftsmanship, Sven’s wisdom is invaluable.Making Flanges Around Bulkhead Hatches for Canvas
Sven Yrvind, a renowned yacht designer and sailor, shares valuable insights on creating flanges around bulkhead hatches for canvas protection in this enlightening video. By following his expert guidance, boat enthusiasts can ensure their living areas remain secure while allowing unhindered access through the hatches.Step 1: Starting with the Flange
Sven begins by explaining that working on flanges vertically and horizontally is significantly easier than doing so in a flat position. To simplify the process further, he divides the task into two or three steps as suggested by fellow expert “for for.” This approach not only makes it more manageable but also allows for greater precision in crafting each component.Step 2: Applying Glue and Securing
Sven proceeds to apply glue along one edge of the flange, ensuring a secure bond when clamped into place. He emphasizes that this stage is crucial for maintaining the structural integrity of the flange, which in turn safeguards the living area beneath the canvas when hatches are open.Step 3: Allowing Time to Dry
After securely attaching the first portion of the flange, Sven allows ample time for it to dry before moving forward with additional steps. This patience and precision are key aspects of his successful boatbuilding methods.Step 4: Finishing Touches
Once the flange is fully dried, Sven removes the clamps carefully, ensuring no damage occurs during this process. He then moves on to attaching four more pieces onto these main frames, completing two pairs of flanges for the bulkhead hatches.The Final Touches
While two flanges form the primary support structure around the hatches, Sven mentions there are two additional pieces required at each end to ensure comprehensive protection. This attention to detail highlights his commitment to producing a durable and reliable design. “Sailing is about finding your path, whether it’s across an ocean or within yourself.” – Sven Yrvind In conclusion, making flanges around bulkhead hatches may seem complex at first glance, but by following Sven Yrvind’s meticulous process, enthusiasts can achieve professional-level results. Remember that the journey of boatbuilding is as rewarding as reaching your destination; it tests one’s patience and dedication. For those seeking to embark on this adventure or simply gain more insight into marine craftsmanship, Sven’s wisdom is invaluable.After securely attaching the first portion of the flange, Sven allows ample time for it to dry before moving forward with additional steps. This patience and precision are key aspects of his successful boatbuilding methods.Step 4: Finishing Touches
Once the flange is fully dried, Sven removes the clamps carefully, ensuring no damage occurs during this process. He then moves on to attaching four more pieces onto these main frames, completing two pairs of flanges for the bulkhead hatches.The Final Touches
While two flanges form the primary support structure around the hatches, Sven mentions there are two additional pieces required at each end to ensure comprehensive protection. This attention to detail highlights his commitment to producing a durable and reliable design. “Sailing is about finding your path, whether it’s across an ocean or within yourself.” – Sven Yrvind In conclusion, making flanges around bulkhead hatches may seem complex at first glance, but by following Sven Yrvind’s meticulous process, enthusiasts can achieve professional-level results. Remember that the journey of boatbuilding is as rewarding as reaching your destination; it tests one’s patience and dedication. For those seeking to embark on this adventure or simply gain more insight into marine craftsmanship, Sven’s wisdom is invaluable.Sven proceeds to apply glue along one edge of the flange, ensuring a secure bond when clamped into place. He emphasizes that this stage is crucial for maintaining the structural integrity of the flange, which in turn safeguards the living area beneath the canvas when hatches are open.Step 3: Allowing Time to Dry
After securely attaching the first portion of the flange, Sven allows ample time for it to dry before moving forward with additional steps. This patience and precision are key aspects of his successful boatbuilding methods.Step 4: Finishing Touches
Once the flange is fully dried, Sven removes the clamps carefully, ensuring no damage occurs during this process. He then moves on to attaching four more pieces onto these main frames, completing two pairs of flanges for the bulkhead hatches.The Final Touches
While two flanges form the primary support structure around the hatches, Sven mentions there are two additional pieces required at each end to ensure comprehensive protection. This attention to detail highlights his commitment to producing a durable and reliable design. “Sailing is about finding your path, whether it’s across an ocean or within yourself.” – Sven Yrvind In conclusion, making flanges around bulkhead hatches may seem complex at first glance, but by following Sven Yrvind’s meticulous process, enthusiasts can achieve professional-level results. Remember that the journey of boatbuilding is as rewarding as reaching your destination; it tests one’s patience and dedication. For those seeking to embark on this adventure or simply gain more insight into marine craftsmanship, Sven’s wisdom is invaluable.Sven begins by explaining that working on flanges vertically and horizontally is significantly easier than doing so in a flat position. To simplify the process further, he divides the task into two or three steps as suggested by fellow expert “for for.” This approach not only makes it more manageable but also allows for greater precision in crafting each component.Step 2: Applying Glue and Securing
Sven proceeds to apply glue along one edge of the flange, ensuring a secure bond when clamped into place. He emphasizes that this stage is crucial for maintaining the structural integrity of the flange, which in turn safeguards the living area beneath the canvas when hatches are open.Step 3: Allowing Time to Dry
After securely attaching the first portion of the flange, Sven allows ample time for it to dry before moving forward with additional steps. This patience and precision are key aspects of his successful boatbuilding methods.Step 4: Finishing Touches
Once the flange is fully dried, Sven removes the clamps carefully, ensuring no damage occurs during this process. He then moves on to attaching four more pieces onto these main frames, completing two pairs of flanges for the bulkhead hatches.The Final Touches
While two flanges form the primary support structure around the hatches, Sven mentions there are two additional pieces required at each end to ensure comprehensive protection. This attention to detail highlights his commitment to producing a durable and reliable design. “Sailing is about finding your path, whether it’s across an ocean or within yourself.” – Sven Yrvind In conclusion, making flanges around bulkhead hatches may seem complex at first glance, but by following Sven Yrvind’s meticulous process, enthusiasts can achieve professional-level results. Remember that the journey of boatbuilding is as rewarding as reaching your destination; it tests one’s patience and dedication. For those seeking to embark on this adventure or simply gain more insight into marine craftsmanship, Sven’s wisdom is invaluable.Sven Yrvind, a renowned yacht designer and sailor, shares valuable insights on creating flanges around bulkhead hatches for canvas protection in this enlightening video. By following his expert guidance, boat enthusiasts can ensure their living areas remain secure while allowing unhindered access through the hatches.Step 1: Starting with the Flange
Sven begins by explaining that working on flanges vertically and horizontally is significantly easier than doing so in a flat position. To simplify the process further, he divides the task into two or three steps as suggested by fellow expert “for for.” This approach not only makes it more manageable but also allows for greater precision in crafting each component.Step 2: Applying Glue and Securing
Sven proceeds to apply glue along one edge of the flange, ensuring a secure bond when clamped into place. He emphasizes that this stage is crucial for maintaining the structural integrity of the flange, which in turn safeguards the living area beneath the canvas when hatches are open.Step 3: Allowing Time to Dry
After securely attaching the first portion of the flange, Sven allows ample time for it to dry before moving forward with additional steps. This patience and precision are key aspects of his successful boatbuilding methods.Step 4: Finishing Touches
Once the flange is fully dried, Sven removes the clamps carefully, ensuring no damage occurs during this process. He then moves on to attaching four more pieces onto these main frames, completing two pairs of flanges for the bulkhead hatches.The Final Touches
While two flanges form the primary support structure around the hatches, Sven mentions there are two additional pieces required at each end to ensure comprehensive protection. This attention to detail highlights his commitment to producing a durable and reliable design. “Sailing is about finding your path, whether it’s across an ocean or within yourself.” – Sven Yrvind In conclusion, making flanges around bulkhead hatches may seem complex at first glance, but by following Sven Yrvind’s meticulous process, enthusiasts can achieve professional-level results. Remember that the journey of boatbuilding is as rewarding as reaching your destination; it tests one’s patience and dedication. For those seeking to embark on this adventure or simply gain more insight into marine craftsmanship, Sven’s wisdom is invaluable.Making Flanges Around Bulkhead Hatches for Canvas
Sven Yrvind, a renowned yacht designer and sailor, shares valuable insights on creating flanges around bulkhead hatches for canvas protection in this enlightening video. By following his expert guidance, boat enthusiasts can ensure their living areas remain secure while allowing unhindered access through the hatches.Step 1: Starting with the Flange
Sven begins by explaining that working on flanges vertically and horizontally is significantly easier than doing so in a flat position. To simplify the process further, he divides the task into two or three steps as suggested by fellow expert “for for.” This approach not only makes it more manageable but also allows for greater precision in crafting each component.Step 2: Applying Glue and Securing
Sven proceeds to apply glue along one edge of the flange, ensuring a secure bond when clamped into place. He emphasizes that this stage is crucial for maintaining the structural integrity of the flange, which in turn safeguards the living area beneath the canvas when hatches are open.Step 3: Allowing Time to Dry
After securely attaching the first portion of the flange, Sven allows ample time for it to dry before moving forward with additional steps. This patience and precision are key aspects of his successful boatbuilding methods.Step 4: Finishing Touches
Once the flange is fully dried, Sven removes the clamps carefully, ensuring no damage occurs during this process. He then moves on to attaching four more pieces onto these main frames, completing two pairs of flanges for the bulkhead hatches.The Final Touches
While two flanges form the primary support structure around the hatches, Sven mentions there are two additional pieces required at each end to ensure comprehensive protection. This attention to detail highlights his commitment to producing a durable and reliable design. “Sailing is about finding your path, whether it’s across an ocean or within yourself.” – Sven Yrvind In conclusion, making flanges around bulkhead hatches may seem complex at first glance, but by following Sven Yrvind’s meticulous process, enthusiasts can achieve professional-level results. Remember that the journey of boatbuilding is as rewarding as reaching your destination; it tests one’s patience and dedication. For those seeking to embark on this adventure or simply gain more insight into marine craftsmanship, Sven’s wisdom is invaluable.Once the flange is fully dried, Sven removes the clamps carefully, ensuring no damage occurs during this process. He then moves on to attaching four more pieces onto these main frames, completing two pairs of flanges for the bulkhead hatches.The Final Touches
While two flanges form the primary support structure around the hatches, Sven mentions there are two additional pieces required at each end to ensure comprehensive protection. This attention to detail highlights his commitment to producing a durable and reliable design. “Sailing is about finding your path, whether it’s across an ocean or within yourself.” – Sven Yrvind In conclusion, making flanges around bulkhead hatches may seem complex at first glance, but by following Sven Yrvind’s meticulous process, enthusiasts can achieve professional-level results. Remember that the journey of boatbuilding is as rewarding as reaching your destination; it tests one’s patience and dedication. For those seeking to embark on this adventure or simply gain more insight into marine craftsmanship, Sven’s wisdom is invaluable.After securely attaching the first portion of the flange, Sven allows ample time for it to dry before moving forward with additional steps. This patience and precision are key aspects of his successful boatbuilding methods.Step 4: Finishing Touches
Once the flange is fully dried, Sven removes the clamps carefully, ensuring no damage occurs during this process. He then moves on to attaching four more pieces onto these main frames, completing two pairs of flanges for the bulkhead hatches.The Final Touches
While two flanges form the primary support structure around the hatches, Sven mentions there are two additional pieces required at each end to ensure comprehensive protection. This attention to detail highlights his commitment to producing a durable and reliable design. “Sailing is about finding your path, whether it’s across an ocean or within yourself.” – Sven Yrvind In conclusion, making flanges around bulkhead hatches may seem complex at first glance, but by following Sven Yrvind’s meticulous process, enthusiasts can achieve professional-level results. Remember that the journey of boatbuilding is as rewarding as reaching your destination; it tests one’s patience and dedication. For those seeking to embark on this adventure or simply gain more insight into marine craftsmanship, Sven’s wisdom is invaluable.Sven proceeds to apply glue along one edge of the flange, ensuring a secure bond when clamped into place. He emphasizes that this stage is crucial for maintaining the structural integrity of the flange, which in turn safeguards the living area beneath the canvas when hatches are open.Step 3: Allowing Time to Dry
After securely attaching the first portion of the flange, Sven allows ample time for it to dry before moving forward with additional steps. This patience and precision are key aspects of his successful boatbuilding methods.Step 4: Finishing Touches
Once the flange is fully dried, Sven removes the clamps carefully, ensuring no damage occurs during this process. He then moves on to attaching four more pieces onto these main frames, completing two pairs of flanges for the bulkhead hatches.The Final Touches
While two flanges form the primary support structure around the hatches, Sven mentions there are two additional pieces required at each end to ensure comprehensive protection. This attention to detail highlights his commitment to producing a durable and reliable design. “Sailing is about finding your path, whether it’s across an ocean or within yourself.” – Sven Yrvind In conclusion, making flanges around bulkhead hatches may seem complex at first glance, but by following Sven Yrvind’s meticulous process, enthusiasts can achieve professional-level results. Remember that the journey of boatbuilding is as rewarding as reaching your destination; it tests one’s patience and dedication. For those seeking to embark on this adventure or simply gain more insight into marine craftsmanship, Sven’s wisdom is invaluable.Sven begins by explaining that working on flanges vertically and horizontally is significantly easier than doing so in a flat position. To simplify the process further, he divides the task into two or three steps as suggested by fellow expert “for for.” This approach not only makes it more manageable but also allows for greater precision in crafting each component.Step 2: Applying Glue and Securing
Sven proceeds to apply glue along one edge of the flange, ensuring a secure bond when clamped into place. He emphasizes that this stage is crucial for maintaining the structural integrity of the flange, which in turn safeguards the living area beneath the canvas when hatches are open.Step 3: Allowing Time to Dry
After securely attaching the first portion of the flange, Sven allows ample time for it to dry before moving forward with additional steps. This patience and precision are key aspects of his successful boatbuilding methods.Step 4: Finishing Touches
Once the flange is fully dried, Sven removes the clamps carefully, ensuring no damage occurs during this process. He then moves on to attaching four more pieces onto these main frames, completing two pairs of flanges for the bulkhead hatches.The Final Touches
While two flanges form the primary support structure around the hatches, Sven mentions there are two additional pieces required at each end to ensure comprehensive protection. This attention to detail highlights his commitment to producing a durable and reliable design. “Sailing is about finding your path, whether it’s across an ocean or within yourself.” – Sven Yrvind In conclusion, making flanges around bulkhead hatches may seem complex at first glance, but by following Sven Yrvind’s meticulous process, enthusiasts can achieve professional-level results. Remember that the journey of boatbuilding is as rewarding as reaching your destination; it tests one’s patience and dedication. For those seeking to embark on this adventure or simply gain more insight into marine craftsmanship, Sven’s wisdom is invaluable.Sven Yrvind, a renowned yacht designer and sailor, shares valuable insights on creating flanges around bulkhead hatches for canvas protection in this enlightening video. By following his expert guidance, boat enthusiasts can ensure their living areas remain secure while allowing unhindered access through the hatches.Step 1: Starting with the Flange
Sven begins by explaining that working on flanges vertically and horizontally is significantly easier than doing so in a flat position. To simplify the process further, he divides the task into two or three steps as suggested by fellow expert “for for.” This approach not only makes it more manageable but also allows for greater precision in crafting each component.Step 2: Applying Glue and Securing
Sven proceeds to apply glue along one edge of the flange, ensuring a secure bond when clamped into place. He emphasizes that this stage is crucial for maintaining the structural integrity of the flange, which in turn safeguards the living area beneath the canvas when hatches are open.Step 3: Allowing Time to Dry
After securely attaching the first portion of the flange, Sven allows ample time for it to dry before moving forward with additional steps. This patience and precision are key aspects of his successful boatbuilding methods.Step 4: Finishing Touches
Once the flange is fully dried, Sven removes the clamps carefully, ensuring no damage occurs during this process. He then moves on to attaching four more pieces onto these main frames, completing two pairs of flanges for the bulkhead hatches.The Final Touches
While two flanges form the primary support structure around the hatches, Sven mentions there are two additional pieces required at each end to ensure comprehensive protection. This attention to detail highlights his commitment to producing a durable and reliable design. “Sailing is about finding your path, whether it’s across an ocean or within yourself.” – Sven Yrvind In conclusion, making flanges around bulkhead hatches may seem complex at first glance, but by following Sven Yrvind’s meticulous process, enthusiasts can achieve professional-level results. Remember that the journey of boatbuilding is as rewarding as reaching your destination; it tests one’s patience and dedication. For those seeking to embark on this adventure or simply gain more insight into marine craftsmanship, Sven’s wisdom is invaluable.Making Flanges Around Bulkhead Hatches for Canvas
Sven Yrvind, a renowned yacht designer and sailor, shares valuable insights on creating flanges around bulkhead hatches for canvas protection in this enlightening video. By following his expert guidance, boat enthusiasts can ensure their living areas remain secure while allowing unhindered access through the hatches.Step 1: Starting with the Flange
Sven begins by explaining that working on flanges vertically and horizontally is significantly easier than doing so in a flat position. To simplify the process further, he divides the task into two or three steps as suggested by fellow expert “for for.” This approach not only makes it more manageable but also allows for greater precision in crafting each component.Step 2: Applying Glue and Securing
Sven proceeds to apply glue along one edge of the flange, ensuring a secure bond when clamped into place. He emphasizes that this stage is crucial for maintaining the structural integrity of the flange, which in turn safeguards the living area beneath the canvas when hatches are open.Step 3: Allowing Time to Dry
After securely attaching the first portion of the flange, Sven allows ample time for it to dry before moving forward with additional steps. This patience and precision are key aspects of his successful boatbuilding methods.Step 4: Finishing Touches
Once the flange is fully dried, Sven removes the clamps carefully, ensuring no damage occurs during this process. He then moves on to attaching four more pieces onto these main frames, completing two pairs of flanges for the bulkhead hatches.The Final Touches
While two flanges form the primary support structure around the hatches, Sven mentions there are two additional pieces required at each end to ensure comprehensive protection. This attention to detail highlights his commitment to producing a durable and reliable design. “Sailing is about finding your path, whether it’s across an ocean or within yourself.” – Sven Yrvind In conclusion, making flanges around bulkhead hatches may seem complex at first glance, but by following Sven Yrvind’s meticulous process, enthusiasts can achieve professional-level results. Remember that the journey of boatbuilding is as rewarding as reaching your destination; it tests one’s patience and dedication. For those seeking to embark on this adventure or simply gain more insight into marine craftsmanship, Sven’s wisdom is invaluable.After securely attaching the first portion of the flange, Sven allows ample time for it to dry before moving forward with additional steps. This patience and precision are key aspects of his successful boatbuilding methods.Step 4: Finishing Touches
Once the flange is fully dried, Sven removes the clamps carefully, ensuring no damage occurs during this process. He then moves on to attaching four more pieces onto these main frames, completing two pairs of flanges for the bulkhead hatches.The Final Touches
While two flanges form the primary support structure around the hatches, Sven mentions there are two additional pieces required at each end to ensure comprehensive protection. This attention to detail highlights his commitment to producing a durable and reliable design. “Sailing is about finding your path, whether it’s across an ocean or within yourself.” – Sven Yrvind In conclusion, making flanges around bulkhead hatches may seem complex at first glance, but by following Sven Yrvind’s meticulous process, enthusiasts can achieve professional-level results. Remember that the journey of boatbuilding is as rewarding as reaching your destination; it tests one’s patience and dedication. For those seeking to embark on this adventure or simply gain more insight into marine craftsmanship, Sven’s wisdom is invaluable.Sven begins by explaining that working on flanges vertically and horizontally is significantly easier than doing so in a flat position. To simplify the process further, he divides the task into two or three steps as suggested by fellow expert “for for.” This approach not only makes it more manageable but also allows for greater precision in crafting each component.Step 2: Applying Glue and Securing
Sven proceeds to apply glue along one edge of the flange, ensuring a secure bond when clamped into place. He emphasizes that this stage is crucial for maintaining the structural integrity of the flange, which in turn safeguards the living area beneath the canvas when hatches are open.Step 3: Allowing Time to Dry
After securely attaching the first portion of the flange, Sven allows ample time for it to dry before moving forward with additional steps. This patience and precision are key aspects of his successful boatbuilding methods.Step 4: Finishing Touches
Once the flange is fully dried, Sven removes the clamps carefully, ensuring no damage occurs during this process. He then moves on to attaching four more pieces onto these main frames, completing two pairs of flanges for the bulkhead hatches.The Final Touches
While two flanges form the primary support structure around the hatches, Sven mentions there are two additional pieces required at each end to ensure comprehensive protection. This attention to detail highlights his commitment to producing a durable and reliable design. “Sailing is about finding your path, whether it’s across an ocean or within yourself.” – Sven Yrvind In conclusion, making flanges around bulkhead hatches may seem complex at first glance, but by following Sven Yrvind’s meticulous process, enthusiasts can achieve professional-level results. Remember that the journey of boatbuilding is as rewarding as reaching your destination; it tests one’s patience and dedication. For those seeking to embark on this adventure or simply gain more insight into marine craftsmanship, Sven’s wisdom is invaluable.Sven Yrvind, a renowned yacht designer and sailor, shares valuable insights on creating flanges around bulkhead hatches for canvas protection in this enlightening video. By following his expert guidance, boat enthusiasts can ensure their living areas remain secure while allowing unhindered access through the hatches.Step 1: Starting with the Flange
Sven begins by explaining that working on flanges vertically and horizontally is significantly easier than doing so in a flat position. To simplify the process further, he divides the task into two or three steps as suggested by fellow expert “for for.” This approach not only makes it more manageable but also allows for greater precision in crafting each component.Step 2: Applying Glue and Securing
Sven proceeds to apply glue along one edge of the flange, ensuring a secure bond when clamped into place. He emphasizes that this stage is crucial for maintaining the structural integrity of the flange, which in turn safeguards the living area beneath the canvas when hatches are open.Step 3: Allowing Time to Dry
After securely attaching the first portion of the flange, Sven allows ample time for it to dry before moving forward with additional steps. This patience and precision are key aspects of his successful boatbuilding methods.Step 4: Finishing Touches
Once the flange is fully dried, Sven removes the clamps carefully, ensuring no damage occurs during this process. He then moves on to attaching four more pieces onto these main frames, completing two pairs of flanges for the bulkhead hatches.The Final Touches
While two flanges form the primary support structure around the hatches, Sven mentions there are two additional pieces required at each end to ensure comprehensive protection. This attention to detail highlights his commitment to producing a durable and reliable design. “Sailing is about finding your path, whether it’s across an ocean or within yourself.” – Sven Yrvind In conclusion, making flanges around bulkhead hatches may seem complex at first glance, but by following Sven Yrvind’s meticulous process, enthusiasts can achieve professional-level results. Remember that the journey of boatbuilding is as rewarding as reaching your destination; it tests one’s patience and dedication. For those seeking to embark on this adventure or simply gain more insight into marine craftsmanship, Sven’s wisdom is invaluable.Making Flanges Around Bulkhead Hatches for Canvas
Sven Yrvind, a renowned yacht designer and sailor, shares valuable insights on creating flanges around bulkhead hatches for canvas protection in this enlightening video. By following his expert guidance, boat enthusiasts can ensure their living areas remain secure while allowing unhindered access through the hatches.Step 1: Starting with the Flange
Sven begins by explaining that working on flanges vertically and horizontally is significantly easier than doing so in a flat position. To simplify the process further, he divides the task into two or three steps as suggested by fellow expert “for for.” This approach not only makes it more manageable but also allows for greater precision in crafting each component.Step 2: Applying Glue and Securing
Sven proceeds to apply glue along one edge of the flange, ensuring a secure bond when clamped into place. He emphasizes that this stage is crucial for maintaining the structural integrity of the flange, which in turn safeguards the living area beneath the canvas when hatches are open.Step 3: Allowing Time to Dry
After securely attaching the first portion of the flange, Sven allows ample time for it to dry before moving forward with additional steps. This patience and precision are key aspects of his successful boatbuilding methods.Step 4: Finishing Touches
Once the flange is fully dried, Sven removes the clamps carefully, ensuring no damage occurs during this process. He then moves on to attaching four more pieces onto these main frames, completing two pairs of flanges for the bulkhead hatches.The Final Touches
While two flanges form the primary support structure around the hatches, Sven mentions there are two additional pieces required at each end to ensure comprehensive protection. This attention to detail highlights his commitment to producing a durable and reliable design. “Sailing is about finding your path, whether it’s across an ocean or within yourself.” – Sven Yrvind In conclusion, making flanges around bulkhead hatches may seem complex at first glance, but by following Sven Yrvind’s meticulous process, enthusiasts can achieve professional-level results. Remember that the journey of boatbuilding is as rewarding as reaching your destination; it tests one’s patience and dedication. For those seeking to embark on this adventure or simply gain more insight into marine craftsmanship, Sven’s wisdom is invaluable.Sven proceeds to apply glue along one edge of the flange, ensuring a secure bond when clamped into place. He emphasizes that this stage is crucial for maintaining the structural integrity of the flange, which in turn safeguards the living area beneath the canvas when hatches are open.Step 3: Allowing Time to Dry
After securely attaching the first portion of the flange, Sven allows ample time for it to dry before moving forward with additional steps. This patience and precision are key aspects of his successful boatbuilding methods.Step 4: Finishing Touches
Once the flange is fully dried, Sven removes the clamps carefully, ensuring no damage occurs during this process. He then moves on to attaching four more pieces onto these main frames, completing two pairs of flanges for the bulkhead hatches.The Final Touches
While two flanges form the primary support structure around the hatches, Sven mentions there are two additional pieces required at each end to ensure comprehensive protection. This attention to detail highlights his commitment to producing a durable and reliable design. “Sailing is about finding your path, whether it’s across an ocean or within yourself.” – Sven Yrvind In conclusion, making flanges around bulkhead hatches may seem complex at first glance, but by following Sven Yrvind’s meticulous process, enthusiasts can achieve professional-level results. Remember that the journey of boatbuilding is as rewarding as reaching your destination; it tests one’s patience and dedication. For those seeking to embark on this adventure or simply gain more insight into marine craftsmanship, Sven’s wisdom is invaluable.Sven begins by explaining that working on flanges vertically and horizontally is significantly easier than doing so in a flat position. To simplify the process further, he divides the task into two or three steps as suggested by fellow expert “for for.” This approach not only makes it more manageable but also allows for greater precision in crafting each component.Step 2: Applying Glue and Securing
Sven proceeds to apply glue along one edge of the flange, ensuring a secure bond when clamped into place. He emphasizes that this stage is crucial for maintaining the structural integrity of the flange, which in turn safeguards the living area beneath the canvas when hatches are open.Step 3: Allowing Time to Dry
After securely attaching the first portion of the flange, Sven allows ample time for it to dry before moving forward with additional steps. This patience and precision are key aspects of his successful boatbuilding methods.Step 4: Finishing Touches
Once the flange is fully dried, Sven removes the clamps carefully, ensuring no damage occurs during this process. He then moves on to attaching four more pieces onto these main frames, completing two pairs of flanges for the bulkhead hatches.The Final Touches
While two flanges form the primary support structure around the hatches, Sven mentions there are two additional pieces required at each end to ensure comprehensive protection. This attention to detail highlights his commitment to producing a durable and reliable design. “Sailing is about finding your path, whether it’s across an ocean or within yourself.” – Sven Yrvind In conclusion, making flanges around bulkhead hatches may seem complex at first glance, but by following Sven Yrvind’s meticulous process, enthusiasts can achieve professional-level results. Remember that the journey of boatbuilding is as rewarding as reaching your destination; it tests one’s patience and dedication. For those seeking to embark on this adventure or simply gain more insight into marine craftsmanship, Sven’s wisdom is invaluable.Sven Yrvind, a renowned yacht designer and sailor, shares valuable insights on creating flanges around bulkhead hatches for canvas protection in this enlightening video. By following his expert guidance, boat enthusiasts can ensure their living areas remain secure while allowing unhindered access through the hatches.Step 1: Starting with the Flange
Sven begins by explaining that working on flanges vertically and horizontally is significantly easier than doing so in a flat position. To simplify the process further, he divides the task into two or three steps as suggested by fellow expert “for for.” This approach not only makes it more manageable but also allows for greater precision in crafting each component.Step 2: Applying Glue and Securing
Sven proceeds to apply glue along one edge of the flange, ensuring a secure bond when clamped into place. He emphasizes that this stage is crucial for maintaining the structural integrity of the flange, which in turn safeguards the living area beneath the canvas when hatches are open.Step 3: Allowing Time to Dry
After securely attaching the first portion of the flange, Sven allows ample time for it to dry before moving forward with additional steps. This patience and precision are key aspects of his successful boatbuilding methods.Step 4: Finishing Touches
Once the flange is fully dried, Sven removes the clamps carefully, ensuring no damage occurs during this process. He then moves on to attaching four more pieces onto these main frames, completing two pairs of flanges for the bulkhead hatches.The Final Touches
While two flanges form the primary support structure around the hatches, Sven mentions there are two additional pieces required at each end to ensure comprehensive protection. This attention to detail highlights his commitment to producing a durable and reliable design. “Sailing is about finding your path, whether it’s across an ocean or within yourself.” – Sven Yrvind In conclusion, making flanges around bulkhead hatches may seem complex at first glance, but by following Sven Yrvind’s meticulous process, enthusiasts can achieve professional-level results. Remember that the journey of boatbuilding is as rewarding as reaching your destination; it tests one’s patience and dedication. For those seeking to embark on this adventure or simply gain more insight into marine craftsmanship, Sven’s wisdom is invaluable.Making Flanges Around Bulkhead Hatches for Canvas
Sven Yrvind, a renowned yacht designer and sailor, shares valuable insights on creating flanges around bulkhead hatches for canvas protection in this enlightening video. By following his expert guidance, boat enthusiasts can ensure their living areas remain secure while allowing unhindered access through the hatches.Step 1: Starting with the Flange
Sven begins by explaining that working on flanges vertically and horizontally is significantly easier than doing so in a flat position. To simplify the process further, he divides the task into two or three steps as suggested by fellow expert “for for.” This approach not only makes it more manageable but also allows for greater precision in crafting each component.Step 2: Applying Glue and Securing
Sven proceeds to apply glue along one edge of the flange, ensuring a secure bond when clamped into place. He emphasizes that this stage is crucial for maintaining the structural integrity of the flange, which in turn safeguards the living area beneath the canvas when hatches are open.Step 3: Allowing Time to Dry
After securely attaching the first portion of the flange, Sven allows ample time for it to dry before moving forward with additional steps. This patience and precision are key aspects of his successful boatbuilding methods.Step 4: Finishing Touches
Once the flange is fully dried, Sven removes the clamps carefully, ensuring no damage occurs during this process. He then moves on to attaching four more pieces onto these main frames, completing two pairs of flanges for the bulkhead hatches.The Final Touches
While two flanges form the primary support structure around the hatches, Sven mentions there are two additional pieces required at each end to ensure comprehensive protection. This attention to detail highlights his commitment to producing a durable and reliable design. “Sailing is about finding your path, whether it’s across an ocean or within yourself.” – Sven Yrvind In conclusion, making flanges around bulkhead hatches may seem complex at first glance, but by following Sven Yrvind’s meticulous process, enthusiasts can achieve professional-level results. Remember that the journey of boatbuilding is as rewarding as reaching your destination; it tests one’s patience and dedication. For those seeking to embark on this adventure or simply gain more insight into marine craftsmanship, Sven’s wisdom is invaluable.Once the flange is fully dried, Sven removes the clamps carefully, ensuring no damage occurs during this process. He then moves on to attaching four more pieces onto these main frames, completing two pairs of flanges for the bulkhead hatches.The Final Touches
While two flanges form the primary support structure around the hatches, Sven mentions there are two additional pieces required at each end to ensure comprehensive protection. This attention to detail highlights his commitment to producing a durable and reliable design. “Sailing is about finding your path, whether it’s across an ocean or within yourself.” – Sven Yrvind In conclusion, making flanges around bulkhead hatches may seem complex at first glance, but by following Sven Yrvind’s meticulous process, enthusiasts can achieve professional-level results. Remember that the journey of boatbuilding is as rewarding as reaching your destination; it tests one’s patience and dedication. For those seeking to embark on this adventure or simply gain more insight into marine craftsmanship, Sven’s wisdom is invaluable.Sven proceeds to apply glue along one edge of the flange, ensuring a secure bond when clamped into place. He emphasizes that this stage is crucial for maintaining the structural integrity of the flange, which in turn safeguards the living area beneath the canvas when hatches are open.Step 3: Allowing Time to Dry
After securely attaching the first portion of the flange, Sven allows ample time for it to dry before moving forward with additional steps. This patience and precision are key aspects of his successful boatbuilding methods.Step 4: Finishing Touches
Once the flange is fully dried, Sven removes the clamps carefully, ensuring no damage occurs during this process. He then moves on to attaching four more pieces onto these main frames, completing two pairs of flanges for the bulkhead hatches.The Final Touches
While two flanges form the primary support structure around the hatches, Sven mentions there are two additional pieces required at each end to ensure comprehensive protection. This attention to detail highlights his commitment to producing a durable and reliable design. “Sailing is about finding your path, whether it’s across an ocean or within yourself.” – Sven Yrvind In conclusion, making flanges around bulkhead hatches may seem complex at first glance, but by following Sven Yrvind’s meticulous process, enthusiasts can achieve professional-level results. Remember that the journey of boatbuilding is as rewarding as reaching your destination; it tests one’s patience and dedication. For those seeking to embark on this adventure or simply gain more insight into marine craftsmanship, Sven’s wisdom is invaluable.Sven begins by explaining that working on flanges vertically and horizontally is significantly easier than doing so in a flat position. To simplify the process further, he divides the task into two or three steps as suggested by fellow expert “for for.” This approach not only makes it more manageable but also allows for greater precision in crafting each component.Step 2: Applying Glue and Securing
Sven proceeds to apply glue along one edge of the flange, ensuring a secure bond when clamped into place. He emphasizes that this stage is crucial for maintaining the structural integrity of the flange, which in turn safeguards the living area beneath the canvas when hatches are open.Step 3: Allowing Time to Dry
After securely attaching the first portion of the flange, Sven allows ample time for it to dry before moving forward with additional steps. This patience and precision are key aspects of his successful boatbuilding methods.Step 4: Finishing Touches
Once the flange is fully dried, Sven removes the clamps carefully, ensuring no damage occurs during this process. He then moves on to attaching four more pieces onto these main frames, completing two pairs of flanges for the bulkhead hatches.The Final Touches
While two flanges form the primary support structure around the hatches, Sven mentions there are two additional pieces required at each end to ensure comprehensive protection. This attention to detail highlights his commitment to producing a durable and reliable design. “Sailing is about finding your path, whether it’s across an ocean or within yourself.” – Sven Yrvind In conclusion, making flanges around bulkhead hatches may seem complex at first glance, but by following Sven Yrvind’s meticulous process, enthusiasts can achieve professional-level results. Remember that the journey of boatbuilding is as rewarding as reaching your destination; it tests one’s patience and dedication. For those seeking to embark on this adventure or simply gain more insight into marine craftsmanship, Sven’s wisdom is invaluable.Sven Yrvind, a renowned yacht designer and sailor, shares valuable insights on creating flanges around bulkhead hatches for canvas protection in this enlightening video. By following his expert guidance, boat enthusiasts can ensure their living areas remain secure while allowing unhindered access through the hatches.Step 1: Starting with the Flange
Sven begins by explaining that working on flanges vertically and horizontally is significantly easier than doing so in a flat position. To simplify the process further, he divides the task into two or three steps as suggested by fellow expert “for for.” This approach not only makes it more manageable but also allows for greater precision in crafting each component.Step 2: Applying Glue and Securing
Sven proceeds to apply glue along one edge of the flange, ensuring a secure bond when clamped into place. He emphasizes that this stage is crucial for maintaining the structural integrity of the flange, which in turn safeguards the living area beneath the canvas when hatches are open.Step 3: Allowing Time to Dry
After securely attaching the first portion of the flange, Sven allows ample time for it to dry before moving forward with additional steps. This patience and precision are key aspects of his successful boatbuilding methods.Step 4: Finishing Touches
Once the flange is fully dried, Sven removes the clamps carefully, ensuring no damage occurs during this process. He then moves on to attaching four more pieces onto these main frames, completing two pairs of flanges for the bulkhead hatches.The Final Touches
While two flanges form the primary support structure around the hatches, Sven mentions there are two additional pieces required at each end to ensure comprehensive protection. This attention to detail highlights his commitment to producing a durable and reliable design. “Sailing is about finding your path, whether it’s across an ocean or within yourself.” – Sven Yrvind In conclusion, making flanges around bulkhead hatches may seem complex at first glance, but by following Sven Yrvind’s meticulous process, enthusiasts can achieve professional-level results. Remember that the journey of boatbuilding is as rewarding as reaching your destination; it tests one’s patience and dedication. For those seeking to embark on this adventure or simply gain more insight into marine craftsmanship, Sven’s wisdom is invaluable.Making Flanges Around Bulkhead Hatches for Canvas
Sven Yrvind, a renowned yacht designer and sailor, shares valuable insights on creating flanges around bulkhead hatches for canvas protection in this enlightening video. By following his expert guidance, boat enthusiasts can ensure their living areas remain secure while allowing unhindered access through the hatches.Step 1: Starting with the Flange
Sven begins by explaining that working on flanges vertically and horizontally is significantly easier than doing so in a flat position. To simplify the process further, he divides the task into two or three steps as suggested by fellow expert “for for.” This approach not only makes it more manageable but also allows for greater precision in crafting each component.Step 2: Applying Glue and Securing
Sven proceeds to apply glue along one edge of the flange, ensuring a secure bond when clamped into place. He emphasizes that this stage is crucial for maintaining the structural integrity of the flange, which in turn safeguards the living area beneath the canvas when hatches are open.Step 3: Allowing Time to Dry
After securely attaching the first portion of the flange, Sven allows ample time for it to dry before moving forward with additional steps. This patience and precision are key aspects of his successful boatbuilding methods.Step 4: Finishing Touches
Once the flange is fully dried, Sven removes the clamps carefully, ensuring no damage occurs during this process. He then moves on to attaching four more pieces onto these main frames, completing two pairs of flanges for the bulkhead hatches.The Final Touches
While two flanges form the primary support structure around the hatches, Sven mentions there are two additional pieces required at each end to ensure comprehensive protection. This attention to detail highlights his commitment to producing a durable and reliable design. “Sailing is about finding your path, whether it’s across an ocean or within yourself.” – Sven Yrvind In conclusion, making flanges around bulkhead hatches may seem complex at first glance, but by following Sven Yrvind’s meticulous process, enthusiasts can achieve professional-level results. Remember that the journey of boatbuilding is as rewarding as reaching your destination; it tests one’s patience and dedication. For those seeking to embark on this adventure or simply gain more insight into marine craftsmanship, Sven’s wisdom is invaluable.After securely attaching the first portion of the flange, Sven allows ample time for it to dry before moving forward with additional steps. This patience and precision are key aspects of his successful boatbuilding methods.Step 4: Finishing Touches
Once the flange is fully dried, Sven removes the clamps carefully, ensuring no damage occurs during this process. He then moves on to attaching four more pieces onto these main frames, completing two pairs of flanges for the bulkhead hatches.The Final Touches
While two flanges form the primary support structure around the hatches, Sven mentions there are two additional pieces required at each end to ensure comprehensive protection. This attention to detail highlights his commitment to producing a durable and reliable design. “Sailing is about finding your path, whether it’s across an ocean or within yourself.” – Sven Yrvind In conclusion, making flanges around bulkhead hatches may seem complex at first glance, but by following Sven Yrvind’s meticulous process, enthusiasts can achieve professional-level results. Remember that the journey of boatbuilding is as rewarding as reaching your destination; it tests one’s patience and dedication. For those seeking to embark on this adventure or simply gain more insight into marine craftsmanship, Sven’s wisdom is invaluable.Sven proceeds to apply glue along one edge of the flange, ensuring a secure bond when clamped into place. He emphasizes that this stage is crucial for maintaining the structural integrity of the flange, which in turn safeguards the living area beneath the canvas when hatches are open.Step 3: Allowing Time to Dry
After securely attaching the first portion of the flange, Sven allows ample time for it to dry before moving forward with additional steps. This patience and precision are key aspects of his successful boatbuilding methods.Step 4: Finishing Touches
Once the flange is fully dried, Sven removes the clamps carefully, ensuring no damage occurs during this process. He then moves on to attaching four more pieces onto these main frames, completing two pairs of flanges for the bulkhead hatches.The Final Touches
While two flanges form the primary support structure around the hatches, Sven mentions there are two additional pieces required at each end to ensure comprehensive protection. This attention to detail highlights his commitment to producing a durable and reliable design. “Sailing is about finding your path, whether it’s across an ocean or within yourself.” – Sven Yrvind In conclusion, making flanges around bulkhead hatches may seem complex at first glance, but by following Sven Yrvind’s meticulous process, enthusiasts can achieve professional-level results. Remember that the journey of boatbuilding is as rewarding as reaching your destination; it tests one’s patience and dedication. For those seeking to embark on this adventure or simply gain more insight into marine craftsmanship, Sven’s wisdom is invaluable.Sven begins by explaining that working on flanges vertically and horizontally is significantly easier than doing so in a flat position. To simplify the process further, he divides the task into two or three steps as suggested by fellow expert “for for.” This approach not only makes it more manageable but also allows for greater precision in crafting each component.Step 2: Applying Glue and Securing
Sven proceeds to apply glue along one edge of the flange, ensuring a secure bond when clamped into place. He emphasizes that this stage is crucial for maintaining the structural integrity of the flange, which in turn safeguards the living area beneath the canvas when hatches are open.Step 3: Allowing Time to Dry
After securely attaching the first portion of the flange, Sven allows ample time for it to dry before moving forward with additional steps. This patience and precision are key aspects of his successful boatbuilding methods.Step 4: Finishing Touches
Once the flange is fully dried, Sven removes the clamps carefully, ensuring no damage occurs during this process. He then moves on to attaching four more pieces onto these main frames, completing two pairs of flanges for the bulkhead hatches.The Final Touches
While two flanges form the primary support structure around the hatches, Sven mentions there are two additional pieces required at each end to ensure comprehensive protection. This attention to detail highlights his commitment to producing a durable and reliable design. “Sailing is about finding your path, whether it’s across an ocean or within yourself.” – Sven Yrvind In conclusion, making flanges around bulkhead hatches may seem complex at first glance, but by following Sven Yrvind’s meticulous process, enthusiasts can achieve professional-level results. Remember that the journey of boatbuilding is as rewarding as reaching your destination; it tests one’s patience and dedication. For those seeking to embark on this adventure or simply gain more insight into marine craftsmanship, Sven’s wisdom is invaluable.Sven Yrvind, a renowned yacht designer and sailor, shares valuable insights on creating flanges around bulkhead hatches for canvas protection in this enlightening video. By following his expert guidance, boat enthusiasts can ensure their living areas remain secure while allowing unhindered access through the hatches.Step 1: Starting with the Flange
Sven begins by explaining that working on flanges vertically and horizontally is significantly easier than doing so in a flat position. To simplify the process further, he divides the task into two or three steps as suggested by fellow expert “for for.” This approach not only makes it more manageable but also allows for greater precision in crafting each component.Step 2: Applying Glue and Securing
Sven proceeds to apply glue along one edge of the flange, ensuring a secure bond when clamped into place. He emphasizes that this stage is crucial for maintaining the structural integrity of the flange, which in turn safeguards the living area beneath the canvas when hatches are open.Step 3: Allowing Time to Dry
After securely attaching the first portion of the flange, Sven allows ample time for it to dry before moving forward with additional steps. This patience and precision are key aspects of his successful boatbuilding methods.Step 4: Finishing Touches
Once the flange is fully dried, Sven removes the clamps carefully, ensuring no damage occurs during this process. He then moves on to attaching four more pieces onto these main frames, completing two pairs of flanges for the bulkhead hatches.The Final Touches
While two flanges form the primary support structure around the hatches, Sven mentions there are two additional pieces required at each end to ensure comprehensive protection. This attention to detail highlights his commitment to producing a durable and reliable design. “Sailing is about finding your path, whether it’s across an ocean or within yourself.” – Sven Yrvind In conclusion, making flanges around bulkhead hatches may seem complex at first glance, but by following Sven Yrvind’s meticulous process, enthusiasts can achieve professional-level results. Remember that the journey of boatbuilding is as rewarding as reaching your destination; it tests one’s patience and dedication. For those seeking to embark on this adventure or simply gain more insight into marine craftsmanship, Sven’s wisdom is invaluable.Making Flanges Around Bulkhead Hatches for Canvas
Sven Yrvind, a renowned yacht designer and sailor, shares valuable insights on creating flanges around bulkhead hatches for canvas protection in this enlightening video. By following his expert guidance, boat enthusiasts can ensure their living areas remain secure while allowing unhindered access through the hatches.Step 1: Starting with the Flange
Sven begins by explaining that working on flanges vertically and horizontally is significantly easier than doing so in a flat position. To simplify the process further, he divides the task into two or three steps as suggested by fellow expert “for for.” This approach not only makes it more manageable but also allows for greater precision in crafting each component.Step 2: Applying Glue and Securing
Sven proceeds to apply glue along one edge of the flange, ensuring a secure bond when clamped into place. He emphasizes that this stage is crucial for maintaining the structural integrity of the flange, which in turn safeguards the living area beneath the canvas when hatches are open.Step 3: Allowing Time to Dry
After securely attaching the first portion of the flange, Sven allows ample time for it to dry before moving forward with additional steps. This patience and precision are key aspects of his successful boatbuilding methods.Step 4: Finishing Touches
Once the flange is fully dried, Sven removes the clamps carefully, ensuring no damage occurs during this process. He then moves on to attaching four more pieces onto these main frames, completing two pairs of flanges for the bulkhead hatches.The Final Touches
While two flanges form the primary support structure around the hatches, Sven mentions there are two additional pieces required at each end to ensure comprehensive protection. This attention to detail highlights his commitment to producing a durable and reliable design. “Sailing is about finding your path, whether it’s across an ocean or within yourself.” – Sven Yrvind In conclusion, making flanges around bulkhead hatches may seem complex at first glance, but by following Sven Yrvind’s meticulous process, enthusiasts can achieve professional-level results. Remember that the journey of boatbuilding is as rewarding as reaching your destination; it tests one’s patience and dedication. For those seeking to embark on this adventure or simply gain more insight into marine craftsmanship, Sven’s wisdom is invaluable.Once the flange is fully dried, Sven removes the clamps carefully, ensuring no damage occurs during this process. He then moves on to attaching four more pieces onto these main frames, completing two pairs of flanges for the bulkhead hatches.The Final Touches
While two flanges form the primary support structure around the hatches, Sven mentions there are two additional pieces required at each end to ensure comprehensive protection. This attention to detail highlights his commitment to producing a durable and reliable design. “Sailing is about finding your path, whether it’s across an ocean or within yourself.” – Sven Yrvind In conclusion, making flanges around bulkhead hatches may seem complex at first glance, but by following Sven Yrvind’s meticulous process, enthusiasts can achieve professional-level results. Remember that the journey of boatbuilding is as rewarding as reaching your destination; it tests one’s patience and dedication. For those seeking to embark on this adventure or simply gain more insight into marine craftsmanship, Sven’s wisdom is invaluable.After securely attaching the first portion of the flange, Sven allows ample time for it to dry before moving forward with additional steps. This patience and precision are key aspects of his successful boatbuilding methods.Step 4: Finishing Touches
Once the flange is fully dried, Sven removes the clamps carefully, ensuring no damage occurs during this process. He then moves on to attaching four more pieces onto these main frames, completing two pairs of flanges for the bulkhead hatches.The Final Touches
While two flanges form the primary support structure around the hatches, Sven mentions there are two additional pieces required at each end to ensure comprehensive protection. This attention to detail highlights his commitment to producing a durable and reliable design. “Sailing is about finding your path, whether it’s across an ocean or within yourself.” – Sven Yrvind In conclusion, making flanges around bulkhead hatches may seem complex at first glance, but by following Sven Yrvind’s meticulous process, enthusiasts can achieve professional-level results. Remember that the journey of boatbuilding is as rewarding as reaching your destination; it tests one’s patience and dedication. For those seeking to embark on this adventure or simply gain more insight into marine craftsmanship, Sven’s wisdom is invaluable.Sven proceeds to apply glue along one edge of the flange, ensuring a secure bond when clamped into place. He emphasizes that this stage is crucial for maintaining the structural integrity of the flange, which in turn safeguards the living area beneath the canvas when hatches are open.Step 3: Allowing Time to Dry
After securely attaching the first portion of the flange, Sven allows ample time for it to dry before moving forward with additional steps. This patience and precision are key aspects of his successful boatbuilding methods.Step 4: Finishing Touches
Once the flange is fully dried, Sven removes the clamps carefully, ensuring no damage occurs during this process. He then moves on to attaching four more pieces onto these main frames, completing two pairs of flanges for the bulkhead hatches.The Final Touches
While two flanges form the primary support structure around the hatches, Sven mentions there are two additional pieces required at each end to ensure comprehensive protection. This attention to detail highlights his commitment to producing a durable and reliable design. “Sailing is about finding your path, whether it’s across an ocean or within yourself.” – Sven Yrvind In conclusion, making flanges around bulkhead hatches may seem complex at first glance, but by following Sven Yrvind’s meticulous process, enthusiasts can achieve professional-level results. Remember that the journey of boatbuilding is as rewarding as reaching your destination; it tests one’s patience and dedication. For those seeking to embark on this adventure or simply gain more insight into marine craftsmanship, Sven’s wisdom is invaluable.Sven begins by explaining that working on flanges vertically and horizontally is significantly easier than doing so in a flat position. To simplify the process further, he divides the task into two or three steps as suggested by fellow expert “for for.” This approach not only makes it more manageable but also allows for greater precision in crafting each component.Step 2: Applying Glue and Securing
Sven proceeds to apply glue along one edge of the flange, ensuring a secure bond when clamped into place. He emphasizes that this stage is crucial for maintaining the structural integrity of the flange, which in turn safeguards the living area beneath the canvas when hatches are open.Step 3: Allowing Time to Dry
After securely attaching the first portion of the flange, Sven allows ample time for it to dry before moving forward with additional steps. This patience and precision are key aspects of his successful boatbuilding methods.Step 4: Finishing Touches
Once the flange is fully dried, Sven removes the clamps carefully, ensuring no damage occurs during this process. He then moves on to attaching four more pieces onto these main frames, completing two pairs of flanges for the bulkhead hatches.The Final Touches
While two flanges form the primary support structure around the hatches, Sven mentions there are two additional pieces required at each end to ensure comprehensive protection. This attention to detail highlights his commitment to producing a durable and reliable design. “Sailing is about finding your path, whether it’s across an ocean or within yourself.” – Sven Yrvind In conclusion, making flanges around bulkhead hatches may seem complex at first glance, but by following Sven Yrvind’s meticulous process, enthusiasts can achieve professional-level results. Remember that the journey of boatbuilding is as rewarding as reaching your destination; it tests one’s patience and dedication. For those seeking to embark on this adventure or simply gain more insight into marine craftsmanship, Sven’s wisdom is invaluable.Sven Yrvind, a renowned yacht designer and sailor, shares valuable insights on creating flanges around bulkhead hatches for canvas protection in this enlightening video. By following his expert guidance, boat enthusiasts can ensure their living areas remain secure while allowing unhindered access through the hatches.Step 1: Starting with the Flange
Sven begins by explaining that working on flanges vertically and horizontally is significantly easier than doing so in a flat position. To simplify the process further, he divides the task into two or three steps as suggested by fellow expert “for for.” This approach not only makes it more manageable but also allows for greater precision in crafting each component.Step 2: Applying Glue and Securing
Sven proceeds to apply glue along one edge of the flange, ensuring a secure bond when clamped into place. He emphasizes that this stage is crucial for maintaining the structural integrity of the flange, which in turn safeguards the living area beneath the canvas when hatches are open.Step 3: Allowing Time to Dry
After securely attaching the first portion of the flange, Sven allows ample time for it to dry before moving forward with additional steps. This patience and precision are key aspects of his successful boatbuilding methods.Step 4: Finishing Touches
Once the flange is fully dried, Sven removes the clamps carefully, ensuring no damage occurs during this process. He then moves on to attaching four more pieces onto these main frames, completing two pairs of flanges for the bulkhead hatches.The Final Touches
While two flanges form the primary support structure around the hatches, Sven mentions there are two additional pieces required at each end to ensure comprehensive protection. This attention to detail highlights his commitment to producing a durable and reliable design. “Sailing is about finding your path, whether it’s across an ocean or within yourself.” – Sven Yrvind In conclusion, making flanges around bulkhead hatches may seem complex at first glance, but by following Sven Yrvind’s meticulous process, enthusiasts can achieve professional-level results. Remember that the journey of boatbuilding is as rewarding as reaching your destination; it tests one’s patience and dedication. For those seeking to embark on this adventure or simply gain more insight into marine craftsmanship, Sven’s wisdom is invaluable.Making Flanges Around Bulkhead Hatches for Canvas
Sven Yrvind, a renowned yacht designer and sailor, shares valuable insights on creating flanges around bulkhead hatches for canvas protection in this enlightening video. By following his expert guidance, boat enthusiasts can ensure their living areas remain secure while allowing unhindered access through the hatches.Step 1: Starting with the Flange
Sven begins by explaining that working on flanges vertically and horizontally is significantly easier than doing so in a flat position. To simplify the process further, he divides the task into two or three steps as suggested by fellow expert “for for.” This approach not only makes it more manageable but also allows for greater precision in crafting each component.Step 2: Applying Glue and Securing
Sven proceeds to apply glue along one edge of the flange, ensuring a secure bond when clamped into place. He emphasizes that this stage is crucial for maintaining the structural integrity of the flange, which in turn safeguards the living area beneath the canvas when hatches are open.Step 3: Allowing Time to Dry
After securely attaching the first portion of the flange, Sven allows ample time for it to dry before moving forward with additional steps. This patience and precision are key aspects of his successful boatbuilding methods.Step 4: Finishing Touches
Once the flange is fully dried, Sven removes the clamps carefully, ensuring no damage occurs during this process. He then moves on to attaching four more pieces onto these main frames, completing two pairs of flanges for the bulkhead hatches.The Final Touches
While two flanges form the primary support structure around the hatches, Sven mentions there are two additional pieces required at each end to ensure comprehensive protection. This attention to detail highlights his commitment to producing a durable and reliable design. “Sailing is about finding your path, whether it’s across an ocean or within yourself.” – Sven Yrvind In conclusion, making flanges around bulkhead hatches may seem complex at first glance, but by following Sven Yrvind’s meticulous process, enthusiasts can achieve professional-level results. Remember that the journey of boatbuilding is as rewarding as reaching your destination; it tests one’s patience and dedication. For those seeking to embark on this adventure or simply gain more insight into marine craftsmanship, Sven’s wisdom is invaluable.After securely attaching the first portion of the flange, Sven allows ample time for it to dry before moving forward with additional steps. This patience and precision are key aspects of his successful boatbuilding methods.Step 4: Finishing Touches
Once the flange is fully dried, Sven removes the clamps carefully, ensuring no damage occurs during this process. He then moves on to attaching four more pieces onto these main frames, completing two pairs of flanges for the bulkhead hatches.The Final Touches
While two flanges form the primary support structure around the hatches, Sven mentions there are two additional pieces required at each end to ensure comprehensive protection. This attention to detail highlights his commitment to producing a durable and reliable design. “Sailing is about finding your path, whether it’s across an ocean or within yourself.” – Sven Yrvind In conclusion, making flanges around bulkhead hatches may seem complex at first glance, but by following Sven Yrvind’s meticulous process, enthusiasts can achieve professional-level results. Remember that the journey of boatbuilding is as rewarding as reaching your destination; it tests one’s patience and dedication. For those seeking to embark on this adventure or simply gain more insight into marine craftsmanship, Sven’s wisdom is invaluable.After securely attaching the first portion of the flange, Sven allows ample time for it to dry before moving forward with additional steps. This patience and precision are key aspects of his successful boatbuilding methods.Step 4: Finishing Touches
Once the flange is fully dried, Sven removes the clamps carefully, ensuring no damage occurs during this process. He then moves on to attaching four more pieces onto these main frames, completing two pairs of flanges for the bulkhead hatches.The Final Touches
While two flanges form the primary support structure around the hatches, Sven mentions there are two additional pieces required at each end to ensure comprehensive protection. This attention to detail highlights his commitment to producing a durable and reliable design. “Sailing is about finding your path, whether it’s across an ocean or within yourself.” – Sven Yrvind In conclusion, making flanges around bulkhead hatches may seem complex at first glance, but by following Sven Yrvind’s meticulous process, enthusiasts can achieve professional-level results. Remember that the journey of boatbuilding is as rewarding as reaching your destination; it tests one’s patience and dedication. For those seeking to embark on this adventure or simply gain more insight into marine craftsmanship, Sven’s wisdom is invaluable.Sven begins by explaining that working on flanges vertically and horizontally is significantly easier than doing so in a flat position. To simplify the process further, he divides the task into two or three steps as suggested by fellow expert “for for.” This approach not only makes it more manageable but also allows for greater precision in crafting each component.Step 2: Applying Glue and Securing
Sven proceeds to apply glue along one edge of the flange, ensuring a secure bond when clamped into place. He emphasizes that this stage is crucial for maintaining the structural integrity of the flange, which in turn safeguards the living area beneath the canvas when hatches are open.Step 3: Allowing Time to Dry
After securely attaching the first portion of the flange, Sven allows ample time for it to dry before moving forward with additional steps. This patience and precision are key aspects of his successful boatbuilding methods.Step 4: Finishing Touches
Once the flange is fully dried, Sven removes the clamps carefully, ensuring no damage occurs during this process. He then moves on to attaching four more pieces onto these main frames, completing two pairs of flanges for the bulkhead hatches.The Final Touches
While two flanges form the primary support structure around the hatches, Sven mentions there are two additional pieces required at each end to ensure comprehensive protection. This attention to detail highlights his commitment to producing a durable and reliable design. “Sailing is about finding your path, whether it’s across an ocean or within yourself.” – Sven Yrvind In conclusion, making flanges around bulkhead hatches may seem complex at first glance, but by following Sven Yrvind’s meticulous process, enthusiasts can achieve professional-level results. Remember that the journey of boatbuilding is as rewarding as reaching your destination; it tests one’s patience and dedication. For those seeking to embark on this adventure or simply gain more insight into marine craftsmanship, Sven’s wisdom is invaluable.Sven Yrvind, a renowned yacht designer and sailor, shares valuable insights on creating flanges around bulkhead hatches for canvas protection in this enlightening video. By following his expert guidance, boat enthusiasts can ensure their living areas remain secure while allowing unhindered access through the hatches.Step 1: Starting with the Flange
Sven begins by explaining that working on flanges vertically and horizontally is significantly easier than doing so in a flat position. To simplify the process further, he divides the task into two or three steps as suggested by fellow expert “for for.” This approach not only makes it more manageable but also allows for greater precision in crafting each component.Step 2: Applying Glue and Securing
Sven proceeds to apply glue along one edge of the flange, ensuring a secure bond when clamped into place. He emphasizes that this stage is crucial for maintaining the structural integrity of the flange, which in turn safeguards the living area beneath the canvas when hatches are open.Step 3: Allowing Time to Dry
After securely attaching the first portion of the flange, Sven allows ample time for it to dry before moving forward with additional steps. This patience and precision are key aspects of his successful boatbuilding methods.Step 4: Finishing Touches
Once the flange is fully dried, Sven removes the clamps carefully, ensuring no damage occurs during this process. He then moves on to attaching four more pieces onto these main frames, completing two pairs of flanges for the bulkhead hatches.The Final Touches
While two flanges form the primary support structure around the hatches, Sven mentions there are two additional pieces required at each end to ensure comprehensive protection. This attention to detail highlights his commitment to producing a durable and reliable design. “Sailing is about finding your path, whether it’s across an ocean or within yourself.” – Sven Yrvind In conclusion, making flanges around bulkhead hatches may seem complex at first glance, but by following Sven Yrvind’s meticulous process, enthusiasts can achieve professional-level results. Remember that the journey of boatbuilding is as rewarding as reaching your destination; it tests one’s patience and dedication. For those seeking to embark on this adventure or simply gain more insight into marine craftsmanship, Sven’s wisdom is invaluable.Making Flanges Around Bulkhead Hatches for Canvas
Sven Yrvind, a renowned yacht designer and sailor, shares valuable insights on creating flanges around bulkhead hatches for canvas protection in this enlightening video. By following his expert guidance, boat enthusiasts can ensure their living areas remain secure while allowing unhindered access through the hatches.Step 1: Starting with the Flange
Sven begins by explaining that working on flanges vertically and horizontally is significantly easier than doing so in a flat position. To simplify the process further, he divides the task into two or three steps as suggested by fellow expert “for for.” This approach not only makes it more manageable but also allows for greater precision in crafting each component.Step 2: Applying Glue and Securing
Sven proceeds to apply glue along one edge of the flange, ensuring a secure bond when clamped into place. He emphasizes that this stage is crucial for maintaining the structural integrity of the flange, which in turn safeguards the living area beneath the canvas when hatches are open.Step 3: Allowing Time to Dry
After securely attaching the first portion of the flange, Sven allows ample time for it to dry before moving forward with additional steps. This patience and precision are key aspects of his successful boatbuilding methods.Step 4: Finishing Touches
Once the flange is fully dried, Sven removes the clamps carefully, ensuring no damage occurs during this process. He then moves on to attaching four more pieces onto these main frames, completing two pairs of flanges for the bulkhead hatches.The Final Touches
While two flanges form the primary support structure around the hatches, Sven mentions there are two additional pieces required at each end to ensure comprehensive protection. This attention to detail highlights his commitment to producing a durable and reliable design. “Sailing is about finding your path, whether it’s across an ocean or within yourself.” – Sven Yrvind In conclusion, making flanges around bulkhead hatches may seem complex at first glance, but by following Sven Yrvind’s meticulous process, enthusiasts can achieve professional-level results. Remember that the journey of boatbuilding is as rewarding as reaching your destination; it tests one’s patience and dedication. For those seeking to embark on this adventure or simply gain more insight into marine craftsmanship, Sven’s wisdom is invaluable.Sven proceeds to apply glue along one edge of the flange, ensuring a secure bond when clamped into place. He emphasizes that this stage is crucial for maintaining the structural integrity of the flange, which in turn safeguards the living area beneath the canvas when hatches are open.Step 3: Allowing Time to Dry
After securely attaching the first portion of the flange, Sven allows ample time for it to dry before moving forward with additional steps. This patience and precision are key aspects of his successful boatbuilding methods.Step 4: Finishing Touches
Once the flange is fully dried, Sven removes the clamps carefully, ensuring no damage occurs during this process. He then moves on to attaching four more pieces onto these main frames, completing two pairs of flanges for the bulkhead hatches.The Final Touches
While two flanges form the primary support structure around the hatches, Sven mentions there are two additional pieces required at each end to ensure comprehensive protection. This attention to detail highlights his commitment to producing a durable and reliable design. “Sailing is about finding your path, whether it’s across an ocean or within yourself.” – Sven Yrvind In conclusion, making flanges around bulkhead hatches may seem complex at first glance, but by following Sven Yrvind’s meticulous process, enthusiasts can achieve professional-level results. Remember that the journey of boatbuilding is as rewarding as reaching your destination; it tests one’s patience and dedication. For those seeking to embark on this adventure or simply gain more insight into marine craftsmanship, Sven’s wisdom is invaluable.Sven begins by explaining that working on flanges vertically and horizontally is significantly easier than doing so in a flat position. To simplify the process further, he divides the task into two or three steps as suggested by fellow expert “for for.” This approach not only makes it more manageable but also allows for greater precision in crafting each component.Step 2: Applying Glue and Securing
Sven proceeds to apply glue along one edge of the flange, ensuring a secure bond when clamped into place. He emphasizes that this stage is crucial for maintaining the structural integrity of the flange, which in turn safeguards the living area beneath the canvas when hatches are open.Step 3: Allowing Time to Dry
After securely attaching the first portion of the flange, Sven allows ample time for it to dry before moving forward with additional steps. This patience and precision are key aspects of his successful boatbuilding methods.Step 4: Finishing Touches
Once the flange is fully dried, Sven removes the clamps carefully, ensuring no damage occurs during this process. He then moves on to attaching four more pieces onto these main frames, completing two pairs of flanges for the bulkhead hatches.The Final Touches
While two flanges form the primary support structure around the hatches, Sven mentions there are two additional pieces required at each end to ensure comprehensive protection. This attention to detail highlights his commitment to producing a durable and reliable design. “Sailing is about finding your path, whether it’s across an ocean or within yourself.” – Sven Yrvind In conclusion, making flanges around bulkhead hatches may seem complex at first glance, but by following Sven Yrvind’s meticulous process, enthusiasts can achieve professional-level results. Remember that the journey of boatbuilding is as rewarding as reaching your destination; it tests one’s patience and dedication. For those seeking to embark on this adventure or simply gain more insight into marine craftsmanship, Sven’s wisdom is invaluable.Sven Yrvind, a renowned yacht designer and sailor, shares valuable insights on creating flanges around bulkhead hatches for canvas protection in this enlightening video. By following his expert guidance, boat enthusiasts can ensure their living areas remain secure while allowing unhindered access through the hatches.Step 1: Starting with the Flange
Sven begins by explaining that working on flanges vertically and horizontally is significantly easier than doing so in a flat position. To simplify the process further, he divides the task into two or three steps as suggested by fellow expert “for for.” This approach not only makes it more manageable but also allows for greater precision in crafting each component.Step 2: Applying Glue and Securing
Sven proceeds to apply glue along one edge of the flange, ensuring a secure bond when clamped into place. He emphasizes that this stage is crucial for maintaining the structural integrity of the flange, which in turn safeguards the living area beneath the canvas when hatches are open.Step 3: Allowing Time to Dry
After securely attaching the first portion of the flange, Sven allows ample time for it to dry before moving forward with additional steps. This patience and precision are key aspects of his successful boatbuilding methods.Step 4: Finishing Touches
Once the flange is fully dried, Sven removes the clamps carefully, ensuring no damage occurs during this process. He then moves on to attaching four more pieces onto these main frames, completing two pairs of flanges for the bulkhead hatches.The Final Touches
While two flanges form the primary support structure around the hatches, Sven mentions there are two additional pieces required at each end to ensure comprehensive protection. This attention to detail highlights his commitment to producing a durable and reliable design. “Sailing is about finding your path, whether it’s across an ocean or within yourself.” – Sven Yrvind In conclusion, making flanges around bulkhead hatches may seem complex at first glance, but by following Sven Yrvind’s meticulous process, enthusiasts can achieve professional-level results. Remember that the journey of boatbuilding is as rewarding as reaching your destination; it tests one’s patience and dedication. For those seeking to embark on this adventure or simply gain more insight into marine craftsmanship, Sven’s wisdom is invaluable.Making Flanges Around Bulkhead Hatches for Canvas
Sven Yrvind, a renowned yacht designer and sailor, shares valuable insights on creating flanges around bulkhead hatches for canvas protection in this enlightening video. By following his expert guidance, boat enthusiasts can ensure their living areas remain secure while allowing unhindered access through the hatches.Step 1: Starting with the Flange
Sven begins by explaining that working on flanges vertically and horizontally is significantly easier than doing so in a flat position. To simplify the process further, he divides the task into two or three steps as suggested by fellow expert “for for.” This approach not only makes it more manageable but also allows for greater precision in crafting each component.Step 2: Applying Glue and Securing
Sven proceeds to apply glue along one edge of the flange, ensuring a secure bond when clamped into place. He emphasizes that this stage is crucial for maintaining the structural integrity of the flange, which in turn safeguards the living area beneath the canvas when hatches are open.Step 3: Allowing Time to Dry
After securely attaching the first portion of the flange, Sven allows ample time for it to dry before moving forward with additional steps. This patience and precision are key aspects of his successful boatbuilding methods.Step 4: Finishing Touches
Once the flange is fully dried, Sven removes the clamps carefully, ensuring no damage occurs during this process. He then moves on to attaching four more pieces onto these main frames, completing two pairs of flanges for the bulkhead hatches.The Final Touches
While two flanges form the primary support structure around the hatches, Sven mentions there are two additional pieces required at each end to ensure comprehensive protection. This attention to detail highlights his commitment to producing a durable and reliable design. “Sailing is about finding your path, whether it’s across an ocean or within yourself.” – Sven Yrvind In conclusion, making flanges around bulkhead hatches may seem complex at first glance, but by following Sven Yrvind’s meticulous process, enthusiasts can achieve professional-level results. Remember that the journey of boatbuilding is as rewarding as reaching your destination; it tests one’s patience and dedication. For those seeking to embark on this adventure or simply gain more insight into marine craftsmanship, Sven’s wisdom is invaluable.Once the flange is fully dried, Sven removes the clamps carefully, ensuring no damage occurs during this process. He then moves on to attaching four more pieces onto these main frames, completing two pairs of flanges for the bulkhead hatches.The Final Touches
While two flanges form the primary support structure around the hatches, Sven mentions there are two additional pieces required at each end to ensure comprehensive protection. This attention to detail highlights his commitment to producing a durable and reliable design. “Sailing is about finding your path, whether it’s across an ocean or within yourself.” – Sven Yrvind In conclusion, making flanges around bulkhead hatches may seem complex at first glance, but by following Sven Yrvind’s meticulous process, enthusiasts can achieve professional-level results. Remember that the journey of boatbuilding is as rewarding as reaching your destination; it tests one’s patience and dedication. For those seeking to embark on this adventure or simply gain more insight into marine craftsmanship, Sven’s wisdom is invaluable.Sven proceeds to apply glue along one edge of the flange, ensuring a secure bond when clamped into place. He emphasizes that this stage is crucial for maintaining the structural integrity of the flange, which in turn safeguards the living area beneath the canvas when hatches are open.Step 3: Allowing Time to Dry
After securely attaching the first portion of the flange, Sven allows ample time for it to dry before moving forward with additional steps. This patience and precision are key aspects of his successful boatbuilding methods.Step 4: Finishing Touches
Once the flange is fully dried, Sven removes the clamps carefully, ensuring no damage occurs during this process. He then moves on to attaching four more pieces onto these main frames, completing two pairs of flanges for the bulkhead hatches.The Final Touches
While two flanges form the primary support structure around the hatches, Sven mentions there are two additional pieces required at each end to ensure comprehensive protection. This attention to detail highlights his commitment to producing a durable and reliable design. “Sailing is about finding your path, whether it’s across an ocean or within yourself.” – Sven Yrvind In conclusion, making flanges around bulkhead hatches may seem complex at first glance, but by following Sven Yrvind’s meticulous process, enthusiasts can achieve professional-level results. Remember that the journey of boatbuilding is as rewarding as reaching your destination; it tests one’s patience and dedication. For those seeking to embark on this adventure or simply gain more insight into marine craftsmanship, Sven’s wisdom is invaluable.Sven begins by explaining that working on flanges vertically and horizontally is significantly easier than doing so in a flat position. To simplify the process further, he divides the task into two or three steps as suggested by fellow expert “for for.” This approach not only makes it more manageable but also allows for greater precision in crafting each component.Step 2: Applying Glue and Securing
Sven proceeds to apply glue along one edge of the flange, ensuring a secure bond when clamped into place. He emphasizes that this stage is crucial for maintaining the structural integrity of the flange, which in turn safeguards the living area beneath the canvas when hatches are open.Step 3: Allowing Time to Dry
After securely attaching the first portion of the flange, Sven allows ample time for it to dry before moving forward with additional steps. This patience and precision are key aspects of his successful boatbuilding methods.Step 4: Finishing Touches
Once the flange is fully dried, Sven removes the clamps carefully, ensuring no damage occurs during this process. He then moves on to attaching four more pieces onto these main frames, completing two pairs of flanges for the bulkhead hatches.The Final Touches
While two flanges form the primary support structure around the hatches, Sven mentions there are two additional pieces required at each end to ensure comprehensive protection. This attention to detail highlights his commitment to producing a durable and reliable design. “Sailing is about finding your path, whether it’s across an ocean or within yourself.” – Sven Yrvind In conclusion, making flanges around bulkhead hatches may seem complex at first glance, but by following Sven Yrvind’s meticulous process, enthusiasts can achieve professional-level results. Remember that the journey of boatbuilding is as rewarding as reaching your destination; it tests one’s patience and dedication. For those seeking to embark on this adventure or simply gain more insight into marine craftsmanship, Sven’s wisdom is invaluable.Sven Yrvind, a renowned yacht designer and sailor, shares valuable insights on creating flanges around bulkhead hatches for canvas protection in this enlightening video. By following his expert guidance, boat enthusiasts can ensure their living areas remain secure while allowing unhindered access through the hatches.Step 1: Starting with the Flange
Sven begins by explaining that working on flanges vertically and horizontally is significantly easier than doing so in a flat position. To simplify the process further, he divides the task into two or three steps as suggested by fellow expert “for for.” This approach not only makes it more manageable but also allows for greater precision in crafting each component.Step 2: Applying Glue and Securing
Sven proceeds to apply glue along one edge of the flange, ensuring a secure bond when clamped into place. He emphasizes that this stage is crucial for maintaining the structural integrity of the flange, which in turn safeguards the living area beneath the canvas when hatches are open.Step 3: Allowing Time to Dry
After securely attaching the first portion of the flange, Sven allows ample time for it to dry before moving forward with additional steps. This patience and precision are key aspects of his successful boatbuilding methods.Step 4: Finishing Touches
Once the flange is fully dried, Sven removes the clamps carefully, ensuring no damage occurs during this process. He then moves on to attaching four more pieces onto these main frames, completing two pairs of flanges for the bulkhead hatches.The Final Touches
While two flanges form the primary support structure around the hatches, Sven mentions there are two additional pieces required at each end to ensure comprehensive protection. This attention to detail highlights his commitment to producing a durable and reliable design. “Sailing is about finding your path, whether it’s across an ocean or within yourself.” – Sven Yrvind In conclusion, making flanges around bulkhead hatches may seem complex at first glance, but by following Sven Yrvind’s meticulous process, enthusiasts can achieve professional-level results. Remember that the journey of boatbuilding is as rewarding as reaching your destination; it tests one’s patience and dedication. For those seeking to embark on this adventure or simply gain more insight into marine craftsmanship, Sven’s wisdom is invaluable.Making Flanges Around Bulkhead Hatches for Canvas
Sven Yrvind, a renowned yacht designer and sailor, shares valuable insights on creating flanges around bulkhead hatches for canvas protection in this enlightening video. By following his expert guidance, boat enthusiasts can ensure their living areas remain secure while allowing unhindered access through the hatches.Step 1: Starting with the Flange
Sven begins by explaining that working on flanges vertically and horizontally is significantly easier than doing so in a flat position. To simplify the process further, he divides the task into two or three steps as suggested by fellow expert “for for.” This approach not only makes it more manageable but also allows for greater precision in crafting each component.Step 2: Applying Glue and Securing
Sven proceeds to apply glue along one edge of the flange, ensuring a secure bond when clamped into place. He emphasizes that this stage is crucial for maintaining the structural integrity of the flange, which in turn safeguards the living area beneath the canvas when hatches are open.Step 3: Allowing Time to Dry
After securely attaching the first portion of the flange, Sven allows ample time for it to dry before moving forward with additional steps. This patience and precision are key aspects of his successful boatbuilding methods.Step 4: Finishing Touches
Once the flange is fully dried, Sven removes the clamps carefully, ensuring no damage occurs during this process. He then moves on to attaching four more pieces onto these main frames, completing two pairs of flanges for the bulkhead hatches.The Final Touches
While two flanges form the primary support structure around the hatches, Sven mentions there are two additional pieces required at each end to ensure comprehensive protection. This attention to detail highlights his commitment to producing a durable and reliable design. “Sailing is about finding your path, whether it’s across an ocean or within yourself.” – Sven Yrvind In conclusion, making flanges around bulkhead hatches may seem complex at first glance, but by following Sven Yrvind’s meticulous process, enthusiasts can achieve professional-level results. Remember that the journey of boatbuilding is as rewarding as reaching your destination; it tests one’s patience and dedication. For those seeking to embark on this adventure or simply gain more insight into marine craftsmanship, Sven’s wisdom is invaluable.After securely attaching the first portion of the flange, Sven allows ample time for it to dry before moving forward with additional steps. This patience and precision are key aspects of his successful boatbuilding methods.Step 4: Finishing Touches
Once the flange is fully dried, Sven removes the clamps carefully, ensuring no damage occurs during this process. He then moves on to attaching four more pieces onto these main frames, completing two pairs of flanges for the bulkhead hatches.The Final Touches
While two flanges form the primary support structure around the hatches, Sven mentions there are two additional pieces required at each end to ensure comprehensive protection. This attention to detail highlights his commitment to producing a durable and reliable design. “Sailing is about finding your path, whether it’s across an ocean or within yourself.” – Sven Yrvind In conclusion, making flanges around bulkhead hatches may seem complex at first glance, but by following Sven Yrvind’s meticulous process, enthusiasts can achieve professional-level results. Remember that the journey of boatbuilding is as rewarding as reaching your destination; it tests one’s patience and dedication. For those seeking to embark on this adventure or simply gain more insight into marine craftsmanship, Sven’s wisdom is invaluable.Sven proceeds to apply glue along one edge of the flange, ensuring a secure bond when clamped into place. He emphasizes that this stage is crucial for maintaining the structural integrity of the flange, which in turn safeguards the living area beneath the canvas when hatches are open.Step 3: Allowing Time to Dry
After securely attaching the first portion of the flange, Sven allows ample time for it to dry before moving forward with additional steps. This patience and precision are key aspects of his successful boatbuilding methods.Step 4: Finishing Touches
Once the flange is fully dried, Sven removes the clamps carefully, ensuring no damage occurs during this process. He then moves on to attaching four more pieces onto these main frames, completing two pairs of flanges for the bulkhead hatches.The Final Touches
While two flanges form the primary support structure around the hatches, Sven mentions there are two additional pieces required at each end to ensure comprehensive protection. This attention to detail highlights his commitment to producing a durable and reliable design. “Sailing is about finding your path, whether it’s across an ocean or within yourself.” – Sven Yrvind In conclusion, making flanges around bulkhead hatches may seem complex at first glance, but by following Sven Yrvind’s meticulous process, enthusiasts can achieve professional-level results. Remember that the journey of boatbuilding is as rewarding as reaching your destination; it tests one’s patience and dedication. For those seeking to embark on this adventure or simply gain more insight into marine craftsmanship, Sven’s wisdom is invaluable.Sven begins by explaining that working on flanges vertically and horizontally is significantly easier than doing so in a flat position. To simplify the process further, he divides the task into two or three steps as suggested by fellow expert “for for.” This approach not only makes it more manageable but also allows for greater precision in crafting each component.Step 2: Applying Glue and Securing
Sven proceeds to apply glue along one edge of the flange, ensuring a secure bond when clamped into place. He emphasizes that this stage is crucial for maintaining the structural integrity of the flange, which in turn safeguards the living area beneath the canvas when hatches are open.Step 3: Allowing Time to Dry
After securely attaching the first portion of the flange, Sven allows ample time for it to dry before moving forward with additional steps. This patience and precision are key aspects of his successful boatbuilding methods.Step 4: Finishing Touches
Once the flange is fully dried, Sven removes the clamps carefully, ensuring no damage occurs during this process. He then moves on to attaching four more pieces onto these main frames, completing two pairs of flanges for the bulkhead hatches.The Final Touches
While two flanges form the primary support structure around the hatches, Sven mentions there are two additional pieces required at each end to ensure comprehensive protection. This attention to detail highlights his commitment to producing a durable and reliable design. “Sailing is about finding your path, whether it’s across an ocean or within yourself.” – Sven Yrvind In conclusion, making flanges around bulkhead hatches may seem complex at first glance, but by following Sven Yrvind’s meticulous process, enthusiasts can achieve professional-level results. Remember that the journey of boatbuilding is as rewarding as reaching your destination; it tests one’s patience and dedication. For those seeking to embark on this adventure or simply gain more insight into marine craftsmanship, Sven’s wisdom is invaluable.Sven Yrvind, a renowned yacht designer and sailor, shares valuable insights on creating flanges around bulkhead hatches for canvas protection in this enlightening video. By following his expert guidance, boat enthusiasts can ensure their living areas remain secure while allowing unhindered access through the hatches.Step 1: Starting with the Flange
Sven begins by explaining that working on flanges vertically and horizontally is significantly easier than doing so in a flat position. To simplify the process further, he divides the task into two or three steps as suggested by fellow expert “for for.” This approach not only makes it more manageable but also allows for greater precision in crafting each component.Step 2: Applying Glue and Securing
Sven proceeds to apply glue along one edge of the flange, ensuring a secure bond when clamped into place. He emphasizes that this stage is crucial for maintaining the structural integrity of the flange, which in turn safeguards the living area beneath the canvas when hatches are open.Step 3: Allowing Time to Dry
After securely attaching the first portion of the flange, Sven allows ample time for it to dry before moving forward with additional steps. This patience and precision are key aspects of his successful boatbuilding methods.Step 4: Finishing Touches
Once the flange is fully dried, Sven removes the clamps carefully, ensuring no damage occurs during this process. He then moves on to attaching four more pieces onto these main frames, completing two pairs of flanges for the bulkhead hatches.The Final Touches
While two flanges form the primary support structure around the hatches, Sven mentions there are two additional pieces required at each end to ensure comprehensive protection. This attention to detail highlights his commitment to producing a durable and reliable design. “Sailing is about finding your path, whether it’s across an ocean or within yourself.” – Sven Yrvind In conclusion, making flanges around bulkhead hatches may seem complex at first glance, but by following Sven Yrvind’s meticulous process, enthusiasts can achieve professional-level results. Remember that the journey of boatbuilding is as rewarding as reaching your destination; it tests one’s patience and dedication. For those seeking to embark on this adventure or simply gain more insight into marine craftsmanship, Sven’s wisdom is invaluable.Making Flanges Around Bulkhead Hatches for Canvas
Sven Yrvind, a renowned yacht designer and sailor, shares valuable insights on creating flanges around bulkhead hatches for canvas protection in this enlightening video. By following his expert guidance, boat enthusiasts can ensure their living areas remain secure while allowing unhindered access through the hatches.Step 1: Starting with the Flange
Sven begins by explaining that working on flanges vertically and horizontally is significantly easier than doing so in a flat position. To simplify the process further, he divides the task into two or three steps as suggested by fellow expert “for for.” This approach not only makes it more manageable but also allows for greater precision in crafting each component.Step 2: Applying Glue and Securing
Sven proceeds to apply glue along one edge of the flange, ensuring a secure bond when clamped into place. He emphasizes that this stage is crucial for maintaining the structural integrity of the flange, which in turn safeguards the living area beneath the canvas when hatches are open.Step 3: Allowing Time to Dry
After securely attaching the first portion of the flange, Sven allows ample time for it to dry before moving forward with additional steps. This patience and precision are key aspects of his successful boatbuilding methods.Step 4: Finishing Touches
Once the flange is fully dried, Sven removes the clamps carefully, ensuring no damage occurs during this process. He then moves on to attaching four more pieces onto these main frames, completing two pairs of flanges for the bulkhead hatches.The Final Touches
While two flanges form the primary support structure around the hatches, Sven mentions there are two additional pieces required at each end to ensure comprehensive protection. This attention to detail highlights his commitment to producing a durable and reliable design. “Sailing is about finding your path, whether it’s across an ocean or within yourself.” – Sven Yrvind In conclusion, making flanges around bulkhead hatches may seem complex at first glance, but by following Sven Yrvind’s meticulous process, enthusiasts can achieve professional-level results. Remember that the journey of boatbuilding is as rewarding as reaching your destination; it tests one’s patience and dedication. For those seeking to embark on this adventure or simply gain more insight into marine craftsmanship, Sven’s wisdom is invaluable.Once the flange is fully dried, Sven removes the clamps carefully, ensuring no damage occurs during this process. He then moves on to attaching four more pieces onto these main frames, completing two pairs of flanges for the bulkhead hatches.The Final Touches
While two flanges form the primary support structure around the hatches, Sven mentions there are two additional pieces required at each end to ensure comprehensive protection. This attention to detail highlights his commitment to producing a durable and reliable design. “Sailing is about finding your path, whether it’s across an ocean or within yourself.” – Sven Yrvind In conclusion, making flanges around bulkhead hatches may seem complex at first glance, but by following Sven Yrvind’s meticulous process, enthusiasts can achieve professional-level results. Remember that the journey of boatbuilding is as rewarding as reaching your destination; it tests one’s patience and dedication. For those seeking to embark on this adventure or simply gain more insight into marine craftsmanship, Sven’s wisdom is invaluable.After securely attaching the first portion of the flange, Sven allows ample time for it to dry before moving forward with additional steps. This patience and precision are key aspects of his successful boatbuilding methods.Step 4: Finishing Touches
Once the flange is fully dried, Sven removes the clamps carefully, ensuring no damage occurs during this process. He then moves on to attaching four more pieces onto these main frames, completing two pairs of flanges for the bulkhead hatches.The Final Touches
While two flanges form the primary support structure around the hatches, Sven mentions there are two additional pieces required at each end to ensure comprehensive protection. This attention to detail highlights his commitment to producing a durable and reliable design. “Sailing is about finding your path, whether it’s across an ocean or within yourself.” – Sven Yrvind In conclusion, making flanges around bulkhead hatches may seem complex at first glance, but by following Sven Yrvind’s meticulous process, enthusiasts can achieve professional-level results. Remember that the journey of boatbuilding is as rewarding as reaching your destination; it tests one’s patience and dedication. For those seeking to embark on this adventure or simply gain more insight into marine craftsmanship, Sven’s wisdom is invaluable.Sven proceeds to apply glue along one edge of the flange, ensuring a secure bond when clamped into place. He emphasizes that this stage is crucial for maintaining the structural integrity of the flange, which in turn safeguards the living area beneath the canvas when hatches are open.Step 3: Allowing Time to Dry
After securely attaching the first portion of the flange, Sven allows ample time for it to dry before moving forward with additional steps. This patience and precision are key aspects of his successful boatbuilding methods.Step 4: Finishing Touches
Once the flange is fully dried, Sven removes the clamps carefully, ensuring no damage occurs during this process. He then moves on to attaching four more pieces onto these main frames, completing two pairs of flanges for the bulkhead hatches.The Final Touches
While two flanges form the primary support structure around the hatches, Sven mentions there are two additional pieces required at each end to ensure comprehensive protection. This attention to detail highlights his commitment to producing a durable and reliable design. “Sailing is about finding your path, whether it’s across an ocean or within yourself.” – Sven Yrvind In conclusion, making flanges around bulkhead hatches may seem complex at first glance, but by following Sven Yrvind’s meticulous process, enthusiasts can achieve professional-level results. Remember that the journey of boatbuilding is as rewarding as reaching your destination; it tests one’s patience and dedication. For those seeking to embark on this adventure or simply gain more insight into marine craftsmanship, Sven’s wisdom is invaluable.Sven begins by explaining that working on flanges vertically and horizontally is significantly easier than doing so in a flat position. To simplify the process further, he divides the task into two or three steps as suggested by fellow expert “for for.” This approach not only makes it more manageable but also allows for greater precision in crafting each component.Step 2: Applying Glue and Securing
Sven proceeds to apply glue along one edge of the flange, ensuring a secure bond when clamped into place. He emphasizes that this stage is crucial for maintaining the structural integrity of the flange, which in turn safeguards the living area beneath the canvas when hatches are open.Step 3: Allowing Time to Dry
After securely attaching the first portion of the flange, Sven allows ample time for it to dry before moving forward with additional steps. This patience and precision are key aspects of his successful boatbuilding methods.Step 4: Finishing Touches
Once the flange is fully dried, Sven removes the clamps carefully, ensuring no damage occurs during this process. He then moves on to attaching four more pieces onto these main frames, completing two pairs of flanges for the bulkhead hatches.The Final Touches
While two flanges form the primary support structure around the hatches, Sven mentions there are two additional pieces required at each end to ensure comprehensive protection. This attention to detail highlights his commitment to producing a durable and reliable design. “Sailing is about finding your path, whether it’s across an ocean or within yourself.” – Sven Yrvind In conclusion, making flanges around bulkhead hatches may seem complex at first glance, but by following Sven Yrvind’s meticulous process, enthusiasts can achieve professional-level results. Remember that the journey of boatbuilding is as rewarding as reaching your destination; it tests one’s patience and dedication. For those seeking to embark on this adventure or simply gain more insight into marine craftsmanship, Sven’s wisdom is invaluable.Sven Yrvind, a renowned yacht designer and sailor, shares valuable insights on creating flanges around bulkhead hatches for canvas protection in this enlightening video. By following his expert guidance, boat enthusiasts can ensure their living areas remain secure while allowing unhindered access through the hatches.Step 1: Starting with the Flange
Sven begins by explaining that working on flanges vertically and horizontally is significantly easier than doing so in a flat position. To simplify the process further, he divides the task into two or three steps as suggested by fellow expert “for for.” This approach not only makes it more manageable but also allows for greater precision in crafting each component.Step 2: Applying Glue and Securing
Sven proceeds to apply glue along one edge of the flange, ensuring a secure bond when clamped into place. He emphasizes that this stage is crucial for maintaining the structural integrity of the flange, which in turn safeguards the living area beneath the canvas when hatches are open.Step 3: Allowing Time to Dry
After securely attaching the first portion of the flange, Sven allows ample time for it to dry before moving forward with additional steps. This patience and precision are key aspects of his successful boatbuilding methods.Step 4: Finishing Touches
Once the flange is fully dried, Sven removes the clamps carefully, ensuring no damage occurs during this process. He then moves on to attaching four more pieces onto these main frames, completing two pairs of flanges for the bulkhead hatches.The Final Touches
While two flanges form the primary support structure around the hatches, Sven mentions there are two additional pieces required at each end to ensure comprehensive protection. This attention to detail highlights his commitment to producing a durable and reliable design. “Sailing is about finding your path, whether it’s across an ocean or within yourself.” – Sven Yrvind In conclusion, making flanges around bulkhead hatches may seem complex at first glance, but by following Sven Yrvind’s meticulous process, enthusiasts can achieve professional-level results. Remember that the journey of boatbuilding is as rewarding as reaching your destination; it tests one’s patience and dedication. For those seeking to embark on this adventure or simply gain more insight into marine craftsmanship, Sven’s wisdom is invaluable.Making Flanges Around Bulkhead Hatches for Canvas
Sven Yrvind, a renowned yacht designer and sailor, shares valuable insights on creating flanges around bulkhead hatches for canvas protection in this enlightening video. By following his expert guidance, boat enthusiasts can ensure their living areas remain secure while allowing unhindered access through the hatches.Step 1: Starting with the Flange
Sven begins by explaining that working on flanges vertically and horizontally is significantly easier than doing so in a flat position. To simplify the process further, he divides the task into two or three steps as suggested by fellow expert “for for.” This approach not only makes it more manageable but also allows for greater precision in crafting each component.Step 2: Applying Glue and Securing
Sven proceeds to apply glue along one edge of the flange, ensuring a secure bond when clamped into place. He emphasizes that this stage is crucial for maintaining the structural integrity of the flange, which in turn safeguards the living area beneath the canvas when hatches are open.Step 3: Allowing Time to Dry
After securely attaching the first portion of the flange, Sven allows ample time for it to dry before moving forward with additional steps. This patience and precision are key aspects of his successful boatbuilding methods.Step 4: Finishing Touches
Once the flange is fully dried, Sven removes the clamps carefully, ensuring no damage occurs during this process. He then moves on to attaching four more pieces onto these main frames, completing two pairs of flanges for the bulkhead hatches.The Final Touches
While two flanges form the primary support structure around the hatches, Sven mentions there are two additional pieces required at each end to ensure comprehensive protection. This attention to detail highlights his commitment to producing a durable and reliable design. “Sailing is about finding your path, whether it’s across an ocean or within yourself.” – Sven Yrvind In conclusion, making flanges around bulkhead hatches may seem complex at first glance, but by following Sven Yrvind’s meticulous process, enthusiasts can achieve professional-level results. Remember that the journey of boatbuilding is as rewarding as reaching your destination; it tests one’s patience and dedication. For those seeking to embark on this adventure or simply gain more insight into marine craftsmanship, Sven’s wisdom is invaluable.Sven proceeds to apply glue along one edge of the flange, ensuring a secure bond when clamped into place. He emphasizes that this stage is crucial for maintaining the structural integrity of the flange, which in turn safeguards the living area beneath the canvas when hatches are open.Step 3: Allowing Time to Dry
After securely attaching the first portion of the flange, Sven allows ample time for it to dry before moving forward with additional steps. This patience and precision are key aspects of his successful boatbuilding methods.Step 4: Finishing Touches
Once the flange is fully dried, Sven removes the clamps carefully, ensuring no damage occurs during this process. He then moves on to attaching four more pieces onto these main frames, completing two pairs of flanges for the bulkhead hatches.The Final Touches
While two flanges form the primary support structure around the hatches, Sven mentions there are two additional pieces required at each end to ensure comprehensive protection. This attention to detail highlights his commitment to producing a durable and reliable design. “Sailing is about finding your path, whether it’s across an ocean or within yourself.” – Sven Yrvind In conclusion, making flanges around bulkhead hatches may seem complex at first glance, but by following Sven Yrvind’s meticulous process, enthusiasts can achieve professional-level results. Remember that the journey of boatbuilding is as rewarding as reaching your destination; it tests one’s patience and dedication. For those seeking to embark on this adventure or simply gain more insight into marine craftsmanship, Sven’s wisdom is invaluable.After securely attaching the first portion of the flange, Sven allows ample time for it to dry before moving forward with additional steps. This patience and precision are key aspects of his successful boatbuilding methods.Step 4: Finishing Touches
Once the flange is fully dried, Sven removes the clamps carefully, ensuring no damage occurs during this process. He then moves on to attaching four more pieces onto these main frames, completing two pairs of flanges for the bulkhead hatches.The Final Touches
While two flanges form the primary support structure around the hatches, Sven mentions there are two additional pieces required at each end to ensure comprehensive protection. This attention to detail highlights his commitment to producing a durable and reliable design. “Sailing is about finding your path, whether it’s across an ocean or within yourself.” – Sven Yrvind In conclusion, making flanges around bulkhead hatches may seem complex at first glance, but by following Sven Yrvind’s meticulous process, enthusiasts can achieve professional-level results. Remember that the journey of boatbuilding is as rewarding as reaching your destination; it tests one’s patience and dedication. For those seeking to embark on this adventure or simply gain more insight into marine craftsmanship, Sven’s wisdom is invaluable.Sven begins by explaining that working on flanges vertically and horizontally is significantly easier than doing so in a flat position. To simplify the process further, he divides the task into two or three steps as suggested by fellow expert “for for.” This approach not only makes it more manageable but also allows for greater precision in crafting each component.Step 2: Applying Glue and Securing
Sven proceeds to apply glue along one edge of the flange, ensuring a secure bond when clamped into place. He emphasizes that this stage is crucial for maintaining the structural integrity of the flange, which in turn safeguards the living area beneath the canvas when hatches are open.Step 3: Allowing Time to Dry
After securely attaching the first portion of the flange, Sven allows ample time for it to dry before moving forward with additional steps. This patience and precision are key aspects of his successful boatbuilding methods.Step 4: Finishing Touches
Once the flange is fully dried, Sven removes the clamps carefully, ensuring no damage occurs during this process. He then moves on to attaching four more pieces onto these main frames, completing two pairs of flanges for the bulkhead hatches.The Final Touches
While two flanges form the primary support structure around the hatches, Sven mentions there are two additional pieces required at each end to ensure comprehensive protection. This attention to detail highlights his commitment to producing a durable and reliable design. “Sailing is about finding your path, whether it’s across an ocean or within yourself.” – Sven Yrvind In conclusion, making flanges around bulkhead hatches may seem complex at first glance, but by following Sven Yrvind’s meticulous process, enthusiasts can achieve professional-level results. Remember that the journey of boatbuilding is as rewarding as reaching your destination; it tests one’s patience and dedication. For those seeking to embark on this adventure or simply gain more insight into marine craftsmanship, Sven’s wisdom is invaluable.Sven Yrvind, a renowned yacht designer and sailor, shares valuable insights on creating flanges around bulkhead hatches for canvas protection in this enlightening video. By following his expert guidance, boat enthusiasts can ensure their living areas remain secure while allowing unhindered access through the hatches.Step 1: Starting with the Flange
Sven begins by explaining that working on flanges vertically and horizontally is significantly easier than doing so in a flat position. To simplify the process further, he divides the task into two or three steps as suggested by fellow expert “for for.” This approach not only makes it more manageable but also allows for greater precision in crafting each component.Step 2: Applying Glue and Securing
Sven proceeds to apply glue along one edge of the flange, ensuring a secure bond when clamped into place. He emphasizes that this stage is crucial for maintaining the structural integrity of the flange, which in turn safeguards the living area beneath the canvas when hatches are open.Step 3: Allowing Time to Dry
After securely attaching the first portion of the flange, Sven allows ample time for it to dry before moving forward with additional steps. This patience and precision are key aspects of his successful boatbuilding methods.Step 4: Finishing Touches
Once the flange is fully dried, Sven removes the clamps carefully, ensuring no damage occurs during this process. He then moves on to attaching four more pieces onto these main frames, completing two pairs of flanges for the bulkhead hatches.The Final Touches
While two flanges form the primary support structure around the hatches, Sven mentions there are two additional pieces required at each end to ensure comprehensive protection. This attention to detail highlights his commitment to producing a durable and reliable design. “Sailing is about finding your path, whether it’s across an ocean or within yourself.” – Sven Yrvind In conclusion, making flanges around bulkhead hatches may seem complex at first glance, but by following Sven Yrvind’s meticulous process, enthusiasts can achieve professional-level results. Remember that the journey of boatbuilding is as rewarding as reaching your destination; it tests one’s patience and dedication. For those seeking to embark on this adventure or simply gain more insight into marine craftsmanship, Sven’s wisdom is invaluable.Making Flanges Around Bulkhead Hatches for Canvas
Sven Yrvind, a renowned yacht designer and sailor, shares valuable insights on creating flanges around bulkhead hatches for canvas protection in this enlightening video. By following his expert guidance, boat enthusiasts can ensure their living areas remain secure while allowing unhindered access through the hatches.Step 1: Starting with the Flange
Sven begins by explaining that working on flanges vertically and horizontally is significantly easier than doing so in a flat position. To simplify the process further, he divides the task into two or three steps as suggested by fellow expert “for for.” This approach not only makes it more manageable but also allows for greater precision in crafting each component.Step 2: Applying Glue and Securing
Sven proceeds to apply glue along one edge of the flange, ensuring a secure bond when clamped into place. He emphasizes that this stage is crucial for maintaining the structural integrity of the flange, which in turn safeguards the living area beneath the canvas when hatches are open.Step 3: Allowing Time to Dry
After securely attaching the first portion of the flange, Sven allows ample time for it to dry before moving forward with additional steps. This patience and precision are key aspects of his successful boatbuilding methods.Step 4: Finishing Touches
Once the flange is fully dried, Sven removes the clamps carefully, ensuring no damage occurs during this process. He then moves on to attaching four more pieces onto these main frames, completing two pairs of flanges for the bulkhead hatches.The Final Touches
While two flanges form the primary support structure around the hatches, Sven mentions there are two additional pieces required at each end to ensure comprehensive protection. This attention to detail highlights his commitment to producing a durable and reliable design. “Sailing is about finding your path, whether it’s across an ocean or within yourself.” – Sven Yrvind In conclusion, making flanges around bulkhead hatches may seem complex at first glance, but by following Sven Yrvind’s meticulous process, enthusiasts can achieve professional-level results. Remember that the journey of boatbuilding is as rewarding as reaching your destination; it tests one’s patience and dedication. For those seeking to embark on this adventure or simply gain more insight into marine craftsmanship, Sven’s wisdom is invaluable.Sven proceeds to apply glue along one edge of the flange, ensuring a secure bond when clamped into place. He emphasizes that this stage is crucial for maintaining the structural integrity of the flange, which in turn safeguards the living area beneath the canvas when hatches are open.Step 3: Allowing Time to Dry
After securely attaching the first portion of the flange, Sven allows ample time for it to dry before moving forward with additional steps. This patience and precision are key aspects of his successful boatbuilding methods.Step 4: Finishing Touches
Once the flange is fully dried, Sven removes the clamps carefully, ensuring no damage occurs during this process. He then moves on to attaching four more pieces onto these main frames, completing two pairs of flanges for the bulkhead hatches.The Final Touches
While two flanges form the primary support structure around the hatches, Sven mentions there are two additional pieces required at each end to ensure comprehensive protection. This attention to detail highlights his commitment to producing a durable and reliable design. “Sailing is about finding your path, whether it’s across an ocean or within yourself.” – Sven Yrvind In conclusion, making flanges around bulkhead hatches may seem complex at first glance, but by following Sven Yrvind’s meticulous process, enthusiasts can achieve professional-level results. Remember that the journey of boatbuilding is as rewarding as reaching your destination; it tests one’s patience and dedication. For those seeking to embark on this adventure or simply gain more insight into marine craftsmanship, Sven’s wisdom is invaluable.Sven begins by explaining that working on flanges vertically and horizontally is significantly easier than doing so in a flat position. To simplify the process further, he divides the task into two or three steps as suggested by fellow expert “for for.” This approach not only makes it more manageable but also allows for greater precision in crafting each component.Step 2: Applying Glue and Securing
Sven proceeds to apply glue along one edge of the flange, ensuring a secure bond when clamped into place. He emphasizes that this stage is crucial for maintaining the structural integrity of the flange, which in turn safeguards the living area beneath the canvas when hatches are open.Step 3: Allowing Time to Dry
After securely attaching the first portion of the flange, Sven allows ample time for it to dry before moving forward with additional steps. This patience and precision are key aspects of his successful boatbuilding methods.Step 4: Finishing Touches
Once the flange is fully dried, Sven removes the clamps carefully, ensuring no damage occurs during this process. He then moves on to attaching four more pieces onto these main frames, completing two pairs of flanges for the bulkhead hatches.The Final Touches
While two flanges form the primary support structure around the hatches, Sven mentions there are two additional pieces required at each end to ensure comprehensive protection. This attention to detail highlights his commitment to producing a durable and reliable design. “Sailing is about finding your path, whether it’s across an ocean or within yourself.” – Sven Yrvind In conclusion, making flanges around bulkhead hatches may seem complex at first glance, but by following Sven Yrvind’s meticulous process, enthusiasts can achieve professional-level results. Remember that the journey of boatbuilding is as rewarding as reaching your destination; it tests one’s patience and dedication. For those seeking to embark on this adventure or simply gain more insight into marine craftsmanship, Sven’s wisdom is invaluable.Sven Yrvind, a renowned yacht designer and sailor, shares valuable insights on creating flanges around bulkhead hatches for canvas protection in this enlightening video. By following his expert guidance, boat enthusiasts can ensure their living areas remain secure while allowing unhindered access through the hatches.Step 1: Starting with the Flange
Sven begins by explaining that working on flanges vertically and horizontally is significantly easier than doing so in a flat position. To simplify the process further, he divides the task into two or three steps as suggested by fellow expert “for for.” This approach not only makes it more manageable but also allows for greater precision in crafting each component.Step 2: Applying Glue and Securing
Sven proceeds to apply glue along one edge of the flange, ensuring a secure bond when clamped into place. He emphasizes that this stage is crucial for maintaining the structural integrity of the flange, which in turn safeguards the living area beneath the canvas when hatches are open.Step 3: Allowing Time to Dry
After securely attaching the first portion of the flange, Sven allows ample time for it to dry before moving forward with additional steps. This patience and precision are key aspects of his successful boatbuilding methods.Step 4: Finishing Touches
Once the flange is fully dried, Sven removes the clamps carefully, ensuring no damage occurs during this process. He then moves on to attaching four more pieces onto these main frames, completing two pairs of flanges for the bulkhead hatches.The Final Touches
While two flanges form the primary support structure around the hatches, Sven mentions there are two additional pieces required at each end to ensure comprehensive protection. This attention to detail highlights his commitment to producing a durable and reliable design. “Sailing is about finding your path, whether it’s across an ocean or within yourself.” – Sven Yrvind In conclusion, making flanges around bulkhead hatches may seem complex at first glance, but by following Sven Yrvind’s meticulous process, enthusiasts can achieve professional-level results. Remember that the journey of boatbuilding is as rewarding as reaching your destination; it tests one’s patience and dedication. For those seeking to embark on this adventure or simply gain more insight into marine craftsmanship, Sven’s wisdom is invaluable.Making Flanges Around Bulkhead Hatches for Canvas
Sven Yrvind, a renowned yacht designer and sailor, shares valuable insights on creating flanges around bulkhead hatches for canvas protection in this enlightening video. By following his expert guidance, boat enthusiasts can ensure their living areas remain secure while allowing unhindered access through the hatches.Step 1: Starting with the Flange
Sven begins by explaining that working on flanges vertically and horizontally is significantly easier than doing so in a flat position. To simplify the process further, he divides the task into two or three steps as suggested by fellow expert “for for.” This approach not only makes it more manageable but also allows for greater precision in crafting each component.Step 2: Applying Glue and Securing
Sven proceeds to apply glue along one edge of the flange, ensuring a secure bond when clamped into place. He emphasizes that this stage is crucial for maintaining the structural integrity of the flange, which in turn safeguards the living area beneath the canvas when hatches are open.Step 3: Allowing Time to Dry
After securely attaching the first portion of the flange, Sven allows ample time for it to dry before moving forward with additional steps. This patience and precision are key aspects of his successful boatbuilding methods.Step 4: Finishing Touches
Once the flange is fully dried, Sven removes the clamps carefully, ensuring no damage occurs during this process. He then moves on to attaching four more pieces onto these main frames, completing two pairs of flanges for the bulkhead hatches.The Final Touches
While two flanges form the primary support structure around the hatches, Sven mentions there are two additional pieces required at each end to ensure comprehensive protection. This attention to detail highlights his commitment to producing a durable and reliable design. “Sailing is about finding your path, whether it’s across an ocean or within yourself.” – Sven Yrvind In conclusion, making flanges around bulkhead hatches may seem complex at first glance, but by following Sven Yrvind’s meticulous process, enthusiasts can achieve professional-level results. Remember that the journey of boatbuilding is as rewarding as reaching your destination; it tests one’s patience and dedication. For those seeking to embark on this adventure or simply gain more insight into marine craftsmanship, Sven’s wisdom is invaluable.Once the flange is fully dried, Sven removes the clamps carefully, ensuring no damage occurs during this process. He then moves on to attaching four more pieces onto these main frames, completing two pairs of flanges for the bulkhead hatches.The Final Touches
While two flanges form the primary support structure around the hatches, Sven mentions there are two additional pieces required at each end to ensure comprehensive protection. This attention to detail highlights his commitment to producing a durable and reliable design. “Sailing is about finding your path, whether it’s across an ocean or within yourself.” – Sven Yrvind In conclusion, making flanges around bulkhead hatches may seem complex at first glance, but by following Sven Yrvind’s meticulous process, enthusiasts can achieve professional-level results. Remember that the journey of boatbuilding is as rewarding as reaching your destination; it tests one’s patience and dedication. For those seeking to embark on this adventure or simply gain more insight into marine craftsmanship, Sven’s wisdom is invaluable.Sven proceeds to apply glue along one edge of the flange, ensuring a secure bond when clamped into place. He emphasizes that this stage is crucial for maintaining the structural integrity of the flange, which in turn safeguards the living area beneath the canvas when hatches are open.Step 3: Allowing Time to Dry
After securely attaching the first portion of the flange, Sven allows ample time for it to dry before moving forward with additional steps. This patience and precision are key aspects of his successful boatbuilding methods.Step 4: Finishing Touches
Once the flange is fully dried, Sven removes the clamps carefully, ensuring no damage occurs during this process. He then moves on to attaching four more pieces onto these main frames, completing two pairs of flanges for the bulkhead hatches.The Final Touches
While two flanges form the primary support structure around the hatches, Sven mentions there are two additional pieces required at each end to ensure comprehensive protection. This attention to detail highlights his commitment to producing a durable and reliable design. “Sailing is about finding your path, whether it’s across an ocean or within yourself.” – Sven Yrvind In conclusion, making flanges around bulkhead hatches may seem complex at first glance, but by following Sven Yrvind’s meticulous process, enthusiasts can achieve professional-level results. Remember that the journey of boatbuilding is as rewarding as reaching your destination; it tests one’s patience and dedication. For those seeking to embark on this adventure or simply gain more insight into marine craftsmanship, Sven’s wisdom is invaluable.Sven begins by explaining that working on flanges vertically and horizontally is significantly easier than doing so in a flat position. To simplify the process further, he divides the task into two or three steps as suggested by fellow expert “for for.” This approach not only makes it more manageable but also allows for greater precision in crafting each component.Step 2: Applying Glue and Securing
Sven proceeds to apply glue along one edge of the flange, ensuring a secure bond when clamped into place. He emphasizes that this stage is crucial for maintaining the structural integrity of the flange, which in turn safeguards the living area beneath the canvas when hatches are open.Step 3: Allowing Time to Dry
After securely attaching the first portion of the flange, Sven allows ample time for it to dry before moving forward with additional steps. This patience and precision are key aspects of his successful boatbuilding methods.Step 4: Finishing Touches
Once the flange is fully dried, Sven removes the clamps carefully, ensuring no damage occurs during this process. He then moves on to attaching four more pieces onto these main frames, completing two pairs of flanges for the bulkhead hatches.The Final Touches
While two flanges form the primary support structure around the hatches, Sven mentions there are two additional pieces required at each end to ensure comprehensive protection. This attention to detail highlights his commitment to producing a durable and reliable design. “Sailing is about finding your path, whether it’s across an ocean or within yourself.” – Sven Yrvind In conclusion, making flanges around bulkhead hatches may seem complex at first glance, but by following Sven Yrvind’s meticulous process, enthusiasts can achieve professional-level results. Remember that the journey of boatbuilding is as rewarding as reaching your destination; it tests one’s patience and dedication. For those seeking to embark on this adventure or simply gain more insight into marine craftsmanship, Sven’s wisdom is invaluable.Sven Yrvind, a renowned yacht designer and sailor, shares valuable insights on creating flanges around bulkhead hatches for canvas protection in this enlightening video. By following his expert guidance, boat enthusiasts can ensure their living areas remain secure while allowing unhindered access through the hatches.Step 1: Starting with the Flange
Sven begins by explaining that working on flanges vertically and horizontally is significantly easier than doing so in a flat position. To simplify the process further, he divides the task into two or three steps as suggested by fellow expert “for for.” This approach not only makes it more manageable but also allows for greater precision in crafting each component.Step 2: Applying Glue and Securing
Sven proceeds to apply glue along one edge of the flange, ensuring a secure bond when clamped into place. He emphasizes that this stage is crucial for maintaining the structural integrity of the flange, which in turn safeguards the living area beneath the canvas when hatches are open.Step 3: Allowing Time to Dry
After securely attaching the first portion of the flange, Sven allows ample time for it to dry before moving forward with additional steps. This patience and precision are key aspects of his successful boatbuilding methods.Step 4: Finishing Touches
Once the flange is fully dried, Sven removes the clamps carefully, ensuring no damage occurs during this process. He then moves on to attaching four more pieces onto these main frames, completing two pairs of flanges for the bulkhead hatches.The Final Touches
While two flanges form the primary support structure around the hatches, Sven mentions there are two additional pieces required at each end to ensure comprehensive protection. This attention to detail highlights his commitment to producing a durable and reliable design. “Sailing is about finding your path, whether it’s across an ocean or within yourself.” – Sven Yrvind In conclusion, making flanges around bulkhead hatches may seem complex at first glance, but by following Sven Yrvind’s meticulous process, enthusiasts can achieve professional-level results. Remember that the journey of boatbuilding is as rewarding as reaching your destination; it tests one’s patience and dedication. For those seeking to embark on this adventure or simply gain more insight into marine craftsmanship, Sven’s wisdom is invaluable.Making Flanges Around Bulkhead Hatches for Canvas
Sven Yrvind, a renowned yacht designer and sailor, shares valuable insights on creating flanges around bulkhead hatches for canvas protection in this enlightening video. By following his expert guidance, boat enthusiasts can ensure their living areas remain secure while allowing unhindered access through the hatches.Step 1: Starting with the Flange
Sven begins by explaining that working on flanges vertically and horizontally is significantly easier than doing so in a flat position. To simplify the process further, he divides the task into two or three steps as suggested by fellow expert “for for.” This approach not only makes it more manageable but also allows for greater precision in crafting each component.Step 2: Applying Glue and Securing
Sven proceeds to apply glue along one edge of the flange, ensuring a secure bond when clamped into place. He emphasizes that this stage is crucial for maintaining the structural integrity of the flange, which in turn safeguards the living area beneath the canvas when hatches are open.Step 3: Allowing Time to Dry
After securely attaching the first portion of the flange, Sven allows ample time for it to dry before moving forward with additional steps. This patience and precision are key aspects of his successful boatbuilding methods.Step 4: Finishing Touches
Once the flange is fully dried, Sven removes the clamps carefully, ensuring no damage occurs during this process. He then moves on to attaching four more pieces onto these main frames, completing two pairs of flanges for the bulkhead hatches.The Final Touches
While two flanges form the primary support structure around the hatches, Sven mentions there are two additional pieces required at each end to ensure comprehensive protection. This attention to detail highlights his commitment to producing a durable and reliable design. “Sailing is about finding your path, whether it’s across an ocean or within yourself.” – Sven Yrvind In conclusion, making flanges around bulkhead hatches may seem complex at first glance, but by following Sven Yrvind’s meticulous process, enthusiasts can achieve professional-level results. Remember that the journey of boatbuilding is as rewarding as reaching your destination; it tests one’s patience and dedication. For those seeking to embark on this adventure or simply gain more insight into marine craftsmanship, Sven’s wisdom is invaluable.After securely attaching the first portion of the flange, Sven allows ample time for it to dry before moving forward with additional steps. This patience and precision are key aspects of his successful boatbuilding methods.Step 4: Finishing Touches
Once the flange is fully dried, Sven removes the clamps carefully, ensuring no damage occurs during this process. He then moves on to attaching four more pieces onto these main frames, completing two pairs of flanges for the bulkhead hatches.The Final Touches
While two flanges form the primary support structure around the hatches, Sven mentions there are two additional pieces required at each end to ensure comprehensive protection. This attention to detail highlights his commitment to producing a durable and reliable design. “Sailing is about finding your path, whether it’s across an ocean or within yourself.” – Sven Yrvind In conclusion, making flanges around bulkhead hatches may seem complex at first glance, but by following Sven Yrvind’s meticulous process, enthusiasts can achieve professional-level results. Remember that the journey of boatbuilding is as rewarding as reaching your destination; it tests one’s patience and dedication. For those seeking to embark on this adventure or simply gain more insight into marine craftsmanship, Sven’s wisdom is invaluable.Sven proceeds to apply glue along one edge of the flange, ensuring a secure bond when clamped into place. He emphasizes that this stage is crucial for maintaining the structural integrity of the flange, which in turn safeguards the living area beneath the canvas when hatches are open.Step 3: Allowing Time to Dry
After securely attaching the first portion of the flange, Sven allows ample time for it to dry before moving forward with additional steps. This patience and precision are key aspects of his successful boatbuilding methods.Step 4: Finishing Touches
Once the flange is fully dried, Sven removes the clamps carefully, ensuring no damage occurs during this process. He then moves on to attaching four more pieces onto these main frames, completing two pairs of flanges for the bulkhead hatches.The Final Touches
While two flanges form the primary support structure around the hatches, Sven mentions there are two additional pieces required at each end to ensure comprehensive protection. This attention to detail highlights his commitment to producing a durable and reliable design. “Sailing is about finding your path, whether it’s across an ocean or within yourself.” – Sven Yrvind In conclusion, making flanges around bulkhead hatches may seem complex at first glance, but by following Sven Yrvind’s meticulous process, enthusiasts can achieve professional-level results. Remember that the journey of boatbuilding is as rewarding as reaching your destination; it tests one’s patience and dedication. For those seeking to embark on this adventure or simply gain more insight into marine craftsmanship, Sven’s wisdom is invaluable.Sven begins by explaining that working on flanges vertically and horizontally is significantly easier than doing so in a flat position. To simplify the process further, he divides the task into two or three steps as suggested by fellow expert “for for.” This approach not only makes it more manageable but also allows for greater precision in crafting each component.Step 2: Applying Glue and Securing
Sven proceeds to apply glue along one edge of the flange, ensuring a secure bond when clamped into place. He emphasizes that this stage is crucial for maintaining the structural integrity of the flange, which in turn safeguards the living area beneath the canvas when hatches are open.Step 3: Allowing Time to Dry
After securely attaching the first portion of the flange, Sven allows ample time for it to dry before moving forward with additional steps. This patience and precision are key aspects of his successful boatbuilding methods.Step 4: Finishing Touches
Once the flange is fully dried, Sven removes the clamps carefully, ensuring no damage occurs during this process. He then moves on to attaching four more pieces onto these main frames, completing two pairs of flanges for the bulkhead hatches.The Final Touches
While two flanges form the primary support structure around the hatches, Sven mentions there are two additional pieces required at each end to ensure comprehensive protection. This attention to detail highlights his commitment to producing a durable and reliable design. “Sailing is about finding your path, whether it’s across an ocean or within yourself.” – Sven Yrvind In conclusion, making flanges around bulkhead hatches may seem complex at first glance, but by following Sven Yrvind’s meticulous process, enthusiasts can achieve professional-level results. Remember that the journey of boatbuilding is as rewarding as reaching your destination; it tests one’s patience and dedication. For those seeking to embark on this adventure or simply gain more insight into marine craftsmanship, Sven’s wisdom is invaluable.Sven Yrvind, a renowned yacht designer and sailor, shares valuable insights on creating flanges around bulkhead hatches for canvas protection in this enlightening video. By following his expert guidance, boat enthusiasts can ensure their living areas remain secure while allowing unhindered access through the hatches.Step 1: Starting with the Flange
Sven begins by explaining that working on flanges vertically and horizontally is significantly easier than doing so in a flat position. To simplify the process further, he divides the task into two or three steps as suggested by fellow expert “for for.” This approach not only makes it more manageable but also allows for greater precision in crafting each component.Step 2: Applying Glue and Securing
Sven proceeds to apply glue along one edge of the flange, ensuring a secure bond when clamped into place. He emphasizes that this stage is crucial for maintaining the structural integrity of the flange, which in turn safeguards the living area beneath the canvas when hatches are open.Step 3: Allowing Time to Dry
After securely attaching the first portion of the flange, Sven allows ample time for it to dry before moving forward with additional steps. This patience and precision are key aspects of his successful boatbuilding methods.Step 4: Finishing Touches
Once the flange is fully dried, Sven removes the clamps carefully, ensuring no damage occurs during this process. He then moves on to attaching four more pieces onto these main frames, completing two pairs of flanges for the bulkhead hatches.The Final Touches
While two flanges form the primary support structure around the hatches, Sven mentions there are two additional pieces required at each end to ensure comprehensive protection. This attention to detail highlights his commitment to producing a durable and reliable design. “Sailing is about finding your path, whether it’s across an ocean or within yourself.” – Sven Yrvind In conclusion, making flanges around bulkhead hatches may seem complex at first glance, but by following Sven Yrvind’s meticulous process, enthusiasts can achieve professional-level results. Remember that the journey of boatbuilding is as rewarding as reaching your destination; it tests one’s patience and dedication. For those seeking to embark on this adventure or simply gain more insight into marine craftsmanship, Sven’s wisdom is invaluable.Making Flanges Around Bulkhead Hatches for Canvas
Sven Yrvind, a renowned yacht designer and sailor, shares valuable insights on creating flanges around bulkhead hatches for canvas protection in this enlightening video. By following his expert guidance, boat enthusiasts can ensure their living areas remain secure while allowing unhindered access through the hatches.Step 1: Starting with the Flange
Sven begins by explaining that working on flanges vertically and horizontally is significantly easier than doing so in a flat position. To simplify the process further, he divides the task into two or three steps as suggested by fellow expert “for for.” This approach not only makes it more manageable but also allows for greater precision in crafting each component.Step 2: Applying Glue and Securing
Sven proceeds to apply glue along one edge of the flange, ensuring a secure bond when clamped into place. He emphasizes that this stage is crucial for maintaining the structural integrity of the flange, which in turn safeguards the living area beneath the canvas when hatches are open.Step 3: Allowing Time to Dry
After securely attaching the first portion of the flange, Sven allows ample time for it to dry before moving forward with additional steps. This patience and precision are key aspects of his successful boatbuilding methods.Step 4: Finishing Touches
Once the flange is fully dried, Sven removes the clamps carefully, ensuring no damage occurs during this process. He then moves on to attaching four more pieces onto these main frames, completing two pairs of flanges for the bulkhead hatches.The Final Touches
While two flanges form the primary support structure around the hatches, Sven mentions there are two additional pieces required at each end to ensure comprehensive protection. This attention to detail highlights his commitment to producing a durable and reliable design. “Sailing is about finding your path, whether it’s across an ocean or within yourself.” – Sven Yrvind In conclusion, making flanges around bulkhead hatches may seem complex at first glance, but by following Sven Yrvind’s meticulous process, enthusiasts can achieve professional-level results. Remember that the journey of boatbuilding is as rewarding as reaching your destination; it tests one’s patience and dedication. For those seeking to embark on this adventure or simply gain more insight into marine craftsmanship, Sven’s wisdom is invaluable.Once the flange is fully dried, Sven removes the clamps carefully, ensuring no damage occurs during this process. He then moves on to attaching four more pieces onto these main frames, completing two pairs of flanges for the bulkhead hatches.The Final Touches
While two flanges form the primary support structure around the hatches, Sven mentions there are two additional pieces required at each end to ensure comprehensive protection. This attention to detail highlights his commitment to producing a durable and reliable design. “Sailing is about finding your path, whether it’s across an ocean or within yourself.” – Sven Yrvind In conclusion, making flanges around bulkhead hatches may seem complex at first glance, but by following Sven Yrvind’s meticulous process, enthusiasts can achieve professional-level results. Remember that the journey of boatbuilding is as rewarding as reaching your destination; it tests one’s patience and dedication. For those seeking to embark on this adventure or simply gain more insight into marine craftsmanship, Sven’s wisdom is invaluable.After securely attaching the first portion of the flange, Sven allows ample time for it to dry before moving forward with additional steps. This patience and precision are key aspects of his successful boatbuilding methods.Step 4: Finishing Touches
Once the flange is fully dried, Sven removes the clamps carefully, ensuring no damage occurs during this process. He then moves on to attaching four more pieces onto these main frames, completing two pairs of flanges for the bulkhead hatches.The Final Touches
While two flanges form the primary support structure around the hatches, Sven mentions there are two additional pieces required at each end to ensure comprehensive protection. This attention to detail highlights his commitment to producing a durable and reliable design. “Sailing is about finding your path, whether it’s across an ocean or within yourself.” – Sven Yrvind In conclusion, making flanges around bulkhead hatches may seem complex at first glance, but by following Sven Yrvind’s meticulous process, enthusiasts can achieve professional-level results. Remember that the journey of boatbuilding is as rewarding as reaching your destination; it tests one’s patience and dedication. For those seeking to embark on this adventure or simply gain more insight into marine craftsmanship, Sven’s wisdom is invaluable.Sven proceeds to apply glue along one edge of the flange, ensuring a secure bond when clamped into place. He emphasizes that this stage is crucial for maintaining the structural integrity of the flange, which in turn safeguards the living area beneath the canvas when hatches are open.Step 3: Allowing Time to Dry
After securely attaching the first portion of the flange, Sven allows ample time for it to dry before moving forward with additional steps. This patience and precision are key aspects of his successful boatbuilding methods.Step 4: Finishing Touches
Once the flange is fully dried, Sven removes the clamps carefully, ensuring no damage occurs during this process. He then moves on to attaching four more pieces onto these main frames, completing two pairs of flanges for the bulkhead hatches.The Final Touches
While two flanges form the primary support structure around the hatches, Sven mentions there are two additional pieces required at each end to ensure comprehensive protection. This attention to detail highlights his commitment to producing a durable and reliable design. “Sailing is about finding your path, whether it’s across an ocean or within yourself.” – Sven Yrvind In conclusion, making flanges around bulkhead hatches may seem complex at first glance, but by following Sven Yrvind’s meticulous process, enthusiasts can achieve professional-level results. Remember that the journey of boatbuilding is as rewarding as reaching your destination; it tests one’s patience and dedication. For those seeking to embark on this adventure or simply gain more insight into marine craftsmanship, Sven’s wisdom is invaluable.Sven begins by explaining that working on flanges vertically and horizontally is significantly easier than doing so in a flat position. To simplify the process further, he divides the task into two or three steps as suggested by fellow expert “for for.” This approach not only makes it more manageable but also allows for greater precision in crafting each component.Step 2: Applying Glue and Securing
Sven proceeds to apply glue along one edge of the flange, ensuring a secure bond when clamped into place. He emphasizes that this stage is crucial for maintaining the structural integrity of the flange, which in turn safeguards the living area beneath the canvas when hatches are open.Step 3: Allowing Time to Dry
After securely attaching the first portion of the flange, Sven allows ample time for it to dry before moving forward with additional steps. This patience and precision are key aspects of his successful boatbuilding methods.Step 4: Finishing Touches
Once the flange is fully dried, Sven removes the clamps carefully, ensuring no damage occurs during this process. He then moves on to attaching four more pieces onto these main frames, completing two pairs of flanges for the bulkhead hatches.The Final Touches
While two flanges form the primary support structure around the hatches, Sven mentions there are two additional pieces required at each end to ensure comprehensive protection. This attention to detail highlights his commitment to producing a durable and reliable design. “Sailing is about finding your path, whether it’s across an ocean or within yourself.” – Sven Yrvind In conclusion, making flanges around bulkhead hatches may seem complex at first glance, but by following Sven Yrvind’s meticulous process, enthusiasts can achieve professional-level results. Remember that the journey of boatbuilding is as rewarding as reaching your destination; it tests one’s patience and dedication. For those seeking to embark on this adventure or simply gain more insight into marine craftsmanship, Sven’s wisdom is invaluable.Sven Yrvind, a renowned yacht designer and sailor, shares valuable insights on creating flanges around bulkhead hatches for canvas protection in this enlightening video. By following his expert guidance, boat enthusiasts can ensure their living areas remain secure while allowing unhindered access through the hatches.Step 1: Starting with the Flange
Sven begins by explaining that working on flanges vertically and horizontally is significantly easier than doing so in a flat position. To simplify the process further, he divides the task into two or three steps as suggested by fellow expert “for for.” This approach not only makes it more manageable but also allows for greater precision in crafting each component.Step 2: Applying Glue and Securing
Sven proceeds to apply glue along one edge of the flange, ensuring a secure bond when clamped into place. He emphasizes that this stage is crucial for maintaining the structural integrity of the flange, which in turn safeguards the living area beneath the canvas when hatches are open.Step 3: Allowing Time to Dry
After securely attaching the first portion of the flange, Sven allows ample time for it to dry before moving forward with additional steps. This patience and precision are key aspects of his successful boatbuilding methods.Step 4: Finishing Touches
Once the flange is fully dried, Sven removes the clamps carefully, ensuring no damage occurs during this process. He then moves on to attaching four more pieces onto these main frames, completing two pairs of flanges for the bulkhead hatches.The Final Touches
While two flanges form the primary support structure around the hatches, Sven mentions there are two additional pieces required at each end to ensure comprehensive protection. This attention to detail highlights his commitment to producing a durable and reliable design. “Sailing is about finding your path, whether it’s across an ocean or within yourself.” – Sven Yrvind In conclusion, making flanges around bulkhead hatches may seem complex at first glance, but by following Sven Yrvind’s meticulous process, enthusiasts can achieve professional-level results. Remember that the journey of boatbuilding is as rewarding as reaching your destination; it tests one’s patience and dedication. For those seeking to embark on this adventure or simply gain more insight into marine craftsmanship, Sven’s wisdom is invaluable.Making Flanges Around Bulkhead Hatches for Canvas
Sven Yrvind, a renowned yacht designer and sailor, shares valuable insights on creating flanges around bulkhead hatches for canvas protection in this enlightening video. By following his expert guidance, boat enthusiasts can ensure their living areas remain secure while allowing unhindered access through the hatches.Step 1: Starting with the Flange
Sven begins by explaining that working on flanges vertically and horizontally is significantly easier than doing so in a flat position. To simplify the process further, he divides the task into two or three steps as suggested by fellow expert “for for.” This approach not only makes it more manageable but also allows for greater precision in crafting each component.Step 2: Applying Glue and Securing
Sven proceeds to apply glue along one edge of the flange, ensuring a secure bond when clamped into place. He emphasizes that this stage is crucial for maintaining the structural integrity of the flange, which in turn safeguards the living area beneath the canvas when hatches are open.Step 3: Allowing Time to Dry
After securely attaching the first portion of the flange, Sven allows ample time for it to dry before moving forward with additional steps. This patience and precision are key aspects of his successful boatbuilding methods.Step 4: Finishing Touches
Once the flange is fully dried, Sven removes the clamps carefully, ensuring no damage occurs during this process. He then moves on to attaching four more pieces onto these main frames, completing two pairs of flanges for the bulkhead hatches.The Final Touches
While two flanges form the primary support structure around the hatches, Sven mentions there are two additional pieces required at each end to ensure comprehensive protection. This attention to detail highlights his commitment to producing a durable and reliable design. “Sailing is about finding your path, whether it’s across an ocean or within yourself.” – Sven Yrvind In conclusion, making flanges around bulkhead hatches may seem complex at first glance, but by following Sven Yrvind’s meticulous process, enthusiasts can achieve professional-level results. Remember that the journey of boatbuilding is as rewarding as reaching your destination; it tests one’s patience and dedication. For those seeking to embark on this adventure or simply gain more insight into marine craftsmanship, Sven’s wisdom is invaluable.Sven begins by explaining that working on flanges vertically and horizontally is significantly easier than doing so in a flat position. To simplify the process further, he divides the task into two or three steps as suggested by fellow expert “for for.” This approach not only makes it more manageable but also allows for greater precision in crafting each component.Step 2: Applying Glue and Securing
Sven proceeds to apply glue along one edge of the flange, ensuring a secure bond when clamped into place. He emphasizes that this stage is crucial for maintaining the structural integrity of the flange, which in turn safeguards the living area beneath the canvas when hatches are open.Step 3: Allowing Time to Dry
After securely attaching the first portion of the flange, Sven allows ample time for it to dry before moving forward with additional steps. This patience and precision are key aspects of his successful boatbuilding methods.Step 4: Finishing Touches
Once the flange is fully dried, Sven removes the clamps carefully, ensuring no damage occurs during this process. He then moves on to attaching four more pieces onto these main frames, completing two pairs of flanges for the bulkhead hatches.The Final Touches
While two flanges form the primary support structure around the hatches, Sven mentions there are two additional pieces required at each end to ensure comprehensive protection. This attention to detail highlights his commitment to producing a durable and reliable design. “Sailing is about finding your path, whether it’s across an ocean or within yourself.” – Sven Yrvind In conclusion, making flanges around bulkhead hatches may seem complex at first glance, but by following Sven Yrvind’s meticulous process, enthusiasts can achieve professional-level results. Remember that the journey of boatbuilding is as rewarding as reaching your destination; it tests one’s patience and dedication. For those seeking to embark on this adventure or simply gain more insight into marine craftsmanship, Sven’s wisdom is invaluable.After securely attaching the first portion of the flange, Sven allows ample time for it to dry before moving forward with additional steps. This patience and precision are key aspects of his successful boatbuilding methods.Step 4: Finishing Touches
Once the flange is fully dried, Sven removes the clamps carefully, ensuring no damage occurs during this process. He then moves on to attaching four more pieces onto these main frames, completing two pairs of flanges for the bulkhead hatches.The Final Touches
While two flanges form the primary support structure around the hatches, Sven mentions there are two additional pieces required at each end to ensure comprehensive protection. This attention to detail highlights his commitment to producing a durable and reliable design. “Sailing is about finding your path, whether it’s across an ocean or within yourself.” – Sven Yrvind In conclusion, making flanges around bulkhead hatches may seem complex at first glance, but by following Sven Yrvind’s meticulous process, enthusiasts can achieve professional-level results. Remember that the journey of boatbuilding is as rewarding as reaching your destination; it tests one’s patience and dedication. For those seeking to embark on this adventure or simply gain more insight into marine craftsmanship, Sven’s wisdom is invaluable.Sven begins by explaining that working on flanges vertically and horizontally is significantly easier than doing so in a flat position. To simplify the process further, he divides the task into two or three steps as suggested by fellow expert “for for.” This approach not only makes it more manageable but also allows for greater precision in crafting each component.Step 2: Applying Glue and Securing
Sven proceeds to apply glue along one edge of the flange, ensuring a secure bond when clamped into place. He emphasizes that this stage is crucial for maintaining the structural integrity of the flange, which in turn safeguards the living area beneath the canvas when hatches are open.Step 3: Allowing Time to Dry
After securely attaching the first portion of the flange, Sven allows ample time for it to dry before moving forward with additional steps. This patience and precision are key aspects of his successful boatbuilding methods.Step 4: Finishing Touches
Once the flange is fully dried, Sven removes the clamps carefully, ensuring no damage occurs during this process. He then moves on to attaching four more pieces onto these main frames, completing two pairs of flanges for the bulkhead hatches.The Final Touches
While two flanges form the primary support structure around the hatches, Sven mentions there are two additional pieces required at each end to ensure comprehensive protection. This attention to detail highlights his commitment to producing a durable and reliable design. “Sailing is about finding your path, whether it’s across an ocean or within yourself.” – Sven Yrvind In conclusion, making flanges around bulkhead hatches may seem complex at first glance, but by following Sven Yrvind’s meticulous process, enthusiasts can achieve professional-level results. Remember that the journey of boatbuilding is as rewarding as reaching your destination; it tests one’s patience and dedication. For those seeking to embark on this adventure or simply gain more insight into marine craftsmanship, Sven’s wisdom is invaluable.Sven Yrvind, a renowned yacht designer and sailor, shares valuable insights on creating flanges around bulkhead hatches for canvas protection in this enlightening video. By following his expert guidance, boat enthusiasts can ensure their living areas remain secure while allowing unhindered access through the hatches.Step 1: Starting with the Flange
Sven begins by explaining that working on flanges vertically and horizontally is significantly easier than doing so in a flat position. To simplify the process further, he divides the task into two or three steps as suggested by fellow expert “for for.” This approach not only makes it more manageable but also allows for greater precision in crafting each component.Step 2: Applying Glue and Securing
Sven proceeds to apply glue along one edge of the flange, ensuring a secure bond when clamped into place. He emphasizes that this stage is crucial for maintaining the structural integrity of the flange, which in turn safeguards the living area beneath the canvas when hatches are open.Step 3: Allowing Time to Dry
After securely attaching the first portion of the flange, Sven allows ample time for it to dry before moving forward with additional steps. This patience and precision are key aspects of his successful boatbuilding methods.Step 4: Finishing Touches
Once the flange is fully dried, Sven removes the clamps carefully, ensuring no damage occurs during this process. He then moves on to attaching four more pieces onto these main frames, completing two pairs of flanges for the bulkhead hatches.The Final Touches
While two flanges form the primary support structure around the hatches, Sven mentions there are two additional pieces required at each end to ensure comprehensive protection. This attention to detail highlights his commitment to producing a durable and reliable design. “Sailing is about finding your path, whether it’s across an ocean or within yourself.” – Sven Yrvind In conclusion, making flanges around bulkhead hatches may seem complex at first glance, but by following Sven Yrvind’s meticulous process, enthusiasts can achieve professional-level results. Remember that the journey of boatbuilding is as rewarding as reaching your destination; it tests one’s patience and dedication. For those seeking to embark on this adventure or simply gain more insight into marine craftsmanship, Sven’s wisdom is invaluable.Making Flanges Around Bulkhead Hatches for Canvas
Sven Yrvind, a renowned yacht designer and sailor, shares valuable insights on creating flanges around bulkhead hatches for canvas protection in this enlightening video. By following his expert guidance, boat enthusiasts can ensure their living areas remain secure while allowing unhindered access through the hatches.Step 1: Starting with the Flange
Sven begins by explaining that working on flanges vertically and horizontally is significantly easier than doing so in a flat position. To simplify the process further, he divides the task into two or three steps as suggested by fellow expert “for for.” This approach not only makes it more manageable but also allows for greater precision in crafting each component.Step 2: Applying Glue and Securing
Sven proceeds to apply glue along one edge of the flange, ensuring a secure bond when clamped into place. He emphasizes that this stage is crucial for maintaining the structural integrity of the flange, which in turn safeguards the living area beneath the canvas when hatches are open.Step 3: Allowing Time to Dry
After securely attaching the first portion of the flange, Sven allows ample time for it to dry before moving forward with additional steps. This patience and precision are key aspects of his successful boatbuilding methods.Step 4: Finishing Touches
Once the flange is fully dried, Sven removes the clamps carefully, ensuring no damage occurs during this process. He then moves on to attaching four more pieces onto these main frames, completing two pairs of flanges for the bulkhead hatches.The Final Touches
While two flanges form the primary support structure around the hatches, Sven mentions there are two additional pieces required at each end to ensure comprehensive protection. This attention to detail highlights his commitment to producing a durable and reliable design. “Sailing is about finding your path, whether it’s across an ocean or within yourself.” – Sven Yrvind In conclusion, making flanges around bulkhead hatches may seem complex at first glance, but by following Sven Yrvind’s meticulous process, enthusiasts can achieve professional-level results. Remember that the journey of boatbuilding is as rewarding as reaching your destination; it tests one’s patience and dedication. For those seeking to embark on this adventure or simply gain more insight into marine craftsmanship, Sven’s wisdom is invaluable.Sven proceeds to apply glue along one edge of the flange, ensuring a secure bond when clamped into place. He emphasizes that this stage is crucial for maintaining the structural integrity of the flange, which in turn safeguards the living area beneath the canvas when hatches are open.Step 3: Allowing Time to Dry
After securely attaching the first portion of the flange, Sven allows ample time for it to dry before moving forward with additional steps. This patience and precision are key aspects of his successful boatbuilding methods.Step 4: Finishing Touches
Once the flange is fully dried, Sven removes the clamps carefully, ensuring no damage occurs during this process. He then moves on to attaching four more pieces onto these main frames, completing two pairs of flanges for the bulkhead hatches.The Final Touches
While two flanges form the primary support structure around the hatches, Sven mentions there are two additional pieces required at each end to ensure comprehensive protection. This attention to detail highlights his commitment to producing a durable and reliable design. “Sailing is about finding your path, whether it’s across an ocean or within yourself.” – Sven Yrvind In conclusion, making flanges around bulkhead hatches may seem complex at first glance, but by following Sven Yrvind’s meticulous process, enthusiasts can achieve professional-level results. Remember that the journey of boatbuilding is as rewarding as reaching your destination; it tests one’s patience and dedication. For those seeking to embark on this adventure or simply gain more insight into marine craftsmanship, Sven’s wisdom is invaluable.Sven begins by explaining that working on flanges vertically and horizontally is significantly easier than doing so in a flat position. To simplify the process further, he divides the task into two or three steps as suggested by fellow expert “for for.” This approach not only makes it more manageable but also allows for greater precision in crafting each component.Step 2: Applying Glue and Securing
Sven proceeds to apply glue along one edge of the flange, ensuring a secure bond when clamped into place. He emphasizes that this stage is crucial for maintaining the structural integrity of the flange, which in turn safeguards the living area beneath the canvas when hatches are open.Step 3: Allowing Time to Dry
After securely attaching the first portion of the flange, Sven allows ample time for it to dry before moving forward with additional steps. This patience and precision are key aspects of his successful boatbuilding methods.Step 4: Finishing Touches
Once the flange is fully dried, Sven removes the clamps carefully, ensuring no damage occurs during this process. He then moves on to attaching four more pieces onto these main frames, completing two pairs of flanges for the bulkhead hatches.The Final Touches
While two flanges form the primary support structure around the hatches, Sven mentions there are two additional pieces required at each end to ensure comprehensive protection. This attention to detail highlights his commitment to producing a durable and reliable design. “Sailing is about finding your path, whether it’s across an ocean or within yourself.” – Sven Yrvind In conclusion, making flanges around bulkhead hatches may seem complex at first glance, but by following Sven Yrvind’s meticulous process, enthusiasts can achieve professional-level results. Remember that the journey of boatbuilding is as rewarding as reaching your destination; it tests one’s patience and dedication. For those seeking to embark on this adventure or simply gain more insight into marine craftsmanship, Sven’s wisdom is invaluable.Sven Yrvind, a renowned yacht designer and sailor, shares valuable insights on creating flanges around bulkhead hatches for canvas protection in this enlightening video. By following his expert guidance, boat enthusiasts can ensure their living areas remain secure while allowing unhindered access through the hatches.Step 1: Starting with the Flange
Sven begins by explaining that working on flanges vertically and horizontally is significantly easier than doing so in a flat position. To simplify the process further, he divides the task into two or three steps as suggested by fellow expert “for for.” This approach not only makes it more manageable but also allows for greater precision in crafting each component.Step 2: Applying Glue and Securing
Sven proceeds to apply glue along one edge of the flange, ensuring a secure bond when clamped into place. He emphasizes that this stage is crucial for maintaining the structural integrity of the flange, which in turn safeguards the living area beneath the canvas when hatches are open.Step 3: Allowing Time to Dry
After securely attaching the first portion of the flange, Sven allows ample time for it to dry before moving forward with additional steps. This patience and precision are key aspects of his successful boatbuilding methods.Step 4: Finishing Touches
Once the flange is fully dried, Sven removes the clamps carefully, ensuring no damage occurs during this process. He then moves on to attaching four more pieces onto these main frames, completing two pairs of flanges for the bulkhead hatches.The Final Touches
While two flanges form the primary support structure around the hatches, Sven mentions there are two additional pieces required at each end to ensure comprehensive protection. This attention to detail highlights his commitment to producing a durable and reliable design. “Sailing is about finding your path, whether it’s across an ocean or within yourself.” – Sven Yrvind In conclusion, making flanges around bulkhead hatches may seem complex at first glance, but by following Sven Yrvind’s meticulous process, enthusiasts can achieve professional-level results. Remember that the journey of boatbuilding is as rewarding as reaching your destination; it tests one’s patience and dedication. For those seeking to embark on this adventure or simply gain more insight into marine craftsmanship, Sven’s wisdom is invaluable.Making Flanges Around Bulkhead Hatches for Canvas
Sven Yrvind, a renowned yacht designer and sailor, shares valuable insights on creating flanges around bulkhead hatches for canvas protection in this enlightening video. By following his expert guidance, boat enthusiasts can ensure their living areas remain secure while allowing unhindered access through the hatches.Step 1: Starting with the Flange
Sven begins by explaining that working on flanges vertically and horizontally is significantly easier than doing so in a flat position. To simplify the process further, he divides the task into two or three steps as suggested by fellow expert “for for.” This approach not only makes it more manageable but also allows for greater precision in crafting each component.Step 2: Applying Glue and Securing
Sven proceeds to apply glue along one edge of the flange, ensuring a secure bond when clamped into place. He emphasizes that this stage is crucial for maintaining the structural integrity of the flange, which in turn safeguards the living area beneath the canvas when hatches are open.Step 3: Allowing Time to Dry
After securely attaching the first portion of the flange, Sven allows ample time for it to dry before moving forward with additional steps. This patience and precision are key aspects of his successful boatbuilding methods.Step 4: Finishing Touches
Once the flange is fully dried, Sven removes the clamps carefully, ensuring no damage occurs during this process. He then moves on to attaching four more pieces onto these main frames, completing two pairs of flanges for the bulkhead hatches.The Final Touches
While two flanges form the primary support structure around the hatches, Sven mentions there are two additional pieces required at each end to ensure comprehensive protection. This attention to detail highlights his commitment to producing a durable and reliable design. “Sailing is about finding your path, whether it’s across an ocean or within yourself.” – Sven Yrvind In conclusion, making flanges around bulkhead hatches may seem complex at first glance, but by following Sven Yrvind’s meticulous process, enthusiasts can achieve professional-level results. Remember that the journey of boatbuilding is as rewarding as reaching your destination; it tests one’s patience and dedication. For those seeking to embark on this adventure or simply gain more insight into marine craftsmanship, Sven’s wisdom is invaluable.Once the flange is fully dried, Sven removes the clamps carefully, ensuring no damage occurs during this process. He then moves on to attaching four more pieces onto these main frames, completing two pairs of flanges for the bulkhead hatches.The Final Touches
While two flanges form the primary support structure around the hatches, Sven mentions there are two additional pieces required at each end to ensure comprehensive protection. This attention to detail highlights his commitment to producing a durable and reliable design. “Sailing is about finding your path, whether it’s across an ocean or within yourself.” – Sven Yrvind In conclusion, making flanges around bulkhead hatches may seem complex at first glance, but by following Sven Yrvind’s meticulous process, enthusiasts can achieve professional-level results. Remember that the journey of boatbuilding is as rewarding as reaching your destination; it tests one’s patience and dedication. For those seeking to embark on this adventure or simply gain more insight into marine craftsmanship, Sven’s wisdom is invaluable.Sven proceeds to apply glue along one edge of the flange, ensuring a secure bond when clamped into place. He emphasizes that this stage is crucial for maintaining the structural integrity of the flange, which in turn safeguards the living area beneath the canvas when hatches are open.Step 3: Allowing Time to Dry
After securely attaching the first portion of the flange, Sven allows ample time for it to dry before moving forward with additional steps. This patience and precision are key aspects of his successful boatbuilding methods.Step 4: Finishing Touches
Once the flange is fully dried, Sven removes the clamps carefully, ensuring no damage occurs during this process. He then moves on to attaching four more pieces onto these main frames, completing two pairs of flanges for the bulkhead hatches.The Final Touches
While two flanges form the primary support structure around the hatches, Sven mentions there are two additional pieces required at each end to ensure comprehensive protection. This attention to detail highlights his commitment to producing a durable and reliable design. “Sailing is about finding your path, whether it’s across an ocean or within yourself.” – Sven Yrvind In conclusion, making flanges around bulkhead hatches may seem complex at first glance, but by following Sven Yrvind’s meticulous process, enthusiasts can achieve professional-level results. Remember that the journey of boatbuilding is as rewarding as reaching your destination; it tests one’s patience and dedication. For those seeking to embark on this adventure or simply gain more insight into marine craftsmanship, Sven’s wisdom is invaluable.Sven begins by explaining that working on flanges vertically and horizontally is significantly easier than doing so in a flat position. To simplify the process further, he divides the task into two or three steps as suggested by fellow expert “for for.” This approach not only makes it more manageable but also allows for greater precision in crafting each component.Step 2: Applying Glue and Securing
Sven proceeds to apply glue along one edge of the flange, ensuring a secure bond when clamped into place. He emphasizes that this stage is crucial for maintaining the structural integrity of the flange, which in turn safeguards the living area beneath the canvas when hatches are open.Step 3: Allowing Time to Dry
After securely attaching the first portion of the flange, Sven allows ample time for it to dry before moving forward with additional steps. This patience and precision are key aspects of his successful boatbuilding methods.Step 4: Finishing Touches
Once the flange is fully dried, Sven removes the clamps carefully, ensuring no damage occurs during this process. He then moves on to attaching four more pieces onto these main frames, completing two pairs of flanges for the bulkhead hatches.The Final Touches
While two flanges form the primary support structure around the hatches, Sven mentions there are two additional pieces required at each end to ensure comprehensive protection. This attention to detail highlights his commitment to producing a durable and reliable design. “Sailing is about finding your path, whether it’s across an ocean or within yourself.” – Sven Yrvind In conclusion, making flanges around bulkhead hatches may seem complex at first glance, but by following Sven Yrvind’s meticulous process, enthusiasts can achieve professional-level results. Remember that the journey of boatbuilding is as rewarding as reaching your destination; it tests one’s patience and dedication. For those seeking to embark on this adventure or simply gain more insight into marine craftsmanship, Sven’s wisdom is invaluable.Sven Yrvind, a renowned yacht designer and sailor, shares valuable insights on creating flanges around bulkhead hatches for canvas protection in this enlightening video. By following his expert guidance, boat enthusiasts can ensure their living areas remain secure while allowing unhindered access through the hatches.Step 1: Starting with the Flange
Sven begins by explaining that working on flanges vertically and horizontally is significantly easier than doing so in a flat position. To simplify the process further, he divides the task into two or three steps as suggested by fellow expert “for for.” This approach not only makes it more manageable but also allows for greater precision in crafting each component.Step 2: Applying Glue and Securing
Sven proceeds to apply glue along one edge of the flange, ensuring a secure bond when clamped into place. He emphasizes that this stage is crucial for maintaining the structural integrity of the flange, which in turn safeguards the living area beneath the canvas when hatches are open.Step 3: Allowing Time to Dry
After securely attaching the first portion of the flange, Sven allows ample time for it to dry before moving forward with additional steps. This patience and precision are key aspects of his successful boatbuilding methods.Step 4: Finishing Touches
Once the flange is fully dried, Sven removes the clamps carefully, ensuring no damage occurs during this process. He then moves on to attaching four more pieces onto these main frames, completing two pairs of flanges for the bulkhead hatches.The Final Touches
While two flanges form the primary support structure around the hatches, Sven mentions there are two additional pieces required at each end to ensure comprehensive protection. This attention to detail highlights his commitment to producing a durable and reliable design. “Sailing is about finding your path, whether it’s across an ocean or within yourself.” – Sven Yrvind In conclusion, making flanges around bulkhead hatches may seem complex at first glance, but by following Sven Yrvind’s meticulous process, enthusiasts can achieve professional-level results. Remember that the journey of boatbuilding is as rewarding as reaching your destination; it tests one’s patience and dedication. For those seeking to embark on this adventure or simply gain more insight into marine craftsmanship, Sven’s wisdom is invaluable.Making Flanges Around Bulkhead Hatches for Canvas
Sven Yrvind, a renowned yacht designer and sailor, shares valuable insights on creating flanges around bulkhead hatches for canvas protection in this enlightening video. By following his expert guidance, boat enthusiasts can ensure their living areas remain secure while allowing unhindered access through the hatches.Step 1: Starting with the Flange
Sven begins by explaining that working on flanges vertically and horizontally is significantly easier than doing so in a flat position. To simplify the process further, he divides the task into two or three steps as suggested by fellow expert “for for.” This approach not only makes it more manageable but also allows for greater precision in crafting each component.Step 2: Applying Glue and Securing
Sven proceeds to apply glue along one edge of the flange, ensuring a secure bond when clamped into place. He emphasizes that this stage is crucial for maintaining the structural integrity of the flange, which in turn safeguards the living area beneath the canvas when hatches are open.Step 3: Allowing Time to Dry
After securely attaching the first portion of the flange, Sven allows ample time for it to dry before moving forward with additional steps. This patience and precision are key aspects of his successful boatbuilding methods.Step 4: Finishing Touches
Once the flange is fully dried, Sven removes the clamps carefully, ensuring no damage occurs during this process. He then moves on to attaching four more pieces onto these main frames, completing two pairs of flanges for the bulkhead hatches.The Final Touches
While two flanges form the primary support structure around the hatches, Sven mentions there are two additional pieces required at each end to ensure comprehensive protection. This attention to detail highlights his commitment to producing a durable and reliable design. “Sailing is about finding your path, whether it’s across an ocean or within yourself.” – Sven Yrvind In conclusion, making flanges around bulkhead hatches may seem complex at first glance, but by following Sven Yrvind’s meticulous process, enthusiasts can achieve professional-level results. Remember that the journey of boatbuilding is as rewarding as reaching your destination; it tests one’s patience and dedication. For those seeking to embark on this adventure or simply gain more insight into marine craftsmanship, Sven’s wisdom is invaluable.After securely attaching the first portion of the flange, Sven allows ample time for it to dry before moving forward with additional steps. This patience and precision are key aspects of his successful boatbuilding methods.Step 4: Finishing Touches
Once the flange is fully dried, Sven removes the clamps carefully, ensuring no damage occurs during this process. He then moves on to attaching four more pieces onto these main frames, completing two pairs of flanges for the bulkhead hatches.The Final Touches
While two flanges form the primary support structure around the hatches, Sven mentions there are two additional pieces required at each end to ensure comprehensive protection. This attention to detail highlights his commitment to producing a durable and reliable design. “Sailing is about finding your path, whether it’s across an ocean or within yourself.” – Sven Yrvind In conclusion, making flanges around bulkhead hatches may seem complex at first glance, but by following Sven Yrvind’s meticulous process, enthusiasts can achieve professional-level results. Remember that the journey of boatbuilding is as rewarding as reaching your destination; it tests one’s patience and dedication. For those seeking to embark on this adventure or simply gain more insight into marine craftsmanship, Sven’s wisdom is invaluable.Sven proceeds to apply glue along one edge of the flange, ensuring a secure bond when clamped into place. He emphasizes that this stage is crucial for maintaining the structural integrity of the flange, which in turn safeguards the living area beneath the canvas when hatches are open.Step 3: Allowing Time to Dry
After securely attaching the first portion of the flange, Sven allows ample time for it to dry before moving forward with additional steps. This patience and precision are key aspects of his successful boatbuilding methods.Step 4: Finishing Touches
Once the flange is fully dried, Sven removes the clamps carefully, ensuring no damage occurs during this process. He then moves on to attaching four more pieces onto these main frames, completing two pairs of flanges for the bulkhead hatches.The Final Touches
While two flanges form the primary support structure around the hatches, Sven mentions there are two additional pieces required at each end to ensure comprehensive protection. This attention to detail highlights his commitment to producing a durable and reliable design. “Sailing is about finding your path, whether it’s across an ocean or within yourself.” – Sven Yrvind In conclusion, making flanges around bulkhead hatches may seem complex at first glance, but by following Sven Yrvind’s meticulous process, enthusiasts can achieve professional-level results. Remember that the journey of boatbuilding is as rewarding as reaching your destination; it tests one’s patience and dedication. For those seeking to embark on this adventure or simply gain more insight into marine craftsmanship, Sven’s wisdom is invaluable.Sven begins by explaining that working on flanges vertically and horizontally is significantly easier than doing so in a flat position. To simplify the process further, he divides the task into two or three steps as suggested by fellow expert “for for.” This approach not only makes it more manageable but also allows for greater precision in crafting each component.Step 2: Applying Glue and Securing
Sven proceeds to apply glue along one edge of the flange, ensuring a secure bond when clamped into place. He emphasizes that this stage is crucial for maintaining the structural integrity of the flange, which in turn safeguards the living area beneath the canvas when hatches are open.Step 3: Allowing Time to Dry
After securely attaching the first portion of the flange, Sven allows ample time for it to dry before moving forward with additional steps. This patience and precision are key aspects of his successful boatbuilding methods.Step 4: Finishing Touches
Once the flange is fully dried, Sven removes the clamps carefully, ensuring no damage occurs during this process. He then moves on to attaching four more pieces onto these main frames, completing two pairs of flanges for the bulkhead hatches.The Final Touches
While two flanges form the primary support structure around the hatches, Sven mentions there are two additional pieces required at each end to ensure comprehensive protection. This attention to detail highlights his commitment to producing a durable and reliable design. “Sailing is about finding your path, whether it’s across an ocean or within yourself.” – Sven Yrvind In conclusion, making flanges around bulkhead hatches may seem complex at first glance, but by following Sven Yrvind’s meticulous process, enthusiasts can achieve professional-level results. Remember that the journey of boatbuilding is as rewarding as reaching your destination; it tests one’s patience and dedication. For those seeking to embark on this adventure or simply gain more insight into marine craftsmanship, Sven’s wisdom is invaluable.Sven Yrvind, a renowned yacht designer and sailor, shares valuable insights on creating flanges around bulkhead hatches for canvas protection in this enlightening video. By following his expert guidance, boat enthusiasts can ensure their living areas remain secure while allowing unhindered access through the hatches.Step 1: Starting with the Flange
Sven begins by explaining that working on flanges vertically and horizontally is significantly easier than doing so in a flat position. To simplify the process further, he divides the task into two or three steps as suggested by fellow expert “for for.” This approach not only makes it more manageable but also allows for greater precision in crafting each component.Step 2: Applying Glue and Securing
Sven proceeds to apply glue along one edge of the flange, ensuring a secure bond when clamped into place. He emphasizes that this stage is crucial for maintaining the structural integrity of the flange, which in turn safeguards the living area beneath the canvas when hatches are open.Step 3: Allowing Time to Dry
After securely attaching the first portion of the flange, Sven allows ample time for it to dry before moving forward with additional steps. This patience and precision are key aspects of his successful boatbuilding methods.Step 4: Finishing Touches
Once the flange is fully dried, Sven removes the clamps carefully, ensuring no damage occurs during this process. He then moves on to attaching four more pieces onto these main frames, completing two pairs of flanges for the bulkhead hatches.The Final Touches
While two flanges form the primary support structure around the hatches, Sven mentions there are two additional pieces required at each end to ensure comprehensive protection. This attention to detail highlights his commitment to producing a durable and reliable design. “Sailing is about finding your path, whether it’s across an ocean or within yourself.” – Sven Yrvind In conclusion, making flanges around bulkhead hatches may seem complex at first glance, but by following Sven Yrvind’s meticulous process, enthusiasts can achieve professional-level results. Remember that the journey of boatbuilding is as rewarding as reaching your destination; it tests one’s patience and dedication. For those seeking to embark on this adventure or simply gain more insight into marine craftsmanship, Sven’s wisdom is invaluable.Making Flanges Around Bulkhead Hatches for Canvas
Sven Yrvind, a renowned yacht designer and sailor, shares valuable insights on creating flanges around bulkhead hatches for canvas protection in this enlightening video. By following his expert guidance, boat enthusiasts can ensure their living areas remain secure while allowing unhindered access through the hatches.Step 1: Starting with the Flange
Sven begins by explaining that working on flanges vertically and horizontally is significantly easier than doing so in a flat position. To simplify the process further, he divides the task into two or three steps as suggested by fellow expert “for for.” This approach not only makes it more manageable but also allows for greater precision in crafting each component.Step 2: Applying Glue and Securing
Sven proceeds to apply glue along one edge of the flange, ensuring a secure bond when clamped into place. He emphasizes that this stage is crucial for maintaining the structural integrity of the flange, which in turn safeguards the living area beneath the canvas when hatches are open.Step 3: Allowing Time to Dry
After securely attaching the first portion of the flange, Sven allows ample time for it to dry before moving forward with additional steps. This patience and precision are key aspects of his successful boatbuilding methods.Step 4: Finishing Touches
Once the flange is fully dried, Sven removes the clamps carefully, ensuring no damage occurs during this process. He then moves on to attaching four more pieces onto these main frames, completing two pairs of flanges for the bulkhead hatches.The Final Touches
While two flanges form the primary support structure around the hatches, Sven mentions there are two additional pieces required at each end to ensure comprehensive protection. This attention to detail highlights his commitment to producing a durable and reliable design. “Sailing is about finding your path, whether it’s across an ocean or within yourself.” – Sven Yrvind In conclusion, making flanges around bulkhead hatches may seem complex at first glance, but by following Sven Yrvind’s meticulous process, enthusiasts can achieve professional-level results. Remember that the journey of boatbuilding is as rewarding as reaching your destination; it tests one’s patience and dedication. For those seeking to embark on this adventure or simply gain more insight into marine craftsmanship, Sven’s wisdom is invaluable.Once the flange is fully dried, Sven removes the clamps carefully, ensuring no damage occurs during this process. He then moves on to attaching four more pieces onto these main frames, completing two pairs of flanges for the bulkhead hatches.The Final Touches
While two flanges form the primary support structure around the hatches, Sven mentions there are two additional pieces required at each end to ensure comprehensive protection. This attention to detail highlights his commitment to producing a durable and reliable design. “Sailing is about finding your path, whether it’s across an ocean or within yourself.” – Sven Yrvind In conclusion, making flanges around bulkhead hatches may seem complex at first glance, but by following Sven Yrvind’s meticulous process, enthusiasts can achieve professional-level results. Remember that the journey of boatbuilding is as rewarding as reaching your destination; it tests one’s patience and dedication. For those seeking to embark on this adventure or simply gain more insight into marine craftsmanship, Sven’s wisdom is invaluable.After securely attaching the first portion of the flange, Sven allows ample time for it to dry before moving forward with additional steps. This patience and precision are key aspects of his successful boatbuilding methods.Step 4: Finishing Touches
Once the flange is fully dried, Sven removes the clamps carefully, ensuring no damage occurs during this process. He then moves on to attaching four more pieces onto these main frames, completing two pairs of flanges for the bulkhead hatches.The Final Touches
While two flanges form the primary support structure around the hatches, Sven mentions there are two additional pieces required at each end to ensure comprehensive protection. This attention to detail highlights his commitment to producing a durable and reliable design. “Sailing is about finding your path, whether it’s across an ocean or within yourself.” – Sven Yrvind In conclusion, making flanges around bulkhead hatches may seem complex at first glance, but by following Sven Yrvind’s meticulous process, enthusiasts can achieve professional-level results. Remember that the journey of boatbuilding is as rewarding as reaching your destination; it tests one’s patience and dedication. For those seeking to embark on this adventure or simply gain more insight into marine craftsmanship, Sven’s wisdom is invaluable.Sven proceeds to apply glue along one edge of the flange, ensuring a secure bond when clamped into place. He emphasizes that this stage is crucial for maintaining the structural integrity of the flange, which in turn safeguards the living area beneath the canvas when hatches are open.Step 3: Allowing Time to Dry
After securely attaching the first portion of the flange, Sven allows ample time for it to dry before moving forward with additional steps. This patience and precision are key aspects of his successful boatbuilding methods.Step 4: Finishing Touches
Once the flange is fully dried, Sven removes the clamps carefully, ensuring no damage occurs during this process. He then moves on to attaching four more pieces onto these main frames, completing two pairs of flanges for the bulkhead hatches.The Final Touches
While two flanges form the primary support structure around the hatches, Sven mentions there are two additional pieces required at each end to ensure comprehensive protection. This attention to detail highlights his commitment to producing a durable and reliable design. “Sailing is about finding your path, whether it’s across an ocean or within yourself.” – Sven Yrvind In conclusion, making flanges around bulkhead hatches may seem complex at first glance, but by following Sven Yrvind’s meticulous process, enthusiasts can achieve professional-level results. Remember that the journey of boatbuilding is as rewarding as reaching your destination; it tests one’s patience and dedication. For those seeking to embark on this adventure or simply gain more insight into marine craftsmanship, Sven’s wisdom is invaluable.Sven begins by explaining that working on flanges vertically and horizontally is significantly easier than doing so in a flat position. To simplify the process further, he divides the task into two or three steps as suggested by fellow expert “for for.” This approach not only makes it more manageable but also allows for greater precision in crafting each component.Step 2: Applying Glue and Securing
Sven proceeds to apply glue along one edge of the flange, ensuring a secure bond when clamped into place. He emphasizes that this stage is crucial for maintaining the structural integrity of the flange, which in turn safeguards the living area beneath the canvas when hatches are open.Step 3: Allowing Time to Dry
After securely attaching the first portion of the flange, Sven allows ample time for it to dry before moving forward with additional steps. This patience and precision are key aspects of his successful boatbuilding methods.Step 4: Finishing Touches
Once the flange is fully dried, Sven removes the clamps carefully, ensuring no damage occurs during this process. He then moves on to attaching four more pieces onto these main frames, completing two pairs of flanges for the bulkhead hatches.The Final Touches
While two flanges form the primary support structure around the hatches, Sven mentions there are two additional pieces required at each end to ensure comprehensive protection. This attention to detail highlights his commitment to producing a durable and reliable design. “Sailing is about finding your path, whether it’s across an ocean or within yourself.” – Sven Yrvind In conclusion, making flanges around bulkhead hatches may seem complex at first glance, but by following Sven Yrvind’s meticulous process, enthusiasts can achieve professional-level results. Remember that the journey of boatbuilding is as rewarding as reaching your destination; it tests one’s patience and dedication. For those seeking to embark on this adventure or simply gain more insight into marine craftsmanship, Sven’s wisdom is invaluable.Sven Yrvind, a renowned yacht designer and sailor, shares valuable insights on creating flanges around bulkhead hatches for canvas protection in this enlightening video. By following his expert guidance, boat enthusiasts can ensure their living areas remain secure while allowing unhindered access through the hatches.Step 1: Starting with the Flange
Sven begins by explaining that working on flanges vertically and horizontally is significantly easier than doing so in a flat position. To simplify the process further, he divides the task into two or three steps as suggested by fellow expert “for for.” This approach not only makes it more manageable but also allows for greater precision in crafting each component.Step 2: Applying Glue and Securing
Sven proceeds to apply glue along one edge of the flange, ensuring a secure bond when clamped into place. He emphasizes that this stage is crucial for maintaining the structural integrity of the flange, which in turn safeguards the living area beneath the canvas when hatches are open.Step 3: Allowing Time to Dry
After securely attaching the first portion of the flange, Sven allows ample time for it to dry before moving forward with additional steps. This patience and precision are key aspects of his successful boatbuilding methods.Step 4: Finishing Touches
Once the flange is fully dried, Sven removes the clamps carefully, ensuring no damage occurs during this process. He then moves on to attaching four more pieces onto these main frames, completing two pairs of flanges for the bulkhead hatches.The Final Touches
While two flanges form the primary support structure around the hatches, Sven mentions there are two additional pieces required at each end to ensure comprehensive protection. This attention to detail highlights his commitment to producing a durable and reliable design. “Sailing is about finding your path, whether it’s across an ocean or within yourself.” – Sven Yrvind In conclusion, making flanges around bulkhead hatches may seem complex at first glance, but by following Sven Yrvind’s meticulous process, enthusiasts can achieve professional-level results. Remember that the journey of boatbuilding is as rewarding as reaching your destination; it tests one’s patience and dedication. For those seeking to embark on this adventure or simply gain more insight into marine craftsmanship, Sven’s wisdom is invaluable.Making Flanges Around Bulkhead Hatches for Canvas
Sven Yrvind, a renowned yacht designer and sailor, shares valuable insights on creating flanges around bulkhead hatches for canvas protection in this enlightening video. By following his expert guidance, boat enthusiasts can ensure their living areas remain secure while allowing unhindered access through the hatches.Step 1: Starting with the Flange
Sven begins by explaining that working on flanges vertically and horizontally is significantly easier than doing so in a flat position. To simplify the process further, he divides the task into two or three steps as suggested by fellow expert “for for.” This approach not only makes it more manageable but also allows for greater precision in crafting each component.Step 2: Applying Glue and Securing
Sven proceeds to apply glue along one edge of the flange, ensuring a secure bond when clamped into place. He emphasizes that this stage is crucial for maintaining the structural integrity of the flange, which in turn safeguards the living area beneath the canvas when hatches are open.Step 3: Allowing Time to Dry
After securely attaching the first portion of the flange, Sven allows ample time for it to dry before moving forward with additional steps. This patience and precision are key aspects of his successful boatbuilding methods.Step 4: Finishing Touches
Once the flange is fully dried, Sven removes the clamps carefully, ensuring no damage occurs during this process. He then moves on to attaching four more pieces onto these main frames, completing two pairs of flanges for the bulkhead hatches.The Final Touches
While two flanges form the primary support structure around the hatches, Sven mentions there are two additional pieces required at each end to ensure comprehensive protection. This attention to detail highlights his commitment to producing a durable and reliable design. “Sailing is about finding your path, whether it’s across an ocean or within yourself.” – Sven Yrvind In conclusion, making flanges around bulkhead hatches may seem complex at first glance, but by following Sven Yrvind’s meticulous process, enthusiasts can achieve professional-level results. Remember that the journey of boatbuilding is as rewarding as reaching your destination; it tests one’s patience and dedication. For those seeking to embark on this adventure or simply gain more insight into marine craftsmanship, Sven’s wisdom is invaluable.Sven Yrvind, a renowned yacht designer and sailor, shares valuable insights on creating flanges around bulkhead hatches for canvas protection in this enlightening video. By following his expert guidance, boat enthusiasts can ensure their living areas remain secure while allowing unhindered access through the hatches.Step 1: Starting with the Flange
Sven begins by explaining that working on flanges vertically and horizontally is significantly easier than doing so in a flat position. To simplify the process further, he divides the task into two or three steps as suggested by fellow expert “for for.” This approach not only makes it more manageable but also allows for greater precision in crafting each component.Step 2: Applying Glue and Securing
Sven proceeds to apply glue along one edge of the flange, ensuring a secure bond when clamped into place. He emphasizes that this stage is crucial for maintaining the structural integrity of the flange, which in turn safeguards the living area beneath the canvas when hatches are open.Step 3: Allowing Time to Dry
After securely attaching the first portion of the flange, Sven allows ample time for it to dry before moving forward with additional steps. This patience and precision are key aspects of his successful boatbuilding methods.Step 4: Finishing Touches
Once the flange is fully dried, Sven removes the clamps carefully, ensuring no damage occurs during this process. He then moves on to attaching four more pieces onto these main frames, completing two pairs of flanges for the bulkhead hatches.The Final Touches
While two flanges form the primary support structure around the hatches, Sven mentions there are two additional pieces required at each end to ensure comprehensive protection. This attention to detail highlights his commitment to producing a durable and reliable design. “Sailing is about finding your path, whether it’s across an ocean or within yourself.” – Sven Yrvind In conclusion, making flanges around bulkhead hatches may seem complex at first glance, but by following Sven Yrvind’s meticulous process, enthusiasts can achieve professional-level results. Remember that the journey of boatbuilding is as rewarding as reaching your destination; it tests one’s patience and dedication. For those seeking to embark on this adventure or simply gain more insight into marine craftsmanship, Sven’s wisdom is invaluable.After securely attaching the first portion of the flange, Sven allows ample time for it to dry before moving forward with additional steps. This patience and precision are key aspects of his successful boatbuilding methods.Step 4: Finishing Touches
Once the flange is fully dried, Sven removes the clamps carefully, ensuring no damage occurs during this process. He then moves on to attaching four more pieces onto these main frames, completing two pairs of flanges for the bulkhead hatches.The Final Touches
While two flanges form the primary support structure around the hatches, Sven mentions there are two additional pieces required at each end to ensure comprehensive protection. This attention to detail highlights his commitment to producing a durable and reliable design. “Sailing is about finding your path, whether it’s across an ocean or within yourself.” – Sven Yrvind In conclusion, making flanges around bulkhead hatches may seem complex at first glance, but by following Sven Yrvind’s meticulous process, enthusiasts can achieve professional-level results. Remember that the journey of boatbuilding is as rewarding as reaching your destination; it tests one’s patience and dedication. For those seeking to embark on this adventure or simply gain more insight into marine craftsmanship, Sven’s wisdom is invaluable.Sven begins by explaining that working on flanges vertically and horizontally is significantly easier than doing so in a flat position. To simplify the process further, he divides the task into two or three steps as suggested by fellow expert “for for.” This approach not only makes it more manageable but also allows for greater precision in crafting each component.Step 2: Applying Glue and Securing
Sven proceeds to apply glue along one edge of the flange, ensuring a secure bond when clamped into place. He emphasizes that this stage is crucial for maintaining the structural integrity of the flange, which in turn safeguards the living area beneath the canvas when hatches are open.Step 3: Allowing Time to Dry
After securely attaching the first portion of the flange, Sven allows ample time for it to dry before moving forward with additional steps. This patience and precision are key aspects of his successful boatbuilding methods.Step 4: Finishing Touches
Once the flange is fully dried, Sven removes the clamps carefully, ensuring no damage occurs during this process. He then moves on to attaching four more pieces onto these main frames, completing two pairs of flanges for the bulkhead hatches.The Final Touches
While two flanges form the primary support structure around the hatches, Sven mentions there are two additional pieces required at each end to ensure comprehensive protection. This attention to detail highlights his commitment to producing a durable and reliable design. “Sailing is about finding your path, whether it’s across an ocean or within yourself.” – Sven Yrvind In conclusion, making flanges around bulkhead hatches may seem complex at first glance, but by following Sven Yrvind’s meticulous process, enthusiasts can achieve professional-level results. Remember that the journey of boatbuilding is as rewarding as reaching your destination; it tests one’s patience and dedication. For those seeking to embark on this adventure or simply gain more insight into marine craftsmanship, Sven’s wisdom is invaluable.Sven Yrvind, a renowned yacht designer and sailor, shares valuable insights on creating flanges around bulkhead hatches for canvas protection in this enlightening video. By following his expert guidance, boat enthusiasts can ensure their living areas remain secure while allowing unhindered access through the hatches.Step 1: Starting with the Flange
Sven begins by explaining that working on flanges vertically and horizontally is significantly easier than doing so in a flat position. To simplify the process further, he divides the task into two or three steps as suggested by fellow expert “for for.” This approach not only makes it more manageable but also allows for greater precision in crafting each component.Step 2: Applying Glue and Securing
Sven proceeds to apply glue along one edge of the flange, ensuring a secure bond when clamped into place. He emphasizes that this stage is crucial for maintaining the structural integrity of the flange, which in turn safeguards the living area beneath the canvas when hatches are open.Step 3: Allowing Time to Dry
After securely attaching the first portion of the flange, Sven allows ample time for it to dry before moving forward with additional steps. This patience and precision are key aspects of his successful boatbuilding methods.Step 4: Finishing Touches
Once the flange is fully dried, Sven removes the clamps carefully, ensuring no damage occurs during this process. He then moves on to attaching four more pieces onto these main frames, completing two pairs of flanges for the bulkhead hatches.The Final Touches
While two flanges form the primary support structure around the hatches, Sven mentions there are two additional pieces required at each end to ensure comprehensive protection. This attention to detail highlights his commitment to producing a durable and reliable design. “Sailing is about finding your path, whether it’s across an ocean or within yourself.” – Sven Yrvind In conclusion, making flanges around bulkhead hatches may seem complex at first glance, but by following Sven Yrvind’s meticulous process, enthusiasts can achieve professional-level results. Remember that the journey of boatbuilding is as rewarding as reaching your destination; it tests one’s patience and dedication. For those seeking to embark on this adventure or simply gain more insight into marine craftsmanship, Sven’s wisdom is invaluable.Making Flanges Around Bulkhead Hatches for Canvas
Sven Yrvind, a renowned yacht designer and sailor, shares valuable insights on creating flanges around bulkhead hatches for canvas protection in this enlightening video. By following his expert guidance, boat enthusiasts can ensure their living areas remain secure while allowing unhindered access through the hatches.Step 1: Starting with the Flange
Sven begins by explaining that working on flanges vertically and horizontally is significantly easier than doing so in a flat position. To simplify the process further, he divides the task into two or three steps as suggested by fellow expert “for for.” This approach not only makes it more manageable but also allows for greater precision in crafting each component.Step 2: Applying Glue and Securing
Sven proceeds to apply glue along one edge of the flange, ensuring a secure bond when clamped into place. He emphasizes that this stage is crucial for maintaining the structural integrity of the flange, which in turn safeguards the living area beneath the canvas when hatches are open.Step 3: Allowing Time to Dry
After securely attaching the first portion of the flange, Sven allows ample time for it to dry before moving forward with additional steps. This patience and precision are key aspects of his successful boatbuilding methods.Step 4: Finishing Touches
Once the flange is fully dried, Sven removes the clamps carefully, ensuring no damage occurs during this process. He then moves on to attaching four more pieces onto these main frames, completing two pairs of flanges for the bulkhead hatches.The Final Touches
While two flanges form the primary support structure around the hatches, Sven mentions there are two additional pieces required at each end to ensure comprehensive protection. This attention to detail highlights his commitment to producing a durable and reliable design. “Sailing is about finding your path, whether it’s across an ocean or within yourself.” – Sven Yrvind In conclusion, making flanges around bulkhead hatches may seem complex at first glance, but by following Sven Yrvind’s meticulous process, enthusiasts can achieve professional-level results. Remember that the journey of boatbuilding is as rewarding as reaching your destination; it tests one’s patience and dedication. For those seeking to embark on this adventure or simply gain more insight into marine craftsmanship, Sven’s wisdom is invaluable.Sven proceeds to apply glue along one edge of the flange, ensuring a secure bond when clamped into place. He emphasizes that this stage is crucial for maintaining the structural integrity of the flange, which in turn safeguards the living area beneath the canvas when hatches are open.Step 3: Allowing Time to Dry
After securely attaching the first portion of the flange, Sven allows ample time for it to dry before moving forward with additional steps. This patience and precision are key aspects of his successful boatbuilding methods.Step 4: Finishing Touches
Once the flange is fully dried, Sven removes the clamps carefully, ensuring no damage occurs during this process. He then moves on to attaching four more pieces onto these main frames, completing two pairs of flanges for the bulkhead hatches.The Final Touches
While two flanges form the primary support structure around the hatches, Sven mentions there are two additional pieces required at each end to ensure comprehensive protection. This attention to detail highlights his commitment to producing a durable and reliable design. “Sailing is about finding your path, whether it’s across an ocean or within yourself.” – Sven Yrvind In conclusion, making flanges around bulkhead hatches may seem complex at first glance, but by following Sven Yrvind’s meticulous process, enthusiasts can achieve professional-level results. Remember that the journey of boatbuilding is as rewarding as reaching your destination; it tests one’s patience and dedication. For those seeking to embark on this adventure or simply gain more insight into marine craftsmanship, Sven’s wisdom is invaluable.Sven begins by explaining that working on flanges vertically and horizontally is significantly easier than doing so in a flat position. To simplify the process further, he divides the task into two or three steps as suggested by fellow expert “for for.” This approach not only makes it more manageable but also allows for greater precision in crafting each component.Step 2: Applying Glue and Securing
Sven proceeds to apply glue along one edge of the flange, ensuring a secure bond when clamped into place. He emphasizes that this stage is crucial for maintaining the structural integrity of the flange, which in turn safeguards the living area beneath the canvas when hatches are open.Step 3: Allowing Time to Dry
After securely attaching the first portion of the flange, Sven allows ample time for it to dry before moving forward with additional steps. This patience and precision are key aspects of his successful boatbuilding methods.Step 4: Finishing Touches
Once the flange is fully dried, Sven removes the clamps carefully, ensuring no damage occurs during this process. He then moves on to attaching four more pieces onto these main frames, completing two pairs of flanges for the bulkhead hatches.The Final Touches
While two flanges form the primary support structure around the hatches, Sven mentions there are two additional pieces required at each end to ensure comprehensive protection. This attention to detail highlights his commitment to producing a durable and reliable design. “Sailing is about finding your path, whether it’s across an ocean or within yourself.” – Sven Yrvind In conclusion, making flanges around bulkhead hatches may seem complex at first glance, but by following Sven Yrvind’s meticulous process, enthusiasts can achieve professional-level results. Remember that the journey of boatbuilding is as rewarding as reaching your destination; it tests one’s patience and dedication. For those seeking to embark on this adventure or simply gain more insight into marine craftsmanship, Sven’s wisdom is invaluable.Sven Yrvind, a renowned yacht designer and sailor, shares valuable insights on creating flanges around bulkhead hatches for canvas protection in this enlightening video. By following his expert guidance, boat enthusiasts can ensure their living areas remain secure while allowing unhindered access through the hatches.Step 1: Starting with the Flange
Sven begins by explaining that working on flanges vertically and horizontally is significantly easier than doing so in a flat position. To simplify the process further, he divides the task into two or three steps as suggested by fellow expert “for for.” This approach not only makes it more manageable but also allows for greater precision in crafting each component.Step 2: Applying Glue and Securing
Sven proceeds to apply glue along one edge of the flange, ensuring a secure bond when clamped into place. He emphasizes that this stage is crucial for maintaining the structural integrity of the flange, which in turn safeguards the living area beneath the canvas when hatches are open.Step 3: Allowing Time to Dry
After securely attaching the first portion of the flange, Sven allows ample time for it to dry before moving forward with additional steps. This patience and precision are key aspects of his successful boatbuilding methods.Step 4: Finishing Touches
Once the flange is fully dried, Sven removes the clamps carefully, ensuring no damage occurs during this process. He then moves on to attaching four more pieces onto these main frames, completing two pairs of flanges for the bulkhead hatches.The Final Touches
While two flanges form the primary support structure around the hatches, Sven mentions there are two additional pieces required at each end to ensure comprehensive protection. This attention to detail highlights his commitment to producing a durable and reliable design. “Sailing is about finding your path, whether it’s across an ocean or within yourself.” – Sven Yrvind In conclusion, making flanges around bulkhead hatches may seem complex at first glance, but by following Sven Yrvind’s meticulous process, enthusiasts can achieve professional-level results. Remember that the journey of boatbuilding is as rewarding as reaching your destination; it tests one’s patience and dedication. For those seeking to embark on this adventure or simply gain more insight into marine craftsmanship, Sven’s wisdom is invaluable.Making Flanges Around Bulkhead Hatches for Canvas
Sven Yrvind, a renowned yacht designer and sailor, shares valuable insights on creating flanges around bulkhead hatches for canvas protection in this enlightening video. By following his expert guidance, boat enthusiasts can ensure their living areas remain secure while allowing unhindered access through the hatches.Step 1: Starting with the Flange
Sven begins by explaining that working on flanges vertically and horizontally is significantly easier than doing so in a flat position. To simplify the process further, he divides the task into two or three steps as suggested by fellow expert “for for.” This approach not only makes it more manageable but also allows for greater precision in crafting each component.Step 2: Applying Glue and Securing
Sven proceeds to apply glue along one edge of the flange, ensuring a secure bond when clamped into place. He emphasizes that this stage is crucial for maintaining the structural integrity of the flange, which in turn safeguards the living area beneath the canvas when hatches are open.Step 3: Allowing Time to Dry
After securely attaching the first portion of the flange, Sven allows ample time for it to dry before moving forward with additional steps. This patience and precision are key aspects of his successful boatbuilding methods.Step 4: Finishing Touches
Once the flange is fully dried, Sven removes the clamps carefully, ensuring no damage occurs during this process. He then moves on to attaching four more pieces onto these main frames, completing two pairs of flanges for the bulkhead hatches.The Final Touches
While two flanges form the primary support structure around the hatches, Sven mentions there are two additional pieces required at each end to ensure comprehensive protection. This attention to detail highlights his commitment to producing a durable and reliable design. “Sailing is about finding your path, whether it’s across an ocean or within yourself.” – Sven Yrvind In conclusion, making flanges around bulkhead hatches may seem complex at first glance, but by following Sven Yrvind’s meticulous process, enthusiasts can achieve professional-level results. Remember that the journey of boatbuilding is as rewarding as reaching your destination; it tests one’s patience and dedication. For those seeking to embark on this adventure or simply gain more insight into marine craftsmanship, Sven’s wisdom is invaluable.Once the flange is fully dried, Sven removes the clamps carefully, ensuring no damage occurs during this process. He then moves on to attaching four more pieces onto these main frames, completing two pairs of flanges for the bulkhead hatches.The Final Touches
While two flanges form the primary support structure around the hatches, Sven mentions there are two additional pieces required at each end to ensure comprehensive protection. This attention to detail highlights his commitment to producing a durable and reliable design. “Sailing is about finding your path, whether it’s across an ocean or within yourself.” – Sven Yrvind In conclusion, making flanges around bulkhead hatches may seem complex at first glance, but by following Sven Yrvind’s meticulous process, enthusiasts can achieve professional-level results. Remember that the journey of boatbuilding is as rewarding as reaching your destination; it tests one’s patience and dedication. For those seeking to embark on this adventure or simply gain more insight into marine craftsmanship, Sven’s wisdom is invaluable.Sven proceeds to apply glue along one edge of the flange, ensuring a secure bond when clamped into place. He emphasizes that this stage is crucial for maintaining the structural integrity of the flange, which in turn safeguards the living area beneath the canvas when hatches are open.Step 3: Allowing Time to Dry
After securely attaching the first portion of the flange, Sven allows ample time for it to dry before moving forward with additional steps. This patience and precision are key aspects of his successful boatbuilding methods.Step 4: Finishing Touches
Once the flange is fully dried, Sven removes the clamps carefully, ensuring no damage occurs during this process. He then moves on to attaching four more pieces onto these main frames, completing two pairs of flanges for the bulkhead hatches.The Final Touches
While two flanges form the primary support structure around the hatches, Sven mentions there are two additional pieces required at each end to ensure comprehensive protection. This attention to detail highlights his commitment to producing a durable and reliable design. “Sailing is about finding your path, whether it’s across an ocean or within yourself.” – Sven Yrvind In conclusion, making flanges around bulkhead hatches may seem complex at first glance, but by following Sven Yrvind’s meticulous process, enthusiasts can achieve professional-level results. Remember that the journey of boatbuilding is as rewarding as reaching your destination; it tests one’s patience and dedication. For those seeking to embark on this adventure or simply gain more insight into marine craftsmanship, Sven’s wisdom is invaluable.Sven begins by explaining that working on flanges vertically and horizontally is significantly easier than doing so in a flat position. To simplify the process further, he divides the task into two or three steps as suggested by fellow expert “for for.” This approach not only makes it more manageable but also allows for greater precision in crafting each component.Step 2: Applying Glue and Securing
Sven proceeds to apply glue along one edge of the flange, ensuring a secure bond when clamped into place. He emphasizes that this stage is crucial for maintaining the structural integrity of the flange, which in turn safeguards the living area beneath the canvas when hatches are open.Step 3: Allowing Time to Dry
After securely attaching the first portion of the flange, Sven allows ample time for it to dry before moving forward with additional steps. This patience and precision are key aspects of his successful boatbuilding methods.Step 4: Finishing Touches
Once the flange is fully dried, Sven removes the clamps carefully, ensuring no damage occurs during this process. He then moves on to attaching four more pieces onto these main frames, completing two pairs of flanges for the bulkhead hatches.The Final Touches
While two flanges form the primary support structure around the hatches, Sven mentions there are two additional pieces required at each end to ensure comprehensive protection. This attention to detail highlights his commitment to producing a durable and reliable design. “Sailing is about finding your path, whether it’s across an ocean or within yourself.” – Sven Yrvind In conclusion, making flanges around bulkhead hatches may seem complex at first glance, but by following Sven Yrvind’s meticulous process, enthusiasts can achieve professional-level results. Remember that the journey of boatbuilding is as rewarding as reaching your destination; it tests one’s patience and dedication. For those seeking to embark on this adventure or simply gain more insight into marine craftsmanship, Sven’s wisdom is invaluable.Sven Yrvind, a renowned yacht designer and sailor, shares valuable insights on creating flanges around bulkhead hatches for canvas protection in this enlightening video. By following his expert guidance, boat enthusiasts can ensure their living areas remain secure while allowing unhindered access through the hatches.Step 1: Starting with the Flange
Sven begins by explaining that working on flanges vertically and horizontally is significantly easier than doing so in a flat position. To simplify the process further, he divides the task into two or three steps as suggested by fellow expert “for for.” This approach not only makes it more manageable but also allows for greater precision in crafting each component.Step 2: Applying Glue and Securing
Sven proceeds to apply glue along one edge of the flange, ensuring a secure bond when clamped into place. He emphasizes that this stage is crucial for maintaining the structural integrity of the flange, which in turn safeguards the living area beneath the canvas when hatches are open.Step 3: Allowing Time to Dry
After securely attaching the first portion of the flange, Sven allows ample time for it to dry before moving forward with additional steps. This patience and precision are key aspects of his successful boatbuilding methods.Step 4: Finishing Touches
Once the flange is fully dried, Sven removes the clamps carefully, ensuring no damage occurs during this process. He then moves on to attaching four more pieces onto these main frames, completing two pairs of flanges for the bulkhead hatches.The Final Touches
While two flanges form the primary support structure around the hatches, Sven mentions there are two additional pieces required at each end to ensure comprehensive protection. This attention to detail highlights his commitment to producing a durable and reliable design. “Sailing is about finding your path, whether it’s across an ocean or within yourself.” – Sven Yrvind In conclusion, making flanges around bulkhead hatches may seem complex at first glance, but by following Sven Yrvind’s meticulous process, enthusiasts can achieve professional-level results. Remember that the journey of boatbuilding is as rewarding as reaching your destination; it tests one’s patience and dedication. For those seeking to embark on this adventure or simply gain more insight into marine craftsmanship, Sven’s wisdom is invaluable.Making Flanges Around Bulkhead Hatches for Canvas
Sven Yrvind, a renowned yacht designer and sailor, shares valuable insights on creating flanges around bulkhead hatches for canvas protection in this enlightening video. By following his expert guidance, boat enthusiasts can ensure their living areas remain secure while allowing unhindered access through the hatches.Step 1: Starting with the Flange
Sven begins by explaining that working on flanges vertically and horizontally is significantly easier than doing so in a flat position. To simplify the process further, he divides the task into two or three steps as suggested by fellow expert “for for.” This approach not only makes it more manageable but also allows for greater precision in crafting each component.Step 2: Applying Glue and Securing
Sven proceeds to apply glue along one edge of the flange, ensuring a secure bond when clamped into place. He emphasizes that this stage is crucial for maintaining the structural integrity of the flange, which in turn safeguards the living area beneath the canvas when hatches are open.Step 3: Allowing Time to Dry
After securely attaching the first portion of the flange, Sven allows ample time for it to dry before moving forward with additional steps. This patience and precision are key aspects of his successful boatbuilding methods.Step 4: Finishing Touches
Once the flange is fully dried, Sven removes the clamps carefully, ensuring no damage occurs during this process. He then moves on to attaching four more pieces onto these main frames, completing two pairs of flanges for the bulkhead hatches.The Final Touches
While two flanges form the primary support structure around the hatches, Sven mentions there are two additional pieces required at each end to ensure comprehensive protection. This attention to detail highlights his commitment to producing a durable and reliable design. “Sailing is about finding your path, whether it’s across an ocean or within yourself.” – Sven Yrvind In conclusion, making flanges around bulkhead hatches may seem complex at first glance, but by following Sven Yrvind’s meticulous process, enthusiasts can achieve professional-level results. Remember that the journey of boatbuilding is as rewarding as reaching your destination; it tests one’s patience and dedication. For those seeking to embark on this adventure or simply gain more insight into marine craftsmanship, Sven’s wisdom is invaluable.After securely attaching the first portion of the flange, Sven allows ample time for it to dry before moving forward with additional steps. This patience and precision are key aspects of his successful boatbuilding methods.Step 4: Finishing Touches
Once the flange is fully dried, Sven removes the clamps carefully, ensuring no damage occurs during this process. He then moves on to attaching four more pieces onto these main frames, completing two pairs of flanges for the bulkhead hatches.The Final Touches
While two flanges form the primary support structure around the hatches, Sven mentions there are two additional pieces required at each end to ensure comprehensive protection. This attention to detail highlights his commitment to producing a durable and reliable design. “Sailing is about finding your path, whether it’s across an ocean or within yourself.” – Sven Yrvind In conclusion, making flanges around bulkhead hatches may seem complex at first glance, but by following Sven Yrvind’s meticulous process, enthusiasts can achieve professional-level results. Remember that the journey of boatbuilding is as rewarding as reaching your destination; it tests one’s patience and dedication. For those seeking to embark on this adventure or simply gain more insight into marine craftsmanship, Sven’s wisdom is invaluable.Sven proceeds to apply glue along one edge of the flange, ensuring a secure bond when clamped into place. He emphasizes that this stage is crucial for maintaining the structural integrity of the flange, which in turn safeguards the living area beneath the canvas when hatches are open.Step 3: Allowing Time to Dry
After securely attaching the first portion of the flange, Sven allows ample time for it to dry before moving forward with additional steps. This patience and precision are key aspects of his successful boatbuilding methods.Step 4: Finishing Touches
Once the flange is fully dried, Sven removes the clamps carefully, ensuring no damage occurs during this process. He then moves on to attaching four more pieces onto these main frames, completing two pairs of flanges for the bulkhead hatches.The Final Touches
While two flanges form the primary support structure around the hatches, Sven mentions there are two additional pieces required at each end to ensure comprehensive protection. This attention to detail highlights his commitment to producing a durable and reliable design. “Sailing is about finding your path, whether it’s across an ocean or within yourself.” – Sven Yrvind In conclusion, making flanges around bulkhead hatches may seem complex at first glance, but by following Sven Yrvind’s meticulous process, enthusiasts can achieve professional-level results. Remember that the journey of boatbuilding is as rewarding as reaching your destination; it tests one’s patience and dedication. For those seeking to embark on this adventure or simply gain more insight into marine craftsmanship, Sven’s wisdom is invaluable.Sven begins by explaining that working on flanges vertically and horizontally is significantly easier than doing so in a flat position. To simplify the process further, he divides the task into two or three steps as suggested by fellow expert “for for.” This approach not only makes it more manageable but also allows for greater precision in crafting each component.Step 2: Applying Glue and Securing
Sven proceeds to apply glue along one edge of the flange, ensuring a secure bond when clamped into place. He emphasizes that this stage is crucial for maintaining the structural integrity of the flange, which in turn safeguards the living area beneath the canvas when hatches are open.Step 3: Allowing Time to Dry
After securely attaching the first portion of the flange, Sven allows ample time for it to dry before moving forward with additional steps. This patience and precision are key aspects of his successful boatbuilding methods.Step 4: Finishing Touches
Once the flange is fully dried, Sven removes the clamps carefully, ensuring no damage occurs during this process. He then moves on to attaching four more pieces onto these main frames, completing two pairs of flanges for the bulkhead hatches.The Final Touches
While two flanges form the primary support structure around the hatches, Sven mentions there are two additional pieces required at each end to ensure comprehensive protection. This attention to detail highlights his commitment to producing a durable and reliable design. “Sailing is about finding your path, whether it’s across an ocean or within yourself.” – Sven Yrvind In conclusion, making flanges around bulkhead hatches may seem complex at first glance, but by following Sven Yrvind’s meticulous process, enthusiasts can achieve professional-level results. Remember that the journey of boatbuilding is as rewarding as reaching your destination; it tests one’s patience and dedication. For those seeking to embark on this adventure or simply gain more insight into marine craftsmanship, Sven’s wisdom is invaluable.Sven Yrvind, a renowned yacht designer and sailor, shares valuable insights on creating flanges around bulkhead hatches for canvas protection in this enlightening video. By following his expert guidance, boat enthusiasts can ensure their living areas remain secure while allowing unhindered access through the hatches.Step 1: Starting with the Flange
Sven begins by explaining that working on flanges vertically and horizontally is significantly easier than doing so in a flat position. To simplify the process further, he divides the task into two or three steps as suggested by fellow expert “for for.” This approach not only makes it more manageable but also allows for greater precision in crafting each component.Step 2: Applying Glue and Securing
Sven proceeds to apply glue along one edge of the flange, ensuring a secure bond when clamped into place. He emphasizes that this stage is crucial for maintaining the structural integrity of the flange, which in turn safeguards the living area beneath the canvas when hatches are open.Step 3: Allowing Time to Dry
After securely attaching the first portion of the flange, Sven allows ample time for it to dry before moving forward with additional steps. This patience and precision are key aspects of his successful boatbuilding methods.Step 4: Finishing Touches
Once the flange is fully dried, Sven removes the clamps carefully, ensuring no damage occurs during this process. He then moves on to attaching four more pieces onto these main frames, completing two pairs of flanges for the bulkhead hatches.The Final Touches
While two flanges form the primary support structure around the hatches, Sven mentions there are two additional pieces required at each end to ensure comprehensive protection. This attention to detail highlights his commitment to producing a durable and reliable design. “Sailing is about finding your path, whether it’s across an ocean or within yourself.” – Sven Yrvind In conclusion, making flanges around bulkhead hatches may seem complex at first glance, but by following Sven Yrvind’s meticulous process, enthusiasts can achieve professional-level results. Remember that the journey of boatbuilding is as rewarding as reaching your destination; it tests one’s patience and dedication. For those seeking to embark on this adventure or simply gain more insight into marine craftsmanship, Sven’s wisdom is invaluable.Making Flanges Around Bulkhead Hatches for Canvas
Sven Yrvind, a renowned yacht designer and sailor, shares valuable insights on creating flanges around bulkhead hatches for canvas protection in this enlightening video. By following his expert guidance, boat enthusiasts can ensure their living areas remain secure while allowing unhindered access through the hatches.Step 1: Starting with the Flange
Sven begins by explaining that working on flanges vertically and horizontally is significantly easier than doing so in a flat position. To simplify the process further, he divides the task into two or three steps as suggested by fellow expert “for for.” This approach not only makes it more manageable but also allows for greater precision in crafting each component.Step 2: Applying Glue and Securing
Sven proceeds to apply glue along one edge of the flange, ensuring a secure bond when clamped into place. He emphasizes that this stage is crucial for maintaining the structural integrity of the flange, which in turn safeguards the living area beneath the canvas when hatches are open.Step 3: Allowing Time to Dry
After securely attaching the first portion of the flange, Sven allows ample time for it to dry before moving forward with additional steps. This patience and precision are key aspects of his successful boatbuilding methods.Step 4: Finishing Touches
Once the flange is fully dried, Sven removes the clamps carefully, ensuring no damage occurs during this process. He then moves on to attaching four more pieces onto these main frames, completing two pairs of flanges for the bulkhead hatches.The Final Touches
While two flanges form the primary support structure around the hatches, Sven mentions there are two additional pieces required at each end to ensure comprehensive protection. This attention to detail highlights his commitment to producing a durable and reliable design. “Sailing is about finding your path, whether it’s across an ocean or within yourself.” – Sven Yrvind In conclusion, making flanges around bulkhead hatches may seem complex at first glance, but by following Sven Yrvind’s meticulous process, enthusiasts can achieve professional-level results. Remember that the journey of boatbuilding is as rewarding as reaching your destination; it tests one’s patience and dedication. For those seeking to embark on this adventure or simply gain more insight into marine craftsmanship, Sven’s wisdom is invaluable.Once the flange is fully dried, Sven removes the clamps carefully, ensuring no damage occurs during this process. He then moves on to attaching four more pieces onto these main frames, completing two pairs of flanges for the bulkhead hatches.The Final Touches
While two flanges form the primary support structure around the hatches, Sven mentions there are two additional pieces required at each end to ensure comprehensive protection. This attention to detail highlights his commitment to producing a durable and reliable design. “Sailing is about finding your path, whether it’s across an ocean or within yourself.” – Sven Yrvind In conclusion, making flanges around bulkhead hatches may seem complex at first glance, but by following Sven Yrvind’s meticulous process, enthusiasts can achieve professional-level results. Remember that the journey of boatbuilding is as rewarding as reaching your destination; it tests one’s patience and dedication. For those seeking to embark on this adventure or simply gain more insight into marine craftsmanship, Sven’s wisdom is invaluable.After securely attaching the first portion of the flange, Sven allows ample time for it to dry before moving forward with additional steps. This patience and precision are key aspects of his successful boatbuilding methods.Step 4: Finishing Touches
Once the flange is fully dried, Sven removes the clamps carefully, ensuring no damage occurs during this process. He then moves on to attaching four more pieces onto these main frames, completing two pairs of flanges for the bulkhead hatches.The Final Touches
While two flanges form the primary support structure around the hatches, Sven mentions there are two additional pieces required at each end to ensure comprehensive protection. This attention to detail highlights his commitment to producing a durable and reliable design. “Sailing is about finding your path, whether it’s across an ocean or within yourself.” – Sven Yrvind In conclusion, making flanges around bulkhead hatches may seem complex at first glance, but by following Sven Yrvind’s meticulous process, enthusiasts can achieve professional-level results. Remember that the journey of boatbuilding is as rewarding as reaching your destination; it tests one’s patience and dedication. For those seeking to embark on this adventure or simply gain more insight into marine craftsmanship, Sven’s wisdom is invaluable.Sven proceeds to apply glue along one edge of the flange, ensuring a secure bond when clamped into place. He emphasizes that this stage is crucial for maintaining the structural integrity of the flange, which in turn safeguards the living area beneath the canvas when hatches are open.Step 3: Allowing Time to Dry
After securely attaching the first portion of the flange, Sven allows ample time for it to dry before moving forward with additional steps. This patience and precision are key aspects of his successful boatbuilding methods.Step 4: Finishing Touches
Once the flange is fully dried, Sven removes the clamps carefully, ensuring no damage occurs during this process. He then moves on to attaching four more pieces onto these main frames, completing two pairs of flanges for the bulkhead hatches.The Final Touches
While two flanges form the primary support structure around the hatches, Sven mentions there are two additional pieces required at each end to ensure comprehensive protection. This attention to detail highlights his commitment to producing a durable and reliable design. “Sailing is about finding your path, whether it’s across an ocean or within yourself.” – Sven Yrvind In conclusion, making flanges around bulkhead hatches may seem complex at first glance, but by following Sven Yrvind’s meticulous process, enthusiasts can achieve professional-level results. Remember that the journey of boatbuilding is as rewarding as reaching your destination; it tests one’s patience and dedication. For those seeking to embark on this adventure or simply gain more insight into marine craftsmanship, Sven’s wisdom is invaluable.Sven begins by explaining that working on flanges vertically and horizontally is significantly easier than doing so in a flat position. To simplify the process further, he divides the task into two or three steps as suggested by fellow expert “for for.” This approach not only makes it more manageable but also allows for greater precision in crafting each component.Step 2: Applying Glue and Securing
Sven proceeds to apply glue along one edge of the flange, ensuring a secure bond when clamped into place. He emphasizes that this stage is crucial for maintaining the structural integrity of the flange, which in turn safeguards the living area beneath the canvas when hatches are open.Step 3: Allowing Time to Dry
After securely attaching the first portion of the flange, Sven allows ample time for it to dry before moving forward with additional steps. This patience and precision are key aspects of his successful boatbuilding methods.Step 4: Finishing Touches
Once the flange is fully dried, Sven removes the clamps carefully, ensuring no damage occurs during this process. He then moves on to attaching four more pieces onto these main frames, completing two pairs of flanges for the bulkhead hatches.The Final Touches
While two flanges form the primary support structure around the hatches, Sven mentions there are two additional pieces required at each end to ensure comprehensive protection. This attention to detail highlights his commitment to producing a durable and reliable design. “Sailing is about finding your path, whether it’s across an ocean or within yourself.” – Sven Yrvind In conclusion, making flanges around bulkhead hatches may seem complex at first glance, but by following Sven Yrvind’s meticulous process, enthusiasts can achieve professional-level results. Remember that the journey of boatbuilding is as rewarding as reaching your destination; it tests one’s patience and dedication. For those seeking to embark on this adventure or simply gain more insight into marine craftsmanship, Sven’s wisdom is invaluable.Sven Yrvind, a renowned yacht designer and sailor, shares valuable insights on creating flanges around bulkhead hatches for canvas protection in this enlightening video. By following his expert guidance, boat enthusiasts can ensure their living areas remain secure while allowing unhindered access through the hatches.Step 1: Starting with the Flange
Sven begins by explaining that working on flanges vertically and horizontally is significantly easier than doing so in a flat position. To simplify the process further, he divides the task into two or three steps as suggested by fellow expert “for for.” This approach not only makes it more manageable but also allows for greater precision in crafting each component.Step 2: Applying Glue and Securing
Sven proceeds to apply glue along one edge of the flange, ensuring a secure bond when clamped into place. He emphasizes that this stage is crucial for maintaining the structural integrity of the flange, which in turn safeguards the living area beneath the canvas when hatches are open.Step 3: Allowing Time to Dry
After securely attaching the first portion of the flange, Sven allows ample time for it to dry before moving forward with additional steps. This patience and precision are key aspects of his successful boatbuilding methods.Step 4: Finishing Touches
Once the flange is fully dried, Sven removes the clamps carefully, ensuring no damage occurs during this process. He then moves on to attaching four more pieces onto these main frames, completing two pairs of flanges for the bulkhead hatches.The Final Touches
While two flanges form the primary support structure around the hatches, Sven mentions there are two additional pieces required at each end to ensure comprehensive protection. This attention to detail highlights his commitment to producing a durable and reliable design. “Sailing is about finding your path, whether it’s across an ocean or within yourself.” – Sven Yrvind In conclusion, making flanges around bulkhead hatches may seem complex at first glance, but by following Sven Yrvind’s meticulous process, enthusiasts can achieve professional-level results. Remember that the journey of boatbuilding is as rewarding as reaching your destination; it tests one’s patience and dedication. For those seeking to embark on this adventure or simply gain more insight into marine craftsmanship, Sven’s wisdom is invaluable.Making Flanges Around Bulkhead Hatches for Canvas
Sven Yrvind, a renowned yacht designer and sailor, shares valuable insights on creating flanges around bulkhead hatches for canvas protection in this enlightening video. By following his expert guidance, boat enthusiasts can ensure their living areas remain secure while allowing unhindered access through the hatches.Step 1: Starting with the Flange
Sven begins by explaining that working on flanges vertically and horizontally is significantly easier than doing so in a flat position. To simplify the process further, he divides the task into two or three steps as suggested by fellow expert “for for.” This approach not only makes it more manageable but also allows for greater precision in crafting each component.Step 2: Applying Glue and Securing
Sven proceeds to apply glue along one edge of the flange, ensuring a secure bond when clamped into place. He emphasizes that this stage is crucial for maintaining the structural integrity of the flange, which in turn safeguards the living area beneath the canvas when hatches are open.Step 3: Allowing Time to Dry
After securely attaching the first portion of the flange, Sven allows ample time for it to dry before moving forward with additional steps. This patience and precision are key aspects of his successful boatbuilding methods.Step 4: Finishing Touches
Once the flange is fully dried, Sven removes the clamps carefully, ensuring no damage occurs during this process. He then moves on to attaching four more pieces onto these main frames, completing two pairs of flanges for the bulkhead hatches.The Final Touches
While two flanges form the primary support structure around the hatches, Sven mentions there are two additional pieces required at each end to ensure comprehensive protection. This attention to detail highlights his commitment to producing a durable and reliable design. “Sailing is about finding your path, whether it’s across an ocean or within yourself.” – Sven Yrvind In conclusion, making flanges around bulkhead hatches may seem complex at first glance, but by following Sven Yrvind’s meticulous process, enthusiasts can achieve professional-level results. Remember that the journey of boatbuilding is as rewarding as reaching your destination; it tests one’s patience and dedication. For those seeking to embark on this adventure or simply gain more insight into marine craftsmanship, Sven’s wisdom is invaluable.Making Flanges Around Bulkhead Hatches for Canvas
Sven Yrvind, a renowned yacht designer and sailor, shares valuable insights on creating flanges around bulkhead hatches for canvas protection in this enlightening video. By following his expert guidance, boat enthusiasts can ensure their living areas remain secure while allowing unhindered access through the hatches.Step 1: Starting with the Flange
Sven begins by explaining that working on flanges vertically and horizontally is significantly easier than doing so in a flat position. To simplify the process further, he divides the task into two or three steps as suggested by fellow expert “for for.” This approach not only makes it more manageable but also allows for greater precision in crafting each component.Step 2: Applying Glue and Securing
Sven proceeds to apply glue along one edge of the flange, ensuring a secure bond when clamped into place. He emphasizes that this stage is crucial for maintaining the structural integrity of the flange, which in turn safeguards the living area beneath the canvas when hatches are open.Step 3: Allowing Time to Dry
After securely attaching the first portion of the flange, Sven allows ample time for it to dry before moving forward with additional steps. This patience and precision are key aspects of his successful boatbuilding methods.Step 4: Finishing Touches
Once the flange is fully dried, Sven removes the clamps carefully, ensuring no damage occurs during this process. He then moves on to attaching four more pieces onto these main frames, completing two pairs of flanges for the bulkhead hatches.The Final Touches
While two flanges form the primary support structure around the hatches, Sven mentions there are two additional pieces required at each end to ensure comprehensive protection. This attention to detail highlights his commitment to producing a durable and reliable design. “Sailing is about finding your path, whether it’s across an ocean or within yourself.” – Sven Yrvind In conclusion, making flanges around bulkhead hatches may seem complex at first glance, but by following Sven Yrvind’s meticulous process, enthusiasts can achieve professional-level results. Remember that the journey of boatbuilding is as rewarding as reaching your destination; it tests one’s patience and dedication. For those seeking to embark on this adventure or simply gain more insight into marine craftsmanship, Sven’s wisdom is invaluable.After securely attaching the first portion of the flange, Sven allows ample time for it to dry before moving forward with additional steps. This patience and precision are key aspects of his successful boatbuilding methods.Step 4: Finishing Touches
Once the flange is fully dried, Sven removes the clamps carefully, ensuring no damage occurs during this process. He then moves on to attaching four more pieces onto these main frames, completing two pairs of flanges for the bulkhead hatches.The Final Touches
While two flanges form the primary support structure around the hatches, Sven mentions there are two additional pieces required at each end to ensure comprehensive protection. This attention to detail highlights his commitment to producing a durable and reliable design. “Sailing is about finding your path, whether it’s across an ocean or within yourself.” – Sven Yrvind In conclusion, making flanges around bulkhead hatches may seem complex at first glance, but by following Sven Yrvind’s meticulous process, enthusiasts can achieve professional-level results. Remember that the journey of boatbuilding is as rewarding as reaching your destination; it tests one’s patience and dedication. For those seeking to embark on this adventure or simply gain more insight into marine craftsmanship, Sven’s wisdom is invaluable.Sven begins by explaining that working on flanges vertically and horizontally is significantly easier than doing so in a flat position. To simplify the process further, he divides the task into two or three steps as suggested by fellow expert “for for.” This approach not only makes it more manageable but also allows for greater precision in crafting each component.Step 2: Applying Glue and Securing
Sven proceeds to apply glue along one edge of the flange, ensuring a secure bond when clamped into place. He emphasizes that this stage is crucial for maintaining the structural integrity of the flange, which in turn safeguards the living area beneath the canvas when hatches are open.Step 3: Allowing Time to Dry
After securely attaching the first portion of the flange, Sven allows ample time for it to dry before moving forward with additional steps. This patience and precision are key aspects of his successful boatbuilding methods.Step 4: Finishing Touches
Once the flange is fully dried, Sven removes the clamps carefully, ensuring no damage occurs during this process. He then moves on to attaching four more pieces onto these main frames, completing two pairs of flanges for the bulkhead hatches.The Final Touches
While two flanges form the primary support structure around the hatches, Sven mentions there are two additional pieces required at each end to ensure comprehensive protection. This attention to detail highlights his commitment to producing a durable and reliable design. “Sailing is about finding your path, whether it’s across an ocean or within yourself.” – Sven Yrvind In conclusion, making flanges around bulkhead hatches may seem complex at first glance, but by following Sven Yrvind’s meticulous process, enthusiasts can achieve professional-level results. Remember that the journey of boatbuilding is as rewarding as reaching your destination; it tests one’s patience and dedication. For those seeking to embark on this adventure or simply gain more insight into marine craftsmanship, Sven’s wisdom is invaluable.Sven Yrvind, a renowned yacht designer and sailor, shares valuable insights on creating flanges around bulkhead hatches for canvas protection in this enlightening video. By following his expert guidance, boat enthusiasts can ensure their living areas remain secure while allowing unhindered access through the hatches.Step 1: Starting with the Flange
Sven begins by explaining that working on flanges vertically and horizontally is significantly easier than doing so in a flat position. To simplify the process further, he divides the task into two or three steps as suggested by fellow expert “for for.” This approach not only makes it more manageable but also allows for greater precision in crafting each component.Step 2: Applying Glue and Securing
Sven proceeds to apply glue along one edge of the flange, ensuring a secure bond when clamped into place. He emphasizes that this stage is crucial for maintaining the structural integrity of the flange, which in turn safeguards the living area beneath the canvas when hatches are open.Step 3: Allowing Time to Dry
After securely attaching the first portion of the flange, Sven allows ample time for it to dry before moving forward with additional steps. This patience and precision are key aspects of his successful boatbuilding methods.Step 4: Finishing Touches
Once the flange is fully dried, Sven removes the clamps carefully, ensuring no damage occurs during this process. He then moves on to attaching four more pieces onto these main frames, completing two pairs of flanges for the bulkhead hatches.The Final Touches
While two flanges form the primary support structure around the hatches, Sven mentions there are two additional pieces required at each end to ensure comprehensive protection. This attention to detail highlights his commitment to producing a durable and reliable design. “Sailing is about finding your path, whether it’s across an ocean or within yourself.” – Sven Yrvind In conclusion, making flanges around bulkhead hatches may seem complex at first glance, but by following Sven Yrvind’s meticulous process, enthusiasts can achieve professional-level results. Remember that the journey of boatbuilding is as rewarding as reaching your destination; it tests one’s patience and dedication. For those seeking to embark on this adventure or simply gain more insight into marine craftsmanship, Sven’s wisdom is invaluable.Making Flanges Around Bulkhead Hatches for Canvas
Sven Yrvind, a renowned yacht designer and sailor, shares valuable insights on creating flanges around bulkhead hatches for canvas protection in this enlightening video. By following his expert guidance, boat enthusiasts can ensure their living areas remain secure while allowing unhindered access through the hatches.Step 1: Starting with the Flange
Sven begins by explaining that working on flanges vertically and horizontally is significantly easier than doing so in a flat position. To simplify the process further, he divides the task into two or three steps as suggested by fellow expert “for for.” This approach not only makes it more manageable but also allows for greater precision in crafting each component.Step 2: Applying Glue and Securing
Sven proceeds to apply glue along one edge of the flange, ensuring a secure bond when clamped into place. He emphasizes that this stage is crucial for maintaining the structural integrity of the flange, which in turn safeguards the living area beneath the canvas when hatches are open.Step 3: Allowing Time to Dry
After securely attaching the first portion of the flange, Sven allows ample time for it to dry before moving forward with additional steps. This patience and precision are key aspects of his successful boatbuilding methods.Step 4: Finishing Touches
Once the flange is fully dried, Sven removes the clamps carefully, ensuring no damage occurs during this process. He then moves on to attaching four more pieces onto these main frames, completing two pairs of flanges for the bulkhead hatches.The Final Touches
While two flanges form the primary support structure around the hatches, Sven mentions there are two additional pieces required at each end to ensure comprehensive protection. This attention to detail highlights his commitment to producing a durable and reliable design. “Sailing is about finding your path, whether it’s across an ocean or within yourself.” – Sven Yrvind In conclusion, making flanges around bulkhead hatches may seem complex at first glance, but by following Sven Yrvind’s meticulous process, enthusiasts can achieve professional-level results. Remember that the journey of boatbuilding is as rewarding as reaching your destination; it tests one’s patience and dedication. For those seeking to embark on this adventure or simply gain more insight into marine craftsmanship, Sven’s wisdom is invaluable.Sven proceeds to apply glue along one edge of the flange, ensuring a secure bond when clamped into place. He emphasizes that this stage is crucial for maintaining the structural integrity of the flange, which in turn safeguards the living area beneath the canvas when hatches are open.Step 3: Allowing Time to Dry
After securely attaching the first portion of the flange, Sven allows ample time for it to dry before moving forward with additional steps. This patience and precision are key aspects of his successful boatbuilding methods.Step 4: Finishing Touches
Once the flange is fully dried, Sven removes the clamps carefully, ensuring no damage occurs during this process. He then moves on to attaching four more pieces onto these main frames, completing two pairs of flanges for the bulkhead hatches.The Final Touches
While two flanges form the primary support structure around the hatches, Sven mentions there are two additional pieces required at each end to ensure comprehensive protection. This attention to detail highlights his commitment to producing a durable and reliable design. “Sailing is about finding your path, whether it’s across an ocean or within yourself.” – Sven Yrvind In conclusion, making flanges around bulkhead hatches may seem complex at first glance, but by following Sven Yrvind’s meticulous process, enthusiasts can achieve professional-level results. Remember that the journey of boatbuilding is as rewarding as reaching your destination; it tests one’s patience and dedication. For those seeking to embark on this adventure or simply gain more insight into marine craftsmanship, Sven’s wisdom is invaluable.Sven begins by explaining that working on flanges vertically and horizontally is significantly easier than doing so in a flat position. To simplify the process further, he divides the task into two or three steps as suggested by fellow expert “for for.” This approach not only makes it more manageable but also allows for greater precision in crafting each component.Step 2: Applying Glue and Securing
Sven proceeds to apply glue along one edge of the flange, ensuring a secure bond when clamped into place. He emphasizes that this stage is crucial for maintaining the structural integrity of the flange, which in turn safeguards the living area beneath the canvas when hatches are open.Step 3: Allowing Time to Dry
After securely attaching the first portion of the flange, Sven allows ample time for it to dry before moving forward with additional steps. This patience and precision are key aspects of his successful boatbuilding methods.Step 4: Finishing Touches
Once the flange is fully dried, Sven removes the clamps carefully, ensuring no damage occurs during this process. He then moves on to attaching four more pieces onto these main frames, completing two pairs of flanges for the bulkhead hatches.The Final Touches
While two flanges form the primary support structure around the hatches, Sven mentions there are two additional pieces required at each end to ensure comprehensive protection. This attention to detail highlights his commitment to producing a durable and reliable design. “Sailing is about finding your path, whether it’s across an ocean or within yourself.” – Sven Yrvind In conclusion, making flanges around bulkhead hatches may seem complex at first glance, but by following Sven Yrvind’s meticulous process, enthusiasts can achieve professional-level results. Remember that the journey of boatbuilding is as rewarding as reaching your destination; it tests one’s patience and dedication. For those seeking to embark on this adventure or simply gain more insight into marine craftsmanship, Sven’s wisdom is invaluable.Sven Yrvind, a renowned yacht designer and sailor, shares valuable insights on creating flanges around bulkhead hatches for canvas protection in this enlightening video. By following his expert guidance, boat enthusiasts can ensure their living areas remain secure while allowing unhindered access through the hatches.Step 1: Starting with the Flange
Sven begins by explaining that working on flanges vertically and horizontally is significantly easier than doing so in a flat position. To simplify the process further, he divides the task into two or three steps as suggested by fellow expert “for for.” This approach not only makes it more manageable but also allows for greater precision in crafting each component.Step 2: Applying Glue and Securing
Sven proceeds to apply glue along one edge of the flange, ensuring a secure bond when clamped into place. He emphasizes that this stage is crucial for maintaining the structural integrity of the flange, which in turn safeguards the living area beneath the canvas when hatches are open.Step 3: Allowing Time to Dry
After securely attaching the first portion of the flange, Sven allows ample time for it to dry before moving forward with additional steps. This patience and precision are key aspects of his successful boatbuilding methods.Step 4: Finishing Touches
Once the flange is fully dried, Sven removes the clamps carefully, ensuring no damage occurs during this process. He then moves on to attaching four more pieces onto these main frames, completing two pairs of flanges for the bulkhead hatches.The Final Touches
While two flanges form the primary support structure around the hatches, Sven mentions there are two additional pieces required at each end to ensure comprehensive protection. This attention to detail highlights his commitment to producing a durable and reliable design. “Sailing is about finding your path, whether it’s across an ocean or within yourself.” – Sven Yrvind In conclusion, making flanges around bulkhead hatches may seem complex at first glance, but by following Sven Yrvind’s meticulous process, enthusiasts can achieve professional-level results. Remember that the journey of boatbuilding is as rewarding as reaching your destination; it tests one’s patience and dedication. For those seeking to embark on this adventure or simply gain more insight into marine craftsmanship, Sven’s wisdom is invaluable.Making Flanges Around Bulkhead Hatches for Canvas
Sven Yrvind, a renowned yacht designer and sailor, shares valuable insights on creating flanges around bulkhead hatches for canvas protection in this enlightening video. By following his expert guidance, boat enthusiasts can ensure their living areas remain secure while allowing unhindered access through the hatches.Step 1: Starting with the Flange
Sven begins by explaining that working on flanges vertically and horizontally is significantly easier than doing so in a flat position. To simplify the process further, he divides the task into two or three steps as suggested by fellow expert “for for.” This approach not only makes it more manageable but also allows for greater precision in crafting each component.Step 2: Applying Glue and Securing
Sven proceeds to apply glue along one edge of the flange, ensuring a secure bond when clamped into place. He emphasizes that this stage is crucial for maintaining the structural integrity of the flange, which in turn safeguards the living area beneath the canvas when hatches are open.Step 3: Allowing Time to Dry
After securely attaching the first portion of the flange, Sven allows ample time for it to dry before moving forward with additional steps. This patience and precision are key aspects of his successful boatbuilding methods.Step 4: Finishing Touches
Once the flange is fully dried, Sven removes the clamps carefully, ensuring no damage occurs during this process. He then moves on to attaching four more pieces onto these main frames, completing two pairs of flanges for the bulkhead hatches.The Final Touches
While two flanges form the primary support structure around the hatches, Sven mentions there are two additional pieces required at each end to ensure comprehensive protection. This attention to detail highlights his commitment to producing a durable and reliable design. “Sailing is about finding your path, whether it’s across an ocean or within yourself.” – Sven Yrvind In conclusion, making flanges around bulkhead hatches may seem complex at first glance, but by following Sven Yrvind’s meticulous process, enthusiasts can achieve professional-level results. Remember that the journey of boatbuilding is as rewarding as reaching your destination; it tests one’s patience and dedication. For those seeking to embark on this adventure or simply gain more insight into marine craftsmanship, Sven’s wisdom is invaluable.Once the flange is fully dried, Sven removes the clamps carefully, ensuring no damage occurs during this process. He then moves on to attaching four more pieces onto these main frames, completing two pairs of flanges for the bulkhead hatches.The Final Touches
While two flanges form the primary support structure around the hatches, Sven mentions there are two additional pieces required at each end to ensure comprehensive protection. This attention to detail highlights his commitment to producing a durable and reliable design. “Sailing is about finding your path, whether it’s across an ocean or within yourself.” – Sven Yrvind In conclusion, making flanges around bulkhead hatches may seem complex at first glance, but by following Sven Yrvind’s meticulous process, enthusiasts can achieve professional-level results. Remember that the journey of boatbuilding is as rewarding as reaching your destination; it tests one’s patience and dedication. For those seeking to embark on this adventure or simply gain more insight into marine craftsmanship, Sven’s wisdom is invaluable.Sven proceeds to apply glue along one edge of the flange, ensuring a secure bond when clamped into place. He emphasizes that this stage is crucial for maintaining the structural integrity of the flange, which in turn safeguards the living area beneath the canvas when hatches are open.Step 3: Allowing Time to Dry
After securely attaching the first portion of the flange, Sven allows ample time for it to dry before moving forward with additional steps. This patience and precision are key aspects of his successful boatbuilding methods.Step 4: Finishing Touches
Once the flange is fully dried, Sven removes the clamps carefully, ensuring no damage occurs during this process. He then moves on to attaching four more pieces onto these main frames, completing two pairs of flanges for the bulkhead hatches.The Final Touches
While two flanges form the primary support structure around the hatches, Sven mentions there are two additional pieces required at each end to ensure comprehensive protection. This attention to detail highlights his commitment to producing a durable and reliable design. “Sailing is about finding your path, whether it’s across an ocean or within yourself.” – Sven Yrvind In conclusion, making flanges around bulkhead hatches may seem complex at first glance, but by following Sven Yrvind’s meticulous process, enthusiasts can achieve professional-level results. Remember that the journey of boatbuilding is as rewarding as reaching your destination; it tests one’s patience and dedication. For those seeking to embark on this adventure or simply gain more insight into marine craftsmanship, Sven’s wisdom is invaluable.Sven begins by explaining that working on flanges vertically and horizontally is significantly easier than doing so in a flat position. To simplify the process further, he divides the task into two or three steps as suggested by fellow expert “for for.” This approach not only makes it more manageable but also allows for greater precision in crafting each component.Step 2: Applying Glue and Securing
Sven proceeds to apply glue along one edge of the flange, ensuring a secure bond when clamped into place. He emphasizes that this stage is crucial for maintaining the structural integrity of the flange, which in turn safeguards the living area beneath the canvas when hatches are open.Step 3: Allowing Time to Dry
After securely attaching the first portion of the flange, Sven allows ample time for it to dry before moving forward with additional steps. This patience and precision are key aspects of his successful boatbuilding methods.Step 4: Finishing Touches
Once the flange is fully dried, Sven removes the clamps carefully, ensuring no damage occurs during this process. He then moves on to attaching four more pieces onto these main frames, completing two pairs of flanges for the bulkhead hatches.The Final Touches
While two flanges form the primary support structure around the hatches, Sven mentions there are two additional pieces required at each end to ensure comprehensive protection. This attention to detail highlights his commitment to producing a durable and reliable design. “Sailing is about finding your path, whether it’s across an ocean or within yourself.” – Sven Yrvind In conclusion, making flanges around bulkhead hatches may seem complex at first glance, but by following Sven Yrvind’s meticulous process, enthusiasts can achieve professional-level results. Remember that the journey of boatbuilding is as rewarding as reaching your destination; it tests one’s patience and dedication. For those seeking to embark on this adventure or simply gain more insight into marine craftsmanship, Sven’s wisdom is invaluable.Sven Yrvind, a renowned yacht designer and sailor, shares valuable insights on creating flanges around bulkhead hatches for canvas protection in this enlightening video. By following his expert guidance, boat enthusiasts can ensure their living areas remain secure while allowing unhindered access through the hatches.Step 1: Starting with the Flange
Sven begins by explaining that working on flanges vertically and horizontally is significantly easier than doing so in a flat position. To simplify the process further, he divides the task into two or three steps as suggested by fellow expert “for for.” This approach not only makes it more manageable but also allows for greater precision in crafting each component.Step 2: Applying Glue and Securing
Sven proceeds to apply glue along one edge of the flange, ensuring a secure bond when clamped into place. He emphasizes that this stage is crucial for maintaining the structural integrity of the flange, which in turn safeguards the living area beneath the canvas when hatches are open.Step 3: Allowing Time to Dry
After securely attaching the first portion of the flange, Sven allows ample time for it to dry before moving forward with additional steps. This patience and precision are key aspects of his successful boatbuilding methods.Step 4: Finishing Touches
Once the flange is fully dried, Sven removes the clamps carefully, ensuring no damage occurs during this process. He then moves on to attaching four more pieces onto these main frames, completing two pairs of flanges for the bulkhead hatches.The Final Touches
While two flanges form the primary support structure around the hatches, Sven mentions there are two additional pieces required at each end to ensure comprehensive protection. This attention to detail highlights his commitment to producing a durable and reliable design. “Sailing is about finding your path, whether it’s across an ocean or within yourself.” – Sven Yrvind In conclusion, making flanges around bulkhead hatches may seem complex at first glance, but by following Sven Yrvind’s meticulous process, enthusiasts can achieve professional-level results. Remember that the journey of boatbuilding is as rewarding as reaching your destination; it tests one’s patience and dedication. For those seeking to embark on this adventure or simply gain more insight into marine craftsmanship, Sven’s wisdom is invaluable.Making Flanges Around Bulkhead Hatches for Canvas
Sven Yrvind, a renowned yacht designer and sailor, shares valuable insights on creating flanges around bulkhead hatches for canvas protection in this enlightening video. By following his expert guidance, boat enthusiasts can ensure their living areas remain secure while allowing unhindered access through the hatches.Step 1: Starting with the Flange
Sven begins by explaining that working on flanges vertically and horizontally is significantly easier than doing so in a flat position. To simplify the process further, he divides the task into two or three steps as suggested by fellow expert “for for.” This approach not only makes it more manageable but also allows for greater precision in crafting each component.Step 2: Applying Glue and Securing
Sven proceeds to apply glue along one edge of the flange, ensuring a secure bond when clamped into place. He emphasizes that this stage is crucial for maintaining the structural integrity of the flange, which in turn safeguards the living area beneath the canvas when hatches are open.Step 3: Allowing Time to Dry
After securely attaching the first portion of the flange, Sven allows ample time for it to dry before moving forward with additional steps. This patience and precision are key aspects of his successful boatbuilding methods.Step 4: Finishing Touches
Once the flange is fully dried, Sven removes the clamps carefully, ensuring no damage occurs during this process. He then moves on to attaching four more pieces onto these main frames, completing two pairs of flanges for the bulkhead hatches.The Final Touches
While two flanges form the primary support structure around the hatches, Sven mentions there are two additional pieces required at each end to ensure comprehensive protection. This attention to detail highlights his commitment to producing a durable and reliable design. “Sailing is about finding your path, whether it’s across an ocean or within yourself.” – Sven Yrvind In conclusion, making flanges around bulkhead hatches may seem complex at first glance, but by following Sven Yrvind’s meticulous process, enthusiasts can achieve professional-level results. Remember that the journey of boatbuilding is as rewarding as reaching your destination; it tests one’s patience and dedication. For those seeking to embark on this adventure or simply gain more insight into marine craftsmanship, Sven’s wisdom is invaluable.After securely attaching the first portion of the flange, Sven allows ample time for it to dry before moving forward with additional steps. This patience and precision are key aspects of his successful boatbuilding methods.Step 4: Finishing Touches
Once the flange is fully dried, Sven removes the clamps carefully, ensuring no damage occurs during this process. He then moves on to attaching four more pieces onto these main frames, completing two pairs of flanges for the bulkhead hatches.The Final Touches
While two flanges form the primary support structure around the hatches, Sven mentions there are two additional pieces required at each end to ensure comprehensive protection. This attention to detail highlights his commitment to producing a durable and reliable design. “Sailing is about finding your path, whether it’s across an ocean or within yourself.” – Sven Yrvind In conclusion, making flanges around bulkhead hatches may seem complex at first glance, but by following Sven Yrvind’s meticulous process, enthusiasts can achieve professional-level results. Remember that the journey of boatbuilding is as rewarding as reaching your destination; it tests one’s patience and dedication. For those seeking to embark on this adventure or simply gain more insight into marine craftsmanship, Sven’s wisdom is invaluable.Sven proceeds to apply glue along one edge of the flange, ensuring a secure bond when clamped into place. He emphasizes that this stage is crucial for maintaining the structural integrity of the flange, which in turn safeguards the living area beneath the canvas when hatches are open.Step 3: Allowing Time to Dry
After securely attaching the first portion of the flange, Sven allows ample time for it to dry before moving forward with additional steps. This patience and precision are key aspects of his successful boatbuilding methods.Step 4: Finishing Touches
Once the flange is fully dried, Sven removes the clamps carefully, ensuring no damage occurs during this process. He then moves on to attaching four more pieces onto these main frames, completing two pairs of flanges for the bulkhead hatches.The Final Touches
While two flanges form the primary support structure around the hatches, Sven mentions there are two additional pieces required at each end to ensure comprehensive protection. This attention to detail highlights his commitment to producing a durable and reliable design. “Sailing is about finding your path, whether it’s across an ocean or within yourself.” – Sven Yrvind In conclusion, making flanges around bulkhead hatches may seem complex at first glance, but by following Sven Yrvind’s meticulous process, enthusiasts can achieve professional-level results. Remember that the journey of boatbuilding is as rewarding as reaching your destination; it tests one’s patience and dedication. For those seeking to embark on this adventure or simply gain more insight into marine craftsmanship, Sven’s wisdom is invaluable.Sven begins by explaining that working on flanges vertically and horizontally is significantly easier than doing so in a flat position. To simplify the process further, he divides the task into two or three steps as suggested by fellow expert “for for.” This approach not only makes it more manageable but also allows for greater precision in crafting each component.Step 2: Applying Glue and Securing
Sven proceeds to apply glue along one edge of the flange, ensuring a secure bond when clamped into place. He emphasizes that this stage is crucial for maintaining the structural integrity of the flange, which in turn safeguards the living area beneath the canvas when hatches are open.Step 3: Allowing Time to Dry
After securely attaching the first portion of the flange, Sven allows ample time for it to dry before moving forward with additional steps. This patience and precision are key aspects of his successful boatbuilding methods.Step 4: Finishing Touches
Once the flange is fully dried, Sven removes the clamps carefully, ensuring no damage occurs during this process. He then moves on to attaching four more pieces onto these main frames, completing two pairs of flanges for the bulkhead hatches.The Final Touches
While two flanges form the primary support structure around the hatches, Sven mentions there are two additional pieces required at each end to ensure comprehensive protection. This attention to detail highlights his commitment to producing a durable and reliable design. “Sailing is about finding your path, whether it’s across an ocean or within yourself.” – Sven Yrvind In conclusion, making flanges around bulkhead hatches may seem complex at first glance, but by following Sven Yrvind’s meticulous process, enthusiasts can achieve professional-level results. Remember that the journey of boatbuilding is as rewarding as reaching your destination; it tests one’s patience and dedication. For those seeking to embark on this adventure or simply gain more insight into marine craftsmanship, Sven’s wisdom is invaluable.Sven Yrvind, a renowned yacht designer and sailor, shares valuable insights on creating flanges around bulkhead hatches for canvas protection in this enlightening video. By following his expert guidance, boat enthusiasts can ensure their living areas remain secure while allowing unhindered access through the hatches.Step 1: Starting with the Flange
Sven begins by explaining that working on flanges vertically and horizontally is significantly easier than doing so in a flat position. To simplify the process further, he divides the task into two or three steps as suggested by fellow expert “for for.” This approach not only makes it more manageable but also allows for greater precision in crafting each component.Step 2: Applying Glue and Securing
Sven proceeds to apply glue along one edge of the flange, ensuring a secure bond when clamped into place. He emphasizes that this stage is crucial for maintaining the structural integrity of the flange, which in turn safeguards the living area beneath the canvas when hatches are open.Step 3: Allowing Time to Dry
After securely attaching the first portion of the flange, Sven allows ample time for it to dry before moving forward with additional steps. This patience and precision are key aspects of his successful boatbuilding methods.Step 4: Finishing Touches
Once the flange is fully dried, Sven removes the clamps carefully, ensuring no damage occurs during this process. He then moves on to attaching four more pieces onto these main frames, completing two pairs of flanges for the bulkhead hatches.The Final Touches
While two flanges form the primary support structure around the hatches, Sven mentions there are two additional pieces required at each end to ensure comprehensive protection. This attention to detail highlights his commitment to producing a durable and reliable design. “Sailing is about finding your path, whether it’s across an ocean or within yourself.” – Sven Yrvind In conclusion, making flanges around bulkhead hatches may seem complex at first glance, but by following Sven Yrvind’s meticulous process, enthusiasts can achieve professional-level results. Remember that the journey of boatbuilding is as rewarding as reaching your destination; it tests one’s patience and dedication. For those seeking to embark on this adventure or simply gain more insight into marine craftsmanship, Sven’s wisdom is invaluable.Making Flanges Around Bulkhead Hatches for Canvas
Sven Yrvind, a renowned yacht designer and sailor, shares valuable insights on creating flanges around bulkhead hatches for canvas protection in this enlightening video. By following his expert guidance, boat enthusiasts can ensure their living areas remain secure while allowing unhindered access through the hatches.Step 1: Starting with the Flange
Sven begins by explaining that working on flanges vertically and horizontally is significantly easier than doing so in a flat position. To simplify the process further, he divides the task into two or three steps as suggested by fellow expert “for for.” This approach not only makes it more manageable but also allows for greater precision in crafting each component.Step 2: Applying Glue and Securing
Sven proceeds to apply glue along one edge of the flange, ensuring a secure bond when clamped into place. He emphasizes that this stage is crucial for maintaining the structural integrity of the flange, which in turn safeguards the living area beneath the canvas when hatches are open.Step 3: Allowing Time to Dry
After securely attaching the first portion of the flange, Sven allows ample time for it to dry before moving forward with additional steps. This patience and precision are key aspects of his successful boatbuilding methods.Step 4: Finishing Touches
Once the flange is fully dried, Sven removes the clamps carefully, ensuring no damage occurs during this process. He then moves on to attaching four more pieces onto these main frames, completing two pairs of flanges for the bulkhead hatches.The Final Touches
While two flanges form the primary support structure around the hatches, Sven mentions there are two additional pieces required at each end to ensure comprehensive protection. This attention to detail highlights his commitment to producing a durable and reliable design. “Sailing is about finding your path, whether it’s across an ocean or within yourself.” – Sven Yrvind In conclusion, making flanges around bulkhead hatches may seem complex at first glance, but by following Sven Yrvind’s meticulous process, enthusiasts can achieve professional-level results. Remember that the journey of boatbuilding is as rewarding as reaching your destination; it tests one’s patience and dedication. For those seeking to embark on this adventure or simply gain more insight into marine craftsmanship, Sven’s wisdom is invaluable.Once the flange is fully dried, Sven removes the clamps carefully, ensuring no damage occurs during this process. He then moves on to attaching four more pieces onto these main frames, completing two pairs of flanges for the bulkhead hatches.The Final Touches
While two flanges form the primary support structure around the hatches, Sven mentions there are two additional pieces required at each end to ensure comprehensive protection. This attention to detail highlights his commitment to producing a durable and reliable design. “Sailing is about finding your path, whether it’s across an ocean or within yourself.” – Sven Yrvind In conclusion, making flanges around bulkhead hatches may seem complex at first glance, but by following Sven Yrvind’s meticulous process, enthusiasts can achieve professional-level results. Remember that the journey of boatbuilding is as rewarding as reaching your destination; it tests one’s patience and dedication. For those seeking to embark on this adventure or simply gain more insight into marine craftsmanship, Sven’s wisdom is invaluable.After securely attaching the first portion of the flange, Sven allows ample time for it to dry before moving forward with additional steps. This patience and precision are key aspects of his successful boatbuilding methods.Step 4: Finishing Touches
Once the flange is fully dried, Sven removes the clamps carefully, ensuring no damage occurs during this process. He then moves on to attaching four more pieces onto these main frames, completing two pairs of flanges for the bulkhead hatches.The Final Touches
While two flanges form the primary support structure around the hatches, Sven mentions there are two additional pieces required at each end to ensure comprehensive protection. This attention to detail highlights his commitment to producing a durable and reliable design. “Sailing is about finding your path, whether it’s across an ocean or within yourself.” – Sven Yrvind In conclusion, making flanges around bulkhead hatches may seem complex at first glance, but by following Sven Yrvind’s meticulous process, enthusiasts can achieve professional-level results. Remember that the journey of boatbuilding is as rewarding as reaching your destination; it tests one’s patience and dedication. For those seeking to embark on this adventure or simply gain more insight into marine craftsmanship, Sven’s wisdom is invaluable.Sven proceeds to apply glue along one edge of the flange, ensuring a secure bond when clamped into place. He emphasizes that this stage is crucial for maintaining the structural integrity of the flange, which in turn safeguards the living area beneath the canvas when hatches are open.Step 3: Allowing Time to Dry
After securely attaching the first portion of the flange, Sven allows ample time for it to dry before moving forward with additional steps. This patience and precision are key aspects of his successful boatbuilding methods.Step 4: Finishing Touches
Once the flange is fully dried, Sven removes the clamps carefully, ensuring no damage occurs during this process. He then moves on to attaching four more pieces onto these main frames, completing two pairs of flanges for the bulkhead hatches.The Final Touches
While two flanges form the primary support structure around the hatches, Sven mentions there are two additional pieces required at each end to ensure comprehensive protection. This attention to detail highlights his commitment to producing a durable and reliable design. “Sailing is about finding your path, whether it’s across an ocean or within yourself.” – Sven Yrvind In conclusion, making flanges around bulkhead hatches may seem complex at first glance, but by following Sven Yrvind’s meticulous process, enthusiasts can achieve professional-level results. Remember that the journey of boatbuilding is as rewarding as reaching your destination; it tests one’s patience and dedication. For those seeking to embark on this adventure or simply gain more insight into marine craftsmanship, Sven’s wisdom is invaluable.Sven begins by explaining that working on flanges vertically and horizontally is significantly easier than doing so in a flat position. To simplify the process further, he divides the task into two or three steps as suggested by fellow expert “for for.” This approach not only makes it more manageable but also allows for greater precision in crafting each component.Step 2: Applying Glue and Securing
Sven proceeds to apply glue along one edge of the flange, ensuring a secure bond when clamped into place. He emphasizes that this stage is crucial for maintaining the structural integrity of the flange, which in turn safeguards the living area beneath the canvas when hatches are open.Step 3: Allowing Time to Dry
After securely attaching the first portion of the flange, Sven allows ample time for it to dry before moving forward with additional steps. This patience and precision are key aspects of his successful boatbuilding methods.Step 4: Finishing Touches
Once the flange is fully dried, Sven removes the clamps carefully, ensuring no damage occurs during this process. He then moves on to attaching four more pieces onto these main frames, completing two pairs of flanges for the bulkhead hatches.The Final Touches
While two flanges form the primary support structure around the hatches, Sven mentions there are two additional pieces required at each end to ensure comprehensive protection. This attention to detail highlights his commitment to producing a durable and reliable design. “Sailing is about finding your path, whether it’s across an ocean or within yourself.” – Sven Yrvind In conclusion, making flanges around bulkhead hatches may seem complex at first glance, but by following Sven Yrvind’s meticulous process, enthusiasts can achieve professional-level results. Remember that the journey of boatbuilding is as rewarding as reaching your destination; it tests one’s patience and dedication. For those seeking to embark on this adventure or simply gain more insight into marine craftsmanship, Sven’s wisdom is invaluable.Sven Yrvind, a renowned yacht designer and sailor, shares valuable insights on creating flanges around bulkhead hatches for canvas protection in this enlightening video. By following his expert guidance, boat enthusiasts can ensure their living areas remain secure while allowing unhindered access through the hatches.Step 1: Starting with the Flange
Sven begins by explaining that working on flanges vertically and horizontally is significantly easier than doing so in a flat position. To simplify the process further, he divides the task into two or three steps as suggested by fellow expert “for for.” This approach not only makes it more manageable but also allows for greater precision in crafting each component.Step 2: Applying Glue and Securing
Sven proceeds to apply glue along one edge of the flange, ensuring a secure bond when clamped into place. He emphasizes that this stage is crucial for maintaining the structural integrity of the flange, which in turn safeguards the living area beneath the canvas when hatches are open.Step 3: Allowing Time to Dry
After securely attaching the first portion of the flange, Sven allows ample time for it to dry before moving forward with additional steps. This patience and precision are key aspects of his successful boatbuilding methods.Step 4: Finishing Touches
Once the flange is fully dried, Sven removes the clamps carefully, ensuring no damage occurs during this process. He then moves on to attaching four more pieces onto these main frames, completing two pairs of flanges for the bulkhead hatches.The Final Touches
While two flanges form the primary support structure around the hatches, Sven mentions there are two additional pieces required at each end to ensure comprehensive protection. This attention to detail highlights his commitment to producing a durable and reliable design. “Sailing is about finding your path, whether it’s across an ocean or within yourself.” – Sven Yrvind In conclusion, making flanges around bulkhead hatches may seem complex at first glance, but by following Sven Yrvind’s meticulous process, enthusiasts can achieve professional-level results. Remember that the journey of boatbuilding is as rewarding as reaching your destination; it tests one’s patience and dedication. For those seeking to embark on this adventure or simply gain more insight into marine craftsmanship, Sven’s wisdom is invaluable.Making Flanges Around Bulkhead Hatches for Canvas
Sven Yrvind, a renowned yacht designer and sailor, shares valuable insights on creating flanges around bulkhead hatches for canvas protection in this enlightening video. By following his expert guidance, boat enthusiasts can ensure their living areas remain secure while allowing unhindered access through the hatches.Step 1: Starting with the Flange
Sven begins by explaining that working on flanges vertically and horizontally is significantly easier than doing so in a flat position. To simplify the process further, he divides the task into two or three steps as suggested by fellow expert “for for.” This approach not only makes it more manageable but also allows for greater precision in crafting each component.Step 2: Applying Glue and Securing
Sven proceeds to apply glue along one edge of the flange, ensuring a secure bond when clamped into place. He emphasizes that this stage is crucial for maintaining the structural integrity of the flange, which in turn safeguards the living area beneath the canvas when hatches are open.Step 3: Allowing Time to Dry
After securely attaching the first portion of the flange, Sven allows ample time for it to dry before moving forward with additional steps. This patience and precision are key aspects of his successful boatbuilding methods.Step 4: Finishing Touches
Once the flange is fully dried, Sven removes the clamps carefully, ensuring no damage occurs during this process. He then moves on to attaching four more pieces onto these main frames, completing two pairs of flanges for the bulkhead hatches.The Final Touches
While two flanges form the primary support structure around the hatches, Sven mentions there are two additional pieces required at each end to ensure comprehensive protection. This attention to detail highlights his commitment to producing a durable and reliable design. “Sailing is about finding your path, whether it’s across an ocean or within yourself.” – Sven Yrvind In conclusion, making flanges around bulkhead hatches may seem complex at first glance, but by following Sven Yrvind’s meticulous process, enthusiasts can achieve professional-level results. Remember that the journey of boatbuilding is as rewarding as reaching your destination; it tests one’s patience and dedication. For those seeking to embark on this adventure or simply gain more insight into marine craftsmanship, Sven’s wisdom is invaluable.Once the flange is fully dried, Sven removes the clamps carefully, ensuring no damage occurs during this process. He then moves on to attaching four more pieces onto these main frames, completing two pairs of flanges for the bulkhead hatches.The Final Touches
While two flanges form the primary support structure around the hatches, Sven mentions there are two additional pieces required at each end to ensure comprehensive protection. This attention to detail highlights his commitment to producing a durable and reliable design. “Sailing is about finding your path, whether it’s across an ocean or within yourself.” – Sven Yrvind In conclusion, making flanges around bulkhead hatches may seem complex at first glance, but by following Sven Yrvind’s meticulous process, enthusiasts can achieve professional-level results. Remember that the journey of boatbuilding is as rewarding as reaching your destination; it tests one’s patience and dedication. For those seeking to embark on this adventure or simply gain more insight into marine craftsmanship, Sven’s wisdom is invaluable.Making Flanges Around Bulkhead Hatches for Canvas
Sven Yrvind, a renowned yacht designer and sailor, shares valuable insights on creating flanges around bulkhead hatches for canvas protection in this enlightening video. By following his expert guidance, boat enthusiasts can ensure their living areas remain secure while allowing unhindered access through the hatches.Step 1: Starting with the Flange
Sven begins by explaining that working on flanges vertically and horizontally is significantly easier than doing so in a flat position. To simplify the process further, he divides the task into two or three steps as suggested by fellow expert “for for.” This approach not only makes it more manageable but also allows for greater precision in crafting each component.Step 2: Applying Glue and Securing
Sven proceeds to apply glue along one edge of the flange, ensuring a secure bond when clamped into place. He emphasizes that this stage is crucial for maintaining the structural integrity of the flange, which in turn safeguards the living area beneath the canvas when hatches are open.Step 3: Allowing Time to Dry
After securely attaching the first portion of the flange, Sven allows ample time for it to dry before moving forward with additional steps. This patience and precision are key aspects of his successful boatbuilding methods.Step 4: Finishing Touches
Once the flange is fully dried, Sven removes the clamps carefully, ensuring no damage occurs during this process. He then moves on to attaching four more pieces onto these main frames, completing two pairs of flanges for the bulkhead hatches.The Final Touches
While two flanges form the primary support structure around the hatches, Sven mentions there are two additional pieces required at each end to ensure comprehensive protection. This attention to detail highlights his commitment to producing a durable and reliable design. “Sailing is about finding your path, whether it’s across an ocean or within yourself.” – Sven Yrvind In conclusion, making flanges around bulkhead hatches may seem complex at first glance, but by following Sven Yrvind’s meticulous process, enthusiasts can achieve professional-level results. Remember that the journey of boatbuilding is as rewarding as reaching your destination; it tests one’s patience and dedication. For those seeking to embark on this adventure or simply gain more insight into marine craftsmanship, Sven’s wisdom is invaluable.After securely attaching the first portion of the flange, Sven allows ample time for it to dry before moving forward with additional steps. This patience and precision are key aspects of his successful boatbuilding methods.Step 4: Finishing Touches
Once the flange is fully dried, Sven removes the clamps carefully, ensuring no damage occurs during this process. He then moves on to attaching four more pieces onto these main frames, completing two pairs of flanges for the bulkhead hatches.The Final Touches
While two flanges form the primary support structure around the hatches, Sven mentions there are two additional pieces required at each end to ensure comprehensive protection. This attention to detail highlights his commitment to producing a durable and reliable design. “Sailing is about finding your path, whether it’s across an ocean or within yourself.” – Sven Yrvind In conclusion, making flanges around bulkhead hatches may seem complex at first glance, but by following Sven Yrvind’s meticulous process, enthusiasts can achieve professional-level results. Remember that the journey of boatbuilding is as rewarding as reaching your destination; it tests one’s patience and dedication. For those seeking to embark on this adventure or simply gain more insight into marine craftsmanship, Sven’s wisdom is invaluable.Sven begins by explaining that working on flanges vertically and horizontally is significantly easier than doing so in a flat position. To simplify the process further, he divides the task into two or three steps as suggested by fellow expert “for for.” This approach not only makes it more manageable but also allows for greater precision in crafting each component.Step 2: Applying Glue and Securing
Sven proceeds to apply glue along one edge of the flange, ensuring a secure bond when clamped into place. He emphasizes that this stage is crucial for maintaining the structural integrity of the flange, which in turn safeguards the living area beneath the canvas when hatches are open.Step 3: Allowing Time to Dry
After securely attaching the first portion of the flange, Sven allows ample time for it to dry before moving forward with additional steps. This patience and precision are key aspects of his successful boatbuilding methods.Step 4: Finishing Touches
Once the flange is fully dried, Sven removes the clamps carefully, ensuring no damage occurs during this process. He then moves on to attaching four more pieces onto these main frames, completing two pairs of flanges for the bulkhead hatches.The Final Touches
While two flanges form the primary support structure around the hatches, Sven mentions there are two additional pieces required at each end to ensure comprehensive protection. This attention to detail highlights his commitment to producing a durable and reliable design. “Sailing is about finding your path, whether it’s across an ocean or within yourself.” – Sven Yrvind In conclusion, making flanges around bulkhead hatches may seem complex at first glance, but by following Sven Yrvind’s meticulous process, enthusiasts can achieve professional-level results. Remember that the journey of boatbuilding is as rewarding as reaching your destination; it tests one’s patience and dedication. For those seeking to embark on this adventure or simply gain more insight into marine craftsmanship, Sven’s wisdom is invaluable.Sven Yrvind, a renowned yacht designer and sailor, shares valuable insights on creating flanges around bulkhead hatches for canvas protection in this enlightening video. By following his expert guidance, boat enthusiasts can ensure their living areas remain secure while allowing unhindered access through the hatches.Step 1: Starting with the Flange
Sven begins by explaining that working on flanges vertically and horizontally is significantly easier than doing so in a flat position. To simplify the process further, he divides the task into two or three steps as suggested by fellow expert “for for.” This approach not only makes it more manageable but also allows for greater precision in crafting each component.Step 2: Applying Glue and Securing
Sven proceeds to apply glue along one edge of the flange, ensuring a secure bond when clamped into place. He emphasizes that this stage is crucial for maintaining the structural integrity of the flange, which in turn safeguards the living area beneath the canvas when hatches are open.Step 3: Allowing Time to Dry
After securely attaching the first portion of the flange, Sven allows ample time for it to dry before moving forward with additional steps. This patience and precision are key aspects of his successful boatbuilding methods.Step 4: Finishing Touches
Once the flange is fully dried, Sven removes the clamps carefully, ensuring no damage occurs during this process. He then moves on to attaching four more pieces onto these main frames, completing two pairs of flanges for the bulkhead hatches.The Final Touches
While two flanges form the primary support structure around the hatches, Sven mentions there are two additional pieces required at each end to ensure comprehensive protection. This attention to detail highlights his commitment to producing a durable and reliable design. “Sailing is about finding your path, whether it’s across an ocean or within yourself.” – Sven Yrvind In conclusion, making flanges around bulkhead hatches may seem complex at first glance, but by following Sven Yrvind’s meticulous process, enthusiasts can achieve professional-level results. Remember that the journey of boatbuilding is as rewarding as reaching your destination; it tests one’s patience and dedication. For those seeking to embark on this adventure or simply gain more insight into marine craftsmanship, Sven’s wisdom is invaluable.Making Flanges Around Bulkhead Hatches for Canvas
Sven Yrvind, a renowned yacht designer and sailor, shares valuable insights on creating flanges around bulkhead hatches for canvas protection in this enlightening video. By following his expert guidance, boat enthusiasts can ensure their living areas remain secure while allowing unhindered access through the hatches.Step 1: Starting with the Flange
Sven begins by explaining that working on flanges vertically and horizontally is significantly easier than doing so in a flat position. To simplify the process further, he divides the task into two or three steps as suggested by fellow expert “for for.” This approach not only makes it more manageable but also allows for greater precision in crafting each component.Step 2: Applying Glue and Securing
Sven proceeds to apply glue along one edge of the flange, ensuring a secure bond when clamped into place. He emphasizes that this stage is crucial for maintaining the structural integrity of the flange, which in turn safeguards the living area beneath the canvas when hatches are open.Step 3: Allowing Time to Dry
After securely attaching the first portion of the flange, Sven allows ample time for it to dry before moving forward with additional steps. This patience and precision are key aspects of his successful boatbuilding methods.Step 4: Finishing Touches
Once the flange is fully dried, Sven removes the clamps carefully, ensuring no damage occurs during this process. He then moves on to attaching four more pieces onto these main frames, completing two pairs of flanges for the bulkhead hatches.The Final Touches
While two flanges form the primary support structure around the hatches, Sven mentions there are two additional pieces required at each end to ensure comprehensive protection. This attention to detail highlights his commitment to producing a durable and reliable design. “Sailing is about finding your path, whether it’s across an ocean or within yourself.” – Sven Yrvind In conclusion, making flanges around bulkhead hatches may seem complex at first glance, but by following Sven Yrvind’s meticulous process, enthusiasts can achieve professional-level results. Remember that the journey of boatbuilding is as rewarding as reaching your destination; it tests one’s patience and dedication. For those seeking to embark on this adventure or simply gain more insight into marine craftsmanship, Sven’s wisdom is invaluable.Sven proceeds to apply glue along one edge of the flange, ensuring a secure bond when clamped into place. He emphasizes that this stage is crucial for maintaining the structural integrity of the flange, which in turn safeguards the living area beneath the canvas when hatches are open.Step 3: Allowing Time to Dry
After securely attaching the first portion of the flange, Sven allows ample time for it to dry before moving forward with additional steps. This patience and precision are key aspects of his successful boatbuilding methods.Step 4: Finishing Touches
Once the flange is fully dried, Sven removes the clamps carefully, ensuring no damage occurs during this process. He then moves on to attaching four more pieces onto these main frames, completing two pairs of flanges for the bulkhead hatches.The Final Touches
While two flanges form the primary support structure around the hatches, Sven mentions there are two additional pieces required at each end to ensure comprehensive protection. This attention to detail highlights his commitment to producing a durable and reliable design. “Sailing is about finding your path, whether it’s across an ocean or within yourself.” – Sven Yrvind In conclusion, making flanges around bulkhead hatches may seem complex at first glance, but by following Sven Yrvind’s meticulous process, enthusiasts can achieve professional-level results. Remember that the journey of boatbuilding is as rewarding as reaching your destination; it tests one’s patience and dedication. For those seeking to embark on this adventure or simply gain more insight into marine craftsmanship, Sven’s wisdom is invaluable.Sven begins by explaining that working on flanges vertically and horizontally is significantly easier than doing so in a flat position. To simplify the process further, he divides the task into two or three steps as suggested by fellow expert “for for.” This approach not only makes it more manageable but also allows for greater precision in crafting each component.Step 2: Applying Glue and Securing
Sven proceeds to apply glue along one edge of the flange, ensuring a secure bond when clamped into place. He emphasizes that this stage is crucial for maintaining the structural integrity of the flange, which in turn safeguards the living area beneath the canvas when hatches are open.Step 3: Allowing Time to Dry
After securely attaching the first portion of the flange, Sven allows ample time for it to dry before moving forward with additional steps. This patience and precision are key aspects of his successful boatbuilding methods.Step 4: Finishing Touches
Once the flange is fully dried, Sven removes the clamps carefully, ensuring no damage occurs during this process. He then moves on to attaching four more pieces onto these main frames, completing two pairs of flanges for the bulkhead hatches.The Final Touches
While two flanges form the primary support structure around the hatches, Sven mentions there are two additional pieces required at each end to ensure comprehensive protection. This attention to detail highlights his commitment to producing a durable and reliable design. “Sailing is about finding your path, whether it’s across an ocean or within yourself.” – Sven Yrvind In conclusion, making flanges around bulkhead hatches may seem complex at first glance, but by following Sven Yrvind’s meticulous process, enthusiasts can achieve professional-level results. Remember that the journey of boatbuilding is as rewarding as reaching your destination; it tests one’s patience and dedication. For those seeking to embark on this adventure or simply gain more insight into marine craftsmanship, Sven’s wisdom is invaluable.Sven Yrvind, a renowned yacht designer and sailor, shares valuable insights on creating flanges around bulkhead hatches for canvas protection in this enlightening video. By following his expert guidance, boat enthusiasts can ensure their living areas remain secure while allowing unhindered access through the hatches.Step 1: Starting with the Flange
Sven begins by explaining that working on flanges vertically and horizontally is significantly easier than doing so in a flat position. To simplify the process further, he divides the task into two or three steps as suggested by fellow expert “for for.” This approach not only makes it more manageable but also allows for greater precision in crafting each component.Step 2: Applying Glue and Securing
Sven proceeds to apply glue along one edge of the flange, ensuring a secure bond when clamped into place. He emphasizes that this stage is crucial for maintaining the structural integrity of the flange, which in turn safeguards the living area beneath the canvas when hatches are open.Step 3: Allowing Time to Dry
After securely attaching the first portion of the flange, Sven allows ample time for it to dry before moving forward with additional steps. This patience and precision are key aspects of his successful boatbuilding methods.Step 4: Finishing Touches
Once the flange is fully dried, Sven removes the clamps carefully, ensuring no damage occurs during this process. He then moves on to attaching four more pieces onto these main frames, completing two pairs of flanges for the bulkhead hatches.The Final Touches
While two flanges form the primary support structure around the hatches, Sven mentions there are two additional pieces required at each end to ensure comprehensive protection. This attention to detail highlights his commitment to producing a durable and reliable design. “Sailing is about finding your path, whether it’s across an ocean or within yourself.” – Sven Yrvind In conclusion, making flanges around bulkhead hatches may seem complex at first glance, but by following Sven Yrvind’s meticulous process, enthusiasts can achieve professional-level results. Remember that the journey of boatbuilding is as rewarding as reaching your destination; it tests one’s patience and dedication. For those seeking to embark on this adventure or simply gain more insight into marine craftsmanship, Sven’s wisdom is invaluable.Making Flanges Around Bulkhead Hatches for Canvas
Sven Yrvind, a renowned yacht designer and sailor, shares valuable insights on creating flanges around bulkhead hatches for canvas protection in this enlightening video. By following his expert guidance, boat enthusiasts can ensure their living areas remain secure while allowing unhindered access through the hatches.Step 1: Starting with the Flange
Sven begins by explaining that working on flanges vertically and horizontally is significantly easier than doing so in a flat position. To simplify the process further, he divides the task into two or three steps as suggested by fellow expert “for for.” This approach not only makes it more manageable but also allows for greater precision in crafting each component.Step 2: Applying Glue and Securing
Sven proceeds to apply glue along one edge of the flange, ensuring a secure bond when clamped into place. He emphasizes that this stage is crucial for maintaining the structural integrity of the flange, which in turn safeguards the living area beneath the canvas when hatches are open.Step 3: Allowing Time to Dry
After securely attaching the first portion of the flange, Sven allows ample time for it to dry before moving forward with additional steps. This patience and precision are key aspects of his successful boatbuilding methods.Step 4: Finishing Touches
Once the flange is fully dried, Sven removes the clamps carefully, ensuring no damage occurs during this process. He then moves on to attaching four more pieces onto these main frames, completing two pairs of flanges for the bulkhead hatches.The Final Touches
While two flanges form the primary support structure around the hatches, Sven mentions there are two additional pieces required at each end to ensure comprehensive protection. This attention to detail highlights his commitment to producing a durable and reliable design. “Sailing is about finding your path, whether it’s across an ocean or within yourself.” – Sven Yrvind In conclusion, making flanges around bulkhead hatches may seem complex at first glance, but by following Sven Yrvind’s meticulous process, enthusiasts can achieve professional-level results. Remember that the journey of boatbuilding is as rewarding as reaching your destination; it tests one’s patience and dedication. For those seeking to embark on this adventure or simply gain more insight into marine craftsmanship, Sven’s wisdom is invaluable.Once the flange is fully dried, Sven removes the clamps carefully, ensuring no damage occurs during this process. He then moves on to attaching four more pieces onto these main frames, completing two pairs of flanges for the bulkhead hatches.The Final Touches
While two flanges form the primary support structure around the hatches, Sven mentions there are two additional pieces required at each end to ensure comprehensive protection. This attention to detail highlights his commitment to producing a durable and reliable design. “Sailing is about finding your path, whether it’s across an ocean or within yourself.” – Sven Yrvind In conclusion, making flanges around bulkhead hatches may seem complex at first glance, but by following Sven Yrvind’s meticulous process, enthusiasts can achieve professional-level results. Remember that the journey of boatbuilding is as rewarding as reaching your destination; it tests one’s patience and dedication. For those seeking to embark on this adventure or simply gain more insight into marine craftsmanship, Sven’s wisdom is invaluable.Sven proceeds to apply glue along one edge of the flange, ensuring a secure bond when clamped into place. He emphasizes that this stage is crucial for maintaining the structural integrity of the flange, which in turn safeguards the living area beneath the canvas when hatches are open.Step 3: Allowing Time to Dry
After securely attaching the first portion of the flange, Sven allows ample time for it to dry before moving forward with additional steps. This patience and precision are key aspects of his successful boatbuilding methods.Step 4: Finishing Touches
Once the flange is fully dried, Sven removes the clamps carefully, ensuring no damage occurs during this process. He then moves on to attaching four more pieces onto these main frames, completing two pairs of flanges for the bulkhead hatches.The Final Touches
While two flanges form the primary support structure around the hatches, Sven mentions there are two additional pieces required at each end to ensure comprehensive protection. This attention to detail highlights his commitment to producing a durable and reliable design. “Sailing is about finding your path, whether it’s across an ocean or within yourself.” – Sven Yrvind In conclusion, making flanges around bulkhead hatches may seem complex at first glance, but by following Sven Yrvind’s meticulous process, enthusiasts can achieve professional-level results. Remember that the journey of boatbuilding is as rewarding as reaching your destination; it tests one’s patience and dedication. For those seeking to embark on this adventure or simply gain more insight into marine craftsmanship, Sven’s wisdom is invaluable.Sven begins by explaining that working on flanges vertically and horizontally is significantly easier than doing so in a flat position. To simplify the process further, he divides the task into two or three steps as suggested by fellow expert “for for.” This approach not only makes it more manageable but also allows for greater precision in crafting each component.Step 2: Applying Glue and Securing
Sven proceeds to apply glue along one edge of the flange, ensuring a secure bond when clamped into place. He emphasizes that this stage is crucial for maintaining the structural integrity of the flange, which in turn safeguards the living area beneath the canvas when hatches are open.Step 3: Allowing Time to Dry
After securely attaching the first portion of the flange, Sven allows ample time for it to dry before moving forward with additional steps. This patience and precision are key aspects of his successful boatbuilding methods.Step 4: Finishing Touches
Once the flange is fully dried, Sven removes the clamps carefully, ensuring no damage occurs during this process. He then moves on to attaching four more pieces onto these main frames, completing two pairs of flanges for the bulkhead hatches.The Final Touches
While two flanges form the primary support structure around the hatches, Sven mentions there are two additional pieces required at each end to ensure comprehensive protection. This attention to detail highlights his commitment to producing a durable and reliable design. “Sailing is about finding your path, whether it’s across an ocean or within yourself.” – Sven Yrvind In conclusion, making flanges around bulkhead hatches may seem complex at first glance, but by following Sven Yrvind’s meticulous process, enthusiasts can achieve professional-level results. Remember that the journey of boatbuilding is as rewarding as reaching your destination; it tests one’s patience and dedication. For those seeking to embark on this adventure or simply gain more insight into marine craftsmanship, Sven’s wisdom is invaluable.Sven Yrvind, a renowned yacht designer and sailor, shares valuable insights on creating flanges around bulkhead hatches for canvas protection in this enlightening video. By following his expert guidance, boat enthusiasts can ensure their living areas remain secure while allowing unhindered access through the hatches.Step 1: Starting with the Flange
Sven begins by explaining that working on flanges vertically and horizontally is significantly easier than doing so in a flat position. To simplify the process further, he divides the task into two or three steps as suggested by fellow expert “for for.” This approach not only makes it more manageable but also allows for greater precision in crafting each component.Step 2: Applying Glue and Securing
Sven proceeds to apply glue along one edge of the flange, ensuring a secure bond when clamped into place. He emphasizes that this stage is crucial for maintaining the structural integrity of the flange, which in turn safeguards the living area beneath the canvas when hatches are open.Step 3: Allowing Time to Dry
After securely attaching the first portion of the flange, Sven allows ample time for it to dry before moving forward with additional steps. This patience and precision are key aspects of his successful boatbuilding methods.Step 4: Finishing Touches
Once the flange is fully dried, Sven removes the clamps carefully, ensuring no damage occurs during this process. He then moves on to attaching four more pieces onto these main frames, completing two pairs of flanges for the bulkhead hatches.The Final Touches
While two flanges form the primary support structure around the hatches, Sven mentions there are two additional pieces required at each end to ensure comprehensive protection. This attention to detail highlights his commitment to producing a durable and reliable design. “Sailing is about finding your path, whether it’s across an ocean or within yourself.” – Sven Yrvind In conclusion, making flanges around bulkhead hatches may seem complex at first glance, but by following Sven Yrvind’s meticulous process, enthusiasts can achieve professional-level results. Remember that the journey of boatbuilding is as rewarding as reaching your destination; it tests one’s patience and dedication. For those seeking to embark on this adventure or simply gain more insight into marine craftsmanship, Sven’s wisdom is invaluable.Making Flanges Around Bulkhead Hatches for Canvas
Sven Yrvind, a renowned yacht designer and sailor, shares valuable insights on creating flanges around bulkhead hatches for canvas protection in this enlightening video. By following his expert guidance, boat enthusiasts can ensure their living areas remain secure while allowing unhindered access through the hatches.Step 1: Starting with the Flange
Sven begins by explaining that working on flanges vertically and horizontally is significantly easier than doing so in a flat position. To simplify the process further, he divides the task into two or three steps as suggested by fellow expert “for for.” This approach not only makes it more manageable but also allows for greater precision in crafting each component.Step 2: Applying Glue and Securing
Sven proceeds to apply glue along one edge of the flange, ensuring a secure bond when clamped into place. He emphasizes that this stage is crucial for maintaining the structural integrity of the flange, which in turn safeguards the living area beneath the canvas when hatches are open.Step 3: Allowing Time to Dry
After securely attaching the first portion of the flange, Sven allows ample time for it to dry before moving forward with additional steps. This patience and precision are key aspects of his successful boatbuilding methods.Step 4: Finishing Touches
Once the flange is fully dried, Sven removes the clamps carefully, ensuring no damage occurs during this process. He then moves on to attaching four more pieces onto these main frames, completing two pairs of flanges for the bulkhead hatches.The Final Touches
While two flanges form the primary support structure around the hatches, Sven mentions there are two additional pieces required at each end to ensure comprehensive protection. This attention to detail highlights his commitment to producing a durable and reliable design. “Sailing is about finding your path, whether it’s across an ocean or within yourself.” – Sven Yrvind In conclusion, making flanges around bulkhead hatches may seem complex at first glance, but by following Sven Yrvind’s meticulous process, enthusiasts can achieve professional-level results. Remember that the journey of boatbuilding is as rewarding as reaching your destination; it tests one’s patience and dedication. For those seeking to embark on this adventure or simply gain more insight into marine craftsmanship, Sven’s wisdom is invaluable.After securely attaching the first portion of the flange, Sven allows ample time for it to dry before moving forward with additional steps. This patience and precision are key aspects of his successful boatbuilding methods.Step 4: Finishing Touches
Once the flange is fully dried, Sven removes the clamps carefully, ensuring no damage occurs during this process. He then moves on to attaching four more pieces onto these main frames, completing two pairs of flanges for the bulkhead hatches.The Final Touches
While two flanges form the primary support structure around the hatches, Sven mentions there are two additional pieces required at each end to ensure comprehensive protection. This attention to detail highlights his commitment to producing a durable and reliable design. “Sailing is about finding your path, whether it’s across an ocean or within yourself.” – Sven Yrvind In conclusion, making flanges around bulkhead hatches may seem complex at first glance, but by following Sven Yrvind’s meticulous process, enthusiasts can achieve professional-level results. Remember that the journey of boatbuilding is as rewarding as reaching your destination; it tests one’s patience and dedication. For those seeking to embark on this adventure or simply gain more insight into marine craftsmanship, Sven’s wisdom is invaluable.Sven proceeds to apply glue along one edge of the flange, ensuring a secure bond when clamped into place. He emphasizes that this stage is crucial for maintaining the structural integrity of the flange, which in turn safeguards the living area beneath the canvas when hatches are open.Step 3: Allowing Time to Dry
After securely attaching the first portion of the flange, Sven allows ample time for it to dry before moving forward with additional steps. This patience and precision are key aspects of his successful boatbuilding methods.Step 4: Finishing Touches
Once the flange is fully dried, Sven removes the clamps carefully, ensuring no damage occurs during this process. He then moves on to attaching four more pieces onto these main frames, completing two pairs of flanges for the bulkhead hatches.The Final Touches
While two flanges form the primary support structure around the hatches, Sven mentions there are two additional pieces required at each end to ensure comprehensive protection. This attention to detail highlights his commitment to producing a durable and reliable design. “Sailing is about finding your path, whether it’s across an ocean or within yourself.” – Sven Yrvind In conclusion, making flanges around bulkhead hatches may seem complex at first glance, but by following Sven Yrvind’s meticulous process, enthusiasts can achieve professional-level results. Remember that the journey of boatbuilding is as rewarding as reaching your destination; it tests one’s patience and dedication. For those seeking to embark on this adventure or simply gain more insight into marine craftsmanship, Sven’s wisdom is invaluable.Sven begins by explaining that working on flanges vertically and horizontally is significantly easier than doing so in a flat position. To simplify the process further, he divides the task into two or three steps as suggested by fellow expert “for for.” This approach not only makes it more manageable but also allows for greater precision in crafting each component.Step 2: Applying Glue and Securing
Sven proceeds to apply glue along one edge of the flange, ensuring a secure bond when clamped into place. He emphasizes that this stage is crucial for maintaining the structural integrity of the flange, which in turn safeguards the living area beneath the canvas when hatches are open.Step 3: Allowing Time to Dry
After securely attaching the first portion of the flange, Sven allows ample time for it to dry before moving forward with additional steps. This patience and precision are key aspects of his successful boatbuilding methods.Step 4: Finishing Touches
Once the flange is fully dried, Sven removes the clamps carefully, ensuring no damage occurs during this process. He then moves on to attaching four more pieces onto these main frames, completing two pairs of flanges for the bulkhead hatches.The Final Touches
While two flanges form the primary support structure around the hatches, Sven mentions there are two additional pieces required at each end to ensure comprehensive protection. This attention to detail highlights his commitment to producing a durable and reliable design. “Sailing is about finding your path, whether it’s across an ocean or within yourself.” – Sven Yrvind In conclusion, making flanges around bulkhead hatches may seem complex at first glance, but by following Sven Yrvind’s meticulous process, enthusiasts can achieve professional-level results. Remember that the journey of boatbuilding is as rewarding as reaching your destination; it tests one’s patience and dedication. For those seeking to embark on this adventure or simply gain more insight into marine craftsmanship, Sven’s wisdom is invaluable.Sven Yrvind, a renowned yacht designer and sailor, shares valuable insights on creating flanges around bulkhead hatches for canvas protection in this enlightening video. By following his expert guidance, boat enthusiasts can ensure their living areas remain secure while allowing unhindered access through the hatches.Step 1: Starting with the Flange
Sven begins by explaining that working on flanges vertically and horizontally is significantly easier than doing so in a flat position. To simplify the process further, he divides the task into two or three steps as suggested by fellow expert “for for.” This approach not only makes it more manageable but also allows for greater precision in crafting each component.Step 2: Applying Glue and Securing
Sven proceeds to apply glue along one edge of the flange, ensuring a secure bond when clamped into place. He emphasizes that this stage is crucial for maintaining the structural integrity of the flange, which in turn safeguards the living area beneath the canvas when hatches are open.Step 3: Allowing Time to Dry
After securely attaching the first portion of the flange, Sven allows ample time for it to dry before moving forward with additional steps. This patience and precision are key aspects of his successful boatbuilding methods.Step 4: Finishing Touches
Once the flange is fully dried, Sven removes the clamps carefully, ensuring no damage occurs during this process. He then moves on to attaching four more pieces onto these main frames, completing two pairs of flanges for the bulkhead hatches.The Final Touches
While two flanges form the primary support structure around the hatches, Sven mentions there are two additional pieces required at each end to ensure comprehensive protection. This attention to detail highlights his commitment to producing a durable and reliable design. “Sailing is about finding your path, whether it’s across an ocean or within yourself.” – Sven Yrvind In conclusion, making flanges around bulkhead hatches may seem complex at first glance, but by following Sven Yrvind’s meticulous process, enthusiasts can achieve professional-level results. Remember that the journey of boatbuilding is as rewarding as reaching your destination; it tests one’s patience and dedication. For those seeking to embark on this adventure or simply gain more insight into marine craftsmanship, Sven’s wisdom is invaluable.Making Flanges Around Bulkhead Hatches for Canvas
Sven Yrvind, a renowned yacht designer and sailor, shares valuable insights on creating flanges around bulkhead hatches for canvas protection in this enlightening video. By following his expert guidance, boat enthusiasts can ensure their living areas remain secure while allowing unhindered access through the hatches.Step 1: Starting with the Flange
Sven begins by explaining that working on flanges vertically and horizontally is significantly easier than doing so in a flat position. To simplify the process further, he divides the task into two or three steps as suggested by fellow expert “for for.” This approach not only makes it more manageable but also allows for greater precision in crafting each component.Step 2: Applying Glue and Securing
Sven proceeds to apply glue along one edge of the flange, ensuring a secure bond when clamped into place. He emphasizes that this stage is crucial for maintaining the structural integrity of the flange, which in turn safeguards the living area beneath the canvas when hatches are open.Step 3: Allowing Time to Dry
After securely attaching the first portion of the flange, Sven allows ample time for it to dry before moving forward with additional steps. This patience and precision are key aspects of his successful boatbuilding methods.Step 4: Finishing Touches
Once the flange is fully dried, Sven removes the clamps carefully, ensuring no damage occurs during this process. He then moves on to attaching four more pieces onto these main frames, completing two pairs of flanges for the bulkhead hatches.The Final Touches
While two flanges form the primary support structure around the hatches, Sven mentions there are two additional pieces required at each end to ensure comprehensive protection. This attention to detail highlights his commitment to producing a durable and reliable design. “Sailing is about finding your path, whether it’s across an ocean or within yourself.” – Sven Yrvind In conclusion, making flanges around bulkhead hatches may seem complex at first glance, but by following Sven Yrvind’s meticulous process, enthusiasts can achieve professional-level results. Remember that the journey of boatbuilding is as rewarding as reaching your destination; it tests one’s patience and dedication. For those seeking to embark on this adventure or simply gain more insight into marine craftsmanship, Sven’s wisdom is invaluable.Once the flange is fully dried, Sven removes the clamps carefully, ensuring no damage occurs during this process. He then moves on to attaching four more pieces onto these main frames, completing two pairs of flanges for the bulkhead hatches.The Final Touches
While two flanges form the primary support structure around the hatches, Sven mentions there are two additional pieces required at each end to ensure comprehensive protection. This attention to detail highlights his commitment to producing a durable and reliable design. “Sailing is about finding your path, whether it’s across an ocean or within yourself.” – Sven Yrvind In conclusion, making flanges around bulkhead hatches may seem complex at first glance, but by following Sven Yrvind’s meticulous process, enthusiasts can achieve professional-level results. Remember that the journey of boatbuilding is as rewarding as reaching your destination; it tests one’s patience and dedication. For those seeking to embark on this adventure or simply gain more insight into marine craftsmanship, Sven’s wisdom is invaluable.After securely attaching the first portion of the flange, Sven allows ample time for it to dry before moving forward with additional steps. This patience and precision are key aspects of his successful boatbuilding methods.Step 4: Finishing Touches
Once the flange is fully dried, Sven removes the clamps carefully, ensuring no damage occurs during this process. He then moves on to attaching four more pieces onto these main frames, completing two pairs of flanges for the bulkhead hatches.The Final Touches
While two flanges form the primary support structure around the hatches, Sven mentions there are two additional pieces required at each end to ensure comprehensive protection. This attention to detail highlights his commitment to producing a durable and reliable design. “Sailing is about finding your path, whether it’s across an ocean or within yourself.” – Sven Yrvind In conclusion, making flanges around bulkhead hatches may seem complex at first glance, but by following Sven Yrvind’s meticulous process, enthusiasts can achieve professional-level results. Remember that the journey of boatbuilding is as rewarding as reaching your destination; it tests one’s patience and dedication. For those seeking to embark on this adventure or simply gain more insight into marine craftsmanship, Sven’s wisdom is invaluable.Sven proceeds to apply glue along one edge of the flange, ensuring a secure bond when clamped into place. He emphasizes that this stage is crucial for maintaining the structural integrity of the flange, which in turn safeguards the living area beneath the canvas when hatches are open.Step 3: Allowing Time to Dry
After securely attaching the first portion of the flange, Sven allows ample time for it to dry before moving forward with additional steps. This patience and precision are key aspects of his successful boatbuilding methods.Step 4: Finishing Touches
Once the flange is fully dried, Sven removes the clamps carefully, ensuring no damage occurs during this process. He then moves on to attaching four more pieces onto these main frames, completing two pairs of flanges for the bulkhead hatches.The Final Touches
While two flanges form the primary support structure around the hatches, Sven mentions there are two additional pieces required at each end to ensure comprehensive protection. This attention to detail highlights his commitment to producing a durable and reliable design. “Sailing is about finding your path, whether it’s across an ocean or within yourself.” – Sven Yrvind In conclusion, making flanges around bulkhead hatches may seem complex at first glance, but by following Sven Yrvind’s meticulous process, enthusiasts can achieve professional-level results. Remember that the journey of boatbuilding is as rewarding as reaching your destination; it tests one’s patience and dedication. For those seeking to embark on this adventure or simply gain more insight into marine craftsmanship, Sven’s wisdom is invaluable.Sven begins by explaining that working on flanges vertically and horizontally is significantly easier than doing so in a flat position. To simplify the process further, he divides the task into two or three steps as suggested by fellow expert “for for.” This approach not only makes it more manageable but also allows for greater precision in crafting each component.Step 2: Applying Glue and Securing
Sven proceeds to apply glue along one edge of the flange, ensuring a secure bond when clamped into place. He emphasizes that this stage is crucial for maintaining the structural integrity of the flange, which in turn safeguards the living area beneath the canvas when hatches are open.Step 3: Allowing Time to Dry
After securely attaching the first portion of the flange, Sven allows ample time for it to dry before moving forward with additional steps. This patience and precision are key aspects of his successful boatbuilding methods.Step 4: Finishing Touches
Once the flange is fully dried, Sven removes the clamps carefully, ensuring no damage occurs during this process. He then moves on to attaching four more pieces onto these main frames, completing two pairs of flanges for the bulkhead hatches.The Final Touches
While two flanges form the primary support structure around the hatches, Sven mentions there are two additional pieces required at each end to ensure comprehensive protection. This attention to detail highlights his commitment to producing a durable and reliable design. “Sailing is about finding your path, whether it’s across an ocean or within yourself.” – Sven Yrvind In conclusion, making flanges around bulkhead hatches may seem complex at first glance, but by following Sven Yrvind’s meticulous process, enthusiasts can achieve professional-level results. Remember that the journey of boatbuilding is as rewarding as reaching your destination; it tests one’s patience and dedication. For those seeking to embark on this adventure or simply gain more insight into marine craftsmanship, Sven’s wisdom is invaluable.Sven Yrvind, a renowned yacht designer and sailor, shares valuable insights on creating flanges around bulkhead hatches for canvas protection in this enlightening video. By following his expert guidance, boat enthusiasts can ensure their living areas remain secure while allowing unhindered access through the hatches.Step 1: Starting with the Flange
Sven begins by explaining that working on flanges vertically and horizontally is significantly easier than doing so in a flat position. To simplify the process further, he divides the task into two or three steps as suggested by fellow expert “for for.” This approach not only makes it more manageable but also allows for greater precision in crafting each component.Step 2: Applying Glue and Securing
Sven proceeds to apply glue along one edge of the flange, ensuring a secure bond when clamped into place. He emphasizes that this stage is crucial for maintaining the structural integrity of the flange, which in turn safeguards the living area beneath the canvas when hatches are open.Step 3: Allowing Time to Dry
After securely attaching the first portion of the flange, Sven allows ample time for it to dry before moving forward with additional steps. This patience and precision are key aspects of his successful boatbuilding methods.Step 4: Finishing Touches
Once the flange is fully dried, Sven removes the clamps carefully, ensuring no damage occurs during this process. He then moves on to attaching four more pieces onto these main frames, completing two pairs of flanges for the bulkhead hatches.The Final Touches
While two flanges form the primary support structure around the hatches, Sven mentions there are two additional pieces required at each end to ensure comprehensive protection. This attention to detail highlights his commitment to producing a durable and reliable design. “Sailing is about finding your path, whether it’s across an ocean or within yourself.” – Sven Yrvind In conclusion, making flanges around bulkhead hatches may seem complex at first glance, but by following Sven Yrvind’s meticulous process, enthusiasts can achieve professional-level results. Remember that the journey of boatbuilding is as rewarding as reaching your destination; it tests one’s patience and dedication. For those seeking to embark on this adventure or simply gain more insight into marine craftsmanship, Sven’s wisdom is invaluable.Making Flanges Around Bulkhead Hatches for Canvas
Sven Yrvind, a renowned yacht designer and sailor, shares valuable insights on creating flanges around bulkhead hatches for canvas protection in this enlightening video. By following his expert guidance, boat enthusiasts can ensure their living areas remain secure while allowing unhindered access through the hatches.Step 1: Starting with the Flange
Sven begins by explaining that working on flanges vertically and horizontally is significantly easier than doing so in a flat position. To simplify the process further, he divides the task into two or three steps as suggested by fellow expert “for for.” This approach not only makes it more manageable but also allows for greater precision in crafting each component.Step 2: Applying Glue and Securing
Sven proceeds to apply glue along one edge of the flange, ensuring a secure bond when clamped into place. He emphasizes that this stage is crucial for maintaining the structural integrity of the flange, which in turn safeguards the living area beneath the canvas when hatches are open.Step 3: Allowing Time to Dry
After securely attaching the first portion of the flange, Sven allows ample time for it to dry before moving forward with additional steps. This patience and precision are key aspects of his successful boatbuilding methods.Step 4: Finishing Touches
Once the flange is fully dried, Sven removes the clamps carefully, ensuring no damage occurs during this process. He then moves on to attaching four more pieces onto these main frames, completing two pairs of flanges for the bulkhead hatches.The Final Touches
While two flanges form the primary support structure around the hatches, Sven mentions there are two additional pieces required at each end to ensure comprehensive protection. This attention to detail highlights his commitment to producing a durable and reliable design. “Sailing is about finding your path, whether it’s across an ocean or within yourself.” – Sven Yrvind In conclusion, making flanges around bulkhead hatches may seem complex at first glance, but by following Sven Yrvind’s meticulous process, enthusiasts can achieve professional-level results. Remember that the journey of boatbuilding is as rewarding as reaching your destination; it tests one’s patience and dedication. For those seeking to embark on this adventure or simply gain more insight into marine craftsmanship, Sven’s wisdom is invaluable.After securely attaching the first portion of the flange, Sven allows ample time for it to dry before moving forward with additional steps. This patience and precision are key aspects of his successful boatbuilding methods.Step 4: Finishing Touches
Once the flange is fully dried, Sven removes the clamps carefully, ensuring no damage occurs during this process. He then moves on to attaching four more pieces onto these main frames, completing two pairs of flanges for the bulkhead hatches.The Final Touches
While two flanges form the primary support structure around the hatches, Sven mentions there are two additional pieces required at each end to ensure comprehensive protection. This attention to detail highlights his commitment to producing a durable and reliable design. “Sailing is about finding your path, whether it’s across an ocean or within yourself.” – Sven Yrvind In conclusion, making flanges around bulkhead hatches may seem complex at first glance, but by following Sven Yrvind’s meticulous process, enthusiasts can achieve professional-level results. Remember that the journey of boatbuilding is as rewarding as reaching your destination; it tests one’s patience and dedication. For those seeking to embark on this adventure or simply gain more insight into marine craftsmanship, Sven’s wisdom is invaluable.Making Flanges Around Bulkhead Hatches for Canvas
Sven Yrvind, a renowned yacht designer and sailor, shares valuable insights on creating flanges around bulkhead hatches for canvas protection in this enlightening video. By following his expert guidance, boat enthusiasts can ensure their living areas remain secure while allowing unhindered access through the hatches.Step 1: Starting with the Flange
Sven begins by explaining that working on flanges vertically and horizontally is significantly easier than doing so in a flat position. To simplify the process further, he divides the task into two or three steps as suggested by fellow expert “for for.” This approach not only makes it more manageable but also allows for greater precision in crafting each component.Step 2: Applying Glue and Securing
Sven proceeds to apply glue along one edge of the flange, ensuring a secure bond when clamped into place. He emphasizes that this stage is crucial for maintaining the structural integrity of the flange, which in turn safeguards the living area beneath the canvas when hatches are open.Step 3: Allowing Time to Dry
After securely attaching the first portion of the flange, Sven allows ample time for it to dry before moving forward with additional steps. This patience and precision are key aspects of his successful boatbuilding methods.Step 4: Finishing Touches
Once the flange is fully dried, Sven removes the clamps carefully, ensuring no damage occurs during this process. He then moves on to attaching four more pieces onto these main frames, completing two pairs of flanges for the bulkhead hatches.The Final Touches
While two flanges form the primary support structure around the hatches, Sven mentions there are two additional pieces required at each end to ensure comprehensive protection. This attention to detail highlights his commitment to producing a durable and reliable design. “Sailing is about finding your path, whether it’s across an ocean or within yourself.” – Sven Yrvind In conclusion, making flanges around bulkhead hatches may seem complex at first glance, but by following Sven Yrvind’s meticulous process, enthusiasts can achieve professional-level results. Remember that the journey of boatbuilding is as rewarding as reaching your destination; it tests one’s patience and dedication. For those seeking to embark on this adventure or simply gain more insight into marine craftsmanship, Sven’s wisdom is invaluable.After securely attaching the first portion of the flange, Sven allows ample time for it to dry before moving forward with additional steps. This patience and precision are key aspects of his successful boatbuilding methods.Step 4: Finishing Touches
Once the flange is fully dried, Sven removes the clamps carefully, ensuring no damage occurs during this process. He then moves on to attaching four more pieces onto these main frames, completing two pairs of flanges for the bulkhead hatches.The Final Touches
While two flanges form the primary support structure around the hatches, Sven mentions there are two additional pieces required at each end to ensure comprehensive protection. This attention to detail highlights his commitment to producing a durable and reliable design. “Sailing is about finding your path, whether it’s across an ocean or within yourself.” – Sven Yrvind In conclusion, making flanges around bulkhead hatches may seem complex at first glance, but by following Sven Yrvind’s meticulous process, enthusiasts can achieve professional-level results. Remember that the journey of boatbuilding is as rewarding as reaching your destination; it tests one’s patience and dedication. For those seeking to embark on this adventure or simply gain more insight into marine craftsmanship, Sven’s wisdom is invaluable.Sven begins by explaining that working on flanges vertically and horizontally is significantly easier than doing so in a flat position. To simplify the process further, he divides the task into two or three steps as suggested by fellow expert “for for.” This approach not only makes it more manageable but also allows for greater precision in crafting each component.Step 2: Applying Glue and Securing
Sven proceeds to apply glue along one edge of the flange, ensuring a secure bond when clamped into place. He emphasizes that this stage is crucial for maintaining the structural integrity of the flange, which in turn safeguards the living area beneath the canvas when hatches are open.Step 3: Allowing Time to Dry
After securely attaching the first portion of the flange, Sven allows ample time for it to dry before moving forward with additional steps. This patience and precision are key aspects of his successful boatbuilding methods.Step 4: Finishing Touches
Once the flange is fully dried, Sven removes the clamps carefully, ensuring no damage occurs during this process. He then moves on to attaching four more pieces onto these main frames, completing two pairs of flanges for the bulkhead hatches.The Final Touches
While two flanges form the primary support structure around the hatches, Sven mentions there are two additional pieces required at each end to ensure comprehensive protection. This attention to detail highlights his commitment to producing a durable and reliable design. “Sailing is about finding your path, whether it’s across an ocean or within yourself.” – Sven Yrvind In conclusion, making flanges around bulkhead hatches may seem complex at first glance, but by following Sven Yrvind’s meticulous process, enthusiasts can achieve professional-level results. Remember that the journey of boatbuilding is as rewarding as reaching your destination; it tests one’s patience and dedication. For those seeking to embark on this adventure or simply gain more insight into marine craftsmanship, Sven’s wisdom is invaluable.Sven Yrvind, a renowned yacht designer and sailor, shares valuable insights on creating flanges around bulkhead hatches for canvas protection in this enlightening video. By following his expert guidance, boat enthusiasts can ensure their living areas remain secure while allowing unhindered access through the hatches.Step 1: Starting with the Flange
Sven begins by explaining that working on flanges vertically and horizontally is significantly easier than doing so in a flat position. To simplify the process further, he divides the task into two or three steps as suggested by fellow expert “for for.” This approach not only makes it more manageable but also allows for greater precision in crafting each component.Step 2: Applying Glue and Securing
Sven proceeds to apply glue along one edge of the flange, ensuring a secure bond when clamped into place. He emphasizes that this stage is crucial for maintaining the structural integrity of the flange, which in turn safeguards the living area beneath the canvas when hatches are open.Step 3: Allowing Time to Dry
After securely attaching the first portion of the flange, Sven allows ample time for it to dry before moving forward with additional steps. This patience and precision are key aspects of his successful boatbuilding methods.Step 4: Finishing Touches
Once the flange is fully dried, Sven removes the clamps carefully, ensuring no damage occurs during this process. He then moves on to attaching four more pieces onto these main frames, completing two pairs of flanges for the bulkhead hatches.The Final Touches
While two flanges form the primary support structure around the hatches, Sven mentions there are two additional pieces required at each end to ensure comprehensive protection. This attention to detail highlights his commitment to producing a durable and reliable design. “Sailing is about finding your path, whether it’s across an ocean or within yourself.” – Sven Yrvind In conclusion, making flanges around bulkhead hatches may seem complex at first glance, but by following Sven Yrvind’s meticulous process, enthusiasts can achieve professional-level results. Remember that the journey of boatbuilding is as rewarding as reaching your destination; it tests one’s patience and dedication. For those seeking to embark on this adventure or simply gain more insight into marine craftsmanship, Sven’s wisdom is invaluable.Making Flanges Around Bulkhead Hatches for Canvas
Sven Yrvind, a renowned yacht designer and sailor, shares valuable insights on creating flanges around bulkhead hatches for canvas protection in this enlightening video. By following his expert guidance, boat enthusiasts can ensure their living areas remain secure while allowing unhindered access through the hatches.Step 1: Starting with the Flange
Sven begins by explaining that working on flanges vertically and horizontally is significantly easier than doing so in a flat position. To simplify the process further, he divides the task into two or three steps as suggested by fellow expert “for for.” This approach not only makes it more manageable but also allows for greater precision in crafting each component.Step 2: Applying Glue and Securing
Sven proceeds to apply glue along one edge of the flange, ensuring a secure bond when clamped into place. He emphasizes that this stage is crucial for maintaining the structural integrity of the flange, which in turn safeguards the living area beneath the canvas when hatches are open.Step 3: Allowing Time to Dry
After securely attaching the first portion of the flange, Sven allows ample time for it to dry before moving forward with additional steps. This patience and precision are key aspects of his successful boatbuilding methods.Step 4: Finishing Touches
Once the flange is fully dried, Sven removes the clamps carefully, ensuring no damage occurs during this process. He then moves on to attaching four more pieces onto these main frames, completing two pairs of flanges for the bulkhead hatches.The Final Touches
While two flanges form the primary support structure around the hatches, Sven mentions there are two additional pieces required at each end to ensure comprehensive protection. This attention to detail highlights his commitment to producing a durable and reliable design. “Sailing is about finding your path, whether it’s across an ocean or within yourself.” – Sven Yrvind In conclusion, making flanges around bulkhead hatches may seem complex at first glance, but by following Sven Yrvind’s meticulous process, enthusiasts can achieve professional-level results. Remember that the journey of boatbuilding is as rewarding as reaching your destination; it tests one’s patience and dedication. For those seeking to embark on this adventure or simply gain more insight into marine craftsmanship, Sven’s wisdom is invaluable.Sven proceeds to apply glue along one edge of the flange, ensuring a secure bond when clamped into place. He emphasizes that this stage is crucial for maintaining the structural integrity of the flange, which in turn safeguards the living area beneath the canvas when hatches are open.Step 3: Allowing Time to Dry
After securely attaching the first portion of the flange, Sven allows ample time for it to dry before moving forward with additional steps. This patience and precision are key aspects of his successful boatbuilding methods.Step 4: Finishing Touches
Once the flange is fully dried, Sven removes the clamps carefully, ensuring no damage occurs during this process. He then moves on to attaching four more pieces onto these main frames, completing two pairs of flanges for the bulkhead hatches.The Final Touches
While two flanges form the primary support structure around the hatches, Sven mentions there are two additional pieces required at each end to ensure comprehensive protection. This attention to detail highlights his commitment to producing a durable and reliable design. “Sailing is about finding your path, whether it’s across an ocean or within yourself.” – Sven Yrvind In conclusion, making flanges around bulkhead hatches may seem complex at first glance, but by following Sven Yrvind’s meticulous process, enthusiasts can achieve professional-level results. Remember that the journey of boatbuilding is as rewarding as reaching your destination; it tests one’s patience and dedication. For those seeking to embark on this adventure or simply gain more insight into marine craftsmanship, Sven’s wisdom is invaluable.Sven begins by explaining that working on flanges vertically and horizontally is significantly easier than doing so in a flat position. To simplify the process further, he divides the task into two or three steps as suggested by fellow expert “for for.” This approach not only makes it more manageable but also allows for greater precision in crafting each component.Step 2: Applying Glue and Securing
Sven proceeds to apply glue along one edge of the flange, ensuring a secure bond when clamped into place. He emphasizes that this stage is crucial for maintaining the structural integrity of the flange, which in turn safeguards the living area beneath the canvas when hatches are open.Step 3: Allowing Time to Dry
After securely attaching the first portion of the flange, Sven allows ample time for it to dry before moving forward with additional steps. This patience and precision are key aspects of his successful boatbuilding methods.Step 4: Finishing Touches
Once the flange is fully dried, Sven removes the clamps carefully, ensuring no damage occurs during this process. He then moves on to attaching four more pieces onto these main frames, completing two pairs of flanges for the bulkhead hatches.The Final Touches
While two flanges form the primary support structure around the hatches, Sven mentions there are two additional pieces required at each end to ensure comprehensive protection. This attention to detail highlights his commitment to producing a durable and reliable design. “Sailing is about finding your path, whether it’s across an ocean or within yourself.” – Sven Yrvind In conclusion, making flanges around bulkhead hatches may seem complex at first glance, but by following Sven Yrvind’s meticulous process, enthusiasts can achieve professional-level results. Remember that the journey of boatbuilding is as rewarding as reaching your destination; it tests one’s patience and dedication. For those seeking to embark on this adventure or simply gain more insight into marine craftsmanship, Sven’s wisdom is invaluable.Sven Yrvind, a renowned yacht designer and sailor, shares valuable insights on creating flanges around bulkhead hatches for canvas protection in this enlightening video. By following his expert guidance, boat enthusiasts can ensure their living areas remain secure while allowing unhindered access through the hatches.Step 1: Starting with the Flange
Sven begins by explaining that working on flanges vertically and horizontally is significantly easier than doing so in a flat position. To simplify the process further, he divides the task into two or three steps as suggested by fellow expert “for for.” This approach not only makes it more manageable but also allows for greater precision in crafting each component.Step 2: Applying Glue and Securing
Sven proceeds to apply glue along one edge of the flange, ensuring a secure bond when clamped into place. He emphasizes that this stage is crucial for maintaining the structural integrity of the flange, which in turn safeguards the living area beneath the canvas when hatches are open.Step 3: Allowing Time to Dry
After securely attaching the first portion of the flange, Sven allows ample time for it to dry before moving forward with additional steps. This patience and precision are key aspects of his successful boatbuilding methods.Step 4: Finishing Touches
Once the flange is fully dried, Sven removes the clamps carefully, ensuring no damage occurs during this process. He then moves on to attaching four more pieces onto these main frames, completing two pairs of flanges for the bulkhead hatches.The Final Touches
While two flanges form the primary support structure around the hatches, Sven mentions there are two additional pieces required at each end to ensure comprehensive protection. This attention to detail highlights his commitment to producing a durable and reliable design. “Sailing is about finding your path, whether it’s across an ocean or within yourself.” – Sven Yrvind In conclusion, making flanges around bulkhead hatches may seem complex at first glance, but by following Sven Yrvind’s meticulous process, enthusiasts can achieve professional-level results. Remember that the journey of boatbuilding is as rewarding as reaching your destination; it tests one’s patience and dedication. For those seeking to embark on this adventure or simply gain more insight into marine craftsmanship, Sven’s wisdom is invaluable.Making Flanges Around Bulkhead Hatches for Canvas
Sven Yrvind, a renowned yacht designer and sailor, shares valuable insights on creating flanges around bulkhead hatches for canvas protection in this enlightening video. By following his expert guidance, boat enthusiasts can ensure their living areas remain secure while allowing unhindered access through the hatches.Step 1: Starting with the Flange
Sven begins by explaining that working on flanges vertically and horizontally is significantly easier than doing so in a flat position. To simplify the process further, he divides the task into two or three steps as suggested by fellow expert “for for.” This approach not only makes it more manageable but also allows for greater precision in crafting each component.Step 2: Applying Glue and Securing
Sven proceeds to apply glue along one edge of the flange, ensuring a secure bond when clamped into place. He emphasizes that this stage is crucial for maintaining the structural integrity of the flange, which in turn safeguards the living area beneath the canvas when hatches are open.Step 3: Allowing Time to Dry
After securely attaching the first portion of the flange, Sven allows ample time for it to dry before moving forward with additional steps. This patience and precision are key aspects of his successful boatbuilding methods.Step 4: Finishing Touches
Once the flange is fully dried, Sven removes the clamps carefully, ensuring no damage occurs during this process. He then moves on to attaching four more pieces onto these main frames, completing two pairs of flanges for the bulkhead hatches.The Final Touches
While two flanges form the primary support structure around the hatches, Sven mentions there are two additional pieces required at each end to ensure comprehensive protection. This attention to detail highlights his commitment to producing a durable and reliable design. “Sailing is about finding your path, whether it’s across an ocean or within yourself.” – Sven Yrvind In conclusion, making flanges around bulkhead hatches may seem complex at first glance, but by following Sven Yrvind’s meticulous process, enthusiasts can achieve professional-level results. Remember that the journey of boatbuilding is as rewarding as reaching your destination; it tests one’s patience and dedication. For those seeking to embark on this adventure or simply gain more insight into marine craftsmanship, Sven’s wisdom is invaluable.Once the flange is fully dried, Sven removes the clamps carefully, ensuring no damage occurs during this process. He then moves on to attaching four more pieces onto these main frames, completing two pairs of flanges for the bulkhead hatches.The Final Touches
While two flanges form the primary support structure around the hatches, Sven mentions there are two additional pieces required at each end to ensure comprehensive protection. This attention to detail highlights his commitment to producing a durable and reliable design. “Sailing is about finding your path, whether it’s across an ocean or within yourself.” – Sven Yrvind In conclusion, making flanges around bulkhead hatches may seem complex at first glance, but by following Sven Yrvind’s meticulous process, enthusiasts can achieve professional-level results. Remember that the journey of boatbuilding is as rewarding as reaching your destination; it tests one’s patience and dedication. For those seeking to embark on this adventure or simply gain more insight into marine craftsmanship, Sven’s wisdom is invaluable.Sven proceeds to apply glue along one edge of the flange, ensuring a secure bond when clamped into place. He emphasizes that this stage is crucial for maintaining the structural integrity of the flange, which in turn safeguards the living area beneath the canvas when hatches are open.Step 3: Allowing Time to Dry
After securely attaching the first portion of the flange, Sven allows ample time for it to dry before moving forward with additional steps. This patience and precision are key aspects of his successful boatbuilding methods.Step 4: Finishing Touches
Once the flange is fully dried, Sven removes the clamps carefully, ensuring no damage occurs during this process. He then moves on to attaching four more pieces onto these main frames, completing two pairs of flanges for the bulkhead hatches.The Final Touches
While two flanges form the primary support structure around the hatches, Sven mentions there are two additional pieces required at each end to ensure comprehensive protection. This attention to detail highlights his commitment to producing a durable and reliable design. “Sailing is about finding your path, whether it’s across an ocean or within yourself.” – Sven Yrvind In conclusion, making flanges around bulkhead hatches may seem complex at first glance, but by following Sven Yrvind’s meticulous process, enthusiasts can achieve professional-level results. Remember that the journey of boatbuilding is as rewarding as reaching your destination; it tests one’s patience and dedication. For those seeking to embark on this adventure or simply gain more insight into marine craftsmanship, Sven’s wisdom is invaluable.Sven begins by explaining that working on flanges vertically and horizontally is significantly easier than doing so in a flat position. To simplify the process further, he divides the task into two or three steps as suggested by fellow expert “for for.” This approach not only makes it more manageable but also allows for greater precision in crafting each component.Step 2: Applying Glue and Securing
Sven proceeds to apply glue along one edge of the flange, ensuring a secure bond when clamped into place. He emphasizes that this stage is crucial for maintaining the structural integrity of the flange, which in turn safeguards the living area beneath the canvas when hatches are open.Step 3: Allowing Time to Dry
After securely attaching the first portion of the flange, Sven allows ample time for it to dry before moving forward with additional steps. This patience and precision are key aspects of his successful boatbuilding methods.Step 4: Finishing Touches
Once the flange is fully dried, Sven removes the clamps carefully, ensuring no damage occurs during this process. He then moves on to attaching four more pieces onto these main frames, completing two pairs of flanges for the bulkhead hatches.The Final Touches
While two flanges form the primary support structure around the hatches, Sven mentions there are two additional pieces required at each end to ensure comprehensive protection. This attention to detail highlights his commitment to producing a durable and reliable design. “Sailing is about finding your path, whether it’s across an ocean or within yourself.” – Sven Yrvind In conclusion, making flanges around bulkhead hatches may seem complex at first glance, but by following Sven Yrvind’s meticulous process, enthusiasts can achieve professional-level results. Remember that the journey of boatbuilding is as rewarding as reaching your destination; it tests one’s patience and dedication. For those seeking to embark on this adventure or simply gain more insight into marine craftsmanship, Sven’s wisdom is invaluable.Sven Yrvind, a renowned yacht designer and sailor, shares valuable insights on creating flanges around bulkhead hatches for canvas protection in this enlightening video. By following his expert guidance, boat enthusiasts can ensure their living areas remain secure while allowing unhindered access through the hatches.Step 1: Starting with the Flange
Sven begins by explaining that working on flanges vertically and horizontally is significantly easier than doing so in a flat position. To simplify the process further, he divides the task into two or three steps as suggested by fellow expert “for for.” This approach not only makes it more manageable but also allows for greater precision in crafting each component.Step 2: Applying Glue and Securing
Sven proceeds to apply glue along one edge of the flange, ensuring a secure bond when clamped into place. He emphasizes that this stage is crucial for maintaining the structural integrity of the flange, which in turn safeguards the living area beneath the canvas when hatches are open.Step 3: Allowing Time to Dry
After securely attaching the first portion of the flange, Sven allows ample time for it to dry before moving forward with additional steps. This patience and precision are key aspects of his successful boatbuilding methods.Step 4: Finishing Touches
Once the flange is fully dried, Sven removes the clamps carefully, ensuring no damage occurs during this process. He then moves on to attaching four more pieces onto these main frames, completing two pairs of flanges for the bulkhead hatches.The Final Touches
While two flanges form the primary support structure around the hatches, Sven mentions there are two additional pieces required at each end to ensure comprehensive protection. This attention to detail highlights his commitment to producing a durable and reliable design. “Sailing is about finding your path, whether it’s across an ocean or within yourself.” – Sven Yrvind In conclusion, making flanges around bulkhead hatches may seem complex at first glance, but by following Sven Yrvind’s meticulous process, enthusiasts can achieve professional-level results. Remember that the journey of boatbuilding is as rewarding as reaching your destination; it tests one’s patience and dedication. For those seeking to embark on this adventure or simply gain more insight into marine craftsmanship, Sven’s wisdom is invaluable.Making Flanges Around Bulkhead Hatches for Canvas
Sven Yrvind, a renowned yacht designer and sailor, shares valuable insights on creating flanges around bulkhead hatches for canvas protection in this enlightening video. By following his expert guidance, boat enthusiasts can ensure their living areas remain secure while allowing unhindered access through the hatches.Step 1: Starting with the Flange
Sven begins by explaining that working on flanges vertically and horizontally is significantly easier than doing so in a flat position. To simplify the process further, he divides the task into two or three steps as suggested by fellow expert “for for.” This approach not only makes it more manageable but also allows for greater precision in crafting each component.Step 2: Applying Glue and Securing
Sven proceeds to apply glue along one edge of the flange, ensuring a secure bond when clamped into place. He emphasizes that this stage is crucial for maintaining the structural integrity of the flange, which in turn safeguards the living area beneath the canvas when hatches are open.Step 3: Allowing Time to Dry
After securely attaching the first portion of the flange, Sven allows ample time for it to dry before moving forward with additional steps. This patience and precision are key aspects of his successful boatbuilding methods.Step 4: Finishing Touches
Once the flange is fully dried, Sven removes the clamps carefully, ensuring no damage occurs during this process. He then moves on to attaching four more pieces onto these main frames, completing two pairs of flanges for the bulkhead hatches.The Final Touches
While two flanges form the primary support structure around the hatches, Sven mentions there are two additional pieces required at each end to ensure comprehensive protection. This attention to detail highlights his commitment to producing a durable and reliable design. “Sailing is about finding your path, whether it’s across an ocean or within yourself.” – Sven Yrvind In conclusion, making flanges around bulkhead hatches may seem complex at first glance, but by following Sven Yrvind’s meticulous process, enthusiasts can achieve professional-level results. Remember that the journey of boatbuilding is as rewarding as reaching your destination; it tests one’s patience and dedication. For those seeking to embark on this adventure or simply gain more insight into marine craftsmanship, Sven’s wisdom is invaluable.After securely attaching the first portion of the flange, Sven allows ample time for it to dry before moving forward with additional steps. This patience and precision are key aspects of his successful boatbuilding methods.Step 4: Finishing Touches
Once the flange is fully dried, Sven removes the clamps carefully, ensuring no damage occurs during this process. He then moves on to attaching four more pieces onto these main frames, completing two pairs of flanges for the bulkhead hatches.The Final Touches
While two flanges form the primary support structure around the hatches, Sven mentions there are two additional pieces required at each end to ensure comprehensive protection. This attention to detail highlights his commitment to producing a durable and reliable design. “Sailing is about finding your path, whether it’s across an ocean or within yourself.” – Sven Yrvind In conclusion, making flanges around bulkhead hatches may seem complex at first glance, but by following Sven Yrvind’s meticulous process, enthusiasts can achieve professional-level results. Remember that the journey of boatbuilding is as rewarding as reaching your destination; it tests one’s patience and dedication. For those seeking to embark on this adventure or simply gain more insight into marine craftsmanship, Sven’s wisdom is invaluable.Sven proceeds to apply glue along one edge of the flange, ensuring a secure bond when clamped into place. He emphasizes that this stage is crucial for maintaining the structural integrity of the flange, which in turn safeguards the living area beneath the canvas when hatches are open.Step 3: Allowing Time to Dry
After securely attaching the first portion of the flange, Sven allows ample time for it to dry before moving forward with additional steps. This patience and precision are key aspects of his successful boatbuilding methods.Step 4: Finishing Touches
Once the flange is fully dried, Sven removes the clamps carefully, ensuring no damage occurs during this process. He then moves on to attaching four more pieces onto these main frames, completing two pairs of flanges for the bulkhead hatches.The Final Touches
While two flanges form the primary support structure around the hatches, Sven mentions there are two additional pieces required at each end to ensure comprehensive protection. This attention to detail highlights his commitment to producing a durable and reliable design. “Sailing is about finding your path, whether it’s across an ocean or within yourself.” – Sven Yrvind In conclusion, making flanges around bulkhead hatches may seem complex at first glance, but by following Sven Yrvind’s meticulous process, enthusiasts can achieve professional-level results. Remember that the journey of boatbuilding is as rewarding as reaching your destination; it tests one’s patience and dedication. For those seeking to embark on this adventure or simply gain more insight into marine craftsmanship, Sven’s wisdom is invaluable.Sven begins by explaining that working on flanges vertically and horizontally is significantly easier than doing so in a flat position. To simplify the process further, he divides the task into two or three steps as suggested by fellow expert “for for.” This approach not only makes it more manageable but also allows for greater precision in crafting each component.Step 2: Applying Glue and Securing
Sven proceeds to apply glue along one edge of the flange, ensuring a secure bond when clamped into place. He emphasizes that this stage is crucial for maintaining the structural integrity of the flange, which in turn safeguards the living area beneath the canvas when hatches are open.Step 3: Allowing Time to Dry
After securely attaching the first portion of the flange, Sven allows ample time for it to dry before moving forward with additional steps. This patience and precision are key aspects of his successful boatbuilding methods.Step 4: Finishing Touches
Once the flange is fully dried, Sven removes the clamps carefully, ensuring no damage occurs during this process. He then moves on to attaching four more pieces onto these main frames, completing two pairs of flanges for the bulkhead hatches.The Final Touches
While two flanges form the primary support structure around the hatches, Sven mentions there are two additional pieces required at each end to ensure comprehensive protection. This attention to detail highlights his commitment to producing a durable and reliable design. “Sailing is about finding your path, whether it’s across an ocean or within yourself.” – Sven Yrvind In conclusion, making flanges around bulkhead hatches may seem complex at first glance, but by following Sven Yrvind’s meticulous process, enthusiasts can achieve professional-level results. Remember that the journey of boatbuilding is as rewarding as reaching your destination; it tests one’s patience and dedication. For those seeking to embark on this adventure or simply gain more insight into marine craftsmanship, Sven’s wisdom is invaluable.Sven Yrvind, a renowned yacht designer and sailor, shares valuable insights on creating flanges around bulkhead hatches for canvas protection in this enlightening video. By following his expert guidance, boat enthusiasts can ensure their living areas remain secure while allowing unhindered access through the hatches.Step 1: Starting with the Flange
Sven begins by explaining that working on flanges vertically and horizontally is significantly easier than doing so in a flat position. To simplify the process further, he divides the task into two or three steps as suggested by fellow expert “for for.” This approach not only makes it more manageable but also allows for greater precision in crafting each component.Step 2: Applying Glue and Securing
Sven proceeds to apply glue along one edge of the flange, ensuring a secure bond when clamped into place. He emphasizes that this stage is crucial for maintaining the structural integrity of the flange, which in turn safeguards the living area beneath the canvas when hatches are open.Step 3: Allowing Time to Dry
After securely attaching the first portion of the flange, Sven allows ample time for it to dry before moving forward with additional steps. This patience and precision are key aspects of his successful boatbuilding methods.Step 4: Finishing Touches
Once the flange is fully dried, Sven removes the clamps carefully, ensuring no damage occurs during this process. He then moves on to attaching four more pieces onto these main frames, completing two pairs of flanges for the bulkhead hatches.The Final Touches
While two flanges form the primary support structure around the hatches, Sven mentions there are two additional pieces required at each end to ensure comprehensive protection. This attention to detail highlights his commitment to producing a durable and reliable design. “Sailing is about finding your path, whether it’s across an ocean or within yourself.” – Sven Yrvind In conclusion, making flanges around bulkhead hatches may seem complex at first glance, but by following Sven Yrvind’s meticulous process, enthusiasts can achieve professional-level results. Remember that the journey of boatbuilding is as rewarding as reaching your destination; it tests one’s patience and dedication. For those seeking to embark on this adventure or simply gain more insight into marine craftsmanship, Sven’s wisdom is invaluable.Making Flanges Around Bulkhead Hatches for Canvas
Sven Yrvind, a renowned yacht designer and sailor, shares valuable insights on creating flanges around bulkhead hatches for canvas protection in this enlightening video. By following his expert guidance, boat enthusiasts can ensure their living areas remain secure while allowing unhindered access through the hatches.Step 1: Starting with the Flange
Sven begins by explaining that working on flanges vertically and horizontally is significantly easier than doing so in a flat position. To simplify the process further, he divides the task into two or three steps as suggested by fellow expert “for for.” This approach not only makes it more manageable but also allows for greater precision in crafting each component.Step 2: Applying Glue and Securing
Sven proceeds to apply glue along one edge of the flange, ensuring a secure bond when clamped into place. He emphasizes that this stage is crucial for maintaining the structural integrity of the flange, which in turn safeguards the living area beneath the canvas when hatches are open.Step 3: Allowing Time to Dry
After securely attaching the first portion of the flange, Sven allows ample time for it to dry before moving forward with additional steps. This patience and precision are key aspects of his successful boatbuilding methods.Step 4: Finishing Touches
Once the flange is fully dried, Sven removes the clamps carefully, ensuring no damage occurs during this process. He then moves on to attaching four more pieces onto these main frames, completing two pairs of flanges for the bulkhead hatches.The Final Touches
While two flanges form the primary support structure around the hatches, Sven mentions there are two additional pieces required at each end to ensure comprehensive protection. This attention to detail highlights his commitment to producing a durable and reliable design. “Sailing is about finding your path, whether it’s across an ocean or within yourself.” – Sven Yrvind In conclusion, making flanges around bulkhead hatches may seem complex at first glance, but by following Sven Yrvind’s meticulous process, enthusiasts can achieve professional-level results. Remember that the journey of boatbuilding is as rewarding as reaching your destination; it tests one’s patience and dedication. For those seeking to embark on this adventure or simply gain more insight into marine craftsmanship, Sven’s wisdom is invaluable.Once the flange is fully dried, Sven removes the clamps carefully, ensuring no damage occurs during this process. He then moves on to attaching four more pieces onto these main frames, completing two pairs of flanges for the bulkhead hatches.The Final Touches
While two flanges form the primary support structure around the hatches, Sven mentions there are two additional pieces required at each end to ensure comprehensive protection. This attention to detail highlights his commitment to producing a durable and reliable design. “Sailing is about finding your path, whether it’s across an ocean or within yourself.” – Sven Yrvind In conclusion, making flanges around bulkhead hatches may seem complex at first glance, but by following Sven Yrvind’s meticulous process, enthusiasts can achieve professional-level results. Remember that the journey of boatbuilding is as rewarding as reaching your destination; it tests one’s patience and dedication. For those seeking to embark on this adventure or simply gain more insight into marine craftsmanship, Sven’s wisdom is invaluable.After securely attaching the first portion of the flange, Sven allows ample time for it to dry before moving forward with additional steps. This patience and precision are key aspects of his successful boatbuilding methods.Step 4: Finishing Touches
Once the flange is fully dried, Sven removes the clamps carefully, ensuring no damage occurs during this process. He then moves on to attaching four more pieces onto these main frames, completing two pairs of flanges for the bulkhead hatches.The Final Touches
While two flanges form the primary support structure around the hatches, Sven mentions there are two additional pieces required at each end to ensure comprehensive protection. This attention to detail highlights his commitment to producing a durable and reliable design. “Sailing is about finding your path, whether it’s across an ocean or within yourself.” – Sven Yrvind In conclusion, making flanges around bulkhead hatches may seem complex at first glance, but by following Sven Yrvind’s meticulous process, enthusiasts can achieve professional-level results. Remember that the journey of boatbuilding is as rewarding as reaching your destination; it tests one’s patience and dedication. For those seeking to embark on this adventure or simply gain more insight into marine craftsmanship, Sven’s wisdom is invaluable.Sven proceeds to apply glue along one edge of the flange, ensuring a secure bond when clamped into place. He emphasizes that this stage is crucial for maintaining the structural integrity of the flange, which in turn safeguards the living area beneath the canvas when hatches are open.Step 3: Allowing Time to Dry
After securely attaching the first portion of the flange, Sven allows ample time for it to dry before moving forward with additional steps. This patience and precision are key aspects of his successful boatbuilding methods.Step 4: Finishing Touches
Once the flange is fully dried, Sven removes the clamps carefully, ensuring no damage occurs during this process. He then moves on to attaching four more pieces onto these main frames, completing two pairs of flanges for the bulkhead hatches.The Final Touches
While two flanges form the primary support structure around the hatches, Sven mentions there are two additional pieces required at each end to ensure comprehensive protection. This attention to detail highlights his commitment to producing a durable and reliable design. “Sailing is about finding your path, whether it’s across an ocean or within yourself.” – Sven Yrvind In conclusion, making flanges around bulkhead hatches may seem complex at first glance, but by following Sven Yrvind’s meticulous process, enthusiasts can achieve professional-level results. Remember that the journey of boatbuilding is as rewarding as reaching your destination; it tests one’s patience and dedication. For those seeking to embark on this adventure or simply gain more insight into marine craftsmanship, Sven’s wisdom is invaluable.Sven begins by explaining that working on flanges vertically and horizontally is significantly easier than doing so in a flat position. To simplify the process further, he divides the task into two or three steps as suggested by fellow expert “for for.” This approach not only makes it more manageable but also allows for greater precision in crafting each component.Step 2: Applying Glue and Securing
Sven proceeds to apply glue along one edge of the flange, ensuring a secure bond when clamped into place. He emphasizes that this stage is crucial for maintaining the structural integrity of the flange, which in turn safeguards the living area beneath the canvas when hatches are open.Step 3: Allowing Time to Dry
After securely attaching the first portion of the flange, Sven allows ample time for it to dry before moving forward with additional steps. This patience and precision are key aspects of his successful boatbuilding methods.Step 4: Finishing Touches
Once the flange is fully dried, Sven removes the clamps carefully, ensuring no damage occurs during this process. He then moves on to attaching four more pieces onto these main frames, completing two pairs of flanges for the bulkhead hatches.The Final Touches
While two flanges form the primary support structure around the hatches, Sven mentions there are two additional pieces required at each end to ensure comprehensive protection. This attention to detail highlights his commitment to producing a durable and reliable design. “Sailing is about finding your path, whether it’s across an ocean or within yourself.” – Sven Yrvind In conclusion, making flanges around bulkhead hatches may seem complex at first glance, but by following Sven Yrvind’s meticulous process, enthusiasts can achieve professional-level results. Remember that the journey of boatbuilding is as rewarding as reaching your destination; it tests one’s patience and dedication. For those seeking to embark on this adventure or simply gain more insight into marine craftsmanship, Sven’s wisdom is invaluable.Sven Yrvind, a renowned yacht designer and sailor, shares valuable insights on creating flanges around bulkhead hatches for canvas protection in this enlightening video. By following his expert guidance, boat enthusiasts can ensure their living areas remain secure while allowing unhindered access through the hatches.Step 1: Starting with the Flange
Sven begins by explaining that working on flanges vertically and horizontally is significantly easier than doing so in a flat position. To simplify the process further, he divides the task into two or three steps as suggested by fellow expert “for for.” This approach not only makes it more manageable but also allows for greater precision in crafting each component.Step 2: Applying Glue and Securing
Sven proceeds to apply glue along one edge of the flange, ensuring a secure bond when clamped into place. He emphasizes that this stage is crucial for maintaining the structural integrity of the flange, which in turn safeguards the living area beneath the canvas when hatches are open.Step 3: Allowing Time to Dry
After securely attaching the first portion of the flange, Sven allows ample time for it to dry before moving forward with additional steps. This patience and precision are key aspects of his successful boatbuilding methods.Step 4: Finishing Touches
Once the flange is fully dried, Sven removes the clamps carefully, ensuring no damage occurs during this process. He then moves on to attaching four more pieces onto these main frames, completing two pairs of flanges for the bulkhead hatches.The Final Touches
While two flanges form the primary support structure around the hatches, Sven mentions there are two additional pieces required at each end to ensure comprehensive protection. This attention to detail highlights his commitment to producing a durable and reliable design. “Sailing is about finding your path, whether it’s across an ocean or within yourself.” – Sven Yrvind In conclusion, making flanges around bulkhead hatches may seem complex at first glance, but by following Sven Yrvind’s meticulous process, enthusiasts can achieve professional-level results. Remember that the journey of boatbuilding is as rewarding as reaching your destination; it tests one’s patience and dedication. For those seeking to embark on this adventure or simply gain more insight into marine craftsmanship, Sven’s wisdom is invaluable.Making Flanges Around Bulkhead Hatches for Canvas
Sven Yrvind, a renowned yacht designer and sailor, shares valuable insights on creating flanges around bulkhead hatches for canvas protection in this enlightening video. By following his expert guidance, boat enthusiasts can ensure their living areas remain secure while allowing unhindered access through the hatches.Step 1: Starting with the Flange
Sven begins by explaining that working on flanges vertically and horizontally is significantly easier than doing so in a flat position. To simplify the process further, he divides the task into two or three steps as suggested by fellow expert “for for.” This approach not only makes it more manageable but also allows for greater precision in crafting each component.Step 2: Applying Glue and Securing
Sven proceeds to apply glue along one edge of the flange, ensuring a secure bond when clamped into place. He emphasizes that this stage is crucial for maintaining the structural integrity of the flange, which in turn safeguards the living area beneath the canvas when hatches are open.Step 3: Allowing Time to Dry
After securely attaching the first portion of the flange, Sven allows ample time for it to dry before moving forward with additional steps. This patience and precision are key aspects of his successful boatbuilding methods.Step 4: Finishing Touches
Once the flange is fully dried, Sven removes the clamps carefully, ensuring no damage occurs during this process. He then moves on to attaching four more pieces onto these main frames, completing two pairs of flanges for the bulkhead hatches.The Final Touches
While two flanges form the primary support structure around the hatches, Sven mentions there are two additional pieces required at each end to ensure comprehensive protection. This attention to detail highlights his commitment to producing a durable and reliable design. “Sailing is about finding your path, whether it’s across an ocean or within yourself.” – Sven Yrvind In conclusion, making flanges around bulkhead hatches may seem complex at first glance, but by following Sven Yrvind’s meticulous process, enthusiasts can achieve professional-level results. Remember that the journey of boatbuilding is as rewarding as reaching your destination; it tests one’s patience and dedication. For those seeking to embark on this adventure or simply gain more insight into marine craftsmanship, Sven’s wisdom is invaluable.Sven proceeds to apply glue along one edge of the flange, ensuring a secure bond when clamped into place. He emphasizes that this stage is crucial for maintaining the structural integrity of the flange, which in turn safeguards the living area beneath the canvas when hatches are open.Step 3: Allowing Time to Dry
After securely attaching the first portion of the flange, Sven allows ample time for it to dry before moving forward with additional steps. This patience and precision are key aspects of his successful boatbuilding methods.Step 4: Finishing Touches
Once the flange is fully dried, Sven removes the clamps carefully, ensuring no damage occurs during this process. He then moves on to attaching four more pieces onto these main frames, completing two pairs of flanges for the bulkhead hatches.The Final Touches
While two flanges form the primary support structure around the hatches, Sven mentions there are two additional pieces required at each end to ensure comprehensive protection. This attention to detail highlights his commitment to producing a durable and reliable design. “Sailing is about finding your path, whether it’s across an ocean or within yourself.” – Sven Yrvind In conclusion, making flanges around bulkhead hatches may seem complex at first glance, but by following Sven Yrvind’s meticulous process, enthusiasts can achieve professional-level results. Remember that the journey of boatbuilding is as rewarding as reaching your destination; it tests one’s patience and dedication. For those seeking to embark on this adventure or simply gain more insight into marine craftsmanship, Sven’s wisdom is invaluable.Making Flanges Around Bulkhead Hatches for Canvas
Sven Yrvind, a renowned yacht designer and sailor, shares valuable insights on creating flanges around bulkhead hatches for canvas protection in this enlightening video. By following his expert guidance, boat enthusiasts can ensure their living areas remain secure while allowing unhindered access through the hatches.Step 1: Starting with the Flange
Sven begins by explaining that working on flanges vertically and horizontally is significantly easier than doing so in a flat position. To simplify the process further, he divides the task into two or three steps as suggested by fellow expert “for for.” This approach not only makes it more manageable but also allows for greater precision in crafting each component.Step 2: Applying Glue and Securing
Sven proceeds to apply glue along one edge of the flange, ensuring a secure bond when clamped into place. He emphasizes that this stage is crucial for maintaining the structural integrity of the flange, which in turn safeguards the living area beneath the canvas when hatches are open.Step 3: Allowing Time to Dry
After securely attaching the first portion of the flange, Sven allows ample time for it to dry before moving forward with additional steps. This patience and precision are key aspects of his successful boatbuilding methods.Step 4: Finishing Touches
Once the flange is fully dried, Sven removes the clamps carefully, ensuring no damage occurs during this process. He then moves on to attaching four more pieces onto these main frames, completing two pairs of flanges for the bulkhead hatches.The Final Touches
While two flanges form the primary support structure around the hatches, Sven mentions there are two additional pieces required at each end to ensure comprehensive protection. This attention to detail highlights his commitment to producing a durable and reliable design. “Sailing is about finding your path, whether it’s across an ocean or within yourself.” – Sven Yrvind In conclusion, making flanges around bulkhead hatches may seem complex at first glance, but by following Sven Yrvind’s meticulous process, enthusiasts can achieve professional-level results. Remember that the journey of boatbuilding is as rewarding as reaching your destination; it tests one’s patience and dedication. For those seeking to embark on this adventure or simply gain more insight into marine craftsmanship, Sven’s wisdom is invaluable.After securely attaching the first portion of the flange, Sven allows ample time for it to dry before moving forward with additional steps. This patience and precision are key aspects of his successful boatbuilding methods.Step 4: Finishing Touches
Once the flange is fully dried, Sven removes the clamps carefully, ensuring no damage occurs during this process. He then moves on to attaching four more pieces onto these main frames, completing two pairs of flanges for the bulkhead hatches.The Final Touches
While two flanges form the primary support structure around the hatches, Sven mentions there are two additional pieces required at each end to ensure comprehensive protection. This attention to detail highlights his commitment to producing a durable and reliable design. “Sailing is about finding your path, whether it’s across an ocean or within yourself.” – Sven Yrvind In conclusion, making flanges around bulkhead hatches may seem complex at first glance, but by following Sven Yrvind’s meticulous process, enthusiasts can achieve professional-level results. Remember that the journey of boatbuilding is as rewarding as reaching your destination; it tests one’s patience and dedication. For those seeking to embark on this adventure or simply gain more insight into marine craftsmanship, Sven’s wisdom is invaluable.Sven begins by explaining that working on flanges vertically and horizontally is significantly easier than doing so in a flat position. To simplify the process further, he divides the task into two or three steps as suggested by fellow expert “for for.” This approach not only makes it more manageable but also allows for greater precision in crafting each component.Step 2: Applying Glue and Securing
Sven proceeds to apply glue along one edge of the flange, ensuring a secure bond when clamped into place. He emphasizes that this stage is crucial for maintaining the structural integrity of the flange, which in turn safeguards the living area beneath the canvas when hatches are open.Step 3: Allowing Time to Dry
After securely attaching the first portion of the flange, Sven allows ample time for it to dry before moving forward with additional steps. This patience and precision are key aspects of his successful boatbuilding methods.Step 4: Finishing Touches
Once the flange is fully dried, Sven removes the clamps carefully, ensuring no damage occurs during this process. He then moves on to attaching four more pieces onto these main frames, completing two pairs of flanges for the bulkhead hatches.The Final Touches
While two flanges form the primary support structure around the hatches, Sven mentions there are two additional pieces required at each end to ensure comprehensive protection. This attention to detail highlights his commitment to producing a durable and reliable design. “Sailing is about finding your path, whether it’s across an ocean or within yourself.” – Sven Yrvind In conclusion, making flanges around bulkhead hatches may seem complex at first glance, but by following Sven Yrvind’s meticulous process, enthusiasts can achieve professional-level results. Remember that the journey of boatbuilding is as rewarding as reaching your destination; it tests one’s patience and dedication. For those seeking to embark on this adventure or simply gain more insight into marine craftsmanship, Sven’s wisdom is invaluable.Sven Yrvind, a renowned yacht designer and sailor, shares valuable insights on creating flanges around bulkhead hatches for canvas protection in this enlightening video. By following his expert guidance, boat enthusiasts can ensure their living areas remain secure while allowing unhindered access through the hatches.Step 1: Starting with the Flange
Sven begins by explaining that working on flanges vertically and horizontally is significantly easier than doing so in a flat position. To simplify the process further, he divides the task into two or three steps as suggested by fellow expert “for for.” This approach not only makes it more manageable but also allows for greater precision in crafting each component.Step 2: Applying Glue and Securing
Sven proceeds to apply glue along one edge of the flange, ensuring a secure bond when clamped into place. He emphasizes that this stage is crucial for maintaining the structural integrity of the flange, which in turn safeguards the living area beneath the canvas when hatches are open.Step 3: Allowing Time to Dry
After securely attaching the first portion of the flange, Sven allows ample time for it to dry before moving forward with additional steps. This patience and precision are key aspects of his successful boatbuilding methods.Step 4: Finishing Touches
Once the flange is fully dried, Sven removes the clamps carefully, ensuring no damage occurs during this process. He then moves on to attaching four more pieces onto these main frames, completing two pairs of flanges for the bulkhead hatches.The Final Touches
While two flanges form the primary support structure around the hatches, Sven mentions there are two additional pieces required at each end to ensure comprehensive protection. This attention to detail highlights his commitment to producing a durable and reliable design. “Sailing is about finding your path, whether it’s across an ocean or within yourself.” – Sven Yrvind In conclusion, making flanges around bulkhead hatches may seem complex at first glance, but by following Sven Yrvind’s meticulous process, enthusiasts can achieve professional-level results. Remember that the journey of boatbuilding is as rewarding as reaching your destination; it tests one’s patience and dedication. For those seeking to embark on this adventure or simply gain more insight into marine craftsmanship, Sven’s wisdom is invaluable.Making Flanges Around Bulkhead Hatches for Canvas
Sven Yrvind, a renowned yacht designer and sailor, shares valuable insights on creating flanges around bulkhead hatches for canvas protection in this enlightening video. By following his expert guidance, boat enthusiasts can ensure their living areas remain secure while allowing unhindered access through the hatches.Step 1: Starting with the Flange
Sven begins by explaining that working on flanges vertically and horizontally is significantly easier than doing so in a flat position. To simplify the process further, he divides the task into two or three steps as suggested by fellow expert “for for.” This approach not only makes it more manageable but also allows for greater precision in crafting each component.Step 2: Applying Glue and Securing
Sven proceeds to apply glue along one edge of the flange, ensuring a secure bond when clamped into place. He emphasizes that this stage is crucial for maintaining the structural integrity of the flange, which in turn safeguards the living area beneath the canvas when hatches are open.Step 3: Allowing Time to Dry
After securely attaching the first portion of the flange, Sven allows ample time for it to dry before moving forward with additional steps. This patience and precision are key aspects of his successful boatbuilding methods.Step 4: Finishing Touches
Once the flange is fully dried, Sven removes the clamps carefully, ensuring no damage occurs during this process. He then moves on to attaching four more pieces onto these main frames, completing two pairs of flanges for the bulkhead hatches.The Final Touches
While two flanges form the primary support structure around the hatches, Sven mentions there are two additional pieces required at each end to ensure comprehensive protection. This attention to detail highlights his commitment to producing a durable and reliable design. “Sailing is about finding your path, whether it’s across an ocean or within yourself.” – Sven Yrvind In conclusion, making flanges around bulkhead hatches may seem complex at first glance, but by following Sven Yrvind’s meticulous process, enthusiasts can achieve professional-level results. Remember that the journey of boatbuilding is as rewarding as reaching your destination; it tests one’s patience and dedication. For those seeking to embark on this adventure or simply gain more insight into marine craftsmanship, Sven’s wisdom is invaluable.Sven proceeds to apply glue along one edge of the flange, ensuring a secure bond when clamped into place. He emphasizes that this stage is crucial for maintaining the structural integrity of the flange, which in turn safeguards the living area beneath the canvas when hatches are open.Step 3: Allowing Time to Dry
After securely attaching the first portion of the flange, Sven allows ample time for it to dry before moving forward with additional steps. This patience and precision are key aspects of his successful boatbuilding methods.Step 4: Finishing Touches
Once the flange is fully dried, Sven removes the clamps carefully, ensuring no damage occurs during this process. He then moves on to attaching four more pieces onto these main frames, completing two pairs of flanges for the bulkhead hatches.The Final Touches
While two flanges form the primary support structure around the hatches, Sven mentions there are two additional pieces required at each end to ensure comprehensive protection. This attention to detail highlights his commitment to producing a durable and reliable design. “Sailing is about finding your path, whether it’s across an ocean or within yourself.” – Sven Yrvind In conclusion, making flanges around bulkhead hatches may seem complex at first glance, but by following Sven Yrvind’s meticulous process, enthusiasts can achieve professional-level results. Remember that the journey of boatbuilding is as rewarding as reaching your destination; it tests one’s patience and dedication. For those seeking to embark on this adventure or simply gain more insight into marine craftsmanship, Sven’s wisdom is invaluable.Sven begins by explaining that working on flanges vertically and horizontally is significantly easier than doing so in a flat position. To simplify the process further, he divides the task into two or three steps as suggested by fellow expert “for for.” This approach not only makes it more manageable but also allows for greater precision in crafting each component.Step 2: Applying Glue and Securing
Sven proceeds to apply glue along one edge of the flange, ensuring a secure bond when clamped into place. He emphasizes that this stage is crucial for maintaining the structural integrity of the flange, which in turn safeguards the living area beneath the canvas when hatches are open.Step 3: Allowing Time to Dry
After securely attaching the first portion of the flange, Sven allows ample time for it to dry before moving forward with additional steps. This patience and precision are key aspects of his successful boatbuilding methods.Step 4: Finishing Touches
Once the flange is fully dried, Sven removes the clamps carefully, ensuring no damage occurs during this process. He then moves on to attaching four more pieces onto these main frames, completing two pairs of flanges for the bulkhead hatches.The Final Touches
While two flanges form the primary support structure around the hatches, Sven mentions there are two additional pieces required at each end to ensure comprehensive protection. This attention to detail highlights his commitment to producing a durable and reliable design. “Sailing is about finding your path, whether it’s across an ocean or within yourself.” – Sven Yrvind In conclusion, making flanges around bulkhead hatches may seem complex at first glance, but by following Sven Yrvind’s meticulous process, enthusiasts can achieve professional-level results. Remember that the journey of boatbuilding is as rewarding as reaching your destination; it tests one’s patience and dedication. For those seeking to embark on this adventure or simply gain more insight into marine craftsmanship, Sven’s wisdom is invaluable.Sven Yrvind, a renowned yacht designer and sailor, shares valuable insights on creating flanges around bulkhead hatches for canvas protection in this enlightening video. By following his expert guidance, boat enthusiasts can ensure their living areas remain secure while allowing unhindered access through the hatches.Step 1: Starting with the Flange
Sven begins by explaining that working on flanges vertically and horizontally is significantly easier than doing so in a flat position. To simplify the process further, he divides the task into two or three steps as suggested by fellow expert “for for.” This approach not only makes it more manageable but also allows for greater precision in crafting each component.Step 2: Applying Glue and Securing
Sven proceeds to apply glue along one edge of the flange, ensuring a secure bond when clamped into place. He emphasizes that this stage is crucial for maintaining the structural integrity of the flange, which in turn safeguards the living area beneath the canvas when hatches are open.Step 3: Allowing Time to Dry
After securely attaching the first portion of the flange, Sven allows ample time for it to dry before moving forward with additional steps. This patience and precision are key aspects of his successful boatbuilding methods.Step 4: Finishing Touches
Once the flange is fully dried, Sven removes the clamps carefully, ensuring no damage occurs during this process. He then moves on to attaching four more pieces onto these main frames, completing two pairs of flanges for the bulkhead hatches.The Final Touches
While two flanges form the primary support structure around the hatches, Sven mentions there are two additional pieces required at each end to ensure comprehensive protection. This attention to detail highlights his commitment to producing a durable and reliable design. “Sailing is about finding your path, whether it’s across an ocean or within yourself.” – Sven Yrvind In conclusion, making flanges around bulkhead hatches may seem complex at first glance, but by following Sven Yrvind’s meticulous process, enthusiasts can achieve professional-level results. Remember that the journey of boatbuilding is as rewarding as reaching your destination; it tests one’s patience and dedication. For those seeking to embark on this adventure or simply gain more insight into marine craftsmanship, Sven’s wisdom is invaluable.Making Flanges Around Bulkhead Hatches for Canvas
Sven Yrvind, a renowned yacht designer and sailor, shares valuable insights on creating flanges around bulkhead hatches for canvas protection in this enlightening video. By following his expert guidance, boat enthusiasts can ensure their living areas remain secure while allowing unhindered access through the hatches.Step 1: Starting with the Flange
Sven begins by explaining that working on flanges vertically and horizontally is significantly easier than doing so in a flat position. To simplify the process further, he divides the task into two or three steps as suggested by fellow expert “for for.” This approach not only makes it more manageable but also allows for greater precision in crafting each component.Step 2: Applying Glue and Securing
Sven proceeds to apply glue along one edge of the flange, ensuring a secure bond when clamped into place. He emphasizes that this stage is crucial for maintaining the structural integrity of the flange, which in turn safeguards the living area beneath the canvas when hatches are open.Step 3: Allowing Time to Dry
After securely attaching the first portion of the flange, Sven allows ample time for it to dry before moving forward with additional steps. This patience and precision are key aspects of his successful boatbuilding methods.Step 4: Finishing Touches
Once the flange is fully dried, Sven removes the clamps carefully, ensuring no damage occurs during this process. He then moves on to attaching four more pieces onto these main frames, completing two pairs of flanges for the bulkhead hatches.The Final Touches
While two flanges form the primary support structure around the hatches, Sven mentions there are two additional pieces required at each end to ensure comprehensive protection. This attention to detail highlights his commitment to producing a durable and reliable design. “Sailing is about finding your path, whether it’s across an ocean or within yourself.” – Sven Yrvind In conclusion, making flanges around bulkhead hatches may seem complex at first glance, but by following Sven Yrvind’s meticulous process, enthusiasts can achieve professional-level results. Remember that the journey of boatbuilding is as rewarding as reaching your destination; it tests one’s patience and dedication. For those seeking to embark on this adventure or simply gain more insight into marine craftsmanship, Sven’s wisdom is invaluable.Once the flange is fully dried, Sven removes the clamps carefully, ensuring no damage occurs during this process. He then moves on to attaching four more pieces onto these main frames, completing two pairs of flanges for the bulkhead hatches.The Final Touches
While two flanges form the primary support structure around the hatches, Sven mentions there are two additional pieces required at each end to ensure comprehensive protection. This attention to detail highlights his commitment to producing a durable and reliable design. “Sailing is about finding your path, whether it’s across an ocean or within yourself.” – Sven Yrvind In conclusion, making flanges around bulkhead hatches may seem complex at first glance, but by following Sven Yrvind’s meticulous process, enthusiasts can achieve professional-level results. Remember that the journey of boatbuilding is as rewarding as reaching your destination; it tests one’s patience and dedication. For those seeking to embark on this adventure or simply gain more insight into marine craftsmanship, Sven’s wisdom is invaluable.Sven proceeds to apply glue along one edge of the flange, ensuring a secure bond when clamped into place. He emphasizes that this stage is crucial for maintaining the structural integrity of the flange, which in turn safeguards the living area beneath the canvas when hatches are open.Step 3: Allowing Time to Dry
After securely attaching the first portion of the flange, Sven allows ample time for it to dry before moving forward with additional steps. This patience and precision are key aspects of his successful boatbuilding methods.Step 4: Finishing Touches
Once the flange is fully dried, Sven removes the clamps carefully, ensuring no damage occurs during this process. He then moves on to attaching four more pieces onto these main frames, completing two pairs of flanges for the bulkhead hatches.The Final Touches
While two flanges form the primary support structure around the hatches, Sven mentions there are two additional pieces required at each end to ensure comprehensive protection. This attention to detail highlights his commitment to producing a durable and reliable design. “Sailing is about finding your path, whether it’s across an ocean or within yourself.” – Sven Yrvind In conclusion, making flanges around bulkhead hatches may seem complex at first glance, but by following Sven Yrvind’s meticulous process, enthusiasts can achieve professional-level results. Remember that the journey of boatbuilding is as rewarding as reaching your destination; it tests one’s patience and dedication. For those seeking to embark on this adventure or simply gain more insight into marine craftsmanship, Sven’s wisdom is invaluable.Sven begins by explaining that working on flanges vertically and horizontally is significantly easier than doing so in a flat position. To simplify the process further, he divides the task into two or three steps as suggested by fellow expert “for for.” This approach not only makes it more manageable but also allows for greater precision in crafting each component.Step 2: Applying Glue and Securing
Sven proceeds to apply glue along one edge of the flange, ensuring a secure bond when clamped into place. He emphasizes that this stage is crucial for maintaining the structural integrity of the flange, which in turn safeguards the living area beneath the canvas when hatches are open.Step 3: Allowing Time to Dry
After securely attaching the first portion of the flange, Sven allows ample time for it to dry before moving forward with additional steps. This patience and precision are key aspects of his successful boatbuilding methods.Step 4: Finishing Touches
Once the flange is fully dried, Sven removes the clamps carefully, ensuring no damage occurs during this process. He then moves on to attaching four more pieces onto these main frames, completing two pairs of flanges for the bulkhead hatches.The Final Touches
While two flanges form the primary support structure around the hatches, Sven mentions there are two additional pieces required at each end to ensure comprehensive protection. This attention to detail highlights his commitment to producing a durable and reliable design. “Sailing is about finding your path, whether it’s across an ocean or within yourself.” – Sven Yrvind In conclusion, making flanges around bulkhead hatches may seem complex at first glance, but by following Sven Yrvind’s meticulous process, enthusiasts can achieve professional-level results. Remember that the journey of boatbuilding is as rewarding as reaching your destination; it tests one’s patience and dedication. For those seeking to embark on this adventure or simply gain more insight into marine craftsmanship, Sven’s wisdom is invaluable.Sven Yrvind, a renowned yacht designer and sailor, shares valuable insights on creating flanges around bulkhead hatches for canvas protection in this enlightening video. By following his expert guidance, boat enthusiasts can ensure their living areas remain secure while allowing unhindered access through the hatches.Step 1: Starting with the Flange
Sven begins by explaining that working on flanges vertically and horizontally is significantly easier than doing so in a flat position. To simplify the process further, he divides the task into two or three steps as suggested by fellow expert “for for.” This approach not only makes it more manageable but also allows for greater precision in crafting each component.Step 2: Applying Glue and Securing
Sven proceeds to apply glue along one edge of the flange, ensuring a secure bond when clamped into place. He emphasizes that this stage is crucial for maintaining the structural integrity of the flange, which in turn safeguards the living area beneath the canvas when hatches are open.Step 3: Allowing Time to Dry
After securely attaching the first portion of the flange, Sven allows ample time for it to dry before moving forward with additional steps. This patience and precision are key aspects of his successful boatbuilding methods.Step 4: Finishing Touches
Once the flange is fully dried, Sven removes the clamps carefully, ensuring no damage occurs during this process. He then moves on to attaching four more pieces onto these main frames, completing two pairs of flanges for the bulkhead hatches.The Final Touches
While two flanges form the primary support structure around the hatches, Sven mentions there are two additional pieces required at each end to ensure comprehensive protection. This attention to detail highlights his commitment to producing a durable and reliable design. “Sailing is about finding your path, whether it’s across an ocean or within yourself.” – Sven Yrvind In conclusion, making flanges around bulkhead hatches may seem complex at first glance, but by following Sven Yrvind’s meticulous process, enthusiasts can achieve professional-level results. Remember that the journey of boatbuilding is as rewarding as reaching your destination; it tests one’s patience and dedication. For those seeking to embark on this adventure or simply gain more insight into marine craftsmanship, Sven’s wisdom is invaluable.Making Flanges Around Bulkhead Hatches for Canvas
Sven Yrvind, a renowned yacht designer and sailor, shares valuable insights on creating flanges around bulkhead hatches for canvas protection in this enlightening video. By following his expert guidance, boat enthusiasts can ensure their living areas remain secure while allowing unhindered access through the hatches.Step 1: Starting with the Flange
Sven begins by explaining that working on flanges vertically and horizontally is significantly easier than doing so in a flat position. To simplify the process further, he divides the task into two or three steps as suggested by fellow expert “for for.” This approach not only makes it more manageable but also allows for greater precision in crafting each component.Step 2: Applying Glue and Securing
Sven proceeds to apply glue along one edge of the flange, ensuring a secure bond when clamped into place. He emphasizes that this stage is crucial for maintaining the structural integrity of the flange, which in turn safeguards the living area beneath the canvas when hatches are open.Step 3: Allowing Time to Dry
After securely attaching the first portion of the flange, Sven allows ample time for it to dry before moving forward with additional steps. This patience and precision are key aspects of his successful boatbuilding methods.Step 4: Finishing Touches
Once the flange is fully dried, Sven removes the clamps carefully, ensuring no damage occurs during this process. He then moves on to attaching four more pieces onto these main frames, completing two pairs of flanges for the bulkhead hatches.The Final Touches
While two flanges form the primary support structure around the hatches, Sven mentions there are two additional pieces required at each end to ensure comprehensive protection. This attention to detail highlights his commitment to producing a durable and reliable design. “Sailing is about finding your path, whether it’s across an ocean or within yourself.” – Sven Yrvind In conclusion, making flanges around bulkhead hatches may seem complex at first glance, but by following Sven Yrvind’s meticulous process, enthusiasts can achieve professional-level results. Remember that the journey of boatbuilding is as rewarding as reaching your destination; it tests one’s patience and dedication. For those seeking to embark on this adventure or simply gain more insight into marine craftsmanship, Sven’s wisdom is invaluable.After securely attaching the first portion of the flange, Sven allows ample time for it to dry before moving forward with additional steps. This patience and precision are key aspects of his successful boatbuilding methods.Step 4: Finishing Touches
Once the flange is fully dried, Sven removes the clamps carefully, ensuring no damage occurs during this process. He then moves on to attaching four more pieces onto these main frames, completing two pairs of flanges for the bulkhead hatches.The Final Touches
While two flanges form the primary support structure around the hatches, Sven mentions there are two additional pieces required at each end to ensure comprehensive protection. This attention to detail highlights his commitment to producing a durable and reliable design. “Sailing is about finding your path, whether it’s across an ocean or within yourself.” – Sven Yrvind In conclusion, making flanges around bulkhead hatches may seem complex at first glance, but by following Sven Yrvind’s meticulous process, enthusiasts can achieve professional-level results. Remember that the journey of boatbuilding is as rewarding as reaching your destination; it tests one’s patience and dedication. For those seeking to embark on this adventure or simply gain more insight into marine craftsmanship, Sven’s wisdom is invaluable.Sven proceeds to apply glue along one edge of the flange, ensuring a secure bond when clamped into place. He emphasizes that this stage is crucial for maintaining the structural integrity of the flange, which in turn safeguards the living area beneath the canvas when hatches are open.Step 3: Allowing Time to Dry
After securely attaching the first portion of the flange, Sven allows ample time for it to dry before moving forward with additional steps. This patience and precision are key aspects of his successful boatbuilding methods.Step 4: Finishing Touches
Once the flange is fully dried, Sven removes the clamps carefully, ensuring no damage occurs during this process. He then moves on to attaching four more pieces onto these main frames, completing two pairs of flanges for the bulkhead hatches.The Final Touches
While two flanges form the primary support structure around the hatches, Sven mentions there are two additional pieces required at each end to ensure comprehensive protection. This attention to detail highlights his commitment to producing a durable and reliable design. “Sailing is about finding your path, whether it’s across an ocean or within yourself.” – Sven Yrvind In conclusion, making flanges around bulkhead hatches may seem complex at first glance, but by following Sven Yrvind’s meticulous process, enthusiasts can achieve professional-level results. Remember that the journey of boatbuilding is as rewarding as reaching your destination; it tests one’s patience and dedication. For those seeking to embark on this adventure or simply gain more insight into marine craftsmanship, Sven’s wisdom is invaluable.Sven begins by explaining that working on flanges vertically and horizontally is significantly easier than doing so in a flat position. To simplify the process further, he divides the task into two or three steps as suggested by fellow expert “for for.” This approach not only makes it more manageable but also allows for greater precision in crafting each component.Step 2: Applying Glue and Securing
Sven proceeds to apply glue along one edge of the flange, ensuring a secure bond when clamped into place. He emphasizes that this stage is crucial for maintaining the structural integrity of the flange, which in turn safeguards the living area beneath the canvas when hatches are open.Step 3: Allowing Time to Dry
After securely attaching the first portion of the flange, Sven allows ample time for it to dry before moving forward with additional steps. This patience and precision are key aspects of his successful boatbuilding methods.Step 4: Finishing Touches
Once the flange is fully dried, Sven removes the clamps carefully, ensuring no damage occurs during this process. He then moves on to attaching four more pieces onto these main frames, completing two pairs of flanges for the bulkhead hatches.The Final Touches
While two flanges form the primary support structure around the hatches, Sven mentions there are two additional pieces required at each end to ensure comprehensive protection. This attention to detail highlights his commitment to producing a durable and reliable design. “Sailing is about finding your path, whether it’s across an ocean or within yourself.” – Sven Yrvind In conclusion, making flanges around bulkhead hatches may seem complex at first glance, but by following Sven Yrvind’s meticulous process, enthusiasts can achieve professional-level results. Remember that the journey of boatbuilding is as rewarding as reaching your destination; it tests one’s patience and dedication. For those seeking to embark on this adventure or simply gain more insight into marine craftsmanship, Sven’s wisdom is invaluable.Sven Yrvind, a renowned yacht designer and sailor, shares valuable insights on creating flanges around bulkhead hatches for canvas protection in this enlightening video. By following his expert guidance, boat enthusiasts can ensure their living areas remain secure while allowing unhindered access through the hatches.Step 1: Starting with the Flange
Sven begins by explaining that working on flanges vertically and horizontally is significantly easier than doing so in a flat position. To simplify the process further, he divides the task into two or three steps as suggested by fellow expert “for for.” This approach not only makes it more manageable but also allows for greater precision in crafting each component.Step 2: Applying Glue and Securing
Sven proceeds to apply glue along one edge of the flange, ensuring a secure bond when clamped into place. He emphasizes that this stage is crucial for maintaining the structural integrity of the flange, which in turn safeguards the living area beneath the canvas when hatches are open.Step 3: Allowing Time to Dry
After securely attaching the first portion of the flange, Sven allows ample time for it to dry before moving forward with additional steps. This patience and precision are key aspects of his successful boatbuilding methods.Step 4: Finishing Touches
Once the flange is fully dried, Sven removes the clamps carefully, ensuring no damage occurs during this process. He then moves on to attaching four more pieces onto these main frames, completing two pairs of flanges for the bulkhead hatches.The Final Touches
While two flanges form the primary support structure around the hatches, Sven mentions there are two additional pieces required at each end to ensure comprehensive protection. This attention to detail highlights his commitment to producing a durable and reliable design. “Sailing is about finding your path, whether it’s across an ocean or within yourself.” – Sven Yrvind In conclusion, making flanges around bulkhead hatches may seem complex at first glance, but by following Sven Yrvind’s meticulous process, enthusiasts can achieve professional-level results. Remember that the journey of boatbuilding is as rewarding as reaching your destination; it tests one’s patience and dedication. For those seeking to embark on this adventure or simply gain more insight into marine craftsmanship, Sven’s wisdom is invaluable.Making Flanges Around Bulkhead Hatches for Canvas
Sven Yrvind, a renowned yacht designer and sailor, shares valuable insights on creating flanges around bulkhead hatches for canvas protection in this enlightening video. By following his expert guidance, boat enthusiasts can ensure their living areas remain secure while allowing unhindered access through the hatches.Step 1: Starting with the Flange
Sven begins by explaining that working on flanges vertically and horizontally is significantly easier than doing so in a flat position. To simplify the process further, he divides the task into two or three steps as suggested by fellow expert “for for.” This approach not only makes it more manageable but also allows for greater precision in crafting each component.Step 2: Applying Glue and Securing
Sven proceeds to apply glue along one edge of the flange, ensuring a secure bond when clamped into place. He emphasizes that this stage is crucial for maintaining the structural integrity of the flange, which in turn safeguards the living area beneath the canvas when hatches are open.Step 3: Allowing Time to Dry
After securely attaching the first portion of the flange, Sven allows ample time for it to dry before moving forward with additional steps. This patience and precision are key aspects of his successful boatbuilding methods.Step 4: Finishing Touches
Once the flange is fully dried, Sven removes the clamps carefully, ensuring no damage occurs during this process. He then moves on to attaching four more pieces onto these main frames, completing two pairs of flanges for the bulkhead hatches.The Final Touches
While two flanges form the primary support structure around the hatches, Sven mentions there are two additional pieces required at each end to ensure comprehensive protection. This attention to detail highlights his commitment to producing a durable and reliable design. “Sailing is about finding your path, whether it’s across an ocean or within yourself.” – Sven Yrvind In conclusion, making flanges around bulkhead hatches may seem complex at first glance, but by following Sven Yrvind’s meticulous process, enthusiasts can achieve professional-level results. Remember that the journey of boatbuilding is as rewarding as reaching your destination; it tests one’s patience and dedication. For those seeking to embark on this adventure or simply gain more insight into marine craftsmanship, Sven’s wisdom is invaluable.Once the flange is fully dried, Sven removes the clamps carefully, ensuring no damage occurs during this process. He then moves on to attaching four more pieces onto these main frames, completing two pairs of flanges for the bulkhead hatches.The Final Touches
While two flanges form the primary support structure around the hatches, Sven mentions there are two additional pieces required at each end to ensure comprehensive protection. This attention to detail highlights his commitment to producing a durable and reliable design. “Sailing is about finding your path, whether it’s across an ocean or within yourself.” – Sven Yrvind In conclusion, making flanges around bulkhead hatches may seem complex at first glance, but by following Sven Yrvind’s meticulous process, enthusiasts can achieve professional-level results. Remember that the journey of boatbuilding is as rewarding as reaching your destination; it tests one’s patience and dedication. For those seeking to embark on this adventure or simply gain more insight into marine craftsmanship, Sven’s wisdom is invaluable.After securely attaching the first portion of the flange, Sven allows ample time for it to dry before moving forward with additional steps. This patience and precision are key aspects of his successful boatbuilding methods.Step 4: Finishing Touches
Once the flange is fully dried, Sven removes the clamps carefully, ensuring no damage occurs during this process. He then moves on to attaching four more pieces onto these main frames, completing two pairs of flanges for the bulkhead hatches.The Final Touches
While two flanges form the primary support structure around the hatches, Sven mentions there are two additional pieces required at each end to ensure comprehensive protection. This attention to detail highlights his commitment to producing a durable and reliable design. “Sailing is about finding your path, whether it’s across an ocean or within yourself.” – Sven Yrvind In conclusion, making flanges around bulkhead hatches may seem complex at first glance, but by following Sven Yrvind’s meticulous process, enthusiasts can achieve professional-level results. Remember that the journey of boatbuilding is as rewarding as reaching your destination; it tests one’s patience and dedication. For those seeking to embark on this adventure or simply gain more insight into marine craftsmanship, Sven’s wisdom is invaluable.Sven proceeds to apply glue along one edge of the flange, ensuring a secure bond when clamped into place. He emphasizes that this stage is crucial for maintaining the structural integrity of the flange, which in turn safeguards the living area beneath the canvas when hatches are open.Step 3: Allowing Time to Dry
After securely attaching the first portion of the flange, Sven allows ample time for it to dry before moving forward with additional steps. This patience and precision are key aspects of his successful boatbuilding methods.Step 4: Finishing Touches
Once the flange is fully dried, Sven removes the clamps carefully, ensuring no damage occurs during this process. He then moves on to attaching four more pieces onto these main frames, completing two pairs of flanges for the bulkhead hatches.The Final Touches
While two flanges form the primary support structure around the hatches, Sven mentions there are two additional pieces required at each end to ensure comprehensive protection. This attention to detail highlights his commitment to producing a durable and reliable design. “Sailing is about finding your path, whether it’s across an ocean or within yourself.” – Sven Yrvind In conclusion, making flanges around bulkhead hatches may seem complex at first glance, but by following Sven Yrvind’s meticulous process, enthusiasts can achieve professional-level results. Remember that the journey of boatbuilding is as rewarding as reaching your destination; it tests one’s patience and dedication. For those seeking to embark on this adventure or simply gain more insight into marine craftsmanship, Sven’s wisdom is invaluable.Sven begins by explaining that working on flanges vertically and horizontally is significantly easier than doing so in a flat position. To simplify the process further, he divides the task into two or three steps as suggested by fellow expert “for for.” This approach not only makes it more manageable but also allows for greater precision in crafting each component.Step 2: Applying Glue and Securing
Sven proceeds to apply glue along one edge of the flange, ensuring a secure bond when clamped into place. He emphasizes that this stage is crucial for maintaining the structural integrity of the flange, which in turn safeguards the living area beneath the canvas when hatches are open.Step 3: Allowing Time to Dry
After securely attaching the first portion of the flange, Sven allows ample time for it to dry before moving forward with additional steps. This patience and precision are key aspects of his successful boatbuilding methods.Step 4: Finishing Touches
Once the flange is fully dried, Sven removes the clamps carefully, ensuring no damage occurs during this process. He then moves on to attaching four more pieces onto these main frames, completing two pairs of flanges for the bulkhead hatches.The Final Touches
While two flanges form the primary support structure around the hatches, Sven mentions there are two additional pieces required at each end to ensure comprehensive protection. This attention to detail highlights his commitment to producing a durable and reliable design. “Sailing is about finding your path, whether it’s across an ocean or within yourself.” – Sven Yrvind In conclusion, making flanges around bulkhead hatches may seem complex at first glance, but by following Sven Yrvind’s meticulous process, enthusiasts can achieve professional-level results. Remember that the journey of boatbuilding is as rewarding as reaching your destination; it tests one’s patience and dedication. For those seeking to embark on this adventure or simply gain more insight into marine craftsmanship, Sven’s wisdom is invaluable.Sven Yrvind, a renowned yacht designer and sailor, shares valuable insights on creating flanges around bulkhead hatches for canvas protection in this enlightening video. By following his expert guidance, boat enthusiasts can ensure their living areas remain secure while allowing unhindered access through the hatches.Step 1: Starting with the Flange
Sven begins by explaining that working on flanges vertically and horizontally is significantly easier than doing so in a flat position. To simplify the process further, he divides the task into two or three steps as suggested by fellow expert “for for.” This approach not only makes it more manageable but also allows for greater precision in crafting each component.Step 2: Applying Glue and Securing
Sven proceeds to apply glue along one edge of the flange, ensuring a secure bond when clamped into place. He emphasizes that this stage is crucial for maintaining the structural integrity of the flange, which in turn safeguards the living area beneath the canvas when hatches are open.Step 3: Allowing Time to Dry
After securely attaching the first portion of the flange, Sven allows ample time for it to dry before moving forward with additional steps. This patience and precision are key aspects of his successful boatbuilding methods.Step 4: Finishing Touches
Once the flange is fully dried, Sven removes the clamps carefully, ensuring no damage occurs during this process. He then moves on to attaching four more pieces onto these main frames, completing two pairs of flanges for the bulkhead hatches.The Final Touches
While two flanges form the primary support structure around the hatches, Sven mentions there are two additional pieces required at each end to ensure comprehensive protection. This attention to detail highlights his commitment to producing a durable and reliable design. “Sailing is about finding your path, whether it’s across an ocean or within yourself.” – Sven Yrvind In conclusion, making flanges around bulkhead hatches may seem complex at first glance, but by following Sven Yrvind’s meticulous process, enthusiasts can achieve professional-level results. Remember that the journey of boatbuilding is as rewarding as reaching your destination; it tests one’s patience and dedication. For those seeking to embark on this adventure or simply gain more insight into marine craftsmanship, Sven’s wisdom is invaluable.Making Flanges Around Bulkhead Hatches for Canvas
Sven Yrvind, a renowned yacht designer and sailor, shares valuable insights on creating flanges around bulkhead hatches for canvas protection in this enlightening video. By following his expert guidance, boat enthusiasts can ensure their living areas remain secure while allowing unhindered access through the hatches.Step 1: Starting with the Flange
Sven begins by explaining that working on flanges vertically and horizontally is significantly easier than doing so in a flat position. To simplify the process further, he divides the task into two or three steps as suggested by fellow expert “for for.” This approach not only makes it more manageable but also allows for greater precision in crafting each component.Step 2: Applying Glue and Securing
Sven proceeds to apply glue along one edge of the flange, ensuring a secure bond when clamped into place. He emphasizes that this stage is crucial for maintaining the structural integrity of the flange, which in turn safeguards the living area beneath the canvas when hatches are open.Step 3: Allowing Time to Dry
After securely attaching the first portion of the flange, Sven allows ample time for it to dry before moving forward with additional steps. This patience and precision are key aspects of his successful boatbuilding methods.Step 4: Finishing Touches
Once the flange is fully dried, Sven removes the clamps carefully, ensuring no damage occurs during this process. He then moves on to attaching four more pieces onto these main frames, completing two pairs of flanges for the bulkhead hatches.The Final Touches
While two flanges form the primary support structure around the hatches, Sven mentions there are two additional pieces required at each end to ensure comprehensive protection. This attention to detail highlights his commitment to producing a durable and reliable design. “Sailing is about finding your path, whether it’s across an ocean or within yourself.” – Sven Yrvind In conclusion, making flanges around bulkhead hatches may seem complex at first glance, but by following Sven Yrvind’s meticulous process, enthusiasts can achieve professional-level results. Remember that the journey of boatbuilding is as rewarding as reaching your destination; it tests one’s patience and dedication. For those seeking to embark on this adventure or simply gain more insight into marine craftsmanship, Sven’s wisdom is invaluable.Sven begins by explaining that working on flanges vertically and horizontally is significantly easier than doing so in a flat position. To simplify the process further, he divides the task into two or three steps as suggested by fellow expert “for for.” This approach not only makes it more manageable but also allows for greater precision in crafting each component.Step 2: Applying Glue and Securing
Sven proceeds to apply glue along one edge of the flange, ensuring a secure bond when clamped into place. He emphasizes that this stage is crucial for maintaining the structural integrity of the flange, which in turn safeguards the living area beneath the canvas when hatches are open.Step 3: Allowing Time to Dry
After securely attaching the first portion of the flange, Sven allows ample time for it to dry before moving forward with additional steps. This patience and precision are key aspects of his successful boatbuilding methods.Step 4: Finishing Touches
Once the flange is fully dried, Sven removes the clamps carefully, ensuring no damage occurs during this process. He then moves on to attaching four more pieces onto these main frames, completing two pairs of flanges for the bulkhead hatches.The Final Touches
While two flanges form the primary support structure around the hatches, Sven mentions there are two additional pieces required at each end to ensure comprehensive protection. This attention to detail highlights his commitment to producing a durable and reliable design. “Sailing is about finding your path, whether it’s across an ocean or within yourself.” – Sven Yrvind In conclusion, making flanges around bulkhead hatches may seem complex at first glance, but by following Sven Yrvind’s meticulous process, enthusiasts can achieve professional-level results. Remember that the journey of boatbuilding is as rewarding as reaching your destination; it tests one’s patience and dedication. For those seeking to embark on this adventure or simply gain more insight into marine craftsmanship, Sven’s wisdom is invaluable.Making Flanges Around Bulkhead Hatches for Canvas
Sven Yrvind, a renowned yacht designer and sailor, shares valuable insights on creating flanges around bulkhead hatches for canvas protection in this enlightening video. By following his expert guidance, boat enthusiasts can ensure their living areas remain secure while allowing unhindered access through the hatches.Step 1: Starting with the Flange
Sven begins by explaining that working on flanges vertically and horizontally is significantly easier than doing so in a flat position. To simplify the process further, he divides the task into two or three steps as suggested by fellow expert “for for.” This approach not only makes it more manageable but also allows for greater precision in crafting each component.Step 2: Applying Glue and Securing
Sven proceeds to apply glue along one edge of the flange, ensuring a secure bond when clamped into place. He emphasizes that this stage is crucial for maintaining the structural integrity of the flange, which in turn safeguards the living area beneath the canvas when hatches are open.Step 3: Allowing Time to Dry
After securely attaching the first portion of the flange, Sven allows ample time for it to dry before moving forward with additional steps. This patience and precision are key aspects of his successful boatbuilding methods.Step 4: Finishing Touches
Once the flange is fully dried, Sven removes the clamps carefully, ensuring no damage occurs during this process. He then moves on to attaching four more pieces onto these main frames, completing two pairs of flanges for the bulkhead hatches.The Final Touches
While two flanges form the primary support structure around the hatches, Sven mentions there are two additional pieces required at each end to ensure comprehensive protection. This attention to detail highlights his commitment to producing a durable and reliable design. “Sailing is about finding your path, whether it’s across an ocean or within yourself.” – Sven Yrvind In conclusion, making flanges around bulkhead hatches may seem complex at first glance, but by following Sven Yrvind’s meticulous process, enthusiasts can achieve professional-level results. Remember that the journey of boatbuilding is as rewarding as reaching your destination; it tests one’s patience and dedication. For those seeking to embark on this adventure or simply gain more insight into marine craftsmanship, Sven’s wisdom is invaluable.After securely attaching the first portion of the flange, Sven allows ample time for it to dry before moving forward with additional steps. This patience and precision are key aspects of his successful boatbuilding methods.Step 4: Finishing Touches
Once the flange is fully dried, Sven removes the clamps carefully, ensuring no damage occurs during this process. He then moves on to attaching four more pieces onto these main frames, completing two pairs of flanges for the bulkhead hatches.The Final Touches
While two flanges form the primary support structure around the hatches, Sven mentions there are two additional pieces required at each end to ensure comprehensive protection. This attention to detail highlights his commitment to producing a durable and reliable design. “Sailing is about finding your path, whether it’s across an ocean or within yourself.” – Sven Yrvind In conclusion, making flanges around bulkhead hatches may seem complex at first glance, but by following Sven Yrvind’s meticulous process, enthusiasts can achieve professional-level results. Remember that the journey of boatbuilding is as rewarding as reaching your destination; it tests one’s patience and dedication. For those seeking to embark on this adventure or simply gain more insight into marine craftsmanship, Sven’s wisdom is invaluable.Sven begins by explaining that working on flanges vertically and horizontally is significantly easier than doing so in a flat position. To simplify the process further, he divides the task into two or three steps as suggested by fellow expert “for for.” This approach not only makes it more manageable but also allows for greater precision in crafting each component.Step 2: Applying Glue and Securing
Sven proceeds to apply glue along one edge of the flange, ensuring a secure bond when clamped into place. He emphasizes that this stage is crucial for maintaining the structural integrity of the flange, which in turn safeguards the living area beneath the canvas when hatches are open.Step 3: Allowing Time to Dry
After securely attaching the first portion of the flange, Sven allows ample time for it to dry before moving forward with additional steps. This patience and precision are key aspects of his successful boatbuilding methods.Step 4: Finishing Touches
Once the flange is fully dried, Sven removes the clamps carefully, ensuring no damage occurs during this process. He then moves on to attaching four more pieces onto these main frames, completing two pairs of flanges for the bulkhead hatches.The Final Touches
While two flanges form the primary support structure around the hatches, Sven mentions there are two additional pieces required at each end to ensure comprehensive protection. This attention to detail highlights his commitment to producing a durable and reliable design. “Sailing is about finding your path, whether it’s across an ocean or within yourself.” – Sven Yrvind In conclusion, making flanges around bulkhead hatches may seem complex at first glance, but by following Sven Yrvind’s meticulous process, enthusiasts can achieve professional-level results. Remember that the journey of boatbuilding is as rewarding as reaching your destination; it tests one’s patience and dedication. For those seeking to embark on this adventure or simply gain more insight into marine craftsmanship, Sven’s wisdom is invaluable.Sven Yrvind, a renowned yacht designer and sailor, shares valuable insights on creating flanges around bulkhead hatches for canvas protection in this enlightening video. By following his expert guidance, boat enthusiasts can ensure their living areas remain secure while allowing unhindered access through the hatches.Step 1: Starting with the Flange
Sven begins by explaining that working on flanges vertically and horizontally is significantly easier than doing so in a flat position. To simplify the process further, he divides the task into two or three steps as suggested by fellow expert “for for.” This approach not only makes it more manageable but also allows for greater precision in crafting each component.Step 2: Applying Glue and Securing
Sven proceeds to apply glue along one edge of the flange, ensuring a secure bond when clamped into place. He emphasizes that this stage is crucial for maintaining the structural integrity of the flange, which in turn safeguards the living area beneath the canvas when hatches are open.Step 3: Allowing Time to Dry
After securely attaching the first portion of the flange, Sven allows ample time for it to dry before moving forward with additional steps. This patience and precision are key aspects of his successful boatbuilding methods.Step 4: Finishing Touches
Once the flange is fully dried, Sven removes the clamps carefully, ensuring no damage occurs during this process. He then moves on to attaching four more pieces onto these main frames, completing two pairs of flanges for the bulkhead hatches.The Final Touches
While two flanges form the primary support structure around the hatches, Sven mentions there are two additional pieces required at each end to ensure comprehensive protection. This attention to detail highlights his commitment to producing a durable and reliable design. “Sailing is about finding your path, whether it’s across an ocean or within yourself.” – Sven Yrvind In conclusion, making flanges around bulkhead hatches may seem complex at first glance, but by following Sven Yrvind’s meticulous process, enthusiasts can achieve professional-level results. Remember that the journey of boatbuilding is as rewarding as reaching your destination; it tests one’s patience and dedication. For those seeking to embark on this adventure or simply gain more insight into marine craftsmanship, Sven’s wisdom is invaluable.Making Flanges Around Bulkhead Hatches for Canvas
Sven Yrvind, a renowned yacht designer and sailor, shares valuable insights on creating flanges around bulkhead hatches for canvas protection in this enlightening video. By following his expert guidance, boat enthusiasts can ensure their living areas remain secure while allowing unhindered access through the hatches.Step 1: Starting with the Flange
Sven begins by explaining that working on flanges vertically and horizontally is significantly easier than doing so in a flat position. To simplify the process further, he divides the task into two or three steps as suggested by fellow expert “for for.” This approach not only makes it more manageable but also allows for greater precision in crafting each component.Step 2: Applying Glue and Securing
Sven proceeds to apply glue along one edge of the flange, ensuring a secure bond when clamped into place. He emphasizes that this stage is crucial for maintaining the structural integrity of the flange, which in turn safeguards the living area beneath the canvas when hatches are open.Step 3: Allowing Time to Dry
After securely attaching the first portion of the flange, Sven allows ample time for it to dry before moving forward with additional steps. This patience and precision are key aspects of his successful boatbuilding methods.Step 4: Finishing Touches
Once the flange is fully dried, Sven removes the clamps carefully, ensuring no damage occurs during this process. He then moves on to attaching four more pieces onto these main frames, completing two pairs of flanges for the bulkhead hatches.The Final Touches
While two flanges form the primary support structure around the hatches, Sven mentions there are two additional pieces required at each end to ensure comprehensive protection. This attention to detail highlights his commitment to producing a durable and reliable design. “Sailing is about finding your path, whether it’s across an ocean or within yourself.” – Sven Yrvind In conclusion, making flanges around bulkhead hatches may seem complex at first glance, but by following Sven Yrvind’s meticulous process, enthusiasts can achieve professional-level results. Remember that the journey of boatbuilding is as rewarding as reaching your destination; it tests one’s patience and dedication. For those seeking to embark on this adventure or simply gain more insight into marine craftsmanship, Sven’s wisdom is invaluable.Sven proceeds to apply glue along one edge of the flange, ensuring a secure bond when clamped into place. He emphasizes that this stage is crucial for maintaining the structural integrity of the flange, which in turn safeguards the living area beneath the canvas when hatches are open.Step 3: Allowing Time to Dry
After securely attaching the first portion of the flange, Sven allows ample time for it to dry before moving forward with additional steps. This patience and precision are key aspects of his successful boatbuilding methods.Step 4: Finishing Touches
Once the flange is fully dried, Sven removes the clamps carefully, ensuring no damage occurs during this process. He then moves on to attaching four more pieces onto these main frames, completing two pairs of flanges for the bulkhead hatches.The Final Touches
While two flanges form the primary support structure around the hatches, Sven mentions there are two additional pieces required at each end to ensure comprehensive protection. This attention to detail highlights his commitment to producing a durable and reliable design. “Sailing is about finding your path, whether it’s across an ocean or within yourself.” – Sven Yrvind In conclusion, making flanges around bulkhead hatches may seem complex at first glance, but by following Sven Yrvind’s meticulous process, enthusiasts can achieve professional-level results. Remember that the journey of boatbuilding is as rewarding as reaching your destination; it tests one’s patience and dedication. For those seeking to embark on this adventure or simply gain more insight into marine craftsmanship, Sven’s wisdom is invaluable.Sven begins by explaining that working on flanges vertically and horizontally is significantly easier than doing so in a flat position. To simplify the process further, he divides the task into two or three steps as suggested by fellow expert “for for.” This approach not only makes it more manageable but also allows for greater precision in crafting each component.Step 2: Applying Glue and Securing
Sven proceeds to apply glue along one edge of the flange, ensuring a secure bond when clamped into place. He emphasizes that this stage is crucial for maintaining the structural integrity of the flange, which in turn safeguards the living area beneath the canvas when hatches are open.Step 3: Allowing Time to Dry
After securely attaching the first portion of the flange, Sven allows ample time for it to dry before moving forward with additional steps. This patience and precision are key aspects of his successful boatbuilding methods.Step 4: Finishing Touches
Once the flange is fully dried, Sven removes the clamps carefully, ensuring no damage occurs during this process. He then moves on to attaching four more pieces onto these main frames, completing two pairs of flanges for the bulkhead hatches.The Final Touches
While two flanges form the primary support structure around the hatches, Sven mentions there are two additional pieces required at each end to ensure comprehensive protection. This attention to detail highlights his commitment to producing a durable and reliable design. “Sailing is about finding your path, whether it’s across an ocean or within yourself.” – Sven Yrvind In conclusion, making flanges around bulkhead hatches may seem complex at first glance, but by following Sven Yrvind’s meticulous process, enthusiasts can achieve professional-level results. Remember that the journey of boatbuilding is as rewarding as reaching your destination; it tests one’s patience and dedication. For those seeking to embark on this adventure or simply gain more insight into marine craftsmanship, Sven’s wisdom is invaluable.Sven Yrvind, a renowned yacht designer and sailor, shares valuable insights on creating flanges around bulkhead hatches for canvas protection in this enlightening video. By following his expert guidance, boat enthusiasts can ensure their living areas remain secure while allowing unhindered access through the hatches.Step 1: Starting with the Flange
Sven begins by explaining that working on flanges vertically and horizontally is significantly easier than doing so in a flat position. To simplify the process further, he divides the task into two or three steps as suggested by fellow expert “for for.” This approach not only makes it more manageable but also allows for greater precision in crafting each component.Step 2: Applying Glue and Securing
Sven proceeds to apply glue along one edge of the flange, ensuring a secure bond when clamped into place. He emphasizes that this stage is crucial for maintaining the structural integrity of the flange, which in turn safeguards the living area beneath the canvas when hatches are open.Step 3: Allowing Time to Dry
After securely attaching the first portion of the flange, Sven allows ample time for it to dry before moving forward with additional steps. This patience and precision are key aspects of his successful boatbuilding methods.Step 4: Finishing Touches
Once the flange is fully dried, Sven removes the clamps carefully, ensuring no damage occurs during this process. He then moves on to attaching four more pieces onto these main frames, completing two pairs of flanges for the bulkhead hatches.The Final Touches
While two flanges form the primary support structure around the hatches, Sven mentions there are two additional pieces required at each end to ensure comprehensive protection. This attention to detail highlights his commitment to producing a durable and reliable design. “Sailing is about finding your path, whether it’s across an ocean or within yourself.” – Sven Yrvind In conclusion, making flanges around bulkhead hatches may seem complex at first glance, but by following Sven Yrvind’s meticulous process, enthusiasts can achieve professional-level results. Remember that the journey of boatbuilding is as rewarding as reaching your destination; it tests one’s patience and dedication. For those seeking to embark on this adventure or simply gain more insight into marine craftsmanship, Sven’s wisdom is invaluable.Making Flanges Around Bulkhead Hatches for Canvas
Sven Yrvind, a renowned yacht designer and sailor, shares valuable insights on creating flanges around bulkhead hatches for canvas protection in this enlightening video. By following his expert guidance, boat enthusiasts can ensure their living areas remain secure while allowing unhindered access through the hatches.Step 1: Starting with the Flange
Sven begins by explaining that working on flanges vertically and horizontally is significantly easier than doing so in a flat position. To simplify the process further, he divides the task into two or three steps as suggested by fellow expert “for for.” This approach not only makes it more manageable but also allows for greater precision in crafting each component.Step 2: Applying Glue and Securing
Sven proceeds to apply glue along one edge of the flange, ensuring a secure bond when clamped into place. He emphasizes that this stage is crucial for maintaining the structural integrity of the flange, which in turn safeguards the living area beneath the canvas when hatches are open.Step 3: Allowing Time to Dry
After securely attaching the first portion of the flange, Sven allows ample time for it to dry before moving forward with additional steps. This patience and precision are key aspects of his successful boatbuilding methods.Step 4: Finishing Touches
Once the flange is fully dried, Sven removes the clamps carefully, ensuring no damage occurs during this process. He then moves on to attaching four more pieces onto these main frames, completing two pairs of flanges for the bulkhead hatches.The Final Touches
While two flanges form the primary support structure around the hatches, Sven mentions there are two additional pieces required at each end to ensure comprehensive protection. This attention to detail highlights his commitment to producing a durable and reliable design. “Sailing is about finding your path, whether it’s across an ocean or within yourself.” – Sven Yrvind In conclusion, making flanges around bulkhead hatches may seem complex at first glance, but by following Sven Yrvind’s meticulous process, enthusiasts can achieve professional-level results. Remember that the journey of boatbuilding is as rewarding as reaching your destination; it tests one’s patience and dedication. For those seeking to embark on this adventure or simply gain more insight into marine craftsmanship, Sven’s wisdom is invaluable.Once the flange is fully dried, Sven removes the clamps carefully, ensuring no damage occurs during this process. He then moves on to attaching four more pieces onto these main frames, completing two pairs of flanges for the bulkhead hatches.The Final Touches
While two flanges form the primary support structure around the hatches, Sven mentions there are two additional pieces required at each end to ensure comprehensive protection. This attention to detail highlights his commitment to producing a durable and reliable design. “Sailing is about finding your path, whether it’s across an ocean or within yourself.” – Sven Yrvind In conclusion, making flanges around bulkhead hatches may seem complex at first glance, but by following Sven Yrvind’s meticulous process, enthusiasts can achieve professional-level results. Remember that the journey of boatbuilding is as rewarding as reaching your destination; it tests one’s patience and dedication. For those seeking to embark on this adventure or simply gain more insight into marine craftsmanship, Sven’s wisdom is invaluable.Sven proceeds to apply glue along one edge of the flange, ensuring a secure bond when clamped into place. He emphasizes that this stage is crucial for maintaining the structural integrity of the flange, which in turn safeguards the living area beneath the canvas when hatches are open.Step 3: Allowing Time to Dry
After securely attaching the first portion of the flange, Sven allows ample time for it to dry before moving forward with additional steps. This patience and precision are key aspects of his successful boatbuilding methods.Step 4: Finishing Touches
Once the flange is fully dried, Sven removes the clamps carefully, ensuring no damage occurs during this process. He then moves on to attaching four more pieces onto these main frames, completing two pairs of flanges for the bulkhead hatches.The Final Touches
While two flanges form the primary support structure around the hatches, Sven mentions there are two additional pieces required at each end to ensure comprehensive protection. This attention to detail highlights his commitment to producing a durable and reliable design. “Sailing is about finding your path, whether it’s across an ocean or within yourself.” – Sven Yrvind In conclusion, making flanges around bulkhead hatches may seem complex at first glance, but by following Sven Yrvind’s meticulous process, enthusiasts can achieve professional-level results. Remember that the journey of boatbuilding is as rewarding as reaching your destination; it tests one’s patience and dedication. For those seeking to embark on this adventure or simply gain more insight into marine craftsmanship, Sven’s wisdom is invaluable.Sven begins by explaining that working on flanges vertically and horizontally is significantly easier than doing so in a flat position. To simplify the process further, he divides the task into two or three steps as suggested by fellow expert “for for.” This approach not only makes it more manageable but also allows for greater precision in crafting each component.Step 2: Applying Glue and Securing
Sven proceeds to apply glue along one edge of the flange, ensuring a secure bond when clamped into place. He emphasizes that this stage is crucial for maintaining the structural integrity of the flange, which in turn safeguards the living area beneath the canvas when hatches are open.Step 3: Allowing Time to Dry
After securely attaching the first portion of the flange, Sven allows ample time for it to dry before moving forward with additional steps. This patience and precision are key aspects of his successful boatbuilding methods.Step 4: Finishing Touches
Once the flange is fully dried, Sven removes the clamps carefully, ensuring no damage occurs during this process. He then moves on to attaching four more pieces onto these main frames, completing two pairs of flanges for the bulkhead hatches.The Final Touches
While two flanges form the primary support structure around the hatches, Sven mentions there are two additional pieces required at each end to ensure comprehensive protection. This attention to detail highlights his commitment to producing a durable and reliable design. “Sailing is about finding your path, whether it’s across an ocean or within yourself.” – Sven Yrvind In conclusion, making flanges around bulkhead hatches may seem complex at first glance, but by following Sven Yrvind’s meticulous process, enthusiasts can achieve professional-level results. Remember that the journey of boatbuilding is as rewarding as reaching your destination; it tests one’s patience and dedication. For those seeking to embark on this adventure or simply gain more insight into marine craftsmanship, Sven’s wisdom is invaluable.Sven Yrvind, a renowned yacht designer and sailor, shares valuable insights on creating flanges around bulkhead hatches for canvas protection in this enlightening video. By following his expert guidance, boat enthusiasts can ensure their living areas remain secure while allowing unhindered access through the hatches.Step 1: Starting with the Flange
Sven begins by explaining that working on flanges vertically and horizontally is significantly easier than doing so in a flat position. To simplify the process further, he divides the task into two or three steps as suggested by fellow expert “for for.” This approach not only makes it more manageable but also allows for greater precision in crafting each component.Step 2: Applying Glue and Securing
Sven proceeds to apply glue along one edge of the flange, ensuring a secure bond when clamped into place. He emphasizes that this stage is crucial for maintaining the structural integrity of the flange, which in turn safeguards the living area beneath the canvas when hatches are open.Step 3: Allowing Time to Dry
After securely attaching the first portion of the flange, Sven allows ample time for it to dry before moving forward with additional steps. This patience and precision are key aspects of his successful boatbuilding methods.Step 4: Finishing Touches
Once the flange is fully dried, Sven removes the clamps carefully, ensuring no damage occurs during this process. He then moves on to attaching four more pieces onto these main frames, completing two pairs of flanges for the bulkhead hatches.The Final Touches
While two flanges form the primary support structure around the hatches, Sven mentions there are two additional pieces required at each end to ensure comprehensive protection. This attention to detail highlights his commitment to producing a durable and reliable design. “Sailing is about finding your path, whether it’s across an ocean or within yourself.” – Sven Yrvind In conclusion, making flanges around bulkhead hatches may seem complex at first glance, but by following Sven Yrvind’s meticulous process, enthusiasts can achieve professional-level results. Remember that the journey of boatbuilding is as rewarding as reaching your destination; it tests one’s patience and dedication. For those seeking to embark on this adventure or simply gain more insight into marine craftsmanship, Sven’s wisdom is invaluable.Making Flanges Around Bulkhead Hatches for Canvas
Sven Yrvind, a renowned yacht designer and sailor, shares valuable insights on creating flanges around bulkhead hatches for canvas protection in this enlightening video. By following his expert guidance, boat enthusiasts can ensure their living areas remain secure while allowing unhindered access through the hatches.Step 1: Starting with the Flange
Sven begins by explaining that working on flanges vertically and horizontally is significantly easier than doing so in a flat position. To simplify the process further, he divides the task into two or three steps as suggested by fellow expert “for for.” This approach not only makes it more manageable but also allows for greater precision in crafting each component.Step 2: Applying Glue and Securing
Sven proceeds to apply glue along one edge of the flange, ensuring a secure bond when clamped into place. He emphasizes that this stage is crucial for maintaining the structural integrity of the flange, which in turn safeguards the living area beneath the canvas when hatches are open.Step 3: Allowing Time to Dry
After securely attaching the first portion of the flange, Sven allows ample time for it to dry before moving forward with additional steps. This patience and precision are key aspects of his successful boatbuilding methods.Step 4: Finishing Touches
Once the flange is fully dried, Sven removes the clamps carefully, ensuring no damage occurs during this process. He then moves on to attaching four more pieces onto these main frames, completing two pairs of flanges for the bulkhead hatches.The Final Touches
While two flanges form the primary support structure around the hatches, Sven mentions there are two additional pieces required at each end to ensure comprehensive protection. This attention to detail highlights his commitment to producing a durable and reliable design. “Sailing is about finding your path, whether it’s across an ocean or within yourself.” – Sven Yrvind In conclusion, making flanges around bulkhead hatches may seem complex at first glance, but by following Sven Yrvind’s meticulous process, enthusiasts can achieve professional-level results. Remember that the journey of boatbuilding is as rewarding as reaching your destination; it tests one’s patience and dedication. For those seeking to embark on this adventure or simply gain more insight into marine craftsmanship, Sven’s wisdom is invaluable.After securely attaching the first portion of the flange, Sven allows ample time for it to dry before moving forward with additional steps. This patience and precision are key aspects of his successful boatbuilding methods.Step 4: Finishing Touches
Once the flange is fully dried, Sven removes the clamps carefully, ensuring no damage occurs during this process. He then moves on to attaching four more pieces onto these main frames, completing two pairs of flanges for the bulkhead hatches.The Final Touches
While two flanges form the primary support structure around the hatches, Sven mentions there are two additional pieces required at each end to ensure comprehensive protection. This attention to detail highlights his commitment to producing a durable and reliable design. “Sailing is about finding your path, whether it’s across an ocean or within yourself.” – Sven Yrvind In conclusion, making flanges around bulkhead hatches may seem complex at first glance, but by following Sven Yrvind’s meticulous process, enthusiasts can achieve professional-level results. Remember that the journey of boatbuilding is as rewarding as reaching your destination; it tests one’s patience and dedication. For those seeking to embark on this adventure or simply gain more insight into marine craftsmanship, Sven’s wisdom is invaluable.Sven proceeds to apply glue along one edge of the flange, ensuring a secure bond when clamped into place. He emphasizes that this stage is crucial for maintaining the structural integrity of the flange, which in turn safeguards the living area beneath the canvas when hatches are open.Step 3: Allowing Time to Dry
After securely attaching the first portion of the flange, Sven allows ample time for it to dry before moving forward with additional steps. This patience and precision are key aspects of his successful boatbuilding methods.Step 4: Finishing Touches
Once the flange is fully dried, Sven removes the clamps carefully, ensuring no damage occurs during this process. He then moves on to attaching four more pieces onto these main frames, completing two pairs of flanges for the bulkhead hatches.The Final Touches
While two flanges form the primary support structure around the hatches, Sven mentions there are two additional pieces required at each end to ensure comprehensive protection. This attention to detail highlights his commitment to producing a durable and reliable design. “Sailing is about finding your path, whether it’s across an ocean or within yourself.” – Sven Yrvind In conclusion, making flanges around bulkhead hatches may seem complex at first glance, but by following Sven Yrvind’s meticulous process, enthusiasts can achieve professional-level results. Remember that the journey of boatbuilding is as rewarding as reaching your destination; it tests one’s patience and dedication. For those seeking to embark on this adventure or simply gain more insight into marine craftsmanship, Sven’s wisdom is invaluable.Sven begins by explaining that working on flanges vertically and horizontally is significantly easier than doing so in a flat position. To simplify the process further, he divides the task into two or three steps as suggested by fellow expert “for for.” This approach not only makes it more manageable but also allows for greater precision in crafting each component.Step 2: Applying Glue and Securing
Sven proceeds to apply glue along one edge of the flange, ensuring a secure bond when clamped into place. He emphasizes that this stage is crucial for maintaining the structural integrity of the flange, which in turn safeguards the living area beneath the canvas when hatches are open.Step 3: Allowing Time to Dry
After securely attaching the first portion of the flange, Sven allows ample time for it to dry before moving forward with additional steps. This patience and precision are key aspects of his successful boatbuilding methods.Step 4: Finishing Touches
Once the flange is fully dried, Sven removes the clamps carefully, ensuring no damage occurs during this process. He then moves on to attaching four more pieces onto these main frames, completing two pairs of flanges for the bulkhead hatches.The Final Touches
While two flanges form the primary support structure around the hatches, Sven mentions there are two additional pieces required at each end to ensure comprehensive protection. This attention to detail highlights his commitment to producing a durable and reliable design. “Sailing is about finding your path, whether it’s across an ocean or within yourself.” – Sven Yrvind In conclusion, making flanges around bulkhead hatches may seem complex at first glance, but by following Sven Yrvind’s meticulous process, enthusiasts can achieve professional-level results. Remember that the journey of boatbuilding is as rewarding as reaching your destination; it tests one’s patience and dedication. For those seeking to embark on this adventure or simply gain more insight into marine craftsmanship, Sven’s wisdom is invaluable.Sven Yrvind, a renowned yacht designer and sailor, shares valuable insights on creating flanges around bulkhead hatches for canvas protection in this enlightening video. By following his expert guidance, boat enthusiasts can ensure their living areas remain secure while allowing unhindered access through the hatches.Step 1: Starting with the Flange
Sven begins by explaining that working on flanges vertically and horizontally is significantly easier than doing so in a flat position. To simplify the process further, he divides the task into two or three steps as suggested by fellow expert “for for.” This approach not only makes it more manageable but also allows for greater precision in crafting each component.Step 2: Applying Glue and Securing
Sven proceeds to apply glue along one edge of the flange, ensuring a secure bond when clamped into place. He emphasizes that this stage is crucial for maintaining the structural integrity of the flange, which in turn safeguards the living area beneath the canvas when hatches are open.Step 3: Allowing Time to Dry
After securely attaching the first portion of the flange, Sven allows ample time for it to dry before moving forward with additional steps. This patience and precision are key aspects of his successful boatbuilding methods.Step 4: Finishing Touches
Once the flange is fully dried, Sven removes the clamps carefully, ensuring no damage occurs during this process. He then moves on to attaching four more pieces onto these main frames, completing two pairs of flanges for the bulkhead hatches.The Final Touches
While two flanges form the primary support structure around the hatches, Sven mentions there are two additional pieces required at each end to ensure comprehensive protection. This attention to detail highlights his commitment to producing a durable and reliable design. “Sailing is about finding your path, whether it’s across an ocean or within yourself.” – Sven Yrvind In conclusion, making flanges around bulkhead hatches may seem complex at first glance, but by following Sven Yrvind’s meticulous process, enthusiasts can achieve professional-level results. Remember that the journey of boatbuilding is as rewarding as reaching your destination; it tests one’s patience and dedication. For those seeking to embark on this adventure or simply gain more insight into marine craftsmanship, Sven’s wisdom is invaluable.Making Flanges Around Bulkhead Hatches for Canvas
Sven Yrvind, a renowned yacht designer and sailor, shares valuable insights on creating flanges around bulkhead hatches for canvas protection in this enlightening video. By following his expert guidance, boat enthusiasts can ensure their living areas remain secure while allowing unhindered access through the hatches.Step 1: Starting with the Flange
Sven begins by explaining that working on flanges vertically and horizontally is significantly easier than doing so in a flat position. To simplify the process further, he divides the task into two or three steps as suggested by fellow expert “for for.” This approach not only makes it more manageable but also allows for greater precision in crafting each component.Step 2: Applying Glue and Securing
Sven proceeds to apply glue along one edge of the flange, ensuring a secure bond when clamped into place. He emphasizes that this stage is crucial for maintaining the structural integrity of the flange, which in turn safeguards the living area beneath the canvas when hatches are open.Step 3: Allowing Time to Dry
After securely attaching the first portion of the flange, Sven allows ample time for it to dry before moving forward with additional steps. This patience and precision are key aspects of his successful boatbuilding methods.Step 4: Finishing Touches
Once the flange is fully dried, Sven removes the clamps carefully, ensuring no damage occurs during this process. He then moves on to attaching four more pieces onto these main frames, completing two pairs of flanges for the bulkhead hatches.The Final Touches
While two flanges form the primary support structure around the hatches, Sven mentions there are two additional pieces required at each end to ensure comprehensive protection. This attention to detail highlights his commitment to producing a durable and reliable design. “Sailing is about finding your path, whether it’s across an ocean or within yourself.” – Sven Yrvind In conclusion, making flanges around bulkhead hatches may seem complex at first glance, but by following Sven Yrvind’s meticulous process, enthusiasts can achieve professional-level results. Remember that the journey of boatbuilding is as rewarding as reaching your destination; it tests one’s patience and dedication. For those seeking to embark on this adventure or simply gain more insight into marine craftsmanship, Sven’s wisdom is invaluable.Once the flange is fully dried, Sven removes the clamps carefully, ensuring no damage occurs during this process. He then moves on to attaching four more pieces onto these main frames, completing two pairs of flanges for the bulkhead hatches.The Final Touches
While two flanges form the primary support structure around the hatches, Sven mentions there are two additional pieces required at each end to ensure comprehensive protection. This attention to detail highlights his commitment to producing a durable and reliable design. “Sailing is about finding your path, whether it’s across an ocean or within yourself.” – Sven Yrvind In conclusion, making flanges around bulkhead hatches may seem complex at first glance, but by following Sven Yrvind’s meticulous process, enthusiasts can achieve professional-level results. Remember that the journey of boatbuilding is as rewarding as reaching your destination; it tests one’s patience and dedication. For those seeking to embark on this adventure or simply gain more insight into marine craftsmanship, Sven’s wisdom is invaluable.After securely attaching the first portion of the flange, Sven allows ample time for it to dry before moving forward with additional steps. This patience and precision are key aspects of his successful boatbuilding methods.Step 4: Finishing Touches
Once the flange is fully dried, Sven removes the clamps carefully, ensuring no damage occurs during this process. He then moves on to attaching four more pieces onto these main frames, completing two pairs of flanges for the bulkhead hatches.The Final Touches
While two flanges form the primary support structure around the hatches, Sven mentions there are two additional pieces required at each end to ensure comprehensive protection. This attention to detail highlights his commitment to producing a durable and reliable design. “Sailing is about finding your path, whether it’s across an ocean or within yourself.” – Sven Yrvind In conclusion, making flanges around bulkhead hatches may seem complex at first glance, but by following Sven Yrvind’s meticulous process, enthusiasts can achieve professional-level results. Remember that the journey of boatbuilding is as rewarding as reaching your destination; it tests one’s patience and dedication. For those seeking to embark on this adventure or simply gain more insight into marine craftsmanship, Sven’s wisdom is invaluable.Sven proceeds to apply glue along one edge of the flange, ensuring a secure bond when clamped into place. He emphasizes that this stage is crucial for maintaining the structural integrity of the flange, which in turn safeguards the living area beneath the canvas when hatches are open.Step 3: Allowing Time to Dry
After securely attaching the first portion of the flange, Sven allows ample time for it to dry before moving forward with additional steps. This patience and precision are key aspects of his successful boatbuilding methods.Step 4: Finishing Touches
Once the flange is fully dried, Sven removes the clamps carefully, ensuring no damage occurs during this process. He then moves on to attaching four more pieces onto these main frames, completing two pairs of flanges for the bulkhead hatches.The Final Touches
While two flanges form the primary support structure around the hatches, Sven mentions there are two additional pieces required at each end to ensure comprehensive protection. This attention to detail highlights his commitment to producing a durable and reliable design. “Sailing is about finding your path, whether it’s across an ocean or within yourself.” – Sven Yrvind In conclusion, making flanges around bulkhead hatches may seem complex at first glance, but by following Sven Yrvind’s meticulous process, enthusiasts can achieve professional-level results. Remember that the journey of boatbuilding is as rewarding as reaching your destination; it tests one’s patience and dedication. For those seeking to embark on this adventure or simply gain more insight into marine craftsmanship, Sven’s wisdom is invaluable.Sven begins by explaining that working on flanges vertically and horizontally is significantly easier than doing so in a flat position. To simplify the process further, he divides the task into two or three steps as suggested by fellow expert “for for.” This approach not only makes it more manageable but also allows for greater precision in crafting each component.Step 2: Applying Glue and Securing
Sven proceeds to apply glue along one edge of the flange, ensuring a secure bond when clamped into place. He emphasizes that this stage is crucial for maintaining the structural integrity of the flange, which in turn safeguards the living area beneath the canvas when hatches are open.Step 3: Allowing Time to Dry
After securely attaching the first portion of the flange, Sven allows ample time for it to dry before moving forward with additional steps. This patience and precision are key aspects of his successful boatbuilding methods.Step 4: Finishing Touches
Once the flange is fully dried, Sven removes the clamps carefully, ensuring no damage occurs during this process. He then moves on to attaching four more pieces onto these main frames, completing two pairs of flanges for the bulkhead hatches.The Final Touches
While two flanges form the primary support structure around the hatches, Sven mentions there are two additional pieces required at each end to ensure comprehensive protection. This attention to detail highlights his commitment to producing a durable and reliable design. “Sailing is about finding your path, whether it’s across an ocean or within yourself.” – Sven Yrvind In conclusion, making flanges around bulkhead hatches may seem complex at first glance, but by following Sven Yrvind’s meticulous process, enthusiasts can achieve professional-level results. Remember that the journey of boatbuilding is as rewarding as reaching your destination; it tests one’s patience and dedication. For those seeking to embark on this adventure or simply gain more insight into marine craftsmanship, Sven’s wisdom is invaluable.Sven Yrvind, a renowned yacht designer and sailor, shares valuable insights on creating flanges around bulkhead hatches for canvas protection in this enlightening video. By following his expert guidance, boat enthusiasts can ensure their living areas remain secure while allowing unhindered access through the hatches.Step 1: Starting with the Flange
Sven begins by explaining that working on flanges vertically and horizontally is significantly easier than doing so in a flat position. To simplify the process further, he divides the task into two or three steps as suggested by fellow expert “for for.” This approach not only makes it more manageable but also allows for greater precision in crafting each component.Step 2: Applying Glue and Securing
Sven proceeds to apply glue along one edge of the flange, ensuring a secure bond when clamped into place. He emphasizes that this stage is crucial for maintaining the structural integrity of the flange, which in turn safeguards the living area beneath the canvas when hatches are open.Step 3: Allowing Time to Dry
After securely attaching the first portion of the flange, Sven allows ample time for it to dry before moving forward with additional steps. This patience and precision are key aspects of his successful boatbuilding methods.Step 4: Finishing Touches
Once the flange is fully dried, Sven removes the clamps carefully, ensuring no damage occurs during this process. He then moves on to attaching four more pieces onto these main frames, completing two pairs of flanges for the bulkhead hatches.The Final Touches
While two flanges form the primary support structure around the hatches, Sven mentions there are two additional pieces required at each end to ensure comprehensive protection. This attention to detail highlights his commitment to producing a durable and reliable design. “Sailing is about finding your path, whether it’s across an ocean or within yourself.” – Sven Yrvind In conclusion, making flanges around bulkhead hatches may seem complex at first glance, but by following Sven Yrvind’s meticulous process, enthusiasts can achieve professional-level results. Remember that the journey of boatbuilding is as rewarding as reaching your destination; it tests one’s patience and dedication. For those seeking to embark on this adventure or simply gain more insight into marine craftsmanship, Sven’s wisdom is invaluable.Making Flanges Around Bulkhead Hatches for Canvas
Sven Yrvind, a renowned yacht designer and sailor, shares valuable insights on creating flanges around bulkhead hatches for canvas protection in this enlightening video. By following his expert guidance, boat enthusiasts can ensure their living areas remain secure while allowing unhindered access through the hatches.Step 1: Starting with the Flange
Sven begins by explaining that working on flanges vertically and horizontally is significantly easier than doing so in a flat position. To simplify the process further, he divides the task into two or three steps as suggested by fellow expert “for for.” This approach not only makes it more manageable but also allows for greater precision in crafting each component.Step 2: Applying Glue and Securing
Sven proceeds to apply glue along one edge of the flange, ensuring a secure bond when clamped into place. He emphasizes that this stage is crucial for maintaining the structural integrity of the flange, which in turn safeguards the living area beneath the canvas when hatches are open.Step 3: Allowing Time to Dry
After securely attaching the first portion of the flange, Sven allows ample time for it to dry before moving forward with additional steps. This patience and precision are key aspects of his successful boatbuilding methods.Step 4: Finishing Touches
Once the flange is fully dried, Sven removes the clamps carefully, ensuring no damage occurs during this process. He then moves on to attaching four more pieces onto these main frames, completing two pairs of flanges for the bulkhead hatches.The Final Touches
While two flanges form the primary support structure around the hatches, Sven mentions there are two additional pieces required at each end to ensure comprehensive protection. This attention to detail highlights his commitment to producing a durable and reliable design. “Sailing is about finding your path, whether it’s across an ocean or within yourself.” – Sven Yrvind In conclusion, making flanges around bulkhead hatches may seem complex at first glance, but by following Sven Yrvind’s meticulous process, enthusiasts can achieve professional-level results. Remember that the journey of boatbuilding is as rewarding as reaching your destination; it tests one’s patience and dedication. For those seeking to embark on this adventure or simply gain more insight into marine craftsmanship, Sven’s wisdom is invaluable.Sven Yrvind, a renowned yacht designer and sailor, shares valuable insights on creating flanges around bulkhead hatches for canvas protection in this enlightening video. By following his expert guidance, boat enthusiasts can ensure their living areas remain secure while allowing unhindered access through the hatches.Step 1: Starting with the Flange
Sven begins by explaining that working on flanges vertically and horizontally is significantly easier than doing so in a flat position. To simplify the process further, he divides the task into two or three steps as suggested by fellow expert “for for.” This approach not only makes it more manageable but also allows for greater precision in crafting each component.Step 2: Applying Glue and Securing
Sven proceeds to apply glue along one edge of the flange, ensuring a secure bond when clamped into place. He emphasizes that this stage is crucial for maintaining the structural integrity of the flange, which in turn safeguards the living area beneath the canvas when hatches are open.Step 3: Allowing Time to Dry
After securely attaching the first portion of the flange, Sven allows ample time for it to dry before moving forward with additional steps. This patience and precision are key aspects of his successful boatbuilding methods.Step 4: Finishing Touches
Once the flange is fully dried, Sven removes the clamps carefully, ensuring no damage occurs during this process. He then moves on to attaching four more pieces onto these main frames, completing two pairs of flanges for the bulkhead hatches.The Final Touches
While two flanges form the primary support structure around the hatches, Sven mentions there are two additional pieces required at each end to ensure comprehensive protection. This attention to detail highlights his commitment to producing a durable and reliable design. “Sailing is about finding your path, whether it’s across an ocean or within yourself.” – Sven Yrvind In conclusion, making flanges around bulkhead hatches may seem complex at first glance, but by following Sven Yrvind’s meticulous process, enthusiasts can achieve professional-level results. Remember that the journey of boatbuilding is as rewarding as reaching your destination; it tests one’s patience and dedication. For those seeking to embark on this adventure or simply gain more insight into marine craftsmanship, Sven’s wisdom is invaluable.Making Flanges Around Bulkhead Hatches for Canvas
Sven Yrvind, a renowned yacht designer and sailor, shares valuable insights on creating flanges around bulkhead hatches for canvas protection in this enlightening video. By following his expert guidance, boat enthusiasts can ensure their living areas remain secure while allowing unhindered access through the hatches.Step 1: Starting with the Flange
Sven begins by explaining that working on flanges vertically and horizontally is significantly easier than doing so in a flat position. To simplify the process further, he divides the task into two or three steps as suggested by fellow expert “for for.” This approach not only makes it more manageable but also allows for greater precision in crafting each component.Step 2: Applying Glue and Securing
Sven proceeds to apply glue along one edge of the flange, ensuring a secure bond when clamped into place. He emphasizes that this stage is crucial for maintaining the structural integrity of the flange, which in turn safeguards the living area beneath the canvas when hatches are open.Step 3: Allowing Time to Dry
After securely attaching the first portion of the flange, Sven allows ample time for it to dry before moving forward with additional steps. This patience and precision are key aspects of his successful boatbuilding methods.Step 4: Finishing Touches
Once the flange is fully dried, Sven removes the clamps carefully, ensuring no damage occurs during this process. He then moves on to attaching four more pieces onto these main frames, completing two pairs of flanges for the bulkhead hatches.The Final Touches
While two flanges form the primary support structure around the hatches, Sven mentions there are two additional pieces required at each end to ensure comprehensive protection. This attention to detail highlights his commitment to producing a durable and reliable design. “Sailing is about finding your path, whether it’s across an ocean or within yourself.” – Sven Yrvind In conclusion, making flanges around bulkhead hatches may seem complex at first glance, but by following Sven Yrvind’s meticulous process, enthusiasts can achieve professional-level results. Remember that the journey of boatbuilding is as rewarding as reaching your destination; it tests one’s patience and dedication. For those seeking to embark on this adventure or simply gain more insight into marine craftsmanship, Sven’s wisdom is invaluable.After securely attaching the first portion of the flange, Sven allows ample time for it to dry before moving forward with additional steps. This patience and precision are key aspects of his successful boatbuilding methods.Step 4: Finishing Touches
Once the flange is fully dried, Sven removes the clamps carefully, ensuring no damage occurs during this process. He then moves on to attaching four more pieces onto these main frames, completing two pairs of flanges for the bulkhead hatches.The Final Touches
While two flanges form the primary support structure around the hatches, Sven mentions there are two additional pieces required at each end to ensure comprehensive protection. This attention to detail highlights his commitment to producing a durable and reliable design. “Sailing is about finding your path, whether it’s across an ocean or within yourself.” – Sven Yrvind In conclusion, making flanges around bulkhead hatches may seem complex at first glance, but by following Sven Yrvind’s meticulous process, enthusiasts can achieve professional-level results. Remember that the journey of boatbuilding is as rewarding as reaching your destination; it tests one’s patience and dedication. For those seeking to embark on this adventure or simply gain more insight into marine craftsmanship, Sven’s wisdom is invaluable.Sven begins by explaining that working on flanges vertically and horizontally is significantly easier than doing so in a flat position. To simplify the process further, he divides the task into two or three steps as suggested by fellow expert “for for.” This approach not only makes it more manageable but also allows for greater precision in crafting each component.Step 2: Applying Glue and Securing
Sven proceeds to apply glue along one edge of the flange, ensuring a secure bond when clamped into place. He emphasizes that this stage is crucial for maintaining the structural integrity of the flange, which in turn safeguards the living area beneath the canvas when hatches are open.Step 3: Allowing Time to Dry
After securely attaching the first portion of the flange, Sven allows ample time for it to dry before moving forward with additional steps. This patience and precision are key aspects of his successful boatbuilding methods.Step 4: Finishing Touches
Once the flange is fully dried, Sven removes the clamps carefully, ensuring no damage occurs during this process. He then moves on to attaching four more pieces onto these main frames, completing two pairs of flanges for the bulkhead hatches.The Final Touches
While two flanges form the primary support structure around the hatches, Sven mentions there are two additional pieces required at each end to ensure comprehensive protection. This attention to detail highlights his commitment to producing a durable and reliable design. “Sailing is about finding your path, whether it’s across an ocean or within yourself.” – Sven Yrvind In conclusion, making flanges around bulkhead hatches may seem complex at first glance, but by following Sven Yrvind’s meticulous process, enthusiasts can achieve professional-level results. Remember that the journey of boatbuilding is as rewarding as reaching your destination; it tests one’s patience and dedication. For those seeking to embark on this adventure or simply gain more insight into marine craftsmanship, Sven’s wisdom is invaluable.Sven Yrvind, a renowned yacht designer and sailor, shares valuable insights on creating flanges around bulkhead hatches for canvas protection in this enlightening video. By following his expert guidance, boat enthusiasts can ensure their living areas remain secure while allowing unhindered access through the hatches.Step 1: Starting with the Flange
Sven begins by explaining that working on flanges vertically and horizontally is significantly easier than doing so in a flat position. To simplify the process further, he divides the task into two or three steps as suggested by fellow expert “for for.” This approach not only makes it more manageable but also allows for greater precision in crafting each component.Step 2: Applying Glue and Securing
Sven proceeds to apply glue along one edge of the flange, ensuring a secure bond when clamped into place. He emphasizes that this stage is crucial for maintaining the structural integrity of the flange, which in turn safeguards the living area beneath the canvas when hatches are open.Step 3: Allowing Time to Dry
After securely attaching the first portion of the flange, Sven allows ample time for it to dry before moving forward with additional steps. This patience and precision are key aspects of his successful boatbuilding methods.Step 4: Finishing Touches
Once the flange is fully dried, Sven removes the clamps carefully, ensuring no damage occurs during this process. He then moves on to attaching four more pieces onto these main frames, completing two pairs of flanges for the bulkhead hatches.The Final Touches
While two flanges form the primary support structure around the hatches, Sven mentions there are two additional pieces required at each end to ensure comprehensive protection. This attention to detail highlights his commitment to producing a durable and reliable design. “Sailing is about finding your path, whether it’s across an ocean or within yourself.” – Sven Yrvind In conclusion, making flanges around bulkhead hatches may seem complex at first glance, but by following Sven Yrvind’s meticulous process, enthusiasts can achieve professional-level results. Remember that the journey of boatbuilding is as rewarding as reaching your destination; it tests one’s patience and dedication. For those seeking to embark on this adventure or simply gain more insight into marine craftsmanship, Sven’s wisdom is invaluable.Making Flanges Around Bulkhead Hatches for Canvas
Sven Yrvind, a renowned yacht designer and sailor, shares valuable insights on creating flanges around bulkhead hatches for canvas protection in this enlightening video. By following his expert guidance, boat enthusiasts can ensure their living areas remain secure while allowing unhindered access through the hatches.Step 1: Starting with the Flange
Sven begins by explaining that working on flanges vertically and horizontally is significantly easier than doing so in a flat position. To simplify the process further, he divides the task into two or three steps as suggested by fellow expert “for for.” This approach not only makes it more manageable but also allows for greater precision in crafting each component.Step 2: Applying Glue and Securing
Sven proceeds to apply glue along one edge of the flange, ensuring a secure bond when clamped into place. He emphasizes that this stage is crucial for maintaining the structural integrity of the flange, which in turn safeguards the living area beneath the canvas when hatches are open.Step 3: Allowing Time to Dry
After securely attaching the first portion of the flange, Sven allows ample time for it to dry before moving forward with additional steps. This patience and precision are key aspects of his successful boatbuilding methods.Step 4: Finishing Touches
Once the flange is fully dried, Sven removes the clamps carefully, ensuring no damage occurs during this process. He then moves on to attaching four more pieces onto these main frames, completing two pairs of flanges for the bulkhead hatches.The Final Touches
While two flanges form the primary support structure around the hatches, Sven mentions there are two additional pieces required at each end to ensure comprehensive protection. This attention to detail highlights his commitment to producing a durable and reliable design. “Sailing is about finding your path, whether it’s across an ocean or within yourself.” – Sven Yrvind In conclusion, making flanges around bulkhead hatches may seem complex at first glance, but by following Sven Yrvind’s meticulous process, enthusiasts can achieve professional-level results. Remember that the journey of boatbuilding is as rewarding as reaching your destination; it tests one’s patience and dedication. For those seeking to embark on this adventure or simply gain more insight into marine craftsmanship, Sven’s wisdom is invaluable.Sven proceeds to apply glue along one edge of the flange, ensuring a secure bond when clamped into place. He emphasizes that this stage is crucial for maintaining the structural integrity of the flange, which in turn safeguards the living area beneath the canvas when hatches are open.Step 3: Allowing Time to Dry
After securely attaching the first portion of the flange, Sven allows ample time for it to dry before moving forward with additional steps. This patience and precision are key aspects of his successful boatbuilding methods.Step 4: Finishing Touches
Once the flange is fully dried, Sven removes the clamps carefully, ensuring no damage occurs during this process. He then moves on to attaching four more pieces onto these main frames, completing two pairs of flanges for the bulkhead hatches.The Final Touches
While two flanges form the primary support structure around the hatches, Sven mentions there are two additional pieces required at each end to ensure comprehensive protection. This attention to detail highlights his commitment to producing a durable and reliable design. “Sailing is about finding your path, whether it’s across an ocean or within yourself.” – Sven Yrvind In conclusion, making flanges around bulkhead hatches may seem complex at first glance, but by following Sven Yrvind’s meticulous process, enthusiasts can achieve professional-level results. Remember that the journey of boatbuilding is as rewarding as reaching your destination; it tests one’s patience and dedication. For those seeking to embark on this adventure or simply gain more insight into marine craftsmanship, Sven’s wisdom is invaluable.Sven begins by explaining that working on flanges vertically and horizontally is significantly easier than doing so in a flat position. To simplify the process further, he divides the task into two or three steps as suggested by fellow expert “for for.” This approach not only makes it more manageable but also allows for greater precision in crafting each component.Step 2: Applying Glue and Securing
Sven proceeds to apply glue along one edge of the flange, ensuring a secure bond when clamped into place. He emphasizes that this stage is crucial for maintaining the structural integrity of the flange, which in turn safeguards the living area beneath the canvas when hatches are open.Step 3: Allowing Time to Dry
After securely attaching the first portion of the flange, Sven allows ample time for it to dry before moving forward with additional steps. This patience and precision are key aspects of his successful boatbuilding methods.Step 4: Finishing Touches
Once the flange is fully dried, Sven removes the clamps carefully, ensuring no damage occurs during this process. He then moves on to attaching four more pieces onto these main frames, completing two pairs of flanges for the bulkhead hatches.The Final Touches
While two flanges form the primary support structure around the hatches, Sven mentions there are two additional pieces required at each end to ensure comprehensive protection. This attention to detail highlights his commitment to producing a durable and reliable design. “Sailing is about finding your path, whether it’s across an ocean or within yourself.” – Sven Yrvind In conclusion, making flanges around bulkhead hatches may seem complex at first glance, but by following Sven Yrvind’s meticulous process, enthusiasts can achieve professional-level results. Remember that the journey of boatbuilding is as rewarding as reaching your destination; it tests one’s patience and dedication. For those seeking to embark on this adventure or simply gain more insight into marine craftsmanship, Sven’s wisdom is invaluable.Sven Yrvind, a renowned yacht designer and sailor, shares valuable insights on creating flanges around bulkhead hatches for canvas protection in this enlightening video. By following his expert guidance, boat enthusiasts can ensure their living areas remain secure while allowing unhindered access through the hatches.Step 1: Starting with the Flange
Sven begins by explaining that working on flanges vertically and horizontally is significantly easier than doing so in a flat position. To simplify the process further, he divides the task into two or three steps as suggested by fellow expert “for for.” This approach not only makes it more manageable but also allows for greater precision in crafting each component.Step 2: Applying Glue and Securing
Sven proceeds to apply glue along one edge of the flange, ensuring a secure bond when clamped into place. He emphasizes that this stage is crucial for maintaining the structural integrity of the flange, which in turn safeguards the living area beneath the canvas when hatches are open.Step 3: Allowing Time to Dry
After securely attaching the first portion of the flange, Sven allows ample time for it to dry before moving forward with additional steps. This patience and precision are key aspects of his successful boatbuilding methods.Step 4: Finishing Touches
Once the flange is fully dried, Sven removes the clamps carefully, ensuring no damage occurs during this process. He then moves on to attaching four more pieces onto these main frames, completing two pairs of flanges for the bulkhead hatches.The Final Touches
While two flanges form the primary support structure around the hatches, Sven mentions there are two additional pieces required at each end to ensure comprehensive protection. This attention to detail highlights his commitment to producing a durable and reliable design. “Sailing is about finding your path, whether it’s across an ocean or within yourself.” – Sven Yrvind In conclusion, making flanges around bulkhead hatches may seem complex at first glance, but by following Sven Yrvind’s meticulous process, enthusiasts can achieve professional-level results. Remember that the journey of boatbuilding is as rewarding as reaching your destination; it tests one’s patience and dedication. For those seeking to embark on this adventure or simply gain more insight into marine craftsmanship, Sven’s wisdom is invaluable.Making Flanges Around Bulkhead Hatches for Canvas
Sven Yrvind, a renowned yacht designer and sailor, shares valuable insights on creating flanges around bulkhead hatches for canvas protection in this enlightening video. By following his expert guidance, boat enthusiasts can ensure their living areas remain secure while allowing unhindered access through the hatches.Step 1: Starting with the Flange
Sven begins by explaining that working on flanges vertically and horizontally is significantly easier than doing so in a flat position. To simplify the process further, he divides the task into two or three steps as suggested by fellow expert “for for.” This approach not only makes it more manageable but also allows for greater precision in crafting each component.Step 2: Applying Glue and Securing
Sven proceeds to apply glue along one edge of the flange, ensuring a secure bond when clamped into place. He emphasizes that this stage is crucial for maintaining the structural integrity of the flange, which in turn safeguards the living area beneath the canvas when hatches are open.Step 3: Allowing Time to Dry
After securely attaching the first portion of the flange, Sven allows ample time for it to dry before moving forward with additional steps. This patience and precision are key aspects of his successful boatbuilding methods.Step 4: Finishing Touches
Once the flange is fully dried, Sven removes the clamps carefully, ensuring no damage occurs during this process. He then moves on to attaching four more pieces onto these main frames, completing two pairs of flanges for the bulkhead hatches.The Final Touches
While two flanges form the primary support structure around the hatches, Sven mentions there are two additional pieces required at each end to ensure comprehensive protection. This attention to detail highlights his commitment to producing a durable and reliable design. “Sailing is about finding your path, whether it’s across an ocean or within yourself.” – Sven Yrvind In conclusion, making flanges around bulkhead hatches may seem complex at first glance, but by following Sven Yrvind’s meticulous process, enthusiasts can achieve professional-level results. Remember that the journey of boatbuilding is as rewarding as reaching your destination; it tests one’s patience and dedication. For those seeking to embark on this adventure or simply gain more insight into marine craftsmanship, Sven’s wisdom is invaluable.Once the flange is fully dried, Sven removes the clamps carefully, ensuring no damage occurs during this process. He then moves on to attaching four more pieces onto these main frames, completing two pairs of flanges for the bulkhead hatches.The Final Touches
While two flanges form the primary support structure around the hatches, Sven mentions there are two additional pieces required at each end to ensure comprehensive protection. This attention to detail highlights his commitment to producing a durable and reliable design. “Sailing is about finding your path, whether it’s across an ocean or within yourself.” – Sven Yrvind In conclusion, making flanges around bulkhead hatches may seem complex at first glance, but by following Sven Yrvind’s meticulous process, enthusiasts can achieve professional-level results. Remember that the journey of boatbuilding is as rewarding as reaching your destination; it tests one’s patience and dedication. For those seeking to embark on this adventure or simply gain more insight into marine craftsmanship, Sven’s wisdom is invaluable.Sven proceeds to apply glue along one edge of the flange, ensuring a secure bond when clamped into place. He emphasizes that this stage is crucial for maintaining the structural integrity of the flange, which in turn safeguards the living area beneath the canvas when hatches are open.Step 3: Allowing Time to Dry
After securely attaching the first portion of the flange, Sven allows ample time for it to dry before moving forward with additional steps. This patience and precision are key aspects of his successful boatbuilding methods.Step 4: Finishing Touches
Once the flange is fully dried, Sven removes the clamps carefully, ensuring no damage occurs during this process. He then moves on to attaching four more pieces onto these main frames, completing two pairs of flanges for the bulkhead hatches.The Final Touches
While two flanges form the primary support structure around the hatches, Sven mentions there are two additional pieces required at each end to ensure comprehensive protection. This attention to detail highlights his commitment to producing a durable and reliable design. “Sailing is about finding your path, whether it’s across an ocean or within yourself.” – Sven Yrvind In conclusion, making flanges around bulkhead hatches may seem complex at first glance, but by following Sven Yrvind’s meticulous process, enthusiasts can achieve professional-level results. Remember that the journey of boatbuilding is as rewarding as reaching your destination; it tests one’s patience and dedication. For those seeking to embark on this adventure or simply gain more insight into marine craftsmanship, Sven’s wisdom is invaluable.Sven begins by explaining that working on flanges vertically and horizontally is significantly easier than doing so in a flat position. To simplify the process further, he divides the task into two or three steps as suggested by fellow expert “for for.” This approach not only makes it more manageable but also allows for greater precision in crafting each component.Step 2: Applying Glue and Securing
Sven proceeds to apply glue along one edge of the flange, ensuring a secure bond when clamped into place. He emphasizes that this stage is crucial for maintaining the structural integrity of the flange, which in turn safeguards the living area beneath the canvas when hatches are open.Step 3: Allowing Time to Dry
After securely attaching the first portion of the flange, Sven allows ample time for it to dry before moving forward with additional steps. This patience and precision are key aspects of his successful boatbuilding methods.Step 4: Finishing Touches
Once the flange is fully dried, Sven removes the clamps carefully, ensuring no damage occurs during this process. He then moves on to attaching four more pieces onto these main frames, completing two pairs of flanges for the bulkhead hatches.The Final Touches
While two flanges form the primary support structure around the hatches, Sven mentions there are two additional pieces required at each end to ensure comprehensive protection. This attention to detail highlights his commitment to producing a durable and reliable design. “Sailing is about finding your path, whether it’s across an ocean or within yourself.” – Sven Yrvind In conclusion, making flanges around bulkhead hatches may seem complex at first glance, but by following Sven Yrvind’s meticulous process, enthusiasts can achieve professional-level results. Remember that the journey of boatbuilding is as rewarding as reaching your destination; it tests one’s patience and dedication. For those seeking to embark on this adventure or simply gain more insight into marine craftsmanship, Sven’s wisdom is invaluable.Sven Yrvind, a renowned yacht designer and sailor, shares valuable insights on creating flanges around bulkhead hatches for canvas protection in this enlightening video. By following his expert guidance, boat enthusiasts can ensure their living areas remain secure while allowing unhindered access through the hatches.Step 1: Starting with the Flange
Sven begins by explaining that working on flanges vertically and horizontally is significantly easier than doing so in a flat position. To simplify the process further, he divides the task into two or three steps as suggested by fellow expert “for for.” This approach not only makes it more manageable but also allows for greater precision in crafting each component.Step 2: Applying Glue and Securing
Sven proceeds to apply glue along one edge of the flange, ensuring a secure bond when clamped into place. He emphasizes that this stage is crucial for maintaining the structural integrity of the flange, which in turn safeguards the living area beneath the canvas when hatches are open.Step 3: Allowing Time to Dry
After securely attaching the first portion of the flange, Sven allows ample time for it to dry before moving forward with additional steps. This patience and precision are key aspects of his successful boatbuilding methods.Step 4: Finishing Touches
Once the flange is fully dried, Sven removes the clamps carefully, ensuring no damage occurs during this process. He then moves on to attaching four more pieces onto these main frames, completing two pairs of flanges for the bulkhead hatches.The Final Touches
While two flanges form the primary support structure around the hatches, Sven mentions there are two additional pieces required at each end to ensure comprehensive protection. This attention to detail highlights his commitment to producing a durable and reliable design. “Sailing is about finding your path, whether it’s across an ocean or within yourself.” – Sven Yrvind In conclusion, making flanges around bulkhead hatches may seem complex at first glance, but by following Sven Yrvind’s meticulous process, enthusiasts can achieve professional-level results. Remember that the journey of boatbuilding is as rewarding as reaching your destination; it tests one’s patience and dedication. For those seeking to embark on this adventure or simply gain more insight into marine craftsmanship, Sven’s wisdom is invaluable.Making Flanges Around Bulkhead Hatches for Canvas
Sven Yrvind, a renowned yacht designer and sailor, shares valuable insights on creating flanges around bulkhead hatches for canvas protection in this enlightening video. By following his expert guidance, boat enthusiasts can ensure their living areas remain secure while allowing unhindered access through the hatches.Step 1: Starting with the Flange
Sven begins by explaining that working on flanges vertically and horizontally is significantly easier than doing so in a flat position. To simplify the process further, he divides the task into two or three steps as suggested by fellow expert “for for.” This approach not only makes it more manageable but also allows for greater precision in crafting each component.Step 2: Applying Glue and Securing
Sven proceeds to apply glue along one edge of the flange, ensuring a secure bond when clamped into place. He emphasizes that this stage is crucial for maintaining the structural integrity of the flange, which in turn safeguards the living area beneath the canvas when hatches are open.Step 3: Allowing Time to Dry
After securely attaching the first portion of the flange, Sven allows ample time for it to dry before moving forward with additional steps. This patience and precision are key aspects of his successful boatbuilding methods.Step 4: Finishing Touches
Once the flange is fully dried, Sven removes the clamps carefully, ensuring no damage occurs during this process. He then moves on to attaching four more pieces onto these main frames, completing two pairs of flanges for the bulkhead hatches.The Final Touches
While two flanges form the primary support structure around the hatches, Sven mentions there are two additional pieces required at each end to ensure comprehensive protection. This attention to detail highlights his commitment to producing a durable and reliable design. “Sailing is about finding your path, whether it’s across an ocean or within yourself.” – Sven Yrvind In conclusion, making flanges around bulkhead hatches may seem complex at first glance, but by following Sven Yrvind’s meticulous process, enthusiasts can achieve professional-level results. Remember that the journey of boatbuilding is as rewarding as reaching your destination; it tests one’s patience and dedication. For those seeking to embark on this adventure or simply gain more insight into marine craftsmanship, Sven’s wisdom is invaluable.After securely attaching the first portion of the flange, Sven allows ample time for it to dry before moving forward with additional steps. This patience and precision are key aspects of his successful boatbuilding methods.Step 4: Finishing Touches
Once the flange is fully dried, Sven removes the clamps carefully, ensuring no damage occurs during this process. He then moves on to attaching four more pieces onto these main frames, completing two pairs of flanges for the bulkhead hatches.The Final Touches
While two flanges form the primary support structure around the hatches, Sven mentions there are two additional pieces required at each end to ensure comprehensive protection. This attention to detail highlights his commitment to producing a durable and reliable design. “Sailing is about finding your path, whether it’s across an ocean or within yourself.” – Sven Yrvind In conclusion, making flanges around bulkhead hatches may seem complex at first glance, but by following Sven Yrvind’s meticulous process, enthusiasts can achieve professional-level results. Remember that the journey of boatbuilding is as rewarding as reaching your destination; it tests one’s patience and dedication. For those seeking to embark on this adventure or simply gain more insight into marine craftsmanship, Sven’s wisdom is invaluable.Sven proceeds to apply glue along one edge of the flange, ensuring a secure bond when clamped into place. He emphasizes that this stage is crucial for maintaining the structural integrity of the flange, which in turn safeguards the living area beneath the canvas when hatches are open.Step 3: Allowing Time to Dry
After securely attaching the first portion of the flange, Sven allows ample time for it to dry before moving forward with additional steps. This patience and precision are key aspects of his successful boatbuilding methods.Step 4: Finishing Touches
Once the flange is fully dried, Sven removes the clamps carefully, ensuring no damage occurs during this process. He then moves on to attaching four more pieces onto these main frames, completing two pairs of flanges for the bulkhead hatches.The Final Touches
While two flanges form the primary support structure around the hatches, Sven mentions there are two additional pieces required at each end to ensure comprehensive protection. This attention to detail highlights his commitment to producing a durable and reliable design. “Sailing is about finding your path, whether it’s across an ocean or within yourself.” – Sven Yrvind In conclusion, making flanges around bulkhead hatches may seem complex at first glance, but by following Sven Yrvind’s meticulous process, enthusiasts can achieve professional-level results. Remember that the journey of boatbuilding is as rewarding as reaching your destination; it tests one’s patience and dedication. For those seeking to embark on this adventure or simply gain more insight into marine craftsmanship, Sven’s wisdom is invaluable.Sven begins by explaining that working on flanges vertically and horizontally is significantly easier than doing so in a flat position. To simplify the process further, he divides the task into two or three steps as suggested by fellow expert “for for.” This approach not only makes it more manageable but also allows for greater precision in crafting each component.Step 2: Applying Glue and Securing
Sven proceeds to apply glue along one edge of the flange, ensuring a secure bond when clamped into place. He emphasizes that this stage is crucial for maintaining the structural integrity of the flange, which in turn safeguards the living area beneath the canvas when hatches are open.Step 3: Allowing Time to Dry
After securely attaching the first portion of the flange, Sven allows ample time for it to dry before moving forward with additional steps. This patience and precision are key aspects of his successful boatbuilding methods.Step 4: Finishing Touches
Once the flange is fully dried, Sven removes the clamps carefully, ensuring no damage occurs during this process. He then moves on to attaching four more pieces onto these main frames, completing two pairs of flanges for the bulkhead hatches.The Final Touches
While two flanges form the primary support structure around the hatches, Sven mentions there are two additional pieces required at each end to ensure comprehensive protection. This attention to detail highlights his commitment to producing a durable and reliable design. “Sailing is about finding your path, whether it’s across an ocean or within yourself.” – Sven Yrvind In conclusion, making flanges around bulkhead hatches may seem complex at first glance, but by following Sven Yrvind’s meticulous process, enthusiasts can achieve professional-level results. Remember that the journey of boatbuilding is as rewarding as reaching your destination; it tests one’s patience and dedication. For those seeking to embark on this adventure or simply gain more insight into marine craftsmanship, Sven’s wisdom is invaluable.Sven Yrvind, a renowned yacht designer and sailor, shares valuable insights on creating flanges around bulkhead hatches for canvas protection in this enlightening video. By following his expert guidance, boat enthusiasts can ensure their living areas remain secure while allowing unhindered access through the hatches.Step 1: Starting with the Flange
Sven begins by explaining that working on flanges vertically and horizontally is significantly easier than doing so in a flat position. To simplify the process further, he divides the task into two or three steps as suggested by fellow expert “for for.” This approach not only makes it more manageable but also allows for greater precision in crafting each component.Step 2: Applying Glue and Securing
Sven proceeds to apply glue along one edge of the flange, ensuring a secure bond when clamped into place. He emphasizes that this stage is crucial for maintaining the structural integrity of the flange, which in turn safeguards the living area beneath the canvas when hatches are open.Step 3: Allowing Time to Dry
After securely attaching the first portion of the flange, Sven allows ample time for it to dry before moving forward with additional steps. This patience and precision are key aspects of his successful boatbuilding methods.Step 4: Finishing Touches
Once the flange is fully dried, Sven removes the clamps carefully, ensuring no damage occurs during this process. He then moves on to attaching four more pieces onto these main frames, completing two pairs of flanges for the bulkhead hatches.The Final Touches
While two flanges form the primary support structure around the hatches, Sven mentions there are two additional pieces required at each end to ensure comprehensive protection. This attention to detail highlights his commitment to producing a durable and reliable design. “Sailing is about finding your path, whether it’s across an ocean or within yourself.” – Sven Yrvind In conclusion, making flanges around bulkhead hatches may seem complex at first glance, but by following Sven Yrvind’s meticulous process, enthusiasts can achieve professional-level results. Remember that the journey of boatbuilding is as rewarding as reaching your destination; it tests one’s patience and dedication. For those seeking to embark on this adventure or simply gain more insight into marine craftsmanship, Sven’s wisdom is invaluable.Making Flanges Around Bulkhead Hatches for Canvas
Sven Yrvind, a renowned yacht designer and sailor, shares valuable insights on creating flanges around bulkhead hatches for canvas protection in this enlightening video. By following his expert guidance, boat enthusiasts can ensure their living areas remain secure while allowing unhindered access through the hatches.Step 1: Starting with the Flange
Sven begins by explaining that working on flanges vertically and horizontally is significantly easier than doing so in a flat position. To simplify the process further, he divides the task into two or three steps as suggested by fellow expert “for for.” This approach not only makes it more manageable but also allows for greater precision in crafting each component.Step 2: Applying Glue and Securing
Sven proceeds to apply glue along one edge of the flange, ensuring a secure bond when clamped into place. He emphasizes that this stage is crucial for maintaining the structural integrity of the flange, which in turn safeguards the living area beneath the canvas when hatches are open.Step 3: Allowing Time to Dry
After securely attaching the first portion of the flange, Sven allows ample time for it to dry before moving forward with additional steps. This patience and precision are key aspects of his successful boatbuilding methods.Step 4: Finishing Touches
Once the flange is fully dried, Sven removes the clamps carefully, ensuring no damage occurs during this process. He then moves on to attaching four more pieces onto these main frames, completing two pairs of flanges for the bulkhead hatches.The Final Touches
While two flanges form the primary support structure around the hatches, Sven mentions there are two additional pieces required at each end to ensure comprehensive protection. This attention to detail highlights his commitment to producing a durable and reliable design. “Sailing is about finding your path, whether it’s across an ocean or within yourself.” – Sven Yrvind In conclusion, making flanges around bulkhead hatches may seem complex at first glance, but by following Sven Yrvind’s meticulous process, enthusiasts can achieve professional-level results. Remember that the journey of boatbuilding is as rewarding as reaching your destination; it tests one’s patience and dedication. For those seeking to embark on this adventure or simply gain more insight into marine craftsmanship, Sven’s wisdom is invaluable.Once the flange is fully dried, Sven removes the clamps carefully, ensuring no damage occurs during this process. He then moves on to attaching four more pieces onto these main frames, completing two pairs of flanges for the bulkhead hatches.The Final Touches
While two flanges form the primary support structure around the hatches, Sven mentions there are two additional pieces required at each end to ensure comprehensive protection. This attention to detail highlights his commitment to producing a durable and reliable design. “Sailing is about finding your path, whether it’s across an ocean or within yourself.” – Sven Yrvind In conclusion, making flanges around bulkhead hatches may seem complex at first glance, but by following Sven Yrvind’s meticulous process, enthusiasts can achieve professional-level results. Remember that the journey of boatbuilding is as rewarding as reaching your destination; it tests one’s patience and dedication. For those seeking to embark on this adventure or simply gain more insight into marine craftsmanship, Sven’s wisdom is invaluable.After securely attaching the first portion of the flange, Sven allows ample time for it to dry before moving forward with additional steps. This patience and precision are key aspects of his successful boatbuilding methods.Step 4: Finishing Touches
Once the flange is fully dried, Sven removes the clamps carefully, ensuring no damage occurs during this process. He then moves on to attaching four more pieces onto these main frames, completing two pairs of flanges for the bulkhead hatches.The Final Touches
While two flanges form the primary support structure around the hatches, Sven mentions there are two additional pieces required at each end to ensure comprehensive protection. This attention to detail highlights his commitment to producing a durable and reliable design. “Sailing is about finding your path, whether it’s across an ocean or within yourself.” – Sven Yrvind In conclusion, making flanges around bulkhead hatches may seem complex at first glance, but by following Sven Yrvind’s meticulous process, enthusiasts can achieve professional-level results. Remember that the journey of boatbuilding is as rewarding as reaching your destination; it tests one’s patience and dedication. For those seeking to embark on this adventure or simply gain more insight into marine craftsmanship, Sven’s wisdom is invaluable.Sven proceeds to apply glue along one edge of the flange, ensuring a secure bond when clamped into place. He emphasizes that this stage is crucial for maintaining the structural integrity of the flange, which in turn safeguards the living area beneath the canvas when hatches are open.Step 3: Allowing Time to Dry
After securely attaching the first portion of the flange, Sven allows ample time for it to dry before moving forward with additional steps. This patience and precision are key aspects of his successful boatbuilding methods.Step 4: Finishing Touches
Once the flange is fully dried, Sven removes the clamps carefully, ensuring no damage occurs during this process. He then moves on to attaching four more pieces onto these main frames, completing two pairs of flanges for the bulkhead hatches.The Final Touches
While two flanges form the primary support structure around the hatches, Sven mentions there are two additional pieces required at each end to ensure comprehensive protection. This attention to detail highlights his commitment to producing a durable and reliable design. “Sailing is about finding your path, whether it’s across an ocean or within yourself.” – Sven Yrvind In conclusion, making flanges around bulkhead hatches may seem complex at first glance, but by following Sven Yrvind’s meticulous process, enthusiasts can achieve professional-level results. Remember that the journey of boatbuilding is as rewarding as reaching your destination; it tests one’s patience and dedication. For those seeking to embark on this adventure or simply gain more insight into marine craftsmanship, Sven’s wisdom is invaluable.Sven begins by explaining that working on flanges vertically and horizontally is significantly easier than doing so in a flat position. To simplify the process further, he divides the task into two or three steps as suggested by fellow expert “for for.” This approach not only makes it more manageable but also allows for greater precision in crafting each component.Step 2: Applying Glue and Securing
Sven proceeds to apply glue along one edge of the flange, ensuring a secure bond when clamped into place. He emphasizes that this stage is crucial for maintaining the structural integrity of the flange, which in turn safeguards the living area beneath the canvas when hatches are open.Step 3: Allowing Time to Dry
After securely attaching the first portion of the flange, Sven allows ample time for it to dry before moving forward with additional steps. This patience and precision are key aspects of his successful boatbuilding methods.Step 4: Finishing Touches
Once the flange is fully dried, Sven removes the clamps carefully, ensuring no damage occurs during this process. He then moves on to attaching four more pieces onto these main frames, completing two pairs of flanges for the bulkhead hatches.The Final Touches
While two flanges form the primary support structure around the hatches, Sven mentions there are two additional pieces required at each end to ensure comprehensive protection. This attention to detail highlights his commitment to producing a durable and reliable design. “Sailing is about finding your path, whether it’s across an ocean or within yourself.” – Sven Yrvind In conclusion, making flanges around bulkhead hatches may seem complex at first glance, but by following Sven Yrvind’s meticulous process, enthusiasts can achieve professional-level results. Remember that the journey of boatbuilding is as rewarding as reaching your destination; it tests one’s patience and dedication. For those seeking to embark on this adventure or simply gain more insight into marine craftsmanship, Sven’s wisdom is invaluable.Sven Yrvind, a renowned yacht designer and sailor, shares valuable insights on creating flanges around bulkhead hatches for canvas protection in this enlightening video. By following his expert guidance, boat enthusiasts can ensure their living areas remain secure while allowing unhindered access through the hatches.Step 1: Starting with the Flange
Sven begins by explaining that working on flanges vertically and horizontally is significantly easier than doing so in a flat position. To simplify the process further, he divides the task into two or three steps as suggested by fellow expert “for for.” This approach not only makes it more manageable but also allows for greater precision in crafting each component.Step 2: Applying Glue and Securing
Sven proceeds to apply glue along one edge of the flange, ensuring a secure bond when clamped into place. He emphasizes that this stage is crucial for maintaining the structural integrity of the flange, which in turn safeguards the living area beneath the canvas when hatches are open.Step 3: Allowing Time to Dry
After securely attaching the first portion of the flange, Sven allows ample time for it to dry before moving forward with additional steps. This patience and precision are key aspects of his successful boatbuilding methods.Step 4: Finishing Touches
Once the flange is fully dried, Sven removes the clamps carefully, ensuring no damage occurs during this process. He then moves on to attaching four more pieces onto these main frames, completing two pairs of flanges for the bulkhead hatches.The Final Touches
While two flanges form the primary support structure around the hatches, Sven mentions there are two additional pieces required at each end to ensure comprehensive protection. This attention to detail highlights his commitment to producing a durable and reliable design. “Sailing is about finding your path, whether it’s across an ocean or within yourself.” – Sven Yrvind In conclusion, making flanges around bulkhead hatches may seem complex at first glance, but by following Sven Yrvind’s meticulous process, enthusiasts can achieve professional-level results. Remember that the journey of boatbuilding is as rewarding as reaching your destination; it tests one’s patience and dedication. For those seeking to embark on this adventure or simply gain more insight into marine craftsmanship, Sven’s wisdom is invaluable.Making Flanges Around Bulkhead Hatches for Canvas
Sven Yrvind, a renowned yacht designer and sailor, shares valuable insights on creating flanges around bulkhead hatches for canvas protection in this enlightening video. By following his expert guidance, boat enthusiasts can ensure their living areas remain secure while allowing unhindered access through the hatches.Step 1: Starting with the Flange
Sven begins by explaining that working on flanges vertically and horizontally is significantly easier than doing so in a flat position. To simplify the process further, he divides the task into two or three steps as suggested by fellow expert “for for.” This approach not only makes it more manageable but also allows for greater precision in crafting each component.Step 2: Applying Glue and Securing
Sven proceeds to apply glue along one edge of the flange, ensuring a secure bond when clamped into place. He emphasizes that this stage is crucial for maintaining the structural integrity of the flange, which in turn safeguards the living area beneath the canvas when hatches are open.Step 3: Allowing Time to Dry
After securely attaching the first portion of the flange, Sven allows ample time for it to dry before moving forward with additional steps. This patience and precision are key aspects of his successful boatbuilding methods.Step 4: Finishing Touches
Once the flange is fully dried, Sven removes the clamps carefully, ensuring no damage occurs during this process. He then moves on to attaching four more pieces onto these main frames, completing two pairs of flanges for the bulkhead hatches.The Final Touches
While two flanges form the primary support structure around the hatches, Sven mentions there are two additional pieces required at each end to ensure comprehensive protection. This attention to detail highlights his commitment to producing a durable and reliable design. “Sailing is about finding your path, whether it’s across an ocean or within yourself.” – Sven Yrvind In conclusion, making flanges around bulkhead hatches may seem complex at first glance, but by following Sven Yrvind’s meticulous process, enthusiasts can achieve professional-level results. Remember that the journey of boatbuilding is as rewarding as reaching your destination; it tests one’s patience and dedication. For those seeking to embark on this adventure or simply gain more insight into marine craftsmanship, Sven’s wisdom is invaluable.Once the flange is fully dried, Sven removes the clamps carefully, ensuring no damage occurs during this process. He then moves on to attaching four more pieces onto these main frames, completing two pairs of flanges for the bulkhead hatches.The Final Touches
While two flanges form the primary support structure around the hatches, Sven mentions there are two additional pieces required at each end to ensure comprehensive protection. This attention to detail highlights his commitment to producing a durable and reliable design. “Sailing is about finding your path, whether it’s across an ocean or within yourself.” – Sven Yrvind In conclusion, making flanges around bulkhead hatches may seem complex at first glance, but by following Sven Yrvind’s meticulous process, enthusiasts can achieve professional-level results. Remember that the journey of boatbuilding is as rewarding as reaching your destination; it tests one’s patience and dedication. For those seeking to embark on this adventure or simply gain more insight into marine craftsmanship, Sven’s wisdom is invaluable.Sven Yrvind, a renowned yacht designer and sailor, shares valuable insights on creating flanges around bulkhead hatches for canvas protection in this enlightening video. By following his expert guidance, boat enthusiasts can ensure their living areas remain secure while allowing unhindered access through the hatches.Step 1: Starting with the Flange
Sven begins by explaining that working on flanges vertically and horizontally is significantly easier than doing so in a flat position. To simplify the process further, he divides the task into two or three steps as suggested by fellow expert “for for.” This approach not only makes it more manageable but also allows for greater precision in crafting each component.Step 2: Applying Glue and Securing
Sven proceeds to apply glue along one edge of the flange, ensuring a secure bond when clamped into place. He emphasizes that this stage is crucial for maintaining the structural integrity of the flange, which in turn safeguards the living area beneath the canvas when hatches are open.Step 3: Allowing Time to Dry
After securely attaching the first portion of the flange, Sven allows ample time for it to dry before moving forward with additional steps. This patience and precision are key aspects of his successful boatbuilding methods.Step 4: Finishing Touches
Once the flange is fully dried, Sven removes the clamps carefully, ensuring no damage occurs during this process. He then moves on to attaching four more pieces onto these main frames, completing two pairs of flanges for the bulkhead hatches.The Final Touches
While two flanges form the primary support structure around the hatches, Sven mentions there are two additional pieces required at each end to ensure comprehensive protection. This attention to detail highlights his commitment to producing a durable and reliable design. “Sailing is about finding your path, whether it’s across an ocean or within yourself.” – Sven Yrvind In conclusion, making flanges around bulkhead hatches may seem complex at first glance, but by following Sven Yrvind’s meticulous process, enthusiasts can achieve professional-level results. Remember that the journey of boatbuilding is as rewarding as reaching your destination; it tests one’s patience and dedication. For those seeking to embark on this adventure or simply gain more insight into marine craftsmanship, Sven’s wisdom is invaluable.Making Flanges Around Bulkhead Hatches for Canvas
Sven Yrvind, a renowned yacht designer and sailor, shares valuable insights on creating flanges around bulkhead hatches for canvas protection in this enlightening video. By following his expert guidance, boat enthusiasts can ensure their living areas remain secure while allowing unhindered access through the hatches.Step 1: Starting with the Flange
Sven begins by explaining that working on flanges vertically and horizontally is significantly easier than doing so in a flat position. To simplify the process further, he divides the task into two or three steps as suggested by fellow expert “for for.” This approach not only makes it more manageable but also allows for greater precision in crafting each component.Step 2: Applying Glue and Securing
Sven proceeds to apply glue along one edge of the flange, ensuring a secure bond when clamped into place. He emphasizes that this stage is crucial for maintaining the structural integrity of the flange, which in turn safeguards the living area beneath the canvas when hatches are open.Step 3: Allowing Time to Dry
After securely attaching the first portion of the flange, Sven allows ample time for it to dry before moving forward with additional steps. This patience and precision are key aspects of his successful boatbuilding methods.Step 4: Finishing Touches
Once the flange is fully dried, Sven removes the clamps carefully, ensuring no damage occurs during this process. He then moves on to attaching four more pieces onto these main frames, completing two pairs of flanges for the bulkhead hatches.The Final Touches
While two flanges form the primary support structure around the hatches, Sven mentions there are two additional pieces required at each end to ensure comprehensive protection. This attention to detail highlights his commitment to producing a durable and reliable design. “Sailing is about finding your path, whether it’s across an ocean or within yourself.” – Sven Yrvind In conclusion, making flanges around bulkhead hatches may seem complex at first glance, but by following Sven Yrvind’s meticulous process, enthusiasts can achieve professional-level results. Remember that the journey of boatbuilding is as rewarding as reaching your destination; it tests one’s patience and dedication. For those seeking to embark on this adventure or simply gain more insight into marine craftsmanship, Sven’s wisdom is invaluable.After securely attaching the first portion of the flange, Sven allows ample time for it to dry before moving forward with additional steps. This patience and precision are key aspects of his successful boatbuilding methods.Step 4: Finishing Touches
Once the flange is fully dried, Sven removes the clamps carefully, ensuring no damage occurs during this process. He then moves on to attaching four more pieces onto these main frames, completing two pairs of flanges for the bulkhead hatches.The Final Touches
While two flanges form the primary support structure around the hatches, Sven mentions there are two additional pieces required at each end to ensure comprehensive protection. This attention to detail highlights his commitment to producing a durable and reliable design. “Sailing is about finding your path, whether it’s across an ocean or within yourself.” – Sven Yrvind In conclusion, making flanges around bulkhead hatches may seem complex at first glance, but by following Sven Yrvind’s meticulous process, enthusiasts can achieve professional-level results. Remember that the journey of boatbuilding is as rewarding as reaching your destination; it tests one’s patience and dedication. For those seeking to embark on this adventure or simply gain more insight into marine craftsmanship, Sven’s wisdom is invaluable.Sven begins by explaining that working on flanges vertically and horizontally is significantly easier than doing so in a flat position. To simplify the process further, he divides the task into two or three steps as suggested by fellow expert “for for.” This approach not only makes it more manageable but also allows for greater precision in crafting each component.Step 2: Applying Glue and Securing
Sven proceeds to apply glue along one edge of the flange, ensuring a secure bond when clamped into place. He emphasizes that this stage is crucial for maintaining the structural integrity of the flange, which in turn safeguards the living area beneath the canvas when hatches are open.Step 3: Allowing Time to Dry
After securely attaching the first portion of the flange, Sven allows ample time for it to dry before moving forward with additional steps. This patience and precision are key aspects of his successful boatbuilding methods.Step 4: Finishing Touches
Once the flange is fully dried, Sven removes the clamps carefully, ensuring no damage occurs during this process. He then moves on to attaching four more pieces onto these main frames, completing two pairs of flanges for the bulkhead hatches.The Final Touches
While two flanges form the primary support structure around the hatches, Sven mentions there are two additional pieces required at each end to ensure comprehensive protection. This attention to detail highlights his commitment to producing a durable and reliable design. “Sailing is about finding your path, whether it’s across an ocean or within yourself.” – Sven Yrvind In conclusion, making flanges around bulkhead hatches may seem complex at first glance, but by following Sven Yrvind’s meticulous process, enthusiasts can achieve professional-level results. Remember that the journey of boatbuilding is as rewarding as reaching your destination; it tests one’s patience and dedication. For those seeking to embark on this adventure or simply gain more insight into marine craftsmanship, Sven’s wisdom is invaluable.Sven Yrvind, a renowned yacht designer and sailor, shares valuable insights on creating flanges around bulkhead hatches for canvas protection in this enlightening video. By following his expert guidance, boat enthusiasts can ensure their living areas remain secure while allowing unhindered access through the hatches.Step 1: Starting with the Flange
Sven begins by explaining that working on flanges vertically and horizontally is significantly easier than doing so in a flat position. To simplify the process further, he divides the task into two or three steps as suggested by fellow expert “for for.” This approach not only makes it more manageable but also allows for greater precision in crafting each component.Step 2: Applying Glue and Securing
Sven proceeds to apply glue along one edge of the flange, ensuring a secure bond when clamped into place. He emphasizes that this stage is crucial for maintaining the structural integrity of the flange, which in turn safeguards the living area beneath the canvas when hatches are open.Step 3: Allowing Time to Dry
After securely attaching the first portion of the flange, Sven allows ample time for it to dry before moving forward with additional steps. This patience and precision are key aspects of his successful boatbuilding methods.Step 4: Finishing Touches
Once the flange is fully dried, Sven removes the clamps carefully, ensuring no damage occurs during this process. He then moves on to attaching four more pieces onto these main frames, completing two pairs of flanges for the bulkhead hatches.The Final Touches
While two flanges form the primary support structure around the hatches, Sven mentions there are two additional pieces required at each end to ensure comprehensive protection. This attention to detail highlights his commitment to producing a durable and reliable design. “Sailing is about finding your path, whether it’s across an ocean or within yourself.” – Sven Yrvind In conclusion, making flanges around bulkhead hatches may seem complex at first glance, but by following Sven Yrvind’s meticulous process, enthusiasts can achieve professional-level results. Remember that the journey of boatbuilding is as rewarding as reaching your destination; it tests one’s patience and dedication. For those seeking to embark on this adventure or simply gain more insight into marine craftsmanship, Sven’s wisdom is invaluable.Making Flanges Around Bulkhead Hatches for Canvas
Sven Yrvind, a renowned yacht designer and sailor, shares valuable insights on creating flanges around bulkhead hatches for canvas protection in this enlightening video. By following his expert guidance, boat enthusiasts can ensure their living areas remain secure while allowing unhindered access through the hatches.Step 1: Starting with the Flange
Sven begins by explaining that working on flanges vertically and horizontally is significantly easier than doing so in a flat position. To simplify the process further, he divides the task into two or three steps as suggested by fellow expert “for for.” This approach not only makes it more manageable but also allows for greater precision in crafting each component.Step 2: Applying Glue and Securing
Sven proceeds to apply glue along one edge of the flange, ensuring a secure bond when clamped into place. He emphasizes that this stage is crucial for maintaining the structural integrity of the flange, which in turn safeguards the living area beneath the canvas when hatches are open.Step 3: Allowing Time to Dry
After securely attaching the first portion of the flange, Sven allows ample time for it to dry before moving forward with additional steps. This patience and precision are key aspects of his successful boatbuilding methods.Step 4: Finishing Touches
Once the flange is fully dried, Sven removes the clamps carefully, ensuring no damage occurs during this process. He then moves on to attaching four more pieces onto these main frames, completing two pairs of flanges for the bulkhead hatches.The Final Touches
While two flanges form the primary support structure around the hatches, Sven mentions there are two additional pieces required at each end to ensure comprehensive protection. This attention to detail highlights his commitment to producing a durable and reliable design. “Sailing is about finding your path, whether it’s across an ocean or within yourself.” – Sven Yrvind In conclusion, making flanges around bulkhead hatches may seem complex at first glance, but by following Sven Yrvind’s meticulous process, enthusiasts can achieve professional-level results. Remember that the journey of boatbuilding is as rewarding as reaching your destination; it tests one’s patience and dedication. For those seeking to embark on this adventure or simply gain more insight into marine craftsmanship, Sven’s wisdom is invaluable.Sven proceeds to apply glue along one edge of the flange, ensuring a secure bond when clamped into place. He emphasizes that this stage is crucial for maintaining the structural integrity of the flange, which in turn safeguards the living area beneath the canvas when hatches are open.Step 3: Allowing Time to Dry
After securely attaching the first portion of the flange, Sven allows ample time for it to dry before moving forward with additional steps. This patience and precision are key aspects of his successful boatbuilding methods.Step 4: Finishing Touches
Once the flange is fully dried, Sven removes the clamps carefully, ensuring no damage occurs during this process. He then moves on to attaching four more pieces onto these main frames, completing two pairs of flanges for the bulkhead hatches.The Final Touches
While two flanges form the primary support structure around the hatches, Sven mentions there are two additional pieces required at each end to ensure comprehensive protection. This attention to detail highlights his commitment to producing a durable and reliable design. “Sailing is about finding your path, whether it’s across an ocean or within yourself.” – Sven Yrvind In conclusion, making flanges around bulkhead hatches may seem complex at first glance, but by following Sven Yrvind’s meticulous process, enthusiasts can achieve professional-level results. Remember that the journey of boatbuilding is as rewarding as reaching your destination; it tests one’s patience and dedication. For those seeking to embark on this adventure or simply gain more insight into marine craftsmanship, Sven’s wisdom is invaluable.Sven begins by explaining that working on flanges vertically and horizontally is significantly easier than doing so in a flat position. To simplify the process further, he divides the task into two or three steps as suggested by fellow expert “for for.” This approach not only makes it more manageable but also allows for greater precision in crafting each component.Step 2: Applying Glue and Securing
Sven proceeds to apply glue along one edge of the flange, ensuring a secure bond when clamped into place. He emphasizes that this stage is crucial for maintaining the structural integrity of the flange, which in turn safeguards the living area beneath the canvas when hatches are open.Step 3: Allowing Time to Dry
After securely attaching the first portion of the flange, Sven allows ample time for it to dry before moving forward with additional steps. This patience and precision are key aspects of his successful boatbuilding methods.Step 4: Finishing Touches
Once the flange is fully dried, Sven removes the clamps carefully, ensuring no damage occurs during this process. He then moves on to attaching four more pieces onto these main frames, completing two pairs of flanges for the bulkhead hatches.The Final Touches
While two flanges form the primary support structure around the hatches, Sven mentions there are two additional pieces required at each end to ensure comprehensive protection. This attention to detail highlights his commitment to producing a durable and reliable design. “Sailing is about finding your path, whether it’s across an ocean or within yourself.” – Sven Yrvind In conclusion, making flanges around bulkhead hatches may seem complex at first glance, but by following Sven Yrvind’s meticulous process, enthusiasts can achieve professional-level results. Remember that the journey of boatbuilding is as rewarding as reaching your destination; it tests one’s patience and dedication. For those seeking to embark on this adventure or simply gain more insight into marine craftsmanship, Sven’s wisdom is invaluable.Sven Yrvind, a renowned yacht designer and sailor, shares valuable insights on creating flanges around bulkhead hatches for canvas protection in this enlightening video. By following his expert guidance, boat enthusiasts can ensure their living areas remain secure while allowing unhindered access through the hatches.Step 1: Starting with the Flange
Sven begins by explaining that working on flanges vertically and horizontally is significantly easier than doing so in a flat position. To simplify the process further, he divides the task into two or three steps as suggested by fellow expert “for for.” This approach not only makes it more manageable but also allows for greater precision in crafting each component.Step 2: Applying Glue and Securing
Sven proceeds to apply glue along one edge of the flange, ensuring a secure bond when clamped into place. He emphasizes that this stage is crucial for maintaining the structural integrity of the flange, which in turn safeguards the living area beneath the canvas when hatches are open.Step 3: Allowing Time to Dry
After securely attaching the first portion of the flange, Sven allows ample time for it to dry before moving forward with additional steps. This patience and precision are key aspects of his successful boatbuilding methods.Step 4: Finishing Touches
Once the flange is fully dried, Sven removes the clamps carefully, ensuring no damage occurs during this process. He then moves on to attaching four more pieces onto these main frames, completing two pairs of flanges for the bulkhead hatches.The Final Touches
While two flanges form the primary support structure around the hatches, Sven mentions there are two additional pieces required at each end to ensure comprehensive protection. This attention to detail highlights his commitment to producing a durable and reliable design. “Sailing is about finding your path, whether it’s across an ocean or within yourself.” – Sven Yrvind In conclusion, making flanges around bulkhead hatches may seem complex at first glance, but by following Sven Yrvind’s meticulous process, enthusiasts can achieve professional-level results. Remember that the journey of boatbuilding is as rewarding as reaching your destination; it tests one’s patience and dedication. For those seeking to embark on this adventure or simply gain more insight into marine craftsmanship, Sven’s wisdom is invaluable.Making Flanges Around Bulkhead Hatches for Canvas
Sven Yrvind, a renowned yacht designer and sailor, shares valuable insights on creating flanges around bulkhead hatches for canvas protection in this enlightening video. By following his expert guidance, boat enthusiasts can ensure their living areas remain secure while allowing unhindered access through the hatches.Step 1: Starting with the Flange
Sven begins by explaining that working on flanges vertically and horizontally is significantly easier than doing so in a flat position. To simplify the process further, he divides the task into two or three steps as suggested by fellow expert “for for.” This approach not only makes it more manageable but also allows for greater precision in crafting each component.Step 2: Applying Glue and Securing
Sven proceeds to apply glue along one edge of the flange, ensuring a secure bond when clamped into place. He emphasizes that this stage is crucial for maintaining the structural integrity of the flange, which in turn safeguards the living area beneath the canvas when hatches are open.Step 3: Allowing Time to Dry
After securely attaching the first portion of the flange, Sven allows ample time for it to dry before moving forward with additional steps. This patience and precision are key aspects of his successful boatbuilding methods.Step 4: Finishing Touches
Once the flange is fully dried, Sven removes the clamps carefully, ensuring no damage occurs during this process. He then moves on to attaching four more pieces onto these main frames, completing two pairs of flanges for the bulkhead hatches.The Final Touches
While two flanges form the primary support structure around the hatches, Sven mentions there are two additional pieces required at each end to ensure comprehensive protection. This attention to detail highlights his commitment to producing a durable and reliable design. “Sailing is about finding your path, whether it’s across an ocean or within yourself.” – Sven Yrvind In conclusion, making flanges around bulkhead hatches may seem complex at first glance, but by following Sven Yrvind’s meticulous process, enthusiasts can achieve professional-level results. Remember that the journey of boatbuilding is as rewarding as reaching your destination; it tests one’s patience and dedication. For those seeking to embark on this adventure or simply gain more insight into marine craftsmanship, Sven’s wisdom is invaluable.Once the flange is fully dried, Sven removes the clamps carefully, ensuring no damage occurs during this process. He then moves on to attaching four more pieces onto these main frames, completing two pairs of flanges for the bulkhead hatches.The Final Touches
While two flanges form the primary support structure around the hatches, Sven mentions there are two additional pieces required at each end to ensure comprehensive protection. This attention to detail highlights his commitment to producing a durable and reliable design. “Sailing is about finding your path, whether it’s across an ocean or within yourself.” – Sven Yrvind In conclusion, making flanges around bulkhead hatches may seem complex at first glance, but by following Sven Yrvind’s meticulous process, enthusiasts can achieve professional-level results. Remember that the journey of boatbuilding is as rewarding as reaching your destination; it tests one’s patience and dedication. For those seeking to embark on this adventure or simply gain more insight into marine craftsmanship, Sven’s wisdom is invaluable.Sven proceeds to apply glue along one edge of the flange, ensuring a secure bond when clamped into place. He emphasizes that this stage is crucial for maintaining the structural integrity of the flange, which in turn safeguards the living area beneath the canvas when hatches are open.Step 3: Allowing Time to Dry
After securely attaching the first portion of the flange, Sven allows ample time for it to dry before moving forward with additional steps. This patience and precision are key aspects of his successful boatbuilding methods.Step 4: Finishing Touches
Once the flange is fully dried, Sven removes the clamps carefully, ensuring no damage occurs during this process. He then moves on to attaching four more pieces onto these main frames, completing two pairs of flanges for the bulkhead hatches.The Final Touches
While two flanges form the primary support structure around the hatches, Sven mentions there are two additional pieces required at each end to ensure comprehensive protection. This attention to detail highlights his commitment to producing a durable and reliable design. “Sailing is about finding your path, whether it’s across an ocean or within yourself.” – Sven Yrvind In conclusion, making flanges around bulkhead hatches may seem complex at first glance, but by following Sven Yrvind’s meticulous process, enthusiasts can achieve professional-level results. Remember that the journey of boatbuilding is as rewarding as reaching your destination; it tests one’s patience and dedication. For those seeking to embark on this adventure or simply gain more insight into marine craftsmanship, Sven’s wisdom is invaluable.Sven begins by explaining that working on flanges vertically and horizontally is significantly easier than doing so in a flat position. To simplify the process further, he divides the task into two or three steps as suggested by fellow expert “for for.” This approach not only makes it more manageable but also allows for greater precision in crafting each component.Step 2: Applying Glue and Securing
Sven proceeds to apply glue along one edge of the flange, ensuring a secure bond when clamped into place. He emphasizes that this stage is crucial for maintaining the structural integrity of the flange, which in turn safeguards the living area beneath the canvas when hatches are open.Step 3: Allowing Time to Dry
After securely attaching the first portion of the flange, Sven allows ample time for it to dry before moving forward with additional steps. This patience and precision are key aspects of his successful boatbuilding methods.Step 4: Finishing Touches
Once the flange is fully dried, Sven removes the clamps carefully, ensuring no damage occurs during this process. He then moves on to attaching four more pieces onto these main frames, completing two pairs of flanges for the bulkhead hatches.The Final Touches
While two flanges form the primary support structure around the hatches, Sven mentions there are two additional pieces required at each end to ensure comprehensive protection. This attention to detail highlights his commitment to producing a durable and reliable design. “Sailing is about finding your path, whether it’s across an ocean or within yourself.” – Sven Yrvind In conclusion, making flanges around bulkhead hatches may seem complex at first glance, but by following Sven Yrvind’s meticulous process, enthusiasts can achieve professional-level results. Remember that the journey of boatbuilding is as rewarding as reaching your destination; it tests one’s patience and dedication. For those seeking to embark on this adventure or simply gain more insight into marine craftsmanship, Sven’s wisdom is invaluable.Sven Yrvind, a renowned yacht designer and sailor, shares valuable insights on creating flanges around bulkhead hatches for canvas protection in this enlightening video. By following his expert guidance, boat enthusiasts can ensure their living areas remain secure while allowing unhindered access through the hatches.Step 1: Starting with the Flange
Sven begins by explaining that working on flanges vertically and horizontally is significantly easier than doing so in a flat position. To simplify the process further, he divides the task into two or three steps as suggested by fellow expert “for for.” This approach not only makes it more manageable but also allows for greater precision in crafting each component.Step 2: Applying Glue and Securing
Sven proceeds to apply glue along one edge of the flange, ensuring a secure bond when clamped into place. He emphasizes that this stage is crucial for maintaining the structural integrity of the flange, which in turn safeguards the living area beneath the canvas when hatches are open.Step 3: Allowing Time to Dry
After securely attaching the first portion of the flange, Sven allows ample time for it to dry before moving forward with additional steps. This patience and precision are key aspects of his successful boatbuilding methods.Step 4: Finishing Touches
Once the flange is fully dried, Sven removes the clamps carefully, ensuring no damage occurs during this process. He then moves on to attaching four more pieces onto these main frames, completing two pairs of flanges for the bulkhead hatches.The Final Touches
While two flanges form the primary support structure around the hatches, Sven mentions there are two additional pieces required at each end to ensure comprehensive protection. This attention to detail highlights his commitment to producing a durable and reliable design. “Sailing is about finding your path, whether it’s across an ocean or within yourself.” – Sven Yrvind In conclusion, making flanges around bulkhead hatches may seem complex at first glance, but by following Sven Yrvind’s meticulous process, enthusiasts can achieve professional-level results. Remember that the journey of boatbuilding is as rewarding as reaching your destination; it tests one’s patience and dedication. For those seeking to embark on this adventure or simply gain more insight into marine craftsmanship, Sven’s wisdom is invaluable.Making Flanges Around Bulkhead Hatches for Canvas
Sven Yrvind, a renowned yacht designer and sailor, shares valuable insights on creating flanges around bulkhead hatches for canvas protection in this enlightening video. By following his expert guidance, boat enthusiasts can ensure their living areas remain secure while allowing unhindered access through the hatches.Step 1: Starting with the Flange
Sven begins by explaining that working on flanges vertically and horizontally is significantly easier than doing so in a flat position. To simplify the process further, he divides the task into two or three steps as suggested by fellow expert “for for.” This approach not only makes it more manageable but also allows for greater precision in crafting each component.Step 2: Applying Glue and Securing
Sven proceeds to apply glue along one edge of the flange, ensuring a secure bond when clamped into place. He emphasizes that this stage is crucial for maintaining the structural integrity of the flange, which in turn safeguards the living area beneath the canvas when hatches are open.Step 3: Allowing Time to Dry
After securely attaching the first portion of the flange, Sven allows ample time for it to dry before moving forward with additional steps. This patience and precision are key aspects of his successful boatbuilding methods.Step 4: Finishing Touches
Once the flange is fully dried, Sven removes the clamps carefully, ensuring no damage occurs during this process. He then moves on to attaching four more pieces onto these main frames, completing two pairs of flanges for the bulkhead hatches.The Final Touches
While two flanges form the primary support structure around the hatches, Sven mentions there are two additional pieces required at each end to ensure comprehensive protection. This attention to detail highlights his commitment to producing a durable and reliable design. “Sailing is about finding your path, whether it’s across an ocean or within yourself.” – Sven Yrvind In conclusion, making flanges around bulkhead hatches may seem complex at first glance, but by following Sven Yrvind’s meticulous process, enthusiasts can achieve professional-level results. Remember that the journey of boatbuilding is as rewarding as reaching your destination; it tests one’s patience and dedication. For those seeking to embark on this adventure or simply gain more insight into marine craftsmanship, Sven’s wisdom is invaluable.After securely attaching the first portion of the flange, Sven allows ample time for it to dry before moving forward with additional steps. This patience and precision are key aspects of his successful boatbuilding methods.Step 4: Finishing Touches
Once the flange is fully dried, Sven removes the clamps carefully, ensuring no damage occurs during this process. He then moves on to attaching four more pieces onto these main frames, completing two pairs of flanges for the bulkhead hatches.The Final Touches
While two flanges form the primary support structure around the hatches, Sven mentions there are two additional pieces required at each end to ensure comprehensive protection. This attention to detail highlights his commitment to producing a durable and reliable design. “Sailing is about finding your path, whether it’s across an ocean or within yourself.” – Sven Yrvind In conclusion, making flanges around bulkhead hatches may seem complex at first glance, but by following Sven Yrvind’s meticulous process, enthusiasts can achieve professional-level results. Remember that the journey of boatbuilding is as rewarding as reaching your destination; it tests one’s patience and dedication. For those seeking to embark on this adventure or simply gain more insight into marine craftsmanship, Sven’s wisdom is invaluable.Sven proceeds to apply glue along one edge of the flange, ensuring a secure bond when clamped into place. He emphasizes that this stage is crucial for maintaining the structural integrity of the flange, which in turn safeguards the living area beneath the canvas when hatches are open.Step 3: Allowing Time to Dry
After securely attaching the first portion of the flange, Sven allows ample time for it to dry before moving forward with additional steps. This patience and precision are key aspects of his successful boatbuilding methods.Step 4: Finishing Touches
Once the flange is fully dried, Sven removes the clamps carefully, ensuring no damage occurs during this process. He then moves on to attaching four more pieces onto these main frames, completing two pairs of flanges for the bulkhead hatches.The Final Touches
While two flanges form the primary support structure around the hatches, Sven mentions there are two additional pieces required at each end to ensure comprehensive protection. This attention to detail highlights his commitment to producing a durable and reliable design. “Sailing is about finding your path, whether it’s across an ocean or within yourself.” – Sven Yrvind In conclusion, making flanges around bulkhead hatches may seem complex at first glance, but by following Sven Yrvind’s meticulous process, enthusiasts can achieve professional-level results. Remember that the journey of boatbuilding is as rewarding as reaching your destination; it tests one’s patience and dedication. For those seeking to embark on this adventure or simply gain more insight into marine craftsmanship, Sven’s wisdom is invaluable.Sven begins by explaining that working on flanges vertically and horizontally is significantly easier than doing so in a flat position. To simplify the process further, he divides the task into two or three steps as suggested by fellow expert “for for.” This approach not only makes it more manageable but also allows for greater precision in crafting each component.Step 2: Applying Glue and Securing
Sven proceeds to apply glue along one edge of the flange, ensuring a secure bond when clamped into place. He emphasizes that this stage is crucial for maintaining the structural integrity of the flange, which in turn safeguards the living area beneath the canvas when hatches are open.Step 3: Allowing Time to Dry
After securely attaching the first portion of the flange, Sven allows ample time for it to dry before moving forward with additional steps. This patience and precision are key aspects of his successful boatbuilding methods.Step 4: Finishing Touches
Once the flange is fully dried, Sven removes the clamps carefully, ensuring no damage occurs during this process. He then moves on to attaching four more pieces onto these main frames, completing two pairs of flanges for the bulkhead hatches.The Final Touches
While two flanges form the primary support structure around the hatches, Sven mentions there are two additional pieces required at each end to ensure comprehensive protection. This attention to detail highlights his commitment to producing a durable and reliable design. “Sailing is about finding your path, whether it’s across an ocean or within yourself.” – Sven Yrvind In conclusion, making flanges around bulkhead hatches may seem complex at first glance, but by following Sven Yrvind’s meticulous process, enthusiasts can achieve professional-level results. Remember that the journey of boatbuilding is as rewarding as reaching your destination; it tests one’s patience and dedication. For those seeking to embark on this adventure or simply gain more insight into marine craftsmanship, Sven’s wisdom is invaluable.Sven Yrvind, a renowned yacht designer and sailor, shares valuable insights on creating flanges around bulkhead hatches for canvas protection in this enlightening video. By following his expert guidance, boat enthusiasts can ensure their living areas remain secure while allowing unhindered access through the hatches.Step 1: Starting with the Flange
Sven begins by explaining that working on flanges vertically and horizontally is significantly easier than doing so in a flat position. To simplify the process further, he divides the task into two or three steps as suggested by fellow expert “for for.” This approach not only makes it more manageable but also allows for greater precision in crafting each component.Step 2: Applying Glue and Securing
Sven proceeds to apply glue along one edge of the flange, ensuring a secure bond when clamped into place. He emphasizes that this stage is crucial for maintaining the structural integrity of the flange, which in turn safeguards the living area beneath the canvas when hatches are open.Step 3: Allowing Time to Dry
After securely attaching the first portion of the flange, Sven allows ample time for it to dry before moving forward with additional steps. This patience and precision are key aspects of his successful boatbuilding methods.Step 4: Finishing Touches
Once the flange is fully dried, Sven removes the clamps carefully, ensuring no damage occurs during this process. He then moves on to attaching four more pieces onto these main frames, completing two pairs of flanges for the bulkhead hatches.The Final Touches
While two flanges form the primary support structure around the hatches, Sven mentions there are two additional pieces required at each end to ensure comprehensive protection. This attention to detail highlights his commitment to producing a durable and reliable design. “Sailing is about finding your path, whether it’s across an ocean or within yourself.” – Sven Yrvind In conclusion, making flanges around bulkhead hatches may seem complex at first glance, but by following Sven Yrvind’s meticulous process, enthusiasts can achieve professional-level results. Remember that the journey of boatbuilding is as rewarding as reaching your destination; it tests one’s patience and dedication. For those seeking to embark on this adventure or simply gain more insight into marine craftsmanship, Sven’s wisdom is invaluable.Making Flanges Around Bulkhead Hatches for Canvas
Sven Yrvind, a renowned yacht designer and sailor, shares valuable insights on creating flanges around bulkhead hatches for canvas protection in this enlightening video. By following his expert guidance, boat enthusiasts can ensure their living areas remain secure while allowing unhindered access through the hatches.Step 1: Starting with the Flange
Sven begins by explaining that working on flanges vertically and horizontally is significantly easier than doing so in a flat position. To simplify the process further, he divides the task into two or three steps as suggested by fellow expert “for for.” This approach not only makes it more manageable but also allows for greater precision in crafting each component.Step 2: Applying Glue and Securing
Sven proceeds to apply glue along one edge of the flange, ensuring a secure bond when clamped into place. He emphasizes that this stage is crucial for maintaining the structural integrity of the flange, which in turn safeguards the living area beneath the canvas when hatches are open.Step 3: Allowing Time to Dry
After securely attaching the first portion of the flange, Sven allows ample time for it to dry before moving forward with additional steps. This patience and precision are key aspects of his successful boatbuilding methods.Step 4: Finishing Touches
Once the flange is fully dried, Sven removes the clamps carefully, ensuring no damage occurs during this process. He then moves on to attaching four more pieces onto these main frames, completing two pairs of flanges for the bulkhead hatches.The Final Touches
While two flanges form the primary support structure around the hatches, Sven mentions there are two additional pieces required at each end to ensure comprehensive protection. This attention to detail highlights his commitment to producing a durable and reliable design. “Sailing is about finding your path, whether it’s across an ocean or within yourself.” – Sven Yrvind In conclusion, making flanges around bulkhead hatches may seem complex at first glance, but by following Sven Yrvind’s meticulous process, enthusiasts can achieve professional-level results. Remember that the journey of boatbuilding is as rewarding as reaching your destination; it tests one’s patience and dedication. For those seeking to embark on this adventure or simply gain more insight into marine craftsmanship, Sven’s wisdom is invaluable.Once the flange is fully dried, Sven removes the clamps carefully, ensuring no damage occurs during this process. He then moves on to attaching four more pieces onto these main frames, completing two pairs of flanges for the bulkhead hatches.The Final Touches
While two flanges form the primary support structure around the hatches, Sven mentions there are two additional pieces required at each end to ensure comprehensive protection. This attention to detail highlights his commitment to producing a durable and reliable design. “Sailing is about finding your path, whether it’s across an ocean or within yourself.” – Sven Yrvind In conclusion, making flanges around bulkhead hatches may seem complex at first glance, but by following Sven Yrvind’s meticulous process, enthusiasts can achieve professional-level results. Remember that the journey of boatbuilding is as rewarding as reaching your destination; it tests one’s patience and dedication. For those seeking to embark on this adventure or simply gain more insight into marine craftsmanship, Sven’s wisdom is invaluable.After securely attaching the first portion of the flange, Sven allows ample time for it to dry before moving forward with additional steps. This patience and precision are key aspects of his successful boatbuilding methods.Step 4: Finishing Touches
Once the flange is fully dried, Sven removes the clamps carefully, ensuring no damage occurs during this process. He then moves on to attaching four more pieces onto these main frames, completing two pairs of flanges for the bulkhead hatches.The Final Touches
While two flanges form the primary support structure around the hatches, Sven mentions there are two additional pieces required at each end to ensure comprehensive protection. This attention to detail highlights his commitment to producing a durable and reliable design. “Sailing is about finding your path, whether it’s across an ocean or within yourself.” – Sven Yrvind In conclusion, making flanges around bulkhead hatches may seem complex at first glance, but by following Sven Yrvind’s meticulous process, enthusiasts can achieve professional-level results. Remember that the journey of boatbuilding is as rewarding as reaching your destination; it tests one’s patience and dedication. For those seeking to embark on this adventure or simply gain more insight into marine craftsmanship, Sven’s wisdom is invaluable.Sven proceeds to apply glue along one edge of the flange, ensuring a secure bond when clamped into place. He emphasizes that this stage is crucial for maintaining the structural integrity of the flange, which in turn safeguards the living area beneath the canvas when hatches are open.Step 3: Allowing Time to Dry
After securely attaching the first portion of the flange, Sven allows ample time for it to dry before moving forward with additional steps. This patience and precision are key aspects of his successful boatbuilding methods.Step 4: Finishing Touches
Once the flange is fully dried, Sven removes the clamps carefully, ensuring no damage occurs during this process. He then moves on to attaching four more pieces onto these main frames, completing two pairs of flanges for the bulkhead hatches.The Final Touches
While two flanges form the primary support structure around the hatches, Sven mentions there are two additional pieces required at each end to ensure comprehensive protection. This attention to detail highlights his commitment to producing a durable and reliable design. “Sailing is about finding your path, whether it’s across an ocean or within yourself.” – Sven Yrvind In conclusion, making flanges around bulkhead hatches may seem complex at first glance, but by following Sven Yrvind’s meticulous process, enthusiasts can achieve professional-level results. Remember that the journey of boatbuilding is as rewarding as reaching your destination; it tests one’s patience and dedication. For those seeking to embark on this adventure or simply gain more insight into marine craftsmanship, Sven’s wisdom is invaluable.Sven begins by explaining that working on flanges vertically and horizontally is significantly easier than doing so in a flat position. To simplify the process further, he divides the task into two or three steps as suggested by fellow expert “for for.” This approach not only makes it more manageable but also allows for greater precision in crafting each component.Step 2: Applying Glue and Securing
Sven proceeds to apply glue along one edge of the flange, ensuring a secure bond when clamped into place. He emphasizes that this stage is crucial for maintaining the structural integrity of the flange, which in turn safeguards the living area beneath the canvas when hatches are open.Step 3: Allowing Time to Dry
After securely attaching the first portion of the flange, Sven allows ample time for it to dry before moving forward with additional steps. This patience and precision are key aspects of his successful boatbuilding methods.Step 4: Finishing Touches
Once the flange is fully dried, Sven removes the clamps carefully, ensuring no damage occurs during this process. He then moves on to attaching four more pieces onto these main frames, completing two pairs of flanges for the bulkhead hatches.The Final Touches
While two flanges form the primary support structure around the hatches, Sven mentions there are two additional pieces required at each end to ensure comprehensive protection. This attention to detail highlights his commitment to producing a durable and reliable design. “Sailing is about finding your path, whether it’s across an ocean or within yourself.” – Sven Yrvind In conclusion, making flanges around bulkhead hatches may seem complex at first glance, but by following Sven Yrvind’s meticulous process, enthusiasts can achieve professional-level results. Remember that the journey of boatbuilding is as rewarding as reaching your destination; it tests one’s patience and dedication. For those seeking to embark on this adventure or simply gain more insight into marine craftsmanship, Sven’s wisdom is invaluable.Sven Yrvind, a renowned yacht designer and sailor, shares valuable insights on creating flanges around bulkhead hatches for canvas protection in this enlightening video. By following his expert guidance, boat enthusiasts can ensure their living areas remain secure while allowing unhindered access through the hatches.Step 1: Starting with the Flange
Sven begins by explaining that working on flanges vertically and horizontally is significantly easier than doing so in a flat position. To simplify the process further, he divides the task into two or three steps as suggested by fellow expert “for for.” This approach not only makes it more manageable but also allows for greater precision in crafting each component.Step 2: Applying Glue and Securing
Sven proceeds to apply glue along one edge of the flange, ensuring a secure bond when clamped into place. He emphasizes that this stage is crucial for maintaining the structural integrity of the flange, which in turn safeguards the living area beneath the canvas when hatches are open.Step 3: Allowing Time to Dry
After securely attaching the first portion of the flange, Sven allows ample time for it to dry before moving forward with additional steps. This patience and precision are key aspects of his successful boatbuilding methods.Step 4: Finishing Touches
Once the flange is fully dried, Sven removes the clamps carefully, ensuring no damage occurs during this process. He then moves on to attaching four more pieces onto these main frames, completing two pairs of flanges for the bulkhead hatches.The Final Touches
While two flanges form the primary support structure around the hatches, Sven mentions there are two additional pieces required at each end to ensure comprehensive protection. This attention to detail highlights his commitment to producing a durable and reliable design. “Sailing is about finding your path, whether it’s across an ocean or within yourself.” – Sven Yrvind In conclusion, making flanges around bulkhead hatches may seem complex at first glance, but by following Sven Yrvind’s meticulous process, enthusiasts can achieve professional-level results. Remember that the journey of boatbuilding is as rewarding as reaching your destination; it tests one’s patience and dedication. For those seeking to embark on this adventure or simply gain more insight into marine craftsmanship, Sven’s wisdom is invaluable.Making Flanges Around Bulkhead Hatches for Canvas
Sven Yrvind, a renowned yacht designer and sailor, shares valuable insights on creating flanges around bulkhead hatches for canvas protection in this enlightening video. By following his expert guidance, boat enthusiasts can ensure their living areas remain secure while allowing unhindered access through the hatches.Step 1: Starting with the Flange
Sven begins by explaining that working on flanges vertically and horizontally is significantly easier than doing so in a flat position. To simplify the process further, he divides the task into two or three steps as suggested by fellow expert “for for.” This approach not only makes it more manageable but also allows for greater precision in crafting each component.Step 2: Applying Glue and Securing
Sven proceeds to apply glue along one edge of the flange, ensuring a secure bond when clamped into place. He emphasizes that this stage is crucial for maintaining the structural integrity of the flange, which in turn safeguards the living area beneath the canvas when hatches are open.Step 3: Allowing Time to Dry
After securely attaching the first portion of the flange, Sven allows ample time for it to dry before moving forward with additional steps. This patience and precision are key aspects of his successful boatbuilding methods.Step 4: Finishing Touches
Once the flange is fully dried, Sven removes the clamps carefully, ensuring no damage occurs during this process. He then moves on to attaching four more pieces onto these main frames, completing two pairs of flanges for the bulkhead hatches.The Final Touches
While two flanges form the primary support structure around the hatches, Sven mentions there are two additional pieces required at each end to ensure comprehensive protection. This attention to detail highlights his commitment to producing a durable and reliable design. “Sailing is about finding your path, whether it’s across an ocean or within yourself.” – Sven Yrvind In conclusion, making flanges around bulkhead hatches may seem complex at first glance, but by following Sven Yrvind’s meticulous process, enthusiasts can achieve professional-level results. Remember that the journey of boatbuilding is as rewarding as reaching your destination; it tests one’s patience and dedication. For those seeking to embark on this adventure or simply gain more insight into marine craftsmanship, Sven’s wisdom is invaluable.After securely attaching the first portion of the flange, Sven allows ample time for it to dry before moving forward with additional steps. This patience and precision are key aspects of his successful boatbuilding methods.Step 4: Finishing Touches
Once the flange is fully dried, Sven removes the clamps carefully, ensuring no damage occurs during this process. He then moves on to attaching four more pieces onto these main frames, completing two pairs of flanges for the bulkhead hatches.The Final Touches
While two flanges form the primary support structure around the hatches, Sven mentions there are two additional pieces required at each end to ensure comprehensive protection. This attention to detail highlights his commitment to producing a durable and reliable design. “Sailing is about finding your path, whether it’s across an ocean or within yourself.” – Sven Yrvind In conclusion, making flanges around bulkhead hatches may seem complex at first glance, but by following Sven Yrvind’s meticulous process, enthusiasts can achieve professional-level results. Remember that the journey of boatbuilding is as rewarding as reaching your destination; it tests one’s patience and dedication. For those seeking to embark on this adventure or simply gain more insight into marine craftsmanship, Sven’s wisdom is invaluable.Sven Yrvind, a renowned yacht designer and sailor, shares valuable insights on creating flanges around bulkhead hatches for canvas protection in this enlightening video. By following his expert guidance, boat enthusiasts can ensure their living areas remain secure while allowing unhindered access through the hatches.Step 1: Starting with the Flange
Sven begins by explaining that working on flanges vertically and horizontally is significantly easier than doing so in a flat position. To simplify the process further, he divides the task into two or three steps as suggested by fellow expert “for for.” This approach not only makes it more manageable but also allows for greater precision in crafting each component.Step 2: Applying Glue and Securing
Sven proceeds to apply glue along one edge of the flange, ensuring a secure bond when clamped into place. He emphasizes that this stage is crucial for maintaining the structural integrity of the flange, which in turn safeguards the living area beneath the canvas when hatches are open.Step 3: Allowing Time to Dry
After securely attaching the first portion of the flange, Sven allows ample time for it to dry before moving forward with additional steps. This patience and precision are key aspects of his successful boatbuilding methods.Step 4: Finishing Touches
Once the flange is fully dried, Sven removes the clamps carefully, ensuring no damage occurs during this process. He then moves on to attaching four more pieces onto these main frames, completing two pairs of flanges for the bulkhead hatches.The Final Touches
While two flanges form the primary support structure around the hatches, Sven mentions there are two additional pieces required at each end to ensure comprehensive protection. This attention to detail highlights his commitment to producing a durable and reliable design. “Sailing is about finding your path, whether it’s across an ocean or within yourself.” – Sven Yrvind In conclusion, making flanges around bulkhead hatches may seem complex at first glance, but by following Sven Yrvind’s meticulous process, enthusiasts can achieve professional-level results. Remember that the journey of boatbuilding is as rewarding as reaching your destination; it tests one’s patience and dedication. For those seeking to embark on this adventure or simply gain more insight into marine craftsmanship, Sven’s wisdom is invaluable.Making Flanges Around Bulkhead Hatches for Canvas
Sven Yrvind, a renowned yacht designer and sailor, shares valuable insights on creating flanges around bulkhead hatches for canvas protection in this enlightening video. By following his expert guidance, boat enthusiasts can ensure their living areas remain secure while allowing unhindered access through the hatches.Step 1: Starting with the Flange
Sven begins by explaining that working on flanges vertically and horizontally is significantly easier than doing so in a flat position. To simplify the process further, he divides the task into two or three steps as suggested by fellow expert “for for.” This approach not only makes it more manageable but also allows for greater precision in crafting each component.Step 2: Applying Glue and Securing
Sven proceeds to apply glue along one edge of the flange, ensuring a secure bond when clamped into place. He emphasizes that this stage is crucial for maintaining the structural integrity of the flange, which in turn safeguards the living area beneath the canvas when hatches are open.Step 3: Allowing Time to Dry
After securely attaching the first portion of the flange, Sven allows ample time for it to dry before moving forward with additional steps. This patience and precision are key aspects of his successful boatbuilding methods.Step 4: Finishing Touches
Once the flange is fully dried, Sven removes the clamps carefully, ensuring no damage occurs during this process. He then moves on to attaching four more pieces onto these main frames, completing two pairs of flanges for the bulkhead hatches.The Final Touches
While two flanges form the primary support structure around the hatches, Sven mentions there are two additional pieces required at each end to ensure comprehensive protection. This attention to detail highlights his commitment to producing a durable and reliable design. “Sailing is about finding your path, whether it’s across an ocean or within yourself.” – Sven Yrvind In conclusion, making flanges around bulkhead hatches may seem complex at first glance, but by following Sven Yrvind’s meticulous process, enthusiasts can achieve professional-level results. Remember that the journey of boatbuilding is as rewarding as reaching your destination; it tests one’s patience and dedication. For those seeking to embark on this adventure or simply gain more insight into marine craftsmanship, Sven’s wisdom is invaluable.After securely attaching the first portion of the flange, Sven allows ample time for it to dry before moving forward with additional steps. This patience and precision are key aspects of his successful boatbuilding methods.Step 4: Finishing Touches
Once the flange is fully dried, Sven removes the clamps carefully, ensuring no damage occurs during this process. He then moves on to attaching four more pieces onto these main frames, completing two pairs of flanges for the bulkhead hatches.The Final Touches
While two flanges form the primary support structure around the hatches, Sven mentions there are two additional pieces required at each end to ensure comprehensive protection. This attention to detail highlights his commitment to producing a durable and reliable design. “Sailing is about finding your path, whether it’s across an ocean or within yourself.” – Sven Yrvind In conclusion, making flanges around bulkhead hatches may seem complex at first glance, but by following Sven Yrvind’s meticulous process, enthusiasts can achieve professional-level results. Remember that the journey of boatbuilding is as rewarding as reaching your destination; it tests one’s patience and dedication. For those seeking to embark on this adventure or simply gain more insight into marine craftsmanship, Sven’s wisdom is invaluable.Sven begins by explaining that working on flanges vertically and horizontally is significantly easier than doing so in a flat position. To simplify the process further, he divides the task into two or three steps as suggested by fellow expert “for for.” This approach not only makes it more manageable but also allows for greater precision in crafting each component.Step 2: Applying Glue and Securing
Sven proceeds to apply glue along one edge of the flange, ensuring a secure bond when clamped into place. He emphasizes that this stage is crucial for maintaining the structural integrity of the flange, which in turn safeguards the living area beneath the canvas when hatches are open.Step 3: Allowing Time to Dry
After securely attaching the first portion of the flange, Sven allows ample time for it to dry before moving forward with additional steps. This patience and precision are key aspects of his successful boatbuilding methods.Step 4: Finishing Touches
Once the flange is fully dried, Sven removes the clamps carefully, ensuring no damage occurs during this process. He then moves on to attaching four more pieces onto these main frames, completing two pairs of flanges for the bulkhead hatches.The Final Touches
While two flanges form the primary support structure around the hatches, Sven mentions there are two additional pieces required at each end to ensure comprehensive protection. This attention to detail highlights his commitment to producing a durable and reliable design. “Sailing is about finding your path, whether it’s across an ocean or within yourself.” – Sven Yrvind In conclusion, making flanges around bulkhead hatches may seem complex at first glance, but by following Sven Yrvind’s meticulous process, enthusiasts can achieve professional-level results. Remember that the journey of boatbuilding is as rewarding as reaching your destination; it tests one’s patience and dedication. For those seeking to embark on this adventure or simply gain more insight into marine craftsmanship, Sven’s wisdom is invaluable.Sven Yrvind, a renowned yacht designer and sailor, shares valuable insights on creating flanges around bulkhead hatches for canvas protection in this enlightening video. By following his expert guidance, boat enthusiasts can ensure their living areas remain secure while allowing unhindered access through the hatches.Step 1: Starting with the Flange
Sven begins by explaining that working on flanges vertically and horizontally is significantly easier than doing so in a flat position. To simplify the process further, he divides the task into two or three steps as suggested by fellow expert “for for.” This approach not only makes it more manageable but also allows for greater precision in crafting each component.Step 2: Applying Glue and Securing
Sven proceeds to apply glue along one edge of the flange, ensuring a secure bond when clamped into place. He emphasizes that this stage is crucial for maintaining the structural integrity of the flange, which in turn safeguards the living area beneath the canvas when hatches are open.Step 3: Allowing Time to Dry
After securely attaching the first portion of the flange, Sven allows ample time for it to dry before moving forward with additional steps. This patience and precision are key aspects of his successful boatbuilding methods.Step 4: Finishing Touches
Once the flange is fully dried, Sven removes the clamps carefully, ensuring no damage occurs during this process. He then moves on to attaching four more pieces onto these main frames, completing two pairs of flanges for the bulkhead hatches.The Final Touches
While two flanges form the primary support structure around the hatches, Sven mentions there are two additional pieces required at each end to ensure comprehensive protection. This attention to detail highlights his commitment to producing a durable and reliable design. “Sailing is about finding your path, whether it’s across an ocean or within yourself.” – Sven Yrvind In conclusion, making flanges around bulkhead hatches may seem complex at first glance, but by following Sven Yrvind’s meticulous process, enthusiasts can achieve professional-level results. Remember that the journey of boatbuilding is as rewarding as reaching your destination; it tests one’s patience and dedication. For those seeking to embark on this adventure or simply gain more insight into marine craftsmanship, Sven’s wisdom is invaluable.Making Flanges Around Bulkhead Hatches for Canvas
Sven Yrvind, a renowned yacht designer and sailor, shares valuable insights on creating flanges around bulkhead hatches for canvas protection in this enlightening video. By following his expert guidance, boat enthusiasts can ensure their living areas remain secure while allowing unhindered access through the hatches.Step 1: Starting with the Flange
Sven begins by explaining that working on flanges vertically and horizontally is significantly easier than doing so in a flat position. To simplify the process further, he divides the task into two or three steps as suggested by fellow expert “for for.” This approach not only makes it more manageable but also allows for greater precision in crafting each component.Step 2: Applying Glue and Securing
Sven proceeds to apply glue along one edge of the flange, ensuring a secure bond when clamped into place. He emphasizes that this stage is crucial for maintaining the structural integrity of the flange, which in turn safeguards the living area beneath the canvas when hatches are open.Step 3: Allowing Time to Dry
After securely attaching the first portion of the flange, Sven allows ample time for it to dry before moving forward with additional steps. This patience and precision are key aspects of his successful boatbuilding methods.Step 4: Finishing Touches
Once the flange is fully dried, Sven removes the clamps carefully, ensuring no damage occurs during this process. He then moves on to attaching four more pieces onto these main frames, completing two pairs of flanges for the bulkhead hatches.The Final Touches
While two flanges form the primary support structure around the hatches, Sven mentions there are two additional pieces required at each end to ensure comprehensive protection. This attention to detail highlights his commitment to producing a durable and reliable design. “Sailing is about finding your path, whether it’s across an ocean or within yourself.” – Sven Yrvind In conclusion, making flanges around bulkhead hatches may seem complex at first glance, but by following Sven Yrvind’s meticulous process, enthusiasts can achieve professional-level results. Remember that the journey of boatbuilding is as rewarding as reaching your destination; it tests one’s patience and dedication. For those seeking to embark on this adventure or simply gain more insight into marine craftsmanship, Sven’s wisdom is invaluable.Sven proceeds to apply glue along one edge of the flange, ensuring a secure bond when clamped into place. He emphasizes that this stage is crucial for maintaining the structural integrity of the flange, which in turn safeguards the living area beneath the canvas when hatches are open.Step 3: Allowing Time to Dry
After securely attaching the first portion of the flange, Sven allows ample time for it to dry before moving forward with additional steps. This patience and precision are key aspects of his successful boatbuilding methods.Step 4: Finishing Touches
Once the flange is fully dried, Sven removes the clamps carefully, ensuring no damage occurs during this process. He then moves on to attaching four more pieces onto these main frames, completing two pairs of flanges for the bulkhead hatches.The Final Touches
While two flanges form the primary support structure around the hatches, Sven mentions there are two additional pieces required at each end to ensure comprehensive protection. This attention to detail highlights his commitment to producing a durable and reliable design. “Sailing is about finding your path, whether it’s across an ocean or within yourself.” – Sven Yrvind In conclusion, making flanges around bulkhead hatches may seem complex at first glance, but by following Sven Yrvind’s meticulous process, enthusiasts can achieve professional-level results. Remember that the journey of boatbuilding is as rewarding as reaching your destination; it tests one’s patience and dedication. For those seeking to embark on this adventure or simply gain more insight into marine craftsmanship, Sven’s wisdom is invaluable.Sven begins by explaining that working on flanges vertically and horizontally is significantly easier than doing so in a flat position. To simplify the process further, he divides the task into two or three steps as suggested by fellow expert “for for.” This approach not only makes it more manageable but also allows for greater precision in crafting each component.Step 2: Applying Glue and Securing
Sven proceeds to apply glue along one edge of the flange, ensuring a secure bond when clamped into place. He emphasizes that this stage is crucial for maintaining the structural integrity of the flange, which in turn safeguards the living area beneath the canvas when hatches are open.Step 3: Allowing Time to Dry
After securely attaching the first portion of the flange, Sven allows ample time for it to dry before moving forward with additional steps. This patience and precision are key aspects of his successful boatbuilding methods.Step 4: Finishing Touches
Once the flange is fully dried, Sven removes the clamps carefully, ensuring no damage occurs during this process. He then moves on to attaching four more pieces onto these main frames, completing two pairs of flanges for the bulkhead hatches.The Final Touches
While two flanges form the primary support structure around the hatches, Sven mentions there are two additional pieces required at each end to ensure comprehensive protection. This attention to detail highlights his commitment to producing a durable and reliable design. “Sailing is about finding your path, whether it’s across an ocean or within yourself.” – Sven Yrvind In conclusion, making flanges around bulkhead hatches may seem complex at first glance, but by following Sven Yrvind’s meticulous process, enthusiasts can achieve professional-level results. Remember that the journey of boatbuilding is as rewarding as reaching your destination; it tests one’s patience and dedication. For those seeking to embark on this adventure or simply gain more insight into marine craftsmanship, Sven’s wisdom is invaluable.Sven Yrvind, a renowned yacht designer and sailor, shares valuable insights on creating flanges around bulkhead hatches for canvas protection in this enlightening video. By following his expert guidance, boat enthusiasts can ensure their living areas remain secure while allowing unhindered access through the hatches.Step 1: Starting with the Flange
Sven begins by explaining that working on flanges vertically and horizontally is significantly easier than doing so in a flat position. To simplify the process further, he divides the task into two or three steps as suggested by fellow expert “for for.” This approach not only makes it more manageable but also allows for greater precision in crafting each component.Step 2: Applying Glue and Securing
Sven proceeds to apply glue along one edge of the flange, ensuring a secure bond when clamped into place. He emphasizes that this stage is crucial for maintaining the structural integrity of the flange, which in turn safeguards the living area beneath the canvas when hatches are open.Step 3: Allowing Time to Dry
After securely attaching the first portion of the flange, Sven allows ample time for it to dry before moving forward with additional steps. This patience and precision are key aspects of his successful boatbuilding methods.Step 4: Finishing Touches
Once the flange is fully dried, Sven removes the clamps carefully, ensuring no damage occurs during this process. He then moves on to attaching four more pieces onto these main frames, completing two pairs of flanges for the bulkhead hatches.The Final Touches
While two flanges form the primary support structure around the hatches, Sven mentions there are two additional pieces required at each end to ensure comprehensive protection. This attention to detail highlights his commitment to producing a durable and reliable design. “Sailing is about finding your path, whether it’s across an ocean or within yourself.” – Sven Yrvind In conclusion, making flanges around bulkhead hatches may seem complex at first glance, but by following Sven Yrvind’s meticulous process, enthusiasts can achieve professional-level results. Remember that the journey of boatbuilding is as rewarding as reaching your destination; it tests one’s patience and dedication. For those seeking to embark on this adventure or simply gain more insight into marine craftsmanship, Sven’s wisdom is invaluable.Making Flanges Around Bulkhead Hatches for Canvas
Sven Yrvind, a renowned yacht designer and sailor, shares valuable insights on creating flanges around bulkhead hatches for canvas protection in this enlightening video. By following his expert guidance, boat enthusiasts can ensure their living areas remain secure while allowing unhindered access through the hatches.Step 1: Starting with the Flange
Sven begins by explaining that working on flanges vertically and horizontally is significantly easier than doing so in a flat position. To simplify the process further, he divides the task into two or three steps as suggested by fellow expert “for for.” This approach not only makes it more manageable but also allows for greater precision in crafting each component.Step 2: Applying Glue and Securing
Sven proceeds to apply glue along one edge of the flange, ensuring a secure bond when clamped into place. He emphasizes that this stage is crucial for maintaining the structural integrity of the flange, which in turn safeguards the living area beneath the canvas when hatches are open.Step 3: Allowing Time to Dry
After securely attaching the first portion of the flange, Sven allows ample time for it to dry before moving forward with additional steps. This patience and precision are key aspects of his successful boatbuilding methods.Step 4: Finishing Touches
Once the flange is fully dried, Sven removes the clamps carefully, ensuring no damage occurs during this process. He then moves on to attaching four more pieces onto these main frames, completing two pairs of flanges for the bulkhead hatches.The Final Touches
While two flanges form the primary support structure around the hatches, Sven mentions there are two additional pieces required at each end to ensure comprehensive protection. This attention to detail highlights his commitment to producing a durable and reliable design. “Sailing is about finding your path, whether it’s across an ocean or within yourself.” – Sven Yrvind In conclusion, making flanges around bulkhead hatches may seem complex at first glance, but by following Sven Yrvind’s meticulous process, enthusiasts can achieve professional-level results. Remember that the journey of boatbuilding is as rewarding as reaching your destination; it tests one’s patience and dedication. For those seeking to embark on this adventure or simply gain more insight into marine craftsmanship, Sven’s wisdom is invaluable.Once the flange is fully dried, Sven removes the clamps carefully, ensuring no damage occurs during this process. He then moves on to attaching four more pieces onto these main frames, completing two pairs of flanges for the bulkhead hatches.The Final Touches
While two flanges form the primary support structure around the hatches, Sven mentions there are two additional pieces required at each end to ensure comprehensive protection. This attention to detail highlights his commitment to producing a durable and reliable design. “Sailing is about finding your path, whether it’s across an ocean or within yourself.” – Sven Yrvind In conclusion, making flanges around bulkhead hatches may seem complex at first glance, but by following Sven Yrvind’s meticulous process, enthusiasts can achieve professional-level results. Remember that the journey of boatbuilding is as rewarding as reaching your destination; it tests one’s patience and dedication. For those seeking to embark on this adventure or simply gain more insight into marine craftsmanship, Sven’s wisdom is invaluable.Sven proceeds to apply glue along one edge of the flange, ensuring a secure bond when clamped into place. He emphasizes that this stage is crucial for maintaining the structural integrity of the flange, which in turn safeguards the living area beneath the canvas when hatches are open.Step 3: Allowing Time to Dry
After securely attaching the first portion of the flange, Sven allows ample time for it to dry before moving forward with additional steps. This patience and precision are key aspects of his successful boatbuilding methods.Step 4: Finishing Touches
Once the flange is fully dried, Sven removes the clamps carefully, ensuring no damage occurs during this process. He then moves on to attaching four more pieces onto these main frames, completing two pairs of flanges for the bulkhead hatches.The Final Touches
While two flanges form the primary support structure around the hatches, Sven mentions there are two additional pieces required at each end to ensure comprehensive protection. This attention to detail highlights his commitment to producing a durable and reliable design. “Sailing is about finding your path, whether it’s across an ocean or within yourself.” – Sven Yrvind In conclusion, making flanges around bulkhead hatches may seem complex at first glance, but by following Sven Yrvind’s meticulous process, enthusiasts can achieve professional-level results. Remember that the journey of boatbuilding is as rewarding as reaching your destination; it tests one’s patience and dedication. For those seeking to embark on this adventure or simply gain more insight into marine craftsmanship, Sven’s wisdom is invaluable.Sven begins by explaining that working on flanges vertically and horizontally is significantly easier than doing so in a flat position. To simplify the process further, he divides the task into two or three steps as suggested by fellow expert “for for.” This approach not only makes it more manageable but also allows for greater precision in crafting each component.Step 2: Applying Glue and Securing
Sven proceeds to apply glue along one edge of the flange, ensuring a secure bond when clamped into place. He emphasizes that this stage is crucial for maintaining the structural integrity of the flange, which in turn safeguards the living area beneath the canvas when hatches are open.Step 3: Allowing Time to Dry
After securely attaching the first portion of the flange, Sven allows ample time for it to dry before moving forward with additional steps. This patience and precision are key aspects of his successful boatbuilding methods.Step 4: Finishing Touches
Once the flange is fully dried, Sven removes the clamps carefully, ensuring no damage occurs during this process. He then moves on to attaching four more pieces onto these main frames, completing two pairs of flanges for the bulkhead hatches.The Final Touches
While two flanges form the primary support structure around the hatches, Sven mentions there are two additional pieces required at each end to ensure comprehensive protection. This attention to detail highlights his commitment to producing a durable and reliable design. “Sailing is about finding your path, whether it’s across an ocean or within yourself.” – Sven Yrvind In conclusion, making flanges around bulkhead hatches may seem complex at first glance, but by following Sven Yrvind’s meticulous process, enthusiasts can achieve professional-level results. Remember that the journey of boatbuilding is as rewarding as reaching your destination; it tests one’s patience and dedication. For those seeking to embark on this adventure or simply gain more insight into marine craftsmanship, Sven’s wisdom is invaluable.Sven Yrvind, a renowned yacht designer and sailor, shares valuable insights on creating flanges around bulkhead hatches for canvas protection in this enlightening video. By following his expert guidance, boat enthusiasts can ensure their living areas remain secure while allowing unhindered access through the hatches.Step 1: Starting with the Flange
Sven begins by explaining that working on flanges vertically and horizontally is significantly easier than doing so in a flat position. To simplify the process further, he divides the task into two or three steps as suggested by fellow expert “for for.” This approach not only makes it more manageable but also allows for greater precision in crafting each component.Step 2: Applying Glue and Securing
Sven proceeds to apply glue along one edge of the flange, ensuring a secure bond when clamped into place. He emphasizes that this stage is crucial for maintaining the structural integrity of the flange, which in turn safeguards the living area beneath the canvas when hatches are open.Step 3: Allowing Time to Dry
After securely attaching the first portion of the flange, Sven allows ample time for it to dry before moving forward with additional steps. This patience and precision are key aspects of his successful boatbuilding methods.Step 4: Finishing Touches
Once the flange is fully dried, Sven removes the clamps carefully, ensuring no damage occurs during this process. He then moves on to attaching four more pieces onto these main frames, completing two pairs of flanges for the bulkhead hatches.The Final Touches
While two flanges form the primary support structure around the hatches, Sven mentions there are two additional pieces required at each end to ensure comprehensive protection. This attention to detail highlights his commitment to producing a durable and reliable design. “Sailing is about finding your path, whether it’s across an ocean or within yourself.” – Sven Yrvind In conclusion, making flanges around bulkhead hatches may seem complex at first glance, but by following Sven Yrvind’s meticulous process, enthusiasts can achieve professional-level results. Remember that the journey of boatbuilding is as rewarding as reaching your destination; it tests one’s patience and dedication. For those seeking to embark on this adventure or simply gain more insight into marine craftsmanship, Sven’s wisdom is invaluable.Making Flanges Around Bulkhead Hatches for Canvas
Sven Yrvind, a renowned yacht designer and sailor, shares valuable insights on creating flanges around bulkhead hatches for canvas protection in this enlightening video. By following his expert guidance, boat enthusiasts can ensure their living areas remain secure while allowing unhindered access through the hatches.Step 1: Starting with the Flange
Sven begins by explaining that working on flanges vertically and horizontally is significantly easier than doing so in a flat position. To simplify the process further, he divides the task into two or three steps as suggested by fellow expert “for for.” This approach not only makes it more manageable but also allows for greater precision in crafting each component.Step 2: Applying Glue and Securing
Sven proceeds to apply glue along one edge of the flange, ensuring a secure bond when clamped into place. He emphasizes that this stage is crucial for maintaining the structural integrity of the flange, which in turn safeguards the living area beneath the canvas when hatches are open.Step 3: Allowing Time to Dry
After securely attaching the first portion of the flange, Sven allows ample time for it to dry before moving forward with additional steps. This patience and precision are key aspects of his successful boatbuilding methods.Step 4: Finishing Touches
Once the flange is fully dried, Sven removes the clamps carefully, ensuring no damage occurs during this process. He then moves on to attaching four more pieces onto these main frames, completing two pairs of flanges for the bulkhead hatches.The Final Touches
While two flanges form the primary support structure around the hatches, Sven mentions there are two additional pieces required at each end to ensure comprehensive protection. This attention to detail highlights his commitment to producing a durable and reliable design. “Sailing is about finding your path, whether it’s across an ocean or within yourself.” – Sven Yrvind In conclusion, making flanges around bulkhead hatches may seem complex at first glance, but by following Sven Yrvind’s meticulous process, enthusiasts can achieve professional-level results. Remember that the journey of boatbuilding is as rewarding as reaching your destination; it tests one’s patience and dedication. For those seeking to embark on this adventure or simply gain more insight into marine craftsmanship, Sven’s wisdom is invaluable.After securely attaching the first portion of the flange, Sven allows ample time for it to dry before moving forward with additional steps. This patience and precision are key aspects of his successful boatbuilding methods.Step 4: Finishing Touches
Once the flange is fully dried, Sven removes the clamps carefully, ensuring no damage occurs during this process. He then moves on to attaching four more pieces onto these main frames, completing two pairs of flanges for the bulkhead hatches.The Final Touches
While two flanges form the primary support structure around the hatches, Sven mentions there are two additional pieces required at each end to ensure comprehensive protection. This attention to detail highlights his commitment to producing a durable and reliable design. “Sailing is about finding your path, whether it’s across an ocean or within yourself.” – Sven Yrvind In conclusion, making flanges around bulkhead hatches may seem complex at first glance, but by following Sven Yrvind’s meticulous process, enthusiasts can achieve professional-level results. Remember that the journey of boatbuilding is as rewarding as reaching your destination; it tests one’s patience and dedication. For those seeking to embark on this adventure or simply gain more insight into marine craftsmanship, Sven’s wisdom is invaluable.Sven proceeds to apply glue along one edge of the flange, ensuring a secure bond when clamped into place. He emphasizes that this stage is crucial for maintaining the structural integrity of the flange, which in turn safeguards the living area beneath the canvas when hatches are open.Step 3: Allowing Time to Dry
After securely attaching the first portion of the flange, Sven allows ample time for it to dry before moving forward with additional steps. This patience and precision are key aspects of his successful boatbuilding methods.Step 4: Finishing Touches
Once the flange is fully dried, Sven removes the clamps carefully, ensuring no damage occurs during this process. He then moves on to attaching four more pieces onto these main frames, completing two pairs of flanges for the bulkhead hatches.The Final Touches
While two flanges form the primary support structure around the hatches, Sven mentions there are two additional pieces required at each end to ensure comprehensive protection. This attention to detail highlights his commitment to producing a durable and reliable design. “Sailing is about finding your path, whether it’s across an ocean or within yourself.” – Sven Yrvind In conclusion, making flanges around bulkhead hatches may seem complex at first glance, but by following Sven Yrvind’s meticulous process, enthusiasts can achieve professional-level results. Remember that the journey of boatbuilding is as rewarding as reaching your destination; it tests one’s patience and dedication. For those seeking to embark on this adventure or simply gain more insight into marine craftsmanship, Sven’s wisdom is invaluable.Sven begins by explaining that working on flanges vertically and horizontally is significantly easier than doing so in a flat position. To simplify the process further, he divides the task into two or three steps as suggested by fellow expert “for for.” This approach not only makes it more manageable but also allows for greater precision in crafting each component.Step 2: Applying Glue and Securing
Sven proceeds to apply glue along one edge of the flange, ensuring a secure bond when clamped into place. He emphasizes that this stage is crucial for maintaining the structural integrity of the flange, which in turn safeguards the living area beneath the canvas when hatches are open.Step 3: Allowing Time to Dry
After securely attaching the first portion of the flange, Sven allows ample time for it to dry before moving forward with additional steps. This patience and precision are key aspects of his successful boatbuilding methods.Step 4: Finishing Touches
Once the flange is fully dried, Sven removes the clamps carefully, ensuring no damage occurs during this process. He then moves on to attaching four more pieces onto these main frames, completing two pairs of flanges for the bulkhead hatches.The Final Touches
While two flanges form the primary support structure around the hatches, Sven mentions there are two additional pieces required at each end to ensure comprehensive protection. This attention to detail highlights his commitment to producing a durable and reliable design. “Sailing is about finding your path, whether it’s across an ocean or within yourself.” – Sven Yrvind In conclusion, making flanges around bulkhead hatches may seem complex at first glance, but by following Sven Yrvind’s meticulous process, enthusiasts can achieve professional-level results. Remember that the journey of boatbuilding is as rewarding as reaching your destination; it tests one’s patience and dedication. For those seeking to embark on this adventure or simply gain more insight into marine craftsmanship, Sven’s wisdom is invaluable.Sven Yrvind, a renowned yacht designer and sailor, shares valuable insights on creating flanges around bulkhead hatches for canvas protection in this enlightening video. By following his expert guidance, boat enthusiasts can ensure their living areas remain secure while allowing unhindered access through the hatches.Step 1: Starting with the Flange
Sven begins by explaining that working on flanges vertically and horizontally is significantly easier than doing so in a flat position. To simplify the process further, he divides the task into two or three steps as suggested by fellow expert “for for.” This approach not only makes it more manageable but also allows for greater precision in crafting each component.Step 2: Applying Glue and Securing
Sven proceeds to apply glue along one edge of the flange, ensuring a secure bond when clamped into place. He emphasizes that this stage is crucial for maintaining the structural integrity of the flange, which in turn safeguards the living area beneath the canvas when hatches are open.Step 3: Allowing Time to Dry
After securely attaching the first portion of the flange, Sven allows ample time for it to dry before moving forward with additional steps. This patience and precision are key aspects of his successful boatbuilding methods.Step 4: Finishing Touches
Once the flange is fully dried, Sven removes the clamps carefully, ensuring no damage occurs during this process. He then moves on to attaching four more pieces onto these main frames, completing two pairs of flanges for the bulkhead hatches.The Final Touches
While two flanges form the primary support structure around the hatches, Sven mentions there are two additional pieces required at each end to ensure comprehensive protection. This attention to detail highlights his commitment to producing a durable and reliable design. “Sailing is about finding your path, whether it’s across an ocean or within yourself.” – Sven Yrvind In conclusion, making flanges around bulkhead hatches may seem complex at first glance, but by following Sven Yrvind’s meticulous process, enthusiasts can achieve professional-level results. Remember that the journey of boatbuilding is as rewarding as reaching your destination; it tests one’s patience and dedication. For those seeking to embark on this adventure or simply gain more insight into marine craftsmanship, Sven’s wisdom is invaluable.Making Flanges Around Bulkhead Hatches for Canvas
Sven Yrvind, a renowned yacht designer and sailor, shares valuable insights on creating flanges around bulkhead hatches for canvas protection in this enlightening video. By following his expert guidance, boat enthusiasts can ensure their living areas remain secure while allowing unhindered access through the hatches.Step 1: Starting with the Flange
Sven begins by explaining that working on flanges vertically and horizontally is significantly easier than doing so in a flat position. To simplify the process further, he divides the task into two or three steps as suggested by fellow expert “for for.” This approach not only makes it more manageable but also allows for greater precision in crafting each component.Step 2: Applying Glue and Securing
Sven proceeds to apply glue along one edge of the flange, ensuring a secure bond when clamped into place. He emphasizes that this stage is crucial for maintaining the structural integrity of the flange, which in turn safeguards the living area beneath the canvas when hatches are open.Step 3: Allowing Time to Dry
After securely attaching the first portion of the flange, Sven allows ample time for it to dry before moving forward with additional steps. This patience and precision are key aspects of his successful boatbuilding methods.Step 4: Finishing Touches
Once the flange is fully dried, Sven removes the clamps carefully, ensuring no damage occurs during this process. He then moves on to attaching four more pieces onto these main frames, completing two pairs of flanges for the bulkhead hatches.The Final Touches
While two flanges form the primary support structure around the hatches, Sven mentions there are two additional pieces required at each end to ensure comprehensive protection. This attention to detail highlights his commitment to producing a durable and reliable design. “Sailing is about finding your path, whether it’s across an ocean or within yourself.” – Sven Yrvind In conclusion, making flanges around bulkhead hatches may seem complex at first glance, but by following Sven Yrvind’s meticulous process, enthusiasts can achieve professional-level results. Remember that the journey of boatbuilding is as rewarding as reaching your destination; it tests one’s patience and dedication. For those seeking to embark on this adventure or simply gain more insight into marine craftsmanship, Sven’s wisdom is invaluable.Once the flange is fully dried, Sven removes the clamps carefully, ensuring no damage occurs during this process. He then moves on to attaching four more pieces onto these main frames, completing two pairs of flanges for the bulkhead hatches.The Final Touches
While two flanges form the primary support structure around the hatches, Sven mentions there are two additional pieces required at each end to ensure comprehensive protection. This attention to detail highlights his commitment to producing a durable and reliable design. “Sailing is about finding your path, whether it’s across an ocean or within yourself.” – Sven Yrvind In conclusion, making flanges around bulkhead hatches may seem complex at first glance, but by following Sven Yrvind’s meticulous process, enthusiasts can achieve professional-level results. Remember that the journey of boatbuilding is as rewarding as reaching your destination; it tests one’s patience and dedication. For those seeking to embark on this adventure or simply gain more insight into marine craftsmanship, Sven’s wisdom is invaluable.After securely attaching the first portion of the flange, Sven allows ample time for it to dry before moving forward with additional steps. This patience and precision are key aspects of his successful boatbuilding methods.Step 4: Finishing Touches
Once the flange is fully dried, Sven removes the clamps carefully, ensuring no damage occurs during this process. He then moves on to attaching four more pieces onto these main frames, completing two pairs of flanges for the bulkhead hatches.The Final Touches
While two flanges form the primary support structure around the hatches, Sven mentions there are two additional pieces required at each end to ensure comprehensive protection. This attention to detail highlights his commitment to producing a durable and reliable design. “Sailing is about finding your path, whether it’s across an ocean or within yourself.” – Sven Yrvind In conclusion, making flanges around bulkhead hatches may seem complex at first glance, but by following Sven Yrvind’s meticulous process, enthusiasts can achieve professional-level results. Remember that the journey of boatbuilding is as rewarding as reaching your destination; it tests one’s patience and dedication. For those seeking to embark on this adventure or simply gain more insight into marine craftsmanship, Sven’s wisdom is invaluable.Sven proceeds to apply glue along one edge of the flange, ensuring a secure bond when clamped into place. He emphasizes that this stage is crucial for maintaining the structural integrity of the flange, which in turn safeguards the living area beneath the canvas when hatches are open.Step 3: Allowing Time to Dry
After securely attaching the first portion of the flange, Sven allows ample time for it to dry before moving forward with additional steps. This patience and precision are key aspects of his successful boatbuilding methods.Step 4: Finishing Touches
Once the flange is fully dried, Sven removes the clamps carefully, ensuring no damage occurs during this process. He then moves on to attaching four more pieces onto these main frames, completing two pairs of flanges for the bulkhead hatches.The Final Touches
While two flanges form the primary support structure around the hatches, Sven mentions there are two additional pieces required at each end to ensure comprehensive protection. This attention to detail highlights his commitment to producing a durable and reliable design. “Sailing is about finding your path, whether it’s across an ocean or within yourself.” – Sven Yrvind In conclusion, making flanges around bulkhead hatches may seem complex at first glance, but by following Sven Yrvind’s meticulous process, enthusiasts can achieve professional-level results. Remember that the journey of boatbuilding is as rewarding as reaching your destination; it tests one’s patience and dedication. For those seeking to embark on this adventure or simply gain more insight into marine craftsmanship, Sven’s wisdom is invaluable.Sven begins by explaining that working on flanges vertically and horizontally is significantly easier than doing so in a flat position. To simplify the process further, he divides the task into two or three steps as suggested by fellow expert “for for.” This approach not only makes it more manageable but also allows for greater precision in crafting each component.Step 2: Applying Glue and Securing
Sven proceeds to apply glue along one edge of the flange, ensuring a secure bond when clamped into place. He emphasizes that this stage is crucial for maintaining the structural integrity of the flange, which in turn safeguards the living area beneath the canvas when hatches are open.Step 3: Allowing Time to Dry
After securely attaching the first portion of the flange, Sven allows ample time for it to dry before moving forward with additional steps. This patience and precision are key aspects of his successful boatbuilding methods.Step 4: Finishing Touches
Once the flange is fully dried, Sven removes the clamps carefully, ensuring no damage occurs during this process. He then moves on to attaching four more pieces onto these main frames, completing two pairs of flanges for the bulkhead hatches.The Final Touches
While two flanges form the primary support structure around the hatches, Sven mentions there are two additional pieces required at each end to ensure comprehensive protection. This attention to detail highlights his commitment to producing a durable and reliable design. “Sailing is about finding your path, whether it’s across an ocean or within yourself.” – Sven Yrvind In conclusion, making flanges around bulkhead hatches may seem complex at first glance, but by following Sven Yrvind’s meticulous process, enthusiasts can achieve professional-level results. Remember that the journey of boatbuilding is as rewarding as reaching your destination; it tests one’s patience and dedication. For those seeking to embark on this adventure or simply gain more insight into marine craftsmanship, Sven’s wisdom is invaluable.Sven Yrvind, a renowned yacht designer and sailor, shares valuable insights on creating flanges around bulkhead hatches for canvas protection in this enlightening video. By following his expert guidance, boat enthusiasts can ensure their living areas remain secure while allowing unhindered access through the hatches.Step 1: Starting with the Flange
Sven begins by explaining that working on flanges vertically and horizontally is significantly easier than doing so in a flat position. To simplify the process further, he divides the task into two or three steps as suggested by fellow expert “for for.” This approach not only makes it more manageable but also allows for greater precision in crafting each component.Step 2: Applying Glue and Securing
Sven proceeds to apply glue along one edge of the flange, ensuring a secure bond when clamped into place. He emphasizes that this stage is crucial for maintaining the structural integrity of the flange, which in turn safeguards the living area beneath the canvas when hatches are open.Step 3: Allowing Time to Dry
After securely attaching the first portion of the flange, Sven allows ample time for it to dry before moving forward with additional steps. This patience and precision are key aspects of his successful boatbuilding methods.Step 4: Finishing Touches
Once the flange is fully dried, Sven removes the clamps carefully, ensuring no damage occurs during this process. He then moves on to attaching four more pieces onto these main frames, completing two pairs of flanges for the bulkhead hatches.The Final Touches
While two flanges form the primary support structure around the hatches, Sven mentions there are two additional pieces required at each end to ensure comprehensive protection. This attention to detail highlights his commitment to producing a durable and reliable design. “Sailing is about finding your path, whether it’s across an ocean or within yourself.” – Sven Yrvind In conclusion, making flanges around bulkhead hatches may seem complex at first glance, but by following Sven Yrvind’s meticulous process, enthusiasts can achieve professional-level results. Remember that the journey of boatbuilding is as rewarding as reaching your destination; it tests one’s patience and dedication. For those seeking to embark on this adventure or simply gain more insight into marine craftsmanship, Sven’s wisdom is invaluable.Making Flanges Around Bulkhead Hatches for Canvas
Sven Yrvind, a renowned yacht designer and sailor, shares valuable insights on creating flanges around bulkhead hatches for canvas protection in this enlightening video. By following his expert guidance, boat enthusiasts can ensure their living areas remain secure while allowing unhindered access through the hatches.Step 1: Starting with the Flange
Sven begins by explaining that working on flanges vertically and horizontally is significantly easier than doing so in a flat position. To simplify the process further, he divides the task into two or three steps as suggested by fellow expert “for for.” This approach not only makes it more manageable but also allows for greater precision in crafting each component.Step 2: Applying Glue and Securing
Sven proceeds to apply glue along one edge of the flange, ensuring a secure bond when clamped into place. He emphasizes that this stage is crucial for maintaining the structural integrity of the flange, which in turn safeguards the living area beneath the canvas when hatches are open.Step 3: Allowing Time to Dry
After securely attaching the first portion of the flange, Sven allows ample time for it to dry before moving forward with additional steps. This patience and precision are key aspects of his successful boatbuilding methods.Step 4: Finishing Touches
Once the flange is fully dried, Sven removes the clamps carefully, ensuring no damage occurs during this process. He then moves on to attaching four more pieces onto these main frames, completing two pairs of flanges for the bulkhead hatches.The Final Touches
While two flanges form the primary support structure around the hatches, Sven mentions there are two additional pieces required at each end to ensure comprehensive protection. This attention to detail highlights his commitment to producing a durable and reliable design. “Sailing is about finding your path, whether it’s across an ocean or within yourself.” – Sven Yrvind In conclusion, making flanges around bulkhead hatches may seem complex at first glance, but by following Sven Yrvind’s meticulous process, enthusiasts can achieve professional-level results. Remember that the journey of boatbuilding is as rewarding as reaching your destination; it tests one’s patience and dedication. For those seeking to embark on this adventure or simply gain more insight into marine craftsmanship, Sven’s wisdom is invaluable.Sven proceeds to apply glue along one edge of the flange, ensuring a secure bond when clamped into place. He emphasizes that this stage is crucial for maintaining the structural integrity of the flange, which in turn safeguards the living area beneath the canvas when hatches are open.Step 3: Allowing Time to Dry
After securely attaching the first portion of the flange, Sven allows ample time for it to dry before moving forward with additional steps. This patience and precision are key aspects of his successful boatbuilding methods.Step 4: Finishing Touches
Once the flange is fully dried, Sven removes the clamps carefully, ensuring no damage occurs during this process. He then moves on to attaching four more pieces onto these main frames, completing two pairs of flanges for the bulkhead hatches.The Final Touches
While two flanges form the primary support structure around the hatches, Sven mentions there are two additional pieces required at each end to ensure comprehensive protection. This attention to detail highlights his commitment to producing a durable and reliable design. “Sailing is about finding your path, whether it’s across an ocean or within yourself.” – Sven Yrvind In conclusion, making flanges around bulkhead hatches may seem complex at first glance, but by following Sven Yrvind’s meticulous process, enthusiasts can achieve professional-level results. Remember that the journey of boatbuilding is as rewarding as reaching your destination; it tests one’s patience and dedication. For those seeking to embark on this adventure or simply gain more insight into marine craftsmanship, Sven’s wisdom is invaluable.Sven Yrvind, a renowned yacht designer and sailor, shares valuable insights on creating flanges around bulkhead hatches for canvas protection in this enlightening video. By following his expert guidance, boat enthusiasts can ensure their living areas remain secure while allowing unhindered access through the hatches.Step 1: Starting with the Flange
Sven begins by explaining that working on flanges vertically and horizontally is significantly easier than doing so in a flat position. To simplify the process further, he divides the task into two or three steps as suggested by fellow expert “for for.” This approach not only makes it more manageable but also allows for greater precision in crafting each component.Step 2: Applying Glue and Securing
Sven proceeds to apply glue along one edge of the flange, ensuring a secure bond when clamped into place. He emphasizes that this stage is crucial for maintaining the structural integrity of the flange, which in turn safeguards the living area beneath the canvas when hatches are open.Step 3: Allowing Time to Dry
After securely attaching the first portion of the flange, Sven allows ample time for it to dry before moving forward with additional steps. This patience and precision are key aspects of his successful boatbuilding methods.Step 4: Finishing Touches
Once the flange is fully dried, Sven removes the clamps carefully, ensuring no damage occurs during this process. He then moves on to attaching four more pieces onto these main frames, completing two pairs of flanges for the bulkhead hatches.The Final Touches
While two flanges form the primary support structure around the hatches, Sven mentions there are two additional pieces required at each end to ensure comprehensive protection. This attention to detail highlights his commitment to producing a durable and reliable design. “Sailing is about finding your path, whether it’s across an ocean or within yourself.” – Sven Yrvind In conclusion, making flanges around bulkhead hatches may seem complex at first glance, but by following Sven Yrvind’s meticulous process, enthusiasts can achieve professional-level results. Remember that the journey of boatbuilding is as rewarding as reaching your destination; it tests one’s patience and dedication. For those seeking to embark on this adventure or simply gain more insight into marine craftsmanship, Sven’s wisdom is invaluable.Making Flanges Around Bulkhead Hatches for Canvas
Sven Yrvind, a renowned yacht designer and sailor, shares valuable insights on creating flanges around bulkhead hatches for canvas protection in this enlightening video. By following his expert guidance, boat enthusiasts can ensure their living areas remain secure while allowing unhindered access through the hatches.Step 1: Starting with the Flange
Sven begins by explaining that working on flanges vertically and horizontally is significantly easier than doing so in a flat position. To simplify the process further, he divides the task into two or three steps as suggested by fellow expert “for for.” This approach not only makes it more manageable but also allows for greater precision in crafting each component.Step 2: Applying Glue and Securing
Sven proceeds to apply glue along one edge of the flange, ensuring a secure bond when clamped into place. He emphasizes that this stage is crucial for maintaining the structural integrity of the flange, which in turn safeguards the living area beneath the canvas when hatches are open.Step 3: Allowing Time to Dry
After securely attaching the first portion of the flange, Sven allows ample time for it to dry before moving forward with additional steps. This patience and precision are key aspects of his successful boatbuilding methods.Step 4: Finishing Touches
Once the flange is fully dried, Sven removes the clamps carefully, ensuring no damage occurs during this process. He then moves on to attaching four more pieces onto these main frames, completing two pairs of flanges for the bulkhead hatches.The Final Touches
While two flanges form the primary support structure around the hatches, Sven mentions there are two additional pieces required at each end to ensure comprehensive protection. This attention to detail highlights his commitment to producing a durable and reliable design. “Sailing is about finding your path, whether it’s across an ocean or within yourself.” – Sven Yrvind In conclusion, making flanges around bulkhead hatches may seem complex at first glance, but by following Sven Yrvind’s meticulous process, enthusiasts can achieve professional-level results. Remember that the journey of boatbuilding is as rewarding as reaching your destination; it tests one’s patience and dedication. For those seeking to embark on this adventure or simply gain more insight into marine craftsmanship, Sven’s wisdom is invaluable.After securely attaching the first portion of the flange, Sven allows ample time for it to dry before moving forward with additional steps. This patience and precision are key aspects of his successful boatbuilding methods.Step 4: Finishing Touches
Once the flange is fully dried, Sven removes the clamps carefully, ensuring no damage occurs during this process. He then moves on to attaching four more pieces onto these main frames, completing two pairs of flanges for the bulkhead hatches.The Final Touches
While two flanges form the primary support structure around the hatches, Sven mentions there are two additional pieces required at each end to ensure comprehensive protection. This attention to detail highlights his commitment to producing a durable and reliable design. “Sailing is about finding your path, whether it’s across an ocean or within yourself.” – Sven Yrvind In conclusion, making flanges around bulkhead hatches may seem complex at first glance, but by following Sven Yrvind’s meticulous process, enthusiasts can achieve professional-level results. Remember that the journey of boatbuilding is as rewarding as reaching your destination; it tests one’s patience and dedication. For those seeking to embark on this adventure or simply gain more insight into marine craftsmanship, Sven’s wisdom is invaluable.Sven begins by explaining that working on flanges vertically and horizontally is significantly easier than doing so in a flat position. To simplify the process further, he divides the task into two or three steps as suggested by fellow expert “for for.” This approach not only makes it more manageable but also allows for greater precision in crafting each component.Step 2: Applying Glue and Securing
Sven proceeds to apply glue along one edge of the flange, ensuring a secure bond when clamped into place. He emphasizes that this stage is crucial for maintaining the structural integrity of the flange, which in turn safeguards the living area beneath the canvas when hatches are open.Step 3: Allowing Time to Dry
After securely attaching the first portion of the flange, Sven allows ample time for it to dry before moving forward with additional steps. This patience and precision are key aspects of his successful boatbuilding methods.Step 4: Finishing Touches
Once the flange is fully dried, Sven removes the clamps carefully, ensuring no damage occurs during this process. He then moves on to attaching four more pieces onto these main frames, completing two pairs of flanges for the bulkhead hatches.The Final Touches
While two flanges form the primary support structure around the hatches, Sven mentions there are two additional pieces required at each end to ensure comprehensive protection. This attention to detail highlights his commitment to producing a durable and reliable design. “Sailing is about finding your path, whether it’s across an ocean or within yourself.” – Sven Yrvind In conclusion, making flanges around bulkhead hatches may seem complex at first glance, but by following Sven Yrvind’s meticulous process, enthusiasts can achieve professional-level results. Remember that the journey of boatbuilding is as rewarding as reaching your destination; it tests one’s patience and dedication. For those seeking to embark on this adventure or simply gain more insight into marine craftsmanship, Sven’s wisdom is invaluable.Sven Yrvind, a renowned yacht designer and sailor, shares valuable insights on creating flanges around bulkhead hatches for canvas protection in this enlightening video. By following his expert guidance, boat enthusiasts can ensure their living areas remain secure while allowing unhindered access through the hatches.Step 1: Starting with the Flange
Sven begins by explaining that working on flanges vertically and horizontally is significantly easier than doing so in a flat position. To simplify the process further, he divides the task into two or three steps as suggested by fellow expert “for for.” This approach not only makes it more manageable but also allows for greater precision in crafting each component.Step 2: Applying Glue and Securing
Sven proceeds to apply glue along one edge of the flange, ensuring a secure bond when clamped into place. He emphasizes that this stage is crucial for maintaining the structural integrity of the flange, which in turn safeguards the living area beneath the canvas when hatches are open.Step 3: Allowing Time to Dry
After securely attaching the first portion of the flange, Sven allows ample time for it to dry before moving forward with additional steps. This patience and precision are key aspects of his successful boatbuilding methods.Step 4: Finishing Touches
Once the flange is fully dried, Sven removes the clamps carefully, ensuring no damage occurs during this process. He then moves on to attaching four more pieces onto these main frames, completing two pairs of flanges for the bulkhead hatches.The Final Touches
While two flanges form the primary support structure around the hatches, Sven mentions there are two additional pieces required at each end to ensure comprehensive protection. This attention to detail highlights his commitment to producing a durable and reliable design. “Sailing is about finding your path, whether it’s across an ocean or within yourself.” – Sven Yrvind In conclusion, making flanges around bulkhead hatches may seem complex at first glance, but by following Sven Yrvind’s meticulous process, enthusiasts can achieve professional-level results. Remember that the journey of boatbuilding is as rewarding as reaching your destination; it tests one’s patience and dedication. For those seeking to embark on this adventure or simply gain more insight into marine craftsmanship, Sven’s wisdom is invaluable.Making Flanges Around Bulkhead Hatches for Canvas
Sven Yrvind, a renowned yacht designer and sailor, shares valuable insights on creating flanges around bulkhead hatches for canvas protection in this enlightening video. By following his expert guidance, boat enthusiasts can ensure their living areas remain secure while allowing unhindered access through the hatches.Step 1: Starting with the Flange
Sven begins by explaining that working on flanges vertically and horizontally is significantly easier than doing so in a flat position. To simplify the process further, he divides the task into two or three steps as suggested by fellow expert “for for.” This approach not only makes it more manageable but also allows for greater precision in crafting each component.Step 2: Applying Glue and Securing
Sven proceeds to apply glue along one edge of the flange, ensuring a secure bond when clamped into place. He emphasizes that this stage is crucial for maintaining the structural integrity of the flange, which in turn safeguards the living area beneath the canvas when hatches are open.Step 3: Allowing Time to Dry
After securely attaching the first portion of the flange, Sven allows ample time for it to dry before moving forward with additional steps. This patience and precision are key aspects of his successful boatbuilding methods.Step 4: Finishing Touches
Once the flange is fully dried, Sven removes the clamps carefully, ensuring no damage occurs during this process. He then moves on to attaching four more pieces onto these main frames, completing two pairs of flanges for the bulkhead hatches.The Final Touches
While two flanges form the primary support structure around the hatches, Sven mentions there are two additional pieces required at each end to ensure comprehensive protection. This attention to detail highlights his commitment to producing a durable and reliable design. “Sailing is about finding your path, whether it’s across an ocean or within yourself.” – Sven Yrvind In conclusion, making flanges around bulkhead hatches may seem complex at first glance, but by following Sven Yrvind’s meticulous process, enthusiasts can achieve professional-level results. Remember that the journey of boatbuilding is as rewarding as reaching your destination; it tests one’s patience and dedication. For those seeking to embark on this adventure or simply gain more insight into marine craftsmanship, Sven’s wisdom is invaluable.Sven proceeds to apply glue along one edge of the flange, ensuring a secure bond when clamped into place. He emphasizes that this stage is crucial for maintaining the structural integrity of the flange, which in turn safeguards the living area beneath the canvas when hatches are open.Step 3: Allowing Time to Dry
After securely attaching the first portion of the flange, Sven allows ample time for it to dry before moving forward with additional steps. This patience and precision are key aspects of his successful boatbuilding methods.Step 4: Finishing Touches
Once the flange is fully dried, Sven removes the clamps carefully, ensuring no damage occurs during this process. He then moves on to attaching four more pieces onto these main frames, completing two pairs of flanges for the bulkhead hatches.The Final Touches
While two flanges form the primary support structure around the hatches, Sven mentions there are two additional pieces required at each end to ensure comprehensive protection. This attention to detail highlights his commitment to producing a durable and reliable design. “Sailing is about finding your path, whether it’s across an ocean or within yourself.” – Sven Yrvind In conclusion, making flanges around bulkhead hatches may seem complex at first glance, but by following Sven Yrvind’s meticulous process, enthusiasts can achieve professional-level results. Remember that the journey of boatbuilding is as rewarding as reaching your destination; it tests one’s patience and dedication. For those seeking to embark on this adventure or simply gain more insight into marine craftsmanship, Sven’s wisdom is invaluable.Sven begins by explaining that working on flanges vertically and horizontally is significantly easier than doing so in a flat position. To simplify the process further, he divides the task into two or three steps as suggested by fellow expert “for for.” This approach not only makes it more manageable but also allows for greater precision in crafting each component.Step 2: Applying Glue and Securing
Sven proceeds to apply glue along one edge of the flange, ensuring a secure bond when clamped into place. He emphasizes that this stage is crucial for maintaining the structural integrity of the flange, which in turn safeguards the living area beneath the canvas when hatches are open.Step 3: Allowing Time to Dry
After securely attaching the first portion of the flange, Sven allows ample time for it to dry before moving forward with additional steps. This patience and precision are key aspects of his successful boatbuilding methods.Step 4: Finishing Touches
Once the flange is fully dried, Sven removes the clamps carefully, ensuring no damage occurs during this process. He then moves on to attaching four more pieces onto these main frames, completing two pairs of flanges for the bulkhead hatches.The Final Touches
While two flanges form the primary support structure around the hatches, Sven mentions there are two additional pieces required at each end to ensure comprehensive protection. This attention to detail highlights his commitment to producing a durable and reliable design. “Sailing is about finding your path, whether it’s across an ocean or within yourself.” – Sven Yrvind In conclusion, making flanges around bulkhead hatches may seem complex at first glance, but by following Sven Yrvind’s meticulous process, enthusiasts can achieve professional-level results. Remember that the journey of boatbuilding is as rewarding as reaching your destination; it tests one’s patience and dedication. For those seeking to embark on this adventure or simply gain more insight into marine craftsmanship, Sven’s wisdom is invaluable.Sven Yrvind, a renowned yacht designer and sailor, shares valuable insights on creating flanges around bulkhead hatches for canvas protection in this enlightening video. By following his expert guidance, boat enthusiasts can ensure their living areas remain secure while allowing unhindered access through the hatches.Step 1: Starting with the Flange
Sven begins by explaining that working on flanges vertically and horizontally is significantly easier than doing so in a flat position. To simplify the process further, he divides the task into two or three steps as suggested by fellow expert “for for.” This approach not only makes it more manageable but also allows for greater precision in crafting each component.Step 2: Applying Glue and Securing
Sven proceeds to apply glue along one edge of the flange, ensuring a secure bond when clamped into place. He emphasizes that this stage is crucial for maintaining the structural integrity of the flange, which in turn safeguards the living area beneath the canvas when hatches are open.Step 3: Allowing Time to Dry
After securely attaching the first portion of the flange, Sven allows ample time for it to dry before moving forward with additional steps. This patience and precision are key aspects of his successful boatbuilding methods.Step 4: Finishing Touches
Once the flange is fully dried, Sven removes the clamps carefully, ensuring no damage occurs during this process. He then moves on to attaching four more pieces onto these main frames, completing two pairs of flanges for the bulkhead hatches.The Final Touches
While two flanges form the primary support structure around the hatches, Sven mentions there are two additional pieces required at each end to ensure comprehensive protection. This attention to detail highlights his commitment to producing a durable and reliable design. “Sailing is about finding your path, whether it’s across an ocean or within yourself.” – Sven Yrvind In conclusion, making flanges around bulkhead hatches may seem complex at first glance, but by following Sven Yrvind’s meticulous process, enthusiasts can achieve professional-level results. Remember that the journey of boatbuilding is as rewarding as reaching your destination; it tests one’s patience and dedication. For those seeking to embark on this adventure or simply gain more insight into marine craftsmanship, Sven’s wisdom is invaluable.Making Flanges Around Bulkhead Hatches for Canvas
Sven Yrvind, a renowned yacht designer and sailor, shares valuable insights on creating flanges around bulkhead hatches for canvas protection in this enlightening video. By following his expert guidance, boat enthusiasts can ensure their living areas remain secure while allowing unhindered access through the hatches.Step 1: Starting with the Flange
Sven begins by explaining that working on flanges vertically and horizontally is significantly easier than doing so in a flat position. To simplify the process further, he divides the task into two or three steps as suggested by fellow expert “for for.” This approach not only makes it more manageable but also allows for greater precision in crafting each component.Step 2: Applying Glue and Securing
Sven proceeds to apply glue along one edge of the flange, ensuring a secure bond when clamped into place. He emphasizes that this stage is crucial for maintaining the structural integrity of the flange, which in turn safeguards the living area beneath the canvas when hatches are open.Step 3: Allowing Time to Dry
After securely attaching the first portion of the flange, Sven allows ample time for it to dry before moving forward with additional steps. This patience and precision are key aspects of his successful boatbuilding methods.Step 4: Finishing Touches
Once the flange is fully dried, Sven removes the clamps carefully, ensuring no damage occurs during this process. He then moves on to attaching four more pieces onto these main frames, completing two pairs of flanges for the bulkhead hatches.The Final Touches
While two flanges form the primary support structure around the hatches, Sven mentions there are two additional pieces required at each end to ensure comprehensive protection. This attention to detail highlights his commitment to producing a durable and reliable design. “Sailing is about finding your path, whether it’s across an ocean or within yourself.” – Sven Yrvind In conclusion, making flanges around bulkhead hatches may seem complex at first glance, but by following Sven Yrvind’s meticulous process, enthusiasts can achieve professional-level results. Remember that the journey of boatbuilding is as rewarding as reaching your destination; it tests one’s patience and dedication. For those seeking to embark on this adventure or simply gain more insight into marine craftsmanship, Sven’s wisdom is invaluable.Once the flange is fully dried, Sven removes the clamps carefully, ensuring no damage occurs during this process. He then moves on to attaching four more pieces onto these main frames, completing two pairs of flanges for the bulkhead hatches.The Final Touches
While two flanges form the primary support structure around the hatches, Sven mentions there are two additional pieces required at each end to ensure comprehensive protection. This attention to detail highlights his commitment to producing a durable and reliable design. “Sailing is about finding your path, whether it’s across an ocean or within yourself.” – Sven Yrvind In conclusion, making flanges around bulkhead hatches may seem complex at first glance, but by following Sven Yrvind’s meticulous process, enthusiasts can achieve professional-level results. Remember that the journey of boatbuilding is as rewarding as reaching your destination; it tests one’s patience and dedication. For those seeking to embark on this adventure or simply gain more insight into marine craftsmanship, Sven’s wisdom is invaluable.Sven proceeds to apply glue along one edge of the flange, ensuring a secure bond when clamped into place. He emphasizes that this stage is crucial for maintaining the structural integrity of the flange, which in turn safeguards the living area beneath the canvas when hatches are open.Step 3: Allowing Time to Dry
After securely attaching the first portion of the flange, Sven allows ample time for it to dry before moving forward with additional steps. This patience and precision are key aspects of his successful boatbuilding methods.Step 4: Finishing Touches
Once the flange is fully dried, Sven removes the clamps carefully, ensuring no damage occurs during this process. He then moves on to attaching four more pieces onto these main frames, completing two pairs of flanges for the bulkhead hatches.The Final Touches
While two flanges form the primary support structure around the hatches, Sven mentions there are two additional pieces required at each end to ensure comprehensive protection. This attention to detail highlights his commitment to producing a durable and reliable design. “Sailing is about finding your path, whether it’s across an ocean or within yourself.” – Sven Yrvind In conclusion, making flanges around bulkhead hatches may seem complex at first glance, but by following Sven Yrvind’s meticulous process, enthusiasts can achieve professional-level results. Remember that the journey of boatbuilding is as rewarding as reaching your destination; it tests one’s patience and dedication. For those seeking to embark on this adventure or simply gain more insight into marine craftsmanship, Sven’s wisdom is invaluable.Sven begins by explaining that working on flanges vertically and horizontally is significantly easier than doing so in a flat position. To simplify the process further, he divides the task into two or three steps as suggested by fellow expert “for for.” This approach not only makes it more manageable but also allows for greater precision in crafting each component.Step 2: Applying Glue and Securing
Sven proceeds to apply glue along one edge of the flange, ensuring a secure bond when clamped into place. He emphasizes that this stage is crucial for maintaining the structural integrity of the flange, which in turn safeguards the living area beneath the canvas when hatches are open.Step 3: Allowing Time to Dry
After securely attaching the first portion of the flange, Sven allows ample time for it to dry before moving forward with additional steps. This patience and precision are key aspects of his successful boatbuilding methods.Step 4: Finishing Touches
Once the flange is fully dried, Sven removes the clamps carefully, ensuring no damage occurs during this process. He then moves on to attaching four more pieces onto these main frames, completing two pairs of flanges for the bulkhead hatches.The Final Touches
While two flanges form the primary support structure around the hatches, Sven mentions there are two additional pieces required at each end to ensure comprehensive protection. This attention to detail highlights his commitment to producing a durable and reliable design. “Sailing is about finding your path, whether it’s across an ocean or within yourself.” – Sven Yrvind In conclusion, making flanges around bulkhead hatches may seem complex at first glance, but by following Sven Yrvind’s meticulous process, enthusiasts can achieve professional-level results. Remember that the journey of boatbuilding is as rewarding as reaching your destination; it tests one’s patience and dedication. For those seeking to embark on this adventure or simply gain more insight into marine craftsmanship, Sven’s wisdom is invaluable.Sven Yrvind, a renowned yacht designer and sailor, shares valuable insights on creating flanges around bulkhead hatches for canvas protection in this enlightening video. By following his expert guidance, boat enthusiasts can ensure their living areas remain secure while allowing unhindered access through the hatches.Step 1: Starting with the Flange
Sven begins by explaining that working on flanges vertically and horizontally is significantly easier than doing so in a flat position. To simplify the process further, he divides the task into two or three steps as suggested by fellow expert “for for.” This approach not only makes it more manageable but also allows for greater precision in crafting each component.Step 2: Applying Glue and Securing
Sven proceeds to apply glue along one edge of the flange, ensuring a secure bond when clamped into place. He emphasizes that this stage is crucial for maintaining the structural integrity of the flange, which in turn safeguards the living area beneath the canvas when hatches are open.Step 3: Allowing Time to Dry
After securely attaching the first portion of the flange, Sven allows ample time for it to dry before moving forward with additional steps. This patience and precision are key aspects of his successful boatbuilding methods.Step 4: Finishing Touches
Once the flange is fully dried, Sven removes the clamps carefully, ensuring no damage occurs during this process. He then moves on to attaching four more pieces onto these main frames, completing two pairs of flanges for the bulkhead hatches.The Final Touches
While two flanges form the primary support structure around the hatches, Sven mentions there are two additional pieces required at each end to ensure comprehensive protection. This attention to detail highlights his commitment to producing a durable and reliable design. “Sailing is about finding your path, whether it’s across an ocean or within yourself.” – Sven Yrvind In conclusion, making flanges around bulkhead hatches may seem complex at first glance, but by following Sven Yrvind’s meticulous process, enthusiasts can achieve professional-level results. Remember that the journey of boatbuilding is as rewarding as reaching your destination; it tests one’s patience and dedication. For those seeking to embark on this adventure or simply gain more insight into marine craftsmanship, Sven’s wisdom is invaluable.Making Flanges Around Bulkhead Hatches for Canvas
Sven Yrvind, a renowned yacht designer and sailor, shares valuable insights on creating flanges around bulkhead hatches for canvas protection in this enlightening video. By following his expert guidance, boat enthusiasts can ensure their living areas remain secure while allowing unhindered access through the hatches.Step 1: Starting with the Flange
Sven begins by explaining that working on flanges vertically and horizontally is significantly easier than doing so in a flat position. To simplify the process further, he divides the task into two or three steps as suggested by fellow expert “for for.” This approach not only makes it more manageable but also allows for greater precision in crafting each component.Step 2: Applying Glue and Securing
Sven proceeds to apply glue along one edge of the flange, ensuring a secure bond when clamped into place. He emphasizes that this stage is crucial for maintaining the structural integrity of the flange, which in turn safeguards the living area beneath the canvas when hatches are open.Step 3: Allowing Time to Dry
After securely attaching the first portion of the flange, Sven allows ample time for it to dry before moving forward with additional steps. This patience and precision are key aspects of his successful boatbuilding methods.Step 4: Finishing Touches
Once the flange is fully dried, Sven removes the clamps carefully, ensuring no damage occurs during this process. He then moves on to attaching four more pieces onto these main frames, completing two pairs of flanges for the bulkhead hatches.The Final Touches
While two flanges form the primary support structure around the hatches, Sven mentions there are two additional pieces required at each end to ensure comprehensive protection. This attention to detail highlights his commitment to producing a durable and reliable design. “Sailing is about finding your path, whether it’s across an ocean or within yourself.” – Sven Yrvind In conclusion, making flanges around bulkhead hatches may seem complex at first glance, but by following Sven Yrvind’s meticulous process, enthusiasts can achieve professional-level results. Remember that the journey of boatbuilding is as rewarding as reaching your destination; it tests one’s patience and dedication. For those seeking to embark on this adventure or simply gain more insight into marine craftsmanship, Sven’s wisdom is invaluable.After securely attaching the first portion of the flange, Sven allows ample time for it to dry before moving forward with additional steps. This patience and precision are key aspects of his successful boatbuilding methods.Step 4: Finishing Touches
Once the flange is fully dried, Sven removes the clamps carefully, ensuring no damage occurs during this process. He then moves on to attaching four more pieces onto these main frames, completing two pairs of flanges for the bulkhead hatches.The Final Touches
While two flanges form the primary support structure around the hatches, Sven mentions there are two additional pieces required at each end to ensure comprehensive protection. This attention to detail highlights his commitment to producing a durable and reliable design. “Sailing is about finding your path, whether it’s across an ocean or within yourself.” – Sven Yrvind In conclusion, making flanges around bulkhead hatches may seem complex at first glance, but by following Sven Yrvind’s meticulous process, enthusiasts can achieve professional-level results. Remember that the journey of boatbuilding is as rewarding as reaching your destination; it tests one’s patience and dedication. For those seeking to embark on this adventure or simply gain more insight into marine craftsmanship, Sven’s wisdom is invaluable.Sven proceeds to apply glue along one edge of the flange, ensuring a secure bond when clamped into place. He emphasizes that this stage is crucial for maintaining the structural integrity of the flange, which in turn safeguards the living area beneath the canvas when hatches are open.Step 3: Allowing Time to Dry
After securely attaching the first portion of the flange, Sven allows ample time for it to dry before moving forward with additional steps. This patience and precision are key aspects of his successful boatbuilding methods.Step 4: Finishing Touches
Once the flange is fully dried, Sven removes the clamps carefully, ensuring no damage occurs during this process. He then moves on to attaching four more pieces onto these main frames, completing two pairs of flanges for the bulkhead hatches.The Final Touches
While two flanges form the primary support structure around the hatches, Sven mentions there are two additional pieces required at each end to ensure comprehensive protection. This attention to detail highlights his commitment to producing a durable and reliable design. “Sailing is about finding your path, whether it’s across an ocean or within yourself.” – Sven Yrvind In conclusion, making flanges around bulkhead hatches may seem complex at first glance, but by following Sven Yrvind’s meticulous process, enthusiasts can achieve professional-level results. Remember that the journey of boatbuilding is as rewarding as reaching your destination; it tests one’s patience and dedication. For those seeking to embark on this adventure or simply gain more insight into marine craftsmanship, Sven’s wisdom is invaluable.Sven begins by explaining that working on flanges vertically and horizontally is significantly easier than doing so in a flat position. To simplify the process further, he divides the task into two or three steps as suggested by fellow expert “for for.” This approach not only makes it more manageable but also allows for greater precision in crafting each component.Step 2: Applying Glue and Securing
Sven proceeds to apply glue along one edge of the flange, ensuring a secure bond when clamped into place. He emphasizes that this stage is crucial for maintaining the structural integrity of the flange, which in turn safeguards the living area beneath the canvas when hatches are open.Step 3: Allowing Time to Dry
After securely attaching the first portion of the flange, Sven allows ample time for it to dry before moving forward with additional steps. This patience and precision are key aspects of his successful boatbuilding methods.Step 4: Finishing Touches
Once the flange is fully dried, Sven removes the clamps carefully, ensuring no damage occurs during this process. He then moves on to attaching four more pieces onto these main frames, completing two pairs of flanges for the bulkhead hatches.The Final Touches
While two flanges form the primary support structure around the hatches, Sven mentions there are two additional pieces required at each end to ensure comprehensive protection. This attention to detail highlights his commitment to producing a durable and reliable design. “Sailing is about finding your path, whether it’s across an ocean or within yourself.” – Sven Yrvind In conclusion, making flanges around bulkhead hatches may seem complex at first glance, but by following Sven Yrvind’s meticulous process, enthusiasts can achieve professional-level results. Remember that the journey of boatbuilding is as rewarding as reaching your destination; it tests one’s patience and dedication. For those seeking to embark on this adventure or simply gain more insight into marine craftsmanship, Sven’s wisdom is invaluable.Sven Yrvind, a renowned yacht designer and sailor, shares valuable insights on creating flanges around bulkhead hatches for canvas protection in this enlightening video. By following his expert guidance, boat enthusiasts can ensure their living areas remain secure while allowing unhindered access through the hatches.Step 1: Starting with the Flange
Sven begins by explaining that working on flanges vertically and horizontally is significantly easier than doing so in a flat position. To simplify the process further, he divides the task into two or three steps as suggested by fellow expert “for for.” This approach not only makes it more manageable but also allows for greater precision in crafting each component.Step 2: Applying Glue and Securing
Sven proceeds to apply glue along one edge of the flange, ensuring a secure bond when clamped into place. He emphasizes that this stage is crucial for maintaining the structural integrity of the flange, which in turn safeguards the living area beneath the canvas when hatches are open.Step 3: Allowing Time to Dry
After securely attaching the first portion of the flange, Sven allows ample time for it to dry before moving forward with additional steps. This patience and precision are key aspects of his successful boatbuilding methods.Step 4: Finishing Touches
Once the flange is fully dried, Sven removes the clamps carefully, ensuring no damage occurs during this process. He then moves on to attaching four more pieces onto these main frames, completing two pairs of flanges for the bulkhead hatches.The Final Touches
While two flanges form the primary support structure around the hatches, Sven mentions there are two additional pieces required at each end to ensure comprehensive protection. This attention to detail highlights his commitment to producing a durable and reliable design. “Sailing is about finding your path, whether it’s across an ocean or within yourself.” – Sven Yrvind In conclusion, making flanges around bulkhead hatches may seem complex at first glance, but by following Sven Yrvind’s meticulous process, enthusiasts can achieve professional-level results. Remember that the journey of boatbuilding is as rewarding as reaching your destination; it tests one’s patience and dedication. For those seeking to embark on this adventure or simply gain more insight into marine craftsmanship, Sven’s wisdom is invaluable.Making Flanges Around Bulkhead Hatches for Canvas
Sven Yrvind, a renowned yacht designer and sailor, shares valuable insights on creating flanges around bulkhead hatches for canvas protection in this enlightening video. By following his expert guidance, boat enthusiasts can ensure their living areas remain secure while allowing unhindered access through the hatches.Step 1: Starting with the Flange
Sven begins by explaining that working on flanges vertically and horizontally is significantly easier than doing so in a flat position. To simplify the process further, he divides the task into two or three steps as suggested by fellow expert “for for.” This approach not only makes it more manageable but also allows for greater precision in crafting each component.Step 2: Applying Glue and Securing
Sven proceeds to apply glue along one edge of the flange, ensuring a secure bond when clamped into place. He emphasizes that this stage is crucial for maintaining the structural integrity of the flange, which in turn safeguards the living area beneath the canvas when hatches are open.Step 3: Allowing Time to Dry
After securely attaching the first portion of the flange, Sven allows ample time for it to dry before moving forward with additional steps. This patience and precision are key aspects of his successful boatbuilding methods.Step 4: Finishing Touches
Once the flange is fully dried, Sven removes the clamps carefully, ensuring no damage occurs during this process. He then moves on to attaching four more pieces onto these main frames, completing two pairs of flanges for the bulkhead hatches.The Final Touches
While two flanges form the primary support structure around the hatches, Sven mentions there are two additional pieces required at each end to ensure comprehensive protection. This attention to detail highlights his commitment to producing a durable and reliable design. “Sailing is about finding your path, whether it’s across an ocean or within yourself.” – Sven Yrvind In conclusion, making flanges around bulkhead hatches may seem complex at first glance, but by following Sven Yrvind’s meticulous process, enthusiasts can achieve professional-level results. Remember that the journey of boatbuilding is as rewarding as reaching your destination; it tests one’s patience and dedication. For those seeking to embark on this adventure or simply gain more insight into marine craftsmanship, Sven’s wisdom is invaluable.Once the flange is fully dried, Sven removes the clamps carefully, ensuring no damage occurs during this process. He then moves on to attaching four more pieces onto these main frames, completing two pairs of flanges for the bulkhead hatches.The Final Touches
While two flanges form the primary support structure around the hatches, Sven mentions there are two additional pieces required at each end to ensure comprehensive protection. This attention to detail highlights his commitment to producing a durable and reliable design. “Sailing is about finding your path, whether it’s across an ocean or within yourself.” – Sven Yrvind In conclusion, making flanges around bulkhead hatches may seem complex at first glance, but by following Sven Yrvind’s meticulous process, enthusiasts can achieve professional-level results. Remember that the journey of boatbuilding is as rewarding as reaching your destination; it tests one’s patience and dedication. For those seeking to embark on this adventure or simply gain more insight into marine craftsmanship, Sven’s wisdom is invaluable.After securely attaching the first portion of the flange, Sven allows ample time for it to dry before moving forward with additional steps. This patience and precision are key aspects of his successful boatbuilding methods.Step 4: Finishing Touches
Once the flange is fully dried, Sven removes the clamps carefully, ensuring no damage occurs during this process. He then moves on to attaching four more pieces onto these main frames, completing two pairs of flanges for the bulkhead hatches.The Final Touches
While two flanges form the primary support structure around the hatches, Sven mentions there are two additional pieces required at each end to ensure comprehensive protection. This attention to detail highlights his commitment to producing a durable and reliable design. “Sailing is about finding your path, whether it’s across an ocean or within yourself.” – Sven Yrvind In conclusion, making flanges around bulkhead hatches may seem complex at first glance, but by following Sven Yrvind’s meticulous process, enthusiasts can achieve professional-level results. Remember that the journey of boatbuilding is as rewarding as reaching your destination; it tests one’s patience and dedication. For those seeking to embark on this adventure or simply gain more insight into marine craftsmanship, Sven’s wisdom is invaluable.Sven proceeds to apply glue along one edge of the flange, ensuring a secure bond when clamped into place. He emphasizes that this stage is crucial for maintaining the structural integrity of the flange, which in turn safeguards the living area beneath the canvas when hatches are open.Step 3: Allowing Time to Dry
After securely attaching the first portion of the flange, Sven allows ample time for it to dry before moving forward with additional steps. This patience and precision are key aspects of his successful boatbuilding methods.Step 4: Finishing Touches
Once the flange is fully dried, Sven removes the clamps carefully, ensuring no damage occurs during this process. He then moves on to attaching four more pieces onto these main frames, completing two pairs of flanges for the bulkhead hatches.The Final Touches
While two flanges form the primary support structure around the hatches, Sven mentions there are two additional pieces required at each end to ensure comprehensive protection. This attention to detail highlights his commitment to producing a durable and reliable design. “Sailing is about finding your path, whether it’s across an ocean or within yourself.” – Sven Yrvind In conclusion, making flanges around bulkhead hatches may seem complex at first glance, but by following Sven Yrvind’s meticulous process, enthusiasts can achieve professional-level results. Remember that the journey of boatbuilding is as rewarding as reaching your destination; it tests one’s patience and dedication. For those seeking to embark on this adventure or simply gain more insight into marine craftsmanship, Sven’s wisdom is invaluable.Sven begins by explaining that working on flanges vertically and horizontally is significantly easier than doing so in a flat position. To simplify the process further, he divides the task into two or three steps as suggested by fellow expert “for for.” This approach not only makes it more manageable but also allows for greater precision in crafting each component.Step 2: Applying Glue and Securing
Sven proceeds to apply glue along one edge of the flange, ensuring a secure bond when clamped into place. He emphasizes that this stage is crucial for maintaining the structural integrity of the flange, which in turn safeguards the living area beneath the canvas when hatches are open.Step 3: Allowing Time to Dry
After securely attaching the first portion of the flange, Sven allows ample time for it to dry before moving forward with additional steps. This patience and precision are key aspects of his successful boatbuilding methods.Step 4: Finishing Touches
Once the flange is fully dried, Sven removes the clamps carefully, ensuring no damage occurs during this process. He then moves on to attaching four more pieces onto these main frames, completing two pairs of flanges for the bulkhead hatches.The Final Touches
While two flanges form the primary support structure around the hatches, Sven mentions there are two additional pieces required at each end to ensure comprehensive protection. This attention to detail highlights his commitment to producing a durable and reliable design. “Sailing is about finding your path, whether it’s across an ocean or within yourself.” – Sven Yrvind In conclusion, making flanges around bulkhead hatches may seem complex at first glance, but by following Sven Yrvind’s meticulous process, enthusiasts can achieve professional-level results. Remember that the journey of boatbuilding is as rewarding as reaching your destination; it tests one’s patience and dedication. For those seeking to embark on this adventure or simply gain more insight into marine craftsmanship, Sven’s wisdom is invaluable.Sven Yrvind, a renowned yacht designer and sailor, shares valuable insights on creating flanges around bulkhead hatches for canvas protection in this enlightening video. By following his expert guidance, boat enthusiasts can ensure their living areas remain secure while allowing unhindered access through the hatches.Step 1: Starting with the Flange
Sven begins by explaining that working on flanges vertically and horizontally is significantly easier than doing so in a flat position. To simplify the process further, he divides the task into two or three steps as suggested by fellow expert “for for.” This approach not only makes it more manageable but also allows for greater precision in crafting each component.Step 2: Applying Glue and Securing
Sven proceeds to apply glue along one edge of the flange, ensuring a secure bond when clamped into place. He emphasizes that this stage is crucial for maintaining the structural integrity of the flange, which in turn safeguards the living area beneath the canvas when hatches are open.Step 3: Allowing Time to Dry
After securely attaching the first portion of the flange, Sven allows ample time for it to dry before moving forward with additional steps. This patience and precision are key aspects of his successful boatbuilding methods.Step 4: Finishing Touches
Once the flange is fully dried, Sven removes the clamps carefully, ensuring no damage occurs during this process. He then moves on to attaching four more pieces onto these main frames, completing two pairs of flanges for the bulkhead hatches.The Final Touches
While two flanges form the primary support structure around the hatches, Sven mentions there are two additional pieces required at each end to ensure comprehensive protection. This attention to detail highlights his commitment to producing a durable and reliable design. “Sailing is about finding your path, whether it’s across an ocean or within yourself.” – Sven Yrvind In conclusion, making flanges around bulkhead hatches may seem complex at first glance, but by following Sven Yrvind’s meticulous process, enthusiasts can achieve professional-level results. Remember that the journey of boatbuilding is as rewarding as reaching your destination; it tests one’s patience and dedication. For those seeking to embark on this adventure or simply gain more insight into marine craftsmanship, Sven’s wisdom is invaluable.Making Flanges Around Bulkhead Hatches for Canvas
Sven Yrvind, a renowned yacht designer and sailor, shares valuable insights on creating flanges around bulkhead hatches for canvas protection in this enlightening video. By following his expert guidance, boat enthusiasts can ensure their living areas remain secure while allowing unhindered access through the hatches.Step 1: Starting with the Flange
Sven begins by explaining that working on flanges vertically and horizontally is significantly easier than doing so in a flat position. To simplify the process further, he divides the task into two or three steps as suggested by fellow expert “for for.” This approach not only makes it more manageable but also allows for greater precision in crafting each component.Step 2: Applying Glue and Securing
Sven proceeds to apply glue along one edge of the flange, ensuring a secure bond when clamped into place. He emphasizes that this stage is crucial for maintaining the structural integrity of the flange, which in turn safeguards the living area beneath the canvas when hatches are open.Step 3: Allowing Time to Dry
After securely attaching the first portion of the flange, Sven allows ample time for it to dry before moving forward with additional steps. This patience and precision are key aspects of his successful boatbuilding methods.Step 4: Finishing Touches
Once the flange is fully dried, Sven removes the clamps carefully, ensuring no damage occurs during this process. He then moves on to attaching four more pieces onto these main frames, completing two pairs of flanges for the bulkhead hatches.The Final Touches
While two flanges form the primary support structure around the hatches, Sven mentions there are two additional pieces required at each end to ensure comprehensive protection. This attention to detail highlights his commitment to producing a durable and reliable design. “Sailing is about finding your path, whether it’s across an ocean or within yourself.” – Sven Yrvind In conclusion, making flanges around bulkhead hatches may seem complex at first glance, but by following Sven Yrvind’s meticulous process, enthusiasts can achieve professional-level results. Remember that the journey of boatbuilding is as rewarding as reaching your destination; it tests one’s patience and dedication. For those seeking to embark on this adventure or simply gain more insight into marine craftsmanship, Sven’s wisdom is invaluable.Sven begins by explaining that working on flanges vertically and horizontally is significantly easier than doing so in a flat position. To simplify the process further, he divides the task into two or three steps as suggested by fellow expert “for for.” This approach not only makes it more manageable but also allows for greater precision in crafting each component.Step 2: Applying Glue and Securing
Sven proceeds to apply glue along one edge of the flange, ensuring a secure bond when clamped into place. He emphasizes that this stage is crucial for maintaining the structural integrity of the flange, which in turn safeguards the living area beneath the canvas when hatches are open.Step 3: Allowing Time to Dry
After securely attaching the first portion of the flange, Sven allows ample time for it to dry before moving forward with additional steps. This patience and precision are key aspects of his successful boatbuilding methods.Step 4: Finishing Touches
Once the flange is fully dried, Sven removes the clamps carefully, ensuring no damage occurs during this process. He then moves on to attaching four more pieces onto these main frames, completing two pairs of flanges for the bulkhead hatches.The Final Touches
While two flanges form the primary support structure around the hatches, Sven mentions there are two additional pieces required at each end to ensure comprehensive protection. This attention to detail highlights his commitment to producing a durable and reliable design. “Sailing is about finding your path, whether it’s across an ocean or within yourself.” – Sven Yrvind In conclusion, making flanges around bulkhead hatches may seem complex at first glance, but by following Sven Yrvind’s meticulous process, enthusiasts can achieve professional-level results. Remember that the journey of boatbuilding is as rewarding as reaching your destination; it tests one’s patience and dedication. For those seeking to embark on this adventure or simply gain more insight into marine craftsmanship, Sven’s wisdom is invaluable.Sven Yrvind, a renowned yacht designer and sailor, shares valuable insights on creating flanges around bulkhead hatches for canvas protection in this enlightening video. By following his expert guidance, boat enthusiasts can ensure their living areas remain secure while allowing unhindered access through the hatches.Step 1: Starting with the Flange
Sven begins by explaining that working on flanges vertically and horizontally is significantly easier than doing so in a flat position. To simplify the process further, he divides the task into two or three steps as suggested by fellow expert “for for.” This approach not only makes it more manageable but also allows for greater precision in crafting each component.Step 2: Applying Glue and Securing
Sven proceeds to apply glue along one edge of the flange, ensuring a secure bond when clamped into place. He emphasizes that this stage is crucial for maintaining the structural integrity of the flange, which in turn safeguards the living area beneath the canvas when hatches are open.Step 3: Allowing Time to Dry
After securely attaching the first portion of the flange, Sven allows ample time for it to dry before moving forward with additional steps. This patience and precision are key aspects of his successful boatbuilding methods.Step 4: Finishing Touches
Once the flange is fully dried, Sven removes the clamps carefully, ensuring no damage occurs during this process. He then moves on to attaching four more pieces onto these main frames, completing two pairs of flanges for the bulkhead hatches.The Final Touches
While two flanges form the primary support structure around the hatches, Sven mentions there are two additional pieces required at each end to ensure comprehensive protection. This attention to detail highlights his commitment to producing a durable and reliable design. “Sailing is about finding your path, whether it’s across an ocean or within yourself.” – Sven Yrvind In conclusion, making flanges around bulkhead hatches may seem complex at first glance, but by following Sven Yrvind’s meticulous process, enthusiasts can achieve professional-level results. Remember that the journey of boatbuilding is as rewarding as reaching your destination; it tests one’s patience and dedication. For those seeking to embark on this adventure or simply gain more insight into marine craftsmanship, Sven’s wisdom is invaluable.Making Flanges Around Bulkhead Hatches for Canvas
Sven Yrvind, a renowned yacht designer and sailor, shares valuable insights on creating flanges around bulkhead hatches for canvas protection in this enlightening video. By following his expert guidance, boat enthusiasts can ensure their living areas remain secure while allowing unhindered access through the hatches.Step 1: Starting with the Flange
Sven begins by explaining that working on flanges vertically and horizontally is significantly easier than doing so in a flat position. To simplify the process further, he divides the task into two or three steps as suggested by fellow expert “for for.” This approach not only makes it more manageable but also allows for greater precision in crafting each component.Step 2: Applying Glue and Securing
Sven proceeds to apply glue along one edge of the flange, ensuring a secure bond when clamped into place. He emphasizes that this stage is crucial for maintaining the structural integrity of the flange, which in turn safeguards the living area beneath the canvas when hatches are open.Step 3: Allowing Time to Dry
After securely attaching the first portion of the flange, Sven allows ample time for it to dry before moving forward with additional steps. This patience and precision are key aspects of his successful boatbuilding methods.Step 4: Finishing Touches
Once the flange is fully dried, Sven removes the clamps carefully, ensuring no damage occurs during this process. He then moves on to attaching four more pieces onto these main frames, completing two pairs of flanges for the bulkhead hatches.The Final Touches
While two flanges form the primary support structure around the hatches, Sven mentions there are two additional pieces required at each end to ensure comprehensive protection. This attention to detail highlights his commitment to producing a durable and reliable design. “Sailing is about finding your path, whether it’s across an ocean or within yourself.” – Sven Yrvind In conclusion, making flanges around bulkhead hatches may seem complex at first glance, but by following Sven Yrvind’s meticulous process, enthusiasts can achieve professional-level results. Remember that the journey of boatbuilding is as rewarding as reaching your destination; it tests one’s patience and dedication. For those seeking to embark on this adventure or simply gain more insight into marine craftsmanship, Sven’s wisdom is invaluable.After securely attaching the first portion of the flange, Sven allows ample time for it to dry before moving forward with additional steps. This patience and precision are key aspects of his successful boatbuilding methods.Step 4: Finishing Touches
Once the flange is fully dried, Sven removes the clamps carefully, ensuring no damage occurs during this process. He then moves on to attaching four more pieces onto these main frames, completing two pairs of flanges for the bulkhead hatches.The Final Touches
While two flanges form the primary support structure around the hatches, Sven mentions there are two additional pieces required at each end to ensure comprehensive protection. This attention to detail highlights his commitment to producing a durable and reliable design. “Sailing is about finding your path, whether it’s across an ocean or within yourself.” – Sven Yrvind In conclusion, making flanges around bulkhead hatches may seem complex at first glance, but by following Sven Yrvind’s meticulous process, enthusiasts can achieve professional-level results. Remember that the journey of boatbuilding is as rewarding as reaching your destination; it tests one’s patience and dedication. For those seeking to embark on this adventure or simply gain more insight into marine craftsmanship, Sven’s wisdom is invaluable.Sven begins by explaining that working on flanges vertically and horizontally is significantly easier than doing so in a flat position. To simplify the process further, he divides the task into two or three steps as suggested by fellow expert “for for.” This approach not only makes it more manageable but also allows for greater precision in crafting each component.Step 2: Applying Glue and Securing
Sven proceeds to apply glue along one edge of the flange, ensuring a secure bond when clamped into place. He emphasizes that this stage is crucial for maintaining the structural integrity of the flange, which in turn safeguards the living area beneath the canvas when hatches are open.Step 3: Allowing Time to Dry
After securely attaching the first portion of the flange, Sven allows ample time for it to dry before moving forward with additional steps. This patience and precision are key aspects of his successful boatbuilding methods.Step 4: Finishing Touches
Once the flange is fully dried, Sven removes the clamps carefully, ensuring no damage occurs during this process. He then moves on to attaching four more pieces onto these main frames, completing two pairs of flanges for the bulkhead hatches.The Final Touches
While two flanges form the primary support structure around the hatches, Sven mentions there are two additional pieces required at each end to ensure comprehensive protection. This attention to detail highlights his commitment to producing a durable and reliable design. “Sailing is about finding your path, whether it’s across an ocean or within yourself.” – Sven Yrvind In conclusion, making flanges around bulkhead hatches may seem complex at first glance, but by following Sven Yrvind’s meticulous process, enthusiasts can achieve professional-level results. Remember that the journey of boatbuilding is as rewarding as reaching your destination; it tests one’s patience and dedication. For those seeking to embark on this adventure or simply gain more insight into marine craftsmanship, Sven’s wisdom is invaluable.Sven Yrvind, a renowned yacht designer and sailor, shares valuable insights on creating flanges around bulkhead hatches for canvas protection in this enlightening video. By following his expert guidance, boat enthusiasts can ensure their living areas remain secure while allowing unhindered access through the hatches.Step 1: Starting with the Flange
Sven begins by explaining that working on flanges vertically and horizontally is significantly easier than doing so in a flat position. To simplify the process further, he divides the task into two or three steps as suggested by fellow expert “for for.” This approach not only makes it more manageable but also allows for greater precision in crafting each component.Step 2: Applying Glue and Securing
Sven proceeds to apply glue along one edge of the flange, ensuring a secure bond when clamped into place. He emphasizes that this stage is crucial for maintaining the structural integrity of the flange, which in turn safeguards the living area beneath the canvas when hatches are open.Step 3: Allowing Time to Dry
After securely attaching the first portion of the flange, Sven allows ample time for it to dry before moving forward with additional steps. This patience and precision are key aspects of his successful boatbuilding methods.Step 4: Finishing Touches
Once the flange is fully dried, Sven removes the clamps carefully, ensuring no damage occurs during this process. He then moves on to attaching four more pieces onto these main frames, completing two pairs of flanges for the bulkhead hatches.The Final Touches
While two flanges form the primary support structure around the hatches, Sven mentions there are two additional pieces required at each end to ensure comprehensive protection. This attention to detail highlights his commitment to producing a durable and reliable design. “Sailing is about finding your path, whether it’s across an ocean or within yourself.” – Sven Yrvind In conclusion, making flanges around bulkhead hatches may seem complex at first glance, but by following Sven Yrvind’s meticulous process, enthusiasts can achieve professional-level results. Remember that the journey of boatbuilding is as rewarding as reaching your destination; it tests one’s patience and dedication. For those seeking to embark on this adventure or simply gain more insight into marine craftsmanship, Sven’s wisdom is invaluable.Making Flanges Around Bulkhead Hatches for Canvas
Sven Yrvind, a renowned yacht designer and sailor, shares valuable insights on creating flanges around bulkhead hatches for canvas protection in this enlightening video. By following his expert guidance, boat enthusiasts can ensure their living areas remain secure while allowing unhindered access through the hatches.Step 1: Starting with the Flange
Sven begins by explaining that working on flanges vertically and horizontally is significantly easier than doing so in a flat position. To simplify the process further, he divides the task into two or three steps as suggested by fellow expert “for for.” This approach not only makes it more manageable but also allows for greater precision in crafting each component.Step 2: Applying Glue and Securing
Sven proceeds to apply glue along one edge of the flange, ensuring a secure bond when clamped into place. He emphasizes that this stage is crucial for maintaining the structural integrity of the flange, which in turn safeguards the living area beneath the canvas when hatches are open.Step 3: Allowing Time to Dry
After securely attaching the first portion of the flange, Sven allows ample time for it to dry before moving forward with additional steps. This patience and precision are key aspects of his successful boatbuilding methods.Step 4: Finishing Touches
Once the flange is fully dried, Sven removes the clamps carefully, ensuring no damage occurs during this process. He then moves on to attaching four more pieces onto these main frames, completing two pairs of flanges for the bulkhead hatches.The Final Touches
While two flanges form the primary support structure around the hatches, Sven mentions there are two additional pieces required at each end to ensure comprehensive protection. This attention to detail highlights his commitment to producing a durable and reliable design. “Sailing is about finding your path, whether it’s across an ocean or within yourself.” – Sven Yrvind In conclusion, making flanges around bulkhead hatches may seem complex at first glance, but by following Sven Yrvind’s meticulous process, enthusiasts can achieve professional-level results. Remember that the journey of boatbuilding is as rewarding as reaching your destination; it tests one’s patience and dedication. For those seeking to embark on this adventure or simply gain more insight into marine craftsmanship, Sven’s wisdom is invaluable.Sven proceeds to apply glue along one edge of the flange, ensuring a secure bond when clamped into place. He emphasizes that this stage is crucial for maintaining the structural integrity of the flange, which in turn safeguards the living area beneath the canvas when hatches are open.Step 3: Allowing Time to Dry
After securely attaching the first portion of the flange, Sven allows ample time for it to dry before moving forward with additional steps. This patience and precision are key aspects of his successful boatbuilding methods.Step 4: Finishing Touches
Once the flange is fully dried, Sven removes the clamps carefully, ensuring no damage occurs during this process. He then moves on to attaching four more pieces onto these main frames, completing two pairs of flanges for the bulkhead hatches.The Final Touches
While two flanges form the primary support structure around the hatches, Sven mentions there are two additional pieces required at each end to ensure comprehensive protection. This attention to detail highlights his commitment to producing a durable and reliable design. “Sailing is about finding your path, whether it’s across an ocean or within yourself.” – Sven Yrvind In conclusion, making flanges around bulkhead hatches may seem complex at first glance, but by following Sven Yrvind’s meticulous process, enthusiasts can achieve professional-level results. Remember that the journey of boatbuilding is as rewarding as reaching your destination; it tests one’s patience and dedication. For those seeking to embark on this adventure or simply gain more insight into marine craftsmanship, Sven’s wisdom is invaluable.Sven begins by explaining that working on flanges vertically and horizontally is significantly easier than doing so in a flat position. To simplify the process further, he divides the task into two or three steps as suggested by fellow expert “for for.” This approach not only makes it more manageable but also allows for greater precision in crafting each component.Step 2: Applying Glue and Securing
Sven proceeds to apply glue along one edge of the flange, ensuring a secure bond when clamped into place. He emphasizes that this stage is crucial for maintaining the structural integrity of the flange, which in turn safeguards the living area beneath the canvas when hatches are open.Step 3: Allowing Time to Dry
After securely attaching the first portion of the flange, Sven allows ample time for it to dry before moving forward with additional steps. This patience and precision are key aspects of his successful boatbuilding methods.Step 4: Finishing Touches
Once the flange is fully dried, Sven removes the clamps carefully, ensuring no damage occurs during this process. He then moves on to attaching four more pieces onto these main frames, completing two pairs of flanges for the bulkhead hatches.The Final Touches
While two flanges form the primary support structure around the hatches, Sven mentions there are two additional pieces required at each end to ensure comprehensive protection. This attention to detail highlights his commitment to producing a durable and reliable design. “Sailing is about finding your path, whether it’s across an ocean or within yourself.” – Sven Yrvind In conclusion, making flanges around bulkhead hatches may seem complex at first glance, but by following Sven Yrvind’s meticulous process, enthusiasts can achieve professional-level results. Remember that the journey of boatbuilding is as rewarding as reaching your destination; it tests one’s patience and dedication. For those seeking to embark on this adventure or simply gain more insight into marine craftsmanship, Sven’s wisdom is invaluable.Sven Yrvind, a renowned yacht designer and sailor, shares valuable insights on creating flanges around bulkhead hatches for canvas protection in this enlightening video. By following his expert guidance, boat enthusiasts can ensure their living areas remain secure while allowing unhindered access through the hatches.Step 1: Starting with the Flange
Sven begins by explaining that working on flanges vertically and horizontally is significantly easier than doing so in a flat position. To simplify the process further, he divides the task into two or three steps as suggested by fellow expert “for for.” This approach not only makes it more manageable but also allows for greater precision in crafting each component.Step 2: Applying Glue and Securing
Sven proceeds to apply glue along one edge of the flange, ensuring a secure bond when clamped into place. He emphasizes that this stage is crucial for maintaining the structural integrity of the flange, which in turn safeguards the living area beneath the canvas when hatches are open.Step 3: Allowing Time to Dry
After securely attaching the first portion of the flange, Sven allows ample time for it to dry before moving forward with additional steps. This patience and precision are key aspects of his successful boatbuilding methods.Step 4: Finishing Touches
Once the flange is fully dried, Sven removes the clamps carefully, ensuring no damage occurs during this process. He then moves on to attaching four more pieces onto these main frames, completing two pairs of flanges for the bulkhead hatches.The Final Touches
While two flanges form the primary support structure around the hatches, Sven mentions there are two additional pieces required at each end to ensure comprehensive protection. This attention to detail highlights his commitment to producing a durable and reliable design. “Sailing is about finding your path, whether it’s across an ocean or within yourself.” – Sven Yrvind In conclusion, making flanges around bulkhead hatches may seem complex at first glance, but by following Sven Yrvind’s meticulous process, enthusiasts can achieve professional-level results. Remember that the journey of boatbuilding is as rewarding as reaching your destination; it tests one’s patience and dedication. For those seeking to embark on this adventure or simply gain more insight into marine craftsmanship, Sven’s wisdom is invaluable.Making Flanges Around Bulkhead Hatches for Canvas
Sven Yrvind, a renowned yacht designer and sailor, shares valuable insights on creating flanges around bulkhead hatches for canvas protection in this enlightening video. By following his expert guidance, boat enthusiasts can ensure their living areas remain secure while allowing unhindered access through the hatches.Step 1: Starting with the Flange
Sven begins by explaining that working on flanges vertically and horizontally is significantly easier than doing so in a flat position. To simplify the process further, he divides the task into two or three steps as suggested by fellow expert “for for.” This approach not only makes it more manageable but also allows for greater precision in crafting each component.Step 2: Applying Glue and Securing
Sven proceeds to apply glue along one edge of the flange, ensuring a secure bond when clamped into place. He emphasizes that this stage is crucial for maintaining the structural integrity of the flange, which in turn safeguards the living area beneath the canvas when hatches are open.Step 3: Allowing Time to Dry
After securely attaching the first portion of the flange, Sven allows ample time for it to dry before moving forward with additional steps. This patience and precision are key aspects of his successful boatbuilding methods.Step 4: Finishing Touches
Once the flange is fully dried, Sven removes the clamps carefully, ensuring no damage occurs during this process. He then moves on to attaching four more pieces onto these main frames, completing two pairs of flanges for the bulkhead hatches.The Final Touches
While two flanges form the primary support structure around the hatches, Sven mentions there are two additional pieces required at each end to ensure comprehensive protection. This attention to detail highlights his commitment to producing a durable and reliable design. “Sailing is about finding your path, whether it’s across an ocean or within yourself.” – Sven Yrvind In conclusion, making flanges around bulkhead hatches may seem complex at first glance, but by following Sven Yrvind’s meticulous process, enthusiasts can achieve professional-level results. Remember that the journey of boatbuilding is as rewarding as reaching your destination; it tests one’s patience and dedication. For those seeking to embark on this adventure or simply gain more insight into marine craftsmanship, Sven’s wisdom is invaluable.Once the flange is fully dried, Sven removes the clamps carefully, ensuring no damage occurs during this process. He then moves on to attaching four more pieces onto these main frames, completing two pairs of flanges for the bulkhead hatches.The Final Touches
While two flanges form the primary support structure around the hatches, Sven mentions there are two additional pieces required at each end to ensure comprehensive protection. This attention to detail highlights his commitment to producing a durable and reliable design. “Sailing is about finding your path, whether it’s across an ocean or within yourself.” – Sven Yrvind In conclusion, making flanges around bulkhead hatches may seem complex at first glance, but by following Sven Yrvind’s meticulous process, enthusiasts can achieve professional-level results. Remember that the journey of boatbuilding is as rewarding as reaching your destination; it tests one’s patience and dedication. For those seeking to embark on this adventure or simply gain more insight into marine craftsmanship, Sven’s wisdom is invaluable.Sven proceeds to apply glue along one edge of the flange, ensuring a secure bond when clamped into place. He emphasizes that this stage is crucial for maintaining the structural integrity of the flange, which in turn safeguards the living area beneath the canvas when hatches are open.Step 3: Allowing Time to Dry
After securely attaching the first portion of the flange, Sven allows ample time for it to dry before moving forward with additional steps. This patience and precision are key aspects of his successful boatbuilding methods.Step 4: Finishing Touches
Once the flange is fully dried, Sven removes the clamps carefully, ensuring no damage occurs during this process. He then moves on to attaching four more pieces onto these main frames, completing two pairs of flanges for the bulkhead hatches.The Final Touches
While two flanges form the primary support structure around the hatches, Sven mentions there are two additional pieces required at each end to ensure comprehensive protection. This attention to detail highlights his commitment to producing a durable and reliable design. “Sailing is about finding your path, whether it’s across an ocean or within yourself.” – Sven Yrvind In conclusion, making flanges around bulkhead hatches may seem complex at first glance, but by following Sven Yrvind’s meticulous process, enthusiasts can achieve professional-level results. Remember that the journey of boatbuilding is as rewarding as reaching your destination; it tests one’s patience and dedication. For those seeking to embark on this adventure or simply gain more insight into marine craftsmanship, Sven’s wisdom is invaluable.Sven begins by explaining that working on flanges vertically and horizontally is significantly easier than doing so in a flat position. To simplify the process further, he divides the task into two or three steps as suggested by fellow expert “for for.” This approach not only makes it more manageable but also allows for greater precision in crafting each component.Step 2: Applying Glue and Securing
Sven proceeds to apply glue along one edge of the flange, ensuring a secure bond when clamped into place. He emphasizes that this stage is crucial for maintaining the structural integrity of the flange, which in turn safeguards the living area beneath the canvas when hatches are open.Step 3: Allowing Time to Dry
After securely attaching the first portion of the flange, Sven allows ample time for it to dry before moving forward with additional steps. This patience and precision are key aspects of his successful boatbuilding methods.Step 4: Finishing Touches
Once the flange is fully dried, Sven removes the clamps carefully, ensuring no damage occurs during this process. He then moves on to attaching four more pieces onto these main frames, completing two pairs of flanges for the bulkhead hatches.The Final Touches
While two flanges form the primary support structure around the hatches, Sven mentions there are two additional pieces required at each end to ensure comprehensive protection. This attention to detail highlights his commitment to producing a durable and reliable design. “Sailing is about finding your path, whether it’s across an ocean or within yourself.” – Sven Yrvind In conclusion, making flanges around bulkhead hatches may seem complex at first glance, but by following Sven Yrvind’s meticulous process, enthusiasts can achieve professional-level results. Remember that the journey of boatbuilding is as rewarding as reaching your destination; it tests one’s patience and dedication. For those seeking to embark on this adventure or simply gain more insight into marine craftsmanship, Sven’s wisdom is invaluable.Sven Yrvind, a renowned yacht designer and sailor, shares valuable insights on creating flanges around bulkhead hatches for canvas protection in this enlightening video. By following his expert guidance, boat enthusiasts can ensure their living areas remain secure while allowing unhindered access through the hatches.Step 1: Starting with the Flange
Sven begins by explaining that working on flanges vertically and horizontally is significantly easier than doing so in a flat position. To simplify the process further, he divides the task into two or three steps as suggested by fellow expert “for for.” This approach not only makes it more manageable but also allows for greater precision in crafting each component.Step 2: Applying Glue and Securing
Sven proceeds to apply glue along one edge of the flange, ensuring a secure bond when clamped into place. He emphasizes that this stage is crucial for maintaining the structural integrity of the flange, which in turn safeguards the living area beneath the canvas when hatches are open.Step 3: Allowing Time to Dry
After securely attaching the first portion of the flange, Sven allows ample time for it to dry before moving forward with additional steps. This patience and precision are key aspects of his successful boatbuilding methods.Step 4: Finishing Touches
Once the flange is fully dried, Sven removes the clamps carefully, ensuring no damage occurs during this process. He then moves on to attaching four more pieces onto these main frames, completing two pairs of flanges for the bulkhead hatches.The Final Touches
While two flanges form the primary support structure around the hatches, Sven mentions there are two additional pieces required at each end to ensure comprehensive protection. This attention to detail highlights his commitment to producing a durable and reliable design. “Sailing is about finding your path, whether it’s across an ocean or within yourself.” – Sven Yrvind In conclusion, making flanges around bulkhead hatches may seem complex at first glance, but by following Sven Yrvind’s meticulous process, enthusiasts can achieve professional-level results. Remember that the journey of boatbuilding is as rewarding as reaching your destination; it tests one’s patience and dedication. For those seeking to embark on this adventure or simply gain more insight into marine craftsmanship, Sven’s wisdom is invaluable.Making Flanges Around Bulkhead Hatches for Canvas
Sven Yrvind, a renowned yacht designer and sailor, shares valuable insights on creating flanges around bulkhead hatches for canvas protection in this enlightening video. By following his expert guidance, boat enthusiasts can ensure their living areas remain secure while allowing unhindered access through the hatches.Step 1: Starting with the Flange
Sven begins by explaining that working on flanges vertically and horizontally is significantly easier than doing so in a flat position. To simplify the process further, he divides the task into two or three steps as suggested by fellow expert “for for.” This approach not only makes it more manageable but also allows for greater precision in crafting each component.Step 2: Applying Glue and Securing
Sven proceeds to apply glue along one edge of the flange, ensuring a secure bond when clamped into place. He emphasizes that this stage is crucial for maintaining the structural integrity of the flange, which in turn safeguards the living area beneath the canvas when hatches are open.Step 3: Allowing Time to Dry
After securely attaching the first portion of the flange, Sven allows ample time for it to dry before moving forward with additional steps. This patience and precision are key aspects of his successful boatbuilding methods.Step 4: Finishing Touches
Once the flange is fully dried, Sven removes the clamps carefully, ensuring no damage occurs during this process. He then moves on to attaching four more pieces onto these main frames, completing two pairs of flanges for the bulkhead hatches.The Final Touches
While two flanges form the primary support structure around the hatches, Sven mentions there are two additional pieces required at each end to ensure comprehensive protection. This attention to detail highlights his commitment to producing a durable and reliable design. “Sailing is about finding your path, whether it’s across an ocean or within yourself.” – Sven Yrvind In conclusion, making flanges around bulkhead hatches may seem complex at first glance, but by following Sven Yrvind’s meticulous process, enthusiasts can achieve professional-level results. Remember that the journey of boatbuilding is as rewarding as reaching your destination; it tests one’s patience and dedication. For those seeking to embark on this adventure or simply gain more insight into marine craftsmanship, Sven’s wisdom is invaluable.After securely attaching the first portion of the flange, Sven allows ample time for it to dry before moving forward with additional steps. This patience and precision are key aspects of his successful boatbuilding methods.Step 4: Finishing Touches
Once the flange is fully dried, Sven removes the clamps carefully, ensuring no damage occurs during this process. He then moves on to attaching four more pieces onto these main frames, completing two pairs of flanges for the bulkhead hatches.The Final Touches
While two flanges form the primary support structure around the hatches, Sven mentions there are two additional pieces required at each end to ensure comprehensive protection. This attention to detail highlights his commitment to producing a durable and reliable design. “Sailing is about finding your path, whether it’s across an ocean or within yourself.” – Sven Yrvind In conclusion, making flanges around bulkhead hatches may seem complex at first glance, but by following Sven Yrvind’s meticulous process, enthusiasts can achieve professional-level results. Remember that the journey of boatbuilding is as rewarding as reaching your destination; it tests one’s patience and dedication. For those seeking to embark on this adventure or simply gain more insight into marine craftsmanship, Sven’s wisdom is invaluable.Sven proceeds to apply glue along one edge of the flange, ensuring a secure bond when clamped into place. He emphasizes that this stage is crucial for maintaining the structural integrity of the flange, which in turn safeguards the living area beneath the canvas when hatches are open.Step 3: Allowing Time to Dry
After securely attaching the first portion of the flange, Sven allows ample time for it to dry before moving forward with additional steps. This patience and precision are key aspects of his successful boatbuilding methods.Step 4: Finishing Touches
Once the flange is fully dried, Sven removes the clamps carefully, ensuring no damage occurs during this process. He then moves on to attaching four more pieces onto these main frames, completing two pairs of flanges for the bulkhead hatches.The Final Touches
While two flanges form the primary support structure around the hatches, Sven mentions there are two additional pieces required at each end to ensure comprehensive protection. This attention to detail highlights his commitment to producing a durable and reliable design. “Sailing is about finding your path, whether it’s across an ocean or within yourself.” – Sven Yrvind In conclusion, making flanges around bulkhead hatches may seem complex at first glance, but by following Sven Yrvind’s meticulous process, enthusiasts can achieve professional-level results. Remember that the journey of boatbuilding is as rewarding as reaching your destination; it tests one’s patience and dedication. For those seeking to embark on this adventure or simply gain more insight into marine craftsmanship, Sven’s wisdom is invaluable.Sven begins by explaining that working on flanges vertically and horizontally is significantly easier than doing so in a flat position. To simplify the process further, he divides the task into two or three steps as suggested by fellow expert “for for.” This approach not only makes it more manageable but also allows for greater precision in crafting each component.Step 2: Applying Glue and Securing
Sven proceeds to apply glue along one edge of the flange, ensuring a secure bond when clamped into place. He emphasizes that this stage is crucial for maintaining the structural integrity of the flange, which in turn safeguards the living area beneath the canvas when hatches are open.Step 3: Allowing Time to Dry
After securely attaching the first portion of the flange, Sven allows ample time for it to dry before moving forward with additional steps. This patience and precision are key aspects of his successful boatbuilding methods.Step 4: Finishing Touches
Once the flange is fully dried, Sven removes the clamps carefully, ensuring no damage occurs during this process. He then moves on to attaching four more pieces onto these main frames, completing two pairs of flanges for the bulkhead hatches.The Final Touches
While two flanges form the primary support structure around the hatches, Sven mentions there are two additional pieces required at each end to ensure comprehensive protection. This attention to detail highlights his commitment to producing a durable and reliable design. “Sailing is about finding your path, whether it’s across an ocean or within yourself.” – Sven Yrvind In conclusion, making flanges around bulkhead hatches may seem complex at first glance, but by following Sven Yrvind’s meticulous process, enthusiasts can achieve professional-level results. Remember that the journey of boatbuilding is as rewarding as reaching your destination; it tests one’s patience and dedication. For those seeking to embark on this adventure or simply gain more insight into marine craftsmanship, Sven’s wisdom is invaluable.Sven Yrvind, a renowned yacht designer and sailor, shares valuable insights on creating flanges around bulkhead hatches for canvas protection in this enlightening video. By following his expert guidance, boat enthusiasts can ensure their living areas remain secure while allowing unhindered access through the hatches.Step 1: Starting with the Flange
Sven begins by explaining that working on flanges vertically and horizontally is significantly easier than doing so in a flat position. To simplify the process further, he divides the task into two or three steps as suggested by fellow expert “for for.” This approach not only makes it more manageable but also allows for greater precision in crafting each component.Step 2: Applying Glue and Securing
Sven proceeds to apply glue along one edge of the flange, ensuring a secure bond when clamped into place. He emphasizes that this stage is crucial for maintaining the structural integrity of the flange, which in turn safeguards the living area beneath the canvas when hatches are open.Step 3: Allowing Time to Dry
After securely attaching the first portion of the flange, Sven allows ample time for it to dry before moving forward with additional steps. This patience and precision are key aspects of his successful boatbuilding methods.Step 4: Finishing Touches
Once the flange is fully dried, Sven removes the clamps carefully, ensuring no damage occurs during this process. He then moves on to attaching four more pieces onto these main frames, completing two pairs of flanges for the bulkhead hatches.The Final Touches
While two flanges form the primary support structure around the hatches, Sven mentions there are two additional pieces required at each end to ensure comprehensive protection. This attention to detail highlights his commitment to producing a durable and reliable design. “Sailing is about finding your path, whether it’s across an ocean or within yourself.” – Sven Yrvind In conclusion, making flanges around bulkhead hatches may seem complex at first glance, but by following Sven Yrvind’s meticulous process, enthusiasts can achieve professional-level results. Remember that the journey of boatbuilding is as rewarding as reaching your destination; it tests one’s patience and dedication. For those seeking to embark on this adventure or simply gain more insight into marine craftsmanship, Sven’s wisdom is invaluable.Making Flanges Around Bulkhead Hatches for Canvas
Sven Yrvind, a renowned yacht designer and sailor, shares valuable insights on creating flanges around bulkhead hatches for canvas protection in this enlightening video. By following his expert guidance, boat enthusiasts can ensure their living areas remain secure while allowing unhindered access through the hatches.Step 1: Starting with the Flange
Sven begins by explaining that working on flanges vertically and horizontally is significantly easier than doing so in a flat position. To simplify the process further, he divides the task into two or three steps as suggested by fellow expert “for for.” This approach not only makes it more manageable but also allows for greater precision in crafting each component.Step 2: Applying Glue and Securing
Sven proceeds to apply glue along one edge of the flange, ensuring a secure bond when clamped into place. He emphasizes that this stage is crucial for maintaining the structural integrity of the flange, which in turn safeguards the living area beneath the canvas when hatches are open.Step 3: Allowing Time to Dry
After securely attaching the first portion of the flange, Sven allows ample time for it to dry before moving forward with additional steps. This patience and precision are key aspects of his successful boatbuilding methods.Step 4: Finishing Touches
Once the flange is fully dried, Sven removes the clamps carefully, ensuring no damage occurs during this process. He then moves on to attaching four more pieces onto these main frames, completing two pairs of flanges for the bulkhead hatches.The Final Touches
While two flanges form the primary support structure around the hatches, Sven mentions there are two additional pieces required at each end to ensure comprehensive protection. This attention to detail highlights his commitment to producing a durable and reliable design. “Sailing is about finding your path, whether it’s across an ocean or within yourself.” – Sven Yrvind In conclusion, making flanges around bulkhead hatches may seem complex at first glance, but by following Sven Yrvind’s meticulous process, enthusiasts can achieve professional-level results. Remember that the journey of boatbuilding is as rewarding as reaching your destination; it tests one’s patience and dedication. For those seeking to embark on this adventure or simply gain more insight into marine craftsmanship, Sven’s wisdom is invaluable.Once the flange is fully dried, Sven removes the clamps carefully, ensuring no damage occurs during this process. He then moves on to attaching four more pieces onto these main frames, completing two pairs of flanges for the bulkhead hatches.The Final Touches
While two flanges form the primary support structure around the hatches, Sven mentions there are two additional pieces required at each end to ensure comprehensive protection. This attention to detail highlights his commitment to producing a durable and reliable design. “Sailing is about finding your path, whether it’s across an ocean or within yourself.” – Sven Yrvind In conclusion, making flanges around bulkhead hatches may seem complex at first glance, but by following Sven Yrvind’s meticulous process, enthusiasts can achieve professional-level results. Remember that the journey of boatbuilding is as rewarding as reaching your destination; it tests one’s patience and dedication. For those seeking to embark on this adventure or simply gain more insight into marine craftsmanship, Sven’s wisdom is invaluable.After securely attaching the first portion of the flange, Sven allows ample time for it to dry before moving forward with additional steps. This patience and precision are key aspects of his successful boatbuilding methods.Step 4: Finishing Touches
Once the flange is fully dried, Sven removes the clamps carefully, ensuring no damage occurs during this process. He then moves on to attaching four more pieces onto these main frames, completing two pairs of flanges for the bulkhead hatches.The Final Touches
While two flanges form the primary support structure around the hatches, Sven mentions there are two additional pieces required at each end to ensure comprehensive protection. This attention to detail highlights his commitment to producing a durable and reliable design. “Sailing is about finding your path, whether it’s across an ocean or within yourself.” – Sven Yrvind In conclusion, making flanges around bulkhead hatches may seem complex at first glance, but by following Sven Yrvind’s meticulous process, enthusiasts can achieve professional-level results. Remember that the journey of boatbuilding is as rewarding as reaching your destination; it tests one’s patience and dedication. For those seeking to embark on this adventure or simply gain more insight into marine craftsmanship, Sven’s wisdom is invaluable.Sven proceeds to apply glue along one edge of the flange, ensuring a secure bond when clamped into place. He emphasizes that this stage is crucial for maintaining the structural integrity of the flange, which in turn safeguards the living area beneath the canvas when hatches are open.Step 3: Allowing Time to Dry
After securely attaching the first portion of the flange, Sven allows ample time for it to dry before moving forward with additional steps. This patience and precision are key aspects of his successful boatbuilding methods.Step 4: Finishing Touches
Once the flange is fully dried, Sven removes the clamps carefully, ensuring no damage occurs during this process. He then moves on to attaching four more pieces onto these main frames, completing two pairs of flanges for the bulkhead hatches.The Final Touches
While two flanges form the primary support structure around the hatches, Sven mentions there are two additional pieces required at each end to ensure comprehensive protection. This attention to detail highlights his commitment to producing a durable and reliable design. “Sailing is about finding your path, whether it’s across an ocean or within yourself.” – Sven Yrvind In conclusion, making flanges around bulkhead hatches may seem complex at first glance, but by following Sven Yrvind’s meticulous process, enthusiasts can achieve professional-level results. Remember that the journey of boatbuilding is as rewarding as reaching your destination; it tests one’s patience and dedication. For those seeking to embark on this adventure or simply gain more insight into marine craftsmanship, Sven’s wisdom is invaluable.Sven begins by explaining that working on flanges vertically and horizontally is significantly easier than doing so in a flat position. To simplify the process further, he divides the task into two or three steps as suggested by fellow expert “for for.” This approach not only makes it more manageable but also allows for greater precision in crafting each component.Step 2: Applying Glue and Securing
Sven proceeds to apply glue along one edge of the flange, ensuring a secure bond when clamped into place. He emphasizes that this stage is crucial for maintaining the structural integrity of the flange, which in turn safeguards the living area beneath the canvas when hatches are open.Step 3: Allowing Time to Dry
After securely attaching the first portion of the flange, Sven allows ample time for it to dry before moving forward with additional steps. This patience and precision are key aspects of his successful boatbuilding methods.Step 4: Finishing Touches
Once the flange is fully dried, Sven removes the clamps carefully, ensuring no damage occurs during this process. He then moves on to attaching four more pieces onto these main frames, completing two pairs of flanges for the bulkhead hatches.The Final Touches
While two flanges form the primary support structure around the hatches, Sven mentions there are two additional pieces required at each end to ensure comprehensive protection. This attention to detail highlights his commitment to producing a durable and reliable design. “Sailing is about finding your path, whether it’s across an ocean or within yourself.” – Sven Yrvind In conclusion, making flanges around bulkhead hatches may seem complex at first glance, but by following Sven Yrvind’s meticulous process, enthusiasts can achieve professional-level results. Remember that the journey of boatbuilding is as rewarding as reaching your destination; it tests one’s patience and dedication. For those seeking to embark on this adventure or simply gain more insight into marine craftsmanship, Sven’s wisdom is invaluable.Sven Yrvind, a renowned yacht designer and sailor, shares valuable insights on creating flanges around bulkhead hatches for canvas protection in this enlightening video. By following his expert guidance, boat enthusiasts can ensure their living areas remain secure while allowing unhindered access through the hatches.Step 1: Starting with the Flange
Sven begins by explaining that working on flanges vertically and horizontally is significantly easier than doing so in a flat position. To simplify the process further, he divides the task into two or three steps as suggested by fellow expert “for for.” This approach not only makes it more manageable but also allows for greater precision in crafting each component.Step 2: Applying Glue and Securing
Sven proceeds to apply glue along one edge of the flange, ensuring a secure bond when clamped into place. He emphasizes that this stage is crucial for maintaining the structural integrity of the flange, which in turn safeguards the living area beneath the canvas when hatches are open.Step 3: Allowing Time to Dry
After securely attaching the first portion of the flange, Sven allows ample time for it to dry before moving forward with additional steps. This patience and precision are key aspects of his successful boatbuilding methods.Step 4: Finishing Touches
Once the flange is fully dried, Sven removes the clamps carefully, ensuring no damage occurs during this process. He then moves on to attaching four more pieces onto these main frames, completing two pairs of flanges for the bulkhead hatches.The Final Touches
While two flanges form the primary support structure around the hatches, Sven mentions there are two additional pieces required at each end to ensure comprehensive protection. This attention to detail highlights his commitment to producing a durable and reliable design. “Sailing is about finding your path, whether it’s across an ocean or within yourself.” – Sven Yrvind In conclusion, making flanges around bulkhead hatches may seem complex at first glance, but by following Sven Yrvind’s meticulous process, enthusiasts can achieve professional-level results. Remember that the journey of boatbuilding is as rewarding as reaching your destination; it tests one’s patience and dedication. For those seeking to embark on this adventure or simply gain more insight into marine craftsmanship, Sven’s wisdom is invaluable.Making Flanges Around Bulkhead Hatches for Canvas
Sven Yrvind, a renowned yacht designer and sailor, shares valuable insights on creating flanges around bulkhead hatches for canvas protection in this enlightening video. By following his expert guidance, boat enthusiasts can ensure their living areas remain secure while allowing unhindered access through the hatches.Step 1: Starting with the Flange
Sven begins by explaining that working on flanges vertically and horizontally is significantly easier than doing so in a flat position. To simplify the process further, he divides the task into two or three steps as suggested by fellow expert “for for.” This approach not only makes it more manageable but also allows for greater precision in crafting each component.Step 2: Applying Glue and Securing
Sven proceeds to apply glue along one edge of the flange, ensuring a secure bond when clamped into place. He emphasizes that this stage is crucial for maintaining the structural integrity of the flange, which in turn safeguards the living area beneath the canvas when hatches are open.Step 3: Allowing Time to Dry
After securely attaching the first portion of the flange, Sven allows ample time for it to dry before moving forward with additional steps. This patience and precision are key aspects of his successful boatbuilding methods.Step 4: Finishing Touches
Once the flange is fully dried, Sven removes the clamps carefully, ensuring no damage occurs during this process. He then moves on to attaching four more pieces onto these main frames, completing two pairs of flanges for the bulkhead hatches.The Final Touches
While two flanges form the primary support structure around the hatches, Sven mentions there are two additional pieces required at each end to ensure comprehensive protection. This attention to detail highlights his commitment to producing a durable and reliable design. “Sailing is about finding your path, whether it’s across an ocean or within yourself.” – Sven Yrvind In conclusion, making flanges around bulkhead hatches may seem complex at first glance, but by following Sven Yrvind’s meticulous process, enthusiasts can achieve professional-level results. Remember that the journey of boatbuilding is as rewarding as reaching your destination; it tests one’s patience and dedication. For those seeking to embark on this adventure or simply gain more insight into marine craftsmanship, Sven’s wisdom is invaluable.Once the flange is fully dried, Sven removes the clamps carefully, ensuring no damage occurs during this process. He then moves on to attaching four more pieces onto these main frames, completing two pairs of flanges for the bulkhead hatches.The Final Touches
While two flanges form the primary support structure around the hatches, Sven mentions there are two additional pieces required at each end to ensure comprehensive protection. This attention to detail highlights his commitment to producing a durable and reliable design. “Sailing is about finding your path, whether it’s across an ocean or within yourself.” – Sven Yrvind In conclusion, making flanges around bulkhead hatches may seem complex at first glance, but by following Sven Yrvind’s meticulous process, enthusiasts can achieve professional-level results. Remember that the journey of boatbuilding is as rewarding as reaching your destination; it tests one’s patience and dedication. For those seeking to embark on this adventure or simply gain more insight into marine craftsmanship, Sven’s wisdom is invaluable.Sven begins by explaining that working on flanges vertically and horizontally is significantly easier than doing so in a flat position. To simplify the process further, he divides the task into two or three steps as suggested by fellow expert “for for.” This approach not only makes it more manageable but also allows for greater precision in crafting each component.Step 2: Applying Glue and Securing
Sven proceeds to apply glue along one edge of the flange, ensuring a secure bond when clamped into place. He emphasizes that this stage is crucial for maintaining the structural integrity of the flange, which in turn safeguards the living area beneath the canvas when hatches are open.Step 3: Allowing Time to Dry
After securely attaching the first portion of the flange, Sven allows ample time for it to dry before moving forward with additional steps. This patience and precision are key aspects of his successful boatbuilding methods.Step 4: Finishing Touches
Once the flange is fully dried, Sven removes the clamps carefully, ensuring no damage occurs during this process. He then moves on to attaching four more pieces onto these main frames, completing two pairs of flanges for the bulkhead hatches.The Final Touches
While two flanges form the primary support structure around the hatches, Sven mentions there are two additional pieces required at each end to ensure comprehensive protection. This attention to detail highlights his commitment to producing a durable and reliable design. “Sailing is about finding your path, whether it’s across an ocean or within yourself.” – Sven Yrvind In conclusion, making flanges around bulkhead hatches may seem complex at first glance, but by following Sven Yrvind’s meticulous process, enthusiasts can achieve professional-level results. Remember that the journey of boatbuilding is as rewarding as reaching your destination; it tests one’s patience and dedication. For those seeking to embark on this adventure or simply gain more insight into marine craftsmanship, Sven’s wisdom is invaluable.Sven Yrvind, a renowned yacht designer and sailor, shares valuable insights on creating flanges around bulkhead hatches for canvas protection in this enlightening video. By following his expert guidance, boat enthusiasts can ensure their living areas remain secure while allowing unhindered access through the hatches.Step 1: Starting with the Flange
Sven begins by explaining that working on flanges vertically and horizontally is significantly easier than doing so in a flat position. To simplify the process further, he divides the task into two or three steps as suggested by fellow expert “for for.” This approach not only makes it more manageable but also allows for greater precision in crafting each component.Step 2: Applying Glue and Securing
Sven proceeds to apply glue along one edge of the flange, ensuring a secure bond when clamped into place. He emphasizes that this stage is crucial for maintaining the structural integrity of the flange, which in turn safeguards the living area beneath the canvas when hatches are open.Step 3: Allowing Time to Dry
After securely attaching the first portion of the flange, Sven allows ample time for it to dry before moving forward with additional steps. This patience and precision are key aspects of his successful boatbuilding methods.Step 4: Finishing Touches
Once the flange is fully dried, Sven removes the clamps carefully, ensuring no damage occurs during this process. He then moves on to attaching four more pieces onto these main frames, completing two pairs of flanges for the bulkhead hatches.The Final Touches
While two flanges form the primary support structure around the hatches, Sven mentions there are two additional pieces required at each end to ensure comprehensive protection. This attention to detail highlights his commitment to producing a durable and reliable design. “Sailing is about finding your path, whether it’s across an ocean or within yourself.” – Sven Yrvind In conclusion, making flanges around bulkhead hatches may seem complex at first glance, but by following Sven Yrvind’s meticulous process, enthusiasts can achieve professional-level results. Remember that the journey of boatbuilding is as rewarding as reaching your destination; it tests one’s patience and dedication. For those seeking to embark on this adventure or simply gain more insight into marine craftsmanship, Sven’s wisdom is invaluable.Making Flanges Around Bulkhead Hatches for Canvas
Sven Yrvind, a renowned yacht designer and sailor, shares valuable insights on creating flanges around bulkhead hatches for canvas protection in this enlightening video. By following his expert guidance, boat enthusiasts can ensure their living areas remain secure while allowing unhindered access through the hatches.Step 1: Starting with the Flange
Sven begins by explaining that working on flanges vertically and horizontally is significantly easier than doing so in a flat position. To simplify the process further, he divides the task into two or three steps as suggested by fellow expert “for for.” This approach not only makes it more manageable but also allows for greater precision in crafting each component.Step 2: Applying Glue and Securing
Sven proceeds to apply glue along one edge of the flange, ensuring a secure bond when clamped into place. He emphasizes that this stage is crucial for maintaining the structural integrity of the flange, which in turn safeguards the living area beneath the canvas when hatches are open.Step 3: Allowing Time to Dry
After securely attaching the first portion of the flange, Sven allows ample time for it to dry before moving forward with additional steps. This patience and precision are key aspects of his successful boatbuilding methods.Step 4: Finishing Touches
Once the flange is fully dried, Sven removes the clamps carefully, ensuring no damage occurs during this process. He then moves on to attaching four more pieces onto these main frames, completing two pairs of flanges for the bulkhead hatches.The Final Touches
While two flanges form the primary support structure around the hatches, Sven mentions there are two additional pieces required at each end to ensure comprehensive protection. This attention to detail highlights his commitment to producing a durable and reliable design. “Sailing is about finding your path, whether it’s across an ocean or within yourself.” – Sven Yrvind In conclusion, making flanges around bulkhead hatches may seem complex at first glance, but by following Sven Yrvind’s meticulous process, enthusiasts can achieve professional-level results. Remember that the journey of boatbuilding is as rewarding as reaching your destination; it tests one’s patience and dedication. For those seeking to embark on this adventure or simply gain more insight into marine craftsmanship, Sven’s wisdom is invaluable.After securely attaching the first portion of the flange, Sven allows ample time for it to dry before moving forward with additional steps. This patience and precision are key aspects of his successful boatbuilding methods.Step 4: Finishing Touches
Once the flange is fully dried, Sven removes the clamps carefully, ensuring no damage occurs during this process. He then moves on to attaching four more pieces onto these main frames, completing two pairs of flanges for the bulkhead hatches.The Final Touches
While two flanges form the primary support structure around the hatches, Sven mentions there are two additional pieces required at each end to ensure comprehensive protection. This attention to detail highlights his commitment to producing a durable and reliable design. “Sailing is about finding your path, whether it’s across an ocean or within yourself.” – Sven Yrvind In conclusion, making flanges around bulkhead hatches may seem complex at first glance, but by following Sven Yrvind’s meticulous process, enthusiasts can achieve professional-level results. Remember that the journey of boatbuilding is as rewarding as reaching your destination; it tests one’s patience and dedication. For those seeking to embark on this adventure or simply gain more insight into marine craftsmanship, Sven’s wisdom is invaluable.Sven begins by explaining that working on flanges vertically and horizontally is significantly easier than doing so in a flat position. To simplify the process further, he divides the task into two or three steps as suggested by fellow expert “for for.” This approach not only makes it more manageable but also allows for greater precision in crafting each component.Step 2: Applying Glue and Securing
Sven proceeds to apply glue along one edge of the flange, ensuring a secure bond when clamped into place. He emphasizes that this stage is crucial for maintaining the structural integrity of the flange, which in turn safeguards the living area beneath the canvas when hatches are open.Step 3: Allowing Time to Dry
After securely attaching the first portion of the flange, Sven allows ample time for it to dry before moving forward with additional steps. This patience and precision are key aspects of his successful boatbuilding methods.Step 4: Finishing Touches
Once the flange is fully dried, Sven removes the clamps carefully, ensuring no damage occurs during this process. He then moves on to attaching four more pieces onto these main frames, completing two pairs of flanges for the bulkhead hatches.The Final Touches
While two flanges form the primary support structure around the hatches, Sven mentions there are two additional pieces required at each end to ensure comprehensive protection. This attention to detail highlights his commitment to producing a durable and reliable design. “Sailing is about finding your path, whether it’s across an ocean or within yourself.” – Sven Yrvind In conclusion, making flanges around bulkhead hatches may seem complex at first glance, but by following Sven Yrvind’s meticulous process, enthusiasts can achieve professional-level results. Remember that the journey of boatbuilding is as rewarding as reaching your destination; it tests one’s patience and dedication. For those seeking to embark on this adventure or simply gain more insight into marine craftsmanship, Sven’s wisdom is invaluable.Sven Yrvind, a renowned yacht designer and sailor, shares valuable insights on creating flanges around bulkhead hatches for canvas protection in this enlightening video. By following his expert guidance, boat enthusiasts can ensure their living areas remain secure while allowing unhindered access through the hatches.Step 1: Starting with the Flange
Sven begins by explaining that working on flanges vertically and horizontally is significantly easier than doing so in a flat position. To simplify the process further, he divides the task into two or three steps as suggested by fellow expert “for for.” This approach not only makes it more manageable but also allows for greater precision in crafting each component.Step 2: Applying Glue and Securing
Sven proceeds to apply glue along one edge of the flange, ensuring a secure bond when clamped into place. He emphasizes that this stage is crucial for maintaining the structural integrity of the flange, which in turn safeguards the living area beneath the canvas when hatches are open.Step 3: Allowing Time to Dry
After securely attaching the first portion of the flange, Sven allows ample time for it to dry before moving forward with additional steps. This patience and precision are key aspects of his successful boatbuilding methods.Step 4: Finishing Touches
Once the flange is fully dried, Sven removes the clamps carefully, ensuring no damage occurs during this process. He then moves on to attaching four more pieces onto these main frames, completing two pairs of flanges for the bulkhead hatches.The Final Touches
While two flanges form the primary support structure around the hatches, Sven mentions there are two additional pieces required at each end to ensure comprehensive protection. This attention to detail highlights his commitment to producing a durable and reliable design. “Sailing is about finding your path, whether it’s across an ocean or within yourself.” – Sven Yrvind In conclusion, making flanges around bulkhead hatches may seem complex at first glance, but by following Sven Yrvind’s meticulous process, enthusiasts can achieve professional-level results. Remember that the journey of boatbuilding is as rewarding as reaching your destination; it tests one’s patience and dedication. For those seeking to embark on this adventure or simply gain more insight into marine craftsmanship, Sven’s wisdom is invaluable.Making Flanges Around Bulkhead Hatches for Canvas
Sven Yrvind, a renowned yacht designer and sailor, shares valuable insights on creating flanges around bulkhead hatches for canvas protection in this enlightening video. By following his expert guidance, boat enthusiasts can ensure their living areas remain secure while allowing unhindered access through the hatches.Step 1: Starting with the Flange
Sven begins by explaining that working on flanges vertically and horizontally is significantly easier than doing so in a flat position. To simplify the process further, he divides the task into two or three steps as suggested by fellow expert “for for.” This approach not only makes it more manageable but also allows for greater precision in crafting each component.Step 2: Applying Glue and Securing
Sven proceeds to apply glue along one edge of the flange, ensuring a secure bond when clamped into place. He emphasizes that this stage is crucial for maintaining the structural integrity of the flange, which in turn safeguards the living area beneath the canvas when hatches are open.Step 3: Allowing Time to Dry
After securely attaching the first portion of the flange, Sven allows ample time for it to dry before moving forward with additional steps. This patience and precision are key aspects of his successful boatbuilding methods.Step 4: Finishing Touches
Once the flange is fully dried, Sven removes the clamps carefully, ensuring no damage occurs during this process. He then moves on to attaching four more pieces onto these main frames, completing two pairs of flanges for the bulkhead hatches.The Final Touches
While two flanges form the primary support structure around the hatches, Sven mentions there are two additional pieces required at each end to ensure comprehensive protection. This attention to detail highlights his commitment to producing a durable and reliable design. “Sailing is about finding your path, whether it’s across an ocean or within yourself.” – Sven Yrvind In conclusion, making flanges around bulkhead hatches may seem complex at first glance, but by following Sven Yrvind’s meticulous process, enthusiasts can achieve professional-level results. Remember that the journey of boatbuilding is as rewarding as reaching your destination; it tests one’s patience and dedication. For those seeking to embark on this adventure or simply gain more insight into marine craftsmanship, Sven’s wisdom is invaluable.Sven proceeds to apply glue along one edge of the flange, ensuring a secure bond when clamped into place. He emphasizes that this stage is crucial for maintaining the structural integrity of the flange, which in turn safeguards the living area beneath the canvas when hatches are open.Step 3: Allowing Time to Dry
After securely attaching the first portion of the flange, Sven allows ample time for it to dry before moving forward with additional steps. This patience and precision are key aspects of his successful boatbuilding methods.Step 4: Finishing Touches
Once the flange is fully dried, Sven removes the clamps carefully, ensuring no damage occurs during this process. He then moves on to attaching four more pieces onto these main frames, completing two pairs of flanges for the bulkhead hatches.The Final Touches
While two flanges form the primary support structure around the hatches, Sven mentions there are two additional pieces required at each end to ensure comprehensive protection. This attention to detail highlights his commitment to producing a durable and reliable design. “Sailing is about finding your path, whether it’s across an ocean or within yourself.” – Sven Yrvind In conclusion, making flanges around bulkhead hatches may seem complex at first glance, but by following Sven Yrvind’s meticulous process, enthusiasts can achieve professional-level results. Remember that the journey of boatbuilding is as rewarding as reaching your destination; it tests one’s patience and dedication. For those seeking to embark on this adventure or simply gain more insight into marine craftsmanship, Sven’s wisdom is invaluable.Sven begins by explaining that working on flanges vertically and horizontally is significantly easier than doing so in a flat position. To simplify the process further, he divides the task into two or three steps as suggested by fellow expert “for for.” This approach not only makes it more manageable but also allows for greater precision in crafting each component.Step 2: Applying Glue and Securing
Sven proceeds to apply glue along one edge of the flange, ensuring a secure bond when clamped into place. He emphasizes that this stage is crucial for maintaining the structural integrity of the flange, which in turn safeguards the living area beneath the canvas when hatches are open.Step 3: Allowing Time to Dry
After securely attaching the first portion of the flange, Sven allows ample time for it to dry before moving forward with additional steps. This patience and precision are key aspects of his successful boatbuilding methods.Step 4: Finishing Touches
Once the flange is fully dried, Sven removes the clamps carefully, ensuring no damage occurs during this process. He then moves on to attaching four more pieces onto these main frames, completing two pairs of flanges for the bulkhead hatches.The Final Touches
While two flanges form the primary support structure around the hatches, Sven mentions there are two additional pieces required at each end to ensure comprehensive protection. This attention to detail highlights his commitment to producing a durable and reliable design. “Sailing is about finding your path, whether it’s across an ocean or within yourself.” – Sven Yrvind In conclusion, making flanges around bulkhead hatches may seem complex at first glance, but by following Sven Yrvind’s meticulous process, enthusiasts can achieve professional-level results. Remember that the journey of boatbuilding is as rewarding as reaching your destination; it tests one’s patience and dedication. For those seeking to embark on this adventure or simply gain more insight into marine craftsmanship, Sven’s wisdom is invaluable.Sven Yrvind, a renowned yacht designer and sailor, shares valuable insights on creating flanges around bulkhead hatches for canvas protection in this enlightening video. By following his expert guidance, boat enthusiasts can ensure their living areas remain secure while allowing unhindered access through the hatches.Step 1: Starting with the Flange
Sven begins by explaining that working on flanges vertically and horizontally is significantly easier than doing so in a flat position. To simplify the process further, he divides the task into two or three steps as suggested by fellow expert “for for.” This approach not only makes it more manageable but also allows for greater precision in crafting each component.Step 2: Applying Glue and Securing
Sven proceeds to apply glue along one edge of the flange, ensuring a secure bond when clamped into place. He emphasizes that this stage is crucial for maintaining the structural integrity of the flange, which in turn safeguards the living area beneath the canvas when hatches are open.Step 3: Allowing Time to Dry
After securely attaching the first portion of the flange, Sven allows ample time for it to dry before moving forward with additional steps. This patience and precision are key aspects of his successful boatbuilding methods.Step 4: Finishing Touches
Once the flange is fully dried, Sven removes the clamps carefully, ensuring no damage occurs during this process. He then moves on to attaching four more pieces onto these main frames, completing two pairs of flanges for the bulkhead hatches.The Final Touches
While two flanges form the primary support structure around the hatches, Sven mentions there are two additional pieces required at each end to ensure comprehensive protection. This attention to detail highlights his commitment to producing a durable and reliable design. “Sailing is about finding your path, whether it’s across an ocean or within yourself.” – Sven Yrvind In conclusion, making flanges around bulkhead hatches may seem complex at first glance, but by following Sven Yrvind’s meticulous process, enthusiasts can achieve professional-level results. Remember that the journey of boatbuilding is as rewarding as reaching your destination; it tests one’s patience and dedication. For those seeking to embark on this adventure or simply gain more insight into marine craftsmanship, Sven’s wisdom is invaluable.Making Flanges Around Bulkhead Hatches for Canvas
Sven Yrvind, a renowned yacht designer and sailor, shares valuable insights on creating flanges around bulkhead hatches for canvas protection in this enlightening video. By following his expert guidance, boat enthusiasts can ensure their living areas remain secure while allowing unhindered access through the hatches.Step 1: Starting with the Flange
Sven begins by explaining that working on flanges vertically and horizontally is significantly easier than doing so in a flat position. To simplify the process further, he divides the task into two or three steps as suggested by fellow expert “for for.” This approach not only makes it more manageable but also allows for greater precision in crafting each component.Step 2: Applying Glue and Securing
Sven proceeds to apply glue along one edge of the flange, ensuring a secure bond when clamped into place. He emphasizes that this stage is crucial for maintaining the structural integrity of the flange, which in turn safeguards the living area beneath the canvas when hatches are open.Step 3: Allowing Time to Dry
After securely attaching the first portion of the flange, Sven allows ample time for it to dry before moving forward with additional steps. This patience and precision are key aspects of his successful boatbuilding methods.Step 4: Finishing Touches
Once the flange is fully dried, Sven removes the clamps carefully, ensuring no damage occurs during this process. He then moves on to attaching four more pieces onto these main frames, completing two pairs of flanges for the bulkhead hatches.The Final Touches
While two flanges form the primary support structure around the hatches, Sven mentions there are two additional pieces required at each end to ensure comprehensive protection. This attention to detail highlights his commitment to producing a durable and reliable design. “Sailing is about finding your path, whether it’s across an ocean or within yourself.” – Sven Yrvind In conclusion, making flanges around bulkhead hatches may seem complex at first glance, but by following Sven Yrvind’s meticulous process, enthusiasts can achieve professional-level results. Remember that the journey of boatbuilding is as rewarding as reaching your destination; it tests one’s patience and dedication. For those seeking to embark on this adventure or simply gain more insight into marine craftsmanship, Sven’s wisdom is invaluable.Once the flange is fully dried, Sven removes the clamps carefully, ensuring no damage occurs during this process. He then moves on to attaching four more pieces onto these main frames, completing two pairs of flanges for the bulkhead hatches.The Final Touches
While two flanges form the primary support structure around the hatches, Sven mentions there are two additional pieces required at each end to ensure comprehensive protection. This attention to detail highlights his commitment to producing a durable and reliable design. “Sailing is about finding your path, whether it’s across an ocean or within yourself.” – Sven Yrvind In conclusion, making flanges around bulkhead hatches may seem complex at first glance, but by following Sven Yrvind’s meticulous process, enthusiasts can achieve professional-level results. Remember that the journey of boatbuilding is as rewarding as reaching your destination; it tests one’s patience and dedication. For those seeking to embark on this adventure or simply gain more insight into marine craftsmanship, Sven’s wisdom is invaluable.Sven proceeds to apply glue along one edge of the flange, ensuring a secure bond when clamped into place. He emphasizes that this stage is crucial for maintaining the structural integrity of the flange, which in turn safeguards the living area beneath the canvas when hatches are open.Step 3: Allowing Time to Dry
After securely attaching the first portion of the flange, Sven allows ample time for it to dry before moving forward with additional steps. This patience and precision are key aspects of his successful boatbuilding methods.Step 4: Finishing Touches
Once the flange is fully dried, Sven removes the clamps carefully, ensuring no damage occurs during this process. He then moves on to attaching four more pieces onto these main frames, completing two pairs of flanges for the bulkhead hatches.The Final Touches
While two flanges form the primary support structure around the hatches, Sven mentions there are two additional pieces required at each end to ensure comprehensive protection. This attention to detail highlights his commitment to producing a durable and reliable design. “Sailing is about finding your path, whether it’s across an ocean or within yourself.” – Sven Yrvind In conclusion, making flanges around bulkhead hatches may seem complex at first glance, but by following Sven Yrvind’s meticulous process, enthusiasts can achieve professional-level results. Remember that the journey of boatbuilding is as rewarding as reaching your destination; it tests one’s patience and dedication. For those seeking to embark on this adventure or simply gain more insight into marine craftsmanship, Sven’s wisdom is invaluable.Sven begins by explaining that working on flanges vertically and horizontally is significantly easier than doing so in a flat position. To simplify the process further, he divides the task into two or three steps as suggested by fellow expert “for for.” This approach not only makes it more manageable but also allows for greater precision in crafting each component.Step 2: Applying Glue and Securing
Sven proceeds to apply glue along one edge of the flange, ensuring a secure bond when clamped into place. He emphasizes that this stage is crucial for maintaining the structural integrity of the flange, which in turn safeguards the living area beneath the canvas when hatches are open.Step 3: Allowing Time to Dry
After securely attaching the first portion of the flange, Sven allows ample time for it to dry before moving forward with additional steps. This patience and precision are key aspects of his successful boatbuilding methods.Step 4: Finishing Touches
Once the flange is fully dried, Sven removes the clamps carefully, ensuring no damage occurs during this process. He then moves on to attaching four more pieces onto these main frames, completing two pairs of flanges for the bulkhead hatches.The Final Touches
While two flanges form the primary support structure around the hatches, Sven mentions there are two additional pieces required at each end to ensure comprehensive protection. This attention to detail highlights his commitment to producing a durable and reliable design. “Sailing is about finding your path, whether it’s across an ocean or within yourself.” – Sven Yrvind In conclusion, making flanges around bulkhead hatches may seem complex at first glance, but by following Sven Yrvind’s meticulous process, enthusiasts can achieve professional-level results. Remember that the journey of boatbuilding is as rewarding as reaching your destination; it tests one’s patience and dedication. For those seeking to embark on this adventure or simply gain more insight into marine craftsmanship, Sven’s wisdom is invaluable.Sven Yrvind, a renowned yacht designer and sailor, shares valuable insights on creating flanges around bulkhead hatches for canvas protection in this enlightening video. By following his expert guidance, boat enthusiasts can ensure their living areas remain secure while allowing unhindered access through the hatches.Step 1: Starting with the Flange
Sven begins by explaining that working on flanges vertically and horizontally is significantly easier than doing so in a flat position. To simplify the process further, he divides the task into two or three steps as suggested by fellow expert “for for.” This approach not only makes it more manageable but also allows for greater precision in crafting each component.Step 2: Applying Glue and Securing
Sven proceeds to apply glue along one edge of the flange, ensuring a secure bond when clamped into place. He emphasizes that this stage is crucial for maintaining the structural integrity of the flange, which in turn safeguards the living area beneath the canvas when hatches are open.Step 3: Allowing Time to Dry
After securely attaching the first portion of the flange, Sven allows ample time for it to dry before moving forward with additional steps. This patience and precision are key aspects of his successful boatbuilding methods.Step 4: Finishing Touches
Once the flange is fully dried, Sven removes the clamps carefully, ensuring no damage occurs during this process. He then moves on to attaching four more pieces onto these main frames, completing two pairs of flanges for the bulkhead hatches.The Final Touches
While two flanges form the primary support structure around the hatches, Sven mentions there are two additional pieces required at each end to ensure comprehensive protection. This attention to detail highlights his commitment to producing a durable and reliable design. “Sailing is about finding your path, whether it’s across an ocean or within yourself.” – Sven Yrvind In conclusion, making flanges around bulkhead hatches may seem complex at first glance, but by following Sven Yrvind’s meticulous process, enthusiasts can achieve professional-level results. Remember that the journey of boatbuilding is as rewarding as reaching your destination; it tests one’s patience and dedication. For those seeking to embark on this adventure or simply gain more insight into marine craftsmanship, Sven’s wisdom is invaluable.Making Flanges Around Bulkhead Hatches for Canvas
Sven Yrvind, a renowned yacht designer and sailor, shares valuable insights on creating flanges around bulkhead hatches for canvas protection in this enlightening video. By following his expert guidance, boat enthusiasts can ensure their living areas remain secure while allowing unhindered access through the hatches.Step 1: Starting with the Flange
Sven begins by explaining that working on flanges vertically and horizontally is significantly easier than doing so in a flat position. To simplify the process further, he divides the task into two or three steps as suggested by fellow expert “for for.” This approach not only makes it more manageable but also allows for greater precision in crafting each component.Step 2: Applying Glue and Securing
Sven proceeds to apply glue along one edge of the flange, ensuring a secure bond when clamped into place. He emphasizes that this stage is crucial for maintaining the structural integrity of the flange, which in turn safeguards the living area beneath the canvas when hatches are open.Step 3: Allowing Time to Dry
After securely attaching the first portion of the flange, Sven allows ample time for it to dry before moving forward with additional steps. This patience and precision are key aspects of his successful boatbuilding methods.Step 4: Finishing Touches
Once the flange is fully dried, Sven removes the clamps carefully, ensuring no damage occurs during this process. He then moves on to attaching four more pieces onto these main frames, completing two pairs of flanges for the bulkhead hatches.The Final Touches
While two flanges form the primary support structure around the hatches, Sven mentions there are two additional pieces required at each end to ensure comprehensive protection. This attention to detail highlights his commitment to producing a durable and reliable design. “Sailing is about finding your path, whether it’s across an ocean or within yourself.” – Sven Yrvind In conclusion, making flanges around bulkhead hatches may seem complex at first glance, but by following Sven Yrvind’s meticulous process, enthusiasts can achieve professional-level results. Remember that the journey of boatbuilding is as rewarding as reaching your destination; it tests one’s patience and dedication. For those seeking to embark on this adventure or simply gain more insight into marine craftsmanship, Sven’s wisdom is invaluable.After securely attaching the first portion of the flange, Sven allows ample time for it to dry before moving forward with additional steps. This patience and precision are key aspects of his successful boatbuilding methods.Step 4: Finishing Touches
Once the flange is fully dried, Sven removes the clamps carefully, ensuring no damage occurs during this process. He then moves on to attaching four more pieces onto these main frames, completing two pairs of flanges for the bulkhead hatches.The Final Touches
While two flanges form the primary support structure around the hatches, Sven mentions there are two additional pieces required at each end to ensure comprehensive protection. This attention to detail highlights his commitment to producing a durable and reliable design. “Sailing is about finding your path, whether it’s across an ocean or within yourself.” – Sven Yrvind In conclusion, making flanges around bulkhead hatches may seem complex at first glance, but by following Sven Yrvind’s meticulous process, enthusiasts can achieve professional-level results. Remember that the journey of boatbuilding is as rewarding as reaching your destination; it tests one’s patience and dedication. For those seeking to embark on this adventure or simply gain more insight into marine craftsmanship, Sven’s wisdom is invaluable.Sven proceeds to apply glue along one edge of the flange, ensuring a secure bond when clamped into place. He emphasizes that this stage is crucial for maintaining the structural integrity of the flange, which in turn safeguards the living area beneath the canvas when hatches are open.Step 3: Allowing Time to Dry
After securely attaching the first portion of the flange, Sven allows ample time for it to dry before moving forward with additional steps. This patience and precision are key aspects of his successful boatbuilding methods.Step 4: Finishing Touches
Once the flange is fully dried, Sven removes the clamps carefully, ensuring no damage occurs during this process. He then moves on to attaching four more pieces onto these main frames, completing two pairs of flanges for the bulkhead hatches.The Final Touches
While two flanges form the primary support structure around the hatches, Sven mentions there are two additional pieces required at each end to ensure comprehensive protection. This attention to detail highlights his commitment to producing a durable and reliable design. “Sailing is about finding your path, whether it’s across an ocean or within yourself.” – Sven Yrvind In conclusion, making flanges around bulkhead hatches may seem complex at first glance, but by following Sven Yrvind’s meticulous process, enthusiasts can achieve professional-level results. Remember that the journey of boatbuilding is as rewarding as reaching your destination; it tests one’s patience and dedication. For those seeking to embark on this adventure or simply gain more insight into marine craftsmanship, Sven’s wisdom is invaluable.Sven begins by explaining that working on flanges vertically and horizontally is significantly easier than doing so in a flat position. To simplify the process further, he divides the task into two or three steps as suggested by fellow expert “for for.” This approach not only makes it more manageable but also allows for greater precision in crafting each component.Step 2: Applying Glue and Securing
Sven proceeds to apply glue along one edge of the flange, ensuring a secure bond when clamped into place. He emphasizes that this stage is crucial for maintaining the structural integrity of the flange, which in turn safeguards the living area beneath the canvas when hatches are open.Step 3: Allowing Time to Dry
After securely attaching the first portion of the flange, Sven allows ample time for it to dry before moving forward with additional steps. This patience and precision are key aspects of his successful boatbuilding methods.Step 4: Finishing Touches
Once the flange is fully dried, Sven removes the clamps carefully, ensuring no damage occurs during this process. He then moves on to attaching four more pieces onto these main frames, completing two pairs of flanges for the bulkhead hatches.The Final Touches
While two flanges form the primary support structure around the hatches, Sven mentions there are two additional pieces required at each end to ensure comprehensive protection. This attention to detail highlights his commitment to producing a durable and reliable design. “Sailing is about finding your path, whether it’s across an ocean or within yourself.” – Sven Yrvind In conclusion, making flanges around bulkhead hatches may seem complex at first glance, but by following Sven Yrvind’s meticulous process, enthusiasts can achieve professional-level results. Remember that the journey of boatbuilding is as rewarding as reaching your destination; it tests one’s patience and dedication. For those seeking to embark on this adventure or simply gain more insight into marine craftsmanship, Sven’s wisdom is invaluable.Sven Yrvind, a renowned yacht designer and sailor, shares valuable insights on creating flanges around bulkhead hatches for canvas protection in this enlightening video. By following his expert guidance, boat enthusiasts can ensure their living areas remain secure while allowing unhindered access through the hatches.Step 1: Starting with the Flange
Sven begins by explaining that working on flanges vertically and horizontally is significantly easier than doing so in a flat position. To simplify the process further, he divides the task into two or three steps as suggested by fellow expert “for for.” This approach not only makes it more manageable but also allows for greater precision in crafting each component.Step 2: Applying Glue and Securing
Sven proceeds to apply glue along one edge of the flange, ensuring a secure bond when clamped into place. He emphasizes that this stage is crucial for maintaining the structural integrity of the flange, which in turn safeguards the living area beneath the canvas when hatches are open.Step 3: Allowing Time to Dry
After securely attaching the first portion of the flange, Sven allows ample time for it to dry before moving forward with additional steps. This patience and precision are key aspects of his successful boatbuilding methods.Step 4: Finishing Touches
Once the flange is fully dried, Sven removes the clamps carefully, ensuring no damage occurs during this process. He then moves on to attaching four more pieces onto these main frames, completing two pairs of flanges for the bulkhead hatches.The Final Touches
While two flanges form the primary support structure around the hatches, Sven mentions there are two additional pieces required at each end to ensure comprehensive protection. This attention to detail highlights his commitment to producing a durable and reliable design. “Sailing is about finding your path, whether it’s across an ocean or within yourself.” – Sven Yrvind In conclusion, making flanges around bulkhead hatches may seem complex at first glance, but by following Sven Yrvind’s meticulous process, enthusiasts can achieve professional-level results. Remember that the journey of boatbuilding is as rewarding as reaching your destination; it tests one’s patience and dedication. For those seeking to embark on this adventure or simply gain more insight into marine craftsmanship, Sven’s wisdom is invaluable.Making Flanges Around Bulkhead Hatches for Canvas
Sven Yrvind, a renowned yacht designer and sailor, shares valuable insights on creating flanges around bulkhead hatches for canvas protection in this enlightening video. By following his expert guidance, boat enthusiasts can ensure their living areas remain secure while allowing unhindered access through the hatches.Step 1: Starting with the Flange
Sven begins by explaining that working on flanges vertically and horizontally is significantly easier than doing so in a flat position. To simplify the process further, he divides the task into two or three steps as suggested by fellow expert “for for.” This approach not only makes it more manageable but also allows for greater precision in crafting each component.Step 2: Applying Glue and Securing
Sven proceeds to apply glue along one edge of the flange, ensuring a secure bond when clamped into place. He emphasizes that this stage is crucial for maintaining the structural integrity of the flange, which in turn safeguards the living area beneath the canvas when hatches are open.Step 3: Allowing Time to Dry
After securely attaching the first portion of the flange, Sven allows ample time for it to dry before moving forward with additional steps. This patience and precision are key aspects of his successful boatbuilding methods.Step 4: Finishing Touches
Once the flange is fully dried, Sven removes the clamps carefully, ensuring no damage occurs during this process. He then moves on to attaching four more pieces onto these main frames, completing two pairs of flanges for the bulkhead hatches.The Final Touches
While two flanges form the primary support structure around the hatches, Sven mentions there are two additional pieces required at each end to ensure comprehensive protection. This attention to detail highlights his commitment to producing a durable and reliable design. “Sailing is about finding your path, whether it’s across an ocean or within yourself.” – Sven Yrvind In conclusion, making flanges around bulkhead hatches may seem complex at first glance, but by following Sven Yrvind’s meticulous process, enthusiasts can achieve professional-level results. Remember that the journey of boatbuilding is as rewarding as reaching your destination; it tests one’s patience and dedication. For those seeking to embark on this adventure or simply gain more insight into marine craftsmanship, Sven’s wisdom is invaluable.Once the flange is fully dried, Sven removes the clamps carefully, ensuring no damage occurs during this process. He then moves on to attaching four more pieces onto these main frames, completing two pairs of flanges for the bulkhead hatches.The Final Touches
While two flanges form the primary support structure around the hatches, Sven mentions there are two additional pieces required at each end to ensure comprehensive protection. This attention to detail highlights his commitment to producing a durable and reliable design. “Sailing is about finding your path, whether it’s across an ocean or within yourself.” – Sven Yrvind In conclusion, making flanges around bulkhead hatches may seem complex at first glance, but by following Sven Yrvind’s meticulous process, enthusiasts can achieve professional-level results. Remember that the journey of boatbuilding is as rewarding as reaching your destination; it tests one’s patience and dedication. For those seeking to embark on this adventure or simply gain more insight into marine craftsmanship, Sven’s wisdom is invaluable.After securely attaching the first portion of the flange, Sven allows ample time for it to dry before moving forward with additional steps. This patience and precision are key aspects of his successful boatbuilding methods.Step 4: Finishing Touches
Once the flange is fully dried, Sven removes the clamps carefully, ensuring no damage occurs during this process. He then moves on to attaching four more pieces onto these main frames, completing two pairs of flanges for the bulkhead hatches.The Final Touches
While two flanges form the primary support structure around the hatches, Sven mentions there are two additional pieces required at each end to ensure comprehensive protection. This attention to detail highlights his commitment to producing a durable and reliable design. “Sailing is about finding your path, whether it’s across an ocean or within yourself.” – Sven Yrvind In conclusion, making flanges around bulkhead hatches may seem complex at first glance, but by following Sven Yrvind’s meticulous process, enthusiasts can achieve professional-level results. Remember that the journey of boatbuilding is as rewarding as reaching your destination; it tests one’s patience and dedication. For those seeking to embark on this adventure or simply gain more insight into marine craftsmanship, Sven’s wisdom is invaluable.Sven proceeds to apply glue along one edge of the flange, ensuring a secure bond when clamped into place. He emphasizes that this stage is crucial for maintaining the structural integrity of the flange, which in turn safeguards the living area beneath the canvas when hatches are open.Step 3: Allowing Time to Dry
After securely attaching the first portion of the flange, Sven allows ample time for it to dry before moving forward with additional steps. This patience and precision are key aspects of his successful boatbuilding methods.Step 4: Finishing Touches
Once the flange is fully dried, Sven removes the clamps carefully, ensuring no damage occurs during this process. He then moves on to attaching four more pieces onto these main frames, completing two pairs of flanges for the bulkhead hatches.The Final Touches
While two flanges form the primary support structure around the hatches, Sven mentions there are two additional pieces required at each end to ensure comprehensive protection. This attention to detail highlights his commitment to producing a durable and reliable design. “Sailing is about finding your path, whether it’s across an ocean or within yourself.” – Sven Yrvind In conclusion, making flanges around bulkhead hatches may seem complex at first glance, but by following Sven Yrvind’s meticulous process, enthusiasts can achieve professional-level results. Remember that the journey of boatbuilding is as rewarding as reaching your destination; it tests one’s patience and dedication. For those seeking to embark on this adventure or simply gain more insight into marine craftsmanship, Sven’s wisdom is invaluable.Sven begins by explaining that working on flanges vertically and horizontally is significantly easier than doing so in a flat position. To simplify the process further, he divides the task into two or three steps as suggested by fellow expert “for for.” This approach not only makes it more manageable but also allows for greater precision in crafting each component.Step 2: Applying Glue and Securing
Sven proceeds to apply glue along one edge of the flange, ensuring a secure bond when clamped into place. He emphasizes that this stage is crucial for maintaining the structural integrity of the flange, which in turn safeguards the living area beneath the canvas when hatches are open.Step 3: Allowing Time to Dry
After securely attaching the first portion of the flange, Sven allows ample time for it to dry before moving forward with additional steps. This patience and precision are key aspects of his successful boatbuilding methods.Step 4: Finishing Touches
Once the flange is fully dried, Sven removes the clamps carefully, ensuring no damage occurs during this process. He then moves on to attaching four more pieces onto these main frames, completing two pairs of flanges for the bulkhead hatches.The Final Touches
While two flanges form the primary support structure around the hatches, Sven mentions there are two additional pieces required at each end to ensure comprehensive protection. This attention to detail highlights his commitment to producing a durable and reliable design. “Sailing is about finding your path, whether it’s across an ocean or within yourself.” – Sven Yrvind In conclusion, making flanges around bulkhead hatches may seem complex at first glance, but by following Sven Yrvind’s meticulous process, enthusiasts can achieve professional-level results. Remember that the journey of boatbuilding is as rewarding as reaching your destination; it tests one’s patience and dedication. For those seeking to embark on this adventure or simply gain more insight into marine craftsmanship, Sven’s wisdom is invaluable.Sven Yrvind, a renowned yacht designer and sailor, shares valuable insights on creating flanges around bulkhead hatches for canvas protection in this enlightening video. By following his expert guidance, boat enthusiasts can ensure their living areas remain secure while allowing unhindered access through the hatches.Step 1: Starting with the Flange
Sven begins by explaining that working on flanges vertically and horizontally is significantly easier than doing so in a flat position. To simplify the process further, he divides the task into two or three steps as suggested by fellow expert “for for.” This approach not only makes it more manageable but also allows for greater precision in crafting each component.Step 2: Applying Glue and Securing
Sven proceeds to apply glue along one edge of the flange, ensuring a secure bond when clamped into place. He emphasizes that this stage is crucial for maintaining the structural integrity of the flange, which in turn safeguards the living area beneath the canvas when hatches are open.Step 3: Allowing Time to Dry
After securely attaching the first portion of the flange, Sven allows ample time for it to dry before moving forward with additional steps. This patience and precision are key aspects of his successful boatbuilding methods.Step 4: Finishing Touches
Once the flange is fully dried, Sven removes the clamps carefully, ensuring no damage occurs during this process. He then moves on to attaching four more pieces onto these main frames, completing two pairs of flanges for the bulkhead hatches.The Final Touches
While two flanges form the primary support structure around the hatches, Sven mentions there are two additional pieces required at each end to ensure comprehensive protection. This attention to detail highlights his commitment to producing a durable and reliable design. “Sailing is about finding your path, whether it’s across an ocean or within yourself.” – Sven Yrvind In conclusion, making flanges around bulkhead hatches may seem complex at first glance, but by following Sven Yrvind’s meticulous process, enthusiasts can achieve professional-level results. Remember that the journey of boatbuilding is as rewarding as reaching your destination; it tests one’s patience and dedication. For those seeking to embark on this adventure or simply gain more insight into marine craftsmanship, Sven’s wisdom is invaluable.Making Flanges Around Bulkhead Hatches for Canvas
Sven Yrvind, a renowned yacht designer and sailor, shares valuable insights on creating flanges around bulkhead hatches for canvas protection in this enlightening video. By following his expert guidance, boat enthusiasts can ensure their living areas remain secure while allowing unhindered access through the hatches.Step 1: Starting with the Flange
Sven begins by explaining that working on flanges vertically and horizontally is significantly easier than doing so in a flat position. To simplify the process further, he divides the task into two or three steps as suggested by fellow expert “for for.” This approach not only makes it more manageable but also allows for greater precision in crafting each component.Step 2: Applying Glue and Securing
Sven proceeds to apply glue along one edge of the flange, ensuring a secure bond when clamped into place. He emphasizes that this stage is crucial for maintaining the structural integrity of the flange, which in turn safeguards the living area beneath the canvas when hatches are open.Step 3: Allowing Time to Dry
After securely attaching the first portion of the flange, Sven allows ample time for it to dry before moving forward with additional steps. This patience and precision are key aspects of his successful boatbuilding methods.Step 4: Finishing Touches
Once the flange is fully dried, Sven removes the clamps carefully, ensuring no damage occurs during this process. He then moves on to attaching four more pieces onto these main frames, completing two pairs of flanges for the bulkhead hatches.The Final Touches
While two flanges form the primary support structure around the hatches, Sven mentions there are two additional pieces required at each end to ensure comprehensive protection. This attention to detail highlights his commitment to producing a durable and reliable design. “Sailing is about finding your path, whether it’s across an ocean or within yourself.” – Sven Yrvind In conclusion, making flanges around bulkhead hatches may seem complex at first glance, but by following Sven Yrvind’s meticulous process, enthusiasts can achieve professional-level results. Remember that the journey of boatbuilding is as rewarding as reaching your destination; it tests one’s patience and dedication. For those seeking to embark on this adventure or simply gain more insight into marine craftsmanship, Sven’s wisdom is invaluable.After securely attaching the first portion of the flange, Sven allows ample time for it to dry before moving forward with additional steps. This patience and precision are key aspects of his successful boatbuilding methods.Step 4: Finishing Touches
Once the flange is fully dried, Sven removes the clamps carefully, ensuring no damage occurs during this process. He then moves on to attaching four more pieces onto these main frames, completing two pairs of flanges for the bulkhead hatches.The Final Touches
While two flanges form the primary support structure around the hatches, Sven mentions there are two additional pieces required at each end to ensure comprehensive protection. This attention to detail highlights his commitment to producing a durable and reliable design. “Sailing is about finding your path, whether it’s across an ocean or within yourself.” – Sven Yrvind In conclusion, making flanges around bulkhead hatches may seem complex at first glance, but by following Sven Yrvind’s meticulous process, enthusiasts can achieve professional-level results. Remember that the journey of boatbuilding is as rewarding as reaching your destination; it tests one’s patience and dedication. For those seeking to embark on this adventure or simply gain more insight into marine craftsmanship, Sven’s wisdom is invaluable.Once the flange is fully dried, Sven removes the clamps carefully, ensuring no damage occurs during this process. He then moves on to attaching four more pieces onto these main frames, completing two pairs of flanges for the bulkhead hatches.The Final Touches
While two flanges form the primary support structure around the hatches, Sven mentions there are two additional pieces required at each end to ensure comprehensive protection. This attention to detail highlights his commitment to producing a durable and reliable design. “Sailing is about finding your path, whether it’s across an ocean or within yourself.” – Sven Yrvind In conclusion, making flanges around bulkhead hatches may seem complex at first glance, but by following Sven Yrvind’s meticulous process, enthusiasts can achieve professional-level results. Remember that the journey of boatbuilding is as rewarding as reaching your destination; it tests one’s patience and dedication. For those seeking to embark on this adventure or simply gain more insight into marine craftsmanship, Sven’s wisdom is invaluable.Sven begins by explaining that working on flanges vertically and horizontally is significantly easier than doing so in a flat position. To simplify the process further, he divides the task into two or three steps as suggested by fellow expert “for for.” This approach not only makes it more manageable but also allows for greater precision in crafting each component.Step 2: Applying Glue and Securing
Sven proceeds to apply glue along one edge of the flange, ensuring a secure bond when clamped into place. He emphasizes that this stage is crucial for maintaining the structural integrity of the flange, which in turn safeguards the living area beneath the canvas when hatches are open.Step 3: Allowing Time to Dry
After securely attaching the first portion of the flange, Sven allows ample time for it to dry before moving forward with additional steps. This patience and precision are key aspects of his successful boatbuilding methods.Step 4: Finishing Touches
Once the flange is fully dried, Sven removes the clamps carefully, ensuring no damage occurs during this process. He then moves on to attaching four more pieces onto these main frames, completing two pairs of flanges for the bulkhead hatches.The Final Touches
While two flanges form the primary support structure around the hatches, Sven mentions there are two additional pieces required at each end to ensure comprehensive protection. This attention to detail highlights his commitment to producing a durable and reliable design. “Sailing is about finding your path, whether it’s across an ocean or within yourself.” – Sven Yrvind In conclusion, making flanges around bulkhead hatches may seem complex at first glance, but by following Sven Yrvind’s meticulous process, enthusiasts can achieve professional-level results. Remember that the journey of boatbuilding is as rewarding as reaching your destination; it tests one’s patience and dedication. For those seeking to embark on this adventure or simply gain more insight into marine craftsmanship, Sven’s wisdom is invaluable.Sven Yrvind, a renowned yacht designer and sailor, shares valuable insights on creating flanges around bulkhead hatches for canvas protection in this enlightening video. By following his expert guidance, boat enthusiasts can ensure their living areas remain secure while allowing unhindered access through the hatches.Step 1: Starting with the Flange
Sven begins by explaining that working on flanges vertically and horizontally is significantly easier than doing so in a flat position. To simplify the process further, he divides the task into two or three steps as suggested by fellow expert “for for.” This approach not only makes it more manageable but also allows for greater precision in crafting each component.Step 2: Applying Glue and Securing
Sven proceeds to apply glue along one edge of the flange, ensuring a secure bond when clamped into place. He emphasizes that this stage is crucial for maintaining the structural integrity of the flange, which in turn safeguards the living area beneath the canvas when hatches are open.Step 3: Allowing Time to Dry
After securely attaching the first portion of the flange, Sven allows ample time for it to dry before moving forward with additional steps. This patience and precision are key aspects of his successful boatbuilding methods.Step 4: Finishing Touches
Once the flange is fully dried, Sven removes the clamps carefully, ensuring no damage occurs during this process. He then moves on to attaching four more pieces onto these main frames, completing two pairs of flanges for the bulkhead hatches.The Final Touches
While two flanges form the primary support structure around the hatches, Sven mentions there are two additional pieces required at each end to ensure comprehensive protection. This attention to detail highlights his commitment to producing a durable and reliable design. “Sailing is about finding your path, whether it’s across an ocean or within yourself.” – Sven Yrvind In conclusion, making flanges around bulkhead hatches may seem complex at first glance, but by following Sven Yrvind’s meticulous process, enthusiasts can achieve professional-level results. Remember that the journey of boatbuilding is as rewarding as reaching your destination; it tests one’s patience and dedication. For those seeking to embark on this adventure or simply gain more insight into marine craftsmanship, Sven’s wisdom is invaluable.Making Flanges Around Bulkhead Hatches for Canvas
Sven Yrvind, a renowned yacht designer and sailor, shares valuable insights on creating flanges around bulkhead hatches for canvas protection in this enlightening video. By following his expert guidance, boat enthusiasts can ensure their living areas remain secure while allowing unhindered access through the hatches.Step 1: Starting with the Flange
Sven begins by explaining that working on flanges vertically and horizontally is significantly easier than doing so in a flat position. To simplify the process further, he divides the task into two or three steps as suggested by fellow expert “for for.” This approach not only makes it more manageable but also allows for greater precision in crafting each component.Step 2: Applying Glue and Securing
Sven proceeds to apply glue along one edge of the flange, ensuring a secure bond when clamped into place. He emphasizes that this stage is crucial for maintaining the structural integrity of the flange, which in turn safeguards the living area beneath the canvas when hatches are open.Step 3: Allowing Time to Dry
After securely attaching the first portion of the flange, Sven allows ample time for it to dry before moving forward with additional steps. This patience and precision are key aspects of his successful boatbuilding methods.Step 4: Finishing Touches
Once the flange is fully dried, Sven removes the clamps carefully, ensuring no damage occurs during this process. He then moves on to attaching four more pieces onto these main frames, completing two pairs of flanges for the bulkhead hatches.The Final Touches
While two flanges form the primary support structure around the hatches, Sven mentions there are two additional pieces required at each end to ensure comprehensive protection. This attention to detail highlights his commitment to producing a durable and reliable design. “Sailing is about finding your path, whether it’s across an ocean or within yourself.” – Sven Yrvind In conclusion, making flanges around bulkhead hatches may seem complex at first glance, but by following Sven Yrvind’s meticulous process, enthusiasts can achieve professional-level results. Remember that the journey of boatbuilding is as rewarding as reaching your destination; it tests one’s patience and dedication. For those seeking to embark on this adventure or simply gain more insight into marine craftsmanship, Sven’s wisdom is invaluable.After securely attaching the first portion of the flange, Sven allows ample time for it to dry before moving forward with additional steps. This patience and precision are key aspects of his successful boatbuilding methods.Step 4: Finishing Touches
Once the flange is fully dried, Sven removes the clamps carefully, ensuring no damage occurs during this process. He then moves on to attaching four more pieces onto these main frames, completing two pairs of flanges for the bulkhead hatches.The Final Touches
While two flanges form the primary support structure around the hatches, Sven mentions there are two additional pieces required at each end to ensure comprehensive protection. This attention to detail highlights his commitment to producing a durable and reliable design. “Sailing is about finding your path, whether it’s across an ocean or within yourself.” – Sven Yrvind In conclusion, making flanges around bulkhead hatches may seem complex at first glance, but by following Sven Yrvind’s meticulous process, enthusiasts can achieve professional-level results. Remember that the journey of boatbuilding is as rewarding as reaching your destination; it tests one’s patience and dedication. For those seeking to embark on this adventure or simply gain more insight into marine craftsmanship, Sven’s wisdom is invaluable.Sven begins by explaining that working on flanges vertically and horizontally is significantly easier than doing so in a flat position. To simplify the process further, he divides the task into two or three steps as suggested by fellow expert “for for.” This approach not only makes it more manageable but also allows for greater precision in crafting each component.Step 2: Applying Glue and Securing
Sven proceeds to apply glue along one edge of the flange, ensuring a secure bond when clamped into place. He emphasizes that this stage is crucial for maintaining the structural integrity of the flange, which in turn safeguards the living area beneath the canvas when hatches are open.Step 3: Allowing Time to Dry
After securely attaching the first portion of the flange, Sven allows ample time for it to dry before moving forward with additional steps. This patience and precision are key aspects of his successful boatbuilding methods.Step 4: Finishing Touches
Once the flange is fully dried, Sven removes the clamps carefully, ensuring no damage occurs during this process. He then moves on to attaching four more pieces onto these main frames, completing two pairs of flanges for the bulkhead hatches.The Final Touches
While two flanges form the primary support structure around the hatches, Sven mentions there are two additional pieces required at each end to ensure comprehensive protection. This attention to detail highlights his commitment to producing a durable and reliable design. “Sailing is about finding your path, whether it’s across an ocean or within yourself.” – Sven Yrvind In conclusion, making flanges around bulkhead hatches may seem complex at first glance, but by following Sven Yrvind’s meticulous process, enthusiasts can achieve professional-level results. Remember that the journey of boatbuilding is as rewarding as reaching your destination; it tests one’s patience and dedication. For those seeking to embark on this adventure or simply gain more insight into marine craftsmanship, Sven’s wisdom is invaluable.Sven Yrvind, a renowned yacht designer and sailor, shares valuable insights on creating flanges around bulkhead hatches for canvas protection in this enlightening video. By following his expert guidance, boat enthusiasts can ensure their living areas remain secure while allowing unhindered access through the hatches.Step 1: Starting with the Flange
Sven begins by explaining that working on flanges vertically and horizontally is significantly easier than doing so in a flat position. To simplify the process further, he divides the task into two or three steps as suggested by fellow expert “for for.” This approach not only makes it more manageable but also allows for greater precision in crafting each component.Step 2: Applying Glue and Securing
Sven proceeds to apply glue along one edge of the flange, ensuring a secure bond when clamped into place. He emphasizes that this stage is crucial for maintaining the structural integrity of the flange, which in turn safeguards the living area beneath the canvas when hatches are open.Step 3: Allowing Time to Dry
After securely attaching the first portion of the flange, Sven allows ample time for it to dry before moving forward with additional steps. This patience and precision are key aspects of his successful boatbuilding methods.Step 4: Finishing Touches
Once the flange is fully dried, Sven removes the clamps carefully, ensuring no damage occurs during this process. He then moves on to attaching four more pieces onto these main frames, completing two pairs of flanges for the bulkhead hatches.The Final Touches
While two flanges form the primary support structure around the hatches, Sven mentions there are two additional pieces required at each end to ensure comprehensive protection. This attention to detail highlights his commitment to producing a durable and reliable design. “Sailing is about finding your path, whether it’s across an ocean or within yourself.” – Sven Yrvind In conclusion, making flanges around bulkhead hatches may seem complex at first glance, but by following Sven Yrvind’s meticulous process, enthusiasts can achieve professional-level results. Remember that the journey of boatbuilding is as rewarding as reaching your destination; it tests one’s patience and dedication. For those seeking to embark on this adventure or simply gain more insight into marine craftsmanship, Sven’s wisdom is invaluable.Making Flanges Around Bulkhead Hatches for Canvas
Sven Yrvind, a renowned yacht designer and sailor, shares valuable insights on creating flanges around bulkhead hatches for canvas protection in this enlightening video. By following his expert guidance, boat enthusiasts can ensure their living areas remain secure while allowing unhindered access through the hatches.Step 1: Starting with the Flange
Sven begins by explaining that working on flanges vertically and horizontally is significantly easier than doing so in a flat position. To simplify the process further, he divides the task into two or three steps as suggested by fellow expert “for for.” This approach not only makes it more manageable but also allows for greater precision in crafting each component.Step 2: Applying Glue and Securing
Sven proceeds to apply glue along one edge of the flange, ensuring a secure bond when clamped into place. He emphasizes that this stage is crucial for maintaining the structural integrity of the flange, which in turn safeguards the living area beneath the canvas when hatches are open.Step 3: Allowing Time to Dry
After securely attaching the first portion of the flange, Sven allows ample time for it to dry before moving forward with additional steps. This patience and precision are key aspects of his successful boatbuilding methods.Step 4: Finishing Touches
Once the flange is fully dried, Sven removes the clamps carefully, ensuring no damage occurs during this process. He then moves on to attaching four more pieces onto these main frames, completing two pairs of flanges for the bulkhead hatches.The Final Touches
While two flanges form the primary support structure around the hatches, Sven mentions there are two additional pieces required at each end to ensure comprehensive protection. This attention to detail highlights his commitment to producing a durable and reliable design. “Sailing is about finding your path, whether it’s across an ocean or within yourself.” – Sven Yrvind In conclusion, making flanges around bulkhead hatches may seem complex at first glance, but by following Sven Yrvind’s meticulous process, enthusiasts can achieve professional-level results. Remember that the journey of boatbuilding is as rewarding as reaching your destination; it tests one’s patience and dedication. For those seeking to embark on this adventure or simply gain more insight into marine craftsmanship, Sven’s wisdom is invaluable.Sven proceeds to apply glue along one edge of the flange, ensuring a secure bond when clamped into place. He emphasizes that this stage is crucial for maintaining the structural integrity of the flange, which in turn safeguards the living area beneath the canvas when hatches are open.Step 3: Allowing Time to Dry
After securely attaching the first portion of the flange, Sven allows ample time for it to dry before moving forward with additional steps. This patience and precision are key aspects of his successful boatbuilding methods.Step 4: Finishing Touches
Once the flange is fully dried, Sven removes the clamps carefully, ensuring no damage occurs during this process. He then moves on to attaching four more pieces onto these main frames, completing two pairs of flanges for the bulkhead hatches.The Final Touches
While two flanges form the primary support structure around the hatches, Sven mentions there are two additional pieces required at each end to ensure comprehensive protection. This attention to detail highlights his commitment to producing a durable and reliable design. “Sailing is about finding your path, whether it’s across an ocean or within yourself.” – Sven Yrvind In conclusion, making flanges around bulkhead hatches may seem complex at first glance, but by following Sven Yrvind’s meticulous process, enthusiasts can achieve professional-level results. Remember that the journey of boatbuilding is as rewarding as reaching your destination; it tests one’s patience and dedication. For those seeking to embark on this adventure or simply gain more insight into marine craftsmanship, Sven’s wisdom is invaluable.Sven begins by explaining that working on flanges vertically and horizontally is significantly easier than doing so in a flat position. To simplify the process further, he divides the task into two or three steps as suggested by fellow expert “for for.” This approach not only makes it more manageable but also allows for greater precision in crafting each component.Step 2: Applying Glue and Securing
Sven proceeds to apply glue along one edge of the flange, ensuring a secure bond when clamped into place. He emphasizes that this stage is crucial for maintaining the structural integrity of the flange, which in turn safeguards the living area beneath the canvas when hatches are open.Step 3: Allowing Time to Dry
After securely attaching the first portion of the flange, Sven allows ample time for it to dry before moving forward with additional steps. This patience and precision are key aspects of his successful boatbuilding methods.Step 4: Finishing Touches
Once the flange is fully dried, Sven removes the clamps carefully, ensuring no damage occurs during this process. He then moves on to attaching four more pieces onto these main frames, completing two pairs of flanges for the bulkhead hatches.The Final Touches
While two flanges form the primary support structure around the hatches, Sven mentions there are two additional pieces required at each end to ensure comprehensive protection. This attention to detail highlights his commitment to producing a durable and reliable design. “Sailing is about finding your path, whether it’s across an ocean or within yourself.” – Sven Yrvind In conclusion, making flanges around bulkhead hatches may seem complex at first glance, but by following Sven Yrvind’s meticulous process, enthusiasts can achieve professional-level results. Remember that the journey of boatbuilding is as rewarding as reaching your destination; it tests one’s patience and dedication. For those seeking to embark on this adventure or simply gain more insight into marine craftsmanship, Sven’s wisdom is invaluable.Sven Yrvind, a renowned yacht designer and sailor, shares valuable insights on creating flanges around bulkhead hatches for canvas protection in this enlightening video. By following his expert guidance, boat enthusiasts can ensure their living areas remain secure while allowing unhindered access through the hatches.Step 1: Starting with the Flange
Sven begins by explaining that working on flanges vertically and horizontally is significantly easier than doing so in a flat position. To simplify the process further, he divides the task into two or three steps as suggested by fellow expert “for for.” This approach not only makes it more manageable but also allows for greater precision in crafting each component.Step 2: Applying Glue and Securing
Sven proceeds to apply glue along one edge of the flange, ensuring a secure bond when clamped into place. He emphasizes that this stage is crucial for maintaining the structural integrity of the flange, which in turn safeguards the living area beneath the canvas when hatches are open.Step 3: Allowing Time to Dry
After securely attaching the first portion of the flange, Sven allows ample time for it to dry before moving forward with additional steps. This patience and precision are key aspects of his successful boatbuilding methods.Step 4: Finishing Touches
Once the flange is fully dried, Sven removes the clamps carefully, ensuring no damage occurs during this process. He then moves on to attaching four more pieces onto these main frames, completing two pairs of flanges for the bulkhead hatches.The Final Touches
While two flanges form the primary support structure around the hatches, Sven mentions there are two additional pieces required at each end to ensure comprehensive protection. This attention to detail highlights his commitment to producing a durable and reliable design. “Sailing is about finding your path, whether it’s across an ocean or within yourself.” – Sven Yrvind In conclusion, making flanges around bulkhead hatches may seem complex at first glance, but by following Sven Yrvind’s meticulous process, enthusiasts can achieve professional-level results. Remember that the journey of boatbuilding is as rewarding as reaching your destination; it tests one’s patience and dedication. For those seeking to embark on this adventure or simply gain more insight into marine craftsmanship, Sven’s wisdom is invaluable.Making Flanges Around Bulkhead Hatches for Canvas
Sven Yrvind, a renowned yacht designer and sailor, shares valuable insights on creating flanges around bulkhead hatches for canvas protection in this enlightening video. By following his expert guidance, boat enthusiasts can ensure their living areas remain secure while allowing unhindered access through the hatches.Step 1: Starting with the Flange
Sven begins by explaining that working on flanges vertically and horizontally is significantly easier than doing so in a flat position. To simplify the process further, he divides the task into two or three steps as suggested by fellow expert “for for.” This approach not only makes it more manageable but also allows for greater precision in crafting each component.Step 2: Applying Glue and Securing
Sven proceeds to apply glue along one edge of the flange, ensuring a secure bond when clamped into place. He emphasizes that this stage is crucial for maintaining the structural integrity of the flange, which in turn safeguards the living area beneath the canvas when hatches are open.Step 3: Allowing Time to Dry
After securely attaching the first portion of the flange, Sven allows ample time for it to dry before moving forward with additional steps. This patience and precision are key aspects of his successful boatbuilding methods.Step 4: Finishing Touches
Once the flange is fully dried, Sven removes the clamps carefully, ensuring no damage occurs during this process. He then moves on to attaching four more pieces onto these main frames, completing two pairs of flanges for the bulkhead hatches.The Final Touches
While two flanges form the primary support structure around the hatches, Sven mentions there are two additional pieces required at each end to ensure comprehensive protection. This attention to detail highlights his commitment to producing a durable and reliable design. “Sailing is about finding your path, whether it’s across an ocean or within yourself.” – Sven Yrvind In conclusion, making flanges around bulkhead hatches may seem complex at first glance, but by following Sven Yrvind’s meticulous process, enthusiasts can achieve professional-level results. Remember that the journey of boatbuilding is as rewarding as reaching your destination; it tests one’s patience and dedication. For those seeking to embark on this adventure or simply gain more insight into marine craftsmanship, Sven’s wisdom is invaluable.Once the flange is fully dried, Sven removes the clamps carefully, ensuring no damage occurs during this process. He then moves on to attaching four more pieces onto these main frames, completing two pairs of flanges for the bulkhead hatches.The Final Touches
While two flanges form the primary support structure around the hatches, Sven mentions there are two additional pieces required at each end to ensure comprehensive protection. This attention to detail highlights his commitment to producing a durable and reliable design. “Sailing is about finding your path, whether it’s across an ocean or within yourself.” – Sven Yrvind In conclusion, making flanges around bulkhead hatches may seem complex at first glance, but by following Sven Yrvind’s meticulous process, enthusiasts can achieve professional-level results. Remember that the journey of boatbuilding is as rewarding as reaching your destination; it tests one’s patience and dedication. For those seeking to embark on this adventure or simply gain more insight into marine craftsmanship, Sven’s wisdom is invaluable.Sven proceeds to apply glue along one edge of the flange, ensuring a secure bond when clamped into place. He emphasizes that this stage is crucial for maintaining the structural integrity of the flange, which in turn safeguards the living area beneath the canvas when hatches are open.Step 3: Allowing Time to Dry
After securely attaching the first portion of the flange, Sven allows ample time for it to dry before moving forward with additional steps. This patience and precision are key aspects of his successful boatbuilding methods.Step 4: Finishing Touches
Once the flange is fully dried, Sven removes the clamps carefully, ensuring no damage occurs during this process. He then moves on to attaching four more pieces onto these main frames, completing two pairs of flanges for the bulkhead hatches.The Final Touches
While two flanges form the primary support structure around the hatches, Sven mentions there are two additional pieces required at each end to ensure comprehensive protection. This attention to detail highlights his commitment to producing a durable and reliable design. “Sailing is about finding your path, whether it’s across an ocean or within yourself.” – Sven Yrvind In conclusion, making flanges around bulkhead hatches may seem complex at first glance, but by following Sven Yrvind’s meticulous process, enthusiasts can achieve professional-level results. Remember that the journey of boatbuilding is as rewarding as reaching your destination; it tests one’s patience and dedication. For those seeking to embark on this adventure or simply gain more insight into marine craftsmanship, Sven’s wisdom is invaluable.Sven begins by explaining that working on flanges vertically and horizontally is significantly easier than doing so in a flat position. To simplify the process further, he divides the task into two or three steps as suggested by fellow expert “for for.” This approach not only makes it more manageable but also allows for greater precision in crafting each component.Step 2: Applying Glue and Securing
Sven proceeds to apply glue along one edge of the flange, ensuring a secure bond when clamped into place. He emphasizes that this stage is crucial for maintaining the structural integrity of the flange, which in turn safeguards the living area beneath the canvas when hatches are open.Step 3: Allowing Time to Dry
After securely attaching the first portion of the flange, Sven allows ample time for it to dry before moving forward with additional steps. This patience and precision are key aspects of his successful boatbuilding methods.Step 4: Finishing Touches
Once the flange is fully dried, Sven removes the clamps carefully, ensuring no damage occurs during this process. He then moves on to attaching four more pieces onto these main frames, completing two pairs of flanges for the bulkhead hatches.The Final Touches
While two flanges form the primary support structure around the hatches, Sven mentions there are two additional pieces required at each end to ensure comprehensive protection. This attention to detail highlights his commitment to producing a durable and reliable design. “Sailing is about finding your path, whether it’s across an ocean or within yourself.” – Sven Yrvind In conclusion, making flanges around bulkhead hatches may seem complex at first glance, but by following Sven Yrvind’s meticulous process, enthusiasts can achieve professional-level results. Remember that the journey of boatbuilding is as rewarding as reaching your destination; it tests one’s patience and dedication. For those seeking to embark on this adventure or simply gain more insight into marine craftsmanship, Sven’s wisdom is invaluable.Sven Yrvind, a renowned yacht designer and sailor, shares valuable insights on creating flanges around bulkhead hatches for canvas protection in this enlightening video. By following his expert guidance, boat enthusiasts can ensure their living areas remain secure while allowing unhindered access through the hatches.Step 1: Starting with the Flange
Sven begins by explaining that working on flanges vertically and horizontally is significantly easier than doing so in a flat position. To simplify the process further, he divides the task into two or three steps as suggested by fellow expert “for for.” This approach not only makes it more manageable but also allows for greater precision in crafting each component.Step 2: Applying Glue and Securing
Sven proceeds to apply glue along one edge of the flange, ensuring a secure bond when clamped into place. He emphasizes that this stage is crucial for maintaining the structural integrity of the flange, which in turn safeguards the living area beneath the canvas when hatches are open.Step 3: Allowing Time to Dry
After securely attaching the first portion of the flange, Sven allows ample time for it to dry before moving forward with additional steps. This patience and precision are key aspects of his successful boatbuilding methods.Step 4: Finishing Touches
Once the flange is fully dried, Sven removes the clamps carefully, ensuring no damage occurs during this process. He then moves on to attaching four more pieces onto these main frames, completing two pairs of flanges for the bulkhead hatches.The Final Touches
While two flanges form the primary support structure around the hatches, Sven mentions there are two additional pieces required at each end to ensure comprehensive protection. This attention to detail highlights his commitment to producing a durable and reliable design. “Sailing is about finding your path, whether it’s across an ocean or within yourself.” – Sven Yrvind In conclusion, making flanges around bulkhead hatches may seem complex at first glance, but by following Sven Yrvind’s meticulous process, enthusiasts can achieve professional-level results. Remember that the journey of boatbuilding is as rewarding as reaching your destination; it tests one’s patience and dedication. For those seeking to embark on this adventure or simply gain more insight into marine craftsmanship, Sven’s wisdom is invaluable.Making Flanges Around Bulkhead Hatches for Canvas
Sven Yrvind, a renowned yacht designer and sailor, shares valuable insights on creating flanges around bulkhead hatches for canvas protection in this enlightening video. By following his expert guidance, boat enthusiasts can ensure their living areas remain secure while allowing unhindered access through the hatches.Step 1: Starting with the Flange
Sven begins by explaining that working on flanges vertically and horizontally is significantly easier than doing so in a flat position. To simplify the process further, he divides the task into two or three steps as suggested by fellow expert “for for.” This approach not only makes it more manageable but also allows for greater precision in crafting each component.Step 2: Applying Glue and Securing
Sven proceeds to apply glue along one edge of the flange, ensuring a secure bond when clamped into place. He emphasizes that this stage is crucial for maintaining the structural integrity of the flange, which in turn safeguards the living area beneath the canvas when hatches are open.Step 3: Allowing Time to Dry
After securely attaching the first portion of the flange, Sven allows ample time for it to dry before moving forward with additional steps. This patience and precision are key aspects of his successful boatbuilding methods.Step 4: Finishing Touches
Once the flange is fully dried, Sven removes the clamps carefully, ensuring no damage occurs during this process. He then moves on to attaching four more pieces onto these main frames, completing two pairs of flanges for the bulkhead hatches.The Final Touches
While two flanges form the primary support structure around the hatches, Sven mentions there are two additional pieces required at each end to ensure comprehensive protection. This attention to detail highlights his commitment to producing a durable and reliable design. “Sailing is about finding your path, whether it’s across an ocean or within yourself.” – Sven Yrvind In conclusion, making flanges around bulkhead hatches may seem complex at first glance, but by following Sven Yrvind’s meticulous process, enthusiasts can achieve professional-level results. Remember that the journey of boatbuilding is as rewarding as reaching your destination; it tests one’s patience and dedication. For those seeking to embark on this adventure or simply gain more insight into marine craftsmanship, Sven’s wisdom is invaluable.After securely attaching the first portion of the flange, Sven allows ample time for it to dry before moving forward with additional steps. This patience and precision are key aspects of his successful boatbuilding methods.Step 4: Finishing Touches
Once the flange is fully dried, Sven removes the clamps carefully, ensuring no damage occurs during this process. He then moves on to attaching four more pieces onto these main frames, completing two pairs of flanges for the bulkhead hatches.The Final Touches
While two flanges form the primary support structure around the hatches, Sven mentions there are two additional pieces required at each end to ensure comprehensive protection. This attention to detail highlights his commitment to producing a durable and reliable design. “Sailing is about finding your path, whether it’s across an ocean or within yourself.” – Sven Yrvind In conclusion, making flanges around bulkhead hatches may seem complex at first glance, but by following Sven Yrvind’s meticulous process, enthusiasts can achieve professional-level results. Remember that the journey of boatbuilding is as rewarding as reaching your destination; it tests one’s patience and dedication. For those seeking to embark on this adventure or simply gain more insight into marine craftsmanship, Sven’s wisdom is invaluable.Sven proceeds to apply glue along one edge of the flange, ensuring a secure bond when clamped into place. He emphasizes that this stage is crucial for maintaining the structural integrity of the flange, which in turn safeguards the living area beneath the canvas when hatches are open.Step 3: Allowing Time to Dry
After securely attaching the first portion of the flange, Sven allows ample time for it to dry before moving forward with additional steps. This patience and precision are key aspects of his successful boatbuilding methods.Step 4: Finishing Touches
Once the flange is fully dried, Sven removes the clamps carefully, ensuring no damage occurs during this process. He then moves on to attaching four more pieces onto these main frames, completing two pairs of flanges for the bulkhead hatches.The Final Touches
While two flanges form the primary support structure around the hatches, Sven mentions there are two additional pieces required at each end to ensure comprehensive protection. This attention to detail highlights his commitment to producing a durable and reliable design. “Sailing is about finding your path, whether it’s across an ocean or within yourself.” – Sven Yrvind In conclusion, making flanges around bulkhead hatches may seem complex at first glance, but by following Sven Yrvind’s meticulous process, enthusiasts can achieve professional-level results. Remember that the journey of boatbuilding is as rewarding as reaching your destination; it tests one’s patience and dedication. For those seeking to embark on this adventure or simply gain more insight into marine craftsmanship, Sven’s wisdom is invaluable.Sven begins by explaining that working on flanges vertically and horizontally is significantly easier than doing so in a flat position. To simplify the process further, he divides the task into two or three steps as suggested by fellow expert “for for.” This approach not only makes it more manageable but also allows for greater precision in crafting each component.Step 2: Applying Glue and Securing
Sven proceeds to apply glue along one edge of the flange, ensuring a secure bond when clamped into place. He emphasizes that this stage is crucial for maintaining the structural integrity of the flange, which in turn safeguards the living area beneath the canvas when hatches are open.Step 3: Allowing Time to Dry
After securely attaching the first portion of the flange, Sven allows ample time for it to dry before moving forward with additional steps. This patience and precision are key aspects of his successful boatbuilding methods.Step 4: Finishing Touches
Once the flange is fully dried, Sven removes the clamps carefully, ensuring no damage occurs during this process. He then moves on to attaching four more pieces onto these main frames, completing two pairs of flanges for the bulkhead hatches.The Final Touches
While two flanges form the primary support structure around the hatches, Sven mentions there are two additional pieces required at each end to ensure comprehensive protection. This attention to detail highlights his commitment to producing a durable and reliable design. “Sailing is about finding your path, whether it’s across an ocean or within yourself.” – Sven Yrvind In conclusion, making flanges around bulkhead hatches may seem complex at first glance, but by following Sven Yrvind’s meticulous process, enthusiasts can achieve professional-level results. Remember that the journey of boatbuilding is as rewarding as reaching your destination; it tests one’s patience and dedication. For those seeking to embark on this adventure or simply gain more insight into marine craftsmanship, Sven’s wisdom is invaluable.Sven Yrvind, a renowned yacht designer and sailor, shares valuable insights on creating flanges around bulkhead hatches for canvas protection in this enlightening video. By following his expert guidance, boat enthusiasts can ensure their living areas remain secure while allowing unhindered access through the hatches.Step 1: Starting with the Flange
Sven begins by explaining that working on flanges vertically and horizontally is significantly easier than doing so in a flat position. To simplify the process further, he divides the task into two or three steps as suggested by fellow expert “for for.” This approach not only makes it more manageable but also allows for greater precision in crafting each component.Step 2: Applying Glue and Securing
Sven proceeds to apply glue along one edge of the flange, ensuring a secure bond when clamped into place. He emphasizes that this stage is crucial for maintaining the structural integrity of the flange, which in turn safeguards the living area beneath the canvas when hatches are open.Step 3: Allowing Time to Dry
After securely attaching the first portion of the flange, Sven allows ample time for it to dry before moving forward with additional steps. This patience and precision are key aspects of his successful boatbuilding methods.Step 4: Finishing Touches
Once the flange is fully dried, Sven removes the clamps carefully, ensuring no damage occurs during this process. He then moves on to attaching four more pieces onto these main frames, completing two pairs of flanges for the bulkhead hatches.The Final Touches
While two flanges form the primary support structure around the hatches, Sven mentions there are two additional pieces required at each end to ensure comprehensive protection. This attention to detail highlights his commitment to producing a durable and reliable design. “Sailing is about finding your path, whether it’s across an ocean or within yourself.” – Sven Yrvind In conclusion, making flanges around bulkhead hatches may seem complex at first glance, but by following Sven Yrvind’s meticulous process, enthusiasts can achieve professional-level results. Remember that the journey of boatbuilding is as rewarding as reaching your destination; it tests one’s patience and dedication. For those seeking to embark on this adventure or simply gain more insight into marine craftsmanship, Sven’s wisdom is invaluable.Making Flanges Around Bulkhead Hatches for Canvas
Sven Yrvind, a renowned yacht designer and sailor, shares valuable insights on creating flanges around bulkhead hatches for canvas protection in this enlightening video. By following his expert guidance, boat enthusiasts can ensure their living areas remain secure while allowing unhindered access through the hatches.Step 1: Starting with the Flange
Sven begins by explaining that working on flanges vertically and horizontally is significantly easier than doing so in a flat position. To simplify the process further, he divides the task into two or three steps as suggested by fellow expert “for for.” This approach not only makes it more manageable but also allows for greater precision in crafting each component.Step 2: Applying Glue and Securing
Sven proceeds to apply glue along one edge of the flange, ensuring a secure bond when clamped into place. He emphasizes that this stage is crucial for maintaining the structural integrity of the flange, which in turn safeguards the living area beneath the canvas when hatches are open.Step 3: Allowing Time to Dry
After securely attaching the first portion of the flange, Sven allows ample time for it to dry before moving forward with additional steps. This patience and precision are key aspects of his successful boatbuilding methods.Step 4: Finishing Touches
Once the flange is fully dried, Sven removes the clamps carefully, ensuring no damage occurs during this process. He then moves on to attaching four more pieces onto these main frames, completing two pairs of flanges for the bulkhead hatches.The Final Touches
While two flanges form the primary support structure around the hatches, Sven mentions there are two additional pieces required at each end to ensure comprehensive protection. This attention to detail highlights his commitment to producing a durable and reliable design. “Sailing is about finding your path, whether it’s across an ocean or within yourself.” – Sven Yrvind In conclusion, making flanges around bulkhead hatches may seem complex at first glance, but by following Sven Yrvind’s meticulous process, enthusiasts can achieve professional-level results. Remember that the journey of boatbuilding is as rewarding as reaching your destination; it tests one’s patience and dedication. For those seeking to embark on this adventure or simply gain more insight into marine craftsmanship, Sven’s wisdom is invaluable.Once the flange is fully dried, Sven removes the clamps carefully, ensuring no damage occurs during this process. He then moves on to attaching four more pieces onto these main frames, completing two pairs of flanges for the bulkhead hatches.The Final Touches
While two flanges form the primary support structure around the hatches, Sven mentions there are two additional pieces required at each end to ensure comprehensive protection. This attention to detail highlights his commitment to producing a durable and reliable design. “Sailing is about finding your path, whether it’s across an ocean or within yourself.” – Sven Yrvind In conclusion, making flanges around bulkhead hatches may seem complex at first glance, but by following Sven Yrvind’s meticulous process, enthusiasts can achieve professional-level results. Remember that the journey of boatbuilding is as rewarding as reaching your destination; it tests one’s patience and dedication. For those seeking to embark on this adventure or simply gain more insight into marine craftsmanship, Sven’s wisdom is invaluable.After securely attaching the first portion of the flange, Sven allows ample time for it to dry before moving forward with additional steps. This patience and precision are key aspects of his successful boatbuilding methods.Step 4: Finishing Touches
Once the flange is fully dried, Sven removes the clamps carefully, ensuring no damage occurs during this process. He then moves on to attaching four more pieces onto these main frames, completing two pairs of flanges for the bulkhead hatches.The Final Touches
While two flanges form the primary support structure around the hatches, Sven mentions there are two additional pieces required at each end to ensure comprehensive protection. This attention to detail highlights his commitment to producing a durable and reliable design. “Sailing is about finding your path, whether it’s across an ocean or within yourself.” – Sven Yrvind In conclusion, making flanges around bulkhead hatches may seem complex at first glance, but by following Sven Yrvind’s meticulous process, enthusiasts can achieve professional-level results. Remember that the journey of boatbuilding is as rewarding as reaching your destination; it tests one’s patience and dedication. For those seeking to embark on this adventure or simply gain more insight into marine craftsmanship, Sven’s wisdom is invaluable.Sven proceeds to apply glue along one edge of the flange, ensuring a secure bond when clamped into place. He emphasizes that this stage is crucial for maintaining the structural integrity of the flange, which in turn safeguards the living area beneath the canvas when hatches are open.Step 3: Allowing Time to Dry
After securely attaching the first portion of the flange, Sven allows ample time for it to dry before moving forward with additional steps. This patience and precision are key aspects of his successful boatbuilding methods.Step 4: Finishing Touches
Once the flange is fully dried, Sven removes the clamps carefully, ensuring no damage occurs during this process. He then moves on to attaching four more pieces onto these main frames, completing two pairs of flanges for the bulkhead hatches.The Final Touches
While two flanges form the primary support structure around the hatches, Sven mentions there are two additional pieces required at each end to ensure comprehensive protection. This attention to detail highlights his commitment to producing a durable and reliable design. “Sailing is about finding your path, whether it’s across an ocean or within yourself.” – Sven Yrvind In conclusion, making flanges around bulkhead hatches may seem complex at first glance, but by following Sven Yrvind’s meticulous process, enthusiasts can achieve professional-level results. Remember that the journey of boatbuilding is as rewarding as reaching your destination; it tests one’s patience and dedication. For those seeking to embark on this adventure or simply gain more insight into marine craftsmanship, Sven’s wisdom is invaluable.Sven begins by explaining that working on flanges vertically and horizontally is significantly easier than doing so in a flat position. To simplify the process further, he divides the task into two or three steps as suggested by fellow expert “for for.” This approach not only makes it more manageable but also allows for greater precision in crafting each component.Step 2: Applying Glue and Securing
Sven proceeds to apply glue along one edge of the flange, ensuring a secure bond when clamped into place. He emphasizes that this stage is crucial for maintaining the structural integrity of the flange, which in turn safeguards the living area beneath the canvas when hatches are open.Step 3: Allowing Time to Dry
After securely attaching the first portion of the flange, Sven allows ample time for it to dry before moving forward with additional steps. This patience and precision are key aspects of his successful boatbuilding methods.Step 4: Finishing Touches
Once the flange is fully dried, Sven removes the clamps carefully, ensuring no damage occurs during this process. He then moves on to attaching four more pieces onto these main frames, completing two pairs of flanges for the bulkhead hatches.The Final Touches
While two flanges form the primary support structure around the hatches, Sven mentions there are two additional pieces required at each end to ensure comprehensive protection. This attention to detail highlights his commitment to producing a durable and reliable design. “Sailing is about finding your path, whether it’s across an ocean or within yourself.” – Sven Yrvind In conclusion, making flanges around bulkhead hatches may seem complex at first glance, but by following Sven Yrvind’s meticulous process, enthusiasts can achieve professional-level results. Remember that the journey of boatbuilding is as rewarding as reaching your destination; it tests one’s patience and dedication. For those seeking to embark on this adventure or simply gain more insight into marine craftsmanship, Sven’s wisdom is invaluable.Sven Yrvind, a renowned yacht designer and sailor, shares valuable insights on creating flanges around bulkhead hatches for canvas protection in this enlightening video. By following his expert guidance, boat enthusiasts can ensure their living areas remain secure while allowing unhindered access through the hatches.Step 1: Starting with the Flange
Sven begins by explaining that working on flanges vertically and horizontally is significantly easier than doing so in a flat position. To simplify the process further, he divides the task into two or three steps as suggested by fellow expert “for for.” This approach not only makes it more manageable but also allows for greater precision in crafting each component.Step 2: Applying Glue and Securing
Sven proceeds to apply glue along one edge of the flange, ensuring a secure bond when clamped into place. He emphasizes that this stage is crucial for maintaining the structural integrity of the flange, which in turn safeguards the living area beneath the canvas when hatches are open.Step 3: Allowing Time to Dry
After securely attaching the first portion of the flange, Sven allows ample time for it to dry before moving forward with additional steps. This patience and precision are key aspects of his successful boatbuilding methods.Step 4: Finishing Touches
Once the flange is fully dried, Sven removes the clamps carefully, ensuring no damage occurs during this process. He then moves on to attaching four more pieces onto these main frames, completing two pairs of flanges for the bulkhead hatches.The Final Touches
While two flanges form the primary support structure around the hatches, Sven mentions there are two additional pieces required at each end to ensure comprehensive protection. This attention to detail highlights his commitment to producing a durable and reliable design. “Sailing is about finding your path, whether it’s across an ocean or within yourself.” – Sven Yrvind In conclusion, making flanges around bulkhead hatches may seem complex at first glance, but by following Sven Yrvind’s meticulous process, enthusiasts can achieve professional-level results. Remember that the journey of boatbuilding is as rewarding as reaching your destination; it tests one’s patience and dedication. For those seeking to embark on this adventure or simply gain more insight into marine craftsmanship, Sven’s wisdom is invaluable.Making Flanges Around Bulkhead Hatches for Canvas
Sven Yrvind, a renowned yacht designer and sailor, shares valuable insights on creating flanges around bulkhead hatches for canvas protection in this enlightening video. By following his expert guidance, boat enthusiasts can ensure their living areas remain secure while allowing unhindered access through the hatches.Step 1: Starting with the Flange
Sven begins by explaining that working on flanges vertically and horizontally is significantly easier than doing so in a flat position. To simplify the process further, he divides the task into two or three steps as suggested by fellow expert “for for.” This approach not only makes it more manageable but also allows for greater precision in crafting each component.Step 2: Applying Glue and Securing
Sven proceeds to apply glue along one edge of the flange, ensuring a secure bond when clamped into place. He emphasizes that this stage is crucial for maintaining the structural integrity of the flange, which in turn safeguards the living area beneath the canvas when hatches are open.Step 3: Allowing Time to Dry
After securely attaching the first portion of the flange, Sven allows ample time for it to dry before moving forward with additional steps. This patience and precision are key aspects of his successful boatbuilding methods.Step 4: Finishing Touches
Once the flange is fully dried, Sven removes the clamps carefully, ensuring no damage occurs during this process. He then moves on to attaching four more pieces onto these main frames, completing two pairs of flanges for the bulkhead hatches.The Final Touches
While two flanges form the primary support structure around the hatches, Sven mentions there are two additional pieces required at each end to ensure comprehensive protection. This attention to detail highlights his commitment to producing a durable and reliable design. “Sailing is about finding your path, whether it’s across an ocean or within yourself.” – Sven Yrvind In conclusion, making flanges around bulkhead hatches may seem complex at first glance, but by following Sven Yrvind’s meticulous process, enthusiasts can achieve professional-level results. Remember that the journey of boatbuilding is as rewarding as reaching your destination; it tests one’s patience and dedication. For those seeking to embark on this adventure or simply gain more insight into marine craftsmanship, Sven’s wisdom is invaluable.Sven proceeds to apply glue along one edge of the flange, ensuring a secure bond when clamped into place. He emphasizes that this stage is crucial for maintaining the structural integrity of the flange, which in turn safeguards the living area beneath the canvas when hatches are open.Step 3: Allowing Time to Dry
After securely attaching the first portion of the flange, Sven allows ample time for it to dry before moving forward with additional steps. This patience and precision are key aspects of his successful boatbuilding methods.Step 4: Finishing Touches
Once the flange is fully dried, Sven removes the clamps carefully, ensuring no damage occurs during this process. He then moves on to attaching four more pieces onto these main frames, completing two pairs of flanges for the bulkhead hatches.The Final Touches
While two flanges form the primary support structure around the hatches, Sven mentions there are two additional pieces required at each end to ensure comprehensive protection. This attention to detail highlights his commitment to producing a durable and reliable design. “Sailing is about finding your path, whether it’s across an ocean or within yourself.” – Sven Yrvind In conclusion, making flanges around bulkhead hatches may seem complex at first glance, but by following Sven Yrvind’s meticulous process, enthusiasts can achieve professional-level results. Remember that the journey of boatbuilding is as rewarding as reaching your destination; it tests one’s patience and dedication. For those seeking to embark on this adventure or simply gain more insight into marine craftsmanship, Sven’s wisdom is invaluable.Once the flange is fully dried, Sven removes the clamps carefully, ensuring no damage occurs during this process. He then moves on to attaching four more pieces onto these main frames, completing two pairs of flanges for the bulkhead hatches.The Final Touches
While two flanges form the primary support structure around the hatches, Sven mentions there are two additional pieces required at each end to ensure comprehensive protection. This attention to detail highlights his commitment to producing a durable and reliable design. “Sailing is about finding your path, whether it’s across an ocean or within yourself.” – Sven Yrvind In conclusion, making flanges around bulkhead hatches may seem complex at first glance, but by following Sven Yrvind’s meticulous process, enthusiasts can achieve professional-level results. Remember that the journey of boatbuilding is as rewarding as reaching your destination; it tests one’s patience and dedication. For those seeking to embark on this adventure or simply gain more insight into marine craftsmanship, Sven’s wisdom is invaluable.Sven begins by explaining that working on flanges vertically and horizontally is significantly easier than doing so in a flat position. To simplify the process further, he divides the task into two or three steps as suggested by fellow expert “for for.” This approach not only makes it more manageable but also allows for greater precision in crafting each component.Step 2: Applying Glue and Securing
Sven proceeds to apply glue along one edge of the flange, ensuring a secure bond when clamped into place. He emphasizes that this stage is crucial for maintaining the structural integrity of the flange, which in turn safeguards the living area beneath the canvas when hatches are open.Step 3: Allowing Time to Dry
After securely attaching the first portion of the flange, Sven allows ample time for it to dry before moving forward with additional steps. This patience and precision are key aspects of his successful boatbuilding methods.Step 4: Finishing Touches
Once the flange is fully dried, Sven removes the clamps carefully, ensuring no damage occurs during this process. He then moves on to attaching four more pieces onto these main frames, completing two pairs of flanges for the bulkhead hatches.The Final Touches
While two flanges form the primary support structure around the hatches, Sven mentions there are two additional pieces required at each end to ensure comprehensive protection. This attention to detail highlights his commitment to producing a durable and reliable design. “Sailing is about finding your path, whether it’s across an ocean or within yourself.” – Sven Yrvind In conclusion, making flanges around bulkhead hatches may seem complex at first glance, but by following Sven Yrvind’s meticulous process, enthusiasts can achieve professional-level results. Remember that the journey of boatbuilding is as rewarding as reaching your destination; it tests one’s patience and dedication. For those seeking to embark on this adventure or simply gain more insight into marine craftsmanship, Sven’s wisdom is invaluable.Sven Yrvind, a renowned yacht designer and sailor, shares valuable insights on creating flanges around bulkhead hatches for canvas protection in this enlightening video. By following his expert guidance, boat enthusiasts can ensure their living areas remain secure while allowing unhindered access through the hatches.Step 1: Starting with the Flange
Sven begins by explaining that working on flanges vertically and horizontally is significantly easier than doing so in a flat position. To simplify the process further, he divides the task into two or three steps as suggested by fellow expert “for for.” This approach not only makes it more manageable but also allows for greater precision in crafting each component.Step 2: Applying Glue and Securing
Sven proceeds to apply glue along one edge of the flange, ensuring a secure bond when clamped into place. He emphasizes that this stage is crucial for maintaining the structural integrity of the flange, which in turn safeguards the living area beneath the canvas when hatches are open.Step 3: Allowing Time to Dry
After securely attaching the first portion of the flange, Sven allows ample time for it to dry before moving forward with additional steps. This patience and precision are key aspects of his successful boatbuilding methods.Step 4: Finishing Touches
Once the flange is fully dried, Sven removes the clamps carefully, ensuring no damage occurs during this process. He then moves on to attaching four more pieces onto these main frames, completing two pairs of flanges for the bulkhead hatches.The Final Touches
While two flanges form the primary support structure around the hatches, Sven mentions there are two additional pieces required at each end to ensure comprehensive protection. This attention to detail highlights his commitment to producing a durable and reliable design. “Sailing is about finding your path, whether it’s across an ocean or within yourself.” – Sven Yrvind In conclusion, making flanges around bulkhead hatches may seem complex at first glance, but by following Sven Yrvind’s meticulous process, enthusiasts can achieve professional-level results. Remember that the journey of boatbuilding is as rewarding as reaching your destination; it tests one’s patience and dedication. For those seeking to embark on this adventure or simply gain more insight into marine craftsmanship, Sven’s wisdom is invaluable.Making Flanges Around Bulkhead Hatches for Canvas
Sven Yrvind, a renowned yacht designer and sailor, shares valuable insights on creating flanges around bulkhead hatches for canvas protection in this enlightening video. By following his expert guidance, boat enthusiasts can ensure their living areas remain secure while allowing unhindered access through the hatches.Step 1: Starting with the Flange
Sven begins by explaining that working on flanges vertically and horizontally is significantly easier than doing so in a flat position. To simplify the process further, he divides the task into two or three steps as suggested by fellow expert “for for.” This approach not only makes it more manageable but also allows for greater precision in crafting each component.Step 2: Applying Glue and Securing
Sven proceeds to apply glue along one edge of the flange, ensuring a secure bond when clamped into place. He emphasizes that this stage is crucial for maintaining the structural integrity of the flange, which in turn safeguards the living area beneath the canvas when hatches are open.Step 3: Allowing Time to Dry
After securely attaching the first portion of the flange, Sven allows ample time for it to dry before moving forward with additional steps. This patience and precision are key aspects of his successful boatbuilding methods.Step 4: Finishing Touches
Once the flange is fully dried, Sven removes the clamps carefully, ensuring no damage occurs during this process. He then moves on to attaching four more pieces onto these main frames, completing two pairs of flanges for the bulkhead hatches.The Final Touches
While two flanges form the primary support structure around the hatches, Sven mentions there are two additional pieces required at each end to ensure comprehensive protection. This attention to detail highlights his commitment to producing a durable and reliable design. “Sailing is about finding your path, whether it’s across an ocean or within yourself.” – Sven Yrvind In conclusion, making flanges around bulkhead hatches may seem complex at first glance, but by following Sven Yrvind’s meticulous process, enthusiasts can achieve professional-level results. Remember that the journey of boatbuilding is as rewarding as reaching your destination; it tests one’s patience and dedication. For those seeking to embark on this adventure or simply gain more insight into marine craftsmanship, Sven’s wisdom is invaluable.After securely attaching the first portion of the flange, Sven allows ample time for it to dry before moving forward with additional steps. This patience and precision are key aspects of his successful boatbuilding methods.Step 4: Finishing Touches
Once the flange is fully dried, Sven removes the clamps carefully, ensuring no damage occurs during this process. He then moves on to attaching four more pieces onto these main frames, completing two pairs of flanges for the bulkhead hatches.The Final Touches
While two flanges form the primary support structure around the hatches, Sven mentions there are two additional pieces required at each end to ensure comprehensive protection. This attention to detail highlights his commitment to producing a durable and reliable design. “Sailing is about finding your path, whether it’s across an ocean or within yourself.” – Sven Yrvind In conclusion, making flanges around bulkhead hatches may seem complex at first glance, but by following Sven Yrvind’s meticulous process, enthusiasts can achieve professional-level results. Remember that the journey of boatbuilding is as rewarding as reaching your destination; it tests one’s patience and dedication. For those seeking to embark on this adventure or simply gain more insight into marine craftsmanship, Sven’s wisdom is invaluable.Sven begins by explaining that working on flanges vertically and horizontally is significantly easier than doing so in a flat position. To simplify the process further, he divides the task into two or three steps as suggested by fellow expert “for for.” This approach not only makes it more manageable but also allows for greater precision in crafting each component.Step 2: Applying Glue and Securing
Sven proceeds to apply glue along one edge of the flange, ensuring a secure bond when clamped into place. He emphasizes that this stage is crucial for maintaining the structural integrity of the flange, which in turn safeguards the living area beneath the canvas when hatches are open.Step 3: Allowing Time to Dry
After securely attaching the first portion of the flange, Sven allows ample time for it to dry before moving forward with additional steps. This patience and precision are key aspects of his successful boatbuilding methods.Step 4: Finishing Touches
Once the flange is fully dried, Sven removes the clamps carefully, ensuring no damage occurs during this process. He then moves on to attaching four more pieces onto these main frames, completing two pairs of flanges for the bulkhead hatches.The Final Touches
While two flanges form the primary support structure around the hatches, Sven mentions there are two additional pieces required at each end to ensure comprehensive protection. This attention to detail highlights his commitment to producing a durable and reliable design. “Sailing is about finding your path, whether it’s across an ocean or within yourself.” – Sven Yrvind In conclusion, making flanges around bulkhead hatches may seem complex at first glance, but by following Sven Yrvind’s meticulous process, enthusiasts can achieve professional-level results. Remember that the journey of boatbuilding is as rewarding as reaching your destination; it tests one’s patience and dedication. For those seeking to embark on this adventure or simply gain more insight into marine craftsmanship, Sven’s wisdom is invaluable.Sven Yrvind, a renowned yacht designer and sailor, shares valuable insights on creating flanges around bulkhead hatches for canvas protection in this enlightening video. By following his expert guidance, boat enthusiasts can ensure their living areas remain secure while allowing unhindered access through the hatches.Step 1: Starting with the Flange
Sven begins by explaining that working on flanges vertically and horizontally is significantly easier than doing so in a flat position. To simplify the process further, he divides the task into two or three steps as suggested by fellow expert “for for.” This approach not only makes it more manageable but also allows for greater precision in crafting each component.Step 2: Applying Glue and Securing
Sven proceeds to apply glue along one edge of the flange, ensuring a secure bond when clamped into place. He emphasizes that this stage is crucial for maintaining the structural integrity of the flange, which in turn safeguards the living area beneath the canvas when hatches are open.Step 3: Allowing Time to Dry
After securely attaching the first portion of the flange, Sven allows ample time for it to dry before moving forward with additional steps. This patience and precision are key aspects of his successful boatbuilding methods.Step 4: Finishing Touches
Once the flange is fully dried, Sven removes the clamps carefully, ensuring no damage occurs during this process. He then moves on to attaching four more pieces onto these main frames, completing two pairs of flanges for the bulkhead hatches.The Final Touches
While two flanges form the primary support structure around the hatches, Sven mentions there are two additional pieces required at each end to ensure comprehensive protection. This attention to detail highlights his commitment to producing a durable and reliable design. “Sailing is about finding your path, whether it’s across an ocean or within yourself.” – Sven Yrvind In conclusion, making flanges around bulkhead hatches may seem complex at first glance, but by following Sven Yrvind’s meticulous process, enthusiasts can achieve professional-level results. Remember that the journey of boatbuilding is as rewarding as reaching your destination; it tests one’s patience and dedication. For those seeking to embark on this adventure or simply gain more insight into marine craftsmanship, Sven’s wisdom is invaluable.Making Flanges Around Bulkhead Hatches for Canvas
Sven Yrvind, a renowned yacht designer and sailor, shares valuable insights on creating flanges around bulkhead hatches for canvas protection in this enlightening video. By following his expert guidance, boat enthusiasts can ensure their living areas remain secure while allowing unhindered access through the hatches.Step 1: Starting with the Flange
Sven begins by explaining that working on flanges vertically and horizontally is significantly easier than doing so in a flat position. To simplify the process further, he divides the task into two or three steps as suggested by fellow expert “for for.” This approach not only makes it more manageable but also allows for greater precision in crafting each component.Step 2: Applying Glue and Securing
Sven proceeds to apply glue along one edge of the flange, ensuring a secure bond when clamped into place. He emphasizes that this stage is crucial for maintaining the structural integrity of the flange, which in turn safeguards the living area beneath the canvas when hatches are open.Step 3: Allowing Time to Dry
After securely attaching the first portion of the flange, Sven allows ample time for it to dry before moving forward with additional steps. This patience and precision are key aspects of his successful boatbuilding methods.Step 4: Finishing Touches
Once the flange is fully dried, Sven removes the clamps carefully, ensuring no damage occurs during this process. He then moves on to attaching four more pieces onto these main frames, completing two pairs of flanges for the bulkhead hatches.The Final Touches
While two flanges form the primary support structure around the hatches, Sven mentions there are two additional pieces required at each end to ensure comprehensive protection. This attention to detail highlights his commitment to producing a durable and reliable design. “Sailing is about finding your path, whether it’s across an ocean or within yourself.” – Sven Yrvind In conclusion, making flanges around bulkhead hatches may seem complex at first glance, but by following Sven Yrvind’s meticulous process, enthusiasts can achieve professional-level results. Remember that the journey of boatbuilding is as rewarding as reaching your destination; it tests one’s patience and dedication. For those seeking to embark on this adventure or simply gain more insight into marine craftsmanship, Sven’s wisdom is invaluable.Sven proceeds to apply glue along one edge of the flange, ensuring a secure bond when clamped into place. He emphasizes that this stage is crucial for maintaining the structural integrity of the flange, which in turn safeguards the living area beneath the canvas when hatches are open.Step 3: Allowing Time to Dry
After securely attaching the first portion of the flange, Sven allows ample time for it to dry before moving forward with additional steps. This patience and precision are key aspects of his successful boatbuilding methods.Step 4: Finishing Touches
Once the flange is fully dried, Sven removes the clamps carefully, ensuring no damage occurs during this process. He then moves on to attaching four more pieces onto these main frames, completing two pairs of flanges for the bulkhead hatches.The Final Touches
While two flanges form the primary support structure around the hatches, Sven mentions there are two additional pieces required at each end to ensure comprehensive protection. This attention to detail highlights his commitment to producing a durable and reliable design. “Sailing is about finding your path, whether it’s across an ocean or within yourself.” – Sven Yrvind In conclusion, making flanges around bulkhead hatches may seem complex at first glance, but by following Sven Yrvind’s meticulous process, enthusiasts can achieve professional-level results. Remember that the journey of boatbuilding is as rewarding as reaching your destination; it tests one’s patience and dedication. For those seeking to embark on this adventure or simply gain more insight into marine craftsmanship, Sven’s wisdom is invaluable.Sven begins by explaining that working on flanges vertically and horizontally is significantly easier than doing so in a flat position. To simplify the process further, he divides the task into two or three steps as suggested by fellow expert “for for.” This approach not only makes it more manageable but also allows for greater precision in crafting each component.Step 2: Applying Glue and Securing
Sven proceeds to apply glue along one edge of the flange, ensuring a secure bond when clamped into place. He emphasizes that this stage is crucial for maintaining the structural integrity of the flange, which in turn safeguards the living area beneath the canvas when hatches are open.Step 3: Allowing Time to Dry
After securely attaching the first portion of the flange, Sven allows ample time for it to dry before moving forward with additional steps. This patience and precision are key aspects of his successful boatbuilding methods.Step 4: Finishing Touches
Once the flange is fully dried, Sven removes the clamps carefully, ensuring no damage occurs during this process. He then moves on to attaching four more pieces onto these main frames, completing two pairs of flanges for the bulkhead hatches.The Final Touches
While two flanges form the primary support structure around the hatches, Sven mentions there are two additional pieces required at each end to ensure comprehensive protection. This attention to detail highlights his commitment to producing a durable and reliable design. “Sailing is about finding your path, whether it’s across an ocean or within yourself.” – Sven Yrvind In conclusion, making flanges around bulkhead hatches may seem complex at first glance, but by following Sven Yrvind’s meticulous process, enthusiasts can achieve professional-level results. Remember that the journey of boatbuilding is as rewarding as reaching your destination; it tests one’s patience and dedication. For those seeking to embark on this adventure or simply gain more insight into marine craftsmanship, Sven’s wisdom is invaluable.Sven Yrvind, a renowned yacht designer and sailor, shares valuable insights on creating flanges around bulkhead hatches for canvas protection in this enlightening video. By following his expert guidance, boat enthusiasts can ensure their living areas remain secure while allowing unhindered access through the hatches.Step 1: Starting with the Flange
Sven begins by explaining that working on flanges vertically and horizontally is significantly easier than doing so in a flat position. To simplify the process further, he divides the task into two or three steps as suggested by fellow expert “for for.” This approach not only makes it more manageable but also allows for greater precision in crafting each component.Step 2: Applying Glue and Securing
Sven proceeds to apply glue along one edge of the flange, ensuring a secure bond when clamped into place. He emphasizes that this stage is crucial for maintaining the structural integrity of the flange, which in turn safeguards the living area beneath the canvas when hatches are open.Step 3: Allowing Time to Dry
After securely attaching the first portion of the flange, Sven allows ample time for it to dry before moving forward with additional steps. This patience and precision are key aspects of his successful boatbuilding methods.Step 4: Finishing Touches
Once the flange is fully dried, Sven removes the clamps carefully, ensuring no damage occurs during this process. He then moves on to attaching four more pieces onto these main frames, completing two pairs of flanges for the bulkhead hatches.The Final Touches
While two flanges form the primary support structure around the hatches, Sven mentions there are two additional pieces required at each end to ensure comprehensive protection. This attention to detail highlights his commitment to producing a durable and reliable design. “Sailing is about finding your path, whether it’s across an ocean or within yourself.” – Sven Yrvind In conclusion, making flanges around bulkhead hatches may seem complex at first glance, but by following Sven Yrvind’s meticulous process, enthusiasts can achieve professional-level results. Remember that the journey of boatbuilding is as rewarding as reaching your destination; it tests one’s patience and dedication. For those seeking to embark on this adventure or simply gain more insight into marine craftsmanship, Sven’s wisdom is invaluable.Making Flanges Around Bulkhead Hatches for Canvas
Sven Yrvind, a renowned yacht designer and sailor, shares valuable insights on creating flanges around bulkhead hatches for canvas protection in this enlightening video. By following his expert guidance, boat enthusiasts can ensure their living areas remain secure while allowing unhindered access through the hatches.Step 1: Starting with the Flange
Sven begins by explaining that working on flanges vertically and horizontally is significantly easier than doing so in a flat position. To simplify the process further, he divides the task into two or three steps as suggested by fellow expert “for for.” This approach not only makes it more manageable but also allows for greater precision in crafting each component.Step 2: Applying Glue and Securing
Sven proceeds to apply glue along one edge of the flange, ensuring a secure bond when clamped into place. He emphasizes that this stage is crucial for maintaining the structural integrity of the flange, which in turn safeguards the living area beneath the canvas when hatches are open.Step 3: Allowing Time to Dry
After securely attaching the first portion of the flange, Sven allows ample time for it to dry before moving forward with additional steps. This patience and precision are key aspects of his successful boatbuilding methods.Step 4: Finishing Touches
Once the flange is fully dried, Sven removes the clamps carefully, ensuring no damage occurs during this process. He then moves on to attaching four more pieces onto these main frames, completing two pairs of flanges for the bulkhead hatches.The Final Touches
While two flanges form the primary support structure around the hatches, Sven mentions there are two additional pieces required at each end to ensure comprehensive protection. This attention to detail highlights his commitment to producing a durable and reliable design. “Sailing is about finding your path, whether it’s across an ocean or within yourself.” – Sven Yrvind In conclusion, making flanges around bulkhead hatches may seem complex at first glance, but by following Sven Yrvind’s meticulous process, enthusiasts can achieve professional-level results. Remember that the journey of boatbuilding is as rewarding as reaching your destination; it tests one’s patience and dedication. For those seeking to embark on this adventure or simply gain more insight into marine craftsmanship, Sven’s wisdom is invaluable.Once the flange is fully dried, Sven removes the clamps carefully, ensuring no damage occurs during this process. He then moves on to attaching four more pieces onto these main frames, completing two pairs of flanges for the bulkhead hatches.The Final Touches
While two flanges form the primary support structure around the hatches, Sven mentions there are two additional pieces required at each end to ensure comprehensive protection. This attention to detail highlights his commitment to producing a durable and reliable design. “Sailing is about finding your path, whether it’s across an ocean or within yourself.” – Sven Yrvind In conclusion, making flanges around bulkhead hatches may seem complex at first glance, but by following Sven Yrvind’s meticulous process, enthusiasts can achieve professional-level results. Remember that the journey of boatbuilding is as rewarding as reaching your destination; it tests one’s patience and dedication. For those seeking to embark on this adventure or simply gain more insight into marine craftsmanship, Sven’s wisdom is invaluable.Sven proceeds to apply glue along one edge of the flange, ensuring a secure bond when clamped into place. He emphasizes that this stage is crucial for maintaining the structural integrity of the flange, which in turn safeguards the living area beneath the canvas when hatches are open.Step 3: Allowing Time to Dry
After securely attaching the first portion of the flange, Sven allows ample time for it to dry before moving forward with additional steps. This patience and precision are key aspects of his successful boatbuilding methods.Step 4: Finishing Touches
Once the flange is fully dried, Sven removes the clamps carefully, ensuring no damage occurs during this process. He then moves on to attaching four more pieces onto these main frames, completing two pairs of flanges for the bulkhead hatches.The Final Touches
While two flanges form the primary support structure around the hatches, Sven mentions there are two additional pieces required at each end to ensure comprehensive protection. This attention to detail highlights his commitment to producing a durable and reliable design. “Sailing is about finding your path, whether it’s across an ocean or within yourself.” – Sven Yrvind In conclusion, making flanges around bulkhead hatches may seem complex at first glance, but by following Sven Yrvind’s meticulous process, enthusiasts can achieve professional-level results. Remember that the journey of boatbuilding is as rewarding as reaching your destination; it tests one’s patience and dedication. For those seeking to embark on this adventure or simply gain more insight into marine craftsmanship, Sven’s wisdom is invaluable.Sven begins by explaining that working on flanges vertically and horizontally is significantly easier than doing so in a flat position. To simplify the process further, he divides the task into two or three steps as suggested by fellow expert “for for.” This approach not only makes it more manageable but also allows for greater precision in crafting each component.Step 2: Applying Glue and Securing
Sven proceeds to apply glue along one edge of the flange, ensuring a secure bond when clamped into place. He emphasizes that this stage is crucial for maintaining the structural integrity of the flange, which in turn safeguards the living area beneath the canvas when hatches are open.Step 3: Allowing Time to Dry
After securely attaching the first portion of the flange, Sven allows ample time for it to dry before moving forward with additional steps. This patience and precision are key aspects of his successful boatbuilding methods.Step 4: Finishing Touches
Once the flange is fully dried, Sven removes the clamps carefully, ensuring no damage occurs during this process. He then moves on to attaching four more pieces onto these main frames, completing two pairs of flanges for the bulkhead hatches.The Final Touches
While two flanges form the primary support structure around the hatches, Sven mentions there are two additional pieces required at each end to ensure comprehensive protection. This attention to detail highlights his commitment to producing a durable and reliable design. “Sailing is about finding your path, whether it’s across an ocean or within yourself.” – Sven Yrvind In conclusion, making flanges around bulkhead hatches may seem complex at first glance, but by following Sven Yrvind’s meticulous process, enthusiasts can achieve professional-level results. Remember that the journey of boatbuilding is as rewarding as reaching your destination; it tests one’s patience and dedication. For those seeking to embark on this adventure or simply gain more insight into marine craftsmanship, Sven’s wisdom is invaluable.Sven Yrvind, a renowned yacht designer and sailor, shares valuable insights on creating flanges around bulkhead hatches for canvas protection in this enlightening video. By following his expert guidance, boat enthusiasts can ensure their living areas remain secure while allowing unhindered access through the hatches.Step 1: Starting with the Flange
Sven begins by explaining that working on flanges vertically and horizontally is significantly easier than doing so in a flat position. To simplify the process further, he divides the task into two or three steps as suggested by fellow expert “for for.” This approach not only makes it more manageable but also allows for greater precision in crafting each component.Step 2: Applying Glue and Securing
Sven proceeds to apply glue along one edge of the flange, ensuring a secure bond when clamped into place. He emphasizes that this stage is crucial for maintaining the structural integrity of the flange, which in turn safeguards the living area beneath the canvas when hatches are open.Step 3: Allowing Time to Dry
After securely attaching the first portion of the flange, Sven allows ample time for it to dry before moving forward with additional steps. This patience and precision are key aspects of his successful boatbuilding methods.Step 4: Finishing Touches
Once the flange is fully dried, Sven removes the clamps carefully, ensuring no damage occurs during this process. He then moves on to attaching four more pieces onto these main frames, completing two pairs of flanges for the bulkhead hatches.The Final Touches
While two flanges form the primary support structure around the hatches, Sven mentions there are two additional pieces required at each end to ensure comprehensive protection. This attention to detail highlights his commitment to producing a durable and reliable design. “Sailing is about finding your path, whether it’s across an ocean or within yourself.” – Sven Yrvind In conclusion, making flanges around bulkhead hatches may seem complex at first glance, but by following Sven Yrvind’s meticulous process, enthusiasts can achieve professional-level results. Remember that the journey of boatbuilding is as rewarding as reaching your destination; it tests one’s patience and dedication. For those seeking to embark on this adventure or simply gain more insight into marine craftsmanship, Sven’s wisdom is invaluable.Making Flanges Around Bulkhead Hatches for Canvas
Sven Yrvind, a renowned yacht designer and sailor, shares valuable insights on creating flanges around bulkhead hatches for canvas protection in this enlightening video. By following his expert guidance, boat enthusiasts can ensure their living areas remain secure while allowing unhindered access through the hatches.Step 1: Starting with the Flange
Sven begins by explaining that working on flanges vertically and horizontally is significantly easier than doing so in a flat position. To simplify the process further, he divides the task into two or three steps as suggested by fellow expert “for for.” This approach not only makes it more manageable but also allows for greater precision in crafting each component.Step 2: Applying Glue and Securing
Sven proceeds to apply glue along one edge of the flange, ensuring a secure bond when clamped into place. He emphasizes that this stage is crucial for maintaining the structural integrity of the flange, which in turn safeguards the living area beneath the canvas when hatches are open.Step 3: Allowing Time to Dry
After securely attaching the first portion of the flange, Sven allows ample time for it to dry before moving forward with additional steps. This patience and precision are key aspects of his successful boatbuilding methods.Step 4: Finishing Touches
Once the flange is fully dried, Sven removes the clamps carefully, ensuring no damage occurs during this process. He then moves on to attaching four more pieces onto these main frames, completing two pairs of flanges for the bulkhead hatches.The Final Touches
While two flanges form the primary support structure around the hatches, Sven mentions there are two additional pieces required at each end to ensure comprehensive protection. This attention to detail highlights his commitment to producing a durable and reliable design. “Sailing is about finding your path, whether it’s across an ocean or within yourself.” – Sven Yrvind In conclusion, making flanges around bulkhead hatches may seem complex at first glance, but by following Sven Yrvind’s meticulous process, enthusiasts can achieve professional-level results. Remember that the journey of boatbuilding is as rewarding as reaching your destination; it tests one’s patience and dedication. For those seeking to embark on this adventure or simply gain more insight into marine craftsmanship, Sven’s wisdom is invaluable.After securely attaching the first portion of the flange, Sven allows ample time for it to dry before moving forward with additional steps. This patience and precision are key aspects of his successful boatbuilding methods.Step 4: Finishing Touches
Once the flange is fully dried, Sven removes the clamps carefully, ensuring no damage occurs during this process. He then moves on to attaching four more pieces onto these main frames, completing two pairs of flanges for the bulkhead hatches.The Final Touches
While two flanges form the primary support structure around the hatches, Sven mentions there are two additional pieces required at each end to ensure comprehensive protection. This attention to detail highlights his commitment to producing a durable and reliable design. “Sailing is about finding your path, whether it’s across an ocean or within yourself.” – Sven Yrvind In conclusion, making flanges around bulkhead hatches may seem complex at first glance, but by following Sven Yrvind’s meticulous process, enthusiasts can achieve professional-level results. Remember that the journey of boatbuilding is as rewarding as reaching your destination; it tests one’s patience and dedication. For those seeking to embark on this adventure or simply gain more insight into marine craftsmanship, Sven’s wisdom is invaluable.Sven proceeds to apply glue along one edge of the flange, ensuring a secure bond when clamped into place. He emphasizes that this stage is crucial for maintaining the structural integrity of the flange, which in turn safeguards the living area beneath the canvas when hatches are open.Step 3: Allowing Time to Dry
After securely attaching the first portion of the flange, Sven allows ample time for it to dry before moving forward with additional steps. This patience and precision are key aspects of his successful boatbuilding methods.Step 4: Finishing Touches
Once the flange is fully dried, Sven removes the clamps carefully, ensuring no damage occurs during this process. He then moves on to attaching four more pieces onto these main frames, completing two pairs of flanges for the bulkhead hatches.The Final Touches
While two flanges form the primary support structure around the hatches, Sven mentions there are two additional pieces required at each end to ensure comprehensive protection. This attention to detail highlights his commitment to producing a durable and reliable design. “Sailing is about finding your path, whether it’s across an ocean or within yourself.” – Sven Yrvind In conclusion, making flanges around bulkhead hatches may seem complex at first glance, but by following Sven Yrvind’s meticulous process, enthusiasts can achieve professional-level results. Remember that the journey of boatbuilding is as rewarding as reaching your destination; it tests one’s patience and dedication. For those seeking to embark on this adventure or simply gain more insight into marine craftsmanship, Sven’s wisdom is invaluable.Sven begins by explaining that working on flanges vertically and horizontally is significantly easier than doing so in a flat position. To simplify the process further, he divides the task into two or three steps as suggested by fellow expert “for for.” This approach not only makes it more manageable but also allows for greater precision in crafting each component.Step 2: Applying Glue and Securing
Sven proceeds to apply glue along one edge of the flange, ensuring a secure bond when clamped into place. He emphasizes that this stage is crucial for maintaining the structural integrity of the flange, which in turn safeguards the living area beneath the canvas when hatches are open.Step 3: Allowing Time to Dry
After securely attaching the first portion of the flange, Sven allows ample time for it to dry before moving forward with additional steps. This patience and precision are key aspects of his successful boatbuilding methods.Step 4: Finishing Touches
Once the flange is fully dried, Sven removes the clamps carefully, ensuring no damage occurs during this process. He then moves on to attaching four more pieces onto these main frames, completing two pairs of flanges for the bulkhead hatches.The Final Touches
While two flanges form the primary support structure around the hatches, Sven mentions there are two additional pieces required at each end to ensure comprehensive protection. This attention to detail highlights his commitment to producing a durable and reliable design. “Sailing is about finding your path, whether it’s across an ocean or within yourself.” – Sven Yrvind In conclusion, making flanges around bulkhead hatches may seem complex at first glance, but by following Sven Yrvind’s meticulous process, enthusiasts can achieve professional-level results. Remember that the journey of boatbuilding is as rewarding as reaching your destination; it tests one’s patience and dedication. For those seeking to embark on this adventure or simply gain more insight into marine craftsmanship, Sven’s wisdom is invaluable.Sven Yrvind, a renowned yacht designer and sailor, shares valuable insights on creating flanges around bulkhead hatches for canvas protection in this enlightening video. By following his expert guidance, boat enthusiasts can ensure their living areas remain secure while allowing unhindered access through the hatches.Step 1: Starting with the Flange
Sven begins by explaining that working on flanges vertically and horizontally is significantly easier than doing so in a flat position. To simplify the process further, he divides the task into two or three steps as suggested by fellow expert “for for.” This approach not only makes it more manageable but also allows for greater precision in crafting each component.Step 2: Applying Glue and Securing
Sven proceeds to apply glue along one edge of the flange, ensuring a secure bond when clamped into place. He emphasizes that this stage is crucial for maintaining the structural integrity of the flange, which in turn safeguards the living area beneath the canvas when hatches are open.Step 3: Allowing Time to Dry
After securely attaching the first portion of the flange, Sven allows ample time for it to dry before moving forward with additional steps. This patience and precision are key aspects of his successful boatbuilding methods.Step 4: Finishing Touches
Once the flange is fully dried, Sven removes the clamps carefully, ensuring no damage occurs during this process. He then moves on to attaching four more pieces onto these main frames, completing two pairs of flanges for the bulkhead hatches.The Final Touches
While two flanges form the primary support structure around the hatches, Sven mentions there are two additional pieces required at each end to ensure comprehensive protection. This attention to detail highlights his commitment to producing a durable and reliable design. “Sailing is about finding your path, whether it’s across an ocean or within yourself.” – Sven Yrvind In conclusion, making flanges around bulkhead hatches may seem complex at first glance, but by following Sven Yrvind’s meticulous process, enthusiasts can achieve professional-level results. Remember that the journey of boatbuilding is as rewarding as reaching your destination; it tests one’s patience and dedication. For those seeking to embark on this adventure or simply gain more insight into marine craftsmanship, Sven’s wisdom is invaluable.Making Flanges Around Bulkhead Hatches for Canvas
Sven Yrvind, a renowned yacht designer and sailor, shares valuable insights on creating flanges around bulkhead hatches for canvas protection in this enlightening video. By following his expert guidance, boat enthusiasts can ensure their living areas remain secure while allowing unhindered access through the hatches.Step 1: Starting with the Flange
Sven begins by explaining that working on flanges vertically and horizontally is significantly easier than doing so in a flat position. To simplify the process further, he divides the task into two or three steps as suggested by fellow expert “for for.” This approach not only makes it more manageable but also allows for greater precision in crafting each component.Step 2: Applying Glue and Securing
Sven proceeds to apply glue along one edge of the flange, ensuring a secure bond when clamped into place. He emphasizes that this stage is crucial for maintaining the structural integrity of the flange, which in turn safeguards the living area beneath the canvas when hatches are open.Step 3: Allowing Time to Dry
After securely attaching the first portion of the flange, Sven allows ample time for it to dry before moving forward with additional steps. This patience and precision are key aspects of his successful boatbuilding methods.Step 4: Finishing Touches
Once the flange is fully dried, Sven removes the clamps carefully, ensuring no damage occurs during this process. He then moves on to attaching four more pieces onto these main frames, completing two pairs of flanges for the bulkhead hatches.The Final Touches
While two flanges form the primary support structure around the hatches, Sven mentions there are two additional pieces required at each end to ensure comprehensive protection. This attention to detail highlights his commitment to producing a durable and reliable design. “Sailing is about finding your path, whether it’s across an ocean or within yourself.” – Sven Yrvind In conclusion, making flanges around bulkhead hatches may seem complex at first glance, but by following Sven Yrvind’s meticulous process, enthusiasts can achieve professional-level results. Remember that the journey of boatbuilding is as rewarding as reaching your destination; it tests one’s patience and dedication. For those seeking to embark on this adventure or simply gain more insight into marine craftsmanship, Sven’s wisdom is invaluable.Once the flange is fully dried, Sven removes the clamps carefully, ensuring no damage occurs during this process. He then moves on to attaching four more pieces onto these main frames, completing two pairs of flanges for the bulkhead hatches.The Final Touches
While two flanges form the primary support structure around the hatches, Sven mentions there are two additional pieces required at each end to ensure comprehensive protection. This attention to detail highlights his commitment to producing a durable and reliable design. “Sailing is about finding your path, whether it’s across an ocean or within yourself.” – Sven Yrvind In conclusion, making flanges around bulkhead hatches may seem complex at first glance, but by following Sven Yrvind’s meticulous process, enthusiasts can achieve professional-level results. Remember that the journey of boatbuilding is as rewarding as reaching your destination; it tests one’s patience and dedication. For those seeking to embark on this adventure or simply gain more insight into marine craftsmanship, Sven’s wisdom is invaluable.After securely attaching the first portion of the flange, Sven allows ample time for it to dry before moving forward with additional steps. This patience and precision are key aspects of his successful boatbuilding methods.Step 4: Finishing Touches
Once the flange is fully dried, Sven removes the clamps carefully, ensuring no damage occurs during this process. He then moves on to attaching four more pieces onto these main frames, completing two pairs of flanges for the bulkhead hatches.The Final Touches
While two flanges form the primary support structure around the hatches, Sven mentions there are two additional pieces required at each end to ensure comprehensive protection. This attention to detail highlights his commitment to producing a durable and reliable design. “Sailing is about finding your path, whether it’s across an ocean or within yourself.” – Sven Yrvind In conclusion, making flanges around bulkhead hatches may seem complex at first glance, but by following Sven Yrvind’s meticulous process, enthusiasts can achieve professional-level results. Remember that the journey of boatbuilding is as rewarding as reaching your destination; it tests one’s patience and dedication. For those seeking to embark on this adventure or simply gain more insight into marine craftsmanship, Sven’s wisdom is invaluable.Sven proceeds to apply glue along one edge of the flange, ensuring a secure bond when clamped into place. He emphasizes that this stage is crucial for maintaining the structural integrity of the flange, which in turn safeguards the living area beneath the canvas when hatches are open.Step 3: Allowing Time to Dry
After securely attaching the first portion of the flange, Sven allows ample time for it to dry before moving forward with additional steps. This patience and precision are key aspects of his successful boatbuilding methods.Step 4: Finishing Touches
Once the flange is fully dried, Sven removes the clamps carefully, ensuring no damage occurs during this process. He then moves on to attaching four more pieces onto these main frames, completing two pairs of flanges for the bulkhead hatches.The Final Touches
While two flanges form the primary support structure around the hatches, Sven mentions there are two additional pieces required at each end to ensure comprehensive protection. This attention to detail highlights his commitment to producing a durable and reliable design. “Sailing is about finding your path, whether it’s across an ocean or within yourself.” – Sven Yrvind In conclusion, making flanges around bulkhead hatches may seem complex at first glance, but by following Sven Yrvind’s meticulous process, enthusiasts can achieve professional-level results. Remember that the journey of boatbuilding is as rewarding as reaching your destination; it tests one’s patience and dedication. For those seeking to embark on this adventure or simply gain more insight into marine craftsmanship, Sven’s wisdom is invaluable.Sven begins by explaining that working on flanges vertically and horizontally is significantly easier than doing so in a flat position. To simplify the process further, he divides the task into two or three steps as suggested by fellow expert “for for.” This approach not only makes it more manageable but also allows for greater precision in crafting each component.Step 2: Applying Glue and Securing
Sven proceeds to apply glue along one edge of the flange, ensuring a secure bond when clamped into place. He emphasizes that this stage is crucial for maintaining the structural integrity of the flange, which in turn safeguards the living area beneath the canvas when hatches are open.Step 3: Allowing Time to Dry
After securely attaching the first portion of the flange, Sven allows ample time for it to dry before moving forward with additional steps. This patience and precision are key aspects of his successful boatbuilding methods.Step 4: Finishing Touches
Once the flange is fully dried, Sven removes the clamps carefully, ensuring no damage occurs during this process. He then moves on to attaching four more pieces onto these main frames, completing two pairs of flanges for the bulkhead hatches.The Final Touches
While two flanges form the primary support structure around the hatches, Sven mentions there are two additional pieces required at each end to ensure comprehensive protection. This attention to detail highlights his commitment to producing a durable and reliable design. “Sailing is about finding your path, whether it’s across an ocean or within yourself.” – Sven Yrvind In conclusion, making flanges around bulkhead hatches may seem complex at first glance, but by following Sven Yrvind’s meticulous process, enthusiasts can achieve professional-level results. Remember that the journey of boatbuilding is as rewarding as reaching your destination; it tests one’s patience and dedication. For those seeking to embark on this adventure or simply gain more insight into marine craftsmanship, Sven’s wisdom is invaluable.Sven Yrvind, a renowned yacht designer and sailor, shares valuable insights on creating flanges around bulkhead hatches for canvas protection in this enlightening video. By following his expert guidance, boat enthusiasts can ensure their living areas remain secure while allowing unhindered access through the hatches.Step 1: Starting with the Flange
Sven begins by explaining that working on flanges vertically and horizontally is significantly easier than doing so in a flat position. To simplify the process further, he divides the task into two or three steps as suggested by fellow expert “for for.” This approach not only makes it more manageable but also allows for greater precision in crafting each component.Step 2: Applying Glue and Securing
Sven proceeds to apply glue along one edge of the flange, ensuring a secure bond when clamped into place. He emphasizes that this stage is crucial for maintaining the structural integrity of the flange, which in turn safeguards the living area beneath the canvas when hatches are open.Step 3: Allowing Time to Dry
After securely attaching the first portion of the flange, Sven allows ample time for it to dry before moving forward with additional steps. This patience and precision are key aspects of his successful boatbuilding methods.Step 4: Finishing Touches
Once the flange is fully dried, Sven removes the clamps carefully, ensuring no damage occurs during this process. He then moves on to attaching four more pieces onto these main frames, completing two pairs of flanges for the bulkhead hatches.The Final Touches
While two flanges form the primary support structure around the hatches, Sven mentions there are two additional pieces required at each end to ensure comprehensive protection. This attention to detail highlights his commitment to producing a durable and reliable design. “Sailing is about finding your path, whether it’s across an ocean or within yourself.” – Sven Yrvind In conclusion, making flanges around bulkhead hatches may seem complex at first glance, but by following Sven Yrvind’s meticulous process, enthusiasts can achieve professional-level results. Remember that the journey of boatbuilding is as rewarding as reaching your destination; it tests one’s patience and dedication. For those seeking to embark on this adventure or simply gain more insight into marine craftsmanship, Sven’s wisdom is invaluable.Making Flanges Around Bulkhead Hatches for Canvas
Sven Yrvind, a renowned yacht designer and sailor, shares valuable insights on creating flanges around bulkhead hatches for canvas protection in this enlightening video. By following his expert guidance, boat enthusiasts can ensure their living areas remain secure while allowing unhindered access through the hatches.Step 1: Starting with the Flange
Sven begins by explaining that working on flanges vertically and horizontally is significantly easier than doing so in a flat position. To simplify the process further, he divides the task into two or three steps as suggested by fellow expert “for for.” This approach not only makes it more manageable but also allows for greater precision in crafting each component.Step 2: Applying Glue and Securing
Sven proceeds to apply glue along one edge of the flange, ensuring a secure bond when clamped into place. He emphasizes that this stage is crucial for maintaining the structural integrity of the flange, which in turn safeguards the living area beneath the canvas when hatches are open.Step 3: Allowing Time to Dry
After securely attaching the first portion of the flange, Sven allows ample time for it to dry before moving forward with additional steps. This patience and precision are key aspects of his successful boatbuilding methods.Step 4: Finishing Touches
Once the flange is fully dried, Sven removes the clamps carefully, ensuring no damage occurs during this process. He then moves on to attaching four more pieces onto these main frames, completing two pairs of flanges for the bulkhead hatches.The Final Touches
While two flanges form the primary support structure around the hatches, Sven mentions there are two additional pieces required at each end to ensure comprehensive protection. This attention to detail highlights his commitment to producing a durable and reliable design. “Sailing is about finding your path, whether it’s across an ocean or within yourself.” – Sven Yrvind In conclusion, making flanges around bulkhead hatches may seem complex at first glance, but by following Sven Yrvind’s meticulous process, enthusiasts can achieve professional-level results. Remember that the journey of boatbuilding is as rewarding as reaching your destination; it tests one’s patience and dedication. For those seeking to embark on this adventure or simply gain more insight into marine craftsmanship, Sven’s wisdom is invaluable.Sven begins by explaining that working on flanges vertically and horizontally is significantly easier than doing so in a flat position. To simplify the process further, he divides the task into two or three steps as suggested by fellow expert “for for.” This approach not only makes it more manageable but also allows for greater precision in crafting each component.Step 2: Applying Glue and Securing
Sven proceeds to apply glue along one edge of the flange, ensuring a secure bond when clamped into place. He emphasizes that this stage is crucial for maintaining the structural integrity of the flange, which in turn safeguards the living area beneath the canvas when hatches are open.Step 3: Allowing Time to Dry
After securely attaching the first portion of the flange, Sven allows ample time for it to dry before moving forward with additional steps. This patience and precision are key aspects of his successful boatbuilding methods.Step 4: Finishing Touches
Once the flange is fully dried, Sven removes the clamps carefully, ensuring no damage occurs during this process. He then moves on to attaching four more pieces onto these main frames, completing two pairs of flanges for the bulkhead hatches.The Final Touches
While two flanges form the primary support structure around the hatches, Sven mentions there are two additional pieces required at each end to ensure comprehensive protection. This attention to detail highlights his commitment to producing a durable and reliable design. “Sailing is about finding your path, whether it’s across an ocean or within yourself.” – Sven Yrvind In conclusion, making flanges around bulkhead hatches may seem complex at first glance, but by following Sven Yrvind’s meticulous process, enthusiasts can achieve professional-level results. Remember that the journey of boatbuilding is as rewarding as reaching your destination; it tests one’s patience and dedication. For those seeking to embark on this adventure or simply gain more insight into marine craftsmanship, Sven’s wisdom is invaluable.Once the flange is fully dried, Sven removes the clamps carefully, ensuring no damage occurs during this process. He then moves on to attaching four more pieces onto these main frames, completing two pairs of flanges for the bulkhead hatches.The Final Touches
While two flanges form the primary support structure around the hatches, Sven mentions there are two additional pieces required at each end to ensure comprehensive protection. This attention to detail highlights his commitment to producing a durable and reliable design. “Sailing is about finding your path, whether it’s across an ocean or within yourself.” – Sven Yrvind In conclusion, making flanges around bulkhead hatches may seem complex at first glance, but by following Sven Yrvind’s meticulous process, enthusiasts can achieve professional-level results. Remember that the journey of boatbuilding is as rewarding as reaching your destination; it tests one’s patience and dedication. For those seeking to embark on this adventure or simply gain more insight into marine craftsmanship, Sven’s wisdom is invaluable.Sven begins by explaining that working on flanges vertically and horizontally is significantly easier than doing so in a flat position. To simplify the process further, he divides the task into two or three steps as suggested by fellow expert “for for.” This approach not only makes it more manageable but also allows for greater precision in crafting each component.Step 2: Applying Glue and Securing
Sven proceeds to apply glue along one edge of the flange, ensuring a secure bond when clamped into place. He emphasizes that this stage is crucial for maintaining the structural integrity of the flange, which in turn safeguards the living area beneath the canvas when hatches are open.Step 3: Allowing Time to Dry
After securely attaching the first portion of the flange, Sven allows ample time for it to dry before moving forward with additional steps. This patience and precision are key aspects of his successful boatbuilding methods.Step 4: Finishing Touches
Once the flange is fully dried, Sven removes the clamps carefully, ensuring no damage occurs during this process. He then moves on to attaching four more pieces onto these main frames, completing two pairs of flanges for the bulkhead hatches.The Final Touches
While two flanges form the primary support structure around the hatches, Sven mentions there are two additional pieces required at each end to ensure comprehensive protection. This attention to detail highlights his commitment to producing a durable and reliable design. “Sailing is about finding your path, whether it’s across an ocean or within yourself.” – Sven Yrvind In conclusion, making flanges around bulkhead hatches may seem complex at first glance, but by following Sven Yrvind’s meticulous process, enthusiasts can achieve professional-level results. Remember that the journey of boatbuilding is as rewarding as reaching your destination; it tests one’s patience and dedication. For those seeking to embark on this adventure or simply gain more insight into marine craftsmanship, Sven’s wisdom is invaluable.Sven Yrvind, a renowned yacht designer and sailor, shares valuable insights on creating flanges around bulkhead hatches for canvas protection in this enlightening video. By following his expert guidance, boat enthusiasts can ensure their living areas remain secure while allowing unhindered access through the hatches.Step 1: Starting with the Flange
Sven begins by explaining that working on flanges vertically and horizontally is significantly easier than doing so in a flat position. To simplify the process further, he divides the task into two or three steps as suggested by fellow expert “for for.” This approach not only makes it more manageable but also allows for greater precision in crafting each component.Step 2: Applying Glue and Securing
Sven proceeds to apply glue along one edge of the flange, ensuring a secure bond when clamped into place. He emphasizes that this stage is crucial for maintaining the structural integrity of the flange, which in turn safeguards the living area beneath the canvas when hatches are open.Step 3: Allowing Time to Dry
After securely attaching the first portion of the flange, Sven allows ample time for it to dry before moving forward with additional steps. This patience and precision are key aspects of his successful boatbuilding methods.Step 4: Finishing Touches
Once the flange is fully dried, Sven removes the clamps carefully, ensuring no damage occurs during this process. He then moves on to attaching four more pieces onto these main frames, completing two pairs of flanges for the bulkhead hatches.The Final Touches
While two flanges form the primary support structure around the hatches, Sven mentions there are two additional pieces required at each end to ensure comprehensive protection. This attention to detail highlights his commitment to producing a durable and reliable design. “Sailing is about finding your path, whether it’s across an ocean or within yourself.” – Sven Yrvind In conclusion, making flanges around bulkhead hatches may seem complex at first glance, but by following Sven Yrvind’s meticulous process, enthusiasts can achieve professional-level results. Remember that the journey of boatbuilding is as rewarding as reaching your destination; it tests one’s patience and dedication. For those seeking to embark on this adventure or simply gain more insight into marine craftsmanship, Sven’s wisdom is invaluable.Making Flanges Around Bulkhead Hatches for Canvas
Sven Yrvind, a renowned yacht designer and sailor, shares valuable insights on creating flanges around bulkhead hatches for canvas protection in this enlightening video. By following his expert guidance, boat enthusiasts can ensure their living areas remain secure while allowing unhindered access through the hatches.Step 1: Starting with the Flange
Sven begins by explaining that working on flanges vertically and horizontally is significantly easier than doing so in a flat position. To simplify the process further, he divides the task into two or three steps as suggested by fellow expert “for for.” This approach not only makes it more manageable but also allows for greater precision in crafting each component.Step 2: Applying Glue and Securing
Sven proceeds to apply glue along one edge of the flange, ensuring a secure bond when clamped into place. He emphasizes that this stage is crucial for maintaining the structural integrity of the flange, which in turn safeguards the living area beneath the canvas when hatches are open.Step 3: Allowing Time to Dry
After securely attaching the first portion of the flange, Sven allows ample time for it to dry before moving forward with additional steps. This patience and precision are key aspects of his successful boatbuilding methods.Step 4: Finishing Touches
Once the flange is fully dried, Sven removes the clamps carefully, ensuring no damage occurs during this process. He then moves on to attaching four more pieces onto these main frames, completing two pairs of flanges for the bulkhead hatches.The Final Touches
While two flanges form the primary support structure around the hatches, Sven mentions there are two additional pieces required at each end to ensure comprehensive protection. This attention to detail highlights his commitment to producing a durable and reliable design. “Sailing is about finding your path, whether it’s across an ocean or within yourself.” – Sven Yrvind In conclusion, making flanges around bulkhead hatches may seem complex at first glance, but by following Sven Yrvind’s meticulous process, enthusiasts can achieve professional-level results. Remember that the journey of boatbuilding is as rewarding as reaching your destination; it tests one’s patience and dedication. For those seeking to embark on this adventure or simply gain more insight into marine craftsmanship, Sven’s wisdom is invaluable.After securely attaching the first portion of the flange, Sven allows ample time for it to dry before moving forward with additional steps. This patience and precision are key aspects of his successful boatbuilding methods.Step 4: Finishing Touches
Once the flange is fully dried, Sven removes the clamps carefully, ensuring no damage occurs during this process. He then moves on to attaching four more pieces onto these main frames, completing two pairs of flanges for the bulkhead hatches.The Final Touches
While two flanges form the primary support structure around the hatches, Sven mentions there are two additional pieces required at each end to ensure comprehensive protection. This attention to detail highlights his commitment to producing a durable and reliable design. “Sailing is about finding your path, whether it’s across an ocean or within yourself.” – Sven Yrvind In conclusion, making flanges around bulkhead hatches may seem complex at first glance, but by following Sven Yrvind’s meticulous process, enthusiasts can achieve professional-level results. Remember that the journey of boatbuilding is as rewarding as reaching your destination; it tests one’s patience and dedication. For those seeking to embark on this adventure or simply gain more insight into marine craftsmanship, Sven’s wisdom is invaluable.Sven begins by explaining that working on flanges vertically and horizontally is significantly easier than doing so in a flat position. To simplify the process further, he divides the task into two or three steps as suggested by fellow expert “for for.” This approach not only makes it more manageable but also allows for greater precision in crafting each component.Step 2: Applying Glue and Securing
Sven proceeds to apply glue along one edge of the flange, ensuring a secure bond when clamped into place. He emphasizes that this stage is crucial for maintaining the structural integrity of the flange, which in turn safeguards the living area beneath the canvas when hatches are open.Step 3: Allowing Time to Dry
After securely attaching the first portion of the flange, Sven allows ample time for it to dry before moving forward with additional steps. This patience and precision are key aspects of his successful boatbuilding methods.Step 4: Finishing Touches
Once the flange is fully dried, Sven removes the clamps carefully, ensuring no damage occurs during this process. He then moves on to attaching four more pieces onto these main frames, completing two pairs of flanges for the bulkhead hatches.The Final Touches
While two flanges form the primary support structure around the hatches, Sven mentions there are two additional pieces required at each end to ensure comprehensive protection. This attention to detail highlights his commitment to producing a durable and reliable design. “Sailing is about finding your path, whether it’s across an ocean or within yourself.” – Sven Yrvind In conclusion, making flanges around bulkhead hatches may seem complex at first glance, but by following Sven Yrvind’s meticulous process, enthusiasts can achieve professional-level results. Remember that the journey of boatbuilding is as rewarding as reaching your destination; it tests one’s patience and dedication. For those seeking to embark on this adventure or simply gain more insight into marine craftsmanship, Sven’s wisdom is invaluable.Sven Yrvind, a renowned yacht designer and sailor, shares valuable insights on creating flanges around bulkhead hatches for canvas protection in this enlightening video. By following his expert guidance, boat enthusiasts can ensure their living areas remain secure while allowing unhindered access through the hatches.Step 1: Starting with the Flange
Sven begins by explaining that working on flanges vertically and horizontally is significantly easier than doing so in a flat position. To simplify the process further, he divides the task into two or three steps as suggested by fellow expert “for for.” This approach not only makes it more manageable but also allows for greater precision in crafting each component.Step 2: Applying Glue and Securing
Sven proceeds to apply glue along one edge of the flange, ensuring a secure bond when clamped into place. He emphasizes that this stage is crucial for maintaining the structural integrity of the flange, which in turn safeguards the living area beneath the canvas when hatches are open.Step 3: Allowing Time to Dry
After securely attaching the first portion of the flange, Sven allows ample time for it to dry before moving forward with additional steps. This patience and precision are key aspects of his successful boatbuilding methods.Step 4: Finishing Touches
Once the flange is fully dried, Sven removes the clamps carefully, ensuring no damage occurs during this process. He then moves on to attaching four more pieces onto these main frames, completing two pairs of flanges for the bulkhead hatches.The Final Touches
While two flanges form the primary support structure around the hatches, Sven mentions there are two additional pieces required at each end to ensure comprehensive protection. This attention to detail highlights his commitment to producing a durable and reliable design. “Sailing is about finding your path, whether it’s across an ocean or within yourself.” – Sven Yrvind In conclusion, making flanges around bulkhead hatches may seem complex at first glance, but by following Sven Yrvind’s meticulous process, enthusiasts can achieve professional-level results. Remember that the journey of boatbuilding is as rewarding as reaching your destination; it tests one’s patience and dedication. For those seeking to embark on this adventure or simply gain more insight into marine craftsmanship, Sven’s wisdom is invaluable.Making Flanges Around Bulkhead Hatches for Canvas
Sven Yrvind, a renowned yacht designer and sailor, shares valuable insights on creating flanges around bulkhead hatches for canvas protection in this enlightening video. By following his expert guidance, boat enthusiasts can ensure their living areas remain secure while allowing unhindered access through the hatches.Step 1: Starting with the Flange
Sven begins by explaining that working on flanges vertically and horizontally is significantly easier than doing so in a flat position. To simplify the process further, he divides the task into two or three steps as suggested by fellow expert “for for.” This approach not only makes it more manageable but also allows for greater precision in crafting each component.Step 2: Applying Glue and Securing
Sven proceeds to apply glue along one edge of the flange, ensuring a secure bond when clamped into place. He emphasizes that this stage is crucial for maintaining the structural integrity of the flange, which in turn safeguards the living area beneath the canvas when hatches are open.Step 3: Allowing Time to Dry
After securely attaching the first portion of the flange, Sven allows ample time for it to dry before moving forward with additional steps. This patience and precision are key aspects of his successful boatbuilding methods.Step 4: Finishing Touches
Once the flange is fully dried, Sven removes the clamps carefully, ensuring no damage occurs during this process. He then moves on to attaching four more pieces onto these main frames, completing two pairs of flanges for the bulkhead hatches.The Final Touches
While two flanges form the primary support structure around the hatches, Sven mentions there are two additional pieces required at each end to ensure comprehensive protection. This attention to detail highlights his commitment to producing a durable and reliable design. “Sailing is about finding your path, whether it’s across an ocean or within yourself.” – Sven Yrvind In conclusion, making flanges around bulkhead hatches may seem complex at first glance, but by following Sven Yrvind’s meticulous process, enthusiasts can achieve professional-level results. Remember that the journey of boatbuilding is as rewarding as reaching your destination; it tests one’s patience and dedication. For those seeking to embark on this adventure or simply gain more insight into marine craftsmanship, Sven’s wisdom is invaluable.Sven proceeds to apply glue along one edge of the flange, ensuring a secure bond when clamped into place. He emphasizes that this stage is crucial for maintaining the structural integrity of the flange, which in turn safeguards the living area beneath the canvas when hatches are open.Step 3: Allowing Time to Dry
After securely attaching the first portion of the flange, Sven allows ample time for it to dry before moving forward with additional steps. This patience and precision are key aspects of his successful boatbuilding methods.Step 4: Finishing Touches
Once the flange is fully dried, Sven removes the clamps carefully, ensuring no damage occurs during this process. He then moves on to attaching four more pieces onto these main frames, completing two pairs of flanges for the bulkhead hatches.The Final Touches
While two flanges form the primary support structure around the hatches, Sven mentions there are two additional pieces required at each end to ensure comprehensive protection. This attention to detail highlights his commitment to producing a durable and reliable design. “Sailing is about finding your path, whether it’s across an ocean or within yourself.” – Sven Yrvind In conclusion, making flanges around bulkhead hatches may seem complex at first glance, but by following Sven Yrvind’s meticulous process, enthusiasts can achieve professional-level results. Remember that the journey of boatbuilding is as rewarding as reaching your destination; it tests one’s patience and dedication. For those seeking to embark on this adventure or simply gain more insight into marine craftsmanship, Sven’s wisdom is invaluable.Sven begins by explaining that working on flanges vertically and horizontally is significantly easier than doing so in a flat position. To simplify the process further, he divides the task into two or three steps as suggested by fellow expert “for for.” This approach not only makes it more manageable but also allows for greater precision in crafting each component.Step 2: Applying Glue and Securing
Sven proceeds to apply glue along one edge of the flange, ensuring a secure bond when clamped into place. He emphasizes that this stage is crucial for maintaining the structural integrity of the flange, which in turn safeguards the living area beneath the canvas when hatches are open.Step 3: Allowing Time to Dry
After securely attaching the first portion of the flange, Sven allows ample time for it to dry before moving forward with additional steps. This patience and precision are key aspects of his successful boatbuilding methods.Step 4: Finishing Touches
Once the flange is fully dried, Sven removes the clamps carefully, ensuring no damage occurs during this process. He then moves on to attaching four more pieces onto these main frames, completing two pairs of flanges for the bulkhead hatches.The Final Touches
While two flanges form the primary support structure around the hatches, Sven mentions there are two additional pieces required at each end to ensure comprehensive protection. This attention to detail highlights his commitment to producing a durable and reliable design. “Sailing is about finding your path, whether it’s across an ocean or within yourself.” – Sven Yrvind In conclusion, making flanges around bulkhead hatches may seem complex at first glance, but by following Sven Yrvind’s meticulous process, enthusiasts can achieve professional-level results. Remember that the journey of boatbuilding is as rewarding as reaching your destination; it tests one’s patience and dedication. For those seeking to embark on this adventure or simply gain more insight into marine craftsmanship, Sven’s wisdom is invaluable.Sven Yrvind, a renowned yacht designer and sailor, shares valuable insights on creating flanges around bulkhead hatches for canvas protection in this enlightening video. By following his expert guidance, boat enthusiasts can ensure their living areas remain secure while allowing unhindered access through the hatches.Step 1: Starting with the Flange
Sven begins by explaining that working on flanges vertically and horizontally is significantly easier than doing so in a flat position. To simplify the process further, he divides the task into two or three steps as suggested by fellow expert “for for.” This approach not only makes it more manageable but also allows for greater precision in crafting each component.Step 2: Applying Glue and Securing
Sven proceeds to apply glue along one edge of the flange, ensuring a secure bond when clamped into place. He emphasizes that this stage is crucial for maintaining the structural integrity of the flange, which in turn safeguards the living area beneath the canvas when hatches are open.Step 3: Allowing Time to Dry
After securely attaching the first portion of the flange, Sven allows ample time for it to dry before moving forward with additional steps. This patience and precision are key aspects of his successful boatbuilding methods.Step 4: Finishing Touches
Once the flange is fully dried, Sven removes the clamps carefully, ensuring no damage occurs during this process. He then moves on to attaching four more pieces onto these main frames, completing two pairs of flanges for the bulkhead hatches.The Final Touches
While two flanges form the primary support structure around the hatches, Sven mentions there are two additional pieces required at each end to ensure comprehensive protection. This attention to detail highlights his commitment to producing a durable and reliable design. “Sailing is about finding your path, whether it’s across an ocean or within yourself.” – Sven Yrvind In conclusion, making flanges around bulkhead hatches may seem complex at first glance, but by following Sven Yrvind’s meticulous process, enthusiasts can achieve professional-level results. Remember that the journey of boatbuilding is as rewarding as reaching your destination; it tests one’s patience and dedication. For those seeking to embark on this adventure or simply gain more insight into marine craftsmanship, Sven’s wisdom is invaluable.Making Flanges Around Bulkhead Hatches for Canvas
Sven Yrvind, a renowned yacht designer and sailor, shares valuable insights on creating flanges around bulkhead hatches for canvas protection in this enlightening video. By following his expert guidance, boat enthusiasts can ensure their living areas remain secure while allowing unhindered access through the hatches.Step 1: Starting with the Flange
Sven begins by explaining that working on flanges vertically and horizontally is significantly easier than doing so in a flat position. To simplify the process further, he divides the task into two or three steps as suggested by fellow expert “for for.” This approach not only makes it more manageable but also allows for greater precision in crafting each component.Step 2: Applying Glue and Securing
Sven proceeds to apply glue along one edge of the flange, ensuring a secure bond when clamped into place. He emphasizes that this stage is crucial for maintaining the structural integrity of the flange, which in turn safeguards the living area beneath the canvas when hatches are open.Step 3: Allowing Time to Dry
After securely attaching the first portion of the flange, Sven allows ample time for it to dry before moving forward with additional steps. This patience and precision are key aspects of his successful boatbuilding methods.Step 4: Finishing Touches
Once the flange is fully dried, Sven removes the clamps carefully, ensuring no damage occurs during this process. He then moves on to attaching four more pieces onto these main frames, completing two pairs of flanges for the bulkhead hatches.The Final Touches
While two flanges form the primary support structure around the hatches, Sven mentions there are two additional pieces required at each end to ensure comprehensive protection. This attention to detail highlights his commitment to producing a durable and reliable design. “Sailing is about finding your path, whether it’s across an ocean or within yourself.” – Sven Yrvind In conclusion, making flanges around bulkhead hatches may seem complex at first glance, but by following Sven Yrvind’s meticulous process, enthusiasts can achieve professional-level results. Remember that the journey of boatbuilding is as rewarding as reaching your destination; it tests one’s patience and dedication. For those seeking to embark on this adventure or simply gain more insight into marine craftsmanship, Sven’s wisdom is invaluable.Once the flange is fully dried, Sven removes the clamps carefully, ensuring no damage occurs during this process. He then moves on to attaching four more pieces onto these main frames, completing two pairs of flanges for the bulkhead hatches.The Final Touches
While two flanges form the primary support structure around the hatches, Sven mentions there are two additional pieces required at each end to ensure comprehensive protection. This attention to detail highlights his commitment to producing a durable and reliable design. “Sailing is about finding your path, whether it’s across an ocean or within yourself.” – Sven Yrvind In conclusion, making flanges around bulkhead hatches may seem complex at first glance, but by following Sven Yrvind’s meticulous process, enthusiasts can achieve professional-level results. Remember that the journey of boatbuilding is as rewarding as reaching your destination; it tests one’s patience and dedication. For those seeking to embark on this adventure or simply gain more insight into marine craftsmanship, Sven’s wisdom is invaluable.Sven proceeds to apply glue along one edge of the flange, ensuring a secure bond when clamped into place. He emphasizes that this stage is crucial for maintaining the structural integrity of the flange, which in turn safeguards the living area beneath the canvas when hatches are open.Step 3: Allowing Time to Dry
After securely attaching the first portion of the flange, Sven allows ample time for it to dry before moving forward with additional steps. This patience and precision are key aspects of his successful boatbuilding methods.Step 4: Finishing Touches
Once the flange is fully dried, Sven removes the clamps carefully, ensuring no damage occurs during this process. He then moves on to attaching four more pieces onto these main frames, completing two pairs of flanges for the bulkhead hatches.The Final Touches
While two flanges form the primary support structure around the hatches, Sven mentions there are two additional pieces required at each end to ensure comprehensive protection. This attention to detail highlights his commitment to producing a durable and reliable design. “Sailing is about finding your path, whether it’s across an ocean or within yourself.” – Sven Yrvind In conclusion, making flanges around bulkhead hatches may seem complex at first glance, but by following Sven Yrvind’s meticulous process, enthusiasts can achieve professional-level results. Remember that the journey of boatbuilding is as rewarding as reaching your destination; it tests one’s patience and dedication. For those seeking to embark on this adventure or simply gain more insight into marine craftsmanship, Sven’s wisdom is invaluable.Sven begins by explaining that working on flanges vertically and horizontally is significantly easier than doing so in a flat position. To simplify the process further, he divides the task into two or three steps as suggested by fellow expert “for for.” This approach not only makes it more manageable but also allows for greater precision in crafting each component.Step 2: Applying Glue and Securing
Sven proceeds to apply glue along one edge of the flange, ensuring a secure bond when clamped into place. He emphasizes that this stage is crucial for maintaining the structural integrity of the flange, which in turn safeguards the living area beneath the canvas when hatches are open.Step 3: Allowing Time to Dry
After securely attaching the first portion of the flange, Sven allows ample time for it to dry before moving forward with additional steps. This patience and precision are key aspects of his successful boatbuilding methods.Step 4: Finishing Touches
Once the flange is fully dried, Sven removes the clamps carefully, ensuring no damage occurs during this process. He then moves on to attaching four more pieces onto these main frames, completing two pairs of flanges for the bulkhead hatches.The Final Touches
While two flanges form the primary support structure around the hatches, Sven mentions there are two additional pieces required at each end to ensure comprehensive protection. This attention to detail highlights his commitment to producing a durable and reliable design. “Sailing is about finding your path, whether it’s across an ocean or within yourself.” – Sven Yrvind In conclusion, making flanges around bulkhead hatches may seem complex at first glance, but by following Sven Yrvind’s meticulous process, enthusiasts can achieve professional-level results. Remember that the journey of boatbuilding is as rewarding as reaching your destination; it tests one’s patience and dedication. For those seeking to embark on this adventure or simply gain more insight into marine craftsmanship, Sven’s wisdom is invaluable.Sven Yrvind, a renowned yacht designer and sailor, shares valuable insights on creating flanges around bulkhead hatches for canvas protection in this enlightening video. By following his expert guidance, boat enthusiasts can ensure their living areas remain secure while allowing unhindered access through the hatches.Step 1: Starting with the Flange
Sven begins by explaining that working on flanges vertically and horizontally is significantly easier than doing so in a flat position. To simplify the process further, he divides the task into two or three steps as suggested by fellow expert “for for.” This approach not only makes it more manageable but also allows for greater precision in crafting each component.Step 2: Applying Glue and Securing
Sven proceeds to apply glue along one edge of the flange, ensuring a secure bond when clamped into place. He emphasizes that this stage is crucial for maintaining the structural integrity of the flange, which in turn safeguards the living area beneath the canvas when hatches are open.Step 3: Allowing Time to Dry
After securely attaching the first portion of the flange, Sven allows ample time for it to dry before moving forward with additional steps. This patience and precision are key aspects of his successful boatbuilding methods.Step 4: Finishing Touches
Once the flange is fully dried, Sven removes the clamps carefully, ensuring no damage occurs during this process. He then moves on to attaching four more pieces onto these main frames, completing two pairs of flanges for the bulkhead hatches.The Final Touches
While two flanges form the primary support structure around the hatches, Sven mentions there are two additional pieces required at each end to ensure comprehensive protection. This attention to detail highlights his commitment to producing a durable and reliable design. “Sailing is about finding your path, whether it’s across an ocean or within yourself.” – Sven Yrvind In conclusion, making flanges around bulkhead hatches may seem complex at first glance, but by following Sven Yrvind’s meticulous process, enthusiasts can achieve professional-level results. Remember that the journey of boatbuilding is as rewarding as reaching your destination; it tests one’s patience and dedication. For those seeking to embark on this adventure or simply gain more insight into marine craftsmanship, Sven’s wisdom is invaluable.Making Flanges Around Bulkhead Hatches for Canvas
Sven Yrvind, a renowned yacht designer and sailor, shares valuable insights on creating flanges around bulkhead hatches for canvas protection in this enlightening video. By following his expert guidance, boat enthusiasts can ensure their living areas remain secure while allowing unhindered access through the hatches.Step 1: Starting with the Flange
Sven begins by explaining that working on flanges vertically and horizontally is significantly easier than doing so in a flat position. To simplify the process further, he divides the task into two or three steps as suggested by fellow expert “for for.” This approach not only makes it more manageable but also allows for greater precision in crafting each component.Step 2: Applying Glue and Securing
Sven proceeds to apply glue along one edge of the flange, ensuring a secure bond when clamped into place. He emphasizes that this stage is crucial for maintaining the structural integrity of the flange, which in turn safeguards the living area beneath the canvas when hatches are open.Step 3: Allowing Time to Dry
After securely attaching the first portion of the flange, Sven allows ample time for it to dry before moving forward with additional steps. This patience and precision are key aspects of his successful boatbuilding methods.Step 4: Finishing Touches
Once the flange is fully dried, Sven removes the clamps carefully, ensuring no damage occurs during this process. He then moves on to attaching four more pieces onto these main frames, completing two pairs of flanges for the bulkhead hatches.The Final Touches
While two flanges form the primary support structure around the hatches, Sven mentions there are two additional pieces required at each end to ensure comprehensive protection. This attention to detail highlights his commitment to producing a durable and reliable design. “Sailing is about finding your path, whether it’s across an ocean or within yourself.” – Sven Yrvind In conclusion, making flanges around bulkhead hatches may seem complex at first glance, but by following Sven Yrvind’s meticulous process, enthusiasts can achieve professional-level results. Remember that the journey of boatbuilding is as rewarding as reaching your destination; it tests one’s patience and dedication. For those seeking to embark on this adventure or simply gain more insight into marine craftsmanship, Sven’s wisdom is invaluable.After securely attaching the first portion of the flange, Sven allows ample time for it to dry before moving forward with additional steps. This patience and precision are key aspects of his successful boatbuilding methods.Step 4: Finishing Touches
Once the flange is fully dried, Sven removes the clamps carefully, ensuring no damage occurs during this process. He then moves on to attaching four more pieces onto these main frames, completing two pairs of flanges for the bulkhead hatches.The Final Touches
While two flanges form the primary support structure around the hatches, Sven mentions there are two additional pieces required at each end to ensure comprehensive protection. This attention to detail highlights his commitment to producing a durable and reliable design. “Sailing is about finding your path, whether it’s across an ocean or within yourself.” – Sven Yrvind In conclusion, making flanges around bulkhead hatches may seem complex at first glance, but by following Sven Yrvind’s meticulous process, enthusiasts can achieve professional-level results. Remember that the journey of boatbuilding is as rewarding as reaching your destination; it tests one’s patience and dedication. For those seeking to embark on this adventure or simply gain more insight into marine craftsmanship, Sven’s wisdom is invaluable.Sven proceeds to apply glue along one edge of the flange, ensuring a secure bond when clamped into place. He emphasizes that this stage is crucial for maintaining the structural integrity of the flange, which in turn safeguards the living area beneath the canvas when hatches are open.Step 3: Allowing Time to Dry
After securely attaching the first portion of the flange, Sven allows ample time for it to dry before moving forward with additional steps. This patience and precision are key aspects of his successful boatbuilding methods.Step 4: Finishing Touches
Once the flange is fully dried, Sven removes the clamps carefully, ensuring no damage occurs during this process. He then moves on to attaching four more pieces onto these main frames, completing two pairs of flanges for the bulkhead hatches.The Final Touches
While two flanges form the primary support structure around the hatches, Sven mentions there are two additional pieces required at each end to ensure comprehensive protection. This attention to detail highlights his commitment to producing a durable and reliable design. “Sailing is about finding your path, whether it’s across an ocean or within yourself.” – Sven Yrvind In conclusion, making flanges around bulkhead hatches may seem complex at first glance, but by following Sven Yrvind’s meticulous process, enthusiasts can achieve professional-level results. Remember that the journey of boatbuilding is as rewarding as reaching your destination; it tests one’s patience and dedication. For those seeking to embark on this adventure or simply gain more insight into marine craftsmanship, Sven’s wisdom is invaluable.Sven begins by explaining that working on flanges vertically and horizontally is significantly easier than doing so in a flat position. To simplify the process further, he divides the task into two or three steps as suggested by fellow expert “for for.” This approach not only makes it more manageable but also allows for greater precision in crafting each component.Step 2: Applying Glue and Securing
Sven proceeds to apply glue along one edge of the flange, ensuring a secure bond when clamped into place. He emphasizes that this stage is crucial for maintaining the structural integrity of the flange, which in turn safeguards the living area beneath the canvas when hatches are open.Step 3: Allowing Time to Dry
After securely attaching the first portion of the flange, Sven allows ample time for it to dry before moving forward with additional steps. This patience and precision are key aspects of his successful boatbuilding methods.Step 4: Finishing Touches
Once the flange is fully dried, Sven removes the clamps carefully, ensuring no damage occurs during this process. He then moves on to attaching four more pieces onto these main frames, completing two pairs of flanges for the bulkhead hatches.The Final Touches
While two flanges form the primary support structure around the hatches, Sven mentions there are two additional pieces required at each end to ensure comprehensive protection. This attention to detail highlights his commitment to producing a durable and reliable design. “Sailing is about finding your path, whether it’s across an ocean or within yourself.” – Sven Yrvind In conclusion, making flanges around bulkhead hatches may seem complex at first glance, but by following Sven Yrvind’s meticulous process, enthusiasts can achieve professional-level results. Remember that the journey of boatbuilding is as rewarding as reaching your destination; it tests one’s patience and dedication. For those seeking to embark on this adventure or simply gain more insight into marine craftsmanship, Sven’s wisdom is invaluable.Sven Yrvind, a renowned yacht designer and sailor, shares valuable insights on creating flanges around bulkhead hatches for canvas protection in this enlightening video. By following his expert guidance, boat enthusiasts can ensure their living areas remain secure while allowing unhindered access through the hatches.Step 1: Starting with the Flange
Sven begins by explaining that working on flanges vertically and horizontally is significantly easier than doing so in a flat position. To simplify the process further, he divides the task into two or three steps as suggested by fellow expert “for for.” This approach not only makes it more manageable but also allows for greater precision in crafting each component.Step 2: Applying Glue and Securing
Sven proceeds to apply glue along one edge of the flange, ensuring a secure bond when clamped into place. He emphasizes that this stage is crucial for maintaining the structural integrity of the flange, which in turn safeguards the living area beneath the canvas when hatches are open.Step 3: Allowing Time to Dry
After securely attaching the first portion of the flange, Sven allows ample time for it to dry before moving forward with additional steps. This patience and precision are key aspects of his successful boatbuilding methods.Step 4: Finishing Touches
Once the flange is fully dried, Sven removes the clamps carefully, ensuring no damage occurs during this process. He then moves on to attaching four more pieces onto these main frames, completing two pairs of flanges for the bulkhead hatches.The Final Touches
While two flanges form the primary support structure around the hatches, Sven mentions there are two additional pieces required at each end to ensure comprehensive protection. This attention to detail highlights his commitment to producing a durable and reliable design. “Sailing is about finding your path, whether it’s across an ocean or within yourself.” – Sven Yrvind In conclusion, making flanges around bulkhead hatches may seem complex at first glance, but by following Sven Yrvind’s meticulous process, enthusiasts can achieve professional-level results. Remember that the journey of boatbuilding is as rewarding as reaching your destination; it tests one’s patience and dedication. For those seeking to embark on this adventure or simply gain more insight into marine craftsmanship, Sven’s wisdom is invaluable.Making Flanges Around Bulkhead Hatches for Canvas
Sven Yrvind, a renowned yacht designer and sailor, shares valuable insights on creating flanges around bulkhead hatches for canvas protection in this enlightening video. By following his expert guidance, boat enthusiasts can ensure their living areas remain secure while allowing unhindered access through the hatches.Step 1: Starting with the Flange
Sven begins by explaining that working on flanges vertically and horizontally is significantly easier than doing so in a flat position. To simplify the process further, he divides the task into two or three steps as suggested by fellow expert “for for.” This approach not only makes it more manageable but also allows for greater precision in crafting each component.Step 2: Applying Glue and Securing
Sven proceeds to apply glue along one edge of the flange, ensuring a secure bond when clamped into place. He emphasizes that this stage is crucial for maintaining the structural integrity of the flange, which in turn safeguards the living area beneath the canvas when hatches are open.Step 3: Allowing Time to Dry
After securely attaching the first portion of the flange, Sven allows ample time for it to dry before moving forward with additional steps. This patience and precision are key aspects of his successful boatbuilding methods.Step 4: Finishing Touches
Once the flange is fully dried, Sven removes the clamps carefully, ensuring no damage occurs during this process. He then moves on to attaching four more pieces onto these main frames, completing two pairs of flanges for the bulkhead hatches.The Final Touches
While two flanges form the primary support structure around the hatches, Sven mentions there are two additional pieces required at each end to ensure comprehensive protection. This attention to detail highlights his commitment to producing a durable and reliable design. “Sailing is about finding your path, whether it’s across an ocean or within yourself.” – Sven Yrvind In conclusion, making flanges around bulkhead hatches may seem complex at first glance, but by following Sven Yrvind’s meticulous process, enthusiasts can achieve professional-level results. Remember that the journey of boatbuilding is as rewarding as reaching your destination; it tests one’s patience and dedication. For those seeking to embark on this adventure or simply gain more insight into marine craftsmanship, Sven’s wisdom is invaluable.Once the flange is fully dried, Sven removes the clamps carefully, ensuring no damage occurs during this process. He then moves on to attaching four more pieces onto these main frames, completing two pairs of flanges for the bulkhead hatches.The Final Touches
While two flanges form the primary support structure around the hatches, Sven mentions there are two additional pieces required at each end to ensure comprehensive protection. This attention to detail highlights his commitment to producing a durable and reliable design. “Sailing is about finding your path, whether it’s across an ocean or within yourself.” – Sven Yrvind In conclusion, making flanges around bulkhead hatches may seem complex at first glance, but by following Sven Yrvind’s meticulous process, enthusiasts can achieve professional-level results. Remember that the journey of boatbuilding is as rewarding as reaching your destination; it tests one’s patience and dedication. For those seeking to embark on this adventure or simply gain more insight into marine craftsmanship, Sven’s wisdom is invaluable.After securely attaching the first portion of the flange, Sven allows ample time for it to dry before moving forward with additional steps. This patience and precision are key aspects of his successful boatbuilding methods.Step 4: Finishing Touches
Once the flange is fully dried, Sven removes the clamps carefully, ensuring no damage occurs during this process. He then moves on to attaching four more pieces onto these main frames, completing two pairs of flanges for the bulkhead hatches.The Final Touches
While two flanges form the primary support structure around the hatches, Sven mentions there are two additional pieces required at each end to ensure comprehensive protection. This attention to detail highlights his commitment to producing a durable and reliable design. “Sailing is about finding your path, whether it’s across an ocean or within yourself.” – Sven Yrvind In conclusion, making flanges around bulkhead hatches may seem complex at first glance, but by following Sven Yrvind’s meticulous process, enthusiasts can achieve professional-level results. Remember that the journey of boatbuilding is as rewarding as reaching your destination; it tests one’s patience and dedication. For those seeking to embark on this adventure or simply gain more insight into marine craftsmanship, Sven’s wisdom is invaluable.Sven proceeds to apply glue along one edge of the flange, ensuring a secure bond when clamped into place. He emphasizes that this stage is crucial for maintaining the structural integrity of the flange, which in turn safeguards the living area beneath the canvas when hatches are open.Step 3: Allowing Time to Dry
After securely attaching the first portion of the flange, Sven allows ample time for it to dry before moving forward with additional steps. This patience and precision are key aspects of his successful boatbuilding methods.Step 4: Finishing Touches
Once the flange is fully dried, Sven removes the clamps carefully, ensuring no damage occurs during this process. He then moves on to attaching four more pieces onto these main frames, completing two pairs of flanges for the bulkhead hatches.The Final Touches
While two flanges form the primary support structure around the hatches, Sven mentions there are two additional pieces required at each end to ensure comprehensive protection. This attention to detail highlights his commitment to producing a durable and reliable design. “Sailing is about finding your path, whether it’s across an ocean or within yourself.” – Sven Yrvind In conclusion, making flanges around bulkhead hatches may seem complex at first glance, but by following Sven Yrvind’s meticulous process, enthusiasts can achieve professional-level results. Remember that the journey of boatbuilding is as rewarding as reaching your destination; it tests one’s patience and dedication. For those seeking to embark on this adventure or simply gain more insight into marine craftsmanship, Sven’s wisdom is invaluable.Sven begins by explaining that working on flanges vertically and horizontally is significantly easier than doing so in a flat position. To simplify the process further, he divides the task into two or three steps as suggested by fellow expert “for for.” This approach not only makes it more manageable but also allows for greater precision in crafting each component.Step 2: Applying Glue and Securing
Sven proceeds to apply glue along one edge of the flange, ensuring a secure bond when clamped into place. He emphasizes that this stage is crucial for maintaining the structural integrity of the flange, which in turn safeguards the living area beneath the canvas when hatches are open.Step 3: Allowing Time to Dry
After securely attaching the first portion of the flange, Sven allows ample time for it to dry before moving forward with additional steps. This patience and precision are key aspects of his successful boatbuilding methods.Step 4: Finishing Touches
Once the flange is fully dried, Sven removes the clamps carefully, ensuring no damage occurs during this process. He then moves on to attaching four more pieces onto these main frames, completing two pairs of flanges for the bulkhead hatches.The Final Touches
While two flanges form the primary support structure around the hatches, Sven mentions there are two additional pieces required at each end to ensure comprehensive protection. This attention to detail highlights his commitment to producing a durable and reliable design. “Sailing is about finding your path, whether it’s across an ocean or within yourself.” – Sven Yrvind In conclusion, making flanges around bulkhead hatches may seem complex at first glance, but by following Sven Yrvind’s meticulous process, enthusiasts can achieve professional-level results. Remember that the journey of boatbuilding is as rewarding as reaching your destination; it tests one’s patience and dedication. For those seeking to embark on this adventure or simply gain more insight into marine craftsmanship, Sven’s wisdom is invaluable.Sven Yrvind, a renowned yacht designer and sailor, shares valuable insights on creating flanges around bulkhead hatches for canvas protection in this enlightening video. By following his expert guidance, boat enthusiasts can ensure their living areas remain secure while allowing unhindered access through the hatches.Step 1: Starting with the Flange
Sven begins by explaining that working on flanges vertically and horizontally is significantly easier than doing so in a flat position. To simplify the process further, he divides the task into two or three steps as suggested by fellow expert “for for.” This approach not only makes it more manageable but also allows for greater precision in crafting each component.Step 2: Applying Glue and Securing
Sven proceeds to apply glue along one edge of the flange, ensuring a secure bond when clamped into place. He emphasizes that this stage is crucial for maintaining the structural integrity of the flange, which in turn safeguards the living area beneath the canvas when hatches are open.Step 3: Allowing Time to Dry
After securely attaching the first portion of the flange, Sven allows ample time for it to dry before moving forward with additional steps. This patience and precision are key aspects of his successful boatbuilding methods.Step 4: Finishing Touches
Once the flange is fully dried, Sven removes the clamps carefully, ensuring no damage occurs during this process. He then moves on to attaching four more pieces onto these main frames, completing two pairs of flanges for the bulkhead hatches.The Final Touches
While two flanges form the primary support structure around the hatches, Sven mentions there are two additional pieces required at each end to ensure comprehensive protection. This attention to detail highlights his commitment to producing a durable and reliable design. “Sailing is about finding your path, whether it’s across an ocean or within yourself.” – Sven Yrvind In conclusion, making flanges around bulkhead hatches may seem complex at first glance, but by following Sven Yrvind’s meticulous process, enthusiasts can achieve professional-level results. Remember that the journey of boatbuilding is as rewarding as reaching your destination; it tests one’s patience and dedication. For those seeking to embark on this adventure or simply gain more insight into marine craftsmanship, Sven’s wisdom is invaluable.Making Flanges Around Bulkhead Hatches for Canvas
Sven Yrvind, a renowned yacht designer and sailor, shares valuable insights on creating flanges around bulkhead hatches for canvas protection in this enlightening video. By following his expert guidance, boat enthusiasts can ensure their living areas remain secure while allowing unhindered access through the hatches.Step 1: Starting with the Flange
Sven begins by explaining that working on flanges vertically and horizontally is significantly easier than doing so in a flat position. To simplify the process further, he divides the task into two or three steps as suggested by fellow expert “for for.” This approach not only makes it more manageable but also allows for greater precision in crafting each component.Step 2: Applying Glue and Securing
Sven proceeds to apply glue along one edge of the flange, ensuring a secure bond when clamped into place. He emphasizes that this stage is crucial for maintaining the structural integrity of the flange, which in turn safeguards the living area beneath the canvas when hatches are open.Step 3: Allowing Time to Dry
After securely attaching the first portion of the flange, Sven allows ample time for it to dry before moving forward with additional steps. This patience and precision are key aspects of his successful boatbuilding methods.Step 4: Finishing Touches
Once the flange is fully dried, Sven removes the clamps carefully, ensuring no damage occurs during this process. He then moves on to attaching four more pieces onto these main frames, completing two pairs of flanges for the bulkhead hatches.The Final Touches
While two flanges form the primary support structure around the hatches, Sven mentions there are two additional pieces required at each end to ensure comprehensive protection. This attention to detail highlights his commitment to producing a durable and reliable design. “Sailing is about finding your path, whether it’s across an ocean or within yourself.” – Sven Yrvind In conclusion, making flanges around bulkhead hatches may seem complex at first glance, but by following Sven Yrvind’s meticulous process, enthusiasts can achieve professional-level results. Remember that the journey of boatbuilding is as rewarding as reaching your destination; it tests one’s patience and dedication. For those seeking to embark on this adventure or simply gain more insight into marine craftsmanship, Sven’s wisdom is invaluable.Sven Yrvind, a renowned yacht designer and sailor, shares valuable insights on creating flanges around bulkhead hatches for canvas protection in this enlightening video. By following his expert guidance, boat enthusiasts can ensure their living areas remain secure while allowing unhindered access through the hatches.Step 1: Starting with the Flange
Sven begins by explaining that working on flanges vertically and horizontally is significantly easier than doing so in a flat position. To simplify the process further, he divides the task into two or three steps as suggested by fellow expert “for for.” This approach not only makes it more manageable but also allows for greater precision in crafting each component.Step 2: Applying Glue and Securing
Sven proceeds to apply glue along one edge of the flange, ensuring a secure bond when clamped into place. He emphasizes that this stage is crucial for maintaining the structural integrity of the flange, which in turn safeguards the living area beneath the canvas when hatches are open.Step 3: Allowing Time to Dry
After securely attaching the first portion of the flange, Sven allows ample time for it to dry before moving forward with additional steps. This patience and precision are key aspects of his successful boatbuilding methods.Step 4: Finishing Touches
Once the flange is fully dried, Sven removes the clamps carefully, ensuring no damage occurs during this process. He then moves on to attaching four more pieces onto these main frames, completing two pairs of flanges for the bulkhead hatches.The Final Touches
While two flanges form the primary support structure around the hatches, Sven mentions there are two additional pieces required at each end to ensure comprehensive protection. This attention to detail highlights his commitment to producing a durable and reliable design. “Sailing is about finding your path, whether it’s across an ocean or within yourself.” – Sven Yrvind In conclusion, making flanges around bulkhead hatches may seem complex at first glance, but by following Sven Yrvind’s meticulous process, enthusiasts can achieve professional-level results. Remember that the journey of boatbuilding is as rewarding as reaching your destination; it tests one’s patience and dedication. For those seeking to embark on this adventure or simply gain more insight into marine craftsmanship, Sven’s wisdom is invaluable.Once the flange is fully dried, Sven removes the clamps carefully, ensuring no damage occurs during this process. He then moves on to attaching four more pieces onto these main frames, completing two pairs of flanges for the bulkhead hatches.The Final Touches
While two flanges form the primary support structure around the hatches, Sven mentions there are two additional pieces required at each end to ensure comprehensive protection. This attention to detail highlights his commitment to producing a durable and reliable design. “Sailing is about finding your path, whether it’s across an ocean or within yourself.” – Sven Yrvind In conclusion, making flanges around bulkhead hatches may seem complex at first glance, but by following Sven Yrvind’s meticulous process, enthusiasts can achieve professional-level results. Remember that the journey of boatbuilding is as rewarding as reaching your destination; it tests one’s patience and dedication. For those seeking to embark on this adventure or simply gain more insight into marine craftsmanship, Sven’s wisdom is invaluable.Sven begins by explaining that working on flanges vertically and horizontally is significantly easier than doing so in a flat position. To simplify the process further, he divides the task into two or three steps as suggested by fellow expert “for for.” This approach not only makes it more manageable but also allows for greater precision in crafting each component.Step 2: Applying Glue and Securing
Sven proceeds to apply glue along one edge of the flange, ensuring a secure bond when clamped into place. He emphasizes that this stage is crucial for maintaining the structural integrity of the flange, which in turn safeguards the living area beneath the canvas when hatches are open.Step 3: Allowing Time to Dry
After securely attaching the first portion of the flange, Sven allows ample time for it to dry before moving forward with additional steps. This patience and precision are key aspects of his successful boatbuilding methods.Step 4: Finishing Touches
Once the flange is fully dried, Sven removes the clamps carefully, ensuring no damage occurs during this process. He then moves on to attaching four more pieces onto these main frames, completing two pairs of flanges for the bulkhead hatches.The Final Touches
While two flanges form the primary support structure around the hatches, Sven mentions there are two additional pieces required at each end to ensure comprehensive protection. This attention to detail highlights his commitment to producing a durable and reliable design. “Sailing is about finding your path, whether it’s across an ocean or within yourself.” – Sven Yrvind In conclusion, making flanges around bulkhead hatches may seem complex at first glance, but by following Sven Yrvind’s meticulous process, enthusiasts can achieve professional-level results. Remember that the journey of boatbuilding is as rewarding as reaching your destination; it tests one’s patience and dedication. For those seeking to embark on this adventure or simply gain more insight into marine craftsmanship, Sven’s wisdom is invaluable.Sven Yrvind, a renowned yacht designer and sailor, shares valuable insights on creating flanges around bulkhead hatches for canvas protection in this enlightening video. By following his expert guidance, boat enthusiasts can ensure their living areas remain secure while allowing unhindered access through the hatches.Step 1: Starting with the Flange
Sven begins by explaining that working on flanges vertically and horizontally is significantly easier than doing so in a flat position. To simplify the process further, he divides the task into two or three steps as suggested by fellow expert “for for.” This approach not only makes it more manageable but also allows for greater precision in crafting each component.Step 2: Applying Glue and Securing
Sven proceeds to apply glue along one edge of the flange, ensuring a secure bond when clamped into place. He emphasizes that this stage is crucial for maintaining the structural integrity of the flange, which in turn safeguards the living area beneath the canvas when hatches are open.Step 3: Allowing Time to Dry
After securely attaching the first portion of the flange, Sven allows ample time for it to dry before moving forward with additional steps. This patience and precision are key aspects of his successful boatbuilding methods.Step 4: Finishing Touches
Once the flange is fully dried, Sven removes the clamps carefully, ensuring no damage occurs during this process. He then moves on to attaching four more pieces onto these main frames, completing two pairs of flanges for the bulkhead hatches.The Final Touches
While two flanges form the primary support structure around the hatches, Sven mentions there are two additional pieces required at each end to ensure comprehensive protection. This attention to detail highlights his commitment to producing a durable and reliable design. “Sailing is about finding your path, whether it’s across an ocean or within yourself.” – Sven Yrvind In conclusion, making flanges around bulkhead hatches may seem complex at first glance, but by following Sven Yrvind’s meticulous process, enthusiasts can achieve professional-level results. Remember that the journey of boatbuilding is as rewarding as reaching your destination; it tests one’s patience and dedication. For those seeking to embark on this adventure or simply gain more insight into marine craftsmanship, Sven’s wisdom is invaluable.Making Flanges Around Bulkhead Hatches for Canvas
Sven Yrvind, a renowned yacht designer and sailor, shares valuable insights on creating flanges around bulkhead hatches for canvas protection in this enlightening video. By following his expert guidance, boat enthusiasts can ensure their living areas remain secure while allowing unhindered access through the hatches.Step 1: Starting with the Flange
Sven begins by explaining that working on flanges vertically and horizontally is significantly easier than doing so in a flat position. To simplify the process further, he divides the task into two or three steps as suggested by fellow expert “for for.” This approach not only makes it more manageable but also allows for greater precision in crafting each component.Step 2: Applying Glue and Securing
Sven proceeds to apply glue along one edge of the flange, ensuring a secure bond when clamped into place. He emphasizes that this stage is crucial for maintaining the structural integrity of the flange, which in turn safeguards the living area beneath the canvas when hatches are open.Step 3: Allowing Time to Dry
After securely attaching the first portion of the flange, Sven allows ample time for it to dry before moving forward with additional steps. This patience and precision are key aspects of his successful boatbuilding methods.Step 4: Finishing Touches
Once the flange is fully dried, Sven removes the clamps carefully, ensuring no damage occurs during this process. He then moves on to attaching four more pieces onto these main frames, completing two pairs of flanges for the bulkhead hatches.The Final Touches
While two flanges form the primary support structure around the hatches, Sven mentions there are two additional pieces required at each end to ensure comprehensive protection. This attention to detail highlights his commitment to producing a durable and reliable design. “Sailing is about finding your path, whether it’s across an ocean or within yourself.” – Sven Yrvind In conclusion, making flanges around bulkhead hatches may seem complex at first glance, but by following Sven Yrvind’s meticulous process, enthusiasts can achieve professional-level results. Remember that the journey of boatbuilding is as rewarding as reaching your destination; it tests one’s patience and dedication. For those seeking to embark on this adventure or simply gain more insight into marine craftsmanship, Sven’s wisdom is invaluable.After securely attaching the first portion of the flange, Sven allows ample time for it to dry before moving forward with additional steps. This patience and precision are key aspects of his successful boatbuilding methods.Step 4: Finishing Touches
Once the flange is fully dried, Sven removes the clamps carefully, ensuring no damage occurs during this process. He then moves on to attaching four more pieces onto these main frames, completing two pairs of flanges for the bulkhead hatches.The Final Touches
While two flanges form the primary support structure around the hatches, Sven mentions there are two additional pieces required at each end to ensure comprehensive protection. This attention to detail highlights his commitment to producing a durable and reliable design. “Sailing is about finding your path, whether it’s across an ocean or within yourself.” – Sven Yrvind In conclusion, making flanges around bulkhead hatches may seem complex at first glance, but by following Sven Yrvind’s meticulous process, enthusiasts can achieve professional-level results. Remember that the journey of boatbuilding is as rewarding as reaching your destination; it tests one’s patience and dedication. For those seeking to embark on this adventure or simply gain more insight into marine craftsmanship, Sven’s wisdom is invaluable.Sven begins by explaining that working on flanges vertically and horizontally is significantly easier than doing so in a flat position. To simplify the process further, he divides the task into two or three steps as suggested by fellow expert “for for.” This approach not only makes it more manageable but also allows for greater precision in crafting each component.Step 2: Applying Glue and Securing
Sven proceeds to apply glue along one edge of the flange, ensuring a secure bond when clamped into place. He emphasizes that this stage is crucial for maintaining the structural integrity of the flange, which in turn safeguards the living area beneath the canvas when hatches are open.Step 3: Allowing Time to Dry
After securely attaching the first portion of the flange, Sven allows ample time for it to dry before moving forward with additional steps. This patience and precision are key aspects of his successful boatbuilding methods.Step 4: Finishing Touches
Once the flange is fully dried, Sven removes the clamps carefully, ensuring no damage occurs during this process. He then moves on to attaching four more pieces onto these main frames, completing two pairs of flanges for the bulkhead hatches.The Final Touches
While two flanges form the primary support structure around the hatches, Sven mentions there are two additional pieces required at each end to ensure comprehensive protection. This attention to detail highlights his commitment to producing a durable and reliable design. “Sailing is about finding your path, whether it’s across an ocean or within yourself.” – Sven Yrvind In conclusion, making flanges around bulkhead hatches may seem complex at first glance, but by following Sven Yrvind’s meticulous process, enthusiasts can achieve professional-level results. Remember that the journey of boatbuilding is as rewarding as reaching your destination; it tests one’s patience and dedication. For those seeking to embark on this adventure or simply gain more insight into marine craftsmanship, Sven’s wisdom is invaluable.Sven Yrvind, a renowned yacht designer and sailor, shares valuable insights on creating flanges around bulkhead hatches for canvas protection in this enlightening video. By following his expert guidance, boat enthusiasts can ensure their living areas remain secure while allowing unhindered access through the hatches.Step 1: Starting with the Flange
Sven begins by explaining that working on flanges vertically and horizontally is significantly easier than doing so in a flat position. To simplify the process further, he divides the task into two or three steps as suggested by fellow expert “for for.” This approach not only makes it more manageable but also allows for greater precision in crafting each component.Step 2: Applying Glue and Securing
Sven proceeds to apply glue along one edge of the flange, ensuring a secure bond when clamped into place. He emphasizes that this stage is crucial for maintaining the structural integrity of the flange, which in turn safeguards the living area beneath the canvas when hatches are open.Step 3: Allowing Time to Dry
After securely attaching the first portion of the flange, Sven allows ample time for it to dry before moving forward with additional steps. This patience and precision are key aspects of his successful boatbuilding methods.Step 4: Finishing Touches
Once the flange is fully dried, Sven removes the clamps carefully, ensuring no damage occurs during this process. He then moves on to attaching four more pieces onto these main frames, completing two pairs of flanges for the bulkhead hatches.The Final Touches
While two flanges form the primary support structure around the hatches, Sven mentions there are two additional pieces required at each end to ensure comprehensive protection. This attention to detail highlights his commitment to producing a durable and reliable design. “Sailing is about finding your path, whether it’s across an ocean or within yourself.” – Sven Yrvind In conclusion, making flanges around bulkhead hatches may seem complex at first glance, but by following Sven Yrvind’s meticulous process, enthusiasts can achieve professional-level results. Remember that the journey of boatbuilding is as rewarding as reaching your destination; it tests one’s patience and dedication. For those seeking to embark on this adventure or simply gain more insight into marine craftsmanship, Sven’s wisdom is invaluable.Making Flanges Around Bulkhead Hatches for Canvas
Sven Yrvind, a renowned yacht designer and sailor, shares valuable insights on creating flanges around bulkhead hatches for canvas protection in this enlightening video. By following his expert guidance, boat enthusiasts can ensure their living areas remain secure while allowing unhindered access through the hatches.Step 1: Starting with the Flange
Sven begins by explaining that working on flanges vertically and horizontally is significantly easier than doing so in a flat position. To simplify the process further, he divides the task into two or three steps as suggested by fellow expert “for for.” This approach not only makes it more manageable but also allows for greater precision in crafting each component.Step 2: Applying Glue and Securing
Sven proceeds to apply glue along one edge of the flange, ensuring a secure bond when clamped into place. He emphasizes that this stage is crucial for maintaining the structural integrity of the flange, which in turn safeguards the living area beneath the canvas when hatches are open.Step 3: Allowing Time to Dry
After securely attaching the first portion of the flange, Sven allows ample time for it to dry before moving forward with additional steps. This patience and precision are key aspects of his successful boatbuilding methods.Step 4: Finishing Touches
Once the flange is fully dried, Sven removes the clamps carefully, ensuring no damage occurs during this process. He then moves on to attaching four more pieces onto these main frames, completing two pairs of flanges for the bulkhead hatches.The Final Touches
While two flanges form the primary support structure around the hatches, Sven mentions there are two additional pieces required at each end to ensure comprehensive protection. This attention to detail highlights his commitment to producing a durable and reliable design. “Sailing is about finding your path, whether it’s across an ocean or within yourself.” – Sven Yrvind In conclusion, making flanges around bulkhead hatches may seem complex at first glance, but by following Sven Yrvind’s meticulous process, enthusiasts can achieve professional-level results. Remember that the journey of boatbuilding is as rewarding as reaching your destination; it tests one’s patience and dedication. For those seeking to embark on this adventure or simply gain more insight into marine craftsmanship, Sven’s wisdom is invaluable.Sven proceeds to apply glue along one edge of the flange, ensuring a secure bond when clamped into place. He emphasizes that this stage is crucial for maintaining the structural integrity of the flange, which in turn safeguards the living area beneath the canvas when hatches are open.Step 3: Allowing Time to Dry
After securely attaching the first portion of the flange, Sven allows ample time for it to dry before moving forward with additional steps. This patience and precision are key aspects of his successful boatbuilding methods.Step 4: Finishing Touches
Once the flange is fully dried, Sven removes the clamps carefully, ensuring no damage occurs during this process. He then moves on to attaching four more pieces onto these main frames, completing two pairs of flanges for the bulkhead hatches.The Final Touches
While two flanges form the primary support structure around the hatches, Sven mentions there are two additional pieces required at each end to ensure comprehensive protection. This attention to detail highlights his commitment to producing a durable and reliable design. “Sailing is about finding your path, whether it’s across an ocean or within yourself.” – Sven Yrvind In conclusion, making flanges around bulkhead hatches may seem complex at first glance, but by following Sven Yrvind’s meticulous process, enthusiasts can achieve professional-level results. Remember that the journey of boatbuilding is as rewarding as reaching your destination; it tests one’s patience and dedication. For those seeking to embark on this adventure or simply gain more insight into marine craftsmanship, Sven’s wisdom is invaluable.Sven begins by explaining that working on flanges vertically and horizontally is significantly easier than doing so in a flat position. To simplify the process further, he divides the task into two or three steps as suggested by fellow expert “for for.” This approach not only makes it more manageable but also allows for greater precision in crafting each component.Step 2: Applying Glue and Securing
Sven proceeds to apply glue along one edge of the flange, ensuring a secure bond when clamped into place. He emphasizes that this stage is crucial for maintaining the structural integrity of the flange, which in turn safeguards the living area beneath the canvas when hatches are open.Step 3: Allowing Time to Dry
After securely attaching the first portion of the flange, Sven allows ample time for it to dry before moving forward with additional steps. This patience and precision are key aspects of his successful boatbuilding methods.Step 4: Finishing Touches
Once the flange is fully dried, Sven removes the clamps carefully, ensuring no damage occurs during this process. He then moves on to attaching four more pieces onto these main frames, completing two pairs of flanges for the bulkhead hatches.The Final Touches
While two flanges form the primary support structure around the hatches, Sven mentions there are two additional pieces required at each end to ensure comprehensive protection. This attention to detail highlights his commitment to producing a durable and reliable design. “Sailing is about finding your path, whether it’s across an ocean or within yourself.” – Sven Yrvind In conclusion, making flanges around bulkhead hatches may seem complex at first glance, but by following Sven Yrvind’s meticulous process, enthusiasts can achieve professional-level results. Remember that the journey of boatbuilding is as rewarding as reaching your destination; it tests one’s patience and dedication. For those seeking to embark on this adventure or simply gain more insight into marine craftsmanship, Sven’s wisdom is invaluable.Sven Yrvind, a renowned yacht designer and sailor, shares valuable insights on creating flanges around bulkhead hatches for canvas protection in this enlightening video. By following his expert guidance, boat enthusiasts can ensure their living areas remain secure while allowing unhindered access through the hatches.Step 1: Starting with the Flange
Sven begins by explaining that working on flanges vertically and horizontally is significantly easier than doing so in a flat position. To simplify the process further, he divides the task into two or three steps as suggested by fellow expert “for for.” This approach not only makes it more manageable but also allows for greater precision in crafting each component.Step 2: Applying Glue and Securing
Sven proceeds to apply glue along one edge of the flange, ensuring a secure bond when clamped into place. He emphasizes that this stage is crucial for maintaining the structural integrity of the flange, which in turn safeguards the living area beneath the canvas when hatches are open.Step 3: Allowing Time to Dry
After securely attaching the first portion of the flange, Sven allows ample time for it to dry before moving forward with additional steps. This patience and precision are key aspects of his successful boatbuilding methods.Step 4: Finishing Touches
Once the flange is fully dried, Sven removes the clamps carefully, ensuring no damage occurs during this process. He then moves on to attaching four more pieces onto these main frames, completing two pairs of flanges for the bulkhead hatches.The Final Touches
While two flanges form the primary support structure around the hatches, Sven mentions there are two additional pieces required at each end to ensure comprehensive protection. This attention to detail highlights his commitment to producing a durable and reliable design. “Sailing is about finding your path, whether it’s across an ocean or within yourself.” – Sven Yrvind In conclusion, making flanges around bulkhead hatches may seem complex at first glance, but by following Sven Yrvind’s meticulous process, enthusiasts can achieve professional-level results. Remember that the journey of boatbuilding is as rewarding as reaching your destination; it tests one’s patience and dedication. For those seeking to embark on this adventure or simply gain more insight into marine craftsmanship, Sven’s wisdom is invaluable.Making Flanges Around Bulkhead Hatches for Canvas
Sven Yrvind, a renowned yacht designer and sailor, shares valuable insights on creating flanges around bulkhead hatches for canvas protection in this enlightening video. By following his expert guidance, boat enthusiasts can ensure their living areas remain secure while allowing unhindered access through the hatches.Step 1: Starting with the Flange
Sven begins by explaining that working on flanges vertically and horizontally is significantly easier than doing so in a flat position. To simplify the process further, he divides the task into two or three steps as suggested by fellow expert “for for.” This approach not only makes it more manageable but also allows for greater precision in crafting each component.Step 2: Applying Glue and Securing
Sven proceeds to apply glue along one edge of the flange, ensuring a secure bond when clamped into place. He emphasizes that this stage is crucial for maintaining the structural integrity of the flange, which in turn safeguards the living area beneath the canvas when hatches are open.Step 3: Allowing Time to Dry
After securely attaching the first portion of the flange, Sven allows ample time for it to dry before moving forward with additional steps. This patience and precision are key aspects of his successful boatbuilding methods.Step 4: Finishing Touches
Once the flange is fully dried, Sven removes the clamps carefully, ensuring no damage occurs during this process. He then moves on to attaching four more pieces onto these main frames, completing two pairs of flanges for the bulkhead hatches.The Final Touches
While two flanges form the primary support structure around the hatches, Sven mentions there are two additional pieces required at each end to ensure comprehensive protection. This attention to detail highlights his commitment to producing a durable and reliable design. “Sailing is about finding your path, whether it’s across an ocean or within yourself.” – Sven Yrvind In conclusion, making flanges around bulkhead hatches may seem complex at first glance, but by following Sven Yrvind’s meticulous process, enthusiasts can achieve professional-level results. Remember that the journey of boatbuilding is as rewarding as reaching your destination; it tests one’s patience and dedication. For those seeking to embark on this adventure or simply gain more insight into marine craftsmanship, Sven’s wisdom is invaluable.Once the flange is fully dried, Sven removes the clamps carefully, ensuring no damage occurs during this process. He then moves on to attaching four more pieces onto these main frames, completing two pairs of flanges for the bulkhead hatches.The Final Touches
While two flanges form the primary support structure around the hatches, Sven mentions there are two additional pieces required at each end to ensure comprehensive protection. This attention to detail highlights his commitment to producing a durable and reliable design. “Sailing is about finding your path, whether it’s across an ocean or within yourself.” – Sven Yrvind In conclusion, making flanges around bulkhead hatches may seem complex at first glance, but by following Sven Yrvind’s meticulous process, enthusiasts can achieve professional-level results. Remember that the journey of boatbuilding is as rewarding as reaching your destination; it tests one’s patience and dedication. For those seeking to embark on this adventure or simply gain more insight into marine craftsmanship, Sven’s wisdom is invaluable.Sven proceeds to apply glue along one edge of the flange, ensuring a secure bond when clamped into place. He emphasizes that this stage is crucial for maintaining the structural integrity of the flange, which in turn safeguards the living area beneath the canvas when hatches are open.Step 3: Allowing Time to Dry
After securely attaching the first portion of the flange, Sven allows ample time for it to dry before moving forward with additional steps. This patience and precision are key aspects of his successful boatbuilding methods.Step 4: Finishing Touches
Once the flange is fully dried, Sven removes the clamps carefully, ensuring no damage occurs during this process. He then moves on to attaching four more pieces onto these main frames, completing two pairs of flanges for the bulkhead hatches.The Final Touches
While two flanges form the primary support structure around the hatches, Sven mentions there are two additional pieces required at each end to ensure comprehensive protection. This attention to detail highlights his commitment to producing a durable and reliable design. “Sailing is about finding your path, whether it’s across an ocean or within yourself.” – Sven Yrvind In conclusion, making flanges around bulkhead hatches may seem complex at first glance, but by following Sven Yrvind’s meticulous process, enthusiasts can achieve professional-level results. Remember that the journey of boatbuilding is as rewarding as reaching your destination; it tests one’s patience and dedication. For those seeking to embark on this adventure or simply gain more insight into marine craftsmanship, Sven’s wisdom is invaluable.Sven begins by explaining that working on flanges vertically and horizontally is significantly easier than doing so in a flat position. To simplify the process further, he divides the task into two or three steps as suggested by fellow expert “for for.” This approach not only makes it more manageable but also allows for greater precision in crafting each component.Step 2: Applying Glue and Securing
Sven proceeds to apply glue along one edge of the flange, ensuring a secure bond when clamped into place. He emphasizes that this stage is crucial for maintaining the structural integrity of the flange, which in turn safeguards the living area beneath the canvas when hatches are open.Step 3: Allowing Time to Dry
After securely attaching the first portion of the flange, Sven allows ample time for it to dry before moving forward with additional steps. This patience and precision are key aspects of his successful boatbuilding methods.Step 4: Finishing Touches
Once the flange is fully dried, Sven removes the clamps carefully, ensuring no damage occurs during this process. He then moves on to attaching four more pieces onto these main frames, completing two pairs of flanges for the bulkhead hatches.The Final Touches
While two flanges form the primary support structure around the hatches, Sven mentions there are two additional pieces required at each end to ensure comprehensive protection. This attention to detail highlights his commitment to producing a durable and reliable design. “Sailing is about finding your path, whether it’s across an ocean or within yourself.” – Sven Yrvind In conclusion, making flanges around bulkhead hatches may seem complex at first glance, but by following Sven Yrvind’s meticulous process, enthusiasts can achieve professional-level results. Remember that the journey of boatbuilding is as rewarding as reaching your destination; it tests one’s patience and dedication. For those seeking to embark on this adventure or simply gain more insight into marine craftsmanship, Sven’s wisdom is invaluable.Sven Yrvind, a renowned yacht designer and sailor, shares valuable insights on creating flanges around bulkhead hatches for canvas protection in this enlightening video. By following his expert guidance, boat enthusiasts can ensure their living areas remain secure while allowing unhindered access through the hatches.Step 1: Starting with the Flange
Sven begins by explaining that working on flanges vertically and horizontally is significantly easier than doing so in a flat position. To simplify the process further, he divides the task into two or three steps as suggested by fellow expert “for for.” This approach not only makes it more manageable but also allows for greater precision in crafting each component.Step 2: Applying Glue and Securing
Sven proceeds to apply glue along one edge of the flange, ensuring a secure bond when clamped into place. He emphasizes that this stage is crucial for maintaining the structural integrity of the flange, which in turn safeguards the living area beneath the canvas when hatches are open.Step 3: Allowing Time to Dry
After securely attaching the first portion of the flange, Sven allows ample time for it to dry before moving forward with additional steps. This patience and precision are key aspects of his successful boatbuilding methods.Step 4: Finishing Touches
Once the flange is fully dried, Sven removes the clamps carefully, ensuring no damage occurs during this process. He then moves on to attaching four more pieces onto these main frames, completing two pairs of flanges for the bulkhead hatches.The Final Touches
While two flanges form the primary support structure around the hatches, Sven mentions there are two additional pieces required at each end to ensure comprehensive protection. This attention to detail highlights his commitment to producing a durable and reliable design. “Sailing is about finding your path, whether it’s across an ocean or within yourself.” – Sven Yrvind In conclusion, making flanges around bulkhead hatches may seem complex at first glance, but by following Sven Yrvind’s meticulous process, enthusiasts can achieve professional-level results. Remember that the journey of boatbuilding is as rewarding as reaching your destination; it tests one’s patience and dedication. For those seeking to embark on this adventure or simply gain more insight into marine craftsmanship, Sven’s wisdom is invaluable.Making Flanges Around Bulkhead Hatches for Canvas
Sven Yrvind, a renowned yacht designer and sailor, shares valuable insights on creating flanges around bulkhead hatches for canvas protection in this enlightening video. By following his expert guidance, boat enthusiasts can ensure their living areas remain secure while allowing unhindered access through the hatches.Step 1: Starting with the Flange
Sven begins by explaining that working on flanges vertically and horizontally is significantly easier than doing so in a flat position. To simplify the process further, he divides the task into two or three steps as suggested by fellow expert “for for.” This approach not only makes it more manageable but also allows for greater precision in crafting each component.Step 2: Applying Glue and Securing
Sven proceeds to apply glue along one edge of the flange, ensuring a secure bond when clamped into place. He emphasizes that this stage is crucial for maintaining the structural integrity of the flange, which in turn safeguards the living area beneath the canvas when hatches are open.Step 3: Allowing Time to Dry
After securely attaching the first portion of the flange, Sven allows ample time for it to dry before moving forward with additional steps. This patience and precision are key aspects of his successful boatbuilding methods.Step 4: Finishing Touches
Once the flange is fully dried, Sven removes the clamps carefully, ensuring no damage occurs during this process. He then moves on to attaching four more pieces onto these main frames, completing two pairs of flanges for the bulkhead hatches.The Final Touches
While two flanges form the primary support structure around the hatches, Sven mentions there are two additional pieces required at each end to ensure comprehensive protection. This attention to detail highlights his commitment to producing a durable and reliable design. “Sailing is about finding your path, whether it’s across an ocean or within yourself.” – Sven Yrvind In conclusion, making flanges around bulkhead hatches may seem complex at first glance, but by following Sven Yrvind’s meticulous process, enthusiasts can achieve professional-level results. Remember that the journey of boatbuilding is as rewarding as reaching your destination; it tests one’s patience and dedication. For those seeking to embark on this adventure or simply gain more insight into marine craftsmanship, Sven’s wisdom is invaluable.After securely attaching the first portion of the flange, Sven allows ample time for it to dry before moving forward with additional steps. This patience and precision are key aspects of his successful boatbuilding methods.Step 4: Finishing Touches
Once the flange is fully dried, Sven removes the clamps carefully, ensuring no damage occurs during this process. He then moves on to attaching four more pieces onto these main frames, completing two pairs of flanges for the bulkhead hatches.The Final Touches
While two flanges form the primary support structure around the hatches, Sven mentions there are two additional pieces required at each end to ensure comprehensive protection. This attention to detail highlights his commitment to producing a durable and reliable design. “Sailing is about finding your path, whether it’s across an ocean or within yourself.” – Sven Yrvind In conclusion, making flanges around bulkhead hatches may seem complex at first glance, but by following Sven Yrvind’s meticulous process, enthusiasts can achieve professional-level results. Remember that the journey of boatbuilding is as rewarding as reaching your destination; it tests one’s patience and dedication. For those seeking to embark on this adventure or simply gain more insight into marine craftsmanship, Sven’s wisdom is invaluable.Sven proceeds to apply glue along one edge of the flange, ensuring a secure bond when clamped into place. He emphasizes that this stage is crucial for maintaining the structural integrity of the flange, which in turn safeguards the living area beneath the canvas when hatches are open.Step 3: Allowing Time to Dry
After securely attaching the first portion of the flange, Sven allows ample time for it to dry before moving forward with additional steps. This patience and precision are key aspects of his successful boatbuilding methods.Step 4: Finishing Touches
Once the flange is fully dried, Sven removes the clamps carefully, ensuring no damage occurs during this process. He then moves on to attaching four more pieces onto these main frames, completing two pairs of flanges for the bulkhead hatches.The Final Touches
While two flanges form the primary support structure around the hatches, Sven mentions there are two additional pieces required at each end to ensure comprehensive protection. This attention to detail highlights his commitment to producing a durable and reliable design. “Sailing is about finding your path, whether it’s across an ocean or within yourself.” – Sven Yrvind In conclusion, making flanges around bulkhead hatches may seem complex at first glance, but by following Sven Yrvind’s meticulous process, enthusiasts can achieve professional-level results. Remember that the journey of boatbuilding is as rewarding as reaching your destination; it tests one’s patience and dedication. For those seeking to embark on this adventure or simply gain more insight into marine craftsmanship, Sven’s wisdom is invaluable.Sven begins by explaining that working on flanges vertically and horizontally is significantly easier than doing so in a flat position. To simplify the process further, he divides the task into two or three steps as suggested by fellow expert “for for.” This approach not only makes it more manageable but also allows for greater precision in crafting each component.Step 2: Applying Glue and Securing
Sven proceeds to apply glue along one edge of the flange, ensuring a secure bond when clamped into place. He emphasizes that this stage is crucial for maintaining the structural integrity of the flange, which in turn safeguards the living area beneath the canvas when hatches are open.Step 3: Allowing Time to Dry
After securely attaching the first portion of the flange, Sven allows ample time for it to dry before moving forward with additional steps. This patience and precision are key aspects of his successful boatbuilding methods.Step 4: Finishing Touches
Once the flange is fully dried, Sven removes the clamps carefully, ensuring no damage occurs during this process. He then moves on to attaching four more pieces onto these main frames, completing two pairs of flanges for the bulkhead hatches.The Final Touches
While two flanges form the primary support structure around the hatches, Sven mentions there are two additional pieces required at each end to ensure comprehensive protection. This attention to detail highlights his commitment to producing a durable and reliable design. “Sailing is about finding your path, whether it’s across an ocean or within yourself.” – Sven Yrvind In conclusion, making flanges around bulkhead hatches may seem complex at first glance, but by following Sven Yrvind’s meticulous process, enthusiasts can achieve professional-level results. Remember that the journey of boatbuilding is as rewarding as reaching your destination; it tests one’s patience and dedication. For those seeking to embark on this adventure or simply gain more insight into marine craftsmanship, Sven’s wisdom is invaluable.Sven Yrvind, a renowned yacht designer and sailor, shares valuable insights on creating flanges around bulkhead hatches for canvas protection in this enlightening video. By following his expert guidance, boat enthusiasts can ensure their living areas remain secure while allowing unhindered access through the hatches.Step 1: Starting with the Flange
Sven begins by explaining that working on flanges vertically and horizontally is significantly easier than doing so in a flat position. To simplify the process further, he divides the task into two or three steps as suggested by fellow expert “for for.” This approach not only makes it more manageable but also allows for greater precision in crafting each component.Step 2: Applying Glue and Securing
Sven proceeds to apply glue along one edge of the flange, ensuring a secure bond when clamped into place. He emphasizes that this stage is crucial for maintaining the structural integrity of the flange, which in turn safeguards the living area beneath the canvas when hatches are open.Step 3: Allowing Time to Dry
After securely attaching the first portion of the flange, Sven allows ample time for it to dry before moving forward with additional steps. This patience and precision are key aspects of his successful boatbuilding methods.Step 4: Finishing Touches
Once the flange is fully dried, Sven removes the clamps carefully, ensuring no damage occurs during this process. He then moves on to attaching four more pieces onto these main frames, completing two pairs of flanges for the bulkhead hatches.The Final Touches
While two flanges form the primary support structure around the hatches, Sven mentions there are two additional pieces required at each end to ensure comprehensive protection. This attention to detail highlights his commitment to producing a durable and reliable design. “Sailing is about finding your path, whether it’s across an ocean or within yourself.” – Sven Yrvind In conclusion, making flanges around bulkhead hatches may seem complex at first glance, but by following Sven Yrvind’s meticulous process, enthusiasts can achieve professional-level results. Remember that the journey of boatbuilding is as rewarding as reaching your destination; it tests one’s patience and dedication. For those seeking to embark on this adventure or simply gain more insight into marine craftsmanship, Sven’s wisdom is invaluable.Making Flanges Around Bulkhead Hatches for Canvas
Sven Yrvind, a renowned yacht designer and sailor, shares valuable insights on creating flanges around bulkhead hatches for canvas protection in this enlightening video. By following his expert guidance, boat enthusiasts can ensure their living areas remain secure while allowing unhindered access through the hatches.Step 1: Starting with the Flange
Sven begins by explaining that working on flanges vertically and horizontally is significantly easier than doing so in a flat position. To simplify the process further, he divides the task into two or three steps as suggested by fellow expert “for for.” This approach not only makes it more manageable but also allows for greater precision in crafting each component.Step 2: Applying Glue and Securing
Sven proceeds to apply glue along one edge of the flange, ensuring a secure bond when clamped into place. He emphasizes that this stage is crucial for maintaining the structural integrity of the flange, which in turn safeguards the living area beneath the canvas when hatches are open.Step 3: Allowing Time to Dry
After securely attaching the first portion of the flange, Sven allows ample time for it to dry before moving forward with additional steps. This patience and precision are key aspects of his successful boatbuilding methods.Step 4: Finishing Touches
Once the flange is fully dried, Sven removes the clamps carefully, ensuring no damage occurs during this process. He then moves on to attaching four more pieces onto these main frames, completing two pairs of flanges for the bulkhead hatches.The Final Touches
While two flanges form the primary support structure around the hatches, Sven mentions there are two additional pieces required at each end to ensure comprehensive protection. This attention to detail highlights his commitment to producing a durable and reliable design. “Sailing is about finding your path, whether it’s across an ocean or within yourself.” – Sven Yrvind In conclusion, making flanges around bulkhead hatches may seem complex at first glance, but by following Sven Yrvind’s meticulous process, enthusiasts can achieve professional-level results. Remember that the journey of boatbuilding is as rewarding as reaching your destination; it tests one’s patience and dedication. For those seeking to embark on this adventure or simply gain more insight into marine craftsmanship, Sven’s wisdom is invaluable.Once the flange is fully dried, Sven removes the clamps carefully, ensuring no damage occurs during this process. He then moves on to attaching four more pieces onto these main frames, completing two pairs of flanges for the bulkhead hatches.The Final Touches
While two flanges form the primary support structure around the hatches, Sven mentions there are two additional pieces required at each end to ensure comprehensive protection. This attention to detail highlights his commitment to producing a durable and reliable design. “Sailing is about finding your path, whether it’s across an ocean or within yourself.” – Sven Yrvind In conclusion, making flanges around bulkhead hatches may seem complex at first glance, but by following Sven Yrvind’s meticulous process, enthusiasts can achieve professional-level results. Remember that the journey of boatbuilding is as rewarding as reaching your destination; it tests one’s patience and dedication. For those seeking to embark on this adventure or simply gain more insight into marine craftsmanship, Sven’s wisdom is invaluable.After securely attaching the first portion of the flange, Sven allows ample time for it to dry before moving forward with additional steps. This patience and precision are key aspects of his successful boatbuilding methods.Step 4: Finishing Touches
Once the flange is fully dried, Sven removes the clamps carefully, ensuring no damage occurs during this process. He then moves on to attaching four more pieces onto these main frames, completing two pairs of flanges for the bulkhead hatches.The Final Touches
While two flanges form the primary support structure around the hatches, Sven mentions there are two additional pieces required at each end to ensure comprehensive protection. This attention to detail highlights his commitment to producing a durable and reliable design. “Sailing is about finding your path, whether it’s across an ocean or within yourself.” – Sven Yrvind In conclusion, making flanges around bulkhead hatches may seem complex at first glance, but by following Sven Yrvind’s meticulous process, enthusiasts can achieve professional-level results. Remember that the journey of boatbuilding is as rewarding as reaching your destination; it tests one’s patience and dedication. For those seeking to embark on this adventure or simply gain more insight into marine craftsmanship, Sven’s wisdom is invaluable.Sven proceeds to apply glue along one edge of the flange, ensuring a secure bond when clamped into place. He emphasizes that this stage is crucial for maintaining the structural integrity of the flange, which in turn safeguards the living area beneath the canvas when hatches are open.Step 3: Allowing Time to Dry
After securely attaching the first portion of the flange, Sven allows ample time for it to dry before moving forward with additional steps. This patience and precision are key aspects of his successful boatbuilding methods.Step 4: Finishing Touches
Once the flange is fully dried, Sven removes the clamps carefully, ensuring no damage occurs during this process. He then moves on to attaching four more pieces onto these main frames, completing two pairs of flanges for the bulkhead hatches.The Final Touches
While two flanges form the primary support structure around the hatches, Sven mentions there are two additional pieces required at each end to ensure comprehensive protection. This attention to detail highlights his commitment to producing a durable and reliable design. “Sailing is about finding your path, whether it’s across an ocean or within yourself.” – Sven Yrvind In conclusion, making flanges around bulkhead hatches may seem complex at first glance, but by following Sven Yrvind’s meticulous process, enthusiasts can achieve professional-level results. Remember that the journey of boatbuilding is as rewarding as reaching your destination; it tests one’s patience and dedication. For those seeking to embark on this adventure or simply gain more insight into marine craftsmanship, Sven’s wisdom is invaluable.Sven begins by explaining that working on flanges vertically and horizontally is significantly easier than doing so in a flat position. To simplify the process further, he divides the task into two or three steps as suggested by fellow expert “for for.” This approach not only makes it more manageable but also allows for greater precision in crafting each component.Step 2: Applying Glue and Securing
Sven proceeds to apply glue along one edge of the flange, ensuring a secure bond when clamped into place. He emphasizes that this stage is crucial for maintaining the structural integrity of the flange, which in turn safeguards the living area beneath the canvas when hatches are open.Step 3: Allowing Time to Dry
After securely attaching the first portion of the flange, Sven allows ample time for it to dry before moving forward with additional steps. This patience and precision are key aspects of his successful boatbuilding methods.Step 4: Finishing Touches
Once the flange is fully dried, Sven removes the clamps carefully, ensuring no damage occurs during this process. He then moves on to attaching four more pieces onto these main frames, completing two pairs of flanges for the bulkhead hatches.The Final Touches
While two flanges form the primary support structure around the hatches, Sven mentions there are two additional pieces required at each end to ensure comprehensive protection. This attention to detail highlights his commitment to producing a durable and reliable design. “Sailing is about finding your path, whether it’s across an ocean or within yourself.” – Sven Yrvind In conclusion, making flanges around bulkhead hatches may seem complex at first glance, but by following Sven Yrvind’s meticulous process, enthusiasts can achieve professional-level results. Remember that the journey of boatbuilding is as rewarding as reaching your destination; it tests one’s patience and dedication. For those seeking to embark on this adventure or simply gain more insight into marine craftsmanship, Sven’s wisdom is invaluable.Sven Yrvind, a renowned yacht designer and sailor, shares valuable insights on creating flanges around bulkhead hatches for canvas protection in this enlightening video. By following his expert guidance, boat enthusiasts can ensure their living areas remain secure while allowing unhindered access through the hatches.Step 1: Starting with the Flange
Sven begins by explaining that working on flanges vertically and horizontally is significantly easier than doing so in a flat position. To simplify the process further, he divides the task into two or three steps as suggested by fellow expert “for for.” This approach not only makes it more manageable but also allows for greater precision in crafting each component.Step 2: Applying Glue and Securing
Sven proceeds to apply glue along one edge of the flange, ensuring a secure bond when clamped into place. He emphasizes that this stage is crucial for maintaining the structural integrity of the flange, which in turn safeguards the living area beneath the canvas when hatches are open.Step 3: Allowing Time to Dry
After securely attaching the first portion of the flange, Sven allows ample time for it to dry before moving forward with additional steps. This patience and precision are key aspects of his successful boatbuilding methods.Step 4: Finishing Touches
Once the flange is fully dried, Sven removes the clamps carefully, ensuring no damage occurs during this process. He then moves on to attaching four more pieces onto these main frames, completing two pairs of flanges for the bulkhead hatches.The Final Touches
While two flanges form the primary support structure around the hatches, Sven mentions there are two additional pieces required at each end to ensure comprehensive protection. This attention to detail highlights his commitment to producing a durable and reliable design. “Sailing is about finding your path, whether it’s across an ocean or within yourself.” – Sven Yrvind In conclusion, making flanges around bulkhead hatches may seem complex at first glance, but by following Sven Yrvind’s meticulous process, enthusiasts can achieve professional-level results. Remember that the journey of boatbuilding is as rewarding as reaching your destination; it tests one’s patience and dedication. For those seeking to embark on this adventure or simply gain more insight into marine craftsmanship, Sven’s wisdom is invaluable.Making Flanges Around Bulkhead Hatches for Canvas
Sven Yrvind, a renowned yacht designer and sailor, shares valuable insights on creating flanges around bulkhead hatches for canvas protection in this enlightening video. By following his expert guidance, boat enthusiasts can ensure their living areas remain secure while allowing unhindered access through the hatches.Step 1: Starting with the Flange
Sven begins by explaining that working on flanges vertically and horizontally is significantly easier than doing so in a flat position. To simplify the process further, he divides the task into two or three steps as suggested by fellow expert “for for.” This approach not only makes it more manageable but also allows for greater precision in crafting each component.Step 2: Applying Glue and Securing
Sven proceeds to apply glue along one edge of the flange, ensuring a secure bond when clamped into place. He emphasizes that this stage is crucial for maintaining the structural integrity of the flange, which in turn safeguards the living area beneath the canvas when hatches are open.Step 3: Allowing Time to Dry
After securely attaching the first portion of the flange, Sven allows ample time for it to dry before moving forward with additional steps. This patience and precision are key aspects of his successful boatbuilding methods.Step 4: Finishing Touches
Once the flange is fully dried, Sven removes the clamps carefully, ensuring no damage occurs during this process. He then moves on to attaching four more pieces onto these main frames, completing two pairs of flanges for the bulkhead hatches.The Final Touches
While two flanges form the primary support structure around the hatches, Sven mentions there are two additional pieces required at each end to ensure comprehensive protection. This attention to detail highlights his commitment to producing a durable and reliable design. “Sailing is about finding your path, whether it’s across an ocean or within yourself.” – Sven Yrvind In conclusion, making flanges around bulkhead hatches may seem complex at first glance, but by following Sven Yrvind’s meticulous process, enthusiasts can achieve professional-level results. Remember that the journey of boatbuilding is as rewarding as reaching your destination; it tests one’s patience and dedication. For those seeking to embark on this adventure or simply gain more insight into marine craftsmanship, Sven’s wisdom is invaluable.Making Flanges Around Bulkhead Hatches for Canvas
Sven Yrvind, a renowned yacht designer and sailor, shares valuable insights on creating flanges around bulkhead hatches for canvas protection in this enlightening video. By following his expert guidance, boat enthusiasts can ensure their living areas remain secure while allowing unhindered access through the hatches.Step 1: Starting with the Flange
Sven begins by explaining that working on flanges vertically and horizontally is significantly easier than doing so in a flat position. To simplify the process further, he divides the task into two or three steps as suggested by fellow expert “for for.” This approach not only makes it more manageable but also allows for greater precision in crafting each component.Step 2: Applying Glue and Securing
Sven proceeds to apply glue along one edge of the flange, ensuring a secure bond when clamped into place. He emphasizes that this stage is crucial for maintaining the structural integrity of the flange, which in turn safeguards the living area beneath the canvas when hatches are open.Step 3: Allowing Time to Dry
After securely attaching the first portion of the flange, Sven allows ample time for it to dry before moving forward with additional steps. This patience and precision are key aspects of his successful boatbuilding methods.Step 4: Finishing Touches
Once the flange is fully dried, Sven removes the clamps carefully, ensuring no damage occurs during this process. He then moves on to attaching four more pieces onto these main frames, completing two pairs of flanges for the bulkhead hatches.The Final Touches
While two flanges form the primary support structure around the hatches, Sven mentions there are two additional pieces required at each end to ensure comprehensive protection. This attention to detail highlights his commitment to producing a durable and reliable design. “Sailing is about finding your path, whether it’s across an ocean or within yourself.” – Sven Yrvind In conclusion, making flanges around bulkhead hatches may seem complex at first glance, but by following Sven Yrvind’s meticulous process, enthusiasts can achieve professional-level results. Remember that the journey of boatbuilding is as rewarding as reaching your destination; it tests one’s patience and dedication. For those seeking to embark on this adventure or simply gain more insight into marine craftsmanship, Sven’s wisdom is invaluable.Once the flange is fully dried, Sven removes the clamps carefully, ensuring no damage occurs during this process. He then moves on to attaching four more pieces onto these main frames, completing two pairs of flanges for the bulkhead hatches.The Final Touches
While two flanges form the primary support structure around the hatches, Sven mentions there are two additional pieces required at each end to ensure comprehensive protection. This attention to detail highlights his commitment to producing a durable and reliable design. “Sailing is about finding your path, whether it’s across an ocean or within yourself.” – Sven Yrvind In conclusion, making flanges around bulkhead hatches may seem complex at first glance, but by following Sven Yrvind’s meticulous process, enthusiasts can achieve professional-level results. Remember that the journey of boatbuilding is as rewarding as reaching your destination; it tests one’s patience and dedication. For those seeking to embark on this adventure or simply gain more insight into marine craftsmanship, Sven’s wisdom is invaluable.Sven begins by explaining that working on flanges vertically and horizontally is significantly easier than doing so in a flat position. To simplify the process further, he divides the task into two or three steps as suggested by fellow expert “for for.” This approach not only makes it more manageable but also allows for greater precision in crafting each component.Step 2: Applying Glue and Securing
Sven proceeds to apply glue along one edge of the flange, ensuring a secure bond when clamped into place. He emphasizes that this stage is crucial for maintaining the structural integrity of the flange, which in turn safeguards the living area beneath the canvas when hatches are open.Step 3: Allowing Time to Dry
After securely attaching the first portion of the flange, Sven allows ample time for it to dry before moving forward with additional steps. This patience and precision are key aspects of his successful boatbuilding methods.Step 4: Finishing Touches
Once the flange is fully dried, Sven removes the clamps carefully, ensuring no damage occurs during this process. He then moves on to attaching four more pieces onto these main frames, completing two pairs of flanges for the bulkhead hatches.The Final Touches
While two flanges form the primary support structure around the hatches, Sven mentions there are two additional pieces required at each end to ensure comprehensive protection. This attention to detail highlights his commitment to producing a durable and reliable design. “Sailing is about finding your path, whether it’s across an ocean or within yourself.” – Sven Yrvind In conclusion, making flanges around bulkhead hatches may seem complex at first glance, but by following Sven Yrvind’s meticulous process, enthusiasts can achieve professional-level results. Remember that the journey of boatbuilding is as rewarding as reaching your destination; it tests one’s patience and dedication. For those seeking to embark on this adventure or simply gain more insight into marine craftsmanship, Sven’s wisdom is invaluable.Sven Yrvind, a renowned yacht designer and sailor, shares valuable insights on creating flanges around bulkhead hatches for canvas protection in this enlightening video. By following his expert guidance, boat enthusiasts can ensure their living areas remain secure while allowing unhindered access through the hatches.Step 1: Starting with the Flange
Sven begins by explaining that working on flanges vertically and horizontally is significantly easier than doing so in a flat position. To simplify the process further, he divides the task into two or three steps as suggested by fellow expert “for for.” This approach not only makes it more manageable but also allows for greater precision in crafting each component.Step 2: Applying Glue and Securing
Sven proceeds to apply glue along one edge of the flange, ensuring a secure bond when clamped into place. He emphasizes that this stage is crucial for maintaining the structural integrity of the flange, which in turn safeguards the living area beneath the canvas when hatches are open.Step 3: Allowing Time to Dry
After securely attaching the first portion of the flange, Sven allows ample time for it to dry before moving forward with additional steps. This patience and precision are key aspects of his successful boatbuilding methods.Step 4: Finishing Touches
Once the flange is fully dried, Sven removes the clamps carefully, ensuring no damage occurs during this process. He then moves on to attaching four more pieces onto these main frames, completing two pairs of flanges for the bulkhead hatches.The Final Touches
While two flanges form the primary support structure around the hatches, Sven mentions there are two additional pieces required at each end to ensure comprehensive protection. This attention to detail highlights his commitment to producing a durable and reliable design. “Sailing is about finding your path, whether it’s across an ocean or within yourself.” – Sven Yrvind In conclusion, making flanges around bulkhead hatches may seem complex at first glance, but by following Sven Yrvind’s meticulous process, enthusiasts can achieve professional-level results. Remember that the journey of boatbuilding is as rewarding as reaching your destination; it tests one’s patience and dedication. For those seeking to embark on this adventure or simply gain more insight into marine craftsmanship, Sven’s wisdom is invaluable.Making Flanges Around Bulkhead Hatches for Canvas
Sven Yrvind, a renowned yacht designer and sailor, shares valuable insights on creating flanges around bulkhead hatches for canvas protection in this enlightening video. By following his expert guidance, boat enthusiasts can ensure their living areas remain secure while allowing unhindered access through the hatches.Step 1: Starting with the Flange
Sven begins by explaining that working on flanges vertically and horizontally is significantly easier than doing so in a flat position. To simplify the process further, he divides the task into two or three steps as suggested by fellow expert “for for.” This approach not only makes it more manageable but also allows for greater precision in crafting each component.Step 2: Applying Glue and Securing
Sven proceeds to apply glue along one edge of the flange, ensuring a secure bond when clamped into place. He emphasizes that this stage is crucial for maintaining the structural integrity of the flange, which in turn safeguards the living area beneath the canvas when hatches are open.Step 3: Allowing Time to Dry
After securely attaching the first portion of the flange, Sven allows ample time for it to dry before moving forward with additional steps. This patience and precision are key aspects of his successful boatbuilding methods.Step 4: Finishing Touches
Once the flange is fully dried, Sven removes the clamps carefully, ensuring no damage occurs during this process. He then moves on to attaching four more pieces onto these main frames, completing two pairs of flanges for the bulkhead hatches.The Final Touches
While two flanges form the primary support structure around the hatches, Sven mentions there are two additional pieces required at each end to ensure comprehensive protection. This attention to detail highlights his commitment to producing a durable and reliable design. “Sailing is about finding your path, whether it’s across an ocean or within yourself.” – Sven Yrvind In conclusion, making flanges around bulkhead hatches may seem complex at first glance, but by following Sven Yrvind’s meticulous process, enthusiasts can achieve professional-level results. Remember that the journey of boatbuilding is as rewarding as reaching your destination; it tests one’s patience and dedication. For those seeking to embark on this adventure or simply gain more insight into marine craftsmanship, Sven’s wisdom is invaluable.After securely attaching the first portion of the flange, Sven allows ample time for it to dry before moving forward with additional steps. This patience and precision are key aspects of his successful boatbuilding methods.Step 4: Finishing Touches
Once the flange is fully dried, Sven removes the clamps carefully, ensuring no damage occurs during this process. He then moves on to attaching four more pieces onto these main frames, completing two pairs of flanges for the bulkhead hatches.The Final Touches
While two flanges form the primary support structure around the hatches, Sven mentions there are two additional pieces required at each end to ensure comprehensive protection. This attention to detail highlights his commitment to producing a durable and reliable design. “Sailing is about finding your path, whether it’s across an ocean or within yourself.” – Sven Yrvind In conclusion, making flanges around bulkhead hatches may seem complex at first glance, but by following Sven Yrvind’s meticulous process, enthusiasts can achieve professional-level results. Remember that the journey of boatbuilding is as rewarding as reaching your destination; it tests one’s patience and dedication. For those seeking to embark on this adventure or simply gain more insight into marine craftsmanship, Sven’s wisdom is invaluable.Sven begins by explaining that working on flanges vertically and horizontally is significantly easier than doing so in a flat position. To simplify the process further, he divides the task into two or three steps as suggested by fellow expert “for for.” This approach not only makes it more manageable but also allows for greater precision in crafting each component.Step 2: Applying Glue and Securing
Sven proceeds to apply glue along one edge of the flange, ensuring a secure bond when clamped into place. He emphasizes that this stage is crucial for maintaining the structural integrity of the flange, which in turn safeguards the living area beneath the canvas when hatches are open.Step 3: Allowing Time to Dry
After securely attaching the first portion of the flange, Sven allows ample time for it to dry before moving forward with additional steps. This patience and precision are key aspects of his successful boatbuilding methods.Step 4: Finishing Touches
Once the flange is fully dried, Sven removes the clamps carefully, ensuring no damage occurs during this process. He then moves on to attaching four more pieces onto these main frames, completing two pairs of flanges for the bulkhead hatches.The Final Touches
While two flanges form the primary support structure around the hatches, Sven mentions there are two additional pieces required at each end to ensure comprehensive protection. This attention to detail highlights his commitment to producing a durable and reliable design. “Sailing is about finding your path, whether it’s across an ocean or within yourself.” – Sven Yrvind In conclusion, making flanges around bulkhead hatches may seem complex at first glance, but by following Sven Yrvind’s meticulous process, enthusiasts can achieve professional-level results. Remember that the journey of boatbuilding is as rewarding as reaching your destination; it tests one’s patience and dedication. For those seeking to embark on this adventure or simply gain more insight into marine craftsmanship, Sven’s wisdom is invaluable.Sven Yrvind, a renowned yacht designer and sailor, shares valuable insights on creating flanges around bulkhead hatches for canvas protection in this enlightening video. By following his expert guidance, boat enthusiasts can ensure their living areas remain secure while allowing unhindered access through the hatches.Step 1: Starting with the Flange
Sven begins by explaining that working on flanges vertically and horizontally is significantly easier than doing so in a flat position. To simplify the process further, he divides the task into two or three steps as suggested by fellow expert “for for.” This approach not only makes it more manageable but also allows for greater precision in crafting each component.Step 2: Applying Glue and Securing
Sven proceeds to apply glue along one edge of the flange, ensuring a secure bond when clamped into place. He emphasizes that this stage is crucial for maintaining the structural integrity of the flange, which in turn safeguards the living area beneath the canvas when hatches are open.Step 3: Allowing Time to Dry
After securely attaching the first portion of the flange, Sven allows ample time for it to dry before moving forward with additional steps. This patience and precision are key aspects of his successful boatbuilding methods.Step 4: Finishing Touches
Once the flange is fully dried, Sven removes the clamps carefully, ensuring no damage occurs during this process. He then moves on to attaching four more pieces onto these main frames, completing two pairs of flanges for the bulkhead hatches.The Final Touches
While two flanges form the primary support structure around the hatches, Sven mentions there are two additional pieces required at each end to ensure comprehensive protection. This attention to detail highlights his commitment to producing a durable and reliable design. “Sailing is about finding your path, whether it’s across an ocean or within yourself.” – Sven Yrvind In conclusion, making flanges around bulkhead hatches may seem complex at first glance, but by following Sven Yrvind’s meticulous process, enthusiasts can achieve professional-level results. Remember that the journey of boatbuilding is as rewarding as reaching your destination; it tests one’s patience and dedication. For those seeking to embark on this adventure or simply gain more insight into marine craftsmanship, Sven’s wisdom is invaluable.Making Flanges Around Bulkhead Hatches for Canvas
Sven Yrvind, a renowned yacht designer and sailor, shares valuable insights on creating flanges around bulkhead hatches for canvas protection in this enlightening video. By following his expert guidance, boat enthusiasts can ensure their living areas remain secure while allowing unhindered access through the hatches.Step 1: Starting with the Flange
Sven begins by explaining that working on flanges vertically and horizontally is significantly easier than doing so in a flat position. To simplify the process further, he divides the task into two or three steps as suggested by fellow expert “for for.” This approach not only makes it more manageable but also allows for greater precision in crafting each component.Step 2: Applying Glue and Securing
Sven proceeds to apply glue along one edge of the flange, ensuring a secure bond when clamped into place. He emphasizes that this stage is crucial for maintaining the structural integrity of the flange, which in turn safeguards the living area beneath the canvas when hatches are open.Step 3: Allowing Time to Dry
After securely attaching the first portion of the flange, Sven allows ample time for it to dry before moving forward with additional steps. This patience and precision are key aspects of his successful boatbuilding methods.Step 4: Finishing Touches
Once the flange is fully dried, Sven removes the clamps carefully, ensuring no damage occurs during this process. He then moves on to attaching four more pieces onto these main frames, completing two pairs of flanges for the bulkhead hatches.The Final Touches
While two flanges form the primary support structure around the hatches, Sven mentions there are two additional pieces required at each end to ensure comprehensive protection. This attention to detail highlights his commitment to producing a durable and reliable design. “Sailing is about finding your path, whether it’s across an ocean or within yourself.” – Sven Yrvind In conclusion, making flanges around bulkhead hatches may seem complex at first glance, but by following Sven Yrvind’s meticulous process, enthusiasts can achieve professional-level results. Remember that the journey of boatbuilding is as rewarding as reaching your destination; it tests one’s patience and dedication. For those seeking to embark on this adventure or simply gain more insight into marine craftsmanship, Sven’s wisdom is invaluable.Sven proceeds to apply glue along one edge of the flange, ensuring a secure bond when clamped into place. He emphasizes that this stage is crucial for maintaining the structural integrity of the flange, which in turn safeguards the living area beneath the canvas when hatches are open.Step 3: Allowing Time to Dry
After securely attaching the first portion of the flange, Sven allows ample time for it to dry before moving forward with additional steps. This patience and precision are key aspects of his successful boatbuilding methods.Step 4: Finishing Touches
Once the flange is fully dried, Sven removes the clamps carefully, ensuring no damage occurs during this process. He then moves on to attaching four more pieces onto these main frames, completing two pairs of flanges for the bulkhead hatches.The Final Touches
While two flanges form the primary support structure around the hatches, Sven mentions there are two additional pieces required at each end to ensure comprehensive protection. This attention to detail highlights his commitment to producing a durable and reliable design. “Sailing is about finding your path, whether it’s across an ocean or within yourself.” – Sven Yrvind In conclusion, making flanges around bulkhead hatches may seem complex at first glance, but by following Sven Yrvind’s meticulous process, enthusiasts can achieve professional-level results. Remember that the journey of boatbuilding is as rewarding as reaching your destination; it tests one’s patience and dedication. For those seeking to embark on this adventure or simply gain more insight into marine craftsmanship, Sven’s wisdom is invaluable.Sven begins by explaining that working on flanges vertically and horizontally is significantly easier than doing so in a flat position. To simplify the process further, he divides the task into two or three steps as suggested by fellow expert “for for.” This approach not only makes it more manageable but also allows for greater precision in crafting each component.Step 2: Applying Glue and Securing
Sven proceeds to apply glue along one edge of the flange, ensuring a secure bond when clamped into place. He emphasizes that this stage is crucial for maintaining the structural integrity of the flange, which in turn safeguards the living area beneath the canvas when hatches are open.Step 3: Allowing Time to Dry
After securely attaching the first portion of the flange, Sven allows ample time for it to dry before moving forward with additional steps. This patience and precision are key aspects of his successful boatbuilding methods.Step 4: Finishing Touches
Once the flange is fully dried, Sven removes the clamps carefully, ensuring no damage occurs during this process. He then moves on to attaching four more pieces onto these main frames, completing two pairs of flanges for the bulkhead hatches.The Final Touches
While two flanges form the primary support structure around the hatches, Sven mentions there are two additional pieces required at each end to ensure comprehensive protection. This attention to detail highlights his commitment to producing a durable and reliable design. “Sailing is about finding your path, whether it’s across an ocean or within yourself.” – Sven Yrvind In conclusion, making flanges around bulkhead hatches may seem complex at first glance, but by following Sven Yrvind’s meticulous process, enthusiasts can achieve professional-level results. Remember that the journey of boatbuilding is as rewarding as reaching your destination; it tests one’s patience and dedication. For those seeking to embark on this adventure or simply gain more insight into marine craftsmanship, Sven’s wisdom is invaluable.Sven Yrvind, a renowned yacht designer and sailor, shares valuable insights on creating flanges around bulkhead hatches for canvas protection in this enlightening video. By following his expert guidance, boat enthusiasts can ensure their living areas remain secure while allowing unhindered access through the hatches.Step 1: Starting with the Flange
Sven begins by explaining that working on flanges vertically and horizontally is significantly easier than doing so in a flat position. To simplify the process further, he divides the task into two or three steps as suggested by fellow expert “for for.” This approach not only makes it more manageable but also allows for greater precision in crafting each component.Step 2: Applying Glue and Securing
Sven proceeds to apply glue along one edge of the flange, ensuring a secure bond when clamped into place. He emphasizes that this stage is crucial for maintaining the structural integrity of the flange, which in turn safeguards the living area beneath the canvas when hatches are open.Step 3: Allowing Time to Dry
After securely attaching the first portion of the flange, Sven allows ample time for it to dry before moving forward with additional steps. This patience and precision are key aspects of his successful boatbuilding methods.Step 4: Finishing Touches
Once the flange is fully dried, Sven removes the clamps carefully, ensuring no damage occurs during this process. He then moves on to attaching four more pieces onto these main frames, completing two pairs of flanges for the bulkhead hatches.The Final Touches
While two flanges form the primary support structure around the hatches, Sven mentions there are two additional pieces required at each end to ensure comprehensive protection. This attention to detail highlights his commitment to producing a durable and reliable design. “Sailing is about finding your path, whether it’s across an ocean or within yourself.” – Sven Yrvind In conclusion, making flanges around bulkhead hatches may seem complex at first glance, but by following Sven Yrvind’s meticulous process, enthusiasts can achieve professional-level results. Remember that the journey of boatbuilding is as rewarding as reaching your destination; it tests one’s patience and dedication. For those seeking to embark on this adventure or simply gain more insight into marine craftsmanship, Sven’s wisdom is invaluable.Making Flanges Around Bulkhead Hatches for Canvas
Sven Yrvind, a renowned yacht designer and sailor, shares valuable insights on creating flanges around bulkhead hatches for canvas protection in this enlightening video. By following his expert guidance, boat enthusiasts can ensure their living areas remain secure while allowing unhindered access through the hatches.Step 1: Starting with the Flange
Sven begins by explaining that working on flanges vertically and horizontally is significantly easier than doing so in a flat position. To simplify the process further, he divides the task into two or three steps as suggested by fellow expert “for for.” This approach not only makes it more manageable but also allows for greater precision in crafting each component.Step 2: Applying Glue and Securing
Sven proceeds to apply glue along one edge of the flange, ensuring a secure bond when clamped into place. He emphasizes that this stage is crucial for maintaining the structural integrity of the flange, which in turn safeguards the living area beneath the canvas when hatches are open.Step 3: Allowing Time to Dry
After securely attaching the first portion of the flange, Sven allows ample time for it to dry before moving forward with additional steps. This patience and precision are key aspects of his successful boatbuilding methods.Step 4: Finishing Touches
Once the flange is fully dried, Sven removes the clamps carefully, ensuring no damage occurs during this process. He then moves on to attaching four more pieces onto these main frames, completing two pairs of flanges for the bulkhead hatches.The Final Touches
While two flanges form the primary support structure around the hatches, Sven mentions there are two additional pieces required at each end to ensure comprehensive protection. This attention to detail highlights his commitment to producing a durable and reliable design. “Sailing is about finding your path, whether it’s across an ocean or within yourself.” – Sven Yrvind In conclusion, making flanges around bulkhead hatches may seem complex at first glance, but by following Sven Yrvind’s meticulous process, enthusiasts can achieve professional-level results. Remember that the journey of boatbuilding is as rewarding as reaching your destination; it tests one’s patience and dedication. For those seeking to embark on this adventure or simply gain more insight into marine craftsmanship, Sven’s wisdom is invaluable.Once the flange is fully dried, Sven removes the clamps carefully, ensuring no damage occurs during this process. He then moves on to attaching four more pieces onto these main frames, completing two pairs of flanges for the bulkhead hatches.The Final Touches
While two flanges form the primary support structure around the hatches, Sven mentions there are two additional pieces required at each end to ensure comprehensive protection. This attention to detail highlights his commitment to producing a durable and reliable design. “Sailing is about finding your path, whether it’s across an ocean or within yourself.” – Sven Yrvind In conclusion, making flanges around bulkhead hatches may seem complex at first glance, but by following Sven Yrvind’s meticulous process, enthusiasts can achieve professional-level results. Remember that the journey of boatbuilding is as rewarding as reaching your destination; it tests one’s patience and dedication. For those seeking to embark on this adventure or simply gain more insight into marine craftsmanship, Sven’s wisdom is invaluable.Sven proceeds to apply glue along one edge of the flange, ensuring a secure bond when clamped into place. He emphasizes that this stage is crucial for maintaining the structural integrity of the flange, which in turn safeguards the living area beneath the canvas when hatches are open.Step 3: Allowing Time to Dry
After securely attaching the first portion of the flange, Sven allows ample time for it to dry before moving forward with additional steps. This patience and precision are key aspects of his successful boatbuilding methods.Step 4: Finishing Touches
Once the flange is fully dried, Sven removes the clamps carefully, ensuring no damage occurs during this process. He then moves on to attaching four more pieces onto these main frames, completing two pairs of flanges for the bulkhead hatches.The Final Touches
While two flanges form the primary support structure around the hatches, Sven mentions there are two additional pieces required at each end to ensure comprehensive protection. This attention to detail highlights his commitment to producing a durable and reliable design. “Sailing is about finding your path, whether it’s across an ocean or within yourself.” – Sven Yrvind In conclusion, making flanges around bulkhead hatches may seem complex at first glance, but by following Sven Yrvind’s meticulous process, enthusiasts can achieve professional-level results. Remember that the journey of boatbuilding is as rewarding as reaching your destination; it tests one’s patience and dedication. For those seeking to embark on this adventure or simply gain more insight into marine craftsmanship, Sven’s wisdom is invaluable.Sven begins by explaining that working on flanges vertically and horizontally is significantly easier than doing so in a flat position. To simplify the process further, he divides the task into two or three steps as suggested by fellow expert “for for.” This approach not only makes it more manageable but also allows for greater precision in crafting each component.Step 2: Applying Glue and Securing
Sven proceeds to apply glue along one edge of the flange, ensuring a secure bond when clamped into place. He emphasizes that this stage is crucial for maintaining the structural integrity of the flange, which in turn safeguards the living area beneath the canvas when hatches are open.Step 3: Allowing Time to Dry
After securely attaching the first portion of the flange, Sven allows ample time for it to dry before moving forward with additional steps. This patience and precision are key aspects of his successful boatbuilding methods.Step 4: Finishing Touches
Once the flange is fully dried, Sven removes the clamps carefully, ensuring no damage occurs during this process. He then moves on to attaching four more pieces onto these main frames, completing two pairs of flanges for the bulkhead hatches.The Final Touches
While two flanges form the primary support structure around the hatches, Sven mentions there are two additional pieces required at each end to ensure comprehensive protection. This attention to detail highlights his commitment to producing a durable and reliable design. “Sailing is about finding your path, whether it’s across an ocean or within yourself.” – Sven Yrvind In conclusion, making flanges around bulkhead hatches may seem complex at first glance, but by following Sven Yrvind’s meticulous process, enthusiasts can achieve professional-level results. Remember that the journey of boatbuilding is as rewarding as reaching your destination; it tests one’s patience and dedication. For those seeking to embark on this adventure or simply gain more insight into marine craftsmanship, Sven’s wisdom is invaluable.Sven Yrvind, a renowned yacht designer and sailor, shares valuable insights on creating flanges around bulkhead hatches for canvas protection in this enlightening video. By following his expert guidance, boat enthusiasts can ensure their living areas remain secure while allowing unhindered access through the hatches.Step 1: Starting with the Flange
Sven begins by explaining that working on flanges vertically and horizontally is significantly easier than doing so in a flat position. To simplify the process further, he divides the task into two or three steps as suggested by fellow expert “for for.” This approach not only makes it more manageable but also allows for greater precision in crafting each component.Step 2: Applying Glue and Securing
Sven proceeds to apply glue along one edge of the flange, ensuring a secure bond when clamped into place. He emphasizes that this stage is crucial for maintaining the structural integrity of the flange, which in turn safeguards the living area beneath the canvas when hatches are open.Step 3: Allowing Time to Dry
After securely attaching the first portion of the flange, Sven allows ample time for it to dry before moving forward with additional steps. This patience and precision are key aspects of his successful boatbuilding methods.Step 4: Finishing Touches
Once the flange is fully dried, Sven removes the clamps carefully, ensuring no damage occurs during this process. He then moves on to attaching four more pieces onto these main frames, completing two pairs of flanges for the bulkhead hatches.The Final Touches
While two flanges form the primary support structure around the hatches, Sven mentions there are two additional pieces required at each end to ensure comprehensive protection. This attention to detail highlights his commitment to producing a durable and reliable design. “Sailing is about finding your path, whether it’s across an ocean or within yourself.” – Sven Yrvind In conclusion, making flanges around bulkhead hatches may seem complex at first glance, but by following Sven Yrvind’s meticulous process, enthusiasts can achieve professional-level results. Remember that the journey of boatbuilding is as rewarding as reaching your destination; it tests one’s patience and dedication. For those seeking to embark on this adventure or simply gain more insight into marine craftsmanship, Sven’s wisdom is invaluable.Making Flanges Around Bulkhead Hatches for Canvas
Sven Yrvind, a renowned yacht designer and sailor, shares valuable insights on creating flanges around bulkhead hatches for canvas protection in this enlightening video. By following his expert guidance, boat enthusiasts can ensure their living areas remain secure while allowing unhindered access through the hatches.Step 1: Starting with the Flange
Sven begins by explaining that working on flanges vertically and horizontally is significantly easier than doing so in a flat position. To simplify the process further, he divides the task into two or three steps as suggested by fellow expert “for for.” This approach not only makes it more manageable but also allows for greater precision in crafting each component.Step 2: Applying Glue and Securing
Sven proceeds to apply glue along one edge of the flange, ensuring a secure bond when clamped into place. He emphasizes that this stage is crucial for maintaining the structural integrity of the flange, which in turn safeguards the living area beneath the canvas when hatches are open.Step 3: Allowing Time to Dry
After securely attaching the first portion of the flange, Sven allows ample time for it to dry before moving forward with additional steps. This patience and precision are key aspects of his successful boatbuilding methods.Step 4: Finishing Touches
Once the flange is fully dried, Sven removes the clamps carefully, ensuring no damage occurs during this process. He then moves on to attaching four more pieces onto these main frames, completing two pairs of flanges for the bulkhead hatches.The Final Touches
While two flanges form the primary support structure around the hatches, Sven mentions there are two additional pieces required at each end to ensure comprehensive protection. This attention to detail highlights his commitment to producing a durable and reliable design. “Sailing is about finding your path, whether it’s across an ocean or within yourself.” – Sven Yrvind In conclusion, making flanges around bulkhead hatches may seem complex at first glance, but by following Sven Yrvind’s meticulous process, enthusiasts can achieve professional-level results. Remember that the journey of boatbuilding is as rewarding as reaching your destination; it tests one’s patience and dedication. For those seeking to embark on this adventure or simply gain more insight into marine craftsmanship, Sven’s wisdom is invaluable.After securely attaching the first portion of the flange, Sven allows ample time for it to dry before moving forward with additional steps. This patience and precision are key aspects of his successful boatbuilding methods.Step 4: Finishing Touches
Once the flange is fully dried, Sven removes the clamps carefully, ensuring no damage occurs during this process. He then moves on to attaching four more pieces onto these main frames, completing two pairs of flanges for the bulkhead hatches.The Final Touches
While two flanges form the primary support structure around the hatches, Sven mentions there are two additional pieces required at each end to ensure comprehensive protection. This attention to detail highlights his commitment to producing a durable and reliable design. “Sailing is about finding your path, whether it’s across an ocean or within yourself.” – Sven Yrvind In conclusion, making flanges around bulkhead hatches may seem complex at first glance, but by following Sven Yrvind’s meticulous process, enthusiasts can achieve professional-level results. Remember that the journey of boatbuilding is as rewarding as reaching your destination; it tests one’s patience and dedication. For those seeking to embark on this adventure or simply gain more insight into marine craftsmanship, Sven’s wisdom is invaluable.Sven proceeds to apply glue along one edge of the flange, ensuring a secure bond when clamped into place. He emphasizes that this stage is crucial for maintaining the structural integrity of the flange, which in turn safeguards the living area beneath the canvas when hatches are open.Step 3: Allowing Time to Dry
After securely attaching the first portion of the flange, Sven allows ample time for it to dry before moving forward with additional steps. This patience and precision are key aspects of his successful boatbuilding methods.Step 4: Finishing Touches
Once the flange is fully dried, Sven removes the clamps carefully, ensuring no damage occurs during this process. He then moves on to attaching four more pieces onto these main frames, completing two pairs of flanges for the bulkhead hatches.The Final Touches
While two flanges form the primary support structure around the hatches, Sven mentions there are two additional pieces required at each end to ensure comprehensive protection. This attention to detail highlights his commitment to producing a durable and reliable design. “Sailing is about finding your path, whether it’s across an ocean or within yourself.” – Sven Yrvind In conclusion, making flanges around bulkhead hatches may seem complex at first glance, but by following Sven Yrvind’s meticulous process, enthusiasts can achieve professional-level results. Remember that the journey of boatbuilding is as rewarding as reaching your destination; it tests one’s patience and dedication. For those seeking to embark on this adventure or simply gain more insight into marine craftsmanship, Sven’s wisdom is invaluable.Sven begins by explaining that working on flanges vertically and horizontally is significantly easier than doing so in a flat position. To simplify the process further, he divides the task into two or three steps as suggested by fellow expert “for for.” This approach not only makes it more manageable but also allows for greater precision in crafting each component.Step 2: Applying Glue and Securing
Sven proceeds to apply glue along one edge of the flange, ensuring a secure bond when clamped into place. He emphasizes that this stage is crucial for maintaining the structural integrity of the flange, which in turn safeguards the living area beneath the canvas when hatches are open.Step 3: Allowing Time to Dry
After securely attaching the first portion of the flange, Sven allows ample time for it to dry before moving forward with additional steps. This patience and precision are key aspects of his successful boatbuilding methods.Step 4: Finishing Touches
Once the flange is fully dried, Sven removes the clamps carefully, ensuring no damage occurs during this process. He then moves on to attaching four more pieces onto these main frames, completing two pairs of flanges for the bulkhead hatches.The Final Touches
While two flanges form the primary support structure around the hatches, Sven mentions there are two additional pieces required at each end to ensure comprehensive protection. This attention to detail highlights his commitment to producing a durable and reliable design. “Sailing is about finding your path, whether it’s across an ocean or within yourself.” – Sven Yrvind In conclusion, making flanges around bulkhead hatches may seem complex at first glance, but by following Sven Yrvind’s meticulous process, enthusiasts can achieve professional-level results. Remember that the journey of boatbuilding is as rewarding as reaching your destination; it tests one’s patience and dedication. For those seeking to embark on this adventure or simply gain more insight into marine craftsmanship, Sven’s wisdom is invaluable.Sven Yrvind, a renowned yacht designer and sailor, shares valuable insights on creating flanges around bulkhead hatches for canvas protection in this enlightening video. By following his expert guidance, boat enthusiasts can ensure their living areas remain secure while allowing unhindered access through the hatches.Step 1: Starting with the Flange
Sven begins by explaining that working on flanges vertically and horizontally is significantly easier than doing so in a flat position. To simplify the process further, he divides the task into two or three steps as suggested by fellow expert “for for.” This approach not only makes it more manageable but also allows for greater precision in crafting each component.Step 2: Applying Glue and Securing
Sven proceeds to apply glue along one edge of the flange, ensuring a secure bond when clamped into place. He emphasizes that this stage is crucial for maintaining the structural integrity of the flange, which in turn safeguards the living area beneath the canvas when hatches are open.Step 3: Allowing Time to Dry
After securely attaching the first portion of the flange, Sven allows ample time for it to dry before moving forward with additional steps. This patience and precision are key aspects of his successful boatbuilding methods.Step 4: Finishing Touches
Once the flange is fully dried, Sven removes the clamps carefully, ensuring no damage occurs during this process. He then moves on to attaching four more pieces onto these main frames, completing two pairs of flanges for the bulkhead hatches.The Final Touches
While two flanges form the primary support structure around the hatches, Sven mentions there are two additional pieces required at each end to ensure comprehensive protection. This attention to detail highlights his commitment to producing a durable and reliable design. “Sailing is about finding your path, whether it’s across an ocean or within yourself.” – Sven Yrvind In conclusion, making flanges around bulkhead hatches may seem complex at first glance, but by following Sven Yrvind’s meticulous process, enthusiasts can achieve professional-level results. Remember that the journey of boatbuilding is as rewarding as reaching your destination; it tests one’s patience and dedication. For those seeking to embark on this adventure or simply gain more insight into marine craftsmanship, Sven’s wisdom is invaluable.Making Flanges Around Bulkhead Hatches for Canvas
Sven Yrvind, a renowned yacht designer and sailor, shares valuable insights on creating flanges around bulkhead hatches for canvas protection in this enlightening video. By following his expert guidance, boat enthusiasts can ensure their living areas remain secure while allowing unhindered access through the hatches.Step 1: Starting with the Flange
Sven begins by explaining that working on flanges vertically and horizontally is significantly easier than doing so in a flat position. To simplify the process further, he divides the task into two or three steps as suggested by fellow expert “for for.” This approach not only makes it more manageable but also allows for greater precision in crafting each component.Step 2: Applying Glue and Securing
Sven proceeds to apply glue along one edge of the flange, ensuring a secure bond when clamped into place. He emphasizes that this stage is crucial for maintaining the structural integrity of the flange, which in turn safeguards the living area beneath the canvas when hatches are open.Step 3: Allowing Time to Dry
After securely attaching the first portion of the flange, Sven allows ample time for it to dry before moving forward with additional steps. This patience and precision are key aspects of his successful boatbuilding methods.Step 4: Finishing Touches
Once the flange is fully dried, Sven removes the clamps carefully, ensuring no damage occurs during this process. He then moves on to attaching four more pieces onto these main frames, completing two pairs of flanges for the bulkhead hatches.The Final Touches
While two flanges form the primary support structure around the hatches, Sven mentions there are two additional pieces required at each end to ensure comprehensive protection. This attention to detail highlights his commitment to producing a durable and reliable design. “Sailing is about finding your path, whether it’s across an ocean or within yourself.” – Sven Yrvind In conclusion, making flanges around bulkhead hatches may seem complex at first glance, but by following Sven Yrvind’s meticulous process, enthusiasts can achieve professional-level results. Remember that the journey of boatbuilding is as rewarding as reaching your destination; it tests one’s patience and dedication. For those seeking to embark on this adventure or simply gain more insight into marine craftsmanship, Sven’s wisdom is invaluable.Once the flange is fully dried, Sven removes the clamps carefully, ensuring no damage occurs during this process. He then moves on to attaching four more pieces onto these main frames, completing two pairs of flanges for the bulkhead hatches.The Final Touches
While two flanges form the primary support structure around the hatches, Sven mentions there are two additional pieces required at each end to ensure comprehensive protection. This attention to detail highlights his commitment to producing a durable and reliable design. “Sailing is about finding your path, whether it’s across an ocean or within yourself.” – Sven Yrvind In conclusion, making flanges around bulkhead hatches may seem complex at first glance, but by following Sven Yrvind’s meticulous process, enthusiasts can achieve professional-level results. Remember that the journey of boatbuilding is as rewarding as reaching your destination; it tests one’s patience and dedication. For those seeking to embark on this adventure or simply gain more insight into marine craftsmanship, Sven’s wisdom is invaluable.After securely attaching the first portion of the flange, Sven allows ample time for it to dry before moving forward with additional steps. This patience and precision are key aspects of his successful boatbuilding methods.Step 4: Finishing Touches
Once the flange is fully dried, Sven removes the clamps carefully, ensuring no damage occurs during this process. He then moves on to attaching four more pieces onto these main frames, completing two pairs of flanges for the bulkhead hatches.The Final Touches
While two flanges form the primary support structure around the hatches, Sven mentions there are two additional pieces required at each end to ensure comprehensive protection. This attention to detail highlights his commitment to producing a durable and reliable design. “Sailing is about finding your path, whether it’s across an ocean or within yourself.” – Sven Yrvind In conclusion, making flanges around bulkhead hatches may seem complex at first glance, but by following Sven Yrvind’s meticulous process, enthusiasts can achieve professional-level results. Remember that the journey of boatbuilding is as rewarding as reaching your destination; it tests one’s patience and dedication. For those seeking to embark on this adventure or simply gain more insight into marine craftsmanship, Sven’s wisdom is invaluable.Sven proceeds to apply glue along one edge of the flange, ensuring a secure bond when clamped into place. He emphasizes that this stage is crucial for maintaining the structural integrity of the flange, which in turn safeguards the living area beneath the canvas when hatches are open.Step 3: Allowing Time to Dry
After securely attaching the first portion of the flange, Sven allows ample time for it to dry before moving forward with additional steps. This patience and precision are key aspects of his successful boatbuilding methods.Step 4: Finishing Touches
Once the flange is fully dried, Sven removes the clamps carefully, ensuring no damage occurs during this process. He then moves on to attaching four more pieces onto these main frames, completing two pairs of flanges for the bulkhead hatches.The Final Touches
While two flanges form the primary support structure around the hatches, Sven mentions there are two additional pieces required at each end to ensure comprehensive protection. This attention to detail highlights his commitment to producing a durable and reliable design. “Sailing is about finding your path, whether it’s across an ocean or within yourself.” – Sven Yrvind In conclusion, making flanges around bulkhead hatches may seem complex at first glance, but by following Sven Yrvind’s meticulous process, enthusiasts can achieve professional-level results. Remember that the journey of boatbuilding is as rewarding as reaching your destination; it tests one’s patience and dedication. For those seeking to embark on this adventure or simply gain more insight into marine craftsmanship, Sven’s wisdom is invaluable.Sven begins by explaining that working on flanges vertically and horizontally is significantly easier than doing so in a flat position. To simplify the process further, he divides the task into two or three steps as suggested by fellow expert “for for.” This approach not only makes it more manageable but also allows for greater precision in crafting each component.Step 2: Applying Glue and Securing
Sven proceeds to apply glue along one edge of the flange, ensuring a secure bond when clamped into place. He emphasizes that this stage is crucial for maintaining the structural integrity of the flange, which in turn safeguards the living area beneath the canvas when hatches are open.Step 3: Allowing Time to Dry
After securely attaching the first portion of the flange, Sven allows ample time for it to dry before moving forward with additional steps. This patience and precision are key aspects of his successful boatbuilding methods.Step 4: Finishing Touches
Once the flange is fully dried, Sven removes the clamps carefully, ensuring no damage occurs during this process. He then moves on to attaching four more pieces onto these main frames, completing two pairs of flanges for the bulkhead hatches.The Final Touches
While two flanges form the primary support structure around the hatches, Sven mentions there are two additional pieces required at each end to ensure comprehensive protection. This attention to detail highlights his commitment to producing a durable and reliable design. “Sailing is about finding your path, whether it’s across an ocean or within yourself.” – Sven Yrvind In conclusion, making flanges around bulkhead hatches may seem complex at first glance, but by following Sven Yrvind’s meticulous process, enthusiasts can achieve professional-level results. Remember that the journey of boatbuilding is as rewarding as reaching your destination; it tests one’s patience and dedication. For those seeking to embark on this adventure or simply gain more insight into marine craftsmanship, Sven’s wisdom is invaluable.Sven Yrvind, a renowned yacht designer and sailor, shares valuable insights on creating flanges around bulkhead hatches for canvas protection in this enlightening video. By following his expert guidance, boat enthusiasts can ensure their living areas remain secure while allowing unhindered access through the hatches.Step 1: Starting with the Flange
Sven begins by explaining that working on flanges vertically and horizontally is significantly easier than doing so in a flat position. To simplify the process further, he divides the task into two or three steps as suggested by fellow expert “for for.” This approach not only makes it more manageable but also allows for greater precision in crafting each component.Step 2: Applying Glue and Securing
Sven proceeds to apply glue along one edge of the flange, ensuring a secure bond when clamped into place. He emphasizes that this stage is crucial for maintaining the structural integrity of the flange, which in turn safeguards the living area beneath the canvas when hatches are open.Step 3: Allowing Time to Dry
After securely attaching the first portion of the flange, Sven allows ample time for it to dry before moving forward with additional steps. This patience and precision are key aspects of his successful boatbuilding methods.Step 4: Finishing Touches
Once the flange is fully dried, Sven removes the clamps carefully, ensuring no damage occurs during this process. He then moves on to attaching four more pieces onto these main frames, completing two pairs of flanges for the bulkhead hatches.The Final Touches
While two flanges form the primary support structure around the hatches, Sven mentions there are two additional pieces required at each end to ensure comprehensive protection. This attention to detail highlights his commitment to producing a durable and reliable design. “Sailing is about finding your path, whether it’s across an ocean or within yourself.” – Sven Yrvind In conclusion, making flanges around bulkhead hatches may seem complex at first glance, but by following Sven Yrvind’s meticulous process, enthusiasts can achieve professional-level results. Remember that the journey of boatbuilding is as rewarding as reaching your destination; it tests one’s patience and dedication. For those seeking to embark on this adventure or simply gain more insight into marine craftsmanship, Sven’s wisdom is invaluable.Making Flanges Around Bulkhead Hatches for Canvas
Sven Yrvind, a renowned yacht designer and sailor, shares valuable insights on creating flanges around bulkhead hatches for canvas protection in this enlightening video. By following his expert guidance, boat enthusiasts can ensure their living areas remain secure while allowing unhindered access through the hatches.Step 1: Starting with the Flange
Sven begins by explaining that working on flanges vertically and horizontally is significantly easier than doing so in a flat position. To simplify the process further, he divides the task into two or three steps as suggested by fellow expert “for for.” This approach not only makes it more manageable but also allows for greater precision in crafting each component.Step 2: Applying Glue and Securing
Sven proceeds to apply glue along one edge of the flange, ensuring a secure bond when clamped into place. He emphasizes that this stage is crucial for maintaining the structural integrity of the flange, which in turn safeguards the living area beneath the canvas when hatches are open.Step 3: Allowing Time to Dry
After securely attaching the first portion of the flange, Sven allows ample time for it to dry before moving forward with additional steps. This patience and precision are key aspects of his successful boatbuilding methods.Step 4: Finishing Touches
Once the flange is fully dried, Sven removes the clamps carefully, ensuring no damage occurs during this process. He then moves on to attaching four more pieces onto these main frames, completing two pairs of flanges for the bulkhead hatches.The Final Touches
While two flanges form the primary support structure around the hatches, Sven mentions there are two additional pieces required at each end to ensure comprehensive protection. This attention to detail highlights his commitment to producing a durable and reliable design. “Sailing is about finding your path, whether it’s across an ocean or within yourself.” – Sven Yrvind In conclusion, making flanges around bulkhead hatches may seem complex at first glance, but by following Sven Yrvind’s meticulous process, enthusiasts can achieve professional-level results. Remember that the journey of boatbuilding is as rewarding as reaching your destination; it tests one’s patience and dedication. For those seeking to embark on this adventure or simply gain more insight into marine craftsmanship, Sven’s wisdom is invaluable.Once the flange is fully dried, Sven removes the clamps carefully, ensuring no damage occurs during this process. He then moves on to attaching four more pieces onto these main frames, completing two pairs of flanges for the bulkhead hatches.The Final Touches
While two flanges form the primary support structure around the hatches, Sven mentions there are two additional pieces required at each end to ensure comprehensive protection. This attention to detail highlights his commitment to producing a durable and reliable design. “Sailing is about finding your path, whether it’s across an ocean or within yourself.” – Sven Yrvind In conclusion, making flanges around bulkhead hatches may seem complex at first glance, but by following Sven Yrvind’s meticulous process, enthusiasts can achieve professional-level results. Remember that the journey of boatbuilding is as rewarding as reaching your destination; it tests one’s patience and dedication. For those seeking to embark on this adventure or simply gain more insight into marine craftsmanship, Sven’s wisdom is invaluable.Making Flanges Around Bulkhead Hatches for Canvas
Sven Yrvind, a renowned yacht designer and sailor, shares valuable insights on creating flanges around bulkhead hatches for canvas protection in this enlightening video. By following his expert guidance, boat enthusiasts can ensure their living areas remain secure while allowing unhindered access through the hatches.Step 1: Starting with the Flange
Sven begins by explaining that working on flanges vertically and horizontally is significantly easier than doing so in a flat position. To simplify the process further, he divides the task into two or three steps as suggested by fellow expert “for for.” This approach not only makes it more manageable but also allows for greater precision in crafting each component.Step 2: Applying Glue and Securing
Sven proceeds to apply glue along one edge of the flange, ensuring a secure bond when clamped into place. He emphasizes that this stage is crucial for maintaining the structural integrity of the flange, which in turn safeguards the living area beneath the canvas when hatches are open.Step 3: Allowing Time to Dry
After securely attaching the first portion of the flange, Sven allows ample time for it to dry before moving forward with additional steps. This patience and precision are key aspects of his successful boatbuilding methods.Step 4: Finishing Touches
Once the flange is fully dried, Sven removes the clamps carefully, ensuring no damage occurs during this process. He then moves on to attaching four more pieces onto these main frames, completing two pairs of flanges for the bulkhead hatches.The Final Touches
While two flanges form the primary support structure around the hatches, Sven mentions there are two additional pieces required at each end to ensure comprehensive protection. This attention to detail highlights his commitment to producing a durable and reliable design. “Sailing is about finding your path, whether it’s across an ocean or within yourself.” – Sven Yrvind In conclusion, making flanges around bulkhead hatches may seem complex at first glance, but by following Sven Yrvind’s meticulous process, enthusiasts can achieve professional-level results. Remember that the journey of boatbuilding is as rewarding as reaching your destination; it tests one’s patience and dedication. For those seeking to embark on this adventure or simply gain more insight into marine craftsmanship, Sven’s wisdom is invaluable.Once the flange is fully dried, Sven removes the clamps carefully, ensuring no damage occurs during this process. He then moves on to attaching four more pieces onto these main frames, completing two pairs of flanges for the bulkhead hatches.The Final Touches
While two flanges form the primary support structure around the hatches, Sven mentions there are two additional pieces required at each end to ensure comprehensive protection. This attention to detail highlights his commitment to producing a durable and reliable design. “Sailing is about finding your path, whether it’s across an ocean or within yourself.” – Sven Yrvind In conclusion, making flanges around bulkhead hatches may seem complex at first glance, but by following Sven Yrvind’s meticulous process, enthusiasts can achieve professional-level results. Remember that the journey of boatbuilding is as rewarding as reaching your destination; it tests one’s patience and dedication. For those seeking to embark on this adventure or simply gain more insight into marine craftsmanship, Sven’s wisdom is invaluable.Sven begins by explaining that working on flanges vertically and horizontally is significantly easier than doing so in a flat position. To simplify the process further, he divides the task into two or three steps as suggested by fellow expert “for for.” This approach not only makes it more manageable but also allows for greater precision in crafting each component.Step 2: Applying Glue and Securing
Sven proceeds to apply glue along one edge of the flange, ensuring a secure bond when clamped into place. He emphasizes that this stage is crucial for maintaining the structural integrity of the flange, which in turn safeguards the living area beneath the canvas when hatches are open.Step 3: Allowing Time to Dry
After securely attaching the first portion of the flange, Sven allows ample time for it to dry before moving forward with additional steps. This patience and precision are key aspects of his successful boatbuilding methods.Step 4: Finishing Touches
Once the flange is fully dried, Sven removes the clamps carefully, ensuring no damage occurs during this process. He then moves on to attaching four more pieces onto these main frames, completing two pairs of flanges for the bulkhead hatches.The Final Touches
While two flanges form the primary support structure around the hatches, Sven mentions there are two additional pieces required at each end to ensure comprehensive protection. This attention to detail highlights his commitment to producing a durable and reliable design. “Sailing is about finding your path, whether it’s across an ocean or within yourself.” – Sven Yrvind In conclusion, making flanges around bulkhead hatches may seem complex at first glance, but by following Sven Yrvind’s meticulous process, enthusiasts can achieve professional-level results. Remember that the journey of boatbuilding is as rewarding as reaching your destination; it tests one’s patience and dedication. For those seeking to embark on this adventure or simply gain more insight into marine craftsmanship, Sven’s wisdom is invaluable.Sven Yrvind, a renowned yacht designer and sailor, shares valuable insights on creating flanges around bulkhead hatches for canvas protection in this enlightening video. By following his expert guidance, boat enthusiasts can ensure their living areas remain secure while allowing unhindered access through the hatches.Step 1: Starting with the Flange
Sven begins by explaining that working on flanges vertically and horizontally is significantly easier than doing so in a flat position. To simplify the process further, he divides the task into two or three steps as suggested by fellow expert “for for.” This approach not only makes it more manageable but also allows for greater precision in crafting each component.Step 2: Applying Glue and Securing
Sven proceeds to apply glue along one edge of the flange, ensuring a secure bond when clamped into place. He emphasizes that this stage is crucial for maintaining the structural integrity of the flange, which in turn safeguards the living area beneath the canvas when hatches are open.Step 3: Allowing Time to Dry
After securely attaching the first portion of the flange, Sven allows ample time for it to dry before moving forward with additional steps. This patience and precision are key aspects of his successful boatbuilding methods.Step 4: Finishing Touches
Once the flange is fully dried, Sven removes the clamps carefully, ensuring no damage occurs during this process. He then moves on to attaching four more pieces onto these main frames, completing two pairs of flanges for the bulkhead hatches.The Final Touches
While two flanges form the primary support structure around the hatches, Sven mentions there are two additional pieces required at each end to ensure comprehensive protection. This attention to detail highlights his commitment to producing a durable and reliable design. “Sailing is about finding your path, whether it’s across an ocean or within yourself.” – Sven Yrvind In conclusion, making flanges around bulkhead hatches may seem complex at first glance, but by following Sven Yrvind’s meticulous process, enthusiasts can achieve professional-level results. Remember that the journey of boatbuilding is as rewarding as reaching your destination; it tests one’s patience and dedication. For those seeking to embark on this adventure or simply gain more insight into marine craftsmanship, Sven’s wisdom is invaluable.Making Flanges Around Bulkhead Hatches for Canvas
Sven Yrvind, a renowned yacht designer and sailor, shares valuable insights on creating flanges around bulkhead hatches for canvas protection in this enlightening video. By following his expert guidance, boat enthusiasts can ensure their living areas remain secure while allowing unhindered access through the hatches.Step 1: Starting with the Flange
Sven begins by explaining that working on flanges vertically and horizontally is significantly easier than doing so in a flat position. To simplify the process further, he divides the task into two or three steps as suggested by fellow expert “for for.” This approach not only makes it more manageable but also allows for greater precision in crafting each component.Step 2: Applying Glue and Securing
Sven proceeds to apply glue along one edge of the flange, ensuring a secure bond when clamped into place. He emphasizes that this stage is crucial for maintaining the structural integrity of the flange, which in turn safeguards the living area beneath the canvas when hatches are open.Step 3: Allowing Time to Dry
After securely attaching the first portion of the flange, Sven allows ample time for it to dry before moving forward with additional steps. This patience and precision are key aspects of his successful boatbuilding methods.Step 4: Finishing Touches
Once the flange is fully dried, Sven removes the clamps carefully, ensuring no damage occurs during this process. He then moves on to attaching four more pieces onto these main frames, completing two pairs of flanges for the bulkhead hatches.The Final Touches
While two flanges form the primary support structure around the hatches, Sven mentions there are two additional pieces required at each end to ensure comprehensive protection. This attention to detail highlights his commitment to producing a durable and reliable design. “Sailing is about finding your path, whether it’s across an ocean or within yourself.” – Sven Yrvind In conclusion, making flanges around bulkhead hatches may seem complex at first glance, but by following Sven Yrvind’s meticulous process, enthusiasts can achieve professional-level results. Remember that the journey of boatbuilding is as rewarding as reaching your destination; it tests one’s patience and dedication. For those seeking to embark on this adventure or simply gain more insight into marine craftsmanship, Sven’s wisdom is invaluable.After securely attaching the first portion of the flange, Sven allows ample time for it to dry before moving forward with additional steps. This patience and precision are key aspects of his successful boatbuilding methods.Step 4: Finishing Touches
Once the flange is fully dried, Sven removes the clamps carefully, ensuring no damage occurs during this process. He then moves on to attaching four more pieces onto these main frames, completing two pairs of flanges for the bulkhead hatches.The Final Touches
While two flanges form the primary support structure around the hatches, Sven mentions there are two additional pieces required at each end to ensure comprehensive protection. This attention to detail highlights his commitment to producing a durable and reliable design. “Sailing is about finding your path, whether it’s across an ocean or within yourself.” – Sven Yrvind In conclusion, making flanges around bulkhead hatches may seem complex at first glance, but by following Sven Yrvind’s meticulous process, enthusiasts can achieve professional-level results. Remember that the journey of boatbuilding is as rewarding as reaching your destination; it tests one’s patience and dedication. For those seeking to embark on this adventure or simply gain more insight into marine craftsmanship, Sven’s wisdom is invaluable.Sven begins by explaining that working on flanges vertically and horizontally is significantly easier than doing so in a flat position. To simplify the process further, he divides the task into two or three steps as suggested by fellow expert “for for.” This approach not only makes it more manageable but also allows for greater precision in crafting each component.Step 2: Applying Glue and Securing
Sven proceeds to apply glue along one edge of the flange, ensuring a secure bond when clamped into place. He emphasizes that this stage is crucial for maintaining the structural integrity of the flange, which in turn safeguards the living area beneath the canvas when hatches are open.Step 3: Allowing Time to Dry
After securely attaching the first portion of the flange, Sven allows ample time for it to dry before moving forward with additional steps. This patience and precision are key aspects of his successful boatbuilding methods.Step 4: Finishing Touches
Once the flange is fully dried, Sven removes the clamps carefully, ensuring no damage occurs during this process. He then moves on to attaching four more pieces onto these main frames, completing two pairs of flanges for the bulkhead hatches.The Final Touches
While two flanges form the primary support structure around the hatches, Sven mentions there are two additional pieces required at each end to ensure comprehensive protection. This attention to detail highlights his commitment to producing a durable and reliable design. “Sailing is about finding your path, whether it’s across an ocean or within yourself.” – Sven Yrvind In conclusion, making flanges around bulkhead hatches may seem complex at first glance, but by following Sven Yrvind’s meticulous process, enthusiasts can achieve professional-level results. Remember that the journey of boatbuilding is as rewarding as reaching your destination; it tests one’s patience and dedication. For those seeking to embark on this adventure or simply gain more insight into marine craftsmanship, Sven’s wisdom is invaluable.Sven Yrvind, a renowned yacht designer and sailor, shares valuable insights on creating flanges around bulkhead hatches for canvas protection in this enlightening video. By following his expert guidance, boat enthusiasts can ensure their living areas remain secure while allowing unhindered access through the hatches.Step 1: Starting with the Flange
Sven begins by explaining that working on flanges vertically and horizontally is significantly easier than doing so in a flat position. To simplify the process further, he divides the task into two or three steps as suggested by fellow expert “for for.” This approach not only makes it more manageable but also allows for greater precision in crafting each component.Step 2: Applying Glue and Securing
Sven proceeds to apply glue along one edge of the flange, ensuring a secure bond when clamped into place. He emphasizes that this stage is crucial for maintaining the structural integrity of the flange, which in turn safeguards the living area beneath the canvas when hatches are open.Step 3: Allowing Time to Dry
After securely attaching the first portion of the flange, Sven allows ample time for it to dry before moving forward with additional steps. This patience and precision are key aspects of his successful boatbuilding methods.Step 4: Finishing Touches
Once the flange is fully dried, Sven removes the clamps carefully, ensuring no damage occurs during this process. He then moves on to attaching four more pieces onto these main frames, completing two pairs of flanges for the bulkhead hatches.The Final Touches
While two flanges form the primary support structure around the hatches, Sven mentions there are two additional pieces required at each end to ensure comprehensive protection. This attention to detail highlights his commitment to producing a durable and reliable design. “Sailing is about finding your path, whether it’s across an ocean or within yourself.” – Sven Yrvind In conclusion, making flanges around bulkhead hatches may seem complex at first glance, but by following Sven Yrvind’s meticulous process, enthusiasts can achieve professional-level results. Remember that the journey of boatbuilding is as rewarding as reaching your destination; it tests one’s patience and dedication. For those seeking to embark on this adventure or simply gain more insight into marine craftsmanship, Sven’s wisdom is invaluable.Making Flanges Around Bulkhead Hatches for Canvas
Sven Yrvind, a renowned yacht designer and sailor, shares valuable insights on creating flanges around bulkhead hatches for canvas protection in this enlightening video. By following his expert guidance, boat enthusiasts can ensure their living areas remain secure while allowing unhindered access through the hatches.Step 1: Starting with the Flange
Sven begins by explaining that working on flanges vertically and horizontally is significantly easier than doing so in a flat position. To simplify the process further, he divides the task into two or three steps as suggested by fellow expert “for for.” This approach not only makes it more manageable but also allows for greater precision in crafting each component.Step 2: Applying Glue and Securing
Sven proceeds to apply glue along one edge of the flange, ensuring a secure bond when clamped into place. He emphasizes that this stage is crucial for maintaining the structural integrity of the flange, which in turn safeguards the living area beneath the canvas when hatches are open.Step 3: Allowing Time to Dry
After securely attaching the first portion of the flange, Sven allows ample time for it to dry before moving forward with additional steps. This patience and precision are key aspects of his successful boatbuilding methods.Step 4: Finishing Touches
Once the flange is fully dried, Sven removes the clamps carefully, ensuring no damage occurs during this process. He then moves on to attaching four more pieces onto these main frames, completing two pairs of flanges for the bulkhead hatches.The Final Touches
While two flanges form the primary support structure around the hatches, Sven mentions there are two additional pieces required at each end to ensure comprehensive protection. This attention to detail highlights his commitment to producing a durable and reliable design. “Sailing is about finding your path, whether it’s across an ocean or within yourself.” – Sven Yrvind In conclusion, making flanges around bulkhead hatches may seem complex at first glance, but by following Sven Yrvind’s meticulous process, enthusiasts can achieve professional-level results. Remember that the journey of boatbuilding is as rewarding as reaching your destination; it tests one’s patience and dedication. For those seeking to embark on this adventure or simply gain more insight into marine craftsmanship, Sven’s wisdom is invaluable.Sven proceeds to apply glue along one edge of the flange, ensuring a secure bond when clamped into place. He emphasizes that this stage is crucial for maintaining the structural integrity of the flange, which in turn safeguards the living area beneath the canvas when hatches are open.Step 3: Allowing Time to Dry
After securely attaching the first portion of the flange, Sven allows ample time for it to dry before moving forward with additional steps. This patience and precision are key aspects of his successful boatbuilding methods.Step 4: Finishing Touches
Once the flange is fully dried, Sven removes the clamps carefully, ensuring no damage occurs during this process. He then moves on to attaching four more pieces onto these main frames, completing two pairs of flanges for the bulkhead hatches.The Final Touches
While two flanges form the primary support structure around the hatches, Sven mentions there are two additional pieces required at each end to ensure comprehensive protection. This attention to detail highlights his commitment to producing a durable and reliable design. “Sailing is about finding your path, whether it’s across an ocean or within yourself.” – Sven Yrvind In conclusion, making flanges around bulkhead hatches may seem complex at first glance, but by following Sven Yrvind’s meticulous process, enthusiasts can achieve professional-level results. Remember that the journey of boatbuilding is as rewarding as reaching your destination; it tests one’s patience and dedication. For those seeking to embark on this adventure or simply gain more insight into marine craftsmanship, Sven’s wisdom is invaluable.Sven begins by explaining that working on flanges vertically and horizontally is significantly easier than doing so in a flat position. To simplify the process further, he divides the task into two or three steps as suggested by fellow expert “for for.” This approach not only makes it more manageable but also allows for greater precision in crafting each component.Step 2: Applying Glue and Securing
Sven proceeds to apply glue along one edge of the flange, ensuring a secure bond when clamped into place. He emphasizes that this stage is crucial for maintaining the structural integrity of the flange, which in turn safeguards the living area beneath the canvas when hatches are open.Step 3: Allowing Time to Dry
After securely attaching the first portion of the flange, Sven allows ample time for it to dry before moving forward with additional steps. This patience and precision are key aspects of his successful boatbuilding methods.Step 4: Finishing Touches
Once the flange is fully dried, Sven removes the clamps carefully, ensuring no damage occurs during this process. He then moves on to attaching four more pieces onto these main frames, completing two pairs of flanges for the bulkhead hatches.The Final Touches
While two flanges form the primary support structure around the hatches, Sven mentions there are two additional pieces required at each end to ensure comprehensive protection. This attention to detail highlights his commitment to producing a durable and reliable design. “Sailing is about finding your path, whether it’s across an ocean or within yourself.” – Sven Yrvind In conclusion, making flanges around bulkhead hatches may seem complex at first glance, but by following Sven Yrvind’s meticulous process, enthusiasts can achieve professional-level results. Remember that the journey of boatbuilding is as rewarding as reaching your destination; it tests one’s patience and dedication. For those seeking to embark on this adventure or simply gain more insight into marine craftsmanship, Sven’s wisdom is invaluable.Sven Yrvind, a renowned yacht designer and sailor, shares valuable insights on creating flanges around bulkhead hatches for canvas protection in this enlightening video. By following his expert guidance, boat enthusiasts can ensure their living areas remain secure while allowing unhindered access through the hatches.Step 1: Starting with the Flange
Sven begins by explaining that working on flanges vertically and horizontally is significantly easier than doing so in a flat position. To simplify the process further, he divides the task into two or three steps as suggested by fellow expert “for for.” This approach not only makes it more manageable but also allows for greater precision in crafting each component.Step 2: Applying Glue and Securing
Sven proceeds to apply glue along one edge of the flange, ensuring a secure bond when clamped into place. He emphasizes that this stage is crucial for maintaining the structural integrity of the flange, which in turn safeguards the living area beneath the canvas when hatches are open.Step 3: Allowing Time to Dry
After securely attaching the first portion of the flange, Sven allows ample time for it to dry before moving forward with additional steps. This patience and precision are key aspects of his successful boatbuilding methods.Step 4: Finishing Touches
Once the flange is fully dried, Sven removes the clamps carefully, ensuring no damage occurs during this process. He then moves on to attaching four more pieces onto these main frames, completing two pairs of flanges for the bulkhead hatches.The Final Touches
While two flanges form the primary support structure around the hatches, Sven mentions there are two additional pieces required at each end to ensure comprehensive protection. This attention to detail highlights his commitment to producing a durable and reliable design. “Sailing is about finding your path, whether it’s across an ocean or within yourself.” – Sven Yrvind In conclusion, making flanges around bulkhead hatches may seem complex at first glance, but by following Sven Yrvind’s meticulous process, enthusiasts can achieve professional-level results. Remember that the journey of boatbuilding is as rewarding as reaching your destination; it tests one’s patience and dedication. For those seeking to embark on this adventure or simply gain more insight into marine craftsmanship, Sven’s wisdom is invaluable.Making Flanges Around Bulkhead Hatches for Canvas
Sven Yrvind, a renowned yacht designer and sailor, shares valuable insights on creating flanges around bulkhead hatches for canvas protection in this enlightening video. By following his expert guidance, boat enthusiasts can ensure their living areas remain secure while allowing unhindered access through the hatches.Step 1: Starting with the Flange
Sven begins by explaining that working on flanges vertically and horizontally is significantly easier than doing so in a flat position. To simplify the process further, he divides the task into two or three steps as suggested by fellow expert “for for.” This approach not only makes it more manageable but also allows for greater precision in crafting each component.Step 2: Applying Glue and Securing
Sven proceeds to apply glue along one edge of the flange, ensuring a secure bond when clamped into place. He emphasizes that this stage is crucial for maintaining the structural integrity of the flange, which in turn safeguards the living area beneath the canvas when hatches are open.Step 3: Allowing Time to Dry
After securely attaching the first portion of the flange, Sven allows ample time for it to dry before moving forward with additional steps. This patience and precision are key aspects of his successful boatbuilding methods.Step 4: Finishing Touches
Once the flange is fully dried, Sven removes the clamps carefully, ensuring no damage occurs during this process. He then moves on to attaching four more pieces onto these main frames, completing two pairs of flanges for the bulkhead hatches.The Final Touches
While two flanges form the primary support structure around the hatches, Sven mentions there are two additional pieces required at each end to ensure comprehensive protection. This attention to detail highlights his commitment to producing a durable and reliable design. “Sailing is about finding your path, whether it’s across an ocean or within yourself.” – Sven Yrvind In conclusion, making flanges around bulkhead hatches may seem complex at first glance, but by following Sven Yrvind’s meticulous process, enthusiasts can achieve professional-level results. Remember that the journey of boatbuilding is as rewarding as reaching your destination; it tests one’s patience and dedication. For those seeking to embark on this adventure or simply gain more insight into marine craftsmanship, Sven’s wisdom is invaluable.Once the flange is fully dried, Sven removes the clamps carefully, ensuring no damage occurs during this process. He then moves on to attaching four more pieces onto these main frames, completing two pairs of flanges for the bulkhead hatches.The Final Touches
While two flanges form the primary support structure around the hatches, Sven mentions there are two additional pieces required at each end to ensure comprehensive protection. This attention to detail highlights his commitment to producing a durable and reliable design. “Sailing is about finding your path, whether it’s across an ocean or within yourself.” – Sven Yrvind In conclusion, making flanges around bulkhead hatches may seem complex at first glance, but by following Sven Yrvind’s meticulous process, enthusiasts can achieve professional-level results. Remember that the journey of boatbuilding is as rewarding as reaching your destination; it tests one’s patience and dedication. For those seeking to embark on this adventure or simply gain more insight into marine craftsmanship, Sven’s wisdom is invaluable.Sven proceeds to apply glue along one edge of the flange, ensuring a secure bond when clamped into place. He emphasizes that this stage is crucial for maintaining the structural integrity of the flange, which in turn safeguards the living area beneath the canvas when hatches are open.Step 3: Allowing Time to Dry
After securely attaching the first portion of the flange, Sven allows ample time for it to dry before moving forward with additional steps. This patience and precision are key aspects of his successful boatbuilding methods.Step 4: Finishing Touches
Once the flange is fully dried, Sven removes the clamps carefully, ensuring no damage occurs during this process. He then moves on to attaching four more pieces onto these main frames, completing two pairs of flanges for the bulkhead hatches.The Final Touches
While two flanges form the primary support structure around the hatches, Sven mentions there are two additional pieces required at each end to ensure comprehensive protection. This attention to detail highlights his commitment to producing a durable and reliable design. “Sailing is about finding your path, whether it’s across an ocean or within yourself.” – Sven Yrvind In conclusion, making flanges around bulkhead hatches may seem complex at first glance, but by following Sven Yrvind’s meticulous process, enthusiasts can achieve professional-level results. Remember that the journey of boatbuilding is as rewarding as reaching your destination; it tests one’s patience and dedication. For those seeking to embark on this adventure or simply gain more insight into marine craftsmanship, Sven’s wisdom is invaluable.Sven begins by explaining that working on flanges vertically and horizontally is significantly easier than doing so in a flat position. To simplify the process further, he divides the task into two or three steps as suggested by fellow expert “for for.” This approach not only makes it more manageable but also allows for greater precision in crafting each component.Step 2: Applying Glue and Securing
Sven proceeds to apply glue along one edge of the flange, ensuring a secure bond when clamped into place. He emphasizes that this stage is crucial for maintaining the structural integrity of the flange, which in turn safeguards the living area beneath the canvas when hatches are open.Step 3: Allowing Time to Dry
After securely attaching the first portion of the flange, Sven allows ample time for it to dry before moving forward with additional steps. This patience and precision are key aspects of his successful boatbuilding methods.Step 4: Finishing Touches
Once the flange is fully dried, Sven removes the clamps carefully, ensuring no damage occurs during this process. He then moves on to attaching four more pieces onto these main frames, completing two pairs of flanges for the bulkhead hatches.The Final Touches
While two flanges form the primary support structure around the hatches, Sven mentions there are two additional pieces required at each end to ensure comprehensive protection. This attention to detail highlights his commitment to producing a durable and reliable design. “Sailing is about finding your path, whether it’s across an ocean or within yourself.” – Sven Yrvind In conclusion, making flanges around bulkhead hatches may seem complex at first glance, but by following Sven Yrvind’s meticulous process, enthusiasts can achieve professional-level results. Remember that the journey of boatbuilding is as rewarding as reaching your destination; it tests one’s patience and dedication. For those seeking to embark on this adventure or simply gain more insight into marine craftsmanship, Sven’s wisdom is invaluable.Sven Yrvind, a renowned yacht designer and sailor, shares valuable insights on creating flanges around bulkhead hatches for canvas protection in this enlightening video. By following his expert guidance, boat enthusiasts can ensure their living areas remain secure while allowing unhindered access through the hatches.Step 1: Starting with the Flange
Sven begins by explaining that working on flanges vertically and horizontally is significantly easier than doing so in a flat position. To simplify the process further, he divides the task into two or three steps as suggested by fellow expert “for for.” This approach not only makes it more manageable but also allows for greater precision in crafting each component.Step 2: Applying Glue and Securing
Sven proceeds to apply glue along one edge of the flange, ensuring a secure bond when clamped into place. He emphasizes that this stage is crucial for maintaining the structural integrity of the flange, which in turn safeguards the living area beneath the canvas when hatches are open.Step 3: Allowing Time to Dry
After securely attaching the first portion of the flange, Sven allows ample time for it to dry before moving forward with additional steps. This patience and precision are key aspects of his successful boatbuilding methods.Step 4: Finishing Touches
Once the flange is fully dried, Sven removes the clamps carefully, ensuring no damage occurs during this process. He then moves on to attaching four more pieces onto these main frames, completing two pairs of flanges for the bulkhead hatches.The Final Touches
While two flanges form the primary support structure around the hatches, Sven mentions there are two additional pieces required at each end to ensure comprehensive protection. This attention to detail highlights his commitment to producing a durable and reliable design. “Sailing is about finding your path, whether it’s across an ocean or within yourself.” – Sven Yrvind In conclusion, making flanges around bulkhead hatches may seem complex at first glance, but by following Sven Yrvind’s meticulous process, enthusiasts can achieve professional-level results. Remember that the journey of boatbuilding is as rewarding as reaching your destination; it tests one’s patience and dedication. For those seeking to embark on this adventure or simply gain more insight into marine craftsmanship, Sven’s wisdom is invaluable.Making Flanges Around Bulkhead Hatches for Canvas
Sven Yrvind, a renowned yacht designer and sailor, shares valuable insights on creating flanges around bulkhead hatches for canvas protection in this enlightening video. By following his expert guidance, boat enthusiasts can ensure their living areas remain secure while allowing unhindered access through the hatches.Step 1: Starting with the Flange
Sven begins by explaining that working on flanges vertically and horizontally is significantly easier than doing so in a flat position. To simplify the process further, he divides the task into two or three steps as suggested by fellow expert “for for.” This approach not only makes it more manageable but also allows for greater precision in crafting each component.Step 2: Applying Glue and Securing
Sven proceeds to apply glue along one edge of the flange, ensuring a secure bond when clamped into place. He emphasizes that this stage is crucial for maintaining the structural integrity of the flange, which in turn safeguards the living area beneath the canvas when hatches are open.Step 3: Allowing Time to Dry
After securely attaching the first portion of the flange, Sven allows ample time for it to dry before moving forward with additional steps. This patience and precision are key aspects of his successful boatbuilding methods.Step 4: Finishing Touches
Once the flange is fully dried, Sven removes the clamps carefully, ensuring no damage occurs during this process. He then moves on to attaching four more pieces onto these main frames, completing two pairs of flanges for the bulkhead hatches.The Final Touches
While two flanges form the primary support structure around the hatches, Sven mentions there are two additional pieces required at each end to ensure comprehensive protection. This attention to detail highlights his commitment to producing a durable and reliable design. “Sailing is about finding your path, whether it’s across an ocean or within yourself.” – Sven Yrvind In conclusion, making flanges around bulkhead hatches may seem complex at first glance, but by following Sven Yrvind’s meticulous process, enthusiasts can achieve professional-level results. Remember that the journey of boatbuilding is as rewarding as reaching your destination; it tests one’s patience and dedication. For those seeking to embark on this adventure or simply gain more insight into marine craftsmanship, Sven’s wisdom is invaluable.After securely attaching the first portion of the flange, Sven allows ample time for it to dry before moving forward with additional steps. This patience and precision are key aspects of his successful boatbuilding methods.Step 4: Finishing Touches
Once the flange is fully dried, Sven removes the clamps carefully, ensuring no damage occurs during this process. He then moves on to attaching four more pieces onto these main frames, completing two pairs of flanges for the bulkhead hatches.The Final Touches
While two flanges form the primary support structure around the hatches, Sven mentions there are two additional pieces required at each end to ensure comprehensive protection. This attention to detail highlights his commitment to producing a durable and reliable design. “Sailing is about finding your path, whether it’s across an ocean or within yourself.” – Sven Yrvind In conclusion, making flanges around bulkhead hatches may seem complex at first glance, but by following Sven Yrvind’s meticulous process, enthusiasts can achieve professional-level results. Remember that the journey of boatbuilding is as rewarding as reaching your destination; it tests one’s patience and dedication. For those seeking to embark on this adventure or simply gain more insight into marine craftsmanship, Sven’s wisdom is invaluable.Sven proceeds to apply glue along one edge of the flange, ensuring a secure bond when clamped into place. He emphasizes that this stage is crucial for maintaining the structural integrity of the flange, which in turn safeguards the living area beneath the canvas when hatches are open.Step 3: Allowing Time to Dry
After securely attaching the first portion of the flange, Sven allows ample time for it to dry before moving forward with additional steps. This patience and precision are key aspects of his successful boatbuilding methods.Step 4: Finishing Touches
Once the flange is fully dried, Sven removes the clamps carefully, ensuring no damage occurs during this process. He then moves on to attaching four more pieces onto these main frames, completing two pairs of flanges for the bulkhead hatches.The Final Touches
While two flanges form the primary support structure around the hatches, Sven mentions there are two additional pieces required at each end to ensure comprehensive protection. This attention to detail highlights his commitment to producing a durable and reliable design. “Sailing is about finding your path, whether it’s across an ocean or within yourself.” – Sven Yrvind In conclusion, making flanges around bulkhead hatches may seem complex at first glance, but by following Sven Yrvind’s meticulous process, enthusiasts can achieve professional-level results. Remember that the journey of boatbuilding is as rewarding as reaching your destination; it tests one’s patience and dedication. For those seeking to embark on this adventure or simply gain more insight into marine craftsmanship, Sven’s wisdom is invaluable.Sven begins by explaining that working on flanges vertically and horizontally is significantly easier than doing so in a flat position. To simplify the process further, he divides the task into two or three steps as suggested by fellow expert “for for.” This approach not only makes it more manageable but also allows for greater precision in crafting each component.Step 2: Applying Glue and Securing
Sven proceeds to apply glue along one edge of the flange, ensuring a secure bond when clamped into place. He emphasizes that this stage is crucial for maintaining the structural integrity of the flange, which in turn safeguards the living area beneath the canvas when hatches are open.Step 3: Allowing Time to Dry
After securely attaching the first portion of the flange, Sven allows ample time for it to dry before moving forward with additional steps. This patience and precision are key aspects of his successful boatbuilding methods.Step 4: Finishing Touches
Once the flange is fully dried, Sven removes the clamps carefully, ensuring no damage occurs during this process. He then moves on to attaching four more pieces onto these main frames, completing two pairs of flanges for the bulkhead hatches.The Final Touches
While two flanges form the primary support structure around the hatches, Sven mentions there are two additional pieces required at each end to ensure comprehensive protection. This attention to detail highlights his commitment to producing a durable and reliable design. “Sailing is about finding your path, whether it’s across an ocean or within yourself.” – Sven Yrvind In conclusion, making flanges around bulkhead hatches may seem complex at first glance, but by following Sven Yrvind’s meticulous process, enthusiasts can achieve professional-level results. Remember that the journey of boatbuilding is as rewarding as reaching your destination; it tests one’s patience and dedication. For those seeking to embark on this adventure or simply gain more insight into marine craftsmanship, Sven’s wisdom is invaluable.Sven Yrvind, a renowned yacht designer and sailor, shares valuable insights on creating flanges around bulkhead hatches for canvas protection in this enlightening video. By following his expert guidance, boat enthusiasts can ensure their living areas remain secure while allowing unhindered access through the hatches.Step 1: Starting with the Flange
Sven begins by explaining that working on flanges vertically and horizontally is significantly easier than doing so in a flat position. To simplify the process further, he divides the task into two or three steps as suggested by fellow expert “for for.” This approach not only makes it more manageable but also allows for greater precision in crafting each component.Step 2: Applying Glue and Securing
Sven proceeds to apply glue along one edge of the flange, ensuring a secure bond when clamped into place. He emphasizes that this stage is crucial for maintaining the structural integrity of the flange, which in turn safeguards the living area beneath the canvas when hatches are open.Step 3: Allowing Time to Dry
After securely attaching the first portion of the flange, Sven allows ample time for it to dry before moving forward with additional steps. This patience and precision are key aspects of his successful boatbuilding methods.Step 4: Finishing Touches
Once the flange is fully dried, Sven removes the clamps carefully, ensuring no damage occurs during this process. He then moves on to attaching four more pieces onto these main frames, completing two pairs of flanges for the bulkhead hatches.The Final Touches
While two flanges form the primary support structure around the hatches, Sven mentions there are two additional pieces required at each end to ensure comprehensive protection. This attention to detail highlights his commitment to producing a durable and reliable design. “Sailing is about finding your path, whether it’s across an ocean or within yourself.” – Sven Yrvind In conclusion, making flanges around bulkhead hatches may seem complex at first glance, but by following Sven Yrvind’s meticulous process, enthusiasts can achieve professional-level results. Remember that the journey of boatbuilding is as rewarding as reaching your destination; it tests one’s patience and dedication. For those seeking to embark on this adventure or simply gain more insight into marine craftsmanship, Sven’s wisdom is invaluable.Making Flanges Around Bulkhead Hatches for Canvas
Sven Yrvind, a renowned yacht designer and sailor, shares valuable insights on creating flanges around bulkhead hatches for canvas protection in this enlightening video. By following his expert guidance, boat enthusiasts can ensure their living areas remain secure while allowing unhindered access through the hatches.Step 1: Starting with the Flange
Sven begins by explaining that working on flanges vertically and horizontally is significantly easier than doing so in a flat position. To simplify the process further, he divides the task into two or three steps as suggested by fellow expert “for for.” This approach not only makes it more manageable but also allows for greater precision in crafting each component.Step 2: Applying Glue and Securing
Sven proceeds to apply glue along one edge of the flange, ensuring a secure bond when clamped into place. He emphasizes that this stage is crucial for maintaining the structural integrity of the flange, which in turn safeguards the living area beneath the canvas when hatches are open.Step 3: Allowing Time to Dry
After securely attaching the first portion of the flange, Sven allows ample time for it to dry before moving forward with additional steps. This patience and precision are key aspects of his successful boatbuilding methods.Step 4: Finishing Touches
Once the flange is fully dried, Sven removes the clamps carefully, ensuring no damage occurs during this process. He then moves on to attaching four more pieces onto these main frames, completing two pairs of flanges for the bulkhead hatches.The Final Touches
While two flanges form the primary support structure around the hatches, Sven mentions there are two additional pieces required at each end to ensure comprehensive protection. This attention to detail highlights his commitment to producing a durable and reliable design. “Sailing is about finding your path, whether it’s across an ocean or within yourself.” – Sven Yrvind In conclusion, making flanges around bulkhead hatches may seem complex at first glance, but by following Sven Yrvind’s meticulous process, enthusiasts can achieve professional-level results. Remember that the journey of boatbuilding is as rewarding as reaching your destination; it tests one’s patience and dedication. For those seeking to embark on this adventure or simply gain more insight into marine craftsmanship, Sven’s wisdom is invaluable.Once the flange is fully dried, Sven removes the clamps carefully, ensuring no damage occurs during this process. He then moves on to attaching four more pieces onto these main frames, completing two pairs of flanges for the bulkhead hatches.The Final Touches
While two flanges form the primary support structure around the hatches, Sven mentions there are two additional pieces required at each end to ensure comprehensive protection. This attention to detail highlights his commitment to producing a durable and reliable design. “Sailing is about finding your path, whether it’s across an ocean or within yourself.” – Sven Yrvind In conclusion, making flanges around bulkhead hatches may seem complex at first glance, but by following Sven Yrvind’s meticulous process, enthusiasts can achieve professional-level results. Remember that the journey of boatbuilding is as rewarding as reaching your destination; it tests one’s patience and dedication. For those seeking to embark on this adventure or simply gain more insight into marine craftsmanship, Sven’s wisdom is invaluable.After securely attaching the first portion of the flange, Sven allows ample time for it to dry before moving forward with additional steps. This patience and precision are key aspects of his successful boatbuilding methods.Step 4: Finishing Touches
Once the flange is fully dried, Sven removes the clamps carefully, ensuring no damage occurs during this process. He then moves on to attaching four more pieces onto these main frames, completing two pairs of flanges for the bulkhead hatches.The Final Touches
While two flanges form the primary support structure around the hatches, Sven mentions there are two additional pieces required at each end to ensure comprehensive protection. This attention to detail highlights his commitment to producing a durable and reliable design. “Sailing is about finding your path, whether it’s across an ocean or within yourself.” – Sven Yrvind In conclusion, making flanges around bulkhead hatches may seem complex at first glance, but by following Sven Yrvind’s meticulous process, enthusiasts can achieve professional-level results. Remember that the journey of boatbuilding is as rewarding as reaching your destination; it tests one’s patience and dedication. For those seeking to embark on this adventure or simply gain more insight into marine craftsmanship, Sven’s wisdom is invaluable.Sven proceeds to apply glue along one edge of the flange, ensuring a secure bond when clamped into place. He emphasizes that this stage is crucial for maintaining the structural integrity of the flange, which in turn safeguards the living area beneath the canvas when hatches are open.Step 3: Allowing Time to Dry
After securely attaching the first portion of the flange, Sven allows ample time for it to dry before moving forward with additional steps. This patience and precision are key aspects of his successful boatbuilding methods.Step 4: Finishing Touches
Once the flange is fully dried, Sven removes the clamps carefully, ensuring no damage occurs during this process. He then moves on to attaching four more pieces onto these main frames, completing two pairs of flanges for the bulkhead hatches.The Final Touches
While two flanges form the primary support structure around the hatches, Sven mentions there are two additional pieces required at each end to ensure comprehensive protection. This attention to detail highlights his commitment to producing a durable and reliable design. “Sailing is about finding your path, whether it’s across an ocean or within yourself.” – Sven Yrvind In conclusion, making flanges around bulkhead hatches may seem complex at first glance, but by following Sven Yrvind’s meticulous process, enthusiasts can achieve professional-level results. Remember that the journey of boatbuilding is as rewarding as reaching your destination; it tests one’s patience and dedication. For those seeking to embark on this adventure or simply gain more insight into marine craftsmanship, Sven’s wisdom is invaluable.Sven begins by explaining that working on flanges vertically and horizontally is significantly easier than doing so in a flat position. To simplify the process further, he divides the task into two or three steps as suggested by fellow expert “for for.” This approach not only makes it more manageable but also allows for greater precision in crafting each component.Step 2: Applying Glue and Securing
Sven proceeds to apply glue along one edge of the flange, ensuring a secure bond when clamped into place. He emphasizes that this stage is crucial for maintaining the structural integrity of the flange, which in turn safeguards the living area beneath the canvas when hatches are open.Step 3: Allowing Time to Dry
After securely attaching the first portion of the flange, Sven allows ample time for it to dry before moving forward with additional steps. This patience and precision are key aspects of his successful boatbuilding methods.Step 4: Finishing Touches
Once the flange is fully dried, Sven removes the clamps carefully, ensuring no damage occurs during this process. He then moves on to attaching four more pieces onto these main frames, completing two pairs of flanges for the bulkhead hatches.The Final Touches
While two flanges form the primary support structure around the hatches, Sven mentions there are two additional pieces required at each end to ensure comprehensive protection. This attention to detail highlights his commitment to producing a durable and reliable design. “Sailing is about finding your path, whether it’s across an ocean or within yourself.” – Sven Yrvind In conclusion, making flanges around bulkhead hatches may seem complex at first glance, but by following Sven Yrvind’s meticulous process, enthusiasts can achieve professional-level results. Remember that the journey of boatbuilding is as rewarding as reaching your destination; it tests one’s patience and dedication. For those seeking to embark on this adventure or simply gain more insight into marine craftsmanship, Sven’s wisdom is invaluable.Sven Yrvind, a renowned yacht designer and sailor, shares valuable insights on creating flanges around bulkhead hatches for canvas protection in this enlightening video. By following his expert guidance, boat enthusiasts can ensure their living areas remain secure while allowing unhindered access through the hatches.Step 1: Starting with the Flange
Sven begins by explaining that working on flanges vertically and horizontally is significantly easier than doing so in a flat position. To simplify the process further, he divides the task into two or three steps as suggested by fellow expert “for for.” This approach not only makes it more manageable but also allows for greater precision in crafting each component.Step 2: Applying Glue and Securing
Sven proceeds to apply glue along one edge of the flange, ensuring a secure bond when clamped into place. He emphasizes that this stage is crucial for maintaining the structural integrity of the flange, which in turn safeguards the living area beneath the canvas when hatches are open.Step 3: Allowing Time to Dry
After securely attaching the first portion of the flange, Sven allows ample time for it to dry before moving forward with additional steps. This patience and precision are key aspects of his successful boatbuilding methods.Step 4: Finishing Touches
Once the flange is fully dried, Sven removes the clamps carefully, ensuring no damage occurs during this process. He then moves on to attaching four more pieces onto these main frames, completing two pairs of flanges for the bulkhead hatches.The Final Touches
While two flanges form the primary support structure around the hatches, Sven mentions there are two additional pieces required at each end to ensure comprehensive protection. This attention to detail highlights his commitment to producing a durable and reliable design. “Sailing is about finding your path, whether it’s across an ocean or within yourself.” – Sven Yrvind In conclusion, making flanges around bulkhead hatches may seem complex at first glance, but by following Sven Yrvind’s meticulous process, enthusiasts can achieve professional-level results. Remember that the journey of boatbuilding is as rewarding as reaching your destination; it tests one’s patience and dedication. For those seeking to embark on this adventure or simply gain more insight into marine craftsmanship, Sven’s wisdom is invaluable.Making Flanges Around Bulkhead Hatches for Canvas
Sven Yrvind, a renowned yacht designer and sailor, shares valuable insights on creating flanges around bulkhead hatches for canvas protection in this enlightening video. By following his expert guidance, boat enthusiasts can ensure their living areas remain secure while allowing unhindered access through the hatches.Step 1: Starting with the Flange
Sven begins by explaining that working on flanges vertically and horizontally is significantly easier than doing so in a flat position. To simplify the process further, he divides the task into two or three steps as suggested by fellow expert “for for.” This approach not only makes it more manageable but also allows for greater precision in crafting each component.Step 2: Applying Glue and Securing
Sven proceeds to apply glue along one edge of the flange, ensuring a secure bond when clamped into place. He emphasizes that this stage is crucial for maintaining the structural integrity of the flange, which in turn safeguards the living area beneath the canvas when hatches are open.Step 3: Allowing Time to Dry
After securely attaching the first portion of the flange, Sven allows ample time for it to dry before moving forward with additional steps. This patience and precision are key aspects of his successful boatbuilding methods.Step 4: Finishing Touches
Once the flange is fully dried, Sven removes the clamps carefully, ensuring no damage occurs during this process. He then moves on to attaching four more pieces onto these main frames, completing two pairs of flanges for the bulkhead hatches.The Final Touches
While two flanges form the primary support structure around the hatches, Sven mentions there are two additional pieces required at each end to ensure comprehensive protection. This attention to detail highlights his commitment to producing a durable and reliable design. “Sailing is about finding your path, whether it’s across an ocean or within yourself.” – Sven Yrvind In conclusion, making flanges around bulkhead hatches may seem complex at first glance, but by following Sven Yrvind’s meticulous process, enthusiasts can achieve professional-level results. Remember that the journey of boatbuilding is as rewarding as reaching your destination; it tests one’s patience and dedication. For those seeking to embark on this adventure or simply gain more insight into marine craftsmanship, Sven’s wisdom is invaluable.After securely attaching the first portion of the flange, Sven allows ample time for it to dry before moving forward with additional steps. This patience and precision are key aspects of his successful boatbuilding methods.Step 4: Finishing Touches
Once the flange is fully dried, Sven removes the clamps carefully, ensuring no damage occurs during this process. He then moves on to attaching four more pieces onto these main frames, completing two pairs of flanges for the bulkhead hatches.The Final Touches
While two flanges form the primary support structure around the hatches, Sven mentions there are two additional pieces required at each end to ensure comprehensive protection. This attention to detail highlights his commitment to producing a durable and reliable design. “Sailing is about finding your path, whether it’s across an ocean or within yourself.” – Sven Yrvind In conclusion, making flanges around bulkhead hatches may seem complex at first glance, but by following Sven Yrvind’s meticulous process, enthusiasts can achieve professional-level results. Remember that the journey of boatbuilding is as rewarding as reaching your destination; it tests one’s patience and dedication. For those seeking to embark on this adventure or simply gain more insight into marine craftsmanship, Sven’s wisdom is invaluable.Making Flanges Around Bulkhead Hatches for Canvas
Sven Yrvind, a renowned yacht designer and sailor, shares valuable insights on creating flanges around bulkhead hatches for canvas protection in this enlightening video. By following his expert guidance, boat enthusiasts can ensure their living areas remain secure while allowing unhindered access through the hatches.Step 1: Starting with the Flange
Sven begins by explaining that working on flanges vertically and horizontally is significantly easier than doing so in a flat position. To simplify the process further, he divides the task into two or three steps as suggested by fellow expert “for for.” This approach not only makes it more manageable but also allows for greater precision in crafting each component.Step 2: Applying Glue and Securing
Sven proceeds to apply glue along one edge of the flange, ensuring a secure bond when clamped into place. He emphasizes that this stage is crucial for maintaining the structural integrity of the flange, which in turn safeguards the living area beneath the canvas when hatches are open.Step 3: Allowing Time to Dry
After securely attaching the first portion of the flange, Sven allows ample time for it to dry before moving forward with additional steps. This patience and precision are key aspects of his successful boatbuilding methods.Step 4: Finishing Touches
Once the flange is fully dried, Sven removes the clamps carefully, ensuring no damage occurs during this process. He then moves on to attaching four more pieces onto these main frames, completing two pairs of flanges for the bulkhead hatches.The Final Touches
While two flanges form the primary support structure around the hatches, Sven mentions there are two additional pieces required at each end to ensure comprehensive protection. This attention to detail highlights his commitment to producing a durable and reliable design. “Sailing is about finding your path, whether it’s across an ocean or within yourself.” – Sven Yrvind In conclusion, making flanges around bulkhead hatches may seem complex at first glance, but by following Sven Yrvind’s meticulous process, enthusiasts can achieve professional-level results. Remember that the journey of boatbuilding is as rewarding as reaching your destination; it tests one’s patience and dedication. For those seeking to embark on this adventure or simply gain more insight into marine craftsmanship, Sven’s wisdom is invaluable.Once the flange is fully dried, Sven removes the clamps carefully, ensuring no damage occurs during this process. He then moves on to attaching four more pieces onto these main frames, completing two pairs of flanges for the bulkhead hatches.The Final Touches
While two flanges form the primary support structure around the hatches, Sven mentions there are two additional pieces required at each end to ensure comprehensive protection. This attention to detail highlights his commitment to producing a durable and reliable design. “Sailing is about finding your path, whether it’s across an ocean or within yourself.” – Sven Yrvind In conclusion, making flanges around bulkhead hatches may seem complex at first glance, but by following Sven Yrvind’s meticulous process, enthusiasts can achieve professional-level results. Remember that the journey of boatbuilding is as rewarding as reaching your destination; it tests one’s patience and dedication. For those seeking to embark on this adventure or simply gain more insight into marine craftsmanship, Sven’s wisdom is invaluable.Sven begins by explaining that working on flanges vertically and horizontally is significantly easier than doing so in a flat position. To simplify the process further, he divides the task into two or three steps as suggested by fellow expert “for for.” This approach not only makes it more manageable but also allows for greater precision in crafting each component.Step 2: Applying Glue and Securing
Sven proceeds to apply glue along one edge of the flange, ensuring a secure bond when clamped into place. He emphasizes that this stage is crucial for maintaining the structural integrity of the flange, which in turn safeguards the living area beneath the canvas when hatches are open.Step 3: Allowing Time to Dry
After securely attaching the first portion of the flange, Sven allows ample time for it to dry before moving forward with additional steps. This patience and precision are key aspects of his successful boatbuilding methods.Step 4: Finishing Touches
Once the flange is fully dried, Sven removes the clamps carefully, ensuring no damage occurs during this process. He then moves on to attaching four more pieces onto these main frames, completing two pairs of flanges for the bulkhead hatches.The Final Touches
While two flanges form the primary support structure around the hatches, Sven mentions there are two additional pieces required at each end to ensure comprehensive protection. This attention to detail highlights his commitment to producing a durable and reliable design. “Sailing is about finding your path, whether it’s across an ocean or within yourself.” – Sven Yrvind In conclusion, making flanges around bulkhead hatches may seem complex at first glance, but by following Sven Yrvind’s meticulous process, enthusiasts can achieve professional-level results. Remember that the journey of boatbuilding is as rewarding as reaching your destination; it tests one’s patience and dedication. For those seeking to embark on this adventure or simply gain more insight into marine craftsmanship, Sven’s wisdom is invaluable.Sven Yrvind, a renowned yacht designer and sailor, shares valuable insights on creating flanges around bulkhead hatches for canvas protection in this enlightening video. By following his expert guidance, boat enthusiasts can ensure their living areas remain secure while allowing unhindered access through the hatches.Step 1: Starting with the Flange
Sven begins by explaining that working on flanges vertically and horizontally is significantly easier than doing so in a flat position. To simplify the process further, he divides the task into two or three steps as suggested by fellow expert “for for.” This approach not only makes it more manageable but also allows for greater precision in crafting each component.Step 2: Applying Glue and Securing
Sven proceeds to apply glue along one edge of the flange, ensuring a secure bond when clamped into place. He emphasizes that this stage is crucial for maintaining the structural integrity of the flange, which in turn safeguards the living area beneath the canvas when hatches are open.Step 3: Allowing Time to Dry
After securely attaching the first portion of the flange, Sven allows ample time for it to dry before moving forward with additional steps. This patience and precision are key aspects of his successful boatbuilding methods.Step 4: Finishing Touches
Once the flange is fully dried, Sven removes the clamps carefully, ensuring no damage occurs during this process. He then moves on to attaching four more pieces onto these main frames, completing two pairs of flanges for the bulkhead hatches.The Final Touches
While two flanges form the primary support structure around the hatches, Sven mentions there are two additional pieces required at each end to ensure comprehensive protection. This attention to detail highlights his commitment to producing a durable and reliable design. “Sailing is about finding your path, whether it’s across an ocean or within yourself.” – Sven Yrvind In conclusion, making flanges around bulkhead hatches may seem complex at first glance, but by following Sven Yrvind’s meticulous process, enthusiasts can achieve professional-level results. Remember that the journey of boatbuilding is as rewarding as reaching your destination; it tests one’s patience and dedication. For those seeking to embark on this adventure or simply gain more insight into marine craftsmanship, Sven’s wisdom is invaluable.Making Flanges Around Bulkhead Hatches for Canvas
Sven Yrvind, a renowned yacht designer and sailor, shares valuable insights on creating flanges around bulkhead hatches for canvas protection in this enlightening video. By following his expert guidance, boat enthusiasts can ensure their living areas remain secure while allowing unhindered access through the hatches.Step 1: Starting with the Flange
Sven begins by explaining that working on flanges vertically and horizontally is significantly easier than doing so in a flat position. To simplify the process further, he divides the task into two or three steps as suggested by fellow expert “for for.” This approach not only makes it more manageable but also allows for greater precision in crafting each component.Step 2: Applying Glue and Securing
Sven proceeds to apply glue along one edge of the flange, ensuring a secure bond when clamped into place. He emphasizes that this stage is crucial for maintaining the structural integrity of the flange, which in turn safeguards the living area beneath the canvas when hatches are open.Step 3: Allowing Time to Dry
After securely attaching the first portion of the flange, Sven allows ample time for it to dry before moving forward with additional steps. This patience and precision are key aspects of his successful boatbuilding methods.Step 4: Finishing Touches
Once the flange is fully dried, Sven removes the clamps carefully, ensuring no damage occurs during this process. He then moves on to attaching four more pieces onto these main frames, completing two pairs of flanges for the bulkhead hatches.The Final Touches
While two flanges form the primary support structure around the hatches, Sven mentions there are two additional pieces required at each end to ensure comprehensive protection. This attention to detail highlights his commitment to producing a durable and reliable design. “Sailing is about finding your path, whether it’s across an ocean or within yourself.” – Sven Yrvind In conclusion, making flanges around bulkhead hatches may seem complex at first glance, but by following Sven Yrvind’s meticulous process, enthusiasts can achieve professional-level results. Remember that the journey of boatbuilding is as rewarding as reaching your destination; it tests one’s patience and dedication. For those seeking to embark on this adventure or simply gain more insight into marine craftsmanship, Sven’s wisdom is invaluable.After securely attaching the first portion of the flange, Sven allows ample time for it to dry before moving forward with additional steps. This patience and precision are key aspects of his successful boatbuilding methods.Step 4: Finishing Touches
Once the flange is fully dried, Sven removes the clamps carefully, ensuring no damage occurs during this process. He then moves on to attaching four more pieces onto these main frames, completing two pairs of flanges for the bulkhead hatches.The Final Touches
While two flanges form the primary support structure around the hatches, Sven mentions there are two additional pieces required at each end to ensure comprehensive protection. This attention to detail highlights his commitment to producing a durable and reliable design. “Sailing is about finding your path, whether it’s across an ocean or within yourself.” – Sven Yrvind In conclusion, making flanges around bulkhead hatches may seem complex at first glance, but by following Sven Yrvind’s meticulous process, enthusiasts can achieve professional-level results. Remember that the journey of boatbuilding is as rewarding as reaching your destination; it tests one’s patience and dedication. For those seeking to embark on this adventure or simply gain more insight into marine craftsmanship, Sven’s wisdom is invaluable.Sven begins by explaining that working on flanges vertically and horizontally is significantly easier than doing so in a flat position. To simplify the process further, he divides the task into two or three steps as suggested by fellow expert “for for.” This approach not only makes it more manageable but also allows for greater precision in crafting each component.Step 2: Applying Glue and Securing
Sven proceeds to apply glue along one edge of the flange, ensuring a secure bond when clamped into place. He emphasizes that this stage is crucial for maintaining the structural integrity of the flange, which in turn safeguards the living area beneath the canvas when hatches are open.Step 3: Allowing Time to Dry
After securely attaching the first portion of the flange, Sven allows ample time for it to dry before moving forward with additional steps. This patience and precision are key aspects of his successful boatbuilding methods.Step 4: Finishing Touches
Once the flange is fully dried, Sven removes the clamps carefully, ensuring no damage occurs during this process. He then moves on to attaching four more pieces onto these main frames, completing two pairs of flanges for the bulkhead hatches.The Final Touches
While two flanges form the primary support structure around the hatches, Sven mentions there are two additional pieces required at each end to ensure comprehensive protection. This attention to detail highlights his commitment to producing a durable and reliable design. “Sailing is about finding your path, whether it’s across an ocean or within yourself.” – Sven Yrvind In conclusion, making flanges around bulkhead hatches may seem complex at first glance, but by following Sven Yrvind’s meticulous process, enthusiasts can achieve professional-level results. Remember that the journey of boatbuilding is as rewarding as reaching your destination; it tests one’s patience and dedication. For those seeking to embark on this adventure or simply gain more insight into marine craftsmanship, Sven’s wisdom is invaluable.Sven Yrvind, a renowned yacht designer and sailor, shares valuable insights on creating flanges around bulkhead hatches for canvas protection in this enlightening video. By following his expert guidance, boat enthusiasts can ensure their living areas remain secure while allowing unhindered access through the hatches.Step 1: Starting with the Flange
Sven begins by explaining that working on flanges vertically and horizontally is significantly easier than doing so in a flat position. To simplify the process further, he divides the task into two or three steps as suggested by fellow expert “for for.” This approach not only makes it more manageable but also allows for greater precision in crafting each component.Step 2: Applying Glue and Securing
Sven proceeds to apply glue along one edge of the flange, ensuring a secure bond when clamped into place. He emphasizes that this stage is crucial for maintaining the structural integrity of the flange, which in turn safeguards the living area beneath the canvas when hatches are open.Step 3: Allowing Time to Dry
After securely attaching the first portion of the flange, Sven allows ample time for it to dry before moving forward with additional steps. This patience and precision are key aspects of his successful boatbuilding methods.Step 4: Finishing Touches
Once the flange is fully dried, Sven removes the clamps carefully, ensuring no damage occurs during this process. He then moves on to attaching four more pieces onto these main frames, completing two pairs of flanges for the bulkhead hatches.The Final Touches
While two flanges form the primary support structure around the hatches, Sven mentions there are two additional pieces required at each end to ensure comprehensive protection. This attention to detail highlights his commitment to producing a durable and reliable design. “Sailing is about finding your path, whether it’s across an ocean or within yourself.” – Sven Yrvind In conclusion, making flanges around bulkhead hatches may seem complex at first glance, but by following Sven Yrvind’s meticulous process, enthusiasts can achieve professional-level results. Remember that the journey of boatbuilding is as rewarding as reaching your destination; it tests one’s patience and dedication. For those seeking to embark on this adventure or simply gain more insight into marine craftsmanship, Sven’s wisdom is invaluable.Making Flanges Around Bulkhead Hatches for Canvas
Sven Yrvind, a renowned yacht designer and sailor, shares valuable insights on creating flanges around bulkhead hatches for canvas protection in this enlightening video. By following his expert guidance, boat enthusiasts can ensure their living areas remain secure while allowing unhindered access through the hatches.Step 1: Starting with the Flange
Sven begins by explaining that working on flanges vertically and horizontally is significantly easier than doing so in a flat position. To simplify the process further, he divides the task into two or three steps as suggested by fellow expert “for for.” This approach not only makes it more manageable but also allows for greater precision in crafting each component.Step 2: Applying Glue and Securing
Sven proceeds to apply glue along one edge of the flange, ensuring a secure bond when clamped into place. He emphasizes that this stage is crucial for maintaining the structural integrity of the flange, which in turn safeguards the living area beneath the canvas when hatches are open.Step 3: Allowing Time to Dry
After securely attaching the first portion of the flange, Sven allows ample time for it to dry before moving forward with additional steps. This patience and precision are key aspects of his successful boatbuilding methods.Step 4: Finishing Touches
Once the flange is fully dried, Sven removes the clamps carefully, ensuring no damage occurs during this process. He then moves on to attaching four more pieces onto these main frames, completing two pairs of flanges for the bulkhead hatches.The Final Touches
While two flanges form the primary support structure around the hatches, Sven mentions there are two additional pieces required at each end to ensure comprehensive protection. This attention to detail highlights his commitment to producing a durable and reliable design. “Sailing is about finding your path, whether it’s across an ocean or within yourself.” – Sven Yrvind In conclusion, making flanges around bulkhead hatches may seem complex at first glance, but by following Sven Yrvind’s meticulous process, enthusiasts can achieve professional-level results. Remember that the journey of boatbuilding is as rewarding as reaching your destination; it tests one’s patience and dedication. For those seeking to embark on this adventure or simply gain more insight into marine craftsmanship, Sven’s wisdom is invaluable.Sven proceeds to apply glue along one edge of the flange, ensuring a secure bond when clamped into place. He emphasizes that this stage is crucial for maintaining the structural integrity of the flange, which in turn safeguards the living area beneath the canvas when hatches are open.Step 3: Allowing Time to Dry
After securely attaching the first portion of the flange, Sven allows ample time for it to dry before moving forward with additional steps. This patience and precision are key aspects of his successful boatbuilding methods.Step 4: Finishing Touches
Once the flange is fully dried, Sven removes the clamps carefully, ensuring no damage occurs during this process. He then moves on to attaching four more pieces onto these main frames, completing two pairs of flanges for the bulkhead hatches.The Final Touches
While two flanges form the primary support structure around the hatches, Sven mentions there are two additional pieces required at each end to ensure comprehensive protection. This attention to detail highlights his commitment to producing a durable and reliable design. “Sailing is about finding your path, whether it’s across an ocean or within yourself.” – Sven Yrvind In conclusion, making flanges around bulkhead hatches may seem complex at first glance, but by following Sven Yrvind’s meticulous process, enthusiasts can achieve professional-level results. Remember that the journey of boatbuilding is as rewarding as reaching your destination; it tests one’s patience and dedication. For those seeking to embark on this adventure or simply gain more insight into marine craftsmanship, Sven’s wisdom is invaluable.Sven begins by explaining that working on flanges vertically and horizontally is significantly easier than doing so in a flat position. To simplify the process further, he divides the task into two or three steps as suggested by fellow expert “for for.” This approach not only makes it more manageable but also allows for greater precision in crafting each component.Step 2: Applying Glue and Securing
Sven proceeds to apply glue along one edge of the flange, ensuring a secure bond when clamped into place. He emphasizes that this stage is crucial for maintaining the structural integrity of the flange, which in turn safeguards the living area beneath the canvas when hatches are open.Step 3: Allowing Time to Dry
After securely attaching the first portion of the flange, Sven allows ample time for it to dry before moving forward with additional steps. This patience and precision are key aspects of his successful boatbuilding methods.Step 4: Finishing Touches
Once the flange is fully dried, Sven removes the clamps carefully, ensuring no damage occurs during this process. He then moves on to attaching four more pieces onto these main frames, completing two pairs of flanges for the bulkhead hatches.The Final Touches
While two flanges form the primary support structure around the hatches, Sven mentions there are two additional pieces required at each end to ensure comprehensive protection. This attention to detail highlights his commitment to producing a durable and reliable design. “Sailing is about finding your path, whether it’s across an ocean or within yourself.” – Sven Yrvind In conclusion, making flanges around bulkhead hatches may seem complex at first glance, but by following Sven Yrvind’s meticulous process, enthusiasts can achieve professional-level results. Remember that the journey of boatbuilding is as rewarding as reaching your destination; it tests one’s patience and dedication. For those seeking to embark on this adventure or simply gain more insight into marine craftsmanship, Sven’s wisdom is invaluable.Sven Yrvind, a renowned yacht designer and sailor, shares valuable insights on creating flanges around bulkhead hatches for canvas protection in this enlightening video. By following his expert guidance, boat enthusiasts can ensure their living areas remain secure while allowing unhindered access through the hatches.Step 1: Starting with the Flange
Sven begins by explaining that working on flanges vertically and horizontally is significantly easier than doing so in a flat position. To simplify the process further, he divides the task into two or three steps as suggested by fellow expert “for for.” This approach not only makes it more manageable but also allows for greater precision in crafting each component.Step 2: Applying Glue and Securing
Sven proceeds to apply glue along one edge of the flange, ensuring a secure bond when clamped into place. He emphasizes that this stage is crucial for maintaining the structural integrity of the flange, which in turn safeguards the living area beneath the canvas when hatches are open.Step 3: Allowing Time to Dry
After securely attaching the first portion of the flange, Sven allows ample time for it to dry before moving forward with additional steps. This patience and precision are key aspects of his successful boatbuilding methods.Step 4: Finishing Touches
Once the flange is fully dried, Sven removes the clamps carefully, ensuring no damage occurs during this process. He then moves on to attaching four more pieces onto these main frames, completing two pairs of flanges for the bulkhead hatches.The Final Touches
While two flanges form the primary support structure around the hatches, Sven mentions there are two additional pieces required at each end to ensure comprehensive protection. This attention to detail highlights his commitment to producing a durable and reliable design. “Sailing is about finding your path, whether it’s across an ocean or within yourself.” – Sven Yrvind In conclusion, making flanges around bulkhead hatches may seem complex at first glance, but by following Sven Yrvind’s meticulous process, enthusiasts can achieve professional-level results. Remember that the journey of boatbuilding is as rewarding as reaching your destination; it tests one’s patience and dedication. For those seeking to embark on this adventure or simply gain more insight into marine craftsmanship, Sven’s wisdom is invaluable.Making Flanges Around Bulkhead Hatches for Canvas
Sven Yrvind, a renowned yacht designer and sailor, shares valuable insights on creating flanges around bulkhead hatches for canvas protection in this enlightening video. By following his expert guidance, boat enthusiasts can ensure their living areas remain secure while allowing unhindered access through the hatches.Step 1: Starting with the Flange
Sven begins by explaining that working on flanges vertically and horizontally is significantly easier than doing so in a flat position. To simplify the process further, he divides the task into two or three steps as suggested by fellow expert “for for.” This approach not only makes it more manageable but also allows for greater precision in crafting each component.Step 2: Applying Glue and Securing
Sven proceeds to apply glue along one edge of the flange, ensuring a secure bond when clamped into place. He emphasizes that this stage is crucial for maintaining the structural integrity of the flange, which in turn safeguards the living area beneath the canvas when hatches are open.Step 3: Allowing Time to Dry
After securely attaching the first portion of the flange, Sven allows ample time for it to dry before moving forward with additional steps. This patience and precision are key aspects of his successful boatbuilding methods.Step 4: Finishing Touches
Once the flange is fully dried, Sven removes the clamps carefully, ensuring no damage occurs during this process. He then moves on to attaching four more pieces onto these main frames, completing two pairs of flanges for the bulkhead hatches.The Final Touches
While two flanges form the primary support structure around the hatches, Sven mentions there are two additional pieces required at each end to ensure comprehensive protection. This attention to detail highlights his commitment to producing a durable and reliable design. “Sailing is about finding your path, whether it’s across an ocean or within yourself.” – Sven Yrvind In conclusion, making flanges around bulkhead hatches may seem complex at first glance, but by following Sven Yrvind’s meticulous process, enthusiasts can achieve professional-level results. Remember that the journey of boatbuilding is as rewarding as reaching your destination; it tests one’s patience and dedication. For those seeking to embark on this adventure or simply gain more insight into marine craftsmanship, Sven’s wisdom is invaluable.Once the flange is fully dried, Sven removes the clamps carefully, ensuring no damage occurs during this process. He then moves on to attaching four more pieces onto these main frames, completing two pairs of flanges for the bulkhead hatches.The Final Touches
While two flanges form the primary support structure around the hatches, Sven mentions there are two additional pieces required at each end to ensure comprehensive protection. This attention to detail highlights his commitment to producing a durable and reliable design. “Sailing is about finding your path, whether it’s across an ocean or within yourself.” – Sven Yrvind In conclusion, making flanges around bulkhead hatches may seem complex at first glance, but by following Sven Yrvind’s meticulous process, enthusiasts can achieve professional-level results. Remember that the journey of boatbuilding is as rewarding as reaching your destination; it tests one’s patience and dedication. For those seeking to embark on this adventure or simply gain more insight into marine craftsmanship, Sven’s wisdom is invaluable.Sven proceeds to apply glue along one edge of the flange, ensuring a secure bond when clamped into place. He emphasizes that this stage is crucial for maintaining the structural integrity of the flange, which in turn safeguards the living area beneath the canvas when hatches are open.Step 3: Allowing Time to Dry
After securely attaching the first portion of the flange, Sven allows ample time for it to dry before moving forward with additional steps. This patience and precision are key aspects of his successful boatbuilding methods.Step 4: Finishing Touches
Once the flange is fully dried, Sven removes the clamps carefully, ensuring no damage occurs during this process. He then moves on to attaching four more pieces onto these main frames, completing two pairs of flanges for the bulkhead hatches.The Final Touches
While two flanges form the primary support structure around the hatches, Sven mentions there are two additional pieces required at each end to ensure comprehensive protection. This attention to detail highlights his commitment to producing a durable and reliable design. “Sailing is about finding your path, whether it’s across an ocean or within yourself.” – Sven Yrvind In conclusion, making flanges around bulkhead hatches may seem complex at first glance, but by following Sven Yrvind’s meticulous process, enthusiasts can achieve professional-level results. Remember that the journey of boatbuilding is as rewarding as reaching your destination; it tests one’s patience and dedication. For those seeking to embark on this adventure or simply gain more insight into marine craftsmanship, Sven’s wisdom is invaluable.Sven begins by explaining that working on flanges vertically and horizontally is significantly easier than doing so in a flat position. To simplify the process further, he divides the task into two or three steps as suggested by fellow expert “for for.” This approach not only makes it more manageable but also allows for greater precision in crafting each component.Step 2: Applying Glue and Securing
Sven proceeds to apply glue along one edge of the flange, ensuring a secure bond when clamped into place. He emphasizes that this stage is crucial for maintaining the structural integrity of the flange, which in turn safeguards the living area beneath the canvas when hatches are open.Step 3: Allowing Time to Dry
After securely attaching the first portion of the flange, Sven allows ample time for it to dry before moving forward with additional steps. This patience and precision are key aspects of his successful boatbuilding methods.Step 4: Finishing Touches
Once the flange is fully dried, Sven removes the clamps carefully, ensuring no damage occurs during this process. He then moves on to attaching four more pieces onto these main frames, completing two pairs of flanges for the bulkhead hatches.The Final Touches
While two flanges form the primary support structure around the hatches, Sven mentions there are two additional pieces required at each end to ensure comprehensive protection. This attention to detail highlights his commitment to producing a durable and reliable design. “Sailing is about finding your path, whether it’s across an ocean or within yourself.” – Sven Yrvind In conclusion, making flanges around bulkhead hatches may seem complex at first glance, but by following Sven Yrvind’s meticulous process, enthusiasts can achieve professional-level results. Remember that the journey of boatbuilding is as rewarding as reaching your destination; it tests one’s patience and dedication. For those seeking to embark on this adventure or simply gain more insight into marine craftsmanship, Sven’s wisdom is invaluable.Sven Yrvind, a renowned yacht designer and sailor, shares valuable insights on creating flanges around bulkhead hatches for canvas protection in this enlightening video. By following his expert guidance, boat enthusiasts can ensure their living areas remain secure while allowing unhindered access through the hatches.Step 1: Starting with the Flange
Sven begins by explaining that working on flanges vertically and horizontally is significantly easier than doing so in a flat position. To simplify the process further, he divides the task into two or three steps as suggested by fellow expert “for for.” This approach not only makes it more manageable but also allows for greater precision in crafting each component.Step 2: Applying Glue and Securing
Sven proceeds to apply glue along one edge of the flange, ensuring a secure bond when clamped into place. He emphasizes that this stage is crucial for maintaining the structural integrity of the flange, which in turn safeguards the living area beneath the canvas when hatches are open.Step 3: Allowing Time to Dry
After securely attaching the first portion of the flange, Sven allows ample time for it to dry before moving forward with additional steps. This patience and precision are key aspects of his successful boatbuilding methods.Step 4: Finishing Touches
Once the flange is fully dried, Sven removes the clamps carefully, ensuring no damage occurs during this process. He then moves on to attaching four more pieces onto these main frames, completing two pairs of flanges for the bulkhead hatches.The Final Touches
While two flanges form the primary support structure around the hatches, Sven mentions there are two additional pieces required at each end to ensure comprehensive protection. This attention to detail highlights his commitment to producing a durable and reliable design. “Sailing is about finding your path, whether it’s across an ocean or within yourself.” – Sven Yrvind In conclusion, making flanges around bulkhead hatches may seem complex at first glance, but by following Sven Yrvind’s meticulous process, enthusiasts can achieve professional-level results. Remember that the journey of boatbuilding is as rewarding as reaching your destination; it tests one’s patience and dedication. For those seeking to embark on this adventure or simply gain more insight into marine craftsmanship, Sven’s wisdom is invaluable.Making Flanges Around Bulkhead Hatches for Canvas
Sven Yrvind, a renowned yacht designer and sailor, shares valuable insights on creating flanges around bulkhead hatches for canvas protection in this enlightening video. By following his expert guidance, boat enthusiasts can ensure their living areas remain secure while allowing unhindered access through the hatches.Step 1: Starting with the Flange
Sven begins by explaining that working on flanges vertically and horizontally is significantly easier than doing so in a flat position. To simplify the process further, he divides the task into two or three steps as suggested by fellow expert “for for.” This approach not only makes it more manageable but also allows for greater precision in crafting each component.Step 2: Applying Glue and Securing
Sven proceeds to apply glue along one edge of the flange, ensuring a secure bond when clamped into place. He emphasizes that this stage is crucial for maintaining the structural integrity of the flange, which in turn safeguards the living area beneath the canvas when hatches are open.Step 3: Allowing Time to Dry
After securely attaching the first portion of the flange, Sven allows ample time for it to dry before moving forward with additional steps. This patience and precision are key aspects of his successful boatbuilding methods.Step 4: Finishing Touches
Once the flange is fully dried, Sven removes the clamps carefully, ensuring no damage occurs during this process. He then moves on to attaching four more pieces onto these main frames, completing two pairs of flanges for the bulkhead hatches.The Final Touches
While two flanges form the primary support structure around the hatches, Sven mentions there are two additional pieces required at each end to ensure comprehensive protection. This attention to detail highlights his commitment to producing a durable and reliable design. “Sailing is about finding your path, whether it’s across an ocean or within yourself.” – Sven Yrvind In conclusion, making flanges around bulkhead hatches may seem complex at first glance, but by following Sven Yrvind’s meticulous process, enthusiasts can achieve professional-level results. Remember that the journey of boatbuilding is as rewarding as reaching your destination; it tests one’s patience and dedication. For those seeking to embark on this adventure or simply gain more insight into marine craftsmanship, Sven’s wisdom is invaluable.After securely attaching the first portion of the flange, Sven allows ample time for it to dry before moving forward with additional steps. This patience and precision are key aspects of his successful boatbuilding methods.Step 4: Finishing Touches
Once the flange is fully dried, Sven removes the clamps carefully, ensuring no damage occurs during this process. He then moves on to attaching four more pieces onto these main frames, completing two pairs of flanges for the bulkhead hatches.The Final Touches
While two flanges form the primary support structure around the hatches, Sven mentions there are two additional pieces required at each end to ensure comprehensive protection. This attention to detail highlights his commitment to producing a durable and reliable design. “Sailing is about finding your path, whether it’s across an ocean or within yourself.” – Sven Yrvind In conclusion, making flanges around bulkhead hatches may seem complex at first glance, but by following Sven Yrvind’s meticulous process, enthusiasts can achieve professional-level results. Remember that the journey of boatbuilding is as rewarding as reaching your destination; it tests one’s patience and dedication. For those seeking to embark on this adventure or simply gain more insight into marine craftsmanship, Sven’s wisdom is invaluable.Sven proceeds to apply glue along one edge of the flange, ensuring a secure bond when clamped into place. He emphasizes that this stage is crucial for maintaining the structural integrity of the flange, which in turn safeguards the living area beneath the canvas when hatches are open.Step 3: Allowing Time to Dry
After securely attaching the first portion of the flange, Sven allows ample time for it to dry before moving forward with additional steps. This patience and precision are key aspects of his successful boatbuilding methods.Step 4: Finishing Touches
Once the flange is fully dried, Sven removes the clamps carefully, ensuring no damage occurs during this process. He then moves on to attaching four more pieces onto these main frames, completing two pairs of flanges for the bulkhead hatches.The Final Touches
While two flanges form the primary support structure around the hatches, Sven mentions there are two additional pieces required at each end to ensure comprehensive protection. This attention to detail highlights his commitment to producing a durable and reliable design. “Sailing is about finding your path, whether it’s across an ocean or within yourself.” – Sven Yrvind In conclusion, making flanges around bulkhead hatches may seem complex at first glance, but by following Sven Yrvind’s meticulous process, enthusiasts can achieve professional-level results. Remember that the journey of boatbuilding is as rewarding as reaching your destination; it tests one’s patience and dedication. For those seeking to embark on this adventure or simply gain more insight into marine craftsmanship, Sven’s wisdom is invaluable.Sven begins by explaining that working on flanges vertically and horizontally is significantly easier than doing so in a flat position. To simplify the process further, he divides the task into two or three steps as suggested by fellow expert “for for.” This approach not only makes it more manageable but also allows for greater precision in crafting each component.Step 2: Applying Glue and Securing
Sven proceeds to apply glue along one edge of the flange, ensuring a secure bond when clamped into place. He emphasizes that this stage is crucial for maintaining the structural integrity of the flange, which in turn safeguards the living area beneath the canvas when hatches are open.Step 3: Allowing Time to Dry
After securely attaching the first portion of the flange, Sven allows ample time for it to dry before moving forward with additional steps. This patience and precision are key aspects of his successful boatbuilding methods.Step 4: Finishing Touches
Once the flange is fully dried, Sven removes the clamps carefully, ensuring no damage occurs during this process. He then moves on to attaching four more pieces onto these main frames, completing two pairs of flanges for the bulkhead hatches.The Final Touches
While two flanges form the primary support structure around the hatches, Sven mentions there are two additional pieces required at each end to ensure comprehensive protection. This attention to detail highlights his commitment to producing a durable and reliable design. “Sailing is about finding your path, whether it’s across an ocean or within yourself.” – Sven Yrvind In conclusion, making flanges around bulkhead hatches may seem complex at first glance, but by following Sven Yrvind’s meticulous process, enthusiasts can achieve professional-level results. Remember that the journey of boatbuilding is as rewarding as reaching your destination; it tests one’s patience and dedication. For those seeking to embark on this adventure or simply gain more insight into marine craftsmanship, Sven’s wisdom is invaluable.Sven Yrvind, a renowned yacht designer and sailor, shares valuable insights on creating flanges around bulkhead hatches for canvas protection in this enlightening video. By following his expert guidance, boat enthusiasts can ensure their living areas remain secure while allowing unhindered access through the hatches.Step 1: Starting with the Flange
Sven begins by explaining that working on flanges vertically and horizontally is significantly easier than doing so in a flat position. To simplify the process further, he divides the task into two or three steps as suggested by fellow expert “for for.” This approach not only makes it more manageable but also allows for greater precision in crafting each component.Step 2: Applying Glue and Securing
Sven proceeds to apply glue along one edge of the flange, ensuring a secure bond when clamped into place. He emphasizes that this stage is crucial for maintaining the structural integrity of the flange, which in turn safeguards the living area beneath the canvas when hatches are open.Step 3: Allowing Time to Dry
After securely attaching the first portion of the flange, Sven allows ample time for it to dry before moving forward with additional steps. This patience and precision are key aspects of his successful boatbuilding methods.Step 4: Finishing Touches
Once the flange is fully dried, Sven removes the clamps carefully, ensuring no damage occurs during this process. He then moves on to attaching four more pieces onto these main frames, completing two pairs of flanges for the bulkhead hatches.The Final Touches
While two flanges form the primary support structure around the hatches, Sven mentions there are two additional pieces required at each end to ensure comprehensive protection. This attention to detail highlights his commitment to producing a durable and reliable design. “Sailing is about finding your path, whether it’s across an ocean or within yourself.” – Sven Yrvind In conclusion, making flanges around bulkhead hatches may seem complex at first glance, but by following Sven Yrvind’s meticulous process, enthusiasts can achieve professional-level results. Remember that the journey of boatbuilding is as rewarding as reaching your destination; it tests one’s patience and dedication. For those seeking to embark on this adventure or simply gain more insight into marine craftsmanship, Sven’s wisdom is invaluable.Making Flanges Around Bulkhead Hatches for Canvas
Sven Yrvind, a renowned yacht designer and sailor, shares valuable insights on creating flanges around bulkhead hatches for canvas protection in this enlightening video. By following his expert guidance, boat enthusiasts can ensure their living areas remain secure while allowing unhindered access through the hatches.Step 1: Starting with the Flange
Sven begins by explaining that working on flanges vertically and horizontally is significantly easier than doing so in a flat position. To simplify the process further, he divides the task into two or three steps as suggested by fellow expert “for for.” This approach not only makes it more manageable but also allows for greater precision in crafting each component.Step 2: Applying Glue and Securing
Sven proceeds to apply glue along one edge of the flange, ensuring a secure bond when clamped into place. He emphasizes that this stage is crucial for maintaining the structural integrity of the flange, which in turn safeguards the living area beneath the canvas when hatches are open.Step 3: Allowing Time to Dry
After securely attaching the first portion of the flange, Sven allows ample time for it to dry before moving forward with additional steps. This patience and precision are key aspects of his successful boatbuilding methods.Step 4: Finishing Touches
Once the flange is fully dried, Sven removes the clamps carefully, ensuring no damage occurs during this process. He then moves on to attaching four more pieces onto these main frames, completing two pairs of flanges for the bulkhead hatches.The Final Touches
While two flanges form the primary support structure around the hatches, Sven mentions there are two additional pieces required at each end to ensure comprehensive protection. This attention to detail highlights his commitment to producing a durable and reliable design. “Sailing is about finding your path, whether it’s across an ocean or within yourself.” – Sven Yrvind In conclusion, making flanges around bulkhead hatches may seem complex at first glance, but by following Sven Yrvind’s meticulous process, enthusiasts can achieve professional-level results. Remember that the journey of boatbuilding is as rewarding as reaching your destination; it tests one’s patience and dedication. For those seeking to embark on this adventure or simply gain more insight into marine craftsmanship, Sven’s wisdom is invaluable.Once the flange is fully dried, Sven removes the clamps carefully, ensuring no damage occurs during this process. He then moves on to attaching four more pieces onto these main frames, completing two pairs of flanges for the bulkhead hatches.The Final Touches
While two flanges form the primary support structure around the hatches, Sven mentions there are two additional pieces required at each end to ensure comprehensive protection. This attention to detail highlights his commitment to producing a durable and reliable design. “Sailing is about finding your path, whether it’s across an ocean or within yourself.” – Sven Yrvind In conclusion, making flanges around bulkhead hatches may seem complex at first glance, but by following Sven Yrvind’s meticulous process, enthusiasts can achieve professional-level results. Remember that the journey of boatbuilding is as rewarding as reaching your destination; it tests one’s patience and dedication. For those seeking to embark on this adventure or simply gain more insight into marine craftsmanship, Sven’s wisdom is invaluable.After securely attaching the first portion of the flange, Sven allows ample time for it to dry before moving forward with additional steps. This patience and precision are key aspects of his successful boatbuilding methods.Step 4: Finishing Touches
Once the flange is fully dried, Sven removes the clamps carefully, ensuring no damage occurs during this process. He then moves on to attaching four more pieces onto these main frames, completing two pairs of flanges for the bulkhead hatches.The Final Touches
While two flanges form the primary support structure around the hatches, Sven mentions there are two additional pieces required at each end to ensure comprehensive protection. This attention to detail highlights his commitment to producing a durable and reliable design. “Sailing is about finding your path, whether it’s across an ocean or within yourself.” – Sven Yrvind In conclusion, making flanges around bulkhead hatches may seem complex at first glance, but by following Sven Yrvind’s meticulous process, enthusiasts can achieve professional-level results. Remember that the journey of boatbuilding is as rewarding as reaching your destination; it tests one’s patience and dedication. For those seeking to embark on this adventure or simply gain more insight into marine craftsmanship, Sven’s wisdom is invaluable.Sven proceeds to apply glue along one edge of the flange, ensuring a secure bond when clamped into place. He emphasizes that this stage is crucial for maintaining the structural integrity of the flange, which in turn safeguards the living area beneath the canvas when hatches are open.Step 3: Allowing Time to Dry
After securely attaching the first portion of the flange, Sven allows ample time for it to dry before moving forward with additional steps. This patience and precision are key aspects of his successful boatbuilding methods.Step 4: Finishing Touches
Once the flange is fully dried, Sven removes the clamps carefully, ensuring no damage occurs during this process. He then moves on to attaching four more pieces onto these main frames, completing two pairs of flanges for the bulkhead hatches.The Final Touches
While two flanges form the primary support structure around the hatches, Sven mentions there are two additional pieces required at each end to ensure comprehensive protection. This attention to detail highlights his commitment to producing a durable and reliable design. “Sailing is about finding your path, whether it’s across an ocean or within yourself.” – Sven Yrvind In conclusion, making flanges around bulkhead hatches may seem complex at first glance, but by following Sven Yrvind’s meticulous process, enthusiasts can achieve professional-level results. Remember that the journey of boatbuilding is as rewarding as reaching your destination; it tests one’s patience and dedication. For those seeking to embark on this adventure or simply gain more insight into marine craftsmanship, Sven’s wisdom is invaluable.Sven begins by explaining that working on flanges vertically and horizontally is significantly easier than doing so in a flat position. To simplify the process further, he divides the task into two or three steps as suggested by fellow expert “for for.” This approach not only makes it more manageable but also allows for greater precision in crafting each component.Step 2: Applying Glue and Securing
Sven proceeds to apply glue along one edge of the flange, ensuring a secure bond when clamped into place. He emphasizes that this stage is crucial for maintaining the structural integrity of the flange, which in turn safeguards the living area beneath the canvas when hatches are open.Step 3: Allowing Time to Dry
After securely attaching the first portion of the flange, Sven allows ample time for it to dry before moving forward with additional steps. This patience and precision are key aspects of his successful boatbuilding methods.Step 4: Finishing Touches
Once the flange is fully dried, Sven removes the clamps carefully, ensuring no damage occurs during this process. He then moves on to attaching four more pieces onto these main frames, completing two pairs of flanges for the bulkhead hatches.The Final Touches
While two flanges form the primary support structure around the hatches, Sven mentions there are two additional pieces required at each end to ensure comprehensive protection. This attention to detail highlights his commitment to producing a durable and reliable design. “Sailing is about finding your path, whether it’s across an ocean or within yourself.” – Sven Yrvind In conclusion, making flanges around bulkhead hatches may seem complex at first glance, but by following Sven Yrvind’s meticulous process, enthusiasts can achieve professional-level results. Remember that the journey of boatbuilding is as rewarding as reaching your destination; it tests one’s patience and dedication. For those seeking to embark on this adventure or simply gain more insight into marine craftsmanship, Sven’s wisdom is invaluable.Sven Yrvind, a renowned yacht designer and sailor, shares valuable insights on creating flanges around bulkhead hatches for canvas protection in this enlightening video. By following his expert guidance, boat enthusiasts can ensure their living areas remain secure while allowing unhindered access through the hatches.Step 1: Starting with the Flange
Sven begins by explaining that working on flanges vertically and horizontally is significantly easier than doing so in a flat position. To simplify the process further, he divides the task into two or three steps as suggested by fellow expert “for for.” This approach not only makes it more manageable but also allows for greater precision in crafting each component.Step 2: Applying Glue and Securing
Sven proceeds to apply glue along one edge of the flange, ensuring a secure bond when clamped into place. He emphasizes that this stage is crucial for maintaining the structural integrity of the flange, which in turn safeguards the living area beneath the canvas when hatches are open.Step 3: Allowing Time to Dry
After securely attaching the first portion of the flange, Sven allows ample time for it to dry before moving forward with additional steps. This patience and precision are key aspects of his successful boatbuilding methods.Step 4: Finishing Touches
Once the flange is fully dried, Sven removes the clamps carefully, ensuring no damage occurs during this process. He then moves on to attaching four more pieces onto these main frames, completing two pairs of flanges for the bulkhead hatches.The Final Touches
While two flanges form the primary support structure around the hatches, Sven mentions there are two additional pieces required at each end to ensure comprehensive protection. This attention to detail highlights his commitment to producing a durable and reliable design. “Sailing is about finding your path, whether it’s across an ocean or within yourself.” – Sven Yrvind In conclusion, making flanges around bulkhead hatches may seem complex at first glance, but by following Sven Yrvind’s meticulous process, enthusiasts can achieve professional-level results. Remember that the journey of boatbuilding is as rewarding as reaching your destination; it tests one’s patience and dedication. For those seeking to embark on this adventure or simply gain more insight into marine craftsmanship, Sven’s wisdom is invaluable.Making Flanges Around Bulkhead Hatches for Canvas
Sven Yrvind, a renowned yacht designer and sailor, shares valuable insights on creating flanges around bulkhead hatches for canvas protection in this enlightening video. By following his expert guidance, boat enthusiasts can ensure their living areas remain secure while allowing unhindered access through the hatches.Step 1: Starting with the Flange
Sven begins by explaining that working on flanges vertically and horizontally is significantly easier than doing so in a flat position. To simplify the process further, he divides the task into two or three steps as suggested by fellow expert “for for.” This approach not only makes it more manageable but also allows for greater precision in crafting each component.Step 2: Applying Glue and Securing
Sven proceeds to apply glue along one edge of the flange, ensuring a secure bond when clamped into place. He emphasizes that this stage is crucial for maintaining the structural integrity of the flange, which in turn safeguards the living area beneath the canvas when hatches are open.Step 3: Allowing Time to Dry
After securely attaching the first portion of the flange, Sven allows ample time for it to dry before moving forward with additional steps. This patience and precision are key aspects of his successful boatbuilding methods.Step 4: Finishing Touches
Once the flange is fully dried, Sven removes the clamps carefully, ensuring no damage occurs during this process. He then moves on to attaching four more pieces onto these main frames, completing two pairs of flanges for the bulkhead hatches.The Final Touches
While two flanges form the primary support structure around the hatches, Sven mentions there are two additional pieces required at each end to ensure comprehensive protection. This attention to detail highlights his commitment to producing a durable and reliable design. “Sailing is about finding your path, whether it’s across an ocean or within yourself.” – Sven Yrvind In conclusion, making flanges around bulkhead hatches may seem complex at first glance, but by following Sven Yrvind’s meticulous process, enthusiasts can achieve professional-level results. Remember that the journey of boatbuilding is as rewarding as reaching your destination; it tests one’s patience and dedication. For those seeking to embark on this adventure or simply gain more insight into marine craftsmanship, Sven’s wisdom is invaluable.Sven proceeds to apply glue along one edge of the flange, ensuring a secure bond when clamped into place. He emphasizes that this stage is crucial for maintaining the structural integrity of the flange, which in turn safeguards the living area beneath the canvas when hatches are open.Step 3: Allowing Time to Dry
After securely attaching the first portion of the flange, Sven allows ample time for it to dry before moving forward with additional steps. This patience and precision are key aspects of his successful boatbuilding methods.Step 4: Finishing Touches
Once the flange is fully dried, Sven removes the clamps carefully, ensuring no damage occurs during this process. He then moves on to attaching four more pieces onto these main frames, completing two pairs of flanges for the bulkhead hatches.The Final Touches
While two flanges form the primary support structure around the hatches, Sven mentions there are two additional pieces required at each end to ensure comprehensive protection. This attention to detail highlights his commitment to producing a durable and reliable design. “Sailing is about finding your path, whether it’s across an ocean or within yourself.” – Sven Yrvind In conclusion, making flanges around bulkhead hatches may seem complex at first glance, but by following Sven Yrvind’s meticulous process, enthusiasts can achieve professional-level results. Remember that the journey of boatbuilding is as rewarding as reaching your destination; it tests one’s patience and dedication. For those seeking to embark on this adventure or simply gain more insight into marine craftsmanship, Sven’s wisdom is invaluable.Making Flanges Around Bulkhead Hatches for Canvas
Sven Yrvind, a renowned yacht designer and sailor, shares valuable insights on creating flanges around bulkhead hatches for canvas protection in this enlightening video. By following his expert guidance, boat enthusiasts can ensure their living areas remain secure while allowing unhindered access through the hatches.Step 1: Starting with the Flange
Sven begins by explaining that working on flanges vertically and horizontally is significantly easier than doing so in a flat position. To simplify the process further, he divides the task into two or three steps as suggested by fellow expert “for for.” This approach not only makes it more manageable but also allows for greater precision in crafting each component.Step 2: Applying Glue and Securing
Sven proceeds to apply glue along one edge of the flange, ensuring a secure bond when clamped into place. He emphasizes that this stage is crucial for maintaining the structural integrity of the flange, which in turn safeguards the living area beneath the canvas when hatches are open.Step 3: Allowing Time to Dry
After securely attaching the first portion of the flange, Sven allows ample time for it to dry before moving forward with additional steps. This patience and precision are key aspects of his successful boatbuilding methods.Step 4: Finishing Touches
Once the flange is fully dried, Sven removes the clamps carefully, ensuring no damage occurs during this process. He then moves on to attaching four more pieces onto these main frames, completing two pairs of flanges for the bulkhead hatches.The Final Touches
While two flanges form the primary support structure around the hatches, Sven mentions there are two additional pieces required at each end to ensure comprehensive protection. This attention to detail highlights his commitment to producing a durable and reliable design. “Sailing is about finding your path, whether it’s across an ocean or within yourself.” – Sven Yrvind In conclusion, making flanges around bulkhead hatches may seem complex at first glance, but by following Sven Yrvind’s meticulous process, enthusiasts can achieve professional-level results. Remember that the journey of boatbuilding is as rewarding as reaching your destination; it tests one’s patience and dedication. For those seeking to embark on this adventure or simply gain more insight into marine craftsmanship, Sven’s wisdom is invaluable.Once the flange is fully dried, Sven removes the clamps carefully, ensuring no damage occurs during this process. He then moves on to attaching four more pieces onto these main frames, completing two pairs of flanges for the bulkhead hatches.The Final Touches
While two flanges form the primary support structure around the hatches, Sven mentions there are two additional pieces required at each end to ensure comprehensive protection. This attention to detail highlights his commitment to producing a durable and reliable design. “Sailing is about finding your path, whether it’s across an ocean or within yourself.” – Sven Yrvind In conclusion, making flanges around bulkhead hatches may seem complex at first glance, but by following Sven Yrvind’s meticulous process, enthusiasts can achieve professional-level results. Remember that the journey of boatbuilding is as rewarding as reaching your destination; it tests one’s patience and dedication. For those seeking to embark on this adventure or simply gain more insight into marine craftsmanship, Sven’s wisdom is invaluable.Sven begins by explaining that working on flanges vertically and horizontally is significantly easier than doing so in a flat position. To simplify the process further, he divides the task into two or three steps as suggested by fellow expert “for for.” This approach not only makes it more manageable but also allows for greater precision in crafting each component.Step 2: Applying Glue and Securing
Sven proceeds to apply glue along one edge of the flange, ensuring a secure bond when clamped into place. He emphasizes that this stage is crucial for maintaining the structural integrity of the flange, which in turn safeguards the living area beneath the canvas when hatches are open.Step 3: Allowing Time to Dry
After securely attaching the first portion of the flange, Sven allows ample time for it to dry before moving forward with additional steps. This patience and precision are key aspects of his successful boatbuilding methods.Step 4: Finishing Touches
Once the flange is fully dried, Sven removes the clamps carefully, ensuring no damage occurs during this process. He then moves on to attaching four more pieces onto these main frames, completing two pairs of flanges for the bulkhead hatches.The Final Touches
While two flanges form the primary support structure around the hatches, Sven mentions there are two additional pieces required at each end to ensure comprehensive protection. This attention to detail highlights his commitment to producing a durable and reliable design. “Sailing is about finding your path, whether it’s across an ocean or within yourself.” – Sven Yrvind In conclusion, making flanges around bulkhead hatches may seem complex at first glance, but by following Sven Yrvind’s meticulous process, enthusiasts can achieve professional-level results. Remember that the journey of boatbuilding is as rewarding as reaching your destination; it tests one’s patience and dedication. For those seeking to embark on this adventure or simply gain more insight into marine craftsmanship, Sven’s wisdom is invaluable.Sven Yrvind, a renowned yacht designer and sailor, shares valuable insights on creating flanges around bulkhead hatches for canvas protection in this enlightening video. By following his expert guidance, boat enthusiasts can ensure their living areas remain secure while allowing unhindered access through the hatches.Step 1: Starting with the Flange
Sven begins by explaining that working on flanges vertically and horizontally is significantly easier than doing so in a flat position. To simplify the process further, he divides the task into two or three steps as suggested by fellow expert “for for.” This approach not only makes it more manageable but also allows for greater precision in crafting each component.Step 2: Applying Glue and Securing
Sven proceeds to apply glue along one edge of the flange, ensuring a secure bond when clamped into place. He emphasizes that this stage is crucial for maintaining the structural integrity of the flange, which in turn safeguards the living area beneath the canvas when hatches are open.Step 3: Allowing Time to Dry
After securely attaching the first portion of the flange, Sven allows ample time for it to dry before moving forward with additional steps. This patience and precision are key aspects of his successful boatbuilding methods.Step 4: Finishing Touches
Once the flange is fully dried, Sven removes the clamps carefully, ensuring no damage occurs during this process. He then moves on to attaching four more pieces onto these main frames, completing two pairs of flanges for the bulkhead hatches.The Final Touches
While two flanges form the primary support structure around the hatches, Sven mentions there are two additional pieces required at each end to ensure comprehensive protection. This attention to detail highlights his commitment to producing a durable and reliable design. “Sailing is about finding your path, whether it’s across an ocean or within yourself.” – Sven Yrvind In conclusion, making flanges around bulkhead hatches may seem complex at first glance, but by following Sven Yrvind’s meticulous process, enthusiasts can achieve professional-level results. Remember that the journey of boatbuilding is as rewarding as reaching your destination; it tests one’s patience and dedication. For those seeking to embark on this adventure or simply gain more insight into marine craftsmanship, Sven’s wisdom is invaluable.Making Flanges Around Bulkhead Hatches for Canvas
Sven Yrvind, a renowned yacht designer and sailor, shares valuable insights on creating flanges around bulkhead hatches for canvas protection in this enlightening video. By following his expert guidance, boat enthusiasts can ensure their living areas remain secure while allowing unhindered access through the hatches.Step 1: Starting with the Flange
Sven begins by explaining that working on flanges vertically and horizontally is significantly easier than doing so in a flat position. To simplify the process further, he divides the task into two or three steps as suggested by fellow expert “for for.” This approach not only makes it more manageable but also allows for greater precision in crafting each component.Step 2: Applying Glue and Securing
Sven proceeds to apply glue along one edge of the flange, ensuring a secure bond when clamped into place. He emphasizes that this stage is crucial for maintaining the structural integrity of the flange, which in turn safeguards the living area beneath the canvas when hatches are open.Step 3: Allowing Time to Dry
After securely attaching the first portion of the flange, Sven allows ample time for it to dry before moving forward with additional steps. This patience and precision are key aspects of his successful boatbuilding methods.Step 4: Finishing Touches
Once the flange is fully dried, Sven removes the clamps carefully, ensuring no damage occurs during this process. He then moves on to attaching four more pieces onto these main frames, completing two pairs of flanges for the bulkhead hatches.The Final Touches
While two flanges form the primary support structure around the hatches, Sven mentions there are two additional pieces required at each end to ensure comprehensive protection. This attention to detail highlights his commitment to producing a durable and reliable design. “Sailing is about finding your path, whether it’s across an ocean or within yourself.” – Sven Yrvind In conclusion, making flanges around bulkhead hatches may seem complex at first glance, but by following Sven Yrvind’s meticulous process, enthusiasts can achieve professional-level results. Remember that the journey of boatbuilding is as rewarding as reaching your destination; it tests one’s patience and dedication. For those seeking to embark on this adventure or simply gain more insight into marine craftsmanship, Sven’s wisdom is invaluable.After securely attaching the first portion of the flange, Sven allows ample time for it to dry before moving forward with additional steps. This patience and precision are key aspects of his successful boatbuilding methods.Step 4: Finishing Touches
Once the flange is fully dried, Sven removes the clamps carefully, ensuring no damage occurs during this process. He then moves on to attaching four more pieces onto these main frames, completing two pairs of flanges for the bulkhead hatches.The Final Touches
While two flanges form the primary support structure around the hatches, Sven mentions there are two additional pieces required at each end to ensure comprehensive protection. This attention to detail highlights his commitment to producing a durable and reliable design. “Sailing is about finding your path, whether it’s across an ocean or within yourself.” – Sven Yrvind In conclusion, making flanges around bulkhead hatches may seem complex at first glance, but by following Sven Yrvind’s meticulous process, enthusiasts can achieve professional-level results. Remember that the journey of boatbuilding is as rewarding as reaching your destination; it tests one’s patience and dedication. For those seeking to embark on this adventure or simply gain more insight into marine craftsmanship, Sven’s wisdom is invaluable.Sven begins by explaining that working on flanges vertically and horizontally is significantly easier than doing so in a flat position. To simplify the process further, he divides the task into two or three steps as suggested by fellow expert “for for.” This approach not only makes it more manageable but also allows for greater precision in crafting each component.Step 2: Applying Glue and Securing
Sven proceeds to apply glue along one edge of the flange, ensuring a secure bond when clamped into place. He emphasizes that this stage is crucial for maintaining the structural integrity of the flange, which in turn safeguards the living area beneath the canvas when hatches are open.Step 3: Allowing Time to Dry
After securely attaching the first portion of the flange, Sven allows ample time for it to dry before moving forward with additional steps. This patience and precision are key aspects of his successful boatbuilding methods.Step 4: Finishing Touches
Once the flange is fully dried, Sven removes the clamps carefully, ensuring no damage occurs during this process. He then moves on to attaching four more pieces onto these main frames, completing two pairs of flanges for the bulkhead hatches.The Final Touches
While two flanges form the primary support structure around the hatches, Sven mentions there are two additional pieces required at each end to ensure comprehensive protection. This attention to detail highlights his commitment to producing a durable and reliable design. “Sailing is about finding your path, whether it’s across an ocean or within yourself.” – Sven Yrvind In conclusion, making flanges around bulkhead hatches may seem complex at first glance, but by following Sven Yrvind’s meticulous process, enthusiasts can achieve professional-level results. Remember that the journey of boatbuilding is as rewarding as reaching your destination; it tests one’s patience and dedication. For those seeking to embark on this adventure or simply gain more insight into marine craftsmanship, Sven’s wisdom is invaluable.Sven Yrvind, a renowned yacht designer and sailor, shares valuable insights on creating flanges around bulkhead hatches for canvas protection in this enlightening video. By following his expert guidance, boat enthusiasts can ensure their living areas remain secure while allowing unhindered access through the hatches.Step 1: Starting with the Flange
Sven begins by explaining that working on flanges vertically and horizontally is significantly easier than doing so in a flat position. To simplify the process further, he divides the task into two or three steps as suggested by fellow expert “for for.” This approach not only makes it more manageable but also allows for greater precision in crafting each component.Step 2: Applying Glue and Securing
Sven proceeds to apply glue along one edge of the flange, ensuring a secure bond when clamped into place. He emphasizes that this stage is crucial for maintaining the structural integrity of the flange, which in turn safeguards the living area beneath the canvas when hatches are open.Step 3: Allowing Time to Dry
After securely attaching the first portion of the flange, Sven allows ample time for it to dry before moving forward with additional steps. This patience and precision are key aspects of his successful boatbuilding methods.Step 4: Finishing Touches
Once the flange is fully dried, Sven removes the clamps carefully, ensuring no damage occurs during this process. He then moves on to attaching four more pieces onto these main frames, completing two pairs of flanges for the bulkhead hatches.The Final Touches
While two flanges form the primary support structure around the hatches, Sven mentions there are two additional pieces required at each end to ensure comprehensive protection. This attention to detail highlights his commitment to producing a durable and reliable design. “Sailing is about finding your path, whether it’s across an ocean or within yourself.” – Sven Yrvind In conclusion, making flanges around bulkhead hatches may seem complex at first glance, but by following Sven Yrvind’s meticulous process, enthusiasts can achieve professional-level results. Remember that the journey of boatbuilding is as rewarding as reaching your destination; it tests one’s patience and dedication. For those seeking to embark on this adventure or simply gain more insight into marine craftsmanship, Sven’s wisdom is invaluable.Making Flanges Around Bulkhead Hatches for Canvas
Sven Yrvind, a renowned yacht designer and sailor, shares valuable insights on creating flanges around bulkhead hatches for canvas protection in this enlightening video. By following his expert guidance, boat enthusiasts can ensure their living areas remain secure while allowing unhindered access through the hatches.Step 1: Starting with the Flange
Sven begins by explaining that working on flanges vertically and horizontally is significantly easier than doing so in a flat position. To simplify the process further, he divides the task into two or three steps as suggested by fellow expert “for for.” This approach not only makes it more manageable but also allows for greater precision in crafting each component.Step 2: Applying Glue and Securing
Sven proceeds to apply glue along one edge of the flange, ensuring a secure bond when clamped into place. He emphasizes that this stage is crucial for maintaining the structural integrity of the flange, which in turn safeguards the living area beneath the canvas when hatches are open.Step 3: Allowing Time to Dry
After securely attaching the first portion of the flange, Sven allows ample time for it to dry before moving forward with additional steps. This patience and precision are key aspects of his successful boatbuilding methods.Step 4: Finishing Touches
Once the flange is fully dried, Sven removes the clamps carefully, ensuring no damage occurs during this process. He then moves on to attaching four more pieces onto these main frames, completing two pairs of flanges for the bulkhead hatches.The Final Touches
While two flanges form the primary support structure around the hatches, Sven mentions there are two additional pieces required at each end to ensure comprehensive protection. This attention to detail highlights his commitment to producing a durable and reliable design. “Sailing is about finding your path, whether it’s across an ocean or within yourself.” – Sven Yrvind In conclusion, making flanges around bulkhead hatches may seem complex at first glance, but by following Sven Yrvind’s meticulous process, enthusiasts can achieve professional-level results. Remember that the journey of boatbuilding is as rewarding as reaching your destination; it tests one’s patience and dedication. For those seeking to embark on this adventure or simply gain more insight into marine craftsmanship, Sven’s wisdom is invaluable.Sven proceeds to apply glue along one edge of the flange, ensuring a secure bond when clamped into place. He emphasizes that this stage is crucial for maintaining the structural integrity of the flange, which in turn safeguards the living area beneath the canvas when hatches are open.Step 3: Allowing Time to Dry
After securely attaching the first portion of the flange, Sven allows ample time for it to dry before moving forward with additional steps. This patience and precision are key aspects of his successful boatbuilding methods.Step 4: Finishing Touches
Once the flange is fully dried, Sven removes the clamps carefully, ensuring no damage occurs during this process. He then moves on to attaching four more pieces onto these main frames, completing two pairs of flanges for the bulkhead hatches.The Final Touches
While two flanges form the primary support structure around the hatches, Sven mentions there are two additional pieces required at each end to ensure comprehensive protection. This attention to detail highlights his commitment to producing a durable and reliable design. “Sailing is about finding your path, whether it’s across an ocean or within yourself.” – Sven Yrvind In conclusion, making flanges around bulkhead hatches may seem complex at first glance, but by following Sven Yrvind’s meticulous process, enthusiasts can achieve professional-level results. Remember that the journey of boatbuilding is as rewarding as reaching your destination; it tests one’s patience and dedication. For those seeking to embark on this adventure or simply gain more insight into marine craftsmanship, Sven’s wisdom is invaluable.Sven begins by explaining that working on flanges vertically and horizontally is significantly easier than doing so in a flat position. To simplify the process further, he divides the task into two or three steps as suggested by fellow expert “for for.” This approach not only makes it more manageable but also allows for greater precision in crafting each component.Step 2: Applying Glue and Securing
Sven proceeds to apply glue along one edge of the flange, ensuring a secure bond when clamped into place. He emphasizes that this stage is crucial for maintaining the structural integrity of the flange, which in turn safeguards the living area beneath the canvas when hatches are open.Step 3: Allowing Time to Dry
After securely attaching the first portion of the flange, Sven allows ample time for it to dry before moving forward with additional steps. This patience and precision are key aspects of his successful boatbuilding methods.Step 4: Finishing Touches
Once the flange is fully dried, Sven removes the clamps carefully, ensuring no damage occurs during this process. He then moves on to attaching four more pieces onto these main frames, completing two pairs of flanges for the bulkhead hatches.The Final Touches
While two flanges form the primary support structure around the hatches, Sven mentions there are two additional pieces required at each end to ensure comprehensive protection. This attention to detail highlights his commitment to producing a durable and reliable design. “Sailing is about finding your path, whether it’s across an ocean or within yourself.” – Sven Yrvind In conclusion, making flanges around bulkhead hatches may seem complex at first glance, but by following Sven Yrvind’s meticulous process, enthusiasts can achieve professional-level results. Remember that the journey of boatbuilding is as rewarding as reaching your destination; it tests one’s patience and dedication. For those seeking to embark on this adventure or simply gain more insight into marine craftsmanship, Sven’s wisdom is invaluable.Sven Yrvind, a renowned yacht designer and sailor, shares valuable insights on creating flanges around bulkhead hatches for canvas protection in this enlightening video. By following his expert guidance, boat enthusiasts can ensure their living areas remain secure while allowing unhindered access through the hatches.Step 1: Starting with the Flange
Sven begins by explaining that working on flanges vertically and horizontally is significantly easier than doing so in a flat position. To simplify the process further, he divides the task into two or three steps as suggested by fellow expert “for for.” This approach not only makes it more manageable but also allows for greater precision in crafting each component.Step 2: Applying Glue and Securing
Sven proceeds to apply glue along one edge of the flange, ensuring a secure bond when clamped into place. He emphasizes that this stage is crucial for maintaining the structural integrity of the flange, which in turn safeguards the living area beneath the canvas when hatches are open.Step 3: Allowing Time to Dry
After securely attaching the first portion of the flange, Sven allows ample time for it to dry before moving forward with additional steps. This patience and precision are key aspects of his successful boatbuilding methods.Step 4: Finishing Touches
Once the flange is fully dried, Sven removes the clamps carefully, ensuring no damage occurs during this process. He then moves on to attaching four more pieces onto these main frames, completing two pairs of flanges for the bulkhead hatches.The Final Touches
While two flanges form the primary support structure around the hatches, Sven mentions there are two additional pieces required at each end to ensure comprehensive protection. This attention to detail highlights his commitment to producing a durable and reliable design. “Sailing is about finding your path, whether it’s across an ocean or within yourself.” – Sven Yrvind In conclusion, making flanges around bulkhead hatches may seem complex at first glance, but by following Sven Yrvind’s meticulous process, enthusiasts can achieve professional-level results. Remember that the journey of boatbuilding is as rewarding as reaching your destination; it tests one’s patience and dedication. For those seeking to embark on this adventure or simply gain more insight into marine craftsmanship, Sven’s wisdom is invaluable.Making Flanges Around Bulkhead Hatches for Canvas
Sven Yrvind, a renowned yacht designer and sailor, shares valuable insights on creating flanges around bulkhead hatches for canvas protection in this enlightening video. By following his expert guidance, boat enthusiasts can ensure their living areas remain secure while allowing unhindered access through the hatches.Step 1: Starting with the Flange
Sven begins by explaining that working on flanges vertically and horizontally is significantly easier than doing so in a flat position. To simplify the process further, he divides the task into two or three steps as suggested by fellow expert “for for.” This approach not only makes it more manageable but also allows for greater precision in crafting each component.Step 2: Applying Glue and Securing
Sven proceeds to apply glue along one edge of the flange, ensuring a secure bond when clamped into place. He emphasizes that this stage is crucial for maintaining the structural integrity of the flange, which in turn safeguards the living area beneath the canvas when hatches are open.Step 3: Allowing Time to Dry
After securely attaching the first portion of the flange, Sven allows ample time for it to dry before moving forward with additional steps. This patience and precision are key aspects of his successful boatbuilding methods.Step 4: Finishing Touches
Once the flange is fully dried, Sven removes the clamps carefully, ensuring no damage occurs during this process. He then moves on to attaching four more pieces onto these main frames, completing two pairs of flanges for the bulkhead hatches.The Final Touches
While two flanges form the primary support structure around the hatches, Sven mentions there are two additional pieces required at each end to ensure comprehensive protection. This attention to detail highlights his commitment to producing a durable and reliable design. “Sailing is about finding your path, whether it’s across an ocean or within yourself.” – Sven Yrvind In conclusion, making flanges around bulkhead hatches may seem complex at first glance, but by following Sven Yrvind’s meticulous process, enthusiasts can achieve professional-level results. Remember that the journey of boatbuilding is as rewarding as reaching your destination; it tests one’s patience and dedication. For those seeking to embark on this adventure or simply gain more insight into marine craftsmanship, Sven’s wisdom is invaluable.Once the flange is fully dried, Sven removes the clamps carefully, ensuring no damage occurs during this process. He then moves on to attaching four more pieces onto these main frames, completing two pairs of flanges for the bulkhead hatches.The Final Touches
While two flanges form the primary support structure around the hatches, Sven mentions there are two additional pieces required at each end to ensure comprehensive protection. This attention to detail highlights his commitment to producing a durable and reliable design. “Sailing is about finding your path, whether it’s across an ocean or within yourself.” – Sven Yrvind In conclusion, making flanges around bulkhead hatches may seem complex at first glance, but by following Sven Yrvind’s meticulous process, enthusiasts can achieve professional-level results. Remember that the journey of boatbuilding is as rewarding as reaching your destination; it tests one’s patience and dedication. For those seeking to embark on this adventure or simply gain more insight into marine craftsmanship, Sven’s wisdom is invaluable.Sven proceeds to apply glue along one edge of the flange, ensuring a secure bond when clamped into place. He emphasizes that this stage is crucial for maintaining the structural integrity of the flange, which in turn safeguards the living area beneath the canvas when hatches are open.Step 3: Allowing Time to Dry
After securely attaching the first portion of the flange, Sven allows ample time for it to dry before moving forward with additional steps. This patience and precision are key aspects of his successful boatbuilding methods.Step 4: Finishing Touches
Once the flange is fully dried, Sven removes the clamps carefully, ensuring no damage occurs during this process. He then moves on to attaching four more pieces onto these main frames, completing two pairs of flanges for the bulkhead hatches.The Final Touches
While two flanges form the primary support structure around the hatches, Sven mentions there are two additional pieces required at each end to ensure comprehensive protection. This attention to detail highlights his commitment to producing a durable and reliable design. “Sailing is about finding your path, whether it’s across an ocean or within yourself.” – Sven Yrvind In conclusion, making flanges around bulkhead hatches may seem complex at first glance, but by following Sven Yrvind’s meticulous process, enthusiasts can achieve professional-level results. Remember that the journey of boatbuilding is as rewarding as reaching your destination; it tests one’s patience and dedication. For those seeking to embark on this adventure or simply gain more insight into marine craftsmanship, Sven’s wisdom is invaluable.Sven begins by explaining that working on flanges vertically and horizontally is significantly easier than doing so in a flat position. To simplify the process further, he divides the task into two or three steps as suggested by fellow expert “for for.” This approach not only makes it more manageable but also allows for greater precision in crafting each component.Step 2: Applying Glue and Securing
Sven proceeds to apply glue along one edge of the flange, ensuring a secure bond when clamped into place. He emphasizes that this stage is crucial for maintaining the structural integrity of the flange, which in turn safeguards the living area beneath the canvas when hatches are open.Step 3: Allowing Time to Dry
After securely attaching the first portion of the flange, Sven allows ample time for it to dry before moving forward with additional steps. This patience and precision are key aspects of his successful boatbuilding methods.Step 4: Finishing Touches
Once the flange is fully dried, Sven removes the clamps carefully, ensuring no damage occurs during this process. He then moves on to attaching four more pieces onto these main frames, completing two pairs of flanges for the bulkhead hatches.The Final Touches
While two flanges form the primary support structure around the hatches, Sven mentions there are two additional pieces required at each end to ensure comprehensive protection. This attention to detail highlights his commitment to producing a durable and reliable design. “Sailing is about finding your path, whether it’s across an ocean or within yourself.” – Sven Yrvind In conclusion, making flanges around bulkhead hatches may seem complex at first glance, but by following Sven Yrvind’s meticulous process, enthusiasts can achieve professional-level results. Remember that the journey of boatbuilding is as rewarding as reaching your destination; it tests one’s patience and dedication. For those seeking to embark on this adventure or simply gain more insight into marine craftsmanship, Sven’s wisdom is invaluable.Sven Yrvind, a renowned yacht designer and sailor, shares valuable insights on creating flanges around bulkhead hatches for canvas protection in this enlightening video. By following his expert guidance, boat enthusiasts can ensure their living areas remain secure while allowing unhindered access through the hatches.Step 1: Starting with the Flange
Sven begins by explaining that working on flanges vertically and horizontally is significantly easier than doing so in a flat position. To simplify the process further, he divides the task into two or three steps as suggested by fellow expert “for for.” This approach not only makes it more manageable but also allows for greater precision in crafting each component.Step 2: Applying Glue and Securing
Sven proceeds to apply glue along one edge of the flange, ensuring a secure bond when clamped into place. He emphasizes that this stage is crucial for maintaining the structural integrity of the flange, which in turn safeguards the living area beneath the canvas when hatches are open.Step 3: Allowing Time to Dry
After securely attaching the first portion of the flange, Sven allows ample time for it to dry before moving forward with additional steps. This patience and precision are key aspects of his successful boatbuilding methods.Step 4: Finishing Touches
Once the flange is fully dried, Sven removes the clamps carefully, ensuring no damage occurs during this process. He then moves on to attaching four more pieces onto these main frames, completing two pairs of flanges for the bulkhead hatches.The Final Touches
While two flanges form the primary support structure around the hatches, Sven mentions there are two additional pieces required at each end to ensure comprehensive protection. This attention to detail highlights his commitment to producing a durable and reliable design. “Sailing is about finding your path, whether it’s across an ocean or within yourself.” – Sven Yrvind In conclusion, making flanges around bulkhead hatches may seem complex at first glance, but by following Sven Yrvind’s meticulous process, enthusiasts can achieve professional-level results. Remember that the journey of boatbuilding is as rewarding as reaching your destination; it tests one’s patience and dedication. For those seeking to embark on this adventure or simply gain more insight into marine craftsmanship, Sven’s wisdom is invaluable.Making Flanges Around Bulkhead Hatches for Canvas
Sven Yrvind, a renowned yacht designer and sailor, shares valuable insights on creating flanges around bulkhead hatches for canvas protection in this enlightening video. By following his expert guidance, boat enthusiasts can ensure their living areas remain secure while allowing unhindered access through the hatches.Step 1: Starting with the Flange
Sven begins by explaining that working on flanges vertically and horizontally is significantly easier than doing so in a flat position. To simplify the process further, he divides the task into two or three steps as suggested by fellow expert “for for.” This approach not only makes it more manageable but also allows for greater precision in crafting each component.Step 2: Applying Glue and Securing
Sven proceeds to apply glue along one edge of the flange, ensuring a secure bond when clamped into place. He emphasizes that this stage is crucial for maintaining the structural integrity of the flange, which in turn safeguards the living area beneath the canvas when hatches are open.Step 3: Allowing Time to Dry
After securely attaching the first portion of the flange, Sven allows ample time for it to dry before moving forward with additional steps. This patience and precision are key aspects of his successful boatbuilding methods.Step 4: Finishing Touches
Once the flange is fully dried, Sven removes the clamps carefully, ensuring no damage occurs during this process. He then moves on to attaching four more pieces onto these main frames, completing two pairs of flanges for the bulkhead hatches.The Final Touches
While two flanges form the primary support structure around the hatches, Sven mentions there are two additional pieces required at each end to ensure comprehensive protection. This attention to detail highlights his commitment to producing a durable and reliable design. “Sailing is about finding your path, whether it’s across an ocean or within yourself.” – Sven Yrvind In conclusion, making flanges around bulkhead hatches may seem complex at first glance, but by following Sven Yrvind’s meticulous process, enthusiasts can achieve professional-level results. Remember that the journey of boatbuilding is as rewarding as reaching your destination; it tests one’s patience and dedication. For those seeking to embark on this adventure or simply gain more insight into marine craftsmanship, Sven’s wisdom is invaluable.After securely attaching the first portion of the flange, Sven allows ample time for it to dry before moving forward with additional steps. This patience and precision are key aspects of his successful boatbuilding methods.Step 4: Finishing Touches
Once the flange is fully dried, Sven removes the clamps carefully, ensuring no damage occurs during this process. He then moves on to attaching four more pieces onto these main frames, completing two pairs of flanges for the bulkhead hatches.The Final Touches
While two flanges form the primary support structure around the hatches, Sven mentions there are two additional pieces required at each end to ensure comprehensive protection. This attention to detail highlights his commitment to producing a durable and reliable design. “Sailing is about finding your path, whether it’s across an ocean or within yourself.” – Sven Yrvind In conclusion, making flanges around bulkhead hatches may seem complex at first glance, but by following Sven Yrvind’s meticulous process, enthusiasts can achieve professional-level results. Remember that the journey of boatbuilding is as rewarding as reaching your destination; it tests one’s patience and dedication. For those seeking to embark on this adventure or simply gain more insight into marine craftsmanship, Sven’s wisdom is invaluable.Sven proceeds to apply glue along one edge of the flange, ensuring a secure bond when clamped into place. He emphasizes that this stage is crucial for maintaining the structural integrity of the flange, which in turn safeguards the living area beneath the canvas when hatches are open.Step 3: Allowing Time to Dry
After securely attaching the first portion of the flange, Sven allows ample time for it to dry before moving forward with additional steps. This patience and precision are key aspects of his successful boatbuilding methods.Step 4: Finishing Touches
Once the flange is fully dried, Sven removes the clamps carefully, ensuring no damage occurs during this process. He then moves on to attaching four more pieces onto these main frames, completing two pairs of flanges for the bulkhead hatches.The Final Touches
While two flanges form the primary support structure around the hatches, Sven mentions there are two additional pieces required at each end to ensure comprehensive protection. This attention to detail highlights his commitment to producing a durable and reliable design. “Sailing is about finding your path, whether it’s across an ocean or within yourself.” – Sven Yrvind In conclusion, making flanges around bulkhead hatches may seem complex at first glance, but by following Sven Yrvind’s meticulous process, enthusiasts can achieve professional-level results. Remember that the journey of boatbuilding is as rewarding as reaching your destination; it tests one’s patience and dedication. For those seeking to embark on this adventure or simply gain more insight into marine craftsmanship, Sven’s wisdom is invaluable.Sven begins by explaining that working on flanges vertically and horizontally is significantly easier than doing so in a flat position. To simplify the process further, he divides the task into two or three steps as suggested by fellow expert “for for.” This approach not only makes it more manageable but also allows for greater precision in crafting each component.Step 2: Applying Glue and Securing
Sven proceeds to apply glue along one edge of the flange, ensuring a secure bond when clamped into place. He emphasizes that this stage is crucial for maintaining the structural integrity of the flange, which in turn safeguards the living area beneath the canvas when hatches are open.Step 3: Allowing Time to Dry
After securely attaching the first portion of the flange, Sven allows ample time for it to dry before moving forward with additional steps. This patience and precision are key aspects of his successful boatbuilding methods.Step 4: Finishing Touches
Once the flange is fully dried, Sven removes the clamps carefully, ensuring no damage occurs during this process. He then moves on to attaching four more pieces onto these main frames, completing two pairs of flanges for the bulkhead hatches.The Final Touches
While two flanges form the primary support structure around the hatches, Sven mentions there are two additional pieces required at each end to ensure comprehensive protection. This attention to detail highlights his commitment to producing a durable and reliable design. “Sailing is about finding your path, whether it’s across an ocean or within yourself.” – Sven Yrvind In conclusion, making flanges around bulkhead hatches may seem complex at first glance, but by following Sven Yrvind’s meticulous process, enthusiasts can achieve professional-level results. Remember that the journey of boatbuilding is as rewarding as reaching your destination; it tests one’s patience and dedication. For those seeking to embark on this adventure or simply gain more insight into marine craftsmanship, Sven’s wisdom is invaluable.Sven Yrvind, a renowned yacht designer and sailor, shares valuable insights on creating flanges around bulkhead hatches for canvas protection in this enlightening video. By following his expert guidance, boat enthusiasts can ensure their living areas remain secure while allowing unhindered access through the hatches.Step 1: Starting with the Flange
Sven begins by explaining that working on flanges vertically and horizontally is significantly easier than doing so in a flat position. To simplify the process further, he divides the task into two or three steps as suggested by fellow expert “for for.” This approach not only makes it more manageable but also allows for greater precision in crafting each component.Step 2: Applying Glue and Securing
Sven proceeds to apply glue along one edge of the flange, ensuring a secure bond when clamped into place. He emphasizes that this stage is crucial for maintaining the structural integrity of the flange, which in turn safeguards the living area beneath the canvas when hatches are open.Step 3: Allowing Time to Dry
After securely attaching the first portion of the flange, Sven allows ample time for it to dry before moving forward with additional steps. This patience and precision are key aspects of his successful boatbuilding methods.Step 4: Finishing Touches
Once the flange is fully dried, Sven removes the clamps carefully, ensuring no damage occurs during this process. He then moves on to attaching four more pieces onto these main frames, completing two pairs of flanges for the bulkhead hatches.The Final Touches
While two flanges form the primary support structure around the hatches, Sven mentions there are two additional pieces required at each end to ensure comprehensive protection. This attention to detail highlights his commitment to producing a durable and reliable design. “Sailing is about finding your path, whether it’s across an ocean or within yourself.” – Sven Yrvind In conclusion, making flanges around bulkhead hatches may seem complex at first glance, but by following Sven Yrvind’s meticulous process, enthusiasts can achieve professional-level results. Remember that the journey of boatbuilding is as rewarding as reaching your destination; it tests one’s patience and dedication. For those seeking to embark on this adventure or simply gain more insight into marine craftsmanship, Sven’s wisdom is invaluable.Making Flanges Around Bulkhead Hatches for Canvas
Sven Yrvind, a renowned yacht designer and sailor, shares valuable insights on creating flanges around bulkhead hatches for canvas protection in this enlightening video. By following his expert guidance, boat enthusiasts can ensure their living areas remain secure while allowing unhindered access through the hatches.Step 1: Starting with the Flange
Sven begins by explaining that working on flanges vertically and horizontally is significantly easier than doing so in a flat position. To simplify the process further, he divides the task into two or three steps as suggested by fellow expert “for for.” This approach not only makes it more manageable but also allows for greater precision in crafting each component.Step 2: Applying Glue and Securing
Sven proceeds to apply glue along one edge of the flange, ensuring a secure bond when clamped into place. He emphasizes that this stage is crucial for maintaining the structural integrity of the flange, which in turn safeguards the living area beneath the canvas when hatches are open.Step 3: Allowing Time to Dry
After securely attaching the first portion of the flange, Sven allows ample time for it to dry before moving forward with additional steps. This patience and precision are key aspects of his successful boatbuilding methods.Step 4: Finishing Touches
Once the flange is fully dried, Sven removes the clamps carefully, ensuring no damage occurs during this process. He then moves on to attaching four more pieces onto these main frames, completing two pairs of flanges for the bulkhead hatches.The Final Touches
While two flanges form the primary support structure around the hatches, Sven mentions there are two additional pieces required at each end to ensure comprehensive protection. This attention to detail highlights his commitment to producing a durable and reliable design. “Sailing is about finding your path, whether it’s across an ocean or within yourself.” – Sven Yrvind In conclusion, making flanges around bulkhead hatches may seem complex at first glance, but by following Sven Yrvind’s meticulous process, enthusiasts can achieve professional-level results. Remember that the journey of boatbuilding is as rewarding as reaching your destination; it tests one’s patience and dedication. For those seeking to embark on this adventure or simply gain more insight into marine craftsmanship, Sven’s wisdom is invaluable.Once the flange is fully dried, Sven removes the clamps carefully, ensuring no damage occurs during this process. He then moves on to attaching four more pieces onto these main frames, completing two pairs of flanges for the bulkhead hatches.The Final Touches
While two flanges form the primary support structure around the hatches, Sven mentions there are two additional pieces required at each end to ensure comprehensive protection. This attention to detail highlights his commitment to producing a durable and reliable design. “Sailing is about finding your path, whether it’s across an ocean or within yourself.” – Sven Yrvind In conclusion, making flanges around bulkhead hatches may seem complex at first glance, but by following Sven Yrvind’s meticulous process, enthusiasts can achieve professional-level results. Remember that the journey of boatbuilding is as rewarding as reaching your destination; it tests one’s patience and dedication. For those seeking to embark on this adventure or simply gain more insight into marine craftsmanship, Sven’s wisdom is invaluable.After securely attaching the first portion of the flange, Sven allows ample time for it to dry before moving forward with additional steps. This patience and precision are key aspects of his successful boatbuilding methods.Step 4: Finishing Touches
Once the flange is fully dried, Sven removes the clamps carefully, ensuring no damage occurs during this process. He then moves on to attaching four more pieces onto these main frames, completing two pairs of flanges for the bulkhead hatches.The Final Touches
While two flanges form the primary support structure around the hatches, Sven mentions there are two additional pieces required at each end to ensure comprehensive protection. This attention to detail highlights his commitment to producing a durable and reliable design. “Sailing is about finding your path, whether it’s across an ocean or within yourself.” – Sven Yrvind In conclusion, making flanges around bulkhead hatches may seem complex at first glance, but by following Sven Yrvind’s meticulous process, enthusiasts can achieve professional-level results. Remember that the journey of boatbuilding is as rewarding as reaching your destination; it tests one’s patience and dedication. For those seeking to embark on this adventure or simply gain more insight into marine craftsmanship, Sven’s wisdom is invaluable.Sven proceeds to apply glue along one edge of the flange, ensuring a secure bond when clamped into place. He emphasizes that this stage is crucial for maintaining the structural integrity of the flange, which in turn safeguards the living area beneath the canvas when hatches are open.Step 3: Allowing Time to Dry
After securely attaching the first portion of the flange, Sven allows ample time for it to dry before moving forward with additional steps. This patience and precision are key aspects of his successful boatbuilding methods.Step 4: Finishing Touches
Once the flange is fully dried, Sven removes the clamps carefully, ensuring no damage occurs during this process. He then moves on to attaching four more pieces onto these main frames, completing two pairs of flanges for the bulkhead hatches.The Final Touches
While two flanges form the primary support structure around the hatches, Sven mentions there are two additional pieces required at each end to ensure comprehensive protection. This attention to detail highlights his commitment to producing a durable and reliable design. “Sailing is about finding your path, whether it’s across an ocean or within yourself.” – Sven Yrvind In conclusion, making flanges around bulkhead hatches may seem complex at first glance, but by following Sven Yrvind’s meticulous process, enthusiasts can achieve professional-level results. Remember that the journey of boatbuilding is as rewarding as reaching your destination; it tests one’s patience and dedication. For those seeking to embark on this adventure or simply gain more insight into marine craftsmanship, Sven’s wisdom is invaluable.Sven begins by explaining that working on flanges vertically and horizontally is significantly easier than doing so in a flat position. To simplify the process further, he divides the task into two or three steps as suggested by fellow expert “for for.” This approach not only makes it more manageable but also allows for greater precision in crafting each component.Step 2: Applying Glue and Securing
Sven proceeds to apply glue along one edge of the flange, ensuring a secure bond when clamped into place. He emphasizes that this stage is crucial for maintaining the structural integrity of the flange, which in turn safeguards the living area beneath the canvas when hatches are open.Step 3: Allowing Time to Dry
After securely attaching the first portion of the flange, Sven allows ample time for it to dry before moving forward with additional steps. This patience and precision are key aspects of his successful boatbuilding methods.Step 4: Finishing Touches
Once the flange is fully dried, Sven removes the clamps carefully, ensuring no damage occurs during this process. He then moves on to attaching four more pieces onto these main frames, completing two pairs of flanges for the bulkhead hatches.The Final Touches
While two flanges form the primary support structure around the hatches, Sven mentions there are two additional pieces required at each end to ensure comprehensive protection. This attention to detail highlights his commitment to producing a durable and reliable design. “Sailing is about finding your path, whether it’s across an ocean or within yourself.” – Sven Yrvind In conclusion, making flanges around bulkhead hatches may seem complex at first glance, but by following Sven Yrvind’s meticulous process, enthusiasts can achieve professional-level results. Remember that the journey of boatbuilding is as rewarding as reaching your destination; it tests one’s patience and dedication. For those seeking to embark on this adventure or simply gain more insight into marine craftsmanship, Sven’s wisdom is invaluable.Sven Yrvind, a renowned yacht designer and sailor, shares valuable insights on creating flanges around bulkhead hatches for canvas protection in this enlightening video. By following his expert guidance, boat enthusiasts can ensure their living areas remain secure while allowing unhindered access through the hatches.Step 1: Starting with the Flange
Sven begins by explaining that working on flanges vertically and horizontally is significantly easier than doing so in a flat position. To simplify the process further, he divides the task into two or three steps as suggested by fellow expert “for for.” This approach not only makes it more manageable but also allows for greater precision in crafting each component.Step 2: Applying Glue and Securing
Sven proceeds to apply glue along one edge of the flange, ensuring a secure bond when clamped into place. He emphasizes that this stage is crucial for maintaining the structural integrity of the flange, which in turn safeguards the living area beneath the canvas when hatches are open.Step 3: Allowing Time to Dry
After securely attaching the first portion of the flange, Sven allows ample time for it to dry before moving forward with additional steps. This patience and precision are key aspects of his successful boatbuilding methods.Step 4: Finishing Touches
Once the flange is fully dried, Sven removes the clamps carefully, ensuring no damage occurs during this process. He then moves on to attaching four more pieces onto these main frames, completing two pairs of flanges for the bulkhead hatches.The Final Touches
While two flanges form the primary support structure around the hatches, Sven mentions there are two additional pieces required at each end to ensure comprehensive protection. This attention to detail highlights his commitment to producing a durable and reliable design. “Sailing is about finding your path, whether it’s across an ocean or within yourself.” – Sven Yrvind In conclusion, making flanges around bulkhead hatches may seem complex at first glance, but by following Sven Yrvind’s meticulous process, enthusiasts can achieve professional-level results. Remember that the journey of boatbuilding is as rewarding as reaching your destination; it tests one’s patience and dedication. For those seeking to embark on this adventure or simply gain more insight into marine craftsmanship, Sven’s wisdom is invaluable.Making Flanges Around Bulkhead Hatches for Canvas
Sven Yrvind, a renowned yacht designer and sailor, shares valuable insights on creating flanges around bulkhead hatches for canvas protection in this enlightening video. By following his expert guidance, boat enthusiasts can ensure their living areas remain secure while allowing unhindered access through the hatches.Step 1: Starting with the Flange
Sven begins by explaining that working on flanges vertically and horizontally is significantly easier than doing so in a flat position. To simplify the process further, he divides the task into two or three steps as suggested by fellow expert “for for.” This approach not only makes it more manageable but also allows for greater precision in crafting each component.Step 2: Applying Glue and Securing
Sven proceeds to apply glue along one edge of the flange, ensuring a secure bond when clamped into place. He emphasizes that this stage is crucial for maintaining the structural integrity of the flange, which in turn safeguards the living area beneath the canvas when hatches are open.Step 3: Allowing Time to Dry
After securely attaching the first portion of the flange, Sven allows ample time for it to dry before moving forward with additional steps. This patience and precision are key aspects of his successful boatbuilding methods.Step 4: Finishing Touches
Once the flange is fully dried, Sven removes the clamps carefully, ensuring no damage occurs during this process. He then moves on to attaching four more pieces onto these main frames, completing two pairs of flanges for the bulkhead hatches.The Final Touches
While two flanges form the primary support structure around the hatches, Sven mentions there are two additional pieces required at each end to ensure comprehensive protection. This attention to detail highlights his commitment to producing a durable and reliable design. “Sailing is about finding your path, whether it’s across an ocean or within yourself.” – Sven Yrvind In conclusion, making flanges around bulkhead hatches may seem complex at first glance, but by following Sven Yrvind’s meticulous process, enthusiasts can achieve professional-level results. Remember that the journey of boatbuilding is as rewarding as reaching your destination; it tests one’s patience and dedication. For those seeking to embark on this adventure or simply gain more insight into marine craftsmanship, Sven’s wisdom is invaluable.Sven begins by explaining that working on flanges vertically and horizontally is significantly easier than doing so in a flat position. To simplify the process further, he divides the task into two or three steps as suggested by fellow expert “for for.” This approach not only makes it more manageable but also allows for greater precision in crafting each component.Step 2: Applying Glue and Securing
Sven proceeds to apply glue along one edge of the flange, ensuring a secure bond when clamped into place. He emphasizes that this stage is crucial for maintaining the structural integrity of the flange, which in turn safeguards the living area beneath the canvas when hatches are open.Step 3: Allowing Time to Dry
After securely attaching the first portion of the flange, Sven allows ample time for it to dry before moving forward with additional steps. This patience and precision are key aspects of his successful boatbuilding methods.Step 4: Finishing Touches
Once the flange is fully dried, Sven removes the clamps carefully, ensuring no damage occurs during this process. He then moves on to attaching four more pieces onto these main frames, completing two pairs of flanges for the bulkhead hatches.The Final Touches
While two flanges form the primary support structure around the hatches, Sven mentions there are two additional pieces required at each end to ensure comprehensive protection. This attention to detail highlights his commitment to producing a durable and reliable design. “Sailing is about finding your path, whether it’s across an ocean or within yourself.” – Sven Yrvind In conclusion, making flanges around bulkhead hatches may seem complex at first glance, but by following Sven Yrvind’s meticulous process, enthusiasts can achieve professional-level results. Remember that the journey of boatbuilding is as rewarding as reaching your destination; it tests one’s patience and dedication. For those seeking to embark on this adventure or simply gain more insight into marine craftsmanship, Sven’s wisdom is invaluable.Making Flanges Around Bulkhead Hatches for Canvas
Sven Yrvind, a renowned yacht designer and sailor, shares valuable insights on creating flanges around bulkhead hatches for canvas protection in this enlightening video. By following his expert guidance, boat enthusiasts can ensure their living areas remain secure while allowing unhindered access through the hatches.Step 1: Starting with the Flange
Sven begins by explaining that working on flanges vertically and horizontally is significantly easier than doing so in a flat position. To simplify the process further, he divides the task into two or three steps as suggested by fellow expert “for for.” This approach not only makes it more manageable but also allows for greater precision in crafting each component.Step 2: Applying Glue and Securing
Sven proceeds to apply glue along one edge of the flange, ensuring a secure bond when clamped into place. He emphasizes that this stage is crucial for maintaining the structural integrity of the flange, which in turn safeguards the living area beneath the canvas when hatches are open.Step 3: Allowing Time to Dry
After securely attaching the first portion of the flange, Sven allows ample time for it to dry before moving forward with additional steps. This patience and precision are key aspects of his successful boatbuilding methods.Step 4: Finishing Touches
Once the flange is fully dried, Sven removes the clamps carefully, ensuring no damage occurs during this process. He then moves on to attaching four more pieces onto these main frames, completing two pairs of flanges for the bulkhead hatches.The Final Touches
While two flanges form the primary support structure around the hatches, Sven mentions there are two additional pieces required at each end to ensure comprehensive protection. This attention to detail highlights his commitment to producing a durable and reliable design. “Sailing is about finding your path, whether it’s across an ocean or within yourself.” – Sven Yrvind In conclusion, making flanges around bulkhead hatches may seem complex at first glance, but by following Sven Yrvind’s meticulous process, enthusiasts can achieve professional-level results. Remember that the journey of boatbuilding is as rewarding as reaching your destination; it tests one’s patience and dedication. For those seeking to embark on this adventure or simply gain more insight into marine craftsmanship, Sven’s wisdom is invaluable.Once the flange is fully dried, Sven removes the clamps carefully, ensuring no damage occurs during this process. He then moves on to attaching four more pieces onto these main frames, completing two pairs of flanges for the bulkhead hatches.The Final Touches
While two flanges form the primary support structure around the hatches, Sven mentions there are two additional pieces required at each end to ensure comprehensive protection. This attention to detail highlights his commitment to producing a durable and reliable design. “Sailing is about finding your path, whether it’s across an ocean or within yourself.” – Sven Yrvind In conclusion, making flanges around bulkhead hatches may seem complex at first glance, but by following Sven Yrvind’s meticulous process, enthusiasts can achieve professional-level results. Remember that the journey of boatbuilding is as rewarding as reaching your destination; it tests one’s patience and dedication. For those seeking to embark on this adventure or simply gain more insight into marine craftsmanship, Sven’s wisdom is invaluable.Sven begins by explaining that working on flanges vertically and horizontally is significantly easier than doing so in a flat position. To simplify the process further, he divides the task into two or three steps as suggested by fellow expert “for for.” This approach not only makes it more manageable but also allows for greater precision in crafting each component.Step 2: Applying Glue and Securing
Sven proceeds to apply glue along one edge of the flange, ensuring a secure bond when clamped into place. He emphasizes that this stage is crucial for maintaining the structural integrity of the flange, which in turn safeguards the living area beneath the canvas when hatches are open.Step 3: Allowing Time to Dry
After securely attaching the first portion of the flange, Sven allows ample time for it to dry before moving forward with additional steps. This patience and precision are key aspects of his successful boatbuilding methods.Step 4: Finishing Touches
Once the flange is fully dried, Sven removes the clamps carefully, ensuring no damage occurs during this process. He then moves on to attaching four more pieces onto these main frames, completing two pairs of flanges for the bulkhead hatches.The Final Touches
While two flanges form the primary support structure around the hatches, Sven mentions there are two additional pieces required at each end to ensure comprehensive protection. This attention to detail highlights his commitment to producing a durable and reliable design. “Sailing is about finding your path, whether it’s across an ocean or within yourself.” – Sven Yrvind In conclusion, making flanges around bulkhead hatches may seem complex at first glance, but by following Sven Yrvind’s meticulous process, enthusiasts can achieve professional-level results. Remember that the journey of boatbuilding is as rewarding as reaching your destination; it tests one’s patience and dedication. For those seeking to embark on this adventure or simply gain more insight into marine craftsmanship, Sven’s wisdom is invaluable.Sven Yrvind, a renowned yacht designer and sailor, shares valuable insights on creating flanges around bulkhead hatches for canvas protection in this enlightening video. By following his expert guidance, boat enthusiasts can ensure their living areas remain secure while allowing unhindered access through the hatches.Step 1: Starting with the Flange
Sven begins by explaining that working on flanges vertically and horizontally is significantly easier than doing so in a flat position. To simplify the process further, he divides the task into two or three steps as suggested by fellow expert “for for.” This approach not only makes it more manageable but also allows for greater precision in crafting each component.Step 2: Applying Glue and Securing
Sven proceeds to apply glue along one edge of the flange, ensuring a secure bond when clamped into place. He emphasizes that this stage is crucial for maintaining the structural integrity of the flange, which in turn safeguards the living area beneath the canvas when hatches are open.Step 3: Allowing Time to Dry
After securely attaching the first portion of the flange, Sven allows ample time for it to dry before moving forward with additional steps. This patience and precision are key aspects of his successful boatbuilding methods.Step 4: Finishing Touches
Once the flange is fully dried, Sven removes the clamps carefully, ensuring no damage occurs during this process. He then moves on to attaching four more pieces onto these main frames, completing two pairs of flanges for the bulkhead hatches.The Final Touches
While two flanges form the primary support structure around the hatches, Sven mentions there are two additional pieces required at each end to ensure comprehensive protection. This attention to detail highlights his commitment to producing a durable and reliable design. “Sailing is about finding your path, whether it’s across an ocean or within yourself.” – Sven Yrvind In conclusion, making flanges around bulkhead hatches may seem complex at first glance, but by following Sven Yrvind’s meticulous process, enthusiasts can achieve professional-level results. Remember that the journey of boatbuilding is as rewarding as reaching your destination; it tests one’s patience and dedication. For those seeking to embark on this adventure or simply gain more insight into marine craftsmanship, Sven’s wisdom is invaluable.Making Flanges Around Bulkhead Hatches for Canvas
Sven Yrvind, a renowned yacht designer and sailor, shares valuable insights on creating flanges around bulkhead hatches for canvas protection in this enlightening video. By following his expert guidance, boat enthusiasts can ensure their living areas remain secure while allowing unhindered access through the hatches.Step 1: Starting with the Flange
Sven begins by explaining that working on flanges vertically and horizontally is significantly easier than doing so in a flat position. To simplify the process further, he divides the task into two or three steps as suggested by fellow expert “for for.” This approach not only makes it more manageable but also allows for greater precision in crafting each component.Step 2: Applying Glue and Securing
Sven proceeds to apply glue along one edge of the flange, ensuring a secure bond when clamped into place. He emphasizes that this stage is crucial for maintaining the structural integrity of the flange, which in turn safeguards the living area beneath the canvas when hatches are open.Step 3: Allowing Time to Dry
After securely attaching the first portion of the flange, Sven allows ample time for it to dry before moving forward with additional steps. This patience and precision are key aspects of his successful boatbuilding methods.Step 4: Finishing Touches
Once the flange is fully dried, Sven removes the clamps carefully, ensuring no damage occurs during this process. He then moves on to attaching four more pieces onto these main frames, completing two pairs of flanges for the bulkhead hatches.The Final Touches
While two flanges form the primary support structure around the hatches, Sven mentions there are two additional pieces required at each end to ensure comprehensive protection. This attention to detail highlights his commitment to producing a durable and reliable design. “Sailing is about finding your path, whether it’s across an ocean or within yourself.” – Sven Yrvind In conclusion, making flanges around bulkhead hatches may seem complex at first glance, but by following Sven Yrvind’s meticulous process, enthusiasts can achieve professional-level results. Remember that the journey of boatbuilding is as rewarding as reaching your destination; it tests one’s patience and dedication. For those seeking to embark on this adventure or simply gain more insight into marine craftsmanship, Sven’s wisdom is invaluable.After securely attaching the first portion of the flange, Sven allows ample time for it to dry before moving forward with additional steps. This patience and precision are key aspects of his successful boatbuilding methods.Step 4: Finishing Touches
Once the flange is fully dried, Sven removes the clamps carefully, ensuring no damage occurs during this process. He then moves on to attaching four more pieces onto these main frames, completing two pairs of flanges for the bulkhead hatches.The Final Touches
While two flanges form the primary support structure around the hatches, Sven mentions there are two additional pieces required at each end to ensure comprehensive protection. This attention to detail highlights his commitment to producing a durable and reliable design. “Sailing is about finding your path, whether it’s across an ocean or within yourself.” – Sven Yrvind In conclusion, making flanges around bulkhead hatches may seem complex at first glance, but by following Sven Yrvind’s meticulous process, enthusiasts can achieve professional-level results. Remember that the journey of boatbuilding is as rewarding as reaching your destination; it tests one’s patience and dedication. For those seeking to embark on this adventure or simply gain more insight into marine craftsmanship, Sven’s wisdom is invaluable.Sven begins by explaining that working on flanges vertically and horizontally is significantly easier than doing so in a flat position. To simplify the process further, he divides the task into two or three steps as suggested by fellow expert “for for.” This approach not only makes it more manageable but also allows for greater precision in crafting each component.Step 2: Applying Glue and Securing
Sven proceeds to apply glue along one edge of the flange, ensuring a secure bond when clamped into place. He emphasizes that this stage is crucial for maintaining the structural integrity of the flange, which in turn safeguards the living area beneath the canvas when hatches are open.Step 3: Allowing Time to Dry
After securely attaching the first portion of the flange, Sven allows ample time for it to dry before moving forward with additional steps. This patience and precision are key aspects of his successful boatbuilding methods.Step 4: Finishing Touches
Once the flange is fully dried, Sven removes the clamps carefully, ensuring no damage occurs during this process. He then moves on to attaching four more pieces onto these main frames, completing two pairs of flanges for the bulkhead hatches.The Final Touches
While two flanges form the primary support structure around the hatches, Sven mentions there are two additional pieces required at each end to ensure comprehensive protection. This attention to detail highlights his commitment to producing a durable and reliable design. “Sailing is about finding your path, whether it’s across an ocean or within yourself.” – Sven Yrvind In conclusion, making flanges around bulkhead hatches may seem complex at first glance, but by following Sven Yrvind’s meticulous process, enthusiasts can achieve professional-level results. Remember that the journey of boatbuilding is as rewarding as reaching your destination; it tests one’s patience and dedication. For those seeking to embark on this adventure or simply gain more insight into marine craftsmanship, Sven’s wisdom is invaluable.Sven Yrvind, a renowned yacht designer and sailor, shares valuable insights on creating flanges around bulkhead hatches for canvas protection in this enlightening video. By following his expert guidance, boat enthusiasts can ensure their living areas remain secure while allowing unhindered access through the hatches.Step 1: Starting with the Flange
Sven begins by explaining that working on flanges vertically and horizontally is significantly easier than doing so in a flat position. To simplify the process further, he divides the task into two or three steps as suggested by fellow expert “for for.” This approach not only makes it more manageable but also allows for greater precision in crafting each component.Step 2: Applying Glue and Securing
Sven proceeds to apply glue along one edge of the flange, ensuring a secure bond when clamped into place. He emphasizes that this stage is crucial for maintaining the structural integrity of the flange, which in turn safeguards the living area beneath the canvas when hatches are open.Step 3: Allowing Time to Dry
After securely attaching the first portion of the flange, Sven allows ample time for it to dry before moving forward with additional steps. This patience and precision are key aspects of his successful boatbuilding methods.Step 4: Finishing Touches
Once the flange is fully dried, Sven removes the clamps carefully, ensuring no damage occurs during this process. He then moves on to attaching four more pieces onto these main frames, completing two pairs of flanges for the bulkhead hatches.The Final Touches
While two flanges form the primary support structure around the hatches, Sven mentions there are two additional pieces required at each end to ensure comprehensive protection. This attention to detail highlights his commitment to producing a durable and reliable design. “Sailing is about finding your path, whether it’s across an ocean or within yourself.” – Sven Yrvind In conclusion, making flanges around bulkhead hatches may seem complex at first glance, but by following Sven Yrvind’s meticulous process, enthusiasts can achieve professional-level results. Remember that the journey of boatbuilding is as rewarding as reaching your destination; it tests one’s patience and dedication. For those seeking to embark on this adventure or simply gain more insight into marine craftsmanship, Sven’s wisdom is invaluable.Making Flanges Around Bulkhead Hatches for Canvas
Sven Yrvind, a renowned yacht designer and sailor, shares valuable insights on creating flanges around bulkhead hatches for canvas protection in this enlightening video. By following his expert guidance, boat enthusiasts can ensure their living areas remain secure while allowing unhindered access through the hatches.Step 1: Starting with the Flange
Sven begins by explaining that working on flanges vertically and horizontally is significantly easier than doing so in a flat position. To simplify the process further, he divides the task into two or three steps as suggested by fellow expert “for for.” This approach not only makes it more manageable but also allows for greater precision in crafting each component.Step 2: Applying Glue and Securing
Sven proceeds to apply glue along one edge of the flange, ensuring a secure bond when clamped into place. He emphasizes that this stage is crucial for maintaining the structural integrity of the flange, which in turn safeguards the living area beneath the canvas when hatches are open.Step 3: Allowing Time to Dry
After securely attaching the first portion of the flange, Sven allows ample time for it to dry before moving forward with additional steps. This patience and precision are key aspects of his successful boatbuilding methods.Step 4: Finishing Touches
Once the flange is fully dried, Sven removes the clamps carefully, ensuring no damage occurs during this process. He then moves on to attaching four more pieces onto these main frames, completing two pairs of flanges for the bulkhead hatches.The Final Touches
While two flanges form the primary support structure around the hatches, Sven mentions there are two additional pieces required at each end to ensure comprehensive protection. This attention to detail highlights his commitment to producing a durable and reliable design. “Sailing is about finding your path, whether it’s across an ocean or within yourself.” – Sven Yrvind In conclusion, making flanges around bulkhead hatches may seem complex at first glance, but by following Sven Yrvind’s meticulous process, enthusiasts can achieve professional-level results. Remember that the journey of boatbuilding is as rewarding as reaching your destination; it tests one’s patience and dedication. For those seeking to embark on this adventure or simply gain more insight into marine craftsmanship, Sven’s wisdom is invaluable.Sven proceeds to apply glue along one edge of the flange, ensuring a secure bond when clamped into place. He emphasizes that this stage is crucial for maintaining the structural integrity of the flange, which in turn safeguards the living area beneath the canvas when hatches are open.Step 3: Allowing Time to Dry
After securely attaching the first portion of the flange, Sven allows ample time for it to dry before moving forward with additional steps. This patience and precision are key aspects of his successful boatbuilding methods.Step 4: Finishing Touches
Once the flange is fully dried, Sven removes the clamps carefully, ensuring no damage occurs during this process. He then moves on to attaching four more pieces onto these main frames, completing two pairs of flanges for the bulkhead hatches.The Final Touches
While two flanges form the primary support structure around the hatches, Sven mentions there are two additional pieces required at each end to ensure comprehensive protection. This attention to detail highlights his commitment to producing a durable and reliable design. “Sailing is about finding your path, whether it’s across an ocean or within yourself.” – Sven Yrvind In conclusion, making flanges around bulkhead hatches may seem complex at first glance, but by following Sven Yrvind’s meticulous process, enthusiasts can achieve professional-level results. Remember that the journey of boatbuilding is as rewarding as reaching your destination; it tests one’s patience and dedication. For those seeking to embark on this adventure or simply gain more insight into marine craftsmanship, Sven’s wisdom is invaluable.Sven begins by explaining that working on flanges vertically and horizontally is significantly easier than doing so in a flat position. To simplify the process further, he divides the task into two or three steps as suggested by fellow expert “for for.” This approach not only makes it more manageable but also allows for greater precision in crafting each component.Step 2: Applying Glue and Securing
Sven proceeds to apply glue along one edge of the flange, ensuring a secure bond when clamped into place. He emphasizes that this stage is crucial for maintaining the structural integrity of the flange, which in turn safeguards the living area beneath the canvas when hatches are open.Step 3: Allowing Time to Dry
After securely attaching the first portion of the flange, Sven allows ample time for it to dry before moving forward with additional steps. This patience and precision are key aspects of his successful boatbuilding methods.Step 4: Finishing Touches
Once the flange is fully dried, Sven removes the clamps carefully, ensuring no damage occurs during this process. He then moves on to attaching four more pieces onto these main frames, completing two pairs of flanges for the bulkhead hatches.The Final Touches
While two flanges form the primary support structure around the hatches, Sven mentions there are two additional pieces required at each end to ensure comprehensive protection. This attention to detail highlights his commitment to producing a durable and reliable design. “Sailing is about finding your path, whether it’s across an ocean or within yourself.” – Sven Yrvind In conclusion, making flanges around bulkhead hatches may seem complex at first glance, but by following Sven Yrvind’s meticulous process, enthusiasts can achieve professional-level results. Remember that the journey of boatbuilding is as rewarding as reaching your destination; it tests one’s patience and dedication. For those seeking to embark on this adventure or simply gain more insight into marine craftsmanship, Sven’s wisdom is invaluable.Sven Yrvind, a renowned yacht designer and sailor, shares valuable insights on creating flanges around bulkhead hatches for canvas protection in this enlightening video. By following his expert guidance, boat enthusiasts can ensure their living areas remain secure while allowing unhindered access through the hatches.Step 1: Starting with the Flange
Sven begins by explaining that working on flanges vertically and horizontally is significantly easier than doing so in a flat position. To simplify the process further, he divides the task into two or three steps as suggested by fellow expert “for for.” This approach not only makes it more manageable but also allows for greater precision in crafting each component.Step 2: Applying Glue and Securing
Sven proceeds to apply glue along one edge of the flange, ensuring a secure bond when clamped into place. He emphasizes that this stage is crucial for maintaining the structural integrity of the flange, which in turn safeguards the living area beneath the canvas when hatches are open.Step 3: Allowing Time to Dry
After securely attaching the first portion of the flange, Sven allows ample time for it to dry before moving forward with additional steps. This patience and precision are key aspects of his successful boatbuilding methods.Step 4: Finishing Touches
Once the flange is fully dried, Sven removes the clamps carefully, ensuring no damage occurs during this process. He then moves on to attaching four more pieces onto these main frames, completing two pairs of flanges for the bulkhead hatches.The Final Touches
While two flanges form the primary support structure around the hatches, Sven mentions there are two additional pieces required at each end to ensure comprehensive protection. This attention to detail highlights his commitment to producing a durable and reliable design. “Sailing is about finding your path, whether it’s across an ocean or within yourself.” – Sven Yrvind In conclusion, making flanges around bulkhead hatches may seem complex at first glance, but by following Sven Yrvind’s meticulous process, enthusiasts can achieve professional-level results. Remember that the journey of boatbuilding is as rewarding as reaching your destination; it tests one’s patience and dedication. For those seeking to embark on this adventure or simply gain more insight into marine craftsmanship, Sven’s wisdom is invaluable.Making Flanges Around Bulkhead Hatches for Canvas
Sven Yrvind, a renowned yacht designer and sailor, shares valuable insights on creating flanges around bulkhead hatches for canvas protection in this enlightening video. By following his expert guidance, boat enthusiasts can ensure their living areas remain secure while allowing unhindered access through the hatches.Step 1: Starting with the Flange
Sven begins by explaining that working on flanges vertically and horizontally is significantly easier than doing so in a flat position. To simplify the process further, he divides the task into two or three steps as suggested by fellow expert “for for.” This approach not only makes it more manageable but also allows for greater precision in crafting each component.Step 2: Applying Glue and Securing
Sven proceeds to apply glue along one edge of the flange, ensuring a secure bond when clamped into place. He emphasizes that this stage is crucial for maintaining the structural integrity of the flange, which in turn safeguards the living area beneath the canvas when hatches are open.Step 3: Allowing Time to Dry
After securely attaching the first portion of the flange, Sven allows ample time for it to dry before moving forward with additional steps. This patience and precision are key aspects of his successful boatbuilding methods.Step 4: Finishing Touches
Once the flange is fully dried, Sven removes the clamps carefully, ensuring no damage occurs during this process. He then moves on to attaching four more pieces onto these main frames, completing two pairs of flanges for the bulkhead hatches.The Final Touches
While two flanges form the primary support structure around the hatches, Sven mentions there are two additional pieces required at each end to ensure comprehensive protection. This attention to detail highlights his commitment to producing a durable and reliable design. “Sailing is about finding your path, whether it’s across an ocean or within yourself.” – Sven Yrvind In conclusion, making flanges around bulkhead hatches may seem complex at first glance, but by following Sven Yrvind’s meticulous process, enthusiasts can achieve professional-level results. Remember that the journey of boatbuilding is as rewarding as reaching your destination; it tests one’s patience and dedication. For those seeking to embark on this adventure or simply gain more insight into marine craftsmanship, Sven’s wisdom is invaluable.Once the flange is fully dried, Sven removes the clamps carefully, ensuring no damage occurs during this process. He then moves on to attaching four more pieces onto these main frames, completing two pairs of flanges for the bulkhead hatches.The Final Touches
While two flanges form the primary support structure around the hatches, Sven mentions there are two additional pieces required at each end to ensure comprehensive protection. This attention to detail highlights his commitment to producing a durable and reliable design. “Sailing is about finding your path, whether it’s across an ocean or within yourself.” – Sven Yrvind In conclusion, making flanges around bulkhead hatches may seem complex at first glance, but by following Sven Yrvind’s meticulous process, enthusiasts can achieve professional-level results. Remember that the journey of boatbuilding is as rewarding as reaching your destination; it tests one’s patience and dedication. For those seeking to embark on this adventure or simply gain more insight into marine craftsmanship, Sven’s wisdom is invaluable.Sven proceeds to apply glue along one edge of the flange, ensuring a secure bond when clamped into place. He emphasizes that this stage is crucial for maintaining the structural integrity of the flange, which in turn safeguards the living area beneath the canvas when hatches are open.Step 3: Allowing Time to Dry
After securely attaching the first portion of the flange, Sven allows ample time for it to dry before moving forward with additional steps. This patience and precision are key aspects of his successful boatbuilding methods.Step 4: Finishing Touches
Once the flange is fully dried, Sven removes the clamps carefully, ensuring no damage occurs during this process. He then moves on to attaching four more pieces onto these main frames, completing two pairs of flanges for the bulkhead hatches.The Final Touches
While two flanges form the primary support structure around the hatches, Sven mentions there are two additional pieces required at each end to ensure comprehensive protection. This attention to detail highlights his commitment to producing a durable and reliable design. “Sailing is about finding your path, whether it’s across an ocean or within yourself.” – Sven Yrvind In conclusion, making flanges around bulkhead hatches may seem complex at first glance, but by following Sven Yrvind’s meticulous process, enthusiasts can achieve professional-level results. Remember that the journey of boatbuilding is as rewarding as reaching your destination; it tests one’s patience and dedication. For those seeking to embark on this adventure or simply gain more insight into marine craftsmanship, Sven’s wisdom is invaluable.Sven begins by explaining that working on flanges vertically and horizontally is significantly easier than doing so in a flat position. To simplify the process further, he divides the task into two or three steps as suggested by fellow expert “for for.” This approach not only makes it more manageable but also allows for greater precision in crafting each component.Step 2: Applying Glue and Securing
Sven proceeds to apply glue along one edge of the flange, ensuring a secure bond when clamped into place. He emphasizes that this stage is crucial for maintaining the structural integrity of the flange, which in turn safeguards the living area beneath the canvas when hatches are open.Step 3: Allowing Time to Dry
After securely attaching the first portion of the flange, Sven allows ample time for it to dry before moving forward with additional steps. This patience and precision are key aspects of his successful boatbuilding methods.Step 4: Finishing Touches
Once the flange is fully dried, Sven removes the clamps carefully, ensuring no damage occurs during this process. He then moves on to attaching four more pieces onto these main frames, completing two pairs of flanges for the bulkhead hatches.The Final Touches
While two flanges form the primary support structure around the hatches, Sven mentions there are two additional pieces required at each end to ensure comprehensive protection. This attention to detail highlights his commitment to producing a durable and reliable design. “Sailing is about finding your path, whether it’s across an ocean or within yourself.” – Sven Yrvind In conclusion, making flanges around bulkhead hatches may seem complex at first glance, but by following Sven Yrvind’s meticulous process, enthusiasts can achieve professional-level results. Remember that the journey of boatbuilding is as rewarding as reaching your destination; it tests one’s patience and dedication. For those seeking to embark on this adventure or simply gain more insight into marine craftsmanship, Sven’s wisdom is invaluable.Sven Yrvind, a renowned yacht designer and sailor, shares valuable insights on creating flanges around bulkhead hatches for canvas protection in this enlightening video. By following his expert guidance, boat enthusiasts can ensure their living areas remain secure while allowing unhindered access through the hatches.Step 1: Starting with the Flange
Sven begins by explaining that working on flanges vertically and horizontally is significantly easier than doing so in a flat position. To simplify the process further, he divides the task into two or three steps as suggested by fellow expert “for for.” This approach not only makes it more manageable but also allows for greater precision in crafting each component.Step 2: Applying Glue and Securing
Sven proceeds to apply glue along one edge of the flange, ensuring a secure bond when clamped into place. He emphasizes that this stage is crucial for maintaining the structural integrity of the flange, which in turn safeguards the living area beneath the canvas when hatches are open.Step 3: Allowing Time to Dry
After securely attaching the first portion of the flange, Sven allows ample time for it to dry before moving forward with additional steps. This patience and precision are key aspects of his successful boatbuilding methods.Step 4: Finishing Touches
Once the flange is fully dried, Sven removes the clamps carefully, ensuring no damage occurs during this process. He then moves on to attaching four more pieces onto these main frames, completing two pairs of flanges for the bulkhead hatches.The Final Touches
While two flanges form the primary support structure around the hatches, Sven mentions there are two additional pieces required at each end to ensure comprehensive protection. This attention to detail highlights his commitment to producing a durable and reliable design. “Sailing is about finding your path, whether it’s across an ocean or within yourself.” – Sven Yrvind In conclusion, making flanges around bulkhead hatches may seem complex at first glance, but by following Sven Yrvind’s meticulous process, enthusiasts can achieve professional-level results. Remember that the journey of boatbuilding is as rewarding as reaching your destination; it tests one’s patience and dedication. For those seeking to embark on this adventure or simply gain more insight into marine craftsmanship, Sven’s wisdom is invaluable.Making Flanges Around Bulkhead Hatches for Canvas
Sven Yrvind, a renowned yacht designer and sailor, shares valuable insights on creating flanges around bulkhead hatches for canvas protection in this enlightening video. By following his expert guidance, boat enthusiasts can ensure their living areas remain secure while allowing unhindered access through the hatches.Step 1: Starting with the Flange
Sven begins by explaining that working on flanges vertically and horizontally is significantly easier than doing so in a flat position. To simplify the process further, he divides the task into two or three steps as suggested by fellow expert “for for.” This approach not only makes it more manageable but also allows for greater precision in crafting each component.Step 2: Applying Glue and Securing
Sven proceeds to apply glue along one edge of the flange, ensuring a secure bond when clamped into place. He emphasizes that this stage is crucial for maintaining the structural integrity of the flange, which in turn safeguards the living area beneath the canvas when hatches are open.Step 3: Allowing Time to Dry
After securely attaching the first portion of the flange, Sven allows ample time for it to dry before moving forward with additional steps. This patience and precision are key aspects of his successful boatbuilding methods.Step 4: Finishing Touches
Once the flange is fully dried, Sven removes the clamps carefully, ensuring no damage occurs during this process. He then moves on to attaching four more pieces onto these main frames, completing two pairs of flanges for the bulkhead hatches.The Final Touches
While two flanges form the primary support structure around the hatches, Sven mentions there are two additional pieces required at each end to ensure comprehensive protection. This attention to detail highlights his commitment to producing a durable and reliable design. “Sailing is about finding your path, whether it’s across an ocean or within yourself.” – Sven Yrvind In conclusion, making flanges around bulkhead hatches may seem complex at first glance, but by following Sven Yrvind’s meticulous process, enthusiasts can achieve professional-level results. Remember that the journey of boatbuilding is as rewarding as reaching your destination; it tests one’s patience and dedication. For those seeking to embark on this adventure or simply gain more insight into marine craftsmanship, Sven’s wisdom is invaluable.After securely attaching the first portion of the flange, Sven allows ample time for it to dry before moving forward with additional steps. This patience and precision are key aspects of his successful boatbuilding methods.Step 4: Finishing Touches
Once the flange is fully dried, Sven removes the clamps carefully, ensuring no damage occurs during this process. He then moves on to attaching four more pieces onto these main frames, completing two pairs of flanges for the bulkhead hatches.The Final Touches
While two flanges form the primary support structure around the hatches, Sven mentions there are two additional pieces required at each end to ensure comprehensive protection. This attention to detail highlights his commitment to producing a durable and reliable design. “Sailing is about finding your path, whether it’s across an ocean or within yourself.” – Sven Yrvind In conclusion, making flanges around bulkhead hatches may seem complex at first glance, but by following Sven Yrvind’s meticulous process, enthusiasts can achieve professional-level results. Remember that the journey of boatbuilding is as rewarding as reaching your destination; it tests one’s patience and dedication. For those seeking to embark on this adventure or simply gain more insight into marine craftsmanship, Sven’s wisdom is invaluable.Sven proceeds to apply glue along one edge of the flange, ensuring a secure bond when clamped into place. He emphasizes that this stage is crucial for maintaining the structural integrity of the flange, which in turn safeguards the living area beneath the canvas when hatches are open.Step 3: Allowing Time to Dry
After securely attaching the first portion of the flange, Sven allows ample time for it to dry before moving forward with additional steps. This patience and precision are key aspects of his successful boatbuilding methods.Step 4: Finishing Touches
Once the flange is fully dried, Sven removes the clamps carefully, ensuring no damage occurs during this process. He then moves on to attaching four more pieces onto these main frames, completing two pairs of flanges for the bulkhead hatches.The Final Touches
While two flanges form the primary support structure around the hatches, Sven mentions there are two additional pieces required at each end to ensure comprehensive protection. This attention to detail highlights his commitment to producing a durable and reliable design. “Sailing is about finding your path, whether it’s across an ocean or within yourself.” – Sven Yrvind In conclusion, making flanges around bulkhead hatches may seem complex at first glance, but by following Sven Yrvind’s meticulous process, enthusiasts can achieve professional-level results. Remember that the journey of boatbuilding is as rewarding as reaching your destination; it tests one’s patience and dedication. For those seeking to embark on this adventure or simply gain more insight into marine craftsmanship, Sven’s wisdom is invaluable.Sven begins by explaining that working on flanges vertically and horizontally is significantly easier than doing so in a flat position. To simplify the process further, he divides the task into two or three steps as suggested by fellow expert “for for.” This approach not only makes it more manageable but also allows for greater precision in crafting each component.Step 2: Applying Glue and Securing
Sven proceeds to apply glue along one edge of the flange, ensuring a secure bond when clamped into place. He emphasizes that this stage is crucial for maintaining the structural integrity of the flange, which in turn safeguards the living area beneath the canvas when hatches are open.Step 3: Allowing Time to Dry
After securely attaching the first portion of the flange, Sven allows ample time for it to dry before moving forward with additional steps. This patience and precision are key aspects of his successful boatbuilding methods.Step 4: Finishing Touches
Once the flange is fully dried, Sven removes the clamps carefully, ensuring no damage occurs during this process. He then moves on to attaching four more pieces onto these main frames, completing two pairs of flanges for the bulkhead hatches.The Final Touches
While two flanges form the primary support structure around the hatches, Sven mentions there are two additional pieces required at each end to ensure comprehensive protection. This attention to detail highlights his commitment to producing a durable and reliable design. “Sailing is about finding your path, whether it’s across an ocean or within yourself.” – Sven Yrvind In conclusion, making flanges around bulkhead hatches may seem complex at first glance, but by following Sven Yrvind’s meticulous process, enthusiasts can achieve professional-level results. Remember that the journey of boatbuilding is as rewarding as reaching your destination; it tests one’s patience and dedication. For those seeking to embark on this adventure or simply gain more insight into marine craftsmanship, Sven’s wisdom is invaluable.Sven Yrvind, a renowned yacht designer and sailor, shares valuable insights on creating flanges around bulkhead hatches for canvas protection in this enlightening video. By following his expert guidance, boat enthusiasts can ensure their living areas remain secure while allowing unhindered access through the hatches.Step 1: Starting with the Flange
Sven begins by explaining that working on flanges vertically and horizontally is significantly easier than doing so in a flat position. To simplify the process further, he divides the task into two or three steps as suggested by fellow expert “for for.” This approach not only makes it more manageable but also allows for greater precision in crafting each component.Step 2: Applying Glue and Securing
Sven proceeds to apply glue along one edge of the flange, ensuring a secure bond when clamped into place. He emphasizes that this stage is crucial for maintaining the structural integrity of the flange, which in turn safeguards the living area beneath the canvas when hatches are open.Step 3: Allowing Time to Dry
After securely attaching the first portion of the flange, Sven allows ample time for it to dry before moving forward with additional steps. This patience and precision are key aspects of his successful boatbuilding methods.Step 4: Finishing Touches
Once the flange is fully dried, Sven removes the clamps carefully, ensuring no damage occurs during this process. He then moves on to attaching four more pieces onto these main frames, completing two pairs of flanges for the bulkhead hatches.The Final Touches
While two flanges form the primary support structure around the hatches, Sven mentions there are two additional pieces required at each end to ensure comprehensive protection. This attention to detail highlights his commitment to producing a durable and reliable design. “Sailing is about finding your path, whether it’s across an ocean or within yourself.” – Sven Yrvind In conclusion, making flanges around bulkhead hatches may seem complex at first glance, but by following Sven Yrvind’s meticulous process, enthusiasts can achieve professional-level results. Remember that the journey of boatbuilding is as rewarding as reaching your destination; it tests one’s patience and dedication. For those seeking to embark on this adventure or simply gain more insight into marine craftsmanship, Sven’s wisdom is invaluable.Making Flanges Around Bulkhead Hatches for Canvas
Sven Yrvind, a renowned yacht designer and sailor, shares valuable insights on creating flanges around bulkhead hatches for canvas protection in this enlightening video. By following his expert guidance, boat enthusiasts can ensure their living areas remain secure while allowing unhindered access through the hatches.Step 1: Starting with the Flange
Sven begins by explaining that working on flanges vertically and horizontally is significantly easier than doing so in a flat position. To simplify the process further, he divides the task into two or three steps as suggested by fellow expert “for for.” This approach not only makes it more manageable but also allows for greater precision in crafting each component.Step 2: Applying Glue and Securing
Sven proceeds to apply glue along one edge of the flange, ensuring a secure bond when clamped into place. He emphasizes that this stage is crucial for maintaining the structural integrity of the flange, which in turn safeguards the living area beneath the canvas when hatches are open.Step 3: Allowing Time to Dry
After securely attaching the first portion of the flange, Sven allows ample time for it to dry before moving forward with additional steps. This patience and precision are key aspects of his successful boatbuilding methods.Step 4: Finishing Touches
Once the flange is fully dried, Sven removes the clamps carefully, ensuring no damage occurs during this process. He then moves on to attaching four more pieces onto these main frames, completing two pairs of flanges for the bulkhead hatches.The Final Touches
While two flanges form the primary support structure around the hatches, Sven mentions there are two additional pieces required at each end to ensure comprehensive protection. This attention to detail highlights his commitment to producing a durable and reliable design. “Sailing is about finding your path, whether it’s across an ocean or within yourself.” – Sven Yrvind In conclusion, making flanges around bulkhead hatches may seem complex at first glance, but by following Sven Yrvind’s meticulous process, enthusiasts can achieve professional-level results. Remember that the journey of boatbuilding is as rewarding as reaching your destination; it tests one’s patience and dedication. For those seeking to embark on this adventure or simply gain more insight into marine craftsmanship, Sven’s wisdom is invaluable.Once the flange is fully dried, Sven removes the clamps carefully, ensuring no damage occurs during this process. He then moves on to attaching four more pieces onto these main frames, completing two pairs of flanges for the bulkhead hatches.The Final Touches
While two flanges form the primary support structure around the hatches, Sven mentions there are two additional pieces required at each end to ensure comprehensive protection. This attention to detail highlights his commitment to producing a durable and reliable design. “Sailing is about finding your path, whether it’s across an ocean or within yourself.” – Sven Yrvind In conclusion, making flanges around bulkhead hatches may seem complex at first glance, but by following Sven Yrvind’s meticulous process, enthusiasts can achieve professional-level results. Remember that the journey of boatbuilding is as rewarding as reaching your destination; it tests one’s patience and dedication. For those seeking to embark on this adventure or simply gain more insight into marine craftsmanship, Sven’s wisdom is invaluable.After securely attaching the first portion of the flange, Sven allows ample time for it to dry before moving forward with additional steps. This patience and precision are key aspects of his successful boatbuilding methods.Step 4: Finishing Touches
Once the flange is fully dried, Sven removes the clamps carefully, ensuring no damage occurs during this process. He then moves on to attaching four more pieces onto these main frames, completing two pairs of flanges for the bulkhead hatches.The Final Touches
While two flanges form the primary support structure around the hatches, Sven mentions there are two additional pieces required at each end to ensure comprehensive protection. This attention to detail highlights his commitment to producing a durable and reliable design. “Sailing is about finding your path, whether it’s across an ocean or within yourself.” – Sven Yrvind In conclusion, making flanges around bulkhead hatches may seem complex at first glance, but by following Sven Yrvind’s meticulous process, enthusiasts can achieve professional-level results. Remember that the journey of boatbuilding is as rewarding as reaching your destination; it tests one’s patience and dedication. For those seeking to embark on this adventure or simply gain more insight into marine craftsmanship, Sven’s wisdom is invaluable.Sven proceeds to apply glue along one edge of the flange, ensuring a secure bond when clamped into place. He emphasizes that this stage is crucial for maintaining the structural integrity of the flange, which in turn safeguards the living area beneath the canvas when hatches are open.Step 3: Allowing Time to Dry
After securely attaching the first portion of the flange, Sven allows ample time for it to dry before moving forward with additional steps. This patience and precision are key aspects of his successful boatbuilding methods.Step 4: Finishing Touches
Once the flange is fully dried, Sven removes the clamps carefully, ensuring no damage occurs during this process. He then moves on to attaching four more pieces onto these main frames, completing two pairs of flanges for the bulkhead hatches.The Final Touches
While two flanges form the primary support structure around the hatches, Sven mentions there are two additional pieces required at each end to ensure comprehensive protection. This attention to detail highlights his commitment to producing a durable and reliable design. “Sailing is about finding your path, whether it’s across an ocean or within yourself.” – Sven Yrvind In conclusion, making flanges around bulkhead hatches may seem complex at first glance, but by following Sven Yrvind’s meticulous process, enthusiasts can achieve professional-level results. Remember that the journey of boatbuilding is as rewarding as reaching your destination; it tests one’s patience and dedication. For those seeking to embark on this adventure or simply gain more insight into marine craftsmanship, Sven’s wisdom is invaluable.Sven begins by explaining that working on flanges vertically and horizontally is significantly easier than doing so in a flat position. To simplify the process further, he divides the task into two or three steps as suggested by fellow expert “for for.” This approach not only makes it more manageable but also allows for greater precision in crafting each component.Step 2: Applying Glue and Securing
Sven proceeds to apply glue along one edge of the flange, ensuring a secure bond when clamped into place. He emphasizes that this stage is crucial for maintaining the structural integrity of the flange, which in turn safeguards the living area beneath the canvas when hatches are open.Step 3: Allowing Time to Dry
After securely attaching the first portion of the flange, Sven allows ample time for it to dry before moving forward with additional steps. This patience and precision are key aspects of his successful boatbuilding methods.Step 4: Finishing Touches
Once the flange is fully dried, Sven removes the clamps carefully, ensuring no damage occurs during this process. He then moves on to attaching four more pieces onto these main frames, completing two pairs of flanges for the bulkhead hatches.The Final Touches
While two flanges form the primary support structure around the hatches, Sven mentions there are two additional pieces required at each end to ensure comprehensive protection. This attention to detail highlights his commitment to producing a durable and reliable design. “Sailing is about finding your path, whether it’s across an ocean or within yourself.” – Sven Yrvind In conclusion, making flanges around bulkhead hatches may seem complex at first glance, but by following Sven Yrvind’s meticulous process, enthusiasts can achieve professional-level results. Remember that the journey of boatbuilding is as rewarding as reaching your destination; it tests one’s patience and dedication. For those seeking to embark on this adventure or simply gain more insight into marine craftsmanship, Sven’s wisdom is invaluable.Sven Yrvind, a renowned yacht designer and sailor, shares valuable insights on creating flanges around bulkhead hatches for canvas protection in this enlightening video. By following his expert guidance, boat enthusiasts can ensure their living areas remain secure while allowing unhindered access through the hatches.Step 1: Starting with the Flange
Sven begins by explaining that working on flanges vertically and horizontally is significantly easier than doing so in a flat position. To simplify the process further, he divides the task into two or three steps as suggested by fellow expert “for for.” This approach not only makes it more manageable but also allows for greater precision in crafting each component.Step 2: Applying Glue and Securing
Sven proceeds to apply glue along one edge of the flange, ensuring a secure bond when clamped into place. He emphasizes that this stage is crucial for maintaining the structural integrity of the flange, which in turn safeguards the living area beneath the canvas when hatches are open.Step 3: Allowing Time to Dry
After securely attaching the first portion of the flange, Sven allows ample time for it to dry before moving forward with additional steps. This patience and precision are key aspects of his successful boatbuilding methods.Step 4: Finishing Touches
Once the flange is fully dried, Sven removes the clamps carefully, ensuring no damage occurs during this process. He then moves on to attaching four more pieces onto these main frames, completing two pairs of flanges for the bulkhead hatches.The Final Touches
While two flanges form the primary support structure around the hatches, Sven mentions there are two additional pieces required at each end to ensure comprehensive protection. This attention to detail highlights his commitment to producing a durable and reliable design. “Sailing is about finding your path, whether it’s across an ocean or within yourself.” – Sven Yrvind In conclusion, making flanges around bulkhead hatches may seem complex at first glance, but by following Sven Yrvind’s meticulous process, enthusiasts can achieve professional-level results. Remember that the journey of boatbuilding is as rewarding as reaching your destination; it tests one’s patience and dedication. For those seeking to embark on this adventure or simply gain more insight into marine craftsmanship, Sven’s wisdom is invaluable.Making Flanges Around Bulkhead Hatches for Canvas
Sven Yrvind, a renowned yacht designer and sailor, shares valuable insights on creating flanges around bulkhead hatches for canvas protection in this enlightening video. By following his expert guidance, boat enthusiasts can ensure their living areas remain secure while allowing unhindered access through the hatches.Step 1: Starting with the Flange
Sven begins by explaining that working on flanges vertically and horizontally is significantly easier than doing so in a flat position. To simplify the process further, he divides the task into two or three steps as suggested by fellow expert “for for.” This approach not only makes it more manageable but also allows for greater precision in crafting each component.Step 2: Applying Glue and Securing
Sven proceeds to apply glue along one edge of the flange, ensuring a secure bond when clamped into place. He emphasizes that this stage is crucial for maintaining the structural integrity of the flange, which in turn safeguards the living area beneath the canvas when hatches are open.Step 3: Allowing Time to Dry
After securely attaching the first portion of the flange, Sven allows ample time for it to dry before moving forward with additional steps. This patience and precision are key aspects of his successful boatbuilding methods.Step 4: Finishing Touches
Once the flange is fully dried, Sven removes the clamps carefully, ensuring no damage occurs during this process. He then moves on to attaching four more pieces onto these main frames, completing two pairs of flanges for the bulkhead hatches.The Final Touches
While two flanges form the primary support structure around the hatches, Sven mentions there are two additional pieces required at each end to ensure comprehensive protection. This attention to detail highlights his commitment to producing a durable and reliable design. “Sailing is about finding your path, whether it’s across an ocean or within yourself.” – Sven Yrvind In conclusion, making flanges around bulkhead hatches may seem complex at first glance, but by following Sven Yrvind’s meticulous process, enthusiasts can achieve professional-level results. Remember that the journey of boatbuilding is as rewarding as reaching your destination; it tests one’s patience and dedication. For those seeking to embark on this adventure or simply gain more insight into marine craftsmanship, Sven’s wisdom is invaluable.Sven Yrvind, a renowned yacht designer and sailor, shares valuable insights on creating flanges around bulkhead hatches for canvas protection in this enlightening video. By following his expert guidance, boat enthusiasts can ensure their living areas remain secure while allowing unhindered access through the hatches.Step 1: Starting with the Flange
Sven begins by explaining that working on flanges vertically and horizontally is significantly easier than doing so in a flat position. To simplify the process further, he divides the task into two or three steps as suggested by fellow expert “for for.” This approach not only makes it more manageable but also allows for greater precision in crafting each component.Step 2: Applying Glue and Securing
Sven proceeds to apply glue along one edge of the flange, ensuring a secure bond when clamped into place. He emphasizes that this stage is crucial for maintaining the structural integrity of the flange, which in turn safeguards the living area beneath the canvas when hatches are open.Step 3: Allowing Time to Dry
After securely attaching the first portion of the flange, Sven allows ample time for it to dry before moving forward with additional steps. This patience and precision are key aspects of his successful boatbuilding methods.Step 4: Finishing Touches
Once the flange is fully dried, Sven removes the clamps carefully, ensuring no damage occurs during this process. He then moves on to attaching four more pieces onto these main frames, completing two pairs of flanges for the bulkhead hatches.The Final Touches
While two flanges form the primary support structure around the hatches, Sven mentions there are two additional pieces required at each end to ensure comprehensive protection. This attention to detail highlights his commitment to producing a durable and reliable design. “Sailing is about finding your path, whether it’s across an ocean or within yourself.” – Sven Yrvind In conclusion, making flanges around bulkhead hatches may seem complex at first glance, but by following Sven Yrvind’s meticulous process, enthusiasts can achieve professional-level results. Remember that the journey of boatbuilding is as rewarding as reaching your destination; it tests one’s patience and dedication. For those seeking to embark on this adventure or simply gain more insight into marine craftsmanship, Sven’s wisdom is invaluable.Making Flanges Around Bulkhead Hatches for Canvas
Sven Yrvind, a renowned yacht designer and sailor, shares valuable insights on creating flanges around bulkhead hatches for canvas protection in this enlightening video. By following his expert guidance, boat enthusiasts can ensure their living areas remain secure while allowing unhindered access through the hatches.Step 1: Starting with the Flange
Sven begins by explaining that working on flanges vertically and horizontally is significantly easier than doing so in a flat position. To simplify the process further, he divides the task into two or three steps as suggested by fellow expert “for for.” This approach not only makes it more manageable but also allows for greater precision in crafting each component.Step 2: Applying Glue and Securing
Sven proceeds to apply glue along one edge of the flange, ensuring a secure bond when clamped into place. He emphasizes that this stage is crucial for maintaining the structural integrity of the flange, which in turn safeguards the living area beneath the canvas when hatches are open.Step 3: Allowing Time to Dry
After securely attaching the first portion of the flange, Sven allows ample time for it to dry before moving forward with additional steps. This patience and precision are key aspects of his successful boatbuilding methods.Step 4: Finishing Touches
Once the flange is fully dried, Sven removes the clamps carefully, ensuring no damage occurs during this process. He then moves on to attaching four more pieces onto these main frames, completing two pairs of flanges for the bulkhead hatches.The Final Touches
While two flanges form the primary support structure around the hatches, Sven mentions there are two additional pieces required at each end to ensure comprehensive protection. This attention to detail highlights his commitment to producing a durable and reliable design. “Sailing is about finding your path, whether it’s across an ocean or within yourself.” – Sven Yrvind In conclusion, making flanges around bulkhead hatches may seem complex at first glance, but by following Sven Yrvind’s meticulous process, enthusiasts can achieve professional-level results. Remember that the journey of boatbuilding is as rewarding as reaching your destination; it tests one’s patience and dedication. For those seeking to embark on this adventure or simply gain more insight into marine craftsmanship, Sven’s wisdom is invaluable.Once the flange is fully dried, Sven removes the clamps carefully, ensuring no damage occurs during this process. He then moves on to attaching four more pieces onto these main frames, completing two pairs of flanges for the bulkhead hatches.The Final Touches
While two flanges form the primary support structure around the hatches, Sven mentions there are two additional pieces required at each end to ensure comprehensive protection. This attention to detail highlights his commitment to producing a durable and reliable design. “Sailing is about finding your path, whether it’s across an ocean or within yourself.” – Sven Yrvind In conclusion, making flanges around bulkhead hatches may seem complex at first glance, but by following Sven Yrvind’s meticulous process, enthusiasts can achieve professional-level results. Remember that the journey of boatbuilding is as rewarding as reaching your destination; it tests one’s patience and dedication. For those seeking to embark on this adventure or simply gain more insight into marine craftsmanship, Sven’s wisdom is invaluable.Sven begins by explaining that working on flanges vertically and horizontally is significantly easier than doing so in a flat position. To simplify the process further, he divides the task into two or three steps as suggested by fellow expert “for for.” This approach not only makes it more manageable but also allows for greater precision in crafting each component.Step 2: Applying Glue and Securing
Sven proceeds to apply glue along one edge of the flange, ensuring a secure bond when clamped into place. He emphasizes that this stage is crucial for maintaining the structural integrity of the flange, which in turn safeguards the living area beneath the canvas when hatches are open.Step 3: Allowing Time to Dry
After securely attaching the first portion of the flange, Sven allows ample time for it to dry before moving forward with additional steps. This patience and precision are key aspects of his successful boatbuilding methods.Step 4: Finishing Touches
Once the flange is fully dried, Sven removes the clamps carefully, ensuring no damage occurs during this process. He then moves on to attaching four more pieces onto these main frames, completing two pairs of flanges for the bulkhead hatches.The Final Touches
While two flanges form the primary support structure around the hatches, Sven mentions there are two additional pieces required at each end to ensure comprehensive protection. This attention to detail highlights his commitment to producing a durable and reliable design. “Sailing is about finding your path, whether it’s across an ocean or within yourself.” – Sven Yrvind In conclusion, making flanges around bulkhead hatches may seem complex at first glance, but by following Sven Yrvind’s meticulous process, enthusiasts can achieve professional-level results. Remember that the journey of boatbuilding is as rewarding as reaching your destination; it tests one’s patience and dedication. For those seeking to embark on this adventure or simply gain more insight into marine craftsmanship, Sven’s wisdom is invaluable.Sven Yrvind, a renowned yacht designer and sailor, shares valuable insights on creating flanges around bulkhead hatches for canvas protection in this enlightening video. By following his expert guidance, boat enthusiasts can ensure their living areas remain secure while allowing unhindered access through the hatches.Step 1: Starting with the Flange
Sven begins by explaining that working on flanges vertically and horizontally is significantly easier than doing so in a flat position. To simplify the process further, he divides the task into two or three steps as suggested by fellow expert “for for.” This approach not only makes it more manageable but also allows for greater precision in crafting each component.Step 2: Applying Glue and Securing
Sven proceeds to apply glue along one edge of the flange, ensuring a secure bond when clamped into place. He emphasizes that this stage is crucial for maintaining the structural integrity of the flange, which in turn safeguards the living area beneath the canvas when hatches are open.Step 3: Allowing Time to Dry
After securely attaching the first portion of the flange, Sven allows ample time for it to dry before moving forward with additional steps. This patience and precision are key aspects of his successful boatbuilding methods.Step 4: Finishing Touches
Once the flange is fully dried, Sven removes the clamps carefully, ensuring no damage occurs during this process. He then moves on to attaching four more pieces onto these main frames, completing two pairs of flanges for the bulkhead hatches.The Final Touches
While two flanges form the primary support structure around the hatches, Sven mentions there are two additional pieces required at each end to ensure comprehensive protection. This attention to detail highlights his commitment to producing a durable and reliable design. “Sailing is about finding your path, whether it’s across an ocean or within yourself.” – Sven Yrvind In conclusion, making flanges around bulkhead hatches may seem complex at first glance, but by following Sven Yrvind’s meticulous process, enthusiasts can achieve professional-level results. Remember that the journey of boatbuilding is as rewarding as reaching your destination; it tests one’s patience and dedication. For those seeking to embark on this adventure or simply gain more insight into marine craftsmanship, Sven’s wisdom is invaluable.Making Flanges Around Bulkhead Hatches for Canvas
Sven Yrvind, a renowned yacht designer and sailor, shares valuable insights on creating flanges around bulkhead hatches for canvas protection in this enlightening video. By following his expert guidance, boat enthusiasts can ensure their living areas remain secure while allowing unhindered access through the hatches.Step 1: Starting with the Flange
Sven begins by explaining that working on flanges vertically and horizontally is significantly easier than doing so in a flat position. To simplify the process further, he divides the task into two or three steps as suggested by fellow expert “for for.” This approach not only makes it more manageable but also allows for greater precision in crafting each component.Step 2: Applying Glue and Securing
Sven proceeds to apply glue along one edge of the flange, ensuring a secure bond when clamped into place. He emphasizes that this stage is crucial for maintaining the structural integrity of the flange, which in turn safeguards the living area beneath the canvas when hatches are open.Step 3: Allowing Time to Dry
After securely attaching the first portion of the flange, Sven allows ample time for it to dry before moving forward with additional steps. This patience and precision are key aspects of his successful boatbuilding methods.Step 4: Finishing Touches
Once the flange is fully dried, Sven removes the clamps carefully, ensuring no damage occurs during this process. He then moves on to attaching four more pieces onto these main frames, completing two pairs of flanges for the bulkhead hatches.The Final Touches
While two flanges form the primary support structure around the hatches, Sven mentions there are two additional pieces required at each end to ensure comprehensive protection. This attention to detail highlights his commitment to producing a durable and reliable design. “Sailing is about finding your path, whether it’s across an ocean or within yourself.” – Sven Yrvind In conclusion, making flanges around bulkhead hatches may seem complex at first glance, but by following Sven Yrvind’s meticulous process, enthusiasts can achieve professional-level results. Remember that the journey of boatbuilding is as rewarding as reaching your destination; it tests one’s patience and dedication. For those seeking to embark on this adventure or simply gain more insight into marine craftsmanship, Sven’s wisdom is invaluable.After securely attaching the first portion of the flange, Sven allows ample time for it to dry before moving forward with additional steps. This patience and precision are key aspects of his successful boatbuilding methods.Step 4: Finishing Touches
Once the flange is fully dried, Sven removes the clamps carefully, ensuring no damage occurs during this process. He then moves on to attaching four more pieces onto these main frames, completing two pairs of flanges for the bulkhead hatches.The Final Touches
While two flanges form the primary support structure around the hatches, Sven mentions there are two additional pieces required at each end to ensure comprehensive protection. This attention to detail highlights his commitment to producing a durable and reliable design. “Sailing is about finding your path, whether it’s across an ocean or within yourself.” – Sven Yrvind In conclusion, making flanges around bulkhead hatches may seem complex at first glance, but by following Sven Yrvind’s meticulous process, enthusiasts can achieve professional-level results. Remember that the journey of boatbuilding is as rewarding as reaching your destination; it tests one’s patience and dedication. For those seeking to embark on this adventure or simply gain more insight into marine craftsmanship, Sven’s wisdom is invaluable.Sven begins by explaining that working on flanges vertically and horizontally is significantly easier than doing so in a flat position. To simplify the process further, he divides the task into two or three steps as suggested by fellow expert “for for.” This approach not only makes it more manageable but also allows for greater precision in crafting each component.Step 2: Applying Glue and Securing
Sven proceeds to apply glue along one edge of the flange, ensuring a secure bond when clamped into place. He emphasizes that this stage is crucial for maintaining the structural integrity of the flange, which in turn safeguards the living area beneath the canvas when hatches are open.Step 3: Allowing Time to Dry
After securely attaching the first portion of the flange, Sven allows ample time for it to dry before moving forward with additional steps. This patience and precision are key aspects of his successful boatbuilding methods.Step 4: Finishing Touches
Once the flange is fully dried, Sven removes the clamps carefully, ensuring no damage occurs during this process. He then moves on to attaching four more pieces onto these main frames, completing two pairs of flanges for the bulkhead hatches.The Final Touches
While two flanges form the primary support structure around the hatches, Sven mentions there are two additional pieces required at each end to ensure comprehensive protection. This attention to detail highlights his commitment to producing a durable and reliable design. “Sailing is about finding your path, whether it’s across an ocean or within yourself.” – Sven Yrvind In conclusion, making flanges around bulkhead hatches may seem complex at first glance, but by following Sven Yrvind’s meticulous process, enthusiasts can achieve professional-level results. Remember that the journey of boatbuilding is as rewarding as reaching your destination; it tests one’s patience and dedication. For those seeking to embark on this adventure or simply gain more insight into marine craftsmanship, Sven’s wisdom is invaluable.Sven Yrvind, a renowned yacht designer and sailor, shares valuable insights on creating flanges around bulkhead hatches for canvas protection in this enlightening video. By following his expert guidance, boat enthusiasts can ensure their living areas remain secure while allowing unhindered access through the hatches.Step 1: Starting with the Flange
Sven begins by explaining that working on flanges vertically and horizontally is significantly easier than doing so in a flat position. To simplify the process further, he divides the task into two or three steps as suggested by fellow expert “for for.” This approach not only makes it more manageable but also allows for greater precision in crafting each component.Step 2: Applying Glue and Securing
Sven proceeds to apply glue along one edge of the flange, ensuring a secure bond when clamped into place. He emphasizes that this stage is crucial for maintaining the structural integrity of the flange, which in turn safeguards the living area beneath the canvas when hatches are open.Step 3: Allowing Time to Dry
After securely attaching the first portion of the flange, Sven allows ample time for it to dry before moving forward with additional steps. This patience and precision are key aspects of his successful boatbuilding methods.Step 4: Finishing Touches
Once the flange is fully dried, Sven removes the clamps carefully, ensuring no damage occurs during this process. He then moves on to attaching four more pieces onto these main frames, completing two pairs of flanges for the bulkhead hatches.The Final Touches
While two flanges form the primary support structure around the hatches, Sven mentions there are two additional pieces required at each end to ensure comprehensive protection. This attention to detail highlights his commitment to producing a durable and reliable design. “Sailing is about finding your path, whether it’s across an ocean or within yourself.” – Sven Yrvind In conclusion, making flanges around bulkhead hatches may seem complex at first glance, but by following Sven Yrvind’s meticulous process, enthusiasts can achieve professional-level results. Remember that the journey of boatbuilding is as rewarding as reaching your destination; it tests one’s patience and dedication. For those seeking to embark on this adventure or simply gain more insight into marine craftsmanship, Sven’s wisdom is invaluable.Making Flanges Around Bulkhead Hatches for Canvas
Sven Yrvind, a renowned yacht designer and sailor, shares valuable insights on creating flanges around bulkhead hatches for canvas protection in this enlightening video. By following his expert guidance, boat enthusiasts can ensure their living areas remain secure while allowing unhindered access through the hatches.Step 1: Starting with the Flange
Sven begins by explaining that working on flanges vertically and horizontally is significantly easier than doing so in a flat position. To simplify the process further, he divides the task into two or three steps as suggested by fellow expert “for for.” This approach not only makes it more manageable but also allows for greater precision in crafting each component.Step 2: Applying Glue and Securing
Sven proceeds to apply glue along one edge of the flange, ensuring a secure bond when clamped into place. He emphasizes that this stage is crucial for maintaining the structural integrity of the flange, which in turn safeguards the living area beneath the canvas when hatches are open.Step 3: Allowing Time to Dry
After securely attaching the first portion of the flange, Sven allows ample time for it to dry before moving forward with additional steps. This patience and precision are key aspects of his successful boatbuilding methods.Step 4: Finishing Touches
Once the flange is fully dried, Sven removes the clamps carefully, ensuring no damage occurs during this process. He then moves on to attaching four more pieces onto these main frames, completing two pairs of flanges for the bulkhead hatches.The Final Touches
While two flanges form the primary support structure around the hatches, Sven mentions there are two additional pieces required at each end to ensure comprehensive protection. This attention to detail highlights his commitment to producing a durable and reliable design. “Sailing is about finding your path, whether it’s across an ocean or within yourself.” – Sven Yrvind In conclusion, making flanges around bulkhead hatches may seem complex at first glance, but by following Sven Yrvind’s meticulous process, enthusiasts can achieve professional-level results. Remember that the journey of boatbuilding is as rewarding as reaching your destination; it tests one’s patience and dedication. For those seeking to embark on this adventure or simply gain more insight into marine craftsmanship, Sven’s wisdom is invaluable.Sven proceeds to apply glue along one edge of the flange, ensuring a secure bond when clamped into place. He emphasizes that this stage is crucial for maintaining the structural integrity of the flange, which in turn safeguards the living area beneath the canvas when hatches are open.Step 3: Allowing Time to Dry
After securely attaching the first portion of the flange, Sven allows ample time for it to dry before moving forward with additional steps. This patience and precision are key aspects of his successful boatbuilding methods.Step 4: Finishing Touches
Once the flange is fully dried, Sven removes the clamps carefully, ensuring no damage occurs during this process. He then moves on to attaching four more pieces onto these main frames, completing two pairs of flanges for the bulkhead hatches.The Final Touches
While two flanges form the primary support structure around the hatches, Sven mentions there are two additional pieces required at each end to ensure comprehensive protection. This attention to detail highlights his commitment to producing a durable and reliable design. “Sailing is about finding your path, whether it’s across an ocean or within yourself.” – Sven Yrvind In conclusion, making flanges around bulkhead hatches may seem complex at first glance, but by following Sven Yrvind’s meticulous process, enthusiasts can achieve professional-level results. Remember that the journey of boatbuilding is as rewarding as reaching your destination; it tests one’s patience and dedication. For those seeking to embark on this adventure or simply gain more insight into marine craftsmanship, Sven’s wisdom is invaluable.Sven begins by explaining that working on flanges vertically and horizontally is significantly easier than doing so in a flat position. To simplify the process further, he divides the task into two or three steps as suggested by fellow expert “for for.” This approach not only makes it more manageable but also allows for greater precision in crafting each component.Step 2: Applying Glue and Securing
Sven proceeds to apply glue along one edge of the flange, ensuring a secure bond when clamped into place. He emphasizes that this stage is crucial for maintaining the structural integrity of the flange, which in turn safeguards the living area beneath the canvas when hatches are open.Step 3: Allowing Time to Dry
After securely attaching the first portion of the flange, Sven allows ample time for it to dry before moving forward with additional steps. This patience and precision are key aspects of his successful boatbuilding methods.Step 4: Finishing Touches
Once the flange is fully dried, Sven removes the clamps carefully, ensuring no damage occurs during this process. He then moves on to attaching four more pieces onto these main frames, completing two pairs of flanges for the bulkhead hatches.The Final Touches
While two flanges form the primary support structure around the hatches, Sven mentions there are two additional pieces required at each end to ensure comprehensive protection. This attention to detail highlights his commitment to producing a durable and reliable design. “Sailing is about finding your path, whether it’s across an ocean or within yourself.” – Sven Yrvind In conclusion, making flanges around bulkhead hatches may seem complex at first glance, but by following Sven Yrvind’s meticulous process, enthusiasts can achieve professional-level results. Remember that the journey of boatbuilding is as rewarding as reaching your destination; it tests one’s patience and dedication. For those seeking to embark on this adventure or simply gain more insight into marine craftsmanship, Sven’s wisdom is invaluable.Sven Yrvind, a renowned yacht designer and sailor, shares valuable insights on creating flanges around bulkhead hatches for canvas protection in this enlightening video. By following his expert guidance, boat enthusiasts can ensure their living areas remain secure while allowing unhindered access through the hatches.Step 1: Starting with the Flange
Sven begins by explaining that working on flanges vertically and horizontally is significantly easier than doing so in a flat position. To simplify the process further, he divides the task into two or three steps as suggested by fellow expert “for for.” This approach not only makes it more manageable but also allows for greater precision in crafting each component.Step 2: Applying Glue and Securing
Sven proceeds to apply glue along one edge of the flange, ensuring a secure bond when clamped into place. He emphasizes that this stage is crucial for maintaining the structural integrity of the flange, which in turn safeguards the living area beneath the canvas when hatches are open.Step 3: Allowing Time to Dry
After securely attaching the first portion of the flange, Sven allows ample time for it to dry before moving forward with additional steps. This patience and precision are key aspects of his successful boatbuilding methods.Step 4: Finishing Touches
Once the flange is fully dried, Sven removes the clamps carefully, ensuring no damage occurs during this process. He then moves on to attaching four more pieces onto these main frames, completing two pairs of flanges for the bulkhead hatches.The Final Touches
While two flanges form the primary support structure around the hatches, Sven mentions there are two additional pieces required at each end to ensure comprehensive protection. This attention to detail highlights his commitment to producing a durable and reliable design. “Sailing is about finding your path, whether it’s across an ocean or within yourself.” – Sven Yrvind In conclusion, making flanges around bulkhead hatches may seem complex at first glance, but by following Sven Yrvind’s meticulous process, enthusiasts can achieve professional-level results. Remember that the journey of boatbuilding is as rewarding as reaching your destination; it tests one’s patience and dedication. For those seeking to embark on this adventure or simply gain more insight into marine craftsmanship, Sven’s wisdom is invaluable.Making Flanges Around Bulkhead Hatches for Canvas
Sven Yrvind, a renowned yacht designer and sailor, shares valuable insights on creating flanges around bulkhead hatches for canvas protection in this enlightening video. By following his expert guidance, boat enthusiasts can ensure their living areas remain secure while allowing unhindered access through the hatches.Step 1: Starting with the Flange
Sven begins by explaining that working on flanges vertically and horizontally is significantly easier than doing so in a flat position. To simplify the process further, he divides the task into two or three steps as suggested by fellow expert “for for.” This approach not only makes it more manageable but also allows for greater precision in crafting each component.Step 2: Applying Glue and Securing
Sven proceeds to apply glue along one edge of the flange, ensuring a secure bond when clamped into place. He emphasizes that this stage is crucial for maintaining the structural integrity of the flange, which in turn safeguards the living area beneath the canvas when hatches are open.Step 3: Allowing Time to Dry
After securely attaching the first portion of the flange, Sven allows ample time for it to dry before moving forward with additional steps. This patience and precision are key aspects of his successful boatbuilding methods.Step 4: Finishing Touches
Once the flange is fully dried, Sven removes the clamps carefully, ensuring no damage occurs during this process. He then moves on to attaching four more pieces onto these main frames, completing two pairs of flanges for the bulkhead hatches.The Final Touches
While two flanges form the primary support structure around the hatches, Sven mentions there are two additional pieces required at each end to ensure comprehensive protection. This attention to detail highlights his commitment to producing a durable and reliable design. “Sailing is about finding your path, whether it’s across an ocean or within yourself.” – Sven Yrvind In conclusion, making flanges around bulkhead hatches may seem complex at first glance, but by following Sven Yrvind’s meticulous process, enthusiasts can achieve professional-level results. Remember that the journey of boatbuilding is as rewarding as reaching your destination; it tests one’s patience and dedication. For those seeking to embark on this adventure or simply gain more insight into marine craftsmanship, Sven’s wisdom is invaluable.Once the flange is fully dried, Sven removes the clamps carefully, ensuring no damage occurs during this process. He then moves on to attaching four more pieces onto these main frames, completing two pairs of flanges for the bulkhead hatches.The Final Touches
While two flanges form the primary support structure around the hatches, Sven mentions there are two additional pieces required at each end to ensure comprehensive protection. This attention to detail highlights his commitment to producing a durable and reliable design. “Sailing is about finding your path, whether it’s across an ocean or within yourself.” – Sven Yrvind In conclusion, making flanges around bulkhead hatches may seem complex at first glance, but by following Sven Yrvind’s meticulous process, enthusiasts can achieve professional-level results. Remember that the journey of boatbuilding is as rewarding as reaching your destination; it tests one’s patience and dedication. For those seeking to embark on this adventure or simply gain more insight into marine craftsmanship, Sven’s wisdom is invaluable.Sven proceeds to apply glue along one edge of the flange, ensuring a secure bond when clamped into place. He emphasizes that this stage is crucial for maintaining the structural integrity of the flange, which in turn safeguards the living area beneath the canvas when hatches are open.Step 3: Allowing Time to Dry
After securely attaching the first portion of the flange, Sven allows ample time for it to dry before moving forward with additional steps. This patience and precision are key aspects of his successful boatbuilding methods.Step 4: Finishing Touches
Once the flange is fully dried, Sven removes the clamps carefully, ensuring no damage occurs during this process. He then moves on to attaching four more pieces onto these main frames, completing two pairs of flanges for the bulkhead hatches.The Final Touches
While two flanges form the primary support structure around the hatches, Sven mentions there are two additional pieces required at each end to ensure comprehensive protection. This attention to detail highlights his commitment to producing a durable and reliable design. “Sailing is about finding your path, whether it’s across an ocean or within yourself.” – Sven Yrvind In conclusion, making flanges around bulkhead hatches may seem complex at first glance, but by following Sven Yrvind’s meticulous process, enthusiasts can achieve professional-level results. Remember that the journey of boatbuilding is as rewarding as reaching your destination; it tests one’s patience and dedication. For those seeking to embark on this adventure or simply gain more insight into marine craftsmanship, Sven’s wisdom is invaluable.Sven begins by explaining that working on flanges vertically and horizontally is significantly easier than doing so in a flat position. To simplify the process further, he divides the task into two or three steps as suggested by fellow expert “for for.” This approach not only makes it more manageable but also allows for greater precision in crafting each component.Step 2: Applying Glue and Securing
Sven proceeds to apply glue along one edge of the flange, ensuring a secure bond when clamped into place. He emphasizes that this stage is crucial for maintaining the structural integrity of the flange, which in turn safeguards the living area beneath the canvas when hatches are open.Step 3: Allowing Time to Dry
After securely attaching the first portion of the flange, Sven allows ample time for it to dry before moving forward with additional steps. This patience and precision are key aspects of his successful boatbuilding methods.Step 4: Finishing Touches
Once the flange is fully dried, Sven removes the clamps carefully, ensuring no damage occurs during this process. He then moves on to attaching four more pieces onto these main frames, completing two pairs of flanges for the bulkhead hatches.The Final Touches
While two flanges form the primary support structure around the hatches, Sven mentions there are two additional pieces required at each end to ensure comprehensive protection. This attention to detail highlights his commitment to producing a durable and reliable design. “Sailing is about finding your path, whether it’s across an ocean or within yourself.” – Sven Yrvind In conclusion, making flanges around bulkhead hatches may seem complex at first glance, but by following Sven Yrvind’s meticulous process, enthusiasts can achieve professional-level results. Remember that the journey of boatbuilding is as rewarding as reaching your destination; it tests one’s patience and dedication. For those seeking to embark on this adventure or simply gain more insight into marine craftsmanship, Sven’s wisdom is invaluable.Sven Yrvind, a renowned yacht designer and sailor, shares valuable insights on creating flanges around bulkhead hatches for canvas protection in this enlightening video. By following his expert guidance, boat enthusiasts can ensure their living areas remain secure while allowing unhindered access through the hatches.Step 1: Starting with the Flange
Sven begins by explaining that working on flanges vertically and horizontally is significantly easier than doing so in a flat position. To simplify the process further, he divides the task into two or three steps as suggested by fellow expert “for for.” This approach not only makes it more manageable but also allows for greater precision in crafting each component.Step 2: Applying Glue and Securing
Sven proceeds to apply glue along one edge of the flange, ensuring a secure bond when clamped into place. He emphasizes that this stage is crucial for maintaining the structural integrity of the flange, which in turn safeguards the living area beneath the canvas when hatches are open.Step 3: Allowing Time to Dry
After securely attaching the first portion of the flange, Sven allows ample time for it to dry before moving forward with additional steps. This patience and precision are key aspects of his successful boatbuilding methods.Step 4: Finishing Touches
Once the flange is fully dried, Sven removes the clamps carefully, ensuring no damage occurs during this process. He then moves on to attaching four more pieces onto these main frames, completing two pairs of flanges for the bulkhead hatches.The Final Touches
While two flanges form the primary support structure around the hatches, Sven mentions there are two additional pieces required at each end to ensure comprehensive protection. This attention to detail highlights his commitment to producing a durable and reliable design. “Sailing is about finding your path, whether it’s across an ocean or within yourself.” – Sven Yrvind In conclusion, making flanges around bulkhead hatches may seem complex at first glance, but by following Sven Yrvind’s meticulous process, enthusiasts can achieve professional-level results. Remember that the journey of boatbuilding is as rewarding as reaching your destination; it tests one’s patience and dedication. For those seeking to embark on this adventure or simply gain more insight into marine craftsmanship, Sven’s wisdom is invaluable.Making Flanges Around Bulkhead Hatches for Canvas
Sven Yrvind, a renowned yacht designer and sailor, shares valuable insights on creating flanges around bulkhead hatches for canvas protection in this enlightening video. By following his expert guidance, boat enthusiasts can ensure their living areas remain secure while allowing unhindered access through the hatches.Step 1: Starting with the Flange
Sven begins by explaining that working on flanges vertically and horizontally is significantly easier than doing so in a flat position. To simplify the process further, he divides the task into two or three steps as suggested by fellow expert “for for.” This approach not only makes it more manageable but also allows for greater precision in crafting each component.Step 2: Applying Glue and Securing
Sven proceeds to apply glue along one edge of the flange, ensuring a secure bond when clamped into place. He emphasizes that this stage is crucial for maintaining the structural integrity of the flange, which in turn safeguards the living area beneath the canvas when hatches are open.Step 3: Allowing Time to Dry
After securely attaching the first portion of the flange, Sven allows ample time for it to dry before moving forward with additional steps. This patience and precision are key aspects of his successful boatbuilding methods.Step 4: Finishing Touches
Once the flange is fully dried, Sven removes the clamps carefully, ensuring no damage occurs during this process. He then moves on to attaching four more pieces onto these main frames, completing two pairs of flanges for the bulkhead hatches.The Final Touches
While two flanges form the primary support structure around the hatches, Sven mentions there are two additional pieces required at each end to ensure comprehensive protection. This attention to detail highlights his commitment to producing a durable and reliable design. “Sailing is about finding your path, whether it’s across an ocean or within yourself.” – Sven Yrvind In conclusion, making flanges around bulkhead hatches may seem complex at first glance, but by following Sven Yrvind’s meticulous process, enthusiasts can achieve professional-level results. Remember that the journey of boatbuilding is as rewarding as reaching your destination; it tests one’s patience and dedication. For those seeking to embark on this adventure or simply gain more insight into marine craftsmanship, Sven’s wisdom is invaluable.After securely attaching the first portion of the flange, Sven allows ample time for it to dry before moving forward with additional steps. This patience and precision are key aspects of his successful boatbuilding methods.Step 4: Finishing Touches
Once the flange is fully dried, Sven removes the clamps carefully, ensuring no damage occurs during this process. He then moves on to attaching four more pieces onto these main frames, completing two pairs of flanges for the bulkhead hatches.The Final Touches
While two flanges form the primary support structure around the hatches, Sven mentions there are two additional pieces required at each end to ensure comprehensive protection. This attention to detail highlights his commitment to producing a durable and reliable design. “Sailing is about finding your path, whether it’s across an ocean or within yourself.” – Sven Yrvind In conclusion, making flanges around bulkhead hatches may seem complex at first glance, but by following Sven Yrvind’s meticulous process, enthusiasts can achieve professional-level results. Remember that the journey of boatbuilding is as rewarding as reaching your destination; it tests one’s patience and dedication. For those seeking to embark on this adventure or simply gain more insight into marine craftsmanship, Sven’s wisdom is invaluable.Sven proceeds to apply glue along one edge of the flange, ensuring a secure bond when clamped into place. He emphasizes that this stage is crucial for maintaining the structural integrity of the flange, which in turn safeguards the living area beneath the canvas when hatches are open.Step 3: Allowing Time to Dry
After securely attaching the first portion of the flange, Sven allows ample time for it to dry before moving forward with additional steps. This patience and precision are key aspects of his successful boatbuilding methods.Step 4: Finishing Touches
Once the flange is fully dried, Sven removes the clamps carefully, ensuring no damage occurs during this process. He then moves on to attaching four more pieces onto these main frames, completing two pairs of flanges for the bulkhead hatches.The Final Touches
While two flanges form the primary support structure around the hatches, Sven mentions there are two additional pieces required at each end to ensure comprehensive protection. This attention to detail highlights his commitment to producing a durable and reliable design. “Sailing is about finding your path, whether it’s across an ocean or within yourself.” – Sven Yrvind In conclusion, making flanges around bulkhead hatches may seem complex at first glance, but by following Sven Yrvind’s meticulous process, enthusiasts can achieve professional-level results. Remember that the journey of boatbuilding is as rewarding as reaching your destination; it tests one’s patience and dedication. For those seeking to embark on this adventure or simply gain more insight into marine craftsmanship, Sven’s wisdom is invaluable.Sven begins by explaining that working on flanges vertically and horizontally is significantly easier than doing so in a flat position. To simplify the process further, he divides the task into two or three steps as suggested by fellow expert “for for.” This approach not only makes it more manageable but also allows for greater precision in crafting each component.Step 2: Applying Glue and Securing
Sven proceeds to apply glue along one edge of the flange, ensuring a secure bond when clamped into place. He emphasizes that this stage is crucial for maintaining the structural integrity of the flange, which in turn safeguards the living area beneath the canvas when hatches are open.Step 3: Allowing Time to Dry
After securely attaching the first portion of the flange, Sven allows ample time for it to dry before moving forward with additional steps. This patience and precision are key aspects of his successful boatbuilding methods.Step 4: Finishing Touches
Once the flange is fully dried, Sven removes the clamps carefully, ensuring no damage occurs during this process. He then moves on to attaching four more pieces onto these main frames, completing two pairs of flanges for the bulkhead hatches.The Final Touches
While two flanges form the primary support structure around the hatches, Sven mentions there are two additional pieces required at each end to ensure comprehensive protection. This attention to detail highlights his commitment to producing a durable and reliable design. “Sailing is about finding your path, whether it’s across an ocean or within yourself.” – Sven Yrvind In conclusion, making flanges around bulkhead hatches may seem complex at first glance, but by following Sven Yrvind’s meticulous process, enthusiasts can achieve professional-level results. Remember that the journey of boatbuilding is as rewarding as reaching your destination; it tests one’s patience and dedication. For those seeking to embark on this adventure or simply gain more insight into marine craftsmanship, Sven’s wisdom is invaluable.Sven Yrvind, a renowned yacht designer and sailor, shares valuable insights on creating flanges around bulkhead hatches for canvas protection in this enlightening video. By following his expert guidance, boat enthusiasts can ensure their living areas remain secure while allowing unhindered access through the hatches.Step 1: Starting with the Flange
Sven begins by explaining that working on flanges vertically and horizontally is significantly easier than doing so in a flat position. To simplify the process further, he divides the task into two or three steps as suggested by fellow expert “for for.” This approach not only makes it more manageable but also allows for greater precision in crafting each component.Step 2: Applying Glue and Securing
Sven proceeds to apply glue along one edge of the flange, ensuring a secure bond when clamped into place. He emphasizes that this stage is crucial for maintaining the structural integrity of the flange, which in turn safeguards the living area beneath the canvas when hatches are open.Step 3: Allowing Time to Dry
After securely attaching the first portion of the flange, Sven allows ample time for it to dry before moving forward with additional steps. This patience and precision are key aspects of his successful boatbuilding methods.Step 4: Finishing Touches
Once the flange is fully dried, Sven removes the clamps carefully, ensuring no damage occurs during this process. He then moves on to attaching four more pieces onto these main frames, completing two pairs of flanges for the bulkhead hatches.The Final Touches
While two flanges form the primary support structure around the hatches, Sven mentions there are two additional pieces required at each end to ensure comprehensive protection. This attention to detail highlights his commitment to producing a durable and reliable design. “Sailing is about finding your path, whether it’s across an ocean or within yourself.” – Sven Yrvind In conclusion, making flanges around bulkhead hatches may seem complex at first glance, but by following Sven Yrvind’s meticulous process, enthusiasts can achieve professional-level results. Remember that the journey of boatbuilding is as rewarding as reaching your destination; it tests one’s patience and dedication. For those seeking to embark on this adventure or simply gain more insight into marine craftsmanship, Sven’s wisdom is invaluable.Making Flanges Around Bulkhead Hatches for Canvas
Sven Yrvind, a renowned yacht designer and sailor, shares valuable insights on creating flanges around bulkhead hatches for canvas protection in this enlightening video. By following his expert guidance, boat enthusiasts can ensure their living areas remain secure while allowing unhindered access through the hatches.Step 1: Starting with the Flange
Sven begins by explaining that working on flanges vertically and horizontally is significantly easier than doing so in a flat position. To simplify the process further, he divides the task into two or three steps as suggested by fellow expert “for for.” This approach not only makes it more manageable but also allows for greater precision in crafting each component.Step 2: Applying Glue and Securing
Sven proceeds to apply glue along one edge of the flange, ensuring a secure bond when clamped into place. He emphasizes that this stage is crucial for maintaining the structural integrity of the flange, which in turn safeguards the living area beneath the canvas when hatches are open.Step 3: Allowing Time to Dry
After securely attaching the first portion of the flange, Sven allows ample time for it to dry before moving forward with additional steps. This patience and precision are key aspects of his successful boatbuilding methods.Step 4: Finishing Touches
Once the flange is fully dried, Sven removes the clamps carefully, ensuring no damage occurs during this process. He then moves on to attaching four more pieces onto these main frames, completing two pairs of flanges for the bulkhead hatches.The Final Touches
While two flanges form the primary support structure around the hatches, Sven mentions there are two additional pieces required at each end to ensure comprehensive protection. This attention to detail highlights his commitment to producing a durable and reliable design. “Sailing is about finding your path, whether it’s across an ocean or within yourself.” – Sven Yrvind In conclusion, making flanges around bulkhead hatches may seem complex at first glance, but by following Sven Yrvind’s meticulous process, enthusiasts can achieve professional-level results. Remember that the journey of boatbuilding is as rewarding as reaching your destination; it tests one’s patience and dedication. For those seeking to embark on this adventure or simply gain more insight into marine craftsmanship, Sven’s wisdom is invaluable.Once the flange is fully dried, Sven removes the clamps carefully, ensuring no damage occurs during this process. He then moves on to attaching four more pieces onto these main frames, completing two pairs of flanges for the bulkhead hatches.The Final Touches
While two flanges form the primary support structure around the hatches, Sven mentions there are two additional pieces required at each end to ensure comprehensive protection. This attention to detail highlights his commitment to producing a durable and reliable design. “Sailing is about finding your path, whether it’s across an ocean or within yourself.” – Sven Yrvind In conclusion, making flanges around bulkhead hatches may seem complex at first glance, but by following Sven Yrvind’s meticulous process, enthusiasts can achieve professional-level results. Remember that the journey of boatbuilding is as rewarding as reaching your destination; it tests one’s patience and dedication. For those seeking to embark on this adventure or simply gain more insight into marine craftsmanship, Sven’s wisdom is invaluable.After securely attaching the first portion of the flange, Sven allows ample time for it to dry before moving forward with additional steps. This patience and precision are key aspects of his successful boatbuilding methods.Step 4: Finishing Touches
Once the flange is fully dried, Sven removes the clamps carefully, ensuring no damage occurs during this process. He then moves on to attaching four more pieces onto these main frames, completing two pairs of flanges for the bulkhead hatches.The Final Touches
While two flanges form the primary support structure around the hatches, Sven mentions there are two additional pieces required at each end to ensure comprehensive protection. This attention to detail highlights his commitment to producing a durable and reliable design. “Sailing is about finding your path, whether it’s across an ocean or within yourself.” – Sven Yrvind In conclusion, making flanges around bulkhead hatches may seem complex at first glance, but by following Sven Yrvind’s meticulous process, enthusiasts can achieve professional-level results. Remember that the journey of boatbuilding is as rewarding as reaching your destination; it tests one’s patience and dedication. For those seeking to embark on this adventure or simply gain more insight into marine craftsmanship, Sven’s wisdom is invaluable.Sven proceeds to apply glue along one edge of the flange, ensuring a secure bond when clamped into place. He emphasizes that this stage is crucial for maintaining the structural integrity of the flange, which in turn safeguards the living area beneath the canvas when hatches are open.Step 3: Allowing Time to Dry
After securely attaching the first portion of the flange, Sven allows ample time for it to dry before moving forward with additional steps. This patience and precision are key aspects of his successful boatbuilding methods.Step 4: Finishing Touches
Once the flange is fully dried, Sven removes the clamps carefully, ensuring no damage occurs during this process. He then moves on to attaching four more pieces onto these main frames, completing two pairs of flanges for the bulkhead hatches.The Final Touches
While two flanges form the primary support structure around the hatches, Sven mentions there are two additional pieces required at each end to ensure comprehensive protection. This attention to detail highlights his commitment to producing a durable and reliable design. “Sailing is about finding your path, whether it’s across an ocean or within yourself.” – Sven Yrvind In conclusion, making flanges around bulkhead hatches may seem complex at first glance, but by following Sven Yrvind’s meticulous process, enthusiasts can achieve professional-level results. Remember that the journey of boatbuilding is as rewarding as reaching your destination; it tests one’s patience and dedication. For those seeking to embark on this adventure or simply gain more insight into marine craftsmanship, Sven’s wisdom is invaluable.Sven begins by explaining that working on flanges vertically and horizontally is significantly easier than doing so in a flat position. To simplify the process further, he divides the task into two or three steps as suggested by fellow expert “for for.” This approach not only makes it more manageable but also allows for greater precision in crafting each component.Step 2: Applying Glue and Securing
Sven proceeds to apply glue along one edge of the flange, ensuring a secure bond when clamped into place. He emphasizes that this stage is crucial for maintaining the structural integrity of the flange, which in turn safeguards the living area beneath the canvas when hatches are open.Step 3: Allowing Time to Dry
After securely attaching the first portion of the flange, Sven allows ample time for it to dry before moving forward with additional steps. This patience and precision are key aspects of his successful boatbuilding methods.Step 4: Finishing Touches
Once the flange is fully dried, Sven removes the clamps carefully, ensuring no damage occurs during this process. He then moves on to attaching four more pieces onto these main frames, completing two pairs of flanges for the bulkhead hatches.The Final Touches
While two flanges form the primary support structure around the hatches, Sven mentions there are two additional pieces required at each end to ensure comprehensive protection. This attention to detail highlights his commitment to producing a durable and reliable design. “Sailing is about finding your path, whether it’s across an ocean or within yourself.” – Sven Yrvind In conclusion, making flanges around bulkhead hatches may seem complex at first glance, but by following Sven Yrvind’s meticulous process, enthusiasts can achieve professional-level results. Remember that the journey of boatbuilding is as rewarding as reaching your destination; it tests one’s patience and dedication. For those seeking to embark on this adventure or simply gain more insight into marine craftsmanship, Sven’s wisdom is invaluable.Sven Yrvind, a renowned yacht designer and sailor, shares valuable insights on creating flanges around bulkhead hatches for canvas protection in this enlightening video. By following his expert guidance, boat enthusiasts can ensure their living areas remain secure while allowing unhindered access through the hatches.Step 1: Starting with the Flange
Sven begins by explaining that working on flanges vertically and horizontally is significantly easier than doing so in a flat position. To simplify the process further, he divides the task into two or three steps as suggested by fellow expert “for for.” This approach not only makes it more manageable but also allows for greater precision in crafting each component.Step 2: Applying Glue and Securing
Sven proceeds to apply glue along one edge of the flange, ensuring a secure bond when clamped into place. He emphasizes that this stage is crucial for maintaining the structural integrity of the flange, which in turn safeguards the living area beneath the canvas when hatches are open.Step 3: Allowing Time to Dry
After securely attaching the first portion of the flange, Sven allows ample time for it to dry before moving forward with additional steps. This patience and precision are key aspects of his successful boatbuilding methods.Step 4: Finishing Touches
Once the flange is fully dried, Sven removes the clamps carefully, ensuring no damage occurs during this process. He then moves on to attaching four more pieces onto these main frames, completing two pairs of flanges for the bulkhead hatches.The Final Touches
While two flanges form the primary support structure around the hatches, Sven mentions there are two additional pieces required at each end to ensure comprehensive protection. This attention to detail highlights his commitment to producing a durable and reliable design. “Sailing is about finding your path, whether it’s across an ocean or within yourself.” – Sven Yrvind In conclusion, making flanges around bulkhead hatches may seem complex at first glance, but by following Sven Yrvind’s meticulous process, enthusiasts can achieve professional-level results. Remember that the journey of boatbuilding is as rewarding as reaching your destination; it tests one’s patience and dedication. For those seeking to embark on this adventure or simply gain more insight into marine craftsmanship, Sven’s wisdom is invaluable.Making Flanges Around Bulkhead Hatches for Canvas
Sven Yrvind, a renowned yacht designer and sailor, shares valuable insights on creating flanges around bulkhead hatches for canvas protection in this enlightening video. By following his expert guidance, boat enthusiasts can ensure their living areas remain secure while allowing unhindered access through the hatches.Step 1: Starting with the Flange
Sven begins by explaining that working on flanges vertically and horizontally is significantly easier than doing so in a flat position. To simplify the process further, he divides the task into two or three steps as suggested by fellow expert “for for.” This approach not only makes it more manageable but also allows for greater precision in crafting each component.Step 2: Applying Glue and Securing
Sven proceeds to apply glue along one edge of the flange, ensuring a secure bond when clamped into place. He emphasizes that this stage is crucial for maintaining the structural integrity of the flange, which in turn safeguards the living area beneath the canvas when hatches are open.Step 3: Allowing Time to Dry
After securely attaching the first portion of the flange, Sven allows ample time for it to dry before moving forward with additional steps. This patience and precision are key aspects of his successful boatbuilding methods.Step 4: Finishing Touches
Once the flange is fully dried, Sven removes the clamps carefully, ensuring no damage occurs during this process. He then moves on to attaching four more pieces onto these main frames, completing two pairs of flanges for the bulkhead hatches.The Final Touches
While two flanges form the primary support structure around the hatches, Sven mentions there are two additional pieces required at each end to ensure comprehensive protection. This attention to detail highlights his commitment to producing a durable and reliable design. “Sailing is about finding your path, whether it’s across an ocean or within yourself.” – Sven Yrvind In conclusion, making flanges around bulkhead hatches may seem complex at first glance, but by following Sven Yrvind’s meticulous process, enthusiasts can achieve professional-level results. Remember that the journey of boatbuilding is as rewarding as reaching your destination; it tests one’s patience and dedication. For those seeking to embark on this adventure or simply gain more insight into marine craftsmanship, Sven’s wisdom is invaluable.Once the flange is fully dried, Sven removes the clamps carefully, ensuring no damage occurs during this process. He then moves on to attaching four more pieces onto these main frames, completing two pairs of flanges for the bulkhead hatches.The Final Touches
While two flanges form the primary support structure around the hatches, Sven mentions there are two additional pieces required at each end to ensure comprehensive protection. This attention to detail highlights his commitment to producing a durable and reliable design. “Sailing is about finding your path, whether it’s across an ocean or within yourself.” – Sven Yrvind In conclusion, making flanges around bulkhead hatches may seem complex at first glance, but by following Sven Yrvind’s meticulous process, enthusiasts can achieve professional-level results. Remember that the journey of boatbuilding is as rewarding as reaching your destination; it tests one’s patience and dedication. For those seeking to embark on this adventure or simply gain more insight into marine craftsmanship, Sven’s wisdom is invaluable.Sven Yrvind, a renowned yacht designer and sailor, shares valuable insights on creating flanges around bulkhead hatches for canvas protection in this enlightening video. By following his expert guidance, boat enthusiasts can ensure their living areas remain secure while allowing unhindered access through the hatches.Step 1: Starting with the Flange
Sven begins by explaining that working on flanges vertically and horizontally is significantly easier than doing so in a flat position. To simplify the process further, he divides the task into two or three steps as suggested by fellow expert “for for.” This approach not only makes it more manageable but also allows for greater precision in crafting each component.Step 2: Applying Glue and Securing
Sven proceeds to apply glue along one edge of the flange, ensuring a secure bond when clamped into place. He emphasizes that this stage is crucial for maintaining the structural integrity of the flange, which in turn safeguards the living area beneath the canvas when hatches are open.Step 3: Allowing Time to Dry
After securely attaching the first portion of the flange, Sven allows ample time for it to dry before moving forward with additional steps. This patience and precision are key aspects of his successful boatbuilding methods.Step 4: Finishing Touches
Once the flange is fully dried, Sven removes the clamps carefully, ensuring no damage occurs during this process. He then moves on to attaching four more pieces onto these main frames, completing two pairs of flanges for the bulkhead hatches.The Final Touches
While two flanges form the primary support structure around the hatches, Sven mentions there are two additional pieces required at each end to ensure comprehensive protection. This attention to detail highlights his commitment to producing a durable and reliable design. “Sailing is about finding your path, whether it’s across an ocean or within yourself.” – Sven Yrvind In conclusion, making flanges around bulkhead hatches may seem complex at first glance, but by following Sven Yrvind’s meticulous process, enthusiasts can achieve professional-level results. Remember that the journey of boatbuilding is as rewarding as reaching your destination; it tests one’s patience and dedication. For those seeking to embark on this adventure or simply gain more insight into marine craftsmanship, Sven’s wisdom is invaluable.Making Flanges Around Bulkhead Hatches for Canvas
Sven Yrvind, a renowned yacht designer and sailor, shares valuable insights on creating flanges around bulkhead hatches for canvas protection in this enlightening video. By following his expert guidance, boat enthusiasts can ensure their living areas remain secure while allowing unhindered access through the hatches.Step 1: Starting with the Flange
Sven begins by explaining that working on flanges vertically and horizontally is significantly easier than doing so in a flat position. To simplify the process further, he divides the task into two or three steps as suggested by fellow expert “for for.” This approach not only makes it more manageable but also allows for greater precision in crafting each component.Step 2: Applying Glue and Securing
Sven proceeds to apply glue along one edge of the flange, ensuring a secure bond when clamped into place. He emphasizes that this stage is crucial for maintaining the structural integrity of the flange, which in turn safeguards the living area beneath the canvas when hatches are open.Step 3: Allowing Time to Dry
After securely attaching the first portion of the flange, Sven allows ample time for it to dry before moving forward with additional steps. This patience and precision are key aspects of his successful boatbuilding methods.Step 4: Finishing Touches
Once the flange is fully dried, Sven removes the clamps carefully, ensuring no damage occurs during this process. He then moves on to attaching four more pieces onto these main frames, completing two pairs of flanges for the bulkhead hatches.The Final Touches
While two flanges form the primary support structure around the hatches, Sven mentions there are two additional pieces required at each end to ensure comprehensive protection. This attention to detail highlights his commitment to producing a durable and reliable design. “Sailing is about finding your path, whether it’s across an ocean or within yourself.” – Sven Yrvind In conclusion, making flanges around bulkhead hatches may seem complex at first glance, but by following Sven Yrvind’s meticulous process, enthusiasts can achieve professional-level results. Remember that the journey of boatbuilding is as rewarding as reaching your destination; it tests one’s patience and dedication. For those seeking to embark on this adventure or simply gain more insight into marine craftsmanship, Sven’s wisdom is invaluable.Once the flange is fully dried, Sven removes the clamps carefully, ensuring no damage occurs during this process. He then moves on to attaching four more pieces onto these main frames, completing two pairs of flanges for the bulkhead hatches.The Final Touches
While two flanges form the primary support structure around the hatches, Sven mentions there are two additional pieces required at each end to ensure comprehensive protection. This attention to detail highlights his commitment to producing a durable and reliable design. “Sailing is about finding your path, whether it’s across an ocean or within yourself.” – Sven Yrvind In conclusion, making flanges around bulkhead hatches may seem complex at first glance, but by following Sven Yrvind’s meticulous process, enthusiasts can achieve professional-level results. Remember that the journey of boatbuilding is as rewarding as reaching your destination; it tests one’s patience and dedication. For those seeking to embark on this adventure or simply gain more insight into marine craftsmanship, Sven’s wisdom is invaluable.Sven begins by explaining that working on flanges vertically and horizontally is significantly easier than doing so in a flat position. To simplify the process further, he divides the task into two or three steps as suggested by fellow expert “for for.” This approach not only makes it more manageable but also allows for greater precision in crafting each component.Step 2: Applying Glue and Securing
Sven proceeds to apply glue along one edge of the flange, ensuring a secure bond when clamped into place. He emphasizes that this stage is crucial for maintaining the structural integrity of the flange, which in turn safeguards the living area beneath the canvas when hatches are open.Step 3: Allowing Time to Dry
After securely attaching the first portion of the flange, Sven allows ample time for it to dry before moving forward with additional steps. This patience and precision are key aspects of his successful boatbuilding methods.Step 4: Finishing Touches
Once the flange is fully dried, Sven removes the clamps carefully, ensuring no damage occurs during this process. He then moves on to attaching four more pieces onto these main frames, completing two pairs of flanges for the bulkhead hatches.The Final Touches
While two flanges form the primary support structure around the hatches, Sven mentions there are two additional pieces required at each end to ensure comprehensive protection. This attention to detail highlights his commitment to producing a durable and reliable design. “Sailing is about finding your path, whether it’s across an ocean or within yourself.” – Sven Yrvind In conclusion, making flanges around bulkhead hatches may seem complex at first glance, but by following Sven Yrvind’s meticulous process, enthusiasts can achieve professional-level results. Remember that the journey of boatbuilding is as rewarding as reaching your destination; it tests one’s patience and dedication. For those seeking to embark on this adventure or simply gain more insight into marine craftsmanship, Sven’s wisdom is invaluable.Sven Yrvind, a renowned yacht designer and sailor, shares valuable insights on creating flanges around bulkhead hatches for canvas protection in this enlightening video. By following his expert guidance, boat enthusiasts can ensure their living areas remain secure while allowing unhindered access through the hatches.Step 1: Starting with the Flange
Sven begins by explaining that working on flanges vertically and horizontally is significantly easier than doing so in a flat position. To simplify the process further, he divides the task into two or three steps as suggested by fellow expert “for for.” This approach not only makes it more manageable but also allows for greater precision in crafting each component.Step 2: Applying Glue and Securing
Sven proceeds to apply glue along one edge of the flange, ensuring a secure bond when clamped into place. He emphasizes that this stage is crucial for maintaining the structural integrity of the flange, which in turn safeguards the living area beneath the canvas when hatches are open.Step 3: Allowing Time to Dry
After securely attaching the first portion of the flange, Sven allows ample time for it to dry before moving forward with additional steps. This patience and precision are key aspects of his successful boatbuilding methods.Step 4: Finishing Touches
Once the flange is fully dried, Sven removes the clamps carefully, ensuring no damage occurs during this process. He then moves on to attaching four more pieces onto these main frames, completing two pairs of flanges for the bulkhead hatches.The Final Touches
While two flanges form the primary support structure around the hatches, Sven mentions there are two additional pieces required at each end to ensure comprehensive protection. This attention to detail highlights his commitment to producing a durable and reliable design. “Sailing is about finding your path, whether it’s across an ocean or within yourself.” – Sven Yrvind In conclusion, making flanges around bulkhead hatches may seem complex at first glance, but by following Sven Yrvind’s meticulous process, enthusiasts can achieve professional-level results. Remember that the journey of boatbuilding is as rewarding as reaching your destination; it tests one’s patience and dedication. For those seeking to embark on this adventure or simply gain more insight into marine craftsmanship, Sven’s wisdom is invaluable.Making Flanges Around Bulkhead Hatches for Canvas
Sven Yrvind, a renowned yacht designer and sailor, shares valuable insights on creating flanges around bulkhead hatches for canvas protection in this enlightening video. By following his expert guidance, boat enthusiasts can ensure their living areas remain secure while allowing unhindered access through the hatches.Step 1: Starting with the Flange
Sven begins by explaining that working on flanges vertically and horizontally is significantly easier than doing so in a flat position. To simplify the process further, he divides the task into two or three steps as suggested by fellow expert “for for.” This approach not only makes it more manageable but also allows for greater precision in crafting each component.Step 2: Applying Glue and Securing
Sven proceeds to apply glue along one edge of the flange, ensuring a secure bond when clamped into place. He emphasizes that this stage is crucial for maintaining the structural integrity of the flange, which in turn safeguards the living area beneath the canvas when hatches are open.Step 3: Allowing Time to Dry
After securely attaching the first portion of the flange, Sven allows ample time for it to dry before moving forward with additional steps. This patience and precision are key aspects of his successful boatbuilding methods.Step 4: Finishing Touches
Once the flange is fully dried, Sven removes the clamps carefully, ensuring no damage occurs during this process. He then moves on to attaching four more pieces onto these main frames, completing two pairs of flanges for the bulkhead hatches.The Final Touches
While two flanges form the primary support structure around the hatches, Sven mentions there are two additional pieces required at each end to ensure comprehensive protection. This attention to detail highlights his commitment to producing a durable and reliable design. “Sailing is about finding your path, whether it’s across an ocean or within yourself.” – Sven Yrvind In conclusion, making flanges around bulkhead hatches may seem complex at first glance, but by following Sven Yrvind’s meticulous process, enthusiasts can achieve professional-level results. Remember that the journey of boatbuilding is as rewarding as reaching your destination; it tests one’s patience and dedication. For those seeking to embark on this adventure or simply gain more insight into marine craftsmanship, Sven’s wisdom is invaluable.After securely attaching the first portion of the flange, Sven allows ample time for it to dry before moving forward with additional steps. This patience and precision are key aspects of his successful boatbuilding methods.Step 4: Finishing Touches
Once the flange is fully dried, Sven removes the clamps carefully, ensuring no damage occurs during this process. He then moves on to attaching four more pieces onto these main frames, completing two pairs of flanges for the bulkhead hatches.The Final Touches
While two flanges form the primary support structure around the hatches, Sven mentions there are two additional pieces required at each end to ensure comprehensive protection. This attention to detail highlights his commitment to producing a durable and reliable design. “Sailing is about finding your path, whether it’s across an ocean or within yourself.” – Sven Yrvind In conclusion, making flanges around bulkhead hatches may seem complex at first glance, but by following Sven Yrvind’s meticulous process, enthusiasts can achieve professional-level results. Remember that the journey of boatbuilding is as rewarding as reaching your destination; it tests one’s patience and dedication. For those seeking to embark on this adventure or simply gain more insight into marine craftsmanship, Sven’s wisdom is invaluable.Sven begins by explaining that working on flanges vertically and horizontally is significantly easier than doing so in a flat position. To simplify the process further, he divides the task into two or three steps as suggested by fellow expert “for for.” This approach not only makes it more manageable but also allows for greater precision in crafting each component.Step 2: Applying Glue and Securing
Sven proceeds to apply glue along one edge of the flange, ensuring a secure bond when clamped into place. He emphasizes that this stage is crucial for maintaining the structural integrity of the flange, which in turn safeguards the living area beneath the canvas when hatches are open.Step 3: Allowing Time to Dry
After securely attaching the first portion of the flange, Sven allows ample time for it to dry before moving forward with additional steps. This patience and precision are key aspects of his successful boatbuilding methods.Step 4: Finishing Touches
Once the flange is fully dried, Sven removes the clamps carefully, ensuring no damage occurs during this process. He then moves on to attaching four more pieces onto these main frames, completing two pairs of flanges for the bulkhead hatches.The Final Touches
While two flanges form the primary support structure around the hatches, Sven mentions there are two additional pieces required at each end to ensure comprehensive protection. This attention to detail highlights his commitment to producing a durable and reliable design. “Sailing is about finding your path, whether it’s across an ocean or within yourself.” – Sven Yrvind In conclusion, making flanges around bulkhead hatches may seem complex at first glance, but by following Sven Yrvind’s meticulous process, enthusiasts can achieve professional-level results. Remember that the journey of boatbuilding is as rewarding as reaching your destination; it tests one’s patience and dedication. For those seeking to embark on this adventure or simply gain more insight into marine craftsmanship, Sven’s wisdom is invaluable.Sven Yrvind, a renowned yacht designer and sailor, shares valuable insights on creating flanges around bulkhead hatches for canvas protection in this enlightening video. By following his expert guidance, boat enthusiasts can ensure their living areas remain secure while allowing unhindered access through the hatches.Step 1: Starting with the Flange
Sven begins by explaining that working on flanges vertically and horizontally is significantly easier than doing so in a flat position. To simplify the process further, he divides the task into two or three steps as suggested by fellow expert “for for.” This approach not only makes it more manageable but also allows for greater precision in crafting each component.Step 2: Applying Glue and Securing
Sven proceeds to apply glue along one edge of the flange, ensuring a secure bond when clamped into place. He emphasizes that this stage is crucial for maintaining the structural integrity of the flange, which in turn safeguards the living area beneath the canvas when hatches are open.Step 3: Allowing Time to Dry
After securely attaching the first portion of the flange, Sven allows ample time for it to dry before moving forward with additional steps. This patience and precision are key aspects of his successful boatbuilding methods.Step 4: Finishing Touches
Once the flange is fully dried, Sven removes the clamps carefully, ensuring no damage occurs during this process. He then moves on to attaching four more pieces onto these main frames, completing two pairs of flanges for the bulkhead hatches.The Final Touches
While two flanges form the primary support structure around the hatches, Sven mentions there are two additional pieces required at each end to ensure comprehensive protection. This attention to detail highlights his commitment to producing a durable and reliable design. “Sailing is about finding your path, whether it’s across an ocean or within yourself.” – Sven Yrvind In conclusion, making flanges around bulkhead hatches may seem complex at first glance, but by following Sven Yrvind’s meticulous process, enthusiasts can achieve professional-level results. Remember that the journey of boatbuilding is as rewarding as reaching your destination; it tests one’s patience and dedication. For those seeking to embark on this adventure or simply gain more insight into marine craftsmanship, Sven’s wisdom is invaluable.Making Flanges Around Bulkhead Hatches for Canvas
Sven Yrvind, a renowned yacht designer and sailor, shares valuable insights on creating flanges around bulkhead hatches for canvas protection in this enlightening video. By following his expert guidance, boat enthusiasts can ensure their living areas remain secure while allowing unhindered access through the hatches.Step 1: Starting with the Flange
Sven begins by explaining that working on flanges vertically and horizontally is significantly easier than doing so in a flat position. To simplify the process further, he divides the task into two or three steps as suggested by fellow expert “for for.” This approach not only makes it more manageable but also allows for greater precision in crafting each component.Step 2: Applying Glue and Securing
Sven proceeds to apply glue along one edge of the flange, ensuring a secure bond when clamped into place. He emphasizes that this stage is crucial for maintaining the structural integrity of the flange, which in turn safeguards the living area beneath the canvas when hatches are open.Step 3: Allowing Time to Dry
After securely attaching the first portion of the flange, Sven allows ample time for it to dry before moving forward with additional steps. This patience and precision are key aspects of his successful boatbuilding methods.Step 4: Finishing Touches
Once the flange is fully dried, Sven removes the clamps carefully, ensuring no damage occurs during this process. He then moves on to attaching four more pieces onto these main frames, completing two pairs of flanges for the bulkhead hatches.The Final Touches
While two flanges form the primary support structure around the hatches, Sven mentions there are two additional pieces required at each end to ensure comprehensive protection. This attention to detail highlights his commitment to producing a durable and reliable design. “Sailing is about finding your path, whether it’s across an ocean or within yourself.” – Sven Yrvind In conclusion, making flanges around bulkhead hatches may seem complex at first glance, but by following Sven Yrvind’s meticulous process, enthusiasts can achieve professional-level results. Remember that the journey of boatbuilding is as rewarding as reaching your destination; it tests one’s patience and dedication. For those seeking to embark on this adventure or simply gain more insight into marine craftsmanship, Sven’s wisdom is invaluable.Sven proceeds to apply glue along one edge of the flange, ensuring a secure bond when clamped into place. He emphasizes that this stage is crucial for maintaining the structural integrity of the flange, which in turn safeguards the living area beneath the canvas when hatches are open.Step 3: Allowing Time to Dry
After securely attaching the first portion of the flange, Sven allows ample time for it to dry before moving forward with additional steps. This patience and precision are key aspects of his successful boatbuilding methods.Step 4: Finishing Touches
Once the flange is fully dried, Sven removes the clamps carefully, ensuring no damage occurs during this process. He then moves on to attaching four more pieces onto these main frames, completing two pairs of flanges for the bulkhead hatches.The Final Touches
While two flanges form the primary support structure around the hatches, Sven mentions there are two additional pieces required at each end to ensure comprehensive protection. This attention to detail highlights his commitment to producing a durable and reliable design. “Sailing is about finding your path, whether it’s across an ocean or within yourself.” – Sven Yrvind In conclusion, making flanges around bulkhead hatches may seem complex at first glance, but by following Sven Yrvind’s meticulous process, enthusiasts can achieve professional-level results. Remember that the journey of boatbuilding is as rewarding as reaching your destination; it tests one’s patience and dedication. For those seeking to embark on this adventure or simply gain more insight into marine craftsmanship, Sven’s wisdom is invaluable.Sven begins by explaining that working on flanges vertically and horizontally is significantly easier than doing so in a flat position. To simplify the process further, he divides the task into two or three steps as suggested by fellow expert “for for.” This approach not only makes it more manageable but also allows for greater precision in crafting each component.Step 2: Applying Glue and Securing
Sven proceeds to apply glue along one edge of the flange, ensuring a secure bond when clamped into place. He emphasizes that this stage is crucial for maintaining the structural integrity of the flange, which in turn safeguards the living area beneath the canvas when hatches are open.Step 3: Allowing Time to Dry
After securely attaching the first portion of the flange, Sven allows ample time for it to dry before moving forward with additional steps. This patience and precision are key aspects of his successful boatbuilding methods.Step 4: Finishing Touches
Once the flange is fully dried, Sven removes the clamps carefully, ensuring no damage occurs during this process. He then moves on to attaching four more pieces onto these main frames, completing two pairs of flanges for the bulkhead hatches.The Final Touches
While two flanges form the primary support structure around the hatches, Sven mentions there are two additional pieces required at each end to ensure comprehensive protection. This attention to detail highlights his commitment to producing a durable and reliable design. “Sailing is about finding your path, whether it’s across an ocean or within yourself.” – Sven Yrvind In conclusion, making flanges around bulkhead hatches may seem complex at first glance, but by following Sven Yrvind’s meticulous process, enthusiasts can achieve professional-level results. Remember that the journey of boatbuilding is as rewarding as reaching your destination; it tests one’s patience and dedication. For those seeking to embark on this adventure or simply gain more insight into marine craftsmanship, Sven’s wisdom is invaluable.Sven Yrvind, a renowned yacht designer and sailor, shares valuable insights on creating flanges around bulkhead hatches for canvas protection in this enlightening video. By following his expert guidance, boat enthusiasts can ensure their living areas remain secure while allowing unhindered access through the hatches.Step 1: Starting with the Flange
Sven begins by explaining that working on flanges vertically and horizontally is significantly easier than doing so in a flat position. To simplify the process further, he divides the task into two or three steps as suggested by fellow expert “for for.” This approach not only makes it more manageable but also allows for greater precision in crafting each component.Step 2: Applying Glue and Securing
Sven proceeds to apply glue along one edge of the flange, ensuring a secure bond when clamped into place. He emphasizes that this stage is crucial for maintaining the structural integrity of the flange, which in turn safeguards the living area beneath the canvas when hatches are open.Step 3: Allowing Time to Dry
After securely attaching the first portion of the flange, Sven allows ample time for it to dry before moving forward with additional steps. This patience and precision are key aspects of his successful boatbuilding methods.Step 4: Finishing Touches
Once the flange is fully dried, Sven removes the clamps carefully, ensuring no damage occurs during this process. He then moves on to attaching four more pieces onto these main frames, completing two pairs of flanges for the bulkhead hatches.The Final Touches
While two flanges form the primary support structure around the hatches, Sven mentions there are two additional pieces required at each end to ensure comprehensive protection. This attention to detail highlights his commitment to producing a durable and reliable design. “Sailing is about finding your path, whether it’s across an ocean or within yourself.” – Sven Yrvind In conclusion, making flanges around bulkhead hatches may seem complex at first glance, but by following Sven Yrvind’s meticulous process, enthusiasts can achieve professional-level results. Remember that the journey of boatbuilding is as rewarding as reaching your destination; it tests one’s patience and dedication. For those seeking to embark on this adventure or simply gain more insight into marine craftsmanship, Sven’s wisdom is invaluable.Making Flanges Around Bulkhead Hatches for Canvas
Sven Yrvind, a renowned yacht designer and sailor, shares valuable insights on creating flanges around bulkhead hatches for canvas protection in this enlightening video. By following his expert guidance, boat enthusiasts can ensure their living areas remain secure while allowing unhindered access through the hatches.Step 1: Starting with the Flange
Sven begins by explaining that working on flanges vertically and horizontally is significantly easier than doing so in a flat position. To simplify the process further, he divides the task into two or three steps as suggested by fellow expert “for for.” This approach not only makes it more manageable but also allows for greater precision in crafting each component.Step 2: Applying Glue and Securing
Sven proceeds to apply glue along one edge of the flange, ensuring a secure bond when clamped into place. He emphasizes that this stage is crucial for maintaining the structural integrity of the flange, which in turn safeguards the living area beneath the canvas when hatches are open.Step 3: Allowing Time to Dry
After securely attaching the first portion of the flange, Sven allows ample time for it to dry before moving forward with additional steps. This patience and precision are key aspects of his successful boatbuilding methods.Step 4: Finishing Touches
Once the flange is fully dried, Sven removes the clamps carefully, ensuring no damage occurs during this process. He then moves on to attaching four more pieces onto these main frames, completing two pairs of flanges for the bulkhead hatches.The Final Touches
While two flanges form the primary support structure around the hatches, Sven mentions there are two additional pieces required at each end to ensure comprehensive protection. This attention to detail highlights his commitment to producing a durable and reliable design. “Sailing is about finding your path, whether it’s across an ocean or within yourself.” – Sven Yrvind In conclusion, making flanges around bulkhead hatches may seem complex at first glance, but by following Sven Yrvind’s meticulous process, enthusiasts can achieve professional-level results. Remember that the journey of boatbuilding is as rewarding as reaching your destination; it tests one’s patience and dedication. For those seeking to embark on this adventure or simply gain more insight into marine craftsmanship, Sven’s wisdom is invaluable.Once the flange is fully dried, Sven removes the clamps carefully, ensuring no damage occurs during this process. He then moves on to attaching four more pieces onto these main frames, completing two pairs of flanges for the bulkhead hatches.The Final Touches
While two flanges form the primary support structure around the hatches, Sven mentions there are two additional pieces required at each end to ensure comprehensive protection. This attention to detail highlights his commitment to producing a durable and reliable design. “Sailing is about finding your path, whether it’s across an ocean or within yourself.” – Sven Yrvind In conclusion, making flanges around bulkhead hatches may seem complex at first glance, but by following Sven Yrvind’s meticulous process, enthusiasts can achieve professional-level results. Remember that the journey of boatbuilding is as rewarding as reaching your destination; it tests one’s patience and dedication. For those seeking to embark on this adventure or simply gain more insight into marine craftsmanship, Sven’s wisdom is invaluable.Sven proceeds to apply glue along one edge of the flange, ensuring a secure bond when clamped into place. He emphasizes that this stage is crucial for maintaining the structural integrity of the flange, which in turn safeguards the living area beneath the canvas when hatches are open.Step 3: Allowing Time to Dry
After securely attaching the first portion of the flange, Sven allows ample time for it to dry before moving forward with additional steps. This patience and precision are key aspects of his successful boatbuilding methods.Step 4: Finishing Touches
Once the flange is fully dried, Sven removes the clamps carefully, ensuring no damage occurs during this process. He then moves on to attaching four more pieces onto these main frames, completing two pairs of flanges for the bulkhead hatches.The Final Touches
While two flanges form the primary support structure around the hatches, Sven mentions there are two additional pieces required at each end to ensure comprehensive protection. This attention to detail highlights his commitment to producing a durable and reliable design. “Sailing is about finding your path, whether it’s across an ocean or within yourself.” – Sven Yrvind In conclusion, making flanges around bulkhead hatches may seem complex at first glance, but by following Sven Yrvind’s meticulous process, enthusiasts can achieve professional-level results. Remember that the journey of boatbuilding is as rewarding as reaching your destination; it tests one’s patience and dedication. For those seeking to embark on this adventure or simply gain more insight into marine craftsmanship, Sven’s wisdom is invaluable.Sven begins by explaining that working on flanges vertically and horizontally is significantly easier than doing so in a flat position. To simplify the process further, he divides the task into two or three steps as suggested by fellow expert “for for.” This approach not only makes it more manageable but also allows for greater precision in crafting each component.Step 2: Applying Glue and Securing
Sven proceeds to apply glue along one edge of the flange, ensuring a secure bond when clamped into place. He emphasizes that this stage is crucial for maintaining the structural integrity of the flange, which in turn safeguards the living area beneath the canvas when hatches are open.Step 3: Allowing Time to Dry
After securely attaching the first portion of the flange, Sven allows ample time for it to dry before moving forward with additional steps. This patience and precision are key aspects of his successful boatbuilding methods.Step 4: Finishing Touches
Once the flange is fully dried, Sven removes the clamps carefully, ensuring no damage occurs during this process. He then moves on to attaching four more pieces onto these main frames, completing two pairs of flanges for the bulkhead hatches.The Final Touches
While two flanges form the primary support structure around the hatches, Sven mentions there are two additional pieces required at each end to ensure comprehensive protection. This attention to detail highlights his commitment to producing a durable and reliable design. “Sailing is about finding your path, whether it’s across an ocean or within yourself.” – Sven Yrvind In conclusion, making flanges around bulkhead hatches may seem complex at first glance, but by following Sven Yrvind’s meticulous process, enthusiasts can achieve professional-level results. Remember that the journey of boatbuilding is as rewarding as reaching your destination; it tests one’s patience and dedication. For those seeking to embark on this adventure or simply gain more insight into marine craftsmanship, Sven’s wisdom is invaluable.Sven Yrvind, a renowned yacht designer and sailor, shares valuable insights on creating flanges around bulkhead hatches for canvas protection in this enlightening video. By following his expert guidance, boat enthusiasts can ensure their living areas remain secure while allowing unhindered access through the hatches.Step 1: Starting with the Flange
Sven begins by explaining that working on flanges vertically and horizontally is significantly easier than doing so in a flat position. To simplify the process further, he divides the task into two or three steps as suggested by fellow expert “for for.” This approach not only makes it more manageable but also allows for greater precision in crafting each component.Step 2: Applying Glue and Securing
Sven proceeds to apply glue along one edge of the flange, ensuring a secure bond when clamped into place. He emphasizes that this stage is crucial for maintaining the structural integrity of the flange, which in turn safeguards the living area beneath the canvas when hatches are open.Step 3: Allowing Time to Dry
After securely attaching the first portion of the flange, Sven allows ample time for it to dry before moving forward with additional steps. This patience and precision are key aspects of his successful boatbuilding methods.Step 4: Finishing Touches
Once the flange is fully dried, Sven removes the clamps carefully, ensuring no damage occurs during this process. He then moves on to attaching four more pieces onto these main frames, completing two pairs of flanges for the bulkhead hatches.The Final Touches
While two flanges form the primary support structure around the hatches, Sven mentions there are two additional pieces required at each end to ensure comprehensive protection. This attention to detail highlights his commitment to producing a durable and reliable design. “Sailing is about finding your path, whether it’s across an ocean or within yourself.” – Sven Yrvind In conclusion, making flanges around bulkhead hatches may seem complex at first glance, but by following Sven Yrvind’s meticulous process, enthusiasts can achieve professional-level results. Remember that the journey of boatbuilding is as rewarding as reaching your destination; it tests one’s patience and dedication. For those seeking to embark on this adventure or simply gain more insight into marine craftsmanship, Sven’s wisdom is invaluable.Making Flanges Around Bulkhead Hatches for Canvas
Sven Yrvind, a renowned yacht designer and sailor, shares valuable insights on creating flanges around bulkhead hatches for canvas protection in this enlightening video. By following his expert guidance, boat enthusiasts can ensure their living areas remain secure while allowing unhindered access through the hatches.Step 1: Starting with the Flange
Sven begins by explaining that working on flanges vertically and horizontally is significantly easier than doing so in a flat position. To simplify the process further, he divides the task into two or three steps as suggested by fellow expert “for for.” This approach not only makes it more manageable but also allows for greater precision in crafting each component.Step 2: Applying Glue and Securing
Sven proceeds to apply glue along one edge of the flange, ensuring a secure bond when clamped into place. He emphasizes that this stage is crucial for maintaining the structural integrity of the flange, which in turn safeguards the living area beneath the canvas when hatches are open.Step 3: Allowing Time to Dry
After securely attaching the first portion of the flange, Sven allows ample time for it to dry before moving forward with additional steps. This patience and precision are key aspects of his successful boatbuilding methods.Step 4: Finishing Touches
Once the flange is fully dried, Sven removes the clamps carefully, ensuring no damage occurs during this process. He then moves on to attaching four more pieces onto these main frames, completing two pairs of flanges for the bulkhead hatches.The Final Touches
While two flanges form the primary support structure around the hatches, Sven mentions there are two additional pieces required at each end to ensure comprehensive protection. This attention to detail highlights his commitment to producing a durable and reliable design. “Sailing is about finding your path, whether it’s across an ocean or within yourself.” – Sven Yrvind In conclusion, making flanges around bulkhead hatches may seem complex at first glance, but by following Sven Yrvind’s meticulous process, enthusiasts can achieve professional-level results. Remember that the journey of boatbuilding is as rewarding as reaching your destination; it tests one’s patience and dedication. For those seeking to embark on this adventure or simply gain more insight into marine craftsmanship, Sven’s wisdom is invaluable.After securely attaching the first portion of the flange, Sven allows ample time for it to dry before moving forward with additional steps. This patience and precision are key aspects of his successful boatbuilding methods.Step 4: Finishing Touches
Once the flange is fully dried, Sven removes the clamps carefully, ensuring no damage occurs during this process. He then moves on to attaching four more pieces onto these main frames, completing two pairs of flanges for the bulkhead hatches.The Final Touches
While two flanges form the primary support structure around the hatches, Sven mentions there are two additional pieces required at each end to ensure comprehensive protection. This attention to detail highlights his commitment to producing a durable and reliable design. “Sailing is about finding your path, whether it’s across an ocean or within yourself.” – Sven Yrvind In conclusion, making flanges around bulkhead hatches may seem complex at first glance, but by following Sven Yrvind’s meticulous process, enthusiasts can achieve professional-level results. Remember that the journey of boatbuilding is as rewarding as reaching your destination; it tests one’s patience and dedication. For those seeking to embark on this adventure or simply gain more insight into marine craftsmanship, Sven’s wisdom is invaluable.Sven proceeds to apply glue along one edge of the flange, ensuring a secure bond when clamped into place. He emphasizes that this stage is crucial for maintaining the structural integrity of the flange, which in turn safeguards the living area beneath the canvas when hatches are open.Step 3: Allowing Time to Dry
After securely attaching the first portion of the flange, Sven allows ample time for it to dry before moving forward with additional steps. This patience and precision are key aspects of his successful boatbuilding methods.Step 4: Finishing Touches
Once the flange is fully dried, Sven removes the clamps carefully, ensuring no damage occurs during this process. He then moves on to attaching four more pieces onto these main frames, completing two pairs of flanges for the bulkhead hatches.The Final Touches
While two flanges form the primary support structure around the hatches, Sven mentions there are two additional pieces required at each end to ensure comprehensive protection. This attention to detail highlights his commitment to producing a durable and reliable design. “Sailing is about finding your path, whether it’s across an ocean or within yourself.” – Sven Yrvind In conclusion, making flanges around bulkhead hatches may seem complex at first glance, but by following Sven Yrvind’s meticulous process, enthusiasts can achieve professional-level results. Remember that the journey of boatbuilding is as rewarding as reaching your destination; it tests one’s patience and dedication. For those seeking to embark on this adventure or simply gain more insight into marine craftsmanship, Sven’s wisdom is invaluable.Sven begins by explaining that working on flanges vertically and horizontally is significantly easier than doing so in a flat position. To simplify the process further, he divides the task into two or three steps as suggested by fellow expert “for for.” This approach not only makes it more manageable but also allows for greater precision in crafting each component.Step 2: Applying Glue and Securing
Sven proceeds to apply glue along one edge of the flange, ensuring a secure bond when clamped into place. He emphasizes that this stage is crucial for maintaining the structural integrity of the flange, which in turn safeguards the living area beneath the canvas when hatches are open.Step 3: Allowing Time to Dry
After securely attaching the first portion of the flange, Sven allows ample time for it to dry before moving forward with additional steps. This patience and precision are key aspects of his successful boatbuilding methods.Step 4: Finishing Touches
Once the flange is fully dried, Sven removes the clamps carefully, ensuring no damage occurs during this process. He then moves on to attaching four more pieces onto these main frames, completing two pairs of flanges for the bulkhead hatches.The Final Touches
While two flanges form the primary support structure around the hatches, Sven mentions there are two additional pieces required at each end to ensure comprehensive protection. This attention to detail highlights his commitment to producing a durable and reliable design. “Sailing is about finding your path, whether it’s across an ocean or within yourself.” – Sven Yrvind In conclusion, making flanges around bulkhead hatches may seem complex at first glance, but by following Sven Yrvind’s meticulous process, enthusiasts can achieve professional-level results. Remember that the journey of boatbuilding is as rewarding as reaching your destination; it tests one’s patience and dedication. For those seeking to embark on this adventure or simply gain more insight into marine craftsmanship, Sven’s wisdom is invaluable.Sven Yrvind, a renowned yacht designer and sailor, shares valuable insights on creating flanges around bulkhead hatches for canvas protection in this enlightening video. By following his expert guidance, boat enthusiasts can ensure their living areas remain secure while allowing unhindered access through the hatches.Step 1: Starting with the Flange
Sven begins by explaining that working on flanges vertically and horizontally is significantly easier than doing so in a flat position. To simplify the process further, he divides the task into two or three steps as suggested by fellow expert “for for.” This approach not only makes it more manageable but also allows for greater precision in crafting each component.Step 2: Applying Glue and Securing
Sven proceeds to apply glue along one edge of the flange, ensuring a secure bond when clamped into place. He emphasizes that this stage is crucial for maintaining the structural integrity of the flange, which in turn safeguards the living area beneath the canvas when hatches are open.Step 3: Allowing Time to Dry
After securely attaching the first portion of the flange, Sven allows ample time for it to dry before moving forward with additional steps. This patience and precision are key aspects of his successful boatbuilding methods.Step 4: Finishing Touches
Once the flange is fully dried, Sven removes the clamps carefully, ensuring no damage occurs during this process. He then moves on to attaching four more pieces onto these main frames, completing two pairs of flanges for the bulkhead hatches.The Final Touches
While two flanges form the primary support structure around the hatches, Sven mentions there are two additional pieces required at each end to ensure comprehensive protection. This attention to detail highlights his commitment to producing a durable and reliable design. “Sailing is about finding your path, whether it’s across an ocean or within yourself.” – Sven Yrvind In conclusion, making flanges around bulkhead hatches may seem complex at first glance, but by following Sven Yrvind’s meticulous process, enthusiasts can achieve professional-level results. Remember that the journey of boatbuilding is as rewarding as reaching your destination; it tests one’s patience and dedication. For those seeking to embark on this adventure or simply gain more insight into marine craftsmanship, Sven’s wisdom is invaluable.Making Flanges Around Bulkhead Hatches for Canvas
Sven Yrvind, a renowned yacht designer and sailor, shares valuable insights on creating flanges around bulkhead hatches for canvas protection in this enlightening video. By following his expert guidance, boat enthusiasts can ensure their living areas remain secure while allowing unhindered access through the hatches.Step 1: Starting with the Flange
Sven begins by explaining that working on flanges vertically and horizontally is significantly easier than doing so in a flat position. To simplify the process further, he divides the task into two or three steps as suggested by fellow expert “for for.” This approach not only makes it more manageable but also allows for greater precision in crafting each component.Step 2: Applying Glue and Securing
Sven proceeds to apply glue along one edge of the flange, ensuring a secure bond when clamped into place. He emphasizes that this stage is crucial for maintaining the structural integrity of the flange, which in turn safeguards the living area beneath the canvas when hatches are open.Step 3: Allowing Time to Dry
After securely attaching the first portion of the flange, Sven allows ample time for it to dry before moving forward with additional steps. This patience and precision are key aspects of his successful boatbuilding methods.Step 4: Finishing Touches
Once the flange is fully dried, Sven removes the clamps carefully, ensuring no damage occurs during this process. He then moves on to attaching four more pieces onto these main frames, completing two pairs of flanges for the bulkhead hatches.The Final Touches
While two flanges form the primary support structure around the hatches, Sven mentions there are two additional pieces required at each end to ensure comprehensive protection. This attention to detail highlights his commitment to producing a durable and reliable design. “Sailing is about finding your path, whether it’s across an ocean or within yourself.” – Sven Yrvind In conclusion, making flanges around bulkhead hatches may seem complex at first glance, but by following Sven Yrvind’s meticulous process, enthusiasts can achieve professional-level results. Remember that the journey of boatbuilding is as rewarding as reaching your destination; it tests one’s patience and dedication. For those seeking to embark on this adventure or simply gain more insight into marine craftsmanship, Sven’s wisdom is invaluable.Once the flange is fully dried, Sven removes the clamps carefully, ensuring no damage occurs during this process. He then moves on to attaching four more pieces onto these main frames, completing two pairs of flanges for the bulkhead hatches.The Final Touches
While two flanges form the primary support structure around the hatches, Sven mentions there are two additional pieces required at each end to ensure comprehensive protection. This attention to detail highlights his commitment to producing a durable and reliable design. “Sailing is about finding your path, whether it’s across an ocean or within yourself.” – Sven Yrvind In conclusion, making flanges around bulkhead hatches may seem complex at first glance, but by following Sven Yrvind’s meticulous process, enthusiasts can achieve professional-level results. Remember that the journey of boatbuilding is as rewarding as reaching your destination; it tests one’s patience and dedication. For those seeking to embark on this adventure or simply gain more insight into marine craftsmanship, Sven’s wisdom is invaluable.After securely attaching the first portion of the flange, Sven allows ample time for it to dry before moving forward with additional steps. This patience and precision are key aspects of his successful boatbuilding methods.Step 4: Finishing Touches
Once the flange is fully dried, Sven removes the clamps carefully, ensuring no damage occurs during this process. He then moves on to attaching four more pieces onto these main frames, completing two pairs of flanges for the bulkhead hatches.The Final Touches
While two flanges form the primary support structure around the hatches, Sven mentions there are two additional pieces required at each end to ensure comprehensive protection. This attention to detail highlights his commitment to producing a durable and reliable design. “Sailing is about finding your path, whether it’s across an ocean or within yourself.” – Sven Yrvind In conclusion, making flanges around bulkhead hatches may seem complex at first glance, but by following Sven Yrvind’s meticulous process, enthusiasts can achieve professional-level results. Remember that the journey of boatbuilding is as rewarding as reaching your destination; it tests one’s patience and dedication. For those seeking to embark on this adventure or simply gain more insight into marine craftsmanship, Sven’s wisdom is invaluable.Sven proceeds to apply glue along one edge of the flange, ensuring a secure bond when clamped into place. He emphasizes that this stage is crucial for maintaining the structural integrity of the flange, which in turn safeguards the living area beneath the canvas when hatches are open.Step 3: Allowing Time to Dry
After securely attaching the first portion of the flange, Sven allows ample time for it to dry before moving forward with additional steps. This patience and precision are key aspects of his successful boatbuilding methods.Step 4: Finishing Touches
Once the flange is fully dried, Sven removes the clamps carefully, ensuring no damage occurs during this process. He then moves on to attaching four more pieces onto these main frames, completing two pairs of flanges for the bulkhead hatches.The Final Touches
While two flanges form the primary support structure around the hatches, Sven mentions there are two additional pieces required at each end to ensure comprehensive protection. This attention to detail highlights his commitment to producing a durable and reliable design. “Sailing is about finding your path, whether it’s across an ocean or within yourself.” – Sven Yrvind In conclusion, making flanges around bulkhead hatches may seem complex at first glance, but by following Sven Yrvind’s meticulous process, enthusiasts can achieve professional-level results. Remember that the journey of boatbuilding is as rewarding as reaching your destination; it tests one’s patience and dedication. For those seeking to embark on this adventure or simply gain more insight into marine craftsmanship, Sven’s wisdom is invaluable.Sven begins by explaining that working on flanges vertically and horizontally is significantly easier than doing so in a flat position. To simplify the process further, he divides the task into two or three steps as suggested by fellow expert “for for.” This approach not only makes it more manageable but also allows for greater precision in crafting each component.Step 2: Applying Glue and Securing
Sven proceeds to apply glue along one edge of the flange, ensuring a secure bond when clamped into place. He emphasizes that this stage is crucial for maintaining the structural integrity of the flange, which in turn safeguards the living area beneath the canvas when hatches are open.Step 3: Allowing Time to Dry
After securely attaching the first portion of the flange, Sven allows ample time for it to dry before moving forward with additional steps. This patience and precision are key aspects of his successful boatbuilding methods.Step 4: Finishing Touches
Once the flange is fully dried, Sven removes the clamps carefully, ensuring no damage occurs during this process. He then moves on to attaching four more pieces onto these main frames, completing two pairs of flanges for the bulkhead hatches.The Final Touches
While two flanges form the primary support structure around the hatches, Sven mentions there are two additional pieces required at each end to ensure comprehensive protection. This attention to detail highlights his commitment to producing a durable and reliable design. “Sailing is about finding your path, whether it’s across an ocean or within yourself.” – Sven Yrvind In conclusion, making flanges around bulkhead hatches may seem complex at first glance, but by following Sven Yrvind’s meticulous process, enthusiasts can achieve professional-level results. Remember that the journey of boatbuilding is as rewarding as reaching your destination; it tests one’s patience and dedication. For those seeking to embark on this adventure or simply gain more insight into marine craftsmanship, Sven’s wisdom is invaluable.Sven Yrvind, a renowned yacht designer and sailor, shares valuable insights on creating flanges around bulkhead hatches for canvas protection in this enlightening video. By following his expert guidance, boat enthusiasts can ensure their living areas remain secure while allowing unhindered access through the hatches.Step 1: Starting with the Flange
Sven begins by explaining that working on flanges vertically and horizontally is significantly easier than doing so in a flat position. To simplify the process further, he divides the task into two or three steps as suggested by fellow expert “for for.” This approach not only makes it more manageable but also allows for greater precision in crafting each component.Step 2: Applying Glue and Securing
Sven proceeds to apply glue along one edge of the flange, ensuring a secure bond when clamped into place. He emphasizes that this stage is crucial for maintaining the structural integrity of the flange, which in turn safeguards the living area beneath the canvas when hatches are open.Step 3: Allowing Time to Dry
After securely attaching the first portion of the flange, Sven allows ample time for it to dry before moving forward with additional steps. This patience and precision are key aspects of his successful boatbuilding methods.Step 4: Finishing Touches
Once the flange is fully dried, Sven removes the clamps carefully, ensuring no damage occurs during this process. He then moves on to attaching four more pieces onto these main frames, completing two pairs of flanges for the bulkhead hatches.The Final Touches
While two flanges form the primary support structure around the hatches, Sven mentions there are two additional pieces required at each end to ensure comprehensive protection. This attention to detail highlights his commitment to producing a durable and reliable design. “Sailing is about finding your path, whether it’s across an ocean or within yourself.” – Sven Yrvind In conclusion, making flanges around bulkhead hatches may seem complex at first glance, but by following Sven Yrvind’s meticulous process, enthusiasts can achieve professional-level results. Remember that the journey of boatbuilding is as rewarding as reaching your destination; it tests one’s patience and dedication. For those seeking to embark on this adventure or simply gain more insight into marine craftsmanship, Sven’s wisdom is invaluable.Making Flanges Around Bulkhead Hatches for Canvas
Sven Yrvind, a renowned yacht designer and sailor, shares valuable insights on creating flanges around bulkhead hatches for canvas protection in this enlightening video. By following his expert guidance, boat enthusiasts can ensure their living areas remain secure while allowing unhindered access through the hatches.Step 1: Starting with the Flange
Sven begins by explaining that working on flanges vertically and horizontally is significantly easier than doing so in a flat position. To simplify the process further, he divides the task into two or three steps as suggested by fellow expert “for for.” This approach not only makes it more manageable but also allows for greater precision in crafting each component.Step 2: Applying Glue and Securing
Sven proceeds to apply glue along one edge of the flange, ensuring a secure bond when clamped into place. He emphasizes that this stage is crucial for maintaining the structural integrity of the flange, which in turn safeguards the living area beneath the canvas when hatches are open.Step 3: Allowing Time to Dry
After securely attaching the first portion of the flange, Sven allows ample time for it to dry before moving forward with additional steps. This patience and precision are key aspects of his successful boatbuilding methods.Step 4: Finishing Touches
Once the flange is fully dried, Sven removes the clamps carefully, ensuring no damage occurs during this process. He then moves on to attaching four more pieces onto these main frames, completing two pairs of flanges for the bulkhead hatches.The Final Touches
While two flanges form the primary support structure around the hatches, Sven mentions there are two additional pieces required at each end to ensure comprehensive protection. This attention to detail highlights his commitment to producing a durable and reliable design. “Sailing is about finding your path, whether it’s across an ocean or within yourself.” – Sven Yrvind In conclusion, making flanges around bulkhead hatches may seem complex at first glance, but by following Sven Yrvind’s meticulous process, enthusiasts can achieve professional-level results. Remember that the journey of boatbuilding is as rewarding as reaching your destination; it tests one’s patience and dedication. For those seeking to embark on this adventure or simply gain more insight into marine craftsmanship, Sven’s wisdom is invaluable.After securely attaching the first portion of the flange, Sven allows ample time for it to dry before moving forward with additional steps. This patience and precision are key aspects of his successful boatbuilding methods.Step 4: Finishing Touches
Once the flange is fully dried, Sven removes the clamps carefully, ensuring no damage occurs during this process. He then moves on to attaching four more pieces onto these main frames, completing two pairs of flanges for the bulkhead hatches.The Final Touches
While two flanges form the primary support structure around the hatches, Sven mentions there are two additional pieces required at each end to ensure comprehensive protection. This attention to detail highlights his commitment to producing a durable and reliable design. “Sailing is about finding your path, whether it’s across an ocean or within yourself.” – Sven Yrvind In conclusion, making flanges around bulkhead hatches may seem complex at first glance, but by following Sven Yrvind’s meticulous process, enthusiasts can achieve professional-level results. Remember that the journey of boatbuilding is as rewarding as reaching your destination; it tests one’s patience and dedication. For those seeking to embark on this adventure or simply gain more insight into marine craftsmanship, Sven’s wisdom is invaluable.Sven Yrvind, a renowned yacht designer and sailor, shares valuable insights on creating flanges around bulkhead hatches for canvas protection in this enlightening video. By following his expert guidance, boat enthusiasts can ensure their living areas remain secure while allowing unhindered access through the hatches.Step 1: Starting with the Flange
Sven begins by explaining that working on flanges vertically and horizontally is significantly easier than doing so in a flat position. To simplify the process further, he divides the task into two or three steps as suggested by fellow expert “for for.” This approach not only makes it more manageable but also allows for greater precision in crafting each component.Step 2: Applying Glue and Securing
Sven proceeds to apply glue along one edge of the flange, ensuring a secure bond when clamped into place. He emphasizes that this stage is crucial for maintaining the structural integrity of the flange, which in turn safeguards the living area beneath the canvas when hatches are open.Step 3: Allowing Time to Dry
After securely attaching the first portion of the flange, Sven allows ample time for it to dry before moving forward with additional steps. This patience and precision are key aspects of his successful boatbuilding methods.Step 4: Finishing Touches
Once the flange is fully dried, Sven removes the clamps carefully, ensuring no damage occurs during this process. He then moves on to attaching four more pieces onto these main frames, completing two pairs of flanges for the bulkhead hatches.The Final Touches
While two flanges form the primary support structure around the hatches, Sven mentions there are two additional pieces required at each end to ensure comprehensive protection. This attention to detail highlights his commitment to producing a durable and reliable design. “Sailing is about finding your path, whether it’s across an ocean or within yourself.” – Sven Yrvind In conclusion, making flanges around bulkhead hatches may seem complex at first glance, but by following Sven Yrvind’s meticulous process, enthusiasts can achieve professional-level results. Remember that the journey of boatbuilding is as rewarding as reaching your destination; it tests one’s patience and dedication. For those seeking to embark on this adventure or simply gain more insight into marine craftsmanship, Sven’s wisdom is invaluable.Making Flanges Around Bulkhead Hatches for Canvas
Sven Yrvind, a renowned yacht designer and sailor, shares valuable insights on creating flanges around bulkhead hatches for canvas protection in this enlightening video. By following his expert guidance, boat enthusiasts can ensure their living areas remain secure while allowing unhindered access through the hatches.Step 1: Starting with the Flange
Sven begins by explaining that working on flanges vertically and horizontally is significantly easier than doing so in a flat position. To simplify the process further, he divides the task into two or three steps as suggested by fellow expert “for for.” This approach not only makes it more manageable but also allows for greater precision in crafting each component.Step 2: Applying Glue and Securing
Sven proceeds to apply glue along one edge of the flange, ensuring a secure bond when clamped into place. He emphasizes that this stage is crucial for maintaining the structural integrity of the flange, which in turn safeguards the living area beneath the canvas when hatches are open.Step 3: Allowing Time to Dry
After securely attaching the first portion of the flange, Sven allows ample time for it to dry before moving forward with additional steps. This patience and precision are key aspects of his successful boatbuilding methods.Step 4: Finishing Touches
Once the flange is fully dried, Sven removes the clamps carefully, ensuring no damage occurs during this process. He then moves on to attaching four more pieces onto these main frames, completing two pairs of flanges for the bulkhead hatches.The Final Touches
While two flanges form the primary support structure around the hatches, Sven mentions there are two additional pieces required at each end to ensure comprehensive protection. This attention to detail highlights his commitment to producing a durable and reliable design. “Sailing is about finding your path, whether it’s across an ocean or within yourself.” – Sven Yrvind In conclusion, making flanges around bulkhead hatches may seem complex at first glance, but by following Sven Yrvind’s meticulous process, enthusiasts can achieve professional-level results. Remember that the journey of boatbuilding is as rewarding as reaching your destination; it tests one’s patience and dedication. For those seeking to embark on this adventure or simply gain more insight into marine craftsmanship, Sven’s wisdom is invaluable.Once the flange is fully dried, Sven removes the clamps carefully, ensuring no damage occurs during this process. He then moves on to attaching four more pieces onto these main frames, completing two pairs of flanges for the bulkhead hatches.The Final Touches
While two flanges form the primary support structure around the hatches, Sven mentions there are two additional pieces required at each end to ensure comprehensive protection. This attention to detail highlights his commitment to producing a durable and reliable design. “Sailing is about finding your path, whether it’s across an ocean or within yourself.” – Sven Yrvind In conclusion, making flanges around bulkhead hatches may seem complex at first glance, but by following Sven Yrvind’s meticulous process, enthusiasts can achieve professional-level results. Remember that the journey of boatbuilding is as rewarding as reaching your destination; it tests one’s patience and dedication. For those seeking to embark on this adventure or simply gain more insight into marine craftsmanship, Sven’s wisdom is invaluable.Sven begins by explaining that working on flanges vertically and horizontally is significantly easier than doing so in a flat position. To simplify the process further, he divides the task into two or three steps as suggested by fellow expert “for for.” This approach not only makes it more manageable but also allows for greater precision in crafting each component.Step 2: Applying Glue and Securing
Sven proceeds to apply glue along one edge of the flange, ensuring a secure bond when clamped into place. He emphasizes that this stage is crucial for maintaining the structural integrity of the flange, which in turn safeguards the living area beneath the canvas when hatches are open.Step 3: Allowing Time to Dry
After securely attaching the first portion of the flange, Sven allows ample time for it to dry before moving forward with additional steps. This patience and precision are key aspects of his successful boatbuilding methods.Step 4: Finishing Touches
Once the flange is fully dried, Sven removes the clamps carefully, ensuring no damage occurs during this process. He then moves on to attaching four more pieces onto these main frames, completing two pairs of flanges for the bulkhead hatches.The Final Touches
While two flanges form the primary support structure around the hatches, Sven mentions there are two additional pieces required at each end to ensure comprehensive protection. This attention to detail highlights his commitment to producing a durable and reliable design. “Sailing is about finding your path, whether it’s across an ocean or within yourself.” – Sven Yrvind In conclusion, making flanges around bulkhead hatches may seem complex at first glance, but by following Sven Yrvind’s meticulous process, enthusiasts can achieve professional-level results. Remember that the journey of boatbuilding is as rewarding as reaching your destination; it tests one’s patience and dedication. For those seeking to embark on this adventure or simply gain more insight into marine craftsmanship, Sven’s wisdom is invaluable.Sven Yrvind, a renowned yacht designer and sailor, shares valuable insights on creating flanges around bulkhead hatches for canvas protection in this enlightening video. By following his expert guidance, boat enthusiasts can ensure their living areas remain secure while allowing unhindered access through the hatches.Step 1: Starting with the Flange
Sven begins by explaining that working on flanges vertically and horizontally is significantly easier than doing so in a flat position. To simplify the process further, he divides the task into two or three steps as suggested by fellow expert “for for.” This approach not only makes it more manageable but also allows for greater precision in crafting each component.Step 2: Applying Glue and Securing
Sven proceeds to apply glue along one edge of the flange, ensuring a secure bond when clamped into place. He emphasizes that this stage is crucial for maintaining the structural integrity of the flange, which in turn safeguards the living area beneath the canvas when hatches are open.Step 3: Allowing Time to Dry
After securely attaching the first portion of the flange, Sven allows ample time for it to dry before moving forward with additional steps. This patience and precision are key aspects of his successful boatbuilding methods.Step 4: Finishing Touches
Once the flange is fully dried, Sven removes the clamps carefully, ensuring no damage occurs during this process. He then moves on to attaching four more pieces onto these main frames, completing two pairs of flanges for the bulkhead hatches.The Final Touches
While two flanges form the primary support structure around the hatches, Sven mentions there are two additional pieces required at each end to ensure comprehensive protection. This attention to detail highlights his commitment to producing a durable and reliable design. “Sailing is about finding your path, whether it’s across an ocean or within yourself.” – Sven Yrvind In conclusion, making flanges around bulkhead hatches may seem complex at first glance, but by following Sven Yrvind’s meticulous process, enthusiasts can achieve professional-level results. Remember that the journey of boatbuilding is as rewarding as reaching your destination; it tests one’s patience and dedication. For those seeking to embark on this adventure or simply gain more insight into marine craftsmanship, Sven’s wisdom is invaluable.Making Flanges Around Bulkhead Hatches for Canvas
Sven Yrvind, a renowned yacht designer and sailor, shares valuable insights on creating flanges around bulkhead hatches for canvas protection in this enlightening video. By following his expert guidance, boat enthusiasts can ensure their living areas remain secure while allowing unhindered access through the hatches.Step 1: Starting with the Flange
Sven begins by explaining that working on flanges vertically and horizontally is significantly easier than doing so in a flat position. To simplify the process further, he divides the task into two or three steps as suggested by fellow expert “for for.” This approach not only makes it more manageable but also allows for greater precision in crafting each component.Step 2: Applying Glue and Securing
Sven proceeds to apply glue along one edge of the flange, ensuring a secure bond when clamped into place. He emphasizes that this stage is crucial for maintaining the structural integrity of the flange, which in turn safeguards the living area beneath the canvas when hatches are open.Step 3: Allowing Time to Dry
After securely attaching the first portion of the flange, Sven allows ample time for it to dry before moving forward with additional steps. This patience and precision are key aspects of his successful boatbuilding methods.Step 4: Finishing Touches
Once the flange is fully dried, Sven removes the clamps carefully, ensuring no damage occurs during this process. He then moves on to attaching four more pieces onto these main frames, completing two pairs of flanges for the bulkhead hatches.The Final Touches
While two flanges form the primary support structure around the hatches, Sven mentions there are two additional pieces required at each end to ensure comprehensive protection. This attention to detail highlights his commitment to producing a durable and reliable design. “Sailing is about finding your path, whether it’s across an ocean or within yourself.” – Sven Yrvind In conclusion, making flanges around bulkhead hatches may seem complex at first glance, but by following Sven Yrvind’s meticulous process, enthusiasts can achieve professional-level results. Remember that the journey of boatbuilding is as rewarding as reaching your destination; it tests one’s patience and dedication. For those seeking to embark on this adventure or simply gain more insight into marine craftsmanship, Sven’s wisdom is invaluable.After securely attaching the first portion of the flange, Sven allows ample time for it to dry before moving forward with additional steps. This patience and precision are key aspects of his successful boatbuilding methods.Step 4: Finishing Touches
Once the flange is fully dried, Sven removes the clamps carefully, ensuring no damage occurs during this process. He then moves on to attaching four more pieces onto these main frames, completing two pairs of flanges for the bulkhead hatches.The Final Touches
While two flanges form the primary support structure around the hatches, Sven mentions there are two additional pieces required at each end to ensure comprehensive protection. This attention to detail highlights his commitment to producing a durable and reliable design. “Sailing is about finding your path, whether it’s across an ocean or within yourself.” – Sven Yrvind In conclusion, making flanges around bulkhead hatches may seem complex at first glance, but by following Sven Yrvind’s meticulous process, enthusiasts can achieve professional-level results. Remember that the journey of boatbuilding is as rewarding as reaching your destination; it tests one’s patience and dedication. For those seeking to embark on this adventure or simply gain more insight into marine craftsmanship, Sven’s wisdom is invaluable.Sven begins by explaining that working on flanges vertically and horizontally is significantly easier than doing so in a flat position. To simplify the process further, he divides the task into two or three steps as suggested by fellow expert “for for.” This approach not only makes it more manageable but also allows for greater precision in crafting each component.Step 2: Applying Glue and Securing
Sven proceeds to apply glue along one edge of the flange, ensuring a secure bond when clamped into place. He emphasizes that this stage is crucial for maintaining the structural integrity of the flange, which in turn safeguards the living area beneath the canvas when hatches are open.Step 3: Allowing Time to Dry
After securely attaching the first portion of the flange, Sven allows ample time for it to dry before moving forward with additional steps. This patience and precision are key aspects of his successful boatbuilding methods.Step 4: Finishing Touches
Once the flange is fully dried, Sven removes the clamps carefully, ensuring no damage occurs during this process. He then moves on to attaching four more pieces onto these main frames, completing two pairs of flanges for the bulkhead hatches.The Final Touches
While two flanges form the primary support structure around the hatches, Sven mentions there are two additional pieces required at each end to ensure comprehensive protection. This attention to detail highlights his commitment to producing a durable and reliable design. “Sailing is about finding your path, whether it’s across an ocean or within yourself.” – Sven Yrvind In conclusion, making flanges around bulkhead hatches may seem complex at first glance, but by following Sven Yrvind’s meticulous process, enthusiasts can achieve professional-level results. Remember that the journey of boatbuilding is as rewarding as reaching your destination; it tests one’s patience and dedication. For those seeking to embark on this adventure or simply gain more insight into marine craftsmanship, Sven’s wisdom is invaluable.Sven Yrvind, a renowned yacht designer and sailor, shares valuable insights on creating flanges around bulkhead hatches for canvas protection in this enlightening video. By following his expert guidance, boat enthusiasts can ensure their living areas remain secure while allowing unhindered access through the hatches.Step 1: Starting with the Flange
Sven begins by explaining that working on flanges vertically and horizontally is significantly easier than doing so in a flat position. To simplify the process further, he divides the task into two or three steps as suggested by fellow expert “for for.” This approach not only makes it more manageable but also allows for greater precision in crafting each component.Step 2: Applying Glue and Securing
Sven proceeds to apply glue along one edge of the flange, ensuring a secure bond when clamped into place. He emphasizes that this stage is crucial for maintaining the structural integrity of the flange, which in turn safeguards the living area beneath the canvas when hatches are open.Step 3: Allowing Time to Dry
After securely attaching the first portion of the flange, Sven allows ample time for it to dry before moving forward with additional steps. This patience and precision are key aspects of his successful boatbuilding methods.Step 4: Finishing Touches
Once the flange is fully dried, Sven removes the clamps carefully, ensuring no damage occurs during this process. He then moves on to attaching four more pieces onto these main frames, completing two pairs of flanges for the bulkhead hatches.The Final Touches
While two flanges form the primary support structure around the hatches, Sven mentions there are two additional pieces required at each end to ensure comprehensive protection. This attention to detail highlights his commitment to producing a durable and reliable design. “Sailing is about finding your path, whether it’s across an ocean or within yourself.” – Sven Yrvind In conclusion, making flanges around bulkhead hatches may seem complex at first glance, but by following Sven Yrvind’s meticulous process, enthusiasts can achieve professional-level results. Remember that the journey of boatbuilding is as rewarding as reaching your destination; it tests one’s patience and dedication. For those seeking to embark on this adventure or simply gain more insight into marine craftsmanship, Sven’s wisdom is invaluable.Making Flanges Around Bulkhead Hatches for Canvas
Sven Yrvind, a renowned yacht designer and sailor, shares valuable insights on creating flanges around bulkhead hatches for canvas protection in this enlightening video. By following his expert guidance, boat enthusiasts can ensure their living areas remain secure while allowing unhindered access through the hatches.Step 1: Starting with the Flange
Sven begins by explaining that working on flanges vertically and horizontally is significantly easier than doing so in a flat position. To simplify the process further, he divides the task into two or three steps as suggested by fellow expert “for for.” This approach not only makes it more manageable but also allows for greater precision in crafting each component.Step 2: Applying Glue and Securing
Sven proceeds to apply glue along one edge of the flange, ensuring a secure bond when clamped into place. He emphasizes that this stage is crucial for maintaining the structural integrity of the flange, which in turn safeguards the living area beneath the canvas when hatches are open.Step 3: Allowing Time to Dry
After securely attaching the first portion of the flange, Sven allows ample time for it to dry before moving forward with additional steps. This patience and precision are key aspects of his successful boatbuilding methods.Step 4: Finishing Touches
Once the flange is fully dried, Sven removes the clamps carefully, ensuring no damage occurs during this process. He then moves on to attaching four more pieces onto these main frames, completing two pairs of flanges for the bulkhead hatches.The Final Touches
While two flanges form the primary support structure around the hatches, Sven mentions there are two additional pieces required at each end to ensure comprehensive protection. This attention to detail highlights his commitment to producing a durable and reliable design. “Sailing is about finding your path, whether it’s across an ocean or within yourself.” – Sven Yrvind In conclusion, making flanges around bulkhead hatches may seem complex at first glance, but by following Sven Yrvind’s meticulous process, enthusiasts can achieve professional-level results. Remember that the journey of boatbuilding is as rewarding as reaching your destination; it tests one’s patience and dedication. For those seeking to embark on this adventure or simply gain more insight into marine craftsmanship, Sven’s wisdom is invaluable.Sven proceeds to apply glue along one edge of the flange, ensuring a secure bond when clamped into place. He emphasizes that this stage is crucial for maintaining the structural integrity of the flange, which in turn safeguards the living area beneath the canvas when hatches are open.Step 3: Allowing Time to Dry
After securely attaching the first portion of the flange, Sven allows ample time for it to dry before moving forward with additional steps. This patience and precision are key aspects of his successful boatbuilding methods.Step 4: Finishing Touches
Once the flange is fully dried, Sven removes the clamps carefully, ensuring no damage occurs during this process. He then moves on to attaching four more pieces onto these main frames, completing two pairs of flanges for the bulkhead hatches.The Final Touches
While two flanges form the primary support structure around the hatches, Sven mentions there are two additional pieces required at each end to ensure comprehensive protection. This attention to detail highlights his commitment to producing a durable and reliable design. “Sailing is about finding your path, whether it’s across an ocean or within yourself.” – Sven Yrvind In conclusion, making flanges around bulkhead hatches may seem complex at first glance, but by following Sven Yrvind’s meticulous process, enthusiasts can achieve professional-level results. Remember that the journey of boatbuilding is as rewarding as reaching your destination; it tests one’s patience and dedication. For those seeking to embark on this adventure or simply gain more insight into marine craftsmanship, Sven’s wisdom is invaluable.Sven begins by explaining that working on flanges vertically and horizontally is significantly easier than doing so in a flat position. To simplify the process further, he divides the task into two or three steps as suggested by fellow expert “for for.” This approach not only makes it more manageable but also allows for greater precision in crafting each component.Step 2: Applying Glue and Securing
Sven proceeds to apply glue along one edge of the flange, ensuring a secure bond when clamped into place. He emphasizes that this stage is crucial for maintaining the structural integrity of the flange, which in turn safeguards the living area beneath the canvas when hatches are open.Step 3: Allowing Time to Dry
After securely attaching the first portion of the flange, Sven allows ample time for it to dry before moving forward with additional steps. This patience and precision are key aspects of his successful boatbuilding methods.Step 4: Finishing Touches
Once the flange is fully dried, Sven removes the clamps carefully, ensuring no damage occurs during this process. He then moves on to attaching four more pieces onto these main frames, completing two pairs of flanges for the bulkhead hatches.The Final Touches
While two flanges form the primary support structure around the hatches, Sven mentions there are two additional pieces required at each end to ensure comprehensive protection. This attention to detail highlights his commitment to producing a durable and reliable design. “Sailing is about finding your path, whether it’s across an ocean or within yourself.” – Sven Yrvind In conclusion, making flanges around bulkhead hatches may seem complex at first glance, but by following Sven Yrvind’s meticulous process, enthusiasts can achieve professional-level results. Remember that the journey of boatbuilding is as rewarding as reaching your destination; it tests one’s patience and dedication. For those seeking to embark on this adventure or simply gain more insight into marine craftsmanship, Sven’s wisdom is invaluable.Sven Yrvind, a renowned yacht designer and sailor, shares valuable insights on creating flanges around bulkhead hatches for canvas protection in this enlightening video. By following his expert guidance, boat enthusiasts can ensure their living areas remain secure while allowing unhindered access through the hatches.Step 1: Starting with the Flange
Sven begins by explaining that working on flanges vertically and horizontally is significantly easier than doing so in a flat position. To simplify the process further, he divides the task into two or three steps as suggested by fellow expert “for for.” This approach not only makes it more manageable but also allows for greater precision in crafting each component.Step 2: Applying Glue and Securing
Sven proceeds to apply glue along one edge of the flange, ensuring a secure bond when clamped into place. He emphasizes that this stage is crucial for maintaining the structural integrity of the flange, which in turn safeguards the living area beneath the canvas when hatches are open.Step 3: Allowing Time to Dry
After securely attaching the first portion of the flange, Sven allows ample time for it to dry before moving forward with additional steps. This patience and precision are key aspects of his successful boatbuilding methods.Step 4: Finishing Touches
Once the flange is fully dried, Sven removes the clamps carefully, ensuring no damage occurs during this process. He then moves on to attaching four more pieces onto these main frames, completing two pairs of flanges for the bulkhead hatches.The Final Touches
While two flanges form the primary support structure around the hatches, Sven mentions there are two additional pieces required at each end to ensure comprehensive protection. This attention to detail highlights his commitment to producing a durable and reliable design. “Sailing is about finding your path, whether it’s across an ocean or within yourself.” – Sven Yrvind In conclusion, making flanges around bulkhead hatches may seem complex at first glance, but by following Sven Yrvind’s meticulous process, enthusiasts can achieve professional-level results. Remember that the journey of boatbuilding is as rewarding as reaching your destination; it tests one’s patience and dedication. For those seeking to embark on this adventure or simply gain more insight into marine craftsmanship, Sven’s wisdom is invaluable.Making Flanges Around Bulkhead Hatches for Canvas
Sven Yrvind, a renowned yacht designer and sailor, shares valuable insights on creating flanges around bulkhead hatches for canvas protection in this enlightening video. By following his expert guidance, boat enthusiasts can ensure their living areas remain secure while allowing unhindered access through the hatches.Step 1: Starting with the Flange
Sven begins by explaining that working on flanges vertically and horizontally is significantly easier than doing so in a flat position. To simplify the process further, he divides the task into two or three steps as suggested by fellow expert “for for.” This approach not only makes it more manageable but also allows for greater precision in crafting each component.Step 2: Applying Glue and Securing
Sven proceeds to apply glue along one edge of the flange, ensuring a secure bond when clamped into place. He emphasizes that this stage is crucial for maintaining the structural integrity of the flange, which in turn safeguards the living area beneath the canvas when hatches are open.Step 3: Allowing Time to Dry
After securely attaching the first portion of the flange, Sven allows ample time for it to dry before moving forward with additional steps. This patience and precision are key aspects of his successful boatbuilding methods.Step 4: Finishing Touches
Once the flange is fully dried, Sven removes the clamps carefully, ensuring no damage occurs during this process. He then moves on to attaching four more pieces onto these main frames, completing two pairs of flanges for the bulkhead hatches.The Final Touches
While two flanges form the primary support structure around the hatches, Sven mentions there are two additional pieces required at each end to ensure comprehensive protection. This attention to detail highlights his commitment to producing a durable and reliable design. “Sailing is about finding your path, whether it’s across an ocean or within yourself.” – Sven Yrvind In conclusion, making flanges around bulkhead hatches may seem complex at first glance, but by following Sven Yrvind’s meticulous process, enthusiasts can achieve professional-level results. Remember that the journey of boatbuilding is as rewarding as reaching your destination; it tests one’s patience and dedication. For those seeking to embark on this adventure or simply gain more insight into marine craftsmanship, Sven’s wisdom is invaluable.Once the flange is fully dried, Sven removes the clamps carefully, ensuring no damage occurs during this process. He then moves on to attaching four more pieces onto these main frames, completing two pairs of flanges for the bulkhead hatches.The Final Touches
While two flanges form the primary support structure around the hatches, Sven mentions there are two additional pieces required at each end to ensure comprehensive protection. This attention to detail highlights his commitment to producing a durable and reliable design. “Sailing is about finding your path, whether it’s across an ocean or within yourself.” – Sven Yrvind In conclusion, making flanges around bulkhead hatches may seem complex at first glance, but by following Sven Yrvind’s meticulous process, enthusiasts can achieve professional-level results. Remember that the journey of boatbuilding is as rewarding as reaching your destination; it tests one’s patience and dedication. For those seeking to embark on this adventure or simply gain more insight into marine craftsmanship, Sven’s wisdom is invaluable.Sven proceeds to apply glue along one edge of the flange, ensuring a secure bond when clamped into place. He emphasizes that this stage is crucial for maintaining the structural integrity of the flange, which in turn safeguards the living area beneath the canvas when hatches are open.Step 3: Allowing Time to Dry
After securely attaching the first portion of the flange, Sven allows ample time for it to dry before moving forward with additional steps. This patience and precision are key aspects of his successful boatbuilding methods.Step 4: Finishing Touches
Once the flange is fully dried, Sven removes the clamps carefully, ensuring no damage occurs during this process. He then moves on to attaching four more pieces onto these main frames, completing two pairs of flanges for the bulkhead hatches.The Final Touches
While two flanges form the primary support structure around the hatches, Sven mentions there are two additional pieces required at each end to ensure comprehensive protection. This attention to detail highlights his commitment to producing a durable and reliable design. “Sailing is about finding your path, whether it’s across an ocean or within yourself.” – Sven Yrvind In conclusion, making flanges around bulkhead hatches may seem complex at first glance, but by following Sven Yrvind’s meticulous process, enthusiasts can achieve professional-level results. Remember that the journey of boatbuilding is as rewarding as reaching your destination; it tests one’s patience and dedication. For those seeking to embark on this adventure or simply gain more insight into marine craftsmanship, Sven’s wisdom is invaluable.Sven begins by explaining that working on flanges vertically and horizontally is significantly easier than doing so in a flat position. To simplify the process further, he divides the task into two or three steps as suggested by fellow expert “for for.” This approach not only makes it more manageable but also allows for greater precision in crafting each component.Step 2: Applying Glue and Securing
Sven proceeds to apply glue along one edge of the flange, ensuring a secure bond when clamped into place. He emphasizes that this stage is crucial for maintaining the structural integrity of the flange, which in turn safeguards the living area beneath the canvas when hatches are open.Step 3: Allowing Time to Dry
After securely attaching the first portion of the flange, Sven allows ample time for it to dry before moving forward with additional steps. This patience and precision are key aspects of his successful boatbuilding methods.Step 4: Finishing Touches
Once the flange is fully dried, Sven removes the clamps carefully, ensuring no damage occurs during this process. He then moves on to attaching four more pieces onto these main frames, completing two pairs of flanges for the bulkhead hatches.The Final Touches
While two flanges form the primary support structure around the hatches, Sven mentions there are two additional pieces required at each end to ensure comprehensive protection. This attention to detail highlights his commitment to producing a durable and reliable design. “Sailing is about finding your path, whether it’s across an ocean or within yourself.” – Sven Yrvind In conclusion, making flanges around bulkhead hatches may seem complex at first glance, but by following Sven Yrvind’s meticulous process, enthusiasts can achieve professional-level results. Remember that the journey of boatbuilding is as rewarding as reaching your destination; it tests one’s patience and dedication. For those seeking to embark on this adventure or simply gain more insight into marine craftsmanship, Sven’s wisdom is invaluable.Sven Yrvind, a renowned yacht designer and sailor, shares valuable insights on creating flanges around bulkhead hatches for canvas protection in this enlightening video. By following his expert guidance, boat enthusiasts can ensure their living areas remain secure while allowing unhindered access through the hatches.Step 1: Starting with the Flange
Sven begins by explaining that working on flanges vertically and horizontally is significantly easier than doing so in a flat position. To simplify the process further, he divides the task into two or three steps as suggested by fellow expert “for for.” This approach not only makes it more manageable but also allows for greater precision in crafting each component.Step 2: Applying Glue and Securing
Sven proceeds to apply glue along one edge of the flange, ensuring a secure bond when clamped into place. He emphasizes that this stage is crucial for maintaining the structural integrity of the flange, which in turn safeguards the living area beneath the canvas when hatches are open.Step 3: Allowing Time to Dry
After securely attaching the first portion of the flange, Sven allows ample time for it to dry before moving forward with additional steps. This patience and precision are key aspects of his successful boatbuilding methods.Step 4: Finishing Touches
Once the flange is fully dried, Sven removes the clamps carefully, ensuring no damage occurs during this process. He then moves on to attaching four more pieces onto these main frames, completing two pairs of flanges for the bulkhead hatches.The Final Touches
While two flanges form the primary support structure around the hatches, Sven mentions there are two additional pieces required at each end to ensure comprehensive protection. This attention to detail highlights his commitment to producing a durable and reliable design. “Sailing is about finding your path, whether it’s across an ocean or within yourself.” – Sven Yrvind In conclusion, making flanges around bulkhead hatches may seem complex at first glance, but by following Sven Yrvind’s meticulous process, enthusiasts can achieve professional-level results. Remember that the journey of boatbuilding is as rewarding as reaching your destination; it tests one’s patience and dedication. For those seeking to embark on this adventure or simply gain more insight into marine craftsmanship, Sven’s wisdom is invaluable.Making Flanges Around Bulkhead Hatches for Canvas
Sven Yrvind, a renowned yacht designer and sailor, shares valuable insights on creating flanges around bulkhead hatches for canvas protection in this enlightening video. By following his expert guidance, boat enthusiasts can ensure their living areas remain secure while allowing unhindered access through the hatches.Step 1: Starting with the Flange
Sven begins by explaining that working on flanges vertically and horizontally is significantly easier than doing so in a flat position. To simplify the process further, he divides the task into two or three steps as suggested by fellow expert “for for.” This approach not only makes it more manageable but also allows for greater precision in crafting each component.Step 2: Applying Glue and Securing
Sven proceeds to apply glue along one edge of the flange, ensuring a secure bond when clamped into place. He emphasizes that this stage is crucial for maintaining the structural integrity of the flange, which in turn safeguards the living area beneath the canvas when hatches are open.Step 3: Allowing Time to Dry
After securely attaching the first portion of the flange, Sven allows ample time for it to dry before moving forward with additional steps. This patience and precision are key aspects of his successful boatbuilding methods.Step 4: Finishing Touches
Once the flange is fully dried, Sven removes the clamps carefully, ensuring no damage occurs during this process. He then moves on to attaching four more pieces onto these main frames, completing two pairs of flanges for the bulkhead hatches.The Final Touches
While two flanges form the primary support structure around the hatches, Sven mentions there are two additional pieces required at each end to ensure comprehensive protection. This attention to detail highlights his commitment to producing a durable and reliable design. “Sailing is about finding your path, whether it’s across an ocean or within yourself.” – Sven Yrvind In conclusion, making flanges around bulkhead hatches may seem complex at first glance, but by following Sven Yrvind’s meticulous process, enthusiasts can achieve professional-level results. Remember that the journey of boatbuilding is as rewarding as reaching your destination; it tests one’s patience and dedication. For those seeking to embark on this adventure or simply gain more insight into marine craftsmanship, Sven’s wisdom is invaluable.After securely attaching the first portion of the flange, Sven allows ample time for it to dry before moving forward with additional steps. This patience and precision are key aspects of his successful boatbuilding methods.Step 4: Finishing Touches
Once the flange is fully dried, Sven removes the clamps carefully, ensuring no damage occurs during this process. He then moves on to attaching four more pieces onto these main frames, completing two pairs of flanges for the bulkhead hatches.The Final Touches
While two flanges form the primary support structure around the hatches, Sven mentions there are two additional pieces required at each end to ensure comprehensive protection. This attention to detail highlights his commitment to producing a durable and reliable design. “Sailing is about finding your path, whether it’s across an ocean or within yourself.” – Sven Yrvind In conclusion, making flanges around bulkhead hatches may seem complex at first glance, but by following Sven Yrvind’s meticulous process, enthusiasts can achieve professional-level results. Remember that the journey of boatbuilding is as rewarding as reaching your destination; it tests one’s patience and dedication. For those seeking to embark on this adventure or simply gain more insight into marine craftsmanship, Sven’s wisdom is invaluable.Sven proceeds to apply glue along one edge of the flange, ensuring a secure bond when clamped into place. He emphasizes that this stage is crucial for maintaining the structural integrity of the flange, which in turn safeguards the living area beneath the canvas when hatches are open.Step 3: Allowing Time to Dry
After securely attaching the first portion of the flange, Sven allows ample time for it to dry before moving forward with additional steps. This patience and precision are key aspects of his successful boatbuilding methods.Step 4: Finishing Touches
Once the flange is fully dried, Sven removes the clamps carefully, ensuring no damage occurs during this process. He then moves on to attaching four more pieces onto these main frames, completing two pairs of flanges for the bulkhead hatches.The Final Touches
While two flanges form the primary support structure around the hatches, Sven mentions there are two additional pieces required at each end to ensure comprehensive protection. This attention to detail highlights his commitment to producing a durable and reliable design. “Sailing is about finding your path, whether it’s across an ocean or within yourself.” – Sven Yrvind In conclusion, making flanges around bulkhead hatches may seem complex at first glance, but by following Sven Yrvind’s meticulous process, enthusiasts can achieve professional-level results. Remember that the journey of boatbuilding is as rewarding as reaching your destination; it tests one’s patience and dedication. For those seeking to embark on this adventure or simply gain more insight into marine craftsmanship, Sven’s wisdom is invaluable.Sven begins by explaining that working on flanges vertically and horizontally is significantly easier than doing so in a flat position. To simplify the process further, he divides the task into two or three steps as suggested by fellow expert “for for.” This approach not only makes it more manageable but also allows for greater precision in crafting each component.Step 2: Applying Glue and Securing
Sven proceeds to apply glue along one edge of the flange, ensuring a secure bond when clamped into place. He emphasizes that this stage is crucial for maintaining the structural integrity of the flange, which in turn safeguards the living area beneath the canvas when hatches are open.Step 3: Allowing Time to Dry
After securely attaching the first portion of the flange, Sven allows ample time for it to dry before moving forward with additional steps. This patience and precision are key aspects of his successful boatbuilding methods.Step 4: Finishing Touches
Once the flange is fully dried, Sven removes the clamps carefully, ensuring no damage occurs during this process. He then moves on to attaching four more pieces onto these main frames, completing two pairs of flanges for the bulkhead hatches.The Final Touches
While two flanges form the primary support structure around the hatches, Sven mentions there are two additional pieces required at each end to ensure comprehensive protection. This attention to detail highlights his commitment to producing a durable and reliable design. “Sailing is about finding your path, whether it’s across an ocean or within yourself.” – Sven Yrvind In conclusion, making flanges around bulkhead hatches may seem complex at first glance, but by following Sven Yrvind’s meticulous process, enthusiasts can achieve professional-level results. Remember that the journey of boatbuilding is as rewarding as reaching your destination; it tests one’s patience and dedication. For those seeking to embark on this adventure or simply gain more insight into marine craftsmanship, Sven’s wisdom is invaluable.Sven Yrvind, a renowned yacht designer and sailor, shares valuable insights on creating flanges around bulkhead hatches for canvas protection in this enlightening video. By following his expert guidance, boat enthusiasts can ensure their living areas remain secure while allowing unhindered access through the hatches.Step 1: Starting with the Flange
Sven begins by explaining that working on flanges vertically and horizontally is significantly easier than doing so in a flat position. To simplify the process further, he divides the task into two or three steps as suggested by fellow expert “for for.” This approach not only makes it more manageable but also allows for greater precision in crafting each component.Step 2: Applying Glue and Securing
Sven proceeds to apply glue along one edge of the flange, ensuring a secure bond when clamped into place. He emphasizes that this stage is crucial for maintaining the structural integrity of the flange, which in turn safeguards the living area beneath the canvas when hatches are open.Step 3: Allowing Time to Dry
After securely attaching the first portion of the flange, Sven allows ample time for it to dry before moving forward with additional steps. This patience and precision are key aspects of his successful boatbuilding methods.Step 4: Finishing Touches
Once the flange is fully dried, Sven removes the clamps carefully, ensuring no damage occurs during this process. He then moves on to attaching four more pieces onto these main frames, completing two pairs of flanges for the bulkhead hatches.The Final Touches
While two flanges form the primary support structure around the hatches, Sven mentions there are two additional pieces required at each end to ensure comprehensive protection. This attention to detail highlights his commitment to producing a durable and reliable design. “Sailing is about finding your path, whether it’s across an ocean or within yourself.” – Sven Yrvind In conclusion, making flanges around bulkhead hatches may seem complex at first glance, but by following Sven Yrvind’s meticulous process, enthusiasts can achieve professional-level results. Remember that the journey of boatbuilding is as rewarding as reaching your destination; it tests one’s patience and dedication. For those seeking to embark on this adventure or simply gain more insight into marine craftsmanship, Sven’s wisdom is invaluable.Making Flanges Around Bulkhead Hatches for Canvas
Sven Yrvind, a renowned yacht designer and sailor, shares valuable insights on creating flanges around bulkhead hatches for canvas protection in this enlightening video. By following his expert guidance, boat enthusiasts can ensure their living areas remain secure while allowing unhindered access through the hatches.Step 1: Starting with the Flange
Sven begins by explaining that working on flanges vertically and horizontally is significantly easier than doing so in a flat position. To simplify the process further, he divides the task into two or three steps as suggested by fellow expert “for for.” This approach not only makes it more manageable but also allows for greater precision in crafting each component.Step 2: Applying Glue and Securing
Sven proceeds to apply glue along one edge of the flange, ensuring a secure bond when clamped into place. He emphasizes that this stage is crucial for maintaining the structural integrity of the flange, which in turn safeguards the living area beneath the canvas when hatches are open.Step 3: Allowing Time to Dry
After securely attaching the first portion of the flange, Sven allows ample time for it to dry before moving forward with additional steps. This patience and precision are key aspects of his successful boatbuilding methods.Step 4: Finishing Touches
Once the flange is fully dried, Sven removes the clamps carefully, ensuring no damage occurs during this process. He then moves on to attaching four more pieces onto these main frames, completing two pairs of flanges for the bulkhead hatches.The Final Touches
While two flanges form the primary support structure around the hatches, Sven mentions there are two additional pieces required at each end to ensure comprehensive protection. This attention to detail highlights his commitment to producing a durable and reliable design. “Sailing is about finding your path, whether it’s across an ocean or within yourself.” – Sven Yrvind In conclusion, making flanges around bulkhead hatches may seem complex at first glance, but by following Sven Yrvind’s meticulous process, enthusiasts can achieve professional-level results. Remember that the journey of boatbuilding is as rewarding as reaching your destination; it tests one’s patience and dedication. For those seeking to embark on this adventure or simply gain more insight into marine craftsmanship, Sven’s wisdom is invaluable.Once the flange is fully dried, Sven removes the clamps carefully, ensuring no damage occurs during this process. He then moves on to attaching four more pieces onto these main frames, completing two pairs of flanges for the bulkhead hatches.The Final Touches
While two flanges form the primary support structure around the hatches, Sven mentions there are two additional pieces required at each end to ensure comprehensive protection. This attention to detail highlights his commitment to producing a durable and reliable design. “Sailing is about finding your path, whether it’s across an ocean or within yourself.” – Sven Yrvind In conclusion, making flanges around bulkhead hatches may seem complex at first glance, but by following Sven Yrvind’s meticulous process, enthusiasts can achieve professional-level results. Remember that the journey of boatbuilding is as rewarding as reaching your destination; it tests one’s patience and dedication. For those seeking to embark on this adventure or simply gain more insight into marine craftsmanship, Sven’s wisdom is invaluable.After securely attaching the first portion of the flange, Sven allows ample time for it to dry before moving forward with additional steps. This patience and precision are key aspects of his successful boatbuilding methods.Step 4: Finishing Touches
Once the flange is fully dried, Sven removes the clamps carefully, ensuring no damage occurs during this process. He then moves on to attaching four more pieces onto these main frames, completing two pairs of flanges for the bulkhead hatches.The Final Touches
While two flanges form the primary support structure around the hatches, Sven mentions there are two additional pieces required at each end to ensure comprehensive protection. This attention to detail highlights his commitment to producing a durable and reliable design. “Sailing is about finding your path, whether it’s across an ocean or within yourself.” – Sven Yrvind In conclusion, making flanges around bulkhead hatches may seem complex at first glance, but by following Sven Yrvind’s meticulous process, enthusiasts can achieve professional-level results. Remember that the journey of boatbuilding is as rewarding as reaching your destination; it tests one’s patience and dedication. For those seeking to embark on this adventure or simply gain more insight into marine craftsmanship, Sven’s wisdom is invaluable.Sven proceeds to apply glue along one edge of the flange, ensuring a secure bond when clamped into place. He emphasizes that this stage is crucial for maintaining the structural integrity of the flange, which in turn safeguards the living area beneath the canvas when hatches are open.Step 3: Allowing Time to Dry
After securely attaching the first portion of the flange, Sven allows ample time for it to dry before moving forward with additional steps. This patience and precision are key aspects of his successful boatbuilding methods.Step 4: Finishing Touches
Once the flange is fully dried, Sven removes the clamps carefully, ensuring no damage occurs during this process. He then moves on to attaching four more pieces onto these main frames, completing two pairs of flanges for the bulkhead hatches.The Final Touches
While two flanges form the primary support structure around the hatches, Sven mentions there are two additional pieces required at each end to ensure comprehensive protection. This attention to detail highlights his commitment to producing a durable and reliable design. “Sailing is about finding your path, whether it’s across an ocean or within yourself.” – Sven Yrvind In conclusion, making flanges around bulkhead hatches may seem complex at first glance, but by following Sven Yrvind’s meticulous process, enthusiasts can achieve professional-level results. Remember that the journey of boatbuilding is as rewarding as reaching your destination; it tests one’s patience and dedication. For those seeking to embark on this adventure or simply gain more insight into marine craftsmanship, Sven’s wisdom is invaluable.Sven begins by explaining that working on flanges vertically and horizontally is significantly easier than doing so in a flat position. To simplify the process further, he divides the task into two or three steps as suggested by fellow expert “for for.” This approach not only makes it more manageable but also allows for greater precision in crafting each component.Step 2: Applying Glue and Securing
Sven proceeds to apply glue along one edge of the flange, ensuring a secure bond when clamped into place. He emphasizes that this stage is crucial for maintaining the structural integrity of the flange, which in turn safeguards the living area beneath the canvas when hatches are open.Step 3: Allowing Time to Dry
After securely attaching the first portion of the flange, Sven allows ample time for it to dry before moving forward with additional steps. This patience and precision are key aspects of his successful boatbuilding methods.Step 4: Finishing Touches
Once the flange is fully dried, Sven removes the clamps carefully, ensuring no damage occurs during this process. He then moves on to attaching four more pieces onto these main frames, completing two pairs of flanges for the bulkhead hatches.The Final Touches
While two flanges form the primary support structure around the hatches, Sven mentions there are two additional pieces required at each end to ensure comprehensive protection. This attention to detail highlights his commitment to producing a durable and reliable design. “Sailing is about finding your path, whether it’s across an ocean or within yourself.” – Sven Yrvind In conclusion, making flanges around bulkhead hatches may seem complex at first glance, but by following Sven Yrvind’s meticulous process, enthusiasts can achieve professional-level results. Remember that the journey of boatbuilding is as rewarding as reaching your destination; it tests one’s patience and dedication. For those seeking to embark on this adventure or simply gain more insight into marine craftsmanship, Sven’s wisdom is invaluable.Sven Yrvind, a renowned yacht designer and sailor, shares valuable insights on creating flanges around bulkhead hatches for canvas protection in this enlightening video. By following his expert guidance, boat enthusiasts can ensure their living areas remain secure while allowing unhindered access through the hatches.Step 1: Starting with the Flange
Sven begins by explaining that working on flanges vertically and horizontally is significantly easier than doing so in a flat position. To simplify the process further, he divides the task into two or three steps as suggested by fellow expert “for for.” This approach not only makes it more manageable but also allows for greater precision in crafting each component.Step 2: Applying Glue and Securing
Sven proceeds to apply glue along one edge of the flange, ensuring a secure bond when clamped into place. He emphasizes that this stage is crucial for maintaining the structural integrity of the flange, which in turn safeguards the living area beneath the canvas when hatches are open.Step 3: Allowing Time to Dry
After securely attaching the first portion of the flange, Sven allows ample time for it to dry before moving forward with additional steps. This patience and precision are key aspects of his successful boatbuilding methods.Step 4: Finishing Touches
Once the flange is fully dried, Sven removes the clamps carefully, ensuring no damage occurs during this process. He then moves on to attaching four more pieces onto these main frames, completing two pairs of flanges for the bulkhead hatches.The Final Touches
While two flanges form the primary support structure around the hatches, Sven mentions there are two additional pieces required at each end to ensure comprehensive protection. This attention to detail highlights his commitment to producing a durable and reliable design. “Sailing is about finding your path, whether it’s across an ocean or within yourself.” – Sven Yrvind In conclusion, making flanges around bulkhead hatches may seem complex at first glance, but by following Sven Yrvind’s meticulous process, enthusiasts can achieve professional-level results. Remember that the journey of boatbuilding is as rewarding as reaching your destination; it tests one’s patience and dedication. For those seeking to embark on this adventure or simply gain more insight into marine craftsmanship, Sven’s wisdom is invaluable.Making Flanges Around Bulkhead Hatches for Canvas
Sven Yrvind, a renowned yacht designer and sailor, shares valuable insights on creating flanges around bulkhead hatches for canvas protection in this enlightening video. By following his expert guidance, boat enthusiasts can ensure their living areas remain secure while allowing unhindered access through the hatches.Step 1: Starting with the Flange
Sven begins by explaining that working on flanges vertically and horizontally is significantly easier than doing so in a flat position. To simplify the process further, he divides the task into two or three steps as suggested by fellow expert “for for.” This approach not only makes it more manageable but also allows for greater precision in crafting each component.Step 2: Applying Glue and Securing
Sven proceeds to apply glue along one edge of the flange, ensuring a secure bond when clamped into place. He emphasizes that this stage is crucial for maintaining the structural integrity of the flange, which in turn safeguards the living area beneath the canvas when hatches are open.Step 3: Allowing Time to Dry
After securely attaching the first portion of the flange, Sven allows ample time for it to dry before moving forward with additional steps. This patience and precision are key aspects of his successful boatbuilding methods.Step 4: Finishing Touches
Once the flange is fully dried, Sven removes the clamps carefully, ensuring no damage occurs during this process. He then moves on to attaching four more pieces onto these main frames, completing two pairs of flanges for the bulkhead hatches.The Final Touches
While two flanges form the primary support structure around the hatches, Sven mentions there are two additional pieces required at each end to ensure comprehensive protection. This attention to detail highlights his commitment to producing a durable and reliable design. “Sailing is about finding your path, whether it’s across an ocean or within yourself.” – Sven Yrvind In conclusion, making flanges around bulkhead hatches may seem complex at first glance, but by following Sven Yrvind’s meticulous process, enthusiasts can achieve professional-level results. Remember that the journey of boatbuilding is as rewarding as reaching your destination; it tests one’s patience and dedication. For those seeking to embark on this adventure or simply gain more insight into marine craftsmanship, Sven’s wisdom is invaluable.Sven proceeds to apply glue along one edge of the flange, ensuring a secure bond when clamped into place. He emphasizes that this stage is crucial for maintaining the structural integrity of the flange, which in turn safeguards the living area beneath the canvas when hatches are open.Step 3: Allowing Time to Dry
After securely attaching the first portion of the flange, Sven allows ample time for it to dry before moving forward with additional steps. This patience and precision are key aspects of his successful boatbuilding methods.Step 4: Finishing Touches
Once the flange is fully dried, Sven removes the clamps carefully, ensuring no damage occurs during this process. He then moves on to attaching four more pieces onto these main frames, completing two pairs of flanges for the bulkhead hatches.The Final Touches
While two flanges form the primary support structure around the hatches, Sven mentions there are two additional pieces required at each end to ensure comprehensive protection. This attention to detail highlights his commitment to producing a durable and reliable design. “Sailing is about finding your path, whether it’s across an ocean or within yourself.” – Sven Yrvind In conclusion, making flanges around bulkhead hatches may seem complex at first glance, but by following Sven Yrvind’s meticulous process, enthusiasts can achieve professional-level results. Remember that the journey of boatbuilding is as rewarding as reaching your destination; it tests one’s patience and dedication. For those seeking to embark on this adventure or simply gain more insight into marine craftsmanship, Sven’s wisdom is invaluable.Sven Yrvind, a renowned yacht designer and sailor, shares valuable insights on creating flanges around bulkhead hatches for canvas protection in this enlightening video. By following his expert guidance, boat enthusiasts can ensure their living areas remain secure while allowing unhindered access through the hatches.Step 1: Starting with the Flange
Sven begins by explaining that working on flanges vertically and horizontally is significantly easier than doing so in a flat position. To simplify the process further, he divides the task into two or three steps as suggested by fellow expert “for for.” This approach not only makes it more manageable but also allows for greater precision in crafting each component.Step 2: Applying Glue and Securing
Sven proceeds to apply glue along one edge of the flange, ensuring a secure bond when clamped into place. He emphasizes that this stage is crucial for maintaining the structural integrity of the flange, which in turn safeguards the living area beneath the canvas when hatches are open.Step 3: Allowing Time to Dry
After securely attaching the first portion of the flange, Sven allows ample time for it to dry before moving forward with additional steps. This patience and precision are key aspects of his successful boatbuilding methods.Step 4: Finishing Touches
Once the flange is fully dried, Sven removes the clamps carefully, ensuring no damage occurs during this process. He then moves on to attaching four more pieces onto these main frames, completing two pairs of flanges for the bulkhead hatches.The Final Touches
While two flanges form the primary support structure around the hatches, Sven mentions there are two additional pieces required at each end to ensure comprehensive protection. This attention to detail highlights his commitment to producing a durable and reliable design. “Sailing is about finding your path, whether it’s across an ocean or within yourself.” – Sven Yrvind In conclusion, making flanges around bulkhead hatches may seem complex at first glance, but by following Sven Yrvind’s meticulous process, enthusiasts can achieve professional-level results. Remember that the journey of boatbuilding is as rewarding as reaching your destination; it tests one’s patience and dedication. For those seeking to embark on this adventure or simply gain more insight into marine craftsmanship, Sven’s wisdom is invaluable.Making Flanges Around Bulkhead Hatches for Canvas
Sven Yrvind, a renowned yacht designer and sailor, shares valuable insights on creating flanges around bulkhead hatches for canvas protection in this enlightening video. By following his expert guidance, boat enthusiasts can ensure their living areas remain secure while allowing unhindered access through the hatches.Step 1: Starting with the Flange
Sven begins by explaining that working on flanges vertically and horizontally is significantly easier than doing so in a flat position. To simplify the process further, he divides the task into two or three steps as suggested by fellow expert “for for.” This approach not only makes it more manageable but also allows for greater precision in crafting each component.Step 2: Applying Glue and Securing
Sven proceeds to apply glue along one edge of the flange, ensuring a secure bond when clamped into place. He emphasizes that this stage is crucial for maintaining the structural integrity of the flange, which in turn safeguards the living area beneath the canvas when hatches are open.Step 3: Allowing Time to Dry
After securely attaching the first portion of the flange, Sven allows ample time for it to dry before moving forward with additional steps. This patience and precision are key aspects of his successful boatbuilding methods.Step 4: Finishing Touches
Once the flange is fully dried, Sven removes the clamps carefully, ensuring no damage occurs during this process. He then moves on to attaching four more pieces onto these main frames, completing two pairs of flanges for the bulkhead hatches.The Final Touches
While two flanges form the primary support structure around the hatches, Sven mentions there are two additional pieces required at each end to ensure comprehensive protection. This attention to detail highlights his commitment to producing a durable and reliable design. “Sailing is about finding your path, whether it’s across an ocean or within yourself.” – Sven Yrvind In conclusion, making flanges around bulkhead hatches may seem complex at first glance, but by following Sven Yrvind’s meticulous process, enthusiasts can achieve professional-level results. Remember that the journey of boatbuilding is as rewarding as reaching your destination; it tests one’s patience and dedication. For those seeking to embark on this adventure or simply gain more insight into marine craftsmanship, Sven’s wisdom is invaluable.Once the flange is fully dried, Sven removes the clamps carefully, ensuring no damage occurs during this process. He then moves on to attaching four more pieces onto these main frames, completing two pairs of flanges for the bulkhead hatches.The Final Touches
While two flanges form the primary support structure around the hatches, Sven mentions there are two additional pieces required at each end to ensure comprehensive protection. This attention to detail highlights his commitment to producing a durable and reliable design. “Sailing is about finding your path, whether it’s across an ocean or within yourself.” – Sven Yrvind In conclusion, making flanges around bulkhead hatches may seem complex at first glance, but by following Sven Yrvind’s meticulous process, enthusiasts can achieve professional-level results. Remember that the journey of boatbuilding is as rewarding as reaching your destination; it tests one’s patience and dedication. For those seeking to embark on this adventure or simply gain more insight into marine craftsmanship, Sven’s wisdom is invaluable.Sven begins by explaining that working on flanges vertically and horizontally is significantly easier than doing so in a flat position. To simplify the process further, he divides the task into two or three steps as suggested by fellow expert “for for.” This approach not only makes it more manageable but also allows for greater precision in crafting each component.Step 2: Applying Glue and Securing
Sven proceeds to apply glue along one edge of the flange, ensuring a secure bond when clamped into place. He emphasizes that this stage is crucial for maintaining the structural integrity of the flange, which in turn safeguards the living area beneath the canvas when hatches are open.Step 3: Allowing Time to Dry
After securely attaching the first portion of the flange, Sven allows ample time for it to dry before moving forward with additional steps. This patience and precision are key aspects of his successful boatbuilding methods.Step 4: Finishing Touches
Once the flange is fully dried, Sven removes the clamps carefully, ensuring no damage occurs during this process. He then moves on to attaching four more pieces onto these main frames, completing two pairs of flanges for the bulkhead hatches.The Final Touches
While two flanges form the primary support structure around the hatches, Sven mentions there are two additional pieces required at each end to ensure comprehensive protection. This attention to detail highlights his commitment to producing a durable and reliable design. “Sailing is about finding your path, whether it’s across an ocean or within yourself.” – Sven Yrvind In conclusion, making flanges around bulkhead hatches may seem complex at first glance, but by following Sven Yrvind’s meticulous process, enthusiasts can achieve professional-level results. Remember that the journey of boatbuilding is as rewarding as reaching your destination; it tests one’s patience and dedication. For those seeking to embark on this adventure or simply gain more insight into marine craftsmanship, Sven’s wisdom is invaluable.Sven Yrvind, a renowned yacht designer and sailor, shares valuable insights on creating flanges around bulkhead hatches for canvas protection in this enlightening video. By following his expert guidance, boat enthusiasts can ensure their living areas remain secure while allowing unhindered access through the hatches.Step 1: Starting with the Flange
Sven begins by explaining that working on flanges vertically and horizontally is significantly easier than doing so in a flat position. To simplify the process further, he divides the task into two or three steps as suggested by fellow expert “for for.” This approach not only makes it more manageable but also allows for greater precision in crafting each component.Step 2: Applying Glue and Securing
Sven proceeds to apply glue along one edge of the flange, ensuring a secure bond when clamped into place. He emphasizes that this stage is crucial for maintaining the structural integrity of the flange, which in turn safeguards the living area beneath the canvas when hatches are open.Step 3: Allowing Time to Dry
After securely attaching the first portion of the flange, Sven allows ample time for it to dry before moving forward with additional steps. This patience and precision are key aspects of his successful boatbuilding methods.Step 4: Finishing Touches
Once the flange is fully dried, Sven removes the clamps carefully, ensuring no damage occurs during this process. He then moves on to attaching four more pieces onto these main frames, completing two pairs of flanges for the bulkhead hatches.The Final Touches
While two flanges form the primary support structure around the hatches, Sven mentions there are two additional pieces required at each end to ensure comprehensive protection. This attention to detail highlights his commitment to producing a durable and reliable design. “Sailing is about finding your path, whether it’s across an ocean or within yourself.” – Sven Yrvind In conclusion, making flanges around bulkhead hatches may seem complex at first glance, but by following Sven Yrvind’s meticulous process, enthusiasts can achieve professional-level results. Remember that the journey of boatbuilding is as rewarding as reaching your destination; it tests one’s patience and dedication. For those seeking to embark on this adventure or simply gain more insight into marine craftsmanship, Sven’s wisdom is invaluable.Making Flanges Around Bulkhead Hatches for Canvas
Sven Yrvind, a renowned yacht designer and sailor, shares valuable insights on creating flanges around bulkhead hatches for canvas protection in this enlightening video. By following his expert guidance, boat enthusiasts can ensure their living areas remain secure while allowing unhindered access through the hatches.Step 1: Starting with the Flange
Sven begins by explaining that working on flanges vertically and horizontally is significantly easier than doing so in a flat position. To simplify the process further, he divides the task into two or three steps as suggested by fellow expert “for for.” This approach not only makes it more manageable but also allows for greater precision in crafting each component.Step 2: Applying Glue and Securing
Sven proceeds to apply glue along one edge of the flange, ensuring a secure bond when clamped into place. He emphasizes that this stage is crucial for maintaining the structural integrity of the flange, which in turn safeguards the living area beneath the canvas when hatches are open.Step 3: Allowing Time to Dry
After securely attaching the first portion of the flange, Sven allows ample time for it to dry before moving forward with additional steps. This patience and precision are key aspects of his successful boatbuilding methods.Step 4: Finishing Touches
Once the flange is fully dried, Sven removes the clamps carefully, ensuring no damage occurs during this process. He then moves on to attaching four more pieces onto these main frames, completing two pairs of flanges for the bulkhead hatches.The Final Touches
While two flanges form the primary support structure around the hatches, Sven mentions there are two additional pieces required at each end to ensure comprehensive protection. This attention to detail highlights his commitment to producing a durable and reliable design. “Sailing is about finding your path, whether it’s across an ocean or within yourself.” – Sven Yrvind In conclusion, making flanges around bulkhead hatches may seem complex at first glance, but by following Sven Yrvind’s meticulous process, enthusiasts can achieve professional-level results. Remember that the journey of boatbuilding is as rewarding as reaching your destination; it tests one’s patience and dedication. For those seeking to embark on this adventure or simply gain more insight into marine craftsmanship, Sven’s wisdom is invaluable.After securely attaching the first portion of the flange, Sven allows ample time for it to dry before moving forward with additional steps. This patience and precision are key aspects of his successful boatbuilding methods.Step 4: Finishing Touches
Once the flange is fully dried, Sven removes the clamps carefully, ensuring no damage occurs during this process. He then moves on to attaching four more pieces onto these main frames, completing two pairs of flanges for the bulkhead hatches.The Final Touches
While two flanges form the primary support structure around the hatches, Sven mentions there are two additional pieces required at each end to ensure comprehensive protection. This attention to detail highlights his commitment to producing a durable and reliable design. “Sailing is about finding your path, whether it’s across an ocean or within yourself.” – Sven Yrvind In conclusion, making flanges around bulkhead hatches may seem complex at first glance, but by following Sven Yrvind’s meticulous process, enthusiasts can achieve professional-level results. Remember that the journey of boatbuilding is as rewarding as reaching your destination; it tests one’s patience and dedication. For those seeking to embark on this adventure or simply gain more insight into marine craftsmanship, Sven’s wisdom is invaluable.Sven begins by explaining that working on flanges vertically and horizontally is significantly easier than doing so in a flat position. To simplify the process further, he divides the task into two or three steps as suggested by fellow expert “for for.” This approach not only makes it more manageable but also allows for greater precision in crafting each component.Step 2: Applying Glue and Securing
Sven proceeds to apply glue along one edge of the flange, ensuring a secure bond when clamped into place. He emphasizes that this stage is crucial for maintaining the structural integrity of the flange, which in turn safeguards the living area beneath the canvas when hatches are open.Step 3: Allowing Time to Dry
After securely attaching the first portion of the flange, Sven allows ample time for it to dry before moving forward with additional steps. This patience and precision are key aspects of his successful boatbuilding methods.Step 4: Finishing Touches
Once the flange is fully dried, Sven removes the clamps carefully, ensuring no damage occurs during this process. He then moves on to attaching four more pieces onto these main frames, completing two pairs of flanges for the bulkhead hatches.The Final Touches
While two flanges form the primary support structure around the hatches, Sven mentions there are two additional pieces required at each end to ensure comprehensive protection. This attention to detail highlights his commitment to producing a durable and reliable design. “Sailing is about finding your path, whether it’s across an ocean or within yourself.” – Sven Yrvind In conclusion, making flanges around bulkhead hatches may seem complex at first glance, but by following Sven Yrvind’s meticulous process, enthusiasts can achieve professional-level results. Remember that the journey of boatbuilding is as rewarding as reaching your destination; it tests one’s patience and dedication. For those seeking to embark on this adventure or simply gain more insight into marine craftsmanship, Sven’s wisdom is invaluable.Sven Yrvind, a renowned yacht designer and sailor, shares valuable insights on creating flanges around bulkhead hatches for canvas protection in this enlightening video. By following his expert guidance, boat enthusiasts can ensure their living areas remain secure while allowing unhindered access through the hatches.Step 1: Starting with the Flange
Sven begins by explaining that working on flanges vertically and horizontally is significantly easier than doing so in a flat position. To simplify the process further, he divides the task into two or three steps as suggested by fellow expert “for for.” This approach not only makes it more manageable but also allows for greater precision in crafting each component.Step 2: Applying Glue and Securing
Sven proceeds to apply glue along one edge of the flange, ensuring a secure bond when clamped into place. He emphasizes that this stage is crucial for maintaining the structural integrity of the flange, which in turn safeguards the living area beneath the canvas when hatches are open.Step 3: Allowing Time to Dry
After securely attaching the first portion of the flange, Sven allows ample time for it to dry before moving forward with additional steps. This patience and precision are key aspects of his successful boatbuilding methods.Step 4: Finishing Touches
Once the flange is fully dried, Sven removes the clamps carefully, ensuring no damage occurs during this process. He then moves on to attaching four more pieces onto these main frames, completing two pairs of flanges for the bulkhead hatches.The Final Touches
While two flanges form the primary support structure around the hatches, Sven mentions there are two additional pieces required at each end to ensure comprehensive protection. This attention to detail highlights his commitment to producing a durable and reliable design. “Sailing is about finding your path, whether it’s across an ocean or within yourself.” – Sven Yrvind In conclusion, making flanges around bulkhead hatches may seem complex at first glance, but by following Sven Yrvind’s meticulous process, enthusiasts can achieve professional-level results. Remember that the journey of boatbuilding is as rewarding as reaching your destination; it tests one’s patience and dedication. For those seeking to embark on this adventure or simply gain more insight into marine craftsmanship, Sven’s wisdom is invaluable.Making Flanges Around Bulkhead Hatches for Canvas
Sven Yrvind, a renowned yacht designer and sailor, shares valuable insights on creating flanges around bulkhead hatches for canvas protection in this enlightening video. By following his expert guidance, boat enthusiasts can ensure their living areas remain secure while allowing unhindered access through the hatches.Step 1: Starting with the Flange
Sven begins by explaining that working on flanges vertically and horizontally is significantly easier than doing so in a flat position. To simplify the process further, he divides the task into two or three steps as suggested by fellow expert “for for.” This approach not only makes it more manageable but also allows for greater precision in crafting each component.Step 2: Applying Glue and Securing
Sven proceeds to apply glue along one edge of the flange, ensuring a secure bond when clamped into place. He emphasizes that this stage is crucial for maintaining the structural integrity of the flange, which in turn safeguards the living area beneath the canvas when hatches are open.Step 3: Allowing Time to Dry
After securely attaching the first portion of the flange, Sven allows ample time for it to dry before moving forward with additional steps. This patience and precision are key aspects of his successful boatbuilding methods.Step 4: Finishing Touches
Once the flange is fully dried, Sven removes the clamps carefully, ensuring no damage occurs during this process. He then moves on to attaching four more pieces onto these main frames, completing two pairs of flanges for the bulkhead hatches.The Final Touches
While two flanges form the primary support structure around the hatches, Sven mentions there are two additional pieces required at each end to ensure comprehensive protection. This attention to detail highlights his commitment to producing a durable and reliable design. “Sailing is about finding your path, whether it’s across an ocean or within yourself.” – Sven Yrvind In conclusion, making flanges around bulkhead hatches may seem complex at first glance, but by following Sven Yrvind’s meticulous process, enthusiasts can achieve professional-level results. Remember that the journey of boatbuilding is as rewarding as reaching your destination; it tests one’s patience and dedication. For those seeking to embark on this adventure or simply gain more insight into marine craftsmanship, Sven’s wisdom is invaluable.Sven proceeds to apply glue along one edge of the flange, ensuring a secure bond when clamped into place. He emphasizes that this stage is crucial for maintaining the structural integrity of the flange, which in turn safeguards the living area beneath the canvas when hatches are open.Step 3: Allowing Time to Dry
After securely attaching the first portion of the flange, Sven allows ample time for it to dry before moving forward with additional steps. This patience and precision are key aspects of his successful boatbuilding methods.Step 4: Finishing Touches
Once the flange is fully dried, Sven removes the clamps carefully, ensuring no damage occurs during this process. He then moves on to attaching four more pieces onto these main frames, completing two pairs of flanges for the bulkhead hatches.The Final Touches
While two flanges form the primary support structure around the hatches, Sven mentions there are two additional pieces required at each end to ensure comprehensive protection. This attention to detail highlights his commitment to producing a durable and reliable design. “Sailing is about finding your path, whether it’s across an ocean or within yourself.” – Sven Yrvind In conclusion, making flanges around bulkhead hatches may seem complex at first glance, but by following Sven Yrvind’s meticulous process, enthusiasts can achieve professional-level results. Remember that the journey of boatbuilding is as rewarding as reaching your destination; it tests one’s patience and dedication. For those seeking to embark on this adventure or simply gain more insight into marine craftsmanship, Sven’s wisdom is invaluable.Sven begins by explaining that working on flanges vertically and horizontally is significantly easier than doing so in a flat position. To simplify the process further, he divides the task into two or three steps as suggested by fellow expert “for for.” This approach not only makes it more manageable but also allows for greater precision in crafting each component.Step 2: Applying Glue and Securing
Sven proceeds to apply glue along one edge of the flange, ensuring a secure bond when clamped into place. He emphasizes that this stage is crucial for maintaining the structural integrity of the flange, which in turn safeguards the living area beneath the canvas when hatches are open.Step 3: Allowing Time to Dry
After securely attaching the first portion of the flange, Sven allows ample time for it to dry before moving forward with additional steps. This patience and precision are key aspects of his successful boatbuilding methods.Step 4: Finishing Touches
Once the flange is fully dried, Sven removes the clamps carefully, ensuring no damage occurs during this process. He then moves on to attaching four more pieces onto these main frames, completing two pairs of flanges for the bulkhead hatches.The Final Touches
While two flanges form the primary support structure around the hatches, Sven mentions there are two additional pieces required at each end to ensure comprehensive protection. This attention to detail highlights his commitment to producing a durable and reliable design. “Sailing is about finding your path, whether it’s across an ocean or within yourself.” – Sven Yrvind In conclusion, making flanges around bulkhead hatches may seem complex at first glance, but by following Sven Yrvind’s meticulous process, enthusiasts can achieve professional-level results. Remember that the journey of boatbuilding is as rewarding as reaching your destination; it tests one’s patience and dedication. For those seeking to embark on this adventure or simply gain more insight into marine craftsmanship, Sven’s wisdom is invaluable.Sven Yrvind, a renowned yacht designer and sailor, shares valuable insights on creating flanges around bulkhead hatches for canvas protection in this enlightening video. By following his expert guidance, boat enthusiasts can ensure their living areas remain secure while allowing unhindered access through the hatches.Step 1: Starting with the Flange
Sven begins by explaining that working on flanges vertically and horizontally is significantly easier than doing so in a flat position. To simplify the process further, he divides the task into two or three steps as suggested by fellow expert “for for.” This approach not only makes it more manageable but also allows for greater precision in crafting each component.Step 2: Applying Glue and Securing
Sven proceeds to apply glue along one edge of the flange, ensuring a secure bond when clamped into place. He emphasizes that this stage is crucial for maintaining the structural integrity of the flange, which in turn safeguards the living area beneath the canvas when hatches are open.Step 3: Allowing Time to Dry
After securely attaching the first portion of the flange, Sven allows ample time for it to dry before moving forward with additional steps. This patience and precision are key aspects of his successful boatbuilding methods.Step 4: Finishing Touches
Once the flange is fully dried, Sven removes the clamps carefully, ensuring no damage occurs during this process. He then moves on to attaching four more pieces onto these main frames, completing two pairs of flanges for the bulkhead hatches.The Final Touches
While two flanges form the primary support structure around the hatches, Sven mentions there are two additional pieces required at each end to ensure comprehensive protection. This attention to detail highlights his commitment to producing a durable and reliable design. “Sailing is about finding your path, whether it’s across an ocean or within yourself.” – Sven Yrvind In conclusion, making flanges around bulkhead hatches may seem complex at first glance, but by following Sven Yrvind’s meticulous process, enthusiasts can achieve professional-level results. Remember that the journey of boatbuilding is as rewarding as reaching your destination; it tests one’s patience and dedication. For those seeking to embark on this adventure or simply gain more insight into marine craftsmanship, Sven’s wisdom is invaluable.Making Flanges Around Bulkhead Hatches for Canvas
Sven Yrvind, a renowned yacht designer and sailor, shares valuable insights on creating flanges around bulkhead hatches for canvas protection in this enlightening video. By following his expert guidance, boat enthusiasts can ensure their living areas remain secure while allowing unhindered access through the hatches.Step 1: Starting with the Flange
Sven begins by explaining that working on flanges vertically and horizontally is significantly easier than doing so in a flat position. To simplify the process further, he divides the task into two or three steps as suggested by fellow expert “for for.” This approach not only makes it more manageable but also allows for greater precision in crafting each component.Step 2: Applying Glue and Securing
Sven proceeds to apply glue along one edge of the flange, ensuring a secure bond when clamped into place. He emphasizes that this stage is crucial for maintaining the structural integrity of the flange, which in turn safeguards the living area beneath the canvas when hatches are open.Step 3: Allowing Time to Dry
After securely attaching the first portion of the flange, Sven allows ample time for it to dry before moving forward with additional steps. This patience and precision are key aspects of his successful boatbuilding methods.Step 4: Finishing Touches
Once the flange is fully dried, Sven removes the clamps carefully, ensuring no damage occurs during this process. He then moves on to attaching four more pieces onto these main frames, completing two pairs of flanges for the bulkhead hatches.The Final Touches
While two flanges form the primary support structure around the hatches, Sven mentions there are two additional pieces required at each end to ensure comprehensive protection. This attention to detail highlights his commitment to producing a durable and reliable design. “Sailing is about finding your path, whether it’s across an ocean or within yourself.” – Sven Yrvind In conclusion, making flanges around bulkhead hatches may seem complex at first glance, but by following Sven Yrvind’s meticulous process, enthusiasts can achieve professional-level results. Remember that the journey of boatbuilding is as rewarding as reaching your destination; it tests one’s patience and dedication. For those seeking to embark on this adventure or simply gain more insight into marine craftsmanship, Sven’s wisdom is invaluable.Once the flange is fully dried, Sven removes the clamps carefully, ensuring no damage occurs during this process. He then moves on to attaching four more pieces onto these main frames, completing two pairs of flanges for the bulkhead hatches.The Final Touches
While two flanges form the primary support structure around the hatches, Sven mentions there are two additional pieces required at each end to ensure comprehensive protection. This attention to detail highlights his commitment to producing a durable and reliable design. “Sailing is about finding your path, whether it’s across an ocean or within yourself.” – Sven Yrvind In conclusion, making flanges around bulkhead hatches may seem complex at first glance, but by following Sven Yrvind’s meticulous process, enthusiasts can achieve professional-level results. Remember that the journey of boatbuilding is as rewarding as reaching your destination; it tests one’s patience and dedication. For those seeking to embark on this adventure or simply gain more insight into marine craftsmanship, Sven’s wisdom is invaluable.Sven proceeds to apply glue along one edge of the flange, ensuring a secure bond when clamped into place. He emphasizes that this stage is crucial for maintaining the structural integrity of the flange, which in turn safeguards the living area beneath the canvas when hatches are open.Step 3: Allowing Time to Dry
After securely attaching the first portion of the flange, Sven allows ample time for it to dry before moving forward with additional steps. This patience and precision are key aspects of his successful boatbuilding methods.Step 4: Finishing Touches
Once the flange is fully dried, Sven removes the clamps carefully, ensuring no damage occurs during this process. He then moves on to attaching four more pieces onto these main frames, completing two pairs of flanges for the bulkhead hatches.The Final Touches
While two flanges form the primary support structure around the hatches, Sven mentions there are two additional pieces required at each end to ensure comprehensive protection. This attention to detail highlights his commitment to producing a durable and reliable design. “Sailing is about finding your path, whether it’s across an ocean or within yourself.” – Sven Yrvind In conclusion, making flanges around bulkhead hatches may seem complex at first glance, but by following Sven Yrvind’s meticulous process, enthusiasts can achieve professional-level results. Remember that the journey of boatbuilding is as rewarding as reaching your destination; it tests one’s patience and dedication. For those seeking to embark on this adventure or simply gain more insight into marine craftsmanship, Sven’s wisdom is invaluable.Sven begins by explaining that working on flanges vertically and horizontally is significantly easier than doing so in a flat position. To simplify the process further, he divides the task into two or three steps as suggested by fellow expert “for for.” This approach not only makes it more manageable but also allows for greater precision in crafting each component.Step 2: Applying Glue and Securing
Sven proceeds to apply glue along one edge of the flange, ensuring a secure bond when clamped into place. He emphasizes that this stage is crucial for maintaining the structural integrity of the flange, which in turn safeguards the living area beneath the canvas when hatches are open.Step 3: Allowing Time to Dry
After securely attaching the first portion of the flange, Sven allows ample time for it to dry before moving forward with additional steps. This patience and precision are key aspects of his successful boatbuilding methods.Step 4: Finishing Touches
Once the flange is fully dried, Sven removes the clamps carefully, ensuring no damage occurs during this process. He then moves on to attaching four more pieces onto these main frames, completing two pairs of flanges for the bulkhead hatches.The Final Touches
While two flanges form the primary support structure around the hatches, Sven mentions there are two additional pieces required at each end to ensure comprehensive protection. This attention to detail highlights his commitment to producing a durable and reliable design. “Sailing is about finding your path, whether it’s across an ocean or within yourself.” – Sven Yrvind In conclusion, making flanges around bulkhead hatches may seem complex at first glance, but by following Sven Yrvind’s meticulous process, enthusiasts can achieve professional-level results. Remember that the journey of boatbuilding is as rewarding as reaching your destination; it tests one’s patience and dedication. For those seeking to embark on this adventure or simply gain more insight into marine craftsmanship, Sven’s wisdom is invaluable.Sven Yrvind, a renowned yacht designer and sailor, shares valuable insights on creating flanges around bulkhead hatches for canvas protection in this enlightening video. By following his expert guidance, boat enthusiasts can ensure their living areas remain secure while allowing unhindered access through the hatches.Step 1: Starting with the Flange
Sven begins by explaining that working on flanges vertically and horizontally is significantly easier than doing so in a flat position. To simplify the process further, he divides the task into two or three steps as suggested by fellow expert “for for.” This approach not only makes it more manageable but also allows for greater precision in crafting each component.Step 2: Applying Glue and Securing
Sven proceeds to apply glue along one edge of the flange, ensuring a secure bond when clamped into place. He emphasizes that this stage is crucial for maintaining the structural integrity of the flange, which in turn safeguards the living area beneath the canvas when hatches are open.Step 3: Allowing Time to Dry
After securely attaching the first portion of the flange, Sven allows ample time for it to dry before moving forward with additional steps. This patience and precision are key aspects of his successful boatbuilding methods.Step 4: Finishing Touches
Once the flange is fully dried, Sven removes the clamps carefully, ensuring no damage occurs during this process. He then moves on to attaching four more pieces onto these main frames, completing two pairs of flanges for the bulkhead hatches.The Final Touches
While two flanges form the primary support structure around the hatches, Sven mentions there are two additional pieces required at each end to ensure comprehensive protection. This attention to detail highlights his commitment to producing a durable and reliable design. “Sailing is about finding your path, whether it’s across an ocean or within yourself.” – Sven Yrvind In conclusion, making flanges around bulkhead hatches may seem complex at first glance, but by following Sven Yrvind’s meticulous process, enthusiasts can achieve professional-level results. Remember that the journey of boatbuilding is as rewarding as reaching your destination; it tests one’s patience and dedication. For those seeking to embark on this adventure or simply gain more insight into marine craftsmanship, Sven’s wisdom is invaluable.Making Flanges Around Bulkhead Hatches for Canvas
Sven Yrvind, a renowned yacht designer and sailor, shares valuable insights on creating flanges around bulkhead hatches for canvas protection in this enlightening video. By following his expert guidance, boat enthusiasts can ensure their living areas remain secure while allowing unhindered access through the hatches.Step 1: Starting with the Flange
Sven begins by explaining that working on flanges vertically and horizontally is significantly easier than doing so in a flat position. To simplify the process further, he divides the task into two or three steps as suggested by fellow expert “for for.” This approach not only makes it more manageable but also allows for greater precision in crafting each component.Step 2: Applying Glue and Securing
Sven proceeds to apply glue along one edge of the flange, ensuring a secure bond when clamped into place. He emphasizes that this stage is crucial for maintaining the structural integrity of the flange, which in turn safeguards the living area beneath the canvas when hatches are open.Step 3: Allowing Time to Dry
After securely attaching the first portion of the flange, Sven allows ample time for it to dry before moving forward with additional steps. This patience and precision are key aspects of his successful boatbuilding methods.Step 4: Finishing Touches
Once the flange is fully dried, Sven removes the clamps carefully, ensuring no damage occurs during this process. He then moves on to attaching four more pieces onto these main frames, completing two pairs of flanges for the bulkhead hatches.The Final Touches
While two flanges form the primary support structure around the hatches, Sven mentions there are two additional pieces required at each end to ensure comprehensive protection. This attention to detail highlights his commitment to producing a durable and reliable design. “Sailing is about finding your path, whether it’s across an ocean or within yourself.” – Sven Yrvind In conclusion, making flanges around bulkhead hatches may seem complex at first glance, but by following Sven Yrvind’s meticulous process, enthusiasts can achieve professional-level results. Remember that the journey of boatbuilding is as rewarding as reaching your destination; it tests one’s patience and dedication. For those seeking to embark on this adventure or simply gain more insight into marine craftsmanship, Sven’s wisdom is invaluable.After securely attaching the first portion of the flange, Sven allows ample time for it to dry before moving forward with additional steps. This patience and precision are key aspects of his successful boatbuilding methods.Step 4: Finishing Touches
Once the flange is fully dried, Sven removes the clamps carefully, ensuring no damage occurs during this process. He then moves on to attaching four more pieces onto these main frames, completing two pairs of flanges for the bulkhead hatches.The Final Touches
While two flanges form the primary support structure around the hatches, Sven mentions there are two additional pieces required at each end to ensure comprehensive protection. This attention to detail highlights his commitment to producing a durable and reliable design. “Sailing is about finding your path, whether it’s across an ocean or within yourself.” – Sven Yrvind In conclusion, making flanges around bulkhead hatches may seem complex at first glance, but by following Sven Yrvind’s meticulous process, enthusiasts can achieve professional-level results. Remember that the journey of boatbuilding is as rewarding as reaching your destination; it tests one’s patience and dedication. For those seeking to embark on this adventure or simply gain more insight into marine craftsmanship, Sven’s wisdom is invaluable.Sven proceeds to apply glue along one edge of the flange, ensuring a secure bond when clamped into place. He emphasizes that this stage is crucial for maintaining the structural integrity of the flange, which in turn safeguards the living area beneath the canvas when hatches are open.Step 3: Allowing Time to Dry
After securely attaching the first portion of the flange, Sven allows ample time for it to dry before moving forward with additional steps. This patience and precision are key aspects of his successful boatbuilding methods.Step 4: Finishing Touches
Once the flange is fully dried, Sven removes the clamps carefully, ensuring no damage occurs during this process. He then moves on to attaching four more pieces onto these main frames, completing two pairs of flanges for the bulkhead hatches.The Final Touches
While two flanges form the primary support structure around the hatches, Sven mentions there are two additional pieces required at each end to ensure comprehensive protection. This attention to detail highlights his commitment to producing a durable and reliable design. “Sailing is about finding your path, whether it’s across an ocean or within yourself.” – Sven Yrvind In conclusion, making flanges around bulkhead hatches may seem complex at first glance, but by following Sven Yrvind’s meticulous process, enthusiasts can achieve professional-level results. Remember that the journey of boatbuilding is as rewarding as reaching your destination; it tests one’s patience and dedication. For those seeking to embark on this adventure or simply gain more insight into marine craftsmanship, Sven’s wisdom is invaluable.Sven begins by explaining that working on flanges vertically and horizontally is significantly easier than doing so in a flat position. To simplify the process further, he divides the task into two or three steps as suggested by fellow expert “for for.” This approach not only makes it more manageable but also allows for greater precision in crafting each component.Step 2: Applying Glue and Securing
Sven proceeds to apply glue along one edge of the flange, ensuring a secure bond when clamped into place. He emphasizes that this stage is crucial for maintaining the structural integrity of the flange, which in turn safeguards the living area beneath the canvas when hatches are open.Step 3: Allowing Time to Dry
After securely attaching the first portion of the flange, Sven allows ample time for it to dry before moving forward with additional steps. This patience and precision are key aspects of his successful boatbuilding methods.Step 4: Finishing Touches
Once the flange is fully dried, Sven removes the clamps carefully, ensuring no damage occurs during this process. He then moves on to attaching four more pieces onto these main frames, completing two pairs of flanges for the bulkhead hatches.The Final Touches
While two flanges form the primary support structure around the hatches, Sven mentions there are two additional pieces required at each end to ensure comprehensive protection. This attention to detail highlights his commitment to producing a durable and reliable design. “Sailing is about finding your path, whether it’s across an ocean or within yourself.” – Sven Yrvind In conclusion, making flanges around bulkhead hatches may seem complex at first glance, but by following Sven Yrvind’s meticulous process, enthusiasts can achieve professional-level results. Remember that the journey of boatbuilding is as rewarding as reaching your destination; it tests one’s patience and dedication. For those seeking to embark on this adventure or simply gain more insight into marine craftsmanship, Sven’s wisdom is invaluable.Sven Yrvind, a renowned yacht designer and sailor, shares valuable insights on creating flanges around bulkhead hatches for canvas protection in this enlightening video. By following his expert guidance, boat enthusiasts can ensure their living areas remain secure while allowing unhindered access through the hatches.Step 1: Starting with the Flange
Sven begins by explaining that working on flanges vertically and horizontally is significantly easier than doing so in a flat position. To simplify the process further, he divides the task into two or three steps as suggested by fellow expert “for for.” This approach not only makes it more manageable but also allows for greater precision in crafting each component.Step 2: Applying Glue and Securing
Sven proceeds to apply glue along one edge of the flange, ensuring a secure bond when clamped into place. He emphasizes that this stage is crucial for maintaining the structural integrity of the flange, which in turn safeguards the living area beneath the canvas when hatches are open.Step 3: Allowing Time to Dry
After securely attaching the first portion of the flange, Sven allows ample time for it to dry before moving forward with additional steps. This patience and precision are key aspects of his successful boatbuilding methods.Step 4: Finishing Touches
Once the flange is fully dried, Sven removes the clamps carefully, ensuring no damage occurs during this process. He then moves on to attaching four more pieces onto these main frames, completing two pairs of flanges for the bulkhead hatches.The Final Touches
While two flanges form the primary support structure around the hatches, Sven mentions there are two additional pieces required at each end to ensure comprehensive protection. This attention to detail highlights his commitment to producing a durable and reliable design. “Sailing is about finding your path, whether it’s across an ocean or within yourself.” – Sven Yrvind In conclusion, making flanges around bulkhead hatches may seem complex at first glance, but by following Sven Yrvind’s meticulous process, enthusiasts can achieve professional-level results. Remember that the journey of boatbuilding is as rewarding as reaching your destination; it tests one’s patience and dedication. For those seeking to embark on this adventure or simply gain more insight into marine craftsmanship, Sven’s wisdom is invaluable.Making Flanges Around Bulkhead Hatches for Canvas
Sven Yrvind, a renowned yacht designer and sailor, shares valuable insights on creating flanges around bulkhead hatches for canvas protection in this enlightening video. By following his expert guidance, boat enthusiasts can ensure their living areas remain secure while allowing unhindered access through the hatches.Step 1: Starting with the Flange
Sven begins by explaining that working on flanges vertically and horizontally is significantly easier than doing so in a flat position. To simplify the process further, he divides the task into two or three steps as suggested by fellow expert “for for.” This approach not only makes it more manageable but also allows for greater precision in crafting each component.Step 2: Applying Glue and Securing
Sven proceeds to apply glue along one edge of the flange, ensuring a secure bond when clamped into place. He emphasizes that this stage is crucial for maintaining the structural integrity of the flange, which in turn safeguards the living area beneath the canvas when hatches are open.Step 3: Allowing Time to Dry
After securely attaching the first portion of the flange, Sven allows ample time for it to dry before moving forward with additional steps. This patience and precision are key aspects of his successful boatbuilding methods.Step 4: Finishing Touches
Once the flange is fully dried, Sven removes the clamps carefully, ensuring no damage occurs during this process. He then moves on to attaching four more pieces onto these main frames, completing two pairs of flanges for the bulkhead hatches.The Final Touches
While two flanges form the primary support structure around the hatches, Sven mentions there are two additional pieces required at each end to ensure comprehensive protection. This attention to detail highlights his commitment to producing a durable and reliable design. “Sailing is about finding your path, whether it’s across an ocean or within yourself.” – Sven Yrvind In conclusion, making flanges around bulkhead hatches may seem complex at first glance, but by following Sven Yrvind’s meticulous process, enthusiasts can achieve professional-level results. Remember that the journey of boatbuilding is as rewarding as reaching your destination; it tests one’s patience and dedication. For those seeking to embark on this adventure or simply gain more insight into marine craftsmanship, Sven’s wisdom is invaluable.Once the flange is fully dried, Sven removes the clamps carefully, ensuring no damage occurs during this process. He then moves on to attaching four more pieces onto these main frames, completing two pairs of flanges for the bulkhead hatches.The Final Touches
While two flanges form the primary support structure around the hatches, Sven mentions there are two additional pieces required at each end to ensure comprehensive protection. This attention to detail highlights his commitment to producing a durable and reliable design. “Sailing is about finding your path, whether it’s across an ocean or within yourself.” – Sven Yrvind In conclusion, making flanges around bulkhead hatches may seem complex at first glance, but by following Sven Yrvind’s meticulous process, enthusiasts can achieve professional-level results. Remember that the journey of boatbuilding is as rewarding as reaching your destination; it tests one’s patience and dedication. For those seeking to embark on this adventure or simply gain more insight into marine craftsmanship, Sven’s wisdom is invaluable.After securely attaching the first portion of the flange, Sven allows ample time for it to dry before moving forward with additional steps. This patience and precision are key aspects of his successful boatbuilding methods.Step 4: Finishing Touches
Once the flange is fully dried, Sven removes the clamps carefully, ensuring no damage occurs during this process. He then moves on to attaching four more pieces onto these main frames, completing two pairs of flanges for the bulkhead hatches.The Final Touches
While two flanges form the primary support structure around the hatches, Sven mentions there are two additional pieces required at each end to ensure comprehensive protection. This attention to detail highlights his commitment to producing a durable and reliable design. “Sailing is about finding your path, whether it’s across an ocean or within yourself.” – Sven Yrvind In conclusion, making flanges around bulkhead hatches may seem complex at first glance, but by following Sven Yrvind’s meticulous process, enthusiasts can achieve professional-level results. Remember that the journey of boatbuilding is as rewarding as reaching your destination; it tests one’s patience and dedication. For those seeking to embark on this adventure or simply gain more insight into marine craftsmanship, Sven’s wisdom is invaluable.Sven proceeds to apply glue along one edge of the flange, ensuring a secure bond when clamped into place. He emphasizes that this stage is crucial for maintaining the structural integrity of the flange, which in turn safeguards the living area beneath the canvas when hatches are open.Step 3: Allowing Time to Dry
After securely attaching the first portion of the flange, Sven allows ample time for it to dry before moving forward with additional steps. This patience and precision are key aspects of his successful boatbuilding methods.Step 4: Finishing Touches
Once the flange is fully dried, Sven removes the clamps carefully, ensuring no damage occurs during this process. He then moves on to attaching four more pieces onto these main frames, completing two pairs of flanges for the bulkhead hatches.The Final Touches
While two flanges form the primary support structure around the hatches, Sven mentions there are two additional pieces required at each end to ensure comprehensive protection. This attention to detail highlights his commitment to producing a durable and reliable design. “Sailing is about finding your path, whether it’s across an ocean or within yourself.” – Sven Yrvind In conclusion, making flanges around bulkhead hatches may seem complex at first glance, but by following Sven Yrvind’s meticulous process, enthusiasts can achieve professional-level results. Remember that the journey of boatbuilding is as rewarding as reaching your destination; it tests one’s patience and dedication. For those seeking to embark on this adventure or simply gain more insight into marine craftsmanship, Sven’s wisdom is invaluable.Sven begins by explaining that working on flanges vertically and horizontally is significantly easier than doing so in a flat position. To simplify the process further, he divides the task into two or three steps as suggested by fellow expert “for for.” This approach not only makes it more manageable but also allows for greater precision in crafting each component.Step 2: Applying Glue and Securing
Sven proceeds to apply glue along one edge of the flange, ensuring a secure bond when clamped into place. He emphasizes that this stage is crucial for maintaining the structural integrity of the flange, which in turn safeguards the living area beneath the canvas when hatches are open.Step 3: Allowing Time to Dry
After securely attaching the first portion of the flange, Sven allows ample time for it to dry before moving forward with additional steps. This patience and precision are key aspects of his successful boatbuilding methods.Step 4: Finishing Touches
Once the flange is fully dried, Sven removes the clamps carefully, ensuring no damage occurs during this process. He then moves on to attaching four more pieces onto these main frames, completing two pairs of flanges for the bulkhead hatches.The Final Touches
While two flanges form the primary support structure around the hatches, Sven mentions there are two additional pieces required at each end to ensure comprehensive protection. This attention to detail highlights his commitment to producing a durable and reliable design. “Sailing is about finding your path, whether it’s across an ocean or within yourself.” – Sven Yrvind In conclusion, making flanges around bulkhead hatches may seem complex at first glance, but by following Sven Yrvind’s meticulous process, enthusiasts can achieve professional-level results. Remember that the journey of boatbuilding is as rewarding as reaching your destination; it tests one’s patience and dedication. For those seeking to embark on this adventure or simply gain more insight into marine craftsmanship, Sven’s wisdom is invaluable.Sven Yrvind, a renowned yacht designer and sailor, shares valuable insights on creating flanges around bulkhead hatches for canvas protection in this enlightening video. By following his expert guidance, boat enthusiasts can ensure their living areas remain secure while allowing unhindered access through the hatches.Step 1: Starting with the Flange
Sven begins by explaining that working on flanges vertically and horizontally is significantly easier than doing so in a flat position. To simplify the process further, he divides the task into two or three steps as suggested by fellow expert “for for.” This approach not only makes it more manageable but also allows for greater precision in crafting each component.Step 2: Applying Glue and Securing
Sven proceeds to apply glue along one edge of the flange, ensuring a secure bond when clamped into place. He emphasizes that this stage is crucial for maintaining the structural integrity of the flange, which in turn safeguards the living area beneath the canvas when hatches are open.Step 3: Allowing Time to Dry
After securely attaching the first portion of the flange, Sven allows ample time for it to dry before moving forward with additional steps. This patience and precision are key aspects of his successful boatbuilding methods.Step 4: Finishing Touches
Once the flange is fully dried, Sven removes the clamps carefully, ensuring no damage occurs during this process. He then moves on to attaching four more pieces onto these main frames, completing two pairs of flanges for the bulkhead hatches.The Final Touches
While two flanges form the primary support structure around the hatches, Sven mentions there are two additional pieces required at each end to ensure comprehensive protection. This attention to detail highlights his commitment to producing a durable and reliable design. “Sailing is about finding your path, whether it’s across an ocean or within yourself.” – Sven Yrvind In conclusion, making flanges around bulkhead hatches may seem complex at first glance, but by following Sven Yrvind’s meticulous process, enthusiasts can achieve professional-level results. Remember that the journey of boatbuilding is as rewarding as reaching your destination; it tests one’s patience and dedication. For those seeking to embark on this adventure or simply gain more insight into marine craftsmanship, Sven’s wisdom is invaluable.Making Flanges Around Bulkhead Hatches for Canvas
Sven Yrvind, a renowned yacht designer and sailor, shares valuable insights on creating flanges around bulkhead hatches for canvas protection in this enlightening video. By following his expert guidance, boat enthusiasts can ensure their living areas remain secure while allowing unhindered access through the hatches.Step 1: Starting with the Flange
Sven begins by explaining that working on flanges vertically and horizontally is significantly easier than doing so in a flat position. To simplify the process further, he divides the task into two or three steps as suggested by fellow expert “for for.” This approach not only makes it more manageable but also allows for greater precision in crafting each component.Step 2: Applying Glue and Securing
Sven proceeds to apply glue along one edge of the flange, ensuring a secure bond when clamped into place. He emphasizes that this stage is crucial for maintaining the structural integrity of the flange, which in turn safeguards the living area beneath the canvas when hatches are open.Step 3: Allowing Time to Dry
After securely attaching the first portion of the flange, Sven allows ample time for it to dry before moving forward with additional steps. This patience and precision are key aspects of his successful boatbuilding methods.Step 4: Finishing Touches
Once the flange is fully dried, Sven removes the clamps carefully, ensuring no damage occurs during this process. He then moves on to attaching four more pieces onto these main frames, completing two pairs of flanges for the bulkhead hatches.The Final Touches
While two flanges form the primary support structure around the hatches, Sven mentions there are two additional pieces required at each end to ensure comprehensive protection. This attention to detail highlights his commitment to producing a durable and reliable design. “Sailing is about finding your path, whether it’s across an ocean or within yourself.” – Sven Yrvind In conclusion, making flanges around bulkhead hatches may seem complex at first glance, but by following Sven Yrvind’s meticulous process, enthusiasts can achieve professional-level results. Remember that the journey of boatbuilding is as rewarding as reaching your destination; it tests one’s patience and dedication. For those seeking to embark on this adventure or simply gain more insight into marine craftsmanship, Sven’s wisdom is invaluable.Sven begins by explaining that working on flanges vertically and horizontally is significantly easier than doing so in a flat position. To simplify the process further, he divides the task into two or three steps as suggested by fellow expert “for for.” This approach not only makes it more manageable but also allows for greater precision in crafting each component.Step 2: Applying Glue and Securing
Sven proceeds to apply glue along one edge of the flange, ensuring a secure bond when clamped into place. He emphasizes that this stage is crucial for maintaining the structural integrity of the flange, which in turn safeguards the living area beneath the canvas when hatches are open.Step 3: Allowing Time to Dry
After securely attaching the first portion of the flange, Sven allows ample time for it to dry before moving forward with additional steps. This patience and precision are key aspects of his successful boatbuilding methods.Step 4: Finishing Touches
Once the flange is fully dried, Sven removes the clamps carefully, ensuring no damage occurs during this process. He then moves on to attaching four more pieces onto these main frames, completing two pairs of flanges for the bulkhead hatches.The Final Touches
While two flanges form the primary support structure around the hatches, Sven mentions there are two additional pieces required at each end to ensure comprehensive protection. This attention to detail highlights his commitment to producing a durable and reliable design. “Sailing is about finding your path, whether it’s across an ocean or within yourself.” – Sven Yrvind In conclusion, making flanges around bulkhead hatches may seem complex at first glance, but by following Sven Yrvind’s meticulous process, enthusiasts can achieve professional-level results. Remember that the journey of boatbuilding is as rewarding as reaching your destination; it tests one’s patience and dedication. For those seeking to embark on this adventure or simply gain more insight into marine craftsmanship, Sven’s wisdom is invaluable.Sven Yrvind, a renowned yacht designer and sailor, shares valuable insights on creating flanges around bulkhead hatches for canvas protection in this enlightening video. By following his expert guidance, boat enthusiasts can ensure their living areas remain secure while allowing unhindered access through the hatches.Step 1: Starting with the Flange
Sven begins by explaining that working on flanges vertically and horizontally is significantly easier than doing so in a flat position. To simplify the process further, he divides the task into two or three steps as suggested by fellow expert “for for.” This approach not only makes it more manageable but also allows for greater precision in crafting each component.Step 2: Applying Glue and Securing
Sven proceeds to apply glue along one edge of the flange, ensuring a secure bond when clamped into place. He emphasizes that this stage is crucial for maintaining the structural integrity of the flange, which in turn safeguards the living area beneath the canvas when hatches are open.Step 3: Allowing Time to Dry
After securely attaching the first portion of the flange, Sven allows ample time for it to dry before moving forward with additional steps. This patience and precision are key aspects of his successful boatbuilding methods.Step 4: Finishing Touches
Once the flange is fully dried, Sven removes the clamps carefully, ensuring no damage occurs during this process. He then moves on to attaching four more pieces onto these main frames, completing two pairs of flanges for the bulkhead hatches.The Final Touches
While two flanges form the primary support structure around the hatches, Sven mentions there are two additional pieces required at each end to ensure comprehensive protection. This attention to detail highlights his commitment to producing a durable and reliable design. “Sailing is about finding your path, whether it’s across an ocean or within yourself.” – Sven Yrvind In conclusion, making flanges around bulkhead hatches may seem complex at first glance, but by following Sven Yrvind’s meticulous process, enthusiasts can achieve professional-level results. Remember that the journey of boatbuilding is as rewarding as reaching your destination; it tests one’s patience and dedication. For those seeking to embark on this adventure or simply gain more insight into marine craftsmanship, Sven’s wisdom is invaluable.Making Flanges Around Bulkhead Hatches for Canvas
Sven Yrvind, a renowned yacht designer and sailor, shares valuable insights on creating flanges around bulkhead hatches for canvas protection in this enlightening video. By following his expert guidance, boat enthusiasts can ensure their living areas remain secure while allowing unhindered access through the hatches.Step 1: Starting with the Flange
Sven begins by explaining that working on flanges vertically and horizontally is significantly easier than doing so in a flat position. To simplify the process further, he divides the task into two or three steps as suggested by fellow expert “for for.” This approach not only makes it more manageable but also allows for greater precision in crafting each component.Step 2: Applying Glue and Securing
Sven proceeds to apply glue along one edge of the flange, ensuring a secure bond when clamped into place. He emphasizes that this stage is crucial for maintaining the structural integrity of the flange, which in turn safeguards the living area beneath the canvas when hatches are open.Step 3: Allowing Time to Dry
After securely attaching the first portion of the flange, Sven allows ample time for it to dry before moving forward with additional steps. This patience and precision are key aspects of his successful boatbuilding methods.Step 4: Finishing Touches
Once the flange is fully dried, Sven removes the clamps carefully, ensuring no damage occurs during this process. He then moves on to attaching four more pieces onto these main frames, completing two pairs of flanges for the bulkhead hatches.The Final Touches
While two flanges form the primary support structure around the hatches, Sven mentions there are two additional pieces required at each end to ensure comprehensive protection. This attention to detail highlights his commitment to producing a durable and reliable design. “Sailing is about finding your path, whether it’s across an ocean or within yourself.” – Sven Yrvind In conclusion, making flanges around bulkhead hatches may seem complex at first glance, but by following Sven Yrvind’s meticulous process, enthusiasts can achieve professional-level results. Remember that the journey of boatbuilding is as rewarding as reaching your destination; it tests one’s patience and dedication. For those seeking to embark on this adventure or simply gain more insight into marine craftsmanship, Sven’s wisdom is invaluable.Once the flange is fully dried, Sven removes the clamps carefully, ensuring no damage occurs during this process. He then moves on to attaching four more pieces onto these main frames, completing two pairs of flanges for the bulkhead hatches.The Final Touches
While two flanges form the primary support structure around the hatches, Sven mentions there are two additional pieces required at each end to ensure comprehensive protection. This attention to detail highlights his commitment to producing a durable and reliable design. “Sailing is about finding your path, whether it’s across an ocean or within yourself.” – Sven Yrvind In conclusion, making flanges around bulkhead hatches may seem complex at first glance, but by following Sven Yrvind’s meticulous process, enthusiasts can achieve professional-level results. Remember that the journey of boatbuilding is as rewarding as reaching your destination; it tests one’s patience and dedication. For those seeking to embark on this adventure or simply gain more insight into marine craftsmanship, Sven’s wisdom is invaluable.Sven begins by explaining that working on flanges vertically and horizontally is significantly easier than doing so in a flat position. To simplify the process further, he divides the task into two or three steps as suggested by fellow expert “for for.” This approach not only makes it more manageable but also allows for greater precision in crafting each component.Step 2: Applying Glue and Securing
Sven proceeds to apply glue along one edge of the flange, ensuring a secure bond when clamped into place. He emphasizes that this stage is crucial for maintaining the structural integrity of the flange, which in turn safeguards the living area beneath the canvas when hatches are open.Step 3: Allowing Time to Dry
After securely attaching the first portion of the flange, Sven allows ample time for it to dry before moving forward with additional steps. This patience and precision are key aspects of his successful boatbuilding methods.Step 4: Finishing Touches
Once the flange is fully dried, Sven removes the clamps carefully, ensuring no damage occurs during this process. He then moves on to attaching four more pieces onto these main frames, completing two pairs of flanges for the bulkhead hatches.The Final Touches
While two flanges form the primary support structure around the hatches, Sven mentions there are two additional pieces required at each end to ensure comprehensive protection. This attention to detail highlights his commitment to producing a durable and reliable design. “Sailing is about finding your path, whether it’s across an ocean or within yourself.” – Sven Yrvind In conclusion, making flanges around bulkhead hatches may seem complex at first glance, but by following Sven Yrvind’s meticulous process, enthusiasts can achieve professional-level results. Remember that the journey of boatbuilding is as rewarding as reaching your destination; it tests one’s patience and dedication. For those seeking to embark on this adventure or simply gain more insight into marine craftsmanship, Sven’s wisdom is invaluable.Sven Yrvind, a renowned yacht designer and sailor, shares valuable insights on creating flanges around bulkhead hatches for canvas protection in this enlightening video. By following his expert guidance, boat enthusiasts can ensure their living areas remain secure while allowing unhindered access through the hatches.Step 1: Starting with the Flange
Sven begins by explaining that working on flanges vertically and horizontally is significantly easier than doing so in a flat position. To simplify the process further, he divides the task into two or three steps as suggested by fellow expert “for for.” This approach not only makes it more manageable but also allows for greater precision in crafting each component.Step 2: Applying Glue and Securing
Sven proceeds to apply glue along one edge of the flange, ensuring a secure bond when clamped into place. He emphasizes that this stage is crucial for maintaining the structural integrity of the flange, which in turn safeguards the living area beneath the canvas when hatches are open.Step 3: Allowing Time to Dry
After securely attaching the first portion of the flange, Sven allows ample time for it to dry before moving forward with additional steps. This patience and precision are key aspects of his successful boatbuilding methods.Step 4: Finishing Touches
Once the flange is fully dried, Sven removes the clamps carefully, ensuring no damage occurs during this process. He then moves on to attaching four more pieces onto these main frames, completing two pairs of flanges for the bulkhead hatches.The Final Touches
While two flanges form the primary support structure around the hatches, Sven mentions there are two additional pieces required at each end to ensure comprehensive protection. This attention to detail highlights his commitment to producing a durable and reliable design. “Sailing is about finding your path, whether it’s across an ocean or within yourself.” – Sven Yrvind In conclusion, making flanges around bulkhead hatches may seem complex at first glance, but by following Sven Yrvind’s meticulous process, enthusiasts can achieve professional-level results. Remember that the journey of boatbuilding is as rewarding as reaching your destination; it tests one’s patience and dedication. For those seeking to embark on this adventure or simply gain more insight into marine craftsmanship, Sven’s wisdom is invaluable.Making Flanges Around Bulkhead Hatches for Canvas
Sven Yrvind, a renowned yacht designer and sailor, shares valuable insights on creating flanges around bulkhead hatches for canvas protection in this enlightening video. By following his expert guidance, boat enthusiasts can ensure their living areas remain secure while allowing unhindered access through the hatches.Step 1: Starting with the Flange
Sven begins by explaining that working on flanges vertically and horizontally is significantly easier than doing so in a flat position. To simplify the process further, he divides the task into two or three steps as suggested by fellow expert “for for.” This approach not only makes it more manageable but also allows for greater precision in crafting each component.Step 2: Applying Glue and Securing
Sven proceeds to apply glue along one edge of the flange, ensuring a secure bond when clamped into place. He emphasizes that this stage is crucial for maintaining the structural integrity of the flange, which in turn safeguards the living area beneath the canvas when hatches are open.Step 3: Allowing Time to Dry
After securely attaching the first portion of the flange, Sven allows ample time for it to dry before moving forward with additional steps. This patience and precision are key aspects of his successful boatbuilding methods.Step 4: Finishing Touches
Once the flange is fully dried, Sven removes the clamps carefully, ensuring no damage occurs during this process. He then moves on to attaching four more pieces onto these main frames, completing two pairs of flanges for the bulkhead hatches.The Final Touches
While two flanges form the primary support structure around the hatches, Sven mentions there are two additional pieces required at each end to ensure comprehensive protection. This attention to detail highlights his commitment to producing a durable and reliable design. “Sailing is about finding your path, whether it’s across an ocean or within yourself.” – Sven Yrvind In conclusion, making flanges around bulkhead hatches may seem complex at first glance, but by following Sven Yrvind’s meticulous process, enthusiasts can achieve professional-level results. Remember that the journey of boatbuilding is as rewarding as reaching your destination; it tests one’s patience and dedication. For those seeking to embark on this adventure or simply gain more insight into marine craftsmanship, Sven’s wisdom is invaluable.After securely attaching the first portion of the flange, Sven allows ample time for it to dry before moving forward with additional steps. This patience and precision are key aspects of his successful boatbuilding methods.Step 4: Finishing Touches
Once the flange is fully dried, Sven removes the clamps carefully, ensuring no damage occurs during this process. He then moves on to attaching four more pieces onto these main frames, completing two pairs of flanges for the bulkhead hatches.The Final Touches
While two flanges form the primary support structure around the hatches, Sven mentions there are two additional pieces required at each end to ensure comprehensive protection. This attention to detail highlights his commitment to producing a durable and reliable design. “Sailing is about finding your path, whether it’s across an ocean or within yourself.” – Sven Yrvind In conclusion, making flanges around bulkhead hatches may seem complex at first glance, but by following Sven Yrvind’s meticulous process, enthusiasts can achieve professional-level results. Remember that the journey of boatbuilding is as rewarding as reaching your destination; it tests one’s patience and dedication. For those seeking to embark on this adventure or simply gain more insight into marine craftsmanship, Sven’s wisdom is invaluable.Sven begins by explaining that working on flanges vertically and horizontally is significantly easier than doing so in a flat position. To simplify the process further, he divides the task into two or three steps as suggested by fellow expert “for for.” This approach not only makes it more manageable but also allows for greater precision in crafting each component.Step 2: Applying Glue and Securing
Sven proceeds to apply glue along one edge of the flange, ensuring a secure bond when clamped into place. He emphasizes that this stage is crucial for maintaining the structural integrity of the flange, which in turn safeguards the living area beneath the canvas when hatches are open.Step 3: Allowing Time to Dry
After securely attaching the first portion of the flange, Sven allows ample time for it to dry before moving forward with additional steps. This patience and precision are key aspects of his successful boatbuilding methods.Step 4: Finishing Touches
Once the flange is fully dried, Sven removes the clamps carefully, ensuring no damage occurs during this process. He then moves on to attaching four more pieces onto these main frames, completing two pairs of flanges for the bulkhead hatches.The Final Touches
While two flanges form the primary support structure around the hatches, Sven mentions there are two additional pieces required at each end to ensure comprehensive protection. This attention to detail highlights his commitment to producing a durable and reliable design. “Sailing is about finding your path, whether it’s across an ocean or within yourself.” – Sven Yrvind In conclusion, making flanges around bulkhead hatches may seem complex at first glance, but by following Sven Yrvind’s meticulous process, enthusiasts can achieve professional-level results. Remember that the journey of boatbuilding is as rewarding as reaching your destination; it tests one’s patience and dedication. For those seeking to embark on this adventure or simply gain more insight into marine craftsmanship, Sven’s wisdom is invaluable.Sven Yrvind, a renowned yacht designer and sailor, shares valuable insights on creating flanges around bulkhead hatches for canvas protection in this enlightening video. By following his expert guidance, boat enthusiasts can ensure their living areas remain secure while allowing unhindered access through the hatches.Step 1: Starting with the Flange
Sven begins by explaining that working on flanges vertically and horizontally is significantly easier than doing so in a flat position. To simplify the process further, he divides the task into two or three steps as suggested by fellow expert “for for.” This approach not only makes it more manageable but also allows for greater precision in crafting each component.Step 2: Applying Glue and Securing
Sven proceeds to apply glue along one edge of the flange, ensuring a secure bond when clamped into place. He emphasizes that this stage is crucial for maintaining the structural integrity of the flange, which in turn safeguards the living area beneath the canvas when hatches are open.Step 3: Allowing Time to Dry
After securely attaching the first portion of the flange, Sven allows ample time for it to dry before moving forward with additional steps. This patience and precision are key aspects of his successful boatbuilding methods.Step 4: Finishing Touches
Once the flange is fully dried, Sven removes the clamps carefully, ensuring no damage occurs during this process. He then moves on to attaching four more pieces onto these main frames, completing two pairs of flanges for the bulkhead hatches.The Final Touches
While two flanges form the primary support structure around the hatches, Sven mentions there are two additional pieces required at each end to ensure comprehensive protection. This attention to detail highlights his commitment to producing a durable and reliable design. “Sailing is about finding your path, whether it’s across an ocean or within yourself.” – Sven Yrvind In conclusion, making flanges around bulkhead hatches may seem complex at first glance, but by following Sven Yrvind’s meticulous process, enthusiasts can achieve professional-level results. Remember that the journey of boatbuilding is as rewarding as reaching your destination; it tests one’s patience and dedication. For those seeking to embark on this adventure or simply gain more insight into marine craftsmanship, Sven’s wisdom is invaluable.Making Flanges Around Bulkhead Hatches for Canvas
Sven Yrvind, a renowned yacht designer and sailor, shares valuable insights on creating flanges around bulkhead hatches for canvas protection in this enlightening video. By following his expert guidance, boat enthusiasts can ensure their living areas remain secure while allowing unhindered access through the hatches.Step 1: Starting with the Flange
Sven begins by explaining that working on flanges vertically and horizontally is significantly easier than doing so in a flat position. To simplify the process further, he divides the task into two or three steps as suggested by fellow expert “for for.” This approach not only makes it more manageable but also allows for greater precision in crafting each component.Step 2: Applying Glue and Securing
Sven proceeds to apply glue along one edge of the flange, ensuring a secure bond when clamped into place. He emphasizes that this stage is crucial for maintaining the structural integrity of the flange, which in turn safeguards the living area beneath the canvas when hatches are open.Step 3: Allowing Time to Dry
After securely attaching the first portion of the flange, Sven allows ample time for it to dry before moving forward with additional steps. This patience and precision are key aspects of his successful boatbuilding methods.Step 4: Finishing Touches
Once the flange is fully dried, Sven removes the clamps carefully, ensuring no damage occurs during this process. He then moves on to attaching four more pieces onto these main frames, completing two pairs of flanges for the bulkhead hatches.The Final Touches
While two flanges form the primary support structure around the hatches, Sven mentions there are two additional pieces required at each end to ensure comprehensive protection. This attention to detail highlights his commitment to producing a durable and reliable design. “Sailing is about finding your path, whether it’s across an ocean or within yourself.” – Sven Yrvind In conclusion, making flanges around bulkhead hatches may seem complex at first glance, but by following Sven Yrvind’s meticulous process, enthusiasts can achieve professional-level results. Remember that the journey of boatbuilding is as rewarding as reaching your destination; it tests one’s patience and dedication. For those seeking to embark on this adventure or simply gain more insight into marine craftsmanship, Sven’s wisdom is invaluable.Sven proceeds to apply glue along one edge of the flange, ensuring a secure bond when clamped into place. He emphasizes that this stage is crucial for maintaining the structural integrity of the flange, which in turn safeguards the living area beneath the canvas when hatches are open.Step 3: Allowing Time to Dry
After securely attaching the first portion of the flange, Sven allows ample time for it to dry before moving forward with additional steps. This patience and precision are key aspects of his successful boatbuilding methods.Step 4: Finishing Touches
Once the flange is fully dried, Sven removes the clamps carefully, ensuring no damage occurs during this process. He then moves on to attaching four more pieces onto these main frames, completing two pairs of flanges for the bulkhead hatches.The Final Touches
While two flanges form the primary support structure around the hatches, Sven mentions there are two additional pieces required at each end to ensure comprehensive protection. This attention to detail highlights his commitment to producing a durable and reliable design. “Sailing is about finding your path, whether it’s across an ocean or within yourself.” – Sven Yrvind In conclusion, making flanges around bulkhead hatches may seem complex at first glance, but by following Sven Yrvind’s meticulous process, enthusiasts can achieve professional-level results. Remember that the journey of boatbuilding is as rewarding as reaching your destination; it tests one’s patience and dedication. For those seeking to embark on this adventure or simply gain more insight into marine craftsmanship, Sven’s wisdom is invaluable.Sven begins by explaining that working on flanges vertically and horizontally is significantly easier than doing so in a flat position. To simplify the process further, he divides the task into two or three steps as suggested by fellow expert “for for.” This approach not only makes it more manageable but also allows for greater precision in crafting each component.Step 2: Applying Glue and Securing
Sven proceeds to apply glue along one edge of the flange, ensuring a secure bond when clamped into place. He emphasizes that this stage is crucial for maintaining the structural integrity of the flange, which in turn safeguards the living area beneath the canvas when hatches are open.Step 3: Allowing Time to Dry
After securely attaching the first portion of the flange, Sven allows ample time for it to dry before moving forward with additional steps. This patience and precision are key aspects of his successful boatbuilding methods.Step 4: Finishing Touches
Once the flange is fully dried, Sven removes the clamps carefully, ensuring no damage occurs during this process. He then moves on to attaching four more pieces onto these main frames, completing two pairs of flanges for the bulkhead hatches.The Final Touches
While two flanges form the primary support structure around the hatches, Sven mentions there are two additional pieces required at each end to ensure comprehensive protection. This attention to detail highlights his commitment to producing a durable and reliable design. “Sailing is about finding your path, whether it’s across an ocean or within yourself.” – Sven Yrvind In conclusion, making flanges around bulkhead hatches may seem complex at first glance, but by following Sven Yrvind’s meticulous process, enthusiasts can achieve professional-level results. Remember that the journey of boatbuilding is as rewarding as reaching your destination; it tests one’s patience and dedication. For those seeking to embark on this adventure or simply gain more insight into marine craftsmanship, Sven’s wisdom is invaluable.Sven Yrvind, a renowned yacht designer and sailor, shares valuable insights on creating flanges around bulkhead hatches for canvas protection in this enlightening video. By following his expert guidance, boat enthusiasts can ensure their living areas remain secure while allowing unhindered access through the hatches.Step 1: Starting with the Flange
Sven begins by explaining that working on flanges vertically and horizontally is significantly easier than doing so in a flat position. To simplify the process further, he divides the task into two or three steps as suggested by fellow expert “for for.” This approach not only makes it more manageable but also allows for greater precision in crafting each component.Step 2: Applying Glue and Securing
Sven proceeds to apply glue along one edge of the flange, ensuring a secure bond when clamped into place. He emphasizes that this stage is crucial for maintaining the structural integrity of the flange, which in turn safeguards the living area beneath the canvas when hatches are open.Step 3: Allowing Time to Dry
After securely attaching the first portion of the flange, Sven allows ample time for it to dry before moving forward with additional steps. This patience and precision are key aspects of his successful boatbuilding methods.Step 4: Finishing Touches
Once the flange is fully dried, Sven removes the clamps carefully, ensuring no damage occurs during this process. He then moves on to attaching four more pieces onto these main frames, completing two pairs of flanges for the bulkhead hatches.The Final Touches
While two flanges form the primary support structure around the hatches, Sven mentions there are two additional pieces required at each end to ensure comprehensive protection. This attention to detail highlights his commitment to producing a durable and reliable design. “Sailing is about finding your path, whether it’s across an ocean or within yourself.” – Sven Yrvind In conclusion, making flanges around bulkhead hatches may seem complex at first glance, but by following Sven Yrvind’s meticulous process, enthusiasts can achieve professional-level results. Remember that the journey of boatbuilding is as rewarding as reaching your destination; it tests one’s patience and dedication. For those seeking to embark on this adventure or simply gain more insight into marine craftsmanship, Sven’s wisdom is invaluable.Making Flanges Around Bulkhead Hatches for Canvas
Sven Yrvind, a renowned yacht designer and sailor, shares valuable insights on creating flanges around bulkhead hatches for canvas protection in this enlightening video. By following his expert guidance, boat enthusiasts can ensure their living areas remain secure while allowing unhindered access through the hatches.Step 1: Starting with the Flange
Sven begins by explaining that working on flanges vertically and horizontally is significantly easier than doing so in a flat position. To simplify the process further, he divides the task into two or three steps as suggested by fellow expert “for for.” This approach not only makes it more manageable but also allows for greater precision in crafting each component.Step 2: Applying Glue and Securing
Sven proceeds to apply glue along one edge of the flange, ensuring a secure bond when clamped into place. He emphasizes that this stage is crucial for maintaining the structural integrity of the flange, which in turn safeguards the living area beneath the canvas when hatches are open.Step 3: Allowing Time to Dry
After securely attaching the first portion of the flange, Sven allows ample time for it to dry before moving forward with additional steps. This patience and precision are key aspects of his successful boatbuilding methods.Step 4: Finishing Touches
Once the flange is fully dried, Sven removes the clamps carefully, ensuring no damage occurs during this process. He then moves on to attaching four more pieces onto these main frames, completing two pairs of flanges for the bulkhead hatches.The Final Touches
While two flanges form the primary support structure around the hatches, Sven mentions there are two additional pieces required at each end to ensure comprehensive protection. This attention to detail highlights his commitment to producing a durable and reliable design. “Sailing is about finding your path, whether it’s across an ocean or within yourself.” – Sven Yrvind In conclusion, making flanges around bulkhead hatches may seem complex at first glance, but by following Sven Yrvind’s meticulous process, enthusiasts can achieve professional-level results. Remember that the journey of boatbuilding is as rewarding as reaching your destination; it tests one’s patience and dedication. For those seeking to embark on this adventure or simply gain more insight into marine craftsmanship, Sven’s wisdom is invaluable.Once the flange is fully dried, Sven removes the clamps carefully, ensuring no damage occurs during this process. He then moves on to attaching four more pieces onto these main frames, completing two pairs of flanges for the bulkhead hatches.The Final Touches
While two flanges form the primary support structure around the hatches, Sven mentions there are two additional pieces required at each end to ensure comprehensive protection. This attention to detail highlights his commitment to producing a durable and reliable design. “Sailing is about finding your path, whether it’s across an ocean or within yourself.” – Sven Yrvind In conclusion, making flanges around bulkhead hatches may seem complex at first glance, but by following Sven Yrvind’s meticulous process, enthusiasts can achieve professional-level results. Remember that the journey of boatbuilding is as rewarding as reaching your destination; it tests one’s patience and dedication. For those seeking to embark on this adventure or simply gain more insight into marine craftsmanship, Sven’s wisdom is invaluable.Sven proceeds to apply glue along one edge of the flange, ensuring a secure bond when clamped into place. He emphasizes that this stage is crucial for maintaining the structural integrity of the flange, which in turn safeguards the living area beneath the canvas when hatches are open.Step 3: Allowing Time to Dry
After securely attaching the first portion of the flange, Sven allows ample time for it to dry before moving forward with additional steps. This patience and precision are key aspects of his successful boatbuilding methods.Step 4: Finishing Touches
Once the flange is fully dried, Sven removes the clamps carefully, ensuring no damage occurs during this process. He then moves on to attaching four more pieces onto these main frames, completing two pairs of flanges for the bulkhead hatches.The Final Touches
While two flanges form the primary support structure around the hatches, Sven mentions there are two additional pieces required at each end to ensure comprehensive protection. This attention to detail highlights his commitment to producing a durable and reliable design. “Sailing is about finding your path, whether it’s across an ocean or within yourself.” – Sven Yrvind In conclusion, making flanges around bulkhead hatches may seem complex at first glance, but by following Sven Yrvind’s meticulous process, enthusiasts can achieve professional-level results. Remember that the journey of boatbuilding is as rewarding as reaching your destination; it tests one’s patience and dedication. For those seeking to embark on this adventure or simply gain more insight into marine craftsmanship, Sven’s wisdom is invaluable.Sven begins by explaining that working on flanges vertically and horizontally is significantly easier than doing so in a flat position. To simplify the process further, he divides the task into two or three steps as suggested by fellow expert “for for.” This approach not only makes it more manageable but also allows for greater precision in crafting each component.Step 2: Applying Glue and Securing
Sven proceeds to apply glue along one edge of the flange, ensuring a secure bond when clamped into place. He emphasizes that this stage is crucial for maintaining the structural integrity of the flange, which in turn safeguards the living area beneath the canvas when hatches are open.Step 3: Allowing Time to Dry
After securely attaching the first portion of the flange, Sven allows ample time for it to dry before moving forward with additional steps. This patience and precision are key aspects of his successful boatbuilding methods.Step 4: Finishing Touches
Once the flange is fully dried, Sven removes the clamps carefully, ensuring no damage occurs during this process. He then moves on to attaching four more pieces onto these main frames, completing two pairs of flanges for the bulkhead hatches.The Final Touches
While two flanges form the primary support structure around the hatches, Sven mentions there are two additional pieces required at each end to ensure comprehensive protection. This attention to detail highlights his commitment to producing a durable and reliable design. “Sailing is about finding your path, whether it’s across an ocean or within yourself.” – Sven Yrvind In conclusion, making flanges around bulkhead hatches may seem complex at first glance, but by following Sven Yrvind’s meticulous process, enthusiasts can achieve professional-level results. Remember that the journey of boatbuilding is as rewarding as reaching your destination; it tests one’s patience and dedication. For those seeking to embark on this adventure or simply gain more insight into marine craftsmanship, Sven’s wisdom is invaluable.Sven Yrvind, a renowned yacht designer and sailor, shares valuable insights on creating flanges around bulkhead hatches for canvas protection in this enlightening video. By following his expert guidance, boat enthusiasts can ensure their living areas remain secure while allowing unhindered access through the hatches.Step 1: Starting with the Flange
Sven begins by explaining that working on flanges vertically and horizontally is significantly easier than doing so in a flat position. To simplify the process further, he divides the task into two or three steps as suggested by fellow expert “for for.” This approach not only makes it more manageable but also allows for greater precision in crafting each component.Step 2: Applying Glue and Securing
Sven proceeds to apply glue along one edge of the flange, ensuring a secure bond when clamped into place. He emphasizes that this stage is crucial for maintaining the structural integrity of the flange, which in turn safeguards the living area beneath the canvas when hatches are open.Step 3: Allowing Time to Dry
After securely attaching the first portion of the flange, Sven allows ample time for it to dry before moving forward with additional steps. This patience and precision are key aspects of his successful boatbuilding methods.Step 4: Finishing Touches
Once the flange is fully dried, Sven removes the clamps carefully, ensuring no damage occurs during this process. He then moves on to attaching four more pieces onto these main frames, completing two pairs of flanges for the bulkhead hatches.The Final Touches
While two flanges form the primary support structure around the hatches, Sven mentions there are two additional pieces required at each end to ensure comprehensive protection. This attention to detail highlights his commitment to producing a durable and reliable design. “Sailing is about finding your path, whether it’s across an ocean or within yourself.” – Sven Yrvind In conclusion, making flanges around bulkhead hatches may seem complex at first glance, but by following Sven Yrvind’s meticulous process, enthusiasts can achieve professional-level results. Remember that the journey of boatbuilding is as rewarding as reaching your destination; it tests one’s patience and dedication. For those seeking to embark on this adventure or simply gain more insight into marine craftsmanship, Sven’s wisdom is invaluable.Making Flanges Around Bulkhead Hatches for Canvas
Sven Yrvind, a renowned yacht designer and sailor, shares valuable insights on creating flanges around bulkhead hatches for canvas protection in this enlightening video. By following his expert guidance, boat enthusiasts can ensure their living areas remain secure while allowing unhindered access through the hatches.Step 1: Starting with the Flange
Sven begins by explaining that working on flanges vertically and horizontally is significantly easier than doing so in a flat position. To simplify the process further, he divides the task into two or three steps as suggested by fellow expert “for for.” This approach not only makes it more manageable but also allows for greater precision in crafting each component.Step 2: Applying Glue and Securing
Sven proceeds to apply glue along one edge of the flange, ensuring a secure bond when clamped into place. He emphasizes that this stage is crucial for maintaining the structural integrity of the flange, which in turn safeguards the living area beneath the canvas when hatches are open.Step 3: Allowing Time to Dry
After securely attaching the first portion of the flange, Sven allows ample time for it to dry before moving forward with additional steps. This patience and precision are key aspects of his successful boatbuilding methods.Step 4: Finishing Touches
Once the flange is fully dried, Sven removes the clamps carefully, ensuring no damage occurs during this process. He then moves on to attaching four more pieces onto these main frames, completing two pairs of flanges for the bulkhead hatches.The Final Touches
While two flanges form the primary support structure around the hatches, Sven mentions there are two additional pieces required at each end to ensure comprehensive protection. This attention to detail highlights his commitment to producing a durable and reliable design. “Sailing is about finding your path, whether it’s across an ocean or within yourself.” – Sven Yrvind In conclusion, making flanges around bulkhead hatches may seem complex at first glance, but by following Sven Yrvind’s meticulous process, enthusiasts can achieve professional-level results. Remember that the journey of boatbuilding is as rewarding as reaching your destination; it tests one’s patience and dedication. For those seeking to embark on this adventure or simply gain more insight into marine craftsmanship, Sven’s wisdom is invaluable.After securely attaching the first portion of the flange, Sven allows ample time for it to dry before moving forward with additional steps. This patience and precision are key aspects of his successful boatbuilding methods.Step 4: Finishing Touches
Once the flange is fully dried, Sven removes the clamps carefully, ensuring no damage occurs during this process. He then moves on to attaching four more pieces onto these main frames, completing two pairs of flanges for the bulkhead hatches.The Final Touches
While two flanges form the primary support structure around the hatches, Sven mentions there are two additional pieces required at each end to ensure comprehensive protection. This attention to detail highlights his commitment to producing a durable and reliable design. “Sailing is about finding your path, whether it’s across an ocean or within yourself.” – Sven Yrvind In conclusion, making flanges around bulkhead hatches may seem complex at first glance, but by following Sven Yrvind’s meticulous process, enthusiasts can achieve professional-level results. Remember that the journey of boatbuilding is as rewarding as reaching your destination; it tests one’s patience and dedication. For those seeking to embark on this adventure or simply gain more insight into marine craftsmanship, Sven’s wisdom is invaluable.Sven proceeds to apply glue along one edge of the flange, ensuring a secure bond when clamped into place. He emphasizes that this stage is crucial for maintaining the structural integrity of the flange, which in turn safeguards the living area beneath the canvas when hatches are open.Step 3: Allowing Time to Dry
After securely attaching the first portion of the flange, Sven allows ample time for it to dry before moving forward with additional steps. This patience and precision are key aspects of his successful boatbuilding methods.Step 4: Finishing Touches
Once the flange is fully dried, Sven removes the clamps carefully, ensuring no damage occurs during this process. He then moves on to attaching four more pieces onto these main frames, completing two pairs of flanges for the bulkhead hatches.The Final Touches
While two flanges form the primary support structure around the hatches, Sven mentions there are two additional pieces required at each end to ensure comprehensive protection. This attention to detail highlights his commitment to producing a durable and reliable design. “Sailing is about finding your path, whether it’s across an ocean or within yourself.” – Sven Yrvind In conclusion, making flanges around bulkhead hatches may seem complex at first glance, but by following Sven Yrvind’s meticulous process, enthusiasts can achieve professional-level results. Remember that the journey of boatbuilding is as rewarding as reaching your destination; it tests one’s patience and dedication. For those seeking to embark on this adventure or simply gain more insight into marine craftsmanship, Sven’s wisdom is invaluable.Sven begins by explaining that working on flanges vertically and horizontally is significantly easier than doing so in a flat position. To simplify the process further, he divides the task into two or three steps as suggested by fellow expert “for for.” This approach not only makes it more manageable but also allows for greater precision in crafting each component.Step 2: Applying Glue and Securing
Sven proceeds to apply glue along one edge of the flange, ensuring a secure bond when clamped into place. He emphasizes that this stage is crucial for maintaining the structural integrity of the flange, which in turn safeguards the living area beneath the canvas when hatches are open.Step 3: Allowing Time to Dry
After securely attaching the first portion of the flange, Sven allows ample time for it to dry before moving forward with additional steps. This patience and precision are key aspects of his successful boatbuilding methods.Step 4: Finishing Touches
Once the flange is fully dried, Sven removes the clamps carefully, ensuring no damage occurs during this process. He then moves on to attaching four more pieces onto these main frames, completing two pairs of flanges for the bulkhead hatches.The Final Touches
While two flanges form the primary support structure around the hatches, Sven mentions there are two additional pieces required at each end to ensure comprehensive protection. This attention to detail highlights his commitment to producing a durable and reliable design. “Sailing is about finding your path, whether it’s across an ocean or within yourself.” – Sven Yrvind In conclusion, making flanges around bulkhead hatches may seem complex at first glance, but by following Sven Yrvind’s meticulous process, enthusiasts can achieve professional-level results. Remember that the journey of boatbuilding is as rewarding as reaching your destination; it tests one’s patience and dedication. For those seeking to embark on this adventure or simply gain more insight into marine craftsmanship, Sven’s wisdom is invaluable.Sven Yrvind, a renowned yacht designer and sailor, shares valuable insights on creating flanges around bulkhead hatches for canvas protection in this enlightening video. By following his expert guidance, boat enthusiasts can ensure their living areas remain secure while allowing unhindered access through the hatches.Step 1: Starting with the Flange
Sven begins by explaining that working on flanges vertically and horizontally is significantly easier than doing so in a flat position. To simplify the process further, he divides the task into two or three steps as suggested by fellow expert “for for.” This approach not only makes it more manageable but also allows for greater precision in crafting each component.Step 2: Applying Glue and Securing
Sven proceeds to apply glue along one edge of the flange, ensuring a secure bond when clamped into place. He emphasizes that this stage is crucial for maintaining the structural integrity of the flange, which in turn safeguards the living area beneath the canvas when hatches are open.Step 3: Allowing Time to Dry
After securely attaching the first portion of the flange, Sven allows ample time for it to dry before moving forward with additional steps. This patience and precision are key aspects of his successful boatbuilding methods.Step 4: Finishing Touches
Once the flange is fully dried, Sven removes the clamps carefully, ensuring no damage occurs during this process. He then moves on to attaching four more pieces onto these main frames, completing two pairs of flanges for the bulkhead hatches.The Final Touches
While two flanges form the primary support structure around the hatches, Sven mentions there are two additional pieces required at each end to ensure comprehensive protection. This attention to detail highlights his commitment to producing a durable and reliable design. “Sailing is about finding your path, whether it’s across an ocean or within yourself.” – Sven Yrvind In conclusion, making flanges around bulkhead hatches may seem complex at first glance, but by following Sven Yrvind’s meticulous process, enthusiasts can achieve professional-level results. Remember that the journey of boatbuilding is as rewarding as reaching your destination; it tests one’s patience and dedication. For those seeking to embark on this adventure or simply gain more insight into marine craftsmanship, Sven’s wisdom is invaluable.Making Flanges Around Bulkhead Hatches for Canvas
Sven Yrvind, a renowned yacht designer and sailor, shares valuable insights on creating flanges around bulkhead hatches for canvas protection in this enlightening video. By following his expert guidance, boat enthusiasts can ensure their living areas remain secure while allowing unhindered access through the hatches.Step 1: Starting with the Flange
Sven begins by explaining that working on flanges vertically and horizontally is significantly easier than doing so in a flat position. To simplify the process further, he divides the task into two or three steps as suggested by fellow expert “for for.” This approach not only makes it more manageable but also allows for greater precision in crafting each component.Step 2: Applying Glue and Securing
Sven proceeds to apply glue along one edge of the flange, ensuring a secure bond when clamped into place. He emphasizes that this stage is crucial for maintaining the structural integrity of the flange, which in turn safeguards the living area beneath the canvas when hatches are open.Step 3: Allowing Time to Dry
After securely attaching the first portion of the flange, Sven allows ample time for it to dry before moving forward with additional steps. This patience and precision are key aspects of his successful boatbuilding methods.Step 4: Finishing Touches
Once the flange is fully dried, Sven removes the clamps carefully, ensuring no damage occurs during this process. He then moves on to attaching four more pieces onto these main frames, completing two pairs of flanges for the bulkhead hatches.The Final Touches
While two flanges form the primary support structure around the hatches, Sven mentions there are two additional pieces required at each end to ensure comprehensive protection. This attention to detail highlights his commitment to producing a durable and reliable design. “Sailing is about finding your path, whether it’s across an ocean or within yourself.” – Sven Yrvind In conclusion, making flanges around bulkhead hatches may seem complex at first glance, but by following Sven Yrvind’s meticulous process, enthusiasts can achieve professional-level results. Remember that the journey of boatbuilding is as rewarding as reaching your destination; it tests one’s patience and dedication. For those seeking to embark on this adventure or simply gain more insight into marine craftsmanship, Sven’s wisdom is invaluable.Once the flange is fully dried, Sven removes the clamps carefully, ensuring no damage occurs during this process. He then moves on to attaching four more pieces onto these main frames, completing two pairs of flanges for the bulkhead hatches.The Final Touches
While two flanges form the primary support structure around the hatches, Sven mentions there are two additional pieces required at each end to ensure comprehensive protection. This attention to detail highlights his commitment to producing a durable and reliable design. “Sailing is about finding your path, whether it’s across an ocean or within yourself.” – Sven Yrvind In conclusion, making flanges around bulkhead hatches may seem complex at first glance, but by following Sven Yrvind’s meticulous process, enthusiasts can achieve professional-level results. Remember that the journey of boatbuilding is as rewarding as reaching your destination; it tests one’s patience and dedication. For those seeking to embark on this adventure or simply gain more insight into marine craftsmanship, Sven’s wisdom is invaluable.After securely attaching the first portion of the flange, Sven allows ample time for it to dry before moving forward with additional steps. This patience and precision are key aspects of his successful boatbuilding methods.Step 4: Finishing Touches
Once the flange is fully dried, Sven removes the clamps carefully, ensuring no damage occurs during this process. He then moves on to attaching four more pieces onto these main frames, completing two pairs of flanges for the bulkhead hatches.The Final Touches
While two flanges form the primary support structure around the hatches, Sven mentions there are two additional pieces required at each end to ensure comprehensive protection. This attention to detail highlights his commitment to producing a durable and reliable design. “Sailing is about finding your path, whether it’s across an ocean or within yourself.” – Sven Yrvind In conclusion, making flanges around bulkhead hatches may seem complex at first glance, but by following Sven Yrvind’s meticulous process, enthusiasts can achieve professional-level results. Remember that the journey of boatbuilding is as rewarding as reaching your destination; it tests one’s patience and dedication. For those seeking to embark on this adventure or simply gain more insight into marine craftsmanship, Sven’s wisdom is invaluable.Sven proceeds to apply glue along one edge of the flange, ensuring a secure bond when clamped into place. He emphasizes that this stage is crucial for maintaining the structural integrity of the flange, which in turn safeguards the living area beneath the canvas when hatches are open.Step 3: Allowing Time to Dry
After securely attaching the first portion of the flange, Sven allows ample time for it to dry before moving forward with additional steps. This patience and precision are key aspects of his successful boatbuilding methods.Step 4: Finishing Touches
Once the flange is fully dried, Sven removes the clamps carefully, ensuring no damage occurs during this process. He then moves on to attaching four more pieces onto these main frames, completing two pairs of flanges for the bulkhead hatches.The Final Touches
While two flanges form the primary support structure around the hatches, Sven mentions there are two additional pieces required at each end to ensure comprehensive protection. This attention to detail highlights his commitment to producing a durable and reliable design. “Sailing is about finding your path, whether it’s across an ocean or within yourself.” – Sven Yrvind In conclusion, making flanges around bulkhead hatches may seem complex at first glance, but by following Sven Yrvind’s meticulous process, enthusiasts can achieve professional-level results. Remember that the journey of boatbuilding is as rewarding as reaching your destination; it tests one’s patience and dedication. For those seeking to embark on this adventure or simply gain more insight into marine craftsmanship, Sven’s wisdom is invaluable.Sven begins by explaining that working on flanges vertically and horizontally is significantly easier than doing so in a flat position. To simplify the process further, he divides the task into two or three steps as suggested by fellow expert “for for.” This approach not only makes it more manageable but also allows for greater precision in crafting each component.Step 2: Applying Glue and Securing
Sven proceeds to apply glue along one edge of the flange, ensuring a secure bond when clamped into place. He emphasizes that this stage is crucial for maintaining the structural integrity of the flange, which in turn safeguards the living area beneath the canvas when hatches are open.Step 3: Allowing Time to Dry
After securely attaching the first portion of the flange, Sven allows ample time for it to dry before moving forward with additional steps. This patience and precision are key aspects of his successful boatbuilding methods.Step 4: Finishing Touches
Once the flange is fully dried, Sven removes the clamps carefully, ensuring no damage occurs during this process. He then moves on to attaching four more pieces onto these main frames, completing two pairs of flanges for the bulkhead hatches.The Final Touches
While two flanges form the primary support structure around the hatches, Sven mentions there are two additional pieces required at each end to ensure comprehensive protection. This attention to detail highlights his commitment to producing a durable and reliable design. “Sailing is about finding your path, whether it’s across an ocean or within yourself.” – Sven Yrvind In conclusion, making flanges around bulkhead hatches may seem complex at first glance, but by following Sven Yrvind’s meticulous process, enthusiasts can achieve professional-level results. Remember that the journey of boatbuilding is as rewarding as reaching your destination; it tests one’s patience and dedication. For those seeking to embark on this adventure or simply gain more insight into marine craftsmanship, Sven’s wisdom is invaluable.Sven Yrvind, a renowned yacht designer and sailor, shares valuable insights on creating flanges around bulkhead hatches for canvas protection in this enlightening video. By following his expert guidance, boat enthusiasts can ensure their living areas remain secure while allowing unhindered access through the hatches.Step 1: Starting with the Flange
Sven begins by explaining that working on flanges vertically and horizontally is significantly easier than doing so in a flat position. To simplify the process further, he divides the task into two or three steps as suggested by fellow expert “for for.” This approach not only makes it more manageable but also allows for greater precision in crafting each component.Step 2: Applying Glue and Securing
Sven proceeds to apply glue along one edge of the flange, ensuring a secure bond when clamped into place. He emphasizes that this stage is crucial for maintaining the structural integrity of the flange, which in turn safeguards the living area beneath the canvas when hatches are open.Step 3: Allowing Time to Dry
After securely attaching the first portion of the flange, Sven allows ample time for it to dry before moving forward with additional steps. This patience and precision are key aspects of his successful boatbuilding methods.Step 4: Finishing Touches
Once the flange is fully dried, Sven removes the clamps carefully, ensuring no damage occurs during this process. He then moves on to attaching four more pieces onto these main frames, completing two pairs of flanges for the bulkhead hatches.The Final Touches
While two flanges form the primary support structure around the hatches, Sven mentions there are two additional pieces required at each end to ensure comprehensive protection. This attention to detail highlights his commitment to producing a durable and reliable design. “Sailing is about finding your path, whether it’s across an ocean or within yourself.” – Sven Yrvind In conclusion, making flanges around bulkhead hatches may seem complex at first glance, but by following Sven Yrvind’s meticulous process, enthusiasts can achieve professional-level results. Remember that the journey of boatbuilding is as rewarding as reaching your destination; it tests one’s patience and dedication. For those seeking to embark on this adventure or simply gain more insight into marine craftsmanship, Sven’s wisdom is invaluable.Making Flanges Around Bulkhead Hatches for Canvas
Sven Yrvind, a renowned yacht designer and sailor, shares valuable insights on creating flanges around bulkhead hatches for canvas protection in this enlightening video. By following his expert guidance, boat enthusiasts can ensure their living areas remain secure while allowing unhindered access through the hatches.Step 1: Starting with the Flange
Sven begins by explaining that working on flanges vertically and horizontally is significantly easier than doing so in a flat position. To simplify the process further, he divides the task into two or three steps as suggested by fellow expert “for for.” This approach not only makes it more manageable but also allows for greater precision in crafting each component.Step 2: Applying Glue and Securing
Sven proceeds to apply glue along one edge of the flange, ensuring a secure bond when clamped into place. He emphasizes that this stage is crucial for maintaining the structural integrity of the flange, which in turn safeguards the living area beneath the canvas when hatches are open.Step 3: Allowing Time to Dry
After securely attaching the first portion of the flange, Sven allows ample time for it to dry before moving forward with additional steps. This patience and precision are key aspects of his successful boatbuilding methods.Step 4: Finishing Touches
Once the flange is fully dried, Sven removes the clamps carefully, ensuring no damage occurs during this process. He then moves on to attaching four more pieces onto these main frames, completing two pairs of flanges for the bulkhead hatches.The Final Touches
While two flanges form the primary support structure around the hatches, Sven mentions there are two additional pieces required at each end to ensure comprehensive protection. This attention to detail highlights his commitment to producing a durable and reliable design. “Sailing is about finding your path, whether it’s across an ocean or within yourself.” – Sven Yrvind In conclusion, making flanges around bulkhead hatches may seem complex at first glance, but by following Sven Yrvind’s meticulous process, enthusiasts can achieve professional-level results. Remember that the journey of boatbuilding is as rewarding as reaching your destination; it tests one’s patience and dedication. For those seeking to embark on this adventure or simply gain more insight into marine craftsmanship, Sven’s wisdom is invaluable.After securely attaching the first portion of the flange, Sven allows ample time for it to dry before moving forward with additional steps. This patience and precision are key aspects of his successful boatbuilding methods.Step 4: Finishing Touches
Once the flange is fully dried, Sven removes the clamps carefully, ensuring no damage occurs during this process. He then moves on to attaching four more pieces onto these main frames, completing two pairs of flanges for the bulkhead hatches.The Final Touches
While two flanges form the primary support structure around the hatches, Sven mentions there are two additional pieces required at each end to ensure comprehensive protection. This attention to detail highlights his commitment to producing a durable and reliable design. “Sailing is about finding your path, whether it’s across an ocean or within yourself.” – Sven Yrvind In conclusion, making flanges around bulkhead hatches may seem complex at first glance, but by following Sven Yrvind’s meticulous process, enthusiasts can achieve professional-level results. Remember that the journey of boatbuilding is as rewarding as reaching your destination; it tests one’s patience and dedication. For those seeking to embark on this adventure or simply gain more insight into marine craftsmanship, Sven’s wisdom is invaluable.Sven begins by explaining that working on flanges vertically and horizontally is significantly easier than doing so in a flat position. To simplify the process further, he divides the task into two or three steps as suggested by fellow expert “for for.” This approach not only makes it more manageable but also allows for greater precision in crafting each component.Step 2: Applying Glue and Securing
Sven proceeds to apply glue along one edge of the flange, ensuring a secure bond when clamped into place. He emphasizes that this stage is crucial for maintaining the structural integrity of the flange, which in turn safeguards the living area beneath the canvas when hatches are open.Step 3: Allowing Time to Dry
After securely attaching the first portion of the flange, Sven allows ample time for it to dry before moving forward with additional steps. This patience and precision are key aspects of his successful boatbuilding methods.Step 4: Finishing Touches
Once the flange is fully dried, Sven removes the clamps carefully, ensuring no damage occurs during this process. He then moves on to attaching four more pieces onto these main frames, completing two pairs of flanges for the bulkhead hatches.The Final Touches
While two flanges form the primary support structure around the hatches, Sven mentions there are two additional pieces required at each end to ensure comprehensive protection. This attention to detail highlights his commitment to producing a durable and reliable design. “Sailing is about finding your path, whether it’s across an ocean or within yourself.” – Sven Yrvind In conclusion, making flanges around bulkhead hatches may seem complex at first glance, but by following Sven Yrvind’s meticulous process, enthusiasts can achieve professional-level results. Remember that the journey of boatbuilding is as rewarding as reaching your destination; it tests one’s patience and dedication. For those seeking to embark on this adventure or simply gain more insight into marine craftsmanship, Sven’s wisdom is invaluable.Sven Yrvind, a renowned yacht designer and sailor, shares valuable insights on creating flanges around bulkhead hatches for canvas protection in this enlightening video. By following his expert guidance, boat enthusiasts can ensure their living areas remain secure while allowing unhindered access through the hatches.Step 1: Starting with the Flange
Sven begins by explaining that working on flanges vertically and horizontally is significantly easier than doing so in a flat position. To simplify the process further, he divides the task into two or three steps as suggested by fellow expert “for for.” This approach not only makes it more manageable but also allows for greater precision in crafting each component.Step 2: Applying Glue and Securing
Sven proceeds to apply glue along one edge of the flange, ensuring a secure bond when clamped into place. He emphasizes that this stage is crucial for maintaining the structural integrity of the flange, which in turn safeguards the living area beneath the canvas when hatches are open.Step 3: Allowing Time to Dry
After securely attaching the first portion of the flange, Sven allows ample time for it to dry before moving forward with additional steps. This patience and precision are key aspects of his successful boatbuilding methods.Step 4: Finishing Touches
Once the flange is fully dried, Sven removes the clamps carefully, ensuring no damage occurs during this process. He then moves on to attaching four more pieces onto these main frames, completing two pairs of flanges for the bulkhead hatches.The Final Touches
While two flanges form the primary support structure around the hatches, Sven mentions there are two additional pieces required at each end to ensure comprehensive protection. This attention to detail highlights his commitment to producing a durable and reliable design. “Sailing is about finding your path, whether it’s across an ocean or within yourself.” – Sven Yrvind In conclusion, making flanges around bulkhead hatches may seem complex at first glance, but by following Sven Yrvind’s meticulous process, enthusiasts can achieve professional-level results. Remember that the journey of boatbuilding is as rewarding as reaching your destination; it tests one’s patience and dedication. For those seeking to embark on this adventure or simply gain more insight into marine craftsmanship, Sven’s wisdom is invaluable.Making Flanges Around Bulkhead Hatches for Canvas
Sven Yrvind, a renowned yacht designer and sailor, shares valuable insights on creating flanges around bulkhead hatches for canvas protection in this enlightening video. By following his expert guidance, boat enthusiasts can ensure their living areas remain secure while allowing unhindered access through the hatches.Step 1: Starting with the Flange
Sven begins by explaining that working on flanges vertically and horizontally is significantly easier than doing so in a flat position. To simplify the process further, he divides the task into two or three steps as suggested by fellow expert “for for.” This approach not only makes it more manageable but also allows for greater precision in crafting each component.Step 2: Applying Glue and Securing
Sven proceeds to apply glue along one edge of the flange, ensuring a secure bond when clamped into place. He emphasizes that this stage is crucial for maintaining the structural integrity of the flange, which in turn safeguards the living area beneath the canvas when hatches are open.Step 3: Allowing Time to Dry
After securely attaching the first portion of the flange, Sven allows ample time for it to dry before moving forward with additional steps. This patience and precision are key aspects of his successful boatbuilding methods.Step 4: Finishing Touches
Once the flange is fully dried, Sven removes the clamps carefully, ensuring no damage occurs during this process. He then moves on to attaching four more pieces onto these main frames, completing two pairs of flanges for the bulkhead hatches.The Final Touches
While two flanges form the primary support structure around the hatches, Sven mentions there are two additional pieces required at each end to ensure comprehensive protection. This attention to detail highlights his commitment to producing a durable and reliable design. “Sailing is about finding your path, whether it’s across an ocean or within yourself.” – Sven Yrvind In conclusion, making flanges around bulkhead hatches may seem complex at first glance, but by following Sven Yrvind’s meticulous process, enthusiasts can achieve professional-level results. Remember that the journey of boatbuilding is as rewarding as reaching your destination; it tests one’s patience and dedication. For those seeking to embark on this adventure or simply gain more insight into marine craftsmanship, Sven’s wisdom is invaluable.Once the flange is fully dried, Sven removes the clamps carefully, ensuring no damage occurs during this process. He then moves on to attaching four more pieces onto these main frames, completing two pairs of flanges for the bulkhead hatches.The Final Touches
While two flanges form the primary support structure around the hatches, Sven mentions there are two additional pieces required at each end to ensure comprehensive protection. This attention to detail highlights his commitment to producing a durable and reliable design. “Sailing is about finding your path, whether it’s across an ocean or within yourself.” – Sven Yrvind In conclusion, making flanges around bulkhead hatches may seem complex at first glance, but by following Sven Yrvind’s meticulous process, enthusiasts can achieve professional-level results. Remember that the journey of boatbuilding is as rewarding as reaching your destination; it tests one’s patience and dedication. For those seeking to embark on this adventure or simply gain more insight into marine craftsmanship, Sven’s wisdom is invaluable.Sven begins by explaining that working on flanges vertically and horizontally is significantly easier than doing so in a flat position. To simplify the process further, he divides the task into two or three steps as suggested by fellow expert “for for.” This approach not only makes it more manageable but also allows for greater precision in crafting each component.Step 2: Applying Glue and Securing
Sven proceeds to apply glue along one edge of the flange, ensuring a secure bond when clamped into place. He emphasizes that this stage is crucial for maintaining the structural integrity of the flange, which in turn safeguards the living area beneath the canvas when hatches are open.Step 3: Allowing Time to Dry
After securely attaching the first portion of the flange, Sven allows ample time for it to dry before moving forward with additional steps. This patience and precision are key aspects of his successful boatbuilding methods.Step 4: Finishing Touches
Once the flange is fully dried, Sven removes the clamps carefully, ensuring no damage occurs during this process. He then moves on to attaching four more pieces onto these main frames, completing two pairs of flanges for the bulkhead hatches.The Final Touches
While two flanges form the primary support structure around the hatches, Sven mentions there are two additional pieces required at each end to ensure comprehensive protection. This attention to detail highlights his commitment to producing a durable and reliable design. “Sailing is about finding your path, whether it’s across an ocean or within yourself.” – Sven Yrvind In conclusion, making flanges around bulkhead hatches may seem complex at first glance, but by following Sven Yrvind’s meticulous process, enthusiasts can achieve professional-level results. Remember that the journey of boatbuilding is as rewarding as reaching your destination; it tests one’s patience and dedication. For those seeking to embark on this adventure or simply gain more insight into marine craftsmanship, Sven’s wisdom is invaluable.Sven Yrvind, a renowned yacht designer and sailor, shares valuable insights on creating flanges around bulkhead hatches for canvas protection in this enlightening video. By following his expert guidance, boat enthusiasts can ensure their living areas remain secure while allowing unhindered access through the hatches.Step 1: Starting with the Flange
Sven begins by explaining that working on flanges vertically and horizontally is significantly easier than doing so in a flat position. To simplify the process further, he divides the task into two or three steps as suggested by fellow expert “for for.” This approach not only makes it more manageable but also allows for greater precision in crafting each component.Step 2: Applying Glue and Securing
Sven proceeds to apply glue along one edge of the flange, ensuring a secure bond when clamped into place. He emphasizes that this stage is crucial for maintaining the structural integrity of the flange, which in turn safeguards the living area beneath the canvas when hatches are open.Step 3: Allowing Time to Dry
After securely attaching the first portion of the flange, Sven allows ample time for it to dry before moving forward with additional steps. This patience and precision are key aspects of his successful boatbuilding methods.Step 4: Finishing Touches
Once the flange is fully dried, Sven removes the clamps carefully, ensuring no damage occurs during this process. He then moves on to attaching four more pieces onto these main frames, completing two pairs of flanges for the bulkhead hatches.The Final Touches
While two flanges form the primary support structure around the hatches, Sven mentions there are two additional pieces required at each end to ensure comprehensive protection. This attention to detail highlights his commitment to producing a durable and reliable design. “Sailing is about finding your path, whether it’s across an ocean or within yourself.” – Sven Yrvind In conclusion, making flanges around bulkhead hatches may seem complex at first glance, but by following Sven Yrvind’s meticulous process, enthusiasts can achieve professional-level results. Remember that the journey of boatbuilding is as rewarding as reaching your destination; it tests one’s patience and dedication. For those seeking to embark on this adventure or simply gain more insight into marine craftsmanship, Sven’s wisdom is invaluable.Making Flanges Around Bulkhead Hatches for Canvas
Sven Yrvind, a renowned yacht designer and sailor, shares valuable insights on creating flanges around bulkhead hatches for canvas protection in this enlightening video. By following his expert guidance, boat enthusiasts can ensure their living areas remain secure while allowing unhindered access through the hatches.Step 1: Starting with the Flange
Sven begins by explaining that working on flanges vertically and horizontally is significantly easier than doing so in a flat position. To simplify the process further, he divides the task into two or three steps as suggested by fellow expert “for for.” This approach not only makes it more manageable but also allows for greater precision in crafting each component.Step 2: Applying Glue and Securing
Sven proceeds to apply glue along one edge of the flange, ensuring a secure bond when clamped into place. He emphasizes that this stage is crucial for maintaining the structural integrity of the flange, which in turn safeguards the living area beneath the canvas when hatches are open.Step 3: Allowing Time to Dry
After securely attaching the first portion of the flange, Sven allows ample time for it to dry before moving forward with additional steps. This patience and precision are key aspects of his successful boatbuilding methods.Step 4: Finishing Touches
Once the flange is fully dried, Sven removes the clamps carefully, ensuring no damage occurs during this process. He then moves on to attaching four more pieces onto these main frames, completing two pairs of flanges for the bulkhead hatches.The Final Touches
While two flanges form the primary support structure around the hatches, Sven mentions there are two additional pieces required at each end to ensure comprehensive protection. This attention to detail highlights his commitment to producing a durable and reliable design. “Sailing is about finding your path, whether it’s across an ocean or within yourself.” – Sven Yrvind In conclusion, making flanges around bulkhead hatches may seem complex at first glance, but by following Sven Yrvind’s meticulous process, enthusiasts can achieve professional-level results. Remember that the journey of boatbuilding is as rewarding as reaching your destination; it tests one’s patience and dedication. For those seeking to embark on this adventure or simply gain more insight into marine craftsmanship, Sven’s wisdom is invaluable.After securely attaching the first portion of the flange, Sven allows ample time for it to dry before moving forward with additional steps. This patience and precision are key aspects of his successful boatbuilding methods.Step 4: Finishing Touches
Once the flange is fully dried, Sven removes the clamps carefully, ensuring no damage occurs during this process. He then moves on to attaching four more pieces onto these main frames, completing two pairs of flanges for the bulkhead hatches.The Final Touches
While two flanges form the primary support structure around the hatches, Sven mentions there are two additional pieces required at each end to ensure comprehensive protection. This attention to detail highlights his commitment to producing a durable and reliable design. “Sailing is about finding your path, whether it’s across an ocean or within yourself.” – Sven Yrvind In conclusion, making flanges around bulkhead hatches may seem complex at first glance, but by following Sven Yrvind’s meticulous process, enthusiasts can achieve professional-level results. Remember that the journey of boatbuilding is as rewarding as reaching your destination; it tests one’s patience and dedication. For those seeking to embark on this adventure or simply gain more insight into marine craftsmanship, Sven’s wisdom is invaluable.Sven begins by explaining that working on flanges vertically and horizontally is significantly easier than doing so in a flat position. To simplify the process further, he divides the task into two or three steps as suggested by fellow expert “for for.” This approach not only makes it more manageable but also allows for greater precision in crafting each component.Step 2: Applying Glue and Securing
Sven proceeds to apply glue along one edge of the flange, ensuring a secure bond when clamped into place. He emphasizes that this stage is crucial for maintaining the structural integrity of the flange, which in turn safeguards the living area beneath the canvas when hatches are open.Step 3: Allowing Time to Dry
After securely attaching the first portion of the flange, Sven allows ample time for it to dry before moving forward with additional steps. This patience and precision are key aspects of his successful boatbuilding methods.Step 4: Finishing Touches
Once the flange is fully dried, Sven removes the clamps carefully, ensuring no damage occurs during this process. He then moves on to attaching four more pieces onto these main frames, completing two pairs of flanges for the bulkhead hatches.The Final Touches
While two flanges form the primary support structure around the hatches, Sven mentions there are two additional pieces required at each end to ensure comprehensive protection. This attention to detail highlights his commitment to producing a durable and reliable design. “Sailing is about finding your path, whether it’s across an ocean or within yourself.” – Sven Yrvind In conclusion, making flanges around bulkhead hatches may seem complex at first glance, but by following Sven Yrvind’s meticulous process, enthusiasts can achieve professional-level results. Remember that the journey of boatbuilding is as rewarding as reaching your destination; it tests one’s patience and dedication. For those seeking to embark on this adventure or simply gain more insight into marine craftsmanship, Sven’s wisdom is invaluable.Sven Yrvind, a renowned yacht designer and sailor, shares valuable insights on creating flanges around bulkhead hatches for canvas protection in this enlightening video. By following his expert guidance, boat enthusiasts can ensure their living areas remain secure while allowing unhindered access through the hatches.Step 1: Starting with the Flange
Sven begins by explaining that working on flanges vertically and horizontally is significantly easier than doing so in a flat position. To simplify the process further, he divides the task into two or three steps as suggested by fellow expert “for for.” This approach not only makes it more manageable but also allows for greater precision in crafting each component.Step 2: Applying Glue and Securing
Sven proceeds to apply glue along one edge of the flange, ensuring a secure bond when clamped into place. He emphasizes that this stage is crucial for maintaining the structural integrity of the flange, which in turn safeguards the living area beneath the canvas when hatches are open.Step 3: Allowing Time to Dry
After securely attaching the first portion of the flange, Sven allows ample time for it to dry before moving forward with additional steps. This patience and precision are key aspects of his successful boatbuilding methods.Step 4: Finishing Touches
Once the flange is fully dried, Sven removes the clamps carefully, ensuring no damage occurs during this process. He then moves on to attaching four more pieces onto these main frames, completing two pairs of flanges for the bulkhead hatches.The Final Touches
While two flanges form the primary support structure around the hatches, Sven mentions there are two additional pieces required at each end to ensure comprehensive protection. This attention to detail highlights his commitment to producing a durable and reliable design. “Sailing is about finding your path, whether it’s across an ocean or within yourself.” – Sven Yrvind In conclusion, making flanges around bulkhead hatches may seem complex at first glance, but by following Sven Yrvind’s meticulous process, enthusiasts can achieve professional-level results. Remember that the journey of boatbuilding is as rewarding as reaching your destination; it tests one’s patience and dedication. For those seeking to embark on this adventure or simply gain more insight into marine craftsmanship, Sven’s wisdom is invaluable.Making Flanges Around Bulkhead Hatches for Canvas
Sven Yrvind, a renowned yacht designer and sailor, shares valuable insights on creating flanges around bulkhead hatches for canvas protection in this enlightening video. By following his expert guidance, boat enthusiasts can ensure their living areas remain secure while allowing unhindered access through the hatches.Step 1: Starting with the Flange
Sven begins by explaining that working on flanges vertically and horizontally is significantly easier than doing so in a flat position. To simplify the process further, he divides the task into two or three steps as suggested by fellow expert “for for.” This approach not only makes it more manageable but also allows for greater precision in crafting each component.Step 2: Applying Glue and Securing
Sven proceeds to apply glue along one edge of the flange, ensuring a secure bond when clamped into place. He emphasizes that this stage is crucial for maintaining the structural integrity of the flange, which in turn safeguards the living area beneath the canvas when hatches are open.Step 3: Allowing Time to Dry
After securely attaching the first portion of the flange, Sven allows ample time for it to dry before moving forward with additional steps. This patience and precision are key aspects of his successful boatbuilding methods.Step 4: Finishing Touches
Once the flange is fully dried, Sven removes the clamps carefully, ensuring no damage occurs during this process. He then moves on to attaching four more pieces onto these main frames, completing two pairs of flanges for the bulkhead hatches.The Final Touches
While two flanges form the primary support structure around the hatches, Sven mentions there are two additional pieces required at each end to ensure comprehensive protection. This attention to detail highlights his commitment to producing a durable and reliable design. “Sailing is about finding your path, whether it’s across an ocean or within yourself.” – Sven Yrvind In conclusion, making flanges around bulkhead hatches may seem complex at first glance, but by following Sven Yrvind’s meticulous process, enthusiasts can achieve professional-level results. Remember that the journey of boatbuilding is as rewarding as reaching your destination; it tests one’s patience and dedication. For those seeking to embark on this adventure or simply gain more insight into marine craftsmanship, Sven’s wisdom is invaluable.Sven proceeds to apply glue along one edge of the flange, ensuring a secure bond when clamped into place. He emphasizes that this stage is crucial for maintaining the structural integrity of the flange, which in turn safeguards the living area beneath the canvas when hatches are open.Step 3: Allowing Time to Dry
After securely attaching the first portion of the flange, Sven allows ample time for it to dry before moving forward with additional steps. This patience and precision are key aspects of his successful boatbuilding methods.Step 4: Finishing Touches
Once the flange is fully dried, Sven removes the clamps carefully, ensuring no damage occurs during this process. He then moves on to attaching four more pieces onto these main frames, completing two pairs of flanges for the bulkhead hatches.The Final Touches
While two flanges form the primary support structure around the hatches, Sven mentions there are two additional pieces required at each end to ensure comprehensive protection. This attention to detail highlights his commitment to producing a durable and reliable design. “Sailing is about finding your path, whether it’s across an ocean or within yourself.” – Sven Yrvind In conclusion, making flanges around bulkhead hatches may seem complex at first glance, but by following Sven Yrvind’s meticulous process, enthusiasts can achieve professional-level results. Remember that the journey of boatbuilding is as rewarding as reaching your destination; it tests one’s patience and dedication. For those seeking to embark on this adventure or simply gain more insight into marine craftsmanship, Sven’s wisdom is invaluable.Sven begins by explaining that working on flanges vertically and horizontally is significantly easier than doing so in a flat position. To simplify the process further, he divides the task into two or three steps as suggested by fellow expert “for for.” This approach not only makes it more manageable but also allows for greater precision in crafting each component.Step 2: Applying Glue and Securing
Sven proceeds to apply glue along one edge of the flange, ensuring a secure bond when clamped into place. He emphasizes that this stage is crucial for maintaining the structural integrity of the flange, which in turn safeguards the living area beneath the canvas when hatches are open.Step 3: Allowing Time to Dry
After securely attaching the first portion of the flange, Sven allows ample time for it to dry before moving forward with additional steps. This patience and precision are key aspects of his successful boatbuilding methods.Step 4: Finishing Touches
Once the flange is fully dried, Sven removes the clamps carefully, ensuring no damage occurs during this process. He then moves on to attaching four more pieces onto these main frames, completing two pairs of flanges for the bulkhead hatches.The Final Touches
While two flanges form the primary support structure around the hatches, Sven mentions there are two additional pieces required at each end to ensure comprehensive protection. This attention to detail highlights his commitment to producing a durable and reliable design. “Sailing is about finding your path, whether it’s across an ocean or within yourself.” – Sven Yrvind In conclusion, making flanges around bulkhead hatches may seem complex at first glance, but by following Sven Yrvind’s meticulous process, enthusiasts can achieve professional-level results. Remember that the journey of boatbuilding is as rewarding as reaching your destination; it tests one’s patience and dedication. For those seeking to embark on this adventure or simply gain more insight into marine craftsmanship, Sven’s wisdom is invaluable.Sven Yrvind, a renowned yacht designer and sailor, shares valuable insights on creating flanges around bulkhead hatches for canvas protection in this enlightening video. By following his expert guidance, boat enthusiasts can ensure their living areas remain secure while allowing unhindered access through the hatches.Step 1: Starting with the Flange
Sven begins by explaining that working on flanges vertically and horizontally is significantly easier than doing so in a flat position. To simplify the process further, he divides the task into two or three steps as suggested by fellow expert “for for.” This approach not only makes it more manageable but also allows for greater precision in crafting each component.Step 2: Applying Glue and Securing
Sven proceeds to apply glue along one edge of the flange, ensuring a secure bond when clamped into place. He emphasizes that this stage is crucial for maintaining the structural integrity of the flange, which in turn safeguards the living area beneath the canvas when hatches are open.Step 3: Allowing Time to Dry
After securely attaching the first portion of the flange, Sven allows ample time for it to dry before moving forward with additional steps. This patience and precision are key aspects of his successful boatbuilding methods.Step 4: Finishing Touches
Once the flange is fully dried, Sven removes the clamps carefully, ensuring no damage occurs during this process. He then moves on to attaching four more pieces onto these main frames, completing two pairs of flanges for the bulkhead hatches.The Final Touches
While two flanges form the primary support structure around the hatches, Sven mentions there are two additional pieces required at each end to ensure comprehensive protection. This attention to detail highlights his commitment to producing a durable and reliable design. “Sailing is about finding your path, whether it’s across an ocean or within yourself.” – Sven Yrvind In conclusion, making flanges around bulkhead hatches may seem complex at first glance, but by following Sven Yrvind’s meticulous process, enthusiasts can achieve professional-level results. Remember that the journey of boatbuilding is as rewarding as reaching your destination; it tests one’s patience and dedication. For those seeking to embark on this adventure or simply gain more insight into marine craftsmanship, Sven’s wisdom is invaluable.Making Flanges Around Bulkhead Hatches for Canvas
Sven Yrvind, a renowned yacht designer and sailor, shares valuable insights on creating flanges around bulkhead hatches for canvas protection in this enlightening video. By following his expert guidance, boat enthusiasts can ensure their living areas remain secure while allowing unhindered access through the hatches.Step 1: Starting with the Flange
Sven begins by explaining that working on flanges vertically and horizontally is significantly easier than doing so in a flat position. To simplify the process further, he divides the task into two or three steps as suggested by fellow expert “for for.” This approach not only makes it more manageable but also allows for greater precision in crafting each component.Step 2: Applying Glue and Securing
Sven proceeds to apply glue along one edge of the flange, ensuring a secure bond when clamped into place. He emphasizes that this stage is crucial for maintaining the structural integrity of the flange, which in turn safeguards the living area beneath the canvas when hatches are open.Step 3: Allowing Time to Dry
After securely attaching the first portion of the flange, Sven allows ample time for it to dry before moving forward with additional steps. This patience and precision are key aspects of his successful boatbuilding methods.Step 4: Finishing Touches
Once the flange is fully dried, Sven removes the clamps carefully, ensuring no damage occurs during this process. He then moves on to attaching four more pieces onto these main frames, completing two pairs of flanges for the bulkhead hatches.The Final Touches
While two flanges form the primary support structure around the hatches, Sven mentions there are two additional pieces required at each end to ensure comprehensive protection. This attention to detail highlights his commitment to producing a durable and reliable design. “Sailing is about finding your path, whether it’s across an ocean or within yourself.” – Sven Yrvind In conclusion, making flanges around bulkhead hatches may seem complex at first glance, but by following Sven Yrvind’s meticulous process, enthusiasts can achieve professional-level results. Remember that the journey of boatbuilding is as rewarding as reaching your destination; it tests one’s patience and dedication. For those seeking to embark on this adventure or simply gain more insight into marine craftsmanship, Sven’s wisdom is invaluable.Once the flange is fully dried, Sven removes the clamps carefully, ensuring no damage occurs during this process. He then moves on to attaching four more pieces onto these main frames, completing two pairs of flanges for the bulkhead hatches.The Final Touches
While two flanges form the primary support structure around the hatches, Sven mentions there are two additional pieces required at each end to ensure comprehensive protection. This attention to detail highlights his commitment to producing a durable and reliable design. “Sailing is about finding your path, whether it’s across an ocean or within yourself.” – Sven Yrvind In conclusion, making flanges around bulkhead hatches may seem complex at first glance, but by following Sven Yrvind’s meticulous process, enthusiasts can achieve professional-level results. Remember that the journey of boatbuilding is as rewarding as reaching your destination; it tests one’s patience and dedication. For those seeking to embark on this adventure or simply gain more insight into marine craftsmanship, Sven’s wisdom is invaluable.Sven proceeds to apply glue along one edge of the flange, ensuring a secure bond when clamped into place. He emphasizes that this stage is crucial for maintaining the structural integrity of the flange, which in turn safeguards the living area beneath the canvas when hatches are open.Step 3: Allowing Time to Dry
After securely attaching the first portion of the flange, Sven allows ample time for it to dry before moving forward with additional steps. This patience and precision are key aspects of his successful boatbuilding methods.Step 4: Finishing Touches
Once the flange is fully dried, Sven removes the clamps carefully, ensuring no damage occurs during this process. He then moves on to attaching four more pieces onto these main frames, completing two pairs of flanges for the bulkhead hatches.The Final Touches
While two flanges form the primary support structure around the hatches, Sven mentions there are two additional pieces required at each end to ensure comprehensive protection. This attention to detail highlights his commitment to producing a durable and reliable design. “Sailing is about finding your path, whether it’s across an ocean or within yourself.” – Sven Yrvind In conclusion, making flanges around bulkhead hatches may seem complex at first glance, but by following Sven Yrvind’s meticulous process, enthusiasts can achieve professional-level results. Remember that the journey of boatbuilding is as rewarding as reaching your destination; it tests one’s patience and dedication. For those seeking to embark on this adventure or simply gain more insight into marine craftsmanship, Sven’s wisdom is invaluable.Sven begins by explaining that working on flanges vertically and horizontally is significantly easier than doing so in a flat position. To simplify the process further, he divides the task into two or three steps as suggested by fellow expert “for for.” This approach not only makes it more manageable but also allows for greater precision in crafting each component.Step 2: Applying Glue and Securing
Sven proceeds to apply glue along one edge of the flange, ensuring a secure bond when clamped into place. He emphasizes that this stage is crucial for maintaining the structural integrity of the flange, which in turn safeguards the living area beneath the canvas when hatches are open.Step 3: Allowing Time to Dry
After securely attaching the first portion of the flange, Sven allows ample time for it to dry before moving forward with additional steps. This patience and precision are key aspects of his successful boatbuilding methods.Step 4: Finishing Touches
Once the flange is fully dried, Sven removes the clamps carefully, ensuring no damage occurs during this process. He then moves on to attaching four more pieces onto these main frames, completing two pairs of flanges for the bulkhead hatches.The Final Touches
While two flanges form the primary support structure around the hatches, Sven mentions there are two additional pieces required at each end to ensure comprehensive protection. This attention to detail highlights his commitment to producing a durable and reliable design. “Sailing is about finding your path, whether it’s across an ocean or within yourself.” – Sven Yrvind In conclusion, making flanges around bulkhead hatches may seem complex at first glance, but by following Sven Yrvind’s meticulous process, enthusiasts can achieve professional-level results. Remember that the journey of boatbuilding is as rewarding as reaching your destination; it tests one’s patience and dedication. For those seeking to embark on this adventure or simply gain more insight into marine craftsmanship, Sven’s wisdom is invaluable.Sven Yrvind, a renowned yacht designer and sailor, shares valuable insights on creating flanges around bulkhead hatches for canvas protection in this enlightening video. By following his expert guidance, boat enthusiasts can ensure their living areas remain secure while allowing unhindered access through the hatches.Step 1: Starting with the Flange
Sven begins by explaining that working on flanges vertically and horizontally is significantly easier than doing so in a flat position. To simplify the process further, he divides the task into two or three steps as suggested by fellow expert “for for.” This approach not only makes it more manageable but also allows for greater precision in crafting each component.Step 2: Applying Glue and Securing
Sven proceeds to apply glue along one edge of the flange, ensuring a secure bond when clamped into place. He emphasizes that this stage is crucial for maintaining the structural integrity of the flange, which in turn safeguards the living area beneath the canvas when hatches are open.Step 3: Allowing Time to Dry
After securely attaching the first portion of the flange, Sven allows ample time for it to dry before moving forward with additional steps. This patience and precision are key aspects of his successful boatbuilding methods.Step 4: Finishing Touches
Once the flange is fully dried, Sven removes the clamps carefully, ensuring no damage occurs during this process. He then moves on to attaching four more pieces onto these main frames, completing two pairs of flanges for the bulkhead hatches.The Final Touches
While two flanges form the primary support structure around the hatches, Sven mentions there are two additional pieces required at each end to ensure comprehensive protection. This attention to detail highlights his commitment to producing a durable and reliable design. “Sailing is about finding your path, whether it’s across an ocean or within yourself.” – Sven Yrvind In conclusion, making flanges around bulkhead hatches may seem complex at first glance, but by following Sven Yrvind’s meticulous process, enthusiasts can achieve professional-level results. Remember that the journey of boatbuilding is as rewarding as reaching your destination; it tests one’s patience and dedication. For those seeking to embark on this adventure or simply gain more insight into marine craftsmanship, Sven’s wisdom is invaluable.Making Flanges Around Bulkhead Hatches for Canvas
Sven Yrvind, a renowned yacht designer and sailor, shares valuable insights on creating flanges around bulkhead hatches for canvas protection in this enlightening video. By following his expert guidance, boat enthusiasts can ensure their living areas remain secure while allowing unhindered access through the hatches.Step 1: Starting with the Flange
Sven begins by explaining that working on flanges vertically and horizontally is significantly easier than doing so in a flat position. To simplify the process further, he divides the task into two or three steps as suggested by fellow expert “for for.” This approach not only makes it more manageable but also allows for greater precision in crafting each component.Step 2: Applying Glue and Securing
Sven proceeds to apply glue along one edge of the flange, ensuring a secure bond when clamped into place. He emphasizes that this stage is crucial for maintaining the structural integrity of the flange, which in turn safeguards the living area beneath the canvas when hatches are open.Step 3: Allowing Time to Dry
After securely attaching the first portion of the flange, Sven allows ample time for it to dry before moving forward with additional steps. This patience and precision are key aspects of his successful boatbuilding methods.Step 4: Finishing Touches
Once the flange is fully dried, Sven removes the clamps carefully, ensuring no damage occurs during this process. He then moves on to attaching four more pieces onto these main frames, completing two pairs of flanges for the bulkhead hatches.The Final Touches
While two flanges form the primary support structure around the hatches, Sven mentions there are two additional pieces required at each end to ensure comprehensive protection. This attention to detail highlights his commitment to producing a durable and reliable design. “Sailing is about finding your path, whether it’s across an ocean or within yourself.” – Sven Yrvind In conclusion, making flanges around bulkhead hatches may seem complex at first glance, but by following Sven Yrvind’s meticulous process, enthusiasts can achieve professional-level results. Remember that the journey of boatbuilding is as rewarding as reaching your destination; it tests one’s patience and dedication. For those seeking to embark on this adventure or simply gain more insight into marine craftsmanship, Sven’s wisdom is invaluable.After securely attaching the first portion of the flange, Sven allows ample time for it to dry before moving forward with additional steps. This patience and precision are key aspects of his successful boatbuilding methods.Step 4: Finishing Touches
Once the flange is fully dried, Sven removes the clamps carefully, ensuring no damage occurs during this process. He then moves on to attaching four more pieces onto these main frames, completing two pairs of flanges for the bulkhead hatches.The Final Touches
While two flanges form the primary support structure around the hatches, Sven mentions there are two additional pieces required at each end to ensure comprehensive protection. This attention to detail highlights his commitment to producing a durable and reliable design. “Sailing is about finding your path, whether it’s across an ocean or within yourself.” – Sven Yrvind In conclusion, making flanges around bulkhead hatches may seem complex at first glance, but by following Sven Yrvind’s meticulous process, enthusiasts can achieve professional-level results. Remember that the journey of boatbuilding is as rewarding as reaching your destination; it tests one’s patience and dedication. For those seeking to embark on this adventure or simply gain more insight into marine craftsmanship, Sven’s wisdom is invaluable.Sven proceeds to apply glue along one edge of the flange, ensuring a secure bond when clamped into place. He emphasizes that this stage is crucial for maintaining the structural integrity of the flange, which in turn safeguards the living area beneath the canvas when hatches are open.Step 3: Allowing Time to Dry
After securely attaching the first portion of the flange, Sven allows ample time for it to dry before moving forward with additional steps. This patience and precision are key aspects of his successful boatbuilding methods.Step 4: Finishing Touches
Once the flange is fully dried, Sven removes the clamps carefully, ensuring no damage occurs during this process. He then moves on to attaching four more pieces onto these main frames, completing two pairs of flanges for the bulkhead hatches.The Final Touches
While two flanges form the primary support structure around the hatches, Sven mentions there are two additional pieces required at each end to ensure comprehensive protection. This attention to detail highlights his commitment to producing a durable and reliable design. “Sailing is about finding your path, whether it’s across an ocean or within yourself.” – Sven Yrvind In conclusion, making flanges around bulkhead hatches may seem complex at first glance, but by following Sven Yrvind’s meticulous process, enthusiasts can achieve professional-level results. Remember that the journey of boatbuilding is as rewarding as reaching your destination; it tests one’s patience and dedication. For those seeking to embark on this adventure or simply gain more insight into marine craftsmanship, Sven’s wisdom is invaluable.Sven begins by explaining that working on flanges vertically and horizontally is significantly easier than doing so in a flat position. To simplify the process further, he divides the task into two or three steps as suggested by fellow expert “for for.” This approach not only makes it more manageable but also allows for greater precision in crafting each component.Step 2: Applying Glue and Securing
Sven proceeds to apply glue along one edge of the flange, ensuring a secure bond when clamped into place. He emphasizes that this stage is crucial for maintaining the structural integrity of the flange, which in turn safeguards the living area beneath the canvas when hatches are open.Step 3: Allowing Time to Dry
After securely attaching the first portion of the flange, Sven allows ample time for it to dry before moving forward with additional steps. This patience and precision are key aspects of his successful boatbuilding methods.Step 4: Finishing Touches
Once the flange is fully dried, Sven removes the clamps carefully, ensuring no damage occurs during this process. He then moves on to attaching four more pieces onto these main frames, completing two pairs of flanges for the bulkhead hatches.The Final Touches
While two flanges form the primary support structure around the hatches, Sven mentions there are two additional pieces required at each end to ensure comprehensive protection. This attention to detail highlights his commitment to producing a durable and reliable design. “Sailing is about finding your path, whether it’s across an ocean or within yourself.” – Sven Yrvind In conclusion, making flanges around bulkhead hatches may seem complex at first glance, but by following Sven Yrvind’s meticulous process, enthusiasts can achieve professional-level results. Remember that the journey of boatbuilding is as rewarding as reaching your destination; it tests one’s patience and dedication. For those seeking to embark on this adventure or simply gain more insight into marine craftsmanship, Sven’s wisdom is invaluable.Sven Yrvind, a renowned yacht designer and sailor, shares valuable insights on creating flanges around bulkhead hatches for canvas protection in this enlightening video. By following his expert guidance, boat enthusiasts can ensure their living areas remain secure while allowing unhindered access through the hatches.Step 1: Starting with the Flange
Sven begins by explaining that working on flanges vertically and horizontally is significantly easier than doing so in a flat position. To simplify the process further, he divides the task into two or three steps as suggested by fellow expert “for for.” This approach not only makes it more manageable but also allows for greater precision in crafting each component.Step 2: Applying Glue and Securing
Sven proceeds to apply glue along one edge of the flange, ensuring a secure bond when clamped into place. He emphasizes that this stage is crucial for maintaining the structural integrity of the flange, which in turn safeguards the living area beneath the canvas when hatches are open.Step 3: Allowing Time to Dry
After securely attaching the first portion of the flange, Sven allows ample time for it to dry before moving forward with additional steps. This patience and precision are key aspects of his successful boatbuilding methods.Step 4: Finishing Touches
Once the flange is fully dried, Sven removes the clamps carefully, ensuring no damage occurs during this process. He then moves on to attaching four more pieces onto these main frames, completing two pairs of flanges for the bulkhead hatches.The Final Touches
While two flanges form the primary support structure around the hatches, Sven mentions there are two additional pieces required at each end to ensure comprehensive protection. This attention to detail highlights his commitment to producing a durable and reliable design. “Sailing is about finding your path, whether it’s across an ocean or within yourself.” – Sven Yrvind In conclusion, making flanges around bulkhead hatches may seem complex at first glance, but by following Sven Yrvind’s meticulous process, enthusiasts can achieve professional-level results. Remember that the journey of boatbuilding is as rewarding as reaching your destination; it tests one’s patience and dedication. For those seeking to embark on this adventure or simply gain more insight into marine craftsmanship, Sven’s wisdom is invaluable.Making Flanges Around Bulkhead Hatches for Canvas
Sven Yrvind, a renowned yacht designer and sailor, shares valuable insights on creating flanges around bulkhead hatches for canvas protection in this enlightening video. By following his expert guidance, boat enthusiasts can ensure their living areas remain secure while allowing unhindered access through the hatches.Step 1: Starting with the Flange
Sven begins by explaining that working on flanges vertically and horizontally is significantly easier than doing so in a flat position. To simplify the process further, he divides the task into two or three steps as suggested by fellow expert “for for.” This approach not only makes it more manageable but also allows for greater precision in crafting each component.Step 2: Applying Glue and Securing
Sven proceeds to apply glue along one edge of the flange, ensuring a secure bond when clamped into place. He emphasizes that this stage is crucial for maintaining the structural integrity of the flange, which in turn safeguards the living area beneath the canvas when hatches are open.Step 3: Allowing Time to Dry
After securely attaching the first portion of the flange, Sven allows ample time for it to dry before moving forward with additional steps. This patience and precision are key aspects of his successful boatbuilding methods.Step 4: Finishing Touches
Once the flange is fully dried, Sven removes the clamps carefully, ensuring no damage occurs during this process. He then moves on to attaching four more pieces onto these main frames, completing two pairs of flanges for the bulkhead hatches.The Final Touches
While two flanges form the primary support structure around the hatches, Sven mentions there are two additional pieces required at each end to ensure comprehensive protection. This attention to detail highlights his commitment to producing a durable and reliable design. “Sailing is about finding your path, whether it’s across an ocean or within yourself.” – Sven Yrvind In conclusion, making flanges around bulkhead hatches may seem complex at first glance, but by following Sven Yrvind’s meticulous process, enthusiasts can achieve professional-level results. Remember that the journey of boatbuilding is as rewarding as reaching your destination; it tests one’s patience and dedication. For those seeking to embark on this adventure or simply gain more insight into marine craftsmanship, Sven’s wisdom is invaluable.Once the flange is fully dried, Sven removes the clamps carefully, ensuring no damage occurs during this process. He then moves on to attaching four more pieces onto these main frames, completing two pairs of flanges for the bulkhead hatches.The Final Touches
While two flanges form the primary support structure around the hatches, Sven mentions there are two additional pieces required at each end to ensure comprehensive protection. This attention to detail highlights his commitment to producing a durable and reliable design. “Sailing is about finding your path, whether it’s across an ocean or within yourself.” – Sven Yrvind In conclusion, making flanges around bulkhead hatches may seem complex at first glance, but by following Sven Yrvind’s meticulous process, enthusiasts can achieve professional-level results. Remember that the journey of boatbuilding is as rewarding as reaching your destination; it tests one’s patience and dedication. For those seeking to embark on this adventure or simply gain more insight into marine craftsmanship, Sven’s wisdom is invaluable.After securely attaching the first portion of the flange, Sven allows ample time for it to dry before moving forward with additional steps. This patience and precision are key aspects of his successful boatbuilding methods.Step 4: Finishing Touches
Once the flange is fully dried, Sven removes the clamps carefully, ensuring no damage occurs during this process. He then moves on to attaching four more pieces onto these main frames, completing two pairs of flanges for the bulkhead hatches.The Final Touches
While two flanges form the primary support structure around the hatches, Sven mentions there are two additional pieces required at each end to ensure comprehensive protection. This attention to detail highlights his commitment to producing a durable and reliable design. “Sailing is about finding your path, whether it’s across an ocean or within yourself.” – Sven Yrvind In conclusion, making flanges around bulkhead hatches may seem complex at first glance, but by following Sven Yrvind’s meticulous process, enthusiasts can achieve professional-level results. Remember that the journey of boatbuilding is as rewarding as reaching your destination; it tests one’s patience and dedication. For those seeking to embark on this adventure or simply gain more insight into marine craftsmanship, Sven’s wisdom is invaluable.Sven proceeds to apply glue along one edge of the flange, ensuring a secure bond when clamped into place. He emphasizes that this stage is crucial for maintaining the structural integrity of the flange, which in turn safeguards the living area beneath the canvas when hatches are open.Step 3: Allowing Time to Dry
After securely attaching the first portion of the flange, Sven allows ample time for it to dry before moving forward with additional steps. This patience and precision are key aspects of his successful boatbuilding methods.Step 4: Finishing Touches
Once the flange is fully dried, Sven removes the clamps carefully, ensuring no damage occurs during this process. He then moves on to attaching four more pieces onto these main frames, completing two pairs of flanges for the bulkhead hatches.The Final Touches
While two flanges form the primary support structure around the hatches, Sven mentions there are two additional pieces required at each end to ensure comprehensive protection. This attention to detail highlights his commitment to producing a durable and reliable design. “Sailing is about finding your path, whether it’s across an ocean or within yourself.” – Sven Yrvind In conclusion, making flanges around bulkhead hatches may seem complex at first glance, but by following Sven Yrvind’s meticulous process, enthusiasts can achieve professional-level results. Remember that the journey of boatbuilding is as rewarding as reaching your destination; it tests one’s patience and dedication. For those seeking to embark on this adventure or simply gain more insight into marine craftsmanship, Sven’s wisdom is invaluable.Sven begins by explaining that working on flanges vertically and horizontally is significantly easier than doing so in a flat position. To simplify the process further, he divides the task into two or three steps as suggested by fellow expert “for for.” This approach not only makes it more manageable but also allows for greater precision in crafting each component.Step 2: Applying Glue and Securing
Sven proceeds to apply glue along one edge of the flange, ensuring a secure bond when clamped into place. He emphasizes that this stage is crucial for maintaining the structural integrity of the flange, which in turn safeguards the living area beneath the canvas when hatches are open.Step 3: Allowing Time to Dry
After securely attaching the first portion of the flange, Sven allows ample time for it to dry before moving forward with additional steps. This patience and precision are key aspects of his successful boatbuilding methods.Step 4: Finishing Touches
Once the flange is fully dried, Sven removes the clamps carefully, ensuring no damage occurs during this process. He then moves on to attaching four more pieces onto these main frames, completing two pairs of flanges for the bulkhead hatches.The Final Touches
While two flanges form the primary support structure around the hatches, Sven mentions there are two additional pieces required at each end to ensure comprehensive protection. This attention to detail highlights his commitment to producing a durable and reliable design. “Sailing is about finding your path, whether it’s across an ocean or within yourself.” – Sven Yrvind In conclusion, making flanges around bulkhead hatches may seem complex at first glance, but by following Sven Yrvind’s meticulous process, enthusiasts can achieve professional-level results. Remember that the journey of boatbuilding is as rewarding as reaching your destination; it tests one’s patience and dedication. For those seeking to embark on this adventure or simply gain more insight into marine craftsmanship, Sven’s wisdom is invaluable.Sven Yrvind, a renowned yacht designer and sailor, shares valuable insights on creating flanges around bulkhead hatches for canvas protection in this enlightening video. By following his expert guidance, boat enthusiasts can ensure their living areas remain secure while allowing unhindered access through the hatches.Step 1: Starting with the Flange
Sven begins by explaining that working on flanges vertically and horizontally is significantly easier than doing so in a flat position. To simplify the process further, he divides the task into two or three steps as suggested by fellow expert “for for.” This approach not only makes it more manageable but also allows for greater precision in crafting each component.Step 2: Applying Glue and Securing
Sven proceeds to apply glue along one edge of the flange, ensuring a secure bond when clamped into place. He emphasizes that this stage is crucial for maintaining the structural integrity of the flange, which in turn safeguards the living area beneath the canvas when hatches are open.Step 3: Allowing Time to Dry
After securely attaching the first portion of the flange, Sven allows ample time for it to dry before moving forward with additional steps. This patience and precision are key aspects of his successful boatbuilding methods.Step 4: Finishing Touches
Once the flange is fully dried, Sven removes the clamps carefully, ensuring no damage occurs during this process. He then moves on to attaching four more pieces onto these main frames, completing two pairs of flanges for the bulkhead hatches.The Final Touches
While two flanges form the primary support structure around the hatches, Sven mentions there are two additional pieces required at each end to ensure comprehensive protection. This attention to detail highlights his commitment to producing a durable and reliable design. “Sailing is about finding your path, whether it’s across an ocean or within yourself.” – Sven Yrvind In conclusion, making flanges around bulkhead hatches may seem complex at first glance, but by following Sven Yrvind’s meticulous process, enthusiasts can achieve professional-level results. Remember that the journey of boatbuilding is as rewarding as reaching your destination; it tests one’s patience and dedication. For those seeking to embark on this adventure or simply gain more insight into marine craftsmanship, Sven’s wisdom is invaluable.Making Flanges Around Bulkhead Hatches for Canvas
Sven Yrvind, a renowned yacht designer and sailor, shares valuable insights on creating flanges around bulkhead hatches for canvas protection in this enlightening video. By following his expert guidance, boat enthusiasts can ensure their living areas remain secure while allowing unhindered access through the hatches.Step 1: Starting with the Flange
Sven begins by explaining that working on flanges vertically and horizontally is significantly easier than doing so in a flat position. To simplify the process further, he divides the task into two or three steps as suggested by fellow expert “for for.” This approach not only makes it more manageable but also allows for greater precision in crafting each component.Step 2: Applying Glue and Securing
Sven proceeds to apply glue along one edge of the flange, ensuring a secure bond when clamped into place. He emphasizes that this stage is crucial for maintaining the structural integrity of the flange, which in turn safeguards the living area beneath the canvas when hatches are open.Step 3: Allowing Time to Dry
After securely attaching the first portion of the flange, Sven allows ample time for it to dry before moving forward with additional steps. This patience and precision are key aspects of his successful boatbuilding methods.Step 4: Finishing Touches
Once the flange is fully dried, Sven removes the clamps carefully, ensuring no damage occurs during this process. He then moves on to attaching four more pieces onto these main frames, completing two pairs of flanges for the bulkhead hatches.The Final Touches
While two flanges form the primary support structure around the hatches, Sven mentions there are two additional pieces required at each end to ensure comprehensive protection. This attention to detail highlights his commitment to producing a durable and reliable design. “Sailing is about finding your path, whether it’s across an ocean or within yourself.” – Sven Yrvind In conclusion, making flanges around bulkhead hatches may seem complex at first glance, but by following Sven Yrvind’s meticulous process, enthusiasts can achieve professional-level results. Remember that the journey of boatbuilding is as rewarding as reaching your destination; it tests one’s patience and dedication. For those seeking to embark on this adventure or simply gain more insight into marine craftsmanship, Sven’s wisdom is invaluable.Sven proceeds to apply glue along one edge of the flange, ensuring a secure bond when clamped into place. He emphasizes that this stage is crucial for maintaining the structural integrity of the flange, which in turn safeguards the living area beneath the canvas when hatches are open.Step 3: Allowing Time to Dry
After securely attaching the first portion of the flange, Sven allows ample time for it to dry before moving forward with additional steps. This patience and precision are key aspects of his successful boatbuilding methods.Step 4: Finishing Touches
Once the flange is fully dried, Sven removes the clamps carefully, ensuring no damage occurs during this process. He then moves on to attaching four more pieces onto these main frames, completing two pairs of flanges for the bulkhead hatches.The Final Touches
While two flanges form the primary support structure around the hatches, Sven mentions there are two additional pieces required at each end to ensure comprehensive protection. This attention to detail highlights his commitment to producing a durable and reliable design. “Sailing is about finding your path, whether it’s across an ocean or within yourself.” – Sven Yrvind In conclusion, making flanges around bulkhead hatches may seem complex at first glance, but by following Sven Yrvind’s meticulous process, enthusiasts can achieve professional-level results. Remember that the journey of boatbuilding is as rewarding as reaching your destination; it tests one’s patience and dedication. For those seeking to embark on this adventure or simply gain more insight into marine craftsmanship, Sven’s wisdom is invaluable.Sven begins by explaining that working on flanges vertically and horizontally is significantly easier than doing so in a flat position. To simplify the process further, he divides the task into two or three steps as suggested by fellow expert “for for.” This approach not only makes it more manageable but also allows for greater precision in crafting each component.Step 2: Applying Glue and Securing
Sven proceeds to apply glue along one edge of the flange, ensuring a secure bond when clamped into place. He emphasizes that this stage is crucial for maintaining the structural integrity of the flange, which in turn safeguards the living area beneath the canvas when hatches are open.Step 3: Allowing Time to Dry
After securely attaching the first portion of the flange, Sven allows ample time for it to dry before moving forward with additional steps. This patience and precision are key aspects of his successful boatbuilding methods.Step 4: Finishing Touches
Once the flange is fully dried, Sven removes the clamps carefully, ensuring no damage occurs during this process. He then moves on to attaching four more pieces onto these main frames, completing two pairs of flanges for the bulkhead hatches.The Final Touches
While two flanges form the primary support structure around the hatches, Sven mentions there are two additional pieces required at each end to ensure comprehensive protection. This attention to detail highlights his commitment to producing a durable and reliable design. “Sailing is about finding your path, whether it’s across an ocean or within yourself.” – Sven Yrvind In conclusion, making flanges around bulkhead hatches may seem complex at first glance, but by following Sven Yrvind’s meticulous process, enthusiasts can achieve professional-level results. Remember that the journey of boatbuilding is as rewarding as reaching your destination; it tests one’s patience and dedication. For those seeking to embark on this adventure or simply gain more insight into marine craftsmanship, Sven’s wisdom is invaluable.Sven Yrvind, a renowned yacht designer and sailor, shares valuable insights on creating flanges around bulkhead hatches for canvas protection in this enlightening video. By following his expert guidance, boat enthusiasts can ensure their living areas remain secure while allowing unhindered access through the hatches.Step 1: Starting with the Flange
Sven begins by explaining that working on flanges vertically and horizontally is significantly easier than doing so in a flat position. To simplify the process further, he divides the task into two or three steps as suggested by fellow expert “for for.” This approach not only makes it more manageable but also allows for greater precision in crafting each component.Step 2: Applying Glue and Securing
Sven proceeds to apply glue along one edge of the flange, ensuring a secure bond when clamped into place. He emphasizes that this stage is crucial for maintaining the structural integrity of the flange, which in turn safeguards the living area beneath the canvas when hatches are open.Step 3: Allowing Time to Dry
After securely attaching the first portion of the flange, Sven allows ample time for it to dry before moving forward with additional steps. This patience and precision are key aspects of his successful boatbuilding methods.Step 4: Finishing Touches
Once the flange is fully dried, Sven removes the clamps carefully, ensuring no damage occurs during this process. He then moves on to attaching four more pieces onto these main frames, completing two pairs of flanges for the bulkhead hatches.The Final Touches
While two flanges form the primary support structure around the hatches, Sven mentions there are two additional pieces required at each end to ensure comprehensive protection. This attention to detail highlights his commitment to producing a durable and reliable design. “Sailing is about finding your path, whether it’s across an ocean or within yourself.” – Sven Yrvind In conclusion, making flanges around bulkhead hatches may seem complex at first glance, but by following Sven Yrvind’s meticulous process, enthusiasts can achieve professional-level results. Remember that the journey of boatbuilding is as rewarding as reaching your destination; it tests one’s patience and dedication. For those seeking to embark on this adventure or simply gain more insight into marine craftsmanship, Sven’s wisdom is invaluable.Making Flanges Around Bulkhead Hatches for Canvas
Sven Yrvind, a renowned yacht designer and sailor, shares valuable insights on creating flanges around bulkhead hatches for canvas protection in this enlightening video. By following his expert guidance, boat enthusiasts can ensure their living areas remain secure while allowing unhindered access through the hatches.Step 1: Starting with the Flange
Sven begins by explaining that working on flanges vertically and horizontally is significantly easier than doing so in a flat position. To simplify the process further, he divides the task into two or three steps as suggested by fellow expert “for for.” This approach not only makes it more manageable but also allows for greater precision in crafting each component.Step 2: Applying Glue and Securing
Sven proceeds to apply glue along one edge of the flange, ensuring a secure bond when clamped into place. He emphasizes that this stage is crucial for maintaining the structural integrity of the flange, which in turn safeguards the living area beneath the canvas when hatches are open.Step 3: Allowing Time to Dry
After securely attaching the first portion of the flange, Sven allows ample time for it to dry before moving forward with additional steps. This patience and precision are key aspects of his successful boatbuilding methods.Step 4: Finishing Touches
Once the flange is fully dried, Sven removes the clamps carefully, ensuring no damage occurs during this process. He then moves on to attaching four more pieces onto these main frames, completing two pairs of flanges for the bulkhead hatches.The Final Touches
While two flanges form the primary support structure around the hatches, Sven mentions there are two additional pieces required at each end to ensure comprehensive protection. This attention to detail highlights his commitment to producing a durable and reliable design. “Sailing is about finding your path, whether it’s across an ocean or within yourself.” – Sven Yrvind In conclusion, making flanges around bulkhead hatches may seem complex at first glance, but by following Sven Yrvind’s meticulous process, enthusiasts can achieve professional-level results. Remember that the journey of boatbuilding is as rewarding as reaching your destination; it tests one’s patience and dedication. For those seeking to embark on this adventure or simply gain more insight into marine craftsmanship, Sven’s wisdom is invaluable.Once the flange is fully dried, Sven removes the clamps carefully, ensuring no damage occurs during this process. He then moves on to attaching four more pieces onto these main frames, completing two pairs of flanges for the bulkhead hatches.The Final Touches
While two flanges form the primary support structure around the hatches, Sven mentions there are two additional pieces required at each end to ensure comprehensive protection. This attention to detail highlights his commitment to producing a durable and reliable design. “Sailing is about finding your path, whether it’s across an ocean or within yourself.” – Sven Yrvind In conclusion, making flanges around bulkhead hatches may seem complex at first glance, but by following Sven Yrvind’s meticulous process, enthusiasts can achieve professional-level results. Remember that the journey of boatbuilding is as rewarding as reaching your destination; it tests one’s patience and dedication. For those seeking to embark on this adventure or simply gain more insight into marine craftsmanship, Sven’s wisdom is invaluable.Sven begins by explaining that working on flanges vertically and horizontally is significantly easier than doing so in a flat position. To simplify the process further, he divides the task into two or three steps as suggested by fellow expert “for for.” This approach not only makes it more manageable but also allows for greater precision in crafting each component.Step 2: Applying Glue and Securing
Sven proceeds to apply glue along one edge of the flange, ensuring a secure bond when clamped into place. He emphasizes that this stage is crucial for maintaining the structural integrity of the flange, which in turn safeguards the living area beneath the canvas when hatches are open.Step 3: Allowing Time to Dry
After securely attaching the first portion of the flange, Sven allows ample time for it to dry before moving forward with additional steps. This patience and precision are key aspects of his successful boatbuilding methods.Step 4: Finishing Touches
Once the flange is fully dried, Sven removes the clamps carefully, ensuring no damage occurs during this process. He then moves on to attaching four more pieces onto these main frames, completing two pairs of flanges for the bulkhead hatches.The Final Touches
While two flanges form the primary support structure around the hatches, Sven mentions there are two additional pieces required at each end to ensure comprehensive protection. This attention to detail highlights his commitment to producing a durable and reliable design. “Sailing is about finding your path, whether it’s across an ocean or within yourself.” – Sven Yrvind In conclusion, making flanges around bulkhead hatches may seem complex at first glance, but by following Sven Yrvind’s meticulous process, enthusiasts can achieve professional-level results. Remember that the journey of boatbuilding is as rewarding as reaching your destination; it tests one’s patience and dedication. For those seeking to embark on this adventure or simply gain more insight into marine craftsmanship, Sven’s wisdom is invaluable.Sven Yrvind, a renowned yacht designer and sailor, shares valuable insights on creating flanges around bulkhead hatches for canvas protection in this enlightening video. By following his expert guidance, boat enthusiasts can ensure their living areas remain secure while allowing unhindered access through the hatches.Step 1: Starting with the Flange
Sven begins by explaining that working on flanges vertically and horizontally is significantly easier than doing so in a flat position. To simplify the process further, he divides the task into two or three steps as suggested by fellow expert “for for.” This approach not only makes it more manageable but also allows for greater precision in crafting each component.Step 2: Applying Glue and Securing
Sven proceeds to apply glue along one edge of the flange, ensuring a secure bond when clamped into place. He emphasizes that this stage is crucial for maintaining the structural integrity of the flange, which in turn safeguards the living area beneath the canvas when hatches are open.Step 3: Allowing Time to Dry
After securely attaching the first portion of the flange, Sven allows ample time for it to dry before moving forward with additional steps. This patience and precision are key aspects of his successful boatbuilding methods.Step 4: Finishing Touches
Once the flange is fully dried, Sven removes the clamps carefully, ensuring no damage occurs during this process. He then moves on to attaching four more pieces onto these main frames, completing two pairs of flanges for the bulkhead hatches.The Final Touches
While two flanges form the primary support structure around the hatches, Sven mentions there are two additional pieces required at each end to ensure comprehensive protection. This attention to detail highlights his commitment to producing a durable and reliable design. “Sailing is about finding your path, whether it’s across an ocean or within yourself.” – Sven Yrvind In conclusion, making flanges around bulkhead hatches may seem complex at first glance, but by following Sven Yrvind’s meticulous process, enthusiasts can achieve professional-level results. Remember that the journey of boatbuilding is as rewarding as reaching your destination; it tests one’s patience and dedication. For those seeking to embark on this adventure or simply gain more insight into marine craftsmanship, Sven’s wisdom is invaluable.Making Flanges Around Bulkhead Hatches for Canvas
Sven Yrvind, a renowned yacht designer and sailor, shares valuable insights on creating flanges around bulkhead hatches for canvas protection in this enlightening video. By following his expert guidance, boat enthusiasts can ensure their living areas remain secure while allowing unhindered access through the hatches.Step 1: Starting with the Flange
Sven begins by explaining that working on flanges vertically and horizontally is significantly easier than doing so in a flat position. To simplify the process further, he divides the task into two or three steps as suggested by fellow expert “for for.” This approach not only makes it more manageable but also allows for greater precision in crafting each component.Step 2: Applying Glue and Securing
Sven proceeds to apply glue along one edge of the flange, ensuring a secure bond when clamped into place. He emphasizes that this stage is crucial for maintaining the structural integrity of the flange, which in turn safeguards the living area beneath the canvas when hatches are open.Step 3: Allowing Time to Dry
After securely attaching the first portion of the flange, Sven allows ample time for it to dry before moving forward with additional steps. This patience and precision are key aspects of his successful boatbuilding methods.Step 4: Finishing Touches
Once the flange is fully dried, Sven removes the clamps carefully, ensuring no damage occurs during this process. He then moves on to attaching four more pieces onto these main frames, completing two pairs of flanges for the bulkhead hatches.The Final Touches
While two flanges form the primary support structure around the hatches, Sven mentions there are two additional pieces required at each end to ensure comprehensive protection. This attention to detail highlights his commitment to producing a durable and reliable design. “Sailing is about finding your path, whether it’s across an ocean or within yourself.” – Sven Yrvind In conclusion, making flanges around bulkhead hatches may seem complex at first glance, but by following Sven Yrvind’s meticulous process, enthusiasts can achieve professional-level results. Remember that the journey of boatbuilding is as rewarding as reaching your destination; it tests one’s patience and dedication. For those seeking to embark on this adventure or simply gain more insight into marine craftsmanship, Sven’s wisdom is invaluable.After securely attaching the first portion of the flange, Sven allows ample time for it to dry before moving forward with additional steps. This patience and precision are key aspects of his successful boatbuilding methods.Step 4: Finishing Touches
Once the flange is fully dried, Sven removes the clamps carefully, ensuring no damage occurs during this process. He then moves on to attaching four more pieces onto these main frames, completing two pairs of flanges for the bulkhead hatches.The Final Touches
While two flanges form the primary support structure around the hatches, Sven mentions there are two additional pieces required at each end to ensure comprehensive protection. This attention to detail highlights his commitment to producing a durable and reliable design. “Sailing is about finding your path, whether it’s across an ocean or within yourself.” – Sven Yrvind In conclusion, making flanges around bulkhead hatches may seem complex at first glance, but by following Sven Yrvind’s meticulous process, enthusiasts can achieve professional-level results. Remember that the journey of boatbuilding is as rewarding as reaching your destination; it tests one’s patience and dedication. For those seeking to embark on this adventure or simply gain more insight into marine craftsmanship, Sven’s wisdom is invaluable.Sven begins by explaining that working on flanges vertically and horizontally is significantly easier than doing so in a flat position. To simplify the process further, he divides the task into two or three steps as suggested by fellow expert “for for.” This approach not only makes it more manageable but also allows for greater precision in crafting each component.Step 2: Applying Glue and Securing
Sven proceeds to apply glue along one edge of the flange, ensuring a secure bond when clamped into place. He emphasizes that this stage is crucial for maintaining the structural integrity of the flange, which in turn safeguards the living area beneath the canvas when hatches are open.Step 3: Allowing Time to Dry
After securely attaching the first portion of the flange, Sven allows ample time for it to dry before moving forward with additional steps. This patience and precision are key aspects of his successful boatbuilding methods.Step 4: Finishing Touches
Once the flange is fully dried, Sven removes the clamps carefully, ensuring no damage occurs during this process. He then moves on to attaching four more pieces onto these main frames, completing two pairs of flanges for the bulkhead hatches.The Final Touches
While two flanges form the primary support structure around the hatches, Sven mentions there are two additional pieces required at each end to ensure comprehensive protection. This attention to detail highlights his commitment to producing a durable and reliable design. “Sailing is about finding your path, whether it’s across an ocean or within yourself.” – Sven Yrvind In conclusion, making flanges around bulkhead hatches may seem complex at first glance, but by following Sven Yrvind’s meticulous process, enthusiasts can achieve professional-level results. Remember that the journey of boatbuilding is as rewarding as reaching your destination; it tests one’s patience and dedication. For those seeking to embark on this adventure or simply gain more insight into marine craftsmanship, Sven’s wisdom is invaluable.Sven Yrvind, a renowned yacht designer and sailor, shares valuable insights on creating flanges around bulkhead hatches for canvas protection in this enlightening video. By following his expert guidance, boat enthusiasts can ensure their living areas remain secure while allowing unhindered access through the hatches.Step 1: Starting with the Flange
Sven begins by explaining that working on flanges vertically and horizontally is significantly easier than doing so in a flat position. To simplify the process further, he divides the task into two or three steps as suggested by fellow expert “for for.” This approach not only makes it more manageable but also allows for greater precision in crafting each component.Step 2: Applying Glue and Securing
Sven proceeds to apply glue along one edge of the flange, ensuring a secure bond when clamped into place. He emphasizes that this stage is crucial for maintaining the structural integrity of the flange, which in turn safeguards the living area beneath the canvas when hatches are open.Step 3: Allowing Time to Dry
After securely attaching the first portion of the flange, Sven allows ample time for it to dry before moving forward with additional steps. This patience and precision are key aspects of his successful boatbuilding methods.Step 4: Finishing Touches
Once the flange is fully dried, Sven removes the clamps carefully, ensuring no damage occurs during this process. He then moves on to attaching four more pieces onto these main frames, completing two pairs of flanges for the bulkhead hatches.The Final Touches
While two flanges form the primary support structure around the hatches, Sven mentions there are two additional pieces required at each end to ensure comprehensive protection. This attention to detail highlights his commitment to producing a durable and reliable design. “Sailing is about finding your path, whether it’s across an ocean or within yourself.” – Sven Yrvind In conclusion, making flanges around bulkhead hatches may seem complex at first glance, but by following Sven Yrvind’s meticulous process, enthusiasts can achieve professional-level results. Remember that the journey of boatbuilding is as rewarding as reaching your destination; it tests one’s patience and dedication. For those seeking to embark on this adventure or simply gain more insight into marine craftsmanship, Sven’s wisdom is invaluable.Making Flanges Around Bulkhead Hatches for Canvas
Sven Yrvind, a renowned yacht designer and sailor, shares valuable insights on creating flanges around bulkhead hatches for canvas protection in this enlightening video. By following his expert guidance, boat enthusiasts can ensure their living areas remain secure while allowing unhindered access through the hatches.Step 1: Starting with the Flange
Sven begins by explaining that working on flanges vertically and horizontally is significantly easier than doing so in a flat position. To simplify the process further, he divides the task into two or three steps as suggested by fellow expert “for for.” This approach not only makes it more manageable but also allows for greater precision in crafting each component.Step 2: Applying Glue and Securing
Sven proceeds to apply glue along one edge of the flange, ensuring a secure bond when clamped into place. He emphasizes that this stage is crucial for maintaining the structural integrity of the flange, which in turn safeguards the living area beneath the canvas when hatches are open.Step 3: Allowing Time to Dry
After securely attaching the first portion of the flange, Sven allows ample time for it to dry before moving forward with additional steps. This patience and precision are key aspects of his successful boatbuilding methods.Step 4: Finishing Touches
Once the flange is fully dried, Sven removes the clamps carefully, ensuring no damage occurs during this process. He then moves on to attaching four more pieces onto these main frames, completing two pairs of flanges for the bulkhead hatches.The Final Touches
While two flanges form the primary support structure around the hatches, Sven mentions there are two additional pieces required at each end to ensure comprehensive protection. This attention to detail highlights his commitment to producing a durable and reliable design. “Sailing is about finding your path, whether it’s across an ocean or within yourself.” – Sven Yrvind In conclusion, making flanges around bulkhead hatches may seem complex at first glance, but by following Sven Yrvind’s meticulous process, enthusiasts can achieve professional-level results. Remember that the journey of boatbuilding is as rewarding as reaching your destination; it tests one’s patience and dedication. For those seeking to embark on this adventure or simply gain more insight into marine craftsmanship, Sven’s wisdom is invaluable.Sven proceeds to apply glue along one edge of the flange, ensuring a secure bond when clamped into place. He emphasizes that this stage is crucial for maintaining the structural integrity of the flange, which in turn safeguards the living area beneath the canvas when hatches are open.Step 3: Allowing Time to Dry
After securely attaching the first portion of the flange, Sven allows ample time for it to dry before moving forward with additional steps. This patience and precision are key aspects of his successful boatbuilding methods.Step 4: Finishing Touches
Once the flange is fully dried, Sven removes the clamps carefully, ensuring no damage occurs during this process. He then moves on to attaching four more pieces onto these main frames, completing two pairs of flanges for the bulkhead hatches.The Final Touches
While two flanges form the primary support structure around the hatches, Sven mentions there are two additional pieces required at each end to ensure comprehensive protection. This attention to detail highlights his commitment to producing a durable and reliable design. “Sailing is about finding your path, whether it’s across an ocean or within yourself.” – Sven Yrvind In conclusion, making flanges around bulkhead hatches may seem complex at first glance, but by following Sven Yrvind’s meticulous process, enthusiasts can achieve professional-level results. Remember that the journey of boatbuilding is as rewarding as reaching your destination; it tests one’s patience and dedication. For those seeking to embark on this adventure or simply gain more insight into marine craftsmanship, Sven’s wisdom is invaluable.Sven begins by explaining that working on flanges vertically and horizontally is significantly easier than doing so in a flat position. To simplify the process further, he divides the task into two or three steps as suggested by fellow expert “for for.” This approach not only makes it more manageable but also allows for greater precision in crafting each component.Step 2: Applying Glue and Securing
Sven proceeds to apply glue along one edge of the flange, ensuring a secure bond when clamped into place. He emphasizes that this stage is crucial for maintaining the structural integrity of the flange, which in turn safeguards the living area beneath the canvas when hatches are open.Step 3: Allowing Time to Dry
After securely attaching the first portion of the flange, Sven allows ample time for it to dry before moving forward with additional steps. This patience and precision are key aspects of his successful boatbuilding methods.Step 4: Finishing Touches
Once the flange is fully dried, Sven removes the clamps carefully, ensuring no damage occurs during this process. He then moves on to attaching four more pieces onto these main frames, completing two pairs of flanges for the bulkhead hatches.The Final Touches
While two flanges form the primary support structure around the hatches, Sven mentions there are two additional pieces required at each end to ensure comprehensive protection. This attention to detail highlights his commitment to producing a durable and reliable design. “Sailing is about finding your path, whether it’s across an ocean or within yourself.” – Sven Yrvind In conclusion, making flanges around bulkhead hatches may seem complex at first glance, but by following Sven Yrvind’s meticulous process, enthusiasts can achieve professional-level results. Remember that the journey of boatbuilding is as rewarding as reaching your destination; it tests one’s patience and dedication. For those seeking to embark on this adventure or simply gain more insight into marine craftsmanship, Sven’s wisdom is invaluable.Sven Yrvind, a renowned yacht designer and sailor, shares valuable insights on creating flanges around bulkhead hatches for canvas protection in this enlightening video. By following his expert guidance, boat enthusiasts can ensure their living areas remain secure while allowing unhindered access through the hatches.Step 1: Starting with the Flange
Sven begins by explaining that working on flanges vertically and horizontally is significantly easier than doing so in a flat position. To simplify the process further, he divides the task into two or three steps as suggested by fellow expert “for for.” This approach not only makes it more manageable but also allows for greater precision in crafting each component.Step 2: Applying Glue and Securing
Sven proceeds to apply glue along one edge of the flange, ensuring a secure bond when clamped into place. He emphasizes that this stage is crucial for maintaining the structural integrity of the flange, which in turn safeguards the living area beneath the canvas when hatches are open.Step 3: Allowing Time to Dry
After securely attaching the first portion of the flange, Sven allows ample time for it to dry before moving forward with additional steps. This patience and precision are key aspects of his successful boatbuilding methods.Step 4: Finishing Touches
Once the flange is fully dried, Sven removes the clamps carefully, ensuring no damage occurs during this process. He then moves on to attaching four more pieces onto these main frames, completing two pairs of flanges for the bulkhead hatches.The Final Touches
While two flanges form the primary support structure around the hatches, Sven mentions there are two additional pieces required at each end to ensure comprehensive protection. This attention to detail highlights his commitment to producing a durable and reliable design. “Sailing is about finding your path, whether it’s across an ocean or within yourself.” – Sven Yrvind In conclusion, making flanges around bulkhead hatches may seem complex at first glance, but by following Sven Yrvind’s meticulous process, enthusiasts can achieve professional-level results. Remember that the journey of boatbuilding is as rewarding as reaching your destination; it tests one’s patience and dedication. For those seeking to embark on this adventure or simply gain more insight into marine craftsmanship, Sven’s wisdom is invaluable.Making Flanges Around Bulkhead Hatches for Canvas
Sven Yrvind, a renowned yacht designer and sailor, shares valuable insights on creating flanges around bulkhead hatches for canvas protection in this enlightening video. By following his expert guidance, boat enthusiasts can ensure their living areas remain secure while allowing unhindered access through the hatches.Step 1: Starting with the Flange
Sven begins by explaining that working on flanges vertically and horizontally is significantly easier than doing so in a flat position. To simplify the process further, he divides the task into two or three steps as suggested by fellow expert “for for.” This approach not only makes it more manageable but also allows for greater precision in crafting each component.Step 2: Applying Glue and Securing
Sven proceeds to apply glue along one edge of the flange, ensuring a secure bond when clamped into place. He emphasizes that this stage is crucial for maintaining the structural integrity of the flange, which in turn safeguards the living area beneath the canvas when hatches are open.Step 3: Allowing Time to Dry
After securely attaching the first portion of the flange, Sven allows ample time for it to dry before moving forward with additional steps. This patience and precision are key aspects of his successful boatbuilding methods.Step 4: Finishing Touches
Once the flange is fully dried, Sven removes the clamps carefully, ensuring no damage occurs during this process. He then moves on to attaching four more pieces onto these main frames, completing two pairs of flanges for the bulkhead hatches.The Final Touches
While two flanges form the primary support structure around the hatches, Sven mentions there are two additional pieces required at each end to ensure comprehensive protection. This attention to detail highlights his commitment to producing a durable and reliable design. “Sailing is about finding your path, whether it’s across an ocean or within yourself.” – Sven Yrvind In conclusion, making flanges around bulkhead hatches may seem complex at first glance, but by following Sven Yrvind’s meticulous process, enthusiasts can achieve professional-level results. Remember that the journey of boatbuilding is as rewarding as reaching your destination; it tests one’s patience and dedication. For those seeking to embark on this adventure or simply gain more insight into marine craftsmanship, Sven’s wisdom is invaluable.Once the flange is fully dried, Sven removes the clamps carefully, ensuring no damage occurs during this process. He then moves on to attaching four more pieces onto these main frames, completing two pairs of flanges for the bulkhead hatches.The Final Touches
While two flanges form the primary support structure around the hatches, Sven mentions there are two additional pieces required at each end to ensure comprehensive protection. This attention to detail highlights his commitment to producing a durable and reliable design. “Sailing is about finding your path, whether it’s across an ocean or within yourself.” – Sven Yrvind In conclusion, making flanges around bulkhead hatches may seem complex at first glance, but by following Sven Yrvind’s meticulous process, enthusiasts can achieve professional-level results. Remember that the journey of boatbuilding is as rewarding as reaching your destination; it tests one’s patience and dedication. For those seeking to embark on this adventure or simply gain more insight into marine craftsmanship, Sven’s wisdom is invaluable.Sven proceeds to apply glue along one edge of the flange, ensuring a secure bond when clamped into place. He emphasizes that this stage is crucial for maintaining the structural integrity of the flange, which in turn safeguards the living area beneath the canvas when hatches are open.Step 3: Allowing Time to Dry
After securely attaching the first portion of the flange, Sven allows ample time for it to dry before moving forward with additional steps. This patience and precision are key aspects of his successful boatbuilding methods.Step 4: Finishing Touches
Once the flange is fully dried, Sven removes the clamps carefully, ensuring no damage occurs during this process. He then moves on to attaching four more pieces onto these main frames, completing two pairs of flanges for the bulkhead hatches.The Final Touches
While two flanges form the primary support structure around the hatches, Sven mentions there are two additional pieces required at each end to ensure comprehensive protection. This attention to detail highlights his commitment to producing a durable and reliable design. “Sailing is about finding your path, whether it’s across an ocean or within yourself.” – Sven Yrvind In conclusion, making flanges around bulkhead hatches may seem complex at first glance, but by following Sven Yrvind’s meticulous process, enthusiasts can achieve professional-level results. Remember that the journey of boatbuilding is as rewarding as reaching your destination; it tests one’s patience and dedication. For those seeking to embark on this adventure or simply gain more insight into marine craftsmanship, Sven’s wisdom is invaluable.Sven begins by explaining that working on flanges vertically and horizontally is significantly easier than doing so in a flat position. To simplify the process further, he divides the task into two or three steps as suggested by fellow expert “for for.” This approach not only makes it more manageable but also allows for greater precision in crafting each component.Step 2: Applying Glue and Securing
Sven proceeds to apply glue along one edge of the flange, ensuring a secure bond when clamped into place. He emphasizes that this stage is crucial for maintaining the structural integrity of the flange, which in turn safeguards the living area beneath the canvas when hatches are open.Step 3: Allowing Time to Dry
After securely attaching the first portion of the flange, Sven allows ample time for it to dry before moving forward with additional steps. This patience and precision are key aspects of his successful boatbuilding methods.Step 4: Finishing Touches
Once the flange is fully dried, Sven removes the clamps carefully, ensuring no damage occurs during this process. He then moves on to attaching four more pieces onto these main frames, completing two pairs of flanges for the bulkhead hatches.The Final Touches
While two flanges form the primary support structure around the hatches, Sven mentions there are two additional pieces required at each end to ensure comprehensive protection. This attention to detail highlights his commitment to producing a durable and reliable design. “Sailing is about finding your path, whether it’s across an ocean or within yourself.” – Sven Yrvind In conclusion, making flanges around bulkhead hatches may seem complex at first glance, but by following Sven Yrvind’s meticulous process, enthusiasts can achieve professional-level results. Remember that the journey of boatbuilding is as rewarding as reaching your destination; it tests one’s patience and dedication. For those seeking to embark on this adventure or simply gain more insight into marine craftsmanship, Sven’s wisdom is invaluable.Sven Yrvind, a renowned yacht designer and sailor, shares valuable insights on creating flanges around bulkhead hatches for canvas protection in this enlightening video. By following his expert guidance, boat enthusiasts can ensure their living areas remain secure while allowing unhindered access through the hatches.Step 1: Starting with the Flange
Sven begins by explaining that working on flanges vertically and horizontally is significantly easier than doing so in a flat position. To simplify the process further, he divides the task into two or three steps as suggested by fellow expert “for for.” This approach not only makes it more manageable but also allows for greater precision in crafting each component.Step 2: Applying Glue and Securing
Sven proceeds to apply glue along one edge of the flange, ensuring a secure bond when clamped into place. He emphasizes that this stage is crucial for maintaining the structural integrity of the flange, which in turn safeguards the living area beneath the canvas when hatches are open.Step 3: Allowing Time to Dry
After securely attaching the first portion of the flange, Sven allows ample time for it to dry before moving forward with additional steps. This patience and precision are key aspects of his successful boatbuilding methods.Step 4: Finishing Touches
Once the flange is fully dried, Sven removes the clamps carefully, ensuring no damage occurs during this process. He then moves on to attaching four more pieces onto these main frames, completing two pairs of flanges for the bulkhead hatches.The Final Touches
While two flanges form the primary support structure around the hatches, Sven mentions there are two additional pieces required at each end to ensure comprehensive protection. This attention to detail highlights his commitment to producing a durable and reliable design. “Sailing is about finding your path, whether it’s across an ocean or within yourself.” – Sven Yrvind In conclusion, making flanges around bulkhead hatches may seem complex at first glance, but by following Sven Yrvind’s meticulous process, enthusiasts can achieve professional-level results. Remember that the journey of boatbuilding is as rewarding as reaching your destination; it tests one’s patience and dedication. For those seeking to embark on this adventure or simply gain more insight into marine craftsmanship, Sven’s wisdom is invaluable.Making Flanges Around Bulkhead Hatches for Canvas
Sven Yrvind, a renowned yacht designer and sailor, shares valuable insights on creating flanges around bulkhead hatches for canvas protection in this enlightening video. By following his expert guidance, boat enthusiasts can ensure their living areas remain secure while allowing unhindered access through the hatches.Step 1: Starting with the Flange
Sven begins by explaining that working on flanges vertically and horizontally is significantly easier than doing so in a flat position. To simplify the process further, he divides the task into two or three steps as suggested by fellow expert “for for.” This approach not only makes it more manageable but also allows for greater precision in crafting each component.Step 2: Applying Glue and Securing
Sven proceeds to apply glue along one edge of the flange, ensuring a secure bond when clamped into place. He emphasizes that this stage is crucial for maintaining the structural integrity of the flange, which in turn safeguards the living area beneath the canvas when hatches are open.Step 3: Allowing Time to Dry
After securely attaching the first portion of the flange, Sven allows ample time for it to dry before moving forward with additional steps. This patience and precision are key aspects of his successful boatbuilding methods.Step 4: Finishing Touches
Once the flange is fully dried, Sven removes the clamps carefully, ensuring no damage occurs during this process. He then moves on to attaching four more pieces onto these main frames, completing two pairs of flanges for the bulkhead hatches.The Final Touches
While two flanges form the primary support structure around the hatches, Sven mentions there are two additional pieces required at each end to ensure comprehensive protection. This attention to detail highlights his commitment to producing a durable and reliable design. “Sailing is about finding your path, whether it’s across an ocean or within yourself.” – Sven Yrvind In conclusion, making flanges around bulkhead hatches may seem complex at first glance, but by following Sven Yrvind’s meticulous process, enthusiasts can achieve professional-level results. Remember that the journey of boatbuilding is as rewarding as reaching your destination; it tests one’s patience and dedication. For those seeking to embark on this adventure or simply gain more insight into marine craftsmanship, Sven’s wisdom is invaluable.After securely attaching the first portion of the flange, Sven allows ample time for it to dry before moving forward with additional steps. This patience and precision are key aspects of his successful boatbuilding methods.Step 4: Finishing Touches
Once the flange is fully dried, Sven removes the clamps carefully, ensuring no damage occurs during this process. He then moves on to attaching four more pieces onto these main frames, completing two pairs of flanges for the bulkhead hatches.The Final Touches
While two flanges form the primary support structure around the hatches, Sven mentions there are two additional pieces required at each end to ensure comprehensive protection. This attention to detail highlights his commitment to producing a durable and reliable design. “Sailing is about finding your path, whether it’s across an ocean or within yourself.” – Sven Yrvind In conclusion, making flanges around bulkhead hatches may seem complex at first glance, but by following Sven Yrvind’s meticulous process, enthusiasts can achieve professional-level results. Remember that the journey of boatbuilding is as rewarding as reaching your destination; it tests one’s patience and dedication. For those seeking to embark on this adventure or simply gain more insight into marine craftsmanship, Sven’s wisdom is invaluable.Sven proceeds to apply glue along one edge of the flange, ensuring a secure bond when clamped into place. He emphasizes that this stage is crucial for maintaining the structural integrity of the flange, which in turn safeguards the living area beneath the canvas when hatches are open.Step 3: Allowing Time to Dry
After securely attaching the first portion of the flange, Sven allows ample time for it to dry before moving forward with additional steps. This patience and precision are key aspects of his successful boatbuilding methods.Step 4: Finishing Touches
Once the flange is fully dried, Sven removes the clamps carefully, ensuring no damage occurs during this process. He then moves on to attaching four more pieces onto these main frames, completing two pairs of flanges for the bulkhead hatches.The Final Touches
While two flanges form the primary support structure around the hatches, Sven mentions there are two additional pieces required at each end to ensure comprehensive protection. This attention to detail highlights his commitment to producing a durable and reliable design. “Sailing is about finding your path, whether it’s across an ocean or within yourself.” – Sven Yrvind In conclusion, making flanges around bulkhead hatches may seem complex at first glance, but by following Sven Yrvind’s meticulous process, enthusiasts can achieve professional-level results. Remember that the journey of boatbuilding is as rewarding as reaching your destination; it tests one’s patience and dedication. For those seeking to embark on this adventure or simply gain more insight into marine craftsmanship, Sven’s wisdom is invaluable.Sven begins by explaining that working on flanges vertically and horizontally is significantly easier than doing so in a flat position. To simplify the process further, he divides the task into two or three steps as suggested by fellow expert “for for.” This approach not only makes it more manageable but also allows for greater precision in crafting each component.Step 2: Applying Glue and Securing
Sven proceeds to apply glue along one edge of the flange, ensuring a secure bond when clamped into place. He emphasizes that this stage is crucial for maintaining the structural integrity of the flange, which in turn safeguards the living area beneath the canvas when hatches are open.Step 3: Allowing Time to Dry
After securely attaching the first portion of the flange, Sven allows ample time for it to dry before moving forward with additional steps. This patience and precision are key aspects of his successful boatbuilding methods.Step 4: Finishing Touches
Once the flange is fully dried, Sven removes the clamps carefully, ensuring no damage occurs during this process. He then moves on to attaching four more pieces onto these main frames, completing two pairs of flanges for the bulkhead hatches.The Final Touches
While two flanges form the primary support structure around the hatches, Sven mentions there are two additional pieces required at each end to ensure comprehensive protection. This attention to detail highlights his commitment to producing a durable and reliable design. “Sailing is about finding your path, whether it’s across an ocean or within yourself.” – Sven Yrvind In conclusion, making flanges around bulkhead hatches may seem complex at first glance, but by following Sven Yrvind’s meticulous process, enthusiasts can achieve professional-level results. Remember that the journey of boatbuilding is as rewarding as reaching your destination; it tests one’s patience and dedication. For those seeking to embark on this adventure or simply gain more insight into marine craftsmanship, Sven’s wisdom is invaluable.Sven Yrvind, a renowned yacht designer and sailor, shares valuable insights on creating flanges around bulkhead hatches for canvas protection in this enlightening video. By following his expert guidance, boat enthusiasts can ensure their living areas remain secure while allowing unhindered access through the hatches.Step 1: Starting with the Flange
Sven begins by explaining that working on flanges vertically and horizontally is significantly easier than doing so in a flat position. To simplify the process further, he divides the task into two or three steps as suggested by fellow expert “for for.” This approach not only makes it more manageable but also allows for greater precision in crafting each component.Step 2: Applying Glue and Securing
Sven proceeds to apply glue along one edge of the flange, ensuring a secure bond when clamped into place. He emphasizes that this stage is crucial for maintaining the structural integrity of the flange, which in turn safeguards the living area beneath the canvas when hatches are open.Step 3: Allowing Time to Dry
After securely attaching the first portion of the flange, Sven allows ample time for it to dry before moving forward with additional steps. This patience and precision are key aspects of his successful boatbuilding methods.Step 4: Finishing Touches
Once the flange is fully dried, Sven removes the clamps carefully, ensuring no damage occurs during this process. He then moves on to attaching four more pieces onto these main frames, completing two pairs of flanges for the bulkhead hatches.The Final Touches
While two flanges form the primary support structure around the hatches, Sven mentions there are two additional pieces required at each end to ensure comprehensive protection. This attention to detail highlights his commitment to producing a durable and reliable design. “Sailing is about finding your path, whether it’s across an ocean or within yourself.” – Sven Yrvind In conclusion, making flanges around bulkhead hatches may seem complex at first glance, but by following Sven Yrvind’s meticulous process, enthusiasts can achieve professional-level results. Remember that the journey of boatbuilding is as rewarding as reaching your destination; it tests one’s patience and dedication. For those seeking to embark on this adventure or simply gain more insight into marine craftsmanship, Sven’s wisdom is invaluable.Making Flanges Around Bulkhead Hatches for Canvas
Sven Yrvind, a renowned yacht designer and sailor, shares valuable insights on creating flanges around bulkhead hatches for canvas protection in this enlightening video. By following his expert guidance, boat enthusiasts can ensure their living areas remain secure while allowing unhindered access through the hatches.Step 1: Starting with the Flange
Sven begins by explaining that working on flanges vertically and horizontally is significantly easier than doing so in a flat position. To simplify the process further, he divides the task into two or three steps as suggested by fellow expert “for for.” This approach not only makes it more manageable but also allows for greater precision in crafting each component.Step 2: Applying Glue and Securing
Sven proceeds to apply glue along one edge of the flange, ensuring a secure bond when clamped into place. He emphasizes that this stage is crucial for maintaining the structural integrity of the flange, which in turn safeguards the living area beneath the canvas when hatches are open.Step 3: Allowing Time to Dry
After securely attaching the first portion of the flange, Sven allows ample time for it to dry before moving forward with additional steps. This patience and precision are key aspects of his successful boatbuilding methods.Step 4: Finishing Touches
Once the flange is fully dried, Sven removes the clamps carefully, ensuring no damage occurs during this process. He then moves on to attaching four more pieces onto these main frames, completing two pairs of flanges for the bulkhead hatches.The Final Touches
While two flanges form the primary support structure around the hatches, Sven mentions there are two additional pieces required at each end to ensure comprehensive protection. This attention to detail highlights his commitment to producing a durable and reliable design. “Sailing is about finding your path, whether it’s across an ocean or within yourself.” – Sven Yrvind In conclusion, making flanges around bulkhead hatches may seem complex at first glance, but by following Sven Yrvind’s meticulous process, enthusiasts can achieve professional-level results. Remember that the journey of boatbuilding is as rewarding as reaching your destination; it tests one’s patience and dedication. For those seeking to embark on this adventure or simply gain more insight into marine craftsmanship, Sven’s wisdom is invaluable.Once the flange is fully dried, Sven removes the clamps carefully, ensuring no damage occurs during this process. He then moves on to attaching four more pieces onto these main frames, completing two pairs of flanges for the bulkhead hatches.The Final Touches
While two flanges form the primary support structure around the hatches, Sven mentions there are two additional pieces required at each end to ensure comprehensive protection. This attention to detail highlights his commitment to producing a durable and reliable design. “Sailing is about finding your path, whether it’s across an ocean or within yourself.” – Sven Yrvind In conclusion, making flanges around bulkhead hatches may seem complex at first glance, but by following Sven Yrvind’s meticulous process, enthusiasts can achieve professional-level results. Remember that the journey of boatbuilding is as rewarding as reaching your destination; it tests one’s patience and dedication. For those seeking to embark on this adventure or simply gain more insight into marine craftsmanship, Sven’s wisdom is invaluable.After securely attaching the first portion of the flange, Sven allows ample time for it to dry before moving forward with additional steps. This patience and precision are key aspects of his successful boatbuilding methods.Step 4: Finishing Touches
Once the flange is fully dried, Sven removes the clamps carefully, ensuring no damage occurs during this process. He then moves on to attaching four more pieces onto these main frames, completing two pairs of flanges for the bulkhead hatches.The Final Touches
While two flanges form the primary support structure around the hatches, Sven mentions there are two additional pieces required at each end to ensure comprehensive protection. This attention to detail highlights his commitment to producing a durable and reliable design. “Sailing is about finding your path, whether it’s across an ocean or within yourself.” – Sven Yrvind In conclusion, making flanges around bulkhead hatches may seem complex at first glance, but by following Sven Yrvind’s meticulous process, enthusiasts can achieve professional-level results. Remember that the journey of boatbuilding is as rewarding as reaching your destination; it tests one’s patience and dedication. For those seeking to embark on this adventure or simply gain more insight into marine craftsmanship, Sven’s wisdom is invaluable.Sven proceeds to apply glue along one edge of the flange, ensuring a secure bond when clamped into place. He emphasizes that this stage is crucial for maintaining the structural integrity of the flange, which in turn safeguards the living area beneath the canvas when hatches are open.Step 3: Allowing Time to Dry
After securely attaching the first portion of the flange, Sven allows ample time for it to dry before moving forward with additional steps. This patience and precision are key aspects of his successful boatbuilding methods.Step 4: Finishing Touches
Once the flange is fully dried, Sven removes the clamps carefully, ensuring no damage occurs during this process. He then moves on to attaching four more pieces onto these main frames, completing two pairs of flanges for the bulkhead hatches.The Final Touches
While two flanges form the primary support structure around the hatches, Sven mentions there are two additional pieces required at each end to ensure comprehensive protection. This attention to detail highlights his commitment to producing a durable and reliable design. “Sailing is about finding your path, whether it’s across an ocean or within yourself.” – Sven Yrvind In conclusion, making flanges around bulkhead hatches may seem complex at first glance, but by following Sven Yrvind’s meticulous process, enthusiasts can achieve professional-level results. Remember that the journey of boatbuilding is as rewarding as reaching your destination; it tests one’s patience and dedication. For those seeking to embark on this adventure or simply gain more insight into marine craftsmanship, Sven’s wisdom is invaluable.Sven begins by explaining that working on flanges vertically and horizontally is significantly easier than doing so in a flat position. To simplify the process further, he divides the task into two or three steps as suggested by fellow expert “for for.” This approach not only makes it more manageable but also allows for greater precision in crafting each component.Step 2: Applying Glue and Securing
Sven proceeds to apply glue along one edge of the flange, ensuring a secure bond when clamped into place. He emphasizes that this stage is crucial for maintaining the structural integrity of the flange, which in turn safeguards the living area beneath the canvas when hatches are open.Step 3: Allowing Time to Dry
After securely attaching the first portion of the flange, Sven allows ample time for it to dry before moving forward with additional steps. This patience and precision are key aspects of his successful boatbuilding methods.Step 4: Finishing Touches
Once the flange is fully dried, Sven removes the clamps carefully, ensuring no damage occurs during this process. He then moves on to attaching four more pieces onto these main frames, completing two pairs of flanges for the bulkhead hatches.The Final Touches
While two flanges form the primary support structure around the hatches, Sven mentions there are two additional pieces required at each end to ensure comprehensive protection. This attention to detail highlights his commitment to producing a durable and reliable design. “Sailing is about finding your path, whether it’s across an ocean or within yourself.” – Sven Yrvind In conclusion, making flanges around bulkhead hatches may seem complex at first glance, but by following Sven Yrvind’s meticulous process, enthusiasts can achieve professional-level results. Remember that the journey of boatbuilding is as rewarding as reaching your destination; it tests one’s patience and dedication. For those seeking to embark on this adventure or simply gain more insight into marine craftsmanship, Sven’s wisdom is invaluable.Sven Yrvind, a renowned yacht designer and sailor, shares valuable insights on creating flanges around bulkhead hatches for canvas protection in this enlightening video. By following his expert guidance, boat enthusiasts can ensure their living areas remain secure while allowing unhindered access through the hatches.Step 1: Starting with the Flange
Sven begins by explaining that working on flanges vertically and horizontally is significantly easier than doing so in a flat position. To simplify the process further, he divides the task into two or three steps as suggested by fellow expert “for for.” This approach not only makes it more manageable but also allows for greater precision in crafting each component.Step 2: Applying Glue and Securing
Sven proceeds to apply glue along one edge of the flange, ensuring a secure bond when clamped into place. He emphasizes that this stage is crucial for maintaining the structural integrity of the flange, which in turn safeguards the living area beneath the canvas when hatches are open.Step 3: Allowing Time to Dry
After securely attaching the first portion of the flange, Sven allows ample time for it to dry before moving forward with additional steps. This patience and precision are key aspects of his successful boatbuilding methods.Step 4: Finishing Touches
Once the flange is fully dried, Sven removes the clamps carefully, ensuring no damage occurs during this process. He then moves on to attaching four more pieces onto these main frames, completing two pairs of flanges for the bulkhead hatches.The Final Touches
While two flanges form the primary support structure around the hatches, Sven mentions there are two additional pieces required at each end to ensure comprehensive protection. This attention to detail highlights his commitment to producing a durable and reliable design. “Sailing is about finding your path, whether it’s across an ocean or within yourself.” – Sven Yrvind In conclusion, making flanges around bulkhead hatches may seem complex at first glance, but by following Sven Yrvind’s meticulous process, enthusiasts can achieve professional-level results. Remember that the journey of boatbuilding is as rewarding as reaching your destination; it tests one’s patience and dedication. For those seeking to embark on this adventure or simply gain more insight into marine craftsmanship, Sven’s wisdom is invaluable.Making Flanges Around Bulkhead Hatches for Canvas
Sven Yrvind, a renowned yacht designer and sailor, shares valuable insights on creating flanges around bulkhead hatches for canvas protection in this enlightening video. By following his expert guidance, boat enthusiasts can ensure their living areas remain secure while allowing unhindered access through the hatches.Step 1: Starting with the Flange
Sven begins by explaining that working on flanges vertically and horizontally is significantly easier than doing so in a flat position. To simplify the process further, he divides the task into two or three steps as suggested by fellow expert “for for.” This approach not only makes it more manageable but also allows for greater precision in crafting each component.Step 2: Applying Glue and Securing
Sven proceeds to apply glue along one edge of the flange, ensuring a secure bond when clamped into place. He emphasizes that this stage is crucial for maintaining the structural integrity of the flange, which in turn safeguards the living area beneath the canvas when hatches are open.Step 3: Allowing Time to Dry
After securely attaching the first portion of the flange, Sven allows ample time for it to dry before moving forward with additional steps. This patience and precision are key aspects of his successful boatbuilding methods.Step 4: Finishing Touches
Once the flange is fully dried, Sven removes the clamps carefully, ensuring no damage occurs during this process. He then moves on to attaching four more pieces onto these main frames, completing two pairs of flanges for the bulkhead hatches.The Final Touches
While two flanges form the primary support structure around the hatches, Sven mentions there are two additional pieces required at each end to ensure comprehensive protection. This attention to detail highlights his commitment to producing a durable and reliable design. “Sailing is about finding your path, whether it’s across an ocean or within yourself.” – Sven Yrvind In conclusion, making flanges around bulkhead hatches may seem complex at first glance, but by following Sven Yrvind’s meticulous process, enthusiasts can achieve professional-level results. Remember that the journey of boatbuilding is as rewarding as reaching your destination; it tests one’s patience and dedication. For those seeking to embark on this adventure or simply gain more insight into marine craftsmanship, Sven’s wisdom is invaluable.Sven begins by explaining that working on flanges vertically and horizontally is significantly easier than doing so in a flat position. To simplify the process further, he divides the task into two or three steps as suggested by fellow expert “for for.” This approach not only makes it more manageable but also allows for greater precision in crafting each component.Step 2: Applying Glue and Securing
Sven proceeds to apply glue along one edge of the flange, ensuring a secure bond when clamped into place. He emphasizes that this stage is crucial for maintaining the structural integrity of the flange, which in turn safeguards the living area beneath the canvas when hatches are open.Step 3: Allowing Time to Dry
After securely attaching the first portion of the flange, Sven allows ample time for it to dry before moving forward with additional steps. This patience and precision are key aspects of his successful boatbuilding methods.Step 4: Finishing Touches
Once the flange is fully dried, Sven removes the clamps carefully, ensuring no damage occurs during this process. He then moves on to attaching four more pieces onto these main frames, completing two pairs of flanges for the bulkhead hatches.The Final Touches
While two flanges form the primary support structure around the hatches, Sven mentions there are two additional pieces required at each end to ensure comprehensive protection. This attention to detail highlights his commitment to producing a durable and reliable design. “Sailing is about finding your path, whether it’s across an ocean or within yourself.” – Sven Yrvind In conclusion, making flanges around bulkhead hatches may seem complex at first glance, but by following Sven Yrvind’s meticulous process, enthusiasts can achieve professional-level results. Remember that the journey of boatbuilding is as rewarding as reaching your destination; it tests one’s patience and dedication. For those seeking to embark on this adventure or simply gain more insight into marine craftsmanship, Sven’s wisdom is invaluable.Sven begins by explaining that working on flanges vertically and horizontally is significantly easier than doing so in a flat position. To simplify the process further, he divides the task into two or three steps as suggested by fellow expert “for for.” This approach not only makes it more manageable but also allows for greater precision in crafting each component.Step 2: Applying Glue and Securing
Sven proceeds to apply glue along one edge of the flange, ensuring a secure bond when clamped into place. He emphasizes that this stage is crucial for maintaining the structural integrity of the flange, which in turn safeguards the living area beneath the canvas when hatches are open.Step 3: Allowing Time to Dry
After securely attaching the first portion of the flange, Sven allows ample time for it to dry before moving forward with additional steps. This patience and precision are key aspects of his successful boatbuilding methods.Step 4: Finishing Touches
Once the flange is fully dried, Sven removes the clamps carefully, ensuring no damage occurs during this process. He then moves on to attaching four more pieces onto these main frames, completing two pairs of flanges for the bulkhead hatches.The Final Touches
While two flanges form the primary support structure around the hatches, Sven mentions there are two additional pieces required at each end to ensure comprehensive protection. This attention to detail highlights his commitment to producing a durable and reliable design. “Sailing is about finding your path, whether it’s across an ocean or within yourself.” – Sven Yrvind In conclusion, making flanges around bulkhead hatches may seem complex at first glance, but by following Sven Yrvind’s meticulous process, enthusiasts can achieve professional-level results. Remember that the journey of boatbuilding is as rewarding as reaching your destination; it tests one’s patience and dedication. For those seeking to embark on this adventure or simply gain more insight into marine craftsmanship, Sven’s wisdom is invaluable.Sven Yrvind, a renowned yacht designer and sailor, shares valuable insights on creating flanges around bulkhead hatches for canvas protection in this enlightening video. By following his expert guidance, boat enthusiasts can ensure their living areas remain secure while allowing unhindered access through the hatches.Step 1: Starting with the Flange
Sven begins by explaining that working on flanges vertically and horizontally is significantly easier than doing so in a flat position. To simplify the process further, he divides the task into two or three steps as suggested by fellow expert “for for.” This approach not only makes it more manageable but also allows for greater precision in crafting each component.Step 2: Applying Glue and Securing
Sven proceeds to apply glue along one edge of the flange, ensuring a secure bond when clamped into place. He emphasizes that this stage is crucial for maintaining the structural integrity of the flange, which in turn safeguards the living area beneath the canvas when hatches are open.Step 3: Allowing Time to Dry
After securely attaching the first portion of the flange, Sven allows ample time for it to dry before moving forward with additional steps. This patience and precision are key aspects of his successful boatbuilding methods.Step 4: Finishing Touches
Once the flange is fully dried, Sven removes the clamps carefully, ensuring no damage occurs during this process. He then moves on to attaching four more pieces onto these main frames, completing two pairs of flanges for the bulkhead hatches.The Final Touches
While two flanges form the primary support structure around the hatches, Sven mentions there are two additional pieces required at each end to ensure comprehensive protection. This attention to detail highlights his commitment to producing a durable and reliable design. “Sailing is about finding your path, whether it’s across an ocean or within yourself.” – Sven Yrvind In conclusion, making flanges around bulkhead hatches may seem complex at first glance, but by following Sven Yrvind’s meticulous process, enthusiasts can achieve professional-level results. Remember that the journey of boatbuilding is as rewarding as reaching your destination; it tests one’s patience and dedication. For those seeking to embark on this adventure or simply gain more insight into marine craftsmanship, Sven’s wisdom is invaluable.Making Flanges Around Bulkhead Hatches for Canvas
Sven Yrvind, a renowned yacht designer and sailor, shares valuable insights on creating flanges around bulkhead hatches for canvas protection in this enlightening video. By following his expert guidance, boat enthusiasts can ensure their living areas remain secure while allowing unhindered access through the hatches.Step 1: Starting with the Flange
Sven begins by explaining that working on flanges vertically and horizontally is significantly easier than doing so in a flat position. To simplify the process further, he divides the task into two or three steps as suggested by fellow expert “for for.” This approach not only makes it more manageable but also allows for greater precision in crafting each component.Step 2: Applying Glue and Securing
Sven proceeds to apply glue along one edge of the flange, ensuring a secure bond when clamped into place. He emphasizes that this stage is crucial for maintaining the structural integrity of the flange, which in turn safeguards the living area beneath the canvas when hatches are open.Step 3: Allowing Time to Dry
After securely attaching the first portion of the flange, Sven allows ample time for it to dry before moving forward with additional steps. This patience and precision are key aspects of his successful boatbuilding methods.Step 4: Finishing Touches
Once the flange is fully dried, Sven removes the clamps carefully, ensuring no damage occurs during this process. He then moves on to attaching four more pieces onto these main frames, completing two pairs of flanges for the bulkhead hatches.The Final Touches
While two flanges form the primary support structure around the hatches, Sven mentions there are two additional pieces required at each end to ensure comprehensive protection. This attention to detail highlights his commitment to producing a durable and reliable design. “Sailing is about finding your path, whether it’s across an ocean or within yourself.” – Sven Yrvind In conclusion, making flanges around bulkhead hatches may seem complex at first glance, but by following Sven Yrvind’s meticulous process, enthusiasts can achieve professional-level results. Remember that the journey of boatbuilding is as rewarding as reaching your destination; it tests one’s patience and dedication. For those seeking to embark on this adventure or simply gain more insight into marine craftsmanship, Sven’s wisdom is invaluable.Once the flange is fully dried, Sven removes the clamps carefully, ensuring no damage occurs during this process. He then moves on to attaching four more pieces onto these main frames, completing two pairs of flanges for the bulkhead hatches.The Final Touches
While two flanges form the primary support structure around the hatches, Sven mentions there are two additional pieces required at each end to ensure comprehensive protection. This attention to detail highlights his commitment to producing a durable and reliable design. “Sailing is about finding your path, whether it’s across an ocean or within yourself.” – Sven Yrvind In conclusion, making flanges around bulkhead hatches may seem complex at first glance, but by following Sven Yrvind’s meticulous process, enthusiasts can achieve professional-level results. Remember that the journey of boatbuilding is as rewarding as reaching your destination; it tests one’s patience and dedication. For those seeking to embark on this adventure or simply gain more insight into marine craftsmanship, Sven’s wisdom is invaluable.Sven begins by explaining that working on flanges vertically and horizontally is significantly easier than doing so in a flat position. To simplify the process further, he divides the task into two or three steps as suggested by fellow expert “for for.” This approach not only makes it more manageable but also allows for greater precision in crafting each component.Step 2: Applying Glue and Securing
Sven proceeds to apply glue along one edge of the flange, ensuring a secure bond when clamped into place. He emphasizes that this stage is crucial for maintaining the structural integrity of the flange, which in turn safeguards the living area beneath the canvas when hatches are open.Step 3: Allowing Time to Dry
After securely attaching the first portion of the flange, Sven allows ample time for it to dry before moving forward with additional steps. This patience and precision are key aspects of his successful boatbuilding methods.Step 4: Finishing Touches
Once the flange is fully dried, Sven removes the clamps carefully, ensuring no damage occurs during this process. He then moves on to attaching four more pieces onto these main frames, completing two pairs of flanges for the bulkhead hatches.The Final Touches
While two flanges form the primary support structure around the hatches, Sven mentions there are two additional pieces required at each end to ensure comprehensive protection. This attention to detail highlights his commitment to producing a durable and reliable design. “Sailing is about finding your path, whether it’s across an ocean or within yourself.” – Sven Yrvind In conclusion, making flanges around bulkhead hatches may seem complex at first glance, but by following Sven Yrvind’s meticulous process, enthusiasts can achieve professional-level results. Remember that the journey of boatbuilding is as rewarding as reaching your destination; it tests one’s patience and dedication. For those seeking to embark on this adventure or simply gain more insight into marine craftsmanship, Sven’s wisdom is invaluable.Sven Yrvind, a renowned yacht designer and sailor, shares valuable insights on creating flanges around bulkhead hatches for canvas protection in this enlightening video. By following his expert guidance, boat enthusiasts can ensure their living areas remain secure while allowing unhindered access through the hatches.Step 1: Starting with the Flange
Sven begins by explaining that working on flanges vertically and horizontally is significantly easier than doing so in a flat position. To simplify the process further, he divides the task into two or three steps as suggested by fellow expert “for for.” This approach not only makes it more manageable but also allows for greater precision in crafting each component.Step 2: Applying Glue and Securing
Sven proceeds to apply glue along one edge of the flange, ensuring a secure bond when clamped into place. He emphasizes that this stage is crucial for maintaining the structural integrity of the flange, which in turn safeguards the living area beneath the canvas when hatches are open.Step 3: Allowing Time to Dry
After securely attaching the first portion of the flange, Sven allows ample time for it to dry before moving forward with additional steps. This patience and precision are key aspects of his successful boatbuilding methods.Step 4: Finishing Touches
Once the flange is fully dried, Sven removes the clamps carefully, ensuring no damage occurs during this process. He then moves on to attaching four more pieces onto these main frames, completing two pairs of flanges for the bulkhead hatches.The Final Touches
While two flanges form the primary support structure around the hatches, Sven mentions there are two additional pieces required at each end to ensure comprehensive protection. This attention to detail highlights his commitment to producing a durable and reliable design. “Sailing is about finding your path, whether it’s across an ocean or within yourself.” – Sven Yrvind In conclusion, making flanges around bulkhead hatches may seem complex at first glance, but by following Sven Yrvind’s meticulous process, enthusiasts can achieve professional-level results. Remember that the journey of boatbuilding is as rewarding as reaching your destination; it tests one’s patience and dedication. For those seeking to embark on this adventure or simply gain more insight into marine craftsmanship, Sven’s wisdom is invaluable.Making Flanges Around Bulkhead Hatches for Canvas
Sven Yrvind, a renowned yacht designer and sailor, shares valuable insights on creating flanges around bulkhead hatches for canvas protection in this enlightening video. By following his expert guidance, boat enthusiasts can ensure their living areas remain secure while allowing unhindered access through the hatches.Step 1: Starting with the Flange
Sven begins by explaining that working on flanges vertically and horizontally is significantly easier than doing so in a flat position. To simplify the process further, he divides the task into two or three steps as suggested by fellow expert “for for.” This approach not only makes it more manageable but also allows for greater precision in crafting each component.Step 2: Applying Glue and Securing
Sven proceeds to apply glue along one edge of the flange, ensuring a secure bond when clamped into place. He emphasizes that this stage is crucial for maintaining the structural integrity of the flange, which in turn safeguards the living area beneath the canvas when hatches are open.Step 3: Allowing Time to Dry
After securely attaching the first portion of the flange, Sven allows ample time for it to dry before moving forward with additional steps. This patience and precision are key aspects of his successful boatbuilding methods.Step 4: Finishing Touches
Once the flange is fully dried, Sven removes the clamps carefully, ensuring no damage occurs during this process. He then moves on to attaching four more pieces onto these main frames, completing two pairs of flanges for the bulkhead hatches.The Final Touches
While two flanges form the primary support structure around the hatches, Sven mentions there are two additional pieces required at each end to ensure comprehensive protection. This attention to detail highlights his commitment to producing a durable and reliable design. “Sailing is about finding your path, whether it’s across an ocean or within yourself.” – Sven Yrvind In conclusion, making flanges around bulkhead hatches may seem complex at first glance, but by following Sven Yrvind’s meticulous process, enthusiasts can achieve professional-level results. Remember that the journey of boatbuilding is as rewarding as reaching your destination; it tests one’s patience and dedication. For those seeking to embark on this adventure or simply gain more insight into marine craftsmanship, Sven’s wisdom is invaluable.After securely attaching the first portion of the flange, Sven allows ample time for it to dry before moving forward with additional steps. This patience and precision are key aspects of his successful boatbuilding methods.Step 4: Finishing Touches
Once the flange is fully dried, Sven removes the clamps carefully, ensuring no damage occurs during this process. He then moves on to attaching four more pieces onto these main frames, completing two pairs of flanges for the bulkhead hatches.The Final Touches
While two flanges form the primary support structure around the hatches, Sven mentions there are two additional pieces required at each end to ensure comprehensive protection. This attention to detail highlights his commitment to producing a durable and reliable design. “Sailing is about finding your path, whether it’s across an ocean or within yourself.” – Sven Yrvind In conclusion, making flanges around bulkhead hatches may seem complex at first glance, but by following Sven Yrvind’s meticulous process, enthusiasts can achieve professional-level results. Remember that the journey of boatbuilding is as rewarding as reaching your destination; it tests one’s patience and dedication. For those seeking to embark on this adventure or simply gain more insight into marine craftsmanship, Sven’s wisdom is invaluable.Sven begins by explaining that working on flanges vertically and horizontally is significantly easier than doing so in a flat position. To simplify the process further, he divides the task into two or three steps as suggested by fellow expert “for for.” This approach not only makes it more manageable but also allows for greater precision in crafting each component.Step 2: Applying Glue and Securing
Sven proceeds to apply glue along one edge of the flange, ensuring a secure bond when clamped into place. He emphasizes that this stage is crucial for maintaining the structural integrity of the flange, which in turn safeguards the living area beneath the canvas when hatches are open.Step 3: Allowing Time to Dry
After securely attaching the first portion of the flange, Sven allows ample time for it to dry before moving forward with additional steps. This patience and precision are key aspects of his successful boatbuilding methods.Step 4: Finishing Touches
Once the flange is fully dried, Sven removes the clamps carefully, ensuring no damage occurs during this process. He then moves on to attaching four more pieces onto these main frames, completing two pairs of flanges for the bulkhead hatches.The Final Touches
While two flanges form the primary support structure around the hatches, Sven mentions there are two additional pieces required at each end to ensure comprehensive protection. This attention to detail highlights his commitment to producing a durable and reliable design. “Sailing is about finding your path, whether it’s across an ocean or within yourself.” – Sven Yrvind In conclusion, making flanges around bulkhead hatches may seem complex at first glance, but by following Sven Yrvind’s meticulous process, enthusiasts can achieve professional-level results. Remember that the journey of boatbuilding is as rewarding as reaching your destination; it tests one’s patience and dedication. For those seeking to embark on this adventure or simply gain more insight into marine craftsmanship, Sven’s wisdom is invaluable.Sven Yrvind, a renowned yacht designer and sailor, shares valuable insights on creating flanges around bulkhead hatches for canvas protection in this enlightening video. By following his expert guidance, boat enthusiasts can ensure their living areas remain secure while allowing unhindered access through the hatches.Step 1: Starting with the Flange
Sven begins by explaining that working on flanges vertically and horizontally is significantly easier than doing so in a flat position. To simplify the process further, he divides the task into two or three steps as suggested by fellow expert “for for.” This approach not only makes it more manageable but also allows for greater precision in crafting each component.Step 2: Applying Glue and Securing
Sven proceeds to apply glue along one edge of the flange, ensuring a secure bond when clamped into place. He emphasizes that this stage is crucial for maintaining the structural integrity of the flange, which in turn safeguards the living area beneath the canvas when hatches are open.Step 3: Allowing Time to Dry
After securely attaching the first portion of the flange, Sven allows ample time for it to dry before moving forward with additional steps. This patience and precision are key aspects of his successful boatbuilding methods.Step 4: Finishing Touches
Once the flange is fully dried, Sven removes the clamps carefully, ensuring no damage occurs during this process. He then moves on to attaching four more pieces onto these main frames, completing two pairs of flanges for the bulkhead hatches.The Final Touches
While two flanges form the primary support structure around the hatches, Sven mentions there are two additional pieces required at each end to ensure comprehensive protection. This attention to detail highlights his commitment to producing a durable and reliable design. “Sailing is about finding your path, whether it’s across an ocean or within yourself.” – Sven Yrvind In conclusion, making flanges around bulkhead hatches may seem complex at first glance, but by following Sven Yrvind’s meticulous process, enthusiasts can achieve professional-level results. Remember that the journey of boatbuilding is as rewarding as reaching your destination; it tests one’s patience and dedication. For those seeking to embark on this adventure or simply gain more insight into marine craftsmanship, Sven’s wisdom is invaluable.Making Flanges Around Bulkhead Hatches for Canvas
Sven Yrvind, a renowned yacht designer and sailor, shares valuable insights on creating flanges around bulkhead hatches for canvas protection in this enlightening video. By following his expert guidance, boat enthusiasts can ensure their living areas remain secure while allowing unhindered access through the hatches.Step 1: Starting with the Flange
Sven begins by explaining that working on flanges vertically and horizontally is significantly easier than doing so in a flat position. To simplify the process further, he divides the task into two or three steps as suggested by fellow expert “for for.” This approach not only makes it more manageable but also allows for greater precision in crafting each component.Step 2: Applying Glue and Securing
Sven proceeds to apply glue along one edge of the flange, ensuring a secure bond when clamped into place. He emphasizes that this stage is crucial for maintaining the structural integrity of the flange, which in turn safeguards the living area beneath the canvas when hatches are open.Step 3: Allowing Time to Dry
After securely attaching the first portion of the flange, Sven allows ample time for it to dry before moving forward with additional steps. This patience and precision are key aspects of his successful boatbuilding methods.Step 4: Finishing Touches
Once the flange is fully dried, Sven removes the clamps carefully, ensuring no damage occurs during this process. He then moves on to attaching four more pieces onto these main frames, completing two pairs of flanges for the bulkhead hatches.The Final Touches
While two flanges form the primary support structure around the hatches, Sven mentions there are two additional pieces required at each end to ensure comprehensive protection. This attention to detail highlights his commitment to producing a durable and reliable design. “Sailing is about finding your path, whether it’s across an ocean or within yourself.” – Sven Yrvind In conclusion, making flanges around bulkhead hatches may seem complex at first glance, but by following Sven Yrvind’s meticulous process, enthusiasts can achieve professional-level results. Remember that the journey of boatbuilding is as rewarding as reaching your destination; it tests one’s patience and dedication. For those seeking to embark on this adventure or simply gain more insight into marine craftsmanship, Sven’s wisdom is invaluable.Sven proceeds to apply glue along one edge of the flange, ensuring a secure bond when clamped into place. He emphasizes that this stage is crucial for maintaining the structural integrity of the flange, which in turn safeguards the living area beneath the canvas when hatches are open.Step 3: Allowing Time to Dry
After securely attaching the first portion of the flange, Sven allows ample time for it to dry before moving forward with additional steps. This patience and precision are key aspects of his successful boatbuilding methods.Step 4: Finishing Touches
Once the flange is fully dried, Sven removes the clamps carefully, ensuring no damage occurs during this process. He then moves on to attaching four more pieces onto these main frames, completing two pairs of flanges for the bulkhead hatches.The Final Touches
While two flanges form the primary support structure around the hatches, Sven mentions there are two additional pieces required at each end to ensure comprehensive protection. This attention to detail highlights his commitment to producing a durable and reliable design. “Sailing is about finding your path, whether it’s across an ocean or within yourself.” – Sven Yrvind In conclusion, making flanges around bulkhead hatches may seem complex at first glance, but by following Sven Yrvind’s meticulous process, enthusiasts can achieve professional-level results. Remember that the journey of boatbuilding is as rewarding as reaching your destination; it tests one’s patience and dedication. For those seeking to embark on this adventure or simply gain more insight into marine craftsmanship, Sven’s wisdom is invaluable.Sven begins by explaining that working on flanges vertically and horizontally is significantly easier than doing so in a flat position. To simplify the process further, he divides the task into two or three steps as suggested by fellow expert “for for.” This approach not only makes it more manageable but also allows for greater precision in crafting each component.Step 2: Applying Glue and Securing
Sven proceeds to apply glue along one edge of the flange, ensuring a secure bond when clamped into place. He emphasizes that this stage is crucial for maintaining the structural integrity of the flange, which in turn safeguards the living area beneath the canvas when hatches are open.Step 3: Allowing Time to Dry
After securely attaching the first portion of the flange, Sven allows ample time for it to dry before moving forward with additional steps. This patience and precision are key aspects of his successful boatbuilding methods.Step 4: Finishing Touches
Once the flange is fully dried, Sven removes the clamps carefully, ensuring no damage occurs during this process. He then moves on to attaching four more pieces onto these main frames, completing two pairs of flanges for the bulkhead hatches.The Final Touches
While two flanges form the primary support structure around the hatches, Sven mentions there are two additional pieces required at each end to ensure comprehensive protection. This attention to detail highlights his commitment to producing a durable and reliable design. “Sailing is about finding your path, whether it’s across an ocean or within yourself.” – Sven Yrvind In conclusion, making flanges around bulkhead hatches may seem complex at first glance, but by following Sven Yrvind’s meticulous process, enthusiasts can achieve professional-level results. Remember that the journey of boatbuilding is as rewarding as reaching your destination; it tests one’s patience and dedication. For those seeking to embark on this adventure or simply gain more insight into marine craftsmanship, Sven’s wisdom is invaluable.Sven Yrvind, a renowned yacht designer and sailor, shares valuable insights on creating flanges around bulkhead hatches for canvas protection in this enlightening video. By following his expert guidance, boat enthusiasts can ensure their living areas remain secure while allowing unhindered access through the hatches.Step 1: Starting with the Flange
Sven begins by explaining that working on flanges vertically and horizontally is significantly easier than doing so in a flat position. To simplify the process further, he divides the task into two or three steps as suggested by fellow expert “for for.” This approach not only makes it more manageable but also allows for greater precision in crafting each component.Step 2: Applying Glue and Securing
Sven proceeds to apply glue along one edge of the flange, ensuring a secure bond when clamped into place. He emphasizes that this stage is crucial for maintaining the structural integrity of the flange, which in turn safeguards the living area beneath the canvas when hatches are open.Step 3: Allowing Time to Dry
After securely attaching the first portion of the flange, Sven allows ample time for it to dry before moving forward with additional steps. This patience and precision are key aspects of his successful boatbuilding methods.Step 4: Finishing Touches
Once the flange is fully dried, Sven removes the clamps carefully, ensuring no damage occurs during this process. He then moves on to attaching four more pieces onto these main frames, completing two pairs of flanges for the bulkhead hatches.The Final Touches
While two flanges form the primary support structure around the hatches, Sven mentions there are two additional pieces required at each end to ensure comprehensive protection. This attention to detail highlights his commitment to producing a durable and reliable design. “Sailing is about finding your path, whether it’s across an ocean or within yourself.” – Sven Yrvind In conclusion, making flanges around bulkhead hatches may seem complex at first glance, but by following Sven Yrvind’s meticulous process, enthusiasts can achieve professional-level results. Remember that the journey of boatbuilding is as rewarding as reaching your destination; it tests one’s patience and dedication. For those seeking to embark on this adventure or simply gain more insight into marine craftsmanship, Sven’s wisdom is invaluable.Making Flanges Around Bulkhead Hatches for Canvas
Sven Yrvind, a renowned yacht designer and sailor, shares valuable insights on creating flanges around bulkhead hatches for canvas protection in this enlightening video. By following his expert guidance, boat enthusiasts can ensure their living areas remain secure while allowing unhindered access through the hatches.Step 1: Starting with the Flange
Sven begins by explaining that working on flanges vertically and horizontally is significantly easier than doing so in a flat position. To simplify the process further, he divides the task into two or three steps as suggested by fellow expert “for for.” This approach not only makes it more manageable but also allows for greater precision in crafting each component.Step 2: Applying Glue and Securing
Sven proceeds to apply glue along one edge of the flange, ensuring a secure bond when clamped into place. He emphasizes that this stage is crucial for maintaining the structural integrity of the flange, which in turn safeguards the living area beneath the canvas when hatches are open.Step 3: Allowing Time to Dry
After securely attaching the first portion of the flange, Sven allows ample time for it to dry before moving forward with additional steps. This patience and precision are key aspects of his successful boatbuilding methods.Step 4: Finishing Touches
Once the flange is fully dried, Sven removes the clamps carefully, ensuring no damage occurs during this process. He then moves on to attaching four more pieces onto these main frames, completing two pairs of flanges for the bulkhead hatches.The Final Touches
While two flanges form the primary support structure around the hatches, Sven mentions there are two additional pieces required at each end to ensure comprehensive protection. This attention to detail highlights his commitment to producing a durable and reliable design. “Sailing is about finding your path, whether it’s across an ocean or within yourself.” – Sven Yrvind In conclusion, making flanges around bulkhead hatches may seem complex at first glance, but by following Sven Yrvind’s meticulous process, enthusiasts can achieve professional-level results. Remember that the journey of boatbuilding is as rewarding as reaching your destination; it tests one’s patience and dedication. For those seeking to embark on this adventure or simply gain more insight into marine craftsmanship, Sven’s wisdom is invaluable.Once the flange is fully dried, Sven removes the clamps carefully, ensuring no damage occurs during this process. He then moves on to attaching four more pieces onto these main frames, completing two pairs of flanges for the bulkhead hatches.The Final Touches
While two flanges form the primary support structure around the hatches, Sven mentions there are two additional pieces required at each end to ensure comprehensive protection. This attention to detail highlights his commitment to producing a durable and reliable design. “Sailing is about finding your path, whether it’s across an ocean or within yourself.” – Sven Yrvind In conclusion, making flanges around bulkhead hatches may seem complex at first glance, but by following Sven Yrvind’s meticulous process, enthusiasts can achieve professional-level results. Remember that the journey of boatbuilding is as rewarding as reaching your destination; it tests one’s patience and dedication. For those seeking to embark on this adventure or simply gain more insight into marine craftsmanship, Sven’s wisdom is invaluable.Sven proceeds to apply glue along one edge of the flange, ensuring a secure bond when clamped into place. He emphasizes that this stage is crucial for maintaining the structural integrity of the flange, which in turn safeguards the living area beneath the canvas when hatches are open.Step 3: Allowing Time to Dry
After securely attaching the first portion of the flange, Sven allows ample time for it to dry before moving forward with additional steps. This patience and precision are key aspects of his successful boatbuilding methods.Step 4: Finishing Touches
Once the flange is fully dried, Sven removes the clamps carefully, ensuring no damage occurs during this process. He then moves on to attaching four more pieces onto these main frames, completing two pairs of flanges for the bulkhead hatches.The Final Touches
While two flanges form the primary support structure around the hatches, Sven mentions there are two additional pieces required at each end to ensure comprehensive protection. This attention to detail highlights his commitment to producing a durable and reliable design. “Sailing is about finding your path, whether it’s across an ocean or within yourself.” – Sven Yrvind In conclusion, making flanges around bulkhead hatches may seem complex at first glance, but by following Sven Yrvind’s meticulous process, enthusiasts can achieve professional-level results. Remember that the journey of boatbuilding is as rewarding as reaching your destination; it tests one’s patience and dedication. For those seeking to embark on this adventure or simply gain more insight into marine craftsmanship, Sven’s wisdom is invaluable.Sven begins by explaining that working on flanges vertically and horizontally is significantly easier than doing so in a flat position. To simplify the process further, he divides the task into two or three steps as suggested by fellow expert “for for.” This approach not only makes it more manageable but also allows for greater precision in crafting each component.Step 2: Applying Glue and Securing
Sven proceeds to apply glue along one edge of the flange, ensuring a secure bond when clamped into place. He emphasizes that this stage is crucial for maintaining the structural integrity of the flange, which in turn safeguards the living area beneath the canvas when hatches are open.Step 3: Allowing Time to Dry
After securely attaching the first portion of the flange, Sven allows ample time for it to dry before moving forward with additional steps. This patience and precision are key aspects of his successful boatbuilding methods.Step 4: Finishing Touches
Once the flange is fully dried, Sven removes the clamps carefully, ensuring no damage occurs during this process. He then moves on to attaching four more pieces onto these main frames, completing two pairs of flanges for the bulkhead hatches.The Final Touches
While two flanges form the primary support structure around the hatches, Sven mentions there are two additional pieces required at each end to ensure comprehensive protection. This attention to detail highlights his commitment to producing a durable and reliable design. “Sailing is about finding your path, whether it’s across an ocean or within yourself.” – Sven Yrvind In conclusion, making flanges around bulkhead hatches may seem complex at first glance, but by following Sven Yrvind’s meticulous process, enthusiasts can achieve professional-level results. Remember that the journey of boatbuilding is as rewarding as reaching your destination; it tests one’s patience and dedication. For those seeking to embark on this adventure or simply gain more insight into marine craftsmanship, Sven’s wisdom is invaluable.Sven Yrvind, a renowned yacht designer and sailor, shares valuable insights on creating flanges around bulkhead hatches for canvas protection in this enlightening video. By following his expert guidance, boat enthusiasts can ensure their living areas remain secure while allowing unhindered access through the hatches.Step 1: Starting with the Flange
Sven begins by explaining that working on flanges vertically and horizontally is significantly easier than doing so in a flat position. To simplify the process further, he divides the task into two or three steps as suggested by fellow expert “for for.” This approach not only makes it more manageable but also allows for greater precision in crafting each component.Step 2: Applying Glue and Securing
Sven proceeds to apply glue along one edge of the flange, ensuring a secure bond when clamped into place. He emphasizes that this stage is crucial for maintaining the structural integrity of the flange, which in turn safeguards the living area beneath the canvas when hatches are open.Step 3: Allowing Time to Dry
After securely attaching the first portion of the flange, Sven allows ample time for it to dry before moving forward with additional steps. This patience and precision are key aspects of his successful boatbuilding methods.Step 4: Finishing Touches
Once the flange is fully dried, Sven removes the clamps carefully, ensuring no damage occurs during this process. He then moves on to attaching four more pieces onto these main frames, completing two pairs of flanges for the bulkhead hatches.The Final Touches
While two flanges form the primary support structure around the hatches, Sven mentions there are two additional pieces required at each end to ensure comprehensive protection. This attention to detail highlights his commitment to producing a durable and reliable design. “Sailing is about finding your path, whether it’s across an ocean or within yourself.” – Sven Yrvind In conclusion, making flanges around bulkhead hatches may seem complex at first glance, but by following Sven Yrvind’s meticulous process, enthusiasts can achieve professional-level results. Remember that the journey of boatbuilding is as rewarding as reaching your destination; it tests one’s patience and dedication. For those seeking to embark on this adventure or simply gain more insight into marine craftsmanship, Sven’s wisdom is invaluable.Making Flanges Around Bulkhead Hatches for Canvas
Sven Yrvind, a renowned yacht designer and sailor, shares valuable insights on creating flanges around bulkhead hatches for canvas protection in this enlightening video. By following his expert guidance, boat enthusiasts can ensure their living areas remain secure while allowing unhindered access through the hatches.Step 1: Starting with the Flange
Sven begins by explaining that working on flanges vertically and horizontally is significantly easier than doing so in a flat position. To simplify the process further, he divides the task into two or three steps as suggested by fellow expert “for for.” This approach not only makes it more manageable but also allows for greater precision in crafting each component.Step 2: Applying Glue and Securing
Sven proceeds to apply glue along one edge of the flange, ensuring a secure bond when clamped into place. He emphasizes that this stage is crucial for maintaining the structural integrity of the flange, which in turn safeguards the living area beneath the canvas when hatches are open.Step 3: Allowing Time to Dry
After securely attaching the first portion of the flange, Sven allows ample time for it to dry before moving forward with additional steps. This patience and precision are key aspects of his successful boatbuilding methods.Step 4: Finishing Touches
Once the flange is fully dried, Sven removes the clamps carefully, ensuring no damage occurs during this process. He then moves on to attaching four more pieces onto these main frames, completing two pairs of flanges for the bulkhead hatches.The Final Touches
While two flanges form the primary support structure around the hatches, Sven mentions there are two additional pieces required at each end to ensure comprehensive protection. This attention to detail highlights his commitment to producing a durable and reliable design. “Sailing is about finding your path, whether it’s across an ocean or within yourself.” – Sven Yrvind In conclusion, making flanges around bulkhead hatches may seem complex at first glance, but by following Sven Yrvind’s meticulous process, enthusiasts can achieve professional-level results. Remember that the journey of boatbuilding is as rewarding as reaching your destination; it tests one’s patience and dedication. For those seeking to embark on this adventure or simply gain more insight into marine craftsmanship, Sven’s wisdom is invaluable.After securely attaching the first portion of the flange, Sven allows ample time for it to dry before moving forward with additional steps. This patience and precision are key aspects of his successful boatbuilding methods.Step 4: Finishing Touches
Once the flange is fully dried, Sven removes the clamps carefully, ensuring no damage occurs during this process. He then moves on to attaching four more pieces onto these main frames, completing two pairs of flanges for the bulkhead hatches.The Final Touches
While two flanges form the primary support structure around the hatches, Sven mentions there are two additional pieces required at each end to ensure comprehensive protection. This attention to detail highlights his commitment to producing a durable and reliable design. “Sailing is about finding your path, whether it’s across an ocean or within yourself.” – Sven Yrvind In conclusion, making flanges around bulkhead hatches may seem complex at first glance, but by following Sven Yrvind’s meticulous process, enthusiasts can achieve professional-level results. Remember that the journey of boatbuilding is as rewarding as reaching your destination; it tests one’s patience and dedication. For those seeking to embark on this adventure or simply gain more insight into marine craftsmanship, Sven’s wisdom is invaluable.Sven proceeds to apply glue along one edge of the flange, ensuring a secure bond when clamped into place. He emphasizes that this stage is crucial for maintaining the structural integrity of the flange, which in turn safeguards the living area beneath the canvas when hatches are open.Step 3: Allowing Time to Dry
After securely attaching the first portion of the flange, Sven allows ample time for it to dry before moving forward with additional steps. This patience and precision are key aspects of his successful boatbuilding methods.Step 4: Finishing Touches
Once the flange is fully dried, Sven removes the clamps carefully, ensuring no damage occurs during this process. He then moves on to attaching four more pieces onto these main frames, completing two pairs of flanges for the bulkhead hatches.The Final Touches
While two flanges form the primary support structure around the hatches, Sven mentions there are two additional pieces required at each end to ensure comprehensive protection. This attention to detail highlights his commitment to producing a durable and reliable design. “Sailing is about finding your path, whether it’s across an ocean or within yourself.” – Sven Yrvind In conclusion, making flanges around bulkhead hatches may seem complex at first glance, but by following Sven Yrvind’s meticulous process, enthusiasts can achieve professional-level results. Remember that the journey of boatbuilding is as rewarding as reaching your destination; it tests one’s patience and dedication. For those seeking to embark on this adventure or simply gain more insight into marine craftsmanship, Sven’s wisdom is invaluable.Sven begins by explaining that working on flanges vertically and horizontally is significantly easier than doing so in a flat position. To simplify the process further, he divides the task into two or three steps as suggested by fellow expert “for for.” This approach not only makes it more manageable but also allows for greater precision in crafting each component.Step 2: Applying Glue and Securing
Sven proceeds to apply glue along one edge of the flange, ensuring a secure bond when clamped into place. He emphasizes that this stage is crucial for maintaining the structural integrity of the flange, which in turn safeguards the living area beneath the canvas when hatches are open.Step 3: Allowing Time to Dry
After securely attaching the first portion of the flange, Sven allows ample time for it to dry before moving forward with additional steps. This patience and precision are key aspects of his successful boatbuilding methods.Step 4: Finishing Touches
Once the flange is fully dried, Sven removes the clamps carefully, ensuring no damage occurs during this process. He then moves on to attaching four more pieces onto these main frames, completing two pairs of flanges for the bulkhead hatches.The Final Touches
While two flanges form the primary support structure around the hatches, Sven mentions there are two additional pieces required at each end to ensure comprehensive protection. This attention to detail highlights his commitment to producing a durable and reliable design. “Sailing is about finding your path, whether it’s across an ocean or within yourself.” – Sven Yrvind In conclusion, making flanges around bulkhead hatches may seem complex at first glance, but by following Sven Yrvind’s meticulous process, enthusiasts can achieve professional-level results. Remember that the journey of boatbuilding is as rewarding as reaching your destination; it tests one’s patience and dedication. For those seeking to embark on this adventure or simply gain more insight into marine craftsmanship, Sven’s wisdom is invaluable.Sven Yrvind, a renowned yacht designer and sailor, shares valuable insights on creating flanges around bulkhead hatches for canvas protection in this enlightening video. By following his expert guidance, boat enthusiasts can ensure their living areas remain secure while allowing unhindered access through the hatches.Step 1: Starting with the Flange
Sven begins by explaining that working on flanges vertically and horizontally is significantly easier than doing so in a flat position. To simplify the process further, he divides the task into two or three steps as suggested by fellow expert “for for.” This approach not only makes it more manageable but also allows for greater precision in crafting each component.Step 2: Applying Glue and Securing
Sven proceeds to apply glue along one edge of the flange, ensuring a secure bond when clamped into place. He emphasizes that this stage is crucial for maintaining the structural integrity of the flange, which in turn safeguards the living area beneath the canvas when hatches are open.Step 3: Allowing Time to Dry
After securely attaching the first portion of the flange, Sven allows ample time for it to dry before moving forward with additional steps. This patience and precision are key aspects of his successful boatbuilding methods.Step 4: Finishing Touches
Once the flange is fully dried, Sven removes the clamps carefully, ensuring no damage occurs during this process. He then moves on to attaching four more pieces onto these main frames, completing two pairs of flanges for the bulkhead hatches.The Final Touches
While two flanges form the primary support structure around the hatches, Sven mentions there are two additional pieces required at each end to ensure comprehensive protection. This attention to detail highlights his commitment to producing a durable and reliable design. “Sailing is about finding your path, whether it’s across an ocean or within yourself.” – Sven Yrvind In conclusion, making flanges around bulkhead hatches may seem complex at first glance, but by following Sven Yrvind’s meticulous process, enthusiasts can achieve professional-level results. Remember that the journey of boatbuilding is as rewarding as reaching your destination; it tests one’s patience and dedication. For those seeking to embark on this adventure or simply gain more insight into marine craftsmanship, Sven’s wisdom is invaluable.Making Flanges Around Bulkhead Hatches for Canvas
Sven Yrvind, a renowned yacht designer and sailor, shares valuable insights on creating flanges around bulkhead hatches for canvas protection in this enlightening video. By following his expert guidance, boat enthusiasts can ensure their living areas remain secure while allowing unhindered access through the hatches.Step 1: Starting with the Flange
Sven begins by explaining that working on flanges vertically and horizontally is significantly easier than doing so in a flat position. To simplify the process further, he divides the task into two or three steps as suggested by fellow expert “for for.” This approach not only makes it more manageable but also allows for greater precision in crafting each component.Step 2: Applying Glue and Securing
Sven proceeds to apply glue along one edge of the flange, ensuring a secure bond when clamped into place. He emphasizes that this stage is crucial for maintaining the structural integrity of the flange, which in turn safeguards the living area beneath the canvas when hatches are open.Step 3: Allowing Time to Dry
After securely attaching the first portion of the flange, Sven allows ample time for it to dry before moving forward with additional steps. This patience and precision are key aspects of his successful boatbuilding methods.Step 4: Finishing Touches
Once the flange is fully dried, Sven removes the clamps carefully, ensuring no damage occurs during this process. He then moves on to attaching four more pieces onto these main frames, completing two pairs of flanges for the bulkhead hatches.The Final Touches
While two flanges form the primary support structure around the hatches, Sven mentions there are two additional pieces required at each end to ensure comprehensive protection. This attention to detail highlights his commitment to producing a durable and reliable design. “Sailing is about finding your path, whether it’s across an ocean or within yourself.” – Sven Yrvind In conclusion, making flanges around bulkhead hatches may seem complex at first glance, but by following Sven Yrvind’s meticulous process, enthusiasts can achieve professional-level results. Remember that the journey of boatbuilding is as rewarding as reaching your destination; it tests one’s patience and dedication. For those seeking to embark on this adventure or simply gain more insight into marine craftsmanship, Sven’s wisdom is invaluable.Once the flange is fully dried, Sven removes the clamps carefully, ensuring no damage occurs during this process. He then moves on to attaching four more pieces onto these main frames, completing two pairs of flanges for the bulkhead hatches.The Final Touches
While two flanges form the primary support structure around the hatches, Sven mentions there are two additional pieces required at each end to ensure comprehensive protection. This attention to detail highlights his commitment to producing a durable and reliable design. “Sailing is about finding your path, whether it’s across an ocean or within yourself.” – Sven Yrvind In conclusion, making flanges around bulkhead hatches may seem complex at first glance, but by following Sven Yrvind’s meticulous process, enthusiasts can achieve professional-level results. Remember that the journey of boatbuilding is as rewarding as reaching your destination; it tests one’s patience and dedication. For those seeking to embark on this adventure or simply gain more insight into marine craftsmanship, Sven’s wisdom is invaluable.After securely attaching the first portion of the flange, Sven allows ample time for it to dry before moving forward with additional steps. This patience and precision are key aspects of his successful boatbuilding methods.Step 4: Finishing Touches
Once the flange is fully dried, Sven removes the clamps carefully, ensuring no damage occurs during this process. He then moves on to attaching four more pieces onto these main frames, completing two pairs of flanges for the bulkhead hatches.The Final Touches
While two flanges form the primary support structure around the hatches, Sven mentions there are two additional pieces required at each end to ensure comprehensive protection. This attention to detail highlights his commitment to producing a durable and reliable design. “Sailing is about finding your path, whether it’s across an ocean or within yourself.” – Sven Yrvind In conclusion, making flanges around bulkhead hatches may seem complex at first glance, but by following Sven Yrvind’s meticulous process, enthusiasts can achieve professional-level results. Remember that the journey of boatbuilding is as rewarding as reaching your destination; it tests one’s patience and dedication. For those seeking to embark on this adventure or simply gain more insight into marine craftsmanship, Sven’s wisdom is invaluable.Sven proceeds to apply glue along one edge of the flange, ensuring a secure bond when clamped into place. He emphasizes that this stage is crucial for maintaining the structural integrity of the flange, which in turn safeguards the living area beneath the canvas when hatches are open.Step 3: Allowing Time to Dry
After securely attaching the first portion of the flange, Sven allows ample time for it to dry before moving forward with additional steps. This patience and precision are key aspects of his successful boatbuilding methods.Step 4: Finishing Touches
Once the flange is fully dried, Sven removes the clamps carefully, ensuring no damage occurs during this process. He then moves on to attaching four more pieces onto these main frames, completing two pairs of flanges for the bulkhead hatches.The Final Touches
While two flanges form the primary support structure around the hatches, Sven mentions there are two additional pieces required at each end to ensure comprehensive protection. This attention to detail highlights his commitment to producing a durable and reliable design. “Sailing is about finding your path, whether it’s across an ocean or within yourself.” – Sven Yrvind In conclusion, making flanges around bulkhead hatches may seem complex at first glance, but by following Sven Yrvind’s meticulous process, enthusiasts can achieve professional-level results. Remember that the journey of boatbuilding is as rewarding as reaching your destination; it tests one’s patience and dedication. For those seeking to embark on this adventure or simply gain more insight into marine craftsmanship, Sven’s wisdom is invaluable.Sven begins by explaining that working on flanges vertically and horizontally is significantly easier than doing so in a flat position. To simplify the process further, he divides the task into two or three steps as suggested by fellow expert “for for.” This approach not only makes it more manageable but also allows for greater precision in crafting each component.Step 2: Applying Glue and Securing
Sven proceeds to apply glue along one edge of the flange, ensuring a secure bond when clamped into place. He emphasizes that this stage is crucial for maintaining the structural integrity of the flange, which in turn safeguards the living area beneath the canvas when hatches are open.Step 3: Allowing Time to Dry
After securely attaching the first portion of the flange, Sven allows ample time for it to dry before moving forward with additional steps. This patience and precision are key aspects of his successful boatbuilding methods.Step 4: Finishing Touches
Once the flange is fully dried, Sven removes the clamps carefully, ensuring no damage occurs during this process. He then moves on to attaching four more pieces onto these main frames, completing two pairs of flanges for the bulkhead hatches.The Final Touches
While two flanges form the primary support structure around the hatches, Sven mentions there are two additional pieces required at each end to ensure comprehensive protection. This attention to detail highlights his commitment to producing a durable and reliable design. “Sailing is about finding your path, whether it’s across an ocean or within yourself.” – Sven Yrvind In conclusion, making flanges around bulkhead hatches may seem complex at first glance, but by following Sven Yrvind’s meticulous process, enthusiasts can achieve professional-level results. Remember that the journey of boatbuilding is as rewarding as reaching your destination; it tests one’s patience and dedication. For those seeking to embark on this adventure or simply gain more insight into marine craftsmanship, Sven’s wisdom is invaluable.Sven Yrvind, a renowned yacht designer and sailor, shares valuable insights on creating flanges around bulkhead hatches for canvas protection in this enlightening video. By following his expert guidance, boat enthusiasts can ensure their living areas remain secure while allowing unhindered access through the hatches.Step 1: Starting with the Flange
Sven begins by explaining that working on flanges vertically and horizontally is significantly easier than doing so in a flat position. To simplify the process further, he divides the task into two or three steps as suggested by fellow expert “for for.” This approach not only makes it more manageable but also allows for greater precision in crafting each component.Step 2: Applying Glue and Securing
Sven proceeds to apply glue along one edge of the flange, ensuring a secure bond when clamped into place. He emphasizes that this stage is crucial for maintaining the structural integrity of the flange, which in turn safeguards the living area beneath the canvas when hatches are open.Step 3: Allowing Time to Dry
After securely attaching the first portion of the flange, Sven allows ample time for it to dry before moving forward with additional steps. This patience and precision are key aspects of his successful boatbuilding methods.Step 4: Finishing Touches
Once the flange is fully dried, Sven removes the clamps carefully, ensuring no damage occurs during this process. He then moves on to attaching four more pieces onto these main frames, completing two pairs of flanges for the bulkhead hatches.The Final Touches
While two flanges form the primary support structure around the hatches, Sven mentions there are two additional pieces required at each end to ensure comprehensive protection. This attention to detail highlights his commitment to producing a durable and reliable design. “Sailing is about finding your path, whether it’s across an ocean or within yourself.” – Sven Yrvind In conclusion, making flanges around bulkhead hatches may seem complex at first glance, but by following Sven Yrvind’s meticulous process, enthusiasts can achieve professional-level results. Remember that the journey of boatbuilding is as rewarding as reaching your destination; it tests one’s patience and dedication. For those seeking to embark on this adventure or simply gain more insight into marine craftsmanship, Sven’s wisdom is invaluable.Making Flanges Around Bulkhead Hatches for Canvas
Sven Yrvind, a renowned yacht designer and sailor, shares valuable insights on creating flanges around bulkhead hatches for canvas protection in this enlightening video. By following his expert guidance, boat enthusiasts can ensure their living areas remain secure while allowing unhindered access through the hatches.Step 1: Starting with the Flange
Sven begins by explaining that working on flanges vertically and horizontally is significantly easier than doing so in a flat position. To simplify the process further, he divides the task into two or three steps as suggested by fellow expert “for for.” This approach not only makes it more manageable but also allows for greater precision in crafting each component.Step 2: Applying Glue and Securing
Sven proceeds to apply glue along one edge of the flange, ensuring a secure bond when clamped into place. He emphasizes that this stage is crucial for maintaining the structural integrity of the flange, which in turn safeguards the living area beneath the canvas when hatches are open.Step 3: Allowing Time to Dry
After securely attaching the first portion of the flange, Sven allows ample time for it to dry before moving forward with additional steps. This patience and precision are key aspects of his successful boatbuilding methods.Step 4: Finishing Touches
Once the flange is fully dried, Sven removes the clamps carefully, ensuring no damage occurs during this process. He then moves on to attaching four more pieces onto these main frames, completing two pairs of flanges for the bulkhead hatches.The Final Touches
While two flanges form the primary support structure around the hatches, Sven mentions there are two additional pieces required at each end to ensure comprehensive protection. This attention to detail highlights his commitment to producing a durable and reliable design. “Sailing is about finding your path, whether it’s across an ocean or within yourself.” – Sven Yrvind In conclusion, making flanges around bulkhead hatches may seem complex at first glance, but by following Sven Yrvind’s meticulous process, enthusiasts can achieve professional-level results. Remember that the journey of boatbuilding is as rewarding as reaching your destination; it tests one’s patience and dedication. For those seeking to embark on this adventure or simply gain more insight into marine craftsmanship, Sven’s wisdom is invaluable.Sven Yrvind, a renowned yacht designer and sailor, shares valuable insights on creating flanges around bulkhead hatches for canvas protection in this enlightening video. By following his expert guidance, boat enthusiasts can ensure their living areas remain secure while allowing unhindered access through the hatches.Step 1: Starting with the Flange
Sven begins by explaining that working on flanges vertically and horizontally is significantly easier than doing so in a flat position. To simplify the process further, he divides the task into two or three steps as suggested by fellow expert “for for.” This approach not only makes it more manageable but also allows for greater precision in crafting each component.Step 2: Applying Glue and Securing
Sven proceeds to apply glue along one edge of the flange, ensuring a secure bond when clamped into place. He emphasizes that this stage is crucial for maintaining the structural integrity of the flange, which in turn safeguards the living area beneath the canvas when hatches are open.Step 3: Allowing Time to Dry
After securely attaching the first portion of the flange, Sven allows ample time for it to dry before moving forward with additional steps. This patience and precision are key aspects of his successful boatbuilding methods.Step 4: Finishing Touches
Once the flange is fully dried, Sven removes the clamps carefully, ensuring no damage occurs during this process. He then moves on to attaching four more pieces onto these main frames, completing two pairs of flanges for the bulkhead hatches.The Final Touches
While two flanges form the primary support structure around the hatches, Sven mentions there are two additional pieces required at each end to ensure comprehensive protection. This attention to detail highlights his commitment to producing a durable and reliable design. “Sailing is about finding your path, whether it’s across an ocean or within yourself.” – Sven Yrvind In conclusion, making flanges around bulkhead hatches may seem complex at first glance, but by following Sven Yrvind’s meticulous process, enthusiasts can achieve professional-level results. Remember that the journey of boatbuilding is as rewarding as reaching your destination; it tests one’s patience and dedication. For those seeking to embark on this adventure or simply gain more insight into marine craftsmanship, Sven’s wisdom is invaluable.Sven begins by explaining that working on flanges vertically and horizontally is significantly easier than doing so in a flat position. To simplify the process further, he divides the task into two or three steps as suggested by fellow expert “for for.” This approach not only makes it more manageable but also allows for greater precision in crafting each component.Step 2: Applying Glue and Securing
Sven proceeds to apply glue along one edge of the flange, ensuring a secure bond when clamped into place. He emphasizes that this stage is crucial for maintaining the structural integrity of the flange, which in turn safeguards the living area beneath the canvas when hatches are open.Step 3: Allowing Time to Dry
After securely attaching the first portion of the flange, Sven allows ample time for it to dry before moving forward with additional steps. This patience and precision are key aspects of his successful boatbuilding methods.Step 4: Finishing Touches
Once the flange is fully dried, Sven removes the clamps carefully, ensuring no damage occurs during this process. He then moves on to attaching four more pieces onto these main frames, completing two pairs of flanges for the bulkhead hatches.The Final Touches
While two flanges form the primary support structure around the hatches, Sven mentions there are two additional pieces required at each end to ensure comprehensive protection. This attention to detail highlights his commitment to producing a durable and reliable design. “Sailing is about finding your path, whether it’s across an ocean or within yourself.” – Sven Yrvind In conclusion, making flanges around bulkhead hatches may seem complex at first glance, but by following Sven Yrvind’s meticulous process, enthusiasts can achieve professional-level results. Remember that the journey of boatbuilding is as rewarding as reaching your destination; it tests one’s patience and dedication. For those seeking to embark on this adventure or simply gain more insight into marine craftsmanship, Sven’s wisdom is invaluable.Sven Yrvind, a renowned yacht designer and sailor, shares valuable insights on creating flanges around bulkhead hatches for canvas protection in this enlightening video. By following his expert guidance, boat enthusiasts can ensure their living areas remain secure while allowing unhindered access through the hatches.Step 1: Starting with the Flange
Sven begins by explaining that working on flanges vertically and horizontally is significantly easier than doing so in a flat position. To simplify the process further, he divides the task into two or three steps as suggested by fellow expert “for for.” This approach not only makes it more manageable but also allows for greater precision in crafting each component.Step 2: Applying Glue and Securing
Sven proceeds to apply glue along one edge of the flange, ensuring a secure bond when clamped into place. He emphasizes that this stage is crucial for maintaining the structural integrity of the flange, which in turn safeguards the living area beneath the canvas when hatches are open.Step 3: Allowing Time to Dry
After securely attaching the first portion of the flange, Sven allows ample time for it to dry before moving forward with additional steps. This patience and precision are key aspects of his successful boatbuilding methods.Step 4: Finishing Touches
Once the flange is fully dried, Sven removes the clamps carefully, ensuring no damage occurs during this process. He then moves on to attaching four more pieces onto these main frames, completing two pairs of flanges for the bulkhead hatches.The Final Touches
While two flanges form the primary support structure around the hatches, Sven mentions there are two additional pieces required at each end to ensure comprehensive protection. This attention to detail highlights his commitment to producing a durable and reliable design. “Sailing is about finding your path, whether it’s across an ocean or within yourself.” – Sven Yrvind In conclusion, making flanges around bulkhead hatches may seem complex at first glance, but by following Sven Yrvind’s meticulous process, enthusiasts can achieve professional-level results. Remember that the journey of boatbuilding is as rewarding as reaching your destination; it tests one’s patience and dedication. For those seeking to embark on this adventure or simply gain more insight into marine craftsmanship, Sven’s wisdom is invaluable.Making Flanges Around Bulkhead Hatches for Canvas
Sven Yrvind, a renowned yacht designer and sailor, shares valuable insights on creating flanges around bulkhead hatches for canvas protection in this enlightening video. By following his expert guidance, boat enthusiasts can ensure their living areas remain secure while allowing unhindered access through the hatches.Step 1: Starting with the Flange
Sven begins by explaining that working on flanges vertically and horizontally is significantly easier than doing so in a flat position. To simplify the process further, he divides the task into two or three steps as suggested by fellow expert “for for.” This approach not only makes it more manageable but also allows for greater precision in crafting each component.Step 2: Applying Glue and Securing
Sven proceeds to apply glue along one edge of the flange, ensuring a secure bond when clamped into place. He emphasizes that this stage is crucial for maintaining the structural integrity of the flange, which in turn safeguards the living area beneath the canvas when hatches are open.Step 3: Allowing Time to Dry
After securely attaching the first portion of the flange, Sven allows ample time for it to dry before moving forward with additional steps. This patience and precision are key aspects of his successful boatbuilding methods.Step 4: Finishing Touches
Once the flange is fully dried, Sven removes the clamps carefully, ensuring no damage occurs during this process. He then moves on to attaching four more pieces onto these main frames, completing two pairs of flanges for the bulkhead hatches.The Final Touches
While two flanges form the primary support structure around the hatches, Sven mentions there are two additional pieces required at each end to ensure comprehensive protection. This attention to detail highlights his commitment to producing a durable and reliable design. “Sailing is about finding your path, whether it’s across an ocean or within yourself.” – Sven Yrvind In conclusion, making flanges around bulkhead hatches may seem complex at first glance, but by following Sven Yrvind’s meticulous process, enthusiasts can achieve professional-level results. Remember that the journey of boatbuilding is as rewarding as reaching your destination; it tests one’s patience and dedication. For those seeking to embark on this adventure or simply gain more insight into marine craftsmanship, Sven’s wisdom is invaluable.Once the flange is fully dried, Sven removes the clamps carefully, ensuring no damage occurs during this process. He then moves on to attaching four more pieces onto these main frames, completing two pairs of flanges for the bulkhead hatches.The Final Touches
While two flanges form the primary support structure around the hatches, Sven mentions there are two additional pieces required at each end to ensure comprehensive protection. This attention to detail highlights his commitment to producing a durable and reliable design. “Sailing is about finding your path, whether it’s across an ocean or within yourself.” – Sven Yrvind In conclusion, making flanges around bulkhead hatches may seem complex at first glance, but by following Sven Yrvind’s meticulous process, enthusiasts can achieve professional-level results. Remember that the journey of boatbuilding is as rewarding as reaching your destination; it tests one’s patience and dedication. For those seeking to embark on this adventure or simply gain more insight into marine craftsmanship, Sven’s wisdom is invaluable.Sven begins by explaining that working on flanges vertically and horizontally is significantly easier than doing so in a flat position. To simplify the process further, he divides the task into two or three steps as suggested by fellow expert “for for.” This approach not only makes it more manageable but also allows for greater precision in crafting each component.Step 2: Applying Glue and Securing
Sven proceeds to apply glue along one edge of the flange, ensuring a secure bond when clamped into place. He emphasizes that this stage is crucial for maintaining the structural integrity of the flange, which in turn safeguards the living area beneath the canvas when hatches are open.Step 3: Allowing Time to Dry
After securely attaching the first portion of the flange, Sven allows ample time for it to dry before moving forward with additional steps. This patience and precision are key aspects of his successful boatbuilding methods.Step 4: Finishing Touches
Once the flange is fully dried, Sven removes the clamps carefully, ensuring no damage occurs during this process. He then moves on to attaching four more pieces onto these main frames, completing two pairs of flanges for the bulkhead hatches.The Final Touches
While two flanges form the primary support structure around the hatches, Sven mentions there are two additional pieces required at each end to ensure comprehensive protection. This attention to detail highlights his commitment to producing a durable and reliable design. “Sailing is about finding your path, whether it’s across an ocean or within yourself.” – Sven Yrvind In conclusion, making flanges around bulkhead hatches may seem complex at first glance, but by following Sven Yrvind’s meticulous process, enthusiasts can achieve professional-level results. Remember that the journey of boatbuilding is as rewarding as reaching your destination; it tests one’s patience and dedication. For those seeking to embark on this adventure or simply gain more insight into marine craftsmanship, Sven’s wisdom is invaluable.Sven Yrvind, a renowned yacht designer and sailor, shares valuable insights on creating flanges around bulkhead hatches for canvas protection in this enlightening video. By following his expert guidance, boat enthusiasts can ensure their living areas remain secure while allowing unhindered access through the hatches.Step 1: Starting with the Flange
Sven begins by explaining that working on flanges vertically and horizontally is significantly easier than doing so in a flat position. To simplify the process further, he divides the task into two or three steps as suggested by fellow expert “for for.” This approach not only makes it more manageable but also allows for greater precision in crafting each component.Step 2: Applying Glue and Securing
Sven proceeds to apply glue along one edge of the flange, ensuring a secure bond when clamped into place. He emphasizes that this stage is crucial for maintaining the structural integrity of the flange, which in turn safeguards the living area beneath the canvas when hatches are open.Step 3: Allowing Time to Dry
After securely attaching the first portion of the flange, Sven allows ample time for it to dry before moving forward with additional steps. This patience and precision are key aspects of his successful boatbuilding methods.Step 4: Finishing Touches
Once the flange is fully dried, Sven removes the clamps carefully, ensuring no damage occurs during this process. He then moves on to attaching four more pieces onto these main frames, completing two pairs of flanges for the bulkhead hatches.The Final Touches
While two flanges form the primary support structure around the hatches, Sven mentions there are two additional pieces required at each end to ensure comprehensive protection. This attention to detail highlights his commitment to producing a durable and reliable design. “Sailing is about finding your path, whether it’s across an ocean or within yourself.” – Sven Yrvind In conclusion, making flanges around bulkhead hatches may seem complex at first glance, but by following Sven Yrvind’s meticulous process, enthusiasts can achieve professional-level results. Remember that the journey of boatbuilding is as rewarding as reaching your destination; it tests one’s patience and dedication. For those seeking to embark on this adventure or simply gain more insight into marine craftsmanship, Sven’s wisdom is invaluable.Making Flanges Around Bulkhead Hatches for Canvas
Sven Yrvind, a renowned yacht designer and sailor, shares valuable insights on creating flanges around bulkhead hatches for canvas protection in this enlightening video. By following his expert guidance, boat enthusiasts can ensure their living areas remain secure while allowing unhindered access through the hatches.Step 1: Starting with the Flange
Sven begins by explaining that working on flanges vertically and horizontally is significantly easier than doing so in a flat position. To simplify the process further, he divides the task into two or three steps as suggested by fellow expert “for for.” This approach not only makes it more manageable but also allows for greater precision in crafting each component.Step 2: Applying Glue and Securing
Sven proceeds to apply glue along one edge of the flange, ensuring a secure bond when clamped into place. He emphasizes that this stage is crucial for maintaining the structural integrity of the flange, which in turn safeguards the living area beneath the canvas when hatches are open.Step 3: Allowing Time to Dry
After securely attaching the first portion of the flange, Sven allows ample time for it to dry before moving forward with additional steps. This patience and precision are key aspects of his successful boatbuilding methods.Step 4: Finishing Touches
Once the flange is fully dried, Sven removes the clamps carefully, ensuring no damage occurs during this process. He then moves on to attaching four more pieces onto these main frames, completing two pairs of flanges for the bulkhead hatches.The Final Touches
While two flanges form the primary support structure around the hatches, Sven mentions there are two additional pieces required at each end to ensure comprehensive protection. This attention to detail highlights his commitment to producing a durable and reliable design. “Sailing is about finding your path, whether it’s across an ocean or within yourself.” – Sven Yrvind In conclusion, making flanges around bulkhead hatches may seem complex at first glance, but by following Sven Yrvind’s meticulous process, enthusiasts can achieve professional-level results. Remember that the journey of boatbuilding is as rewarding as reaching your destination; it tests one’s patience and dedication. For those seeking to embark on this adventure or simply gain more insight into marine craftsmanship, Sven’s wisdom is invaluable.After securely attaching the first portion of the flange, Sven allows ample time for it to dry before moving forward with additional steps. This patience and precision are key aspects of his successful boatbuilding methods.Step 4: Finishing Touches
Once the flange is fully dried, Sven removes the clamps carefully, ensuring no damage occurs during this process. He then moves on to attaching four more pieces onto these main frames, completing two pairs of flanges for the bulkhead hatches.The Final Touches
While two flanges form the primary support structure around the hatches, Sven mentions there are two additional pieces required at each end to ensure comprehensive protection. This attention to detail highlights his commitment to producing a durable and reliable design. “Sailing is about finding your path, whether it’s across an ocean or within yourself.” – Sven Yrvind In conclusion, making flanges around bulkhead hatches may seem complex at first glance, but by following Sven Yrvind’s meticulous process, enthusiasts can achieve professional-level results. Remember that the journey of boatbuilding is as rewarding as reaching your destination; it tests one’s patience and dedication. For those seeking to embark on this adventure or simply gain more insight into marine craftsmanship, Sven’s wisdom is invaluable.Sven begins by explaining that working on flanges vertically and horizontally is significantly easier than doing so in a flat position. To simplify the process further, he divides the task into two or three steps as suggested by fellow expert “for for.” This approach not only makes it more manageable but also allows for greater precision in crafting each component.Step 2: Applying Glue and Securing
Sven proceeds to apply glue along one edge of the flange, ensuring a secure bond when clamped into place. He emphasizes that this stage is crucial for maintaining the structural integrity of the flange, which in turn safeguards the living area beneath the canvas when hatches are open.Step 3: Allowing Time to Dry
After securely attaching the first portion of the flange, Sven allows ample time for it to dry before moving forward with additional steps. This patience and precision are key aspects of his successful boatbuilding methods.Step 4: Finishing Touches
Once the flange is fully dried, Sven removes the clamps carefully, ensuring no damage occurs during this process. He then moves on to attaching four more pieces onto these main frames, completing two pairs of flanges for the bulkhead hatches.The Final Touches
While two flanges form the primary support structure around the hatches, Sven mentions there are two additional pieces required at each end to ensure comprehensive protection. This attention to detail highlights his commitment to producing a durable and reliable design. “Sailing is about finding your path, whether it’s across an ocean or within yourself.” – Sven Yrvind In conclusion, making flanges around bulkhead hatches may seem complex at first glance, but by following Sven Yrvind’s meticulous process, enthusiasts can achieve professional-level results. Remember that the journey of boatbuilding is as rewarding as reaching your destination; it tests one’s patience and dedication. For those seeking to embark on this adventure or simply gain more insight into marine craftsmanship, Sven’s wisdom is invaluable.Sven Yrvind, a renowned yacht designer and sailor, shares valuable insights on creating flanges around bulkhead hatches for canvas protection in this enlightening video. By following his expert guidance, boat enthusiasts can ensure their living areas remain secure while allowing unhindered access through the hatches.Step 1: Starting with the Flange
Sven begins by explaining that working on flanges vertically and horizontally is significantly easier than doing so in a flat position. To simplify the process further, he divides the task into two or three steps as suggested by fellow expert “for for.” This approach not only makes it more manageable but also allows for greater precision in crafting each component.Step 2: Applying Glue and Securing
Sven proceeds to apply glue along one edge of the flange, ensuring a secure bond when clamped into place. He emphasizes that this stage is crucial for maintaining the structural integrity of the flange, which in turn safeguards the living area beneath the canvas when hatches are open.Step 3: Allowing Time to Dry
After securely attaching the first portion of the flange, Sven allows ample time for it to dry before moving forward with additional steps. This patience and precision are key aspects of his successful boatbuilding methods.Step 4: Finishing Touches
Once the flange is fully dried, Sven removes the clamps carefully, ensuring no damage occurs during this process. He then moves on to attaching four more pieces onto these main frames, completing two pairs of flanges for the bulkhead hatches.The Final Touches
While two flanges form the primary support structure around the hatches, Sven mentions there are two additional pieces required at each end to ensure comprehensive protection. This attention to detail highlights his commitment to producing a durable and reliable design. “Sailing is about finding your path, whether it’s across an ocean or within yourself.” – Sven Yrvind In conclusion, making flanges around bulkhead hatches may seem complex at first glance, but by following Sven Yrvind’s meticulous process, enthusiasts can achieve professional-level results. Remember that the journey of boatbuilding is as rewarding as reaching your destination; it tests one’s patience and dedication. For those seeking to embark on this adventure or simply gain more insight into marine craftsmanship, Sven’s wisdom is invaluable.Making Flanges Around Bulkhead Hatches for Canvas
Sven Yrvind, a renowned yacht designer and sailor, shares valuable insights on creating flanges around bulkhead hatches for canvas protection in this enlightening video. By following his expert guidance, boat enthusiasts can ensure their living areas remain secure while allowing unhindered access through the hatches.Step 1: Starting with the Flange
Sven begins by explaining that working on flanges vertically and horizontally is significantly easier than doing so in a flat position. To simplify the process further, he divides the task into two or three steps as suggested by fellow expert “for for.” This approach not only makes it more manageable but also allows for greater precision in crafting each component.Step 2: Applying Glue and Securing
Sven proceeds to apply glue along one edge of the flange, ensuring a secure bond when clamped into place. He emphasizes that this stage is crucial for maintaining the structural integrity of the flange, which in turn safeguards the living area beneath the canvas when hatches are open.Step 3: Allowing Time to Dry
After securely attaching the first portion of the flange, Sven allows ample time for it to dry before moving forward with additional steps. This patience and precision are key aspects of his successful boatbuilding methods.Step 4: Finishing Touches
Once the flange is fully dried, Sven removes the clamps carefully, ensuring no damage occurs during this process. He then moves on to attaching four more pieces onto these main frames, completing two pairs of flanges for the bulkhead hatches.The Final Touches
While two flanges form the primary support structure around the hatches, Sven mentions there are two additional pieces required at each end to ensure comprehensive protection. This attention to detail highlights his commitment to producing a durable and reliable design. “Sailing is about finding your path, whether it’s across an ocean or within yourself.” – Sven Yrvind In conclusion, making flanges around bulkhead hatches may seem complex at first glance, but by following Sven Yrvind’s meticulous process, enthusiasts can achieve professional-level results. Remember that the journey of boatbuilding is as rewarding as reaching your destination; it tests one’s patience and dedication. For those seeking to embark on this adventure or simply gain more insight into marine craftsmanship, Sven’s wisdom is invaluable.Sven proceeds to apply glue along one edge of the flange, ensuring a secure bond when clamped into place. He emphasizes that this stage is crucial for maintaining the structural integrity of the flange, which in turn safeguards the living area beneath the canvas when hatches are open.Step 3: Allowing Time to Dry
After securely attaching the first portion of the flange, Sven allows ample time for it to dry before moving forward with additional steps. This patience and precision are key aspects of his successful boatbuilding methods.Step 4: Finishing Touches
Once the flange is fully dried, Sven removes the clamps carefully, ensuring no damage occurs during this process. He then moves on to attaching four more pieces onto these main frames, completing two pairs of flanges for the bulkhead hatches.The Final Touches
While two flanges form the primary support structure around the hatches, Sven mentions there are two additional pieces required at each end to ensure comprehensive protection. This attention to detail highlights his commitment to producing a durable and reliable design. “Sailing is about finding your path, whether it’s across an ocean or within yourself.” – Sven Yrvind In conclusion, making flanges around bulkhead hatches may seem complex at first glance, but by following Sven Yrvind’s meticulous process, enthusiasts can achieve professional-level results. Remember that the journey of boatbuilding is as rewarding as reaching your destination; it tests one’s patience and dedication. For those seeking to embark on this adventure or simply gain more insight into marine craftsmanship, Sven’s wisdom is invaluable.Sven begins by explaining that working on flanges vertically and horizontally is significantly easier than doing so in a flat position. To simplify the process further, he divides the task into two or three steps as suggested by fellow expert “for for.” This approach not only makes it more manageable but also allows for greater precision in crafting each component.Step 2: Applying Glue and Securing
Sven proceeds to apply glue along one edge of the flange, ensuring a secure bond when clamped into place. He emphasizes that this stage is crucial for maintaining the structural integrity of the flange, which in turn safeguards the living area beneath the canvas when hatches are open.Step 3: Allowing Time to Dry
After securely attaching the first portion of the flange, Sven allows ample time for it to dry before moving forward with additional steps. This patience and precision are key aspects of his successful boatbuilding methods.Step 4: Finishing Touches
Once the flange is fully dried, Sven removes the clamps carefully, ensuring no damage occurs during this process. He then moves on to attaching four more pieces onto these main frames, completing two pairs of flanges for the bulkhead hatches.The Final Touches
While two flanges form the primary support structure around the hatches, Sven mentions there are two additional pieces required at each end to ensure comprehensive protection. This attention to detail highlights his commitment to producing a durable and reliable design. “Sailing is about finding your path, whether it’s across an ocean or within yourself.” – Sven Yrvind In conclusion, making flanges around bulkhead hatches may seem complex at first glance, but by following Sven Yrvind’s meticulous process, enthusiasts can achieve professional-level results. Remember that the journey of boatbuilding is as rewarding as reaching your destination; it tests one’s patience and dedication. For those seeking to embark on this adventure or simply gain more insight into marine craftsmanship, Sven’s wisdom is invaluable.Sven Yrvind, a renowned yacht designer and sailor, shares valuable insights on creating flanges around bulkhead hatches for canvas protection in this enlightening video. By following his expert guidance, boat enthusiasts can ensure their living areas remain secure while allowing unhindered access through the hatches.Step 1: Starting with the Flange
Sven begins by explaining that working on flanges vertically and horizontally is significantly easier than doing so in a flat position. To simplify the process further, he divides the task into two or three steps as suggested by fellow expert “for for.” This approach not only makes it more manageable but also allows for greater precision in crafting each component.Step 2: Applying Glue and Securing
Sven proceeds to apply glue along one edge of the flange, ensuring a secure bond when clamped into place. He emphasizes that this stage is crucial for maintaining the structural integrity of the flange, which in turn safeguards the living area beneath the canvas when hatches are open.Step 3: Allowing Time to Dry
After securely attaching the first portion of the flange, Sven allows ample time for it to dry before moving forward with additional steps. This patience and precision are key aspects of his successful boatbuilding methods.Step 4: Finishing Touches
Once the flange is fully dried, Sven removes the clamps carefully, ensuring no damage occurs during this process. He then moves on to attaching four more pieces onto these main frames, completing two pairs of flanges for the bulkhead hatches.The Final Touches
While two flanges form the primary support structure around the hatches, Sven mentions there are two additional pieces required at each end to ensure comprehensive protection. This attention to detail highlights his commitment to producing a durable and reliable design. “Sailing is about finding your path, whether it’s across an ocean or within yourself.” – Sven Yrvind In conclusion, making flanges around bulkhead hatches may seem complex at first glance, but by following Sven Yrvind’s meticulous process, enthusiasts can achieve professional-level results. Remember that the journey of boatbuilding is as rewarding as reaching your destination; it tests one’s patience and dedication. For those seeking to embark on this adventure or simply gain more insight into marine craftsmanship, Sven’s wisdom is invaluable.Making Flanges Around Bulkhead Hatches for Canvas
Sven Yrvind, a renowned yacht designer and sailor, shares valuable insights on creating flanges around bulkhead hatches for canvas protection in this enlightening video. By following his expert guidance, boat enthusiasts can ensure their living areas remain secure while allowing unhindered access through the hatches.Step 1: Starting with the Flange
Sven begins by explaining that working on flanges vertically and horizontally is significantly easier than doing so in a flat position. To simplify the process further, he divides the task into two or three steps as suggested by fellow expert “for for.” This approach not only makes it more manageable but also allows for greater precision in crafting each component.Step 2: Applying Glue and Securing
Sven proceeds to apply glue along one edge of the flange, ensuring a secure bond when clamped into place. He emphasizes that this stage is crucial for maintaining the structural integrity of the flange, which in turn safeguards the living area beneath the canvas when hatches are open.Step 3: Allowing Time to Dry
After securely attaching the first portion of the flange, Sven allows ample time for it to dry before moving forward with additional steps. This patience and precision are key aspects of his successful boatbuilding methods.Step 4: Finishing Touches
Once the flange is fully dried, Sven removes the clamps carefully, ensuring no damage occurs during this process. He then moves on to attaching four more pieces onto these main frames, completing two pairs of flanges for the bulkhead hatches.The Final Touches
While two flanges form the primary support structure around the hatches, Sven mentions there are two additional pieces required at each end to ensure comprehensive protection. This attention to detail highlights his commitment to producing a durable and reliable design. “Sailing is about finding your path, whether it’s across an ocean or within yourself.” – Sven Yrvind In conclusion, making flanges around bulkhead hatches may seem complex at first glance, but by following Sven Yrvind’s meticulous process, enthusiasts can achieve professional-level results. Remember that the journey of boatbuilding is as rewarding as reaching your destination; it tests one’s patience and dedication. For those seeking to embark on this adventure or simply gain more insight into marine craftsmanship, Sven’s wisdom is invaluable.Once the flange is fully dried, Sven removes the clamps carefully, ensuring no damage occurs during this process. He then moves on to attaching four more pieces onto these main frames, completing two pairs of flanges for the bulkhead hatches.The Final Touches
While two flanges form the primary support structure around the hatches, Sven mentions there are two additional pieces required at each end to ensure comprehensive protection. This attention to detail highlights his commitment to producing a durable and reliable design. “Sailing is about finding your path, whether it’s across an ocean or within yourself.” – Sven Yrvind In conclusion, making flanges around bulkhead hatches may seem complex at first glance, but by following Sven Yrvind’s meticulous process, enthusiasts can achieve professional-level results. Remember that the journey of boatbuilding is as rewarding as reaching your destination; it tests one’s patience and dedication. For those seeking to embark on this adventure or simply gain more insight into marine craftsmanship, Sven’s wisdom is invaluable.Sven proceeds to apply glue along one edge of the flange, ensuring a secure bond when clamped into place. He emphasizes that this stage is crucial for maintaining the structural integrity of the flange, which in turn safeguards the living area beneath the canvas when hatches are open.Step 3: Allowing Time to Dry
After securely attaching the first portion of the flange, Sven allows ample time for it to dry before moving forward with additional steps. This patience and precision are key aspects of his successful boatbuilding methods.Step 4: Finishing Touches
Once the flange is fully dried, Sven removes the clamps carefully, ensuring no damage occurs during this process. He then moves on to attaching four more pieces onto these main frames, completing two pairs of flanges for the bulkhead hatches.The Final Touches
While two flanges form the primary support structure around the hatches, Sven mentions there are two additional pieces required at each end to ensure comprehensive protection. This attention to detail highlights his commitment to producing a durable and reliable design. “Sailing is about finding your path, whether it’s across an ocean or within yourself.” – Sven Yrvind In conclusion, making flanges around bulkhead hatches may seem complex at first glance, but by following Sven Yrvind’s meticulous process, enthusiasts can achieve professional-level results. Remember that the journey of boatbuilding is as rewarding as reaching your destination; it tests one’s patience and dedication. For those seeking to embark on this adventure or simply gain more insight into marine craftsmanship, Sven’s wisdom is invaluable.Sven begins by explaining that working on flanges vertically and horizontally is significantly easier than doing so in a flat position. To simplify the process further, he divides the task into two or three steps as suggested by fellow expert “for for.” This approach not only makes it more manageable but also allows for greater precision in crafting each component.Step 2: Applying Glue and Securing
Sven proceeds to apply glue along one edge of the flange, ensuring a secure bond when clamped into place. He emphasizes that this stage is crucial for maintaining the structural integrity of the flange, which in turn safeguards the living area beneath the canvas when hatches are open.Step 3: Allowing Time to Dry
After securely attaching the first portion of the flange, Sven allows ample time for it to dry before moving forward with additional steps. This patience and precision are key aspects of his successful boatbuilding methods.Step 4: Finishing Touches
Once the flange is fully dried, Sven removes the clamps carefully, ensuring no damage occurs during this process. He then moves on to attaching four more pieces onto these main frames, completing two pairs of flanges for the bulkhead hatches.The Final Touches
While two flanges form the primary support structure around the hatches, Sven mentions there are two additional pieces required at each end to ensure comprehensive protection. This attention to detail highlights his commitment to producing a durable and reliable design. “Sailing is about finding your path, whether it’s across an ocean or within yourself.” – Sven Yrvind In conclusion, making flanges around bulkhead hatches may seem complex at first glance, but by following Sven Yrvind’s meticulous process, enthusiasts can achieve professional-level results. Remember that the journey of boatbuilding is as rewarding as reaching your destination; it tests one’s patience and dedication. For those seeking to embark on this adventure or simply gain more insight into marine craftsmanship, Sven’s wisdom is invaluable.Sven Yrvind, a renowned yacht designer and sailor, shares valuable insights on creating flanges around bulkhead hatches for canvas protection in this enlightening video. By following his expert guidance, boat enthusiasts can ensure their living areas remain secure while allowing unhindered access through the hatches.Step 1: Starting with the Flange
Sven begins by explaining that working on flanges vertically and horizontally is significantly easier than doing so in a flat position. To simplify the process further, he divides the task into two or three steps as suggested by fellow expert “for for.” This approach not only makes it more manageable but also allows for greater precision in crafting each component.Step 2: Applying Glue and Securing
Sven proceeds to apply glue along one edge of the flange, ensuring a secure bond when clamped into place. He emphasizes that this stage is crucial for maintaining the structural integrity of the flange, which in turn safeguards the living area beneath the canvas when hatches are open.Step 3: Allowing Time to Dry
After securely attaching the first portion of the flange, Sven allows ample time for it to dry before moving forward with additional steps. This patience and precision are key aspects of his successful boatbuilding methods.Step 4: Finishing Touches
Once the flange is fully dried, Sven removes the clamps carefully, ensuring no damage occurs during this process. He then moves on to attaching four more pieces onto these main frames, completing two pairs of flanges for the bulkhead hatches.The Final Touches
While two flanges form the primary support structure around the hatches, Sven mentions there are two additional pieces required at each end to ensure comprehensive protection. This attention to detail highlights his commitment to producing a durable and reliable design. “Sailing is about finding your path, whether it’s across an ocean or within yourself.” – Sven Yrvind In conclusion, making flanges around bulkhead hatches may seem complex at first glance, but by following Sven Yrvind’s meticulous process, enthusiasts can achieve professional-level results. Remember that the journey of boatbuilding is as rewarding as reaching your destination; it tests one’s patience and dedication. For those seeking to embark on this adventure or simply gain more insight into marine craftsmanship, Sven’s wisdom is invaluable.Making Flanges Around Bulkhead Hatches for Canvas
Sven Yrvind, a renowned yacht designer and sailor, shares valuable insights on creating flanges around bulkhead hatches for canvas protection in this enlightening video. By following his expert guidance, boat enthusiasts can ensure their living areas remain secure while allowing unhindered access through the hatches.Step 1: Starting with the Flange
Sven begins by explaining that working on flanges vertically and horizontally is significantly easier than doing so in a flat position. To simplify the process further, he divides the task into two or three steps as suggested by fellow expert “for for.” This approach not only makes it more manageable but also allows for greater precision in crafting each component.Step 2: Applying Glue and Securing
Sven proceeds to apply glue along one edge of the flange, ensuring a secure bond when clamped into place. He emphasizes that this stage is crucial for maintaining the structural integrity of the flange, which in turn safeguards the living area beneath the canvas when hatches are open.Step 3: Allowing Time to Dry
After securely attaching the first portion of the flange, Sven allows ample time for it to dry before moving forward with additional steps. This patience and precision are key aspects of his successful boatbuilding methods.Step 4: Finishing Touches
Once the flange is fully dried, Sven removes the clamps carefully, ensuring no damage occurs during this process. He then moves on to attaching four more pieces onto these main frames, completing two pairs of flanges for the bulkhead hatches.The Final Touches
While two flanges form the primary support structure around the hatches, Sven mentions there are two additional pieces required at each end to ensure comprehensive protection. This attention to detail highlights his commitment to producing a durable and reliable design. “Sailing is about finding your path, whether it’s across an ocean or within yourself.” – Sven Yrvind In conclusion, making flanges around bulkhead hatches may seem complex at first glance, but by following Sven Yrvind’s meticulous process, enthusiasts can achieve professional-level results. Remember that the journey of boatbuilding is as rewarding as reaching your destination; it tests one’s patience and dedication. For those seeking to embark on this adventure or simply gain more insight into marine craftsmanship, Sven’s wisdom is invaluable.After securely attaching the first portion of the flange, Sven allows ample time for it to dry before moving forward with additional steps. This patience and precision are key aspects of his successful boatbuilding methods.Step 4: Finishing Touches
Once the flange is fully dried, Sven removes the clamps carefully, ensuring no damage occurs during this process. He then moves on to attaching four more pieces onto these main frames, completing two pairs of flanges for the bulkhead hatches.The Final Touches
While two flanges form the primary support structure around the hatches, Sven mentions there are two additional pieces required at each end to ensure comprehensive protection. This attention to detail highlights his commitment to producing a durable and reliable design. “Sailing is about finding your path, whether it’s across an ocean or within yourself.” – Sven Yrvind In conclusion, making flanges around bulkhead hatches may seem complex at first glance, but by following Sven Yrvind’s meticulous process, enthusiasts can achieve professional-level results. Remember that the journey of boatbuilding is as rewarding as reaching your destination; it tests one’s patience and dedication. For those seeking to embark on this adventure or simply gain more insight into marine craftsmanship, Sven’s wisdom is invaluable.Sven proceeds to apply glue along one edge of the flange, ensuring a secure bond when clamped into place. He emphasizes that this stage is crucial for maintaining the structural integrity of the flange, which in turn safeguards the living area beneath the canvas when hatches are open.Step 3: Allowing Time to Dry
After securely attaching the first portion of the flange, Sven allows ample time for it to dry before moving forward with additional steps. This patience and precision are key aspects of his successful boatbuilding methods.Step 4: Finishing Touches
Once the flange is fully dried, Sven removes the clamps carefully, ensuring no damage occurs during this process. He then moves on to attaching four more pieces onto these main frames, completing two pairs of flanges for the bulkhead hatches.The Final Touches
While two flanges form the primary support structure around the hatches, Sven mentions there are two additional pieces required at each end to ensure comprehensive protection. This attention to detail highlights his commitment to producing a durable and reliable design. “Sailing is about finding your path, whether it’s across an ocean or within yourself.” – Sven Yrvind In conclusion, making flanges around bulkhead hatches may seem complex at first glance, but by following Sven Yrvind’s meticulous process, enthusiasts can achieve professional-level results. Remember that the journey of boatbuilding is as rewarding as reaching your destination; it tests one’s patience and dedication. For those seeking to embark on this adventure or simply gain more insight into marine craftsmanship, Sven’s wisdom is invaluable.Sven begins by explaining that working on flanges vertically and horizontally is significantly easier than doing so in a flat position. To simplify the process further, he divides the task into two or three steps as suggested by fellow expert “for for.” This approach not only makes it more manageable but also allows for greater precision in crafting each component.Step 2: Applying Glue and Securing
Sven proceeds to apply glue along one edge of the flange, ensuring a secure bond when clamped into place. He emphasizes that this stage is crucial for maintaining the structural integrity of the flange, which in turn safeguards the living area beneath the canvas when hatches are open.Step 3: Allowing Time to Dry
After securely attaching the first portion of the flange, Sven allows ample time for it to dry before moving forward with additional steps. This patience and precision are key aspects of his successful boatbuilding methods.Step 4: Finishing Touches
Once the flange is fully dried, Sven removes the clamps carefully, ensuring no damage occurs during this process. He then moves on to attaching four more pieces onto these main frames, completing two pairs of flanges for the bulkhead hatches.The Final Touches
While two flanges form the primary support structure around the hatches, Sven mentions there are two additional pieces required at each end to ensure comprehensive protection. This attention to detail highlights his commitment to producing a durable and reliable design. “Sailing is about finding your path, whether it’s across an ocean or within yourself.” – Sven Yrvind In conclusion, making flanges around bulkhead hatches may seem complex at first glance, but by following Sven Yrvind’s meticulous process, enthusiasts can achieve professional-level results. Remember that the journey of boatbuilding is as rewarding as reaching your destination; it tests one’s patience and dedication. For those seeking to embark on this adventure or simply gain more insight into marine craftsmanship, Sven’s wisdom is invaluable.Sven Yrvind, a renowned yacht designer and sailor, shares valuable insights on creating flanges around bulkhead hatches for canvas protection in this enlightening video. By following his expert guidance, boat enthusiasts can ensure their living areas remain secure while allowing unhindered access through the hatches.Step 1: Starting with the Flange
Sven begins by explaining that working on flanges vertically and horizontally is significantly easier than doing so in a flat position. To simplify the process further, he divides the task into two or three steps as suggested by fellow expert “for for.” This approach not only makes it more manageable but also allows for greater precision in crafting each component.Step 2: Applying Glue and Securing
Sven proceeds to apply glue along one edge of the flange, ensuring a secure bond when clamped into place. He emphasizes that this stage is crucial for maintaining the structural integrity of the flange, which in turn safeguards the living area beneath the canvas when hatches are open.Step 3: Allowing Time to Dry
After securely attaching the first portion of the flange, Sven allows ample time for it to dry before moving forward with additional steps. This patience and precision are key aspects of his successful boatbuilding methods.Step 4: Finishing Touches
Once the flange is fully dried, Sven removes the clamps carefully, ensuring no damage occurs during this process. He then moves on to attaching four more pieces onto these main frames, completing two pairs of flanges for the bulkhead hatches.The Final Touches
While two flanges form the primary support structure around the hatches, Sven mentions there are two additional pieces required at each end to ensure comprehensive protection. This attention to detail highlights his commitment to producing a durable and reliable design. “Sailing is about finding your path, whether it’s across an ocean or within yourself.” – Sven Yrvind In conclusion, making flanges around bulkhead hatches may seem complex at first glance, but by following Sven Yrvind’s meticulous process, enthusiasts can achieve professional-level results. Remember that the journey of boatbuilding is as rewarding as reaching your destination; it tests one’s patience and dedication. For those seeking to embark on this adventure or simply gain more insight into marine craftsmanship, Sven’s wisdom is invaluable.Making Flanges Around Bulkhead Hatches for Canvas
Sven Yrvind, a renowned yacht designer and sailor, shares valuable insights on creating flanges around bulkhead hatches for canvas protection in this enlightening video. By following his expert guidance, boat enthusiasts can ensure their living areas remain secure while allowing unhindered access through the hatches.Step 1: Starting with the Flange
Sven begins by explaining that working on flanges vertically and horizontally is significantly easier than doing so in a flat position. To simplify the process further, he divides the task into two or three steps as suggested by fellow expert “for for.” This approach not only makes it more manageable but also allows for greater precision in crafting each component.Step 2: Applying Glue and Securing
Sven proceeds to apply glue along one edge of the flange, ensuring a secure bond when clamped into place. He emphasizes that this stage is crucial for maintaining the structural integrity of the flange, which in turn safeguards the living area beneath the canvas when hatches are open.Step 3: Allowing Time to Dry
After securely attaching the first portion of the flange, Sven allows ample time for it to dry before moving forward with additional steps. This patience and precision are key aspects of his successful boatbuilding methods.Step 4: Finishing Touches
Once the flange is fully dried, Sven removes the clamps carefully, ensuring no damage occurs during this process. He then moves on to attaching four more pieces onto these main frames, completing two pairs of flanges for the bulkhead hatches.The Final Touches
While two flanges form the primary support structure around the hatches, Sven mentions there are two additional pieces required at each end to ensure comprehensive protection. This attention to detail highlights his commitment to producing a durable and reliable design. “Sailing is about finding your path, whether it’s across an ocean or within yourself.” – Sven Yrvind In conclusion, making flanges around bulkhead hatches may seem complex at first glance, but by following Sven Yrvind’s meticulous process, enthusiasts can achieve professional-level results. Remember that the journey of boatbuilding is as rewarding as reaching your destination; it tests one’s patience and dedication. For those seeking to embark on this adventure or simply gain more insight into marine craftsmanship, Sven’s wisdom is invaluable.Once the flange is fully dried, Sven removes the clamps carefully, ensuring no damage occurs during this process. He then moves on to attaching four more pieces onto these main frames, completing two pairs of flanges for the bulkhead hatches.The Final Touches
While two flanges form the primary support structure around the hatches, Sven mentions there are two additional pieces required at each end to ensure comprehensive protection. This attention to detail highlights his commitment to producing a durable and reliable design. “Sailing is about finding your path, whether it’s across an ocean or within yourself.” – Sven Yrvind In conclusion, making flanges around bulkhead hatches may seem complex at first glance, but by following Sven Yrvind’s meticulous process, enthusiasts can achieve professional-level results. Remember that the journey of boatbuilding is as rewarding as reaching your destination; it tests one’s patience and dedication. For those seeking to embark on this adventure or simply gain more insight into marine craftsmanship, Sven’s wisdom is invaluable.After securely attaching the first portion of the flange, Sven allows ample time for it to dry before moving forward with additional steps. This patience and precision are key aspects of his successful boatbuilding methods.Step 4: Finishing Touches
Once the flange is fully dried, Sven removes the clamps carefully, ensuring no damage occurs during this process. He then moves on to attaching four more pieces onto these main frames, completing two pairs of flanges for the bulkhead hatches.The Final Touches
While two flanges form the primary support structure around the hatches, Sven mentions there are two additional pieces required at each end to ensure comprehensive protection. This attention to detail highlights his commitment to producing a durable and reliable design. “Sailing is about finding your path, whether it’s across an ocean or within yourself.” – Sven Yrvind In conclusion, making flanges around bulkhead hatches may seem complex at first glance, but by following Sven Yrvind’s meticulous process, enthusiasts can achieve professional-level results. Remember that the journey of boatbuilding is as rewarding as reaching your destination; it tests one’s patience and dedication. For those seeking to embark on this adventure or simply gain more insight into marine craftsmanship, Sven’s wisdom is invaluable.Sven proceeds to apply glue along one edge of the flange, ensuring a secure bond when clamped into place. He emphasizes that this stage is crucial for maintaining the structural integrity of the flange, which in turn safeguards the living area beneath the canvas when hatches are open.Step 3: Allowing Time to Dry
After securely attaching the first portion of the flange, Sven allows ample time for it to dry before moving forward with additional steps. This patience and precision are key aspects of his successful boatbuilding methods.Step 4: Finishing Touches
Once the flange is fully dried, Sven removes the clamps carefully, ensuring no damage occurs during this process. He then moves on to attaching four more pieces onto these main frames, completing two pairs of flanges for the bulkhead hatches.The Final Touches
While two flanges form the primary support structure around the hatches, Sven mentions there are two additional pieces required at each end to ensure comprehensive protection. This attention to detail highlights his commitment to producing a durable and reliable design. “Sailing is about finding your path, whether it’s across an ocean or within yourself.” – Sven Yrvind In conclusion, making flanges around bulkhead hatches may seem complex at first glance, but by following Sven Yrvind’s meticulous process, enthusiasts can achieve professional-level results. Remember that the journey of boatbuilding is as rewarding as reaching your destination; it tests one’s patience and dedication. For those seeking to embark on this adventure or simply gain more insight into marine craftsmanship, Sven’s wisdom is invaluable.Sven begins by explaining that working on flanges vertically and horizontally is significantly easier than doing so in a flat position. To simplify the process further, he divides the task into two or three steps as suggested by fellow expert “for for.” This approach not only makes it more manageable but also allows for greater precision in crafting each component.Step 2: Applying Glue and Securing
Sven proceeds to apply glue along one edge of the flange, ensuring a secure bond when clamped into place. He emphasizes that this stage is crucial for maintaining the structural integrity of the flange, which in turn safeguards the living area beneath the canvas when hatches are open.Step 3: Allowing Time to Dry
After securely attaching the first portion of the flange, Sven allows ample time for it to dry before moving forward with additional steps. This patience and precision are key aspects of his successful boatbuilding methods.Step 4: Finishing Touches
Once the flange is fully dried, Sven removes the clamps carefully, ensuring no damage occurs during this process. He then moves on to attaching four more pieces onto these main frames, completing two pairs of flanges for the bulkhead hatches.The Final Touches
While two flanges form the primary support structure around the hatches, Sven mentions there are two additional pieces required at each end to ensure comprehensive protection. This attention to detail highlights his commitment to producing a durable and reliable design. “Sailing is about finding your path, whether it’s across an ocean or within yourself.” – Sven Yrvind In conclusion, making flanges around bulkhead hatches may seem complex at first glance, but by following Sven Yrvind’s meticulous process, enthusiasts can achieve professional-level results. Remember that the journey of boatbuilding is as rewarding as reaching your destination; it tests one’s patience and dedication. For those seeking to embark on this adventure or simply gain more insight into marine craftsmanship, Sven’s wisdom is invaluable.Sven Yrvind, a renowned yacht designer and sailor, shares valuable insights on creating flanges around bulkhead hatches for canvas protection in this enlightening video. By following his expert guidance, boat enthusiasts can ensure their living areas remain secure while allowing unhindered access through the hatches.Step 1: Starting with the Flange
Sven begins by explaining that working on flanges vertically and horizontally is significantly easier than doing so in a flat position. To simplify the process further, he divides the task into two or three steps as suggested by fellow expert “for for.” This approach not only makes it more manageable but also allows for greater precision in crafting each component.Step 2: Applying Glue and Securing
Sven proceeds to apply glue along one edge of the flange, ensuring a secure bond when clamped into place. He emphasizes that this stage is crucial for maintaining the structural integrity of the flange, which in turn safeguards the living area beneath the canvas when hatches are open.Step 3: Allowing Time to Dry
After securely attaching the first portion of the flange, Sven allows ample time for it to dry before moving forward with additional steps. This patience and precision are key aspects of his successful boatbuilding methods.Step 4: Finishing Touches
Once the flange is fully dried, Sven removes the clamps carefully, ensuring no damage occurs during this process. He then moves on to attaching four more pieces onto these main frames, completing two pairs of flanges for the bulkhead hatches.The Final Touches
While two flanges form the primary support structure around the hatches, Sven mentions there are two additional pieces required at each end to ensure comprehensive protection. This attention to detail highlights his commitment to producing a durable and reliable design. “Sailing is about finding your path, whether it’s across an ocean or within yourself.” – Sven Yrvind In conclusion, making flanges around bulkhead hatches may seem complex at first glance, but by following Sven Yrvind’s meticulous process, enthusiasts can achieve professional-level results. Remember that the journey of boatbuilding is as rewarding as reaching your destination; it tests one’s patience and dedication. For those seeking to embark on this adventure or simply gain more insight into marine craftsmanship, Sven’s wisdom is invaluable.Making Flanges Around Bulkhead Hatches for Canvas
Sven Yrvind, a renowned yacht designer and sailor, shares valuable insights on creating flanges around bulkhead hatches for canvas protection in this enlightening video. By following his expert guidance, boat enthusiasts can ensure their living areas remain secure while allowing unhindered access through the hatches.Step 1: Starting with the Flange
Sven begins by explaining that working on flanges vertically and horizontally is significantly easier than doing so in a flat position. To simplify the process further, he divides the task into two or three steps as suggested by fellow expert “for for.” This approach not only makes it more manageable but also allows for greater precision in crafting each component.Step 2: Applying Glue and Securing
Sven proceeds to apply glue along one edge of the flange, ensuring a secure bond when clamped into place. He emphasizes that this stage is crucial for maintaining the structural integrity of the flange, which in turn safeguards the living area beneath the canvas when hatches are open.Step 3: Allowing Time to Dry
After securely attaching the first portion of the flange, Sven allows ample time for it to dry before moving forward with additional steps. This patience and precision are key aspects of his successful boatbuilding methods.Step 4: Finishing Touches
Once the flange is fully dried, Sven removes the clamps carefully, ensuring no damage occurs during this process. He then moves on to attaching four more pieces onto these main frames, completing two pairs of flanges for the bulkhead hatches.The Final Touches
While two flanges form the primary support structure around the hatches, Sven mentions there are two additional pieces required at each end to ensure comprehensive protection. This attention to detail highlights his commitment to producing a durable and reliable design. “Sailing is about finding your path, whether it’s across an ocean or within yourself.” – Sven Yrvind In conclusion, making flanges around bulkhead hatches may seem complex at first glance, but by following Sven Yrvind’s meticulous process, enthusiasts can achieve professional-level results. Remember that the journey of boatbuilding is as rewarding as reaching your destination; it tests one’s patience and dedication. For those seeking to embark on this adventure or simply gain more insight into marine craftsmanship, Sven’s wisdom is invaluable.Making Flanges Around Bulkhead Hatches for Canvas
Sven Yrvind, a renowned yacht designer and sailor, shares valuable insights on creating flanges around bulkhead hatches for canvas protection in this enlightening video. By following his expert guidance, boat enthusiasts can ensure their living areas remain secure while allowing unhindered access through the hatches.Step 1: Starting with the Flange
Sven begins by explaining that working on flanges vertically and horizontally is significantly easier than doing so in a flat position. To simplify the process further, he divides the task into two or three steps as suggested by fellow expert “for for.” This approach not only makes it more manageable but also allows for greater precision in crafting each component.Step 2: Applying Glue and Securing
Sven proceeds to apply glue along one edge of the flange, ensuring a secure bond when clamped into place. He emphasizes that this stage is crucial for maintaining the structural integrity of the flange, which in turn safeguards the living area beneath the canvas when hatches are open.Step 3: Allowing Time to Dry
After securely attaching the first portion of the flange, Sven allows ample time for it to dry before moving forward with additional steps. This patience and precision are key aspects of his successful boatbuilding methods.Step 4: Finishing Touches
Once the flange is fully dried, Sven removes the clamps carefully, ensuring no damage occurs during this process. He then moves on to attaching four more pieces onto these main frames, completing two pairs of flanges for the bulkhead hatches.The Final Touches
While two flanges form the primary support structure around the hatches, Sven mentions there are two additional pieces required at each end to ensure comprehensive protection. This attention to detail highlights his commitment to producing a durable and reliable design. “Sailing is about finding your path, whether it’s across an ocean or within yourself.” – Sven Yrvind In conclusion, making flanges around bulkhead hatches may seem complex at first glance, but by following Sven Yrvind’s meticulous process, enthusiasts can achieve professional-level results. Remember that the journey of boatbuilding is as rewarding as reaching your destination; it tests one’s patience and dedication. For those seeking to embark on this adventure or simply gain more insight into marine craftsmanship, Sven’s wisdom is invaluable.Sven begins by explaining that working on flanges vertically and horizontally is significantly easier than doing so in a flat position. To simplify the process further, he divides the task into two or three steps as suggested by fellow expert “for for.” This approach not only makes it more manageable but also allows for greater precision in crafting each component.Step 2: Applying Glue and Securing
Sven proceeds to apply glue along one edge of the flange, ensuring a secure bond when clamped into place. He emphasizes that this stage is crucial for maintaining the structural integrity of the flange, which in turn safeguards the living area beneath the canvas when hatches are open.Step 3: Allowing Time to Dry
After securely attaching the first portion of the flange, Sven allows ample time for it to dry before moving forward with additional steps. This patience and precision are key aspects of his successful boatbuilding methods.Step 4: Finishing Touches
Once the flange is fully dried, Sven removes the clamps carefully, ensuring no damage occurs during this process. He then moves on to attaching four more pieces onto these main frames, completing two pairs of flanges for the bulkhead hatches.The Final Touches
While two flanges form the primary support structure around the hatches, Sven mentions there are two additional pieces required at each end to ensure comprehensive protection. This attention to detail highlights his commitment to producing a durable and reliable design. “Sailing is about finding your path, whether it’s across an ocean or within yourself.” – Sven Yrvind In conclusion, making flanges around bulkhead hatches may seem complex at first glance, but by following Sven Yrvind’s meticulous process, enthusiasts can achieve professional-level results. Remember that the journey of boatbuilding is as rewarding as reaching your destination; it tests one’s patience and dedication. For those seeking to embark on this adventure or simply gain more insight into marine craftsmanship, Sven’s wisdom is invaluable.Sven Yrvind, a renowned yacht designer and sailor, shares valuable insights on creating flanges around bulkhead hatches for canvas protection in this enlightening video. By following his expert guidance, boat enthusiasts can ensure their living areas remain secure while allowing unhindered access through the hatches.Step 1: Starting with the Flange
Sven begins by explaining that working on flanges vertically and horizontally is significantly easier than doing so in a flat position. To simplify the process further, he divides the task into two or three steps as suggested by fellow expert “for for.” This approach not only makes it more manageable but also allows for greater precision in crafting each component.Step 2: Applying Glue and Securing
Sven proceeds to apply glue along one edge of the flange, ensuring a secure bond when clamped into place. He emphasizes that this stage is crucial for maintaining the structural integrity of the flange, which in turn safeguards the living area beneath the canvas when hatches are open.Step 3: Allowing Time to Dry
After securely attaching the first portion of the flange, Sven allows ample time for it to dry before moving forward with additional steps. This patience and precision are key aspects of his successful boatbuilding methods.Step 4: Finishing Touches
Once the flange is fully dried, Sven removes the clamps carefully, ensuring no damage occurs during this process. He then moves on to attaching four more pieces onto these main frames, completing two pairs of flanges for the bulkhead hatches.The Final Touches
While two flanges form the primary support structure around the hatches, Sven mentions there are two additional pieces required at each end to ensure comprehensive protection. This attention to detail highlights his commitment to producing a durable and reliable design. “Sailing is about finding your path, whether it’s across an ocean or within yourself.” – Sven Yrvind In conclusion, making flanges around bulkhead hatches may seem complex at first glance, but by following Sven Yrvind’s meticulous process, enthusiasts can achieve professional-level results. Remember that the journey of boatbuilding is as rewarding as reaching your destination; it tests one’s patience and dedication. For those seeking to embark on this adventure or simply gain more insight into marine craftsmanship, Sven’s wisdom is invaluable.Making Flanges Around Bulkhead Hatches for Canvas
Sven Yrvind, a renowned yacht designer and sailor, shares valuable insights on creating flanges around bulkhead hatches for canvas protection in this enlightening video. By following his expert guidance, boat enthusiasts can ensure their living areas remain secure while allowing unhindered access through the hatches.Step 1: Starting with the Flange
Sven begins by explaining that working on flanges vertically and horizontally is significantly easier than doing so in a flat position. To simplify the process further, he divides the task into two or three steps as suggested by fellow expert “for for.” This approach not only makes it more manageable but also allows for greater precision in crafting each component.Step 2: Applying Glue and Securing
Sven proceeds to apply glue along one edge of the flange, ensuring a secure bond when clamped into place. He emphasizes that this stage is crucial for maintaining the structural integrity of the flange, which in turn safeguards the living area beneath the canvas when hatches are open.Step 3: Allowing Time to Dry
After securely attaching the first portion of the flange, Sven allows ample time for it to dry before moving forward with additional steps. This patience and precision are key aspects of his successful boatbuilding methods.Step 4: Finishing Touches
Once the flange is fully dried, Sven removes the clamps carefully, ensuring no damage occurs during this process. He then moves on to attaching four more pieces onto these main frames, completing two pairs of flanges for the bulkhead hatches.The Final Touches
While two flanges form the primary support structure around the hatches, Sven mentions there are two additional pieces required at each end to ensure comprehensive protection. This attention to detail highlights his commitment to producing a durable and reliable design. “Sailing is about finding your path, whether it’s across an ocean or within yourself.” – Sven Yrvind In conclusion, making flanges around bulkhead hatches may seem complex at first glance, but by following Sven Yrvind’s meticulous process, enthusiasts can achieve professional-level results. Remember that the journey of boatbuilding is as rewarding as reaching your destination; it tests one’s patience and dedication. For those seeking to embark on this adventure or simply gain more insight into marine craftsmanship, Sven’s wisdom is invaluable.Once the flange is fully dried, Sven removes the clamps carefully, ensuring no damage occurs during this process. He then moves on to attaching four more pieces onto these main frames, completing two pairs of flanges for the bulkhead hatches.The Final Touches
While two flanges form the primary support structure around the hatches, Sven mentions there are two additional pieces required at each end to ensure comprehensive protection. This attention to detail highlights his commitment to producing a durable and reliable design. “Sailing is about finding your path, whether it’s across an ocean or within yourself.” – Sven Yrvind In conclusion, making flanges around bulkhead hatches may seem complex at first glance, but by following Sven Yrvind’s meticulous process, enthusiasts can achieve professional-level results. Remember that the journey of boatbuilding is as rewarding as reaching your destination; it tests one’s patience and dedication. For those seeking to embark on this adventure or simply gain more insight into marine craftsmanship, Sven’s wisdom is invaluable.Sven begins by explaining that working on flanges vertically and horizontally is significantly easier than doing so in a flat position. To simplify the process further, he divides the task into two or three steps as suggested by fellow expert “for for.” This approach not only makes it more manageable but also allows for greater precision in crafting each component.Step 2: Applying Glue and Securing
Sven proceeds to apply glue along one edge of the flange, ensuring a secure bond when clamped into place. He emphasizes that this stage is crucial for maintaining the structural integrity of the flange, which in turn safeguards the living area beneath the canvas when hatches are open.Step 3: Allowing Time to Dry
After securely attaching the first portion of the flange, Sven allows ample time for it to dry before moving forward with additional steps. This patience and precision are key aspects of his successful boatbuilding methods.Step 4: Finishing Touches
Once the flange is fully dried, Sven removes the clamps carefully, ensuring no damage occurs during this process. He then moves on to attaching four more pieces onto these main frames, completing two pairs of flanges for the bulkhead hatches.The Final Touches
While two flanges form the primary support structure around the hatches, Sven mentions there are two additional pieces required at each end to ensure comprehensive protection. This attention to detail highlights his commitment to producing a durable and reliable design. “Sailing is about finding your path, whether it’s across an ocean or within yourself.” – Sven Yrvind In conclusion, making flanges around bulkhead hatches may seem complex at first glance, but by following Sven Yrvind’s meticulous process, enthusiasts can achieve professional-level results. Remember that the journey of boatbuilding is as rewarding as reaching your destination; it tests one’s patience and dedication. For those seeking to embark on this adventure or simply gain more insight into marine craftsmanship, Sven’s wisdom is invaluable.Sven Yrvind, a renowned yacht designer and sailor, shares valuable insights on creating flanges around bulkhead hatches for canvas protection in this enlightening video. By following his expert guidance, boat enthusiasts can ensure their living areas remain secure while allowing unhindered access through the hatches.Step 1: Starting with the Flange
Sven begins by explaining that working on flanges vertically and horizontally is significantly easier than doing so in a flat position. To simplify the process further, he divides the task into two or three steps as suggested by fellow expert “for for.” This approach not only makes it more manageable but also allows for greater precision in crafting each component.Step 2: Applying Glue and Securing
Sven proceeds to apply glue along one edge of the flange, ensuring a secure bond when clamped into place. He emphasizes that this stage is crucial for maintaining the structural integrity of the flange, which in turn safeguards the living area beneath the canvas when hatches are open.Step 3: Allowing Time to Dry
After securely attaching the first portion of the flange, Sven allows ample time for it to dry before moving forward with additional steps. This patience and precision are key aspects of his successful boatbuilding methods.Step 4: Finishing Touches
Once the flange is fully dried, Sven removes the clamps carefully, ensuring no damage occurs during this process. He then moves on to attaching four more pieces onto these main frames, completing two pairs of flanges for the bulkhead hatches.The Final Touches
While two flanges form the primary support structure around the hatches, Sven mentions there are two additional pieces required at each end to ensure comprehensive protection. This attention to detail highlights his commitment to producing a durable and reliable design. “Sailing is about finding your path, whether it’s across an ocean or within yourself.” – Sven Yrvind In conclusion, making flanges around bulkhead hatches may seem complex at first glance, but by following Sven Yrvind’s meticulous process, enthusiasts can achieve professional-level results. Remember that the journey of boatbuilding is as rewarding as reaching your destination; it tests one’s patience and dedication. For those seeking to embark on this adventure or simply gain more insight into marine craftsmanship, Sven’s wisdom is invaluable.Making Flanges Around Bulkhead Hatches for Canvas
Sven Yrvind, a renowned yacht designer and sailor, shares valuable insights on creating flanges around bulkhead hatches for canvas protection in this enlightening video. By following his expert guidance, boat enthusiasts can ensure their living areas remain secure while allowing unhindered access through the hatches.Step 1: Starting with the Flange
Sven begins by explaining that working on flanges vertically and horizontally is significantly easier than doing so in a flat position. To simplify the process further, he divides the task into two or three steps as suggested by fellow expert “for for.” This approach not only makes it more manageable but also allows for greater precision in crafting each component.Step 2: Applying Glue and Securing
Sven proceeds to apply glue along one edge of the flange, ensuring a secure bond when clamped into place. He emphasizes that this stage is crucial for maintaining the structural integrity of the flange, which in turn safeguards the living area beneath the canvas when hatches are open.Step 3: Allowing Time to Dry
After securely attaching the first portion of the flange, Sven allows ample time for it to dry before moving forward with additional steps. This patience and precision are key aspects of his successful boatbuilding methods.Step 4: Finishing Touches
Once the flange is fully dried, Sven removes the clamps carefully, ensuring no damage occurs during this process. He then moves on to attaching four more pieces onto these main frames, completing two pairs of flanges for the bulkhead hatches.The Final Touches
While two flanges form the primary support structure around the hatches, Sven mentions there are two additional pieces required at each end to ensure comprehensive protection. This attention to detail highlights his commitment to producing a durable and reliable design. “Sailing is about finding your path, whether it’s across an ocean or within yourself.” – Sven Yrvind In conclusion, making flanges around bulkhead hatches may seem complex at first glance, but by following Sven Yrvind’s meticulous process, enthusiasts can achieve professional-level results. Remember that the journey of boatbuilding is as rewarding as reaching your destination; it tests one’s patience and dedication. For those seeking to embark on this adventure or simply gain more insight into marine craftsmanship, Sven’s wisdom is invaluable.After securely attaching the first portion of the flange, Sven allows ample time for it to dry before moving forward with additional steps. This patience and precision are key aspects of his successful boatbuilding methods.Step 4: Finishing Touches
Once the flange is fully dried, Sven removes the clamps carefully, ensuring no damage occurs during this process. He then moves on to attaching four more pieces onto these main frames, completing two pairs of flanges for the bulkhead hatches.The Final Touches
While two flanges form the primary support structure around the hatches, Sven mentions there are two additional pieces required at each end to ensure comprehensive protection. This attention to detail highlights his commitment to producing a durable and reliable design. “Sailing is about finding your path, whether it’s across an ocean or within yourself.” – Sven Yrvind In conclusion, making flanges around bulkhead hatches may seem complex at first glance, but by following Sven Yrvind’s meticulous process, enthusiasts can achieve professional-level results. Remember that the journey of boatbuilding is as rewarding as reaching your destination; it tests one’s patience and dedication. For those seeking to embark on this adventure or simply gain more insight into marine craftsmanship, Sven’s wisdom is invaluable.Sven begins by explaining that working on flanges vertically and horizontally is significantly easier than doing so in a flat position. To simplify the process further, he divides the task into two or three steps as suggested by fellow expert “for for.” This approach not only makes it more manageable but also allows for greater precision in crafting each component.Step 2: Applying Glue and Securing
Sven proceeds to apply glue along one edge of the flange, ensuring a secure bond when clamped into place. He emphasizes that this stage is crucial for maintaining the structural integrity of the flange, which in turn safeguards the living area beneath the canvas when hatches are open.Step 3: Allowing Time to Dry
After securely attaching the first portion of the flange, Sven allows ample time for it to dry before moving forward with additional steps. This patience and precision are key aspects of his successful boatbuilding methods.Step 4: Finishing Touches
Once the flange is fully dried, Sven removes the clamps carefully, ensuring no damage occurs during this process. He then moves on to attaching four more pieces onto these main frames, completing two pairs of flanges for the bulkhead hatches.The Final Touches
While two flanges form the primary support structure around the hatches, Sven mentions there are two additional pieces required at each end to ensure comprehensive protection. This attention to detail highlights his commitment to producing a durable and reliable design. “Sailing is about finding your path, whether it’s across an ocean or within yourself.” – Sven Yrvind In conclusion, making flanges around bulkhead hatches may seem complex at first glance, but by following Sven Yrvind’s meticulous process, enthusiasts can achieve professional-level results. Remember that the journey of boatbuilding is as rewarding as reaching your destination; it tests one’s patience and dedication. For those seeking to embark on this adventure or simply gain more insight into marine craftsmanship, Sven’s wisdom is invaluable.Sven Yrvind, a renowned yacht designer and sailor, shares valuable insights on creating flanges around bulkhead hatches for canvas protection in this enlightening video. By following his expert guidance, boat enthusiasts can ensure their living areas remain secure while allowing unhindered access through the hatches.Step 1: Starting with the Flange
Sven begins by explaining that working on flanges vertically and horizontally is significantly easier than doing so in a flat position. To simplify the process further, he divides the task into two or three steps as suggested by fellow expert “for for.” This approach not only makes it more manageable but also allows for greater precision in crafting each component.Step 2: Applying Glue and Securing
Sven proceeds to apply glue along one edge of the flange, ensuring a secure bond when clamped into place. He emphasizes that this stage is crucial for maintaining the structural integrity of the flange, which in turn safeguards the living area beneath the canvas when hatches are open.Step 3: Allowing Time to Dry
After securely attaching the first portion of the flange, Sven allows ample time for it to dry before moving forward with additional steps. This patience and precision are key aspects of his successful boatbuilding methods.Step 4: Finishing Touches
Once the flange is fully dried, Sven removes the clamps carefully, ensuring no damage occurs during this process. He then moves on to attaching four more pieces onto these main frames, completing two pairs of flanges for the bulkhead hatches.The Final Touches
While two flanges form the primary support structure around the hatches, Sven mentions there are two additional pieces required at each end to ensure comprehensive protection. This attention to detail highlights his commitment to producing a durable and reliable design. “Sailing is about finding your path, whether it’s across an ocean or within yourself.” – Sven Yrvind In conclusion, making flanges around bulkhead hatches may seem complex at first glance, but by following Sven Yrvind’s meticulous process, enthusiasts can achieve professional-level results. Remember that the journey of boatbuilding is as rewarding as reaching your destination; it tests one’s patience and dedication. For those seeking to embark on this adventure or simply gain more insight into marine craftsmanship, Sven’s wisdom is invaluable.Making Flanges Around Bulkhead Hatches for Canvas
Sven Yrvind, a renowned yacht designer and sailor, shares valuable insights on creating flanges around bulkhead hatches for canvas protection in this enlightening video. By following his expert guidance, boat enthusiasts can ensure their living areas remain secure while allowing unhindered access through the hatches.Step 1: Starting with the Flange
Sven begins by explaining that working on flanges vertically and horizontally is significantly easier than doing so in a flat position. To simplify the process further, he divides the task into two or three steps as suggested by fellow expert “for for.” This approach not only makes it more manageable but also allows for greater precision in crafting each component.Step 2: Applying Glue and Securing
Sven proceeds to apply glue along one edge of the flange, ensuring a secure bond when clamped into place. He emphasizes that this stage is crucial for maintaining the structural integrity of the flange, which in turn safeguards the living area beneath the canvas when hatches are open.Step 3: Allowing Time to Dry
After securely attaching the first portion of the flange, Sven allows ample time for it to dry before moving forward with additional steps. This patience and precision are key aspects of his successful boatbuilding methods.Step 4: Finishing Touches
Once the flange is fully dried, Sven removes the clamps carefully, ensuring no damage occurs during this process. He then moves on to attaching four more pieces onto these main frames, completing two pairs of flanges for the bulkhead hatches.The Final Touches
While two flanges form the primary support structure around the hatches, Sven mentions there are two additional pieces required at each end to ensure comprehensive protection. This attention to detail highlights his commitment to producing a durable and reliable design. “Sailing is about finding your path, whether it’s across an ocean or within yourself.” – Sven Yrvind In conclusion, making flanges around bulkhead hatches may seem complex at first glance, but by following Sven Yrvind’s meticulous process, enthusiasts can achieve professional-level results. Remember that the journey of boatbuilding is as rewarding as reaching your destination; it tests one’s patience and dedication. For those seeking to embark on this adventure or simply gain more insight into marine craftsmanship, Sven’s wisdom is invaluable.Sven proceeds to apply glue along one edge of the flange, ensuring a secure bond when clamped into place. He emphasizes that this stage is crucial for maintaining the structural integrity of the flange, which in turn safeguards the living area beneath the canvas when hatches are open.Step 3: Allowing Time to Dry
After securely attaching the first portion of the flange, Sven allows ample time for it to dry before moving forward with additional steps. This patience and precision are key aspects of his successful boatbuilding methods.Step 4: Finishing Touches
Once the flange is fully dried, Sven removes the clamps carefully, ensuring no damage occurs during this process. He then moves on to attaching four more pieces onto these main frames, completing two pairs of flanges for the bulkhead hatches.The Final Touches
While two flanges form the primary support structure around the hatches, Sven mentions there are two additional pieces required at each end to ensure comprehensive protection. This attention to detail highlights his commitment to producing a durable and reliable design. “Sailing is about finding your path, whether it’s across an ocean or within yourself.” – Sven Yrvind In conclusion, making flanges around bulkhead hatches may seem complex at first glance, but by following Sven Yrvind’s meticulous process, enthusiasts can achieve professional-level results. Remember that the journey of boatbuilding is as rewarding as reaching your destination; it tests one’s patience and dedication. For those seeking to embark on this adventure or simply gain more insight into marine craftsmanship, Sven’s wisdom is invaluable.Sven begins by explaining that working on flanges vertically and horizontally is significantly easier than doing so in a flat position. To simplify the process further, he divides the task into two or three steps as suggested by fellow expert “for for.” This approach not only makes it more manageable but also allows for greater precision in crafting each component.Step 2: Applying Glue and Securing
Sven proceeds to apply glue along one edge of the flange, ensuring a secure bond when clamped into place. He emphasizes that this stage is crucial for maintaining the structural integrity of the flange, which in turn safeguards the living area beneath the canvas when hatches are open.Step 3: Allowing Time to Dry
After securely attaching the first portion of the flange, Sven allows ample time for it to dry before moving forward with additional steps. This patience and precision are key aspects of his successful boatbuilding methods.Step 4: Finishing Touches
Once the flange is fully dried, Sven removes the clamps carefully, ensuring no damage occurs during this process. He then moves on to attaching four more pieces onto these main frames, completing two pairs of flanges for the bulkhead hatches.The Final Touches
While two flanges form the primary support structure around the hatches, Sven mentions there are two additional pieces required at each end to ensure comprehensive protection. This attention to detail highlights his commitment to producing a durable and reliable design. “Sailing is about finding your path, whether it’s across an ocean or within yourself.” – Sven Yrvind In conclusion, making flanges around bulkhead hatches may seem complex at first glance, but by following Sven Yrvind’s meticulous process, enthusiasts can achieve professional-level results. Remember that the journey of boatbuilding is as rewarding as reaching your destination; it tests one’s patience and dedication. For those seeking to embark on this adventure or simply gain more insight into marine craftsmanship, Sven’s wisdom is invaluable.Sven Yrvind, a renowned yacht designer and sailor, shares valuable insights on creating flanges around bulkhead hatches for canvas protection in this enlightening video. By following his expert guidance, boat enthusiasts can ensure their living areas remain secure while allowing unhindered access through the hatches.Step 1: Starting with the Flange
Sven begins by explaining that working on flanges vertically and horizontally is significantly easier than doing so in a flat position. To simplify the process further, he divides the task into two or three steps as suggested by fellow expert “for for.” This approach not only makes it more manageable but also allows for greater precision in crafting each component.Step 2: Applying Glue and Securing
Sven proceeds to apply glue along one edge of the flange, ensuring a secure bond when clamped into place. He emphasizes that this stage is crucial for maintaining the structural integrity of the flange, which in turn safeguards the living area beneath the canvas when hatches are open.Step 3: Allowing Time to Dry
After securely attaching the first portion of the flange, Sven allows ample time for it to dry before moving forward with additional steps. This patience and precision are key aspects of his successful boatbuilding methods.Step 4: Finishing Touches
Once the flange is fully dried, Sven removes the clamps carefully, ensuring no damage occurs during this process. He then moves on to attaching four more pieces onto these main frames, completing two pairs of flanges for the bulkhead hatches.The Final Touches
While two flanges form the primary support structure around the hatches, Sven mentions there are two additional pieces required at each end to ensure comprehensive protection. This attention to detail highlights his commitment to producing a durable and reliable design. “Sailing is about finding your path, whether it’s across an ocean or within yourself.” – Sven Yrvind In conclusion, making flanges around bulkhead hatches may seem complex at first glance, but by following Sven Yrvind’s meticulous process, enthusiasts can achieve professional-level results. Remember that the journey of boatbuilding is as rewarding as reaching your destination; it tests one’s patience and dedication. For those seeking to embark on this adventure or simply gain more insight into marine craftsmanship, Sven’s wisdom is invaluable.Making Flanges Around Bulkhead Hatches for Canvas
Sven Yrvind, a renowned yacht designer and sailor, shares valuable insights on creating flanges around bulkhead hatches for canvas protection in this enlightening video. By following his expert guidance, boat enthusiasts can ensure their living areas remain secure while allowing unhindered access through the hatches.Step 1: Starting with the Flange
Sven begins by explaining that working on flanges vertically and horizontally is significantly easier than doing so in a flat position. To simplify the process further, he divides the task into two or three steps as suggested by fellow expert “for for.” This approach not only makes it more manageable but also allows for greater precision in crafting each component.Step 2: Applying Glue and Securing
Sven proceeds to apply glue along one edge of the flange, ensuring a secure bond when clamped into place. He emphasizes that this stage is crucial for maintaining the structural integrity of the flange, which in turn safeguards the living area beneath the canvas when hatches are open.Step 3: Allowing Time to Dry
After securely attaching the first portion of the flange, Sven allows ample time for it to dry before moving forward with additional steps. This patience and precision are key aspects of his successful boatbuilding methods.Step 4: Finishing Touches
Once the flange is fully dried, Sven removes the clamps carefully, ensuring no damage occurs during this process. He then moves on to attaching four more pieces onto these main frames, completing two pairs of flanges for the bulkhead hatches.The Final Touches
While two flanges form the primary support structure around the hatches, Sven mentions there are two additional pieces required at each end to ensure comprehensive protection. This attention to detail highlights his commitment to producing a durable and reliable design. “Sailing is about finding your path, whether it’s across an ocean or within yourself.” – Sven Yrvind In conclusion, making flanges around bulkhead hatches may seem complex at first glance, but by following Sven Yrvind’s meticulous process, enthusiasts can achieve professional-level results. Remember that the journey of boatbuilding is as rewarding as reaching your destination; it tests one’s patience and dedication. For those seeking to embark on this adventure or simply gain more insight into marine craftsmanship, Sven’s wisdom is invaluable.Once the flange is fully dried, Sven removes the clamps carefully, ensuring no damage occurs during this process. He then moves on to attaching four more pieces onto these main frames, completing two pairs of flanges for the bulkhead hatches.The Final Touches
While two flanges form the primary support structure around the hatches, Sven mentions there are two additional pieces required at each end to ensure comprehensive protection. This attention to detail highlights his commitment to producing a durable and reliable design. “Sailing is about finding your path, whether it’s across an ocean or within yourself.” – Sven Yrvind In conclusion, making flanges around bulkhead hatches may seem complex at first glance, but by following Sven Yrvind’s meticulous process, enthusiasts can achieve professional-level results. Remember that the journey of boatbuilding is as rewarding as reaching your destination; it tests one’s patience and dedication. For those seeking to embark on this adventure or simply gain more insight into marine craftsmanship, Sven’s wisdom is invaluable.Sven proceeds to apply glue along one edge of the flange, ensuring a secure bond when clamped into place. He emphasizes that this stage is crucial for maintaining the structural integrity of the flange, which in turn safeguards the living area beneath the canvas when hatches are open.Step 3: Allowing Time to Dry
After securely attaching the first portion of the flange, Sven allows ample time for it to dry before moving forward with additional steps. This patience and precision are key aspects of his successful boatbuilding methods.Step 4: Finishing Touches
Once the flange is fully dried, Sven removes the clamps carefully, ensuring no damage occurs during this process. He then moves on to attaching four more pieces onto these main frames, completing two pairs of flanges for the bulkhead hatches.The Final Touches
While two flanges form the primary support structure around the hatches, Sven mentions there are two additional pieces required at each end to ensure comprehensive protection. This attention to detail highlights his commitment to producing a durable and reliable design. “Sailing is about finding your path, whether it’s across an ocean or within yourself.” – Sven Yrvind In conclusion, making flanges around bulkhead hatches may seem complex at first glance, but by following Sven Yrvind’s meticulous process, enthusiasts can achieve professional-level results. Remember that the journey of boatbuilding is as rewarding as reaching your destination; it tests one’s patience and dedication. For those seeking to embark on this adventure or simply gain more insight into marine craftsmanship, Sven’s wisdom is invaluable.Sven begins by explaining that working on flanges vertically and horizontally is significantly easier than doing so in a flat position. To simplify the process further, he divides the task into two or three steps as suggested by fellow expert “for for.” This approach not only makes it more manageable but also allows for greater precision in crafting each component.Step 2: Applying Glue and Securing
Sven proceeds to apply glue along one edge of the flange, ensuring a secure bond when clamped into place. He emphasizes that this stage is crucial for maintaining the structural integrity of the flange, which in turn safeguards the living area beneath the canvas when hatches are open.Step 3: Allowing Time to Dry
After securely attaching the first portion of the flange, Sven allows ample time for it to dry before moving forward with additional steps. This patience and precision are key aspects of his successful boatbuilding methods.Step 4: Finishing Touches
Once the flange is fully dried, Sven removes the clamps carefully, ensuring no damage occurs during this process. He then moves on to attaching four more pieces onto these main frames, completing two pairs of flanges for the bulkhead hatches.The Final Touches
While two flanges form the primary support structure around the hatches, Sven mentions there are two additional pieces required at each end to ensure comprehensive protection. This attention to detail highlights his commitment to producing a durable and reliable design. “Sailing is about finding your path, whether it’s across an ocean or within yourself.” – Sven Yrvind In conclusion, making flanges around bulkhead hatches may seem complex at first glance, but by following Sven Yrvind’s meticulous process, enthusiasts can achieve professional-level results. Remember that the journey of boatbuilding is as rewarding as reaching your destination; it tests one’s patience and dedication. For those seeking to embark on this adventure or simply gain more insight into marine craftsmanship, Sven’s wisdom is invaluable.Sven Yrvind, a renowned yacht designer and sailor, shares valuable insights on creating flanges around bulkhead hatches for canvas protection in this enlightening video. By following his expert guidance, boat enthusiasts can ensure their living areas remain secure while allowing unhindered access through the hatches.Step 1: Starting with the Flange
Sven begins by explaining that working on flanges vertically and horizontally is significantly easier than doing so in a flat position. To simplify the process further, he divides the task into two or three steps as suggested by fellow expert “for for.” This approach not only makes it more manageable but also allows for greater precision in crafting each component.Step 2: Applying Glue and Securing
Sven proceeds to apply glue along one edge of the flange, ensuring a secure bond when clamped into place. He emphasizes that this stage is crucial for maintaining the structural integrity of the flange, which in turn safeguards the living area beneath the canvas when hatches are open.Step 3: Allowing Time to Dry
After securely attaching the first portion of the flange, Sven allows ample time for it to dry before moving forward with additional steps. This patience and precision are key aspects of his successful boatbuilding methods.Step 4: Finishing Touches
Once the flange is fully dried, Sven removes the clamps carefully, ensuring no damage occurs during this process. He then moves on to attaching four more pieces onto these main frames, completing two pairs of flanges for the bulkhead hatches.The Final Touches
While two flanges form the primary support structure around the hatches, Sven mentions there are two additional pieces required at each end to ensure comprehensive protection. This attention to detail highlights his commitment to producing a durable and reliable design. “Sailing is about finding your path, whether it’s across an ocean or within yourself.” – Sven Yrvind In conclusion, making flanges around bulkhead hatches may seem complex at first glance, but by following Sven Yrvind’s meticulous process, enthusiasts can achieve professional-level results. Remember that the journey of boatbuilding is as rewarding as reaching your destination; it tests one’s patience and dedication. For those seeking to embark on this adventure or simply gain more insight into marine craftsmanship, Sven’s wisdom is invaluable.Making Flanges Around Bulkhead Hatches for Canvas
Sven Yrvind, a renowned yacht designer and sailor, shares valuable insights on creating flanges around bulkhead hatches for canvas protection in this enlightening video. By following his expert guidance, boat enthusiasts can ensure their living areas remain secure while allowing unhindered access through the hatches.Step 1: Starting with the Flange
Sven begins by explaining that working on flanges vertically and horizontally is significantly easier than doing so in a flat position. To simplify the process further, he divides the task into two or three steps as suggested by fellow expert “for for.” This approach not only makes it more manageable but also allows for greater precision in crafting each component.Step 2: Applying Glue and Securing
Sven proceeds to apply glue along one edge of the flange, ensuring a secure bond when clamped into place. He emphasizes that this stage is crucial for maintaining the structural integrity of the flange, which in turn safeguards the living area beneath the canvas when hatches are open.Step 3: Allowing Time to Dry
After securely attaching the first portion of the flange, Sven allows ample time for it to dry before moving forward with additional steps. This patience and precision are key aspects of his successful boatbuilding methods.Step 4: Finishing Touches
Once the flange is fully dried, Sven removes the clamps carefully, ensuring no damage occurs during this process. He then moves on to attaching four more pieces onto these main frames, completing two pairs of flanges for the bulkhead hatches.The Final Touches
While two flanges form the primary support structure around the hatches, Sven mentions there are two additional pieces required at each end to ensure comprehensive protection. This attention to detail highlights his commitment to producing a durable and reliable design. “Sailing is about finding your path, whether it’s across an ocean or within yourself.” – Sven Yrvind In conclusion, making flanges around bulkhead hatches may seem complex at first glance, but by following Sven Yrvind’s meticulous process, enthusiasts can achieve professional-level results. Remember that the journey of boatbuilding is as rewarding as reaching your destination; it tests one’s patience and dedication. For those seeking to embark on this adventure or simply gain more insight into marine craftsmanship, Sven’s wisdom is invaluable.After securely attaching the first portion of the flange, Sven allows ample time for it to dry before moving forward with additional steps. This patience and precision are key aspects of his successful boatbuilding methods.Step 4: Finishing Touches
Once the flange is fully dried, Sven removes the clamps carefully, ensuring no damage occurs during this process. He then moves on to attaching four more pieces onto these main frames, completing two pairs of flanges for the bulkhead hatches.The Final Touches
While two flanges form the primary support structure around the hatches, Sven mentions there are two additional pieces required at each end to ensure comprehensive protection. This attention to detail highlights his commitment to producing a durable and reliable design. “Sailing is about finding your path, whether it’s across an ocean or within yourself.” – Sven Yrvind In conclusion, making flanges around bulkhead hatches may seem complex at first glance, but by following Sven Yrvind’s meticulous process, enthusiasts can achieve professional-level results. Remember that the journey of boatbuilding is as rewarding as reaching your destination; it tests one’s patience and dedication. For those seeking to embark on this adventure or simply gain more insight into marine craftsmanship, Sven’s wisdom is invaluable.Sven proceeds to apply glue along one edge of the flange, ensuring a secure bond when clamped into place. He emphasizes that this stage is crucial for maintaining the structural integrity of the flange, which in turn safeguards the living area beneath the canvas when hatches are open.Step 3: Allowing Time to Dry
After securely attaching the first portion of the flange, Sven allows ample time for it to dry before moving forward with additional steps. This patience and precision are key aspects of his successful boatbuilding methods.Step 4: Finishing Touches
Once the flange is fully dried, Sven removes the clamps carefully, ensuring no damage occurs during this process. He then moves on to attaching four more pieces onto these main frames, completing two pairs of flanges for the bulkhead hatches.The Final Touches
While two flanges form the primary support structure around the hatches, Sven mentions there are two additional pieces required at each end to ensure comprehensive protection. This attention to detail highlights his commitment to producing a durable and reliable design. “Sailing is about finding your path, whether it’s across an ocean or within yourself.” – Sven Yrvind In conclusion, making flanges around bulkhead hatches may seem complex at first glance, but by following Sven Yrvind’s meticulous process, enthusiasts can achieve professional-level results. Remember that the journey of boatbuilding is as rewarding as reaching your destination; it tests one’s patience and dedication. For those seeking to embark on this adventure or simply gain more insight into marine craftsmanship, Sven’s wisdom is invaluable.Sven begins by explaining that working on flanges vertically and horizontally is significantly easier than doing so in a flat position. To simplify the process further, he divides the task into two or three steps as suggested by fellow expert “for for.” This approach not only makes it more manageable but also allows for greater precision in crafting each component.Step 2: Applying Glue and Securing
Sven proceeds to apply glue along one edge of the flange, ensuring a secure bond when clamped into place. He emphasizes that this stage is crucial for maintaining the structural integrity of the flange, which in turn safeguards the living area beneath the canvas when hatches are open.Step 3: Allowing Time to Dry
After securely attaching the first portion of the flange, Sven allows ample time for it to dry before moving forward with additional steps. This patience and precision are key aspects of his successful boatbuilding methods.Step 4: Finishing Touches
Once the flange is fully dried, Sven removes the clamps carefully, ensuring no damage occurs during this process. He then moves on to attaching four more pieces onto these main frames, completing two pairs of flanges for the bulkhead hatches.The Final Touches
While two flanges form the primary support structure around the hatches, Sven mentions there are two additional pieces required at each end to ensure comprehensive protection. This attention to detail highlights his commitment to producing a durable and reliable design. “Sailing is about finding your path, whether it’s across an ocean or within yourself.” – Sven Yrvind In conclusion, making flanges around bulkhead hatches may seem complex at first glance, but by following Sven Yrvind’s meticulous process, enthusiasts can achieve professional-level results. Remember that the journey of boatbuilding is as rewarding as reaching your destination; it tests one’s patience and dedication. For those seeking to embark on this adventure or simply gain more insight into marine craftsmanship, Sven’s wisdom is invaluable.Sven Yrvind, a renowned yacht designer and sailor, shares valuable insights on creating flanges around bulkhead hatches for canvas protection in this enlightening video. By following his expert guidance, boat enthusiasts can ensure their living areas remain secure while allowing unhindered access through the hatches.Step 1: Starting with the Flange
Sven begins by explaining that working on flanges vertically and horizontally is significantly easier than doing so in a flat position. To simplify the process further, he divides the task into two or three steps as suggested by fellow expert “for for.” This approach not only makes it more manageable but also allows for greater precision in crafting each component.Step 2: Applying Glue and Securing
Sven proceeds to apply glue along one edge of the flange, ensuring a secure bond when clamped into place. He emphasizes that this stage is crucial for maintaining the structural integrity of the flange, which in turn safeguards the living area beneath the canvas when hatches are open.Step 3: Allowing Time to Dry
After securely attaching the first portion of the flange, Sven allows ample time for it to dry before moving forward with additional steps. This patience and precision are key aspects of his successful boatbuilding methods.Step 4: Finishing Touches
Once the flange is fully dried, Sven removes the clamps carefully, ensuring no damage occurs during this process. He then moves on to attaching four more pieces onto these main frames, completing two pairs of flanges for the bulkhead hatches.The Final Touches
While two flanges form the primary support structure around the hatches, Sven mentions there are two additional pieces required at each end to ensure comprehensive protection. This attention to detail highlights his commitment to producing a durable and reliable design. “Sailing is about finding your path, whether it’s across an ocean or within yourself.” – Sven Yrvind In conclusion, making flanges around bulkhead hatches may seem complex at first glance, but by following Sven Yrvind’s meticulous process, enthusiasts can achieve professional-level results. Remember that the journey of boatbuilding is as rewarding as reaching your destination; it tests one’s patience and dedication. For those seeking to embark on this adventure or simply gain more insight into marine craftsmanship, Sven’s wisdom is invaluable.Making Flanges Around Bulkhead Hatches for Canvas
Sven Yrvind, a renowned yacht designer and sailor, shares valuable insights on creating flanges around bulkhead hatches for canvas protection in this enlightening video. By following his expert guidance, boat enthusiasts can ensure their living areas remain secure while allowing unhindered access through the hatches.Step 1: Starting with the Flange
Sven begins by explaining that working on flanges vertically and horizontally is significantly easier than doing so in a flat position. To simplify the process further, he divides the task into two or three steps as suggested by fellow expert “for for.” This approach not only makes it more manageable but also allows for greater precision in crafting each component.Step 2: Applying Glue and Securing
Sven proceeds to apply glue along one edge of the flange, ensuring a secure bond when clamped into place. He emphasizes that this stage is crucial for maintaining the structural integrity of the flange, which in turn safeguards the living area beneath the canvas when hatches are open.Step 3: Allowing Time to Dry
After securely attaching the first portion of the flange, Sven allows ample time for it to dry before moving forward with additional steps. This patience and precision are key aspects of his successful boatbuilding methods.Step 4: Finishing Touches
Once the flange is fully dried, Sven removes the clamps carefully, ensuring no damage occurs during this process. He then moves on to attaching four more pieces onto these main frames, completing two pairs of flanges for the bulkhead hatches.The Final Touches
While two flanges form the primary support structure around the hatches, Sven mentions there are two additional pieces required at each end to ensure comprehensive protection. This attention to detail highlights his commitment to producing a durable and reliable design. “Sailing is about finding your path, whether it’s across an ocean or within yourself.” – Sven Yrvind In conclusion, making flanges around bulkhead hatches may seem complex at first glance, but by following Sven Yrvind’s meticulous process, enthusiasts can achieve professional-level results. Remember that the journey of boatbuilding is as rewarding as reaching your destination; it tests one’s patience and dedication. For those seeking to embark on this adventure or simply gain more insight into marine craftsmanship, Sven’s wisdom is invaluable.Once the flange is fully dried, Sven removes the clamps carefully, ensuring no damage occurs during this process. He then moves on to attaching four more pieces onto these main frames, completing two pairs of flanges for the bulkhead hatches.The Final Touches
While two flanges form the primary support structure around the hatches, Sven mentions there are two additional pieces required at each end to ensure comprehensive protection. This attention to detail highlights his commitment to producing a durable and reliable design. “Sailing is about finding your path, whether it’s across an ocean or within yourself.” – Sven Yrvind In conclusion, making flanges around bulkhead hatches may seem complex at first glance, but by following Sven Yrvind’s meticulous process, enthusiasts can achieve professional-level results. Remember that the journey of boatbuilding is as rewarding as reaching your destination; it tests one’s patience and dedication. For those seeking to embark on this adventure or simply gain more insight into marine craftsmanship, Sven’s wisdom is invaluable.After securely attaching the first portion of the flange, Sven allows ample time for it to dry before moving forward with additional steps. This patience and precision are key aspects of his successful boatbuilding methods.Step 4: Finishing Touches
Once the flange is fully dried, Sven removes the clamps carefully, ensuring no damage occurs during this process. He then moves on to attaching four more pieces onto these main frames, completing two pairs of flanges for the bulkhead hatches.The Final Touches
While two flanges form the primary support structure around the hatches, Sven mentions there are two additional pieces required at each end to ensure comprehensive protection. This attention to detail highlights his commitment to producing a durable and reliable design. “Sailing is about finding your path, whether it’s across an ocean or within yourself.” – Sven Yrvind In conclusion, making flanges around bulkhead hatches may seem complex at first glance, but by following Sven Yrvind’s meticulous process, enthusiasts can achieve professional-level results. Remember that the journey of boatbuilding is as rewarding as reaching your destination; it tests one’s patience and dedication. For those seeking to embark on this adventure or simply gain more insight into marine craftsmanship, Sven’s wisdom is invaluable.Sven proceeds to apply glue along one edge of the flange, ensuring a secure bond when clamped into place. He emphasizes that this stage is crucial for maintaining the structural integrity of the flange, which in turn safeguards the living area beneath the canvas when hatches are open.Step 3: Allowing Time to Dry
After securely attaching the first portion of the flange, Sven allows ample time for it to dry before moving forward with additional steps. This patience and precision are key aspects of his successful boatbuilding methods.Step 4: Finishing Touches
Once the flange is fully dried, Sven removes the clamps carefully, ensuring no damage occurs during this process. He then moves on to attaching four more pieces onto these main frames, completing two pairs of flanges for the bulkhead hatches.The Final Touches
While two flanges form the primary support structure around the hatches, Sven mentions there are two additional pieces required at each end to ensure comprehensive protection. This attention to detail highlights his commitment to producing a durable and reliable design. “Sailing is about finding your path, whether it’s across an ocean or within yourself.” – Sven Yrvind In conclusion, making flanges around bulkhead hatches may seem complex at first glance, but by following Sven Yrvind’s meticulous process, enthusiasts can achieve professional-level results. Remember that the journey of boatbuilding is as rewarding as reaching your destination; it tests one’s patience and dedication. For those seeking to embark on this adventure or simply gain more insight into marine craftsmanship, Sven’s wisdom is invaluable.Sven begins by explaining that working on flanges vertically and horizontally is significantly easier than doing so in a flat position. To simplify the process further, he divides the task into two or three steps as suggested by fellow expert “for for.” This approach not only makes it more manageable but also allows for greater precision in crafting each component.Step 2: Applying Glue and Securing
Sven proceeds to apply glue along one edge of the flange, ensuring a secure bond when clamped into place. He emphasizes that this stage is crucial for maintaining the structural integrity of the flange, which in turn safeguards the living area beneath the canvas when hatches are open.Step 3: Allowing Time to Dry
After securely attaching the first portion of the flange, Sven allows ample time for it to dry before moving forward with additional steps. This patience and precision are key aspects of his successful boatbuilding methods.Step 4: Finishing Touches
Once the flange is fully dried, Sven removes the clamps carefully, ensuring no damage occurs during this process. He then moves on to attaching four more pieces onto these main frames, completing two pairs of flanges for the bulkhead hatches.The Final Touches
While two flanges form the primary support structure around the hatches, Sven mentions there are two additional pieces required at each end to ensure comprehensive protection. This attention to detail highlights his commitment to producing a durable and reliable design. “Sailing is about finding your path, whether it’s across an ocean or within yourself.” – Sven Yrvind In conclusion, making flanges around bulkhead hatches may seem complex at first glance, but by following Sven Yrvind’s meticulous process, enthusiasts can achieve professional-level results. Remember that the journey of boatbuilding is as rewarding as reaching your destination; it tests one’s patience and dedication. For those seeking to embark on this adventure or simply gain more insight into marine craftsmanship, Sven’s wisdom is invaluable.Sven Yrvind, a renowned yacht designer and sailor, shares valuable insights on creating flanges around bulkhead hatches for canvas protection in this enlightening video. By following his expert guidance, boat enthusiasts can ensure their living areas remain secure while allowing unhindered access through the hatches.Step 1: Starting with the Flange
Sven begins by explaining that working on flanges vertically and horizontally is significantly easier than doing so in a flat position. To simplify the process further, he divides the task into two or three steps as suggested by fellow expert “for for.” This approach not only makes it more manageable but also allows for greater precision in crafting each component.Step 2: Applying Glue and Securing
Sven proceeds to apply glue along one edge of the flange, ensuring a secure bond when clamped into place. He emphasizes that this stage is crucial for maintaining the structural integrity of the flange, which in turn safeguards the living area beneath the canvas when hatches are open.Step 3: Allowing Time to Dry
After securely attaching the first portion of the flange, Sven allows ample time for it to dry before moving forward with additional steps. This patience and precision are key aspects of his successful boatbuilding methods.Step 4: Finishing Touches
Once the flange is fully dried, Sven removes the clamps carefully, ensuring no damage occurs during this process. He then moves on to attaching four more pieces onto these main frames, completing two pairs of flanges for the bulkhead hatches.The Final Touches
While two flanges form the primary support structure around the hatches, Sven mentions there are two additional pieces required at each end to ensure comprehensive protection. This attention to detail highlights his commitment to producing a durable and reliable design. “Sailing is about finding your path, whether it’s across an ocean or within yourself.” – Sven Yrvind In conclusion, making flanges around bulkhead hatches may seem complex at first glance, but by following Sven Yrvind’s meticulous process, enthusiasts can achieve professional-level results. Remember that the journey of boatbuilding is as rewarding as reaching your destination; it tests one’s patience and dedication. For those seeking to embark on this adventure or simply gain more insight into marine craftsmanship, Sven’s wisdom is invaluable.Making Flanges Around Bulkhead Hatches for Canvas
Sven Yrvind, a renowned yacht designer and sailor, shares valuable insights on creating flanges around bulkhead hatches for canvas protection in this enlightening video. By following his expert guidance, boat enthusiasts can ensure their living areas remain secure while allowing unhindered access through the hatches.Step 1: Starting with the Flange
Sven begins by explaining that working on flanges vertically and horizontally is significantly easier than doing so in a flat position. To simplify the process further, he divides the task into two or three steps as suggested by fellow expert “for for.” This approach not only makes it more manageable but also allows for greater precision in crafting each component.Step 2: Applying Glue and Securing
Sven proceeds to apply glue along one edge of the flange, ensuring a secure bond when clamped into place. He emphasizes that this stage is crucial for maintaining the structural integrity of the flange, which in turn safeguards the living area beneath the canvas when hatches are open.Step 3: Allowing Time to Dry
After securely attaching the first portion of the flange, Sven allows ample time for it to dry before moving forward with additional steps. This patience and precision are key aspects of his successful boatbuilding methods.Step 4: Finishing Touches
Once the flange is fully dried, Sven removes the clamps carefully, ensuring no damage occurs during this process. He then moves on to attaching four more pieces onto these main frames, completing two pairs of flanges for the bulkhead hatches.The Final Touches
While two flanges form the primary support structure around the hatches, Sven mentions there are two additional pieces required at each end to ensure comprehensive protection. This attention to detail highlights his commitment to producing a durable and reliable design. “Sailing is about finding your path, whether it’s across an ocean or within yourself.” – Sven Yrvind In conclusion, making flanges around bulkhead hatches may seem complex at first glance, but by following Sven Yrvind’s meticulous process, enthusiasts can achieve professional-level results. Remember that the journey of boatbuilding is as rewarding as reaching your destination; it tests one’s patience and dedication. For those seeking to embark on this adventure or simply gain more insight into marine craftsmanship, Sven’s wisdom is invaluable.Once the flange is fully dried, Sven removes the clamps carefully, ensuring no damage occurs during this process. He then moves on to attaching four more pieces onto these main frames, completing two pairs of flanges for the bulkhead hatches.The Final Touches
While two flanges form the primary support structure around the hatches, Sven mentions there are two additional pieces required at each end to ensure comprehensive protection. This attention to detail highlights his commitment to producing a durable and reliable design. “Sailing is about finding your path, whether it’s across an ocean or within yourself.” – Sven Yrvind In conclusion, making flanges around bulkhead hatches may seem complex at first glance, but by following Sven Yrvind’s meticulous process, enthusiasts can achieve professional-level results. Remember that the journey of boatbuilding is as rewarding as reaching your destination; it tests one’s patience and dedication. For those seeking to embark on this adventure or simply gain more insight into marine craftsmanship, Sven’s wisdom is invaluable.Making Flanges Around Bulkhead Hatches for Canvas
Sven Yrvind, a renowned yacht designer and sailor, shares valuable insights on creating flanges around bulkhead hatches for canvas protection in this enlightening video. By following his expert guidance, boat enthusiasts can ensure their living areas remain secure while allowing unhindered access through the hatches.Step 1: Starting with the Flange
Sven begins by explaining that working on flanges vertically and horizontally is significantly easier than doing so in a flat position. To simplify the process further, he divides the task into two or three steps as suggested by fellow expert “for for.” This approach not only makes it more manageable but also allows for greater precision in crafting each component.Step 2: Applying Glue and Securing
Sven proceeds to apply glue along one edge of the flange, ensuring a secure bond when clamped into place. He emphasizes that this stage is crucial for maintaining the structural integrity of the flange, which in turn safeguards the living area beneath the canvas when hatches are open.Step 3: Allowing Time to Dry
After securely attaching the first portion of the flange, Sven allows ample time for it to dry before moving forward with additional steps. This patience and precision are key aspects of his successful boatbuilding methods.Step 4: Finishing Touches
Once the flange is fully dried, Sven removes the clamps carefully, ensuring no damage occurs during this process. He then moves on to attaching four more pieces onto these main frames, completing two pairs of flanges for the bulkhead hatches.The Final Touches
While two flanges form the primary support structure around the hatches, Sven mentions there are two additional pieces required at each end to ensure comprehensive protection. This attention to detail highlights his commitment to producing a durable and reliable design. “Sailing is about finding your path, whether it’s across an ocean or within yourself.” – Sven Yrvind In conclusion, making flanges around bulkhead hatches may seem complex at first glance, but by following Sven Yrvind’s meticulous process, enthusiasts can achieve professional-level results. Remember that the journey of boatbuilding is as rewarding as reaching your destination; it tests one’s patience and dedication. For those seeking to embark on this adventure or simply gain more insight into marine craftsmanship, Sven’s wisdom is invaluable.Sven begins by explaining that working on flanges vertically and horizontally is significantly easier than doing so in a flat position. To simplify the process further, he divides the task into two or three steps as suggested by fellow expert “for for.” This approach not only makes it more manageable but also allows for greater precision in crafting each component.Step 2: Applying Glue and Securing
Sven proceeds to apply glue along one edge of the flange, ensuring a secure bond when clamped into place. He emphasizes that this stage is crucial for maintaining the structural integrity of the flange, which in turn safeguards the living area beneath the canvas when hatches are open.Step 3: Allowing Time to Dry
After securely attaching the first portion of the flange, Sven allows ample time for it to dry before moving forward with additional steps. This patience and precision are key aspects of his successful boatbuilding methods.Step 4: Finishing Touches
Once the flange is fully dried, Sven removes the clamps carefully, ensuring no damage occurs during this process. He then moves on to attaching four more pieces onto these main frames, completing two pairs of flanges for the bulkhead hatches.The Final Touches
While two flanges form the primary support structure around the hatches, Sven mentions there are two additional pieces required at each end to ensure comprehensive protection. This attention to detail highlights his commitment to producing a durable and reliable design. “Sailing is about finding your path, whether it’s across an ocean or within yourself.” – Sven Yrvind In conclusion, making flanges around bulkhead hatches may seem complex at first glance, but by following Sven Yrvind’s meticulous process, enthusiasts can achieve professional-level results. Remember that the journey of boatbuilding is as rewarding as reaching your destination; it tests one’s patience and dedication. For those seeking to embark on this adventure or simply gain more insight into marine craftsmanship, Sven’s wisdom is invaluable.Sven Yrvind, a renowned yacht designer and sailor, shares valuable insights on creating flanges around bulkhead hatches for canvas protection in this enlightening video. By following his expert guidance, boat enthusiasts can ensure their living areas remain secure while allowing unhindered access through the hatches.Step 1: Starting with the Flange
Sven begins by explaining that working on flanges vertically and horizontally is significantly easier than doing so in a flat position. To simplify the process further, he divides the task into two or three steps as suggested by fellow expert “for for.” This approach not only makes it more manageable but also allows for greater precision in crafting each component.Step 2: Applying Glue and Securing
Sven proceeds to apply glue along one edge of the flange, ensuring a secure bond when clamped into place. He emphasizes that this stage is crucial for maintaining the structural integrity of the flange, which in turn safeguards the living area beneath the canvas when hatches are open.Step 3: Allowing Time to Dry
After securely attaching the first portion of the flange, Sven allows ample time for it to dry before moving forward with additional steps. This patience and precision are key aspects of his successful boatbuilding methods.Step 4: Finishing Touches
Once the flange is fully dried, Sven removes the clamps carefully, ensuring no damage occurs during this process. He then moves on to attaching four more pieces onto these main frames, completing two pairs of flanges for the bulkhead hatches.The Final Touches
While two flanges form the primary support structure around the hatches, Sven mentions there are two additional pieces required at each end to ensure comprehensive protection. This attention to detail highlights his commitment to producing a durable and reliable design. “Sailing is about finding your path, whether it’s across an ocean or within yourself.” – Sven Yrvind In conclusion, making flanges around bulkhead hatches may seem complex at first glance, but by following Sven Yrvind’s meticulous process, enthusiasts can achieve professional-level results. Remember that the journey of boatbuilding is as rewarding as reaching your destination; it tests one’s patience and dedication. For those seeking to embark on this adventure or simply gain more insight into marine craftsmanship, Sven’s wisdom is invaluable.Making Flanges Around Bulkhead Hatches for Canvas
Sven Yrvind, a renowned yacht designer and sailor, shares valuable insights on creating flanges around bulkhead hatches for canvas protection in this enlightening video. By following his expert guidance, boat enthusiasts can ensure their living areas remain secure while allowing unhindered access through the hatches.Step 1: Starting with the Flange
Sven begins by explaining that working on flanges vertically and horizontally is significantly easier than doing so in a flat position. To simplify the process further, he divides the task into two or three steps as suggested by fellow expert “for for.” This approach not only makes it more manageable but also allows for greater precision in crafting each component.Step 2: Applying Glue and Securing
Sven proceeds to apply glue along one edge of the flange, ensuring a secure bond when clamped into place. He emphasizes that this stage is crucial for maintaining the structural integrity of the flange, which in turn safeguards the living area beneath the canvas when hatches are open.Step 3: Allowing Time to Dry
After securely attaching the first portion of the flange, Sven allows ample time for it to dry before moving forward with additional steps. This patience and precision are key aspects of his successful boatbuilding methods.Step 4: Finishing Touches
Once the flange is fully dried, Sven removes the clamps carefully, ensuring no damage occurs during this process. He then moves on to attaching four more pieces onto these main frames, completing two pairs of flanges for the bulkhead hatches.The Final Touches
While two flanges form the primary support structure around the hatches, Sven mentions there are two additional pieces required at each end to ensure comprehensive protection. This attention to detail highlights his commitment to producing a durable and reliable design. “Sailing is about finding your path, whether it’s across an ocean or within yourself.” – Sven Yrvind In conclusion, making flanges around bulkhead hatches may seem complex at first glance, but by following Sven Yrvind’s meticulous process, enthusiasts can achieve professional-level results. Remember that the journey of boatbuilding is as rewarding as reaching your destination; it tests one’s patience and dedication. For those seeking to embark on this adventure or simply gain more insight into marine craftsmanship, Sven’s wisdom is invaluable.Once the flange is fully dried, Sven removes the clamps carefully, ensuring no damage occurs during this process. He then moves on to attaching four more pieces onto these main frames, completing two pairs of flanges for the bulkhead hatches.The Final Touches
While two flanges form the primary support structure around the hatches, Sven mentions there are two additional pieces required at each end to ensure comprehensive protection. This attention to detail highlights his commitment to producing a durable and reliable design. “Sailing is about finding your path, whether it’s across an ocean or within yourself.” – Sven Yrvind In conclusion, making flanges around bulkhead hatches may seem complex at first glance, but by following Sven Yrvind’s meticulous process, enthusiasts can achieve professional-level results. Remember that the journey of boatbuilding is as rewarding as reaching your destination; it tests one’s patience and dedication. For those seeking to embark on this adventure or simply gain more insight into marine craftsmanship, Sven’s wisdom is invaluable.Sven begins by explaining that working on flanges vertically and horizontally is significantly easier than doing so in a flat position. To simplify the process further, he divides the task into two or three steps as suggested by fellow expert “for for.” This approach not only makes it more manageable but also allows for greater precision in crafting each component.Step 2: Applying Glue and Securing
Sven proceeds to apply glue along one edge of the flange, ensuring a secure bond when clamped into place. He emphasizes that this stage is crucial for maintaining the structural integrity of the flange, which in turn safeguards the living area beneath the canvas when hatches are open.Step 3: Allowing Time to Dry
After securely attaching the first portion of the flange, Sven allows ample time for it to dry before moving forward with additional steps. This patience and precision are key aspects of his successful boatbuilding methods.Step 4: Finishing Touches
Once the flange is fully dried, Sven removes the clamps carefully, ensuring no damage occurs during this process. He then moves on to attaching four more pieces onto these main frames, completing two pairs of flanges for the bulkhead hatches.The Final Touches
While two flanges form the primary support structure around the hatches, Sven mentions there are two additional pieces required at each end to ensure comprehensive protection. This attention to detail highlights his commitment to producing a durable and reliable design. “Sailing is about finding your path, whether it’s across an ocean or within yourself.” – Sven Yrvind In conclusion, making flanges around bulkhead hatches may seem complex at first glance, but by following Sven Yrvind’s meticulous process, enthusiasts can achieve professional-level results. Remember that the journey of boatbuilding is as rewarding as reaching your destination; it tests one’s patience and dedication. For those seeking to embark on this adventure or simply gain more insight into marine craftsmanship, Sven’s wisdom is invaluable.Sven Yrvind, a renowned yacht designer and sailor, shares valuable insights on creating flanges around bulkhead hatches for canvas protection in this enlightening video. By following his expert guidance, boat enthusiasts can ensure their living areas remain secure while allowing unhindered access through the hatches.Step 1: Starting with the Flange
Sven begins by explaining that working on flanges vertically and horizontally is significantly easier than doing so in a flat position. To simplify the process further, he divides the task into two or three steps as suggested by fellow expert “for for.” This approach not only makes it more manageable but also allows for greater precision in crafting each component.Step 2: Applying Glue and Securing
Sven proceeds to apply glue along one edge of the flange, ensuring a secure bond when clamped into place. He emphasizes that this stage is crucial for maintaining the structural integrity of the flange, which in turn safeguards the living area beneath the canvas when hatches are open.Step 3: Allowing Time to Dry
After securely attaching the first portion of the flange, Sven allows ample time for it to dry before moving forward with additional steps. This patience and precision are key aspects of his successful boatbuilding methods.Step 4: Finishing Touches
Once the flange is fully dried, Sven removes the clamps carefully, ensuring no damage occurs during this process. He then moves on to attaching four more pieces onto these main frames, completing two pairs of flanges for the bulkhead hatches.The Final Touches
While two flanges form the primary support structure around the hatches, Sven mentions there are two additional pieces required at each end to ensure comprehensive protection. This attention to detail highlights his commitment to producing a durable and reliable design. “Sailing is about finding your path, whether it’s across an ocean or within yourself.” – Sven Yrvind In conclusion, making flanges around bulkhead hatches may seem complex at first glance, but by following Sven Yrvind’s meticulous process, enthusiasts can achieve professional-level results. Remember that the journey of boatbuilding is as rewarding as reaching your destination; it tests one’s patience and dedication. For those seeking to embark on this adventure or simply gain more insight into marine craftsmanship, Sven’s wisdom is invaluable.Making Flanges Around Bulkhead Hatches for Canvas
Sven Yrvind, a renowned yacht designer and sailor, shares valuable insights on creating flanges around bulkhead hatches for canvas protection in this enlightening video. By following his expert guidance, boat enthusiasts can ensure their living areas remain secure while allowing unhindered access through the hatches.Step 1: Starting with the Flange
Sven begins by explaining that working on flanges vertically and horizontally is significantly easier than doing so in a flat position. To simplify the process further, he divides the task into two or three steps as suggested by fellow expert “for for.” This approach not only makes it more manageable but also allows for greater precision in crafting each component.Step 2: Applying Glue and Securing
Sven proceeds to apply glue along one edge of the flange, ensuring a secure bond when clamped into place. He emphasizes that this stage is crucial for maintaining the structural integrity of the flange, which in turn safeguards the living area beneath the canvas when hatches are open.Step 3: Allowing Time to Dry
After securely attaching the first portion of the flange, Sven allows ample time for it to dry before moving forward with additional steps. This patience and precision are key aspects of his successful boatbuilding methods.Step 4: Finishing Touches
Once the flange is fully dried, Sven removes the clamps carefully, ensuring no damage occurs during this process. He then moves on to attaching four more pieces onto these main frames, completing two pairs of flanges for the bulkhead hatches.The Final Touches
While two flanges form the primary support structure around the hatches, Sven mentions there are two additional pieces required at each end to ensure comprehensive protection. This attention to detail highlights his commitment to producing a durable and reliable design. “Sailing is about finding your path, whether it’s across an ocean or within yourself.” – Sven Yrvind In conclusion, making flanges around bulkhead hatches may seem complex at first glance, but by following Sven Yrvind’s meticulous process, enthusiasts can achieve professional-level results. Remember that the journey of boatbuilding is as rewarding as reaching your destination; it tests one’s patience and dedication. For those seeking to embark on this adventure or simply gain more insight into marine craftsmanship, Sven’s wisdom is invaluable.After securely attaching the first portion of the flange, Sven allows ample time for it to dry before moving forward with additional steps. This patience and precision are key aspects of his successful boatbuilding methods.Step 4: Finishing Touches
Once the flange is fully dried, Sven removes the clamps carefully, ensuring no damage occurs during this process. He then moves on to attaching four more pieces onto these main frames, completing two pairs of flanges for the bulkhead hatches.The Final Touches
While two flanges form the primary support structure around the hatches, Sven mentions there are two additional pieces required at each end to ensure comprehensive protection. This attention to detail highlights his commitment to producing a durable and reliable design. “Sailing is about finding your path, whether it’s across an ocean or within yourself.” – Sven Yrvind In conclusion, making flanges around bulkhead hatches may seem complex at first glance, but by following Sven Yrvind’s meticulous process, enthusiasts can achieve professional-level results. Remember that the journey of boatbuilding is as rewarding as reaching your destination; it tests one’s patience and dedication. For those seeking to embark on this adventure or simply gain more insight into marine craftsmanship, Sven’s wisdom is invaluable.Sven begins by explaining that working on flanges vertically and horizontally is significantly easier than doing so in a flat position. To simplify the process further, he divides the task into two or three steps as suggested by fellow expert “for for.” This approach not only makes it more manageable but also allows for greater precision in crafting each component.Step 2: Applying Glue and Securing
Sven proceeds to apply glue along one edge of the flange, ensuring a secure bond when clamped into place. He emphasizes that this stage is crucial for maintaining the structural integrity of the flange, which in turn safeguards the living area beneath the canvas when hatches are open.Step 3: Allowing Time to Dry
After securely attaching the first portion of the flange, Sven allows ample time for it to dry before moving forward with additional steps. This patience and precision are key aspects of his successful boatbuilding methods.Step 4: Finishing Touches
Once the flange is fully dried, Sven removes the clamps carefully, ensuring no damage occurs during this process. He then moves on to attaching four more pieces onto these main frames, completing two pairs of flanges for the bulkhead hatches.The Final Touches
While two flanges form the primary support structure around the hatches, Sven mentions there are two additional pieces required at each end to ensure comprehensive protection. This attention to detail highlights his commitment to producing a durable and reliable design. “Sailing is about finding your path, whether it’s across an ocean or within yourself.” – Sven Yrvind In conclusion, making flanges around bulkhead hatches may seem complex at first glance, but by following Sven Yrvind’s meticulous process, enthusiasts can achieve professional-level results. Remember that the journey of boatbuilding is as rewarding as reaching your destination; it tests one’s patience and dedication. For those seeking to embark on this adventure or simply gain more insight into marine craftsmanship, Sven’s wisdom is invaluable.Sven Yrvind, a renowned yacht designer and sailor, shares valuable insights on creating flanges around bulkhead hatches for canvas protection in this enlightening video. By following his expert guidance, boat enthusiasts can ensure their living areas remain secure while allowing unhindered access through the hatches.Step 1: Starting with the Flange
Sven begins by explaining that working on flanges vertically and horizontally is significantly easier than doing so in a flat position. To simplify the process further, he divides the task into two or three steps as suggested by fellow expert “for for.” This approach not only makes it more manageable but also allows for greater precision in crafting each component.Step 2: Applying Glue and Securing
Sven proceeds to apply glue along one edge of the flange, ensuring a secure bond when clamped into place. He emphasizes that this stage is crucial for maintaining the structural integrity of the flange, which in turn safeguards the living area beneath the canvas when hatches are open.Step 3: Allowing Time to Dry
After securely attaching the first portion of the flange, Sven allows ample time for it to dry before moving forward with additional steps. This patience and precision are key aspects of his successful boatbuilding methods.Step 4: Finishing Touches
Once the flange is fully dried, Sven removes the clamps carefully, ensuring no damage occurs during this process. He then moves on to attaching four more pieces onto these main frames, completing two pairs of flanges for the bulkhead hatches.The Final Touches
While two flanges form the primary support structure around the hatches, Sven mentions there are two additional pieces required at each end to ensure comprehensive protection. This attention to detail highlights his commitment to producing a durable and reliable design. “Sailing is about finding your path, whether it’s across an ocean or within yourself.” – Sven Yrvind In conclusion, making flanges around bulkhead hatches may seem complex at first glance, but by following Sven Yrvind’s meticulous process, enthusiasts can achieve professional-level results. Remember that the journey of boatbuilding is as rewarding as reaching your destination; it tests one’s patience and dedication. For those seeking to embark on this adventure or simply gain more insight into marine craftsmanship, Sven’s wisdom is invaluable.Making Flanges Around Bulkhead Hatches for Canvas
Sven Yrvind, a renowned yacht designer and sailor, shares valuable insights on creating flanges around bulkhead hatches for canvas protection in this enlightening video. By following his expert guidance, boat enthusiasts can ensure their living areas remain secure while allowing unhindered access through the hatches.Step 1: Starting with the Flange
Sven begins by explaining that working on flanges vertically and horizontally is significantly easier than doing so in a flat position. To simplify the process further, he divides the task into two or three steps as suggested by fellow expert “for for.” This approach not only makes it more manageable but also allows for greater precision in crafting each component.Step 2: Applying Glue and Securing
Sven proceeds to apply glue along one edge of the flange, ensuring a secure bond when clamped into place. He emphasizes that this stage is crucial for maintaining the structural integrity of the flange, which in turn safeguards the living area beneath the canvas when hatches are open.Step 3: Allowing Time to Dry
After securely attaching the first portion of the flange, Sven allows ample time for it to dry before moving forward with additional steps. This patience and precision are key aspects of his successful boatbuilding methods.Step 4: Finishing Touches
Once the flange is fully dried, Sven removes the clamps carefully, ensuring no damage occurs during this process. He then moves on to attaching four more pieces onto these main frames, completing two pairs of flanges for the bulkhead hatches.The Final Touches
While two flanges form the primary support structure around the hatches, Sven mentions there are two additional pieces required at each end to ensure comprehensive protection. This attention to detail highlights his commitment to producing a durable and reliable design. “Sailing is about finding your path, whether it’s across an ocean or within yourself.” – Sven Yrvind In conclusion, making flanges around bulkhead hatches may seem complex at first glance, but by following Sven Yrvind’s meticulous process, enthusiasts can achieve professional-level results. Remember that the journey of boatbuilding is as rewarding as reaching your destination; it tests one’s patience and dedication. For those seeking to embark on this adventure or simply gain more insight into marine craftsmanship, Sven’s wisdom is invaluable.Sven proceeds to apply glue along one edge of the flange, ensuring a secure bond when clamped into place. He emphasizes that this stage is crucial for maintaining the structural integrity of the flange, which in turn safeguards the living area beneath the canvas when hatches are open.Step 3: Allowing Time to Dry
After securely attaching the first portion of the flange, Sven allows ample time for it to dry before moving forward with additional steps. This patience and precision are key aspects of his successful boatbuilding methods.Step 4: Finishing Touches
Once the flange is fully dried, Sven removes the clamps carefully, ensuring no damage occurs during this process. He then moves on to attaching four more pieces onto these main frames, completing two pairs of flanges for the bulkhead hatches.The Final Touches
While two flanges form the primary support structure around the hatches, Sven mentions there are two additional pieces required at each end to ensure comprehensive protection. This attention to detail highlights his commitment to producing a durable and reliable design. “Sailing is about finding your path, whether it’s across an ocean or within yourself.” – Sven Yrvind In conclusion, making flanges around bulkhead hatches may seem complex at first glance, but by following Sven Yrvind’s meticulous process, enthusiasts can achieve professional-level results. Remember that the journey of boatbuilding is as rewarding as reaching your destination; it tests one’s patience and dedication. For those seeking to embark on this adventure or simply gain more insight into marine craftsmanship, Sven’s wisdom is invaluable.Sven begins by explaining that working on flanges vertically and horizontally is significantly easier than doing so in a flat position. To simplify the process further, he divides the task into two or three steps as suggested by fellow expert “for for.” This approach not only makes it more manageable but also allows for greater precision in crafting each component.Step 2: Applying Glue and Securing
Sven proceeds to apply glue along one edge of the flange, ensuring a secure bond when clamped into place. He emphasizes that this stage is crucial for maintaining the structural integrity of the flange, which in turn safeguards the living area beneath the canvas when hatches are open.Step 3: Allowing Time to Dry
After securely attaching the first portion of the flange, Sven allows ample time for it to dry before moving forward with additional steps. This patience and precision are key aspects of his successful boatbuilding methods.Step 4: Finishing Touches
Once the flange is fully dried, Sven removes the clamps carefully, ensuring no damage occurs during this process. He then moves on to attaching four more pieces onto these main frames, completing two pairs of flanges for the bulkhead hatches.The Final Touches
While two flanges form the primary support structure around the hatches, Sven mentions there are two additional pieces required at each end to ensure comprehensive protection. This attention to detail highlights his commitment to producing a durable and reliable design. “Sailing is about finding your path, whether it’s across an ocean or within yourself.” – Sven Yrvind In conclusion, making flanges around bulkhead hatches may seem complex at first glance, but by following Sven Yrvind’s meticulous process, enthusiasts can achieve professional-level results. Remember that the journey of boatbuilding is as rewarding as reaching your destination; it tests one’s patience and dedication. For those seeking to embark on this adventure or simply gain more insight into marine craftsmanship, Sven’s wisdom is invaluable.Sven Yrvind, a renowned yacht designer and sailor, shares valuable insights on creating flanges around bulkhead hatches for canvas protection in this enlightening video. By following his expert guidance, boat enthusiasts can ensure their living areas remain secure while allowing unhindered access through the hatches.Step 1: Starting with the Flange
Sven begins by explaining that working on flanges vertically and horizontally is significantly easier than doing so in a flat position. To simplify the process further, he divides the task into two or three steps as suggested by fellow expert “for for.” This approach not only makes it more manageable but also allows for greater precision in crafting each component.Step 2: Applying Glue and Securing
Sven proceeds to apply glue along one edge of the flange, ensuring a secure bond when clamped into place. He emphasizes that this stage is crucial for maintaining the structural integrity of the flange, which in turn safeguards the living area beneath the canvas when hatches are open.Step 3: Allowing Time to Dry
After securely attaching the first portion of the flange, Sven allows ample time for it to dry before moving forward with additional steps. This patience and precision are key aspects of his successful boatbuilding methods.Step 4: Finishing Touches
Once the flange is fully dried, Sven removes the clamps carefully, ensuring no damage occurs during this process. He then moves on to attaching four more pieces onto these main frames, completing two pairs of flanges for the bulkhead hatches.The Final Touches
While two flanges form the primary support structure around the hatches, Sven mentions there are two additional pieces required at each end to ensure comprehensive protection. This attention to detail highlights his commitment to producing a durable and reliable design. “Sailing is about finding your path, whether it’s across an ocean or within yourself.” – Sven Yrvind In conclusion, making flanges around bulkhead hatches may seem complex at first glance, but by following Sven Yrvind’s meticulous process, enthusiasts can achieve professional-level results. Remember that the journey of boatbuilding is as rewarding as reaching your destination; it tests one’s patience and dedication. For those seeking to embark on this adventure or simply gain more insight into marine craftsmanship, Sven’s wisdom is invaluable.Making Flanges Around Bulkhead Hatches for Canvas
Sven Yrvind, a renowned yacht designer and sailor, shares valuable insights on creating flanges around bulkhead hatches for canvas protection in this enlightening video. By following his expert guidance, boat enthusiasts can ensure their living areas remain secure while allowing unhindered access through the hatches.Step 1: Starting with the Flange
Sven begins by explaining that working on flanges vertically and horizontally is significantly easier than doing so in a flat position. To simplify the process further, he divides the task into two or three steps as suggested by fellow expert “for for.” This approach not only makes it more manageable but also allows for greater precision in crafting each component.Step 2: Applying Glue and Securing
Sven proceeds to apply glue along one edge of the flange, ensuring a secure bond when clamped into place. He emphasizes that this stage is crucial for maintaining the structural integrity of the flange, which in turn safeguards the living area beneath the canvas when hatches are open.Step 3: Allowing Time to Dry
After securely attaching the first portion of the flange, Sven allows ample time for it to dry before moving forward with additional steps. This patience and precision are key aspects of his successful boatbuilding methods.Step 4: Finishing Touches
Once the flange is fully dried, Sven removes the clamps carefully, ensuring no damage occurs during this process. He then moves on to attaching four more pieces onto these main frames, completing two pairs of flanges for the bulkhead hatches.The Final Touches
While two flanges form the primary support structure around the hatches, Sven mentions there are two additional pieces required at each end to ensure comprehensive protection. This attention to detail highlights his commitment to producing a durable and reliable design. “Sailing is about finding your path, whether it’s across an ocean or within yourself.” – Sven Yrvind In conclusion, making flanges around bulkhead hatches may seem complex at first glance, but by following Sven Yrvind’s meticulous process, enthusiasts can achieve professional-level results. Remember that the journey of boatbuilding is as rewarding as reaching your destination; it tests one’s patience and dedication. For those seeking to embark on this adventure or simply gain more insight into marine craftsmanship, Sven’s wisdom is invaluable.Once the flange is fully dried, Sven removes the clamps carefully, ensuring no damage occurs during this process. He then moves on to attaching four more pieces onto these main frames, completing two pairs of flanges for the bulkhead hatches.The Final Touches
While two flanges form the primary support structure around the hatches, Sven mentions there are two additional pieces required at each end to ensure comprehensive protection. This attention to detail highlights his commitment to producing a durable and reliable design. “Sailing is about finding your path, whether it’s across an ocean or within yourself.” – Sven Yrvind In conclusion, making flanges around bulkhead hatches may seem complex at first glance, but by following Sven Yrvind’s meticulous process, enthusiasts can achieve professional-level results. Remember that the journey of boatbuilding is as rewarding as reaching your destination; it tests one’s patience and dedication. For those seeking to embark on this adventure or simply gain more insight into marine craftsmanship, Sven’s wisdom is invaluable.Sven proceeds to apply glue along one edge of the flange, ensuring a secure bond when clamped into place. He emphasizes that this stage is crucial for maintaining the structural integrity of the flange, which in turn safeguards the living area beneath the canvas when hatches are open.Step 3: Allowing Time to Dry
After securely attaching the first portion of the flange, Sven allows ample time for it to dry before moving forward with additional steps. This patience and precision are key aspects of his successful boatbuilding methods.Step 4: Finishing Touches
Once the flange is fully dried, Sven removes the clamps carefully, ensuring no damage occurs during this process. He then moves on to attaching four more pieces onto these main frames, completing two pairs of flanges for the bulkhead hatches.The Final Touches
While two flanges form the primary support structure around the hatches, Sven mentions there are two additional pieces required at each end to ensure comprehensive protection. This attention to detail highlights his commitment to producing a durable and reliable design. “Sailing is about finding your path, whether it’s across an ocean or within yourself.” – Sven Yrvind In conclusion, making flanges around bulkhead hatches may seem complex at first glance, but by following Sven Yrvind’s meticulous process, enthusiasts can achieve professional-level results. Remember that the journey of boatbuilding is as rewarding as reaching your destination; it tests one’s patience and dedication. For those seeking to embark on this adventure or simply gain more insight into marine craftsmanship, Sven’s wisdom is invaluable.Sven begins by explaining that working on flanges vertically and horizontally is significantly easier than doing so in a flat position. To simplify the process further, he divides the task into two or three steps as suggested by fellow expert “for for.” This approach not only makes it more manageable but also allows for greater precision in crafting each component.Step 2: Applying Glue and Securing
Sven proceeds to apply glue along one edge of the flange, ensuring a secure bond when clamped into place. He emphasizes that this stage is crucial for maintaining the structural integrity of the flange, which in turn safeguards the living area beneath the canvas when hatches are open.Step 3: Allowing Time to Dry
After securely attaching the first portion of the flange, Sven allows ample time for it to dry before moving forward with additional steps. This patience and precision are key aspects of his successful boatbuilding methods.Step 4: Finishing Touches
Once the flange is fully dried, Sven removes the clamps carefully, ensuring no damage occurs during this process. He then moves on to attaching four more pieces onto these main frames, completing two pairs of flanges for the bulkhead hatches.The Final Touches
While two flanges form the primary support structure around the hatches, Sven mentions there are two additional pieces required at each end to ensure comprehensive protection. This attention to detail highlights his commitment to producing a durable and reliable design. “Sailing is about finding your path, whether it’s across an ocean or within yourself.” – Sven Yrvind In conclusion, making flanges around bulkhead hatches may seem complex at first glance, but by following Sven Yrvind’s meticulous process, enthusiasts can achieve professional-level results. Remember that the journey of boatbuilding is as rewarding as reaching your destination; it tests one’s patience and dedication. For those seeking to embark on this adventure or simply gain more insight into marine craftsmanship, Sven’s wisdom is invaluable.Sven Yrvind, a renowned yacht designer and sailor, shares valuable insights on creating flanges around bulkhead hatches for canvas protection in this enlightening video. By following his expert guidance, boat enthusiasts can ensure their living areas remain secure while allowing unhindered access through the hatches.Step 1: Starting with the Flange
Sven begins by explaining that working on flanges vertically and horizontally is significantly easier than doing so in a flat position. To simplify the process further, he divides the task into two or three steps as suggested by fellow expert “for for.” This approach not only makes it more manageable but also allows for greater precision in crafting each component.Step 2: Applying Glue and Securing
Sven proceeds to apply glue along one edge of the flange, ensuring a secure bond when clamped into place. He emphasizes that this stage is crucial for maintaining the structural integrity of the flange, which in turn safeguards the living area beneath the canvas when hatches are open.Step 3: Allowing Time to Dry
After securely attaching the first portion of the flange, Sven allows ample time for it to dry before moving forward with additional steps. This patience and precision are key aspects of his successful boatbuilding methods.Step 4: Finishing Touches
Once the flange is fully dried, Sven removes the clamps carefully, ensuring no damage occurs during this process. He then moves on to attaching four more pieces onto these main frames, completing two pairs of flanges for the bulkhead hatches.The Final Touches
While two flanges form the primary support structure around the hatches, Sven mentions there are two additional pieces required at each end to ensure comprehensive protection. This attention to detail highlights his commitment to producing a durable and reliable design. “Sailing is about finding your path, whether it’s across an ocean or within yourself.” – Sven Yrvind In conclusion, making flanges around bulkhead hatches may seem complex at first glance, but by following Sven Yrvind’s meticulous process, enthusiasts can achieve professional-level results. Remember that the journey of boatbuilding is as rewarding as reaching your destination; it tests one’s patience and dedication. For those seeking to embark on this adventure or simply gain more insight into marine craftsmanship, Sven’s wisdom is invaluable.Making Flanges Around Bulkhead Hatches for Canvas
Sven Yrvind, a renowned yacht designer and sailor, shares valuable insights on creating flanges around bulkhead hatches for canvas protection in this enlightening video. By following his expert guidance, boat enthusiasts can ensure their living areas remain secure while allowing unhindered access through the hatches.Step 1: Starting with the Flange
Sven begins by explaining that working on flanges vertically and horizontally is significantly easier than doing so in a flat position. To simplify the process further, he divides the task into two or three steps as suggested by fellow expert “for for.” This approach not only makes it more manageable but also allows for greater precision in crafting each component.Step 2: Applying Glue and Securing
Sven proceeds to apply glue along one edge of the flange, ensuring a secure bond when clamped into place. He emphasizes that this stage is crucial for maintaining the structural integrity of the flange, which in turn safeguards the living area beneath the canvas when hatches are open.Step 3: Allowing Time to Dry
After securely attaching the first portion of the flange, Sven allows ample time for it to dry before moving forward with additional steps. This patience and precision are key aspects of his successful boatbuilding methods.Step 4: Finishing Touches
Once the flange is fully dried, Sven removes the clamps carefully, ensuring no damage occurs during this process. He then moves on to attaching four more pieces onto these main frames, completing two pairs of flanges for the bulkhead hatches.The Final Touches
While two flanges form the primary support structure around the hatches, Sven mentions there are two additional pieces required at each end to ensure comprehensive protection. This attention to detail highlights his commitment to producing a durable and reliable design. “Sailing is about finding your path, whether it’s across an ocean or within yourself.” – Sven Yrvind In conclusion, making flanges around bulkhead hatches may seem complex at first glance, but by following Sven Yrvind’s meticulous process, enthusiasts can achieve professional-level results. Remember that the journey of boatbuilding is as rewarding as reaching your destination; it tests one’s patience and dedication. For those seeking to embark on this adventure or simply gain more insight into marine craftsmanship, Sven’s wisdom is invaluable.After securely attaching the first portion of the flange, Sven allows ample time for it to dry before moving forward with additional steps. This patience and precision are key aspects of his successful boatbuilding methods.Step 4: Finishing Touches
Once the flange is fully dried, Sven removes the clamps carefully, ensuring no damage occurs during this process. He then moves on to attaching four more pieces onto these main frames, completing two pairs of flanges for the bulkhead hatches.The Final Touches
While two flanges form the primary support structure around the hatches, Sven mentions there are two additional pieces required at each end to ensure comprehensive protection. This attention to detail highlights his commitment to producing a durable and reliable design. “Sailing is about finding your path, whether it’s across an ocean or within yourself.” – Sven Yrvind In conclusion, making flanges around bulkhead hatches may seem complex at first glance, but by following Sven Yrvind’s meticulous process, enthusiasts can achieve professional-level results. Remember that the journey of boatbuilding is as rewarding as reaching your destination; it tests one’s patience and dedication. For those seeking to embark on this adventure or simply gain more insight into marine craftsmanship, Sven’s wisdom is invaluable.Sven proceeds to apply glue along one edge of the flange, ensuring a secure bond when clamped into place. He emphasizes that this stage is crucial for maintaining the structural integrity of the flange, which in turn safeguards the living area beneath the canvas when hatches are open.Step 3: Allowing Time to Dry
After securely attaching the first portion of the flange, Sven allows ample time for it to dry before moving forward with additional steps. This patience and precision are key aspects of his successful boatbuilding methods.Step 4: Finishing Touches
Once the flange is fully dried, Sven removes the clamps carefully, ensuring no damage occurs during this process. He then moves on to attaching four more pieces onto these main frames, completing two pairs of flanges for the bulkhead hatches.The Final Touches
While two flanges form the primary support structure around the hatches, Sven mentions there are two additional pieces required at each end to ensure comprehensive protection. This attention to detail highlights his commitment to producing a durable and reliable design. “Sailing is about finding your path, whether it’s across an ocean or within yourself.” – Sven Yrvind In conclusion, making flanges around bulkhead hatches may seem complex at first glance, but by following Sven Yrvind’s meticulous process, enthusiasts can achieve professional-level results. Remember that the journey of boatbuilding is as rewarding as reaching your destination; it tests one’s patience and dedication. For those seeking to embark on this adventure or simply gain more insight into marine craftsmanship, Sven’s wisdom is invaluable.Sven begins by explaining that working on flanges vertically and horizontally is significantly easier than doing so in a flat position. To simplify the process further, he divides the task into two or three steps as suggested by fellow expert “for for.” This approach not only makes it more manageable but also allows for greater precision in crafting each component.Step 2: Applying Glue and Securing
Sven proceeds to apply glue along one edge of the flange, ensuring a secure bond when clamped into place. He emphasizes that this stage is crucial for maintaining the structural integrity of the flange, which in turn safeguards the living area beneath the canvas when hatches are open.Step 3: Allowing Time to Dry
After securely attaching the first portion of the flange, Sven allows ample time for it to dry before moving forward with additional steps. This patience and precision are key aspects of his successful boatbuilding methods.Step 4: Finishing Touches
Once the flange is fully dried, Sven removes the clamps carefully, ensuring no damage occurs during this process. He then moves on to attaching four more pieces onto these main frames, completing two pairs of flanges for the bulkhead hatches.The Final Touches
While two flanges form the primary support structure around the hatches, Sven mentions there are two additional pieces required at each end to ensure comprehensive protection. This attention to detail highlights his commitment to producing a durable and reliable design. “Sailing is about finding your path, whether it’s across an ocean or within yourself.” – Sven Yrvind In conclusion, making flanges around bulkhead hatches may seem complex at first glance, but by following Sven Yrvind’s meticulous process, enthusiasts can achieve professional-level results. Remember that the journey of boatbuilding is as rewarding as reaching your destination; it tests one’s patience and dedication. For those seeking to embark on this adventure or simply gain more insight into marine craftsmanship, Sven’s wisdom is invaluable.Sven Yrvind, a renowned yacht designer and sailor, shares valuable insights on creating flanges around bulkhead hatches for canvas protection in this enlightening video. By following his expert guidance, boat enthusiasts can ensure their living areas remain secure while allowing unhindered access through the hatches.Step 1: Starting with the Flange
Sven begins by explaining that working on flanges vertically and horizontally is significantly easier than doing so in a flat position. To simplify the process further, he divides the task into two or three steps as suggested by fellow expert “for for.” This approach not only makes it more manageable but also allows for greater precision in crafting each component.Step 2: Applying Glue and Securing
Sven proceeds to apply glue along one edge of the flange, ensuring a secure bond when clamped into place. He emphasizes that this stage is crucial for maintaining the structural integrity of the flange, which in turn safeguards the living area beneath the canvas when hatches are open.Step 3: Allowing Time to Dry
After securely attaching the first portion of the flange, Sven allows ample time for it to dry before moving forward with additional steps. This patience and precision are key aspects of his successful boatbuilding methods.Step 4: Finishing Touches
Once the flange is fully dried, Sven removes the clamps carefully, ensuring no damage occurs during this process. He then moves on to attaching four more pieces onto these main frames, completing two pairs of flanges for the bulkhead hatches.The Final Touches
While two flanges form the primary support structure around the hatches, Sven mentions there are two additional pieces required at each end to ensure comprehensive protection. This attention to detail highlights his commitment to producing a durable and reliable design. “Sailing is about finding your path, whether it’s across an ocean or within yourself.” – Sven Yrvind In conclusion, making flanges around bulkhead hatches may seem complex at first glance, but by following Sven Yrvind’s meticulous process, enthusiasts can achieve professional-level results. Remember that the journey of boatbuilding is as rewarding as reaching your destination; it tests one’s patience and dedication. For those seeking to embark on this adventure or simply gain more insight into marine craftsmanship, Sven’s wisdom is invaluable.Making Flanges Around Bulkhead Hatches for Canvas
Sven Yrvind, a renowned yacht designer and sailor, shares valuable insights on creating flanges around bulkhead hatches for canvas protection in this enlightening video. By following his expert guidance, boat enthusiasts can ensure their living areas remain secure while allowing unhindered access through the hatches.Step 1: Starting with the Flange
Sven begins by explaining that working on flanges vertically and horizontally is significantly easier than doing so in a flat position. To simplify the process further, he divides the task into two or three steps as suggested by fellow expert “for for.” This approach not only makes it more manageable but also allows for greater precision in crafting each component.Step 2: Applying Glue and Securing
Sven proceeds to apply glue along one edge of the flange, ensuring a secure bond when clamped into place. He emphasizes that this stage is crucial for maintaining the structural integrity of the flange, which in turn safeguards the living area beneath the canvas when hatches are open.Step 3: Allowing Time to Dry
After securely attaching the first portion of the flange, Sven allows ample time for it to dry before moving forward with additional steps. This patience and precision are key aspects of his successful boatbuilding methods.Step 4: Finishing Touches
Once the flange is fully dried, Sven removes the clamps carefully, ensuring no damage occurs during this process. He then moves on to attaching four more pieces onto these main frames, completing two pairs of flanges for the bulkhead hatches.The Final Touches
While two flanges form the primary support structure around the hatches, Sven mentions there are two additional pieces required at each end to ensure comprehensive protection. This attention to detail highlights his commitment to producing a durable and reliable design. “Sailing is about finding your path, whether it’s across an ocean or within yourself.” – Sven Yrvind In conclusion, making flanges around bulkhead hatches may seem complex at first glance, but by following Sven Yrvind’s meticulous process, enthusiasts can achieve professional-level results. Remember that the journey of boatbuilding is as rewarding as reaching your destination; it tests one’s patience and dedication. For those seeking to embark on this adventure or simply gain more insight into marine craftsmanship, Sven’s wisdom is invaluable.Once the flange is fully dried, Sven removes the clamps carefully, ensuring no damage occurs during this process. He then moves on to attaching four more pieces onto these main frames, completing two pairs of flanges for the bulkhead hatches.The Final Touches
While two flanges form the primary support structure around the hatches, Sven mentions there are two additional pieces required at each end to ensure comprehensive protection. This attention to detail highlights his commitment to producing a durable and reliable design. “Sailing is about finding your path, whether it’s across an ocean or within yourself.” – Sven Yrvind In conclusion, making flanges around bulkhead hatches may seem complex at first glance, but by following Sven Yrvind’s meticulous process, enthusiasts can achieve professional-level results. Remember that the journey of boatbuilding is as rewarding as reaching your destination; it tests one’s patience and dedication. For those seeking to embark on this adventure or simply gain more insight into marine craftsmanship, Sven’s wisdom is invaluable.After securely attaching the first portion of the flange, Sven allows ample time for it to dry before moving forward with additional steps. This patience and precision are key aspects of his successful boatbuilding methods.Step 4: Finishing Touches
Once the flange is fully dried, Sven removes the clamps carefully, ensuring no damage occurs during this process. He then moves on to attaching four more pieces onto these main frames, completing two pairs of flanges for the bulkhead hatches.The Final Touches
While two flanges form the primary support structure around the hatches, Sven mentions there are two additional pieces required at each end to ensure comprehensive protection. This attention to detail highlights his commitment to producing a durable and reliable design. “Sailing is about finding your path, whether it’s across an ocean or within yourself.” – Sven Yrvind In conclusion, making flanges around bulkhead hatches may seem complex at first glance, but by following Sven Yrvind’s meticulous process, enthusiasts can achieve professional-level results. Remember that the journey of boatbuilding is as rewarding as reaching your destination; it tests one’s patience and dedication. For those seeking to embark on this adventure or simply gain more insight into marine craftsmanship, Sven’s wisdom is invaluable.Sven proceeds to apply glue along one edge of the flange, ensuring a secure bond when clamped into place. He emphasizes that this stage is crucial for maintaining the structural integrity of the flange, which in turn safeguards the living area beneath the canvas when hatches are open.Step 3: Allowing Time to Dry
After securely attaching the first portion of the flange, Sven allows ample time for it to dry before moving forward with additional steps. This patience and precision are key aspects of his successful boatbuilding methods.Step 4: Finishing Touches
Once the flange is fully dried, Sven removes the clamps carefully, ensuring no damage occurs during this process. He then moves on to attaching four more pieces onto these main frames, completing two pairs of flanges for the bulkhead hatches.The Final Touches
While two flanges form the primary support structure around the hatches, Sven mentions there are two additional pieces required at each end to ensure comprehensive protection. This attention to detail highlights his commitment to producing a durable and reliable design. “Sailing is about finding your path, whether it’s across an ocean or within yourself.” – Sven Yrvind In conclusion, making flanges around bulkhead hatches may seem complex at first glance, but by following Sven Yrvind’s meticulous process, enthusiasts can achieve professional-level results. Remember that the journey of boatbuilding is as rewarding as reaching your destination; it tests one’s patience and dedication. For those seeking to embark on this adventure or simply gain more insight into marine craftsmanship, Sven’s wisdom is invaluable.Sven begins by explaining that working on flanges vertically and horizontally is significantly easier than doing so in a flat position. To simplify the process further, he divides the task into two or three steps as suggested by fellow expert “for for.” This approach not only makes it more manageable but also allows for greater precision in crafting each component.Step 2: Applying Glue and Securing
Sven proceeds to apply glue along one edge of the flange, ensuring a secure bond when clamped into place. He emphasizes that this stage is crucial for maintaining the structural integrity of the flange, which in turn safeguards the living area beneath the canvas when hatches are open.Step 3: Allowing Time to Dry
After securely attaching the first portion of the flange, Sven allows ample time for it to dry before moving forward with additional steps. This patience and precision are key aspects of his successful boatbuilding methods.Step 4: Finishing Touches
Once the flange is fully dried, Sven removes the clamps carefully, ensuring no damage occurs during this process. He then moves on to attaching four more pieces onto these main frames, completing two pairs of flanges for the bulkhead hatches.The Final Touches
While two flanges form the primary support structure around the hatches, Sven mentions there are two additional pieces required at each end to ensure comprehensive protection. This attention to detail highlights his commitment to producing a durable and reliable design. “Sailing is about finding your path, whether it’s across an ocean or within yourself.” – Sven Yrvind In conclusion, making flanges around bulkhead hatches may seem complex at first glance, but by following Sven Yrvind’s meticulous process, enthusiasts can achieve professional-level results. Remember that the journey of boatbuilding is as rewarding as reaching your destination; it tests one’s patience and dedication. For those seeking to embark on this adventure or simply gain more insight into marine craftsmanship, Sven’s wisdom is invaluable.Sven Yrvind, a renowned yacht designer and sailor, shares valuable insights on creating flanges around bulkhead hatches for canvas protection in this enlightening video. By following his expert guidance, boat enthusiasts can ensure their living areas remain secure while allowing unhindered access through the hatches.Step 1: Starting with the Flange
Sven begins by explaining that working on flanges vertically and horizontally is significantly easier than doing so in a flat position. To simplify the process further, he divides the task into two or three steps as suggested by fellow expert “for for.” This approach not only makes it more manageable but also allows for greater precision in crafting each component.Step 2: Applying Glue and Securing
Sven proceeds to apply glue along one edge of the flange, ensuring a secure bond when clamped into place. He emphasizes that this stage is crucial for maintaining the structural integrity of the flange, which in turn safeguards the living area beneath the canvas when hatches are open.Step 3: Allowing Time to Dry
After securely attaching the first portion of the flange, Sven allows ample time for it to dry before moving forward with additional steps. This patience and precision are key aspects of his successful boatbuilding methods.Step 4: Finishing Touches
Once the flange is fully dried, Sven removes the clamps carefully, ensuring no damage occurs during this process. He then moves on to attaching four more pieces onto these main frames, completing two pairs of flanges for the bulkhead hatches.The Final Touches
While two flanges form the primary support structure around the hatches, Sven mentions there are two additional pieces required at each end to ensure comprehensive protection. This attention to detail highlights his commitment to producing a durable and reliable design. “Sailing is about finding your path, whether it’s across an ocean or within yourself.” – Sven Yrvind In conclusion, making flanges around bulkhead hatches may seem complex at first glance, but by following Sven Yrvind’s meticulous process, enthusiasts can achieve professional-level results. Remember that the journey of boatbuilding is as rewarding as reaching your destination; it tests one’s patience and dedication. For those seeking to embark on this adventure or simply gain more insight into marine craftsmanship, Sven’s wisdom is invaluable.Making Flanges Around Bulkhead Hatches for Canvas
Sven Yrvind, a renowned yacht designer and sailor, shares valuable insights on creating flanges around bulkhead hatches for canvas protection in this enlightening video. By following his expert guidance, boat enthusiasts can ensure their living areas remain secure while allowing unhindered access through the hatches.Step 1: Starting with the Flange
Sven begins by explaining that working on flanges vertically and horizontally is significantly easier than doing so in a flat position. To simplify the process further, he divides the task into two or three steps as suggested by fellow expert “for for.” This approach not only makes it more manageable but also allows for greater precision in crafting each component.Step 2: Applying Glue and Securing
Sven proceeds to apply glue along one edge of the flange, ensuring a secure bond when clamped into place. He emphasizes that this stage is crucial for maintaining the structural integrity of the flange, which in turn safeguards the living area beneath the canvas when hatches are open.Step 3: Allowing Time to Dry
After securely attaching the first portion of the flange, Sven allows ample time for it to dry before moving forward with additional steps. This patience and precision are key aspects of his successful boatbuilding methods.Step 4: Finishing Touches
Once the flange is fully dried, Sven removes the clamps carefully, ensuring no damage occurs during this process. He then moves on to attaching four more pieces onto these main frames, completing two pairs of flanges for the bulkhead hatches.The Final Touches
While two flanges form the primary support structure around the hatches, Sven mentions there are two additional pieces required at each end to ensure comprehensive protection. This attention to detail highlights his commitment to producing a durable and reliable design. “Sailing is about finding your path, whether it’s across an ocean or within yourself.” – Sven Yrvind In conclusion, making flanges around bulkhead hatches may seem complex at first glance, but by following Sven Yrvind’s meticulous process, enthusiasts can achieve professional-level results. Remember that the journey of boatbuilding is as rewarding as reaching your destination; it tests one’s patience and dedication. For those seeking to embark on this adventure or simply gain more insight into marine craftsmanship, Sven’s wisdom is invaluable.After securely attaching the first portion of the flange, Sven allows ample time for it to dry before moving forward with additional steps. This patience and precision are key aspects of his successful boatbuilding methods.Step 4: Finishing Touches
Once the flange is fully dried, Sven removes the clamps carefully, ensuring no damage occurs during this process. He then moves on to attaching four more pieces onto these main frames, completing two pairs of flanges for the bulkhead hatches.The Final Touches
While two flanges form the primary support structure around the hatches, Sven mentions there are two additional pieces required at each end to ensure comprehensive protection. This attention to detail highlights his commitment to producing a durable and reliable design. “Sailing is about finding your path, whether it’s across an ocean or within yourself.” – Sven Yrvind In conclusion, making flanges around bulkhead hatches may seem complex at first glance, but by following Sven Yrvind’s meticulous process, enthusiasts can achieve professional-level results. Remember that the journey of boatbuilding is as rewarding as reaching your destination; it tests one’s patience and dedication. For those seeking to embark on this adventure or simply gain more insight into marine craftsmanship, Sven’s wisdom is invaluable.Making Flanges Around Bulkhead Hatches for Canvas
Sven Yrvind, a renowned yacht designer and sailor, shares valuable insights on creating flanges around bulkhead hatches for canvas protection in this enlightening video. By following his expert guidance, boat enthusiasts can ensure their living areas remain secure while allowing unhindered access through the hatches.Step 1: Starting with the Flange
Sven begins by explaining that working on flanges vertically and horizontally is significantly easier than doing so in a flat position. To simplify the process further, he divides the task into two or three steps as suggested by fellow expert “for for.” This approach not only makes it more manageable but also allows for greater precision in crafting each component.Step 2: Applying Glue and Securing
Sven proceeds to apply glue along one edge of the flange, ensuring a secure bond when clamped into place. He emphasizes that this stage is crucial for maintaining the structural integrity of the flange, which in turn safeguards the living area beneath the canvas when hatches are open.Step 3: Allowing Time to Dry
After securely attaching the first portion of the flange, Sven allows ample time for it to dry before moving forward with additional steps. This patience and precision are key aspects of his successful boatbuilding methods.Step 4: Finishing Touches
Once the flange is fully dried, Sven removes the clamps carefully, ensuring no damage occurs during this process. He then moves on to attaching four more pieces onto these main frames, completing two pairs of flanges for the bulkhead hatches.The Final Touches
While two flanges form the primary support structure around the hatches, Sven mentions there are two additional pieces required at each end to ensure comprehensive protection. This attention to detail highlights his commitment to producing a durable and reliable design. “Sailing is about finding your path, whether it’s across an ocean or within yourself.” – Sven Yrvind In conclusion, making flanges around bulkhead hatches may seem complex at first glance, but by following Sven Yrvind’s meticulous process, enthusiasts can achieve professional-level results. Remember that the journey of boatbuilding is as rewarding as reaching your destination; it tests one’s patience and dedication. For those seeking to embark on this adventure or simply gain more insight into marine craftsmanship, Sven’s wisdom is invaluable.Sven begins by explaining that working on flanges vertically and horizontally is significantly easier than doing so in a flat position. To simplify the process further, he divides the task into two or three steps as suggested by fellow expert “for for.” This approach not only makes it more manageable but also allows for greater precision in crafting each component.Step 2: Applying Glue and Securing
Sven proceeds to apply glue along one edge of the flange, ensuring a secure bond when clamped into place. He emphasizes that this stage is crucial for maintaining the structural integrity of the flange, which in turn safeguards the living area beneath the canvas when hatches are open.Step 3: Allowing Time to Dry
After securely attaching the first portion of the flange, Sven allows ample time for it to dry before moving forward with additional steps. This patience and precision are key aspects of his successful boatbuilding methods.Step 4: Finishing Touches
Once the flange is fully dried, Sven removes the clamps carefully, ensuring no damage occurs during this process. He then moves on to attaching four more pieces onto these main frames, completing two pairs of flanges for the bulkhead hatches.The Final Touches
While two flanges form the primary support structure around the hatches, Sven mentions there are two additional pieces required at each end to ensure comprehensive protection. This attention to detail highlights his commitment to producing a durable and reliable design. “Sailing is about finding your path, whether it’s across an ocean or within yourself.” – Sven Yrvind In conclusion, making flanges around bulkhead hatches may seem complex at first glance, but by following Sven Yrvind’s meticulous process, enthusiasts can achieve professional-level results. Remember that the journey of boatbuilding is as rewarding as reaching your destination; it tests one’s patience and dedication. For those seeking to embark on this adventure or simply gain more insight into marine craftsmanship, Sven’s wisdom is invaluable.Sven Yrvind, a renowned yacht designer and sailor, shares valuable insights on creating flanges around bulkhead hatches for canvas protection in this enlightening video. By following his expert guidance, boat enthusiasts can ensure their living areas remain secure while allowing unhindered access through the hatches.Step 1: Starting with the Flange
Sven begins by explaining that working on flanges vertically and horizontally is significantly easier than doing so in a flat position. To simplify the process further, he divides the task into two or three steps as suggested by fellow expert “for for.” This approach not only makes it more manageable but also allows for greater precision in crafting each component.Step 2: Applying Glue and Securing
Sven proceeds to apply glue along one edge of the flange, ensuring a secure bond when clamped into place. He emphasizes that this stage is crucial for maintaining the structural integrity of the flange, which in turn safeguards the living area beneath the canvas when hatches are open.Step 3: Allowing Time to Dry
After securely attaching the first portion of the flange, Sven allows ample time for it to dry before moving forward with additional steps. This patience and precision are key aspects of his successful boatbuilding methods.Step 4: Finishing Touches
Once the flange is fully dried, Sven removes the clamps carefully, ensuring no damage occurs during this process. He then moves on to attaching four more pieces onto these main frames, completing two pairs of flanges for the bulkhead hatches.The Final Touches
While two flanges form the primary support structure around the hatches, Sven mentions there are two additional pieces required at each end to ensure comprehensive protection. This attention to detail highlights his commitment to producing a durable and reliable design. “Sailing is about finding your path, whether it’s across an ocean or within yourself.” – Sven Yrvind In conclusion, making flanges around bulkhead hatches may seem complex at first glance, but by following Sven Yrvind’s meticulous process, enthusiasts can achieve professional-level results. Remember that the journey of boatbuilding is as rewarding as reaching your destination; it tests one’s patience and dedication. For those seeking to embark on this adventure or simply gain more insight into marine craftsmanship, Sven’s wisdom is invaluable.Making Flanges Around Bulkhead Hatches for Canvas
Sven Yrvind, a renowned yacht designer and sailor, shares valuable insights on creating flanges around bulkhead hatches for canvas protection in this enlightening video. By following his expert guidance, boat enthusiasts can ensure their living areas remain secure while allowing unhindered access through the hatches.Step 1: Starting with the Flange
Sven begins by explaining that working on flanges vertically and horizontally is significantly easier than doing so in a flat position. To simplify the process further, he divides the task into two or three steps as suggested by fellow expert “for for.” This approach not only makes it more manageable but also allows for greater precision in crafting each component.Step 2: Applying Glue and Securing
Sven proceeds to apply glue along one edge of the flange, ensuring a secure bond when clamped into place. He emphasizes that this stage is crucial for maintaining the structural integrity of the flange, which in turn safeguards the living area beneath the canvas when hatches are open.Step 3: Allowing Time to Dry
After securely attaching the first portion of the flange, Sven allows ample time for it to dry before moving forward with additional steps. This patience and precision are key aspects of his successful boatbuilding methods.Step 4: Finishing Touches
Once the flange is fully dried, Sven removes the clamps carefully, ensuring no damage occurs during this process. He then moves on to attaching four more pieces onto these main frames, completing two pairs of flanges for the bulkhead hatches.The Final Touches
While two flanges form the primary support structure around the hatches, Sven mentions there are two additional pieces required at each end to ensure comprehensive protection. This attention to detail highlights his commitment to producing a durable and reliable design. “Sailing is about finding your path, whether it’s across an ocean or within yourself.” – Sven Yrvind In conclusion, making flanges around bulkhead hatches may seem complex at first glance, but by following Sven Yrvind’s meticulous process, enthusiasts can achieve professional-level results. Remember that the journey of boatbuilding is as rewarding as reaching your destination; it tests one’s patience and dedication. For those seeking to embark on this adventure or simply gain more insight into marine craftsmanship, Sven’s wisdom is invaluable.Once the flange is fully dried, Sven removes the clamps carefully, ensuring no damage occurs during this process. He then moves on to attaching four more pieces onto these main frames, completing two pairs of flanges for the bulkhead hatches.The Final Touches
While two flanges form the primary support structure around the hatches, Sven mentions there are two additional pieces required at each end to ensure comprehensive protection. This attention to detail highlights his commitment to producing a durable and reliable design. “Sailing is about finding your path, whether it’s across an ocean or within yourself.” – Sven Yrvind In conclusion, making flanges around bulkhead hatches may seem complex at first glance, but by following Sven Yrvind’s meticulous process, enthusiasts can achieve professional-level results. Remember that the journey of boatbuilding is as rewarding as reaching your destination; it tests one’s patience and dedication. For those seeking to embark on this adventure or simply gain more insight into marine craftsmanship, Sven’s wisdom is invaluable.Sven begins by explaining that working on flanges vertically and horizontally is significantly easier than doing so in a flat position. To simplify the process further, he divides the task into two or three steps as suggested by fellow expert “for for.” This approach not only makes it more manageable but also allows for greater precision in crafting each component.Step 2: Applying Glue and Securing
Sven proceeds to apply glue along one edge of the flange, ensuring a secure bond when clamped into place. He emphasizes that this stage is crucial for maintaining the structural integrity of the flange, which in turn safeguards the living area beneath the canvas when hatches are open.Step 3: Allowing Time to Dry
After securely attaching the first portion of the flange, Sven allows ample time for it to dry before moving forward with additional steps. This patience and precision are key aspects of his successful boatbuilding methods.Step 4: Finishing Touches
Once the flange is fully dried, Sven removes the clamps carefully, ensuring no damage occurs during this process. He then moves on to attaching four more pieces onto these main frames, completing two pairs of flanges for the bulkhead hatches.The Final Touches
While two flanges form the primary support structure around the hatches, Sven mentions there are two additional pieces required at each end to ensure comprehensive protection. This attention to detail highlights his commitment to producing a durable and reliable design. “Sailing is about finding your path, whether it’s across an ocean or within yourself.” – Sven Yrvind In conclusion, making flanges around bulkhead hatches may seem complex at first glance, but by following Sven Yrvind’s meticulous process, enthusiasts can achieve professional-level results. Remember that the journey of boatbuilding is as rewarding as reaching your destination; it tests one’s patience and dedication. For those seeking to embark on this adventure or simply gain more insight into marine craftsmanship, Sven’s wisdom is invaluable.Sven Yrvind, a renowned yacht designer and sailor, shares valuable insights on creating flanges around bulkhead hatches for canvas protection in this enlightening video. By following his expert guidance, boat enthusiasts can ensure their living areas remain secure while allowing unhindered access through the hatches.Step 1: Starting with the Flange
Sven begins by explaining that working on flanges vertically and horizontally is significantly easier than doing so in a flat position. To simplify the process further, he divides the task into two or three steps as suggested by fellow expert “for for.” This approach not only makes it more manageable but also allows for greater precision in crafting each component.Step 2: Applying Glue and Securing
Sven proceeds to apply glue along one edge of the flange, ensuring a secure bond when clamped into place. He emphasizes that this stage is crucial for maintaining the structural integrity of the flange, which in turn safeguards the living area beneath the canvas when hatches are open.Step 3: Allowing Time to Dry
After securely attaching the first portion of the flange, Sven allows ample time for it to dry before moving forward with additional steps. This patience and precision are key aspects of his successful boatbuilding methods.Step 4: Finishing Touches
Once the flange is fully dried, Sven removes the clamps carefully, ensuring no damage occurs during this process. He then moves on to attaching four more pieces onto these main frames, completing two pairs of flanges for the bulkhead hatches.The Final Touches
While two flanges form the primary support structure around the hatches, Sven mentions there are two additional pieces required at each end to ensure comprehensive protection. This attention to detail highlights his commitment to producing a durable and reliable design. “Sailing is about finding your path, whether it’s across an ocean or within yourself.” – Sven Yrvind In conclusion, making flanges around bulkhead hatches may seem complex at first glance, but by following Sven Yrvind’s meticulous process, enthusiasts can achieve professional-level results. Remember that the journey of boatbuilding is as rewarding as reaching your destination; it tests one’s patience and dedication. For those seeking to embark on this adventure or simply gain more insight into marine craftsmanship, Sven’s wisdom is invaluable.Making Flanges Around Bulkhead Hatches for Canvas
Sven Yrvind, a renowned yacht designer and sailor, shares valuable insights on creating flanges around bulkhead hatches for canvas protection in this enlightening video. By following his expert guidance, boat enthusiasts can ensure their living areas remain secure while allowing unhindered access through the hatches.Step 1: Starting with the Flange
Sven begins by explaining that working on flanges vertically and horizontally is significantly easier than doing so in a flat position. To simplify the process further, he divides the task into two or three steps as suggested by fellow expert “for for.” This approach not only makes it more manageable but also allows for greater precision in crafting each component.Step 2: Applying Glue and Securing
Sven proceeds to apply glue along one edge of the flange, ensuring a secure bond when clamped into place. He emphasizes that this stage is crucial for maintaining the structural integrity of the flange, which in turn safeguards the living area beneath the canvas when hatches are open.Step 3: Allowing Time to Dry
After securely attaching the first portion of the flange, Sven allows ample time for it to dry before moving forward with additional steps. This patience and precision are key aspects of his successful boatbuilding methods.Step 4: Finishing Touches
Once the flange is fully dried, Sven removes the clamps carefully, ensuring no damage occurs during this process. He then moves on to attaching four more pieces onto these main frames, completing two pairs of flanges for the bulkhead hatches.The Final Touches
While two flanges form the primary support structure around the hatches, Sven mentions there are two additional pieces required at each end to ensure comprehensive protection. This attention to detail highlights his commitment to producing a durable and reliable design. “Sailing is about finding your path, whether it’s across an ocean or within yourself.” – Sven Yrvind In conclusion, making flanges around bulkhead hatches may seem complex at first glance, but by following Sven Yrvind’s meticulous process, enthusiasts can achieve professional-level results. Remember that the journey of boatbuilding is as rewarding as reaching your destination; it tests one’s patience and dedication. For those seeking to embark on this adventure or simply gain more insight into marine craftsmanship, Sven’s wisdom is invaluable.After securely attaching the first portion of the flange, Sven allows ample time for it to dry before moving forward with additional steps. This patience and precision are key aspects of his successful boatbuilding methods.Step 4: Finishing Touches
Once the flange is fully dried, Sven removes the clamps carefully, ensuring no damage occurs during this process. He then moves on to attaching four more pieces onto these main frames, completing two pairs of flanges for the bulkhead hatches.The Final Touches
While two flanges form the primary support structure around the hatches, Sven mentions there are two additional pieces required at each end to ensure comprehensive protection. This attention to detail highlights his commitment to producing a durable and reliable design. “Sailing is about finding your path, whether it’s across an ocean or within yourself.” – Sven Yrvind In conclusion, making flanges around bulkhead hatches may seem complex at first glance, but by following Sven Yrvind’s meticulous process, enthusiasts can achieve professional-level results. Remember that the journey of boatbuilding is as rewarding as reaching your destination; it tests one’s patience and dedication. For those seeking to embark on this adventure or simply gain more insight into marine craftsmanship, Sven’s wisdom is invaluable.Sven begins by explaining that working on flanges vertically and horizontally is significantly easier than doing so in a flat position. To simplify the process further, he divides the task into two or three steps as suggested by fellow expert “for for.” This approach not only makes it more manageable but also allows for greater precision in crafting each component.Step 2: Applying Glue and Securing
Sven proceeds to apply glue along one edge of the flange, ensuring a secure bond when clamped into place. He emphasizes that this stage is crucial for maintaining the structural integrity of the flange, which in turn safeguards the living area beneath the canvas when hatches are open.Step 3: Allowing Time to Dry
After securely attaching the first portion of the flange, Sven allows ample time for it to dry before moving forward with additional steps. This patience and precision are key aspects of his successful boatbuilding methods.Step 4: Finishing Touches
Once the flange is fully dried, Sven removes the clamps carefully, ensuring no damage occurs during this process. He then moves on to attaching four more pieces onto these main frames, completing two pairs of flanges for the bulkhead hatches.The Final Touches
While two flanges form the primary support structure around the hatches, Sven mentions there are two additional pieces required at each end to ensure comprehensive protection. This attention to detail highlights his commitment to producing a durable and reliable design. “Sailing is about finding your path, whether it’s across an ocean or within yourself.” – Sven Yrvind In conclusion, making flanges around bulkhead hatches may seem complex at first glance, but by following Sven Yrvind’s meticulous process, enthusiasts can achieve professional-level results. Remember that the journey of boatbuilding is as rewarding as reaching your destination; it tests one’s patience and dedication. For those seeking to embark on this adventure or simply gain more insight into marine craftsmanship, Sven’s wisdom is invaluable.Sven Yrvind, a renowned yacht designer and sailor, shares valuable insights on creating flanges around bulkhead hatches for canvas protection in this enlightening video. By following his expert guidance, boat enthusiasts can ensure their living areas remain secure while allowing unhindered access through the hatches.Step 1: Starting with the Flange
Sven begins by explaining that working on flanges vertically and horizontally is significantly easier than doing so in a flat position. To simplify the process further, he divides the task into two or three steps as suggested by fellow expert “for for.” This approach not only makes it more manageable but also allows for greater precision in crafting each component.Step 2: Applying Glue and Securing
Sven proceeds to apply glue along one edge of the flange, ensuring a secure bond when clamped into place. He emphasizes that this stage is crucial for maintaining the structural integrity of the flange, which in turn safeguards the living area beneath the canvas when hatches are open.Step 3: Allowing Time to Dry
After securely attaching the first portion of the flange, Sven allows ample time for it to dry before moving forward with additional steps. This patience and precision are key aspects of his successful boatbuilding methods.Step 4: Finishing Touches
Once the flange is fully dried, Sven removes the clamps carefully, ensuring no damage occurs during this process. He then moves on to attaching four more pieces onto these main frames, completing two pairs of flanges for the bulkhead hatches.The Final Touches
While two flanges form the primary support structure around the hatches, Sven mentions there are two additional pieces required at each end to ensure comprehensive protection. This attention to detail highlights his commitment to producing a durable and reliable design. “Sailing is about finding your path, whether it’s across an ocean or within yourself.” – Sven Yrvind In conclusion, making flanges around bulkhead hatches may seem complex at first glance, but by following Sven Yrvind’s meticulous process, enthusiasts can achieve professional-level results. Remember that the journey of boatbuilding is as rewarding as reaching your destination; it tests one’s patience and dedication. For those seeking to embark on this adventure or simply gain more insight into marine craftsmanship, Sven’s wisdom is invaluable.Making Flanges Around Bulkhead Hatches for Canvas
Sven Yrvind, a renowned yacht designer and sailor, shares valuable insights on creating flanges around bulkhead hatches for canvas protection in this enlightening video. By following his expert guidance, boat enthusiasts can ensure their living areas remain secure while allowing unhindered access through the hatches.Step 1: Starting with the Flange
Sven begins by explaining that working on flanges vertically and horizontally is significantly easier than doing so in a flat position. To simplify the process further, he divides the task into two or three steps as suggested by fellow expert “for for.” This approach not only makes it more manageable but also allows for greater precision in crafting each component.Step 2: Applying Glue and Securing
Sven proceeds to apply glue along one edge of the flange, ensuring a secure bond when clamped into place. He emphasizes that this stage is crucial for maintaining the structural integrity of the flange, which in turn safeguards the living area beneath the canvas when hatches are open.Step 3: Allowing Time to Dry
After securely attaching the first portion of the flange, Sven allows ample time for it to dry before moving forward with additional steps. This patience and precision are key aspects of his successful boatbuilding methods.Step 4: Finishing Touches
Once the flange is fully dried, Sven removes the clamps carefully, ensuring no damage occurs during this process. He then moves on to attaching four more pieces onto these main frames, completing two pairs of flanges for the bulkhead hatches.The Final Touches
While two flanges form the primary support structure around the hatches, Sven mentions there are two additional pieces required at each end to ensure comprehensive protection. This attention to detail highlights his commitment to producing a durable and reliable design. “Sailing is about finding your path, whether it’s across an ocean or within yourself.” – Sven Yrvind In conclusion, making flanges around bulkhead hatches may seem complex at first glance, but by following Sven Yrvind’s meticulous process, enthusiasts can achieve professional-level results. Remember that the journey of boatbuilding is as rewarding as reaching your destination; it tests one’s patience and dedication. For those seeking to embark on this adventure or simply gain more insight into marine craftsmanship, Sven’s wisdom is invaluable.Sven proceeds to apply glue along one edge of the flange, ensuring a secure bond when clamped into place. He emphasizes that this stage is crucial for maintaining the structural integrity of the flange, which in turn safeguards the living area beneath the canvas when hatches are open.Step 3: Allowing Time to Dry
After securely attaching the first portion of the flange, Sven allows ample time for it to dry before moving forward with additional steps. This patience and precision are key aspects of his successful boatbuilding methods.Step 4: Finishing Touches
Once the flange is fully dried, Sven removes the clamps carefully, ensuring no damage occurs during this process. He then moves on to attaching four more pieces onto these main frames, completing two pairs of flanges for the bulkhead hatches.The Final Touches
While two flanges form the primary support structure around the hatches, Sven mentions there are two additional pieces required at each end to ensure comprehensive protection. This attention to detail highlights his commitment to producing a durable and reliable design. “Sailing is about finding your path, whether it’s across an ocean or within yourself.” – Sven Yrvind In conclusion, making flanges around bulkhead hatches may seem complex at first glance, but by following Sven Yrvind’s meticulous process, enthusiasts can achieve professional-level results. Remember that the journey of boatbuilding is as rewarding as reaching your destination; it tests one’s patience and dedication. For those seeking to embark on this adventure or simply gain more insight into marine craftsmanship, Sven’s wisdom is invaluable.Sven begins by explaining that working on flanges vertically and horizontally is significantly easier than doing so in a flat position. To simplify the process further, he divides the task into two or three steps as suggested by fellow expert “for for.” This approach not only makes it more manageable but also allows for greater precision in crafting each component.Step 2: Applying Glue and Securing
Sven proceeds to apply glue along one edge of the flange, ensuring a secure bond when clamped into place. He emphasizes that this stage is crucial for maintaining the structural integrity of the flange, which in turn safeguards the living area beneath the canvas when hatches are open.Step 3: Allowing Time to Dry
After securely attaching the first portion of the flange, Sven allows ample time for it to dry before moving forward with additional steps. This patience and precision are key aspects of his successful boatbuilding methods.Step 4: Finishing Touches
Once the flange is fully dried, Sven removes the clamps carefully, ensuring no damage occurs during this process. He then moves on to attaching four more pieces onto these main frames, completing two pairs of flanges for the bulkhead hatches.The Final Touches
While two flanges form the primary support structure around the hatches, Sven mentions there are two additional pieces required at each end to ensure comprehensive protection. This attention to detail highlights his commitment to producing a durable and reliable design. “Sailing is about finding your path, whether it’s across an ocean or within yourself.” – Sven Yrvind In conclusion, making flanges around bulkhead hatches may seem complex at first glance, but by following Sven Yrvind’s meticulous process, enthusiasts can achieve professional-level results. Remember that the journey of boatbuilding is as rewarding as reaching your destination; it tests one’s patience and dedication. For those seeking to embark on this adventure or simply gain more insight into marine craftsmanship, Sven’s wisdom is invaluable.Sven Yrvind, a renowned yacht designer and sailor, shares valuable insights on creating flanges around bulkhead hatches for canvas protection in this enlightening video. By following his expert guidance, boat enthusiasts can ensure their living areas remain secure while allowing unhindered access through the hatches.Step 1: Starting with the Flange
Sven begins by explaining that working on flanges vertically and horizontally is significantly easier than doing so in a flat position. To simplify the process further, he divides the task into two or three steps as suggested by fellow expert “for for.” This approach not only makes it more manageable but also allows for greater precision in crafting each component.Step 2: Applying Glue and Securing
Sven proceeds to apply glue along one edge of the flange, ensuring a secure bond when clamped into place. He emphasizes that this stage is crucial for maintaining the structural integrity of the flange, which in turn safeguards the living area beneath the canvas when hatches are open.Step 3: Allowing Time to Dry
After securely attaching the first portion of the flange, Sven allows ample time for it to dry before moving forward with additional steps. This patience and precision are key aspects of his successful boatbuilding methods.Step 4: Finishing Touches
Once the flange is fully dried, Sven removes the clamps carefully, ensuring no damage occurs during this process. He then moves on to attaching four more pieces onto these main frames, completing two pairs of flanges for the bulkhead hatches.The Final Touches
While two flanges form the primary support structure around the hatches, Sven mentions there are two additional pieces required at each end to ensure comprehensive protection. This attention to detail highlights his commitment to producing a durable and reliable design. “Sailing is about finding your path, whether it’s across an ocean or within yourself.” – Sven Yrvind In conclusion, making flanges around bulkhead hatches may seem complex at first glance, but by following Sven Yrvind’s meticulous process, enthusiasts can achieve professional-level results. Remember that the journey of boatbuilding is as rewarding as reaching your destination; it tests one’s patience and dedication. For those seeking to embark on this adventure or simply gain more insight into marine craftsmanship, Sven’s wisdom is invaluable.Making Flanges Around Bulkhead Hatches for Canvas
Sven Yrvind, a renowned yacht designer and sailor, shares valuable insights on creating flanges around bulkhead hatches for canvas protection in this enlightening video. By following his expert guidance, boat enthusiasts can ensure their living areas remain secure while allowing unhindered access through the hatches.Step 1: Starting with the Flange
Sven begins by explaining that working on flanges vertically and horizontally is significantly easier than doing so in a flat position. To simplify the process further, he divides the task into two or three steps as suggested by fellow expert “for for.” This approach not only makes it more manageable but also allows for greater precision in crafting each component.Step 2: Applying Glue and Securing
Sven proceeds to apply glue along one edge of the flange, ensuring a secure bond when clamped into place. He emphasizes that this stage is crucial for maintaining the structural integrity of the flange, which in turn safeguards the living area beneath the canvas when hatches are open.Step 3: Allowing Time to Dry
After securely attaching the first portion of the flange, Sven allows ample time for it to dry before moving forward with additional steps. This patience and precision are key aspects of his successful boatbuilding methods.Step 4: Finishing Touches
Once the flange is fully dried, Sven removes the clamps carefully, ensuring no damage occurs during this process. He then moves on to attaching four more pieces onto these main frames, completing two pairs of flanges for the bulkhead hatches.The Final Touches
While two flanges form the primary support structure around the hatches, Sven mentions there are two additional pieces required at each end to ensure comprehensive protection. This attention to detail highlights his commitment to producing a durable and reliable design. “Sailing is about finding your path, whether it’s across an ocean or within yourself.” – Sven Yrvind In conclusion, making flanges around bulkhead hatches may seem complex at first glance, but by following Sven Yrvind’s meticulous process, enthusiasts can achieve professional-level results. Remember that the journey of boatbuilding is as rewarding as reaching your destination; it tests one’s patience and dedication. For those seeking to embark on this adventure or simply gain more insight into marine craftsmanship, Sven’s wisdom is invaluable.Once the flange is fully dried, Sven removes the clamps carefully, ensuring no damage occurs during this process. He then moves on to attaching four more pieces onto these main frames, completing two pairs of flanges for the bulkhead hatches.The Final Touches
While two flanges form the primary support structure around the hatches, Sven mentions there are two additional pieces required at each end to ensure comprehensive protection. This attention to detail highlights his commitment to producing a durable and reliable design. “Sailing is about finding your path, whether it’s across an ocean or within yourself.” – Sven Yrvind In conclusion, making flanges around bulkhead hatches may seem complex at first glance, but by following Sven Yrvind’s meticulous process, enthusiasts can achieve professional-level results. Remember that the journey of boatbuilding is as rewarding as reaching your destination; it tests one’s patience and dedication. For those seeking to embark on this adventure or simply gain more insight into marine craftsmanship, Sven’s wisdom is invaluable.Sven proceeds to apply glue along one edge of the flange, ensuring a secure bond when clamped into place. He emphasizes that this stage is crucial for maintaining the structural integrity of the flange, which in turn safeguards the living area beneath the canvas when hatches are open.Step 3: Allowing Time to Dry
After securely attaching the first portion of the flange, Sven allows ample time for it to dry before moving forward with additional steps. This patience and precision are key aspects of his successful boatbuilding methods.Step 4: Finishing Touches
Once the flange is fully dried, Sven removes the clamps carefully, ensuring no damage occurs during this process. He then moves on to attaching four more pieces onto these main frames, completing two pairs of flanges for the bulkhead hatches.The Final Touches
While two flanges form the primary support structure around the hatches, Sven mentions there are two additional pieces required at each end to ensure comprehensive protection. This attention to detail highlights his commitment to producing a durable and reliable design. “Sailing is about finding your path, whether it’s across an ocean or within yourself.” – Sven Yrvind In conclusion, making flanges around bulkhead hatches may seem complex at first glance, but by following Sven Yrvind’s meticulous process, enthusiasts can achieve professional-level results. Remember that the journey of boatbuilding is as rewarding as reaching your destination; it tests one’s patience and dedication. For those seeking to embark on this adventure or simply gain more insight into marine craftsmanship, Sven’s wisdom is invaluable.Sven begins by explaining that working on flanges vertically and horizontally is significantly easier than doing so in a flat position. To simplify the process further, he divides the task into two or three steps as suggested by fellow expert “for for.” This approach not only makes it more manageable but also allows for greater precision in crafting each component.Step 2: Applying Glue and Securing
Sven proceeds to apply glue along one edge of the flange, ensuring a secure bond when clamped into place. He emphasizes that this stage is crucial for maintaining the structural integrity of the flange, which in turn safeguards the living area beneath the canvas when hatches are open.Step 3: Allowing Time to Dry
After securely attaching the first portion of the flange, Sven allows ample time for it to dry before moving forward with additional steps. This patience and precision are key aspects of his successful boatbuilding methods.Step 4: Finishing Touches
Once the flange is fully dried, Sven removes the clamps carefully, ensuring no damage occurs during this process. He then moves on to attaching four more pieces onto these main frames, completing two pairs of flanges for the bulkhead hatches.The Final Touches
While two flanges form the primary support structure around the hatches, Sven mentions there are two additional pieces required at each end to ensure comprehensive protection. This attention to detail highlights his commitment to producing a durable and reliable design. “Sailing is about finding your path, whether it’s across an ocean or within yourself.” – Sven Yrvind In conclusion, making flanges around bulkhead hatches may seem complex at first glance, but by following Sven Yrvind’s meticulous process, enthusiasts can achieve professional-level results. Remember that the journey of boatbuilding is as rewarding as reaching your destination; it tests one’s patience and dedication. For those seeking to embark on this adventure or simply gain more insight into marine craftsmanship, Sven’s wisdom is invaluable.Sven Yrvind, a renowned yacht designer and sailor, shares valuable insights on creating flanges around bulkhead hatches for canvas protection in this enlightening video. By following his expert guidance, boat enthusiasts can ensure their living areas remain secure while allowing unhindered access through the hatches.Step 1: Starting with the Flange
Sven begins by explaining that working on flanges vertically and horizontally is significantly easier than doing so in a flat position. To simplify the process further, he divides the task into two or three steps as suggested by fellow expert “for for.” This approach not only makes it more manageable but also allows for greater precision in crafting each component.Step 2: Applying Glue and Securing
Sven proceeds to apply glue along one edge of the flange, ensuring a secure bond when clamped into place. He emphasizes that this stage is crucial for maintaining the structural integrity of the flange, which in turn safeguards the living area beneath the canvas when hatches are open.Step 3: Allowing Time to Dry
After securely attaching the first portion of the flange, Sven allows ample time for it to dry before moving forward with additional steps. This patience and precision are key aspects of his successful boatbuilding methods.Step 4: Finishing Touches
Once the flange is fully dried, Sven removes the clamps carefully, ensuring no damage occurs during this process. He then moves on to attaching four more pieces onto these main frames, completing two pairs of flanges for the bulkhead hatches.The Final Touches
While two flanges form the primary support structure around the hatches, Sven mentions there are two additional pieces required at each end to ensure comprehensive protection. This attention to detail highlights his commitment to producing a durable and reliable design. “Sailing is about finding your path, whether it’s across an ocean or within yourself.” – Sven Yrvind In conclusion, making flanges around bulkhead hatches may seem complex at first glance, but by following Sven Yrvind’s meticulous process, enthusiasts can achieve professional-level results. Remember that the journey of boatbuilding is as rewarding as reaching your destination; it tests one’s patience and dedication. For those seeking to embark on this adventure or simply gain more insight into marine craftsmanship, Sven’s wisdom is invaluable.Making Flanges Around Bulkhead Hatches for Canvas
Sven Yrvind, a renowned yacht designer and sailor, shares valuable insights on creating flanges around bulkhead hatches for canvas protection in this enlightening video. By following his expert guidance, boat enthusiasts can ensure their living areas remain secure while allowing unhindered access through the hatches.Step 1: Starting with the Flange
Sven begins by explaining that working on flanges vertically and horizontally is significantly easier than doing so in a flat position. To simplify the process further, he divides the task into two or three steps as suggested by fellow expert “for for.” This approach not only makes it more manageable but also allows for greater precision in crafting each component.Step 2: Applying Glue and Securing
Sven proceeds to apply glue along one edge of the flange, ensuring a secure bond when clamped into place. He emphasizes that this stage is crucial for maintaining the structural integrity of the flange, which in turn safeguards the living area beneath the canvas when hatches are open.Step 3: Allowing Time to Dry
After securely attaching the first portion of the flange, Sven allows ample time for it to dry before moving forward with additional steps. This patience and precision are key aspects of his successful boatbuilding methods.Step 4: Finishing Touches
Once the flange is fully dried, Sven removes the clamps carefully, ensuring no damage occurs during this process. He then moves on to attaching four more pieces onto these main frames, completing two pairs of flanges for the bulkhead hatches.The Final Touches
While two flanges form the primary support structure around the hatches, Sven mentions there are two additional pieces required at each end to ensure comprehensive protection. This attention to detail highlights his commitment to producing a durable and reliable design. “Sailing is about finding your path, whether it’s across an ocean or within yourself.” – Sven Yrvind In conclusion, making flanges around bulkhead hatches may seem complex at first glance, but by following Sven Yrvind’s meticulous process, enthusiasts can achieve professional-level results. Remember that the journey of boatbuilding is as rewarding as reaching your destination; it tests one’s patience and dedication. For those seeking to embark on this adventure or simply gain more insight into marine craftsmanship, Sven’s wisdom is invaluable.After securely attaching the first portion of the flange, Sven allows ample time for it to dry before moving forward with additional steps. This patience and precision are key aspects of his successful boatbuilding methods.Step 4: Finishing Touches
Once the flange is fully dried, Sven removes the clamps carefully, ensuring no damage occurs during this process. He then moves on to attaching four more pieces onto these main frames, completing two pairs of flanges for the bulkhead hatches.The Final Touches
While two flanges form the primary support structure around the hatches, Sven mentions there are two additional pieces required at each end to ensure comprehensive protection. This attention to detail highlights his commitment to producing a durable and reliable design. “Sailing is about finding your path, whether it’s across an ocean or within yourself.” – Sven Yrvind In conclusion, making flanges around bulkhead hatches may seem complex at first glance, but by following Sven Yrvind’s meticulous process, enthusiasts can achieve professional-level results. Remember that the journey of boatbuilding is as rewarding as reaching your destination; it tests one’s patience and dedication. For those seeking to embark on this adventure or simply gain more insight into marine craftsmanship, Sven’s wisdom is invaluable.Sven proceeds to apply glue along one edge of the flange, ensuring a secure bond when clamped into place. He emphasizes that this stage is crucial for maintaining the structural integrity of the flange, which in turn safeguards the living area beneath the canvas when hatches are open.Step 3: Allowing Time to Dry
After securely attaching the first portion of the flange, Sven allows ample time for it to dry before moving forward with additional steps. This patience and precision are key aspects of his successful boatbuilding methods.Step 4: Finishing Touches
Once the flange is fully dried, Sven removes the clamps carefully, ensuring no damage occurs during this process. He then moves on to attaching four more pieces onto these main frames, completing two pairs of flanges for the bulkhead hatches.The Final Touches
While two flanges form the primary support structure around the hatches, Sven mentions there are two additional pieces required at each end to ensure comprehensive protection. This attention to detail highlights his commitment to producing a durable and reliable design. “Sailing is about finding your path, whether it’s across an ocean or within yourself.” – Sven Yrvind In conclusion, making flanges around bulkhead hatches may seem complex at first glance, but by following Sven Yrvind’s meticulous process, enthusiasts can achieve professional-level results. Remember that the journey of boatbuilding is as rewarding as reaching your destination; it tests one’s patience and dedication. For those seeking to embark on this adventure or simply gain more insight into marine craftsmanship, Sven’s wisdom is invaluable.Sven begins by explaining that working on flanges vertically and horizontally is significantly easier than doing so in a flat position. To simplify the process further, he divides the task into two or three steps as suggested by fellow expert “for for.” This approach not only makes it more manageable but also allows for greater precision in crafting each component.Step 2: Applying Glue and Securing
Sven proceeds to apply glue along one edge of the flange, ensuring a secure bond when clamped into place. He emphasizes that this stage is crucial for maintaining the structural integrity of the flange, which in turn safeguards the living area beneath the canvas when hatches are open.Step 3: Allowing Time to Dry
After securely attaching the first portion of the flange, Sven allows ample time for it to dry before moving forward with additional steps. This patience and precision are key aspects of his successful boatbuilding methods.Step 4: Finishing Touches
Once the flange is fully dried, Sven removes the clamps carefully, ensuring no damage occurs during this process. He then moves on to attaching four more pieces onto these main frames, completing two pairs of flanges for the bulkhead hatches.The Final Touches
While two flanges form the primary support structure around the hatches, Sven mentions there are two additional pieces required at each end to ensure comprehensive protection. This attention to detail highlights his commitment to producing a durable and reliable design. “Sailing is about finding your path, whether it’s across an ocean or within yourself.” – Sven Yrvind In conclusion, making flanges around bulkhead hatches may seem complex at first glance, but by following Sven Yrvind’s meticulous process, enthusiasts can achieve professional-level results. Remember that the journey of boatbuilding is as rewarding as reaching your destination; it tests one’s patience and dedication. For those seeking to embark on this adventure or simply gain more insight into marine craftsmanship, Sven’s wisdom is invaluable.Sven Yrvind, a renowned yacht designer and sailor, shares valuable insights on creating flanges around bulkhead hatches for canvas protection in this enlightening video. By following his expert guidance, boat enthusiasts can ensure their living areas remain secure while allowing unhindered access through the hatches.Step 1: Starting with the Flange
Sven begins by explaining that working on flanges vertically and horizontally is significantly easier than doing so in a flat position. To simplify the process further, he divides the task into two or three steps as suggested by fellow expert “for for.” This approach not only makes it more manageable but also allows for greater precision in crafting each component.Step 2: Applying Glue and Securing
Sven proceeds to apply glue along one edge of the flange, ensuring a secure bond when clamped into place. He emphasizes that this stage is crucial for maintaining the structural integrity of the flange, which in turn safeguards the living area beneath the canvas when hatches are open.Step 3: Allowing Time to Dry
After securely attaching the first portion of the flange, Sven allows ample time for it to dry before moving forward with additional steps. This patience and precision are key aspects of his successful boatbuilding methods.Step 4: Finishing Touches
Once the flange is fully dried, Sven removes the clamps carefully, ensuring no damage occurs during this process. He then moves on to attaching four more pieces onto these main frames, completing two pairs of flanges for the bulkhead hatches.The Final Touches
While two flanges form the primary support structure around the hatches, Sven mentions there are two additional pieces required at each end to ensure comprehensive protection. This attention to detail highlights his commitment to producing a durable and reliable design. “Sailing is about finding your path, whether it’s across an ocean or within yourself.” – Sven Yrvind In conclusion, making flanges around bulkhead hatches may seem complex at first glance, but by following Sven Yrvind’s meticulous process, enthusiasts can achieve professional-level results. Remember that the journey of boatbuilding is as rewarding as reaching your destination; it tests one’s patience and dedication. For those seeking to embark on this adventure or simply gain more insight into marine craftsmanship, Sven’s wisdom is invaluable.Making Flanges Around Bulkhead Hatches for Canvas
Sven Yrvind, a renowned yacht designer and sailor, shares valuable insights on creating flanges around bulkhead hatches for canvas protection in this enlightening video. By following his expert guidance, boat enthusiasts can ensure their living areas remain secure while allowing unhindered access through the hatches.Step 1: Starting with the Flange
Sven begins by explaining that working on flanges vertically and horizontally is significantly easier than doing so in a flat position. To simplify the process further, he divides the task into two or three steps as suggested by fellow expert “for for.” This approach not only makes it more manageable but also allows for greater precision in crafting each component.Step 2: Applying Glue and Securing
Sven proceeds to apply glue along one edge of the flange, ensuring a secure bond when clamped into place. He emphasizes that this stage is crucial for maintaining the structural integrity of the flange, which in turn safeguards the living area beneath the canvas when hatches are open.Step 3: Allowing Time to Dry
After securely attaching the first portion of the flange, Sven allows ample time for it to dry before moving forward with additional steps. This patience and precision are key aspects of his successful boatbuilding methods.Step 4: Finishing Touches
Once the flange is fully dried, Sven removes the clamps carefully, ensuring no damage occurs during this process. He then moves on to attaching four more pieces onto these main frames, completing two pairs of flanges for the bulkhead hatches.The Final Touches
While two flanges form the primary support structure around the hatches, Sven mentions there are two additional pieces required at each end to ensure comprehensive protection. This attention to detail highlights his commitment to producing a durable and reliable design. “Sailing is about finding your path, whether it’s across an ocean or within yourself.” – Sven Yrvind In conclusion, making flanges around bulkhead hatches may seem complex at first glance, but by following Sven Yrvind’s meticulous process, enthusiasts can achieve professional-level results. Remember that the journey of boatbuilding is as rewarding as reaching your destination; it tests one’s patience and dedication. For those seeking to embark on this adventure or simply gain more insight into marine craftsmanship, Sven’s wisdom is invaluable.Once the flange is fully dried, Sven removes the clamps carefully, ensuring no damage occurs during this process. He then moves on to attaching four more pieces onto these main frames, completing two pairs of flanges for the bulkhead hatches.The Final Touches
While two flanges form the primary support structure around the hatches, Sven mentions there are two additional pieces required at each end to ensure comprehensive protection. This attention to detail highlights his commitment to producing a durable and reliable design. “Sailing is about finding your path, whether it’s across an ocean or within yourself.” – Sven Yrvind In conclusion, making flanges around bulkhead hatches may seem complex at first glance, but by following Sven Yrvind’s meticulous process, enthusiasts can achieve professional-level results. Remember that the journey of boatbuilding is as rewarding as reaching your destination; it tests one’s patience and dedication. For those seeking to embark on this adventure or simply gain more insight into marine craftsmanship, Sven’s wisdom is invaluable.After securely attaching the first portion of the flange, Sven allows ample time for it to dry before moving forward with additional steps. This patience and precision are key aspects of his successful boatbuilding methods.Step 4: Finishing Touches
Once the flange is fully dried, Sven removes the clamps carefully, ensuring no damage occurs during this process. He then moves on to attaching four more pieces onto these main frames, completing two pairs of flanges for the bulkhead hatches.The Final Touches
While two flanges form the primary support structure around the hatches, Sven mentions there are two additional pieces required at each end to ensure comprehensive protection. This attention to detail highlights his commitment to producing a durable and reliable design. “Sailing is about finding your path, whether it’s across an ocean or within yourself.” – Sven Yrvind In conclusion, making flanges around bulkhead hatches may seem complex at first glance, but by following Sven Yrvind’s meticulous process, enthusiasts can achieve professional-level results. Remember that the journey of boatbuilding is as rewarding as reaching your destination; it tests one’s patience and dedication. For those seeking to embark on this adventure or simply gain more insight into marine craftsmanship, Sven’s wisdom is invaluable.Sven proceeds to apply glue along one edge of the flange, ensuring a secure bond when clamped into place. He emphasizes that this stage is crucial for maintaining the structural integrity of the flange, which in turn safeguards the living area beneath the canvas when hatches are open.Step 3: Allowing Time to Dry
After securely attaching the first portion of the flange, Sven allows ample time for it to dry before moving forward with additional steps. This patience and precision are key aspects of his successful boatbuilding methods.Step 4: Finishing Touches
Once the flange is fully dried, Sven removes the clamps carefully, ensuring no damage occurs during this process. He then moves on to attaching four more pieces onto these main frames, completing two pairs of flanges for the bulkhead hatches.The Final Touches
While two flanges form the primary support structure around the hatches, Sven mentions there are two additional pieces required at each end to ensure comprehensive protection. This attention to detail highlights his commitment to producing a durable and reliable design. “Sailing is about finding your path, whether it’s across an ocean or within yourself.” – Sven Yrvind In conclusion, making flanges around bulkhead hatches may seem complex at first glance, but by following Sven Yrvind’s meticulous process, enthusiasts can achieve professional-level results. Remember that the journey of boatbuilding is as rewarding as reaching your destination; it tests one’s patience and dedication. For those seeking to embark on this adventure or simply gain more insight into marine craftsmanship, Sven’s wisdom is invaluable.Sven begins by explaining that working on flanges vertically and horizontally is significantly easier than doing so in a flat position. To simplify the process further, he divides the task into two or three steps as suggested by fellow expert “for for.” This approach not only makes it more manageable but also allows for greater precision in crafting each component.Step 2: Applying Glue and Securing
Sven proceeds to apply glue along one edge of the flange, ensuring a secure bond when clamped into place. He emphasizes that this stage is crucial for maintaining the structural integrity of the flange, which in turn safeguards the living area beneath the canvas when hatches are open.Step 3: Allowing Time to Dry
After securely attaching the first portion of the flange, Sven allows ample time for it to dry before moving forward with additional steps. This patience and precision are key aspects of his successful boatbuilding methods.Step 4: Finishing Touches
Once the flange is fully dried, Sven removes the clamps carefully, ensuring no damage occurs during this process. He then moves on to attaching four more pieces onto these main frames, completing two pairs of flanges for the bulkhead hatches.The Final Touches
While two flanges form the primary support structure around the hatches, Sven mentions there are two additional pieces required at each end to ensure comprehensive protection. This attention to detail highlights his commitment to producing a durable and reliable design. “Sailing is about finding your path, whether it’s across an ocean or within yourself.” – Sven Yrvind In conclusion, making flanges around bulkhead hatches may seem complex at first glance, but by following Sven Yrvind’s meticulous process, enthusiasts can achieve professional-level results. Remember that the journey of boatbuilding is as rewarding as reaching your destination; it tests one’s patience and dedication. For those seeking to embark on this adventure or simply gain more insight into marine craftsmanship, Sven’s wisdom is invaluable.Sven Yrvind, a renowned yacht designer and sailor, shares valuable insights on creating flanges around bulkhead hatches for canvas protection in this enlightening video. By following his expert guidance, boat enthusiasts can ensure their living areas remain secure while allowing unhindered access through the hatches.Step 1: Starting with the Flange
Sven begins by explaining that working on flanges vertically and horizontally is significantly easier than doing so in a flat position. To simplify the process further, he divides the task into two or three steps as suggested by fellow expert “for for.” This approach not only makes it more manageable but also allows for greater precision in crafting each component.Step 2: Applying Glue and Securing
Sven proceeds to apply glue along one edge of the flange, ensuring a secure bond when clamped into place. He emphasizes that this stage is crucial for maintaining the structural integrity of the flange, which in turn safeguards the living area beneath the canvas when hatches are open.Step 3: Allowing Time to Dry
After securely attaching the first portion of the flange, Sven allows ample time for it to dry before moving forward with additional steps. This patience and precision are key aspects of his successful boatbuilding methods.Step 4: Finishing Touches
Once the flange is fully dried, Sven removes the clamps carefully, ensuring no damage occurs during this process. He then moves on to attaching four more pieces onto these main frames, completing two pairs of flanges for the bulkhead hatches.The Final Touches
While two flanges form the primary support structure around the hatches, Sven mentions there are two additional pieces required at each end to ensure comprehensive protection. This attention to detail highlights his commitment to producing a durable and reliable design. “Sailing is about finding your path, whether it’s across an ocean or within yourself.” – Sven Yrvind In conclusion, making flanges around bulkhead hatches may seem complex at first glance, but by following Sven Yrvind’s meticulous process, enthusiasts can achieve professional-level results. Remember that the journey of boatbuilding is as rewarding as reaching your destination; it tests one’s patience and dedication. For those seeking to embark on this adventure or simply gain more insight into marine craftsmanship, Sven’s wisdom is invaluable.Making Flanges Around Bulkhead Hatches for Canvas
Sven Yrvind, a renowned yacht designer and sailor, shares valuable insights on creating flanges around bulkhead hatches for canvas protection in this enlightening video. By following his expert guidance, boat enthusiasts can ensure their living areas remain secure while allowing unhindered access through the hatches.Step 1: Starting with the Flange
Sven begins by explaining that working on flanges vertically and horizontally is significantly easier than doing so in a flat position. To simplify the process further, he divides the task into two or three steps as suggested by fellow expert “for for.” This approach not only makes it more manageable but also allows for greater precision in crafting each component.Step 2: Applying Glue and Securing
Sven proceeds to apply glue along one edge of the flange, ensuring a secure bond when clamped into place. He emphasizes that this stage is crucial for maintaining the structural integrity of the flange, which in turn safeguards the living area beneath the canvas when hatches are open.Step 3: Allowing Time to Dry
After securely attaching the first portion of the flange, Sven allows ample time for it to dry before moving forward with additional steps. This patience and precision are key aspects of his successful boatbuilding methods.Step 4: Finishing Touches
Once the flange is fully dried, Sven removes the clamps carefully, ensuring no damage occurs during this process. He then moves on to attaching four more pieces onto these main frames, completing two pairs of flanges for the bulkhead hatches.The Final Touches
While two flanges form the primary support structure around the hatches, Sven mentions there are two additional pieces required at each end to ensure comprehensive protection. This attention to detail highlights his commitment to producing a durable and reliable design. “Sailing is about finding your path, whether it’s across an ocean or within yourself.” – Sven Yrvind In conclusion, making flanges around bulkhead hatches may seem complex at first glance, but by following Sven Yrvind’s meticulous process, enthusiasts can achieve professional-level results. Remember that the journey of boatbuilding is as rewarding as reaching your destination; it tests one’s patience and dedication. For those seeking to embark on this adventure or simply gain more insight into marine craftsmanship, Sven’s wisdom is invaluable.Sven proceeds to apply glue along one edge of the flange, ensuring a secure bond when clamped into place. He emphasizes that this stage is crucial for maintaining the structural integrity of the flange, which in turn safeguards the living area beneath the canvas when hatches are open.Step 3: Allowing Time to Dry
After securely attaching the first portion of the flange, Sven allows ample time for it to dry before moving forward with additional steps. This patience and precision are key aspects of his successful boatbuilding methods.Step 4: Finishing Touches
Once the flange is fully dried, Sven removes the clamps carefully, ensuring no damage occurs during this process. He then moves on to attaching four more pieces onto these main frames, completing two pairs of flanges for the bulkhead hatches.The Final Touches
While two flanges form the primary support structure around the hatches, Sven mentions there are two additional pieces required at each end to ensure comprehensive protection. This attention to detail highlights his commitment to producing a durable and reliable design. “Sailing is about finding your path, whether it’s across an ocean or within yourself.” – Sven Yrvind In conclusion, making flanges around bulkhead hatches may seem complex at first glance, but by following Sven Yrvind’s meticulous process, enthusiasts can achieve professional-level results. Remember that the journey of boatbuilding is as rewarding as reaching your destination; it tests one’s patience and dedication. For those seeking to embark on this adventure or simply gain more insight into marine craftsmanship, Sven’s wisdom is invaluable.Making Flanges Around Bulkhead Hatches for Canvas
Sven Yrvind, a renowned yacht designer and sailor, shares valuable insights on creating flanges around bulkhead hatches for canvas protection in this enlightening video. By following his expert guidance, boat enthusiasts can ensure their living areas remain secure while allowing unhindered access through the hatches.Step 1: Starting with the Flange
Sven begins by explaining that working on flanges vertically and horizontally is significantly easier than doing so in a flat position. To simplify the process further, he divides the task into two or three steps as suggested by fellow expert “for for.” This approach not only makes it more manageable but also allows for greater precision in crafting each component.Step 2: Applying Glue and Securing
Sven proceeds to apply glue along one edge of the flange, ensuring a secure bond when clamped into place. He emphasizes that this stage is crucial for maintaining the structural integrity of the flange, which in turn safeguards the living area beneath the canvas when hatches are open.Step 3: Allowing Time to Dry
After securely attaching the first portion of the flange, Sven allows ample time for it to dry before moving forward with additional steps. This patience and precision are key aspects of his successful boatbuilding methods.Step 4: Finishing Touches
Once the flange is fully dried, Sven removes the clamps carefully, ensuring no damage occurs during this process. He then moves on to attaching four more pieces onto these main frames, completing two pairs of flanges for the bulkhead hatches.The Final Touches
While two flanges form the primary support structure around the hatches, Sven mentions there are two additional pieces required at each end to ensure comprehensive protection. This attention to detail highlights his commitment to producing a durable and reliable design. “Sailing is about finding your path, whether it’s across an ocean or within yourself.” – Sven Yrvind In conclusion, making flanges around bulkhead hatches may seem complex at first glance, but by following Sven Yrvind’s meticulous process, enthusiasts can achieve professional-level results. Remember that the journey of boatbuilding is as rewarding as reaching your destination; it tests one’s patience and dedication. For those seeking to embark on this adventure or simply gain more insight into marine craftsmanship, Sven’s wisdom is invaluable.Sven begins by explaining that working on flanges vertically and horizontally is significantly easier than doing so in a flat position. To simplify the process further, he divides the task into two or three steps as suggested by fellow expert “for for.” This approach not only makes it more manageable but also allows for greater precision in crafting each component.Step 2: Applying Glue and Securing
Sven proceeds to apply glue along one edge of the flange, ensuring a secure bond when clamped into place. He emphasizes that this stage is crucial for maintaining the structural integrity of the flange, which in turn safeguards the living area beneath the canvas when hatches are open.Step 3: Allowing Time to Dry
After securely attaching the first portion of the flange, Sven allows ample time for it to dry before moving forward with additional steps. This patience and precision are key aspects of his successful boatbuilding methods.Step 4: Finishing Touches
Once the flange is fully dried, Sven removes the clamps carefully, ensuring no damage occurs during this process. He then moves on to attaching four more pieces onto these main frames, completing two pairs of flanges for the bulkhead hatches.The Final Touches
While two flanges form the primary support structure around the hatches, Sven mentions there are two additional pieces required at each end to ensure comprehensive protection. This attention to detail highlights his commitment to producing a durable and reliable design. “Sailing is about finding your path, whether it’s across an ocean or within yourself.” – Sven Yrvind In conclusion, making flanges around bulkhead hatches may seem complex at first glance, but by following Sven Yrvind’s meticulous process, enthusiasts can achieve professional-level results. Remember that the journey of boatbuilding is as rewarding as reaching your destination; it tests one’s patience and dedication. For those seeking to embark on this adventure or simply gain more insight into marine craftsmanship, Sven’s wisdom is invaluable.Sven Yrvind, a renowned yacht designer and sailor, shares valuable insights on creating flanges around bulkhead hatches for canvas protection in this enlightening video. By following his expert guidance, boat enthusiasts can ensure their living areas remain secure while allowing unhindered access through the hatches.Step 1: Starting with the Flange
Sven begins by explaining that working on flanges vertically and horizontally is significantly easier than doing so in a flat position. To simplify the process further, he divides the task into two or three steps as suggested by fellow expert “for for.” This approach not only makes it more manageable but also allows for greater precision in crafting each component.Step 2: Applying Glue and Securing
Sven proceeds to apply glue along one edge of the flange, ensuring a secure bond when clamped into place. He emphasizes that this stage is crucial for maintaining the structural integrity of the flange, which in turn safeguards the living area beneath the canvas when hatches are open.Step 3: Allowing Time to Dry
After securely attaching the first portion of the flange, Sven allows ample time for it to dry before moving forward with additional steps. This patience and precision are key aspects of his successful boatbuilding methods.Step 4: Finishing Touches
Once the flange is fully dried, Sven removes the clamps carefully, ensuring no damage occurs during this process. He then moves on to attaching four more pieces onto these main frames, completing two pairs of flanges for the bulkhead hatches.The Final Touches
While two flanges form the primary support structure around the hatches, Sven mentions there are two additional pieces required at each end to ensure comprehensive protection. This attention to detail highlights his commitment to producing a durable and reliable design. “Sailing is about finding your path, whether it’s across an ocean or within yourself.” – Sven Yrvind In conclusion, making flanges around bulkhead hatches may seem complex at first glance, but by following Sven Yrvind’s meticulous process, enthusiasts can achieve professional-level results. Remember that the journey of boatbuilding is as rewarding as reaching your destination; it tests one’s patience and dedication. For those seeking to embark on this adventure or simply gain more insight into marine craftsmanship, Sven’s wisdom is invaluable.Making Flanges Around Bulkhead Hatches for Canvas
Sven Yrvind, a renowned yacht designer and sailor, shares valuable insights on creating flanges around bulkhead hatches for canvas protection in this enlightening video. By following his expert guidance, boat enthusiasts can ensure their living areas remain secure while allowing unhindered access through the hatches.Step 1: Starting with the Flange
Sven begins by explaining that working on flanges vertically and horizontally is significantly easier than doing so in a flat position. To simplify the process further, he divides the task into two or three steps as suggested by fellow expert “for for.” This approach not only makes it more manageable but also allows for greater precision in crafting each component.Step 2: Applying Glue and Securing
Sven proceeds to apply glue along one edge of the flange, ensuring a secure bond when clamped into place. He emphasizes that this stage is crucial for maintaining the structural integrity of the flange, which in turn safeguards the living area beneath the canvas when hatches are open.Step 3: Allowing Time to Dry
After securely attaching the first portion of the flange, Sven allows ample time for it to dry before moving forward with additional steps. This patience and precision are key aspects of his successful boatbuilding methods.Step 4: Finishing Touches
Once the flange is fully dried, Sven removes the clamps carefully, ensuring no damage occurs during this process. He then moves on to attaching four more pieces onto these main frames, completing two pairs of flanges for the bulkhead hatches.The Final Touches
While two flanges form the primary support structure around the hatches, Sven mentions there are two additional pieces required at each end to ensure comprehensive protection. This attention to detail highlights his commitment to producing a durable and reliable design. “Sailing is about finding your path, whether it’s across an ocean or within yourself.” – Sven Yrvind In conclusion, making flanges around bulkhead hatches may seem complex at first glance, but by following Sven Yrvind’s meticulous process, enthusiasts can achieve professional-level results. Remember that the journey of boatbuilding is as rewarding as reaching your destination; it tests one’s patience and dedication. For those seeking to embark on this adventure or simply gain more insight into marine craftsmanship, Sven’s wisdom is invaluable.Once the flange is fully dried, Sven removes the clamps carefully, ensuring no damage occurs during this process. He then moves on to attaching four more pieces onto these main frames, completing two pairs of flanges for the bulkhead hatches.The Final Touches
While two flanges form the primary support structure around the hatches, Sven mentions there are two additional pieces required at each end to ensure comprehensive protection. This attention to detail highlights his commitment to producing a durable and reliable design. “Sailing is about finding your path, whether it’s across an ocean or within yourself.” – Sven Yrvind In conclusion, making flanges around bulkhead hatches may seem complex at first glance, but by following Sven Yrvind’s meticulous process, enthusiasts can achieve professional-level results. Remember that the journey of boatbuilding is as rewarding as reaching your destination; it tests one’s patience and dedication. For those seeking to embark on this adventure or simply gain more insight into marine craftsmanship, Sven’s wisdom is invaluable.Sven begins by explaining that working on flanges vertically and horizontally is significantly easier than doing so in a flat position. To simplify the process further, he divides the task into two or three steps as suggested by fellow expert “for for.” This approach not only makes it more manageable but also allows for greater precision in crafting each component.Step 2: Applying Glue and Securing
Sven proceeds to apply glue along one edge of the flange, ensuring a secure bond when clamped into place. He emphasizes that this stage is crucial for maintaining the structural integrity of the flange, which in turn safeguards the living area beneath the canvas when hatches are open.Step 3: Allowing Time to Dry
After securely attaching the first portion of the flange, Sven allows ample time for it to dry before moving forward with additional steps. This patience and precision are key aspects of his successful boatbuilding methods.Step 4: Finishing Touches
Once the flange is fully dried, Sven removes the clamps carefully, ensuring no damage occurs during this process. He then moves on to attaching four more pieces onto these main frames, completing two pairs of flanges for the bulkhead hatches.The Final Touches
While two flanges form the primary support structure around the hatches, Sven mentions there are two additional pieces required at each end to ensure comprehensive protection. This attention to detail highlights his commitment to producing a durable and reliable design. “Sailing is about finding your path, whether it’s across an ocean or within yourself.” – Sven Yrvind In conclusion, making flanges around bulkhead hatches may seem complex at first glance, but by following Sven Yrvind’s meticulous process, enthusiasts can achieve professional-level results. Remember that the journey of boatbuilding is as rewarding as reaching your destination; it tests one’s patience and dedication. For those seeking to embark on this adventure or simply gain more insight into marine craftsmanship, Sven’s wisdom is invaluable.Sven Yrvind, a renowned yacht designer and sailor, shares valuable insights on creating flanges around bulkhead hatches for canvas protection in this enlightening video. By following his expert guidance, boat enthusiasts can ensure their living areas remain secure while allowing unhindered access through the hatches.Step 1: Starting with the Flange
Sven begins by explaining that working on flanges vertically and horizontally is significantly easier than doing so in a flat position. To simplify the process further, he divides the task into two or three steps as suggested by fellow expert “for for.” This approach not only makes it more manageable but also allows for greater precision in crafting each component.Step 2: Applying Glue and Securing
Sven proceeds to apply glue along one edge of the flange, ensuring a secure bond when clamped into place. He emphasizes that this stage is crucial for maintaining the structural integrity of the flange, which in turn safeguards the living area beneath the canvas when hatches are open.Step 3: Allowing Time to Dry
After securely attaching the first portion of the flange, Sven allows ample time for it to dry before moving forward with additional steps. This patience and precision are key aspects of his successful boatbuilding methods.Step 4: Finishing Touches
Once the flange is fully dried, Sven removes the clamps carefully, ensuring no damage occurs during this process. He then moves on to attaching four more pieces onto these main frames, completing two pairs of flanges for the bulkhead hatches.The Final Touches
While two flanges form the primary support structure around the hatches, Sven mentions there are two additional pieces required at each end to ensure comprehensive protection. This attention to detail highlights his commitment to producing a durable and reliable design. “Sailing is about finding your path, whether it’s across an ocean or within yourself.” – Sven Yrvind In conclusion, making flanges around bulkhead hatches may seem complex at first glance, but by following Sven Yrvind’s meticulous process, enthusiasts can achieve professional-level results. Remember that the journey of boatbuilding is as rewarding as reaching your destination; it tests one’s patience and dedication. For those seeking to embark on this adventure or simply gain more insight into marine craftsmanship, Sven’s wisdom is invaluable.Making Flanges Around Bulkhead Hatches for Canvas
Sven Yrvind, a renowned yacht designer and sailor, shares valuable insights on creating flanges around bulkhead hatches for canvas protection in this enlightening video. By following his expert guidance, boat enthusiasts can ensure their living areas remain secure while allowing unhindered access through the hatches.Step 1: Starting with the Flange
Sven begins by explaining that working on flanges vertically and horizontally is significantly easier than doing so in a flat position. To simplify the process further, he divides the task into two or three steps as suggested by fellow expert “for for.” This approach not only makes it more manageable but also allows for greater precision in crafting each component.Step 2: Applying Glue and Securing
Sven proceeds to apply glue along one edge of the flange, ensuring a secure bond when clamped into place. He emphasizes that this stage is crucial for maintaining the structural integrity of the flange, which in turn safeguards the living area beneath the canvas when hatches are open.Step 3: Allowing Time to Dry
After securely attaching the first portion of the flange, Sven allows ample time for it to dry before moving forward with additional steps. This patience and precision are key aspects of his successful boatbuilding methods.Step 4: Finishing Touches
Once the flange is fully dried, Sven removes the clamps carefully, ensuring no damage occurs during this process. He then moves on to attaching four more pieces onto these main frames, completing two pairs of flanges for the bulkhead hatches.The Final Touches
While two flanges form the primary support structure around the hatches, Sven mentions there are two additional pieces required at each end to ensure comprehensive protection. This attention to detail highlights his commitment to producing a durable and reliable design. “Sailing is about finding your path, whether it’s across an ocean or within yourself.” – Sven Yrvind In conclusion, making flanges around bulkhead hatches may seem complex at first glance, but by following Sven Yrvind’s meticulous process, enthusiasts can achieve professional-level results. Remember that the journey of boatbuilding is as rewarding as reaching your destination; it tests one’s patience and dedication. For those seeking to embark on this adventure or simply gain more insight into marine craftsmanship, Sven’s wisdom is invaluable.After securely attaching the first portion of the flange, Sven allows ample time for it to dry before moving forward with additional steps. This patience and precision are key aspects of his successful boatbuilding methods.Step 4: Finishing Touches
Once the flange is fully dried, Sven removes the clamps carefully, ensuring no damage occurs during this process. He then moves on to attaching four more pieces onto these main frames, completing two pairs of flanges for the bulkhead hatches.The Final Touches
While two flanges form the primary support structure around the hatches, Sven mentions there are two additional pieces required at each end to ensure comprehensive protection. This attention to detail highlights his commitment to producing a durable and reliable design. “Sailing is about finding your path, whether it’s across an ocean or within yourself.” – Sven Yrvind In conclusion, making flanges around bulkhead hatches may seem complex at first glance, but by following Sven Yrvind’s meticulous process, enthusiasts can achieve professional-level results. Remember that the journey of boatbuilding is as rewarding as reaching your destination; it tests one’s patience and dedication. For those seeking to embark on this adventure or simply gain more insight into marine craftsmanship, Sven’s wisdom is invaluable.Sven begins by explaining that working on flanges vertically and horizontally is significantly easier than doing so in a flat position. To simplify the process further, he divides the task into two or three steps as suggested by fellow expert “for for.” This approach not only makes it more manageable but also allows for greater precision in crafting each component.Step 2: Applying Glue and Securing
Sven proceeds to apply glue along one edge of the flange, ensuring a secure bond when clamped into place. He emphasizes that this stage is crucial for maintaining the structural integrity of the flange, which in turn safeguards the living area beneath the canvas when hatches are open.Step 3: Allowing Time to Dry
After securely attaching the first portion of the flange, Sven allows ample time for it to dry before moving forward with additional steps. This patience and precision are key aspects of his successful boatbuilding methods.Step 4: Finishing Touches
Once the flange is fully dried, Sven removes the clamps carefully, ensuring no damage occurs during this process. He then moves on to attaching four more pieces onto these main frames, completing two pairs of flanges for the bulkhead hatches.The Final Touches
While two flanges form the primary support structure around the hatches, Sven mentions there are two additional pieces required at each end to ensure comprehensive protection. This attention to detail highlights his commitment to producing a durable and reliable design. “Sailing is about finding your path, whether it’s across an ocean or within yourself.” – Sven Yrvind In conclusion, making flanges around bulkhead hatches may seem complex at first glance, but by following Sven Yrvind’s meticulous process, enthusiasts can achieve professional-level results. Remember that the journey of boatbuilding is as rewarding as reaching your destination; it tests one’s patience and dedication. For those seeking to embark on this adventure or simply gain more insight into marine craftsmanship, Sven’s wisdom is invaluable.Sven Yrvind, a renowned yacht designer and sailor, shares valuable insights on creating flanges around bulkhead hatches for canvas protection in this enlightening video. By following his expert guidance, boat enthusiasts can ensure their living areas remain secure while allowing unhindered access through the hatches.Step 1: Starting with the Flange
Sven begins by explaining that working on flanges vertically and horizontally is significantly easier than doing so in a flat position. To simplify the process further, he divides the task into two or three steps as suggested by fellow expert “for for.” This approach not only makes it more manageable but also allows for greater precision in crafting each component.Step 2: Applying Glue and Securing
Sven proceeds to apply glue along one edge of the flange, ensuring a secure bond when clamped into place. He emphasizes that this stage is crucial for maintaining the structural integrity of the flange, which in turn safeguards the living area beneath the canvas when hatches are open.Step 3: Allowing Time to Dry
After securely attaching the first portion of the flange, Sven allows ample time for it to dry before moving forward with additional steps. This patience and precision are key aspects of his successful boatbuilding methods.Step 4: Finishing Touches
Once the flange is fully dried, Sven removes the clamps carefully, ensuring no damage occurs during this process. He then moves on to attaching four more pieces onto these main frames, completing two pairs of flanges for the bulkhead hatches.The Final Touches
While two flanges form the primary support structure around the hatches, Sven mentions there are two additional pieces required at each end to ensure comprehensive protection. This attention to detail highlights his commitment to producing a durable and reliable design. “Sailing is about finding your path, whether it’s across an ocean or within yourself.” – Sven Yrvind In conclusion, making flanges around bulkhead hatches may seem complex at first glance, but by following Sven Yrvind’s meticulous process, enthusiasts can achieve professional-level results. Remember that the journey of boatbuilding is as rewarding as reaching your destination; it tests one’s patience and dedication. For those seeking to embark on this adventure or simply gain more insight into marine craftsmanship, Sven’s wisdom is invaluable.Making Flanges Around Bulkhead Hatches for Canvas
Sven Yrvind, a renowned yacht designer and sailor, shares valuable insights on creating flanges around bulkhead hatches for canvas protection in this enlightening video. By following his expert guidance, boat enthusiasts can ensure their living areas remain secure while allowing unhindered access through the hatches.Step 1: Starting with the Flange
Sven begins by explaining that working on flanges vertically and horizontally is significantly easier than doing so in a flat position. To simplify the process further, he divides the task into two or three steps as suggested by fellow expert “for for.” This approach not only makes it more manageable but also allows for greater precision in crafting each component.Step 2: Applying Glue and Securing
Sven proceeds to apply glue along one edge of the flange, ensuring a secure bond when clamped into place. He emphasizes that this stage is crucial for maintaining the structural integrity of the flange, which in turn safeguards the living area beneath the canvas when hatches are open.Step 3: Allowing Time to Dry
After securely attaching the first portion of the flange, Sven allows ample time for it to dry before moving forward with additional steps. This patience and precision are key aspects of his successful boatbuilding methods.Step 4: Finishing Touches
Once the flange is fully dried, Sven removes the clamps carefully, ensuring no damage occurs during this process. He then moves on to attaching four more pieces onto these main frames, completing two pairs of flanges for the bulkhead hatches.The Final Touches
While two flanges form the primary support structure around the hatches, Sven mentions there are two additional pieces required at each end to ensure comprehensive protection. This attention to detail highlights his commitment to producing a durable and reliable design. “Sailing is about finding your path, whether it’s across an ocean or within yourself.” – Sven Yrvind In conclusion, making flanges around bulkhead hatches may seem complex at first glance, but by following Sven Yrvind’s meticulous process, enthusiasts can achieve professional-level results. Remember that the journey of boatbuilding is as rewarding as reaching your destination; it tests one’s patience and dedication. For those seeking to embark on this adventure or simply gain more insight into marine craftsmanship, Sven’s wisdom is invaluable.Sven proceeds to apply glue along one edge of the flange, ensuring a secure bond when clamped into place. He emphasizes that this stage is crucial for maintaining the structural integrity of the flange, which in turn safeguards the living area beneath the canvas when hatches are open.Step 3: Allowing Time to Dry
After securely attaching the first portion of the flange, Sven allows ample time for it to dry before moving forward with additional steps. This patience and precision are key aspects of his successful boatbuilding methods.Step 4: Finishing Touches
Once the flange is fully dried, Sven removes the clamps carefully, ensuring no damage occurs during this process. He then moves on to attaching four more pieces onto these main frames, completing two pairs of flanges for the bulkhead hatches.The Final Touches
While two flanges form the primary support structure around the hatches, Sven mentions there are two additional pieces required at each end to ensure comprehensive protection. This attention to detail highlights his commitment to producing a durable and reliable design. “Sailing is about finding your path, whether it’s across an ocean or within yourself.” – Sven Yrvind In conclusion, making flanges around bulkhead hatches may seem complex at first glance, but by following Sven Yrvind’s meticulous process, enthusiasts can achieve professional-level results. Remember that the journey of boatbuilding is as rewarding as reaching your destination; it tests one’s patience and dedication. For those seeking to embark on this adventure or simply gain more insight into marine craftsmanship, Sven’s wisdom is invaluable.Sven begins by explaining that working on flanges vertically and horizontally is significantly easier than doing so in a flat position. To simplify the process further, he divides the task into two or three steps as suggested by fellow expert “for for.” This approach not only makes it more manageable but also allows for greater precision in crafting each component.Step 2: Applying Glue and Securing
Sven proceeds to apply glue along one edge of the flange, ensuring a secure bond when clamped into place. He emphasizes that this stage is crucial for maintaining the structural integrity of the flange, which in turn safeguards the living area beneath the canvas when hatches are open.Step 3: Allowing Time to Dry
After securely attaching the first portion of the flange, Sven allows ample time for it to dry before moving forward with additional steps. This patience and precision are key aspects of his successful boatbuilding methods.Step 4: Finishing Touches
Once the flange is fully dried, Sven removes the clamps carefully, ensuring no damage occurs during this process. He then moves on to attaching four more pieces onto these main frames, completing two pairs of flanges for the bulkhead hatches.The Final Touches
While two flanges form the primary support structure around the hatches, Sven mentions there are two additional pieces required at each end to ensure comprehensive protection. This attention to detail highlights his commitment to producing a durable and reliable design. “Sailing is about finding your path, whether it’s across an ocean or within yourself.” – Sven Yrvind In conclusion, making flanges around bulkhead hatches may seem complex at first glance, but by following Sven Yrvind’s meticulous process, enthusiasts can achieve professional-level results. Remember that the journey of boatbuilding is as rewarding as reaching your destination; it tests one’s patience and dedication. For those seeking to embark on this adventure or simply gain more insight into marine craftsmanship, Sven’s wisdom is invaluable.Sven Yrvind, a renowned yacht designer and sailor, shares valuable insights on creating flanges around bulkhead hatches for canvas protection in this enlightening video. By following his expert guidance, boat enthusiasts can ensure their living areas remain secure while allowing unhindered access through the hatches.Step 1: Starting with the Flange
Sven begins by explaining that working on flanges vertically and horizontally is significantly easier than doing so in a flat position. To simplify the process further, he divides the task into two or three steps as suggested by fellow expert “for for.” This approach not only makes it more manageable but also allows for greater precision in crafting each component.Step 2: Applying Glue and Securing
Sven proceeds to apply glue along one edge of the flange, ensuring a secure bond when clamped into place. He emphasizes that this stage is crucial for maintaining the structural integrity of the flange, which in turn safeguards the living area beneath the canvas when hatches are open.Step 3: Allowing Time to Dry
After securely attaching the first portion of the flange, Sven allows ample time for it to dry before moving forward with additional steps. This patience and precision are key aspects of his successful boatbuilding methods.Step 4: Finishing Touches
Once the flange is fully dried, Sven removes the clamps carefully, ensuring no damage occurs during this process. He then moves on to attaching four more pieces onto these main frames, completing two pairs of flanges for the bulkhead hatches.The Final Touches
While two flanges form the primary support structure around the hatches, Sven mentions there are two additional pieces required at each end to ensure comprehensive protection. This attention to detail highlights his commitment to producing a durable and reliable design. “Sailing is about finding your path, whether it’s across an ocean or within yourself.” – Sven Yrvind In conclusion, making flanges around bulkhead hatches may seem complex at first glance, but by following Sven Yrvind’s meticulous process, enthusiasts can achieve professional-level results. Remember that the journey of boatbuilding is as rewarding as reaching your destination; it tests one’s patience and dedication. For those seeking to embark on this adventure or simply gain more insight into marine craftsmanship, Sven’s wisdom is invaluable.Making Flanges Around Bulkhead Hatches for Canvas
Sven Yrvind, a renowned yacht designer and sailor, shares valuable insights on creating flanges around bulkhead hatches for canvas protection in this enlightening video. By following his expert guidance, boat enthusiasts can ensure their living areas remain secure while allowing unhindered access through the hatches.Step 1: Starting with the Flange
Sven begins by explaining that working on flanges vertically and horizontally is significantly easier than doing so in a flat position. To simplify the process further, he divides the task into two or three steps as suggested by fellow expert “for for.” This approach not only makes it more manageable but also allows for greater precision in crafting each component.Step 2: Applying Glue and Securing
Sven proceeds to apply glue along one edge of the flange, ensuring a secure bond when clamped into place. He emphasizes that this stage is crucial for maintaining the structural integrity of the flange, which in turn safeguards the living area beneath the canvas when hatches are open.Step 3: Allowing Time to Dry
After securely attaching the first portion of the flange, Sven allows ample time for it to dry before moving forward with additional steps. This patience and precision are key aspects of his successful boatbuilding methods.Step 4: Finishing Touches
Once the flange is fully dried, Sven removes the clamps carefully, ensuring no damage occurs during this process. He then moves on to attaching four more pieces onto these main frames, completing two pairs of flanges for the bulkhead hatches.The Final Touches
While two flanges form the primary support structure around the hatches, Sven mentions there are two additional pieces required at each end to ensure comprehensive protection. This attention to detail highlights his commitment to producing a durable and reliable design. “Sailing is about finding your path, whether it’s across an ocean or within yourself.” – Sven Yrvind In conclusion, making flanges around bulkhead hatches may seem complex at first glance, but by following Sven Yrvind’s meticulous process, enthusiasts can achieve professional-level results. Remember that the journey of boatbuilding is as rewarding as reaching your destination; it tests one’s patience and dedication. For those seeking to embark on this adventure or simply gain more insight into marine craftsmanship, Sven’s wisdom is invaluable.Once the flange is fully dried, Sven removes the clamps carefully, ensuring no damage occurs during this process. He then moves on to attaching four more pieces onto these main frames, completing two pairs of flanges for the bulkhead hatches.The Final Touches
While two flanges form the primary support structure around the hatches, Sven mentions there are two additional pieces required at each end to ensure comprehensive protection. This attention to detail highlights his commitment to producing a durable and reliable design. “Sailing is about finding your path, whether it’s across an ocean or within yourself.” – Sven Yrvind In conclusion, making flanges around bulkhead hatches may seem complex at first glance, but by following Sven Yrvind’s meticulous process, enthusiasts can achieve professional-level results. Remember that the journey of boatbuilding is as rewarding as reaching your destination; it tests one’s patience and dedication. For those seeking to embark on this adventure or simply gain more insight into marine craftsmanship, Sven’s wisdom is invaluable.Sven proceeds to apply glue along one edge of the flange, ensuring a secure bond when clamped into place. He emphasizes that this stage is crucial for maintaining the structural integrity of the flange, which in turn safeguards the living area beneath the canvas when hatches are open.Step 3: Allowing Time to Dry
After securely attaching the first portion of the flange, Sven allows ample time for it to dry before moving forward with additional steps. This patience and precision are key aspects of his successful boatbuilding methods.Step 4: Finishing Touches
Once the flange is fully dried, Sven removes the clamps carefully, ensuring no damage occurs during this process. He then moves on to attaching four more pieces onto these main frames, completing two pairs of flanges for the bulkhead hatches.The Final Touches
While two flanges form the primary support structure around the hatches, Sven mentions there are two additional pieces required at each end to ensure comprehensive protection. This attention to detail highlights his commitment to producing a durable and reliable design. “Sailing is about finding your path, whether it’s across an ocean or within yourself.” – Sven Yrvind In conclusion, making flanges around bulkhead hatches may seem complex at first glance, but by following Sven Yrvind’s meticulous process, enthusiasts can achieve professional-level results. Remember that the journey of boatbuilding is as rewarding as reaching your destination; it tests one’s patience and dedication. For those seeking to embark on this adventure or simply gain more insight into marine craftsmanship, Sven’s wisdom is invaluable.Sven begins by explaining that working on flanges vertically and horizontally is significantly easier than doing so in a flat position. To simplify the process further, he divides the task into two or three steps as suggested by fellow expert “for for.” This approach not only makes it more manageable but also allows for greater precision in crafting each component.Step 2: Applying Glue and Securing
Sven proceeds to apply glue along one edge of the flange, ensuring a secure bond when clamped into place. He emphasizes that this stage is crucial for maintaining the structural integrity of the flange, which in turn safeguards the living area beneath the canvas when hatches are open.Step 3: Allowing Time to Dry
After securely attaching the first portion of the flange, Sven allows ample time for it to dry before moving forward with additional steps. This patience and precision are key aspects of his successful boatbuilding methods.Step 4: Finishing Touches
Once the flange is fully dried, Sven removes the clamps carefully, ensuring no damage occurs during this process. He then moves on to attaching four more pieces onto these main frames, completing two pairs of flanges for the bulkhead hatches.The Final Touches
While two flanges form the primary support structure around the hatches, Sven mentions there are two additional pieces required at each end to ensure comprehensive protection. This attention to detail highlights his commitment to producing a durable and reliable design. “Sailing is about finding your path, whether it’s across an ocean or within yourself.” – Sven Yrvind In conclusion, making flanges around bulkhead hatches may seem complex at first glance, but by following Sven Yrvind’s meticulous process, enthusiasts can achieve professional-level results. Remember that the journey of boatbuilding is as rewarding as reaching your destination; it tests one’s patience and dedication. For those seeking to embark on this adventure or simply gain more insight into marine craftsmanship, Sven’s wisdom is invaluable.Sven Yrvind, a renowned yacht designer and sailor, shares valuable insights on creating flanges around bulkhead hatches for canvas protection in this enlightening video. By following his expert guidance, boat enthusiasts can ensure their living areas remain secure while allowing unhindered access through the hatches.Step 1: Starting with the Flange
Sven begins by explaining that working on flanges vertically and horizontally is significantly easier than doing so in a flat position. To simplify the process further, he divides the task into two or three steps as suggested by fellow expert “for for.” This approach not only makes it more manageable but also allows for greater precision in crafting each component.Step 2: Applying Glue and Securing
Sven proceeds to apply glue along one edge of the flange, ensuring a secure bond when clamped into place. He emphasizes that this stage is crucial for maintaining the structural integrity of the flange, which in turn safeguards the living area beneath the canvas when hatches are open.Step 3: Allowing Time to Dry
After securely attaching the first portion of the flange, Sven allows ample time for it to dry before moving forward with additional steps. This patience and precision are key aspects of his successful boatbuilding methods.Step 4: Finishing Touches
Once the flange is fully dried, Sven removes the clamps carefully, ensuring no damage occurs during this process. He then moves on to attaching four more pieces onto these main frames, completing two pairs of flanges for the bulkhead hatches.The Final Touches
While two flanges form the primary support structure around the hatches, Sven mentions there are two additional pieces required at each end to ensure comprehensive protection. This attention to detail highlights his commitment to producing a durable and reliable design. “Sailing is about finding your path, whether it’s across an ocean or within yourself.” – Sven Yrvind In conclusion, making flanges around bulkhead hatches may seem complex at first glance, but by following Sven Yrvind’s meticulous process, enthusiasts can achieve professional-level results. Remember that the journey of boatbuilding is as rewarding as reaching your destination; it tests one’s patience and dedication. For those seeking to embark on this adventure or simply gain more insight into marine craftsmanship, Sven’s wisdom is invaluable.Making Flanges Around Bulkhead Hatches for Canvas
Sven Yrvind, a renowned yacht designer and sailor, shares valuable insights on creating flanges around bulkhead hatches for canvas protection in this enlightening video. By following his expert guidance, boat enthusiasts can ensure their living areas remain secure while allowing unhindered access through the hatches.Step 1: Starting with the Flange
Sven begins by explaining that working on flanges vertically and horizontally is significantly easier than doing so in a flat position. To simplify the process further, he divides the task into two or three steps as suggested by fellow expert “for for.” This approach not only makes it more manageable but also allows for greater precision in crafting each component.Step 2: Applying Glue and Securing
Sven proceeds to apply glue along one edge of the flange, ensuring a secure bond when clamped into place. He emphasizes that this stage is crucial for maintaining the structural integrity of the flange, which in turn safeguards the living area beneath the canvas when hatches are open.Step 3: Allowing Time to Dry
After securely attaching the first portion of the flange, Sven allows ample time for it to dry before moving forward with additional steps. This patience and precision are key aspects of his successful boatbuilding methods.Step 4: Finishing Touches
Once the flange is fully dried, Sven removes the clamps carefully, ensuring no damage occurs during this process. He then moves on to attaching four more pieces onto these main frames, completing two pairs of flanges for the bulkhead hatches.The Final Touches
While two flanges form the primary support structure around the hatches, Sven mentions there are two additional pieces required at each end to ensure comprehensive protection. This attention to detail highlights his commitment to producing a durable and reliable design. “Sailing is about finding your path, whether it’s across an ocean or within yourself.” – Sven Yrvind In conclusion, making flanges around bulkhead hatches may seem complex at first glance, but by following Sven Yrvind’s meticulous process, enthusiasts can achieve professional-level results. Remember that the journey of boatbuilding is as rewarding as reaching your destination; it tests one’s patience and dedication. For those seeking to embark on this adventure or simply gain more insight into marine craftsmanship, Sven’s wisdom is invaluable.After securely attaching the first portion of the flange, Sven allows ample time for it to dry before moving forward with additional steps. This patience and precision are key aspects of his successful boatbuilding methods.Step 4: Finishing Touches
Once the flange is fully dried, Sven removes the clamps carefully, ensuring no damage occurs during this process. He then moves on to attaching four more pieces onto these main frames, completing two pairs of flanges for the bulkhead hatches.The Final Touches
While two flanges form the primary support structure around the hatches, Sven mentions there are two additional pieces required at each end to ensure comprehensive protection. This attention to detail highlights his commitment to producing a durable and reliable design. “Sailing is about finding your path, whether it’s across an ocean or within yourself.” – Sven Yrvind In conclusion, making flanges around bulkhead hatches may seem complex at first glance, but by following Sven Yrvind’s meticulous process, enthusiasts can achieve professional-level results. Remember that the journey of boatbuilding is as rewarding as reaching your destination; it tests one’s patience and dedication. For those seeking to embark on this adventure or simply gain more insight into marine craftsmanship, Sven’s wisdom is invaluable.Sven proceeds to apply glue along one edge of the flange, ensuring a secure bond when clamped into place. He emphasizes that this stage is crucial for maintaining the structural integrity of the flange, which in turn safeguards the living area beneath the canvas when hatches are open.Step 3: Allowing Time to Dry
After securely attaching the first portion of the flange, Sven allows ample time for it to dry before moving forward with additional steps. This patience and precision are key aspects of his successful boatbuilding methods.Step 4: Finishing Touches
Once the flange is fully dried, Sven removes the clamps carefully, ensuring no damage occurs during this process. He then moves on to attaching four more pieces onto these main frames, completing two pairs of flanges for the bulkhead hatches.The Final Touches
While two flanges form the primary support structure around the hatches, Sven mentions there are two additional pieces required at each end to ensure comprehensive protection. This attention to detail highlights his commitment to producing a durable and reliable design. “Sailing is about finding your path, whether it’s across an ocean or within yourself.” – Sven Yrvind In conclusion, making flanges around bulkhead hatches may seem complex at first glance, but by following Sven Yrvind’s meticulous process, enthusiasts can achieve professional-level results. Remember that the journey of boatbuilding is as rewarding as reaching your destination; it tests one’s patience and dedication. For those seeking to embark on this adventure or simply gain more insight into marine craftsmanship, Sven’s wisdom is invaluable.Sven begins by explaining that working on flanges vertically and horizontally is significantly easier than doing so in a flat position. To simplify the process further, he divides the task into two or three steps as suggested by fellow expert “for for.” This approach not only makes it more manageable but also allows for greater precision in crafting each component.Step 2: Applying Glue and Securing
Sven proceeds to apply glue along one edge of the flange, ensuring a secure bond when clamped into place. He emphasizes that this stage is crucial for maintaining the structural integrity of the flange, which in turn safeguards the living area beneath the canvas when hatches are open.Step 3: Allowing Time to Dry
After securely attaching the first portion of the flange, Sven allows ample time for it to dry before moving forward with additional steps. This patience and precision are key aspects of his successful boatbuilding methods.Step 4: Finishing Touches
Once the flange is fully dried, Sven removes the clamps carefully, ensuring no damage occurs during this process. He then moves on to attaching four more pieces onto these main frames, completing two pairs of flanges for the bulkhead hatches.The Final Touches
While two flanges form the primary support structure around the hatches, Sven mentions there are two additional pieces required at each end to ensure comprehensive protection. This attention to detail highlights his commitment to producing a durable and reliable design. “Sailing is about finding your path, whether it’s across an ocean or within yourself.” – Sven Yrvind In conclusion, making flanges around bulkhead hatches may seem complex at first glance, but by following Sven Yrvind’s meticulous process, enthusiasts can achieve professional-level results. Remember that the journey of boatbuilding is as rewarding as reaching your destination; it tests one’s patience and dedication. For those seeking to embark on this adventure or simply gain more insight into marine craftsmanship, Sven’s wisdom is invaluable.Sven Yrvind, a renowned yacht designer and sailor, shares valuable insights on creating flanges around bulkhead hatches for canvas protection in this enlightening video. By following his expert guidance, boat enthusiasts can ensure their living areas remain secure while allowing unhindered access through the hatches.Step 1: Starting with the Flange
Sven begins by explaining that working on flanges vertically and horizontally is significantly easier than doing so in a flat position. To simplify the process further, he divides the task into two or three steps as suggested by fellow expert “for for.” This approach not only makes it more manageable but also allows for greater precision in crafting each component.Step 2: Applying Glue and Securing
Sven proceeds to apply glue along one edge of the flange, ensuring a secure bond when clamped into place. He emphasizes that this stage is crucial for maintaining the structural integrity of the flange, which in turn safeguards the living area beneath the canvas when hatches are open.Step 3: Allowing Time to Dry
After securely attaching the first portion of the flange, Sven allows ample time for it to dry before moving forward with additional steps. This patience and precision are key aspects of his successful boatbuilding methods.Step 4: Finishing Touches
Once the flange is fully dried, Sven removes the clamps carefully, ensuring no damage occurs during this process. He then moves on to attaching four more pieces onto these main frames, completing two pairs of flanges for the bulkhead hatches.The Final Touches
While two flanges form the primary support structure around the hatches, Sven mentions there are two additional pieces required at each end to ensure comprehensive protection. This attention to detail highlights his commitment to producing a durable and reliable design. “Sailing is about finding your path, whether it’s across an ocean or within yourself.” – Sven Yrvind In conclusion, making flanges around bulkhead hatches may seem complex at first glance, but by following Sven Yrvind’s meticulous process, enthusiasts can achieve professional-level results. Remember that the journey of boatbuilding is as rewarding as reaching your destination; it tests one’s patience and dedication. For those seeking to embark on this adventure or simply gain more insight into marine craftsmanship, Sven’s wisdom is invaluable.Making Flanges Around Bulkhead Hatches for Canvas
Sven Yrvind, a renowned yacht designer and sailor, shares valuable insights on creating flanges around bulkhead hatches for canvas protection in this enlightening video. By following his expert guidance, boat enthusiasts can ensure their living areas remain secure while allowing unhindered access through the hatches.Step 1: Starting with the Flange
Sven begins by explaining that working on flanges vertically and horizontally is significantly easier than doing so in a flat position. To simplify the process further, he divides the task into two or three steps as suggested by fellow expert “for for.” This approach not only makes it more manageable but also allows for greater precision in crafting each component.Step 2: Applying Glue and Securing
Sven proceeds to apply glue along one edge of the flange, ensuring a secure bond when clamped into place. He emphasizes that this stage is crucial for maintaining the structural integrity of the flange, which in turn safeguards the living area beneath the canvas when hatches are open.Step 3: Allowing Time to Dry
After securely attaching the first portion of the flange, Sven allows ample time for it to dry before moving forward with additional steps. This patience and precision are key aspects of his successful boatbuilding methods.Step 4: Finishing Touches
Once the flange is fully dried, Sven removes the clamps carefully, ensuring no damage occurs during this process. He then moves on to attaching four more pieces onto these main frames, completing two pairs of flanges for the bulkhead hatches.The Final Touches
While two flanges form the primary support structure around the hatches, Sven mentions there are two additional pieces required at each end to ensure comprehensive protection. This attention to detail highlights his commitment to producing a durable and reliable design. “Sailing is about finding your path, whether it’s across an ocean or within yourself.” – Sven Yrvind In conclusion, making flanges around bulkhead hatches may seem complex at first glance, but by following Sven Yrvind’s meticulous process, enthusiasts can achieve professional-level results. Remember that the journey of boatbuilding is as rewarding as reaching your destination; it tests one’s patience and dedication. For those seeking to embark on this adventure or simply gain more insight into marine craftsmanship, Sven’s wisdom is invaluable.Once the flange is fully dried, Sven removes the clamps carefully, ensuring no damage occurs during this process. He then moves on to attaching four more pieces onto these main frames, completing two pairs of flanges for the bulkhead hatches.The Final Touches
While two flanges form the primary support structure around the hatches, Sven mentions there are two additional pieces required at each end to ensure comprehensive protection. This attention to detail highlights his commitment to producing a durable and reliable design. “Sailing is about finding your path, whether it’s across an ocean or within yourself.” – Sven Yrvind In conclusion, making flanges around bulkhead hatches may seem complex at first glance, but by following Sven Yrvind’s meticulous process, enthusiasts can achieve professional-level results. Remember that the journey of boatbuilding is as rewarding as reaching your destination; it tests one’s patience and dedication. For those seeking to embark on this adventure or simply gain more insight into marine craftsmanship, Sven’s wisdom is invaluable.After securely attaching the first portion of the flange, Sven allows ample time for it to dry before moving forward with additional steps. This patience and precision are key aspects of his successful boatbuilding methods.Step 4: Finishing Touches
Once the flange is fully dried, Sven removes the clamps carefully, ensuring no damage occurs during this process. He then moves on to attaching four more pieces onto these main frames, completing two pairs of flanges for the bulkhead hatches.The Final Touches
While two flanges form the primary support structure around the hatches, Sven mentions there are two additional pieces required at each end to ensure comprehensive protection. This attention to detail highlights his commitment to producing a durable and reliable design. “Sailing is about finding your path, whether it’s across an ocean or within yourself.” – Sven Yrvind In conclusion, making flanges around bulkhead hatches may seem complex at first glance, but by following Sven Yrvind’s meticulous process, enthusiasts can achieve professional-level results. Remember that the journey of boatbuilding is as rewarding as reaching your destination; it tests one’s patience and dedication. For those seeking to embark on this adventure or simply gain more insight into marine craftsmanship, Sven’s wisdom is invaluable.Sven proceeds to apply glue along one edge of the flange, ensuring a secure bond when clamped into place. He emphasizes that this stage is crucial for maintaining the structural integrity of the flange, which in turn safeguards the living area beneath the canvas when hatches are open.Step 3: Allowing Time to Dry
After securely attaching the first portion of the flange, Sven allows ample time for it to dry before moving forward with additional steps. This patience and precision are key aspects of his successful boatbuilding methods.Step 4: Finishing Touches
Once the flange is fully dried, Sven removes the clamps carefully, ensuring no damage occurs during this process. He then moves on to attaching four more pieces onto these main frames, completing two pairs of flanges for the bulkhead hatches.The Final Touches
While two flanges form the primary support structure around the hatches, Sven mentions there are two additional pieces required at each end to ensure comprehensive protection. This attention to detail highlights his commitment to producing a durable and reliable design. “Sailing is about finding your path, whether it’s across an ocean or within yourself.” – Sven Yrvind In conclusion, making flanges around bulkhead hatches may seem complex at first glance, but by following Sven Yrvind’s meticulous process, enthusiasts can achieve professional-level results. Remember that the journey of boatbuilding is as rewarding as reaching your destination; it tests one’s patience and dedication. For those seeking to embark on this adventure or simply gain more insight into marine craftsmanship, Sven’s wisdom is invaluable.Sven begins by explaining that working on flanges vertically and horizontally is significantly easier than doing so in a flat position. To simplify the process further, he divides the task into two or three steps as suggested by fellow expert “for for.” This approach not only makes it more manageable but also allows for greater precision in crafting each component.Step 2: Applying Glue and Securing
Sven proceeds to apply glue along one edge of the flange, ensuring a secure bond when clamped into place. He emphasizes that this stage is crucial for maintaining the structural integrity of the flange, which in turn safeguards the living area beneath the canvas when hatches are open.Step 3: Allowing Time to Dry
After securely attaching the first portion of the flange, Sven allows ample time for it to dry before moving forward with additional steps. This patience and precision are key aspects of his successful boatbuilding methods.Step 4: Finishing Touches
Once the flange is fully dried, Sven removes the clamps carefully, ensuring no damage occurs during this process. He then moves on to attaching four more pieces onto these main frames, completing two pairs of flanges for the bulkhead hatches.The Final Touches
While two flanges form the primary support structure around the hatches, Sven mentions there are two additional pieces required at each end to ensure comprehensive protection. This attention to detail highlights his commitment to producing a durable and reliable design. “Sailing is about finding your path, whether it’s across an ocean or within yourself.” – Sven Yrvind In conclusion, making flanges around bulkhead hatches may seem complex at first glance, but by following Sven Yrvind’s meticulous process, enthusiasts can achieve professional-level results. Remember that the journey of boatbuilding is as rewarding as reaching your destination; it tests one’s patience and dedication. For those seeking to embark on this adventure or simply gain more insight into marine craftsmanship, Sven’s wisdom is invaluable.Sven Yrvind, a renowned yacht designer and sailor, shares valuable insights on creating flanges around bulkhead hatches for canvas protection in this enlightening video. By following his expert guidance, boat enthusiasts can ensure their living areas remain secure while allowing unhindered access through the hatches.Step 1: Starting with the Flange
Sven begins by explaining that working on flanges vertically and horizontally is significantly easier than doing so in a flat position. To simplify the process further, he divides the task into two or three steps as suggested by fellow expert “for for.” This approach not only makes it more manageable but also allows for greater precision in crafting each component.Step 2: Applying Glue and Securing
Sven proceeds to apply glue along one edge of the flange, ensuring a secure bond when clamped into place. He emphasizes that this stage is crucial for maintaining the structural integrity of the flange, which in turn safeguards the living area beneath the canvas when hatches are open.Step 3: Allowing Time to Dry
After securely attaching the first portion of the flange, Sven allows ample time for it to dry before moving forward with additional steps. This patience and precision are key aspects of his successful boatbuilding methods.Step 4: Finishing Touches
Once the flange is fully dried, Sven removes the clamps carefully, ensuring no damage occurs during this process. He then moves on to attaching four more pieces onto these main frames, completing two pairs of flanges for the bulkhead hatches.The Final Touches
While two flanges form the primary support structure around the hatches, Sven mentions there are two additional pieces required at each end to ensure comprehensive protection. This attention to detail highlights his commitment to producing a durable and reliable design. “Sailing is about finding your path, whether it’s across an ocean or within yourself.” – Sven Yrvind In conclusion, making flanges around bulkhead hatches may seem complex at first glance, but by following Sven Yrvind’s meticulous process, enthusiasts can achieve professional-level results. Remember that the journey of boatbuilding is as rewarding as reaching your destination; it tests one’s patience and dedication. For those seeking to embark on this adventure or simply gain more insight into marine craftsmanship, Sven’s wisdom is invaluable.Making Flanges Around Bulkhead Hatches for Canvas
Sven Yrvind, a renowned yacht designer and sailor, shares valuable insights on creating flanges around bulkhead hatches for canvas protection in this enlightening video. By following his expert guidance, boat enthusiasts can ensure their living areas remain secure while allowing unhindered access through the hatches.Step 1: Starting with the Flange
Sven begins by explaining that working on flanges vertically and horizontally is significantly easier than doing so in a flat position. To simplify the process further, he divides the task into two or three steps as suggested by fellow expert “for for.” This approach not only makes it more manageable but also allows for greater precision in crafting each component.Step 2: Applying Glue and Securing
Sven proceeds to apply glue along one edge of the flange, ensuring a secure bond when clamped into place. He emphasizes that this stage is crucial for maintaining the structural integrity of the flange, which in turn safeguards the living area beneath the canvas when hatches are open.Step 3: Allowing Time to Dry
After securely attaching the first portion of the flange, Sven allows ample time for it to dry before moving forward with additional steps. This patience and precision are key aspects of his successful boatbuilding methods.Step 4: Finishing Touches
Once the flange is fully dried, Sven removes the clamps carefully, ensuring no damage occurs during this process. He then moves on to attaching four more pieces onto these main frames, completing two pairs of flanges for the bulkhead hatches.The Final Touches
While two flanges form the primary support structure around the hatches, Sven mentions there are two additional pieces required at each end to ensure comprehensive protection. This attention to detail highlights his commitment to producing a durable and reliable design. “Sailing is about finding your path, whether it’s across an ocean or within yourself.” – Sven Yrvind In conclusion, making flanges around bulkhead hatches may seem complex at first glance, but by following Sven Yrvind’s meticulous process, enthusiasts can achieve professional-level results. Remember that the journey of boatbuilding is as rewarding as reaching your destination; it tests one’s patience and dedication. For those seeking to embark on this adventure or simply gain more insight into marine craftsmanship, Sven’s wisdom is invaluable.Sven begins by explaining that working on flanges vertically and horizontally is significantly easier than doing so in a flat position. To simplify the process further, he divides the task into two or three steps as suggested by fellow expert “for for.” This approach not only makes it more manageable but also allows for greater precision in crafting each component.Step 2: Applying Glue and Securing
Sven proceeds to apply glue along one edge of the flange, ensuring a secure bond when clamped into place. He emphasizes that this stage is crucial for maintaining the structural integrity of the flange, which in turn safeguards the living area beneath the canvas when hatches are open.Step 3: Allowing Time to Dry
After securely attaching the first portion of the flange, Sven allows ample time for it to dry before moving forward with additional steps. This patience and precision are key aspects of his successful boatbuilding methods.Step 4: Finishing Touches
Once the flange is fully dried, Sven removes the clamps carefully, ensuring no damage occurs during this process. He then moves on to attaching four more pieces onto these main frames, completing two pairs of flanges for the bulkhead hatches.The Final Touches
While two flanges form the primary support structure around the hatches, Sven mentions there are two additional pieces required at each end to ensure comprehensive protection. This attention to detail highlights his commitment to producing a durable and reliable design. “Sailing is about finding your path, whether it’s across an ocean or within yourself.” – Sven Yrvind In conclusion, making flanges around bulkhead hatches may seem complex at first glance, but by following Sven Yrvind’s meticulous process, enthusiasts can achieve professional-level results. Remember that the journey of boatbuilding is as rewarding as reaching your destination; it tests one’s patience and dedication. For those seeking to embark on this adventure or simply gain more insight into marine craftsmanship, Sven’s wisdom is invaluable.Making Flanges Around Bulkhead Hatches for Canvas
Sven Yrvind, a renowned yacht designer and sailor, shares valuable insights on creating flanges around bulkhead hatches for canvas protection in this enlightening video. By following his expert guidance, boat enthusiasts can ensure their living areas remain secure while allowing unhindered access through the hatches.Step 1: Starting with the Flange
Sven begins by explaining that working on flanges vertically and horizontally is significantly easier than doing so in a flat position. To simplify the process further, he divides the task into two or three steps as suggested by fellow expert “for for.” This approach not only makes it more manageable but also allows for greater precision in crafting each component.Step 2: Applying Glue and Securing
Sven proceeds to apply glue along one edge of the flange, ensuring a secure bond when clamped into place. He emphasizes that this stage is crucial for maintaining the structural integrity of the flange, which in turn safeguards the living area beneath the canvas when hatches are open.Step 3: Allowing Time to Dry
After securely attaching the first portion of the flange, Sven allows ample time for it to dry before moving forward with additional steps. This patience and precision are key aspects of his successful boatbuilding methods.Step 4: Finishing Touches
Once the flange is fully dried, Sven removes the clamps carefully, ensuring no damage occurs during this process. He then moves on to attaching four more pieces onto these main frames, completing two pairs of flanges for the bulkhead hatches.The Final Touches
While two flanges form the primary support structure around the hatches, Sven mentions there are two additional pieces required at each end to ensure comprehensive protection. This attention to detail highlights his commitment to producing a durable and reliable design. “Sailing is about finding your path, whether it’s across an ocean or within yourself.” – Sven Yrvind In conclusion, making flanges around bulkhead hatches may seem complex at first glance, but by following Sven Yrvind’s meticulous process, enthusiasts can achieve professional-level results. Remember that the journey of boatbuilding is as rewarding as reaching your destination; it tests one’s patience and dedication. For those seeking to embark on this adventure or simply gain more insight into marine craftsmanship, Sven’s wisdom is invaluable.Sven begins by explaining that working on flanges vertically and horizontally is significantly easier than doing so in a flat position. To simplify the process further, he divides the task into two or three steps as suggested by fellow expert “for for.” This approach not only makes it more manageable but also allows for greater precision in crafting each component.Step 2: Applying Glue and Securing
Sven proceeds to apply glue along one edge of the flange, ensuring a secure bond when clamped into place. He emphasizes that this stage is crucial for maintaining the structural integrity of the flange, which in turn safeguards the living area beneath the canvas when hatches are open.Step 3: Allowing Time to Dry
After securely attaching the first portion of the flange, Sven allows ample time for it to dry before moving forward with additional steps. This patience and precision are key aspects of his successful boatbuilding methods.Step 4: Finishing Touches
Once the flange is fully dried, Sven removes the clamps carefully, ensuring no damage occurs during this process. He then moves on to attaching four more pieces onto these main frames, completing two pairs of flanges for the bulkhead hatches.The Final Touches
While two flanges form the primary support structure around the hatches, Sven mentions there are two additional pieces required at each end to ensure comprehensive protection. This attention to detail highlights his commitment to producing a durable and reliable design. “Sailing is about finding your path, whether it’s across an ocean or within yourself.” – Sven Yrvind In conclusion, making flanges around bulkhead hatches may seem complex at first glance, but by following Sven Yrvind’s meticulous process, enthusiasts can achieve professional-level results. Remember that the journey of boatbuilding is as rewarding as reaching your destination; it tests one’s patience and dedication. For those seeking to embark on this adventure or simply gain more insight into marine craftsmanship, Sven’s wisdom is invaluable.Sven Yrvind, a renowned yacht designer and sailor, shares valuable insights on creating flanges around bulkhead hatches for canvas protection in this enlightening video. By following his expert guidance, boat enthusiasts can ensure their living areas remain secure while allowing unhindered access through the hatches.Step 1: Starting with the Flange
Sven begins by explaining that working on flanges vertically and horizontally is significantly easier than doing so in a flat position. To simplify the process further, he divides the task into two or three steps as suggested by fellow expert “for for.” This approach not only makes it more manageable but also allows for greater precision in crafting each component.Step 2: Applying Glue and Securing
Sven proceeds to apply glue along one edge of the flange, ensuring a secure bond when clamped into place. He emphasizes that this stage is crucial for maintaining the structural integrity of the flange, which in turn safeguards the living area beneath the canvas when hatches are open.Step 3: Allowing Time to Dry
After securely attaching the first portion of the flange, Sven allows ample time for it to dry before moving forward with additional steps. This patience and precision are key aspects of his successful boatbuilding methods.Step 4: Finishing Touches
Once the flange is fully dried, Sven removes the clamps carefully, ensuring no damage occurs during this process. He then moves on to attaching four more pieces onto these main frames, completing two pairs of flanges for the bulkhead hatches.The Final Touches
While two flanges form the primary support structure around the hatches, Sven mentions there are two additional pieces required at each end to ensure comprehensive protection. This attention to detail highlights his commitment to producing a durable and reliable design. “Sailing is about finding your path, whether it’s across an ocean or within yourself.” – Sven Yrvind In conclusion, making flanges around bulkhead hatches may seem complex at first glance, but by following Sven Yrvind’s meticulous process, enthusiasts can achieve professional-level results. Remember that the journey of boatbuilding is as rewarding as reaching your destination; it tests one’s patience and dedication. For those seeking to embark on this adventure or simply gain more insight into marine craftsmanship, Sven’s wisdom is invaluable.Making Flanges Around Bulkhead Hatches for Canvas
Sven Yrvind, a renowned yacht designer and sailor, shares valuable insights on creating flanges around bulkhead hatches for canvas protection in this enlightening video. By following his expert guidance, boat enthusiasts can ensure their living areas remain secure while allowing unhindered access through the hatches.Step 1: Starting with the Flange
Sven begins by explaining that working on flanges vertically and horizontally is significantly easier than doing so in a flat position. To simplify the process further, he divides the task into two or three steps as suggested by fellow expert “for for.” This approach not only makes it more manageable but also allows for greater precision in crafting each component.Step 2: Applying Glue and Securing
Sven proceeds to apply glue along one edge of the flange, ensuring a secure bond when clamped into place. He emphasizes that this stage is crucial for maintaining the structural integrity of the flange, which in turn safeguards the living area beneath the canvas when hatches are open.Step 3: Allowing Time to Dry
After securely attaching the first portion of the flange, Sven allows ample time for it to dry before moving forward with additional steps. This patience and precision are key aspects of his successful boatbuilding methods.Step 4: Finishing Touches
Once the flange is fully dried, Sven removes the clamps carefully, ensuring no damage occurs during this process. He then moves on to attaching four more pieces onto these main frames, completing two pairs of flanges for the bulkhead hatches.The Final Touches
While two flanges form the primary support structure around the hatches, Sven mentions there are two additional pieces required at each end to ensure comprehensive protection. This attention to detail highlights his commitment to producing a durable and reliable design. “Sailing is about finding your path, whether it’s across an ocean or within yourself.” – Sven Yrvind In conclusion, making flanges around bulkhead hatches may seem complex at first glance, but by following Sven Yrvind’s meticulous process, enthusiasts can achieve professional-level results. Remember that the journey of boatbuilding is as rewarding as reaching your destination; it tests one’s patience and dedication. For those seeking to embark on this adventure or simply gain more insight into marine craftsmanship, Sven’s wisdom is invaluable.Once the flange is fully dried, Sven removes the clamps carefully, ensuring no damage occurs during this process. He then moves on to attaching four more pieces onto these main frames, completing two pairs of flanges for the bulkhead hatches.The Final Touches
While two flanges form the primary support structure around the hatches, Sven mentions there are two additional pieces required at each end to ensure comprehensive protection. This attention to detail highlights his commitment to producing a durable and reliable design. “Sailing is about finding your path, whether it’s across an ocean or within yourself.” – Sven Yrvind In conclusion, making flanges around bulkhead hatches may seem complex at first glance, but by following Sven Yrvind’s meticulous process, enthusiasts can achieve professional-level results. Remember that the journey of boatbuilding is as rewarding as reaching your destination; it tests one’s patience and dedication. For those seeking to embark on this adventure or simply gain more insight into marine craftsmanship, Sven’s wisdom is invaluable.Sven begins by explaining that working on flanges vertically and horizontally is significantly easier than doing so in a flat position. To simplify the process further, he divides the task into two or three steps as suggested by fellow expert “for for.” This approach not only makes it more manageable but also allows for greater precision in crafting each component.Step 2: Applying Glue and Securing
Sven proceeds to apply glue along one edge of the flange, ensuring a secure bond when clamped into place. He emphasizes that this stage is crucial for maintaining the structural integrity of the flange, which in turn safeguards the living area beneath the canvas when hatches are open.Step 3: Allowing Time to Dry
After securely attaching the first portion of the flange, Sven allows ample time for it to dry before moving forward with additional steps. This patience and precision are key aspects of his successful boatbuilding methods.Step 4: Finishing Touches
Once the flange is fully dried, Sven removes the clamps carefully, ensuring no damage occurs during this process. He then moves on to attaching four more pieces onto these main frames, completing two pairs of flanges for the bulkhead hatches.The Final Touches
While two flanges form the primary support structure around the hatches, Sven mentions there are two additional pieces required at each end to ensure comprehensive protection. This attention to detail highlights his commitment to producing a durable and reliable design. “Sailing is about finding your path, whether it’s across an ocean or within yourself.” – Sven Yrvind In conclusion, making flanges around bulkhead hatches may seem complex at first glance, but by following Sven Yrvind’s meticulous process, enthusiasts can achieve professional-level results. Remember that the journey of boatbuilding is as rewarding as reaching your destination; it tests one’s patience and dedication. For those seeking to embark on this adventure or simply gain more insight into marine craftsmanship, Sven’s wisdom is invaluable.Sven Yrvind, a renowned yacht designer and sailor, shares valuable insights on creating flanges around bulkhead hatches for canvas protection in this enlightening video. By following his expert guidance, boat enthusiasts can ensure their living areas remain secure while allowing unhindered access through the hatches.Step 1: Starting with the Flange
Sven begins by explaining that working on flanges vertically and horizontally is significantly easier than doing so in a flat position. To simplify the process further, he divides the task into two or three steps as suggested by fellow expert “for for.” This approach not only makes it more manageable but also allows for greater precision in crafting each component.Step 2: Applying Glue and Securing
Sven proceeds to apply glue along one edge of the flange, ensuring a secure bond when clamped into place. He emphasizes that this stage is crucial for maintaining the structural integrity of the flange, which in turn safeguards the living area beneath the canvas when hatches are open.Step 3: Allowing Time to Dry
After securely attaching the first portion of the flange, Sven allows ample time for it to dry before moving forward with additional steps. This patience and precision are key aspects of his successful boatbuilding methods.Step 4: Finishing Touches
Once the flange is fully dried, Sven removes the clamps carefully, ensuring no damage occurs during this process. He then moves on to attaching four more pieces onto these main frames, completing two pairs of flanges for the bulkhead hatches.The Final Touches
While two flanges form the primary support structure around the hatches, Sven mentions there are two additional pieces required at each end to ensure comprehensive protection. This attention to detail highlights his commitment to producing a durable and reliable design. “Sailing is about finding your path, whether it’s across an ocean or within yourself.” – Sven Yrvind In conclusion, making flanges around bulkhead hatches may seem complex at first glance, but by following Sven Yrvind’s meticulous process, enthusiasts can achieve professional-level results. Remember that the journey of boatbuilding is as rewarding as reaching your destination; it tests one’s patience and dedication. For those seeking to embark on this adventure or simply gain more insight into marine craftsmanship, Sven’s wisdom is invaluable.Making Flanges Around Bulkhead Hatches for Canvas
Sven Yrvind, a renowned yacht designer and sailor, shares valuable insights on creating flanges around bulkhead hatches for canvas protection in this enlightening video. By following his expert guidance, boat enthusiasts can ensure their living areas remain secure while allowing unhindered access through the hatches.Step 1: Starting with the Flange
Sven begins by explaining that working on flanges vertically and horizontally is significantly easier than doing so in a flat position. To simplify the process further, he divides the task into two or three steps as suggested by fellow expert “for for.” This approach not only makes it more manageable but also allows for greater precision in crafting each component.Step 2: Applying Glue and Securing
Sven proceeds to apply glue along one edge of the flange, ensuring a secure bond when clamped into place. He emphasizes that this stage is crucial for maintaining the structural integrity of the flange, which in turn safeguards the living area beneath the canvas when hatches are open.Step 3: Allowing Time to Dry
After securely attaching the first portion of the flange, Sven allows ample time for it to dry before moving forward with additional steps. This patience and precision are key aspects of his successful boatbuilding methods.Step 4: Finishing Touches
Once the flange is fully dried, Sven removes the clamps carefully, ensuring no damage occurs during this process. He then moves on to attaching four more pieces onto these main frames, completing two pairs of flanges for the bulkhead hatches.The Final Touches
While two flanges form the primary support structure around the hatches, Sven mentions there are two additional pieces required at each end to ensure comprehensive protection. This attention to detail highlights his commitment to producing a durable and reliable design. “Sailing is about finding your path, whether it’s across an ocean or within yourself.” – Sven Yrvind In conclusion, making flanges around bulkhead hatches may seem complex at first glance, but by following Sven Yrvind’s meticulous process, enthusiasts can achieve professional-level results. Remember that the journey of boatbuilding is as rewarding as reaching your destination; it tests one’s patience and dedication. For those seeking to embark on this adventure or simply gain more insight into marine craftsmanship, Sven’s wisdom is invaluable.After securely attaching the first portion of the flange, Sven allows ample time for it to dry before moving forward with additional steps. This patience and precision are key aspects of his successful boatbuilding methods.Step 4: Finishing Touches
Once the flange is fully dried, Sven removes the clamps carefully, ensuring no damage occurs during this process. He then moves on to attaching four more pieces onto these main frames, completing two pairs of flanges for the bulkhead hatches.The Final Touches
While two flanges form the primary support structure around the hatches, Sven mentions there are two additional pieces required at each end to ensure comprehensive protection. This attention to detail highlights his commitment to producing a durable and reliable design. “Sailing is about finding your path, whether it’s across an ocean or within yourself.” – Sven Yrvind In conclusion, making flanges around bulkhead hatches may seem complex at first glance, but by following Sven Yrvind’s meticulous process, enthusiasts can achieve professional-level results. Remember that the journey of boatbuilding is as rewarding as reaching your destination; it tests one’s patience and dedication. For those seeking to embark on this adventure or simply gain more insight into marine craftsmanship, Sven’s wisdom is invaluable.Sven begins by explaining that working on flanges vertically and horizontally is significantly easier than doing so in a flat position. To simplify the process further, he divides the task into two or three steps as suggested by fellow expert “for for.” This approach not only makes it more manageable but also allows for greater precision in crafting each component.Step 2: Applying Glue and Securing
Sven proceeds to apply glue along one edge of the flange, ensuring a secure bond when clamped into place. He emphasizes that this stage is crucial for maintaining the structural integrity of the flange, which in turn safeguards the living area beneath the canvas when hatches are open.Step 3: Allowing Time to Dry
After securely attaching the first portion of the flange, Sven allows ample time for it to dry before moving forward with additional steps. This patience and precision are key aspects of his successful boatbuilding methods.Step 4: Finishing Touches
Once the flange is fully dried, Sven removes the clamps carefully, ensuring no damage occurs during this process. He then moves on to attaching four more pieces onto these main frames, completing two pairs of flanges for the bulkhead hatches.The Final Touches
While two flanges form the primary support structure around the hatches, Sven mentions there are two additional pieces required at each end to ensure comprehensive protection. This attention to detail highlights his commitment to producing a durable and reliable design. “Sailing is about finding your path, whether it’s across an ocean or within yourself.” – Sven Yrvind In conclusion, making flanges around bulkhead hatches may seem complex at first glance, but by following Sven Yrvind’s meticulous process, enthusiasts can achieve professional-level results. Remember that the journey of boatbuilding is as rewarding as reaching your destination; it tests one’s patience and dedication. For those seeking to embark on this adventure or simply gain more insight into marine craftsmanship, Sven’s wisdom is invaluable.Sven Yrvind, a renowned yacht designer and sailor, shares valuable insights on creating flanges around bulkhead hatches for canvas protection in this enlightening video. By following his expert guidance, boat enthusiasts can ensure their living areas remain secure while allowing unhindered access through the hatches.Step 1: Starting with the Flange
Sven begins by explaining that working on flanges vertically and horizontally is significantly easier than doing so in a flat position. To simplify the process further, he divides the task into two or three steps as suggested by fellow expert “for for.” This approach not only makes it more manageable but also allows for greater precision in crafting each component.Step 2: Applying Glue and Securing
Sven proceeds to apply glue along one edge of the flange, ensuring a secure bond when clamped into place. He emphasizes that this stage is crucial for maintaining the structural integrity of the flange, which in turn safeguards the living area beneath the canvas when hatches are open.Step 3: Allowing Time to Dry
After securely attaching the first portion of the flange, Sven allows ample time for it to dry before moving forward with additional steps. This patience and precision are key aspects of his successful boatbuilding methods.Step 4: Finishing Touches
Once the flange is fully dried, Sven removes the clamps carefully, ensuring no damage occurs during this process. He then moves on to attaching four more pieces onto these main frames, completing two pairs of flanges for the bulkhead hatches.The Final Touches
While two flanges form the primary support structure around the hatches, Sven mentions there are two additional pieces required at each end to ensure comprehensive protection. This attention to detail highlights his commitment to producing a durable and reliable design. “Sailing is about finding your path, whether it’s across an ocean or within yourself.” – Sven Yrvind In conclusion, making flanges around bulkhead hatches may seem complex at first glance, but by following Sven Yrvind’s meticulous process, enthusiasts can achieve professional-level results. Remember that the journey of boatbuilding is as rewarding as reaching your destination; it tests one’s patience and dedication. For those seeking to embark on this adventure or simply gain more insight into marine craftsmanship, Sven’s wisdom is invaluable.Making Flanges Around Bulkhead Hatches for Canvas
Sven Yrvind, a renowned yacht designer and sailor, shares valuable insights on creating flanges around bulkhead hatches for canvas protection in this enlightening video. By following his expert guidance, boat enthusiasts can ensure their living areas remain secure while allowing unhindered access through the hatches.Step 1: Starting with the Flange
Sven begins by explaining that working on flanges vertically and horizontally is significantly easier than doing so in a flat position. To simplify the process further, he divides the task into two or three steps as suggested by fellow expert “for for.” This approach not only makes it more manageable but also allows for greater precision in crafting each component.Step 2: Applying Glue and Securing
Sven proceeds to apply glue along one edge of the flange, ensuring a secure bond when clamped into place. He emphasizes that this stage is crucial for maintaining the structural integrity of the flange, which in turn safeguards the living area beneath the canvas when hatches are open.Step 3: Allowing Time to Dry
After securely attaching the first portion of the flange, Sven allows ample time for it to dry before moving forward with additional steps. This patience and precision are key aspects of his successful boatbuilding methods.Step 4: Finishing Touches
Once the flange is fully dried, Sven removes the clamps carefully, ensuring no damage occurs during this process. He then moves on to attaching four more pieces onto these main frames, completing two pairs of flanges for the bulkhead hatches.The Final Touches
While two flanges form the primary support structure around the hatches, Sven mentions there are two additional pieces required at each end to ensure comprehensive protection. This attention to detail highlights his commitment to producing a durable and reliable design. “Sailing is about finding your path, whether it’s across an ocean or within yourself.” – Sven Yrvind In conclusion, making flanges around bulkhead hatches may seem complex at first glance, but by following Sven Yrvind’s meticulous process, enthusiasts can achieve professional-level results. Remember that the journey of boatbuilding is as rewarding as reaching your destination; it tests one’s patience and dedication. For those seeking to embark on this adventure or simply gain more insight into marine craftsmanship, Sven’s wisdom is invaluable.Sven proceeds to apply glue along one edge of the flange, ensuring a secure bond when clamped into place. He emphasizes that this stage is crucial for maintaining the structural integrity of the flange, which in turn safeguards the living area beneath the canvas when hatches are open.Step 3: Allowing Time to Dry
After securely attaching the first portion of the flange, Sven allows ample time for it to dry before moving forward with additional steps. This patience and precision are key aspects of his successful boatbuilding methods.Step 4: Finishing Touches
Once the flange is fully dried, Sven removes the clamps carefully, ensuring no damage occurs during this process. He then moves on to attaching four more pieces onto these main frames, completing two pairs of flanges for the bulkhead hatches.The Final Touches
While two flanges form the primary support structure around the hatches, Sven mentions there are two additional pieces required at each end to ensure comprehensive protection. This attention to detail highlights his commitment to producing a durable and reliable design. “Sailing is about finding your path, whether it’s across an ocean or within yourself.” – Sven Yrvind In conclusion, making flanges around bulkhead hatches may seem complex at first glance, but by following Sven Yrvind’s meticulous process, enthusiasts can achieve professional-level results. Remember that the journey of boatbuilding is as rewarding as reaching your destination; it tests one’s patience and dedication. For those seeking to embark on this adventure or simply gain more insight into marine craftsmanship, Sven’s wisdom is invaluable.Sven begins by explaining that working on flanges vertically and horizontally is significantly easier than doing so in a flat position. To simplify the process further, he divides the task into two or three steps as suggested by fellow expert “for for.” This approach not only makes it more manageable but also allows for greater precision in crafting each component.Step 2: Applying Glue and Securing
Sven proceeds to apply glue along one edge of the flange, ensuring a secure bond when clamped into place. He emphasizes that this stage is crucial for maintaining the structural integrity of the flange, which in turn safeguards the living area beneath the canvas when hatches are open.Step 3: Allowing Time to Dry
After securely attaching the first portion of the flange, Sven allows ample time for it to dry before moving forward with additional steps. This patience and precision are key aspects of his successful boatbuilding methods.Step 4: Finishing Touches
Once the flange is fully dried, Sven removes the clamps carefully, ensuring no damage occurs during this process. He then moves on to attaching four more pieces onto these main frames, completing two pairs of flanges for the bulkhead hatches.The Final Touches
While two flanges form the primary support structure around the hatches, Sven mentions there are two additional pieces required at each end to ensure comprehensive protection. This attention to detail highlights his commitment to producing a durable and reliable design. “Sailing is about finding your path, whether it’s across an ocean or within yourself.” – Sven Yrvind In conclusion, making flanges around bulkhead hatches may seem complex at first glance, but by following Sven Yrvind’s meticulous process, enthusiasts can achieve professional-level results. Remember that the journey of boatbuilding is as rewarding as reaching your destination; it tests one’s patience and dedication. For those seeking to embark on this adventure or simply gain more insight into marine craftsmanship, Sven’s wisdom is invaluable.Sven Yrvind, a renowned yacht designer and sailor, shares valuable insights on creating flanges around bulkhead hatches for canvas protection in this enlightening video. By following his expert guidance, boat enthusiasts can ensure their living areas remain secure while allowing unhindered access through the hatches.Step 1: Starting with the Flange
Sven begins by explaining that working on flanges vertically and horizontally is significantly easier than doing so in a flat position. To simplify the process further, he divides the task into two or three steps as suggested by fellow expert “for for.” This approach not only makes it more manageable but also allows for greater precision in crafting each component.Step 2: Applying Glue and Securing
Sven proceeds to apply glue along one edge of the flange, ensuring a secure bond when clamped into place. He emphasizes that this stage is crucial for maintaining the structural integrity of the flange, which in turn safeguards the living area beneath the canvas when hatches are open.Step 3: Allowing Time to Dry
After securely attaching the first portion of the flange, Sven allows ample time for it to dry before moving forward with additional steps. This patience and precision are key aspects of his successful boatbuilding methods.Step 4: Finishing Touches
Once the flange is fully dried, Sven removes the clamps carefully, ensuring no damage occurs during this process. He then moves on to attaching four more pieces onto these main frames, completing two pairs of flanges for the bulkhead hatches.The Final Touches
While two flanges form the primary support structure around the hatches, Sven mentions there are two additional pieces required at each end to ensure comprehensive protection. This attention to detail highlights his commitment to producing a durable and reliable design. “Sailing is about finding your path, whether it’s across an ocean or within yourself.” – Sven Yrvind In conclusion, making flanges around bulkhead hatches may seem complex at first glance, but by following Sven Yrvind’s meticulous process, enthusiasts can achieve professional-level results. Remember that the journey of boatbuilding is as rewarding as reaching your destination; it tests one’s patience and dedication. For those seeking to embark on this adventure or simply gain more insight into marine craftsmanship, Sven’s wisdom is invaluable.Making Flanges Around Bulkhead Hatches for Canvas
Sven Yrvind, a renowned yacht designer and sailor, shares valuable insights on creating flanges around bulkhead hatches for canvas protection in this enlightening video. By following his expert guidance, boat enthusiasts can ensure their living areas remain secure while allowing unhindered access through the hatches.Step 1: Starting with the Flange
Sven begins by explaining that working on flanges vertically and horizontally is significantly easier than doing so in a flat position. To simplify the process further, he divides the task into two or three steps as suggested by fellow expert “for for.” This approach not only makes it more manageable but also allows for greater precision in crafting each component.Step 2: Applying Glue and Securing
Sven proceeds to apply glue along one edge of the flange, ensuring a secure bond when clamped into place. He emphasizes that this stage is crucial for maintaining the structural integrity of the flange, which in turn safeguards the living area beneath the canvas when hatches are open.Step 3: Allowing Time to Dry
After securely attaching the first portion of the flange, Sven allows ample time for it to dry before moving forward with additional steps. This patience and precision are key aspects of his successful boatbuilding methods.Step 4: Finishing Touches
Once the flange is fully dried, Sven removes the clamps carefully, ensuring no damage occurs during this process. He then moves on to attaching four more pieces onto these main frames, completing two pairs of flanges for the bulkhead hatches.The Final Touches
While two flanges form the primary support structure around the hatches, Sven mentions there are two additional pieces required at each end to ensure comprehensive protection. This attention to detail highlights his commitment to producing a durable and reliable design. “Sailing is about finding your path, whether it’s across an ocean or within yourself.” – Sven Yrvind In conclusion, making flanges around bulkhead hatches may seem complex at first glance, but by following Sven Yrvind’s meticulous process, enthusiasts can achieve professional-level results. Remember that the journey of boatbuilding is as rewarding as reaching your destination; it tests one’s patience and dedication. For those seeking to embark on this adventure or simply gain more insight into marine craftsmanship, Sven’s wisdom is invaluable.Once the flange is fully dried, Sven removes the clamps carefully, ensuring no damage occurs during this process. He then moves on to attaching four more pieces onto these main frames, completing two pairs of flanges for the bulkhead hatches.The Final Touches
While two flanges form the primary support structure around the hatches, Sven mentions there are two additional pieces required at each end to ensure comprehensive protection. This attention to detail highlights his commitment to producing a durable and reliable design. “Sailing is about finding your path, whether it’s across an ocean or within yourself.” – Sven Yrvind In conclusion, making flanges around bulkhead hatches may seem complex at first glance, but by following Sven Yrvind’s meticulous process, enthusiasts can achieve professional-level results. Remember that the journey of boatbuilding is as rewarding as reaching your destination; it tests one’s patience and dedication. For those seeking to embark on this adventure or simply gain more insight into marine craftsmanship, Sven’s wisdom is invaluable.Sven proceeds to apply glue along one edge of the flange, ensuring a secure bond when clamped into place. He emphasizes that this stage is crucial for maintaining the structural integrity of the flange, which in turn safeguards the living area beneath the canvas when hatches are open.Step 3: Allowing Time to Dry
After securely attaching the first portion of the flange, Sven allows ample time for it to dry before moving forward with additional steps. This patience and precision are key aspects of his successful boatbuilding methods.Step 4: Finishing Touches
Once the flange is fully dried, Sven removes the clamps carefully, ensuring no damage occurs during this process. He then moves on to attaching four more pieces onto these main frames, completing two pairs of flanges for the bulkhead hatches.The Final Touches
While two flanges form the primary support structure around the hatches, Sven mentions there are two additional pieces required at each end to ensure comprehensive protection. This attention to detail highlights his commitment to producing a durable and reliable design. “Sailing is about finding your path, whether it’s across an ocean or within yourself.” – Sven Yrvind In conclusion, making flanges around bulkhead hatches may seem complex at first glance, but by following Sven Yrvind’s meticulous process, enthusiasts can achieve professional-level results. Remember that the journey of boatbuilding is as rewarding as reaching your destination; it tests one’s patience and dedication. For those seeking to embark on this adventure or simply gain more insight into marine craftsmanship, Sven’s wisdom is invaluable.Sven begins by explaining that working on flanges vertically and horizontally is significantly easier than doing so in a flat position. To simplify the process further, he divides the task into two or three steps as suggested by fellow expert “for for.” This approach not only makes it more manageable but also allows for greater precision in crafting each component.Step 2: Applying Glue and Securing
Sven proceeds to apply glue along one edge of the flange, ensuring a secure bond when clamped into place. He emphasizes that this stage is crucial for maintaining the structural integrity of the flange, which in turn safeguards the living area beneath the canvas when hatches are open.Step 3: Allowing Time to Dry
After securely attaching the first portion of the flange, Sven allows ample time for it to dry before moving forward with additional steps. This patience and precision are key aspects of his successful boatbuilding methods.Step 4: Finishing Touches
Once the flange is fully dried, Sven removes the clamps carefully, ensuring no damage occurs during this process. He then moves on to attaching four more pieces onto these main frames, completing two pairs of flanges for the bulkhead hatches.The Final Touches
While two flanges form the primary support structure around the hatches, Sven mentions there are two additional pieces required at each end to ensure comprehensive protection. This attention to detail highlights his commitment to producing a durable and reliable design. “Sailing is about finding your path, whether it’s across an ocean or within yourself.” – Sven Yrvind In conclusion, making flanges around bulkhead hatches may seem complex at first glance, but by following Sven Yrvind’s meticulous process, enthusiasts can achieve professional-level results. Remember that the journey of boatbuilding is as rewarding as reaching your destination; it tests one’s patience and dedication. For those seeking to embark on this adventure or simply gain more insight into marine craftsmanship, Sven’s wisdom is invaluable.Sven Yrvind, a renowned yacht designer and sailor, shares valuable insights on creating flanges around bulkhead hatches for canvas protection in this enlightening video. By following his expert guidance, boat enthusiasts can ensure their living areas remain secure while allowing unhindered access through the hatches.Step 1: Starting with the Flange
Sven begins by explaining that working on flanges vertically and horizontally is significantly easier than doing so in a flat position. To simplify the process further, he divides the task into two or three steps as suggested by fellow expert “for for.” This approach not only makes it more manageable but also allows for greater precision in crafting each component.Step 2: Applying Glue and Securing
Sven proceeds to apply glue along one edge of the flange, ensuring a secure bond when clamped into place. He emphasizes that this stage is crucial for maintaining the structural integrity of the flange, which in turn safeguards the living area beneath the canvas when hatches are open.Step 3: Allowing Time to Dry
After securely attaching the first portion of the flange, Sven allows ample time for it to dry before moving forward with additional steps. This patience and precision are key aspects of his successful boatbuilding methods.Step 4: Finishing Touches
Once the flange is fully dried, Sven removes the clamps carefully, ensuring no damage occurs during this process. He then moves on to attaching four more pieces onto these main frames, completing two pairs of flanges for the bulkhead hatches.The Final Touches
While two flanges form the primary support structure around the hatches, Sven mentions there are two additional pieces required at each end to ensure comprehensive protection. This attention to detail highlights his commitment to producing a durable and reliable design. “Sailing is about finding your path, whether it’s across an ocean or within yourself.” – Sven Yrvind In conclusion, making flanges around bulkhead hatches may seem complex at first glance, but by following Sven Yrvind’s meticulous process, enthusiasts can achieve professional-level results. Remember that the journey of boatbuilding is as rewarding as reaching your destination; it tests one’s patience and dedication. For those seeking to embark on this adventure or simply gain more insight into marine craftsmanship, Sven’s wisdom is invaluable.Making Flanges Around Bulkhead Hatches for Canvas
Sven Yrvind, a renowned yacht designer and sailor, shares valuable insights on creating flanges around bulkhead hatches for canvas protection in this enlightening video. By following his expert guidance, boat enthusiasts can ensure their living areas remain secure while allowing unhindered access through the hatches.Step 1: Starting with the Flange
Sven begins by explaining that working on flanges vertically and horizontally is significantly easier than doing so in a flat position. To simplify the process further, he divides the task into two or three steps as suggested by fellow expert “for for.” This approach not only makes it more manageable but also allows for greater precision in crafting each component.Step 2: Applying Glue and Securing
Sven proceeds to apply glue along one edge of the flange, ensuring a secure bond when clamped into place. He emphasizes that this stage is crucial for maintaining the structural integrity of the flange, which in turn safeguards the living area beneath the canvas when hatches are open.Step 3: Allowing Time to Dry
After securely attaching the first portion of the flange, Sven allows ample time for it to dry before moving forward with additional steps. This patience and precision are key aspects of his successful boatbuilding methods.Step 4: Finishing Touches
Once the flange is fully dried, Sven removes the clamps carefully, ensuring no damage occurs during this process. He then moves on to attaching four more pieces onto these main frames, completing two pairs of flanges for the bulkhead hatches.The Final Touches
While two flanges form the primary support structure around the hatches, Sven mentions there are two additional pieces required at each end to ensure comprehensive protection. This attention to detail highlights his commitment to producing a durable and reliable design. “Sailing is about finding your path, whether it’s across an ocean or within yourself.” – Sven Yrvind In conclusion, making flanges around bulkhead hatches may seem complex at first glance, but by following Sven Yrvind’s meticulous process, enthusiasts can achieve professional-level results. Remember that the journey of boatbuilding is as rewarding as reaching your destination; it tests one’s patience and dedication. For those seeking to embark on this adventure or simply gain more insight into marine craftsmanship, Sven’s wisdom is invaluable.After securely attaching the first portion of the flange, Sven allows ample time for it to dry before moving forward with additional steps. This patience and precision are key aspects of his successful boatbuilding methods.Step 4: Finishing Touches
Once the flange is fully dried, Sven removes the clamps carefully, ensuring no damage occurs during this process. He then moves on to attaching four more pieces onto these main frames, completing two pairs of flanges for the bulkhead hatches.The Final Touches
While two flanges form the primary support structure around the hatches, Sven mentions there are two additional pieces required at each end to ensure comprehensive protection. This attention to detail highlights his commitment to producing a durable and reliable design. “Sailing is about finding your path, whether it’s across an ocean or within yourself.” – Sven Yrvind In conclusion, making flanges around bulkhead hatches may seem complex at first glance, but by following Sven Yrvind’s meticulous process, enthusiasts can achieve professional-level results. Remember that the journey of boatbuilding is as rewarding as reaching your destination; it tests one’s patience and dedication. For those seeking to embark on this adventure or simply gain more insight into marine craftsmanship, Sven’s wisdom is invaluable.Sven proceeds to apply glue along one edge of the flange, ensuring a secure bond when clamped into place. He emphasizes that this stage is crucial for maintaining the structural integrity of the flange, which in turn safeguards the living area beneath the canvas when hatches are open.Step 3: Allowing Time to Dry
After securely attaching the first portion of the flange, Sven allows ample time for it to dry before moving forward with additional steps. This patience and precision are key aspects of his successful boatbuilding methods.Step 4: Finishing Touches
Once the flange is fully dried, Sven removes the clamps carefully, ensuring no damage occurs during this process. He then moves on to attaching four more pieces onto these main frames, completing two pairs of flanges for the bulkhead hatches.The Final Touches
While two flanges form the primary support structure around the hatches, Sven mentions there are two additional pieces required at each end to ensure comprehensive protection. This attention to detail highlights his commitment to producing a durable and reliable design. “Sailing is about finding your path, whether it’s across an ocean or within yourself.” – Sven Yrvind In conclusion, making flanges around bulkhead hatches may seem complex at first glance, but by following Sven Yrvind’s meticulous process, enthusiasts can achieve professional-level results. Remember that the journey of boatbuilding is as rewarding as reaching your destination; it tests one’s patience and dedication. For those seeking to embark on this adventure or simply gain more insight into marine craftsmanship, Sven’s wisdom is invaluable.Sven begins by explaining that working on flanges vertically and horizontally is significantly easier than doing so in a flat position. To simplify the process further, he divides the task into two or three steps as suggested by fellow expert “for for.” This approach not only makes it more manageable but also allows for greater precision in crafting each component.Step 2: Applying Glue and Securing
Sven proceeds to apply glue along one edge of the flange, ensuring a secure bond when clamped into place. He emphasizes that this stage is crucial for maintaining the structural integrity of the flange, which in turn safeguards the living area beneath the canvas when hatches are open.Step 3: Allowing Time to Dry
After securely attaching the first portion of the flange, Sven allows ample time for it to dry before moving forward with additional steps. This patience and precision are key aspects of his successful boatbuilding methods.Step 4: Finishing Touches
Once the flange is fully dried, Sven removes the clamps carefully, ensuring no damage occurs during this process. He then moves on to attaching four more pieces onto these main frames, completing two pairs of flanges for the bulkhead hatches.The Final Touches
While two flanges form the primary support structure around the hatches, Sven mentions there are two additional pieces required at each end to ensure comprehensive protection. This attention to detail highlights his commitment to producing a durable and reliable design. “Sailing is about finding your path, whether it’s across an ocean or within yourself.” – Sven Yrvind In conclusion, making flanges around bulkhead hatches may seem complex at first glance, but by following Sven Yrvind’s meticulous process, enthusiasts can achieve professional-level results. Remember that the journey of boatbuilding is as rewarding as reaching your destination; it tests one’s patience and dedication. For those seeking to embark on this adventure or simply gain more insight into marine craftsmanship, Sven’s wisdom is invaluable.Sven Yrvind, a renowned yacht designer and sailor, shares valuable insights on creating flanges around bulkhead hatches for canvas protection in this enlightening video. By following his expert guidance, boat enthusiasts can ensure their living areas remain secure while allowing unhindered access through the hatches.Step 1: Starting with the Flange
Sven begins by explaining that working on flanges vertically and horizontally is significantly easier than doing so in a flat position. To simplify the process further, he divides the task into two or three steps as suggested by fellow expert “for for.” This approach not only makes it more manageable but also allows for greater precision in crafting each component.Step 2: Applying Glue and Securing
Sven proceeds to apply glue along one edge of the flange, ensuring a secure bond when clamped into place. He emphasizes that this stage is crucial for maintaining the structural integrity of the flange, which in turn safeguards the living area beneath the canvas when hatches are open.Step 3: Allowing Time to Dry
After securely attaching the first portion of the flange, Sven allows ample time for it to dry before moving forward with additional steps. This patience and precision are key aspects of his successful boatbuilding methods.Step 4: Finishing Touches
Once the flange is fully dried, Sven removes the clamps carefully, ensuring no damage occurs during this process. He then moves on to attaching four more pieces onto these main frames, completing two pairs of flanges for the bulkhead hatches.The Final Touches
While two flanges form the primary support structure around the hatches, Sven mentions there are two additional pieces required at each end to ensure comprehensive protection. This attention to detail highlights his commitment to producing a durable and reliable design. “Sailing is about finding your path, whether it’s across an ocean or within yourself.” – Sven Yrvind In conclusion, making flanges around bulkhead hatches may seem complex at first glance, but by following Sven Yrvind’s meticulous process, enthusiasts can achieve professional-level results. Remember that the journey of boatbuilding is as rewarding as reaching your destination; it tests one’s patience and dedication. For those seeking to embark on this adventure or simply gain more insight into marine craftsmanship, Sven’s wisdom is invaluable.Making Flanges Around Bulkhead Hatches for Canvas
Sven Yrvind, a renowned yacht designer and sailor, shares valuable insights on creating flanges around bulkhead hatches for canvas protection in this enlightening video. By following his expert guidance, boat enthusiasts can ensure their living areas remain secure while allowing unhindered access through the hatches.Step 1: Starting with the Flange
Sven begins by explaining that working on flanges vertically and horizontally is significantly easier than doing so in a flat position. To simplify the process further, he divides the task into two or three steps as suggested by fellow expert “for for.” This approach not only makes it more manageable but also allows for greater precision in crafting each component.Step 2: Applying Glue and Securing
Sven proceeds to apply glue along one edge of the flange, ensuring a secure bond when clamped into place. He emphasizes that this stage is crucial for maintaining the structural integrity of the flange, which in turn safeguards the living area beneath the canvas when hatches are open.Step 3: Allowing Time to Dry
After securely attaching the first portion of the flange, Sven allows ample time for it to dry before moving forward with additional steps. This patience and precision are key aspects of his successful boatbuilding methods.Step 4: Finishing Touches
Once the flange is fully dried, Sven removes the clamps carefully, ensuring no damage occurs during this process. He then moves on to attaching four more pieces onto these main frames, completing two pairs of flanges for the bulkhead hatches.The Final Touches
While two flanges form the primary support structure around the hatches, Sven mentions there are two additional pieces required at each end to ensure comprehensive protection. This attention to detail highlights his commitment to producing a durable and reliable design. “Sailing is about finding your path, whether it’s across an ocean or within yourself.” – Sven Yrvind In conclusion, making flanges around bulkhead hatches may seem complex at first glance, but by following Sven Yrvind’s meticulous process, enthusiasts can achieve professional-level results. Remember that the journey of boatbuilding is as rewarding as reaching your destination; it tests one’s patience and dedication. For those seeking to embark on this adventure or simply gain more insight into marine craftsmanship, Sven’s wisdom is invaluable.Once the flange is fully dried, Sven removes the clamps carefully, ensuring no damage occurs during this process. He then moves on to attaching four more pieces onto these main frames, completing two pairs of flanges for the bulkhead hatches.The Final Touches
While two flanges form the primary support structure around the hatches, Sven mentions there are two additional pieces required at each end to ensure comprehensive protection. This attention to detail highlights his commitment to producing a durable and reliable design. “Sailing is about finding your path, whether it’s across an ocean or within yourself.” – Sven Yrvind In conclusion, making flanges around bulkhead hatches may seem complex at first glance, but by following Sven Yrvind’s meticulous process, enthusiasts can achieve professional-level results. Remember that the journey of boatbuilding is as rewarding as reaching your destination; it tests one’s patience and dedication. For those seeking to embark on this adventure or simply gain more insight into marine craftsmanship, Sven’s wisdom is invaluable.After securely attaching the first portion of the flange, Sven allows ample time for it to dry before moving forward with additional steps. This patience and precision are key aspects of his successful boatbuilding methods.Step 4: Finishing Touches
Once the flange is fully dried, Sven removes the clamps carefully, ensuring no damage occurs during this process. He then moves on to attaching four more pieces onto these main frames, completing two pairs of flanges for the bulkhead hatches.The Final Touches
While two flanges form the primary support structure around the hatches, Sven mentions there are two additional pieces required at each end to ensure comprehensive protection. This attention to detail highlights his commitment to producing a durable and reliable design. “Sailing is about finding your path, whether it’s across an ocean or within yourself.” – Sven Yrvind In conclusion, making flanges around bulkhead hatches may seem complex at first glance, but by following Sven Yrvind’s meticulous process, enthusiasts can achieve professional-level results. Remember that the journey of boatbuilding is as rewarding as reaching your destination; it tests one’s patience and dedication. For those seeking to embark on this adventure or simply gain more insight into marine craftsmanship, Sven’s wisdom is invaluable.Sven proceeds to apply glue along one edge of the flange, ensuring a secure bond when clamped into place. He emphasizes that this stage is crucial for maintaining the structural integrity of the flange, which in turn safeguards the living area beneath the canvas when hatches are open.Step 3: Allowing Time to Dry
After securely attaching the first portion of the flange, Sven allows ample time for it to dry before moving forward with additional steps. This patience and precision are key aspects of his successful boatbuilding methods.Step 4: Finishing Touches
Once the flange is fully dried, Sven removes the clamps carefully, ensuring no damage occurs during this process. He then moves on to attaching four more pieces onto these main frames, completing two pairs of flanges for the bulkhead hatches.The Final Touches
While two flanges form the primary support structure around the hatches, Sven mentions there are two additional pieces required at each end to ensure comprehensive protection. This attention to detail highlights his commitment to producing a durable and reliable design. “Sailing is about finding your path, whether it’s across an ocean or within yourself.” – Sven Yrvind In conclusion, making flanges around bulkhead hatches may seem complex at first glance, but by following Sven Yrvind’s meticulous process, enthusiasts can achieve professional-level results. Remember that the journey of boatbuilding is as rewarding as reaching your destination; it tests one’s patience and dedication. For those seeking to embark on this adventure or simply gain more insight into marine craftsmanship, Sven’s wisdom is invaluable.Sven begins by explaining that working on flanges vertically and horizontally is significantly easier than doing so in a flat position. To simplify the process further, he divides the task into two or three steps as suggested by fellow expert “for for.” This approach not only makes it more manageable but also allows for greater precision in crafting each component.Step 2: Applying Glue and Securing
Sven proceeds to apply glue along one edge of the flange, ensuring a secure bond when clamped into place. He emphasizes that this stage is crucial for maintaining the structural integrity of the flange, which in turn safeguards the living area beneath the canvas when hatches are open.Step 3: Allowing Time to Dry
After securely attaching the first portion of the flange, Sven allows ample time for it to dry before moving forward with additional steps. This patience and precision are key aspects of his successful boatbuilding methods.Step 4: Finishing Touches
Once the flange is fully dried, Sven removes the clamps carefully, ensuring no damage occurs during this process. He then moves on to attaching four more pieces onto these main frames, completing two pairs of flanges for the bulkhead hatches.The Final Touches
While two flanges form the primary support structure around the hatches, Sven mentions there are two additional pieces required at each end to ensure comprehensive protection. This attention to detail highlights his commitment to producing a durable and reliable design. “Sailing is about finding your path, whether it’s across an ocean or within yourself.” – Sven Yrvind In conclusion, making flanges around bulkhead hatches may seem complex at first glance, but by following Sven Yrvind’s meticulous process, enthusiasts can achieve professional-level results. Remember that the journey of boatbuilding is as rewarding as reaching your destination; it tests one’s patience and dedication. For those seeking to embark on this adventure or simply gain more insight into marine craftsmanship, Sven’s wisdom is invaluable.Sven Yrvind, a renowned yacht designer and sailor, shares valuable insights on creating flanges around bulkhead hatches for canvas protection in this enlightening video. By following his expert guidance, boat enthusiasts can ensure their living areas remain secure while allowing unhindered access through the hatches.Step 1: Starting with the Flange
Sven begins by explaining that working on flanges vertically and horizontally is significantly easier than doing so in a flat position. To simplify the process further, he divides the task into two or three steps as suggested by fellow expert “for for.” This approach not only makes it more manageable but also allows for greater precision in crafting each component.Step 2: Applying Glue and Securing
Sven proceeds to apply glue along one edge of the flange, ensuring a secure bond when clamped into place. He emphasizes that this stage is crucial for maintaining the structural integrity of the flange, which in turn safeguards the living area beneath the canvas when hatches are open.Step 3: Allowing Time to Dry
After securely attaching the first portion of the flange, Sven allows ample time for it to dry before moving forward with additional steps. This patience and precision are key aspects of his successful boatbuilding methods.Step 4: Finishing Touches
Once the flange is fully dried, Sven removes the clamps carefully, ensuring no damage occurs during this process. He then moves on to attaching four more pieces onto these main frames, completing two pairs of flanges for the bulkhead hatches.The Final Touches
While two flanges form the primary support structure around the hatches, Sven mentions there are two additional pieces required at each end to ensure comprehensive protection. This attention to detail highlights his commitment to producing a durable and reliable design. “Sailing is about finding your path, whether it’s across an ocean or within yourself.” – Sven Yrvind In conclusion, making flanges around bulkhead hatches may seem complex at first glance, but by following Sven Yrvind’s meticulous process, enthusiasts can achieve professional-level results. Remember that the journey of boatbuilding is as rewarding as reaching your destination; it tests one’s patience and dedication. For those seeking to embark on this adventure or simply gain more insight into marine craftsmanship, Sven’s wisdom is invaluable.Making Flanges Around Bulkhead Hatches for Canvas
Sven Yrvind, a renowned yacht designer and sailor, shares valuable insights on creating flanges around bulkhead hatches for canvas protection in this enlightening video. By following his expert guidance, boat enthusiasts can ensure their living areas remain secure while allowing unhindered access through the hatches.Step 1: Starting with the Flange
Sven begins by explaining that working on flanges vertically and horizontally is significantly easier than doing so in a flat position. To simplify the process further, he divides the task into two or three steps as suggested by fellow expert “for for.” This approach not only makes it more manageable but also allows for greater precision in crafting each component.Step 2: Applying Glue and Securing
Sven proceeds to apply glue along one edge of the flange, ensuring a secure bond when clamped into place. He emphasizes that this stage is crucial for maintaining the structural integrity of the flange, which in turn safeguards the living area beneath the canvas when hatches are open.Step 3: Allowing Time to Dry
After securely attaching the first portion of the flange, Sven allows ample time for it to dry before moving forward with additional steps. This patience and precision are key aspects of his successful boatbuilding methods.Step 4: Finishing Touches
Once the flange is fully dried, Sven removes the clamps carefully, ensuring no damage occurs during this process. He then moves on to attaching four more pieces onto these main frames, completing two pairs of flanges for the bulkhead hatches.The Final Touches
While two flanges form the primary support structure around the hatches, Sven mentions there are two additional pieces required at each end to ensure comprehensive protection. This attention to detail highlights his commitment to producing a durable and reliable design. “Sailing is about finding your path, whether it’s across an ocean or within yourself.” – Sven Yrvind In conclusion, making flanges around bulkhead hatches may seem complex at first glance, but by following Sven Yrvind’s meticulous process, enthusiasts can achieve professional-level results. Remember that the journey of boatbuilding is as rewarding as reaching your destination; it tests one’s patience and dedication. For those seeking to embark on this adventure or simply gain more insight into marine craftsmanship, Sven’s wisdom is invaluable.Sven Yrvind, a renowned yacht designer and sailor, shares valuable insights on creating flanges around bulkhead hatches for canvas protection in this enlightening video. By following his expert guidance, boat enthusiasts can ensure their living areas remain secure while allowing unhindered access through the hatches.Step 1: Starting with the Flange
Sven begins by explaining that working on flanges vertically and horizontally is significantly easier than doing so in a flat position. To simplify the process further, he divides the task into two or three steps as suggested by fellow expert “for for.” This approach not only makes it more manageable but also allows for greater precision in crafting each component.Step 2: Applying Glue and Securing
Sven proceeds to apply glue along one edge of the flange, ensuring a secure bond when clamped into place. He emphasizes that this stage is crucial for maintaining the structural integrity of the flange, which in turn safeguards the living area beneath the canvas when hatches are open.Step 3: Allowing Time to Dry
After securely attaching the first portion of the flange, Sven allows ample time for it to dry before moving forward with additional steps. This patience and precision are key aspects of his successful boatbuilding methods.Step 4: Finishing Touches
Once the flange is fully dried, Sven removes the clamps carefully, ensuring no damage occurs during this process. He then moves on to attaching four more pieces onto these main frames, completing two pairs of flanges for the bulkhead hatches.The Final Touches
While two flanges form the primary support structure around the hatches, Sven mentions there are two additional pieces required at each end to ensure comprehensive protection. This attention to detail highlights his commitment to producing a durable and reliable design. “Sailing is about finding your path, whether it’s across an ocean or within yourself.” – Sven Yrvind In conclusion, making flanges around bulkhead hatches may seem complex at first glance, but by following Sven Yrvind’s meticulous process, enthusiasts can achieve professional-level results. Remember that the journey of boatbuilding is as rewarding as reaching your destination; it tests one’s patience and dedication. For those seeking to embark on this adventure or simply gain more insight into marine craftsmanship, Sven’s wisdom is invaluable.Making Flanges Around Bulkhead Hatches for Canvas
Sven Yrvind, a renowned yacht designer and sailor, shares valuable insights on creating flanges around bulkhead hatches for canvas protection in this enlightening video. By following his expert guidance, boat enthusiasts can ensure their living areas remain secure while allowing unhindered access through the hatches.Step 1: Starting with the Flange
Sven begins by explaining that working on flanges vertically and horizontally is significantly easier than doing so in a flat position. To simplify the process further, he divides the task into two or three steps as suggested by fellow expert “for for.” This approach not only makes it more manageable but also allows for greater precision in crafting each component.Step 2: Applying Glue and Securing
Sven proceeds to apply glue along one edge of the flange, ensuring a secure bond when clamped into place. He emphasizes that this stage is crucial for maintaining the structural integrity of the flange, which in turn safeguards the living area beneath the canvas when hatches are open.Step 3: Allowing Time to Dry
After securely attaching the first portion of the flange, Sven allows ample time for it to dry before moving forward with additional steps. This patience and precision are key aspects of his successful boatbuilding methods.Step 4: Finishing Touches
Once the flange is fully dried, Sven removes the clamps carefully, ensuring no damage occurs during this process. He then moves on to attaching four more pieces onto these main frames, completing two pairs of flanges for the bulkhead hatches.The Final Touches
While two flanges form the primary support structure around the hatches, Sven mentions there are two additional pieces required at each end to ensure comprehensive protection. This attention to detail highlights his commitment to producing a durable and reliable design. “Sailing is about finding your path, whether it’s across an ocean or within yourself.” – Sven Yrvind In conclusion, making flanges around bulkhead hatches may seem complex at first glance, but by following Sven Yrvind’s meticulous process, enthusiasts can achieve professional-level results. Remember that the journey of boatbuilding is as rewarding as reaching your destination; it tests one’s patience and dedication. For those seeking to embark on this adventure or simply gain more insight into marine craftsmanship, Sven’s wisdom is invaluable.Sven begins by explaining that working on flanges vertically and horizontally is significantly easier than doing so in a flat position. To simplify the process further, he divides the task into two or three steps as suggested by fellow expert “for for.” This approach not only makes it more manageable but also allows for greater precision in crafting each component.Step 2: Applying Glue and Securing
Sven proceeds to apply glue along one edge of the flange, ensuring a secure bond when clamped into place. He emphasizes that this stage is crucial for maintaining the structural integrity of the flange, which in turn safeguards the living area beneath the canvas when hatches are open.Step 3: Allowing Time to Dry
After securely attaching the first portion of the flange, Sven allows ample time for it to dry before moving forward with additional steps. This patience and precision are key aspects of his successful boatbuilding methods.Step 4: Finishing Touches
Once the flange is fully dried, Sven removes the clamps carefully, ensuring no damage occurs during this process. He then moves on to attaching four more pieces onto these main frames, completing two pairs of flanges for the bulkhead hatches.The Final Touches
While two flanges form the primary support structure around the hatches, Sven mentions there are two additional pieces required at each end to ensure comprehensive protection. This attention to detail highlights his commitment to producing a durable and reliable design. “Sailing is about finding your path, whether it’s across an ocean or within yourself.” – Sven Yrvind In conclusion, making flanges around bulkhead hatches may seem complex at first glance, but by following Sven Yrvind’s meticulous process, enthusiasts can achieve professional-level results. Remember that the journey of boatbuilding is as rewarding as reaching your destination; it tests one’s patience and dedication. For those seeking to embark on this adventure or simply gain more insight into marine craftsmanship, Sven’s wisdom is invaluable.Sven Yrvind, a renowned yacht designer and sailor, shares valuable insights on creating flanges around bulkhead hatches for canvas protection in this enlightening video. By following his expert guidance, boat enthusiasts can ensure their living areas remain secure while allowing unhindered access through the hatches.Step 1: Starting with the Flange
Sven begins by explaining that working on flanges vertically and horizontally is significantly easier than doing so in a flat position. To simplify the process further, he divides the task into two or three steps as suggested by fellow expert “for for.” This approach not only makes it more manageable but also allows for greater precision in crafting each component.Step 2: Applying Glue and Securing
Sven proceeds to apply glue along one edge of the flange, ensuring a secure bond when clamped into place. He emphasizes that this stage is crucial for maintaining the structural integrity of the flange, which in turn safeguards the living area beneath the canvas when hatches are open.Step 3: Allowing Time to Dry
After securely attaching the first portion of the flange, Sven allows ample time for it to dry before moving forward with additional steps. This patience and precision are key aspects of his successful boatbuilding methods.Step 4: Finishing Touches
Once the flange is fully dried, Sven removes the clamps carefully, ensuring no damage occurs during this process. He then moves on to attaching four more pieces onto these main frames, completing two pairs of flanges for the bulkhead hatches.The Final Touches
While two flanges form the primary support structure around the hatches, Sven mentions there are two additional pieces required at each end to ensure comprehensive protection. This attention to detail highlights his commitment to producing a durable and reliable design. “Sailing is about finding your path, whether it’s across an ocean or within yourself.” – Sven Yrvind In conclusion, making flanges around bulkhead hatches may seem complex at first glance, but by following Sven Yrvind’s meticulous process, enthusiasts can achieve professional-level results. Remember that the journey of boatbuilding is as rewarding as reaching your destination; it tests one’s patience and dedication. For those seeking to embark on this adventure or simply gain more insight into marine craftsmanship, Sven’s wisdom is invaluable.Making Flanges Around Bulkhead Hatches for Canvas
Sven Yrvind, a renowned yacht designer and sailor, shares valuable insights on creating flanges around bulkhead hatches for canvas protection in this enlightening video. By following his expert guidance, boat enthusiasts can ensure their living areas remain secure while allowing unhindered access through the hatches.Step 1: Starting with the Flange
Sven begins by explaining that working on flanges vertically and horizontally is significantly easier than doing so in a flat position. To simplify the process further, he divides the task into two or three steps as suggested by fellow expert “for for.” This approach not only makes it more manageable but also allows for greater precision in crafting each component.Step 2: Applying Glue and Securing
Sven proceeds to apply glue along one edge of the flange, ensuring a secure bond when clamped into place. He emphasizes that this stage is crucial for maintaining the structural integrity of the flange, which in turn safeguards the living area beneath the canvas when hatches are open.Step 3: Allowing Time to Dry
After securely attaching the first portion of the flange, Sven allows ample time for it to dry before moving forward with additional steps. This patience and precision are key aspects of his successful boatbuilding methods.Step 4: Finishing Touches
Once the flange is fully dried, Sven removes the clamps carefully, ensuring no damage occurs during this process. He then moves on to attaching four more pieces onto these main frames, completing two pairs of flanges for the bulkhead hatches.The Final Touches
While two flanges form the primary support structure around the hatches, Sven mentions there are two additional pieces required at each end to ensure comprehensive protection. This attention to detail highlights his commitment to producing a durable and reliable design. “Sailing is about finding your path, whether it’s across an ocean or within yourself.” – Sven Yrvind In conclusion, making flanges around bulkhead hatches may seem complex at first glance, but by following Sven Yrvind’s meticulous process, enthusiasts can achieve professional-level results. Remember that the journey of boatbuilding is as rewarding as reaching your destination; it tests one’s patience and dedication. For those seeking to embark on this adventure or simply gain more insight into marine craftsmanship, Sven’s wisdom is invaluable.Once the flange is fully dried, Sven removes the clamps carefully, ensuring no damage occurs during this process. He then moves on to attaching four more pieces onto these main frames, completing two pairs of flanges for the bulkhead hatches.The Final Touches
While two flanges form the primary support structure around the hatches, Sven mentions there are two additional pieces required at each end to ensure comprehensive protection. This attention to detail highlights his commitment to producing a durable and reliable design. “Sailing is about finding your path, whether it’s across an ocean or within yourself.” – Sven Yrvind In conclusion, making flanges around bulkhead hatches may seem complex at first glance, but by following Sven Yrvind’s meticulous process, enthusiasts can achieve professional-level results. Remember that the journey of boatbuilding is as rewarding as reaching your destination; it tests one’s patience and dedication. For those seeking to embark on this adventure or simply gain more insight into marine craftsmanship, Sven’s wisdom is invaluable.Sven begins by explaining that working on flanges vertically and horizontally is significantly easier than doing so in a flat position. To simplify the process further, he divides the task into two or three steps as suggested by fellow expert “for for.” This approach not only makes it more manageable but also allows for greater precision in crafting each component.Step 2: Applying Glue and Securing
Sven proceeds to apply glue along one edge of the flange, ensuring a secure bond when clamped into place. He emphasizes that this stage is crucial for maintaining the structural integrity of the flange, which in turn safeguards the living area beneath the canvas when hatches are open.Step 3: Allowing Time to Dry
After securely attaching the first portion of the flange, Sven allows ample time for it to dry before moving forward with additional steps. This patience and precision are key aspects of his successful boatbuilding methods.Step 4: Finishing Touches
Once the flange is fully dried, Sven removes the clamps carefully, ensuring no damage occurs during this process. He then moves on to attaching four more pieces onto these main frames, completing two pairs of flanges for the bulkhead hatches.The Final Touches
While two flanges form the primary support structure around the hatches, Sven mentions there are two additional pieces required at each end to ensure comprehensive protection. This attention to detail highlights his commitment to producing a durable and reliable design. “Sailing is about finding your path, whether it’s across an ocean or within yourself.” – Sven Yrvind In conclusion, making flanges around bulkhead hatches may seem complex at first glance, but by following Sven Yrvind’s meticulous process, enthusiasts can achieve professional-level results. Remember that the journey of boatbuilding is as rewarding as reaching your destination; it tests one’s patience and dedication. For those seeking to embark on this adventure or simply gain more insight into marine craftsmanship, Sven’s wisdom is invaluable.Sven Yrvind, a renowned yacht designer and sailor, shares valuable insights on creating flanges around bulkhead hatches for canvas protection in this enlightening video. By following his expert guidance, boat enthusiasts can ensure their living areas remain secure while allowing unhindered access through the hatches.Step 1: Starting with the Flange
Sven begins by explaining that working on flanges vertically and horizontally is significantly easier than doing so in a flat position. To simplify the process further, he divides the task into two or three steps as suggested by fellow expert “for for.” This approach not only makes it more manageable but also allows for greater precision in crafting each component.Step 2: Applying Glue and Securing
Sven proceeds to apply glue along one edge of the flange, ensuring a secure bond when clamped into place. He emphasizes that this stage is crucial for maintaining the structural integrity of the flange, which in turn safeguards the living area beneath the canvas when hatches are open.Step 3: Allowing Time to Dry
After securely attaching the first portion of the flange, Sven allows ample time for it to dry before moving forward with additional steps. This patience and precision are key aspects of his successful boatbuilding methods.Step 4: Finishing Touches
Once the flange is fully dried, Sven removes the clamps carefully, ensuring no damage occurs during this process. He then moves on to attaching four more pieces onto these main frames, completing two pairs of flanges for the bulkhead hatches.The Final Touches
While two flanges form the primary support structure around the hatches, Sven mentions there are two additional pieces required at each end to ensure comprehensive protection. This attention to detail highlights his commitment to producing a durable and reliable design. “Sailing is about finding your path, whether it’s across an ocean or within yourself.” – Sven Yrvind In conclusion, making flanges around bulkhead hatches may seem complex at first glance, but by following Sven Yrvind’s meticulous process, enthusiasts can achieve professional-level results. Remember that the journey of boatbuilding is as rewarding as reaching your destination; it tests one’s patience and dedication. For those seeking to embark on this adventure or simply gain more insight into marine craftsmanship, Sven’s wisdom is invaluable.Making Flanges Around Bulkhead Hatches for Canvas
Sven Yrvind, a renowned yacht designer and sailor, shares valuable insights on creating flanges around bulkhead hatches for canvas protection in this enlightening video. By following his expert guidance, boat enthusiasts can ensure their living areas remain secure while allowing unhindered access through the hatches.Step 1: Starting with the Flange
Sven begins by explaining that working on flanges vertically and horizontally is significantly easier than doing so in a flat position. To simplify the process further, he divides the task into two or three steps as suggested by fellow expert “for for.” This approach not only makes it more manageable but also allows for greater precision in crafting each component.Step 2: Applying Glue and Securing
Sven proceeds to apply glue along one edge of the flange, ensuring a secure bond when clamped into place. He emphasizes that this stage is crucial for maintaining the structural integrity of the flange, which in turn safeguards the living area beneath the canvas when hatches are open.Step 3: Allowing Time to Dry
After securely attaching the first portion of the flange, Sven allows ample time for it to dry before moving forward with additional steps. This patience and precision are key aspects of his successful boatbuilding methods.Step 4: Finishing Touches
Once the flange is fully dried, Sven removes the clamps carefully, ensuring no damage occurs during this process. He then moves on to attaching four more pieces onto these main frames, completing two pairs of flanges for the bulkhead hatches.The Final Touches
While two flanges form the primary support structure around the hatches, Sven mentions there are two additional pieces required at each end to ensure comprehensive protection. This attention to detail highlights his commitment to producing a durable and reliable design. “Sailing is about finding your path, whether it’s across an ocean or within yourself.” – Sven Yrvind In conclusion, making flanges around bulkhead hatches may seem complex at first glance, but by following Sven Yrvind’s meticulous process, enthusiasts can achieve professional-level results. Remember that the journey of boatbuilding is as rewarding as reaching your destination; it tests one’s patience and dedication. For those seeking to embark on this adventure or simply gain more insight into marine craftsmanship, Sven’s wisdom is invaluable.After securely attaching the first portion of the flange, Sven allows ample time for it to dry before moving forward with additional steps. This patience and precision are key aspects of his successful boatbuilding methods.Step 4: Finishing Touches
Once the flange is fully dried, Sven removes the clamps carefully, ensuring no damage occurs during this process. He then moves on to attaching four more pieces onto these main frames, completing two pairs of flanges for the bulkhead hatches.The Final Touches
While two flanges form the primary support structure around the hatches, Sven mentions there are two additional pieces required at each end to ensure comprehensive protection. This attention to detail highlights his commitment to producing a durable and reliable design. “Sailing is about finding your path, whether it’s across an ocean or within yourself.” – Sven Yrvind In conclusion, making flanges around bulkhead hatches may seem complex at first glance, but by following Sven Yrvind’s meticulous process, enthusiasts can achieve professional-level results. Remember that the journey of boatbuilding is as rewarding as reaching your destination; it tests one’s patience and dedication. For those seeking to embark on this adventure or simply gain more insight into marine craftsmanship, Sven’s wisdom is invaluable.Sven begins by explaining that working on flanges vertically and horizontally is significantly easier than doing so in a flat position. To simplify the process further, he divides the task into two or three steps as suggested by fellow expert “for for.” This approach not only makes it more manageable but also allows for greater precision in crafting each component.Step 2: Applying Glue and Securing
Sven proceeds to apply glue along one edge of the flange, ensuring a secure bond when clamped into place. He emphasizes that this stage is crucial for maintaining the structural integrity of the flange, which in turn safeguards the living area beneath the canvas when hatches are open.Step 3: Allowing Time to Dry
After securely attaching the first portion of the flange, Sven allows ample time for it to dry before moving forward with additional steps. This patience and precision are key aspects of his successful boatbuilding methods.Step 4: Finishing Touches
Once the flange is fully dried, Sven removes the clamps carefully, ensuring no damage occurs during this process. He then moves on to attaching four more pieces onto these main frames, completing two pairs of flanges for the bulkhead hatches.The Final Touches
While two flanges form the primary support structure around the hatches, Sven mentions there are two additional pieces required at each end to ensure comprehensive protection. This attention to detail highlights his commitment to producing a durable and reliable design. “Sailing is about finding your path, whether it’s across an ocean or within yourself.” – Sven Yrvind In conclusion, making flanges around bulkhead hatches may seem complex at first glance, but by following Sven Yrvind’s meticulous process, enthusiasts can achieve professional-level results. Remember that the journey of boatbuilding is as rewarding as reaching your destination; it tests one’s patience and dedication. For those seeking to embark on this adventure or simply gain more insight into marine craftsmanship, Sven’s wisdom is invaluable.Sven Yrvind, a renowned yacht designer and sailor, shares valuable insights on creating flanges around bulkhead hatches for canvas protection in this enlightening video. By following his expert guidance, boat enthusiasts can ensure their living areas remain secure while allowing unhindered access through the hatches.Step 1: Starting with the Flange
Sven begins by explaining that working on flanges vertically and horizontally is significantly easier than doing so in a flat position. To simplify the process further, he divides the task into two or three steps as suggested by fellow expert “for for.” This approach not only makes it more manageable but also allows for greater precision in crafting each component.Step 2: Applying Glue and Securing
Sven proceeds to apply glue along one edge of the flange, ensuring a secure bond when clamped into place. He emphasizes that this stage is crucial for maintaining the structural integrity of the flange, which in turn safeguards the living area beneath the canvas when hatches are open.Step 3: Allowing Time to Dry
After securely attaching the first portion of the flange, Sven allows ample time for it to dry before moving forward with additional steps. This patience and precision are key aspects of his successful boatbuilding methods.Step 4: Finishing Touches
Once the flange is fully dried, Sven removes the clamps carefully, ensuring no damage occurs during this process. He then moves on to attaching four more pieces onto these main frames, completing two pairs of flanges for the bulkhead hatches.The Final Touches
While two flanges form the primary support structure around the hatches, Sven mentions there are two additional pieces required at each end to ensure comprehensive protection. This attention to detail highlights his commitment to producing a durable and reliable design. “Sailing is about finding your path, whether it’s across an ocean or within yourself.” – Sven Yrvind In conclusion, making flanges around bulkhead hatches may seem complex at first glance, but by following Sven Yrvind’s meticulous process, enthusiasts can achieve professional-level results. Remember that the journey of boatbuilding is as rewarding as reaching your destination; it tests one’s patience and dedication. For those seeking to embark on this adventure or simply gain more insight into marine craftsmanship, Sven’s wisdom is invaluable.Making Flanges Around Bulkhead Hatches for Canvas
Sven Yrvind, a renowned yacht designer and sailor, shares valuable insights on creating flanges around bulkhead hatches for canvas protection in this enlightening video. By following his expert guidance, boat enthusiasts can ensure their living areas remain secure while allowing unhindered access through the hatches.Step 1: Starting with the Flange
Sven begins by explaining that working on flanges vertically and horizontally is significantly easier than doing so in a flat position. To simplify the process further, he divides the task into two or three steps as suggested by fellow expert “for for.” This approach not only makes it more manageable but also allows for greater precision in crafting each component.Step 2: Applying Glue and Securing
Sven proceeds to apply glue along one edge of the flange, ensuring a secure bond when clamped into place. He emphasizes that this stage is crucial for maintaining the structural integrity of the flange, which in turn safeguards the living area beneath the canvas when hatches are open.Step 3: Allowing Time to Dry
After securely attaching the first portion of the flange, Sven allows ample time for it to dry before moving forward with additional steps. This patience and precision are key aspects of his successful boatbuilding methods.Step 4: Finishing Touches
Once the flange is fully dried, Sven removes the clamps carefully, ensuring no damage occurs during this process. He then moves on to attaching four more pieces onto these main frames, completing two pairs of flanges for the bulkhead hatches.The Final Touches
While two flanges form the primary support structure around the hatches, Sven mentions there are two additional pieces required at each end to ensure comprehensive protection. This attention to detail highlights his commitment to producing a durable and reliable design. “Sailing is about finding your path, whether it’s across an ocean or within yourself.” – Sven Yrvind In conclusion, making flanges around bulkhead hatches may seem complex at first glance, but by following Sven Yrvind’s meticulous process, enthusiasts can achieve professional-level results. Remember that the journey of boatbuilding is as rewarding as reaching your destination; it tests one’s patience and dedication. For those seeking to embark on this adventure or simply gain more insight into marine craftsmanship, Sven’s wisdom is invaluable.Sven proceeds to apply glue along one edge of the flange, ensuring a secure bond when clamped into place. He emphasizes that this stage is crucial for maintaining the structural integrity of the flange, which in turn safeguards the living area beneath the canvas when hatches are open.Step 3: Allowing Time to Dry
After securely attaching the first portion of the flange, Sven allows ample time for it to dry before moving forward with additional steps. This patience and precision are key aspects of his successful boatbuilding methods.Step 4: Finishing Touches
Once the flange is fully dried, Sven removes the clamps carefully, ensuring no damage occurs during this process. He then moves on to attaching four more pieces onto these main frames, completing two pairs of flanges for the bulkhead hatches.The Final Touches
While two flanges form the primary support structure around the hatches, Sven mentions there are two additional pieces required at each end to ensure comprehensive protection. This attention to detail highlights his commitment to producing a durable and reliable design. “Sailing is about finding your path, whether it’s across an ocean or within yourself.” – Sven Yrvind In conclusion, making flanges around bulkhead hatches may seem complex at first glance, but by following Sven Yrvind’s meticulous process, enthusiasts can achieve professional-level results. Remember that the journey of boatbuilding is as rewarding as reaching your destination; it tests one’s patience and dedication. For those seeking to embark on this adventure or simply gain more insight into marine craftsmanship, Sven’s wisdom is invaluable.Sven begins by explaining that working on flanges vertically and horizontally is significantly easier than doing so in a flat position. To simplify the process further, he divides the task into two or three steps as suggested by fellow expert “for for.” This approach not only makes it more manageable but also allows for greater precision in crafting each component.Step 2: Applying Glue and Securing
Sven proceeds to apply glue along one edge of the flange, ensuring a secure bond when clamped into place. He emphasizes that this stage is crucial for maintaining the structural integrity of the flange, which in turn safeguards the living area beneath the canvas when hatches are open.Step 3: Allowing Time to Dry
After securely attaching the first portion of the flange, Sven allows ample time for it to dry before moving forward with additional steps. This patience and precision are key aspects of his successful boatbuilding methods.Step 4: Finishing Touches
Once the flange is fully dried, Sven removes the clamps carefully, ensuring no damage occurs during this process. He then moves on to attaching four more pieces onto these main frames, completing two pairs of flanges for the bulkhead hatches.The Final Touches
While two flanges form the primary support structure around the hatches, Sven mentions there are two additional pieces required at each end to ensure comprehensive protection. This attention to detail highlights his commitment to producing a durable and reliable design. “Sailing is about finding your path, whether it’s across an ocean or within yourself.” – Sven Yrvind In conclusion, making flanges around bulkhead hatches may seem complex at first glance, but by following Sven Yrvind’s meticulous process, enthusiasts can achieve professional-level results. Remember that the journey of boatbuilding is as rewarding as reaching your destination; it tests one’s patience and dedication. For those seeking to embark on this adventure or simply gain more insight into marine craftsmanship, Sven’s wisdom is invaluable.Sven Yrvind, a renowned yacht designer and sailor, shares valuable insights on creating flanges around bulkhead hatches for canvas protection in this enlightening video. By following his expert guidance, boat enthusiasts can ensure their living areas remain secure while allowing unhindered access through the hatches.Step 1: Starting with the Flange
Sven begins by explaining that working on flanges vertically and horizontally is significantly easier than doing so in a flat position. To simplify the process further, he divides the task into two or three steps as suggested by fellow expert “for for.” This approach not only makes it more manageable but also allows for greater precision in crafting each component.Step 2: Applying Glue and Securing
Sven proceeds to apply glue along one edge of the flange, ensuring a secure bond when clamped into place. He emphasizes that this stage is crucial for maintaining the structural integrity of the flange, which in turn safeguards the living area beneath the canvas when hatches are open.Step 3: Allowing Time to Dry
After securely attaching the first portion of the flange, Sven allows ample time for it to dry before moving forward with additional steps. This patience and precision are key aspects of his successful boatbuilding methods.Step 4: Finishing Touches
Once the flange is fully dried, Sven removes the clamps carefully, ensuring no damage occurs during this process. He then moves on to attaching four more pieces onto these main frames, completing two pairs of flanges for the bulkhead hatches.The Final Touches
While two flanges form the primary support structure around the hatches, Sven mentions there are two additional pieces required at each end to ensure comprehensive protection. This attention to detail highlights his commitment to producing a durable and reliable design. “Sailing is about finding your path, whether it’s across an ocean or within yourself.” – Sven Yrvind In conclusion, making flanges around bulkhead hatches may seem complex at first glance, but by following Sven Yrvind’s meticulous process, enthusiasts can achieve professional-level results. Remember that the journey of boatbuilding is as rewarding as reaching your destination; it tests one’s patience and dedication. For those seeking to embark on this adventure or simply gain more insight into marine craftsmanship, Sven’s wisdom is invaluable.Making Flanges Around Bulkhead Hatches for Canvas
Sven Yrvind, a renowned yacht designer and sailor, shares valuable insights on creating flanges around bulkhead hatches for canvas protection in this enlightening video. By following his expert guidance, boat enthusiasts can ensure their living areas remain secure while allowing unhindered access through the hatches.Step 1: Starting with the Flange
Sven begins by explaining that working on flanges vertically and horizontally is significantly easier than doing so in a flat position. To simplify the process further, he divides the task into two or three steps as suggested by fellow expert “for for.” This approach not only makes it more manageable but also allows for greater precision in crafting each component.Step 2: Applying Glue and Securing
Sven proceeds to apply glue along one edge of the flange, ensuring a secure bond when clamped into place. He emphasizes that this stage is crucial for maintaining the structural integrity of the flange, which in turn safeguards the living area beneath the canvas when hatches are open.Step 3: Allowing Time to Dry
After securely attaching the first portion of the flange, Sven allows ample time for it to dry before moving forward with additional steps. This patience and precision are key aspects of his successful boatbuilding methods.Step 4: Finishing Touches
Once the flange is fully dried, Sven removes the clamps carefully, ensuring no damage occurs during this process. He then moves on to attaching four more pieces onto these main frames, completing two pairs of flanges for the bulkhead hatches.The Final Touches
While two flanges form the primary support structure around the hatches, Sven mentions there are two additional pieces required at each end to ensure comprehensive protection. This attention to detail highlights his commitment to producing a durable and reliable design. “Sailing is about finding your path, whether it’s across an ocean or within yourself.” – Sven Yrvind In conclusion, making flanges around bulkhead hatches may seem complex at first glance, but by following Sven Yrvind’s meticulous process, enthusiasts can achieve professional-level results. Remember that the journey of boatbuilding is as rewarding as reaching your destination; it tests one’s patience and dedication. For those seeking to embark on this adventure or simply gain more insight into marine craftsmanship, Sven’s wisdom is invaluable.Once the flange is fully dried, Sven removes the clamps carefully, ensuring no damage occurs during this process. He then moves on to attaching four more pieces onto these main frames, completing two pairs of flanges for the bulkhead hatches.The Final Touches
While two flanges form the primary support structure around the hatches, Sven mentions there are two additional pieces required at each end to ensure comprehensive protection. This attention to detail highlights his commitment to producing a durable and reliable design. “Sailing is about finding your path, whether it’s across an ocean or within yourself.” – Sven Yrvind In conclusion, making flanges around bulkhead hatches may seem complex at first glance, but by following Sven Yrvind’s meticulous process, enthusiasts can achieve professional-level results. Remember that the journey of boatbuilding is as rewarding as reaching your destination; it tests one’s patience and dedication. For those seeking to embark on this adventure or simply gain more insight into marine craftsmanship, Sven’s wisdom is invaluable.Sven proceeds to apply glue along one edge of the flange, ensuring a secure bond when clamped into place. He emphasizes that this stage is crucial for maintaining the structural integrity of the flange, which in turn safeguards the living area beneath the canvas when hatches are open.Step 3: Allowing Time to Dry
After securely attaching the first portion of the flange, Sven allows ample time for it to dry before moving forward with additional steps. This patience and precision are key aspects of his successful boatbuilding methods.Step 4: Finishing Touches
Once the flange is fully dried, Sven removes the clamps carefully, ensuring no damage occurs during this process. He then moves on to attaching four more pieces onto these main frames, completing two pairs of flanges for the bulkhead hatches.The Final Touches
While two flanges form the primary support structure around the hatches, Sven mentions there are two additional pieces required at each end to ensure comprehensive protection. This attention to detail highlights his commitment to producing a durable and reliable design. “Sailing is about finding your path, whether it’s across an ocean or within yourself.” – Sven Yrvind In conclusion, making flanges around bulkhead hatches may seem complex at first glance, but by following Sven Yrvind’s meticulous process, enthusiasts can achieve professional-level results. Remember that the journey of boatbuilding is as rewarding as reaching your destination; it tests one’s patience and dedication. For those seeking to embark on this adventure or simply gain more insight into marine craftsmanship, Sven’s wisdom is invaluable.Sven begins by explaining that working on flanges vertically and horizontally is significantly easier than doing so in a flat position. To simplify the process further, he divides the task into two or three steps as suggested by fellow expert “for for.” This approach not only makes it more manageable but also allows for greater precision in crafting each component.Step 2: Applying Glue and Securing
Sven proceeds to apply glue along one edge of the flange, ensuring a secure bond when clamped into place. He emphasizes that this stage is crucial for maintaining the structural integrity of the flange, which in turn safeguards the living area beneath the canvas when hatches are open.Step 3: Allowing Time to Dry
After securely attaching the first portion of the flange, Sven allows ample time for it to dry before moving forward with additional steps. This patience and precision are key aspects of his successful boatbuilding methods.Step 4: Finishing Touches
Once the flange is fully dried, Sven removes the clamps carefully, ensuring no damage occurs during this process. He then moves on to attaching four more pieces onto these main frames, completing two pairs of flanges for the bulkhead hatches.The Final Touches
While two flanges form the primary support structure around the hatches, Sven mentions there are two additional pieces required at each end to ensure comprehensive protection. This attention to detail highlights his commitment to producing a durable and reliable design. “Sailing is about finding your path, whether it’s across an ocean or within yourself.” – Sven Yrvind In conclusion, making flanges around bulkhead hatches may seem complex at first glance, but by following Sven Yrvind’s meticulous process, enthusiasts can achieve professional-level results. Remember that the journey of boatbuilding is as rewarding as reaching your destination; it tests one’s patience and dedication. For those seeking to embark on this adventure or simply gain more insight into marine craftsmanship, Sven’s wisdom is invaluable.Sven Yrvind, a renowned yacht designer and sailor, shares valuable insights on creating flanges around bulkhead hatches for canvas protection in this enlightening video. By following his expert guidance, boat enthusiasts can ensure their living areas remain secure while allowing unhindered access through the hatches.Step 1: Starting with the Flange
Sven begins by explaining that working on flanges vertically and horizontally is significantly easier than doing so in a flat position. To simplify the process further, he divides the task into two or three steps as suggested by fellow expert “for for.” This approach not only makes it more manageable but also allows for greater precision in crafting each component.Step 2: Applying Glue and Securing
Sven proceeds to apply glue along one edge of the flange, ensuring a secure bond when clamped into place. He emphasizes that this stage is crucial for maintaining the structural integrity of the flange, which in turn safeguards the living area beneath the canvas when hatches are open.Step 3: Allowing Time to Dry
After securely attaching the first portion of the flange, Sven allows ample time for it to dry before moving forward with additional steps. This patience and precision are key aspects of his successful boatbuilding methods.Step 4: Finishing Touches
Once the flange is fully dried, Sven removes the clamps carefully, ensuring no damage occurs during this process. He then moves on to attaching four more pieces onto these main frames, completing two pairs of flanges for the bulkhead hatches.The Final Touches
While two flanges form the primary support structure around the hatches, Sven mentions there are two additional pieces required at each end to ensure comprehensive protection. This attention to detail highlights his commitment to producing a durable and reliable design. “Sailing is about finding your path, whether it’s across an ocean or within yourself.” – Sven Yrvind In conclusion, making flanges around bulkhead hatches may seem complex at first glance, but by following Sven Yrvind’s meticulous process, enthusiasts can achieve professional-level results. Remember that the journey of boatbuilding is as rewarding as reaching your destination; it tests one’s patience and dedication. For those seeking to embark on this adventure or simply gain more insight into marine craftsmanship, Sven’s wisdom is invaluable.Making Flanges Around Bulkhead Hatches for Canvas
Sven Yrvind, a renowned yacht designer and sailor, shares valuable insights on creating flanges around bulkhead hatches for canvas protection in this enlightening video. By following his expert guidance, boat enthusiasts can ensure their living areas remain secure while allowing unhindered access through the hatches.Step 1: Starting with the Flange
Sven begins by explaining that working on flanges vertically and horizontally is significantly easier than doing so in a flat position. To simplify the process further, he divides the task into two or three steps as suggested by fellow expert “for for.” This approach not only makes it more manageable but also allows for greater precision in crafting each component.Step 2: Applying Glue and Securing
Sven proceeds to apply glue along one edge of the flange, ensuring a secure bond when clamped into place. He emphasizes that this stage is crucial for maintaining the structural integrity of the flange, which in turn safeguards the living area beneath the canvas when hatches are open.Step 3: Allowing Time to Dry
After securely attaching the first portion of the flange, Sven allows ample time for it to dry before moving forward with additional steps. This patience and precision are key aspects of his successful boatbuilding methods.Step 4: Finishing Touches
Once the flange is fully dried, Sven removes the clamps carefully, ensuring no damage occurs during this process. He then moves on to attaching four more pieces onto these main frames, completing two pairs of flanges for the bulkhead hatches.The Final Touches
While two flanges form the primary support structure around the hatches, Sven mentions there are two additional pieces required at each end to ensure comprehensive protection. This attention to detail highlights his commitment to producing a durable and reliable design. “Sailing is about finding your path, whether it’s across an ocean or within yourself.” – Sven Yrvind In conclusion, making flanges around bulkhead hatches may seem complex at first glance, but by following Sven Yrvind’s meticulous process, enthusiasts can achieve professional-level results. Remember that the journey of boatbuilding is as rewarding as reaching your destination; it tests one’s patience and dedication. For those seeking to embark on this adventure or simply gain more insight into marine craftsmanship, Sven’s wisdom is invaluable.After securely attaching the first portion of the flange, Sven allows ample time for it to dry before moving forward with additional steps. This patience and precision are key aspects of his successful boatbuilding methods.Step 4: Finishing Touches
Once the flange is fully dried, Sven removes the clamps carefully, ensuring no damage occurs during this process. He then moves on to attaching four more pieces onto these main frames, completing two pairs of flanges for the bulkhead hatches.The Final Touches
While two flanges form the primary support structure around the hatches, Sven mentions there are two additional pieces required at each end to ensure comprehensive protection. This attention to detail highlights his commitment to producing a durable and reliable design. “Sailing is about finding your path, whether it’s across an ocean or within yourself.” – Sven Yrvind In conclusion, making flanges around bulkhead hatches may seem complex at first glance, but by following Sven Yrvind’s meticulous process, enthusiasts can achieve professional-level results. Remember that the journey of boatbuilding is as rewarding as reaching your destination; it tests one’s patience and dedication. For those seeking to embark on this adventure or simply gain more insight into marine craftsmanship, Sven’s wisdom is invaluable.Sven proceeds to apply glue along one edge of the flange, ensuring a secure bond when clamped into place. He emphasizes that this stage is crucial for maintaining the structural integrity of the flange, which in turn safeguards the living area beneath the canvas when hatches are open.Step 3: Allowing Time to Dry
After securely attaching the first portion of the flange, Sven allows ample time for it to dry before moving forward with additional steps. This patience and precision are key aspects of his successful boatbuilding methods.Step 4: Finishing Touches
Once the flange is fully dried, Sven removes the clamps carefully, ensuring no damage occurs during this process. He then moves on to attaching four more pieces onto these main frames, completing two pairs of flanges for the bulkhead hatches.The Final Touches
While two flanges form the primary support structure around the hatches, Sven mentions there are two additional pieces required at each end to ensure comprehensive protection. This attention to detail highlights his commitment to producing a durable and reliable design. “Sailing is about finding your path, whether it’s across an ocean or within yourself.” – Sven Yrvind In conclusion, making flanges around bulkhead hatches may seem complex at first glance, but by following Sven Yrvind’s meticulous process, enthusiasts can achieve professional-level results. Remember that the journey of boatbuilding is as rewarding as reaching your destination; it tests one’s patience and dedication. For those seeking to embark on this adventure or simply gain more insight into marine craftsmanship, Sven’s wisdom is invaluable.Sven begins by explaining that working on flanges vertically and horizontally is significantly easier than doing so in a flat position. To simplify the process further, he divides the task into two or three steps as suggested by fellow expert “for for.” This approach not only makes it more manageable but also allows for greater precision in crafting each component.Step 2: Applying Glue and Securing
Sven proceeds to apply glue along one edge of the flange, ensuring a secure bond when clamped into place. He emphasizes that this stage is crucial for maintaining the structural integrity of the flange, which in turn safeguards the living area beneath the canvas when hatches are open.Step 3: Allowing Time to Dry
After securely attaching the first portion of the flange, Sven allows ample time for it to dry before moving forward with additional steps. This patience and precision are key aspects of his successful boatbuilding methods.Step 4: Finishing Touches
Once the flange is fully dried, Sven removes the clamps carefully, ensuring no damage occurs during this process. He then moves on to attaching four more pieces onto these main frames, completing two pairs of flanges for the bulkhead hatches.The Final Touches
While two flanges form the primary support structure around the hatches, Sven mentions there are two additional pieces required at each end to ensure comprehensive protection. This attention to detail highlights his commitment to producing a durable and reliable design. “Sailing is about finding your path, whether it’s across an ocean or within yourself.” – Sven Yrvind In conclusion, making flanges around bulkhead hatches may seem complex at first glance, but by following Sven Yrvind’s meticulous process, enthusiasts can achieve professional-level results. Remember that the journey of boatbuilding is as rewarding as reaching your destination; it tests one’s patience and dedication. For those seeking to embark on this adventure or simply gain more insight into marine craftsmanship, Sven’s wisdom is invaluable.Sven Yrvind, a renowned yacht designer and sailor, shares valuable insights on creating flanges around bulkhead hatches for canvas protection in this enlightening video. By following his expert guidance, boat enthusiasts can ensure their living areas remain secure while allowing unhindered access through the hatches.Step 1: Starting with the Flange
Sven begins by explaining that working on flanges vertically and horizontally is significantly easier than doing so in a flat position. To simplify the process further, he divides the task into two or three steps as suggested by fellow expert “for for.” This approach not only makes it more manageable but also allows for greater precision in crafting each component.Step 2: Applying Glue and Securing
Sven proceeds to apply glue along one edge of the flange, ensuring a secure bond when clamped into place. He emphasizes that this stage is crucial for maintaining the structural integrity of the flange, which in turn safeguards the living area beneath the canvas when hatches are open.Step 3: Allowing Time to Dry
After securely attaching the first portion of the flange, Sven allows ample time for it to dry before moving forward with additional steps. This patience and precision are key aspects of his successful boatbuilding methods.Step 4: Finishing Touches
Once the flange is fully dried, Sven removes the clamps carefully, ensuring no damage occurs during this process. He then moves on to attaching four more pieces onto these main frames, completing two pairs of flanges for the bulkhead hatches.The Final Touches
While two flanges form the primary support structure around the hatches, Sven mentions there are two additional pieces required at each end to ensure comprehensive protection. This attention to detail highlights his commitment to producing a durable and reliable design. “Sailing is about finding your path, whether it’s across an ocean or within yourself.” – Sven Yrvind In conclusion, making flanges around bulkhead hatches may seem complex at first glance, but by following Sven Yrvind’s meticulous process, enthusiasts can achieve professional-level results. Remember that the journey of boatbuilding is as rewarding as reaching your destination; it tests one’s patience and dedication. For those seeking to embark on this adventure or simply gain more insight into marine craftsmanship, Sven’s wisdom is invaluable.Making Flanges Around Bulkhead Hatches for Canvas
Sven Yrvind, a renowned yacht designer and sailor, shares valuable insights on creating flanges around bulkhead hatches for canvas protection in this enlightening video. By following his expert guidance, boat enthusiasts can ensure their living areas remain secure while allowing unhindered access through the hatches.Step 1: Starting with the Flange
Sven begins by explaining that working on flanges vertically and horizontally is significantly easier than doing so in a flat position. To simplify the process further, he divides the task into two or three steps as suggested by fellow expert “for for.” This approach not only makes it more manageable but also allows for greater precision in crafting each component.Step 2: Applying Glue and Securing
Sven proceeds to apply glue along one edge of the flange, ensuring a secure bond when clamped into place. He emphasizes that this stage is crucial for maintaining the structural integrity of the flange, which in turn safeguards the living area beneath the canvas when hatches are open.Step 3: Allowing Time to Dry
After securely attaching the first portion of the flange, Sven allows ample time for it to dry before moving forward with additional steps. This patience and precision are key aspects of his successful boatbuilding methods.Step 4: Finishing Touches
Once the flange is fully dried, Sven removes the clamps carefully, ensuring no damage occurs during this process. He then moves on to attaching four more pieces onto these main frames, completing two pairs of flanges for the bulkhead hatches.The Final Touches
While two flanges form the primary support structure around the hatches, Sven mentions there are two additional pieces required at each end to ensure comprehensive protection. This attention to detail highlights his commitment to producing a durable and reliable design. “Sailing is about finding your path, whether it’s across an ocean or within yourself.” – Sven Yrvind In conclusion, making flanges around bulkhead hatches may seem complex at first glance, but by following Sven Yrvind’s meticulous process, enthusiasts can achieve professional-level results. Remember that the journey of boatbuilding is as rewarding as reaching your destination; it tests one’s patience and dedication. For those seeking to embark on this adventure or simply gain more insight into marine craftsmanship, Sven’s wisdom is invaluable.Once the flange is fully dried, Sven removes the clamps carefully, ensuring no damage occurs during this process. He then moves on to attaching four more pieces onto these main frames, completing two pairs of flanges for the bulkhead hatches.The Final Touches
While two flanges form the primary support structure around the hatches, Sven mentions there are two additional pieces required at each end to ensure comprehensive protection. This attention to detail highlights his commitment to producing a durable and reliable design. “Sailing is about finding your path, whether it’s across an ocean or within yourself.” – Sven Yrvind In conclusion, making flanges around bulkhead hatches may seem complex at first glance, but by following Sven Yrvind’s meticulous process, enthusiasts can achieve professional-level results. Remember that the journey of boatbuilding is as rewarding as reaching your destination; it tests one’s patience and dedication. For those seeking to embark on this adventure or simply gain more insight into marine craftsmanship, Sven’s wisdom is invaluable.After securely attaching the first portion of the flange, Sven allows ample time for it to dry before moving forward with additional steps. This patience and precision are key aspects of his successful boatbuilding methods.Step 4: Finishing Touches
Once the flange is fully dried, Sven removes the clamps carefully, ensuring no damage occurs during this process. He then moves on to attaching four more pieces onto these main frames, completing two pairs of flanges for the bulkhead hatches.The Final Touches
While two flanges form the primary support structure around the hatches, Sven mentions there are two additional pieces required at each end to ensure comprehensive protection. This attention to detail highlights his commitment to producing a durable and reliable design. “Sailing is about finding your path, whether it’s across an ocean or within yourself.” – Sven Yrvind In conclusion, making flanges around bulkhead hatches may seem complex at first glance, but by following Sven Yrvind’s meticulous process, enthusiasts can achieve professional-level results. Remember that the journey of boatbuilding is as rewarding as reaching your destination; it tests one’s patience and dedication. For those seeking to embark on this adventure or simply gain more insight into marine craftsmanship, Sven’s wisdom is invaluable.Sven proceeds to apply glue along one edge of the flange, ensuring a secure bond when clamped into place. He emphasizes that this stage is crucial for maintaining the structural integrity of the flange, which in turn safeguards the living area beneath the canvas when hatches are open.Step 3: Allowing Time to Dry
After securely attaching the first portion of the flange, Sven allows ample time for it to dry before moving forward with additional steps. This patience and precision are key aspects of his successful boatbuilding methods.Step 4: Finishing Touches
Once the flange is fully dried, Sven removes the clamps carefully, ensuring no damage occurs during this process. He then moves on to attaching four more pieces onto these main frames, completing two pairs of flanges for the bulkhead hatches.The Final Touches
While two flanges form the primary support structure around the hatches, Sven mentions there are two additional pieces required at each end to ensure comprehensive protection. This attention to detail highlights his commitment to producing a durable and reliable design. “Sailing is about finding your path, whether it’s across an ocean or within yourself.” – Sven Yrvind In conclusion, making flanges around bulkhead hatches may seem complex at first glance, but by following Sven Yrvind’s meticulous process, enthusiasts can achieve professional-level results. Remember that the journey of boatbuilding is as rewarding as reaching your destination; it tests one’s patience and dedication. For those seeking to embark on this adventure or simply gain more insight into marine craftsmanship, Sven’s wisdom is invaluable.Sven begins by explaining that working on flanges vertically and horizontally is significantly easier than doing so in a flat position. To simplify the process further, he divides the task into two or three steps as suggested by fellow expert “for for.” This approach not only makes it more manageable but also allows for greater precision in crafting each component.Step 2: Applying Glue and Securing
Sven proceeds to apply glue along one edge of the flange, ensuring a secure bond when clamped into place. He emphasizes that this stage is crucial for maintaining the structural integrity of the flange, which in turn safeguards the living area beneath the canvas when hatches are open.Step 3: Allowing Time to Dry
After securely attaching the first portion of the flange, Sven allows ample time for it to dry before moving forward with additional steps. This patience and precision are key aspects of his successful boatbuilding methods.Step 4: Finishing Touches
Once the flange is fully dried, Sven removes the clamps carefully, ensuring no damage occurs during this process. He then moves on to attaching four more pieces onto these main frames, completing two pairs of flanges for the bulkhead hatches.The Final Touches
While two flanges form the primary support structure around the hatches, Sven mentions there are two additional pieces required at each end to ensure comprehensive protection. This attention to detail highlights his commitment to producing a durable and reliable design. “Sailing is about finding your path, whether it’s across an ocean or within yourself.” – Sven Yrvind In conclusion, making flanges around bulkhead hatches may seem complex at first glance, but by following Sven Yrvind’s meticulous process, enthusiasts can achieve professional-level results. Remember that the journey of boatbuilding is as rewarding as reaching your destination; it tests one’s patience and dedication. For those seeking to embark on this adventure or simply gain more insight into marine craftsmanship, Sven’s wisdom is invaluable.Sven Yrvind, a renowned yacht designer and sailor, shares valuable insights on creating flanges around bulkhead hatches for canvas protection in this enlightening video. By following his expert guidance, boat enthusiasts can ensure their living areas remain secure while allowing unhindered access through the hatches.Step 1: Starting with the Flange
Sven begins by explaining that working on flanges vertically and horizontally is significantly easier than doing so in a flat position. To simplify the process further, he divides the task into two or three steps as suggested by fellow expert “for for.” This approach not only makes it more manageable but also allows for greater precision in crafting each component.Step 2: Applying Glue and Securing
Sven proceeds to apply glue along one edge of the flange, ensuring a secure bond when clamped into place. He emphasizes that this stage is crucial for maintaining the structural integrity of the flange, which in turn safeguards the living area beneath the canvas when hatches are open.Step 3: Allowing Time to Dry
After securely attaching the first portion of the flange, Sven allows ample time for it to dry before moving forward with additional steps. This patience and precision are key aspects of his successful boatbuilding methods.Step 4: Finishing Touches
Once the flange is fully dried, Sven removes the clamps carefully, ensuring no damage occurs during this process. He then moves on to attaching four more pieces onto these main frames, completing two pairs of flanges for the bulkhead hatches.The Final Touches
While two flanges form the primary support structure around the hatches, Sven mentions there are two additional pieces required at each end to ensure comprehensive protection. This attention to detail highlights his commitment to producing a durable and reliable design. “Sailing is about finding your path, whether it’s across an ocean or within yourself.” – Sven Yrvind In conclusion, making flanges around bulkhead hatches may seem complex at first glance, but by following Sven Yrvind’s meticulous process, enthusiasts can achieve professional-level results. Remember that the journey of boatbuilding is as rewarding as reaching your destination; it tests one’s patience and dedication. For those seeking to embark on this adventure or simply gain more insight into marine craftsmanship, Sven’s wisdom is invaluable.Making Flanges Around Bulkhead Hatches for Canvas
Sven Yrvind, a renowned yacht designer and sailor, shares valuable insights on creating flanges around bulkhead hatches for canvas protection in this enlightening video. By following his expert guidance, boat enthusiasts can ensure their living areas remain secure while allowing unhindered access through the hatches.Step 1: Starting with the Flange
Sven begins by explaining that working on flanges vertically and horizontally is significantly easier than doing so in a flat position. To simplify the process further, he divides the task into two or three steps as suggested by fellow expert “for for.” This approach not only makes it more manageable but also allows for greater precision in crafting each component.Step 2: Applying Glue and Securing
Sven proceeds to apply glue along one edge of the flange, ensuring a secure bond when clamped into place. He emphasizes that this stage is crucial for maintaining the structural integrity of the flange, which in turn safeguards the living area beneath the canvas when hatches are open.Step 3: Allowing Time to Dry
After securely attaching the first portion of the flange, Sven allows ample time for it to dry before moving forward with additional steps. This patience and precision are key aspects of his successful boatbuilding methods.Step 4: Finishing Touches
Once the flange is fully dried, Sven removes the clamps carefully, ensuring no damage occurs during this process. He then moves on to attaching four more pieces onto these main frames, completing two pairs of flanges for the bulkhead hatches.The Final Touches
While two flanges form the primary support structure around the hatches, Sven mentions there are two additional pieces required at each end to ensure comprehensive protection. This attention to detail highlights his commitment to producing a durable and reliable design. “Sailing is about finding your path, whether it’s across an ocean or within yourself.” – Sven Yrvind In conclusion, making flanges around bulkhead hatches may seem complex at first glance, but by following Sven Yrvind’s meticulous process, enthusiasts can achieve professional-level results. Remember that the journey of boatbuilding is as rewarding as reaching your destination; it tests one’s patience and dedication. For those seeking to embark on this adventure or simply gain more insight into marine craftsmanship, Sven’s wisdom is invaluable.Once the flange is fully dried, Sven removes the clamps carefully, ensuring no damage occurs during this process. He then moves on to attaching four more pieces onto these main frames, completing two pairs of flanges for the bulkhead hatches.The Final Touches
While two flanges form the primary support structure around the hatches, Sven mentions there are two additional pieces required at each end to ensure comprehensive protection. This attention to detail highlights his commitment to producing a durable and reliable design. “Sailing is about finding your path, whether it’s across an ocean or within yourself.” – Sven Yrvind In conclusion, making flanges around bulkhead hatches may seem complex at first glance, but by following Sven Yrvind’s meticulous process, enthusiasts can achieve professional-level results. Remember that the journey of boatbuilding is as rewarding as reaching your destination; it tests one’s patience and dedication. For those seeking to embark on this adventure or simply gain more insight into marine craftsmanship, Sven’s wisdom is invaluable.Sven Yrvind, a renowned yacht designer and sailor, shares valuable insights on creating flanges around bulkhead hatches for canvas protection in this enlightening video. By following his expert guidance, boat enthusiasts can ensure their living areas remain secure while allowing unhindered access through the hatches.Step 1: Starting with the Flange
Sven begins by explaining that working on flanges vertically and horizontally is significantly easier than doing so in a flat position. To simplify the process further, he divides the task into two or three steps as suggested by fellow expert “for for.” This approach not only makes it more manageable but also allows for greater precision in crafting each component.Step 2: Applying Glue and Securing
Sven proceeds to apply glue along one edge of the flange, ensuring a secure bond when clamped into place. He emphasizes that this stage is crucial for maintaining the structural integrity of the flange, which in turn safeguards the living area beneath the canvas when hatches are open.Step 3: Allowing Time to Dry
After securely attaching the first portion of the flange, Sven allows ample time for it to dry before moving forward with additional steps. This patience and precision are key aspects of his successful boatbuilding methods.Step 4: Finishing Touches
Once the flange is fully dried, Sven removes the clamps carefully, ensuring no damage occurs during this process. He then moves on to attaching four more pieces onto these main frames, completing two pairs of flanges for the bulkhead hatches.The Final Touches
While two flanges form the primary support structure around the hatches, Sven mentions there are two additional pieces required at each end to ensure comprehensive protection. This attention to detail highlights his commitment to producing a durable and reliable design. “Sailing is about finding your path, whether it’s across an ocean or within yourself.” – Sven Yrvind In conclusion, making flanges around bulkhead hatches may seem complex at first glance, but by following Sven Yrvind’s meticulous process, enthusiasts can achieve professional-level results. Remember that the journey of boatbuilding is as rewarding as reaching your destination; it tests one’s patience and dedication. For those seeking to embark on this adventure or simply gain more insight into marine craftsmanship, Sven’s wisdom is invaluable.Making Flanges Around Bulkhead Hatches for Canvas
Sven Yrvind, a renowned yacht designer and sailor, shares valuable insights on creating flanges around bulkhead hatches for canvas protection in this enlightening video. By following his expert guidance, boat enthusiasts can ensure their living areas remain secure while allowing unhindered access through the hatches.Step 1: Starting with the Flange
Sven begins by explaining that working on flanges vertically and horizontally is significantly easier than doing so in a flat position. To simplify the process further, he divides the task into two or three steps as suggested by fellow expert “for for.” This approach not only makes it more manageable but also allows for greater precision in crafting each component.Step 2: Applying Glue and Securing
Sven proceeds to apply glue along one edge of the flange, ensuring a secure bond when clamped into place. He emphasizes that this stage is crucial for maintaining the structural integrity of the flange, which in turn safeguards the living area beneath the canvas when hatches are open.Step 3: Allowing Time to Dry
After securely attaching the first portion of the flange, Sven allows ample time for it to dry before moving forward with additional steps. This patience and precision are key aspects of his successful boatbuilding methods.Step 4: Finishing Touches
Once the flange is fully dried, Sven removes the clamps carefully, ensuring no damage occurs during this process. He then moves on to attaching four more pieces onto these main frames, completing two pairs of flanges for the bulkhead hatches.The Final Touches
While two flanges form the primary support structure around the hatches, Sven mentions there are two additional pieces required at each end to ensure comprehensive protection. This attention to detail highlights his commitment to producing a durable and reliable design. “Sailing is about finding your path, whether it’s across an ocean or within yourself.” – Sven Yrvind In conclusion, making flanges around bulkhead hatches may seem complex at first glance, but by following Sven Yrvind’s meticulous process, enthusiasts can achieve professional-level results. Remember that the journey of boatbuilding is as rewarding as reaching your destination; it tests one’s patience and dedication. For those seeking to embark on this adventure or simply gain more insight into marine craftsmanship, Sven’s wisdom is invaluable.Sven begins by explaining that working on flanges vertically and horizontally is significantly easier than doing so in a flat position. To simplify the process further, he divides the task into two or three steps as suggested by fellow expert “for for.” This approach not only makes it more manageable but also allows for greater precision in crafting each component.Step 2: Applying Glue and Securing
Sven proceeds to apply glue along one edge of the flange, ensuring a secure bond when clamped into place. He emphasizes that this stage is crucial for maintaining the structural integrity of the flange, which in turn safeguards the living area beneath the canvas when hatches are open.Step 3: Allowing Time to Dry
After securely attaching the first portion of the flange, Sven allows ample time for it to dry before moving forward with additional steps. This patience and precision are key aspects of his successful boatbuilding methods.Step 4: Finishing Touches
Once the flange is fully dried, Sven removes the clamps carefully, ensuring no damage occurs during this process. He then moves on to attaching four more pieces onto these main frames, completing two pairs of flanges for the bulkhead hatches.The Final Touches
While two flanges form the primary support structure around the hatches, Sven mentions there are two additional pieces required at each end to ensure comprehensive protection. This attention to detail highlights his commitment to producing a durable and reliable design. “Sailing is about finding your path, whether it’s across an ocean or within yourself.” – Sven Yrvind In conclusion, making flanges around bulkhead hatches may seem complex at first glance, but by following Sven Yrvind’s meticulous process, enthusiasts can achieve professional-level results. Remember that the journey of boatbuilding is as rewarding as reaching your destination; it tests one’s patience and dedication. For those seeking to embark on this adventure or simply gain more insight into marine craftsmanship, Sven’s wisdom is invaluable.Sven Yrvind, a renowned yacht designer and sailor, shares valuable insights on creating flanges around bulkhead hatches for canvas protection in this enlightening video. By following his expert guidance, boat enthusiasts can ensure their living areas remain secure while allowing unhindered access through the hatches.Step 1: Starting with the Flange
Sven begins by explaining that working on flanges vertically and horizontally is significantly easier than doing so in a flat position. To simplify the process further, he divides the task into two or three steps as suggested by fellow expert “for for.” This approach not only makes it more manageable but also allows for greater precision in crafting each component.Step 2: Applying Glue and Securing
Sven proceeds to apply glue along one edge of the flange, ensuring a secure bond when clamped into place. He emphasizes that this stage is crucial for maintaining the structural integrity of the flange, which in turn safeguards the living area beneath the canvas when hatches are open.Step 3: Allowing Time to Dry
After securely attaching the first portion of the flange, Sven allows ample time for it to dry before moving forward with additional steps. This patience and precision are key aspects of his successful boatbuilding methods.Step 4: Finishing Touches
Once the flange is fully dried, Sven removes the clamps carefully, ensuring no damage occurs during this process. He then moves on to attaching four more pieces onto these main frames, completing two pairs of flanges for the bulkhead hatches.The Final Touches
While two flanges form the primary support structure around the hatches, Sven mentions there are two additional pieces required at each end to ensure comprehensive protection. This attention to detail highlights his commitment to producing a durable and reliable design. “Sailing is about finding your path, whether it’s across an ocean or within yourself.” – Sven Yrvind In conclusion, making flanges around bulkhead hatches may seem complex at first glance, but by following Sven Yrvind’s meticulous process, enthusiasts can achieve professional-level results. Remember that the journey of boatbuilding is as rewarding as reaching your destination; it tests one’s patience and dedication. For those seeking to embark on this adventure or simply gain more insight into marine craftsmanship, Sven’s wisdom is invaluable.Making Flanges Around Bulkhead Hatches for Canvas
Sven Yrvind, a renowned yacht designer and sailor, shares valuable insights on creating flanges around bulkhead hatches for canvas protection in this enlightening video. By following his expert guidance, boat enthusiasts can ensure their living areas remain secure while allowing unhindered access through the hatches.Step 1: Starting with the Flange
Sven begins by explaining that working on flanges vertically and horizontally is significantly easier than doing so in a flat position. To simplify the process further, he divides the task into two or three steps as suggested by fellow expert “for for.” This approach not only makes it more manageable but also allows for greater precision in crafting each component.Step 2: Applying Glue and Securing
Sven proceeds to apply glue along one edge of the flange, ensuring a secure bond when clamped into place. He emphasizes that this stage is crucial for maintaining the structural integrity of the flange, which in turn safeguards the living area beneath the canvas when hatches are open.Step 3: Allowing Time to Dry
After securely attaching the first portion of the flange, Sven allows ample time for it to dry before moving forward with additional steps. This patience and precision are key aspects of his successful boatbuilding methods.Step 4: Finishing Touches
Once the flange is fully dried, Sven removes the clamps carefully, ensuring no damage occurs during this process. He then moves on to attaching four more pieces onto these main frames, completing two pairs of flanges for the bulkhead hatches.The Final Touches
While two flanges form the primary support structure around the hatches, Sven mentions there are two additional pieces required at each end to ensure comprehensive protection. This attention to detail highlights his commitment to producing a durable and reliable design. “Sailing is about finding your path, whether it’s across an ocean or within yourself.” – Sven Yrvind In conclusion, making flanges around bulkhead hatches may seem complex at first glance, but by following Sven Yrvind’s meticulous process, enthusiasts can achieve professional-level results. Remember that the journey of boatbuilding is as rewarding as reaching your destination; it tests one’s patience and dedication. For those seeking to embark on this adventure or simply gain more insight into marine craftsmanship, Sven’s wisdom is invaluable.Once the flange is fully dried, Sven removes the clamps carefully, ensuring no damage occurs during this process. He then moves on to attaching four more pieces onto these main frames, completing two pairs of flanges for the bulkhead hatches.The Final Touches
While two flanges form the primary support structure around the hatches, Sven mentions there are two additional pieces required at each end to ensure comprehensive protection. This attention to detail highlights his commitment to producing a durable and reliable design. “Sailing is about finding your path, whether it’s across an ocean or within yourself.” – Sven Yrvind In conclusion, making flanges around bulkhead hatches may seem complex at first glance, but by following Sven Yrvind’s meticulous process, enthusiasts can achieve professional-level results. Remember that the journey of boatbuilding is as rewarding as reaching your destination; it tests one’s patience and dedication. For those seeking to embark on this adventure or simply gain more insight into marine craftsmanship, Sven’s wisdom is invaluable.Sven begins by explaining that working on flanges vertically and horizontally is significantly easier than doing so in a flat position. To simplify the process further, he divides the task into two or three steps as suggested by fellow expert “for for.” This approach not only makes it more manageable but also allows for greater precision in crafting each component.Step 2: Applying Glue and Securing
Sven proceeds to apply glue along one edge of the flange, ensuring a secure bond when clamped into place. He emphasizes that this stage is crucial for maintaining the structural integrity of the flange, which in turn safeguards the living area beneath the canvas when hatches are open.Step 3: Allowing Time to Dry
After securely attaching the first portion of the flange, Sven allows ample time for it to dry before moving forward with additional steps. This patience and precision are key aspects of his successful boatbuilding methods.Step 4: Finishing Touches
Once the flange is fully dried, Sven removes the clamps carefully, ensuring no damage occurs during this process. He then moves on to attaching four more pieces onto these main frames, completing two pairs of flanges for the bulkhead hatches.The Final Touches
While two flanges form the primary support structure around the hatches, Sven mentions there are two additional pieces required at each end to ensure comprehensive protection. This attention to detail highlights his commitment to producing a durable and reliable design. “Sailing is about finding your path, whether it’s across an ocean or within yourself.” – Sven Yrvind In conclusion, making flanges around bulkhead hatches may seem complex at first glance, but by following Sven Yrvind’s meticulous process, enthusiasts can achieve professional-level results. Remember that the journey of boatbuilding is as rewarding as reaching your destination; it tests one’s patience and dedication. For those seeking to embark on this adventure or simply gain more insight into marine craftsmanship, Sven’s wisdom is invaluable.Sven Yrvind, a renowned yacht designer and sailor, shares valuable insights on creating flanges around bulkhead hatches for canvas protection in this enlightening video. By following his expert guidance, boat enthusiasts can ensure their living areas remain secure while allowing unhindered access through the hatches.Step 1: Starting with the Flange
Sven begins by explaining that working on flanges vertically and horizontally is significantly easier than doing so in a flat position. To simplify the process further, he divides the task into two or three steps as suggested by fellow expert “for for.” This approach not only makes it more manageable but also allows for greater precision in crafting each component.Step 2: Applying Glue and Securing
Sven proceeds to apply glue along one edge of the flange, ensuring a secure bond when clamped into place. He emphasizes that this stage is crucial for maintaining the structural integrity of the flange, which in turn safeguards the living area beneath the canvas when hatches are open.Step 3: Allowing Time to Dry
After securely attaching the first portion of the flange, Sven allows ample time for it to dry before moving forward with additional steps. This patience and precision are key aspects of his successful boatbuilding methods.Step 4: Finishing Touches
Once the flange is fully dried, Sven removes the clamps carefully, ensuring no damage occurs during this process. He then moves on to attaching four more pieces onto these main frames, completing two pairs of flanges for the bulkhead hatches.The Final Touches
While two flanges form the primary support structure around the hatches, Sven mentions there are two additional pieces required at each end to ensure comprehensive protection. This attention to detail highlights his commitment to producing a durable and reliable design. “Sailing is about finding your path, whether it’s across an ocean or within yourself.” – Sven Yrvind In conclusion, making flanges around bulkhead hatches may seem complex at first glance, but by following Sven Yrvind’s meticulous process, enthusiasts can achieve professional-level results. Remember that the journey of boatbuilding is as rewarding as reaching your destination; it tests one’s patience and dedication. For those seeking to embark on this adventure or simply gain more insight into marine craftsmanship, Sven’s wisdom is invaluable.Making Flanges Around Bulkhead Hatches for Canvas
Sven Yrvind, a renowned yacht designer and sailor, shares valuable insights on creating flanges around bulkhead hatches for canvas protection in this enlightening video. By following his expert guidance, boat enthusiasts can ensure their living areas remain secure while allowing unhindered access through the hatches.Step 1: Starting with the Flange
Sven begins by explaining that working on flanges vertically and horizontally is significantly easier than doing so in a flat position. To simplify the process further, he divides the task into two or three steps as suggested by fellow expert “for for.” This approach not only makes it more manageable but also allows for greater precision in crafting each component.Step 2: Applying Glue and Securing
Sven proceeds to apply glue along one edge of the flange, ensuring a secure bond when clamped into place. He emphasizes that this stage is crucial for maintaining the structural integrity of the flange, which in turn safeguards the living area beneath the canvas when hatches are open.Step 3: Allowing Time to Dry
After securely attaching the first portion of the flange, Sven allows ample time for it to dry before moving forward with additional steps. This patience and precision are key aspects of his successful boatbuilding methods.Step 4: Finishing Touches
Once the flange is fully dried, Sven removes the clamps carefully, ensuring no damage occurs during this process. He then moves on to attaching four more pieces onto these main frames, completing two pairs of flanges for the bulkhead hatches.The Final Touches
While two flanges form the primary support structure around the hatches, Sven mentions there are two additional pieces required at each end to ensure comprehensive protection. This attention to detail highlights his commitment to producing a durable and reliable design. “Sailing is about finding your path, whether it’s across an ocean or within yourself.” – Sven Yrvind In conclusion, making flanges around bulkhead hatches may seem complex at first glance, but by following Sven Yrvind’s meticulous process, enthusiasts can achieve professional-level results. Remember that the journey of boatbuilding is as rewarding as reaching your destination; it tests one’s patience and dedication. For those seeking to embark on this adventure or simply gain more insight into marine craftsmanship, Sven’s wisdom is invaluable.After securely attaching the first portion of the flange, Sven allows ample time for it to dry before moving forward with additional steps. This patience and precision are key aspects of his successful boatbuilding methods.Step 4: Finishing Touches
Once the flange is fully dried, Sven removes the clamps carefully, ensuring no damage occurs during this process. He then moves on to attaching four more pieces onto these main frames, completing two pairs of flanges for the bulkhead hatches.The Final Touches
While two flanges form the primary support structure around the hatches, Sven mentions there are two additional pieces required at each end to ensure comprehensive protection. This attention to detail highlights his commitment to producing a durable and reliable design. “Sailing is about finding your path, whether it’s across an ocean or within yourself.” – Sven Yrvind In conclusion, making flanges around bulkhead hatches may seem complex at first glance, but by following Sven Yrvind’s meticulous process, enthusiasts can achieve professional-level results. Remember that the journey of boatbuilding is as rewarding as reaching your destination; it tests one’s patience and dedication. For those seeking to embark on this adventure or simply gain more insight into marine craftsmanship, Sven’s wisdom is invaluable.Sven begins by explaining that working on flanges vertically and horizontally is significantly easier than doing so in a flat position. To simplify the process further, he divides the task into two or three steps as suggested by fellow expert “for for.” This approach not only makes it more manageable but also allows for greater precision in crafting each component.Step 2: Applying Glue and Securing
Sven proceeds to apply glue along one edge of the flange, ensuring a secure bond when clamped into place. He emphasizes that this stage is crucial for maintaining the structural integrity of the flange, which in turn safeguards the living area beneath the canvas when hatches are open.Step 3: Allowing Time to Dry
After securely attaching the first portion of the flange, Sven allows ample time for it to dry before moving forward with additional steps. This patience and precision are key aspects of his successful boatbuilding methods.Step 4: Finishing Touches
Once the flange is fully dried, Sven removes the clamps carefully, ensuring no damage occurs during this process. He then moves on to attaching four more pieces onto these main frames, completing two pairs of flanges for the bulkhead hatches.The Final Touches
While two flanges form the primary support structure around the hatches, Sven mentions there are two additional pieces required at each end to ensure comprehensive protection. This attention to detail highlights his commitment to producing a durable and reliable design. “Sailing is about finding your path, whether it’s across an ocean or within yourself.” – Sven Yrvind In conclusion, making flanges around bulkhead hatches may seem complex at first glance, but by following Sven Yrvind’s meticulous process, enthusiasts can achieve professional-level results. Remember that the journey of boatbuilding is as rewarding as reaching your destination; it tests one’s patience and dedication. For those seeking to embark on this adventure or simply gain more insight into marine craftsmanship, Sven’s wisdom is invaluable.Sven Yrvind, a renowned yacht designer and sailor, shares valuable insights on creating flanges around bulkhead hatches for canvas protection in this enlightening video. By following his expert guidance, boat enthusiasts can ensure their living areas remain secure while allowing unhindered access through the hatches.Step 1: Starting with the Flange
Sven begins by explaining that working on flanges vertically and horizontally is significantly easier than doing so in a flat position. To simplify the process further, he divides the task into two or three steps as suggested by fellow expert “for for.” This approach not only makes it more manageable but also allows for greater precision in crafting each component.Step 2: Applying Glue and Securing
Sven proceeds to apply glue along one edge of the flange, ensuring a secure bond when clamped into place. He emphasizes that this stage is crucial for maintaining the structural integrity of the flange, which in turn safeguards the living area beneath the canvas when hatches are open.Step 3: Allowing Time to Dry
After securely attaching the first portion of the flange, Sven allows ample time for it to dry before moving forward with additional steps. This patience and precision are key aspects of his successful boatbuilding methods.Step 4: Finishing Touches
Once the flange is fully dried, Sven removes the clamps carefully, ensuring no damage occurs during this process. He then moves on to attaching four more pieces onto these main frames, completing two pairs of flanges for the bulkhead hatches.The Final Touches
While two flanges form the primary support structure around the hatches, Sven mentions there are two additional pieces required at each end to ensure comprehensive protection. This attention to detail highlights his commitment to producing a durable and reliable design. “Sailing is about finding your path, whether it’s across an ocean or within yourself.” – Sven Yrvind In conclusion, making flanges around bulkhead hatches may seem complex at first glance, but by following Sven Yrvind’s meticulous process, enthusiasts can achieve professional-level results. Remember that the journey of boatbuilding is as rewarding as reaching your destination; it tests one’s patience and dedication. For those seeking to embark on this adventure or simply gain more insight into marine craftsmanship, Sven’s wisdom is invaluable.Making Flanges Around Bulkhead Hatches for Canvas
Sven Yrvind, a renowned yacht designer and sailor, shares valuable insights on creating flanges around bulkhead hatches for canvas protection in this enlightening video. By following his expert guidance, boat enthusiasts can ensure their living areas remain secure while allowing unhindered access through the hatches.Step 1: Starting with the Flange
Sven begins by explaining that working on flanges vertically and horizontally is significantly easier than doing so in a flat position. To simplify the process further, he divides the task into two or three steps as suggested by fellow expert “for for.” This approach not only makes it more manageable but also allows for greater precision in crafting each component.Step 2: Applying Glue and Securing
Sven proceeds to apply glue along one edge of the flange, ensuring a secure bond when clamped into place. He emphasizes that this stage is crucial for maintaining the structural integrity of the flange, which in turn safeguards the living area beneath the canvas when hatches are open.Step 3: Allowing Time to Dry
After securely attaching the first portion of the flange, Sven allows ample time for it to dry before moving forward with additional steps. This patience and precision are key aspects of his successful boatbuilding methods.Step 4: Finishing Touches
Once the flange is fully dried, Sven removes the clamps carefully, ensuring no damage occurs during this process. He then moves on to attaching four more pieces onto these main frames, completing two pairs of flanges for the bulkhead hatches.The Final Touches
While two flanges form the primary support structure around the hatches, Sven mentions there are two additional pieces required at each end to ensure comprehensive protection. This attention to detail highlights his commitment to producing a durable and reliable design. “Sailing is about finding your path, whether it’s across an ocean or within yourself.” – Sven Yrvind In conclusion, making flanges around bulkhead hatches may seem complex at first glance, but by following Sven Yrvind’s meticulous process, enthusiasts can achieve professional-level results. Remember that the journey of boatbuilding is as rewarding as reaching your destination; it tests one’s patience and dedication. For those seeking to embark on this adventure or simply gain more insight into marine craftsmanship, Sven’s wisdom is invaluable.Sven proceeds to apply glue along one edge of the flange, ensuring a secure bond when clamped into place. He emphasizes that this stage is crucial for maintaining the structural integrity of the flange, which in turn safeguards the living area beneath the canvas when hatches are open.Step 3: Allowing Time to Dry
After securely attaching the first portion of the flange, Sven allows ample time for it to dry before moving forward with additional steps. This patience and precision are key aspects of his successful boatbuilding methods.Step 4: Finishing Touches
Once the flange is fully dried, Sven removes the clamps carefully, ensuring no damage occurs during this process. He then moves on to attaching four more pieces onto these main frames, completing two pairs of flanges for the bulkhead hatches.The Final Touches
While two flanges form the primary support structure around the hatches, Sven mentions there are two additional pieces required at each end to ensure comprehensive protection. This attention to detail highlights his commitment to producing a durable and reliable design. “Sailing is about finding your path, whether it’s across an ocean or within yourself.” – Sven Yrvind In conclusion, making flanges around bulkhead hatches may seem complex at first glance, but by following Sven Yrvind’s meticulous process, enthusiasts can achieve professional-level results. Remember that the journey of boatbuilding is as rewarding as reaching your destination; it tests one’s patience and dedication. For those seeking to embark on this adventure or simply gain more insight into marine craftsmanship, Sven’s wisdom is invaluable.Sven begins by explaining that working on flanges vertically and horizontally is significantly easier than doing so in a flat position. To simplify the process further, he divides the task into two or three steps as suggested by fellow expert “for for.” This approach not only makes it more manageable but also allows for greater precision in crafting each component.Step 2: Applying Glue and Securing
Sven proceeds to apply glue along one edge of the flange, ensuring a secure bond when clamped into place. He emphasizes that this stage is crucial for maintaining the structural integrity of the flange, which in turn safeguards the living area beneath the canvas when hatches are open.Step 3: Allowing Time to Dry
After securely attaching the first portion of the flange, Sven allows ample time for it to dry before moving forward with additional steps. This patience and precision are key aspects of his successful boatbuilding methods.Step 4: Finishing Touches
Once the flange is fully dried, Sven removes the clamps carefully, ensuring no damage occurs during this process. He then moves on to attaching four more pieces onto these main frames, completing two pairs of flanges for the bulkhead hatches.The Final Touches
While two flanges form the primary support structure around the hatches, Sven mentions there are two additional pieces required at each end to ensure comprehensive protection. This attention to detail highlights his commitment to producing a durable and reliable design. “Sailing is about finding your path, whether it’s across an ocean or within yourself.” – Sven Yrvind In conclusion, making flanges around bulkhead hatches may seem complex at first glance, but by following Sven Yrvind’s meticulous process, enthusiasts can achieve professional-level results. Remember that the journey of boatbuilding is as rewarding as reaching your destination; it tests one’s patience and dedication. For those seeking to embark on this adventure or simply gain more insight into marine craftsmanship, Sven’s wisdom is invaluable.Sven Yrvind, a renowned yacht designer and sailor, shares valuable insights on creating flanges around bulkhead hatches for canvas protection in this enlightening video. By following his expert guidance, boat enthusiasts can ensure their living areas remain secure while allowing unhindered access through the hatches.Step 1: Starting with the Flange
Sven begins by explaining that working on flanges vertically and horizontally is significantly easier than doing so in a flat position. To simplify the process further, he divides the task into two or three steps as suggested by fellow expert “for for.” This approach not only makes it more manageable but also allows for greater precision in crafting each component.Step 2: Applying Glue and Securing
Sven proceeds to apply glue along one edge of the flange, ensuring a secure bond when clamped into place. He emphasizes that this stage is crucial for maintaining the structural integrity of the flange, which in turn safeguards the living area beneath the canvas when hatches are open.Step 3: Allowing Time to Dry
After securely attaching the first portion of the flange, Sven allows ample time for it to dry before moving forward with additional steps. This patience and precision are key aspects of his successful boatbuilding methods.Step 4: Finishing Touches
Once the flange is fully dried, Sven removes the clamps carefully, ensuring no damage occurs during this process. He then moves on to attaching four more pieces onto these main frames, completing two pairs of flanges for the bulkhead hatches.The Final Touches
While two flanges form the primary support structure around the hatches, Sven mentions there are two additional pieces required at each end to ensure comprehensive protection. This attention to detail highlights his commitment to producing a durable and reliable design. “Sailing is about finding your path, whether it’s across an ocean or within yourself.” – Sven Yrvind In conclusion, making flanges around bulkhead hatches may seem complex at first glance, but by following Sven Yrvind’s meticulous process, enthusiasts can achieve professional-level results. Remember that the journey of boatbuilding is as rewarding as reaching your destination; it tests one’s patience and dedication. For those seeking to embark on this adventure or simply gain more insight into marine craftsmanship, Sven’s wisdom is invaluable.Making Flanges Around Bulkhead Hatches for Canvas
Sven Yrvind, a renowned yacht designer and sailor, shares valuable insights on creating flanges around bulkhead hatches for canvas protection in this enlightening video. By following his expert guidance, boat enthusiasts can ensure their living areas remain secure while allowing unhindered access through the hatches.Step 1: Starting with the Flange
Sven begins by explaining that working on flanges vertically and horizontally is significantly easier than doing so in a flat position. To simplify the process further, he divides the task into two or three steps as suggested by fellow expert “for for.” This approach not only makes it more manageable but also allows for greater precision in crafting each component.Step 2: Applying Glue and Securing
Sven proceeds to apply glue along one edge of the flange, ensuring a secure bond when clamped into place. He emphasizes that this stage is crucial for maintaining the structural integrity of the flange, which in turn safeguards the living area beneath the canvas when hatches are open.Step 3: Allowing Time to Dry
After securely attaching the first portion of the flange, Sven allows ample time for it to dry before moving forward with additional steps. This patience and precision are key aspects of his successful boatbuilding methods.Step 4: Finishing Touches
Once the flange is fully dried, Sven removes the clamps carefully, ensuring no damage occurs during this process. He then moves on to attaching four more pieces onto these main frames, completing two pairs of flanges for the bulkhead hatches.The Final Touches
While two flanges form the primary support structure around the hatches, Sven mentions there are two additional pieces required at each end to ensure comprehensive protection. This attention to detail highlights his commitment to producing a durable and reliable design. “Sailing is about finding your path, whether it’s across an ocean or within yourself.” – Sven Yrvind In conclusion, making flanges around bulkhead hatches may seem complex at first glance, but by following Sven Yrvind’s meticulous process, enthusiasts can achieve professional-level results. Remember that the journey of boatbuilding is as rewarding as reaching your destination; it tests one’s patience and dedication. For those seeking to embark on this adventure or simply gain more insight into marine craftsmanship, Sven’s wisdom is invaluable.Once the flange is fully dried, Sven removes the clamps carefully, ensuring no damage occurs during this process. He then moves on to attaching four more pieces onto these main frames, completing two pairs of flanges for the bulkhead hatches.The Final Touches
While two flanges form the primary support structure around the hatches, Sven mentions there are two additional pieces required at each end to ensure comprehensive protection. This attention to detail highlights his commitment to producing a durable and reliable design. “Sailing is about finding your path, whether it’s across an ocean or within yourself.” – Sven Yrvind In conclusion, making flanges around bulkhead hatches may seem complex at first glance, but by following Sven Yrvind’s meticulous process, enthusiasts can achieve professional-level results. Remember that the journey of boatbuilding is as rewarding as reaching your destination; it tests one’s patience and dedication. For those seeking to embark on this adventure or simply gain more insight into marine craftsmanship, Sven’s wisdom is invaluable.Sven proceeds to apply glue along one edge of the flange, ensuring a secure bond when clamped into place. He emphasizes that this stage is crucial for maintaining the structural integrity of the flange, which in turn safeguards the living area beneath the canvas when hatches are open.Step 3: Allowing Time to Dry
After securely attaching the first portion of the flange, Sven allows ample time for it to dry before moving forward with additional steps. This patience and precision are key aspects of his successful boatbuilding methods.Step 4: Finishing Touches
Once the flange is fully dried, Sven removes the clamps carefully, ensuring no damage occurs during this process. He then moves on to attaching four more pieces onto these main frames, completing two pairs of flanges for the bulkhead hatches.The Final Touches
While two flanges form the primary support structure around the hatches, Sven mentions there are two additional pieces required at each end to ensure comprehensive protection. This attention to detail highlights his commitment to producing a durable and reliable design. “Sailing is about finding your path, whether it’s across an ocean or within yourself.” – Sven Yrvind In conclusion, making flanges around bulkhead hatches may seem complex at first glance, but by following Sven Yrvind’s meticulous process, enthusiasts can achieve professional-level results. Remember that the journey of boatbuilding is as rewarding as reaching your destination; it tests one’s patience and dedication. For those seeking to embark on this adventure or simply gain more insight into marine craftsmanship, Sven’s wisdom is invaluable.Sven begins by explaining that working on flanges vertically and horizontally is significantly easier than doing so in a flat position. To simplify the process further, he divides the task into two or three steps as suggested by fellow expert “for for.” This approach not only makes it more manageable but also allows for greater precision in crafting each component.Step 2: Applying Glue and Securing
Sven proceeds to apply glue along one edge of the flange, ensuring a secure bond when clamped into place. He emphasizes that this stage is crucial for maintaining the structural integrity of the flange, which in turn safeguards the living area beneath the canvas when hatches are open.Step 3: Allowing Time to Dry
After securely attaching the first portion of the flange, Sven allows ample time for it to dry before moving forward with additional steps. This patience and precision are key aspects of his successful boatbuilding methods.Step 4: Finishing Touches
Once the flange is fully dried, Sven removes the clamps carefully, ensuring no damage occurs during this process. He then moves on to attaching four more pieces onto these main frames, completing two pairs of flanges for the bulkhead hatches.The Final Touches
While two flanges form the primary support structure around the hatches, Sven mentions there are two additional pieces required at each end to ensure comprehensive protection. This attention to detail highlights his commitment to producing a durable and reliable design. “Sailing is about finding your path, whether it’s across an ocean or within yourself.” – Sven Yrvind In conclusion, making flanges around bulkhead hatches may seem complex at first glance, but by following Sven Yrvind’s meticulous process, enthusiasts can achieve professional-level results. Remember that the journey of boatbuilding is as rewarding as reaching your destination; it tests one’s patience and dedication. For those seeking to embark on this adventure or simply gain more insight into marine craftsmanship, Sven’s wisdom is invaluable.Sven Yrvind, a renowned yacht designer and sailor, shares valuable insights on creating flanges around bulkhead hatches for canvas protection in this enlightening video. By following his expert guidance, boat enthusiasts can ensure their living areas remain secure while allowing unhindered access through the hatches.Step 1: Starting with the Flange
Sven begins by explaining that working on flanges vertically and horizontally is significantly easier than doing so in a flat position. To simplify the process further, he divides the task into two or three steps as suggested by fellow expert “for for.” This approach not only makes it more manageable but also allows for greater precision in crafting each component.Step 2: Applying Glue and Securing
Sven proceeds to apply glue along one edge of the flange, ensuring a secure bond when clamped into place. He emphasizes that this stage is crucial for maintaining the structural integrity of the flange, which in turn safeguards the living area beneath the canvas when hatches are open.Step 3: Allowing Time to Dry
After securely attaching the first portion of the flange, Sven allows ample time for it to dry before moving forward with additional steps. This patience and precision are key aspects of his successful boatbuilding methods.Step 4: Finishing Touches
Once the flange is fully dried, Sven removes the clamps carefully, ensuring no damage occurs during this process. He then moves on to attaching four more pieces onto these main frames, completing two pairs of flanges for the bulkhead hatches.The Final Touches
While two flanges form the primary support structure around the hatches, Sven mentions there are two additional pieces required at each end to ensure comprehensive protection. This attention to detail highlights his commitment to producing a durable and reliable design. “Sailing is about finding your path, whether it’s across an ocean or within yourself.” – Sven Yrvind In conclusion, making flanges around bulkhead hatches may seem complex at first glance, but by following Sven Yrvind’s meticulous process, enthusiasts can achieve professional-level results. Remember that the journey of boatbuilding is as rewarding as reaching your destination; it tests one’s patience and dedication. For those seeking to embark on this adventure or simply gain more insight into marine craftsmanship, Sven’s wisdom is invaluable.Making Flanges Around Bulkhead Hatches for Canvas
Sven Yrvind, a renowned yacht designer and sailor, shares valuable insights on creating flanges around bulkhead hatches for canvas protection in this enlightening video. By following his expert guidance, boat enthusiasts can ensure their living areas remain secure while allowing unhindered access through the hatches.Step 1: Starting with the Flange
Sven begins by explaining that working on flanges vertically and horizontally is significantly easier than doing so in a flat position. To simplify the process further, he divides the task into two or three steps as suggested by fellow expert “for for.” This approach not only makes it more manageable but also allows for greater precision in crafting each component.Step 2: Applying Glue and Securing
Sven proceeds to apply glue along one edge of the flange, ensuring a secure bond when clamped into place. He emphasizes that this stage is crucial for maintaining the structural integrity of the flange, which in turn safeguards the living area beneath the canvas when hatches are open.Step 3: Allowing Time to Dry
After securely attaching the first portion of the flange, Sven allows ample time for it to dry before moving forward with additional steps. This patience and precision are key aspects of his successful boatbuilding methods.Step 4: Finishing Touches
Once the flange is fully dried, Sven removes the clamps carefully, ensuring no damage occurs during this process. He then moves on to attaching four more pieces onto these main frames, completing two pairs of flanges for the bulkhead hatches.The Final Touches
While two flanges form the primary support structure around the hatches, Sven mentions there are two additional pieces required at each end to ensure comprehensive protection. This attention to detail highlights his commitment to producing a durable and reliable design. “Sailing is about finding your path, whether it’s across an ocean or within yourself.” – Sven Yrvind In conclusion, making flanges around bulkhead hatches may seem complex at first glance, but by following Sven Yrvind’s meticulous process, enthusiasts can achieve professional-level results. Remember that the journey of boatbuilding is as rewarding as reaching your destination; it tests one’s patience and dedication. For those seeking to embark on this adventure or simply gain more insight into marine craftsmanship, Sven’s wisdom is invaluable.After securely attaching the first portion of the flange, Sven allows ample time for it to dry before moving forward with additional steps. This patience and precision are key aspects of his successful boatbuilding methods.Step 4: Finishing Touches
Once the flange is fully dried, Sven removes the clamps carefully, ensuring no damage occurs during this process. He then moves on to attaching four more pieces onto these main frames, completing two pairs of flanges for the bulkhead hatches.The Final Touches
While two flanges form the primary support structure around the hatches, Sven mentions there are two additional pieces required at each end to ensure comprehensive protection. This attention to detail highlights his commitment to producing a durable and reliable design. “Sailing is about finding your path, whether it’s across an ocean or within yourself.” – Sven Yrvind In conclusion, making flanges around bulkhead hatches may seem complex at first glance, but by following Sven Yrvind’s meticulous process, enthusiasts can achieve professional-level results. Remember that the journey of boatbuilding is as rewarding as reaching your destination; it tests one’s patience and dedication. For those seeking to embark on this adventure or simply gain more insight into marine craftsmanship, Sven’s wisdom is invaluable.Sven proceeds to apply glue along one edge of the flange, ensuring a secure bond when clamped into place. He emphasizes that this stage is crucial for maintaining the structural integrity of the flange, which in turn safeguards the living area beneath the canvas when hatches are open.Step 3: Allowing Time to Dry
After securely attaching the first portion of the flange, Sven allows ample time for it to dry before moving forward with additional steps. This patience and precision are key aspects of his successful boatbuilding methods.Step 4: Finishing Touches
Once the flange is fully dried, Sven removes the clamps carefully, ensuring no damage occurs during this process. He then moves on to attaching four more pieces onto these main frames, completing two pairs of flanges for the bulkhead hatches.The Final Touches
While two flanges form the primary support structure around the hatches, Sven mentions there are two additional pieces required at each end to ensure comprehensive protection. This attention to detail highlights his commitment to producing a durable and reliable design. “Sailing is about finding your path, whether it’s across an ocean or within yourself.” – Sven Yrvind In conclusion, making flanges around bulkhead hatches may seem complex at first glance, but by following Sven Yrvind’s meticulous process, enthusiasts can achieve professional-level results. Remember that the journey of boatbuilding is as rewarding as reaching your destination; it tests one’s patience and dedication. For those seeking to embark on this adventure or simply gain more insight into marine craftsmanship, Sven’s wisdom is invaluable.Sven begins by explaining that working on flanges vertically and horizontally is significantly easier than doing so in a flat position. To simplify the process further, he divides the task into two or three steps as suggested by fellow expert “for for.” This approach not only makes it more manageable but also allows for greater precision in crafting each component.Step 2: Applying Glue and Securing
Sven proceeds to apply glue along one edge of the flange, ensuring a secure bond when clamped into place. He emphasizes that this stage is crucial for maintaining the structural integrity of the flange, which in turn safeguards the living area beneath the canvas when hatches are open.Step 3: Allowing Time to Dry
After securely attaching the first portion of the flange, Sven allows ample time for it to dry before moving forward with additional steps. This patience and precision are key aspects of his successful boatbuilding methods.Step 4: Finishing Touches
Once the flange is fully dried, Sven removes the clamps carefully, ensuring no damage occurs during this process. He then moves on to attaching four more pieces onto these main frames, completing two pairs of flanges for the bulkhead hatches.The Final Touches
While two flanges form the primary support structure around the hatches, Sven mentions there are two additional pieces required at each end to ensure comprehensive protection. This attention to detail highlights his commitment to producing a durable and reliable design. “Sailing is about finding your path, whether it’s across an ocean or within yourself.” – Sven Yrvind In conclusion, making flanges around bulkhead hatches may seem complex at first glance, but by following Sven Yrvind’s meticulous process, enthusiasts can achieve professional-level results. Remember that the journey of boatbuilding is as rewarding as reaching your destination; it tests one’s patience and dedication. For those seeking to embark on this adventure or simply gain more insight into marine craftsmanship, Sven’s wisdom is invaluable.Sven Yrvind, a renowned yacht designer and sailor, shares valuable insights on creating flanges around bulkhead hatches for canvas protection in this enlightening video. By following his expert guidance, boat enthusiasts can ensure their living areas remain secure while allowing unhindered access through the hatches.Step 1: Starting with the Flange
Sven begins by explaining that working on flanges vertically and horizontally is significantly easier than doing so in a flat position. To simplify the process further, he divides the task into two or three steps as suggested by fellow expert “for for.” This approach not only makes it more manageable but also allows for greater precision in crafting each component.Step 2: Applying Glue and Securing
Sven proceeds to apply glue along one edge of the flange, ensuring a secure bond when clamped into place. He emphasizes that this stage is crucial for maintaining the structural integrity of the flange, which in turn safeguards the living area beneath the canvas when hatches are open.Step 3: Allowing Time to Dry
After securely attaching the first portion of the flange, Sven allows ample time for it to dry before moving forward with additional steps. This patience and precision are key aspects of his successful boatbuilding methods.Step 4: Finishing Touches
Once the flange is fully dried, Sven removes the clamps carefully, ensuring no damage occurs during this process. He then moves on to attaching four more pieces onto these main frames, completing two pairs of flanges for the bulkhead hatches.The Final Touches
While two flanges form the primary support structure around the hatches, Sven mentions there are two additional pieces required at each end to ensure comprehensive protection. This attention to detail highlights his commitment to producing a durable and reliable design. “Sailing is about finding your path, whether it’s across an ocean or within yourself.” – Sven Yrvind In conclusion, making flanges around bulkhead hatches may seem complex at first glance, but by following Sven Yrvind’s meticulous process, enthusiasts can achieve professional-level results. Remember that the journey of boatbuilding is as rewarding as reaching your destination; it tests one’s patience and dedication. For those seeking to embark on this adventure or simply gain more insight into marine craftsmanship, Sven’s wisdom is invaluable.Making Flanges Around Bulkhead Hatches for Canvas
Sven Yrvind, a renowned yacht designer and sailor, shares valuable insights on creating flanges around bulkhead hatches for canvas protection in this enlightening video. By following his expert guidance, boat enthusiasts can ensure their living areas remain secure while allowing unhindered access through the hatches.Step 1: Starting with the Flange
Sven begins by explaining that working on flanges vertically and horizontally is significantly easier than doing so in a flat position. To simplify the process further, he divides the task into two or three steps as suggested by fellow expert “for for.” This approach not only makes it more manageable but also allows for greater precision in crafting each component.Step 2: Applying Glue and Securing
Sven proceeds to apply glue along one edge of the flange, ensuring a secure bond when clamped into place. He emphasizes that this stage is crucial for maintaining the structural integrity of the flange, which in turn safeguards the living area beneath the canvas when hatches are open.Step 3: Allowing Time to Dry
After securely attaching the first portion of the flange, Sven allows ample time for it to dry before moving forward with additional steps. This patience and precision are key aspects of his successful boatbuilding methods.Step 4: Finishing Touches
Once the flange is fully dried, Sven removes the clamps carefully, ensuring no damage occurs during this process. He then moves on to attaching four more pieces onto these main frames, completing two pairs of flanges for the bulkhead hatches.The Final Touches
While two flanges form the primary support structure around the hatches, Sven mentions there are two additional pieces required at each end to ensure comprehensive protection. This attention to detail highlights his commitment to producing a durable and reliable design. “Sailing is about finding your path, whether it’s across an ocean or within yourself.” – Sven Yrvind In conclusion, making flanges around bulkhead hatches may seem complex at first glance, but by following Sven Yrvind’s meticulous process, enthusiasts can achieve professional-level results. Remember that the journey of boatbuilding is as rewarding as reaching your destination; it tests one’s patience and dedication. For those seeking to embark on this adventure or simply gain more insight into marine craftsmanship, Sven’s wisdom is invaluable.Once the flange is fully dried, Sven removes the clamps carefully, ensuring no damage occurs during this process. He then moves on to attaching four more pieces onto these main frames, completing two pairs of flanges for the bulkhead hatches.The Final Touches
While two flanges form the primary support structure around the hatches, Sven mentions there are two additional pieces required at each end to ensure comprehensive protection. This attention to detail highlights his commitment to producing a durable and reliable design. “Sailing is about finding your path, whether it’s across an ocean or within yourself.” – Sven Yrvind In conclusion, making flanges around bulkhead hatches may seem complex at first glance, but by following Sven Yrvind’s meticulous process, enthusiasts can achieve professional-level results. Remember that the journey of boatbuilding is as rewarding as reaching your destination; it tests one’s patience and dedication. For those seeking to embark on this adventure or simply gain more insight into marine craftsmanship, Sven’s wisdom is invaluable.After securely attaching the first portion of the flange, Sven allows ample time for it to dry before moving forward with additional steps. This patience and precision are key aspects of his successful boatbuilding methods.Step 4: Finishing Touches
Once the flange is fully dried, Sven removes the clamps carefully, ensuring no damage occurs during this process. He then moves on to attaching four more pieces onto these main frames, completing two pairs of flanges for the bulkhead hatches.The Final Touches
While two flanges form the primary support structure around the hatches, Sven mentions there are two additional pieces required at each end to ensure comprehensive protection. This attention to detail highlights his commitment to producing a durable and reliable design. “Sailing is about finding your path, whether it’s across an ocean or within yourself.” – Sven Yrvind In conclusion, making flanges around bulkhead hatches may seem complex at first glance, but by following Sven Yrvind’s meticulous process, enthusiasts can achieve professional-level results. Remember that the journey of boatbuilding is as rewarding as reaching your destination; it tests one’s patience and dedication. For those seeking to embark on this adventure or simply gain more insight into marine craftsmanship, Sven’s wisdom is invaluable.Sven proceeds to apply glue along one edge of the flange, ensuring a secure bond when clamped into place. He emphasizes that this stage is crucial for maintaining the structural integrity of the flange, which in turn safeguards the living area beneath the canvas when hatches are open.Step 3: Allowing Time to Dry
After securely attaching the first portion of the flange, Sven allows ample time for it to dry before moving forward with additional steps. This patience and precision are key aspects of his successful boatbuilding methods.Step 4: Finishing Touches
Once the flange is fully dried, Sven removes the clamps carefully, ensuring no damage occurs during this process. He then moves on to attaching four more pieces onto these main frames, completing two pairs of flanges for the bulkhead hatches.The Final Touches
While two flanges form the primary support structure around the hatches, Sven mentions there are two additional pieces required at each end to ensure comprehensive protection. This attention to detail highlights his commitment to producing a durable and reliable design. “Sailing is about finding your path, whether it’s across an ocean or within yourself.” – Sven Yrvind In conclusion, making flanges around bulkhead hatches may seem complex at first glance, but by following Sven Yrvind’s meticulous process, enthusiasts can achieve professional-level results. Remember that the journey of boatbuilding is as rewarding as reaching your destination; it tests one’s patience and dedication. For those seeking to embark on this adventure or simply gain more insight into marine craftsmanship, Sven’s wisdom is invaluable.Sven begins by explaining that working on flanges vertically and horizontally is significantly easier than doing so in a flat position. To simplify the process further, he divides the task into two or three steps as suggested by fellow expert “for for.” This approach not only makes it more manageable but also allows for greater precision in crafting each component.Step 2: Applying Glue and Securing
Sven proceeds to apply glue along one edge of the flange, ensuring a secure bond when clamped into place. He emphasizes that this stage is crucial for maintaining the structural integrity of the flange, which in turn safeguards the living area beneath the canvas when hatches are open.Step 3: Allowing Time to Dry
After securely attaching the first portion of the flange, Sven allows ample time for it to dry before moving forward with additional steps. This patience and precision are key aspects of his successful boatbuilding methods.Step 4: Finishing Touches
Once the flange is fully dried, Sven removes the clamps carefully, ensuring no damage occurs during this process. He then moves on to attaching four more pieces onto these main frames, completing two pairs of flanges for the bulkhead hatches.The Final Touches
While two flanges form the primary support structure around the hatches, Sven mentions there are two additional pieces required at each end to ensure comprehensive protection. This attention to detail highlights his commitment to producing a durable and reliable design. “Sailing is about finding your path, whether it’s across an ocean or within yourself.” – Sven Yrvind In conclusion, making flanges around bulkhead hatches may seem complex at first glance, but by following Sven Yrvind’s meticulous process, enthusiasts can achieve professional-level results. Remember that the journey of boatbuilding is as rewarding as reaching your destination; it tests one’s patience and dedication. For those seeking to embark on this adventure or simply gain more insight into marine craftsmanship, Sven’s wisdom is invaluable.Sven Yrvind, a renowned yacht designer and sailor, shares valuable insights on creating flanges around bulkhead hatches for canvas protection in this enlightening video. By following his expert guidance, boat enthusiasts can ensure their living areas remain secure while allowing unhindered access through the hatches.Step 1: Starting with the Flange
Sven begins by explaining that working on flanges vertically and horizontally is significantly easier than doing so in a flat position. To simplify the process further, he divides the task into two or three steps as suggested by fellow expert “for for.” This approach not only makes it more manageable but also allows for greater precision in crafting each component.Step 2: Applying Glue and Securing
Sven proceeds to apply glue along one edge of the flange, ensuring a secure bond when clamped into place. He emphasizes that this stage is crucial for maintaining the structural integrity of the flange, which in turn safeguards the living area beneath the canvas when hatches are open.Step 3: Allowing Time to Dry
After securely attaching the first portion of the flange, Sven allows ample time for it to dry before moving forward with additional steps. This patience and precision are key aspects of his successful boatbuilding methods.Step 4: Finishing Touches
Once the flange is fully dried, Sven removes the clamps carefully, ensuring no damage occurs during this process. He then moves on to attaching four more pieces onto these main frames, completing two pairs of flanges for the bulkhead hatches.The Final Touches
While two flanges form the primary support structure around the hatches, Sven mentions there are two additional pieces required at each end to ensure comprehensive protection. This attention to detail highlights his commitment to producing a durable and reliable design. “Sailing is about finding your path, whether it’s across an ocean or within yourself.” – Sven Yrvind In conclusion, making flanges around bulkhead hatches may seem complex at first glance, but by following Sven Yrvind’s meticulous process, enthusiasts can achieve professional-level results. Remember that the journey of boatbuilding is as rewarding as reaching your destination; it tests one’s patience and dedication. For those seeking to embark on this adventure or simply gain more insight into marine craftsmanship, Sven’s wisdom is invaluable.Making Flanges Around Bulkhead Hatches for Canvas
Sven Yrvind, a renowned yacht designer and sailor, shares valuable insights on creating flanges around bulkhead hatches for canvas protection in this enlightening video. By following his expert guidance, boat enthusiasts can ensure their living areas remain secure while allowing unhindered access through the hatches.Step 1: Starting with the Flange
Sven begins by explaining that working on flanges vertically and horizontally is significantly easier than doing so in a flat position. To simplify the process further, he divides the task into two or three steps as suggested by fellow expert “for for.” This approach not only makes it more manageable but also allows for greater precision in crafting each component.Step 2: Applying Glue and Securing
Sven proceeds to apply glue along one edge of the flange, ensuring a secure bond when clamped into place. He emphasizes that this stage is crucial for maintaining the structural integrity of the flange, which in turn safeguards the living area beneath the canvas when hatches are open.Step 3: Allowing Time to Dry
After securely attaching the first portion of the flange, Sven allows ample time for it to dry before moving forward with additional steps. This patience and precision are key aspects of his successful boatbuilding methods.Step 4: Finishing Touches
Once the flange is fully dried, Sven removes the clamps carefully, ensuring no damage occurs during this process. He then moves on to attaching four more pieces onto these main frames, completing two pairs of flanges for the bulkhead hatches.The Final Touches
While two flanges form the primary support structure around the hatches, Sven mentions there are two additional pieces required at each end to ensure comprehensive protection. This attention to detail highlights his commitment to producing a durable and reliable design. “Sailing is about finding your path, whether it’s across an ocean or within yourself.” – Sven Yrvind In conclusion, making flanges around bulkhead hatches may seem complex at first glance, but by following Sven Yrvind’s meticulous process, enthusiasts can achieve professional-level results. Remember that the journey of boatbuilding is as rewarding as reaching your destination; it tests one’s patience and dedication. For those seeking to embark on this adventure or simply gain more insight into marine craftsmanship, Sven’s wisdom is invaluable.After securely attaching the first portion of the flange, Sven allows ample time for it to dry before moving forward with additional steps. This patience and precision are key aspects of his successful boatbuilding methods.Step 4: Finishing Touches
Once the flange is fully dried, Sven removes the clamps carefully, ensuring no damage occurs during this process. He then moves on to attaching four more pieces onto these main frames, completing two pairs of flanges for the bulkhead hatches.The Final Touches
While two flanges form the primary support structure around the hatches, Sven mentions there are two additional pieces required at each end to ensure comprehensive protection. This attention to detail highlights his commitment to producing a durable and reliable design. “Sailing is about finding your path, whether it’s across an ocean or within yourself.” – Sven Yrvind In conclusion, making flanges around bulkhead hatches may seem complex at first glance, but by following Sven Yrvind’s meticulous process, enthusiasts can achieve professional-level results. Remember that the journey of boatbuilding is as rewarding as reaching your destination; it tests one’s patience and dedication. For those seeking to embark on this adventure or simply gain more insight into marine craftsmanship, Sven’s wisdom is invaluable.Sven Yrvind, a renowned yacht designer and sailor, shares valuable insights on creating flanges around bulkhead hatches for canvas protection in this enlightening video. By following his expert guidance, boat enthusiasts can ensure their living areas remain secure while allowing unhindered access through the hatches.Step 1: Starting with the Flange
Sven begins by explaining that working on flanges vertically and horizontally is significantly easier than doing so in a flat position. To simplify the process further, he divides the task into two or three steps as suggested by fellow expert “for for.” This approach not only makes it more manageable but also allows for greater precision in crafting each component.Step 2: Applying Glue and Securing
Sven proceeds to apply glue along one edge of the flange, ensuring a secure bond when clamped into place. He emphasizes that this stage is crucial for maintaining the structural integrity of the flange, which in turn safeguards the living area beneath the canvas when hatches are open.Step 3: Allowing Time to Dry
After securely attaching the first portion of the flange, Sven allows ample time for it to dry before moving forward with additional steps. This patience and precision are key aspects of his successful boatbuilding methods.Step 4: Finishing Touches
Once the flange is fully dried, Sven removes the clamps carefully, ensuring no damage occurs during this process. He then moves on to attaching four more pieces onto these main frames, completing two pairs of flanges for the bulkhead hatches.The Final Touches
While two flanges form the primary support structure around the hatches, Sven mentions there are two additional pieces required at each end to ensure comprehensive protection. This attention to detail highlights his commitment to producing a durable and reliable design. “Sailing is about finding your path, whether it’s across an ocean or within yourself.” – Sven Yrvind In conclusion, making flanges around bulkhead hatches may seem complex at first glance, but by following Sven Yrvind’s meticulous process, enthusiasts can achieve professional-level results. Remember that the journey of boatbuilding is as rewarding as reaching your destination; it tests one’s patience and dedication. For those seeking to embark on this adventure or simply gain more insight into marine craftsmanship, Sven’s wisdom is invaluable.Making Flanges Around Bulkhead Hatches for Canvas
Sven Yrvind, a renowned yacht designer and sailor, shares valuable insights on creating flanges around bulkhead hatches for canvas protection in this enlightening video. By following his expert guidance, boat enthusiasts can ensure their living areas remain secure while allowing unhindered access through the hatches.Step 1: Starting with the Flange
Sven begins by explaining that working on flanges vertically and horizontally is significantly easier than doing so in a flat position. To simplify the process further, he divides the task into two or three steps as suggested by fellow expert “for for.” This approach not only makes it more manageable but also allows for greater precision in crafting each component.Step 2: Applying Glue and Securing
Sven proceeds to apply glue along one edge of the flange, ensuring a secure bond when clamped into place. He emphasizes that this stage is crucial for maintaining the structural integrity of the flange, which in turn safeguards the living area beneath the canvas when hatches are open.Step 3: Allowing Time to Dry
After securely attaching the first portion of the flange, Sven allows ample time for it to dry before moving forward with additional steps. This patience and precision are key aspects of his successful boatbuilding methods.Step 4: Finishing Touches
Once the flange is fully dried, Sven removes the clamps carefully, ensuring no damage occurs during this process. He then moves on to attaching four more pieces onto these main frames, completing two pairs of flanges for the bulkhead hatches.The Final Touches
While two flanges form the primary support structure around the hatches, Sven mentions there are two additional pieces required at each end to ensure comprehensive protection. This attention to detail highlights his commitment to producing a durable and reliable design. “Sailing is about finding your path, whether it’s across an ocean or within yourself.” – Sven Yrvind In conclusion, making flanges around bulkhead hatches may seem complex at first glance, but by following Sven Yrvind’s meticulous process, enthusiasts can achieve professional-level results. Remember that the journey of boatbuilding is as rewarding as reaching your destination; it tests one’s patience and dedication. For those seeking to embark on this adventure or simply gain more insight into marine craftsmanship, Sven’s wisdom is invaluable.Sven begins by explaining that working on flanges vertically and horizontally is significantly easier than doing so in a flat position. To simplify the process further, he divides the task into two or three steps as suggested by fellow expert “for for.” This approach not only makes it more manageable but also allows for greater precision in crafting each component.Step 2: Applying Glue and Securing
Sven proceeds to apply glue along one edge of the flange, ensuring a secure bond when clamped into place. He emphasizes that this stage is crucial for maintaining the structural integrity of the flange, which in turn safeguards the living area beneath the canvas when hatches are open.Step 3: Allowing Time to Dry
After securely attaching the first portion of the flange, Sven allows ample time for it to dry before moving forward with additional steps. This patience and precision are key aspects of his successful boatbuilding methods.Step 4: Finishing Touches
Once the flange is fully dried, Sven removes the clamps carefully, ensuring no damage occurs during this process. He then moves on to attaching four more pieces onto these main frames, completing two pairs of flanges for the bulkhead hatches.The Final Touches
While two flanges form the primary support structure around the hatches, Sven mentions there are two additional pieces required at each end to ensure comprehensive protection. This attention to detail highlights his commitment to producing a durable and reliable design. “Sailing is about finding your path, whether it’s across an ocean or within yourself.” – Sven Yrvind In conclusion, making flanges around bulkhead hatches may seem complex at first glance, but by following Sven Yrvind’s meticulous process, enthusiasts can achieve professional-level results. Remember that the journey of boatbuilding is as rewarding as reaching your destination; it tests one’s patience and dedication. For those seeking to embark on this adventure or simply gain more insight into marine craftsmanship, Sven’s wisdom is invaluable.Sven Yrvind, a renowned yacht designer and sailor, shares valuable insights on creating flanges around bulkhead hatches for canvas protection in this enlightening video. By following his expert guidance, boat enthusiasts can ensure their living areas remain secure while allowing unhindered access through the hatches.Step 1: Starting with the Flange
Sven begins by explaining that working on flanges vertically and horizontally is significantly easier than doing so in a flat position. To simplify the process further, he divides the task into two or three steps as suggested by fellow expert “for for.” This approach not only makes it more manageable but also allows for greater precision in crafting each component.Step 2: Applying Glue and Securing
Sven proceeds to apply glue along one edge of the flange, ensuring a secure bond when clamped into place. He emphasizes that this stage is crucial for maintaining the structural integrity of the flange, which in turn safeguards the living area beneath the canvas when hatches are open.Step 3: Allowing Time to Dry
After securely attaching the first portion of the flange, Sven allows ample time for it to dry before moving forward with additional steps. This patience and precision are key aspects of his successful boatbuilding methods.Step 4: Finishing Touches
Once the flange is fully dried, Sven removes the clamps carefully, ensuring no damage occurs during this process. He then moves on to attaching four more pieces onto these main frames, completing two pairs of flanges for the bulkhead hatches.The Final Touches
While two flanges form the primary support structure around the hatches, Sven mentions there are two additional pieces required at each end to ensure comprehensive protection. This attention to detail highlights his commitment to producing a durable and reliable design. “Sailing is about finding your path, whether it’s across an ocean or within yourself.” – Sven Yrvind In conclusion, making flanges around bulkhead hatches may seem complex at first glance, but by following Sven Yrvind’s meticulous process, enthusiasts can achieve professional-level results. Remember that the journey of boatbuilding is as rewarding as reaching your destination; it tests one’s patience and dedication. For those seeking to embark on this adventure or simply gain more insight into marine craftsmanship, Sven’s wisdom is invaluable.Making Flanges Around Bulkhead Hatches for Canvas
Sven Yrvind, a renowned yacht designer and sailor, shares valuable insights on creating flanges around bulkhead hatches for canvas protection in this enlightening video. By following his expert guidance, boat enthusiasts can ensure their living areas remain secure while allowing unhindered access through the hatches.Step 1: Starting with the Flange
Sven begins by explaining that working on flanges vertically and horizontally is significantly easier than doing so in a flat position. To simplify the process further, he divides the task into two or three steps as suggested by fellow expert “for for.” This approach not only makes it more manageable but also allows for greater precision in crafting each component.Step 2: Applying Glue and Securing
Sven proceeds to apply glue along one edge of the flange, ensuring a secure bond when clamped into place. He emphasizes that this stage is crucial for maintaining the structural integrity of the flange, which in turn safeguards the living area beneath the canvas when hatches are open.Step 3: Allowing Time to Dry
After securely attaching the first portion of the flange, Sven allows ample time for it to dry before moving forward with additional steps. This patience and precision are key aspects of his successful boatbuilding methods.Step 4: Finishing Touches
Once the flange is fully dried, Sven removes the clamps carefully, ensuring no damage occurs during this process. He then moves on to attaching four more pieces onto these main frames, completing two pairs of flanges for the bulkhead hatches.The Final Touches
While two flanges form the primary support structure around the hatches, Sven mentions there are two additional pieces required at each end to ensure comprehensive protection. This attention to detail highlights his commitment to producing a durable and reliable design. “Sailing is about finding your path, whether it’s across an ocean or within yourself.” – Sven Yrvind In conclusion, making flanges around bulkhead hatches may seem complex at first glance, but by following Sven Yrvind’s meticulous process, enthusiasts can achieve professional-level results. Remember that the journey of boatbuilding is as rewarding as reaching your destination; it tests one’s patience and dedication. For those seeking to embark on this adventure or simply gain more insight into marine craftsmanship, Sven’s wisdom is invaluable.Once the flange is fully dried, Sven removes the clamps carefully, ensuring no damage occurs during this process. He then moves on to attaching four more pieces onto these main frames, completing two pairs of flanges for the bulkhead hatches.The Final Touches
While two flanges form the primary support structure around the hatches, Sven mentions there are two additional pieces required at each end to ensure comprehensive protection. This attention to detail highlights his commitment to producing a durable and reliable design. “Sailing is about finding your path, whether it’s across an ocean or within yourself.” – Sven Yrvind In conclusion, making flanges around bulkhead hatches may seem complex at first glance, but by following Sven Yrvind’s meticulous process, enthusiasts can achieve professional-level results. Remember that the journey of boatbuilding is as rewarding as reaching your destination; it tests one’s patience and dedication. For those seeking to embark on this adventure or simply gain more insight into marine craftsmanship, Sven’s wisdom is invaluable.Sven begins by explaining that working on flanges vertically and horizontally is significantly easier than doing so in a flat position. To simplify the process further, he divides the task into two or three steps as suggested by fellow expert “for for.” This approach not only makes it more manageable but also allows for greater precision in crafting each component.Step 2: Applying Glue and Securing
Sven proceeds to apply glue along one edge of the flange, ensuring a secure bond when clamped into place. He emphasizes that this stage is crucial for maintaining the structural integrity of the flange, which in turn safeguards the living area beneath the canvas when hatches are open.Step 3: Allowing Time to Dry
After securely attaching the first portion of the flange, Sven allows ample time for it to dry before moving forward with additional steps. This patience and precision are key aspects of his successful boatbuilding methods.Step 4: Finishing Touches
Once the flange is fully dried, Sven removes the clamps carefully, ensuring no damage occurs during this process. He then moves on to attaching four more pieces onto these main frames, completing two pairs of flanges for the bulkhead hatches.The Final Touches
While two flanges form the primary support structure around the hatches, Sven mentions there are two additional pieces required at each end to ensure comprehensive protection. This attention to detail highlights his commitment to producing a durable and reliable design. “Sailing is about finding your path, whether it’s across an ocean or within yourself.” – Sven Yrvind In conclusion, making flanges around bulkhead hatches may seem complex at first glance, but by following Sven Yrvind’s meticulous process, enthusiasts can achieve professional-level results. Remember that the journey of boatbuilding is as rewarding as reaching your destination; it tests one’s patience and dedication. For those seeking to embark on this adventure or simply gain more insight into marine craftsmanship, Sven’s wisdom is invaluable.Sven Yrvind, a renowned yacht designer and sailor, shares valuable insights on creating flanges around bulkhead hatches for canvas protection in this enlightening video. By following his expert guidance, boat enthusiasts can ensure their living areas remain secure while allowing unhindered access through the hatches.Step 1: Starting with the Flange
Sven begins by explaining that working on flanges vertically and horizontally is significantly easier than doing so in a flat position. To simplify the process further, he divides the task into two or three steps as suggested by fellow expert “for for.” This approach not only makes it more manageable but also allows for greater precision in crafting each component.Step 2: Applying Glue and Securing
Sven proceeds to apply glue along one edge of the flange, ensuring a secure bond when clamped into place. He emphasizes that this stage is crucial for maintaining the structural integrity of the flange, which in turn safeguards the living area beneath the canvas when hatches are open.Step 3: Allowing Time to Dry
After securely attaching the first portion of the flange, Sven allows ample time for it to dry before moving forward with additional steps. This patience and precision are key aspects of his successful boatbuilding methods.Step 4: Finishing Touches
Once the flange is fully dried, Sven removes the clamps carefully, ensuring no damage occurs during this process. He then moves on to attaching four more pieces onto these main frames, completing two pairs of flanges for the bulkhead hatches.The Final Touches
While two flanges form the primary support structure around the hatches, Sven mentions there are two additional pieces required at each end to ensure comprehensive protection. This attention to detail highlights his commitment to producing a durable and reliable design. “Sailing is about finding your path, whether it’s across an ocean or within yourself.” – Sven Yrvind In conclusion, making flanges around bulkhead hatches may seem complex at first glance, but by following Sven Yrvind’s meticulous process, enthusiasts can achieve professional-level results. Remember that the journey of boatbuilding is as rewarding as reaching your destination; it tests one’s patience and dedication. For those seeking to embark on this adventure or simply gain more insight into marine craftsmanship, Sven’s wisdom is invaluable.Making Flanges Around Bulkhead Hatches for Canvas
Sven Yrvind, a renowned yacht designer and sailor, shares valuable insights on creating flanges around bulkhead hatches for canvas protection in this enlightening video. By following his expert guidance, boat enthusiasts can ensure their living areas remain secure while allowing unhindered access through the hatches.Step 1: Starting with the Flange
Sven begins by explaining that working on flanges vertically and horizontally is significantly easier than doing so in a flat position. To simplify the process further, he divides the task into two or three steps as suggested by fellow expert “for for.” This approach not only makes it more manageable but also allows for greater precision in crafting each component.Step 2: Applying Glue and Securing
Sven proceeds to apply glue along one edge of the flange, ensuring a secure bond when clamped into place. He emphasizes that this stage is crucial for maintaining the structural integrity of the flange, which in turn safeguards the living area beneath the canvas when hatches are open.Step 3: Allowing Time to Dry
After securely attaching the first portion of the flange, Sven allows ample time for it to dry before moving forward with additional steps. This patience and precision are key aspects of his successful boatbuilding methods.Step 4: Finishing Touches
Once the flange is fully dried, Sven removes the clamps carefully, ensuring no damage occurs during this process. He then moves on to attaching four more pieces onto these main frames, completing two pairs of flanges for the bulkhead hatches.The Final Touches
While two flanges form the primary support structure around the hatches, Sven mentions there are two additional pieces required at each end to ensure comprehensive protection. This attention to detail highlights his commitment to producing a durable and reliable design. “Sailing is about finding your path, whether it’s across an ocean or within yourself.” – Sven Yrvind In conclusion, making flanges around bulkhead hatches may seem complex at first glance, but by following Sven Yrvind’s meticulous process, enthusiasts can achieve professional-level results. Remember that the journey of boatbuilding is as rewarding as reaching your destination; it tests one’s patience and dedication. For those seeking to embark on this adventure or simply gain more insight into marine craftsmanship, Sven’s wisdom is invaluable.After securely attaching the first portion of the flange, Sven allows ample time for it to dry before moving forward with additional steps. This patience and precision are key aspects of his successful boatbuilding methods.Step 4: Finishing Touches
Once the flange is fully dried, Sven removes the clamps carefully, ensuring no damage occurs during this process. He then moves on to attaching four more pieces onto these main frames, completing two pairs of flanges for the bulkhead hatches.The Final Touches
While two flanges form the primary support structure around the hatches, Sven mentions there are two additional pieces required at each end to ensure comprehensive protection. This attention to detail highlights his commitment to producing a durable and reliable design. “Sailing is about finding your path, whether it’s across an ocean or within yourself.” – Sven Yrvind In conclusion, making flanges around bulkhead hatches may seem complex at first glance, but by following Sven Yrvind’s meticulous process, enthusiasts can achieve professional-level results. Remember that the journey of boatbuilding is as rewarding as reaching your destination; it tests one’s patience and dedication. For those seeking to embark on this adventure or simply gain more insight into marine craftsmanship, Sven’s wisdom is invaluable.Sven begins by explaining that working on flanges vertically and horizontally is significantly easier than doing so in a flat position. To simplify the process further, he divides the task into two or three steps as suggested by fellow expert “for for.” This approach not only makes it more manageable but also allows for greater precision in crafting each component.Step 2: Applying Glue and Securing
Sven proceeds to apply glue along one edge of the flange, ensuring a secure bond when clamped into place. He emphasizes that this stage is crucial for maintaining the structural integrity of the flange, which in turn safeguards the living area beneath the canvas when hatches are open.Step 3: Allowing Time to Dry
After securely attaching the first portion of the flange, Sven allows ample time for it to dry before moving forward with additional steps. This patience and precision are key aspects of his successful boatbuilding methods.Step 4: Finishing Touches
Once the flange is fully dried, Sven removes the clamps carefully, ensuring no damage occurs during this process. He then moves on to attaching four more pieces onto these main frames, completing two pairs of flanges for the bulkhead hatches.The Final Touches
While two flanges form the primary support structure around the hatches, Sven mentions there are two additional pieces required at each end to ensure comprehensive protection. This attention to detail highlights his commitment to producing a durable and reliable design. “Sailing is about finding your path, whether it’s across an ocean or within yourself.” – Sven Yrvind In conclusion, making flanges around bulkhead hatches may seem complex at first glance, but by following Sven Yrvind’s meticulous process, enthusiasts can achieve professional-level results. Remember that the journey of boatbuilding is as rewarding as reaching your destination; it tests one’s patience and dedication. For those seeking to embark on this adventure or simply gain more insight into marine craftsmanship, Sven’s wisdom is invaluable.Sven Yrvind, a renowned yacht designer and sailor, shares valuable insights on creating flanges around bulkhead hatches for canvas protection in this enlightening video. By following his expert guidance, boat enthusiasts can ensure their living areas remain secure while allowing unhindered access through the hatches.Step 1: Starting with the Flange
Sven begins by explaining that working on flanges vertically and horizontally is significantly easier than doing so in a flat position. To simplify the process further, he divides the task into two or three steps as suggested by fellow expert “for for.” This approach not only makes it more manageable but also allows for greater precision in crafting each component.Step 2: Applying Glue and Securing
Sven proceeds to apply glue along one edge of the flange, ensuring a secure bond when clamped into place. He emphasizes that this stage is crucial for maintaining the structural integrity of the flange, which in turn safeguards the living area beneath the canvas when hatches are open.Step 3: Allowing Time to Dry
After securely attaching the first portion of the flange, Sven allows ample time for it to dry before moving forward with additional steps. This patience and precision are key aspects of his successful boatbuilding methods.Step 4: Finishing Touches
Once the flange is fully dried, Sven removes the clamps carefully, ensuring no damage occurs during this process. He then moves on to attaching four more pieces onto these main frames, completing two pairs of flanges for the bulkhead hatches.The Final Touches
While two flanges form the primary support structure around the hatches, Sven mentions there are two additional pieces required at each end to ensure comprehensive protection. This attention to detail highlights his commitment to producing a durable and reliable design. “Sailing is about finding your path, whether it’s across an ocean or within yourself.” – Sven Yrvind In conclusion, making flanges around bulkhead hatches may seem complex at first glance, but by following Sven Yrvind’s meticulous process, enthusiasts can achieve professional-level results. Remember that the journey of boatbuilding is as rewarding as reaching your destination; it tests one’s patience and dedication. For those seeking to embark on this adventure or simply gain more insight into marine craftsmanship, Sven’s wisdom is invaluable.Making Flanges Around Bulkhead Hatches for Canvas
Sven Yrvind, a renowned yacht designer and sailor, shares valuable insights on creating flanges around bulkhead hatches for canvas protection in this enlightening video. By following his expert guidance, boat enthusiasts can ensure their living areas remain secure while allowing unhindered access through the hatches.Step 1: Starting with the Flange
Sven begins by explaining that working on flanges vertically and horizontally is significantly easier than doing so in a flat position. To simplify the process further, he divides the task into two or three steps as suggested by fellow expert “for for.” This approach not only makes it more manageable but also allows for greater precision in crafting each component.Step 2: Applying Glue and Securing
Sven proceeds to apply glue along one edge of the flange, ensuring a secure bond when clamped into place. He emphasizes that this stage is crucial for maintaining the structural integrity of the flange, which in turn safeguards the living area beneath the canvas when hatches are open.Step 3: Allowing Time to Dry
After securely attaching the first portion of the flange, Sven allows ample time for it to dry before moving forward with additional steps. This patience and precision are key aspects of his successful boatbuilding methods.Step 4: Finishing Touches
Once the flange is fully dried, Sven removes the clamps carefully, ensuring no damage occurs during this process. He then moves on to attaching four more pieces onto these main frames, completing two pairs of flanges for the bulkhead hatches.The Final Touches
While two flanges form the primary support structure around the hatches, Sven mentions there are two additional pieces required at each end to ensure comprehensive protection. This attention to detail highlights his commitment to producing a durable and reliable design. “Sailing is about finding your path, whether it’s across an ocean or within yourself.” – Sven Yrvind In conclusion, making flanges around bulkhead hatches may seem complex at first glance, but by following Sven Yrvind’s meticulous process, enthusiasts can achieve professional-level results. Remember that the journey of boatbuilding is as rewarding as reaching your destination; it tests one’s patience and dedication. For those seeking to embark on this adventure or simply gain more insight into marine craftsmanship, Sven’s wisdom is invaluable.Sven proceeds to apply glue along one edge of the flange, ensuring a secure bond when clamped into place. He emphasizes that this stage is crucial for maintaining the structural integrity of the flange, which in turn safeguards the living area beneath the canvas when hatches are open.Step 3: Allowing Time to Dry
After securely attaching the first portion of the flange, Sven allows ample time for it to dry before moving forward with additional steps. This patience and precision are key aspects of his successful boatbuilding methods.Step 4: Finishing Touches
Once the flange is fully dried, Sven removes the clamps carefully, ensuring no damage occurs during this process. He then moves on to attaching four more pieces onto these main frames, completing two pairs of flanges for the bulkhead hatches.The Final Touches
While two flanges form the primary support structure around the hatches, Sven mentions there are two additional pieces required at each end to ensure comprehensive protection. This attention to detail highlights his commitment to producing a durable and reliable design. “Sailing is about finding your path, whether it’s across an ocean or within yourself.” – Sven Yrvind In conclusion, making flanges around bulkhead hatches may seem complex at first glance, but by following Sven Yrvind’s meticulous process, enthusiasts can achieve professional-level results. Remember that the journey of boatbuilding is as rewarding as reaching your destination; it tests one’s patience and dedication. For those seeking to embark on this adventure or simply gain more insight into marine craftsmanship, Sven’s wisdom is invaluable.Sven begins by explaining that working on flanges vertically and horizontally is significantly easier than doing so in a flat position. To simplify the process further, he divides the task into two or three steps as suggested by fellow expert “for for.” This approach not only makes it more manageable but also allows for greater precision in crafting each component.Step 2: Applying Glue and Securing
Sven proceeds to apply glue along one edge of the flange, ensuring a secure bond when clamped into place. He emphasizes that this stage is crucial for maintaining the structural integrity of the flange, which in turn safeguards the living area beneath the canvas when hatches are open.Step 3: Allowing Time to Dry
After securely attaching the first portion of the flange, Sven allows ample time for it to dry before moving forward with additional steps. This patience and precision are key aspects of his successful boatbuilding methods.Step 4: Finishing Touches
Once the flange is fully dried, Sven removes the clamps carefully, ensuring no damage occurs during this process. He then moves on to attaching four more pieces onto these main frames, completing two pairs of flanges for the bulkhead hatches.The Final Touches
While two flanges form the primary support structure around the hatches, Sven mentions there are two additional pieces required at each end to ensure comprehensive protection. This attention to detail highlights his commitment to producing a durable and reliable design. “Sailing is about finding your path, whether it’s across an ocean or within yourself.” – Sven Yrvind In conclusion, making flanges around bulkhead hatches may seem complex at first glance, but by following Sven Yrvind’s meticulous process, enthusiasts can achieve professional-level results. Remember that the journey of boatbuilding is as rewarding as reaching your destination; it tests one’s patience and dedication. For those seeking to embark on this adventure or simply gain more insight into marine craftsmanship, Sven’s wisdom is invaluable.Sven Yrvind, a renowned yacht designer and sailor, shares valuable insights on creating flanges around bulkhead hatches for canvas protection in this enlightening video. By following his expert guidance, boat enthusiasts can ensure their living areas remain secure while allowing unhindered access through the hatches.Step 1: Starting with the Flange
Sven begins by explaining that working on flanges vertically and horizontally is significantly easier than doing so in a flat position. To simplify the process further, he divides the task into two or three steps as suggested by fellow expert “for for.” This approach not only makes it more manageable but also allows for greater precision in crafting each component.Step 2: Applying Glue and Securing
Sven proceeds to apply glue along one edge of the flange, ensuring a secure bond when clamped into place. He emphasizes that this stage is crucial for maintaining the structural integrity of the flange, which in turn safeguards the living area beneath the canvas when hatches are open.Step 3: Allowing Time to Dry
After securely attaching the first portion of the flange, Sven allows ample time for it to dry before moving forward with additional steps. This patience and precision are key aspects of his successful boatbuilding methods.Step 4: Finishing Touches
Once the flange is fully dried, Sven removes the clamps carefully, ensuring no damage occurs during this process. He then moves on to attaching four more pieces onto these main frames, completing two pairs of flanges for the bulkhead hatches.The Final Touches
While two flanges form the primary support structure around the hatches, Sven mentions there are two additional pieces required at each end to ensure comprehensive protection. This attention to detail highlights his commitment to producing a durable and reliable design. “Sailing is about finding your path, whether it’s across an ocean or within yourself.” – Sven Yrvind In conclusion, making flanges around bulkhead hatches may seem complex at first glance, but by following Sven Yrvind’s meticulous process, enthusiasts can achieve professional-level results. Remember that the journey of boatbuilding is as rewarding as reaching your destination; it tests one’s patience and dedication. For those seeking to embark on this adventure or simply gain more insight into marine craftsmanship, Sven’s wisdom is invaluable.Making Flanges Around Bulkhead Hatches for Canvas
Sven Yrvind, a renowned yacht designer and sailor, shares valuable insights on creating flanges around bulkhead hatches for canvas protection in this enlightening video. By following his expert guidance, boat enthusiasts can ensure their living areas remain secure while allowing unhindered access through the hatches.Step 1: Starting with the Flange
Sven begins by explaining that working on flanges vertically and horizontally is significantly easier than doing so in a flat position. To simplify the process further, he divides the task into two or three steps as suggested by fellow expert “for for.” This approach not only makes it more manageable but also allows for greater precision in crafting each component.Step 2: Applying Glue and Securing
Sven proceeds to apply glue along one edge of the flange, ensuring a secure bond when clamped into place. He emphasizes that this stage is crucial for maintaining the structural integrity of the flange, which in turn safeguards the living area beneath the canvas when hatches are open.Step 3: Allowing Time to Dry
After securely attaching the first portion of the flange, Sven allows ample time for it to dry before moving forward with additional steps. This patience and precision are key aspects of his successful boatbuilding methods.Step 4: Finishing Touches
Once the flange is fully dried, Sven removes the clamps carefully, ensuring no damage occurs during this process. He then moves on to attaching four more pieces onto these main frames, completing two pairs of flanges for the bulkhead hatches.The Final Touches
While two flanges form the primary support structure around the hatches, Sven mentions there are two additional pieces required at each end to ensure comprehensive protection. This attention to detail highlights his commitment to producing a durable and reliable design. “Sailing is about finding your path, whether it’s across an ocean or within yourself.” – Sven Yrvind In conclusion, making flanges around bulkhead hatches may seem complex at first glance, but by following Sven Yrvind’s meticulous process, enthusiasts can achieve professional-level results. Remember that the journey of boatbuilding is as rewarding as reaching your destination; it tests one’s patience and dedication. For those seeking to embark on this adventure or simply gain more insight into marine craftsmanship, Sven’s wisdom is invaluable.Once the flange is fully dried, Sven removes the clamps carefully, ensuring no damage occurs during this process. He then moves on to attaching four more pieces onto these main frames, completing two pairs of flanges for the bulkhead hatches.The Final Touches
While two flanges form the primary support structure around the hatches, Sven mentions there are two additional pieces required at each end to ensure comprehensive protection. This attention to detail highlights his commitment to producing a durable and reliable design. “Sailing is about finding your path, whether it’s across an ocean or within yourself.” – Sven Yrvind In conclusion, making flanges around bulkhead hatches may seem complex at first glance, but by following Sven Yrvind’s meticulous process, enthusiasts can achieve professional-level results. Remember that the journey of boatbuilding is as rewarding as reaching your destination; it tests one’s patience and dedication. For those seeking to embark on this adventure or simply gain more insight into marine craftsmanship, Sven’s wisdom is invaluable.Sven proceeds to apply glue along one edge of the flange, ensuring a secure bond when clamped into place. He emphasizes that this stage is crucial for maintaining the structural integrity of the flange, which in turn safeguards the living area beneath the canvas when hatches are open.Step 3: Allowing Time to Dry
After securely attaching the first portion of the flange, Sven allows ample time for it to dry before moving forward with additional steps. This patience and precision are key aspects of his successful boatbuilding methods.Step 4: Finishing Touches
Once the flange is fully dried, Sven removes the clamps carefully, ensuring no damage occurs during this process. He then moves on to attaching four more pieces onto these main frames, completing two pairs of flanges for the bulkhead hatches.The Final Touches
While two flanges form the primary support structure around the hatches, Sven mentions there are two additional pieces required at each end to ensure comprehensive protection. This attention to detail highlights his commitment to producing a durable and reliable design. “Sailing is about finding your path, whether it’s across an ocean or within yourself.” – Sven Yrvind In conclusion, making flanges around bulkhead hatches may seem complex at first glance, but by following Sven Yrvind’s meticulous process, enthusiasts can achieve professional-level results. Remember that the journey of boatbuilding is as rewarding as reaching your destination; it tests one’s patience and dedication. For those seeking to embark on this adventure or simply gain more insight into marine craftsmanship, Sven’s wisdom is invaluable.Sven begins by explaining that working on flanges vertically and horizontally is significantly easier than doing so in a flat position. To simplify the process further, he divides the task into two or three steps as suggested by fellow expert “for for.” This approach not only makes it more manageable but also allows for greater precision in crafting each component.Step 2: Applying Glue and Securing
Sven proceeds to apply glue along one edge of the flange, ensuring a secure bond when clamped into place. He emphasizes that this stage is crucial for maintaining the structural integrity of the flange, which in turn safeguards the living area beneath the canvas when hatches are open.Step 3: Allowing Time to Dry
After securely attaching the first portion of the flange, Sven allows ample time for it to dry before moving forward with additional steps. This patience and precision are key aspects of his successful boatbuilding methods.Step 4: Finishing Touches
Once the flange is fully dried, Sven removes the clamps carefully, ensuring no damage occurs during this process. He then moves on to attaching four more pieces onto these main frames, completing two pairs of flanges for the bulkhead hatches.The Final Touches
While two flanges form the primary support structure around the hatches, Sven mentions there are two additional pieces required at each end to ensure comprehensive protection. This attention to detail highlights his commitment to producing a durable and reliable design. “Sailing is about finding your path, whether it’s across an ocean or within yourself.” – Sven Yrvind In conclusion, making flanges around bulkhead hatches may seem complex at first glance, but by following Sven Yrvind’s meticulous process, enthusiasts can achieve professional-level results. Remember that the journey of boatbuilding is as rewarding as reaching your destination; it tests one’s patience and dedication. For those seeking to embark on this adventure or simply gain more insight into marine craftsmanship, Sven’s wisdom is invaluable.Sven Yrvind, a renowned yacht designer and sailor, shares valuable insights on creating flanges around bulkhead hatches for canvas protection in this enlightening video. By following his expert guidance, boat enthusiasts can ensure their living areas remain secure while allowing unhindered access through the hatches.Step 1: Starting with the Flange
Sven begins by explaining that working on flanges vertically and horizontally is significantly easier than doing so in a flat position. To simplify the process further, he divides the task into two or three steps as suggested by fellow expert “for for.” This approach not only makes it more manageable but also allows for greater precision in crafting each component.Step 2: Applying Glue and Securing
Sven proceeds to apply glue along one edge of the flange, ensuring a secure bond when clamped into place. He emphasizes that this stage is crucial for maintaining the structural integrity of the flange, which in turn safeguards the living area beneath the canvas when hatches are open.Step 3: Allowing Time to Dry
After securely attaching the first portion of the flange, Sven allows ample time for it to dry before moving forward with additional steps. This patience and precision are key aspects of his successful boatbuilding methods.Step 4: Finishing Touches
Once the flange is fully dried, Sven removes the clamps carefully, ensuring no damage occurs during this process. He then moves on to attaching four more pieces onto these main frames, completing two pairs of flanges for the bulkhead hatches.The Final Touches
While two flanges form the primary support structure around the hatches, Sven mentions there are two additional pieces required at each end to ensure comprehensive protection. This attention to detail highlights his commitment to producing a durable and reliable design. “Sailing is about finding your path, whether it’s across an ocean or within yourself.” – Sven Yrvind In conclusion, making flanges around bulkhead hatches may seem complex at first glance, but by following Sven Yrvind’s meticulous process, enthusiasts can achieve professional-level results. Remember that the journey of boatbuilding is as rewarding as reaching your destination; it tests one’s patience and dedication. For those seeking to embark on this adventure or simply gain more insight into marine craftsmanship, Sven’s wisdom is invaluable.Making Flanges Around Bulkhead Hatches for Canvas
Sven Yrvind, a renowned yacht designer and sailor, shares valuable insights on creating flanges around bulkhead hatches for canvas protection in this enlightening video. By following his expert guidance, boat enthusiasts can ensure their living areas remain secure while allowing unhindered access through the hatches.Step 1: Starting with the Flange
Sven begins by explaining that working on flanges vertically and horizontally is significantly easier than doing so in a flat position. To simplify the process further, he divides the task into two or three steps as suggested by fellow expert “for for.” This approach not only makes it more manageable but also allows for greater precision in crafting each component.Step 2: Applying Glue and Securing
Sven proceeds to apply glue along one edge of the flange, ensuring a secure bond when clamped into place. He emphasizes that this stage is crucial for maintaining the structural integrity of the flange, which in turn safeguards the living area beneath the canvas when hatches are open.Step 3: Allowing Time to Dry
After securely attaching the first portion of the flange, Sven allows ample time for it to dry before moving forward with additional steps. This patience and precision are key aspects of his successful boatbuilding methods.Step 4: Finishing Touches
Once the flange is fully dried, Sven removes the clamps carefully, ensuring no damage occurs during this process. He then moves on to attaching four more pieces onto these main frames, completing two pairs of flanges for the bulkhead hatches.The Final Touches
While two flanges form the primary support structure around the hatches, Sven mentions there are two additional pieces required at each end to ensure comprehensive protection. This attention to detail highlights his commitment to producing a durable and reliable design. “Sailing is about finding your path, whether it’s across an ocean or within yourself.” – Sven Yrvind In conclusion, making flanges around bulkhead hatches may seem complex at first glance, but by following Sven Yrvind’s meticulous process, enthusiasts can achieve professional-level results. Remember that the journey of boatbuilding is as rewarding as reaching your destination; it tests one’s patience and dedication. For those seeking to embark on this adventure or simply gain more insight into marine craftsmanship, Sven’s wisdom is invaluable.After securely attaching the first portion of the flange, Sven allows ample time for it to dry before moving forward with additional steps. This patience and precision are key aspects of his successful boatbuilding methods.Step 4: Finishing Touches
Once the flange is fully dried, Sven removes the clamps carefully, ensuring no damage occurs during this process. He then moves on to attaching four more pieces onto these main frames, completing two pairs of flanges for the bulkhead hatches.The Final Touches
While two flanges form the primary support structure around the hatches, Sven mentions there are two additional pieces required at each end to ensure comprehensive protection. This attention to detail highlights his commitment to producing a durable and reliable design. “Sailing is about finding your path, whether it’s across an ocean or within yourself.” – Sven Yrvind In conclusion, making flanges around bulkhead hatches may seem complex at first glance, but by following Sven Yrvind’s meticulous process, enthusiasts can achieve professional-level results. Remember that the journey of boatbuilding is as rewarding as reaching your destination; it tests one’s patience and dedication. For those seeking to embark on this adventure or simply gain more insight into marine craftsmanship, Sven’s wisdom is invaluable.Sven proceeds to apply glue along one edge of the flange, ensuring a secure bond when clamped into place. He emphasizes that this stage is crucial for maintaining the structural integrity of the flange, which in turn safeguards the living area beneath the canvas when hatches are open.Step 3: Allowing Time to Dry
After securely attaching the first portion of the flange, Sven allows ample time for it to dry before moving forward with additional steps. This patience and precision are key aspects of his successful boatbuilding methods.Step 4: Finishing Touches
Once the flange is fully dried, Sven removes the clamps carefully, ensuring no damage occurs during this process. He then moves on to attaching four more pieces onto these main frames, completing two pairs of flanges for the bulkhead hatches.The Final Touches
While two flanges form the primary support structure around the hatches, Sven mentions there are two additional pieces required at each end to ensure comprehensive protection. This attention to detail highlights his commitment to producing a durable and reliable design. “Sailing is about finding your path, whether it’s across an ocean or within yourself.” – Sven Yrvind In conclusion, making flanges around bulkhead hatches may seem complex at first glance, but by following Sven Yrvind’s meticulous process, enthusiasts can achieve professional-level results. Remember that the journey of boatbuilding is as rewarding as reaching your destination; it tests one’s patience and dedication. For those seeking to embark on this adventure or simply gain more insight into marine craftsmanship, Sven’s wisdom is invaluable.Sven begins by explaining that working on flanges vertically and horizontally is significantly easier than doing so in a flat position. To simplify the process further, he divides the task into two or three steps as suggested by fellow expert “for for.” This approach not only makes it more manageable but also allows for greater precision in crafting each component.Step 2: Applying Glue and Securing
Sven proceeds to apply glue along one edge of the flange, ensuring a secure bond when clamped into place. He emphasizes that this stage is crucial for maintaining the structural integrity of the flange, which in turn safeguards the living area beneath the canvas when hatches are open.Step 3: Allowing Time to Dry
After securely attaching the first portion of the flange, Sven allows ample time for it to dry before moving forward with additional steps. This patience and precision are key aspects of his successful boatbuilding methods.Step 4: Finishing Touches
Once the flange is fully dried, Sven removes the clamps carefully, ensuring no damage occurs during this process. He then moves on to attaching four more pieces onto these main frames, completing two pairs of flanges for the bulkhead hatches.The Final Touches
While two flanges form the primary support structure around the hatches, Sven mentions there are two additional pieces required at each end to ensure comprehensive protection. This attention to detail highlights his commitment to producing a durable and reliable design. “Sailing is about finding your path, whether it’s across an ocean or within yourself.” – Sven Yrvind In conclusion, making flanges around bulkhead hatches may seem complex at first glance, but by following Sven Yrvind’s meticulous process, enthusiasts can achieve professional-level results. Remember that the journey of boatbuilding is as rewarding as reaching your destination; it tests one’s patience and dedication. For those seeking to embark on this adventure or simply gain more insight into marine craftsmanship, Sven’s wisdom is invaluable.Sven Yrvind, a renowned yacht designer and sailor, shares valuable insights on creating flanges around bulkhead hatches for canvas protection in this enlightening video. By following his expert guidance, boat enthusiasts can ensure their living areas remain secure while allowing unhindered access through the hatches.Step 1: Starting with the Flange
Sven begins by explaining that working on flanges vertically and horizontally is significantly easier than doing so in a flat position. To simplify the process further, he divides the task into two or three steps as suggested by fellow expert “for for.” This approach not only makes it more manageable but also allows for greater precision in crafting each component.Step 2: Applying Glue and Securing
Sven proceeds to apply glue along one edge of the flange, ensuring a secure bond when clamped into place. He emphasizes that this stage is crucial for maintaining the structural integrity of the flange, which in turn safeguards the living area beneath the canvas when hatches are open.Step 3: Allowing Time to Dry
After securely attaching the first portion of the flange, Sven allows ample time for it to dry before moving forward with additional steps. This patience and precision are key aspects of his successful boatbuilding methods.Step 4: Finishing Touches
Once the flange is fully dried, Sven removes the clamps carefully, ensuring no damage occurs during this process. He then moves on to attaching four more pieces onto these main frames, completing two pairs of flanges for the bulkhead hatches.The Final Touches
While two flanges form the primary support structure around the hatches, Sven mentions there are two additional pieces required at each end to ensure comprehensive protection. This attention to detail highlights his commitment to producing a durable and reliable design. “Sailing is about finding your path, whether it’s across an ocean or within yourself.” – Sven Yrvind In conclusion, making flanges around bulkhead hatches may seem complex at first glance, but by following Sven Yrvind’s meticulous process, enthusiasts can achieve professional-level results. Remember that the journey of boatbuilding is as rewarding as reaching your destination; it tests one’s patience and dedication. For those seeking to embark on this adventure or simply gain more insight into marine craftsmanship, Sven’s wisdom is invaluable.Making Flanges Around Bulkhead Hatches for Canvas
Sven Yrvind, a renowned yacht designer and sailor, shares valuable insights on creating flanges around bulkhead hatches for canvas protection in this enlightening video. By following his expert guidance, boat enthusiasts can ensure their living areas remain secure while allowing unhindered access through the hatches.Step 1: Starting with the Flange
Sven begins by explaining that working on flanges vertically and horizontally is significantly easier than doing so in a flat position. To simplify the process further, he divides the task into two or three steps as suggested by fellow expert “for for.” This approach not only makes it more manageable but also allows for greater precision in crafting each component.Step 2: Applying Glue and Securing
Sven proceeds to apply glue along one edge of the flange, ensuring a secure bond when clamped into place. He emphasizes that this stage is crucial for maintaining the structural integrity of the flange, which in turn safeguards the living area beneath the canvas when hatches are open.Step 3: Allowing Time to Dry
After securely attaching the first portion of the flange, Sven allows ample time for it to dry before moving forward with additional steps. This patience and precision are key aspects of his successful boatbuilding methods.Step 4: Finishing Touches
Once the flange is fully dried, Sven removes the clamps carefully, ensuring no damage occurs during this process. He then moves on to attaching four more pieces onto these main frames, completing two pairs of flanges for the bulkhead hatches.The Final Touches
While two flanges form the primary support structure around the hatches, Sven mentions there are two additional pieces required at each end to ensure comprehensive protection. This attention to detail highlights his commitment to producing a durable and reliable design. “Sailing is about finding your path, whether it’s across an ocean or within yourself.” – Sven Yrvind In conclusion, making flanges around bulkhead hatches may seem complex at first glance, but by following Sven Yrvind’s meticulous process, enthusiasts can achieve professional-level results. Remember that the journey of boatbuilding is as rewarding as reaching your destination; it tests one’s patience and dedication. For those seeking to embark on this adventure or simply gain more insight into marine craftsmanship, Sven’s wisdom is invaluable.Once the flange is fully dried, Sven removes the clamps carefully, ensuring no damage occurs during this process. He then moves on to attaching four more pieces onto these main frames, completing two pairs of flanges for the bulkhead hatches.The Final Touches
While two flanges form the primary support structure around the hatches, Sven mentions there are two additional pieces required at each end to ensure comprehensive protection. This attention to detail highlights his commitment to producing a durable and reliable design. “Sailing is about finding your path, whether it’s across an ocean or within yourself.” – Sven Yrvind In conclusion, making flanges around bulkhead hatches may seem complex at first glance, but by following Sven Yrvind’s meticulous process, enthusiasts can achieve professional-level results. Remember that the journey of boatbuilding is as rewarding as reaching your destination; it tests one’s patience and dedication. For those seeking to embark on this adventure or simply gain more insight into marine craftsmanship, Sven’s wisdom is invaluable.After securely attaching the first portion of the flange, Sven allows ample time for it to dry before moving forward with additional steps. This patience and precision are key aspects of his successful boatbuilding methods.Step 4: Finishing Touches
Once the flange is fully dried, Sven removes the clamps carefully, ensuring no damage occurs during this process. He then moves on to attaching four more pieces onto these main frames, completing two pairs of flanges for the bulkhead hatches.The Final Touches
While two flanges form the primary support structure around the hatches, Sven mentions there are two additional pieces required at each end to ensure comprehensive protection. This attention to detail highlights his commitment to producing a durable and reliable design. “Sailing is about finding your path, whether it’s across an ocean or within yourself.” – Sven Yrvind In conclusion, making flanges around bulkhead hatches may seem complex at first glance, but by following Sven Yrvind’s meticulous process, enthusiasts can achieve professional-level results. Remember that the journey of boatbuilding is as rewarding as reaching your destination; it tests one’s patience and dedication. For those seeking to embark on this adventure or simply gain more insight into marine craftsmanship, Sven’s wisdom is invaluable.Sven proceeds to apply glue along one edge of the flange, ensuring a secure bond when clamped into place. He emphasizes that this stage is crucial for maintaining the structural integrity of the flange, which in turn safeguards the living area beneath the canvas when hatches are open.Step 3: Allowing Time to Dry
After securely attaching the first portion of the flange, Sven allows ample time for it to dry before moving forward with additional steps. This patience and precision are key aspects of his successful boatbuilding methods.Step 4: Finishing Touches
Once the flange is fully dried, Sven removes the clamps carefully, ensuring no damage occurs during this process. He then moves on to attaching four more pieces onto these main frames, completing two pairs of flanges for the bulkhead hatches.The Final Touches
While two flanges form the primary support structure around the hatches, Sven mentions there are two additional pieces required at each end to ensure comprehensive protection. This attention to detail highlights his commitment to producing a durable and reliable design. “Sailing is about finding your path, whether it’s across an ocean or within yourself.” – Sven Yrvind In conclusion, making flanges around bulkhead hatches may seem complex at first glance, but by following Sven Yrvind’s meticulous process, enthusiasts can achieve professional-level results. Remember that the journey of boatbuilding is as rewarding as reaching your destination; it tests one’s patience and dedication. For those seeking to embark on this adventure or simply gain more insight into marine craftsmanship, Sven’s wisdom is invaluable.Sven begins by explaining that working on flanges vertically and horizontally is significantly easier than doing so in a flat position. To simplify the process further, he divides the task into two or three steps as suggested by fellow expert “for for.” This approach not only makes it more manageable but also allows for greater precision in crafting each component.Step 2: Applying Glue and Securing
Sven proceeds to apply glue along one edge of the flange, ensuring a secure bond when clamped into place. He emphasizes that this stage is crucial for maintaining the structural integrity of the flange, which in turn safeguards the living area beneath the canvas when hatches are open.Step 3: Allowing Time to Dry
After securely attaching the first portion of the flange, Sven allows ample time for it to dry before moving forward with additional steps. This patience and precision are key aspects of his successful boatbuilding methods.Step 4: Finishing Touches
Once the flange is fully dried, Sven removes the clamps carefully, ensuring no damage occurs during this process. He then moves on to attaching four more pieces onto these main frames, completing two pairs of flanges for the bulkhead hatches.The Final Touches
While two flanges form the primary support structure around the hatches, Sven mentions there are two additional pieces required at each end to ensure comprehensive protection. This attention to detail highlights his commitment to producing a durable and reliable design. “Sailing is about finding your path, whether it’s across an ocean or within yourself.” – Sven Yrvind In conclusion, making flanges around bulkhead hatches may seem complex at first glance, but by following Sven Yrvind’s meticulous process, enthusiasts can achieve professional-level results. Remember that the journey of boatbuilding is as rewarding as reaching your destination; it tests one’s patience and dedication. For those seeking to embark on this adventure or simply gain more insight into marine craftsmanship, Sven’s wisdom is invaluable.Sven Yrvind, a renowned yacht designer and sailor, shares valuable insights on creating flanges around bulkhead hatches for canvas protection in this enlightening video. By following his expert guidance, boat enthusiasts can ensure their living areas remain secure while allowing unhindered access through the hatches.Step 1: Starting with the Flange
Sven begins by explaining that working on flanges vertically and horizontally is significantly easier than doing so in a flat position. To simplify the process further, he divides the task into two or three steps as suggested by fellow expert “for for.” This approach not only makes it more manageable but also allows for greater precision in crafting each component.Step 2: Applying Glue and Securing
Sven proceeds to apply glue along one edge of the flange, ensuring a secure bond when clamped into place. He emphasizes that this stage is crucial for maintaining the structural integrity of the flange, which in turn safeguards the living area beneath the canvas when hatches are open.Step 3: Allowing Time to Dry
After securely attaching the first portion of the flange, Sven allows ample time for it to dry before moving forward with additional steps. This patience and precision are key aspects of his successful boatbuilding methods.Step 4: Finishing Touches
Once the flange is fully dried, Sven removes the clamps carefully, ensuring no damage occurs during this process. He then moves on to attaching four more pieces onto these main frames, completing two pairs of flanges for the bulkhead hatches.The Final Touches
While two flanges form the primary support structure around the hatches, Sven mentions there are two additional pieces required at each end to ensure comprehensive protection. This attention to detail highlights his commitment to producing a durable and reliable design. “Sailing is about finding your path, whether it’s across an ocean or within yourself.” – Sven Yrvind In conclusion, making flanges around bulkhead hatches may seem complex at first glance, but by following Sven Yrvind’s meticulous process, enthusiasts can achieve professional-level results. Remember that the journey of boatbuilding is as rewarding as reaching your destination; it tests one’s patience and dedication. For those seeking to embark on this adventure or simply gain more insight into marine craftsmanship, Sven’s wisdom is invaluable.Making Flanges Around Bulkhead Hatches for Canvas
Sven Yrvind, a renowned yacht designer and sailor, shares valuable insights on creating flanges around bulkhead hatches for canvas protection in this enlightening video. By following his expert guidance, boat enthusiasts can ensure their living areas remain secure while allowing unhindered access through the hatches.Step 1: Starting with the Flange
Sven begins by explaining that working on flanges vertically and horizontally is significantly easier than doing so in a flat position. To simplify the process further, he divides the task into two or three steps as suggested by fellow expert “for for.” This approach not only makes it more manageable but also allows for greater precision in crafting each component.Step 2: Applying Glue and Securing
Sven proceeds to apply glue along one edge of the flange, ensuring a secure bond when clamped into place. He emphasizes that this stage is crucial for maintaining the structural integrity of the flange, which in turn safeguards the living area beneath the canvas when hatches are open.Step 3: Allowing Time to Dry
After securely attaching the first portion of the flange, Sven allows ample time for it to dry before moving forward with additional steps. This patience and precision are key aspects of his successful boatbuilding methods.Step 4: Finishing Touches
Once the flange is fully dried, Sven removes the clamps carefully, ensuring no damage occurs during this process. He then moves on to attaching four more pieces onto these main frames, completing two pairs of flanges for the bulkhead hatches.The Final Touches
While two flanges form the primary support structure around the hatches, Sven mentions there are two additional pieces required at each end to ensure comprehensive protection. This attention to detail highlights his commitment to producing a durable and reliable design. “Sailing is about finding your path, whether it’s across an ocean or within yourself.” – Sven Yrvind In conclusion, making flanges around bulkhead hatches may seem complex at first glance, but by following Sven Yrvind’s meticulous process, enthusiasts can achieve professional-level results. Remember that the journey of boatbuilding is as rewarding as reaching your destination; it tests one’s patience and dedication. For those seeking to embark on this adventure or simply gain more insight into marine craftsmanship, Sven’s wisdom is invaluable.Sven proceeds to apply glue along one edge of the flange, ensuring a secure bond when clamped into place. He emphasizes that this stage is crucial for maintaining the structural integrity of the flange, which in turn safeguards the living area beneath the canvas when hatches are open.Step 3: Allowing Time to Dry
After securely attaching the first portion of the flange, Sven allows ample time for it to dry before moving forward with additional steps. This patience and precision are key aspects of his successful boatbuilding methods.Step 4: Finishing Touches
Once the flange is fully dried, Sven removes the clamps carefully, ensuring no damage occurs during this process. He then moves on to attaching four more pieces onto these main frames, completing two pairs of flanges for the bulkhead hatches.The Final Touches
While two flanges form the primary support structure around the hatches, Sven mentions there are two additional pieces required at each end to ensure comprehensive protection. This attention to detail highlights his commitment to producing a durable and reliable design. “Sailing is about finding your path, whether it’s across an ocean or within yourself.” – Sven Yrvind In conclusion, making flanges around bulkhead hatches may seem complex at first glance, but by following Sven Yrvind’s meticulous process, enthusiasts can achieve professional-level results. Remember that the journey of boatbuilding is as rewarding as reaching your destination; it tests one’s patience and dedication. For those seeking to embark on this adventure or simply gain more insight into marine craftsmanship, Sven’s wisdom is invaluable.Sven Yrvind, a renowned yacht designer and sailor, shares valuable insights on creating flanges around bulkhead hatches for canvas protection in this enlightening video. By following his expert guidance, boat enthusiasts can ensure their living areas remain secure while allowing unhindered access through the hatches.Step 1: Starting with the Flange
Sven begins by explaining that working on flanges vertically and horizontally is significantly easier than doing so in a flat position. To simplify the process further, he divides the task into two or three steps as suggested by fellow expert “for for.” This approach not only makes it more manageable but also allows for greater precision in crafting each component.Step 2: Applying Glue and Securing
Sven proceeds to apply glue along one edge of the flange, ensuring a secure bond when clamped into place. He emphasizes that this stage is crucial for maintaining the structural integrity of the flange, which in turn safeguards the living area beneath the canvas when hatches are open.Step 3: Allowing Time to Dry
After securely attaching the first portion of the flange, Sven allows ample time for it to dry before moving forward with additional steps. This patience and precision are key aspects of his successful boatbuilding methods.Step 4: Finishing Touches
Once the flange is fully dried, Sven removes the clamps carefully, ensuring no damage occurs during this process. He then moves on to attaching four more pieces onto these main frames, completing two pairs of flanges for the bulkhead hatches.The Final Touches
While two flanges form the primary support structure around the hatches, Sven mentions there are two additional pieces required at each end to ensure comprehensive protection. This attention to detail highlights his commitment to producing a durable and reliable design. “Sailing is about finding your path, whether it’s across an ocean or within yourself.” – Sven Yrvind In conclusion, making flanges around bulkhead hatches may seem complex at first glance, but by following Sven Yrvind’s meticulous process, enthusiasts can achieve professional-level results. Remember that the journey of boatbuilding is as rewarding as reaching your destination; it tests one’s patience and dedication. For those seeking to embark on this adventure or simply gain more insight into marine craftsmanship, Sven’s wisdom is invaluable.Making Flanges Around Bulkhead Hatches for Canvas
Sven Yrvind, a renowned yacht designer and sailor, shares valuable insights on creating flanges around bulkhead hatches for canvas protection in this enlightening video. By following his expert guidance, boat enthusiasts can ensure their living areas remain secure while allowing unhindered access through the hatches.Step 1: Starting with the Flange
Sven begins by explaining that working on flanges vertically and horizontally is significantly easier than doing so in a flat position. To simplify the process further, he divides the task into two or three steps as suggested by fellow expert “for for.” This approach not only makes it more manageable but also allows for greater precision in crafting each component.Step 2: Applying Glue and Securing
Sven proceeds to apply glue along one edge of the flange, ensuring a secure bond when clamped into place. He emphasizes that this stage is crucial for maintaining the structural integrity of the flange, which in turn safeguards the living area beneath the canvas when hatches are open.Step 3: Allowing Time to Dry
After securely attaching the first portion of the flange, Sven allows ample time for it to dry before moving forward with additional steps. This patience and precision are key aspects of his successful boatbuilding methods.Step 4: Finishing Touches
Once the flange is fully dried, Sven removes the clamps carefully, ensuring no damage occurs during this process. He then moves on to attaching four more pieces onto these main frames, completing two pairs of flanges for the bulkhead hatches.The Final Touches
While two flanges form the primary support structure around the hatches, Sven mentions there are two additional pieces required at each end to ensure comprehensive protection. This attention to detail highlights his commitment to producing a durable and reliable design. “Sailing is about finding your path, whether it’s across an ocean or within yourself.” – Sven Yrvind In conclusion, making flanges around bulkhead hatches may seem complex at first glance, but by following Sven Yrvind’s meticulous process, enthusiasts can achieve professional-level results. Remember that the journey of boatbuilding is as rewarding as reaching your destination; it tests one’s patience and dedication. For those seeking to embark on this adventure or simply gain more insight into marine craftsmanship, Sven’s wisdom is invaluable.Sven begins by explaining that working on flanges vertically and horizontally is significantly easier than doing so in a flat position. To simplify the process further, he divides the task into two or three steps as suggested by fellow expert “for for.” This approach not only makes it more manageable but also allows for greater precision in crafting each component.Step 2: Applying Glue and Securing
Sven proceeds to apply glue along one edge of the flange, ensuring a secure bond when clamped into place. He emphasizes that this stage is crucial for maintaining the structural integrity of the flange, which in turn safeguards the living area beneath the canvas when hatches are open.Step 3: Allowing Time to Dry
After securely attaching the first portion of the flange, Sven allows ample time for it to dry before moving forward with additional steps. This patience and precision are key aspects of his successful boatbuilding methods.Step 4: Finishing Touches
Once the flange is fully dried, Sven removes the clamps carefully, ensuring no damage occurs during this process. He then moves on to attaching four more pieces onto these main frames, completing two pairs of flanges for the bulkhead hatches.The Final Touches
While two flanges form the primary support structure around the hatches, Sven mentions there are two additional pieces required at each end to ensure comprehensive protection. This attention to detail highlights his commitment to producing a durable and reliable design. “Sailing is about finding your path, whether it’s across an ocean or within yourself.” – Sven Yrvind In conclusion, making flanges around bulkhead hatches may seem complex at first glance, but by following Sven Yrvind’s meticulous process, enthusiasts can achieve professional-level results. Remember that the journey of boatbuilding is as rewarding as reaching your destination; it tests one’s patience and dedication. For those seeking to embark on this adventure or simply gain more insight into marine craftsmanship, Sven’s wisdom is invaluable.Sven Yrvind, a renowned yacht designer and sailor, shares valuable insights on creating flanges around bulkhead hatches for canvas protection in this enlightening video. By following his expert guidance, boat enthusiasts can ensure their living areas remain secure while allowing unhindered access through the hatches.Step 1: Starting with the Flange
Sven begins by explaining that working on flanges vertically and horizontally is significantly easier than doing so in a flat position. To simplify the process further, he divides the task into two or three steps as suggested by fellow expert “for for.” This approach not only makes it more manageable but also allows for greater precision in crafting each component.Step 2: Applying Glue and Securing
Sven proceeds to apply glue along one edge of the flange, ensuring a secure bond when clamped into place. He emphasizes that this stage is crucial for maintaining the structural integrity of the flange, which in turn safeguards the living area beneath the canvas when hatches are open.Step 3: Allowing Time to Dry
After securely attaching the first portion of the flange, Sven allows ample time for it to dry before moving forward with additional steps. This patience and precision are key aspects of his successful boatbuilding methods.Step 4: Finishing Touches
Once the flange is fully dried, Sven removes the clamps carefully, ensuring no damage occurs during this process. He then moves on to attaching four more pieces onto these main frames, completing two pairs of flanges for the bulkhead hatches.The Final Touches
While two flanges form the primary support structure around the hatches, Sven mentions there are two additional pieces required at each end to ensure comprehensive protection. This attention to detail highlights his commitment to producing a durable and reliable design. “Sailing is about finding your path, whether it’s across an ocean or within yourself.” – Sven Yrvind In conclusion, making flanges around bulkhead hatches may seem complex at first glance, but by following Sven Yrvind’s meticulous process, enthusiasts can achieve professional-level results. Remember that the journey of boatbuilding is as rewarding as reaching your destination; it tests one’s patience and dedication. For those seeking to embark on this adventure or simply gain more insight into marine craftsmanship, Sven’s wisdom is invaluable.Making Flanges Around Bulkhead Hatches for Canvas
Sven Yrvind, a renowned yacht designer and sailor, shares valuable insights on creating flanges around bulkhead hatches for canvas protection in this enlightening video. By following his expert guidance, boat enthusiasts can ensure their living areas remain secure while allowing unhindered access through the hatches.Step 1: Starting with the Flange
Sven begins by explaining that working on flanges vertically and horizontally is significantly easier than doing so in a flat position. To simplify the process further, he divides the task into two or three steps as suggested by fellow expert “for for.” This approach not only makes it more manageable but also allows for greater precision in crafting each component.Step 2: Applying Glue and Securing
Sven proceeds to apply glue along one edge of the flange, ensuring a secure bond when clamped into place. He emphasizes that this stage is crucial for maintaining the structural integrity of the flange, which in turn safeguards the living area beneath the canvas when hatches are open.Step 3: Allowing Time to Dry
After securely attaching the first portion of the flange, Sven allows ample time for it to dry before moving forward with additional steps. This patience and precision are key aspects of his successful boatbuilding methods.Step 4: Finishing Touches
Once the flange is fully dried, Sven removes the clamps carefully, ensuring no damage occurs during this process. He then moves on to attaching four more pieces onto these main frames, completing two pairs of flanges for the bulkhead hatches.The Final Touches
While two flanges form the primary support structure around the hatches, Sven mentions there are two additional pieces required at each end to ensure comprehensive protection. This attention to detail highlights his commitment to producing a durable and reliable design. “Sailing is about finding your path, whether it’s across an ocean or within yourself.” – Sven Yrvind In conclusion, making flanges around bulkhead hatches may seem complex at first glance, but by following Sven Yrvind’s meticulous process, enthusiasts can achieve professional-level results. Remember that the journey of boatbuilding is as rewarding as reaching your destination; it tests one’s patience and dedication. For those seeking to embark on this adventure or simply gain more insight into marine craftsmanship, Sven’s wisdom is invaluable.Once the flange is fully dried, Sven removes the clamps carefully, ensuring no damage occurs during this process. He then moves on to attaching four more pieces onto these main frames, completing two pairs of flanges for the bulkhead hatches.The Final Touches
While two flanges form the primary support structure around the hatches, Sven mentions there are two additional pieces required at each end to ensure comprehensive protection. This attention to detail highlights his commitment to producing a durable and reliable design. “Sailing is about finding your path, whether it’s across an ocean or within yourself.” – Sven Yrvind In conclusion, making flanges around bulkhead hatches may seem complex at first glance, but by following Sven Yrvind’s meticulous process, enthusiasts can achieve professional-level results. Remember that the journey of boatbuilding is as rewarding as reaching your destination; it tests one’s patience and dedication. For those seeking to embark on this adventure or simply gain more insight into marine craftsmanship, Sven’s wisdom is invaluable.Sven begins by explaining that working on flanges vertically and horizontally is significantly easier than doing so in a flat position. To simplify the process further, he divides the task into two or three steps as suggested by fellow expert “for for.” This approach not only makes it more manageable but also allows for greater precision in crafting each component.Step 2: Applying Glue and Securing
Sven proceeds to apply glue along one edge of the flange, ensuring a secure bond when clamped into place. He emphasizes that this stage is crucial for maintaining the structural integrity of the flange, which in turn safeguards the living area beneath the canvas when hatches are open.Step 3: Allowing Time to Dry
After securely attaching the first portion of the flange, Sven allows ample time for it to dry before moving forward with additional steps. This patience and precision are key aspects of his successful boatbuilding methods.Step 4: Finishing Touches
Once the flange is fully dried, Sven removes the clamps carefully, ensuring no damage occurs during this process. He then moves on to attaching four more pieces onto these main frames, completing two pairs of flanges for the bulkhead hatches.The Final Touches
While two flanges form the primary support structure around the hatches, Sven mentions there are two additional pieces required at each end to ensure comprehensive protection. This attention to detail highlights his commitment to producing a durable and reliable design. “Sailing is about finding your path, whether it’s across an ocean or within yourself.” – Sven Yrvind In conclusion, making flanges around bulkhead hatches may seem complex at first glance, but by following Sven Yrvind’s meticulous process, enthusiasts can achieve professional-level results. Remember that the journey of boatbuilding is as rewarding as reaching your destination; it tests one’s patience and dedication. For those seeking to embark on this adventure or simply gain more insight into marine craftsmanship, Sven’s wisdom is invaluable.Sven Yrvind, a renowned yacht designer and sailor, shares valuable insights on creating flanges around bulkhead hatches for canvas protection in this enlightening video. By following his expert guidance, boat enthusiasts can ensure their living areas remain secure while allowing unhindered access through the hatches.Step 1: Starting with the Flange
Sven begins by explaining that working on flanges vertically and horizontally is significantly easier than doing so in a flat position. To simplify the process further, he divides the task into two or three steps as suggested by fellow expert “for for.” This approach not only makes it more manageable but also allows for greater precision in crafting each component.Step 2: Applying Glue and Securing
Sven proceeds to apply glue along one edge of the flange, ensuring a secure bond when clamped into place. He emphasizes that this stage is crucial for maintaining the structural integrity of the flange, which in turn safeguards the living area beneath the canvas when hatches are open.Step 3: Allowing Time to Dry
After securely attaching the first portion of the flange, Sven allows ample time for it to dry before moving forward with additional steps. This patience and precision are key aspects of his successful boatbuilding methods.Step 4: Finishing Touches
Once the flange is fully dried, Sven removes the clamps carefully, ensuring no damage occurs during this process. He then moves on to attaching four more pieces onto these main frames, completing two pairs of flanges for the bulkhead hatches.The Final Touches
While two flanges form the primary support structure around the hatches, Sven mentions there are two additional pieces required at each end to ensure comprehensive protection. This attention to detail highlights his commitment to producing a durable and reliable design. “Sailing is about finding your path, whether it’s across an ocean or within yourself.” – Sven Yrvind In conclusion, making flanges around bulkhead hatches may seem complex at first glance, but by following Sven Yrvind’s meticulous process, enthusiasts can achieve professional-level results. Remember that the journey of boatbuilding is as rewarding as reaching your destination; it tests one’s patience and dedication. For those seeking to embark on this adventure or simply gain more insight into marine craftsmanship, Sven’s wisdom is invaluable.Making Flanges Around Bulkhead Hatches for Canvas
Sven Yrvind, a renowned yacht designer and sailor, shares valuable insights on creating flanges around bulkhead hatches for canvas protection in this enlightening video. By following his expert guidance, boat enthusiasts can ensure their living areas remain secure while allowing unhindered access through the hatches.Step 1: Starting with the Flange
Sven begins by explaining that working on flanges vertically and horizontally is significantly easier than doing so in a flat position. To simplify the process further, he divides the task into two or three steps as suggested by fellow expert “for for.” This approach not only makes it more manageable but also allows for greater precision in crafting each component.Step 2: Applying Glue and Securing
Sven proceeds to apply glue along one edge of the flange, ensuring a secure bond when clamped into place. He emphasizes that this stage is crucial for maintaining the structural integrity of the flange, which in turn safeguards the living area beneath the canvas when hatches are open.Step 3: Allowing Time to Dry
After securely attaching the first portion of the flange, Sven allows ample time for it to dry before moving forward with additional steps. This patience and precision are key aspects of his successful boatbuilding methods.Step 4: Finishing Touches
Once the flange is fully dried, Sven removes the clamps carefully, ensuring no damage occurs during this process. He then moves on to attaching four more pieces onto these main frames, completing two pairs of flanges for the bulkhead hatches.The Final Touches
While two flanges form the primary support structure around the hatches, Sven mentions there are two additional pieces required at each end to ensure comprehensive protection. This attention to detail highlights his commitment to producing a durable and reliable design. “Sailing is about finding your path, whether it’s across an ocean or within yourself.” – Sven Yrvind In conclusion, making flanges around bulkhead hatches may seem complex at first glance, but by following Sven Yrvind’s meticulous process, enthusiasts can achieve professional-level results. Remember that the journey of boatbuilding is as rewarding as reaching your destination; it tests one’s patience and dedication. For those seeking to embark on this adventure or simply gain more insight into marine craftsmanship, Sven’s wisdom is invaluable.After securely attaching the first portion of the flange, Sven allows ample time for it to dry before moving forward with additional steps. This patience and precision are key aspects of his successful boatbuilding methods.Step 4: Finishing Touches
Once the flange is fully dried, Sven removes the clamps carefully, ensuring no damage occurs during this process. He then moves on to attaching four more pieces onto these main frames, completing two pairs of flanges for the bulkhead hatches.The Final Touches
While two flanges form the primary support structure around the hatches, Sven mentions there are two additional pieces required at each end to ensure comprehensive protection. This attention to detail highlights his commitment to producing a durable and reliable design. “Sailing is about finding your path, whether it’s across an ocean or within yourself.” – Sven Yrvind In conclusion, making flanges around bulkhead hatches may seem complex at first glance, but by following Sven Yrvind’s meticulous process, enthusiasts can achieve professional-level results. Remember that the journey of boatbuilding is as rewarding as reaching your destination; it tests one’s patience and dedication. For those seeking to embark on this adventure or simply gain more insight into marine craftsmanship, Sven’s wisdom is invaluable.Sven begins by explaining that working on flanges vertically and horizontally is significantly easier than doing so in a flat position. To simplify the process further, he divides the task into two or three steps as suggested by fellow expert “for for.” This approach not only makes it more manageable but also allows for greater precision in crafting each component.Step 2: Applying Glue and Securing
Sven proceeds to apply glue along one edge of the flange, ensuring a secure bond when clamped into place. He emphasizes that this stage is crucial for maintaining the structural integrity of the flange, which in turn safeguards the living area beneath the canvas when hatches are open.Step 3: Allowing Time to Dry
After securely attaching the first portion of the flange, Sven allows ample time for it to dry before moving forward with additional steps. This patience and precision are key aspects of his successful boatbuilding methods.Step 4: Finishing Touches
Once the flange is fully dried, Sven removes the clamps carefully, ensuring no damage occurs during this process. He then moves on to attaching four more pieces onto these main frames, completing two pairs of flanges for the bulkhead hatches.The Final Touches
While two flanges form the primary support structure around the hatches, Sven mentions there are two additional pieces required at each end to ensure comprehensive protection. This attention to detail highlights his commitment to producing a durable and reliable design. “Sailing is about finding your path, whether it’s across an ocean or within yourself.” – Sven Yrvind In conclusion, making flanges around bulkhead hatches may seem complex at first glance, but by following Sven Yrvind’s meticulous process, enthusiasts can achieve professional-level results. Remember that the journey of boatbuilding is as rewarding as reaching your destination; it tests one’s patience and dedication. For those seeking to embark on this adventure or simply gain more insight into marine craftsmanship, Sven’s wisdom is invaluable.Sven Yrvind, a renowned yacht designer and sailor, shares valuable insights on creating flanges around bulkhead hatches for canvas protection in this enlightening video. By following his expert guidance, boat enthusiasts can ensure their living areas remain secure while allowing unhindered access through the hatches.Step 1: Starting with the Flange
Sven begins by explaining that working on flanges vertically and horizontally is significantly easier than doing so in a flat position. To simplify the process further, he divides the task into two or three steps as suggested by fellow expert “for for.” This approach not only makes it more manageable but also allows for greater precision in crafting each component.Step 2: Applying Glue and Securing
Sven proceeds to apply glue along one edge of the flange, ensuring a secure bond when clamped into place. He emphasizes that this stage is crucial for maintaining the structural integrity of the flange, which in turn safeguards the living area beneath the canvas when hatches are open.Step 3: Allowing Time to Dry
After securely attaching the first portion of the flange, Sven allows ample time for it to dry before moving forward with additional steps. This patience and precision are key aspects of his successful boatbuilding methods.Step 4: Finishing Touches
Once the flange is fully dried, Sven removes the clamps carefully, ensuring no damage occurs during this process. He then moves on to attaching four more pieces onto these main frames, completing two pairs of flanges for the bulkhead hatches.The Final Touches
While two flanges form the primary support structure around the hatches, Sven mentions there are two additional pieces required at each end to ensure comprehensive protection. This attention to detail highlights his commitment to producing a durable and reliable design. “Sailing is about finding your path, whether it’s across an ocean or within yourself.” – Sven Yrvind In conclusion, making flanges around bulkhead hatches may seem complex at first glance, but by following Sven Yrvind’s meticulous process, enthusiasts can achieve professional-level results. Remember that the journey of boatbuilding is as rewarding as reaching your destination; it tests one’s patience and dedication. For those seeking to embark on this adventure or simply gain more insight into marine craftsmanship, Sven’s wisdom is invaluable.Making Flanges Around Bulkhead Hatches for Canvas
Sven Yrvind, a renowned yacht designer and sailor, shares valuable insights on creating flanges around bulkhead hatches for canvas protection in this enlightening video. By following his expert guidance, boat enthusiasts can ensure their living areas remain secure while allowing unhindered access through the hatches.Step 1: Starting with the Flange
Sven begins by explaining that working on flanges vertically and horizontally is significantly easier than doing so in a flat position. To simplify the process further, he divides the task into two or three steps as suggested by fellow expert “for for.” This approach not only makes it more manageable but also allows for greater precision in crafting each component.Step 2: Applying Glue and Securing
Sven proceeds to apply glue along one edge of the flange, ensuring a secure bond when clamped into place. He emphasizes that this stage is crucial for maintaining the structural integrity of the flange, which in turn safeguards the living area beneath the canvas when hatches are open.Step 3: Allowing Time to Dry
After securely attaching the first portion of the flange, Sven allows ample time for it to dry before moving forward with additional steps. This patience and precision are key aspects of his successful boatbuilding methods.Step 4: Finishing Touches
Once the flange is fully dried, Sven removes the clamps carefully, ensuring no damage occurs during this process. He then moves on to attaching four more pieces onto these main frames, completing two pairs of flanges for the bulkhead hatches.The Final Touches
While two flanges form the primary support structure around the hatches, Sven mentions there are two additional pieces required at each end to ensure comprehensive protection. This attention to detail highlights his commitment to producing a durable and reliable design. “Sailing is about finding your path, whether it’s across an ocean or within yourself.” – Sven Yrvind In conclusion, making flanges around bulkhead hatches may seem complex at first glance, but by following Sven Yrvind’s meticulous process, enthusiasts can achieve professional-level results. Remember that the journey of boatbuilding is as rewarding as reaching your destination; it tests one’s patience and dedication. For those seeking to embark on this adventure or simply gain more insight into marine craftsmanship, Sven’s wisdom is invaluable.Sven proceeds to apply glue along one edge of the flange, ensuring a secure bond when clamped into place. He emphasizes that this stage is crucial for maintaining the structural integrity of the flange, which in turn safeguards the living area beneath the canvas when hatches are open.Step 3: Allowing Time to Dry
After securely attaching the first portion of the flange, Sven allows ample time for it to dry before moving forward with additional steps. This patience and precision are key aspects of his successful boatbuilding methods.Step 4: Finishing Touches
Once the flange is fully dried, Sven removes the clamps carefully, ensuring no damage occurs during this process. He then moves on to attaching four more pieces onto these main frames, completing two pairs of flanges for the bulkhead hatches.The Final Touches
While two flanges form the primary support structure around the hatches, Sven mentions there are two additional pieces required at each end to ensure comprehensive protection. This attention to detail highlights his commitment to producing a durable and reliable design. “Sailing is about finding your path, whether it’s across an ocean or within yourself.” – Sven Yrvind In conclusion, making flanges around bulkhead hatches may seem complex at first glance, but by following Sven Yrvind’s meticulous process, enthusiasts can achieve professional-level results. Remember that the journey of boatbuilding is as rewarding as reaching your destination; it tests one’s patience and dedication. For those seeking to embark on this adventure or simply gain more insight into marine craftsmanship, Sven’s wisdom is invaluable.Sven begins by explaining that working on flanges vertically and horizontally is significantly easier than doing so in a flat position. To simplify the process further, he divides the task into two or three steps as suggested by fellow expert “for for.” This approach not only makes it more manageable but also allows for greater precision in crafting each component.Step 2: Applying Glue and Securing
Sven proceeds to apply glue along one edge of the flange, ensuring a secure bond when clamped into place. He emphasizes that this stage is crucial for maintaining the structural integrity of the flange, which in turn safeguards the living area beneath the canvas when hatches are open.Step 3: Allowing Time to Dry
After securely attaching the first portion of the flange, Sven allows ample time for it to dry before moving forward with additional steps. This patience and precision are key aspects of his successful boatbuilding methods.Step 4: Finishing Touches
Once the flange is fully dried, Sven removes the clamps carefully, ensuring no damage occurs during this process. He then moves on to attaching four more pieces onto these main frames, completing two pairs of flanges for the bulkhead hatches.The Final Touches
While two flanges form the primary support structure around the hatches, Sven mentions there are two additional pieces required at each end to ensure comprehensive protection. This attention to detail highlights his commitment to producing a durable and reliable design. “Sailing is about finding your path, whether it’s across an ocean or within yourself.” – Sven Yrvind In conclusion, making flanges around bulkhead hatches may seem complex at first glance, but by following Sven Yrvind’s meticulous process, enthusiasts can achieve professional-level results. Remember that the journey of boatbuilding is as rewarding as reaching your destination; it tests one’s patience and dedication. For those seeking to embark on this adventure or simply gain more insight into marine craftsmanship, Sven’s wisdom is invaluable.Sven Yrvind, a renowned yacht designer and sailor, shares valuable insights on creating flanges around bulkhead hatches for canvas protection in this enlightening video. By following his expert guidance, boat enthusiasts can ensure their living areas remain secure while allowing unhindered access through the hatches.Step 1: Starting with the Flange
Sven begins by explaining that working on flanges vertically and horizontally is significantly easier than doing so in a flat position. To simplify the process further, he divides the task into two or three steps as suggested by fellow expert “for for.” This approach not only makes it more manageable but also allows for greater precision in crafting each component.Step 2: Applying Glue and Securing
Sven proceeds to apply glue along one edge of the flange, ensuring a secure bond when clamped into place. He emphasizes that this stage is crucial for maintaining the structural integrity of the flange, which in turn safeguards the living area beneath the canvas when hatches are open.Step 3: Allowing Time to Dry
After securely attaching the first portion of the flange, Sven allows ample time for it to dry before moving forward with additional steps. This patience and precision are key aspects of his successful boatbuilding methods.Step 4: Finishing Touches
Once the flange is fully dried, Sven removes the clamps carefully, ensuring no damage occurs during this process. He then moves on to attaching four more pieces onto these main frames, completing two pairs of flanges for the bulkhead hatches.The Final Touches
While two flanges form the primary support structure around the hatches, Sven mentions there are two additional pieces required at each end to ensure comprehensive protection. This attention to detail highlights his commitment to producing a durable and reliable design. “Sailing is about finding your path, whether it’s across an ocean or within yourself.” – Sven Yrvind In conclusion, making flanges around bulkhead hatches may seem complex at first glance, but by following Sven Yrvind’s meticulous process, enthusiasts can achieve professional-level results. Remember that the journey of boatbuilding is as rewarding as reaching your destination; it tests one’s patience and dedication. For those seeking to embark on this adventure or simply gain more insight into marine craftsmanship, Sven’s wisdom is invaluable.Making Flanges Around Bulkhead Hatches for Canvas
Sven Yrvind, a renowned yacht designer and sailor, shares valuable insights on creating flanges around bulkhead hatches for canvas protection in this enlightening video. By following his expert guidance, boat enthusiasts can ensure their living areas remain secure while allowing unhindered access through the hatches.Step 1: Starting with the Flange
Sven begins by explaining that working on flanges vertically and horizontally is significantly easier than doing so in a flat position. To simplify the process further, he divides the task into two or three steps as suggested by fellow expert “for for.” This approach not only makes it more manageable but also allows for greater precision in crafting each component.Step 2: Applying Glue and Securing
Sven proceeds to apply glue along one edge of the flange, ensuring a secure bond when clamped into place. He emphasizes that this stage is crucial for maintaining the structural integrity of the flange, which in turn safeguards the living area beneath the canvas when hatches are open.Step 3: Allowing Time to Dry
After securely attaching the first portion of the flange, Sven allows ample time for it to dry before moving forward with additional steps. This patience and precision are key aspects of his successful boatbuilding methods.Step 4: Finishing Touches
Once the flange is fully dried, Sven removes the clamps carefully, ensuring no damage occurs during this process. He then moves on to attaching four more pieces onto these main frames, completing two pairs of flanges for the bulkhead hatches.The Final Touches
While two flanges form the primary support structure around the hatches, Sven mentions there are two additional pieces required at each end to ensure comprehensive protection. This attention to detail highlights his commitment to producing a durable and reliable design. “Sailing is about finding your path, whether it’s across an ocean or within yourself.” – Sven Yrvind In conclusion, making flanges around bulkhead hatches may seem complex at first glance, but by following Sven Yrvind’s meticulous process, enthusiasts can achieve professional-level results. Remember that the journey of boatbuilding is as rewarding as reaching your destination; it tests one’s patience and dedication. For those seeking to embark on this adventure or simply gain more insight into marine craftsmanship, Sven’s wisdom is invaluable.Once the flange is fully dried, Sven removes the clamps carefully, ensuring no damage occurs during this process. He then moves on to attaching four more pieces onto these main frames, completing two pairs of flanges for the bulkhead hatches.The Final Touches
While two flanges form the primary support structure around the hatches, Sven mentions there are two additional pieces required at each end to ensure comprehensive protection. This attention to detail highlights his commitment to producing a durable and reliable design. “Sailing is about finding your path, whether it’s across an ocean or within yourself.” – Sven Yrvind In conclusion, making flanges around bulkhead hatches may seem complex at first glance, but by following Sven Yrvind’s meticulous process, enthusiasts can achieve professional-level results. Remember that the journey of boatbuilding is as rewarding as reaching your destination; it tests one’s patience and dedication. For those seeking to embark on this adventure or simply gain more insight into marine craftsmanship, Sven’s wisdom is invaluable.Sven proceeds to apply glue along one edge of the flange, ensuring a secure bond when clamped into place. He emphasizes that this stage is crucial for maintaining the structural integrity of the flange, which in turn safeguards the living area beneath the canvas when hatches are open.Step 3: Allowing Time to Dry
After securely attaching the first portion of the flange, Sven allows ample time for it to dry before moving forward with additional steps. This patience and precision are key aspects of his successful boatbuilding methods.Step 4: Finishing Touches
Once the flange is fully dried, Sven removes the clamps carefully, ensuring no damage occurs during this process. He then moves on to attaching four more pieces onto these main frames, completing two pairs of flanges for the bulkhead hatches.The Final Touches
While two flanges form the primary support structure around the hatches, Sven mentions there are two additional pieces required at each end to ensure comprehensive protection. This attention to detail highlights his commitment to producing a durable and reliable design. “Sailing is about finding your path, whether it’s across an ocean or within yourself.” – Sven Yrvind In conclusion, making flanges around bulkhead hatches may seem complex at first glance, but by following Sven Yrvind’s meticulous process, enthusiasts can achieve professional-level results. Remember that the journey of boatbuilding is as rewarding as reaching your destination; it tests one’s patience and dedication. For those seeking to embark on this adventure or simply gain more insight into marine craftsmanship, Sven’s wisdom is invaluable.Sven begins by explaining that working on flanges vertically and horizontally is significantly easier than doing so in a flat position. To simplify the process further, he divides the task into two or three steps as suggested by fellow expert “for for.” This approach not only makes it more manageable but also allows for greater precision in crafting each component.Step 2: Applying Glue and Securing
Sven proceeds to apply glue along one edge of the flange, ensuring a secure bond when clamped into place. He emphasizes that this stage is crucial for maintaining the structural integrity of the flange, which in turn safeguards the living area beneath the canvas when hatches are open.Step 3: Allowing Time to Dry
After securely attaching the first portion of the flange, Sven allows ample time for it to dry before moving forward with additional steps. This patience and precision are key aspects of his successful boatbuilding methods.Step 4: Finishing Touches
Once the flange is fully dried, Sven removes the clamps carefully, ensuring no damage occurs during this process. He then moves on to attaching four more pieces onto these main frames, completing two pairs of flanges for the bulkhead hatches.The Final Touches
While two flanges form the primary support structure around the hatches, Sven mentions there are two additional pieces required at each end to ensure comprehensive protection. This attention to detail highlights his commitment to producing a durable and reliable design. “Sailing is about finding your path, whether it’s across an ocean or within yourself.” – Sven Yrvind In conclusion, making flanges around bulkhead hatches may seem complex at first glance, but by following Sven Yrvind’s meticulous process, enthusiasts can achieve professional-level results. Remember that the journey of boatbuilding is as rewarding as reaching your destination; it tests one’s patience and dedication. For those seeking to embark on this adventure or simply gain more insight into marine craftsmanship, Sven’s wisdom is invaluable.Sven Yrvind, a renowned yacht designer and sailor, shares valuable insights on creating flanges around bulkhead hatches for canvas protection in this enlightening video. By following his expert guidance, boat enthusiasts can ensure their living areas remain secure while allowing unhindered access through the hatches.Step 1: Starting with the Flange
Sven begins by explaining that working on flanges vertically and horizontally is significantly easier than doing so in a flat position. To simplify the process further, he divides the task into two or three steps as suggested by fellow expert “for for.” This approach not only makes it more manageable but also allows for greater precision in crafting each component.Step 2: Applying Glue and Securing
Sven proceeds to apply glue along one edge of the flange, ensuring a secure bond when clamped into place. He emphasizes that this stage is crucial for maintaining the structural integrity of the flange, which in turn safeguards the living area beneath the canvas when hatches are open.Step 3: Allowing Time to Dry
After securely attaching the first portion of the flange, Sven allows ample time for it to dry before moving forward with additional steps. This patience and precision are key aspects of his successful boatbuilding methods.Step 4: Finishing Touches
Once the flange is fully dried, Sven removes the clamps carefully, ensuring no damage occurs during this process. He then moves on to attaching four more pieces onto these main frames, completing two pairs of flanges for the bulkhead hatches.The Final Touches
While two flanges form the primary support structure around the hatches, Sven mentions there are two additional pieces required at each end to ensure comprehensive protection. This attention to detail highlights his commitment to producing a durable and reliable design. “Sailing is about finding your path, whether it’s across an ocean or within yourself.” – Sven Yrvind In conclusion, making flanges around bulkhead hatches may seem complex at first glance, but by following Sven Yrvind’s meticulous process, enthusiasts can achieve professional-level results. Remember that the journey of boatbuilding is as rewarding as reaching your destination; it tests one’s patience and dedication. For those seeking to embark on this adventure or simply gain more insight into marine craftsmanship, Sven’s wisdom is invaluable.Making Flanges Around Bulkhead Hatches for Canvas
Sven Yrvind, a renowned yacht designer and sailor, shares valuable insights on creating flanges around bulkhead hatches for canvas protection in this enlightening video. By following his expert guidance, boat enthusiasts can ensure their living areas remain secure while allowing unhindered access through the hatches.Step 1: Starting with the Flange
Sven begins by explaining that working on flanges vertically and horizontally is significantly easier than doing so in a flat position. To simplify the process further, he divides the task into two or three steps as suggested by fellow expert “for for.” This approach not only makes it more manageable but also allows for greater precision in crafting each component.Step 2: Applying Glue and Securing
Sven proceeds to apply glue along one edge of the flange, ensuring a secure bond when clamped into place. He emphasizes that this stage is crucial for maintaining the structural integrity of the flange, which in turn safeguards the living area beneath the canvas when hatches are open.Step 3: Allowing Time to Dry
After securely attaching the first portion of the flange, Sven allows ample time for it to dry before moving forward with additional steps. This patience and precision are key aspects of his successful boatbuilding methods.Step 4: Finishing Touches
Once the flange is fully dried, Sven removes the clamps carefully, ensuring no damage occurs during this process. He then moves on to attaching four more pieces onto these main frames, completing two pairs of flanges for the bulkhead hatches.The Final Touches
While two flanges form the primary support structure around the hatches, Sven mentions there are two additional pieces required at each end to ensure comprehensive protection. This attention to detail highlights his commitment to producing a durable and reliable design. “Sailing is about finding your path, whether it’s across an ocean or within yourself.” – Sven Yrvind In conclusion, making flanges around bulkhead hatches may seem complex at first glance, but by following Sven Yrvind’s meticulous process, enthusiasts can achieve professional-level results. Remember that the journey of boatbuilding is as rewarding as reaching your destination; it tests one’s patience and dedication. For those seeking to embark on this adventure or simply gain more insight into marine craftsmanship, Sven’s wisdom is invaluable.After securely attaching the first portion of the flange, Sven allows ample time for it to dry before moving forward with additional steps. This patience and precision are key aspects of his successful boatbuilding methods.Step 4: Finishing Touches
Once the flange is fully dried, Sven removes the clamps carefully, ensuring no damage occurs during this process. He then moves on to attaching four more pieces onto these main frames, completing two pairs of flanges for the bulkhead hatches.The Final Touches
While two flanges form the primary support structure around the hatches, Sven mentions there are two additional pieces required at each end to ensure comprehensive protection. This attention to detail highlights his commitment to producing a durable and reliable design. “Sailing is about finding your path, whether it’s across an ocean or within yourself.” – Sven Yrvind In conclusion, making flanges around bulkhead hatches may seem complex at first glance, but by following Sven Yrvind’s meticulous process, enthusiasts can achieve professional-level results. Remember that the journey of boatbuilding is as rewarding as reaching your destination; it tests one’s patience and dedication. For those seeking to embark on this adventure or simply gain more insight into marine craftsmanship, Sven’s wisdom is invaluable.Sven proceeds to apply glue along one edge of the flange, ensuring a secure bond when clamped into place. He emphasizes that this stage is crucial for maintaining the structural integrity of the flange, which in turn safeguards the living area beneath the canvas when hatches are open.Step 3: Allowing Time to Dry
After securely attaching the first portion of the flange, Sven allows ample time for it to dry before moving forward with additional steps. This patience and precision are key aspects of his successful boatbuilding methods.Step 4: Finishing Touches
Once the flange is fully dried, Sven removes the clamps carefully, ensuring no damage occurs during this process. He then moves on to attaching four more pieces onto these main frames, completing two pairs of flanges for the bulkhead hatches.The Final Touches
While two flanges form the primary support structure around the hatches, Sven mentions there are two additional pieces required at each end to ensure comprehensive protection. This attention to detail highlights his commitment to producing a durable and reliable design. “Sailing is about finding your path, whether it’s across an ocean or within yourself.” – Sven Yrvind In conclusion, making flanges around bulkhead hatches may seem complex at first glance, but by following Sven Yrvind’s meticulous process, enthusiasts can achieve professional-level results. Remember that the journey of boatbuilding is as rewarding as reaching your destination; it tests one’s patience and dedication. For those seeking to embark on this adventure or simply gain more insight into marine craftsmanship, Sven’s wisdom is invaluable.Sven begins by explaining that working on flanges vertically and horizontally is significantly easier than doing so in a flat position. To simplify the process further, he divides the task into two or three steps as suggested by fellow expert “for for.” This approach not only makes it more manageable but also allows for greater precision in crafting each component.Step 2: Applying Glue and Securing
Sven proceeds to apply glue along one edge of the flange, ensuring a secure bond when clamped into place. He emphasizes that this stage is crucial for maintaining the structural integrity of the flange, which in turn safeguards the living area beneath the canvas when hatches are open.Step 3: Allowing Time to Dry
After securely attaching the first portion of the flange, Sven allows ample time for it to dry before moving forward with additional steps. This patience and precision are key aspects of his successful boatbuilding methods.Step 4: Finishing Touches
Once the flange is fully dried, Sven removes the clamps carefully, ensuring no damage occurs during this process. He then moves on to attaching four more pieces onto these main frames, completing two pairs of flanges for the bulkhead hatches.The Final Touches
While two flanges form the primary support structure around the hatches, Sven mentions there are two additional pieces required at each end to ensure comprehensive protection. This attention to detail highlights his commitment to producing a durable and reliable design. “Sailing is about finding your path, whether it’s across an ocean or within yourself.” – Sven Yrvind In conclusion, making flanges around bulkhead hatches may seem complex at first glance, but by following Sven Yrvind’s meticulous process, enthusiasts can achieve professional-level results. Remember that the journey of boatbuilding is as rewarding as reaching your destination; it tests one’s patience and dedication. For those seeking to embark on this adventure or simply gain more insight into marine craftsmanship, Sven’s wisdom is invaluable.Sven Yrvind, a renowned yacht designer and sailor, shares valuable insights on creating flanges around bulkhead hatches for canvas protection in this enlightening video. By following his expert guidance, boat enthusiasts can ensure their living areas remain secure while allowing unhindered access through the hatches.Step 1: Starting with the Flange
Sven begins by explaining that working on flanges vertically and horizontally is significantly easier than doing so in a flat position. To simplify the process further, he divides the task into two or three steps as suggested by fellow expert “for for.” This approach not only makes it more manageable but also allows for greater precision in crafting each component.Step 2: Applying Glue and Securing
Sven proceeds to apply glue along one edge of the flange, ensuring a secure bond when clamped into place. He emphasizes that this stage is crucial for maintaining the structural integrity of the flange, which in turn safeguards the living area beneath the canvas when hatches are open.Step 3: Allowing Time to Dry
After securely attaching the first portion of the flange, Sven allows ample time for it to dry before moving forward with additional steps. This patience and precision are key aspects of his successful boatbuilding methods.Step 4: Finishing Touches
Once the flange is fully dried, Sven removes the clamps carefully, ensuring no damage occurs during this process. He then moves on to attaching four more pieces onto these main frames, completing two pairs of flanges for the bulkhead hatches.The Final Touches
While two flanges form the primary support structure around the hatches, Sven mentions there are two additional pieces required at each end to ensure comprehensive protection. This attention to detail highlights his commitment to producing a durable and reliable design. “Sailing is about finding your path, whether it’s across an ocean or within yourself.” – Sven Yrvind In conclusion, making flanges around bulkhead hatches may seem complex at first glance, but by following Sven Yrvind’s meticulous process, enthusiasts can achieve professional-level results. Remember that the journey of boatbuilding is as rewarding as reaching your destination; it tests one’s patience and dedication. For those seeking to embark on this adventure or simply gain more insight into marine craftsmanship, Sven’s wisdom is invaluable.Making Flanges Around Bulkhead Hatches for Canvas
Sven Yrvind, a renowned yacht designer and sailor, shares valuable insights on creating flanges around bulkhead hatches for canvas protection in this enlightening video. By following his expert guidance, boat enthusiasts can ensure their living areas remain secure while allowing unhindered access through the hatches.Step 1: Starting with the Flange
Sven begins by explaining that working on flanges vertically and horizontally is significantly easier than doing so in a flat position. To simplify the process further, he divides the task into two or three steps as suggested by fellow expert “for for.” This approach not only makes it more manageable but also allows for greater precision in crafting each component.Step 2: Applying Glue and Securing
Sven proceeds to apply glue along one edge of the flange, ensuring a secure bond when clamped into place. He emphasizes that this stage is crucial for maintaining the structural integrity of the flange, which in turn safeguards the living area beneath the canvas when hatches are open.Step 3: Allowing Time to Dry
After securely attaching the first portion of the flange, Sven allows ample time for it to dry before moving forward with additional steps. This patience and precision are key aspects of his successful boatbuilding methods.Step 4: Finishing Touches
Once the flange is fully dried, Sven removes the clamps carefully, ensuring no damage occurs during this process. He then moves on to attaching four more pieces onto these main frames, completing two pairs of flanges for the bulkhead hatches.The Final Touches
While two flanges form the primary support structure around the hatches, Sven mentions there are two additional pieces required at each end to ensure comprehensive protection. This attention to detail highlights his commitment to producing a durable and reliable design. “Sailing is about finding your path, whether it’s across an ocean or within yourself.” – Sven Yrvind In conclusion, making flanges around bulkhead hatches may seem complex at first glance, but by following Sven Yrvind’s meticulous process, enthusiasts can achieve professional-level results. Remember that the journey of boatbuilding is as rewarding as reaching your destination; it tests one’s patience and dedication. For those seeking to embark on this adventure or simply gain more insight into marine craftsmanship, Sven’s wisdom is invaluable.Once the flange is fully dried, Sven removes the clamps carefully, ensuring no damage occurs during this process. He then moves on to attaching four more pieces onto these main frames, completing two pairs of flanges for the bulkhead hatches.The Final Touches
While two flanges form the primary support structure around the hatches, Sven mentions there are two additional pieces required at each end to ensure comprehensive protection. This attention to detail highlights his commitment to producing a durable and reliable design. “Sailing is about finding your path, whether it’s across an ocean or within yourself.” – Sven Yrvind In conclusion, making flanges around bulkhead hatches may seem complex at first glance, but by following Sven Yrvind’s meticulous process, enthusiasts can achieve professional-level results. Remember that the journey of boatbuilding is as rewarding as reaching your destination; it tests one’s patience and dedication. For those seeking to embark on this adventure or simply gain more insight into marine craftsmanship, Sven’s wisdom is invaluable.After securely attaching the first portion of the flange, Sven allows ample time for it to dry before moving forward with additional steps. This patience and precision are key aspects of his successful boatbuilding methods.Step 4: Finishing Touches
Once the flange is fully dried, Sven removes the clamps carefully, ensuring no damage occurs during this process. He then moves on to attaching four more pieces onto these main frames, completing two pairs of flanges for the bulkhead hatches.The Final Touches
While two flanges form the primary support structure around the hatches, Sven mentions there are two additional pieces required at each end to ensure comprehensive protection. This attention to detail highlights his commitment to producing a durable and reliable design. “Sailing is about finding your path, whether it’s across an ocean or within yourself.” – Sven Yrvind In conclusion, making flanges around bulkhead hatches may seem complex at first glance, but by following Sven Yrvind’s meticulous process, enthusiasts can achieve professional-level results. Remember that the journey of boatbuilding is as rewarding as reaching your destination; it tests one’s patience and dedication. For those seeking to embark on this adventure or simply gain more insight into marine craftsmanship, Sven’s wisdom is invaluable.Sven proceeds to apply glue along one edge of the flange, ensuring a secure bond when clamped into place. He emphasizes that this stage is crucial for maintaining the structural integrity of the flange, which in turn safeguards the living area beneath the canvas when hatches are open.Step 3: Allowing Time to Dry
After securely attaching the first portion of the flange, Sven allows ample time for it to dry before moving forward with additional steps. This patience and precision are key aspects of his successful boatbuilding methods.Step 4: Finishing Touches
Once the flange is fully dried, Sven removes the clamps carefully, ensuring no damage occurs during this process. He then moves on to attaching four more pieces onto these main frames, completing two pairs of flanges for the bulkhead hatches.The Final Touches
While two flanges form the primary support structure around the hatches, Sven mentions there are two additional pieces required at each end to ensure comprehensive protection. This attention to detail highlights his commitment to producing a durable and reliable design. “Sailing is about finding your path, whether it’s across an ocean or within yourself.” – Sven Yrvind In conclusion, making flanges around bulkhead hatches may seem complex at first glance, but by following Sven Yrvind’s meticulous process, enthusiasts can achieve professional-level results. Remember that the journey of boatbuilding is as rewarding as reaching your destination; it tests one’s patience and dedication. For those seeking to embark on this adventure or simply gain more insight into marine craftsmanship, Sven’s wisdom is invaluable.Sven begins by explaining that working on flanges vertically and horizontally is significantly easier than doing so in a flat position. To simplify the process further, he divides the task into two or three steps as suggested by fellow expert “for for.” This approach not only makes it more manageable but also allows for greater precision in crafting each component.Step 2: Applying Glue and Securing
Sven proceeds to apply glue along one edge of the flange, ensuring a secure bond when clamped into place. He emphasizes that this stage is crucial for maintaining the structural integrity of the flange, which in turn safeguards the living area beneath the canvas when hatches are open.Step 3: Allowing Time to Dry
After securely attaching the first portion of the flange, Sven allows ample time for it to dry before moving forward with additional steps. This patience and precision are key aspects of his successful boatbuilding methods.Step 4: Finishing Touches
Once the flange is fully dried, Sven removes the clamps carefully, ensuring no damage occurs during this process. He then moves on to attaching four more pieces onto these main frames, completing two pairs of flanges for the bulkhead hatches.The Final Touches
While two flanges form the primary support structure around the hatches, Sven mentions there are two additional pieces required at each end to ensure comprehensive protection. This attention to detail highlights his commitment to producing a durable and reliable design. “Sailing is about finding your path, whether it’s across an ocean or within yourself.” – Sven Yrvind In conclusion, making flanges around bulkhead hatches may seem complex at first glance, but by following Sven Yrvind’s meticulous process, enthusiasts can achieve professional-level results. Remember that the journey of boatbuilding is as rewarding as reaching your destination; it tests one’s patience and dedication. For those seeking to embark on this adventure or simply gain more insight into marine craftsmanship, Sven’s wisdom is invaluable.Sven Yrvind, a renowned yacht designer and sailor, shares valuable insights on creating flanges around bulkhead hatches for canvas protection in this enlightening video. By following his expert guidance, boat enthusiasts can ensure their living areas remain secure while allowing unhindered access through the hatches.Step 1: Starting with the Flange
Sven begins by explaining that working on flanges vertically and horizontally is significantly easier than doing so in a flat position. To simplify the process further, he divides the task into two or three steps as suggested by fellow expert “for for.” This approach not only makes it more manageable but also allows for greater precision in crafting each component.Step 2: Applying Glue and Securing
Sven proceeds to apply glue along one edge of the flange, ensuring a secure bond when clamped into place. He emphasizes that this stage is crucial for maintaining the structural integrity of the flange, which in turn safeguards the living area beneath the canvas when hatches are open.Step 3: Allowing Time to Dry
After securely attaching the first portion of the flange, Sven allows ample time for it to dry before moving forward with additional steps. This patience and precision are key aspects of his successful boatbuilding methods.Step 4: Finishing Touches
Once the flange is fully dried, Sven removes the clamps carefully, ensuring no damage occurs during this process. He then moves on to attaching four more pieces onto these main frames, completing two pairs of flanges for the bulkhead hatches.The Final Touches
While two flanges form the primary support structure around the hatches, Sven mentions there are two additional pieces required at each end to ensure comprehensive protection. This attention to detail highlights his commitment to producing a durable and reliable design. “Sailing is about finding your path, whether it’s across an ocean or within yourself.” – Sven Yrvind In conclusion, making flanges around bulkhead hatches may seem complex at first glance, but by following Sven Yrvind’s meticulous process, enthusiasts can achieve professional-level results. Remember that the journey of boatbuilding is as rewarding as reaching your destination; it tests one’s patience and dedication. For those seeking to embark on this adventure or simply gain more insight into marine craftsmanship, Sven’s wisdom is invaluable.Making Flanges Around Bulkhead Hatches for Canvas
Sven Yrvind, a renowned yacht designer and sailor, shares valuable insights on creating flanges around bulkhead hatches for canvas protection in this enlightening video. By following his expert guidance, boat enthusiasts can ensure their living areas remain secure while allowing unhindered access through the hatches.Step 1: Starting with the Flange
Sven begins by explaining that working on flanges vertically and horizontally is significantly easier than doing so in a flat position. To simplify the process further, he divides the task into two or three steps as suggested by fellow expert “for for.” This approach not only makes it more manageable but also allows for greater precision in crafting each component.Step 2: Applying Glue and Securing
Sven proceeds to apply glue along one edge of the flange, ensuring a secure bond when clamped into place. He emphasizes that this stage is crucial for maintaining the structural integrity of the flange, which in turn safeguards the living area beneath the canvas when hatches are open.Step 3: Allowing Time to Dry
After securely attaching the first portion of the flange, Sven allows ample time for it to dry before moving forward with additional steps. This patience and precision are key aspects of his successful boatbuilding methods.Step 4: Finishing Touches
Once the flange is fully dried, Sven removes the clamps carefully, ensuring no damage occurs during this process. He then moves on to attaching four more pieces onto these main frames, completing two pairs of flanges for the bulkhead hatches.The Final Touches
While two flanges form the primary support structure around the hatches, Sven mentions there are two additional pieces required at each end to ensure comprehensive protection. This attention to detail highlights his commitment to producing a durable and reliable design. “Sailing is about finding your path, whether it’s across an ocean or within yourself.” – Sven Yrvind In conclusion, making flanges around bulkhead hatches may seem complex at first glance, but by following Sven Yrvind’s meticulous process, enthusiasts can achieve professional-level results. Remember that the journey of boatbuilding is as rewarding as reaching your destination; it tests one’s patience and dedication. For those seeking to embark on this adventure or simply gain more insight into marine craftsmanship, Sven’s wisdom is invaluable.After securely attaching the first portion of the flange, Sven allows ample time for it to dry before moving forward with additional steps. This patience and precision are key aspects of his successful boatbuilding methods.Step 4: Finishing Touches
Once the flange is fully dried, Sven removes the clamps carefully, ensuring no damage occurs during this process. He then moves on to attaching four more pieces onto these main frames, completing two pairs of flanges for the bulkhead hatches.The Final Touches
While two flanges form the primary support structure around the hatches, Sven mentions there are two additional pieces required at each end to ensure comprehensive protection. This attention to detail highlights his commitment to producing a durable and reliable design. “Sailing is about finding your path, whether it’s across an ocean or within yourself.” – Sven Yrvind In conclusion, making flanges around bulkhead hatches may seem complex at first glance, but by following Sven Yrvind’s meticulous process, enthusiasts can achieve professional-level results. Remember that the journey of boatbuilding is as rewarding as reaching your destination; it tests one’s patience and dedication. For those seeking to embark on this adventure or simply gain more insight into marine craftsmanship, Sven’s wisdom is invaluable.Sven proceeds to apply glue along one edge of the flange, ensuring a secure bond when clamped into place. He emphasizes that this stage is crucial for maintaining the structural integrity of the flange, which in turn safeguards the living area beneath the canvas when hatches are open.Step 3: Allowing Time to Dry
After securely attaching the first portion of the flange, Sven allows ample time for it to dry before moving forward with additional steps. This patience and precision are key aspects of his successful boatbuilding methods.Step 4: Finishing Touches
Once the flange is fully dried, Sven removes the clamps carefully, ensuring no damage occurs during this process. He then moves on to attaching four more pieces onto these main frames, completing two pairs of flanges for the bulkhead hatches.The Final Touches
While two flanges form the primary support structure around the hatches, Sven mentions there are two additional pieces required at each end to ensure comprehensive protection. This attention to detail highlights his commitment to producing a durable and reliable design. “Sailing is about finding your path, whether it’s across an ocean or within yourself.” – Sven Yrvind In conclusion, making flanges around bulkhead hatches may seem complex at first glance, but by following Sven Yrvind’s meticulous process, enthusiasts can achieve professional-level results. Remember that the journey of boatbuilding is as rewarding as reaching your destination; it tests one’s patience and dedication. For those seeking to embark on this adventure or simply gain more insight into marine craftsmanship, Sven’s wisdom is invaluable.Sven Yrvind, a renowned yacht designer and sailor, shares valuable insights on creating flanges around bulkhead hatches for canvas protection in this enlightening video. By following his expert guidance, boat enthusiasts can ensure their living areas remain secure while allowing unhindered access through the hatches.Step 1: Starting with the Flange
Sven begins by explaining that working on flanges vertically and horizontally is significantly easier than doing so in a flat position. To simplify the process further, he divides the task into two or three steps as suggested by fellow expert “for for.” This approach not only makes it more manageable but also allows for greater precision in crafting each component.Step 2: Applying Glue and Securing
Sven proceeds to apply glue along one edge of the flange, ensuring a secure bond when clamped into place. He emphasizes that this stage is crucial for maintaining the structural integrity of the flange, which in turn safeguards the living area beneath the canvas when hatches are open.Step 3: Allowing Time to Dry
After securely attaching the first portion of the flange, Sven allows ample time for it to dry before moving forward with additional steps. This patience and precision are key aspects of his successful boatbuilding methods.Step 4: Finishing Touches
Once the flange is fully dried, Sven removes the clamps carefully, ensuring no damage occurs during this process. He then moves on to attaching four more pieces onto these main frames, completing two pairs of flanges for the bulkhead hatches.The Final Touches
While two flanges form the primary support structure around the hatches, Sven mentions there are two additional pieces required at each end to ensure comprehensive protection. This attention to detail highlights his commitment to producing a durable and reliable design. “Sailing is about finding your path, whether it’s across an ocean or within yourself.” – Sven Yrvind In conclusion, making flanges around bulkhead hatches may seem complex at first glance, but by following Sven Yrvind’s meticulous process, enthusiasts can achieve professional-level results. Remember that the journey of boatbuilding is as rewarding as reaching your destination; it tests one’s patience and dedication. For those seeking to embark on this adventure or simply gain more insight into marine craftsmanship, Sven’s wisdom is invaluable.Making Flanges Around Bulkhead Hatches for Canvas
Sven Yrvind, a renowned yacht designer and sailor, shares valuable insights on creating flanges around bulkhead hatches for canvas protection in this enlightening video. By following his expert guidance, boat enthusiasts can ensure their living areas remain secure while allowing unhindered access through the hatches.Step 1: Starting with the Flange
Sven begins by explaining that working on flanges vertically and horizontally is significantly easier than doing so in a flat position. To simplify the process further, he divides the task into two or three steps as suggested by fellow expert “for for.” This approach not only makes it more manageable but also allows for greater precision in crafting each component.Step 2: Applying Glue and Securing
Sven proceeds to apply glue along one edge of the flange, ensuring a secure bond when clamped into place. He emphasizes that this stage is crucial for maintaining the structural integrity of the flange, which in turn safeguards the living area beneath the canvas when hatches are open.Step 3: Allowing Time to Dry
After securely attaching the first portion of the flange, Sven allows ample time for it to dry before moving forward with additional steps. This patience and precision are key aspects of his successful boatbuilding methods.Step 4: Finishing Touches
Once the flange is fully dried, Sven removes the clamps carefully, ensuring no damage occurs during this process. He then moves on to attaching four more pieces onto these main frames, completing two pairs of flanges for the bulkhead hatches.The Final Touches
While two flanges form the primary support structure around the hatches, Sven mentions there are two additional pieces required at each end to ensure comprehensive protection. This attention to detail highlights his commitment to producing a durable and reliable design. “Sailing is about finding your path, whether it’s across an ocean or within yourself.” – Sven Yrvind In conclusion, making flanges around bulkhead hatches may seem complex at first glance, but by following Sven Yrvind’s meticulous process, enthusiasts can achieve professional-level results. Remember that the journey of boatbuilding is as rewarding as reaching your destination; it tests one’s patience and dedication. For those seeking to embark on this adventure or simply gain more insight into marine craftsmanship, Sven’s wisdom is invaluable.Sven begins by explaining that working on flanges vertically and horizontally is significantly easier than doing so in a flat position. To simplify the process further, he divides the task into two or three steps as suggested by fellow expert “for for.” This approach not only makes it more manageable but also allows for greater precision in crafting each component.Step 2: Applying Glue and Securing
Sven proceeds to apply glue along one edge of the flange, ensuring a secure bond when clamped into place. He emphasizes that this stage is crucial for maintaining the structural integrity of the flange, which in turn safeguards the living area beneath the canvas when hatches are open.Step 3: Allowing Time to Dry
After securely attaching the first portion of the flange, Sven allows ample time for it to dry before moving forward with additional steps. This patience and precision are key aspects of his successful boatbuilding methods.Step 4: Finishing Touches
Once the flange is fully dried, Sven removes the clamps carefully, ensuring no damage occurs during this process. He then moves on to attaching four more pieces onto these main frames, completing two pairs of flanges for the bulkhead hatches.The Final Touches
While two flanges form the primary support structure around the hatches, Sven mentions there are two additional pieces required at each end to ensure comprehensive protection. This attention to detail highlights his commitment to producing a durable and reliable design. “Sailing is about finding your path, whether it’s across an ocean or within yourself.” – Sven Yrvind In conclusion, making flanges around bulkhead hatches may seem complex at first glance, but by following Sven Yrvind’s meticulous process, enthusiasts can achieve professional-level results. Remember that the journey of boatbuilding is as rewarding as reaching your destination; it tests one’s patience and dedication. For those seeking to embark on this adventure or simply gain more insight into marine craftsmanship, Sven’s wisdom is invaluable.Sven Yrvind, a renowned yacht designer and sailor, shares valuable insights on creating flanges around bulkhead hatches for canvas protection in this enlightening video. By following his expert guidance, boat enthusiasts can ensure their living areas remain secure while allowing unhindered access through the hatches.Step 1: Starting with the Flange
Sven begins by explaining that working on flanges vertically and horizontally is significantly easier than doing so in a flat position. To simplify the process further, he divides the task into two or three steps as suggested by fellow expert “for for.” This approach not only makes it more manageable but also allows for greater precision in crafting each component.Step 2: Applying Glue and Securing
Sven proceeds to apply glue along one edge of the flange, ensuring a secure bond when clamped into place. He emphasizes that this stage is crucial for maintaining the structural integrity of the flange, which in turn safeguards the living area beneath the canvas when hatches are open.Step 3: Allowing Time to Dry
After securely attaching the first portion of the flange, Sven allows ample time for it to dry before moving forward with additional steps. This patience and precision are key aspects of his successful boatbuilding methods.Step 4: Finishing Touches
Once the flange is fully dried, Sven removes the clamps carefully, ensuring no damage occurs during this process. He then moves on to attaching four more pieces onto these main frames, completing two pairs of flanges for the bulkhead hatches.The Final Touches
While two flanges form the primary support structure around the hatches, Sven mentions there are two additional pieces required at each end to ensure comprehensive protection. This attention to detail highlights his commitment to producing a durable and reliable design. “Sailing is about finding your path, whether it’s across an ocean or within yourself.” – Sven Yrvind In conclusion, making flanges around bulkhead hatches may seem complex at first glance, but by following Sven Yrvind’s meticulous process, enthusiasts can achieve professional-level results. Remember that the journey of boatbuilding is as rewarding as reaching your destination; it tests one’s patience and dedication. For those seeking to embark on this adventure or simply gain more insight into marine craftsmanship, Sven’s wisdom is invaluable.Making Flanges Around Bulkhead Hatches for Canvas
Sven Yrvind, a renowned yacht designer and sailor, shares valuable insights on creating flanges around bulkhead hatches for canvas protection in this enlightening video. By following his expert guidance, boat enthusiasts can ensure their living areas remain secure while allowing unhindered access through the hatches.Step 1: Starting with the Flange
Sven begins by explaining that working on flanges vertically and horizontally is significantly easier than doing so in a flat position. To simplify the process further, he divides the task into two or three steps as suggested by fellow expert “for for.” This approach not only makes it more manageable but also allows for greater precision in crafting each component.Step 2: Applying Glue and Securing
Sven proceeds to apply glue along one edge of the flange, ensuring a secure bond when clamped into place. He emphasizes that this stage is crucial for maintaining the structural integrity of the flange, which in turn safeguards the living area beneath the canvas when hatches are open.Step 3: Allowing Time to Dry
After securely attaching the first portion of the flange, Sven allows ample time for it to dry before moving forward with additional steps. This patience and precision are key aspects of his successful boatbuilding methods.Step 4: Finishing Touches
Once the flange is fully dried, Sven removes the clamps carefully, ensuring no damage occurs during this process. He then moves on to attaching four more pieces onto these main frames, completing two pairs of flanges for the bulkhead hatches.The Final Touches
While two flanges form the primary support structure around the hatches, Sven mentions there are two additional pieces required at each end to ensure comprehensive protection. This attention to detail highlights his commitment to producing a durable and reliable design. “Sailing is about finding your path, whether it’s across an ocean or within yourself.” – Sven Yrvind In conclusion, making flanges around bulkhead hatches may seem complex at first glance, but by following Sven Yrvind’s meticulous process, enthusiasts can achieve professional-level results. Remember that the journey of boatbuilding is as rewarding as reaching your destination; it tests one’s patience and dedication. For those seeking to embark on this adventure or simply gain more insight into marine craftsmanship, Sven’s wisdom is invaluable.Once the flange is fully dried, Sven removes the clamps carefully, ensuring no damage occurs during this process. He then moves on to attaching four more pieces onto these main frames, completing two pairs of flanges for the bulkhead hatches.The Final Touches
While two flanges form the primary support structure around the hatches, Sven mentions there are two additional pieces required at each end to ensure comprehensive protection. This attention to detail highlights his commitment to producing a durable and reliable design. “Sailing is about finding your path, whether it’s across an ocean or within yourself.” – Sven Yrvind In conclusion, making flanges around bulkhead hatches may seem complex at first glance, but by following Sven Yrvind’s meticulous process, enthusiasts can achieve professional-level results. Remember that the journey of boatbuilding is as rewarding as reaching your destination; it tests one’s patience and dedication. For those seeking to embark on this adventure or simply gain more insight into marine craftsmanship, Sven’s wisdom is invaluable.Sven begins by explaining that working on flanges vertically and horizontally is significantly easier than doing so in a flat position. To simplify the process further, he divides the task into two or three steps as suggested by fellow expert “for for.” This approach not only makes it more manageable but also allows for greater precision in crafting each component.Step 2: Applying Glue and Securing
Sven proceeds to apply glue along one edge of the flange, ensuring a secure bond when clamped into place. He emphasizes that this stage is crucial for maintaining the structural integrity of the flange, which in turn safeguards the living area beneath the canvas when hatches are open.Step 3: Allowing Time to Dry
After securely attaching the first portion of the flange, Sven allows ample time for it to dry before moving forward with additional steps. This patience and precision are key aspects of his successful boatbuilding methods.Step 4: Finishing Touches
Once the flange is fully dried, Sven removes the clamps carefully, ensuring no damage occurs during this process. He then moves on to attaching four more pieces onto these main frames, completing two pairs of flanges for the bulkhead hatches.The Final Touches
While two flanges form the primary support structure around the hatches, Sven mentions there are two additional pieces required at each end to ensure comprehensive protection. This attention to detail highlights his commitment to producing a durable and reliable design. “Sailing is about finding your path, whether it’s across an ocean or within yourself.” – Sven Yrvind In conclusion, making flanges around bulkhead hatches may seem complex at first glance, but by following Sven Yrvind’s meticulous process, enthusiasts can achieve professional-level results. Remember that the journey of boatbuilding is as rewarding as reaching your destination; it tests one’s patience and dedication. For those seeking to embark on this adventure or simply gain more insight into marine craftsmanship, Sven’s wisdom is invaluable.Sven Yrvind, a renowned yacht designer and sailor, shares valuable insights on creating flanges around bulkhead hatches for canvas protection in this enlightening video. By following his expert guidance, boat enthusiasts can ensure their living areas remain secure while allowing unhindered access through the hatches.Step 1: Starting with the Flange
Sven begins by explaining that working on flanges vertically and horizontally is significantly easier than doing so in a flat position. To simplify the process further, he divides the task into two or three steps as suggested by fellow expert “for for.” This approach not only makes it more manageable but also allows for greater precision in crafting each component.Step 2: Applying Glue and Securing
Sven proceeds to apply glue along one edge of the flange, ensuring a secure bond when clamped into place. He emphasizes that this stage is crucial for maintaining the structural integrity of the flange, which in turn safeguards the living area beneath the canvas when hatches are open.Step 3: Allowing Time to Dry
After securely attaching the first portion of the flange, Sven allows ample time for it to dry before moving forward with additional steps. This patience and precision are key aspects of his successful boatbuilding methods.Step 4: Finishing Touches
Once the flange is fully dried, Sven removes the clamps carefully, ensuring no damage occurs during this process. He then moves on to attaching four more pieces onto these main frames, completing two pairs of flanges for the bulkhead hatches.The Final Touches
While two flanges form the primary support structure around the hatches, Sven mentions there are two additional pieces required at each end to ensure comprehensive protection. This attention to detail highlights his commitment to producing a durable and reliable design. “Sailing is about finding your path, whether it’s across an ocean or within yourself.” – Sven Yrvind In conclusion, making flanges around bulkhead hatches may seem complex at first glance, but by following Sven Yrvind’s meticulous process, enthusiasts can achieve professional-level results. Remember that the journey of boatbuilding is as rewarding as reaching your destination; it tests one’s patience and dedication. For those seeking to embark on this adventure or simply gain more insight into marine craftsmanship, Sven’s wisdom is invaluable.Making Flanges Around Bulkhead Hatches for Canvas
Sven Yrvind, a renowned yacht designer and sailor, shares valuable insights on creating flanges around bulkhead hatches for canvas protection in this enlightening video. By following his expert guidance, boat enthusiasts can ensure their living areas remain secure while allowing unhindered access through the hatches.Step 1: Starting with the Flange
Sven begins by explaining that working on flanges vertically and horizontally is significantly easier than doing so in a flat position. To simplify the process further, he divides the task into two or three steps as suggested by fellow expert “for for.” This approach not only makes it more manageable but also allows for greater precision in crafting each component.Step 2: Applying Glue and Securing
Sven proceeds to apply glue along one edge of the flange, ensuring a secure bond when clamped into place. He emphasizes that this stage is crucial for maintaining the structural integrity of the flange, which in turn safeguards the living area beneath the canvas when hatches are open.Step 3: Allowing Time to Dry
After securely attaching the first portion of the flange, Sven allows ample time for it to dry before moving forward with additional steps. This patience and precision are key aspects of his successful boatbuilding methods.Step 4: Finishing Touches
Once the flange is fully dried, Sven removes the clamps carefully, ensuring no damage occurs during this process. He then moves on to attaching four more pieces onto these main frames, completing two pairs of flanges for the bulkhead hatches.The Final Touches
While two flanges form the primary support structure around the hatches, Sven mentions there are two additional pieces required at each end to ensure comprehensive protection. This attention to detail highlights his commitment to producing a durable and reliable design. “Sailing is about finding your path, whether it’s across an ocean or within yourself.” – Sven Yrvind In conclusion, making flanges around bulkhead hatches may seem complex at first glance, but by following Sven Yrvind’s meticulous process, enthusiasts can achieve professional-level results. Remember that the journey of boatbuilding is as rewarding as reaching your destination; it tests one’s patience and dedication. For those seeking to embark on this adventure or simply gain more insight into marine craftsmanship, Sven’s wisdom is invaluable.After securely attaching the first portion of the flange, Sven allows ample time for it to dry before moving forward with additional steps. This patience and precision are key aspects of his successful boatbuilding methods.Step 4: Finishing Touches
Once the flange is fully dried, Sven removes the clamps carefully, ensuring no damage occurs during this process. He then moves on to attaching four more pieces onto these main frames, completing two pairs of flanges for the bulkhead hatches.The Final Touches
While two flanges form the primary support structure around the hatches, Sven mentions there are two additional pieces required at each end to ensure comprehensive protection. This attention to detail highlights his commitment to producing a durable and reliable design. “Sailing is about finding your path, whether it’s across an ocean or within yourself.” – Sven Yrvind In conclusion, making flanges around bulkhead hatches may seem complex at first glance, but by following Sven Yrvind’s meticulous process, enthusiasts can achieve professional-level results. Remember that the journey of boatbuilding is as rewarding as reaching your destination; it tests one’s patience and dedication. For those seeking to embark on this adventure or simply gain more insight into marine craftsmanship, Sven’s wisdom is invaluable.Sven begins by explaining that working on flanges vertically and horizontally is significantly easier than doing so in a flat position. To simplify the process further, he divides the task into two or three steps as suggested by fellow expert “for for.” This approach not only makes it more manageable but also allows for greater precision in crafting each component.Step 2: Applying Glue and Securing
Sven proceeds to apply glue along one edge of the flange, ensuring a secure bond when clamped into place. He emphasizes that this stage is crucial for maintaining the structural integrity of the flange, which in turn safeguards the living area beneath the canvas when hatches are open.Step 3: Allowing Time to Dry
After securely attaching the first portion of the flange, Sven allows ample time for it to dry before moving forward with additional steps. This patience and precision are key aspects of his successful boatbuilding methods.Step 4: Finishing Touches
Once the flange is fully dried, Sven removes the clamps carefully, ensuring no damage occurs during this process. He then moves on to attaching four more pieces onto these main frames, completing two pairs of flanges for the bulkhead hatches.The Final Touches
While two flanges form the primary support structure around the hatches, Sven mentions there are two additional pieces required at each end to ensure comprehensive protection. This attention to detail highlights his commitment to producing a durable and reliable design. “Sailing is about finding your path, whether it’s across an ocean or within yourself.” – Sven Yrvind In conclusion, making flanges around bulkhead hatches may seem complex at first glance, but by following Sven Yrvind’s meticulous process, enthusiasts can achieve professional-level results. Remember that the journey of boatbuilding is as rewarding as reaching your destination; it tests one’s patience and dedication. For those seeking to embark on this adventure or simply gain more insight into marine craftsmanship, Sven’s wisdom is invaluable.Sven Yrvind, a renowned yacht designer and sailor, shares valuable insights on creating flanges around bulkhead hatches for canvas protection in this enlightening video. By following his expert guidance, boat enthusiasts can ensure their living areas remain secure while allowing unhindered access through the hatches.Step 1: Starting with the Flange
Sven begins by explaining that working on flanges vertically and horizontally is significantly easier than doing so in a flat position. To simplify the process further, he divides the task into two or three steps as suggested by fellow expert “for for.” This approach not only makes it more manageable but also allows for greater precision in crafting each component.Step 2: Applying Glue and Securing
Sven proceeds to apply glue along one edge of the flange, ensuring a secure bond when clamped into place. He emphasizes that this stage is crucial for maintaining the structural integrity of the flange, which in turn safeguards the living area beneath the canvas when hatches are open.Step 3: Allowing Time to Dry
After securely attaching the first portion of the flange, Sven allows ample time for it to dry before moving forward with additional steps. This patience and precision are key aspects of his successful boatbuilding methods.Step 4: Finishing Touches
Once the flange is fully dried, Sven removes the clamps carefully, ensuring no damage occurs during this process. He then moves on to attaching four more pieces onto these main frames, completing two pairs of flanges for the bulkhead hatches.The Final Touches
While two flanges form the primary support structure around the hatches, Sven mentions there are two additional pieces required at each end to ensure comprehensive protection. This attention to detail highlights his commitment to producing a durable and reliable design. “Sailing is about finding your path, whether it’s across an ocean or within yourself.” – Sven Yrvind In conclusion, making flanges around bulkhead hatches may seem complex at first glance, but by following Sven Yrvind’s meticulous process, enthusiasts can achieve professional-level results. Remember that the journey of boatbuilding is as rewarding as reaching your destination; it tests one’s patience and dedication. For those seeking to embark on this adventure or simply gain more insight into marine craftsmanship, Sven’s wisdom is invaluable.Making Flanges Around Bulkhead Hatches for Canvas
Sven Yrvind, a renowned yacht designer and sailor, shares valuable insights on creating flanges around bulkhead hatches for canvas protection in this enlightening video. By following his expert guidance, boat enthusiasts can ensure their living areas remain secure while allowing unhindered access through the hatches.Step 1: Starting with the Flange
Sven begins by explaining that working on flanges vertically and horizontally is significantly easier than doing so in a flat position. To simplify the process further, he divides the task into two or three steps as suggested by fellow expert “for for.” This approach not only makes it more manageable but also allows for greater precision in crafting each component.Step 2: Applying Glue and Securing
Sven proceeds to apply glue along one edge of the flange, ensuring a secure bond when clamped into place. He emphasizes that this stage is crucial for maintaining the structural integrity of the flange, which in turn safeguards the living area beneath the canvas when hatches are open.Step 3: Allowing Time to Dry
After securely attaching the first portion of the flange, Sven allows ample time for it to dry before moving forward with additional steps. This patience and precision are key aspects of his successful boatbuilding methods.Step 4: Finishing Touches
Once the flange is fully dried, Sven removes the clamps carefully, ensuring no damage occurs during this process. He then moves on to attaching four more pieces onto these main frames, completing two pairs of flanges for the bulkhead hatches.The Final Touches
While two flanges form the primary support structure around the hatches, Sven mentions there are two additional pieces required at each end to ensure comprehensive protection. This attention to detail highlights his commitment to producing a durable and reliable design. “Sailing is about finding your path, whether it’s across an ocean or within yourself.” – Sven Yrvind In conclusion, making flanges around bulkhead hatches may seem complex at first glance, but by following Sven Yrvind’s meticulous process, enthusiasts can achieve professional-level results. Remember that the journey of boatbuilding is as rewarding as reaching your destination; it tests one’s patience and dedication. For those seeking to embark on this adventure or simply gain more insight into marine craftsmanship, Sven’s wisdom is invaluable.Sven proceeds to apply glue along one edge of the flange, ensuring a secure bond when clamped into place. He emphasizes that this stage is crucial for maintaining the structural integrity of the flange, which in turn safeguards the living area beneath the canvas when hatches are open.Step 3: Allowing Time to Dry
After securely attaching the first portion of the flange, Sven allows ample time for it to dry before moving forward with additional steps. This patience and precision are key aspects of his successful boatbuilding methods.Step 4: Finishing Touches
Once the flange is fully dried, Sven removes the clamps carefully, ensuring no damage occurs during this process. He then moves on to attaching four more pieces onto these main frames, completing two pairs of flanges for the bulkhead hatches.The Final Touches
While two flanges form the primary support structure around the hatches, Sven mentions there are two additional pieces required at each end to ensure comprehensive protection. This attention to detail highlights his commitment to producing a durable and reliable design. “Sailing is about finding your path, whether it’s across an ocean or within yourself.” – Sven Yrvind In conclusion, making flanges around bulkhead hatches may seem complex at first glance, but by following Sven Yrvind’s meticulous process, enthusiasts can achieve professional-level results. Remember that the journey of boatbuilding is as rewarding as reaching your destination; it tests one’s patience and dedication. For those seeking to embark on this adventure or simply gain more insight into marine craftsmanship, Sven’s wisdom is invaluable.Sven begins by explaining that working on flanges vertically and horizontally is significantly easier than doing so in a flat position. To simplify the process further, he divides the task into two or three steps as suggested by fellow expert “for for.” This approach not only makes it more manageable but also allows for greater precision in crafting each component.Step 2: Applying Glue and Securing
Sven proceeds to apply glue along one edge of the flange, ensuring a secure bond when clamped into place. He emphasizes that this stage is crucial for maintaining the structural integrity of the flange, which in turn safeguards the living area beneath the canvas when hatches are open.Step 3: Allowing Time to Dry
After securely attaching the first portion of the flange, Sven allows ample time for it to dry before moving forward with additional steps. This patience and precision are key aspects of his successful boatbuilding methods.Step 4: Finishing Touches
Once the flange is fully dried, Sven removes the clamps carefully, ensuring no damage occurs during this process. He then moves on to attaching four more pieces onto these main frames, completing two pairs of flanges for the bulkhead hatches.The Final Touches
While two flanges form the primary support structure around the hatches, Sven mentions there are two additional pieces required at each end to ensure comprehensive protection. This attention to detail highlights his commitment to producing a durable and reliable design. “Sailing is about finding your path, whether it’s across an ocean or within yourself.” – Sven Yrvind In conclusion, making flanges around bulkhead hatches may seem complex at first glance, but by following Sven Yrvind’s meticulous process, enthusiasts can achieve professional-level results. Remember that the journey of boatbuilding is as rewarding as reaching your destination; it tests one’s patience and dedication. For those seeking to embark on this adventure or simply gain more insight into marine craftsmanship, Sven’s wisdom is invaluable.Sven Yrvind, a renowned yacht designer and sailor, shares valuable insights on creating flanges around bulkhead hatches for canvas protection in this enlightening video. By following his expert guidance, boat enthusiasts can ensure their living areas remain secure while allowing unhindered access through the hatches.Step 1: Starting with the Flange
Sven begins by explaining that working on flanges vertically and horizontally is significantly easier than doing so in a flat position. To simplify the process further, he divides the task into two or three steps as suggested by fellow expert “for for.” This approach not only makes it more manageable but also allows for greater precision in crafting each component.Step 2: Applying Glue and Securing
Sven proceeds to apply glue along one edge of the flange, ensuring a secure bond when clamped into place. He emphasizes that this stage is crucial for maintaining the structural integrity of the flange, which in turn safeguards the living area beneath the canvas when hatches are open.Step 3: Allowing Time to Dry
After securely attaching the first portion of the flange, Sven allows ample time for it to dry before moving forward with additional steps. This patience and precision are key aspects of his successful boatbuilding methods.Step 4: Finishing Touches
Once the flange is fully dried, Sven removes the clamps carefully, ensuring no damage occurs during this process. He then moves on to attaching four more pieces onto these main frames, completing two pairs of flanges for the bulkhead hatches.The Final Touches
While two flanges form the primary support structure around the hatches, Sven mentions there are two additional pieces required at each end to ensure comprehensive protection. This attention to detail highlights his commitment to producing a durable and reliable design. “Sailing is about finding your path, whether it’s across an ocean or within yourself.” – Sven Yrvind In conclusion, making flanges around bulkhead hatches may seem complex at first glance, but by following Sven Yrvind’s meticulous process, enthusiasts can achieve professional-level results. Remember that the journey of boatbuilding is as rewarding as reaching your destination; it tests one’s patience and dedication. For those seeking to embark on this adventure or simply gain more insight into marine craftsmanship, Sven’s wisdom is invaluable.Making Flanges Around Bulkhead Hatches for Canvas
Sven Yrvind, a renowned yacht designer and sailor, shares valuable insights on creating flanges around bulkhead hatches for canvas protection in this enlightening video. By following his expert guidance, boat enthusiasts can ensure their living areas remain secure while allowing unhindered access through the hatches.Step 1: Starting with the Flange
Sven begins by explaining that working on flanges vertically and horizontally is significantly easier than doing so in a flat position. To simplify the process further, he divides the task into two or three steps as suggested by fellow expert “for for.” This approach not only makes it more manageable but also allows for greater precision in crafting each component.Step 2: Applying Glue and Securing
Sven proceeds to apply glue along one edge of the flange, ensuring a secure bond when clamped into place. He emphasizes that this stage is crucial for maintaining the structural integrity of the flange, which in turn safeguards the living area beneath the canvas when hatches are open.Step 3: Allowing Time to Dry
After securely attaching the first portion of the flange, Sven allows ample time for it to dry before moving forward with additional steps. This patience and precision are key aspects of his successful boatbuilding methods.Step 4: Finishing Touches
Once the flange is fully dried, Sven removes the clamps carefully, ensuring no damage occurs during this process. He then moves on to attaching four more pieces onto these main frames, completing two pairs of flanges for the bulkhead hatches.The Final Touches
While two flanges form the primary support structure around the hatches, Sven mentions there are two additional pieces required at each end to ensure comprehensive protection. This attention to detail highlights his commitment to producing a durable and reliable design. “Sailing is about finding your path, whether it’s across an ocean or within yourself.” – Sven Yrvind In conclusion, making flanges around bulkhead hatches may seem complex at first glance, but by following Sven Yrvind’s meticulous process, enthusiasts can achieve professional-level results. Remember that the journey of boatbuilding is as rewarding as reaching your destination; it tests one’s patience and dedication. For those seeking to embark on this adventure or simply gain more insight into marine craftsmanship, Sven’s wisdom is invaluable.Once the flange is fully dried, Sven removes the clamps carefully, ensuring no damage occurs during this process. He then moves on to attaching four more pieces onto these main frames, completing two pairs of flanges for the bulkhead hatches.The Final Touches
While two flanges form the primary support structure around the hatches, Sven mentions there are two additional pieces required at each end to ensure comprehensive protection. This attention to detail highlights his commitment to producing a durable and reliable design. “Sailing is about finding your path, whether it’s across an ocean or within yourself.” – Sven Yrvind In conclusion, making flanges around bulkhead hatches may seem complex at first glance, but by following Sven Yrvind’s meticulous process, enthusiasts can achieve professional-level results. Remember that the journey of boatbuilding is as rewarding as reaching your destination; it tests one’s patience and dedication. For those seeking to embark on this adventure or simply gain more insight into marine craftsmanship, Sven’s wisdom is invaluable.Sven proceeds to apply glue along one edge of the flange, ensuring a secure bond when clamped into place. He emphasizes that this stage is crucial for maintaining the structural integrity of the flange, which in turn safeguards the living area beneath the canvas when hatches are open.Step 3: Allowing Time to Dry
After securely attaching the first portion of the flange, Sven allows ample time for it to dry before moving forward with additional steps. This patience and precision are key aspects of his successful boatbuilding methods.Step 4: Finishing Touches
Once the flange is fully dried, Sven removes the clamps carefully, ensuring no damage occurs during this process. He then moves on to attaching four more pieces onto these main frames, completing two pairs of flanges for the bulkhead hatches.The Final Touches
While two flanges form the primary support structure around the hatches, Sven mentions there are two additional pieces required at each end to ensure comprehensive protection. This attention to detail highlights his commitment to producing a durable and reliable design. “Sailing is about finding your path, whether it’s across an ocean or within yourself.” – Sven Yrvind In conclusion, making flanges around bulkhead hatches may seem complex at first glance, but by following Sven Yrvind’s meticulous process, enthusiasts can achieve professional-level results. Remember that the journey of boatbuilding is as rewarding as reaching your destination; it tests one’s patience and dedication. For those seeking to embark on this adventure or simply gain more insight into marine craftsmanship, Sven’s wisdom is invaluable.Sven begins by explaining that working on flanges vertically and horizontally is significantly easier than doing so in a flat position. To simplify the process further, he divides the task into two or three steps as suggested by fellow expert “for for.” This approach not only makes it more manageable but also allows for greater precision in crafting each component.Step 2: Applying Glue and Securing
Sven proceeds to apply glue along one edge of the flange, ensuring a secure bond when clamped into place. He emphasizes that this stage is crucial for maintaining the structural integrity of the flange, which in turn safeguards the living area beneath the canvas when hatches are open.Step 3: Allowing Time to Dry
After securely attaching the first portion of the flange, Sven allows ample time for it to dry before moving forward with additional steps. This patience and precision are key aspects of his successful boatbuilding methods.Step 4: Finishing Touches
Once the flange is fully dried, Sven removes the clamps carefully, ensuring no damage occurs during this process. He then moves on to attaching four more pieces onto these main frames, completing two pairs of flanges for the bulkhead hatches.The Final Touches
While two flanges form the primary support structure around the hatches, Sven mentions there are two additional pieces required at each end to ensure comprehensive protection. This attention to detail highlights his commitment to producing a durable and reliable design. “Sailing is about finding your path, whether it’s across an ocean or within yourself.” – Sven Yrvind In conclusion, making flanges around bulkhead hatches may seem complex at first glance, but by following Sven Yrvind’s meticulous process, enthusiasts can achieve professional-level results. Remember that the journey of boatbuilding is as rewarding as reaching your destination; it tests one’s patience and dedication. For those seeking to embark on this adventure or simply gain more insight into marine craftsmanship, Sven’s wisdom is invaluable.Sven Yrvind, a renowned yacht designer and sailor, shares valuable insights on creating flanges around bulkhead hatches for canvas protection in this enlightening video. By following his expert guidance, boat enthusiasts can ensure their living areas remain secure while allowing unhindered access through the hatches.Step 1: Starting with the Flange
Sven begins by explaining that working on flanges vertically and horizontally is significantly easier than doing so in a flat position. To simplify the process further, he divides the task into two or three steps as suggested by fellow expert “for for.” This approach not only makes it more manageable but also allows for greater precision in crafting each component.Step 2: Applying Glue and Securing
Sven proceeds to apply glue along one edge of the flange, ensuring a secure bond when clamped into place. He emphasizes that this stage is crucial for maintaining the structural integrity of the flange, which in turn safeguards the living area beneath the canvas when hatches are open.Step 3: Allowing Time to Dry
After securely attaching the first portion of the flange, Sven allows ample time for it to dry before moving forward with additional steps. This patience and precision are key aspects of his successful boatbuilding methods.Step 4: Finishing Touches
Once the flange is fully dried, Sven removes the clamps carefully, ensuring no damage occurs during this process. He then moves on to attaching four more pieces onto these main frames, completing two pairs of flanges for the bulkhead hatches.The Final Touches
While two flanges form the primary support structure around the hatches, Sven mentions there are two additional pieces required at each end to ensure comprehensive protection. This attention to detail highlights his commitment to producing a durable and reliable design. “Sailing is about finding your path, whether it’s across an ocean or within yourself.” – Sven Yrvind In conclusion, making flanges around bulkhead hatches may seem complex at first glance, but by following Sven Yrvind’s meticulous process, enthusiasts can achieve professional-level results. Remember that the journey of boatbuilding is as rewarding as reaching your destination; it tests one’s patience and dedication. For those seeking to embark on this adventure or simply gain more insight into marine craftsmanship, Sven’s wisdom is invaluable.Making Flanges Around Bulkhead Hatches for Canvas
Sven Yrvind, a renowned yacht designer and sailor, shares valuable insights on creating flanges around bulkhead hatches for canvas protection in this enlightening video. By following his expert guidance, boat enthusiasts can ensure their living areas remain secure while allowing unhindered access through the hatches.Step 1: Starting with the Flange
Sven begins by explaining that working on flanges vertically and horizontally is significantly easier than doing so in a flat position. To simplify the process further, he divides the task into two or three steps as suggested by fellow expert “for for.” This approach not only makes it more manageable but also allows for greater precision in crafting each component.Step 2: Applying Glue and Securing
Sven proceeds to apply glue along one edge of the flange, ensuring a secure bond when clamped into place. He emphasizes that this stage is crucial for maintaining the structural integrity of the flange, which in turn safeguards the living area beneath the canvas when hatches are open.Step 3: Allowing Time to Dry
After securely attaching the first portion of the flange, Sven allows ample time for it to dry before moving forward with additional steps. This patience and precision are key aspects of his successful boatbuilding methods.Step 4: Finishing Touches
Once the flange is fully dried, Sven removes the clamps carefully, ensuring no damage occurs during this process. He then moves on to attaching four more pieces onto these main frames, completing two pairs of flanges for the bulkhead hatches.The Final Touches
While two flanges form the primary support structure around the hatches, Sven mentions there are two additional pieces required at each end to ensure comprehensive protection. This attention to detail highlights his commitment to producing a durable and reliable design. “Sailing is about finding your path, whether it’s across an ocean or within yourself.” – Sven Yrvind In conclusion, making flanges around bulkhead hatches may seem complex at first glance, but by following Sven Yrvind’s meticulous process, enthusiasts can achieve professional-level results. Remember that the journey of boatbuilding is as rewarding as reaching your destination; it tests one’s patience and dedication. For those seeking to embark on this adventure or simply gain more insight into marine craftsmanship, Sven’s wisdom is invaluable.After securely attaching the first portion of the flange, Sven allows ample time for it to dry before moving forward with additional steps. This patience and precision are key aspects of his successful boatbuilding methods.Step 4: Finishing Touches
Once the flange is fully dried, Sven removes the clamps carefully, ensuring no damage occurs during this process. He then moves on to attaching four more pieces onto these main frames, completing two pairs of flanges for the bulkhead hatches.The Final Touches
While two flanges form the primary support structure around the hatches, Sven mentions there are two additional pieces required at each end to ensure comprehensive protection. This attention to detail highlights his commitment to producing a durable and reliable design. “Sailing is about finding your path, whether it’s across an ocean or within yourself.” – Sven Yrvind In conclusion, making flanges around bulkhead hatches may seem complex at first glance, but by following Sven Yrvind’s meticulous process, enthusiasts can achieve professional-level results. Remember that the journey of boatbuilding is as rewarding as reaching your destination; it tests one’s patience and dedication. For those seeking to embark on this adventure or simply gain more insight into marine craftsmanship, Sven’s wisdom is invaluable.Sven proceeds to apply glue along one edge of the flange, ensuring a secure bond when clamped into place. He emphasizes that this stage is crucial for maintaining the structural integrity of the flange, which in turn safeguards the living area beneath the canvas when hatches are open.Step 3: Allowing Time to Dry
After securely attaching the first portion of the flange, Sven allows ample time for it to dry before moving forward with additional steps. This patience and precision are key aspects of his successful boatbuilding methods.Step 4: Finishing Touches
Once the flange is fully dried, Sven removes the clamps carefully, ensuring no damage occurs during this process. He then moves on to attaching four more pieces onto these main frames, completing two pairs of flanges for the bulkhead hatches.The Final Touches
While two flanges form the primary support structure around the hatches, Sven mentions there are two additional pieces required at each end to ensure comprehensive protection. This attention to detail highlights his commitment to producing a durable and reliable design. “Sailing is about finding your path, whether it’s across an ocean or within yourself.” – Sven Yrvind In conclusion, making flanges around bulkhead hatches may seem complex at first glance, but by following Sven Yrvind’s meticulous process, enthusiasts can achieve professional-level results. Remember that the journey of boatbuilding is as rewarding as reaching your destination; it tests one’s patience and dedication. For those seeking to embark on this adventure or simply gain more insight into marine craftsmanship, Sven’s wisdom is invaluable.Sven begins by explaining that working on flanges vertically and horizontally is significantly easier than doing so in a flat position. To simplify the process further, he divides the task into two or three steps as suggested by fellow expert “for for.” This approach not only makes it more manageable but also allows for greater precision in crafting each component.Step 2: Applying Glue and Securing
Sven proceeds to apply glue along one edge of the flange, ensuring a secure bond when clamped into place. He emphasizes that this stage is crucial for maintaining the structural integrity of the flange, which in turn safeguards the living area beneath the canvas when hatches are open.Step 3: Allowing Time to Dry
After securely attaching the first portion of the flange, Sven allows ample time for it to dry before moving forward with additional steps. This patience and precision are key aspects of his successful boatbuilding methods.Step 4: Finishing Touches
Once the flange is fully dried, Sven removes the clamps carefully, ensuring no damage occurs during this process. He then moves on to attaching four more pieces onto these main frames, completing two pairs of flanges for the bulkhead hatches.The Final Touches
While two flanges form the primary support structure around the hatches, Sven mentions there are two additional pieces required at each end to ensure comprehensive protection. This attention to detail highlights his commitment to producing a durable and reliable design. “Sailing is about finding your path, whether it’s across an ocean or within yourself.” – Sven Yrvind In conclusion, making flanges around bulkhead hatches may seem complex at first glance, but by following Sven Yrvind’s meticulous process, enthusiasts can achieve professional-level results. Remember that the journey of boatbuilding is as rewarding as reaching your destination; it tests one’s patience and dedication. For those seeking to embark on this adventure or simply gain more insight into marine craftsmanship, Sven’s wisdom is invaluable.Sven Yrvind, a renowned yacht designer and sailor, shares valuable insights on creating flanges around bulkhead hatches for canvas protection in this enlightening video. By following his expert guidance, boat enthusiasts can ensure their living areas remain secure while allowing unhindered access through the hatches.Step 1: Starting with the Flange
Sven begins by explaining that working on flanges vertically and horizontally is significantly easier than doing so in a flat position. To simplify the process further, he divides the task into two or three steps as suggested by fellow expert “for for.” This approach not only makes it more manageable but also allows for greater precision in crafting each component.Step 2: Applying Glue and Securing
Sven proceeds to apply glue along one edge of the flange, ensuring a secure bond when clamped into place. He emphasizes that this stage is crucial for maintaining the structural integrity of the flange, which in turn safeguards the living area beneath the canvas when hatches are open.Step 3: Allowing Time to Dry
After securely attaching the first portion of the flange, Sven allows ample time for it to dry before moving forward with additional steps. This patience and precision are key aspects of his successful boatbuilding methods.Step 4: Finishing Touches
Once the flange is fully dried, Sven removes the clamps carefully, ensuring no damage occurs during this process. He then moves on to attaching four more pieces onto these main frames, completing two pairs of flanges for the bulkhead hatches.The Final Touches
While two flanges form the primary support structure around the hatches, Sven mentions there are two additional pieces required at each end to ensure comprehensive protection. This attention to detail highlights his commitment to producing a durable and reliable design. “Sailing is about finding your path, whether it’s across an ocean or within yourself.” – Sven Yrvind In conclusion, making flanges around bulkhead hatches may seem complex at first glance, but by following Sven Yrvind’s meticulous process, enthusiasts can achieve professional-level results. Remember that the journey of boatbuilding is as rewarding as reaching your destination; it tests one’s patience and dedication. For those seeking to embark on this adventure or simply gain more insight into marine craftsmanship, Sven’s wisdom is invaluable.Making Flanges Around Bulkhead Hatches for Canvas
Sven Yrvind, a renowned yacht designer and sailor, shares valuable insights on creating flanges around bulkhead hatches for canvas protection in this enlightening video. By following his expert guidance, boat enthusiasts can ensure their living areas remain secure while allowing unhindered access through the hatches.Step 1: Starting with the Flange
Sven begins by explaining that working on flanges vertically and horizontally is significantly easier than doing so in a flat position. To simplify the process further, he divides the task into two or three steps as suggested by fellow expert “for for.” This approach not only makes it more manageable but also allows for greater precision in crafting each component.Step 2: Applying Glue and Securing
Sven proceeds to apply glue along one edge of the flange, ensuring a secure bond when clamped into place. He emphasizes that this stage is crucial for maintaining the structural integrity of the flange, which in turn safeguards the living area beneath the canvas when hatches are open.Step 3: Allowing Time to Dry
After securely attaching the first portion of the flange, Sven allows ample time for it to dry before moving forward with additional steps. This patience and precision are key aspects of his successful boatbuilding methods.Step 4: Finishing Touches
Once the flange is fully dried, Sven removes the clamps carefully, ensuring no damage occurs during this process. He then moves on to attaching four more pieces onto these main frames, completing two pairs of flanges for the bulkhead hatches.The Final Touches
While two flanges form the primary support structure around the hatches, Sven mentions there are two additional pieces required at each end to ensure comprehensive protection. This attention to detail highlights his commitment to producing a durable and reliable design. “Sailing is about finding your path, whether it’s across an ocean or within yourself.” – Sven Yrvind In conclusion, making flanges around bulkhead hatches may seem complex at first glance, but by following Sven Yrvind’s meticulous process, enthusiasts can achieve professional-level results. Remember that the journey of boatbuilding is as rewarding as reaching your destination; it tests one’s patience and dedication. For those seeking to embark on this adventure or simply gain more insight into marine craftsmanship, Sven’s wisdom is invaluable.Once the flange is fully dried, Sven removes the clamps carefully, ensuring no damage occurs during this process. He then moves on to attaching four more pieces onto these main frames, completing two pairs of flanges for the bulkhead hatches.The Final Touches
While two flanges form the primary support structure around the hatches, Sven mentions there are two additional pieces required at each end to ensure comprehensive protection. This attention to detail highlights his commitment to producing a durable and reliable design. “Sailing is about finding your path, whether it’s across an ocean or within yourself.” – Sven Yrvind In conclusion, making flanges around bulkhead hatches may seem complex at first glance, but by following Sven Yrvind’s meticulous process, enthusiasts can achieve professional-level results. Remember that the journey of boatbuilding is as rewarding as reaching your destination; it tests one’s patience and dedication. For those seeking to embark on this adventure or simply gain more insight into marine craftsmanship, Sven’s wisdom is invaluable.After securely attaching the first portion of the flange, Sven allows ample time for it to dry before moving forward with additional steps. This patience and precision are key aspects of his successful boatbuilding methods.Step 4: Finishing Touches
Once the flange is fully dried, Sven removes the clamps carefully, ensuring no damage occurs during this process. He then moves on to attaching four more pieces onto these main frames, completing two pairs of flanges for the bulkhead hatches.The Final Touches
While two flanges form the primary support structure around the hatches, Sven mentions there are two additional pieces required at each end to ensure comprehensive protection. This attention to detail highlights his commitment to producing a durable and reliable design. “Sailing is about finding your path, whether it’s across an ocean or within yourself.” – Sven Yrvind In conclusion, making flanges around bulkhead hatches may seem complex at first glance, but by following Sven Yrvind’s meticulous process, enthusiasts can achieve professional-level results. Remember that the journey of boatbuilding is as rewarding as reaching your destination; it tests one’s patience and dedication. For those seeking to embark on this adventure or simply gain more insight into marine craftsmanship, Sven’s wisdom is invaluable.Sven proceeds to apply glue along one edge of the flange, ensuring a secure bond when clamped into place. He emphasizes that this stage is crucial for maintaining the structural integrity of the flange, which in turn safeguards the living area beneath the canvas when hatches are open.Step 3: Allowing Time to Dry
After securely attaching the first portion of the flange, Sven allows ample time for it to dry before moving forward with additional steps. This patience and precision are key aspects of his successful boatbuilding methods.Step 4: Finishing Touches
Once the flange is fully dried, Sven removes the clamps carefully, ensuring no damage occurs during this process. He then moves on to attaching four more pieces onto these main frames, completing two pairs of flanges for the bulkhead hatches.The Final Touches
While two flanges form the primary support structure around the hatches, Sven mentions there are two additional pieces required at each end to ensure comprehensive protection. This attention to detail highlights his commitment to producing a durable and reliable design. “Sailing is about finding your path, whether it’s across an ocean or within yourself.” – Sven Yrvind In conclusion, making flanges around bulkhead hatches may seem complex at first glance, but by following Sven Yrvind’s meticulous process, enthusiasts can achieve professional-level results. Remember that the journey of boatbuilding is as rewarding as reaching your destination; it tests one’s patience and dedication. For those seeking to embark on this adventure or simply gain more insight into marine craftsmanship, Sven’s wisdom is invaluable.Sven begins by explaining that working on flanges vertically and horizontally is significantly easier than doing so in a flat position. To simplify the process further, he divides the task into two or three steps as suggested by fellow expert “for for.” This approach not only makes it more manageable but also allows for greater precision in crafting each component.Step 2: Applying Glue and Securing
Sven proceeds to apply glue along one edge of the flange, ensuring a secure bond when clamped into place. He emphasizes that this stage is crucial for maintaining the structural integrity of the flange, which in turn safeguards the living area beneath the canvas when hatches are open.Step 3: Allowing Time to Dry
After securely attaching the first portion of the flange, Sven allows ample time for it to dry before moving forward with additional steps. This patience and precision are key aspects of his successful boatbuilding methods.Step 4: Finishing Touches
Once the flange is fully dried, Sven removes the clamps carefully, ensuring no damage occurs during this process. He then moves on to attaching four more pieces onto these main frames, completing two pairs of flanges for the bulkhead hatches.The Final Touches
While two flanges form the primary support structure around the hatches, Sven mentions there are two additional pieces required at each end to ensure comprehensive protection. This attention to detail highlights his commitment to producing a durable and reliable design. “Sailing is about finding your path, whether it’s across an ocean or within yourself.” – Sven Yrvind In conclusion, making flanges around bulkhead hatches may seem complex at first glance, but by following Sven Yrvind’s meticulous process, enthusiasts can achieve professional-level results. Remember that the journey of boatbuilding is as rewarding as reaching your destination; it tests one’s patience and dedication. For those seeking to embark on this adventure or simply gain more insight into marine craftsmanship, Sven’s wisdom is invaluable.Sven Yrvind, a renowned yacht designer and sailor, shares valuable insights on creating flanges around bulkhead hatches for canvas protection in this enlightening video. By following his expert guidance, boat enthusiasts can ensure their living areas remain secure while allowing unhindered access through the hatches.Step 1: Starting with the Flange
Sven begins by explaining that working on flanges vertically and horizontally is significantly easier than doing so in a flat position. To simplify the process further, he divides the task into two or three steps as suggested by fellow expert “for for.” This approach not only makes it more manageable but also allows for greater precision in crafting each component.Step 2: Applying Glue and Securing
Sven proceeds to apply glue along one edge of the flange, ensuring a secure bond when clamped into place. He emphasizes that this stage is crucial for maintaining the structural integrity of the flange, which in turn safeguards the living area beneath the canvas when hatches are open.Step 3: Allowing Time to Dry
After securely attaching the first portion of the flange, Sven allows ample time for it to dry before moving forward with additional steps. This patience and precision are key aspects of his successful boatbuilding methods.Step 4: Finishing Touches
Once the flange is fully dried, Sven removes the clamps carefully, ensuring no damage occurs during this process. He then moves on to attaching four more pieces onto these main frames, completing two pairs of flanges for the bulkhead hatches.The Final Touches
While two flanges form the primary support structure around the hatches, Sven mentions there are two additional pieces required at each end to ensure comprehensive protection. This attention to detail highlights his commitment to producing a durable and reliable design. “Sailing is about finding your path, whether it’s across an ocean or within yourself.” – Sven Yrvind In conclusion, making flanges around bulkhead hatches may seem complex at first glance, but by following Sven Yrvind’s meticulous process, enthusiasts can achieve professional-level results. Remember that the journey of boatbuilding is as rewarding as reaching your destination; it tests one’s patience and dedication. For those seeking to embark on this adventure or simply gain more insight into marine craftsmanship, Sven’s wisdom is invaluable.Making Flanges Around Bulkhead Hatches for Canvas
Sven Yrvind, a renowned yacht designer and sailor, shares valuable insights on creating flanges around bulkhead hatches for canvas protection in this enlightening video. By following his expert guidance, boat enthusiasts can ensure their living areas remain secure while allowing unhindered access through the hatches.Step 1: Starting with the Flange
Sven begins by explaining that working on flanges vertically and horizontally is significantly easier than doing so in a flat position. To simplify the process further, he divides the task into two or three steps as suggested by fellow expert “for for.” This approach not only makes it more manageable but also allows for greater precision in crafting each component.Step 2: Applying Glue and Securing
Sven proceeds to apply glue along one edge of the flange, ensuring a secure bond when clamped into place. He emphasizes that this stage is crucial for maintaining the structural integrity of the flange, which in turn safeguards the living area beneath the canvas when hatches are open.Step 3: Allowing Time to Dry
After securely attaching the first portion of the flange, Sven allows ample time for it to dry before moving forward with additional steps. This patience and precision are key aspects of his successful boatbuilding methods.Step 4: Finishing Touches
Once the flange is fully dried, Sven removes the clamps carefully, ensuring no damage occurs during this process. He then moves on to attaching four more pieces onto these main frames, completing two pairs of flanges for the bulkhead hatches.The Final Touches
While two flanges form the primary support structure around the hatches, Sven mentions there are two additional pieces required at each end to ensure comprehensive protection. This attention to detail highlights his commitment to producing a durable and reliable design. “Sailing is about finding your path, whether it’s across an ocean or within yourself.” – Sven Yrvind In conclusion, making flanges around bulkhead hatches may seem complex at first glance, but by following Sven Yrvind’s meticulous process, enthusiasts can achieve professional-level results. Remember that the journey of boatbuilding is as rewarding as reaching your destination; it tests one’s patience and dedication. For those seeking to embark on this adventure or simply gain more insight into marine craftsmanship, Sven’s wisdom is invaluable.Sven proceeds to apply glue along one edge of the flange, ensuring a secure bond when clamped into place. He emphasizes that this stage is crucial for maintaining the structural integrity of the flange, which in turn safeguards the living area beneath the canvas when hatches are open.Step 3: Allowing Time to Dry
After securely attaching the first portion of the flange, Sven allows ample time for it to dry before moving forward with additional steps. This patience and precision are key aspects of his successful boatbuilding methods.Step 4: Finishing Touches
Once the flange is fully dried, Sven removes the clamps carefully, ensuring no damage occurs during this process. He then moves on to attaching four more pieces onto these main frames, completing two pairs of flanges for the bulkhead hatches.The Final Touches
While two flanges form the primary support structure around the hatches, Sven mentions there are two additional pieces required at each end to ensure comprehensive protection. This attention to detail highlights his commitment to producing a durable and reliable design. “Sailing is about finding your path, whether it’s across an ocean or within yourself.” – Sven Yrvind In conclusion, making flanges around bulkhead hatches may seem complex at first glance, but by following Sven Yrvind’s meticulous process, enthusiasts can achieve professional-level results. Remember that the journey of boatbuilding is as rewarding as reaching your destination; it tests one’s patience and dedication. For those seeking to embark on this adventure or simply gain more insight into marine craftsmanship, Sven’s wisdom is invaluable.Sven proceeds to apply glue along one edge of the flange, ensuring a secure bond when clamped into place. He emphasizes that this stage is crucial for maintaining the structural integrity of the flange, which in turn safeguards the living area beneath the canvas when hatches are open.Step 3: Allowing Time to Dry
After securely attaching the first portion of the flange, Sven allows ample time for it to dry before moving forward with additional steps. This patience and precision are key aspects of his successful boatbuilding methods.Step 4: Finishing Touches
Once the flange is fully dried, Sven removes the clamps carefully, ensuring no damage occurs during this process. He then moves on to attaching four more pieces onto these main frames, completing two pairs of flanges for the bulkhead hatches.The Final Touches
While two flanges form the primary support structure around the hatches, Sven mentions there are two additional pieces required at each end to ensure comprehensive protection. This attention to detail highlights his commitment to producing a durable and reliable design. “Sailing is about finding your path, whether it’s across an ocean or within yourself.” – Sven Yrvind In conclusion, making flanges around bulkhead hatches may seem complex at first glance, but by following Sven Yrvind’s meticulous process, enthusiasts can achieve professional-level results. Remember that the journey of boatbuilding is as rewarding as reaching your destination; it tests one’s patience and dedication. For those seeking to embark on this adventure or simply gain more insight into marine craftsmanship, Sven’s wisdom is invaluable.Sven Yrvind, a renowned yacht designer and sailor, shares valuable insights on creating flanges around bulkhead hatches for canvas protection in this enlightening video. By following his expert guidance, boat enthusiasts can ensure their living areas remain secure while allowing unhindered access through the hatches.Step 1: Starting with the Flange
Sven begins by explaining that working on flanges vertically and horizontally is significantly easier than doing so in a flat position. To simplify the process further, he divides the task into two or three steps as suggested by fellow expert “for for.” This approach not only makes it more manageable but also allows for greater precision in crafting each component.Step 2: Applying Glue and Securing
Sven proceeds to apply glue along one edge of the flange, ensuring a secure bond when clamped into place. He emphasizes that this stage is crucial for maintaining the structural integrity of the flange, which in turn safeguards the living area beneath the canvas when hatches are open.Step 3: Allowing Time to Dry
After securely attaching the first portion of the flange, Sven allows ample time for it to dry before moving forward with additional steps. This patience and precision are key aspects of his successful boatbuilding methods.Step 4: Finishing Touches
Once the flange is fully dried, Sven removes the clamps carefully, ensuring no damage occurs during this process. He then moves on to attaching four more pieces onto these main frames, completing two pairs of flanges for the bulkhead hatches.The Final Touches
While two flanges form the primary support structure around the hatches, Sven mentions there are two additional pieces required at each end to ensure comprehensive protection. This attention to detail highlights his commitment to producing a durable and reliable design. “Sailing is about finding your path, whether it’s across an ocean or within yourself.” – Sven Yrvind In conclusion, making flanges around bulkhead hatches may seem complex at first glance, but by following Sven Yrvind’s meticulous process, enthusiasts can achieve professional-level results. Remember that the journey of boatbuilding is as rewarding as reaching your destination; it tests one’s patience and dedication. For those seeking to embark on this adventure or simply gain more insight into marine craftsmanship, Sven’s wisdom is invaluable.Making Flanges Around Bulkhead Hatches for Canvas
Sven Yrvind, a renowned yacht designer and sailor, shares valuable insights on creating flanges around bulkhead hatches for canvas protection in this enlightening video. By following his expert guidance, boat enthusiasts can ensure their living areas remain secure while allowing unhindered access through the hatches.Step 1: Starting with the Flange
Sven begins by explaining that working on flanges vertically and horizontally is significantly easier than doing so in a flat position. To simplify the process further, he divides the task into two or three steps as suggested by fellow expert “for for.” This approach not only makes it more manageable but also allows for greater precision in crafting each component.Step 2: Applying Glue and Securing
Sven proceeds to apply glue along one edge of the flange, ensuring a secure bond when clamped into place. He emphasizes that this stage is crucial for maintaining the structural integrity of the flange, which in turn safeguards the living area beneath the canvas when hatches are open.Step 3: Allowing Time to Dry
After securely attaching the first portion of the flange, Sven allows ample time for it to dry before moving forward with additional steps. This patience and precision are key aspects of his successful boatbuilding methods.Step 4: Finishing Touches
Once the flange is fully dried, Sven removes the clamps carefully, ensuring no damage occurs during this process. He then moves on to attaching four more pieces onto these main frames, completing two pairs of flanges for the bulkhead hatches.The Final Touches
While two flanges form the primary support structure around the hatches, Sven mentions there are two additional pieces required at each end to ensure comprehensive protection. This attention to detail highlights his commitment to producing a durable and reliable design. “Sailing is about finding your path, whether it’s across an ocean or within yourself.” – Sven Yrvind In conclusion, making flanges around bulkhead hatches may seem complex at first glance, but by following Sven Yrvind’s meticulous process, enthusiasts can achieve professional-level results. Remember that the journey of boatbuilding is as rewarding as reaching your destination; it tests one’s patience and dedication. For those seeking to embark on this adventure or simply gain more insight into marine craftsmanship, Sven’s wisdom is invaluable.Sven begins by explaining that working on flanges vertically and horizontally is significantly easier than doing so in a flat position. To simplify the process further, he divides the task into two or three steps as suggested by fellow expert “for for.” This approach not only makes it more manageable but also allows for greater precision in crafting each component.Step 2: Applying Glue and Securing
Sven proceeds to apply glue along one edge of the flange, ensuring a secure bond when clamped into place. He emphasizes that this stage is crucial for maintaining the structural integrity of the flange, which in turn safeguards the living area beneath the canvas when hatches are open.Step 3: Allowing Time to Dry
After securely attaching the first portion of the flange, Sven allows ample time for it to dry before moving forward with additional steps. This patience and precision are key aspects of his successful boatbuilding methods.Step 4: Finishing Touches
Once the flange is fully dried, Sven removes the clamps carefully, ensuring no damage occurs during this process. He then moves on to attaching four more pieces onto these main frames, completing two pairs of flanges for the bulkhead hatches.The Final Touches
While two flanges form the primary support structure around the hatches, Sven mentions there are two additional pieces required at each end to ensure comprehensive protection. This attention to detail highlights his commitment to producing a durable and reliable design. “Sailing is about finding your path, whether it’s across an ocean or within yourself.” – Sven Yrvind In conclusion, making flanges around bulkhead hatches may seem complex at first glance, but by following Sven Yrvind’s meticulous process, enthusiasts can achieve professional-level results. Remember that the journey of boatbuilding is as rewarding as reaching your destination; it tests one’s patience and dedication. For those seeking to embark on this adventure or simply gain more insight into marine craftsmanship, Sven’s wisdom is invaluable.Sven Yrvind, a renowned yacht designer and sailor, shares valuable insights on creating flanges around bulkhead hatches for canvas protection in this enlightening video. By following his expert guidance, boat enthusiasts can ensure their living areas remain secure while allowing unhindered access through the hatches.Step 1: Starting with the Flange
Sven begins by explaining that working on flanges vertically and horizontally is significantly easier than doing so in a flat position. To simplify the process further, he divides the task into two or three steps as suggested by fellow expert “for for.” This approach not only makes it more manageable but also allows for greater precision in crafting each component.Step 2: Applying Glue and Securing
Sven proceeds to apply glue along one edge of the flange, ensuring a secure bond when clamped into place. He emphasizes that this stage is crucial for maintaining the structural integrity of the flange, which in turn safeguards the living area beneath the canvas when hatches are open.Step 3: Allowing Time to Dry
After securely attaching the first portion of the flange, Sven allows ample time for it to dry before moving forward with additional steps. This patience and precision are key aspects of his successful boatbuilding methods.Step 4: Finishing Touches
Once the flange is fully dried, Sven removes the clamps carefully, ensuring no damage occurs during this process. He then moves on to attaching four more pieces onto these main frames, completing two pairs of flanges for the bulkhead hatches.The Final Touches
While two flanges form the primary support structure around the hatches, Sven mentions there are two additional pieces required at each end to ensure comprehensive protection. This attention to detail highlights his commitment to producing a durable and reliable design. “Sailing is about finding your path, whether it’s across an ocean or within yourself.” – Sven Yrvind In conclusion, making flanges around bulkhead hatches may seem complex at first glance, but by following Sven Yrvind’s meticulous process, enthusiasts can achieve professional-level results. Remember that the journey of boatbuilding is as rewarding as reaching your destination; it tests one’s patience and dedication. For those seeking to embark on this adventure or simply gain more insight into marine craftsmanship, Sven’s wisdom is invaluable.Making Flanges Around Bulkhead Hatches for Canvas
Sven Yrvind, a renowned yacht designer and sailor, shares valuable insights on creating flanges around bulkhead hatches for canvas protection in this enlightening video. By following his expert guidance, boat enthusiasts can ensure their living areas remain secure while allowing unhindered access through the hatches.Step 1: Starting with the Flange
Sven begins by explaining that working on flanges vertically and horizontally is significantly easier than doing so in a flat position. To simplify the process further, he divides the task into two or three steps as suggested by fellow expert “for for.” This approach not only makes it more manageable but also allows for greater precision in crafting each component.Step 2: Applying Glue and Securing
Sven proceeds to apply glue along one edge of the flange, ensuring a secure bond when clamped into place. He emphasizes that this stage is crucial for maintaining the structural integrity of the flange, which in turn safeguards the living area beneath the canvas when hatches are open.Step 3: Allowing Time to Dry
After securely attaching the first portion of the flange, Sven allows ample time for it to dry before moving forward with additional steps. This patience and precision are key aspects of his successful boatbuilding methods.Step 4: Finishing Touches
Once the flange is fully dried, Sven removes the clamps carefully, ensuring no damage occurs during this process. He then moves on to attaching four more pieces onto these main frames, completing two pairs of flanges for the bulkhead hatches.The Final Touches
While two flanges form the primary support structure around the hatches, Sven mentions there are two additional pieces required at each end to ensure comprehensive protection. This attention to detail highlights his commitment to producing a durable and reliable design. “Sailing is about finding your path, whether it’s across an ocean or within yourself.” – Sven Yrvind In conclusion, making flanges around bulkhead hatches may seem complex at first glance, but by following Sven Yrvind’s meticulous process, enthusiasts can achieve professional-level results. Remember that the journey of boatbuilding is as rewarding as reaching your destination; it tests one’s patience and dedication. For those seeking to embark on this adventure or simply gain more insight into marine craftsmanship, Sven’s wisdom is invaluable.Once the flange is fully dried, Sven removes the clamps carefully, ensuring no damage occurs during this process. He then moves on to attaching four more pieces onto these main frames, completing two pairs of flanges for the bulkhead hatches.The Final Touches
While two flanges form the primary support structure around the hatches, Sven mentions there are two additional pieces required at each end to ensure comprehensive protection. This attention to detail highlights his commitment to producing a durable and reliable design. “Sailing is about finding your path, whether it’s across an ocean or within yourself.” – Sven Yrvind In conclusion, making flanges around bulkhead hatches may seem complex at first glance, but by following Sven Yrvind’s meticulous process, enthusiasts can achieve professional-level results. Remember that the journey of boatbuilding is as rewarding as reaching your destination; it tests one’s patience and dedication. For those seeking to embark on this adventure or simply gain more insight into marine craftsmanship, Sven’s wisdom is invaluable.Sven begins by explaining that working on flanges vertically and horizontally is significantly easier than doing so in a flat position. To simplify the process further, he divides the task into two or three steps as suggested by fellow expert “for for.” This approach not only makes it more manageable but also allows for greater precision in crafting each component.Step 2: Applying Glue and Securing
Sven proceeds to apply glue along one edge of the flange, ensuring a secure bond when clamped into place. He emphasizes that this stage is crucial for maintaining the structural integrity of the flange, which in turn safeguards the living area beneath the canvas when hatches are open.Step 3: Allowing Time to Dry
After securely attaching the first portion of the flange, Sven allows ample time for it to dry before moving forward with additional steps. This patience and precision are key aspects of his successful boatbuilding methods.Step 4: Finishing Touches
Once the flange is fully dried, Sven removes the clamps carefully, ensuring no damage occurs during this process. He then moves on to attaching four more pieces onto these main frames, completing two pairs of flanges for the bulkhead hatches.The Final Touches
While two flanges form the primary support structure around the hatches, Sven mentions there are two additional pieces required at each end to ensure comprehensive protection. This attention to detail highlights his commitment to producing a durable and reliable design. “Sailing is about finding your path, whether it’s across an ocean or within yourself.” – Sven Yrvind In conclusion, making flanges around bulkhead hatches may seem complex at first glance, but by following Sven Yrvind’s meticulous process, enthusiasts can achieve professional-level results. Remember that the journey of boatbuilding is as rewarding as reaching your destination; it tests one’s patience and dedication. For those seeking to embark on this adventure or simply gain more insight into marine craftsmanship, Sven’s wisdom is invaluable.Sven Yrvind, a renowned yacht designer and sailor, shares valuable insights on creating flanges around bulkhead hatches for canvas protection in this enlightening video. By following his expert guidance, boat enthusiasts can ensure their living areas remain secure while allowing unhindered access through the hatches.Step 1: Starting with the Flange
Sven begins by explaining that working on flanges vertically and horizontally is significantly easier than doing so in a flat position. To simplify the process further, he divides the task into two or three steps as suggested by fellow expert “for for.” This approach not only makes it more manageable but also allows for greater precision in crafting each component.Step 2: Applying Glue and Securing
Sven proceeds to apply glue along one edge of the flange, ensuring a secure bond when clamped into place. He emphasizes that this stage is crucial for maintaining the structural integrity of the flange, which in turn safeguards the living area beneath the canvas when hatches are open.Step 3: Allowing Time to Dry
After securely attaching the first portion of the flange, Sven allows ample time for it to dry before moving forward with additional steps. This patience and precision are key aspects of his successful boatbuilding methods.Step 4: Finishing Touches
Once the flange is fully dried, Sven removes the clamps carefully, ensuring no damage occurs during this process. He then moves on to attaching four more pieces onto these main frames, completing two pairs of flanges for the bulkhead hatches.The Final Touches
While two flanges form the primary support structure around the hatches, Sven mentions there are two additional pieces required at each end to ensure comprehensive protection. This attention to detail highlights his commitment to producing a durable and reliable design. “Sailing is about finding your path, whether it’s across an ocean or within yourself.” – Sven Yrvind In conclusion, making flanges around bulkhead hatches may seem complex at first glance, but by following Sven Yrvind’s meticulous process, enthusiasts can achieve professional-level results. Remember that the journey of boatbuilding is as rewarding as reaching your destination; it tests one’s patience and dedication. For those seeking to embark on this adventure or simply gain more insight into marine craftsmanship, Sven’s wisdom is invaluable.Making Flanges Around Bulkhead Hatches for Canvas
Sven Yrvind, a renowned yacht designer and sailor, shares valuable insights on creating flanges around bulkhead hatches for canvas protection in this enlightening video. By following his expert guidance, boat enthusiasts can ensure their living areas remain secure while allowing unhindered access through the hatches.Step 1: Starting with the Flange
Sven begins by explaining that working on flanges vertically and horizontally is significantly easier than doing so in a flat position. To simplify the process further, he divides the task into two or three steps as suggested by fellow expert “for for.” This approach not only makes it more manageable but also allows for greater precision in crafting each component.Step 2: Applying Glue and Securing
Sven proceeds to apply glue along one edge of the flange, ensuring a secure bond when clamped into place. He emphasizes that this stage is crucial for maintaining the structural integrity of the flange, which in turn safeguards the living area beneath the canvas when hatches are open.Step 3: Allowing Time to Dry
After securely attaching the first portion of the flange, Sven allows ample time for it to dry before moving forward with additional steps. This patience and precision are key aspects of his successful boatbuilding methods.Step 4: Finishing Touches
Once the flange is fully dried, Sven removes the clamps carefully, ensuring no damage occurs during this process. He then moves on to attaching four more pieces onto these main frames, completing two pairs of flanges for the bulkhead hatches.The Final Touches
While two flanges form the primary support structure around the hatches, Sven mentions there are two additional pieces required at each end to ensure comprehensive protection. This attention to detail highlights his commitment to producing a durable and reliable design. “Sailing is about finding your path, whether it’s across an ocean or within yourself.” – Sven Yrvind In conclusion, making flanges around bulkhead hatches may seem complex at first glance, but by following Sven Yrvind’s meticulous process, enthusiasts can achieve professional-level results. Remember that the journey of boatbuilding is as rewarding as reaching your destination; it tests one’s patience and dedication. For those seeking to embark on this adventure or simply gain more insight into marine craftsmanship, Sven’s wisdom is invaluable.After securely attaching the first portion of the flange, Sven allows ample time for it to dry before moving forward with additional steps. This patience and precision are key aspects of his successful boatbuilding methods.Step 4: Finishing Touches
Once the flange is fully dried, Sven removes the clamps carefully, ensuring no damage occurs during this process. He then moves on to attaching four more pieces onto these main frames, completing two pairs of flanges for the bulkhead hatches.The Final Touches
While two flanges form the primary support structure around the hatches, Sven mentions there are two additional pieces required at each end to ensure comprehensive protection. This attention to detail highlights his commitment to producing a durable and reliable design. “Sailing is about finding your path, whether it’s across an ocean or within yourself.” – Sven Yrvind In conclusion, making flanges around bulkhead hatches may seem complex at first glance, but by following Sven Yrvind’s meticulous process, enthusiasts can achieve professional-level results. Remember that the journey of boatbuilding is as rewarding as reaching your destination; it tests one’s patience and dedication. For those seeking to embark on this adventure or simply gain more insight into marine craftsmanship, Sven’s wisdom is invaluable.Sven begins by explaining that working on flanges vertically and horizontally is significantly easier than doing so in a flat position. To simplify the process further, he divides the task into two or three steps as suggested by fellow expert “for for.” This approach not only makes it more manageable but also allows for greater precision in crafting each component.Step 2: Applying Glue and Securing
Sven proceeds to apply glue along one edge of the flange, ensuring a secure bond when clamped into place. He emphasizes that this stage is crucial for maintaining the structural integrity of the flange, which in turn safeguards the living area beneath the canvas when hatches are open.Step 3: Allowing Time to Dry
After securely attaching the first portion of the flange, Sven allows ample time for it to dry before moving forward with additional steps. This patience and precision are key aspects of his successful boatbuilding methods.Step 4: Finishing Touches
Once the flange is fully dried, Sven removes the clamps carefully, ensuring no damage occurs during this process. He then moves on to attaching four more pieces onto these main frames, completing two pairs of flanges for the bulkhead hatches.The Final Touches
While two flanges form the primary support structure around the hatches, Sven mentions there are two additional pieces required at each end to ensure comprehensive protection. This attention to detail highlights his commitment to producing a durable and reliable design. “Sailing is about finding your path, whether it’s across an ocean or within yourself.” – Sven Yrvind In conclusion, making flanges around bulkhead hatches may seem complex at first glance, but by following Sven Yrvind’s meticulous process, enthusiasts can achieve professional-level results. Remember that the journey of boatbuilding is as rewarding as reaching your destination; it tests one’s patience and dedication. For those seeking to embark on this adventure or simply gain more insight into marine craftsmanship, Sven’s wisdom is invaluable.Sven Yrvind, a renowned yacht designer and sailor, shares valuable insights on creating flanges around bulkhead hatches for canvas protection in this enlightening video. By following his expert guidance, boat enthusiasts can ensure their living areas remain secure while allowing unhindered access through the hatches.Step 1: Starting with the Flange
Sven begins by explaining that working on flanges vertically and horizontally is significantly easier than doing so in a flat position. To simplify the process further, he divides the task into two or three steps as suggested by fellow expert “for for.” This approach not only makes it more manageable but also allows for greater precision in crafting each component.Step 2: Applying Glue and Securing
Sven proceeds to apply glue along one edge of the flange, ensuring a secure bond when clamped into place. He emphasizes that this stage is crucial for maintaining the structural integrity of the flange, which in turn safeguards the living area beneath the canvas when hatches are open.Step 3: Allowing Time to Dry
After securely attaching the first portion of the flange, Sven allows ample time for it to dry before moving forward with additional steps. This patience and precision are key aspects of his successful boatbuilding methods.Step 4: Finishing Touches
Once the flange is fully dried, Sven removes the clamps carefully, ensuring no damage occurs during this process. He then moves on to attaching four more pieces onto these main frames, completing two pairs of flanges for the bulkhead hatches.The Final Touches
While two flanges form the primary support structure around the hatches, Sven mentions there are two additional pieces required at each end to ensure comprehensive protection. This attention to detail highlights his commitment to producing a durable and reliable design. “Sailing is about finding your path, whether it’s across an ocean or within yourself.” – Sven Yrvind In conclusion, making flanges around bulkhead hatches may seem complex at first glance, but by following Sven Yrvind’s meticulous process, enthusiasts can achieve professional-level results. Remember that the journey of boatbuilding is as rewarding as reaching your destination; it tests one’s patience and dedication. For those seeking to embark on this adventure or simply gain more insight into marine craftsmanship, Sven’s wisdom is invaluable.Making Flanges Around Bulkhead Hatches for Canvas
Sven Yrvind, a renowned yacht designer and sailor, shares valuable insights on creating flanges around bulkhead hatches for canvas protection in this enlightening video. By following his expert guidance, boat enthusiasts can ensure their living areas remain secure while allowing unhindered access through the hatches.Step 1: Starting with the Flange
Sven begins by explaining that working on flanges vertically and horizontally is significantly easier than doing so in a flat position. To simplify the process further, he divides the task into two or three steps as suggested by fellow expert “for for.” This approach not only makes it more manageable but also allows for greater precision in crafting each component.Step 2: Applying Glue and Securing
Sven proceeds to apply glue along one edge of the flange, ensuring a secure bond when clamped into place. He emphasizes that this stage is crucial for maintaining the structural integrity of the flange, which in turn safeguards the living area beneath the canvas when hatches are open.Step 3: Allowing Time to Dry
After securely attaching the first portion of the flange, Sven allows ample time for it to dry before moving forward with additional steps. This patience and precision are key aspects of his successful boatbuilding methods.Step 4: Finishing Touches
Once the flange is fully dried, Sven removes the clamps carefully, ensuring no damage occurs during this process. He then moves on to attaching four more pieces onto these main frames, completing two pairs of flanges for the bulkhead hatches.The Final Touches
While two flanges form the primary support structure around the hatches, Sven mentions there are two additional pieces required at each end to ensure comprehensive protection. This attention to detail highlights his commitment to producing a durable and reliable design. “Sailing is about finding your path, whether it’s across an ocean or within yourself.” – Sven Yrvind In conclusion, making flanges around bulkhead hatches may seem complex at first glance, but by following Sven Yrvind’s meticulous process, enthusiasts can achieve professional-level results. Remember that the journey of boatbuilding is as rewarding as reaching your destination; it tests one’s patience and dedication. For those seeking to embark on this adventure or simply gain more insight into marine craftsmanship, Sven’s wisdom is invaluable.Sven proceeds to apply glue along one edge of the flange, ensuring a secure bond when clamped into place. He emphasizes that this stage is crucial for maintaining the structural integrity of the flange, which in turn safeguards the living area beneath the canvas when hatches are open.Step 3: Allowing Time to Dry
After securely attaching the first portion of the flange, Sven allows ample time for it to dry before moving forward with additional steps. This patience and precision are key aspects of his successful boatbuilding methods.Step 4: Finishing Touches
Once the flange is fully dried, Sven removes the clamps carefully, ensuring no damage occurs during this process. He then moves on to attaching four more pieces onto these main frames, completing two pairs of flanges for the bulkhead hatches.The Final Touches
While two flanges form the primary support structure around the hatches, Sven mentions there are two additional pieces required at each end to ensure comprehensive protection. This attention to detail highlights his commitment to producing a durable and reliable design. “Sailing is about finding your path, whether it’s across an ocean or within yourself.” – Sven Yrvind In conclusion, making flanges around bulkhead hatches may seem complex at first glance, but by following Sven Yrvind’s meticulous process, enthusiasts can achieve professional-level results. Remember that the journey of boatbuilding is as rewarding as reaching your destination; it tests one’s patience and dedication. For those seeking to embark on this adventure or simply gain more insight into marine craftsmanship, Sven’s wisdom is invaluable.Sven begins by explaining that working on flanges vertically and horizontally is significantly easier than doing so in a flat position. To simplify the process further, he divides the task into two or three steps as suggested by fellow expert “for for.” This approach not only makes it more manageable but also allows for greater precision in crafting each component.Step 2: Applying Glue and Securing
Sven proceeds to apply glue along one edge of the flange, ensuring a secure bond when clamped into place. He emphasizes that this stage is crucial for maintaining the structural integrity of the flange, which in turn safeguards the living area beneath the canvas when hatches are open.Step 3: Allowing Time to Dry
After securely attaching the first portion of the flange, Sven allows ample time for it to dry before moving forward with additional steps. This patience and precision are key aspects of his successful boatbuilding methods.Step 4: Finishing Touches
Once the flange is fully dried, Sven removes the clamps carefully, ensuring no damage occurs during this process. He then moves on to attaching four more pieces onto these main frames, completing two pairs of flanges for the bulkhead hatches.The Final Touches
While two flanges form the primary support structure around the hatches, Sven mentions there are two additional pieces required at each end to ensure comprehensive protection. This attention to detail highlights his commitment to producing a durable and reliable design. “Sailing is about finding your path, whether it’s across an ocean or within yourself.” – Sven Yrvind In conclusion, making flanges around bulkhead hatches may seem complex at first glance, but by following Sven Yrvind’s meticulous process, enthusiasts can achieve professional-level results. Remember that the journey of boatbuilding is as rewarding as reaching your destination; it tests one’s patience and dedication. For those seeking to embark on this adventure or simply gain more insight into marine craftsmanship, Sven’s wisdom is invaluable.Sven Yrvind, a renowned yacht designer and sailor, shares valuable insights on creating flanges around bulkhead hatches for canvas protection in this enlightening video. By following his expert guidance, boat enthusiasts can ensure their living areas remain secure while allowing unhindered access through the hatches.Step 1: Starting with the Flange
Sven begins by explaining that working on flanges vertically and horizontally is significantly easier than doing so in a flat position. To simplify the process further, he divides the task into two or three steps as suggested by fellow expert “for for.” This approach not only makes it more manageable but also allows for greater precision in crafting each component.Step 2: Applying Glue and Securing
Sven proceeds to apply glue along one edge of the flange, ensuring a secure bond when clamped into place. He emphasizes that this stage is crucial for maintaining the structural integrity of the flange, which in turn safeguards the living area beneath the canvas when hatches are open.Step 3: Allowing Time to Dry
After securely attaching the first portion of the flange, Sven allows ample time for it to dry before moving forward with additional steps. This patience and precision are key aspects of his successful boatbuilding methods.Step 4: Finishing Touches
Once the flange is fully dried, Sven removes the clamps carefully, ensuring no damage occurs during this process. He then moves on to attaching four more pieces onto these main frames, completing two pairs of flanges for the bulkhead hatches.The Final Touches
While two flanges form the primary support structure around the hatches, Sven mentions there are two additional pieces required at each end to ensure comprehensive protection. This attention to detail highlights his commitment to producing a durable and reliable design. “Sailing is about finding your path, whether it’s across an ocean or within yourself.” – Sven Yrvind In conclusion, making flanges around bulkhead hatches may seem complex at first glance, but by following Sven Yrvind’s meticulous process, enthusiasts can achieve professional-level results. Remember that the journey of boatbuilding is as rewarding as reaching your destination; it tests one’s patience and dedication. For those seeking to embark on this adventure or simply gain more insight into marine craftsmanship, Sven’s wisdom is invaluable.Making Flanges Around Bulkhead Hatches for Canvas
Sven Yrvind, a renowned yacht designer and sailor, shares valuable insights on creating flanges around bulkhead hatches for canvas protection in this enlightening video. By following his expert guidance, boat enthusiasts can ensure their living areas remain secure while allowing unhindered access through the hatches.Step 1: Starting with the Flange
Sven begins by explaining that working on flanges vertically and horizontally is significantly easier than doing so in a flat position. To simplify the process further, he divides the task into two or three steps as suggested by fellow expert “for for.” This approach not only makes it more manageable but also allows for greater precision in crafting each component.Step 2: Applying Glue and Securing
Sven proceeds to apply glue along one edge of the flange, ensuring a secure bond when clamped into place. He emphasizes that this stage is crucial for maintaining the structural integrity of the flange, which in turn safeguards the living area beneath the canvas when hatches are open.Step 3: Allowing Time to Dry
After securely attaching the first portion of the flange, Sven allows ample time for it to dry before moving forward with additional steps. This patience and precision are key aspects of his successful boatbuilding methods.Step 4: Finishing Touches
Once the flange is fully dried, Sven removes the clamps carefully, ensuring no damage occurs during this process. He then moves on to attaching four more pieces onto these main frames, completing two pairs of flanges for the bulkhead hatches.The Final Touches
While two flanges form the primary support structure around the hatches, Sven mentions there are two additional pieces required at each end to ensure comprehensive protection. This attention to detail highlights his commitment to producing a durable and reliable design. “Sailing is about finding your path, whether it’s across an ocean or within yourself.” – Sven Yrvind In conclusion, making flanges around bulkhead hatches may seem complex at first glance, but by following Sven Yrvind’s meticulous process, enthusiasts can achieve professional-level results. Remember that the journey of boatbuilding is as rewarding as reaching your destination; it tests one’s patience and dedication. For those seeking to embark on this adventure or simply gain more insight into marine craftsmanship, Sven’s wisdom is invaluable.Once the flange is fully dried, Sven removes the clamps carefully, ensuring no damage occurs during this process. He then moves on to attaching four more pieces onto these main frames, completing two pairs of flanges for the bulkhead hatches.The Final Touches
While two flanges form the primary support structure around the hatches, Sven mentions there are two additional pieces required at each end to ensure comprehensive protection. This attention to detail highlights his commitment to producing a durable and reliable design. “Sailing is about finding your path, whether it’s across an ocean or within yourself.” – Sven Yrvind In conclusion, making flanges around bulkhead hatches may seem complex at first glance, but by following Sven Yrvind’s meticulous process, enthusiasts can achieve professional-level results. Remember that the journey of boatbuilding is as rewarding as reaching your destination; it tests one’s patience and dedication. For those seeking to embark on this adventure or simply gain more insight into marine craftsmanship, Sven’s wisdom is invaluable.Sven proceeds to apply glue along one edge of the flange, ensuring a secure bond when clamped into place. He emphasizes that this stage is crucial for maintaining the structural integrity of the flange, which in turn safeguards the living area beneath the canvas when hatches are open.Step 3: Allowing Time to Dry
After securely attaching the first portion of the flange, Sven allows ample time for it to dry before moving forward with additional steps. This patience and precision are key aspects of his successful boatbuilding methods.Step 4: Finishing Touches
Once the flange is fully dried, Sven removes the clamps carefully, ensuring no damage occurs during this process. He then moves on to attaching four more pieces onto these main frames, completing two pairs of flanges for the bulkhead hatches.The Final Touches
While two flanges form the primary support structure around the hatches, Sven mentions there are two additional pieces required at each end to ensure comprehensive protection. This attention to detail highlights his commitment to producing a durable and reliable design. “Sailing is about finding your path, whether it’s across an ocean or within yourself.” – Sven Yrvind In conclusion, making flanges around bulkhead hatches may seem complex at first glance, but by following Sven Yrvind’s meticulous process, enthusiasts can achieve professional-level results. Remember that the journey of boatbuilding is as rewarding as reaching your destination; it tests one’s patience and dedication. For those seeking to embark on this adventure or simply gain more insight into marine craftsmanship, Sven’s wisdom is invaluable.Sven begins by explaining that working on flanges vertically and horizontally is significantly easier than doing so in a flat position. To simplify the process further, he divides the task into two or three steps as suggested by fellow expert “for for.” This approach not only makes it more manageable but also allows for greater precision in crafting each component.Step 2: Applying Glue and Securing
Sven proceeds to apply glue along one edge of the flange, ensuring a secure bond when clamped into place. He emphasizes that this stage is crucial for maintaining the structural integrity of the flange, which in turn safeguards the living area beneath the canvas when hatches are open.Step 3: Allowing Time to Dry
After securely attaching the first portion of the flange, Sven allows ample time for it to dry before moving forward with additional steps. This patience and precision are key aspects of his successful boatbuilding methods.Step 4: Finishing Touches
Once the flange is fully dried, Sven removes the clamps carefully, ensuring no damage occurs during this process. He then moves on to attaching four more pieces onto these main frames, completing two pairs of flanges for the bulkhead hatches.The Final Touches
While two flanges form the primary support structure around the hatches, Sven mentions there are two additional pieces required at each end to ensure comprehensive protection. This attention to detail highlights his commitment to producing a durable and reliable design. “Sailing is about finding your path, whether it’s across an ocean or within yourself.” – Sven Yrvind In conclusion, making flanges around bulkhead hatches may seem complex at first glance, but by following Sven Yrvind’s meticulous process, enthusiasts can achieve professional-level results. Remember that the journey of boatbuilding is as rewarding as reaching your destination; it tests one’s patience and dedication. For those seeking to embark on this adventure or simply gain more insight into marine craftsmanship, Sven’s wisdom is invaluable.Sven Yrvind, a renowned yacht designer and sailor, shares valuable insights on creating flanges around bulkhead hatches for canvas protection in this enlightening video. By following his expert guidance, boat enthusiasts can ensure their living areas remain secure while allowing unhindered access through the hatches.Step 1: Starting with the Flange
Sven begins by explaining that working on flanges vertically and horizontally is significantly easier than doing so in a flat position. To simplify the process further, he divides the task into two or three steps as suggested by fellow expert “for for.” This approach not only makes it more manageable but also allows for greater precision in crafting each component.Step 2: Applying Glue and Securing
Sven proceeds to apply glue along one edge of the flange, ensuring a secure bond when clamped into place. He emphasizes that this stage is crucial for maintaining the structural integrity of the flange, which in turn safeguards the living area beneath the canvas when hatches are open.Step 3: Allowing Time to Dry
After securely attaching the first portion of the flange, Sven allows ample time for it to dry before moving forward with additional steps. This patience and precision are key aspects of his successful boatbuilding methods.Step 4: Finishing Touches
Once the flange is fully dried, Sven removes the clamps carefully, ensuring no damage occurs during this process. He then moves on to attaching four more pieces onto these main frames, completing two pairs of flanges for the bulkhead hatches.The Final Touches
While two flanges form the primary support structure around the hatches, Sven mentions there are two additional pieces required at each end to ensure comprehensive protection. This attention to detail highlights his commitment to producing a durable and reliable design. “Sailing is about finding your path, whether it’s across an ocean or within yourself.” – Sven Yrvind In conclusion, making flanges around bulkhead hatches may seem complex at first glance, but by following Sven Yrvind’s meticulous process, enthusiasts can achieve professional-level results. Remember that the journey of boatbuilding is as rewarding as reaching your destination; it tests one’s patience and dedication. For those seeking to embark on this adventure or simply gain more insight into marine craftsmanship, Sven’s wisdom is invaluable.Making Flanges Around Bulkhead Hatches for Canvas
Sven Yrvind, a renowned yacht designer and sailor, shares valuable insights on creating flanges around bulkhead hatches for canvas protection in this enlightening video. By following his expert guidance, boat enthusiasts can ensure their living areas remain secure while allowing unhindered access through the hatches.Step 1: Starting with the Flange
Sven begins by explaining that working on flanges vertically and horizontally is significantly easier than doing so in a flat position. To simplify the process further, he divides the task into two or three steps as suggested by fellow expert “for for.” This approach not only makes it more manageable but also allows for greater precision in crafting each component.Step 2: Applying Glue and Securing
Sven proceeds to apply glue along one edge of the flange, ensuring a secure bond when clamped into place. He emphasizes that this stage is crucial for maintaining the structural integrity of the flange, which in turn safeguards the living area beneath the canvas when hatches are open.Step 3: Allowing Time to Dry
After securely attaching the first portion of the flange, Sven allows ample time for it to dry before moving forward with additional steps. This patience and precision are key aspects of his successful boatbuilding methods.Step 4: Finishing Touches
Once the flange is fully dried, Sven removes the clamps carefully, ensuring no damage occurs during this process. He then moves on to attaching four more pieces onto these main frames, completing two pairs of flanges for the bulkhead hatches.The Final Touches
While two flanges form the primary support structure around the hatches, Sven mentions there are two additional pieces required at each end to ensure comprehensive protection. This attention to detail highlights his commitment to producing a durable and reliable design. “Sailing is about finding your path, whether it’s across an ocean or within yourself.” – Sven Yrvind In conclusion, making flanges around bulkhead hatches may seem complex at first glance, but by following Sven Yrvind’s meticulous process, enthusiasts can achieve professional-level results. Remember that the journey of boatbuilding is as rewarding as reaching your destination; it tests one’s patience and dedication. For those seeking to embark on this adventure or simply gain more insight into marine craftsmanship, Sven’s wisdom is invaluable.After securely attaching the first portion of the flange, Sven allows ample time for it to dry before moving forward with additional steps. This patience and precision are key aspects of his successful boatbuilding methods.Step 4: Finishing Touches
Once the flange is fully dried, Sven removes the clamps carefully, ensuring no damage occurs during this process. He then moves on to attaching four more pieces onto these main frames, completing two pairs of flanges for the bulkhead hatches.The Final Touches
While two flanges form the primary support structure around the hatches, Sven mentions there are two additional pieces required at each end to ensure comprehensive protection. This attention to detail highlights his commitment to producing a durable and reliable design. “Sailing is about finding your path, whether it’s across an ocean or within yourself.” – Sven Yrvind In conclusion, making flanges around bulkhead hatches may seem complex at first glance, but by following Sven Yrvind’s meticulous process, enthusiasts can achieve professional-level results. Remember that the journey of boatbuilding is as rewarding as reaching your destination; it tests one’s patience and dedication. For those seeking to embark on this adventure or simply gain more insight into marine craftsmanship, Sven’s wisdom is invaluable.Sven proceeds to apply glue along one edge of the flange, ensuring a secure bond when clamped into place. He emphasizes that this stage is crucial for maintaining the structural integrity of the flange, which in turn safeguards the living area beneath the canvas when hatches are open.Step 3: Allowing Time to Dry
After securely attaching the first portion of the flange, Sven allows ample time for it to dry before moving forward with additional steps. This patience and precision are key aspects of his successful boatbuilding methods.Step 4: Finishing Touches
Once the flange is fully dried, Sven removes the clamps carefully, ensuring no damage occurs during this process. He then moves on to attaching four more pieces onto these main frames, completing two pairs of flanges for the bulkhead hatches.The Final Touches
While two flanges form the primary support structure around the hatches, Sven mentions there are two additional pieces required at each end to ensure comprehensive protection. This attention to detail highlights his commitment to producing a durable and reliable design. “Sailing is about finding your path, whether it’s across an ocean or within yourself.” – Sven Yrvind In conclusion, making flanges around bulkhead hatches may seem complex at first glance, but by following Sven Yrvind’s meticulous process, enthusiasts can achieve professional-level results. Remember that the journey of boatbuilding is as rewarding as reaching your destination; it tests one’s patience and dedication. For those seeking to embark on this adventure or simply gain more insight into marine craftsmanship, Sven’s wisdom is invaluable.Sven begins by explaining that working on flanges vertically and horizontally is significantly easier than doing so in a flat position. To simplify the process further, he divides the task into two or three steps as suggested by fellow expert “for for.” This approach not only makes it more manageable but also allows for greater precision in crafting each component.Step 2: Applying Glue and Securing
Sven proceeds to apply glue along one edge of the flange, ensuring a secure bond when clamped into place. He emphasizes that this stage is crucial for maintaining the structural integrity of the flange, which in turn safeguards the living area beneath the canvas when hatches are open.Step 3: Allowing Time to Dry
After securely attaching the first portion of the flange, Sven allows ample time for it to dry before moving forward with additional steps. This patience and precision are key aspects of his successful boatbuilding methods.Step 4: Finishing Touches
Once the flange is fully dried, Sven removes the clamps carefully, ensuring no damage occurs during this process. He then moves on to attaching four more pieces onto these main frames, completing two pairs of flanges for the bulkhead hatches.The Final Touches
While two flanges form the primary support structure around the hatches, Sven mentions there are two additional pieces required at each end to ensure comprehensive protection. This attention to detail highlights his commitment to producing a durable and reliable design. “Sailing is about finding your path, whether it’s across an ocean or within yourself.” – Sven Yrvind In conclusion, making flanges around bulkhead hatches may seem complex at first glance, but by following Sven Yrvind’s meticulous process, enthusiasts can achieve professional-level results. Remember that the journey of boatbuilding is as rewarding as reaching your destination; it tests one’s patience and dedication. For those seeking to embark on this adventure or simply gain more insight into marine craftsmanship, Sven’s wisdom is invaluable.Sven Yrvind, a renowned yacht designer and sailor, shares valuable insights on creating flanges around bulkhead hatches for canvas protection in this enlightening video. By following his expert guidance, boat enthusiasts can ensure their living areas remain secure while allowing unhindered access through the hatches.Step 1: Starting with the Flange
Sven begins by explaining that working on flanges vertically and horizontally is significantly easier than doing so in a flat position. To simplify the process further, he divides the task into two or three steps as suggested by fellow expert “for for.” This approach not only makes it more manageable but also allows for greater precision in crafting each component.Step 2: Applying Glue and Securing
Sven proceeds to apply glue along one edge of the flange, ensuring a secure bond when clamped into place. He emphasizes that this stage is crucial for maintaining the structural integrity of the flange, which in turn safeguards the living area beneath the canvas when hatches are open.Step 3: Allowing Time to Dry
After securely attaching the first portion of the flange, Sven allows ample time for it to dry before moving forward with additional steps. This patience and precision are key aspects of his successful boatbuilding methods.Step 4: Finishing Touches
Once the flange is fully dried, Sven removes the clamps carefully, ensuring no damage occurs during this process. He then moves on to attaching four more pieces onto these main frames, completing two pairs of flanges for the bulkhead hatches.The Final Touches
While two flanges form the primary support structure around the hatches, Sven mentions there are two additional pieces required at each end to ensure comprehensive protection. This attention to detail highlights his commitment to producing a durable and reliable design. “Sailing is about finding your path, whether it’s across an ocean or within yourself.” – Sven Yrvind In conclusion, making flanges around bulkhead hatches may seem complex at first glance, but by following Sven Yrvind’s meticulous process, enthusiasts can achieve professional-level results. Remember that the journey of boatbuilding is as rewarding as reaching your destination; it tests one’s patience and dedication. For those seeking to embark on this adventure or simply gain more insight into marine craftsmanship, Sven’s wisdom is invaluable.Making Flanges Around Bulkhead Hatches for Canvas
Sven Yrvind, a renowned yacht designer and sailor, shares valuable insights on creating flanges around bulkhead hatches for canvas protection in this enlightening video. By following his expert guidance, boat enthusiasts can ensure their living areas remain secure while allowing unhindered access through the hatches.Step 1: Starting with the Flange
Sven begins by explaining that working on flanges vertically and horizontally is significantly easier than doing so in a flat position. To simplify the process further, he divides the task into two or three steps as suggested by fellow expert “for for.” This approach not only makes it more manageable but also allows for greater precision in crafting each component.Step 2: Applying Glue and Securing
Sven proceeds to apply glue along one edge of the flange, ensuring a secure bond when clamped into place. He emphasizes that this stage is crucial for maintaining the structural integrity of the flange, which in turn safeguards the living area beneath the canvas when hatches are open.Step 3: Allowing Time to Dry
After securely attaching the first portion of the flange, Sven allows ample time for it to dry before moving forward with additional steps. This patience and precision are key aspects of his successful boatbuilding methods.Step 4: Finishing Touches
Once the flange is fully dried, Sven removes the clamps carefully, ensuring no damage occurs during this process. He then moves on to attaching four more pieces onto these main frames, completing two pairs of flanges for the bulkhead hatches.The Final Touches
While two flanges form the primary support structure around the hatches, Sven mentions there are two additional pieces required at each end to ensure comprehensive protection. This attention to detail highlights his commitment to producing a durable and reliable design. “Sailing is about finding your path, whether it’s across an ocean or within yourself.” – Sven Yrvind In conclusion, making flanges around bulkhead hatches may seem complex at first glance, but by following Sven Yrvind’s meticulous process, enthusiasts can achieve professional-level results. Remember that the journey of boatbuilding is as rewarding as reaching your destination; it tests one’s patience and dedication. For those seeking to embark on this adventure or simply gain more insight into marine craftsmanship, Sven’s wisdom is invaluable.Once the flange is fully dried, Sven removes the clamps carefully, ensuring no damage occurs during this process. He then moves on to attaching four more pieces onto these main frames, completing two pairs of flanges for the bulkhead hatches.The Final Touches
While two flanges form the primary support structure around the hatches, Sven mentions there are two additional pieces required at each end to ensure comprehensive protection. This attention to detail highlights his commitment to producing a durable and reliable design. “Sailing is about finding your path, whether it’s across an ocean or within yourself.” – Sven Yrvind In conclusion, making flanges around bulkhead hatches may seem complex at first glance, but by following Sven Yrvind’s meticulous process, enthusiasts can achieve professional-level results. Remember that the journey of boatbuilding is as rewarding as reaching your destination; it tests one’s patience and dedication. For those seeking to embark on this adventure or simply gain more insight into marine craftsmanship, Sven’s wisdom is invaluable.After securely attaching the first portion of the flange, Sven allows ample time for it to dry before moving forward with additional steps. This patience and precision are key aspects of his successful boatbuilding methods.Step 4: Finishing Touches
Once the flange is fully dried, Sven removes the clamps carefully, ensuring no damage occurs during this process. He then moves on to attaching four more pieces onto these main frames, completing two pairs of flanges for the bulkhead hatches.The Final Touches
While two flanges form the primary support structure around the hatches, Sven mentions there are two additional pieces required at each end to ensure comprehensive protection. This attention to detail highlights his commitment to producing a durable and reliable design. “Sailing is about finding your path, whether it’s across an ocean or within yourself.” – Sven Yrvind In conclusion, making flanges around bulkhead hatches may seem complex at first glance, but by following Sven Yrvind’s meticulous process, enthusiasts can achieve professional-level results. Remember that the journey of boatbuilding is as rewarding as reaching your destination; it tests one’s patience and dedication. For those seeking to embark on this adventure or simply gain more insight into marine craftsmanship, Sven’s wisdom is invaluable.Sven proceeds to apply glue along one edge of the flange, ensuring a secure bond when clamped into place. He emphasizes that this stage is crucial for maintaining the structural integrity of the flange, which in turn safeguards the living area beneath the canvas when hatches are open.Step 3: Allowing Time to Dry
After securely attaching the first portion of the flange, Sven allows ample time for it to dry before moving forward with additional steps. This patience and precision are key aspects of his successful boatbuilding methods.Step 4: Finishing Touches
Once the flange is fully dried, Sven removes the clamps carefully, ensuring no damage occurs during this process. He then moves on to attaching four more pieces onto these main frames, completing two pairs of flanges for the bulkhead hatches.The Final Touches
While two flanges form the primary support structure around the hatches, Sven mentions there are two additional pieces required at each end to ensure comprehensive protection. This attention to detail highlights his commitment to producing a durable and reliable design. “Sailing is about finding your path, whether it’s across an ocean or within yourself.” – Sven Yrvind In conclusion, making flanges around bulkhead hatches may seem complex at first glance, but by following Sven Yrvind’s meticulous process, enthusiasts can achieve professional-level results. Remember that the journey of boatbuilding is as rewarding as reaching your destination; it tests one’s patience and dedication. For those seeking to embark on this adventure or simply gain more insight into marine craftsmanship, Sven’s wisdom is invaluable.Sven begins by explaining that working on flanges vertically and horizontally is significantly easier than doing so in a flat position. To simplify the process further, he divides the task into two or three steps as suggested by fellow expert “for for.” This approach not only makes it more manageable but also allows for greater precision in crafting each component.Step 2: Applying Glue and Securing
Sven proceeds to apply glue along one edge of the flange, ensuring a secure bond when clamped into place. He emphasizes that this stage is crucial for maintaining the structural integrity of the flange, which in turn safeguards the living area beneath the canvas when hatches are open.Step 3: Allowing Time to Dry
After securely attaching the first portion of the flange, Sven allows ample time for it to dry before moving forward with additional steps. This patience and precision are key aspects of his successful boatbuilding methods.Step 4: Finishing Touches
Once the flange is fully dried, Sven removes the clamps carefully, ensuring no damage occurs during this process. He then moves on to attaching four more pieces onto these main frames, completing two pairs of flanges for the bulkhead hatches.The Final Touches
While two flanges form the primary support structure around the hatches, Sven mentions there are two additional pieces required at each end to ensure comprehensive protection. This attention to detail highlights his commitment to producing a durable and reliable design. “Sailing is about finding your path, whether it’s across an ocean or within yourself.” – Sven Yrvind In conclusion, making flanges around bulkhead hatches may seem complex at first glance, but by following Sven Yrvind’s meticulous process, enthusiasts can achieve professional-level results. Remember that the journey of boatbuilding is as rewarding as reaching your destination; it tests one’s patience and dedication. For those seeking to embark on this adventure or simply gain more insight into marine craftsmanship, Sven’s wisdom is invaluable.Sven Yrvind, a renowned yacht designer and sailor, shares valuable insights on creating flanges around bulkhead hatches for canvas protection in this enlightening video. By following his expert guidance, boat enthusiasts can ensure their living areas remain secure while allowing unhindered access through the hatches.Step 1: Starting with the Flange
Sven begins by explaining that working on flanges vertically and horizontally is significantly easier than doing so in a flat position. To simplify the process further, he divides the task into two or three steps as suggested by fellow expert “for for.” This approach not only makes it more manageable but also allows for greater precision in crafting each component.Step 2: Applying Glue and Securing
Sven proceeds to apply glue along one edge of the flange, ensuring a secure bond when clamped into place. He emphasizes that this stage is crucial for maintaining the structural integrity of the flange, which in turn safeguards the living area beneath the canvas when hatches are open.Step 3: Allowing Time to Dry
After securely attaching the first portion of the flange, Sven allows ample time for it to dry before moving forward with additional steps. This patience and precision are key aspects of his successful boatbuilding methods.Step 4: Finishing Touches
Once the flange is fully dried, Sven removes the clamps carefully, ensuring no damage occurs during this process. He then moves on to attaching four more pieces onto these main frames, completing two pairs of flanges for the bulkhead hatches.The Final Touches
While two flanges form the primary support structure around the hatches, Sven mentions there are two additional pieces required at each end to ensure comprehensive protection. This attention to detail highlights his commitment to producing a durable and reliable design. “Sailing is about finding your path, whether it’s across an ocean or within yourself.” – Sven Yrvind In conclusion, making flanges around bulkhead hatches may seem complex at first glance, but by following Sven Yrvind’s meticulous process, enthusiasts can achieve professional-level results. Remember that the journey of boatbuilding is as rewarding as reaching your destination; it tests one’s patience and dedication. For those seeking to embark on this adventure or simply gain more insight into marine craftsmanship, Sven’s wisdom is invaluable.Making Flanges Around Bulkhead Hatches for Canvas
Sven Yrvind, a renowned yacht designer and sailor, shares valuable insights on creating flanges around bulkhead hatches for canvas protection in this enlightening video. By following his expert guidance, boat enthusiasts can ensure their living areas remain secure while allowing unhindered access through the hatches.Step 1: Starting with the Flange
Sven begins by explaining that working on flanges vertically and horizontally is significantly easier than doing so in a flat position. To simplify the process further, he divides the task into two or three steps as suggested by fellow expert “for for.” This approach not only makes it more manageable but also allows for greater precision in crafting each component.Step 2: Applying Glue and Securing
Sven proceeds to apply glue along one edge of the flange, ensuring a secure bond when clamped into place. He emphasizes that this stage is crucial for maintaining the structural integrity of the flange, which in turn safeguards the living area beneath the canvas when hatches are open.Step 3: Allowing Time to Dry
After securely attaching the first portion of the flange, Sven allows ample time for it to dry before moving forward with additional steps. This patience and precision are key aspects of his successful boatbuilding methods.Step 4: Finishing Touches
Once the flange is fully dried, Sven removes the clamps carefully, ensuring no damage occurs during this process. He then moves on to attaching four more pieces onto these main frames, completing two pairs of flanges for the bulkhead hatches.The Final Touches
While two flanges form the primary support structure around the hatches, Sven mentions there are two additional pieces required at each end to ensure comprehensive protection. This attention to detail highlights his commitment to producing a durable and reliable design. “Sailing is about finding your path, whether it’s across an ocean or within yourself.” – Sven Yrvind In conclusion, making flanges around bulkhead hatches may seem complex at first glance, but by following Sven Yrvind’s meticulous process, enthusiasts can achieve professional-level results. Remember that the journey of boatbuilding is as rewarding as reaching your destination; it tests one’s patience and dedication. For those seeking to embark on this adventure or simply gain more insight into marine craftsmanship, Sven’s wisdom is invaluable.Sven begins by explaining that working on flanges vertically and horizontally is significantly easier than doing so in a flat position. To simplify the process further, he divides the task into two or three steps as suggested by fellow expert “for for.” This approach not only makes it more manageable but also allows for greater precision in crafting each component.Step 2: Applying Glue and Securing
Sven proceeds to apply glue along one edge of the flange, ensuring a secure bond when clamped into place. He emphasizes that this stage is crucial for maintaining the structural integrity of the flange, which in turn safeguards the living area beneath the canvas when hatches are open.Step 3: Allowing Time to Dry
After securely attaching the first portion of the flange, Sven allows ample time for it to dry before moving forward with additional steps. This patience and precision are key aspects of his successful boatbuilding methods.Step 4: Finishing Touches
Once the flange is fully dried, Sven removes the clamps carefully, ensuring no damage occurs during this process. He then moves on to attaching four more pieces onto these main frames, completing two pairs of flanges for the bulkhead hatches.The Final Touches
While two flanges form the primary support structure around the hatches, Sven mentions there are two additional pieces required at each end to ensure comprehensive protection. This attention to detail highlights his commitment to producing a durable and reliable design. “Sailing is about finding your path, whether it’s across an ocean or within yourself.” – Sven Yrvind In conclusion, making flanges around bulkhead hatches may seem complex at first glance, but by following Sven Yrvind’s meticulous process, enthusiasts can achieve professional-level results. Remember that the journey of boatbuilding is as rewarding as reaching your destination; it tests one’s patience and dedication. For those seeking to embark on this adventure or simply gain more insight into marine craftsmanship, Sven’s wisdom is invaluable.Sven proceeds to apply glue along one edge of the flange, ensuring a secure bond when clamped into place. He emphasizes that this stage is crucial for maintaining the structural integrity of the flange, which in turn safeguards the living area beneath the canvas when hatches are open.Step 3: Allowing Time to Dry
After securely attaching the first portion of the flange, Sven allows ample time for it to dry before moving forward with additional steps. This patience and precision are key aspects of his successful boatbuilding methods.Step 4: Finishing Touches
Once the flange is fully dried, Sven removes the clamps carefully, ensuring no damage occurs during this process. He then moves on to attaching four more pieces onto these main frames, completing two pairs of flanges for the bulkhead hatches.The Final Touches
While two flanges form the primary support structure around the hatches, Sven mentions there are two additional pieces required at each end to ensure comprehensive protection. This attention to detail highlights his commitment to producing a durable and reliable design. “Sailing is about finding your path, whether it’s across an ocean or within yourself.” – Sven Yrvind In conclusion, making flanges around bulkhead hatches may seem complex at first glance, but by following Sven Yrvind’s meticulous process, enthusiasts can achieve professional-level results. Remember that the journey of boatbuilding is as rewarding as reaching your destination; it tests one’s patience and dedication. For those seeking to embark on this adventure or simply gain more insight into marine craftsmanship, Sven’s wisdom is invaluable.Sven Yrvind, a renowned yacht designer and sailor, shares valuable insights on creating flanges around bulkhead hatches for canvas protection in this enlightening video. By following his expert guidance, boat enthusiasts can ensure their living areas remain secure while allowing unhindered access through the hatches.Step 1: Starting with the Flange
Sven begins by explaining that working on flanges vertically and horizontally is significantly easier than doing so in a flat position. To simplify the process further, he divides the task into two or three steps as suggested by fellow expert “for for.” This approach not only makes it more manageable but also allows for greater precision in crafting each component.Step 2: Applying Glue and Securing
Sven proceeds to apply glue along one edge of the flange, ensuring a secure bond when clamped into place. He emphasizes that this stage is crucial for maintaining the structural integrity of the flange, which in turn safeguards the living area beneath the canvas when hatches are open.Step 3: Allowing Time to Dry
After securely attaching the first portion of the flange, Sven allows ample time for it to dry before moving forward with additional steps. This patience and precision are key aspects of his successful boatbuilding methods.Step 4: Finishing Touches
Once the flange is fully dried, Sven removes the clamps carefully, ensuring no damage occurs during this process. He then moves on to attaching four more pieces onto these main frames, completing two pairs of flanges for the bulkhead hatches.The Final Touches
While two flanges form the primary support structure around the hatches, Sven mentions there are two additional pieces required at each end to ensure comprehensive protection. This attention to detail highlights his commitment to producing a durable and reliable design. “Sailing is about finding your path, whether it’s across an ocean or within yourself.” – Sven Yrvind In conclusion, making flanges around bulkhead hatches may seem complex at first glance, but by following Sven Yrvind’s meticulous process, enthusiasts can achieve professional-level results. Remember that the journey of boatbuilding is as rewarding as reaching your destination; it tests one’s patience and dedication. For those seeking to embark on this adventure or simply gain more insight into marine craftsmanship, Sven’s wisdom is invaluable.Making Flanges Around Bulkhead Hatches for Canvas
Sven Yrvind, a renowned yacht designer and sailor, shares valuable insights on creating flanges around bulkhead hatches for canvas protection in this enlightening video. By following his expert guidance, boat enthusiasts can ensure their living areas remain secure while allowing unhindered access through the hatches.Step 1: Starting with the Flange
Sven begins by explaining that working on flanges vertically and horizontally is significantly easier than doing so in a flat position. To simplify the process further, he divides the task into two or three steps as suggested by fellow expert “for for.” This approach not only makes it more manageable but also allows for greater precision in crafting each component.Step 2: Applying Glue and Securing
Sven proceeds to apply glue along one edge of the flange, ensuring a secure bond when clamped into place. He emphasizes that this stage is crucial for maintaining the structural integrity of the flange, which in turn safeguards the living area beneath the canvas when hatches are open.Step 3: Allowing Time to Dry
After securely attaching the first portion of the flange, Sven allows ample time for it to dry before moving forward with additional steps. This patience and precision are key aspects of his successful boatbuilding methods.Step 4: Finishing Touches
Once the flange is fully dried, Sven removes the clamps carefully, ensuring no damage occurs during this process. He then moves on to attaching four more pieces onto these main frames, completing two pairs of flanges for the bulkhead hatches.The Final Touches
While two flanges form the primary support structure around the hatches, Sven mentions there are two additional pieces required at each end to ensure comprehensive protection. This attention to detail highlights his commitment to producing a durable and reliable design. “Sailing is about finding your path, whether it’s across an ocean or within yourself.” – Sven Yrvind In conclusion, making flanges around bulkhead hatches may seem complex at first glance, but by following Sven Yrvind’s meticulous process, enthusiasts can achieve professional-level results. Remember that the journey of boatbuilding is as rewarding as reaching your destination; it tests one’s patience and dedication. For those seeking to embark on this adventure or simply gain more insight into marine craftsmanship, Sven’s wisdom is invaluable.Sven begins by explaining that working on flanges vertically and horizontally is significantly easier than doing so in a flat position. To simplify the process further, he divides the task into two or three steps as suggested by fellow expert “for for.” This approach not only makes it more manageable but also allows for greater precision in crafting each component.Step 2: Applying Glue and Securing
Sven proceeds to apply glue along one edge of the flange, ensuring a secure bond when clamped into place. He emphasizes that this stage is crucial for maintaining the structural integrity of the flange, which in turn safeguards the living area beneath the canvas when hatches are open.Step 3: Allowing Time to Dry
After securely attaching the first portion of the flange, Sven allows ample time for it to dry before moving forward with additional steps. This patience and precision are key aspects of his successful boatbuilding methods.Step 4: Finishing Touches
Once the flange is fully dried, Sven removes the clamps carefully, ensuring no damage occurs during this process. He then moves on to attaching four more pieces onto these main frames, completing two pairs of flanges for the bulkhead hatches.The Final Touches
While two flanges form the primary support structure around the hatches, Sven mentions there are two additional pieces required at each end to ensure comprehensive protection. This attention to detail highlights his commitment to producing a durable and reliable design. “Sailing is about finding your path, whether it’s across an ocean or within yourself.” – Sven Yrvind In conclusion, making flanges around bulkhead hatches may seem complex at first glance, but by following Sven Yrvind’s meticulous process, enthusiasts can achieve professional-level results. Remember that the journey of boatbuilding is as rewarding as reaching your destination; it tests one’s patience and dedication. For those seeking to embark on this adventure or simply gain more insight into marine craftsmanship, Sven’s wisdom is invaluable.Sven Yrvind, a renowned yacht designer and sailor, shares valuable insights on creating flanges around bulkhead hatches for canvas protection in this enlightening video. By following his expert guidance, boat enthusiasts can ensure their living areas remain secure while allowing unhindered access through the hatches.Step 1: Starting with the Flange
Sven begins by explaining that working on flanges vertically and horizontally is significantly easier than doing so in a flat position. To simplify the process further, he divides the task into two or three steps as suggested by fellow expert “for for.” This approach not only makes it more manageable but also allows for greater precision in crafting each component.Step 2: Applying Glue and Securing
Sven proceeds to apply glue along one edge of the flange, ensuring a secure bond when clamped into place. He emphasizes that this stage is crucial for maintaining the structural integrity of the flange, which in turn safeguards the living area beneath the canvas when hatches are open.Step 3: Allowing Time to Dry
After securely attaching the first portion of the flange, Sven allows ample time for it to dry before moving forward with additional steps. This patience and precision are key aspects of his successful boatbuilding methods.Step 4: Finishing Touches
Once the flange is fully dried, Sven removes the clamps carefully, ensuring no damage occurs during this process. He then moves on to attaching four more pieces onto these main frames, completing two pairs of flanges for the bulkhead hatches.The Final Touches
While two flanges form the primary support structure around the hatches, Sven mentions there are two additional pieces required at each end to ensure comprehensive protection. This attention to detail highlights his commitment to producing a durable and reliable design. “Sailing is about finding your path, whether it’s across an ocean or within yourself.” – Sven Yrvind In conclusion, making flanges around bulkhead hatches may seem complex at first glance, but by following Sven Yrvind’s meticulous process, enthusiasts can achieve professional-level results. Remember that the journey of boatbuilding is as rewarding as reaching your destination; it tests one’s patience and dedication. For those seeking to embark on this adventure or simply gain more insight into marine craftsmanship, Sven’s wisdom is invaluable.Making Flanges Around Bulkhead Hatches for Canvas
Sven Yrvind, a renowned yacht designer and sailor, shares valuable insights on creating flanges around bulkhead hatches for canvas protection in this enlightening video. By following his expert guidance, boat enthusiasts can ensure their living areas remain secure while allowing unhindered access through the hatches.Step 1: Starting with the Flange
Sven begins by explaining that working on flanges vertically and horizontally is significantly easier than doing so in a flat position. To simplify the process further, he divides the task into two or three steps as suggested by fellow expert “for for.” This approach not only makes it more manageable but also allows for greater precision in crafting each component.Step 2: Applying Glue and Securing
Sven proceeds to apply glue along one edge of the flange, ensuring a secure bond when clamped into place. He emphasizes that this stage is crucial for maintaining the structural integrity of the flange, which in turn safeguards the living area beneath the canvas when hatches are open.Step 3: Allowing Time to Dry
After securely attaching the first portion of the flange, Sven allows ample time for it to dry before moving forward with additional steps. This patience and precision are key aspects of his successful boatbuilding methods.Step 4: Finishing Touches
Once the flange is fully dried, Sven removes the clamps carefully, ensuring no damage occurs during this process. He then moves on to attaching four more pieces onto these main frames, completing two pairs of flanges for the bulkhead hatches.The Final Touches
While two flanges form the primary support structure around the hatches, Sven mentions there are two additional pieces required at each end to ensure comprehensive protection. This attention to detail highlights his commitment to producing a durable and reliable design. “Sailing is about finding your path, whether it’s across an ocean or within yourself.” – Sven Yrvind In conclusion, making flanges around bulkhead hatches may seem complex at first glance, but by following Sven Yrvind’s meticulous process, enthusiasts can achieve professional-level results. Remember that the journey of boatbuilding is as rewarding as reaching your destination; it tests one’s patience and dedication. For those seeking to embark on this adventure or simply gain more insight into marine craftsmanship, Sven’s wisdom is invaluable.Once the flange is fully dried, Sven removes the clamps carefully, ensuring no damage occurs during this process. He then moves on to attaching four more pieces onto these main frames, completing two pairs of flanges for the bulkhead hatches.The Final Touches
While two flanges form the primary support structure around the hatches, Sven mentions there are two additional pieces required at each end to ensure comprehensive protection. This attention to detail highlights his commitment to producing a durable and reliable design. “Sailing is about finding your path, whether it’s across an ocean or within yourself.” – Sven Yrvind In conclusion, making flanges around bulkhead hatches may seem complex at first glance, but by following Sven Yrvind’s meticulous process, enthusiasts can achieve professional-level results. Remember that the journey of boatbuilding is as rewarding as reaching your destination; it tests one’s patience and dedication. For those seeking to embark on this adventure or simply gain more insight into marine craftsmanship, Sven’s wisdom is invaluable.Sven begins by explaining that working on flanges vertically and horizontally is significantly easier than doing so in a flat position. To simplify the process further, he divides the task into two or three steps as suggested by fellow expert “for for.” This approach not only makes it more manageable but also allows for greater precision in crafting each component.Step 2: Applying Glue and Securing
Sven proceeds to apply glue along one edge of the flange, ensuring a secure bond when clamped into place. He emphasizes that this stage is crucial for maintaining the structural integrity of the flange, which in turn safeguards the living area beneath the canvas when hatches are open.Step 3: Allowing Time to Dry
After securely attaching the first portion of the flange, Sven allows ample time for it to dry before moving forward with additional steps. This patience and precision are key aspects of his successful boatbuilding methods.Step 4: Finishing Touches
Once the flange is fully dried, Sven removes the clamps carefully, ensuring no damage occurs during this process. He then moves on to attaching four more pieces onto these main frames, completing two pairs of flanges for the bulkhead hatches.The Final Touches
While two flanges form the primary support structure around the hatches, Sven mentions there are two additional pieces required at each end to ensure comprehensive protection. This attention to detail highlights his commitment to producing a durable and reliable design. “Sailing is about finding your path, whether it’s across an ocean or within yourself.” – Sven Yrvind In conclusion, making flanges around bulkhead hatches may seem complex at first glance, but by following Sven Yrvind’s meticulous process, enthusiasts can achieve professional-level results. Remember that the journey of boatbuilding is as rewarding as reaching your destination; it tests one’s patience and dedication. For those seeking to embark on this adventure or simply gain more insight into marine craftsmanship, Sven’s wisdom is invaluable.Sven Yrvind, a renowned yacht designer and sailor, shares valuable insights on creating flanges around bulkhead hatches for canvas protection in this enlightening video. By following his expert guidance, boat enthusiasts can ensure their living areas remain secure while allowing unhindered access through the hatches.Step 1: Starting with the Flange
Sven begins by explaining that working on flanges vertically and horizontally is significantly easier than doing so in a flat position. To simplify the process further, he divides the task into two or three steps as suggested by fellow expert “for for.” This approach not only makes it more manageable but also allows for greater precision in crafting each component.Step 2: Applying Glue and Securing
Sven proceeds to apply glue along one edge of the flange, ensuring a secure bond when clamped into place. He emphasizes that this stage is crucial for maintaining the structural integrity of the flange, which in turn safeguards the living area beneath the canvas when hatches are open.Step 3: Allowing Time to Dry
After securely attaching the first portion of the flange, Sven allows ample time for it to dry before moving forward with additional steps. This patience and precision are key aspects of his successful boatbuilding methods.Step 4: Finishing Touches
Once the flange is fully dried, Sven removes the clamps carefully, ensuring no damage occurs during this process. He then moves on to attaching four more pieces onto these main frames, completing two pairs of flanges for the bulkhead hatches.The Final Touches
While two flanges form the primary support structure around the hatches, Sven mentions there are two additional pieces required at each end to ensure comprehensive protection. This attention to detail highlights his commitment to producing a durable and reliable design. “Sailing is about finding your path, whether it’s across an ocean or within yourself.” – Sven Yrvind In conclusion, making flanges around bulkhead hatches may seem complex at first glance, but by following Sven Yrvind’s meticulous process, enthusiasts can achieve professional-level results. Remember that the journey of boatbuilding is as rewarding as reaching your destination; it tests one’s patience and dedication. For those seeking to embark on this adventure or simply gain more insight into marine craftsmanship, Sven’s wisdom is invaluable.Making Flanges Around Bulkhead Hatches for Canvas
Sven Yrvind, a renowned yacht designer and sailor, shares valuable insights on creating flanges around bulkhead hatches for canvas protection in this enlightening video. By following his expert guidance, boat enthusiasts can ensure their living areas remain secure while allowing unhindered access through the hatches.Step 1: Starting with the Flange
Sven begins by explaining that working on flanges vertically and horizontally is significantly easier than doing so in a flat position. To simplify the process further, he divides the task into two or three steps as suggested by fellow expert “for for.” This approach not only makes it more manageable but also allows for greater precision in crafting each component.Step 2: Applying Glue and Securing
Sven proceeds to apply glue along one edge of the flange, ensuring a secure bond when clamped into place. He emphasizes that this stage is crucial for maintaining the structural integrity of the flange, which in turn safeguards the living area beneath the canvas when hatches are open.Step 3: Allowing Time to Dry
After securely attaching the first portion of the flange, Sven allows ample time for it to dry before moving forward with additional steps. This patience and precision are key aspects of his successful boatbuilding methods.Step 4: Finishing Touches
Once the flange is fully dried, Sven removes the clamps carefully, ensuring no damage occurs during this process. He then moves on to attaching four more pieces onto these main frames, completing two pairs of flanges for the bulkhead hatches.The Final Touches
While two flanges form the primary support structure around the hatches, Sven mentions there are two additional pieces required at each end to ensure comprehensive protection. This attention to detail highlights his commitment to producing a durable and reliable design. “Sailing is about finding your path, whether it’s across an ocean or within yourself.” – Sven Yrvind In conclusion, making flanges around bulkhead hatches may seem complex at first glance, but by following Sven Yrvind’s meticulous process, enthusiasts can achieve professional-level results. Remember that the journey of boatbuilding is as rewarding as reaching your destination; it tests one’s patience and dedication. For those seeking to embark on this adventure or simply gain more insight into marine craftsmanship, Sven’s wisdom is invaluable.After securely attaching the first portion of the flange, Sven allows ample time for it to dry before moving forward with additional steps. This patience and precision are key aspects of his successful boatbuilding methods.Step 4: Finishing Touches
Once the flange is fully dried, Sven removes the clamps carefully, ensuring no damage occurs during this process. He then moves on to attaching four more pieces onto these main frames, completing two pairs of flanges for the bulkhead hatches.The Final Touches
While two flanges form the primary support structure around the hatches, Sven mentions there are two additional pieces required at each end to ensure comprehensive protection. This attention to detail highlights his commitment to producing a durable and reliable design. “Sailing is about finding your path, whether it’s across an ocean or within yourself.” – Sven Yrvind In conclusion, making flanges around bulkhead hatches may seem complex at first glance, but by following Sven Yrvind’s meticulous process, enthusiasts can achieve professional-level results. Remember that the journey of boatbuilding is as rewarding as reaching your destination; it tests one’s patience and dedication. For those seeking to embark on this adventure or simply gain more insight into marine craftsmanship, Sven’s wisdom is invaluable.Sven begins by explaining that working on flanges vertically and horizontally is significantly easier than doing so in a flat position. To simplify the process further, he divides the task into two or three steps as suggested by fellow expert “for for.” This approach not only makes it more manageable but also allows for greater precision in crafting each component.Step 2: Applying Glue and Securing
Sven proceeds to apply glue along one edge of the flange, ensuring a secure bond when clamped into place. He emphasizes that this stage is crucial for maintaining the structural integrity of the flange, which in turn safeguards the living area beneath the canvas when hatches are open.Step 3: Allowing Time to Dry
After securely attaching the first portion of the flange, Sven allows ample time for it to dry before moving forward with additional steps. This patience and precision are key aspects of his successful boatbuilding methods.Step 4: Finishing Touches
Once the flange is fully dried, Sven removes the clamps carefully, ensuring no damage occurs during this process. He then moves on to attaching four more pieces onto these main frames, completing two pairs of flanges for the bulkhead hatches.The Final Touches
While two flanges form the primary support structure around the hatches, Sven mentions there are two additional pieces required at each end to ensure comprehensive protection. This attention to detail highlights his commitment to producing a durable and reliable design. “Sailing is about finding your path, whether it’s across an ocean or within yourself.” – Sven Yrvind In conclusion, making flanges around bulkhead hatches may seem complex at first glance, but by following Sven Yrvind’s meticulous process, enthusiasts can achieve professional-level results. Remember that the journey of boatbuilding is as rewarding as reaching your destination; it tests one’s patience and dedication. For those seeking to embark on this adventure or simply gain more insight into marine craftsmanship, Sven’s wisdom is invaluable.Sven Yrvind, a renowned yacht designer and sailor, shares valuable insights on creating flanges around bulkhead hatches for canvas protection in this enlightening video. By following his expert guidance, boat enthusiasts can ensure their living areas remain secure while allowing unhindered access through the hatches.Step 1: Starting with the Flange
Sven begins by explaining that working on flanges vertically and horizontally is significantly easier than doing so in a flat position. To simplify the process further, he divides the task into two or three steps as suggested by fellow expert “for for.” This approach not only makes it more manageable but also allows for greater precision in crafting each component.Step 2: Applying Glue and Securing
Sven proceeds to apply glue along one edge of the flange, ensuring a secure bond when clamped into place. He emphasizes that this stage is crucial for maintaining the structural integrity of the flange, which in turn safeguards the living area beneath the canvas when hatches are open.Step 3: Allowing Time to Dry
After securely attaching the first portion of the flange, Sven allows ample time for it to dry before moving forward with additional steps. This patience and precision are key aspects of his successful boatbuilding methods.Step 4: Finishing Touches
Once the flange is fully dried, Sven removes the clamps carefully, ensuring no damage occurs during this process. He then moves on to attaching four more pieces onto these main frames, completing two pairs of flanges for the bulkhead hatches.The Final Touches
While two flanges form the primary support structure around the hatches, Sven mentions there are two additional pieces required at each end to ensure comprehensive protection. This attention to detail highlights his commitment to producing a durable and reliable design. “Sailing is about finding your path, whether it’s across an ocean or within yourself.” – Sven Yrvind In conclusion, making flanges around bulkhead hatches may seem complex at first glance, but by following Sven Yrvind’s meticulous process, enthusiasts can achieve professional-level results. Remember that the journey of boatbuilding is as rewarding as reaching your destination; it tests one’s patience and dedication. For those seeking to embark on this adventure or simply gain more insight into marine craftsmanship, Sven’s wisdom is invaluable.Making Flanges Around Bulkhead Hatches for Canvas
Sven Yrvind, a renowned yacht designer and sailor, shares valuable insights on creating flanges around bulkhead hatches for canvas protection in this enlightening video. By following his expert guidance, boat enthusiasts can ensure their living areas remain secure while allowing unhindered access through the hatches.Step 1: Starting with the Flange
Sven begins by explaining that working on flanges vertically and horizontally is significantly easier than doing so in a flat position. To simplify the process further, he divides the task into two or three steps as suggested by fellow expert “for for.” This approach not only makes it more manageable but also allows for greater precision in crafting each component.Step 2: Applying Glue and Securing
Sven proceeds to apply glue along one edge of the flange, ensuring a secure bond when clamped into place. He emphasizes that this stage is crucial for maintaining the structural integrity of the flange, which in turn safeguards the living area beneath the canvas when hatches are open.Step 3: Allowing Time to Dry
After securely attaching the first portion of the flange, Sven allows ample time for it to dry before moving forward with additional steps. This patience and precision are key aspects of his successful boatbuilding methods.Step 4: Finishing Touches
Once the flange is fully dried, Sven removes the clamps carefully, ensuring no damage occurs during this process. He then moves on to attaching four more pieces onto these main frames, completing two pairs of flanges for the bulkhead hatches.The Final Touches
While two flanges form the primary support structure around the hatches, Sven mentions there are two additional pieces required at each end to ensure comprehensive protection. This attention to detail highlights his commitment to producing a durable and reliable design. “Sailing is about finding your path, whether it’s across an ocean or within yourself.” – Sven Yrvind In conclusion, making flanges around bulkhead hatches may seem complex at first glance, but by following Sven Yrvind’s meticulous process, enthusiasts can achieve professional-level results. Remember that the journey of boatbuilding is as rewarding as reaching your destination; it tests one’s patience and dedication. For those seeking to embark on this adventure or simply gain more insight into marine craftsmanship, Sven’s wisdom is invaluable.Sven proceeds to apply glue along one edge of the flange, ensuring a secure bond when clamped into place. He emphasizes that this stage is crucial for maintaining the structural integrity of the flange, which in turn safeguards the living area beneath the canvas when hatches are open.Step 3: Allowing Time to Dry
After securely attaching the first portion of the flange, Sven allows ample time for it to dry before moving forward with additional steps. This patience and precision are key aspects of his successful boatbuilding methods.Step 4: Finishing Touches
Once the flange is fully dried, Sven removes the clamps carefully, ensuring no damage occurs during this process. He then moves on to attaching four more pieces onto these main frames, completing two pairs of flanges for the bulkhead hatches.The Final Touches
While two flanges form the primary support structure around the hatches, Sven mentions there are two additional pieces required at each end to ensure comprehensive protection. This attention to detail highlights his commitment to producing a durable and reliable design. “Sailing is about finding your path, whether it’s across an ocean or within yourself.” – Sven Yrvind In conclusion, making flanges around bulkhead hatches may seem complex at first glance, but by following Sven Yrvind’s meticulous process, enthusiasts can achieve professional-level results. Remember that the journey of boatbuilding is as rewarding as reaching your destination; it tests one’s patience and dedication. For those seeking to embark on this adventure or simply gain more insight into marine craftsmanship, Sven’s wisdom is invaluable.Sven begins by explaining that working on flanges vertically and horizontally is significantly easier than doing so in a flat position. To simplify the process further, he divides the task into two or three steps as suggested by fellow expert “for for.” This approach not only makes it more manageable but also allows for greater precision in crafting each component.Step 2: Applying Glue and Securing
Sven proceeds to apply glue along one edge of the flange, ensuring a secure bond when clamped into place. He emphasizes that this stage is crucial for maintaining the structural integrity of the flange, which in turn safeguards the living area beneath the canvas when hatches are open.Step 3: Allowing Time to Dry
After securely attaching the first portion of the flange, Sven allows ample time for it to dry before moving forward with additional steps. This patience and precision are key aspects of his successful boatbuilding methods.Step 4: Finishing Touches
Once the flange is fully dried, Sven removes the clamps carefully, ensuring no damage occurs during this process. He then moves on to attaching four more pieces onto these main frames, completing two pairs of flanges for the bulkhead hatches.The Final Touches
While two flanges form the primary support structure around the hatches, Sven mentions there are two additional pieces required at each end to ensure comprehensive protection. This attention to detail highlights his commitment to producing a durable and reliable design. “Sailing is about finding your path, whether it’s across an ocean or within yourself.” – Sven Yrvind In conclusion, making flanges around bulkhead hatches may seem complex at first glance, but by following Sven Yrvind’s meticulous process, enthusiasts can achieve professional-level results. Remember that the journey of boatbuilding is as rewarding as reaching your destination; it tests one’s patience and dedication. For those seeking to embark on this adventure or simply gain more insight into marine craftsmanship, Sven’s wisdom is invaluable.Sven Yrvind, a renowned yacht designer and sailor, shares valuable insights on creating flanges around bulkhead hatches for canvas protection in this enlightening video. By following his expert guidance, boat enthusiasts can ensure their living areas remain secure while allowing unhindered access through the hatches.Step 1: Starting with the Flange
Sven begins by explaining that working on flanges vertically and horizontally is significantly easier than doing so in a flat position. To simplify the process further, he divides the task into two or three steps as suggested by fellow expert “for for.” This approach not only makes it more manageable but also allows for greater precision in crafting each component.Step 2: Applying Glue and Securing
Sven proceeds to apply glue along one edge of the flange, ensuring a secure bond when clamped into place. He emphasizes that this stage is crucial for maintaining the structural integrity of the flange, which in turn safeguards the living area beneath the canvas when hatches are open.Step 3: Allowing Time to Dry
After securely attaching the first portion of the flange, Sven allows ample time for it to dry before moving forward with additional steps. This patience and precision are key aspects of his successful boatbuilding methods.Step 4: Finishing Touches
Once the flange is fully dried, Sven removes the clamps carefully, ensuring no damage occurs during this process. He then moves on to attaching four more pieces onto these main frames, completing two pairs of flanges for the bulkhead hatches.The Final Touches
While two flanges form the primary support structure around the hatches, Sven mentions there are two additional pieces required at each end to ensure comprehensive protection. This attention to detail highlights his commitment to producing a durable and reliable design. “Sailing is about finding your path, whether it’s across an ocean or within yourself.” – Sven Yrvind In conclusion, making flanges around bulkhead hatches may seem complex at first glance, but by following Sven Yrvind’s meticulous process, enthusiasts can achieve professional-level results. Remember that the journey of boatbuilding is as rewarding as reaching your destination; it tests one’s patience and dedication. For those seeking to embark on this adventure or simply gain more insight into marine craftsmanship, Sven’s wisdom is invaluable.Making Flanges Around Bulkhead Hatches for Canvas
Sven Yrvind, a renowned yacht designer and sailor, shares valuable insights on creating flanges around bulkhead hatches for canvas protection in this enlightening video. By following his expert guidance, boat enthusiasts can ensure their living areas remain secure while allowing unhindered access through the hatches.Step 1: Starting with the Flange
Sven begins by explaining that working on flanges vertically and horizontally is significantly easier than doing so in a flat position. To simplify the process further, he divides the task into two or three steps as suggested by fellow expert “for for.” This approach not only makes it more manageable but also allows for greater precision in crafting each component.Step 2: Applying Glue and Securing
Sven proceeds to apply glue along one edge of the flange, ensuring a secure bond when clamped into place. He emphasizes that this stage is crucial for maintaining the structural integrity of the flange, which in turn safeguards the living area beneath the canvas when hatches are open.Step 3: Allowing Time to Dry
After securely attaching the first portion of the flange, Sven allows ample time for it to dry before moving forward with additional steps. This patience and precision are key aspects of his successful boatbuilding methods.Step 4: Finishing Touches
Once the flange is fully dried, Sven removes the clamps carefully, ensuring no damage occurs during this process. He then moves on to attaching four more pieces onto these main frames, completing two pairs of flanges for the bulkhead hatches.The Final Touches
While two flanges form the primary support structure around the hatches, Sven mentions there are two additional pieces required at each end to ensure comprehensive protection. This attention to detail highlights his commitment to producing a durable and reliable design. “Sailing is about finding your path, whether it’s across an ocean or within yourself.” – Sven Yrvind In conclusion, making flanges around bulkhead hatches may seem complex at first glance, but by following Sven Yrvind’s meticulous process, enthusiasts can achieve professional-level results. Remember that the journey of boatbuilding is as rewarding as reaching your destination; it tests one’s patience and dedication. For those seeking to embark on this adventure or simply gain more insight into marine craftsmanship, Sven’s wisdom is invaluable.Once the flange is fully dried, Sven removes the clamps carefully, ensuring no damage occurs during this process. He then moves on to attaching four more pieces onto these main frames, completing two pairs of flanges for the bulkhead hatches.The Final Touches
While two flanges form the primary support structure around the hatches, Sven mentions there are two additional pieces required at each end to ensure comprehensive protection. This attention to detail highlights his commitment to producing a durable and reliable design. “Sailing is about finding your path, whether it’s across an ocean or within yourself.” – Sven Yrvind In conclusion, making flanges around bulkhead hatches may seem complex at first glance, but by following Sven Yrvind’s meticulous process, enthusiasts can achieve professional-level results. Remember that the journey of boatbuilding is as rewarding as reaching your destination; it tests one’s patience and dedication. For those seeking to embark on this adventure or simply gain more insight into marine craftsmanship, Sven’s wisdom is invaluable.Sven proceeds to apply glue along one edge of the flange, ensuring a secure bond when clamped into place. He emphasizes that this stage is crucial for maintaining the structural integrity of the flange, which in turn safeguards the living area beneath the canvas when hatches are open.Step 3: Allowing Time to Dry
After securely attaching the first portion of the flange, Sven allows ample time for it to dry before moving forward with additional steps. This patience and precision are key aspects of his successful boatbuilding methods.Step 4: Finishing Touches
Once the flange is fully dried, Sven removes the clamps carefully, ensuring no damage occurs during this process. He then moves on to attaching four more pieces onto these main frames, completing two pairs of flanges for the bulkhead hatches.The Final Touches
While two flanges form the primary support structure around the hatches, Sven mentions there are two additional pieces required at each end to ensure comprehensive protection. This attention to detail highlights his commitment to producing a durable and reliable design. “Sailing is about finding your path, whether it’s across an ocean or within yourself.” – Sven Yrvind In conclusion, making flanges around bulkhead hatches may seem complex at first glance, but by following Sven Yrvind’s meticulous process, enthusiasts can achieve professional-level results. Remember that the journey of boatbuilding is as rewarding as reaching your destination; it tests one’s patience and dedication. For those seeking to embark on this adventure or simply gain more insight into marine craftsmanship, Sven’s wisdom is invaluable.Sven begins by explaining that working on flanges vertically and horizontally is significantly easier than doing so in a flat position. To simplify the process further, he divides the task into two or three steps as suggested by fellow expert “for for.” This approach not only makes it more manageable but also allows for greater precision in crafting each component.Step 2: Applying Glue and Securing
Sven proceeds to apply glue along one edge of the flange, ensuring a secure bond when clamped into place. He emphasizes that this stage is crucial for maintaining the structural integrity of the flange, which in turn safeguards the living area beneath the canvas when hatches are open.Step 3: Allowing Time to Dry
After securely attaching the first portion of the flange, Sven allows ample time for it to dry before moving forward with additional steps. This patience and precision are key aspects of his successful boatbuilding methods.Step 4: Finishing Touches
Once the flange is fully dried, Sven removes the clamps carefully, ensuring no damage occurs during this process. He then moves on to attaching four more pieces onto these main frames, completing two pairs of flanges for the bulkhead hatches.The Final Touches
While two flanges form the primary support structure around the hatches, Sven mentions there are two additional pieces required at each end to ensure comprehensive protection. This attention to detail highlights his commitment to producing a durable and reliable design. “Sailing is about finding your path, whether it’s across an ocean or within yourself.” – Sven Yrvind In conclusion, making flanges around bulkhead hatches may seem complex at first glance, but by following Sven Yrvind’s meticulous process, enthusiasts can achieve professional-level results. Remember that the journey of boatbuilding is as rewarding as reaching your destination; it tests one’s patience and dedication. For those seeking to embark on this adventure or simply gain more insight into marine craftsmanship, Sven’s wisdom is invaluable.Sven Yrvind, a renowned yacht designer and sailor, shares valuable insights on creating flanges around bulkhead hatches for canvas protection in this enlightening video. By following his expert guidance, boat enthusiasts can ensure their living areas remain secure while allowing unhindered access through the hatches.Step 1: Starting with the Flange
Sven begins by explaining that working on flanges vertically and horizontally is significantly easier than doing so in a flat position. To simplify the process further, he divides the task into two or three steps as suggested by fellow expert “for for.” This approach not only makes it more manageable but also allows for greater precision in crafting each component.Step 2: Applying Glue and Securing
Sven proceeds to apply glue along one edge of the flange, ensuring a secure bond when clamped into place. He emphasizes that this stage is crucial for maintaining the structural integrity of the flange, which in turn safeguards the living area beneath the canvas when hatches are open.Step 3: Allowing Time to Dry
After securely attaching the first portion of the flange, Sven allows ample time for it to dry before moving forward with additional steps. This patience and precision are key aspects of his successful boatbuilding methods.Step 4: Finishing Touches
Once the flange is fully dried, Sven removes the clamps carefully, ensuring no damage occurs during this process. He then moves on to attaching four more pieces onto these main frames, completing two pairs of flanges for the bulkhead hatches.The Final Touches
While two flanges form the primary support structure around the hatches, Sven mentions there are two additional pieces required at each end to ensure comprehensive protection. This attention to detail highlights his commitment to producing a durable and reliable design. “Sailing is about finding your path, whether it’s across an ocean or within yourself.” – Sven Yrvind In conclusion, making flanges around bulkhead hatches may seem complex at first glance, but by following Sven Yrvind’s meticulous process, enthusiasts can achieve professional-level results. Remember that the journey of boatbuilding is as rewarding as reaching your destination; it tests one’s patience and dedication. For those seeking to embark on this adventure or simply gain more insight into marine craftsmanship, Sven’s wisdom is invaluable.Making Flanges Around Bulkhead Hatches for Canvas
Sven Yrvind, a renowned yacht designer and sailor, shares valuable insights on creating flanges around bulkhead hatches for canvas protection in this enlightening video. By following his expert guidance, boat enthusiasts can ensure their living areas remain secure while allowing unhindered access through the hatches.Step 1: Starting with the Flange
Sven begins by explaining that working on flanges vertically and horizontally is significantly easier than doing so in a flat position. To simplify the process further, he divides the task into two or three steps as suggested by fellow expert “for for.” This approach not only makes it more manageable but also allows for greater precision in crafting each component.Step 2: Applying Glue and Securing
Sven proceeds to apply glue along one edge of the flange, ensuring a secure bond when clamped into place. He emphasizes that this stage is crucial for maintaining the structural integrity of the flange, which in turn safeguards the living area beneath the canvas when hatches are open.Step 3: Allowing Time to Dry
After securely attaching the first portion of the flange, Sven allows ample time for it to dry before moving forward with additional steps. This patience and precision are key aspects of his successful boatbuilding methods.Step 4: Finishing Touches
Once the flange is fully dried, Sven removes the clamps carefully, ensuring no damage occurs during this process. He then moves on to attaching four more pieces onto these main frames, completing two pairs of flanges for the bulkhead hatches.The Final Touches
While two flanges form the primary support structure around the hatches, Sven mentions there are two additional pieces required at each end to ensure comprehensive protection. This attention to detail highlights his commitment to producing a durable and reliable design. “Sailing is about finding your path, whether it’s across an ocean or within yourself.” – Sven Yrvind In conclusion, making flanges around bulkhead hatches may seem complex at first glance, but by following Sven Yrvind’s meticulous process, enthusiasts can achieve professional-level results. Remember that the journey of boatbuilding is as rewarding as reaching your destination; it tests one’s patience and dedication. For those seeking to embark on this adventure or simply gain more insight into marine craftsmanship, Sven’s wisdom is invaluable.After securely attaching the first portion of the flange, Sven allows ample time for it to dry before moving forward with additional steps. This patience and precision are key aspects of his successful boatbuilding methods.Step 4: Finishing Touches
Once the flange is fully dried, Sven removes the clamps carefully, ensuring no damage occurs during this process. He then moves on to attaching four more pieces onto these main frames, completing two pairs of flanges for the bulkhead hatches.The Final Touches
While two flanges form the primary support structure around the hatches, Sven mentions there are two additional pieces required at each end to ensure comprehensive protection. This attention to detail highlights his commitment to producing a durable and reliable design. “Sailing is about finding your path, whether it’s across an ocean or within yourself.” – Sven Yrvind In conclusion, making flanges around bulkhead hatches may seem complex at first glance, but by following Sven Yrvind’s meticulous process, enthusiasts can achieve professional-level results. Remember that the journey of boatbuilding is as rewarding as reaching your destination; it tests one’s patience and dedication. For those seeking to embark on this adventure or simply gain more insight into marine craftsmanship, Sven’s wisdom is invaluable.Sven proceeds to apply glue along one edge of the flange, ensuring a secure bond when clamped into place. He emphasizes that this stage is crucial for maintaining the structural integrity of the flange, which in turn safeguards the living area beneath the canvas when hatches are open.Step 3: Allowing Time to Dry
After securely attaching the first portion of the flange, Sven allows ample time for it to dry before moving forward with additional steps. This patience and precision are key aspects of his successful boatbuilding methods.Step 4: Finishing Touches
Once the flange is fully dried, Sven removes the clamps carefully, ensuring no damage occurs during this process. He then moves on to attaching four more pieces onto these main frames, completing two pairs of flanges for the bulkhead hatches.The Final Touches
While two flanges form the primary support structure around the hatches, Sven mentions there are two additional pieces required at each end to ensure comprehensive protection. This attention to detail highlights his commitment to producing a durable and reliable design. “Sailing is about finding your path, whether it’s across an ocean or within yourself.” – Sven Yrvind In conclusion, making flanges around bulkhead hatches may seem complex at first glance, but by following Sven Yrvind’s meticulous process, enthusiasts can achieve professional-level results. Remember that the journey of boatbuilding is as rewarding as reaching your destination; it tests one’s patience and dedication. For those seeking to embark on this adventure or simply gain more insight into marine craftsmanship, Sven’s wisdom is invaluable.Sven begins by explaining that working on flanges vertically and horizontally is significantly easier than doing so in a flat position. To simplify the process further, he divides the task into two or three steps as suggested by fellow expert “for for.” This approach not only makes it more manageable but also allows for greater precision in crafting each component.Step 2: Applying Glue and Securing
Sven proceeds to apply glue along one edge of the flange, ensuring a secure bond when clamped into place. He emphasizes that this stage is crucial for maintaining the structural integrity of the flange, which in turn safeguards the living area beneath the canvas when hatches are open.Step 3: Allowing Time to Dry
After securely attaching the first portion of the flange, Sven allows ample time for it to dry before moving forward with additional steps. This patience and precision are key aspects of his successful boatbuilding methods.Step 4: Finishing Touches
Once the flange is fully dried, Sven removes the clamps carefully, ensuring no damage occurs during this process. He then moves on to attaching four more pieces onto these main frames, completing two pairs of flanges for the bulkhead hatches.The Final Touches
While two flanges form the primary support structure around the hatches, Sven mentions there are two additional pieces required at each end to ensure comprehensive protection. This attention to detail highlights his commitment to producing a durable and reliable design. “Sailing is about finding your path, whether it’s across an ocean or within yourself.” – Sven Yrvind In conclusion, making flanges around bulkhead hatches may seem complex at first glance, but by following Sven Yrvind’s meticulous process, enthusiasts can achieve professional-level results. Remember that the journey of boatbuilding is as rewarding as reaching your destination; it tests one’s patience and dedication. For those seeking to embark on this adventure or simply gain more insight into marine craftsmanship, Sven’s wisdom is invaluable.Sven Yrvind, a renowned yacht designer and sailor, shares valuable insights on creating flanges around bulkhead hatches for canvas protection in this enlightening video. By following his expert guidance, boat enthusiasts can ensure their living areas remain secure while allowing unhindered access through the hatches.Step 1: Starting with the Flange
Sven begins by explaining that working on flanges vertically and horizontally is significantly easier than doing so in a flat position. To simplify the process further, he divides the task into two or three steps as suggested by fellow expert “for for.” This approach not only makes it more manageable but also allows for greater precision in crafting each component.Step 2: Applying Glue and Securing
Sven proceeds to apply glue along one edge of the flange, ensuring a secure bond when clamped into place. He emphasizes that this stage is crucial for maintaining the structural integrity of the flange, which in turn safeguards the living area beneath the canvas when hatches are open.Step 3: Allowing Time to Dry
After securely attaching the first portion of the flange, Sven allows ample time for it to dry before moving forward with additional steps. This patience and precision are key aspects of his successful boatbuilding methods.Step 4: Finishing Touches
Once the flange is fully dried, Sven removes the clamps carefully, ensuring no damage occurs during this process. He then moves on to attaching four more pieces onto these main frames, completing two pairs of flanges for the bulkhead hatches.The Final Touches
While two flanges form the primary support structure around the hatches, Sven mentions there are two additional pieces required at each end to ensure comprehensive protection. This attention to detail highlights his commitment to producing a durable and reliable design. “Sailing is about finding your path, whether it’s across an ocean or within yourself.” – Sven Yrvind In conclusion, making flanges around bulkhead hatches may seem complex at first glance, but by following Sven Yrvind’s meticulous process, enthusiasts can achieve professional-level results. Remember that the journey of boatbuilding is as rewarding as reaching your destination; it tests one’s patience and dedication. For those seeking to embark on this adventure or simply gain more insight into marine craftsmanship, Sven’s wisdom is invaluable.Making Flanges Around Bulkhead Hatches for Canvas
Sven Yrvind, a renowned yacht designer and sailor, shares valuable insights on creating flanges around bulkhead hatches for canvas protection in this enlightening video. By following his expert guidance, boat enthusiasts can ensure their living areas remain secure while allowing unhindered access through the hatches.Step 1: Starting with the Flange
Sven begins by explaining that working on flanges vertically and horizontally is significantly easier than doing so in a flat position. To simplify the process further, he divides the task into two or three steps as suggested by fellow expert “for for.” This approach not only makes it more manageable but also allows for greater precision in crafting each component.Step 2: Applying Glue and Securing
Sven proceeds to apply glue along one edge of the flange, ensuring a secure bond when clamped into place. He emphasizes that this stage is crucial for maintaining the structural integrity of the flange, which in turn safeguards the living area beneath the canvas when hatches are open.Step 3: Allowing Time to Dry
After securely attaching the first portion of the flange, Sven allows ample time for it to dry before moving forward with additional steps. This patience and precision are key aspects of his successful boatbuilding methods.Step 4: Finishing Touches
Once the flange is fully dried, Sven removes the clamps carefully, ensuring no damage occurs during this process. He then moves on to attaching four more pieces onto these main frames, completing two pairs of flanges for the bulkhead hatches.The Final Touches
While two flanges form the primary support structure around the hatches, Sven mentions there are two additional pieces required at each end to ensure comprehensive protection. This attention to detail highlights his commitment to producing a durable and reliable design. “Sailing is about finding your path, whether it’s across an ocean or within yourself.” – Sven Yrvind In conclusion, making flanges around bulkhead hatches may seem complex at first glance, but by following Sven Yrvind’s meticulous process, enthusiasts can achieve professional-level results. Remember that the journey of boatbuilding is as rewarding as reaching your destination; it tests one’s patience and dedication. For those seeking to embark on this adventure or simply gain more insight into marine craftsmanship, Sven’s wisdom is invaluable.Once the flange is fully dried, Sven removes the clamps carefully, ensuring no damage occurs during this process. He then moves on to attaching four more pieces onto these main frames, completing two pairs of flanges for the bulkhead hatches.The Final Touches
While two flanges form the primary support structure around the hatches, Sven mentions there are two additional pieces required at each end to ensure comprehensive protection. This attention to detail highlights his commitment to producing a durable and reliable design. “Sailing is about finding your path, whether it’s across an ocean or within yourself.” – Sven Yrvind In conclusion, making flanges around bulkhead hatches may seem complex at first glance, but by following Sven Yrvind’s meticulous process, enthusiasts can achieve professional-level results. Remember that the journey of boatbuilding is as rewarding as reaching your destination; it tests one’s patience and dedication. For those seeking to embark on this adventure or simply gain more insight into marine craftsmanship, Sven’s wisdom is invaluable.After securely attaching the first portion of the flange, Sven allows ample time for it to dry before moving forward with additional steps. This patience and precision are key aspects of his successful boatbuilding methods.Step 4: Finishing Touches
Once the flange is fully dried, Sven removes the clamps carefully, ensuring no damage occurs during this process. He then moves on to attaching four more pieces onto these main frames, completing two pairs of flanges for the bulkhead hatches.The Final Touches
While two flanges form the primary support structure around the hatches, Sven mentions there are two additional pieces required at each end to ensure comprehensive protection. This attention to detail highlights his commitment to producing a durable and reliable design. “Sailing is about finding your path, whether it’s across an ocean or within yourself.” – Sven Yrvind In conclusion, making flanges around bulkhead hatches may seem complex at first glance, but by following Sven Yrvind’s meticulous process, enthusiasts can achieve professional-level results. Remember that the journey of boatbuilding is as rewarding as reaching your destination; it tests one’s patience and dedication. For those seeking to embark on this adventure or simply gain more insight into marine craftsmanship, Sven’s wisdom is invaluable.Sven proceeds to apply glue along one edge of the flange, ensuring a secure bond when clamped into place. He emphasizes that this stage is crucial for maintaining the structural integrity of the flange, which in turn safeguards the living area beneath the canvas when hatches are open.Step 3: Allowing Time to Dry
After securely attaching the first portion of the flange, Sven allows ample time for it to dry before moving forward with additional steps. This patience and precision are key aspects of his successful boatbuilding methods.Step 4: Finishing Touches
Once the flange is fully dried, Sven removes the clamps carefully, ensuring no damage occurs during this process. He then moves on to attaching four more pieces onto these main frames, completing two pairs of flanges for the bulkhead hatches.The Final Touches
While two flanges form the primary support structure around the hatches, Sven mentions there are two additional pieces required at each end to ensure comprehensive protection. This attention to detail highlights his commitment to producing a durable and reliable design. “Sailing is about finding your path, whether it’s across an ocean or within yourself.” – Sven Yrvind In conclusion, making flanges around bulkhead hatches may seem complex at first glance, but by following Sven Yrvind’s meticulous process, enthusiasts can achieve professional-level results. Remember that the journey of boatbuilding is as rewarding as reaching your destination; it tests one’s patience and dedication. For those seeking to embark on this adventure or simply gain more insight into marine craftsmanship, Sven’s wisdom is invaluable.Sven begins by explaining that working on flanges vertically and horizontally is significantly easier than doing so in a flat position. To simplify the process further, he divides the task into two or three steps as suggested by fellow expert “for for.” This approach not only makes it more manageable but also allows for greater precision in crafting each component.Step 2: Applying Glue and Securing
Sven proceeds to apply glue along one edge of the flange, ensuring a secure bond when clamped into place. He emphasizes that this stage is crucial for maintaining the structural integrity of the flange, which in turn safeguards the living area beneath the canvas when hatches are open.Step 3: Allowing Time to Dry
After securely attaching the first portion of the flange, Sven allows ample time for it to dry before moving forward with additional steps. This patience and precision are key aspects of his successful boatbuilding methods.Step 4: Finishing Touches
Once the flange is fully dried, Sven removes the clamps carefully, ensuring no damage occurs during this process. He then moves on to attaching four more pieces onto these main frames, completing two pairs of flanges for the bulkhead hatches.The Final Touches
While two flanges form the primary support structure around the hatches, Sven mentions there are two additional pieces required at each end to ensure comprehensive protection. This attention to detail highlights his commitment to producing a durable and reliable design. “Sailing is about finding your path, whether it’s across an ocean or within yourself.” – Sven Yrvind In conclusion, making flanges around bulkhead hatches may seem complex at first glance, but by following Sven Yrvind’s meticulous process, enthusiasts can achieve professional-level results. Remember that the journey of boatbuilding is as rewarding as reaching your destination; it tests one’s patience and dedication. For those seeking to embark on this adventure or simply gain more insight into marine craftsmanship, Sven’s wisdom is invaluable.Sven Yrvind, a renowned yacht designer and sailor, shares valuable insights on creating flanges around bulkhead hatches for canvas protection in this enlightening video. By following his expert guidance, boat enthusiasts can ensure their living areas remain secure while allowing unhindered access through the hatches.Step 1: Starting with the Flange
Sven begins by explaining that working on flanges vertically and horizontally is significantly easier than doing so in a flat position. To simplify the process further, he divides the task into two or three steps as suggested by fellow expert “for for.” This approach not only makes it more manageable but also allows for greater precision in crafting each component.Step 2: Applying Glue and Securing
Sven proceeds to apply glue along one edge of the flange, ensuring a secure bond when clamped into place. He emphasizes that this stage is crucial for maintaining the structural integrity of the flange, which in turn safeguards the living area beneath the canvas when hatches are open.Step 3: Allowing Time to Dry
After securely attaching the first portion of the flange, Sven allows ample time for it to dry before moving forward with additional steps. This patience and precision are key aspects of his successful boatbuilding methods.Step 4: Finishing Touches
Once the flange is fully dried, Sven removes the clamps carefully, ensuring no damage occurs during this process. He then moves on to attaching four more pieces onto these main frames, completing two pairs of flanges for the bulkhead hatches.The Final Touches
While two flanges form the primary support structure around the hatches, Sven mentions there are two additional pieces required at each end to ensure comprehensive protection. This attention to detail highlights his commitment to producing a durable and reliable design. “Sailing is about finding your path, whether it’s across an ocean or within yourself.” – Sven Yrvind In conclusion, making flanges around bulkhead hatches may seem complex at first glance, but by following Sven Yrvind’s meticulous process, enthusiasts can achieve professional-level results. Remember that the journey of boatbuilding is as rewarding as reaching your destination; it tests one’s patience and dedication. For those seeking to embark on this adventure or simply gain more insight into marine craftsmanship, Sven’s wisdom is invaluable.Making Flanges Around Bulkhead Hatches for Canvas
Sven Yrvind, a renowned yacht designer and sailor, shares valuable insights on creating flanges around bulkhead hatches for canvas protection in this enlightening video. By following his expert guidance, boat enthusiasts can ensure their living areas remain secure while allowing unhindered access through the hatches.Step 1: Starting with the Flange
Sven begins by explaining that working on flanges vertically and horizontally is significantly easier than doing so in a flat position. To simplify the process further, he divides the task into two or three steps as suggested by fellow expert “for for.” This approach not only makes it more manageable but also allows for greater precision in crafting each component.Step 2: Applying Glue and Securing
Sven proceeds to apply glue along one edge of the flange, ensuring a secure bond when clamped into place. He emphasizes that this stage is crucial for maintaining the structural integrity of the flange, which in turn safeguards the living area beneath the canvas when hatches are open.Step 3: Allowing Time to Dry
After securely attaching the first portion of the flange, Sven allows ample time for it to dry before moving forward with additional steps. This patience and precision are key aspects of his successful boatbuilding methods.Step 4: Finishing Touches
Once the flange is fully dried, Sven removes the clamps carefully, ensuring no damage occurs during this process. He then moves on to attaching four more pieces onto these main frames, completing two pairs of flanges for the bulkhead hatches.The Final Touches
While two flanges form the primary support structure around the hatches, Sven mentions there are two additional pieces required at each end to ensure comprehensive protection. This attention to detail highlights his commitment to producing a durable and reliable design. “Sailing is about finding your path, whether it’s across an ocean or within yourself.” – Sven Yrvind In conclusion, making flanges around bulkhead hatches may seem complex at first glance, but by following Sven Yrvind’s meticulous process, enthusiasts can achieve professional-level results. Remember that the journey of boatbuilding is as rewarding as reaching your destination; it tests one’s patience and dedication. For those seeking to embark on this adventure or simply gain more insight into marine craftsmanship, Sven’s wisdom is invaluable.Sven Yrvind, a renowned yacht designer and sailor, shares valuable insights on creating flanges around bulkhead hatches for canvas protection in this enlightening video. By following his expert guidance, boat enthusiasts can ensure their living areas remain secure while allowing unhindered access through the hatches.Step 1: Starting with the Flange
Sven begins by explaining that working on flanges vertically and horizontally is significantly easier than doing so in a flat position. To simplify the process further, he divides the task into two or three steps as suggested by fellow expert “for for.” This approach not only makes it more manageable but also allows for greater precision in crafting each component.Step 2: Applying Glue and Securing
Sven proceeds to apply glue along one edge of the flange, ensuring a secure bond when clamped into place. He emphasizes that this stage is crucial for maintaining the structural integrity of the flange, which in turn safeguards the living area beneath the canvas when hatches are open.Step 3: Allowing Time to Dry
After securely attaching the first portion of the flange, Sven allows ample time for it to dry before moving forward with additional steps. This patience and precision are key aspects of his successful boatbuilding methods.Step 4: Finishing Touches
Once the flange is fully dried, Sven removes the clamps carefully, ensuring no damage occurs during this process. He then moves on to attaching four more pieces onto these main frames, completing two pairs of flanges for the bulkhead hatches.The Final Touches
While two flanges form the primary support structure around the hatches, Sven mentions there are two additional pieces required at each end to ensure comprehensive protection. This attention to detail highlights his commitment to producing a durable and reliable design. “Sailing is about finding your path, whether it’s across an ocean or within yourself.” – Sven Yrvind In conclusion, making flanges around bulkhead hatches may seem complex at first glance, but by following Sven Yrvind’s meticulous process, enthusiasts can achieve professional-level results. Remember that the journey of boatbuilding is as rewarding as reaching your destination; it tests one’s patience and dedication. For those seeking to embark on this adventure or simply gain more insight into marine craftsmanship, Sven’s wisdom is invaluable.Sven proceeds to apply glue along one edge of the flange, ensuring a secure bond when clamped into place. He emphasizes that this stage is crucial for maintaining the structural integrity of the flange, which in turn safeguards the living area beneath the canvas when hatches are open.Step 3: Allowing Time to Dry
After securely attaching the first portion of the flange, Sven allows ample time for it to dry before moving forward with additional steps. This patience and precision are key aspects of his successful boatbuilding methods.Step 4: Finishing Touches
Once the flange is fully dried, Sven removes the clamps carefully, ensuring no damage occurs during this process. He then moves on to attaching four more pieces onto these main frames, completing two pairs of flanges for the bulkhead hatches.The Final Touches
While two flanges form the primary support structure around the hatches, Sven mentions there are two additional pieces required at each end to ensure comprehensive protection. This attention to detail highlights his commitment to producing a durable and reliable design. “Sailing is about finding your path, whether it’s across an ocean or within yourself.” – Sven Yrvind In conclusion, making flanges around bulkhead hatches may seem complex at first glance, but by following Sven Yrvind’s meticulous process, enthusiasts can achieve professional-level results. Remember that the journey of boatbuilding is as rewarding as reaching your destination; it tests one’s patience and dedication. For those seeking to embark on this adventure or simply gain more insight into marine craftsmanship, Sven’s wisdom is invaluable.Sven Yrvind, a renowned yacht designer and sailor, shares valuable insights on creating flanges around bulkhead hatches for canvas protection in this enlightening video. By following his expert guidance, boat enthusiasts can ensure their living areas remain secure while allowing unhindered access through the hatches.Step 1: Starting with the Flange
Sven begins by explaining that working on flanges vertically and horizontally is significantly easier than doing so in a flat position. To simplify the process further, he divides the task into two or three steps as suggested by fellow expert “for for.” This approach not only makes it more manageable but also allows for greater precision in crafting each component.Step 2: Applying Glue and Securing
Sven proceeds to apply glue along one edge of the flange, ensuring a secure bond when clamped into place. He emphasizes that this stage is crucial for maintaining the structural integrity of the flange, which in turn safeguards the living area beneath the canvas when hatches are open.Step 3: Allowing Time to Dry
After securely attaching the first portion of the flange, Sven allows ample time for it to dry before moving forward with additional steps. This patience and precision are key aspects of his successful boatbuilding methods.Step 4: Finishing Touches
Once the flange is fully dried, Sven removes the clamps carefully, ensuring no damage occurs during this process. He then moves on to attaching four more pieces onto these main frames, completing two pairs of flanges for the bulkhead hatches.The Final Touches
While two flanges form the primary support structure around the hatches, Sven mentions there are two additional pieces required at each end to ensure comprehensive protection. This attention to detail highlights his commitment to producing a durable and reliable design. “Sailing is about finding your path, whether it’s across an ocean or within yourself.” – Sven Yrvind In conclusion, making flanges around bulkhead hatches may seem complex at first glance, but by following Sven Yrvind’s meticulous process, enthusiasts can achieve professional-level results. Remember that the journey of boatbuilding is as rewarding as reaching your destination; it tests one’s patience and dedication. For those seeking to embark on this adventure or simply gain more insight into marine craftsmanship, Sven’s wisdom is invaluable.Making Flanges Around Bulkhead Hatches for Canvas
Sven Yrvind, a renowned yacht designer and sailor, shares valuable insights on creating flanges around bulkhead hatches for canvas protection in this enlightening video. By following his expert guidance, boat enthusiasts can ensure their living areas remain secure while allowing unhindered access through the hatches.Step 1: Starting with the Flange
Sven begins by explaining that working on flanges vertically and horizontally is significantly easier than doing so in a flat position. To simplify the process further, he divides the task into two or three steps as suggested by fellow expert “for for.” This approach not only makes it more manageable but also allows for greater precision in crafting each component.Step 2: Applying Glue and Securing
Sven proceeds to apply glue along one edge of the flange, ensuring a secure bond when clamped into place. He emphasizes that this stage is crucial for maintaining the structural integrity of the flange, which in turn safeguards the living area beneath the canvas when hatches are open.Step 3: Allowing Time to Dry
After securely attaching the first portion of the flange, Sven allows ample time for it to dry before moving forward with additional steps. This patience and precision are key aspects of his successful boatbuilding methods.Step 4: Finishing Touches
Once the flange is fully dried, Sven removes the clamps carefully, ensuring no damage occurs during this process. He then moves on to attaching four more pieces onto these main frames, completing two pairs of flanges for the bulkhead hatches.The Final Touches
While two flanges form the primary support structure around the hatches, Sven mentions there are two additional pieces required at each end to ensure comprehensive protection. This attention to detail highlights his commitment to producing a durable and reliable design. “Sailing is about finding your path, whether it’s across an ocean or within yourself.” – Sven Yrvind In conclusion, making flanges around bulkhead hatches may seem complex at first glance, but by following Sven Yrvind’s meticulous process, enthusiasts can achieve professional-level results. Remember that the journey of boatbuilding is as rewarding as reaching your destination; it tests one’s patience and dedication. For those seeking to embark on this adventure or simply gain more insight into marine craftsmanship, Sven’s wisdom is invaluable.Sven begins by explaining that working on flanges vertically and horizontally is significantly easier than doing so in a flat position. To simplify the process further, he divides the task into two or three steps as suggested by fellow expert “for for.” This approach not only makes it more manageable but also allows for greater precision in crafting each component.Step 2: Applying Glue and Securing
Sven proceeds to apply glue along one edge of the flange, ensuring a secure bond when clamped into place. He emphasizes that this stage is crucial for maintaining the structural integrity of the flange, which in turn safeguards the living area beneath the canvas when hatches are open.Step 3: Allowing Time to Dry
After securely attaching the first portion of the flange, Sven allows ample time for it to dry before moving forward with additional steps. This patience and precision are key aspects of his successful boatbuilding methods.Step 4: Finishing Touches
Once the flange is fully dried, Sven removes the clamps carefully, ensuring no damage occurs during this process. He then moves on to attaching four more pieces onto these main frames, completing two pairs of flanges for the bulkhead hatches.The Final Touches
While two flanges form the primary support structure around the hatches, Sven mentions there are two additional pieces required at each end to ensure comprehensive protection. This attention to detail highlights his commitment to producing a durable and reliable design. “Sailing is about finding your path, whether it’s across an ocean or within yourself.” – Sven Yrvind In conclusion, making flanges around bulkhead hatches may seem complex at first glance, but by following Sven Yrvind’s meticulous process, enthusiasts can achieve professional-level results. Remember that the journey of boatbuilding is as rewarding as reaching your destination; it tests one’s patience and dedication. For those seeking to embark on this adventure or simply gain more insight into marine craftsmanship, Sven’s wisdom is invaluable.Sven Yrvind, a renowned yacht designer and sailor, shares valuable insights on creating flanges around bulkhead hatches for canvas protection in this enlightening video. By following his expert guidance, boat enthusiasts can ensure their living areas remain secure while allowing unhindered access through the hatches.Step 1: Starting with the Flange
Sven begins by explaining that working on flanges vertically and horizontally is significantly easier than doing so in a flat position. To simplify the process further, he divides the task into two or three steps as suggested by fellow expert “for for.” This approach not only makes it more manageable but also allows for greater precision in crafting each component.Step 2: Applying Glue and Securing
Sven proceeds to apply glue along one edge of the flange, ensuring a secure bond when clamped into place. He emphasizes that this stage is crucial for maintaining the structural integrity of the flange, which in turn safeguards the living area beneath the canvas when hatches are open.Step 3: Allowing Time to Dry
After securely attaching the first portion of the flange, Sven allows ample time for it to dry before moving forward with additional steps. This patience and precision are key aspects of his successful boatbuilding methods.Step 4: Finishing Touches
Once the flange is fully dried, Sven removes the clamps carefully, ensuring no damage occurs during this process. He then moves on to attaching four more pieces onto these main frames, completing two pairs of flanges for the bulkhead hatches.The Final Touches
While two flanges form the primary support structure around the hatches, Sven mentions there are two additional pieces required at each end to ensure comprehensive protection. This attention to detail highlights his commitment to producing a durable and reliable design. “Sailing is about finding your path, whether it’s across an ocean or within yourself.” – Sven Yrvind In conclusion, making flanges around bulkhead hatches may seem complex at first glance, but by following Sven Yrvind’s meticulous process, enthusiasts can achieve professional-level results. Remember that the journey of boatbuilding is as rewarding as reaching your destination; it tests one’s patience and dedication. For those seeking to embark on this adventure or simply gain more insight into marine craftsmanship, Sven’s wisdom is invaluable.Making Flanges Around Bulkhead Hatches for Canvas
Sven Yrvind, a renowned yacht designer and sailor, shares valuable insights on creating flanges around bulkhead hatches for canvas protection in this enlightening video. By following his expert guidance, boat enthusiasts can ensure their living areas remain secure while allowing unhindered access through the hatches.Step 1: Starting with the Flange
Sven begins by explaining that working on flanges vertically and horizontally is significantly easier than doing so in a flat position. To simplify the process further, he divides the task into two or three steps as suggested by fellow expert “for for.” This approach not only makes it more manageable but also allows for greater precision in crafting each component.Step 2: Applying Glue and Securing
Sven proceeds to apply glue along one edge of the flange, ensuring a secure bond when clamped into place. He emphasizes that this stage is crucial for maintaining the structural integrity of the flange, which in turn safeguards the living area beneath the canvas when hatches are open.Step 3: Allowing Time to Dry
After securely attaching the first portion of the flange, Sven allows ample time for it to dry before moving forward with additional steps. This patience and precision are key aspects of his successful boatbuilding methods.Step 4: Finishing Touches
Once the flange is fully dried, Sven removes the clamps carefully, ensuring no damage occurs during this process. He then moves on to attaching four more pieces onto these main frames, completing two pairs of flanges for the bulkhead hatches.The Final Touches
While two flanges form the primary support structure around the hatches, Sven mentions there are two additional pieces required at each end to ensure comprehensive protection. This attention to detail highlights his commitment to producing a durable and reliable design. “Sailing is about finding your path, whether it’s across an ocean or within yourself.” – Sven Yrvind In conclusion, making flanges around bulkhead hatches may seem complex at first glance, but by following Sven Yrvind’s meticulous process, enthusiasts can achieve professional-level results. Remember that the journey of boatbuilding is as rewarding as reaching your destination; it tests one’s patience and dedication. For those seeking to embark on this adventure or simply gain more insight into marine craftsmanship, Sven’s wisdom is invaluable.Once the flange is fully dried, Sven removes the clamps carefully, ensuring no damage occurs during this process. He then moves on to attaching four more pieces onto these main frames, completing two pairs of flanges for the bulkhead hatches.The Final Touches
While two flanges form the primary support structure around the hatches, Sven mentions there are two additional pieces required at each end to ensure comprehensive protection. This attention to detail highlights his commitment to producing a durable and reliable design. “Sailing is about finding your path, whether it’s across an ocean or within yourself.” – Sven Yrvind In conclusion, making flanges around bulkhead hatches may seem complex at first glance, but by following Sven Yrvind’s meticulous process, enthusiasts can achieve professional-level results. Remember that the journey of boatbuilding is as rewarding as reaching your destination; it tests one’s patience and dedication. For those seeking to embark on this adventure or simply gain more insight into marine craftsmanship, Sven’s wisdom is invaluable.Sven begins by explaining that working on flanges vertically and horizontally is significantly easier than doing so in a flat position. To simplify the process further, he divides the task into two or three steps as suggested by fellow expert “for for.” This approach not only makes it more manageable but also allows for greater precision in crafting each component.Step 2: Applying Glue and Securing
Sven proceeds to apply glue along one edge of the flange, ensuring a secure bond when clamped into place. He emphasizes that this stage is crucial for maintaining the structural integrity of the flange, which in turn safeguards the living area beneath the canvas when hatches are open.Step 3: Allowing Time to Dry
After securely attaching the first portion of the flange, Sven allows ample time for it to dry before moving forward with additional steps. This patience and precision are key aspects of his successful boatbuilding methods.Step 4: Finishing Touches
Once the flange is fully dried, Sven removes the clamps carefully, ensuring no damage occurs during this process. He then moves on to attaching four more pieces onto these main frames, completing two pairs of flanges for the bulkhead hatches.The Final Touches
While two flanges form the primary support structure around the hatches, Sven mentions there are two additional pieces required at each end to ensure comprehensive protection. This attention to detail highlights his commitment to producing a durable and reliable design. “Sailing is about finding your path, whether it’s across an ocean or within yourself.” – Sven Yrvind In conclusion, making flanges around bulkhead hatches may seem complex at first glance, but by following Sven Yrvind’s meticulous process, enthusiasts can achieve professional-level results. Remember that the journey of boatbuilding is as rewarding as reaching your destination; it tests one’s patience and dedication. For those seeking to embark on this adventure or simply gain more insight into marine craftsmanship, Sven’s wisdom is invaluable.Sven Yrvind, a renowned yacht designer and sailor, shares valuable insights on creating flanges around bulkhead hatches for canvas protection in this enlightening video. By following his expert guidance, boat enthusiasts can ensure their living areas remain secure while allowing unhindered access through the hatches.Step 1: Starting with the Flange
Sven begins by explaining that working on flanges vertically and horizontally is significantly easier than doing so in a flat position. To simplify the process further, he divides the task into two or three steps as suggested by fellow expert “for for.” This approach not only makes it more manageable but also allows for greater precision in crafting each component.Step 2: Applying Glue and Securing
Sven proceeds to apply glue along one edge of the flange, ensuring a secure bond when clamped into place. He emphasizes that this stage is crucial for maintaining the structural integrity of the flange, which in turn safeguards the living area beneath the canvas when hatches are open.Step 3: Allowing Time to Dry
After securely attaching the first portion of the flange, Sven allows ample time for it to dry before moving forward with additional steps. This patience and precision are key aspects of his successful boatbuilding methods.Step 4: Finishing Touches
Once the flange is fully dried, Sven removes the clamps carefully, ensuring no damage occurs during this process. He then moves on to attaching four more pieces onto these main frames, completing two pairs of flanges for the bulkhead hatches.The Final Touches
While two flanges form the primary support structure around the hatches, Sven mentions there are two additional pieces required at each end to ensure comprehensive protection. This attention to detail highlights his commitment to producing a durable and reliable design. “Sailing is about finding your path, whether it’s across an ocean or within yourself.” – Sven Yrvind In conclusion, making flanges around bulkhead hatches may seem complex at first glance, but by following Sven Yrvind’s meticulous process, enthusiasts can achieve professional-level results. Remember that the journey of boatbuilding is as rewarding as reaching your destination; it tests one’s patience and dedication. For those seeking to embark on this adventure or simply gain more insight into marine craftsmanship, Sven’s wisdom is invaluable.Making Flanges Around Bulkhead Hatches for Canvas
Sven Yrvind, a renowned yacht designer and sailor, shares valuable insights on creating flanges around bulkhead hatches for canvas protection in this enlightening video. By following his expert guidance, boat enthusiasts can ensure their living areas remain secure while allowing unhindered access through the hatches.Step 1: Starting with the Flange
Sven begins by explaining that working on flanges vertically and horizontally is significantly easier than doing so in a flat position. To simplify the process further, he divides the task into two or three steps as suggested by fellow expert “for for.” This approach not only makes it more manageable but also allows for greater precision in crafting each component.Step 2: Applying Glue and Securing
Sven proceeds to apply glue along one edge of the flange, ensuring a secure bond when clamped into place. He emphasizes that this stage is crucial for maintaining the structural integrity of the flange, which in turn safeguards the living area beneath the canvas when hatches are open.Step 3: Allowing Time to Dry
After securely attaching the first portion of the flange, Sven allows ample time for it to dry before moving forward with additional steps. This patience and precision are key aspects of his successful boatbuilding methods.Step 4: Finishing Touches
Once the flange is fully dried, Sven removes the clamps carefully, ensuring no damage occurs during this process. He then moves on to attaching four more pieces onto these main frames, completing two pairs of flanges for the bulkhead hatches.The Final Touches
While two flanges form the primary support structure around the hatches, Sven mentions there are two additional pieces required at each end to ensure comprehensive protection. This attention to detail highlights his commitment to producing a durable and reliable design. “Sailing is about finding your path, whether it’s across an ocean or within yourself.” – Sven Yrvind In conclusion, making flanges around bulkhead hatches may seem complex at first glance, but by following Sven Yrvind’s meticulous process, enthusiasts can achieve professional-level results. Remember that the journey of boatbuilding is as rewarding as reaching your destination; it tests one’s patience and dedication. For those seeking to embark on this adventure or simply gain more insight into marine craftsmanship, Sven’s wisdom is invaluable.After securely attaching the first portion of the flange, Sven allows ample time for it to dry before moving forward with additional steps. This patience and precision are key aspects of his successful boatbuilding methods.Step 4: Finishing Touches
Once the flange is fully dried, Sven removes the clamps carefully, ensuring no damage occurs during this process. He then moves on to attaching four more pieces onto these main frames, completing two pairs of flanges for the bulkhead hatches.The Final Touches
While two flanges form the primary support structure around the hatches, Sven mentions there are two additional pieces required at each end to ensure comprehensive protection. This attention to detail highlights his commitment to producing a durable and reliable design. “Sailing is about finding your path, whether it’s across an ocean or within yourself.” – Sven Yrvind In conclusion, making flanges around bulkhead hatches may seem complex at first glance, but by following Sven Yrvind’s meticulous process, enthusiasts can achieve professional-level results. Remember that the journey of boatbuilding is as rewarding as reaching your destination; it tests one’s patience and dedication. For those seeking to embark on this adventure or simply gain more insight into marine craftsmanship, Sven’s wisdom is invaluable.Sven begins by explaining that working on flanges vertically and horizontally is significantly easier than doing so in a flat position. To simplify the process further, he divides the task into two or three steps as suggested by fellow expert “for for.” This approach not only makes it more manageable but also allows for greater precision in crafting each component.Step 2: Applying Glue and Securing
Sven proceeds to apply glue along one edge of the flange, ensuring a secure bond when clamped into place. He emphasizes that this stage is crucial for maintaining the structural integrity of the flange, which in turn safeguards the living area beneath the canvas when hatches are open.Step 3: Allowing Time to Dry
After securely attaching the first portion of the flange, Sven allows ample time for it to dry before moving forward with additional steps. This patience and precision are key aspects of his successful boatbuilding methods.Step 4: Finishing Touches
Once the flange is fully dried, Sven removes the clamps carefully, ensuring no damage occurs during this process. He then moves on to attaching four more pieces onto these main frames, completing two pairs of flanges for the bulkhead hatches.The Final Touches
While two flanges form the primary support structure around the hatches, Sven mentions there are two additional pieces required at each end to ensure comprehensive protection. This attention to detail highlights his commitment to producing a durable and reliable design. “Sailing is about finding your path, whether it’s across an ocean or within yourself.” – Sven Yrvind In conclusion, making flanges around bulkhead hatches may seem complex at first glance, but by following Sven Yrvind’s meticulous process, enthusiasts can achieve professional-level results. Remember that the journey of boatbuilding is as rewarding as reaching your destination; it tests one’s patience and dedication. For those seeking to embark on this adventure or simply gain more insight into marine craftsmanship, Sven’s wisdom is invaluable.Sven Yrvind, a renowned yacht designer and sailor, shares valuable insights on creating flanges around bulkhead hatches for canvas protection in this enlightening video. By following his expert guidance, boat enthusiasts can ensure their living areas remain secure while allowing unhindered access through the hatches.Step 1: Starting with the Flange
Sven begins by explaining that working on flanges vertically and horizontally is significantly easier than doing so in a flat position. To simplify the process further, he divides the task into two or three steps as suggested by fellow expert “for for.” This approach not only makes it more manageable but also allows for greater precision in crafting each component.Step 2: Applying Glue and Securing
Sven proceeds to apply glue along one edge of the flange, ensuring a secure bond when clamped into place. He emphasizes that this stage is crucial for maintaining the structural integrity of the flange, which in turn safeguards the living area beneath the canvas when hatches are open.Step 3: Allowing Time to Dry
After securely attaching the first portion of the flange, Sven allows ample time for it to dry before moving forward with additional steps. This patience and precision are key aspects of his successful boatbuilding methods.Step 4: Finishing Touches
Once the flange is fully dried, Sven removes the clamps carefully, ensuring no damage occurs during this process. He then moves on to attaching four more pieces onto these main frames, completing two pairs of flanges for the bulkhead hatches.The Final Touches
While two flanges form the primary support structure around the hatches, Sven mentions there are two additional pieces required at each end to ensure comprehensive protection. This attention to detail highlights his commitment to producing a durable and reliable design. “Sailing is about finding your path, whether it’s across an ocean or within yourself.” – Sven Yrvind In conclusion, making flanges around bulkhead hatches may seem complex at first glance, but by following Sven Yrvind’s meticulous process, enthusiasts can achieve professional-level results. Remember that the journey of boatbuilding is as rewarding as reaching your destination; it tests one’s patience and dedication. For those seeking to embark on this adventure or simply gain more insight into marine craftsmanship, Sven’s wisdom is invaluable.Making Flanges Around Bulkhead Hatches for Canvas
Sven Yrvind, a renowned yacht designer and sailor, shares valuable insights on creating flanges around bulkhead hatches for canvas protection in this enlightening video. By following his expert guidance, boat enthusiasts can ensure their living areas remain secure while allowing unhindered access through the hatches.Step 1: Starting with the Flange
Sven begins by explaining that working on flanges vertically and horizontally is significantly easier than doing so in a flat position. To simplify the process further, he divides the task into two or three steps as suggested by fellow expert “for for.” This approach not only makes it more manageable but also allows for greater precision in crafting each component.Step 2: Applying Glue and Securing
Sven proceeds to apply glue along one edge of the flange, ensuring a secure bond when clamped into place. He emphasizes that this stage is crucial for maintaining the structural integrity of the flange, which in turn safeguards the living area beneath the canvas when hatches are open.Step 3: Allowing Time to Dry
After securely attaching the first portion of the flange, Sven allows ample time for it to dry before moving forward with additional steps. This patience and precision are key aspects of his successful boatbuilding methods.Step 4: Finishing Touches
Once the flange is fully dried, Sven removes the clamps carefully, ensuring no damage occurs during this process. He then moves on to attaching four more pieces onto these main frames, completing two pairs of flanges for the bulkhead hatches.The Final Touches
While two flanges form the primary support structure around the hatches, Sven mentions there are two additional pieces required at each end to ensure comprehensive protection. This attention to detail highlights his commitment to producing a durable and reliable design. “Sailing is about finding your path, whether it’s across an ocean or within yourself.” – Sven Yrvind In conclusion, making flanges around bulkhead hatches may seem complex at first glance, but by following Sven Yrvind’s meticulous process, enthusiasts can achieve professional-level results. Remember that the journey of boatbuilding is as rewarding as reaching your destination; it tests one’s patience and dedication. For those seeking to embark on this adventure or simply gain more insight into marine craftsmanship, Sven’s wisdom is invaluable.Sven proceeds to apply glue along one edge of the flange, ensuring a secure bond when clamped into place. He emphasizes that this stage is crucial for maintaining the structural integrity of the flange, which in turn safeguards the living area beneath the canvas when hatches are open.Step 3: Allowing Time to Dry
After securely attaching the first portion of the flange, Sven allows ample time for it to dry before moving forward with additional steps. This patience and precision are key aspects of his successful boatbuilding methods.Step 4: Finishing Touches
Once the flange is fully dried, Sven removes the clamps carefully, ensuring no damage occurs during this process. He then moves on to attaching four more pieces onto these main frames, completing two pairs of flanges for the bulkhead hatches.The Final Touches
While two flanges form the primary support structure around the hatches, Sven mentions there are two additional pieces required at each end to ensure comprehensive protection. This attention to detail highlights his commitment to producing a durable and reliable design. “Sailing is about finding your path, whether it’s across an ocean or within yourself.” – Sven Yrvind In conclusion, making flanges around bulkhead hatches may seem complex at first glance, but by following Sven Yrvind’s meticulous process, enthusiasts can achieve professional-level results. Remember that the journey of boatbuilding is as rewarding as reaching your destination; it tests one’s patience and dedication. For those seeking to embark on this adventure or simply gain more insight into marine craftsmanship, Sven’s wisdom is invaluable.Sven begins by explaining that working on flanges vertically and horizontally is significantly easier than doing so in a flat position. To simplify the process further, he divides the task into two or three steps as suggested by fellow expert “for for.” This approach not only makes it more manageable but also allows for greater precision in crafting each component.Step 2: Applying Glue and Securing
Sven proceeds to apply glue along one edge of the flange, ensuring a secure bond when clamped into place. He emphasizes that this stage is crucial for maintaining the structural integrity of the flange, which in turn safeguards the living area beneath the canvas when hatches are open.Step 3: Allowing Time to Dry
After securely attaching the first portion of the flange, Sven allows ample time for it to dry before moving forward with additional steps. This patience and precision are key aspects of his successful boatbuilding methods.Step 4: Finishing Touches
Once the flange is fully dried, Sven removes the clamps carefully, ensuring no damage occurs during this process. He then moves on to attaching four more pieces onto these main frames, completing two pairs of flanges for the bulkhead hatches.The Final Touches
While two flanges form the primary support structure around the hatches, Sven mentions there are two additional pieces required at each end to ensure comprehensive protection. This attention to detail highlights his commitment to producing a durable and reliable design. “Sailing is about finding your path, whether it’s across an ocean or within yourself.” – Sven Yrvind In conclusion, making flanges around bulkhead hatches may seem complex at first glance, but by following Sven Yrvind’s meticulous process, enthusiasts can achieve professional-level results. Remember that the journey of boatbuilding is as rewarding as reaching your destination; it tests one’s patience and dedication. For those seeking to embark on this adventure or simply gain more insight into marine craftsmanship, Sven’s wisdom is invaluable.Sven Yrvind, a renowned yacht designer and sailor, shares valuable insights on creating flanges around bulkhead hatches for canvas protection in this enlightening video. By following his expert guidance, boat enthusiasts can ensure their living areas remain secure while allowing unhindered access through the hatches.Step 1: Starting with the Flange
Sven begins by explaining that working on flanges vertically and horizontally is significantly easier than doing so in a flat position. To simplify the process further, he divides the task into two or three steps as suggested by fellow expert “for for.” This approach not only makes it more manageable but also allows for greater precision in crafting each component.Step 2: Applying Glue and Securing
Sven proceeds to apply glue along one edge of the flange, ensuring a secure bond when clamped into place. He emphasizes that this stage is crucial for maintaining the structural integrity of the flange, which in turn safeguards the living area beneath the canvas when hatches are open.Step 3: Allowing Time to Dry
After securely attaching the first portion of the flange, Sven allows ample time for it to dry before moving forward with additional steps. This patience and precision are key aspects of his successful boatbuilding methods.Step 4: Finishing Touches
Once the flange is fully dried, Sven removes the clamps carefully, ensuring no damage occurs during this process. He then moves on to attaching four more pieces onto these main frames, completing two pairs of flanges for the bulkhead hatches.The Final Touches
While two flanges form the primary support structure around the hatches, Sven mentions there are two additional pieces required at each end to ensure comprehensive protection. This attention to detail highlights his commitment to producing a durable and reliable design. “Sailing is about finding your path, whether it’s across an ocean or within yourself.” – Sven Yrvind In conclusion, making flanges around bulkhead hatches may seem complex at first glance, but by following Sven Yrvind’s meticulous process, enthusiasts can achieve professional-level results. Remember that the journey of boatbuilding is as rewarding as reaching your destination; it tests one’s patience and dedication. For those seeking to embark on this adventure or simply gain more insight into marine craftsmanship, Sven’s wisdom is invaluable.Making Flanges Around Bulkhead Hatches for Canvas
Sven Yrvind, a renowned yacht designer and sailor, shares valuable insights on creating flanges around bulkhead hatches for canvas protection in this enlightening video. By following his expert guidance, boat enthusiasts can ensure their living areas remain secure while allowing unhindered access through the hatches.Step 1: Starting with the Flange
Sven begins by explaining that working on flanges vertically and horizontally is significantly easier than doing so in a flat position. To simplify the process further, he divides the task into two or three steps as suggested by fellow expert “for for.” This approach not only makes it more manageable but also allows for greater precision in crafting each component.Step 2: Applying Glue and Securing
Sven proceeds to apply glue along one edge of the flange, ensuring a secure bond when clamped into place. He emphasizes that this stage is crucial for maintaining the structural integrity of the flange, which in turn safeguards the living area beneath the canvas when hatches are open.Step 3: Allowing Time to Dry
After securely attaching the first portion of the flange, Sven allows ample time for it to dry before moving forward with additional steps. This patience and precision are key aspects of his successful boatbuilding methods.Step 4: Finishing Touches
Once the flange is fully dried, Sven removes the clamps carefully, ensuring no damage occurs during this process. He then moves on to attaching four more pieces onto these main frames, completing two pairs of flanges for the bulkhead hatches.The Final Touches
While two flanges form the primary support structure around the hatches, Sven mentions there are two additional pieces required at each end to ensure comprehensive protection. This attention to detail highlights his commitment to producing a durable and reliable design. “Sailing is about finding your path, whether it’s across an ocean or within yourself.” – Sven Yrvind In conclusion, making flanges around bulkhead hatches may seem complex at first glance, but by following Sven Yrvind’s meticulous process, enthusiasts can achieve professional-level results. Remember that the journey of boatbuilding is as rewarding as reaching your destination; it tests one’s patience and dedication. For those seeking to embark on this adventure or simply gain more insight into marine craftsmanship, Sven’s wisdom is invaluable.Once the flange is fully dried, Sven removes the clamps carefully, ensuring no damage occurs during this process. He then moves on to attaching four more pieces onto these main frames, completing two pairs of flanges for the bulkhead hatches.The Final Touches
While two flanges form the primary support structure around the hatches, Sven mentions there are two additional pieces required at each end to ensure comprehensive protection. This attention to detail highlights his commitment to producing a durable and reliable design. “Sailing is about finding your path, whether it’s across an ocean or within yourself.” – Sven Yrvind In conclusion, making flanges around bulkhead hatches may seem complex at first glance, but by following Sven Yrvind’s meticulous process, enthusiasts can achieve professional-level results. Remember that the journey of boatbuilding is as rewarding as reaching your destination; it tests one’s patience and dedication. For those seeking to embark on this adventure or simply gain more insight into marine craftsmanship, Sven’s wisdom is invaluable.Sven proceeds to apply glue along one edge of the flange, ensuring a secure bond when clamped into place. He emphasizes that this stage is crucial for maintaining the structural integrity of the flange, which in turn safeguards the living area beneath the canvas when hatches are open.Step 3: Allowing Time to Dry
After securely attaching the first portion of the flange, Sven allows ample time for it to dry before moving forward with additional steps. This patience and precision are key aspects of his successful boatbuilding methods.Step 4: Finishing Touches
Once the flange is fully dried, Sven removes the clamps carefully, ensuring no damage occurs during this process. He then moves on to attaching four more pieces onto these main frames, completing two pairs of flanges for the bulkhead hatches.The Final Touches
While two flanges form the primary support structure around the hatches, Sven mentions there are two additional pieces required at each end to ensure comprehensive protection. This attention to detail highlights his commitment to producing a durable and reliable design. “Sailing is about finding your path, whether it’s across an ocean or within yourself.” – Sven Yrvind In conclusion, making flanges around bulkhead hatches may seem complex at first glance, but by following Sven Yrvind’s meticulous process, enthusiasts can achieve professional-level results. Remember that the journey of boatbuilding is as rewarding as reaching your destination; it tests one’s patience and dedication. For those seeking to embark on this adventure or simply gain more insight into marine craftsmanship, Sven’s wisdom is invaluable.Sven begins by explaining that working on flanges vertically and horizontally is significantly easier than doing so in a flat position. To simplify the process further, he divides the task into two or three steps as suggested by fellow expert “for for.” This approach not only makes it more manageable but also allows for greater precision in crafting each component.Step 2: Applying Glue and Securing
Sven proceeds to apply glue along one edge of the flange, ensuring a secure bond when clamped into place. He emphasizes that this stage is crucial for maintaining the structural integrity of the flange, which in turn safeguards the living area beneath the canvas when hatches are open.Step 3: Allowing Time to Dry
After securely attaching the first portion of the flange, Sven allows ample time for it to dry before moving forward with additional steps. This patience and precision are key aspects of his successful boatbuilding methods.Step 4: Finishing Touches
Once the flange is fully dried, Sven removes the clamps carefully, ensuring no damage occurs during this process. He then moves on to attaching four more pieces onto these main frames, completing two pairs of flanges for the bulkhead hatches.The Final Touches
While two flanges form the primary support structure around the hatches, Sven mentions there are two additional pieces required at each end to ensure comprehensive protection. This attention to detail highlights his commitment to producing a durable and reliable design. “Sailing is about finding your path, whether it’s across an ocean or within yourself.” – Sven Yrvind In conclusion, making flanges around bulkhead hatches may seem complex at first glance, but by following Sven Yrvind’s meticulous process, enthusiasts can achieve professional-level results. Remember that the journey of boatbuilding is as rewarding as reaching your destination; it tests one’s patience and dedication. For those seeking to embark on this adventure or simply gain more insight into marine craftsmanship, Sven’s wisdom is invaluable.Sven Yrvind, a renowned yacht designer and sailor, shares valuable insights on creating flanges around bulkhead hatches for canvas protection in this enlightening video. By following his expert guidance, boat enthusiasts can ensure their living areas remain secure while allowing unhindered access through the hatches.Step 1: Starting with the Flange
Sven begins by explaining that working on flanges vertically and horizontally is significantly easier than doing so in a flat position. To simplify the process further, he divides the task into two or three steps as suggested by fellow expert “for for.” This approach not only makes it more manageable but also allows for greater precision in crafting each component.Step 2: Applying Glue and Securing
Sven proceeds to apply glue along one edge of the flange, ensuring a secure bond when clamped into place. He emphasizes that this stage is crucial for maintaining the structural integrity of the flange, which in turn safeguards the living area beneath the canvas when hatches are open.Step 3: Allowing Time to Dry
After securely attaching the first portion of the flange, Sven allows ample time for it to dry before moving forward with additional steps. This patience and precision are key aspects of his successful boatbuilding methods.Step 4: Finishing Touches
Once the flange is fully dried, Sven removes the clamps carefully, ensuring no damage occurs during this process. He then moves on to attaching four more pieces onto these main frames, completing two pairs of flanges for the bulkhead hatches.The Final Touches
While two flanges form the primary support structure around the hatches, Sven mentions there are two additional pieces required at each end to ensure comprehensive protection. This attention to detail highlights his commitment to producing a durable and reliable design. “Sailing is about finding your path, whether it’s across an ocean or within yourself.” – Sven Yrvind In conclusion, making flanges around bulkhead hatches may seem complex at first glance, but by following Sven Yrvind’s meticulous process, enthusiasts can achieve professional-level results. Remember that the journey of boatbuilding is as rewarding as reaching your destination; it tests one’s patience and dedication. For those seeking to embark on this adventure or simply gain more insight into marine craftsmanship, Sven’s wisdom is invaluable.Making Flanges Around Bulkhead Hatches for Canvas
Sven Yrvind, a renowned yacht designer and sailor, shares valuable insights on creating flanges around bulkhead hatches for canvas protection in this enlightening video. By following his expert guidance, boat enthusiasts can ensure their living areas remain secure while allowing unhindered access through the hatches.Step 1: Starting with the Flange
Sven begins by explaining that working on flanges vertically and horizontally is significantly easier than doing so in a flat position. To simplify the process further, he divides the task into two or three steps as suggested by fellow expert “for for.” This approach not only makes it more manageable but also allows for greater precision in crafting each component.Step 2: Applying Glue and Securing
Sven proceeds to apply glue along one edge of the flange, ensuring a secure bond when clamped into place. He emphasizes that this stage is crucial for maintaining the structural integrity of the flange, which in turn safeguards the living area beneath the canvas when hatches are open.Step 3: Allowing Time to Dry
After securely attaching the first portion of the flange, Sven allows ample time for it to dry before moving forward with additional steps. This patience and precision are key aspects of his successful boatbuilding methods.Step 4: Finishing Touches
Once the flange is fully dried, Sven removes the clamps carefully, ensuring no damage occurs during this process. He then moves on to attaching four more pieces onto these main frames, completing two pairs of flanges for the bulkhead hatches.The Final Touches
While two flanges form the primary support structure around the hatches, Sven mentions there are two additional pieces required at each end to ensure comprehensive protection. This attention to detail highlights his commitment to producing a durable and reliable design. “Sailing is about finding your path, whether it’s across an ocean or within yourself.” – Sven Yrvind In conclusion, making flanges around bulkhead hatches may seem complex at first glance, but by following Sven Yrvind’s meticulous process, enthusiasts can achieve professional-level results. Remember that the journey of boatbuilding is as rewarding as reaching your destination; it tests one’s patience and dedication. For those seeking to embark on this adventure or simply gain more insight into marine craftsmanship, Sven’s wisdom is invaluable.After securely attaching the first portion of the flange, Sven allows ample time for it to dry before moving forward with additional steps. This patience and precision are key aspects of his successful boatbuilding methods.Step 4: Finishing Touches
Once the flange is fully dried, Sven removes the clamps carefully, ensuring no damage occurs during this process. He then moves on to attaching four more pieces onto these main frames, completing two pairs of flanges for the bulkhead hatches.The Final Touches
While two flanges form the primary support structure around the hatches, Sven mentions there are two additional pieces required at each end to ensure comprehensive protection. This attention to detail highlights his commitment to producing a durable and reliable design. “Sailing is about finding your path, whether it’s across an ocean or within yourself.” – Sven Yrvind In conclusion, making flanges around bulkhead hatches may seem complex at first glance, but by following Sven Yrvind’s meticulous process, enthusiasts can achieve professional-level results. Remember that the journey of boatbuilding is as rewarding as reaching your destination; it tests one’s patience and dedication. For those seeking to embark on this adventure or simply gain more insight into marine craftsmanship, Sven’s wisdom is invaluable.Sven proceeds to apply glue along one edge of the flange, ensuring a secure bond when clamped into place. He emphasizes that this stage is crucial for maintaining the structural integrity of the flange, which in turn safeguards the living area beneath the canvas when hatches are open.Step 3: Allowing Time to Dry
After securely attaching the first portion of the flange, Sven allows ample time for it to dry before moving forward with additional steps. This patience and precision are key aspects of his successful boatbuilding methods.Step 4: Finishing Touches
Once the flange is fully dried, Sven removes the clamps carefully, ensuring no damage occurs during this process. He then moves on to attaching four more pieces onto these main frames, completing two pairs of flanges for the bulkhead hatches.The Final Touches
While two flanges form the primary support structure around the hatches, Sven mentions there are two additional pieces required at each end to ensure comprehensive protection. This attention to detail highlights his commitment to producing a durable and reliable design. “Sailing is about finding your path, whether it’s across an ocean or within yourself.” – Sven Yrvind In conclusion, making flanges around bulkhead hatches may seem complex at first glance, but by following Sven Yrvind’s meticulous process, enthusiasts can achieve professional-level results. Remember that the journey of boatbuilding is as rewarding as reaching your destination; it tests one’s patience and dedication. For those seeking to embark on this adventure or simply gain more insight into marine craftsmanship, Sven’s wisdom is invaluable.Sven begins by explaining that working on flanges vertically and horizontally is significantly easier than doing so in a flat position. To simplify the process further, he divides the task into two or three steps as suggested by fellow expert “for for.” This approach not only makes it more manageable but also allows for greater precision in crafting each component.Step 2: Applying Glue and Securing
Sven proceeds to apply glue along one edge of the flange, ensuring a secure bond when clamped into place. He emphasizes that this stage is crucial for maintaining the structural integrity of the flange, which in turn safeguards the living area beneath the canvas when hatches are open.Step 3: Allowing Time to Dry
After securely attaching the first portion of the flange, Sven allows ample time for it to dry before moving forward with additional steps. This patience and precision are key aspects of his successful boatbuilding methods.Step 4: Finishing Touches
Once the flange is fully dried, Sven removes the clamps carefully, ensuring no damage occurs during this process. He then moves on to attaching four more pieces onto these main frames, completing two pairs of flanges for the bulkhead hatches.The Final Touches
While two flanges form the primary support structure around the hatches, Sven mentions there are two additional pieces required at each end to ensure comprehensive protection. This attention to detail highlights his commitment to producing a durable and reliable design. “Sailing is about finding your path, whether it’s across an ocean or within yourself.” – Sven Yrvind In conclusion, making flanges around bulkhead hatches may seem complex at first glance, but by following Sven Yrvind’s meticulous process, enthusiasts can achieve professional-level results. Remember that the journey of boatbuilding is as rewarding as reaching your destination; it tests one’s patience and dedication. For those seeking to embark on this adventure or simply gain more insight into marine craftsmanship, Sven’s wisdom is invaluable.Sven Yrvind, a renowned yacht designer and sailor, shares valuable insights on creating flanges around bulkhead hatches for canvas protection in this enlightening video. By following his expert guidance, boat enthusiasts can ensure their living areas remain secure while allowing unhindered access through the hatches.Step 1: Starting with the Flange
Sven begins by explaining that working on flanges vertically and horizontally is significantly easier than doing so in a flat position. To simplify the process further, he divides the task into two or three steps as suggested by fellow expert “for for.” This approach not only makes it more manageable but also allows for greater precision in crafting each component.Step 2: Applying Glue and Securing
Sven proceeds to apply glue along one edge of the flange, ensuring a secure bond when clamped into place. He emphasizes that this stage is crucial for maintaining the structural integrity of the flange, which in turn safeguards the living area beneath the canvas when hatches are open.Step 3: Allowing Time to Dry
After securely attaching the first portion of the flange, Sven allows ample time for it to dry before moving forward with additional steps. This patience and precision are key aspects of his successful boatbuilding methods.Step 4: Finishing Touches
Once the flange is fully dried, Sven removes the clamps carefully, ensuring no damage occurs during this process. He then moves on to attaching four more pieces onto these main frames, completing two pairs of flanges for the bulkhead hatches.The Final Touches
While two flanges form the primary support structure around the hatches, Sven mentions there are two additional pieces required at each end to ensure comprehensive protection. This attention to detail highlights his commitment to producing a durable and reliable design. “Sailing is about finding your path, whether it’s across an ocean or within yourself.” – Sven Yrvind In conclusion, making flanges around bulkhead hatches may seem complex at first glance, but by following Sven Yrvind’s meticulous process, enthusiasts can achieve professional-level results. Remember that the journey of boatbuilding is as rewarding as reaching your destination; it tests one’s patience and dedication. For those seeking to embark on this adventure or simply gain more insight into marine craftsmanship, Sven’s wisdom is invaluable.Making Flanges Around Bulkhead Hatches for Canvas
Sven Yrvind, a renowned yacht designer and sailor, shares valuable insights on creating flanges around bulkhead hatches for canvas protection in this enlightening video. By following his expert guidance, boat enthusiasts can ensure their living areas remain secure while allowing unhindered access through the hatches.Step 1: Starting with the Flange
Sven begins by explaining that working on flanges vertically and horizontally is significantly easier than doing so in a flat position. To simplify the process further, he divides the task into two or three steps as suggested by fellow expert “for for.” This approach not only makes it more manageable but also allows for greater precision in crafting each component.Step 2: Applying Glue and Securing
Sven proceeds to apply glue along one edge of the flange, ensuring a secure bond when clamped into place. He emphasizes that this stage is crucial for maintaining the structural integrity of the flange, which in turn safeguards the living area beneath the canvas when hatches are open.Step 3: Allowing Time to Dry
After securely attaching the first portion of the flange, Sven allows ample time for it to dry before moving forward with additional steps. This patience and precision are key aspects of his successful boatbuilding methods.Step 4: Finishing Touches
Once the flange is fully dried, Sven removes the clamps carefully, ensuring no damage occurs during this process. He then moves on to attaching four more pieces onto these main frames, completing two pairs of flanges for the bulkhead hatches.The Final Touches
While two flanges form the primary support structure around the hatches, Sven mentions there are two additional pieces required at each end to ensure comprehensive protection. This attention to detail highlights his commitment to producing a durable and reliable design. “Sailing is about finding your path, whether it’s across an ocean or within yourself.” – Sven Yrvind In conclusion, making flanges around bulkhead hatches may seem complex at first glance, but by following Sven Yrvind’s meticulous process, enthusiasts can achieve professional-level results. Remember that the journey of boatbuilding is as rewarding as reaching your destination; it tests one’s patience and dedication. For those seeking to embark on this adventure or simply gain more insight into marine craftsmanship, Sven’s wisdom is invaluable.Once the flange is fully dried, Sven removes the clamps carefully, ensuring no damage occurs during this process. He then moves on to attaching four more pieces onto these main frames, completing two pairs of flanges for the bulkhead hatches.The Final Touches
While two flanges form the primary support structure around the hatches, Sven mentions there are two additional pieces required at each end to ensure comprehensive protection. This attention to detail highlights his commitment to producing a durable and reliable design. “Sailing is about finding your path, whether it’s across an ocean or within yourself.” – Sven Yrvind In conclusion, making flanges around bulkhead hatches may seem complex at first glance, but by following Sven Yrvind’s meticulous process, enthusiasts can achieve professional-level results. Remember that the journey of boatbuilding is as rewarding as reaching your destination; it tests one’s patience and dedication. For those seeking to embark on this adventure or simply gain more insight into marine craftsmanship, Sven’s wisdom is invaluable.After securely attaching the first portion of the flange, Sven allows ample time for it to dry before moving forward with additional steps. This patience and precision are key aspects of his successful boatbuilding methods.Step 4: Finishing Touches
Once the flange is fully dried, Sven removes the clamps carefully, ensuring no damage occurs during this process. He then moves on to attaching four more pieces onto these main frames, completing two pairs of flanges for the bulkhead hatches.The Final Touches
While two flanges form the primary support structure around the hatches, Sven mentions there are two additional pieces required at each end to ensure comprehensive protection. This attention to detail highlights his commitment to producing a durable and reliable design. “Sailing is about finding your path, whether it’s across an ocean or within yourself.” – Sven Yrvind In conclusion, making flanges around bulkhead hatches may seem complex at first glance, but by following Sven Yrvind’s meticulous process, enthusiasts can achieve professional-level results. Remember that the journey of boatbuilding is as rewarding as reaching your destination; it tests one’s patience and dedication. For those seeking to embark on this adventure or simply gain more insight into marine craftsmanship, Sven’s wisdom is invaluable.Sven proceeds to apply glue along one edge of the flange, ensuring a secure bond when clamped into place. He emphasizes that this stage is crucial for maintaining the structural integrity of the flange, which in turn safeguards the living area beneath the canvas when hatches are open.Step 3: Allowing Time to Dry
After securely attaching the first portion of the flange, Sven allows ample time for it to dry before moving forward with additional steps. This patience and precision are key aspects of his successful boatbuilding methods.Step 4: Finishing Touches
Once the flange is fully dried, Sven removes the clamps carefully, ensuring no damage occurs during this process. He then moves on to attaching four more pieces onto these main frames, completing two pairs of flanges for the bulkhead hatches.The Final Touches
While two flanges form the primary support structure around the hatches, Sven mentions there are two additional pieces required at each end to ensure comprehensive protection. This attention to detail highlights his commitment to producing a durable and reliable design. “Sailing is about finding your path, whether it’s across an ocean or within yourself.” – Sven Yrvind In conclusion, making flanges around bulkhead hatches may seem complex at first glance, but by following Sven Yrvind’s meticulous process, enthusiasts can achieve professional-level results. Remember that the journey of boatbuilding is as rewarding as reaching your destination; it tests one’s patience and dedication. For those seeking to embark on this adventure or simply gain more insight into marine craftsmanship, Sven’s wisdom is invaluable.Sven begins by explaining that working on flanges vertically and horizontally is significantly easier than doing so in a flat position. To simplify the process further, he divides the task into two or three steps as suggested by fellow expert “for for.” This approach not only makes it more manageable but also allows for greater precision in crafting each component.Step 2: Applying Glue and Securing
Sven proceeds to apply glue along one edge of the flange, ensuring a secure bond when clamped into place. He emphasizes that this stage is crucial for maintaining the structural integrity of the flange, which in turn safeguards the living area beneath the canvas when hatches are open.Step 3: Allowing Time to Dry
After securely attaching the first portion of the flange, Sven allows ample time for it to dry before moving forward with additional steps. This patience and precision are key aspects of his successful boatbuilding methods.Step 4: Finishing Touches
Once the flange is fully dried, Sven removes the clamps carefully, ensuring no damage occurs during this process. He then moves on to attaching four more pieces onto these main frames, completing two pairs of flanges for the bulkhead hatches.The Final Touches
While two flanges form the primary support structure around the hatches, Sven mentions there are two additional pieces required at each end to ensure comprehensive protection. This attention to detail highlights his commitment to producing a durable and reliable design. “Sailing is about finding your path, whether it’s across an ocean or within yourself.” – Sven Yrvind In conclusion, making flanges around bulkhead hatches may seem complex at first glance, but by following Sven Yrvind’s meticulous process, enthusiasts can achieve professional-level results. Remember that the journey of boatbuilding is as rewarding as reaching your destination; it tests one’s patience and dedication. For those seeking to embark on this adventure or simply gain more insight into marine craftsmanship, Sven’s wisdom is invaluable.Sven Yrvind, a renowned yacht designer and sailor, shares valuable insights on creating flanges around bulkhead hatches for canvas protection in this enlightening video. By following his expert guidance, boat enthusiasts can ensure their living areas remain secure while allowing unhindered access through the hatches.Step 1: Starting with the Flange
Sven begins by explaining that working on flanges vertically and horizontally is significantly easier than doing so in a flat position. To simplify the process further, he divides the task into two or three steps as suggested by fellow expert “for for.” This approach not only makes it more manageable but also allows for greater precision in crafting each component.Step 2: Applying Glue and Securing
Sven proceeds to apply glue along one edge of the flange, ensuring a secure bond when clamped into place. He emphasizes that this stage is crucial for maintaining the structural integrity of the flange, which in turn safeguards the living area beneath the canvas when hatches are open.Step 3: Allowing Time to Dry
After securely attaching the first portion of the flange, Sven allows ample time for it to dry before moving forward with additional steps. This patience and precision are key aspects of his successful boatbuilding methods.Step 4: Finishing Touches
Once the flange is fully dried, Sven removes the clamps carefully, ensuring no damage occurs during this process. He then moves on to attaching four more pieces onto these main frames, completing two pairs of flanges for the bulkhead hatches.The Final Touches
While two flanges form the primary support structure around the hatches, Sven mentions there are two additional pieces required at each end to ensure comprehensive protection. This attention to detail highlights his commitment to producing a durable and reliable design. “Sailing is about finding your path, whether it’s across an ocean or within yourself.” – Sven Yrvind In conclusion, making flanges around bulkhead hatches may seem complex at first glance, but by following Sven Yrvind’s meticulous process, enthusiasts can achieve professional-level results. Remember that the journey of boatbuilding is as rewarding as reaching your destination; it tests one’s patience and dedication. For those seeking to embark on this adventure or simply gain more insight into marine craftsmanship, Sven’s wisdom is invaluable.Making Flanges Around Bulkhead Hatches for Canvas
Sven Yrvind, a renowned yacht designer and sailor, shares valuable insights on creating flanges around bulkhead hatches for canvas protection in this enlightening video. By following his expert guidance, boat enthusiasts can ensure their living areas remain secure while allowing unhindered access through the hatches.Step 1: Starting with the Flange
Sven begins by explaining that working on flanges vertically and horizontally is significantly easier than doing so in a flat position. To simplify the process further, he divides the task into two or three steps as suggested by fellow expert “for for.” This approach not only makes it more manageable but also allows for greater precision in crafting each component.Step 2: Applying Glue and Securing
Sven proceeds to apply glue along one edge of the flange, ensuring a secure bond when clamped into place. He emphasizes that this stage is crucial for maintaining the structural integrity of the flange, which in turn safeguards the living area beneath the canvas when hatches are open.Step 3: Allowing Time to Dry
After securely attaching the first portion of the flange, Sven allows ample time for it to dry before moving forward with additional steps. This patience and precision are key aspects of his successful boatbuilding methods.Step 4: Finishing Touches
Once the flange is fully dried, Sven removes the clamps carefully, ensuring no damage occurs during this process. He then moves on to attaching four more pieces onto these main frames, completing two pairs of flanges for the bulkhead hatches.The Final Touches
While two flanges form the primary support structure around the hatches, Sven mentions there are two additional pieces required at each end to ensure comprehensive protection. This attention to detail highlights his commitment to producing a durable and reliable design. “Sailing is about finding your path, whether it’s across an ocean or within yourself.” – Sven Yrvind In conclusion, making flanges around bulkhead hatches may seem complex at first glance, but by following Sven Yrvind’s meticulous process, enthusiasts can achieve professional-level results. Remember that the journey of boatbuilding is as rewarding as reaching your destination; it tests one’s patience and dedication. For those seeking to embark on this adventure or simply gain more insight into marine craftsmanship, Sven’s wisdom is invaluable.Making Flanges Around Bulkhead Hatches for Canvas
Sven Yrvind, a renowned yacht designer and sailor, shares valuable insights on creating flanges around bulkhead hatches for canvas protection in this enlightening video. By following his expert guidance, boat enthusiasts can ensure their living areas remain secure while allowing unhindered access through the hatches.Step 1: Starting with the Flange
Sven begins by explaining that working on flanges vertically and horizontally is significantly easier than doing so in a flat position. To simplify the process further, he divides the task into two or three steps as suggested by fellow expert “for for.” This approach not only makes it more manageable but also allows for greater precision in crafting each component.Step 2: Applying Glue and Securing
Sven proceeds to apply glue along one edge of the flange, ensuring a secure bond when clamped into place. He emphasizes that this stage is crucial for maintaining the structural integrity of the flange, which in turn safeguards the living area beneath the canvas when hatches are open.Step 3: Allowing Time to Dry
After securely attaching the first portion of the flange, Sven allows ample time for it to dry before moving forward with additional steps. This patience and precision are key aspects of his successful boatbuilding methods.Step 4: Finishing Touches
Once the flange is fully dried, Sven removes the clamps carefully, ensuring no damage occurs during this process. He then moves on to attaching four more pieces onto these main frames, completing two pairs of flanges for the bulkhead hatches.The Final Touches
While two flanges form the primary support structure around the hatches, Sven mentions there are two additional pieces required at each end to ensure comprehensive protection. This attention to detail highlights his commitment to producing a durable and reliable design. “Sailing is about finding your path, whether it’s across an ocean or within yourself.” – Sven Yrvind In conclusion, making flanges around bulkhead hatches may seem complex at first glance, but by following Sven Yrvind’s meticulous process, enthusiasts can achieve professional-level results. Remember that the journey of boatbuilding is as rewarding as reaching your destination; it tests one’s patience and dedication. For those seeking to embark on this adventure or simply gain more insight into marine craftsmanship, Sven’s wisdom is invaluable.Sven proceeds to apply glue along one edge of the flange, ensuring a secure bond when clamped into place. He emphasizes that this stage is crucial for maintaining the structural integrity of the flange, which in turn safeguards the living area beneath the canvas when hatches are open.Step 3: Allowing Time to Dry
After securely attaching the first portion of the flange, Sven allows ample time for it to dry before moving forward with additional steps. This patience and precision are key aspects of his successful boatbuilding methods.Step 4: Finishing Touches
Once the flange is fully dried, Sven removes the clamps carefully, ensuring no damage occurs during this process. He then moves on to attaching four more pieces onto these main frames, completing two pairs of flanges for the bulkhead hatches.The Final Touches
While two flanges form the primary support structure around the hatches, Sven mentions there are two additional pieces required at each end to ensure comprehensive protection. This attention to detail highlights his commitment to producing a durable and reliable design. “Sailing is about finding your path, whether it’s across an ocean or within yourself.” – Sven Yrvind In conclusion, making flanges around bulkhead hatches may seem complex at first glance, but by following Sven Yrvind’s meticulous process, enthusiasts can achieve professional-level results. Remember that the journey of boatbuilding is as rewarding as reaching your destination; it tests one’s patience and dedication. For those seeking to embark on this adventure or simply gain more insight into marine craftsmanship, Sven’s wisdom is invaluable.Sven Yrvind, a renowned yacht designer and sailor, shares valuable insights on creating flanges around bulkhead hatches for canvas protection in this enlightening video. By following his expert guidance, boat enthusiasts can ensure their living areas remain secure while allowing unhindered access through the hatches.Step 1: Starting with the Flange
Sven begins by explaining that working on flanges vertically and horizontally is significantly easier than doing so in a flat position. To simplify the process further, he divides the task into two or three steps as suggested by fellow expert “for for.” This approach not only makes it more manageable but also allows for greater precision in crafting each component.Step 2: Applying Glue and Securing
Sven proceeds to apply glue along one edge of the flange, ensuring a secure bond when clamped into place. He emphasizes that this stage is crucial for maintaining the structural integrity of the flange, which in turn safeguards the living area beneath the canvas when hatches are open.Step 3: Allowing Time to Dry
After securely attaching the first portion of the flange, Sven allows ample time for it to dry before moving forward with additional steps. This patience and precision are key aspects of his successful boatbuilding methods.Step 4: Finishing Touches
Once the flange is fully dried, Sven removes the clamps carefully, ensuring no damage occurs during this process. He then moves on to attaching four more pieces onto these main frames, completing two pairs of flanges for the bulkhead hatches.The Final Touches
While two flanges form the primary support structure around the hatches, Sven mentions there are two additional pieces required at each end to ensure comprehensive protection. This attention to detail highlights his commitment to producing a durable and reliable design. “Sailing is about finding your path, whether it’s across an ocean or within yourself.” – Sven Yrvind In conclusion, making flanges around bulkhead hatches may seem complex at first glance, but by following Sven Yrvind’s meticulous process, enthusiasts can achieve professional-level results. Remember that the journey of boatbuilding is as rewarding as reaching your destination; it tests one’s patience and dedication. For those seeking to embark on this adventure or simply gain more insight into marine craftsmanship, Sven’s wisdom is invaluable.Making Flanges Around Bulkhead Hatches for Canvas
Sven Yrvind, a renowned yacht designer and sailor, shares valuable insights on creating flanges around bulkhead hatches for canvas protection in this enlightening video. By following his expert guidance, boat enthusiasts can ensure their living areas remain secure while allowing unhindered access through the hatches.Step 1: Starting with the Flange
Sven begins by explaining that working on flanges vertically and horizontally is significantly easier than doing so in a flat position. To simplify the process further, he divides the task into two or three steps as suggested by fellow expert “for for.” This approach not only makes it more manageable but also allows for greater precision in crafting each component.Step 2: Applying Glue and Securing
Sven proceeds to apply glue along one edge of the flange, ensuring a secure bond when clamped into place. He emphasizes that this stage is crucial for maintaining the structural integrity of the flange, which in turn safeguards the living area beneath the canvas when hatches are open.Step 3: Allowing Time to Dry
After securely attaching the first portion of the flange, Sven allows ample time for it to dry before moving forward with additional steps. This patience and precision are key aspects of his successful boatbuilding methods.Step 4: Finishing Touches
Once the flange is fully dried, Sven removes the clamps carefully, ensuring no damage occurs during this process. He then moves on to attaching four more pieces onto these main frames, completing two pairs of flanges for the bulkhead hatches.The Final Touches
While two flanges form the primary support structure around the hatches, Sven mentions there are two additional pieces required at each end to ensure comprehensive protection. This attention to detail highlights his commitment to producing a durable and reliable design. “Sailing is about finding your path, whether it’s across an ocean or within yourself.” – Sven Yrvind In conclusion, making flanges around bulkhead hatches may seem complex at first glance, but by following Sven Yrvind’s meticulous process, enthusiasts can achieve professional-level results. Remember that the journey of boatbuilding is as rewarding as reaching your destination; it tests one’s patience and dedication. For those seeking to embark on this adventure or simply gain more insight into marine craftsmanship, Sven’s wisdom is invaluable.Sven begins by explaining that working on flanges vertically and horizontally is significantly easier than doing so in a flat position. To simplify the process further, he divides the task into two or three steps as suggested by fellow expert “for for.” This approach not only makes it more manageable but also allows for greater precision in crafting each component.Step 2: Applying Glue and Securing
Sven proceeds to apply glue along one edge of the flange, ensuring a secure bond when clamped into place. He emphasizes that this stage is crucial for maintaining the structural integrity of the flange, which in turn safeguards the living area beneath the canvas when hatches are open.Step 3: Allowing Time to Dry
After securely attaching the first portion of the flange, Sven allows ample time for it to dry before moving forward with additional steps. This patience and precision are key aspects of his successful boatbuilding methods.Step 4: Finishing Touches
Once the flange is fully dried, Sven removes the clamps carefully, ensuring no damage occurs during this process. He then moves on to attaching four more pieces onto these main frames, completing two pairs of flanges for the bulkhead hatches.The Final Touches
While two flanges form the primary support structure around the hatches, Sven mentions there are two additional pieces required at each end to ensure comprehensive protection. This attention to detail highlights his commitment to producing a durable and reliable design. “Sailing is about finding your path, whether it’s across an ocean or within yourself.” – Sven Yrvind In conclusion, making flanges around bulkhead hatches may seem complex at first glance, but by following Sven Yrvind’s meticulous process, enthusiasts can achieve professional-level results. Remember that the journey of boatbuilding is as rewarding as reaching your destination; it tests one’s patience and dedication. For those seeking to embark on this adventure or simply gain more insight into marine craftsmanship, Sven’s wisdom is invaluable.Sven Yrvind, a renowned yacht designer and sailor, shares valuable insights on creating flanges around bulkhead hatches for canvas protection in this enlightening video. By following his expert guidance, boat enthusiasts can ensure their living areas remain secure while allowing unhindered access through the hatches.Step 1: Starting with the Flange
Sven begins by explaining that working on flanges vertically and horizontally is significantly easier than doing so in a flat position. To simplify the process further, he divides the task into two or three steps as suggested by fellow expert “for for.” This approach not only makes it more manageable but also allows for greater precision in crafting each component.Step 2: Applying Glue and Securing
Sven proceeds to apply glue along one edge of the flange, ensuring a secure bond when clamped into place. He emphasizes that this stage is crucial for maintaining the structural integrity of the flange, which in turn safeguards the living area beneath the canvas when hatches are open.Step 3: Allowing Time to Dry
After securely attaching the first portion of the flange, Sven allows ample time for it to dry before moving forward with additional steps. This patience and precision are key aspects of his successful boatbuilding methods.Step 4: Finishing Touches
Once the flange is fully dried, Sven removes the clamps carefully, ensuring no damage occurs during this process. He then moves on to attaching four more pieces onto these main frames, completing two pairs of flanges for the bulkhead hatches.The Final Touches
While two flanges form the primary support structure around the hatches, Sven mentions there are two additional pieces required at each end to ensure comprehensive protection. This attention to detail highlights his commitment to producing a durable and reliable design. “Sailing is about finding your path, whether it’s across an ocean or within yourself.” – Sven Yrvind In conclusion, making flanges around bulkhead hatches may seem complex at first glance, but by following Sven Yrvind’s meticulous process, enthusiasts can achieve professional-level results. Remember that the journey of boatbuilding is as rewarding as reaching your destination; it tests one’s patience and dedication. For those seeking to embark on this adventure or simply gain more insight into marine craftsmanship, Sven’s wisdom is invaluable.Making Flanges Around Bulkhead Hatches for Canvas
Sven Yrvind, a renowned yacht designer and sailor, shares valuable insights on creating flanges around bulkhead hatches for canvas protection in this enlightening video. By following his expert guidance, boat enthusiasts can ensure their living areas remain secure while allowing unhindered access through the hatches.Step 1: Starting with the Flange
Sven begins by explaining that working on flanges vertically and horizontally is significantly easier than doing so in a flat position. To simplify the process further, he divides the task into two or three steps as suggested by fellow expert “for for.” This approach not only makes it more manageable but also allows for greater precision in crafting each component.Step 2: Applying Glue and Securing
Sven proceeds to apply glue along one edge of the flange, ensuring a secure bond when clamped into place. He emphasizes that this stage is crucial for maintaining the structural integrity of the flange, which in turn safeguards the living area beneath the canvas when hatches are open.Step 3: Allowing Time to Dry
After securely attaching the first portion of the flange, Sven allows ample time for it to dry before moving forward with additional steps. This patience and precision are key aspects of his successful boatbuilding methods.Step 4: Finishing Touches
Once the flange is fully dried, Sven removes the clamps carefully, ensuring no damage occurs during this process. He then moves on to attaching four more pieces onto these main frames, completing two pairs of flanges for the bulkhead hatches.The Final Touches
While two flanges form the primary support structure around the hatches, Sven mentions there are two additional pieces required at each end to ensure comprehensive protection. This attention to detail highlights his commitment to producing a durable and reliable design. “Sailing is about finding your path, whether it’s across an ocean or within yourself.” – Sven Yrvind In conclusion, making flanges around bulkhead hatches may seem complex at first glance, but by following Sven Yrvind’s meticulous process, enthusiasts can achieve professional-level results. Remember that the journey of boatbuilding is as rewarding as reaching your destination; it tests one’s patience and dedication. For those seeking to embark on this adventure or simply gain more insight into marine craftsmanship, Sven’s wisdom is invaluable.Once the flange is fully dried, Sven removes the clamps carefully, ensuring no damage occurs during this process. He then moves on to attaching four more pieces onto these main frames, completing two pairs of flanges for the bulkhead hatches.The Final Touches
While two flanges form the primary support structure around the hatches, Sven mentions there are two additional pieces required at each end to ensure comprehensive protection. This attention to detail highlights his commitment to producing a durable and reliable design. “Sailing is about finding your path, whether it’s across an ocean or within yourself.” – Sven Yrvind In conclusion, making flanges around bulkhead hatches may seem complex at first glance, but by following Sven Yrvind’s meticulous process, enthusiasts can achieve professional-level results. Remember that the journey of boatbuilding is as rewarding as reaching your destination; it tests one’s patience and dedication. For those seeking to embark on this adventure or simply gain more insight into marine craftsmanship, Sven’s wisdom is invaluable.Sven begins by explaining that working on flanges vertically and horizontally is significantly easier than doing so in a flat position. To simplify the process further, he divides the task into two or three steps as suggested by fellow expert “for for.” This approach not only makes it more manageable but also allows for greater precision in crafting each component.Step 2: Applying Glue and Securing
Sven proceeds to apply glue along one edge of the flange, ensuring a secure bond when clamped into place. He emphasizes that this stage is crucial for maintaining the structural integrity of the flange, which in turn safeguards the living area beneath the canvas when hatches are open.Step 3: Allowing Time to Dry
After securely attaching the first portion of the flange, Sven allows ample time for it to dry before moving forward with additional steps. This patience and precision are key aspects of his successful boatbuilding methods.Step 4: Finishing Touches
Once the flange is fully dried, Sven removes the clamps carefully, ensuring no damage occurs during this process. He then moves on to attaching four more pieces onto these main frames, completing two pairs of flanges for the bulkhead hatches.The Final Touches
While two flanges form the primary support structure around the hatches, Sven mentions there are two additional pieces required at each end to ensure comprehensive protection. This attention to detail highlights his commitment to producing a durable and reliable design. “Sailing is about finding your path, whether it’s across an ocean or within yourself.” – Sven Yrvind In conclusion, making flanges around bulkhead hatches may seem complex at first glance, but by following Sven Yrvind’s meticulous process, enthusiasts can achieve professional-level results. Remember that the journey of boatbuilding is as rewarding as reaching your destination; it tests one’s patience and dedication. For those seeking to embark on this adventure or simply gain more insight into marine craftsmanship, Sven’s wisdom is invaluable.Sven Yrvind, a renowned yacht designer and sailor, shares valuable insights on creating flanges around bulkhead hatches for canvas protection in this enlightening video. By following his expert guidance, boat enthusiasts can ensure their living areas remain secure while allowing unhindered access through the hatches.Step 1: Starting with the Flange
Sven begins by explaining that working on flanges vertically and horizontally is significantly easier than doing so in a flat position. To simplify the process further, he divides the task into two or three steps as suggested by fellow expert “for for.” This approach not only makes it more manageable but also allows for greater precision in crafting each component.Step 2: Applying Glue and Securing
Sven proceeds to apply glue along one edge of the flange, ensuring a secure bond when clamped into place. He emphasizes that this stage is crucial for maintaining the structural integrity of the flange, which in turn safeguards the living area beneath the canvas when hatches are open.Step 3: Allowing Time to Dry
After securely attaching the first portion of the flange, Sven allows ample time for it to dry before moving forward with additional steps. This patience and precision are key aspects of his successful boatbuilding methods.Step 4: Finishing Touches
Once the flange is fully dried, Sven removes the clamps carefully, ensuring no damage occurs during this process. He then moves on to attaching four more pieces onto these main frames, completing two pairs of flanges for the bulkhead hatches.The Final Touches
While two flanges form the primary support structure around the hatches, Sven mentions there are two additional pieces required at each end to ensure comprehensive protection. This attention to detail highlights his commitment to producing a durable and reliable design. “Sailing is about finding your path, whether it’s across an ocean or within yourself.” – Sven Yrvind In conclusion, making flanges around bulkhead hatches may seem complex at first glance, but by following Sven Yrvind’s meticulous process, enthusiasts can achieve professional-level results. Remember that the journey of boatbuilding is as rewarding as reaching your destination; it tests one’s patience and dedication. For those seeking to embark on this adventure or simply gain more insight into marine craftsmanship, Sven’s wisdom is invaluable.Making Flanges Around Bulkhead Hatches for Canvas
Sven Yrvind, a renowned yacht designer and sailor, shares valuable insights on creating flanges around bulkhead hatches for canvas protection in this enlightening video. By following his expert guidance, boat enthusiasts can ensure their living areas remain secure while allowing unhindered access through the hatches.Step 1: Starting with the Flange
Sven begins by explaining that working on flanges vertically and horizontally is significantly easier than doing so in a flat position. To simplify the process further, he divides the task into two or three steps as suggested by fellow expert “for for.” This approach not only makes it more manageable but also allows for greater precision in crafting each component.Step 2: Applying Glue and Securing
Sven proceeds to apply glue along one edge of the flange, ensuring a secure bond when clamped into place. He emphasizes that this stage is crucial for maintaining the structural integrity of the flange, which in turn safeguards the living area beneath the canvas when hatches are open.Step 3: Allowing Time to Dry
After securely attaching the first portion of the flange, Sven allows ample time for it to dry before moving forward with additional steps. This patience and precision are key aspects of his successful boatbuilding methods.Step 4: Finishing Touches
Once the flange is fully dried, Sven removes the clamps carefully, ensuring no damage occurs during this process. He then moves on to attaching four more pieces onto these main frames, completing two pairs of flanges for the bulkhead hatches.The Final Touches
While two flanges form the primary support structure around the hatches, Sven mentions there are two additional pieces required at each end to ensure comprehensive protection. This attention to detail highlights his commitment to producing a durable and reliable design. “Sailing is about finding your path, whether it’s across an ocean or within yourself.” – Sven Yrvind In conclusion, making flanges around bulkhead hatches may seem complex at first glance, but by following Sven Yrvind’s meticulous process, enthusiasts can achieve professional-level results. Remember that the journey of boatbuilding is as rewarding as reaching your destination; it tests one’s patience and dedication. For those seeking to embark on this adventure or simply gain more insight into marine craftsmanship, Sven’s wisdom is invaluable.After securely attaching the first portion of the flange, Sven allows ample time for it to dry before moving forward with additional steps. This patience and precision are key aspects of his successful boatbuilding methods.Step 4: Finishing Touches
Once the flange is fully dried, Sven removes the clamps carefully, ensuring no damage occurs during this process. He then moves on to attaching four more pieces onto these main frames, completing two pairs of flanges for the bulkhead hatches.The Final Touches
While two flanges form the primary support structure around the hatches, Sven mentions there are two additional pieces required at each end to ensure comprehensive protection. This attention to detail highlights his commitment to producing a durable and reliable design. “Sailing is about finding your path, whether it’s across an ocean or within yourself.” – Sven Yrvind In conclusion, making flanges around bulkhead hatches may seem complex at first glance, but by following Sven Yrvind’s meticulous process, enthusiasts can achieve professional-level results. Remember that the journey of boatbuilding is as rewarding as reaching your destination; it tests one’s patience and dedication. For those seeking to embark on this adventure or simply gain more insight into marine craftsmanship, Sven’s wisdom is invaluable.Sven begins by explaining that working on flanges vertically and horizontally is significantly easier than doing so in a flat position. To simplify the process further, he divides the task into two or three steps as suggested by fellow expert “for for.” This approach not only makes it more manageable but also allows for greater precision in crafting each component.Step 2: Applying Glue and Securing
Sven proceeds to apply glue along one edge of the flange, ensuring a secure bond when clamped into place. He emphasizes that this stage is crucial for maintaining the structural integrity of the flange, which in turn safeguards the living area beneath the canvas when hatches are open.Step 3: Allowing Time to Dry
After securely attaching the first portion of the flange, Sven allows ample time for it to dry before moving forward with additional steps. This patience and precision are key aspects of his successful boatbuilding methods.Step 4: Finishing Touches
Once the flange is fully dried, Sven removes the clamps carefully, ensuring no damage occurs during this process. He then moves on to attaching four more pieces onto these main frames, completing two pairs of flanges for the bulkhead hatches.The Final Touches
While two flanges form the primary support structure around the hatches, Sven mentions there are two additional pieces required at each end to ensure comprehensive protection. This attention to detail highlights his commitment to producing a durable and reliable design. “Sailing is about finding your path, whether it’s across an ocean or within yourself.” – Sven Yrvind In conclusion, making flanges around bulkhead hatches may seem complex at first glance, but by following Sven Yrvind’s meticulous process, enthusiasts can achieve professional-level results. Remember that the journey of boatbuilding is as rewarding as reaching your destination; it tests one’s patience and dedication. For those seeking to embark on this adventure or simply gain more insight into marine craftsmanship, Sven’s wisdom is invaluable.Sven Yrvind, a renowned yacht designer and sailor, shares valuable insights on creating flanges around bulkhead hatches for canvas protection in this enlightening video. By following his expert guidance, boat enthusiasts can ensure their living areas remain secure while allowing unhindered access through the hatches.Step 1: Starting with the Flange
Sven begins by explaining that working on flanges vertically and horizontally is significantly easier than doing so in a flat position. To simplify the process further, he divides the task into two or three steps as suggested by fellow expert “for for.” This approach not only makes it more manageable but also allows for greater precision in crafting each component.Step 2: Applying Glue and Securing
Sven proceeds to apply glue along one edge of the flange, ensuring a secure bond when clamped into place. He emphasizes that this stage is crucial for maintaining the structural integrity of the flange, which in turn safeguards the living area beneath the canvas when hatches are open.Step 3: Allowing Time to Dry
After securely attaching the first portion of the flange, Sven allows ample time for it to dry before moving forward with additional steps. This patience and precision are key aspects of his successful boatbuilding methods.Step 4: Finishing Touches
Once the flange is fully dried, Sven removes the clamps carefully, ensuring no damage occurs during this process. He then moves on to attaching four more pieces onto these main frames, completing two pairs of flanges for the bulkhead hatches.The Final Touches
While two flanges form the primary support structure around the hatches, Sven mentions there are two additional pieces required at each end to ensure comprehensive protection. This attention to detail highlights his commitment to producing a durable and reliable design. “Sailing is about finding your path, whether it’s across an ocean or within yourself.” – Sven Yrvind In conclusion, making flanges around bulkhead hatches may seem complex at first glance, but by following Sven Yrvind’s meticulous process, enthusiasts can achieve professional-level results. Remember that the journey of boatbuilding is as rewarding as reaching your destination; it tests one’s patience and dedication. For those seeking to embark on this adventure or simply gain more insight into marine craftsmanship, Sven’s wisdom is invaluable.Making Flanges Around Bulkhead Hatches for Canvas
Sven Yrvind, a renowned yacht designer and sailor, shares valuable insights on creating flanges around bulkhead hatches for canvas protection in this enlightening video. By following his expert guidance, boat enthusiasts can ensure their living areas remain secure while allowing unhindered access through the hatches.Step 1: Starting with the Flange
Sven begins by explaining that working on flanges vertically and horizontally is significantly easier than doing so in a flat position. To simplify the process further, he divides the task into two or three steps as suggested by fellow expert “for for.” This approach not only makes it more manageable but also allows for greater precision in crafting each component.Step 2: Applying Glue and Securing
Sven proceeds to apply glue along one edge of the flange, ensuring a secure bond when clamped into place. He emphasizes that this stage is crucial for maintaining the structural integrity of the flange, which in turn safeguards the living area beneath the canvas when hatches are open.Step 3: Allowing Time to Dry
After securely attaching the first portion of the flange, Sven allows ample time for it to dry before moving forward with additional steps. This patience and precision are key aspects of his successful boatbuilding methods.Step 4: Finishing Touches
Once the flange is fully dried, Sven removes the clamps carefully, ensuring no damage occurs during this process. He then moves on to attaching four more pieces onto these main frames, completing two pairs of flanges for the bulkhead hatches.The Final Touches
While two flanges form the primary support structure around the hatches, Sven mentions there are two additional pieces required at each end to ensure comprehensive protection. This attention to detail highlights his commitment to producing a durable and reliable design. “Sailing is about finding your path, whether it’s across an ocean or within yourself.” – Sven Yrvind In conclusion, making flanges around bulkhead hatches may seem complex at first glance, but by following Sven Yrvind’s meticulous process, enthusiasts can achieve professional-level results. Remember that the journey of boatbuilding is as rewarding as reaching your destination; it tests one’s patience and dedication. For those seeking to embark on this adventure or simply gain more insight into marine craftsmanship, Sven’s wisdom is invaluable.Sven proceeds to apply glue along one edge of the flange, ensuring a secure bond when clamped into place. He emphasizes that this stage is crucial for maintaining the structural integrity of the flange, which in turn safeguards the living area beneath the canvas when hatches are open.Step 3: Allowing Time to Dry
After securely attaching the first portion of the flange, Sven allows ample time for it to dry before moving forward with additional steps. This patience and precision are key aspects of his successful boatbuilding methods.Step 4: Finishing Touches
Once the flange is fully dried, Sven removes the clamps carefully, ensuring no damage occurs during this process. He then moves on to attaching four more pieces onto these main frames, completing two pairs of flanges for the bulkhead hatches.The Final Touches
While two flanges form the primary support structure around the hatches, Sven mentions there are two additional pieces required at each end to ensure comprehensive protection. This attention to detail highlights his commitment to producing a durable and reliable design. “Sailing is about finding your path, whether it’s across an ocean or within yourself.” – Sven Yrvind In conclusion, making flanges around bulkhead hatches may seem complex at first glance, but by following Sven Yrvind’s meticulous process, enthusiasts can achieve professional-level results. Remember that the journey of boatbuilding is as rewarding as reaching your destination; it tests one’s patience and dedication. For those seeking to embark on this adventure or simply gain more insight into marine craftsmanship, Sven’s wisdom is invaluable.Sven begins by explaining that working on flanges vertically and horizontally is significantly easier than doing so in a flat position. To simplify the process further, he divides the task into two or three steps as suggested by fellow expert “for for.” This approach not only makes it more manageable but also allows for greater precision in crafting each component.Step 2: Applying Glue and Securing
Sven proceeds to apply glue along one edge of the flange, ensuring a secure bond when clamped into place. He emphasizes that this stage is crucial for maintaining the structural integrity of the flange, which in turn safeguards the living area beneath the canvas when hatches are open.Step 3: Allowing Time to Dry
After securely attaching the first portion of the flange, Sven allows ample time for it to dry before moving forward with additional steps. This patience and precision are key aspects of his successful boatbuilding methods.Step 4: Finishing Touches
Once the flange is fully dried, Sven removes the clamps carefully, ensuring no damage occurs during this process. He then moves on to attaching four more pieces onto these main frames, completing two pairs of flanges for the bulkhead hatches.The Final Touches
While two flanges form the primary support structure around the hatches, Sven mentions there are two additional pieces required at each end to ensure comprehensive protection. This attention to detail highlights his commitment to producing a durable and reliable design. “Sailing is about finding your path, whether it’s across an ocean or within yourself.” – Sven Yrvind In conclusion, making flanges around bulkhead hatches may seem complex at first glance, but by following Sven Yrvind’s meticulous process, enthusiasts can achieve professional-level results. Remember that the journey of boatbuilding is as rewarding as reaching your destination; it tests one’s patience and dedication. For those seeking to embark on this adventure or simply gain more insight into marine craftsmanship, Sven’s wisdom is invaluable.Sven Yrvind, a renowned yacht designer and sailor, shares valuable insights on creating flanges around bulkhead hatches for canvas protection in this enlightening video. By following his expert guidance, boat enthusiasts can ensure their living areas remain secure while allowing unhindered access through the hatches.Step 1: Starting with the Flange
Sven begins by explaining that working on flanges vertically and horizontally is significantly easier than doing so in a flat position. To simplify the process further, he divides the task into two or three steps as suggested by fellow expert “for for.” This approach not only makes it more manageable but also allows for greater precision in crafting each component.Step 2: Applying Glue and Securing
Sven proceeds to apply glue along one edge of the flange, ensuring a secure bond when clamped into place. He emphasizes that this stage is crucial for maintaining the structural integrity of the flange, which in turn safeguards the living area beneath the canvas when hatches are open.Step 3: Allowing Time to Dry
After securely attaching the first portion of the flange, Sven allows ample time for it to dry before moving forward with additional steps. This patience and precision are key aspects of his successful boatbuilding methods.Step 4: Finishing Touches
Once the flange is fully dried, Sven removes the clamps carefully, ensuring no damage occurs during this process. He then moves on to attaching four more pieces onto these main frames, completing two pairs of flanges for the bulkhead hatches.The Final Touches
While two flanges form the primary support structure around the hatches, Sven mentions there are two additional pieces required at each end to ensure comprehensive protection. This attention to detail highlights his commitment to producing a durable and reliable design. “Sailing is about finding your path, whether it’s across an ocean or within yourself.” – Sven Yrvind In conclusion, making flanges around bulkhead hatches may seem complex at first glance, but by following Sven Yrvind’s meticulous process, enthusiasts can achieve professional-level results. Remember that the journey of boatbuilding is as rewarding as reaching your destination; it tests one’s patience and dedication. For those seeking to embark on this adventure or simply gain more insight into marine craftsmanship, Sven’s wisdom is invaluable.Making Flanges Around Bulkhead Hatches for Canvas
Sven Yrvind, a renowned yacht designer and sailor, shares valuable insights on creating flanges around bulkhead hatches for canvas protection in this enlightening video. By following his expert guidance, boat enthusiasts can ensure their living areas remain secure while allowing unhindered access through the hatches.Step 1: Starting with the Flange
Sven begins by explaining that working on flanges vertically and horizontally is significantly easier than doing so in a flat position. To simplify the process further, he divides the task into two or three steps as suggested by fellow expert “for for.” This approach not only makes it more manageable but also allows for greater precision in crafting each component.Step 2: Applying Glue and Securing
Sven proceeds to apply glue along one edge of the flange, ensuring a secure bond when clamped into place. He emphasizes that this stage is crucial for maintaining the structural integrity of the flange, which in turn safeguards the living area beneath the canvas when hatches are open.Step 3: Allowing Time to Dry
After securely attaching the first portion of the flange, Sven allows ample time for it to dry before moving forward with additional steps. This patience and precision are key aspects of his successful boatbuilding methods.Step 4: Finishing Touches
Once the flange is fully dried, Sven removes the clamps carefully, ensuring no damage occurs during this process. He then moves on to attaching four more pieces onto these main frames, completing two pairs of flanges for the bulkhead hatches.The Final Touches
While two flanges form the primary support structure around the hatches, Sven mentions there are two additional pieces required at each end to ensure comprehensive protection. This attention to detail highlights his commitment to producing a durable and reliable design. “Sailing is about finding your path, whether it’s across an ocean or within yourself.” – Sven Yrvind In conclusion, making flanges around bulkhead hatches may seem complex at first glance, but by following Sven Yrvind’s meticulous process, enthusiasts can achieve professional-level results. Remember that the journey of boatbuilding is as rewarding as reaching your destination; it tests one’s patience and dedication. For those seeking to embark on this adventure or simply gain more insight into marine craftsmanship, Sven’s wisdom is invaluable.Once the flange is fully dried, Sven removes the clamps carefully, ensuring no damage occurs during this process. He then moves on to attaching four more pieces onto these main frames, completing two pairs of flanges for the bulkhead hatches.The Final Touches
While two flanges form the primary support structure around the hatches, Sven mentions there are two additional pieces required at each end to ensure comprehensive protection. This attention to detail highlights his commitment to producing a durable and reliable design. “Sailing is about finding your path, whether it’s across an ocean or within yourself.” – Sven Yrvind In conclusion, making flanges around bulkhead hatches may seem complex at first glance, but by following Sven Yrvind’s meticulous process, enthusiasts can achieve professional-level results. Remember that the journey of boatbuilding is as rewarding as reaching your destination; it tests one’s patience and dedication. For those seeking to embark on this adventure or simply gain more insight into marine craftsmanship, Sven’s wisdom is invaluable.Sven proceeds to apply glue along one edge of the flange, ensuring a secure bond when clamped into place. He emphasizes that this stage is crucial for maintaining the structural integrity of the flange, which in turn safeguards the living area beneath the canvas when hatches are open.Step 3: Allowing Time to Dry
After securely attaching the first portion of the flange, Sven allows ample time for it to dry before moving forward with additional steps. This patience and precision are key aspects of his successful boatbuilding methods.Step 4: Finishing Touches
Once the flange is fully dried, Sven removes the clamps carefully, ensuring no damage occurs during this process. He then moves on to attaching four more pieces onto these main frames, completing two pairs of flanges for the bulkhead hatches.The Final Touches
While two flanges form the primary support structure around the hatches, Sven mentions there are two additional pieces required at each end to ensure comprehensive protection. This attention to detail highlights his commitment to producing a durable and reliable design. “Sailing is about finding your path, whether it’s across an ocean or within yourself.” – Sven Yrvind In conclusion, making flanges around bulkhead hatches may seem complex at first glance, but by following Sven Yrvind’s meticulous process, enthusiasts can achieve professional-level results. Remember that the journey of boatbuilding is as rewarding as reaching your destination; it tests one’s patience and dedication. For those seeking to embark on this adventure or simply gain more insight into marine craftsmanship, Sven’s wisdom is invaluable.Sven begins by explaining that working on flanges vertically and horizontally is significantly easier than doing so in a flat position. To simplify the process further, he divides the task into two or three steps as suggested by fellow expert “for for.” This approach not only makes it more manageable but also allows for greater precision in crafting each component.Step 2: Applying Glue and Securing
Sven proceeds to apply glue along one edge of the flange, ensuring a secure bond when clamped into place. He emphasizes that this stage is crucial for maintaining the structural integrity of the flange, which in turn safeguards the living area beneath the canvas when hatches are open.Step 3: Allowing Time to Dry
After securely attaching the first portion of the flange, Sven allows ample time for it to dry before moving forward with additional steps. This patience and precision are key aspects of his successful boatbuilding methods.Step 4: Finishing Touches
Once the flange is fully dried, Sven removes the clamps carefully, ensuring no damage occurs during this process. He then moves on to attaching four more pieces onto these main frames, completing two pairs of flanges for the bulkhead hatches.The Final Touches
While two flanges form the primary support structure around the hatches, Sven mentions there are two additional pieces required at each end to ensure comprehensive protection. This attention to detail highlights his commitment to producing a durable and reliable design. “Sailing is about finding your path, whether it’s across an ocean or within yourself.” – Sven Yrvind In conclusion, making flanges around bulkhead hatches may seem complex at first glance, but by following Sven Yrvind’s meticulous process, enthusiasts can achieve professional-level results. Remember that the journey of boatbuilding is as rewarding as reaching your destination; it tests one’s patience and dedication. For those seeking to embark on this adventure or simply gain more insight into marine craftsmanship, Sven’s wisdom is invaluable.Sven Yrvind, a renowned yacht designer and sailor, shares valuable insights on creating flanges around bulkhead hatches for canvas protection in this enlightening video. By following his expert guidance, boat enthusiasts can ensure their living areas remain secure while allowing unhindered access through the hatches.Step 1: Starting with the Flange
Sven begins by explaining that working on flanges vertically and horizontally is significantly easier than doing so in a flat position. To simplify the process further, he divides the task into two or three steps as suggested by fellow expert “for for.” This approach not only makes it more manageable but also allows for greater precision in crafting each component.Step 2: Applying Glue and Securing
Sven proceeds to apply glue along one edge of the flange, ensuring a secure bond when clamped into place. He emphasizes that this stage is crucial for maintaining the structural integrity of the flange, which in turn safeguards the living area beneath the canvas when hatches are open.Step 3: Allowing Time to Dry
After securely attaching the first portion of the flange, Sven allows ample time for it to dry before moving forward with additional steps. This patience and precision are key aspects of his successful boatbuilding methods.Step 4: Finishing Touches
Once the flange is fully dried, Sven removes the clamps carefully, ensuring no damage occurs during this process. He then moves on to attaching four more pieces onto these main frames, completing two pairs of flanges for the bulkhead hatches.The Final Touches
While two flanges form the primary support structure around the hatches, Sven mentions there are two additional pieces required at each end to ensure comprehensive protection. This attention to detail highlights his commitment to producing a durable and reliable design. “Sailing is about finding your path, whether it’s across an ocean or within yourself.” – Sven Yrvind In conclusion, making flanges around bulkhead hatches may seem complex at first glance, but by following Sven Yrvind’s meticulous process, enthusiasts can achieve professional-level results. Remember that the journey of boatbuilding is as rewarding as reaching your destination; it tests one’s patience and dedication. For those seeking to embark on this adventure or simply gain more insight into marine craftsmanship, Sven’s wisdom is invaluable.Making Flanges Around Bulkhead Hatches for Canvas
Sven Yrvind, a renowned yacht designer and sailor, shares valuable insights on creating flanges around bulkhead hatches for canvas protection in this enlightening video. By following his expert guidance, boat enthusiasts can ensure their living areas remain secure while allowing unhindered access through the hatches.Step 1: Starting with the Flange
Sven begins by explaining that working on flanges vertically and horizontally is significantly easier than doing so in a flat position. To simplify the process further, he divides the task into two or three steps as suggested by fellow expert “for for.” This approach not only makes it more manageable but also allows for greater precision in crafting each component.Step 2: Applying Glue and Securing
Sven proceeds to apply glue along one edge of the flange, ensuring a secure bond when clamped into place. He emphasizes that this stage is crucial for maintaining the structural integrity of the flange, which in turn safeguards the living area beneath the canvas when hatches are open.Step 3: Allowing Time to Dry
After securely attaching the first portion of the flange, Sven allows ample time for it to dry before moving forward with additional steps. This patience and precision are key aspects of his successful boatbuilding methods.Step 4: Finishing Touches
Once the flange is fully dried, Sven removes the clamps carefully, ensuring no damage occurs during this process. He then moves on to attaching four more pieces onto these main frames, completing two pairs of flanges for the bulkhead hatches.The Final Touches
While two flanges form the primary support structure around the hatches, Sven mentions there are two additional pieces required at each end to ensure comprehensive protection. This attention to detail highlights his commitment to producing a durable and reliable design. “Sailing is about finding your path, whether it’s across an ocean or within yourself.” – Sven Yrvind In conclusion, making flanges around bulkhead hatches may seem complex at first glance, but by following Sven Yrvind’s meticulous process, enthusiasts can achieve professional-level results. Remember that the journey of boatbuilding is as rewarding as reaching your destination; it tests one’s patience and dedication. For those seeking to embark on this adventure or simply gain more insight into marine craftsmanship, Sven’s wisdom is invaluable.After securely attaching the first portion of the flange, Sven allows ample time for it to dry before moving forward with additional steps. This patience and precision are key aspects of his successful boatbuilding methods.Step 4: Finishing Touches
Once the flange is fully dried, Sven removes the clamps carefully, ensuring no damage occurs during this process. He then moves on to attaching four more pieces onto these main frames, completing two pairs of flanges for the bulkhead hatches.The Final Touches
While two flanges form the primary support structure around the hatches, Sven mentions there are two additional pieces required at each end to ensure comprehensive protection. This attention to detail highlights his commitment to producing a durable and reliable design. “Sailing is about finding your path, whether it’s across an ocean or within yourself.” – Sven Yrvind In conclusion, making flanges around bulkhead hatches may seem complex at first glance, but by following Sven Yrvind’s meticulous process, enthusiasts can achieve professional-level results. Remember that the journey of boatbuilding is as rewarding as reaching your destination; it tests one’s patience and dedication. For those seeking to embark on this adventure or simply gain more insight into marine craftsmanship, Sven’s wisdom is invaluable.Sven proceeds to apply glue along one edge of the flange, ensuring a secure bond when clamped into place. He emphasizes that this stage is crucial for maintaining the structural integrity of the flange, which in turn safeguards the living area beneath the canvas when hatches are open.Step 3: Allowing Time to Dry
After securely attaching the first portion of the flange, Sven allows ample time for it to dry before moving forward with additional steps. This patience and precision are key aspects of his successful boatbuilding methods.Step 4: Finishing Touches
Once the flange is fully dried, Sven removes the clamps carefully, ensuring no damage occurs during this process. He then moves on to attaching four more pieces onto these main frames, completing two pairs of flanges for the bulkhead hatches.The Final Touches
While two flanges form the primary support structure around the hatches, Sven mentions there are two additional pieces required at each end to ensure comprehensive protection. This attention to detail highlights his commitment to producing a durable and reliable design. “Sailing is about finding your path, whether it’s across an ocean or within yourself.” – Sven Yrvind In conclusion, making flanges around bulkhead hatches may seem complex at first glance, but by following Sven Yrvind’s meticulous process, enthusiasts can achieve professional-level results. Remember that the journey of boatbuilding is as rewarding as reaching your destination; it tests one’s patience and dedication. For those seeking to embark on this adventure or simply gain more insight into marine craftsmanship, Sven’s wisdom is invaluable.Sven begins by explaining that working on flanges vertically and horizontally is significantly easier than doing so in a flat position. To simplify the process further, he divides the task into two or three steps as suggested by fellow expert “for for.” This approach not only makes it more manageable but also allows for greater precision in crafting each component.Step 2: Applying Glue and Securing
Sven proceeds to apply glue along one edge of the flange, ensuring a secure bond when clamped into place. He emphasizes that this stage is crucial for maintaining the structural integrity of the flange, which in turn safeguards the living area beneath the canvas when hatches are open.Step 3: Allowing Time to Dry
After securely attaching the first portion of the flange, Sven allows ample time for it to dry before moving forward with additional steps. This patience and precision are key aspects of his successful boatbuilding methods.Step 4: Finishing Touches
Once the flange is fully dried, Sven removes the clamps carefully, ensuring no damage occurs during this process. He then moves on to attaching four more pieces onto these main frames, completing two pairs of flanges for the bulkhead hatches.The Final Touches
While two flanges form the primary support structure around the hatches, Sven mentions there are two additional pieces required at each end to ensure comprehensive protection. This attention to detail highlights his commitment to producing a durable and reliable design. “Sailing is about finding your path, whether it’s across an ocean or within yourself.” – Sven Yrvind In conclusion, making flanges around bulkhead hatches may seem complex at first glance, but by following Sven Yrvind’s meticulous process, enthusiasts can achieve professional-level results. Remember that the journey of boatbuilding is as rewarding as reaching your destination; it tests one’s patience and dedication. For those seeking to embark on this adventure or simply gain more insight into marine craftsmanship, Sven’s wisdom is invaluable.Sven Yrvind, a renowned yacht designer and sailor, shares valuable insights on creating flanges around bulkhead hatches for canvas protection in this enlightening video. By following his expert guidance, boat enthusiasts can ensure their living areas remain secure while allowing unhindered access through the hatches.Step 1: Starting with the Flange
Sven begins by explaining that working on flanges vertically and horizontally is significantly easier than doing so in a flat position. To simplify the process further, he divides the task into two or three steps as suggested by fellow expert “for for.” This approach not only makes it more manageable but also allows for greater precision in crafting each component.Step 2: Applying Glue and Securing
Sven proceeds to apply glue along one edge of the flange, ensuring a secure bond when clamped into place. He emphasizes that this stage is crucial for maintaining the structural integrity of the flange, which in turn safeguards the living area beneath the canvas when hatches are open.Step 3: Allowing Time to Dry
After securely attaching the first portion of the flange, Sven allows ample time for it to dry before moving forward with additional steps. This patience and precision are key aspects of his successful boatbuilding methods.Step 4: Finishing Touches
Once the flange is fully dried, Sven removes the clamps carefully, ensuring no damage occurs during this process. He then moves on to attaching four more pieces onto these main frames, completing two pairs of flanges for the bulkhead hatches.The Final Touches
While two flanges form the primary support structure around the hatches, Sven mentions there are two additional pieces required at each end to ensure comprehensive protection. This attention to detail highlights his commitment to producing a durable and reliable design. “Sailing is about finding your path, whether it’s across an ocean or within yourself.” – Sven Yrvind In conclusion, making flanges around bulkhead hatches may seem complex at first glance, but by following Sven Yrvind’s meticulous process, enthusiasts can achieve professional-level results. Remember that the journey of boatbuilding is as rewarding as reaching your destination; it tests one’s patience and dedication. For those seeking to embark on this adventure or simply gain more insight into marine craftsmanship, Sven’s wisdom is invaluable.Making Flanges Around Bulkhead Hatches for Canvas
Sven Yrvind, a renowned yacht designer and sailor, shares valuable insights on creating flanges around bulkhead hatches for canvas protection in this enlightening video. By following his expert guidance, boat enthusiasts can ensure their living areas remain secure while allowing unhindered access through the hatches.Step 1: Starting with the Flange
Sven begins by explaining that working on flanges vertically and horizontally is significantly easier than doing so in a flat position. To simplify the process further, he divides the task into two or three steps as suggested by fellow expert “for for.” This approach not only makes it more manageable but also allows for greater precision in crafting each component.Step 2: Applying Glue and Securing
Sven proceeds to apply glue along one edge of the flange, ensuring a secure bond when clamped into place. He emphasizes that this stage is crucial for maintaining the structural integrity of the flange, which in turn safeguards the living area beneath the canvas when hatches are open.Step 3: Allowing Time to Dry
After securely attaching the first portion of the flange, Sven allows ample time for it to dry before moving forward with additional steps. This patience and precision are key aspects of his successful boatbuilding methods.Step 4: Finishing Touches
Once the flange is fully dried, Sven removes the clamps carefully, ensuring no damage occurs during this process. He then moves on to attaching four more pieces onto these main frames, completing two pairs of flanges for the bulkhead hatches.The Final Touches
While two flanges form the primary support structure around the hatches, Sven mentions there are two additional pieces required at each end to ensure comprehensive protection. This attention to detail highlights his commitment to producing a durable and reliable design. “Sailing is about finding your path, whether it’s across an ocean or within yourself.” – Sven Yrvind In conclusion, making flanges around bulkhead hatches may seem complex at first glance, but by following Sven Yrvind’s meticulous process, enthusiasts can achieve professional-level results. Remember that the journey of boatbuilding is as rewarding as reaching your destination; it tests one’s patience and dedication. For those seeking to embark on this adventure or simply gain more insight into marine craftsmanship, Sven’s wisdom is invaluable.Once the flange is fully dried, Sven removes the clamps carefully, ensuring no damage occurs during this process. He then moves on to attaching four more pieces onto these main frames, completing two pairs of flanges for the bulkhead hatches.The Final Touches
While two flanges form the primary support structure around the hatches, Sven mentions there are two additional pieces required at each end to ensure comprehensive protection. This attention to detail highlights his commitment to producing a durable and reliable design. “Sailing is about finding your path, whether it’s across an ocean or within yourself.” – Sven Yrvind In conclusion, making flanges around bulkhead hatches may seem complex at first glance, but by following Sven Yrvind’s meticulous process, enthusiasts can achieve professional-level results. Remember that the journey of boatbuilding is as rewarding as reaching your destination; it tests one’s patience and dedication. For those seeking to embark on this adventure or simply gain more insight into marine craftsmanship, Sven’s wisdom is invaluable.After securely attaching the first portion of the flange, Sven allows ample time for it to dry before moving forward with additional steps. This patience and precision are key aspects of his successful boatbuilding methods.Step 4: Finishing Touches
Once the flange is fully dried, Sven removes the clamps carefully, ensuring no damage occurs during this process. He then moves on to attaching four more pieces onto these main frames, completing two pairs of flanges for the bulkhead hatches.The Final Touches
While two flanges form the primary support structure around the hatches, Sven mentions there are two additional pieces required at each end to ensure comprehensive protection. This attention to detail highlights his commitment to producing a durable and reliable design. “Sailing is about finding your path, whether it’s across an ocean or within yourself.” – Sven Yrvind In conclusion, making flanges around bulkhead hatches may seem complex at first glance, but by following Sven Yrvind’s meticulous process, enthusiasts can achieve professional-level results. Remember that the journey of boatbuilding is as rewarding as reaching your destination; it tests one’s patience and dedication. For those seeking to embark on this adventure or simply gain more insight into marine craftsmanship, Sven’s wisdom is invaluable.Sven proceeds to apply glue along one edge of the flange, ensuring a secure bond when clamped into place. He emphasizes that this stage is crucial for maintaining the structural integrity of the flange, which in turn safeguards the living area beneath the canvas when hatches are open.Step 3: Allowing Time to Dry
After securely attaching the first portion of the flange, Sven allows ample time for it to dry before moving forward with additional steps. This patience and precision are key aspects of his successful boatbuilding methods.Step 4: Finishing Touches
Once the flange is fully dried, Sven removes the clamps carefully, ensuring no damage occurs during this process. He then moves on to attaching four more pieces onto these main frames, completing two pairs of flanges for the bulkhead hatches.The Final Touches
While two flanges form the primary support structure around the hatches, Sven mentions there are two additional pieces required at each end to ensure comprehensive protection. This attention to detail highlights his commitment to producing a durable and reliable design. “Sailing is about finding your path, whether it’s across an ocean or within yourself.” – Sven Yrvind In conclusion, making flanges around bulkhead hatches may seem complex at first glance, but by following Sven Yrvind’s meticulous process, enthusiasts can achieve professional-level results. Remember that the journey of boatbuilding is as rewarding as reaching your destination; it tests one’s patience and dedication. For those seeking to embark on this adventure or simply gain more insight into marine craftsmanship, Sven’s wisdom is invaluable.Sven begins by explaining that working on flanges vertically and horizontally is significantly easier than doing so in a flat position. To simplify the process further, he divides the task into two or three steps as suggested by fellow expert “for for.” This approach not only makes it more manageable but also allows for greater precision in crafting each component.Step 2: Applying Glue and Securing
Sven proceeds to apply glue along one edge of the flange, ensuring a secure bond when clamped into place. He emphasizes that this stage is crucial for maintaining the structural integrity of the flange, which in turn safeguards the living area beneath the canvas when hatches are open.Step 3: Allowing Time to Dry
After securely attaching the first portion of the flange, Sven allows ample time for it to dry before moving forward with additional steps. This patience and precision are key aspects of his successful boatbuilding methods.Step 4: Finishing Touches
Once the flange is fully dried, Sven removes the clamps carefully, ensuring no damage occurs during this process. He then moves on to attaching four more pieces onto these main frames, completing two pairs of flanges for the bulkhead hatches.The Final Touches
While two flanges form the primary support structure around the hatches, Sven mentions there are two additional pieces required at each end to ensure comprehensive protection. This attention to detail highlights his commitment to producing a durable and reliable design. “Sailing is about finding your path, whether it’s across an ocean or within yourself.” – Sven Yrvind In conclusion, making flanges around bulkhead hatches may seem complex at first glance, but by following Sven Yrvind’s meticulous process, enthusiasts can achieve professional-level results. Remember that the journey of boatbuilding is as rewarding as reaching your destination; it tests one’s patience and dedication. For those seeking to embark on this adventure or simply gain more insight into marine craftsmanship, Sven’s wisdom is invaluable.Sven Yrvind, a renowned yacht designer and sailor, shares valuable insights on creating flanges around bulkhead hatches for canvas protection in this enlightening video. By following his expert guidance, boat enthusiasts can ensure their living areas remain secure while allowing unhindered access through the hatches.Step 1: Starting with the Flange
Sven begins by explaining that working on flanges vertically and horizontally is significantly easier than doing so in a flat position. To simplify the process further, he divides the task into two or three steps as suggested by fellow expert “for for.” This approach not only makes it more manageable but also allows for greater precision in crafting each component.Step 2: Applying Glue and Securing
Sven proceeds to apply glue along one edge of the flange, ensuring a secure bond when clamped into place. He emphasizes that this stage is crucial for maintaining the structural integrity of the flange, which in turn safeguards the living area beneath the canvas when hatches are open.Step 3: Allowing Time to Dry
After securely attaching the first portion of the flange, Sven allows ample time for it to dry before moving forward with additional steps. This patience and precision are key aspects of his successful boatbuilding methods.Step 4: Finishing Touches
Once the flange is fully dried, Sven removes the clamps carefully, ensuring no damage occurs during this process. He then moves on to attaching four more pieces onto these main frames, completing two pairs of flanges for the bulkhead hatches.The Final Touches
While two flanges form the primary support structure around the hatches, Sven mentions there are two additional pieces required at each end to ensure comprehensive protection. This attention to detail highlights his commitment to producing a durable and reliable design. “Sailing is about finding your path, whether it’s across an ocean or within yourself.” – Sven Yrvind In conclusion, making flanges around bulkhead hatches may seem complex at first glance, but by following Sven Yrvind’s meticulous process, enthusiasts can achieve professional-level results. Remember that the journey of boatbuilding is as rewarding as reaching your destination; it tests one’s patience and dedication. For those seeking to embark on this adventure or simply gain more insight into marine craftsmanship, Sven’s wisdom is invaluable.Making Flanges Around Bulkhead Hatches for Canvas
Sven Yrvind, a renowned yacht designer and sailor, shares valuable insights on creating flanges around bulkhead hatches for canvas protection in this enlightening video. By following his expert guidance, boat enthusiasts can ensure their living areas remain secure while allowing unhindered access through the hatches.Step 1: Starting with the Flange
Sven begins by explaining that working on flanges vertically and horizontally is significantly easier than doing so in a flat position. To simplify the process further, he divides the task into two or three steps as suggested by fellow expert “for for.” This approach not only makes it more manageable but also allows for greater precision in crafting each component.Step 2: Applying Glue and Securing
Sven proceeds to apply glue along one edge of the flange, ensuring a secure bond when clamped into place. He emphasizes that this stage is crucial for maintaining the structural integrity of the flange, which in turn safeguards the living area beneath the canvas when hatches are open.Step 3: Allowing Time to Dry
After securely attaching the first portion of the flange, Sven allows ample time for it to dry before moving forward with additional steps. This patience and precision are key aspects of his successful boatbuilding methods.Step 4: Finishing Touches
Once the flange is fully dried, Sven removes the clamps carefully, ensuring no damage occurs during this process. He then moves on to attaching four more pieces onto these main frames, completing two pairs of flanges for the bulkhead hatches.The Final Touches
While two flanges form the primary support structure around the hatches, Sven mentions there are two additional pieces required at each end to ensure comprehensive protection. This attention to detail highlights his commitment to producing a durable and reliable design. “Sailing is about finding your path, whether it’s across an ocean or within yourself.” – Sven Yrvind In conclusion, making flanges around bulkhead hatches may seem complex at first glance, but by following Sven Yrvind’s meticulous process, enthusiasts can achieve professional-level results. Remember that the journey of boatbuilding is as rewarding as reaching your destination; it tests one’s patience and dedication. For those seeking to embark on this adventure or simply gain more insight into marine craftsmanship, Sven’s wisdom is invaluable.Once the flange is fully dried, Sven removes the clamps carefully, ensuring no damage occurs during this process. He then moves on to attaching four more pieces onto these main frames, completing two pairs of flanges for the bulkhead hatches.The Final Touches
While two flanges form the primary support structure around the hatches, Sven mentions there are two additional pieces required at each end to ensure comprehensive protection. This attention to detail highlights his commitment to producing a durable and reliable design. “Sailing is about finding your path, whether it’s across an ocean or within yourself.” – Sven Yrvind In conclusion, making flanges around bulkhead hatches may seem complex at first glance, but by following Sven Yrvind’s meticulous process, enthusiasts can achieve professional-level results. Remember that the journey of boatbuilding is as rewarding as reaching your destination; it tests one’s patience and dedication. For those seeking to embark on this adventure or simply gain more insight into marine craftsmanship, Sven’s wisdom is invaluable.Making Flanges Around Bulkhead Hatches for Canvas
Sven Yrvind, a renowned yacht designer and sailor, shares valuable insights on creating flanges around bulkhead hatches for canvas protection in this enlightening video. By following his expert guidance, boat enthusiasts can ensure their living areas remain secure while allowing unhindered access through the hatches.Step 1: Starting with the Flange
Sven begins by explaining that working on flanges vertically and horizontally is significantly easier than doing so in a flat position. To simplify the process further, he divides the task into two or three steps as suggested by fellow expert “for for.” This approach not only makes it more manageable but also allows for greater precision in crafting each component.Step 2: Applying Glue and Securing
Sven proceeds to apply glue along one edge of the flange, ensuring a secure bond when clamped into place. He emphasizes that this stage is crucial for maintaining the structural integrity of the flange, which in turn safeguards the living area beneath the canvas when hatches are open.Step 3: Allowing Time to Dry
After securely attaching the first portion of the flange, Sven allows ample time for it to dry before moving forward with additional steps. This patience and precision are key aspects of his successful boatbuilding methods.Step 4: Finishing Touches
Once the flange is fully dried, Sven removes the clamps carefully, ensuring no damage occurs during this process. He then moves on to attaching four more pieces onto these main frames, completing two pairs of flanges for the bulkhead hatches.The Final Touches
While two flanges form the primary support structure around the hatches, Sven mentions there are two additional pieces required at each end to ensure comprehensive protection. This attention to detail highlights his commitment to producing a durable and reliable design. “Sailing is about finding your path, whether it’s across an ocean or within yourself.” – Sven Yrvind In conclusion, making flanges around bulkhead hatches may seem complex at first glance, but by following Sven Yrvind’s meticulous process, enthusiasts can achieve professional-level results. Remember that the journey of boatbuilding is as rewarding as reaching your destination; it tests one’s patience and dedication. For those seeking to embark on this adventure or simply gain more insight into marine craftsmanship, Sven’s wisdom is invaluable.Sven proceeds to apply glue along one edge of the flange, ensuring a secure bond when clamped into place. He emphasizes that this stage is crucial for maintaining the structural integrity of the flange, which in turn safeguards the living area beneath the canvas when hatches are open.Step 3: Allowing Time to Dry
After securely attaching the first portion of the flange, Sven allows ample time for it to dry before moving forward with additional steps. This patience and precision are key aspects of his successful boatbuilding methods.Step 4: Finishing Touches
Once the flange is fully dried, Sven removes the clamps carefully, ensuring no damage occurs during this process. He then moves on to attaching four more pieces onto these main frames, completing two pairs of flanges for the bulkhead hatches.The Final Touches
While two flanges form the primary support structure around the hatches, Sven mentions there are two additional pieces required at each end to ensure comprehensive protection. This attention to detail highlights his commitment to producing a durable and reliable design. “Sailing is about finding your path, whether it’s across an ocean or within yourself.” – Sven Yrvind In conclusion, making flanges around bulkhead hatches may seem complex at first glance, but by following Sven Yrvind’s meticulous process, enthusiasts can achieve professional-level results. Remember that the journey of boatbuilding is as rewarding as reaching your destination; it tests one’s patience and dedication. For those seeking to embark on this adventure or simply gain more insight into marine craftsmanship, Sven’s wisdom is invaluable.Sven Yrvind, a renowned yacht designer and sailor, shares valuable insights on creating flanges around bulkhead hatches for canvas protection in this enlightening video. By following his expert guidance, boat enthusiasts can ensure their living areas remain secure while allowing unhindered access through the hatches.Step 1: Starting with the Flange
Sven begins by explaining that working on flanges vertically and horizontally is significantly easier than doing so in a flat position. To simplify the process further, he divides the task into two or three steps as suggested by fellow expert “for for.” This approach not only makes it more manageable but also allows for greater precision in crafting each component.Step 2: Applying Glue and Securing
Sven proceeds to apply glue along one edge of the flange, ensuring a secure bond when clamped into place. He emphasizes that this stage is crucial for maintaining the structural integrity of the flange, which in turn safeguards the living area beneath the canvas when hatches are open.Step 3: Allowing Time to Dry
After securely attaching the first portion of the flange, Sven allows ample time for it to dry before moving forward with additional steps. This patience and precision are key aspects of his successful boatbuilding methods.Step 4: Finishing Touches
Once the flange is fully dried, Sven removes the clamps carefully, ensuring no damage occurs during this process. He then moves on to attaching four more pieces onto these main frames, completing two pairs of flanges for the bulkhead hatches.The Final Touches
While two flanges form the primary support structure around the hatches, Sven mentions there are two additional pieces required at each end to ensure comprehensive protection. This attention to detail highlights his commitment to producing a durable and reliable design. “Sailing is about finding your path, whether it’s across an ocean or within yourself.” – Sven Yrvind In conclusion, making flanges around bulkhead hatches may seem complex at first glance, but by following Sven Yrvind’s meticulous process, enthusiasts can achieve professional-level results. Remember that the journey of boatbuilding is as rewarding as reaching your destination; it tests one’s patience and dedication. For those seeking to embark on this adventure or simply gain more insight into marine craftsmanship, Sven’s wisdom is invaluable.Making Flanges Around Bulkhead Hatches for Canvas
Sven Yrvind, a renowned yacht designer and sailor, shares valuable insights on creating flanges around bulkhead hatches for canvas protection in this enlightening video. By following his expert guidance, boat enthusiasts can ensure their living areas remain secure while allowing unhindered access through the hatches.Step 1: Starting with the Flange
Sven begins by explaining that working on flanges vertically and horizontally is significantly easier than doing so in a flat position. To simplify the process further, he divides the task into two or three steps as suggested by fellow expert “for for.” This approach not only makes it more manageable but also allows for greater precision in crafting each component.Step 2: Applying Glue and Securing
Sven proceeds to apply glue along one edge of the flange, ensuring a secure bond when clamped into place. He emphasizes that this stage is crucial for maintaining the structural integrity of the flange, which in turn safeguards the living area beneath the canvas when hatches are open.Step 3: Allowing Time to Dry
After securely attaching the first portion of the flange, Sven allows ample time for it to dry before moving forward with additional steps. This patience and precision are key aspects of his successful boatbuilding methods.Step 4: Finishing Touches
Once the flange is fully dried, Sven removes the clamps carefully, ensuring no damage occurs during this process. He then moves on to attaching four more pieces onto these main frames, completing two pairs of flanges for the bulkhead hatches.The Final Touches
While two flanges form the primary support structure around the hatches, Sven mentions there are two additional pieces required at each end to ensure comprehensive protection. This attention to detail highlights his commitment to producing a durable and reliable design. “Sailing is about finding your path, whether it’s across an ocean or within yourself.” – Sven Yrvind In conclusion, making flanges around bulkhead hatches may seem complex at first glance, but by following Sven Yrvind’s meticulous process, enthusiasts can achieve professional-level results. Remember that the journey of boatbuilding is as rewarding as reaching your destination; it tests one’s patience and dedication. For those seeking to embark on this adventure or simply gain more insight into marine craftsmanship, Sven’s wisdom is invaluable.Sven begins by explaining that working on flanges vertically and horizontally is significantly easier than doing so in a flat position. To simplify the process further, he divides the task into two or three steps as suggested by fellow expert “for for.” This approach not only makes it more manageable but also allows for greater precision in crafting each component.Step 2: Applying Glue and Securing
Sven proceeds to apply glue along one edge of the flange, ensuring a secure bond when clamped into place. He emphasizes that this stage is crucial for maintaining the structural integrity of the flange, which in turn safeguards the living area beneath the canvas when hatches are open.Step 3: Allowing Time to Dry
After securely attaching the first portion of the flange, Sven allows ample time for it to dry before moving forward with additional steps. This patience and precision are key aspects of his successful boatbuilding methods.Step 4: Finishing Touches
Once the flange is fully dried, Sven removes the clamps carefully, ensuring no damage occurs during this process. He then moves on to attaching four more pieces onto these main frames, completing two pairs of flanges for the bulkhead hatches.The Final Touches
While two flanges form the primary support structure around the hatches, Sven mentions there are two additional pieces required at each end to ensure comprehensive protection. This attention to detail highlights his commitment to producing a durable and reliable design. “Sailing is about finding your path, whether it’s across an ocean or within yourself.” – Sven Yrvind In conclusion, making flanges around bulkhead hatches may seem complex at first glance, but by following Sven Yrvind’s meticulous process, enthusiasts can achieve professional-level results. Remember that the journey of boatbuilding is as rewarding as reaching your destination; it tests one’s patience and dedication. For those seeking to embark on this adventure or simply gain more insight into marine craftsmanship, Sven’s wisdom is invaluable.Sven Yrvind, a renowned yacht designer and sailor, shares valuable insights on creating flanges around bulkhead hatches for canvas protection in this enlightening video. By following his expert guidance, boat enthusiasts can ensure their living areas remain secure while allowing unhindered access through the hatches.Step 1: Starting with the Flange
Sven begins by explaining that working on flanges vertically and horizontally is significantly easier than doing so in a flat position. To simplify the process further, he divides the task into two or three steps as suggested by fellow expert “for for.” This approach not only makes it more manageable but also allows for greater precision in crafting each component.Step 2: Applying Glue and Securing
Sven proceeds to apply glue along one edge of the flange, ensuring a secure bond when clamped into place. He emphasizes that this stage is crucial for maintaining the structural integrity of the flange, which in turn safeguards the living area beneath the canvas when hatches are open.Step 3: Allowing Time to Dry
After securely attaching the first portion of the flange, Sven allows ample time for it to dry before moving forward with additional steps. This patience and precision are key aspects of his successful boatbuilding methods.Step 4: Finishing Touches
Once the flange is fully dried, Sven removes the clamps carefully, ensuring no damage occurs during this process. He then moves on to attaching four more pieces onto these main frames, completing two pairs of flanges for the bulkhead hatches.The Final Touches
While two flanges form the primary support structure around the hatches, Sven mentions there are two additional pieces required at each end to ensure comprehensive protection. This attention to detail highlights his commitment to producing a durable and reliable design. “Sailing is about finding your path, whether it’s across an ocean or within yourself.” – Sven Yrvind In conclusion, making flanges around bulkhead hatches may seem complex at first glance, but by following Sven Yrvind’s meticulous process, enthusiasts can achieve professional-level results. Remember that the journey of boatbuilding is as rewarding as reaching your destination; it tests one’s patience and dedication. For those seeking to embark on this adventure or simply gain more insight into marine craftsmanship, Sven’s wisdom is invaluable.Making Flanges Around Bulkhead Hatches for Canvas
Sven Yrvind, a renowned yacht designer and sailor, shares valuable insights on creating flanges around bulkhead hatches for canvas protection in this enlightening video. By following his expert guidance, boat enthusiasts can ensure their living areas remain secure while allowing unhindered access through the hatches.Step 1: Starting with the Flange
Sven begins by explaining that working on flanges vertically and horizontally is significantly easier than doing so in a flat position. To simplify the process further, he divides the task into two or three steps as suggested by fellow expert “for for.” This approach not only makes it more manageable but also allows for greater precision in crafting each component.Step 2: Applying Glue and Securing
Sven proceeds to apply glue along one edge of the flange, ensuring a secure bond when clamped into place. He emphasizes that this stage is crucial for maintaining the structural integrity of the flange, which in turn safeguards the living area beneath the canvas when hatches are open.Step 3: Allowing Time to Dry
After securely attaching the first portion of the flange, Sven allows ample time for it to dry before moving forward with additional steps. This patience and precision are key aspects of his successful boatbuilding methods.Step 4: Finishing Touches
Once the flange is fully dried, Sven removes the clamps carefully, ensuring no damage occurs during this process. He then moves on to attaching four more pieces onto these main frames, completing two pairs of flanges for the bulkhead hatches.The Final Touches
While two flanges form the primary support structure around the hatches, Sven mentions there are two additional pieces required at each end to ensure comprehensive protection. This attention to detail highlights his commitment to producing a durable and reliable design. “Sailing is about finding your path, whether it’s across an ocean or within yourself.” – Sven Yrvind In conclusion, making flanges around bulkhead hatches may seem complex at first glance, but by following Sven Yrvind’s meticulous process, enthusiasts can achieve professional-level results. Remember that the journey of boatbuilding is as rewarding as reaching your destination; it tests one’s patience and dedication. For those seeking to embark on this adventure or simply gain more insight into marine craftsmanship, Sven’s wisdom is invaluable.Once the flange is fully dried, Sven removes the clamps carefully, ensuring no damage occurs during this process. He then moves on to attaching four more pieces onto these main frames, completing two pairs of flanges for the bulkhead hatches.The Final Touches
While two flanges form the primary support structure around the hatches, Sven mentions there are two additional pieces required at each end to ensure comprehensive protection. This attention to detail highlights his commitment to producing a durable and reliable design. “Sailing is about finding your path, whether it’s across an ocean or within yourself.” – Sven Yrvind In conclusion, making flanges around bulkhead hatches may seem complex at first glance, but by following Sven Yrvind’s meticulous process, enthusiasts can achieve professional-level results. Remember that the journey of boatbuilding is as rewarding as reaching your destination; it tests one’s patience and dedication. For those seeking to embark on this adventure or simply gain more insight into marine craftsmanship, Sven’s wisdom is invaluable.Sven begins by explaining that working on flanges vertically and horizontally is significantly easier than doing so in a flat position. To simplify the process further, he divides the task into two or three steps as suggested by fellow expert “for for.” This approach not only makes it more manageable but also allows for greater precision in crafting each component.Step 2: Applying Glue and Securing
Sven proceeds to apply glue along one edge of the flange, ensuring a secure bond when clamped into place. He emphasizes that this stage is crucial for maintaining the structural integrity of the flange, which in turn safeguards the living area beneath the canvas when hatches are open.Step 3: Allowing Time to Dry
After securely attaching the first portion of the flange, Sven allows ample time for it to dry before moving forward with additional steps. This patience and precision are key aspects of his successful boatbuilding methods.Step 4: Finishing Touches
Once the flange is fully dried, Sven removes the clamps carefully, ensuring no damage occurs during this process. He then moves on to attaching four more pieces onto these main frames, completing two pairs of flanges for the bulkhead hatches.The Final Touches
While two flanges form the primary support structure around the hatches, Sven mentions there are two additional pieces required at each end to ensure comprehensive protection. This attention to detail highlights his commitment to producing a durable and reliable design. “Sailing is about finding your path, whether it’s across an ocean or within yourself.” – Sven Yrvind In conclusion, making flanges around bulkhead hatches may seem complex at first glance, but by following Sven Yrvind’s meticulous process, enthusiasts can achieve professional-level results. Remember that the journey of boatbuilding is as rewarding as reaching your destination; it tests one’s patience and dedication. For those seeking to embark on this adventure or simply gain more insight into marine craftsmanship, Sven’s wisdom is invaluable.Sven Yrvind, a renowned yacht designer and sailor, shares valuable insights on creating flanges around bulkhead hatches for canvas protection in this enlightening video. By following his expert guidance, boat enthusiasts can ensure their living areas remain secure while allowing unhindered access through the hatches.Step 1: Starting with the Flange
Sven begins by explaining that working on flanges vertically and horizontally is significantly easier than doing so in a flat position. To simplify the process further, he divides the task into two or three steps as suggested by fellow expert “for for.” This approach not only makes it more manageable but also allows for greater precision in crafting each component.Step 2: Applying Glue and Securing
Sven proceeds to apply glue along one edge of the flange, ensuring a secure bond when clamped into place. He emphasizes that this stage is crucial for maintaining the structural integrity of the flange, which in turn safeguards the living area beneath the canvas when hatches are open.Step 3: Allowing Time to Dry
After securely attaching the first portion of the flange, Sven allows ample time for it to dry before moving forward with additional steps. This patience and precision are key aspects of his successful boatbuilding methods.Step 4: Finishing Touches
Once the flange is fully dried, Sven removes the clamps carefully, ensuring no damage occurs during this process. He then moves on to attaching four more pieces onto these main frames, completing two pairs of flanges for the bulkhead hatches.The Final Touches
While two flanges form the primary support structure around the hatches, Sven mentions there are two additional pieces required at each end to ensure comprehensive protection. This attention to detail highlights his commitment to producing a durable and reliable design. “Sailing is about finding your path, whether it’s across an ocean or within yourself.” – Sven Yrvind In conclusion, making flanges around bulkhead hatches may seem complex at first glance, but by following Sven Yrvind’s meticulous process, enthusiasts can achieve professional-level results. Remember that the journey of boatbuilding is as rewarding as reaching your destination; it tests one’s patience and dedication. For those seeking to embark on this adventure or simply gain more insight into marine craftsmanship, Sven’s wisdom is invaluable.Making Flanges Around Bulkhead Hatches for Canvas
Sven Yrvind, a renowned yacht designer and sailor, shares valuable insights on creating flanges around bulkhead hatches for canvas protection in this enlightening video. By following his expert guidance, boat enthusiasts can ensure their living areas remain secure while allowing unhindered access through the hatches.Step 1: Starting with the Flange
Sven begins by explaining that working on flanges vertically and horizontally is significantly easier than doing so in a flat position. To simplify the process further, he divides the task into two or three steps as suggested by fellow expert “for for.” This approach not only makes it more manageable but also allows for greater precision in crafting each component.Step 2: Applying Glue and Securing
Sven proceeds to apply glue along one edge of the flange, ensuring a secure bond when clamped into place. He emphasizes that this stage is crucial for maintaining the structural integrity of the flange, which in turn safeguards the living area beneath the canvas when hatches are open.Step 3: Allowing Time to Dry
After securely attaching the first portion of the flange, Sven allows ample time for it to dry before moving forward with additional steps. This patience and precision are key aspects of his successful boatbuilding methods.Step 4: Finishing Touches
Once the flange is fully dried, Sven removes the clamps carefully, ensuring no damage occurs during this process. He then moves on to attaching four more pieces onto these main frames, completing two pairs of flanges for the bulkhead hatches.The Final Touches
While two flanges form the primary support structure around the hatches, Sven mentions there are two additional pieces required at each end to ensure comprehensive protection. This attention to detail highlights his commitment to producing a durable and reliable design. “Sailing is about finding your path, whether it’s across an ocean or within yourself.” – Sven Yrvind In conclusion, making flanges around bulkhead hatches may seem complex at first glance, but by following Sven Yrvind’s meticulous process, enthusiasts can achieve professional-level results. Remember that the journey of boatbuilding is as rewarding as reaching your destination; it tests one’s patience and dedication. For those seeking to embark on this adventure or simply gain more insight into marine craftsmanship, Sven’s wisdom is invaluable.After securely attaching the first portion of the flange, Sven allows ample time for it to dry before moving forward with additional steps. This patience and precision are key aspects of his successful boatbuilding methods.Step 4: Finishing Touches
Once the flange is fully dried, Sven removes the clamps carefully, ensuring no damage occurs during this process. He then moves on to attaching four more pieces onto these main frames, completing two pairs of flanges for the bulkhead hatches.The Final Touches
While two flanges form the primary support structure around the hatches, Sven mentions there are two additional pieces required at each end to ensure comprehensive protection. This attention to detail highlights his commitment to producing a durable and reliable design. “Sailing is about finding your path, whether it’s across an ocean or within yourself.” – Sven Yrvind In conclusion, making flanges around bulkhead hatches may seem complex at first glance, but by following Sven Yrvind’s meticulous process, enthusiasts can achieve professional-level results. Remember that the journey of boatbuilding is as rewarding as reaching your destination; it tests one’s patience and dedication. For those seeking to embark on this adventure or simply gain more insight into marine craftsmanship, Sven’s wisdom is invaluable.Sven begins by explaining that working on flanges vertically and horizontally is significantly easier than doing so in a flat position. To simplify the process further, he divides the task into two or three steps as suggested by fellow expert “for for.” This approach not only makes it more manageable but also allows for greater precision in crafting each component.Step 2: Applying Glue and Securing
Sven proceeds to apply glue along one edge of the flange, ensuring a secure bond when clamped into place. He emphasizes that this stage is crucial for maintaining the structural integrity of the flange, which in turn safeguards the living area beneath the canvas when hatches are open.Step 3: Allowing Time to Dry
After securely attaching the first portion of the flange, Sven allows ample time for it to dry before moving forward with additional steps. This patience and precision are key aspects of his successful boatbuilding methods.Step 4: Finishing Touches
Once the flange is fully dried, Sven removes the clamps carefully, ensuring no damage occurs during this process. He then moves on to attaching four more pieces onto these main frames, completing two pairs of flanges for the bulkhead hatches.The Final Touches
While two flanges form the primary support structure around the hatches, Sven mentions there are two additional pieces required at each end to ensure comprehensive protection. This attention to detail highlights his commitment to producing a durable and reliable design. “Sailing is about finding your path, whether it’s across an ocean or within yourself.” – Sven Yrvind In conclusion, making flanges around bulkhead hatches may seem complex at first glance, but by following Sven Yrvind’s meticulous process, enthusiasts can achieve professional-level results. Remember that the journey of boatbuilding is as rewarding as reaching your destination; it tests one’s patience and dedication. For those seeking to embark on this adventure or simply gain more insight into marine craftsmanship, Sven’s wisdom is invaluable.Sven Yrvind, a renowned yacht designer and sailor, shares valuable insights on creating flanges around bulkhead hatches for canvas protection in this enlightening video. By following his expert guidance, boat enthusiasts can ensure their living areas remain secure while allowing unhindered access through the hatches.Step 1: Starting with the Flange
Sven begins by explaining that working on flanges vertically and horizontally is significantly easier than doing so in a flat position. To simplify the process further, he divides the task into two or three steps as suggested by fellow expert “for for.” This approach not only makes it more manageable but also allows for greater precision in crafting each component.Step 2: Applying Glue and Securing
Sven proceeds to apply glue along one edge of the flange, ensuring a secure bond when clamped into place. He emphasizes that this stage is crucial for maintaining the structural integrity of the flange, which in turn safeguards the living area beneath the canvas when hatches are open.Step 3: Allowing Time to Dry
After securely attaching the first portion of the flange, Sven allows ample time for it to dry before moving forward with additional steps. This patience and precision are key aspects of his successful boatbuilding methods.Step 4: Finishing Touches
Once the flange is fully dried, Sven removes the clamps carefully, ensuring no damage occurs during this process. He then moves on to attaching four more pieces onto these main frames, completing two pairs of flanges for the bulkhead hatches.The Final Touches
While two flanges form the primary support structure around the hatches, Sven mentions there are two additional pieces required at each end to ensure comprehensive protection. This attention to detail highlights his commitment to producing a durable and reliable design. “Sailing is about finding your path, whether it’s across an ocean or within yourself.” – Sven Yrvind In conclusion, making flanges around bulkhead hatches may seem complex at first glance, but by following Sven Yrvind’s meticulous process, enthusiasts can achieve professional-level results. Remember that the journey of boatbuilding is as rewarding as reaching your destination; it tests one’s patience and dedication. For those seeking to embark on this adventure or simply gain more insight into marine craftsmanship, Sven’s wisdom is invaluable.Making Flanges Around Bulkhead Hatches for Canvas
Sven Yrvind, a renowned yacht designer and sailor, shares valuable insights on creating flanges around bulkhead hatches for canvas protection in this enlightening video. By following his expert guidance, boat enthusiasts can ensure their living areas remain secure while allowing unhindered access through the hatches.Step 1: Starting with the Flange
Sven begins by explaining that working on flanges vertically and horizontally is significantly easier than doing so in a flat position. To simplify the process further, he divides the task into two or three steps as suggested by fellow expert “for for.” This approach not only makes it more manageable but also allows for greater precision in crafting each component.Step 2: Applying Glue and Securing
Sven proceeds to apply glue along one edge of the flange, ensuring a secure bond when clamped into place. He emphasizes that this stage is crucial for maintaining the structural integrity of the flange, which in turn safeguards the living area beneath the canvas when hatches are open.Step 3: Allowing Time to Dry
After securely attaching the first portion of the flange, Sven allows ample time for it to dry before moving forward with additional steps. This patience and precision are key aspects of his successful boatbuilding methods.Step 4: Finishing Touches
Once the flange is fully dried, Sven removes the clamps carefully, ensuring no damage occurs during this process. He then moves on to attaching four more pieces onto these main frames, completing two pairs of flanges for the bulkhead hatches.The Final Touches
While two flanges form the primary support structure around the hatches, Sven mentions there are two additional pieces required at each end to ensure comprehensive protection. This attention to detail highlights his commitment to producing a durable and reliable design. “Sailing is about finding your path, whether it’s across an ocean or within yourself.” – Sven Yrvind In conclusion, making flanges around bulkhead hatches may seem complex at first glance, but by following Sven Yrvind’s meticulous process, enthusiasts can achieve professional-level results. Remember that the journey of boatbuilding is as rewarding as reaching your destination; it tests one’s patience and dedication. For those seeking to embark on this adventure or simply gain more insight into marine craftsmanship, Sven’s wisdom is invaluable.Sven proceeds to apply glue along one edge of the flange, ensuring a secure bond when clamped into place. He emphasizes that this stage is crucial for maintaining the structural integrity of the flange, which in turn safeguards the living area beneath the canvas when hatches are open.Step 3: Allowing Time to Dry
After securely attaching the first portion of the flange, Sven allows ample time for it to dry before moving forward with additional steps. This patience and precision are key aspects of his successful boatbuilding methods.Step 4: Finishing Touches
Once the flange is fully dried, Sven removes the clamps carefully, ensuring no damage occurs during this process. He then moves on to attaching four more pieces onto these main frames, completing two pairs of flanges for the bulkhead hatches.The Final Touches
While two flanges form the primary support structure around the hatches, Sven mentions there are two additional pieces required at each end to ensure comprehensive protection. This attention to detail highlights his commitment to producing a durable and reliable design. “Sailing is about finding your path, whether it’s across an ocean or within yourself.” – Sven Yrvind In conclusion, making flanges around bulkhead hatches may seem complex at first glance, but by following Sven Yrvind’s meticulous process, enthusiasts can achieve professional-level results. Remember that the journey of boatbuilding is as rewarding as reaching your destination; it tests one’s patience and dedication. For those seeking to embark on this adventure or simply gain more insight into marine craftsmanship, Sven’s wisdom is invaluable.Sven begins by explaining that working on flanges vertically and horizontally is significantly easier than doing so in a flat position. To simplify the process further, he divides the task into two or three steps as suggested by fellow expert “for for.” This approach not only makes it more manageable but also allows for greater precision in crafting each component.Step 2: Applying Glue and Securing
Sven proceeds to apply glue along one edge of the flange, ensuring a secure bond when clamped into place. He emphasizes that this stage is crucial for maintaining the structural integrity of the flange, which in turn safeguards the living area beneath the canvas when hatches are open.Step 3: Allowing Time to Dry
After securely attaching the first portion of the flange, Sven allows ample time for it to dry before moving forward with additional steps. This patience and precision are key aspects of his successful boatbuilding methods.Step 4: Finishing Touches
Once the flange is fully dried, Sven removes the clamps carefully, ensuring no damage occurs during this process. He then moves on to attaching four more pieces onto these main frames, completing two pairs of flanges for the bulkhead hatches.The Final Touches
While two flanges form the primary support structure around the hatches, Sven mentions there are two additional pieces required at each end to ensure comprehensive protection. This attention to detail highlights his commitment to producing a durable and reliable design. “Sailing is about finding your path, whether it’s across an ocean or within yourself.” – Sven Yrvind In conclusion, making flanges around bulkhead hatches may seem complex at first glance, but by following Sven Yrvind’s meticulous process, enthusiasts can achieve professional-level results. Remember that the journey of boatbuilding is as rewarding as reaching your destination; it tests one’s patience and dedication. For those seeking to embark on this adventure or simply gain more insight into marine craftsmanship, Sven’s wisdom is invaluable.Sven Yrvind, a renowned yacht designer and sailor, shares valuable insights on creating flanges around bulkhead hatches for canvas protection in this enlightening video. By following his expert guidance, boat enthusiasts can ensure their living areas remain secure while allowing unhindered access through the hatches.Step 1: Starting with the Flange
Sven begins by explaining that working on flanges vertically and horizontally is significantly easier than doing so in a flat position. To simplify the process further, he divides the task into two or three steps as suggested by fellow expert “for for.” This approach not only makes it more manageable but also allows for greater precision in crafting each component.Step 2: Applying Glue and Securing
Sven proceeds to apply glue along one edge of the flange, ensuring a secure bond when clamped into place. He emphasizes that this stage is crucial for maintaining the structural integrity of the flange, which in turn safeguards the living area beneath the canvas when hatches are open.Step 3: Allowing Time to Dry
After securely attaching the first portion of the flange, Sven allows ample time for it to dry before moving forward with additional steps. This patience and precision are key aspects of his successful boatbuilding methods.Step 4: Finishing Touches
Once the flange is fully dried, Sven removes the clamps carefully, ensuring no damage occurs during this process. He then moves on to attaching four more pieces onto these main frames, completing two pairs of flanges for the bulkhead hatches.The Final Touches
While two flanges form the primary support structure around the hatches, Sven mentions there are two additional pieces required at each end to ensure comprehensive protection. This attention to detail highlights his commitment to producing a durable and reliable design. “Sailing is about finding your path, whether it’s across an ocean or within yourself.” – Sven Yrvind In conclusion, making flanges around bulkhead hatches may seem complex at first glance, but by following Sven Yrvind’s meticulous process, enthusiasts can achieve professional-level results. Remember that the journey of boatbuilding is as rewarding as reaching your destination; it tests one’s patience and dedication. For those seeking to embark on this adventure or simply gain more insight into marine craftsmanship, Sven’s wisdom is invaluable.Making Flanges Around Bulkhead Hatches for Canvas
Sven Yrvind, a renowned yacht designer and sailor, shares valuable insights on creating flanges around bulkhead hatches for canvas protection in this enlightening video. By following his expert guidance, boat enthusiasts can ensure their living areas remain secure while allowing unhindered access through the hatches.Step 1: Starting with the Flange
Sven begins by explaining that working on flanges vertically and horizontally is significantly easier than doing so in a flat position. To simplify the process further, he divides the task into two or three steps as suggested by fellow expert “for for.” This approach not only makes it more manageable but also allows for greater precision in crafting each component.Step 2: Applying Glue and Securing
Sven proceeds to apply glue along one edge of the flange, ensuring a secure bond when clamped into place. He emphasizes that this stage is crucial for maintaining the structural integrity of the flange, which in turn safeguards the living area beneath the canvas when hatches are open.Step 3: Allowing Time to Dry
After securely attaching the first portion of the flange, Sven allows ample time for it to dry before moving forward with additional steps. This patience and precision are key aspects of his successful boatbuilding methods.Step 4: Finishing Touches
Once the flange is fully dried, Sven removes the clamps carefully, ensuring no damage occurs during this process. He then moves on to attaching four more pieces onto these main frames, completing two pairs of flanges for the bulkhead hatches.The Final Touches
While two flanges form the primary support structure around the hatches, Sven mentions there are two additional pieces required at each end to ensure comprehensive protection. This attention to detail highlights his commitment to producing a durable and reliable design. “Sailing is about finding your path, whether it’s across an ocean or within yourself.” – Sven Yrvind In conclusion, making flanges around bulkhead hatches may seem complex at first glance, but by following Sven Yrvind’s meticulous process, enthusiasts can achieve professional-level results. Remember that the journey of boatbuilding is as rewarding as reaching your destination; it tests one’s patience and dedication. For those seeking to embark on this adventure or simply gain more insight into marine craftsmanship, Sven’s wisdom is invaluable.Once the flange is fully dried, Sven removes the clamps carefully, ensuring no damage occurs during this process. He then moves on to attaching four more pieces onto these main frames, completing two pairs of flanges for the bulkhead hatches.The Final Touches
While two flanges form the primary support structure around the hatches, Sven mentions there are two additional pieces required at each end to ensure comprehensive protection. This attention to detail highlights his commitment to producing a durable and reliable design. “Sailing is about finding your path, whether it’s across an ocean or within yourself.” – Sven Yrvind In conclusion, making flanges around bulkhead hatches may seem complex at first glance, but by following Sven Yrvind’s meticulous process, enthusiasts can achieve professional-level results. Remember that the journey of boatbuilding is as rewarding as reaching your destination; it tests one’s patience and dedication. For those seeking to embark on this adventure or simply gain more insight into marine craftsmanship, Sven’s wisdom is invaluable.Sven proceeds to apply glue along one edge of the flange, ensuring a secure bond when clamped into place. He emphasizes that this stage is crucial for maintaining the structural integrity of the flange, which in turn safeguards the living area beneath the canvas when hatches are open.Step 3: Allowing Time to Dry
After securely attaching the first portion of the flange, Sven allows ample time for it to dry before moving forward with additional steps. This patience and precision are key aspects of his successful boatbuilding methods.Step 4: Finishing Touches
Once the flange is fully dried, Sven removes the clamps carefully, ensuring no damage occurs during this process. He then moves on to attaching four more pieces onto these main frames, completing two pairs of flanges for the bulkhead hatches.The Final Touches
While two flanges form the primary support structure around the hatches, Sven mentions there are two additional pieces required at each end to ensure comprehensive protection. This attention to detail highlights his commitment to producing a durable and reliable design. “Sailing is about finding your path, whether it’s across an ocean or within yourself.” – Sven Yrvind In conclusion, making flanges around bulkhead hatches may seem complex at first glance, but by following Sven Yrvind’s meticulous process, enthusiasts can achieve professional-level results. Remember that the journey of boatbuilding is as rewarding as reaching your destination; it tests one’s patience and dedication. For those seeking to embark on this adventure or simply gain more insight into marine craftsmanship, Sven’s wisdom is invaluable.Sven begins by explaining that working on flanges vertically and horizontally is significantly easier than doing so in a flat position. To simplify the process further, he divides the task into two or three steps as suggested by fellow expert “for for.” This approach not only makes it more manageable but also allows for greater precision in crafting each component.Step 2: Applying Glue and Securing
Sven proceeds to apply glue along one edge of the flange, ensuring a secure bond when clamped into place. He emphasizes that this stage is crucial for maintaining the structural integrity of the flange, which in turn safeguards the living area beneath the canvas when hatches are open.Step 3: Allowing Time to Dry
After securely attaching the first portion of the flange, Sven allows ample time for it to dry before moving forward with additional steps. This patience and precision are key aspects of his successful boatbuilding methods.Step 4: Finishing Touches
Once the flange is fully dried, Sven removes the clamps carefully, ensuring no damage occurs during this process. He then moves on to attaching four more pieces onto these main frames, completing two pairs of flanges for the bulkhead hatches.The Final Touches
While two flanges form the primary support structure around the hatches, Sven mentions there are two additional pieces required at each end to ensure comprehensive protection. This attention to detail highlights his commitment to producing a durable and reliable design. “Sailing is about finding your path, whether it’s across an ocean or within yourself.” – Sven Yrvind In conclusion, making flanges around bulkhead hatches may seem complex at first glance, but by following Sven Yrvind’s meticulous process, enthusiasts can achieve professional-level results. Remember that the journey of boatbuilding is as rewarding as reaching your destination; it tests one’s patience and dedication. For those seeking to embark on this adventure or simply gain more insight into marine craftsmanship, Sven’s wisdom is invaluable.Sven Yrvind, a renowned yacht designer and sailor, shares valuable insights on creating flanges around bulkhead hatches for canvas protection in this enlightening video. By following his expert guidance, boat enthusiasts can ensure their living areas remain secure while allowing unhindered access through the hatches.Step 1: Starting with the Flange
Sven begins by explaining that working on flanges vertically and horizontally is significantly easier than doing so in a flat position. To simplify the process further, he divides the task into two or three steps as suggested by fellow expert “for for.” This approach not only makes it more manageable but also allows for greater precision in crafting each component.Step 2: Applying Glue and Securing
Sven proceeds to apply glue along one edge of the flange, ensuring a secure bond when clamped into place. He emphasizes that this stage is crucial for maintaining the structural integrity of the flange, which in turn safeguards the living area beneath the canvas when hatches are open.Step 3: Allowing Time to Dry
After securely attaching the first portion of the flange, Sven allows ample time for it to dry before moving forward with additional steps. This patience and precision are key aspects of his successful boatbuilding methods.Step 4: Finishing Touches
Once the flange is fully dried, Sven removes the clamps carefully, ensuring no damage occurs during this process. He then moves on to attaching four more pieces onto these main frames, completing two pairs of flanges for the bulkhead hatches.The Final Touches
While two flanges form the primary support structure around the hatches, Sven mentions there are two additional pieces required at each end to ensure comprehensive protection. This attention to detail highlights his commitment to producing a durable and reliable design. “Sailing is about finding your path, whether it’s across an ocean or within yourself.” – Sven Yrvind In conclusion, making flanges around bulkhead hatches may seem complex at first glance, but by following Sven Yrvind’s meticulous process, enthusiasts can achieve professional-level results. Remember that the journey of boatbuilding is as rewarding as reaching your destination; it tests one’s patience and dedication. For those seeking to embark on this adventure or simply gain more insight into marine craftsmanship, Sven’s wisdom is invaluable.Making Flanges Around Bulkhead Hatches for Canvas
Sven Yrvind, a renowned yacht designer and sailor, shares valuable insights on creating flanges around bulkhead hatches for canvas protection in this enlightening video. By following his expert guidance, boat enthusiasts can ensure their living areas remain secure while allowing unhindered access through the hatches.Step 1: Starting with the Flange
Sven begins by explaining that working on flanges vertically and horizontally is significantly easier than doing so in a flat position. To simplify the process further, he divides the task into two or three steps as suggested by fellow expert “for for.” This approach not only makes it more manageable but also allows for greater precision in crafting each component.Step 2: Applying Glue and Securing
Sven proceeds to apply glue along one edge of the flange, ensuring a secure bond when clamped into place. He emphasizes that this stage is crucial for maintaining the structural integrity of the flange, which in turn safeguards the living area beneath the canvas when hatches are open.Step 3: Allowing Time to Dry
After securely attaching the first portion of the flange, Sven allows ample time for it to dry before moving forward with additional steps. This patience and precision are key aspects of his successful boatbuilding methods.Step 4: Finishing Touches
Once the flange is fully dried, Sven removes the clamps carefully, ensuring no damage occurs during this process. He then moves on to attaching four more pieces onto these main frames, completing two pairs of flanges for the bulkhead hatches.The Final Touches
While two flanges form the primary support structure around the hatches, Sven mentions there are two additional pieces required at each end to ensure comprehensive protection. This attention to detail highlights his commitment to producing a durable and reliable design. “Sailing is about finding your path, whether it’s across an ocean or within yourself.” – Sven Yrvind In conclusion, making flanges around bulkhead hatches may seem complex at first glance, but by following Sven Yrvind’s meticulous process, enthusiasts can achieve professional-level results. Remember that the journey of boatbuilding is as rewarding as reaching your destination; it tests one’s patience and dedication. For those seeking to embark on this adventure or simply gain more insight into marine craftsmanship, Sven’s wisdom is invaluable.After securely attaching the first portion of the flange, Sven allows ample time for it to dry before moving forward with additional steps. This patience and precision are key aspects of his successful boatbuilding methods.Step 4: Finishing Touches
Once the flange is fully dried, Sven removes the clamps carefully, ensuring no damage occurs during this process. He then moves on to attaching four more pieces onto these main frames, completing two pairs of flanges for the bulkhead hatches.The Final Touches
While two flanges form the primary support structure around the hatches, Sven mentions there are two additional pieces required at each end to ensure comprehensive protection. This attention to detail highlights his commitment to producing a durable and reliable design. “Sailing is about finding your path, whether it’s across an ocean or within yourself.” – Sven Yrvind In conclusion, making flanges around bulkhead hatches may seem complex at first glance, but by following Sven Yrvind’s meticulous process, enthusiasts can achieve professional-level results. Remember that the journey of boatbuilding is as rewarding as reaching your destination; it tests one’s patience and dedication. For those seeking to embark on this adventure or simply gain more insight into marine craftsmanship, Sven’s wisdom is invaluable.Sven proceeds to apply glue along one edge of the flange, ensuring a secure bond when clamped into place. He emphasizes that this stage is crucial for maintaining the structural integrity of the flange, which in turn safeguards the living area beneath the canvas when hatches are open.Step 3: Allowing Time to Dry
After securely attaching the first portion of the flange, Sven allows ample time for it to dry before moving forward with additional steps. This patience and precision are key aspects of his successful boatbuilding methods.Step 4: Finishing Touches
Once the flange is fully dried, Sven removes the clamps carefully, ensuring no damage occurs during this process. He then moves on to attaching four more pieces onto these main frames, completing two pairs of flanges for the bulkhead hatches.The Final Touches
While two flanges form the primary support structure around the hatches, Sven mentions there are two additional pieces required at each end to ensure comprehensive protection. This attention to detail highlights his commitment to producing a durable and reliable design. “Sailing is about finding your path, whether it’s across an ocean or within yourself.” – Sven Yrvind In conclusion, making flanges around bulkhead hatches may seem complex at first glance, but by following Sven Yrvind’s meticulous process, enthusiasts can achieve professional-level results. Remember that the journey of boatbuilding is as rewarding as reaching your destination; it tests one’s patience and dedication. For those seeking to embark on this adventure or simply gain more insight into marine craftsmanship, Sven’s wisdom is invaluable.Sven begins by explaining that working on flanges vertically and horizontally is significantly easier than doing so in a flat position. To simplify the process further, he divides the task into two or three steps as suggested by fellow expert “for for.” This approach not only makes it more manageable but also allows for greater precision in crafting each component.Step 2: Applying Glue and Securing
Sven proceeds to apply glue along one edge of the flange, ensuring a secure bond when clamped into place. He emphasizes that this stage is crucial for maintaining the structural integrity of the flange, which in turn safeguards the living area beneath the canvas when hatches are open.Step 3: Allowing Time to Dry
After securely attaching the first portion of the flange, Sven allows ample time for it to dry before moving forward with additional steps. This patience and precision are key aspects of his successful boatbuilding methods.Step 4: Finishing Touches
Once the flange is fully dried, Sven removes the clamps carefully, ensuring no damage occurs during this process. He then moves on to attaching four more pieces onto these main frames, completing two pairs of flanges for the bulkhead hatches.The Final Touches
While two flanges form the primary support structure around the hatches, Sven mentions there are two additional pieces required at each end to ensure comprehensive protection. This attention to detail highlights his commitment to producing a durable and reliable design. “Sailing is about finding your path, whether it’s across an ocean or within yourself.” – Sven Yrvind In conclusion, making flanges around bulkhead hatches may seem complex at first glance, but by following Sven Yrvind’s meticulous process, enthusiasts can achieve professional-level results. Remember that the journey of boatbuilding is as rewarding as reaching your destination; it tests one’s patience and dedication. For those seeking to embark on this adventure or simply gain more insight into marine craftsmanship, Sven’s wisdom is invaluable.Sven Yrvind, a renowned yacht designer and sailor, shares valuable insights on creating flanges around bulkhead hatches for canvas protection in this enlightening video. By following his expert guidance, boat enthusiasts can ensure their living areas remain secure while allowing unhindered access through the hatches.Step 1: Starting with the Flange
Sven begins by explaining that working on flanges vertically and horizontally is significantly easier than doing so in a flat position. To simplify the process further, he divides the task into two or three steps as suggested by fellow expert “for for.” This approach not only makes it more manageable but also allows for greater precision in crafting each component.Step 2: Applying Glue and Securing
Sven proceeds to apply glue along one edge of the flange, ensuring a secure bond when clamped into place. He emphasizes that this stage is crucial for maintaining the structural integrity of the flange, which in turn safeguards the living area beneath the canvas when hatches are open.Step 3: Allowing Time to Dry
After securely attaching the first portion of the flange, Sven allows ample time for it to dry before moving forward with additional steps. This patience and precision are key aspects of his successful boatbuilding methods.Step 4: Finishing Touches
Once the flange is fully dried, Sven removes the clamps carefully, ensuring no damage occurs during this process. He then moves on to attaching four more pieces onto these main frames, completing two pairs of flanges for the bulkhead hatches.The Final Touches
While two flanges form the primary support structure around the hatches, Sven mentions there are two additional pieces required at each end to ensure comprehensive protection. This attention to detail highlights his commitment to producing a durable and reliable design. “Sailing is about finding your path, whether it’s across an ocean or within yourself.” – Sven Yrvind In conclusion, making flanges around bulkhead hatches may seem complex at first glance, but by following Sven Yrvind’s meticulous process, enthusiasts can achieve professional-level results. Remember that the journey of boatbuilding is as rewarding as reaching your destination; it tests one’s patience and dedication. For those seeking to embark on this adventure or simply gain more insight into marine craftsmanship, Sven’s wisdom is invaluable.Making Flanges Around Bulkhead Hatches for Canvas
Sven Yrvind, a renowned yacht designer and sailor, shares valuable insights on creating flanges around bulkhead hatches for canvas protection in this enlightening video. By following his expert guidance, boat enthusiasts can ensure their living areas remain secure while allowing unhindered access through the hatches.Step 1: Starting with the Flange
Sven begins by explaining that working on flanges vertically and horizontally is significantly easier than doing so in a flat position. To simplify the process further, he divides the task into two or three steps as suggested by fellow expert “for for.” This approach not only makes it more manageable but also allows for greater precision in crafting each component.Step 2: Applying Glue and Securing
Sven proceeds to apply glue along one edge of the flange, ensuring a secure bond when clamped into place. He emphasizes that this stage is crucial for maintaining the structural integrity of the flange, which in turn safeguards the living area beneath the canvas when hatches are open.Step 3: Allowing Time to Dry
After securely attaching the first portion of the flange, Sven allows ample time for it to dry before moving forward with additional steps. This patience and precision are key aspects of his successful boatbuilding methods.Step 4: Finishing Touches
Once the flange is fully dried, Sven removes the clamps carefully, ensuring no damage occurs during this process. He then moves on to attaching four more pieces onto these main frames, completing two pairs of flanges for the bulkhead hatches.The Final Touches
While two flanges form the primary support structure around the hatches, Sven mentions there are two additional pieces required at each end to ensure comprehensive protection. This attention to detail highlights his commitment to producing a durable and reliable design. “Sailing is about finding your path, whether it’s across an ocean or within yourself.” – Sven Yrvind In conclusion, making flanges around bulkhead hatches may seem complex at first glance, but by following Sven Yrvind’s meticulous process, enthusiasts can achieve professional-level results. Remember that the journey of boatbuilding is as rewarding as reaching your destination; it tests one’s patience and dedication. For those seeking to embark on this adventure or simply gain more insight into marine craftsmanship, Sven’s wisdom is invaluable.Once the flange is fully dried, Sven removes the clamps carefully, ensuring no damage occurs during this process. He then moves on to attaching four more pieces onto these main frames, completing two pairs of flanges for the bulkhead hatches.The Final Touches
While two flanges form the primary support structure around the hatches, Sven mentions there are two additional pieces required at each end to ensure comprehensive protection. This attention to detail highlights his commitment to producing a durable and reliable design. “Sailing is about finding your path, whether it’s across an ocean or within yourself.” – Sven Yrvind In conclusion, making flanges around bulkhead hatches may seem complex at first glance, but by following Sven Yrvind’s meticulous process, enthusiasts can achieve professional-level results. Remember that the journey of boatbuilding is as rewarding as reaching your destination; it tests one’s patience and dedication. For those seeking to embark on this adventure or simply gain more insight into marine craftsmanship, Sven’s wisdom is invaluable.After securely attaching the first portion of the flange, Sven allows ample time for it to dry before moving forward with additional steps. This patience and precision are key aspects of his successful boatbuilding methods.Step 4: Finishing Touches
Once the flange is fully dried, Sven removes the clamps carefully, ensuring no damage occurs during this process. He then moves on to attaching four more pieces onto these main frames, completing two pairs of flanges for the bulkhead hatches.The Final Touches
While two flanges form the primary support structure around the hatches, Sven mentions there are two additional pieces required at each end to ensure comprehensive protection. This attention to detail highlights his commitment to producing a durable and reliable design. “Sailing is about finding your path, whether it’s across an ocean or within yourself.” – Sven Yrvind In conclusion, making flanges around bulkhead hatches may seem complex at first glance, but by following Sven Yrvind’s meticulous process, enthusiasts can achieve professional-level results. Remember that the journey of boatbuilding is as rewarding as reaching your destination; it tests one’s patience and dedication. For those seeking to embark on this adventure or simply gain more insight into marine craftsmanship, Sven’s wisdom is invaluable.Sven proceeds to apply glue along one edge of the flange, ensuring a secure bond when clamped into place. He emphasizes that this stage is crucial for maintaining the structural integrity of the flange, which in turn safeguards the living area beneath the canvas when hatches are open.Step 3: Allowing Time to Dry
After securely attaching the first portion of the flange, Sven allows ample time for it to dry before moving forward with additional steps. This patience and precision are key aspects of his successful boatbuilding methods.Step 4: Finishing Touches
Once the flange is fully dried, Sven removes the clamps carefully, ensuring no damage occurs during this process. He then moves on to attaching four more pieces onto these main frames, completing two pairs of flanges for the bulkhead hatches.The Final Touches
While two flanges form the primary support structure around the hatches, Sven mentions there are two additional pieces required at each end to ensure comprehensive protection. This attention to detail highlights his commitment to producing a durable and reliable design. “Sailing is about finding your path, whether it’s across an ocean or within yourself.” – Sven Yrvind In conclusion, making flanges around bulkhead hatches may seem complex at first glance, but by following Sven Yrvind’s meticulous process, enthusiasts can achieve professional-level results. Remember that the journey of boatbuilding is as rewarding as reaching your destination; it tests one’s patience and dedication. For those seeking to embark on this adventure or simply gain more insight into marine craftsmanship, Sven’s wisdom is invaluable.Sven begins by explaining that working on flanges vertically and horizontally is significantly easier than doing so in a flat position. To simplify the process further, he divides the task into two or three steps as suggested by fellow expert “for for.” This approach not only makes it more manageable but also allows for greater precision in crafting each component.Step 2: Applying Glue and Securing
Sven proceeds to apply glue along one edge of the flange, ensuring a secure bond when clamped into place. He emphasizes that this stage is crucial for maintaining the structural integrity of the flange, which in turn safeguards the living area beneath the canvas when hatches are open.Step 3: Allowing Time to Dry
After securely attaching the first portion of the flange, Sven allows ample time for it to dry before moving forward with additional steps. This patience and precision are key aspects of his successful boatbuilding methods.Step 4: Finishing Touches
Once the flange is fully dried, Sven removes the clamps carefully, ensuring no damage occurs during this process. He then moves on to attaching four more pieces onto these main frames, completing two pairs of flanges for the bulkhead hatches.The Final Touches
While two flanges form the primary support structure around the hatches, Sven mentions there are two additional pieces required at each end to ensure comprehensive protection. This attention to detail highlights his commitment to producing a durable and reliable design. “Sailing is about finding your path, whether it’s across an ocean or within yourself.” – Sven Yrvind In conclusion, making flanges around bulkhead hatches may seem complex at first glance, but by following Sven Yrvind’s meticulous process, enthusiasts can achieve professional-level results. Remember that the journey of boatbuilding is as rewarding as reaching your destination; it tests one’s patience and dedication. For those seeking to embark on this adventure or simply gain more insight into marine craftsmanship, Sven’s wisdom is invaluable.Sven Yrvind, a renowned yacht designer and sailor, shares valuable insights on creating flanges around bulkhead hatches for canvas protection in this enlightening video. By following his expert guidance, boat enthusiasts can ensure their living areas remain secure while allowing unhindered access through the hatches.Step 1: Starting with the Flange
Sven begins by explaining that working on flanges vertically and horizontally is significantly easier than doing so in a flat position. To simplify the process further, he divides the task into two or three steps as suggested by fellow expert “for for.” This approach not only makes it more manageable but also allows for greater precision in crafting each component.Step 2: Applying Glue and Securing
Sven proceeds to apply glue along one edge of the flange, ensuring a secure bond when clamped into place. He emphasizes that this stage is crucial for maintaining the structural integrity of the flange, which in turn safeguards the living area beneath the canvas when hatches are open.Step 3: Allowing Time to Dry
After securely attaching the first portion of the flange, Sven allows ample time for it to dry before moving forward with additional steps. This patience and precision are key aspects of his successful boatbuilding methods.Step 4: Finishing Touches
Once the flange is fully dried, Sven removes the clamps carefully, ensuring no damage occurs during this process. He then moves on to attaching four more pieces onto these main frames, completing two pairs of flanges for the bulkhead hatches.The Final Touches
While two flanges form the primary support structure around the hatches, Sven mentions there are two additional pieces required at each end to ensure comprehensive protection. This attention to detail highlights his commitment to producing a durable and reliable design. “Sailing is about finding your path, whether it’s across an ocean or within yourself.” – Sven Yrvind In conclusion, making flanges around bulkhead hatches may seem complex at first glance, but by following Sven Yrvind’s meticulous process, enthusiasts can achieve professional-level results. Remember that the journey of boatbuilding is as rewarding as reaching your destination; it tests one’s patience and dedication. For those seeking to embark on this adventure or simply gain more insight into marine craftsmanship, Sven’s wisdom is invaluable.Making Flanges Around Bulkhead Hatches for Canvas
Sven Yrvind, a renowned yacht designer and sailor, shares valuable insights on creating flanges around bulkhead hatches for canvas protection in this enlightening video. By following his expert guidance, boat enthusiasts can ensure their living areas remain secure while allowing unhindered access through the hatches.Step 1: Starting with the Flange
Sven begins by explaining that working on flanges vertically and horizontally is significantly easier than doing so in a flat position. To simplify the process further, he divides the task into two or three steps as suggested by fellow expert “for for.” This approach not only makes it more manageable but also allows for greater precision in crafting each component.Step 2: Applying Glue and Securing
Sven proceeds to apply glue along one edge of the flange, ensuring a secure bond when clamped into place. He emphasizes that this stage is crucial for maintaining the structural integrity of the flange, which in turn safeguards the living area beneath the canvas when hatches are open.Step 3: Allowing Time to Dry
After securely attaching the first portion of the flange, Sven allows ample time for it to dry before moving forward with additional steps. This patience and precision are key aspects of his successful boatbuilding methods.Step 4: Finishing Touches
Once the flange is fully dried, Sven removes the clamps carefully, ensuring no damage occurs during this process. He then moves on to attaching four more pieces onto these main frames, completing two pairs of flanges for the bulkhead hatches.The Final Touches
While two flanges form the primary support structure around the hatches, Sven mentions there are two additional pieces required at each end to ensure comprehensive protection. This attention to detail highlights his commitment to producing a durable and reliable design. “Sailing is about finding your path, whether it’s across an ocean or within yourself.” – Sven Yrvind In conclusion, making flanges around bulkhead hatches may seem complex at first glance, but by following Sven Yrvind’s meticulous process, enthusiasts can achieve professional-level results. Remember that the journey of boatbuilding is as rewarding as reaching your destination; it tests one’s patience and dedication. For those seeking to embark on this adventure or simply gain more insight into marine craftsmanship, Sven’s wisdom is invaluable.After securely attaching the first portion of the flange, Sven allows ample time for it to dry before moving forward with additional steps. This patience and precision are key aspects of his successful boatbuilding methods.Step 4: Finishing Touches
Once the flange is fully dried, Sven removes the clamps carefully, ensuring no damage occurs during this process. He then moves on to attaching four more pieces onto these main frames, completing two pairs of flanges for the bulkhead hatches.The Final Touches
While two flanges form the primary support structure around the hatches, Sven mentions there are two additional pieces required at each end to ensure comprehensive protection. This attention to detail highlights his commitment to producing a durable and reliable design. “Sailing is about finding your path, whether it’s across an ocean or within yourself.” – Sven Yrvind In conclusion, making flanges around bulkhead hatches may seem complex at first glance, but by following Sven Yrvind’s meticulous process, enthusiasts can achieve professional-level results. Remember that the journey of boatbuilding is as rewarding as reaching your destination; it tests one’s patience and dedication. For those seeking to embark on this adventure or simply gain more insight into marine craftsmanship, Sven’s wisdom is invaluable.Making Flanges Around Bulkhead Hatches for Canvas
Sven Yrvind, a renowned yacht designer and sailor, shares valuable insights on creating flanges around bulkhead hatches for canvas protection in this enlightening video. By following his expert guidance, boat enthusiasts can ensure their living areas remain secure while allowing unhindered access through the hatches.Step 1: Starting with the Flange
Sven begins by explaining that working on flanges vertically and horizontally is significantly easier than doing so in a flat position. To simplify the process further, he divides the task into two or three steps as suggested by fellow expert “for for.” This approach not only makes it more manageable but also allows for greater precision in crafting each component.Step 2: Applying Glue and Securing
Sven proceeds to apply glue along one edge of the flange, ensuring a secure bond when clamped into place. He emphasizes that this stage is crucial for maintaining the structural integrity of the flange, which in turn safeguards the living area beneath the canvas when hatches are open.Step 3: Allowing Time to Dry
After securely attaching the first portion of the flange, Sven allows ample time for it to dry before moving forward with additional steps. This patience and precision are key aspects of his successful boatbuilding methods.Step 4: Finishing Touches
Once the flange is fully dried, Sven removes the clamps carefully, ensuring no damage occurs during this process. He then moves on to attaching four more pieces onto these main frames, completing two pairs of flanges for the bulkhead hatches.The Final Touches
While two flanges form the primary support structure around the hatches, Sven mentions there are two additional pieces required at each end to ensure comprehensive protection. This attention to detail highlights his commitment to producing a durable and reliable design. “Sailing is about finding your path, whether it’s across an ocean or within yourself.” – Sven Yrvind In conclusion, making flanges around bulkhead hatches may seem complex at first glance, but by following Sven Yrvind’s meticulous process, enthusiasts can achieve professional-level results. Remember that the journey of boatbuilding is as rewarding as reaching your destination; it tests one’s patience and dedication. For those seeking to embark on this adventure or simply gain more insight into marine craftsmanship, Sven’s wisdom is invaluable.Sven proceeds to apply glue along one edge of the flange, ensuring a secure bond when clamped into place. He emphasizes that this stage is crucial for maintaining the structural integrity of the flange, which in turn safeguards the living area beneath the canvas when hatches are open.Step 3: Allowing Time to Dry
After securely attaching the first portion of the flange, Sven allows ample time for it to dry before moving forward with additional steps. This patience and precision are key aspects of his successful boatbuilding methods.Step 4: Finishing Touches
Once the flange is fully dried, Sven removes the clamps carefully, ensuring no damage occurs during this process. He then moves on to attaching four more pieces onto these main frames, completing two pairs of flanges for the bulkhead hatches.The Final Touches
While two flanges form the primary support structure around the hatches, Sven mentions there are two additional pieces required at each end to ensure comprehensive protection. This attention to detail highlights his commitment to producing a durable and reliable design. “Sailing is about finding your path, whether it’s across an ocean or within yourself.” – Sven Yrvind In conclusion, making flanges around bulkhead hatches may seem complex at first glance, but by following Sven Yrvind’s meticulous process, enthusiasts can achieve professional-level results. Remember that the journey of boatbuilding is as rewarding as reaching your destination; it tests one’s patience and dedication. For those seeking to embark on this adventure or simply gain more insight into marine craftsmanship, Sven’s wisdom is invaluable.Sven Yrvind, a renowned yacht designer and sailor, shares valuable insights on creating flanges around bulkhead hatches for canvas protection in this enlightening video. By following his expert guidance, boat enthusiasts can ensure their living areas remain secure while allowing unhindered access through the hatches.Step 1: Starting with the Flange
Sven begins by explaining that working on flanges vertically and horizontally is significantly easier than doing so in a flat position. To simplify the process further, he divides the task into two or three steps as suggested by fellow expert “for for.” This approach not only makes it more manageable but also allows for greater precision in crafting each component.Step 2: Applying Glue and Securing
Sven proceeds to apply glue along one edge of the flange, ensuring a secure bond when clamped into place. He emphasizes that this stage is crucial for maintaining the structural integrity of the flange, which in turn safeguards the living area beneath the canvas when hatches are open.Step 3: Allowing Time to Dry
After securely attaching the first portion of the flange, Sven allows ample time for it to dry before moving forward with additional steps. This patience and precision are key aspects of his successful boatbuilding methods.Step 4: Finishing Touches
Once the flange is fully dried, Sven removes the clamps carefully, ensuring no damage occurs during this process. He then moves on to attaching four more pieces onto these main frames, completing two pairs of flanges for the bulkhead hatches.The Final Touches
While two flanges form the primary support structure around the hatches, Sven mentions there are two additional pieces required at each end to ensure comprehensive protection. This attention to detail highlights his commitment to producing a durable and reliable design. “Sailing is about finding your path, whether it’s across an ocean or within yourself.” – Sven Yrvind In conclusion, making flanges around bulkhead hatches may seem complex at first glance, but by following Sven Yrvind’s meticulous process, enthusiasts can achieve professional-level results. Remember that the journey of boatbuilding is as rewarding as reaching your destination; it tests one’s patience and dedication. For those seeking to embark on this adventure or simply gain more insight into marine craftsmanship, Sven’s wisdom is invaluable.Making Flanges Around Bulkhead Hatches for Canvas
Sven Yrvind, a renowned yacht designer and sailor, shares valuable insights on creating flanges around bulkhead hatches for canvas protection in this enlightening video. By following his expert guidance, boat enthusiasts can ensure their living areas remain secure while allowing unhindered access through the hatches.Step 1: Starting with the Flange
Sven begins by explaining that working on flanges vertically and horizontally is significantly easier than doing so in a flat position. To simplify the process further, he divides the task into two or three steps as suggested by fellow expert “for for.” This approach not only makes it more manageable but also allows for greater precision in crafting each component.Step 2: Applying Glue and Securing
Sven proceeds to apply glue along one edge of the flange, ensuring a secure bond when clamped into place. He emphasizes that this stage is crucial for maintaining the structural integrity of the flange, which in turn safeguards the living area beneath the canvas when hatches are open.Step 3: Allowing Time to Dry
After securely attaching the first portion of the flange, Sven allows ample time for it to dry before moving forward with additional steps. This patience and precision are key aspects of his successful boatbuilding methods.Step 4: Finishing Touches
Once the flange is fully dried, Sven removes the clamps carefully, ensuring no damage occurs during this process. He then moves on to attaching four more pieces onto these main frames, completing two pairs of flanges for the bulkhead hatches.The Final Touches
While two flanges form the primary support structure around the hatches, Sven mentions there are two additional pieces required at each end to ensure comprehensive protection. This attention to detail highlights his commitment to producing a durable and reliable design. “Sailing is about finding your path, whether it’s across an ocean or within yourself.” – Sven Yrvind In conclusion, making flanges around bulkhead hatches may seem complex at first glance, but by following Sven Yrvind’s meticulous process, enthusiasts can achieve professional-level results. Remember that the journey of boatbuilding is as rewarding as reaching your destination; it tests one’s patience and dedication. For those seeking to embark on this adventure or simply gain more insight into marine craftsmanship, Sven’s wisdom is invaluable.Sven begins by explaining that working on flanges vertically and horizontally is significantly easier than doing so in a flat position. To simplify the process further, he divides the task into two or three steps as suggested by fellow expert “for for.” This approach not only makes it more manageable but also allows for greater precision in crafting each component.Step 2: Applying Glue and Securing
Sven proceeds to apply glue along one edge of the flange, ensuring a secure bond when clamped into place. He emphasizes that this stage is crucial for maintaining the structural integrity of the flange, which in turn safeguards the living area beneath the canvas when hatches are open.Step 3: Allowing Time to Dry
After securely attaching the first portion of the flange, Sven allows ample time for it to dry before moving forward with additional steps. This patience and precision are key aspects of his successful boatbuilding methods.Step 4: Finishing Touches
Once the flange is fully dried, Sven removes the clamps carefully, ensuring no damage occurs during this process. He then moves on to attaching four more pieces onto these main frames, completing two pairs of flanges for the bulkhead hatches.The Final Touches
While two flanges form the primary support structure around the hatches, Sven mentions there are two additional pieces required at each end to ensure comprehensive protection. This attention to detail highlights his commitment to producing a durable and reliable design. “Sailing is about finding your path, whether it’s across an ocean or within yourself.” – Sven Yrvind In conclusion, making flanges around bulkhead hatches may seem complex at first glance, but by following Sven Yrvind’s meticulous process, enthusiasts can achieve professional-level results. Remember that the journey of boatbuilding is as rewarding as reaching your destination; it tests one’s patience and dedication. For those seeking to embark on this adventure or simply gain more insight into marine craftsmanship, Sven’s wisdom is invaluable.Sven Yrvind, a renowned yacht designer and sailor, shares valuable insights on creating flanges around bulkhead hatches for canvas protection in this enlightening video. By following his expert guidance, boat enthusiasts can ensure their living areas remain secure while allowing unhindered access through the hatches.Step 1: Starting with the Flange
Sven begins by explaining that working on flanges vertically and horizontally is significantly easier than doing so in a flat position. To simplify the process further, he divides the task into two or three steps as suggested by fellow expert “for for.” This approach not only makes it more manageable but also allows for greater precision in crafting each component.Step 2: Applying Glue and Securing
Sven proceeds to apply glue along one edge of the flange, ensuring a secure bond when clamped into place. He emphasizes that this stage is crucial for maintaining the structural integrity of the flange, which in turn safeguards the living area beneath the canvas when hatches are open.Step 3: Allowing Time to Dry
After securely attaching the first portion of the flange, Sven allows ample time for it to dry before moving forward with additional steps. This patience and precision are key aspects of his successful boatbuilding methods.Step 4: Finishing Touches
Once the flange is fully dried, Sven removes the clamps carefully, ensuring no damage occurs during this process. He then moves on to attaching four more pieces onto these main frames, completing two pairs of flanges for the bulkhead hatches.The Final Touches
While two flanges form the primary support structure around the hatches, Sven mentions there are two additional pieces required at each end to ensure comprehensive protection. This attention to detail highlights his commitment to producing a durable and reliable design. “Sailing is about finding your path, whether it’s across an ocean or within yourself.” – Sven Yrvind In conclusion, making flanges around bulkhead hatches may seem complex at first glance, but by following Sven Yrvind’s meticulous process, enthusiasts can achieve professional-level results. Remember that the journey of boatbuilding is as rewarding as reaching your destination; it tests one’s patience and dedication. For those seeking to embark on this adventure or simply gain more insight into marine craftsmanship, Sven’s wisdom is invaluable.Making Flanges Around Bulkhead Hatches for Canvas
Sven Yrvind, a renowned yacht designer and sailor, shares valuable insights on creating flanges around bulkhead hatches for canvas protection in this enlightening video. By following his expert guidance, boat enthusiasts can ensure their living areas remain secure while allowing unhindered access through the hatches.Step 1: Starting with the Flange
Sven begins by explaining that working on flanges vertically and horizontally is significantly easier than doing so in a flat position. To simplify the process further, he divides the task into two or three steps as suggested by fellow expert “for for.” This approach not only makes it more manageable but also allows for greater precision in crafting each component.Step 2: Applying Glue and Securing
Sven proceeds to apply glue along one edge of the flange, ensuring a secure bond when clamped into place. He emphasizes that this stage is crucial for maintaining the structural integrity of the flange, which in turn safeguards the living area beneath the canvas when hatches are open.Step 3: Allowing Time to Dry
After securely attaching the first portion of the flange, Sven allows ample time for it to dry before moving forward with additional steps. This patience and precision are key aspects of his successful boatbuilding methods.Step 4: Finishing Touches
Once the flange is fully dried, Sven removes the clamps carefully, ensuring no damage occurs during this process. He then moves on to attaching four more pieces onto these main frames, completing two pairs of flanges for the bulkhead hatches.The Final Touches
While two flanges form the primary support structure around the hatches, Sven mentions there are two additional pieces required at each end to ensure comprehensive protection. This attention to detail highlights his commitment to producing a durable and reliable design. “Sailing is about finding your path, whether it’s across an ocean or within yourself.” – Sven Yrvind In conclusion, making flanges around bulkhead hatches may seem complex at first glance, but by following Sven Yrvind’s meticulous process, enthusiasts can achieve professional-level results. Remember that the journey of boatbuilding is as rewarding as reaching your destination; it tests one’s patience and dedication. For those seeking to embark on this adventure or simply gain more insight into marine craftsmanship, Sven’s wisdom is invaluable.Once the flange is fully dried, Sven removes the clamps carefully, ensuring no damage occurs during this process. He then moves on to attaching four more pieces onto these main frames, completing two pairs of flanges for the bulkhead hatches.The Final Touches
While two flanges form the primary support structure around the hatches, Sven mentions there are two additional pieces required at each end to ensure comprehensive protection. This attention to detail highlights his commitment to producing a durable and reliable design. “Sailing is about finding your path, whether it’s across an ocean or within yourself.” – Sven Yrvind In conclusion, making flanges around bulkhead hatches may seem complex at first glance, but by following Sven Yrvind’s meticulous process, enthusiasts can achieve professional-level results. Remember that the journey of boatbuilding is as rewarding as reaching your destination; it tests one’s patience and dedication. For those seeking to embark on this adventure or simply gain more insight into marine craftsmanship, Sven’s wisdom is invaluable.Sven begins by explaining that working on flanges vertically and horizontally is significantly easier than doing so in a flat position. To simplify the process further, he divides the task into two or three steps as suggested by fellow expert “for for.” This approach not only makes it more manageable but also allows for greater precision in crafting each component.Step 2: Applying Glue and Securing
Sven proceeds to apply glue along one edge of the flange, ensuring a secure bond when clamped into place. He emphasizes that this stage is crucial for maintaining the structural integrity of the flange, which in turn safeguards the living area beneath the canvas when hatches are open.Step 3: Allowing Time to Dry
After securely attaching the first portion of the flange, Sven allows ample time for it to dry before moving forward with additional steps. This patience and precision are key aspects of his successful boatbuilding methods.Step 4: Finishing Touches
Once the flange is fully dried, Sven removes the clamps carefully, ensuring no damage occurs during this process. He then moves on to attaching four more pieces onto these main frames, completing two pairs of flanges for the bulkhead hatches.The Final Touches
While two flanges form the primary support structure around the hatches, Sven mentions there are two additional pieces required at each end to ensure comprehensive protection. This attention to detail highlights his commitment to producing a durable and reliable design. “Sailing is about finding your path, whether it’s across an ocean or within yourself.” – Sven Yrvind In conclusion, making flanges around bulkhead hatches may seem complex at first glance, but by following Sven Yrvind’s meticulous process, enthusiasts can achieve professional-level results. Remember that the journey of boatbuilding is as rewarding as reaching your destination; it tests one’s patience and dedication. For those seeking to embark on this adventure or simply gain more insight into marine craftsmanship, Sven’s wisdom is invaluable.Sven Yrvind, a renowned yacht designer and sailor, shares valuable insights on creating flanges around bulkhead hatches for canvas protection in this enlightening video. By following his expert guidance, boat enthusiasts can ensure their living areas remain secure while allowing unhindered access through the hatches.Step 1: Starting with the Flange
Sven begins by explaining that working on flanges vertically and horizontally is significantly easier than doing so in a flat position. To simplify the process further, he divides the task into two or three steps as suggested by fellow expert “for for.” This approach not only makes it more manageable but also allows for greater precision in crafting each component.Step 2: Applying Glue and Securing
Sven proceeds to apply glue along one edge of the flange, ensuring a secure bond when clamped into place. He emphasizes that this stage is crucial for maintaining the structural integrity of the flange, which in turn safeguards the living area beneath the canvas when hatches are open.Step 3: Allowing Time to Dry
After securely attaching the first portion of the flange, Sven allows ample time for it to dry before moving forward with additional steps. This patience and precision are key aspects of his successful boatbuilding methods.Step 4: Finishing Touches
Once the flange is fully dried, Sven removes the clamps carefully, ensuring no damage occurs during this process. He then moves on to attaching four more pieces onto these main frames, completing two pairs of flanges for the bulkhead hatches.The Final Touches
While two flanges form the primary support structure around the hatches, Sven mentions there are two additional pieces required at each end to ensure comprehensive protection. This attention to detail highlights his commitment to producing a durable and reliable design. “Sailing is about finding your path, whether it’s across an ocean or within yourself.” – Sven Yrvind In conclusion, making flanges around bulkhead hatches may seem complex at first glance, but by following Sven Yrvind’s meticulous process, enthusiasts can achieve professional-level results. Remember that the journey of boatbuilding is as rewarding as reaching your destination; it tests one’s patience and dedication. For those seeking to embark on this adventure or simply gain more insight into marine craftsmanship, Sven’s wisdom is invaluable.Making Flanges Around Bulkhead Hatches for Canvas
Sven Yrvind, a renowned yacht designer and sailor, shares valuable insights on creating flanges around bulkhead hatches for canvas protection in this enlightening video. By following his expert guidance, boat enthusiasts can ensure their living areas remain secure while allowing unhindered access through the hatches.Step 1: Starting with the Flange
Sven begins by explaining that working on flanges vertically and horizontally is significantly easier than doing so in a flat position. To simplify the process further, he divides the task into two or three steps as suggested by fellow expert “for for.” This approach not only makes it more manageable but also allows for greater precision in crafting each component.Step 2: Applying Glue and Securing
Sven proceeds to apply glue along one edge of the flange, ensuring a secure bond when clamped into place. He emphasizes that this stage is crucial for maintaining the structural integrity of the flange, which in turn safeguards the living area beneath the canvas when hatches are open.Step 3: Allowing Time to Dry
After securely attaching the first portion of the flange, Sven allows ample time for it to dry before moving forward with additional steps. This patience and precision are key aspects of his successful boatbuilding methods.Step 4: Finishing Touches
Once the flange is fully dried, Sven removes the clamps carefully, ensuring no damage occurs during this process. He then moves on to attaching four more pieces onto these main frames, completing two pairs of flanges for the bulkhead hatches.The Final Touches
While two flanges form the primary support structure around the hatches, Sven mentions there are two additional pieces required at each end to ensure comprehensive protection. This attention to detail highlights his commitment to producing a durable and reliable design. “Sailing is about finding your path, whether it’s across an ocean or within yourself.” – Sven Yrvind In conclusion, making flanges around bulkhead hatches may seem complex at first glance, but by following Sven Yrvind’s meticulous process, enthusiasts can achieve professional-level results. Remember that the journey of boatbuilding is as rewarding as reaching your destination; it tests one’s patience and dedication. For those seeking to embark on this adventure or simply gain more insight into marine craftsmanship, Sven’s wisdom is invaluable.After securely attaching the first portion of the flange, Sven allows ample time for it to dry before moving forward with additional steps. This patience and precision are key aspects of his successful boatbuilding methods.Step 4: Finishing Touches
Once the flange is fully dried, Sven removes the clamps carefully, ensuring no damage occurs during this process. He then moves on to attaching four more pieces onto these main frames, completing two pairs of flanges for the bulkhead hatches.The Final Touches
While two flanges form the primary support structure around the hatches, Sven mentions there are two additional pieces required at each end to ensure comprehensive protection. This attention to detail highlights his commitment to producing a durable and reliable design. “Sailing is about finding your path, whether it’s across an ocean or within yourself.” – Sven Yrvind In conclusion, making flanges around bulkhead hatches may seem complex at first glance, but by following Sven Yrvind’s meticulous process, enthusiasts can achieve professional-level results. Remember that the journey of boatbuilding is as rewarding as reaching your destination; it tests one’s patience and dedication. For those seeking to embark on this adventure or simply gain more insight into marine craftsmanship, Sven’s wisdom is invaluable.Sven begins by explaining that working on flanges vertically and horizontally is significantly easier than doing so in a flat position. To simplify the process further, he divides the task into two or three steps as suggested by fellow expert “for for.” This approach not only makes it more manageable but also allows for greater precision in crafting each component.Step 2: Applying Glue and Securing
Sven proceeds to apply glue along one edge of the flange, ensuring a secure bond when clamped into place. He emphasizes that this stage is crucial for maintaining the structural integrity of the flange, which in turn safeguards the living area beneath the canvas when hatches are open.Step 3: Allowing Time to Dry
After securely attaching the first portion of the flange, Sven allows ample time for it to dry before moving forward with additional steps. This patience and precision are key aspects of his successful boatbuilding methods.Step 4: Finishing Touches
Once the flange is fully dried, Sven removes the clamps carefully, ensuring no damage occurs during this process. He then moves on to attaching four more pieces onto these main frames, completing two pairs of flanges for the bulkhead hatches.The Final Touches
While two flanges form the primary support structure around the hatches, Sven mentions there are two additional pieces required at each end to ensure comprehensive protection. This attention to detail highlights his commitment to producing a durable and reliable design. “Sailing is about finding your path, whether it’s across an ocean or within yourself.” – Sven Yrvind In conclusion, making flanges around bulkhead hatches may seem complex at first glance, but by following Sven Yrvind’s meticulous process, enthusiasts can achieve professional-level results. Remember that the journey of boatbuilding is as rewarding as reaching your destination; it tests one’s patience and dedication. For those seeking to embark on this adventure or simply gain more insight into marine craftsmanship, Sven’s wisdom is invaluable.Sven Yrvind, a renowned yacht designer and sailor, shares valuable insights on creating flanges around bulkhead hatches for canvas protection in this enlightening video. By following his expert guidance, boat enthusiasts can ensure their living areas remain secure while allowing unhindered access through the hatches.Step 1: Starting with the Flange
Sven begins by explaining that working on flanges vertically and horizontally is significantly easier than doing so in a flat position. To simplify the process further, he divides the task into two or three steps as suggested by fellow expert “for for.” This approach not only makes it more manageable but also allows for greater precision in crafting each component.Step 2: Applying Glue and Securing
Sven proceeds to apply glue along one edge of the flange, ensuring a secure bond when clamped into place. He emphasizes that this stage is crucial for maintaining the structural integrity of the flange, which in turn safeguards the living area beneath the canvas when hatches are open.Step 3: Allowing Time to Dry
After securely attaching the first portion of the flange, Sven allows ample time for it to dry before moving forward with additional steps. This patience and precision are key aspects of his successful boatbuilding methods.Step 4: Finishing Touches
Once the flange is fully dried, Sven removes the clamps carefully, ensuring no damage occurs during this process. He then moves on to attaching four more pieces onto these main frames, completing two pairs of flanges for the bulkhead hatches.The Final Touches
While two flanges form the primary support structure around the hatches, Sven mentions there are two additional pieces required at each end to ensure comprehensive protection. This attention to detail highlights his commitment to producing a durable and reliable design. “Sailing is about finding your path, whether it’s across an ocean or within yourself.” – Sven Yrvind In conclusion, making flanges around bulkhead hatches may seem complex at first glance, but by following Sven Yrvind’s meticulous process, enthusiasts can achieve professional-level results. Remember that the journey of boatbuilding is as rewarding as reaching your destination; it tests one’s patience and dedication. For those seeking to embark on this adventure or simply gain more insight into marine craftsmanship, Sven’s wisdom is invaluable.Making Flanges Around Bulkhead Hatches for Canvas
Sven Yrvind, a renowned yacht designer and sailor, shares valuable insights on creating flanges around bulkhead hatches for canvas protection in this enlightening video. By following his expert guidance, boat enthusiasts can ensure their living areas remain secure while allowing unhindered access through the hatches.Step 1: Starting with the Flange
Sven begins by explaining that working on flanges vertically and horizontally is significantly easier than doing so in a flat position. To simplify the process further, he divides the task into two or three steps as suggested by fellow expert “for for.” This approach not only makes it more manageable but also allows for greater precision in crafting each component.Step 2: Applying Glue and Securing
Sven proceeds to apply glue along one edge of the flange, ensuring a secure bond when clamped into place. He emphasizes that this stage is crucial for maintaining the structural integrity of the flange, which in turn safeguards the living area beneath the canvas when hatches are open.Step 3: Allowing Time to Dry
After securely attaching the first portion of the flange, Sven allows ample time for it to dry before moving forward with additional steps. This patience and precision are key aspects of his successful boatbuilding methods.Step 4: Finishing Touches
Once the flange is fully dried, Sven removes the clamps carefully, ensuring no damage occurs during this process. He then moves on to attaching four more pieces onto these main frames, completing two pairs of flanges for the bulkhead hatches.The Final Touches
While two flanges form the primary support structure around the hatches, Sven mentions there are two additional pieces required at each end to ensure comprehensive protection. This attention to detail highlights his commitment to producing a durable and reliable design. “Sailing is about finding your path, whether it’s across an ocean or within yourself.” – Sven Yrvind In conclusion, making flanges around bulkhead hatches may seem complex at first glance, but by following Sven Yrvind’s meticulous process, enthusiasts can achieve professional-level results. Remember that the journey of boatbuilding is as rewarding as reaching your destination; it tests one’s patience and dedication. For those seeking to embark on this adventure or simply gain more insight into marine craftsmanship, Sven’s wisdom is invaluable.Sven proceeds to apply glue along one edge of the flange, ensuring a secure bond when clamped into place. He emphasizes that this stage is crucial for maintaining the structural integrity of the flange, which in turn safeguards the living area beneath the canvas when hatches are open.Step 3: Allowing Time to Dry
After securely attaching the first portion of the flange, Sven allows ample time for it to dry before moving forward with additional steps. This patience and precision are key aspects of his successful boatbuilding methods.Step 4: Finishing Touches
Once the flange is fully dried, Sven removes the clamps carefully, ensuring no damage occurs during this process. He then moves on to attaching four more pieces onto these main frames, completing two pairs of flanges for the bulkhead hatches.The Final Touches
While two flanges form the primary support structure around the hatches, Sven mentions there are two additional pieces required at each end to ensure comprehensive protection. This attention to detail highlights his commitment to producing a durable and reliable design. “Sailing is about finding your path, whether it’s across an ocean or within yourself.” – Sven Yrvind In conclusion, making flanges around bulkhead hatches may seem complex at first glance, but by following Sven Yrvind’s meticulous process, enthusiasts can achieve professional-level results. Remember that the journey of boatbuilding is as rewarding as reaching your destination; it tests one’s patience and dedication. For those seeking to embark on this adventure or simply gain more insight into marine craftsmanship, Sven’s wisdom is invaluable.Sven begins by explaining that working on flanges vertically and horizontally is significantly easier than doing so in a flat position. To simplify the process further, he divides the task into two or three steps as suggested by fellow expert “for for.” This approach not only makes it more manageable but also allows for greater precision in crafting each component.Step 2: Applying Glue and Securing
Sven proceeds to apply glue along one edge of the flange, ensuring a secure bond when clamped into place. He emphasizes that this stage is crucial for maintaining the structural integrity of the flange, which in turn safeguards the living area beneath the canvas when hatches are open.Step 3: Allowing Time to Dry
After securely attaching the first portion of the flange, Sven allows ample time for it to dry before moving forward with additional steps. This patience and precision are key aspects of his successful boatbuilding methods.Step 4: Finishing Touches
Once the flange is fully dried, Sven removes the clamps carefully, ensuring no damage occurs during this process. He then moves on to attaching four more pieces onto these main frames, completing two pairs of flanges for the bulkhead hatches.The Final Touches
While two flanges form the primary support structure around the hatches, Sven mentions there are two additional pieces required at each end to ensure comprehensive protection. This attention to detail highlights his commitment to producing a durable and reliable design. “Sailing is about finding your path, whether it’s across an ocean or within yourself.” – Sven Yrvind In conclusion, making flanges around bulkhead hatches may seem complex at first glance, but by following Sven Yrvind’s meticulous process, enthusiasts can achieve professional-level results. Remember that the journey of boatbuilding is as rewarding as reaching your destination; it tests one’s patience and dedication. For those seeking to embark on this adventure or simply gain more insight into marine craftsmanship, Sven’s wisdom is invaluable.Sven Yrvind, a renowned yacht designer and sailor, shares valuable insights on creating flanges around bulkhead hatches for canvas protection in this enlightening video. By following his expert guidance, boat enthusiasts can ensure their living areas remain secure while allowing unhindered access through the hatches.Step 1: Starting with the Flange
Sven begins by explaining that working on flanges vertically and horizontally is significantly easier than doing so in a flat position. To simplify the process further, he divides the task into two or three steps as suggested by fellow expert “for for.” This approach not only makes it more manageable but also allows for greater precision in crafting each component.Step 2: Applying Glue and Securing
Sven proceeds to apply glue along one edge of the flange, ensuring a secure bond when clamped into place. He emphasizes that this stage is crucial for maintaining the structural integrity of the flange, which in turn safeguards the living area beneath the canvas when hatches are open.Step 3: Allowing Time to Dry
After securely attaching the first portion of the flange, Sven allows ample time for it to dry before moving forward with additional steps. This patience and precision are key aspects of his successful boatbuilding methods.Step 4: Finishing Touches
Once the flange is fully dried, Sven removes the clamps carefully, ensuring no damage occurs during this process. He then moves on to attaching four more pieces onto these main frames, completing two pairs of flanges for the bulkhead hatches.The Final Touches
While two flanges form the primary support structure around the hatches, Sven mentions there are two additional pieces required at each end to ensure comprehensive protection. This attention to detail highlights his commitment to producing a durable and reliable design. “Sailing is about finding your path, whether it’s across an ocean or within yourself.” – Sven Yrvind In conclusion, making flanges around bulkhead hatches may seem complex at first glance, but by following Sven Yrvind’s meticulous process, enthusiasts can achieve professional-level results. Remember that the journey of boatbuilding is as rewarding as reaching your destination; it tests one’s patience and dedication. For those seeking to embark on this adventure or simply gain more insight into marine craftsmanship, Sven’s wisdom is invaluable.Making Flanges Around Bulkhead Hatches for Canvas
Sven Yrvind, a renowned yacht designer and sailor, shares valuable insights on creating flanges around bulkhead hatches for canvas protection in this enlightening video. By following his expert guidance, boat enthusiasts can ensure their living areas remain secure while allowing unhindered access through the hatches.Step 1: Starting with the Flange
Sven begins by explaining that working on flanges vertically and horizontally is significantly easier than doing so in a flat position. To simplify the process further, he divides the task into two or three steps as suggested by fellow expert “for for.” This approach not only makes it more manageable but also allows for greater precision in crafting each component.Step 2: Applying Glue and Securing
Sven proceeds to apply glue along one edge of the flange, ensuring a secure bond when clamped into place. He emphasizes that this stage is crucial for maintaining the structural integrity of the flange, which in turn safeguards the living area beneath the canvas when hatches are open.Step 3: Allowing Time to Dry
After securely attaching the first portion of the flange, Sven allows ample time for it to dry before moving forward with additional steps. This patience and precision are key aspects of his successful boatbuilding methods.Step 4: Finishing Touches
Once the flange is fully dried, Sven removes the clamps carefully, ensuring no damage occurs during this process. He then moves on to attaching four more pieces onto these main frames, completing two pairs of flanges for the bulkhead hatches.The Final Touches
While two flanges form the primary support structure around the hatches, Sven mentions there are two additional pieces required at each end to ensure comprehensive protection. This attention to detail highlights his commitment to producing a durable and reliable design. “Sailing is about finding your path, whether it’s across an ocean or within yourself.” – Sven Yrvind In conclusion, making flanges around bulkhead hatches may seem complex at first glance, but by following Sven Yrvind’s meticulous process, enthusiasts can achieve professional-level results. Remember that the journey of boatbuilding is as rewarding as reaching your destination; it tests one’s patience and dedication. For those seeking to embark on this adventure or simply gain more insight into marine craftsmanship, Sven’s wisdom is invaluable.Once the flange is fully dried, Sven removes the clamps carefully, ensuring no damage occurs during this process. He then moves on to attaching four more pieces onto these main frames, completing two pairs of flanges for the bulkhead hatches.The Final Touches
While two flanges form the primary support structure around the hatches, Sven mentions there are two additional pieces required at each end to ensure comprehensive protection. This attention to detail highlights his commitment to producing a durable and reliable design. “Sailing is about finding your path, whether it’s across an ocean or within yourself.” – Sven Yrvind In conclusion, making flanges around bulkhead hatches may seem complex at first glance, but by following Sven Yrvind’s meticulous process, enthusiasts can achieve professional-level results. Remember that the journey of boatbuilding is as rewarding as reaching your destination; it tests one’s patience and dedication. For those seeking to embark on this adventure or simply gain more insight into marine craftsmanship, Sven’s wisdom is invaluable.Sven proceeds to apply glue along one edge of the flange, ensuring a secure bond when clamped into place. He emphasizes that this stage is crucial for maintaining the structural integrity of the flange, which in turn safeguards the living area beneath the canvas when hatches are open.Step 3: Allowing Time to Dry
After securely attaching the first portion of the flange, Sven allows ample time for it to dry before moving forward with additional steps. This patience and precision are key aspects of his successful boatbuilding methods.Step 4: Finishing Touches
Once the flange is fully dried, Sven removes the clamps carefully, ensuring no damage occurs during this process. He then moves on to attaching four more pieces onto these main frames, completing two pairs of flanges for the bulkhead hatches.The Final Touches
While two flanges form the primary support structure around the hatches, Sven mentions there are two additional pieces required at each end to ensure comprehensive protection. This attention to detail highlights his commitment to producing a durable and reliable design. “Sailing is about finding your path, whether it’s across an ocean or within yourself.” – Sven Yrvind In conclusion, making flanges around bulkhead hatches may seem complex at first glance, but by following Sven Yrvind’s meticulous process, enthusiasts can achieve professional-level results. Remember that the journey of boatbuilding is as rewarding as reaching your destination; it tests one’s patience and dedication. For those seeking to embark on this adventure or simply gain more insight into marine craftsmanship, Sven’s wisdom is invaluable.Sven begins by explaining that working on flanges vertically and horizontally is significantly easier than doing so in a flat position. To simplify the process further, he divides the task into two or three steps as suggested by fellow expert “for for.” This approach not only makes it more manageable but also allows for greater precision in crafting each component.Step 2: Applying Glue and Securing
Sven proceeds to apply glue along one edge of the flange, ensuring a secure bond when clamped into place. He emphasizes that this stage is crucial for maintaining the structural integrity of the flange, which in turn safeguards the living area beneath the canvas when hatches are open.Step 3: Allowing Time to Dry
After securely attaching the first portion of the flange, Sven allows ample time for it to dry before moving forward with additional steps. This patience and precision are key aspects of his successful boatbuilding methods.Step 4: Finishing Touches
Once the flange is fully dried, Sven removes the clamps carefully, ensuring no damage occurs during this process. He then moves on to attaching four more pieces onto these main frames, completing two pairs of flanges for the bulkhead hatches.The Final Touches
While two flanges form the primary support structure around the hatches, Sven mentions there are two additional pieces required at each end to ensure comprehensive protection. This attention to detail highlights his commitment to producing a durable and reliable design. “Sailing is about finding your path, whether it’s across an ocean or within yourself.” – Sven Yrvind In conclusion, making flanges around bulkhead hatches may seem complex at first glance, but by following Sven Yrvind’s meticulous process, enthusiasts can achieve professional-level results. Remember that the journey of boatbuilding is as rewarding as reaching your destination; it tests one’s patience and dedication. For those seeking to embark on this adventure or simply gain more insight into marine craftsmanship, Sven’s wisdom is invaluable.Sven Yrvind, a renowned yacht designer and sailor, shares valuable insights on creating flanges around bulkhead hatches for canvas protection in this enlightening video. By following his expert guidance, boat enthusiasts can ensure their living areas remain secure while allowing unhindered access through the hatches.Step 1: Starting with the Flange
Sven begins by explaining that working on flanges vertically and horizontally is significantly easier than doing so in a flat position. To simplify the process further, he divides the task into two or three steps as suggested by fellow expert “for for.” This approach not only makes it more manageable but also allows for greater precision in crafting each component.Step 2: Applying Glue and Securing
Sven proceeds to apply glue along one edge of the flange, ensuring a secure bond when clamped into place. He emphasizes that this stage is crucial for maintaining the structural integrity of the flange, which in turn safeguards the living area beneath the canvas when hatches are open.Step 3: Allowing Time to Dry
After securely attaching the first portion of the flange, Sven allows ample time for it to dry before moving forward with additional steps. This patience and precision are key aspects of his successful boatbuilding methods.Step 4: Finishing Touches
Once the flange is fully dried, Sven removes the clamps carefully, ensuring no damage occurs during this process. He then moves on to attaching four more pieces onto these main frames, completing two pairs of flanges for the bulkhead hatches.The Final Touches
While two flanges form the primary support structure around the hatches, Sven mentions there are two additional pieces required at each end to ensure comprehensive protection. This attention to detail highlights his commitment to producing a durable and reliable design. “Sailing is about finding your path, whether it’s across an ocean or within yourself.” – Sven Yrvind In conclusion, making flanges around bulkhead hatches may seem complex at first glance, but by following Sven Yrvind’s meticulous process, enthusiasts can achieve professional-level results. Remember that the journey of boatbuilding is as rewarding as reaching your destination; it tests one’s patience and dedication. For those seeking to embark on this adventure or simply gain more insight into marine craftsmanship, Sven’s wisdom is invaluable.Making Flanges Around Bulkhead Hatches for Canvas
Sven Yrvind, a renowned yacht designer and sailor, shares valuable insights on creating flanges around bulkhead hatches for canvas protection in this enlightening video. By following his expert guidance, boat enthusiasts can ensure their living areas remain secure while allowing unhindered access through the hatches.Step 1: Starting with the Flange
Sven begins by explaining that working on flanges vertically and horizontally is significantly easier than doing so in a flat position. To simplify the process further, he divides the task into two or three steps as suggested by fellow expert “for for.” This approach not only makes it more manageable but also allows for greater precision in crafting each component.Step 2: Applying Glue and Securing
Sven proceeds to apply glue along one edge of the flange, ensuring a secure bond when clamped into place. He emphasizes that this stage is crucial for maintaining the structural integrity of the flange, which in turn safeguards the living area beneath the canvas when hatches are open.Step 3: Allowing Time to Dry
After securely attaching the first portion of the flange, Sven allows ample time for it to dry before moving forward with additional steps. This patience and precision are key aspects of his successful boatbuilding methods.Step 4: Finishing Touches
Once the flange is fully dried, Sven removes the clamps carefully, ensuring no damage occurs during this process. He then moves on to attaching four more pieces onto these main frames, completing two pairs of flanges for the bulkhead hatches.The Final Touches
While two flanges form the primary support structure around the hatches, Sven mentions there are two additional pieces required at each end to ensure comprehensive protection. This attention to detail highlights his commitment to producing a durable and reliable design. “Sailing is about finding your path, whether it’s across an ocean or within yourself.” – Sven Yrvind In conclusion, making flanges around bulkhead hatches may seem complex at first glance, but by following Sven Yrvind’s meticulous process, enthusiasts can achieve professional-level results. Remember that the journey of boatbuilding is as rewarding as reaching your destination; it tests one’s patience and dedication. For those seeking to embark on this adventure or simply gain more insight into marine craftsmanship, Sven’s wisdom is invaluable.After securely attaching the first portion of the flange, Sven allows ample time for it to dry before moving forward with additional steps. This patience and precision are key aspects of his successful boatbuilding methods.Step 4: Finishing Touches
Once the flange is fully dried, Sven removes the clamps carefully, ensuring no damage occurs during this process. He then moves on to attaching four more pieces onto these main frames, completing two pairs of flanges for the bulkhead hatches.The Final Touches
While two flanges form the primary support structure around the hatches, Sven mentions there are two additional pieces required at each end to ensure comprehensive protection. This attention to detail highlights his commitment to producing a durable and reliable design. “Sailing is about finding your path, whether it’s across an ocean or within yourself.” – Sven Yrvind In conclusion, making flanges around bulkhead hatches may seem complex at first glance, but by following Sven Yrvind’s meticulous process, enthusiasts can achieve professional-level results. Remember that the journey of boatbuilding is as rewarding as reaching your destination; it tests one’s patience and dedication. For those seeking to embark on this adventure or simply gain more insight into marine craftsmanship, Sven’s wisdom is invaluable.Sven proceeds to apply glue along one edge of the flange, ensuring a secure bond when clamped into place. He emphasizes that this stage is crucial for maintaining the structural integrity of the flange, which in turn safeguards the living area beneath the canvas when hatches are open.Step 3: Allowing Time to Dry
After securely attaching the first portion of the flange, Sven allows ample time for it to dry before moving forward with additional steps. This patience and precision are key aspects of his successful boatbuilding methods.Step 4: Finishing Touches
Once the flange is fully dried, Sven removes the clamps carefully, ensuring no damage occurs during this process. He then moves on to attaching four more pieces onto these main frames, completing two pairs of flanges for the bulkhead hatches.The Final Touches
While two flanges form the primary support structure around the hatches, Sven mentions there are two additional pieces required at each end to ensure comprehensive protection. This attention to detail highlights his commitment to producing a durable and reliable design. “Sailing is about finding your path, whether it’s across an ocean or within yourself.” – Sven Yrvind In conclusion, making flanges around bulkhead hatches may seem complex at first glance, but by following Sven Yrvind’s meticulous process, enthusiasts can achieve professional-level results. Remember that the journey of boatbuilding is as rewarding as reaching your destination; it tests one’s patience and dedication. For those seeking to embark on this adventure or simply gain more insight into marine craftsmanship, Sven’s wisdom is invaluable.Sven begins by explaining that working on flanges vertically and horizontally is significantly easier than doing so in a flat position. To simplify the process further, he divides the task into two or three steps as suggested by fellow expert “for for.” This approach not only makes it more manageable but also allows for greater precision in crafting each component.Step 2: Applying Glue and Securing
Sven proceeds to apply glue along one edge of the flange, ensuring a secure bond when clamped into place. He emphasizes that this stage is crucial for maintaining the structural integrity of the flange, which in turn safeguards the living area beneath the canvas when hatches are open.Step 3: Allowing Time to Dry
After securely attaching the first portion of the flange, Sven allows ample time for it to dry before moving forward with additional steps. This patience and precision are key aspects of his successful boatbuilding methods.Step 4: Finishing Touches
Once the flange is fully dried, Sven removes the clamps carefully, ensuring no damage occurs during this process. He then moves on to attaching four more pieces onto these main frames, completing two pairs of flanges for the bulkhead hatches.The Final Touches
While two flanges form the primary support structure around the hatches, Sven mentions there are two additional pieces required at each end to ensure comprehensive protection. This attention to detail highlights his commitment to producing a durable and reliable design. “Sailing is about finding your path, whether it’s across an ocean or within yourself.” – Sven Yrvind In conclusion, making flanges around bulkhead hatches may seem complex at first glance, but by following Sven Yrvind’s meticulous process, enthusiasts can achieve professional-level results. Remember that the journey of boatbuilding is as rewarding as reaching your destination; it tests one’s patience and dedication. For those seeking to embark on this adventure or simply gain more insight into marine craftsmanship, Sven’s wisdom is invaluable.Sven Yrvind, a renowned yacht designer and sailor, shares valuable insights on creating flanges around bulkhead hatches for canvas protection in this enlightening video. By following his expert guidance, boat enthusiasts can ensure their living areas remain secure while allowing unhindered access through the hatches.Step 1: Starting with the Flange
Sven begins by explaining that working on flanges vertically and horizontally is significantly easier than doing so in a flat position. To simplify the process further, he divides the task into two or three steps as suggested by fellow expert “for for.” This approach not only makes it more manageable but also allows for greater precision in crafting each component.Step 2: Applying Glue and Securing
Sven proceeds to apply glue along one edge of the flange, ensuring a secure bond when clamped into place. He emphasizes that this stage is crucial for maintaining the structural integrity of the flange, which in turn safeguards the living area beneath the canvas when hatches are open.Step 3: Allowing Time to Dry
After securely attaching the first portion of the flange, Sven allows ample time for it to dry before moving forward with additional steps. This patience and precision are key aspects of his successful boatbuilding methods.Step 4: Finishing Touches
Once the flange is fully dried, Sven removes the clamps carefully, ensuring no damage occurs during this process. He then moves on to attaching four more pieces onto these main frames, completing two pairs of flanges for the bulkhead hatches.The Final Touches
While two flanges form the primary support structure around the hatches, Sven mentions there are two additional pieces required at each end to ensure comprehensive protection. This attention to detail highlights his commitment to producing a durable and reliable design. “Sailing is about finding your path, whether it’s across an ocean or within yourself.” – Sven Yrvind In conclusion, making flanges around bulkhead hatches may seem complex at first glance, but by following Sven Yrvind’s meticulous process, enthusiasts can achieve professional-level results. Remember that the journey of boatbuilding is as rewarding as reaching your destination; it tests one’s patience and dedication. For those seeking to embark on this adventure or simply gain more insight into marine craftsmanship, Sven’s wisdom is invaluable.Making Flanges Around Bulkhead Hatches for Canvas
Sven Yrvind, a renowned yacht designer and sailor, shares valuable insights on creating flanges around bulkhead hatches for canvas protection in this enlightening video. By following his expert guidance, boat enthusiasts can ensure their living areas remain secure while allowing unhindered access through the hatches.Step 1: Starting with the Flange
Sven begins by explaining that working on flanges vertically and horizontally is significantly easier than doing so in a flat position. To simplify the process further, he divides the task into two or three steps as suggested by fellow expert “for for.” This approach not only makes it more manageable but also allows for greater precision in crafting each component.Step 2: Applying Glue and Securing
Sven proceeds to apply glue along one edge of the flange, ensuring a secure bond when clamped into place. He emphasizes that this stage is crucial for maintaining the structural integrity of the flange, which in turn safeguards the living area beneath the canvas when hatches are open.Step 3: Allowing Time to Dry
After securely attaching the first portion of the flange, Sven allows ample time for it to dry before moving forward with additional steps. This patience and precision are key aspects of his successful boatbuilding methods.Step 4: Finishing Touches
Once the flange is fully dried, Sven removes the clamps carefully, ensuring no damage occurs during this process. He then moves on to attaching four more pieces onto these main frames, completing two pairs of flanges for the bulkhead hatches.The Final Touches
While two flanges form the primary support structure around the hatches, Sven mentions there are two additional pieces required at each end to ensure comprehensive protection. This attention to detail highlights his commitment to producing a durable and reliable design. “Sailing is about finding your path, whether it’s across an ocean or within yourself.” – Sven Yrvind In conclusion, making flanges around bulkhead hatches may seem complex at first glance, but by following Sven Yrvind’s meticulous process, enthusiasts can achieve professional-level results. Remember that the journey of boatbuilding is as rewarding as reaching your destination; it tests one’s patience and dedication. For those seeking to embark on this adventure or simply gain more insight into marine craftsmanship, Sven’s wisdom is invaluable.Once the flange is fully dried, Sven removes the clamps carefully, ensuring no damage occurs during this process. He then moves on to attaching four more pieces onto these main frames, completing two pairs of flanges for the bulkhead hatches.The Final Touches
While two flanges form the primary support structure around the hatches, Sven mentions there are two additional pieces required at each end to ensure comprehensive protection. This attention to detail highlights his commitment to producing a durable and reliable design. “Sailing is about finding your path, whether it’s across an ocean or within yourself.” – Sven Yrvind In conclusion, making flanges around bulkhead hatches may seem complex at first glance, but by following Sven Yrvind’s meticulous process, enthusiasts can achieve professional-level results. Remember that the journey of boatbuilding is as rewarding as reaching your destination; it tests one’s patience and dedication. For those seeking to embark on this adventure or simply gain more insight into marine craftsmanship, Sven’s wisdom is invaluable.After securely attaching the first portion of the flange, Sven allows ample time for it to dry before moving forward with additional steps. This patience and precision are key aspects of his successful boatbuilding methods.Step 4: Finishing Touches
Once the flange is fully dried, Sven removes the clamps carefully, ensuring no damage occurs during this process. He then moves on to attaching four more pieces onto these main frames, completing two pairs of flanges for the bulkhead hatches.The Final Touches
While two flanges form the primary support structure around the hatches, Sven mentions there are two additional pieces required at each end to ensure comprehensive protection. This attention to detail highlights his commitment to producing a durable and reliable design. “Sailing is about finding your path, whether it’s across an ocean or within yourself.” – Sven Yrvind In conclusion, making flanges around bulkhead hatches may seem complex at first glance, but by following Sven Yrvind’s meticulous process, enthusiasts can achieve professional-level results. Remember that the journey of boatbuilding is as rewarding as reaching your destination; it tests one’s patience and dedication. For those seeking to embark on this adventure or simply gain more insight into marine craftsmanship, Sven’s wisdom is invaluable.Sven proceeds to apply glue along one edge of the flange, ensuring a secure bond when clamped into place. He emphasizes that this stage is crucial for maintaining the structural integrity of the flange, which in turn safeguards the living area beneath the canvas when hatches are open.Step 3: Allowing Time to Dry
After securely attaching the first portion of the flange, Sven allows ample time for it to dry before moving forward with additional steps. This patience and precision are key aspects of his successful boatbuilding methods.Step 4: Finishing Touches
Once the flange is fully dried, Sven removes the clamps carefully, ensuring no damage occurs during this process. He then moves on to attaching four more pieces onto these main frames, completing two pairs of flanges for the bulkhead hatches.The Final Touches
While two flanges form the primary support structure around the hatches, Sven mentions there are two additional pieces required at each end to ensure comprehensive protection. This attention to detail highlights his commitment to producing a durable and reliable design. “Sailing is about finding your path, whether it’s across an ocean or within yourself.” – Sven Yrvind In conclusion, making flanges around bulkhead hatches may seem complex at first glance, but by following Sven Yrvind’s meticulous process, enthusiasts can achieve professional-level results. Remember that the journey of boatbuilding is as rewarding as reaching your destination; it tests one’s patience and dedication. For those seeking to embark on this adventure or simply gain more insight into marine craftsmanship, Sven’s wisdom is invaluable.Sven begins by explaining that working on flanges vertically and horizontally is significantly easier than doing so in a flat position. To simplify the process further, he divides the task into two or three steps as suggested by fellow expert “for for.” This approach not only makes it more manageable but also allows for greater precision in crafting each component.Step 2: Applying Glue and Securing
Sven proceeds to apply glue along one edge of the flange, ensuring a secure bond when clamped into place. He emphasizes that this stage is crucial for maintaining the structural integrity of the flange, which in turn safeguards the living area beneath the canvas when hatches are open.Step 3: Allowing Time to Dry
After securely attaching the first portion of the flange, Sven allows ample time for it to dry before moving forward with additional steps. This patience and precision are key aspects of his successful boatbuilding methods.Step 4: Finishing Touches
Once the flange is fully dried, Sven removes the clamps carefully, ensuring no damage occurs during this process. He then moves on to attaching four more pieces onto these main frames, completing two pairs of flanges for the bulkhead hatches.The Final Touches
While two flanges form the primary support structure around the hatches, Sven mentions there are two additional pieces required at each end to ensure comprehensive protection. This attention to detail highlights his commitment to producing a durable and reliable design. “Sailing is about finding your path, whether it’s across an ocean or within yourself.” – Sven Yrvind In conclusion, making flanges around bulkhead hatches may seem complex at first glance, but by following Sven Yrvind’s meticulous process, enthusiasts can achieve professional-level results. Remember that the journey of boatbuilding is as rewarding as reaching your destination; it tests one’s patience and dedication. For those seeking to embark on this adventure or simply gain more insight into marine craftsmanship, Sven’s wisdom is invaluable.Sven Yrvind, a renowned yacht designer and sailor, shares valuable insights on creating flanges around bulkhead hatches for canvas protection in this enlightening video. By following his expert guidance, boat enthusiasts can ensure their living areas remain secure while allowing unhindered access through the hatches.Step 1: Starting with the Flange
Sven begins by explaining that working on flanges vertically and horizontally is significantly easier than doing so in a flat position. To simplify the process further, he divides the task into two or three steps as suggested by fellow expert “for for.” This approach not only makes it more manageable but also allows for greater precision in crafting each component.Step 2: Applying Glue and Securing
Sven proceeds to apply glue along one edge of the flange, ensuring a secure bond when clamped into place. He emphasizes that this stage is crucial for maintaining the structural integrity of the flange, which in turn safeguards the living area beneath the canvas when hatches are open.Step 3: Allowing Time to Dry
After securely attaching the first portion of the flange, Sven allows ample time for it to dry before moving forward with additional steps. This patience and precision are key aspects of his successful boatbuilding methods.Step 4: Finishing Touches
Once the flange is fully dried, Sven removes the clamps carefully, ensuring no damage occurs during this process. He then moves on to attaching four more pieces onto these main frames, completing two pairs of flanges for the bulkhead hatches.The Final Touches
While two flanges form the primary support structure around the hatches, Sven mentions there are two additional pieces required at each end to ensure comprehensive protection. This attention to detail highlights his commitment to producing a durable and reliable design. “Sailing is about finding your path, whether it’s across an ocean or within yourself.” – Sven Yrvind In conclusion, making flanges around bulkhead hatches may seem complex at first glance, but by following Sven Yrvind’s meticulous process, enthusiasts can achieve professional-level results. Remember that the journey of boatbuilding is as rewarding as reaching your destination; it tests one’s patience and dedication. For those seeking to embark on this adventure or simply gain more insight into marine craftsmanship, Sven’s wisdom is invaluable.Making Flanges Around Bulkhead Hatches for Canvas
Sven Yrvind, a renowned yacht designer and sailor, shares valuable insights on creating flanges around bulkhead hatches for canvas protection in this enlightening video. By following his expert guidance, boat enthusiasts can ensure their living areas remain secure while allowing unhindered access through the hatches.Step 1: Starting with the Flange
Sven begins by explaining that working on flanges vertically and horizontally is significantly easier than doing so in a flat position. To simplify the process further, he divides the task into two or three steps as suggested by fellow expert “for for.” This approach not only makes it more manageable but also allows for greater precision in crafting each component.Step 2: Applying Glue and Securing
Sven proceeds to apply glue along one edge of the flange, ensuring a secure bond when clamped into place. He emphasizes that this stage is crucial for maintaining the structural integrity of the flange, which in turn safeguards the living area beneath the canvas when hatches are open.Step 3: Allowing Time to Dry
After securely attaching the first portion of the flange, Sven allows ample time for it to dry before moving forward with additional steps. This patience and precision are key aspects of his successful boatbuilding methods.Step 4: Finishing Touches
Once the flange is fully dried, Sven removes the clamps carefully, ensuring no damage occurs during this process. He then moves on to attaching four more pieces onto these main frames, completing two pairs of flanges for the bulkhead hatches.The Final Touches
While two flanges form the primary support structure around the hatches, Sven mentions there are two additional pieces required at each end to ensure comprehensive protection. This attention to detail highlights his commitment to producing a durable and reliable design. “Sailing is about finding your path, whether it’s across an ocean or within yourself.” – Sven Yrvind In conclusion, making flanges around bulkhead hatches may seem complex at first glance, but by following Sven Yrvind’s meticulous process, enthusiasts can achieve professional-level results. Remember that the journey of boatbuilding is as rewarding as reaching your destination; it tests one’s patience and dedication. For those seeking to embark on this adventure or simply gain more insight into marine craftsmanship, Sven’s wisdom is invaluable.Sven proceeds to apply glue along one edge of the flange, ensuring a secure bond when clamped into place. He emphasizes that this stage is crucial for maintaining the structural integrity of the flange, which in turn safeguards the living area beneath the canvas when hatches are open.Step 3: Allowing Time to Dry
After securely attaching the first portion of the flange, Sven allows ample time for it to dry before moving forward with additional steps. This patience and precision are key aspects of his successful boatbuilding methods.Step 4: Finishing Touches
Once the flange is fully dried, Sven removes the clamps carefully, ensuring no damage occurs during this process. He then moves on to attaching four more pieces onto these main frames, completing two pairs of flanges for the bulkhead hatches.The Final Touches
While two flanges form the primary support structure around the hatches, Sven mentions there are two additional pieces required at each end to ensure comprehensive protection. This attention to detail highlights his commitment to producing a durable and reliable design. “Sailing is about finding your path, whether it’s across an ocean or within yourself.” – Sven Yrvind In conclusion, making flanges around bulkhead hatches may seem complex at first glance, but by following Sven Yrvind’s meticulous process, enthusiasts can achieve professional-level results. Remember that the journey of boatbuilding is as rewarding as reaching your destination; it tests one’s patience and dedication. For those seeking to embark on this adventure or simply gain more insight into marine craftsmanship, Sven’s wisdom is invaluable.Making Flanges Around Bulkhead Hatches for Canvas
Sven Yrvind, a renowned yacht designer and sailor, shares valuable insights on creating flanges around bulkhead hatches for canvas protection in this enlightening video. By following his expert guidance, boat enthusiasts can ensure their living areas remain secure while allowing unhindered access through the hatches.Step 1: Starting with the Flange
Sven begins by explaining that working on flanges vertically and horizontally is significantly easier than doing so in a flat position. To simplify the process further, he divides the task into two or three steps as suggested by fellow expert “for for.” This approach not only makes it more manageable but also allows for greater precision in crafting each component.Step 2: Applying Glue and Securing
Sven proceeds to apply glue along one edge of the flange, ensuring a secure bond when clamped into place. He emphasizes that this stage is crucial for maintaining the structural integrity of the flange, which in turn safeguards the living area beneath the canvas when hatches are open.Step 3: Allowing Time to Dry
After securely attaching the first portion of the flange, Sven allows ample time for it to dry before moving forward with additional steps. This patience and precision are key aspects of his successful boatbuilding methods.Step 4: Finishing Touches
Once the flange is fully dried, Sven removes the clamps carefully, ensuring no damage occurs during this process. He then moves on to attaching four more pieces onto these main frames, completing two pairs of flanges for the bulkhead hatches.The Final Touches
While two flanges form the primary support structure around the hatches, Sven mentions there are two additional pieces required at each end to ensure comprehensive protection. This attention to detail highlights his commitment to producing a durable and reliable design. “Sailing is about finding your path, whether it’s across an ocean or within yourself.” – Sven Yrvind In conclusion, making flanges around bulkhead hatches may seem complex at first glance, but by following Sven Yrvind’s meticulous process, enthusiasts can achieve professional-level results. Remember that the journey of boatbuilding is as rewarding as reaching your destination; it tests one’s patience and dedication. For those seeking to embark on this adventure or simply gain more insight into marine craftsmanship, Sven’s wisdom is invaluable.Sven proceeds to apply glue along one edge of the flange, ensuring a secure bond when clamped into place. He emphasizes that this stage is crucial for maintaining the structural integrity of the flange, which in turn safeguards the living area beneath the canvas when hatches are open.Step 3: Allowing Time to Dry
After securely attaching the first portion of the flange, Sven allows ample time for it to dry before moving forward with additional steps. This patience and precision are key aspects of his successful boatbuilding methods.Step 4: Finishing Touches
Once the flange is fully dried, Sven removes the clamps carefully, ensuring no damage occurs during this process. He then moves on to attaching four more pieces onto these main frames, completing two pairs of flanges for the bulkhead hatches.The Final Touches
While two flanges form the primary support structure around the hatches, Sven mentions there are two additional pieces required at each end to ensure comprehensive protection. This attention to detail highlights his commitment to producing a durable and reliable design. “Sailing is about finding your path, whether it’s across an ocean or within yourself.” – Sven Yrvind In conclusion, making flanges around bulkhead hatches may seem complex at first glance, but by following Sven Yrvind’s meticulous process, enthusiasts can achieve professional-level results. Remember that the journey of boatbuilding is as rewarding as reaching your destination; it tests one’s patience and dedication. For those seeking to embark on this adventure or simply gain more insight into marine craftsmanship, Sven’s wisdom is invaluable.Sven Yrvind, a renowned yacht designer and sailor, shares valuable insights on creating flanges around bulkhead hatches for canvas protection in this enlightening video. By following his expert guidance, boat enthusiasts can ensure their living areas remain secure while allowing unhindered access through the hatches.Step 1: Starting with the Flange
Sven begins by explaining that working on flanges vertically and horizontally is significantly easier than doing so in a flat position. To simplify the process further, he divides the task into two or three steps as suggested by fellow expert “for for.” This approach not only makes it more manageable but also allows for greater precision in crafting each component.Step 2: Applying Glue and Securing
Sven proceeds to apply glue along one edge of the flange, ensuring a secure bond when clamped into place. He emphasizes that this stage is crucial for maintaining the structural integrity of the flange, which in turn safeguards the living area beneath the canvas when hatches are open.Step 3: Allowing Time to Dry
After securely attaching the first portion of the flange, Sven allows ample time for it to dry before moving forward with additional steps. This patience and precision are key aspects of his successful boatbuilding methods.Step 4: Finishing Touches
Once the flange is fully dried, Sven removes the clamps carefully, ensuring no damage occurs during this process. He then moves on to attaching four more pieces onto these main frames, completing two pairs of flanges for the bulkhead hatches.The Final Touches
While two flanges form the primary support structure around the hatches, Sven mentions there are two additional pieces required at each end to ensure comprehensive protection. This attention to detail highlights his commitment to producing a durable and reliable design. “Sailing is about finding your path, whether it’s across an ocean or within yourself.” – Sven Yrvind In conclusion, making flanges around bulkhead hatches may seem complex at first glance, but by following Sven Yrvind’s meticulous process, enthusiasts can achieve professional-level results. Remember that the journey of boatbuilding is as rewarding as reaching your destination; it tests one’s patience and dedication. For those seeking to embark on this adventure or simply gain more insight into marine craftsmanship, Sven’s wisdom is invaluable.Making Flanges Around Bulkhead Hatches for Canvas
Sven Yrvind, a renowned yacht designer and sailor, shares valuable insights on creating flanges around bulkhead hatches for canvas protection in this enlightening video. By following his expert guidance, boat enthusiasts can ensure their living areas remain secure while allowing unhindered access through the hatches.Step 1: Starting with the Flange
Sven begins by explaining that working on flanges vertically and horizontally is significantly easier than doing so in a flat position. To simplify the process further, he divides the task into two or three steps as suggested by fellow expert “for for.” This approach not only makes it more manageable but also allows for greater precision in crafting each component.Step 2: Applying Glue and Securing
Sven proceeds to apply glue along one edge of the flange, ensuring a secure bond when clamped into place. He emphasizes that this stage is crucial for maintaining the structural integrity of the flange, which in turn safeguards the living area beneath the canvas when hatches are open.Step 3: Allowing Time to Dry
After securely attaching the first portion of the flange, Sven allows ample time for it to dry before moving forward with additional steps. This patience and precision are key aspects of his successful boatbuilding methods.Step 4: Finishing Touches
Once the flange is fully dried, Sven removes the clamps carefully, ensuring no damage occurs during this process. He then moves on to attaching four more pieces onto these main frames, completing two pairs of flanges for the bulkhead hatches.The Final Touches
While two flanges form the primary support structure around the hatches, Sven mentions there are two additional pieces required at each end to ensure comprehensive protection. This attention to detail highlights his commitment to producing a durable and reliable design. “Sailing is about finding your path, whether it’s across an ocean or within yourself.” – Sven Yrvind In conclusion, making flanges around bulkhead hatches may seem complex at first glance, but by following Sven Yrvind’s meticulous process, enthusiasts can achieve professional-level results. Remember that the journey of boatbuilding is as rewarding as reaching your destination; it tests one’s patience and dedication. For those seeking to embark on this adventure or simply gain more insight into marine craftsmanship, Sven’s wisdom is invaluable.Sven begins by explaining that working on flanges vertically and horizontally is significantly easier than doing so in a flat position. To simplify the process further, he divides the task into two or three steps as suggested by fellow expert “for for.” This approach not only makes it more manageable but also allows for greater precision in crafting each component.Step 2: Applying Glue and Securing
Sven proceeds to apply glue along one edge of the flange, ensuring a secure bond when clamped into place. He emphasizes that this stage is crucial for maintaining the structural integrity of the flange, which in turn safeguards the living area beneath the canvas when hatches are open.Step 3: Allowing Time to Dry
After securely attaching the first portion of the flange, Sven allows ample time for it to dry before moving forward with additional steps. This patience and precision are key aspects of his successful boatbuilding methods.Step 4: Finishing Touches
Once the flange is fully dried, Sven removes the clamps carefully, ensuring no damage occurs during this process. He then moves on to attaching four more pieces onto these main frames, completing two pairs of flanges for the bulkhead hatches.The Final Touches
While two flanges form the primary support structure around the hatches, Sven mentions there are two additional pieces required at each end to ensure comprehensive protection. This attention to detail highlights his commitment to producing a durable and reliable design. “Sailing is about finding your path, whether it’s across an ocean or within yourself.” – Sven Yrvind In conclusion, making flanges around bulkhead hatches may seem complex at first glance, but by following Sven Yrvind’s meticulous process, enthusiasts can achieve professional-level results. Remember that the journey of boatbuilding is as rewarding as reaching your destination; it tests one’s patience and dedication. For those seeking to embark on this adventure or simply gain more insight into marine craftsmanship, Sven’s wisdom is invaluable.Sven Yrvind, a renowned yacht designer and sailor, shares valuable insights on creating flanges around bulkhead hatches for canvas protection in this enlightening video. By following his expert guidance, boat enthusiasts can ensure their living areas remain secure while allowing unhindered access through the hatches.Step 1: Starting with the Flange
Sven begins by explaining that working on flanges vertically and horizontally is significantly easier than doing so in a flat position. To simplify the process further, he divides the task into two or three steps as suggested by fellow expert “for for.” This approach not only makes it more manageable but also allows for greater precision in crafting each component.Step 2: Applying Glue and Securing
Sven proceeds to apply glue along one edge of the flange, ensuring a secure bond when clamped into place. He emphasizes that this stage is crucial for maintaining the structural integrity of the flange, which in turn safeguards the living area beneath the canvas when hatches are open.Step 3: Allowing Time to Dry
After securely attaching the first portion of the flange, Sven allows ample time for it to dry before moving forward with additional steps. This patience and precision are key aspects of his successful boatbuilding methods.Step 4: Finishing Touches
Once the flange is fully dried, Sven removes the clamps carefully, ensuring no damage occurs during this process. He then moves on to attaching four more pieces onto these main frames, completing two pairs of flanges for the bulkhead hatches.The Final Touches
While two flanges form the primary support structure around the hatches, Sven mentions there are two additional pieces required at each end to ensure comprehensive protection. This attention to detail highlights his commitment to producing a durable and reliable design. “Sailing is about finding your path, whether it’s across an ocean or within yourself.” – Sven Yrvind In conclusion, making flanges around bulkhead hatches may seem complex at first glance, but by following Sven Yrvind’s meticulous process, enthusiasts can achieve professional-level results. Remember that the journey of boatbuilding is as rewarding as reaching your destination; it tests one’s patience and dedication. For those seeking to embark on this adventure or simply gain more insight into marine craftsmanship, Sven’s wisdom is invaluable.Making Flanges Around Bulkhead Hatches for Canvas
Sven Yrvind, a renowned yacht designer and sailor, shares valuable insights on creating flanges around bulkhead hatches for canvas protection in this enlightening video. By following his expert guidance, boat enthusiasts can ensure their living areas remain secure while allowing unhindered access through the hatches.Step 1: Starting with the Flange
Sven begins by explaining that working on flanges vertically and horizontally is significantly easier than doing so in a flat position. To simplify the process further, he divides the task into two or three steps as suggested by fellow expert “for for.” This approach not only makes it more manageable but also allows for greater precision in crafting each component.Step 2: Applying Glue and Securing
Sven proceeds to apply glue along one edge of the flange, ensuring a secure bond when clamped into place. He emphasizes that this stage is crucial for maintaining the structural integrity of the flange, which in turn safeguards the living area beneath the canvas when hatches are open.Step 3: Allowing Time to Dry
After securely attaching the first portion of the flange, Sven allows ample time for it to dry before moving forward with additional steps. This patience and precision are key aspects of his successful boatbuilding methods.Step 4: Finishing Touches
Once the flange is fully dried, Sven removes the clamps carefully, ensuring no damage occurs during this process. He then moves on to attaching four more pieces onto these main frames, completing two pairs of flanges for the bulkhead hatches.The Final Touches
While two flanges form the primary support structure around the hatches, Sven mentions there are two additional pieces required at each end to ensure comprehensive protection. This attention to detail highlights his commitment to producing a durable and reliable design. “Sailing is about finding your path, whether it’s across an ocean or within yourself.” – Sven Yrvind In conclusion, making flanges around bulkhead hatches may seem complex at first glance, but by following Sven Yrvind’s meticulous process, enthusiasts can achieve professional-level results. Remember that the journey of boatbuilding is as rewarding as reaching your destination; it tests one’s patience and dedication. For those seeking to embark on this adventure or simply gain more insight into marine craftsmanship, Sven’s wisdom is invaluable.Once the flange is fully dried, Sven removes the clamps carefully, ensuring no damage occurs during this process. He then moves on to attaching four more pieces onto these main frames, completing two pairs of flanges for the bulkhead hatches.The Final Touches
While two flanges form the primary support structure around the hatches, Sven mentions there are two additional pieces required at each end to ensure comprehensive protection. This attention to detail highlights his commitment to producing a durable and reliable design. “Sailing is about finding your path, whether it’s across an ocean or within yourself.” – Sven Yrvind In conclusion, making flanges around bulkhead hatches may seem complex at first glance, but by following Sven Yrvind’s meticulous process, enthusiasts can achieve professional-level results. Remember that the journey of boatbuilding is as rewarding as reaching your destination; it tests one’s patience and dedication. For those seeking to embark on this adventure or simply gain more insight into marine craftsmanship, Sven’s wisdom is invaluable.Sven begins by explaining that working on flanges vertically and horizontally is significantly easier than doing so in a flat position. To simplify the process further, he divides the task into two or three steps as suggested by fellow expert “for for.” This approach not only makes it more manageable but also allows for greater precision in crafting each component.Step 2: Applying Glue and Securing
Sven proceeds to apply glue along one edge of the flange, ensuring a secure bond when clamped into place. He emphasizes that this stage is crucial for maintaining the structural integrity of the flange, which in turn safeguards the living area beneath the canvas when hatches are open.Step 3: Allowing Time to Dry
After securely attaching the first portion of the flange, Sven allows ample time for it to dry before moving forward with additional steps. This patience and precision are key aspects of his successful boatbuilding methods.Step 4: Finishing Touches
Once the flange is fully dried, Sven removes the clamps carefully, ensuring no damage occurs during this process. He then moves on to attaching four more pieces onto these main frames, completing two pairs of flanges for the bulkhead hatches.The Final Touches
While two flanges form the primary support structure around the hatches, Sven mentions there are two additional pieces required at each end to ensure comprehensive protection. This attention to detail highlights his commitment to producing a durable and reliable design. “Sailing is about finding your path, whether it’s across an ocean or within yourself.” – Sven Yrvind In conclusion, making flanges around bulkhead hatches may seem complex at first glance, but by following Sven Yrvind’s meticulous process, enthusiasts can achieve professional-level results. Remember that the journey of boatbuilding is as rewarding as reaching your destination; it tests one’s patience and dedication. For those seeking to embark on this adventure or simply gain more insight into marine craftsmanship, Sven’s wisdom is invaluable.Sven Yrvind, a renowned yacht designer and sailor, shares valuable insights on creating flanges around bulkhead hatches for canvas protection in this enlightening video. By following his expert guidance, boat enthusiasts can ensure their living areas remain secure while allowing unhindered access through the hatches.Step 1: Starting with the Flange
Sven begins by explaining that working on flanges vertically and horizontally is significantly easier than doing so in a flat position. To simplify the process further, he divides the task into two or three steps as suggested by fellow expert “for for.” This approach not only makes it more manageable but also allows for greater precision in crafting each component.Step 2: Applying Glue and Securing
Sven proceeds to apply glue along one edge of the flange, ensuring a secure bond when clamped into place. He emphasizes that this stage is crucial for maintaining the structural integrity of the flange, which in turn safeguards the living area beneath the canvas when hatches are open.Step 3: Allowing Time to Dry
After securely attaching the first portion of the flange, Sven allows ample time for it to dry before moving forward with additional steps. This patience and precision are key aspects of his successful boatbuilding methods.Step 4: Finishing Touches
Once the flange is fully dried, Sven removes the clamps carefully, ensuring no damage occurs during this process. He then moves on to attaching four more pieces onto these main frames, completing two pairs of flanges for the bulkhead hatches.The Final Touches
While two flanges form the primary support structure around the hatches, Sven mentions there are two additional pieces required at each end to ensure comprehensive protection. This attention to detail highlights his commitment to producing a durable and reliable design. “Sailing is about finding your path, whether it’s across an ocean or within yourself.” – Sven Yrvind In conclusion, making flanges around bulkhead hatches may seem complex at first glance, but by following Sven Yrvind’s meticulous process, enthusiasts can achieve professional-level results. Remember that the journey of boatbuilding is as rewarding as reaching your destination; it tests one’s patience and dedication. For those seeking to embark on this adventure or simply gain more insight into marine craftsmanship, Sven’s wisdom is invaluable.Making Flanges Around Bulkhead Hatches for Canvas
Sven Yrvind, a renowned yacht designer and sailor, shares valuable insights on creating flanges around bulkhead hatches for canvas protection in this enlightening video. By following his expert guidance, boat enthusiasts can ensure their living areas remain secure while allowing unhindered access through the hatches.Step 1: Starting with the Flange
Sven begins by explaining that working on flanges vertically and horizontally is significantly easier than doing so in a flat position. To simplify the process further, he divides the task into two or three steps as suggested by fellow expert “for for.” This approach not only makes it more manageable but also allows for greater precision in crafting each component.Step 2: Applying Glue and Securing
Sven proceeds to apply glue along one edge of the flange, ensuring a secure bond when clamped into place. He emphasizes that this stage is crucial for maintaining the structural integrity of the flange, which in turn safeguards the living area beneath the canvas when hatches are open.Step 3: Allowing Time to Dry
After securely attaching the first portion of the flange, Sven allows ample time for it to dry before moving forward with additional steps. This patience and precision are key aspects of his successful boatbuilding methods.Step 4: Finishing Touches
Once the flange is fully dried, Sven removes the clamps carefully, ensuring no damage occurs during this process. He then moves on to attaching four more pieces onto these main frames, completing two pairs of flanges for the bulkhead hatches.The Final Touches
While two flanges form the primary support structure around the hatches, Sven mentions there are two additional pieces required at each end to ensure comprehensive protection. This attention to detail highlights his commitment to producing a durable and reliable design. “Sailing is about finding your path, whether it’s across an ocean or within yourself.” – Sven Yrvind In conclusion, making flanges around bulkhead hatches may seem complex at first glance, but by following Sven Yrvind’s meticulous process, enthusiasts can achieve professional-level results. Remember that the journey of boatbuilding is as rewarding as reaching your destination; it tests one’s patience and dedication. For those seeking to embark on this adventure or simply gain more insight into marine craftsmanship, Sven’s wisdom is invaluable.After securely attaching the first portion of the flange, Sven allows ample time for it to dry before moving forward with additional steps. This patience and precision are key aspects of his successful boatbuilding methods.Step 4: Finishing Touches
Once the flange is fully dried, Sven removes the clamps carefully, ensuring no damage occurs during this process. He then moves on to attaching four more pieces onto these main frames, completing two pairs of flanges for the bulkhead hatches.The Final Touches
While two flanges form the primary support structure around the hatches, Sven mentions there are two additional pieces required at each end to ensure comprehensive protection. This attention to detail highlights his commitment to producing a durable and reliable design. “Sailing is about finding your path, whether it’s across an ocean or within yourself.” – Sven Yrvind In conclusion, making flanges around bulkhead hatches may seem complex at first glance, but by following Sven Yrvind’s meticulous process, enthusiasts can achieve professional-level results. Remember that the journey of boatbuilding is as rewarding as reaching your destination; it tests one’s patience and dedication. For those seeking to embark on this adventure or simply gain more insight into marine craftsmanship, Sven’s wisdom is invaluable.Sven begins by explaining that working on flanges vertically and horizontally is significantly easier than doing so in a flat position. To simplify the process further, he divides the task into two or three steps as suggested by fellow expert “for for.” This approach not only makes it more manageable but also allows for greater precision in crafting each component.Step 2: Applying Glue and Securing
Sven proceeds to apply glue along one edge of the flange, ensuring a secure bond when clamped into place. He emphasizes that this stage is crucial for maintaining the structural integrity of the flange, which in turn safeguards the living area beneath the canvas when hatches are open.Step 3: Allowing Time to Dry
After securely attaching the first portion of the flange, Sven allows ample time for it to dry before moving forward with additional steps. This patience and precision are key aspects of his successful boatbuilding methods.Step 4: Finishing Touches
Once the flange is fully dried, Sven removes the clamps carefully, ensuring no damage occurs during this process. He then moves on to attaching four more pieces onto these main frames, completing two pairs of flanges for the bulkhead hatches.The Final Touches
While two flanges form the primary support structure around the hatches, Sven mentions there are two additional pieces required at each end to ensure comprehensive protection. This attention to detail highlights his commitment to producing a durable and reliable design. “Sailing is about finding your path, whether it’s across an ocean or within yourself.” – Sven Yrvind In conclusion, making flanges around bulkhead hatches may seem complex at first glance, but by following Sven Yrvind’s meticulous process, enthusiasts can achieve professional-level results. Remember that the journey of boatbuilding is as rewarding as reaching your destination; it tests one’s patience and dedication. For those seeking to embark on this adventure or simply gain more insight into marine craftsmanship, Sven’s wisdom is invaluable.Sven Yrvind, a renowned yacht designer and sailor, shares valuable insights on creating flanges around bulkhead hatches for canvas protection in this enlightening video. By following his expert guidance, boat enthusiasts can ensure their living areas remain secure while allowing unhindered access through the hatches.Step 1: Starting with the Flange
Sven begins by explaining that working on flanges vertically and horizontally is significantly easier than doing so in a flat position. To simplify the process further, he divides the task into two or three steps as suggested by fellow expert “for for.” This approach not only makes it more manageable but also allows for greater precision in crafting each component.Step 2: Applying Glue and Securing
Sven proceeds to apply glue along one edge of the flange, ensuring a secure bond when clamped into place. He emphasizes that this stage is crucial for maintaining the structural integrity of the flange, which in turn safeguards the living area beneath the canvas when hatches are open.Step 3: Allowing Time to Dry
After securely attaching the first portion of the flange, Sven allows ample time for it to dry before moving forward with additional steps. This patience and precision are key aspects of his successful boatbuilding methods.Step 4: Finishing Touches
Once the flange is fully dried, Sven removes the clamps carefully, ensuring no damage occurs during this process. He then moves on to attaching four more pieces onto these main frames, completing two pairs of flanges for the bulkhead hatches.The Final Touches
While two flanges form the primary support structure around the hatches, Sven mentions there are two additional pieces required at each end to ensure comprehensive protection. This attention to detail highlights his commitment to producing a durable and reliable design. “Sailing is about finding your path, whether it’s across an ocean or within yourself.” – Sven Yrvind In conclusion, making flanges around bulkhead hatches may seem complex at first glance, but by following Sven Yrvind’s meticulous process, enthusiasts can achieve professional-level results. Remember that the journey of boatbuilding is as rewarding as reaching your destination; it tests one’s patience and dedication. For those seeking to embark on this adventure or simply gain more insight into marine craftsmanship, Sven’s wisdom is invaluable.Making Flanges Around Bulkhead Hatches for Canvas
Sven Yrvind, a renowned yacht designer and sailor, shares valuable insights on creating flanges around bulkhead hatches for canvas protection in this enlightening video. By following his expert guidance, boat enthusiasts can ensure their living areas remain secure while allowing unhindered access through the hatches.Step 1: Starting with the Flange
Sven begins by explaining that working on flanges vertically and horizontally is significantly easier than doing so in a flat position. To simplify the process further, he divides the task into two or three steps as suggested by fellow expert “for for.” This approach not only makes it more manageable but also allows for greater precision in crafting each component.Step 2: Applying Glue and Securing
Sven proceeds to apply glue along one edge of the flange, ensuring a secure bond when clamped into place. He emphasizes that this stage is crucial for maintaining the structural integrity of the flange, which in turn safeguards the living area beneath the canvas when hatches are open.Step 3: Allowing Time to Dry
After securely attaching the first portion of the flange, Sven allows ample time for it to dry before moving forward with additional steps. This patience and precision are key aspects of his successful boatbuilding methods.Step 4: Finishing Touches
Once the flange is fully dried, Sven removes the clamps carefully, ensuring no damage occurs during this process. He then moves on to attaching four more pieces onto these main frames, completing two pairs of flanges for the bulkhead hatches.The Final Touches
While two flanges form the primary support structure around the hatches, Sven mentions there are two additional pieces required at each end to ensure comprehensive protection. This attention to detail highlights his commitment to producing a durable and reliable design. “Sailing is about finding your path, whether it’s across an ocean or within yourself.” – Sven Yrvind In conclusion, making flanges around bulkhead hatches may seem complex at first glance, but by following Sven Yrvind’s meticulous process, enthusiasts can achieve professional-level results. Remember that the journey of boatbuilding is as rewarding as reaching your destination; it tests one’s patience and dedication. For those seeking to embark on this adventure or simply gain more insight into marine craftsmanship, Sven’s wisdom is invaluable.Sven proceeds to apply glue along one edge of the flange, ensuring a secure bond when clamped into place. He emphasizes that this stage is crucial for maintaining the structural integrity of the flange, which in turn safeguards the living area beneath the canvas when hatches are open.Step 3: Allowing Time to Dry
After securely attaching the first portion of the flange, Sven allows ample time for it to dry before moving forward with additional steps. This patience and precision are key aspects of his successful boatbuilding methods.Step 4: Finishing Touches
Once the flange is fully dried, Sven removes the clamps carefully, ensuring no damage occurs during this process. He then moves on to attaching four more pieces onto these main frames, completing two pairs of flanges for the bulkhead hatches.The Final Touches
While two flanges form the primary support structure around the hatches, Sven mentions there are two additional pieces required at each end to ensure comprehensive protection. This attention to detail highlights his commitment to producing a durable and reliable design. “Sailing is about finding your path, whether it’s across an ocean or within yourself.” – Sven Yrvind In conclusion, making flanges around bulkhead hatches may seem complex at first glance, but by following Sven Yrvind’s meticulous process, enthusiasts can achieve professional-level results. Remember that the journey of boatbuilding is as rewarding as reaching your destination; it tests one’s patience and dedication. For those seeking to embark on this adventure or simply gain more insight into marine craftsmanship, Sven’s wisdom is invaluable.Sven begins by explaining that working on flanges vertically and horizontally is significantly easier than doing so in a flat position. To simplify the process further, he divides the task into two or three steps as suggested by fellow expert “for for.” This approach not only makes it more manageable but also allows for greater precision in crafting each component.Step 2: Applying Glue and Securing
Sven proceeds to apply glue along one edge of the flange, ensuring a secure bond when clamped into place. He emphasizes that this stage is crucial for maintaining the structural integrity of the flange, which in turn safeguards the living area beneath the canvas when hatches are open.Step 3: Allowing Time to Dry
After securely attaching the first portion of the flange, Sven allows ample time for it to dry before moving forward with additional steps. This patience and precision are key aspects of his successful boatbuilding methods.Step 4: Finishing Touches
Once the flange is fully dried, Sven removes the clamps carefully, ensuring no damage occurs during this process. He then moves on to attaching four more pieces onto these main frames, completing two pairs of flanges for the bulkhead hatches.The Final Touches
While two flanges form the primary support structure around the hatches, Sven mentions there are two additional pieces required at each end to ensure comprehensive protection. This attention to detail highlights his commitment to producing a durable and reliable design. “Sailing is about finding your path, whether it’s across an ocean or within yourself.” – Sven Yrvind In conclusion, making flanges around bulkhead hatches may seem complex at first glance, but by following Sven Yrvind’s meticulous process, enthusiasts can achieve professional-level results. Remember that the journey of boatbuilding is as rewarding as reaching your destination; it tests one’s patience and dedication. For those seeking to embark on this adventure or simply gain more insight into marine craftsmanship, Sven’s wisdom is invaluable.Sven Yrvind, a renowned yacht designer and sailor, shares valuable insights on creating flanges around bulkhead hatches for canvas protection in this enlightening video. By following his expert guidance, boat enthusiasts can ensure their living areas remain secure while allowing unhindered access through the hatches.Step 1: Starting with the Flange
Sven begins by explaining that working on flanges vertically and horizontally is significantly easier than doing so in a flat position. To simplify the process further, he divides the task into two or three steps as suggested by fellow expert “for for.” This approach not only makes it more manageable but also allows for greater precision in crafting each component.Step 2: Applying Glue and Securing
Sven proceeds to apply glue along one edge of the flange, ensuring a secure bond when clamped into place. He emphasizes that this stage is crucial for maintaining the structural integrity of the flange, which in turn safeguards the living area beneath the canvas when hatches are open.Step 3: Allowing Time to Dry
After securely attaching the first portion of the flange, Sven allows ample time for it to dry before moving forward with additional steps. This patience and precision are key aspects of his successful boatbuilding methods.Step 4: Finishing Touches
Once the flange is fully dried, Sven removes the clamps carefully, ensuring no damage occurs during this process. He then moves on to attaching four more pieces onto these main frames, completing two pairs of flanges for the bulkhead hatches.The Final Touches
While two flanges form the primary support structure around the hatches, Sven mentions there are two additional pieces required at each end to ensure comprehensive protection. This attention to detail highlights his commitment to producing a durable and reliable design. “Sailing is about finding your path, whether it’s across an ocean or within yourself.” – Sven Yrvind In conclusion, making flanges around bulkhead hatches may seem complex at first glance, but by following Sven Yrvind’s meticulous process, enthusiasts can achieve professional-level results. Remember that the journey of boatbuilding is as rewarding as reaching your destination; it tests one’s patience and dedication. For those seeking to embark on this adventure or simply gain more insight into marine craftsmanship, Sven’s wisdom is invaluable.Making Flanges Around Bulkhead Hatches for Canvas
Sven Yrvind, a renowned yacht designer and sailor, shares valuable insights on creating flanges around bulkhead hatches for canvas protection in this enlightening video. By following his expert guidance, boat enthusiasts can ensure their living areas remain secure while allowing unhindered access through the hatches.Step 1: Starting with the Flange
Sven begins by explaining that working on flanges vertically and horizontally is significantly easier than doing so in a flat position. To simplify the process further, he divides the task into two or three steps as suggested by fellow expert “for for.” This approach not only makes it more manageable but also allows for greater precision in crafting each component.Step 2: Applying Glue and Securing
Sven proceeds to apply glue along one edge of the flange, ensuring a secure bond when clamped into place. He emphasizes that this stage is crucial for maintaining the structural integrity of the flange, which in turn safeguards the living area beneath the canvas when hatches are open.Step 3: Allowing Time to Dry
After securely attaching the first portion of the flange, Sven allows ample time for it to dry before moving forward with additional steps. This patience and precision are key aspects of his successful boatbuilding methods.Step 4: Finishing Touches
Once the flange is fully dried, Sven removes the clamps carefully, ensuring no damage occurs during this process. He then moves on to attaching four more pieces onto these main frames, completing two pairs of flanges for the bulkhead hatches.The Final Touches
While two flanges form the primary support structure around the hatches, Sven mentions there are two additional pieces required at each end to ensure comprehensive protection. This attention to detail highlights his commitment to producing a durable and reliable design. “Sailing is about finding your path, whether it’s across an ocean or within yourself.” – Sven Yrvind In conclusion, making flanges around bulkhead hatches may seem complex at first glance, but by following Sven Yrvind’s meticulous process, enthusiasts can achieve professional-level results. Remember that the journey of boatbuilding is as rewarding as reaching your destination; it tests one’s patience and dedication. For those seeking to embark on this adventure or simply gain more insight into marine craftsmanship, Sven’s wisdom is invaluable.Once the flange is fully dried, Sven removes the clamps carefully, ensuring no damage occurs during this process. He then moves on to attaching four more pieces onto these main frames, completing two pairs of flanges for the bulkhead hatches.The Final Touches
While two flanges form the primary support structure around the hatches, Sven mentions there are two additional pieces required at each end to ensure comprehensive protection. This attention to detail highlights his commitment to producing a durable and reliable design. “Sailing is about finding your path, whether it’s across an ocean or within yourself.” – Sven Yrvind In conclusion, making flanges around bulkhead hatches may seem complex at first glance, but by following Sven Yrvind’s meticulous process, enthusiasts can achieve professional-level results. Remember that the journey of boatbuilding is as rewarding as reaching your destination; it tests one’s patience and dedication. For those seeking to embark on this adventure or simply gain more insight into marine craftsmanship, Sven’s wisdom is invaluable.Sven proceeds to apply glue along one edge of the flange, ensuring a secure bond when clamped into place. He emphasizes that this stage is crucial for maintaining the structural integrity of the flange, which in turn safeguards the living area beneath the canvas when hatches are open.Step 3: Allowing Time to Dry
After securely attaching the first portion of the flange, Sven allows ample time for it to dry before moving forward with additional steps. This patience and precision are key aspects of his successful boatbuilding methods.Step 4: Finishing Touches
Once the flange is fully dried, Sven removes the clamps carefully, ensuring no damage occurs during this process. He then moves on to attaching four more pieces onto these main frames, completing two pairs of flanges for the bulkhead hatches.The Final Touches
While two flanges form the primary support structure around the hatches, Sven mentions there are two additional pieces required at each end to ensure comprehensive protection. This attention to detail highlights his commitment to producing a durable and reliable design. “Sailing is about finding your path, whether it’s across an ocean or within yourself.” – Sven Yrvind In conclusion, making flanges around bulkhead hatches may seem complex at first glance, but by following Sven Yrvind’s meticulous process, enthusiasts can achieve professional-level results. Remember that the journey of boatbuilding is as rewarding as reaching your destination; it tests one’s patience and dedication. For those seeking to embark on this adventure or simply gain more insight into marine craftsmanship, Sven’s wisdom is invaluable.Sven begins by explaining that working on flanges vertically and horizontally is significantly easier than doing so in a flat position. To simplify the process further, he divides the task into two or three steps as suggested by fellow expert “for for.” This approach not only makes it more manageable but also allows for greater precision in crafting each component.Step 2: Applying Glue and Securing
Sven proceeds to apply glue along one edge of the flange, ensuring a secure bond when clamped into place. He emphasizes that this stage is crucial for maintaining the structural integrity of the flange, which in turn safeguards the living area beneath the canvas when hatches are open.Step 3: Allowing Time to Dry
After securely attaching the first portion of the flange, Sven allows ample time for it to dry before moving forward with additional steps. This patience and precision are key aspects of his successful boatbuilding methods.Step 4: Finishing Touches
Once the flange is fully dried, Sven removes the clamps carefully, ensuring no damage occurs during this process. He then moves on to attaching four more pieces onto these main frames, completing two pairs of flanges for the bulkhead hatches.The Final Touches
While two flanges form the primary support structure around the hatches, Sven mentions there are two additional pieces required at each end to ensure comprehensive protection. This attention to detail highlights his commitment to producing a durable and reliable design. “Sailing is about finding your path, whether it’s across an ocean or within yourself.” – Sven Yrvind In conclusion, making flanges around bulkhead hatches may seem complex at first glance, but by following Sven Yrvind’s meticulous process, enthusiasts can achieve professional-level results. Remember that the journey of boatbuilding is as rewarding as reaching your destination; it tests one’s patience and dedication. For those seeking to embark on this adventure or simply gain more insight into marine craftsmanship, Sven’s wisdom is invaluable.Sven Yrvind, a renowned yacht designer and sailor, shares valuable insights on creating flanges around bulkhead hatches for canvas protection in this enlightening video. By following his expert guidance, boat enthusiasts can ensure their living areas remain secure while allowing unhindered access through the hatches.Step 1: Starting with the Flange
Sven begins by explaining that working on flanges vertically and horizontally is significantly easier than doing so in a flat position. To simplify the process further, he divides the task into two or three steps as suggested by fellow expert “for for.” This approach not only makes it more manageable but also allows for greater precision in crafting each component.Step 2: Applying Glue and Securing
Sven proceeds to apply glue along one edge of the flange, ensuring a secure bond when clamped into place. He emphasizes that this stage is crucial for maintaining the structural integrity of the flange, which in turn safeguards the living area beneath the canvas when hatches are open.Step 3: Allowing Time to Dry
After securely attaching the first portion of the flange, Sven allows ample time for it to dry before moving forward with additional steps. This patience and precision are key aspects of his successful boatbuilding methods.Step 4: Finishing Touches
Once the flange is fully dried, Sven removes the clamps carefully, ensuring no damage occurs during this process. He then moves on to attaching four more pieces onto these main frames, completing two pairs of flanges for the bulkhead hatches.The Final Touches
While two flanges form the primary support structure around the hatches, Sven mentions there are two additional pieces required at each end to ensure comprehensive protection. This attention to detail highlights his commitment to producing a durable and reliable design. “Sailing is about finding your path, whether it’s across an ocean or within yourself.” – Sven Yrvind In conclusion, making flanges around bulkhead hatches may seem complex at first glance, but by following Sven Yrvind’s meticulous process, enthusiasts can achieve professional-level results. Remember that the journey of boatbuilding is as rewarding as reaching your destination; it tests one’s patience and dedication. For those seeking to embark on this adventure or simply gain more insight into marine craftsmanship, Sven’s wisdom is invaluable.Making Flanges Around Bulkhead Hatches for Canvas
Sven Yrvind, a renowned yacht designer and sailor, shares valuable insights on creating flanges around bulkhead hatches for canvas protection in this enlightening video. By following his expert guidance, boat enthusiasts can ensure their living areas remain secure while allowing unhindered access through the hatches.Step 1: Starting with the Flange
Sven begins by explaining that working on flanges vertically and horizontally is significantly easier than doing so in a flat position. To simplify the process further, he divides the task into two or three steps as suggested by fellow expert “for for.” This approach not only makes it more manageable but also allows for greater precision in crafting each component.Step 2: Applying Glue and Securing
Sven proceeds to apply glue along one edge of the flange, ensuring a secure bond when clamped into place. He emphasizes that this stage is crucial for maintaining the structural integrity of the flange, which in turn safeguards the living area beneath the canvas when hatches are open.Step 3: Allowing Time to Dry
After securely attaching the first portion of the flange, Sven allows ample time for it to dry before moving forward with additional steps. This patience and precision are key aspects of his successful boatbuilding methods.Step 4: Finishing Touches
Once the flange is fully dried, Sven removes the clamps carefully, ensuring no damage occurs during this process. He then moves on to attaching four more pieces onto these main frames, completing two pairs of flanges for the bulkhead hatches.The Final Touches
While two flanges form the primary support structure around the hatches, Sven mentions there are two additional pieces required at each end to ensure comprehensive protection. This attention to detail highlights his commitment to producing a durable and reliable design. “Sailing is about finding your path, whether it’s across an ocean or within yourself.” – Sven Yrvind In conclusion, making flanges around bulkhead hatches may seem complex at first glance, but by following Sven Yrvind’s meticulous process, enthusiasts can achieve professional-level results. Remember that the journey of boatbuilding is as rewarding as reaching your destination; it tests one’s patience and dedication. For those seeking to embark on this adventure or simply gain more insight into marine craftsmanship, Sven’s wisdom is invaluable.After securely attaching the first portion of the flange, Sven allows ample time for it to dry before moving forward with additional steps. This patience and precision are key aspects of his successful boatbuilding methods.Step 4: Finishing Touches
Once the flange is fully dried, Sven removes the clamps carefully, ensuring no damage occurs during this process. He then moves on to attaching four more pieces onto these main frames, completing two pairs of flanges for the bulkhead hatches.The Final Touches
While two flanges form the primary support structure around the hatches, Sven mentions there are two additional pieces required at each end to ensure comprehensive protection. This attention to detail highlights his commitment to producing a durable and reliable design. “Sailing is about finding your path, whether it’s across an ocean or within yourself.” – Sven Yrvind In conclusion, making flanges around bulkhead hatches may seem complex at first glance, but by following Sven Yrvind’s meticulous process, enthusiasts can achieve professional-level results. Remember that the journey of boatbuilding is as rewarding as reaching your destination; it tests one’s patience and dedication. For those seeking to embark on this adventure or simply gain more insight into marine craftsmanship, Sven’s wisdom is invaluable.Sven proceeds to apply glue along one edge of the flange, ensuring a secure bond when clamped into place. He emphasizes that this stage is crucial for maintaining the structural integrity of the flange, which in turn safeguards the living area beneath the canvas when hatches are open.Step 3: Allowing Time to Dry
After securely attaching the first portion of the flange, Sven allows ample time for it to dry before moving forward with additional steps. This patience and precision are key aspects of his successful boatbuilding methods.Step 4: Finishing Touches
Once the flange is fully dried, Sven removes the clamps carefully, ensuring no damage occurs during this process. He then moves on to attaching four more pieces onto these main frames, completing two pairs of flanges for the bulkhead hatches.The Final Touches
While two flanges form the primary support structure around the hatches, Sven mentions there are two additional pieces required at each end to ensure comprehensive protection. This attention to detail highlights his commitment to producing a durable and reliable design. “Sailing is about finding your path, whether it’s across an ocean or within yourself.” – Sven Yrvind In conclusion, making flanges around bulkhead hatches may seem complex at first glance, but by following Sven Yrvind’s meticulous process, enthusiasts can achieve professional-level results. Remember that the journey of boatbuilding is as rewarding as reaching your destination; it tests one’s patience and dedication. For those seeking to embark on this adventure or simply gain more insight into marine craftsmanship, Sven’s wisdom is invaluable.Sven begins by explaining that working on flanges vertically and horizontally is significantly easier than doing so in a flat position. To simplify the process further, he divides the task into two or three steps as suggested by fellow expert “for for.” This approach not only makes it more manageable but also allows for greater precision in crafting each component.Step 2: Applying Glue and Securing
Sven proceeds to apply glue along one edge of the flange, ensuring a secure bond when clamped into place. He emphasizes that this stage is crucial for maintaining the structural integrity of the flange, which in turn safeguards the living area beneath the canvas when hatches are open.Step 3: Allowing Time to Dry
After securely attaching the first portion of the flange, Sven allows ample time for it to dry before moving forward with additional steps. This patience and precision are key aspects of his successful boatbuilding methods.Step 4: Finishing Touches
Once the flange is fully dried, Sven removes the clamps carefully, ensuring no damage occurs during this process. He then moves on to attaching four more pieces onto these main frames, completing two pairs of flanges for the bulkhead hatches.The Final Touches
While two flanges form the primary support structure around the hatches, Sven mentions there are two additional pieces required at each end to ensure comprehensive protection. This attention to detail highlights his commitment to producing a durable and reliable design. “Sailing is about finding your path, whether it’s across an ocean or within yourself.” – Sven Yrvind In conclusion, making flanges around bulkhead hatches may seem complex at first glance, but by following Sven Yrvind’s meticulous process, enthusiasts can achieve professional-level results. Remember that the journey of boatbuilding is as rewarding as reaching your destination; it tests one’s patience and dedication. For those seeking to embark on this adventure or simply gain more insight into marine craftsmanship, Sven’s wisdom is invaluable.Sven Yrvind, a renowned yacht designer and sailor, shares valuable insights on creating flanges around bulkhead hatches for canvas protection in this enlightening video. By following his expert guidance, boat enthusiasts can ensure their living areas remain secure while allowing unhindered access through the hatches.Step 1: Starting with the Flange
Sven begins by explaining that working on flanges vertically and horizontally is significantly easier than doing so in a flat position. To simplify the process further, he divides the task into two or three steps as suggested by fellow expert “for for.” This approach not only makes it more manageable but also allows for greater precision in crafting each component.Step 2: Applying Glue and Securing
Sven proceeds to apply glue along one edge of the flange, ensuring a secure bond when clamped into place. He emphasizes that this stage is crucial for maintaining the structural integrity of the flange, which in turn safeguards the living area beneath the canvas when hatches are open.Step 3: Allowing Time to Dry
After securely attaching the first portion of the flange, Sven allows ample time for it to dry before moving forward with additional steps. This patience and precision are key aspects of his successful boatbuilding methods.Step 4: Finishing Touches
Once the flange is fully dried, Sven removes the clamps carefully, ensuring no damage occurs during this process. He then moves on to attaching four more pieces onto these main frames, completing two pairs of flanges for the bulkhead hatches.The Final Touches
While two flanges form the primary support structure around the hatches, Sven mentions there are two additional pieces required at each end to ensure comprehensive protection. This attention to detail highlights his commitment to producing a durable and reliable design. “Sailing is about finding your path, whether it’s across an ocean or within yourself.” – Sven Yrvind In conclusion, making flanges around bulkhead hatches may seem complex at first glance, but by following Sven Yrvind’s meticulous process, enthusiasts can achieve professional-level results. Remember that the journey of boatbuilding is as rewarding as reaching your destination; it tests one’s patience and dedication. For those seeking to embark on this adventure or simply gain more insight into marine craftsmanship, Sven’s wisdom is invaluable.Making Flanges Around Bulkhead Hatches for Canvas
Sven Yrvind, a renowned yacht designer and sailor, shares valuable insights on creating flanges around bulkhead hatches for canvas protection in this enlightening video. By following his expert guidance, boat enthusiasts can ensure their living areas remain secure while allowing unhindered access through the hatches.Step 1: Starting with the Flange
Sven begins by explaining that working on flanges vertically and horizontally is significantly easier than doing so in a flat position. To simplify the process further, he divides the task into two or three steps as suggested by fellow expert “for for.” This approach not only makes it more manageable but also allows for greater precision in crafting each component.Step 2: Applying Glue and Securing
Sven proceeds to apply glue along one edge of the flange, ensuring a secure bond when clamped into place. He emphasizes that this stage is crucial for maintaining the structural integrity of the flange, which in turn safeguards the living area beneath the canvas when hatches are open.Step 3: Allowing Time to Dry
After securely attaching the first portion of the flange, Sven allows ample time for it to dry before moving forward with additional steps. This patience and precision are key aspects of his successful boatbuilding methods.Step 4: Finishing Touches
Once the flange is fully dried, Sven removes the clamps carefully, ensuring no damage occurs during this process. He then moves on to attaching four more pieces onto these main frames, completing two pairs of flanges for the bulkhead hatches.The Final Touches
While two flanges form the primary support structure around the hatches, Sven mentions there are two additional pieces required at each end to ensure comprehensive protection. This attention to detail highlights his commitment to producing a durable and reliable design. “Sailing is about finding your path, whether it’s across an ocean or within yourself.” – Sven Yrvind In conclusion, making flanges around bulkhead hatches may seem complex at first glance, but by following Sven Yrvind’s meticulous process, enthusiasts can achieve professional-level results. Remember that the journey of boatbuilding is as rewarding as reaching your destination; it tests one’s patience and dedication. For those seeking to embark on this adventure or simply gain more insight into marine craftsmanship, Sven’s wisdom is invaluable.Once the flange is fully dried, Sven removes the clamps carefully, ensuring no damage occurs during this process. He then moves on to attaching four more pieces onto these main frames, completing two pairs of flanges for the bulkhead hatches.The Final Touches
While two flanges form the primary support structure around the hatches, Sven mentions there are two additional pieces required at each end to ensure comprehensive protection. This attention to detail highlights his commitment to producing a durable and reliable design. “Sailing is about finding your path, whether it’s across an ocean or within yourself.” – Sven Yrvind In conclusion, making flanges around bulkhead hatches may seem complex at first glance, but by following Sven Yrvind’s meticulous process, enthusiasts can achieve professional-level results. Remember that the journey of boatbuilding is as rewarding as reaching your destination; it tests one’s patience and dedication. For those seeking to embark on this adventure or simply gain more insight into marine craftsmanship, Sven’s wisdom is invaluable.After securely attaching the first portion of the flange, Sven allows ample time for it to dry before moving forward with additional steps. This patience and precision are key aspects of his successful boatbuilding methods.Step 4: Finishing Touches
Once the flange is fully dried, Sven removes the clamps carefully, ensuring no damage occurs during this process. He then moves on to attaching four more pieces onto these main frames, completing two pairs of flanges for the bulkhead hatches.The Final Touches
While two flanges form the primary support structure around the hatches, Sven mentions there are two additional pieces required at each end to ensure comprehensive protection. This attention to detail highlights his commitment to producing a durable and reliable design. “Sailing is about finding your path, whether it’s across an ocean or within yourself.” – Sven Yrvind In conclusion, making flanges around bulkhead hatches may seem complex at first glance, but by following Sven Yrvind’s meticulous process, enthusiasts can achieve professional-level results. Remember that the journey of boatbuilding is as rewarding as reaching your destination; it tests one’s patience and dedication. For those seeking to embark on this adventure or simply gain more insight into marine craftsmanship, Sven’s wisdom is invaluable.Sven proceeds to apply glue along one edge of the flange, ensuring a secure bond when clamped into place. He emphasizes that this stage is crucial for maintaining the structural integrity of the flange, which in turn safeguards the living area beneath the canvas when hatches are open.Step 3: Allowing Time to Dry
After securely attaching the first portion of the flange, Sven allows ample time for it to dry before moving forward with additional steps. This patience and precision are key aspects of his successful boatbuilding methods.Step 4: Finishing Touches
Once the flange is fully dried, Sven removes the clamps carefully, ensuring no damage occurs during this process. He then moves on to attaching four more pieces onto these main frames, completing two pairs of flanges for the bulkhead hatches.The Final Touches
While two flanges form the primary support structure around the hatches, Sven mentions there are two additional pieces required at each end to ensure comprehensive protection. This attention to detail highlights his commitment to producing a durable and reliable design. “Sailing is about finding your path, whether it’s across an ocean or within yourself.” – Sven Yrvind In conclusion, making flanges around bulkhead hatches may seem complex at first glance, but by following Sven Yrvind’s meticulous process, enthusiasts can achieve professional-level results. Remember that the journey of boatbuilding is as rewarding as reaching your destination; it tests one’s patience and dedication. For those seeking to embark on this adventure or simply gain more insight into marine craftsmanship, Sven’s wisdom is invaluable.Sven begins by explaining that working on flanges vertically and horizontally is significantly easier than doing so in a flat position. To simplify the process further, he divides the task into two or three steps as suggested by fellow expert “for for.” This approach not only makes it more manageable but also allows for greater precision in crafting each component.Step 2: Applying Glue and Securing
Sven proceeds to apply glue along one edge of the flange, ensuring a secure bond when clamped into place. He emphasizes that this stage is crucial for maintaining the structural integrity of the flange, which in turn safeguards the living area beneath the canvas when hatches are open.Step 3: Allowing Time to Dry
After securely attaching the first portion of the flange, Sven allows ample time for it to dry before moving forward with additional steps. This patience and precision are key aspects of his successful boatbuilding methods.Step 4: Finishing Touches
Once the flange is fully dried, Sven removes the clamps carefully, ensuring no damage occurs during this process. He then moves on to attaching four more pieces onto these main frames, completing two pairs of flanges for the bulkhead hatches.The Final Touches
While two flanges form the primary support structure around the hatches, Sven mentions there are two additional pieces required at each end to ensure comprehensive protection. This attention to detail highlights his commitment to producing a durable and reliable design. “Sailing is about finding your path, whether it’s across an ocean or within yourself.” – Sven Yrvind In conclusion, making flanges around bulkhead hatches may seem complex at first glance, but by following Sven Yrvind’s meticulous process, enthusiasts can achieve professional-level results. Remember that the journey of boatbuilding is as rewarding as reaching your destination; it tests one’s patience and dedication. For those seeking to embark on this adventure or simply gain more insight into marine craftsmanship, Sven’s wisdom is invaluable.Sven Yrvind, a renowned yacht designer and sailor, shares valuable insights on creating flanges around bulkhead hatches for canvas protection in this enlightening video. By following his expert guidance, boat enthusiasts can ensure their living areas remain secure while allowing unhindered access through the hatches.Step 1: Starting with the Flange
Sven begins by explaining that working on flanges vertically and horizontally is significantly easier than doing so in a flat position. To simplify the process further, he divides the task into two or three steps as suggested by fellow expert “for for.” This approach not only makes it more manageable but also allows for greater precision in crafting each component.Step 2: Applying Glue and Securing
Sven proceeds to apply glue along one edge of the flange, ensuring a secure bond when clamped into place. He emphasizes that this stage is crucial for maintaining the structural integrity of the flange, which in turn safeguards the living area beneath the canvas when hatches are open.Step 3: Allowing Time to Dry
After securely attaching the first portion of the flange, Sven allows ample time for it to dry before moving forward with additional steps. This patience and precision are key aspects of his successful boatbuilding methods.Step 4: Finishing Touches
Once the flange is fully dried, Sven removes the clamps carefully, ensuring no damage occurs during this process. He then moves on to attaching four more pieces onto these main frames, completing two pairs of flanges for the bulkhead hatches.The Final Touches
While two flanges form the primary support structure around the hatches, Sven mentions there are two additional pieces required at each end to ensure comprehensive protection. This attention to detail highlights his commitment to producing a durable and reliable design. “Sailing is about finding your path, whether it’s across an ocean or within yourself.” – Sven Yrvind In conclusion, making flanges around bulkhead hatches may seem complex at first glance, but by following Sven Yrvind’s meticulous process, enthusiasts can achieve professional-level results. Remember that the journey of boatbuilding is as rewarding as reaching your destination; it tests one’s patience and dedication. For those seeking to embark on this adventure or simply gain more insight into marine craftsmanship, Sven’s wisdom is invaluable.Making Flanges Around Bulkhead Hatches for Canvas
Sven Yrvind, a renowned yacht designer and sailor, shares valuable insights on creating flanges around bulkhead hatches for canvas protection in this enlightening video. By following his expert guidance, boat enthusiasts can ensure their living areas remain secure while allowing unhindered access through the hatches.Step 1: Starting with the Flange
Sven begins by explaining that working on flanges vertically and horizontally is significantly easier than doing so in a flat position. To simplify the process further, he divides the task into two or three steps as suggested by fellow expert “for for.” This approach not only makes it more manageable but also allows for greater precision in crafting each component.Step 2: Applying Glue and Securing
Sven proceeds to apply glue along one edge of the flange, ensuring a secure bond when clamped into place. He emphasizes that this stage is crucial for maintaining the structural integrity of the flange, which in turn safeguards the living area beneath the canvas when hatches are open.Step 3: Allowing Time to Dry
After securely attaching the first portion of the flange, Sven allows ample time for it to dry before moving forward with additional steps. This patience and precision are key aspects of his successful boatbuilding methods.Step 4: Finishing Touches
Once the flange is fully dried, Sven removes the clamps carefully, ensuring no damage occurs during this process. He then moves on to attaching four more pieces onto these main frames, completing two pairs of flanges for the bulkhead hatches.The Final Touches
While two flanges form the primary support structure around the hatches, Sven mentions there are two additional pieces required at each end to ensure comprehensive protection. This attention to detail highlights his commitment to producing a durable and reliable design. “Sailing is about finding your path, whether it’s across an ocean or within yourself.” – Sven Yrvind In conclusion, making flanges around bulkhead hatches may seem complex at first glance, but by following Sven Yrvind’s meticulous process, enthusiasts can achieve professional-level results. Remember that the journey of boatbuilding is as rewarding as reaching your destination; it tests one’s patience and dedication. For those seeking to embark on this adventure or simply gain more insight into marine craftsmanship, Sven’s wisdom is invaluable.Sven begins by explaining that working on flanges vertically and horizontally is significantly easier than doing so in a flat position. To simplify the process further, he divides the task into two or three steps as suggested by fellow expert “for for.” This approach not only makes it more manageable but also allows for greater precision in crafting each component.Step 2: Applying Glue and Securing
Sven proceeds to apply glue along one edge of the flange, ensuring a secure bond when clamped into place. He emphasizes that this stage is crucial for maintaining the structural integrity of the flange, which in turn safeguards the living area beneath the canvas when hatches are open.Step 3: Allowing Time to Dry
After securely attaching the first portion of the flange, Sven allows ample time for it to dry before moving forward with additional steps. This patience and precision are key aspects of his successful boatbuilding methods.Step 4: Finishing Touches
Once the flange is fully dried, Sven removes the clamps carefully, ensuring no damage occurs during this process. He then moves on to attaching four more pieces onto these main frames, completing two pairs of flanges for the bulkhead hatches.The Final Touches
While two flanges form the primary support structure around the hatches, Sven mentions there are two additional pieces required at each end to ensure comprehensive protection. This attention to detail highlights his commitment to producing a durable and reliable design. “Sailing is about finding your path, whether it’s across an ocean or within yourself.” – Sven Yrvind In conclusion, making flanges around bulkhead hatches may seem complex at first glance, but by following Sven Yrvind’s meticulous process, enthusiasts can achieve professional-level results. Remember that the journey of boatbuilding is as rewarding as reaching your destination; it tests one’s patience and dedication. For those seeking to embark on this adventure or simply gain more insight into marine craftsmanship, Sven’s wisdom is invaluable.Making Flanges Around Bulkhead Hatches for Canvas
Sven Yrvind, a renowned yacht designer and sailor, shares valuable insights on creating flanges around bulkhead hatches for canvas protection in this enlightening video. By following his expert guidance, boat enthusiasts can ensure their living areas remain secure while allowing unhindered access through the hatches.Step 1: Starting with the Flange
Sven begins by explaining that working on flanges vertically and horizontally is significantly easier than doing so in a flat position. To simplify the process further, he divides the task into two or three steps as suggested by fellow expert “for for.” This approach not only makes it more manageable but also allows for greater precision in crafting each component.Step 2: Applying Glue and Securing
Sven proceeds to apply glue along one edge of the flange, ensuring a secure bond when clamped into place. He emphasizes that this stage is crucial for maintaining the structural integrity of the flange, which in turn safeguards the living area beneath the canvas when hatches are open.Step 3: Allowing Time to Dry
After securely attaching the first portion of the flange, Sven allows ample time for it to dry before moving forward with additional steps. This patience and precision are key aspects of his successful boatbuilding methods.Step 4: Finishing Touches
Once the flange is fully dried, Sven removes the clamps carefully, ensuring no damage occurs during this process. He then moves on to attaching four more pieces onto these main frames, completing two pairs of flanges for the bulkhead hatches.The Final Touches
While two flanges form the primary support structure around the hatches, Sven mentions there are two additional pieces required at each end to ensure comprehensive protection. This attention to detail highlights his commitment to producing a durable and reliable design. “Sailing is about finding your path, whether it’s across an ocean or within yourself.” – Sven Yrvind In conclusion, making flanges around bulkhead hatches may seem complex at first glance, but by following Sven Yrvind’s meticulous process, enthusiasts can achieve professional-level results. Remember that the journey of boatbuilding is as rewarding as reaching your destination; it tests one’s patience and dedication. For those seeking to embark on this adventure or simply gain more insight into marine craftsmanship, Sven’s wisdom is invaluable.Sven proceeds to apply glue along one edge of the flange, ensuring a secure bond when clamped into place. He emphasizes that this stage is crucial for maintaining the structural integrity of the flange, which in turn safeguards the living area beneath the canvas when hatches are open.Step 3: Allowing Time to Dry
After securely attaching the first portion of the flange, Sven allows ample time for it to dry before moving forward with additional steps. This patience and precision are key aspects of his successful boatbuilding methods.Step 4: Finishing Touches
Once the flange is fully dried, Sven removes the clamps carefully, ensuring no damage occurs during this process. He then moves on to attaching four more pieces onto these main frames, completing two pairs of flanges for the bulkhead hatches.The Final Touches
While two flanges form the primary support structure around the hatches, Sven mentions there are two additional pieces required at each end to ensure comprehensive protection. This attention to detail highlights his commitment to producing a durable and reliable design. “Sailing is about finding your path, whether it’s across an ocean or within yourself.” – Sven Yrvind In conclusion, making flanges around bulkhead hatches may seem complex at first glance, but by following Sven Yrvind’s meticulous process, enthusiasts can achieve professional-level results. Remember that the journey of boatbuilding is as rewarding as reaching your destination; it tests one’s patience and dedication. For those seeking to embark on this adventure or simply gain more insight into marine craftsmanship, Sven’s wisdom is invaluable.Sven Yrvind, a renowned yacht designer and sailor, shares valuable insights on creating flanges around bulkhead hatches for canvas protection in this enlightening video. By following his expert guidance, boat enthusiasts can ensure their living areas remain secure while allowing unhindered access through the hatches.Step 1: Starting with the Flange
Sven begins by explaining that working on flanges vertically and horizontally is significantly easier than doing so in a flat position. To simplify the process further, he divides the task into two or three steps as suggested by fellow expert “for for.” This approach not only makes it more manageable but also allows for greater precision in crafting each component.Step 2: Applying Glue and Securing
Sven proceeds to apply glue along one edge of the flange, ensuring a secure bond when clamped into place. He emphasizes that this stage is crucial for maintaining the structural integrity of the flange, which in turn safeguards the living area beneath the canvas when hatches are open.Step 3: Allowing Time to Dry
After securely attaching the first portion of the flange, Sven allows ample time for it to dry before moving forward with additional steps. This patience and precision are key aspects of his successful boatbuilding methods.Step 4: Finishing Touches
Once the flange is fully dried, Sven removes the clamps carefully, ensuring no damage occurs during this process. He then moves on to attaching four more pieces onto these main frames, completing two pairs of flanges for the bulkhead hatches.The Final Touches
While two flanges form the primary support structure around the hatches, Sven mentions there are two additional pieces required at each end to ensure comprehensive protection. This attention to detail highlights his commitment to producing a durable and reliable design. “Sailing is about finding your path, whether it’s across an ocean or within yourself.” – Sven Yrvind In conclusion, making flanges around bulkhead hatches may seem complex at first glance, but by following Sven Yrvind’s meticulous process, enthusiasts can achieve professional-level results. Remember that the journey of boatbuilding is as rewarding as reaching your destination; it tests one’s patience and dedication. For those seeking to embark on this adventure or simply gain more insight into marine craftsmanship, Sven’s wisdom is invaluable.Making Flanges Around Bulkhead Hatches for Canvas
Sven Yrvind, a renowned yacht designer and sailor, shares valuable insights on creating flanges around bulkhead hatches for canvas protection in this enlightening video. By following his expert guidance, boat enthusiasts can ensure their living areas remain secure while allowing unhindered access through the hatches.Step 1: Starting with the Flange
Sven begins by explaining that working on flanges vertically and horizontally is significantly easier than doing so in a flat position. To simplify the process further, he divides the task into two or three steps as suggested by fellow expert “for for.” This approach not only makes it more manageable but also allows for greater precision in crafting each component.Step 2: Applying Glue and Securing
Sven proceeds to apply glue along one edge of the flange, ensuring a secure bond when clamped into place. He emphasizes that this stage is crucial for maintaining the structural integrity of the flange, which in turn safeguards the living area beneath the canvas when hatches are open.Step 3: Allowing Time to Dry
After securely attaching the first portion of the flange, Sven allows ample time for it to dry before moving forward with additional steps. This patience and precision are key aspects of his successful boatbuilding methods.Step 4: Finishing Touches
Once the flange is fully dried, Sven removes the clamps carefully, ensuring no damage occurs during this process. He then moves on to attaching four more pieces onto these main frames, completing two pairs of flanges for the bulkhead hatches.The Final Touches
While two flanges form the primary support structure around the hatches, Sven mentions there are two additional pieces required at each end to ensure comprehensive protection. This attention to detail highlights his commitment to producing a durable and reliable design. “Sailing is about finding your path, whether it’s across an ocean or within yourself.” – Sven Yrvind In conclusion, making flanges around bulkhead hatches may seem complex at first glance, but by following Sven Yrvind’s meticulous process, enthusiasts can achieve professional-level results. Remember that the journey of boatbuilding is as rewarding as reaching your destination; it tests one’s patience and dedication. For those seeking to embark on this adventure or simply gain more insight into marine craftsmanship, Sven’s wisdom is invaluable.Sven begins by explaining that working on flanges vertically and horizontally is significantly easier than doing so in a flat position. To simplify the process further, he divides the task into two or three steps as suggested by fellow expert “for for.” This approach not only makes it more manageable but also allows for greater precision in crafting each component.Step 2: Applying Glue and Securing
Sven proceeds to apply glue along one edge of the flange, ensuring a secure bond when clamped into place. He emphasizes that this stage is crucial for maintaining the structural integrity of the flange, which in turn safeguards the living area beneath the canvas when hatches are open.Step 3: Allowing Time to Dry
After securely attaching the first portion of the flange, Sven allows ample time for it to dry before moving forward with additional steps. This patience and precision are key aspects of his successful boatbuilding methods.Step 4: Finishing Touches
Once the flange is fully dried, Sven removes the clamps carefully, ensuring no damage occurs during this process. He then moves on to attaching four more pieces onto these main frames, completing two pairs of flanges for the bulkhead hatches.The Final Touches
While two flanges form the primary support structure around the hatches, Sven mentions there are two additional pieces required at each end to ensure comprehensive protection. This attention to detail highlights his commitment to producing a durable and reliable design. “Sailing is about finding your path, whether it’s across an ocean or within yourself.” – Sven Yrvind In conclusion, making flanges around bulkhead hatches may seem complex at first glance, but by following Sven Yrvind’s meticulous process, enthusiasts can achieve professional-level results. Remember that the journey of boatbuilding is as rewarding as reaching your destination; it tests one’s patience and dedication. For those seeking to embark on this adventure or simply gain more insight into marine craftsmanship, Sven’s wisdom is invaluable.Sven Yrvind, a renowned yacht designer and sailor, shares valuable insights on creating flanges around bulkhead hatches for canvas protection in this enlightening video. By following his expert guidance, boat enthusiasts can ensure their living areas remain secure while allowing unhindered access through the hatches.Step 1: Starting with the Flange
Sven begins by explaining that working on flanges vertically and horizontally is significantly easier than doing so in a flat position. To simplify the process further, he divides the task into two or three steps as suggested by fellow expert “for for.” This approach not only makes it more manageable but also allows for greater precision in crafting each component.Step 2: Applying Glue and Securing
Sven proceeds to apply glue along one edge of the flange, ensuring a secure bond when clamped into place. He emphasizes that this stage is crucial for maintaining the structural integrity of the flange, which in turn safeguards the living area beneath the canvas when hatches are open.Step 3: Allowing Time to Dry
After securely attaching the first portion of the flange, Sven allows ample time for it to dry before moving forward with additional steps. This patience and precision are key aspects of his successful boatbuilding methods.Step 4: Finishing Touches
Once the flange is fully dried, Sven removes the clamps carefully, ensuring no damage occurs during this process. He then moves on to attaching four more pieces onto these main frames, completing two pairs of flanges for the bulkhead hatches.The Final Touches
While two flanges form the primary support structure around the hatches, Sven mentions there are two additional pieces required at each end to ensure comprehensive protection. This attention to detail highlights his commitment to producing a durable and reliable design. “Sailing is about finding your path, whether it’s across an ocean or within yourself.” – Sven Yrvind In conclusion, making flanges around bulkhead hatches may seem complex at first glance, but by following Sven Yrvind’s meticulous process, enthusiasts can achieve professional-level results. Remember that the journey of boatbuilding is as rewarding as reaching your destination; it tests one’s patience and dedication. For those seeking to embark on this adventure or simply gain more insight into marine craftsmanship, Sven’s wisdom is invaluable.Making Flanges Around Bulkhead Hatches for Canvas
Sven Yrvind, a renowned yacht designer and sailor, shares valuable insights on creating flanges around bulkhead hatches for canvas protection in this enlightening video. By following his expert guidance, boat enthusiasts can ensure their living areas remain secure while allowing unhindered access through the hatches.Step 1: Starting with the Flange
Sven begins by explaining that working on flanges vertically and horizontally is significantly easier than doing so in a flat position. To simplify the process further, he divides the task into two or three steps as suggested by fellow expert “for for.” This approach not only makes it more manageable but also allows for greater precision in crafting each component.Step 2: Applying Glue and Securing
Sven proceeds to apply glue along one edge of the flange, ensuring a secure bond when clamped into place. He emphasizes that this stage is crucial for maintaining the structural integrity of the flange, which in turn safeguards the living area beneath the canvas when hatches are open.Step 3: Allowing Time to Dry
After securely attaching the first portion of the flange, Sven allows ample time for it to dry before moving forward with additional steps. This patience and precision are key aspects of his successful boatbuilding methods.Step 4: Finishing Touches
Once the flange is fully dried, Sven removes the clamps carefully, ensuring no damage occurs during this process. He then moves on to attaching four more pieces onto these main frames, completing two pairs of flanges for the bulkhead hatches.The Final Touches
While two flanges form the primary support structure around the hatches, Sven mentions there are two additional pieces required at each end to ensure comprehensive protection. This attention to detail highlights his commitment to producing a durable and reliable design. “Sailing is about finding your path, whether it’s across an ocean or within yourself.” – Sven Yrvind In conclusion, making flanges around bulkhead hatches may seem complex at first glance, but by following Sven Yrvind’s meticulous process, enthusiasts can achieve professional-level results. Remember that the journey of boatbuilding is as rewarding as reaching your destination; it tests one’s patience and dedication. For those seeking to embark on this adventure or simply gain more insight into marine craftsmanship, Sven’s wisdom is invaluable.Once the flange is fully dried, Sven removes the clamps carefully, ensuring no damage occurs during this process. He then moves on to attaching four more pieces onto these main frames, completing two pairs of flanges for the bulkhead hatches.The Final Touches
While two flanges form the primary support structure around the hatches, Sven mentions there are two additional pieces required at each end to ensure comprehensive protection. This attention to detail highlights his commitment to producing a durable and reliable design. “Sailing is about finding your path, whether it’s across an ocean or within yourself.” – Sven Yrvind In conclusion, making flanges around bulkhead hatches may seem complex at first glance, but by following Sven Yrvind’s meticulous process, enthusiasts can achieve professional-level results. Remember that the journey of boatbuilding is as rewarding as reaching your destination; it tests one’s patience and dedication. For those seeking to embark on this adventure or simply gain more insight into marine craftsmanship, Sven’s wisdom is invaluable.Sven begins by explaining that working on flanges vertically and horizontally is significantly easier than doing so in a flat position. To simplify the process further, he divides the task into two or three steps as suggested by fellow expert “for for.” This approach not only makes it more manageable but also allows for greater precision in crafting each component.Step 2: Applying Glue and Securing
Sven proceeds to apply glue along one edge of the flange, ensuring a secure bond when clamped into place. He emphasizes that this stage is crucial for maintaining the structural integrity of the flange, which in turn safeguards the living area beneath the canvas when hatches are open.Step 3: Allowing Time to Dry
After securely attaching the first portion of the flange, Sven allows ample time for it to dry before moving forward with additional steps. This patience and precision are key aspects of his successful boatbuilding methods.Step 4: Finishing Touches
Once the flange is fully dried, Sven removes the clamps carefully, ensuring no damage occurs during this process. He then moves on to attaching four more pieces onto these main frames, completing two pairs of flanges for the bulkhead hatches.The Final Touches
While two flanges form the primary support structure around the hatches, Sven mentions there are two additional pieces required at each end to ensure comprehensive protection. This attention to detail highlights his commitment to producing a durable and reliable design. “Sailing is about finding your path, whether it’s across an ocean or within yourself.” – Sven Yrvind In conclusion, making flanges around bulkhead hatches may seem complex at first glance, but by following Sven Yrvind’s meticulous process, enthusiasts can achieve professional-level results. Remember that the journey of boatbuilding is as rewarding as reaching your destination; it tests one’s patience and dedication. For those seeking to embark on this adventure or simply gain more insight into marine craftsmanship, Sven’s wisdom is invaluable.Sven Yrvind, a renowned yacht designer and sailor, shares valuable insights on creating flanges around bulkhead hatches for canvas protection in this enlightening video. By following his expert guidance, boat enthusiasts can ensure their living areas remain secure while allowing unhindered access through the hatches.Step 1: Starting with the Flange
Sven begins by explaining that working on flanges vertically and horizontally is significantly easier than doing so in a flat position. To simplify the process further, he divides the task into two or three steps as suggested by fellow expert “for for.” This approach not only makes it more manageable but also allows for greater precision in crafting each component.Step 2: Applying Glue and Securing
Sven proceeds to apply glue along one edge of the flange, ensuring a secure bond when clamped into place. He emphasizes that this stage is crucial for maintaining the structural integrity of the flange, which in turn safeguards the living area beneath the canvas when hatches are open.Step 3: Allowing Time to Dry
After securely attaching the first portion of the flange, Sven allows ample time for it to dry before moving forward with additional steps. This patience and precision are key aspects of his successful boatbuilding methods.Step 4: Finishing Touches
Once the flange is fully dried, Sven removes the clamps carefully, ensuring no damage occurs during this process. He then moves on to attaching four more pieces onto these main frames, completing two pairs of flanges for the bulkhead hatches.The Final Touches
While two flanges form the primary support structure around the hatches, Sven mentions there are two additional pieces required at each end to ensure comprehensive protection. This attention to detail highlights his commitment to producing a durable and reliable design. “Sailing is about finding your path, whether it’s across an ocean or within yourself.” – Sven Yrvind In conclusion, making flanges around bulkhead hatches may seem complex at first glance, but by following Sven Yrvind’s meticulous process, enthusiasts can achieve professional-level results. Remember that the journey of boatbuilding is as rewarding as reaching your destination; it tests one’s patience and dedication. For those seeking to embark on this adventure or simply gain more insight into marine craftsmanship, Sven’s wisdom is invaluable.Making Flanges Around Bulkhead Hatches for Canvas
Sven Yrvind, a renowned yacht designer and sailor, shares valuable insights on creating flanges around bulkhead hatches for canvas protection in this enlightening video. By following his expert guidance, boat enthusiasts can ensure their living areas remain secure while allowing unhindered access through the hatches.Step 1: Starting with the Flange
Sven begins by explaining that working on flanges vertically and horizontally is significantly easier than doing so in a flat position. To simplify the process further, he divides the task into two or three steps as suggested by fellow expert “for for.” This approach not only makes it more manageable but also allows for greater precision in crafting each component.Step 2: Applying Glue and Securing
Sven proceeds to apply glue along one edge of the flange, ensuring a secure bond when clamped into place. He emphasizes that this stage is crucial for maintaining the structural integrity of the flange, which in turn safeguards the living area beneath the canvas when hatches are open.Step 3: Allowing Time to Dry
After securely attaching the first portion of the flange, Sven allows ample time for it to dry before moving forward with additional steps. This patience and precision are key aspects of his successful boatbuilding methods.Step 4: Finishing Touches
Once the flange is fully dried, Sven removes the clamps carefully, ensuring no damage occurs during this process. He then moves on to attaching four more pieces onto these main frames, completing two pairs of flanges for the bulkhead hatches.The Final Touches
While two flanges form the primary support structure around the hatches, Sven mentions there are two additional pieces required at each end to ensure comprehensive protection. This attention to detail highlights his commitment to producing a durable and reliable design. “Sailing is about finding your path, whether it’s across an ocean or within yourself.” – Sven Yrvind In conclusion, making flanges around bulkhead hatches may seem complex at first glance, but by following Sven Yrvind’s meticulous process, enthusiasts can achieve professional-level results. Remember that the journey of boatbuilding is as rewarding as reaching your destination; it tests one’s patience and dedication. For those seeking to embark on this adventure or simply gain more insight into marine craftsmanship, Sven’s wisdom is invaluable.After securely attaching the first portion of the flange, Sven allows ample time for it to dry before moving forward with additional steps. This patience and precision are key aspects of his successful boatbuilding methods.Step 4: Finishing Touches
Once the flange is fully dried, Sven removes the clamps carefully, ensuring no damage occurs during this process. He then moves on to attaching four more pieces onto these main frames, completing two pairs of flanges for the bulkhead hatches.The Final Touches
While two flanges form the primary support structure around the hatches, Sven mentions there are two additional pieces required at each end to ensure comprehensive protection. This attention to detail highlights his commitment to producing a durable and reliable design. “Sailing is about finding your path, whether it’s across an ocean or within yourself.” – Sven Yrvind In conclusion, making flanges around bulkhead hatches may seem complex at first glance, but by following Sven Yrvind’s meticulous process, enthusiasts can achieve professional-level results. Remember that the journey of boatbuilding is as rewarding as reaching your destination; it tests one’s patience and dedication. For those seeking to embark on this adventure or simply gain more insight into marine craftsmanship, Sven’s wisdom is invaluable.Sven begins by explaining that working on flanges vertically and horizontally is significantly easier than doing so in a flat position. To simplify the process further, he divides the task into two or three steps as suggested by fellow expert “for for.” This approach not only makes it more manageable but also allows for greater precision in crafting each component.Step 2: Applying Glue and Securing
Sven proceeds to apply glue along one edge of the flange, ensuring a secure bond when clamped into place. He emphasizes that this stage is crucial for maintaining the structural integrity of the flange, which in turn safeguards the living area beneath the canvas when hatches are open.Step 3: Allowing Time to Dry
After securely attaching the first portion of the flange, Sven allows ample time for it to dry before moving forward with additional steps. This patience and precision are key aspects of his successful boatbuilding methods.Step 4: Finishing Touches
Once the flange is fully dried, Sven removes the clamps carefully, ensuring no damage occurs during this process. He then moves on to attaching four more pieces onto these main frames, completing two pairs of flanges for the bulkhead hatches.The Final Touches
While two flanges form the primary support structure around the hatches, Sven mentions there are two additional pieces required at each end to ensure comprehensive protection. This attention to detail highlights his commitment to producing a durable and reliable design. “Sailing is about finding your path, whether it’s across an ocean or within yourself.” – Sven Yrvind In conclusion, making flanges around bulkhead hatches may seem complex at first glance, but by following Sven Yrvind’s meticulous process, enthusiasts can achieve professional-level results. Remember that the journey of boatbuilding is as rewarding as reaching your destination; it tests one’s patience and dedication. For those seeking to embark on this adventure or simply gain more insight into marine craftsmanship, Sven’s wisdom is invaluable.Sven Yrvind, a renowned yacht designer and sailor, shares valuable insights on creating flanges around bulkhead hatches for canvas protection in this enlightening video. By following his expert guidance, boat enthusiasts can ensure their living areas remain secure while allowing unhindered access through the hatches.Step 1: Starting with the Flange
Sven begins by explaining that working on flanges vertically and horizontally is significantly easier than doing so in a flat position. To simplify the process further, he divides the task into two or three steps as suggested by fellow expert “for for.” This approach not only makes it more manageable but also allows for greater precision in crafting each component.Step 2: Applying Glue and Securing
Sven proceeds to apply glue along one edge of the flange, ensuring a secure bond when clamped into place. He emphasizes that this stage is crucial for maintaining the structural integrity of the flange, which in turn safeguards the living area beneath the canvas when hatches are open.Step 3: Allowing Time to Dry
After securely attaching the first portion of the flange, Sven allows ample time for it to dry before moving forward with additional steps. This patience and precision are key aspects of his successful boatbuilding methods.Step 4: Finishing Touches
Once the flange is fully dried, Sven removes the clamps carefully, ensuring no damage occurs during this process. He then moves on to attaching four more pieces onto these main frames, completing two pairs of flanges for the bulkhead hatches.The Final Touches
While two flanges form the primary support structure around the hatches, Sven mentions there are two additional pieces required at each end to ensure comprehensive protection. This attention to detail highlights his commitment to producing a durable and reliable design. “Sailing is about finding your path, whether it’s across an ocean or within yourself.” – Sven Yrvind In conclusion, making flanges around bulkhead hatches may seem complex at first glance, but by following Sven Yrvind’s meticulous process, enthusiasts can achieve professional-level results. Remember that the journey of boatbuilding is as rewarding as reaching your destination; it tests one’s patience and dedication. For those seeking to embark on this adventure or simply gain more insight into marine craftsmanship, Sven’s wisdom is invaluable.Making Flanges Around Bulkhead Hatches for Canvas
Sven Yrvind, a renowned yacht designer and sailor, shares valuable insights on creating flanges around bulkhead hatches for canvas protection in this enlightening video. By following his expert guidance, boat enthusiasts can ensure their living areas remain secure while allowing unhindered access through the hatches.Step 1: Starting with the Flange
Sven begins by explaining that working on flanges vertically and horizontally is significantly easier than doing so in a flat position. To simplify the process further, he divides the task into two or three steps as suggested by fellow expert “for for.” This approach not only makes it more manageable but also allows for greater precision in crafting each component.Step 2: Applying Glue and Securing
Sven proceeds to apply glue along one edge of the flange, ensuring a secure bond when clamped into place. He emphasizes that this stage is crucial for maintaining the structural integrity of the flange, which in turn safeguards the living area beneath the canvas when hatches are open.Step 3: Allowing Time to Dry
After securely attaching the first portion of the flange, Sven allows ample time for it to dry before moving forward with additional steps. This patience and precision are key aspects of his successful boatbuilding methods.Step 4: Finishing Touches
Once the flange is fully dried, Sven removes the clamps carefully, ensuring no damage occurs during this process. He then moves on to attaching four more pieces onto these main frames, completing two pairs of flanges for the bulkhead hatches.The Final Touches
While two flanges form the primary support structure around the hatches, Sven mentions there are two additional pieces required at each end to ensure comprehensive protection. This attention to detail highlights his commitment to producing a durable and reliable design. “Sailing is about finding your path, whether it’s across an ocean or within yourself.” – Sven Yrvind In conclusion, making flanges around bulkhead hatches may seem complex at first glance, but by following Sven Yrvind’s meticulous process, enthusiasts can achieve professional-level results. Remember that the journey of boatbuilding is as rewarding as reaching your destination; it tests one’s patience and dedication. For those seeking to embark on this adventure or simply gain more insight into marine craftsmanship, Sven’s wisdom is invaluable.Sven proceeds to apply glue along one edge of the flange, ensuring a secure bond when clamped into place. He emphasizes that this stage is crucial for maintaining the structural integrity of the flange, which in turn safeguards the living area beneath the canvas when hatches are open.Step 3: Allowing Time to Dry
After securely attaching the first portion of the flange, Sven allows ample time for it to dry before moving forward with additional steps. This patience and precision are key aspects of his successful boatbuilding methods.Step 4: Finishing Touches
Once the flange is fully dried, Sven removes the clamps carefully, ensuring no damage occurs during this process. He then moves on to attaching four more pieces onto these main frames, completing two pairs of flanges for the bulkhead hatches.The Final Touches
While two flanges form the primary support structure around the hatches, Sven mentions there are two additional pieces required at each end to ensure comprehensive protection. This attention to detail highlights his commitment to producing a durable and reliable design. “Sailing is about finding your path, whether it’s across an ocean or within yourself.” – Sven Yrvind In conclusion, making flanges around bulkhead hatches may seem complex at first glance, but by following Sven Yrvind’s meticulous process, enthusiasts can achieve professional-level results. Remember that the journey of boatbuilding is as rewarding as reaching your destination; it tests one’s patience and dedication. For those seeking to embark on this adventure or simply gain more insight into marine craftsmanship, Sven’s wisdom is invaluable.Sven begins by explaining that working on flanges vertically and horizontally is significantly easier than doing so in a flat position. To simplify the process further, he divides the task into two or three steps as suggested by fellow expert “for for.” This approach not only makes it more manageable but also allows for greater precision in crafting each component.Step 2: Applying Glue and Securing
Sven proceeds to apply glue along one edge of the flange, ensuring a secure bond when clamped into place. He emphasizes that this stage is crucial for maintaining the structural integrity of the flange, which in turn safeguards the living area beneath the canvas when hatches are open.Step 3: Allowing Time to Dry
After securely attaching the first portion of the flange, Sven allows ample time for it to dry before moving forward with additional steps. This patience and precision are key aspects of his successful boatbuilding methods.Step 4: Finishing Touches
Once the flange is fully dried, Sven removes the clamps carefully, ensuring no damage occurs during this process. He then moves on to attaching four more pieces onto these main frames, completing two pairs of flanges for the bulkhead hatches.The Final Touches
While two flanges form the primary support structure around the hatches, Sven mentions there are two additional pieces required at each end to ensure comprehensive protection. This attention to detail highlights his commitment to producing a durable and reliable design. “Sailing is about finding your path, whether it’s across an ocean or within yourself.” – Sven Yrvind In conclusion, making flanges around bulkhead hatches may seem complex at first glance, but by following Sven Yrvind’s meticulous process, enthusiasts can achieve professional-level results. Remember that the journey of boatbuilding is as rewarding as reaching your destination; it tests one’s patience and dedication. For those seeking to embark on this adventure or simply gain more insight into marine craftsmanship, Sven’s wisdom is invaluable.Sven Yrvind, a renowned yacht designer and sailor, shares valuable insights on creating flanges around bulkhead hatches for canvas protection in this enlightening video. By following his expert guidance, boat enthusiasts can ensure their living areas remain secure while allowing unhindered access through the hatches.Step 1: Starting with the Flange
Sven begins by explaining that working on flanges vertically and horizontally is significantly easier than doing so in a flat position. To simplify the process further, he divides the task into two or three steps as suggested by fellow expert “for for.” This approach not only makes it more manageable but also allows for greater precision in crafting each component.Step 2: Applying Glue and Securing
Sven proceeds to apply glue along one edge of the flange, ensuring a secure bond when clamped into place. He emphasizes that this stage is crucial for maintaining the structural integrity of the flange, which in turn safeguards the living area beneath the canvas when hatches are open.Step 3: Allowing Time to Dry
After securely attaching the first portion of the flange, Sven allows ample time for it to dry before moving forward with additional steps. This patience and precision are key aspects of his successful boatbuilding methods.Step 4: Finishing Touches
Once the flange is fully dried, Sven removes the clamps carefully, ensuring no damage occurs during this process. He then moves on to attaching four more pieces onto these main frames, completing two pairs of flanges for the bulkhead hatches.The Final Touches
While two flanges form the primary support structure around the hatches, Sven mentions there are two additional pieces required at each end to ensure comprehensive protection. This attention to detail highlights his commitment to producing a durable and reliable design. “Sailing is about finding your path, whether it’s across an ocean or within yourself.” – Sven Yrvind In conclusion, making flanges around bulkhead hatches may seem complex at first glance, but by following Sven Yrvind’s meticulous process, enthusiasts can achieve professional-level results. Remember that the journey of boatbuilding is as rewarding as reaching your destination; it tests one’s patience and dedication. For those seeking to embark on this adventure or simply gain more insight into marine craftsmanship, Sven’s wisdom is invaluable.Making Flanges Around Bulkhead Hatches for Canvas
Sven Yrvind, a renowned yacht designer and sailor, shares valuable insights on creating flanges around bulkhead hatches for canvas protection in this enlightening video. By following his expert guidance, boat enthusiasts can ensure their living areas remain secure while allowing unhindered access through the hatches.Step 1: Starting with the Flange
Sven begins by explaining that working on flanges vertically and horizontally is significantly easier than doing so in a flat position. To simplify the process further, he divides the task into two or three steps as suggested by fellow expert “for for.” This approach not only makes it more manageable but also allows for greater precision in crafting each component.Step 2: Applying Glue and Securing
Sven proceeds to apply glue along one edge of the flange, ensuring a secure bond when clamped into place. He emphasizes that this stage is crucial for maintaining the structural integrity of the flange, which in turn safeguards the living area beneath the canvas when hatches are open.Step 3: Allowing Time to Dry
After securely attaching the first portion of the flange, Sven allows ample time for it to dry before moving forward with additional steps. This patience and precision are key aspects of his successful boatbuilding methods.Step 4: Finishing Touches
Once the flange is fully dried, Sven removes the clamps carefully, ensuring no damage occurs during this process. He then moves on to attaching four more pieces onto these main frames, completing two pairs of flanges for the bulkhead hatches.The Final Touches
While two flanges form the primary support structure around the hatches, Sven mentions there are two additional pieces required at each end to ensure comprehensive protection. This attention to detail highlights his commitment to producing a durable and reliable design. “Sailing is about finding your path, whether it’s across an ocean or within yourself.” – Sven Yrvind In conclusion, making flanges around bulkhead hatches may seem complex at first glance, but by following Sven Yrvind’s meticulous process, enthusiasts can achieve professional-level results. Remember that the journey of boatbuilding is as rewarding as reaching your destination; it tests one’s patience and dedication. For those seeking to embark on this adventure or simply gain more insight into marine craftsmanship, Sven’s wisdom is invaluable.Once the flange is fully dried, Sven removes the clamps carefully, ensuring no damage occurs during this process. He then moves on to attaching four more pieces onto these main frames, completing two pairs of flanges for the bulkhead hatches.The Final Touches
While two flanges form the primary support structure around the hatches, Sven mentions there are two additional pieces required at each end to ensure comprehensive protection. This attention to detail highlights his commitment to producing a durable and reliable design. “Sailing is about finding your path, whether it’s across an ocean or within yourself.” – Sven Yrvind In conclusion, making flanges around bulkhead hatches may seem complex at first glance, but by following Sven Yrvind’s meticulous process, enthusiasts can achieve professional-level results. Remember that the journey of boatbuilding is as rewarding as reaching your destination; it tests one’s patience and dedication. For those seeking to embark on this adventure or simply gain more insight into marine craftsmanship, Sven’s wisdom is invaluable.Sven proceeds to apply glue along one edge of the flange, ensuring a secure bond when clamped into place. He emphasizes that this stage is crucial for maintaining the structural integrity of the flange, which in turn safeguards the living area beneath the canvas when hatches are open.Step 3: Allowing Time to Dry
After securely attaching the first portion of the flange, Sven allows ample time for it to dry before moving forward with additional steps. This patience and precision are key aspects of his successful boatbuilding methods.Step 4: Finishing Touches
Once the flange is fully dried, Sven removes the clamps carefully, ensuring no damage occurs during this process. He then moves on to attaching four more pieces onto these main frames, completing two pairs of flanges for the bulkhead hatches.The Final Touches
While two flanges form the primary support structure around the hatches, Sven mentions there are two additional pieces required at each end to ensure comprehensive protection. This attention to detail highlights his commitment to producing a durable and reliable design. “Sailing is about finding your path, whether it’s across an ocean or within yourself.” – Sven Yrvind In conclusion, making flanges around bulkhead hatches may seem complex at first glance, but by following Sven Yrvind’s meticulous process, enthusiasts can achieve professional-level results. Remember that the journey of boatbuilding is as rewarding as reaching your destination; it tests one’s patience and dedication. For those seeking to embark on this adventure or simply gain more insight into marine craftsmanship, Sven’s wisdom is invaluable.Sven begins by explaining that working on flanges vertically and horizontally is significantly easier than doing so in a flat position. To simplify the process further, he divides the task into two or three steps as suggested by fellow expert “for for.” This approach not only makes it more manageable but also allows for greater precision in crafting each component.Step 2: Applying Glue and Securing
Sven proceeds to apply glue along one edge of the flange, ensuring a secure bond when clamped into place. He emphasizes that this stage is crucial for maintaining the structural integrity of the flange, which in turn safeguards the living area beneath the canvas when hatches are open.Step 3: Allowing Time to Dry
After securely attaching the first portion of the flange, Sven allows ample time for it to dry before moving forward with additional steps. This patience and precision are key aspects of his successful boatbuilding methods.Step 4: Finishing Touches
Once the flange is fully dried, Sven removes the clamps carefully, ensuring no damage occurs during this process. He then moves on to attaching four more pieces onto these main frames, completing two pairs of flanges for the bulkhead hatches.The Final Touches
While two flanges form the primary support structure around the hatches, Sven mentions there are two additional pieces required at each end to ensure comprehensive protection. This attention to detail highlights his commitment to producing a durable and reliable design. “Sailing is about finding your path, whether it’s across an ocean or within yourself.” – Sven Yrvind In conclusion, making flanges around bulkhead hatches may seem complex at first glance, but by following Sven Yrvind’s meticulous process, enthusiasts can achieve professional-level results. Remember that the journey of boatbuilding is as rewarding as reaching your destination; it tests one’s patience and dedication. For those seeking to embark on this adventure or simply gain more insight into marine craftsmanship, Sven’s wisdom is invaluable.Sven Yrvind, a renowned yacht designer and sailor, shares valuable insights on creating flanges around bulkhead hatches for canvas protection in this enlightening video. By following his expert guidance, boat enthusiasts can ensure their living areas remain secure while allowing unhindered access through the hatches.Step 1: Starting with the Flange
Sven begins by explaining that working on flanges vertically and horizontally is significantly easier than doing so in a flat position. To simplify the process further, he divides the task into two or three steps as suggested by fellow expert “for for.” This approach not only makes it more manageable but also allows for greater precision in crafting each component.Step 2: Applying Glue and Securing
Sven proceeds to apply glue along one edge of the flange, ensuring a secure bond when clamped into place. He emphasizes that this stage is crucial for maintaining the structural integrity of the flange, which in turn safeguards the living area beneath the canvas when hatches are open.Step 3: Allowing Time to Dry
After securely attaching the first portion of the flange, Sven allows ample time for it to dry before moving forward with additional steps. This patience and precision are key aspects of his successful boatbuilding methods.Step 4: Finishing Touches
Once the flange is fully dried, Sven removes the clamps carefully, ensuring no damage occurs during this process. He then moves on to attaching four more pieces onto these main frames, completing two pairs of flanges for the bulkhead hatches.The Final Touches
While two flanges form the primary support structure around the hatches, Sven mentions there are two additional pieces required at each end to ensure comprehensive protection. This attention to detail highlights his commitment to producing a durable and reliable design. “Sailing is about finding your path, whether it’s across an ocean or within yourself.” – Sven Yrvind In conclusion, making flanges around bulkhead hatches may seem complex at first glance, but by following Sven Yrvind’s meticulous process, enthusiasts can achieve professional-level results. Remember that the journey of boatbuilding is as rewarding as reaching your destination; it tests one’s patience and dedication. For those seeking to embark on this adventure or simply gain more insight into marine craftsmanship, Sven’s wisdom is invaluable.Making Flanges Around Bulkhead Hatches for Canvas
Sven Yrvind, a renowned yacht designer and sailor, shares valuable insights on creating flanges around bulkhead hatches for canvas protection in this enlightening video. By following his expert guidance, boat enthusiasts can ensure their living areas remain secure while allowing unhindered access through the hatches.Step 1: Starting with the Flange
Sven begins by explaining that working on flanges vertically and horizontally is significantly easier than doing so in a flat position. To simplify the process further, he divides the task into two or three steps as suggested by fellow expert “for for.” This approach not only makes it more manageable but also allows for greater precision in crafting each component.Step 2: Applying Glue and Securing
Sven proceeds to apply glue along one edge of the flange, ensuring a secure bond when clamped into place. He emphasizes that this stage is crucial for maintaining the structural integrity of the flange, which in turn safeguards the living area beneath the canvas when hatches are open.Step 3: Allowing Time to Dry
After securely attaching the first portion of the flange, Sven allows ample time for it to dry before moving forward with additional steps. This patience and precision are key aspects of his successful boatbuilding methods.Step 4: Finishing Touches
Once the flange is fully dried, Sven removes the clamps carefully, ensuring no damage occurs during this process. He then moves on to attaching four more pieces onto these main frames, completing two pairs of flanges for the bulkhead hatches.The Final Touches
While two flanges form the primary support structure around the hatches, Sven mentions there are two additional pieces required at each end to ensure comprehensive protection. This attention to detail highlights his commitment to producing a durable and reliable design. “Sailing is about finding your path, whether it’s across an ocean or within yourself.” – Sven Yrvind In conclusion, making flanges around bulkhead hatches may seem complex at first glance, but by following Sven Yrvind’s meticulous process, enthusiasts can achieve professional-level results. Remember that the journey of boatbuilding is as rewarding as reaching your destination; it tests one’s patience and dedication. For those seeking to embark on this adventure or simply gain more insight into marine craftsmanship, Sven’s wisdom is invaluable.After securely attaching the first portion of the flange, Sven allows ample time for it to dry before moving forward with additional steps. This patience and precision are key aspects of his successful boatbuilding methods.Step 4: Finishing Touches
Once the flange is fully dried, Sven removes the clamps carefully, ensuring no damage occurs during this process. He then moves on to attaching four more pieces onto these main frames, completing two pairs of flanges for the bulkhead hatches.The Final Touches
While two flanges form the primary support structure around the hatches, Sven mentions there are two additional pieces required at each end to ensure comprehensive protection. This attention to detail highlights his commitment to producing a durable and reliable design. “Sailing is about finding your path, whether it’s across an ocean or within yourself.” – Sven Yrvind In conclusion, making flanges around bulkhead hatches may seem complex at first glance, but by following Sven Yrvind’s meticulous process, enthusiasts can achieve professional-level results. Remember that the journey of boatbuilding is as rewarding as reaching your destination; it tests one’s patience and dedication. For those seeking to embark on this adventure or simply gain more insight into marine craftsmanship, Sven’s wisdom is invaluable.Sven proceeds to apply glue along one edge of the flange, ensuring a secure bond when clamped into place. He emphasizes that this stage is crucial for maintaining the structural integrity of the flange, which in turn safeguards the living area beneath the canvas when hatches are open.Step 3: Allowing Time to Dry
After securely attaching the first portion of the flange, Sven allows ample time for it to dry before moving forward with additional steps. This patience and precision are key aspects of his successful boatbuilding methods.Step 4: Finishing Touches
Once the flange is fully dried, Sven removes the clamps carefully, ensuring no damage occurs during this process. He then moves on to attaching four more pieces onto these main frames, completing two pairs of flanges for the bulkhead hatches.The Final Touches
While two flanges form the primary support structure around the hatches, Sven mentions there are two additional pieces required at each end to ensure comprehensive protection. This attention to detail highlights his commitment to producing a durable and reliable design. “Sailing is about finding your path, whether it’s across an ocean or within yourself.” – Sven Yrvind In conclusion, making flanges around bulkhead hatches may seem complex at first glance, but by following Sven Yrvind’s meticulous process, enthusiasts can achieve professional-level results. Remember that the journey of boatbuilding is as rewarding as reaching your destination; it tests one’s patience and dedication. For those seeking to embark on this adventure or simply gain more insight into marine craftsmanship, Sven’s wisdom is invaluable.Sven begins by explaining that working on flanges vertically and horizontally is significantly easier than doing so in a flat position. To simplify the process further, he divides the task into two or three steps as suggested by fellow expert “for for.” This approach not only makes it more manageable but also allows for greater precision in crafting each component.Step 2: Applying Glue and Securing
Sven proceeds to apply glue along one edge of the flange, ensuring a secure bond when clamped into place. He emphasizes that this stage is crucial for maintaining the structural integrity of the flange, which in turn safeguards the living area beneath the canvas when hatches are open.Step 3: Allowing Time to Dry
After securely attaching the first portion of the flange, Sven allows ample time for it to dry before moving forward with additional steps. This patience and precision are key aspects of his successful boatbuilding methods.Step 4: Finishing Touches
Once the flange is fully dried, Sven removes the clamps carefully, ensuring no damage occurs during this process. He then moves on to attaching four more pieces onto these main frames, completing two pairs of flanges for the bulkhead hatches.The Final Touches
While two flanges form the primary support structure around the hatches, Sven mentions there are two additional pieces required at each end to ensure comprehensive protection. This attention to detail highlights his commitment to producing a durable and reliable design. “Sailing is about finding your path, whether it’s across an ocean or within yourself.” – Sven Yrvind In conclusion, making flanges around bulkhead hatches may seem complex at first glance, but by following Sven Yrvind’s meticulous process, enthusiasts can achieve professional-level results. Remember that the journey of boatbuilding is as rewarding as reaching your destination; it tests one’s patience and dedication. For those seeking to embark on this adventure or simply gain more insight into marine craftsmanship, Sven’s wisdom is invaluable.Sven Yrvind, a renowned yacht designer and sailor, shares valuable insights on creating flanges around bulkhead hatches for canvas protection in this enlightening video. By following his expert guidance, boat enthusiasts can ensure their living areas remain secure while allowing unhindered access through the hatches.Step 1: Starting with the Flange
Sven begins by explaining that working on flanges vertically and horizontally is significantly easier than doing so in a flat position. To simplify the process further, he divides the task into two or three steps as suggested by fellow expert “for for.” This approach not only makes it more manageable but also allows for greater precision in crafting each component.Step 2: Applying Glue and Securing
Sven proceeds to apply glue along one edge of the flange, ensuring a secure bond when clamped into place. He emphasizes that this stage is crucial for maintaining the structural integrity of the flange, which in turn safeguards the living area beneath the canvas when hatches are open.Step 3: Allowing Time to Dry
After securely attaching the first portion of the flange, Sven allows ample time for it to dry before moving forward with additional steps. This patience and precision are key aspects of his successful boatbuilding methods.Step 4: Finishing Touches
Once the flange is fully dried, Sven removes the clamps carefully, ensuring no damage occurs during this process. He then moves on to attaching four more pieces onto these main frames, completing two pairs of flanges for the bulkhead hatches.The Final Touches
While two flanges form the primary support structure around the hatches, Sven mentions there are two additional pieces required at each end to ensure comprehensive protection. This attention to detail highlights his commitment to producing a durable and reliable design. “Sailing is about finding your path, whether it’s across an ocean or within yourself.” – Sven Yrvind In conclusion, making flanges around bulkhead hatches may seem complex at first glance, but by following Sven Yrvind’s meticulous process, enthusiasts can achieve professional-level results. Remember that the journey of boatbuilding is as rewarding as reaching your destination; it tests one’s patience and dedication. For those seeking to embark on this adventure or simply gain more insight into marine craftsmanship, Sven’s wisdom is invaluable.Making Flanges Around Bulkhead Hatches for Canvas
Sven Yrvind, a renowned yacht designer and sailor, shares valuable insights on creating flanges around bulkhead hatches for canvas protection in this enlightening video. By following his expert guidance, boat enthusiasts can ensure their living areas remain secure while allowing unhindered access through the hatches.Step 1: Starting with the Flange
Sven begins by explaining that working on flanges vertically and horizontally is significantly easier than doing so in a flat position. To simplify the process further, he divides the task into two or three steps as suggested by fellow expert “for for.” This approach not only makes it more manageable but also allows for greater precision in crafting each component.Step 2: Applying Glue and Securing
Sven proceeds to apply glue along one edge of the flange, ensuring a secure bond when clamped into place. He emphasizes that this stage is crucial for maintaining the structural integrity of the flange, which in turn safeguards the living area beneath the canvas when hatches are open.Step 3: Allowing Time to Dry
After securely attaching the first portion of the flange, Sven allows ample time for it to dry before moving forward with additional steps. This patience and precision are key aspects of his successful boatbuilding methods.Step 4: Finishing Touches
Once the flange is fully dried, Sven removes the clamps carefully, ensuring no damage occurs during this process. He then moves on to attaching four more pieces onto these main frames, completing two pairs of flanges for the bulkhead hatches.The Final Touches
While two flanges form the primary support structure around the hatches, Sven mentions there are two additional pieces required at each end to ensure comprehensive protection. This attention to detail highlights his commitment to producing a durable and reliable design. “Sailing is about finding your path, whether it’s across an ocean or within yourself.” – Sven Yrvind In conclusion, making flanges around bulkhead hatches may seem complex at first glance, but by following Sven Yrvind’s meticulous process, enthusiasts can achieve professional-level results. Remember that the journey of boatbuilding is as rewarding as reaching your destination; it tests one’s patience and dedication. For those seeking to embark on this adventure or simply gain more insight into marine craftsmanship, Sven’s wisdom is invaluable.Once the flange is fully dried, Sven removes the clamps carefully, ensuring no damage occurs during this process. He then moves on to attaching four more pieces onto these main frames, completing two pairs of flanges for the bulkhead hatches.The Final Touches
While two flanges form the primary support structure around the hatches, Sven mentions there are two additional pieces required at each end to ensure comprehensive protection. This attention to detail highlights his commitment to producing a durable and reliable design. “Sailing is about finding your path, whether it’s across an ocean or within yourself.” – Sven Yrvind In conclusion, making flanges around bulkhead hatches may seem complex at first glance, but by following Sven Yrvind’s meticulous process, enthusiasts can achieve professional-level results. Remember that the journey of boatbuilding is as rewarding as reaching your destination; it tests one’s patience and dedication. For those seeking to embark on this adventure or simply gain more insight into marine craftsmanship, Sven’s wisdom is invaluable.After securely attaching the first portion of the flange, Sven allows ample time for it to dry before moving forward with additional steps. This patience and precision are key aspects of his successful boatbuilding methods.Step 4: Finishing Touches
Once the flange is fully dried, Sven removes the clamps carefully, ensuring no damage occurs during this process. He then moves on to attaching four more pieces onto these main frames, completing two pairs of flanges for the bulkhead hatches.The Final Touches
While two flanges form the primary support structure around the hatches, Sven mentions there are two additional pieces required at each end to ensure comprehensive protection. This attention to detail highlights his commitment to producing a durable and reliable design. “Sailing is about finding your path, whether it’s across an ocean or within yourself.” – Sven Yrvind In conclusion, making flanges around bulkhead hatches may seem complex at first glance, but by following Sven Yrvind’s meticulous process, enthusiasts can achieve professional-level results. Remember that the journey of boatbuilding is as rewarding as reaching your destination; it tests one’s patience and dedication. For those seeking to embark on this adventure or simply gain more insight into marine craftsmanship, Sven’s wisdom is invaluable.Sven proceeds to apply glue along one edge of the flange, ensuring a secure bond when clamped into place. He emphasizes that this stage is crucial for maintaining the structural integrity of the flange, which in turn safeguards the living area beneath the canvas when hatches are open.Step 3: Allowing Time to Dry
After securely attaching the first portion of the flange, Sven allows ample time for it to dry before moving forward with additional steps. This patience and precision are key aspects of his successful boatbuilding methods.Step 4: Finishing Touches
Once the flange is fully dried, Sven removes the clamps carefully, ensuring no damage occurs during this process. He then moves on to attaching four more pieces onto these main frames, completing two pairs of flanges for the bulkhead hatches.The Final Touches
While two flanges form the primary support structure around the hatches, Sven mentions there are two additional pieces required at each end to ensure comprehensive protection. This attention to detail highlights his commitment to producing a durable and reliable design. “Sailing is about finding your path, whether it’s across an ocean or within yourself.” – Sven Yrvind In conclusion, making flanges around bulkhead hatches may seem complex at first glance, but by following Sven Yrvind’s meticulous process, enthusiasts can achieve professional-level results. Remember that the journey of boatbuilding is as rewarding as reaching your destination; it tests one’s patience and dedication. For those seeking to embark on this adventure or simply gain more insight into marine craftsmanship, Sven’s wisdom is invaluable.Sven begins by explaining that working on flanges vertically and horizontally is significantly easier than doing so in a flat position. To simplify the process further, he divides the task into two or three steps as suggested by fellow expert “for for.” This approach not only makes it more manageable but also allows for greater precision in crafting each component.Step 2: Applying Glue and Securing
Sven proceeds to apply glue along one edge of the flange, ensuring a secure bond when clamped into place. He emphasizes that this stage is crucial for maintaining the structural integrity of the flange, which in turn safeguards the living area beneath the canvas when hatches are open.Step 3: Allowing Time to Dry
After securely attaching the first portion of the flange, Sven allows ample time for it to dry before moving forward with additional steps. This patience and precision are key aspects of his successful boatbuilding methods.Step 4: Finishing Touches
Once the flange is fully dried, Sven removes the clamps carefully, ensuring no damage occurs during this process. He then moves on to attaching four more pieces onto these main frames, completing two pairs of flanges for the bulkhead hatches.The Final Touches
While two flanges form the primary support structure around the hatches, Sven mentions there are two additional pieces required at each end to ensure comprehensive protection. This attention to detail highlights his commitment to producing a durable and reliable design. “Sailing is about finding your path, whether it’s across an ocean or within yourself.” – Sven Yrvind In conclusion, making flanges around bulkhead hatches may seem complex at first glance, but by following Sven Yrvind’s meticulous process, enthusiasts can achieve professional-level results. Remember that the journey of boatbuilding is as rewarding as reaching your destination; it tests one’s patience and dedication. For those seeking to embark on this adventure or simply gain more insight into marine craftsmanship, Sven’s wisdom is invaluable.Sven Yrvind, a renowned yacht designer and sailor, shares valuable insights on creating flanges around bulkhead hatches for canvas protection in this enlightening video. By following his expert guidance, boat enthusiasts can ensure their living areas remain secure while allowing unhindered access through the hatches.Step 1: Starting with the Flange
Sven begins by explaining that working on flanges vertically and horizontally is significantly easier than doing so in a flat position. To simplify the process further, he divides the task into two or three steps as suggested by fellow expert “for for.” This approach not only makes it more manageable but also allows for greater precision in crafting each component.Step 2: Applying Glue and Securing
Sven proceeds to apply glue along one edge of the flange, ensuring a secure bond when clamped into place. He emphasizes that this stage is crucial for maintaining the structural integrity of the flange, which in turn safeguards the living area beneath the canvas when hatches are open.Step 3: Allowing Time to Dry
After securely attaching the first portion of the flange, Sven allows ample time for it to dry before moving forward with additional steps. This patience and precision are key aspects of his successful boatbuilding methods.Step 4: Finishing Touches
Once the flange is fully dried, Sven removes the clamps carefully, ensuring no damage occurs during this process. He then moves on to attaching four more pieces onto these main frames, completing two pairs of flanges for the bulkhead hatches.The Final Touches
While two flanges form the primary support structure around the hatches, Sven mentions there are two additional pieces required at each end to ensure comprehensive protection. This attention to detail highlights his commitment to producing a durable and reliable design. “Sailing is about finding your path, whether it’s across an ocean or within yourself.” – Sven Yrvind In conclusion, making flanges around bulkhead hatches may seem complex at first glance, but by following Sven Yrvind’s meticulous process, enthusiasts can achieve professional-level results. Remember that the journey of boatbuilding is as rewarding as reaching your destination; it tests one’s patience and dedication. For those seeking to embark on this adventure or simply gain more insight into marine craftsmanship, Sven’s wisdom is invaluable.Making Flanges Around Bulkhead Hatches for Canvas
Sven Yrvind, a renowned yacht designer and sailor, shares valuable insights on creating flanges around bulkhead hatches for canvas protection in this enlightening video. By following his expert guidance, boat enthusiasts can ensure their living areas remain secure while allowing unhindered access through the hatches.Step 1: Starting with the Flange
Sven begins by explaining that working on flanges vertically and horizontally is significantly easier than doing so in a flat position. To simplify the process further, he divides the task into two or three steps as suggested by fellow expert “for for.” This approach not only makes it more manageable but also allows for greater precision in crafting each component.Step 2: Applying Glue and Securing
Sven proceeds to apply glue along one edge of the flange, ensuring a secure bond when clamped into place. He emphasizes that this stage is crucial for maintaining the structural integrity of the flange, which in turn safeguards the living area beneath the canvas when hatches are open.Step 3: Allowing Time to Dry
After securely attaching the first portion of the flange, Sven allows ample time for it to dry before moving forward with additional steps. This patience and precision are key aspects of his successful boatbuilding methods.Step 4: Finishing Touches
Once the flange is fully dried, Sven removes the clamps carefully, ensuring no damage occurs during this process. He then moves on to attaching four more pieces onto these main frames, completing two pairs of flanges for the bulkhead hatches.The Final Touches
While two flanges form the primary support structure around the hatches, Sven mentions there are two additional pieces required at each end to ensure comprehensive protection. This attention to detail highlights his commitment to producing a durable and reliable design. “Sailing is about finding your path, whether it’s across an ocean or within yourself.” – Sven Yrvind In conclusion, making flanges around bulkhead hatches may seem complex at first glance, but by following Sven Yrvind’s meticulous process, enthusiasts can achieve professional-level results. Remember that the journey of boatbuilding is as rewarding as reaching your destination; it tests one’s patience and dedication. For those seeking to embark on this adventure or simply gain more insight into marine craftsmanship, Sven’s wisdom is invaluable.Sven Yrvind, a renowned yacht designer and sailor, shares valuable insights on creating flanges around bulkhead hatches for canvas protection in this enlightening video. By following his expert guidance, boat enthusiasts can ensure their living areas remain secure while allowing unhindered access through the hatches.Step 1: Starting with the Flange
Sven begins by explaining that working on flanges vertically and horizontally is significantly easier than doing so in a flat position. To simplify the process further, he divides the task into two or three steps as suggested by fellow expert “for for.” This approach not only makes it more manageable but also allows for greater precision in crafting each component.Step 2: Applying Glue and Securing
Sven proceeds to apply glue along one edge of the flange, ensuring a secure bond when clamped into place. He emphasizes that this stage is crucial for maintaining the structural integrity of the flange, which in turn safeguards the living area beneath the canvas when hatches are open.Step 3: Allowing Time to Dry
After securely attaching the first portion of the flange, Sven allows ample time for it to dry before moving forward with additional steps. This patience and precision are key aspects of his successful boatbuilding methods.Step 4: Finishing Touches
Once the flange is fully dried, Sven removes the clamps carefully, ensuring no damage occurs during this process. He then moves on to attaching four more pieces onto these main frames, completing two pairs of flanges for the bulkhead hatches.The Final Touches
While two flanges form the primary support structure around the hatches, Sven mentions there are two additional pieces required at each end to ensure comprehensive protection. This attention to detail highlights his commitment to producing a durable and reliable design. “Sailing is about finding your path, whether it’s across an ocean or within yourself.” – Sven Yrvind In conclusion, making flanges around bulkhead hatches may seem complex at first glance, but by following Sven Yrvind’s meticulous process, enthusiasts can achieve professional-level results. Remember that the journey of boatbuilding is as rewarding as reaching your destination; it tests one’s patience and dedication. For those seeking to embark on this adventure or simply gain more insight into marine craftsmanship, Sven’s wisdom is invaluable.Making Flanges Around Bulkhead Hatches for Canvas
Sven Yrvind, a renowned yacht designer and sailor, shares valuable insights on creating flanges around bulkhead hatches for canvas protection in this enlightening video. By following his expert guidance, boat enthusiasts can ensure their living areas remain secure while allowing unhindered access through the hatches.Step 1: Starting with the Flange
Sven begins by explaining that working on flanges vertically and horizontally is significantly easier than doing so in a flat position. To simplify the process further, he divides the task into two or three steps as suggested by fellow expert “for for.” This approach not only makes it more manageable but also allows for greater precision in crafting each component.Step 2: Applying Glue and Securing
Sven proceeds to apply glue along one edge of the flange, ensuring a secure bond when clamped into place. He emphasizes that this stage is crucial for maintaining the structural integrity of the flange, which in turn safeguards the living area beneath the canvas when hatches are open.Step 3: Allowing Time to Dry
After securely attaching the first portion of the flange, Sven allows ample time for it to dry before moving forward with additional steps. This patience and precision are key aspects of his successful boatbuilding methods.Step 4: Finishing Touches
Once the flange is fully dried, Sven removes the clamps carefully, ensuring no damage occurs during this process. He then moves on to attaching four more pieces onto these main frames, completing two pairs of flanges for the bulkhead hatches.The Final Touches
While two flanges form the primary support structure around the hatches, Sven mentions there are two additional pieces required at each end to ensure comprehensive protection. This attention to detail highlights his commitment to producing a durable and reliable design. “Sailing is about finding your path, whether it’s across an ocean or within yourself.” – Sven Yrvind In conclusion, making flanges around bulkhead hatches may seem complex at first glance, but by following Sven Yrvind’s meticulous process, enthusiasts can achieve professional-level results. Remember that the journey of boatbuilding is as rewarding as reaching your destination; it tests one’s patience and dedication. For those seeking to embark on this adventure or simply gain more insight into marine craftsmanship, Sven’s wisdom is invaluable.Sven proceeds to apply glue along one edge of the flange, ensuring a secure bond when clamped into place. He emphasizes that this stage is crucial for maintaining the structural integrity of the flange, which in turn safeguards the living area beneath the canvas when hatches are open.Step 3: Allowing Time to Dry
After securely attaching the first portion of the flange, Sven allows ample time for it to dry before moving forward with additional steps. This patience and precision are key aspects of his successful boatbuilding methods.Step 4: Finishing Touches
Once the flange is fully dried, Sven removes the clamps carefully, ensuring no damage occurs during this process. He then moves on to attaching four more pieces onto these main frames, completing two pairs of flanges for the bulkhead hatches.The Final Touches
While two flanges form the primary support structure around the hatches, Sven mentions there are two additional pieces required at each end to ensure comprehensive protection. This attention to detail highlights his commitment to producing a durable and reliable design. “Sailing is about finding your path, whether it’s across an ocean or within yourself.” – Sven Yrvind In conclusion, making flanges around bulkhead hatches may seem complex at first glance, but by following Sven Yrvind’s meticulous process, enthusiasts can achieve professional-level results. Remember that the journey of boatbuilding is as rewarding as reaching your destination; it tests one’s patience and dedication. For those seeking to embark on this adventure or simply gain more insight into marine craftsmanship, Sven’s wisdom is invaluable.Sven Yrvind, a renowned yacht designer and sailor, shares valuable insights on creating flanges around bulkhead hatches for canvas protection in this enlightening video. By following his expert guidance, boat enthusiasts can ensure their living areas remain secure while allowing unhindered access through the hatches.Step 1: Starting with the Flange
Sven begins by explaining that working on flanges vertically and horizontally is significantly easier than doing so in a flat position. To simplify the process further, he divides the task into two or three steps as suggested by fellow expert “for for.” This approach not only makes it more manageable but also allows for greater precision in crafting each component.Step 2: Applying Glue and Securing
Sven proceeds to apply glue along one edge of the flange, ensuring a secure bond when clamped into place. He emphasizes that this stage is crucial for maintaining the structural integrity of the flange, which in turn safeguards the living area beneath the canvas when hatches are open.Step 3: Allowing Time to Dry
After securely attaching the first portion of the flange, Sven allows ample time for it to dry before moving forward with additional steps. This patience and precision are key aspects of his successful boatbuilding methods.Step 4: Finishing Touches
Once the flange is fully dried, Sven removes the clamps carefully, ensuring no damage occurs during this process. He then moves on to attaching four more pieces onto these main frames, completing two pairs of flanges for the bulkhead hatches.The Final Touches
While two flanges form the primary support structure around the hatches, Sven mentions there are two additional pieces required at each end to ensure comprehensive protection. This attention to detail highlights his commitment to producing a durable and reliable design. “Sailing is about finding your path, whether it’s across an ocean or within yourself.” – Sven Yrvind In conclusion, making flanges around bulkhead hatches may seem complex at first glance, but by following Sven Yrvind’s meticulous process, enthusiasts can achieve professional-level results. Remember that the journey of boatbuilding is as rewarding as reaching your destination; it tests one’s patience and dedication. For those seeking to embark on this adventure or simply gain more insight into marine craftsmanship, Sven’s wisdom is invaluable.Making Flanges Around Bulkhead Hatches for Canvas
Sven Yrvind, a renowned yacht designer and sailor, shares valuable insights on creating flanges around bulkhead hatches for canvas protection in this enlightening video. By following his expert guidance, boat enthusiasts can ensure their living areas remain secure while allowing unhindered access through the hatches.Step 1: Starting with the Flange
Sven begins by explaining that working on flanges vertically and horizontally is significantly easier than doing so in a flat position. To simplify the process further, he divides the task into two or three steps as suggested by fellow expert “for for.” This approach not only makes it more manageable but also allows for greater precision in crafting each component.Step 2: Applying Glue and Securing
Sven proceeds to apply glue along one edge of the flange, ensuring a secure bond when clamped into place. He emphasizes that this stage is crucial for maintaining the structural integrity of the flange, which in turn safeguards the living area beneath the canvas when hatches are open.Step 3: Allowing Time to Dry
After securely attaching the first portion of the flange, Sven allows ample time for it to dry before moving forward with additional steps. This patience and precision are key aspects of his successful boatbuilding methods.Step 4: Finishing Touches
Once the flange is fully dried, Sven removes the clamps carefully, ensuring no damage occurs during this process. He then moves on to attaching four more pieces onto these main frames, completing two pairs of flanges for the bulkhead hatches.The Final Touches
While two flanges form the primary support structure around the hatches, Sven mentions there are two additional pieces required at each end to ensure comprehensive protection. This attention to detail highlights his commitment to producing a durable and reliable design. “Sailing is about finding your path, whether it’s across an ocean or within yourself.” – Sven Yrvind In conclusion, making flanges around bulkhead hatches may seem complex at first glance, but by following Sven Yrvind’s meticulous process, enthusiasts can achieve professional-level results. Remember that the journey of boatbuilding is as rewarding as reaching your destination; it tests one’s patience and dedication. For those seeking to embark on this adventure or simply gain more insight into marine craftsmanship, Sven’s wisdom is invaluable.Sven begins by explaining that working on flanges vertically and horizontally is significantly easier than doing so in a flat position. To simplify the process further, he divides the task into two or three steps as suggested by fellow expert “for for.” This approach not only makes it more manageable but also allows for greater precision in crafting each component.Step 2: Applying Glue and Securing
Sven proceeds to apply glue along one edge of the flange, ensuring a secure bond when clamped into place. He emphasizes that this stage is crucial for maintaining the structural integrity of the flange, which in turn safeguards the living area beneath the canvas when hatches are open.Step 3: Allowing Time to Dry
After securely attaching the first portion of the flange, Sven allows ample time for it to dry before moving forward with additional steps. This patience and precision are key aspects of his successful boatbuilding methods.Step 4: Finishing Touches
Once the flange is fully dried, Sven removes the clamps carefully, ensuring no damage occurs during this process. He then moves on to attaching four more pieces onto these main frames, completing two pairs of flanges for the bulkhead hatches.The Final Touches
While two flanges form the primary support structure around the hatches, Sven mentions there are two additional pieces required at each end to ensure comprehensive protection. This attention to detail highlights his commitment to producing a durable and reliable design. “Sailing is about finding your path, whether it’s across an ocean or within yourself.” – Sven Yrvind In conclusion, making flanges around bulkhead hatches may seem complex at first glance, but by following Sven Yrvind’s meticulous process, enthusiasts can achieve professional-level results. Remember that the journey of boatbuilding is as rewarding as reaching your destination; it tests one’s patience and dedication. For those seeking to embark on this adventure or simply gain more insight into marine craftsmanship, Sven’s wisdom is invaluable.Sven Yrvind, a renowned yacht designer and sailor, shares valuable insights on creating flanges around bulkhead hatches for canvas protection in this enlightening video. By following his expert guidance, boat enthusiasts can ensure their living areas remain secure while allowing unhindered access through the hatches.Step 1: Starting with the Flange
Sven begins by explaining that working on flanges vertically and horizontally is significantly easier than doing so in a flat position. To simplify the process further, he divides the task into two or three steps as suggested by fellow expert “for for.” This approach not only makes it more manageable but also allows for greater precision in crafting each component.Step 2: Applying Glue and Securing
Sven proceeds to apply glue along one edge of the flange, ensuring a secure bond when clamped into place. He emphasizes that this stage is crucial for maintaining the structural integrity of the flange, which in turn safeguards the living area beneath the canvas when hatches are open.Step 3: Allowing Time to Dry
After securely attaching the first portion of the flange, Sven allows ample time for it to dry before moving forward with additional steps. This patience and precision are key aspects of his successful boatbuilding methods.Step 4: Finishing Touches
Once the flange is fully dried, Sven removes the clamps carefully, ensuring no damage occurs during this process. He then moves on to attaching four more pieces onto these main frames, completing two pairs of flanges for the bulkhead hatches.The Final Touches
While two flanges form the primary support structure around the hatches, Sven mentions there are two additional pieces required at each end to ensure comprehensive protection. This attention to detail highlights his commitment to producing a durable and reliable design. “Sailing is about finding your path, whether it’s across an ocean or within yourself.” – Sven Yrvind In conclusion, making flanges around bulkhead hatches may seem complex at first glance, but by following Sven Yrvind’s meticulous process, enthusiasts can achieve professional-level results. Remember that the journey of boatbuilding is as rewarding as reaching your destination; it tests one’s patience and dedication. For those seeking to embark on this adventure or simply gain more insight into marine craftsmanship, Sven’s wisdom is invaluable.Making Flanges Around Bulkhead Hatches for Canvas
Sven Yrvind, a renowned yacht designer and sailor, shares valuable insights on creating flanges around bulkhead hatches for canvas protection in this enlightening video. By following his expert guidance, boat enthusiasts can ensure their living areas remain secure while allowing unhindered access through the hatches.Step 1: Starting with the Flange
Sven begins by explaining that working on flanges vertically and horizontally is significantly easier than doing so in a flat position. To simplify the process further, he divides the task into two or three steps as suggested by fellow expert “for for.” This approach not only makes it more manageable but also allows for greater precision in crafting each component.Step 2: Applying Glue and Securing
Sven proceeds to apply glue along one edge of the flange, ensuring a secure bond when clamped into place. He emphasizes that this stage is crucial for maintaining the structural integrity of the flange, which in turn safeguards the living area beneath the canvas when hatches are open.Step 3: Allowing Time to Dry
After securely attaching the first portion of the flange, Sven allows ample time for it to dry before moving forward with additional steps. This patience and precision are key aspects of his successful boatbuilding methods.Step 4: Finishing Touches
Once the flange is fully dried, Sven removes the clamps carefully, ensuring no damage occurs during this process. He then moves on to attaching four more pieces onto these main frames, completing two pairs of flanges for the bulkhead hatches.The Final Touches
While two flanges form the primary support structure around the hatches, Sven mentions there are two additional pieces required at each end to ensure comprehensive protection. This attention to detail highlights his commitment to producing a durable and reliable design. “Sailing is about finding your path, whether it’s across an ocean or within yourself.” – Sven Yrvind In conclusion, making flanges around bulkhead hatches may seem complex at first glance, but by following Sven Yrvind’s meticulous process, enthusiasts can achieve professional-level results. Remember that the journey of boatbuilding is as rewarding as reaching your destination; it tests one’s patience and dedication. For those seeking to embark on this adventure or simply gain more insight into marine craftsmanship, Sven’s wisdom is invaluable.Once the flange is fully dried, Sven removes the clamps carefully, ensuring no damage occurs during this process. He then moves on to attaching four more pieces onto these main frames, completing two pairs of flanges for the bulkhead hatches.The Final Touches
While two flanges form the primary support structure around the hatches, Sven mentions there are two additional pieces required at each end to ensure comprehensive protection. This attention to detail highlights his commitment to producing a durable and reliable design. “Sailing is about finding your path, whether it’s across an ocean or within yourself.” – Sven Yrvind In conclusion, making flanges around bulkhead hatches may seem complex at first glance, but by following Sven Yrvind’s meticulous process, enthusiasts can achieve professional-level results. Remember that the journey of boatbuilding is as rewarding as reaching your destination; it tests one’s patience and dedication. For those seeking to embark on this adventure or simply gain more insight into marine craftsmanship, Sven’s wisdom is invaluable.Sven begins by explaining that working on flanges vertically and horizontally is significantly easier than doing so in a flat position. To simplify the process further, he divides the task into two or three steps as suggested by fellow expert “for for.” This approach not only makes it more manageable but also allows for greater precision in crafting each component.Step 2: Applying Glue and Securing
Sven proceeds to apply glue along one edge of the flange, ensuring a secure bond when clamped into place. He emphasizes that this stage is crucial for maintaining the structural integrity of the flange, which in turn safeguards the living area beneath the canvas when hatches are open.Step 3: Allowing Time to Dry
After securely attaching the first portion of the flange, Sven allows ample time for it to dry before moving forward with additional steps. This patience and precision are key aspects of his successful boatbuilding methods.Step 4: Finishing Touches
Once the flange is fully dried, Sven removes the clamps carefully, ensuring no damage occurs during this process. He then moves on to attaching four more pieces onto these main frames, completing two pairs of flanges for the bulkhead hatches.The Final Touches
While two flanges form the primary support structure around the hatches, Sven mentions there are two additional pieces required at each end to ensure comprehensive protection. This attention to detail highlights his commitment to producing a durable and reliable design. “Sailing is about finding your path, whether it’s across an ocean or within yourself.” – Sven Yrvind In conclusion, making flanges around bulkhead hatches may seem complex at first glance, but by following Sven Yrvind’s meticulous process, enthusiasts can achieve professional-level results. Remember that the journey of boatbuilding is as rewarding as reaching your destination; it tests one’s patience and dedication. For those seeking to embark on this adventure or simply gain more insight into marine craftsmanship, Sven’s wisdom is invaluable.Sven Yrvind, a renowned yacht designer and sailor, shares valuable insights on creating flanges around bulkhead hatches for canvas protection in this enlightening video. By following his expert guidance, boat enthusiasts can ensure their living areas remain secure while allowing unhindered access through the hatches.Step 1: Starting with the Flange
Sven begins by explaining that working on flanges vertically and horizontally is significantly easier than doing so in a flat position. To simplify the process further, he divides the task into two or three steps as suggested by fellow expert “for for.” This approach not only makes it more manageable but also allows for greater precision in crafting each component.Step 2: Applying Glue and Securing
Sven proceeds to apply glue along one edge of the flange, ensuring a secure bond when clamped into place. He emphasizes that this stage is crucial for maintaining the structural integrity of the flange, which in turn safeguards the living area beneath the canvas when hatches are open.Step 3: Allowing Time to Dry
After securely attaching the first portion of the flange, Sven allows ample time for it to dry before moving forward with additional steps. This patience and precision are key aspects of his successful boatbuilding methods.Step 4: Finishing Touches
Once the flange is fully dried, Sven removes the clamps carefully, ensuring no damage occurs during this process. He then moves on to attaching four more pieces onto these main frames, completing two pairs of flanges for the bulkhead hatches.The Final Touches
While two flanges form the primary support structure around the hatches, Sven mentions there are two additional pieces required at each end to ensure comprehensive protection. This attention to detail highlights his commitment to producing a durable and reliable design. “Sailing is about finding your path, whether it’s across an ocean or within yourself.” – Sven Yrvind In conclusion, making flanges around bulkhead hatches may seem complex at first glance, but by following Sven Yrvind’s meticulous process, enthusiasts can achieve professional-level results. Remember that the journey of boatbuilding is as rewarding as reaching your destination; it tests one’s patience and dedication. For those seeking to embark on this adventure or simply gain more insight into marine craftsmanship, Sven’s wisdom is invaluable.Making Flanges Around Bulkhead Hatches for Canvas
Sven Yrvind, a renowned yacht designer and sailor, shares valuable insights on creating flanges around bulkhead hatches for canvas protection in this enlightening video. By following his expert guidance, boat enthusiasts can ensure their living areas remain secure while allowing unhindered access through the hatches.Step 1: Starting with the Flange
Sven begins by explaining that working on flanges vertically and horizontally is significantly easier than doing so in a flat position. To simplify the process further, he divides the task into two or three steps as suggested by fellow expert “for for.” This approach not only makes it more manageable but also allows for greater precision in crafting each component.Step 2: Applying Glue and Securing
Sven proceeds to apply glue along one edge of the flange, ensuring a secure bond when clamped into place. He emphasizes that this stage is crucial for maintaining the structural integrity of the flange, which in turn safeguards the living area beneath the canvas when hatches are open.Step 3: Allowing Time to Dry
After securely attaching the first portion of the flange, Sven allows ample time for it to dry before moving forward with additional steps. This patience and precision are key aspects of his successful boatbuilding methods.Step 4: Finishing Touches
Once the flange is fully dried, Sven removes the clamps carefully, ensuring no damage occurs during this process. He then moves on to attaching four more pieces onto these main frames, completing two pairs of flanges for the bulkhead hatches.The Final Touches
While two flanges form the primary support structure around the hatches, Sven mentions there are two additional pieces required at each end to ensure comprehensive protection. This attention to detail highlights his commitment to producing a durable and reliable design. “Sailing is about finding your path, whether it’s across an ocean or within yourself.” – Sven Yrvind In conclusion, making flanges around bulkhead hatches may seem complex at first glance, but by following Sven Yrvind’s meticulous process, enthusiasts can achieve professional-level results. Remember that the journey of boatbuilding is as rewarding as reaching your destination; it tests one’s patience and dedication. For those seeking to embark on this adventure or simply gain more insight into marine craftsmanship, Sven’s wisdom is invaluable.After securely attaching the first portion of the flange, Sven allows ample time for it to dry before moving forward with additional steps. This patience and precision are key aspects of his successful boatbuilding methods.Step 4: Finishing Touches
Once the flange is fully dried, Sven removes the clamps carefully, ensuring no damage occurs during this process. He then moves on to attaching four more pieces onto these main frames, completing two pairs of flanges for the bulkhead hatches.The Final Touches
While two flanges form the primary support structure around the hatches, Sven mentions there are two additional pieces required at each end to ensure comprehensive protection. This attention to detail highlights his commitment to producing a durable and reliable design. “Sailing is about finding your path, whether it’s across an ocean or within yourself.” – Sven Yrvind In conclusion, making flanges around bulkhead hatches may seem complex at first glance, but by following Sven Yrvind’s meticulous process, enthusiasts can achieve professional-level results. Remember that the journey of boatbuilding is as rewarding as reaching your destination; it tests one’s patience and dedication. For those seeking to embark on this adventure or simply gain more insight into marine craftsmanship, Sven’s wisdom is invaluable.Sven begins by explaining that working on flanges vertically and horizontally is significantly easier than doing so in a flat position. To simplify the process further, he divides the task into two or three steps as suggested by fellow expert “for for.” This approach not only makes it more manageable but also allows for greater precision in crafting each component.Step 2: Applying Glue and Securing
Sven proceeds to apply glue along one edge of the flange, ensuring a secure bond when clamped into place. He emphasizes that this stage is crucial for maintaining the structural integrity of the flange, which in turn safeguards the living area beneath the canvas when hatches are open.Step 3: Allowing Time to Dry
After securely attaching the first portion of the flange, Sven allows ample time for it to dry before moving forward with additional steps. This patience and precision are key aspects of his successful boatbuilding methods.Step 4: Finishing Touches
Once the flange is fully dried, Sven removes the clamps carefully, ensuring no damage occurs during this process. He then moves on to attaching four more pieces onto these main frames, completing two pairs of flanges for the bulkhead hatches.The Final Touches
While two flanges form the primary support structure around the hatches, Sven mentions there are two additional pieces required at each end to ensure comprehensive protection. This attention to detail highlights his commitment to producing a durable and reliable design. “Sailing is about finding your path, whether it’s across an ocean or within yourself.” – Sven Yrvind In conclusion, making flanges around bulkhead hatches may seem complex at first glance, but by following Sven Yrvind’s meticulous process, enthusiasts can achieve professional-level results. Remember that the journey of boatbuilding is as rewarding as reaching your destination; it tests one’s patience and dedication. For those seeking to embark on this adventure or simply gain more insight into marine craftsmanship, Sven’s wisdom is invaluable.Sven Yrvind, a renowned yacht designer and sailor, shares valuable insights on creating flanges around bulkhead hatches for canvas protection in this enlightening video. By following his expert guidance, boat enthusiasts can ensure their living areas remain secure while allowing unhindered access through the hatches.Step 1: Starting with the Flange
Sven begins by explaining that working on flanges vertically and horizontally is significantly easier than doing so in a flat position. To simplify the process further, he divides the task into two or three steps as suggested by fellow expert “for for.” This approach not only makes it more manageable but also allows for greater precision in crafting each component.Step 2: Applying Glue and Securing
Sven proceeds to apply glue along one edge of the flange, ensuring a secure bond when clamped into place. He emphasizes that this stage is crucial for maintaining the structural integrity of the flange, which in turn safeguards the living area beneath the canvas when hatches are open.Step 3: Allowing Time to Dry
After securely attaching the first portion of the flange, Sven allows ample time for it to dry before moving forward with additional steps. This patience and precision are key aspects of his successful boatbuilding methods.Step 4: Finishing Touches
Once the flange is fully dried, Sven removes the clamps carefully, ensuring no damage occurs during this process. He then moves on to attaching four more pieces onto these main frames, completing two pairs of flanges for the bulkhead hatches.The Final Touches
While two flanges form the primary support structure around the hatches, Sven mentions there are two additional pieces required at each end to ensure comprehensive protection. This attention to detail highlights his commitment to producing a durable and reliable design. “Sailing is about finding your path, whether it’s across an ocean or within yourself.” – Sven Yrvind In conclusion, making flanges around bulkhead hatches may seem complex at first glance, but by following Sven Yrvind’s meticulous process, enthusiasts can achieve professional-level results. Remember that the journey of boatbuilding is as rewarding as reaching your destination; it tests one’s patience and dedication. For those seeking to embark on this adventure or simply gain more insight into marine craftsmanship, Sven’s wisdom is invaluable.Making Flanges Around Bulkhead Hatches for Canvas
Sven Yrvind, a renowned yacht designer and sailor, shares valuable insights on creating flanges around bulkhead hatches for canvas protection in this enlightening video. By following his expert guidance, boat enthusiasts can ensure their living areas remain secure while allowing unhindered access through the hatches.Step 1: Starting with the Flange
Sven begins by explaining that working on flanges vertically and horizontally is significantly easier than doing so in a flat position. To simplify the process further, he divides the task into two or three steps as suggested by fellow expert “for for.” This approach not only makes it more manageable but also allows for greater precision in crafting each component.Step 2: Applying Glue and Securing
Sven proceeds to apply glue along one edge of the flange, ensuring a secure bond when clamped into place. He emphasizes that this stage is crucial for maintaining the structural integrity of the flange, which in turn safeguards the living area beneath the canvas when hatches are open.Step 3: Allowing Time to Dry
After securely attaching the first portion of the flange, Sven allows ample time for it to dry before moving forward with additional steps. This patience and precision are key aspects of his successful boatbuilding methods.Step 4: Finishing Touches
Once the flange is fully dried, Sven removes the clamps carefully, ensuring no damage occurs during this process. He then moves on to attaching four more pieces onto these main frames, completing two pairs of flanges for the bulkhead hatches.The Final Touches
While two flanges form the primary support structure around the hatches, Sven mentions there are two additional pieces required at each end to ensure comprehensive protection. This attention to detail highlights his commitment to producing a durable and reliable design. “Sailing is about finding your path, whether it’s across an ocean or within yourself.” – Sven Yrvind In conclusion, making flanges around bulkhead hatches may seem complex at first glance, but by following Sven Yrvind’s meticulous process, enthusiasts can achieve professional-level results. Remember that the journey of boatbuilding is as rewarding as reaching your destination; it tests one’s patience and dedication. For those seeking to embark on this adventure or simply gain more insight into marine craftsmanship, Sven’s wisdom is invaluable.Sven proceeds to apply glue along one edge of the flange, ensuring a secure bond when clamped into place. He emphasizes that this stage is crucial for maintaining the structural integrity of the flange, which in turn safeguards the living area beneath the canvas when hatches are open.Step 3: Allowing Time to Dry
After securely attaching the first portion of the flange, Sven allows ample time for it to dry before moving forward with additional steps. This patience and precision are key aspects of his successful boatbuilding methods.Step 4: Finishing Touches
Once the flange is fully dried, Sven removes the clamps carefully, ensuring no damage occurs during this process. He then moves on to attaching four more pieces onto these main frames, completing two pairs of flanges for the bulkhead hatches.The Final Touches
While two flanges form the primary support structure around the hatches, Sven mentions there are two additional pieces required at each end to ensure comprehensive protection. This attention to detail highlights his commitment to producing a durable and reliable design. “Sailing is about finding your path, whether it’s across an ocean or within yourself.” – Sven Yrvind In conclusion, making flanges around bulkhead hatches may seem complex at first glance, but by following Sven Yrvind’s meticulous process, enthusiasts can achieve professional-level results. Remember that the journey of boatbuilding is as rewarding as reaching your destination; it tests one’s patience and dedication. For those seeking to embark on this adventure or simply gain more insight into marine craftsmanship, Sven’s wisdom is invaluable.Sven begins by explaining that working on flanges vertically and horizontally is significantly easier than doing so in a flat position. To simplify the process further, he divides the task into two or three steps as suggested by fellow expert “for for.” This approach not only makes it more manageable but also allows for greater precision in crafting each component.Step 2: Applying Glue and Securing
Sven proceeds to apply glue along one edge of the flange, ensuring a secure bond when clamped into place. He emphasizes that this stage is crucial for maintaining the structural integrity of the flange, which in turn safeguards the living area beneath the canvas when hatches are open.Step 3: Allowing Time to Dry
After securely attaching the first portion of the flange, Sven allows ample time for it to dry before moving forward with additional steps. This patience and precision are key aspects of his successful boatbuilding methods.Step 4: Finishing Touches
Once the flange is fully dried, Sven removes the clamps carefully, ensuring no damage occurs during this process. He then moves on to attaching four more pieces onto these main frames, completing two pairs of flanges for the bulkhead hatches.The Final Touches
While two flanges form the primary support structure around the hatches, Sven mentions there are two additional pieces required at each end to ensure comprehensive protection. This attention to detail highlights his commitment to producing a durable and reliable design. “Sailing is about finding your path, whether it’s across an ocean or within yourself.” – Sven Yrvind In conclusion, making flanges around bulkhead hatches may seem complex at first glance, but by following Sven Yrvind’s meticulous process, enthusiasts can achieve professional-level results. Remember that the journey of boatbuilding is as rewarding as reaching your destination; it tests one’s patience and dedication. For those seeking to embark on this adventure or simply gain more insight into marine craftsmanship, Sven’s wisdom is invaluable.Sven Yrvind, a renowned yacht designer and sailor, shares valuable insights on creating flanges around bulkhead hatches for canvas protection in this enlightening video. By following his expert guidance, boat enthusiasts can ensure their living areas remain secure while allowing unhindered access through the hatches.Step 1: Starting with the Flange
Sven begins by explaining that working on flanges vertically and horizontally is significantly easier than doing so in a flat position. To simplify the process further, he divides the task into two or three steps as suggested by fellow expert “for for.” This approach not only makes it more manageable but also allows for greater precision in crafting each component.Step 2: Applying Glue and Securing
Sven proceeds to apply glue along one edge of the flange, ensuring a secure bond when clamped into place. He emphasizes that this stage is crucial for maintaining the structural integrity of the flange, which in turn safeguards the living area beneath the canvas when hatches are open.Step 3: Allowing Time to Dry
After securely attaching the first portion of the flange, Sven allows ample time for it to dry before moving forward with additional steps. This patience and precision are key aspects of his successful boatbuilding methods.Step 4: Finishing Touches
Once the flange is fully dried, Sven removes the clamps carefully, ensuring no damage occurs during this process. He then moves on to attaching four more pieces onto these main frames, completing two pairs of flanges for the bulkhead hatches.The Final Touches
While two flanges form the primary support structure around the hatches, Sven mentions there are two additional pieces required at each end to ensure comprehensive protection. This attention to detail highlights his commitment to producing a durable and reliable design. “Sailing is about finding your path, whether it’s across an ocean or within yourself.” – Sven Yrvind In conclusion, making flanges around bulkhead hatches may seem complex at first glance, but by following Sven Yrvind’s meticulous process, enthusiasts can achieve professional-level results. Remember that the journey of boatbuilding is as rewarding as reaching your destination; it tests one’s patience and dedication. For those seeking to embark on this adventure or simply gain more insight into marine craftsmanship, Sven’s wisdom is invaluable.Making Flanges Around Bulkhead Hatches for Canvas
Sven Yrvind, a renowned yacht designer and sailor, shares valuable insights on creating flanges around bulkhead hatches for canvas protection in this enlightening video. By following his expert guidance, boat enthusiasts can ensure their living areas remain secure while allowing unhindered access through the hatches.Step 1: Starting with the Flange
Sven begins by explaining that working on flanges vertically and horizontally is significantly easier than doing so in a flat position. To simplify the process further, he divides the task into two or three steps as suggested by fellow expert “for for.” This approach not only makes it more manageable but also allows for greater precision in crafting each component.Step 2: Applying Glue and Securing
Sven proceeds to apply glue along one edge of the flange, ensuring a secure bond when clamped into place. He emphasizes that this stage is crucial for maintaining the structural integrity of the flange, which in turn safeguards the living area beneath the canvas when hatches are open.Step 3: Allowing Time to Dry
After securely attaching the first portion of the flange, Sven allows ample time for it to dry before moving forward with additional steps. This patience and precision are key aspects of his successful boatbuilding methods.Step 4: Finishing Touches
Once the flange is fully dried, Sven removes the clamps carefully, ensuring no damage occurs during this process. He then moves on to attaching four more pieces onto these main frames, completing two pairs of flanges for the bulkhead hatches.The Final Touches
While two flanges form the primary support structure around the hatches, Sven mentions there are two additional pieces required at each end to ensure comprehensive protection. This attention to detail highlights his commitment to producing a durable and reliable design. “Sailing is about finding your path, whether it’s across an ocean or within yourself.” – Sven Yrvind In conclusion, making flanges around bulkhead hatches may seem complex at first glance, but by following Sven Yrvind’s meticulous process, enthusiasts can achieve professional-level results. Remember that the journey of boatbuilding is as rewarding as reaching your destination; it tests one’s patience and dedication. For those seeking to embark on this adventure or simply gain more insight into marine craftsmanship, Sven’s wisdom is invaluable.Once the flange is fully dried, Sven removes the clamps carefully, ensuring no damage occurs during this process. He then moves on to attaching four more pieces onto these main frames, completing two pairs of flanges for the bulkhead hatches.The Final Touches
While two flanges form the primary support structure around the hatches, Sven mentions there are two additional pieces required at each end to ensure comprehensive protection. This attention to detail highlights his commitment to producing a durable and reliable design. “Sailing is about finding your path, whether it’s across an ocean or within yourself.” – Sven Yrvind In conclusion, making flanges around bulkhead hatches may seem complex at first glance, but by following Sven Yrvind’s meticulous process, enthusiasts can achieve professional-level results. Remember that the journey of boatbuilding is as rewarding as reaching your destination; it tests one’s patience and dedication. For those seeking to embark on this adventure or simply gain more insight into marine craftsmanship, Sven’s wisdom is invaluable.Sven proceeds to apply glue along one edge of the flange, ensuring a secure bond when clamped into place. He emphasizes that this stage is crucial for maintaining the structural integrity of the flange, which in turn safeguards the living area beneath the canvas when hatches are open.Step 3: Allowing Time to Dry
After securely attaching the first portion of the flange, Sven allows ample time for it to dry before moving forward with additional steps. This patience and precision are key aspects of his successful boatbuilding methods.Step 4: Finishing Touches
Once the flange is fully dried, Sven removes the clamps carefully, ensuring no damage occurs during this process. He then moves on to attaching four more pieces onto these main frames, completing two pairs of flanges for the bulkhead hatches.The Final Touches
While two flanges form the primary support structure around the hatches, Sven mentions there are two additional pieces required at each end to ensure comprehensive protection. This attention to detail highlights his commitment to producing a durable and reliable design. “Sailing is about finding your path, whether it’s across an ocean or within yourself.” – Sven Yrvind In conclusion, making flanges around bulkhead hatches may seem complex at first glance, but by following Sven Yrvind’s meticulous process, enthusiasts can achieve professional-level results. Remember that the journey of boatbuilding is as rewarding as reaching your destination; it tests one’s patience and dedication. For those seeking to embark on this adventure or simply gain more insight into marine craftsmanship, Sven’s wisdom is invaluable.Sven begins by explaining that working on flanges vertically and horizontally is significantly easier than doing so in a flat position. To simplify the process further, he divides the task into two or three steps as suggested by fellow expert “for for.” This approach not only makes it more manageable but also allows for greater precision in crafting each component.Step 2: Applying Glue and Securing
Sven proceeds to apply glue along one edge of the flange, ensuring a secure bond when clamped into place. He emphasizes that this stage is crucial for maintaining the structural integrity of the flange, which in turn safeguards the living area beneath the canvas when hatches are open.Step 3: Allowing Time to Dry
After securely attaching the first portion of the flange, Sven allows ample time for it to dry before moving forward with additional steps. This patience and precision are key aspects of his successful boatbuilding methods.Step 4: Finishing Touches
Once the flange is fully dried, Sven removes the clamps carefully, ensuring no damage occurs during this process. He then moves on to attaching four more pieces onto these main frames, completing two pairs of flanges for the bulkhead hatches.The Final Touches
While two flanges form the primary support structure around the hatches, Sven mentions there are two additional pieces required at each end to ensure comprehensive protection. This attention to detail highlights his commitment to producing a durable and reliable design. “Sailing is about finding your path, whether it’s across an ocean or within yourself.” – Sven Yrvind In conclusion, making flanges around bulkhead hatches may seem complex at first glance, but by following Sven Yrvind’s meticulous process, enthusiasts can achieve professional-level results. Remember that the journey of boatbuilding is as rewarding as reaching your destination; it tests one’s patience and dedication. For those seeking to embark on this adventure or simply gain more insight into marine craftsmanship, Sven’s wisdom is invaluable.Sven Yrvind, a renowned yacht designer and sailor, shares valuable insights on creating flanges around bulkhead hatches for canvas protection in this enlightening video. By following his expert guidance, boat enthusiasts can ensure their living areas remain secure while allowing unhindered access through the hatches.Step 1: Starting with the Flange
Sven begins by explaining that working on flanges vertically and horizontally is significantly easier than doing so in a flat position. To simplify the process further, he divides the task into two or three steps as suggested by fellow expert “for for.” This approach not only makes it more manageable but also allows for greater precision in crafting each component.Step 2: Applying Glue and Securing
Sven proceeds to apply glue along one edge of the flange, ensuring a secure bond when clamped into place. He emphasizes that this stage is crucial for maintaining the structural integrity of the flange, which in turn safeguards the living area beneath the canvas when hatches are open.Step 3: Allowing Time to Dry
After securely attaching the first portion of the flange, Sven allows ample time for it to dry before moving forward with additional steps. This patience and precision are key aspects of his successful boatbuilding methods.Step 4: Finishing Touches
Once the flange is fully dried, Sven removes the clamps carefully, ensuring no damage occurs during this process. He then moves on to attaching four more pieces onto these main frames, completing two pairs of flanges for the bulkhead hatches.The Final Touches
While two flanges form the primary support structure around the hatches, Sven mentions there are two additional pieces required at each end to ensure comprehensive protection. This attention to detail highlights his commitment to producing a durable and reliable design. “Sailing is about finding your path, whether it’s across an ocean or within yourself.” – Sven Yrvind In conclusion, making flanges around bulkhead hatches may seem complex at first glance, but by following Sven Yrvind’s meticulous process, enthusiasts can achieve professional-level results. Remember that the journey of boatbuilding is as rewarding as reaching your destination; it tests one’s patience and dedication. For those seeking to embark on this adventure or simply gain more insight into marine craftsmanship, Sven’s wisdom is invaluable.Making Flanges Around Bulkhead Hatches for Canvas
Sven Yrvind, a renowned yacht designer and sailor, shares valuable insights on creating flanges around bulkhead hatches for canvas protection in this enlightening video. By following his expert guidance, boat enthusiasts can ensure their living areas remain secure while allowing unhindered access through the hatches.Step 1: Starting with the Flange
Sven begins by explaining that working on flanges vertically and horizontally is significantly easier than doing so in a flat position. To simplify the process further, he divides the task into two or three steps as suggested by fellow expert “for for.” This approach not only makes it more manageable but also allows for greater precision in crafting each component.Step 2: Applying Glue and Securing
Sven proceeds to apply glue along one edge of the flange, ensuring a secure bond when clamped into place. He emphasizes that this stage is crucial for maintaining the structural integrity of the flange, which in turn safeguards the living area beneath the canvas when hatches are open.Step 3: Allowing Time to Dry
After securely attaching the first portion of the flange, Sven allows ample time for it to dry before moving forward with additional steps. This patience and precision are key aspects of his successful boatbuilding methods.Step 4: Finishing Touches
Once the flange is fully dried, Sven removes the clamps carefully, ensuring no damage occurs during this process. He then moves on to attaching four more pieces onto these main frames, completing two pairs of flanges for the bulkhead hatches.The Final Touches
While two flanges form the primary support structure around the hatches, Sven mentions there are two additional pieces required at each end to ensure comprehensive protection. This attention to detail highlights his commitment to producing a durable and reliable design. “Sailing is about finding your path, whether it’s across an ocean or within yourself.” – Sven Yrvind In conclusion, making flanges around bulkhead hatches may seem complex at first glance, but by following Sven Yrvind’s meticulous process, enthusiasts can achieve professional-level results. Remember that the journey of boatbuilding is as rewarding as reaching your destination; it tests one’s patience and dedication. For those seeking to embark on this adventure or simply gain more insight into marine craftsmanship, Sven’s wisdom is invaluable.After securely attaching the first portion of the flange, Sven allows ample time for it to dry before moving forward with additional steps. This patience and precision are key aspects of his successful boatbuilding methods.Step 4: Finishing Touches
Once the flange is fully dried, Sven removes the clamps carefully, ensuring no damage occurs during this process. He then moves on to attaching four more pieces onto these main frames, completing two pairs of flanges for the bulkhead hatches.The Final Touches
While two flanges form the primary support structure around the hatches, Sven mentions there are two additional pieces required at each end to ensure comprehensive protection. This attention to detail highlights his commitment to producing a durable and reliable design. “Sailing is about finding your path, whether it’s across an ocean or within yourself.” – Sven Yrvind In conclusion, making flanges around bulkhead hatches may seem complex at first glance, but by following Sven Yrvind’s meticulous process, enthusiasts can achieve professional-level results. Remember that the journey of boatbuilding is as rewarding as reaching your destination; it tests one’s patience and dedication. For those seeking to embark on this adventure or simply gain more insight into marine craftsmanship, Sven’s wisdom is invaluable.Sven proceeds to apply glue along one edge of the flange, ensuring a secure bond when clamped into place. He emphasizes that this stage is crucial for maintaining the structural integrity of the flange, which in turn safeguards the living area beneath the canvas when hatches are open.Step 3: Allowing Time to Dry
After securely attaching the first portion of the flange, Sven allows ample time for it to dry before moving forward with additional steps. This patience and precision are key aspects of his successful boatbuilding methods.Step 4: Finishing Touches
Once the flange is fully dried, Sven removes the clamps carefully, ensuring no damage occurs during this process. He then moves on to attaching four more pieces onto these main frames, completing two pairs of flanges for the bulkhead hatches.The Final Touches
While two flanges form the primary support structure around the hatches, Sven mentions there are two additional pieces required at each end to ensure comprehensive protection. This attention to detail highlights his commitment to producing a durable and reliable design. “Sailing is about finding your path, whether it’s across an ocean or within yourself.” – Sven Yrvind In conclusion, making flanges around bulkhead hatches may seem complex at first glance, but by following Sven Yrvind’s meticulous process, enthusiasts can achieve professional-level results. Remember that the journey of boatbuilding is as rewarding as reaching your destination; it tests one’s patience and dedication. For those seeking to embark on this adventure or simply gain more insight into marine craftsmanship, Sven’s wisdom is invaluable.Sven begins by explaining that working on flanges vertically and horizontally is significantly easier than doing so in a flat position. To simplify the process further, he divides the task into two or three steps as suggested by fellow expert “for for.” This approach not only makes it more manageable but also allows for greater precision in crafting each component.Step 2: Applying Glue and Securing
Sven proceeds to apply glue along one edge of the flange, ensuring a secure bond when clamped into place. He emphasizes that this stage is crucial for maintaining the structural integrity of the flange, which in turn safeguards the living area beneath the canvas when hatches are open.Step 3: Allowing Time to Dry
After securely attaching the first portion of the flange, Sven allows ample time for it to dry before moving forward with additional steps. This patience and precision are key aspects of his successful boatbuilding methods.Step 4: Finishing Touches
Once the flange is fully dried, Sven removes the clamps carefully, ensuring no damage occurs during this process. He then moves on to attaching four more pieces onto these main frames, completing two pairs of flanges for the bulkhead hatches.The Final Touches
While two flanges form the primary support structure around the hatches, Sven mentions there are two additional pieces required at each end to ensure comprehensive protection. This attention to detail highlights his commitment to producing a durable and reliable design. “Sailing is about finding your path, whether it’s across an ocean or within yourself.” – Sven Yrvind In conclusion, making flanges around bulkhead hatches may seem complex at first glance, but by following Sven Yrvind’s meticulous process, enthusiasts can achieve professional-level results. Remember that the journey of boatbuilding is as rewarding as reaching your destination; it tests one’s patience and dedication. For those seeking to embark on this adventure or simply gain more insight into marine craftsmanship, Sven’s wisdom is invaluable.Sven Yrvind, a renowned yacht designer and sailor, shares valuable insights on creating flanges around bulkhead hatches for canvas protection in this enlightening video. By following his expert guidance, boat enthusiasts can ensure their living areas remain secure while allowing unhindered access through the hatches.Step 1: Starting with the Flange
Sven begins by explaining that working on flanges vertically and horizontally is significantly easier than doing so in a flat position. To simplify the process further, he divides the task into two or three steps as suggested by fellow expert “for for.” This approach not only makes it more manageable but also allows for greater precision in crafting each component.Step 2: Applying Glue and Securing
Sven proceeds to apply glue along one edge of the flange, ensuring a secure bond when clamped into place. He emphasizes that this stage is crucial for maintaining the structural integrity of the flange, which in turn safeguards the living area beneath the canvas when hatches are open.Step 3: Allowing Time to Dry
After securely attaching the first portion of the flange, Sven allows ample time for it to dry before moving forward with additional steps. This patience and precision are key aspects of his successful boatbuilding methods.Step 4: Finishing Touches
Once the flange is fully dried, Sven removes the clamps carefully, ensuring no damage occurs during this process. He then moves on to attaching four more pieces onto these main frames, completing two pairs of flanges for the bulkhead hatches.The Final Touches
While two flanges form the primary support structure around the hatches, Sven mentions there are two additional pieces required at each end to ensure comprehensive protection. This attention to detail highlights his commitment to producing a durable and reliable design. “Sailing is about finding your path, whether it’s across an ocean or within yourself.” – Sven Yrvind In conclusion, making flanges around bulkhead hatches may seem complex at first glance, but by following Sven Yrvind’s meticulous process, enthusiasts can achieve professional-level results. Remember that the journey of boatbuilding is as rewarding as reaching your destination; it tests one’s patience and dedication. For those seeking to embark on this adventure or simply gain more insight into marine craftsmanship, Sven’s wisdom is invaluable.Making Flanges Around Bulkhead Hatches for Canvas
Sven Yrvind, a renowned yacht designer and sailor, shares valuable insights on creating flanges around bulkhead hatches for canvas protection in this enlightening video. By following his expert guidance, boat enthusiasts can ensure their living areas remain secure while allowing unhindered access through the hatches.Step 1: Starting with the Flange
Sven begins by explaining that working on flanges vertically and horizontally is significantly easier than doing so in a flat position. To simplify the process further, he divides the task into two or three steps as suggested by fellow expert “for for.” This approach not only makes it more manageable but also allows for greater precision in crafting each component.Step 2: Applying Glue and Securing
Sven proceeds to apply glue along one edge of the flange, ensuring a secure bond when clamped into place. He emphasizes that this stage is crucial for maintaining the structural integrity of the flange, which in turn safeguards the living area beneath the canvas when hatches are open.Step 3: Allowing Time to Dry
After securely attaching the first portion of the flange, Sven allows ample time for it to dry before moving forward with additional steps. This patience and precision are key aspects of his successful boatbuilding methods.Step 4: Finishing Touches
Once the flange is fully dried, Sven removes the clamps carefully, ensuring no damage occurs during this process. He then moves on to attaching four more pieces onto these main frames, completing two pairs of flanges for the bulkhead hatches.The Final Touches
While two flanges form the primary support structure around the hatches, Sven mentions there are two additional pieces required at each end to ensure comprehensive protection. This attention to detail highlights his commitment to producing a durable and reliable design. “Sailing is about finding your path, whether it’s across an ocean or within yourself.” – Sven Yrvind In conclusion, making flanges around bulkhead hatches may seem complex at first glance, but by following Sven Yrvind’s meticulous process, enthusiasts can achieve professional-level results. Remember that the journey of boatbuilding is as rewarding as reaching your destination; it tests one’s patience and dedication. For those seeking to embark on this adventure or simply gain more insight into marine craftsmanship, Sven’s wisdom is invaluable.Once the flange is fully dried, Sven removes the clamps carefully, ensuring no damage occurs during this process. He then moves on to attaching four more pieces onto these main frames, completing two pairs of flanges for the bulkhead hatches.The Final Touches
While two flanges form the primary support structure around the hatches, Sven mentions there are two additional pieces required at each end to ensure comprehensive protection. This attention to detail highlights his commitment to producing a durable and reliable design. “Sailing is about finding your path, whether it’s across an ocean or within yourself.” – Sven Yrvind In conclusion, making flanges around bulkhead hatches may seem complex at first glance, but by following Sven Yrvind’s meticulous process, enthusiasts can achieve professional-level results. Remember that the journey of boatbuilding is as rewarding as reaching your destination; it tests one’s patience and dedication. For those seeking to embark on this adventure or simply gain more insight into marine craftsmanship, Sven’s wisdom is invaluable.After securely attaching the first portion of the flange, Sven allows ample time for it to dry before moving forward with additional steps. This patience and precision are key aspects of his successful boatbuilding methods.Step 4: Finishing Touches
Once the flange is fully dried, Sven removes the clamps carefully, ensuring no damage occurs during this process. He then moves on to attaching four more pieces onto these main frames, completing two pairs of flanges for the bulkhead hatches.The Final Touches
While two flanges form the primary support structure around the hatches, Sven mentions there are two additional pieces required at each end to ensure comprehensive protection. This attention to detail highlights his commitment to producing a durable and reliable design. “Sailing is about finding your path, whether it’s across an ocean or within yourself.” – Sven Yrvind In conclusion, making flanges around bulkhead hatches may seem complex at first glance, but by following Sven Yrvind’s meticulous process, enthusiasts can achieve professional-level results. Remember that the journey of boatbuilding is as rewarding as reaching your destination; it tests one’s patience and dedication. For those seeking to embark on this adventure or simply gain more insight into marine craftsmanship, Sven’s wisdom is invaluable.Sven proceeds to apply glue along one edge of the flange, ensuring a secure bond when clamped into place. He emphasizes that this stage is crucial for maintaining the structural integrity of the flange, which in turn safeguards the living area beneath the canvas when hatches are open.Step 3: Allowing Time to Dry
After securely attaching the first portion of the flange, Sven allows ample time for it to dry before moving forward with additional steps. This patience and precision are key aspects of his successful boatbuilding methods.Step 4: Finishing Touches
Once the flange is fully dried, Sven removes the clamps carefully, ensuring no damage occurs during this process. He then moves on to attaching four more pieces onto these main frames, completing two pairs of flanges for the bulkhead hatches.The Final Touches
While two flanges form the primary support structure around the hatches, Sven mentions there are two additional pieces required at each end to ensure comprehensive protection. This attention to detail highlights his commitment to producing a durable and reliable design. “Sailing is about finding your path, whether it’s across an ocean or within yourself.” – Sven Yrvind In conclusion, making flanges around bulkhead hatches may seem complex at first glance, but by following Sven Yrvind’s meticulous process, enthusiasts can achieve professional-level results. Remember that the journey of boatbuilding is as rewarding as reaching your destination; it tests one’s patience and dedication. For those seeking to embark on this adventure or simply gain more insight into marine craftsmanship, Sven’s wisdom is invaluable.Sven begins by explaining that working on flanges vertically and horizontally is significantly easier than doing so in a flat position. To simplify the process further, he divides the task into two or three steps as suggested by fellow expert “for for.” This approach not only makes it more manageable but also allows for greater precision in crafting each component.Step 2: Applying Glue and Securing
Sven proceeds to apply glue along one edge of the flange, ensuring a secure bond when clamped into place. He emphasizes that this stage is crucial for maintaining the structural integrity of the flange, which in turn safeguards the living area beneath the canvas when hatches are open.Step 3: Allowing Time to Dry
After securely attaching the first portion of the flange, Sven allows ample time for it to dry before moving forward with additional steps. This patience and precision are key aspects of his successful boatbuilding methods.Step 4: Finishing Touches
Once the flange is fully dried, Sven removes the clamps carefully, ensuring no damage occurs during this process. He then moves on to attaching four more pieces onto these main frames, completing two pairs of flanges for the bulkhead hatches.The Final Touches
While two flanges form the primary support structure around the hatches, Sven mentions there are two additional pieces required at each end to ensure comprehensive protection. This attention to detail highlights his commitment to producing a durable and reliable design. “Sailing is about finding your path, whether it’s across an ocean or within yourself.” – Sven Yrvind In conclusion, making flanges around bulkhead hatches may seem complex at first glance, but by following Sven Yrvind’s meticulous process, enthusiasts can achieve professional-level results. Remember that the journey of boatbuilding is as rewarding as reaching your destination; it tests one’s patience and dedication. For those seeking to embark on this adventure or simply gain more insight into marine craftsmanship, Sven’s wisdom is invaluable.Sven Yrvind, a renowned yacht designer and sailor, shares valuable insights on creating flanges around bulkhead hatches for canvas protection in this enlightening video. By following his expert guidance, boat enthusiasts can ensure their living areas remain secure while allowing unhindered access through the hatches.Step 1: Starting with the Flange
Sven begins by explaining that working on flanges vertically and horizontally is significantly easier than doing so in a flat position. To simplify the process further, he divides the task into two or three steps as suggested by fellow expert “for for.” This approach not only makes it more manageable but also allows for greater precision in crafting each component.Step 2: Applying Glue and Securing
Sven proceeds to apply glue along one edge of the flange, ensuring a secure bond when clamped into place. He emphasizes that this stage is crucial for maintaining the structural integrity of the flange, which in turn safeguards the living area beneath the canvas when hatches are open.Step 3: Allowing Time to Dry
After securely attaching the first portion of the flange, Sven allows ample time for it to dry before moving forward with additional steps. This patience and precision are key aspects of his successful boatbuilding methods.Step 4: Finishing Touches
Once the flange is fully dried, Sven removes the clamps carefully, ensuring no damage occurs during this process. He then moves on to attaching four more pieces onto these main frames, completing two pairs of flanges for the bulkhead hatches.The Final Touches
While two flanges form the primary support structure around the hatches, Sven mentions there are two additional pieces required at each end to ensure comprehensive protection. This attention to detail highlights his commitment to producing a durable and reliable design. “Sailing is about finding your path, whether it’s across an ocean or within yourself.” – Sven Yrvind In conclusion, making flanges around bulkhead hatches may seem complex at first glance, but by following Sven Yrvind’s meticulous process, enthusiasts can achieve professional-level results. Remember that the journey of boatbuilding is as rewarding as reaching your destination; it tests one’s patience and dedication. For those seeking to embark on this adventure or simply gain more insight into marine craftsmanship, Sven’s wisdom is invaluable.Making Flanges Around Bulkhead Hatches for Canvas
Sven Yrvind, a renowned yacht designer and sailor, shares valuable insights on creating flanges around bulkhead hatches for canvas protection in this enlightening video. By following his expert guidance, boat enthusiasts can ensure their living areas remain secure while allowing unhindered access through the hatches.Step 1: Starting with the Flange
Sven begins by explaining that working on flanges vertically and horizontally is significantly easier than doing so in a flat position. To simplify the process further, he divides the task into two or three steps as suggested by fellow expert “for for.” This approach not only makes it more manageable but also allows for greater precision in crafting each component.Step 2: Applying Glue and Securing
Sven proceeds to apply glue along one edge of the flange, ensuring a secure bond when clamped into place. He emphasizes that this stage is crucial for maintaining the structural integrity of the flange, which in turn safeguards the living area beneath the canvas when hatches are open.Step 3: Allowing Time to Dry
After securely attaching the first portion of the flange, Sven allows ample time for it to dry before moving forward with additional steps. This patience and precision are key aspects of his successful boatbuilding methods.Step 4: Finishing Touches
Once the flange is fully dried, Sven removes the clamps carefully, ensuring no damage occurs during this process. He then moves on to attaching four more pieces onto these main frames, completing two pairs of flanges for the bulkhead hatches.The Final Touches
While two flanges form the primary support structure around the hatches, Sven mentions there are two additional pieces required at each end to ensure comprehensive protection. This attention to detail highlights his commitment to producing a durable and reliable design. “Sailing is about finding your path, whether it’s across an ocean or within yourself.” – Sven Yrvind In conclusion, making flanges around bulkhead hatches may seem complex at first glance, but by following Sven Yrvind’s meticulous process, enthusiasts can achieve professional-level results. Remember that the journey of boatbuilding is as rewarding as reaching your destination; it tests one’s patience and dedication. For those seeking to embark on this adventure or simply gain more insight into marine craftsmanship, Sven’s wisdom is invaluable.Once the flange is fully dried, Sven removes the clamps carefully, ensuring no damage occurs during this process. He then moves on to attaching four more pieces onto these main frames, completing two pairs of flanges for the bulkhead hatches.The Final Touches
While two flanges form the primary support structure around the hatches, Sven mentions there are two additional pieces required at each end to ensure comprehensive protection. This attention to detail highlights his commitment to producing a durable and reliable design. “Sailing is about finding your path, whether it’s across an ocean or within yourself.” – Sven Yrvind In conclusion, making flanges around bulkhead hatches may seem complex at first glance, but by following Sven Yrvind’s meticulous process, enthusiasts can achieve professional-level results. Remember that the journey of boatbuilding is as rewarding as reaching your destination; it tests one’s patience and dedication. For those seeking to embark on this adventure or simply gain more insight into marine craftsmanship, Sven’s wisdom is invaluable.Sven Yrvind, a renowned yacht designer and sailor, shares valuable insights on creating flanges around bulkhead hatches for canvas protection in this enlightening video. By following his expert guidance, boat enthusiasts can ensure their living areas remain secure while allowing unhindered access through the hatches.Step 1: Starting with the Flange
Sven begins by explaining that working on flanges vertically and horizontally is significantly easier than doing so in a flat position. To simplify the process further, he divides the task into two or three steps as suggested by fellow expert “for for.” This approach not only makes it more manageable but also allows for greater precision in crafting each component.Step 2: Applying Glue and Securing
Sven proceeds to apply glue along one edge of the flange, ensuring a secure bond when clamped into place. He emphasizes that this stage is crucial for maintaining the structural integrity of the flange, which in turn safeguards the living area beneath the canvas when hatches are open.Step 3: Allowing Time to Dry
After securely attaching the first portion of the flange, Sven allows ample time for it to dry before moving forward with additional steps. This patience and precision are key aspects of his successful boatbuilding methods.Step 4: Finishing Touches
Once the flange is fully dried, Sven removes the clamps carefully, ensuring no damage occurs during this process. He then moves on to attaching four more pieces onto these main frames, completing two pairs of flanges for the bulkhead hatches.The Final Touches
While two flanges form the primary support structure around the hatches, Sven mentions there are two additional pieces required at each end to ensure comprehensive protection. This attention to detail highlights his commitment to producing a durable and reliable design. “Sailing is about finding your path, whether it’s across an ocean or within yourself.” – Sven Yrvind In conclusion, making flanges around bulkhead hatches may seem complex at first glance, but by following Sven Yrvind’s meticulous process, enthusiasts can achieve professional-level results. Remember that the journey of boatbuilding is as rewarding as reaching your destination; it tests one’s patience and dedication. For those seeking to embark on this adventure or simply gain more insight into marine craftsmanship, Sven’s wisdom is invaluable.Making Flanges Around Bulkhead Hatches for Canvas
Sven Yrvind, a renowned yacht designer and sailor, shares valuable insights on creating flanges around bulkhead hatches for canvas protection in this enlightening video. By following his expert guidance, boat enthusiasts can ensure their living areas remain secure while allowing unhindered access through the hatches.Step 1: Starting with the Flange
Sven begins by explaining that working on flanges vertically and horizontally is significantly easier than doing so in a flat position. To simplify the process further, he divides the task into two or three steps as suggested by fellow expert “for for.” This approach not only makes it more manageable but also allows for greater precision in crafting each component.Step 2: Applying Glue and Securing
Sven proceeds to apply glue along one edge of the flange, ensuring a secure bond when clamped into place. He emphasizes that this stage is crucial for maintaining the structural integrity of the flange, which in turn safeguards the living area beneath the canvas when hatches are open.Step 3: Allowing Time to Dry
After securely attaching the first portion of the flange, Sven allows ample time for it to dry before moving forward with additional steps. This patience and precision are key aspects of his successful boatbuilding methods.Step 4: Finishing Touches
Once the flange is fully dried, Sven removes the clamps carefully, ensuring no damage occurs during this process. He then moves on to attaching four more pieces onto these main frames, completing two pairs of flanges for the bulkhead hatches.The Final Touches
While two flanges form the primary support structure around the hatches, Sven mentions there are two additional pieces required at each end to ensure comprehensive protection. This attention to detail highlights his commitment to producing a durable and reliable design. “Sailing is about finding your path, whether it’s across an ocean or within yourself.” – Sven Yrvind In conclusion, making flanges around bulkhead hatches may seem complex at first glance, but by following Sven Yrvind’s meticulous process, enthusiasts can achieve professional-level results. Remember that the journey of boatbuilding is as rewarding as reaching your destination; it tests one’s patience and dedication. For those seeking to embark on this adventure or simply gain more insight into marine craftsmanship, Sven’s wisdom is invaluable.Sven proceeds to apply glue along one edge of the flange, ensuring a secure bond when clamped into place. He emphasizes that this stage is crucial for maintaining the structural integrity of the flange, which in turn safeguards the living area beneath the canvas when hatches are open.Step 3: Allowing Time to Dry
After securely attaching the first portion of the flange, Sven allows ample time for it to dry before moving forward with additional steps. This patience and precision are key aspects of his successful boatbuilding methods.Step 4: Finishing Touches
Once the flange is fully dried, Sven removes the clamps carefully, ensuring no damage occurs during this process. He then moves on to attaching four more pieces onto these main frames, completing two pairs of flanges for the bulkhead hatches.The Final Touches
While two flanges form the primary support structure around the hatches, Sven mentions there are two additional pieces required at each end to ensure comprehensive protection. This attention to detail highlights his commitment to producing a durable and reliable design. “Sailing is about finding your path, whether it’s across an ocean or within yourself.” – Sven Yrvind In conclusion, making flanges around bulkhead hatches may seem complex at first glance, but by following Sven Yrvind’s meticulous process, enthusiasts can achieve professional-level results. Remember that the journey of boatbuilding is as rewarding as reaching your destination; it tests one’s patience and dedication. For those seeking to embark on this adventure or simply gain more insight into marine craftsmanship, Sven’s wisdom is invaluable.Sven Yrvind, a renowned yacht designer and sailor, shares valuable insights on creating flanges around bulkhead hatches for canvas protection in this enlightening video. By following his expert guidance, boat enthusiasts can ensure their living areas remain secure while allowing unhindered access through the hatches.Step 1: Starting with the Flange
Sven begins by explaining that working on flanges vertically and horizontally is significantly easier than doing so in a flat position. To simplify the process further, he divides the task into two or three steps as suggested by fellow expert “for for.” This approach not only makes it more manageable but also allows for greater precision in crafting each component.Step 2: Applying Glue and Securing
Sven proceeds to apply glue along one edge of the flange, ensuring a secure bond when clamped into place. He emphasizes that this stage is crucial for maintaining the structural integrity of the flange, which in turn safeguards the living area beneath the canvas when hatches are open.Step 3: Allowing Time to Dry
After securely attaching the first portion of the flange, Sven allows ample time for it to dry before moving forward with additional steps. This patience and precision are key aspects of his successful boatbuilding methods.Step 4: Finishing Touches
Once the flange is fully dried, Sven removes the clamps carefully, ensuring no damage occurs during this process. He then moves on to attaching four more pieces onto these main frames, completing two pairs of flanges for the bulkhead hatches.The Final Touches
While two flanges form the primary support structure around the hatches, Sven mentions there are two additional pieces required at each end to ensure comprehensive protection. This attention to detail highlights his commitment to producing a durable and reliable design. “Sailing is about finding your path, whether it’s across an ocean or within yourself.” – Sven Yrvind In conclusion, making flanges around bulkhead hatches may seem complex at first glance, but by following Sven Yrvind’s meticulous process, enthusiasts can achieve professional-level results. Remember that the journey of boatbuilding is as rewarding as reaching your destination; it tests one’s patience and dedication. For those seeking to embark on this adventure or simply gain more insight into marine craftsmanship, Sven’s wisdom is invaluable.Making Flanges Around Bulkhead Hatches for Canvas
Sven Yrvind, a renowned yacht designer and sailor, shares valuable insights on creating flanges around bulkhead hatches for canvas protection in this enlightening video. By following his expert guidance, boat enthusiasts can ensure their living areas remain secure while allowing unhindered access through the hatches.Step 1: Starting with the Flange
Sven begins by explaining that working on flanges vertically and horizontally is significantly easier than doing so in a flat position. To simplify the process further, he divides the task into two or three steps as suggested by fellow expert “for for.” This approach not only makes it more manageable but also allows for greater precision in crafting each component.Step 2: Applying Glue and Securing
Sven proceeds to apply glue along one edge of the flange, ensuring a secure bond when clamped into place. He emphasizes that this stage is crucial for maintaining the structural integrity of the flange, which in turn safeguards the living area beneath the canvas when hatches are open.Step 3: Allowing Time to Dry
After securely attaching the first portion of the flange, Sven allows ample time for it to dry before moving forward with additional steps. This patience and precision are key aspects of his successful boatbuilding methods.Step 4: Finishing Touches
Once the flange is fully dried, Sven removes the clamps carefully, ensuring no damage occurs during this process. He then moves on to attaching four more pieces onto these main frames, completing two pairs of flanges for the bulkhead hatches.The Final Touches
While two flanges form the primary support structure around the hatches, Sven mentions there are two additional pieces required at each end to ensure comprehensive protection. This attention to detail highlights his commitment to producing a durable and reliable design. “Sailing is about finding your path, whether it’s across an ocean or within yourself.” – Sven Yrvind In conclusion, making flanges around bulkhead hatches may seem complex at first glance, but by following Sven Yrvind’s meticulous process, enthusiasts can achieve professional-level results. Remember that the journey of boatbuilding is as rewarding as reaching your destination; it tests one’s patience and dedication. For those seeking to embark on this adventure or simply gain more insight into marine craftsmanship, Sven’s wisdom is invaluable.Sven begins by explaining that working on flanges vertically and horizontally is significantly easier than doing so in a flat position. To simplify the process further, he divides the task into two or three steps as suggested by fellow expert “for for.” This approach not only makes it more manageable but also allows for greater precision in crafting each component.Step 2: Applying Glue and Securing
Sven proceeds to apply glue along one edge of the flange, ensuring a secure bond when clamped into place. He emphasizes that this stage is crucial for maintaining the structural integrity of the flange, which in turn safeguards the living area beneath the canvas when hatches are open.Step 3: Allowing Time to Dry
After securely attaching the first portion of the flange, Sven allows ample time for it to dry before moving forward with additional steps. This patience and precision are key aspects of his successful boatbuilding methods.Step 4: Finishing Touches
Once the flange is fully dried, Sven removes the clamps carefully, ensuring no damage occurs during this process. He then moves on to attaching four more pieces onto these main frames, completing two pairs of flanges for the bulkhead hatches.The Final Touches
While two flanges form the primary support structure around the hatches, Sven mentions there are two additional pieces required at each end to ensure comprehensive protection. This attention to detail highlights his commitment to producing a durable and reliable design. “Sailing is about finding your path, whether it’s across an ocean or within yourself.” – Sven Yrvind In conclusion, making flanges around bulkhead hatches may seem complex at first glance, but by following Sven Yrvind’s meticulous process, enthusiasts can achieve professional-level results. Remember that the journey of boatbuilding is as rewarding as reaching your destination; it tests one’s patience and dedication. For those seeking to embark on this adventure or simply gain more insight into marine craftsmanship, Sven’s wisdom is invaluable.Sven Yrvind, a renowned yacht designer and sailor, shares valuable insights on creating flanges around bulkhead hatches for canvas protection in this enlightening video. By following his expert guidance, boat enthusiasts can ensure their living areas remain secure while allowing unhindered access through the hatches.Step 1: Starting with the Flange
Sven begins by explaining that working on flanges vertically and horizontally is significantly easier than doing so in a flat position. To simplify the process further, he divides the task into two or three steps as suggested by fellow expert “for for.” This approach not only makes it more manageable but also allows for greater precision in crafting each component.Step 2: Applying Glue and Securing
Sven proceeds to apply glue along one edge of the flange, ensuring a secure bond when clamped into place. He emphasizes that this stage is crucial for maintaining the structural integrity of the flange, which in turn safeguards the living area beneath the canvas when hatches are open.Step 3: Allowing Time to Dry
After securely attaching the first portion of the flange, Sven allows ample time for it to dry before moving forward with additional steps. This patience and precision are key aspects of his successful boatbuilding methods.Step 4: Finishing Touches
Once the flange is fully dried, Sven removes the clamps carefully, ensuring no damage occurs during this process. He then moves on to attaching four more pieces onto these main frames, completing two pairs of flanges for the bulkhead hatches.The Final Touches
While two flanges form the primary support structure around the hatches, Sven mentions there are two additional pieces required at each end to ensure comprehensive protection. This attention to detail highlights his commitment to producing a durable and reliable design. “Sailing is about finding your path, whether it’s across an ocean or within yourself.” – Sven Yrvind In conclusion, making flanges around bulkhead hatches may seem complex at first glance, but by following Sven Yrvind’s meticulous process, enthusiasts can achieve professional-level results. Remember that the journey of boatbuilding is as rewarding as reaching your destination; it tests one’s patience and dedication. For those seeking to embark on this adventure or simply gain more insight into marine craftsmanship, Sven’s wisdom is invaluable.Making Flanges Around Bulkhead Hatches for Canvas
Sven Yrvind, a renowned yacht designer and sailor, shares valuable insights on creating flanges around bulkhead hatches for canvas protection in this enlightening video. By following his expert guidance, boat enthusiasts can ensure their living areas remain secure while allowing unhindered access through the hatches.Step 1: Starting with the Flange
Sven begins by explaining that working on flanges vertically and horizontally is significantly easier than doing so in a flat position. To simplify the process further, he divides the task into two or three steps as suggested by fellow expert “for for.” This approach not only makes it more manageable but also allows for greater precision in crafting each component.Step 2: Applying Glue and Securing
Sven proceeds to apply glue along one edge of the flange, ensuring a secure bond when clamped into place. He emphasizes that this stage is crucial for maintaining the structural integrity of the flange, which in turn safeguards the living area beneath the canvas when hatches are open.Step 3: Allowing Time to Dry
After securely attaching the first portion of the flange, Sven allows ample time for it to dry before moving forward with additional steps. This patience and precision are key aspects of his successful boatbuilding methods.Step 4: Finishing Touches
Once the flange is fully dried, Sven removes the clamps carefully, ensuring no damage occurs during this process. He then moves on to attaching four more pieces onto these main frames, completing two pairs of flanges for the bulkhead hatches.The Final Touches
While two flanges form the primary support structure around the hatches, Sven mentions there are two additional pieces required at each end to ensure comprehensive protection. This attention to detail highlights his commitment to producing a durable and reliable design. “Sailing is about finding your path, whether it’s across an ocean or within yourself.” – Sven Yrvind In conclusion, making flanges around bulkhead hatches may seem complex at first glance, but by following Sven Yrvind’s meticulous process, enthusiasts can achieve professional-level results. Remember that the journey of boatbuilding is as rewarding as reaching your destination; it tests one’s patience and dedication. For those seeking to embark on this adventure or simply gain more insight into marine craftsmanship, Sven’s wisdom is invaluable.Once the flange is fully dried, Sven removes the clamps carefully, ensuring no damage occurs during this process. He then moves on to attaching four more pieces onto these main frames, completing two pairs of flanges for the bulkhead hatches.The Final Touches
While two flanges form the primary support structure around the hatches, Sven mentions there are two additional pieces required at each end to ensure comprehensive protection. This attention to detail highlights his commitment to producing a durable and reliable design. “Sailing is about finding your path, whether it’s across an ocean or within yourself.” – Sven Yrvind In conclusion, making flanges around bulkhead hatches may seem complex at first glance, but by following Sven Yrvind’s meticulous process, enthusiasts can achieve professional-level results. Remember that the journey of boatbuilding is as rewarding as reaching your destination; it tests one’s patience and dedication. For those seeking to embark on this adventure or simply gain more insight into marine craftsmanship, Sven’s wisdom is invaluable.Sven begins by explaining that working on flanges vertically and horizontally is significantly easier than doing so in a flat position. To simplify the process further, he divides the task into two or three steps as suggested by fellow expert “for for.” This approach not only makes it more manageable but also allows for greater precision in crafting each component.Step 2: Applying Glue and Securing
Sven proceeds to apply glue along one edge of the flange, ensuring a secure bond when clamped into place. He emphasizes that this stage is crucial for maintaining the structural integrity of the flange, which in turn safeguards the living area beneath the canvas when hatches are open.Step 3: Allowing Time to Dry
After securely attaching the first portion of the flange, Sven allows ample time for it to dry before moving forward with additional steps. This patience and precision are key aspects of his successful boatbuilding methods.Step 4: Finishing Touches
Once the flange is fully dried, Sven removes the clamps carefully, ensuring no damage occurs during this process. He then moves on to attaching four more pieces onto these main frames, completing two pairs of flanges for the bulkhead hatches.The Final Touches
While two flanges form the primary support structure around the hatches, Sven mentions there are two additional pieces required at each end to ensure comprehensive protection. This attention to detail highlights his commitment to producing a durable and reliable design. “Sailing is about finding your path, whether it’s across an ocean or within yourself.” – Sven Yrvind In conclusion, making flanges around bulkhead hatches may seem complex at first glance, but by following Sven Yrvind’s meticulous process, enthusiasts can achieve professional-level results. Remember that the journey of boatbuilding is as rewarding as reaching your destination; it tests one’s patience and dedication. For those seeking to embark on this adventure or simply gain more insight into marine craftsmanship, Sven’s wisdom is invaluable.Sven Yrvind, a renowned yacht designer and sailor, shares valuable insights on creating flanges around bulkhead hatches for canvas protection in this enlightening video. By following his expert guidance, boat enthusiasts can ensure their living areas remain secure while allowing unhindered access through the hatches.Step 1: Starting with the Flange
Sven begins by explaining that working on flanges vertically and horizontally is significantly easier than doing so in a flat position. To simplify the process further, he divides the task into two or three steps as suggested by fellow expert “for for.” This approach not only makes it more manageable but also allows for greater precision in crafting each component.Step 2: Applying Glue and Securing
Sven proceeds to apply glue along one edge of the flange, ensuring a secure bond when clamped into place. He emphasizes that this stage is crucial for maintaining the structural integrity of the flange, which in turn safeguards the living area beneath the canvas when hatches are open.Step 3: Allowing Time to Dry
After securely attaching the first portion of the flange, Sven allows ample time for it to dry before moving forward with additional steps. This patience and precision are key aspects of his successful boatbuilding methods.Step 4: Finishing Touches
Once the flange is fully dried, Sven removes the clamps carefully, ensuring no damage occurs during this process. He then moves on to attaching four more pieces onto these main frames, completing two pairs of flanges for the bulkhead hatches.The Final Touches
While two flanges form the primary support structure around the hatches, Sven mentions there are two additional pieces required at each end to ensure comprehensive protection. This attention to detail highlights his commitment to producing a durable and reliable design. “Sailing is about finding your path, whether it’s across an ocean or within yourself.” – Sven Yrvind In conclusion, making flanges around bulkhead hatches may seem complex at first glance, but by following Sven Yrvind’s meticulous process, enthusiasts can achieve professional-level results. Remember that the journey of boatbuilding is as rewarding as reaching your destination; it tests one’s patience and dedication. For those seeking to embark on this adventure or simply gain more insight into marine craftsmanship, Sven’s wisdom is invaluable.Making Flanges Around Bulkhead Hatches for Canvas
Sven Yrvind, a renowned yacht designer and sailor, shares valuable insights on creating flanges around bulkhead hatches for canvas protection in this enlightening video. By following his expert guidance, boat enthusiasts can ensure their living areas remain secure while allowing unhindered access through the hatches.Step 1: Starting with the Flange
Sven begins by explaining that working on flanges vertically and horizontally is significantly easier than doing so in a flat position. To simplify the process further, he divides the task into two or three steps as suggested by fellow expert “for for.” This approach not only makes it more manageable but also allows for greater precision in crafting each component.Step 2: Applying Glue and Securing
Sven proceeds to apply glue along one edge of the flange, ensuring a secure bond when clamped into place. He emphasizes that this stage is crucial for maintaining the structural integrity of the flange, which in turn safeguards the living area beneath the canvas when hatches are open.Step 3: Allowing Time to Dry
After securely attaching the first portion of the flange, Sven allows ample time for it to dry before moving forward with additional steps. This patience and precision are key aspects of his successful boatbuilding methods.Step 4: Finishing Touches
Once the flange is fully dried, Sven removes the clamps carefully, ensuring no damage occurs during this process. He then moves on to attaching four more pieces onto these main frames, completing two pairs of flanges for the bulkhead hatches.The Final Touches
While two flanges form the primary support structure around the hatches, Sven mentions there are two additional pieces required at each end to ensure comprehensive protection. This attention to detail highlights his commitment to producing a durable and reliable design. “Sailing is about finding your path, whether it’s across an ocean or within yourself.” – Sven Yrvind In conclusion, making flanges around bulkhead hatches may seem complex at first glance, but by following Sven Yrvind’s meticulous process, enthusiasts can achieve professional-level results. Remember that the journey of boatbuilding is as rewarding as reaching your destination; it tests one’s patience and dedication. For those seeking to embark on this adventure or simply gain more insight into marine craftsmanship, Sven’s wisdom is invaluable.After securely attaching the first portion of the flange, Sven allows ample time for it to dry before moving forward with additional steps. This patience and precision are key aspects of his successful boatbuilding methods.Step 4: Finishing Touches
Once the flange is fully dried, Sven removes the clamps carefully, ensuring no damage occurs during this process. He then moves on to attaching four more pieces onto these main frames, completing two pairs of flanges for the bulkhead hatches.The Final Touches
While two flanges form the primary support structure around the hatches, Sven mentions there are two additional pieces required at each end to ensure comprehensive protection. This attention to detail highlights his commitment to producing a durable and reliable design. “Sailing is about finding your path, whether it’s across an ocean or within yourself.” – Sven Yrvind In conclusion, making flanges around bulkhead hatches may seem complex at first glance, but by following Sven Yrvind’s meticulous process, enthusiasts can achieve professional-level results. Remember that the journey of boatbuilding is as rewarding as reaching your destination; it tests one’s patience and dedication. For those seeking to embark on this adventure or simply gain more insight into marine craftsmanship, Sven’s wisdom is invaluable.Sven begins by explaining that working on flanges vertically and horizontally is significantly easier than doing so in a flat position. To simplify the process further, he divides the task into two or three steps as suggested by fellow expert “for for.” This approach not only makes it more manageable but also allows for greater precision in crafting each component.Step 2: Applying Glue and Securing
Sven proceeds to apply glue along one edge of the flange, ensuring a secure bond when clamped into place. He emphasizes that this stage is crucial for maintaining the structural integrity of the flange, which in turn safeguards the living area beneath the canvas when hatches are open.Step 3: Allowing Time to Dry
After securely attaching the first portion of the flange, Sven allows ample time for it to dry before moving forward with additional steps. This patience and precision are key aspects of his successful boatbuilding methods.Step 4: Finishing Touches
Once the flange is fully dried, Sven removes the clamps carefully, ensuring no damage occurs during this process. He then moves on to attaching four more pieces onto these main frames, completing two pairs of flanges for the bulkhead hatches.The Final Touches
While two flanges form the primary support structure around the hatches, Sven mentions there are two additional pieces required at each end to ensure comprehensive protection. This attention to detail highlights his commitment to producing a durable and reliable design. “Sailing is about finding your path, whether it’s across an ocean or within yourself.” – Sven Yrvind In conclusion, making flanges around bulkhead hatches may seem complex at first glance, but by following Sven Yrvind’s meticulous process, enthusiasts can achieve professional-level results. Remember that the journey of boatbuilding is as rewarding as reaching your destination; it tests one’s patience and dedication. For those seeking to embark on this adventure or simply gain more insight into marine craftsmanship, Sven’s wisdom is invaluable.Sven Yrvind, a renowned yacht designer and sailor, shares valuable insights on creating flanges around bulkhead hatches for canvas protection in this enlightening video. By following his expert guidance, boat enthusiasts can ensure their living areas remain secure while allowing unhindered access through the hatches.Step 1: Starting with the Flange
Sven begins by explaining that working on flanges vertically and horizontally is significantly easier than doing so in a flat position. To simplify the process further, he divides the task into two or three steps as suggested by fellow expert “for for.” This approach not only makes it more manageable but also allows for greater precision in crafting each component.Step 2: Applying Glue and Securing
Sven proceeds to apply glue along one edge of the flange, ensuring a secure bond when clamped into place. He emphasizes that this stage is crucial for maintaining the structural integrity of the flange, which in turn safeguards the living area beneath the canvas when hatches are open.Step 3: Allowing Time to Dry
After securely attaching the first portion of the flange, Sven allows ample time for it to dry before moving forward with additional steps. This patience and precision are key aspects of his successful boatbuilding methods.Step 4: Finishing Touches
Once the flange is fully dried, Sven removes the clamps carefully, ensuring no damage occurs during this process. He then moves on to attaching four more pieces onto these main frames, completing two pairs of flanges for the bulkhead hatches.The Final Touches
While two flanges form the primary support structure around the hatches, Sven mentions there are two additional pieces required at each end to ensure comprehensive protection. This attention to detail highlights his commitment to producing a durable and reliable design. “Sailing is about finding your path, whether it’s across an ocean or within yourself.” – Sven Yrvind In conclusion, making flanges around bulkhead hatches may seem complex at first glance, but by following Sven Yrvind’s meticulous process, enthusiasts can achieve professional-level results. Remember that the journey of boatbuilding is as rewarding as reaching your destination; it tests one’s patience and dedication. For those seeking to embark on this adventure or simply gain more insight into marine craftsmanship, Sven’s wisdom is invaluable.Making Flanges Around Bulkhead Hatches for Canvas
Sven Yrvind, a renowned yacht designer and sailor, shares valuable insights on creating flanges around bulkhead hatches for canvas protection in this enlightening video. By following his expert guidance, boat enthusiasts can ensure their living areas remain secure while allowing unhindered access through the hatches.Step 1: Starting with the Flange
Sven begins by explaining that working on flanges vertically and horizontally is significantly easier than doing so in a flat position. To simplify the process further, he divides the task into two or three steps as suggested by fellow expert “for for.” This approach not only makes it more manageable but also allows for greater precision in crafting each component.Step 2: Applying Glue and Securing
Sven proceeds to apply glue along one edge of the flange, ensuring a secure bond when clamped into place. He emphasizes that this stage is crucial for maintaining the structural integrity of the flange, which in turn safeguards the living area beneath the canvas when hatches are open.Step 3: Allowing Time to Dry
After securely attaching the first portion of the flange, Sven allows ample time for it to dry before moving forward with additional steps. This patience and precision are key aspects of his successful boatbuilding methods.Step 4: Finishing Touches
Once the flange is fully dried, Sven removes the clamps carefully, ensuring no damage occurs during this process. He then moves on to attaching four more pieces onto these main frames, completing two pairs of flanges for the bulkhead hatches.The Final Touches
While two flanges form the primary support structure around the hatches, Sven mentions there are two additional pieces required at each end to ensure comprehensive protection. This attention to detail highlights his commitment to producing a durable and reliable design. “Sailing is about finding your path, whether it’s across an ocean or within yourself.” – Sven Yrvind In conclusion, making flanges around bulkhead hatches may seem complex at first glance, but by following Sven Yrvind’s meticulous process, enthusiasts can achieve professional-level results. Remember that the journey of boatbuilding is as rewarding as reaching your destination; it tests one’s patience and dedication. For those seeking to embark on this adventure or simply gain more insight into marine craftsmanship, Sven’s wisdom is invaluable.Sven proceeds to apply glue along one edge of the flange, ensuring a secure bond when clamped into place. He emphasizes that this stage is crucial for maintaining the structural integrity of the flange, which in turn safeguards the living area beneath the canvas when hatches are open.Step 3: Allowing Time to Dry
After securely attaching the first portion of the flange, Sven allows ample time for it to dry before moving forward with additional steps. This patience and precision are key aspects of his successful boatbuilding methods.Step 4: Finishing Touches
Once the flange is fully dried, Sven removes the clamps carefully, ensuring no damage occurs during this process. He then moves on to attaching four more pieces onto these main frames, completing two pairs of flanges for the bulkhead hatches.The Final Touches
While two flanges form the primary support structure around the hatches, Sven mentions there are two additional pieces required at each end to ensure comprehensive protection. This attention to detail highlights his commitment to producing a durable and reliable design. “Sailing is about finding your path, whether it’s across an ocean or within yourself.” – Sven Yrvind In conclusion, making flanges around bulkhead hatches may seem complex at first glance, but by following Sven Yrvind’s meticulous process, enthusiasts can achieve professional-level results. Remember that the journey of boatbuilding is as rewarding as reaching your destination; it tests one’s patience and dedication. For those seeking to embark on this adventure or simply gain more insight into marine craftsmanship, Sven’s wisdom is invaluable.Sven begins by explaining that working on flanges vertically and horizontally is significantly easier than doing so in a flat position. To simplify the process further, he divides the task into two or three steps as suggested by fellow expert “for for.” This approach not only makes it more manageable but also allows for greater precision in crafting each component.Step 2: Applying Glue and Securing
Sven proceeds to apply glue along one edge of the flange, ensuring a secure bond when clamped into place. He emphasizes that this stage is crucial for maintaining the structural integrity of the flange, which in turn safeguards the living area beneath the canvas when hatches are open.Step 3: Allowing Time to Dry
After securely attaching the first portion of the flange, Sven allows ample time for it to dry before moving forward with additional steps. This patience and precision are key aspects of his successful boatbuilding methods.Step 4: Finishing Touches
Once the flange is fully dried, Sven removes the clamps carefully, ensuring no damage occurs during this process. He then moves on to attaching four more pieces onto these main frames, completing two pairs of flanges for the bulkhead hatches.The Final Touches
While two flanges form the primary support structure around the hatches, Sven mentions there are two additional pieces required at each end to ensure comprehensive protection. This attention to detail highlights his commitment to producing a durable and reliable design. “Sailing is about finding your path, whether it’s across an ocean or within yourself.” – Sven Yrvind In conclusion, making flanges around bulkhead hatches may seem complex at first glance, but by following Sven Yrvind’s meticulous process, enthusiasts can achieve professional-level results. Remember that the journey of boatbuilding is as rewarding as reaching your destination; it tests one’s patience and dedication. For those seeking to embark on this adventure or simply gain more insight into marine craftsmanship, Sven’s wisdom is invaluable.Sven Yrvind, a renowned yacht designer and sailor, shares valuable insights on creating flanges around bulkhead hatches for canvas protection in this enlightening video. By following his expert guidance, boat enthusiasts can ensure their living areas remain secure while allowing unhindered access through the hatches.Step 1: Starting with the Flange
Sven begins by explaining that working on flanges vertically and horizontally is significantly easier than doing so in a flat position. To simplify the process further, he divides the task into two or three steps as suggested by fellow expert “for for.” This approach not only makes it more manageable but also allows for greater precision in crafting each component.Step 2: Applying Glue and Securing
Sven proceeds to apply glue along one edge of the flange, ensuring a secure bond when clamped into place. He emphasizes that this stage is crucial for maintaining the structural integrity of the flange, which in turn safeguards the living area beneath the canvas when hatches are open.Step 3: Allowing Time to Dry
After securely attaching the first portion of the flange, Sven allows ample time for it to dry before moving forward with additional steps. This patience and precision are key aspects of his successful boatbuilding methods.Step 4: Finishing Touches
Once the flange is fully dried, Sven removes the clamps carefully, ensuring no damage occurs during this process. He then moves on to attaching four more pieces onto these main frames, completing two pairs of flanges for the bulkhead hatches.The Final Touches
While two flanges form the primary support structure around the hatches, Sven mentions there are two additional pieces required at each end to ensure comprehensive protection. This attention to detail highlights his commitment to producing a durable and reliable design. “Sailing is about finding your path, whether it’s across an ocean or within yourself.” – Sven Yrvind In conclusion, making flanges around bulkhead hatches may seem complex at first glance, but by following Sven Yrvind’s meticulous process, enthusiasts can achieve professional-level results. Remember that the journey of boatbuilding is as rewarding as reaching your destination; it tests one’s patience and dedication. For those seeking to embark on this adventure or simply gain more insight into marine craftsmanship, Sven’s wisdom is invaluable.Making Flanges Around Bulkhead Hatches for Canvas
Sven Yrvind, a renowned yacht designer and sailor, shares valuable insights on creating flanges around bulkhead hatches for canvas protection in this enlightening video. By following his expert guidance, boat enthusiasts can ensure their living areas remain secure while allowing unhindered access through the hatches.Step 1: Starting with the Flange
Sven begins by explaining that working on flanges vertically and horizontally is significantly easier than doing so in a flat position. To simplify the process further, he divides the task into two or three steps as suggested by fellow expert “for for.” This approach not only makes it more manageable but also allows for greater precision in crafting each component.Step 2: Applying Glue and Securing
Sven proceeds to apply glue along one edge of the flange, ensuring a secure bond when clamped into place. He emphasizes that this stage is crucial for maintaining the structural integrity of the flange, which in turn safeguards the living area beneath the canvas when hatches are open.Step 3: Allowing Time to Dry
After securely attaching the first portion of the flange, Sven allows ample time for it to dry before moving forward with additional steps. This patience and precision are key aspects of his successful boatbuilding methods.Step 4: Finishing Touches
Once the flange is fully dried, Sven removes the clamps carefully, ensuring no damage occurs during this process. He then moves on to attaching four more pieces onto these main frames, completing two pairs of flanges for the bulkhead hatches.The Final Touches
While two flanges form the primary support structure around the hatches, Sven mentions there are two additional pieces required at each end to ensure comprehensive protection. This attention to detail highlights his commitment to producing a durable and reliable design. “Sailing is about finding your path, whether it’s across an ocean or within yourself.” – Sven Yrvind In conclusion, making flanges around bulkhead hatches may seem complex at first glance, but by following Sven Yrvind’s meticulous process, enthusiasts can achieve professional-level results. Remember that the journey of boatbuilding is as rewarding as reaching your destination; it tests one’s patience and dedication. For those seeking to embark on this adventure or simply gain more insight into marine craftsmanship, Sven’s wisdom is invaluable.Once the flange is fully dried, Sven removes the clamps carefully, ensuring no damage occurs during this process. He then moves on to attaching four more pieces onto these main frames, completing two pairs of flanges for the bulkhead hatches.The Final Touches
While two flanges form the primary support structure around the hatches, Sven mentions there are two additional pieces required at each end to ensure comprehensive protection. This attention to detail highlights his commitment to producing a durable and reliable design. “Sailing is about finding your path, whether it’s across an ocean or within yourself.” – Sven Yrvind In conclusion, making flanges around bulkhead hatches may seem complex at first glance, but by following Sven Yrvind’s meticulous process, enthusiasts can achieve professional-level results. Remember that the journey of boatbuilding is as rewarding as reaching your destination; it tests one’s patience and dedication. For those seeking to embark on this adventure or simply gain more insight into marine craftsmanship, Sven’s wisdom is invaluable.Sven proceeds to apply glue along one edge of the flange, ensuring a secure bond when clamped into place. He emphasizes that this stage is crucial for maintaining the structural integrity of the flange, which in turn safeguards the living area beneath the canvas when hatches are open.Step 3: Allowing Time to Dry
After securely attaching the first portion of the flange, Sven allows ample time for it to dry before moving forward with additional steps. This patience and precision are key aspects of his successful boatbuilding methods.Step 4: Finishing Touches
Once the flange is fully dried, Sven removes the clamps carefully, ensuring no damage occurs during this process. He then moves on to attaching four more pieces onto these main frames, completing two pairs of flanges for the bulkhead hatches.The Final Touches
While two flanges form the primary support structure around the hatches, Sven mentions there are two additional pieces required at each end to ensure comprehensive protection. This attention to detail highlights his commitment to producing a durable and reliable design. “Sailing is about finding your path, whether it’s across an ocean or within yourself.” – Sven Yrvind In conclusion, making flanges around bulkhead hatches may seem complex at first glance, but by following Sven Yrvind’s meticulous process, enthusiasts can achieve professional-level results. Remember that the journey of boatbuilding is as rewarding as reaching your destination; it tests one’s patience and dedication. For those seeking to embark on this adventure or simply gain more insight into marine craftsmanship, Sven’s wisdom is invaluable.Sven begins by explaining that working on flanges vertically and horizontally is significantly easier than doing so in a flat position. To simplify the process further, he divides the task into two or three steps as suggested by fellow expert “for for.” This approach not only makes it more manageable but also allows for greater precision in crafting each component.Step 2: Applying Glue and Securing
Sven proceeds to apply glue along one edge of the flange, ensuring a secure bond when clamped into place. He emphasizes that this stage is crucial for maintaining the structural integrity of the flange, which in turn safeguards the living area beneath the canvas when hatches are open.Step 3: Allowing Time to Dry
After securely attaching the first portion of the flange, Sven allows ample time for it to dry before moving forward with additional steps. This patience and precision are key aspects of his successful boatbuilding methods.Step 4: Finishing Touches
Once the flange is fully dried, Sven removes the clamps carefully, ensuring no damage occurs during this process. He then moves on to attaching four more pieces onto these main frames, completing two pairs of flanges for the bulkhead hatches.The Final Touches
While two flanges form the primary support structure around the hatches, Sven mentions there are two additional pieces required at each end to ensure comprehensive protection. This attention to detail highlights his commitment to producing a durable and reliable design. “Sailing is about finding your path, whether it’s across an ocean or within yourself.” – Sven Yrvind In conclusion, making flanges around bulkhead hatches may seem complex at first glance, but by following Sven Yrvind’s meticulous process, enthusiasts can achieve professional-level results. Remember that the journey of boatbuilding is as rewarding as reaching your destination; it tests one’s patience and dedication. For those seeking to embark on this adventure or simply gain more insight into marine craftsmanship, Sven’s wisdom is invaluable.Sven Yrvind, a renowned yacht designer and sailor, shares valuable insights on creating flanges around bulkhead hatches for canvas protection in this enlightening video. By following his expert guidance, boat enthusiasts can ensure their living areas remain secure while allowing unhindered access through the hatches.Step 1: Starting with the Flange
Sven begins by explaining that working on flanges vertically and horizontally is significantly easier than doing so in a flat position. To simplify the process further, he divides the task into two or three steps as suggested by fellow expert “for for.” This approach not only makes it more manageable but also allows for greater precision in crafting each component.Step 2: Applying Glue and Securing
Sven proceeds to apply glue along one edge of the flange, ensuring a secure bond when clamped into place. He emphasizes that this stage is crucial for maintaining the structural integrity of the flange, which in turn safeguards the living area beneath the canvas when hatches are open.Step 3: Allowing Time to Dry
After securely attaching the first portion of the flange, Sven allows ample time for it to dry before moving forward with additional steps. This patience and precision are key aspects of his successful boatbuilding methods.Step 4: Finishing Touches
Once the flange is fully dried, Sven removes the clamps carefully, ensuring no damage occurs during this process. He then moves on to attaching four more pieces onto these main frames, completing two pairs of flanges for the bulkhead hatches.The Final Touches
While two flanges form the primary support structure around the hatches, Sven mentions there are two additional pieces required at each end to ensure comprehensive protection. This attention to detail highlights his commitment to producing a durable and reliable design. “Sailing is about finding your path, whether it’s across an ocean or within yourself.” – Sven Yrvind In conclusion, making flanges around bulkhead hatches may seem complex at first glance, but by following Sven Yrvind’s meticulous process, enthusiasts can achieve professional-level results. Remember that the journey of boatbuilding is as rewarding as reaching your destination; it tests one’s patience and dedication. For those seeking to embark on this adventure or simply gain more insight into marine craftsmanship, Sven’s wisdom is invaluable.Making Flanges Around Bulkhead Hatches for Canvas
Sven Yrvind, a renowned yacht designer and sailor, shares valuable insights on creating flanges around bulkhead hatches for canvas protection in this enlightening video. By following his expert guidance, boat enthusiasts can ensure their living areas remain secure while allowing unhindered access through the hatches.Step 1: Starting with the Flange
Sven begins by explaining that working on flanges vertically and horizontally is significantly easier than doing so in a flat position. To simplify the process further, he divides the task into two or three steps as suggested by fellow expert “for for.” This approach not only makes it more manageable but also allows for greater precision in crafting each component.Step 2: Applying Glue and Securing
Sven proceeds to apply glue along one edge of the flange, ensuring a secure bond when clamped into place. He emphasizes that this stage is crucial for maintaining the structural integrity of the flange, which in turn safeguards the living area beneath the canvas when hatches are open.Step 3: Allowing Time to Dry
After securely attaching the first portion of the flange, Sven allows ample time for it to dry before moving forward with additional steps. This patience and precision are key aspects of his successful boatbuilding methods.Step 4: Finishing Touches
Once the flange is fully dried, Sven removes the clamps carefully, ensuring no damage occurs during this process. He then moves on to attaching four more pieces onto these main frames, completing two pairs of flanges for the bulkhead hatches.The Final Touches
While two flanges form the primary support structure around the hatches, Sven mentions there are two additional pieces required at each end to ensure comprehensive protection. This attention to detail highlights his commitment to producing a durable and reliable design. “Sailing is about finding your path, whether it’s across an ocean or within yourself.” – Sven Yrvind In conclusion, making flanges around bulkhead hatches may seem complex at first glance, but by following Sven Yrvind’s meticulous process, enthusiasts can achieve professional-level results. Remember that the journey of boatbuilding is as rewarding as reaching your destination; it tests one’s patience and dedication. For those seeking to embark on this adventure or simply gain more insight into marine craftsmanship, Sven’s wisdom is invaluable.After securely attaching the first portion of the flange, Sven allows ample time for it to dry before moving forward with additional steps. This patience and precision are key aspects of his successful boatbuilding methods.Step 4: Finishing Touches
Once the flange is fully dried, Sven removes the clamps carefully, ensuring no damage occurs during this process. He then moves on to attaching four more pieces onto these main frames, completing two pairs of flanges for the bulkhead hatches.The Final Touches
While two flanges form the primary support structure around the hatches, Sven mentions there are two additional pieces required at each end to ensure comprehensive protection. This attention to detail highlights his commitment to producing a durable and reliable design. “Sailing is about finding your path, whether it’s across an ocean or within yourself.” – Sven Yrvind In conclusion, making flanges around bulkhead hatches may seem complex at first glance, but by following Sven Yrvind’s meticulous process, enthusiasts can achieve professional-level results. Remember that the journey of boatbuilding is as rewarding as reaching your destination; it tests one’s patience and dedication. For those seeking to embark on this adventure or simply gain more insight into marine craftsmanship, Sven’s wisdom is invaluable.Sven proceeds to apply glue along one edge of the flange, ensuring a secure bond when clamped into place. He emphasizes that this stage is crucial for maintaining the structural integrity of the flange, which in turn safeguards the living area beneath the canvas when hatches are open.Step 3: Allowing Time to Dry
After securely attaching the first portion of the flange, Sven allows ample time for it to dry before moving forward with additional steps. This patience and precision are key aspects of his successful boatbuilding methods.Step 4: Finishing Touches
Once the flange is fully dried, Sven removes the clamps carefully, ensuring no damage occurs during this process. He then moves on to attaching four more pieces onto these main frames, completing two pairs of flanges for the bulkhead hatches.The Final Touches
While two flanges form the primary support structure around the hatches, Sven mentions there are two additional pieces required at each end to ensure comprehensive protection. This attention to detail highlights his commitment to producing a durable and reliable design. “Sailing is about finding your path, whether it’s across an ocean or within yourself.” – Sven Yrvind In conclusion, making flanges around bulkhead hatches may seem complex at first glance, but by following Sven Yrvind’s meticulous process, enthusiasts can achieve professional-level results. Remember that the journey of boatbuilding is as rewarding as reaching your destination; it tests one’s patience and dedication. For those seeking to embark on this adventure or simply gain more insight into marine craftsmanship, Sven’s wisdom is invaluable.Sven begins by explaining that working on flanges vertically and horizontally is significantly easier than doing so in a flat position. To simplify the process further, he divides the task into two or three steps as suggested by fellow expert “for for.” This approach not only makes it more manageable but also allows for greater precision in crafting each component.Step 2: Applying Glue and Securing
Sven proceeds to apply glue along one edge of the flange, ensuring a secure bond when clamped into place. He emphasizes that this stage is crucial for maintaining the structural integrity of the flange, which in turn safeguards the living area beneath the canvas when hatches are open.Step 3: Allowing Time to Dry
After securely attaching the first portion of the flange, Sven allows ample time for it to dry before moving forward with additional steps. This patience and precision are key aspects of his successful boatbuilding methods.Step 4: Finishing Touches
Once the flange is fully dried, Sven removes the clamps carefully, ensuring no damage occurs during this process. He then moves on to attaching four more pieces onto these main frames, completing two pairs of flanges for the bulkhead hatches.The Final Touches
While two flanges form the primary support structure around the hatches, Sven mentions there are two additional pieces required at each end to ensure comprehensive protection. This attention to detail highlights his commitment to producing a durable and reliable design. “Sailing is about finding your path, whether it’s across an ocean or within yourself.” – Sven Yrvind In conclusion, making flanges around bulkhead hatches may seem complex at first glance, but by following Sven Yrvind’s meticulous process, enthusiasts can achieve professional-level results. Remember that the journey of boatbuilding is as rewarding as reaching your destination; it tests one’s patience and dedication. For those seeking to embark on this adventure or simply gain more insight into marine craftsmanship, Sven’s wisdom is invaluable.Sven Yrvind, a renowned yacht designer and sailor, shares valuable insights on creating flanges around bulkhead hatches for canvas protection in this enlightening video. By following his expert guidance, boat enthusiasts can ensure their living areas remain secure while allowing unhindered access through the hatches.Step 1: Starting with the Flange
Sven begins by explaining that working on flanges vertically and horizontally is significantly easier than doing so in a flat position. To simplify the process further, he divides the task into two or three steps as suggested by fellow expert “for for.” This approach not only makes it more manageable but also allows for greater precision in crafting each component.Step 2: Applying Glue and Securing
Sven proceeds to apply glue along one edge of the flange, ensuring a secure bond when clamped into place. He emphasizes that this stage is crucial for maintaining the structural integrity of the flange, which in turn safeguards the living area beneath the canvas when hatches are open.Step 3: Allowing Time to Dry
After securely attaching the first portion of the flange, Sven allows ample time for it to dry before moving forward with additional steps. This patience and precision are key aspects of his successful boatbuilding methods.Step 4: Finishing Touches
Once the flange is fully dried, Sven removes the clamps carefully, ensuring no damage occurs during this process. He then moves on to attaching four more pieces onto these main frames, completing two pairs of flanges for the bulkhead hatches.The Final Touches
While two flanges form the primary support structure around the hatches, Sven mentions there are two additional pieces required at each end to ensure comprehensive protection. This attention to detail highlights his commitment to producing a durable and reliable design. “Sailing is about finding your path, whether it’s across an ocean or within yourself.” – Sven Yrvind In conclusion, making flanges around bulkhead hatches may seem complex at first glance, but by following Sven Yrvind’s meticulous process, enthusiasts can achieve professional-level results. Remember that the journey of boatbuilding is as rewarding as reaching your destination; it tests one’s patience and dedication. For those seeking to embark on this adventure or simply gain more insight into marine craftsmanship, Sven’s wisdom is invaluable.Making Flanges Around Bulkhead Hatches for Canvas
Sven Yrvind, a renowned yacht designer and sailor, shares valuable insights on creating flanges around bulkhead hatches for canvas protection in this enlightening video. By following his expert guidance, boat enthusiasts can ensure their living areas remain secure while allowing unhindered access through the hatches.Step 1: Starting with the Flange
Sven begins by explaining that working on flanges vertically and horizontally is significantly easier than doing so in a flat position. To simplify the process further, he divides the task into two or three steps as suggested by fellow expert “for for.” This approach not only makes it more manageable but also allows for greater precision in crafting each component.Step 2: Applying Glue and Securing
Sven proceeds to apply glue along one edge of the flange, ensuring a secure bond when clamped into place. He emphasizes that this stage is crucial for maintaining the structural integrity of the flange, which in turn safeguards the living area beneath the canvas when hatches are open.Step 3: Allowing Time to Dry
After securely attaching the first portion of the flange, Sven allows ample time for it to dry before moving forward with additional steps. This patience and precision are key aspects of his successful boatbuilding methods.Step 4: Finishing Touches
Once the flange is fully dried, Sven removes the clamps carefully, ensuring no damage occurs during this process. He then moves on to attaching four more pieces onto these main frames, completing two pairs of flanges for the bulkhead hatches.The Final Touches
While two flanges form the primary support structure around the hatches, Sven mentions there are two additional pieces required at each end to ensure comprehensive protection. This attention to detail highlights his commitment to producing a durable and reliable design. “Sailing is about finding your path, whether it’s across an ocean or within yourself.” – Sven Yrvind In conclusion, making flanges around bulkhead hatches may seem complex at first glance, but by following Sven Yrvind’s meticulous process, enthusiasts can achieve professional-level results. Remember that the journey of boatbuilding is as rewarding as reaching your destination; it tests one’s patience and dedication. For those seeking to embark on this adventure or simply gain more insight into marine craftsmanship, Sven’s wisdom is invaluable.Once the flange is fully dried, Sven removes the clamps carefully, ensuring no damage occurs during this process. He then moves on to attaching four more pieces onto these main frames, completing two pairs of flanges for the bulkhead hatches.The Final Touches
While two flanges form the primary support structure around the hatches, Sven mentions there are two additional pieces required at each end to ensure comprehensive protection. This attention to detail highlights his commitment to producing a durable and reliable design. “Sailing is about finding your path, whether it’s across an ocean or within yourself.” – Sven Yrvind In conclusion, making flanges around bulkhead hatches may seem complex at first glance, but by following Sven Yrvind’s meticulous process, enthusiasts can achieve professional-level results. Remember that the journey of boatbuilding is as rewarding as reaching your destination; it tests one’s patience and dedication. For those seeking to embark on this adventure or simply gain more insight into marine craftsmanship, Sven’s wisdom is invaluable.After securely attaching the first portion of the flange, Sven allows ample time for it to dry before moving forward with additional steps. This patience and precision are key aspects of his successful boatbuilding methods.Step 4: Finishing Touches
Once the flange is fully dried, Sven removes the clamps carefully, ensuring no damage occurs during this process. He then moves on to attaching four more pieces onto these main frames, completing two pairs of flanges for the bulkhead hatches.The Final Touches
While two flanges form the primary support structure around the hatches, Sven mentions there are two additional pieces required at each end to ensure comprehensive protection. This attention to detail highlights his commitment to producing a durable and reliable design. “Sailing is about finding your path, whether it’s across an ocean or within yourself.” – Sven Yrvind In conclusion, making flanges around bulkhead hatches may seem complex at first glance, but by following Sven Yrvind’s meticulous process, enthusiasts can achieve professional-level results. Remember that the journey of boatbuilding is as rewarding as reaching your destination; it tests one’s patience and dedication. For those seeking to embark on this adventure or simply gain more insight into marine craftsmanship, Sven’s wisdom is invaluable.Sven proceeds to apply glue along one edge of the flange, ensuring a secure bond when clamped into place. He emphasizes that this stage is crucial for maintaining the structural integrity of the flange, which in turn safeguards the living area beneath the canvas when hatches are open.Step 3: Allowing Time to Dry
After securely attaching the first portion of the flange, Sven allows ample time for it to dry before moving forward with additional steps. This patience and precision are key aspects of his successful boatbuilding methods.Step 4: Finishing Touches
Once the flange is fully dried, Sven removes the clamps carefully, ensuring no damage occurs during this process. He then moves on to attaching four more pieces onto these main frames, completing two pairs of flanges for the bulkhead hatches.The Final Touches
While two flanges form the primary support structure around the hatches, Sven mentions there are two additional pieces required at each end to ensure comprehensive protection. This attention to detail highlights his commitment to producing a durable and reliable design. “Sailing is about finding your path, whether it’s across an ocean or within yourself.” – Sven Yrvind In conclusion, making flanges around bulkhead hatches may seem complex at first glance, but by following Sven Yrvind’s meticulous process, enthusiasts can achieve professional-level results. Remember that the journey of boatbuilding is as rewarding as reaching your destination; it tests one’s patience and dedication. For those seeking to embark on this adventure or simply gain more insight into marine craftsmanship, Sven’s wisdom is invaluable.Sven begins by explaining that working on flanges vertically and horizontally is significantly easier than doing so in a flat position. To simplify the process further, he divides the task into two or three steps as suggested by fellow expert “for for.” This approach not only makes it more manageable but also allows for greater precision in crafting each component.Step 2: Applying Glue and Securing
Sven proceeds to apply glue along one edge of the flange, ensuring a secure bond when clamped into place. He emphasizes that this stage is crucial for maintaining the structural integrity of the flange, which in turn safeguards the living area beneath the canvas when hatches are open.Step 3: Allowing Time to Dry
After securely attaching the first portion of the flange, Sven allows ample time for it to dry before moving forward with additional steps. This patience and precision are key aspects of his successful boatbuilding methods.Step 4: Finishing Touches
Once the flange is fully dried, Sven removes the clamps carefully, ensuring no damage occurs during this process. He then moves on to attaching four more pieces onto these main frames, completing two pairs of flanges for the bulkhead hatches.The Final Touches
While two flanges form the primary support structure around the hatches, Sven mentions there are two additional pieces required at each end to ensure comprehensive protection. This attention to detail highlights his commitment to producing a durable and reliable design. “Sailing is about finding your path, whether it’s across an ocean or within yourself.” – Sven Yrvind In conclusion, making flanges around bulkhead hatches may seem complex at first glance, but by following Sven Yrvind’s meticulous process, enthusiasts can achieve professional-level results. Remember that the journey of boatbuilding is as rewarding as reaching your destination; it tests one’s patience and dedication. For those seeking to embark on this adventure or simply gain more insight into marine craftsmanship, Sven’s wisdom is invaluable.Sven Yrvind, a renowned yacht designer and sailor, shares valuable insights on creating flanges around bulkhead hatches for canvas protection in this enlightening video. By following his expert guidance, boat enthusiasts can ensure their living areas remain secure while allowing unhindered access through the hatches.Step 1: Starting with the Flange
Sven begins by explaining that working on flanges vertically and horizontally is significantly easier than doing so in a flat position. To simplify the process further, he divides the task into two or three steps as suggested by fellow expert “for for.” This approach not only makes it more manageable but also allows for greater precision in crafting each component.Step 2: Applying Glue and Securing
Sven proceeds to apply glue along one edge of the flange, ensuring a secure bond when clamped into place. He emphasizes that this stage is crucial for maintaining the structural integrity of the flange, which in turn safeguards the living area beneath the canvas when hatches are open.Step 3: Allowing Time to Dry
After securely attaching the first portion of the flange, Sven allows ample time for it to dry before moving forward with additional steps. This patience and precision are key aspects of his successful boatbuilding methods.Step 4: Finishing Touches
Once the flange is fully dried, Sven removes the clamps carefully, ensuring no damage occurs during this process. He then moves on to attaching four more pieces onto these main frames, completing two pairs of flanges for the bulkhead hatches.The Final Touches
While two flanges form the primary support structure around the hatches, Sven mentions there are two additional pieces required at each end to ensure comprehensive protection. This attention to detail highlights his commitment to producing a durable and reliable design. “Sailing is about finding your path, whether it’s across an ocean or within yourself.” – Sven Yrvind In conclusion, making flanges around bulkhead hatches may seem complex at first glance, but by following Sven Yrvind’s meticulous process, enthusiasts can achieve professional-level results. Remember that the journey of boatbuilding is as rewarding as reaching your destination; it tests one’s patience and dedication. For those seeking to embark on this adventure or simply gain more insight into marine craftsmanship, Sven’s wisdom is invaluable.Making Flanges Around Bulkhead Hatches for Canvas
Sven Yrvind, a renowned yacht designer and sailor, shares valuable insights on creating flanges around bulkhead hatches for canvas protection in this enlightening video. By following his expert guidance, boat enthusiasts can ensure their living areas remain secure while allowing unhindered access through the hatches.Step 1: Starting with the Flange
Sven begins by explaining that working on flanges vertically and horizontally is significantly easier than doing so in a flat position. To simplify the process further, he divides the task into two or three steps as suggested by fellow expert “for for.” This approach not only makes it more manageable but also allows for greater precision in crafting each component.Step 2: Applying Glue and Securing
Sven proceeds to apply glue along one edge of the flange, ensuring a secure bond when clamped into place. He emphasizes that this stage is crucial for maintaining the structural integrity of the flange, which in turn safeguards the living area beneath the canvas when hatches are open.Step 3: Allowing Time to Dry
After securely attaching the first portion of the flange, Sven allows ample time for it to dry before moving forward with additional steps. This patience and precision are key aspects of his successful boatbuilding methods.Step 4: Finishing Touches
Once the flange is fully dried, Sven removes the clamps carefully, ensuring no damage occurs during this process. He then moves on to attaching four more pieces onto these main frames, completing two pairs of flanges for the bulkhead hatches.The Final Touches
While two flanges form the primary support structure around the hatches, Sven mentions there are two additional pieces required at each end to ensure comprehensive protection. This attention to detail highlights his commitment to producing a durable and reliable design. “Sailing is about finding your path, whether it’s across an ocean or within yourself.” – Sven Yrvind In conclusion, making flanges around bulkhead hatches may seem complex at first glance, but by following Sven Yrvind’s meticulous process, enthusiasts can achieve professional-level results. Remember that the journey of boatbuilding is as rewarding as reaching your destination; it tests one’s patience and dedication. For those seeking to embark on this adventure or simply gain more insight into marine craftsmanship, Sven’s wisdom is invaluable.After securely attaching the first portion of the flange, Sven allows ample time for it to dry before moving forward with additional steps. This patience and precision are key aspects of his successful boatbuilding methods.Step 4: Finishing Touches
Once the flange is fully dried, Sven removes the clamps carefully, ensuring no damage occurs during this process. He then moves on to attaching four more pieces onto these main frames, completing two pairs of flanges for the bulkhead hatches.The Final Touches
While two flanges form the primary support structure around the hatches, Sven mentions there are two additional pieces required at each end to ensure comprehensive protection. This attention to detail highlights his commitment to producing a durable and reliable design. “Sailing is about finding your path, whether it’s across an ocean or within yourself.” – Sven Yrvind In conclusion, making flanges around bulkhead hatches may seem complex at first glance, but by following Sven Yrvind’s meticulous process, enthusiasts can achieve professional-level results. Remember that the journey of boatbuilding is as rewarding as reaching your destination; it tests one’s patience and dedication. For those seeking to embark on this adventure or simply gain more insight into marine craftsmanship, Sven’s wisdom is invaluable.Sven Yrvind, a renowned yacht designer and sailor, shares valuable insights on creating flanges around bulkhead hatches for canvas protection in this enlightening video. By following his expert guidance, boat enthusiasts can ensure their living areas remain secure while allowing unhindered access through the hatches.Step 1: Starting with the Flange
Sven begins by explaining that working on flanges vertically and horizontally is significantly easier than doing so in a flat position. To simplify the process further, he divides the task into two or three steps as suggested by fellow expert “for for.” This approach not only makes it more manageable but also allows for greater precision in crafting each component.Step 2: Applying Glue and Securing
Sven proceeds to apply glue along one edge of the flange, ensuring a secure bond when clamped into place. He emphasizes that this stage is crucial for maintaining the structural integrity of the flange, which in turn safeguards the living area beneath the canvas when hatches are open.Step 3: Allowing Time to Dry
After securely attaching the first portion of the flange, Sven allows ample time for it to dry before moving forward with additional steps. This patience and precision are key aspects of his successful boatbuilding methods.Step 4: Finishing Touches
Once the flange is fully dried, Sven removes the clamps carefully, ensuring no damage occurs during this process. He then moves on to attaching four more pieces onto these main frames, completing two pairs of flanges for the bulkhead hatches.The Final Touches
While two flanges form the primary support structure around the hatches, Sven mentions there are two additional pieces required at each end to ensure comprehensive protection. This attention to detail highlights his commitment to producing a durable and reliable design. “Sailing is about finding your path, whether it’s across an ocean or within yourself.” – Sven Yrvind In conclusion, making flanges around bulkhead hatches may seem complex at first glance, but by following Sven Yrvind’s meticulous process, enthusiasts can achieve professional-level results. Remember that the journey of boatbuilding is as rewarding as reaching your destination; it tests one’s patience and dedication. For those seeking to embark on this adventure or simply gain more insight into marine craftsmanship, Sven’s wisdom is invaluable.Making Flanges Around Bulkhead Hatches for Canvas
Sven Yrvind, a renowned yacht designer and sailor, shares valuable insights on creating flanges around bulkhead hatches for canvas protection in this enlightening video. By following his expert guidance, boat enthusiasts can ensure their living areas remain secure while allowing unhindered access through the hatches.Step 1: Starting with the Flange
Sven begins by explaining that working on flanges vertically and horizontally is significantly easier than doing so in a flat position. To simplify the process further, he divides the task into two or three steps as suggested by fellow expert “for for.” This approach not only makes it more manageable but also allows for greater precision in crafting each component.Step 2: Applying Glue and Securing
Sven proceeds to apply glue along one edge of the flange, ensuring a secure bond when clamped into place. He emphasizes that this stage is crucial for maintaining the structural integrity of the flange, which in turn safeguards the living area beneath the canvas when hatches are open.Step 3: Allowing Time to Dry
After securely attaching the first portion of the flange, Sven allows ample time for it to dry before moving forward with additional steps. This patience and precision are key aspects of his successful boatbuilding methods.Step 4: Finishing Touches
Once the flange is fully dried, Sven removes the clamps carefully, ensuring no damage occurs during this process. He then moves on to attaching four more pieces onto these main frames, completing two pairs of flanges for the bulkhead hatches.The Final Touches
While two flanges form the primary support structure around the hatches, Sven mentions there are two additional pieces required at each end to ensure comprehensive protection. This attention to detail highlights his commitment to producing a durable and reliable design. “Sailing is about finding your path, whether it’s across an ocean or within yourself.” – Sven Yrvind In conclusion, making flanges around bulkhead hatches may seem complex at first glance, but by following Sven Yrvind’s meticulous process, enthusiasts can achieve professional-level results. Remember that the journey of boatbuilding is as rewarding as reaching your destination; it tests one’s patience and dedication. For those seeking to embark on this adventure or simply gain more insight into marine craftsmanship, Sven’s wisdom is invaluable.Sven proceeds to apply glue along one edge of the flange, ensuring a secure bond when clamped into place. He emphasizes that this stage is crucial for maintaining the structural integrity of the flange, which in turn safeguards the living area beneath the canvas when hatches are open.Step 3: Allowing Time to Dry
After securely attaching the first portion of the flange, Sven allows ample time for it to dry before moving forward with additional steps. This patience and precision are key aspects of his successful boatbuilding methods.Step 4: Finishing Touches
Once the flange is fully dried, Sven removes the clamps carefully, ensuring no damage occurs during this process. He then moves on to attaching four more pieces onto these main frames, completing two pairs of flanges for the bulkhead hatches.The Final Touches
While two flanges form the primary support structure around the hatches, Sven mentions there are two additional pieces required at each end to ensure comprehensive protection. This attention to detail highlights his commitment to producing a durable and reliable design. “Sailing is about finding your path, whether it’s across an ocean or within yourself.” – Sven Yrvind In conclusion, making flanges around bulkhead hatches may seem complex at first glance, but by following Sven Yrvind’s meticulous process, enthusiasts can achieve professional-level results. Remember that the journey of boatbuilding is as rewarding as reaching your destination; it tests one’s patience and dedication. For those seeking to embark on this adventure or simply gain more insight into marine craftsmanship, Sven’s wisdom is invaluable.Sven Yrvind, a renowned yacht designer and sailor, shares valuable insights on creating flanges around bulkhead hatches for canvas protection in this enlightening video. By following his expert guidance, boat enthusiasts can ensure their living areas remain secure while allowing unhindered access through the hatches.Step 1: Starting with the Flange
Sven begins by explaining that working on flanges vertically and horizontally is significantly easier than doing so in a flat position. To simplify the process further, he divides the task into two or three steps as suggested by fellow expert “for for.” This approach not only makes it more manageable but also allows for greater precision in crafting each component.Step 2: Applying Glue and Securing
Sven proceeds to apply glue along one edge of the flange, ensuring a secure bond when clamped into place. He emphasizes that this stage is crucial for maintaining the structural integrity of the flange, which in turn safeguards the living area beneath the canvas when hatches are open.Step 3: Allowing Time to Dry
After securely attaching the first portion of the flange, Sven allows ample time for it to dry before moving forward with additional steps. This patience and precision are key aspects of his successful boatbuilding methods.Step 4: Finishing Touches
Once the flange is fully dried, Sven removes the clamps carefully, ensuring no damage occurs during this process. He then moves on to attaching four more pieces onto these main frames, completing two pairs of flanges for the bulkhead hatches.The Final Touches
While two flanges form the primary support structure around the hatches, Sven mentions there are two additional pieces required at each end to ensure comprehensive protection. This attention to detail highlights his commitment to producing a durable and reliable design. “Sailing is about finding your path, whether it’s across an ocean or within yourself.” – Sven Yrvind In conclusion, making flanges around bulkhead hatches may seem complex at first glance, but by following Sven Yrvind’s meticulous process, enthusiasts can achieve professional-level results. Remember that the journey of boatbuilding is as rewarding as reaching your destination; it tests one’s patience and dedication. For those seeking to embark on this adventure or simply gain more insight into marine craftsmanship, Sven’s wisdom is invaluable.Making Flanges Around Bulkhead Hatches for Canvas
Sven Yrvind, a renowned yacht designer and sailor, shares valuable insights on creating flanges around bulkhead hatches for canvas protection in this enlightening video. By following his expert guidance, boat enthusiasts can ensure their living areas remain secure while allowing unhindered access through the hatches.Step 1: Starting with the Flange
Sven begins by explaining that working on flanges vertically and horizontally is significantly easier than doing so in a flat position. To simplify the process further, he divides the task into two or three steps as suggested by fellow expert “for for.” This approach not only makes it more manageable but also allows for greater precision in crafting each component.Step 2: Applying Glue and Securing
Sven proceeds to apply glue along one edge of the flange, ensuring a secure bond when clamped into place. He emphasizes that this stage is crucial for maintaining the structural integrity of the flange, which in turn safeguards the living area beneath the canvas when hatches are open.Step 3: Allowing Time to Dry
After securely attaching the first portion of the flange, Sven allows ample time for it to dry before moving forward with additional steps. This patience and precision are key aspects of his successful boatbuilding methods.Step 4: Finishing Touches
Once the flange is fully dried, Sven removes the clamps carefully, ensuring no damage occurs during this process. He then moves on to attaching four more pieces onto these main frames, completing two pairs of flanges for the bulkhead hatches.The Final Touches
While two flanges form the primary support structure around the hatches, Sven mentions there are two additional pieces required at each end to ensure comprehensive protection. This attention to detail highlights his commitment to producing a durable and reliable design. “Sailing is about finding your path, whether it’s across an ocean or within yourself.” – Sven Yrvind In conclusion, making flanges around bulkhead hatches may seem complex at first glance, but by following Sven Yrvind’s meticulous process, enthusiasts can achieve professional-level results. Remember that the journey of boatbuilding is as rewarding as reaching your destination; it tests one’s patience and dedication. For those seeking to embark on this adventure or simply gain more insight into marine craftsmanship, Sven’s wisdom is invaluable.Sven begins by explaining that working on flanges vertically and horizontally is significantly easier than doing so in a flat position. To simplify the process further, he divides the task into two or three steps as suggested by fellow expert “for for.” This approach not only makes it more manageable but also allows for greater precision in crafting each component.Step 2: Applying Glue and Securing
Sven proceeds to apply glue along one edge of the flange, ensuring a secure bond when clamped into place. He emphasizes that this stage is crucial for maintaining the structural integrity of the flange, which in turn safeguards the living area beneath the canvas when hatches are open.Step 3: Allowing Time to Dry
After securely attaching the first portion of the flange, Sven allows ample time for it to dry before moving forward with additional steps. This patience and precision are key aspects of his successful boatbuilding methods.Step 4: Finishing Touches
Once the flange is fully dried, Sven removes the clamps carefully, ensuring no damage occurs during this process. He then moves on to attaching four more pieces onto these main frames, completing two pairs of flanges for the bulkhead hatches.The Final Touches
While two flanges form the primary support structure around the hatches, Sven mentions there are two additional pieces required at each end to ensure comprehensive protection. This attention to detail highlights his commitment to producing a durable and reliable design. “Sailing is about finding your path, whether it’s across an ocean or within yourself.” – Sven Yrvind In conclusion, making flanges around bulkhead hatches may seem complex at first glance, but by following Sven Yrvind’s meticulous process, enthusiasts can achieve professional-level results. Remember that the journey of boatbuilding is as rewarding as reaching your destination; it tests one’s patience and dedication. For those seeking to embark on this adventure or simply gain more insight into marine craftsmanship, Sven’s wisdom is invaluable.Sven Yrvind, a renowned yacht designer and sailor, shares valuable insights on creating flanges around bulkhead hatches for canvas protection in this enlightening video. By following his expert guidance, boat enthusiasts can ensure their living areas remain secure while allowing unhindered access through the hatches.Step 1: Starting with the Flange
Sven begins by explaining that working on flanges vertically and horizontally is significantly easier than doing so in a flat position. To simplify the process further, he divides the task into two or three steps as suggested by fellow expert “for for.” This approach not only makes it more manageable but also allows for greater precision in crafting each component.Step 2: Applying Glue and Securing
Sven proceeds to apply glue along one edge of the flange, ensuring a secure bond when clamped into place. He emphasizes that this stage is crucial for maintaining the structural integrity of the flange, which in turn safeguards the living area beneath the canvas when hatches are open.Step 3: Allowing Time to Dry
After securely attaching the first portion of the flange, Sven allows ample time for it to dry before moving forward with additional steps. This patience and precision are key aspects of his successful boatbuilding methods.Step 4: Finishing Touches
Once the flange is fully dried, Sven removes the clamps carefully, ensuring no damage occurs during this process. He then moves on to attaching four more pieces onto these main frames, completing two pairs of flanges for the bulkhead hatches.The Final Touches
While two flanges form the primary support structure around the hatches, Sven mentions there are two additional pieces required at each end to ensure comprehensive protection. This attention to detail highlights his commitment to producing a durable and reliable design. “Sailing is about finding your path, whether it’s across an ocean or within yourself.” – Sven Yrvind In conclusion, making flanges around bulkhead hatches may seem complex at first glance, but by following Sven Yrvind’s meticulous process, enthusiasts can achieve professional-level results. Remember that the journey of boatbuilding is as rewarding as reaching your destination; it tests one’s patience and dedication. For those seeking to embark on this adventure or simply gain more insight into marine craftsmanship, Sven’s wisdom is invaluable.Making Flanges Around Bulkhead Hatches for Canvas
Sven Yrvind, a renowned yacht designer and sailor, shares valuable insights on creating flanges around bulkhead hatches for canvas protection in this enlightening video. By following his expert guidance, boat enthusiasts can ensure their living areas remain secure while allowing unhindered access through the hatches.Step 1: Starting with the Flange
Sven begins by explaining that working on flanges vertically and horizontally is significantly easier than doing so in a flat position. To simplify the process further, he divides the task into two or three steps as suggested by fellow expert “for for.” This approach not only makes it more manageable but also allows for greater precision in crafting each component.Step 2: Applying Glue and Securing
Sven proceeds to apply glue along one edge of the flange, ensuring a secure bond when clamped into place. He emphasizes that this stage is crucial for maintaining the structural integrity of the flange, which in turn safeguards the living area beneath the canvas when hatches are open.Step 3: Allowing Time to Dry
After securely attaching the first portion of the flange, Sven allows ample time for it to dry before moving forward with additional steps. This patience and precision are key aspects of his successful boatbuilding methods.Step 4: Finishing Touches
Once the flange is fully dried, Sven removes the clamps carefully, ensuring no damage occurs during this process. He then moves on to attaching four more pieces onto these main frames, completing two pairs of flanges for the bulkhead hatches.The Final Touches
While two flanges form the primary support structure around the hatches, Sven mentions there are two additional pieces required at each end to ensure comprehensive protection. This attention to detail highlights his commitment to producing a durable and reliable design. “Sailing is about finding your path, whether it’s across an ocean or within yourself.” – Sven Yrvind In conclusion, making flanges around bulkhead hatches may seem complex at first glance, but by following Sven Yrvind’s meticulous process, enthusiasts can achieve professional-level results. Remember that the journey of boatbuilding is as rewarding as reaching your destination; it tests one’s patience and dedication. For those seeking to embark on this adventure or simply gain more insight into marine craftsmanship, Sven’s wisdom is invaluable.Once the flange is fully dried, Sven removes the clamps carefully, ensuring no damage occurs during this process. He then moves on to attaching four more pieces onto these main frames, completing two pairs of flanges for the bulkhead hatches.The Final Touches
While two flanges form the primary support structure around the hatches, Sven mentions there are two additional pieces required at each end to ensure comprehensive protection. This attention to detail highlights his commitment to producing a durable and reliable design. “Sailing is about finding your path, whether it’s across an ocean or within yourself.” – Sven Yrvind In conclusion, making flanges around bulkhead hatches may seem complex at first glance, but by following Sven Yrvind’s meticulous process, enthusiasts can achieve professional-level results. Remember that the journey of boatbuilding is as rewarding as reaching your destination; it tests one’s patience and dedication. For those seeking to embark on this adventure or simply gain more insight into marine craftsmanship, Sven’s wisdom is invaluable.Sven begins by explaining that working on flanges vertically and horizontally is significantly easier than doing so in a flat position. To simplify the process further, he divides the task into two or three steps as suggested by fellow expert “for for.” This approach not only makes it more manageable but also allows for greater precision in crafting each component.Step 2: Applying Glue and Securing
Sven proceeds to apply glue along one edge of the flange, ensuring a secure bond when clamped into place. He emphasizes that this stage is crucial for maintaining the structural integrity of the flange, which in turn safeguards the living area beneath the canvas when hatches are open.Step 3: Allowing Time to Dry
After securely attaching the first portion of the flange, Sven allows ample time for it to dry before moving forward with additional steps. This patience and precision are key aspects of his successful boatbuilding methods.Step 4: Finishing Touches
Once the flange is fully dried, Sven removes the clamps carefully, ensuring no damage occurs during this process. He then moves on to attaching four more pieces onto these main frames, completing two pairs of flanges for the bulkhead hatches.The Final Touches
While two flanges form the primary support structure around the hatches, Sven mentions there are two additional pieces required at each end to ensure comprehensive protection. This attention to detail highlights his commitment to producing a durable and reliable design. “Sailing is about finding your path, whether it’s across an ocean or within yourself.” – Sven Yrvind In conclusion, making flanges around bulkhead hatches may seem complex at first glance, but by following Sven Yrvind’s meticulous process, enthusiasts can achieve professional-level results. Remember that the journey of boatbuilding is as rewarding as reaching your destination; it tests one’s patience and dedication. For those seeking to embark on this adventure or simply gain more insight into marine craftsmanship, Sven’s wisdom is invaluable.Sven Yrvind, a renowned yacht designer and sailor, shares valuable insights on creating flanges around bulkhead hatches for canvas protection in this enlightening video. By following his expert guidance, boat enthusiasts can ensure their living areas remain secure while allowing unhindered access through the hatches.Step 1: Starting with the Flange
Sven begins by explaining that working on flanges vertically and horizontally is significantly easier than doing so in a flat position. To simplify the process further, he divides the task into two or three steps as suggested by fellow expert “for for.” This approach not only makes it more manageable but also allows for greater precision in crafting each component.Step 2: Applying Glue and Securing
Sven proceeds to apply glue along one edge of the flange, ensuring a secure bond when clamped into place. He emphasizes that this stage is crucial for maintaining the structural integrity of the flange, which in turn safeguards the living area beneath the canvas when hatches are open.Step 3: Allowing Time to Dry
After securely attaching the first portion of the flange, Sven allows ample time for it to dry before moving forward with additional steps. This patience and precision are key aspects of his successful boatbuilding methods.Step 4: Finishing Touches
Once the flange is fully dried, Sven removes the clamps carefully, ensuring no damage occurs during this process. He then moves on to attaching four more pieces onto these main frames, completing two pairs of flanges for the bulkhead hatches.The Final Touches
While two flanges form the primary support structure around the hatches, Sven mentions there are two additional pieces required at each end to ensure comprehensive protection. This attention to detail highlights his commitment to producing a durable and reliable design. “Sailing is about finding your path, whether it’s across an ocean or within yourself.” – Sven Yrvind In conclusion, making flanges around bulkhead hatches may seem complex at first glance, but by following Sven Yrvind’s meticulous process, enthusiasts can achieve professional-level results. Remember that the journey of boatbuilding is as rewarding as reaching your destination; it tests one’s patience and dedication. For those seeking to embark on this adventure or simply gain more insight into marine craftsmanship, Sven’s wisdom is invaluable.Making Flanges Around Bulkhead Hatches for Canvas
Sven Yrvind, a renowned yacht designer and sailor, shares valuable insights on creating flanges around bulkhead hatches for canvas protection in this enlightening video. By following his expert guidance, boat enthusiasts can ensure their living areas remain secure while allowing unhindered access through the hatches.Step 1: Starting with the Flange
Sven begins by explaining that working on flanges vertically and horizontally is significantly easier than doing so in a flat position. To simplify the process further, he divides the task into two or three steps as suggested by fellow expert “for for.” This approach not only makes it more manageable but also allows for greater precision in crafting each component.Step 2: Applying Glue and Securing
Sven proceeds to apply glue along one edge of the flange, ensuring a secure bond when clamped into place. He emphasizes that this stage is crucial for maintaining the structural integrity of the flange, which in turn safeguards the living area beneath the canvas when hatches are open.Step 3: Allowing Time to Dry
After securely attaching the first portion of the flange, Sven allows ample time for it to dry before moving forward with additional steps. This patience and precision are key aspects of his successful boatbuilding methods.Step 4: Finishing Touches
Once the flange is fully dried, Sven removes the clamps carefully, ensuring no damage occurs during this process. He then moves on to attaching four more pieces onto these main frames, completing two pairs of flanges for the bulkhead hatches.The Final Touches
While two flanges form the primary support structure around the hatches, Sven mentions there are two additional pieces required at each end to ensure comprehensive protection. This attention to detail highlights his commitment to producing a durable and reliable design. “Sailing is about finding your path, whether it’s across an ocean or within yourself.” – Sven Yrvind In conclusion, making flanges around bulkhead hatches may seem complex at first glance, but by following Sven Yrvind’s meticulous process, enthusiasts can achieve professional-level results. Remember that the journey of boatbuilding is as rewarding as reaching your destination; it tests one’s patience and dedication. For those seeking to embark on this adventure or simply gain more insight into marine craftsmanship, Sven’s wisdom is invaluable.After securely attaching the first portion of the flange, Sven allows ample time for it to dry before moving forward with additional steps. This patience and precision are key aspects of his successful boatbuilding methods.Step 4: Finishing Touches
Once the flange is fully dried, Sven removes the clamps carefully, ensuring no damage occurs during this process. He then moves on to attaching four more pieces onto these main frames, completing two pairs of flanges for the bulkhead hatches.The Final Touches
While two flanges form the primary support structure around the hatches, Sven mentions there are two additional pieces required at each end to ensure comprehensive protection. This attention to detail highlights his commitment to producing a durable and reliable design. “Sailing is about finding your path, whether it’s across an ocean or within yourself.” – Sven Yrvind In conclusion, making flanges around bulkhead hatches may seem complex at first glance, but by following Sven Yrvind’s meticulous process, enthusiasts can achieve professional-level results. Remember that the journey of boatbuilding is as rewarding as reaching your destination; it tests one’s patience and dedication. For those seeking to embark on this adventure or simply gain more insight into marine craftsmanship, Sven’s wisdom is invaluable.Sven begins by explaining that working on flanges vertically and horizontally is significantly easier than doing so in a flat position. To simplify the process further, he divides the task into two or three steps as suggested by fellow expert “for for.” This approach not only makes it more manageable but also allows for greater precision in crafting each component.Step 2: Applying Glue and Securing
Sven proceeds to apply glue along one edge of the flange, ensuring a secure bond when clamped into place. He emphasizes that this stage is crucial for maintaining the structural integrity of the flange, which in turn safeguards the living area beneath the canvas when hatches are open.Step 3: Allowing Time to Dry
After securely attaching the first portion of the flange, Sven allows ample time for it to dry before moving forward with additional steps. This patience and precision are key aspects of his successful boatbuilding methods.Step 4: Finishing Touches
Once the flange is fully dried, Sven removes the clamps carefully, ensuring no damage occurs during this process. He then moves on to attaching four more pieces onto these main frames, completing two pairs of flanges for the bulkhead hatches.The Final Touches
While two flanges form the primary support structure around the hatches, Sven mentions there are two additional pieces required at each end to ensure comprehensive protection. This attention to detail highlights his commitment to producing a durable and reliable design. “Sailing is about finding your path, whether it’s across an ocean or within yourself.” – Sven Yrvind In conclusion, making flanges around bulkhead hatches may seem complex at first glance, but by following Sven Yrvind’s meticulous process, enthusiasts can achieve professional-level results. Remember that the journey of boatbuilding is as rewarding as reaching your destination; it tests one’s patience and dedication. For those seeking to embark on this adventure or simply gain more insight into marine craftsmanship, Sven’s wisdom is invaluable.Sven Yrvind, a renowned yacht designer and sailor, shares valuable insights on creating flanges around bulkhead hatches for canvas protection in this enlightening video. By following his expert guidance, boat enthusiasts can ensure their living areas remain secure while allowing unhindered access through the hatches.Step 1: Starting with the Flange
Sven begins by explaining that working on flanges vertically and horizontally is significantly easier than doing so in a flat position. To simplify the process further, he divides the task into two or three steps as suggested by fellow expert “for for.” This approach not only makes it more manageable but also allows for greater precision in crafting each component.Step 2: Applying Glue and Securing
Sven proceeds to apply glue along one edge of the flange, ensuring a secure bond when clamped into place. He emphasizes that this stage is crucial for maintaining the structural integrity of the flange, which in turn safeguards the living area beneath the canvas when hatches are open.Step 3: Allowing Time to Dry
After securely attaching the first portion of the flange, Sven allows ample time for it to dry before moving forward with additional steps. This patience and precision are key aspects of his successful boatbuilding methods.Step 4: Finishing Touches
Once the flange is fully dried, Sven removes the clamps carefully, ensuring no damage occurs during this process. He then moves on to attaching four more pieces onto these main frames, completing two pairs of flanges for the bulkhead hatches.The Final Touches
While two flanges form the primary support structure around the hatches, Sven mentions there are two additional pieces required at each end to ensure comprehensive protection. This attention to detail highlights his commitment to producing a durable and reliable design. “Sailing is about finding your path, whether it’s across an ocean or within yourself.” – Sven Yrvind In conclusion, making flanges around bulkhead hatches may seem complex at first glance, but by following Sven Yrvind’s meticulous process, enthusiasts can achieve professional-level results. Remember that the journey of boatbuilding is as rewarding as reaching your destination; it tests one’s patience and dedication. For those seeking to embark on this adventure or simply gain more insight into marine craftsmanship, Sven’s wisdom is invaluable.Making Flanges Around Bulkhead Hatches for Canvas
Sven Yrvind, a renowned yacht designer and sailor, shares valuable insights on creating flanges around bulkhead hatches for canvas protection in this enlightening video. By following his expert guidance, boat enthusiasts can ensure their living areas remain secure while allowing unhindered access through the hatches.Step 1: Starting with the Flange
Sven begins by explaining that working on flanges vertically and horizontally is significantly easier than doing so in a flat position. To simplify the process further, he divides the task into two or three steps as suggested by fellow expert “for for.” This approach not only makes it more manageable but also allows for greater precision in crafting each component.Step 2: Applying Glue and Securing
Sven proceeds to apply glue along one edge of the flange, ensuring a secure bond when clamped into place. He emphasizes that this stage is crucial for maintaining the structural integrity of the flange, which in turn safeguards the living area beneath the canvas when hatches are open.Step 3: Allowing Time to Dry
After securely attaching the first portion of the flange, Sven allows ample time for it to dry before moving forward with additional steps. This patience and precision are key aspects of his successful boatbuilding methods.Step 4: Finishing Touches
Once the flange is fully dried, Sven removes the clamps carefully, ensuring no damage occurs during this process. He then moves on to attaching four more pieces onto these main frames, completing two pairs of flanges for the bulkhead hatches.The Final Touches
While two flanges form the primary support structure around the hatches, Sven mentions there are two additional pieces required at each end to ensure comprehensive protection. This attention to detail highlights his commitment to producing a durable and reliable design. “Sailing is about finding your path, whether it’s across an ocean or within yourself.” – Sven Yrvind In conclusion, making flanges around bulkhead hatches may seem complex at first glance, but by following Sven Yrvind’s meticulous process, enthusiasts can achieve professional-level results. Remember that the journey of boatbuilding is as rewarding as reaching your destination; it tests one’s patience and dedication. For those seeking to embark on this adventure or simply gain more insight into marine craftsmanship, Sven’s wisdom is invaluable.Sven proceeds to apply glue along one edge of the flange, ensuring a secure bond when clamped into place. He emphasizes that this stage is crucial for maintaining the structural integrity of the flange, which in turn safeguards the living area beneath the canvas when hatches are open.Step 3: Allowing Time to Dry
After securely attaching the first portion of the flange, Sven allows ample time for it to dry before moving forward with additional steps. This patience and precision are key aspects of his successful boatbuilding methods.Step 4: Finishing Touches
Once the flange is fully dried, Sven removes the clamps carefully, ensuring no damage occurs during this process. He then moves on to attaching four more pieces onto these main frames, completing two pairs of flanges for the bulkhead hatches.The Final Touches
While two flanges form the primary support structure around the hatches, Sven mentions there are two additional pieces required at each end to ensure comprehensive protection. This attention to detail highlights his commitment to producing a durable and reliable design. “Sailing is about finding your path, whether it’s across an ocean or within yourself.” – Sven Yrvind In conclusion, making flanges around bulkhead hatches may seem complex at first glance, but by following Sven Yrvind’s meticulous process, enthusiasts can achieve professional-level results. Remember that the journey of boatbuilding is as rewarding as reaching your destination; it tests one’s patience and dedication. For those seeking to embark on this adventure or simply gain more insight into marine craftsmanship, Sven’s wisdom is invaluable.Sven begins by explaining that working on flanges vertically and horizontally is significantly easier than doing so in a flat position. To simplify the process further, he divides the task into two or three steps as suggested by fellow expert “for for.” This approach not only makes it more manageable but also allows for greater precision in crafting each component.Step 2: Applying Glue and Securing
Sven proceeds to apply glue along one edge of the flange, ensuring a secure bond when clamped into place. He emphasizes that this stage is crucial for maintaining the structural integrity of the flange, which in turn safeguards the living area beneath the canvas when hatches are open.Step 3: Allowing Time to Dry
After securely attaching the first portion of the flange, Sven allows ample time for it to dry before moving forward with additional steps. This patience and precision are key aspects of his successful boatbuilding methods.Step 4: Finishing Touches
Once the flange is fully dried, Sven removes the clamps carefully, ensuring no damage occurs during this process. He then moves on to attaching four more pieces onto these main frames, completing two pairs of flanges for the bulkhead hatches.The Final Touches
While two flanges form the primary support structure around the hatches, Sven mentions there are two additional pieces required at each end to ensure comprehensive protection. This attention to detail highlights his commitment to producing a durable and reliable design. “Sailing is about finding your path, whether it’s across an ocean or within yourself.” – Sven Yrvind In conclusion, making flanges around bulkhead hatches may seem complex at first glance, but by following Sven Yrvind’s meticulous process, enthusiasts can achieve professional-level results. Remember that the journey of boatbuilding is as rewarding as reaching your destination; it tests one’s patience and dedication. For those seeking to embark on this adventure or simply gain more insight into marine craftsmanship, Sven’s wisdom is invaluable.Sven Yrvind, a renowned yacht designer and sailor, shares valuable insights on creating flanges around bulkhead hatches for canvas protection in this enlightening video. By following his expert guidance, boat enthusiasts can ensure their living areas remain secure while allowing unhindered access through the hatches.Step 1: Starting with the Flange
Sven begins by explaining that working on flanges vertically and horizontally is significantly easier than doing so in a flat position. To simplify the process further, he divides the task into two or three steps as suggested by fellow expert “for for.” This approach not only makes it more manageable but also allows for greater precision in crafting each component.Step 2: Applying Glue and Securing
Sven proceeds to apply glue along one edge of the flange, ensuring a secure bond when clamped into place. He emphasizes that this stage is crucial for maintaining the structural integrity of the flange, which in turn safeguards the living area beneath the canvas when hatches are open.Step 3: Allowing Time to Dry
After securely attaching the first portion of the flange, Sven allows ample time for it to dry before moving forward with additional steps. This patience and precision are key aspects of his successful boatbuilding methods.Step 4: Finishing Touches
Once the flange is fully dried, Sven removes the clamps carefully, ensuring no damage occurs during this process. He then moves on to attaching four more pieces onto these main frames, completing two pairs of flanges for the bulkhead hatches.The Final Touches
While two flanges form the primary support structure around the hatches, Sven mentions there are two additional pieces required at each end to ensure comprehensive protection. This attention to detail highlights his commitment to producing a durable and reliable design. “Sailing is about finding your path, whether it’s across an ocean or within yourself.” – Sven Yrvind In conclusion, making flanges around bulkhead hatches may seem complex at first glance, but by following Sven Yrvind’s meticulous process, enthusiasts can achieve professional-level results. Remember that the journey of boatbuilding is as rewarding as reaching your destination; it tests one’s patience and dedication. For those seeking to embark on this adventure or simply gain more insight into marine craftsmanship, Sven’s wisdom is invaluable.Making Flanges Around Bulkhead Hatches for Canvas
Sven Yrvind, a renowned yacht designer and sailor, shares valuable insights on creating flanges around bulkhead hatches for canvas protection in this enlightening video. By following his expert guidance, boat enthusiasts can ensure their living areas remain secure while allowing unhindered access through the hatches.Step 1: Starting with the Flange
Sven begins by explaining that working on flanges vertically and horizontally is significantly easier than doing so in a flat position. To simplify the process further, he divides the task into two or three steps as suggested by fellow expert “for for.” This approach not only makes it more manageable but also allows for greater precision in crafting each component.Step 2: Applying Glue and Securing
Sven proceeds to apply glue along one edge of the flange, ensuring a secure bond when clamped into place. He emphasizes that this stage is crucial for maintaining the structural integrity of the flange, which in turn safeguards the living area beneath the canvas when hatches are open.Step 3: Allowing Time to Dry
After securely attaching the first portion of the flange, Sven allows ample time for it to dry before moving forward with additional steps. This patience and precision are key aspects of his successful boatbuilding methods.Step 4: Finishing Touches
Once the flange is fully dried, Sven removes the clamps carefully, ensuring no damage occurs during this process. He then moves on to attaching four more pieces onto these main frames, completing two pairs of flanges for the bulkhead hatches.The Final Touches
While two flanges form the primary support structure around the hatches, Sven mentions there are two additional pieces required at each end to ensure comprehensive protection. This attention to detail highlights his commitment to producing a durable and reliable design. “Sailing is about finding your path, whether it’s across an ocean or within yourself.” – Sven Yrvind In conclusion, making flanges around bulkhead hatches may seem complex at first glance, but by following Sven Yrvind’s meticulous process, enthusiasts can achieve professional-level results. Remember that the journey of boatbuilding is as rewarding as reaching your destination; it tests one’s patience and dedication. For those seeking to embark on this adventure or simply gain more insight into marine craftsmanship, Sven’s wisdom is invaluable.Once the flange is fully dried, Sven removes the clamps carefully, ensuring no damage occurs during this process. He then moves on to attaching four more pieces onto these main frames, completing two pairs of flanges for the bulkhead hatches.The Final Touches
While two flanges form the primary support structure around the hatches, Sven mentions there are two additional pieces required at each end to ensure comprehensive protection. This attention to detail highlights his commitment to producing a durable and reliable design. “Sailing is about finding your path, whether it’s across an ocean or within yourself.” – Sven Yrvind In conclusion, making flanges around bulkhead hatches may seem complex at first glance, but by following Sven Yrvind’s meticulous process, enthusiasts can achieve professional-level results. Remember that the journey of boatbuilding is as rewarding as reaching your destination; it tests one’s patience and dedication. For those seeking to embark on this adventure or simply gain more insight into marine craftsmanship, Sven’s wisdom is invaluable.Sven proceeds to apply glue along one edge of the flange, ensuring a secure bond when clamped into place. He emphasizes that this stage is crucial for maintaining the structural integrity of the flange, which in turn safeguards the living area beneath the canvas when hatches are open.Step 3: Allowing Time to Dry
After securely attaching the first portion of the flange, Sven allows ample time for it to dry before moving forward with additional steps. This patience and precision are key aspects of his successful boatbuilding methods.Step 4: Finishing Touches
Once the flange is fully dried, Sven removes the clamps carefully, ensuring no damage occurs during this process. He then moves on to attaching four more pieces onto these main frames, completing two pairs of flanges for the bulkhead hatches.The Final Touches
While two flanges form the primary support structure around the hatches, Sven mentions there are two additional pieces required at each end to ensure comprehensive protection. This attention to detail highlights his commitment to producing a durable and reliable design. “Sailing is about finding your path, whether it’s across an ocean or within yourself.” – Sven Yrvind In conclusion, making flanges around bulkhead hatches may seem complex at first glance, but by following Sven Yrvind’s meticulous process, enthusiasts can achieve professional-level results. Remember that the journey of boatbuilding is as rewarding as reaching your destination; it tests one’s patience and dedication. For those seeking to embark on this adventure or simply gain more insight into marine craftsmanship, Sven’s wisdom is invaluable.Sven begins by explaining that working on flanges vertically and horizontally is significantly easier than doing so in a flat position. To simplify the process further, he divides the task into two or three steps as suggested by fellow expert “for for.” This approach not only makes it more manageable but also allows for greater precision in crafting each component.Step 2: Applying Glue and Securing
Sven proceeds to apply glue along one edge of the flange, ensuring a secure bond when clamped into place. He emphasizes that this stage is crucial for maintaining the structural integrity of the flange, which in turn safeguards the living area beneath the canvas when hatches are open.Step 3: Allowing Time to Dry
After securely attaching the first portion of the flange, Sven allows ample time for it to dry before moving forward with additional steps. This patience and precision are key aspects of his successful boatbuilding methods.Step 4: Finishing Touches
Once the flange is fully dried, Sven removes the clamps carefully, ensuring no damage occurs during this process. He then moves on to attaching four more pieces onto these main frames, completing two pairs of flanges for the bulkhead hatches.The Final Touches
While two flanges form the primary support structure around the hatches, Sven mentions there are two additional pieces required at each end to ensure comprehensive protection. This attention to detail highlights his commitment to producing a durable and reliable design. “Sailing is about finding your path, whether it’s across an ocean or within yourself.” – Sven Yrvind In conclusion, making flanges around bulkhead hatches may seem complex at first glance, but by following Sven Yrvind’s meticulous process, enthusiasts can achieve professional-level results. Remember that the journey of boatbuilding is as rewarding as reaching your destination; it tests one’s patience and dedication. For those seeking to embark on this adventure or simply gain more insight into marine craftsmanship, Sven’s wisdom is invaluable.Sven Yrvind, a renowned yacht designer and sailor, shares valuable insights on creating flanges around bulkhead hatches for canvas protection in this enlightening video. By following his expert guidance, boat enthusiasts can ensure their living areas remain secure while allowing unhindered access through the hatches.Step 1: Starting with the Flange
Sven begins by explaining that working on flanges vertically and horizontally is significantly easier than doing so in a flat position. To simplify the process further, he divides the task into two or three steps as suggested by fellow expert “for for.” This approach not only makes it more manageable but also allows for greater precision in crafting each component.Step 2: Applying Glue and Securing
Sven proceeds to apply glue along one edge of the flange, ensuring a secure bond when clamped into place. He emphasizes that this stage is crucial for maintaining the structural integrity of the flange, which in turn safeguards the living area beneath the canvas when hatches are open.Step 3: Allowing Time to Dry
After securely attaching the first portion of the flange, Sven allows ample time for it to dry before moving forward with additional steps. This patience and precision are key aspects of his successful boatbuilding methods.Step 4: Finishing Touches
Once the flange is fully dried, Sven removes the clamps carefully, ensuring no damage occurs during this process. He then moves on to attaching four more pieces onto these main frames, completing two pairs of flanges for the bulkhead hatches.The Final Touches
While two flanges form the primary support structure around the hatches, Sven mentions there are two additional pieces required at each end to ensure comprehensive protection. This attention to detail highlights his commitment to producing a durable and reliable design. “Sailing is about finding your path, whether it’s across an ocean or within yourself.” – Sven Yrvind In conclusion, making flanges around bulkhead hatches may seem complex at first glance, but by following Sven Yrvind’s meticulous process, enthusiasts can achieve professional-level results. Remember that the journey of boatbuilding is as rewarding as reaching your destination; it tests one’s patience and dedication. For those seeking to embark on this adventure or simply gain more insight into marine craftsmanship, Sven’s wisdom is invaluable.Making Flanges Around Bulkhead Hatches for Canvas
Sven Yrvind, a renowned yacht designer and sailor, shares valuable insights on creating flanges around bulkhead hatches for canvas protection in this enlightening video. By following his expert guidance, boat enthusiasts can ensure their living areas remain secure while allowing unhindered access through the hatches.Step 1: Starting with the Flange
Sven begins by explaining that working on flanges vertically and horizontally is significantly easier than doing so in a flat position. To simplify the process further, he divides the task into two or three steps as suggested by fellow expert “for for.” This approach not only makes it more manageable but also allows for greater precision in crafting each component.Step 2: Applying Glue and Securing
Sven proceeds to apply glue along one edge of the flange, ensuring a secure bond when clamped into place. He emphasizes that this stage is crucial for maintaining the structural integrity of the flange, which in turn safeguards the living area beneath the canvas when hatches are open.Step 3: Allowing Time to Dry
After securely attaching the first portion of the flange, Sven allows ample time for it to dry before moving forward with additional steps. This patience and precision are key aspects of his successful boatbuilding methods.Step 4: Finishing Touches
Once the flange is fully dried, Sven removes the clamps carefully, ensuring no damage occurs during this process. He then moves on to attaching four more pieces onto these main frames, completing two pairs of flanges for the bulkhead hatches.The Final Touches
While two flanges form the primary support structure around the hatches, Sven mentions there are two additional pieces required at each end to ensure comprehensive protection. This attention to detail highlights his commitment to producing a durable and reliable design. “Sailing is about finding your path, whether it’s across an ocean or within yourself.” – Sven Yrvind In conclusion, making flanges around bulkhead hatches may seem complex at first glance, but by following Sven Yrvind’s meticulous process, enthusiasts can achieve professional-level results. Remember that the journey of boatbuilding is as rewarding as reaching your destination; it tests one’s patience and dedication. For those seeking to embark on this adventure or simply gain more insight into marine craftsmanship, Sven’s wisdom is invaluable.After securely attaching the first portion of the flange, Sven allows ample time for it to dry before moving forward with additional steps. This patience and precision are key aspects of his successful boatbuilding methods.Step 4: Finishing Touches
Once the flange is fully dried, Sven removes the clamps carefully, ensuring no damage occurs during this process. He then moves on to attaching four more pieces onto these main frames, completing two pairs of flanges for the bulkhead hatches.The Final Touches
While two flanges form the primary support structure around the hatches, Sven mentions there are two additional pieces required at each end to ensure comprehensive protection. This attention to detail highlights his commitment to producing a durable and reliable design. “Sailing is about finding your path, whether it’s across an ocean or within yourself.” – Sven Yrvind In conclusion, making flanges around bulkhead hatches may seem complex at first glance, but by following Sven Yrvind’s meticulous process, enthusiasts can achieve professional-level results. Remember that the journey of boatbuilding is as rewarding as reaching your destination; it tests one’s patience and dedication. For those seeking to embark on this adventure or simply gain more insight into marine craftsmanship, Sven’s wisdom is invaluable.Sven proceeds to apply glue along one edge of the flange, ensuring a secure bond when clamped into place. He emphasizes that this stage is crucial for maintaining the structural integrity of the flange, which in turn safeguards the living area beneath the canvas when hatches are open.Step 3: Allowing Time to Dry
After securely attaching the first portion of the flange, Sven allows ample time for it to dry before moving forward with additional steps. This patience and precision are key aspects of his successful boatbuilding methods.Step 4: Finishing Touches
Once the flange is fully dried, Sven removes the clamps carefully, ensuring no damage occurs during this process. He then moves on to attaching four more pieces onto these main frames, completing two pairs of flanges for the bulkhead hatches.The Final Touches
While two flanges form the primary support structure around the hatches, Sven mentions there are two additional pieces required at each end to ensure comprehensive protection. This attention to detail highlights his commitment to producing a durable and reliable design. “Sailing is about finding your path, whether it’s across an ocean or within yourself.” – Sven Yrvind In conclusion, making flanges around bulkhead hatches may seem complex at first glance, but by following Sven Yrvind’s meticulous process, enthusiasts can achieve professional-level results. Remember that the journey of boatbuilding is as rewarding as reaching your destination; it tests one’s patience and dedication. For those seeking to embark on this adventure or simply gain more insight into marine craftsmanship, Sven’s wisdom is invaluable.Sven begins by explaining that working on flanges vertically and horizontally is significantly easier than doing so in a flat position. To simplify the process further, he divides the task into two or three steps as suggested by fellow expert “for for.” This approach not only makes it more manageable but also allows for greater precision in crafting each component.Step 2: Applying Glue and Securing
Sven proceeds to apply glue along one edge of the flange, ensuring a secure bond when clamped into place. He emphasizes that this stage is crucial for maintaining the structural integrity of the flange, which in turn safeguards the living area beneath the canvas when hatches are open.Step 3: Allowing Time to Dry
After securely attaching the first portion of the flange, Sven allows ample time for it to dry before moving forward with additional steps. This patience and precision are key aspects of his successful boatbuilding methods.Step 4: Finishing Touches
Once the flange is fully dried, Sven removes the clamps carefully, ensuring no damage occurs during this process. He then moves on to attaching four more pieces onto these main frames, completing two pairs of flanges for the bulkhead hatches.The Final Touches
While two flanges form the primary support structure around the hatches, Sven mentions there are two additional pieces required at each end to ensure comprehensive protection. This attention to detail highlights his commitment to producing a durable and reliable design. “Sailing is about finding your path, whether it’s across an ocean or within yourself.” – Sven Yrvind In conclusion, making flanges around bulkhead hatches may seem complex at first glance, but by following Sven Yrvind’s meticulous process, enthusiasts can achieve professional-level results. Remember that the journey of boatbuilding is as rewarding as reaching your destination; it tests one’s patience and dedication. For those seeking to embark on this adventure or simply gain more insight into marine craftsmanship, Sven’s wisdom is invaluable.Sven Yrvind, a renowned yacht designer and sailor, shares valuable insights on creating flanges around bulkhead hatches for canvas protection in this enlightening video. By following his expert guidance, boat enthusiasts can ensure their living areas remain secure while allowing unhindered access through the hatches.Step 1: Starting with the Flange
Sven begins by explaining that working on flanges vertically and horizontally is significantly easier than doing so in a flat position. To simplify the process further, he divides the task into two or three steps as suggested by fellow expert “for for.” This approach not only makes it more manageable but also allows for greater precision in crafting each component.Step 2: Applying Glue and Securing
Sven proceeds to apply glue along one edge of the flange, ensuring a secure bond when clamped into place. He emphasizes that this stage is crucial for maintaining the structural integrity of the flange, which in turn safeguards the living area beneath the canvas when hatches are open.Step 3: Allowing Time to Dry
After securely attaching the first portion of the flange, Sven allows ample time for it to dry before moving forward with additional steps. This patience and precision are key aspects of his successful boatbuilding methods.Step 4: Finishing Touches
Once the flange is fully dried, Sven removes the clamps carefully, ensuring no damage occurs during this process. He then moves on to attaching four more pieces onto these main frames, completing two pairs of flanges for the bulkhead hatches.The Final Touches
While two flanges form the primary support structure around the hatches, Sven mentions there are two additional pieces required at each end to ensure comprehensive protection. This attention to detail highlights his commitment to producing a durable and reliable design. “Sailing is about finding your path, whether it’s across an ocean or within yourself.” – Sven Yrvind In conclusion, making flanges around bulkhead hatches may seem complex at first glance, but by following Sven Yrvind’s meticulous process, enthusiasts can achieve professional-level results. Remember that the journey of boatbuilding is as rewarding as reaching your destination; it tests one’s patience and dedication. For those seeking to embark on this adventure or simply gain more insight into marine craftsmanship, Sven’s wisdom is invaluable.Making Flanges Around Bulkhead Hatches for Canvas
Sven Yrvind, a renowned yacht designer and sailor, shares valuable insights on creating flanges around bulkhead hatches for canvas protection in this enlightening video. By following his expert guidance, boat enthusiasts can ensure their living areas remain secure while allowing unhindered access through the hatches.Step 1: Starting with the Flange
Sven begins by explaining that working on flanges vertically and horizontally is significantly easier than doing so in a flat position. To simplify the process further, he divides the task into two or three steps as suggested by fellow expert “for for.” This approach not only makes it more manageable but also allows for greater precision in crafting each component.Step 2: Applying Glue and Securing
Sven proceeds to apply glue along one edge of the flange, ensuring a secure bond when clamped into place. He emphasizes that this stage is crucial for maintaining the structural integrity of the flange, which in turn safeguards the living area beneath the canvas when hatches are open.Step 3: Allowing Time to Dry
After securely attaching the first portion of the flange, Sven allows ample time for it to dry before moving forward with additional steps. This patience and precision are key aspects of his successful boatbuilding methods.Step 4: Finishing Touches
Once the flange is fully dried, Sven removes the clamps carefully, ensuring no damage occurs during this process. He then moves on to attaching four more pieces onto these main frames, completing two pairs of flanges for the bulkhead hatches.The Final Touches
While two flanges form the primary support structure around the hatches, Sven mentions there are two additional pieces required at each end to ensure comprehensive protection. This attention to detail highlights his commitment to producing a durable and reliable design. “Sailing is about finding your path, whether it’s across an ocean or within yourself.” – Sven Yrvind In conclusion, making flanges around bulkhead hatches may seem complex at first glance, but by following Sven Yrvind’s meticulous process, enthusiasts can achieve professional-level results. Remember that the journey of boatbuilding is as rewarding as reaching your destination; it tests one’s patience and dedication. For those seeking to embark on this adventure or simply gain more insight into marine craftsmanship, Sven’s wisdom is invaluable.Once the flange is fully dried, Sven removes the clamps carefully, ensuring no damage occurs during this process. He then moves on to attaching four more pieces onto these main frames, completing two pairs of flanges for the bulkhead hatches.The Final Touches
While two flanges form the primary support structure around the hatches, Sven mentions there are two additional pieces required at each end to ensure comprehensive protection. This attention to detail highlights his commitment to producing a durable and reliable design. “Sailing is about finding your path, whether it’s across an ocean or within yourself.” – Sven Yrvind In conclusion, making flanges around bulkhead hatches may seem complex at first glance, but by following Sven Yrvind’s meticulous process, enthusiasts can achieve professional-level results. Remember that the journey of boatbuilding is as rewarding as reaching your destination; it tests one’s patience and dedication. For those seeking to embark on this adventure or simply gain more insight into marine craftsmanship, Sven’s wisdom is invaluable.After securely attaching the first portion of the flange, Sven allows ample time for it to dry before moving forward with additional steps. This patience and precision are key aspects of his successful boatbuilding methods.Step 4: Finishing Touches
Once the flange is fully dried, Sven removes the clamps carefully, ensuring no damage occurs during this process. He then moves on to attaching four more pieces onto these main frames, completing two pairs of flanges for the bulkhead hatches.The Final Touches
While two flanges form the primary support structure around the hatches, Sven mentions there are two additional pieces required at each end to ensure comprehensive protection. This attention to detail highlights his commitment to producing a durable and reliable design. “Sailing is about finding your path, whether it’s across an ocean or within yourself.” – Sven Yrvind In conclusion, making flanges around bulkhead hatches may seem complex at first glance, but by following Sven Yrvind’s meticulous process, enthusiasts can achieve professional-level results. Remember that the journey of boatbuilding is as rewarding as reaching your destination; it tests one’s patience and dedication. For those seeking to embark on this adventure or simply gain more insight into marine craftsmanship, Sven’s wisdom is invaluable.Sven proceeds to apply glue along one edge of the flange, ensuring a secure bond when clamped into place. He emphasizes that this stage is crucial for maintaining the structural integrity of the flange, which in turn safeguards the living area beneath the canvas when hatches are open.Step 3: Allowing Time to Dry
After securely attaching the first portion of the flange, Sven allows ample time for it to dry before moving forward with additional steps. This patience and precision are key aspects of his successful boatbuilding methods.Step 4: Finishing Touches
Once the flange is fully dried, Sven removes the clamps carefully, ensuring no damage occurs during this process. He then moves on to attaching four more pieces onto these main frames, completing two pairs of flanges for the bulkhead hatches.The Final Touches
While two flanges form the primary support structure around the hatches, Sven mentions there are two additional pieces required at each end to ensure comprehensive protection. This attention to detail highlights his commitment to producing a durable and reliable design. “Sailing is about finding your path, whether it’s across an ocean or within yourself.” – Sven Yrvind In conclusion, making flanges around bulkhead hatches may seem complex at first glance, but by following Sven Yrvind’s meticulous process, enthusiasts can achieve professional-level results. Remember that the journey of boatbuilding is as rewarding as reaching your destination; it tests one’s patience and dedication. For those seeking to embark on this adventure or simply gain more insight into marine craftsmanship, Sven’s wisdom is invaluable.Sven begins by explaining that working on flanges vertically and horizontally is significantly easier than doing so in a flat position. To simplify the process further, he divides the task into two or three steps as suggested by fellow expert “for for.” This approach not only makes it more manageable but also allows for greater precision in crafting each component.Step 2: Applying Glue and Securing
Sven proceeds to apply glue along one edge of the flange, ensuring a secure bond when clamped into place. He emphasizes that this stage is crucial for maintaining the structural integrity of the flange, which in turn safeguards the living area beneath the canvas when hatches are open.Step 3: Allowing Time to Dry
After securely attaching the first portion of the flange, Sven allows ample time for it to dry before moving forward with additional steps. This patience and precision are key aspects of his successful boatbuilding methods.Step 4: Finishing Touches
Once the flange is fully dried, Sven removes the clamps carefully, ensuring no damage occurs during this process. He then moves on to attaching four more pieces onto these main frames, completing two pairs of flanges for the bulkhead hatches.The Final Touches
While two flanges form the primary support structure around the hatches, Sven mentions there are two additional pieces required at each end to ensure comprehensive protection. This attention to detail highlights his commitment to producing a durable and reliable design. “Sailing is about finding your path, whether it’s across an ocean or within yourself.” – Sven Yrvind In conclusion, making flanges around bulkhead hatches may seem complex at first glance, but by following Sven Yrvind’s meticulous process, enthusiasts can achieve professional-level results. Remember that the journey of boatbuilding is as rewarding as reaching your destination; it tests one’s patience and dedication. For those seeking to embark on this adventure or simply gain more insight into marine craftsmanship, Sven’s wisdom is invaluable.Sven Yrvind, a renowned yacht designer and sailor, shares valuable insights on creating flanges around bulkhead hatches for canvas protection in this enlightening video. By following his expert guidance, boat enthusiasts can ensure their living areas remain secure while allowing unhindered access through the hatches.Step 1: Starting with the Flange
Sven begins by explaining that working on flanges vertically and horizontally is significantly easier than doing so in a flat position. To simplify the process further, he divides the task into two or three steps as suggested by fellow expert “for for.” This approach not only makes it more manageable but also allows for greater precision in crafting each component.Step 2: Applying Glue and Securing
Sven proceeds to apply glue along one edge of the flange, ensuring a secure bond when clamped into place. He emphasizes that this stage is crucial for maintaining the structural integrity of the flange, which in turn safeguards the living area beneath the canvas when hatches are open.Step 3: Allowing Time to Dry
After securely attaching the first portion of the flange, Sven allows ample time for it to dry before moving forward with additional steps. This patience and precision are key aspects of his successful boatbuilding methods.Step 4: Finishing Touches
Once the flange is fully dried, Sven removes the clamps carefully, ensuring no damage occurs during this process. He then moves on to attaching four more pieces onto these main frames, completing two pairs of flanges for the bulkhead hatches.The Final Touches
While two flanges form the primary support structure around the hatches, Sven mentions there are two additional pieces required at each end to ensure comprehensive protection. This attention to detail highlights his commitment to producing a durable and reliable design. “Sailing is about finding your path, whether it’s across an ocean or within yourself.” – Sven Yrvind In conclusion, making flanges around bulkhead hatches may seem complex at first glance, but by following Sven Yrvind’s meticulous process, enthusiasts can achieve professional-level results. Remember that the journey of boatbuilding is as rewarding as reaching your destination; it tests one’s patience and dedication. For those seeking to embark on this adventure or simply gain more insight into marine craftsmanship, Sven’s wisdom is invaluable.Making Flanges Around Bulkhead Hatches for Canvas
Sven Yrvind, a renowned yacht designer and sailor, shares valuable insights on creating flanges around bulkhead hatches for canvas protection in this enlightening video. By following his expert guidance, boat enthusiasts can ensure their living areas remain secure while allowing unhindered access through the hatches.Step 1: Starting with the Flange
Sven begins by explaining that working on flanges vertically and horizontally is significantly easier than doing so in a flat position. To simplify the process further, he divides the task into two or three steps as suggested by fellow expert “for for.” This approach not only makes it more manageable but also allows for greater precision in crafting each component.Step 2: Applying Glue and Securing
Sven proceeds to apply glue along one edge of the flange, ensuring a secure bond when clamped into place. He emphasizes that this stage is crucial for maintaining the structural integrity of the flange, which in turn safeguards the living area beneath the canvas when hatches are open.Step 3: Allowing Time to Dry
After securely attaching the first portion of the flange, Sven allows ample time for it to dry before moving forward with additional steps. This patience and precision are key aspects of his successful boatbuilding methods.Step 4: Finishing Touches
Once the flange is fully dried, Sven removes the clamps carefully, ensuring no damage occurs during this process. He then moves on to attaching four more pieces onto these main frames, completing two pairs of flanges for the bulkhead hatches.The Final Touches
While two flanges form the primary support structure around the hatches, Sven mentions there are two additional pieces required at each end to ensure comprehensive protection. This attention to detail highlights his commitment to producing a durable and reliable design. “Sailing is about finding your path, whether it’s across an ocean or within yourself.” – Sven Yrvind In conclusion, making flanges around bulkhead hatches may seem complex at first glance, but by following Sven Yrvind’s meticulous process, enthusiasts can achieve professional-level results. Remember that the journey of boatbuilding is as rewarding as reaching your destination; it tests one’s patience and dedication. For those seeking to embark on this adventure or simply gain more insight into marine craftsmanship, Sven’s wisdom is invaluable.After securely attaching the first portion of the flange, Sven allows ample time for it to dry before moving forward with additional steps. This patience and precision are key aspects of his successful boatbuilding methods.Step 4: Finishing Touches
Once the flange is fully dried, Sven removes the clamps carefully, ensuring no damage occurs during this process. He then moves on to attaching four more pieces onto these main frames, completing two pairs of flanges for the bulkhead hatches.The Final Touches
While two flanges form the primary support structure around the hatches, Sven mentions there are two additional pieces required at each end to ensure comprehensive protection. This attention to detail highlights his commitment to producing a durable and reliable design. “Sailing is about finding your path, whether it’s across an ocean or within yourself.” – Sven Yrvind In conclusion, making flanges around bulkhead hatches may seem complex at first glance, but by following Sven Yrvind’s meticulous process, enthusiasts can achieve professional-level results. Remember that the journey of boatbuilding is as rewarding as reaching your destination; it tests one’s patience and dedication. For those seeking to embark on this adventure or simply gain more insight into marine craftsmanship, Sven’s wisdom is invaluable.After securely attaching the first portion of the flange, Sven allows ample time for it to dry before moving forward with additional steps. This patience and precision are key aspects of his successful boatbuilding methods.Step 4: Finishing Touches
Once the flange is fully dried, Sven removes the clamps carefully, ensuring no damage occurs during this process. He then moves on to attaching four more pieces onto these main frames, completing two pairs of flanges for the bulkhead hatches.The Final Touches
While two flanges form the primary support structure around the hatches, Sven mentions there are two additional pieces required at each end to ensure comprehensive protection. This attention to detail highlights his commitment to producing a durable and reliable design. “Sailing is about finding your path, whether it’s across an ocean or within yourself.” – Sven Yrvind In conclusion, making flanges around bulkhead hatches may seem complex at first glance, but by following Sven Yrvind’s meticulous process, enthusiasts can achieve professional-level results. Remember that the journey of boatbuilding is as rewarding as reaching your destination; it tests one’s patience and dedication. For those seeking to embark on this adventure or simply gain more insight into marine craftsmanship, Sven’s wisdom is invaluable.Sven Yrvind, a renowned yacht designer and sailor, shares valuable insights on creating flanges around bulkhead hatches for canvas protection in this enlightening video. By following his expert guidance, boat enthusiasts can ensure their living areas remain secure while allowing unhindered access through the hatches.Step 1: Starting with the Flange
Sven begins by explaining that working on flanges vertically and horizontally is significantly easier than doing so in a flat position. To simplify the process further, he divides the task into two or three steps as suggested by fellow expert “for for.” This approach not only makes it more manageable but also allows for greater precision in crafting each component.Step 2: Applying Glue and Securing
Sven proceeds to apply glue along one edge of the flange, ensuring a secure bond when clamped into place. He emphasizes that this stage is crucial for maintaining the structural integrity of the flange, which in turn safeguards the living area beneath the canvas when hatches are open.Step 3: Allowing Time to Dry
After securely attaching the first portion of the flange, Sven allows ample time for it to dry before moving forward with additional steps. This patience and precision are key aspects of his successful boatbuilding methods.Step 4: Finishing Touches
Once the flange is fully dried, Sven removes the clamps carefully, ensuring no damage occurs during this process. He then moves on to attaching four more pieces onto these main frames, completing two pairs of flanges for the bulkhead hatches.The Final Touches
While two flanges form the primary support structure around the hatches, Sven mentions there are two additional pieces required at each end to ensure comprehensive protection. This attention to detail highlights his commitment to producing a durable and reliable design. “Sailing is about finding your path, whether it’s across an ocean or within yourself.” – Sven Yrvind In conclusion, making flanges around bulkhead hatches may seem complex at first glance, but by following Sven Yrvind’s meticulous process, enthusiasts can achieve professional-level results. Remember that the journey of boatbuilding is as rewarding as reaching your destination; it tests one’s patience and dedication. For those seeking to embark on this adventure or simply gain more insight into marine craftsmanship, Sven’s wisdom is invaluable.Making Flanges Around Bulkhead Hatches for Canvas
Sven Yrvind, a renowned yacht designer and sailor, shares valuable insights on creating flanges around bulkhead hatches for canvas protection in this enlightening video. By following his expert guidance, boat enthusiasts can ensure their living areas remain secure while allowing unhindered access through the hatches.Step 1: Starting with the Flange
Sven begins by explaining that working on flanges vertically and horizontally is significantly easier than doing so in a flat position. To simplify the process further, he divides the task into two or three steps as suggested by fellow expert “for for.” This approach not only makes it more manageable but also allows for greater precision in crafting each component.Step 2: Applying Glue and Securing
Sven proceeds to apply glue along one edge of the flange, ensuring a secure bond when clamped into place. He emphasizes that this stage is crucial for maintaining the structural integrity of the flange, which in turn safeguards the living area beneath the canvas when hatches are open.Step 3: Allowing Time to Dry
After securely attaching the first portion of the flange, Sven allows ample time for it to dry before moving forward with additional steps. This patience and precision are key aspects of his successful boatbuilding methods.Step 4: Finishing Touches
Once the flange is fully dried, Sven removes the clamps carefully, ensuring no damage occurs during this process. He then moves on to attaching four more pieces onto these main frames, completing two pairs of flanges for the bulkhead hatches.The Final Touches
While two flanges form the primary support structure around the hatches, Sven mentions there are two additional pieces required at each end to ensure comprehensive protection. This attention to detail highlights his commitment to producing a durable and reliable design. “Sailing is about finding your path, whether it’s across an ocean or within yourself.” – Sven Yrvind In conclusion, making flanges around bulkhead hatches may seem complex at first glance, but by following Sven Yrvind’s meticulous process, enthusiasts can achieve professional-level results. Remember that the journey of boatbuilding is as rewarding as reaching your destination; it tests one’s patience and dedication. For those seeking to embark on this adventure or simply gain more insight into marine craftsmanship, Sven’s wisdom is invaluable.Sven proceeds to apply glue along one edge of the flange, ensuring a secure bond when clamped into place. He emphasizes that this stage is crucial for maintaining the structural integrity of the flange, which in turn safeguards the living area beneath the canvas when hatches are open.Step 3: Allowing Time to Dry
After securely attaching the first portion of the flange, Sven allows ample time for it to dry before moving forward with additional steps. This patience and precision are key aspects of his successful boatbuilding methods.Step 4: Finishing Touches
Once the flange is fully dried, Sven removes the clamps carefully, ensuring no damage occurs during this process. He then moves on to attaching four more pieces onto these main frames, completing two pairs of flanges for the bulkhead hatches.The Final Touches
While two flanges form the primary support structure around the hatches, Sven mentions there are two additional pieces required at each end to ensure comprehensive protection. This attention to detail highlights his commitment to producing a durable and reliable design. “Sailing is about finding your path, whether it’s across an ocean or within yourself.” – Sven Yrvind In conclusion, making flanges around bulkhead hatches may seem complex at first glance, but by following Sven Yrvind’s meticulous process, enthusiasts can achieve professional-level results. Remember that the journey of boatbuilding is as rewarding as reaching your destination; it tests one’s patience and dedication. For those seeking to embark on this adventure or simply gain more insight into marine craftsmanship, Sven’s wisdom is invaluable.Sven Yrvind, a renowned yacht designer and sailor, shares valuable insights on creating flanges around bulkhead hatches for canvas protection in this enlightening video. By following his expert guidance, boat enthusiasts can ensure their living areas remain secure while allowing unhindered access through the hatches.Step 1: Starting with the Flange
Sven begins by explaining that working on flanges vertically and horizontally is significantly easier than doing so in a flat position. To simplify the process further, he divides the task into two or three steps as suggested by fellow expert “for for.” This approach not only makes it more manageable but also allows for greater precision in crafting each component.Step 2: Applying Glue and Securing
Sven proceeds to apply glue along one edge of the flange, ensuring a secure bond when clamped into place. He emphasizes that this stage is crucial for maintaining the structural integrity of the flange, which in turn safeguards the living area beneath the canvas when hatches are open.Step 3: Allowing Time to Dry
After securely attaching the first portion of the flange, Sven allows ample time for it to dry before moving forward with additional steps. This patience and precision are key aspects of his successful boatbuilding methods.Step 4: Finishing Touches
Once the flange is fully dried, Sven removes the clamps carefully, ensuring no damage occurs during this process. He then moves on to attaching four more pieces onto these main frames, completing two pairs of flanges for the bulkhead hatches.The Final Touches
While two flanges form the primary support structure around the hatches, Sven mentions there are two additional pieces required at each end to ensure comprehensive protection. This attention to detail highlights his commitment to producing a durable and reliable design. “Sailing is about finding your path, whether it’s across an ocean or within yourself.” – Sven Yrvind In conclusion, making flanges around bulkhead hatches may seem complex at first glance, but by following Sven Yrvind’s meticulous process, enthusiasts can achieve professional-level results. Remember that the journey of boatbuilding is as rewarding as reaching your destination; it tests one’s patience and dedication. For those seeking to embark on this adventure or simply gain more insight into marine craftsmanship, Sven’s wisdom is invaluable.Making Flanges Around Bulkhead Hatches for Canvas
Sven Yrvind, a renowned yacht designer and sailor, shares valuable insights on creating flanges around bulkhead hatches for canvas protection in this enlightening video. By following his expert guidance, boat enthusiasts can ensure their living areas remain secure while allowing unhindered access through the hatches.Step 1: Starting with the Flange
Sven begins by explaining that working on flanges vertically and horizontally is significantly easier than doing so in a flat position. To simplify the process further, he divides the task into two or three steps as suggested by fellow expert “for for.” This approach not only makes it more manageable but also allows for greater precision in crafting each component.Step 2: Applying Glue and Securing
Sven proceeds to apply glue along one edge of the flange, ensuring a secure bond when clamped into place. He emphasizes that this stage is crucial for maintaining the structural integrity of the flange, which in turn safeguards the living area beneath the canvas when hatches are open.Step 3: Allowing Time to Dry
After securely attaching the first portion of the flange, Sven allows ample time for it to dry before moving forward with additional steps. This patience and precision are key aspects of his successful boatbuilding methods.Step 4: Finishing Touches
Once the flange is fully dried, Sven removes the clamps carefully, ensuring no damage occurs during this process. He then moves on to attaching four more pieces onto these main frames, completing two pairs of flanges for the bulkhead hatches.The Final Touches
While two flanges form the primary support structure around the hatches, Sven mentions there are two additional pieces required at each end to ensure comprehensive protection. This attention to detail highlights his commitment to producing a durable and reliable design. “Sailing is about finding your path, whether it’s across an ocean or within yourself.” – Sven Yrvind In conclusion, making flanges around bulkhead hatches may seem complex at first glance, but by following Sven Yrvind’s meticulous process, enthusiasts can achieve professional-level results. Remember that the journey of boatbuilding is as rewarding as reaching your destination; it tests one’s patience and dedication. For those seeking to embark on this adventure or simply gain more insight into marine craftsmanship, Sven’s wisdom is invaluable.Sven begins by explaining that working on flanges vertically and horizontally is significantly easier than doing so in a flat position. To simplify the process further, he divides the task into two or three steps as suggested by fellow expert “for for.” This approach not only makes it more manageable but also allows for greater precision in crafting each component.Step 2: Applying Glue and Securing
Sven proceeds to apply glue along one edge of the flange, ensuring a secure bond when clamped into place. He emphasizes that this stage is crucial for maintaining the structural integrity of the flange, which in turn safeguards the living area beneath the canvas when hatches are open.Step 3: Allowing Time to Dry
After securely attaching the first portion of the flange, Sven allows ample time for it to dry before moving forward with additional steps. This patience and precision are key aspects of his successful boatbuilding methods.Step 4: Finishing Touches
Once the flange is fully dried, Sven removes the clamps carefully, ensuring no damage occurs during this process. He then moves on to attaching four more pieces onto these main frames, completing two pairs of flanges for the bulkhead hatches.The Final Touches
While two flanges form the primary support structure around the hatches, Sven mentions there are two additional pieces required at each end to ensure comprehensive protection. This attention to detail highlights his commitment to producing a durable and reliable design. “Sailing is about finding your path, whether it’s across an ocean or within yourself.” – Sven Yrvind In conclusion, making flanges around bulkhead hatches may seem complex at first glance, but by following Sven Yrvind’s meticulous process, enthusiasts can achieve professional-level results. Remember that the journey of boatbuilding is as rewarding as reaching your destination; it tests one’s patience and dedication. For those seeking to embark on this adventure or simply gain more insight into marine craftsmanship, Sven’s wisdom is invaluable.Sven Yrvind, a renowned yacht designer and sailor, shares valuable insights on creating flanges around bulkhead hatches for canvas protection in this enlightening video. By following his expert guidance, boat enthusiasts can ensure their living areas remain secure while allowing unhindered access through the hatches.Step 1: Starting with the Flange
Sven begins by explaining that working on flanges vertically and horizontally is significantly easier than doing so in a flat position. To simplify the process further, he divides the task into two or three steps as suggested by fellow expert “for for.” This approach not only makes it more manageable but also allows for greater precision in crafting each component.Step 2: Applying Glue and Securing
Sven proceeds to apply glue along one edge of the flange, ensuring a secure bond when clamped into place. He emphasizes that this stage is crucial for maintaining the structural integrity of the flange, which in turn safeguards the living area beneath the canvas when hatches are open.Step 3: Allowing Time to Dry
After securely attaching the first portion of the flange, Sven allows ample time for it to dry before moving forward with additional steps. This patience and precision are key aspects of his successful boatbuilding methods.Step 4: Finishing Touches
Once the flange is fully dried, Sven removes the clamps carefully, ensuring no damage occurs during this process. He then moves on to attaching four more pieces onto these main frames, completing two pairs of flanges for the bulkhead hatches.The Final Touches
While two flanges form the primary support structure around the hatches, Sven mentions there are two additional pieces required at each end to ensure comprehensive protection. This attention to detail highlights his commitment to producing a durable and reliable design. “Sailing is about finding your path, whether it’s across an ocean or within yourself.” – Sven Yrvind In conclusion, making flanges around bulkhead hatches may seem complex at first glance, but by following Sven Yrvind’s meticulous process, enthusiasts can achieve professional-level results. Remember that the journey of boatbuilding is as rewarding as reaching your destination; it tests one’s patience and dedication. For those seeking to embark on this adventure or simply gain more insight into marine craftsmanship, Sven’s wisdom is invaluable.Making Flanges Around Bulkhead Hatches for Canvas
Sven Yrvind, a renowned yacht designer and sailor, shares valuable insights on creating flanges around bulkhead hatches for canvas protection in this enlightening video. By following his expert guidance, boat enthusiasts can ensure their living areas remain secure while allowing unhindered access through the hatches.Step 1: Starting with the Flange
Sven begins by explaining that working on flanges vertically and horizontally is significantly easier than doing so in a flat position. To simplify the process further, he divides the task into two or three steps as suggested by fellow expert “for for.” This approach not only makes it more manageable but also allows for greater precision in crafting each component.Step 2: Applying Glue and Securing
Sven proceeds to apply glue along one edge of the flange, ensuring a secure bond when clamped into place. He emphasizes that this stage is crucial for maintaining the structural integrity of the flange, which in turn safeguards the living area beneath the canvas when hatches are open.Step 3: Allowing Time to Dry
After securely attaching the first portion of the flange, Sven allows ample time for it to dry before moving forward with additional steps. This patience and precision are key aspects of his successful boatbuilding methods.Step 4: Finishing Touches
Once the flange is fully dried, Sven removes the clamps carefully, ensuring no damage occurs during this process. He then moves on to attaching four more pieces onto these main frames, completing two pairs of flanges for the bulkhead hatches.The Final Touches
While two flanges form the primary support structure around the hatches, Sven mentions there are two additional pieces required at each end to ensure comprehensive protection. This attention to detail highlights his commitment to producing a durable and reliable design. “Sailing is about finding your path, whether it’s across an ocean or within yourself.” – Sven Yrvind In conclusion, making flanges around bulkhead hatches may seem complex at first glance, but by following Sven Yrvind’s meticulous process, enthusiasts can achieve professional-level results. Remember that the journey of boatbuilding is as rewarding as reaching your destination; it tests one’s patience and dedication. For those seeking to embark on this adventure or simply gain more insight into marine craftsmanship, Sven’s wisdom is invaluable.Once the flange is fully dried, Sven removes the clamps carefully, ensuring no damage occurs during this process. He then moves on to attaching four more pieces onto these main frames, completing two pairs of flanges for the bulkhead hatches.The Final Touches
While two flanges form the primary support structure around the hatches, Sven mentions there are two additional pieces required at each end to ensure comprehensive protection. This attention to detail highlights his commitment to producing a durable and reliable design. “Sailing is about finding your path, whether it’s across an ocean or within yourself.” – Sven Yrvind In conclusion, making flanges around bulkhead hatches may seem complex at first glance, but by following Sven Yrvind’s meticulous process, enthusiasts can achieve professional-level results. Remember that the journey of boatbuilding is as rewarding as reaching your destination; it tests one’s patience and dedication. For those seeking to embark on this adventure or simply gain more insight into marine craftsmanship, Sven’s wisdom is invaluable.Sven begins by explaining that working on flanges vertically and horizontally is significantly easier than doing so in a flat position. To simplify the process further, he divides the task into two or three steps as suggested by fellow expert “for for.” This approach not only makes it more manageable but also allows for greater precision in crafting each component.Step 2: Applying Glue and Securing
Sven proceeds to apply glue along one edge of the flange, ensuring a secure bond when clamped into place. He emphasizes that this stage is crucial for maintaining the structural integrity of the flange, which in turn safeguards the living area beneath the canvas when hatches are open.Step 3: Allowing Time to Dry
After securely attaching the first portion of the flange, Sven allows ample time for it to dry before moving forward with additional steps. This patience and precision are key aspects of his successful boatbuilding methods.Step 4: Finishing Touches
Once the flange is fully dried, Sven removes the clamps carefully, ensuring no damage occurs during this process. He then moves on to attaching four more pieces onto these main frames, completing two pairs of flanges for the bulkhead hatches.The Final Touches
While two flanges form the primary support structure around the hatches, Sven mentions there are two additional pieces required at each end to ensure comprehensive protection. This attention to detail highlights his commitment to producing a durable and reliable design. “Sailing is about finding your path, whether it’s across an ocean or within yourself.” – Sven Yrvind In conclusion, making flanges around bulkhead hatches may seem complex at first glance, but by following Sven Yrvind’s meticulous process, enthusiasts can achieve professional-level results. Remember that the journey of boatbuilding is as rewarding as reaching your destination; it tests one’s patience and dedication. For those seeking to embark on this adventure or simply gain more insight into marine craftsmanship, Sven’s wisdom is invaluable.Sven Yrvind, a renowned yacht designer and sailor, shares valuable insights on creating flanges around bulkhead hatches for canvas protection in this enlightening video. By following his expert guidance, boat enthusiasts can ensure their living areas remain secure while allowing unhindered access through the hatches.Step 1: Starting with the Flange
Sven begins by explaining that working on flanges vertically and horizontally is significantly easier than doing so in a flat position. To simplify the process further, he divides the task into two or three steps as suggested by fellow expert “for for.” This approach not only makes it more manageable but also allows for greater precision in crafting each component.Step 2: Applying Glue and Securing
Sven proceeds to apply glue along one edge of the flange, ensuring a secure bond when clamped into place. He emphasizes that this stage is crucial for maintaining the structural integrity of the flange, which in turn safeguards the living area beneath the canvas when hatches are open.Step 3: Allowing Time to Dry
After securely attaching the first portion of the flange, Sven allows ample time for it to dry before moving forward with additional steps. This patience and precision are key aspects of his successful boatbuilding methods.Step 4: Finishing Touches
Once the flange is fully dried, Sven removes the clamps carefully, ensuring no damage occurs during this process. He then moves on to attaching four more pieces onto these main frames, completing two pairs of flanges for the bulkhead hatches.The Final Touches
While two flanges form the primary support structure around the hatches, Sven mentions there are two additional pieces required at each end to ensure comprehensive protection. This attention to detail highlights his commitment to producing a durable and reliable design. “Sailing is about finding your path, whether it’s across an ocean or within yourself.” – Sven Yrvind In conclusion, making flanges around bulkhead hatches may seem complex at first glance, but by following Sven Yrvind’s meticulous process, enthusiasts can achieve professional-level results. Remember that the journey of boatbuilding is as rewarding as reaching your destination; it tests one’s patience and dedication. For those seeking to embark on this adventure or simply gain more insight into marine craftsmanship, Sven’s wisdom is invaluable.Making Flanges Around Bulkhead Hatches for Canvas
Sven Yrvind, a renowned yacht designer and sailor, shares valuable insights on creating flanges around bulkhead hatches for canvas protection in this enlightening video. By following his expert guidance, boat enthusiasts can ensure their living areas remain secure while allowing unhindered access through the hatches.Step 1: Starting with the Flange
Sven begins by explaining that working on flanges vertically and horizontally is significantly easier than doing so in a flat position. To simplify the process further, he divides the task into two or three steps as suggested by fellow expert “for for.” This approach not only makes it more manageable but also allows for greater precision in crafting each component.Step 2: Applying Glue and Securing
Sven proceeds to apply glue along one edge of the flange, ensuring a secure bond when clamped into place. He emphasizes that this stage is crucial for maintaining the structural integrity of the flange, which in turn safeguards the living area beneath the canvas when hatches are open.Step 3: Allowing Time to Dry
After securely attaching the first portion of the flange, Sven allows ample time for it to dry before moving forward with additional steps. This patience and precision are key aspects of his successful boatbuilding methods.Step 4: Finishing Touches
Once the flange is fully dried, Sven removes the clamps carefully, ensuring no damage occurs during this process. He then moves on to attaching four more pieces onto these main frames, completing two pairs of flanges for the bulkhead hatches.The Final Touches
While two flanges form the primary support structure around the hatches, Sven mentions there are two additional pieces required at each end to ensure comprehensive protection. This attention to detail highlights his commitment to producing a durable and reliable design. “Sailing is about finding your path, whether it’s across an ocean or within yourself.” – Sven Yrvind In conclusion, making flanges around bulkhead hatches may seem complex at first glance, but by following Sven Yrvind’s meticulous process, enthusiasts can achieve professional-level results. Remember that the journey of boatbuilding is as rewarding as reaching your destination; it tests one’s patience and dedication. For those seeking to embark on this adventure or simply gain more insight into marine craftsmanship, Sven’s wisdom is invaluable.After securely attaching the first portion of the flange, Sven allows ample time for it to dry before moving forward with additional steps. This patience and precision are key aspects of his successful boatbuilding methods.Step 4: Finishing Touches
Once the flange is fully dried, Sven removes the clamps carefully, ensuring no damage occurs during this process. He then moves on to attaching four more pieces onto these main frames, completing two pairs of flanges for the bulkhead hatches.The Final Touches
While two flanges form the primary support structure around the hatches, Sven mentions there are two additional pieces required at each end to ensure comprehensive protection. This attention to detail highlights his commitment to producing a durable and reliable design. “Sailing is about finding your path, whether it’s across an ocean or within yourself.” – Sven Yrvind In conclusion, making flanges around bulkhead hatches may seem complex at first glance, but by following Sven Yrvind’s meticulous process, enthusiasts can achieve professional-level results. Remember that the journey of boatbuilding is as rewarding as reaching your destination; it tests one’s patience and dedication. For those seeking to embark on this adventure or simply gain more insight into marine craftsmanship, Sven’s wisdom is invaluable.Sven begins by explaining that working on flanges vertically and horizontally is significantly easier than doing so in a flat position. To simplify the process further, he divides the task into two or three steps as suggested by fellow expert “for for.” This approach not only makes it more manageable but also allows for greater precision in crafting each component.Step 2: Applying Glue and Securing
Sven proceeds to apply glue along one edge of the flange, ensuring a secure bond when clamped into place. He emphasizes that this stage is crucial for maintaining the structural integrity of the flange, which in turn safeguards the living area beneath the canvas when hatches are open.Step 3: Allowing Time to Dry
After securely attaching the first portion of the flange, Sven allows ample time for it to dry before moving forward with additional steps. This patience and precision are key aspects of his successful boatbuilding methods.Step 4: Finishing Touches
Once the flange is fully dried, Sven removes the clamps carefully, ensuring no damage occurs during this process. He then moves on to attaching four more pieces onto these main frames, completing two pairs of flanges for the bulkhead hatches.The Final Touches
While two flanges form the primary support structure around the hatches, Sven mentions there are two additional pieces required at each end to ensure comprehensive protection. This attention to detail highlights his commitment to producing a durable and reliable design. “Sailing is about finding your path, whether it’s across an ocean or within yourself.” – Sven Yrvind In conclusion, making flanges around bulkhead hatches may seem complex at first glance, but by following Sven Yrvind’s meticulous process, enthusiasts can achieve professional-level results. Remember that the journey of boatbuilding is as rewarding as reaching your destination; it tests one’s patience and dedication. For those seeking to embark on this adventure or simply gain more insight into marine craftsmanship, Sven’s wisdom is invaluable.Sven Yrvind, a renowned yacht designer and sailor, shares valuable insights on creating flanges around bulkhead hatches for canvas protection in this enlightening video. By following his expert guidance, boat enthusiasts can ensure their living areas remain secure while allowing unhindered access through the hatches.Step 1: Starting with the Flange
Sven begins by explaining that working on flanges vertically and horizontally is significantly easier than doing so in a flat position. To simplify the process further, he divides the task into two or three steps as suggested by fellow expert “for for.” This approach not only makes it more manageable but also allows for greater precision in crafting each component.Step 2: Applying Glue and Securing
Sven proceeds to apply glue along one edge of the flange, ensuring a secure bond when clamped into place. He emphasizes that this stage is crucial for maintaining the structural integrity of the flange, which in turn safeguards the living area beneath the canvas when hatches are open.Step 3: Allowing Time to Dry
After securely attaching the first portion of the flange, Sven allows ample time for it to dry before moving forward with additional steps. This patience and precision are key aspects of his successful boatbuilding methods.Step 4: Finishing Touches
Once the flange is fully dried, Sven removes the clamps carefully, ensuring no damage occurs during this process. He then moves on to attaching four more pieces onto these main frames, completing two pairs of flanges for the bulkhead hatches.The Final Touches
While two flanges form the primary support structure around the hatches, Sven mentions there are two additional pieces required at each end to ensure comprehensive protection. This attention to detail highlights his commitment to producing a durable and reliable design. “Sailing is about finding your path, whether it’s across an ocean or within yourself.” – Sven Yrvind In conclusion, making flanges around bulkhead hatches may seem complex at first glance, but by following Sven Yrvind’s meticulous process, enthusiasts can achieve professional-level results. Remember that the journey of boatbuilding is as rewarding as reaching your destination; it tests one’s patience and dedication. For those seeking to embark on this adventure or simply gain more insight into marine craftsmanship, Sven’s wisdom is invaluable.Making Flanges Around Bulkhead Hatches for Canvas
Sven Yrvind, a renowned yacht designer and sailor, shares valuable insights on creating flanges around bulkhead hatches for canvas protection in this enlightening video. By following his expert guidance, boat enthusiasts can ensure their living areas remain secure while allowing unhindered access through the hatches.Step 1: Starting with the Flange
Sven begins by explaining that working on flanges vertically and horizontally is significantly easier than doing so in a flat position. To simplify the process further, he divides the task into two or three steps as suggested by fellow expert “for for.” This approach not only makes it more manageable but also allows for greater precision in crafting each component.Step 2: Applying Glue and Securing
Sven proceeds to apply glue along one edge of the flange, ensuring a secure bond when clamped into place. He emphasizes that this stage is crucial for maintaining the structural integrity of the flange, which in turn safeguards the living area beneath the canvas when hatches are open.Step 3: Allowing Time to Dry
After securely attaching the first portion of the flange, Sven allows ample time for it to dry before moving forward with additional steps. This patience and precision are key aspects of his successful boatbuilding methods.Step 4: Finishing Touches
Once the flange is fully dried, Sven removes the clamps carefully, ensuring no damage occurs during this process. He then moves on to attaching four more pieces onto these main frames, completing two pairs of flanges for the bulkhead hatches.The Final Touches
While two flanges form the primary support structure around the hatches, Sven mentions there are two additional pieces required at each end to ensure comprehensive protection. This attention to detail highlights his commitment to producing a durable and reliable design. “Sailing is about finding your path, whether it’s across an ocean or within yourself.” – Sven Yrvind In conclusion, making flanges around bulkhead hatches may seem complex at first glance, but by following Sven Yrvind’s meticulous process, enthusiasts can achieve professional-level results. Remember that the journey of boatbuilding is as rewarding as reaching your destination; it tests one’s patience and dedication. For those seeking to embark on this adventure or simply gain more insight into marine craftsmanship, Sven’s wisdom is invaluable.Sven proceeds to apply glue along one edge of the flange, ensuring a secure bond when clamped into place. He emphasizes that this stage is crucial for maintaining the structural integrity of the flange, which in turn safeguards the living area beneath the canvas when hatches are open.Step 3: Allowing Time to Dry
After securely attaching the first portion of the flange, Sven allows ample time for it to dry before moving forward with additional steps. This patience and precision are key aspects of his successful boatbuilding methods.Step 4: Finishing Touches
Once the flange is fully dried, Sven removes the clamps carefully, ensuring no damage occurs during this process. He then moves on to attaching four more pieces onto these main frames, completing two pairs of flanges for the bulkhead hatches.The Final Touches
While two flanges form the primary support structure around the hatches, Sven mentions there are two additional pieces required at each end to ensure comprehensive protection. This attention to detail highlights his commitment to producing a durable and reliable design. “Sailing is about finding your path, whether it’s across an ocean or within yourself.” – Sven Yrvind In conclusion, making flanges around bulkhead hatches may seem complex at first glance, but by following Sven Yrvind’s meticulous process, enthusiasts can achieve professional-level results. Remember that the journey of boatbuilding is as rewarding as reaching your destination; it tests one’s patience and dedication. For those seeking to embark on this adventure or simply gain more insight into marine craftsmanship, Sven’s wisdom is invaluable.Sven begins by explaining that working on flanges vertically and horizontally is significantly easier than doing so in a flat position. To simplify the process further, he divides the task into two or three steps as suggested by fellow expert “for for.” This approach not only makes it more manageable but also allows for greater precision in crafting each component.Step 2: Applying Glue and Securing
Sven proceeds to apply glue along one edge of the flange, ensuring a secure bond when clamped into place. He emphasizes that this stage is crucial for maintaining the structural integrity of the flange, which in turn safeguards the living area beneath the canvas when hatches are open.Step 3: Allowing Time to Dry
After securely attaching the first portion of the flange, Sven allows ample time for it to dry before moving forward with additional steps. This patience and precision are key aspects of his successful boatbuilding methods.Step 4: Finishing Touches
Once the flange is fully dried, Sven removes the clamps carefully, ensuring no damage occurs during this process. He then moves on to attaching four more pieces onto these main frames, completing two pairs of flanges for the bulkhead hatches.The Final Touches
While two flanges form the primary support structure around the hatches, Sven mentions there are two additional pieces required at each end to ensure comprehensive protection. This attention to detail highlights his commitment to producing a durable and reliable design. “Sailing is about finding your path, whether it’s across an ocean or within yourself.” – Sven Yrvind In conclusion, making flanges around bulkhead hatches may seem complex at first glance, but by following Sven Yrvind’s meticulous process, enthusiasts can achieve professional-level results. Remember that the journey of boatbuilding is as rewarding as reaching your destination; it tests one’s patience and dedication. For those seeking to embark on this adventure or simply gain more insight into marine craftsmanship, Sven’s wisdom is invaluable.Sven Yrvind, a renowned yacht designer and sailor, shares valuable insights on creating flanges around bulkhead hatches for canvas protection in this enlightening video. By following his expert guidance, boat enthusiasts can ensure their living areas remain secure while allowing unhindered access through the hatches.Step 1: Starting with the Flange
Sven begins by explaining that working on flanges vertically and horizontally is significantly easier than doing so in a flat position. To simplify the process further, he divides the task into two or three steps as suggested by fellow expert “for for.” This approach not only makes it more manageable but also allows for greater precision in crafting each component.Step 2: Applying Glue and Securing
Sven proceeds to apply glue along one edge of the flange, ensuring a secure bond when clamped into place. He emphasizes that this stage is crucial for maintaining the structural integrity of the flange, which in turn safeguards the living area beneath the canvas when hatches are open.Step 3: Allowing Time to Dry
After securely attaching the first portion of the flange, Sven allows ample time for it to dry before moving forward with additional steps. This patience and precision are key aspects of his successful boatbuilding methods.Step 4: Finishing Touches
Once the flange is fully dried, Sven removes the clamps carefully, ensuring no damage occurs during this process. He then moves on to attaching four more pieces onto these main frames, completing two pairs of flanges for the bulkhead hatches.The Final Touches
While two flanges form the primary support structure around the hatches, Sven mentions there are two additional pieces required at each end to ensure comprehensive protection. This attention to detail highlights his commitment to producing a durable and reliable design. “Sailing is about finding your path, whether it’s across an ocean or within yourself.” – Sven Yrvind In conclusion, making flanges around bulkhead hatches may seem complex at first glance, but by following Sven Yrvind’s meticulous process, enthusiasts can achieve professional-level results. Remember that the journey of boatbuilding is as rewarding as reaching your destination; it tests one’s patience and dedication. For those seeking to embark on this adventure or simply gain more insight into marine craftsmanship, Sven’s wisdom is invaluable.Making Flanges Around Bulkhead Hatches for Canvas
Sven Yrvind, a renowned yacht designer and sailor, shares valuable insights on creating flanges around bulkhead hatches for canvas protection in this enlightening video. By following his expert guidance, boat enthusiasts can ensure their living areas remain secure while allowing unhindered access through the hatches.Step 1: Starting with the Flange
Sven begins by explaining that working on flanges vertically and horizontally is significantly easier than doing so in a flat position. To simplify the process further, he divides the task into two or three steps as suggested by fellow expert “for for.” This approach not only makes it more manageable but also allows for greater precision in crafting each component.Step 2: Applying Glue and Securing
Sven proceeds to apply glue along one edge of the flange, ensuring a secure bond when clamped into place. He emphasizes that this stage is crucial for maintaining the structural integrity of the flange, which in turn safeguards the living area beneath the canvas when hatches are open.Step 3: Allowing Time to Dry
After securely attaching the first portion of the flange, Sven allows ample time for it to dry before moving forward with additional steps. This patience and precision are key aspects of his successful boatbuilding methods.Step 4: Finishing Touches
Once the flange is fully dried, Sven removes the clamps carefully, ensuring no damage occurs during this process. He then moves on to attaching four more pieces onto these main frames, completing two pairs of flanges for the bulkhead hatches.The Final Touches
While two flanges form the primary support structure around the hatches, Sven mentions there are two additional pieces required at each end to ensure comprehensive protection. This attention to detail highlights his commitment to producing a durable and reliable design. “Sailing is about finding your path, whether it’s across an ocean or within yourself.” – Sven Yrvind In conclusion, making flanges around bulkhead hatches may seem complex at first glance, but by following Sven Yrvind’s meticulous process, enthusiasts can achieve professional-level results. Remember that the journey of boatbuilding is as rewarding as reaching your destination; it tests one’s patience and dedication. For those seeking to embark on this adventure or simply gain more insight into marine craftsmanship, Sven’s wisdom is invaluable.Once the flange is fully dried, Sven removes the clamps carefully, ensuring no damage occurs during this process. He then moves on to attaching four more pieces onto these main frames, completing two pairs of flanges for the bulkhead hatches.The Final Touches
While two flanges form the primary support structure around the hatches, Sven mentions there are two additional pieces required at each end to ensure comprehensive protection. This attention to detail highlights his commitment to producing a durable and reliable design. “Sailing is about finding your path, whether it’s across an ocean or within yourself.” – Sven Yrvind In conclusion, making flanges around bulkhead hatches may seem complex at first glance, but by following Sven Yrvind’s meticulous process, enthusiasts can achieve professional-level results. Remember that the journey of boatbuilding is as rewarding as reaching your destination; it tests one’s patience and dedication. For those seeking to embark on this adventure or simply gain more insight into marine craftsmanship, Sven’s wisdom is invaluable.Sven proceeds to apply glue along one edge of the flange, ensuring a secure bond when clamped into place. He emphasizes that this stage is crucial for maintaining the structural integrity of the flange, which in turn safeguards the living area beneath the canvas when hatches are open.Step 3: Allowing Time to Dry
After securely attaching the first portion of the flange, Sven allows ample time for it to dry before moving forward with additional steps. This patience and precision are key aspects of his successful boatbuilding methods.Step 4: Finishing Touches
Once the flange is fully dried, Sven removes the clamps carefully, ensuring no damage occurs during this process. He then moves on to attaching four more pieces onto these main frames, completing two pairs of flanges for the bulkhead hatches.The Final Touches
While two flanges form the primary support structure around the hatches, Sven mentions there are two additional pieces required at each end to ensure comprehensive protection. This attention to detail highlights his commitment to producing a durable and reliable design. “Sailing is about finding your path, whether it’s across an ocean or within yourself.” – Sven Yrvind In conclusion, making flanges around bulkhead hatches may seem complex at first glance, but by following Sven Yrvind’s meticulous process, enthusiasts can achieve professional-level results. Remember that the journey of boatbuilding is as rewarding as reaching your destination; it tests one’s patience and dedication. For those seeking to embark on this adventure or simply gain more insight into marine craftsmanship, Sven’s wisdom is invaluable.Sven begins by explaining that working on flanges vertically and horizontally is significantly easier than doing so in a flat position. To simplify the process further, he divides the task into two or three steps as suggested by fellow expert “for for.” This approach not only makes it more manageable but also allows for greater precision in crafting each component.Step 2: Applying Glue and Securing
Sven proceeds to apply glue along one edge of the flange, ensuring a secure bond when clamped into place. He emphasizes that this stage is crucial for maintaining the structural integrity of the flange, which in turn safeguards the living area beneath the canvas when hatches are open.Step 3: Allowing Time to Dry
After securely attaching the first portion of the flange, Sven allows ample time for it to dry before moving forward with additional steps. This patience and precision are key aspects of his successful boatbuilding methods.Step 4: Finishing Touches
Once the flange is fully dried, Sven removes the clamps carefully, ensuring no damage occurs during this process. He then moves on to attaching four more pieces onto these main frames, completing two pairs of flanges for the bulkhead hatches.The Final Touches
While two flanges form the primary support structure around the hatches, Sven mentions there are two additional pieces required at each end to ensure comprehensive protection. This attention to detail highlights his commitment to producing a durable and reliable design. “Sailing is about finding your path, whether it’s across an ocean or within yourself.” – Sven Yrvind In conclusion, making flanges around bulkhead hatches may seem complex at first glance, but by following Sven Yrvind’s meticulous process, enthusiasts can achieve professional-level results. Remember that the journey of boatbuilding is as rewarding as reaching your destination; it tests one’s patience and dedication. For those seeking to embark on this adventure or simply gain more insight into marine craftsmanship, Sven’s wisdom is invaluable.Sven Yrvind, a renowned yacht designer and sailor, shares valuable insights on creating flanges around bulkhead hatches for canvas protection in this enlightening video. By following his expert guidance, boat enthusiasts can ensure their living areas remain secure while allowing unhindered access through the hatches.Step 1: Starting with the Flange
Sven begins by explaining that working on flanges vertically and horizontally is significantly easier than doing so in a flat position. To simplify the process further, he divides the task into two or three steps as suggested by fellow expert “for for.” This approach not only makes it more manageable but also allows for greater precision in crafting each component.Step 2: Applying Glue and Securing
Sven proceeds to apply glue along one edge of the flange, ensuring a secure bond when clamped into place. He emphasizes that this stage is crucial for maintaining the structural integrity of the flange, which in turn safeguards the living area beneath the canvas when hatches are open.Step 3: Allowing Time to Dry
After securely attaching the first portion of the flange, Sven allows ample time for it to dry before moving forward with additional steps. This patience and precision are key aspects of his successful boatbuilding methods.Step 4: Finishing Touches
Once the flange is fully dried, Sven removes the clamps carefully, ensuring no damage occurs during this process. He then moves on to attaching four more pieces onto these main frames, completing two pairs of flanges for the bulkhead hatches.The Final Touches
While two flanges form the primary support structure around the hatches, Sven mentions there are two additional pieces required at each end to ensure comprehensive protection. This attention to detail highlights his commitment to producing a durable and reliable design. “Sailing is about finding your path, whether it’s across an ocean or within yourself.” – Sven Yrvind In conclusion, making flanges around bulkhead hatches may seem complex at first glance, but by following Sven Yrvind’s meticulous process, enthusiasts can achieve professional-level results. Remember that the journey of boatbuilding is as rewarding as reaching your destination; it tests one’s patience and dedication. For those seeking to embark on this adventure or simply gain more insight into marine craftsmanship, Sven’s wisdom is invaluable.Making Flanges Around Bulkhead Hatches for Canvas
Sven Yrvind, a renowned yacht designer and sailor, shares valuable insights on creating flanges around bulkhead hatches for canvas protection in this enlightening video. By following his expert guidance, boat enthusiasts can ensure their living areas remain secure while allowing unhindered access through the hatches.Step 1: Starting with the Flange
Sven begins by explaining that working on flanges vertically and horizontally is significantly easier than doing so in a flat position. To simplify the process further, he divides the task into two or three steps as suggested by fellow expert “for for.” This approach not only makes it more manageable but also allows for greater precision in crafting each component.Step 2: Applying Glue and Securing
Sven proceeds to apply glue along one edge of the flange, ensuring a secure bond when clamped into place. He emphasizes that this stage is crucial for maintaining the structural integrity of the flange, which in turn safeguards the living area beneath the canvas when hatches are open.Step 3: Allowing Time to Dry
After securely attaching the first portion of the flange, Sven allows ample time for it to dry before moving forward with additional steps. This patience and precision are key aspects of his successful boatbuilding methods.Step 4: Finishing Touches
Once the flange is fully dried, Sven removes the clamps carefully, ensuring no damage occurs during this process. He then moves on to attaching four more pieces onto these main frames, completing two pairs of flanges for the bulkhead hatches.The Final Touches
While two flanges form the primary support structure around the hatches, Sven mentions there are two additional pieces required at each end to ensure comprehensive protection. This attention to detail highlights his commitment to producing a durable and reliable design. “Sailing is about finding your path, whether it’s across an ocean or within yourself.” – Sven Yrvind In conclusion, making flanges around bulkhead hatches may seem complex at first glance, but by following Sven Yrvind’s meticulous process, enthusiasts can achieve professional-level results. Remember that the journey of boatbuilding is as rewarding as reaching your destination; it tests one’s patience and dedication. For those seeking to embark on this adventure or simply gain more insight into marine craftsmanship, Sven’s wisdom is invaluable.After securely attaching the first portion of the flange, Sven allows ample time for it to dry before moving forward with additional steps. This patience and precision are key aspects of his successful boatbuilding methods.Step 4: Finishing Touches
Once the flange is fully dried, Sven removes the clamps carefully, ensuring no damage occurs during this process. He then moves on to attaching four more pieces onto these main frames, completing two pairs of flanges for the bulkhead hatches.The Final Touches
While two flanges form the primary support structure around the hatches, Sven mentions there are two additional pieces required at each end to ensure comprehensive protection. This attention to detail highlights his commitment to producing a durable and reliable design. “Sailing is about finding your path, whether it’s across an ocean or within yourself.” – Sven Yrvind In conclusion, making flanges around bulkhead hatches may seem complex at first glance, but by following Sven Yrvind’s meticulous process, enthusiasts can achieve professional-level results. Remember that the journey of boatbuilding is as rewarding as reaching your destination; it tests one’s patience and dedication. For those seeking to embark on this adventure or simply gain more insight into marine craftsmanship, Sven’s wisdom is invaluable.Sven proceeds to apply glue along one edge of the flange, ensuring a secure bond when clamped into place. He emphasizes that this stage is crucial for maintaining the structural integrity of the flange, which in turn safeguards the living area beneath the canvas when hatches are open.Step 3: Allowing Time to Dry
After securely attaching the first portion of the flange, Sven allows ample time for it to dry before moving forward with additional steps. This patience and precision are key aspects of his successful boatbuilding methods.Step 4: Finishing Touches
Once the flange is fully dried, Sven removes the clamps carefully, ensuring no damage occurs during this process. He then moves on to attaching four more pieces onto these main frames, completing two pairs of flanges for the bulkhead hatches.The Final Touches
While two flanges form the primary support structure around the hatches, Sven mentions there are two additional pieces required at each end to ensure comprehensive protection. This attention to detail highlights his commitment to producing a durable and reliable design. “Sailing is about finding your path, whether it’s across an ocean or within yourself.” – Sven Yrvind In conclusion, making flanges around bulkhead hatches may seem complex at first glance, but by following Sven Yrvind’s meticulous process, enthusiasts can achieve professional-level results. Remember that the journey of boatbuilding is as rewarding as reaching your destination; it tests one’s patience and dedication. For those seeking to embark on this adventure or simply gain more insight into marine craftsmanship, Sven’s wisdom is invaluable.Sven begins by explaining that working on flanges vertically and horizontally is significantly easier than doing so in a flat position. To simplify the process further, he divides the task into two or three steps as suggested by fellow expert “for for.” This approach not only makes it more manageable but also allows for greater precision in crafting each component.Step 2: Applying Glue and Securing
Sven proceeds to apply glue along one edge of the flange, ensuring a secure bond when clamped into place. He emphasizes that this stage is crucial for maintaining the structural integrity of the flange, which in turn safeguards the living area beneath the canvas when hatches are open.Step 3: Allowing Time to Dry
After securely attaching the first portion of the flange, Sven allows ample time for it to dry before moving forward with additional steps. This patience and precision are key aspects of his successful boatbuilding methods.Step 4: Finishing Touches
Once the flange is fully dried, Sven removes the clamps carefully, ensuring no damage occurs during this process. He then moves on to attaching four more pieces onto these main frames, completing two pairs of flanges for the bulkhead hatches.The Final Touches
While two flanges form the primary support structure around the hatches, Sven mentions there are two additional pieces required at each end to ensure comprehensive protection. This attention to detail highlights his commitment to producing a durable and reliable design. “Sailing is about finding your path, whether it’s across an ocean or within yourself.” – Sven Yrvind In conclusion, making flanges around bulkhead hatches may seem complex at first glance, but by following Sven Yrvind’s meticulous process, enthusiasts can achieve professional-level results. Remember that the journey of boatbuilding is as rewarding as reaching your destination; it tests one’s patience and dedication. For those seeking to embark on this adventure or simply gain more insight into marine craftsmanship, Sven’s wisdom is invaluable.Sven Yrvind, a renowned yacht designer and sailor, shares valuable insights on creating flanges around bulkhead hatches for canvas protection in this enlightening video. By following his expert guidance, boat enthusiasts can ensure their living areas remain secure while allowing unhindered access through the hatches.Step 1: Starting with the Flange
Sven begins by explaining that working on flanges vertically and horizontally is significantly easier than doing so in a flat position. To simplify the process further, he divides the task into two or three steps as suggested by fellow expert “for for.” This approach not only makes it more manageable but also allows for greater precision in crafting each component.Step 2: Applying Glue and Securing
Sven proceeds to apply glue along one edge of the flange, ensuring a secure bond when clamped into place. He emphasizes that this stage is crucial for maintaining the structural integrity of the flange, which in turn safeguards the living area beneath the canvas when hatches are open.Step 3: Allowing Time to Dry
After securely attaching the first portion of the flange, Sven allows ample time for it to dry before moving forward with additional steps. This patience and precision are key aspects of his successful boatbuilding methods.Step 4: Finishing Touches
Once the flange is fully dried, Sven removes the clamps carefully, ensuring no damage occurs during this process. He then moves on to attaching four more pieces onto these main frames, completing two pairs of flanges for the bulkhead hatches.The Final Touches
While two flanges form the primary support structure around the hatches, Sven mentions there are two additional pieces required at each end to ensure comprehensive protection. This attention to detail highlights his commitment to producing a durable and reliable design. “Sailing is about finding your path, whether it’s across an ocean or within yourself.” – Sven Yrvind In conclusion, making flanges around bulkhead hatches may seem complex at first glance, but by following Sven Yrvind’s meticulous process, enthusiasts can achieve professional-level results. Remember that the journey of boatbuilding is as rewarding as reaching your destination; it tests one’s patience and dedication. For those seeking to embark on this adventure or simply gain more insight into marine craftsmanship, Sven’s wisdom is invaluable.Making Flanges Around Bulkhead Hatches for Canvas
Sven Yrvind, a renowned yacht designer and sailor, shares valuable insights on creating flanges around bulkhead hatches for canvas protection in this enlightening video. By following his expert guidance, boat enthusiasts can ensure their living areas remain secure while allowing unhindered access through the hatches.Step 1: Starting with the Flange
Sven begins by explaining that working on flanges vertically and horizontally is significantly easier than doing so in a flat position. To simplify the process further, he divides the task into two or three steps as suggested by fellow expert “for for.” This approach not only makes it more manageable but also allows for greater precision in crafting each component.Step 2: Applying Glue and Securing
Sven proceeds to apply glue along one edge of the flange, ensuring a secure bond when clamped into place. He emphasizes that this stage is crucial for maintaining the structural integrity of the flange, which in turn safeguards the living area beneath the canvas when hatches are open.Step 3: Allowing Time to Dry
After securely attaching the first portion of the flange, Sven allows ample time for it to dry before moving forward with additional steps. This patience and precision are key aspects of his successful boatbuilding methods.Step 4: Finishing Touches
Once the flange is fully dried, Sven removes the clamps carefully, ensuring no damage occurs during this process. He then moves on to attaching four more pieces onto these main frames, completing two pairs of flanges for the bulkhead hatches.The Final Touches
While two flanges form the primary support structure around the hatches, Sven mentions there are two additional pieces required at each end to ensure comprehensive protection. This attention to detail highlights his commitment to producing a durable and reliable design. “Sailing is about finding your path, whether it’s across an ocean or within yourself.” – Sven Yrvind In conclusion, making flanges around bulkhead hatches may seem complex at first glance, but by following Sven Yrvind’s meticulous process, enthusiasts can achieve professional-level results. Remember that the journey of boatbuilding is as rewarding as reaching your destination; it tests one’s patience and dedication. For those seeking to embark on this adventure or simply gain more insight into marine craftsmanship, Sven’s wisdom is invaluable.Once the flange is fully dried, Sven removes the clamps carefully, ensuring no damage occurs during this process. He then moves on to attaching four more pieces onto these main frames, completing two pairs of flanges for the bulkhead hatches.The Final Touches
While two flanges form the primary support structure around the hatches, Sven mentions there are two additional pieces required at each end to ensure comprehensive protection. This attention to detail highlights his commitment to producing a durable and reliable design. “Sailing is about finding your path, whether it’s across an ocean or within yourself.” – Sven Yrvind In conclusion, making flanges around bulkhead hatches may seem complex at first glance, but by following Sven Yrvind’s meticulous process, enthusiasts can achieve professional-level results. Remember that the journey of boatbuilding is as rewarding as reaching your destination; it tests one’s patience and dedication. For those seeking to embark on this adventure or simply gain more insight into marine craftsmanship, Sven’s wisdom is invaluable.After securely attaching the first portion of the flange, Sven allows ample time for it to dry before moving forward with additional steps. This patience and precision are key aspects of his successful boatbuilding methods.Step 4: Finishing Touches
Once the flange is fully dried, Sven removes the clamps carefully, ensuring no damage occurs during this process. He then moves on to attaching four more pieces onto these main frames, completing two pairs of flanges for the bulkhead hatches.The Final Touches
While two flanges form the primary support structure around the hatches, Sven mentions there are two additional pieces required at each end to ensure comprehensive protection. This attention to detail highlights his commitment to producing a durable and reliable design. “Sailing is about finding your path, whether it’s across an ocean or within yourself.” – Sven Yrvind In conclusion, making flanges around bulkhead hatches may seem complex at first glance, but by following Sven Yrvind’s meticulous process, enthusiasts can achieve professional-level results. Remember that the journey of boatbuilding is as rewarding as reaching your destination; it tests one’s patience and dedication. For those seeking to embark on this adventure or simply gain more insight into marine craftsmanship, Sven’s wisdom is invaluable.Sven proceeds to apply glue along one edge of the flange, ensuring a secure bond when clamped into place. He emphasizes that this stage is crucial for maintaining the structural integrity of the flange, which in turn safeguards the living area beneath the canvas when hatches are open.Step 3: Allowing Time to Dry
After securely attaching the first portion of the flange, Sven allows ample time for it to dry before moving forward with additional steps. This patience and precision are key aspects of his successful boatbuilding methods.Step 4: Finishing Touches
Once the flange is fully dried, Sven removes the clamps carefully, ensuring no damage occurs during this process. He then moves on to attaching four more pieces onto these main frames, completing two pairs of flanges for the bulkhead hatches.The Final Touches
While two flanges form the primary support structure around the hatches, Sven mentions there are two additional pieces required at each end to ensure comprehensive protection. This attention to detail highlights his commitment to producing a durable and reliable design. “Sailing is about finding your path, whether it’s across an ocean or within yourself.” – Sven Yrvind In conclusion, making flanges around bulkhead hatches may seem complex at first glance, but by following Sven Yrvind’s meticulous process, enthusiasts can achieve professional-level results. Remember that the journey of boatbuilding is as rewarding as reaching your destination; it tests one’s patience and dedication. For those seeking to embark on this adventure or simply gain more insight into marine craftsmanship, Sven’s wisdom is invaluable.Sven begins by explaining that working on flanges vertically and horizontally is significantly easier than doing so in a flat position. To simplify the process further, he divides the task into two or three steps as suggested by fellow expert “for for.” This approach not only makes it more manageable but also allows for greater precision in crafting each component.Step 2: Applying Glue and Securing
Sven proceeds to apply glue along one edge of the flange, ensuring a secure bond when clamped into place. He emphasizes that this stage is crucial for maintaining the structural integrity of the flange, which in turn safeguards the living area beneath the canvas when hatches are open.Step 3: Allowing Time to Dry
After securely attaching the first portion of the flange, Sven allows ample time for it to dry before moving forward with additional steps. This patience and precision are key aspects of his successful boatbuilding methods.Step 4: Finishing Touches
Once the flange is fully dried, Sven removes the clamps carefully, ensuring no damage occurs during this process. He then moves on to attaching four more pieces onto these main frames, completing two pairs of flanges for the bulkhead hatches.The Final Touches
While two flanges form the primary support structure around the hatches, Sven mentions there are two additional pieces required at each end to ensure comprehensive protection. This attention to detail highlights his commitment to producing a durable and reliable design. “Sailing is about finding your path, whether it’s across an ocean or within yourself.” – Sven Yrvind In conclusion, making flanges around bulkhead hatches may seem complex at first glance, but by following Sven Yrvind’s meticulous process, enthusiasts can achieve professional-level results. Remember that the journey of boatbuilding is as rewarding as reaching your destination; it tests one’s patience and dedication. For those seeking to embark on this adventure or simply gain more insight into marine craftsmanship, Sven’s wisdom is invaluable.Sven Yrvind, a renowned yacht designer and sailor, shares valuable insights on creating flanges around bulkhead hatches for canvas protection in this enlightening video. By following his expert guidance, boat enthusiasts can ensure their living areas remain secure while allowing unhindered access through the hatches.Step 1: Starting with the Flange
Sven begins by explaining that working on flanges vertically and horizontally is significantly easier than doing so in a flat position. To simplify the process further, he divides the task into two or three steps as suggested by fellow expert “for for.” This approach not only makes it more manageable but also allows for greater precision in crafting each component.Step 2: Applying Glue and Securing
Sven proceeds to apply glue along one edge of the flange, ensuring a secure bond when clamped into place. He emphasizes that this stage is crucial for maintaining the structural integrity of the flange, which in turn safeguards the living area beneath the canvas when hatches are open.Step 3: Allowing Time to Dry
After securely attaching the first portion of the flange, Sven allows ample time for it to dry before moving forward with additional steps. This patience and precision are key aspects of his successful boatbuilding methods.Step 4: Finishing Touches
Once the flange is fully dried, Sven removes the clamps carefully, ensuring no damage occurs during this process. He then moves on to attaching four more pieces onto these main frames, completing two pairs of flanges for the bulkhead hatches.The Final Touches
While two flanges form the primary support structure around the hatches, Sven mentions there are two additional pieces required at each end to ensure comprehensive protection. This attention to detail highlights his commitment to producing a durable and reliable design. “Sailing is about finding your path, whether it’s across an ocean or within yourself.” – Sven Yrvind In conclusion, making flanges around bulkhead hatches may seem complex at first glance, but by following Sven Yrvind’s meticulous process, enthusiasts can achieve professional-level results. Remember that the journey of boatbuilding is as rewarding as reaching your destination; it tests one’s patience and dedication. For those seeking to embark on this adventure or simply gain more insight into marine craftsmanship, Sven’s wisdom is invaluable.Making Flanges Around Bulkhead Hatches for Canvas
Sven Yrvind, a renowned yacht designer and sailor, shares valuable insights on creating flanges around bulkhead hatches for canvas protection in this enlightening video. By following his expert guidance, boat enthusiasts can ensure their living areas remain secure while allowing unhindered access through the hatches.Step 1: Starting with the Flange
Sven begins by explaining that working on flanges vertically and horizontally is significantly easier than doing so in a flat position. To simplify the process further, he divides the task into two or three steps as suggested by fellow expert “for for.” This approach not only makes it more manageable but also allows for greater precision in crafting each component.Step 2: Applying Glue and Securing
Sven proceeds to apply glue along one edge of the flange, ensuring a secure bond when clamped into place. He emphasizes that this stage is crucial for maintaining the structural integrity of the flange, which in turn safeguards the living area beneath the canvas when hatches are open.Step 3: Allowing Time to Dry
After securely attaching the first portion of the flange, Sven allows ample time for it to dry before moving forward with additional steps. This patience and precision are key aspects of his successful boatbuilding methods.Step 4: Finishing Touches
Once the flange is fully dried, Sven removes the clamps carefully, ensuring no damage occurs during this process. He then moves on to attaching four more pieces onto these main frames, completing two pairs of flanges for the bulkhead hatches.The Final Touches
While two flanges form the primary support structure around the hatches, Sven mentions there are two additional pieces required at each end to ensure comprehensive protection. This attention to detail highlights his commitment to producing a durable and reliable design. “Sailing is about finding your path, whether it’s across an ocean or within yourself.” – Sven Yrvind In conclusion, making flanges around bulkhead hatches may seem complex at first glance, but by following Sven Yrvind’s meticulous process, enthusiasts can achieve professional-level results. Remember that the journey of boatbuilding is as rewarding as reaching your destination; it tests one’s patience and dedication. For those seeking to embark on this adventure or simply gain more insight into marine craftsmanship, Sven’s wisdom is invaluable.Sven proceeds to apply glue along one edge of the flange, ensuring a secure bond when clamped into place. He emphasizes that this stage is crucial for maintaining the structural integrity of the flange, which in turn safeguards the living area beneath the canvas when hatches are open.Step 3: Allowing Time to Dry
After securely attaching the first portion of the flange, Sven allows ample time for it to dry before moving forward with additional steps. This patience and precision are key aspects of his successful boatbuilding methods.Step 4: Finishing Touches
Once the flange is fully dried, Sven removes the clamps carefully, ensuring no damage occurs during this process. He then moves on to attaching four more pieces onto these main frames, completing two pairs of flanges for the bulkhead hatches.The Final Touches
While two flanges form the primary support structure around the hatches, Sven mentions there are two additional pieces required at each end to ensure comprehensive protection. This attention to detail highlights his commitment to producing a durable and reliable design. “Sailing is about finding your path, whether it’s across an ocean or within yourself.” – Sven Yrvind In conclusion, making flanges around bulkhead hatches may seem complex at first glance, but by following Sven Yrvind’s meticulous process, enthusiasts can achieve professional-level results. Remember that the journey of boatbuilding is as rewarding as reaching your destination; it tests one’s patience and dedication. For those seeking to embark on this adventure or simply gain more insight into marine craftsmanship, Sven’s wisdom is invaluable.After securely attaching the first portion of the flange, Sven allows ample time for it to dry before moving forward with additional steps. This patience and precision are key aspects of his successful boatbuilding methods.Step 4: Finishing Touches
Once the flange is fully dried, Sven removes the clamps carefully, ensuring no damage occurs during this process. He then moves on to attaching four more pieces onto these main frames, completing two pairs of flanges for the bulkhead hatches.The Final Touches
While two flanges form the primary support structure around the hatches, Sven mentions there are two additional pieces required at each end to ensure comprehensive protection. This attention to detail highlights his commitment to producing a durable and reliable design. “Sailing is about finding your path, whether it’s across an ocean or within yourself.” – Sven Yrvind In conclusion, making flanges around bulkhead hatches may seem complex at first glance, but by following Sven Yrvind’s meticulous process, enthusiasts can achieve professional-level results. Remember that the journey of boatbuilding is as rewarding as reaching your destination; it tests one’s patience and dedication. For those seeking to embark on this adventure or simply gain more insight into marine craftsmanship, Sven’s wisdom is invaluable.Sven Yrvind, a renowned yacht designer and sailor, shares valuable insights on creating flanges around bulkhead hatches for canvas protection in this enlightening video. By following his expert guidance, boat enthusiasts can ensure their living areas remain secure while allowing unhindered access through the hatches.Step 1: Starting with the Flange
Sven begins by explaining that working on flanges vertically and horizontally is significantly easier than doing so in a flat position. To simplify the process further, he divides the task into two or three steps as suggested by fellow expert “for for.” This approach not only makes it more manageable but also allows for greater precision in crafting each component.Step 2: Applying Glue and Securing
Sven proceeds to apply glue along one edge of the flange, ensuring a secure bond when clamped into place. He emphasizes that this stage is crucial for maintaining the structural integrity of the flange, which in turn safeguards the living area beneath the canvas when hatches are open.Step 3: Allowing Time to Dry
After securely attaching the first portion of the flange, Sven allows ample time for it to dry before moving forward with additional steps. This patience and precision are key aspects of his successful boatbuilding methods.Step 4: Finishing Touches
Once the flange is fully dried, Sven removes the clamps carefully, ensuring no damage occurs during this process. He then moves on to attaching four more pieces onto these main frames, completing two pairs of flanges for the bulkhead hatches.The Final Touches
While two flanges form the primary support structure around the hatches, Sven mentions there are two additional pieces required at each end to ensure comprehensive protection. This attention to detail highlights his commitment to producing a durable and reliable design. “Sailing is about finding your path, whether it’s across an ocean or within yourself.” – Sven Yrvind In conclusion, making flanges around bulkhead hatches may seem complex at first glance, but by following Sven Yrvind’s meticulous process, enthusiasts can achieve professional-level results. Remember that the journey of boatbuilding is as rewarding as reaching your destination; it tests one’s patience and dedication. For those seeking to embark on this adventure or simply gain more insight into marine craftsmanship, Sven’s wisdom is invaluable.Making Flanges Around Bulkhead Hatches for Canvas
Sven Yrvind, a renowned yacht designer and sailor, shares valuable insights on creating flanges around bulkhead hatches for canvas protection in this enlightening video. By following his expert guidance, boat enthusiasts can ensure their living areas remain secure while allowing unhindered access through the hatches.Step 1: Starting with the Flange
Sven begins by explaining that working on flanges vertically and horizontally is significantly easier than doing so in a flat position. To simplify the process further, he divides the task into two or three steps as suggested by fellow expert “for for.” This approach not only makes it more manageable but also allows for greater precision in crafting each component.Step 2: Applying Glue and Securing
Sven proceeds to apply glue along one edge of the flange, ensuring a secure bond when clamped into place. He emphasizes that this stage is crucial for maintaining the structural integrity of the flange, which in turn safeguards the living area beneath the canvas when hatches are open.Step 3: Allowing Time to Dry
After securely attaching the first portion of the flange, Sven allows ample time for it to dry before moving forward with additional steps. This patience and precision are key aspects of his successful boatbuilding methods.Step 4: Finishing Touches
Once the flange is fully dried, Sven removes the clamps carefully, ensuring no damage occurs during this process. He then moves on to attaching four more pieces onto these main frames, completing two pairs of flanges for the bulkhead hatches.The Final Touches
While two flanges form the primary support structure around the hatches, Sven mentions there are two additional pieces required at each end to ensure comprehensive protection. This attention to detail highlights his commitment to producing a durable and reliable design. “Sailing is about finding your path, whether it’s across an ocean or within yourself.” – Sven Yrvind In conclusion, making flanges around bulkhead hatches may seem complex at first glance, but by following Sven Yrvind’s meticulous process, enthusiasts can achieve professional-level results. Remember that the journey of boatbuilding is as rewarding as reaching your destination; it tests one’s patience and dedication. For those seeking to embark on this adventure or simply gain more insight into marine craftsmanship, Sven’s wisdom is invaluable.Sven proceeds to apply glue along one edge of the flange, ensuring a secure bond when clamped into place. He emphasizes that this stage is crucial for maintaining the structural integrity of the flange, which in turn safeguards the living area beneath the canvas when hatches are open.Step 3: Allowing Time to Dry
After securely attaching the first portion of the flange, Sven allows ample time for it to dry before moving forward with additional steps. This patience and precision are key aspects of his successful boatbuilding methods.Step 4: Finishing Touches
Once the flange is fully dried, Sven removes the clamps carefully, ensuring no damage occurs during this process. He then moves on to attaching four more pieces onto these main frames, completing two pairs of flanges for the bulkhead hatches.The Final Touches
While two flanges form the primary support structure around the hatches, Sven mentions there are two additional pieces required at each end to ensure comprehensive protection. This attention to detail highlights his commitment to producing a durable and reliable design. “Sailing is about finding your path, whether it’s across an ocean or within yourself.” – Sven Yrvind In conclusion, making flanges around bulkhead hatches may seem complex at first glance, but by following Sven Yrvind’s meticulous process, enthusiasts can achieve professional-level results. Remember that the journey of boatbuilding is as rewarding as reaching your destination; it tests one’s patience and dedication. For those seeking to embark on this adventure or simply gain more insight into marine craftsmanship, Sven’s wisdom is invaluable.Sven Yrvind, a renowned yacht designer and sailor, shares valuable insights on creating flanges around bulkhead hatches for canvas protection in this enlightening video. By following his expert guidance, boat enthusiasts can ensure their living areas remain secure while allowing unhindered access through the hatches.Step 1: Starting with the Flange
Sven begins by explaining that working on flanges vertically and horizontally is significantly easier than doing so in a flat position. To simplify the process further, he divides the task into two or three steps as suggested by fellow expert “for for.” This approach not only makes it more manageable but also allows for greater precision in crafting each component.Step 2: Applying Glue and Securing
Sven proceeds to apply glue along one edge of the flange, ensuring a secure bond when clamped into place. He emphasizes that this stage is crucial for maintaining the structural integrity of the flange, which in turn safeguards the living area beneath the canvas when hatches are open.Step 3: Allowing Time to Dry
After securely attaching the first portion of the flange, Sven allows ample time for it to dry before moving forward with additional steps. This patience and precision are key aspects of his successful boatbuilding methods.Step 4: Finishing Touches
Once the flange is fully dried, Sven removes the clamps carefully, ensuring no damage occurs during this process. He then moves on to attaching four more pieces onto these main frames, completing two pairs of flanges for the bulkhead hatches.The Final Touches
While two flanges form the primary support structure around the hatches, Sven mentions there are two additional pieces required at each end to ensure comprehensive protection. This attention to detail highlights his commitment to producing a durable and reliable design. “Sailing is about finding your path, whether it’s across an ocean or within yourself.” – Sven Yrvind In conclusion, making flanges around bulkhead hatches may seem complex at first glance, but by following Sven Yrvind’s meticulous process, enthusiasts can achieve professional-level results. Remember that the journey of boatbuilding is as rewarding as reaching your destination; it tests one’s patience and dedication. For those seeking to embark on this adventure or simply gain more insight into marine craftsmanship, Sven’s wisdom is invaluable.Making Flanges Around Bulkhead Hatches for Canvas
Sven Yrvind, a renowned yacht designer and sailor, shares valuable insights on creating flanges around bulkhead hatches for canvas protection in this enlightening video. By following his expert guidance, boat enthusiasts can ensure their living areas remain secure while allowing unhindered access through the hatches.Step 1: Starting with the Flange
Sven begins by explaining that working on flanges vertically and horizontally is significantly easier than doing so in a flat position. To simplify the process further, he divides the task into two or three steps as suggested by fellow expert “for for.” This approach not only makes it more manageable but also allows for greater precision in crafting each component.Step 2: Applying Glue and Securing
Sven proceeds to apply glue along one edge of the flange, ensuring a secure bond when clamped into place. He emphasizes that this stage is crucial for maintaining the structural integrity of the flange, which in turn safeguards the living area beneath the canvas when hatches are open.Step 3: Allowing Time to Dry
After securely attaching the first portion of the flange, Sven allows ample time for it to dry before moving forward with additional steps. This patience and precision are key aspects of his successful boatbuilding methods.Step 4: Finishing Touches
Once the flange is fully dried, Sven removes the clamps carefully, ensuring no damage occurs during this process. He then moves on to attaching four more pieces onto these main frames, completing two pairs of flanges for the bulkhead hatches.The Final Touches
While two flanges form the primary support structure around the hatches, Sven mentions there are two additional pieces required at each end to ensure comprehensive protection. This attention to detail highlights his commitment to producing a durable and reliable design. “Sailing is about finding your path, whether it’s across an ocean or within yourself.” – Sven Yrvind In conclusion, making flanges around bulkhead hatches may seem complex at first glance, but by following Sven Yrvind’s meticulous process, enthusiasts can achieve professional-level results. Remember that the journey of boatbuilding is as rewarding as reaching your destination; it tests one’s patience and dedication. For those seeking to embark on this adventure or simply gain more insight into marine craftsmanship, Sven’s wisdom is invaluable.Sven begins by explaining that working on flanges vertically and horizontally is significantly easier than doing so in a flat position. To simplify the process further, he divides the task into two or three steps as suggested by fellow expert “for for.” This approach not only makes it more manageable but also allows for greater precision in crafting each component.Step 2: Applying Glue and Securing
Sven proceeds to apply glue along one edge of the flange, ensuring a secure bond when clamped into place. He emphasizes that this stage is crucial for maintaining the structural integrity of the flange, which in turn safeguards the living area beneath the canvas when hatches are open.Step 3: Allowing Time to Dry
After securely attaching the first portion of the flange, Sven allows ample time for it to dry before moving forward with additional steps. This patience and precision are key aspects of his successful boatbuilding methods.Step 4: Finishing Touches
Once the flange is fully dried, Sven removes the clamps carefully, ensuring no damage occurs during this process. He then moves on to attaching four more pieces onto these main frames, completing two pairs of flanges for the bulkhead hatches.The Final Touches
While two flanges form the primary support structure around the hatches, Sven mentions there are two additional pieces required at each end to ensure comprehensive protection. This attention to detail highlights his commitment to producing a durable and reliable design. “Sailing is about finding your path, whether it’s across an ocean or within yourself.” – Sven Yrvind In conclusion, making flanges around bulkhead hatches may seem complex at first glance, but by following Sven Yrvind’s meticulous process, enthusiasts can achieve professional-level results. Remember that the journey of boatbuilding is as rewarding as reaching your destination; it tests one’s patience and dedication. For those seeking to embark on this adventure or simply gain more insight into marine craftsmanship, Sven’s wisdom is invaluable.Sven Yrvind, a renowned yacht designer and sailor, shares valuable insights on creating flanges around bulkhead hatches for canvas protection in this enlightening video. By following his expert guidance, boat enthusiasts can ensure their living areas remain secure while allowing unhindered access through the hatches.Step 1: Starting with the Flange
Sven begins by explaining that working on flanges vertically and horizontally is significantly easier than doing so in a flat position. To simplify the process further, he divides the task into two or three steps as suggested by fellow expert “for for.” This approach not only makes it more manageable but also allows for greater precision in crafting each component.Step 2: Applying Glue and Securing
Sven proceeds to apply glue along one edge of the flange, ensuring a secure bond when clamped into place. He emphasizes that this stage is crucial for maintaining the structural integrity of the flange, which in turn safeguards the living area beneath the canvas when hatches are open.Step 3: Allowing Time to Dry
After securely attaching the first portion of the flange, Sven allows ample time for it to dry before moving forward with additional steps. This patience and precision are key aspects of his successful boatbuilding methods.Step 4: Finishing Touches
Once the flange is fully dried, Sven removes the clamps carefully, ensuring no damage occurs during this process. He then moves on to attaching four more pieces onto these main frames, completing two pairs of flanges for the bulkhead hatches.The Final Touches
While two flanges form the primary support structure around the hatches, Sven mentions there are two additional pieces required at each end to ensure comprehensive protection. This attention to detail highlights his commitment to producing a durable and reliable design. “Sailing is about finding your path, whether it’s across an ocean or within yourself.” – Sven Yrvind In conclusion, making flanges around bulkhead hatches may seem complex at first glance, but by following Sven Yrvind’s meticulous process, enthusiasts can achieve professional-level results. Remember that the journey of boatbuilding is as rewarding as reaching your destination; it tests one’s patience and dedication. For those seeking to embark on this adventure or simply gain more insight into marine craftsmanship, Sven’s wisdom is invaluable.Making Flanges Around Bulkhead Hatches for Canvas
Sven Yrvind, a renowned yacht designer and sailor, shares valuable insights on creating flanges around bulkhead hatches for canvas protection in this enlightening video. By following his expert guidance, boat enthusiasts can ensure their living areas remain secure while allowing unhindered access through the hatches.Step 1: Starting with the Flange
Sven begins by explaining that working on flanges vertically and horizontally is significantly easier than doing so in a flat position. To simplify the process further, he divides the task into two or three steps as suggested by fellow expert “for for.” This approach not only makes it more manageable but also allows for greater precision in crafting each component.Step 2: Applying Glue and Securing
Sven proceeds to apply glue along one edge of the flange, ensuring a secure bond when clamped into place. He emphasizes that this stage is crucial for maintaining the structural integrity of the flange, which in turn safeguards the living area beneath the canvas when hatches are open.Step 3: Allowing Time to Dry
After securely attaching the first portion of the flange, Sven allows ample time for it to dry before moving forward with additional steps. This patience and precision are key aspects of his successful boatbuilding methods.Step 4: Finishing Touches
Once the flange is fully dried, Sven removes the clamps carefully, ensuring no damage occurs during this process. He then moves on to attaching four more pieces onto these main frames, completing two pairs of flanges for the bulkhead hatches.The Final Touches
While two flanges form the primary support structure around the hatches, Sven mentions there are two additional pieces required at each end to ensure comprehensive protection. This attention to detail highlights his commitment to producing a durable and reliable design. “Sailing is about finding your path, whether it’s across an ocean or within yourself.” – Sven Yrvind In conclusion, making flanges around bulkhead hatches may seem complex at first glance, but by following Sven Yrvind’s meticulous process, enthusiasts can achieve professional-level results. Remember that the journey of boatbuilding is as rewarding as reaching your destination; it tests one’s patience and dedication. For those seeking to embark on this adventure or simply gain more insight into marine craftsmanship, Sven’s wisdom is invaluable.Once the flange is fully dried, Sven removes the clamps carefully, ensuring no damage occurs during this process. He then moves on to attaching four more pieces onto these main frames, completing two pairs of flanges for the bulkhead hatches.The Final Touches
While two flanges form the primary support structure around the hatches, Sven mentions there are two additional pieces required at each end to ensure comprehensive protection. This attention to detail highlights his commitment to producing a durable and reliable design. “Sailing is about finding your path, whether it’s across an ocean or within yourself.” – Sven Yrvind In conclusion, making flanges around bulkhead hatches may seem complex at first glance, but by following Sven Yrvind’s meticulous process, enthusiasts can achieve professional-level results. Remember that the journey of boatbuilding is as rewarding as reaching your destination; it tests one’s patience and dedication. For those seeking to embark on this adventure or simply gain more insight into marine craftsmanship, Sven’s wisdom is invaluable.Sven begins by explaining that working on flanges vertically and horizontally is significantly easier than doing so in a flat position. To simplify the process further, he divides the task into two or three steps as suggested by fellow expert “for for.” This approach not only makes it more manageable but also allows for greater precision in crafting each component.Step 2: Applying Glue and Securing
Sven proceeds to apply glue along one edge of the flange, ensuring a secure bond when clamped into place. He emphasizes that this stage is crucial for maintaining the structural integrity of the flange, which in turn safeguards the living area beneath the canvas when hatches are open.Step 3: Allowing Time to Dry
After securely attaching the first portion of the flange, Sven allows ample time for it to dry before moving forward with additional steps. This patience and precision are key aspects of his successful boatbuilding methods.Step 4: Finishing Touches
Once the flange is fully dried, Sven removes the clamps carefully, ensuring no damage occurs during this process. He then moves on to attaching four more pieces onto these main frames, completing two pairs of flanges for the bulkhead hatches.The Final Touches
While two flanges form the primary support structure around the hatches, Sven mentions there are two additional pieces required at each end to ensure comprehensive protection. This attention to detail highlights his commitment to producing a durable and reliable design. “Sailing is about finding your path, whether it’s across an ocean or within yourself.” – Sven Yrvind In conclusion, making flanges around bulkhead hatches may seem complex at first glance, but by following Sven Yrvind’s meticulous process, enthusiasts can achieve professional-level results. Remember that the journey of boatbuilding is as rewarding as reaching your destination; it tests one’s patience and dedication. For those seeking to embark on this adventure or simply gain more insight into marine craftsmanship, Sven’s wisdom is invaluable.Sven Yrvind, a renowned yacht designer and sailor, shares valuable insights on creating flanges around bulkhead hatches for canvas protection in this enlightening video. By following his expert guidance, boat enthusiasts can ensure their living areas remain secure while allowing unhindered access through the hatches.Step 1: Starting with the Flange
Sven begins by explaining that working on flanges vertically and horizontally is significantly easier than doing so in a flat position. To simplify the process further, he divides the task into two or three steps as suggested by fellow expert “for for.” This approach not only makes it more manageable but also allows for greater precision in crafting each component.Step 2: Applying Glue and Securing
Sven proceeds to apply glue along one edge of the flange, ensuring a secure bond when clamped into place. He emphasizes that this stage is crucial for maintaining the structural integrity of the flange, which in turn safeguards the living area beneath the canvas when hatches are open.Step 3: Allowing Time to Dry
After securely attaching the first portion of the flange, Sven allows ample time for it to dry before moving forward with additional steps. This patience and precision are key aspects of his successful boatbuilding methods.Step 4: Finishing Touches
Once the flange is fully dried, Sven removes the clamps carefully, ensuring no damage occurs during this process. He then moves on to attaching four more pieces onto these main frames, completing two pairs of flanges for the bulkhead hatches.The Final Touches
While two flanges form the primary support structure around the hatches, Sven mentions there are two additional pieces required at each end to ensure comprehensive protection. This attention to detail highlights his commitment to producing a durable and reliable design. “Sailing is about finding your path, whether it’s across an ocean or within yourself.” – Sven Yrvind In conclusion, making flanges around bulkhead hatches may seem complex at first glance, but by following Sven Yrvind’s meticulous process, enthusiasts can achieve professional-level results. Remember that the journey of boatbuilding is as rewarding as reaching your destination; it tests one’s patience and dedication. For those seeking to embark on this adventure or simply gain more insight into marine craftsmanship, Sven’s wisdom is invaluable.Making Flanges Around Bulkhead Hatches for Canvas
Sven Yrvind, a renowned yacht designer and sailor, shares valuable insights on creating flanges around bulkhead hatches for canvas protection in this enlightening video. By following his expert guidance, boat enthusiasts can ensure their living areas remain secure while allowing unhindered access through the hatches.Step 1: Starting with the Flange
Sven begins by explaining that working on flanges vertically and horizontally is significantly easier than doing so in a flat position. To simplify the process further, he divides the task into two or three steps as suggested by fellow expert “for for.” This approach not only makes it more manageable but also allows for greater precision in crafting each component.Step 2: Applying Glue and Securing
Sven proceeds to apply glue along one edge of the flange, ensuring a secure bond when clamped into place. He emphasizes that this stage is crucial for maintaining the structural integrity of the flange, which in turn safeguards the living area beneath the canvas when hatches are open.Step 3: Allowing Time to Dry
After securely attaching the first portion of the flange, Sven allows ample time for it to dry before moving forward with additional steps. This patience and precision are key aspects of his successful boatbuilding methods.Step 4: Finishing Touches
Once the flange is fully dried, Sven removes the clamps carefully, ensuring no damage occurs during this process. He then moves on to attaching four more pieces onto these main frames, completing two pairs of flanges for the bulkhead hatches.The Final Touches
While two flanges form the primary support structure around the hatches, Sven mentions there are two additional pieces required at each end to ensure comprehensive protection. This attention to detail highlights his commitment to producing a durable and reliable design. “Sailing is about finding your path, whether it’s across an ocean or within yourself.” – Sven Yrvind In conclusion, making flanges around bulkhead hatches may seem complex at first glance, but by following Sven Yrvind’s meticulous process, enthusiasts can achieve professional-level results. Remember that the journey of boatbuilding is as rewarding as reaching your destination; it tests one’s patience and dedication. For those seeking to embark on this adventure or simply gain more insight into marine craftsmanship, Sven’s wisdom is invaluable.After securely attaching the first portion of the flange, Sven allows ample time for it to dry before moving forward with additional steps. This patience and precision are key aspects of his successful boatbuilding methods.Step 4: Finishing Touches
Once the flange is fully dried, Sven removes the clamps carefully, ensuring no damage occurs during this process. He then moves on to attaching four more pieces onto these main frames, completing two pairs of flanges for the bulkhead hatches.The Final Touches
While two flanges form the primary support structure around the hatches, Sven mentions there are two additional pieces required at each end to ensure comprehensive protection. This attention to detail highlights his commitment to producing a durable and reliable design. “Sailing is about finding your path, whether it’s across an ocean or within yourself.” – Sven Yrvind In conclusion, making flanges around bulkhead hatches may seem complex at first glance, but by following Sven Yrvind’s meticulous process, enthusiasts can achieve professional-level results. Remember that the journey of boatbuilding is as rewarding as reaching your destination; it tests one’s patience and dedication. For those seeking to embark on this adventure or simply gain more insight into marine craftsmanship, Sven’s wisdom is invaluable.Sven begins by explaining that working on flanges vertically and horizontally is significantly easier than doing so in a flat position. To simplify the process further, he divides the task into two or three steps as suggested by fellow expert “for for.” This approach not only makes it more manageable but also allows for greater precision in crafting each component.Step 2: Applying Glue and Securing
Sven proceeds to apply glue along one edge of the flange, ensuring a secure bond when clamped into place. He emphasizes that this stage is crucial for maintaining the structural integrity of the flange, which in turn safeguards the living area beneath the canvas when hatches are open.Step 3: Allowing Time to Dry
After securely attaching the first portion of the flange, Sven allows ample time for it to dry before moving forward with additional steps. This patience and precision are key aspects of his successful boatbuilding methods.Step 4: Finishing Touches
Once the flange is fully dried, Sven removes the clamps carefully, ensuring no damage occurs during this process. He then moves on to attaching four more pieces onto these main frames, completing two pairs of flanges for the bulkhead hatches.The Final Touches
While two flanges form the primary support structure around the hatches, Sven mentions there are two additional pieces required at each end to ensure comprehensive protection. This attention to detail highlights his commitment to producing a durable and reliable design. “Sailing is about finding your path, whether it’s across an ocean or within yourself.” – Sven Yrvind In conclusion, making flanges around bulkhead hatches may seem complex at first glance, but by following Sven Yrvind’s meticulous process, enthusiasts can achieve professional-level results. Remember that the journey of boatbuilding is as rewarding as reaching your destination; it tests one’s patience and dedication. For those seeking to embark on this adventure or simply gain more insight into marine craftsmanship, Sven’s wisdom is invaluable.Sven Yrvind, a renowned yacht designer and sailor, shares valuable insights on creating flanges around bulkhead hatches for canvas protection in this enlightening video. By following his expert guidance, boat enthusiasts can ensure their living areas remain secure while allowing unhindered access through the hatches.Step 1: Starting with the Flange
Sven begins by explaining that working on flanges vertically and horizontally is significantly easier than doing so in a flat position. To simplify the process further, he divides the task into two or three steps as suggested by fellow expert “for for.” This approach not only makes it more manageable but also allows for greater precision in crafting each component.Step 2: Applying Glue and Securing
Sven proceeds to apply glue along one edge of the flange, ensuring a secure bond when clamped into place. He emphasizes that this stage is crucial for maintaining the structural integrity of the flange, which in turn safeguards the living area beneath the canvas when hatches are open.Step 3: Allowing Time to Dry
After securely attaching the first portion of the flange, Sven allows ample time for it to dry before moving forward with additional steps. This patience and precision are key aspects of his successful boatbuilding methods.Step 4: Finishing Touches
Once the flange is fully dried, Sven removes the clamps carefully, ensuring no damage occurs during this process. He then moves on to attaching four more pieces onto these main frames, completing two pairs of flanges for the bulkhead hatches.The Final Touches
While two flanges form the primary support structure around the hatches, Sven mentions there are two additional pieces required at each end to ensure comprehensive protection. This attention to detail highlights his commitment to producing a durable and reliable design. “Sailing is about finding your path, whether it’s across an ocean or within yourself.” – Sven Yrvind In conclusion, making flanges around bulkhead hatches may seem complex at first glance, but by following Sven Yrvind’s meticulous process, enthusiasts can achieve professional-level results. Remember that the journey of boatbuilding is as rewarding as reaching your destination; it tests one’s patience and dedication. For those seeking to embark on this adventure or simply gain more insight into marine craftsmanship, Sven’s wisdom is invaluable.Making Flanges Around Bulkhead Hatches for Canvas
Sven Yrvind, a renowned yacht designer and sailor, shares valuable insights on creating flanges around bulkhead hatches for canvas protection in this enlightening video. By following his expert guidance, boat enthusiasts can ensure their living areas remain secure while allowing unhindered access through the hatches.Step 1: Starting with the Flange
Sven begins by explaining that working on flanges vertically and horizontally is significantly easier than doing so in a flat position. To simplify the process further, he divides the task into two or three steps as suggested by fellow expert “for for.” This approach not only makes it more manageable but also allows for greater precision in crafting each component.Step 2: Applying Glue and Securing
Sven proceeds to apply glue along one edge of the flange, ensuring a secure bond when clamped into place. He emphasizes that this stage is crucial for maintaining the structural integrity of the flange, which in turn safeguards the living area beneath the canvas when hatches are open.Step 3: Allowing Time to Dry
After securely attaching the first portion of the flange, Sven allows ample time for it to dry before moving forward with additional steps. This patience and precision are key aspects of his successful boatbuilding methods.Step 4: Finishing Touches
Once the flange is fully dried, Sven removes the clamps carefully, ensuring no damage occurs during this process. He then moves on to attaching four more pieces onto these main frames, completing two pairs of flanges for the bulkhead hatches.The Final Touches
While two flanges form the primary support structure around the hatches, Sven mentions there are two additional pieces required at each end to ensure comprehensive protection. This attention to detail highlights his commitment to producing a durable and reliable design. “Sailing is about finding your path, whether it’s across an ocean or within yourself.” – Sven Yrvind In conclusion, making flanges around bulkhead hatches may seem complex at first glance, but by following Sven Yrvind’s meticulous process, enthusiasts can achieve professional-level results. Remember that the journey of boatbuilding is as rewarding as reaching your destination; it tests one’s patience and dedication. For those seeking to embark on this adventure or simply gain more insight into marine craftsmanship, Sven’s wisdom is invaluable.Sven proceeds to apply glue along one edge of the flange, ensuring a secure bond when clamped into place. He emphasizes that this stage is crucial for maintaining the structural integrity of the flange, which in turn safeguards the living area beneath the canvas when hatches are open.Step 3: Allowing Time to Dry
After securely attaching the first portion of the flange, Sven allows ample time for it to dry before moving forward with additional steps. This patience and precision are key aspects of his successful boatbuilding methods.Step 4: Finishing Touches
Once the flange is fully dried, Sven removes the clamps carefully, ensuring no damage occurs during this process. He then moves on to attaching four more pieces onto these main frames, completing two pairs of flanges for the bulkhead hatches.The Final Touches
While two flanges form the primary support structure around the hatches, Sven mentions there are two additional pieces required at each end to ensure comprehensive protection. This attention to detail highlights his commitment to producing a durable and reliable design. “Sailing is about finding your path, whether it’s across an ocean or within yourself.” – Sven Yrvind In conclusion, making flanges around bulkhead hatches may seem complex at first glance, but by following Sven Yrvind’s meticulous process, enthusiasts can achieve professional-level results. Remember that the journey of boatbuilding is as rewarding as reaching your destination; it tests one’s patience and dedication. For those seeking to embark on this adventure or simply gain more insight into marine craftsmanship, Sven’s wisdom is invaluable.Sven begins by explaining that working on flanges vertically and horizontally is significantly easier than doing so in a flat position. To simplify the process further, he divides the task into two or three steps as suggested by fellow expert “for for.” This approach not only makes it more manageable but also allows for greater precision in crafting each component.Step 2: Applying Glue and Securing
Sven proceeds to apply glue along one edge of the flange, ensuring a secure bond when clamped into place. He emphasizes that this stage is crucial for maintaining the structural integrity of the flange, which in turn safeguards the living area beneath the canvas when hatches are open.Step 3: Allowing Time to Dry
After securely attaching the first portion of the flange, Sven allows ample time for it to dry before moving forward with additional steps. This patience and precision are key aspects of his successful boatbuilding methods.Step 4: Finishing Touches
Once the flange is fully dried, Sven removes the clamps carefully, ensuring no damage occurs during this process. He then moves on to attaching four more pieces onto these main frames, completing two pairs of flanges for the bulkhead hatches.The Final Touches
While two flanges form the primary support structure around the hatches, Sven mentions there are two additional pieces required at each end to ensure comprehensive protection. This attention to detail highlights his commitment to producing a durable and reliable design. “Sailing is about finding your path, whether it’s across an ocean or within yourself.” – Sven Yrvind In conclusion, making flanges around bulkhead hatches may seem complex at first glance, but by following Sven Yrvind’s meticulous process, enthusiasts can achieve professional-level results. Remember that the journey of boatbuilding is as rewarding as reaching your destination; it tests one’s patience and dedication. For those seeking to embark on this adventure or simply gain more insight into marine craftsmanship, Sven’s wisdom is invaluable.Sven Yrvind, a renowned yacht designer and sailor, shares valuable insights on creating flanges around bulkhead hatches for canvas protection in this enlightening video. By following his expert guidance, boat enthusiasts can ensure their living areas remain secure while allowing unhindered access through the hatches.Step 1: Starting with the Flange
Sven begins by explaining that working on flanges vertically and horizontally is significantly easier than doing so in a flat position. To simplify the process further, he divides the task into two or three steps as suggested by fellow expert “for for.” This approach not only makes it more manageable but also allows for greater precision in crafting each component.Step 2: Applying Glue and Securing
Sven proceeds to apply glue along one edge of the flange, ensuring a secure bond when clamped into place. He emphasizes that this stage is crucial for maintaining the structural integrity of the flange, which in turn safeguards the living area beneath the canvas when hatches are open.Step 3: Allowing Time to Dry
After securely attaching the first portion of the flange, Sven allows ample time for it to dry before moving forward with additional steps. This patience and precision are key aspects of his successful boatbuilding methods.Step 4: Finishing Touches
Once the flange is fully dried, Sven removes the clamps carefully, ensuring no damage occurs during this process. He then moves on to attaching four more pieces onto these main frames, completing two pairs of flanges for the bulkhead hatches.The Final Touches
While two flanges form the primary support structure around the hatches, Sven mentions there are two additional pieces required at each end to ensure comprehensive protection. This attention to detail highlights his commitment to producing a durable and reliable design. “Sailing is about finding your path, whether it’s across an ocean or within yourself.” – Sven Yrvind In conclusion, making flanges around bulkhead hatches may seem complex at first glance, but by following Sven Yrvind’s meticulous process, enthusiasts can achieve professional-level results. Remember that the journey of boatbuilding is as rewarding as reaching your destination; it tests one’s patience and dedication. For those seeking to embark on this adventure or simply gain more insight into marine craftsmanship, Sven’s wisdom is invaluable.Making Flanges Around Bulkhead Hatches for Canvas
Sven Yrvind, a renowned yacht designer and sailor, shares valuable insights on creating flanges around bulkhead hatches for canvas protection in this enlightening video. By following his expert guidance, boat enthusiasts can ensure their living areas remain secure while allowing unhindered access through the hatches.Step 1: Starting with the Flange
Sven begins by explaining that working on flanges vertically and horizontally is significantly easier than doing so in a flat position. To simplify the process further, he divides the task into two or three steps as suggested by fellow expert “for for.” This approach not only makes it more manageable but also allows for greater precision in crafting each component.Step 2: Applying Glue and Securing
Sven proceeds to apply glue along one edge of the flange, ensuring a secure bond when clamped into place. He emphasizes that this stage is crucial for maintaining the structural integrity of the flange, which in turn safeguards the living area beneath the canvas when hatches are open.Step 3: Allowing Time to Dry
After securely attaching the first portion of the flange, Sven allows ample time for it to dry before moving forward with additional steps. This patience and precision are key aspects of his successful boatbuilding methods.Step 4: Finishing Touches
Once the flange is fully dried, Sven removes the clamps carefully, ensuring no damage occurs during this process. He then moves on to attaching four more pieces onto these main frames, completing two pairs of flanges for the bulkhead hatches.The Final Touches
While two flanges form the primary support structure around the hatches, Sven mentions there are two additional pieces required at each end to ensure comprehensive protection. This attention to detail highlights his commitment to producing a durable and reliable design. “Sailing is about finding your path, whether it’s across an ocean or within yourself.” – Sven Yrvind In conclusion, making flanges around bulkhead hatches may seem complex at first glance, but by following Sven Yrvind’s meticulous process, enthusiasts can achieve professional-level results. Remember that the journey of boatbuilding is as rewarding as reaching your destination; it tests one’s patience and dedication. For those seeking to embark on this adventure or simply gain more insight into marine craftsmanship, Sven’s wisdom is invaluable.Once the flange is fully dried, Sven removes the clamps carefully, ensuring no damage occurs during this process. He then moves on to attaching four more pieces onto these main frames, completing two pairs of flanges for the bulkhead hatches.The Final Touches
While two flanges form the primary support structure around the hatches, Sven mentions there are two additional pieces required at each end to ensure comprehensive protection. This attention to detail highlights his commitment to producing a durable and reliable design. “Sailing is about finding your path, whether it’s across an ocean or within yourself.” – Sven Yrvind In conclusion, making flanges around bulkhead hatches may seem complex at first glance, but by following Sven Yrvind’s meticulous process, enthusiasts can achieve professional-level results. Remember that the journey of boatbuilding is as rewarding as reaching your destination; it tests one’s patience and dedication. For those seeking to embark on this adventure or simply gain more insight into marine craftsmanship, Sven’s wisdom is invaluable.Sven proceeds to apply glue along one edge of the flange, ensuring a secure bond when clamped into place. He emphasizes that this stage is crucial for maintaining the structural integrity of the flange, which in turn safeguards the living area beneath the canvas when hatches are open.Step 3: Allowing Time to Dry
After securely attaching the first portion of the flange, Sven allows ample time for it to dry before moving forward with additional steps. This patience and precision are key aspects of his successful boatbuilding methods.Step 4: Finishing Touches
Once the flange is fully dried, Sven removes the clamps carefully, ensuring no damage occurs during this process. He then moves on to attaching four more pieces onto these main frames, completing two pairs of flanges for the bulkhead hatches.The Final Touches
While two flanges form the primary support structure around the hatches, Sven mentions there are two additional pieces required at each end to ensure comprehensive protection. This attention to detail highlights his commitment to producing a durable and reliable design. “Sailing is about finding your path, whether it’s across an ocean or within yourself.” – Sven Yrvind In conclusion, making flanges around bulkhead hatches may seem complex at first glance, but by following Sven Yrvind’s meticulous process, enthusiasts can achieve professional-level results. Remember that the journey of boatbuilding is as rewarding as reaching your destination; it tests one’s patience and dedication. For those seeking to embark on this adventure or simply gain more insight into marine craftsmanship, Sven’s wisdom is invaluable.Sven begins by explaining that working on flanges vertically and horizontally is significantly easier than doing so in a flat position. To simplify the process further, he divides the task into two or three steps as suggested by fellow expert “for for.” This approach not only makes it more manageable but also allows for greater precision in crafting each component.Step 2: Applying Glue and Securing
Sven proceeds to apply glue along one edge of the flange, ensuring a secure bond when clamped into place. He emphasizes that this stage is crucial for maintaining the structural integrity of the flange, which in turn safeguards the living area beneath the canvas when hatches are open.Step 3: Allowing Time to Dry
After securely attaching the first portion of the flange, Sven allows ample time for it to dry before moving forward with additional steps. This patience and precision are key aspects of his successful boatbuilding methods.Step 4: Finishing Touches
Once the flange is fully dried, Sven removes the clamps carefully, ensuring no damage occurs during this process. He then moves on to attaching four more pieces onto these main frames, completing two pairs of flanges for the bulkhead hatches.The Final Touches
While two flanges form the primary support structure around the hatches, Sven mentions there are two additional pieces required at each end to ensure comprehensive protection. This attention to detail highlights his commitment to producing a durable and reliable design. “Sailing is about finding your path, whether it’s across an ocean or within yourself.” – Sven Yrvind In conclusion, making flanges around bulkhead hatches may seem complex at first glance, but by following Sven Yrvind’s meticulous process, enthusiasts can achieve professional-level results. Remember that the journey of boatbuilding is as rewarding as reaching your destination; it tests one’s patience and dedication. For those seeking to embark on this adventure or simply gain more insight into marine craftsmanship, Sven’s wisdom is invaluable.Sven Yrvind, a renowned yacht designer and sailor, shares valuable insights on creating flanges around bulkhead hatches for canvas protection in this enlightening video. By following his expert guidance, boat enthusiasts can ensure their living areas remain secure while allowing unhindered access through the hatches.Step 1: Starting with the Flange
Sven begins by explaining that working on flanges vertically and horizontally is significantly easier than doing so in a flat position. To simplify the process further, he divides the task into two or three steps as suggested by fellow expert “for for.” This approach not only makes it more manageable but also allows for greater precision in crafting each component.Step 2: Applying Glue and Securing
Sven proceeds to apply glue along one edge of the flange, ensuring a secure bond when clamped into place. He emphasizes that this stage is crucial for maintaining the structural integrity of the flange, which in turn safeguards the living area beneath the canvas when hatches are open.Step 3: Allowing Time to Dry
After securely attaching the first portion of the flange, Sven allows ample time for it to dry before moving forward with additional steps. This patience and precision are key aspects of his successful boatbuilding methods.Step 4: Finishing Touches
Once the flange is fully dried, Sven removes the clamps carefully, ensuring no damage occurs during this process. He then moves on to attaching four more pieces onto these main frames, completing two pairs of flanges for the bulkhead hatches.The Final Touches
While two flanges form the primary support structure around the hatches, Sven mentions there are two additional pieces required at each end to ensure comprehensive protection. This attention to detail highlights his commitment to producing a durable and reliable design. “Sailing is about finding your path, whether it’s across an ocean or within yourself.” – Sven Yrvind In conclusion, making flanges around bulkhead hatches may seem complex at first glance, but by following Sven Yrvind’s meticulous process, enthusiasts can achieve professional-level results. Remember that the journey of boatbuilding is as rewarding as reaching your destination; it tests one’s patience and dedication. For those seeking to embark on this adventure or simply gain more insight into marine craftsmanship, Sven’s wisdom is invaluable.Making Flanges Around Bulkhead Hatches for Canvas
Sven Yrvind, a renowned yacht designer and sailor, shares valuable insights on creating flanges around bulkhead hatches for canvas protection in this enlightening video. By following his expert guidance, boat enthusiasts can ensure their living areas remain secure while allowing unhindered access through the hatches.Step 1: Starting with the Flange
Sven begins by explaining that working on flanges vertically and horizontally is significantly easier than doing so in a flat position. To simplify the process further, he divides the task into two or three steps as suggested by fellow expert “for for.” This approach not only makes it more manageable but also allows for greater precision in crafting each component.Step 2: Applying Glue and Securing
Sven proceeds to apply glue along one edge of the flange, ensuring a secure bond when clamped into place. He emphasizes that this stage is crucial for maintaining the structural integrity of the flange, which in turn safeguards the living area beneath the canvas when hatches are open.Step 3: Allowing Time to Dry
After securely attaching the first portion of the flange, Sven allows ample time for it to dry before moving forward with additional steps. This patience and precision are key aspects of his successful boatbuilding methods.Step 4: Finishing Touches
Once the flange is fully dried, Sven removes the clamps carefully, ensuring no damage occurs during this process. He then moves on to attaching four more pieces onto these main frames, completing two pairs of flanges for the bulkhead hatches.The Final Touches
While two flanges form the primary support structure around the hatches, Sven mentions there are two additional pieces required at each end to ensure comprehensive protection. This attention to detail highlights his commitment to producing a durable and reliable design. “Sailing is about finding your path, whether it’s across an ocean or within yourself.” – Sven Yrvind In conclusion, making flanges around bulkhead hatches may seem complex at first glance, but by following Sven Yrvind’s meticulous process, enthusiasts can achieve professional-level results. Remember that the journey of boatbuilding is as rewarding as reaching your destination; it tests one’s patience and dedication. For those seeking to embark on this adventure or simply gain more insight into marine craftsmanship, Sven’s wisdom is invaluable.After securely attaching the first portion of the flange, Sven allows ample time for it to dry before moving forward with additional steps. This patience and precision are key aspects of his successful boatbuilding methods.Step 4: Finishing Touches
Once the flange is fully dried, Sven removes the clamps carefully, ensuring no damage occurs during this process. He then moves on to attaching four more pieces onto these main frames, completing two pairs of flanges for the bulkhead hatches.The Final Touches
While two flanges form the primary support structure around the hatches, Sven mentions there are two additional pieces required at each end to ensure comprehensive protection. This attention to detail highlights his commitment to producing a durable and reliable design. “Sailing is about finding your path, whether it’s across an ocean or within yourself.” – Sven Yrvind In conclusion, making flanges around bulkhead hatches may seem complex at first glance, but by following Sven Yrvind’s meticulous process, enthusiasts can achieve professional-level results. Remember that the journey of boatbuilding is as rewarding as reaching your destination; it tests one’s patience and dedication. For those seeking to embark on this adventure or simply gain more insight into marine craftsmanship, Sven’s wisdom is invaluable.Sven proceeds to apply glue along one edge of the flange, ensuring a secure bond when clamped into place. He emphasizes that this stage is crucial for maintaining the structural integrity of the flange, which in turn safeguards the living area beneath the canvas when hatches are open.Step 3: Allowing Time to Dry
After securely attaching the first portion of the flange, Sven allows ample time for it to dry before moving forward with additional steps. This patience and precision are key aspects of his successful boatbuilding methods.Step 4: Finishing Touches
Once the flange is fully dried, Sven removes the clamps carefully, ensuring no damage occurs during this process. He then moves on to attaching four more pieces onto these main frames, completing two pairs of flanges for the bulkhead hatches.The Final Touches
While two flanges form the primary support structure around the hatches, Sven mentions there are two additional pieces required at each end to ensure comprehensive protection. This attention to detail highlights his commitment to producing a durable and reliable design. “Sailing is about finding your path, whether it’s across an ocean or within yourself.” – Sven Yrvind In conclusion, making flanges around bulkhead hatches may seem complex at first glance, but by following Sven Yrvind’s meticulous process, enthusiasts can achieve professional-level results. Remember that the journey of boatbuilding is as rewarding as reaching your destination; it tests one’s patience and dedication. For those seeking to embark on this adventure or simply gain more insight into marine craftsmanship, Sven’s wisdom is invaluable.Sven begins by explaining that working on flanges vertically and horizontally is significantly easier than doing so in a flat position. To simplify the process further, he divides the task into two or three steps as suggested by fellow expert “for for.” This approach not only makes it more manageable but also allows for greater precision in crafting each component.Step 2: Applying Glue and Securing
Sven proceeds to apply glue along one edge of the flange, ensuring a secure bond when clamped into place. He emphasizes that this stage is crucial for maintaining the structural integrity of the flange, which in turn safeguards the living area beneath the canvas when hatches are open.Step 3: Allowing Time to Dry
After securely attaching the first portion of the flange, Sven allows ample time for it to dry before moving forward with additional steps. This patience and precision are key aspects of his successful boatbuilding methods.Step 4: Finishing Touches
Once the flange is fully dried, Sven removes the clamps carefully, ensuring no damage occurs during this process. He then moves on to attaching four more pieces onto these main frames, completing two pairs of flanges for the bulkhead hatches.The Final Touches
While two flanges form the primary support structure around the hatches, Sven mentions there are two additional pieces required at each end to ensure comprehensive protection. This attention to detail highlights his commitment to producing a durable and reliable design. “Sailing is about finding your path, whether it’s across an ocean or within yourself.” – Sven Yrvind In conclusion, making flanges around bulkhead hatches may seem complex at first glance, but by following Sven Yrvind’s meticulous process, enthusiasts can achieve professional-level results. Remember that the journey of boatbuilding is as rewarding as reaching your destination; it tests one’s patience and dedication. For those seeking to embark on this adventure or simply gain more insight into marine craftsmanship, Sven’s wisdom is invaluable.Sven Yrvind, a renowned yacht designer and sailor, shares valuable insights on creating flanges around bulkhead hatches for canvas protection in this enlightening video. By following his expert guidance, boat enthusiasts can ensure their living areas remain secure while allowing unhindered access through the hatches.Step 1: Starting with the Flange
Sven begins by explaining that working on flanges vertically and horizontally is significantly easier than doing so in a flat position. To simplify the process further, he divides the task into two or three steps as suggested by fellow expert “for for.” This approach not only makes it more manageable but also allows for greater precision in crafting each component.Step 2: Applying Glue and Securing
Sven proceeds to apply glue along one edge of the flange, ensuring a secure bond when clamped into place. He emphasizes that this stage is crucial for maintaining the structural integrity of the flange, which in turn safeguards the living area beneath the canvas when hatches are open.Step 3: Allowing Time to Dry
After securely attaching the first portion of the flange, Sven allows ample time for it to dry before moving forward with additional steps. This patience and precision are key aspects of his successful boatbuilding methods.Step 4: Finishing Touches
Once the flange is fully dried, Sven removes the clamps carefully, ensuring no damage occurs during this process. He then moves on to attaching four more pieces onto these main frames, completing two pairs of flanges for the bulkhead hatches.The Final Touches
While two flanges form the primary support structure around the hatches, Sven mentions there are two additional pieces required at each end to ensure comprehensive protection. This attention to detail highlights his commitment to producing a durable and reliable design. “Sailing is about finding your path, whether it’s across an ocean or within yourself.” – Sven Yrvind In conclusion, making flanges around bulkhead hatches may seem complex at first glance, but by following Sven Yrvind’s meticulous process, enthusiasts can achieve professional-level results. Remember that the journey of boatbuilding is as rewarding as reaching your destination; it tests one’s patience and dedication. For those seeking to embark on this adventure or simply gain more insight into marine craftsmanship, Sven’s wisdom is invaluable.Making Flanges Around Bulkhead Hatches for Canvas
Sven Yrvind, a renowned yacht designer and sailor, shares valuable insights on creating flanges around bulkhead hatches for canvas protection in this enlightening video. By following his expert guidance, boat enthusiasts can ensure their living areas remain secure while allowing unhindered access through the hatches.Step 1: Starting with the Flange
Sven begins by explaining that working on flanges vertically and horizontally is significantly easier than doing so in a flat position. To simplify the process further, he divides the task into two or three steps as suggested by fellow expert “for for.” This approach not only makes it more manageable but also allows for greater precision in crafting each component.Step 2: Applying Glue and Securing
Sven proceeds to apply glue along one edge of the flange, ensuring a secure bond when clamped into place. He emphasizes that this stage is crucial for maintaining the structural integrity of the flange, which in turn safeguards the living area beneath the canvas when hatches are open.Step 3: Allowing Time to Dry
After securely attaching the first portion of the flange, Sven allows ample time for it to dry before moving forward with additional steps. This patience and precision are key aspects of his successful boatbuilding methods.Step 4: Finishing Touches
Once the flange is fully dried, Sven removes the clamps carefully, ensuring no damage occurs during this process. He then moves on to attaching four more pieces onto these main frames, completing two pairs of flanges for the bulkhead hatches.The Final Touches
While two flanges form the primary support structure around the hatches, Sven mentions there are two additional pieces required at each end to ensure comprehensive protection. This attention to detail highlights his commitment to producing a durable and reliable design. “Sailing is about finding your path, whether it’s across an ocean or within yourself.” – Sven Yrvind In conclusion, making flanges around bulkhead hatches may seem complex at first glance, but by following Sven Yrvind’s meticulous process, enthusiasts can achieve professional-level results. Remember that the journey of boatbuilding is as rewarding as reaching your destination; it tests one’s patience and dedication. For those seeking to embark on this adventure or simply gain more insight into marine craftsmanship, Sven’s wisdom is invaluable.Once the flange is fully dried, Sven removes the clamps carefully, ensuring no damage occurs during this process. He then moves on to attaching four more pieces onto these main frames, completing two pairs of flanges for the bulkhead hatches.The Final Touches
While two flanges form the primary support structure around the hatches, Sven mentions there are two additional pieces required at each end to ensure comprehensive protection. This attention to detail highlights his commitment to producing a durable and reliable design. “Sailing is about finding your path, whether it’s across an ocean or within yourself.” – Sven Yrvind In conclusion, making flanges around bulkhead hatches may seem complex at first glance, but by following Sven Yrvind’s meticulous process, enthusiasts can achieve professional-level results. Remember that the journey of boatbuilding is as rewarding as reaching your destination; it tests one’s patience and dedication. For those seeking to embark on this adventure or simply gain more insight into marine craftsmanship, Sven’s wisdom is invaluable.After securely attaching the first portion of the flange, Sven allows ample time for it to dry before moving forward with additional steps. This patience and precision are key aspects of his successful boatbuilding methods.Step 4: Finishing Touches
Once the flange is fully dried, Sven removes the clamps carefully, ensuring no damage occurs during this process. He then moves on to attaching four more pieces onto these main frames, completing two pairs of flanges for the bulkhead hatches.The Final Touches
While two flanges form the primary support structure around the hatches, Sven mentions there are two additional pieces required at each end to ensure comprehensive protection. This attention to detail highlights his commitment to producing a durable and reliable design. “Sailing is about finding your path, whether it’s across an ocean or within yourself.” – Sven Yrvind In conclusion, making flanges around bulkhead hatches may seem complex at first glance, but by following Sven Yrvind’s meticulous process, enthusiasts can achieve professional-level results. Remember that the journey of boatbuilding is as rewarding as reaching your destination; it tests one’s patience and dedication. For those seeking to embark on this adventure or simply gain more insight into marine craftsmanship, Sven’s wisdom is invaluable.Sven proceeds to apply glue along one edge of the flange, ensuring a secure bond when clamped into place. He emphasizes that this stage is crucial for maintaining the structural integrity of the flange, which in turn safeguards the living area beneath the canvas when hatches are open.Step 3: Allowing Time to Dry
After securely attaching the first portion of the flange, Sven allows ample time for it to dry before moving forward with additional steps. This patience and precision are key aspects of his successful boatbuilding methods.Step 4: Finishing Touches
Once the flange is fully dried, Sven removes the clamps carefully, ensuring no damage occurs during this process. He then moves on to attaching four more pieces onto these main frames, completing two pairs of flanges for the bulkhead hatches.The Final Touches
While two flanges form the primary support structure around the hatches, Sven mentions there are two additional pieces required at each end to ensure comprehensive protection. This attention to detail highlights his commitment to producing a durable and reliable design. “Sailing is about finding your path, whether it’s across an ocean or within yourself.” – Sven Yrvind In conclusion, making flanges around bulkhead hatches may seem complex at first glance, but by following Sven Yrvind’s meticulous process, enthusiasts can achieve professional-level results. Remember that the journey of boatbuilding is as rewarding as reaching your destination; it tests one’s patience and dedication. For those seeking to embark on this adventure or simply gain more insight into marine craftsmanship, Sven’s wisdom is invaluable.Sven begins by explaining that working on flanges vertically and horizontally is significantly easier than doing so in a flat position. To simplify the process further, he divides the task into two or three steps as suggested by fellow expert “for for.” This approach not only makes it more manageable but also allows for greater precision in crafting each component.Step 2: Applying Glue and Securing
Sven proceeds to apply glue along one edge of the flange, ensuring a secure bond when clamped into place. He emphasizes that this stage is crucial for maintaining the structural integrity of the flange, which in turn safeguards the living area beneath the canvas when hatches are open.Step 3: Allowing Time to Dry
After securely attaching the first portion of the flange, Sven allows ample time for it to dry before moving forward with additional steps. This patience and precision are key aspects of his successful boatbuilding methods.Step 4: Finishing Touches
Once the flange is fully dried, Sven removes the clamps carefully, ensuring no damage occurs during this process. He then moves on to attaching four more pieces onto these main frames, completing two pairs of flanges for the bulkhead hatches.The Final Touches
While two flanges form the primary support structure around the hatches, Sven mentions there are two additional pieces required at each end to ensure comprehensive protection. This attention to detail highlights his commitment to producing a durable and reliable design. “Sailing is about finding your path, whether it’s across an ocean or within yourself.” – Sven Yrvind In conclusion, making flanges around bulkhead hatches may seem complex at first glance, but by following Sven Yrvind’s meticulous process, enthusiasts can achieve professional-level results. Remember that the journey of boatbuilding is as rewarding as reaching your destination; it tests one’s patience and dedication. For those seeking to embark on this adventure or simply gain more insight into marine craftsmanship, Sven’s wisdom is invaluable.Sven Yrvind, a renowned yacht designer and sailor, shares valuable insights on creating flanges around bulkhead hatches for canvas protection in this enlightening video. By following his expert guidance, boat enthusiasts can ensure their living areas remain secure while allowing unhindered access through the hatches.Step 1: Starting with the Flange
Sven begins by explaining that working on flanges vertically and horizontally is significantly easier than doing so in a flat position. To simplify the process further, he divides the task into two or three steps as suggested by fellow expert “for for.” This approach not only makes it more manageable but also allows for greater precision in crafting each component.Step 2: Applying Glue and Securing
Sven proceeds to apply glue along one edge of the flange, ensuring a secure bond when clamped into place. He emphasizes that this stage is crucial for maintaining the structural integrity of the flange, which in turn safeguards the living area beneath the canvas when hatches are open.Step 3: Allowing Time to Dry
After securely attaching the first portion of the flange, Sven allows ample time for it to dry before moving forward with additional steps. This patience and precision are key aspects of his successful boatbuilding methods.Step 4: Finishing Touches
Once the flange is fully dried, Sven removes the clamps carefully, ensuring no damage occurs during this process. He then moves on to attaching four more pieces onto these main frames, completing two pairs of flanges for the bulkhead hatches.The Final Touches
While two flanges form the primary support structure around the hatches, Sven mentions there are two additional pieces required at each end to ensure comprehensive protection. This attention to detail highlights his commitment to producing a durable and reliable design. “Sailing is about finding your path, whether it’s across an ocean or within yourself.” – Sven Yrvind In conclusion, making flanges around bulkhead hatches may seem complex at first glance, but by following Sven Yrvind’s meticulous process, enthusiasts can achieve professional-level results. Remember that the journey of boatbuilding is as rewarding as reaching your destination; it tests one’s patience and dedication. For those seeking to embark on this adventure or simply gain more insight into marine craftsmanship, Sven’s wisdom is invaluable.Making Flanges Around Bulkhead Hatches for Canvas
Sven Yrvind, a renowned yacht designer and sailor, shares valuable insights on creating flanges around bulkhead hatches for canvas protection in this enlightening video. By following his expert guidance, boat enthusiasts can ensure their living areas remain secure while allowing unhindered access through the hatches.Step 1: Starting with the Flange
Sven begins by explaining that working on flanges vertically and horizontally is significantly easier than doing so in a flat position. To simplify the process further, he divides the task into two or three steps as suggested by fellow expert “for for.” This approach not only makes it more manageable but also allows for greater precision in crafting each component.Step 2: Applying Glue and Securing
Sven proceeds to apply glue along one edge of the flange, ensuring a secure bond when clamped into place. He emphasizes that this stage is crucial for maintaining the structural integrity of the flange, which in turn safeguards the living area beneath the canvas when hatches are open.Step 3: Allowing Time to Dry
After securely attaching the first portion of the flange, Sven allows ample time for it to dry before moving forward with additional steps. This patience and precision are key aspects of his successful boatbuilding methods.Step 4: Finishing Touches
Once the flange is fully dried, Sven removes the clamps carefully, ensuring no damage occurs during this process. He then moves on to attaching four more pieces onto these main frames, completing two pairs of flanges for the bulkhead hatches.The Final Touches
While two flanges form the primary support structure around the hatches, Sven mentions there are two additional pieces required at each end to ensure comprehensive protection. This attention to detail highlights his commitment to producing a durable and reliable design. “Sailing is about finding your path, whether it’s across an ocean or within yourself.” – Sven Yrvind In conclusion, making flanges around bulkhead hatches may seem complex at first glance, but by following Sven Yrvind’s meticulous process, enthusiasts can achieve professional-level results. Remember that the journey of boatbuilding is as rewarding as reaching your destination; it tests one’s patience and dedication. For those seeking to embark on this adventure or simply gain more insight into marine craftsmanship, Sven’s wisdom is invaluable.Sven begins by explaining that working on flanges vertically and horizontally is significantly easier than doing so in a flat position. To simplify the process further, he divides the task into two or three steps as suggested by fellow expert “for for.” This approach not only makes it more manageable but also allows for greater precision in crafting each component.Step 2: Applying Glue and Securing
Sven proceeds to apply glue along one edge of the flange, ensuring a secure bond when clamped into place. He emphasizes that this stage is crucial for maintaining the structural integrity of the flange, which in turn safeguards the living area beneath the canvas when hatches are open.Step 3: Allowing Time to Dry
After securely attaching the first portion of the flange, Sven allows ample time for it to dry before moving forward with additional steps. This patience and precision are key aspects of his successful boatbuilding methods.Step 4: Finishing Touches
Once the flange is fully dried, Sven removes the clamps carefully, ensuring no damage occurs during this process. He then moves on to attaching four more pieces onto these main frames, completing two pairs of flanges for the bulkhead hatches.The Final Touches
While two flanges form the primary support structure around the hatches, Sven mentions there are two additional pieces required at each end to ensure comprehensive protection. This attention to detail highlights his commitment to producing a durable and reliable design. “Sailing is about finding your path, whether it’s across an ocean or within yourself.” – Sven Yrvind In conclusion, making flanges around bulkhead hatches may seem complex at first glance, but by following Sven Yrvind’s meticulous process, enthusiasts can achieve professional-level results. Remember that the journey of boatbuilding is as rewarding as reaching your destination; it tests one’s patience and dedication. For those seeking to embark on this adventure or simply gain more insight into marine craftsmanship, Sven’s wisdom is invaluable.After securely attaching the first portion of the flange, Sven allows ample time for it to dry before moving forward with additional steps. This patience and precision are key aspects of his successful boatbuilding methods.Step 4: Finishing Touches
Once the flange is fully dried, Sven removes the clamps carefully, ensuring no damage occurs during this process. He then moves on to attaching four more pieces onto these main frames, completing two pairs of flanges for the bulkhead hatches.The Final Touches
While two flanges form the primary support structure around the hatches, Sven mentions there are two additional pieces required at each end to ensure comprehensive protection. This attention to detail highlights his commitment to producing a durable and reliable design. “Sailing is about finding your path, whether it’s across an ocean or within yourself.” – Sven Yrvind In conclusion, making flanges around bulkhead hatches may seem complex at first glance, but by following Sven Yrvind’s meticulous process, enthusiasts can achieve professional-level results. Remember that the journey of boatbuilding is as rewarding as reaching your destination; it tests one’s patience and dedication. For those seeking to embark on this adventure or simply gain more insight into marine craftsmanship, Sven’s wisdom is invaluable.Sven Yrvind, a renowned yacht designer and sailor, shares valuable insights on creating flanges around bulkhead hatches for canvas protection in this enlightening video. By following his expert guidance, boat enthusiasts can ensure their living areas remain secure while allowing unhindered access through the hatches.Step 1: Starting with the Flange
Sven begins by explaining that working on flanges vertically and horizontally is significantly easier than doing so in a flat position. To simplify the process further, he divides the task into two or three steps as suggested by fellow expert “for for.” This approach not only makes it more manageable but also allows for greater precision in crafting each component.Step 2: Applying Glue and Securing
Sven proceeds to apply glue along one edge of the flange, ensuring a secure bond when clamped into place. He emphasizes that this stage is crucial for maintaining the structural integrity of the flange, which in turn safeguards the living area beneath the canvas when hatches are open.Step 3: Allowing Time to Dry
After securely attaching the first portion of the flange, Sven allows ample time for it to dry before moving forward with additional steps. This patience and precision are key aspects of his successful boatbuilding methods.Step 4: Finishing Touches
Once the flange is fully dried, Sven removes the clamps carefully, ensuring no damage occurs during this process. He then moves on to attaching four more pieces onto these main frames, completing two pairs of flanges for the bulkhead hatches.The Final Touches
While two flanges form the primary support structure around the hatches, Sven mentions there are two additional pieces required at each end to ensure comprehensive protection. This attention to detail highlights his commitment to producing a durable and reliable design. “Sailing is about finding your path, whether it’s across an ocean or within yourself.” – Sven Yrvind In conclusion, making flanges around bulkhead hatches may seem complex at first glance, but by following Sven Yrvind’s meticulous process, enthusiasts can achieve professional-level results. Remember that the journey of boatbuilding is as rewarding as reaching your destination; it tests one’s patience and dedication. For those seeking to embark on this adventure or simply gain more insight into marine craftsmanship, Sven’s wisdom is invaluable.Making Flanges Around Bulkhead Hatches for Canvas
Sven Yrvind, a renowned yacht designer and sailor, shares valuable insights on creating flanges around bulkhead hatches for canvas protection in this enlightening video. By following his expert guidance, boat enthusiasts can ensure their living areas remain secure while allowing unhindered access through the hatches.Step 1: Starting with the Flange
Sven begins by explaining that working on flanges vertically and horizontally is significantly easier than doing so in a flat position. To simplify the process further, he divides the task into two or three steps as suggested by fellow expert “for for.” This approach not only makes it more manageable but also allows for greater precision in crafting each component.Step 2: Applying Glue and Securing
Sven proceeds to apply glue along one edge of the flange, ensuring a secure bond when clamped into place. He emphasizes that this stage is crucial for maintaining the structural integrity of the flange, which in turn safeguards the living area beneath the canvas when hatches are open.Step 3: Allowing Time to Dry
After securely attaching the first portion of the flange, Sven allows ample time for it to dry before moving forward with additional steps. This patience and precision are key aspects of his successful boatbuilding methods.Step 4: Finishing Touches
Once the flange is fully dried, Sven removes the clamps carefully, ensuring no damage occurs during this process. He then moves on to attaching four more pieces onto these main frames, completing two pairs of flanges for the bulkhead hatches.The Final Touches
While two flanges form the primary support structure around the hatches, Sven mentions there are two additional pieces required at each end to ensure comprehensive protection. This attention to detail highlights his commitment to producing a durable and reliable design. “Sailing is about finding your path, whether it’s across an ocean or within yourself.” – Sven Yrvind In conclusion, making flanges around bulkhead hatches may seem complex at first glance, but by following Sven Yrvind’s meticulous process, enthusiasts can achieve professional-level results. Remember that the journey of boatbuilding is as rewarding as reaching your destination; it tests one’s patience and dedication. For those seeking to embark on this adventure or simply gain more insight into marine craftsmanship, Sven’s wisdom is invaluable.Sven proceeds to apply glue along one edge of the flange, ensuring a secure bond when clamped into place. He emphasizes that this stage is crucial for maintaining the structural integrity of the flange, which in turn safeguards the living area beneath the canvas when hatches are open.Step 3: Allowing Time to Dry
After securely attaching the first portion of the flange, Sven allows ample time for it to dry before moving forward with additional steps. This patience and precision are key aspects of his successful boatbuilding methods.Step 4: Finishing Touches
Once the flange is fully dried, Sven removes the clamps carefully, ensuring no damage occurs during this process. He then moves on to attaching four more pieces onto these main frames, completing two pairs of flanges for the bulkhead hatches.The Final Touches
While two flanges form the primary support structure around the hatches, Sven mentions there are two additional pieces required at each end to ensure comprehensive protection. This attention to detail highlights his commitment to producing a durable and reliable design. “Sailing is about finding your path, whether it’s across an ocean or within yourself.” – Sven Yrvind In conclusion, making flanges around bulkhead hatches may seem complex at first glance, but by following Sven Yrvind’s meticulous process, enthusiasts can achieve professional-level results. Remember that the journey of boatbuilding is as rewarding as reaching your destination; it tests one’s patience and dedication. For those seeking to embark on this adventure or simply gain more insight into marine craftsmanship, Sven’s wisdom is invaluable.Sven Yrvind, a renowned yacht designer and sailor, shares valuable insights on creating flanges around bulkhead hatches for canvas protection in this enlightening video. By following his expert guidance, boat enthusiasts can ensure their living areas remain secure while allowing unhindered access through the hatches.Step 1: Starting with the Flange
Sven begins by explaining that working on flanges vertically and horizontally is significantly easier than doing so in a flat position. To simplify the process further, he divides the task into two or three steps as suggested by fellow expert “for for.” This approach not only makes it more manageable but also allows for greater precision in crafting each component.Step 2: Applying Glue and Securing
Sven proceeds to apply glue along one edge of the flange, ensuring a secure bond when clamped into place. He emphasizes that this stage is crucial for maintaining the structural integrity of the flange, which in turn safeguards the living area beneath the canvas when hatches are open.Step 3: Allowing Time to Dry
After securely attaching the first portion of the flange, Sven allows ample time for it to dry before moving forward with additional steps. This patience and precision are key aspects of his successful boatbuilding methods.Step 4: Finishing Touches
Once the flange is fully dried, Sven removes the clamps carefully, ensuring no damage occurs during this process. He then moves on to attaching four more pieces onto these main frames, completing two pairs of flanges for the bulkhead hatches.The Final Touches
While two flanges form the primary support structure around the hatches, Sven mentions there are two additional pieces required at each end to ensure comprehensive protection. This attention to detail highlights his commitment to producing a durable and reliable design. “Sailing is about finding your path, whether it’s across an ocean or within yourself.” – Sven Yrvind In conclusion, making flanges around bulkhead hatches may seem complex at first glance, but by following Sven Yrvind’s meticulous process, enthusiasts can achieve professional-level results. Remember that the journey of boatbuilding is as rewarding as reaching your destination; it tests one’s patience and dedication. For those seeking to embark on this adventure or simply gain more insight into marine craftsmanship, Sven’s wisdom is invaluable.Making Flanges Around Bulkhead Hatches for Canvas
Sven Yrvind, a renowned yacht designer and sailor, shares valuable insights on creating flanges around bulkhead hatches for canvas protection in this enlightening video. By following his expert guidance, boat enthusiasts can ensure their living areas remain secure while allowing unhindered access through the hatches.Step 1: Starting with the Flange
Sven begins by explaining that working on flanges vertically and horizontally is significantly easier than doing so in a flat position. To simplify the process further, he divides the task into two or three steps as suggested by fellow expert “for for.” This approach not only makes it more manageable but also allows for greater precision in crafting each component.Step 2: Applying Glue and Securing
Sven proceeds to apply glue along one edge of the flange, ensuring a secure bond when clamped into place. He emphasizes that this stage is crucial for maintaining the structural integrity of the flange, which in turn safeguards the living area beneath the canvas when hatches are open.Step 3: Allowing Time to Dry
After securely attaching the first portion of the flange, Sven allows ample time for it to dry before moving forward with additional steps. This patience and precision are key aspects of his successful boatbuilding methods.Step 4: Finishing Touches
Once the flange is fully dried, Sven removes the clamps carefully, ensuring no damage occurs during this process. He then moves on to attaching four more pieces onto these main frames, completing two pairs of flanges for the bulkhead hatches.The Final Touches
While two flanges form the primary support structure around the hatches, Sven mentions there are two additional pieces required at each end to ensure comprehensive protection. This attention to detail highlights his commitment to producing a durable and reliable design. “Sailing is about finding your path, whether it’s across an ocean or within yourself.” – Sven Yrvind In conclusion, making flanges around bulkhead hatches may seem complex at first glance, but by following Sven Yrvind’s meticulous process, enthusiasts can achieve professional-level results. Remember that the journey of boatbuilding is as rewarding as reaching your destination; it tests one’s patience and dedication. For those seeking to embark on this adventure or simply gain more insight into marine craftsmanship, Sven’s wisdom is invaluable.Sven begins by explaining that working on flanges vertically and horizontally is significantly easier than doing so in a flat position. To simplify the process further, he divides the task into two or three steps as suggested by fellow expert “for for.” This approach not only makes it more manageable but also allows for greater precision in crafting each component.Step 2: Applying Glue and Securing
Sven proceeds to apply glue along one edge of the flange, ensuring a secure bond when clamped into place. He emphasizes that this stage is crucial for maintaining the structural integrity of the flange, which in turn safeguards the living area beneath the canvas when hatches are open.Step 3: Allowing Time to Dry
After securely attaching the first portion of the flange, Sven allows ample time for it to dry before moving forward with additional steps. This patience and precision are key aspects of his successful boatbuilding methods.Step 4: Finishing Touches
Once the flange is fully dried, Sven removes the clamps carefully, ensuring no damage occurs during this process. He then moves on to attaching four more pieces onto these main frames, completing two pairs of flanges for the bulkhead hatches.The Final Touches
While two flanges form the primary support structure around the hatches, Sven mentions there are two additional pieces required at each end to ensure comprehensive protection. This attention to detail highlights his commitment to producing a durable and reliable design. “Sailing is about finding your path, whether it’s across an ocean or within yourself.” – Sven Yrvind In conclusion, making flanges around bulkhead hatches may seem complex at first glance, but by following Sven Yrvind’s meticulous process, enthusiasts can achieve professional-level results. Remember that the journey of boatbuilding is as rewarding as reaching your destination; it tests one’s patience and dedication. For those seeking to embark on this adventure or simply gain more insight into marine craftsmanship, Sven’s wisdom is invaluable.Sven Yrvind, a renowned yacht designer and sailor, shares valuable insights on creating flanges around bulkhead hatches for canvas protection in this enlightening video. By following his expert guidance, boat enthusiasts can ensure their living areas remain secure while allowing unhindered access through the hatches.Step 1: Starting with the Flange
Sven begins by explaining that working on flanges vertically and horizontally is significantly easier than doing so in a flat position. To simplify the process further, he divides the task into two or three steps as suggested by fellow expert “for for.” This approach not only makes it more manageable but also allows for greater precision in crafting each component.Step 2: Applying Glue and Securing
Sven proceeds to apply glue along one edge of the flange, ensuring a secure bond when clamped into place. He emphasizes that this stage is crucial for maintaining the structural integrity of the flange, which in turn safeguards the living area beneath the canvas when hatches are open.Step 3: Allowing Time to Dry
After securely attaching the first portion of the flange, Sven allows ample time for it to dry before moving forward with additional steps. This patience and precision are key aspects of his successful boatbuilding methods.Step 4: Finishing Touches
Once the flange is fully dried, Sven removes the clamps carefully, ensuring no damage occurs during this process. He then moves on to attaching four more pieces onto these main frames, completing two pairs of flanges for the bulkhead hatches.The Final Touches
While two flanges form the primary support structure around the hatches, Sven mentions there are two additional pieces required at each end to ensure comprehensive protection. This attention to detail highlights his commitment to producing a durable and reliable design. “Sailing is about finding your path, whether it’s across an ocean or within yourself.” – Sven Yrvind In conclusion, making flanges around bulkhead hatches may seem complex at first glance, but by following Sven Yrvind’s meticulous process, enthusiasts can achieve professional-level results. Remember that the journey of boatbuilding is as rewarding as reaching your destination; it tests one’s patience and dedication. For those seeking to embark on this adventure or simply gain more insight into marine craftsmanship, Sven’s wisdom is invaluable.Making Flanges Around Bulkhead Hatches for Canvas
Sven Yrvind, a renowned yacht designer and sailor, shares valuable insights on creating flanges around bulkhead hatches for canvas protection in this enlightening video. By following his expert guidance, boat enthusiasts can ensure their living areas remain secure while allowing unhindered access through the hatches.Step 1: Starting with the Flange
Sven begins by explaining that working on flanges vertically and horizontally is significantly easier than doing so in a flat position. To simplify the process further, he divides the task into two or three steps as suggested by fellow expert “for for.” This approach not only makes it more manageable but also allows for greater precision in crafting each component.Step 2: Applying Glue and Securing
Sven proceeds to apply glue along one edge of the flange, ensuring a secure bond when clamped into place. He emphasizes that this stage is crucial for maintaining the structural integrity of the flange, which in turn safeguards the living area beneath the canvas when hatches are open.Step 3: Allowing Time to Dry
After securely attaching the first portion of the flange, Sven allows ample time for it to dry before moving forward with additional steps. This patience and precision are key aspects of his successful boatbuilding methods.Step 4: Finishing Touches
Once the flange is fully dried, Sven removes the clamps carefully, ensuring no damage occurs during this process. He then moves on to attaching four more pieces onto these main frames, completing two pairs of flanges for the bulkhead hatches.The Final Touches
While two flanges form the primary support structure around the hatches, Sven mentions there are two additional pieces required at each end to ensure comprehensive protection. This attention to detail highlights his commitment to producing a durable and reliable design. “Sailing is about finding your path, whether it’s across an ocean or within yourself.” – Sven Yrvind In conclusion, making flanges around bulkhead hatches may seem complex at first glance, but by following Sven Yrvind’s meticulous process, enthusiasts can achieve professional-level results. Remember that the journey of boatbuilding is as rewarding as reaching your destination; it tests one’s patience and dedication. For those seeking to embark on this adventure or simply gain more insight into marine craftsmanship, Sven’s wisdom is invaluable.Once the flange is fully dried, Sven removes the clamps carefully, ensuring no damage occurs during this process. He then moves on to attaching four more pieces onto these main frames, completing two pairs of flanges for the bulkhead hatches.The Final Touches
While two flanges form the primary support structure around the hatches, Sven mentions there are two additional pieces required at each end to ensure comprehensive protection. This attention to detail highlights his commitment to producing a durable and reliable design. “Sailing is about finding your path, whether it’s across an ocean or within yourself.” – Sven Yrvind In conclusion, making flanges around bulkhead hatches may seem complex at first glance, but by following Sven Yrvind’s meticulous process, enthusiasts can achieve professional-level results. Remember that the journey of boatbuilding is as rewarding as reaching your destination; it tests one’s patience and dedication. For those seeking to embark on this adventure or simply gain more insight into marine craftsmanship, Sven’s wisdom is invaluable.Sven begins by explaining that working on flanges vertically and horizontally is significantly easier than doing so in a flat position. To simplify the process further, he divides the task into two or three steps as suggested by fellow expert “for for.” This approach not only makes it more manageable but also allows for greater precision in crafting each component.Step 2: Applying Glue and Securing
Sven proceeds to apply glue along one edge of the flange, ensuring a secure bond when clamped into place. He emphasizes that this stage is crucial for maintaining the structural integrity of the flange, which in turn safeguards the living area beneath the canvas when hatches are open.Step 3: Allowing Time to Dry
After securely attaching the first portion of the flange, Sven allows ample time for it to dry before moving forward with additional steps. This patience and precision are key aspects of his successful boatbuilding methods.Step 4: Finishing Touches
Once the flange is fully dried, Sven removes the clamps carefully, ensuring no damage occurs during this process. He then moves on to attaching four more pieces onto these main frames, completing two pairs of flanges for the bulkhead hatches.The Final Touches
While two flanges form the primary support structure around the hatches, Sven mentions there are two additional pieces required at each end to ensure comprehensive protection. This attention to detail highlights his commitment to producing a durable and reliable design. “Sailing is about finding your path, whether it’s across an ocean or within yourself.” – Sven Yrvind In conclusion, making flanges around bulkhead hatches may seem complex at first glance, but by following Sven Yrvind’s meticulous process, enthusiasts can achieve professional-level results. Remember that the journey of boatbuilding is as rewarding as reaching your destination; it tests one’s patience and dedication. For those seeking to embark on this adventure or simply gain more insight into marine craftsmanship, Sven’s wisdom is invaluable.Sven Yrvind, a renowned yacht designer and sailor, shares valuable insights on creating flanges around bulkhead hatches for canvas protection in this enlightening video. By following his expert guidance, boat enthusiasts can ensure their living areas remain secure while allowing unhindered access through the hatches.Step 1: Starting with the Flange
Sven begins by explaining that working on flanges vertically and horizontally is significantly easier than doing so in a flat position. To simplify the process further, he divides the task into two or three steps as suggested by fellow expert “for for.” This approach not only makes it more manageable but also allows for greater precision in crafting each component.Step 2: Applying Glue and Securing
Sven proceeds to apply glue along one edge of the flange, ensuring a secure bond when clamped into place. He emphasizes that this stage is crucial for maintaining the structural integrity of the flange, which in turn safeguards the living area beneath the canvas when hatches are open.Step 3: Allowing Time to Dry
After securely attaching the first portion of the flange, Sven allows ample time for it to dry before moving forward with additional steps. This patience and precision are key aspects of his successful boatbuilding methods.Step 4: Finishing Touches
Once the flange is fully dried, Sven removes the clamps carefully, ensuring no damage occurs during this process. He then moves on to attaching four more pieces onto these main frames, completing two pairs of flanges for the bulkhead hatches.The Final Touches
While two flanges form the primary support structure around the hatches, Sven mentions there are two additional pieces required at each end to ensure comprehensive protection. This attention to detail highlights his commitment to producing a durable and reliable design. “Sailing is about finding your path, whether it’s across an ocean or within yourself.” – Sven Yrvind In conclusion, making flanges around bulkhead hatches may seem complex at first glance, but by following Sven Yrvind’s meticulous process, enthusiasts can achieve professional-level results. Remember that the journey of boatbuilding is as rewarding as reaching your destination; it tests one’s patience and dedication. For those seeking to embark on this adventure or simply gain more insight into marine craftsmanship, Sven’s wisdom is invaluable.Making Flanges Around Bulkhead Hatches for Canvas
Sven Yrvind, a renowned yacht designer and sailor, shares valuable insights on creating flanges around bulkhead hatches for canvas protection in this enlightening video. By following his expert guidance, boat enthusiasts can ensure their living areas remain secure while allowing unhindered access through the hatches.Step 1: Starting with the Flange
Sven begins by explaining that working on flanges vertically and horizontally is significantly easier than doing so in a flat position. To simplify the process further, he divides the task into two or three steps as suggested by fellow expert “for for.” This approach not only makes it more manageable but also allows for greater precision in crafting each component.Step 2: Applying Glue and Securing
Sven proceeds to apply glue along one edge of the flange, ensuring a secure bond when clamped into place. He emphasizes that this stage is crucial for maintaining the structural integrity of the flange, which in turn safeguards the living area beneath the canvas when hatches are open.Step 3: Allowing Time to Dry
After securely attaching the first portion of the flange, Sven allows ample time for it to dry before moving forward with additional steps. This patience and precision are key aspects of his successful boatbuilding methods.Step 4: Finishing Touches
Once the flange is fully dried, Sven removes the clamps carefully, ensuring no damage occurs during this process. He then moves on to attaching four more pieces onto these main frames, completing two pairs of flanges for the bulkhead hatches.The Final Touches
While two flanges form the primary support structure around the hatches, Sven mentions there are two additional pieces required at each end to ensure comprehensive protection. This attention to detail highlights his commitment to producing a durable and reliable design. “Sailing is about finding your path, whether it’s across an ocean or within yourself.” – Sven Yrvind In conclusion, making flanges around bulkhead hatches may seem complex at first glance, but by following Sven Yrvind’s meticulous process, enthusiasts can achieve professional-level results. Remember that the journey of boatbuilding is as rewarding as reaching your destination; it tests one’s patience and dedication. For those seeking to embark on this adventure or simply gain more insight into marine craftsmanship, Sven’s wisdom is invaluable.After securely attaching the first portion of the flange, Sven allows ample time for it to dry before moving forward with additional steps. This patience and precision are key aspects of his successful boatbuilding methods.Step 4: Finishing Touches
Once the flange is fully dried, Sven removes the clamps carefully, ensuring no damage occurs during this process. He then moves on to attaching four more pieces onto these main frames, completing two pairs of flanges for the bulkhead hatches.The Final Touches
While two flanges form the primary support structure around the hatches, Sven mentions there are two additional pieces required at each end to ensure comprehensive protection. This attention to detail highlights his commitment to producing a durable and reliable design. “Sailing is about finding your path, whether it’s across an ocean or within yourself.” – Sven Yrvind In conclusion, making flanges around bulkhead hatches may seem complex at first glance, but by following Sven Yrvind’s meticulous process, enthusiasts can achieve professional-level results. Remember that the journey of boatbuilding is as rewarding as reaching your destination; it tests one’s patience and dedication. For those seeking to embark on this adventure or simply gain more insight into marine craftsmanship, Sven’s wisdom is invaluable.Sven begins by explaining that working on flanges vertically and horizontally is significantly easier than doing so in a flat position. To simplify the process further, he divides the task into two or three steps as suggested by fellow expert “for for.” This approach not only makes it more manageable but also allows for greater precision in crafting each component.Step 2: Applying Glue and Securing
Sven proceeds to apply glue along one edge of the flange, ensuring a secure bond when clamped into place. He emphasizes that this stage is crucial for maintaining the structural integrity of the flange, which in turn safeguards the living area beneath the canvas when hatches are open.Step 3: Allowing Time to Dry
After securely attaching the first portion of the flange, Sven allows ample time for it to dry before moving forward with additional steps. This patience and precision are key aspects of his successful boatbuilding methods.Step 4: Finishing Touches
Once the flange is fully dried, Sven removes the clamps carefully, ensuring no damage occurs during this process. He then moves on to attaching four more pieces onto these main frames, completing two pairs of flanges for the bulkhead hatches.The Final Touches
While two flanges form the primary support structure around the hatches, Sven mentions there are two additional pieces required at each end to ensure comprehensive protection. This attention to detail highlights his commitment to producing a durable and reliable design. “Sailing is about finding your path, whether it’s across an ocean or within yourself.” – Sven Yrvind In conclusion, making flanges around bulkhead hatches may seem complex at first glance, but by following Sven Yrvind’s meticulous process, enthusiasts can achieve professional-level results. Remember that the journey of boatbuilding is as rewarding as reaching your destination; it tests one’s patience and dedication. For those seeking to embark on this adventure or simply gain more insight into marine craftsmanship, Sven’s wisdom is invaluable.Sven Yrvind, a renowned yacht designer and sailor, shares valuable insights on creating flanges around bulkhead hatches for canvas protection in this enlightening video. By following his expert guidance, boat enthusiasts can ensure their living areas remain secure while allowing unhindered access through the hatches.Step 1: Starting with the Flange
Sven begins by explaining that working on flanges vertically and horizontally is significantly easier than doing so in a flat position. To simplify the process further, he divides the task into two or three steps as suggested by fellow expert “for for.” This approach not only makes it more manageable but also allows for greater precision in crafting each component.Step 2: Applying Glue and Securing
Sven proceeds to apply glue along one edge of the flange, ensuring a secure bond when clamped into place. He emphasizes that this stage is crucial for maintaining the structural integrity of the flange, which in turn safeguards the living area beneath the canvas when hatches are open.Step 3: Allowing Time to Dry
After securely attaching the first portion of the flange, Sven allows ample time for it to dry before moving forward with additional steps. This patience and precision are key aspects of his successful boatbuilding methods.Step 4: Finishing Touches
Once the flange is fully dried, Sven removes the clamps carefully, ensuring no damage occurs during this process. He then moves on to attaching four more pieces onto these main frames, completing two pairs of flanges for the bulkhead hatches.The Final Touches
While two flanges form the primary support structure around the hatches, Sven mentions there are two additional pieces required at each end to ensure comprehensive protection. This attention to detail highlights his commitment to producing a durable and reliable design. “Sailing is about finding your path, whether it’s across an ocean or within yourself.” – Sven Yrvind In conclusion, making flanges around bulkhead hatches may seem complex at first glance, but by following Sven Yrvind’s meticulous process, enthusiasts can achieve professional-level results. Remember that the journey of boatbuilding is as rewarding as reaching your destination; it tests one’s patience and dedication. For those seeking to embark on this adventure or simply gain more insight into marine craftsmanship, Sven’s wisdom is invaluable.Making Flanges Around Bulkhead Hatches for Canvas
Sven Yrvind, a renowned yacht designer and sailor, shares valuable insights on creating flanges around bulkhead hatches for canvas protection in this enlightening video. By following his expert guidance, boat enthusiasts can ensure their living areas remain secure while allowing unhindered access through the hatches.Step 1: Starting with the Flange
Sven begins by explaining that working on flanges vertically and horizontally is significantly easier than doing so in a flat position. To simplify the process further, he divides the task into two or three steps as suggested by fellow expert “for for.” This approach not only makes it more manageable but also allows for greater precision in crafting each component.Step 2: Applying Glue and Securing
Sven proceeds to apply glue along one edge of the flange, ensuring a secure bond when clamped into place. He emphasizes that this stage is crucial for maintaining the structural integrity of the flange, which in turn safeguards the living area beneath the canvas when hatches are open.Step 3: Allowing Time to Dry
After securely attaching the first portion of the flange, Sven allows ample time for it to dry before moving forward with additional steps. This patience and precision are key aspects of his successful boatbuilding methods.Step 4: Finishing Touches
Once the flange is fully dried, Sven removes the clamps carefully, ensuring no damage occurs during this process. He then moves on to attaching four more pieces onto these main frames, completing two pairs of flanges for the bulkhead hatches.The Final Touches
While two flanges form the primary support structure around the hatches, Sven mentions there are two additional pieces required at each end to ensure comprehensive protection. This attention to detail highlights his commitment to producing a durable and reliable design. “Sailing is about finding your path, whether it’s across an ocean or within yourself.” – Sven Yrvind In conclusion, making flanges around bulkhead hatches may seem complex at first glance, but by following Sven Yrvind’s meticulous process, enthusiasts can achieve professional-level results. Remember that the journey of boatbuilding is as rewarding as reaching your destination; it tests one’s patience and dedication. For those seeking to embark on this adventure or simply gain more insight into marine craftsmanship, Sven’s wisdom is invaluable.Sven proceeds to apply glue along one edge of the flange, ensuring a secure bond when clamped into place. He emphasizes that this stage is crucial for maintaining the structural integrity of the flange, which in turn safeguards the living area beneath the canvas when hatches are open.Step 3: Allowing Time to Dry
After securely attaching the first portion of the flange, Sven allows ample time for it to dry before moving forward with additional steps. This patience and precision are key aspects of his successful boatbuilding methods.Step 4: Finishing Touches
Once the flange is fully dried, Sven removes the clamps carefully, ensuring no damage occurs during this process. He then moves on to attaching four more pieces onto these main frames, completing two pairs of flanges for the bulkhead hatches.The Final Touches
While two flanges form the primary support structure around the hatches, Sven mentions there are two additional pieces required at each end to ensure comprehensive protection. This attention to detail highlights his commitment to producing a durable and reliable design. “Sailing is about finding your path, whether it’s across an ocean or within yourself.” – Sven Yrvind In conclusion, making flanges around bulkhead hatches may seem complex at first glance, but by following Sven Yrvind’s meticulous process, enthusiasts can achieve professional-level results. Remember that the journey of boatbuilding is as rewarding as reaching your destination; it tests one’s patience and dedication. For those seeking to embark on this adventure or simply gain more insight into marine craftsmanship, Sven’s wisdom is invaluable.Sven begins by explaining that working on flanges vertically and horizontally is significantly easier than doing so in a flat position. To simplify the process further, he divides the task into two or three steps as suggested by fellow expert “for for.” This approach not only makes it more manageable but also allows for greater precision in crafting each component.Step 2: Applying Glue and Securing
Sven proceeds to apply glue along one edge of the flange, ensuring a secure bond when clamped into place. He emphasizes that this stage is crucial for maintaining the structural integrity of the flange, which in turn safeguards the living area beneath the canvas when hatches are open.Step 3: Allowing Time to Dry
After securely attaching the first portion of the flange, Sven allows ample time for it to dry before moving forward with additional steps. This patience and precision are key aspects of his successful boatbuilding methods.Step 4: Finishing Touches
Once the flange is fully dried, Sven removes the clamps carefully, ensuring no damage occurs during this process. He then moves on to attaching four more pieces onto these main frames, completing two pairs of flanges for the bulkhead hatches.The Final Touches
While two flanges form the primary support structure around the hatches, Sven mentions there are two additional pieces required at each end to ensure comprehensive protection. This attention to detail highlights his commitment to producing a durable and reliable design. “Sailing is about finding your path, whether it’s across an ocean or within yourself.” – Sven Yrvind In conclusion, making flanges around bulkhead hatches may seem complex at first glance, but by following Sven Yrvind’s meticulous process, enthusiasts can achieve professional-level results. Remember that the journey of boatbuilding is as rewarding as reaching your destination; it tests one’s patience and dedication. For those seeking to embark on this adventure or simply gain more insight into marine craftsmanship, Sven’s wisdom is invaluable.Sven Yrvind, a renowned yacht designer and sailor, shares valuable insights on creating flanges around bulkhead hatches for canvas protection in this enlightening video. By following his expert guidance, boat enthusiasts can ensure their living areas remain secure while allowing unhindered access through the hatches.Step 1: Starting with the Flange
Sven begins by explaining that working on flanges vertically and horizontally is significantly easier than doing so in a flat position. To simplify the process further, he divides the task into two or three steps as suggested by fellow expert “for for.” This approach not only makes it more manageable but also allows for greater precision in crafting each component.Step 2: Applying Glue and Securing
Sven proceeds to apply glue along one edge of the flange, ensuring a secure bond when clamped into place. He emphasizes that this stage is crucial for maintaining the structural integrity of the flange, which in turn safeguards the living area beneath the canvas when hatches are open.Step 3: Allowing Time to Dry
After securely attaching the first portion of the flange, Sven allows ample time for it to dry before moving forward with additional steps. This patience and precision are key aspects of his successful boatbuilding methods.Step 4: Finishing Touches
Once the flange is fully dried, Sven removes the clamps carefully, ensuring no damage occurs during this process. He then moves on to attaching four more pieces onto these main frames, completing two pairs of flanges for the bulkhead hatches.The Final Touches
While two flanges form the primary support structure around the hatches, Sven mentions there are two additional pieces required at each end to ensure comprehensive protection. This attention to detail highlights his commitment to producing a durable and reliable design. “Sailing is about finding your path, whether it’s across an ocean or within yourself.” – Sven Yrvind In conclusion, making flanges around bulkhead hatches may seem complex at first glance, but by following Sven Yrvind’s meticulous process, enthusiasts can achieve professional-level results. Remember that the journey of boatbuilding is as rewarding as reaching your destination; it tests one’s patience and dedication. For those seeking to embark on this adventure or simply gain more insight into marine craftsmanship, Sven’s wisdom is invaluable.Making Flanges Around Bulkhead Hatches for Canvas
Sven Yrvind, a renowned yacht designer and sailor, shares valuable insights on creating flanges around bulkhead hatches for canvas protection in this enlightening video. By following his expert guidance, boat enthusiasts can ensure their living areas remain secure while allowing unhindered access through the hatches.Step 1: Starting with the Flange
Sven begins by explaining that working on flanges vertically and horizontally is significantly easier than doing so in a flat position. To simplify the process further, he divides the task into two or three steps as suggested by fellow expert “for for.” This approach not only makes it more manageable but also allows for greater precision in crafting each component.Step 2: Applying Glue and Securing
Sven proceeds to apply glue along one edge of the flange, ensuring a secure bond when clamped into place. He emphasizes that this stage is crucial for maintaining the structural integrity of the flange, which in turn safeguards the living area beneath the canvas when hatches are open.Step 3: Allowing Time to Dry
After securely attaching the first portion of the flange, Sven allows ample time for it to dry before moving forward with additional steps. This patience and precision are key aspects of his successful boatbuilding methods.Step 4: Finishing Touches
Once the flange is fully dried, Sven removes the clamps carefully, ensuring no damage occurs during this process. He then moves on to attaching four more pieces onto these main frames, completing two pairs of flanges for the bulkhead hatches.The Final Touches
While two flanges form the primary support structure around the hatches, Sven mentions there are two additional pieces required at each end to ensure comprehensive protection. This attention to detail highlights his commitment to producing a durable and reliable design. “Sailing is about finding your path, whether it’s across an ocean or within yourself.” – Sven Yrvind In conclusion, making flanges around bulkhead hatches may seem complex at first glance, but by following Sven Yrvind’s meticulous process, enthusiasts can achieve professional-level results. Remember that the journey of boatbuilding is as rewarding as reaching your destination; it tests one’s patience and dedication. For those seeking to embark on this adventure or simply gain more insight into marine craftsmanship, Sven’s wisdom is invaluable.Once the flange is fully dried, Sven removes the clamps carefully, ensuring no damage occurs during this process. He then moves on to attaching four more pieces onto these main frames, completing two pairs of flanges for the bulkhead hatches.The Final Touches
While two flanges form the primary support structure around the hatches, Sven mentions there are two additional pieces required at each end to ensure comprehensive protection. This attention to detail highlights his commitment to producing a durable and reliable design. “Sailing is about finding your path, whether it’s across an ocean or within yourself.” – Sven Yrvind In conclusion, making flanges around bulkhead hatches may seem complex at first glance, but by following Sven Yrvind’s meticulous process, enthusiasts can achieve professional-level results. Remember that the journey of boatbuilding is as rewarding as reaching your destination; it tests one’s patience and dedication. For those seeking to embark on this adventure or simply gain more insight into marine craftsmanship, Sven’s wisdom is invaluable.Sven proceeds to apply glue along one edge of the flange, ensuring a secure bond when clamped into place. He emphasizes that this stage is crucial for maintaining the structural integrity of the flange, which in turn safeguards the living area beneath the canvas when hatches are open.Step 3: Allowing Time to Dry
After securely attaching the first portion of the flange, Sven allows ample time for it to dry before moving forward with additional steps. This patience and precision are key aspects of his successful boatbuilding methods.Step 4: Finishing Touches
Once the flange is fully dried, Sven removes the clamps carefully, ensuring no damage occurs during this process. He then moves on to attaching four more pieces onto these main frames, completing two pairs of flanges for the bulkhead hatches.The Final Touches
While two flanges form the primary support structure around the hatches, Sven mentions there are two additional pieces required at each end to ensure comprehensive protection. This attention to detail highlights his commitment to producing a durable and reliable design. “Sailing is about finding your path, whether it’s across an ocean or within yourself.” – Sven Yrvind In conclusion, making flanges around bulkhead hatches may seem complex at first glance, but by following Sven Yrvind’s meticulous process, enthusiasts can achieve professional-level results. Remember that the journey of boatbuilding is as rewarding as reaching your destination; it tests one’s patience and dedication. For those seeking to embark on this adventure or simply gain more insight into marine craftsmanship, Sven’s wisdom is invaluable.Sven begins by explaining that working on flanges vertically and horizontally is significantly easier than doing so in a flat position. To simplify the process further, he divides the task into two or three steps as suggested by fellow expert “for for.” This approach not only makes it more manageable but also allows for greater precision in crafting each component.Step 2: Applying Glue and Securing
Sven proceeds to apply glue along one edge of the flange, ensuring a secure bond when clamped into place. He emphasizes that this stage is crucial for maintaining the structural integrity of the flange, which in turn safeguards the living area beneath the canvas when hatches are open.Step 3: Allowing Time to Dry
After securely attaching the first portion of the flange, Sven allows ample time for it to dry before moving forward with additional steps. This patience and precision are key aspects of his successful boatbuilding methods.Step 4: Finishing Touches
Once the flange is fully dried, Sven removes the clamps carefully, ensuring no damage occurs during this process. He then moves on to attaching four more pieces onto these main frames, completing two pairs of flanges for the bulkhead hatches.The Final Touches
While two flanges form the primary support structure around the hatches, Sven mentions there are two additional pieces required at each end to ensure comprehensive protection. This attention to detail highlights his commitment to producing a durable and reliable design. “Sailing is about finding your path, whether it’s across an ocean or within yourself.” – Sven Yrvind In conclusion, making flanges around bulkhead hatches may seem complex at first glance, but by following Sven Yrvind’s meticulous process, enthusiasts can achieve professional-level results. Remember that the journey of boatbuilding is as rewarding as reaching your destination; it tests one’s patience and dedication. For those seeking to embark on this adventure or simply gain more insight into marine craftsmanship, Sven’s wisdom is invaluable.Sven Yrvind, a renowned yacht designer and sailor, shares valuable insights on creating flanges around bulkhead hatches for canvas protection in this enlightening video. By following his expert guidance, boat enthusiasts can ensure their living areas remain secure while allowing unhindered access through the hatches.Step 1: Starting with the Flange
Sven begins by explaining that working on flanges vertically and horizontally is significantly easier than doing so in a flat position. To simplify the process further, he divides the task into two or three steps as suggested by fellow expert “for for.” This approach not only makes it more manageable but also allows for greater precision in crafting each component.Step 2: Applying Glue and Securing
Sven proceeds to apply glue along one edge of the flange, ensuring a secure bond when clamped into place. He emphasizes that this stage is crucial for maintaining the structural integrity of the flange, which in turn safeguards the living area beneath the canvas when hatches are open.Step 3: Allowing Time to Dry
After securely attaching the first portion of the flange, Sven allows ample time for it to dry before moving forward with additional steps. This patience and precision are key aspects of his successful boatbuilding methods.Step 4: Finishing Touches
Once the flange is fully dried, Sven removes the clamps carefully, ensuring no damage occurs during this process. He then moves on to attaching four more pieces onto these main frames, completing two pairs of flanges for the bulkhead hatches.The Final Touches
While two flanges form the primary support structure around the hatches, Sven mentions there are two additional pieces required at each end to ensure comprehensive protection. This attention to detail highlights his commitment to producing a durable and reliable design. “Sailing is about finding your path, whether it’s across an ocean or within yourself.” – Sven Yrvind In conclusion, making flanges around bulkhead hatches may seem complex at first glance, but by following Sven Yrvind’s meticulous process, enthusiasts can achieve professional-level results. Remember that the journey of boatbuilding is as rewarding as reaching your destination; it tests one’s patience and dedication. For those seeking to embark on this adventure or simply gain more insight into marine craftsmanship, Sven’s wisdom is invaluable.Making Flanges Around Bulkhead Hatches for Canvas
Sven Yrvind, a renowned yacht designer and sailor, shares valuable insights on creating flanges around bulkhead hatches for canvas protection in this enlightening video. By following his expert guidance, boat enthusiasts can ensure their living areas remain secure while allowing unhindered access through the hatches.Step 1: Starting with the Flange
Sven begins by explaining that working on flanges vertically and horizontally is significantly easier than doing so in a flat position. To simplify the process further, he divides the task into two or three steps as suggested by fellow expert “for for.” This approach not only makes it more manageable but also allows for greater precision in crafting each component.Step 2: Applying Glue and Securing
Sven proceeds to apply glue along one edge of the flange, ensuring a secure bond when clamped into place. He emphasizes that this stage is crucial for maintaining the structural integrity of the flange, which in turn safeguards the living area beneath the canvas when hatches are open.Step 3: Allowing Time to Dry
After securely attaching the first portion of the flange, Sven allows ample time for it to dry before moving forward with additional steps. This patience and precision are key aspects of his successful boatbuilding methods.Step 4: Finishing Touches
Once the flange is fully dried, Sven removes the clamps carefully, ensuring no damage occurs during this process. He then moves on to attaching four more pieces onto these main frames, completing two pairs of flanges for the bulkhead hatches.The Final Touches
While two flanges form the primary support structure around the hatches, Sven mentions there are two additional pieces required at each end to ensure comprehensive protection. This attention to detail highlights his commitment to producing a durable and reliable design. “Sailing is about finding your path, whether it’s across an ocean or within yourself.” – Sven Yrvind In conclusion, making flanges around bulkhead hatches may seem complex at first glance, but by following Sven Yrvind’s meticulous process, enthusiasts can achieve professional-level results. Remember that the journey of boatbuilding is as rewarding as reaching your destination; it tests one’s patience and dedication. For those seeking to embark on this adventure or simply gain more insight into marine craftsmanship, Sven’s wisdom is invaluable.After securely attaching the first portion of the flange, Sven allows ample time for it to dry before moving forward with additional steps. This patience and precision are key aspects of his successful boatbuilding methods.Step 4: Finishing Touches
Once the flange is fully dried, Sven removes the clamps carefully, ensuring no damage occurs during this process. He then moves on to attaching four more pieces onto these main frames, completing two pairs of flanges for the bulkhead hatches.The Final Touches
While two flanges form the primary support structure around the hatches, Sven mentions there are two additional pieces required at each end to ensure comprehensive protection. This attention to detail highlights his commitment to producing a durable and reliable design. “Sailing is about finding your path, whether it’s across an ocean or within yourself.” – Sven Yrvind In conclusion, making flanges around bulkhead hatches may seem complex at first glance, but by following Sven Yrvind’s meticulous process, enthusiasts can achieve professional-level results. Remember that the journey of boatbuilding is as rewarding as reaching your destination; it tests one’s patience and dedication. For those seeking to embark on this adventure or simply gain more insight into marine craftsmanship, Sven’s wisdom is invaluable.Sven proceeds to apply glue along one edge of the flange, ensuring a secure bond when clamped into place. He emphasizes that this stage is crucial for maintaining the structural integrity of the flange, which in turn safeguards the living area beneath the canvas when hatches are open.Step 3: Allowing Time to Dry
After securely attaching the first portion of the flange, Sven allows ample time for it to dry before moving forward with additional steps. This patience and precision are key aspects of his successful boatbuilding methods.Step 4: Finishing Touches
Once the flange is fully dried, Sven removes the clamps carefully, ensuring no damage occurs during this process. He then moves on to attaching four more pieces onto these main frames, completing two pairs of flanges for the bulkhead hatches.The Final Touches
While two flanges form the primary support structure around the hatches, Sven mentions there are two additional pieces required at each end to ensure comprehensive protection. This attention to detail highlights his commitment to producing a durable and reliable design. “Sailing is about finding your path, whether it’s across an ocean or within yourself.” – Sven Yrvind In conclusion, making flanges around bulkhead hatches may seem complex at first glance, but by following Sven Yrvind’s meticulous process, enthusiasts can achieve professional-level results. Remember that the journey of boatbuilding is as rewarding as reaching your destination; it tests one’s patience and dedication. For those seeking to embark on this adventure or simply gain more insight into marine craftsmanship, Sven’s wisdom is invaluable.Sven begins by explaining that working on flanges vertically and horizontally is significantly easier than doing so in a flat position. To simplify the process further, he divides the task into two or three steps as suggested by fellow expert “for for.” This approach not only makes it more manageable but also allows for greater precision in crafting each component.Step 2: Applying Glue and Securing
Sven proceeds to apply glue along one edge of the flange, ensuring a secure bond when clamped into place. He emphasizes that this stage is crucial for maintaining the structural integrity of the flange, which in turn safeguards the living area beneath the canvas when hatches are open.Step 3: Allowing Time to Dry
After securely attaching the first portion of the flange, Sven allows ample time for it to dry before moving forward with additional steps. This patience and precision are key aspects of his successful boatbuilding methods.Step 4: Finishing Touches
Once the flange is fully dried, Sven removes the clamps carefully, ensuring no damage occurs during this process. He then moves on to attaching four more pieces onto these main frames, completing two pairs of flanges for the bulkhead hatches.The Final Touches
While two flanges form the primary support structure around the hatches, Sven mentions there are two additional pieces required at each end to ensure comprehensive protection. This attention to detail highlights his commitment to producing a durable and reliable design. “Sailing is about finding your path, whether it’s across an ocean or within yourself.” – Sven Yrvind In conclusion, making flanges around bulkhead hatches may seem complex at first glance, but by following Sven Yrvind’s meticulous process, enthusiasts can achieve professional-level results. Remember that the journey of boatbuilding is as rewarding as reaching your destination; it tests one’s patience and dedication. For those seeking to embark on this adventure or simply gain more insight into marine craftsmanship, Sven’s wisdom is invaluable.Sven Yrvind, a renowned yacht designer and sailor, shares valuable insights on creating flanges around bulkhead hatches for canvas protection in this enlightening video. By following his expert guidance, boat enthusiasts can ensure their living areas remain secure while allowing unhindered access through the hatches.Step 1: Starting with the Flange
Sven begins by explaining that working on flanges vertically and horizontally is significantly easier than doing so in a flat position. To simplify the process further, he divides the task into two or three steps as suggested by fellow expert “for for.” This approach not only makes it more manageable but also allows for greater precision in crafting each component.Step 2: Applying Glue and Securing
Sven proceeds to apply glue along one edge of the flange, ensuring a secure bond when clamped into place. He emphasizes that this stage is crucial for maintaining the structural integrity of the flange, which in turn safeguards the living area beneath the canvas when hatches are open.Step 3: Allowing Time to Dry
After securely attaching the first portion of the flange, Sven allows ample time for it to dry before moving forward with additional steps. This patience and precision are key aspects of his successful boatbuilding methods.Step 4: Finishing Touches
Once the flange is fully dried, Sven removes the clamps carefully, ensuring no damage occurs during this process. He then moves on to attaching four more pieces onto these main frames, completing two pairs of flanges for the bulkhead hatches.The Final Touches
While two flanges form the primary support structure around the hatches, Sven mentions there are two additional pieces required at each end to ensure comprehensive protection. This attention to detail highlights his commitment to producing a durable and reliable design. “Sailing is about finding your path, whether it’s across an ocean or within yourself.” – Sven Yrvind In conclusion, making flanges around bulkhead hatches may seem complex at first glance, but by following Sven Yrvind’s meticulous process, enthusiasts can achieve professional-level results. Remember that the journey of boatbuilding is as rewarding as reaching your destination; it tests one’s patience and dedication. For those seeking to embark on this adventure or simply gain more insight into marine craftsmanship, Sven’s wisdom is invaluable.Making Flanges Around Bulkhead Hatches for Canvas
Sven Yrvind, a renowned yacht designer and sailor, shares valuable insights on creating flanges around bulkhead hatches for canvas protection in this enlightening video. By following his expert guidance, boat enthusiasts can ensure their living areas remain secure while allowing unhindered access through the hatches.Step 1: Starting with the Flange
Sven begins by explaining that working on flanges vertically and horizontally is significantly easier than doing so in a flat position. To simplify the process further, he divides the task into two or three steps as suggested by fellow expert “for for.” This approach not only makes it more manageable but also allows for greater precision in crafting each component.Step 2: Applying Glue and Securing
Sven proceeds to apply glue along one edge of the flange, ensuring a secure bond when clamped into place. He emphasizes that this stage is crucial for maintaining the structural integrity of the flange, which in turn safeguards the living area beneath the canvas when hatches are open.Step 3: Allowing Time to Dry
After securely attaching the first portion of the flange, Sven allows ample time for it to dry before moving forward with additional steps. This patience and precision are key aspects of his successful boatbuilding methods.Step 4: Finishing Touches
Once the flange is fully dried, Sven removes the clamps carefully, ensuring no damage occurs during this process. He then moves on to attaching four more pieces onto these main frames, completing two pairs of flanges for the bulkhead hatches.The Final Touches
While two flanges form the primary support structure around the hatches, Sven mentions there are two additional pieces required at each end to ensure comprehensive protection. This attention to detail highlights his commitment to producing a durable and reliable design. “Sailing is about finding your path, whether it’s across an ocean or within yourself.” – Sven Yrvind In conclusion, making flanges around bulkhead hatches may seem complex at first glance, but by following Sven Yrvind’s meticulous process, enthusiasts can achieve professional-level results. Remember that the journey of boatbuilding is as rewarding as reaching your destination; it tests one’s patience and dedication. For those seeking to embark on this adventure or simply gain more insight into marine craftsmanship, Sven’s wisdom is invaluable.Once the flange is fully dried, Sven removes the clamps carefully, ensuring no damage occurs during this process. He then moves on to attaching four more pieces onto these main frames, completing two pairs of flanges for the bulkhead hatches.The Final Touches
While two flanges form the primary support structure around the hatches, Sven mentions there are two additional pieces required at each end to ensure comprehensive protection. This attention to detail highlights his commitment to producing a durable and reliable design. “Sailing is about finding your path, whether it’s across an ocean or within yourself.” – Sven Yrvind In conclusion, making flanges around bulkhead hatches may seem complex at first glance, but by following Sven Yrvind’s meticulous process, enthusiasts can achieve professional-level results. Remember that the journey of boatbuilding is as rewarding as reaching your destination; it tests one’s patience and dedication. For those seeking to embark on this adventure or simply gain more insight into marine craftsmanship, Sven’s wisdom is invaluable.After securely attaching the first portion of the flange, Sven allows ample time for it to dry before moving forward with additional steps. This patience and precision are key aspects of his successful boatbuilding methods.Step 4: Finishing Touches
Once the flange is fully dried, Sven removes the clamps carefully, ensuring no damage occurs during this process. He then moves on to attaching four more pieces onto these main frames, completing two pairs of flanges for the bulkhead hatches.The Final Touches
While two flanges form the primary support structure around the hatches, Sven mentions there are two additional pieces required at each end to ensure comprehensive protection. This attention to detail highlights his commitment to producing a durable and reliable design. “Sailing is about finding your path, whether it’s across an ocean or within yourself.” – Sven Yrvind In conclusion, making flanges around bulkhead hatches may seem complex at first glance, but by following Sven Yrvind’s meticulous process, enthusiasts can achieve professional-level results. Remember that the journey of boatbuilding is as rewarding as reaching your destination; it tests one’s patience and dedication. For those seeking to embark on this adventure or simply gain more insight into marine craftsmanship, Sven’s wisdom is invaluable.Sven proceeds to apply glue along one edge of the flange, ensuring a secure bond when clamped into place. He emphasizes that this stage is crucial for maintaining the structural integrity of the flange, which in turn safeguards the living area beneath the canvas when hatches are open.Step 3: Allowing Time to Dry
After securely attaching the first portion of the flange, Sven allows ample time for it to dry before moving forward with additional steps. This patience and precision are key aspects of his successful boatbuilding methods.Step 4: Finishing Touches
Once the flange is fully dried, Sven removes the clamps carefully, ensuring no damage occurs during this process. He then moves on to attaching four more pieces onto these main frames, completing two pairs of flanges for the bulkhead hatches.The Final Touches
While two flanges form the primary support structure around the hatches, Sven mentions there are two additional pieces required at each end to ensure comprehensive protection. This attention to detail highlights his commitment to producing a durable and reliable design. “Sailing is about finding your path, whether it’s across an ocean or within yourself.” – Sven Yrvind In conclusion, making flanges around bulkhead hatches may seem complex at first glance, but by following Sven Yrvind’s meticulous process, enthusiasts can achieve professional-level results. Remember that the journey of boatbuilding is as rewarding as reaching your destination; it tests one’s patience and dedication. For those seeking to embark on this adventure or simply gain more insight into marine craftsmanship, Sven’s wisdom is invaluable.Sven begins by explaining that working on flanges vertically and horizontally is significantly easier than doing so in a flat position. To simplify the process further, he divides the task into two or three steps as suggested by fellow expert “for for.” This approach not only makes it more manageable but also allows for greater precision in crafting each component.Step 2: Applying Glue and Securing
Sven proceeds to apply glue along one edge of the flange, ensuring a secure bond when clamped into place. He emphasizes that this stage is crucial for maintaining the structural integrity of the flange, which in turn safeguards the living area beneath the canvas when hatches are open.Step 3: Allowing Time to Dry
After securely attaching the first portion of the flange, Sven allows ample time for it to dry before moving forward with additional steps. This patience and precision are key aspects of his successful boatbuilding methods.Step 4: Finishing Touches
Once the flange is fully dried, Sven removes the clamps carefully, ensuring no damage occurs during this process. He then moves on to attaching four more pieces onto these main frames, completing two pairs of flanges for the bulkhead hatches.The Final Touches
While two flanges form the primary support structure around the hatches, Sven mentions there are two additional pieces required at each end to ensure comprehensive protection. This attention to detail highlights his commitment to producing a durable and reliable design. “Sailing is about finding your path, whether it’s across an ocean or within yourself.” – Sven Yrvind In conclusion, making flanges around bulkhead hatches may seem complex at first glance, but by following Sven Yrvind’s meticulous process, enthusiasts can achieve professional-level results. Remember that the journey of boatbuilding is as rewarding as reaching your destination; it tests one’s patience and dedication. For those seeking to embark on this adventure or simply gain more insight into marine craftsmanship, Sven’s wisdom is invaluable.Sven Yrvind, a renowned yacht designer and sailor, shares valuable insights on creating flanges around bulkhead hatches for canvas protection in this enlightening video. By following his expert guidance, boat enthusiasts can ensure their living areas remain secure while allowing unhindered access through the hatches.Step 1: Starting with the Flange
Sven begins by explaining that working on flanges vertically and horizontally is significantly easier than doing so in a flat position. To simplify the process further, he divides the task into two or three steps as suggested by fellow expert “for for.” This approach not only makes it more manageable but also allows for greater precision in crafting each component.Step 2: Applying Glue and Securing
Sven proceeds to apply glue along one edge of the flange, ensuring a secure bond when clamped into place. He emphasizes that this stage is crucial for maintaining the structural integrity of the flange, which in turn safeguards the living area beneath the canvas when hatches are open.Step 3: Allowing Time to Dry
After securely attaching the first portion of the flange, Sven allows ample time for it to dry before moving forward with additional steps. This patience and precision are key aspects of his successful boatbuilding methods.Step 4: Finishing Touches
Once the flange is fully dried, Sven removes the clamps carefully, ensuring no damage occurs during this process. He then moves on to attaching four more pieces onto these main frames, completing two pairs of flanges for the bulkhead hatches.The Final Touches
While two flanges form the primary support structure around the hatches, Sven mentions there are two additional pieces required at each end to ensure comprehensive protection. This attention to detail highlights his commitment to producing a durable and reliable design. “Sailing is about finding your path, whether it’s across an ocean or within yourself.” – Sven Yrvind In conclusion, making flanges around bulkhead hatches may seem complex at first glance, but by following Sven Yrvind’s meticulous process, enthusiasts can achieve professional-level results. Remember that the journey of boatbuilding is as rewarding as reaching your destination; it tests one’s patience and dedication. For those seeking to embark on this adventure or simply gain more insight into marine craftsmanship, Sven’s wisdom is invaluable.Making Flanges Around Bulkhead Hatches for Canvas
Sven Yrvind, a renowned yacht designer and sailor, shares valuable insights on creating flanges around bulkhead hatches for canvas protection in this enlightening video. By following his expert guidance, boat enthusiasts can ensure their living areas remain secure while allowing unhindered access through the hatches.Step 1: Starting with the Flange
Sven begins by explaining that working on flanges vertically and horizontally is significantly easier than doing so in a flat position. To simplify the process further, he divides the task into two or three steps as suggested by fellow expert “for for.” This approach not only makes it more manageable but also allows for greater precision in crafting each component.Step 2: Applying Glue and Securing
Sven proceeds to apply glue along one edge of the flange, ensuring a secure bond when clamped into place. He emphasizes that this stage is crucial for maintaining the structural integrity of the flange, which in turn safeguards the living area beneath the canvas when hatches are open.Step 3: Allowing Time to Dry
After securely attaching the first portion of the flange, Sven allows ample time for it to dry before moving forward with additional steps. This patience and precision are key aspects of his successful boatbuilding methods.Step 4: Finishing Touches
Once the flange is fully dried, Sven removes the clamps carefully, ensuring no damage occurs during this process. He then moves on to attaching four more pieces onto these main frames, completing two pairs of flanges for the bulkhead hatches.The Final Touches
While two flanges form the primary support structure around the hatches, Sven mentions there are two additional pieces required at each end to ensure comprehensive protection. This attention to detail highlights his commitment to producing a durable and reliable design. “Sailing is about finding your path, whether it’s across an ocean or within yourself.” – Sven Yrvind In conclusion, making flanges around bulkhead hatches may seem complex at first glance, but by following Sven Yrvind’s meticulous process, enthusiasts can achieve professional-level results. Remember that the journey of boatbuilding is as rewarding as reaching your destination; it tests one’s patience and dedication. For those seeking to embark on this adventure or simply gain more insight into marine craftsmanship, Sven’s wisdom is invaluable.Sven Yrvind, a renowned yacht designer and sailor, shares valuable insights on creating flanges around bulkhead hatches for canvas protection in this enlightening video. By following his expert guidance, boat enthusiasts can ensure their living areas remain secure while allowing unhindered access through the hatches.Step 1: Starting with the Flange
Sven begins by explaining that working on flanges vertically and horizontally is significantly easier than doing so in a flat position. To simplify the process further, he divides the task into two or three steps as suggested by fellow expert “for for.” This approach not only makes it more manageable but also allows for greater precision in crafting each component.Step 2: Applying Glue and Securing
Sven proceeds to apply glue along one edge of the flange, ensuring a secure bond when clamped into place. He emphasizes that this stage is crucial for maintaining the structural integrity of the flange, which in turn safeguards the living area beneath the canvas when hatches are open.Step 3: Allowing Time to Dry
After securely attaching the first portion of the flange, Sven allows ample time for it to dry before moving forward with additional steps. This patience and precision are key aspects of his successful boatbuilding methods.Step 4: Finishing Touches
Once the flange is fully dried, Sven removes the clamps carefully, ensuring no damage occurs during this process. He then moves on to attaching four more pieces onto these main frames, completing two pairs of flanges for the bulkhead hatches.The Final Touches
While two flanges form the primary support structure around the hatches, Sven mentions there are two additional pieces required at each end to ensure comprehensive protection. This attention to detail highlights his commitment to producing a durable and reliable design. “Sailing is about finding your path, whether it’s across an ocean or within yourself.” – Sven Yrvind In conclusion, making flanges around bulkhead hatches may seem complex at first glance, but by following Sven Yrvind’s meticulous process, enthusiasts can achieve professional-level results. Remember that the journey of boatbuilding is as rewarding as reaching your destination; it tests one’s patience and dedication. For those seeking to embark on this adventure or simply gain more insight into marine craftsmanship, Sven’s wisdom is invaluable.After securely attaching the first portion of the flange, Sven allows ample time for it to dry before moving forward with additional steps. This patience and precision are key aspects of his successful boatbuilding methods.Step 4: Finishing Touches
Once the flange is fully dried, Sven removes the clamps carefully, ensuring no damage occurs during this process. He then moves on to attaching four more pieces onto these main frames, completing two pairs of flanges for the bulkhead hatches.The Final Touches
While two flanges form the primary support structure around the hatches, Sven mentions there are two additional pieces required at each end to ensure comprehensive protection. This attention to detail highlights his commitment to producing a durable and reliable design. “Sailing is about finding your path, whether it’s across an ocean or within yourself.” – Sven Yrvind In conclusion, making flanges around bulkhead hatches may seem complex at first glance, but by following Sven Yrvind’s meticulous process, enthusiasts can achieve professional-level results. Remember that the journey of boatbuilding is as rewarding as reaching your destination; it tests one’s patience and dedication. For those seeking to embark on this adventure or simply gain more insight into marine craftsmanship, Sven’s wisdom is invaluable.Sven Yrvind, a renowned yacht designer and sailor, shares valuable insights on creating flanges around bulkhead hatches for canvas protection in this enlightening video. By following his expert guidance, boat enthusiasts can ensure their living areas remain secure while allowing unhindered access through the hatches.Step 1: Starting with the Flange
Sven begins by explaining that working on flanges vertically and horizontally is significantly easier than doing so in a flat position. To simplify the process further, he divides the task into two or three steps as suggested by fellow expert “for for.” This approach not only makes it more manageable but also allows for greater precision in crafting each component.Step 2: Applying Glue and Securing
Sven proceeds to apply glue along one edge of the flange, ensuring a secure bond when clamped into place. He emphasizes that this stage is crucial for maintaining the structural integrity of the flange, which in turn safeguards the living area beneath the canvas when hatches are open.Step 3: Allowing Time to Dry
After securely attaching the first portion of the flange, Sven allows ample time for it to dry before moving forward with additional steps. This patience and precision are key aspects of his successful boatbuilding methods.Step 4: Finishing Touches
Once the flange is fully dried, Sven removes the clamps carefully, ensuring no damage occurs during this process. He then moves on to attaching four more pieces onto these main frames, completing two pairs of flanges for the bulkhead hatches.The Final Touches
While two flanges form the primary support structure around the hatches, Sven mentions there are two additional pieces required at each end to ensure comprehensive protection. This attention to detail highlights his commitment to producing a durable and reliable design. “Sailing is about finding your path, whether it’s across an ocean or within yourself.” – Sven Yrvind In conclusion, making flanges around bulkhead hatches may seem complex at first glance, but by following Sven Yrvind’s meticulous process, enthusiasts can achieve professional-level results. Remember that the journey of boatbuilding is as rewarding as reaching your destination; it tests one’s patience and dedication. For those seeking to embark on this adventure or simply gain more insight into marine craftsmanship, Sven’s wisdom is invaluable.Making Flanges Around Bulkhead Hatches for Canvas
Sven Yrvind, a renowned yacht designer and sailor, shares valuable insights on creating flanges around bulkhead hatches for canvas protection in this enlightening video. By following his expert guidance, boat enthusiasts can ensure their living areas remain secure while allowing unhindered access through the hatches.Step 1: Starting with the Flange
Sven begins by explaining that working on flanges vertically and horizontally is significantly easier than doing so in a flat position. To simplify the process further, he divides the task into two or three steps as suggested by fellow expert “for for.” This approach not only makes it more manageable but also allows for greater precision in crafting each component.Step 2: Applying Glue and Securing
Sven proceeds to apply glue along one edge of the flange, ensuring a secure bond when clamped into place. He emphasizes that this stage is crucial for maintaining the structural integrity of the flange, which in turn safeguards the living area beneath the canvas when hatches are open.Step 3: Allowing Time to Dry
After securely attaching the first portion of the flange, Sven allows ample time for it to dry before moving forward with additional steps. This patience and precision are key aspects of his successful boatbuilding methods.Step 4: Finishing Touches
Once the flange is fully dried, Sven removes the clamps carefully, ensuring no damage occurs during this process. He then moves on to attaching four more pieces onto these main frames, completing two pairs of flanges for the bulkhead hatches.The Final Touches
While two flanges form the primary support structure around the hatches, Sven mentions there are two additional pieces required at each end to ensure comprehensive protection. This attention to detail highlights his commitment to producing a durable and reliable design. “Sailing is about finding your path, whether it’s across an ocean or within yourself.” – Sven Yrvind In conclusion, making flanges around bulkhead hatches may seem complex at first glance, but by following Sven Yrvind’s meticulous process, enthusiasts can achieve professional-level results. Remember that the journey of boatbuilding is as rewarding as reaching your destination; it tests one’s patience and dedication. For those seeking to embark on this adventure or simply gain more insight into marine craftsmanship, Sven’s wisdom is invaluable.Sven proceeds to apply glue along one edge of the flange, ensuring a secure bond when clamped into place. He emphasizes that this stage is crucial for maintaining the structural integrity of the flange, which in turn safeguards the living area beneath the canvas when hatches are open.Step 3: Allowing Time to Dry
After securely attaching the first portion of the flange, Sven allows ample time for it to dry before moving forward with additional steps. This patience and precision are key aspects of his successful boatbuilding methods.Step 4: Finishing Touches
Once the flange is fully dried, Sven removes the clamps carefully, ensuring no damage occurs during this process. He then moves on to attaching four more pieces onto these main frames, completing two pairs of flanges for the bulkhead hatches.The Final Touches
While two flanges form the primary support structure around the hatches, Sven mentions there are two additional pieces required at each end to ensure comprehensive protection. This attention to detail highlights his commitment to producing a durable and reliable design. “Sailing is about finding your path, whether it’s across an ocean or within yourself.” – Sven Yrvind In conclusion, making flanges around bulkhead hatches may seem complex at first glance, but by following Sven Yrvind’s meticulous process, enthusiasts can achieve professional-level results. Remember that the journey of boatbuilding is as rewarding as reaching your destination; it tests one’s patience and dedication. For those seeking to embark on this adventure or simply gain more insight into marine craftsmanship, Sven’s wisdom is invaluable.Sven Yrvind, a renowned yacht designer and sailor, shares valuable insights on creating flanges around bulkhead hatches for canvas protection in this enlightening video. By following his expert guidance, boat enthusiasts can ensure their living areas remain secure while allowing unhindered access through the hatches.Step 1: Starting with the Flange
Sven begins by explaining that working on flanges vertically and horizontally is significantly easier than doing so in a flat position. To simplify the process further, he divides the task into two or three steps as suggested by fellow expert “for for.” This approach not only makes it more manageable but also allows for greater precision in crafting each component.Step 2: Applying Glue and Securing
Sven proceeds to apply glue along one edge of the flange, ensuring a secure bond when clamped into place. He emphasizes that this stage is crucial for maintaining the structural integrity of the flange, which in turn safeguards the living area beneath the canvas when hatches are open.Step 3: Allowing Time to Dry
After securely attaching the first portion of the flange, Sven allows ample time for it to dry before moving forward with additional steps. This patience and precision are key aspects of his successful boatbuilding methods.Step 4: Finishing Touches
Once the flange is fully dried, Sven removes the clamps carefully, ensuring no damage occurs during this process. He then moves on to attaching four more pieces onto these main frames, completing two pairs of flanges for the bulkhead hatches.The Final Touches
While two flanges form the primary support structure around the hatches, Sven mentions there are two additional pieces required at each end to ensure comprehensive protection. This attention to detail highlights his commitment to producing a durable and reliable design. “Sailing is about finding your path, whether it’s across an ocean or within yourself.” – Sven Yrvind In conclusion, making flanges around bulkhead hatches may seem complex at first glance, but by following Sven Yrvind’s meticulous process, enthusiasts can achieve professional-level results. Remember that the journey of boatbuilding is as rewarding as reaching your destination; it tests one’s patience and dedication. For those seeking to embark on this adventure or simply gain more insight into marine craftsmanship, Sven’s wisdom is invaluable.Making Flanges Around Bulkhead Hatches for Canvas
Sven Yrvind, a renowned yacht designer and sailor, shares valuable insights on creating flanges around bulkhead hatches for canvas protection in this enlightening video. By following his expert guidance, boat enthusiasts can ensure their living areas remain secure while allowing unhindered access through the hatches.Step 1: Starting with the Flange
Sven begins by explaining that working on flanges vertically and horizontally is significantly easier than doing so in a flat position. To simplify the process further, he divides the task into two or three steps as suggested by fellow expert “for for.” This approach not only makes it more manageable but also allows for greater precision in crafting each component.Step 2: Applying Glue and Securing
Sven proceeds to apply glue along one edge of the flange, ensuring a secure bond when clamped into place. He emphasizes that this stage is crucial for maintaining the structural integrity of the flange, which in turn safeguards the living area beneath the canvas when hatches are open.Step 3: Allowing Time to Dry
After securely attaching the first portion of the flange, Sven allows ample time for it to dry before moving forward with additional steps. This patience and precision are key aspects of his successful boatbuilding methods.Step 4: Finishing Touches
Once the flange is fully dried, Sven removes the clamps carefully, ensuring no damage occurs during this process. He then moves on to attaching four more pieces onto these main frames, completing two pairs of flanges for the bulkhead hatches.The Final Touches
While two flanges form the primary support structure around the hatches, Sven mentions there are two additional pieces required at each end to ensure comprehensive protection. This attention to detail highlights his commitment to producing a durable and reliable design. “Sailing is about finding your path, whether it’s across an ocean or within yourself.” – Sven Yrvind In conclusion, making flanges around bulkhead hatches may seem complex at first glance, but by following Sven Yrvind’s meticulous process, enthusiasts can achieve professional-level results. Remember that the journey of boatbuilding is as rewarding as reaching your destination; it tests one’s patience and dedication. For those seeking to embark on this adventure or simply gain more insight into marine craftsmanship, Sven’s wisdom is invaluable.Sven begins by explaining that working on flanges vertically and horizontally is significantly easier than doing so in a flat position. To simplify the process further, he divides the task into two or three steps as suggested by fellow expert “for for.” This approach not only makes it more manageable but also allows for greater precision in crafting each component.Step 2: Applying Glue and Securing
Sven proceeds to apply glue along one edge of the flange, ensuring a secure bond when clamped into place. He emphasizes that this stage is crucial for maintaining the structural integrity of the flange, which in turn safeguards the living area beneath the canvas when hatches are open.Step 3: Allowing Time to Dry
After securely attaching the first portion of the flange, Sven allows ample time for it to dry before moving forward with additional steps. This patience and precision are key aspects of his successful boatbuilding methods.Step 4: Finishing Touches
Once the flange is fully dried, Sven removes the clamps carefully, ensuring no damage occurs during this process. He then moves on to attaching four more pieces onto these main frames, completing two pairs of flanges for the bulkhead hatches.The Final Touches
While two flanges form the primary support structure around the hatches, Sven mentions there are two additional pieces required at each end to ensure comprehensive protection. This attention to detail highlights his commitment to producing a durable and reliable design. “Sailing is about finding your path, whether it’s across an ocean or within yourself.” – Sven Yrvind In conclusion, making flanges around bulkhead hatches may seem complex at first glance, but by following Sven Yrvind’s meticulous process, enthusiasts can achieve professional-level results. Remember that the journey of boatbuilding is as rewarding as reaching your destination; it tests one’s patience and dedication. For those seeking to embark on this adventure or simply gain more insight into marine craftsmanship, Sven’s wisdom is invaluable.Sven Yrvind, a renowned yacht designer and sailor, shares valuable insights on creating flanges around bulkhead hatches for canvas protection in this enlightening video. By following his expert guidance, boat enthusiasts can ensure their living areas remain secure while allowing unhindered access through the hatches.Step 1: Starting with the Flange
Sven begins by explaining that working on flanges vertically and horizontally is significantly easier than doing so in a flat position. To simplify the process further, he divides the task into two or three steps as suggested by fellow expert “for for.” This approach not only makes it more manageable but also allows for greater precision in crafting each component.Step 2: Applying Glue and Securing
Sven proceeds to apply glue along one edge of the flange, ensuring a secure bond when clamped into place. He emphasizes that this stage is crucial for maintaining the structural integrity of the flange, which in turn safeguards the living area beneath the canvas when hatches are open.Step 3: Allowing Time to Dry
After securely attaching the first portion of the flange, Sven allows ample time for it to dry before moving forward with additional steps. This patience and precision are key aspects of his successful boatbuilding methods.Step 4: Finishing Touches
Once the flange is fully dried, Sven removes the clamps carefully, ensuring no damage occurs during this process. He then moves on to attaching four more pieces onto these main frames, completing two pairs of flanges for the bulkhead hatches.The Final Touches
While two flanges form the primary support structure around the hatches, Sven mentions there are two additional pieces required at each end to ensure comprehensive protection. This attention to detail highlights his commitment to producing a durable and reliable design. “Sailing is about finding your path, whether it’s across an ocean or within yourself.” – Sven Yrvind In conclusion, making flanges around bulkhead hatches may seem complex at first glance, but by following Sven Yrvind’s meticulous process, enthusiasts can achieve professional-level results. Remember that the journey of boatbuilding is as rewarding as reaching your destination; it tests one’s patience and dedication. For those seeking to embark on this adventure or simply gain more insight into marine craftsmanship, Sven’s wisdom is invaluable.Making Flanges Around Bulkhead Hatches for Canvas
Sven Yrvind, a renowned yacht designer and sailor, shares valuable insights on creating flanges around bulkhead hatches for canvas protection in this enlightening video. By following his expert guidance, boat enthusiasts can ensure their living areas remain secure while allowing unhindered access through the hatches.Step 1: Starting with the Flange
Sven begins by explaining that working on flanges vertically and horizontally is significantly easier than doing so in a flat position. To simplify the process further, he divides the task into two or three steps as suggested by fellow expert “for for.” This approach not only makes it more manageable but also allows for greater precision in crafting each component.Step 2: Applying Glue and Securing
Sven proceeds to apply glue along one edge of the flange, ensuring a secure bond when clamped into place. He emphasizes that this stage is crucial for maintaining the structural integrity of the flange, which in turn safeguards the living area beneath the canvas when hatches are open.Step 3: Allowing Time to Dry
After securely attaching the first portion of the flange, Sven allows ample time for it to dry before moving forward with additional steps. This patience and precision are key aspects of his successful boatbuilding methods.Step 4: Finishing Touches
Once the flange is fully dried, Sven removes the clamps carefully, ensuring no damage occurs during this process. He then moves on to attaching four more pieces onto these main frames, completing two pairs of flanges for the bulkhead hatches.The Final Touches
While two flanges form the primary support structure around the hatches, Sven mentions there are two additional pieces required at each end to ensure comprehensive protection. This attention to detail highlights his commitment to producing a durable and reliable design. “Sailing is about finding your path, whether it’s across an ocean or within yourself.” – Sven Yrvind In conclusion, making flanges around bulkhead hatches may seem complex at first glance, but by following Sven Yrvind’s meticulous process, enthusiasts can achieve professional-level results. Remember that the journey of boatbuilding is as rewarding as reaching your destination; it tests one’s patience and dedication. For those seeking to embark on this adventure or simply gain more insight into marine craftsmanship, Sven’s wisdom is invaluable.Once the flange is fully dried, Sven removes the clamps carefully, ensuring no damage occurs during this process. He then moves on to attaching four more pieces onto these main frames, completing two pairs of flanges for the bulkhead hatches.The Final Touches
While two flanges form the primary support structure around the hatches, Sven mentions there are two additional pieces required at each end to ensure comprehensive protection. This attention to detail highlights his commitment to producing a durable and reliable design. “Sailing is about finding your path, whether it’s across an ocean or within yourself.” – Sven Yrvind In conclusion, making flanges around bulkhead hatches may seem complex at first glance, but by following Sven Yrvind’s meticulous process, enthusiasts can achieve professional-level results. Remember that the journey of boatbuilding is as rewarding as reaching your destination; it tests one’s patience and dedication. For those seeking to embark on this adventure or simply gain more insight into marine craftsmanship, Sven’s wisdom is invaluable.Sven begins by explaining that working on flanges vertically and horizontally is significantly easier than doing so in a flat position. To simplify the process further, he divides the task into two or three steps as suggested by fellow expert “for for.” This approach not only makes it more manageable but also allows for greater precision in crafting each component.Step 2: Applying Glue and Securing
Sven proceeds to apply glue along one edge of the flange, ensuring a secure bond when clamped into place. He emphasizes that this stage is crucial for maintaining the structural integrity of the flange, which in turn safeguards the living area beneath the canvas when hatches are open.Step 3: Allowing Time to Dry
After securely attaching the first portion of the flange, Sven allows ample time for it to dry before moving forward with additional steps. This patience and precision are key aspects of his successful boatbuilding methods.Step 4: Finishing Touches
Once the flange is fully dried, Sven removes the clamps carefully, ensuring no damage occurs during this process. He then moves on to attaching four more pieces onto these main frames, completing two pairs of flanges for the bulkhead hatches.The Final Touches
While two flanges form the primary support structure around the hatches, Sven mentions there are two additional pieces required at each end to ensure comprehensive protection. This attention to detail highlights his commitment to producing a durable and reliable design. “Sailing is about finding your path, whether it’s across an ocean or within yourself.” – Sven Yrvind In conclusion, making flanges around bulkhead hatches may seem complex at first glance, but by following Sven Yrvind’s meticulous process, enthusiasts can achieve professional-level results. Remember that the journey of boatbuilding is as rewarding as reaching your destination; it tests one’s patience and dedication. For those seeking to embark on this adventure or simply gain more insight into marine craftsmanship, Sven’s wisdom is invaluable.Sven Yrvind, a renowned yacht designer and sailor, shares valuable insights on creating flanges around bulkhead hatches for canvas protection in this enlightening video. By following his expert guidance, boat enthusiasts can ensure their living areas remain secure while allowing unhindered access through the hatches.Step 1: Starting with the Flange
Sven begins by explaining that working on flanges vertically and horizontally is significantly easier than doing so in a flat position. To simplify the process further, he divides the task into two or three steps as suggested by fellow expert “for for.” This approach not only makes it more manageable but also allows for greater precision in crafting each component.Step 2: Applying Glue and Securing
Sven proceeds to apply glue along one edge of the flange, ensuring a secure bond when clamped into place. He emphasizes that this stage is crucial for maintaining the structural integrity of the flange, which in turn safeguards the living area beneath the canvas when hatches are open.Step 3: Allowing Time to Dry
After securely attaching the first portion of the flange, Sven allows ample time for it to dry before moving forward with additional steps. This patience and precision are key aspects of his successful boatbuilding methods.Step 4: Finishing Touches
Once the flange is fully dried, Sven removes the clamps carefully, ensuring no damage occurs during this process. He then moves on to attaching four more pieces onto these main frames, completing two pairs of flanges for the bulkhead hatches.The Final Touches
While two flanges form the primary support structure around the hatches, Sven mentions there are two additional pieces required at each end to ensure comprehensive protection. This attention to detail highlights his commitment to producing a durable and reliable design. “Sailing is about finding your path, whether it’s across an ocean or within yourself.” – Sven Yrvind In conclusion, making flanges around bulkhead hatches may seem complex at first glance, but by following Sven Yrvind’s meticulous process, enthusiasts can achieve professional-level results. Remember that the journey of boatbuilding is as rewarding as reaching your destination; it tests one’s patience and dedication. For those seeking to embark on this adventure or simply gain more insight into marine craftsmanship, Sven’s wisdom is invaluable.Making Flanges Around Bulkhead Hatches for Canvas
Sven Yrvind, a renowned yacht designer and sailor, shares valuable insights on creating flanges around bulkhead hatches for canvas protection in this enlightening video. By following his expert guidance, boat enthusiasts can ensure their living areas remain secure while allowing unhindered access through the hatches.Step 1: Starting with the Flange
Sven begins by explaining that working on flanges vertically and horizontally is significantly easier than doing so in a flat position. To simplify the process further, he divides the task into two or three steps as suggested by fellow expert “for for.” This approach not only makes it more manageable but also allows for greater precision in crafting each component.Step 2: Applying Glue and Securing
Sven proceeds to apply glue along one edge of the flange, ensuring a secure bond when clamped into place. He emphasizes that this stage is crucial for maintaining the structural integrity of the flange, which in turn safeguards the living area beneath the canvas when hatches are open.Step 3: Allowing Time to Dry
After securely attaching the first portion of the flange, Sven allows ample time for it to dry before moving forward with additional steps. This patience and precision are key aspects of his successful boatbuilding methods.Step 4: Finishing Touches
Once the flange is fully dried, Sven removes the clamps carefully, ensuring no damage occurs during this process. He then moves on to attaching four more pieces onto these main frames, completing two pairs of flanges for the bulkhead hatches.The Final Touches
While two flanges form the primary support structure around the hatches, Sven mentions there are two additional pieces required at each end to ensure comprehensive protection. This attention to detail highlights his commitment to producing a durable and reliable design. “Sailing is about finding your path, whether it’s across an ocean or within yourself.” – Sven Yrvind In conclusion, making flanges around bulkhead hatches may seem complex at first glance, but by following Sven Yrvind’s meticulous process, enthusiasts can achieve professional-level results. Remember that the journey of boatbuilding is as rewarding as reaching your destination; it tests one’s patience and dedication. For those seeking to embark on this adventure or simply gain more insight into marine craftsmanship, Sven’s wisdom is invaluable.After securely attaching the first portion of the flange, Sven allows ample time for it to dry before moving forward with additional steps. This patience and precision are key aspects of his successful boatbuilding methods.Step 4: Finishing Touches
Once the flange is fully dried, Sven removes the clamps carefully, ensuring no damage occurs during this process. He then moves on to attaching four more pieces onto these main frames, completing two pairs of flanges for the bulkhead hatches.The Final Touches
While two flanges form the primary support structure around the hatches, Sven mentions there are two additional pieces required at each end to ensure comprehensive protection. This attention to detail highlights his commitment to producing a durable and reliable design. “Sailing is about finding your path, whether it’s across an ocean or within yourself.” – Sven Yrvind In conclusion, making flanges around bulkhead hatches may seem complex at first glance, but by following Sven Yrvind’s meticulous process, enthusiasts can achieve professional-level results. Remember that the journey of boatbuilding is as rewarding as reaching your destination; it tests one’s patience and dedication. For those seeking to embark on this adventure or simply gain more insight into marine craftsmanship, Sven’s wisdom is invaluable.Sven begins by explaining that working on flanges vertically and horizontally is significantly easier than doing so in a flat position. To simplify the process further, he divides the task into two or three steps as suggested by fellow expert “for for.” This approach not only makes it more manageable but also allows for greater precision in crafting each component.Step 2: Applying Glue and Securing
Sven proceeds to apply glue along one edge of the flange, ensuring a secure bond when clamped into place. He emphasizes that this stage is crucial for maintaining the structural integrity of the flange, which in turn safeguards the living area beneath the canvas when hatches are open.Step 3: Allowing Time to Dry
After securely attaching the first portion of the flange, Sven allows ample time for it to dry before moving forward with additional steps. This patience and precision are key aspects of his successful boatbuilding methods.Step 4: Finishing Touches
Once the flange is fully dried, Sven removes the clamps carefully, ensuring no damage occurs during this process. He then moves on to attaching four more pieces onto these main frames, completing two pairs of flanges for the bulkhead hatches.The Final Touches
While two flanges form the primary support structure around the hatches, Sven mentions there are two additional pieces required at each end to ensure comprehensive protection. This attention to detail highlights his commitment to producing a durable and reliable design. “Sailing is about finding your path, whether it’s across an ocean or within yourself.” – Sven Yrvind In conclusion, making flanges around bulkhead hatches may seem complex at first glance, but by following Sven Yrvind’s meticulous process, enthusiasts can achieve professional-level results. Remember that the journey of boatbuilding is as rewarding as reaching your destination; it tests one’s patience and dedication. For those seeking to embark on this adventure or simply gain more insight into marine craftsmanship, Sven’s wisdom is invaluable.Sven Yrvind, a renowned yacht designer and sailor, shares valuable insights on creating flanges around bulkhead hatches for canvas protection in this enlightening video. By following his expert guidance, boat enthusiasts can ensure their living areas remain secure while allowing unhindered access through the hatches.Step 1: Starting with the Flange
Sven begins by explaining that working on flanges vertically and horizontally is significantly easier than doing so in a flat position. To simplify the process further, he divides the task into two or three steps as suggested by fellow expert “for for.” This approach not only makes it more manageable but also allows for greater precision in crafting each component.Step 2: Applying Glue and Securing
Sven proceeds to apply glue along one edge of the flange, ensuring a secure bond when clamped into place. He emphasizes that this stage is crucial for maintaining the structural integrity of the flange, which in turn safeguards the living area beneath the canvas when hatches are open.Step 3: Allowing Time to Dry
After securely attaching the first portion of the flange, Sven allows ample time for it to dry before moving forward with additional steps. This patience and precision are key aspects of his successful boatbuilding methods.Step 4: Finishing Touches
Once the flange is fully dried, Sven removes the clamps carefully, ensuring no damage occurs during this process. He then moves on to attaching four more pieces onto these main frames, completing two pairs of flanges for the bulkhead hatches.The Final Touches
While two flanges form the primary support structure around the hatches, Sven mentions there are two additional pieces required at each end to ensure comprehensive protection. This attention to detail highlights his commitment to producing a durable and reliable design. “Sailing is about finding your path, whether it’s across an ocean or within yourself.” – Sven Yrvind In conclusion, making flanges around bulkhead hatches may seem complex at first glance, but by following Sven Yrvind’s meticulous process, enthusiasts can achieve professional-level results. Remember that the journey of boatbuilding is as rewarding as reaching your destination; it tests one’s patience and dedication. For those seeking to embark on this adventure or simply gain more insight into marine craftsmanship, Sven’s wisdom is invaluable.Making Flanges Around Bulkhead Hatches for Canvas
Sven Yrvind, a renowned yacht designer and sailor, shares valuable insights on creating flanges around bulkhead hatches for canvas protection in this enlightening video. By following his expert guidance, boat enthusiasts can ensure their living areas remain secure while allowing unhindered access through the hatches.Step 1: Starting with the Flange
Sven begins by explaining that working on flanges vertically and horizontally is significantly easier than doing so in a flat position. To simplify the process further, he divides the task into two or three steps as suggested by fellow expert “for for.” This approach not only makes it more manageable but also allows for greater precision in crafting each component.Step 2: Applying Glue and Securing
Sven proceeds to apply glue along one edge of the flange, ensuring a secure bond when clamped into place. He emphasizes that this stage is crucial for maintaining the structural integrity of the flange, which in turn safeguards the living area beneath the canvas when hatches are open.Step 3: Allowing Time to Dry
After securely attaching the first portion of the flange, Sven allows ample time for it to dry before moving forward with additional steps. This patience and precision are key aspects of his successful boatbuilding methods.Step 4: Finishing Touches
Once the flange is fully dried, Sven removes the clamps carefully, ensuring no damage occurs during this process. He then moves on to attaching four more pieces onto these main frames, completing two pairs of flanges for the bulkhead hatches.The Final Touches
While two flanges form the primary support structure around the hatches, Sven mentions there are two additional pieces required at each end to ensure comprehensive protection. This attention to detail highlights his commitment to producing a durable and reliable design. “Sailing is about finding your path, whether it’s across an ocean or within yourself.” – Sven Yrvind In conclusion, making flanges around bulkhead hatches may seem complex at first glance, but by following Sven Yrvind’s meticulous process, enthusiasts can achieve professional-level results. Remember that the journey of boatbuilding is as rewarding as reaching your destination; it tests one’s patience and dedication. For those seeking to embark on this adventure or simply gain more insight into marine craftsmanship, Sven’s wisdom is invaluable.Sven proceeds to apply glue along one edge of the flange, ensuring a secure bond when clamped into place. He emphasizes that this stage is crucial for maintaining the structural integrity of the flange, which in turn safeguards the living area beneath the canvas when hatches are open.Step 3: Allowing Time to Dry
After securely attaching the first portion of the flange, Sven allows ample time for it to dry before moving forward with additional steps. This patience and precision are key aspects of his successful boatbuilding methods.Step 4: Finishing Touches
Once the flange is fully dried, Sven removes the clamps carefully, ensuring no damage occurs during this process. He then moves on to attaching four more pieces onto these main frames, completing two pairs of flanges for the bulkhead hatches.The Final Touches
While two flanges form the primary support structure around the hatches, Sven mentions there are two additional pieces required at each end to ensure comprehensive protection. This attention to detail highlights his commitment to producing a durable and reliable design. “Sailing is about finding your path, whether it’s across an ocean or within yourself.” – Sven Yrvind In conclusion, making flanges around bulkhead hatches may seem complex at first glance, but by following Sven Yrvind’s meticulous process, enthusiasts can achieve professional-level results. Remember that the journey of boatbuilding is as rewarding as reaching your destination; it tests one’s patience and dedication. For those seeking to embark on this adventure or simply gain more insight into marine craftsmanship, Sven’s wisdom is invaluable.Sven begins by explaining that working on flanges vertically and horizontally is significantly easier than doing so in a flat position. To simplify the process further, he divides the task into two or three steps as suggested by fellow expert “for for.” This approach not only makes it more manageable but also allows for greater precision in crafting each component.Step 2: Applying Glue and Securing
Sven proceeds to apply glue along one edge of the flange, ensuring a secure bond when clamped into place. He emphasizes that this stage is crucial for maintaining the structural integrity of the flange, which in turn safeguards the living area beneath the canvas when hatches are open.Step 3: Allowing Time to Dry
After securely attaching the first portion of the flange, Sven allows ample time for it to dry before moving forward with additional steps. This patience and precision are key aspects of his successful boatbuilding methods.Step 4: Finishing Touches
Once the flange is fully dried, Sven removes the clamps carefully, ensuring no damage occurs during this process. He then moves on to attaching four more pieces onto these main frames, completing two pairs of flanges for the bulkhead hatches.The Final Touches
While two flanges form the primary support structure around the hatches, Sven mentions there are two additional pieces required at each end to ensure comprehensive protection. This attention to detail highlights his commitment to producing a durable and reliable design. “Sailing is about finding your path, whether it’s across an ocean or within yourself.” – Sven Yrvind In conclusion, making flanges around bulkhead hatches may seem complex at first glance, but by following Sven Yrvind’s meticulous process, enthusiasts can achieve professional-level results. Remember that the journey of boatbuilding is as rewarding as reaching your destination; it tests one’s patience and dedication. For those seeking to embark on this adventure or simply gain more insight into marine craftsmanship, Sven’s wisdom is invaluable.Sven Yrvind, a renowned yacht designer and sailor, shares valuable insights on creating flanges around bulkhead hatches for canvas protection in this enlightening video. By following his expert guidance, boat enthusiasts can ensure their living areas remain secure while allowing unhindered access through the hatches.Step 1: Starting with the Flange
Sven begins by explaining that working on flanges vertically and horizontally is significantly easier than doing so in a flat position. To simplify the process further, he divides the task into two or three steps as suggested by fellow expert “for for.” This approach not only makes it more manageable but also allows for greater precision in crafting each component.Step 2: Applying Glue and Securing
Sven proceeds to apply glue along one edge of the flange, ensuring a secure bond when clamped into place. He emphasizes that this stage is crucial for maintaining the structural integrity of the flange, which in turn safeguards the living area beneath the canvas when hatches are open.Step 3: Allowing Time to Dry
After securely attaching the first portion of the flange, Sven allows ample time for it to dry before moving forward with additional steps. This patience and precision are key aspects of his successful boatbuilding methods.Step 4: Finishing Touches
Once the flange is fully dried, Sven removes the clamps carefully, ensuring no damage occurs during this process. He then moves on to attaching four more pieces onto these main frames, completing two pairs of flanges for the bulkhead hatches.The Final Touches
While two flanges form the primary support structure around the hatches, Sven mentions there are two additional pieces required at each end to ensure comprehensive protection. This attention to detail highlights his commitment to producing a durable and reliable design. “Sailing is about finding your path, whether it’s across an ocean or within yourself.” – Sven Yrvind In conclusion, making flanges around bulkhead hatches may seem complex at first glance, but by following Sven Yrvind’s meticulous process, enthusiasts can achieve professional-level results. Remember that the journey of boatbuilding is as rewarding as reaching your destination; it tests one’s patience and dedication. For those seeking to embark on this adventure or simply gain more insight into marine craftsmanship, Sven’s wisdom is invaluable.Making Flanges Around Bulkhead Hatches for Canvas
Sven Yrvind, a renowned yacht designer and sailor, shares valuable insights on creating flanges around bulkhead hatches for canvas protection in this enlightening video. By following his expert guidance, boat enthusiasts can ensure their living areas remain secure while allowing unhindered access through the hatches.Step 1: Starting with the Flange
Sven begins by explaining that working on flanges vertically and horizontally is significantly easier than doing so in a flat position. To simplify the process further, he divides the task into two or three steps as suggested by fellow expert “for for.” This approach not only makes it more manageable but also allows for greater precision in crafting each component.Step 2: Applying Glue and Securing
Sven proceeds to apply glue along one edge of the flange, ensuring a secure bond when clamped into place. He emphasizes that this stage is crucial for maintaining the structural integrity of the flange, which in turn safeguards the living area beneath the canvas when hatches are open.Step 3: Allowing Time to Dry
After securely attaching the first portion of the flange, Sven allows ample time for it to dry before moving forward with additional steps. This patience and precision are key aspects of his successful boatbuilding methods.Step 4: Finishing Touches
Once the flange is fully dried, Sven removes the clamps carefully, ensuring no damage occurs during this process. He then moves on to attaching four more pieces onto these main frames, completing two pairs of flanges for the bulkhead hatches.The Final Touches
While two flanges form the primary support structure around the hatches, Sven mentions there are two additional pieces required at each end to ensure comprehensive protection. This attention to detail highlights his commitment to producing a durable and reliable design. “Sailing is about finding your path, whether it’s across an ocean or within yourself.” – Sven Yrvind In conclusion, making flanges around bulkhead hatches may seem complex at first glance, but by following Sven Yrvind’s meticulous process, enthusiasts can achieve professional-level results. Remember that the journey of boatbuilding is as rewarding as reaching your destination; it tests one’s patience and dedication. For those seeking to embark on this adventure or simply gain more insight into marine craftsmanship, Sven’s wisdom is invaluable.Once the flange is fully dried, Sven removes the clamps carefully, ensuring no damage occurs during this process. He then moves on to attaching four more pieces onto these main frames, completing two pairs of flanges for the bulkhead hatches.The Final Touches
While two flanges form the primary support structure around the hatches, Sven mentions there are two additional pieces required at each end to ensure comprehensive protection. This attention to detail highlights his commitment to producing a durable and reliable design. “Sailing is about finding your path, whether it’s across an ocean or within yourself.” – Sven Yrvind In conclusion, making flanges around bulkhead hatches may seem complex at first glance, but by following Sven Yrvind’s meticulous process, enthusiasts can achieve professional-level results. Remember that the journey of boatbuilding is as rewarding as reaching your destination; it tests one’s patience and dedication. For those seeking to embark on this adventure or simply gain more insight into marine craftsmanship, Sven’s wisdom is invaluable.Sven proceeds to apply glue along one edge of the flange, ensuring a secure bond when clamped into place. He emphasizes that this stage is crucial for maintaining the structural integrity of the flange, which in turn safeguards the living area beneath the canvas when hatches are open.Step 3: Allowing Time to Dry
After securely attaching the first portion of the flange, Sven allows ample time for it to dry before moving forward with additional steps. This patience and precision are key aspects of his successful boatbuilding methods.Step 4: Finishing Touches
Once the flange is fully dried, Sven removes the clamps carefully, ensuring no damage occurs during this process. He then moves on to attaching four more pieces onto these main frames, completing two pairs of flanges for the bulkhead hatches.The Final Touches
While two flanges form the primary support structure around the hatches, Sven mentions there are two additional pieces required at each end to ensure comprehensive protection. This attention to detail highlights his commitment to producing a durable and reliable design. “Sailing is about finding your path, whether it’s across an ocean or within yourself.” – Sven Yrvind In conclusion, making flanges around bulkhead hatches may seem complex at first glance, but by following Sven Yrvind’s meticulous process, enthusiasts can achieve professional-level results. Remember that the journey of boatbuilding is as rewarding as reaching your destination; it tests one’s patience and dedication. For those seeking to embark on this adventure or simply gain more insight into marine craftsmanship, Sven’s wisdom is invaluable.Sven begins by explaining that working on flanges vertically and horizontally is significantly easier than doing so in a flat position. To simplify the process further, he divides the task into two or three steps as suggested by fellow expert “for for.” This approach not only makes it more manageable but also allows for greater precision in crafting each component.Step 2: Applying Glue and Securing
Sven proceeds to apply glue along one edge of the flange, ensuring a secure bond when clamped into place. He emphasizes that this stage is crucial for maintaining the structural integrity of the flange, which in turn safeguards the living area beneath the canvas when hatches are open.Step 3: Allowing Time to Dry
After securely attaching the first portion of the flange, Sven allows ample time for it to dry before moving forward with additional steps. This patience and precision are key aspects of his successful boatbuilding methods.Step 4: Finishing Touches
Once the flange is fully dried, Sven removes the clamps carefully, ensuring no damage occurs during this process. He then moves on to attaching four more pieces onto these main frames, completing two pairs of flanges for the bulkhead hatches.The Final Touches
While two flanges form the primary support structure around the hatches, Sven mentions there are two additional pieces required at each end to ensure comprehensive protection. This attention to detail highlights his commitment to producing a durable and reliable design. “Sailing is about finding your path, whether it’s across an ocean or within yourself.” – Sven Yrvind In conclusion, making flanges around bulkhead hatches may seem complex at first glance, but by following Sven Yrvind’s meticulous process, enthusiasts can achieve professional-level results. Remember that the journey of boatbuilding is as rewarding as reaching your destination; it tests one’s patience and dedication. For those seeking to embark on this adventure or simply gain more insight into marine craftsmanship, Sven’s wisdom is invaluable.Sven Yrvind, a renowned yacht designer and sailor, shares valuable insights on creating flanges around bulkhead hatches for canvas protection in this enlightening video. By following his expert guidance, boat enthusiasts can ensure their living areas remain secure while allowing unhindered access through the hatches.Step 1: Starting with the Flange
Sven begins by explaining that working on flanges vertically and horizontally is significantly easier than doing so in a flat position. To simplify the process further, he divides the task into two or three steps as suggested by fellow expert “for for.” This approach not only makes it more manageable but also allows for greater precision in crafting each component.Step 2: Applying Glue and Securing
Sven proceeds to apply glue along one edge of the flange, ensuring a secure bond when clamped into place. He emphasizes that this stage is crucial for maintaining the structural integrity of the flange, which in turn safeguards the living area beneath the canvas when hatches are open.Step 3: Allowing Time to Dry
After securely attaching the first portion of the flange, Sven allows ample time for it to dry before moving forward with additional steps. This patience and precision are key aspects of his successful boatbuilding methods.Step 4: Finishing Touches
Once the flange is fully dried, Sven removes the clamps carefully, ensuring no damage occurs during this process. He then moves on to attaching four more pieces onto these main frames, completing two pairs of flanges for the bulkhead hatches.The Final Touches
While two flanges form the primary support structure around the hatches, Sven mentions there are two additional pieces required at each end to ensure comprehensive protection. This attention to detail highlights his commitment to producing a durable and reliable design. “Sailing is about finding your path, whether it’s across an ocean or within yourself.” – Sven Yrvind In conclusion, making flanges around bulkhead hatches may seem complex at first glance, but by following Sven Yrvind’s meticulous process, enthusiasts can achieve professional-level results. Remember that the journey of boatbuilding is as rewarding as reaching your destination; it tests one’s patience and dedication. For those seeking to embark on this adventure or simply gain more insight into marine craftsmanship, Sven’s wisdom is invaluable.Making Flanges Around Bulkhead Hatches for Canvas
Sven Yrvind, a renowned yacht designer and sailor, shares valuable insights on creating flanges around bulkhead hatches for canvas protection in this enlightening video. By following his expert guidance, boat enthusiasts can ensure their living areas remain secure while allowing unhindered access through the hatches.Step 1: Starting with the Flange
Sven begins by explaining that working on flanges vertically and horizontally is significantly easier than doing so in a flat position. To simplify the process further, he divides the task into two or three steps as suggested by fellow expert “for for.” This approach not only makes it more manageable but also allows for greater precision in crafting each component.Step 2: Applying Glue and Securing
Sven proceeds to apply glue along one edge of the flange, ensuring a secure bond when clamped into place. He emphasizes that this stage is crucial for maintaining the structural integrity of the flange, which in turn safeguards the living area beneath the canvas when hatches are open.Step 3: Allowing Time to Dry
After securely attaching the first portion of the flange, Sven allows ample time for it to dry before moving forward with additional steps. This patience and precision are key aspects of his successful boatbuilding methods.Step 4: Finishing Touches
Once the flange is fully dried, Sven removes the clamps carefully, ensuring no damage occurs during this process. He then moves on to attaching four more pieces onto these main frames, completing two pairs of flanges for the bulkhead hatches.The Final Touches
While two flanges form the primary support structure around the hatches, Sven mentions there are two additional pieces required at each end to ensure comprehensive protection. This attention to detail highlights his commitment to producing a durable and reliable design. “Sailing is about finding your path, whether it’s across an ocean or within yourself.” – Sven Yrvind In conclusion, making flanges around bulkhead hatches may seem complex at first glance, but by following Sven Yrvind’s meticulous process, enthusiasts can achieve professional-level results. Remember that the journey of boatbuilding is as rewarding as reaching your destination; it tests one’s patience and dedication. For those seeking to embark on this adventure or simply gain more insight into marine craftsmanship, Sven’s wisdom is invaluable.After securely attaching the first portion of the flange, Sven allows ample time for it to dry before moving forward with additional steps. This patience and precision are key aspects of his successful boatbuilding methods.Step 4: Finishing Touches
Once the flange is fully dried, Sven removes the clamps carefully, ensuring no damage occurs during this process. He then moves on to attaching four more pieces onto these main frames, completing two pairs of flanges for the bulkhead hatches.The Final Touches
While two flanges form the primary support structure around the hatches, Sven mentions there are two additional pieces required at each end to ensure comprehensive protection. This attention to detail highlights his commitment to producing a durable and reliable design. “Sailing is about finding your path, whether it’s across an ocean or within yourself.” – Sven Yrvind In conclusion, making flanges around bulkhead hatches may seem complex at first glance, but by following Sven Yrvind’s meticulous process, enthusiasts can achieve professional-level results. Remember that the journey of boatbuilding is as rewarding as reaching your destination; it tests one’s patience and dedication. For those seeking to embark on this adventure or simply gain more insight into marine craftsmanship, Sven’s wisdom is invaluable.Sven proceeds to apply glue along one edge of the flange, ensuring a secure bond when clamped into place. He emphasizes that this stage is crucial for maintaining the structural integrity of the flange, which in turn safeguards the living area beneath the canvas when hatches are open.Step 3: Allowing Time to Dry
After securely attaching the first portion of the flange, Sven allows ample time for it to dry before moving forward with additional steps. This patience and precision are key aspects of his successful boatbuilding methods.Step 4: Finishing Touches
Once the flange is fully dried, Sven removes the clamps carefully, ensuring no damage occurs during this process. He then moves on to attaching four more pieces onto these main frames, completing two pairs of flanges for the bulkhead hatches.The Final Touches
While two flanges form the primary support structure around the hatches, Sven mentions there are two additional pieces required at each end to ensure comprehensive protection. This attention to detail highlights his commitment to producing a durable and reliable design. “Sailing is about finding your path, whether it’s across an ocean or within yourself.” – Sven Yrvind In conclusion, making flanges around bulkhead hatches may seem complex at first glance, but by following Sven Yrvind’s meticulous process, enthusiasts can achieve professional-level results. Remember that the journey of boatbuilding is as rewarding as reaching your destination; it tests one’s patience and dedication. For those seeking to embark on this adventure or simply gain more insight into marine craftsmanship, Sven’s wisdom is invaluable.Sven begins by explaining that working on flanges vertically and horizontally is significantly easier than doing so in a flat position. To simplify the process further, he divides the task into two or three steps as suggested by fellow expert “for for.” This approach not only makes it more manageable but also allows for greater precision in crafting each component.Step 2: Applying Glue and Securing
Sven proceeds to apply glue along one edge of the flange, ensuring a secure bond when clamped into place. He emphasizes that this stage is crucial for maintaining the structural integrity of the flange, which in turn safeguards the living area beneath the canvas when hatches are open.Step 3: Allowing Time to Dry
After securely attaching the first portion of the flange, Sven allows ample time for it to dry before moving forward with additional steps. This patience and precision are key aspects of his successful boatbuilding methods.Step 4: Finishing Touches
Once the flange is fully dried, Sven removes the clamps carefully, ensuring no damage occurs during this process. He then moves on to attaching four more pieces onto these main frames, completing two pairs of flanges for the bulkhead hatches.The Final Touches
While two flanges form the primary support structure around the hatches, Sven mentions there are two additional pieces required at each end to ensure comprehensive protection. This attention to detail highlights his commitment to producing a durable and reliable design. “Sailing is about finding your path, whether it’s across an ocean or within yourself.” – Sven Yrvind In conclusion, making flanges around bulkhead hatches may seem complex at first glance, but by following Sven Yrvind’s meticulous process, enthusiasts can achieve professional-level results. Remember that the journey of boatbuilding is as rewarding as reaching your destination; it tests one’s patience and dedication. For those seeking to embark on this adventure or simply gain more insight into marine craftsmanship, Sven’s wisdom is invaluable.Sven Yrvind, a renowned yacht designer and sailor, shares valuable insights on creating flanges around bulkhead hatches for canvas protection in this enlightening video. By following his expert guidance, boat enthusiasts can ensure their living areas remain secure while allowing unhindered access through the hatches.Step 1: Starting with the Flange
Sven begins by explaining that working on flanges vertically and horizontally is significantly easier than doing so in a flat position. To simplify the process further, he divides the task into two or three steps as suggested by fellow expert “for for.” This approach not only makes it more manageable but also allows for greater precision in crafting each component.Step 2: Applying Glue and Securing
Sven proceeds to apply glue along one edge of the flange, ensuring a secure bond when clamped into place. He emphasizes that this stage is crucial for maintaining the structural integrity of the flange, which in turn safeguards the living area beneath the canvas when hatches are open.Step 3: Allowing Time to Dry
After securely attaching the first portion of the flange, Sven allows ample time for it to dry before moving forward with additional steps. This patience and precision are key aspects of his successful boatbuilding methods.Step 4: Finishing Touches
Once the flange is fully dried, Sven removes the clamps carefully, ensuring no damage occurs during this process. He then moves on to attaching four more pieces onto these main frames, completing two pairs of flanges for the bulkhead hatches.The Final Touches
While two flanges form the primary support structure around the hatches, Sven mentions there are two additional pieces required at each end to ensure comprehensive protection. This attention to detail highlights his commitment to producing a durable and reliable design. “Sailing is about finding your path, whether it’s across an ocean or within yourself.” – Sven Yrvind In conclusion, making flanges around bulkhead hatches may seem complex at first glance, but by following Sven Yrvind’s meticulous process, enthusiasts can achieve professional-level results. Remember that the journey of boatbuilding is as rewarding as reaching your destination; it tests one’s patience and dedication. For those seeking to embark on this adventure or simply gain more insight into marine craftsmanship, Sven’s wisdom is invaluable.Making Flanges Around Bulkhead Hatches for Canvas
Sven Yrvind, a renowned yacht designer and sailor, shares valuable insights on creating flanges around bulkhead hatches for canvas protection in this enlightening video. By following his expert guidance, boat enthusiasts can ensure their living areas remain secure while allowing unhindered access through the hatches.Step 1: Starting with the Flange
Sven begins by explaining that working on flanges vertically and horizontally is significantly easier than doing so in a flat position. To simplify the process further, he divides the task into two or three steps as suggested by fellow expert “for for.” This approach not only makes it more manageable but also allows for greater precision in crafting each component.Step 2: Applying Glue and Securing
Sven proceeds to apply glue along one edge of the flange, ensuring a secure bond when clamped into place. He emphasizes that this stage is crucial for maintaining the structural integrity of the flange, which in turn safeguards the living area beneath the canvas when hatches are open.Step 3: Allowing Time to Dry
After securely attaching the first portion of the flange, Sven allows ample time for it to dry before moving forward with additional steps. This patience and precision are key aspects of his successful boatbuilding methods.Step 4: Finishing Touches
Once the flange is fully dried, Sven removes the clamps carefully, ensuring no damage occurs during this process. He then moves on to attaching four more pieces onto these main frames, completing two pairs of flanges for the bulkhead hatches.The Final Touches
While two flanges form the primary support structure around the hatches, Sven mentions there are two additional pieces required at each end to ensure comprehensive protection. This attention to detail highlights his commitment to producing a durable and reliable design. “Sailing is about finding your path, whether it’s across an ocean or within yourself.” – Sven Yrvind In conclusion, making flanges around bulkhead hatches may seem complex at first glance, but by following Sven Yrvind’s meticulous process, enthusiasts can achieve professional-level results. Remember that the journey of boatbuilding is as rewarding as reaching your destination; it tests one’s patience and dedication. For those seeking to embark on this adventure or simply gain more insight into marine craftsmanship, Sven’s wisdom is invaluable.Once the flange is fully dried, Sven removes the clamps carefully, ensuring no damage occurs during this process. He then moves on to attaching four more pieces onto these main frames, completing two pairs of flanges for the bulkhead hatches.The Final Touches
While two flanges form the primary support structure around the hatches, Sven mentions there are two additional pieces required at each end to ensure comprehensive protection. This attention to detail highlights his commitment to producing a durable and reliable design. “Sailing is about finding your path, whether it’s across an ocean or within yourself.” – Sven Yrvind In conclusion, making flanges around bulkhead hatches may seem complex at first glance, but by following Sven Yrvind’s meticulous process, enthusiasts can achieve professional-level results. Remember that the journey of boatbuilding is as rewarding as reaching your destination; it tests one’s patience and dedication. For those seeking to embark on this adventure or simply gain more insight into marine craftsmanship, Sven’s wisdom is invaluable.After securely attaching the first portion of the flange, Sven allows ample time for it to dry before moving forward with additional steps. This patience and precision are key aspects of his successful boatbuilding methods.Step 4: Finishing Touches
Once the flange is fully dried, Sven removes the clamps carefully, ensuring no damage occurs during this process. He then moves on to attaching four more pieces onto these main frames, completing two pairs of flanges for the bulkhead hatches.The Final Touches
While two flanges form the primary support structure around the hatches, Sven mentions there are two additional pieces required at each end to ensure comprehensive protection. This attention to detail highlights his commitment to producing a durable and reliable design. “Sailing is about finding your path, whether it’s across an ocean or within yourself.” – Sven Yrvind In conclusion, making flanges around bulkhead hatches may seem complex at first glance, but by following Sven Yrvind’s meticulous process, enthusiasts can achieve professional-level results. Remember that the journey of boatbuilding is as rewarding as reaching your destination; it tests one’s patience and dedication. For those seeking to embark on this adventure or simply gain more insight into marine craftsmanship, Sven’s wisdom is invaluable.Sven proceeds to apply glue along one edge of the flange, ensuring a secure bond when clamped into place. He emphasizes that this stage is crucial for maintaining the structural integrity of the flange, which in turn safeguards the living area beneath the canvas when hatches are open.Step 3: Allowing Time to Dry
After securely attaching the first portion of the flange, Sven allows ample time for it to dry before moving forward with additional steps. This patience and precision are key aspects of his successful boatbuilding methods.Step 4: Finishing Touches
Once the flange is fully dried, Sven removes the clamps carefully, ensuring no damage occurs during this process. He then moves on to attaching four more pieces onto these main frames, completing two pairs of flanges for the bulkhead hatches.The Final Touches
While two flanges form the primary support structure around the hatches, Sven mentions there are two additional pieces required at each end to ensure comprehensive protection. This attention to detail highlights his commitment to producing a durable and reliable design. “Sailing is about finding your path, whether it’s across an ocean or within yourself.” – Sven Yrvind In conclusion, making flanges around bulkhead hatches may seem complex at first glance, but by following Sven Yrvind’s meticulous process, enthusiasts can achieve professional-level results. Remember that the journey of boatbuilding is as rewarding as reaching your destination; it tests one’s patience and dedication. For those seeking to embark on this adventure or simply gain more insight into marine craftsmanship, Sven’s wisdom is invaluable.Sven begins by explaining that working on flanges vertically and horizontally is significantly easier than doing so in a flat position. To simplify the process further, he divides the task into two or three steps as suggested by fellow expert “for for.” This approach not only makes it more manageable but also allows for greater precision in crafting each component.Step 2: Applying Glue and Securing
Sven proceeds to apply glue along one edge of the flange, ensuring a secure bond when clamped into place. He emphasizes that this stage is crucial for maintaining the structural integrity of the flange, which in turn safeguards the living area beneath the canvas when hatches are open.Step 3: Allowing Time to Dry
After securely attaching the first portion of the flange, Sven allows ample time for it to dry before moving forward with additional steps. This patience and precision are key aspects of his successful boatbuilding methods.Step 4: Finishing Touches
Once the flange is fully dried, Sven removes the clamps carefully, ensuring no damage occurs during this process. He then moves on to attaching four more pieces onto these main frames, completing two pairs of flanges for the bulkhead hatches.The Final Touches
While two flanges form the primary support structure around the hatches, Sven mentions there are two additional pieces required at each end to ensure comprehensive protection. This attention to detail highlights his commitment to producing a durable and reliable design. “Sailing is about finding your path, whether it’s across an ocean or within yourself.” – Sven Yrvind In conclusion, making flanges around bulkhead hatches may seem complex at first glance, but by following Sven Yrvind’s meticulous process, enthusiasts can achieve professional-level results. Remember that the journey of boatbuilding is as rewarding as reaching your destination; it tests one’s patience and dedication. For those seeking to embark on this adventure or simply gain more insight into marine craftsmanship, Sven’s wisdom is invaluable.Sven Yrvind, a renowned yacht designer and sailor, shares valuable insights on creating flanges around bulkhead hatches for canvas protection in this enlightening video. By following his expert guidance, boat enthusiasts can ensure their living areas remain secure while allowing unhindered access through the hatches.Step 1: Starting with the Flange
Sven begins by explaining that working on flanges vertically and horizontally is significantly easier than doing so in a flat position. To simplify the process further, he divides the task into two or three steps as suggested by fellow expert “for for.” This approach not only makes it more manageable but also allows for greater precision in crafting each component.Step 2: Applying Glue and Securing
Sven proceeds to apply glue along one edge of the flange, ensuring a secure bond when clamped into place. He emphasizes that this stage is crucial for maintaining the structural integrity of the flange, which in turn safeguards the living area beneath the canvas when hatches are open.Step 3: Allowing Time to Dry
After securely attaching the first portion of the flange, Sven allows ample time for it to dry before moving forward with additional steps. This patience and precision are key aspects of his successful boatbuilding methods.Step 4: Finishing Touches
Once the flange is fully dried, Sven removes the clamps carefully, ensuring no damage occurs during this process. He then moves on to attaching four more pieces onto these main frames, completing two pairs of flanges for the bulkhead hatches.The Final Touches
While two flanges form the primary support structure around the hatches, Sven mentions there are two additional pieces required at each end to ensure comprehensive protection. This attention to detail highlights his commitment to producing a durable and reliable design. “Sailing is about finding your path, whether it’s across an ocean or within yourself.” – Sven Yrvind In conclusion, making flanges around bulkhead hatches may seem complex at first glance, but by following Sven Yrvind’s meticulous process, enthusiasts can achieve professional-level results. Remember that the journey of boatbuilding is as rewarding as reaching your destination; it tests one’s patience and dedication. For those seeking to embark on this adventure or simply gain more insight into marine craftsmanship, Sven’s wisdom is invaluable.Making Flanges Around Bulkhead Hatches for Canvas
Sven Yrvind, a renowned yacht designer and sailor, shares valuable insights on creating flanges around bulkhead hatches for canvas protection in this enlightening video. By following his expert guidance, boat enthusiasts can ensure their living areas remain secure while allowing unhindered access through the hatches.Step 1: Starting with the Flange
Sven begins by explaining that working on flanges vertically and horizontally is significantly easier than doing so in a flat position. To simplify the process further, he divides the task into two or three steps as suggested by fellow expert “for for.” This approach not only makes it more manageable but also allows for greater precision in crafting each component.Step 2: Applying Glue and Securing
Sven proceeds to apply glue along one edge of the flange, ensuring a secure bond when clamped into place. He emphasizes that this stage is crucial for maintaining the structural integrity of the flange, which in turn safeguards the living area beneath the canvas when hatches are open.Step 3: Allowing Time to Dry
After securely attaching the first portion of the flange, Sven allows ample time for it to dry before moving forward with additional steps. This patience and precision are key aspects of his successful boatbuilding methods.Step 4: Finishing Touches
Once the flange is fully dried, Sven removes the clamps carefully, ensuring no damage occurs during this process. He then moves on to attaching four more pieces onto these main frames, completing two pairs of flanges for the bulkhead hatches.The Final Touches
While two flanges form the primary support structure around the hatches, Sven mentions there are two additional pieces required at each end to ensure comprehensive protection. This attention to detail highlights his commitment to producing a durable and reliable design. “Sailing is about finding your path, whether it’s across an ocean or within yourself.” – Sven Yrvind In conclusion, making flanges around bulkhead hatches may seem complex at first glance, but by following Sven Yrvind’s meticulous process, enthusiasts can achieve professional-level results. Remember that the journey of boatbuilding is as rewarding as reaching your destination; it tests one’s patience and dedication. For those seeking to embark on this adventure or simply gain more insight into marine craftsmanship, Sven’s wisdom is invaluable.Making Flanges Around Bulkhead Hatches for Canvas
Sven Yrvind, a renowned yacht designer and sailor, shares valuable insights on creating flanges around bulkhead hatches for canvas protection in this enlightening video. By following his expert guidance, boat enthusiasts can ensure their living areas remain secure while allowing unhindered access through the hatches.Step 1: Starting with the Flange
Sven begins by explaining that working on flanges vertically and horizontally is significantly easier than doing so in a flat position. To simplify the process further, he divides the task into two or three steps as suggested by fellow expert “for for.” This approach not only makes it more manageable but also allows for greater precision in crafting each component.Step 2: Applying Glue and Securing
Sven proceeds to apply glue along one edge of the flange, ensuring a secure bond when clamped into place. He emphasizes that this stage is crucial for maintaining the structural integrity of the flange, which in turn safeguards the living area beneath the canvas when hatches are open.Step 3: Allowing Time to Dry
After securely attaching the first portion of the flange, Sven allows ample time for it to dry before moving forward with additional steps. This patience and precision are key aspects of his successful boatbuilding methods.Step 4: Finishing Touches
Once the flange is fully dried, Sven removes the clamps carefully, ensuring no damage occurs during this process. He then moves on to attaching four more pieces onto these main frames, completing two pairs of flanges for the bulkhead hatches.The Final Touches
While two flanges form the primary support structure around the hatches, Sven mentions there are two additional pieces required at each end to ensure comprehensive protection. This attention to detail highlights his commitment to producing a durable and reliable design. “Sailing is about finding your path, whether it’s across an ocean or within yourself.” – Sven Yrvind In conclusion, making flanges around bulkhead hatches may seem complex at first glance, but by following Sven Yrvind’s meticulous process, enthusiasts can achieve professional-level results. Remember that the journey of boatbuilding is as rewarding as reaching your destination; it tests one’s patience and dedication. For those seeking to embark on this adventure or simply gain more insight into marine craftsmanship, Sven’s wisdom is invaluable.After securely attaching the first portion of the flange, Sven allows ample time for it to dry before moving forward with additional steps. This patience and precision are key aspects of his successful boatbuilding methods.Step 4: Finishing Touches
Once the flange is fully dried, Sven removes the clamps carefully, ensuring no damage occurs during this process. He then moves on to attaching four more pieces onto these main frames, completing two pairs of flanges for the bulkhead hatches.The Final Touches
While two flanges form the primary support structure around the hatches, Sven mentions there are two additional pieces required at each end to ensure comprehensive protection. This attention to detail highlights his commitment to producing a durable and reliable design. “Sailing is about finding your path, whether it’s across an ocean or within yourself.” – Sven Yrvind In conclusion, making flanges around bulkhead hatches may seem complex at first glance, but by following Sven Yrvind’s meticulous process, enthusiasts can achieve professional-level results. Remember that the journey of boatbuilding is as rewarding as reaching your destination; it tests one’s patience and dedication. For those seeking to embark on this adventure or simply gain more insight into marine craftsmanship, Sven’s wisdom is invaluable.Sven Yrvind, a renowned yacht designer and sailor, shares valuable insights on creating flanges around bulkhead hatches for canvas protection in this enlightening video. By following his expert guidance, boat enthusiasts can ensure their living areas remain secure while allowing unhindered access through the hatches.Step 1: Starting with the Flange
Sven begins by explaining that working on flanges vertically and horizontally is significantly easier than doing so in a flat position. To simplify the process further, he divides the task into two or three steps as suggested by fellow expert “for for.” This approach not only makes it more manageable but also allows for greater precision in crafting each component.Step 2: Applying Glue and Securing
Sven proceeds to apply glue along one edge of the flange, ensuring a secure bond when clamped into place. He emphasizes that this stage is crucial for maintaining the structural integrity of the flange, which in turn safeguards the living area beneath the canvas when hatches are open.Step 3: Allowing Time to Dry
After securely attaching the first portion of the flange, Sven allows ample time for it to dry before moving forward with additional steps. This patience and precision are key aspects of his successful boatbuilding methods.Step 4: Finishing Touches
Once the flange is fully dried, Sven removes the clamps carefully, ensuring no damage occurs during this process. He then moves on to attaching four more pieces onto these main frames, completing two pairs of flanges for the bulkhead hatches.The Final Touches
While two flanges form the primary support structure around the hatches, Sven mentions there are two additional pieces required at each end to ensure comprehensive protection. This attention to detail highlights his commitment to producing a durable and reliable design. “Sailing is about finding your path, whether it’s across an ocean or within yourself.” – Sven Yrvind In conclusion, making flanges around bulkhead hatches may seem complex at first glance, but by following Sven Yrvind’s meticulous process, enthusiasts can achieve professional-level results. Remember that the journey of boatbuilding is as rewarding as reaching your destination; it tests one’s patience and dedication. For those seeking to embark on this adventure or simply gain more insight into marine craftsmanship, Sven’s wisdom is invaluable.Making Flanges Around Bulkhead Hatches for Canvas
Sven Yrvind, a renowned yacht designer and sailor, shares valuable insights on creating flanges around bulkhead hatches for canvas protection in this enlightening video. By following his expert guidance, boat enthusiasts can ensure their living areas remain secure while allowing unhindered access through the hatches.Step 1: Starting with the Flange
Sven begins by explaining that working on flanges vertically and horizontally is significantly easier than doing so in a flat position. To simplify the process further, he divides the task into two or three steps as suggested by fellow expert “for for.” This approach not only makes it more manageable but also allows for greater precision in crafting each component.Step 2: Applying Glue and Securing
Sven proceeds to apply glue along one edge of the flange, ensuring a secure bond when clamped into place. He emphasizes that this stage is crucial for maintaining the structural integrity of the flange, which in turn safeguards the living area beneath the canvas when hatches are open.Step 3: Allowing Time to Dry
After securely attaching the first portion of the flange, Sven allows ample time for it to dry before moving forward with additional steps. This patience and precision are key aspects of his successful boatbuilding methods.Step 4: Finishing Touches
Once the flange is fully dried, Sven removes the clamps carefully, ensuring no damage occurs during this process. He then moves on to attaching four more pieces onto these main frames, completing two pairs of flanges for the bulkhead hatches.The Final Touches
While two flanges form the primary support structure around the hatches, Sven mentions there are two additional pieces required at each end to ensure comprehensive protection. This attention to detail highlights his commitment to producing a durable and reliable design. “Sailing is about finding your path, whether it’s across an ocean or within yourself.” – Sven Yrvind In conclusion, making flanges around bulkhead hatches may seem complex at first glance, but by following Sven Yrvind’s meticulous process, enthusiasts can achieve professional-level results. Remember that the journey of boatbuilding is as rewarding as reaching your destination; it tests one’s patience and dedication. For those seeking to embark on this adventure or simply gain more insight into marine craftsmanship, Sven’s wisdom is invaluable.Sven proceeds to apply glue along one edge of the flange, ensuring a secure bond when clamped into place. He emphasizes that this stage is crucial for maintaining the structural integrity of the flange, which in turn safeguards the living area beneath the canvas when hatches are open.Step 3: Allowing Time to Dry
After securely attaching the first portion of the flange, Sven allows ample time for it to dry before moving forward with additional steps. This patience and precision are key aspects of his successful boatbuilding methods.Step 4: Finishing Touches
Once the flange is fully dried, Sven removes the clamps carefully, ensuring no damage occurs during this process. He then moves on to attaching four more pieces onto these main frames, completing two pairs of flanges for the bulkhead hatches.The Final Touches
While two flanges form the primary support structure around the hatches, Sven mentions there are two additional pieces required at each end to ensure comprehensive protection. This attention to detail highlights his commitment to producing a durable and reliable design. “Sailing is about finding your path, whether it’s across an ocean or within yourself.” – Sven Yrvind In conclusion, making flanges around bulkhead hatches may seem complex at first glance, but by following Sven Yrvind’s meticulous process, enthusiasts can achieve professional-level results. Remember that the journey of boatbuilding is as rewarding as reaching your destination; it tests one’s patience and dedication. For those seeking to embark on this adventure or simply gain more insight into marine craftsmanship, Sven’s wisdom is invaluable.Sven Yrvind, a renowned yacht designer and sailor, shares valuable insights on creating flanges around bulkhead hatches for canvas protection in this enlightening video. By following his expert guidance, boat enthusiasts can ensure their living areas remain secure while allowing unhindered access through the hatches.Step 1: Starting with the Flange
Sven begins by explaining that working on flanges vertically and horizontally is significantly easier than doing so in a flat position. To simplify the process further, he divides the task into two or three steps as suggested by fellow expert “for for.” This approach not only makes it more manageable but also allows for greater precision in crafting each component.Step 2: Applying Glue and Securing
Sven proceeds to apply glue along one edge of the flange, ensuring a secure bond when clamped into place. He emphasizes that this stage is crucial for maintaining the structural integrity of the flange, which in turn safeguards the living area beneath the canvas when hatches are open.Step 3: Allowing Time to Dry
After securely attaching the first portion of the flange, Sven allows ample time for it to dry before moving forward with additional steps. This patience and precision are key aspects of his successful boatbuilding methods.Step 4: Finishing Touches
Once the flange is fully dried, Sven removes the clamps carefully, ensuring no damage occurs during this process. He then moves on to attaching four more pieces onto these main frames, completing two pairs of flanges for the bulkhead hatches.The Final Touches
While two flanges form the primary support structure around the hatches, Sven mentions there are two additional pieces required at each end to ensure comprehensive protection. This attention to detail highlights his commitment to producing a durable and reliable design. “Sailing is about finding your path, whether it’s across an ocean or within yourself.” – Sven Yrvind In conclusion, making flanges around bulkhead hatches may seem complex at first glance, but by following Sven Yrvind’s meticulous process, enthusiasts can achieve professional-level results. Remember that the journey of boatbuilding is as rewarding as reaching your destination; it tests one’s patience and dedication. For those seeking to embark on this adventure or simply gain more insight into marine craftsmanship, Sven’s wisdom is invaluable.Making Flanges Around Bulkhead Hatches for Canvas
Sven Yrvind, a renowned yacht designer and sailor, shares valuable insights on creating flanges around bulkhead hatches for canvas protection in this enlightening video. By following his expert guidance, boat enthusiasts can ensure their living areas remain secure while allowing unhindered access through the hatches.Step 1: Starting with the Flange
Sven begins by explaining that working on flanges vertically and horizontally is significantly easier than doing so in a flat position. To simplify the process further, he divides the task into two or three steps as suggested by fellow expert “for for.” This approach not only makes it more manageable but also allows for greater precision in crafting each component.Step 2: Applying Glue and Securing
Sven proceeds to apply glue along one edge of the flange, ensuring a secure bond when clamped into place. He emphasizes that this stage is crucial for maintaining the structural integrity of the flange, which in turn safeguards the living area beneath the canvas when hatches are open.Step 3: Allowing Time to Dry
After securely attaching the first portion of the flange, Sven allows ample time for it to dry before moving forward with additional steps. This patience and precision are key aspects of his successful boatbuilding methods.Step 4: Finishing Touches
Once the flange is fully dried, Sven removes the clamps carefully, ensuring no damage occurs during this process. He then moves on to attaching four more pieces onto these main frames, completing two pairs of flanges for the bulkhead hatches.The Final Touches
While two flanges form the primary support structure around the hatches, Sven mentions there are two additional pieces required at each end to ensure comprehensive protection. This attention to detail highlights his commitment to producing a durable and reliable design. “Sailing is about finding your path, whether it’s across an ocean or within yourself.” – Sven Yrvind In conclusion, making flanges around bulkhead hatches may seem complex at first glance, but by following Sven Yrvind’s meticulous process, enthusiasts can achieve professional-level results. Remember that the journey of boatbuilding is as rewarding as reaching your destination; it tests one’s patience and dedication. For those seeking to embark on this adventure or simply gain more insight into marine craftsmanship, Sven’s wisdom is invaluable.Sven begins by explaining that working on flanges vertically and horizontally is significantly easier than doing so in a flat position. To simplify the process further, he divides the task into two or three steps as suggested by fellow expert “for for.” This approach not only makes it more manageable but also allows for greater precision in crafting each component.Step 2: Applying Glue and Securing
Sven proceeds to apply glue along one edge of the flange, ensuring a secure bond when clamped into place. He emphasizes that this stage is crucial for maintaining the structural integrity of the flange, which in turn safeguards the living area beneath the canvas when hatches are open.Step 3: Allowing Time to Dry
After securely attaching the first portion of the flange, Sven allows ample time for it to dry before moving forward with additional steps. This patience and precision are key aspects of his successful boatbuilding methods.Step 4: Finishing Touches
Once the flange is fully dried, Sven removes the clamps carefully, ensuring no damage occurs during this process. He then moves on to attaching four more pieces onto these main frames, completing two pairs of flanges for the bulkhead hatches.The Final Touches
While two flanges form the primary support structure around the hatches, Sven mentions there are two additional pieces required at each end to ensure comprehensive protection. This attention to detail highlights his commitment to producing a durable and reliable design. “Sailing is about finding your path, whether it’s across an ocean or within yourself.” – Sven Yrvind In conclusion, making flanges around bulkhead hatches may seem complex at first glance, but by following Sven Yrvind’s meticulous process, enthusiasts can achieve professional-level results. Remember that the journey of boatbuilding is as rewarding as reaching your destination; it tests one’s patience and dedication. For those seeking to embark on this adventure or simply gain more insight into marine craftsmanship, Sven’s wisdom is invaluable.Sven Yrvind, a renowned yacht designer and sailor, shares valuable insights on creating flanges around bulkhead hatches for canvas protection in this enlightening video. By following his expert guidance, boat enthusiasts can ensure their living areas remain secure while allowing unhindered access through the hatches.Step 1: Starting with the Flange
Sven begins by explaining that working on flanges vertically and horizontally is significantly easier than doing so in a flat position. To simplify the process further, he divides the task into two or three steps as suggested by fellow expert “for for.” This approach not only makes it more manageable but also allows for greater precision in crafting each component.Step 2: Applying Glue and Securing
Sven proceeds to apply glue along one edge of the flange, ensuring a secure bond when clamped into place. He emphasizes that this stage is crucial for maintaining the structural integrity of the flange, which in turn safeguards the living area beneath the canvas when hatches are open.Step 3: Allowing Time to Dry
After securely attaching the first portion of the flange, Sven allows ample time for it to dry before moving forward with additional steps. This patience and precision are key aspects of his successful boatbuilding methods.Step 4: Finishing Touches
Once the flange is fully dried, Sven removes the clamps carefully, ensuring no damage occurs during this process. He then moves on to attaching four more pieces onto these main frames, completing two pairs of flanges for the bulkhead hatches.The Final Touches
While two flanges form the primary support structure around the hatches, Sven mentions there are two additional pieces required at each end to ensure comprehensive protection. This attention to detail highlights his commitment to producing a durable and reliable design. “Sailing is about finding your path, whether it’s across an ocean or within yourself.” – Sven Yrvind In conclusion, making flanges around bulkhead hatches may seem complex at first glance, but by following Sven Yrvind’s meticulous process, enthusiasts can achieve professional-level results. Remember that the journey of boatbuilding is as rewarding as reaching your destination; it tests one’s patience and dedication. For those seeking to embark on this adventure or simply gain more insight into marine craftsmanship, Sven’s wisdom is invaluable.Making Flanges Around Bulkhead Hatches for Canvas
Sven Yrvind, a renowned yacht designer and sailor, shares valuable insights on creating flanges around bulkhead hatches for canvas protection in this enlightening video. By following his expert guidance, boat enthusiasts can ensure their living areas remain secure while allowing unhindered access through the hatches.Step 1: Starting with the Flange
Sven begins by explaining that working on flanges vertically and horizontally is significantly easier than doing so in a flat position. To simplify the process further, he divides the task into two or three steps as suggested by fellow expert “for for.” This approach not only makes it more manageable but also allows for greater precision in crafting each component.Step 2: Applying Glue and Securing
Sven proceeds to apply glue along one edge of the flange, ensuring a secure bond when clamped into place. He emphasizes that this stage is crucial for maintaining the structural integrity of the flange, which in turn safeguards the living area beneath the canvas when hatches are open.Step 3: Allowing Time to Dry
After securely attaching the first portion of the flange, Sven allows ample time for it to dry before moving forward with additional steps. This patience and precision are key aspects of his successful boatbuilding methods.Step 4: Finishing Touches
Once the flange is fully dried, Sven removes the clamps carefully, ensuring no damage occurs during this process. He then moves on to attaching four more pieces onto these main frames, completing two pairs of flanges for the bulkhead hatches.The Final Touches
While two flanges form the primary support structure around the hatches, Sven mentions there are two additional pieces required at each end to ensure comprehensive protection. This attention to detail highlights his commitment to producing a durable and reliable design. “Sailing is about finding your path, whether it’s across an ocean or within yourself.” – Sven Yrvind In conclusion, making flanges around bulkhead hatches may seem complex at first glance, but by following Sven Yrvind’s meticulous process, enthusiasts can achieve professional-level results. Remember that the journey of boatbuilding is as rewarding as reaching your destination; it tests one’s patience and dedication. For those seeking to embark on this adventure or simply gain more insight into marine craftsmanship, Sven’s wisdom is invaluable.Once the flange is fully dried, Sven removes the clamps carefully, ensuring no damage occurs during this process. He then moves on to attaching four more pieces onto these main frames, completing two pairs of flanges for the bulkhead hatches.The Final Touches
While two flanges form the primary support structure around the hatches, Sven mentions there are two additional pieces required at each end to ensure comprehensive protection. This attention to detail highlights his commitment to producing a durable and reliable design. “Sailing is about finding your path, whether it’s across an ocean or within yourself.” – Sven Yrvind In conclusion, making flanges around bulkhead hatches may seem complex at first glance, but by following Sven Yrvind’s meticulous process, enthusiasts can achieve professional-level results. Remember that the journey of boatbuilding is as rewarding as reaching your destination; it tests one’s patience and dedication. For those seeking to embark on this adventure or simply gain more insight into marine craftsmanship, Sven’s wisdom is invaluable.Sven begins by explaining that working on flanges vertically and horizontally is significantly easier than doing so in a flat position. To simplify the process further, he divides the task into two or three steps as suggested by fellow expert “for for.” This approach not only makes it more manageable but also allows for greater precision in crafting each component.Step 2: Applying Glue and Securing
Sven proceeds to apply glue along one edge of the flange, ensuring a secure bond when clamped into place. He emphasizes that this stage is crucial for maintaining the structural integrity of the flange, which in turn safeguards the living area beneath the canvas when hatches are open.Step 3: Allowing Time to Dry
After securely attaching the first portion of the flange, Sven allows ample time for it to dry before moving forward with additional steps. This patience and precision are key aspects of his successful boatbuilding methods.Step 4: Finishing Touches
Once the flange is fully dried, Sven removes the clamps carefully, ensuring no damage occurs during this process. He then moves on to attaching four more pieces onto these main frames, completing two pairs of flanges for the bulkhead hatches.The Final Touches
While two flanges form the primary support structure around the hatches, Sven mentions there are two additional pieces required at each end to ensure comprehensive protection. This attention to detail highlights his commitment to producing a durable and reliable design. “Sailing is about finding your path, whether it’s across an ocean or within yourself.” – Sven Yrvind In conclusion, making flanges around bulkhead hatches may seem complex at first glance, but by following Sven Yrvind’s meticulous process, enthusiasts can achieve professional-level results. Remember that the journey of boatbuilding is as rewarding as reaching your destination; it tests one’s patience and dedication. For those seeking to embark on this adventure or simply gain more insight into marine craftsmanship, Sven’s wisdom is invaluable.Sven Yrvind, a renowned yacht designer and sailor, shares valuable insights on creating flanges around bulkhead hatches for canvas protection in this enlightening video. By following his expert guidance, boat enthusiasts can ensure their living areas remain secure while allowing unhindered access through the hatches.Step 1: Starting with the Flange
Sven begins by explaining that working on flanges vertically and horizontally is significantly easier than doing so in a flat position. To simplify the process further, he divides the task into two or three steps as suggested by fellow expert “for for.” This approach not only makes it more manageable but also allows for greater precision in crafting each component.Step 2: Applying Glue and Securing
Sven proceeds to apply glue along one edge of the flange, ensuring a secure bond when clamped into place. He emphasizes that this stage is crucial for maintaining the structural integrity of the flange, which in turn safeguards the living area beneath the canvas when hatches are open.Step 3: Allowing Time to Dry
After securely attaching the first portion of the flange, Sven allows ample time for it to dry before moving forward with additional steps. This patience and precision are key aspects of his successful boatbuilding methods.Step 4: Finishing Touches
Once the flange is fully dried, Sven removes the clamps carefully, ensuring no damage occurs during this process. He then moves on to attaching four more pieces onto these main frames, completing two pairs of flanges for the bulkhead hatches.The Final Touches
While two flanges form the primary support structure around the hatches, Sven mentions there are two additional pieces required at each end to ensure comprehensive protection. This attention to detail highlights his commitment to producing a durable and reliable design. “Sailing is about finding your path, whether it’s across an ocean or within yourself.” – Sven Yrvind In conclusion, making flanges around bulkhead hatches may seem complex at first glance, but by following Sven Yrvind’s meticulous process, enthusiasts can achieve professional-level results. Remember that the journey of boatbuilding is as rewarding as reaching your destination; it tests one’s patience and dedication. For those seeking to embark on this adventure or simply gain more insight into marine craftsmanship, Sven’s wisdom is invaluable.Making Flanges Around Bulkhead Hatches for Canvas
Sven Yrvind, a renowned yacht designer and sailor, shares valuable insights on creating flanges around bulkhead hatches for canvas protection in this enlightening video. By following his expert guidance, boat enthusiasts can ensure their living areas remain secure while allowing unhindered access through the hatches.Step 1: Starting with the Flange
Sven begins by explaining that working on flanges vertically and horizontally is significantly easier than doing so in a flat position. To simplify the process further, he divides the task into two or three steps as suggested by fellow expert “for for.” This approach not only makes it more manageable but also allows for greater precision in crafting each component.Step 2: Applying Glue and Securing
Sven proceeds to apply glue along one edge of the flange, ensuring a secure bond when clamped into place. He emphasizes that this stage is crucial for maintaining the structural integrity of the flange, which in turn safeguards the living area beneath the canvas when hatches are open.Step 3: Allowing Time to Dry
After securely attaching the first portion of the flange, Sven allows ample time for it to dry before moving forward with additional steps. This patience and precision are key aspects of his successful boatbuilding methods.Step 4: Finishing Touches
Once the flange is fully dried, Sven removes the clamps carefully, ensuring no damage occurs during this process. He then moves on to attaching four more pieces onto these main frames, completing two pairs of flanges for the bulkhead hatches.The Final Touches
While two flanges form the primary support structure around the hatches, Sven mentions there are two additional pieces required at each end to ensure comprehensive protection. This attention to detail highlights his commitment to producing a durable and reliable design. “Sailing is about finding your path, whether it’s across an ocean or within yourself.” – Sven Yrvind In conclusion, making flanges around bulkhead hatches may seem complex at first glance, but by following Sven Yrvind’s meticulous process, enthusiasts can achieve professional-level results. Remember that the journey of boatbuilding is as rewarding as reaching your destination; it tests one’s patience and dedication. For those seeking to embark on this adventure or simply gain more insight into marine craftsmanship, Sven’s wisdom is invaluable.After securely attaching the first portion of the flange, Sven allows ample time for it to dry before moving forward with additional steps. This patience and precision are key aspects of his successful boatbuilding methods.Step 4: Finishing Touches
Once the flange is fully dried, Sven removes the clamps carefully, ensuring no damage occurs during this process. He then moves on to attaching four more pieces onto these main frames, completing two pairs of flanges for the bulkhead hatches.The Final Touches
While two flanges form the primary support structure around the hatches, Sven mentions there are two additional pieces required at each end to ensure comprehensive protection. This attention to detail highlights his commitment to producing a durable and reliable design. “Sailing is about finding your path, whether it’s across an ocean or within yourself.” – Sven Yrvind In conclusion, making flanges around bulkhead hatches may seem complex at first glance, but by following Sven Yrvind’s meticulous process, enthusiasts can achieve professional-level results. Remember that the journey of boatbuilding is as rewarding as reaching your destination; it tests one’s patience and dedication. For those seeking to embark on this adventure or simply gain more insight into marine craftsmanship, Sven’s wisdom is invaluable.Sven begins by explaining that working on flanges vertically and horizontally is significantly easier than doing so in a flat position. To simplify the process further, he divides the task into two or three steps as suggested by fellow expert “for for.” This approach not only makes it more manageable but also allows for greater precision in crafting each component.Step 2: Applying Glue and Securing
Sven proceeds to apply glue along one edge of the flange, ensuring a secure bond when clamped into place. He emphasizes that this stage is crucial for maintaining the structural integrity of the flange, which in turn safeguards the living area beneath the canvas when hatches are open.Step 3: Allowing Time to Dry
After securely attaching the first portion of the flange, Sven allows ample time for it to dry before moving forward with additional steps. This patience and precision are key aspects of his successful boatbuilding methods.Step 4: Finishing Touches
Once the flange is fully dried, Sven removes the clamps carefully, ensuring no damage occurs during this process. He then moves on to attaching four more pieces onto these main frames, completing two pairs of flanges for the bulkhead hatches.The Final Touches
While two flanges form the primary support structure around the hatches, Sven mentions there are two additional pieces required at each end to ensure comprehensive protection. This attention to detail highlights his commitment to producing a durable and reliable design. “Sailing is about finding your path, whether it’s across an ocean or within yourself.” – Sven Yrvind In conclusion, making flanges around bulkhead hatches may seem complex at first glance, but by following Sven Yrvind’s meticulous process, enthusiasts can achieve professional-level results. Remember that the journey of boatbuilding is as rewarding as reaching your destination; it tests one’s patience and dedication. For those seeking to embark on this adventure or simply gain more insight into marine craftsmanship, Sven’s wisdom is invaluable.Sven Yrvind, a renowned yacht designer and sailor, shares valuable insights on creating flanges around bulkhead hatches for canvas protection in this enlightening video. By following his expert guidance, boat enthusiasts can ensure their living areas remain secure while allowing unhindered access through the hatches.Step 1: Starting with the Flange
Sven begins by explaining that working on flanges vertically and horizontally is significantly easier than doing so in a flat position. To simplify the process further, he divides the task into two or three steps as suggested by fellow expert “for for.” This approach not only makes it more manageable but also allows for greater precision in crafting each component.Step 2: Applying Glue and Securing
Sven proceeds to apply glue along one edge of the flange, ensuring a secure bond when clamped into place. He emphasizes that this stage is crucial for maintaining the structural integrity of the flange, which in turn safeguards the living area beneath the canvas when hatches are open.Step 3: Allowing Time to Dry
After securely attaching the first portion of the flange, Sven allows ample time for it to dry before moving forward with additional steps. This patience and precision are key aspects of his successful boatbuilding methods.Step 4: Finishing Touches
Once the flange is fully dried, Sven removes the clamps carefully, ensuring no damage occurs during this process. He then moves on to attaching four more pieces onto these main frames, completing two pairs of flanges for the bulkhead hatches.The Final Touches
While two flanges form the primary support structure around the hatches, Sven mentions there are two additional pieces required at each end to ensure comprehensive protection. This attention to detail highlights his commitment to producing a durable and reliable design. “Sailing is about finding your path, whether it’s across an ocean or within yourself.” – Sven Yrvind In conclusion, making flanges around bulkhead hatches may seem complex at first glance, but by following Sven Yrvind’s meticulous process, enthusiasts can achieve professional-level results. Remember that the journey of boatbuilding is as rewarding as reaching your destination; it tests one’s patience and dedication. For those seeking to embark on this adventure or simply gain more insight into marine craftsmanship, Sven’s wisdom is invaluable.Making Flanges Around Bulkhead Hatches for Canvas
Sven Yrvind, a renowned yacht designer and sailor, shares valuable insights on creating flanges around bulkhead hatches for canvas protection in this enlightening video. By following his expert guidance, boat enthusiasts can ensure their living areas remain secure while allowing unhindered access through the hatches.Step 1: Starting with the Flange
Sven begins by explaining that working on flanges vertically and horizontally is significantly easier than doing so in a flat position. To simplify the process further, he divides the task into two or three steps as suggested by fellow expert “for for.” This approach not only makes it more manageable but also allows for greater precision in crafting each component.Step 2: Applying Glue and Securing
Sven proceeds to apply glue along one edge of the flange, ensuring a secure bond when clamped into place. He emphasizes that this stage is crucial for maintaining the structural integrity of the flange, which in turn safeguards the living area beneath the canvas when hatches are open.Step 3: Allowing Time to Dry
After securely attaching the first portion of the flange, Sven allows ample time for it to dry before moving forward with additional steps. This patience and precision are key aspects of his successful boatbuilding methods.Step 4: Finishing Touches
Once the flange is fully dried, Sven removes the clamps carefully, ensuring no damage occurs during this process. He then moves on to attaching four more pieces onto these main frames, completing two pairs of flanges for the bulkhead hatches.The Final Touches
While two flanges form the primary support structure around the hatches, Sven mentions there are two additional pieces required at each end to ensure comprehensive protection. This attention to detail highlights his commitment to producing a durable and reliable design. “Sailing is about finding your path, whether it’s across an ocean or within yourself.” – Sven Yrvind In conclusion, making flanges around bulkhead hatches may seem complex at first glance, but by following Sven Yrvind’s meticulous process, enthusiasts can achieve professional-level results. Remember that the journey of boatbuilding is as rewarding as reaching your destination; it tests one’s patience and dedication. For those seeking to embark on this adventure or simply gain more insight into marine craftsmanship, Sven’s wisdom is invaluable.Sven proceeds to apply glue along one edge of the flange, ensuring a secure bond when clamped into place. He emphasizes that this stage is crucial for maintaining the structural integrity of the flange, which in turn safeguards the living area beneath the canvas when hatches are open.Step 3: Allowing Time to Dry
After securely attaching the first portion of the flange, Sven allows ample time for it to dry before moving forward with additional steps. This patience and precision are key aspects of his successful boatbuilding methods.Step 4: Finishing Touches
Once the flange is fully dried, Sven removes the clamps carefully, ensuring no damage occurs during this process. He then moves on to attaching four more pieces onto these main frames, completing two pairs of flanges for the bulkhead hatches.The Final Touches
While two flanges form the primary support structure around the hatches, Sven mentions there are two additional pieces required at each end to ensure comprehensive protection. This attention to detail highlights his commitment to producing a durable and reliable design. “Sailing is about finding your path, whether it’s across an ocean or within yourself.” – Sven Yrvind In conclusion, making flanges around bulkhead hatches may seem complex at first glance, but by following Sven Yrvind’s meticulous process, enthusiasts can achieve professional-level results. Remember that the journey of boatbuilding is as rewarding as reaching your destination; it tests one’s patience and dedication. For those seeking to embark on this adventure or simply gain more insight into marine craftsmanship, Sven’s wisdom is invaluable.Sven begins by explaining that working on flanges vertically and horizontally is significantly easier than doing so in a flat position. To simplify the process further, he divides the task into two or three steps as suggested by fellow expert “for for.” This approach not only makes it more manageable but also allows for greater precision in crafting each component.Step 2: Applying Glue and Securing
Sven proceeds to apply glue along one edge of the flange, ensuring a secure bond when clamped into place. He emphasizes that this stage is crucial for maintaining the structural integrity of the flange, which in turn safeguards the living area beneath the canvas when hatches are open.Step 3: Allowing Time to Dry
After securely attaching the first portion of the flange, Sven allows ample time for it to dry before moving forward with additional steps. This patience and precision are key aspects of his successful boatbuilding methods.Step 4: Finishing Touches
Once the flange is fully dried, Sven removes the clamps carefully, ensuring no damage occurs during this process. He then moves on to attaching four more pieces onto these main frames, completing two pairs of flanges for the bulkhead hatches.The Final Touches
While two flanges form the primary support structure around the hatches, Sven mentions there are two additional pieces required at each end to ensure comprehensive protection. This attention to detail highlights his commitment to producing a durable and reliable design. “Sailing is about finding your path, whether it’s across an ocean or within yourself.” – Sven Yrvind In conclusion, making flanges around bulkhead hatches may seem complex at first glance, but by following Sven Yrvind’s meticulous process, enthusiasts can achieve professional-level results. Remember that the journey of boatbuilding is as rewarding as reaching your destination; it tests one’s patience and dedication. For those seeking to embark on this adventure or simply gain more insight into marine craftsmanship, Sven’s wisdom is invaluable.Sven Yrvind, a renowned yacht designer and sailor, shares valuable insights on creating flanges around bulkhead hatches for canvas protection in this enlightening video. By following his expert guidance, boat enthusiasts can ensure their living areas remain secure while allowing unhindered access through the hatches.Step 1: Starting with the Flange
Sven begins by explaining that working on flanges vertically and horizontally is significantly easier than doing so in a flat position. To simplify the process further, he divides the task into two or three steps as suggested by fellow expert “for for.” This approach not only makes it more manageable but also allows for greater precision in crafting each component.Step 2: Applying Glue and Securing
Sven proceeds to apply glue along one edge of the flange, ensuring a secure bond when clamped into place. He emphasizes that this stage is crucial for maintaining the structural integrity of the flange, which in turn safeguards the living area beneath the canvas when hatches are open.Step 3: Allowing Time to Dry
After securely attaching the first portion of the flange, Sven allows ample time for it to dry before moving forward with additional steps. This patience and precision are key aspects of his successful boatbuilding methods.Step 4: Finishing Touches
Once the flange is fully dried, Sven removes the clamps carefully, ensuring no damage occurs during this process. He then moves on to attaching four more pieces onto these main frames, completing two pairs of flanges for the bulkhead hatches.The Final Touches
While two flanges form the primary support structure around the hatches, Sven mentions there are two additional pieces required at each end to ensure comprehensive protection. This attention to detail highlights his commitment to producing a durable and reliable design. “Sailing is about finding your path, whether it’s across an ocean or within yourself.” – Sven Yrvind In conclusion, making flanges around bulkhead hatches may seem complex at first glance, but by following Sven Yrvind’s meticulous process, enthusiasts can achieve professional-level results. Remember that the journey of boatbuilding is as rewarding as reaching your destination; it tests one’s patience and dedication. For those seeking to embark on this adventure or simply gain more insight into marine craftsmanship, Sven’s wisdom is invaluable.Making Flanges Around Bulkhead Hatches for Canvas
Sven Yrvind, a renowned yacht designer and sailor, shares valuable insights on creating flanges around bulkhead hatches for canvas protection in this enlightening video. By following his expert guidance, boat enthusiasts can ensure their living areas remain secure while allowing unhindered access through the hatches.Step 1: Starting with the Flange
Sven begins by explaining that working on flanges vertically and horizontally is significantly easier than doing so in a flat position. To simplify the process further, he divides the task into two or three steps as suggested by fellow expert “for for.” This approach not only makes it more manageable but also allows for greater precision in crafting each component.Step 2: Applying Glue and Securing
Sven proceeds to apply glue along one edge of the flange, ensuring a secure bond when clamped into place. He emphasizes that this stage is crucial for maintaining the structural integrity of the flange, which in turn safeguards the living area beneath the canvas when hatches are open.Step 3: Allowing Time to Dry
After securely attaching the first portion of the flange, Sven allows ample time for it to dry before moving forward with additional steps. This patience and precision are key aspects of his successful boatbuilding methods.Step 4: Finishing Touches
Once the flange is fully dried, Sven removes the clamps carefully, ensuring no damage occurs during this process. He then moves on to attaching four more pieces onto these main frames, completing two pairs of flanges for the bulkhead hatches.The Final Touches
While two flanges form the primary support structure around the hatches, Sven mentions there are two additional pieces required at each end to ensure comprehensive protection. This attention to detail highlights his commitment to producing a durable and reliable design. “Sailing is about finding your path, whether it’s across an ocean or within yourself.” – Sven Yrvind In conclusion, making flanges around bulkhead hatches may seem complex at first glance, but by following Sven Yrvind’s meticulous process, enthusiasts can achieve professional-level results. Remember that the journey of boatbuilding is as rewarding as reaching your destination; it tests one’s patience and dedication. For those seeking to embark on this adventure or simply gain more insight into marine craftsmanship, Sven’s wisdom is invaluable.Once the flange is fully dried, Sven removes the clamps carefully, ensuring no damage occurs during this process. He then moves on to attaching four more pieces onto these main frames, completing two pairs of flanges for the bulkhead hatches.The Final Touches
While two flanges form the primary support structure around the hatches, Sven mentions there are two additional pieces required at each end to ensure comprehensive protection. This attention to detail highlights his commitment to producing a durable and reliable design. “Sailing is about finding your path, whether it’s across an ocean or within yourself.” – Sven Yrvind In conclusion, making flanges around bulkhead hatches may seem complex at first glance, but by following Sven Yrvind’s meticulous process, enthusiasts can achieve professional-level results. Remember that the journey of boatbuilding is as rewarding as reaching your destination; it tests one’s patience and dedication. For those seeking to embark on this adventure or simply gain more insight into marine craftsmanship, Sven’s wisdom is invaluable.Sven proceeds to apply glue along one edge of the flange, ensuring a secure bond when clamped into place. He emphasizes that this stage is crucial for maintaining the structural integrity of the flange, which in turn safeguards the living area beneath the canvas when hatches are open.Step 3: Allowing Time to Dry
After securely attaching the first portion of the flange, Sven allows ample time for it to dry before moving forward with additional steps. This patience and precision are key aspects of his successful boatbuilding methods.Step 4: Finishing Touches
Once the flange is fully dried, Sven removes the clamps carefully, ensuring no damage occurs during this process. He then moves on to attaching four more pieces onto these main frames, completing two pairs of flanges for the bulkhead hatches.The Final Touches
While two flanges form the primary support structure around the hatches, Sven mentions there are two additional pieces required at each end to ensure comprehensive protection. This attention to detail highlights his commitment to producing a durable and reliable design. “Sailing is about finding your path, whether it’s across an ocean or within yourself.” – Sven Yrvind In conclusion, making flanges around bulkhead hatches may seem complex at first glance, but by following Sven Yrvind’s meticulous process, enthusiasts can achieve professional-level results. Remember that the journey of boatbuilding is as rewarding as reaching your destination; it tests one’s patience and dedication. For those seeking to embark on this adventure or simply gain more insight into marine craftsmanship, Sven’s wisdom is invaluable.Sven begins by explaining that working on flanges vertically and horizontally is significantly easier than doing so in a flat position. To simplify the process further, he divides the task into two or three steps as suggested by fellow expert “for for.” This approach not only makes it more manageable but also allows for greater precision in crafting each component.Step 2: Applying Glue and Securing
Sven proceeds to apply glue along one edge of the flange, ensuring a secure bond when clamped into place. He emphasizes that this stage is crucial for maintaining the structural integrity of the flange, which in turn safeguards the living area beneath the canvas when hatches are open.Step 3: Allowing Time to Dry
After securely attaching the first portion of the flange, Sven allows ample time for it to dry before moving forward with additional steps. This patience and precision are key aspects of his successful boatbuilding methods.Step 4: Finishing Touches
Once the flange is fully dried, Sven removes the clamps carefully, ensuring no damage occurs during this process. He then moves on to attaching four more pieces onto these main frames, completing two pairs of flanges for the bulkhead hatches.The Final Touches
While two flanges form the primary support structure around the hatches, Sven mentions there are two additional pieces required at each end to ensure comprehensive protection. This attention to detail highlights his commitment to producing a durable and reliable design. “Sailing is about finding your path, whether it’s across an ocean or within yourself.” – Sven Yrvind In conclusion, making flanges around bulkhead hatches may seem complex at first glance, but by following Sven Yrvind’s meticulous process, enthusiasts can achieve professional-level results. Remember that the journey of boatbuilding is as rewarding as reaching your destination; it tests one’s patience and dedication. For those seeking to embark on this adventure or simply gain more insight into marine craftsmanship, Sven’s wisdom is invaluable.Sven Yrvind, a renowned yacht designer and sailor, shares valuable insights on creating flanges around bulkhead hatches for canvas protection in this enlightening video. By following his expert guidance, boat enthusiasts can ensure their living areas remain secure while allowing unhindered access through the hatches.Step 1: Starting with the Flange
Sven begins by explaining that working on flanges vertically and horizontally is significantly easier than doing so in a flat position. To simplify the process further, he divides the task into two or three steps as suggested by fellow expert “for for.” This approach not only makes it more manageable but also allows for greater precision in crafting each component.Step 2: Applying Glue and Securing
Sven proceeds to apply glue along one edge of the flange, ensuring a secure bond when clamped into place. He emphasizes that this stage is crucial for maintaining the structural integrity of the flange, which in turn safeguards the living area beneath the canvas when hatches are open.Step 3: Allowing Time to Dry
After securely attaching the first portion of the flange, Sven allows ample time for it to dry before moving forward with additional steps. This patience and precision are key aspects of his successful boatbuilding methods.Step 4: Finishing Touches
Once the flange is fully dried, Sven removes the clamps carefully, ensuring no damage occurs during this process. He then moves on to attaching four more pieces onto these main frames, completing two pairs of flanges for the bulkhead hatches.The Final Touches
While two flanges form the primary support structure around the hatches, Sven mentions there are two additional pieces required at each end to ensure comprehensive protection. This attention to detail highlights his commitment to producing a durable and reliable design. “Sailing is about finding your path, whether it’s across an ocean or within yourself.” – Sven Yrvind In conclusion, making flanges around bulkhead hatches may seem complex at first glance, but by following Sven Yrvind’s meticulous process, enthusiasts can achieve professional-level results. Remember that the journey of boatbuilding is as rewarding as reaching your destination; it tests one’s patience and dedication. For those seeking to embark on this adventure or simply gain more insight into marine craftsmanship, Sven’s wisdom is invaluable.Making Flanges Around Bulkhead Hatches for Canvas
Sven Yrvind, a renowned yacht designer and sailor, shares valuable insights on creating flanges around bulkhead hatches for canvas protection in this enlightening video. By following his expert guidance, boat enthusiasts can ensure their living areas remain secure while allowing unhindered access through the hatches.Step 1: Starting with the Flange
Sven begins by explaining that working on flanges vertically and horizontally is significantly easier than doing so in a flat position. To simplify the process further, he divides the task into two or three steps as suggested by fellow expert “for for.” This approach not only makes it more manageable but also allows for greater precision in crafting each component.Step 2: Applying Glue and Securing
Sven proceeds to apply glue along one edge of the flange, ensuring a secure bond when clamped into place. He emphasizes that this stage is crucial for maintaining the structural integrity of the flange, which in turn safeguards the living area beneath the canvas when hatches are open.Step 3: Allowing Time to Dry
After securely attaching the first portion of the flange, Sven allows ample time for it to dry before moving forward with additional steps. This patience and precision are key aspects of his successful boatbuilding methods.Step 4: Finishing Touches
Once the flange is fully dried, Sven removes the clamps carefully, ensuring no damage occurs during this process. He then moves on to attaching four more pieces onto these main frames, completing two pairs of flanges for the bulkhead hatches.The Final Touches
While two flanges form the primary support structure around the hatches, Sven mentions there are two additional pieces required at each end to ensure comprehensive protection. This attention to detail highlights his commitment to producing a durable and reliable design. “Sailing is about finding your path, whether it’s across an ocean or within yourself.” – Sven Yrvind In conclusion, making flanges around bulkhead hatches may seem complex at first glance, but by following Sven Yrvind’s meticulous process, enthusiasts can achieve professional-level results. Remember that the journey of boatbuilding is as rewarding as reaching your destination; it tests one’s patience and dedication. For those seeking to embark on this adventure or simply gain more insight into marine craftsmanship, Sven’s wisdom is invaluable.After securely attaching the first portion of the flange, Sven allows ample time for it to dry before moving forward with additional steps. This patience and precision are key aspects of his successful boatbuilding methods.Step 4: Finishing Touches
Once the flange is fully dried, Sven removes the clamps carefully, ensuring no damage occurs during this process. He then moves on to attaching four more pieces onto these main frames, completing two pairs of flanges for the bulkhead hatches.The Final Touches
While two flanges form the primary support structure around the hatches, Sven mentions there are two additional pieces required at each end to ensure comprehensive protection. This attention to detail highlights his commitment to producing a durable and reliable design. “Sailing is about finding your path, whether it’s across an ocean or within yourself.” – Sven Yrvind In conclusion, making flanges around bulkhead hatches may seem complex at first glance, but by following Sven Yrvind’s meticulous process, enthusiasts can achieve professional-level results. Remember that the journey of boatbuilding is as rewarding as reaching your destination; it tests one’s patience and dedication. For those seeking to embark on this adventure or simply gain more insight into marine craftsmanship, Sven’s wisdom is invaluable.Sven proceeds to apply glue along one edge of the flange, ensuring a secure bond when clamped into place. He emphasizes that this stage is crucial for maintaining the structural integrity of the flange, which in turn safeguards the living area beneath the canvas when hatches are open.Step 3: Allowing Time to Dry
After securely attaching the first portion of the flange, Sven allows ample time for it to dry before moving forward with additional steps. This patience and precision are key aspects of his successful boatbuilding methods.Step 4: Finishing Touches
Once the flange is fully dried, Sven removes the clamps carefully, ensuring no damage occurs during this process. He then moves on to attaching four more pieces onto these main frames, completing two pairs of flanges for the bulkhead hatches.The Final Touches
While two flanges form the primary support structure around the hatches, Sven mentions there are two additional pieces required at each end to ensure comprehensive protection. This attention to detail highlights his commitment to producing a durable and reliable design. “Sailing is about finding your path, whether it’s across an ocean or within yourself.” – Sven Yrvind In conclusion, making flanges around bulkhead hatches may seem complex at first glance, but by following Sven Yrvind’s meticulous process, enthusiasts can achieve professional-level results. Remember that the journey of boatbuilding is as rewarding as reaching your destination; it tests one’s patience and dedication. For those seeking to embark on this adventure or simply gain more insight into marine craftsmanship, Sven’s wisdom is invaluable.Sven begins by explaining that working on flanges vertically and horizontally is significantly easier than doing so in a flat position. To simplify the process further, he divides the task into two or three steps as suggested by fellow expert “for for.” This approach not only makes it more manageable but also allows for greater precision in crafting each component.Step 2: Applying Glue and Securing
Sven proceeds to apply glue along one edge of the flange, ensuring a secure bond when clamped into place. He emphasizes that this stage is crucial for maintaining the structural integrity of the flange, which in turn safeguards the living area beneath the canvas when hatches are open.Step 3: Allowing Time to Dry
After securely attaching the first portion of the flange, Sven allows ample time for it to dry before moving forward with additional steps. This patience and precision are key aspects of his successful boatbuilding methods.Step 4: Finishing Touches
Once the flange is fully dried, Sven removes the clamps carefully, ensuring no damage occurs during this process. He then moves on to attaching four more pieces onto these main frames, completing two pairs of flanges for the bulkhead hatches.The Final Touches
While two flanges form the primary support structure around the hatches, Sven mentions there are two additional pieces required at each end to ensure comprehensive protection. This attention to detail highlights his commitment to producing a durable and reliable design. “Sailing is about finding your path, whether it’s across an ocean or within yourself.” – Sven Yrvind In conclusion, making flanges around bulkhead hatches may seem complex at first glance, but by following Sven Yrvind’s meticulous process, enthusiasts can achieve professional-level results. Remember that the journey of boatbuilding is as rewarding as reaching your destination; it tests one’s patience and dedication. For those seeking to embark on this adventure or simply gain more insight into marine craftsmanship, Sven’s wisdom is invaluable.Sven Yrvind, a renowned yacht designer and sailor, shares valuable insights on creating flanges around bulkhead hatches for canvas protection in this enlightening video. By following his expert guidance, boat enthusiasts can ensure their living areas remain secure while allowing unhindered access through the hatches.Step 1: Starting with the Flange
Sven begins by explaining that working on flanges vertically and horizontally is significantly easier than doing so in a flat position. To simplify the process further, he divides the task into two or three steps as suggested by fellow expert “for for.” This approach not only makes it more manageable but also allows for greater precision in crafting each component.Step 2: Applying Glue and Securing
Sven proceeds to apply glue along one edge of the flange, ensuring a secure bond when clamped into place. He emphasizes that this stage is crucial for maintaining the structural integrity of the flange, which in turn safeguards the living area beneath the canvas when hatches are open.Step 3: Allowing Time to Dry
After securely attaching the first portion of the flange, Sven allows ample time for it to dry before moving forward with additional steps. This patience and precision are key aspects of his successful boatbuilding methods.Step 4: Finishing Touches
Once the flange is fully dried, Sven removes the clamps carefully, ensuring no damage occurs during this process. He then moves on to attaching four more pieces onto these main frames, completing two pairs of flanges for the bulkhead hatches.The Final Touches
While two flanges form the primary support structure around the hatches, Sven mentions there are two additional pieces required at each end to ensure comprehensive protection. This attention to detail highlights his commitment to producing a durable and reliable design. “Sailing is about finding your path, whether it’s across an ocean or within yourself.” – Sven Yrvind In conclusion, making flanges around bulkhead hatches may seem complex at first glance, but by following Sven Yrvind’s meticulous process, enthusiasts can achieve professional-level results. Remember that the journey of boatbuilding is as rewarding as reaching your destination; it tests one’s patience and dedication. For those seeking to embark on this adventure or simply gain more insight into marine craftsmanship, Sven’s wisdom is invaluable.Making Flanges Around Bulkhead Hatches for Canvas
Sven Yrvind, a renowned yacht designer and sailor, shares valuable insights on creating flanges around bulkhead hatches for canvas protection in this enlightening video. By following his expert guidance, boat enthusiasts can ensure their living areas remain secure while allowing unhindered access through the hatches.Step 1: Starting with the Flange
Sven begins by explaining that working on flanges vertically and horizontally is significantly easier than doing so in a flat position. To simplify the process further, he divides the task into two or three steps as suggested by fellow expert “for for.” This approach not only makes it more manageable but also allows for greater precision in crafting each component.Step 2: Applying Glue and Securing
Sven proceeds to apply glue along one edge of the flange, ensuring a secure bond when clamped into place. He emphasizes that this stage is crucial for maintaining the structural integrity of the flange, which in turn safeguards the living area beneath the canvas when hatches are open.Step 3: Allowing Time to Dry
After securely attaching the first portion of the flange, Sven allows ample time for it to dry before moving forward with additional steps. This patience and precision are key aspects of his successful boatbuilding methods.Step 4: Finishing Touches
Once the flange is fully dried, Sven removes the clamps carefully, ensuring no damage occurs during this process. He then moves on to attaching four more pieces onto these main frames, completing two pairs of flanges for the bulkhead hatches.The Final Touches
While two flanges form the primary support structure around the hatches, Sven mentions there are two additional pieces required at each end to ensure comprehensive protection. This attention to detail highlights his commitment to producing a durable and reliable design. “Sailing is about finding your path, whether it’s across an ocean or within yourself.” – Sven Yrvind In conclusion, making flanges around bulkhead hatches may seem complex at first glance, but by following Sven Yrvind’s meticulous process, enthusiasts can achieve professional-level results. Remember that the journey of boatbuilding is as rewarding as reaching your destination; it tests one’s patience and dedication. For those seeking to embark on this adventure or simply gain more insight into marine craftsmanship, Sven’s wisdom is invaluable.Once the flange is fully dried, Sven removes the clamps carefully, ensuring no damage occurs during this process. He then moves on to attaching four more pieces onto these main frames, completing two pairs of flanges for the bulkhead hatches.The Final Touches
While two flanges form the primary support structure around the hatches, Sven mentions there are two additional pieces required at each end to ensure comprehensive protection. This attention to detail highlights his commitment to producing a durable and reliable design. “Sailing is about finding your path, whether it’s across an ocean or within yourself.” – Sven Yrvind In conclusion, making flanges around bulkhead hatches may seem complex at first glance, but by following Sven Yrvind’s meticulous process, enthusiasts can achieve professional-level results. Remember that the journey of boatbuilding is as rewarding as reaching your destination; it tests one’s patience and dedication. For those seeking to embark on this adventure or simply gain more insight into marine craftsmanship, Sven’s wisdom is invaluable.After securely attaching the first portion of the flange, Sven allows ample time for it to dry before moving forward with additional steps. This patience and precision are key aspects of his successful boatbuilding methods.Step 4: Finishing Touches
Once the flange is fully dried, Sven removes the clamps carefully, ensuring no damage occurs during this process. He then moves on to attaching four more pieces onto these main frames, completing two pairs of flanges for the bulkhead hatches.The Final Touches
While two flanges form the primary support structure around the hatches, Sven mentions there are two additional pieces required at each end to ensure comprehensive protection. This attention to detail highlights his commitment to producing a durable and reliable design. “Sailing is about finding your path, whether it’s across an ocean or within yourself.” – Sven Yrvind In conclusion, making flanges around bulkhead hatches may seem complex at first glance, but by following Sven Yrvind’s meticulous process, enthusiasts can achieve professional-level results. Remember that the journey of boatbuilding is as rewarding as reaching your destination; it tests one’s patience and dedication. For those seeking to embark on this adventure or simply gain more insight into marine craftsmanship, Sven’s wisdom is invaluable.Sven proceeds to apply glue along one edge of the flange, ensuring a secure bond when clamped into place. He emphasizes that this stage is crucial for maintaining the structural integrity of the flange, which in turn safeguards the living area beneath the canvas when hatches are open.Step 3: Allowing Time to Dry
After securely attaching the first portion of the flange, Sven allows ample time for it to dry before moving forward with additional steps. This patience and precision are key aspects of his successful boatbuilding methods.Step 4: Finishing Touches
Once the flange is fully dried, Sven removes the clamps carefully, ensuring no damage occurs during this process. He then moves on to attaching four more pieces onto these main frames, completing two pairs of flanges for the bulkhead hatches.The Final Touches
While two flanges form the primary support structure around the hatches, Sven mentions there are two additional pieces required at each end to ensure comprehensive protection. This attention to detail highlights his commitment to producing a durable and reliable design. “Sailing is about finding your path, whether it’s across an ocean or within yourself.” – Sven Yrvind In conclusion, making flanges around bulkhead hatches may seem complex at first glance, but by following Sven Yrvind’s meticulous process, enthusiasts can achieve professional-level results. Remember that the journey of boatbuilding is as rewarding as reaching your destination; it tests one’s patience and dedication. For those seeking to embark on this adventure or simply gain more insight into marine craftsmanship, Sven’s wisdom is invaluable.Sven begins by explaining that working on flanges vertically and horizontally is significantly easier than doing so in a flat position. To simplify the process further, he divides the task into two or three steps as suggested by fellow expert “for for.” This approach not only makes it more manageable but also allows for greater precision in crafting each component.Step 2: Applying Glue and Securing
Sven proceeds to apply glue along one edge of the flange, ensuring a secure bond when clamped into place. He emphasizes that this stage is crucial for maintaining the structural integrity of the flange, which in turn safeguards the living area beneath the canvas when hatches are open.Step 3: Allowing Time to Dry
After securely attaching the first portion of the flange, Sven allows ample time for it to dry before moving forward with additional steps. This patience and precision are key aspects of his successful boatbuilding methods.Step 4: Finishing Touches
Once the flange is fully dried, Sven removes the clamps carefully, ensuring no damage occurs during this process. He then moves on to attaching four more pieces onto these main frames, completing two pairs of flanges for the bulkhead hatches.The Final Touches
While two flanges form the primary support structure around the hatches, Sven mentions there are two additional pieces required at each end to ensure comprehensive protection. This attention to detail highlights his commitment to producing a durable and reliable design. “Sailing is about finding your path, whether it’s across an ocean or within yourself.” – Sven Yrvind In conclusion, making flanges around bulkhead hatches may seem complex at first glance, but by following Sven Yrvind’s meticulous process, enthusiasts can achieve professional-level results. Remember that the journey of boatbuilding is as rewarding as reaching your destination; it tests one’s patience and dedication. For those seeking to embark on this adventure or simply gain more insight into marine craftsmanship, Sven’s wisdom is invaluable.Sven Yrvind, a renowned yacht designer and sailor, shares valuable insights on creating flanges around bulkhead hatches for canvas protection in this enlightening video. By following his expert guidance, boat enthusiasts can ensure their living areas remain secure while allowing unhindered access through the hatches.Step 1: Starting with the Flange
Sven begins by explaining that working on flanges vertically and horizontally is significantly easier than doing so in a flat position. To simplify the process further, he divides the task into two or three steps as suggested by fellow expert “for for.” This approach not only makes it more manageable but also allows for greater precision in crafting each component.Step 2: Applying Glue and Securing
Sven proceeds to apply glue along one edge of the flange, ensuring a secure bond when clamped into place. He emphasizes that this stage is crucial for maintaining the structural integrity of the flange, which in turn safeguards the living area beneath the canvas when hatches are open.Step 3: Allowing Time to Dry
After securely attaching the first portion of the flange, Sven allows ample time for it to dry before moving forward with additional steps. This patience and precision are key aspects of his successful boatbuilding methods.Step 4: Finishing Touches
Once the flange is fully dried, Sven removes the clamps carefully, ensuring no damage occurs during this process. He then moves on to attaching four more pieces onto these main frames, completing two pairs of flanges for the bulkhead hatches.The Final Touches
While two flanges form the primary support structure around the hatches, Sven mentions there are two additional pieces required at each end to ensure comprehensive protection. This attention to detail highlights his commitment to producing a durable and reliable design. “Sailing is about finding your path, whether it’s across an ocean or within yourself.” – Sven Yrvind In conclusion, making flanges around bulkhead hatches may seem complex at first glance, but by following Sven Yrvind’s meticulous process, enthusiasts can achieve professional-level results. Remember that the journey of boatbuilding is as rewarding as reaching your destination; it tests one’s patience and dedication. For those seeking to embark on this adventure or simply gain more insight into marine craftsmanship, Sven’s wisdom is invaluable.Making Flanges Around Bulkhead Hatches for Canvas
Sven Yrvind, a renowned yacht designer and sailor, shares valuable insights on creating flanges around bulkhead hatches for canvas protection in this enlightening video. By following his expert guidance, boat enthusiasts can ensure their living areas remain secure while allowing unhindered access through the hatches.Step 1: Starting with the Flange
Sven begins by explaining that working on flanges vertically and horizontally is significantly easier than doing so in a flat position. To simplify the process further, he divides the task into two or three steps as suggested by fellow expert “for for.” This approach not only makes it more manageable but also allows for greater precision in crafting each component.Step 2: Applying Glue and Securing
Sven proceeds to apply glue along one edge of the flange, ensuring a secure bond when clamped into place. He emphasizes that this stage is crucial for maintaining the structural integrity of the flange, which in turn safeguards the living area beneath the canvas when hatches are open.Step 3: Allowing Time to Dry
After securely attaching the first portion of the flange, Sven allows ample time for it to dry before moving forward with additional steps. This patience and precision are key aspects of his successful boatbuilding methods.Step 4: Finishing Touches
Once the flange is fully dried, Sven removes the clamps carefully, ensuring no damage occurs during this process. He then moves on to attaching four more pieces onto these main frames, completing two pairs of flanges for the bulkhead hatches.The Final Touches
While two flanges form the primary support structure around the hatches, Sven mentions there are two additional pieces required at each end to ensure comprehensive protection. This attention to detail highlights his commitment to producing a durable and reliable design. “Sailing is about finding your path, whether it’s across an ocean or within yourself.” – Sven Yrvind In conclusion, making flanges around bulkhead hatches may seem complex at first glance, but by following Sven Yrvind’s meticulous process, enthusiasts can achieve professional-level results. Remember that the journey of boatbuilding is as rewarding as reaching your destination; it tests one’s patience and dedication. For those seeking to embark on this adventure or simply gain more insight into marine craftsmanship, Sven’s wisdom is invaluable.Once the flange is fully dried, Sven removes the clamps carefully, ensuring no damage occurs during this process. He then moves on to attaching four more pieces onto these main frames, completing two pairs of flanges for the bulkhead hatches.The Final Touches
While two flanges form the primary support structure around the hatches, Sven mentions there are two additional pieces required at each end to ensure comprehensive protection. This attention to detail highlights his commitment to producing a durable and reliable design. “Sailing is about finding your path, whether it’s across an ocean or within yourself.” – Sven Yrvind In conclusion, making flanges around bulkhead hatches may seem complex at first glance, but by following Sven Yrvind’s meticulous process, enthusiasts can achieve professional-level results. Remember that the journey of boatbuilding is as rewarding as reaching your destination; it tests one’s patience and dedication. For those seeking to embark on this adventure or simply gain more insight into marine craftsmanship, Sven’s wisdom is invaluable.Making Flanges Around Bulkhead Hatches for Canvas
Sven Yrvind, a renowned yacht designer and sailor, shares valuable insights on creating flanges around bulkhead hatches for canvas protection in this enlightening video. By following his expert guidance, boat enthusiasts can ensure their living areas remain secure while allowing unhindered access through the hatches.Step 1: Starting with the Flange
Sven begins by explaining that working on flanges vertically and horizontally is significantly easier than doing so in a flat position. To simplify the process further, he divides the task into two or three steps as suggested by fellow expert “for for.” This approach not only makes it more manageable but also allows for greater precision in crafting each component.Step 2: Applying Glue and Securing
Sven proceeds to apply glue along one edge of the flange, ensuring a secure bond when clamped into place. He emphasizes that this stage is crucial for maintaining the structural integrity of the flange, which in turn safeguards the living area beneath the canvas when hatches are open.Step 3: Allowing Time to Dry
After securely attaching the first portion of the flange, Sven allows ample time for it to dry before moving forward with additional steps. This patience and precision are key aspects of his successful boatbuilding methods.Step 4: Finishing Touches
Once the flange is fully dried, Sven removes the clamps carefully, ensuring no damage occurs during this process. He then moves on to attaching four more pieces onto these main frames, completing two pairs of flanges for the bulkhead hatches.The Final Touches
While two flanges form the primary support structure around the hatches, Sven mentions there are two additional pieces required at each end to ensure comprehensive protection. This attention to detail highlights his commitment to producing a durable and reliable design. “Sailing is about finding your path, whether it’s across an ocean or within yourself.” – Sven Yrvind In conclusion, making flanges around bulkhead hatches may seem complex at first glance, but by following Sven Yrvind’s meticulous process, enthusiasts can achieve professional-level results. Remember that the journey of boatbuilding is as rewarding as reaching your destination; it tests one’s patience and dedication. For those seeking to embark on this adventure or simply gain more insight into marine craftsmanship, Sven’s wisdom is invaluable.After securely attaching the first portion of the flange, Sven allows ample time for it to dry before moving forward with additional steps. This patience and precision are key aspects of his successful boatbuilding methods.Step 4: Finishing Touches
Once the flange is fully dried, Sven removes the clamps carefully, ensuring no damage occurs during this process. He then moves on to attaching four more pieces onto these main frames, completing two pairs of flanges for the bulkhead hatches.The Final Touches
While two flanges form the primary support structure around the hatches, Sven mentions there are two additional pieces required at each end to ensure comprehensive protection. This attention to detail highlights his commitment to producing a durable and reliable design. “Sailing is about finding your path, whether it’s across an ocean or within yourself.” – Sven Yrvind In conclusion, making flanges around bulkhead hatches may seem complex at first glance, but by following Sven Yrvind’s meticulous process, enthusiasts can achieve professional-level results. Remember that the journey of boatbuilding is as rewarding as reaching your destination; it tests one’s patience and dedication. For those seeking to embark on this adventure or simply gain more insight into marine craftsmanship, Sven’s wisdom is invaluable.Sven Yrvind, a renowned yacht designer and sailor, shares valuable insights on creating flanges around bulkhead hatches for canvas protection in this enlightening video. By following his expert guidance, boat enthusiasts can ensure their living areas remain secure while allowing unhindered access through the hatches.Step 1: Starting with the Flange
Sven begins by explaining that working on flanges vertically and horizontally is significantly easier than doing so in a flat position. To simplify the process further, he divides the task into two or three steps as suggested by fellow expert “for for.” This approach not only makes it more manageable but also allows for greater precision in crafting each component.Step 2: Applying Glue and Securing
Sven proceeds to apply glue along one edge of the flange, ensuring a secure bond when clamped into place. He emphasizes that this stage is crucial for maintaining the structural integrity of the flange, which in turn safeguards the living area beneath the canvas when hatches are open.Step 3: Allowing Time to Dry
After securely attaching the first portion of the flange, Sven allows ample time for it to dry before moving forward with additional steps. This patience and precision are key aspects of his successful boatbuilding methods.Step 4: Finishing Touches
Once the flange is fully dried, Sven removes the clamps carefully, ensuring no damage occurs during this process. He then moves on to attaching four more pieces onto these main frames, completing two pairs of flanges for the bulkhead hatches.The Final Touches
While two flanges form the primary support structure around the hatches, Sven mentions there are two additional pieces required at each end to ensure comprehensive protection. This attention to detail highlights his commitment to producing a durable and reliable design. “Sailing is about finding your path, whether it’s across an ocean or within yourself.” – Sven Yrvind In conclusion, making flanges around bulkhead hatches may seem complex at first glance, but by following Sven Yrvind’s meticulous process, enthusiasts can achieve professional-level results. Remember that the journey of boatbuilding is as rewarding as reaching your destination; it tests one’s patience and dedication. For those seeking to embark on this adventure or simply gain more insight into marine craftsmanship, Sven’s wisdom is invaluable.Making Flanges Around Bulkhead Hatches for Canvas
Sven Yrvind, a renowned yacht designer and sailor, shares valuable insights on creating flanges around bulkhead hatches for canvas protection in this enlightening video. By following his expert guidance, boat enthusiasts can ensure their living areas remain secure while allowing unhindered access through the hatches.Step 1: Starting with the Flange
Sven begins by explaining that working on flanges vertically and horizontally is significantly easier than doing so in a flat position. To simplify the process further, he divides the task into two or three steps as suggested by fellow expert “for for.” This approach not only makes it more manageable but also allows for greater precision in crafting each component.Step 2: Applying Glue and Securing
Sven proceeds to apply glue along one edge of the flange, ensuring a secure bond when clamped into place. He emphasizes that this stage is crucial for maintaining the structural integrity of the flange, which in turn safeguards the living area beneath the canvas when hatches are open.Step 3: Allowing Time to Dry
After securely attaching the first portion of the flange, Sven allows ample time for it to dry before moving forward with additional steps. This patience and precision are key aspects of his successful boatbuilding methods.Step 4: Finishing Touches
Once the flange is fully dried, Sven removes the clamps carefully, ensuring no damage occurs during this process. He then moves on to attaching four more pieces onto these main frames, completing two pairs of flanges for the bulkhead hatches.The Final Touches
While two flanges form the primary support structure around the hatches, Sven mentions there are two additional pieces required at each end to ensure comprehensive protection. This attention to detail highlights his commitment to producing a durable and reliable design. “Sailing is about finding your path, whether it’s across an ocean or within yourself.” – Sven Yrvind In conclusion, making flanges around bulkhead hatches may seem complex at first glance, but by following Sven Yrvind’s meticulous process, enthusiasts can achieve professional-level results. Remember that the journey of boatbuilding is as rewarding as reaching your destination; it tests one’s patience and dedication. For those seeking to embark on this adventure or simply gain more insight into marine craftsmanship, Sven’s wisdom is invaluable.Sven proceeds to apply glue along one edge of the flange, ensuring a secure bond when clamped into place. He emphasizes that this stage is crucial for maintaining the structural integrity of the flange, which in turn safeguards the living area beneath the canvas when hatches are open.Step 3: Allowing Time to Dry
After securely attaching the first portion of the flange, Sven allows ample time for it to dry before moving forward with additional steps. This patience and precision are key aspects of his successful boatbuilding methods.Step 4: Finishing Touches
Once the flange is fully dried, Sven removes the clamps carefully, ensuring no damage occurs during this process. He then moves on to attaching four more pieces onto these main frames, completing two pairs of flanges for the bulkhead hatches.The Final Touches
While two flanges form the primary support structure around the hatches, Sven mentions there are two additional pieces required at each end to ensure comprehensive protection. This attention to detail highlights his commitment to producing a durable and reliable design. “Sailing is about finding your path, whether it’s across an ocean or within yourself.” – Sven Yrvind In conclusion, making flanges around bulkhead hatches may seem complex at first glance, but by following Sven Yrvind’s meticulous process, enthusiasts can achieve professional-level results. Remember that the journey of boatbuilding is as rewarding as reaching your destination; it tests one’s patience and dedication. For those seeking to embark on this adventure or simply gain more insight into marine craftsmanship, Sven’s wisdom is invaluable.Sven Yrvind, a renowned yacht designer and sailor, shares valuable insights on creating flanges around bulkhead hatches for canvas protection in this enlightening video. By following his expert guidance, boat enthusiasts can ensure their living areas remain secure while allowing unhindered access through the hatches.Step 1: Starting with the Flange
Sven begins by explaining that working on flanges vertically and horizontally is significantly easier than doing so in a flat position. To simplify the process further, he divides the task into two or three steps as suggested by fellow expert “for for.” This approach not only makes it more manageable but also allows for greater precision in crafting each component.Step 2: Applying Glue and Securing
Sven proceeds to apply glue along one edge of the flange, ensuring a secure bond when clamped into place. He emphasizes that this stage is crucial for maintaining the structural integrity of the flange, which in turn safeguards the living area beneath the canvas when hatches are open.Step 3: Allowing Time to Dry
After securely attaching the first portion of the flange, Sven allows ample time for it to dry before moving forward with additional steps. This patience and precision are key aspects of his successful boatbuilding methods.Step 4: Finishing Touches
Once the flange is fully dried, Sven removes the clamps carefully, ensuring no damage occurs during this process. He then moves on to attaching four more pieces onto these main frames, completing two pairs of flanges for the bulkhead hatches.The Final Touches
While two flanges form the primary support structure around the hatches, Sven mentions there are two additional pieces required at each end to ensure comprehensive protection. This attention to detail highlights his commitment to producing a durable and reliable design. “Sailing is about finding your path, whether it’s across an ocean or within yourself.” – Sven Yrvind In conclusion, making flanges around bulkhead hatches may seem complex at first glance, but by following Sven Yrvind’s meticulous process, enthusiasts can achieve professional-level results. Remember that the journey of boatbuilding is as rewarding as reaching your destination; it tests one’s patience and dedication. For those seeking to embark on this adventure or simply gain more insight into marine craftsmanship, Sven’s wisdom is invaluable.Making Flanges Around Bulkhead Hatches for Canvas
Sven Yrvind, a renowned yacht designer and sailor, shares valuable insights on creating flanges around bulkhead hatches for canvas protection in this enlightening video. By following his expert guidance, boat enthusiasts can ensure their living areas remain secure while allowing unhindered access through the hatches.Step 1: Starting with the Flange
Sven begins by explaining that working on flanges vertically and horizontally is significantly easier than doing so in a flat position. To simplify the process further, he divides the task into two or three steps as suggested by fellow expert “for for.” This approach not only makes it more manageable but also allows for greater precision in crafting each component.Step 2: Applying Glue and Securing
Sven proceeds to apply glue along one edge of the flange, ensuring a secure bond when clamped into place. He emphasizes that this stage is crucial for maintaining the structural integrity of the flange, which in turn safeguards the living area beneath the canvas when hatches are open.Step 3: Allowing Time to Dry
After securely attaching the first portion of the flange, Sven allows ample time for it to dry before moving forward with additional steps. This patience and precision are key aspects of his successful boatbuilding methods.Step 4: Finishing Touches
Once the flange is fully dried, Sven removes the clamps carefully, ensuring no damage occurs during this process. He then moves on to attaching four more pieces onto these main frames, completing two pairs of flanges for the bulkhead hatches.The Final Touches
While two flanges form the primary support structure around the hatches, Sven mentions there are two additional pieces required at each end to ensure comprehensive protection. This attention to detail highlights his commitment to producing a durable and reliable design. “Sailing is about finding your path, whether it’s across an ocean or within yourself.” – Sven Yrvind In conclusion, making flanges around bulkhead hatches may seem complex at first glance, but by following Sven Yrvind’s meticulous process, enthusiasts can achieve professional-level results. Remember that the journey of boatbuilding is as rewarding as reaching your destination; it tests one’s patience and dedication. For those seeking to embark on this adventure or simply gain more insight into marine craftsmanship, Sven’s wisdom is invaluable.Sven begins by explaining that working on flanges vertically and horizontally is significantly easier than doing so in a flat position. To simplify the process further, he divides the task into two or three steps as suggested by fellow expert “for for.” This approach not only makes it more manageable but also allows for greater precision in crafting each component.Step 2: Applying Glue and Securing
Sven proceeds to apply glue along one edge of the flange, ensuring a secure bond when clamped into place. He emphasizes that this stage is crucial for maintaining the structural integrity of the flange, which in turn safeguards the living area beneath the canvas when hatches are open.Step 3: Allowing Time to Dry
After securely attaching the first portion of the flange, Sven allows ample time for it to dry before moving forward with additional steps. This patience and precision are key aspects of his successful boatbuilding methods.Step 4: Finishing Touches
Once the flange is fully dried, Sven removes the clamps carefully, ensuring no damage occurs during this process. He then moves on to attaching four more pieces onto these main frames, completing two pairs of flanges for the bulkhead hatches.The Final Touches
While two flanges form the primary support structure around the hatches, Sven mentions there are two additional pieces required at each end to ensure comprehensive protection. This attention to detail highlights his commitment to producing a durable and reliable design. “Sailing is about finding your path, whether it’s across an ocean or within yourself.” – Sven Yrvind In conclusion, making flanges around bulkhead hatches may seem complex at first glance, but by following Sven Yrvind’s meticulous process, enthusiasts can achieve professional-level results. Remember that the journey of boatbuilding is as rewarding as reaching your destination; it tests one’s patience and dedication. For those seeking to embark on this adventure or simply gain more insight into marine craftsmanship, Sven’s wisdom is invaluable.Sven Yrvind, a renowned yacht designer and sailor, shares valuable insights on creating flanges around bulkhead hatches for canvas protection in this enlightening video. By following his expert guidance, boat enthusiasts can ensure their living areas remain secure while allowing unhindered access through the hatches.Step 1: Starting with the Flange
Sven begins by explaining that working on flanges vertically and horizontally is significantly easier than doing so in a flat position. To simplify the process further, he divides the task into two or three steps as suggested by fellow expert “for for.” This approach not only makes it more manageable but also allows for greater precision in crafting each component.Step 2: Applying Glue and Securing
Sven proceeds to apply glue along one edge of the flange, ensuring a secure bond when clamped into place. He emphasizes that this stage is crucial for maintaining the structural integrity of the flange, which in turn safeguards the living area beneath the canvas when hatches are open.Step 3: Allowing Time to Dry
After securely attaching the first portion of the flange, Sven allows ample time for it to dry before moving forward with additional steps. This patience and precision are key aspects of his successful boatbuilding methods.Step 4: Finishing Touches
Once the flange is fully dried, Sven removes the clamps carefully, ensuring no damage occurs during this process. He then moves on to attaching four more pieces onto these main frames, completing two pairs of flanges for the bulkhead hatches.The Final Touches
While two flanges form the primary support structure around the hatches, Sven mentions there are two additional pieces required at each end to ensure comprehensive protection. This attention to detail highlights his commitment to producing a durable and reliable design. “Sailing is about finding your path, whether it’s across an ocean or within yourself.” – Sven Yrvind In conclusion, making flanges around bulkhead hatches may seem complex at first glance, but by following Sven Yrvind’s meticulous process, enthusiasts can achieve professional-level results. Remember that the journey of boatbuilding is as rewarding as reaching your destination; it tests one’s patience and dedication. For those seeking to embark on this adventure or simply gain more insight into marine craftsmanship, Sven’s wisdom is invaluable.Making Flanges Around Bulkhead Hatches for Canvas
Sven Yrvind, a renowned yacht designer and sailor, shares valuable insights on creating flanges around bulkhead hatches for canvas protection in this enlightening video. By following his expert guidance, boat enthusiasts can ensure their living areas remain secure while allowing unhindered access through the hatches.Step 1: Starting with the Flange
Sven begins by explaining that working on flanges vertically and horizontally is significantly easier than doing so in a flat position. To simplify the process further, he divides the task into two or three steps as suggested by fellow expert “for for.” This approach not only makes it more manageable but also allows for greater precision in crafting each component.Step 2: Applying Glue and Securing
Sven proceeds to apply glue along one edge of the flange, ensuring a secure bond when clamped into place. He emphasizes that this stage is crucial for maintaining the structural integrity of the flange, which in turn safeguards the living area beneath the canvas when hatches are open.Step 3: Allowing Time to Dry
After securely attaching the first portion of the flange, Sven allows ample time for it to dry before moving forward with additional steps. This patience and precision are key aspects of his successful boatbuilding methods.Step 4: Finishing Touches
Once the flange is fully dried, Sven removes the clamps carefully, ensuring no damage occurs during this process. He then moves on to attaching four more pieces onto these main frames, completing two pairs of flanges for the bulkhead hatches.The Final Touches
While two flanges form the primary support structure around the hatches, Sven mentions there are two additional pieces required at each end to ensure comprehensive protection. This attention to detail highlights his commitment to producing a durable and reliable design. “Sailing is about finding your path, whether it’s across an ocean or within yourself.” – Sven Yrvind In conclusion, making flanges around bulkhead hatches may seem complex at first glance, but by following Sven Yrvind’s meticulous process, enthusiasts can achieve professional-level results. Remember that the journey of boatbuilding is as rewarding as reaching your destination; it tests one’s patience and dedication. For those seeking to embark on this adventure or simply gain more insight into marine craftsmanship, Sven’s wisdom is invaluable.Once the flange is fully dried, Sven removes the clamps carefully, ensuring no damage occurs during this process. He then moves on to attaching four more pieces onto these main frames, completing two pairs of flanges for the bulkhead hatches.The Final Touches
While two flanges form the primary support structure around the hatches, Sven mentions there are two additional pieces required at each end to ensure comprehensive protection. This attention to detail highlights his commitment to producing a durable and reliable design. “Sailing is about finding your path, whether it’s across an ocean or within yourself.” – Sven Yrvind In conclusion, making flanges around bulkhead hatches may seem complex at first glance, but by following Sven Yrvind’s meticulous process, enthusiasts can achieve professional-level results. Remember that the journey of boatbuilding is as rewarding as reaching your destination; it tests one’s patience and dedication. For those seeking to embark on this adventure or simply gain more insight into marine craftsmanship, Sven’s wisdom is invaluable.Sven begins by explaining that working on flanges vertically and horizontally is significantly easier than doing so in a flat position. To simplify the process further, he divides the task into two or three steps as suggested by fellow expert “for for.” This approach not only makes it more manageable but also allows for greater precision in crafting each component.Step 2: Applying Glue and Securing
Sven proceeds to apply glue along one edge of the flange, ensuring a secure bond when clamped into place. He emphasizes that this stage is crucial for maintaining the structural integrity of the flange, which in turn safeguards the living area beneath the canvas when hatches are open.Step 3: Allowing Time to Dry
After securely attaching the first portion of the flange, Sven allows ample time for it to dry before moving forward with additional steps. This patience and precision are key aspects of his successful boatbuilding methods.Step 4: Finishing Touches
Once the flange is fully dried, Sven removes the clamps carefully, ensuring no damage occurs during this process. He then moves on to attaching four more pieces onto these main frames, completing two pairs of flanges for the bulkhead hatches.The Final Touches
While two flanges form the primary support structure around the hatches, Sven mentions there are two additional pieces required at each end to ensure comprehensive protection. This attention to detail highlights his commitment to producing a durable and reliable design. “Sailing is about finding your path, whether it’s across an ocean or within yourself.” – Sven Yrvind In conclusion, making flanges around bulkhead hatches may seem complex at first glance, but by following Sven Yrvind’s meticulous process, enthusiasts can achieve professional-level results. Remember that the journey of boatbuilding is as rewarding as reaching your destination; it tests one’s patience and dedication. For those seeking to embark on this adventure or simply gain more insight into marine craftsmanship, Sven’s wisdom is invaluable.Sven Yrvind, a renowned yacht designer and sailor, shares valuable insights on creating flanges around bulkhead hatches for canvas protection in this enlightening video. By following his expert guidance, boat enthusiasts can ensure their living areas remain secure while allowing unhindered access through the hatches.Step 1: Starting with the Flange
Sven begins by explaining that working on flanges vertically and horizontally is significantly easier than doing so in a flat position. To simplify the process further, he divides the task into two or three steps as suggested by fellow expert “for for.” This approach not only makes it more manageable but also allows for greater precision in crafting each component.Step 2: Applying Glue and Securing
Sven proceeds to apply glue along one edge of the flange, ensuring a secure bond when clamped into place. He emphasizes that this stage is crucial for maintaining the structural integrity of the flange, which in turn safeguards the living area beneath the canvas when hatches are open.Step 3: Allowing Time to Dry
After securely attaching the first portion of the flange, Sven allows ample time for it to dry before moving forward with additional steps. This patience and precision are key aspects of his successful boatbuilding methods.Step 4: Finishing Touches
Once the flange is fully dried, Sven removes the clamps carefully, ensuring no damage occurs during this process. He then moves on to attaching four more pieces onto these main frames, completing two pairs of flanges for the bulkhead hatches.The Final Touches
While two flanges form the primary support structure around the hatches, Sven mentions there are two additional pieces required at each end to ensure comprehensive protection. This attention to detail highlights his commitment to producing a durable and reliable design. “Sailing is about finding your path, whether it’s across an ocean or within yourself.” – Sven Yrvind In conclusion, making flanges around bulkhead hatches may seem complex at first glance, but by following Sven Yrvind’s meticulous process, enthusiasts can achieve professional-level results. Remember that the journey of boatbuilding is as rewarding as reaching your destination; it tests one’s patience and dedication. For those seeking to embark on this adventure or simply gain more insight into marine craftsmanship, Sven’s wisdom is invaluable.Making Flanges Around Bulkhead Hatches for Canvas
Sven Yrvind, a renowned yacht designer and sailor, shares valuable insights on creating flanges around bulkhead hatches for canvas protection in this enlightening video. By following his expert guidance, boat enthusiasts can ensure their living areas remain secure while allowing unhindered access through the hatches.Step 1: Starting with the Flange
Sven begins by explaining that working on flanges vertically and horizontally is significantly easier than doing so in a flat position. To simplify the process further, he divides the task into two or three steps as suggested by fellow expert “for for.” This approach not only makes it more manageable but also allows for greater precision in crafting each component.Step 2: Applying Glue and Securing
Sven proceeds to apply glue along one edge of the flange, ensuring a secure bond when clamped into place. He emphasizes that this stage is crucial for maintaining the structural integrity of the flange, which in turn safeguards the living area beneath the canvas when hatches are open.Step 3: Allowing Time to Dry
After securely attaching the first portion of the flange, Sven allows ample time for it to dry before moving forward with additional steps. This patience and precision are key aspects of his successful boatbuilding methods.Step 4: Finishing Touches
Once the flange is fully dried, Sven removes the clamps carefully, ensuring no damage occurs during this process. He then moves on to attaching four more pieces onto these main frames, completing two pairs of flanges for the bulkhead hatches.The Final Touches
While two flanges form the primary support structure around the hatches, Sven mentions there are two additional pieces required at each end to ensure comprehensive protection. This attention to detail highlights his commitment to producing a durable and reliable design. “Sailing is about finding your path, whether it’s across an ocean or within yourself.” – Sven Yrvind In conclusion, making flanges around bulkhead hatches may seem complex at first glance, but by following Sven Yrvind’s meticulous process, enthusiasts can achieve professional-level results. Remember that the journey of boatbuilding is as rewarding as reaching your destination; it tests one’s patience and dedication. For those seeking to embark on this adventure or simply gain more insight into marine craftsmanship, Sven’s wisdom is invaluable.After securely attaching the first portion of the flange, Sven allows ample time for it to dry before moving forward with additional steps. This patience and precision are key aspects of his successful boatbuilding methods.Step 4: Finishing Touches
Once the flange is fully dried, Sven removes the clamps carefully, ensuring no damage occurs during this process. He then moves on to attaching four more pieces onto these main frames, completing two pairs of flanges for the bulkhead hatches.The Final Touches
While two flanges form the primary support structure around the hatches, Sven mentions there are two additional pieces required at each end to ensure comprehensive protection. This attention to detail highlights his commitment to producing a durable and reliable design. “Sailing is about finding your path, whether it’s across an ocean or within yourself.” – Sven Yrvind In conclusion, making flanges around bulkhead hatches may seem complex at first glance, but by following Sven Yrvind’s meticulous process, enthusiasts can achieve professional-level results. Remember that the journey of boatbuilding is as rewarding as reaching your destination; it tests one’s patience and dedication. For those seeking to embark on this adventure or simply gain more insight into marine craftsmanship, Sven’s wisdom is invaluable.Sven begins by explaining that working on flanges vertically and horizontally is significantly easier than doing so in a flat position. To simplify the process further, he divides the task into two or three steps as suggested by fellow expert “for for.” This approach not only makes it more manageable but also allows for greater precision in crafting each component.Step 2: Applying Glue and Securing
Sven proceeds to apply glue along one edge of the flange, ensuring a secure bond when clamped into place. He emphasizes that this stage is crucial for maintaining the structural integrity of the flange, which in turn safeguards the living area beneath the canvas when hatches are open.Step 3: Allowing Time to Dry
After securely attaching the first portion of the flange, Sven allows ample time for it to dry before moving forward with additional steps. This patience and precision are key aspects of his successful boatbuilding methods.Step 4: Finishing Touches
Once the flange is fully dried, Sven removes the clamps carefully, ensuring no damage occurs during this process. He then moves on to attaching four more pieces onto these main frames, completing two pairs of flanges for the bulkhead hatches.The Final Touches
While two flanges form the primary support structure around the hatches, Sven mentions there are two additional pieces required at each end to ensure comprehensive protection. This attention to detail highlights his commitment to producing a durable and reliable design. “Sailing is about finding your path, whether it’s across an ocean or within yourself.” – Sven Yrvind In conclusion, making flanges around bulkhead hatches may seem complex at first glance, but by following Sven Yrvind’s meticulous process, enthusiasts can achieve professional-level results. Remember that the journey of boatbuilding is as rewarding as reaching your destination; it tests one’s patience and dedication. For those seeking to embark on this adventure or simply gain more insight into marine craftsmanship, Sven’s wisdom is invaluable.Sven Yrvind, a renowned yacht designer and sailor, shares valuable insights on creating flanges around bulkhead hatches for canvas protection in this enlightening video. By following his expert guidance, boat enthusiasts can ensure their living areas remain secure while allowing unhindered access through the hatches.Step 1: Starting with the Flange
Sven begins by explaining that working on flanges vertically and horizontally is significantly easier than doing so in a flat position. To simplify the process further, he divides the task into two or three steps as suggested by fellow expert “for for.” This approach not only makes it more manageable but also allows for greater precision in crafting each component.Step 2: Applying Glue and Securing
Sven proceeds to apply glue along one edge of the flange, ensuring a secure bond when clamped into place. He emphasizes that this stage is crucial for maintaining the structural integrity of the flange, which in turn safeguards the living area beneath the canvas when hatches are open.Step 3: Allowing Time to Dry
After securely attaching the first portion of the flange, Sven allows ample time for it to dry before moving forward with additional steps. This patience and precision are key aspects of his successful boatbuilding methods.Step 4: Finishing Touches
Once the flange is fully dried, Sven removes the clamps carefully, ensuring no damage occurs during this process. He then moves on to attaching four more pieces onto these main frames, completing two pairs of flanges for the bulkhead hatches.The Final Touches
While two flanges form the primary support structure around the hatches, Sven mentions there are two additional pieces required at each end to ensure comprehensive protection. This attention to detail highlights his commitment to producing a durable and reliable design. “Sailing is about finding your path, whether it’s across an ocean or within yourself.” – Sven Yrvind In conclusion, making flanges around bulkhead hatches may seem complex at first glance, but by following Sven Yrvind’s meticulous process, enthusiasts can achieve professional-level results. Remember that the journey of boatbuilding is as rewarding as reaching your destination; it tests one’s patience and dedication. For those seeking to embark on this adventure or simply gain more insight into marine craftsmanship, Sven’s wisdom is invaluable.Making Flanges Around Bulkhead Hatches for Canvas
Sven Yrvind, a renowned yacht designer and sailor, shares valuable insights on creating flanges around bulkhead hatches for canvas protection in this enlightening video. By following his expert guidance, boat enthusiasts can ensure their living areas remain secure while allowing unhindered access through the hatches.Step 1: Starting with the Flange
Sven begins by explaining that working on flanges vertically and horizontally is significantly easier than doing so in a flat position. To simplify the process further, he divides the task into two or three steps as suggested by fellow expert “for for.” This approach not only makes it more manageable but also allows for greater precision in crafting each component.Step 2: Applying Glue and Securing
Sven proceeds to apply glue along one edge of the flange, ensuring a secure bond when clamped into place. He emphasizes that this stage is crucial for maintaining the structural integrity of the flange, which in turn safeguards the living area beneath the canvas when hatches are open.Step 3: Allowing Time to Dry
After securely attaching the first portion of the flange, Sven allows ample time for it to dry before moving forward with additional steps. This patience and precision are key aspects of his successful boatbuilding methods.Step 4: Finishing Touches
Once the flange is fully dried, Sven removes the clamps carefully, ensuring no damage occurs during this process. He then moves on to attaching four more pieces onto these main frames, completing two pairs of flanges for the bulkhead hatches.The Final Touches
While two flanges form the primary support structure around the hatches, Sven mentions there are two additional pieces required at each end to ensure comprehensive protection. This attention to detail highlights his commitment to producing a durable and reliable design. “Sailing is about finding your path, whether it’s across an ocean or within yourself.” – Sven Yrvind In conclusion, making flanges around bulkhead hatches may seem complex at first glance, but by following Sven Yrvind’s meticulous process, enthusiasts can achieve professional-level results. Remember that the journey of boatbuilding is as rewarding as reaching your destination; it tests one’s patience and dedication. For those seeking to embark on this adventure or simply gain more insight into marine craftsmanship, Sven’s wisdom is invaluable.Sven proceeds to apply glue along one edge of the flange, ensuring a secure bond when clamped into place. He emphasizes that this stage is crucial for maintaining the structural integrity of the flange, which in turn safeguards the living area beneath the canvas when hatches are open.Step 3: Allowing Time to Dry
After securely attaching the first portion of the flange, Sven allows ample time for it to dry before moving forward with additional steps. This patience and precision are key aspects of his successful boatbuilding methods.Step 4: Finishing Touches
Once the flange is fully dried, Sven removes the clamps carefully, ensuring no damage occurs during this process. He then moves on to attaching four more pieces onto these main frames, completing two pairs of flanges for the bulkhead hatches.The Final Touches
While two flanges form the primary support structure around the hatches, Sven mentions there are two additional pieces required at each end to ensure comprehensive protection. This attention to detail highlights his commitment to producing a durable and reliable design. “Sailing is about finding your path, whether it’s across an ocean or within yourself.” – Sven Yrvind In conclusion, making flanges around bulkhead hatches may seem complex at first glance, but by following Sven Yrvind’s meticulous process, enthusiasts can achieve professional-level results. Remember that the journey of boatbuilding is as rewarding as reaching your destination; it tests one’s patience and dedication. For those seeking to embark on this adventure or simply gain more insight into marine craftsmanship, Sven’s wisdom is invaluable.Sven begins by explaining that working on flanges vertically and horizontally is significantly easier than doing so in a flat position. To simplify the process further, he divides the task into two or three steps as suggested by fellow expert “for for.” This approach not only makes it more manageable but also allows for greater precision in crafting each component.Step 2: Applying Glue and Securing
Sven proceeds to apply glue along one edge of the flange, ensuring a secure bond when clamped into place. He emphasizes that this stage is crucial for maintaining the structural integrity of the flange, which in turn safeguards the living area beneath the canvas when hatches are open.Step 3: Allowing Time to Dry
After securely attaching the first portion of the flange, Sven allows ample time for it to dry before moving forward with additional steps. This patience and precision are key aspects of his successful boatbuilding methods.Step 4: Finishing Touches
Once the flange is fully dried, Sven removes the clamps carefully, ensuring no damage occurs during this process. He then moves on to attaching four more pieces onto these main frames, completing two pairs of flanges for the bulkhead hatches.The Final Touches
While two flanges form the primary support structure around the hatches, Sven mentions there are two additional pieces required at each end to ensure comprehensive protection. This attention to detail highlights his commitment to producing a durable and reliable design. “Sailing is about finding your path, whether it’s across an ocean or within yourself.” – Sven Yrvind In conclusion, making flanges around bulkhead hatches may seem complex at first glance, but by following Sven Yrvind’s meticulous process, enthusiasts can achieve professional-level results. Remember that the journey of boatbuilding is as rewarding as reaching your destination; it tests one’s patience and dedication. For those seeking to embark on this adventure or simply gain more insight into marine craftsmanship, Sven’s wisdom is invaluable.Sven Yrvind, a renowned yacht designer and sailor, shares valuable insights on creating flanges around bulkhead hatches for canvas protection in this enlightening video. By following his expert guidance, boat enthusiasts can ensure their living areas remain secure while allowing unhindered access through the hatches.Step 1: Starting with the Flange
Sven begins by explaining that working on flanges vertically and horizontally is significantly easier than doing so in a flat position. To simplify the process further, he divides the task into two or three steps as suggested by fellow expert “for for.” This approach not only makes it more manageable but also allows for greater precision in crafting each component.Step 2: Applying Glue and Securing
Sven proceeds to apply glue along one edge of the flange, ensuring a secure bond when clamped into place. He emphasizes that this stage is crucial for maintaining the structural integrity of the flange, which in turn safeguards the living area beneath the canvas when hatches are open.Step 3: Allowing Time to Dry
After securely attaching the first portion of the flange, Sven allows ample time for it to dry before moving forward with additional steps. This patience and precision are key aspects of his successful boatbuilding methods.Step 4: Finishing Touches
Once the flange is fully dried, Sven removes the clamps carefully, ensuring no damage occurs during this process. He then moves on to attaching four more pieces onto these main frames, completing two pairs of flanges for the bulkhead hatches.The Final Touches
While two flanges form the primary support structure around the hatches, Sven mentions there are two additional pieces required at each end to ensure comprehensive protection. This attention to detail highlights his commitment to producing a durable and reliable design. “Sailing is about finding your path, whether it’s across an ocean or within yourself.” – Sven Yrvind In conclusion, making flanges around bulkhead hatches may seem complex at first glance, but by following Sven Yrvind’s meticulous process, enthusiasts can achieve professional-level results. Remember that the journey of boatbuilding is as rewarding as reaching your destination; it tests one’s patience and dedication. For those seeking to embark on this adventure or simply gain more insight into marine craftsmanship, Sven’s wisdom is invaluable.Making Flanges Around Bulkhead Hatches for Canvas
Sven Yrvind, a renowned yacht designer and sailor, shares valuable insights on creating flanges around bulkhead hatches for canvas protection in this enlightening video. By following his expert guidance, boat enthusiasts can ensure their living areas remain secure while allowing unhindered access through the hatches.Step 1: Starting with the Flange
Sven begins by explaining that working on flanges vertically and horizontally is significantly easier than doing so in a flat position. To simplify the process further, he divides the task into two or three steps as suggested by fellow expert “for for.” This approach not only makes it more manageable but also allows for greater precision in crafting each component.Step 2: Applying Glue and Securing
Sven proceeds to apply glue along one edge of the flange, ensuring a secure bond when clamped into place. He emphasizes that this stage is crucial for maintaining the structural integrity of the flange, which in turn safeguards the living area beneath the canvas when hatches are open.Step 3: Allowing Time to Dry
After securely attaching the first portion of the flange, Sven allows ample time for it to dry before moving forward with additional steps. This patience and precision are key aspects of his successful boatbuilding methods.Step 4: Finishing Touches
Once the flange is fully dried, Sven removes the clamps carefully, ensuring no damage occurs during this process. He then moves on to attaching four more pieces onto these main frames, completing two pairs of flanges for the bulkhead hatches.The Final Touches
While two flanges form the primary support structure around the hatches, Sven mentions there are two additional pieces required at each end to ensure comprehensive protection. This attention to detail highlights his commitment to producing a durable and reliable design. “Sailing is about finding your path, whether it’s across an ocean or within yourself.” – Sven Yrvind In conclusion, making flanges around bulkhead hatches may seem complex at first glance, but by following Sven Yrvind’s meticulous process, enthusiasts can achieve professional-level results. Remember that the journey of boatbuilding is as rewarding as reaching your destination; it tests one’s patience and dedication. For those seeking to embark on this adventure or simply gain more insight into marine craftsmanship, Sven’s wisdom is invaluable.Once the flange is fully dried, Sven removes the clamps carefully, ensuring no damage occurs during this process. He then moves on to attaching four more pieces onto these main frames, completing two pairs of flanges for the bulkhead hatches.The Final Touches
While two flanges form the primary support structure around the hatches, Sven mentions there are two additional pieces required at each end to ensure comprehensive protection. This attention to detail highlights his commitment to producing a durable and reliable design. “Sailing is about finding your path, whether it’s across an ocean or within yourself.” – Sven Yrvind In conclusion, making flanges around bulkhead hatches may seem complex at first glance, but by following Sven Yrvind’s meticulous process, enthusiasts can achieve professional-level results. Remember that the journey of boatbuilding is as rewarding as reaching your destination; it tests one’s patience and dedication. For those seeking to embark on this adventure or simply gain more insight into marine craftsmanship, Sven’s wisdom is invaluable.Sven proceeds to apply glue along one edge of the flange, ensuring a secure bond when clamped into place. He emphasizes that this stage is crucial for maintaining the structural integrity of the flange, which in turn safeguards the living area beneath the canvas when hatches are open.Step 3: Allowing Time to Dry
After securely attaching the first portion of the flange, Sven allows ample time for it to dry before moving forward with additional steps. This patience and precision are key aspects of his successful boatbuilding methods.Step 4: Finishing Touches
Once the flange is fully dried, Sven removes the clamps carefully, ensuring no damage occurs during this process. He then moves on to attaching four more pieces onto these main frames, completing two pairs of flanges for the bulkhead hatches.The Final Touches
While two flanges form the primary support structure around the hatches, Sven mentions there are two additional pieces required at each end to ensure comprehensive protection. This attention to detail highlights his commitment to producing a durable and reliable design. “Sailing is about finding your path, whether it’s across an ocean or within yourself.” – Sven Yrvind In conclusion, making flanges around bulkhead hatches may seem complex at first glance, but by following Sven Yrvind’s meticulous process, enthusiasts can achieve professional-level results. Remember that the journey of boatbuilding is as rewarding as reaching your destination; it tests one’s patience and dedication. For those seeking to embark on this adventure or simply gain more insight into marine craftsmanship, Sven’s wisdom is invaluable.Sven begins by explaining that working on flanges vertically and horizontally is significantly easier than doing so in a flat position. To simplify the process further, he divides the task into two or three steps as suggested by fellow expert “for for.” This approach not only makes it more manageable but also allows for greater precision in crafting each component.Step 2: Applying Glue and Securing
Sven proceeds to apply glue along one edge of the flange, ensuring a secure bond when clamped into place. He emphasizes that this stage is crucial for maintaining the structural integrity of the flange, which in turn safeguards the living area beneath the canvas when hatches are open.Step 3: Allowing Time to Dry
After securely attaching the first portion of the flange, Sven allows ample time for it to dry before moving forward with additional steps. This patience and precision are key aspects of his successful boatbuilding methods.Step 4: Finishing Touches
Once the flange is fully dried, Sven removes the clamps carefully, ensuring no damage occurs during this process. He then moves on to attaching four more pieces onto these main frames, completing two pairs of flanges for the bulkhead hatches.The Final Touches
While two flanges form the primary support structure around the hatches, Sven mentions there are two additional pieces required at each end to ensure comprehensive protection. This attention to detail highlights his commitment to producing a durable and reliable design. “Sailing is about finding your path, whether it’s across an ocean or within yourself.” – Sven Yrvind In conclusion, making flanges around bulkhead hatches may seem complex at first glance, but by following Sven Yrvind’s meticulous process, enthusiasts can achieve professional-level results. Remember that the journey of boatbuilding is as rewarding as reaching your destination; it tests one’s patience and dedication. For those seeking to embark on this adventure or simply gain more insight into marine craftsmanship, Sven’s wisdom is invaluable.Sven Yrvind, a renowned yacht designer and sailor, shares valuable insights on creating flanges around bulkhead hatches for canvas protection in this enlightening video. By following his expert guidance, boat enthusiasts can ensure their living areas remain secure while allowing unhindered access through the hatches.Step 1: Starting with the Flange
Sven begins by explaining that working on flanges vertically and horizontally is significantly easier than doing so in a flat position. To simplify the process further, he divides the task into two or three steps as suggested by fellow expert “for for.” This approach not only makes it more manageable but also allows for greater precision in crafting each component.Step 2: Applying Glue and Securing
Sven proceeds to apply glue along one edge of the flange, ensuring a secure bond when clamped into place. He emphasizes that this stage is crucial for maintaining the structural integrity of the flange, which in turn safeguards the living area beneath the canvas when hatches are open.Step 3: Allowing Time to Dry
After securely attaching the first portion of the flange, Sven allows ample time for it to dry before moving forward with additional steps. This patience and precision are key aspects of his successful boatbuilding methods.Step 4: Finishing Touches
Once the flange is fully dried, Sven removes the clamps carefully, ensuring no damage occurs during this process. He then moves on to attaching four more pieces onto these main frames, completing two pairs of flanges for the bulkhead hatches.The Final Touches
While two flanges form the primary support structure around the hatches, Sven mentions there are two additional pieces required at each end to ensure comprehensive protection. This attention to detail highlights his commitment to producing a durable and reliable design. “Sailing is about finding your path, whether it’s across an ocean or within yourself.” – Sven Yrvind In conclusion, making flanges around bulkhead hatches may seem complex at first glance, but by following Sven Yrvind’s meticulous process, enthusiasts can achieve professional-level results. Remember that the journey of boatbuilding is as rewarding as reaching your destination; it tests one’s patience and dedication. For those seeking to embark on this adventure or simply gain more insight into marine craftsmanship, Sven’s wisdom is invaluable.Making Flanges Around Bulkhead Hatches for Canvas
Sven Yrvind, a renowned yacht designer and sailor, shares valuable insights on creating flanges around bulkhead hatches for canvas protection in this enlightening video. By following his expert guidance, boat enthusiasts can ensure their living areas remain secure while allowing unhindered access through the hatches.Step 1: Starting with the Flange
Sven begins by explaining that working on flanges vertically and horizontally is significantly easier than doing so in a flat position. To simplify the process further, he divides the task into two or three steps as suggested by fellow expert “for for.” This approach not only makes it more manageable but also allows for greater precision in crafting each component.Step 2: Applying Glue and Securing
Sven proceeds to apply glue along one edge of the flange, ensuring a secure bond when clamped into place. He emphasizes that this stage is crucial for maintaining the structural integrity of the flange, which in turn safeguards the living area beneath the canvas when hatches are open.Step 3: Allowing Time to Dry
After securely attaching the first portion of the flange, Sven allows ample time for it to dry before moving forward with additional steps. This patience and precision are key aspects of his successful boatbuilding methods.Step 4: Finishing Touches
Once the flange is fully dried, Sven removes the clamps carefully, ensuring no damage occurs during this process. He then moves on to attaching four more pieces onto these main frames, completing two pairs of flanges for the bulkhead hatches.The Final Touches
While two flanges form the primary support structure around the hatches, Sven mentions there are two additional pieces required at each end to ensure comprehensive protection. This attention to detail highlights his commitment to producing a durable and reliable design. “Sailing is about finding your path, whether it’s across an ocean or within yourself.” – Sven Yrvind In conclusion, making flanges around bulkhead hatches may seem complex at first glance, but by following Sven Yrvind’s meticulous process, enthusiasts can achieve professional-level results. Remember that the journey of boatbuilding is as rewarding as reaching your destination; it tests one’s patience and dedication. For those seeking to embark on this adventure or simply gain more insight into marine craftsmanship, Sven’s wisdom is invaluable.After securely attaching the first portion of the flange, Sven allows ample time for it to dry before moving forward with additional steps. This patience and precision are key aspects of his successful boatbuilding methods.Step 4: Finishing Touches
Once the flange is fully dried, Sven removes the clamps carefully, ensuring no damage occurs during this process. He then moves on to attaching four more pieces onto these main frames, completing two pairs of flanges for the bulkhead hatches.The Final Touches
While two flanges form the primary support structure around the hatches, Sven mentions there are two additional pieces required at each end to ensure comprehensive protection. This attention to detail highlights his commitment to producing a durable and reliable design. “Sailing is about finding your path, whether it’s across an ocean or within yourself.” – Sven Yrvind In conclusion, making flanges around bulkhead hatches may seem complex at first glance, but by following Sven Yrvind’s meticulous process, enthusiasts can achieve professional-level results. Remember that the journey of boatbuilding is as rewarding as reaching your destination; it tests one’s patience and dedication. For those seeking to embark on this adventure or simply gain more insight into marine craftsmanship, Sven’s wisdom is invaluable.Sven proceeds to apply glue along one edge of the flange, ensuring a secure bond when clamped into place. He emphasizes that this stage is crucial for maintaining the structural integrity of the flange, which in turn safeguards the living area beneath the canvas when hatches are open.Step 3: Allowing Time to Dry
After securely attaching the first portion of the flange, Sven allows ample time for it to dry before moving forward with additional steps. This patience and precision are key aspects of his successful boatbuilding methods.Step 4: Finishing Touches
Once the flange is fully dried, Sven removes the clamps carefully, ensuring no damage occurs during this process. He then moves on to attaching four more pieces onto these main frames, completing two pairs of flanges for the bulkhead hatches.The Final Touches
While two flanges form the primary support structure around the hatches, Sven mentions there are two additional pieces required at each end to ensure comprehensive protection. This attention to detail highlights his commitment to producing a durable and reliable design. “Sailing is about finding your path, whether it’s across an ocean or within yourself.” – Sven Yrvind In conclusion, making flanges around bulkhead hatches may seem complex at first glance, but by following Sven Yrvind’s meticulous process, enthusiasts can achieve professional-level results. Remember that the journey of boatbuilding is as rewarding as reaching your destination; it tests one’s patience and dedication. For those seeking to embark on this adventure or simply gain more insight into marine craftsmanship, Sven’s wisdom is invaluable.Sven begins by explaining that working on flanges vertically and horizontally is significantly easier than doing so in a flat position. To simplify the process further, he divides the task into two or three steps as suggested by fellow expert “for for.” This approach not only makes it more manageable but also allows for greater precision in crafting each component.Step 2: Applying Glue and Securing
Sven proceeds to apply glue along one edge of the flange, ensuring a secure bond when clamped into place. He emphasizes that this stage is crucial for maintaining the structural integrity of the flange, which in turn safeguards the living area beneath the canvas when hatches are open.Step 3: Allowing Time to Dry
After securely attaching the first portion of the flange, Sven allows ample time for it to dry before moving forward with additional steps. This patience and precision are key aspects of his successful boatbuilding methods.Step 4: Finishing Touches
Once the flange is fully dried, Sven removes the clamps carefully, ensuring no damage occurs during this process. He then moves on to attaching four more pieces onto these main frames, completing two pairs of flanges for the bulkhead hatches.The Final Touches
While two flanges form the primary support structure around the hatches, Sven mentions there are two additional pieces required at each end to ensure comprehensive protection. This attention to detail highlights his commitment to producing a durable and reliable design. “Sailing is about finding your path, whether it’s across an ocean or within yourself.” – Sven Yrvind In conclusion, making flanges around bulkhead hatches may seem complex at first glance, but by following Sven Yrvind’s meticulous process, enthusiasts can achieve professional-level results. Remember that the journey of boatbuilding is as rewarding as reaching your destination; it tests one’s patience and dedication. For those seeking to embark on this adventure or simply gain more insight into marine craftsmanship, Sven’s wisdom is invaluable.Sven Yrvind, a renowned yacht designer and sailor, shares valuable insights on creating flanges around bulkhead hatches for canvas protection in this enlightening video. By following his expert guidance, boat enthusiasts can ensure their living areas remain secure while allowing unhindered access through the hatches.Step 1: Starting with the Flange
Sven begins by explaining that working on flanges vertically and horizontally is significantly easier than doing so in a flat position. To simplify the process further, he divides the task into two or three steps as suggested by fellow expert “for for.” This approach not only makes it more manageable but also allows for greater precision in crafting each component.Step 2: Applying Glue and Securing
Sven proceeds to apply glue along one edge of the flange, ensuring a secure bond when clamped into place. He emphasizes that this stage is crucial for maintaining the structural integrity of the flange, which in turn safeguards the living area beneath the canvas when hatches are open.Step 3: Allowing Time to Dry
After securely attaching the first portion of the flange, Sven allows ample time for it to dry before moving forward with additional steps. This patience and precision are key aspects of his successful boatbuilding methods.Step 4: Finishing Touches
Once the flange is fully dried, Sven removes the clamps carefully, ensuring no damage occurs during this process. He then moves on to attaching four more pieces onto these main frames, completing two pairs of flanges for the bulkhead hatches.The Final Touches
While two flanges form the primary support structure around the hatches, Sven mentions there are two additional pieces required at each end to ensure comprehensive protection. This attention to detail highlights his commitment to producing a durable and reliable design. “Sailing is about finding your path, whether it’s across an ocean or within yourself.” – Sven Yrvind In conclusion, making flanges around bulkhead hatches may seem complex at first glance, but by following Sven Yrvind’s meticulous process, enthusiasts can achieve professional-level results. Remember that the journey of boatbuilding is as rewarding as reaching your destination; it tests one’s patience and dedication. For those seeking to embark on this adventure or simply gain more insight into marine craftsmanship, Sven’s wisdom is invaluable.Making Flanges Around Bulkhead Hatches for Canvas
Sven Yrvind, a renowned yacht designer and sailor, shares valuable insights on creating flanges around bulkhead hatches for canvas protection in this enlightening video. By following his expert guidance, boat enthusiasts can ensure their living areas remain secure while allowing unhindered access through the hatches.Step 1: Starting with the Flange
Sven begins by explaining that working on flanges vertically and horizontally is significantly easier than doing so in a flat position. To simplify the process further, he divides the task into two or three steps as suggested by fellow expert “for for.” This approach not only makes it more manageable but also allows for greater precision in crafting each component.Step 2: Applying Glue and Securing
Sven proceeds to apply glue along one edge of the flange, ensuring a secure bond when clamped into place. He emphasizes that this stage is crucial for maintaining the structural integrity of the flange, which in turn safeguards the living area beneath the canvas when hatches are open.Step 3: Allowing Time to Dry
After securely attaching the first portion of the flange, Sven allows ample time for it to dry before moving forward with additional steps. This patience and precision are key aspects of his successful boatbuilding methods.Step 4: Finishing Touches
Once the flange is fully dried, Sven removes the clamps carefully, ensuring no damage occurs during this process. He then moves on to attaching four more pieces onto these main frames, completing two pairs of flanges for the bulkhead hatches.The Final Touches
While two flanges form the primary support structure around the hatches, Sven mentions there are two additional pieces required at each end to ensure comprehensive protection. This attention to detail highlights his commitment to producing a durable and reliable design. “Sailing is about finding your path, whether it’s across an ocean or within yourself.” – Sven Yrvind In conclusion, making flanges around bulkhead hatches may seem complex at first glance, but by following Sven Yrvind’s meticulous process, enthusiasts can achieve professional-level results. Remember that the journey of boatbuilding is as rewarding as reaching your destination; it tests one’s patience and dedication. For those seeking to embark on this adventure or simply gain more insight into marine craftsmanship, Sven’s wisdom is invaluable.Once the flange is fully dried, Sven removes the clamps carefully, ensuring no damage occurs during this process. He then moves on to attaching four more pieces onto these main frames, completing two pairs of flanges for the bulkhead hatches.The Final Touches
While two flanges form the primary support structure around the hatches, Sven mentions there are two additional pieces required at each end to ensure comprehensive protection. This attention to detail highlights his commitment to producing a durable and reliable design. “Sailing is about finding your path, whether it’s across an ocean or within yourself.” – Sven Yrvind In conclusion, making flanges around bulkhead hatches may seem complex at first glance, but by following Sven Yrvind’s meticulous process, enthusiasts can achieve professional-level results. Remember that the journey of boatbuilding is as rewarding as reaching your destination; it tests one’s patience and dedication. For those seeking to embark on this adventure or simply gain more insight into marine craftsmanship, Sven’s wisdom is invaluable.After securely attaching the first portion of the flange, Sven allows ample time for it to dry before moving forward with additional steps. This patience and precision are key aspects of his successful boatbuilding methods.Step 4: Finishing Touches
Once the flange is fully dried, Sven removes the clamps carefully, ensuring no damage occurs during this process. He then moves on to attaching four more pieces onto these main frames, completing two pairs of flanges for the bulkhead hatches.The Final Touches
While two flanges form the primary support structure around the hatches, Sven mentions there are two additional pieces required at each end to ensure comprehensive protection. This attention to detail highlights his commitment to producing a durable and reliable design. “Sailing is about finding your path, whether it’s across an ocean or within yourself.” – Sven Yrvind In conclusion, making flanges around bulkhead hatches may seem complex at first glance, but by following Sven Yrvind’s meticulous process, enthusiasts can achieve professional-level results. Remember that the journey of boatbuilding is as rewarding as reaching your destination; it tests one’s patience and dedication. For those seeking to embark on this adventure or simply gain more insight into marine craftsmanship, Sven’s wisdom is invaluable.Sven proceeds to apply glue along one edge of the flange, ensuring a secure bond when clamped into place. He emphasizes that this stage is crucial for maintaining the structural integrity of the flange, which in turn safeguards the living area beneath the canvas when hatches are open.Step 3: Allowing Time to Dry
After securely attaching the first portion of the flange, Sven allows ample time for it to dry before moving forward with additional steps. This patience and precision are key aspects of his successful boatbuilding methods.Step 4: Finishing Touches
Once the flange is fully dried, Sven removes the clamps carefully, ensuring no damage occurs during this process. He then moves on to attaching four more pieces onto these main frames, completing two pairs of flanges for the bulkhead hatches.The Final Touches
While two flanges form the primary support structure around the hatches, Sven mentions there are two additional pieces required at each end to ensure comprehensive protection. This attention to detail highlights his commitment to producing a durable and reliable design. “Sailing is about finding your path, whether it’s across an ocean or within yourself.” – Sven Yrvind In conclusion, making flanges around bulkhead hatches may seem complex at first glance, but by following Sven Yrvind’s meticulous process, enthusiasts can achieve professional-level results. Remember that the journey of boatbuilding is as rewarding as reaching your destination; it tests one’s patience and dedication. For those seeking to embark on this adventure or simply gain more insight into marine craftsmanship, Sven’s wisdom is invaluable.Sven begins by explaining that working on flanges vertically and horizontally is significantly easier than doing so in a flat position. To simplify the process further, he divides the task into two or three steps as suggested by fellow expert “for for.” This approach not only makes it more manageable but also allows for greater precision in crafting each component.Step 2: Applying Glue and Securing
Sven proceeds to apply glue along one edge of the flange, ensuring a secure bond when clamped into place. He emphasizes that this stage is crucial for maintaining the structural integrity of the flange, which in turn safeguards the living area beneath the canvas when hatches are open.Step 3: Allowing Time to Dry
After securely attaching the first portion of the flange, Sven allows ample time for it to dry before moving forward with additional steps. This patience and precision are key aspects of his successful boatbuilding methods.Step 4: Finishing Touches
Once the flange is fully dried, Sven removes the clamps carefully, ensuring no damage occurs during this process. He then moves on to attaching four more pieces onto these main frames, completing two pairs of flanges for the bulkhead hatches.The Final Touches
While two flanges form the primary support structure around the hatches, Sven mentions there are two additional pieces required at each end to ensure comprehensive protection. This attention to detail highlights his commitment to producing a durable and reliable design. “Sailing is about finding your path, whether it’s across an ocean or within yourself.” – Sven Yrvind In conclusion, making flanges around bulkhead hatches may seem complex at first glance, but by following Sven Yrvind’s meticulous process, enthusiasts can achieve professional-level results. Remember that the journey of boatbuilding is as rewarding as reaching your destination; it tests one’s patience and dedication. For those seeking to embark on this adventure or simply gain more insight into marine craftsmanship, Sven’s wisdom is invaluable.Sven Yrvind, a renowned yacht designer and sailor, shares valuable insights on creating flanges around bulkhead hatches for canvas protection in this enlightening video. By following his expert guidance, boat enthusiasts can ensure their living areas remain secure while allowing unhindered access through the hatches.Step 1: Starting with the Flange
Sven begins by explaining that working on flanges vertically and horizontally is significantly easier than doing so in a flat position. To simplify the process further, he divides the task into two or three steps as suggested by fellow expert “for for.” This approach not only makes it more manageable but also allows for greater precision in crafting each component.Step 2: Applying Glue and Securing
Sven proceeds to apply glue along one edge of the flange, ensuring a secure bond when clamped into place. He emphasizes that this stage is crucial for maintaining the structural integrity of the flange, which in turn safeguards the living area beneath the canvas when hatches are open.Step 3: Allowing Time to Dry
After securely attaching the first portion of the flange, Sven allows ample time for it to dry before moving forward with additional steps. This patience and precision are key aspects of his successful boatbuilding methods.Step 4: Finishing Touches
Once the flange is fully dried, Sven removes the clamps carefully, ensuring no damage occurs during this process. He then moves on to attaching four more pieces onto these main frames, completing two pairs of flanges for the bulkhead hatches.The Final Touches
While two flanges form the primary support structure around the hatches, Sven mentions there are two additional pieces required at each end to ensure comprehensive protection. This attention to detail highlights his commitment to producing a durable and reliable design. “Sailing is about finding your path, whether it’s across an ocean or within yourself.” – Sven Yrvind In conclusion, making flanges around bulkhead hatches may seem complex at first glance, but by following Sven Yrvind’s meticulous process, enthusiasts can achieve professional-level results. Remember that the journey of boatbuilding is as rewarding as reaching your destination; it tests one’s patience and dedication. For those seeking to embark on this adventure or simply gain more insight into marine craftsmanship, Sven’s wisdom is invaluable.Making Flanges Around Bulkhead Hatches for Canvas
Sven Yrvind, a renowned yacht designer and sailor, shares valuable insights on creating flanges around bulkhead hatches for canvas protection in this enlightening video. By following his expert guidance, boat enthusiasts can ensure their living areas remain secure while allowing unhindered access through the hatches.Step 1: Starting with the Flange
Sven begins by explaining that working on flanges vertically and horizontally is significantly easier than doing so in a flat position. To simplify the process further, he divides the task into two or three steps as suggested by fellow expert “for for.” This approach not only makes it more manageable but also allows for greater precision in crafting each component.Step 2: Applying Glue and Securing
Sven proceeds to apply glue along one edge of the flange, ensuring a secure bond when clamped into place. He emphasizes that this stage is crucial for maintaining the structural integrity of the flange, which in turn safeguards the living area beneath the canvas when hatches are open.Step 3: Allowing Time to Dry
After securely attaching the first portion of the flange, Sven allows ample time for it to dry before moving forward with additional steps. This patience and precision are key aspects of his successful boatbuilding methods.Step 4: Finishing Touches
Once the flange is fully dried, Sven removes the clamps carefully, ensuring no damage occurs during this process. He then moves on to attaching four more pieces onto these main frames, completing two pairs of flanges for the bulkhead hatches.The Final Touches
While two flanges form the primary support structure around the hatches, Sven mentions there are two additional pieces required at each end to ensure comprehensive protection. This attention to detail highlights his commitment to producing a durable and reliable design. “Sailing is about finding your path, whether it’s across an ocean or within yourself.” – Sven Yrvind In conclusion, making flanges around bulkhead hatches may seem complex at first glance, but by following Sven Yrvind’s meticulous process, enthusiasts can achieve professional-level results. Remember that the journey of boatbuilding is as rewarding as reaching your destination; it tests one’s patience and dedication. For those seeking to embark on this adventure or simply gain more insight into marine craftsmanship, Sven’s wisdom is invaluable.After securely attaching the first portion of the flange, Sven allows ample time for it to dry before moving forward with additional steps. This patience and precision are key aspects of his successful boatbuilding methods.Step 4: Finishing Touches
Once the flange is fully dried, Sven removes the clamps carefully, ensuring no damage occurs during this process. He then moves on to attaching four more pieces onto these main frames, completing two pairs of flanges for the bulkhead hatches.The Final Touches
While two flanges form the primary support structure around the hatches, Sven mentions there are two additional pieces required at each end to ensure comprehensive protection. This attention to detail highlights his commitment to producing a durable and reliable design. “Sailing is about finding your path, whether it’s across an ocean or within yourself.” – Sven Yrvind In conclusion, making flanges around bulkhead hatches may seem complex at first glance, but by following Sven Yrvind’s meticulous process, enthusiasts can achieve professional-level results. Remember that the journey of boatbuilding is as rewarding as reaching your destination; it tests one’s patience and dedication. For those seeking to embark on this adventure or simply gain more insight into marine craftsmanship, Sven’s wisdom is invaluable.Making Flanges Around Bulkhead Hatches for Canvas
Sven Yrvind, a renowned yacht designer and sailor, shares valuable insights on creating flanges around bulkhead hatches for canvas protection in this enlightening video. By following his expert guidance, boat enthusiasts can ensure their living areas remain secure while allowing unhindered access through the hatches.Step 1: Starting with the Flange
Sven begins by explaining that working on flanges vertically and horizontally is significantly easier than doing so in a flat position. To simplify the process further, he divides the task into two or three steps as suggested by fellow expert “for for.” This approach not only makes it more manageable but also allows for greater precision in crafting each component.Step 2: Applying Glue and Securing
Sven proceeds to apply glue along one edge of the flange, ensuring a secure bond when clamped into place. He emphasizes that this stage is crucial for maintaining the structural integrity of the flange, which in turn safeguards the living area beneath the canvas when hatches are open.Step 3: Allowing Time to Dry
After securely attaching the first portion of the flange, Sven allows ample time for it to dry before moving forward with additional steps. This patience and precision are key aspects of his successful boatbuilding methods.Step 4: Finishing Touches
Once the flange is fully dried, Sven removes the clamps carefully, ensuring no damage occurs during this process. He then moves on to attaching four more pieces onto these main frames, completing two pairs of flanges for the bulkhead hatches.The Final Touches
While two flanges form the primary support structure around the hatches, Sven mentions there are two additional pieces required at each end to ensure comprehensive protection. This attention to detail highlights his commitment to producing a durable and reliable design. “Sailing is about finding your path, whether it’s across an ocean or within yourself.” – Sven Yrvind In conclusion, making flanges around bulkhead hatches may seem complex at first glance, but by following Sven Yrvind’s meticulous process, enthusiasts can achieve professional-level results. Remember that the journey of boatbuilding is as rewarding as reaching your destination; it tests one’s patience and dedication. For those seeking to embark on this adventure or simply gain more insight into marine craftsmanship, Sven’s wisdom is invaluable.After securely attaching the first portion of the flange, Sven allows ample time for it to dry before moving forward with additional steps. This patience and precision are key aspects of his successful boatbuilding methods.Step 4: Finishing Touches
Once the flange is fully dried, Sven removes the clamps carefully, ensuring no damage occurs during this process. He then moves on to attaching four more pieces onto these main frames, completing two pairs of flanges for the bulkhead hatches.The Final Touches
While two flanges form the primary support structure around the hatches, Sven mentions there are two additional pieces required at each end to ensure comprehensive protection. This attention to detail highlights his commitment to producing a durable and reliable design. “Sailing is about finding your path, whether it’s across an ocean or within yourself.” – Sven Yrvind In conclusion, making flanges around bulkhead hatches may seem complex at first glance, but by following Sven Yrvind’s meticulous process, enthusiasts can achieve professional-level results. Remember that the journey of boatbuilding is as rewarding as reaching your destination; it tests one’s patience and dedication. For those seeking to embark on this adventure or simply gain more insight into marine craftsmanship, Sven’s wisdom is invaluable.Sven Yrvind, a renowned yacht designer and sailor, shares valuable insights on creating flanges around bulkhead hatches for canvas protection in this enlightening video. By following his expert guidance, boat enthusiasts can ensure their living areas remain secure while allowing unhindered access through the hatches.Step 1: Starting with the Flange
Sven begins by explaining that working on flanges vertically and horizontally is significantly easier than doing so in a flat position. To simplify the process further, he divides the task into two or three steps as suggested by fellow expert “for for.” This approach not only makes it more manageable but also allows for greater precision in crafting each component.Step 2: Applying Glue and Securing
Sven proceeds to apply glue along one edge of the flange, ensuring a secure bond when clamped into place. He emphasizes that this stage is crucial for maintaining the structural integrity of the flange, which in turn safeguards the living area beneath the canvas when hatches are open.Step 3: Allowing Time to Dry
After securely attaching the first portion of the flange, Sven allows ample time for it to dry before moving forward with additional steps. This patience and precision are key aspects of his successful boatbuilding methods.Step 4: Finishing Touches
Once the flange is fully dried, Sven removes the clamps carefully, ensuring no damage occurs during this process. He then moves on to attaching four more pieces onto these main frames, completing two pairs of flanges for the bulkhead hatches.The Final Touches
While two flanges form the primary support structure around the hatches, Sven mentions there are two additional pieces required at each end to ensure comprehensive protection. This attention to detail highlights his commitment to producing a durable and reliable design. “Sailing is about finding your path, whether it’s across an ocean or within yourself.” – Sven Yrvind In conclusion, making flanges around bulkhead hatches may seem complex at first glance, but by following Sven Yrvind’s meticulous process, enthusiasts can achieve professional-level results. Remember that the journey of boatbuilding is as rewarding as reaching your destination; it tests one’s patience and dedication. For those seeking to embark on this adventure or simply gain more insight into marine craftsmanship, Sven’s wisdom is invaluable.Making Flanges Around Bulkhead Hatches for Canvas
Sven Yrvind, a renowned yacht designer and sailor, shares valuable insights on creating flanges around bulkhead hatches for canvas protection in this enlightening video. By following his expert guidance, boat enthusiasts can ensure their living areas remain secure while allowing unhindered access through the hatches.Step 1: Starting with the Flange
Sven begins by explaining that working on flanges vertically and horizontally is significantly easier than doing so in a flat position. To simplify the process further, he divides the task into two or three steps as suggested by fellow expert “for for.” This approach not only makes it more manageable but also allows for greater precision in crafting each component.Step 2: Applying Glue and Securing
Sven proceeds to apply glue along one edge of the flange, ensuring a secure bond when clamped into place. He emphasizes that this stage is crucial for maintaining the structural integrity of the flange, which in turn safeguards the living area beneath the canvas when hatches are open.Step 3: Allowing Time to Dry
After securely attaching the first portion of the flange, Sven allows ample time for it to dry before moving forward with additional steps. This patience and precision are key aspects of his successful boatbuilding methods.Step 4: Finishing Touches
Once the flange is fully dried, Sven removes the clamps carefully, ensuring no damage occurs during this process. He then moves on to attaching four more pieces onto these main frames, completing two pairs of flanges for the bulkhead hatches.The Final Touches
While two flanges form the primary support structure around the hatches, Sven mentions there are two additional pieces required at each end to ensure comprehensive protection. This attention to detail highlights his commitment to producing a durable and reliable design. “Sailing is about finding your path, whether it’s across an ocean or within yourself.” – Sven Yrvind In conclusion, making flanges around bulkhead hatches may seem complex at first glance, but by following Sven Yrvind’s meticulous process, enthusiasts can achieve professional-level results. Remember that the journey of boatbuilding is as rewarding as reaching your destination; it tests one’s patience and dedication. For those seeking to embark on this adventure or simply gain more insight into marine craftsmanship, Sven’s wisdom is invaluable.Sven proceeds to apply glue along one edge of the flange, ensuring a secure bond when clamped into place. He emphasizes that this stage is crucial for maintaining the structural integrity of the flange, which in turn safeguards the living area beneath the canvas when hatches are open.Step 3: Allowing Time to Dry
After securely attaching the first portion of the flange, Sven allows ample time for it to dry before moving forward with additional steps. This patience and precision are key aspects of his successful boatbuilding methods.Step 4: Finishing Touches
Once the flange is fully dried, Sven removes the clamps carefully, ensuring no damage occurs during this process. He then moves on to attaching four more pieces onto these main frames, completing two pairs of flanges for the bulkhead hatches.The Final Touches
While two flanges form the primary support structure around the hatches, Sven mentions there are two additional pieces required at each end to ensure comprehensive protection. This attention to detail highlights his commitment to producing a durable and reliable design. “Sailing is about finding your path, whether it’s across an ocean or within yourself.” – Sven Yrvind In conclusion, making flanges around bulkhead hatches may seem complex at first glance, but by following Sven Yrvind’s meticulous process, enthusiasts can achieve professional-level results. Remember that the journey of boatbuilding is as rewarding as reaching your destination; it tests one’s patience and dedication. For those seeking to embark on this adventure or simply gain more insight into marine craftsmanship, Sven’s wisdom is invaluable.Sven Yrvind, a renowned yacht designer and sailor, shares valuable insights on creating flanges around bulkhead hatches for canvas protection in this enlightening video. By following his expert guidance, boat enthusiasts can ensure their living areas remain secure while allowing unhindered access through the hatches.Step 1: Starting with the Flange
Sven begins by explaining that working on flanges vertically and horizontally is significantly easier than doing so in a flat position. To simplify the process further, he divides the task into two or three steps as suggested by fellow expert “for for.” This approach not only makes it more manageable but also allows for greater precision in crafting each component.Step 2: Applying Glue and Securing
Sven proceeds to apply glue along one edge of the flange, ensuring a secure bond when clamped into place. He emphasizes that this stage is crucial for maintaining the structural integrity of the flange, which in turn safeguards the living area beneath the canvas when hatches are open.Step 3: Allowing Time to Dry
After securely attaching the first portion of the flange, Sven allows ample time for it to dry before moving forward with additional steps. This patience and precision are key aspects of his successful boatbuilding methods.Step 4: Finishing Touches
Once the flange is fully dried, Sven removes the clamps carefully, ensuring no damage occurs during this process. He then moves on to attaching four more pieces onto these main frames, completing two pairs of flanges for the bulkhead hatches.The Final Touches
While two flanges form the primary support structure around the hatches, Sven mentions there are two additional pieces required at each end to ensure comprehensive protection. This attention to detail highlights his commitment to producing a durable and reliable design. “Sailing is about finding your path, whether it’s across an ocean or within yourself.” – Sven Yrvind In conclusion, making flanges around bulkhead hatches may seem complex at first glance, but by following Sven Yrvind’s meticulous process, enthusiasts can achieve professional-level results. Remember that the journey of boatbuilding is as rewarding as reaching your destination; it tests one’s patience and dedication. For those seeking to embark on this adventure or simply gain more insight into marine craftsmanship, Sven’s wisdom is invaluable.Making Flanges Around Bulkhead Hatches for Canvas
Sven Yrvind, a renowned yacht designer and sailor, shares valuable insights on creating flanges around bulkhead hatches for canvas protection in this enlightening video. By following his expert guidance, boat enthusiasts can ensure their living areas remain secure while allowing unhindered access through the hatches.Step 1: Starting with the Flange
Sven begins by explaining that working on flanges vertically and horizontally is significantly easier than doing so in a flat position. To simplify the process further, he divides the task into two or three steps as suggested by fellow expert “for for.” This approach not only makes it more manageable but also allows for greater precision in crafting each component.Step 2: Applying Glue and Securing
Sven proceeds to apply glue along one edge of the flange, ensuring a secure bond when clamped into place. He emphasizes that this stage is crucial for maintaining the structural integrity of the flange, which in turn safeguards the living area beneath the canvas when hatches are open.Step 3: Allowing Time to Dry
After securely attaching the first portion of the flange, Sven allows ample time for it to dry before moving forward with additional steps. This patience and precision are key aspects of his successful boatbuilding methods.Step 4: Finishing Touches
Once the flange is fully dried, Sven removes the clamps carefully, ensuring no damage occurs during this process. He then moves on to attaching four more pieces onto these main frames, completing two pairs of flanges for the bulkhead hatches.The Final Touches
While two flanges form the primary support structure around the hatches, Sven mentions there are two additional pieces required at each end to ensure comprehensive protection. This attention to detail highlights his commitment to producing a durable and reliable design. “Sailing is about finding your path, whether it’s across an ocean or within yourself.” – Sven Yrvind In conclusion, making flanges around bulkhead hatches may seem complex at first glance, but by following Sven Yrvind’s meticulous process, enthusiasts can achieve professional-level results. Remember that the journey of boatbuilding is as rewarding as reaching your destination; it tests one’s patience and dedication. For those seeking to embark on this adventure or simply gain more insight into marine craftsmanship, Sven’s wisdom is invaluable.Sven begins by explaining that working on flanges vertically and horizontally is significantly easier than doing so in a flat position. To simplify the process further, he divides the task into two or three steps as suggested by fellow expert “for for.” This approach not only makes it more manageable but also allows for greater precision in crafting each component.Step 2: Applying Glue and Securing
Sven proceeds to apply glue along one edge of the flange, ensuring a secure bond when clamped into place. He emphasizes that this stage is crucial for maintaining the structural integrity of the flange, which in turn safeguards the living area beneath the canvas when hatches are open.Step 3: Allowing Time to Dry
After securely attaching the first portion of the flange, Sven allows ample time for it to dry before moving forward with additional steps. This patience and precision are key aspects of his successful boatbuilding methods.Step 4: Finishing Touches
Once the flange is fully dried, Sven removes the clamps carefully, ensuring no damage occurs during this process. He then moves on to attaching four more pieces onto these main frames, completing two pairs of flanges for the bulkhead hatches.The Final Touches
While two flanges form the primary support structure around the hatches, Sven mentions there are two additional pieces required at each end to ensure comprehensive protection. This attention to detail highlights his commitment to producing a durable and reliable design. “Sailing is about finding your path, whether it’s across an ocean or within yourself.” – Sven Yrvind In conclusion, making flanges around bulkhead hatches may seem complex at first glance, but by following Sven Yrvind’s meticulous process, enthusiasts can achieve professional-level results. Remember that the journey of boatbuilding is as rewarding as reaching your destination; it tests one’s patience and dedication. For those seeking to embark on this adventure or simply gain more insight into marine craftsmanship, Sven’s wisdom is invaluable.Sven Yrvind, a renowned yacht designer and sailor, shares valuable insights on creating flanges around bulkhead hatches for canvas protection in this enlightening video. By following his expert guidance, boat enthusiasts can ensure their living areas remain secure while allowing unhindered access through the hatches.Step 1: Starting with the Flange
Sven begins by explaining that working on flanges vertically and horizontally is significantly easier than doing so in a flat position. To simplify the process further, he divides the task into two or three steps as suggested by fellow expert “for for.” This approach not only makes it more manageable but also allows for greater precision in crafting each component.Step 2: Applying Glue and Securing
Sven proceeds to apply glue along one edge of the flange, ensuring a secure bond when clamped into place. He emphasizes that this stage is crucial for maintaining the structural integrity of the flange, which in turn safeguards the living area beneath the canvas when hatches are open.Step 3: Allowing Time to Dry
After securely attaching the first portion of the flange, Sven allows ample time for it to dry before moving forward with additional steps. This patience and precision are key aspects of his successful boatbuilding methods.Step 4: Finishing Touches
Once the flange is fully dried, Sven removes the clamps carefully, ensuring no damage occurs during this process. He then moves on to attaching four more pieces onto these main frames, completing two pairs of flanges for the bulkhead hatches.The Final Touches
While two flanges form the primary support structure around the hatches, Sven mentions there are two additional pieces required at each end to ensure comprehensive protection. This attention to detail highlights his commitment to producing a durable and reliable design. “Sailing is about finding your path, whether it’s across an ocean or within yourself.” – Sven Yrvind In conclusion, making flanges around bulkhead hatches may seem complex at first glance, but by following Sven Yrvind’s meticulous process, enthusiasts can achieve professional-level results. Remember that the journey of boatbuilding is as rewarding as reaching your destination; it tests one’s patience and dedication. For those seeking to embark on this adventure or simply gain more insight into marine craftsmanship, Sven’s wisdom is invaluable.Making Flanges Around Bulkhead Hatches for Canvas
Sven Yrvind, a renowned yacht designer and sailor, shares valuable insights on creating flanges around bulkhead hatches for canvas protection in this enlightening video. By following his expert guidance, boat enthusiasts can ensure their living areas remain secure while allowing unhindered access through the hatches.Step 1: Starting with the Flange
Sven begins by explaining that working on flanges vertically and horizontally is significantly easier than doing so in a flat position. To simplify the process further, he divides the task into two or three steps as suggested by fellow expert “for for.” This approach not only makes it more manageable but also allows for greater precision in crafting each component.Step 2: Applying Glue and Securing
Sven proceeds to apply glue along one edge of the flange, ensuring a secure bond when clamped into place. He emphasizes that this stage is crucial for maintaining the structural integrity of the flange, which in turn safeguards the living area beneath the canvas when hatches are open.Step 3: Allowing Time to Dry
After securely attaching the first portion of the flange, Sven allows ample time for it to dry before moving forward with additional steps. This patience and precision are key aspects of his successful boatbuilding methods.Step 4: Finishing Touches
Once the flange is fully dried, Sven removes the clamps carefully, ensuring no damage occurs during this process. He then moves on to attaching four more pieces onto these main frames, completing two pairs of flanges for the bulkhead hatches.The Final Touches
While two flanges form the primary support structure around the hatches, Sven mentions there are two additional pieces required at each end to ensure comprehensive protection. This attention to detail highlights his commitment to producing a durable and reliable design. “Sailing is about finding your path, whether it’s across an ocean or within yourself.” – Sven Yrvind In conclusion, making flanges around bulkhead hatches may seem complex at first glance, but by following Sven Yrvind’s meticulous process, enthusiasts can achieve professional-level results. Remember that the journey of boatbuilding is as rewarding as reaching your destination; it tests one’s patience and dedication. For those seeking to embark on this adventure or simply gain more insight into marine craftsmanship, Sven’s wisdom is invaluable.Once the flange is fully dried, Sven removes the clamps carefully, ensuring no damage occurs during this process. He then moves on to attaching four more pieces onto these main frames, completing two pairs of flanges for the bulkhead hatches.The Final Touches
While two flanges form the primary support structure around the hatches, Sven mentions there are two additional pieces required at each end to ensure comprehensive protection. This attention to detail highlights his commitment to producing a durable and reliable design. “Sailing is about finding your path, whether it’s across an ocean or within yourself.” – Sven Yrvind In conclusion, making flanges around bulkhead hatches may seem complex at first glance, but by following Sven Yrvind’s meticulous process, enthusiasts can achieve professional-level results. Remember that the journey of boatbuilding is as rewarding as reaching your destination; it tests one’s patience and dedication. For those seeking to embark on this adventure or simply gain more insight into marine craftsmanship, Sven’s wisdom is invaluable.Sven begins by explaining that working on flanges vertically and horizontally is significantly easier than doing so in a flat position. To simplify the process further, he divides the task into two or three steps as suggested by fellow expert “for for.” This approach not only makes it more manageable but also allows for greater precision in crafting each component.Step 2: Applying Glue and Securing
Sven proceeds to apply glue along one edge of the flange, ensuring a secure bond when clamped into place. He emphasizes that this stage is crucial for maintaining the structural integrity of the flange, which in turn safeguards the living area beneath the canvas when hatches are open.Step 3: Allowing Time to Dry
After securely attaching the first portion of the flange, Sven allows ample time for it to dry before moving forward with additional steps. This patience and precision are key aspects of his successful boatbuilding methods.Step 4: Finishing Touches
Once the flange is fully dried, Sven removes the clamps carefully, ensuring no damage occurs during this process. He then moves on to attaching four more pieces onto these main frames, completing two pairs of flanges for the bulkhead hatches.The Final Touches
While two flanges form the primary support structure around the hatches, Sven mentions there are two additional pieces required at each end to ensure comprehensive protection. This attention to detail highlights his commitment to producing a durable and reliable design. “Sailing is about finding your path, whether it’s across an ocean or within yourself.” – Sven Yrvind In conclusion, making flanges around bulkhead hatches may seem complex at first glance, but by following Sven Yrvind’s meticulous process, enthusiasts can achieve professional-level results. Remember that the journey of boatbuilding is as rewarding as reaching your destination; it tests one’s patience and dedication. For those seeking to embark on this adventure or simply gain more insight into marine craftsmanship, Sven’s wisdom is invaluable.Sven Yrvind, a renowned yacht designer and sailor, shares valuable insights on creating flanges around bulkhead hatches for canvas protection in this enlightening video. By following his expert guidance, boat enthusiasts can ensure their living areas remain secure while allowing unhindered access through the hatches.Step 1: Starting with the Flange
Sven begins by explaining that working on flanges vertically and horizontally is significantly easier than doing so in a flat position. To simplify the process further, he divides the task into two or three steps as suggested by fellow expert “for for.” This approach not only makes it more manageable but also allows for greater precision in crafting each component.Step 2: Applying Glue and Securing
Sven proceeds to apply glue along one edge of the flange, ensuring a secure bond when clamped into place. He emphasizes that this stage is crucial for maintaining the structural integrity of the flange, which in turn safeguards the living area beneath the canvas when hatches are open.Step 3: Allowing Time to Dry
After securely attaching the first portion of the flange, Sven allows ample time for it to dry before moving forward with additional steps. This patience and precision are key aspects of his successful boatbuilding methods.Step 4: Finishing Touches
Once the flange is fully dried, Sven removes the clamps carefully, ensuring no damage occurs during this process. He then moves on to attaching four more pieces onto these main frames, completing two pairs of flanges for the bulkhead hatches.The Final Touches
While two flanges form the primary support structure around the hatches, Sven mentions there are two additional pieces required at each end to ensure comprehensive protection. This attention to detail highlights his commitment to producing a durable and reliable design. “Sailing is about finding your path, whether it’s across an ocean or within yourself.” – Sven Yrvind In conclusion, making flanges around bulkhead hatches may seem complex at first glance, but by following Sven Yrvind’s meticulous process, enthusiasts can achieve professional-level results. Remember that the journey of boatbuilding is as rewarding as reaching your destination; it tests one’s patience and dedication. For those seeking to embark on this adventure or simply gain more insight into marine craftsmanship, Sven’s wisdom is invaluable.Making Flanges Around Bulkhead Hatches for Canvas
Sven Yrvind, a renowned yacht designer and sailor, shares valuable insights on creating flanges around bulkhead hatches for canvas protection in this enlightening video. By following his expert guidance, boat enthusiasts can ensure their living areas remain secure while allowing unhindered access through the hatches.Step 1: Starting with the Flange
Sven begins by explaining that working on flanges vertically and horizontally is significantly easier than doing so in a flat position. To simplify the process further, he divides the task into two or three steps as suggested by fellow expert “for for.” This approach not only makes it more manageable but also allows for greater precision in crafting each component.Step 2: Applying Glue and Securing
Sven proceeds to apply glue along one edge of the flange, ensuring a secure bond when clamped into place. He emphasizes that this stage is crucial for maintaining the structural integrity of the flange, which in turn safeguards the living area beneath the canvas when hatches are open.Step 3: Allowing Time to Dry
After securely attaching the first portion of the flange, Sven allows ample time for it to dry before moving forward with additional steps. This patience and precision are key aspects of his successful boatbuilding methods.Step 4: Finishing Touches
Once the flange is fully dried, Sven removes the clamps carefully, ensuring no damage occurs during this process. He then moves on to attaching four more pieces onto these main frames, completing two pairs of flanges for the bulkhead hatches.The Final Touches
While two flanges form the primary support structure around the hatches, Sven mentions there are two additional pieces required at each end to ensure comprehensive protection. This attention to detail highlights his commitment to producing a durable and reliable design. “Sailing is about finding your path, whether it’s across an ocean or within yourself.” – Sven Yrvind In conclusion, making flanges around bulkhead hatches may seem complex at first glance, but by following Sven Yrvind’s meticulous process, enthusiasts can achieve professional-level results. Remember that the journey of boatbuilding is as rewarding as reaching your destination; it tests one’s patience and dedication. For those seeking to embark on this adventure or simply gain more insight into marine craftsmanship, Sven’s wisdom is invaluable.After securely attaching the first portion of the flange, Sven allows ample time for it to dry before moving forward with additional steps. This patience and precision are key aspects of his successful boatbuilding methods.Step 4: Finishing Touches
Once the flange is fully dried, Sven removes the clamps carefully, ensuring no damage occurs during this process. He then moves on to attaching four more pieces onto these main frames, completing two pairs of flanges for the bulkhead hatches.The Final Touches
While two flanges form the primary support structure around the hatches, Sven mentions there are two additional pieces required at each end to ensure comprehensive protection. This attention to detail highlights his commitment to producing a durable and reliable design. “Sailing is about finding your path, whether it’s across an ocean or within yourself.” – Sven Yrvind In conclusion, making flanges around bulkhead hatches may seem complex at first glance, but by following Sven Yrvind’s meticulous process, enthusiasts can achieve professional-level results. Remember that the journey of boatbuilding is as rewarding as reaching your destination; it tests one’s patience and dedication. For those seeking to embark on this adventure or simply gain more insight into marine craftsmanship, Sven’s wisdom is invaluable.Sven begins by explaining that working on flanges vertically and horizontally is significantly easier than doing so in a flat position. To simplify the process further, he divides the task into two or three steps as suggested by fellow expert “for for.” This approach not only makes it more manageable but also allows for greater precision in crafting each component.Step 2: Applying Glue and Securing
Sven proceeds to apply glue along one edge of the flange, ensuring a secure bond when clamped into place. He emphasizes that this stage is crucial for maintaining the structural integrity of the flange, which in turn safeguards the living area beneath the canvas when hatches are open.Step 3: Allowing Time to Dry
After securely attaching the first portion of the flange, Sven allows ample time for it to dry before moving forward with additional steps. This patience and precision are key aspects of his successful boatbuilding methods.Step 4: Finishing Touches
Once the flange is fully dried, Sven removes the clamps carefully, ensuring no damage occurs during this process. He then moves on to attaching four more pieces onto these main frames, completing two pairs of flanges for the bulkhead hatches.The Final Touches
While two flanges form the primary support structure around the hatches, Sven mentions there are two additional pieces required at each end to ensure comprehensive protection. This attention to detail highlights his commitment to producing a durable and reliable design. “Sailing is about finding your path, whether it’s across an ocean or within yourself.” – Sven Yrvind In conclusion, making flanges around bulkhead hatches may seem complex at first glance, but by following Sven Yrvind’s meticulous process, enthusiasts can achieve professional-level results. Remember that the journey of boatbuilding is as rewarding as reaching your destination; it tests one’s patience and dedication. For those seeking to embark on this adventure or simply gain more insight into marine craftsmanship, Sven’s wisdom is invaluable.Sven Yrvind, a renowned yacht designer and sailor, shares valuable insights on creating flanges around bulkhead hatches for canvas protection in this enlightening video. By following his expert guidance, boat enthusiasts can ensure their living areas remain secure while allowing unhindered access through the hatches.Step 1: Starting with the Flange
Sven begins by explaining that working on flanges vertically and horizontally is significantly easier than doing so in a flat position. To simplify the process further, he divides the task into two or three steps as suggested by fellow expert “for for.” This approach not only makes it more manageable but also allows for greater precision in crafting each component.Step 2: Applying Glue and Securing
Sven proceeds to apply glue along one edge of the flange, ensuring a secure bond when clamped into place. He emphasizes that this stage is crucial for maintaining the structural integrity of the flange, which in turn safeguards the living area beneath the canvas when hatches are open.Step 3: Allowing Time to Dry
After securely attaching the first portion of the flange, Sven allows ample time for it to dry before moving forward with additional steps. This patience and precision are key aspects of his successful boatbuilding methods.Step 4: Finishing Touches
Once the flange is fully dried, Sven removes the clamps carefully, ensuring no damage occurs during this process. He then moves on to attaching four more pieces onto these main frames, completing two pairs of flanges for the bulkhead hatches.The Final Touches
While two flanges form the primary support structure around the hatches, Sven mentions there are two additional pieces required at each end to ensure comprehensive protection. This attention to detail highlights his commitment to producing a durable and reliable design. “Sailing is about finding your path, whether it’s across an ocean or within yourself.” – Sven Yrvind In conclusion, making flanges around bulkhead hatches may seem complex at first glance, but by following Sven Yrvind’s meticulous process, enthusiasts can achieve professional-level results. Remember that the journey of boatbuilding is as rewarding as reaching your destination; it tests one’s patience and dedication. For those seeking to embark on this adventure or simply gain more insight into marine craftsmanship, Sven’s wisdom is invaluable.Making Flanges Around Bulkhead Hatches for Canvas
Sven Yrvind, a renowned yacht designer and sailor, shares valuable insights on creating flanges around bulkhead hatches for canvas protection in this enlightening video. By following his expert guidance, boat enthusiasts can ensure their living areas remain secure while allowing unhindered access through the hatches.Step 1: Starting with the Flange
Sven begins by explaining that working on flanges vertically and horizontally is significantly easier than doing so in a flat position. To simplify the process further, he divides the task into two or three steps as suggested by fellow expert “for for.” This approach not only makes it more manageable but also allows for greater precision in crafting each component.Step 2: Applying Glue and Securing
Sven proceeds to apply glue along one edge of the flange, ensuring a secure bond when clamped into place. He emphasizes that this stage is crucial for maintaining the structural integrity of the flange, which in turn safeguards the living area beneath the canvas when hatches are open.Step 3: Allowing Time to Dry
After securely attaching the first portion of the flange, Sven allows ample time for it to dry before moving forward with additional steps. This patience and precision are key aspects of his successful boatbuilding methods.Step 4: Finishing Touches
Once the flange is fully dried, Sven removes the clamps carefully, ensuring no damage occurs during this process. He then moves on to attaching four more pieces onto these main frames, completing two pairs of flanges for the bulkhead hatches.The Final Touches
While two flanges form the primary support structure around the hatches, Sven mentions there are two additional pieces required at each end to ensure comprehensive protection. This attention to detail highlights his commitment to producing a durable and reliable design. “Sailing is about finding your path, whether it’s across an ocean or within yourself.” – Sven Yrvind In conclusion, making flanges around bulkhead hatches may seem complex at first glance, but by following Sven Yrvind’s meticulous process, enthusiasts can achieve professional-level results. Remember that the journey of boatbuilding is as rewarding as reaching your destination; it tests one’s patience and dedication. For those seeking to embark on this adventure or simply gain more insight into marine craftsmanship, Sven’s wisdom is invaluable.Sven proceeds to apply glue along one edge of the flange, ensuring a secure bond when clamped into place. He emphasizes that this stage is crucial for maintaining the structural integrity of the flange, which in turn safeguards the living area beneath the canvas when hatches are open.Step 3: Allowing Time to Dry
After securely attaching the first portion of the flange, Sven allows ample time for it to dry before moving forward with additional steps. This patience and precision are key aspects of his successful boatbuilding methods.Step 4: Finishing Touches
Once the flange is fully dried, Sven removes the clamps carefully, ensuring no damage occurs during this process. He then moves on to attaching four more pieces onto these main frames, completing two pairs of flanges for the bulkhead hatches.The Final Touches
While two flanges form the primary support structure around the hatches, Sven mentions there are two additional pieces required at each end to ensure comprehensive protection. This attention to detail highlights his commitment to producing a durable and reliable design. “Sailing is about finding your path, whether it’s across an ocean or within yourself.” – Sven Yrvind In conclusion, making flanges around bulkhead hatches may seem complex at first glance, but by following Sven Yrvind’s meticulous process, enthusiasts can achieve professional-level results. Remember that the journey of boatbuilding is as rewarding as reaching your destination; it tests one’s patience and dedication. For those seeking to embark on this adventure or simply gain more insight into marine craftsmanship, Sven’s wisdom is invaluable.Sven begins by explaining that working on flanges vertically and horizontally is significantly easier than doing so in a flat position. To simplify the process further, he divides the task into two or three steps as suggested by fellow expert “for for.” This approach not only makes it more manageable but also allows for greater precision in crafting each component.Step 2: Applying Glue and Securing
Sven proceeds to apply glue along one edge of the flange, ensuring a secure bond when clamped into place. He emphasizes that this stage is crucial for maintaining the structural integrity of the flange, which in turn safeguards the living area beneath the canvas when hatches are open.Step 3: Allowing Time to Dry
After securely attaching the first portion of the flange, Sven allows ample time for it to dry before moving forward with additional steps. This patience and precision are key aspects of his successful boatbuilding methods.Step 4: Finishing Touches
Once the flange is fully dried, Sven removes the clamps carefully, ensuring no damage occurs during this process. He then moves on to attaching four more pieces onto these main frames, completing two pairs of flanges for the bulkhead hatches.The Final Touches
While two flanges form the primary support structure around the hatches, Sven mentions there are two additional pieces required at each end to ensure comprehensive protection. This attention to detail highlights his commitment to producing a durable and reliable design. “Sailing is about finding your path, whether it’s across an ocean or within yourself.” – Sven Yrvind In conclusion, making flanges around bulkhead hatches may seem complex at first glance, but by following Sven Yrvind’s meticulous process, enthusiasts can achieve professional-level results. Remember that the journey of boatbuilding is as rewarding as reaching your destination; it tests one’s patience and dedication. For those seeking to embark on this adventure or simply gain more insight into marine craftsmanship, Sven’s wisdom is invaluable.Sven Yrvind, a renowned yacht designer and sailor, shares valuable insights on creating flanges around bulkhead hatches for canvas protection in this enlightening video. By following his expert guidance, boat enthusiasts can ensure their living areas remain secure while allowing unhindered access through the hatches.Step 1: Starting with the Flange
Sven begins by explaining that working on flanges vertically and horizontally is significantly easier than doing so in a flat position. To simplify the process further, he divides the task into two or three steps as suggested by fellow expert “for for.” This approach not only makes it more manageable but also allows for greater precision in crafting each component.Step 2: Applying Glue and Securing
Sven proceeds to apply glue along one edge of the flange, ensuring a secure bond when clamped into place. He emphasizes that this stage is crucial for maintaining the structural integrity of the flange, which in turn safeguards the living area beneath the canvas when hatches are open.Step 3: Allowing Time to Dry
After securely attaching the first portion of the flange, Sven allows ample time for it to dry before moving forward with additional steps. This patience and precision are key aspects of his successful boatbuilding methods.Step 4: Finishing Touches
Once the flange is fully dried, Sven removes the clamps carefully, ensuring no damage occurs during this process. He then moves on to attaching four more pieces onto these main frames, completing two pairs of flanges for the bulkhead hatches.The Final Touches
While two flanges form the primary support structure around the hatches, Sven mentions there are two additional pieces required at each end to ensure comprehensive protection. This attention to detail highlights his commitment to producing a durable and reliable design. “Sailing is about finding your path, whether it’s across an ocean or within yourself.” – Sven Yrvind In conclusion, making flanges around bulkhead hatches may seem complex at first glance, but by following Sven Yrvind’s meticulous process, enthusiasts can achieve professional-level results. Remember that the journey of boatbuilding is as rewarding as reaching your destination; it tests one’s patience and dedication. For those seeking to embark on this adventure or simply gain more insight into marine craftsmanship, Sven’s wisdom is invaluable.Making Flanges Around Bulkhead Hatches for Canvas
Sven Yrvind, a renowned yacht designer and sailor, shares valuable insights on creating flanges around bulkhead hatches for canvas protection in this enlightening video. By following his expert guidance, boat enthusiasts can ensure their living areas remain secure while allowing unhindered access through the hatches.Step 1: Starting with the Flange
Sven begins by explaining that working on flanges vertically and horizontally is significantly easier than doing so in a flat position. To simplify the process further, he divides the task into two or three steps as suggested by fellow expert “for for.” This approach not only makes it more manageable but also allows for greater precision in crafting each component.Step 2: Applying Glue and Securing
Sven proceeds to apply glue along one edge of the flange, ensuring a secure bond when clamped into place. He emphasizes that this stage is crucial for maintaining the structural integrity of the flange, which in turn safeguards the living area beneath the canvas when hatches are open.Step 3: Allowing Time to Dry
After securely attaching the first portion of the flange, Sven allows ample time for it to dry before moving forward with additional steps. This patience and precision are key aspects of his successful boatbuilding methods.Step 4: Finishing Touches
Once the flange is fully dried, Sven removes the clamps carefully, ensuring no damage occurs during this process. He then moves on to attaching four more pieces onto these main frames, completing two pairs of flanges for the bulkhead hatches.The Final Touches
While two flanges form the primary support structure around the hatches, Sven mentions there are two additional pieces required at each end to ensure comprehensive protection. This attention to detail highlights his commitment to producing a durable and reliable design. “Sailing is about finding your path, whether it’s across an ocean or within yourself.” – Sven Yrvind In conclusion, making flanges around bulkhead hatches may seem complex at first glance, but by following Sven Yrvind’s meticulous process, enthusiasts can achieve professional-level results. Remember that the journey of boatbuilding is as rewarding as reaching your destination; it tests one’s patience and dedication. For those seeking to embark on this adventure or simply gain more insight into marine craftsmanship, Sven’s wisdom is invaluable.Once the flange is fully dried, Sven removes the clamps carefully, ensuring no damage occurs during this process. He then moves on to attaching four more pieces onto these main frames, completing two pairs of flanges for the bulkhead hatches.The Final Touches
While two flanges form the primary support structure around the hatches, Sven mentions there are two additional pieces required at each end to ensure comprehensive protection. This attention to detail highlights his commitment to producing a durable and reliable design. “Sailing is about finding your path, whether it’s across an ocean or within yourself.” – Sven Yrvind In conclusion, making flanges around bulkhead hatches may seem complex at first glance, but by following Sven Yrvind’s meticulous process, enthusiasts can achieve professional-level results. Remember that the journey of boatbuilding is as rewarding as reaching your destination; it tests one’s patience and dedication. For those seeking to embark on this adventure or simply gain more insight into marine craftsmanship, Sven’s wisdom is invaluable.Sven proceeds to apply glue along one edge of the flange, ensuring a secure bond when clamped into place. He emphasizes that this stage is crucial for maintaining the structural integrity of the flange, which in turn safeguards the living area beneath the canvas when hatches are open.Step 3: Allowing Time to Dry
After securely attaching the first portion of the flange, Sven allows ample time for it to dry before moving forward with additional steps. This patience and precision are key aspects of his successful boatbuilding methods.Step 4: Finishing Touches
Once the flange is fully dried, Sven removes the clamps carefully, ensuring no damage occurs during this process. He then moves on to attaching four more pieces onto these main frames, completing two pairs of flanges for the bulkhead hatches.The Final Touches
While two flanges form the primary support structure around the hatches, Sven mentions there are two additional pieces required at each end to ensure comprehensive protection. This attention to detail highlights his commitment to producing a durable and reliable design. “Sailing is about finding your path, whether it’s across an ocean or within yourself.” – Sven Yrvind In conclusion, making flanges around bulkhead hatches may seem complex at first glance, but by following Sven Yrvind’s meticulous process, enthusiasts can achieve professional-level results. Remember that the journey of boatbuilding is as rewarding as reaching your destination; it tests one’s patience and dedication. For those seeking to embark on this adventure or simply gain more insight into marine craftsmanship, Sven’s wisdom is invaluable.Sven begins by explaining that working on flanges vertically and horizontally is significantly easier than doing so in a flat position. To simplify the process further, he divides the task into two or three steps as suggested by fellow expert “for for.” This approach not only makes it more manageable but also allows for greater precision in crafting each component.Step 2: Applying Glue and Securing
Sven proceeds to apply glue along one edge of the flange, ensuring a secure bond when clamped into place. He emphasizes that this stage is crucial for maintaining the structural integrity of the flange, which in turn safeguards the living area beneath the canvas when hatches are open.Step 3: Allowing Time to Dry
After securely attaching the first portion of the flange, Sven allows ample time for it to dry before moving forward with additional steps. This patience and precision are key aspects of his successful boatbuilding methods.Step 4: Finishing Touches
Once the flange is fully dried, Sven removes the clamps carefully, ensuring no damage occurs during this process. He then moves on to attaching four more pieces onto these main frames, completing two pairs of flanges for the bulkhead hatches.The Final Touches
While two flanges form the primary support structure around the hatches, Sven mentions there are two additional pieces required at each end to ensure comprehensive protection. This attention to detail highlights his commitment to producing a durable and reliable design. “Sailing is about finding your path, whether it’s across an ocean or within yourself.” – Sven Yrvind In conclusion, making flanges around bulkhead hatches may seem complex at first glance, but by following Sven Yrvind’s meticulous process, enthusiasts can achieve professional-level results. Remember that the journey of boatbuilding is as rewarding as reaching your destination; it tests one’s patience and dedication. For those seeking to embark on this adventure or simply gain more insight into marine craftsmanship, Sven’s wisdom is invaluable.Sven Yrvind, a renowned yacht designer and sailor, shares valuable insights on creating flanges around bulkhead hatches for canvas protection in this enlightening video. By following his expert guidance, boat enthusiasts can ensure their living areas remain secure while allowing unhindered access through the hatches.Step 1: Starting with the Flange
Sven begins by explaining that working on flanges vertically and horizontally is significantly easier than doing so in a flat position. To simplify the process further, he divides the task into two or three steps as suggested by fellow expert “for for.” This approach not only makes it more manageable but also allows for greater precision in crafting each component.Step 2: Applying Glue and Securing
Sven proceeds to apply glue along one edge of the flange, ensuring a secure bond when clamped into place. He emphasizes that this stage is crucial for maintaining the structural integrity of the flange, which in turn safeguards the living area beneath the canvas when hatches are open.Step 3: Allowing Time to Dry
After securely attaching the first portion of the flange, Sven allows ample time for it to dry before moving forward with additional steps. This patience and precision are key aspects of his successful boatbuilding methods.Step 4: Finishing Touches
Once the flange is fully dried, Sven removes the clamps carefully, ensuring no damage occurs during this process. He then moves on to attaching four more pieces onto these main frames, completing two pairs of flanges for the bulkhead hatches.The Final Touches
While two flanges form the primary support structure around the hatches, Sven mentions there are two additional pieces required at each end to ensure comprehensive protection. This attention to detail highlights his commitment to producing a durable and reliable design. “Sailing is about finding your path, whether it’s across an ocean or within yourself.” – Sven Yrvind In conclusion, making flanges around bulkhead hatches may seem complex at first glance, but by following Sven Yrvind’s meticulous process, enthusiasts can achieve professional-level results. Remember that the journey of boatbuilding is as rewarding as reaching your destination; it tests one’s patience and dedication. For those seeking to embark on this adventure or simply gain more insight into marine craftsmanship, Sven’s wisdom is invaluable.Making Flanges Around Bulkhead Hatches for Canvas
Sven Yrvind, a renowned yacht designer and sailor, shares valuable insights on creating flanges around bulkhead hatches for canvas protection in this enlightening video. By following his expert guidance, boat enthusiasts can ensure their living areas remain secure while allowing unhindered access through the hatches.Step 1: Starting with the Flange
Sven begins by explaining that working on flanges vertically and horizontally is significantly easier than doing so in a flat position. To simplify the process further, he divides the task into two or three steps as suggested by fellow expert “for for.” This approach not only makes it more manageable but also allows for greater precision in crafting each component.Step 2: Applying Glue and Securing
Sven proceeds to apply glue along one edge of the flange, ensuring a secure bond when clamped into place. He emphasizes that this stage is crucial for maintaining the structural integrity of the flange, which in turn safeguards the living area beneath the canvas when hatches are open.Step 3: Allowing Time to Dry
After securely attaching the first portion of the flange, Sven allows ample time for it to dry before moving forward with additional steps. This patience and precision are key aspects of his successful boatbuilding methods.Step 4: Finishing Touches
Once the flange is fully dried, Sven removes the clamps carefully, ensuring no damage occurs during this process. He then moves on to attaching four more pieces onto these main frames, completing two pairs of flanges for the bulkhead hatches.The Final Touches
While two flanges form the primary support structure around the hatches, Sven mentions there are two additional pieces required at each end to ensure comprehensive protection. This attention to detail highlights his commitment to producing a durable and reliable design. “Sailing is about finding your path, whether it’s across an ocean or within yourself.” – Sven Yrvind In conclusion, making flanges around bulkhead hatches may seem complex at first glance, but by following Sven Yrvind’s meticulous process, enthusiasts can achieve professional-level results. Remember that the journey of boatbuilding is as rewarding as reaching your destination; it tests one’s patience and dedication. For those seeking to embark on this adventure or simply gain more insight into marine craftsmanship, Sven’s wisdom is invaluable.After securely attaching the first portion of the flange, Sven allows ample time for it to dry before moving forward with additional steps. This patience and precision are key aspects of his successful boatbuilding methods.Step 4: Finishing Touches
Once the flange is fully dried, Sven removes the clamps carefully, ensuring no damage occurs during this process. He then moves on to attaching four more pieces onto these main frames, completing two pairs of flanges for the bulkhead hatches.The Final Touches
While two flanges form the primary support structure around the hatches, Sven mentions there are two additional pieces required at each end to ensure comprehensive protection. This attention to detail highlights his commitment to producing a durable and reliable design. “Sailing is about finding your path, whether it’s across an ocean or within yourself.” – Sven Yrvind In conclusion, making flanges around bulkhead hatches may seem complex at first glance, but by following Sven Yrvind’s meticulous process, enthusiasts can achieve professional-level results. Remember that the journey of boatbuilding is as rewarding as reaching your destination; it tests one’s patience and dedication. For those seeking to embark on this adventure or simply gain more insight into marine craftsmanship, Sven’s wisdom is invaluable.Sven proceeds to apply glue along one edge of the flange, ensuring a secure bond when clamped into place. He emphasizes that this stage is crucial for maintaining the structural integrity of the flange, which in turn safeguards the living area beneath the canvas when hatches are open.Step 3: Allowing Time to Dry
After securely attaching the first portion of the flange, Sven allows ample time for it to dry before moving forward with additional steps. This patience and precision are key aspects of his successful boatbuilding methods.Step 4: Finishing Touches
Once the flange is fully dried, Sven removes the clamps carefully, ensuring no damage occurs during this process. He then moves on to attaching four more pieces onto these main frames, completing two pairs of flanges for the bulkhead hatches.The Final Touches
While two flanges form the primary support structure around the hatches, Sven mentions there are two additional pieces required at each end to ensure comprehensive protection. This attention to detail highlights his commitment to producing a durable and reliable design. “Sailing is about finding your path, whether it’s across an ocean or within yourself.” – Sven Yrvind In conclusion, making flanges around bulkhead hatches may seem complex at first glance, but by following Sven Yrvind’s meticulous process, enthusiasts can achieve professional-level results. Remember that the journey of boatbuilding is as rewarding as reaching your destination; it tests one’s patience and dedication. For those seeking to embark on this adventure or simply gain more insight into marine craftsmanship, Sven’s wisdom is invaluable.Sven begins by explaining that working on flanges vertically and horizontally is significantly easier than doing so in a flat position. To simplify the process further, he divides the task into two or three steps as suggested by fellow expert “for for.” This approach not only makes it more manageable but also allows for greater precision in crafting each component.Step 2: Applying Glue and Securing
Sven proceeds to apply glue along one edge of the flange, ensuring a secure bond when clamped into place. He emphasizes that this stage is crucial for maintaining the structural integrity of the flange, which in turn safeguards the living area beneath the canvas when hatches are open.Step 3: Allowing Time to Dry
After securely attaching the first portion of the flange, Sven allows ample time for it to dry before moving forward with additional steps. This patience and precision are key aspects of his successful boatbuilding methods.Step 4: Finishing Touches
Once the flange is fully dried, Sven removes the clamps carefully, ensuring no damage occurs during this process. He then moves on to attaching four more pieces onto these main frames, completing two pairs of flanges for the bulkhead hatches.The Final Touches
While two flanges form the primary support structure around the hatches, Sven mentions there are two additional pieces required at each end to ensure comprehensive protection. This attention to detail highlights his commitment to producing a durable and reliable design. “Sailing is about finding your path, whether it’s across an ocean or within yourself.” – Sven Yrvind In conclusion, making flanges around bulkhead hatches may seem complex at first glance, but by following Sven Yrvind’s meticulous process, enthusiasts can achieve professional-level results. Remember that the journey of boatbuilding is as rewarding as reaching your destination; it tests one’s patience and dedication. For those seeking to embark on this adventure or simply gain more insight into marine craftsmanship, Sven’s wisdom is invaluable.Sven Yrvind, a renowned yacht designer and sailor, shares valuable insights on creating flanges around bulkhead hatches for canvas protection in this enlightening video. By following his expert guidance, boat enthusiasts can ensure their living areas remain secure while allowing unhindered access through the hatches.Step 1: Starting with the Flange
Sven begins by explaining that working on flanges vertically and horizontally is significantly easier than doing so in a flat position. To simplify the process further, he divides the task into two or three steps as suggested by fellow expert “for for.” This approach not only makes it more manageable but also allows for greater precision in crafting each component.Step 2: Applying Glue and Securing
Sven proceeds to apply glue along one edge of the flange, ensuring a secure bond when clamped into place. He emphasizes that this stage is crucial for maintaining the structural integrity of the flange, which in turn safeguards the living area beneath the canvas when hatches are open.Step 3: Allowing Time to Dry
After securely attaching the first portion of the flange, Sven allows ample time for it to dry before moving forward with additional steps. This patience and precision are key aspects of his successful boatbuilding methods.Step 4: Finishing Touches
Once the flange is fully dried, Sven removes the clamps carefully, ensuring no damage occurs during this process. He then moves on to attaching four more pieces onto these main frames, completing two pairs of flanges for the bulkhead hatches.The Final Touches
While two flanges form the primary support structure around the hatches, Sven mentions there are two additional pieces required at each end to ensure comprehensive protection. This attention to detail highlights his commitment to producing a durable and reliable design. “Sailing is about finding your path, whether it’s across an ocean or within yourself.” – Sven Yrvind In conclusion, making flanges around bulkhead hatches may seem complex at first glance, but by following Sven Yrvind’s meticulous process, enthusiasts can achieve professional-level results. Remember that the journey of boatbuilding is as rewarding as reaching your destination; it tests one’s patience and dedication. For those seeking to embark on this adventure or simply gain more insight into marine craftsmanship, Sven’s wisdom is invaluable.Making Flanges Around Bulkhead Hatches for Canvas
Sven Yrvind, a renowned yacht designer and sailor, shares valuable insights on creating flanges around bulkhead hatches for canvas protection in this enlightening video. By following his expert guidance, boat enthusiasts can ensure their living areas remain secure while allowing unhindered access through the hatches.Step 1: Starting with the Flange
Sven begins by explaining that working on flanges vertically and horizontally is significantly easier than doing so in a flat position. To simplify the process further, he divides the task into two or three steps as suggested by fellow expert “for for.” This approach not only makes it more manageable but also allows for greater precision in crafting each component.Step 2: Applying Glue and Securing
Sven proceeds to apply glue along one edge of the flange, ensuring a secure bond when clamped into place. He emphasizes that this stage is crucial for maintaining the structural integrity of the flange, which in turn safeguards the living area beneath the canvas when hatches are open.Step 3: Allowing Time to Dry
After securely attaching the first portion of the flange, Sven allows ample time for it to dry before moving forward with additional steps. This patience and precision are key aspects of his successful boatbuilding methods.Step 4: Finishing Touches
Once the flange is fully dried, Sven removes the clamps carefully, ensuring no damage occurs during this process. He then moves on to attaching four more pieces onto these main frames, completing two pairs of flanges for the bulkhead hatches.The Final Touches
While two flanges form the primary support structure around the hatches, Sven mentions there are two additional pieces required at each end to ensure comprehensive protection. This attention to detail highlights his commitment to producing a durable and reliable design. “Sailing is about finding your path, whether it’s across an ocean or within yourself.” – Sven Yrvind In conclusion, making flanges around bulkhead hatches may seem complex at first glance, but by following Sven Yrvind’s meticulous process, enthusiasts can achieve professional-level results. Remember that the journey of boatbuilding is as rewarding as reaching your destination; it tests one’s patience and dedication. For those seeking to embark on this adventure or simply gain more insight into marine craftsmanship, Sven’s wisdom is invaluable.Once the flange is fully dried, Sven removes the clamps carefully, ensuring no damage occurs during this process. He then moves on to attaching four more pieces onto these main frames, completing two pairs of flanges for the bulkhead hatches.The Final Touches
While two flanges form the primary support structure around the hatches, Sven mentions there are two additional pieces required at each end to ensure comprehensive protection. This attention to detail highlights his commitment to producing a durable and reliable design. “Sailing is about finding your path, whether it’s across an ocean or within yourself.” – Sven Yrvind In conclusion, making flanges around bulkhead hatches may seem complex at first glance, but by following Sven Yrvind’s meticulous process, enthusiasts can achieve professional-level results. Remember that the journey of boatbuilding is as rewarding as reaching your destination; it tests one’s patience and dedication. For those seeking to embark on this adventure or simply gain more insight into marine craftsmanship, Sven’s wisdom is invaluable.After securely attaching the first portion of the flange, Sven allows ample time for it to dry before moving forward with additional steps. This patience and precision are key aspects of his successful boatbuilding methods.Step 4: Finishing Touches
Once the flange is fully dried, Sven removes the clamps carefully, ensuring no damage occurs during this process. He then moves on to attaching four more pieces onto these main frames, completing two pairs of flanges for the bulkhead hatches.The Final Touches
While two flanges form the primary support structure around the hatches, Sven mentions there are two additional pieces required at each end to ensure comprehensive protection. This attention to detail highlights his commitment to producing a durable and reliable design. “Sailing is about finding your path, whether it’s across an ocean or within yourself.” – Sven Yrvind In conclusion, making flanges around bulkhead hatches may seem complex at first glance, but by following Sven Yrvind’s meticulous process, enthusiasts can achieve professional-level results. Remember that the journey of boatbuilding is as rewarding as reaching your destination; it tests one’s patience and dedication. For those seeking to embark on this adventure or simply gain more insight into marine craftsmanship, Sven’s wisdom is invaluable.Sven proceeds to apply glue along one edge of the flange, ensuring a secure bond when clamped into place. He emphasizes that this stage is crucial for maintaining the structural integrity of the flange, which in turn safeguards the living area beneath the canvas when hatches are open.Step 3: Allowing Time to Dry
After securely attaching the first portion of the flange, Sven allows ample time for it to dry before moving forward with additional steps. This patience and precision are key aspects of his successful boatbuilding methods.Step 4: Finishing Touches
Once the flange is fully dried, Sven removes the clamps carefully, ensuring no damage occurs during this process. He then moves on to attaching four more pieces onto these main frames, completing two pairs of flanges for the bulkhead hatches.The Final Touches
While two flanges form the primary support structure around the hatches, Sven mentions there are two additional pieces required at each end to ensure comprehensive protection. This attention to detail highlights his commitment to producing a durable and reliable design. “Sailing is about finding your path, whether it’s across an ocean or within yourself.” – Sven Yrvind In conclusion, making flanges around bulkhead hatches may seem complex at first glance, but by following Sven Yrvind’s meticulous process, enthusiasts can achieve professional-level results. Remember that the journey of boatbuilding is as rewarding as reaching your destination; it tests one’s patience and dedication. For those seeking to embark on this adventure or simply gain more insight into marine craftsmanship, Sven’s wisdom is invaluable.Sven begins by explaining that working on flanges vertically and horizontally is significantly easier than doing so in a flat position. To simplify the process further, he divides the task into two or three steps as suggested by fellow expert “for for.” This approach not only makes it more manageable but also allows for greater precision in crafting each component.Step 2: Applying Glue and Securing
Sven proceeds to apply glue along one edge of the flange, ensuring a secure bond when clamped into place. He emphasizes that this stage is crucial for maintaining the structural integrity of the flange, which in turn safeguards the living area beneath the canvas when hatches are open.Step 3: Allowing Time to Dry
After securely attaching the first portion of the flange, Sven allows ample time for it to dry before moving forward with additional steps. This patience and precision are key aspects of his successful boatbuilding methods.Step 4: Finishing Touches
Once the flange is fully dried, Sven removes the clamps carefully, ensuring no damage occurs during this process. He then moves on to attaching four more pieces onto these main frames, completing two pairs of flanges for the bulkhead hatches.The Final Touches
While two flanges form the primary support structure around the hatches, Sven mentions there are two additional pieces required at each end to ensure comprehensive protection. This attention to detail highlights his commitment to producing a durable and reliable design. “Sailing is about finding your path, whether it’s across an ocean or within yourself.” – Sven Yrvind In conclusion, making flanges around bulkhead hatches may seem complex at first glance, but by following Sven Yrvind’s meticulous process, enthusiasts can achieve professional-level results. Remember that the journey of boatbuilding is as rewarding as reaching your destination; it tests one’s patience and dedication. For those seeking to embark on this adventure or simply gain more insight into marine craftsmanship, Sven’s wisdom is invaluable.Sven Yrvind, a renowned yacht designer and sailor, shares valuable insights on creating flanges around bulkhead hatches for canvas protection in this enlightening video. By following his expert guidance, boat enthusiasts can ensure their living areas remain secure while allowing unhindered access through the hatches.Step 1: Starting with the Flange
Sven begins by explaining that working on flanges vertically and horizontally is significantly easier than doing so in a flat position. To simplify the process further, he divides the task into two or three steps as suggested by fellow expert “for for.” This approach not only makes it more manageable but also allows for greater precision in crafting each component.Step 2: Applying Glue and Securing
Sven proceeds to apply glue along one edge of the flange, ensuring a secure bond when clamped into place. He emphasizes that this stage is crucial for maintaining the structural integrity of the flange, which in turn safeguards the living area beneath the canvas when hatches are open.Step 3: Allowing Time to Dry
After securely attaching the first portion of the flange, Sven allows ample time for it to dry before moving forward with additional steps. This patience and precision are key aspects of his successful boatbuilding methods.Step 4: Finishing Touches
Once the flange is fully dried, Sven removes the clamps carefully, ensuring no damage occurs during this process. He then moves on to attaching four more pieces onto these main frames, completing two pairs of flanges for the bulkhead hatches.The Final Touches
While two flanges form the primary support structure around the hatches, Sven mentions there are two additional pieces required at each end to ensure comprehensive protection. This attention to detail highlights his commitment to producing a durable and reliable design. “Sailing is about finding your path, whether it’s across an ocean or within yourself.” – Sven Yrvind In conclusion, making flanges around bulkhead hatches may seem complex at first glance, but by following Sven Yrvind’s meticulous process, enthusiasts can achieve professional-level results. Remember that the journey of boatbuilding is as rewarding as reaching your destination; it tests one’s patience and dedication. For those seeking to embark on this adventure or simply gain more insight into marine craftsmanship, Sven’s wisdom is invaluable.Making Flanges Around Bulkhead Hatches for Canvas
Sven Yrvind, a renowned yacht designer and sailor, shares valuable insights on creating flanges around bulkhead hatches for canvas protection in this enlightening video. By following his expert guidance, boat enthusiasts can ensure their living areas remain secure while allowing unhindered access through the hatches.Step 1: Starting with the Flange
Sven begins by explaining that working on flanges vertically and horizontally is significantly easier than doing so in a flat position. To simplify the process further, he divides the task into two or three steps as suggested by fellow expert “for for.” This approach not only makes it more manageable but also allows for greater precision in crafting each component.Step 2: Applying Glue and Securing
Sven proceeds to apply glue along one edge of the flange, ensuring a secure bond when clamped into place. He emphasizes that this stage is crucial for maintaining the structural integrity of the flange, which in turn safeguards the living area beneath the canvas when hatches are open.Step 3: Allowing Time to Dry
After securely attaching the first portion of the flange, Sven allows ample time for it to dry before moving forward with additional steps. This patience and precision are key aspects of his successful boatbuilding methods.Step 4: Finishing Touches
Once the flange is fully dried, Sven removes the clamps carefully, ensuring no damage occurs during this process. He then moves on to attaching four more pieces onto these main frames, completing two pairs of flanges for the bulkhead hatches.The Final Touches
While two flanges form the primary support structure around the hatches, Sven mentions there are two additional pieces required at each end to ensure comprehensive protection. This attention to detail highlights his commitment to producing a durable and reliable design. “Sailing is about finding your path, whether it’s across an ocean or within yourself.” – Sven Yrvind In conclusion, making flanges around bulkhead hatches may seem complex at first glance, but by following Sven Yrvind’s meticulous process, enthusiasts can achieve professional-level results. Remember that the journey of boatbuilding is as rewarding as reaching your destination; it tests one’s patience and dedication. For those seeking to embark on this adventure or simply gain more insight into marine craftsmanship, Sven’s wisdom is invaluable.Sven proceeds to apply glue along one edge of the flange, ensuring a secure bond when clamped into place. He emphasizes that this stage is crucial for maintaining the structural integrity of the flange, which in turn safeguards the living area beneath the canvas when hatches are open.Step 3: Allowing Time to Dry
After securely attaching the first portion of the flange, Sven allows ample time for it to dry before moving forward with additional steps. This patience and precision are key aspects of his successful boatbuilding methods.Step 4: Finishing Touches
Once the flange is fully dried, Sven removes the clamps carefully, ensuring no damage occurs during this process. He then moves on to attaching four more pieces onto these main frames, completing two pairs of flanges for the bulkhead hatches.The Final Touches
While two flanges form the primary support structure around the hatches, Sven mentions there are two additional pieces required at each end to ensure comprehensive protection. This attention to detail highlights his commitment to producing a durable and reliable design. “Sailing is about finding your path, whether it’s across an ocean or within yourself.” – Sven Yrvind In conclusion, making flanges around bulkhead hatches may seem complex at first glance, but by following Sven Yrvind’s meticulous process, enthusiasts can achieve professional-level results. Remember that the journey of boatbuilding is as rewarding as reaching your destination; it tests one’s patience and dedication. For those seeking to embark on this adventure or simply gain more insight into marine craftsmanship, Sven’s wisdom is invaluable.Making Flanges Around Bulkhead Hatches for Canvas
Sven Yrvind, a renowned yacht designer and sailor, shares valuable insights on creating flanges around bulkhead hatches for canvas protection in this enlightening video. By following his expert guidance, boat enthusiasts can ensure their living areas remain secure while allowing unhindered access through the hatches.Step 1: Starting with the Flange
Sven begins by explaining that working on flanges vertically and horizontally is significantly easier than doing so in a flat position. To simplify the process further, he divides the task into two or three steps as suggested by fellow expert “for for.” This approach not only makes it more manageable but also allows for greater precision in crafting each component.Step 2: Applying Glue and Securing
Sven proceeds to apply glue along one edge of the flange, ensuring a secure bond when clamped into place. He emphasizes that this stage is crucial for maintaining the structural integrity of the flange, which in turn safeguards the living area beneath the canvas when hatches are open.Step 3: Allowing Time to Dry
After securely attaching the first portion of the flange, Sven allows ample time for it to dry before moving forward with additional steps. This patience and precision are key aspects of his successful boatbuilding methods.Step 4: Finishing Touches
Once the flange is fully dried, Sven removes the clamps carefully, ensuring no damage occurs during this process. He then moves on to attaching four more pieces onto these main frames, completing two pairs of flanges for the bulkhead hatches.The Final Touches
While two flanges form the primary support structure around the hatches, Sven mentions there are two additional pieces required at each end to ensure comprehensive protection. This attention to detail highlights his commitment to producing a durable and reliable design. “Sailing is about finding your path, whether it’s across an ocean or within yourself.” – Sven Yrvind In conclusion, making flanges around bulkhead hatches may seem complex at first glance, but by following Sven Yrvind’s meticulous process, enthusiasts can achieve professional-level results. Remember that the journey of boatbuilding is as rewarding as reaching your destination; it tests one’s patience and dedication. For those seeking to embark on this adventure or simply gain more insight into marine craftsmanship, Sven’s wisdom is invaluable.After securely attaching the first portion of the flange, Sven allows ample time for it to dry before moving forward with additional steps. This patience and precision are key aspects of his successful boatbuilding methods.Step 4: Finishing Touches
Once the flange is fully dried, Sven removes the clamps carefully, ensuring no damage occurs during this process. He then moves on to attaching four more pieces onto these main frames, completing two pairs of flanges for the bulkhead hatches.The Final Touches
While two flanges form the primary support structure around the hatches, Sven mentions there are two additional pieces required at each end to ensure comprehensive protection. This attention to detail highlights his commitment to producing a durable and reliable design. “Sailing is about finding your path, whether it’s across an ocean or within yourself.” – Sven Yrvind In conclusion, making flanges around bulkhead hatches may seem complex at first glance, but by following Sven Yrvind’s meticulous process, enthusiasts can achieve professional-level results. Remember that the journey of boatbuilding is as rewarding as reaching your destination; it tests one’s patience and dedication. For those seeking to embark on this adventure or simply gain more insight into marine craftsmanship, Sven’s wisdom is invaluable.Sven Yrvind, a renowned yacht designer and sailor, shares valuable insights on creating flanges around bulkhead hatches for canvas protection in this enlightening video. By following his expert guidance, boat enthusiasts can ensure their living areas remain secure while allowing unhindered access through the hatches.Step 1: Starting with the Flange
Sven begins by explaining that working on flanges vertically and horizontally is significantly easier than doing so in a flat position. To simplify the process further, he divides the task into two or three steps as suggested by fellow expert “for for.” This approach not only makes it more manageable but also allows for greater precision in crafting each component.Step 2: Applying Glue and Securing
Sven proceeds to apply glue along one edge of the flange, ensuring a secure bond when clamped into place. He emphasizes that this stage is crucial for maintaining the structural integrity of the flange, which in turn safeguards the living area beneath the canvas when hatches are open.Step 3: Allowing Time to Dry
After securely attaching the first portion of the flange, Sven allows ample time for it to dry before moving forward with additional steps. This patience and precision are key aspects of his successful boatbuilding methods.Step 4: Finishing Touches
Once the flange is fully dried, Sven removes the clamps carefully, ensuring no damage occurs during this process. He then moves on to attaching four more pieces onto these main frames, completing two pairs of flanges for the bulkhead hatches.The Final Touches
While two flanges form the primary support structure around the hatches, Sven mentions there are two additional pieces required at each end to ensure comprehensive protection. This attention to detail highlights his commitment to producing a durable and reliable design. “Sailing is about finding your path, whether it’s across an ocean or within yourself.” – Sven Yrvind In conclusion, making flanges around bulkhead hatches may seem complex at first glance, but by following Sven Yrvind’s meticulous process, enthusiasts can achieve professional-level results. Remember that the journey of boatbuilding is as rewarding as reaching your destination; it tests one’s patience and dedication. For those seeking to embark on this adventure or simply gain more insight into marine craftsmanship, Sven’s wisdom is invaluable.Making Flanges Around Bulkhead Hatches for Canvas
Sven Yrvind, a renowned yacht designer and sailor, shares valuable insights on creating flanges around bulkhead hatches for canvas protection in this enlightening video. By following his expert guidance, boat enthusiasts can ensure their living areas remain secure while allowing unhindered access through the hatches.Step 1: Starting with the Flange
Sven begins by explaining that working on flanges vertically and horizontally is significantly easier than doing so in a flat position. To simplify the process further, he divides the task into two or three steps as suggested by fellow expert “for for.” This approach not only makes it more manageable but also allows for greater precision in crafting each component.Step 2: Applying Glue and Securing
Sven proceeds to apply glue along one edge of the flange, ensuring a secure bond when clamped into place. He emphasizes that this stage is crucial for maintaining the structural integrity of the flange, which in turn safeguards the living area beneath the canvas when hatches are open.Step 3: Allowing Time to Dry
After securely attaching the first portion of the flange, Sven allows ample time for it to dry before moving forward with additional steps. This patience and precision are key aspects of his successful boatbuilding methods.Step 4: Finishing Touches
Once the flange is fully dried, Sven removes the clamps carefully, ensuring no damage occurs during this process. He then moves on to attaching four more pieces onto these main frames, completing two pairs of flanges for the bulkhead hatches.The Final Touches
While two flanges form the primary support structure around the hatches, Sven mentions there are two additional pieces required at each end to ensure comprehensive protection. This attention to detail highlights his commitment to producing a durable and reliable design. “Sailing is about finding your path, whether it’s across an ocean or within yourself.” – Sven Yrvind In conclusion, making flanges around bulkhead hatches may seem complex at first glance, but by following Sven Yrvind’s meticulous process, enthusiasts can achieve professional-level results. Remember that the journey of boatbuilding is as rewarding as reaching your destination; it tests one’s patience and dedication. For those seeking to embark on this adventure or simply gain more insight into marine craftsmanship, Sven’s wisdom is invaluable.Sven proceeds to apply glue along one edge of the flange, ensuring a secure bond when clamped into place. He emphasizes that this stage is crucial for maintaining the structural integrity of the flange, which in turn safeguards the living area beneath the canvas when hatches are open.Step 3: Allowing Time to Dry
After securely attaching the first portion of the flange, Sven allows ample time for it to dry before moving forward with additional steps. This patience and precision are key aspects of his successful boatbuilding methods.Step 4: Finishing Touches
Once the flange is fully dried, Sven removes the clamps carefully, ensuring no damage occurs during this process. He then moves on to attaching four more pieces onto these main frames, completing two pairs of flanges for the bulkhead hatches.The Final Touches
While two flanges form the primary support structure around the hatches, Sven mentions there are two additional pieces required at each end to ensure comprehensive protection. This attention to detail highlights his commitment to producing a durable and reliable design. “Sailing is about finding your path, whether it’s across an ocean or within yourself.” – Sven Yrvind In conclusion, making flanges around bulkhead hatches may seem complex at first glance, but by following Sven Yrvind’s meticulous process, enthusiasts can achieve professional-level results. Remember that the journey of boatbuilding is as rewarding as reaching your destination; it tests one’s patience and dedication. For those seeking to embark on this adventure or simply gain more insight into marine craftsmanship, Sven’s wisdom is invaluable.Sven Yrvind, a renowned yacht designer and sailor, shares valuable insights on creating flanges around bulkhead hatches for canvas protection in this enlightening video. By following his expert guidance, boat enthusiasts can ensure their living areas remain secure while allowing unhindered access through the hatches.Step 1: Starting with the Flange
Sven begins by explaining that working on flanges vertically and horizontally is significantly easier than doing so in a flat position. To simplify the process further, he divides the task into two or three steps as suggested by fellow expert “for for.” This approach not only makes it more manageable but also allows for greater precision in crafting each component.Step 2: Applying Glue and Securing
Sven proceeds to apply glue along one edge of the flange, ensuring a secure bond when clamped into place. He emphasizes that this stage is crucial for maintaining the structural integrity of the flange, which in turn safeguards the living area beneath the canvas when hatches are open.Step 3: Allowing Time to Dry
After securely attaching the first portion of the flange, Sven allows ample time for it to dry before moving forward with additional steps. This patience and precision are key aspects of his successful boatbuilding methods.Step 4: Finishing Touches
Once the flange is fully dried, Sven removes the clamps carefully, ensuring no damage occurs during this process. He then moves on to attaching four more pieces onto these main frames, completing two pairs of flanges for the bulkhead hatches.The Final Touches
While two flanges form the primary support structure around the hatches, Sven mentions there are two additional pieces required at each end to ensure comprehensive protection. This attention to detail highlights his commitment to producing a durable and reliable design. “Sailing is about finding your path, whether it’s across an ocean or within yourself.” – Sven Yrvind In conclusion, making flanges around bulkhead hatches may seem complex at first glance, but by following Sven Yrvind’s meticulous process, enthusiasts can achieve professional-level results. Remember that the journey of boatbuilding is as rewarding as reaching your destination; it tests one’s patience and dedication. For those seeking to embark on this adventure or simply gain more insight into marine craftsmanship, Sven’s wisdom is invaluable.Making Flanges Around Bulkhead Hatches for Canvas
Sven Yrvind, a renowned yacht designer and sailor, shares valuable insights on creating flanges around bulkhead hatches for canvas protection in this enlightening video. By following his expert guidance, boat enthusiasts can ensure their living areas remain secure while allowing unhindered access through the hatches.Step 1: Starting with the Flange
Sven begins by explaining that working on flanges vertically and horizontally is significantly easier than doing so in a flat position. To simplify the process further, he divides the task into two or three steps as suggested by fellow expert “for for.” This approach not only makes it more manageable but also allows for greater precision in crafting each component.Step 2: Applying Glue and Securing
Sven proceeds to apply glue along one edge of the flange, ensuring a secure bond when clamped into place. He emphasizes that this stage is crucial for maintaining the structural integrity of the flange, which in turn safeguards the living area beneath the canvas when hatches are open.Step 3: Allowing Time to Dry
After securely attaching the first portion of the flange, Sven allows ample time for it to dry before moving forward with additional steps. This patience and precision are key aspects of his successful boatbuilding methods.Step 4: Finishing Touches
Once the flange is fully dried, Sven removes the clamps carefully, ensuring no damage occurs during this process. He then moves on to attaching four more pieces onto these main frames, completing two pairs of flanges for the bulkhead hatches.The Final Touches
While two flanges form the primary support structure around the hatches, Sven mentions there are two additional pieces required at each end to ensure comprehensive protection. This attention to detail highlights his commitment to producing a durable and reliable design. “Sailing is about finding your path, whether it’s across an ocean or within yourself.” – Sven Yrvind In conclusion, making flanges around bulkhead hatches may seem complex at first glance, but by following Sven Yrvind’s meticulous process, enthusiasts can achieve professional-level results. Remember that the journey of boatbuilding is as rewarding as reaching your destination; it tests one’s patience and dedication. For those seeking to embark on this adventure or simply gain more insight into marine craftsmanship, Sven’s wisdom is invaluable.Sven begins by explaining that working on flanges vertically and horizontally is significantly easier than doing so in a flat position. To simplify the process further, he divides the task into two or three steps as suggested by fellow expert “for for.” This approach not only makes it more manageable but also allows for greater precision in crafting each component.Step 2: Applying Glue and Securing
Sven proceeds to apply glue along one edge of the flange, ensuring a secure bond when clamped into place. He emphasizes that this stage is crucial for maintaining the structural integrity of the flange, which in turn safeguards the living area beneath the canvas when hatches are open.Step 3: Allowing Time to Dry
After securely attaching the first portion of the flange, Sven allows ample time for it to dry before moving forward with additional steps. This patience and precision are key aspects of his successful boatbuilding methods.Step 4: Finishing Touches
Once the flange is fully dried, Sven removes the clamps carefully, ensuring no damage occurs during this process. He then moves on to attaching four more pieces onto these main frames, completing two pairs of flanges for the bulkhead hatches.The Final Touches
While two flanges form the primary support structure around the hatches, Sven mentions there are two additional pieces required at each end to ensure comprehensive protection. This attention to detail highlights his commitment to producing a durable and reliable design. “Sailing is about finding your path, whether it’s across an ocean or within yourself.” – Sven Yrvind In conclusion, making flanges around bulkhead hatches may seem complex at first glance, but by following Sven Yrvind’s meticulous process, enthusiasts can achieve professional-level results. Remember that the journey of boatbuilding is as rewarding as reaching your destination; it tests one’s patience and dedication. For those seeking to embark on this adventure or simply gain more insight into marine craftsmanship, Sven’s wisdom is invaluable.Sven Yrvind, a renowned yacht designer and sailor, shares valuable insights on creating flanges around bulkhead hatches for canvas protection in this enlightening video. By following his expert guidance, boat enthusiasts can ensure their living areas remain secure while allowing unhindered access through the hatches.Step 1: Starting with the Flange
Sven begins by explaining that working on flanges vertically and horizontally is significantly easier than doing so in a flat position. To simplify the process further, he divides the task into two or three steps as suggested by fellow expert “for for.” This approach not only makes it more manageable but also allows for greater precision in crafting each component.Step 2: Applying Glue and Securing
Sven proceeds to apply glue along one edge of the flange, ensuring a secure bond when clamped into place. He emphasizes that this stage is crucial for maintaining the structural integrity of the flange, which in turn safeguards the living area beneath the canvas when hatches are open.Step 3: Allowing Time to Dry
After securely attaching the first portion of the flange, Sven allows ample time for it to dry before moving forward with additional steps. This patience and precision are key aspects of his successful boatbuilding methods.Step 4: Finishing Touches
Once the flange is fully dried, Sven removes the clamps carefully, ensuring no damage occurs during this process. He then moves on to attaching four more pieces onto these main frames, completing two pairs of flanges for the bulkhead hatches.The Final Touches
While two flanges form the primary support structure around the hatches, Sven mentions there are two additional pieces required at each end to ensure comprehensive protection. This attention to detail highlights his commitment to producing a durable and reliable design. “Sailing is about finding your path, whether it’s across an ocean or within yourself.” – Sven Yrvind In conclusion, making flanges around bulkhead hatches may seem complex at first glance, but by following Sven Yrvind’s meticulous process, enthusiasts can achieve professional-level results. Remember that the journey of boatbuilding is as rewarding as reaching your destination; it tests one’s patience and dedication. For those seeking to embark on this adventure or simply gain more insight into marine craftsmanship, Sven’s wisdom is invaluable.Making Flanges Around Bulkhead Hatches for Canvas
Sven Yrvind, a renowned yacht designer and sailor, shares valuable insights on creating flanges around bulkhead hatches for canvas protection in this enlightening video. By following his expert guidance, boat enthusiasts can ensure their living areas remain secure while allowing unhindered access through the hatches.Step 1: Starting with the Flange
Sven begins by explaining that working on flanges vertically and horizontally is significantly easier than doing so in a flat position. To simplify the process further, he divides the task into two or three steps as suggested by fellow expert “for for.” This approach not only makes it more manageable but also allows for greater precision in crafting each component.Step 2: Applying Glue and Securing
Sven proceeds to apply glue along one edge of the flange, ensuring a secure bond when clamped into place. He emphasizes that this stage is crucial for maintaining the structural integrity of the flange, which in turn safeguards the living area beneath the canvas when hatches are open.Step 3: Allowing Time to Dry
After securely attaching the first portion of the flange, Sven allows ample time for it to dry before moving forward with additional steps. This patience and precision are key aspects of his successful boatbuilding methods.Step 4: Finishing Touches
Once the flange is fully dried, Sven removes the clamps carefully, ensuring no damage occurs during this process. He then moves on to attaching four more pieces onto these main frames, completing two pairs of flanges for the bulkhead hatches.The Final Touches
While two flanges form the primary support structure around the hatches, Sven mentions there are two additional pieces required at each end to ensure comprehensive protection. This attention to detail highlights his commitment to producing a durable and reliable design. “Sailing is about finding your path, whether it’s across an ocean or within yourself.” – Sven Yrvind In conclusion, making flanges around bulkhead hatches may seem complex at first glance, but by following Sven Yrvind’s meticulous process, enthusiasts can achieve professional-level results. Remember that the journey of boatbuilding is as rewarding as reaching your destination; it tests one’s patience and dedication. For those seeking to embark on this adventure or simply gain more insight into marine craftsmanship, Sven’s wisdom is invaluable.Once the flange is fully dried, Sven removes the clamps carefully, ensuring no damage occurs during this process. He then moves on to attaching four more pieces onto these main frames, completing two pairs of flanges for the bulkhead hatches.The Final Touches
While two flanges form the primary support structure around the hatches, Sven mentions there are two additional pieces required at each end to ensure comprehensive protection. This attention to detail highlights his commitment to producing a durable and reliable design. “Sailing is about finding your path, whether it’s across an ocean or within yourself.” – Sven Yrvind In conclusion, making flanges around bulkhead hatches may seem complex at first glance, but by following Sven Yrvind’s meticulous process, enthusiasts can achieve professional-level results. Remember that the journey of boatbuilding is as rewarding as reaching your destination; it tests one’s patience and dedication. For those seeking to embark on this adventure or simply gain more insight into marine craftsmanship, Sven’s wisdom is invaluable.Sven begins by explaining that working on flanges vertically and horizontally is significantly easier than doing so in a flat position. To simplify the process further, he divides the task into two or three steps as suggested by fellow expert “for for.” This approach not only makes it more manageable but also allows for greater precision in crafting each component.Step 2: Applying Glue and Securing
Sven proceeds to apply glue along one edge of the flange, ensuring a secure bond when clamped into place. He emphasizes that this stage is crucial for maintaining the structural integrity of the flange, which in turn safeguards the living area beneath the canvas when hatches are open.Step 3: Allowing Time to Dry
After securely attaching the first portion of the flange, Sven allows ample time for it to dry before moving forward with additional steps. This patience and precision are key aspects of his successful boatbuilding methods.Step 4: Finishing Touches
Once the flange is fully dried, Sven removes the clamps carefully, ensuring no damage occurs during this process. He then moves on to attaching four more pieces onto these main frames, completing two pairs of flanges for the bulkhead hatches.The Final Touches
While two flanges form the primary support structure around the hatches, Sven mentions there are two additional pieces required at each end to ensure comprehensive protection. This attention to detail highlights his commitment to producing a durable and reliable design. “Sailing is about finding your path, whether it’s across an ocean or within yourself.” – Sven Yrvind In conclusion, making flanges around bulkhead hatches may seem complex at first glance, but by following Sven Yrvind’s meticulous process, enthusiasts can achieve professional-level results. Remember that the journey of boatbuilding is as rewarding as reaching your destination; it tests one’s patience and dedication. For those seeking to embark on this adventure or simply gain more insight into marine craftsmanship, Sven’s wisdom is invaluable.Sven Yrvind, a renowned yacht designer and sailor, shares valuable insights on creating flanges around bulkhead hatches for canvas protection in this enlightening video. By following his expert guidance, boat enthusiasts can ensure their living areas remain secure while allowing unhindered access through the hatches.Step 1: Starting with the Flange
Sven begins by explaining that working on flanges vertically and horizontally is significantly easier than doing so in a flat position. To simplify the process further, he divides the task into two or three steps as suggested by fellow expert “for for.” This approach not only makes it more manageable but also allows for greater precision in crafting each component.Step 2: Applying Glue and Securing
Sven proceeds to apply glue along one edge of the flange, ensuring a secure bond when clamped into place. He emphasizes that this stage is crucial for maintaining the structural integrity of the flange, which in turn safeguards the living area beneath the canvas when hatches are open.Step 3: Allowing Time to Dry
After securely attaching the first portion of the flange, Sven allows ample time for it to dry before moving forward with additional steps. This patience and precision are key aspects of his successful boatbuilding methods.Step 4: Finishing Touches
Once the flange is fully dried, Sven removes the clamps carefully, ensuring no damage occurs during this process. He then moves on to attaching four more pieces onto these main frames, completing two pairs of flanges for the bulkhead hatches.The Final Touches
While two flanges form the primary support structure around the hatches, Sven mentions there are two additional pieces required at each end to ensure comprehensive protection. This attention to detail highlights his commitment to producing a durable and reliable design. “Sailing is about finding your path, whether it’s across an ocean or within yourself.” – Sven Yrvind In conclusion, making flanges around bulkhead hatches may seem complex at first glance, but by following Sven Yrvind’s meticulous process, enthusiasts can achieve professional-level results. Remember that the journey of boatbuilding is as rewarding as reaching your destination; it tests one’s patience and dedication. For those seeking to embark on this adventure or simply gain more insight into marine craftsmanship, Sven’s wisdom is invaluable.Making Flanges Around Bulkhead Hatches for Canvas
Sven Yrvind, a renowned yacht designer and sailor, shares valuable insights on creating flanges around bulkhead hatches for canvas protection in this enlightening video. By following his expert guidance, boat enthusiasts can ensure their living areas remain secure while allowing unhindered access through the hatches.Step 1: Starting with the Flange
Sven begins by explaining that working on flanges vertically and horizontally is significantly easier than doing so in a flat position. To simplify the process further, he divides the task into two or three steps as suggested by fellow expert “for for.” This approach not only makes it more manageable but also allows for greater precision in crafting each component.Step 2: Applying Glue and Securing
Sven proceeds to apply glue along one edge of the flange, ensuring a secure bond when clamped into place. He emphasizes that this stage is crucial for maintaining the structural integrity of the flange, which in turn safeguards the living area beneath the canvas when hatches are open.Step 3: Allowing Time to Dry
After securely attaching the first portion of the flange, Sven allows ample time for it to dry before moving forward with additional steps. This patience and precision are key aspects of his successful boatbuilding methods.Step 4: Finishing Touches
Once the flange is fully dried, Sven removes the clamps carefully, ensuring no damage occurs during this process. He then moves on to attaching four more pieces onto these main frames, completing two pairs of flanges for the bulkhead hatches.The Final Touches
While two flanges form the primary support structure around the hatches, Sven mentions there are two additional pieces required at each end to ensure comprehensive protection. This attention to detail highlights his commitment to producing a durable and reliable design. “Sailing is about finding your path, whether it’s across an ocean or within yourself.” – Sven Yrvind In conclusion, making flanges around bulkhead hatches may seem complex at first glance, but by following Sven Yrvind’s meticulous process, enthusiasts can achieve professional-level results. Remember that the journey of boatbuilding is as rewarding as reaching your destination; it tests one’s patience and dedication. For those seeking to embark on this adventure or simply gain more insight into marine craftsmanship, Sven’s wisdom is invaluable.After securely attaching the first portion of the flange, Sven allows ample time for it to dry before moving forward with additional steps. This patience and precision are key aspects of his successful boatbuilding methods.Step 4: Finishing Touches
Once the flange is fully dried, Sven removes the clamps carefully, ensuring no damage occurs during this process. He then moves on to attaching four more pieces onto these main frames, completing two pairs of flanges for the bulkhead hatches.The Final Touches
While two flanges form the primary support structure around the hatches, Sven mentions there are two additional pieces required at each end to ensure comprehensive protection. This attention to detail highlights his commitment to producing a durable and reliable design. “Sailing is about finding your path, whether it’s across an ocean or within yourself.” – Sven Yrvind In conclusion, making flanges around bulkhead hatches may seem complex at first glance, but by following Sven Yrvind’s meticulous process, enthusiasts can achieve professional-level results. Remember that the journey of boatbuilding is as rewarding as reaching your destination; it tests one’s patience and dedication. For those seeking to embark on this adventure or simply gain more insight into marine craftsmanship, Sven’s wisdom is invaluable.Sven begins by explaining that working on flanges vertically and horizontally is significantly easier than doing so in a flat position. To simplify the process further, he divides the task into two or three steps as suggested by fellow expert “for for.” This approach not only makes it more manageable but also allows for greater precision in crafting each component.Step 2: Applying Glue and Securing
Sven proceeds to apply glue along one edge of the flange, ensuring a secure bond when clamped into place. He emphasizes that this stage is crucial for maintaining the structural integrity of the flange, which in turn safeguards the living area beneath the canvas when hatches are open.Step 3: Allowing Time to Dry
After securely attaching the first portion of the flange, Sven allows ample time for it to dry before moving forward with additional steps. This patience and precision are key aspects of his successful boatbuilding methods.Step 4: Finishing Touches
Once the flange is fully dried, Sven removes the clamps carefully, ensuring no damage occurs during this process. He then moves on to attaching four more pieces onto these main frames, completing two pairs of flanges for the bulkhead hatches.The Final Touches
While two flanges form the primary support structure around the hatches, Sven mentions there are two additional pieces required at each end to ensure comprehensive protection. This attention to detail highlights his commitment to producing a durable and reliable design. “Sailing is about finding your path, whether it’s across an ocean or within yourself.” – Sven Yrvind In conclusion, making flanges around bulkhead hatches may seem complex at first glance, but by following Sven Yrvind’s meticulous process, enthusiasts can achieve professional-level results. Remember that the journey of boatbuilding is as rewarding as reaching your destination; it tests one’s patience and dedication. For those seeking to embark on this adventure or simply gain more insight into marine craftsmanship, Sven’s wisdom is invaluable.Sven Yrvind, a renowned yacht designer and sailor, shares valuable insights on creating flanges around bulkhead hatches for canvas protection in this enlightening video. By following his expert guidance, boat enthusiasts can ensure their living areas remain secure while allowing unhindered access through the hatches.Step 1: Starting with the Flange
Sven begins by explaining that working on flanges vertically and horizontally is significantly easier than doing so in a flat position. To simplify the process further, he divides the task into two or three steps as suggested by fellow expert “for for.” This approach not only makes it more manageable but also allows for greater precision in crafting each component.Step 2: Applying Glue and Securing
Sven proceeds to apply glue along one edge of the flange, ensuring a secure bond when clamped into place. He emphasizes that this stage is crucial for maintaining the structural integrity of the flange, which in turn safeguards the living area beneath the canvas when hatches are open.Step 3: Allowing Time to Dry
After securely attaching the first portion of the flange, Sven allows ample time for it to dry before moving forward with additional steps. This patience and precision are key aspects of his successful boatbuilding methods.Step 4: Finishing Touches
Once the flange is fully dried, Sven removes the clamps carefully, ensuring no damage occurs during this process. He then moves on to attaching four more pieces onto these main frames, completing two pairs of flanges for the bulkhead hatches.The Final Touches
While two flanges form the primary support structure around the hatches, Sven mentions there are two additional pieces required at each end to ensure comprehensive protection. This attention to detail highlights his commitment to producing a durable and reliable design. “Sailing is about finding your path, whether it’s across an ocean or within yourself.” – Sven Yrvind In conclusion, making flanges around bulkhead hatches may seem complex at first glance, but by following Sven Yrvind’s meticulous process, enthusiasts can achieve professional-level results. Remember that the journey of boatbuilding is as rewarding as reaching your destination; it tests one’s patience and dedication. For those seeking to embark on this adventure or simply gain more insight into marine craftsmanship, Sven’s wisdom is invaluable.Making Flanges Around Bulkhead Hatches for Canvas
Sven Yrvind, a renowned yacht designer and sailor, shares valuable insights on creating flanges around bulkhead hatches for canvas protection in this enlightening video. By following his expert guidance, boat enthusiasts can ensure their living areas remain secure while allowing unhindered access through the hatches.Step 1: Starting with the Flange
Sven begins by explaining that working on flanges vertically and horizontally is significantly easier than doing so in a flat position. To simplify the process further, he divides the task into two or three steps as suggested by fellow expert “for for.” This approach not only makes it more manageable but also allows for greater precision in crafting each component.Step 2: Applying Glue and Securing
Sven proceeds to apply glue along one edge of the flange, ensuring a secure bond when clamped into place. He emphasizes that this stage is crucial for maintaining the structural integrity of the flange, which in turn safeguards the living area beneath the canvas when hatches are open.Step 3: Allowing Time to Dry
After securely attaching the first portion of the flange, Sven allows ample time for it to dry before moving forward with additional steps. This patience and precision are key aspects of his successful boatbuilding methods.Step 4: Finishing Touches
Once the flange is fully dried, Sven removes the clamps carefully, ensuring no damage occurs during this process. He then moves on to attaching four more pieces onto these main frames, completing two pairs of flanges for the bulkhead hatches.The Final Touches
While two flanges form the primary support structure around the hatches, Sven mentions there are two additional pieces required at each end to ensure comprehensive protection. This attention to detail highlights his commitment to producing a durable and reliable design. “Sailing is about finding your path, whether it’s across an ocean or within yourself.” – Sven Yrvind In conclusion, making flanges around bulkhead hatches may seem complex at first glance, but by following Sven Yrvind’s meticulous process, enthusiasts can achieve professional-level results. Remember that the journey of boatbuilding is as rewarding as reaching your destination; it tests one’s patience and dedication. For those seeking to embark on this adventure or simply gain more insight into marine craftsmanship, Sven’s wisdom is invaluable.Sven proceeds to apply glue along one edge of the flange, ensuring a secure bond when clamped into place. He emphasizes that this stage is crucial for maintaining the structural integrity of the flange, which in turn safeguards the living area beneath the canvas when hatches are open.Step 3: Allowing Time to Dry
After securely attaching the first portion of the flange, Sven allows ample time for it to dry before moving forward with additional steps. This patience and precision are key aspects of his successful boatbuilding methods.Step 4: Finishing Touches
Once the flange is fully dried, Sven removes the clamps carefully, ensuring no damage occurs during this process. He then moves on to attaching four more pieces onto these main frames, completing two pairs of flanges for the bulkhead hatches.The Final Touches
While two flanges form the primary support structure around the hatches, Sven mentions there are two additional pieces required at each end to ensure comprehensive protection. This attention to detail highlights his commitment to producing a durable and reliable design. “Sailing is about finding your path, whether it’s across an ocean or within yourself.” – Sven Yrvind In conclusion, making flanges around bulkhead hatches may seem complex at first glance, but by following Sven Yrvind’s meticulous process, enthusiasts can achieve professional-level results. Remember that the journey of boatbuilding is as rewarding as reaching your destination; it tests one’s patience and dedication. For those seeking to embark on this adventure or simply gain more insight into marine craftsmanship, Sven’s wisdom is invaluable.Sven begins by explaining that working on flanges vertically and horizontally is significantly easier than doing so in a flat position. To simplify the process further, he divides the task into two or three steps as suggested by fellow expert “for for.” This approach not only makes it more manageable but also allows for greater precision in crafting each component.Step 2: Applying Glue and Securing
Sven proceeds to apply glue along one edge of the flange, ensuring a secure bond when clamped into place. He emphasizes that this stage is crucial for maintaining the structural integrity of the flange, which in turn safeguards the living area beneath the canvas when hatches are open.Step 3: Allowing Time to Dry
After securely attaching the first portion of the flange, Sven allows ample time for it to dry before moving forward with additional steps. This patience and precision are key aspects of his successful boatbuilding methods.Step 4: Finishing Touches
Once the flange is fully dried, Sven removes the clamps carefully, ensuring no damage occurs during this process. He then moves on to attaching four more pieces onto these main frames, completing two pairs of flanges for the bulkhead hatches.The Final Touches
While two flanges form the primary support structure around the hatches, Sven mentions there are two additional pieces required at each end to ensure comprehensive protection. This attention to detail highlights his commitment to producing a durable and reliable design. “Sailing is about finding your path, whether it’s across an ocean or within yourself.” – Sven Yrvind In conclusion, making flanges around bulkhead hatches may seem complex at first glance, but by following Sven Yrvind’s meticulous process, enthusiasts can achieve professional-level results. Remember that the journey of boatbuilding is as rewarding as reaching your destination; it tests one’s patience and dedication. For those seeking to embark on this adventure or simply gain more insight into marine craftsmanship, Sven’s wisdom is invaluable.Sven Yrvind, a renowned yacht designer and sailor, shares valuable insights on creating flanges around bulkhead hatches for canvas protection in this enlightening video. By following his expert guidance, boat enthusiasts can ensure their living areas remain secure while allowing unhindered access through the hatches.Step 1: Starting with the Flange
Sven begins by explaining that working on flanges vertically and horizontally is significantly easier than doing so in a flat position. To simplify the process further, he divides the task into two or three steps as suggested by fellow expert “for for.” This approach not only makes it more manageable but also allows for greater precision in crafting each component.Step 2: Applying Glue and Securing
Sven proceeds to apply glue along one edge of the flange, ensuring a secure bond when clamped into place. He emphasizes that this stage is crucial for maintaining the structural integrity of the flange, which in turn safeguards the living area beneath the canvas when hatches are open.Step 3: Allowing Time to Dry
After securely attaching the first portion of the flange, Sven allows ample time for it to dry before moving forward with additional steps. This patience and precision are key aspects of his successful boatbuilding methods.Step 4: Finishing Touches
Once the flange is fully dried, Sven removes the clamps carefully, ensuring no damage occurs during this process. He then moves on to attaching four more pieces onto these main frames, completing two pairs of flanges for the bulkhead hatches.The Final Touches
While two flanges form the primary support structure around the hatches, Sven mentions there are two additional pieces required at each end to ensure comprehensive protection. This attention to detail highlights his commitment to producing a durable and reliable design. “Sailing is about finding your path, whether it’s across an ocean or within yourself.” – Sven Yrvind In conclusion, making flanges around bulkhead hatches may seem complex at first glance, but by following Sven Yrvind’s meticulous process, enthusiasts can achieve professional-level results. Remember that the journey of boatbuilding is as rewarding as reaching your destination; it tests one’s patience and dedication. For those seeking to embark on this adventure or simply gain more insight into marine craftsmanship, Sven’s wisdom is invaluable.Making Flanges Around Bulkhead Hatches for Canvas
Sven Yrvind, a renowned yacht designer and sailor, shares valuable insights on creating flanges around bulkhead hatches for canvas protection in this enlightening video. By following his expert guidance, boat enthusiasts can ensure their living areas remain secure while allowing unhindered access through the hatches.Step 1: Starting with the Flange
Sven begins by explaining that working on flanges vertically and horizontally is significantly easier than doing so in a flat position. To simplify the process further, he divides the task into two or three steps as suggested by fellow expert “for for.” This approach not only makes it more manageable but also allows for greater precision in crafting each component.Step 2: Applying Glue and Securing
Sven proceeds to apply glue along one edge of the flange, ensuring a secure bond when clamped into place. He emphasizes that this stage is crucial for maintaining the structural integrity of the flange, which in turn safeguards the living area beneath the canvas when hatches are open.Step 3: Allowing Time to Dry
After securely attaching the first portion of the flange, Sven allows ample time for it to dry before moving forward with additional steps. This patience and precision are key aspects of his successful boatbuilding methods.Step 4: Finishing Touches
Once the flange is fully dried, Sven removes the clamps carefully, ensuring no damage occurs during this process. He then moves on to attaching four more pieces onto these main frames, completing two pairs of flanges for the bulkhead hatches.The Final Touches
While two flanges form the primary support structure around the hatches, Sven mentions there are two additional pieces required at each end to ensure comprehensive protection. This attention to detail highlights his commitment to producing a durable and reliable design. “Sailing is about finding your path, whether it’s across an ocean or within yourself.” – Sven Yrvind In conclusion, making flanges around bulkhead hatches may seem complex at first glance, but by following Sven Yrvind’s meticulous process, enthusiasts can achieve professional-level results. Remember that the journey of boatbuilding is as rewarding as reaching your destination; it tests one’s patience and dedication. For those seeking to embark on this adventure or simply gain more insight into marine craftsmanship, Sven’s wisdom is invaluable.Once the flange is fully dried, Sven removes the clamps carefully, ensuring no damage occurs during this process. He then moves on to attaching four more pieces onto these main frames, completing two pairs of flanges for the bulkhead hatches.The Final Touches
While two flanges form the primary support structure around the hatches, Sven mentions there are two additional pieces required at each end to ensure comprehensive protection. This attention to detail highlights his commitment to producing a durable and reliable design. “Sailing is about finding your path, whether it’s across an ocean or within yourself.” – Sven Yrvind In conclusion, making flanges around bulkhead hatches may seem complex at first glance, but by following Sven Yrvind’s meticulous process, enthusiasts can achieve professional-level results. Remember that the journey of boatbuilding is as rewarding as reaching your destination; it tests one’s patience and dedication. For those seeking to embark on this adventure or simply gain more insight into marine craftsmanship, Sven’s wisdom is invaluable.Sven proceeds to apply glue along one edge of the flange, ensuring a secure bond when clamped into place. He emphasizes that this stage is crucial for maintaining the structural integrity of the flange, which in turn safeguards the living area beneath the canvas when hatches are open.Step 3: Allowing Time to Dry
After securely attaching the first portion of the flange, Sven allows ample time for it to dry before moving forward with additional steps. This patience and precision are key aspects of his successful boatbuilding methods.Step 4: Finishing Touches
Once the flange is fully dried, Sven removes the clamps carefully, ensuring no damage occurs during this process. He then moves on to attaching four more pieces onto these main frames, completing two pairs of flanges for the bulkhead hatches.The Final Touches
While two flanges form the primary support structure around the hatches, Sven mentions there are two additional pieces required at each end to ensure comprehensive protection. This attention to detail highlights his commitment to producing a durable and reliable design. “Sailing is about finding your path, whether it’s across an ocean or within yourself.” – Sven Yrvind In conclusion, making flanges around bulkhead hatches may seem complex at first glance, but by following Sven Yrvind’s meticulous process, enthusiasts can achieve professional-level results. Remember that the journey of boatbuilding is as rewarding as reaching your destination; it tests one’s patience and dedication. For those seeking to embark on this adventure or simply gain more insight into marine craftsmanship, Sven’s wisdom is invaluable.Sven begins by explaining that working on flanges vertically and horizontally is significantly easier than doing so in a flat position. To simplify the process further, he divides the task into two or three steps as suggested by fellow expert “for for.” This approach not only makes it more manageable but also allows for greater precision in crafting each component.Step 2: Applying Glue and Securing
Sven proceeds to apply glue along one edge of the flange, ensuring a secure bond when clamped into place. He emphasizes that this stage is crucial for maintaining the structural integrity of the flange, which in turn safeguards the living area beneath the canvas when hatches are open.Step 3: Allowing Time to Dry
After securely attaching the first portion of the flange, Sven allows ample time for it to dry before moving forward with additional steps. This patience and precision are key aspects of his successful boatbuilding methods.Step 4: Finishing Touches
Once the flange is fully dried, Sven removes the clamps carefully, ensuring no damage occurs during this process. He then moves on to attaching four more pieces onto these main frames, completing two pairs of flanges for the bulkhead hatches.The Final Touches
While two flanges form the primary support structure around the hatches, Sven mentions there are two additional pieces required at each end to ensure comprehensive protection. This attention to detail highlights his commitment to producing a durable and reliable design. “Sailing is about finding your path, whether it’s across an ocean or within yourself.” – Sven Yrvind In conclusion, making flanges around bulkhead hatches may seem complex at first glance, but by following Sven Yrvind’s meticulous process, enthusiasts can achieve professional-level results. Remember that the journey of boatbuilding is as rewarding as reaching your destination; it tests one’s patience and dedication. For those seeking to embark on this adventure or simply gain more insight into marine craftsmanship, Sven’s wisdom is invaluable.Sven Yrvind, a renowned yacht designer and sailor, shares valuable insights on creating flanges around bulkhead hatches for canvas protection in this enlightening video. By following his expert guidance, boat enthusiasts can ensure their living areas remain secure while allowing unhindered access through the hatches.Step 1: Starting with the Flange
Sven begins by explaining that working on flanges vertically and horizontally is significantly easier than doing so in a flat position. To simplify the process further, he divides the task into two or three steps as suggested by fellow expert “for for.” This approach not only makes it more manageable but also allows for greater precision in crafting each component.Step 2: Applying Glue and Securing
Sven proceeds to apply glue along one edge of the flange, ensuring a secure bond when clamped into place. He emphasizes that this stage is crucial for maintaining the structural integrity of the flange, which in turn safeguards the living area beneath the canvas when hatches are open.Step 3: Allowing Time to Dry
After securely attaching the first portion of the flange, Sven allows ample time for it to dry before moving forward with additional steps. This patience and precision are key aspects of his successful boatbuilding methods.Step 4: Finishing Touches
Once the flange is fully dried, Sven removes the clamps carefully, ensuring no damage occurs during this process. He then moves on to attaching four more pieces onto these main frames, completing two pairs of flanges for the bulkhead hatches.The Final Touches
While two flanges form the primary support structure around the hatches, Sven mentions there are two additional pieces required at each end to ensure comprehensive protection. This attention to detail highlights his commitment to producing a durable and reliable design. “Sailing is about finding your path, whether it’s across an ocean or within yourself.” – Sven Yrvind In conclusion, making flanges around bulkhead hatches may seem complex at first glance, but by following Sven Yrvind’s meticulous process, enthusiasts can achieve professional-level results. Remember that the journey of boatbuilding is as rewarding as reaching your destination; it tests one’s patience and dedication. For those seeking to embark on this adventure or simply gain more insight into marine craftsmanship, Sven’s wisdom is invaluable.Making Flanges Around Bulkhead Hatches for Canvas
Sven Yrvind, a renowned yacht designer and sailor, shares valuable insights on creating flanges around bulkhead hatches for canvas protection in this enlightening video. By following his expert guidance, boat enthusiasts can ensure their living areas remain secure while allowing unhindered access through the hatches.Step 1: Starting with the Flange
Sven begins by explaining that working on flanges vertically and horizontally is significantly easier than doing so in a flat position. To simplify the process further, he divides the task into two or three steps as suggested by fellow expert “for for.” This approach not only makes it more manageable but also allows for greater precision in crafting each component.Step 2: Applying Glue and Securing
Sven proceeds to apply glue along one edge of the flange, ensuring a secure bond when clamped into place. He emphasizes that this stage is crucial for maintaining the structural integrity of the flange, which in turn safeguards the living area beneath the canvas when hatches are open.Step 3: Allowing Time to Dry
After securely attaching the first portion of the flange, Sven allows ample time for it to dry before moving forward with additional steps. This patience and precision are key aspects of his successful boatbuilding methods.Step 4: Finishing Touches
Once the flange is fully dried, Sven removes the clamps carefully, ensuring no damage occurs during this process. He then moves on to attaching four more pieces onto these main frames, completing two pairs of flanges for the bulkhead hatches.The Final Touches
While two flanges form the primary support structure around the hatches, Sven mentions there are two additional pieces required at each end to ensure comprehensive protection. This attention to detail highlights his commitment to producing a durable and reliable design. “Sailing is about finding your path, whether it’s across an ocean or within yourself.” – Sven Yrvind In conclusion, making flanges around bulkhead hatches may seem complex at first glance, but by following Sven Yrvind’s meticulous process, enthusiasts can achieve professional-level results. Remember that the journey of boatbuilding is as rewarding as reaching your destination; it tests one’s patience and dedication. For those seeking to embark on this adventure or simply gain more insight into marine craftsmanship, Sven’s wisdom is invaluable.After securely attaching the first portion of the flange, Sven allows ample time for it to dry before moving forward with additional steps. This patience and precision are key aspects of his successful boatbuilding methods.Step 4: Finishing Touches
Once the flange is fully dried, Sven removes the clamps carefully, ensuring no damage occurs during this process. He then moves on to attaching four more pieces onto these main frames, completing two pairs of flanges for the bulkhead hatches.The Final Touches
While two flanges form the primary support structure around the hatches, Sven mentions there are two additional pieces required at each end to ensure comprehensive protection. This attention to detail highlights his commitment to producing a durable and reliable design. “Sailing is about finding your path, whether it’s across an ocean or within yourself.” – Sven Yrvind In conclusion, making flanges around bulkhead hatches may seem complex at first glance, but by following Sven Yrvind’s meticulous process, enthusiasts can achieve professional-level results. Remember that the journey of boatbuilding is as rewarding as reaching your destination; it tests one’s patience and dedication. For those seeking to embark on this adventure or simply gain more insight into marine craftsmanship, Sven’s wisdom is invaluable.Sven proceeds to apply glue along one edge of the flange, ensuring a secure bond when clamped into place. He emphasizes that this stage is crucial for maintaining the structural integrity of the flange, which in turn safeguards the living area beneath the canvas when hatches are open.Step 3: Allowing Time to Dry
After securely attaching the first portion of the flange, Sven allows ample time for it to dry before moving forward with additional steps. This patience and precision are key aspects of his successful boatbuilding methods.Step 4: Finishing Touches
Once the flange is fully dried, Sven removes the clamps carefully, ensuring no damage occurs during this process. He then moves on to attaching four more pieces onto these main frames, completing two pairs of flanges for the bulkhead hatches.The Final Touches
While two flanges form the primary support structure around the hatches, Sven mentions there are two additional pieces required at each end to ensure comprehensive protection. This attention to detail highlights his commitment to producing a durable and reliable design. “Sailing is about finding your path, whether it’s across an ocean or within yourself.” – Sven Yrvind In conclusion, making flanges around bulkhead hatches may seem complex at first glance, but by following Sven Yrvind’s meticulous process, enthusiasts can achieve professional-level results. Remember that the journey of boatbuilding is as rewarding as reaching your destination; it tests one’s patience and dedication. For those seeking to embark on this adventure or simply gain more insight into marine craftsmanship, Sven’s wisdom is invaluable.Sven begins by explaining that working on flanges vertically and horizontally is significantly easier than doing so in a flat position. To simplify the process further, he divides the task into two or three steps as suggested by fellow expert “for for.” This approach not only makes it more manageable but also allows for greater precision in crafting each component.Step 2: Applying Glue and Securing
Sven proceeds to apply glue along one edge of the flange, ensuring a secure bond when clamped into place. He emphasizes that this stage is crucial for maintaining the structural integrity of the flange, which in turn safeguards the living area beneath the canvas when hatches are open.Step 3: Allowing Time to Dry
After securely attaching the first portion of the flange, Sven allows ample time for it to dry before moving forward with additional steps. This patience and precision are key aspects of his successful boatbuilding methods.Step 4: Finishing Touches
Once the flange is fully dried, Sven removes the clamps carefully, ensuring no damage occurs during this process. He then moves on to attaching four more pieces onto these main frames, completing two pairs of flanges for the bulkhead hatches.The Final Touches
While two flanges form the primary support structure around the hatches, Sven mentions there are two additional pieces required at each end to ensure comprehensive protection. This attention to detail highlights his commitment to producing a durable and reliable design. “Sailing is about finding your path, whether it’s across an ocean or within yourself.” – Sven Yrvind In conclusion, making flanges around bulkhead hatches may seem complex at first glance, but by following Sven Yrvind’s meticulous process, enthusiasts can achieve professional-level results. Remember that the journey of boatbuilding is as rewarding as reaching your destination; it tests one’s patience and dedication. For those seeking to embark on this adventure or simply gain more insight into marine craftsmanship, Sven’s wisdom is invaluable.Sven Yrvind, a renowned yacht designer and sailor, shares valuable insights on creating flanges around bulkhead hatches for canvas protection in this enlightening video. By following his expert guidance, boat enthusiasts can ensure their living areas remain secure while allowing unhindered access through the hatches.Step 1: Starting with the Flange
Sven begins by explaining that working on flanges vertically and horizontally is significantly easier than doing so in a flat position. To simplify the process further, he divides the task into two or three steps as suggested by fellow expert “for for.” This approach not only makes it more manageable but also allows for greater precision in crafting each component.Step 2: Applying Glue and Securing
Sven proceeds to apply glue along one edge of the flange, ensuring a secure bond when clamped into place. He emphasizes that this stage is crucial for maintaining the structural integrity of the flange, which in turn safeguards the living area beneath the canvas when hatches are open.Step 3: Allowing Time to Dry
After securely attaching the first portion of the flange, Sven allows ample time for it to dry before moving forward with additional steps. This patience and precision are key aspects of his successful boatbuilding methods.Step 4: Finishing Touches
Once the flange is fully dried, Sven removes the clamps carefully, ensuring no damage occurs during this process. He then moves on to attaching four more pieces onto these main frames, completing two pairs of flanges for the bulkhead hatches.The Final Touches
While two flanges form the primary support structure around the hatches, Sven mentions there are two additional pieces required at each end to ensure comprehensive protection. This attention to detail highlights his commitment to producing a durable and reliable design. “Sailing is about finding your path, whether it’s across an ocean or within yourself.” – Sven Yrvind In conclusion, making flanges around bulkhead hatches may seem complex at first glance, but by following Sven Yrvind’s meticulous process, enthusiasts can achieve professional-level results. Remember that the journey of boatbuilding is as rewarding as reaching your destination; it tests one’s patience and dedication. For those seeking to embark on this adventure or simply gain more insight into marine craftsmanship, Sven’s wisdom is invaluable.Making Flanges Around Bulkhead Hatches for Canvas
Sven Yrvind, a renowned yacht designer and sailor, shares valuable insights on creating flanges around bulkhead hatches for canvas protection in this enlightening video. By following his expert guidance, boat enthusiasts can ensure their living areas remain secure while allowing unhindered access through the hatches.Step 1: Starting with the Flange
Sven begins by explaining that working on flanges vertically and horizontally is significantly easier than doing so in a flat position. To simplify the process further, he divides the task into two or three steps as suggested by fellow expert “for for.” This approach not only makes it more manageable but also allows for greater precision in crafting each component.Step 2: Applying Glue and Securing
Sven proceeds to apply glue along one edge of the flange, ensuring a secure bond when clamped into place. He emphasizes that this stage is crucial for maintaining the structural integrity of the flange, which in turn safeguards the living area beneath the canvas when hatches are open.Step 3: Allowing Time to Dry
After securely attaching the first portion of the flange, Sven allows ample time for it to dry before moving forward with additional steps. This patience and precision are key aspects of his successful boatbuilding methods.Step 4: Finishing Touches
Once the flange is fully dried, Sven removes the clamps carefully, ensuring no damage occurs during this process. He then moves on to attaching four more pieces onto these main frames, completing two pairs of flanges for the bulkhead hatches.The Final Touches
While two flanges form the primary support structure around the hatches, Sven mentions there are two additional pieces required at each end to ensure comprehensive protection. This attention to detail highlights his commitment to producing a durable and reliable design. “Sailing is about finding your path, whether it’s across an ocean or within yourself.” – Sven Yrvind In conclusion, making flanges around bulkhead hatches may seem complex at first glance, but by following Sven Yrvind’s meticulous process, enthusiasts can achieve professional-level results. Remember that the journey of boatbuilding is as rewarding as reaching your destination; it tests one’s patience and dedication. For those seeking to embark on this adventure or simply gain more insight into marine craftsmanship, Sven’s wisdom is invaluable.Once the flange is fully dried, Sven removes the clamps carefully, ensuring no damage occurs during this process. He then moves on to attaching four more pieces onto these main frames, completing two pairs of flanges for the bulkhead hatches.The Final Touches
While two flanges form the primary support structure around the hatches, Sven mentions there are two additional pieces required at each end to ensure comprehensive protection. This attention to detail highlights his commitment to producing a durable and reliable design. “Sailing is about finding your path, whether it’s across an ocean or within yourself.” – Sven Yrvind In conclusion, making flanges around bulkhead hatches may seem complex at first glance, but by following Sven Yrvind’s meticulous process, enthusiasts can achieve professional-level results. Remember that the journey of boatbuilding is as rewarding as reaching your destination; it tests one’s patience and dedication. For those seeking to embark on this adventure or simply gain more insight into marine craftsmanship, Sven’s wisdom is invaluable.After securely attaching the first portion of the flange, Sven allows ample time for it to dry before moving forward with additional steps. This patience and precision are key aspects of his successful boatbuilding methods.Step 4: Finishing Touches
Once the flange is fully dried, Sven removes the clamps carefully, ensuring no damage occurs during this process. He then moves on to attaching four more pieces onto these main frames, completing two pairs of flanges for the bulkhead hatches.The Final Touches
While two flanges form the primary support structure around the hatches, Sven mentions there are two additional pieces required at each end to ensure comprehensive protection. This attention to detail highlights his commitment to producing a durable and reliable design. “Sailing is about finding your path, whether it’s across an ocean or within yourself.” – Sven Yrvind In conclusion, making flanges around bulkhead hatches may seem complex at first glance, but by following Sven Yrvind’s meticulous process, enthusiasts can achieve professional-level results. Remember that the journey of boatbuilding is as rewarding as reaching your destination; it tests one’s patience and dedication. For those seeking to embark on this adventure or simply gain more insight into marine craftsmanship, Sven’s wisdom is invaluable.Sven proceeds to apply glue along one edge of the flange, ensuring a secure bond when clamped into place. He emphasizes that this stage is crucial for maintaining the structural integrity of the flange, which in turn safeguards the living area beneath the canvas when hatches are open.Step 3: Allowing Time to Dry
After securely attaching the first portion of the flange, Sven allows ample time for it to dry before moving forward with additional steps. This patience and precision are key aspects of his successful boatbuilding methods.Step 4: Finishing Touches
Once the flange is fully dried, Sven removes the clamps carefully, ensuring no damage occurs during this process. He then moves on to attaching four more pieces onto these main frames, completing two pairs of flanges for the bulkhead hatches.The Final Touches
While two flanges form the primary support structure around the hatches, Sven mentions there are two additional pieces required at each end to ensure comprehensive protection. This attention to detail highlights his commitment to producing a durable and reliable design. “Sailing is about finding your path, whether it’s across an ocean or within yourself.” – Sven Yrvind In conclusion, making flanges around bulkhead hatches may seem complex at first glance, but by following Sven Yrvind’s meticulous process, enthusiasts can achieve professional-level results. Remember that the journey of boatbuilding is as rewarding as reaching your destination; it tests one’s patience and dedication. For those seeking to embark on this adventure or simply gain more insight into marine craftsmanship, Sven’s wisdom is invaluable.Sven begins by explaining that working on flanges vertically and horizontally is significantly easier than doing so in a flat position. To simplify the process further, he divides the task into two or three steps as suggested by fellow expert “for for.” This approach not only makes it more manageable but also allows for greater precision in crafting each component.Step 2: Applying Glue and Securing
Sven proceeds to apply glue along one edge of the flange, ensuring a secure bond when clamped into place. He emphasizes that this stage is crucial for maintaining the structural integrity of the flange, which in turn safeguards the living area beneath the canvas when hatches are open.Step 3: Allowing Time to Dry
After securely attaching the first portion of the flange, Sven allows ample time for it to dry before moving forward with additional steps. This patience and precision are key aspects of his successful boatbuilding methods.Step 4: Finishing Touches
Once the flange is fully dried, Sven removes the clamps carefully, ensuring no damage occurs during this process. He then moves on to attaching four more pieces onto these main frames, completing two pairs of flanges for the bulkhead hatches.The Final Touches
While two flanges form the primary support structure around the hatches, Sven mentions there are two additional pieces required at each end to ensure comprehensive protection. This attention to detail highlights his commitment to producing a durable and reliable design. “Sailing is about finding your path, whether it’s across an ocean or within yourself.” – Sven Yrvind In conclusion, making flanges around bulkhead hatches may seem complex at first glance, but by following Sven Yrvind’s meticulous process, enthusiasts can achieve professional-level results. Remember that the journey of boatbuilding is as rewarding as reaching your destination; it tests one’s patience and dedication. For those seeking to embark on this adventure or simply gain more insight into marine craftsmanship, Sven’s wisdom is invaluable.Sven Yrvind, a renowned yacht designer and sailor, shares valuable insights on creating flanges around bulkhead hatches for canvas protection in this enlightening video. By following his expert guidance, boat enthusiasts can ensure their living areas remain secure while allowing unhindered access through the hatches.Step 1: Starting with the Flange
Sven begins by explaining that working on flanges vertically and horizontally is significantly easier than doing so in a flat position. To simplify the process further, he divides the task into two or three steps as suggested by fellow expert “for for.” This approach not only makes it more manageable but also allows for greater precision in crafting each component.Step 2: Applying Glue and Securing
Sven proceeds to apply glue along one edge of the flange, ensuring a secure bond when clamped into place. He emphasizes that this stage is crucial for maintaining the structural integrity of the flange, which in turn safeguards the living area beneath the canvas when hatches are open.Step 3: Allowing Time to Dry
After securely attaching the first portion of the flange, Sven allows ample time for it to dry before moving forward with additional steps. This patience and precision are key aspects of his successful boatbuilding methods.Step 4: Finishing Touches
Once the flange is fully dried, Sven removes the clamps carefully, ensuring no damage occurs during this process. He then moves on to attaching four more pieces onto these main frames, completing two pairs of flanges for the bulkhead hatches.The Final Touches
While two flanges form the primary support structure around the hatches, Sven mentions there are two additional pieces required at each end to ensure comprehensive protection. This attention to detail highlights his commitment to producing a durable and reliable design. “Sailing is about finding your path, whether it’s across an ocean or within yourself.” – Sven Yrvind In conclusion, making flanges around bulkhead hatches may seem complex at first glance, but by following Sven Yrvind’s meticulous process, enthusiasts can achieve professional-level results. Remember that the journey of boatbuilding is as rewarding as reaching your destination; it tests one’s patience and dedication. For those seeking to embark on this adventure or simply gain more insight into marine craftsmanship, Sven’s wisdom is invaluable.Making Flanges Around Bulkhead Hatches for Canvas
Sven Yrvind, a renowned yacht designer and sailor, shares valuable insights on creating flanges around bulkhead hatches for canvas protection in this enlightening video. By following his expert guidance, boat enthusiasts can ensure their living areas remain secure while allowing unhindered access through the hatches.Step 1: Starting with the Flange
Sven begins by explaining that working on flanges vertically and horizontally is significantly easier than doing so in a flat position. To simplify the process further, he divides the task into two or three steps as suggested by fellow expert “for for.” This approach not only makes it more manageable but also allows for greater precision in crafting each component.Step 2: Applying Glue and Securing
Sven proceeds to apply glue along one edge of the flange, ensuring a secure bond when clamped into place. He emphasizes that this stage is crucial for maintaining the structural integrity of the flange, which in turn safeguards the living area beneath the canvas when hatches are open.Step 3: Allowing Time to Dry
After securely attaching the first portion of the flange, Sven allows ample time for it to dry before moving forward with additional steps. This patience and precision are key aspects of his successful boatbuilding methods.Step 4: Finishing Touches
Once the flange is fully dried, Sven removes the clamps carefully, ensuring no damage occurs during this process. He then moves on to attaching four more pieces onto these main frames, completing two pairs of flanges for the bulkhead hatches.The Final Touches
While two flanges form the primary support structure around the hatches, Sven mentions there are two additional pieces required at each end to ensure comprehensive protection. This attention to detail highlights his commitment to producing a durable and reliable design. “Sailing is about finding your path, whether it’s across an ocean or within yourself.” – Sven Yrvind In conclusion, making flanges around bulkhead hatches may seem complex at first glance, but by following Sven Yrvind’s meticulous process, enthusiasts can achieve professional-level results. Remember that the journey of boatbuilding is as rewarding as reaching your destination; it tests one’s patience and dedication. For those seeking to embark on this adventure or simply gain more insight into marine craftsmanship, Sven’s wisdom is invaluable.Sven begins by explaining that working on flanges vertically and horizontally is significantly easier than doing so in a flat position. To simplify the process further, he divides the task into two or three steps as suggested by fellow expert “for for.” This approach not only makes it more manageable but also allows for greater precision in crafting each component.Step 2: Applying Glue and Securing
Sven proceeds to apply glue along one edge of the flange, ensuring a secure bond when clamped into place. He emphasizes that this stage is crucial for maintaining the structural integrity of the flange, which in turn safeguards the living area beneath the canvas when hatches are open.Step 3: Allowing Time to Dry
After securely attaching the first portion of the flange, Sven allows ample time for it to dry before moving forward with additional steps. This patience and precision are key aspects of his successful boatbuilding methods.Step 4: Finishing Touches
Once the flange is fully dried, Sven removes the clamps carefully, ensuring no damage occurs during this process. He then moves on to attaching four more pieces onto these main frames, completing two pairs of flanges for the bulkhead hatches.The Final Touches
While two flanges form the primary support structure around the hatches, Sven mentions there are two additional pieces required at each end to ensure comprehensive protection. This attention to detail highlights his commitment to producing a durable and reliable design. “Sailing is about finding your path, whether it’s across an ocean or within yourself.” – Sven Yrvind In conclusion, making flanges around bulkhead hatches may seem complex at first glance, but by following Sven Yrvind’s meticulous process, enthusiasts can achieve professional-level results. Remember that the journey of boatbuilding is as rewarding as reaching your destination; it tests one’s patience and dedication. For those seeking to embark on this adventure or simply gain more insight into marine craftsmanship, Sven’s wisdom is invaluable.Making Flanges Around Bulkhead Hatches for Canvas
Sven Yrvind, a renowned yacht designer and sailor, shares valuable insights on creating flanges around bulkhead hatches for canvas protection in this enlightening video. By following his expert guidance, boat enthusiasts can ensure their living areas remain secure while allowing unhindered access through the hatches.Step 1: Starting with the Flange
Sven begins by explaining that working on flanges vertically and horizontally is significantly easier than doing so in a flat position. To simplify the process further, he divides the task into two or three steps as suggested by fellow expert “for for.” This approach not only makes it more manageable but also allows for greater precision in crafting each component.Step 2: Applying Glue and Securing
Sven proceeds to apply glue along one edge of the flange, ensuring a secure bond when clamped into place. He emphasizes that this stage is crucial for maintaining the structural integrity of the flange, which in turn safeguards the living area beneath the canvas when hatches are open.Step 3: Allowing Time to Dry
After securely attaching the first portion of the flange, Sven allows ample time for it to dry before moving forward with additional steps. This patience and precision are key aspects of his successful boatbuilding methods.Step 4: Finishing Touches
Once the flange is fully dried, Sven removes the clamps carefully, ensuring no damage occurs during this process. He then moves on to attaching four more pieces onto these main frames, completing two pairs of flanges for the bulkhead hatches.The Final Touches
While two flanges form the primary support structure around the hatches, Sven mentions there are two additional pieces required at each end to ensure comprehensive protection. This attention to detail highlights his commitment to producing a durable and reliable design. “Sailing is about finding your path, whether it’s across an ocean or within yourself.” – Sven Yrvind In conclusion, making flanges around bulkhead hatches may seem complex at first glance, but by following Sven Yrvind’s meticulous process, enthusiasts can achieve professional-level results. Remember that the journey of boatbuilding is as rewarding as reaching your destination; it tests one’s patience and dedication. For those seeking to embark on this adventure or simply gain more insight into marine craftsmanship, Sven’s wisdom is invaluable.After securely attaching the first portion of the flange, Sven allows ample time for it to dry before moving forward with additional steps. This patience and precision are key aspects of his successful boatbuilding methods.Step 4: Finishing Touches
Once the flange is fully dried, Sven removes the clamps carefully, ensuring no damage occurs during this process. He then moves on to attaching four more pieces onto these main frames, completing two pairs of flanges for the bulkhead hatches.The Final Touches
While two flanges form the primary support structure around the hatches, Sven mentions there are two additional pieces required at each end to ensure comprehensive protection. This attention to detail highlights his commitment to producing a durable and reliable design. “Sailing is about finding your path, whether it’s across an ocean or within yourself.” – Sven Yrvind In conclusion, making flanges around bulkhead hatches may seem complex at first glance, but by following Sven Yrvind’s meticulous process, enthusiasts can achieve professional-level results. Remember that the journey of boatbuilding is as rewarding as reaching your destination; it tests one’s patience and dedication. For those seeking to embark on this adventure or simply gain more insight into marine craftsmanship, Sven’s wisdom is invaluable.Sven Yrvind, a renowned yacht designer and sailor, shares valuable insights on creating flanges around bulkhead hatches for canvas protection in this enlightening video. By following his expert guidance, boat enthusiasts can ensure their living areas remain secure while allowing unhindered access through the hatches.Step 1: Starting with the Flange
Sven begins by explaining that working on flanges vertically and horizontally is significantly easier than doing so in a flat position. To simplify the process further, he divides the task into two or three steps as suggested by fellow expert “for for.” This approach not only makes it more manageable but also allows for greater precision in crafting each component.Step 2: Applying Glue and Securing
Sven proceeds to apply glue along one edge of the flange, ensuring a secure bond when clamped into place. He emphasizes that this stage is crucial for maintaining the structural integrity of the flange, which in turn safeguards the living area beneath the canvas when hatches are open.Step 3: Allowing Time to Dry
After securely attaching the first portion of the flange, Sven allows ample time for it to dry before moving forward with additional steps. This patience and precision are key aspects of his successful boatbuilding methods.Step 4: Finishing Touches
Once the flange is fully dried, Sven removes the clamps carefully, ensuring no damage occurs during this process. He then moves on to attaching four more pieces onto these main frames, completing two pairs of flanges for the bulkhead hatches.The Final Touches
While two flanges form the primary support structure around the hatches, Sven mentions there are two additional pieces required at each end to ensure comprehensive protection. This attention to detail highlights his commitment to producing a durable and reliable design. “Sailing is about finding your path, whether it’s across an ocean or within yourself.” – Sven Yrvind In conclusion, making flanges around bulkhead hatches may seem complex at first glance, but by following Sven Yrvind’s meticulous process, enthusiasts can achieve professional-level results. Remember that the journey of boatbuilding is as rewarding as reaching your destination; it tests one’s patience and dedication. For those seeking to embark on this adventure or simply gain more insight into marine craftsmanship, Sven’s wisdom is invaluable.Making Flanges Around Bulkhead Hatches for Canvas
Sven Yrvind, a renowned yacht designer and sailor, shares valuable insights on creating flanges around bulkhead hatches for canvas protection in this enlightening video. By following his expert guidance, boat enthusiasts can ensure their living areas remain secure while allowing unhindered access through the hatches.Step 1: Starting with the Flange
Sven begins by explaining that working on flanges vertically and horizontally is significantly easier than doing so in a flat position. To simplify the process further, he divides the task into two or three steps as suggested by fellow expert “for for.” This approach not only makes it more manageable but also allows for greater precision in crafting each component.Step 2: Applying Glue and Securing
Sven proceeds to apply glue along one edge of the flange, ensuring a secure bond when clamped into place. He emphasizes that this stage is crucial for maintaining the structural integrity of the flange, which in turn safeguards the living area beneath the canvas when hatches are open.Step 3: Allowing Time to Dry
After securely attaching the first portion of the flange, Sven allows ample time for it to dry before moving forward with additional steps. This patience and precision are key aspects of his successful boatbuilding methods.Step 4: Finishing Touches
Once the flange is fully dried, Sven removes the clamps carefully, ensuring no damage occurs during this process. He then moves on to attaching four more pieces onto these main frames, completing two pairs of flanges for the bulkhead hatches.The Final Touches
While two flanges form the primary support structure around the hatches, Sven mentions there are two additional pieces required at each end to ensure comprehensive protection. This attention to detail highlights his commitment to producing a durable and reliable design. “Sailing is about finding your path, whether it’s across an ocean or within yourself.” – Sven Yrvind In conclusion, making flanges around bulkhead hatches may seem complex at first glance, but by following Sven Yrvind’s meticulous process, enthusiasts can achieve professional-level results. Remember that the journey of boatbuilding is as rewarding as reaching your destination; it tests one’s patience and dedication. For those seeking to embark on this adventure or simply gain more insight into marine craftsmanship, Sven’s wisdom is invaluable.Sven proceeds to apply glue along one edge of the flange, ensuring a secure bond when clamped into place. He emphasizes that this stage is crucial for maintaining the structural integrity of the flange, which in turn safeguards the living area beneath the canvas when hatches are open.Step 3: Allowing Time to Dry
After securely attaching the first portion of the flange, Sven allows ample time for it to dry before moving forward with additional steps. This patience and precision are key aspects of his successful boatbuilding methods.Step 4: Finishing Touches
Once the flange is fully dried, Sven removes the clamps carefully, ensuring no damage occurs during this process. He then moves on to attaching four more pieces onto these main frames, completing two pairs of flanges for the bulkhead hatches.The Final Touches
While two flanges form the primary support structure around the hatches, Sven mentions there are two additional pieces required at each end to ensure comprehensive protection. This attention to detail highlights his commitment to producing a durable and reliable design. “Sailing is about finding your path, whether it’s across an ocean or within yourself.” – Sven Yrvind In conclusion, making flanges around bulkhead hatches may seem complex at first glance, but by following Sven Yrvind’s meticulous process, enthusiasts can achieve professional-level results. Remember that the journey of boatbuilding is as rewarding as reaching your destination; it tests one’s patience and dedication. For those seeking to embark on this adventure or simply gain more insight into marine craftsmanship, Sven’s wisdom is invaluable.Sven Yrvind, a renowned yacht designer and sailor, shares valuable insights on creating flanges around bulkhead hatches for canvas protection in this enlightening video. By following his expert guidance, boat enthusiasts can ensure their living areas remain secure while allowing unhindered access through the hatches.Step 1: Starting with the Flange
Sven begins by explaining that working on flanges vertically and horizontally is significantly easier than doing so in a flat position. To simplify the process further, he divides the task into two or three steps as suggested by fellow expert “for for.” This approach not only makes it more manageable but also allows for greater precision in crafting each component.Step 2: Applying Glue and Securing
Sven proceeds to apply glue along one edge of the flange, ensuring a secure bond when clamped into place. He emphasizes that this stage is crucial for maintaining the structural integrity of the flange, which in turn safeguards the living area beneath the canvas when hatches are open.Step 3: Allowing Time to Dry
After securely attaching the first portion of the flange, Sven allows ample time for it to dry before moving forward with additional steps. This patience and precision are key aspects of his successful boatbuilding methods.Step 4: Finishing Touches
Once the flange is fully dried, Sven removes the clamps carefully, ensuring no damage occurs during this process. He then moves on to attaching four more pieces onto these main frames, completing two pairs of flanges for the bulkhead hatches.The Final Touches
While two flanges form the primary support structure around the hatches, Sven mentions there are two additional pieces required at each end to ensure comprehensive protection. This attention to detail highlights his commitment to producing a durable and reliable design. “Sailing is about finding your path, whether it’s across an ocean or within yourself.” – Sven Yrvind In conclusion, making flanges around bulkhead hatches may seem complex at first glance, but by following Sven Yrvind’s meticulous process, enthusiasts can achieve professional-level results. Remember that the journey of boatbuilding is as rewarding as reaching your destination; it tests one’s patience and dedication. For those seeking to embark on this adventure or simply gain more insight into marine craftsmanship, Sven’s wisdom is invaluable.Making Flanges Around Bulkhead Hatches for Canvas
Sven Yrvind, a renowned yacht designer and sailor, shares valuable insights on creating flanges around bulkhead hatches for canvas protection in this enlightening video. By following his expert guidance, boat enthusiasts can ensure their living areas remain secure while allowing unhindered access through the hatches.Step 1: Starting with the Flange
Sven begins by explaining that working on flanges vertically and horizontally is significantly easier than doing so in a flat position. To simplify the process further, he divides the task into two or three steps as suggested by fellow expert “for for.” This approach not only makes it more manageable but also allows for greater precision in crafting each component.Step 2: Applying Glue and Securing
Sven proceeds to apply glue along one edge of the flange, ensuring a secure bond when clamped into place. He emphasizes that this stage is crucial for maintaining the structural integrity of the flange, which in turn safeguards the living area beneath the canvas when hatches are open.Step 3: Allowing Time to Dry
After securely attaching the first portion of the flange, Sven allows ample time for it to dry before moving forward with additional steps. This patience and precision are key aspects of his successful boatbuilding methods.Step 4: Finishing Touches
Once the flange is fully dried, Sven removes the clamps carefully, ensuring no damage occurs during this process. He then moves on to attaching four more pieces onto these main frames, completing two pairs of flanges for the bulkhead hatches.The Final Touches
While two flanges form the primary support structure around the hatches, Sven mentions there are two additional pieces required at each end to ensure comprehensive protection. This attention to detail highlights his commitment to producing a durable and reliable design. “Sailing is about finding your path, whether it’s across an ocean or within yourself.” – Sven Yrvind In conclusion, making flanges around bulkhead hatches may seem complex at first glance, but by following Sven Yrvind’s meticulous process, enthusiasts can achieve professional-level results. Remember that the journey of boatbuilding is as rewarding as reaching your destination; it tests one’s patience and dedication. For those seeking to embark on this adventure or simply gain more insight into marine craftsmanship, Sven’s wisdom is invaluable.Sven begins by explaining that working on flanges vertically and horizontally is significantly easier than doing so in a flat position. To simplify the process further, he divides the task into two or three steps as suggested by fellow expert “for for.” This approach not only makes it more manageable but also allows for greater precision in crafting each component.Step 2: Applying Glue and Securing
Sven proceeds to apply glue along one edge of the flange, ensuring a secure bond when clamped into place. He emphasizes that this stage is crucial for maintaining the structural integrity of the flange, which in turn safeguards the living area beneath the canvas when hatches are open.Step 3: Allowing Time to Dry
After securely attaching the first portion of the flange, Sven allows ample time for it to dry before moving forward with additional steps. This patience and precision are key aspects of his successful boatbuilding methods.Step 4: Finishing Touches
Once the flange is fully dried, Sven removes the clamps carefully, ensuring no damage occurs during this process. He then moves on to attaching four more pieces onto these main frames, completing two pairs of flanges for the bulkhead hatches.The Final Touches
While two flanges form the primary support structure around the hatches, Sven mentions there are two additional pieces required at each end to ensure comprehensive protection. This attention to detail highlights his commitment to producing a durable and reliable design. “Sailing is about finding your path, whether it’s across an ocean or within yourself.” – Sven Yrvind In conclusion, making flanges around bulkhead hatches may seem complex at first glance, but by following Sven Yrvind’s meticulous process, enthusiasts can achieve professional-level results. Remember that the journey of boatbuilding is as rewarding as reaching your destination; it tests one’s patience and dedication. For those seeking to embark on this adventure or simply gain more insight into marine craftsmanship, Sven’s wisdom is invaluable.Sven Yrvind, a renowned yacht designer and sailor, shares valuable insights on creating flanges around bulkhead hatches for canvas protection in this enlightening video. By following his expert guidance, boat enthusiasts can ensure their living areas remain secure while allowing unhindered access through the hatches.Step 1: Starting with the Flange
Sven begins by explaining that working on flanges vertically and horizontally is significantly easier than doing so in a flat position. To simplify the process further, he divides the task into two or three steps as suggested by fellow expert “for for.” This approach not only makes it more manageable but also allows for greater precision in crafting each component.Step 2: Applying Glue and Securing
Sven proceeds to apply glue along one edge of the flange, ensuring a secure bond when clamped into place. He emphasizes that this stage is crucial for maintaining the structural integrity of the flange, which in turn safeguards the living area beneath the canvas when hatches are open.Step 3: Allowing Time to Dry
After securely attaching the first portion of the flange, Sven allows ample time for it to dry before moving forward with additional steps. This patience and precision are key aspects of his successful boatbuilding methods.Step 4: Finishing Touches
Once the flange is fully dried, Sven removes the clamps carefully, ensuring no damage occurs during this process. He then moves on to attaching four more pieces onto these main frames, completing two pairs of flanges for the bulkhead hatches.The Final Touches
While two flanges form the primary support structure around the hatches, Sven mentions there are two additional pieces required at each end to ensure comprehensive protection. This attention to detail highlights his commitment to producing a durable and reliable design. “Sailing is about finding your path, whether it’s across an ocean or within yourself.” – Sven Yrvind In conclusion, making flanges around bulkhead hatches may seem complex at first glance, but by following Sven Yrvind’s meticulous process, enthusiasts can achieve professional-level results. Remember that the journey of boatbuilding is as rewarding as reaching your destination; it tests one’s patience and dedication. For those seeking to embark on this adventure or simply gain more insight into marine craftsmanship, Sven’s wisdom is invaluable.Making Flanges Around Bulkhead Hatches for Canvas
Sven Yrvind, a renowned yacht designer and sailor, shares valuable insights on creating flanges around bulkhead hatches for canvas protection in this enlightening video. By following his expert guidance, boat enthusiasts can ensure their living areas remain secure while allowing unhindered access through the hatches.Step 1: Starting with the Flange
Sven begins by explaining that working on flanges vertically and horizontally is significantly easier than doing so in a flat position. To simplify the process further, he divides the task into two or three steps as suggested by fellow expert “for for.” This approach not only makes it more manageable but also allows for greater precision in crafting each component.Step 2: Applying Glue and Securing
Sven proceeds to apply glue along one edge of the flange, ensuring a secure bond when clamped into place. He emphasizes that this stage is crucial for maintaining the structural integrity of the flange, which in turn safeguards the living area beneath the canvas when hatches are open.Step 3: Allowing Time to Dry
After securely attaching the first portion of the flange, Sven allows ample time for it to dry before moving forward with additional steps. This patience and precision are key aspects of his successful boatbuilding methods.Step 4: Finishing Touches
Once the flange is fully dried, Sven removes the clamps carefully, ensuring no damage occurs during this process. He then moves on to attaching four more pieces onto these main frames, completing two pairs of flanges for the bulkhead hatches.The Final Touches
While two flanges form the primary support structure around the hatches, Sven mentions there are two additional pieces required at each end to ensure comprehensive protection. This attention to detail highlights his commitment to producing a durable and reliable design. “Sailing is about finding your path, whether it’s across an ocean or within yourself.” – Sven Yrvind In conclusion, making flanges around bulkhead hatches may seem complex at first glance, but by following Sven Yrvind’s meticulous process, enthusiasts can achieve professional-level results. Remember that the journey of boatbuilding is as rewarding as reaching your destination; it tests one’s patience and dedication. For those seeking to embark on this adventure or simply gain more insight into marine craftsmanship, Sven’s wisdom is invaluable.Once the flange is fully dried, Sven removes the clamps carefully, ensuring no damage occurs during this process. He then moves on to attaching four more pieces onto these main frames, completing two pairs of flanges for the bulkhead hatches.The Final Touches
While two flanges form the primary support structure around the hatches, Sven mentions there are two additional pieces required at each end to ensure comprehensive protection. This attention to detail highlights his commitment to producing a durable and reliable design. “Sailing is about finding your path, whether it’s across an ocean or within yourself.” – Sven Yrvind In conclusion, making flanges around bulkhead hatches may seem complex at first glance, but by following Sven Yrvind’s meticulous process, enthusiasts can achieve professional-level results. Remember that the journey of boatbuilding is as rewarding as reaching your destination; it tests one’s patience and dedication. For those seeking to embark on this adventure or simply gain more insight into marine craftsmanship, Sven’s wisdom is invaluable.Sven begins by explaining that working on flanges vertically and horizontally is significantly easier than doing so in a flat position. To simplify the process further, he divides the task into two or three steps as suggested by fellow expert “for for.” This approach not only makes it more manageable but also allows for greater precision in crafting each component.Step 2: Applying Glue and Securing
Sven proceeds to apply glue along one edge of the flange, ensuring a secure bond when clamped into place. He emphasizes that this stage is crucial for maintaining the structural integrity of the flange, which in turn safeguards the living area beneath the canvas when hatches are open.Step 3: Allowing Time to Dry
After securely attaching the first portion of the flange, Sven allows ample time for it to dry before moving forward with additional steps. This patience and precision are key aspects of his successful boatbuilding methods.Step 4: Finishing Touches
Once the flange is fully dried, Sven removes the clamps carefully, ensuring no damage occurs during this process. He then moves on to attaching four more pieces onto these main frames, completing two pairs of flanges for the bulkhead hatches.The Final Touches
While two flanges form the primary support structure around the hatches, Sven mentions there are two additional pieces required at each end to ensure comprehensive protection. This attention to detail highlights his commitment to producing a durable and reliable design. “Sailing is about finding your path, whether it’s across an ocean or within yourself.” – Sven Yrvind In conclusion, making flanges around bulkhead hatches may seem complex at first glance, but by following Sven Yrvind’s meticulous process, enthusiasts can achieve professional-level results. Remember that the journey of boatbuilding is as rewarding as reaching your destination; it tests one’s patience and dedication. For those seeking to embark on this adventure or simply gain more insight into marine craftsmanship, Sven’s wisdom is invaluable.Sven Yrvind, a renowned yacht designer and sailor, shares valuable insights on creating flanges around bulkhead hatches for canvas protection in this enlightening video. By following his expert guidance, boat enthusiasts can ensure their living areas remain secure while allowing unhindered access through the hatches.Step 1: Starting with the Flange
Sven begins by explaining that working on flanges vertically and horizontally is significantly easier than doing so in a flat position. To simplify the process further, he divides the task into two or three steps as suggested by fellow expert “for for.” This approach not only makes it more manageable but also allows for greater precision in crafting each component.Step 2: Applying Glue and Securing
Sven proceeds to apply glue along one edge of the flange, ensuring a secure bond when clamped into place. He emphasizes that this stage is crucial for maintaining the structural integrity of the flange, which in turn safeguards the living area beneath the canvas when hatches are open.Step 3: Allowing Time to Dry
After securely attaching the first portion of the flange, Sven allows ample time for it to dry before moving forward with additional steps. This patience and precision are key aspects of his successful boatbuilding methods.Step 4: Finishing Touches
Once the flange is fully dried, Sven removes the clamps carefully, ensuring no damage occurs during this process. He then moves on to attaching four more pieces onto these main frames, completing two pairs of flanges for the bulkhead hatches.The Final Touches
While two flanges form the primary support structure around the hatches, Sven mentions there are two additional pieces required at each end to ensure comprehensive protection. This attention to detail highlights his commitment to producing a durable and reliable design. “Sailing is about finding your path, whether it’s across an ocean or within yourself.” – Sven Yrvind In conclusion, making flanges around bulkhead hatches may seem complex at first glance, but by following Sven Yrvind’s meticulous process, enthusiasts can achieve professional-level results. Remember that the journey of boatbuilding is as rewarding as reaching your destination; it tests one’s patience and dedication. For those seeking to embark on this adventure or simply gain more insight into marine craftsmanship, Sven’s wisdom is invaluable.Making Flanges Around Bulkhead Hatches for Canvas
Sven Yrvind, a renowned yacht designer and sailor, shares valuable insights on creating flanges around bulkhead hatches for canvas protection in this enlightening video. By following his expert guidance, boat enthusiasts can ensure their living areas remain secure while allowing unhindered access through the hatches.Step 1: Starting with the Flange
Sven begins by explaining that working on flanges vertically and horizontally is significantly easier than doing so in a flat position. To simplify the process further, he divides the task into two or three steps as suggested by fellow expert “for for.” This approach not only makes it more manageable but also allows for greater precision in crafting each component.Step 2: Applying Glue and Securing
Sven proceeds to apply glue along one edge of the flange, ensuring a secure bond when clamped into place. He emphasizes that this stage is crucial for maintaining the structural integrity of the flange, which in turn safeguards the living area beneath the canvas when hatches are open.Step 3: Allowing Time to Dry
After securely attaching the first portion of the flange, Sven allows ample time for it to dry before moving forward with additional steps. This patience and precision are key aspects of his successful boatbuilding methods.Step 4: Finishing Touches
Once the flange is fully dried, Sven removes the clamps carefully, ensuring no damage occurs during this process. He then moves on to attaching four more pieces onto these main frames, completing two pairs of flanges for the bulkhead hatches.The Final Touches
While two flanges form the primary support structure around the hatches, Sven mentions there are two additional pieces required at each end to ensure comprehensive protection. This attention to detail highlights his commitment to producing a durable and reliable design. “Sailing is about finding your path, whether it’s across an ocean or within yourself.” – Sven Yrvind In conclusion, making flanges around bulkhead hatches may seem complex at first glance, but by following Sven Yrvind’s meticulous process, enthusiasts can achieve professional-level results. Remember that the journey of boatbuilding is as rewarding as reaching your destination; it tests one’s patience and dedication. For those seeking to embark on this adventure or simply gain more insight into marine craftsmanship, Sven’s wisdom is invaluable.After securely attaching the first portion of the flange, Sven allows ample time for it to dry before moving forward with additional steps. This patience and precision are key aspects of his successful boatbuilding methods.Step 4: Finishing Touches
Once the flange is fully dried, Sven removes the clamps carefully, ensuring no damage occurs during this process. He then moves on to attaching four more pieces onto these main frames, completing two pairs of flanges for the bulkhead hatches.The Final Touches
While two flanges form the primary support structure around the hatches, Sven mentions there are two additional pieces required at each end to ensure comprehensive protection. This attention to detail highlights his commitment to producing a durable and reliable design. “Sailing is about finding your path, whether it’s across an ocean or within yourself.” – Sven Yrvind In conclusion, making flanges around bulkhead hatches may seem complex at first glance, but by following Sven Yrvind’s meticulous process, enthusiasts can achieve professional-level results. Remember that the journey of boatbuilding is as rewarding as reaching your destination; it tests one’s patience and dedication. For those seeking to embark on this adventure or simply gain more insight into marine craftsmanship, Sven’s wisdom is invaluable.Sven begins by explaining that working on flanges vertically and horizontally is significantly easier than doing so in a flat position. To simplify the process further, he divides the task into two or three steps as suggested by fellow expert “for for.” This approach not only makes it more manageable but also allows for greater precision in crafting each component.Step 2: Applying Glue and Securing
Sven proceeds to apply glue along one edge of the flange, ensuring a secure bond when clamped into place. He emphasizes that this stage is crucial for maintaining the structural integrity of the flange, which in turn safeguards the living area beneath the canvas when hatches are open.Step 3: Allowing Time to Dry
After securely attaching the first portion of the flange, Sven allows ample time for it to dry before moving forward with additional steps. This patience and precision are key aspects of his successful boatbuilding methods.Step 4: Finishing Touches
Once the flange is fully dried, Sven removes the clamps carefully, ensuring no damage occurs during this process. He then moves on to attaching four more pieces onto these main frames, completing two pairs of flanges for the bulkhead hatches.The Final Touches
While two flanges form the primary support structure around the hatches, Sven mentions there are two additional pieces required at each end to ensure comprehensive protection. This attention to detail highlights his commitment to producing a durable and reliable design. “Sailing is about finding your path, whether it’s across an ocean or within yourself.” – Sven Yrvind In conclusion, making flanges around bulkhead hatches may seem complex at first glance, but by following Sven Yrvind’s meticulous process, enthusiasts can achieve professional-level results. Remember that the journey of boatbuilding is as rewarding as reaching your destination; it tests one’s patience and dedication. For those seeking to embark on this adventure or simply gain more insight into marine craftsmanship, Sven’s wisdom is invaluable.Sven Yrvind, a renowned yacht designer and sailor, shares valuable insights on creating flanges around bulkhead hatches for canvas protection in this enlightening video. By following his expert guidance, boat enthusiasts can ensure their living areas remain secure while allowing unhindered access through the hatches.Step 1: Starting with the Flange
Sven begins by explaining that working on flanges vertically and horizontally is significantly easier than doing so in a flat position. To simplify the process further, he divides the task into two or three steps as suggested by fellow expert “for for.” This approach not only makes it more manageable but also allows for greater precision in crafting each component.Step 2: Applying Glue and Securing
Sven proceeds to apply glue along one edge of the flange, ensuring a secure bond when clamped into place. He emphasizes that this stage is crucial for maintaining the structural integrity of the flange, which in turn safeguards the living area beneath the canvas when hatches are open.Step 3: Allowing Time to Dry
After securely attaching the first portion of the flange, Sven allows ample time for it to dry before moving forward with additional steps. This patience and precision are key aspects of his successful boatbuilding methods.Step 4: Finishing Touches
Once the flange is fully dried, Sven removes the clamps carefully, ensuring no damage occurs during this process. He then moves on to attaching four more pieces onto these main frames, completing two pairs of flanges for the bulkhead hatches.The Final Touches
While two flanges form the primary support structure around the hatches, Sven mentions there are two additional pieces required at each end to ensure comprehensive protection. This attention to detail highlights his commitment to producing a durable and reliable design. “Sailing is about finding your path, whether it’s across an ocean or within yourself.” – Sven Yrvind In conclusion, making flanges around bulkhead hatches may seem complex at first glance, but by following Sven Yrvind’s meticulous process, enthusiasts can achieve professional-level results. Remember that the journey of boatbuilding is as rewarding as reaching your destination; it tests one’s patience and dedication. For those seeking to embark on this adventure or simply gain more insight into marine craftsmanship, Sven’s wisdom is invaluable.Making Flanges Around Bulkhead Hatches for Canvas
Sven Yrvind, a renowned yacht designer and sailor, shares valuable insights on creating flanges around bulkhead hatches for canvas protection in this enlightening video. By following his expert guidance, boat enthusiasts can ensure their living areas remain secure while allowing unhindered access through the hatches.Step 1: Starting with the Flange
Sven begins by explaining that working on flanges vertically and horizontally is significantly easier than doing so in a flat position. To simplify the process further, he divides the task into two or three steps as suggested by fellow expert “for for.” This approach not only makes it more manageable but also allows for greater precision in crafting each component.Step 2: Applying Glue and Securing
Sven proceeds to apply glue along one edge of the flange, ensuring a secure bond when clamped into place. He emphasizes that this stage is crucial for maintaining the structural integrity of the flange, which in turn safeguards the living area beneath the canvas when hatches are open.Step 3: Allowing Time to Dry
After securely attaching the first portion of the flange, Sven allows ample time for it to dry before moving forward with additional steps. This patience and precision are key aspects of his successful boatbuilding methods.Step 4: Finishing Touches
Once the flange is fully dried, Sven removes the clamps carefully, ensuring no damage occurs during this process. He then moves on to attaching four more pieces onto these main frames, completing two pairs of flanges for the bulkhead hatches.The Final Touches
While two flanges form the primary support structure around the hatches, Sven mentions there are two additional pieces required at each end to ensure comprehensive protection. This attention to detail highlights his commitment to producing a durable and reliable design. “Sailing is about finding your path, whether it’s across an ocean or within yourself.” – Sven Yrvind In conclusion, making flanges around bulkhead hatches may seem complex at first glance, but by following Sven Yrvind’s meticulous process, enthusiasts can achieve professional-level results. Remember that the journey of boatbuilding is as rewarding as reaching your destination; it tests one’s patience and dedication. For those seeking to embark on this adventure or simply gain more insight into marine craftsmanship, Sven’s wisdom is invaluable.Sven proceeds to apply glue along one edge of the flange, ensuring a secure bond when clamped into place. He emphasizes that this stage is crucial for maintaining the structural integrity of the flange, which in turn safeguards the living area beneath the canvas when hatches are open.Step 3: Allowing Time to Dry
After securely attaching the first portion of the flange, Sven allows ample time for it to dry before moving forward with additional steps. This patience and precision are key aspects of his successful boatbuilding methods.Step 4: Finishing Touches
Once the flange is fully dried, Sven removes the clamps carefully, ensuring no damage occurs during this process. He then moves on to attaching four more pieces onto these main frames, completing two pairs of flanges for the bulkhead hatches.The Final Touches
While two flanges form the primary support structure around the hatches, Sven mentions there are two additional pieces required at each end to ensure comprehensive protection. This attention to detail highlights his commitment to producing a durable and reliable design. “Sailing is about finding your path, whether it’s across an ocean or within yourself.” – Sven Yrvind In conclusion, making flanges around bulkhead hatches may seem complex at first glance, but by following Sven Yrvind’s meticulous process, enthusiasts can achieve professional-level results. Remember that the journey of boatbuilding is as rewarding as reaching your destination; it tests one’s patience and dedication. For those seeking to embark on this adventure or simply gain more insight into marine craftsmanship, Sven’s wisdom is invaluable.Sven begins by explaining that working on flanges vertically and horizontally is significantly easier than doing so in a flat position. To simplify the process further, he divides the task into two or three steps as suggested by fellow expert “for for.” This approach not only makes it more manageable but also allows for greater precision in crafting each component.Step 2: Applying Glue and Securing
Sven proceeds to apply glue along one edge of the flange, ensuring a secure bond when clamped into place. He emphasizes that this stage is crucial for maintaining the structural integrity of the flange, which in turn safeguards the living area beneath the canvas when hatches are open.Step 3: Allowing Time to Dry
After securely attaching the first portion of the flange, Sven allows ample time for it to dry before moving forward with additional steps. This patience and precision are key aspects of his successful boatbuilding methods.Step 4: Finishing Touches
Once the flange is fully dried, Sven removes the clamps carefully, ensuring no damage occurs during this process. He then moves on to attaching four more pieces onto these main frames, completing two pairs of flanges for the bulkhead hatches.The Final Touches
While two flanges form the primary support structure around the hatches, Sven mentions there are two additional pieces required at each end to ensure comprehensive protection. This attention to detail highlights his commitment to producing a durable and reliable design. “Sailing is about finding your path, whether it’s across an ocean or within yourself.” – Sven Yrvind In conclusion, making flanges around bulkhead hatches may seem complex at first glance, but by following Sven Yrvind’s meticulous process, enthusiasts can achieve professional-level results. Remember that the journey of boatbuilding is as rewarding as reaching your destination; it tests one’s patience and dedication. For those seeking to embark on this adventure or simply gain more insight into marine craftsmanship, Sven’s wisdom is invaluable.Sven Yrvind, a renowned yacht designer and sailor, shares valuable insights on creating flanges around bulkhead hatches for canvas protection in this enlightening video. By following his expert guidance, boat enthusiasts can ensure their living areas remain secure while allowing unhindered access through the hatches.Step 1: Starting with the Flange
Sven begins by explaining that working on flanges vertically and horizontally is significantly easier than doing so in a flat position. To simplify the process further, he divides the task into two or three steps as suggested by fellow expert “for for.” This approach not only makes it more manageable but also allows for greater precision in crafting each component.Step 2: Applying Glue and Securing
Sven proceeds to apply glue along one edge of the flange, ensuring a secure bond when clamped into place. He emphasizes that this stage is crucial for maintaining the structural integrity of the flange, which in turn safeguards the living area beneath the canvas when hatches are open.Step 3: Allowing Time to Dry
After securely attaching the first portion of the flange, Sven allows ample time for it to dry before moving forward with additional steps. This patience and precision are key aspects of his successful boatbuilding methods.Step 4: Finishing Touches
Once the flange is fully dried, Sven removes the clamps carefully, ensuring no damage occurs during this process. He then moves on to attaching four more pieces onto these main frames, completing two pairs of flanges for the bulkhead hatches.The Final Touches
While two flanges form the primary support structure around the hatches, Sven mentions there are two additional pieces required at each end to ensure comprehensive protection. This attention to detail highlights his commitment to producing a durable and reliable design. “Sailing is about finding your path, whether it’s across an ocean or within yourself.” – Sven Yrvind In conclusion, making flanges around bulkhead hatches may seem complex at first glance, but by following Sven Yrvind’s meticulous process, enthusiasts can achieve professional-level results. Remember that the journey of boatbuilding is as rewarding as reaching your destination; it tests one’s patience and dedication. For those seeking to embark on this adventure or simply gain more insight into marine craftsmanship, Sven’s wisdom is invaluable.Making Flanges Around Bulkhead Hatches for Canvas
Sven Yrvind, a renowned yacht designer and sailor, shares valuable insights on creating flanges around bulkhead hatches for canvas protection in this enlightening video. By following his expert guidance, boat enthusiasts can ensure their living areas remain secure while allowing unhindered access through the hatches.Step 1: Starting with the Flange
Sven begins by explaining that working on flanges vertically and horizontally is significantly easier than doing so in a flat position. To simplify the process further, he divides the task into two or three steps as suggested by fellow expert “for for.” This approach not only makes it more manageable but also allows for greater precision in crafting each component.Step 2: Applying Glue and Securing
Sven proceeds to apply glue along one edge of the flange, ensuring a secure bond when clamped into place. He emphasizes that this stage is crucial for maintaining the structural integrity of the flange, which in turn safeguards the living area beneath the canvas when hatches are open.Step 3: Allowing Time to Dry
After securely attaching the first portion of the flange, Sven allows ample time for it to dry before moving forward with additional steps. This patience and precision are key aspects of his successful boatbuilding methods.Step 4: Finishing Touches
Once the flange is fully dried, Sven removes the clamps carefully, ensuring no damage occurs during this process. He then moves on to attaching four more pieces onto these main frames, completing two pairs of flanges for the bulkhead hatches.The Final Touches
While two flanges form the primary support structure around the hatches, Sven mentions there are two additional pieces required at each end to ensure comprehensive protection. This attention to detail highlights his commitment to producing a durable and reliable design. “Sailing is about finding your path, whether it’s across an ocean or within yourself.” – Sven Yrvind In conclusion, making flanges around bulkhead hatches may seem complex at first glance, but by following Sven Yrvind’s meticulous process, enthusiasts can achieve professional-level results. Remember that the journey of boatbuilding is as rewarding as reaching your destination; it tests one’s patience and dedication. For those seeking to embark on this adventure or simply gain more insight into marine craftsmanship, Sven’s wisdom is invaluable.Once the flange is fully dried, Sven removes the clamps carefully, ensuring no damage occurs during this process. He then moves on to attaching four more pieces onto these main frames, completing two pairs of flanges for the bulkhead hatches.The Final Touches
While two flanges form the primary support structure around the hatches, Sven mentions there are two additional pieces required at each end to ensure comprehensive protection. This attention to detail highlights his commitment to producing a durable and reliable design. “Sailing is about finding your path, whether it’s across an ocean or within yourself.” – Sven Yrvind In conclusion, making flanges around bulkhead hatches may seem complex at first glance, but by following Sven Yrvind’s meticulous process, enthusiasts can achieve professional-level results. Remember that the journey of boatbuilding is as rewarding as reaching your destination; it tests one’s patience and dedication. For those seeking to embark on this adventure or simply gain more insight into marine craftsmanship, Sven’s wisdom is invaluable.Sven proceeds to apply glue along one edge of the flange, ensuring a secure bond when clamped into place. He emphasizes that this stage is crucial for maintaining the structural integrity of the flange, which in turn safeguards the living area beneath the canvas when hatches are open.Step 3: Allowing Time to Dry
After securely attaching the first portion of the flange, Sven allows ample time for it to dry before moving forward with additional steps. This patience and precision are key aspects of his successful boatbuilding methods.Step 4: Finishing Touches
Once the flange is fully dried, Sven removes the clamps carefully, ensuring no damage occurs during this process. He then moves on to attaching four more pieces onto these main frames, completing two pairs of flanges for the bulkhead hatches.The Final Touches
While two flanges form the primary support structure around the hatches, Sven mentions there are two additional pieces required at each end to ensure comprehensive protection. This attention to detail highlights his commitment to producing a durable and reliable design. “Sailing is about finding your path, whether it’s across an ocean or within yourself.” – Sven Yrvind In conclusion, making flanges around bulkhead hatches may seem complex at first glance, but by following Sven Yrvind’s meticulous process, enthusiasts can achieve professional-level results. Remember that the journey of boatbuilding is as rewarding as reaching your destination; it tests one’s patience and dedication. For those seeking to embark on this adventure or simply gain more insight into marine craftsmanship, Sven’s wisdom is invaluable.Sven begins by explaining that working on flanges vertically and horizontally is significantly easier than doing so in a flat position. To simplify the process further, he divides the task into two or three steps as suggested by fellow expert “for for.” This approach not only makes it more manageable but also allows for greater precision in crafting each component.Step 2: Applying Glue and Securing
Sven proceeds to apply glue along one edge of the flange, ensuring a secure bond when clamped into place. He emphasizes that this stage is crucial for maintaining the structural integrity of the flange, which in turn safeguards the living area beneath the canvas when hatches are open.Step 3: Allowing Time to Dry
After securely attaching the first portion of the flange, Sven allows ample time for it to dry before moving forward with additional steps. This patience and precision are key aspects of his successful boatbuilding methods.Step 4: Finishing Touches
Once the flange is fully dried, Sven removes the clamps carefully, ensuring no damage occurs during this process. He then moves on to attaching four more pieces onto these main frames, completing two pairs of flanges for the bulkhead hatches.The Final Touches
While two flanges form the primary support structure around the hatches, Sven mentions there are two additional pieces required at each end to ensure comprehensive protection. This attention to detail highlights his commitment to producing a durable and reliable design. “Sailing is about finding your path, whether it’s across an ocean or within yourself.” – Sven Yrvind In conclusion, making flanges around bulkhead hatches may seem complex at first glance, but by following Sven Yrvind’s meticulous process, enthusiasts can achieve professional-level results. Remember that the journey of boatbuilding is as rewarding as reaching your destination; it tests one’s patience and dedication. For those seeking to embark on this adventure or simply gain more insight into marine craftsmanship, Sven’s wisdom is invaluable.Sven Yrvind, a renowned yacht designer and sailor, shares valuable insights on creating flanges around bulkhead hatches for canvas protection in this enlightening video. By following his expert guidance, boat enthusiasts can ensure their living areas remain secure while allowing unhindered access through the hatches.Step 1: Starting with the Flange
Sven begins by explaining that working on flanges vertically and horizontally is significantly easier than doing so in a flat position. To simplify the process further, he divides the task into two or three steps as suggested by fellow expert “for for.” This approach not only makes it more manageable but also allows for greater precision in crafting each component.Step 2: Applying Glue and Securing
Sven proceeds to apply glue along one edge of the flange, ensuring a secure bond when clamped into place. He emphasizes that this stage is crucial for maintaining the structural integrity of the flange, which in turn safeguards the living area beneath the canvas when hatches are open.Step 3: Allowing Time to Dry
After securely attaching the first portion of the flange, Sven allows ample time for it to dry before moving forward with additional steps. This patience and precision are key aspects of his successful boatbuilding methods.Step 4: Finishing Touches
Once the flange is fully dried, Sven removes the clamps carefully, ensuring no damage occurs during this process. He then moves on to attaching four more pieces onto these main frames, completing two pairs of flanges for the bulkhead hatches.The Final Touches
While two flanges form the primary support structure around the hatches, Sven mentions there are two additional pieces required at each end to ensure comprehensive protection. This attention to detail highlights his commitment to producing a durable and reliable design. “Sailing is about finding your path, whether it’s across an ocean or within yourself.” – Sven Yrvind In conclusion, making flanges around bulkhead hatches may seem complex at first glance, but by following Sven Yrvind’s meticulous process, enthusiasts can achieve professional-level results. Remember that the journey of boatbuilding is as rewarding as reaching your destination; it tests one’s patience and dedication. For those seeking to embark on this adventure or simply gain more insight into marine craftsmanship, Sven’s wisdom is invaluable.Making Flanges Around Bulkhead Hatches for Canvas
Sven Yrvind, a renowned yacht designer and sailor, shares valuable insights on creating flanges around bulkhead hatches for canvas protection in this enlightening video. By following his expert guidance, boat enthusiasts can ensure their living areas remain secure while allowing unhindered access through the hatches.Step 1: Starting with the Flange
Sven begins by explaining that working on flanges vertically and horizontally is significantly easier than doing so in a flat position. To simplify the process further, he divides the task into two or three steps as suggested by fellow expert “for for.” This approach not only makes it more manageable but also allows for greater precision in crafting each component.Step 2: Applying Glue and Securing
Sven proceeds to apply glue along one edge of the flange, ensuring a secure bond when clamped into place. He emphasizes that this stage is crucial for maintaining the structural integrity of the flange, which in turn safeguards the living area beneath the canvas when hatches are open.Step 3: Allowing Time to Dry
After securely attaching the first portion of the flange, Sven allows ample time for it to dry before moving forward with additional steps. This patience and precision are key aspects of his successful boatbuilding methods.Step 4: Finishing Touches
Once the flange is fully dried, Sven removes the clamps carefully, ensuring no damage occurs during this process. He then moves on to attaching four more pieces onto these main frames, completing two pairs of flanges for the bulkhead hatches.The Final Touches
While two flanges form the primary support structure around the hatches, Sven mentions there are two additional pieces required at each end to ensure comprehensive protection. This attention to detail highlights his commitment to producing a durable and reliable design. “Sailing is about finding your path, whether it’s across an ocean or within yourself.” – Sven Yrvind In conclusion, making flanges around bulkhead hatches may seem complex at first glance, but by following Sven Yrvind’s meticulous process, enthusiasts can achieve professional-level results. Remember that the journey of boatbuilding is as rewarding as reaching your destination; it tests one’s patience and dedication. For those seeking to embark on this adventure or simply gain more insight into marine craftsmanship, Sven’s wisdom is invaluable.After securely attaching the first portion of the flange, Sven allows ample time for it to dry before moving forward with additional steps. This patience and precision are key aspects of his successful boatbuilding methods.Step 4: Finishing Touches
Once the flange is fully dried, Sven removes the clamps carefully, ensuring no damage occurs during this process. He then moves on to attaching four more pieces onto these main frames, completing two pairs of flanges for the bulkhead hatches.The Final Touches
While two flanges form the primary support structure around the hatches, Sven mentions there are two additional pieces required at each end to ensure comprehensive protection. This attention to detail highlights his commitment to producing a durable and reliable design. “Sailing is about finding your path, whether it’s across an ocean or within yourself.” – Sven Yrvind In conclusion, making flanges around bulkhead hatches may seem complex at first glance, but by following Sven Yrvind’s meticulous process, enthusiasts can achieve professional-level results. Remember that the journey of boatbuilding is as rewarding as reaching your destination; it tests one’s patience and dedication. For those seeking to embark on this adventure or simply gain more insight into marine craftsmanship, Sven’s wisdom is invaluable.Sven proceeds to apply glue along one edge of the flange, ensuring a secure bond when clamped into place. He emphasizes that this stage is crucial for maintaining the structural integrity of the flange, which in turn safeguards the living area beneath the canvas when hatches are open.Step 3: Allowing Time to Dry
After securely attaching the first portion of the flange, Sven allows ample time for it to dry before moving forward with additional steps. This patience and precision are key aspects of his successful boatbuilding methods.Step 4: Finishing Touches
Once the flange is fully dried, Sven removes the clamps carefully, ensuring no damage occurs during this process. He then moves on to attaching four more pieces onto these main frames, completing two pairs of flanges for the bulkhead hatches.The Final Touches
While two flanges form the primary support structure around the hatches, Sven mentions there are two additional pieces required at each end to ensure comprehensive protection. This attention to detail highlights his commitment to producing a durable and reliable design. “Sailing is about finding your path, whether it’s across an ocean or within yourself.” – Sven Yrvind In conclusion, making flanges around bulkhead hatches may seem complex at first glance, but by following Sven Yrvind’s meticulous process, enthusiasts can achieve professional-level results. Remember that the journey of boatbuilding is as rewarding as reaching your destination; it tests one’s patience and dedication. For those seeking to embark on this adventure or simply gain more insight into marine craftsmanship, Sven’s wisdom is invaluable.Sven begins by explaining that working on flanges vertically and horizontally is significantly easier than doing so in a flat position. To simplify the process further, he divides the task into two or three steps as suggested by fellow expert “for for.” This approach not only makes it more manageable but also allows for greater precision in crafting each component.Step 2: Applying Glue and Securing
Sven proceeds to apply glue along one edge of the flange, ensuring a secure bond when clamped into place. He emphasizes that this stage is crucial for maintaining the structural integrity of the flange, which in turn safeguards the living area beneath the canvas when hatches are open.Step 3: Allowing Time to Dry
After securely attaching the first portion of the flange, Sven allows ample time for it to dry before moving forward with additional steps. This patience and precision are key aspects of his successful boatbuilding methods.Step 4: Finishing Touches
Once the flange is fully dried, Sven removes the clamps carefully, ensuring no damage occurs during this process. He then moves on to attaching four more pieces onto these main frames, completing two pairs of flanges for the bulkhead hatches.The Final Touches
While two flanges form the primary support structure around the hatches, Sven mentions there are two additional pieces required at each end to ensure comprehensive protection. This attention to detail highlights his commitment to producing a durable and reliable design. “Sailing is about finding your path, whether it’s across an ocean or within yourself.” – Sven Yrvind In conclusion, making flanges around bulkhead hatches may seem complex at first glance, but by following Sven Yrvind’s meticulous process, enthusiasts can achieve professional-level results. Remember that the journey of boatbuilding is as rewarding as reaching your destination; it tests one’s patience and dedication. For those seeking to embark on this adventure or simply gain more insight into marine craftsmanship, Sven’s wisdom is invaluable.Sven Yrvind, a renowned yacht designer and sailor, shares valuable insights on creating flanges around bulkhead hatches for canvas protection in this enlightening video. By following his expert guidance, boat enthusiasts can ensure their living areas remain secure while allowing unhindered access through the hatches.Step 1: Starting with the Flange
Sven begins by explaining that working on flanges vertically and horizontally is significantly easier than doing so in a flat position. To simplify the process further, he divides the task into two or three steps as suggested by fellow expert “for for.” This approach not only makes it more manageable but also allows for greater precision in crafting each component.Step 2: Applying Glue and Securing
Sven proceeds to apply glue along one edge of the flange, ensuring a secure bond when clamped into place. He emphasizes that this stage is crucial for maintaining the structural integrity of the flange, which in turn safeguards the living area beneath the canvas when hatches are open.Step 3: Allowing Time to Dry
After securely attaching the first portion of the flange, Sven allows ample time for it to dry before moving forward with additional steps. This patience and precision are key aspects of his successful boatbuilding methods.Step 4: Finishing Touches
Once the flange is fully dried, Sven removes the clamps carefully, ensuring no damage occurs during this process. He then moves on to attaching four more pieces onto these main frames, completing two pairs of flanges for the bulkhead hatches.The Final Touches
While two flanges form the primary support structure around the hatches, Sven mentions there are two additional pieces required at each end to ensure comprehensive protection. This attention to detail highlights his commitment to producing a durable and reliable design. “Sailing is about finding your path, whether it’s across an ocean or within yourself.” – Sven Yrvind In conclusion, making flanges around bulkhead hatches may seem complex at first glance, but by following Sven Yrvind’s meticulous process, enthusiasts can achieve professional-level results. Remember that the journey of boatbuilding is as rewarding as reaching your destination; it tests one’s patience and dedication. For those seeking to embark on this adventure or simply gain more insight into marine craftsmanship, Sven’s wisdom is invaluable.Making Flanges Around Bulkhead Hatches for Canvas
Sven Yrvind, a renowned yacht designer and sailor, shares valuable insights on creating flanges around bulkhead hatches for canvas protection in this enlightening video. By following his expert guidance, boat enthusiasts can ensure their living areas remain secure while allowing unhindered access through the hatches.Step 1: Starting with the Flange
Sven begins by explaining that working on flanges vertically and horizontally is significantly easier than doing so in a flat position. To simplify the process further, he divides the task into two or three steps as suggested by fellow expert “for for.” This approach not only makes it more manageable but also allows for greater precision in crafting each component.Step 2: Applying Glue and Securing
Sven proceeds to apply glue along one edge of the flange, ensuring a secure bond when clamped into place. He emphasizes that this stage is crucial for maintaining the structural integrity of the flange, which in turn safeguards the living area beneath the canvas when hatches are open.Step 3: Allowing Time to Dry
After securely attaching the first portion of the flange, Sven allows ample time for it to dry before moving forward with additional steps. This patience and precision are key aspects of his successful boatbuilding methods.Step 4: Finishing Touches
Once the flange is fully dried, Sven removes the clamps carefully, ensuring no damage occurs during this process. He then moves on to attaching four more pieces onto these main frames, completing two pairs of flanges for the bulkhead hatches.The Final Touches
While two flanges form the primary support structure around the hatches, Sven mentions there are two additional pieces required at each end to ensure comprehensive protection. This attention to detail highlights his commitment to producing a durable and reliable design. “Sailing is about finding your path, whether it’s across an ocean or within yourself.” – Sven Yrvind In conclusion, making flanges around bulkhead hatches may seem complex at first glance, but by following Sven Yrvind’s meticulous process, enthusiasts can achieve professional-level results. Remember that the journey of boatbuilding is as rewarding as reaching your destination; it tests one’s patience and dedication. For those seeking to embark on this adventure or simply gain more insight into marine craftsmanship, Sven’s wisdom is invaluable.Once the flange is fully dried, Sven removes the clamps carefully, ensuring no damage occurs during this process. He then moves on to attaching four more pieces onto these main frames, completing two pairs of flanges for the bulkhead hatches.The Final Touches
While two flanges form the primary support structure around the hatches, Sven mentions there are two additional pieces required at each end to ensure comprehensive protection. This attention to detail highlights his commitment to producing a durable and reliable design. “Sailing is about finding your path, whether it’s across an ocean or within yourself.” – Sven Yrvind In conclusion, making flanges around bulkhead hatches may seem complex at first glance, but by following Sven Yrvind’s meticulous process, enthusiasts can achieve professional-level results. Remember that the journey of boatbuilding is as rewarding as reaching your destination; it tests one’s patience and dedication. For those seeking to embark on this adventure or simply gain more insight into marine craftsmanship, Sven’s wisdom is invaluable.After securely attaching the first portion of the flange, Sven allows ample time for it to dry before moving forward with additional steps. This patience and precision are key aspects of his successful boatbuilding methods.Step 4: Finishing Touches
Once the flange is fully dried, Sven removes the clamps carefully, ensuring no damage occurs during this process. He then moves on to attaching four more pieces onto these main frames, completing two pairs of flanges for the bulkhead hatches.The Final Touches
While two flanges form the primary support structure around the hatches, Sven mentions there are two additional pieces required at each end to ensure comprehensive protection. This attention to detail highlights his commitment to producing a durable and reliable design. “Sailing is about finding your path, whether it’s across an ocean or within yourself.” – Sven Yrvind In conclusion, making flanges around bulkhead hatches may seem complex at first glance, but by following Sven Yrvind’s meticulous process, enthusiasts can achieve professional-level results. Remember that the journey of boatbuilding is as rewarding as reaching your destination; it tests one’s patience and dedication. For those seeking to embark on this adventure or simply gain more insight into marine craftsmanship, Sven’s wisdom is invaluable.Sven proceeds to apply glue along one edge of the flange, ensuring a secure bond when clamped into place. He emphasizes that this stage is crucial for maintaining the structural integrity of the flange, which in turn safeguards the living area beneath the canvas when hatches are open.Step 3: Allowing Time to Dry
After securely attaching the first portion of the flange, Sven allows ample time for it to dry before moving forward with additional steps. This patience and precision are key aspects of his successful boatbuilding methods.Step 4: Finishing Touches
Once the flange is fully dried, Sven removes the clamps carefully, ensuring no damage occurs during this process. He then moves on to attaching four more pieces onto these main frames, completing two pairs of flanges for the bulkhead hatches.The Final Touches
While two flanges form the primary support structure around the hatches, Sven mentions there are two additional pieces required at each end to ensure comprehensive protection. This attention to detail highlights his commitment to producing a durable and reliable design. “Sailing is about finding your path, whether it’s across an ocean or within yourself.” – Sven Yrvind In conclusion, making flanges around bulkhead hatches may seem complex at first glance, but by following Sven Yrvind’s meticulous process, enthusiasts can achieve professional-level results. Remember that the journey of boatbuilding is as rewarding as reaching your destination; it tests one’s patience and dedication. For those seeking to embark on this adventure or simply gain more insight into marine craftsmanship, Sven’s wisdom is invaluable.Sven begins by explaining that working on flanges vertically and horizontally is significantly easier than doing so in a flat position. To simplify the process further, he divides the task into two or three steps as suggested by fellow expert “for for.” This approach not only makes it more manageable but also allows for greater precision in crafting each component.Step 2: Applying Glue and Securing
Sven proceeds to apply glue along one edge of the flange, ensuring a secure bond when clamped into place. He emphasizes that this stage is crucial for maintaining the structural integrity of the flange, which in turn safeguards the living area beneath the canvas when hatches are open.Step 3: Allowing Time to Dry
After securely attaching the first portion of the flange, Sven allows ample time for it to dry before moving forward with additional steps. This patience and precision are key aspects of his successful boatbuilding methods.Step 4: Finishing Touches
Once the flange is fully dried, Sven removes the clamps carefully, ensuring no damage occurs during this process. He then moves on to attaching four more pieces onto these main frames, completing two pairs of flanges for the bulkhead hatches.The Final Touches
While two flanges form the primary support structure around the hatches, Sven mentions there are two additional pieces required at each end to ensure comprehensive protection. This attention to detail highlights his commitment to producing a durable and reliable design. “Sailing is about finding your path, whether it’s across an ocean or within yourself.” – Sven Yrvind In conclusion, making flanges around bulkhead hatches may seem complex at first glance, but by following Sven Yrvind’s meticulous process, enthusiasts can achieve professional-level results. Remember that the journey of boatbuilding is as rewarding as reaching your destination; it tests one’s patience and dedication. For those seeking to embark on this adventure or simply gain more insight into marine craftsmanship, Sven’s wisdom is invaluable.Sven Yrvind, a renowned yacht designer and sailor, shares valuable insights on creating flanges around bulkhead hatches for canvas protection in this enlightening video. By following his expert guidance, boat enthusiasts can ensure their living areas remain secure while allowing unhindered access through the hatches.Step 1: Starting with the Flange
Sven begins by explaining that working on flanges vertically and horizontally is significantly easier than doing so in a flat position. To simplify the process further, he divides the task into two or three steps as suggested by fellow expert “for for.” This approach not only makes it more manageable but also allows for greater precision in crafting each component.Step 2: Applying Glue and Securing
Sven proceeds to apply glue along one edge of the flange, ensuring a secure bond when clamped into place. He emphasizes that this stage is crucial for maintaining the structural integrity of the flange, which in turn safeguards the living area beneath the canvas when hatches are open.Step 3: Allowing Time to Dry
After securely attaching the first portion of the flange, Sven allows ample time for it to dry before moving forward with additional steps. This patience and precision are key aspects of his successful boatbuilding methods.Step 4: Finishing Touches
Once the flange is fully dried, Sven removes the clamps carefully, ensuring no damage occurs during this process. He then moves on to attaching four more pieces onto these main frames, completing two pairs of flanges for the bulkhead hatches.The Final Touches
While two flanges form the primary support structure around the hatches, Sven mentions there are two additional pieces required at each end to ensure comprehensive protection. This attention to detail highlights his commitment to producing a durable and reliable design. “Sailing is about finding your path, whether it’s across an ocean or within yourself.” – Sven Yrvind In conclusion, making flanges around bulkhead hatches may seem complex at first glance, but by following Sven Yrvind’s meticulous process, enthusiasts can achieve professional-level results. Remember that the journey of boatbuilding is as rewarding as reaching your destination; it tests one’s patience and dedication. For those seeking to embark on this adventure or simply gain more insight into marine craftsmanship, Sven’s wisdom is invaluable.Making Flanges Around Bulkhead Hatches for Canvas
Sven Yrvind, a renowned yacht designer and sailor, shares valuable insights on creating flanges around bulkhead hatches for canvas protection in this enlightening video. By following his expert guidance, boat enthusiasts can ensure their living areas remain secure while allowing unhindered access through the hatches.Step 1: Starting with the Flange
Sven begins by explaining that working on flanges vertically and horizontally is significantly easier than doing so in a flat position. To simplify the process further, he divides the task into two or three steps as suggested by fellow expert “for for.” This approach not only makes it more manageable but also allows for greater precision in crafting each component.Step 2: Applying Glue and Securing
Sven proceeds to apply glue along one edge of the flange, ensuring a secure bond when clamped into place. He emphasizes that this stage is crucial for maintaining the structural integrity of the flange, which in turn safeguards the living area beneath the canvas when hatches are open.Step 3: Allowing Time to Dry
After securely attaching the first portion of the flange, Sven allows ample time for it to dry before moving forward with additional steps. This patience and precision are key aspects of his successful boatbuilding methods.Step 4: Finishing Touches
Once the flange is fully dried, Sven removes the clamps carefully, ensuring no damage occurs during this process. He then moves on to attaching four more pieces onto these main frames, completing two pairs of flanges for the bulkhead hatches.The Final Touches
While two flanges form the primary support structure around the hatches, Sven mentions there are two additional pieces required at each end to ensure comprehensive protection. This attention to detail highlights his commitment to producing a durable and reliable design. “Sailing is about finding your path, whether it’s across an ocean or within yourself.” – Sven Yrvind In conclusion, making flanges around bulkhead hatches may seem complex at first glance, but by following Sven Yrvind’s meticulous process, enthusiasts can achieve professional-level results. Remember that the journey of boatbuilding is as rewarding as reaching your destination; it tests one’s patience and dedication. For those seeking to embark on this adventure or simply gain more insight into marine craftsmanship, Sven’s wisdom is invaluable.Sven Yrvind, a renowned yacht designer and sailor, shares valuable insights on creating flanges around bulkhead hatches for canvas protection in this enlightening video. By following his expert guidance, boat enthusiasts can ensure their living areas remain secure while allowing unhindered access through the hatches.Step 1: Starting with the Flange
Sven begins by explaining that working on flanges vertically and horizontally is significantly easier than doing so in a flat position. To simplify the process further, he divides the task into two or three steps as suggested by fellow expert “for for.” This approach not only makes it more manageable but also allows for greater precision in crafting each component.Step 2: Applying Glue and Securing
Sven proceeds to apply glue along one edge of the flange, ensuring a secure bond when clamped into place. He emphasizes that this stage is crucial for maintaining the structural integrity of the flange, which in turn safeguards the living area beneath the canvas when hatches are open.Step 3: Allowing Time to Dry
After securely attaching the first portion of the flange, Sven allows ample time for it to dry before moving forward with additional steps. This patience and precision are key aspects of his successful boatbuilding methods.Step 4: Finishing Touches
Once the flange is fully dried, Sven removes the clamps carefully, ensuring no damage occurs during this process. He then moves on to attaching four more pieces onto these main frames, completing two pairs of flanges for the bulkhead hatches.The Final Touches
While two flanges form the primary support structure around the hatches, Sven mentions there are two additional pieces required at each end to ensure comprehensive protection. This attention to detail highlights his commitment to producing a durable and reliable design. “Sailing is about finding your path, whether it’s across an ocean or within yourself.” – Sven Yrvind In conclusion, making flanges around bulkhead hatches may seem complex at first glance, but by following Sven Yrvind’s meticulous process, enthusiasts can achieve professional-level results. Remember that the journey of boatbuilding is as rewarding as reaching your destination; it tests one’s patience and dedication. For those seeking to embark on this adventure or simply gain more insight into marine craftsmanship, Sven’s wisdom is invaluable.Making Flanges Around Bulkhead Hatches for Canvas
Sven Yrvind, a renowned yacht designer and sailor, shares valuable insights on creating flanges around bulkhead hatches for canvas protection in this enlightening video. By following his expert guidance, boat enthusiasts can ensure their living areas remain secure while allowing unhindered access through the hatches.Step 1: Starting with the Flange
Sven begins by explaining that working on flanges vertically and horizontally is significantly easier than doing so in a flat position. To simplify the process further, he divides the task into two or three steps as suggested by fellow expert “for for.” This approach not only makes it more manageable but also allows for greater precision in crafting each component.Step 2: Applying Glue and Securing
Sven proceeds to apply glue along one edge of the flange, ensuring a secure bond when clamped into place. He emphasizes that this stage is crucial for maintaining the structural integrity of the flange, which in turn safeguards the living area beneath the canvas when hatches are open.Step 3: Allowing Time to Dry
After securely attaching the first portion of the flange, Sven allows ample time for it to dry before moving forward with additional steps. This patience and precision are key aspects of his successful boatbuilding methods.Step 4: Finishing Touches
Once the flange is fully dried, Sven removes the clamps carefully, ensuring no damage occurs during this process. He then moves on to attaching four more pieces onto these main frames, completing two pairs of flanges for the bulkhead hatches.The Final Touches
While two flanges form the primary support structure around the hatches, Sven mentions there are two additional pieces required at each end to ensure comprehensive protection. This attention to detail highlights his commitment to producing a durable and reliable design. “Sailing is about finding your path, whether it’s across an ocean or within yourself.” – Sven Yrvind In conclusion, making flanges around bulkhead hatches may seem complex at first glance, but by following Sven Yrvind’s meticulous process, enthusiasts can achieve professional-level results. Remember that the journey of boatbuilding is as rewarding as reaching your destination; it tests one’s patience and dedication. For those seeking to embark on this adventure or simply gain more insight into marine craftsmanship, Sven’s wisdom is invaluable.After securely attaching the first portion of the flange, Sven allows ample time for it to dry before moving forward with additional steps. This patience and precision are key aspects of his successful boatbuilding methods.Step 4: Finishing Touches
Once the flange is fully dried, Sven removes the clamps carefully, ensuring no damage occurs during this process. He then moves on to attaching four more pieces onto these main frames, completing two pairs of flanges for the bulkhead hatches.The Final Touches
While two flanges form the primary support structure around the hatches, Sven mentions there are two additional pieces required at each end to ensure comprehensive protection. This attention to detail highlights his commitment to producing a durable and reliable design. “Sailing is about finding your path, whether it’s across an ocean or within yourself.” – Sven Yrvind In conclusion, making flanges around bulkhead hatches may seem complex at first glance, but by following Sven Yrvind’s meticulous process, enthusiasts can achieve professional-level results. Remember that the journey of boatbuilding is as rewarding as reaching your destination; it tests one’s patience and dedication. For those seeking to embark on this adventure or simply gain more insight into marine craftsmanship, Sven’s wisdom is invaluable.Sven Yrvind, a renowned yacht designer and sailor, shares valuable insights on creating flanges around bulkhead hatches for canvas protection in this enlightening video. By following his expert guidance, boat enthusiasts can ensure their living areas remain secure while allowing unhindered access through the hatches.Step 1: Starting with the Flange
Sven begins by explaining that working on flanges vertically and horizontally is significantly easier than doing so in a flat position. To simplify the process further, he divides the task into two or three steps as suggested by fellow expert “for for.” This approach not only makes it more manageable but also allows for greater precision in crafting each component.Step 2: Applying Glue and Securing
Sven proceeds to apply glue along one edge of the flange, ensuring a secure bond when clamped into place. He emphasizes that this stage is crucial for maintaining the structural integrity of the flange, which in turn safeguards the living area beneath the canvas when hatches are open.Step 3: Allowing Time to Dry
After securely attaching the first portion of the flange, Sven allows ample time for it to dry before moving forward with additional steps. This patience and precision are key aspects of his successful boatbuilding methods.Step 4: Finishing Touches
Once the flange is fully dried, Sven removes the clamps carefully, ensuring no damage occurs during this process. He then moves on to attaching four more pieces onto these main frames, completing two pairs of flanges for the bulkhead hatches.The Final Touches
While two flanges form the primary support structure around the hatches, Sven mentions there are two additional pieces required at each end to ensure comprehensive protection. This attention to detail highlights his commitment to producing a durable and reliable design. “Sailing is about finding your path, whether it’s across an ocean or within yourself.” – Sven Yrvind In conclusion, making flanges around bulkhead hatches may seem complex at first glance, but by following Sven Yrvind’s meticulous process, enthusiasts can achieve professional-level results. Remember that the journey of boatbuilding is as rewarding as reaching your destination; it tests one’s patience and dedication. For those seeking to embark on this adventure or simply gain more insight into marine craftsmanship, Sven’s wisdom is invaluable.Making Flanges Around Bulkhead Hatches for Canvas
Sven Yrvind, a renowned yacht designer and sailor, shares valuable insights on creating flanges around bulkhead hatches for canvas protection in this enlightening video. By following his expert guidance, boat enthusiasts can ensure their living areas remain secure while allowing unhindered access through the hatches.Step 1: Starting with the Flange
Sven begins by explaining that working on flanges vertically and horizontally is significantly easier than doing so in a flat position. To simplify the process further, he divides the task into two or three steps as suggested by fellow expert “for for.” This approach not only makes it more manageable but also allows for greater precision in crafting each component.Step 2: Applying Glue and Securing
Sven proceeds to apply glue along one edge of the flange, ensuring a secure bond when clamped into place. He emphasizes that this stage is crucial for maintaining the structural integrity of the flange, which in turn safeguards the living area beneath the canvas when hatches are open.Step 3: Allowing Time to Dry
After securely attaching the first portion of the flange, Sven allows ample time for it to dry before moving forward with additional steps. This patience and precision are key aspects of his successful boatbuilding methods.Step 4: Finishing Touches
Once the flange is fully dried, Sven removes the clamps carefully, ensuring no damage occurs during this process. He then moves on to attaching four more pieces onto these main frames, completing two pairs of flanges for the bulkhead hatches.The Final Touches
While two flanges form the primary support structure around the hatches, Sven mentions there are two additional pieces required at each end to ensure comprehensive protection. This attention to detail highlights his commitment to producing a durable and reliable design. “Sailing is about finding your path, whether it’s across an ocean or within yourself.” – Sven Yrvind In conclusion, making flanges around bulkhead hatches may seem complex at first glance, but by following Sven Yrvind’s meticulous process, enthusiasts can achieve professional-level results. Remember that the journey of boatbuilding is as rewarding as reaching your destination; it tests one’s patience and dedication. For those seeking to embark on this adventure or simply gain more insight into marine craftsmanship, Sven’s wisdom is invaluable.Sven proceeds to apply glue along one edge of the flange, ensuring a secure bond when clamped into place. He emphasizes that this stage is crucial for maintaining the structural integrity of the flange, which in turn safeguards the living area beneath the canvas when hatches are open.Step 3: Allowing Time to Dry
After securely attaching the first portion of the flange, Sven allows ample time for it to dry before moving forward with additional steps. This patience and precision are key aspects of his successful boatbuilding methods.Step 4: Finishing Touches
Once the flange is fully dried, Sven removes the clamps carefully, ensuring no damage occurs during this process. He then moves on to attaching four more pieces onto these main frames, completing two pairs of flanges for the bulkhead hatches.The Final Touches
While two flanges form the primary support structure around the hatches, Sven mentions there are two additional pieces required at each end to ensure comprehensive protection. This attention to detail highlights his commitment to producing a durable and reliable design. “Sailing is about finding your path, whether it’s across an ocean or within yourself.” – Sven Yrvind In conclusion, making flanges around bulkhead hatches may seem complex at first glance, but by following Sven Yrvind’s meticulous process, enthusiasts can achieve professional-level results. Remember that the journey of boatbuilding is as rewarding as reaching your destination; it tests one’s patience and dedication. For those seeking to embark on this adventure or simply gain more insight into marine craftsmanship, Sven’s wisdom is invaluable.Sven Yrvind, a renowned yacht designer and sailor, shares valuable insights on creating flanges around bulkhead hatches for canvas protection in this enlightening video. By following his expert guidance, boat enthusiasts can ensure their living areas remain secure while allowing unhindered access through the hatches.Step 1: Starting with the Flange
Sven begins by explaining that working on flanges vertically and horizontally is significantly easier than doing so in a flat position. To simplify the process further, he divides the task into two or three steps as suggested by fellow expert “for for.” This approach not only makes it more manageable but also allows for greater precision in crafting each component.Step 2: Applying Glue and Securing
Sven proceeds to apply glue along one edge of the flange, ensuring a secure bond when clamped into place. He emphasizes that this stage is crucial for maintaining the structural integrity of the flange, which in turn safeguards the living area beneath the canvas when hatches are open.Step 3: Allowing Time to Dry
After securely attaching the first portion of the flange, Sven allows ample time for it to dry before moving forward with additional steps. This patience and precision are key aspects of his successful boatbuilding methods.Step 4: Finishing Touches
Once the flange is fully dried, Sven removes the clamps carefully, ensuring no damage occurs during this process. He then moves on to attaching four more pieces onto these main frames, completing two pairs of flanges for the bulkhead hatches.The Final Touches
While two flanges form the primary support structure around the hatches, Sven mentions there are two additional pieces required at each end to ensure comprehensive protection. This attention to detail highlights his commitment to producing a durable and reliable design. “Sailing is about finding your path, whether it’s across an ocean or within yourself.” – Sven Yrvind In conclusion, making flanges around bulkhead hatches may seem complex at first glance, but by following Sven Yrvind’s meticulous process, enthusiasts can achieve professional-level results. Remember that the journey of boatbuilding is as rewarding as reaching your destination; it tests one’s patience and dedication. For those seeking to embark on this adventure or simply gain more insight into marine craftsmanship, Sven’s wisdom is invaluable.Making Flanges Around Bulkhead Hatches for Canvas
Sven Yrvind, a renowned yacht designer and sailor, shares valuable insights on creating flanges around bulkhead hatches for canvas protection in this enlightening video. By following his expert guidance, boat enthusiasts can ensure their living areas remain secure while allowing unhindered access through the hatches.Step 1: Starting with the Flange
Sven begins by explaining that working on flanges vertically and horizontally is significantly easier than doing so in a flat position. To simplify the process further, he divides the task into two or three steps as suggested by fellow expert “for for.” This approach not only makes it more manageable but also allows for greater precision in crafting each component.Step 2: Applying Glue and Securing
Sven proceeds to apply glue along one edge of the flange, ensuring a secure bond when clamped into place. He emphasizes that this stage is crucial for maintaining the structural integrity of the flange, which in turn safeguards the living area beneath the canvas when hatches are open.Step 3: Allowing Time to Dry
After securely attaching the first portion of the flange, Sven allows ample time for it to dry before moving forward with additional steps. This patience and precision are key aspects of his successful boatbuilding methods.Step 4: Finishing Touches
Once the flange is fully dried, Sven removes the clamps carefully, ensuring no damage occurs during this process. He then moves on to attaching four more pieces onto these main frames, completing two pairs of flanges for the bulkhead hatches.The Final Touches
While two flanges form the primary support structure around the hatches, Sven mentions there are two additional pieces required at each end to ensure comprehensive protection. This attention to detail highlights his commitment to producing a durable and reliable design. “Sailing is about finding your path, whether it’s across an ocean or within yourself.” – Sven Yrvind In conclusion, making flanges around bulkhead hatches may seem complex at first glance, but by following Sven Yrvind’s meticulous process, enthusiasts can achieve professional-level results. Remember that the journey of boatbuilding is as rewarding as reaching your destination; it tests one’s patience and dedication. For those seeking to embark on this adventure or simply gain more insight into marine craftsmanship, Sven’s wisdom is invaluable.Sven begins by explaining that working on flanges vertically and horizontally is significantly easier than doing so in a flat position. To simplify the process further, he divides the task into two or three steps as suggested by fellow expert “for for.” This approach not only makes it more manageable but also allows for greater precision in crafting each component.Step 2: Applying Glue and Securing
Sven proceeds to apply glue along one edge of the flange, ensuring a secure bond when clamped into place. He emphasizes that this stage is crucial for maintaining the structural integrity of the flange, which in turn safeguards the living area beneath the canvas when hatches are open.Step 3: Allowing Time to Dry
After securely attaching the first portion of the flange, Sven allows ample time for it to dry before moving forward with additional steps. This patience and precision are key aspects of his successful boatbuilding methods.Step 4: Finishing Touches
Once the flange is fully dried, Sven removes the clamps carefully, ensuring no damage occurs during this process. He then moves on to attaching four more pieces onto these main frames, completing two pairs of flanges for the bulkhead hatches.The Final Touches
While two flanges form the primary support structure around the hatches, Sven mentions there are two additional pieces required at each end to ensure comprehensive protection. This attention to detail highlights his commitment to producing a durable and reliable design. “Sailing is about finding your path, whether it’s across an ocean or within yourself.” – Sven Yrvind In conclusion, making flanges around bulkhead hatches may seem complex at first glance, but by following Sven Yrvind’s meticulous process, enthusiasts can achieve professional-level results. Remember that the journey of boatbuilding is as rewarding as reaching your destination; it tests one’s patience and dedication. For those seeking to embark on this adventure or simply gain more insight into marine craftsmanship, Sven’s wisdom is invaluable.Sven Yrvind, a renowned yacht designer and sailor, shares valuable insights on creating flanges around bulkhead hatches for canvas protection in this enlightening video. By following his expert guidance, boat enthusiasts can ensure their living areas remain secure while allowing unhindered access through the hatches.Step 1: Starting with the Flange
Sven begins by explaining that working on flanges vertically and horizontally is significantly easier than doing so in a flat position. To simplify the process further, he divides the task into two or three steps as suggested by fellow expert “for for.” This approach not only makes it more manageable but also allows for greater precision in crafting each component.Step 2: Applying Glue and Securing
Sven proceeds to apply glue along one edge of the flange, ensuring a secure bond when clamped into place. He emphasizes that this stage is crucial for maintaining the structural integrity of the flange, which in turn safeguards the living area beneath the canvas when hatches are open.Step 3: Allowing Time to Dry
After securely attaching the first portion of the flange, Sven allows ample time for it to dry before moving forward with additional steps. This patience and precision are key aspects of his successful boatbuilding methods.Step 4: Finishing Touches
Once the flange is fully dried, Sven removes the clamps carefully, ensuring no damage occurs during this process. He then moves on to attaching four more pieces onto these main frames, completing two pairs of flanges for the bulkhead hatches.The Final Touches
While two flanges form the primary support structure around the hatches, Sven mentions there are two additional pieces required at each end to ensure comprehensive protection. This attention to detail highlights his commitment to producing a durable and reliable design. “Sailing is about finding your path, whether it’s across an ocean or within yourself.” – Sven Yrvind In conclusion, making flanges around bulkhead hatches may seem complex at first glance, but by following Sven Yrvind’s meticulous process, enthusiasts can achieve professional-level results. Remember that the journey of boatbuilding is as rewarding as reaching your destination; it tests one’s patience and dedication. For those seeking to embark on this adventure or simply gain more insight into marine craftsmanship, Sven’s wisdom is invaluable.Making Flanges Around Bulkhead Hatches for Canvas
Sven Yrvind, a renowned yacht designer and sailor, shares valuable insights on creating flanges around bulkhead hatches for canvas protection in this enlightening video. By following his expert guidance, boat enthusiasts can ensure their living areas remain secure while allowing unhindered access through the hatches.Step 1: Starting with the Flange
Sven begins by explaining that working on flanges vertically and horizontally is significantly easier than doing so in a flat position. To simplify the process further, he divides the task into two or three steps as suggested by fellow expert “for for.” This approach not only makes it more manageable but also allows for greater precision in crafting each component.Step 2: Applying Glue and Securing
Sven proceeds to apply glue along one edge of the flange, ensuring a secure bond when clamped into place. He emphasizes that this stage is crucial for maintaining the structural integrity of the flange, which in turn safeguards the living area beneath the canvas when hatches are open.Step 3: Allowing Time to Dry
After securely attaching the first portion of the flange, Sven allows ample time for it to dry before moving forward with additional steps. This patience and precision are key aspects of his successful boatbuilding methods.Step 4: Finishing Touches
Once the flange is fully dried, Sven removes the clamps carefully, ensuring no damage occurs during this process. He then moves on to attaching four more pieces onto these main frames, completing two pairs of flanges for the bulkhead hatches.The Final Touches
While two flanges form the primary support structure around the hatches, Sven mentions there are two additional pieces required at each end to ensure comprehensive protection. This attention to detail highlights his commitment to producing a durable and reliable design. “Sailing is about finding your path, whether it’s across an ocean or within yourself.” – Sven Yrvind In conclusion, making flanges around bulkhead hatches may seem complex at first glance, but by following Sven Yrvind’s meticulous process, enthusiasts can achieve professional-level results. Remember that the journey of boatbuilding is as rewarding as reaching your destination; it tests one’s patience and dedication. For those seeking to embark on this adventure or simply gain more insight into marine craftsmanship, Sven’s wisdom is invaluable.Once the flange is fully dried, Sven removes the clamps carefully, ensuring no damage occurs during this process. He then moves on to attaching four more pieces onto these main frames, completing two pairs of flanges for the bulkhead hatches.The Final Touches
While two flanges form the primary support structure around the hatches, Sven mentions there are two additional pieces required at each end to ensure comprehensive protection. This attention to detail highlights his commitment to producing a durable and reliable design. “Sailing is about finding your path, whether it’s across an ocean or within yourself.” – Sven Yrvind In conclusion, making flanges around bulkhead hatches may seem complex at first glance, but by following Sven Yrvind’s meticulous process, enthusiasts can achieve professional-level results. Remember that the journey of boatbuilding is as rewarding as reaching your destination; it tests one’s patience and dedication. For those seeking to embark on this adventure or simply gain more insight into marine craftsmanship, Sven’s wisdom is invaluable.Sven begins by explaining that working on flanges vertically and horizontally is significantly easier than doing so in a flat position. To simplify the process further, he divides the task into two or three steps as suggested by fellow expert “for for.” This approach not only makes it more manageable but also allows for greater precision in crafting each component.Step 2: Applying Glue and Securing
Sven proceeds to apply glue along one edge of the flange, ensuring a secure bond when clamped into place. He emphasizes that this stage is crucial for maintaining the structural integrity of the flange, which in turn safeguards the living area beneath the canvas when hatches are open.Step 3: Allowing Time to Dry
After securely attaching the first portion of the flange, Sven allows ample time for it to dry before moving forward with additional steps. This patience and precision are key aspects of his successful boatbuilding methods.Step 4: Finishing Touches
Once the flange is fully dried, Sven removes the clamps carefully, ensuring no damage occurs during this process. He then moves on to attaching four more pieces onto these main frames, completing two pairs of flanges for the bulkhead hatches.The Final Touches
While two flanges form the primary support structure around the hatches, Sven mentions there are two additional pieces required at each end to ensure comprehensive protection. This attention to detail highlights his commitment to producing a durable and reliable design. “Sailing is about finding your path, whether it’s across an ocean or within yourself.” – Sven Yrvind In conclusion, making flanges around bulkhead hatches may seem complex at first glance, but by following Sven Yrvind’s meticulous process, enthusiasts can achieve professional-level results. Remember that the journey of boatbuilding is as rewarding as reaching your destination; it tests one’s patience and dedication. For those seeking to embark on this adventure or simply gain more insight into marine craftsmanship, Sven’s wisdom is invaluable.Sven Yrvind, a renowned yacht designer and sailor, shares valuable insights on creating flanges around bulkhead hatches for canvas protection in this enlightening video. By following his expert guidance, boat enthusiasts can ensure their living areas remain secure while allowing unhindered access through the hatches.Step 1: Starting with the Flange
Sven begins by explaining that working on flanges vertically and horizontally is significantly easier than doing so in a flat position. To simplify the process further, he divides the task into two or three steps as suggested by fellow expert “for for.” This approach not only makes it more manageable but also allows for greater precision in crafting each component.Step 2: Applying Glue and Securing
Sven proceeds to apply glue along one edge of the flange, ensuring a secure bond when clamped into place. He emphasizes that this stage is crucial for maintaining the structural integrity of the flange, which in turn safeguards the living area beneath the canvas when hatches are open.Step 3: Allowing Time to Dry
After securely attaching the first portion of the flange, Sven allows ample time for it to dry before moving forward with additional steps. This patience and precision are key aspects of his successful boatbuilding methods.Step 4: Finishing Touches
Once the flange is fully dried, Sven removes the clamps carefully, ensuring no damage occurs during this process. He then moves on to attaching four more pieces onto these main frames, completing two pairs of flanges for the bulkhead hatches.The Final Touches
While two flanges form the primary support structure around the hatches, Sven mentions there are two additional pieces required at each end to ensure comprehensive protection. This attention to detail highlights his commitment to producing a durable and reliable design. “Sailing is about finding your path, whether it’s across an ocean or within yourself.” – Sven Yrvind In conclusion, making flanges around bulkhead hatches may seem complex at first glance, but by following Sven Yrvind’s meticulous process, enthusiasts can achieve professional-level results. Remember that the journey of boatbuilding is as rewarding as reaching your destination; it tests one’s patience and dedication. For those seeking to embark on this adventure or simply gain more insight into marine craftsmanship, Sven’s wisdom is invaluable.Making Flanges Around Bulkhead Hatches for Canvas
Sven Yrvind, a renowned yacht designer and sailor, shares valuable insights on creating flanges around bulkhead hatches for canvas protection in this enlightening video. By following his expert guidance, boat enthusiasts can ensure their living areas remain secure while allowing unhindered access through the hatches.Step 1: Starting with the Flange
Sven begins by explaining that working on flanges vertically and horizontally is significantly easier than doing so in a flat position. To simplify the process further, he divides the task into two or three steps as suggested by fellow expert “for for.” This approach not only makes it more manageable but also allows for greater precision in crafting each component.Step 2: Applying Glue and Securing
Sven proceeds to apply glue along one edge of the flange, ensuring a secure bond when clamped into place. He emphasizes that this stage is crucial for maintaining the structural integrity of the flange, which in turn safeguards the living area beneath the canvas when hatches are open.Step 3: Allowing Time to Dry
After securely attaching the first portion of the flange, Sven allows ample time for it to dry before moving forward with additional steps. This patience and precision are key aspects of his successful boatbuilding methods.Step 4: Finishing Touches
Once the flange is fully dried, Sven removes the clamps carefully, ensuring no damage occurs during this process. He then moves on to attaching four more pieces onto these main frames, completing two pairs of flanges for the bulkhead hatches.The Final Touches
While two flanges form the primary support structure around the hatches, Sven mentions there are two additional pieces required at each end to ensure comprehensive protection. This attention to detail highlights his commitment to producing a durable and reliable design. “Sailing is about finding your path, whether it’s across an ocean or within yourself.” – Sven Yrvind In conclusion, making flanges around bulkhead hatches may seem complex at first glance, but by following Sven Yrvind’s meticulous process, enthusiasts can achieve professional-level results. Remember that the journey of boatbuilding is as rewarding as reaching your destination; it tests one’s patience and dedication. For those seeking to embark on this adventure or simply gain more insight into marine craftsmanship, Sven’s wisdom is invaluable.After securely attaching the first portion of the flange, Sven allows ample time for it to dry before moving forward with additional steps. This patience and precision are key aspects of his successful boatbuilding methods.Step 4: Finishing Touches
Once the flange is fully dried, Sven removes the clamps carefully, ensuring no damage occurs during this process. He then moves on to attaching four more pieces onto these main frames, completing two pairs of flanges for the bulkhead hatches.The Final Touches
While two flanges form the primary support structure around the hatches, Sven mentions there are two additional pieces required at each end to ensure comprehensive protection. This attention to detail highlights his commitment to producing a durable and reliable design. “Sailing is about finding your path, whether it’s across an ocean or within yourself.” – Sven Yrvind In conclusion, making flanges around bulkhead hatches may seem complex at first glance, but by following Sven Yrvind’s meticulous process, enthusiasts can achieve professional-level results. Remember that the journey of boatbuilding is as rewarding as reaching your destination; it tests one’s patience and dedication. For those seeking to embark on this adventure or simply gain more insight into marine craftsmanship, Sven’s wisdom is invaluable.Sven begins by explaining that working on flanges vertically and horizontally is significantly easier than doing so in a flat position. To simplify the process further, he divides the task into two or three steps as suggested by fellow expert “for for.” This approach not only makes it more manageable but also allows for greater precision in crafting each component.Step 2: Applying Glue and Securing
Sven proceeds to apply glue along one edge of the flange, ensuring a secure bond when clamped into place. He emphasizes that this stage is crucial for maintaining the structural integrity of the flange, which in turn safeguards the living area beneath the canvas when hatches are open.Step 3: Allowing Time to Dry
After securely attaching the first portion of the flange, Sven allows ample time for it to dry before moving forward with additional steps. This patience and precision are key aspects of his successful boatbuilding methods.Step 4: Finishing Touches
Once the flange is fully dried, Sven removes the clamps carefully, ensuring no damage occurs during this process. He then moves on to attaching four more pieces onto these main frames, completing two pairs of flanges for the bulkhead hatches.The Final Touches
While two flanges form the primary support structure around the hatches, Sven mentions there are two additional pieces required at each end to ensure comprehensive protection. This attention to detail highlights his commitment to producing a durable and reliable design. “Sailing is about finding your path, whether it’s across an ocean or within yourself.” – Sven Yrvind In conclusion, making flanges around bulkhead hatches may seem complex at first glance, but by following Sven Yrvind’s meticulous process, enthusiasts can achieve professional-level results. Remember that the journey of boatbuilding is as rewarding as reaching your destination; it tests one’s patience and dedication. For those seeking to embark on this adventure or simply gain more insight into marine craftsmanship, Sven’s wisdom is invaluable.Sven Yrvind, a renowned yacht designer and sailor, shares valuable insights on creating flanges around bulkhead hatches for canvas protection in this enlightening video. By following his expert guidance, boat enthusiasts can ensure their living areas remain secure while allowing unhindered access through the hatches.Step 1: Starting with the Flange
Sven begins by explaining that working on flanges vertically and horizontally is significantly easier than doing so in a flat position. To simplify the process further, he divides the task into two or three steps as suggested by fellow expert “for for.” This approach not only makes it more manageable but also allows for greater precision in crafting each component.Step 2: Applying Glue and Securing
Sven proceeds to apply glue along one edge of the flange, ensuring a secure bond when clamped into place. He emphasizes that this stage is crucial for maintaining the structural integrity of the flange, which in turn safeguards the living area beneath the canvas when hatches are open.Step 3: Allowing Time to Dry
After securely attaching the first portion of the flange, Sven allows ample time for it to dry before moving forward with additional steps. This patience and precision are key aspects of his successful boatbuilding methods.Step 4: Finishing Touches
Once the flange is fully dried, Sven removes the clamps carefully, ensuring no damage occurs during this process. He then moves on to attaching four more pieces onto these main frames, completing two pairs of flanges for the bulkhead hatches.The Final Touches
While two flanges form the primary support structure around the hatches, Sven mentions there are two additional pieces required at each end to ensure comprehensive protection. This attention to detail highlights his commitment to producing a durable and reliable design. “Sailing is about finding your path, whether it’s across an ocean or within yourself.” – Sven Yrvind In conclusion, making flanges around bulkhead hatches may seem complex at first glance, but by following Sven Yrvind’s meticulous process, enthusiasts can achieve professional-level results. Remember that the journey of boatbuilding is as rewarding as reaching your destination; it tests one’s patience and dedication. For those seeking to embark on this adventure or simply gain more insight into marine craftsmanship, Sven’s wisdom is invaluable.Making Flanges Around Bulkhead Hatches for Canvas
Sven Yrvind, a renowned yacht designer and sailor, shares valuable insights on creating flanges around bulkhead hatches for canvas protection in this enlightening video. By following his expert guidance, boat enthusiasts can ensure their living areas remain secure while allowing unhindered access through the hatches.Step 1: Starting with the Flange
Sven begins by explaining that working on flanges vertically and horizontally is significantly easier than doing so in a flat position. To simplify the process further, he divides the task into two or three steps as suggested by fellow expert “for for.” This approach not only makes it more manageable but also allows for greater precision in crafting each component.Step 2: Applying Glue and Securing
Sven proceeds to apply glue along one edge of the flange, ensuring a secure bond when clamped into place. He emphasizes that this stage is crucial for maintaining the structural integrity of the flange, which in turn safeguards the living area beneath the canvas when hatches are open.Step 3: Allowing Time to Dry
After securely attaching the first portion of the flange, Sven allows ample time for it to dry before moving forward with additional steps. This patience and precision are key aspects of his successful boatbuilding methods.Step 4: Finishing Touches
Once the flange is fully dried, Sven removes the clamps carefully, ensuring no damage occurs during this process. He then moves on to attaching four more pieces onto these main frames, completing two pairs of flanges for the bulkhead hatches.The Final Touches
While two flanges form the primary support structure around the hatches, Sven mentions there are two additional pieces required at each end to ensure comprehensive protection. This attention to detail highlights his commitment to producing a durable and reliable design. “Sailing is about finding your path, whether it’s across an ocean or within yourself.” – Sven Yrvind In conclusion, making flanges around bulkhead hatches may seem complex at first glance, but by following Sven Yrvind’s meticulous process, enthusiasts can achieve professional-level results. Remember that the journey of boatbuilding is as rewarding as reaching your destination; it tests one’s patience and dedication. For those seeking to embark on this adventure or simply gain more insight into marine craftsmanship, Sven’s wisdom is invaluable.Sven proceeds to apply glue along one edge of the flange, ensuring a secure bond when clamped into place. He emphasizes that this stage is crucial for maintaining the structural integrity of the flange, which in turn safeguards the living area beneath the canvas when hatches are open.Step 3: Allowing Time to Dry
After securely attaching the first portion of the flange, Sven allows ample time for it to dry before moving forward with additional steps. This patience and precision are key aspects of his successful boatbuilding methods.Step 4: Finishing Touches
Once the flange is fully dried, Sven removes the clamps carefully, ensuring no damage occurs during this process. He then moves on to attaching four more pieces onto these main frames, completing two pairs of flanges for the bulkhead hatches.The Final Touches
While two flanges form the primary support structure around the hatches, Sven mentions there are two additional pieces required at each end to ensure comprehensive protection. This attention to detail highlights his commitment to producing a durable and reliable design. “Sailing is about finding your path, whether it’s across an ocean or within yourself.” – Sven Yrvind In conclusion, making flanges around bulkhead hatches may seem complex at first glance, but by following Sven Yrvind’s meticulous process, enthusiasts can achieve professional-level results. Remember that the journey of boatbuilding is as rewarding as reaching your destination; it tests one’s patience and dedication. For those seeking to embark on this adventure or simply gain more insight into marine craftsmanship, Sven’s wisdom is invaluable.Sven begins by explaining that working on flanges vertically and horizontally is significantly easier than doing so in a flat position. To simplify the process further, he divides the task into two or three steps as suggested by fellow expert “for for.” This approach not only makes it more manageable but also allows for greater precision in crafting each component.Step 2: Applying Glue and Securing
Sven proceeds to apply glue along one edge of the flange, ensuring a secure bond when clamped into place. He emphasizes that this stage is crucial for maintaining the structural integrity of the flange, which in turn safeguards the living area beneath the canvas when hatches are open.Step 3: Allowing Time to Dry
After securely attaching the first portion of the flange, Sven allows ample time for it to dry before moving forward with additional steps. This patience and precision are key aspects of his successful boatbuilding methods.Step 4: Finishing Touches
Once the flange is fully dried, Sven removes the clamps carefully, ensuring no damage occurs during this process. He then moves on to attaching four more pieces onto these main frames, completing two pairs of flanges for the bulkhead hatches.The Final Touches
While two flanges form the primary support structure around the hatches, Sven mentions there are two additional pieces required at each end to ensure comprehensive protection. This attention to detail highlights his commitment to producing a durable and reliable design. “Sailing is about finding your path, whether it’s across an ocean or within yourself.” – Sven Yrvind In conclusion, making flanges around bulkhead hatches may seem complex at first glance, but by following Sven Yrvind’s meticulous process, enthusiasts can achieve professional-level results. Remember that the journey of boatbuilding is as rewarding as reaching your destination; it tests one’s patience and dedication. For those seeking to embark on this adventure or simply gain more insight into marine craftsmanship, Sven’s wisdom is invaluable.Sven Yrvind, a renowned yacht designer and sailor, shares valuable insights on creating flanges around bulkhead hatches for canvas protection in this enlightening video. By following his expert guidance, boat enthusiasts can ensure their living areas remain secure while allowing unhindered access through the hatches.Step 1: Starting with the Flange
Sven begins by explaining that working on flanges vertically and horizontally is significantly easier than doing so in a flat position. To simplify the process further, he divides the task into two or three steps as suggested by fellow expert “for for.” This approach not only makes it more manageable but also allows for greater precision in crafting each component.Step 2: Applying Glue and Securing
Sven proceeds to apply glue along one edge of the flange, ensuring a secure bond when clamped into place. He emphasizes that this stage is crucial for maintaining the structural integrity of the flange, which in turn safeguards the living area beneath the canvas when hatches are open.Step 3: Allowing Time to Dry
After securely attaching the first portion of the flange, Sven allows ample time for it to dry before moving forward with additional steps. This patience and precision are key aspects of his successful boatbuilding methods.Step 4: Finishing Touches
Once the flange is fully dried, Sven removes the clamps carefully, ensuring no damage occurs during this process. He then moves on to attaching four more pieces onto these main frames, completing two pairs of flanges for the bulkhead hatches.The Final Touches
While two flanges form the primary support structure around the hatches, Sven mentions there are two additional pieces required at each end to ensure comprehensive protection. This attention to detail highlights his commitment to producing a durable and reliable design. “Sailing is about finding your path, whether it’s across an ocean or within yourself.” – Sven Yrvind In conclusion, making flanges around bulkhead hatches may seem complex at first glance, but by following Sven Yrvind’s meticulous process, enthusiasts can achieve professional-level results. Remember that the journey of boatbuilding is as rewarding as reaching your destination; it tests one’s patience and dedication. For those seeking to embark on this adventure or simply gain more insight into marine craftsmanship, Sven’s wisdom is invaluable.Making Flanges Around Bulkhead Hatches for Canvas
Sven Yrvind, a renowned yacht designer and sailor, shares valuable insights on creating flanges around bulkhead hatches for canvas protection in this enlightening video. By following his expert guidance, boat enthusiasts can ensure their living areas remain secure while allowing unhindered access through the hatches.Step 1: Starting with the Flange
Sven begins by explaining that working on flanges vertically and horizontally is significantly easier than doing so in a flat position. To simplify the process further, he divides the task into two or three steps as suggested by fellow expert “for for.” This approach not only makes it more manageable but also allows for greater precision in crafting each component.Step 2: Applying Glue and Securing
Sven proceeds to apply glue along one edge of the flange, ensuring a secure bond when clamped into place. He emphasizes that this stage is crucial for maintaining the structural integrity of the flange, which in turn safeguards the living area beneath the canvas when hatches are open.Step 3: Allowing Time to Dry
After securely attaching the first portion of the flange, Sven allows ample time for it to dry before moving forward with additional steps. This patience and precision are key aspects of his successful boatbuilding methods.Step 4: Finishing Touches
Once the flange is fully dried, Sven removes the clamps carefully, ensuring no damage occurs during this process. He then moves on to attaching four more pieces onto these main frames, completing two pairs of flanges for the bulkhead hatches.The Final Touches
While two flanges form the primary support structure around the hatches, Sven mentions there are two additional pieces required at each end to ensure comprehensive protection. This attention to detail highlights his commitment to producing a durable and reliable design. “Sailing is about finding your path, whether it’s across an ocean or within yourself.” – Sven Yrvind In conclusion, making flanges around bulkhead hatches may seem complex at first glance, but by following Sven Yrvind’s meticulous process, enthusiasts can achieve professional-level results. Remember that the journey of boatbuilding is as rewarding as reaching your destination; it tests one’s patience and dedication. For those seeking to embark on this adventure or simply gain more insight into marine craftsmanship, Sven’s wisdom is invaluable.Once the flange is fully dried, Sven removes the clamps carefully, ensuring no damage occurs during this process. He then moves on to attaching four more pieces onto these main frames, completing two pairs of flanges for the bulkhead hatches.The Final Touches
While two flanges form the primary support structure around the hatches, Sven mentions there are two additional pieces required at each end to ensure comprehensive protection. This attention to detail highlights his commitment to producing a durable and reliable design. “Sailing is about finding your path, whether it’s across an ocean or within yourself.” – Sven Yrvind In conclusion, making flanges around bulkhead hatches may seem complex at first glance, but by following Sven Yrvind’s meticulous process, enthusiasts can achieve professional-level results. Remember that the journey of boatbuilding is as rewarding as reaching your destination; it tests one’s patience and dedication. For those seeking to embark on this adventure or simply gain more insight into marine craftsmanship, Sven’s wisdom is invaluable.Sven proceeds to apply glue along one edge of the flange, ensuring a secure bond when clamped into place. He emphasizes that this stage is crucial for maintaining the structural integrity of the flange, which in turn safeguards the living area beneath the canvas when hatches are open.Step 3: Allowing Time to Dry
After securely attaching the first portion of the flange, Sven allows ample time for it to dry before moving forward with additional steps. This patience and precision are key aspects of his successful boatbuilding methods.Step 4: Finishing Touches
Once the flange is fully dried, Sven removes the clamps carefully, ensuring no damage occurs during this process. He then moves on to attaching four more pieces onto these main frames, completing two pairs of flanges for the bulkhead hatches.The Final Touches
While two flanges form the primary support structure around the hatches, Sven mentions there are two additional pieces required at each end to ensure comprehensive protection. This attention to detail highlights his commitment to producing a durable and reliable design. “Sailing is about finding your path, whether it’s across an ocean or within yourself.” – Sven Yrvind In conclusion, making flanges around bulkhead hatches may seem complex at first glance, but by following Sven Yrvind’s meticulous process, enthusiasts can achieve professional-level results. Remember that the journey of boatbuilding is as rewarding as reaching your destination; it tests one’s patience and dedication. For those seeking to embark on this adventure or simply gain more insight into marine craftsmanship, Sven’s wisdom is invaluable.Sven begins by explaining that working on flanges vertically and horizontally is significantly easier than doing so in a flat position. To simplify the process further, he divides the task into two or three steps as suggested by fellow expert “for for.” This approach not only makes it more manageable but also allows for greater precision in crafting each component.Step 2: Applying Glue and Securing
Sven proceeds to apply glue along one edge of the flange, ensuring a secure bond when clamped into place. He emphasizes that this stage is crucial for maintaining the structural integrity of the flange, which in turn safeguards the living area beneath the canvas when hatches are open.Step 3: Allowing Time to Dry
After securely attaching the first portion of the flange, Sven allows ample time for it to dry before moving forward with additional steps. This patience and precision are key aspects of his successful boatbuilding methods.Step 4: Finishing Touches
Once the flange is fully dried, Sven removes the clamps carefully, ensuring no damage occurs during this process. He then moves on to attaching four more pieces onto these main frames, completing two pairs of flanges for the bulkhead hatches.The Final Touches
While two flanges form the primary support structure around the hatches, Sven mentions there are two additional pieces required at each end to ensure comprehensive protection. This attention to detail highlights his commitment to producing a durable and reliable design. “Sailing is about finding your path, whether it’s across an ocean or within yourself.” – Sven Yrvind In conclusion, making flanges around bulkhead hatches may seem complex at first glance, but by following Sven Yrvind’s meticulous process, enthusiasts can achieve professional-level results. Remember that the journey of boatbuilding is as rewarding as reaching your destination; it tests one’s patience and dedication. For those seeking to embark on this adventure or simply gain more insight into marine craftsmanship, Sven’s wisdom is invaluable.Sven Yrvind, a renowned yacht designer and sailor, shares valuable insights on creating flanges around bulkhead hatches for canvas protection in this enlightening video. By following his expert guidance, boat enthusiasts can ensure their living areas remain secure while allowing unhindered access through the hatches.Step 1: Starting with the Flange
Sven begins by explaining that working on flanges vertically and horizontally is significantly easier than doing so in a flat position. To simplify the process further, he divides the task into two or three steps as suggested by fellow expert “for for.” This approach not only makes it more manageable but also allows for greater precision in crafting each component.Step 2: Applying Glue and Securing
Sven proceeds to apply glue along one edge of the flange, ensuring a secure bond when clamped into place. He emphasizes that this stage is crucial for maintaining the structural integrity of the flange, which in turn safeguards the living area beneath the canvas when hatches are open.Step 3: Allowing Time to Dry
After securely attaching the first portion of the flange, Sven allows ample time for it to dry before moving forward with additional steps. This patience and precision are key aspects of his successful boatbuilding methods.Step 4: Finishing Touches
Once the flange is fully dried, Sven removes the clamps carefully, ensuring no damage occurs during this process. He then moves on to attaching four more pieces onto these main frames, completing two pairs of flanges for the bulkhead hatches.The Final Touches
While two flanges form the primary support structure around the hatches, Sven mentions there are two additional pieces required at each end to ensure comprehensive protection. This attention to detail highlights his commitment to producing a durable and reliable design. “Sailing is about finding your path, whether it’s across an ocean or within yourself.” – Sven Yrvind In conclusion, making flanges around bulkhead hatches may seem complex at first glance, but by following Sven Yrvind’s meticulous process, enthusiasts can achieve professional-level results. Remember that the journey of boatbuilding is as rewarding as reaching your destination; it tests one’s patience and dedication. For those seeking to embark on this adventure or simply gain more insight into marine craftsmanship, Sven’s wisdom is invaluable.Making Flanges Around Bulkhead Hatches for Canvas
Sven Yrvind, a renowned yacht designer and sailor, shares valuable insights on creating flanges around bulkhead hatches for canvas protection in this enlightening video. By following his expert guidance, boat enthusiasts can ensure their living areas remain secure while allowing unhindered access through the hatches.Step 1: Starting with the Flange
Sven begins by explaining that working on flanges vertically and horizontally is significantly easier than doing so in a flat position. To simplify the process further, he divides the task into two or three steps as suggested by fellow expert “for for.” This approach not only makes it more manageable but also allows for greater precision in crafting each component.Step 2: Applying Glue and Securing
Sven proceeds to apply glue along one edge of the flange, ensuring a secure bond when clamped into place. He emphasizes that this stage is crucial for maintaining the structural integrity of the flange, which in turn safeguards the living area beneath the canvas when hatches are open.Step 3: Allowing Time to Dry
After securely attaching the first portion of the flange, Sven allows ample time for it to dry before moving forward with additional steps. This patience and precision are key aspects of his successful boatbuilding methods.Step 4: Finishing Touches
Once the flange is fully dried, Sven removes the clamps carefully, ensuring no damage occurs during this process. He then moves on to attaching four more pieces onto these main frames, completing two pairs of flanges for the bulkhead hatches.The Final Touches
While two flanges form the primary support structure around the hatches, Sven mentions there are two additional pieces required at each end to ensure comprehensive protection. This attention to detail highlights his commitment to producing a durable and reliable design. “Sailing is about finding your path, whether it’s across an ocean or within yourself.” – Sven Yrvind In conclusion, making flanges around bulkhead hatches may seem complex at first glance, but by following Sven Yrvind’s meticulous process, enthusiasts can achieve professional-level results. Remember that the journey of boatbuilding is as rewarding as reaching your destination; it tests one’s patience and dedication. For those seeking to embark on this adventure or simply gain more insight into marine craftsmanship, Sven’s wisdom is invaluable.After securely attaching the first portion of the flange, Sven allows ample time for it to dry before moving forward with additional steps. This patience and precision are key aspects of his successful boatbuilding methods.Step 4: Finishing Touches
Once the flange is fully dried, Sven removes the clamps carefully, ensuring no damage occurs during this process. He then moves on to attaching four more pieces onto these main frames, completing two pairs of flanges for the bulkhead hatches.The Final Touches
While two flanges form the primary support structure around the hatches, Sven mentions there are two additional pieces required at each end to ensure comprehensive protection. This attention to detail highlights his commitment to producing a durable and reliable design. “Sailing is about finding your path, whether it’s across an ocean or within yourself.” – Sven Yrvind In conclusion, making flanges around bulkhead hatches may seem complex at first glance, but by following Sven Yrvind’s meticulous process, enthusiasts can achieve professional-level results. Remember that the journey of boatbuilding is as rewarding as reaching your destination; it tests one’s patience and dedication. For those seeking to embark on this adventure or simply gain more insight into marine craftsmanship, Sven’s wisdom is invaluable.Sven proceeds to apply glue along one edge of the flange, ensuring a secure bond when clamped into place. He emphasizes that this stage is crucial for maintaining the structural integrity of the flange, which in turn safeguards the living area beneath the canvas when hatches are open.Step 3: Allowing Time to Dry
After securely attaching the first portion of the flange, Sven allows ample time for it to dry before moving forward with additional steps. This patience and precision are key aspects of his successful boatbuilding methods.Step 4: Finishing Touches
Once the flange is fully dried, Sven removes the clamps carefully, ensuring no damage occurs during this process. He then moves on to attaching four more pieces onto these main frames, completing two pairs of flanges for the bulkhead hatches.The Final Touches
While two flanges form the primary support structure around the hatches, Sven mentions there are two additional pieces required at each end to ensure comprehensive protection. This attention to detail highlights his commitment to producing a durable and reliable design. “Sailing is about finding your path, whether it’s across an ocean or within yourself.” – Sven Yrvind In conclusion, making flanges around bulkhead hatches may seem complex at first glance, but by following Sven Yrvind’s meticulous process, enthusiasts can achieve professional-level results. Remember that the journey of boatbuilding is as rewarding as reaching your destination; it tests one’s patience and dedication. For those seeking to embark on this adventure or simply gain more insight into marine craftsmanship, Sven’s wisdom is invaluable.Sven begins by explaining that working on flanges vertically and horizontally is significantly easier than doing so in a flat position. To simplify the process further, he divides the task into two or three steps as suggested by fellow expert “for for.” This approach not only makes it more manageable but also allows for greater precision in crafting each component.Step 2: Applying Glue and Securing
Sven proceeds to apply glue along one edge of the flange, ensuring a secure bond when clamped into place. He emphasizes that this stage is crucial for maintaining the structural integrity of the flange, which in turn safeguards the living area beneath the canvas when hatches are open.Step 3: Allowing Time to Dry
After securely attaching the first portion of the flange, Sven allows ample time for it to dry before moving forward with additional steps. This patience and precision are key aspects of his successful boatbuilding methods.Step 4: Finishing Touches
Once the flange is fully dried, Sven removes the clamps carefully, ensuring no damage occurs during this process. He then moves on to attaching four more pieces onto these main frames, completing two pairs of flanges for the bulkhead hatches.The Final Touches
While two flanges form the primary support structure around the hatches, Sven mentions there are two additional pieces required at each end to ensure comprehensive protection. This attention to detail highlights his commitment to producing a durable and reliable design. “Sailing is about finding your path, whether it’s across an ocean or within yourself.” – Sven Yrvind In conclusion, making flanges around bulkhead hatches may seem complex at first glance, but by following Sven Yrvind’s meticulous process, enthusiasts can achieve professional-level results. Remember that the journey of boatbuilding is as rewarding as reaching your destination; it tests one’s patience and dedication. For those seeking to embark on this adventure or simply gain more insight into marine craftsmanship, Sven’s wisdom is invaluable.Sven Yrvind, a renowned yacht designer and sailor, shares valuable insights on creating flanges around bulkhead hatches for canvas protection in this enlightening video. By following his expert guidance, boat enthusiasts can ensure their living areas remain secure while allowing unhindered access through the hatches.Step 1: Starting with the Flange
Sven begins by explaining that working on flanges vertically and horizontally is significantly easier than doing so in a flat position. To simplify the process further, he divides the task into two or three steps as suggested by fellow expert “for for.” This approach not only makes it more manageable but also allows for greater precision in crafting each component.Step 2: Applying Glue and Securing
Sven proceeds to apply glue along one edge of the flange, ensuring a secure bond when clamped into place. He emphasizes that this stage is crucial for maintaining the structural integrity of the flange, which in turn safeguards the living area beneath the canvas when hatches are open.Step 3: Allowing Time to Dry
After securely attaching the first portion of the flange, Sven allows ample time for it to dry before moving forward with additional steps. This patience and precision are key aspects of his successful boatbuilding methods.Step 4: Finishing Touches
Once the flange is fully dried, Sven removes the clamps carefully, ensuring no damage occurs during this process. He then moves on to attaching four more pieces onto these main frames, completing two pairs of flanges for the bulkhead hatches.The Final Touches
While two flanges form the primary support structure around the hatches, Sven mentions there are two additional pieces required at each end to ensure comprehensive protection. This attention to detail highlights his commitment to producing a durable and reliable design. “Sailing is about finding your path, whether it’s across an ocean or within yourself.” – Sven Yrvind In conclusion, making flanges around bulkhead hatches may seem complex at first glance, but by following Sven Yrvind’s meticulous process, enthusiasts can achieve professional-level results. Remember that the journey of boatbuilding is as rewarding as reaching your destination; it tests one’s patience and dedication. For those seeking to embark on this adventure or simply gain more insight into marine craftsmanship, Sven’s wisdom is invaluable.Making Flanges Around Bulkhead Hatches for Canvas
Sven Yrvind, a renowned yacht designer and sailor, shares valuable insights on creating flanges around bulkhead hatches for canvas protection in this enlightening video. By following his expert guidance, boat enthusiasts can ensure their living areas remain secure while allowing unhindered access through the hatches.Step 1: Starting with the Flange
Sven begins by explaining that working on flanges vertically and horizontally is significantly easier than doing so in a flat position. To simplify the process further, he divides the task into two or three steps as suggested by fellow expert “for for.” This approach not only makes it more manageable but also allows for greater precision in crafting each component.Step 2: Applying Glue and Securing
Sven proceeds to apply glue along one edge of the flange, ensuring a secure bond when clamped into place. He emphasizes that this stage is crucial for maintaining the structural integrity of the flange, which in turn safeguards the living area beneath the canvas when hatches are open.Step 3: Allowing Time to Dry
After securely attaching the first portion of the flange, Sven allows ample time for it to dry before moving forward with additional steps. This patience and precision are key aspects of his successful boatbuilding methods.Step 4: Finishing Touches
Once the flange is fully dried, Sven removes the clamps carefully, ensuring no damage occurs during this process. He then moves on to attaching four more pieces onto these main frames, completing two pairs of flanges for the bulkhead hatches.The Final Touches
While two flanges form the primary support structure around the hatches, Sven mentions there are two additional pieces required at each end to ensure comprehensive protection. This attention to detail highlights his commitment to producing a durable and reliable design. “Sailing is about finding your path, whether it’s across an ocean or within yourself.” – Sven Yrvind In conclusion, making flanges around bulkhead hatches may seem complex at first glance, but by following Sven Yrvind’s meticulous process, enthusiasts can achieve professional-level results. Remember that the journey of boatbuilding is as rewarding as reaching your destination; it tests one’s patience and dedication. For those seeking to embark on this adventure or simply gain more insight into marine craftsmanship, Sven’s wisdom is invaluable.Once the flange is fully dried, Sven removes the clamps carefully, ensuring no damage occurs during this process. He then moves on to attaching four more pieces onto these main frames, completing two pairs of flanges for the bulkhead hatches.The Final Touches
While two flanges form the primary support structure around the hatches, Sven mentions there are two additional pieces required at each end to ensure comprehensive protection. This attention to detail highlights his commitment to producing a durable and reliable design. “Sailing is about finding your path, whether it’s across an ocean or within yourself.” – Sven Yrvind In conclusion, making flanges around bulkhead hatches may seem complex at first glance, but by following Sven Yrvind’s meticulous process, enthusiasts can achieve professional-level results. Remember that the journey of boatbuilding is as rewarding as reaching your destination; it tests one’s patience and dedication. For those seeking to embark on this adventure or simply gain more insight into marine craftsmanship, Sven’s wisdom is invaluable.After securely attaching the first portion of the flange, Sven allows ample time for it to dry before moving forward with additional steps. This patience and precision are key aspects of his successful boatbuilding methods.Step 4: Finishing Touches
Once the flange is fully dried, Sven removes the clamps carefully, ensuring no damage occurs during this process. He then moves on to attaching four more pieces onto these main frames, completing two pairs of flanges for the bulkhead hatches.The Final Touches
While two flanges form the primary support structure around the hatches, Sven mentions there are two additional pieces required at each end to ensure comprehensive protection. This attention to detail highlights his commitment to producing a durable and reliable design. “Sailing is about finding your path, whether it’s across an ocean or within yourself.” – Sven Yrvind In conclusion, making flanges around bulkhead hatches may seem complex at first glance, but by following Sven Yrvind’s meticulous process, enthusiasts can achieve professional-level results. Remember that the journey of boatbuilding is as rewarding as reaching your destination; it tests one’s patience and dedication. For those seeking to embark on this adventure or simply gain more insight into marine craftsmanship, Sven’s wisdom is invaluable.Sven proceeds to apply glue along one edge of the flange, ensuring a secure bond when clamped into place. He emphasizes that this stage is crucial for maintaining the structural integrity of the flange, which in turn safeguards the living area beneath the canvas when hatches are open.Step 3: Allowing Time to Dry
After securely attaching the first portion of the flange, Sven allows ample time for it to dry before moving forward with additional steps. This patience and precision are key aspects of his successful boatbuilding methods.Step 4: Finishing Touches
Once the flange is fully dried, Sven removes the clamps carefully, ensuring no damage occurs during this process. He then moves on to attaching four more pieces onto these main frames, completing two pairs of flanges for the bulkhead hatches.The Final Touches
While two flanges form the primary support structure around the hatches, Sven mentions there are two additional pieces required at each end to ensure comprehensive protection. This attention to detail highlights his commitment to producing a durable and reliable design. “Sailing is about finding your path, whether it’s across an ocean or within yourself.” – Sven Yrvind In conclusion, making flanges around bulkhead hatches may seem complex at first glance, but by following Sven Yrvind’s meticulous process, enthusiasts can achieve professional-level results. Remember that the journey of boatbuilding is as rewarding as reaching your destination; it tests one’s patience and dedication. For those seeking to embark on this adventure or simply gain more insight into marine craftsmanship, Sven’s wisdom is invaluable.Sven begins by explaining that working on flanges vertically and horizontally is significantly easier than doing so in a flat position. To simplify the process further, he divides the task into two or three steps as suggested by fellow expert “for for.” This approach not only makes it more manageable but also allows for greater precision in crafting each component.Step 2: Applying Glue and Securing
Sven proceeds to apply glue along one edge of the flange, ensuring a secure bond when clamped into place. He emphasizes that this stage is crucial for maintaining the structural integrity of the flange, which in turn safeguards the living area beneath the canvas when hatches are open.Step 3: Allowing Time to Dry
After securely attaching the first portion of the flange, Sven allows ample time for it to dry before moving forward with additional steps. This patience and precision are key aspects of his successful boatbuilding methods.Step 4: Finishing Touches
Once the flange is fully dried, Sven removes the clamps carefully, ensuring no damage occurs during this process. He then moves on to attaching four more pieces onto these main frames, completing two pairs of flanges for the bulkhead hatches.The Final Touches
While two flanges form the primary support structure around the hatches, Sven mentions there are two additional pieces required at each end to ensure comprehensive protection. This attention to detail highlights his commitment to producing a durable and reliable design. “Sailing is about finding your path, whether it’s across an ocean or within yourself.” – Sven Yrvind In conclusion, making flanges around bulkhead hatches may seem complex at first glance, but by following Sven Yrvind’s meticulous process, enthusiasts can achieve professional-level results. Remember that the journey of boatbuilding is as rewarding as reaching your destination; it tests one’s patience and dedication. For those seeking to embark on this adventure or simply gain more insight into marine craftsmanship, Sven’s wisdom is invaluable.Sven Yrvind, a renowned yacht designer and sailor, shares valuable insights on creating flanges around bulkhead hatches for canvas protection in this enlightening video. By following his expert guidance, boat enthusiasts can ensure their living areas remain secure while allowing unhindered access through the hatches.Step 1: Starting with the Flange
Sven begins by explaining that working on flanges vertically and horizontally is significantly easier than doing so in a flat position. To simplify the process further, he divides the task into two or three steps as suggested by fellow expert “for for.” This approach not only makes it more manageable but also allows for greater precision in crafting each component.Step 2: Applying Glue and Securing
Sven proceeds to apply glue along one edge of the flange, ensuring a secure bond when clamped into place. He emphasizes that this stage is crucial for maintaining the structural integrity of the flange, which in turn safeguards the living area beneath the canvas when hatches are open.Step 3: Allowing Time to Dry
After securely attaching the first portion of the flange, Sven allows ample time for it to dry before moving forward with additional steps. This patience and precision are key aspects of his successful boatbuilding methods.Step 4: Finishing Touches
Once the flange is fully dried, Sven removes the clamps carefully, ensuring no damage occurs during this process. He then moves on to attaching four more pieces onto these main frames, completing two pairs of flanges for the bulkhead hatches.The Final Touches
While two flanges form the primary support structure around the hatches, Sven mentions there are two additional pieces required at each end to ensure comprehensive protection. This attention to detail highlights his commitment to producing a durable and reliable design. “Sailing is about finding your path, whether it’s across an ocean or within yourself.” – Sven Yrvind In conclusion, making flanges around bulkhead hatches may seem complex at first glance, but by following Sven Yrvind’s meticulous process, enthusiasts can achieve professional-level results. Remember that the journey of boatbuilding is as rewarding as reaching your destination; it tests one’s patience and dedication. For those seeking to embark on this adventure or simply gain more insight into marine craftsmanship, Sven’s wisdom is invaluable.Making Flanges Around Bulkhead Hatches for Canvas
Sven Yrvind, a renowned yacht designer and sailor, shares valuable insights on creating flanges around bulkhead hatches for canvas protection in this enlightening video. By following his expert guidance, boat enthusiasts can ensure their living areas remain secure while allowing unhindered access through the hatches.Step 1: Starting with the Flange
Sven begins by explaining that working on flanges vertically and horizontally is significantly easier than doing so in a flat position. To simplify the process further, he divides the task into two or three steps as suggested by fellow expert “for for.” This approach not only makes it more manageable but also allows for greater precision in crafting each component.Step 2: Applying Glue and Securing
Sven proceeds to apply glue along one edge of the flange, ensuring a secure bond when clamped into place. He emphasizes that this stage is crucial for maintaining the structural integrity of the flange, which in turn safeguards the living area beneath the canvas when hatches are open.Step 3: Allowing Time to Dry
After securely attaching the first portion of the flange, Sven allows ample time for it to dry before moving forward with additional steps. This patience and precision are key aspects of his successful boatbuilding methods.Step 4: Finishing Touches
Once the flange is fully dried, Sven removes the clamps carefully, ensuring no damage occurs during this process. He then moves on to attaching four more pieces onto these main frames, completing two pairs of flanges for the bulkhead hatches.The Final Touches
While two flanges form the primary support structure around the hatches, Sven mentions there are two additional pieces required at each end to ensure comprehensive protection. This attention to detail highlights his commitment to producing a durable and reliable design. “Sailing is about finding your path, whether it’s across an ocean or within yourself.” – Sven Yrvind In conclusion, making flanges around bulkhead hatches may seem complex at first glance, but by following Sven Yrvind’s meticulous process, enthusiasts can achieve professional-level results. Remember that the journey of boatbuilding is as rewarding as reaching your destination; it tests one’s patience and dedication. For those seeking to embark on this adventure or simply gain more insight into marine craftsmanship, Sven’s wisdom is invaluable.Once the flange is fully dried, Sven removes the clamps carefully, ensuring no damage occurs during this process. He then moves on to attaching four more pieces onto these main frames, completing two pairs of flanges for the bulkhead hatches.The Final Touches
While two flanges form the primary support structure around the hatches, Sven mentions there are two additional pieces required at each end to ensure comprehensive protection. This attention to detail highlights his commitment to producing a durable and reliable design. “Sailing is about finding your path, whether it’s across an ocean or within yourself.” – Sven Yrvind In conclusion, making flanges around bulkhead hatches may seem complex at first glance, but by following Sven Yrvind’s meticulous process, enthusiasts can achieve professional-level results. Remember that the journey of boatbuilding is as rewarding as reaching your destination; it tests one’s patience and dedication. For those seeking to embark on this adventure or simply gain more insight into marine craftsmanship, Sven’s wisdom is invaluable.Sven Yrvind, a renowned yacht designer and sailor, shares valuable insights on creating flanges around bulkhead hatches for canvas protection in this enlightening video. By following his expert guidance, boat enthusiasts can ensure their living areas remain secure while allowing unhindered access through the hatches.Step 1: Starting with the Flange
Sven begins by explaining that working on flanges vertically and horizontally is significantly easier than doing so in a flat position. To simplify the process further, he divides the task into two or three steps as suggested by fellow expert “for for.” This approach not only makes it more manageable but also allows for greater precision in crafting each component.Step 2: Applying Glue and Securing
Sven proceeds to apply glue along one edge of the flange, ensuring a secure bond when clamped into place. He emphasizes that this stage is crucial for maintaining the structural integrity of the flange, which in turn safeguards the living area beneath the canvas when hatches are open.Step 3: Allowing Time to Dry
After securely attaching the first portion of the flange, Sven allows ample time for it to dry before moving forward with additional steps. This patience and precision are key aspects of his successful boatbuilding methods.Step 4: Finishing Touches
Once the flange is fully dried, Sven removes the clamps carefully, ensuring no damage occurs during this process. He then moves on to attaching four more pieces onto these main frames, completing two pairs of flanges for the bulkhead hatches.The Final Touches
While two flanges form the primary support structure around the hatches, Sven mentions there are two additional pieces required at each end to ensure comprehensive protection. This attention to detail highlights his commitment to producing a durable and reliable design. “Sailing is about finding your path, whether it’s across an ocean or within yourself.” – Sven Yrvind In conclusion, making flanges around bulkhead hatches may seem complex at first glance, but by following Sven Yrvind’s meticulous process, enthusiasts can achieve professional-level results. Remember that the journey of boatbuilding is as rewarding as reaching your destination; it tests one’s patience and dedication. For those seeking to embark on this adventure or simply gain more insight into marine craftsmanship, Sven’s wisdom is invaluable.Making Flanges Around Bulkhead Hatches for Canvas
Sven Yrvind, a renowned yacht designer and sailor, shares valuable insights on creating flanges around bulkhead hatches for canvas protection in this enlightening video. By following his expert guidance, boat enthusiasts can ensure their living areas remain secure while allowing unhindered access through the hatches.Step 1: Starting with the Flange
Sven begins by explaining that working on flanges vertically and horizontally is significantly easier than doing so in a flat position. To simplify the process further, he divides the task into two or three steps as suggested by fellow expert “for for.” This approach not only makes it more manageable but also allows for greater precision in crafting each component.Step 2: Applying Glue and Securing
Sven proceeds to apply glue along one edge of the flange, ensuring a secure bond when clamped into place. He emphasizes that this stage is crucial for maintaining the structural integrity of the flange, which in turn safeguards the living area beneath the canvas when hatches are open.Step 3: Allowing Time to Dry
After securely attaching the first portion of the flange, Sven allows ample time for it to dry before moving forward with additional steps. This patience and precision are key aspects of his successful boatbuilding methods.Step 4: Finishing Touches
Once the flange is fully dried, Sven removes the clamps carefully, ensuring no damage occurs during this process. He then moves on to attaching four more pieces onto these main frames, completing two pairs of flanges for the bulkhead hatches.The Final Touches
While two flanges form the primary support structure around the hatches, Sven mentions there are two additional pieces required at each end to ensure comprehensive protection. This attention to detail highlights his commitment to producing a durable and reliable design. “Sailing is about finding your path, whether it’s across an ocean or within yourself.” – Sven Yrvind In conclusion, making flanges around bulkhead hatches may seem complex at first glance, but by following Sven Yrvind’s meticulous process, enthusiasts can achieve professional-level results. Remember that the journey of boatbuilding is as rewarding as reaching your destination; it tests one’s patience and dedication. For those seeking to embark on this adventure or simply gain more insight into marine craftsmanship, Sven’s wisdom is invaluable.After securely attaching the first portion of the flange, Sven allows ample time for it to dry before moving forward with additional steps. This patience and precision are key aspects of his successful boatbuilding methods.Step 4: Finishing Touches
Once the flange is fully dried, Sven removes the clamps carefully, ensuring no damage occurs during this process. He then moves on to attaching four more pieces onto these main frames, completing two pairs of flanges for the bulkhead hatches.The Final Touches
While two flanges form the primary support structure around the hatches, Sven mentions there are two additional pieces required at each end to ensure comprehensive protection. This attention to detail highlights his commitment to producing a durable and reliable design. “Sailing is about finding your path, whether it’s across an ocean or within yourself.” – Sven Yrvind In conclusion, making flanges around bulkhead hatches may seem complex at first glance, but by following Sven Yrvind’s meticulous process, enthusiasts can achieve professional-level results. Remember that the journey of boatbuilding is as rewarding as reaching your destination; it tests one’s patience and dedication. For those seeking to embark on this adventure or simply gain more insight into marine craftsmanship, Sven’s wisdom is invaluable.Sven Yrvind, a renowned yacht designer and sailor, shares valuable insights on creating flanges around bulkhead hatches for canvas protection in this enlightening video. By following his expert guidance, boat enthusiasts can ensure their living areas remain secure while allowing unhindered access through the hatches.Step 1: Starting with the Flange
Sven begins by explaining that working on flanges vertically and horizontally is significantly easier than doing so in a flat position. To simplify the process further, he divides the task into two or three steps as suggested by fellow expert “for for.” This approach not only makes it more manageable but also allows for greater precision in crafting each component.Step 2: Applying Glue and Securing
Sven proceeds to apply glue along one edge of the flange, ensuring a secure bond when clamped into place. He emphasizes that this stage is crucial for maintaining the structural integrity of the flange, which in turn safeguards the living area beneath the canvas when hatches are open.Step 3: Allowing Time to Dry
After securely attaching the first portion of the flange, Sven allows ample time for it to dry before moving forward with additional steps. This patience and precision are key aspects of his successful boatbuilding methods.Step 4: Finishing Touches
Once the flange is fully dried, Sven removes the clamps carefully, ensuring no damage occurs during this process. He then moves on to attaching four more pieces onto these main frames, completing two pairs of flanges for the bulkhead hatches.The Final Touches
While two flanges form the primary support structure around the hatches, Sven mentions there are two additional pieces required at each end to ensure comprehensive protection. This attention to detail highlights his commitment to producing a durable and reliable design. “Sailing is about finding your path, whether it’s across an ocean or within yourself.” – Sven Yrvind In conclusion, making flanges around bulkhead hatches may seem complex at first glance, but by following Sven Yrvind’s meticulous process, enthusiasts can achieve professional-level results. Remember that the journey of boatbuilding is as rewarding as reaching your destination; it tests one’s patience and dedication. For those seeking to embark on this adventure or simply gain more insight into marine craftsmanship, Sven’s wisdom is invaluable.Making Flanges Around Bulkhead Hatches for Canvas
Sven Yrvind, a renowned yacht designer and sailor, shares valuable insights on creating flanges around bulkhead hatches for canvas protection in this enlightening video. By following his expert guidance, boat enthusiasts can ensure their living areas remain secure while allowing unhindered access through the hatches.Step 1: Starting with the Flange
Sven begins by explaining that working on flanges vertically and horizontally is significantly easier than doing so in a flat position. To simplify the process further, he divides the task into two or three steps as suggested by fellow expert “for for.” This approach not only makes it more manageable but also allows for greater precision in crafting each component.Step 2: Applying Glue and Securing
Sven proceeds to apply glue along one edge of the flange, ensuring a secure bond when clamped into place. He emphasizes that this stage is crucial for maintaining the structural integrity of the flange, which in turn safeguards the living area beneath the canvas when hatches are open.Step 3: Allowing Time to Dry
After securely attaching the first portion of the flange, Sven allows ample time for it to dry before moving forward with additional steps. This patience and precision are key aspects of his successful boatbuilding methods.Step 4: Finishing Touches
Once the flange is fully dried, Sven removes the clamps carefully, ensuring no damage occurs during this process. He then moves on to attaching four more pieces onto these main frames, completing two pairs of flanges for the bulkhead hatches.The Final Touches
While two flanges form the primary support structure around the hatches, Sven mentions there are two additional pieces required at each end to ensure comprehensive protection. This attention to detail highlights his commitment to producing a durable and reliable design. “Sailing is about finding your path, whether it’s across an ocean or within yourself.” – Sven Yrvind In conclusion, making flanges around bulkhead hatches may seem complex at first glance, but by following Sven Yrvind’s meticulous process, enthusiasts can achieve professional-level results. Remember that the journey of boatbuilding is as rewarding as reaching your destination; it tests one’s patience and dedication. For those seeking to embark on this adventure or simply gain more insight into marine craftsmanship, Sven’s wisdom is invaluable.Sven proceeds to apply glue along one edge of the flange, ensuring a secure bond when clamped into place. He emphasizes that this stage is crucial for maintaining the structural integrity of the flange, which in turn safeguards the living area beneath the canvas when hatches are open.Step 3: Allowing Time to Dry
After securely attaching the first portion of the flange, Sven allows ample time for it to dry before moving forward with additional steps. This patience and precision are key aspects of his successful boatbuilding methods.Step 4: Finishing Touches
Once the flange is fully dried, Sven removes the clamps carefully, ensuring no damage occurs during this process. He then moves on to attaching four more pieces onto these main frames, completing two pairs of flanges for the bulkhead hatches.The Final Touches
While two flanges form the primary support structure around the hatches, Sven mentions there are two additional pieces required at each end to ensure comprehensive protection. This attention to detail highlights his commitment to producing a durable and reliable design. “Sailing is about finding your path, whether it’s across an ocean or within yourself.” – Sven Yrvind In conclusion, making flanges around bulkhead hatches may seem complex at first glance, but by following Sven Yrvind’s meticulous process, enthusiasts can achieve professional-level results. Remember that the journey of boatbuilding is as rewarding as reaching your destination; it tests one’s patience and dedication. For those seeking to embark on this adventure or simply gain more insight into marine craftsmanship, Sven’s wisdom is invaluable.Sven Yrvind, a renowned yacht designer and sailor, shares valuable insights on creating flanges around bulkhead hatches for canvas protection in this enlightening video. By following his expert guidance, boat enthusiasts can ensure their living areas remain secure while allowing unhindered access through the hatches.Step 1: Starting with the Flange
Sven begins by explaining that working on flanges vertically and horizontally is significantly easier than doing so in a flat position. To simplify the process further, he divides the task into two or three steps as suggested by fellow expert “for for.” This approach not only makes it more manageable but also allows for greater precision in crafting each component.Step 2: Applying Glue and Securing
Sven proceeds to apply glue along one edge of the flange, ensuring a secure bond when clamped into place. He emphasizes that this stage is crucial for maintaining the structural integrity of the flange, which in turn safeguards the living area beneath the canvas when hatches are open.Step 3: Allowing Time to Dry
After securely attaching the first portion of the flange, Sven allows ample time for it to dry before moving forward with additional steps. This patience and precision are key aspects of his successful boatbuilding methods.Step 4: Finishing Touches
Once the flange is fully dried, Sven removes the clamps carefully, ensuring no damage occurs during this process. He then moves on to attaching four more pieces onto these main frames, completing two pairs of flanges for the bulkhead hatches.The Final Touches
While two flanges form the primary support structure around the hatches, Sven mentions there are two additional pieces required at each end to ensure comprehensive protection. This attention to detail highlights his commitment to producing a durable and reliable design. “Sailing is about finding your path, whether it’s across an ocean or within yourself.” – Sven Yrvind In conclusion, making flanges around bulkhead hatches may seem complex at first glance, but by following Sven Yrvind’s meticulous process, enthusiasts can achieve professional-level results. Remember that the journey of boatbuilding is as rewarding as reaching your destination; it tests one’s patience and dedication. For those seeking to embark on this adventure or simply gain more insight into marine craftsmanship, Sven’s wisdom is invaluable.Making Flanges Around Bulkhead Hatches for Canvas
Sven Yrvind, a renowned yacht designer and sailor, shares valuable insights on creating flanges around bulkhead hatches for canvas protection in this enlightening video. By following his expert guidance, boat enthusiasts can ensure their living areas remain secure while allowing unhindered access through the hatches.Step 1: Starting with the Flange
Sven begins by explaining that working on flanges vertically and horizontally is significantly easier than doing so in a flat position. To simplify the process further, he divides the task into two or three steps as suggested by fellow expert “for for.” This approach not only makes it more manageable but also allows for greater precision in crafting each component.Step 2: Applying Glue and Securing
Sven proceeds to apply glue along one edge of the flange, ensuring a secure bond when clamped into place. He emphasizes that this stage is crucial for maintaining the structural integrity of the flange, which in turn safeguards the living area beneath the canvas when hatches are open.Step 3: Allowing Time to Dry
After securely attaching the first portion of the flange, Sven allows ample time for it to dry before moving forward with additional steps. This patience and precision are key aspects of his successful boatbuilding methods.Step 4: Finishing Touches
Once the flange is fully dried, Sven removes the clamps carefully, ensuring no damage occurs during this process. He then moves on to attaching four more pieces onto these main frames, completing two pairs of flanges for the bulkhead hatches.The Final Touches
While two flanges form the primary support structure around the hatches, Sven mentions there are two additional pieces required at each end to ensure comprehensive protection. This attention to detail highlights his commitment to producing a durable and reliable design. “Sailing is about finding your path, whether it’s across an ocean or within yourself.” – Sven Yrvind In conclusion, making flanges around bulkhead hatches may seem complex at first glance, but by following Sven Yrvind’s meticulous process, enthusiasts can achieve professional-level results. Remember that the journey of boatbuilding is as rewarding as reaching your destination; it tests one’s patience and dedication. For those seeking to embark on this adventure or simply gain more insight into marine craftsmanship, Sven’s wisdom is invaluable.Sven begins by explaining that working on flanges vertically and horizontally is significantly easier than doing so in a flat position. To simplify the process further, he divides the task into two or three steps as suggested by fellow expert “for for.” This approach not only makes it more manageable but also allows for greater precision in crafting each component.Step 2: Applying Glue and Securing
Sven proceeds to apply glue along one edge of the flange, ensuring a secure bond when clamped into place. He emphasizes that this stage is crucial for maintaining the structural integrity of the flange, which in turn safeguards the living area beneath the canvas when hatches are open.Step 3: Allowing Time to Dry
After securely attaching the first portion of the flange, Sven allows ample time for it to dry before moving forward with additional steps. This patience and precision are key aspects of his successful boatbuilding methods.Step 4: Finishing Touches
Once the flange is fully dried, Sven removes the clamps carefully, ensuring no damage occurs during this process. He then moves on to attaching four more pieces onto these main frames, completing two pairs of flanges for the bulkhead hatches.The Final Touches
While two flanges form the primary support structure around the hatches, Sven mentions there are two additional pieces required at each end to ensure comprehensive protection. This attention to detail highlights his commitment to producing a durable and reliable design. “Sailing is about finding your path, whether it’s across an ocean or within yourself.” – Sven Yrvind In conclusion, making flanges around bulkhead hatches may seem complex at first glance, but by following Sven Yrvind’s meticulous process, enthusiasts can achieve professional-level results. Remember that the journey of boatbuilding is as rewarding as reaching your destination; it tests one’s patience and dedication. For those seeking to embark on this adventure or simply gain more insight into marine craftsmanship, Sven’s wisdom is invaluable.Sven Yrvind, a renowned yacht designer and sailor, shares valuable insights on creating flanges around bulkhead hatches for canvas protection in this enlightening video. By following his expert guidance, boat enthusiasts can ensure their living areas remain secure while allowing unhindered access through the hatches.Step 1: Starting with the Flange
Sven begins by explaining that working on flanges vertically and horizontally is significantly easier than doing so in a flat position. To simplify the process further, he divides the task into two or three steps as suggested by fellow expert “for for.” This approach not only makes it more manageable but also allows for greater precision in crafting each component.Step 2: Applying Glue and Securing
Sven proceeds to apply glue along one edge of the flange, ensuring a secure bond when clamped into place. He emphasizes that this stage is crucial for maintaining the structural integrity of the flange, which in turn safeguards the living area beneath the canvas when hatches are open.Step 3: Allowing Time to Dry
After securely attaching the first portion of the flange, Sven allows ample time for it to dry before moving forward with additional steps. This patience and precision are key aspects of his successful boatbuilding methods.Step 4: Finishing Touches
Once the flange is fully dried, Sven removes the clamps carefully, ensuring no damage occurs during this process. He then moves on to attaching four more pieces onto these main frames, completing two pairs of flanges for the bulkhead hatches.The Final Touches
While two flanges form the primary support structure around the hatches, Sven mentions there are two additional pieces required at each end to ensure comprehensive protection. This attention to detail highlights his commitment to producing a durable and reliable design. “Sailing is about finding your path, whether it’s across an ocean or within yourself.” – Sven Yrvind In conclusion, making flanges around bulkhead hatches may seem complex at first glance, but by following Sven Yrvind’s meticulous process, enthusiasts can achieve professional-level results. Remember that the journey of boatbuilding is as rewarding as reaching your destination; it tests one’s patience and dedication. For those seeking to embark on this adventure or simply gain more insight into marine craftsmanship, Sven’s wisdom is invaluable.Making Flanges Around Bulkhead Hatches for Canvas
Sven Yrvind, a renowned yacht designer and sailor, shares valuable insights on creating flanges around bulkhead hatches for canvas protection in this enlightening video. By following his expert guidance, boat enthusiasts can ensure their living areas remain secure while allowing unhindered access through the hatches.Step 1: Starting with the Flange
Sven begins by explaining that working on flanges vertically and horizontally is significantly easier than doing so in a flat position. To simplify the process further, he divides the task into two or three steps as suggested by fellow expert “for for.” This approach not only makes it more manageable but also allows for greater precision in crafting each component.Step 2: Applying Glue and Securing
Sven proceeds to apply glue along one edge of the flange, ensuring a secure bond when clamped into place. He emphasizes that this stage is crucial for maintaining the structural integrity of the flange, which in turn safeguards the living area beneath the canvas when hatches are open.Step 3: Allowing Time to Dry
After securely attaching the first portion of the flange, Sven allows ample time for it to dry before moving forward with additional steps. This patience and precision are key aspects of his successful boatbuilding methods.Step 4: Finishing Touches
Once the flange is fully dried, Sven removes the clamps carefully, ensuring no damage occurs during this process. He then moves on to attaching four more pieces onto these main frames, completing two pairs of flanges for the bulkhead hatches.The Final Touches
While two flanges form the primary support structure around the hatches, Sven mentions there are two additional pieces required at each end to ensure comprehensive protection. This attention to detail highlights his commitment to producing a durable and reliable design. “Sailing is about finding your path, whether it’s across an ocean or within yourself.” – Sven Yrvind In conclusion, making flanges around bulkhead hatches may seem complex at first glance, but by following Sven Yrvind’s meticulous process, enthusiasts can achieve professional-level results. Remember that the journey of boatbuilding is as rewarding as reaching your destination; it tests one’s patience and dedication. For those seeking to embark on this adventure or simply gain more insight into marine craftsmanship, Sven’s wisdom is invaluable.Once the flange is fully dried, Sven removes the clamps carefully, ensuring no damage occurs during this process. He then moves on to attaching four more pieces onto these main frames, completing two pairs of flanges for the bulkhead hatches.The Final Touches
While two flanges form the primary support structure around the hatches, Sven mentions there are two additional pieces required at each end to ensure comprehensive protection. This attention to detail highlights his commitment to producing a durable and reliable design. “Sailing is about finding your path, whether it’s across an ocean or within yourself.” – Sven Yrvind In conclusion, making flanges around bulkhead hatches may seem complex at first glance, but by following Sven Yrvind’s meticulous process, enthusiasts can achieve professional-level results. Remember that the journey of boatbuilding is as rewarding as reaching your destination; it tests one’s patience and dedication. For those seeking to embark on this adventure or simply gain more insight into marine craftsmanship, Sven’s wisdom is invaluable.Sven begins by explaining that working on flanges vertically and horizontally is significantly easier than doing so in a flat position. To simplify the process further, he divides the task into two or three steps as suggested by fellow expert “for for.” This approach not only makes it more manageable but also allows for greater precision in crafting each component.Step 2: Applying Glue and Securing
Sven proceeds to apply glue along one edge of the flange, ensuring a secure bond when clamped into place. He emphasizes that this stage is crucial for maintaining the structural integrity of the flange, which in turn safeguards the living area beneath the canvas when hatches are open.Step 3: Allowing Time to Dry
After securely attaching the first portion of the flange, Sven allows ample time for it to dry before moving forward with additional steps. This patience and precision are key aspects of his successful boatbuilding methods.Step 4: Finishing Touches
Once the flange is fully dried, Sven removes the clamps carefully, ensuring no damage occurs during this process. He then moves on to attaching four more pieces onto these main frames, completing two pairs of flanges for the bulkhead hatches.The Final Touches
While two flanges form the primary support structure around the hatches, Sven mentions there are two additional pieces required at each end to ensure comprehensive protection. This attention to detail highlights his commitment to producing a durable and reliable design. “Sailing is about finding your path, whether it’s across an ocean or within yourself.” – Sven Yrvind In conclusion, making flanges around bulkhead hatches may seem complex at first glance, but by following Sven Yrvind’s meticulous process, enthusiasts can achieve professional-level results. Remember that the journey of boatbuilding is as rewarding as reaching your destination; it tests one’s patience and dedication. For those seeking to embark on this adventure or simply gain more insight into marine craftsmanship, Sven’s wisdom is invaluable.Sven Yrvind, a renowned yacht designer and sailor, shares valuable insights on creating flanges around bulkhead hatches for canvas protection in this enlightening video. By following his expert guidance, boat enthusiasts can ensure their living areas remain secure while allowing unhindered access through the hatches.Step 1: Starting with the Flange
Sven begins by explaining that working on flanges vertically and horizontally is significantly easier than doing so in a flat position. To simplify the process further, he divides the task into two or three steps as suggested by fellow expert “for for.” This approach not only makes it more manageable but also allows for greater precision in crafting each component.Step 2: Applying Glue and Securing
Sven proceeds to apply glue along one edge of the flange, ensuring a secure bond when clamped into place. He emphasizes that this stage is crucial for maintaining the structural integrity of the flange, which in turn safeguards the living area beneath the canvas when hatches are open.Step 3: Allowing Time to Dry
After securely attaching the first portion of the flange, Sven allows ample time for it to dry before moving forward with additional steps. This patience and precision are key aspects of his successful boatbuilding methods.Step 4: Finishing Touches
Once the flange is fully dried, Sven removes the clamps carefully, ensuring no damage occurs during this process. He then moves on to attaching four more pieces onto these main frames, completing two pairs of flanges for the bulkhead hatches.The Final Touches
While two flanges form the primary support structure around the hatches, Sven mentions there are two additional pieces required at each end to ensure comprehensive protection. This attention to detail highlights his commitment to producing a durable and reliable design. “Sailing is about finding your path, whether it’s across an ocean or within yourself.” – Sven Yrvind In conclusion, making flanges around bulkhead hatches may seem complex at first glance, but by following Sven Yrvind’s meticulous process, enthusiasts can achieve professional-level results. Remember that the journey of boatbuilding is as rewarding as reaching your destination; it tests one’s patience and dedication. For those seeking to embark on this adventure or simply gain more insight into marine craftsmanship, Sven’s wisdom is invaluable.Making Flanges Around Bulkhead Hatches for Canvas
Sven Yrvind, a renowned yacht designer and sailor, shares valuable insights on creating flanges around bulkhead hatches for canvas protection in this enlightening video. By following his expert guidance, boat enthusiasts can ensure their living areas remain secure while allowing unhindered access through the hatches.Step 1: Starting with the Flange
Sven begins by explaining that working on flanges vertically and horizontally is significantly easier than doing so in a flat position. To simplify the process further, he divides the task into two or three steps as suggested by fellow expert “for for.” This approach not only makes it more manageable but also allows for greater precision in crafting each component.Step 2: Applying Glue and Securing
Sven proceeds to apply glue along one edge of the flange, ensuring a secure bond when clamped into place. He emphasizes that this stage is crucial for maintaining the structural integrity of the flange, which in turn safeguards the living area beneath the canvas when hatches are open.Step 3: Allowing Time to Dry
After securely attaching the first portion of the flange, Sven allows ample time for it to dry before moving forward with additional steps. This patience and precision are key aspects of his successful boatbuilding methods.Step 4: Finishing Touches
Once the flange is fully dried, Sven removes the clamps carefully, ensuring no damage occurs during this process. He then moves on to attaching four more pieces onto these main frames, completing two pairs of flanges for the bulkhead hatches.The Final Touches
While two flanges form the primary support structure around the hatches, Sven mentions there are two additional pieces required at each end to ensure comprehensive protection. This attention to detail highlights his commitment to producing a durable and reliable design. “Sailing is about finding your path, whether it’s across an ocean or within yourself.” – Sven Yrvind In conclusion, making flanges around bulkhead hatches may seem complex at first glance, but by following Sven Yrvind’s meticulous process, enthusiasts can achieve professional-level results. Remember that the journey of boatbuilding is as rewarding as reaching your destination; it tests one’s patience and dedication. For those seeking to embark on this adventure or simply gain more insight into marine craftsmanship, Sven’s wisdom is invaluable.After securely attaching the first portion of the flange, Sven allows ample time for it to dry before moving forward with additional steps. This patience and precision are key aspects of his successful boatbuilding methods.Step 4: Finishing Touches
Once the flange is fully dried, Sven removes the clamps carefully, ensuring no damage occurs during this process. He then moves on to attaching four more pieces onto these main frames, completing two pairs of flanges for the bulkhead hatches.The Final Touches
While two flanges form the primary support structure around the hatches, Sven mentions there are two additional pieces required at each end to ensure comprehensive protection. This attention to detail highlights his commitment to producing a durable and reliable design. “Sailing is about finding your path, whether it’s across an ocean or within yourself.” – Sven Yrvind In conclusion, making flanges around bulkhead hatches may seem complex at first glance, but by following Sven Yrvind’s meticulous process, enthusiasts can achieve professional-level results. Remember that the journey of boatbuilding is as rewarding as reaching your destination; it tests one’s patience and dedication. For those seeking to embark on this adventure or simply gain more insight into marine craftsmanship, Sven’s wisdom is invaluable.Sven begins by explaining that working on flanges vertically and horizontally is significantly easier than doing so in a flat position. To simplify the process further, he divides the task into two or three steps as suggested by fellow expert “for for.” This approach not only makes it more manageable but also allows for greater precision in crafting each component.Step 2: Applying Glue and Securing
Sven proceeds to apply glue along one edge of the flange, ensuring a secure bond when clamped into place. He emphasizes that this stage is crucial for maintaining the structural integrity of the flange, which in turn safeguards the living area beneath the canvas when hatches are open.Step 3: Allowing Time to Dry
After securely attaching the first portion of the flange, Sven allows ample time for it to dry before moving forward with additional steps. This patience and precision are key aspects of his successful boatbuilding methods.Step 4: Finishing Touches
Once the flange is fully dried, Sven removes the clamps carefully, ensuring no damage occurs during this process. He then moves on to attaching four more pieces onto these main frames, completing two pairs of flanges for the bulkhead hatches.The Final Touches
While two flanges form the primary support structure around the hatches, Sven mentions there are two additional pieces required at each end to ensure comprehensive protection. This attention to detail highlights his commitment to producing a durable and reliable design. “Sailing is about finding your path, whether it’s across an ocean or within yourself.” – Sven Yrvind In conclusion, making flanges around bulkhead hatches may seem complex at first glance, but by following Sven Yrvind’s meticulous process, enthusiasts can achieve professional-level results. Remember that the journey of boatbuilding is as rewarding as reaching your destination; it tests one’s patience and dedication. For those seeking to embark on this adventure or simply gain more insight into marine craftsmanship, Sven’s wisdom is invaluable.Sven Yrvind, a renowned yacht designer and sailor, shares valuable insights on creating flanges around bulkhead hatches for canvas protection in this enlightening video. By following his expert guidance, boat enthusiasts can ensure their living areas remain secure while allowing unhindered access through the hatches.Step 1: Starting with the Flange
Sven begins by explaining that working on flanges vertically and horizontally is significantly easier than doing so in a flat position. To simplify the process further, he divides the task into two or three steps as suggested by fellow expert “for for.” This approach not only makes it more manageable but also allows for greater precision in crafting each component.Step 2: Applying Glue and Securing
Sven proceeds to apply glue along one edge of the flange, ensuring a secure bond when clamped into place. He emphasizes that this stage is crucial for maintaining the structural integrity of the flange, which in turn safeguards the living area beneath the canvas when hatches are open.Step 3: Allowing Time to Dry
After securely attaching the first portion of the flange, Sven allows ample time for it to dry before moving forward with additional steps. This patience and precision are key aspects of his successful boatbuilding methods.Step 4: Finishing Touches
Once the flange is fully dried, Sven removes the clamps carefully, ensuring no damage occurs during this process. He then moves on to attaching four more pieces onto these main frames, completing two pairs of flanges for the bulkhead hatches.The Final Touches
While two flanges form the primary support structure around the hatches, Sven mentions there are two additional pieces required at each end to ensure comprehensive protection. This attention to detail highlights his commitment to producing a durable and reliable design. “Sailing is about finding your path, whether it’s across an ocean or within yourself.” – Sven Yrvind In conclusion, making flanges around bulkhead hatches may seem complex at first glance, but by following Sven Yrvind’s meticulous process, enthusiasts can achieve professional-level results. Remember that the journey of boatbuilding is as rewarding as reaching your destination; it tests one’s patience and dedication. For those seeking to embark on this adventure or simply gain more insight into marine craftsmanship, Sven’s wisdom is invaluable.Making Flanges Around Bulkhead Hatches for Canvas
Sven Yrvind, a renowned yacht designer and sailor, shares valuable insights on creating flanges around bulkhead hatches for canvas protection in this enlightening video. By following his expert guidance, boat enthusiasts can ensure their living areas remain secure while allowing unhindered access through the hatches.Step 1: Starting with the Flange
Sven begins by explaining that working on flanges vertically and horizontally is significantly easier than doing so in a flat position. To simplify the process further, he divides the task into two or three steps as suggested by fellow expert “for for.” This approach not only makes it more manageable but also allows for greater precision in crafting each component.Step 2: Applying Glue and Securing
Sven proceeds to apply glue along one edge of the flange, ensuring a secure bond when clamped into place. He emphasizes that this stage is crucial for maintaining the structural integrity of the flange, which in turn safeguards the living area beneath the canvas when hatches are open.Step 3: Allowing Time to Dry
After securely attaching the first portion of the flange, Sven allows ample time for it to dry before moving forward with additional steps. This patience and precision are key aspects of his successful boatbuilding methods.Step 4: Finishing Touches
Once the flange is fully dried, Sven removes the clamps carefully, ensuring no damage occurs during this process. He then moves on to attaching four more pieces onto these main frames, completing two pairs of flanges for the bulkhead hatches.The Final Touches
While two flanges form the primary support structure around the hatches, Sven mentions there are two additional pieces required at each end to ensure comprehensive protection. This attention to detail highlights his commitment to producing a durable and reliable design. “Sailing is about finding your path, whether it’s across an ocean or within yourself.” – Sven Yrvind In conclusion, making flanges around bulkhead hatches may seem complex at first glance, but by following Sven Yrvind’s meticulous process, enthusiasts can achieve professional-level results. Remember that the journey of boatbuilding is as rewarding as reaching your destination; it tests one’s patience and dedication. For those seeking to embark on this adventure or simply gain more insight into marine craftsmanship, Sven’s wisdom is invaluable.Sven proceeds to apply glue along one edge of the flange, ensuring a secure bond when clamped into place. He emphasizes that this stage is crucial for maintaining the structural integrity of the flange, which in turn safeguards the living area beneath the canvas when hatches are open.Step 3: Allowing Time to Dry
After securely attaching the first portion of the flange, Sven allows ample time for it to dry before moving forward with additional steps. This patience and precision are key aspects of his successful boatbuilding methods.Step 4: Finishing Touches
Once the flange is fully dried, Sven removes the clamps carefully, ensuring no damage occurs during this process. He then moves on to attaching four more pieces onto these main frames, completing two pairs of flanges for the bulkhead hatches.The Final Touches
While two flanges form the primary support structure around the hatches, Sven mentions there are two additional pieces required at each end to ensure comprehensive protection. This attention to detail highlights his commitment to producing a durable and reliable design. “Sailing is about finding your path, whether it’s across an ocean or within yourself.” – Sven Yrvind In conclusion, making flanges around bulkhead hatches may seem complex at first glance, but by following Sven Yrvind’s meticulous process, enthusiasts can achieve professional-level results. Remember that the journey of boatbuilding is as rewarding as reaching your destination; it tests one’s patience and dedication. For those seeking to embark on this adventure or simply gain more insight into marine craftsmanship, Sven’s wisdom is invaluable.Sven begins by explaining that working on flanges vertically and horizontally is significantly easier than doing so in a flat position. To simplify the process further, he divides the task into two or three steps as suggested by fellow expert “for for.” This approach not only makes it more manageable but also allows for greater precision in crafting each component.Step 2: Applying Glue and Securing
Sven proceeds to apply glue along one edge of the flange, ensuring a secure bond when clamped into place. He emphasizes that this stage is crucial for maintaining the structural integrity of the flange, which in turn safeguards the living area beneath the canvas when hatches are open.Step 3: Allowing Time to Dry
After securely attaching the first portion of the flange, Sven allows ample time for it to dry before moving forward with additional steps. This patience and precision are key aspects of his successful boatbuilding methods.Step 4: Finishing Touches
Once the flange is fully dried, Sven removes the clamps carefully, ensuring no damage occurs during this process. He then moves on to attaching four more pieces onto these main frames, completing two pairs of flanges for the bulkhead hatches.The Final Touches
While two flanges form the primary support structure around the hatches, Sven mentions there are two additional pieces required at each end to ensure comprehensive protection. This attention to detail highlights his commitment to producing a durable and reliable design. “Sailing is about finding your path, whether it’s across an ocean or within yourself.” – Sven Yrvind In conclusion, making flanges around bulkhead hatches may seem complex at first glance, but by following Sven Yrvind’s meticulous process, enthusiasts can achieve professional-level results. Remember that the journey of boatbuilding is as rewarding as reaching your destination; it tests one’s patience and dedication. For those seeking to embark on this adventure or simply gain more insight into marine craftsmanship, Sven’s wisdom is invaluable.Sven Yrvind, a renowned yacht designer and sailor, shares valuable insights on creating flanges around bulkhead hatches for canvas protection in this enlightening video. By following his expert guidance, boat enthusiasts can ensure their living areas remain secure while allowing unhindered access through the hatches.Step 1: Starting with the Flange
Sven begins by explaining that working on flanges vertically and horizontally is significantly easier than doing so in a flat position. To simplify the process further, he divides the task into two or three steps as suggested by fellow expert “for for.” This approach not only makes it more manageable but also allows for greater precision in crafting each component.Step 2: Applying Glue and Securing
Sven proceeds to apply glue along one edge of the flange, ensuring a secure bond when clamped into place. He emphasizes that this stage is crucial for maintaining the structural integrity of the flange, which in turn safeguards the living area beneath the canvas when hatches are open.Step 3: Allowing Time to Dry
After securely attaching the first portion of the flange, Sven allows ample time for it to dry before moving forward with additional steps. This patience and precision are key aspects of his successful boatbuilding methods.Step 4: Finishing Touches
Once the flange is fully dried, Sven removes the clamps carefully, ensuring no damage occurs during this process. He then moves on to attaching four more pieces onto these main frames, completing two pairs of flanges for the bulkhead hatches.The Final Touches
While two flanges form the primary support structure around the hatches, Sven mentions there are two additional pieces required at each end to ensure comprehensive protection. This attention to detail highlights his commitment to producing a durable and reliable design. “Sailing is about finding your path, whether it’s across an ocean or within yourself.” – Sven Yrvind In conclusion, making flanges around bulkhead hatches may seem complex at first glance, but by following Sven Yrvind’s meticulous process, enthusiasts can achieve professional-level results. Remember that the journey of boatbuilding is as rewarding as reaching your destination; it tests one’s patience and dedication. For those seeking to embark on this adventure or simply gain more insight into marine craftsmanship, Sven’s wisdom is invaluable.Making Flanges Around Bulkhead Hatches for Canvas
Sven Yrvind, a renowned yacht designer and sailor, shares valuable insights on creating flanges around bulkhead hatches for canvas protection in this enlightening video. By following his expert guidance, boat enthusiasts can ensure their living areas remain secure while allowing unhindered access through the hatches.Step 1: Starting with the Flange
Sven begins by explaining that working on flanges vertically and horizontally is significantly easier than doing so in a flat position. To simplify the process further, he divides the task into two or three steps as suggested by fellow expert “for for.” This approach not only makes it more manageable but also allows for greater precision in crafting each component.Step 2: Applying Glue and Securing
Sven proceeds to apply glue along one edge of the flange, ensuring a secure bond when clamped into place. He emphasizes that this stage is crucial for maintaining the structural integrity of the flange, which in turn safeguards the living area beneath the canvas when hatches are open.Step 3: Allowing Time to Dry
After securely attaching the first portion of the flange, Sven allows ample time for it to dry before moving forward with additional steps. This patience and precision are key aspects of his successful boatbuilding methods.Step 4: Finishing Touches
Once the flange is fully dried, Sven removes the clamps carefully, ensuring no damage occurs during this process. He then moves on to attaching four more pieces onto these main frames, completing two pairs of flanges for the bulkhead hatches.The Final Touches
While two flanges form the primary support structure around the hatches, Sven mentions there are two additional pieces required at each end to ensure comprehensive protection. This attention to detail highlights his commitment to producing a durable and reliable design. “Sailing is about finding your path, whether it’s across an ocean or within yourself.” – Sven Yrvind In conclusion, making flanges around bulkhead hatches may seem complex at first glance, but by following Sven Yrvind’s meticulous process, enthusiasts can achieve professional-level results. Remember that the journey of boatbuilding is as rewarding as reaching your destination; it tests one’s patience and dedication. For those seeking to embark on this adventure or simply gain more insight into marine craftsmanship, Sven’s wisdom is invaluable.Once the flange is fully dried, Sven removes the clamps carefully, ensuring no damage occurs during this process. He then moves on to attaching four more pieces onto these main frames, completing two pairs of flanges for the bulkhead hatches.The Final Touches
While two flanges form the primary support structure around the hatches, Sven mentions there are two additional pieces required at each end to ensure comprehensive protection. This attention to detail highlights his commitment to producing a durable and reliable design. “Sailing is about finding your path, whether it’s across an ocean or within yourself.” – Sven Yrvind In conclusion, making flanges around bulkhead hatches may seem complex at first glance, but by following Sven Yrvind’s meticulous process, enthusiasts can achieve professional-level results. Remember that the journey of boatbuilding is as rewarding as reaching your destination; it tests one’s patience and dedication. For those seeking to embark on this adventure or simply gain more insight into marine craftsmanship, Sven’s wisdom is invaluable.Sven proceeds to apply glue along one edge of the flange, ensuring a secure bond when clamped into place. He emphasizes that this stage is crucial for maintaining the structural integrity of the flange, which in turn safeguards the living area beneath the canvas when hatches are open.Step 3: Allowing Time to Dry
After securely attaching the first portion of the flange, Sven allows ample time for it to dry before moving forward with additional steps. This patience and precision are key aspects of his successful boatbuilding methods.Step 4: Finishing Touches
Once the flange is fully dried, Sven removes the clamps carefully, ensuring no damage occurs during this process. He then moves on to attaching four more pieces onto these main frames, completing two pairs of flanges for the bulkhead hatches.The Final Touches
While two flanges form the primary support structure around the hatches, Sven mentions there are two additional pieces required at each end to ensure comprehensive protection. This attention to detail highlights his commitment to producing a durable and reliable design. “Sailing is about finding your path, whether it’s across an ocean or within yourself.” – Sven Yrvind In conclusion, making flanges around bulkhead hatches may seem complex at first glance, but by following Sven Yrvind’s meticulous process, enthusiasts can achieve professional-level results. Remember that the journey of boatbuilding is as rewarding as reaching your destination; it tests one’s patience and dedication. For those seeking to embark on this adventure or simply gain more insight into marine craftsmanship, Sven’s wisdom is invaluable.Sven begins by explaining that working on flanges vertically and horizontally is significantly easier than doing so in a flat position. To simplify the process further, he divides the task into two or three steps as suggested by fellow expert “for for.” This approach not only makes it more manageable but also allows for greater precision in crafting each component.Step 2: Applying Glue and Securing
Sven proceeds to apply glue along one edge of the flange, ensuring a secure bond when clamped into place. He emphasizes that this stage is crucial for maintaining the structural integrity of the flange, which in turn safeguards the living area beneath the canvas when hatches are open.Step 3: Allowing Time to Dry
After securely attaching the first portion of the flange, Sven allows ample time for it to dry before moving forward with additional steps. This patience and precision are key aspects of his successful boatbuilding methods.Step 4: Finishing Touches
Once the flange is fully dried, Sven removes the clamps carefully, ensuring no damage occurs during this process. He then moves on to attaching four more pieces onto these main frames, completing two pairs of flanges for the bulkhead hatches.The Final Touches
While two flanges form the primary support structure around the hatches, Sven mentions there are two additional pieces required at each end to ensure comprehensive protection. This attention to detail highlights his commitment to producing a durable and reliable design. “Sailing is about finding your path, whether it’s across an ocean or within yourself.” – Sven Yrvind In conclusion, making flanges around bulkhead hatches may seem complex at first glance, but by following Sven Yrvind’s meticulous process, enthusiasts can achieve professional-level results. Remember that the journey of boatbuilding is as rewarding as reaching your destination; it tests one’s patience and dedication. For those seeking to embark on this adventure or simply gain more insight into marine craftsmanship, Sven’s wisdom is invaluable.Sven Yrvind, a renowned yacht designer and sailor, shares valuable insights on creating flanges around bulkhead hatches for canvas protection in this enlightening video. By following his expert guidance, boat enthusiasts can ensure their living areas remain secure while allowing unhindered access through the hatches.Step 1: Starting with the Flange
Sven begins by explaining that working on flanges vertically and horizontally is significantly easier than doing so in a flat position. To simplify the process further, he divides the task into two or three steps as suggested by fellow expert “for for.” This approach not only makes it more manageable but also allows for greater precision in crafting each component.Step 2: Applying Glue and Securing
Sven proceeds to apply glue along one edge of the flange, ensuring a secure bond when clamped into place. He emphasizes that this stage is crucial for maintaining the structural integrity of the flange, which in turn safeguards the living area beneath the canvas when hatches are open.Step 3: Allowing Time to Dry
After securely attaching the first portion of the flange, Sven allows ample time for it to dry before moving forward with additional steps. This patience and precision are key aspects of his successful boatbuilding methods.Step 4: Finishing Touches
Once the flange is fully dried, Sven removes the clamps carefully, ensuring no damage occurs during this process. He then moves on to attaching four more pieces onto these main frames, completing two pairs of flanges for the bulkhead hatches.The Final Touches
While two flanges form the primary support structure around the hatches, Sven mentions there are two additional pieces required at each end to ensure comprehensive protection. This attention to detail highlights his commitment to producing a durable and reliable design. “Sailing is about finding your path, whether it’s across an ocean or within yourself.” – Sven Yrvind In conclusion, making flanges around bulkhead hatches may seem complex at first glance, but by following Sven Yrvind’s meticulous process, enthusiasts can achieve professional-level results. Remember that the journey of boatbuilding is as rewarding as reaching your destination; it tests one’s patience and dedication. For those seeking to embark on this adventure or simply gain more insight into marine craftsmanship, Sven’s wisdom is invaluable.Making Flanges Around Bulkhead Hatches for Canvas
Sven Yrvind, a renowned yacht designer and sailor, shares valuable insights on creating flanges around bulkhead hatches for canvas protection in this enlightening video. By following his expert guidance, boat enthusiasts can ensure their living areas remain secure while allowing unhindered access through the hatches.Step 1: Starting with the Flange
Sven begins by explaining that working on flanges vertically and horizontally is significantly easier than doing so in a flat position. To simplify the process further, he divides the task into two or three steps as suggested by fellow expert “for for.” This approach not only makes it more manageable but also allows for greater precision in crafting each component.Step 2: Applying Glue and Securing
Sven proceeds to apply glue along one edge of the flange, ensuring a secure bond when clamped into place. He emphasizes that this stage is crucial for maintaining the structural integrity of the flange, which in turn safeguards the living area beneath the canvas when hatches are open.Step 3: Allowing Time to Dry
After securely attaching the first portion of the flange, Sven allows ample time for it to dry before moving forward with additional steps. This patience and precision are key aspects of his successful boatbuilding methods.Step 4: Finishing Touches
Once the flange is fully dried, Sven removes the clamps carefully, ensuring no damage occurs during this process. He then moves on to attaching four more pieces onto these main frames, completing two pairs of flanges for the bulkhead hatches.The Final Touches
While two flanges form the primary support structure around the hatches, Sven mentions there are two additional pieces required at each end to ensure comprehensive protection. This attention to detail highlights his commitment to producing a durable and reliable design. “Sailing is about finding your path, whether it’s across an ocean or within yourself.” – Sven Yrvind In conclusion, making flanges around bulkhead hatches may seem complex at first glance, but by following Sven Yrvind’s meticulous process, enthusiasts can achieve professional-level results. Remember that the journey of boatbuilding is as rewarding as reaching your destination; it tests one’s patience and dedication. For those seeking to embark on this adventure or simply gain more insight into marine craftsmanship, Sven’s wisdom is invaluable.After securely attaching the first portion of the flange, Sven allows ample time for it to dry before moving forward with additional steps. This patience and precision are key aspects of his successful boatbuilding methods.Step 4: Finishing Touches
Once the flange is fully dried, Sven removes the clamps carefully, ensuring no damage occurs during this process. He then moves on to attaching four more pieces onto these main frames, completing two pairs of flanges for the bulkhead hatches.The Final Touches
While two flanges form the primary support structure around the hatches, Sven mentions there are two additional pieces required at each end to ensure comprehensive protection. This attention to detail highlights his commitment to producing a durable and reliable design. “Sailing is about finding your path, whether it’s across an ocean or within yourself.” – Sven Yrvind In conclusion, making flanges around bulkhead hatches may seem complex at first glance, but by following Sven Yrvind’s meticulous process, enthusiasts can achieve professional-level results. Remember that the journey of boatbuilding is as rewarding as reaching your destination; it tests one’s patience and dedication. For those seeking to embark on this adventure or simply gain more insight into marine craftsmanship, Sven’s wisdom is invaluable.Sven proceeds to apply glue along one edge of the flange, ensuring a secure bond when clamped into place. He emphasizes that this stage is crucial for maintaining the structural integrity of the flange, which in turn safeguards the living area beneath the canvas when hatches are open.Step 3: Allowing Time to Dry
After securely attaching the first portion of the flange, Sven allows ample time for it to dry before moving forward with additional steps. This patience and precision are key aspects of his successful boatbuilding methods.Step 4: Finishing Touches
Once the flange is fully dried, Sven removes the clamps carefully, ensuring no damage occurs during this process. He then moves on to attaching four more pieces onto these main frames, completing two pairs of flanges for the bulkhead hatches.The Final Touches
While two flanges form the primary support structure around the hatches, Sven mentions there are two additional pieces required at each end to ensure comprehensive protection. This attention to detail highlights his commitment to producing a durable and reliable design. “Sailing is about finding your path, whether it’s across an ocean or within yourself.” – Sven Yrvind In conclusion, making flanges around bulkhead hatches may seem complex at first glance, but by following Sven Yrvind’s meticulous process, enthusiasts can achieve professional-level results. Remember that the journey of boatbuilding is as rewarding as reaching your destination; it tests one’s patience and dedication. For those seeking to embark on this adventure or simply gain more insight into marine craftsmanship, Sven’s wisdom is invaluable.Sven begins by explaining that working on flanges vertically and horizontally is significantly easier than doing so in a flat position. To simplify the process further, he divides the task into two or three steps as suggested by fellow expert “for for.” This approach not only makes it more manageable but also allows for greater precision in crafting each component.Step 2: Applying Glue and Securing
Sven proceeds to apply glue along one edge of the flange, ensuring a secure bond when clamped into place. He emphasizes that this stage is crucial for maintaining the structural integrity of the flange, which in turn safeguards the living area beneath the canvas when hatches are open.Step 3: Allowing Time to Dry
After securely attaching the first portion of the flange, Sven allows ample time for it to dry before moving forward with additional steps. This patience and precision are key aspects of his successful boatbuilding methods.Step 4: Finishing Touches
Once the flange is fully dried, Sven removes the clamps carefully, ensuring no damage occurs during this process. He then moves on to attaching four more pieces onto these main frames, completing two pairs of flanges for the bulkhead hatches.The Final Touches
While two flanges form the primary support structure around the hatches, Sven mentions there are two additional pieces required at each end to ensure comprehensive protection. This attention to detail highlights his commitment to producing a durable and reliable design. “Sailing is about finding your path, whether it’s across an ocean or within yourself.” – Sven Yrvind In conclusion, making flanges around bulkhead hatches may seem complex at first glance, but by following Sven Yrvind’s meticulous process, enthusiasts can achieve professional-level results. Remember that the journey of boatbuilding is as rewarding as reaching your destination; it tests one’s patience and dedication. For those seeking to embark on this adventure or simply gain more insight into marine craftsmanship, Sven’s wisdom is invaluable.Sven Yrvind, a renowned yacht designer and sailor, shares valuable insights on creating flanges around bulkhead hatches for canvas protection in this enlightening video. By following his expert guidance, boat enthusiasts can ensure their living areas remain secure while allowing unhindered access through the hatches.Step 1: Starting with the Flange
Sven begins by explaining that working on flanges vertically and horizontally is significantly easier than doing so in a flat position. To simplify the process further, he divides the task into two or three steps as suggested by fellow expert “for for.” This approach not only makes it more manageable but also allows for greater precision in crafting each component.Step 2: Applying Glue and Securing
Sven proceeds to apply glue along one edge of the flange, ensuring a secure bond when clamped into place. He emphasizes that this stage is crucial for maintaining the structural integrity of the flange, which in turn safeguards the living area beneath the canvas when hatches are open.Step 3: Allowing Time to Dry
After securely attaching the first portion of the flange, Sven allows ample time for it to dry before moving forward with additional steps. This patience and precision are key aspects of his successful boatbuilding methods.Step 4: Finishing Touches
Once the flange is fully dried, Sven removes the clamps carefully, ensuring no damage occurs during this process. He then moves on to attaching four more pieces onto these main frames, completing two pairs of flanges for the bulkhead hatches.The Final Touches
While two flanges form the primary support structure around the hatches, Sven mentions there are two additional pieces required at each end to ensure comprehensive protection. This attention to detail highlights his commitment to producing a durable and reliable design. “Sailing is about finding your path, whether it’s across an ocean or within yourself.” – Sven Yrvind In conclusion, making flanges around bulkhead hatches may seem complex at first glance, but by following Sven Yrvind’s meticulous process, enthusiasts can achieve professional-level results. Remember that the journey of boatbuilding is as rewarding as reaching your destination; it tests one’s patience and dedication. For those seeking to embark on this adventure or simply gain more insight into marine craftsmanship, Sven’s wisdom is invaluable.Making Flanges Around Bulkhead Hatches for Canvas
Sven Yrvind, a renowned yacht designer and sailor, shares valuable insights on creating flanges around bulkhead hatches for canvas protection in this enlightening video. By following his expert guidance, boat enthusiasts can ensure their living areas remain secure while allowing unhindered access through the hatches.Step 1: Starting with the Flange
Sven begins by explaining that working on flanges vertically and horizontally is significantly easier than doing so in a flat position. To simplify the process further, he divides the task into two or three steps as suggested by fellow expert “for for.” This approach not only makes it more manageable but also allows for greater precision in crafting each component.Step 2: Applying Glue and Securing
Sven proceeds to apply glue along one edge of the flange, ensuring a secure bond when clamped into place. He emphasizes that this stage is crucial for maintaining the structural integrity of the flange, which in turn safeguards the living area beneath the canvas when hatches are open.Step 3: Allowing Time to Dry
After securely attaching the first portion of the flange, Sven allows ample time for it to dry before moving forward with additional steps. This patience and precision are key aspects of his successful boatbuilding methods.Step 4: Finishing Touches
Once the flange is fully dried, Sven removes the clamps carefully, ensuring no damage occurs during this process. He then moves on to attaching four more pieces onto these main frames, completing two pairs of flanges for the bulkhead hatches.The Final Touches
While two flanges form the primary support structure around the hatches, Sven mentions there are two additional pieces required at each end to ensure comprehensive protection. This attention to detail highlights his commitment to producing a durable and reliable design. “Sailing is about finding your path, whether it’s across an ocean or within yourself.” – Sven Yrvind In conclusion, making flanges around bulkhead hatches may seem complex at first glance, but by following Sven Yrvind’s meticulous process, enthusiasts can achieve professional-level results. Remember that the journey of boatbuilding is as rewarding as reaching your destination; it tests one’s patience and dedication. For those seeking to embark on this adventure or simply gain more insight into marine craftsmanship, Sven’s wisdom is invaluable.Once the flange is fully dried, Sven removes the clamps carefully, ensuring no damage occurs during this process. He then moves on to attaching four more pieces onto these main frames, completing two pairs of flanges for the bulkhead hatches.The Final Touches
While two flanges form the primary support structure around the hatches, Sven mentions there are two additional pieces required at each end to ensure comprehensive protection. This attention to detail highlights his commitment to producing a durable and reliable design. “Sailing is about finding your path, whether it’s across an ocean or within yourself.” – Sven Yrvind In conclusion, making flanges around bulkhead hatches may seem complex at first glance, but by following Sven Yrvind’s meticulous process, enthusiasts can achieve professional-level results. Remember that the journey of boatbuilding is as rewarding as reaching your destination; it tests one’s patience and dedication. For those seeking to embark on this adventure or simply gain more insight into marine craftsmanship, Sven’s wisdom is invaluable.After securely attaching the first portion of the flange, Sven allows ample time for it to dry before moving forward with additional steps. This patience and precision are key aspects of his successful boatbuilding methods.Step 4: Finishing Touches
Once the flange is fully dried, Sven removes the clamps carefully, ensuring no damage occurs during this process. He then moves on to attaching four more pieces onto these main frames, completing two pairs of flanges for the bulkhead hatches.The Final Touches
While two flanges form the primary support structure around the hatches, Sven mentions there are two additional pieces required at each end to ensure comprehensive protection. This attention to detail highlights his commitment to producing a durable and reliable design. “Sailing is about finding your path, whether it’s across an ocean or within yourself.” – Sven Yrvind In conclusion, making flanges around bulkhead hatches may seem complex at first glance, but by following Sven Yrvind’s meticulous process, enthusiasts can achieve professional-level results. Remember that the journey of boatbuilding is as rewarding as reaching your destination; it tests one’s patience and dedication. For those seeking to embark on this adventure or simply gain more insight into marine craftsmanship, Sven’s wisdom is invaluable.Sven proceeds to apply glue along one edge of the flange, ensuring a secure bond when clamped into place. He emphasizes that this stage is crucial for maintaining the structural integrity of the flange, which in turn safeguards the living area beneath the canvas when hatches are open.Step 3: Allowing Time to Dry
After securely attaching the first portion of the flange, Sven allows ample time for it to dry before moving forward with additional steps. This patience and precision are key aspects of his successful boatbuilding methods.Step 4: Finishing Touches
Once the flange is fully dried, Sven removes the clamps carefully, ensuring no damage occurs during this process. He then moves on to attaching four more pieces onto these main frames, completing two pairs of flanges for the bulkhead hatches.The Final Touches
While two flanges form the primary support structure around the hatches, Sven mentions there are two additional pieces required at each end to ensure comprehensive protection. This attention to detail highlights his commitment to producing a durable and reliable design. “Sailing is about finding your path, whether it’s across an ocean or within yourself.” – Sven Yrvind In conclusion, making flanges around bulkhead hatches may seem complex at first glance, but by following Sven Yrvind’s meticulous process, enthusiasts can achieve professional-level results. Remember that the journey of boatbuilding is as rewarding as reaching your destination; it tests one’s patience and dedication. For those seeking to embark on this adventure or simply gain more insight into marine craftsmanship, Sven’s wisdom is invaluable.Sven begins by explaining that working on flanges vertically and horizontally is significantly easier than doing so in a flat position. To simplify the process further, he divides the task into two or three steps as suggested by fellow expert “for for.” This approach not only makes it more manageable but also allows for greater precision in crafting each component.Step 2: Applying Glue and Securing
Sven proceeds to apply glue along one edge of the flange, ensuring a secure bond when clamped into place. He emphasizes that this stage is crucial for maintaining the structural integrity of the flange, which in turn safeguards the living area beneath the canvas when hatches are open.Step 3: Allowing Time to Dry
After securely attaching the first portion of the flange, Sven allows ample time for it to dry before moving forward with additional steps. This patience and precision are key aspects of his successful boatbuilding methods.Step 4: Finishing Touches
Once the flange is fully dried, Sven removes the clamps carefully, ensuring no damage occurs during this process. He then moves on to attaching four more pieces onto these main frames, completing two pairs of flanges for the bulkhead hatches.The Final Touches
While two flanges form the primary support structure around the hatches, Sven mentions there are two additional pieces required at each end to ensure comprehensive protection. This attention to detail highlights his commitment to producing a durable and reliable design. “Sailing is about finding your path, whether it’s across an ocean or within yourself.” – Sven Yrvind In conclusion, making flanges around bulkhead hatches may seem complex at first glance, but by following Sven Yrvind’s meticulous process, enthusiasts can achieve professional-level results. Remember that the journey of boatbuilding is as rewarding as reaching your destination; it tests one’s patience and dedication. For those seeking to embark on this adventure or simply gain more insight into marine craftsmanship, Sven’s wisdom is invaluable.Sven Yrvind, a renowned yacht designer and sailor, shares valuable insights on creating flanges around bulkhead hatches for canvas protection in this enlightening video. By following his expert guidance, boat enthusiasts can ensure their living areas remain secure while allowing unhindered access through the hatches.Step 1: Starting with the Flange
Sven begins by explaining that working on flanges vertically and horizontally is significantly easier than doing so in a flat position. To simplify the process further, he divides the task into two or three steps as suggested by fellow expert “for for.” This approach not only makes it more manageable but also allows for greater precision in crafting each component.Step 2: Applying Glue and Securing
Sven proceeds to apply glue along one edge of the flange, ensuring a secure bond when clamped into place. He emphasizes that this stage is crucial for maintaining the structural integrity of the flange, which in turn safeguards the living area beneath the canvas when hatches are open.Step 3: Allowing Time to Dry
After securely attaching the first portion of the flange, Sven allows ample time for it to dry before moving forward with additional steps. This patience and precision are key aspects of his successful boatbuilding methods.Step 4: Finishing Touches
Once the flange is fully dried, Sven removes the clamps carefully, ensuring no damage occurs during this process. He then moves on to attaching four more pieces onto these main frames, completing two pairs of flanges for the bulkhead hatches.The Final Touches
While two flanges form the primary support structure around the hatches, Sven mentions there are two additional pieces required at each end to ensure comprehensive protection. This attention to detail highlights his commitment to producing a durable and reliable design. “Sailing is about finding your path, whether it’s across an ocean or within yourself.” – Sven Yrvind In conclusion, making flanges around bulkhead hatches may seem complex at first glance, but by following Sven Yrvind’s meticulous process, enthusiasts can achieve professional-level results. Remember that the journey of boatbuilding is as rewarding as reaching your destination; it tests one’s patience and dedication. For those seeking to embark on this adventure or simply gain more insight into marine craftsmanship, Sven’s wisdom is invaluable.Making Flanges Around Bulkhead Hatches for Canvas
Sven Yrvind, a renowned yacht designer and sailor, shares valuable insights on creating flanges around bulkhead hatches for canvas protection in this enlightening video. By following his expert guidance, boat enthusiasts can ensure their living areas remain secure while allowing unhindered access through the hatches.Step 1: Starting with the Flange
Sven begins by explaining that working on flanges vertically and horizontally is significantly easier than doing so in a flat position. To simplify the process further, he divides the task into two or three steps as suggested by fellow expert “for for.” This approach not only makes it more manageable but also allows for greater precision in crafting each component.Step 2: Applying Glue and Securing
Sven proceeds to apply glue along one edge of the flange, ensuring a secure bond when clamped into place. He emphasizes that this stage is crucial for maintaining the structural integrity of the flange, which in turn safeguards the living area beneath the canvas when hatches are open.Step 3: Allowing Time to Dry
After securely attaching the first portion of the flange, Sven allows ample time for it to dry before moving forward with additional steps. This patience and precision are key aspects of his successful boatbuilding methods.Step 4: Finishing Touches
Once the flange is fully dried, Sven removes the clamps carefully, ensuring no damage occurs during this process. He then moves on to attaching four more pieces onto these main frames, completing two pairs of flanges for the bulkhead hatches.The Final Touches
While two flanges form the primary support structure around the hatches, Sven mentions there are two additional pieces required at each end to ensure comprehensive protection. This attention to detail highlights his commitment to producing a durable and reliable design. “Sailing is about finding your path, whether it’s across an ocean or within yourself.” – Sven Yrvind In conclusion, making flanges around bulkhead hatches may seem complex at first glance, but by following Sven Yrvind’s meticulous process, enthusiasts can achieve professional-level results. Remember that the journey of boatbuilding is as rewarding as reaching your destination; it tests one’s patience and dedication. For those seeking to embark on this adventure or simply gain more insight into marine craftsmanship, Sven’s wisdom is invaluable.After securely attaching the first portion of the flange, Sven allows ample time for it to dry before moving forward with additional steps. This patience and precision are key aspects of his successful boatbuilding methods.Step 4: Finishing Touches
Once the flange is fully dried, Sven removes the clamps carefully, ensuring no damage occurs during this process. He then moves on to attaching four more pieces onto these main frames, completing two pairs of flanges for the bulkhead hatches.The Final Touches
While two flanges form the primary support structure around the hatches, Sven mentions there are two additional pieces required at each end to ensure comprehensive protection. This attention to detail highlights his commitment to producing a durable and reliable design. “Sailing is about finding your path, whether it’s across an ocean or within yourself.” – Sven Yrvind In conclusion, making flanges around bulkhead hatches may seem complex at first glance, but by following Sven Yrvind’s meticulous process, enthusiasts can achieve professional-level results. Remember that the journey of boatbuilding is as rewarding as reaching your destination; it tests one’s patience and dedication. For those seeking to embark on this adventure or simply gain more insight into marine craftsmanship, Sven’s wisdom is invaluable.Once the flange is fully dried, Sven removes the clamps carefully, ensuring no damage occurs during this process. He then moves on to attaching four more pieces onto these main frames, completing two pairs of flanges for the bulkhead hatches.The Final Touches
While two flanges form the primary support structure around the hatches, Sven mentions there are two additional pieces required at each end to ensure comprehensive protection. This attention to detail highlights his commitment to producing a durable and reliable design. “Sailing is about finding your path, whether it’s across an ocean or within yourself.” – Sven Yrvind In conclusion, making flanges around bulkhead hatches may seem complex at first glance, but by following Sven Yrvind’s meticulous process, enthusiasts can achieve professional-level results. Remember that the journey of boatbuilding is as rewarding as reaching your destination; it tests one’s patience and dedication. For those seeking to embark on this adventure or simply gain more insight into marine craftsmanship, Sven’s wisdom is invaluable.Sven Yrvind, a renowned yacht designer and sailor, shares valuable insights on creating flanges around bulkhead hatches for canvas protection in this enlightening video. By following his expert guidance, boat enthusiasts can ensure their living areas remain secure while allowing unhindered access through the hatches.Step 1: Starting with the Flange
Sven begins by explaining that working on flanges vertically and horizontally is significantly easier than doing so in a flat position. To simplify the process further, he divides the task into two or three steps as suggested by fellow expert “for for.” This approach not only makes it more manageable but also allows for greater precision in crafting each component.Step 2: Applying Glue and Securing
Sven proceeds to apply glue along one edge of the flange, ensuring a secure bond when clamped into place. He emphasizes that this stage is crucial for maintaining the structural integrity of the flange, which in turn safeguards the living area beneath the canvas when hatches are open.Step 3: Allowing Time to Dry
After securely attaching the first portion of the flange, Sven allows ample time for it to dry before moving forward with additional steps. This patience and precision are key aspects of his successful boatbuilding methods.Step 4: Finishing Touches
Once the flange is fully dried, Sven removes the clamps carefully, ensuring no damage occurs during this process. He then moves on to attaching four more pieces onto these main frames, completing two pairs of flanges for the bulkhead hatches.The Final Touches
While two flanges form the primary support structure around the hatches, Sven mentions there are two additional pieces required at each end to ensure comprehensive protection. This attention to detail highlights his commitment to producing a durable and reliable design. “Sailing is about finding your path, whether it’s across an ocean or within yourself.” – Sven Yrvind In conclusion, making flanges around bulkhead hatches may seem complex at first glance, but by following Sven Yrvind’s meticulous process, enthusiasts can achieve professional-level results. Remember that the journey of boatbuilding is as rewarding as reaching your destination; it tests one’s patience and dedication. For those seeking to embark on this adventure or simply gain more insight into marine craftsmanship, Sven’s wisdom is invaluable.Making Flanges Around Bulkhead Hatches for Canvas
Sven Yrvind, a renowned yacht designer and sailor, shares valuable insights on creating flanges around bulkhead hatches for canvas protection in this enlightening video. By following his expert guidance, boat enthusiasts can ensure their living areas remain secure while allowing unhindered access through the hatches.Step 1: Starting with the Flange
Sven begins by explaining that working on flanges vertically and horizontally is significantly easier than doing so in a flat position. To simplify the process further, he divides the task into two or three steps as suggested by fellow expert “for for.” This approach not only makes it more manageable but also allows for greater precision in crafting each component.Step 2: Applying Glue and Securing
Sven proceeds to apply glue along one edge of the flange, ensuring a secure bond when clamped into place. He emphasizes that this stage is crucial for maintaining the structural integrity of the flange, which in turn safeguards the living area beneath the canvas when hatches are open.Step 3: Allowing Time to Dry
After securely attaching the first portion of the flange, Sven allows ample time for it to dry before moving forward with additional steps. This patience and precision are key aspects of his successful boatbuilding methods.Step 4: Finishing Touches
Once the flange is fully dried, Sven removes the clamps carefully, ensuring no damage occurs during this process. He then moves on to attaching four more pieces onto these main frames, completing two pairs of flanges for the bulkhead hatches.The Final Touches
While two flanges form the primary support structure around the hatches, Sven mentions there are two additional pieces required at each end to ensure comprehensive protection. This attention to detail highlights his commitment to producing a durable and reliable design. “Sailing is about finding your path, whether it’s across an ocean or within yourself.” – Sven Yrvind In conclusion, making flanges around bulkhead hatches may seem complex at first glance, but by following Sven Yrvind’s meticulous process, enthusiasts can achieve professional-level results. Remember that the journey of boatbuilding is as rewarding as reaching your destination; it tests one’s patience and dedication. For those seeking to embark on this adventure or simply gain more insight into marine craftsmanship, Sven’s wisdom is invaluable.After securely attaching the first portion of the flange, Sven allows ample time for it to dry before moving forward with additional steps. This patience and precision are key aspects of his successful boatbuilding methods.Step 4: Finishing Touches
Once the flange is fully dried, Sven removes the clamps carefully, ensuring no damage occurs during this process. He then moves on to attaching four more pieces onto these main frames, completing two pairs of flanges for the bulkhead hatches.The Final Touches
While two flanges form the primary support structure around the hatches, Sven mentions there are two additional pieces required at each end to ensure comprehensive protection. This attention to detail highlights his commitment to producing a durable and reliable design. “Sailing is about finding your path, whether it’s across an ocean or within yourself.” – Sven Yrvind In conclusion, making flanges around bulkhead hatches may seem complex at first glance, but by following Sven Yrvind’s meticulous process, enthusiasts can achieve professional-level results. Remember that the journey of boatbuilding is as rewarding as reaching your destination; it tests one’s patience and dedication. For those seeking to embark on this adventure or simply gain more insight into marine craftsmanship, Sven’s wisdom is invaluable.Sven Yrvind, a renowned yacht designer and sailor, shares valuable insights on creating flanges around bulkhead hatches for canvas protection in this enlightening video. By following his expert guidance, boat enthusiasts can ensure their living areas remain secure while allowing unhindered access through the hatches.Step 1: Starting with the Flange
Sven begins by explaining that working on flanges vertically and horizontally is significantly easier than doing so in a flat position. To simplify the process further, he divides the task into two or three steps as suggested by fellow expert “for for.” This approach not only makes it more manageable but also allows for greater precision in crafting each component.Step 2: Applying Glue and Securing
Sven proceeds to apply glue along one edge of the flange, ensuring a secure bond when clamped into place. He emphasizes that this stage is crucial for maintaining the structural integrity of the flange, which in turn safeguards the living area beneath the canvas when hatches are open.Step 3: Allowing Time to Dry
After securely attaching the first portion of the flange, Sven allows ample time for it to dry before moving forward with additional steps. This patience and precision are key aspects of his successful boatbuilding methods.Step 4: Finishing Touches
Once the flange is fully dried, Sven removes the clamps carefully, ensuring no damage occurs during this process. He then moves on to attaching four more pieces onto these main frames, completing two pairs of flanges for the bulkhead hatches.The Final Touches
While two flanges form the primary support structure around the hatches, Sven mentions there are two additional pieces required at each end to ensure comprehensive protection. This attention to detail highlights his commitment to producing a durable and reliable design. “Sailing is about finding your path, whether it’s across an ocean or within yourself.” – Sven Yrvind In conclusion, making flanges around bulkhead hatches may seem complex at first glance, but by following Sven Yrvind’s meticulous process, enthusiasts can achieve professional-level results. Remember that the journey of boatbuilding is as rewarding as reaching your destination; it tests one’s patience and dedication. For those seeking to embark on this adventure or simply gain more insight into marine craftsmanship, Sven’s wisdom is invaluable.Making Flanges Around Bulkhead Hatches for Canvas
Sven Yrvind, a renowned yacht designer and sailor, shares valuable insights on creating flanges around bulkhead hatches for canvas protection in this enlightening video. By following his expert guidance, boat enthusiasts can ensure their living areas remain secure while allowing unhindered access through the hatches.Step 1: Starting with the Flange
Sven begins by explaining that working on flanges vertically and horizontally is significantly easier than doing so in a flat position. To simplify the process further, he divides the task into two or three steps as suggested by fellow expert “for for.” This approach not only makes it more manageable but also allows for greater precision in crafting each component.Step 2: Applying Glue and Securing
Sven proceeds to apply glue along one edge of the flange, ensuring a secure bond when clamped into place. He emphasizes that this stage is crucial for maintaining the structural integrity of the flange, which in turn safeguards the living area beneath the canvas when hatches are open.Step 3: Allowing Time to Dry
After securely attaching the first portion of the flange, Sven allows ample time for it to dry before moving forward with additional steps. This patience and precision are key aspects of his successful boatbuilding methods.Step 4: Finishing Touches
Once the flange is fully dried, Sven removes the clamps carefully, ensuring no damage occurs during this process. He then moves on to attaching four more pieces onto these main frames, completing two pairs of flanges for the bulkhead hatches.The Final Touches
While two flanges form the primary support structure around the hatches, Sven mentions there are two additional pieces required at each end to ensure comprehensive protection. This attention to detail highlights his commitment to producing a durable and reliable design. “Sailing is about finding your path, whether it’s across an ocean or within yourself.” – Sven Yrvind In conclusion, making flanges around bulkhead hatches may seem complex at first glance, but by following Sven Yrvind’s meticulous process, enthusiasts can achieve professional-level results. Remember that the journey of boatbuilding is as rewarding as reaching your destination; it tests one’s patience and dedication. For those seeking to embark on this adventure or simply gain more insight into marine craftsmanship, Sven’s wisdom is invaluable.Sven proceeds to apply glue along one edge of the flange, ensuring a secure bond when clamped into place. He emphasizes that this stage is crucial for maintaining the structural integrity of the flange, which in turn safeguards the living area beneath the canvas when hatches are open.Step 3: Allowing Time to Dry
After securely attaching the first portion of the flange, Sven allows ample time for it to dry before moving forward with additional steps. This patience and precision are key aspects of his successful boatbuilding methods.Step 4: Finishing Touches
Once the flange is fully dried, Sven removes the clamps carefully, ensuring no damage occurs during this process. He then moves on to attaching four more pieces onto these main frames, completing two pairs of flanges for the bulkhead hatches.The Final Touches
While two flanges form the primary support structure around the hatches, Sven mentions there are two additional pieces required at each end to ensure comprehensive protection. This attention to detail highlights his commitment to producing a durable and reliable design. “Sailing is about finding your path, whether it’s across an ocean or within yourself.” – Sven Yrvind In conclusion, making flanges around bulkhead hatches may seem complex at first glance, but by following Sven Yrvind’s meticulous process, enthusiasts can achieve professional-level results. Remember that the journey of boatbuilding is as rewarding as reaching your destination; it tests one’s patience and dedication. For those seeking to embark on this adventure or simply gain more insight into marine craftsmanship, Sven’s wisdom is invaluable.Sven Yrvind, a renowned yacht designer and sailor, shares valuable insights on creating flanges around bulkhead hatches for canvas protection in this enlightening video. By following his expert guidance, boat enthusiasts can ensure their living areas remain secure while allowing unhindered access through the hatches.Step 1: Starting with the Flange
Sven begins by explaining that working on flanges vertically and horizontally is significantly easier than doing so in a flat position. To simplify the process further, he divides the task into two or three steps as suggested by fellow expert “for for.” This approach not only makes it more manageable but also allows for greater precision in crafting each component.Step 2: Applying Glue and Securing
Sven proceeds to apply glue along one edge of the flange, ensuring a secure bond when clamped into place. He emphasizes that this stage is crucial for maintaining the structural integrity of the flange, which in turn safeguards the living area beneath the canvas when hatches are open.Step 3: Allowing Time to Dry
After securely attaching the first portion of the flange, Sven allows ample time for it to dry before moving forward with additional steps. This patience and precision are key aspects of his successful boatbuilding methods.Step 4: Finishing Touches
Once the flange is fully dried, Sven removes the clamps carefully, ensuring no damage occurs during this process. He then moves on to attaching four more pieces onto these main frames, completing two pairs of flanges for the bulkhead hatches.The Final Touches
While two flanges form the primary support structure around the hatches, Sven mentions there are two additional pieces required at each end to ensure comprehensive protection. This attention to detail highlights his commitment to producing a durable and reliable design. “Sailing is about finding your path, whether it’s across an ocean or within yourself.” – Sven Yrvind In conclusion, making flanges around bulkhead hatches may seem complex at first glance, but by following Sven Yrvind’s meticulous process, enthusiasts can achieve professional-level results. Remember that the journey of boatbuilding is as rewarding as reaching your destination; it tests one’s patience and dedication. For those seeking to embark on this adventure or simply gain more insight into marine craftsmanship, Sven’s wisdom is invaluable.Making Flanges Around Bulkhead Hatches for Canvas
Sven Yrvind, a renowned yacht designer and sailor, shares valuable insights on creating flanges around bulkhead hatches for canvas protection in this enlightening video. By following his expert guidance, boat enthusiasts can ensure their living areas remain secure while allowing unhindered access through the hatches.Step 1: Starting with the Flange
Sven begins by explaining that working on flanges vertically and horizontally is significantly easier than doing so in a flat position. To simplify the process further, he divides the task into two or three steps as suggested by fellow expert “for for.” This approach not only makes it more manageable but also allows for greater precision in crafting each component.Step 2: Applying Glue and Securing
Sven proceeds to apply glue along one edge of the flange, ensuring a secure bond when clamped into place. He emphasizes that this stage is crucial for maintaining the structural integrity of the flange, which in turn safeguards the living area beneath the canvas when hatches are open.Step 3: Allowing Time to Dry
After securely attaching the first portion of the flange, Sven allows ample time for it to dry before moving forward with additional steps. This patience and precision are key aspects of his successful boatbuilding methods.Step 4: Finishing Touches
Once the flange is fully dried, Sven removes the clamps carefully, ensuring no damage occurs during this process. He then moves on to attaching four more pieces onto these main frames, completing two pairs of flanges for the bulkhead hatches.The Final Touches
While two flanges form the primary support structure around the hatches, Sven mentions there are two additional pieces required at each end to ensure comprehensive protection. This attention to detail highlights his commitment to producing a durable and reliable design. “Sailing is about finding your path, whether it’s across an ocean or within yourself.” – Sven Yrvind In conclusion, making flanges around bulkhead hatches may seem complex at first glance, but by following Sven Yrvind’s meticulous process, enthusiasts can achieve professional-level results. Remember that the journey of boatbuilding is as rewarding as reaching your destination; it tests one’s patience and dedication. For those seeking to embark on this adventure or simply gain more insight into marine craftsmanship, Sven’s wisdom is invaluable.Sven begins by explaining that working on flanges vertically and horizontally is significantly easier than doing so in a flat position. To simplify the process further, he divides the task into two or three steps as suggested by fellow expert “for for.” This approach not only makes it more manageable but also allows for greater precision in crafting each component.Step 2: Applying Glue and Securing
Sven proceeds to apply glue along one edge of the flange, ensuring a secure bond when clamped into place. He emphasizes that this stage is crucial for maintaining the structural integrity of the flange, which in turn safeguards the living area beneath the canvas when hatches are open.Step 3: Allowing Time to Dry
After securely attaching the first portion of the flange, Sven allows ample time for it to dry before moving forward with additional steps. This patience and precision are key aspects of his successful boatbuilding methods.Step 4: Finishing Touches
Once the flange is fully dried, Sven removes the clamps carefully, ensuring no damage occurs during this process. He then moves on to attaching four more pieces onto these main frames, completing two pairs of flanges for the bulkhead hatches.The Final Touches
While two flanges form the primary support structure around the hatches, Sven mentions there are two additional pieces required at each end to ensure comprehensive protection. This attention to detail highlights his commitment to producing a durable and reliable design. “Sailing is about finding your path, whether it’s across an ocean or within yourself.” – Sven Yrvind In conclusion, making flanges around bulkhead hatches may seem complex at first glance, but by following Sven Yrvind’s meticulous process, enthusiasts can achieve professional-level results. Remember that the journey of boatbuilding is as rewarding as reaching your destination; it tests one’s patience and dedication. For those seeking to embark on this adventure or simply gain more insight into marine craftsmanship, Sven’s wisdom is invaluable.Sven Yrvind, a renowned yacht designer and sailor, shares valuable insights on creating flanges around bulkhead hatches for canvas protection in this enlightening video. By following his expert guidance, boat enthusiasts can ensure their living areas remain secure while allowing unhindered access through the hatches.Step 1: Starting with the Flange
Sven begins by explaining that working on flanges vertically and horizontally is significantly easier than doing so in a flat position. To simplify the process further, he divides the task into two or three steps as suggested by fellow expert “for for.” This approach not only makes it more manageable but also allows for greater precision in crafting each component.Step 2: Applying Glue and Securing
Sven proceeds to apply glue along one edge of the flange, ensuring a secure bond when clamped into place. He emphasizes that this stage is crucial for maintaining the structural integrity of the flange, which in turn safeguards the living area beneath the canvas when hatches are open.Step 3: Allowing Time to Dry
After securely attaching the first portion of the flange, Sven allows ample time for it to dry before moving forward with additional steps. This patience and precision are key aspects of his successful boatbuilding methods.Step 4: Finishing Touches
Once the flange is fully dried, Sven removes the clamps carefully, ensuring no damage occurs during this process. He then moves on to attaching four more pieces onto these main frames, completing two pairs of flanges for the bulkhead hatches.The Final Touches
While two flanges form the primary support structure around the hatches, Sven mentions there are two additional pieces required at each end to ensure comprehensive protection. This attention to detail highlights his commitment to producing a durable and reliable design. “Sailing is about finding your path, whether it’s across an ocean or within yourself.” – Sven Yrvind In conclusion, making flanges around bulkhead hatches may seem complex at first glance, but by following Sven Yrvind’s meticulous process, enthusiasts can achieve professional-level results. Remember that the journey of boatbuilding is as rewarding as reaching your destination; it tests one’s patience and dedication. For those seeking to embark on this adventure or simply gain more insight into marine craftsmanship, Sven’s wisdom is invaluable.Making Flanges Around Bulkhead Hatches for Canvas
Sven Yrvind, a renowned yacht designer and sailor, shares valuable insights on creating flanges around bulkhead hatches for canvas protection in this enlightening video. By following his expert guidance, boat enthusiasts can ensure their living areas remain secure while allowing unhindered access through the hatches.Step 1: Starting with the Flange
Sven begins by explaining that working on flanges vertically and horizontally is significantly easier than doing so in a flat position. To simplify the process further, he divides the task into two or three steps as suggested by fellow expert “for for.” This approach not only makes it more manageable but also allows for greater precision in crafting each component.Step 2: Applying Glue and Securing
Sven proceeds to apply glue along one edge of the flange, ensuring a secure bond when clamped into place. He emphasizes that this stage is crucial for maintaining the structural integrity of the flange, which in turn safeguards the living area beneath the canvas when hatches are open.Step 3: Allowing Time to Dry
After securely attaching the first portion of the flange, Sven allows ample time for it to dry before moving forward with additional steps. This patience and precision are key aspects of his successful boatbuilding methods.Step 4: Finishing Touches
Once the flange is fully dried, Sven removes the clamps carefully, ensuring no damage occurs during this process. He then moves on to attaching four more pieces onto these main frames, completing two pairs of flanges for the bulkhead hatches.The Final Touches
While two flanges form the primary support structure around the hatches, Sven mentions there are two additional pieces required at each end to ensure comprehensive protection. This attention to detail highlights his commitment to producing a durable and reliable design. “Sailing is about finding your path, whether it’s across an ocean or within yourself.” – Sven Yrvind In conclusion, making flanges around bulkhead hatches may seem complex at first glance, but by following Sven Yrvind’s meticulous process, enthusiasts can achieve professional-level results. Remember that the journey of boatbuilding is as rewarding as reaching your destination; it tests one’s patience and dedication. For those seeking to embark on this adventure or simply gain more insight into marine craftsmanship, Sven’s wisdom is invaluable.Once the flange is fully dried, Sven removes the clamps carefully, ensuring no damage occurs during this process. He then moves on to attaching four more pieces onto these main frames, completing two pairs of flanges for the bulkhead hatches.The Final Touches
While two flanges form the primary support structure around the hatches, Sven mentions there are two additional pieces required at each end to ensure comprehensive protection. This attention to detail highlights his commitment to producing a durable and reliable design. “Sailing is about finding your path, whether it’s across an ocean or within yourself.” – Sven Yrvind In conclusion, making flanges around bulkhead hatches may seem complex at first glance, but by following Sven Yrvind’s meticulous process, enthusiasts can achieve professional-level results. Remember that the journey of boatbuilding is as rewarding as reaching your destination; it tests one’s patience and dedication. For those seeking to embark on this adventure or simply gain more insight into marine craftsmanship, Sven’s wisdom is invaluable.Sven begins by explaining that working on flanges vertically and horizontally is significantly easier than doing so in a flat position. To simplify the process further, he divides the task into two or three steps as suggested by fellow expert “for for.” This approach not only makes it more manageable but also allows for greater precision in crafting each component.Step 2: Applying Glue and Securing
Sven proceeds to apply glue along one edge of the flange, ensuring a secure bond when clamped into place. He emphasizes that this stage is crucial for maintaining the structural integrity of the flange, which in turn safeguards the living area beneath the canvas when hatches are open.Step 3: Allowing Time to Dry
After securely attaching the first portion of the flange, Sven allows ample time for it to dry before moving forward with additional steps. This patience and precision are key aspects of his successful boatbuilding methods.Step 4: Finishing Touches
Once the flange is fully dried, Sven removes the clamps carefully, ensuring no damage occurs during this process. He then moves on to attaching four more pieces onto these main frames, completing two pairs of flanges for the bulkhead hatches.The Final Touches
While two flanges form the primary support structure around the hatches, Sven mentions there are two additional pieces required at each end to ensure comprehensive protection. This attention to detail highlights his commitment to producing a durable and reliable design. “Sailing is about finding your path, whether it’s across an ocean or within yourself.” – Sven Yrvind In conclusion, making flanges around bulkhead hatches may seem complex at first glance, but by following Sven Yrvind’s meticulous process, enthusiasts can achieve professional-level results. Remember that the journey of boatbuilding is as rewarding as reaching your destination; it tests one’s patience and dedication. For those seeking to embark on this adventure or simply gain more insight into marine craftsmanship, Sven’s wisdom is invaluable.Sven Yrvind, a renowned yacht designer and sailor, shares valuable insights on creating flanges around bulkhead hatches for canvas protection in this enlightening video. By following his expert guidance, boat enthusiasts can ensure their living areas remain secure while allowing unhindered access through the hatches.Step 1: Starting with the Flange
Sven begins by explaining that working on flanges vertically and horizontally is significantly easier than doing so in a flat position. To simplify the process further, he divides the task into two or three steps as suggested by fellow expert “for for.” This approach not only makes it more manageable but also allows for greater precision in crafting each component.Step 2: Applying Glue and Securing
Sven proceeds to apply glue along one edge of the flange, ensuring a secure bond when clamped into place. He emphasizes that this stage is crucial for maintaining the structural integrity of the flange, which in turn safeguards the living area beneath the canvas when hatches are open.Step 3: Allowing Time to Dry
After securely attaching the first portion of the flange, Sven allows ample time for it to dry before moving forward with additional steps. This patience and precision are key aspects of his successful boatbuilding methods.Step 4: Finishing Touches
Once the flange is fully dried, Sven removes the clamps carefully, ensuring no damage occurs during this process. He then moves on to attaching four more pieces onto these main frames, completing two pairs of flanges for the bulkhead hatches.The Final Touches
While two flanges form the primary support structure around the hatches, Sven mentions there are two additional pieces required at each end to ensure comprehensive protection. This attention to detail highlights his commitment to producing a durable and reliable design. “Sailing is about finding your path, whether it’s across an ocean or within yourself.” – Sven Yrvind In conclusion, making flanges around bulkhead hatches may seem complex at first glance, but by following Sven Yrvind’s meticulous process, enthusiasts can achieve professional-level results. Remember that the journey of boatbuilding is as rewarding as reaching your destination; it tests one’s patience and dedication. For those seeking to embark on this adventure or simply gain more insight into marine craftsmanship, Sven’s wisdom is invaluable.Making Flanges Around Bulkhead Hatches for Canvas
Sven Yrvind, a renowned yacht designer and sailor, shares valuable insights on creating flanges around bulkhead hatches for canvas protection in this enlightening video. By following his expert guidance, boat enthusiasts can ensure their living areas remain secure while allowing unhindered access through the hatches.Step 1: Starting with the Flange
Sven begins by explaining that working on flanges vertically and horizontally is significantly easier than doing so in a flat position. To simplify the process further, he divides the task into two or three steps as suggested by fellow expert “for for.” This approach not only makes it more manageable but also allows for greater precision in crafting each component.Step 2: Applying Glue and Securing
Sven proceeds to apply glue along one edge of the flange, ensuring a secure bond when clamped into place. He emphasizes that this stage is crucial for maintaining the structural integrity of the flange, which in turn safeguards the living area beneath the canvas when hatches are open.Step 3: Allowing Time to Dry
After securely attaching the first portion of the flange, Sven allows ample time for it to dry before moving forward with additional steps. This patience and precision are key aspects of his successful boatbuilding methods.Step 4: Finishing Touches
Once the flange is fully dried, Sven removes the clamps carefully, ensuring no damage occurs during this process. He then moves on to attaching four more pieces onto these main frames, completing two pairs of flanges for the bulkhead hatches.The Final Touches
While two flanges form the primary support structure around the hatches, Sven mentions there are two additional pieces required at each end to ensure comprehensive protection. This attention to detail highlights his commitment to producing a durable and reliable design. “Sailing is about finding your path, whether it’s across an ocean or within yourself.” – Sven Yrvind In conclusion, making flanges around bulkhead hatches may seem complex at first glance, but by following Sven Yrvind’s meticulous process, enthusiasts can achieve professional-level results. Remember that the journey of boatbuilding is as rewarding as reaching your destination; it tests one’s patience and dedication. For those seeking to embark on this adventure or simply gain more insight into marine craftsmanship, Sven’s wisdom is invaluable.After securely attaching the first portion of the flange, Sven allows ample time for it to dry before moving forward with additional steps. This patience and precision are key aspects of his successful boatbuilding methods.Step 4: Finishing Touches
Once the flange is fully dried, Sven removes the clamps carefully, ensuring no damage occurs during this process. He then moves on to attaching four more pieces onto these main frames, completing two pairs of flanges for the bulkhead hatches.The Final Touches
While two flanges form the primary support structure around the hatches, Sven mentions there are two additional pieces required at each end to ensure comprehensive protection. This attention to detail highlights his commitment to producing a durable and reliable design. “Sailing is about finding your path, whether it’s across an ocean or within yourself.” – Sven Yrvind In conclusion, making flanges around bulkhead hatches may seem complex at first glance, but by following Sven Yrvind’s meticulous process, enthusiasts can achieve professional-level results. Remember that the journey of boatbuilding is as rewarding as reaching your destination; it tests one’s patience and dedication. For those seeking to embark on this adventure or simply gain more insight into marine craftsmanship, Sven’s wisdom is invaluable.Sven begins by explaining that working on flanges vertically and horizontally is significantly easier than doing so in a flat position. To simplify the process further, he divides the task into two or three steps as suggested by fellow expert “for for.” This approach not only makes it more manageable but also allows for greater precision in crafting each component.Step 2: Applying Glue and Securing
Sven proceeds to apply glue along one edge of the flange, ensuring a secure bond when clamped into place. He emphasizes that this stage is crucial for maintaining the structural integrity of the flange, which in turn safeguards the living area beneath the canvas when hatches are open.Step 3: Allowing Time to Dry
After securely attaching the first portion of the flange, Sven allows ample time for it to dry before moving forward with additional steps. This patience and precision are key aspects of his successful boatbuilding methods.Step 4: Finishing Touches
Once the flange is fully dried, Sven removes the clamps carefully, ensuring no damage occurs during this process. He then moves on to attaching four more pieces onto these main frames, completing two pairs of flanges for the bulkhead hatches.The Final Touches
While two flanges form the primary support structure around the hatches, Sven mentions there are two additional pieces required at each end to ensure comprehensive protection. This attention to detail highlights his commitment to producing a durable and reliable design. “Sailing is about finding your path, whether it’s across an ocean or within yourself.” – Sven Yrvind In conclusion, making flanges around bulkhead hatches may seem complex at first glance, but by following Sven Yrvind’s meticulous process, enthusiasts can achieve professional-level results. Remember that the journey of boatbuilding is as rewarding as reaching your destination; it tests one’s patience and dedication. For those seeking to embark on this adventure or simply gain more insight into marine craftsmanship, Sven’s wisdom is invaluable.Sven Yrvind, a renowned yacht designer and sailor, shares valuable insights on creating flanges around bulkhead hatches for canvas protection in this enlightening video. By following his expert guidance, boat enthusiasts can ensure their living areas remain secure while allowing unhindered access through the hatches.Step 1: Starting with the Flange
Sven begins by explaining that working on flanges vertically and horizontally is significantly easier than doing so in a flat position. To simplify the process further, he divides the task into two or three steps as suggested by fellow expert “for for.” This approach not only makes it more manageable but also allows for greater precision in crafting each component.Step 2: Applying Glue and Securing
Sven proceeds to apply glue along one edge of the flange, ensuring a secure bond when clamped into place. He emphasizes that this stage is crucial for maintaining the structural integrity of the flange, which in turn safeguards the living area beneath the canvas when hatches are open.Step 3: Allowing Time to Dry
After securely attaching the first portion of the flange, Sven allows ample time for it to dry before moving forward with additional steps. This patience and precision are key aspects of his successful boatbuilding methods.Step 4: Finishing Touches
Once the flange is fully dried, Sven removes the clamps carefully, ensuring no damage occurs during this process. He then moves on to attaching four more pieces onto these main frames, completing two pairs of flanges for the bulkhead hatches.The Final Touches
While two flanges form the primary support structure around the hatches, Sven mentions there are two additional pieces required at each end to ensure comprehensive protection. This attention to detail highlights his commitment to producing a durable and reliable design. “Sailing is about finding your path, whether it’s across an ocean or within yourself.” – Sven Yrvind In conclusion, making flanges around bulkhead hatches may seem complex at first glance, but by following Sven Yrvind’s meticulous process, enthusiasts can achieve professional-level results. Remember that the journey of boatbuilding is as rewarding as reaching your destination; it tests one’s patience and dedication. For those seeking to embark on this adventure or simply gain more insight into marine craftsmanship, Sven’s wisdom is invaluable.Making Flanges Around Bulkhead Hatches for Canvas
Sven Yrvind, a renowned yacht designer and sailor, shares valuable insights on creating flanges around bulkhead hatches for canvas protection in this enlightening video. By following his expert guidance, boat enthusiasts can ensure their living areas remain secure while allowing unhindered access through the hatches.Step 1: Starting with the Flange
Sven begins by explaining that working on flanges vertically and horizontally is significantly easier than doing so in a flat position. To simplify the process further, he divides the task into two or three steps as suggested by fellow expert “for for.” This approach not only makes it more manageable but also allows for greater precision in crafting each component.Step 2: Applying Glue and Securing
Sven proceeds to apply glue along one edge of the flange, ensuring a secure bond when clamped into place. He emphasizes that this stage is crucial for maintaining the structural integrity of the flange, which in turn safeguards the living area beneath the canvas when hatches are open.Step 3: Allowing Time to Dry
After securely attaching the first portion of the flange, Sven allows ample time for it to dry before moving forward with additional steps. This patience and precision are key aspects of his successful boatbuilding methods.Step 4: Finishing Touches
Once the flange is fully dried, Sven removes the clamps carefully, ensuring no damage occurs during this process. He then moves on to attaching four more pieces onto these main frames, completing two pairs of flanges for the bulkhead hatches.The Final Touches
While two flanges form the primary support structure around the hatches, Sven mentions there are two additional pieces required at each end to ensure comprehensive protection. This attention to detail highlights his commitment to producing a durable and reliable design. “Sailing is about finding your path, whether it’s across an ocean or within yourself.” – Sven Yrvind In conclusion, making flanges around bulkhead hatches may seem complex at first glance, but by following Sven Yrvind’s meticulous process, enthusiasts can achieve professional-level results. Remember that the journey of boatbuilding is as rewarding as reaching your destination; it tests one’s patience and dedication. For those seeking to embark on this adventure or simply gain more insight into marine craftsmanship, Sven’s wisdom is invaluable.Sven proceeds to apply glue along one edge of the flange, ensuring a secure bond when clamped into place. He emphasizes that this stage is crucial for maintaining the structural integrity of the flange, which in turn safeguards the living area beneath the canvas when hatches are open.Step 3: Allowing Time to Dry
After securely attaching the first portion of the flange, Sven allows ample time for it to dry before moving forward with additional steps. This patience and precision are key aspects of his successful boatbuilding methods.Step 4: Finishing Touches
Once the flange is fully dried, Sven removes the clamps carefully, ensuring no damage occurs during this process. He then moves on to attaching four more pieces onto these main frames, completing two pairs of flanges for the bulkhead hatches.The Final Touches
While two flanges form the primary support structure around the hatches, Sven mentions there are two additional pieces required at each end to ensure comprehensive protection. This attention to detail highlights his commitment to producing a durable and reliable design. “Sailing is about finding your path, whether it’s across an ocean or within yourself.” – Sven Yrvind In conclusion, making flanges around bulkhead hatches may seem complex at first glance, but by following Sven Yrvind’s meticulous process, enthusiasts can achieve professional-level results. Remember that the journey of boatbuilding is as rewarding as reaching your destination; it tests one’s patience and dedication. For those seeking to embark on this adventure or simply gain more insight into marine craftsmanship, Sven’s wisdom is invaluable.Sven begins by explaining that working on flanges vertically and horizontally is significantly easier than doing so in a flat position. To simplify the process further, he divides the task into two or three steps as suggested by fellow expert “for for.” This approach not only makes it more manageable but also allows for greater precision in crafting each component.Step 2: Applying Glue and Securing
Sven proceeds to apply glue along one edge of the flange, ensuring a secure bond when clamped into place. He emphasizes that this stage is crucial for maintaining the structural integrity of the flange, which in turn safeguards the living area beneath the canvas when hatches are open.Step 3: Allowing Time to Dry
After securely attaching the first portion of the flange, Sven allows ample time for it to dry before moving forward with additional steps. This patience and precision are key aspects of his successful boatbuilding methods.Step 4: Finishing Touches
Once the flange is fully dried, Sven removes the clamps carefully, ensuring no damage occurs during this process. He then moves on to attaching four more pieces onto these main frames, completing two pairs of flanges for the bulkhead hatches.The Final Touches
While two flanges form the primary support structure around the hatches, Sven mentions there are two additional pieces required at each end to ensure comprehensive protection. This attention to detail highlights his commitment to producing a durable and reliable design. “Sailing is about finding your path, whether it’s across an ocean or within yourself.” – Sven Yrvind In conclusion, making flanges around bulkhead hatches may seem complex at first glance, but by following Sven Yrvind’s meticulous process, enthusiasts can achieve professional-level results. Remember that the journey of boatbuilding is as rewarding as reaching your destination; it tests one’s patience and dedication. For those seeking to embark on this adventure or simply gain more insight into marine craftsmanship, Sven’s wisdom is invaluable.Sven Yrvind, a renowned yacht designer and sailor, shares valuable insights on creating flanges around bulkhead hatches for canvas protection in this enlightening video. By following his expert guidance, boat enthusiasts can ensure their living areas remain secure while allowing unhindered access through the hatches.Step 1: Starting with the Flange
Sven begins by explaining that working on flanges vertically and horizontally is significantly easier than doing so in a flat position. To simplify the process further, he divides the task into two or three steps as suggested by fellow expert “for for.” This approach not only makes it more manageable but also allows for greater precision in crafting each component.Step 2: Applying Glue and Securing
Sven proceeds to apply glue along one edge of the flange, ensuring a secure bond when clamped into place. He emphasizes that this stage is crucial for maintaining the structural integrity of the flange, which in turn safeguards the living area beneath the canvas when hatches are open.Step 3: Allowing Time to Dry
After securely attaching the first portion of the flange, Sven allows ample time for it to dry before moving forward with additional steps. This patience and precision are key aspects of his successful boatbuilding methods.Step 4: Finishing Touches
Once the flange is fully dried, Sven removes the clamps carefully, ensuring no damage occurs during this process. He then moves on to attaching four more pieces onto these main frames, completing two pairs of flanges for the bulkhead hatches.The Final Touches
While two flanges form the primary support structure around the hatches, Sven mentions there are two additional pieces required at each end to ensure comprehensive protection. This attention to detail highlights his commitment to producing a durable and reliable design. “Sailing is about finding your path, whether it’s across an ocean or within yourself.” – Sven Yrvind In conclusion, making flanges around bulkhead hatches may seem complex at first glance, but by following Sven Yrvind’s meticulous process, enthusiasts can achieve professional-level results. Remember that the journey of boatbuilding is as rewarding as reaching your destination; it tests one’s patience and dedication. For those seeking to embark on this adventure or simply gain more insight into marine craftsmanship, Sven’s wisdom is invaluable.Making Flanges Around Bulkhead Hatches for Canvas
Sven Yrvind, a renowned yacht designer and sailor, shares valuable insights on creating flanges around bulkhead hatches for canvas protection in this enlightening video. By following his expert guidance, boat enthusiasts can ensure their living areas remain secure while allowing unhindered access through the hatches.Step 1: Starting with the Flange
Sven begins by explaining that working on flanges vertically and horizontally is significantly easier than doing so in a flat position. To simplify the process further, he divides the task into two or three steps as suggested by fellow expert “for for.” This approach not only makes it more manageable but also allows for greater precision in crafting each component.Step 2: Applying Glue and Securing
Sven proceeds to apply glue along one edge of the flange, ensuring a secure bond when clamped into place. He emphasizes that this stage is crucial for maintaining the structural integrity of the flange, which in turn safeguards the living area beneath the canvas when hatches are open.Step 3: Allowing Time to Dry
After securely attaching the first portion of the flange, Sven allows ample time for it to dry before moving forward with additional steps. This patience and precision are key aspects of his successful boatbuilding methods.Step 4: Finishing Touches
Once the flange is fully dried, Sven removes the clamps carefully, ensuring no damage occurs during this process. He then moves on to attaching four more pieces onto these main frames, completing two pairs of flanges for the bulkhead hatches.The Final Touches
While two flanges form the primary support structure around the hatches, Sven mentions there are two additional pieces required at each end to ensure comprehensive protection. This attention to detail highlights his commitment to producing a durable and reliable design. “Sailing is about finding your path, whether it’s across an ocean or within yourself.” – Sven Yrvind In conclusion, making flanges around bulkhead hatches may seem complex at first glance, but by following Sven Yrvind’s meticulous process, enthusiasts can achieve professional-level results. Remember that the journey of boatbuilding is as rewarding as reaching your destination; it tests one’s patience and dedication. For those seeking to embark on this adventure or simply gain more insight into marine craftsmanship, Sven’s wisdom is invaluable.Once the flange is fully dried, Sven removes the clamps carefully, ensuring no damage occurs during this process. He then moves on to attaching four more pieces onto these main frames, completing two pairs of flanges for the bulkhead hatches.The Final Touches
While two flanges form the primary support structure around the hatches, Sven mentions there are two additional pieces required at each end to ensure comprehensive protection. This attention to detail highlights his commitment to producing a durable and reliable design. “Sailing is about finding your path, whether it’s across an ocean or within yourself.” – Sven Yrvind In conclusion, making flanges around bulkhead hatches may seem complex at first glance, but by following Sven Yrvind’s meticulous process, enthusiasts can achieve professional-level results. Remember that the journey of boatbuilding is as rewarding as reaching your destination; it tests one’s patience and dedication. For those seeking to embark on this adventure or simply gain more insight into marine craftsmanship, Sven’s wisdom is invaluable.Sven proceeds to apply glue along one edge of the flange, ensuring a secure bond when clamped into place. He emphasizes that this stage is crucial for maintaining the structural integrity of the flange, which in turn safeguards the living area beneath the canvas when hatches are open.Step 3: Allowing Time to Dry
After securely attaching the first portion of the flange, Sven allows ample time for it to dry before moving forward with additional steps. This patience and precision are key aspects of his successful boatbuilding methods.Step 4: Finishing Touches
Once the flange is fully dried, Sven removes the clamps carefully, ensuring no damage occurs during this process. He then moves on to attaching four more pieces onto these main frames, completing two pairs of flanges for the bulkhead hatches.The Final Touches
While two flanges form the primary support structure around the hatches, Sven mentions there are two additional pieces required at each end to ensure comprehensive protection. This attention to detail highlights his commitment to producing a durable and reliable design. “Sailing is about finding your path, whether it’s across an ocean or within yourself.” – Sven Yrvind In conclusion, making flanges around bulkhead hatches may seem complex at first glance, but by following Sven Yrvind’s meticulous process, enthusiasts can achieve professional-level results. Remember that the journey of boatbuilding is as rewarding as reaching your destination; it tests one’s patience and dedication. For those seeking to embark on this adventure or simply gain more insight into marine craftsmanship, Sven’s wisdom is invaluable.Sven begins by explaining that working on flanges vertically and horizontally is significantly easier than doing so in a flat position. To simplify the process further, he divides the task into two or three steps as suggested by fellow expert “for for.” This approach not only makes it more manageable but also allows for greater precision in crafting each component.Step 2: Applying Glue and Securing
Sven proceeds to apply glue along one edge of the flange, ensuring a secure bond when clamped into place. He emphasizes that this stage is crucial for maintaining the structural integrity of the flange, which in turn safeguards the living area beneath the canvas when hatches are open.Step 3: Allowing Time to Dry
After securely attaching the first portion of the flange, Sven allows ample time for it to dry before moving forward with additional steps. This patience and precision are key aspects of his successful boatbuilding methods.Step 4: Finishing Touches
Once the flange is fully dried, Sven removes the clamps carefully, ensuring no damage occurs during this process. He then moves on to attaching four more pieces onto these main frames, completing two pairs of flanges for the bulkhead hatches.The Final Touches
While two flanges form the primary support structure around the hatches, Sven mentions there are two additional pieces required at each end to ensure comprehensive protection. This attention to detail highlights his commitment to producing a durable and reliable design. “Sailing is about finding your path, whether it’s across an ocean or within yourself.” – Sven Yrvind In conclusion, making flanges around bulkhead hatches may seem complex at first glance, but by following Sven Yrvind’s meticulous process, enthusiasts can achieve professional-level results. Remember that the journey of boatbuilding is as rewarding as reaching your destination; it tests one’s patience and dedication. For those seeking to embark on this adventure or simply gain more insight into marine craftsmanship, Sven’s wisdom is invaluable.Sven Yrvind, a renowned yacht designer and sailor, shares valuable insights on creating flanges around bulkhead hatches for canvas protection in this enlightening video. By following his expert guidance, boat enthusiasts can ensure their living areas remain secure while allowing unhindered access through the hatches.Step 1: Starting with the Flange
Sven begins by explaining that working on flanges vertically and horizontally is significantly easier than doing so in a flat position. To simplify the process further, he divides the task into two or three steps as suggested by fellow expert “for for.” This approach not only makes it more manageable but also allows for greater precision in crafting each component.Step 2: Applying Glue and Securing
Sven proceeds to apply glue along one edge of the flange, ensuring a secure bond when clamped into place. He emphasizes that this stage is crucial for maintaining the structural integrity of the flange, which in turn safeguards the living area beneath the canvas when hatches are open.Step 3: Allowing Time to Dry
After securely attaching the first portion of the flange, Sven allows ample time for it to dry before moving forward with additional steps. This patience and precision are key aspects of his successful boatbuilding methods.Step 4: Finishing Touches
Once the flange is fully dried, Sven removes the clamps carefully, ensuring no damage occurs during this process. He then moves on to attaching four more pieces onto these main frames, completing two pairs of flanges for the bulkhead hatches.The Final Touches
While two flanges form the primary support structure around the hatches, Sven mentions there are two additional pieces required at each end to ensure comprehensive protection. This attention to detail highlights his commitment to producing a durable and reliable design. “Sailing is about finding your path, whether it’s across an ocean or within yourself.” – Sven Yrvind In conclusion, making flanges around bulkhead hatches may seem complex at first glance, but by following Sven Yrvind’s meticulous process, enthusiasts can achieve professional-level results. Remember that the journey of boatbuilding is as rewarding as reaching your destination; it tests one’s patience and dedication. For those seeking to embark on this adventure or simply gain more insight into marine craftsmanship, Sven’s wisdom is invaluable.Making Flanges Around Bulkhead Hatches for Canvas
Sven Yrvind, a renowned yacht designer and sailor, shares valuable insights on creating flanges around bulkhead hatches for canvas protection in this enlightening video. By following his expert guidance, boat enthusiasts can ensure their living areas remain secure while allowing unhindered access through the hatches.Step 1: Starting with the Flange
Sven begins by explaining that working on flanges vertically and horizontally is significantly easier than doing so in a flat position. To simplify the process further, he divides the task into two or three steps as suggested by fellow expert “for for.” This approach not only makes it more manageable but also allows for greater precision in crafting each component.Step 2: Applying Glue and Securing
Sven proceeds to apply glue along one edge of the flange, ensuring a secure bond when clamped into place. He emphasizes that this stage is crucial for maintaining the structural integrity of the flange, which in turn safeguards the living area beneath the canvas when hatches are open.Step 3: Allowing Time to Dry
After securely attaching the first portion of the flange, Sven allows ample time for it to dry before moving forward with additional steps. This patience and precision are key aspects of his successful boatbuilding methods.Step 4: Finishing Touches
Once the flange is fully dried, Sven removes the clamps carefully, ensuring no damage occurs during this process. He then moves on to attaching four more pieces onto these main frames, completing two pairs of flanges for the bulkhead hatches.The Final Touches
While two flanges form the primary support structure around the hatches, Sven mentions there are two additional pieces required at each end to ensure comprehensive protection. This attention to detail highlights his commitment to producing a durable and reliable design. “Sailing is about finding your path, whether it’s across an ocean or within yourself.” – Sven Yrvind In conclusion, making flanges around bulkhead hatches may seem complex at first glance, but by following Sven Yrvind’s meticulous process, enthusiasts can achieve professional-level results. Remember that the journey of boatbuilding is as rewarding as reaching your destination; it tests one’s patience and dedication. For those seeking to embark on this adventure or simply gain more insight into marine craftsmanship, Sven’s wisdom is invaluable.After securely attaching the first portion of the flange, Sven allows ample time for it to dry before moving forward with additional steps. This patience and precision are key aspects of his successful boatbuilding methods.Step 4: Finishing Touches
Once the flange is fully dried, Sven removes the clamps carefully, ensuring no damage occurs during this process. He then moves on to attaching four more pieces onto these main frames, completing two pairs of flanges for the bulkhead hatches.The Final Touches
While two flanges form the primary support structure around the hatches, Sven mentions there are two additional pieces required at each end to ensure comprehensive protection. This attention to detail highlights his commitment to producing a durable and reliable design. “Sailing is about finding your path, whether it’s across an ocean or within yourself.” – Sven Yrvind In conclusion, making flanges around bulkhead hatches may seem complex at first glance, but by following Sven Yrvind’s meticulous process, enthusiasts can achieve professional-level results. Remember that the journey of boatbuilding is as rewarding as reaching your destination; it tests one’s patience and dedication. For those seeking to embark on this adventure or simply gain more insight into marine craftsmanship, Sven’s wisdom is invaluable.Sven proceeds to apply glue along one edge of the flange, ensuring a secure bond when clamped into place. He emphasizes that this stage is crucial for maintaining the structural integrity of the flange, which in turn safeguards the living area beneath the canvas when hatches are open.Step 3: Allowing Time to Dry
After securely attaching the first portion of the flange, Sven allows ample time for it to dry before moving forward with additional steps. This patience and precision are key aspects of his successful boatbuilding methods.Step 4: Finishing Touches
Once the flange is fully dried, Sven removes the clamps carefully, ensuring no damage occurs during this process. He then moves on to attaching four more pieces onto these main frames, completing two pairs of flanges for the bulkhead hatches.The Final Touches
While two flanges form the primary support structure around the hatches, Sven mentions there are two additional pieces required at each end to ensure comprehensive protection. This attention to detail highlights his commitment to producing a durable and reliable design. “Sailing is about finding your path, whether it’s across an ocean or within yourself.” – Sven Yrvind In conclusion, making flanges around bulkhead hatches may seem complex at first glance, but by following Sven Yrvind’s meticulous process, enthusiasts can achieve professional-level results. Remember that the journey of boatbuilding is as rewarding as reaching your destination; it tests one’s patience and dedication. For those seeking to embark on this adventure or simply gain more insight into marine craftsmanship, Sven’s wisdom is invaluable.Sven begins by explaining that working on flanges vertically and horizontally is significantly easier than doing so in a flat position. To simplify the process further, he divides the task into two or three steps as suggested by fellow expert “for for.” This approach not only makes it more manageable but also allows for greater precision in crafting each component.Step 2: Applying Glue and Securing
Sven proceeds to apply glue along one edge of the flange, ensuring a secure bond when clamped into place. He emphasizes that this stage is crucial for maintaining the structural integrity of the flange, which in turn safeguards the living area beneath the canvas when hatches are open.Step 3: Allowing Time to Dry
After securely attaching the first portion of the flange, Sven allows ample time for it to dry before moving forward with additional steps. This patience and precision are key aspects of his successful boatbuilding methods.Step 4: Finishing Touches
Once the flange is fully dried, Sven removes the clamps carefully, ensuring no damage occurs during this process. He then moves on to attaching four more pieces onto these main frames, completing two pairs of flanges for the bulkhead hatches.The Final Touches
While two flanges form the primary support structure around the hatches, Sven mentions there are two additional pieces required at each end to ensure comprehensive protection. This attention to detail highlights his commitment to producing a durable and reliable design. “Sailing is about finding your path, whether it’s across an ocean or within yourself.” – Sven Yrvind In conclusion, making flanges around bulkhead hatches may seem complex at first glance, but by following Sven Yrvind’s meticulous process, enthusiasts can achieve professional-level results. Remember that the journey of boatbuilding is as rewarding as reaching your destination; it tests one’s patience and dedication. For those seeking to embark on this adventure or simply gain more insight into marine craftsmanship, Sven’s wisdom is invaluable.Sven Yrvind, a renowned yacht designer and sailor, shares valuable insights on creating flanges around bulkhead hatches for canvas protection in this enlightening video. By following his expert guidance, boat enthusiasts can ensure their living areas remain secure while allowing unhindered access through the hatches.Step 1: Starting with the Flange
Sven begins by explaining that working on flanges vertically and horizontally is significantly easier than doing so in a flat position. To simplify the process further, he divides the task into two or three steps as suggested by fellow expert “for for.” This approach not only makes it more manageable but also allows for greater precision in crafting each component.Step 2: Applying Glue and Securing
Sven proceeds to apply glue along one edge of the flange, ensuring a secure bond when clamped into place. He emphasizes that this stage is crucial for maintaining the structural integrity of the flange, which in turn safeguards the living area beneath the canvas when hatches are open.Step 3: Allowing Time to Dry
After securely attaching the first portion of the flange, Sven allows ample time for it to dry before moving forward with additional steps. This patience and precision are key aspects of his successful boatbuilding methods.Step 4: Finishing Touches
Once the flange is fully dried, Sven removes the clamps carefully, ensuring no damage occurs during this process. He then moves on to attaching four more pieces onto these main frames, completing two pairs of flanges for the bulkhead hatches.The Final Touches
While two flanges form the primary support structure around the hatches, Sven mentions there are two additional pieces required at each end to ensure comprehensive protection. This attention to detail highlights his commitment to producing a durable and reliable design. “Sailing is about finding your path, whether it’s across an ocean or within yourself.” – Sven Yrvind In conclusion, making flanges around bulkhead hatches may seem complex at first glance, but by following Sven Yrvind’s meticulous process, enthusiasts can achieve professional-level results. Remember that the journey of boatbuilding is as rewarding as reaching your destination; it tests one’s patience and dedication. For those seeking to embark on this adventure or simply gain more insight into marine craftsmanship, Sven’s wisdom is invaluable.Making Flanges Around Bulkhead Hatches for Canvas
Sven Yrvind, a renowned yacht designer and sailor, shares valuable insights on creating flanges around bulkhead hatches for canvas protection in this enlightening video. By following his expert guidance, boat enthusiasts can ensure their living areas remain secure while allowing unhindered access through the hatches.Step 1: Starting with the Flange
Sven begins by explaining that working on flanges vertically and horizontally is significantly easier than doing so in a flat position. To simplify the process further, he divides the task into two or three steps as suggested by fellow expert “for for.” This approach not only makes it more manageable but also allows for greater precision in crafting each component.Step 2: Applying Glue and Securing
Sven proceeds to apply glue along one edge of the flange, ensuring a secure bond when clamped into place. He emphasizes that this stage is crucial for maintaining the structural integrity of the flange, which in turn safeguards the living area beneath the canvas when hatches are open.Step 3: Allowing Time to Dry
After securely attaching the first portion of the flange, Sven allows ample time for it to dry before moving forward with additional steps. This patience and precision are key aspects of his successful boatbuilding methods.Step 4: Finishing Touches
Once the flange is fully dried, Sven removes the clamps carefully, ensuring no damage occurs during this process. He then moves on to attaching four more pieces onto these main frames, completing two pairs of flanges for the bulkhead hatches.The Final Touches
While two flanges form the primary support structure around the hatches, Sven mentions there are two additional pieces required at each end to ensure comprehensive protection. This attention to detail highlights his commitment to producing a durable and reliable design. “Sailing is about finding your path, whether it’s across an ocean or within yourself.” – Sven Yrvind In conclusion, making flanges around bulkhead hatches may seem complex at first glance, but by following Sven Yrvind’s meticulous process, enthusiasts can achieve professional-level results. Remember that the journey of boatbuilding is as rewarding as reaching your destination; it tests one’s patience and dedication. For those seeking to embark on this adventure or simply gain more insight into marine craftsmanship, Sven’s wisdom is invaluable.Once the flange is fully dried, Sven removes the clamps carefully, ensuring no damage occurs during this process. He then moves on to attaching four more pieces onto these main frames, completing two pairs of flanges for the bulkhead hatches.The Final Touches
While two flanges form the primary support structure around the hatches, Sven mentions there are two additional pieces required at each end to ensure comprehensive protection. This attention to detail highlights his commitment to producing a durable and reliable design. “Sailing is about finding your path, whether it’s across an ocean or within yourself.” – Sven Yrvind In conclusion, making flanges around bulkhead hatches may seem complex at first glance, but by following Sven Yrvind’s meticulous process, enthusiasts can achieve professional-level results. Remember that the journey of boatbuilding is as rewarding as reaching your destination; it tests one’s patience and dedication. For those seeking to embark on this adventure or simply gain more insight into marine craftsmanship, Sven’s wisdom is invaluable.After securely attaching the first portion of the flange, Sven allows ample time for it to dry before moving forward with additional steps. This patience and precision are key aspects of his successful boatbuilding methods.Step 4: Finishing Touches
Once the flange is fully dried, Sven removes the clamps carefully, ensuring no damage occurs during this process. He then moves on to attaching four more pieces onto these main frames, completing two pairs of flanges for the bulkhead hatches.The Final Touches
While two flanges form the primary support structure around the hatches, Sven mentions there are two additional pieces required at each end to ensure comprehensive protection. This attention to detail highlights his commitment to producing a durable and reliable design. “Sailing is about finding your path, whether it’s across an ocean or within yourself.” – Sven Yrvind In conclusion, making flanges around bulkhead hatches may seem complex at first glance, but by following Sven Yrvind’s meticulous process, enthusiasts can achieve professional-level results. Remember that the journey of boatbuilding is as rewarding as reaching your destination; it tests one’s patience and dedication. For those seeking to embark on this adventure or simply gain more insight into marine craftsmanship, Sven’s wisdom is invaluable.Sven proceeds to apply glue along one edge of the flange, ensuring a secure bond when clamped into place. He emphasizes that this stage is crucial for maintaining the structural integrity of the flange, which in turn safeguards the living area beneath the canvas when hatches are open.Step 3: Allowing Time to Dry
After securely attaching the first portion of the flange, Sven allows ample time for it to dry before moving forward with additional steps. This patience and precision are key aspects of his successful boatbuilding methods.Step 4: Finishing Touches
Once the flange is fully dried, Sven removes the clamps carefully, ensuring no damage occurs during this process. He then moves on to attaching four more pieces onto these main frames, completing two pairs of flanges for the bulkhead hatches.The Final Touches
While two flanges form the primary support structure around the hatches, Sven mentions there are two additional pieces required at each end to ensure comprehensive protection. This attention to detail highlights his commitment to producing a durable and reliable design. “Sailing is about finding your path, whether it’s across an ocean or within yourself.” – Sven Yrvind In conclusion, making flanges around bulkhead hatches may seem complex at first glance, but by following Sven Yrvind’s meticulous process, enthusiasts can achieve professional-level results. Remember that the journey of boatbuilding is as rewarding as reaching your destination; it tests one’s patience and dedication. For those seeking to embark on this adventure or simply gain more insight into marine craftsmanship, Sven’s wisdom is invaluable.Sven begins by explaining that working on flanges vertically and horizontally is significantly easier than doing so in a flat position. To simplify the process further, he divides the task into two or three steps as suggested by fellow expert “for for.” This approach not only makes it more manageable but also allows for greater precision in crafting each component.Step 2: Applying Glue and Securing
Sven proceeds to apply glue along one edge of the flange, ensuring a secure bond when clamped into place. He emphasizes that this stage is crucial for maintaining the structural integrity of the flange, which in turn safeguards the living area beneath the canvas when hatches are open.Step 3: Allowing Time to Dry
After securely attaching the first portion of the flange, Sven allows ample time for it to dry before moving forward with additional steps. This patience and precision are key aspects of his successful boatbuilding methods.Step 4: Finishing Touches
Once the flange is fully dried, Sven removes the clamps carefully, ensuring no damage occurs during this process. He then moves on to attaching four more pieces onto these main frames, completing two pairs of flanges for the bulkhead hatches.The Final Touches
While two flanges form the primary support structure around the hatches, Sven mentions there are two additional pieces required at each end to ensure comprehensive protection. This attention to detail highlights his commitment to producing a durable and reliable design. “Sailing is about finding your path, whether it’s across an ocean or within yourself.” – Sven Yrvind In conclusion, making flanges around bulkhead hatches may seem complex at first glance, but by following Sven Yrvind’s meticulous process, enthusiasts can achieve professional-level results. Remember that the journey of boatbuilding is as rewarding as reaching your destination; it tests one’s patience and dedication. For those seeking to embark on this adventure or simply gain more insight into marine craftsmanship, Sven’s wisdom is invaluable.Sven Yrvind, a renowned yacht designer and sailor, shares valuable insights on creating flanges around bulkhead hatches for canvas protection in this enlightening video. By following his expert guidance, boat enthusiasts can ensure their living areas remain secure while allowing unhindered access through the hatches.Step 1: Starting with the Flange
Sven begins by explaining that working on flanges vertically and horizontally is significantly easier than doing so in a flat position. To simplify the process further, he divides the task into two or three steps as suggested by fellow expert “for for.” This approach not only makes it more manageable but also allows for greater precision in crafting each component.Step 2: Applying Glue and Securing
Sven proceeds to apply glue along one edge of the flange, ensuring a secure bond when clamped into place. He emphasizes that this stage is crucial for maintaining the structural integrity of the flange, which in turn safeguards the living area beneath the canvas when hatches are open.Step 3: Allowing Time to Dry
After securely attaching the first portion of the flange, Sven allows ample time for it to dry before moving forward with additional steps. This patience and precision are key aspects of his successful boatbuilding methods.Step 4: Finishing Touches
Once the flange is fully dried, Sven removes the clamps carefully, ensuring no damage occurs during this process. He then moves on to attaching four more pieces onto these main frames, completing two pairs of flanges for the bulkhead hatches.The Final Touches
While two flanges form the primary support structure around the hatches, Sven mentions there are two additional pieces required at each end to ensure comprehensive protection. This attention to detail highlights his commitment to producing a durable and reliable design. “Sailing is about finding your path, whether it’s across an ocean or within yourself.” – Sven Yrvind In conclusion, making flanges around bulkhead hatches may seem complex at first glance, but by following Sven Yrvind’s meticulous process, enthusiasts can achieve professional-level results. Remember that the journey of boatbuilding is as rewarding as reaching your destination; it tests one’s patience and dedication. For those seeking to embark on this adventure or simply gain more insight into marine craftsmanship, Sven’s wisdom is invaluable.Making Flanges Around Bulkhead Hatches for Canvas
Sven Yrvind, a renowned yacht designer and sailor, shares valuable insights on creating flanges around bulkhead hatches for canvas protection in this enlightening video. By following his expert guidance, boat enthusiasts can ensure their living areas remain secure while allowing unhindered access through the hatches.Step 1: Starting with the Flange
Sven begins by explaining that working on flanges vertically and horizontally is significantly easier than doing so in a flat position. To simplify the process further, he divides the task into two or three steps as suggested by fellow expert “for for.” This approach not only makes it more manageable but also allows for greater precision in crafting each component.Step 2: Applying Glue and Securing
Sven proceeds to apply glue along one edge of the flange, ensuring a secure bond when clamped into place. He emphasizes that this stage is crucial for maintaining the structural integrity of the flange, which in turn safeguards the living area beneath the canvas when hatches are open.Step 3: Allowing Time to Dry
After securely attaching the first portion of the flange, Sven allows ample time for it to dry before moving forward with additional steps. This patience and precision are key aspects of his successful boatbuilding methods.Step 4: Finishing Touches
Once the flange is fully dried, Sven removes the clamps carefully, ensuring no damage occurs during this process. He then moves on to attaching four more pieces onto these main frames, completing two pairs of flanges for the bulkhead hatches.The Final Touches
While two flanges form the primary support structure around the hatches, Sven mentions there are two additional pieces required at each end to ensure comprehensive protection. This attention to detail highlights his commitment to producing a durable and reliable design. “Sailing is about finding your path, whether it’s across an ocean or within yourself.” – Sven Yrvind In conclusion, making flanges around bulkhead hatches may seem complex at first glance, but by following Sven Yrvind’s meticulous process, enthusiasts can achieve professional-level results. Remember that the journey of boatbuilding is as rewarding as reaching your destination; it tests one’s patience and dedication. For those seeking to embark on this adventure or simply gain more insight into marine craftsmanship, Sven’s wisdom is invaluable.Sven proceeds to apply glue along one edge of the flange, ensuring a secure bond when clamped into place. He emphasizes that this stage is crucial for maintaining the structural integrity of the flange, which in turn safeguards the living area beneath the canvas when hatches are open.Step 3: Allowing Time to Dry
After securely attaching the first portion of the flange, Sven allows ample time for it to dry before moving forward with additional steps. This patience and precision are key aspects of his successful boatbuilding methods.Step 4: Finishing Touches
Once the flange is fully dried, Sven removes the clamps carefully, ensuring no damage occurs during this process. He then moves on to attaching four more pieces onto these main frames, completing two pairs of flanges for the bulkhead hatches.The Final Touches
While two flanges form the primary support structure around the hatches, Sven mentions there are two additional pieces required at each end to ensure comprehensive protection. This attention to detail highlights his commitment to producing a durable and reliable design. “Sailing is about finding your path, whether it’s across an ocean or within yourself.” – Sven Yrvind In conclusion, making flanges around bulkhead hatches may seem complex at first glance, but by following Sven Yrvind’s meticulous process, enthusiasts can achieve professional-level results. Remember that the journey of boatbuilding is as rewarding as reaching your destination; it tests one’s patience and dedication. For those seeking to embark on this adventure or simply gain more insight into marine craftsmanship, Sven’s wisdom is invaluable.Once the flange is fully dried, Sven removes the clamps carefully, ensuring no damage occurs during this process. He then moves on to attaching four more pieces onto these main frames, completing two pairs of flanges for the bulkhead hatches.The Final Touches
While two flanges form the primary support structure around the hatches, Sven mentions there are two additional pieces required at each end to ensure comprehensive protection. This attention to detail highlights his commitment to producing a durable and reliable design. “Sailing is about finding your path, whether it’s across an ocean or within yourself.” – Sven Yrvind In conclusion, making flanges around bulkhead hatches may seem complex at first glance, but by following Sven Yrvind’s meticulous process, enthusiasts can achieve professional-level results. Remember that the journey of boatbuilding is as rewarding as reaching your destination; it tests one’s patience and dedication. For those seeking to embark on this adventure or simply gain more insight into marine craftsmanship, Sven’s wisdom is invaluable.Sven Yrvind, a renowned yacht designer and sailor, shares valuable insights on creating flanges around bulkhead hatches for canvas protection in this enlightening video. By following his expert guidance, boat enthusiasts can ensure their living areas remain secure while allowing unhindered access through the hatches.Step 1: Starting with the Flange
Sven begins by explaining that working on flanges vertically and horizontally is significantly easier than doing so in a flat position. To simplify the process further, he divides the task into two or three steps as suggested by fellow expert “for for.” This approach not only makes it more manageable but also allows for greater precision in crafting each component.Step 2: Applying Glue and Securing
Sven proceeds to apply glue along one edge of the flange, ensuring a secure bond when clamped into place. He emphasizes that this stage is crucial for maintaining the structural integrity of the flange, which in turn safeguards the living area beneath the canvas when hatches are open.Step 3: Allowing Time to Dry
After securely attaching the first portion of the flange, Sven allows ample time for it to dry before moving forward with additional steps. This patience and precision are key aspects of his successful boatbuilding methods.Step 4: Finishing Touches
Once the flange is fully dried, Sven removes the clamps carefully, ensuring no damage occurs during this process. He then moves on to attaching four more pieces onto these main frames, completing two pairs of flanges for the bulkhead hatches.The Final Touches
While two flanges form the primary support structure around the hatches, Sven mentions there are two additional pieces required at each end to ensure comprehensive protection. This attention to detail highlights his commitment to producing a durable and reliable design. “Sailing is about finding your path, whether it’s across an ocean or within yourself.” – Sven Yrvind In conclusion, making flanges around bulkhead hatches may seem complex at first glance, but by following Sven Yrvind’s meticulous process, enthusiasts can achieve professional-level results. Remember that the journey of boatbuilding is as rewarding as reaching your destination; it tests one’s patience and dedication. For those seeking to embark on this adventure or simply gain more insight into marine craftsmanship, Sven’s wisdom is invaluable.Making Flanges Around Bulkhead Hatches for Canvas
Sven Yrvind, a renowned yacht designer and sailor, shares valuable insights on creating flanges around bulkhead hatches for canvas protection in this enlightening video. By following his expert guidance, boat enthusiasts can ensure their living areas remain secure while allowing unhindered access through the hatches.Step 1: Starting with the Flange
Sven begins by explaining that working on flanges vertically and horizontally is significantly easier than doing so in a flat position. To simplify the process further, he divides the task into two or three steps as suggested by fellow expert “for for.” This approach not only makes it more manageable but also allows for greater precision in crafting each component.Step 2: Applying Glue and Securing
Sven proceeds to apply glue along one edge of the flange, ensuring a secure bond when clamped into place. He emphasizes that this stage is crucial for maintaining the structural integrity of the flange, which in turn safeguards the living area beneath the canvas when hatches are open.Step 3: Allowing Time to Dry
After securely attaching the first portion of the flange, Sven allows ample time for it to dry before moving forward with additional steps. This patience and precision are key aspects of his successful boatbuilding methods.Step 4: Finishing Touches
Once the flange is fully dried, Sven removes the clamps carefully, ensuring no damage occurs during this process. He then moves on to attaching four more pieces onto these main frames, completing two pairs of flanges for the bulkhead hatches.The Final Touches
While two flanges form the primary support structure around the hatches, Sven mentions there are two additional pieces required at each end to ensure comprehensive protection. This attention to detail highlights his commitment to producing a durable and reliable design. “Sailing is about finding your path, whether it’s across an ocean or within yourself.” – Sven Yrvind In conclusion, making flanges around bulkhead hatches may seem complex at first glance, but by following Sven Yrvind’s meticulous process, enthusiasts can achieve professional-level results. Remember that the journey of boatbuilding is as rewarding as reaching your destination; it tests one’s patience and dedication. For those seeking to embark on this adventure or simply gain more insight into marine craftsmanship, Sven’s wisdom is invaluable.After securely attaching the first portion of the flange, Sven allows ample time for it to dry before moving forward with additional steps. This patience and precision are key aspects of his successful boatbuilding methods.Step 4: Finishing Touches
Once the flange is fully dried, Sven removes the clamps carefully, ensuring no damage occurs during this process. He then moves on to attaching four more pieces onto these main frames, completing two pairs of flanges for the bulkhead hatches.The Final Touches
While two flanges form the primary support structure around the hatches, Sven mentions there are two additional pieces required at each end to ensure comprehensive protection. This attention to detail highlights his commitment to producing a durable and reliable design. “Sailing is about finding your path, whether it’s across an ocean or within yourself.” – Sven Yrvind In conclusion, making flanges around bulkhead hatches may seem complex at first glance, but by following Sven Yrvind’s meticulous process, enthusiasts can achieve professional-level results. Remember that the journey of boatbuilding is as rewarding as reaching your destination; it tests one’s patience and dedication. For those seeking to embark on this adventure or simply gain more insight into marine craftsmanship, Sven’s wisdom is invaluable.Sven Yrvind, a renowned yacht designer and sailor, shares valuable insights on creating flanges around bulkhead hatches for canvas protection in this enlightening video. By following his expert guidance, boat enthusiasts can ensure their living areas remain secure while allowing unhindered access through the hatches.Step 1: Starting with the Flange
Sven begins by explaining that working on flanges vertically and horizontally is significantly easier than doing so in a flat position. To simplify the process further, he divides the task into two or three steps as suggested by fellow expert “for for.” This approach not only makes it more manageable but also allows for greater precision in crafting each component.Step 2: Applying Glue and Securing
Sven proceeds to apply glue along one edge of the flange, ensuring a secure bond when clamped into place. He emphasizes that this stage is crucial for maintaining the structural integrity of the flange, which in turn safeguards the living area beneath the canvas when hatches are open.Step 3: Allowing Time to Dry
After securely attaching the first portion of the flange, Sven allows ample time for it to dry before moving forward with additional steps. This patience and precision are key aspects of his successful boatbuilding methods.Step 4: Finishing Touches
Once the flange is fully dried, Sven removes the clamps carefully, ensuring no damage occurs during this process. He then moves on to attaching four more pieces onto these main frames, completing two pairs of flanges for the bulkhead hatches.The Final Touches
While two flanges form the primary support structure around the hatches, Sven mentions there are two additional pieces required at each end to ensure comprehensive protection. This attention to detail highlights his commitment to producing a durable and reliable design. “Sailing is about finding your path, whether it’s across an ocean or within yourself.” – Sven Yrvind In conclusion, making flanges around bulkhead hatches may seem complex at first glance, but by following Sven Yrvind’s meticulous process, enthusiasts can achieve professional-level results. Remember that the journey of boatbuilding is as rewarding as reaching your destination; it tests one’s patience and dedication. For those seeking to embark on this adventure or simply gain more insight into marine craftsmanship, Sven’s wisdom is invaluable.Making Flanges Around Bulkhead Hatches for Canvas
Sven Yrvind, a renowned yacht designer and sailor, shares valuable insights on creating flanges around bulkhead hatches for canvas protection in this enlightening video. By following his expert guidance, boat enthusiasts can ensure their living areas remain secure while allowing unhindered access through the hatches.Step 1: Starting with the Flange
Sven begins by explaining that working on flanges vertically and horizontally is significantly easier than doing so in a flat position. To simplify the process further, he divides the task into two or three steps as suggested by fellow expert “for for.” This approach not only makes it more manageable but also allows for greater precision in crafting each component.Step 2: Applying Glue and Securing
Sven proceeds to apply glue along one edge of the flange, ensuring a secure bond when clamped into place. He emphasizes that this stage is crucial for maintaining the structural integrity of the flange, which in turn safeguards the living area beneath the canvas when hatches are open.Step 3: Allowing Time to Dry
After securely attaching the first portion of the flange, Sven allows ample time for it to dry before moving forward with additional steps. This patience and precision are key aspects of his successful boatbuilding methods.Step 4: Finishing Touches
Once the flange is fully dried, Sven removes the clamps carefully, ensuring no damage occurs during this process. He then moves on to attaching four more pieces onto these main frames, completing two pairs of flanges for the bulkhead hatches.The Final Touches
While two flanges form the primary support structure around the hatches, Sven mentions there are two additional pieces required at each end to ensure comprehensive protection. This attention to detail highlights his commitment to producing a durable and reliable design. “Sailing is about finding your path, whether it’s across an ocean or within yourself.” – Sven Yrvind In conclusion, making flanges around bulkhead hatches may seem complex at first glance, but by following Sven Yrvind’s meticulous process, enthusiasts can achieve professional-level results. Remember that the journey of boatbuilding is as rewarding as reaching your destination; it tests one’s patience and dedication. For those seeking to embark on this adventure or simply gain more insight into marine craftsmanship, Sven’s wisdom is invaluable.Sven proceeds to apply glue along one edge of the flange, ensuring a secure bond when clamped into place. He emphasizes that this stage is crucial for maintaining the structural integrity of the flange, which in turn safeguards the living area beneath the canvas when hatches are open.Step 3: Allowing Time to Dry
After securely attaching the first portion of the flange, Sven allows ample time for it to dry before moving forward with additional steps. This patience and precision are key aspects of his successful boatbuilding methods.Step 4: Finishing Touches
Once the flange is fully dried, Sven removes the clamps carefully, ensuring no damage occurs during this process. He then moves on to attaching four more pieces onto these main frames, completing two pairs of flanges for the bulkhead hatches.The Final Touches
While two flanges form the primary support structure around the hatches, Sven mentions there are two additional pieces required at each end to ensure comprehensive protection. This attention to detail highlights his commitment to producing a durable and reliable design. “Sailing is about finding your path, whether it’s across an ocean or within yourself.” – Sven Yrvind In conclusion, making flanges around bulkhead hatches may seem complex at first glance, but by following Sven Yrvind’s meticulous process, enthusiasts can achieve professional-level results. Remember that the journey of boatbuilding is as rewarding as reaching your destination; it tests one’s patience and dedication. For those seeking to embark on this adventure or simply gain more insight into marine craftsmanship, Sven’s wisdom is invaluable.Sven Yrvind, a renowned yacht designer and sailor, shares valuable insights on creating flanges around bulkhead hatches for canvas protection in this enlightening video. By following his expert guidance, boat enthusiasts can ensure their living areas remain secure while allowing unhindered access through the hatches.Step 1: Starting with the Flange
Sven begins by explaining that working on flanges vertically and horizontally is significantly easier than doing so in a flat position. To simplify the process further, he divides the task into two or three steps as suggested by fellow expert “for for.” This approach not only makes it more manageable but also allows for greater precision in crafting each component.Step 2: Applying Glue and Securing
Sven proceeds to apply glue along one edge of the flange, ensuring a secure bond when clamped into place. He emphasizes that this stage is crucial for maintaining the structural integrity of the flange, which in turn safeguards the living area beneath the canvas when hatches are open.Step 3: Allowing Time to Dry
After securely attaching the first portion of the flange, Sven allows ample time for it to dry before moving forward with additional steps. This patience and precision are key aspects of his successful boatbuilding methods.Step 4: Finishing Touches
Once the flange is fully dried, Sven removes the clamps carefully, ensuring no damage occurs during this process. He then moves on to attaching four more pieces onto these main frames, completing two pairs of flanges for the bulkhead hatches.The Final Touches
While two flanges form the primary support structure around the hatches, Sven mentions there are two additional pieces required at each end to ensure comprehensive protection. This attention to detail highlights his commitment to producing a durable and reliable design. “Sailing is about finding your path, whether it’s across an ocean or within yourself.” – Sven Yrvind In conclusion, making flanges around bulkhead hatches may seem complex at first glance, but by following Sven Yrvind’s meticulous process, enthusiasts can achieve professional-level results. Remember that the journey of boatbuilding is as rewarding as reaching your destination; it tests one’s patience and dedication. For those seeking to embark on this adventure or simply gain more insight into marine craftsmanship, Sven’s wisdom is invaluable.Making Flanges Around Bulkhead Hatches for Canvas
Sven Yrvind, a renowned yacht designer and sailor, shares valuable insights on creating flanges around bulkhead hatches for canvas protection in this enlightening video. By following his expert guidance, boat enthusiasts can ensure their living areas remain secure while allowing unhindered access through the hatches.Step 1: Starting with the Flange
Sven begins by explaining that working on flanges vertically and horizontally is significantly easier than doing so in a flat position. To simplify the process further, he divides the task into two or three steps as suggested by fellow expert “for for.” This approach not only makes it more manageable but also allows for greater precision in crafting each component.Step 2: Applying Glue and Securing
Sven proceeds to apply glue along one edge of the flange, ensuring a secure bond when clamped into place. He emphasizes that this stage is crucial for maintaining the structural integrity of the flange, which in turn safeguards the living area beneath the canvas when hatches are open.Step 3: Allowing Time to Dry
After securely attaching the first portion of the flange, Sven allows ample time for it to dry before moving forward with additional steps. This patience and precision are key aspects of his successful boatbuilding methods.Step 4: Finishing Touches
Once the flange is fully dried, Sven removes the clamps carefully, ensuring no damage occurs during this process. He then moves on to attaching four more pieces onto these main frames, completing two pairs of flanges for the bulkhead hatches.The Final Touches
While two flanges form the primary support structure around the hatches, Sven mentions there are two additional pieces required at each end to ensure comprehensive protection. This attention to detail highlights his commitment to producing a durable and reliable design. “Sailing is about finding your path, whether it’s across an ocean or within yourself.” – Sven Yrvind In conclusion, making flanges around bulkhead hatches may seem complex at first glance, but by following Sven Yrvind’s meticulous process, enthusiasts can achieve professional-level results. Remember that the journey of boatbuilding is as rewarding as reaching your destination; it tests one’s patience and dedication. For those seeking to embark on this adventure or simply gain more insight into marine craftsmanship, Sven’s wisdom is invaluable.Sven begins by explaining that working on flanges vertically and horizontally is significantly easier than doing so in a flat position. To simplify the process further, he divides the task into two or three steps as suggested by fellow expert “for for.” This approach not only makes it more manageable but also allows for greater precision in crafting each component.Step 2: Applying Glue and Securing
Sven proceeds to apply glue along one edge of the flange, ensuring a secure bond when clamped into place. He emphasizes that this stage is crucial for maintaining the structural integrity of the flange, which in turn safeguards the living area beneath the canvas when hatches are open.Step 3: Allowing Time to Dry
After securely attaching the first portion of the flange, Sven allows ample time for it to dry before moving forward with additional steps. This patience and precision are key aspects of his successful boatbuilding methods.Step 4: Finishing Touches
Once the flange is fully dried, Sven removes the clamps carefully, ensuring no damage occurs during this process. He then moves on to attaching four more pieces onto these main frames, completing two pairs of flanges for the bulkhead hatches.The Final Touches
While two flanges form the primary support structure around the hatches, Sven mentions there are two additional pieces required at each end to ensure comprehensive protection. This attention to detail highlights his commitment to producing a durable and reliable design. “Sailing is about finding your path, whether it’s across an ocean or within yourself.” – Sven Yrvind In conclusion, making flanges around bulkhead hatches may seem complex at first glance, but by following Sven Yrvind’s meticulous process, enthusiasts can achieve professional-level results. Remember that the journey of boatbuilding is as rewarding as reaching your destination; it tests one’s patience and dedication. For those seeking to embark on this adventure or simply gain more insight into marine craftsmanship, Sven’s wisdom is invaluable.Sven Yrvind, a renowned yacht designer and sailor, shares valuable insights on creating flanges around bulkhead hatches for canvas protection in this enlightening video. By following his expert guidance, boat enthusiasts can ensure their living areas remain secure while allowing unhindered access through the hatches.Step 1: Starting with the Flange
Sven begins by explaining that working on flanges vertically and horizontally is significantly easier than doing so in a flat position. To simplify the process further, he divides the task into two or three steps as suggested by fellow expert “for for.” This approach not only makes it more manageable but also allows for greater precision in crafting each component.Step 2: Applying Glue and Securing
Sven proceeds to apply glue along one edge of the flange, ensuring a secure bond when clamped into place. He emphasizes that this stage is crucial for maintaining the structural integrity of the flange, which in turn safeguards the living area beneath the canvas when hatches are open.Step 3: Allowing Time to Dry
After securely attaching the first portion of the flange, Sven allows ample time for it to dry before moving forward with additional steps. This patience and precision are key aspects of his successful boatbuilding methods.Step 4: Finishing Touches
Once the flange is fully dried, Sven removes the clamps carefully, ensuring no damage occurs during this process. He then moves on to attaching four more pieces onto these main frames, completing two pairs of flanges for the bulkhead hatches.The Final Touches
While two flanges form the primary support structure around the hatches, Sven mentions there are two additional pieces required at each end to ensure comprehensive protection. This attention to detail highlights his commitment to producing a durable and reliable design. “Sailing is about finding your path, whether it’s across an ocean or within yourself.” – Sven Yrvind In conclusion, making flanges around bulkhead hatches may seem complex at first glance, but by following Sven Yrvind’s meticulous process, enthusiasts can achieve professional-level results. Remember that the journey of boatbuilding is as rewarding as reaching your destination; it tests one’s patience and dedication. For those seeking to embark on this adventure or simply gain more insight into marine craftsmanship, Sven’s wisdom is invaluable.Making Flanges Around Bulkhead Hatches for Canvas
Sven Yrvind, a renowned yacht designer and sailor, shares valuable insights on creating flanges around bulkhead hatches for canvas protection in this enlightening video. By following his expert guidance, boat enthusiasts can ensure their living areas remain secure while allowing unhindered access through the hatches.Step 1: Starting with the Flange
Sven begins by explaining that working on flanges vertically and horizontally is significantly easier than doing so in a flat position. To simplify the process further, he divides the task into two or three steps as suggested by fellow expert “for for.” This approach not only makes it more manageable but also allows for greater precision in crafting each component.Step 2: Applying Glue and Securing
Sven proceeds to apply glue along one edge of the flange, ensuring a secure bond when clamped into place. He emphasizes that this stage is crucial for maintaining the structural integrity of the flange, which in turn safeguards the living area beneath the canvas when hatches are open.Step 3: Allowing Time to Dry
After securely attaching the first portion of the flange, Sven allows ample time for it to dry before moving forward with additional steps. This patience and precision are key aspects of his successful boatbuilding methods.Step 4: Finishing Touches
Once the flange is fully dried, Sven removes the clamps carefully, ensuring no damage occurs during this process. He then moves on to attaching four more pieces onto these main frames, completing two pairs of flanges for the bulkhead hatches.The Final Touches
While two flanges form the primary support structure around the hatches, Sven mentions there are two additional pieces required at each end to ensure comprehensive protection. This attention to detail highlights his commitment to producing a durable and reliable design. “Sailing is about finding your path, whether it’s across an ocean or within yourself.” – Sven Yrvind In conclusion, making flanges around bulkhead hatches may seem complex at first glance, but by following Sven Yrvind’s meticulous process, enthusiasts can achieve professional-level results. Remember that the journey of boatbuilding is as rewarding as reaching your destination; it tests one’s patience and dedication. For those seeking to embark on this adventure or simply gain more insight into marine craftsmanship, Sven’s wisdom is invaluable.Once the flange is fully dried, Sven removes the clamps carefully, ensuring no damage occurs during this process. He then moves on to attaching four more pieces onto these main frames, completing two pairs of flanges for the bulkhead hatches.The Final Touches
While two flanges form the primary support structure around the hatches, Sven mentions there are two additional pieces required at each end to ensure comprehensive protection. This attention to detail highlights his commitment to producing a durable and reliable design. “Sailing is about finding your path, whether it’s across an ocean or within yourself.” – Sven Yrvind In conclusion, making flanges around bulkhead hatches may seem complex at first glance, but by following Sven Yrvind’s meticulous process, enthusiasts can achieve professional-level results. Remember that the journey of boatbuilding is as rewarding as reaching your destination; it tests one’s patience and dedication. For those seeking to embark on this adventure or simply gain more insight into marine craftsmanship, Sven’s wisdom is invaluable.Sven begins by explaining that working on flanges vertically and horizontally is significantly easier than doing so in a flat position. To simplify the process further, he divides the task into two or three steps as suggested by fellow expert “for for.” This approach not only makes it more manageable but also allows for greater precision in crafting each component.Step 2: Applying Glue and Securing
Sven proceeds to apply glue along one edge of the flange, ensuring a secure bond when clamped into place. He emphasizes that this stage is crucial for maintaining the structural integrity of the flange, which in turn safeguards the living area beneath the canvas when hatches are open.Step 3: Allowing Time to Dry
After securely attaching the first portion of the flange, Sven allows ample time for it to dry before moving forward with additional steps. This patience and precision are key aspects of his successful boatbuilding methods.Step 4: Finishing Touches
Once the flange is fully dried, Sven removes the clamps carefully, ensuring no damage occurs during this process. He then moves on to attaching four more pieces onto these main frames, completing two pairs of flanges for the bulkhead hatches.The Final Touches
While two flanges form the primary support structure around the hatches, Sven mentions there are two additional pieces required at each end to ensure comprehensive protection. This attention to detail highlights his commitment to producing a durable and reliable design. “Sailing is about finding your path, whether it’s across an ocean or within yourself.” – Sven Yrvind In conclusion, making flanges around bulkhead hatches may seem complex at first glance, but by following Sven Yrvind’s meticulous process, enthusiasts can achieve professional-level results. Remember that the journey of boatbuilding is as rewarding as reaching your destination; it tests one’s patience and dedication. For those seeking to embark on this adventure or simply gain more insight into marine craftsmanship, Sven’s wisdom is invaluable.Sven Yrvind, a renowned yacht designer and sailor, shares valuable insights on creating flanges around bulkhead hatches for canvas protection in this enlightening video. By following his expert guidance, boat enthusiasts can ensure their living areas remain secure while allowing unhindered access through the hatches.Step 1: Starting with the Flange
Sven begins by explaining that working on flanges vertically and horizontally is significantly easier than doing so in a flat position. To simplify the process further, he divides the task into two or three steps as suggested by fellow expert “for for.” This approach not only makes it more manageable but also allows for greater precision in crafting each component.Step 2: Applying Glue and Securing
Sven proceeds to apply glue along one edge of the flange, ensuring a secure bond when clamped into place. He emphasizes that this stage is crucial for maintaining the structural integrity of the flange, which in turn safeguards the living area beneath the canvas when hatches are open.Step 3: Allowing Time to Dry
After securely attaching the first portion of the flange, Sven allows ample time for it to dry before moving forward with additional steps. This patience and precision are key aspects of his successful boatbuilding methods.Step 4: Finishing Touches
Once the flange is fully dried, Sven removes the clamps carefully, ensuring no damage occurs during this process. He then moves on to attaching four more pieces onto these main frames, completing two pairs of flanges for the bulkhead hatches.The Final Touches
While two flanges form the primary support structure around the hatches, Sven mentions there are two additional pieces required at each end to ensure comprehensive protection. This attention to detail highlights his commitment to producing a durable and reliable design. “Sailing is about finding your path, whether it’s across an ocean or within yourself.” – Sven Yrvind In conclusion, making flanges around bulkhead hatches may seem complex at first glance, but by following Sven Yrvind’s meticulous process, enthusiasts can achieve professional-level results. Remember that the journey of boatbuilding is as rewarding as reaching your destination; it tests one’s patience and dedication. For those seeking to embark on this adventure or simply gain more insight into marine craftsmanship, Sven’s wisdom is invaluable.Making Flanges Around Bulkhead Hatches for Canvas
Sven Yrvind, a renowned yacht designer and sailor, shares valuable insights on creating flanges around bulkhead hatches for canvas protection in this enlightening video. By following his expert guidance, boat enthusiasts can ensure their living areas remain secure while allowing unhindered access through the hatches.Step 1: Starting with the Flange
Sven begins by explaining that working on flanges vertically and horizontally is significantly easier than doing so in a flat position. To simplify the process further, he divides the task into two or three steps as suggested by fellow expert “for for.” This approach not only makes it more manageable but also allows for greater precision in crafting each component.Step 2: Applying Glue and Securing
Sven proceeds to apply glue along one edge of the flange, ensuring a secure bond when clamped into place. He emphasizes that this stage is crucial for maintaining the structural integrity of the flange, which in turn safeguards the living area beneath the canvas when hatches are open.Step 3: Allowing Time to Dry
After securely attaching the first portion of the flange, Sven allows ample time for it to dry before moving forward with additional steps. This patience and precision are key aspects of his successful boatbuilding methods.Step 4: Finishing Touches
Once the flange is fully dried, Sven removes the clamps carefully, ensuring no damage occurs during this process. He then moves on to attaching four more pieces onto these main frames, completing two pairs of flanges for the bulkhead hatches.The Final Touches
While two flanges form the primary support structure around the hatches, Sven mentions there are two additional pieces required at each end to ensure comprehensive protection. This attention to detail highlights his commitment to producing a durable and reliable design. “Sailing is about finding your path, whether it’s across an ocean or within yourself.” – Sven Yrvind In conclusion, making flanges around bulkhead hatches may seem complex at first glance, but by following Sven Yrvind’s meticulous process, enthusiasts can achieve professional-level results. Remember that the journey of boatbuilding is as rewarding as reaching your destination; it tests one’s patience and dedication. For those seeking to embark on this adventure or simply gain more insight into marine craftsmanship, Sven’s wisdom is invaluable.After securely attaching the first portion of the flange, Sven allows ample time for it to dry before moving forward with additional steps. This patience and precision are key aspects of his successful boatbuilding methods.Step 4: Finishing Touches
Once the flange is fully dried, Sven removes the clamps carefully, ensuring no damage occurs during this process. He then moves on to attaching four more pieces onto these main frames, completing two pairs of flanges for the bulkhead hatches.The Final Touches
While two flanges form the primary support structure around the hatches, Sven mentions there are two additional pieces required at each end to ensure comprehensive protection. This attention to detail highlights his commitment to producing a durable and reliable design. “Sailing is about finding your path, whether it’s across an ocean or within yourself.” – Sven Yrvind In conclusion, making flanges around bulkhead hatches may seem complex at first glance, but by following Sven Yrvind’s meticulous process, enthusiasts can achieve professional-level results. Remember that the journey of boatbuilding is as rewarding as reaching your destination; it tests one’s patience and dedication. For those seeking to embark on this adventure or simply gain more insight into marine craftsmanship, Sven’s wisdom is invaluable.Sven begins by explaining that working on flanges vertically and horizontally is significantly easier than doing so in a flat position. To simplify the process further, he divides the task into two or three steps as suggested by fellow expert “for for.” This approach not only makes it more manageable but also allows for greater precision in crafting each component.Step 2: Applying Glue and Securing
Sven proceeds to apply glue along one edge of the flange, ensuring a secure bond when clamped into place. He emphasizes that this stage is crucial for maintaining the structural integrity of the flange, which in turn safeguards the living area beneath the canvas when hatches are open.Step 3: Allowing Time to Dry
After securely attaching the first portion of the flange, Sven allows ample time for it to dry before moving forward with additional steps. This patience and precision are key aspects of his successful boatbuilding methods.Step 4: Finishing Touches
Once the flange is fully dried, Sven removes the clamps carefully, ensuring no damage occurs during this process. He then moves on to attaching four more pieces onto these main frames, completing two pairs of flanges for the bulkhead hatches.The Final Touches
While two flanges form the primary support structure around the hatches, Sven mentions there are two additional pieces required at each end to ensure comprehensive protection. This attention to detail highlights his commitment to producing a durable and reliable design. “Sailing is about finding your path, whether it’s across an ocean or within yourself.” – Sven Yrvind In conclusion, making flanges around bulkhead hatches may seem complex at first glance, but by following Sven Yrvind’s meticulous process, enthusiasts can achieve professional-level results. Remember that the journey of boatbuilding is as rewarding as reaching your destination; it tests one’s patience and dedication. For those seeking to embark on this adventure or simply gain more insight into marine craftsmanship, Sven’s wisdom is invaluable.Sven Yrvind, a renowned yacht designer and sailor, shares valuable insights on creating flanges around bulkhead hatches for canvas protection in this enlightening video. By following his expert guidance, boat enthusiasts can ensure their living areas remain secure while allowing unhindered access through the hatches.Step 1: Starting with the Flange
Sven begins by explaining that working on flanges vertically and horizontally is significantly easier than doing so in a flat position. To simplify the process further, he divides the task into two or three steps as suggested by fellow expert “for for.” This approach not only makes it more manageable but also allows for greater precision in crafting each component.Step 2: Applying Glue and Securing
Sven proceeds to apply glue along one edge of the flange, ensuring a secure bond when clamped into place. He emphasizes that this stage is crucial for maintaining the structural integrity of the flange, which in turn safeguards the living area beneath the canvas when hatches are open.Step 3: Allowing Time to Dry
After securely attaching the first portion of the flange, Sven allows ample time for it to dry before moving forward with additional steps. This patience and precision are key aspects of his successful boatbuilding methods.Step 4: Finishing Touches
Once the flange is fully dried, Sven removes the clamps carefully, ensuring no damage occurs during this process. He then moves on to attaching four more pieces onto these main frames, completing two pairs of flanges for the bulkhead hatches.The Final Touches
While two flanges form the primary support structure around the hatches, Sven mentions there are two additional pieces required at each end to ensure comprehensive protection. This attention to detail highlights his commitment to producing a durable and reliable design. “Sailing is about finding your path, whether it’s across an ocean or within yourself.” – Sven Yrvind In conclusion, making flanges around bulkhead hatches may seem complex at first glance, but by following Sven Yrvind’s meticulous process, enthusiasts can achieve professional-level results. Remember that the journey of boatbuilding is as rewarding as reaching your destination; it tests one’s patience and dedication. For those seeking to embark on this adventure or simply gain more insight into marine craftsmanship, Sven’s wisdom is invaluable.Making Flanges Around Bulkhead Hatches for Canvas
Sven Yrvind, a renowned yacht designer and sailor, shares valuable insights on creating flanges around bulkhead hatches for canvas protection in this enlightening video. By following his expert guidance, boat enthusiasts can ensure their living areas remain secure while allowing unhindered access through the hatches.Step 1: Starting with the Flange
Sven begins by explaining that working on flanges vertically and horizontally is significantly easier than doing so in a flat position. To simplify the process further, he divides the task into two or three steps as suggested by fellow expert “for for.” This approach not only makes it more manageable but also allows for greater precision in crafting each component.Step 2: Applying Glue and Securing
Sven proceeds to apply glue along one edge of the flange, ensuring a secure bond when clamped into place. He emphasizes that this stage is crucial for maintaining the structural integrity of the flange, which in turn safeguards the living area beneath the canvas when hatches are open.Step 3: Allowing Time to Dry
After securely attaching the first portion of the flange, Sven allows ample time for it to dry before moving forward with additional steps. This patience and precision are key aspects of his successful boatbuilding methods.Step 4: Finishing Touches
Once the flange is fully dried, Sven removes the clamps carefully, ensuring no damage occurs during this process. He then moves on to attaching four more pieces onto these main frames, completing two pairs of flanges for the bulkhead hatches.The Final Touches
While two flanges form the primary support structure around the hatches, Sven mentions there are two additional pieces required at each end to ensure comprehensive protection. This attention to detail highlights his commitment to producing a durable and reliable design. “Sailing is about finding your path, whether it’s across an ocean or within yourself.” – Sven Yrvind In conclusion, making flanges around bulkhead hatches may seem complex at first glance, but by following Sven Yrvind’s meticulous process, enthusiasts can achieve professional-level results. Remember that the journey of boatbuilding is as rewarding as reaching your destination; it tests one’s patience and dedication. For those seeking to embark on this adventure or simply gain more insight into marine craftsmanship, Sven’s wisdom is invaluable.Sven proceeds to apply glue along one edge of the flange, ensuring a secure bond when clamped into place. He emphasizes that this stage is crucial for maintaining the structural integrity of the flange, which in turn safeguards the living area beneath the canvas when hatches are open.Step 3: Allowing Time to Dry
After securely attaching the first portion of the flange, Sven allows ample time for it to dry before moving forward with additional steps. This patience and precision are key aspects of his successful boatbuilding methods.Step 4: Finishing Touches
Once the flange is fully dried, Sven removes the clamps carefully, ensuring no damage occurs during this process. He then moves on to attaching four more pieces onto these main frames, completing two pairs of flanges for the bulkhead hatches.The Final Touches
While two flanges form the primary support structure around the hatches, Sven mentions there are two additional pieces required at each end to ensure comprehensive protection. This attention to detail highlights his commitment to producing a durable and reliable design. “Sailing is about finding your path, whether it’s across an ocean or within yourself.” – Sven Yrvind In conclusion, making flanges around bulkhead hatches may seem complex at first glance, but by following Sven Yrvind’s meticulous process, enthusiasts can achieve professional-level results. Remember that the journey of boatbuilding is as rewarding as reaching your destination; it tests one’s patience and dedication. For those seeking to embark on this adventure or simply gain more insight into marine craftsmanship, Sven’s wisdom is invaluable.Sven begins by explaining that working on flanges vertically and horizontally is significantly easier than doing so in a flat position. To simplify the process further, he divides the task into two or three steps as suggested by fellow expert “for for.” This approach not only makes it more manageable but also allows for greater precision in crafting each component.Step 2: Applying Glue and Securing
Sven proceeds to apply glue along one edge of the flange, ensuring a secure bond when clamped into place. He emphasizes that this stage is crucial for maintaining the structural integrity of the flange, which in turn safeguards the living area beneath the canvas when hatches are open.Step 3: Allowing Time to Dry
After securely attaching the first portion of the flange, Sven allows ample time for it to dry before moving forward with additional steps. This patience and precision are key aspects of his successful boatbuilding methods.Step 4: Finishing Touches
Once the flange is fully dried, Sven removes the clamps carefully, ensuring no damage occurs during this process. He then moves on to attaching four more pieces onto these main frames, completing two pairs of flanges for the bulkhead hatches.The Final Touches
While two flanges form the primary support structure around the hatches, Sven mentions there are two additional pieces required at each end to ensure comprehensive protection. This attention to detail highlights his commitment to producing a durable and reliable design. “Sailing is about finding your path, whether it’s across an ocean or within yourself.” – Sven Yrvind In conclusion, making flanges around bulkhead hatches may seem complex at first glance, but by following Sven Yrvind’s meticulous process, enthusiasts can achieve professional-level results. Remember that the journey of boatbuilding is as rewarding as reaching your destination; it tests one’s patience and dedication. For those seeking to embark on this adventure or simply gain more insight into marine craftsmanship, Sven’s wisdom is invaluable.Sven Yrvind, a renowned yacht designer and sailor, shares valuable insights on creating flanges around bulkhead hatches for canvas protection in this enlightening video. By following his expert guidance, boat enthusiasts can ensure their living areas remain secure while allowing unhindered access through the hatches.Step 1: Starting with the Flange
Sven begins by explaining that working on flanges vertically and horizontally is significantly easier than doing so in a flat position. To simplify the process further, he divides the task into two or three steps as suggested by fellow expert “for for.” This approach not only makes it more manageable but also allows for greater precision in crafting each component.Step 2: Applying Glue and Securing
Sven proceeds to apply glue along one edge of the flange, ensuring a secure bond when clamped into place. He emphasizes that this stage is crucial for maintaining the structural integrity of the flange, which in turn safeguards the living area beneath the canvas when hatches are open.Step 3: Allowing Time to Dry
After securely attaching the first portion of the flange, Sven allows ample time for it to dry before moving forward with additional steps. This patience and precision are key aspects of his successful boatbuilding methods.Step 4: Finishing Touches
Once the flange is fully dried, Sven removes the clamps carefully, ensuring no damage occurs during this process. He then moves on to attaching four more pieces onto these main frames, completing two pairs of flanges for the bulkhead hatches.The Final Touches
While two flanges form the primary support structure around the hatches, Sven mentions there are two additional pieces required at each end to ensure comprehensive protection. This attention to detail highlights his commitment to producing a durable and reliable design. “Sailing is about finding your path, whether it’s across an ocean or within yourself.” – Sven Yrvind In conclusion, making flanges around bulkhead hatches may seem complex at first glance, but by following Sven Yrvind’s meticulous process, enthusiasts can achieve professional-level results. Remember that the journey of boatbuilding is as rewarding as reaching your destination; it tests one’s patience and dedication. For those seeking to embark on this adventure or simply gain more insight into marine craftsmanship, Sven’s wisdom is invaluable.Making Flanges Around Bulkhead Hatches for Canvas
Sven Yrvind, a renowned yacht designer and sailor, shares valuable insights on creating flanges around bulkhead hatches for canvas protection in this enlightening video. By following his expert guidance, boat enthusiasts can ensure their living areas remain secure while allowing unhindered access through the hatches.Step 1: Starting with the Flange
Sven begins by explaining that working on flanges vertically and horizontally is significantly easier than doing so in a flat position. To simplify the process further, he divides the task into two or three steps as suggested by fellow expert “for for.” This approach not only makes it more manageable but also allows for greater precision in crafting each component.Step 2: Applying Glue and Securing
Sven proceeds to apply glue along one edge of the flange, ensuring a secure bond when clamped into place. He emphasizes that this stage is crucial for maintaining the structural integrity of the flange, which in turn safeguards the living area beneath the canvas when hatches are open.Step 3: Allowing Time to Dry
After securely attaching the first portion of the flange, Sven allows ample time for it to dry before moving forward with additional steps. This patience and precision are key aspects of his successful boatbuilding methods.Step 4: Finishing Touches
Once the flange is fully dried, Sven removes the clamps carefully, ensuring no damage occurs during this process. He then moves on to attaching four more pieces onto these main frames, completing two pairs of flanges for the bulkhead hatches.The Final Touches
While two flanges form the primary support structure around the hatches, Sven mentions there are two additional pieces required at each end to ensure comprehensive protection. This attention to detail highlights his commitment to producing a durable and reliable design. “Sailing is about finding your path, whether it’s across an ocean or within yourself.” – Sven Yrvind In conclusion, making flanges around bulkhead hatches may seem complex at first glance, but by following Sven Yrvind’s meticulous process, enthusiasts can achieve professional-level results. Remember that the journey of boatbuilding is as rewarding as reaching your destination; it tests one’s patience and dedication. For those seeking to embark on this adventure or simply gain more insight into marine craftsmanship, Sven’s wisdom is invaluable.Once the flange is fully dried, Sven removes the clamps carefully, ensuring no damage occurs during this process. He then moves on to attaching four more pieces onto these main frames, completing two pairs of flanges for the bulkhead hatches.The Final Touches
While two flanges form the primary support structure around the hatches, Sven mentions there are two additional pieces required at each end to ensure comprehensive protection. This attention to detail highlights his commitment to producing a durable and reliable design. “Sailing is about finding your path, whether it’s across an ocean or within yourself.” – Sven Yrvind In conclusion, making flanges around bulkhead hatches may seem complex at first glance, but by following Sven Yrvind’s meticulous process, enthusiasts can achieve professional-level results. Remember that the journey of boatbuilding is as rewarding as reaching your destination; it tests one’s patience and dedication. For those seeking to embark on this adventure or simply gain more insight into marine craftsmanship, Sven’s wisdom is invaluable.Sven proceeds to apply glue along one edge of the flange, ensuring a secure bond when clamped into place. He emphasizes that this stage is crucial for maintaining the structural integrity of the flange, which in turn safeguards the living area beneath the canvas when hatches are open.Step 3: Allowing Time to Dry
After securely attaching the first portion of the flange, Sven allows ample time for it to dry before moving forward with additional steps. This patience and precision are key aspects of his successful boatbuilding methods.Step 4: Finishing Touches
Once the flange is fully dried, Sven removes the clamps carefully, ensuring no damage occurs during this process. He then moves on to attaching four more pieces onto these main frames, completing two pairs of flanges for the bulkhead hatches.The Final Touches
While two flanges form the primary support structure around the hatches, Sven mentions there are two additional pieces required at each end to ensure comprehensive protection. This attention to detail highlights his commitment to producing a durable and reliable design. “Sailing is about finding your path, whether it’s across an ocean or within yourself.” – Sven Yrvind In conclusion, making flanges around bulkhead hatches may seem complex at first glance, but by following Sven Yrvind’s meticulous process, enthusiasts can achieve professional-level results. Remember that the journey of boatbuilding is as rewarding as reaching your destination; it tests one’s patience and dedication. For those seeking to embark on this adventure or simply gain more insight into marine craftsmanship, Sven’s wisdom is invaluable.Sven begins by explaining that working on flanges vertically and horizontally is significantly easier than doing so in a flat position. To simplify the process further, he divides the task into two or three steps as suggested by fellow expert “for for.” This approach not only makes it more manageable but also allows for greater precision in crafting each component.Step 2: Applying Glue and Securing
Sven proceeds to apply glue along one edge of the flange, ensuring a secure bond when clamped into place. He emphasizes that this stage is crucial for maintaining the structural integrity of the flange, which in turn safeguards the living area beneath the canvas when hatches are open.Step 3: Allowing Time to Dry
After securely attaching the first portion of the flange, Sven allows ample time for it to dry before moving forward with additional steps. This patience and precision are key aspects of his successful boatbuilding methods.Step 4: Finishing Touches
Once the flange is fully dried, Sven removes the clamps carefully, ensuring no damage occurs during this process. He then moves on to attaching four more pieces onto these main frames, completing two pairs of flanges for the bulkhead hatches.The Final Touches
While two flanges form the primary support structure around the hatches, Sven mentions there are two additional pieces required at each end to ensure comprehensive protection. This attention to detail highlights his commitment to producing a durable and reliable design. “Sailing is about finding your path, whether it’s across an ocean or within yourself.” – Sven Yrvind In conclusion, making flanges around bulkhead hatches may seem complex at first glance, but by following Sven Yrvind’s meticulous process, enthusiasts can achieve professional-level results. Remember that the journey of boatbuilding is as rewarding as reaching your destination; it tests one’s patience and dedication. For those seeking to embark on this adventure or simply gain more insight into marine craftsmanship, Sven’s wisdom is invaluable.Sven Yrvind, a renowned yacht designer and sailor, shares valuable insights on creating flanges around bulkhead hatches for canvas protection in this enlightening video. By following his expert guidance, boat enthusiasts can ensure their living areas remain secure while allowing unhindered access through the hatches.Step 1: Starting with the Flange
Sven begins by explaining that working on flanges vertically and horizontally is significantly easier than doing so in a flat position. To simplify the process further, he divides the task into two or three steps as suggested by fellow expert “for for.” This approach not only makes it more manageable but also allows for greater precision in crafting each component.Step 2: Applying Glue and Securing
Sven proceeds to apply glue along one edge of the flange, ensuring a secure bond when clamped into place. He emphasizes that this stage is crucial for maintaining the structural integrity of the flange, which in turn safeguards the living area beneath the canvas when hatches are open.Step 3: Allowing Time to Dry
After securely attaching the first portion of the flange, Sven allows ample time for it to dry before moving forward with additional steps. This patience and precision are key aspects of his successful boatbuilding methods.Step 4: Finishing Touches
Once the flange is fully dried, Sven removes the clamps carefully, ensuring no damage occurs during this process. He then moves on to attaching four more pieces onto these main frames, completing two pairs of flanges for the bulkhead hatches.The Final Touches
While two flanges form the primary support structure around the hatches, Sven mentions there are two additional pieces required at each end to ensure comprehensive protection. This attention to detail highlights his commitment to producing a durable and reliable design. “Sailing is about finding your path, whether it’s across an ocean or within yourself.” – Sven Yrvind In conclusion, making flanges around bulkhead hatches may seem complex at first glance, but by following Sven Yrvind’s meticulous process, enthusiasts can achieve professional-level results. Remember that the journey of boatbuilding is as rewarding as reaching your destination; it tests one’s patience and dedication. For those seeking to embark on this adventure or simply gain more insight into marine craftsmanship, Sven’s wisdom is invaluable.Making Flanges Around Bulkhead Hatches for Canvas
Sven Yrvind, a renowned yacht designer and sailor, shares valuable insights on creating flanges around bulkhead hatches for canvas protection in this enlightening video. By following his expert guidance, boat enthusiasts can ensure their living areas remain secure while allowing unhindered access through the hatches.Step 1: Starting with the Flange
Sven begins by explaining that working on flanges vertically and horizontally is significantly easier than doing so in a flat position. To simplify the process further, he divides the task into two or three steps as suggested by fellow expert “for for.” This approach not only makes it more manageable but also allows for greater precision in crafting each component.Step 2: Applying Glue and Securing
Sven proceeds to apply glue along one edge of the flange, ensuring a secure bond when clamped into place. He emphasizes that this stage is crucial for maintaining the structural integrity of the flange, which in turn safeguards the living area beneath the canvas when hatches are open.Step 3: Allowing Time to Dry
After securely attaching the first portion of the flange, Sven allows ample time for it to dry before moving forward with additional steps. This patience and precision are key aspects of his successful boatbuilding methods.Step 4: Finishing Touches
Once the flange is fully dried, Sven removes the clamps carefully, ensuring no damage occurs during this process. He then moves on to attaching four more pieces onto these main frames, completing two pairs of flanges for the bulkhead hatches.The Final Touches
While two flanges form the primary support structure around the hatches, Sven mentions there are two additional pieces required at each end to ensure comprehensive protection. This attention to detail highlights his commitment to producing a durable and reliable design. “Sailing is about finding your path, whether it’s across an ocean or within yourself.” – Sven Yrvind In conclusion, making flanges around bulkhead hatches may seem complex at first glance, but by following Sven Yrvind’s meticulous process, enthusiasts can achieve professional-level results. Remember that the journey of boatbuilding is as rewarding as reaching your destination; it tests one’s patience and dedication. For those seeking to embark on this adventure or simply gain more insight into marine craftsmanship, Sven’s wisdom is invaluable.After securely attaching the first portion of the flange, Sven allows ample time for it to dry before moving forward with additional steps. This patience and precision are key aspects of his successful boatbuilding methods.Step 4: Finishing Touches
Once the flange is fully dried, Sven removes the clamps carefully, ensuring no damage occurs during this process. He then moves on to attaching four more pieces onto these main frames, completing two pairs of flanges for the bulkhead hatches.The Final Touches
While two flanges form the primary support structure around the hatches, Sven mentions there are two additional pieces required at each end to ensure comprehensive protection. This attention to detail highlights his commitment to producing a durable and reliable design. “Sailing is about finding your path, whether it’s across an ocean or within yourself.” – Sven Yrvind In conclusion, making flanges around bulkhead hatches may seem complex at first glance, but by following Sven Yrvind’s meticulous process, enthusiasts can achieve professional-level results. Remember that the journey of boatbuilding is as rewarding as reaching your destination; it tests one’s patience and dedication. For those seeking to embark on this adventure or simply gain more insight into marine craftsmanship, Sven’s wisdom is invaluable.Sven proceeds to apply glue along one edge of the flange, ensuring a secure bond when clamped into place. He emphasizes that this stage is crucial for maintaining the structural integrity of the flange, which in turn safeguards the living area beneath the canvas when hatches are open.Step 3: Allowing Time to Dry
After securely attaching the first portion of the flange, Sven allows ample time for it to dry before moving forward with additional steps. This patience and precision are key aspects of his successful boatbuilding methods.Step 4: Finishing Touches
Once the flange is fully dried, Sven removes the clamps carefully, ensuring no damage occurs during this process. He then moves on to attaching four more pieces onto these main frames, completing two pairs of flanges for the bulkhead hatches.The Final Touches
While two flanges form the primary support structure around the hatches, Sven mentions there are two additional pieces required at each end to ensure comprehensive protection. This attention to detail highlights his commitment to producing a durable and reliable design. “Sailing is about finding your path, whether it’s across an ocean or within yourself.” – Sven Yrvind In conclusion, making flanges around bulkhead hatches may seem complex at first glance, but by following Sven Yrvind’s meticulous process, enthusiasts can achieve professional-level results. Remember that the journey of boatbuilding is as rewarding as reaching your destination; it tests one’s patience and dedication. For those seeking to embark on this adventure or simply gain more insight into marine craftsmanship, Sven’s wisdom is invaluable.Sven begins by explaining that working on flanges vertically and horizontally is significantly easier than doing so in a flat position. To simplify the process further, he divides the task into two or three steps as suggested by fellow expert “for for.” This approach not only makes it more manageable but also allows for greater precision in crafting each component.Step 2: Applying Glue and Securing
Sven proceeds to apply glue along one edge of the flange, ensuring a secure bond when clamped into place. He emphasizes that this stage is crucial for maintaining the structural integrity of the flange, which in turn safeguards the living area beneath the canvas when hatches are open.Step 3: Allowing Time to Dry
After securely attaching the first portion of the flange, Sven allows ample time for it to dry before moving forward with additional steps. This patience and precision are key aspects of his successful boatbuilding methods.Step 4: Finishing Touches
Once the flange is fully dried, Sven removes the clamps carefully, ensuring no damage occurs during this process. He then moves on to attaching four more pieces onto these main frames, completing two pairs of flanges for the bulkhead hatches.The Final Touches
While two flanges form the primary support structure around the hatches, Sven mentions there are two additional pieces required at each end to ensure comprehensive protection. This attention to detail highlights his commitment to producing a durable and reliable design. “Sailing is about finding your path, whether it’s across an ocean or within yourself.” – Sven Yrvind In conclusion, making flanges around bulkhead hatches may seem complex at first glance, but by following Sven Yrvind’s meticulous process, enthusiasts can achieve professional-level results. Remember that the journey of boatbuilding is as rewarding as reaching your destination; it tests one’s patience and dedication. For those seeking to embark on this adventure or simply gain more insight into marine craftsmanship, Sven’s wisdom is invaluable.Sven Yrvind, a renowned yacht designer and sailor, shares valuable insights on creating flanges around bulkhead hatches for canvas protection in this enlightening video. By following his expert guidance, boat enthusiasts can ensure their living areas remain secure while allowing unhindered access through the hatches.Step 1: Starting with the Flange
Sven begins by explaining that working on flanges vertically and horizontally is significantly easier than doing so in a flat position. To simplify the process further, he divides the task into two or three steps as suggested by fellow expert “for for.” This approach not only makes it more manageable but also allows for greater precision in crafting each component.Step 2: Applying Glue and Securing
Sven proceeds to apply glue along one edge of the flange, ensuring a secure bond when clamped into place. He emphasizes that this stage is crucial for maintaining the structural integrity of the flange, which in turn safeguards the living area beneath the canvas when hatches are open.Step 3: Allowing Time to Dry
After securely attaching the first portion of the flange, Sven allows ample time for it to dry before moving forward with additional steps. This patience and precision are key aspects of his successful boatbuilding methods.Step 4: Finishing Touches
Once the flange is fully dried, Sven removes the clamps carefully, ensuring no damage occurs during this process. He then moves on to attaching four more pieces onto these main frames, completing two pairs of flanges for the bulkhead hatches.The Final Touches
While two flanges form the primary support structure around the hatches, Sven mentions there are two additional pieces required at each end to ensure comprehensive protection. This attention to detail highlights his commitment to producing a durable and reliable design. “Sailing is about finding your path, whether it’s across an ocean or within yourself.” – Sven Yrvind In conclusion, making flanges around bulkhead hatches may seem complex at first glance, but by following Sven Yrvind’s meticulous process, enthusiasts can achieve professional-level results. Remember that the journey of boatbuilding is as rewarding as reaching your destination; it tests one’s patience and dedication. For those seeking to embark on this adventure or simply gain more insight into marine craftsmanship, Sven’s wisdom is invaluable.Making Flanges Around Bulkhead Hatches for Canvas
Sven Yrvind, a renowned yacht designer and sailor, shares valuable insights on creating flanges around bulkhead hatches for canvas protection in this enlightening video. By following his expert guidance, boat enthusiasts can ensure their living areas remain secure while allowing unhindered access through the hatches.Step 1: Starting with the Flange
Sven begins by explaining that working on flanges vertically and horizontally is significantly easier than doing so in a flat position. To simplify the process further, he divides the task into two or three steps as suggested by fellow expert “for for.” This approach not only makes it more manageable but also allows for greater precision in crafting each component.Step 2: Applying Glue and Securing
Sven proceeds to apply glue along one edge of the flange, ensuring a secure bond when clamped into place. He emphasizes that this stage is crucial for maintaining the structural integrity of the flange, which in turn safeguards the living area beneath the canvas when hatches are open.Step 3: Allowing Time to Dry
After securely attaching the first portion of the flange, Sven allows ample time for it to dry before moving forward with additional steps. This patience and precision are key aspects of his successful boatbuilding methods.Step 4: Finishing Touches
Once the flange is fully dried, Sven removes the clamps carefully, ensuring no damage occurs during this process. He then moves on to attaching four more pieces onto these main frames, completing two pairs of flanges for the bulkhead hatches.The Final Touches
While two flanges form the primary support structure around the hatches, Sven mentions there are two additional pieces required at each end to ensure comprehensive protection. This attention to detail highlights his commitment to producing a durable and reliable design. “Sailing is about finding your path, whether it’s across an ocean or within yourself.” – Sven Yrvind In conclusion, making flanges around bulkhead hatches may seem complex at first glance, but by following Sven Yrvind’s meticulous process, enthusiasts can achieve professional-level results. Remember that the journey of boatbuilding is as rewarding as reaching your destination; it tests one’s patience and dedication. For those seeking to embark on this adventure or simply gain more insight into marine craftsmanship, Sven’s wisdom is invaluable.Once the flange is fully dried, Sven removes the clamps carefully, ensuring no damage occurs during this process. He then moves on to attaching four more pieces onto these main frames, completing two pairs of flanges for the bulkhead hatches.The Final Touches
While two flanges form the primary support structure around the hatches, Sven mentions there are two additional pieces required at each end to ensure comprehensive protection. This attention to detail highlights his commitment to producing a durable and reliable design. “Sailing is about finding your path, whether it’s across an ocean or within yourself.” – Sven Yrvind In conclusion, making flanges around bulkhead hatches may seem complex at first glance, but by following Sven Yrvind’s meticulous process, enthusiasts can achieve professional-level results. Remember that the journey of boatbuilding is as rewarding as reaching your destination; it tests one’s patience and dedication. For those seeking to embark on this adventure or simply gain more insight into marine craftsmanship, Sven’s wisdom is invaluable.After securely attaching the first portion of the flange, Sven allows ample time for it to dry before moving forward with additional steps. This patience and precision are key aspects of his successful boatbuilding methods.Step 4: Finishing Touches
Once the flange is fully dried, Sven removes the clamps carefully, ensuring no damage occurs during this process. He then moves on to attaching four more pieces onto these main frames, completing two pairs of flanges for the bulkhead hatches.The Final Touches
While two flanges form the primary support structure around the hatches, Sven mentions there are two additional pieces required at each end to ensure comprehensive protection. This attention to detail highlights his commitment to producing a durable and reliable design. “Sailing is about finding your path, whether it’s across an ocean or within yourself.” – Sven Yrvind In conclusion, making flanges around bulkhead hatches may seem complex at first glance, but by following Sven Yrvind’s meticulous process, enthusiasts can achieve professional-level results. Remember that the journey of boatbuilding is as rewarding as reaching your destination; it tests one’s patience and dedication. For those seeking to embark on this adventure or simply gain more insight into marine craftsmanship, Sven’s wisdom is invaluable.Sven proceeds to apply glue along one edge of the flange, ensuring a secure bond when clamped into place. He emphasizes that this stage is crucial for maintaining the structural integrity of the flange, which in turn safeguards the living area beneath the canvas when hatches are open.Step 3: Allowing Time to Dry
After securely attaching the first portion of the flange, Sven allows ample time for it to dry before moving forward with additional steps. This patience and precision are key aspects of his successful boatbuilding methods.Step 4: Finishing Touches
Once the flange is fully dried, Sven removes the clamps carefully, ensuring no damage occurs during this process. He then moves on to attaching four more pieces onto these main frames, completing two pairs of flanges for the bulkhead hatches.The Final Touches
While two flanges form the primary support structure around the hatches, Sven mentions there are two additional pieces required at each end to ensure comprehensive protection. This attention to detail highlights his commitment to producing a durable and reliable design. “Sailing is about finding your path, whether it’s across an ocean or within yourself.” – Sven Yrvind In conclusion, making flanges around bulkhead hatches may seem complex at first glance, but by following Sven Yrvind’s meticulous process, enthusiasts can achieve professional-level results. Remember that the journey of boatbuilding is as rewarding as reaching your destination; it tests one’s patience and dedication. For those seeking to embark on this adventure or simply gain more insight into marine craftsmanship, Sven’s wisdom is invaluable.Sven begins by explaining that working on flanges vertically and horizontally is significantly easier than doing so in a flat position. To simplify the process further, he divides the task into two or three steps as suggested by fellow expert “for for.” This approach not only makes it more manageable but also allows for greater precision in crafting each component.Step 2: Applying Glue and Securing
Sven proceeds to apply glue along one edge of the flange, ensuring a secure bond when clamped into place. He emphasizes that this stage is crucial for maintaining the structural integrity of the flange, which in turn safeguards the living area beneath the canvas when hatches are open.Step 3: Allowing Time to Dry
After securely attaching the first portion of the flange, Sven allows ample time for it to dry before moving forward with additional steps. This patience and precision are key aspects of his successful boatbuilding methods.Step 4: Finishing Touches
Once the flange is fully dried, Sven removes the clamps carefully, ensuring no damage occurs during this process. He then moves on to attaching four more pieces onto these main frames, completing two pairs of flanges for the bulkhead hatches.The Final Touches
While two flanges form the primary support structure around the hatches, Sven mentions there are two additional pieces required at each end to ensure comprehensive protection. This attention to detail highlights his commitment to producing a durable and reliable design. “Sailing is about finding your path, whether it’s across an ocean or within yourself.” – Sven Yrvind In conclusion, making flanges around bulkhead hatches may seem complex at first glance, but by following Sven Yrvind’s meticulous process, enthusiasts can achieve professional-level results. Remember that the journey of boatbuilding is as rewarding as reaching your destination; it tests one’s patience and dedication. For those seeking to embark on this adventure or simply gain more insight into marine craftsmanship, Sven’s wisdom is invaluable.Sven Yrvind, a renowned yacht designer and sailor, shares valuable insights on creating flanges around bulkhead hatches for canvas protection in this enlightening video. By following his expert guidance, boat enthusiasts can ensure their living areas remain secure while allowing unhindered access through the hatches.Step 1: Starting with the Flange
Sven begins by explaining that working on flanges vertically and horizontally is significantly easier than doing so in a flat position. To simplify the process further, he divides the task into two or three steps as suggested by fellow expert “for for.” This approach not only makes it more manageable but also allows for greater precision in crafting each component.Step 2: Applying Glue and Securing
Sven proceeds to apply glue along one edge of the flange, ensuring a secure bond when clamped into place. He emphasizes that this stage is crucial for maintaining the structural integrity of the flange, which in turn safeguards the living area beneath the canvas when hatches are open.Step 3: Allowing Time to Dry
After securely attaching the first portion of the flange, Sven allows ample time for it to dry before moving forward with additional steps. This patience and precision are key aspects of his successful boatbuilding methods.Step 4: Finishing Touches
Once the flange is fully dried, Sven removes the clamps carefully, ensuring no damage occurs during this process. He then moves on to attaching four more pieces onto these main frames, completing two pairs of flanges for the bulkhead hatches.The Final Touches
While two flanges form the primary support structure around the hatches, Sven mentions there are two additional pieces required at each end to ensure comprehensive protection. This attention to detail highlights his commitment to producing a durable and reliable design. “Sailing is about finding your path, whether it’s across an ocean or within yourself.” – Sven Yrvind In conclusion, making flanges around bulkhead hatches may seem complex at first glance, but by following Sven Yrvind’s meticulous process, enthusiasts can achieve professional-level results. Remember that the journey of boatbuilding is as rewarding as reaching your destination; it tests one’s patience and dedication. For those seeking to embark on this adventure or simply gain more insight into marine craftsmanship, Sven’s wisdom is invaluable.Making Flanges Around Bulkhead Hatches for Canvas
Sven Yrvind, a renowned yacht designer and sailor, shares valuable insights on creating flanges around bulkhead hatches for canvas protection in this enlightening video. By following his expert guidance, boat enthusiasts can ensure their living areas remain secure while allowing unhindered access through the hatches.Step 1: Starting with the Flange
Sven begins by explaining that working on flanges vertically and horizontally is significantly easier than doing so in a flat position. To simplify the process further, he divides the task into two or three steps as suggested by fellow expert “for for.” This approach not only makes it more manageable but also allows for greater precision in crafting each component.Step 2: Applying Glue and Securing
Sven proceeds to apply glue along one edge of the flange, ensuring a secure bond when clamped into place. He emphasizes that this stage is crucial for maintaining the structural integrity of the flange, which in turn safeguards the living area beneath the canvas when hatches are open.Step 3: Allowing Time to Dry
After securely attaching the first portion of the flange, Sven allows ample time for it to dry before moving forward with additional steps. This patience and precision are key aspects of his successful boatbuilding methods.Step 4: Finishing Touches
Once the flange is fully dried, Sven removes the clamps carefully, ensuring no damage occurs during this process. He then moves on to attaching four more pieces onto these main frames, completing two pairs of flanges for the bulkhead hatches.The Final Touches
While two flanges form the primary support structure around the hatches, Sven mentions there are two additional pieces required at each end to ensure comprehensive protection. This attention to detail highlights his commitment to producing a durable and reliable design. “Sailing is about finding your path, whether it’s across an ocean or within yourself.” – Sven Yrvind In conclusion, making flanges around bulkhead hatches may seem complex at first glance, but by following Sven Yrvind’s meticulous process, enthusiasts can achieve professional-level results. Remember that the journey of boatbuilding is as rewarding as reaching your destination; it tests one’s patience and dedication. For those seeking to embark on this adventure or simply gain more insight into marine craftsmanship, Sven’s wisdom is invaluable.Sven begins by explaining that working on flanges vertically and horizontally is significantly easier than doing so in a flat position. To simplify the process further, he divides the task into two or three steps as suggested by fellow expert “for for.” This approach not only makes it more manageable but also allows for greater precision in crafting each component.Step 2: Applying Glue and Securing
Sven proceeds to apply glue along one edge of the flange, ensuring a secure bond when clamped into place. He emphasizes that this stage is crucial for maintaining the structural integrity of the flange, which in turn safeguards the living area beneath the canvas when hatches are open.Step 3: Allowing Time to Dry
After securely attaching the first portion of the flange, Sven allows ample time for it to dry before moving forward with additional steps. This patience and precision are key aspects of his successful boatbuilding methods.Step 4: Finishing Touches
Once the flange is fully dried, Sven removes the clamps carefully, ensuring no damage occurs during this process. He then moves on to attaching four more pieces onto these main frames, completing two pairs of flanges for the bulkhead hatches.The Final Touches
While two flanges form the primary support structure around the hatches, Sven mentions there are two additional pieces required at each end to ensure comprehensive protection. This attention to detail highlights his commitment to producing a durable and reliable design. “Sailing is about finding your path, whether it’s across an ocean or within yourself.” – Sven Yrvind In conclusion, making flanges around bulkhead hatches may seem complex at first glance, but by following Sven Yrvind’s meticulous process, enthusiasts can achieve professional-level results. Remember that the journey of boatbuilding is as rewarding as reaching your destination; it tests one’s patience and dedication. For those seeking to embark on this adventure or simply gain more insight into marine craftsmanship, Sven’s wisdom is invaluable.Once the flange is fully dried, Sven removes the clamps carefully, ensuring no damage occurs during this process. He then moves on to attaching four more pieces onto these main frames, completing two pairs of flanges for the bulkhead hatches.The Final Touches
While two flanges form the primary support structure around the hatches, Sven mentions there are two additional pieces required at each end to ensure comprehensive protection. This attention to detail highlights his commitment to producing a durable and reliable design. “Sailing is about finding your path, whether it’s across an ocean or within yourself.” – Sven Yrvind In conclusion, making flanges around bulkhead hatches may seem complex at first glance, but by following Sven Yrvind’s meticulous process, enthusiasts can achieve professional-level results. Remember that the journey of boatbuilding is as rewarding as reaching your destination; it tests one’s patience and dedication. For those seeking to embark on this adventure or simply gain more insight into marine craftsmanship, Sven’s wisdom is invaluable.Sven Yrvind, a renowned yacht designer and sailor, shares valuable insights on creating flanges around bulkhead hatches for canvas protection in this enlightening video. By following his expert guidance, boat enthusiasts can ensure their living areas remain secure while allowing unhindered access through the hatches.Step 1: Starting with the Flange
Sven begins by explaining that working on flanges vertically and horizontally is significantly easier than doing so in a flat position. To simplify the process further, he divides the task into two or three steps as suggested by fellow expert “for for.” This approach not only makes it more manageable but also allows for greater precision in crafting each component.Step 2: Applying Glue and Securing
Sven proceeds to apply glue along one edge of the flange, ensuring a secure bond when clamped into place. He emphasizes that this stage is crucial for maintaining the structural integrity of the flange, which in turn safeguards the living area beneath the canvas when hatches are open.Step 3: Allowing Time to Dry
After securely attaching the first portion of the flange, Sven allows ample time for it to dry before moving forward with additional steps. This patience and precision are key aspects of his successful boatbuilding methods.Step 4: Finishing Touches
Once the flange is fully dried, Sven removes the clamps carefully, ensuring no damage occurs during this process. He then moves on to attaching four more pieces onto these main frames, completing two pairs of flanges for the bulkhead hatches.The Final Touches
While two flanges form the primary support structure around the hatches, Sven mentions there are two additional pieces required at each end to ensure comprehensive protection. This attention to detail highlights his commitment to producing a durable and reliable design. “Sailing is about finding your path, whether it’s across an ocean or within yourself.” – Sven Yrvind In conclusion, making flanges around bulkhead hatches may seem complex at first glance, but by following Sven Yrvind’s meticulous process, enthusiasts can achieve professional-level results. Remember that the journey of boatbuilding is as rewarding as reaching your destination; it tests one’s patience and dedication. For those seeking to embark on this adventure or simply gain more insight into marine craftsmanship, Sven’s wisdom is invaluable.Making Flanges Around Bulkhead Hatches for Canvas
Sven Yrvind, a renowned yacht designer and sailor, shares valuable insights on creating flanges around bulkhead hatches for canvas protection in this enlightening video. By following his expert guidance, boat enthusiasts can ensure their living areas remain secure while allowing unhindered access through the hatches.Step 1: Starting with the Flange
Sven begins by explaining that working on flanges vertically and horizontally is significantly easier than doing so in a flat position. To simplify the process further, he divides the task into two or three steps as suggested by fellow expert “for for.” This approach not only makes it more manageable but also allows for greater precision in crafting each component.Step 2: Applying Glue and Securing
Sven proceeds to apply glue along one edge of the flange, ensuring a secure bond when clamped into place. He emphasizes that this stage is crucial for maintaining the structural integrity of the flange, which in turn safeguards the living area beneath the canvas when hatches are open.Step 3: Allowing Time to Dry
After securely attaching the first portion of the flange, Sven allows ample time for it to dry before moving forward with additional steps. This patience and precision are key aspects of his successful boatbuilding methods.Step 4: Finishing Touches
Once the flange is fully dried, Sven removes the clamps carefully, ensuring no damage occurs during this process. He then moves on to attaching four more pieces onto these main frames, completing two pairs of flanges for the bulkhead hatches.The Final Touches
While two flanges form the primary support structure around the hatches, Sven mentions there are two additional pieces required at each end to ensure comprehensive protection. This attention to detail highlights his commitment to producing a durable and reliable design. “Sailing is about finding your path, whether it’s across an ocean or within yourself.” – Sven Yrvind In conclusion, making flanges around bulkhead hatches may seem complex at first glance, but by following Sven Yrvind’s meticulous process, enthusiasts can achieve professional-level results. Remember that the journey of boatbuilding is as rewarding as reaching your destination; it tests one’s patience and dedication. For those seeking to embark on this adventure or simply gain more insight into marine craftsmanship, Sven’s wisdom is invaluable.After securely attaching the first portion of the flange, Sven allows ample time for it to dry before moving forward with additional steps. This patience and precision are key aspects of his successful boatbuilding methods.Step 4: Finishing Touches
Once the flange is fully dried, Sven removes the clamps carefully, ensuring no damage occurs during this process. He then moves on to attaching four more pieces onto these main frames, completing two pairs of flanges for the bulkhead hatches.The Final Touches
While two flanges form the primary support structure around the hatches, Sven mentions there are two additional pieces required at each end to ensure comprehensive protection. This attention to detail highlights his commitment to producing a durable and reliable design. “Sailing is about finding your path, whether it’s across an ocean or within yourself.” – Sven Yrvind In conclusion, making flanges around bulkhead hatches may seem complex at first glance, but by following Sven Yrvind’s meticulous process, enthusiasts can achieve professional-level results. Remember that the journey of boatbuilding is as rewarding as reaching your destination; it tests one’s patience and dedication. For those seeking to embark on this adventure or simply gain more insight into marine craftsmanship, Sven’s wisdom is invaluable.Sven Yrvind, a renowned yacht designer and sailor, shares valuable insights on creating flanges around bulkhead hatches for canvas protection in this enlightening video. By following his expert guidance, boat enthusiasts can ensure their living areas remain secure while allowing unhindered access through the hatches.Step 1: Starting with the Flange
Sven begins by explaining that working on flanges vertically and horizontally is significantly easier than doing so in a flat position. To simplify the process further, he divides the task into two or three steps as suggested by fellow expert “for for.” This approach not only makes it more manageable but also allows for greater precision in crafting each component.Step 2: Applying Glue and Securing
Sven proceeds to apply glue along one edge of the flange, ensuring a secure bond when clamped into place. He emphasizes that this stage is crucial for maintaining the structural integrity of the flange, which in turn safeguards the living area beneath the canvas when hatches are open.Step 3: Allowing Time to Dry
After securely attaching the first portion of the flange, Sven allows ample time for it to dry before moving forward with additional steps. This patience and precision are key aspects of his successful boatbuilding methods.Step 4: Finishing Touches
Once the flange is fully dried, Sven removes the clamps carefully, ensuring no damage occurs during this process. He then moves on to attaching four more pieces onto these main frames, completing two pairs of flanges for the bulkhead hatches.The Final Touches
While two flanges form the primary support structure around the hatches, Sven mentions there are two additional pieces required at each end to ensure comprehensive protection. This attention to detail highlights his commitment to producing a durable and reliable design. “Sailing is about finding your path, whether it’s across an ocean or within yourself.” – Sven Yrvind In conclusion, making flanges around bulkhead hatches may seem complex at first glance, but by following Sven Yrvind’s meticulous process, enthusiasts can achieve professional-level results. Remember that the journey of boatbuilding is as rewarding as reaching your destination; it tests one’s patience and dedication. For those seeking to embark on this adventure or simply gain more insight into marine craftsmanship, Sven’s wisdom is invaluable.Making Flanges Around Bulkhead Hatches for Canvas
Sven Yrvind, a renowned yacht designer and sailor, shares valuable insights on creating flanges around bulkhead hatches for canvas protection in this enlightening video. By following his expert guidance, boat enthusiasts can ensure their living areas remain secure while allowing unhindered access through the hatches.Step 1: Starting with the Flange
Sven begins by explaining that working on flanges vertically and horizontally is significantly easier than doing so in a flat position. To simplify the process further, he divides the task into two or three steps as suggested by fellow expert “for for.” This approach not only makes it more manageable but also allows for greater precision in crafting each component.Step 2: Applying Glue and Securing
Sven proceeds to apply glue along one edge of the flange, ensuring a secure bond when clamped into place. He emphasizes that this stage is crucial for maintaining the structural integrity of the flange, which in turn safeguards the living area beneath the canvas when hatches are open.Step 3: Allowing Time to Dry
After securely attaching the first portion of the flange, Sven allows ample time for it to dry before moving forward with additional steps. This patience and precision are key aspects of his successful boatbuilding methods.Step 4: Finishing Touches
Once the flange is fully dried, Sven removes the clamps carefully, ensuring no damage occurs during this process. He then moves on to attaching four more pieces onto these main frames, completing two pairs of flanges for the bulkhead hatches.The Final Touches
While two flanges form the primary support structure around the hatches, Sven mentions there are two additional pieces required at each end to ensure comprehensive protection. This attention to detail highlights his commitment to producing a durable and reliable design. “Sailing is about finding your path, whether it’s across an ocean or within yourself.” – Sven Yrvind In conclusion, making flanges around bulkhead hatches may seem complex at first glance, but by following Sven Yrvind’s meticulous process, enthusiasts can achieve professional-level results. Remember that the journey of boatbuilding is as rewarding as reaching your destination; it tests one’s patience and dedication. For those seeking to embark on this adventure or simply gain more insight into marine craftsmanship, Sven’s wisdom is invaluable.Sven proceeds to apply glue along one edge of the flange, ensuring a secure bond when clamped into place. He emphasizes that this stage is crucial for maintaining the structural integrity of the flange, which in turn safeguards the living area beneath the canvas when hatches are open.Step 3: Allowing Time to Dry
After securely attaching the first portion of the flange, Sven allows ample time for it to dry before moving forward with additional steps. This patience and precision are key aspects of his successful boatbuilding methods.Step 4: Finishing Touches
Once the flange is fully dried, Sven removes the clamps carefully, ensuring no damage occurs during this process. He then moves on to attaching four more pieces onto these main frames, completing two pairs of flanges for the bulkhead hatches.The Final Touches
While two flanges form the primary support structure around the hatches, Sven mentions there are two additional pieces required at each end to ensure comprehensive protection. This attention to detail highlights his commitment to producing a durable and reliable design. “Sailing is about finding your path, whether it’s across an ocean or within yourself.” – Sven Yrvind In conclusion, making flanges around bulkhead hatches may seem complex at first glance, but by following Sven Yrvind’s meticulous process, enthusiasts can achieve professional-level results. Remember that the journey of boatbuilding is as rewarding as reaching your destination; it tests one’s patience and dedication. For those seeking to embark on this adventure or simply gain more insight into marine craftsmanship, Sven’s wisdom is invaluable.Sven Yrvind, a renowned yacht designer and sailor, shares valuable insights on creating flanges around bulkhead hatches for canvas protection in this enlightening video. By following his expert guidance, boat enthusiasts can ensure their living areas remain secure while allowing unhindered access through the hatches.Step 1: Starting with the Flange
Sven begins by explaining that working on flanges vertically and horizontally is significantly easier than doing so in a flat position. To simplify the process further, he divides the task into two or three steps as suggested by fellow expert “for for.” This approach not only makes it more manageable but also allows for greater precision in crafting each component.Step 2: Applying Glue and Securing
Sven proceeds to apply glue along one edge of the flange, ensuring a secure bond when clamped into place. He emphasizes that this stage is crucial for maintaining the structural integrity of the flange, which in turn safeguards the living area beneath the canvas when hatches are open.Step 3: Allowing Time to Dry
After securely attaching the first portion of the flange, Sven allows ample time for it to dry before moving forward with additional steps. This patience and precision are key aspects of his successful boatbuilding methods.Step 4: Finishing Touches
Once the flange is fully dried, Sven removes the clamps carefully, ensuring no damage occurs during this process. He then moves on to attaching four more pieces onto these main frames, completing two pairs of flanges for the bulkhead hatches.The Final Touches
While two flanges form the primary support structure around the hatches, Sven mentions there are two additional pieces required at each end to ensure comprehensive protection. This attention to detail highlights his commitment to producing a durable and reliable design. “Sailing is about finding your path, whether it’s across an ocean or within yourself.” – Sven Yrvind In conclusion, making flanges around bulkhead hatches may seem complex at first glance, but by following Sven Yrvind’s meticulous process, enthusiasts can achieve professional-level results. Remember that the journey of boatbuilding is as rewarding as reaching your destination; it tests one’s patience and dedication. For those seeking to embark on this adventure or simply gain more insight into marine craftsmanship, Sven’s wisdom is invaluable.Making Flanges Around Bulkhead Hatches for Canvas
Sven Yrvind, a renowned yacht designer and sailor, shares valuable insights on creating flanges around bulkhead hatches for canvas protection in this enlightening video. By following his expert guidance, boat enthusiasts can ensure their living areas remain secure while allowing unhindered access through the hatches.Step 1: Starting with the Flange
Sven begins by explaining that working on flanges vertically and horizontally is significantly easier than doing so in a flat position. To simplify the process further, he divides the task into two or three steps as suggested by fellow expert “for for.” This approach not only makes it more manageable but also allows for greater precision in crafting each component.Step 2: Applying Glue and Securing
Sven proceeds to apply glue along one edge of the flange, ensuring a secure bond when clamped into place. He emphasizes that this stage is crucial for maintaining the structural integrity of the flange, which in turn safeguards the living area beneath the canvas when hatches are open.Step 3: Allowing Time to Dry
After securely attaching the first portion of the flange, Sven allows ample time for it to dry before moving forward with additional steps. This patience and precision are key aspects of his successful boatbuilding methods.Step 4: Finishing Touches
Once the flange is fully dried, Sven removes the clamps carefully, ensuring no damage occurs during this process. He then moves on to attaching four more pieces onto these main frames, completing two pairs of flanges for the bulkhead hatches.The Final Touches
While two flanges form the primary support structure around the hatches, Sven mentions there are two additional pieces required at each end to ensure comprehensive protection. This attention to detail highlights his commitment to producing a durable and reliable design. “Sailing is about finding your path, whether it’s across an ocean or within yourself.” – Sven Yrvind In conclusion, making flanges around bulkhead hatches may seem complex at first glance, but by following Sven Yrvind’s meticulous process, enthusiasts can achieve professional-level results. Remember that the journey of boatbuilding is as rewarding as reaching your destination; it tests one’s patience and dedication. For those seeking to embark on this adventure or simply gain more insight into marine craftsmanship, Sven’s wisdom is invaluable.Sven begins by explaining that working on flanges vertically and horizontally is significantly easier than doing so in a flat position. To simplify the process further, he divides the task into two or three steps as suggested by fellow expert “for for.” This approach not only makes it more manageable but also allows for greater precision in crafting each component.Step 2: Applying Glue and Securing
Sven proceeds to apply glue along one edge of the flange, ensuring a secure bond when clamped into place. He emphasizes that this stage is crucial for maintaining the structural integrity of the flange, which in turn safeguards the living area beneath the canvas when hatches are open.Step 3: Allowing Time to Dry
After securely attaching the first portion of the flange, Sven allows ample time for it to dry before moving forward with additional steps. This patience and precision are key aspects of his successful boatbuilding methods.Step 4: Finishing Touches
Once the flange is fully dried, Sven removes the clamps carefully, ensuring no damage occurs during this process. He then moves on to attaching four more pieces onto these main frames, completing two pairs of flanges for the bulkhead hatches.The Final Touches
While two flanges form the primary support structure around the hatches, Sven mentions there are two additional pieces required at each end to ensure comprehensive protection. This attention to detail highlights his commitment to producing a durable and reliable design. “Sailing is about finding your path, whether it’s across an ocean or within yourself.” – Sven Yrvind In conclusion, making flanges around bulkhead hatches may seem complex at first glance, but by following Sven Yrvind’s meticulous process, enthusiasts can achieve professional-level results. Remember that the journey of boatbuilding is as rewarding as reaching your destination; it tests one’s patience and dedication. For those seeking to embark on this adventure or simply gain more insight into marine craftsmanship, Sven’s wisdom is invaluable.Sven Yrvind, a renowned yacht designer and sailor, shares valuable insights on creating flanges around bulkhead hatches for canvas protection in this enlightening video. By following his expert guidance, boat enthusiasts can ensure their living areas remain secure while allowing unhindered access through the hatches.Step 1: Starting with the Flange
Sven begins by explaining that working on flanges vertically and horizontally is significantly easier than doing so in a flat position. To simplify the process further, he divides the task into two or three steps as suggested by fellow expert “for for.” This approach not only makes it more manageable but also allows for greater precision in crafting each component.Step 2: Applying Glue and Securing
Sven proceeds to apply glue along one edge of the flange, ensuring a secure bond when clamped into place. He emphasizes that this stage is crucial for maintaining the structural integrity of the flange, which in turn safeguards the living area beneath the canvas when hatches are open.Step 3: Allowing Time to Dry
After securely attaching the first portion of the flange, Sven allows ample time for it to dry before moving forward with additional steps. This patience and precision are key aspects of his successful boatbuilding methods.Step 4: Finishing Touches
Once the flange is fully dried, Sven removes the clamps carefully, ensuring no damage occurs during this process. He then moves on to attaching four more pieces onto these main frames, completing two pairs of flanges for the bulkhead hatches.The Final Touches
While two flanges form the primary support structure around the hatches, Sven mentions there are two additional pieces required at each end to ensure comprehensive protection. This attention to detail highlights his commitment to producing a durable and reliable design. “Sailing is about finding your path, whether it’s across an ocean or within yourself.” – Sven Yrvind In conclusion, making flanges around bulkhead hatches may seem complex at first glance, but by following Sven Yrvind’s meticulous process, enthusiasts can achieve professional-level results. Remember that the journey of boatbuilding is as rewarding as reaching your destination; it tests one’s patience and dedication. For those seeking to embark on this adventure or simply gain more insight into marine craftsmanship, Sven’s wisdom is invaluable.Making Flanges Around Bulkhead Hatches for Canvas
Sven Yrvind, a renowned yacht designer and sailor, shares valuable insights on creating flanges around bulkhead hatches for canvas protection in this enlightening video. By following his expert guidance, boat enthusiasts can ensure their living areas remain secure while allowing unhindered access through the hatches.Step 1: Starting with the Flange
Sven begins by explaining that working on flanges vertically and horizontally is significantly easier than doing so in a flat position. To simplify the process further, he divides the task into two or three steps as suggested by fellow expert “for for.” This approach not only makes it more manageable but also allows for greater precision in crafting each component.Step 2: Applying Glue and Securing
Sven proceeds to apply glue along one edge of the flange, ensuring a secure bond when clamped into place. He emphasizes that this stage is crucial for maintaining the structural integrity of the flange, which in turn safeguards the living area beneath the canvas when hatches are open.Step 3: Allowing Time to Dry
After securely attaching the first portion of the flange, Sven allows ample time for it to dry before moving forward with additional steps. This patience and precision are key aspects of his successful boatbuilding methods.Step 4: Finishing Touches
Once the flange is fully dried, Sven removes the clamps carefully, ensuring no damage occurs during this process. He then moves on to attaching four more pieces onto these main frames, completing two pairs of flanges for the bulkhead hatches.The Final Touches
While two flanges form the primary support structure around the hatches, Sven mentions there are two additional pieces required at each end to ensure comprehensive protection. This attention to detail highlights his commitment to producing a durable and reliable design. “Sailing is about finding your path, whether it’s across an ocean or within yourself.” – Sven Yrvind In conclusion, making flanges around bulkhead hatches may seem complex at first glance, but by following Sven Yrvind’s meticulous process, enthusiasts can achieve professional-level results. Remember that the journey of boatbuilding is as rewarding as reaching your destination; it tests one’s patience and dedication. For those seeking to embark on this adventure or simply gain more insight into marine craftsmanship, Sven’s wisdom is invaluable.Once the flange is fully dried, Sven removes the clamps carefully, ensuring no damage occurs during this process. He then moves on to attaching four more pieces onto these main frames, completing two pairs of flanges for the bulkhead hatches.The Final Touches
While two flanges form the primary support structure around the hatches, Sven mentions there are two additional pieces required at each end to ensure comprehensive protection. This attention to detail highlights his commitment to producing a durable and reliable design. “Sailing is about finding your path, whether it’s across an ocean or within yourself.” – Sven Yrvind In conclusion, making flanges around bulkhead hatches may seem complex at first glance, but by following Sven Yrvind’s meticulous process, enthusiasts can achieve professional-level results. Remember that the journey of boatbuilding is as rewarding as reaching your destination; it tests one’s patience and dedication. For those seeking to embark on this adventure or simply gain more insight into marine craftsmanship, Sven’s wisdom is invaluable.Sven begins by explaining that working on flanges vertically and horizontally is significantly easier than doing so in a flat position. To simplify the process further, he divides the task into two or three steps as suggested by fellow expert “for for.” This approach not only makes it more manageable but also allows for greater precision in crafting each component.Step 2: Applying Glue and Securing
Sven proceeds to apply glue along one edge of the flange, ensuring a secure bond when clamped into place. He emphasizes that this stage is crucial for maintaining the structural integrity of the flange, which in turn safeguards the living area beneath the canvas when hatches are open.Step 3: Allowing Time to Dry
After securely attaching the first portion of the flange, Sven allows ample time for it to dry before moving forward with additional steps. This patience and precision are key aspects of his successful boatbuilding methods.Step 4: Finishing Touches
Once the flange is fully dried, Sven removes the clamps carefully, ensuring no damage occurs during this process. He then moves on to attaching four more pieces onto these main frames, completing two pairs of flanges for the bulkhead hatches.The Final Touches
While two flanges form the primary support structure around the hatches, Sven mentions there are two additional pieces required at each end to ensure comprehensive protection. This attention to detail highlights his commitment to producing a durable and reliable design. “Sailing is about finding your path, whether it’s across an ocean or within yourself.” – Sven Yrvind In conclusion, making flanges around bulkhead hatches may seem complex at first glance, but by following Sven Yrvind’s meticulous process, enthusiasts can achieve professional-level results. Remember that the journey of boatbuilding is as rewarding as reaching your destination; it tests one’s patience and dedication. For those seeking to embark on this adventure or simply gain more insight into marine craftsmanship, Sven’s wisdom is invaluable.Sven Yrvind, a renowned yacht designer and sailor, shares valuable insights on creating flanges around bulkhead hatches for canvas protection in this enlightening video. By following his expert guidance, boat enthusiasts can ensure their living areas remain secure while allowing unhindered access through the hatches.Step 1: Starting with the Flange
Sven begins by explaining that working on flanges vertically and horizontally is significantly easier than doing so in a flat position. To simplify the process further, he divides the task into two or three steps as suggested by fellow expert “for for.” This approach not only makes it more manageable but also allows for greater precision in crafting each component.Step 2: Applying Glue and Securing
Sven proceeds to apply glue along one edge of the flange, ensuring a secure bond when clamped into place. He emphasizes that this stage is crucial for maintaining the structural integrity of the flange, which in turn safeguards the living area beneath the canvas when hatches are open.Step 3: Allowing Time to Dry
After securely attaching the first portion of the flange, Sven allows ample time for it to dry before moving forward with additional steps. This patience and precision are key aspects of his successful boatbuilding methods.Step 4: Finishing Touches
Once the flange is fully dried, Sven removes the clamps carefully, ensuring no damage occurs during this process. He then moves on to attaching four more pieces onto these main frames, completing two pairs of flanges for the bulkhead hatches.The Final Touches
While two flanges form the primary support structure around the hatches, Sven mentions there are two additional pieces required at each end to ensure comprehensive protection. This attention to detail highlights his commitment to producing a durable and reliable design. “Sailing is about finding your path, whether it’s across an ocean or within yourself.” – Sven Yrvind In conclusion, making flanges around bulkhead hatches may seem complex at first glance, but by following Sven Yrvind’s meticulous process, enthusiasts can achieve professional-level results. Remember that the journey of boatbuilding is as rewarding as reaching your destination; it tests one’s patience and dedication. For those seeking to embark on this adventure or simply gain more insight into marine craftsmanship, Sven’s wisdom is invaluable.Making Flanges Around Bulkhead Hatches for Canvas
Sven Yrvind, a renowned yacht designer and sailor, shares valuable insights on creating flanges around bulkhead hatches for canvas protection in this enlightening video. By following his expert guidance, boat enthusiasts can ensure their living areas remain secure while allowing unhindered access through the hatches.Step 1: Starting with the Flange
Sven begins by explaining that working on flanges vertically and horizontally is significantly easier than doing so in a flat position. To simplify the process further, he divides the task into two or three steps as suggested by fellow expert “for for.” This approach not only makes it more manageable but also allows for greater precision in crafting each component.Step 2: Applying Glue and Securing
Sven proceeds to apply glue along one edge of the flange, ensuring a secure bond when clamped into place. He emphasizes that this stage is crucial for maintaining the structural integrity of the flange, which in turn safeguards the living area beneath the canvas when hatches are open.Step 3: Allowing Time to Dry
After securely attaching the first portion of the flange, Sven allows ample time for it to dry before moving forward with additional steps. This patience and precision are key aspects of his successful boatbuilding methods.Step 4: Finishing Touches
Once the flange is fully dried, Sven removes the clamps carefully, ensuring no damage occurs during this process. He then moves on to attaching four more pieces onto these main frames, completing two pairs of flanges for the bulkhead hatches.The Final Touches
While two flanges form the primary support structure around the hatches, Sven mentions there are two additional pieces required at each end to ensure comprehensive protection. This attention to detail highlights his commitment to producing a durable and reliable design. “Sailing is about finding your path, whether it’s across an ocean or within yourself.” – Sven Yrvind In conclusion, making flanges around bulkhead hatches may seem complex at first glance, but by following Sven Yrvind’s meticulous process, enthusiasts can achieve professional-level results. Remember that the journey of boatbuilding is as rewarding as reaching your destination; it tests one’s patience and dedication. For those seeking to embark on this adventure or simply gain more insight into marine craftsmanship, Sven’s wisdom is invaluable.After securely attaching the first portion of the flange, Sven allows ample time for it to dry before moving forward with additional steps. This patience and precision are key aspects of his successful boatbuilding methods.Step 4: Finishing Touches
Once the flange is fully dried, Sven removes the clamps carefully, ensuring no damage occurs during this process. He then moves on to attaching four more pieces onto these main frames, completing two pairs of flanges for the bulkhead hatches.The Final Touches
While two flanges form the primary support structure around the hatches, Sven mentions there are two additional pieces required at each end to ensure comprehensive protection. This attention to detail highlights his commitment to producing a durable and reliable design. “Sailing is about finding your path, whether it’s across an ocean or within yourself.” – Sven Yrvind In conclusion, making flanges around bulkhead hatches may seem complex at first glance, but by following Sven Yrvind’s meticulous process, enthusiasts can achieve professional-level results. Remember that the journey of boatbuilding is as rewarding as reaching your destination; it tests one’s patience and dedication. For those seeking to embark on this adventure or simply gain more insight into marine craftsmanship, Sven’s wisdom is invaluable.Sven begins by explaining that working on flanges vertically and horizontally is significantly easier than doing so in a flat position. To simplify the process further, he divides the task into two or three steps as suggested by fellow expert “for for.” This approach not only makes it more manageable but also allows for greater precision in crafting each component.Step 2: Applying Glue and Securing
Sven proceeds to apply glue along one edge of the flange, ensuring a secure bond when clamped into place. He emphasizes that this stage is crucial for maintaining the structural integrity of the flange, which in turn safeguards the living area beneath the canvas when hatches are open.Step 3: Allowing Time to Dry
After securely attaching the first portion of the flange, Sven allows ample time for it to dry before moving forward with additional steps. This patience and precision are key aspects of his successful boatbuilding methods.Step 4: Finishing Touches
Once the flange is fully dried, Sven removes the clamps carefully, ensuring no damage occurs during this process. He then moves on to attaching four more pieces onto these main frames, completing two pairs of flanges for the bulkhead hatches.The Final Touches
While two flanges form the primary support structure around the hatches, Sven mentions there are two additional pieces required at each end to ensure comprehensive protection. This attention to detail highlights his commitment to producing a durable and reliable design. “Sailing is about finding your path, whether it’s across an ocean or within yourself.” – Sven Yrvind In conclusion, making flanges around bulkhead hatches may seem complex at first glance, but by following Sven Yrvind’s meticulous process, enthusiasts can achieve professional-level results. Remember that the journey of boatbuilding is as rewarding as reaching your destination; it tests one’s patience and dedication. For those seeking to embark on this adventure or simply gain more insight into marine craftsmanship, Sven’s wisdom is invaluable.Sven Yrvind, a renowned yacht designer and sailor, shares valuable insights on creating flanges around bulkhead hatches for canvas protection in this enlightening video. By following his expert guidance, boat enthusiasts can ensure their living areas remain secure while allowing unhindered access through the hatches.Step 1: Starting with the Flange
Sven begins by explaining that working on flanges vertically and horizontally is significantly easier than doing so in a flat position. To simplify the process further, he divides the task into two or three steps as suggested by fellow expert “for for.” This approach not only makes it more manageable but also allows for greater precision in crafting each component.Step 2: Applying Glue and Securing
Sven proceeds to apply glue along one edge of the flange, ensuring a secure bond when clamped into place. He emphasizes that this stage is crucial for maintaining the structural integrity of the flange, which in turn safeguards the living area beneath the canvas when hatches are open.Step 3: Allowing Time to Dry
After securely attaching the first portion of the flange, Sven allows ample time for it to dry before moving forward with additional steps. This patience and precision are key aspects of his successful boatbuilding methods.Step 4: Finishing Touches
Once the flange is fully dried, Sven removes the clamps carefully, ensuring no damage occurs during this process. He then moves on to attaching four more pieces onto these main frames, completing two pairs of flanges for the bulkhead hatches.The Final Touches
While two flanges form the primary support structure around the hatches, Sven mentions there are two additional pieces required at each end to ensure comprehensive protection. This attention to detail highlights his commitment to producing a durable and reliable design. “Sailing is about finding your path, whether it’s across an ocean or within yourself.” – Sven Yrvind In conclusion, making flanges around bulkhead hatches may seem complex at first glance, but by following Sven Yrvind’s meticulous process, enthusiasts can achieve professional-level results. Remember that the journey of boatbuilding is as rewarding as reaching your destination; it tests one’s patience and dedication. For those seeking to embark on this adventure or simply gain more insight into marine craftsmanship, Sven’s wisdom is invaluable.Making Flanges Around Bulkhead Hatches for Canvas
Sven Yrvind, a renowned yacht designer and sailor, shares valuable insights on creating flanges around bulkhead hatches for canvas protection in this enlightening video. By following his expert guidance, boat enthusiasts can ensure their living areas remain secure while allowing unhindered access through the hatches.Step 1: Starting with the Flange
Sven begins by explaining that working on flanges vertically and horizontally is significantly easier than doing so in a flat position. To simplify the process further, he divides the task into two or three steps as suggested by fellow expert “for for.” This approach not only makes it more manageable but also allows for greater precision in crafting each component.Step 2: Applying Glue and Securing
Sven proceeds to apply glue along one edge of the flange, ensuring a secure bond when clamped into place. He emphasizes that this stage is crucial for maintaining the structural integrity of the flange, which in turn safeguards the living area beneath the canvas when hatches are open.Step 3: Allowing Time to Dry
After securely attaching the first portion of the flange, Sven allows ample time for it to dry before moving forward with additional steps. This patience and precision are key aspects of his successful boatbuilding methods.Step 4: Finishing Touches
Once the flange is fully dried, Sven removes the clamps carefully, ensuring no damage occurs during this process. He then moves on to attaching four more pieces onto these main frames, completing two pairs of flanges for the bulkhead hatches.The Final Touches
While two flanges form the primary support structure around the hatches, Sven mentions there are two additional pieces required at each end to ensure comprehensive protection. This attention to detail highlights his commitment to producing a durable and reliable design. “Sailing is about finding your path, whether it’s across an ocean or within yourself.” – Sven Yrvind In conclusion, making flanges around bulkhead hatches may seem complex at first glance, but by following Sven Yrvind’s meticulous process, enthusiasts can achieve professional-level results. Remember that the journey of boatbuilding is as rewarding as reaching your destination; it tests one’s patience and dedication. For those seeking to embark on this adventure or simply gain more insight into marine craftsmanship, Sven’s wisdom is invaluable.Sven proceeds to apply glue along one edge of the flange, ensuring a secure bond when clamped into place. He emphasizes that this stage is crucial for maintaining the structural integrity of the flange, which in turn safeguards the living area beneath the canvas when hatches are open.Step 3: Allowing Time to Dry
After securely attaching the first portion of the flange, Sven allows ample time for it to dry before moving forward with additional steps. This patience and precision are key aspects of his successful boatbuilding methods.Step 4: Finishing Touches
Once the flange is fully dried, Sven removes the clamps carefully, ensuring no damage occurs during this process. He then moves on to attaching four more pieces onto these main frames, completing two pairs of flanges for the bulkhead hatches.The Final Touches
While two flanges form the primary support structure around the hatches, Sven mentions there are two additional pieces required at each end to ensure comprehensive protection. This attention to detail highlights his commitment to producing a durable and reliable design. “Sailing is about finding your path, whether it’s across an ocean or within yourself.” – Sven Yrvind In conclusion, making flanges around bulkhead hatches may seem complex at first glance, but by following Sven Yrvind’s meticulous process, enthusiasts can achieve professional-level results. Remember that the journey of boatbuilding is as rewarding as reaching your destination; it tests one’s patience and dedication. For those seeking to embark on this adventure or simply gain more insight into marine craftsmanship, Sven’s wisdom is invaluable.Sven begins by explaining that working on flanges vertically and horizontally is significantly easier than doing so in a flat position. To simplify the process further, he divides the task into two or three steps as suggested by fellow expert “for for.” This approach not only makes it more manageable but also allows for greater precision in crafting each component.Step 2: Applying Glue and Securing
Sven proceeds to apply glue along one edge of the flange, ensuring a secure bond when clamped into place. He emphasizes that this stage is crucial for maintaining the structural integrity of the flange, which in turn safeguards the living area beneath the canvas when hatches are open.Step 3: Allowing Time to Dry
After securely attaching the first portion of the flange, Sven allows ample time for it to dry before moving forward with additional steps. This patience and precision are key aspects of his successful boatbuilding methods.Step 4: Finishing Touches
Once the flange is fully dried, Sven removes the clamps carefully, ensuring no damage occurs during this process. He then moves on to attaching four more pieces onto these main frames, completing two pairs of flanges for the bulkhead hatches.The Final Touches
While two flanges form the primary support structure around the hatches, Sven mentions there are two additional pieces required at each end to ensure comprehensive protection. This attention to detail highlights his commitment to producing a durable and reliable design. “Sailing is about finding your path, whether it’s across an ocean or within yourself.” – Sven Yrvind In conclusion, making flanges around bulkhead hatches may seem complex at first glance, but by following Sven Yrvind’s meticulous process, enthusiasts can achieve professional-level results. Remember that the journey of boatbuilding is as rewarding as reaching your destination; it tests one’s patience and dedication. For those seeking to embark on this adventure or simply gain more insight into marine craftsmanship, Sven’s wisdom is invaluable.Sven Yrvind, a renowned yacht designer and sailor, shares valuable insights on creating flanges around bulkhead hatches for canvas protection in this enlightening video. By following his expert guidance, boat enthusiasts can ensure their living areas remain secure while allowing unhindered access through the hatches.Step 1: Starting with the Flange
Sven begins by explaining that working on flanges vertically and horizontally is significantly easier than doing so in a flat position. To simplify the process further, he divides the task into two or three steps as suggested by fellow expert “for for.” This approach not only makes it more manageable but also allows for greater precision in crafting each component.Step 2: Applying Glue and Securing
Sven proceeds to apply glue along one edge of the flange, ensuring a secure bond when clamped into place. He emphasizes that this stage is crucial for maintaining the structural integrity of the flange, which in turn safeguards the living area beneath the canvas when hatches are open.Step 3: Allowing Time to Dry
After securely attaching the first portion of the flange, Sven allows ample time for it to dry before moving forward with additional steps. This patience and precision are key aspects of his successful boatbuilding methods.Step 4: Finishing Touches
Once the flange is fully dried, Sven removes the clamps carefully, ensuring no damage occurs during this process. He then moves on to attaching four more pieces onto these main frames, completing two pairs of flanges for the bulkhead hatches.The Final Touches
While two flanges form the primary support structure around the hatches, Sven mentions there are two additional pieces required at each end to ensure comprehensive protection. This attention to detail highlights his commitment to producing a durable and reliable design. “Sailing is about finding your path, whether it’s across an ocean or within yourself.” – Sven Yrvind In conclusion, making flanges around bulkhead hatches may seem complex at first glance, but by following Sven Yrvind’s meticulous process, enthusiasts can achieve professional-level results. Remember that the journey of boatbuilding is as rewarding as reaching your destination; it tests one’s patience and dedication. For those seeking to embark on this adventure or simply gain more insight into marine craftsmanship, Sven’s wisdom is invaluable.Making Flanges Around Bulkhead Hatches for Canvas
Sven Yrvind, a renowned yacht designer and sailor, shares valuable insights on creating flanges around bulkhead hatches for canvas protection in this enlightening video. By following his expert guidance, boat enthusiasts can ensure their living areas remain secure while allowing unhindered access through the hatches.Step 1: Starting with the Flange
Sven begins by explaining that working on flanges vertically and horizontally is significantly easier than doing so in a flat position. To simplify the process further, he divides the task into two or three steps as suggested by fellow expert “for for.” This approach not only makes it more manageable but also allows for greater precision in crafting each component.Step 2: Applying Glue and Securing
Sven proceeds to apply glue along one edge of the flange, ensuring a secure bond when clamped into place. He emphasizes that this stage is crucial for maintaining the structural integrity of the flange, which in turn safeguards the living area beneath the canvas when hatches are open.Step 3: Allowing Time to Dry
After securely attaching the first portion of the flange, Sven allows ample time for it to dry before moving forward with additional steps. This patience and precision are key aspects of his successful boatbuilding methods.Step 4: Finishing Touches
Once the flange is fully dried, Sven removes the clamps carefully, ensuring no damage occurs during this process. He then moves on to attaching four more pieces onto these main frames, completing two pairs of flanges for the bulkhead hatches.The Final Touches
While two flanges form the primary support structure around the hatches, Sven mentions there are two additional pieces required at each end to ensure comprehensive protection. This attention to detail highlights his commitment to producing a durable and reliable design. “Sailing is about finding your path, whether it’s across an ocean or within yourself.” – Sven Yrvind In conclusion, making flanges around bulkhead hatches may seem complex at first glance, but by following Sven Yrvind’s meticulous process, enthusiasts can achieve professional-level results. Remember that the journey of boatbuilding is as rewarding as reaching your destination; it tests one’s patience and dedication. For those seeking to embark on this adventure or simply gain more insight into marine craftsmanship, Sven’s wisdom is invaluable.Once the flange is fully dried, Sven removes the clamps carefully, ensuring no damage occurs during this process. He then moves on to attaching four more pieces onto these main frames, completing two pairs of flanges for the bulkhead hatches.The Final Touches
While two flanges form the primary support structure around the hatches, Sven mentions there are two additional pieces required at each end to ensure comprehensive protection. This attention to detail highlights his commitment to producing a durable and reliable design. “Sailing is about finding your path, whether it’s across an ocean or within yourself.” – Sven Yrvind In conclusion, making flanges around bulkhead hatches may seem complex at first glance, but by following Sven Yrvind’s meticulous process, enthusiasts can achieve professional-level results. Remember that the journey of boatbuilding is as rewarding as reaching your destination; it tests one’s patience and dedication. For those seeking to embark on this adventure or simply gain more insight into marine craftsmanship, Sven’s wisdom is invaluable.Sven proceeds to apply glue along one edge of the flange, ensuring a secure bond when clamped into place. He emphasizes that this stage is crucial for maintaining the structural integrity of the flange, which in turn safeguards the living area beneath the canvas when hatches are open.Step 3: Allowing Time to Dry
After securely attaching the first portion of the flange, Sven allows ample time for it to dry before moving forward with additional steps. This patience and precision are key aspects of his successful boatbuilding methods.Step 4: Finishing Touches
Once the flange is fully dried, Sven removes the clamps carefully, ensuring no damage occurs during this process. He then moves on to attaching four more pieces onto these main frames, completing two pairs of flanges for the bulkhead hatches.The Final Touches
While two flanges form the primary support structure around the hatches, Sven mentions there are two additional pieces required at each end to ensure comprehensive protection. This attention to detail highlights his commitment to producing a durable and reliable design. “Sailing is about finding your path, whether it’s across an ocean or within yourself.” – Sven Yrvind In conclusion, making flanges around bulkhead hatches may seem complex at first glance, but by following Sven Yrvind’s meticulous process, enthusiasts can achieve professional-level results. Remember that the journey of boatbuilding is as rewarding as reaching your destination; it tests one’s patience and dedication. For those seeking to embark on this adventure or simply gain more insight into marine craftsmanship, Sven’s wisdom is invaluable.Sven begins by explaining that working on flanges vertically and horizontally is significantly easier than doing so in a flat position. To simplify the process further, he divides the task into two or three steps as suggested by fellow expert “for for.” This approach not only makes it more manageable but also allows for greater precision in crafting each component.Step 2: Applying Glue and Securing
Sven proceeds to apply glue along one edge of the flange, ensuring a secure bond when clamped into place. He emphasizes that this stage is crucial for maintaining the structural integrity of the flange, which in turn safeguards the living area beneath the canvas when hatches are open.Step 3: Allowing Time to Dry
After securely attaching the first portion of the flange, Sven allows ample time for it to dry before moving forward with additional steps. This patience and precision are key aspects of his successful boatbuilding methods.Step 4: Finishing Touches
Once the flange is fully dried, Sven removes the clamps carefully, ensuring no damage occurs during this process. He then moves on to attaching four more pieces onto these main frames, completing two pairs of flanges for the bulkhead hatches.The Final Touches
While two flanges form the primary support structure around the hatches, Sven mentions there are two additional pieces required at each end to ensure comprehensive protection. This attention to detail highlights his commitment to producing a durable and reliable design. “Sailing is about finding your path, whether it’s across an ocean or within yourself.” – Sven Yrvind In conclusion, making flanges around bulkhead hatches may seem complex at first glance, but by following Sven Yrvind’s meticulous process, enthusiasts can achieve professional-level results. Remember that the journey of boatbuilding is as rewarding as reaching your destination; it tests one’s patience and dedication. For those seeking to embark on this adventure or simply gain more insight into marine craftsmanship, Sven’s wisdom is invaluable.Sven Yrvind, a renowned yacht designer and sailor, shares valuable insights on creating flanges around bulkhead hatches for canvas protection in this enlightening video. By following his expert guidance, boat enthusiasts can ensure their living areas remain secure while allowing unhindered access through the hatches.Step 1: Starting with the Flange
Sven begins by explaining that working on flanges vertically and horizontally is significantly easier than doing so in a flat position. To simplify the process further, he divides the task into two or three steps as suggested by fellow expert “for for.” This approach not only makes it more manageable but also allows for greater precision in crafting each component.Step 2: Applying Glue and Securing
Sven proceeds to apply glue along one edge of the flange, ensuring a secure bond when clamped into place. He emphasizes that this stage is crucial for maintaining the structural integrity of the flange, which in turn safeguards the living area beneath the canvas when hatches are open.Step 3: Allowing Time to Dry
After securely attaching the first portion of the flange, Sven allows ample time for it to dry before moving forward with additional steps. This patience and precision are key aspects of his successful boatbuilding methods.Step 4: Finishing Touches
Once the flange is fully dried, Sven removes the clamps carefully, ensuring no damage occurs during this process. He then moves on to attaching four more pieces onto these main frames, completing two pairs of flanges for the bulkhead hatches.The Final Touches
While two flanges form the primary support structure around the hatches, Sven mentions there are two additional pieces required at each end to ensure comprehensive protection. This attention to detail highlights his commitment to producing a durable and reliable design. “Sailing is about finding your path, whether it’s across an ocean or within yourself.” – Sven Yrvind In conclusion, making flanges around bulkhead hatches may seem complex at first glance, but by following Sven Yrvind’s meticulous process, enthusiasts can achieve professional-level results. Remember that the journey of boatbuilding is as rewarding as reaching your destination; it tests one’s patience and dedication. For those seeking to embark on this adventure or simply gain more insight into marine craftsmanship, Sven’s wisdom is invaluable.Making Flanges Around Bulkhead Hatches for Canvas
Sven Yrvind, a renowned yacht designer and sailor, shares valuable insights on creating flanges around bulkhead hatches for canvas protection in this enlightening video. By following his expert guidance, boat enthusiasts can ensure their living areas remain secure while allowing unhindered access through the hatches.Step 1: Starting with the Flange
Sven begins by explaining that working on flanges vertically and horizontally is significantly easier than doing so in a flat position. To simplify the process further, he divides the task into two or three steps as suggested by fellow expert “for for.” This approach not only makes it more manageable but also allows for greater precision in crafting each component.Step 2: Applying Glue and Securing
Sven proceeds to apply glue along one edge of the flange, ensuring a secure bond when clamped into place. He emphasizes that this stage is crucial for maintaining the structural integrity of the flange, which in turn safeguards the living area beneath the canvas when hatches are open.Step 3: Allowing Time to Dry
After securely attaching the first portion of the flange, Sven allows ample time for it to dry before moving forward with additional steps. This patience and precision are key aspects of his successful boatbuilding methods.Step 4: Finishing Touches
Once the flange is fully dried, Sven removes the clamps carefully, ensuring no damage occurs during this process. He then moves on to attaching four more pieces onto these main frames, completing two pairs of flanges for the bulkhead hatches.The Final Touches
While two flanges form the primary support structure around the hatches, Sven mentions there are two additional pieces required at each end to ensure comprehensive protection. This attention to detail highlights his commitment to producing a durable and reliable design. “Sailing is about finding your path, whether it’s across an ocean or within yourself.” – Sven Yrvind In conclusion, making flanges around bulkhead hatches may seem complex at first glance, but by following Sven Yrvind’s meticulous process, enthusiasts can achieve professional-level results. Remember that the journey of boatbuilding is as rewarding as reaching your destination; it tests one’s patience and dedication. For those seeking to embark on this adventure or simply gain more insight into marine craftsmanship, Sven’s wisdom is invaluable.After securely attaching the first portion of the flange, Sven allows ample time for it to dry before moving forward with additional steps. This patience and precision are key aspects of his successful boatbuilding methods.Step 4: Finishing Touches
Once the flange is fully dried, Sven removes the clamps carefully, ensuring no damage occurs during this process. He then moves on to attaching four more pieces onto these main frames, completing two pairs of flanges for the bulkhead hatches.The Final Touches
While two flanges form the primary support structure around the hatches, Sven mentions there are two additional pieces required at each end to ensure comprehensive protection. This attention to detail highlights his commitment to producing a durable and reliable design. “Sailing is about finding your path, whether it’s across an ocean or within yourself.” – Sven Yrvind In conclusion, making flanges around bulkhead hatches may seem complex at first glance, but by following Sven Yrvind’s meticulous process, enthusiasts can achieve professional-level results. Remember that the journey of boatbuilding is as rewarding as reaching your destination; it tests one’s patience and dedication. For those seeking to embark on this adventure or simply gain more insight into marine craftsmanship, Sven’s wisdom is invaluable.Sven proceeds to apply glue along one edge of the flange, ensuring a secure bond when clamped into place. He emphasizes that this stage is crucial for maintaining the structural integrity of the flange, which in turn safeguards the living area beneath the canvas when hatches are open.Step 3: Allowing Time to Dry
After securely attaching the first portion of the flange, Sven allows ample time for it to dry before moving forward with additional steps. This patience and precision are key aspects of his successful boatbuilding methods.Step 4: Finishing Touches
Once the flange is fully dried, Sven removes the clamps carefully, ensuring no damage occurs during this process. He then moves on to attaching four more pieces onto these main frames, completing two pairs of flanges for the bulkhead hatches.The Final Touches
While two flanges form the primary support structure around the hatches, Sven mentions there are two additional pieces required at each end to ensure comprehensive protection. This attention to detail highlights his commitment to producing a durable and reliable design. “Sailing is about finding your path, whether it’s across an ocean or within yourself.” – Sven Yrvind In conclusion, making flanges around bulkhead hatches may seem complex at first glance, but by following Sven Yrvind’s meticulous process, enthusiasts can achieve professional-level results. Remember that the journey of boatbuilding is as rewarding as reaching your destination; it tests one’s patience and dedication. For those seeking to embark on this adventure or simply gain more insight into marine craftsmanship, Sven’s wisdom is invaluable.Sven begins by explaining that working on flanges vertically and horizontally is significantly easier than doing so in a flat position. To simplify the process further, he divides the task into two or three steps as suggested by fellow expert “for for.” This approach not only makes it more manageable but also allows for greater precision in crafting each component.Step 2: Applying Glue and Securing
Sven proceeds to apply glue along one edge of the flange, ensuring a secure bond when clamped into place. He emphasizes that this stage is crucial for maintaining the structural integrity of the flange, which in turn safeguards the living area beneath the canvas when hatches are open.Step 3: Allowing Time to Dry
After securely attaching the first portion of the flange, Sven allows ample time for it to dry before moving forward with additional steps. This patience and precision are key aspects of his successful boatbuilding methods.Step 4: Finishing Touches
Once the flange is fully dried, Sven removes the clamps carefully, ensuring no damage occurs during this process. He then moves on to attaching four more pieces onto these main frames, completing two pairs of flanges for the bulkhead hatches.The Final Touches
While two flanges form the primary support structure around the hatches, Sven mentions there are two additional pieces required at each end to ensure comprehensive protection. This attention to detail highlights his commitment to producing a durable and reliable design. “Sailing is about finding your path, whether it’s across an ocean or within yourself.” – Sven Yrvind In conclusion, making flanges around bulkhead hatches may seem complex at first glance, but by following Sven Yrvind’s meticulous process, enthusiasts can achieve professional-level results. Remember that the journey of boatbuilding is as rewarding as reaching your destination; it tests one’s patience and dedication. For those seeking to embark on this adventure or simply gain more insight into marine craftsmanship, Sven’s wisdom is invaluable.Sven Yrvind, a renowned yacht designer and sailor, shares valuable insights on creating flanges around bulkhead hatches for canvas protection in this enlightening video. By following his expert guidance, boat enthusiasts can ensure their living areas remain secure while allowing unhindered access through the hatches.Step 1: Starting with the Flange
Sven begins by explaining that working on flanges vertically and horizontally is significantly easier than doing so in a flat position. To simplify the process further, he divides the task into two or three steps as suggested by fellow expert “for for.” This approach not only makes it more manageable but also allows for greater precision in crafting each component.Step 2: Applying Glue and Securing
Sven proceeds to apply glue along one edge of the flange, ensuring a secure bond when clamped into place. He emphasizes that this stage is crucial for maintaining the structural integrity of the flange, which in turn safeguards the living area beneath the canvas when hatches are open.Step 3: Allowing Time to Dry
After securely attaching the first portion of the flange, Sven allows ample time for it to dry before moving forward with additional steps. This patience and precision are key aspects of his successful boatbuilding methods.Step 4: Finishing Touches
Once the flange is fully dried, Sven removes the clamps carefully, ensuring no damage occurs during this process. He then moves on to attaching four more pieces onto these main frames, completing two pairs of flanges for the bulkhead hatches.The Final Touches
While two flanges form the primary support structure around the hatches, Sven mentions there are two additional pieces required at each end to ensure comprehensive protection. This attention to detail highlights his commitment to producing a durable and reliable design. “Sailing is about finding your path, whether it’s across an ocean or within yourself.” – Sven Yrvind In conclusion, making flanges around bulkhead hatches may seem complex at first glance, but by following Sven Yrvind’s meticulous process, enthusiasts can achieve professional-level results. Remember that the journey of boatbuilding is as rewarding as reaching your destination; it tests one’s patience and dedication. For those seeking to embark on this adventure or simply gain more insight into marine craftsmanship, Sven’s wisdom is invaluable.Making Flanges Around Bulkhead Hatches for Canvas
Sven Yrvind, a renowned yacht designer and sailor, shares valuable insights on creating flanges around bulkhead hatches for canvas protection in this enlightening video. By following his expert guidance, boat enthusiasts can ensure their living areas remain secure while allowing unhindered access through the hatches.Step 1: Starting with the Flange
Sven begins by explaining that working on flanges vertically and horizontally is significantly easier than doing so in a flat position. To simplify the process further, he divides the task into two or three steps as suggested by fellow expert “for for.” This approach not only makes it more manageable but also allows for greater precision in crafting each component.Step 2: Applying Glue and Securing
Sven proceeds to apply glue along one edge of the flange, ensuring a secure bond when clamped into place. He emphasizes that this stage is crucial for maintaining the structural integrity of the flange, which in turn safeguards the living area beneath the canvas when hatches are open.Step 3: Allowing Time to Dry
After securely attaching the first portion of the flange, Sven allows ample time for it to dry before moving forward with additional steps. This patience and precision are key aspects of his successful boatbuilding methods.Step 4: Finishing Touches
Once the flange is fully dried, Sven removes the clamps carefully, ensuring no damage occurs during this process. He then moves on to attaching four more pieces onto these main frames, completing two pairs of flanges for the bulkhead hatches.The Final Touches
While two flanges form the primary support structure around the hatches, Sven mentions there are two additional pieces required at each end to ensure comprehensive protection. This attention to detail highlights his commitment to producing a durable and reliable design. “Sailing is about finding your path, whether it’s across an ocean or within yourself.” – Sven Yrvind In conclusion, making flanges around bulkhead hatches may seem complex at first glance, but by following Sven Yrvind’s meticulous process, enthusiasts can achieve professional-level results. Remember that the journey of boatbuilding is as rewarding as reaching your destination; it tests one’s patience and dedication. For those seeking to embark on this adventure or simply gain more insight into marine craftsmanship, Sven’s wisdom is invaluable.Once the flange is fully dried, Sven removes the clamps carefully, ensuring no damage occurs during this process. He then moves on to attaching four more pieces onto these main frames, completing two pairs of flanges for the bulkhead hatches.The Final Touches
While two flanges form the primary support structure around the hatches, Sven mentions there are two additional pieces required at each end to ensure comprehensive protection. This attention to detail highlights his commitment to producing a durable and reliable design. “Sailing is about finding your path, whether it’s across an ocean or within yourself.” – Sven Yrvind In conclusion, making flanges around bulkhead hatches may seem complex at first glance, but by following Sven Yrvind’s meticulous process, enthusiasts can achieve professional-level results. Remember that the journey of boatbuilding is as rewarding as reaching your destination; it tests one’s patience and dedication. For those seeking to embark on this adventure or simply gain more insight into marine craftsmanship, Sven’s wisdom is invaluable.After securely attaching the first portion of the flange, Sven allows ample time for it to dry before moving forward with additional steps. This patience and precision are key aspects of his successful boatbuilding methods.Step 4: Finishing Touches
Once the flange is fully dried, Sven removes the clamps carefully, ensuring no damage occurs during this process. He then moves on to attaching four more pieces onto these main frames, completing two pairs of flanges for the bulkhead hatches.The Final Touches
While two flanges form the primary support structure around the hatches, Sven mentions there are two additional pieces required at each end to ensure comprehensive protection. This attention to detail highlights his commitment to producing a durable and reliable design. “Sailing is about finding your path, whether it’s across an ocean or within yourself.” – Sven Yrvind In conclusion, making flanges around bulkhead hatches may seem complex at first glance, but by following Sven Yrvind’s meticulous process, enthusiasts can achieve professional-level results. Remember that the journey of boatbuilding is as rewarding as reaching your destination; it tests one’s patience and dedication. For those seeking to embark on this adventure or simply gain more insight into marine craftsmanship, Sven’s wisdom is invaluable.Sven proceeds to apply glue along one edge of the flange, ensuring a secure bond when clamped into place. He emphasizes that this stage is crucial for maintaining the structural integrity of the flange, which in turn safeguards the living area beneath the canvas when hatches are open.Step 3: Allowing Time to Dry
After securely attaching the first portion of the flange, Sven allows ample time for it to dry before moving forward with additional steps. This patience and precision are key aspects of his successful boatbuilding methods.Step 4: Finishing Touches
Once the flange is fully dried, Sven removes the clamps carefully, ensuring no damage occurs during this process. He then moves on to attaching four more pieces onto these main frames, completing two pairs of flanges for the bulkhead hatches.The Final Touches
While two flanges form the primary support structure around the hatches, Sven mentions there are two additional pieces required at each end to ensure comprehensive protection. This attention to detail highlights his commitment to producing a durable and reliable design. “Sailing is about finding your path, whether it’s across an ocean or within yourself.” – Sven Yrvind In conclusion, making flanges around bulkhead hatches may seem complex at first glance, but by following Sven Yrvind’s meticulous process, enthusiasts can achieve professional-level results. Remember that the journey of boatbuilding is as rewarding as reaching your destination; it tests one’s patience and dedication. For those seeking to embark on this adventure or simply gain more insight into marine craftsmanship, Sven’s wisdom is invaluable.Sven begins by explaining that working on flanges vertically and horizontally is significantly easier than doing so in a flat position. To simplify the process further, he divides the task into two or three steps as suggested by fellow expert “for for.” This approach not only makes it more manageable but also allows for greater precision in crafting each component.Step 2: Applying Glue and Securing
Sven proceeds to apply glue along one edge of the flange, ensuring a secure bond when clamped into place. He emphasizes that this stage is crucial for maintaining the structural integrity of the flange, which in turn safeguards the living area beneath the canvas when hatches are open.Step 3: Allowing Time to Dry
After securely attaching the first portion of the flange, Sven allows ample time for it to dry before moving forward with additional steps. This patience and precision are key aspects of his successful boatbuilding methods.Step 4: Finishing Touches
Once the flange is fully dried, Sven removes the clamps carefully, ensuring no damage occurs during this process. He then moves on to attaching four more pieces onto these main frames, completing two pairs of flanges for the bulkhead hatches.The Final Touches
While two flanges form the primary support structure around the hatches, Sven mentions there are two additional pieces required at each end to ensure comprehensive protection. This attention to detail highlights his commitment to producing a durable and reliable design. “Sailing is about finding your path, whether it’s across an ocean or within yourself.” – Sven Yrvind In conclusion, making flanges around bulkhead hatches may seem complex at first glance, but by following Sven Yrvind’s meticulous process, enthusiasts can achieve professional-level results. Remember that the journey of boatbuilding is as rewarding as reaching your destination; it tests one’s patience and dedication. For those seeking to embark on this adventure or simply gain more insight into marine craftsmanship, Sven’s wisdom is invaluable.Sven Yrvind, a renowned yacht designer and sailor, shares valuable insights on creating flanges around bulkhead hatches for canvas protection in this enlightening video. By following his expert guidance, boat enthusiasts can ensure their living areas remain secure while allowing unhindered access through the hatches.Step 1: Starting with the Flange
Sven begins by explaining that working on flanges vertically and horizontally is significantly easier than doing so in a flat position. To simplify the process further, he divides the task into two or three steps as suggested by fellow expert “for for.” This approach not only makes it more manageable but also allows for greater precision in crafting each component.Step 2: Applying Glue and Securing
Sven proceeds to apply glue along one edge of the flange, ensuring a secure bond when clamped into place. He emphasizes that this stage is crucial for maintaining the structural integrity of the flange, which in turn safeguards the living area beneath the canvas when hatches are open.Step 3: Allowing Time to Dry
After securely attaching the first portion of the flange, Sven allows ample time for it to dry before moving forward with additional steps. This patience and precision are key aspects of his successful boatbuilding methods.Step 4: Finishing Touches
Once the flange is fully dried, Sven removes the clamps carefully, ensuring no damage occurs during this process. He then moves on to attaching four more pieces onto these main frames, completing two pairs of flanges for the bulkhead hatches.The Final Touches
While two flanges form the primary support structure around the hatches, Sven mentions there are two additional pieces required at each end to ensure comprehensive protection. This attention to detail highlights his commitment to producing a durable and reliable design. “Sailing is about finding your path, whether it’s across an ocean or within yourself.” – Sven Yrvind In conclusion, making flanges around bulkhead hatches may seem complex at first glance, but by following Sven Yrvind’s meticulous process, enthusiasts can achieve professional-level results. Remember that the journey of boatbuilding is as rewarding as reaching your destination; it tests one’s patience and dedication. For those seeking to embark on this adventure or simply gain more insight into marine craftsmanship, Sven’s wisdom is invaluable.Making Flanges Around Bulkhead Hatches for Canvas
Sven Yrvind, a renowned yacht designer and sailor, shares valuable insights on creating flanges around bulkhead hatches for canvas protection in this enlightening video. By following his expert guidance, boat enthusiasts can ensure their living areas remain secure while allowing unhindered access through the hatches.Step 1: Starting with the Flange
Sven begins by explaining that working on flanges vertically and horizontally is significantly easier than doing so in a flat position. To simplify the process further, he divides the task into two or three steps as suggested by fellow expert “for for.” This approach not only makes it more manageable but also allows for greater precision in crafting each component.Step 2: Applying Glue and Securing
Sven proceeds to apply glue along one edge of the flange, ensuring a secure bond when clamped into place. He emphasizes that this stage is crucial for maintaining the structural integrity of the flange, which in turn safeguards the living area beneath the canvas when hatches are open.Step 3: Allowing Time to Dry
After securely attaching the first portion of the flange, Sven allows ample time for it to dry before moving forward with additional steps. This patience and precision are key aspects of his successful boatbuilding methods.Step 4: Finishing Touches
Once the flange is fully dried, Sven removes the clamps carefully, ensuring no damage occurs during this process. He then moves on to attaching four more pieces onto these main frames, completing two pairs of flanges for the bulkhead hatches.The Final Touches
While two flanges form the primary support structure around the hatches, Sven mentions there are two additional pieces required at each end to ensure comprehensive protection. This attention to detail highlights his commitment to producing a durable and reliable design. “Sailing is about finding your path, whether it’s across an ocean or within yourself.” – Sven Yrvind In conclusion, making flanges around bulkhead hatches may seem complex at first glance, but by following Sven Yrvind’s meticulous process, enthusiasts can achieve professional-level results. Remember that the journey of boatbuilding is as rewarding as reaching your destination; it tests one’s patience and dedication. For those seeking to embark on this adventure or simply gain more insight into marine craftsmanship, Sven’s wisdom is invaluable.Sven Yrvind, a renowned yacht designer and sailor, shares valuable insights on creating flanges around bulkhead hatches for canvas protection in this enlightening video. By following his expert guidance, boat enthusiasts can ensure their living areas remain secure while allowing unhindered access through the hatches.Step 1: Starting with the Flange
Sven begins by explaining that working on flanges vertically and horizontally is significantly easier than doing so in a flat position. To simplify the process further, he divides the task into two or three steps as suggested by fellow expert “for for.” This approach not only makes it more manageable but also allows for greater precision in crafting each component.Step 2: Applying Glue and Securing
Sven proceeds to apply glue along one edge of the flange, ensuring a secure bond when clamped into place. He emphasizes that this stage is crucial for maintaining the structural integrity of the flange, which in turn safeguards the living area beneath the canvas when hatches are open.Step 3: Allowing Time to Dry
After securely attaching the first portion of the flange, Sven allows ample time for it to dry before moving forward with additional steps. This patience and precision are key aspects of his successful boatbuilding methods.Step 4: Finishing Touches
Once the flange is fully dried, Sven removes the clamps carefully, ensuring no damage occurs during this process. He then moves on to attaching four more pieces onto these main frames, completing two pairs of flanges for the bulkhead hatches.The Final Touches
While two flanges form the primary support structure around the hatches, Sven mentions there are two additional pieces required at each end to ensure comprehensive protection. This attention to detail highlights his commitment to producing a durable and reliable design. “Sailing is about finding your path, whether it’s across an ocean or within yourself.” – Sven Yrvind In conclusion, making flanges around bulkhead hatches may seem complex at first glance, but by following Sven Yrvind’s meticulous process, enthusiasts can achieve professional-level results. Remember that the journey of boatbuilding is as rewarding as reaching your destination; it tests one’s patience and dedication. For those seeking to embark on this adventure or simply gain more insight into marine craftsmanship, Sven’s wisdom is invaluable.Once the flange is fully dried, Sven removes the clamps carefully, ensuring no damage occurs during this process. He then moves on to attaching four more pieces onto these main frames, completing two pairs of flanges for the bulkhead hatches.The Final Touches
While two flanges form the primary support structure around the hatches, Sven mentions there are two additional pieces required at each end to ensure comprehensive protection. This attention to detail highlights his commitment to producing a durable and reliable design. “Sailing is about finding your path, whether it’s across an ocean or within yourself.” – Sven Yrvind In conclusion, making flanges around bulkhead hatches may seem complex at first glance, but by following Sven Yrvind’s meticulous process, enthusiasts can achieve professional-level results. Remember that the journey of boatbuilding is as rewarding as reaching your destination; it tests one’s patience and dedication. For those seeking to embark on this adventure or simply gain more insight into marine craftsmanship, Sven’s wisdom is invaluable.Sven Yrvind, a renowned yacht designer and sailor, shares valuable insights on creating flanges around bulkhead hatches for canvas protection in this enlightening video. By following his expert guidance, boat enthusiasts can ensure their living areas remain secure while allowing unhindered access through the hatches.Step 1: Starting with the Flange
Sven begins by explaining that working on flanges vertically and horizontally is significantly easier than doing so in a flat position. To simplify the process further, he divides the task into two or three steps as suggested by fellow expert “for for.” This approach not only makes it more manageable but also allows for greater precision in crafting each component.Step 2: Applying Glue and Securing
Sven proceeds to apply glue along one edge of the flange, ensuring a secure bond when clamped into place. He emphasizes that this stage is crucial for maintaining the structural integrity of the flange, which in turn safeguards the living area beneath the canvas when hatches are open.Step 3: Allowing Time to Dry
After securely attaching the first portion of the flange, Sven allows ample time for it to dry before moving forward with additional steps. This patience and precision are key aspects of his successful boatbuilding methods.Step 4: Finishing Touches
Once the flange is fully dried, Sven removes the clamps carefully, ensuring no damage occurs during this process. He then moves on to attaching four more pieces onto these main frames, completing two pairs of flanges for the bulkhead hatches.The Final Touches
While two flanges form the primary support structure around the hatches, Sven mentions there are two additional pieces required at each end to ensure comprehensive protection. This attention to detail highlights his commitment to producing a durable and reliable design. “Sailing is about finding your path, whether it’s across an ocean or within yourself.” – Sven Yrvind In conclusion, making flanges around bulkhead hatches may seem complex at first glance, but by following Sven Yrvind’s meticulous process, enthusiasts can achieve professional-level results. Remember that the journey of boatbuilding is as rewarding as reaching your destination; it tests one’s patience and dedication. For those seeking to embark on this adventure or simply gain more insight into marine craftsmanship, Sven’s wisdom is invaluable.Making Flanges Around Bulkhead Hatches for Canvas
Sven Yrvind, a renowned yacht designer and sailor, shares valuable insights on creating flanges around bulkhead hatches for canvas protection in this enlightening video. By following his expert guidance, boat enthusiasts can ensure their living areas remain secure while allowing unhindered access through the hatches.Step 1: Starting with the Flange
Sven begins by explaining that working on flanges vertically and horizontally is significantly easier than doing so in a flat position. To simplify the process further, he divides the task into two or three steps as suggested by fellow expert “for for.” This approach not only makes it more manageable but also allows for greater precision in crafting each component.Step 2: Applying Glue and Securing
Sven proceeds to apply glue along one edge of the flange, ensuring a secure bond when clamped into place. He emphasizes that this stage is crucial for maintaining the structural integrity of the flange, which in turn safeguards the living area beneath the canvas when hatches are open.Step 3: Allowing Time to Dry
After securely attaching the first portion of the flange, Sven allows ample time for it to dry before moving forward with additional steps. This patience and precision are key aspects of his successful boatbuilding methods.Step 4: Finishing Touches
Once the flange is fully dried, Sven removes the clamps carefully, ensuring no damage occurs during this process. He then moves on to attaching four more pieces onto these main frames, completing two pairs of flanges for the bulkhead hatches.The Final Touches
While two flanges form the primary support structure around the hatches, Sven mentions there are two additional pieces required at each end to ensure comprehensive protection. This attention to detail highlights his commitment to producing a durable and reliable design. “Sailing is about finding your path, whether it’s across an ocean or within yourself.” – Sven Yrvind In conclusion, making flanges around bulkhead hatches may seem complex at first glance, but by following Sven Yrvind’s meticulous process, enthusiasts can achieve professional-level results. Remember that the journey of boatbuilding is as rewarding as reaching your destination; it tests one’s patience and dedication. For those seeking to embark on this adventure or simply gain more insight into marine craftsmanship, Sven’s wisdom is invaluable.After securely attaching the first portion of the flange, Sven allows ample time for it to dry before moving forward with additional steps. This patience and precision are key aspects of his successful boatbuilding methods.Step 4: Finishing Touches
Once the flange is fully dried, Sven removes the clamps carefully, ensuring no damage occurs during this process. He then moves on to attaching four more pieces onto these main frames, completing two pairs of flanges for the bulkhead hatches.The Final Touches
While two flanges form the primary support structure around the hatches, Sven mentions there are two additional pieces required at each end to ensure comprehensive protection. This attention to detail highlights his commitment to producing a durable and reliable design. “Sailing is about finding your path, whether it’s across an ocean or within yourself.” – Sven Yrvind In conclusion, making flanges around bulkhead hatches may seem complex at first glance, but by following Sven Yrvind’s meticulous process, enthusiasts can achieve professional-level results. Remember that the journey of boatbuilding is as rewarding as reaching your destination; it tests one’s patience and dedication. For those seeking to embark on this adventure or simply gain more insight into marine craftsmanship, Sven’s wisdom is invaluable.Sven Yrvind, a renowned yacht designer and sailor, shares valuable insights on creating flanges around bulkhead hatches for canvas protection in this enlightening video. By following his expert guidance, boat enthusiasts can ensure their living areas remain secure while allowing unhindered access through the hatches.Step 1: Starting with the Flange
Sven begins by explaining that working on flanges vertically and horizontally is significantly easier than doing so in a flat position. To simplify the process further, he divides the task into two or three steps as suggested by fellow expert “for for.” This approach not only makes it more manageable but also allows for greater precision in crafting each component.Step 2: Applying Glue and Securing
Sven proceeds to apply glue along one edge of the flange, ensuring a secure bond when clamped into place. He emphasizes that this stage is crucial for maintaining the structural integrity of the flange, which in turn safeguards the living area beneath the canvas when hatches are open.Step 3: Allowing Time to Dry
After securely attaching the first portion of the flange, Sven allows ample time for it to dry before moving forward with additional steps. This patience and precision are key aspects of his successful boatbuilding methods.Step 4: Finishing Touches
Once the flange is fully dried, Sven removes the clamps carefully, ensuring no damage occurs during this process. He then moves on to attaching four more pieces onto these main frames, completing two pairs of flanges for the bulkhead hatches.The Final Touches
While two flanges form the primary support structure around the hatches, Sven mentions there are two additional pieces required at each end to ensure comprehensive protection. This attention to detail highlights his commitment to producing a durable and reliable design. “Sailing is about finding your path, whether it’s across an ocean or within yourself.” – Sven Yrvind In conclusion, making flanges around bulkhead hatches may seem complex at first glance, but by following Sven Yrvind’s meticulous process, enthusiasts can achieve professional-level results. Remember that the journey of boatbuilding is as rewarding as reaching your destination; it tests one’s patience and dedication. For those seeking to embark on this adventure or simply gain more insight into marine craftsmanship, Sven’s wisdom is invaluable.Making Flanges Around Bulkhead Hatches for Canvas
Sven Yrvind, a renowned yacht designer and sailor, shares valuable insights on creating flanges around bulkhead hatches for canvas protection in this enlightening video. By following his expert guidance, boat enthusiasts can ensure their living areas remain secure while allowing unhindered access through the hatches.Step 1: Starting with the Flange
Sven begins by explaining that working on flanges vertically and horizontally is significantly easier than doing so in a flat position. To simplify the process further, he divides the task into two or three steps as suggested by fellow expert “for for.” This approach not only makes it more manageable but also allows for greater precision in crafting each component.Step 2: Applying Glue and Securing
Sven proceeds to apply glue along one edge of the flange, ensuring a secure bond when clamped into place. He emphasizes that this stage is crucial for maintaining the structural integrity of the flange, which in turn safeguards the living area beneath the canvas when hatches are open.Step 3: Allowing Time to Dry
After securely attaching the first portion of the flange, Sven allows ample time for it to dry before moving forward with additional steps. This patience and precision are key aspects of his successful boatbuilding methods.Step 4: Finishing Touches
Once the flange is fully dried, Sven removes the clamps carefully, ensuring no damage occurs during this process. He then moves on to attaching four more pieces onto these main frames, completing two pairs of flanges for the bulkhead hatches.The Final Touches
While two flanges form the primary support structure around the hatches, Sven mentions there are two additional pieces required at each end to ensure comprehensive protection. This attention to detail highlights his commitment to producing a durable and reliable design. “Sailing is about finding your path, whether it’s across an ocean or within yourself.” – Sven Yrvind In conclusion, making flanges around bulkhead hatches may seem complex at first glance, but by following Sven Yrvind’s meticulous process, enthusiasts can achieve professional-level results. Remember that the journey of boatbuilding is as rewarding as reaching your destination; it tests one’s patience and dedication. For those seeking to embark on this adventure or simply gain more insight into marine craftsmanship, Sven’s wisdom is invaluable.Sven proceeds to apply glue along one edge of the flange, ensuring a secure bond when clamped into place. He emphasizes that this stage is crucial for maintaining the structural integrity of the flange, which in turn safeguards the living area beneath the canvas when hatches are open.Step 3: Allowing Time to Dry
After securely attaching the first portion of the flange, Sven allows ample time for it to dry before moving forward with additional steps. This patience and precision are key aspects of his successful boatbuilding methods.Step 4: Finishing Touches
Once the flange is fully dried, Sven removes the clamps carefully, ensuring no damage occurs during this process. He then moves on to attaching four more pieces onto these main frames, completing two pairs of flanges for the bulkhead hatches.The Final Touches
While two flanges form the primary support structure around the hatches, Sven mentions there are two additional pieces required at each end to ensure comprehensive protection. This attention to detail highlights his commitment to producing a durable and reliable design. “Sailing is about finding your path, whether it’s across an ocean or within yourself.” – Sven Yrvind In conclusion, making flanges around bulkhead hatches may seem complex at first glance, but by following Sven Yrvind’s meticulous process, enthusiasts can achieve professional-level results. Remember that the journey of boatbuilding is as rewarding as reaching your destination; it tests one’s patience and dedication. For those seeking to embark on this adventure or simply gain more insight into marine craftsmanship, Sven’s wisdom is invaluable.Sven Yrvind, a renowned yacht designer and sailor, shares valuable insights on creating flanges around bulkhead hatches for canvas protection in this enlightening video. By following his expert guidance, boat enthusiasts can ensure their living areas remain secure while allowing unhindered access through the hatches.Step 1: Starting with the Flange
Sven begins by explaining that working on flanges vertically and horizontally is significantly easier than doing so in a flat position. To simplify the process further, he divides the task into two or three steps as suggested by fellow expert “for for.” This approach not only makes it more manageable but also allows for greater precision in crafting each component.Step 2: Applying Glue and Securing
Sven proceeds to apply glue along one edge of the flange, ensuring a secure bond when clamped into place. He emphasizes that this stage is crucial for maintaining the structural integrity of the flange, which in turn safeguards the living area beneath the canvas when hatches are open.Step 3: Allowing Time to Dry
After securely attaching the first portion of the flange, Sven allows ample time for it to dry before moving forward with additional steps. This patience and precision are key aspects of his successful boatbuilding methods.Step 4: Finishing Touches
Once the flange is fully dried, Sven removes the clamps carefully, ensuring no damage occurs during this process. He then moves on to attaching four more pieces onto these main frames, completing two pairs of flanges for the bulkhead hatches.The Final Touches
While two flanges form the primary support structure around the hatches, Sven mentions there are two additional pieces required at each end to ensure comprehensive protection. This attention to detail highlights his commitment to producing a durable and reliable design. “Sailing is about finding your path, whether it’s across an ocean or within yourself.” – Sven Yrvind In conclusion, making flanges around bulkhead hatches may seem complex at first glance, but by following Sven Yrvind’s meticulous process, enthusiasts can achieve professional-level results. Remember that the journey of boatbuilding is as rewarding as reaching your destination; it tests one’s patience and dedication. For those seeking to embark on this adventure or simply gain more insight into marine craftsmanship, Sven’s wisdom is invaluable.Making Flanges Around Bulkhead Hatches for Canvas
Sven Yrvind, a renowned yacht designer and sailor, shares valuable insights on creating flanges around bulkhead hatches for canvas protection in this enlightening video. By following his expert guidance, boat enthusiasts can ensure their living areas remain secure while allowing unhindered access through the hatches.Step 1: Starting with the Flange
Sven begins by explaining that working on flanges vertically and horizontally is significantly easier than doing so in a flat position. To simplify the process further, he divides the task into two or three steps as suggested by fellow expert “for for.” This approach not only makes it more manageable but also allows for greater precision in crafting each component.Step 2: Applying Glue and Securing
Sven proceeds to apply glue along one edge of the flange, ensuring a secure bond when clamped into place. He emphasizes that this stage is crucial for maintaining the structural integrity of the flange, which in turn safeguards the living area beneath the canvas when hatches are open.Step 3: Allowing Time to Dry
After securely attaching the first portion of the flange, Sven allows ample time for it to dry before moving forward with additional steps. This patience and precision are key aspects of his successful boatbuilding methods.Step 4: Finishing Touches
Once the flange is fully dried, Sven removes the clamps carefully, ensuring no damage occurs during this process. He then moves on to attaching four more pieces onto these main frames, completing two pairs of flanges for the bulkhead hatches.The Final Touches
While two flanges form the primary support structure around the hatches, Sven mentions there are two additional pieces required at each end to ensure comprehensive protection. This attention to detail highlights his commitment to producing a durable and reliable design. “Sailing is about finding your path, whether it’s across an ocean or within yourself.” – Sven Yrvind In conclusion, making flanges around bulkhead hatches may seem complex at first glance, but by following Sven Yrvind’s meticulous process, enthusiasts can achieve professional-level results. Remember that the journey of boatbuilding is as rewarding as reaching your destination; it tests one’s patience and dedication. For those seeking to embark on this adventure or simply gain more insight into marine craftsmanship, Sven’s wisdom is invaluable.Sven begins by explaining that working on flanges vertically and horizontally is significantly easier than doing so in a flat position. To simplify the process further, he divides the task into two or three steps as suggested by fellow expert “for for.” This approach not only makes it more manageable but also allows for greater precision in crafting each component.Step 2: Applying Glue and Securing
Sven proceeds to apply glue along one edge of the flange, ensuring a secure bond when clamped into place. He emphasizes that this stage is crucial for maintaining the structural integrity of the flange, which in turn safeguards the living area beneath the canvas when hatches are open.Step 3: Allowing Time to Dry
After securely attaching the first portion of the flange, Sven allows ample time for it to dry before moving forward with additional steps. This patience and precision are key aspects of his successful boatbuilding methods.Step 4: Finishing Touches
Once the flange is fully dried, Sven removes the clamps carefully, ensuring no damage occurs during this process. He then moves on to attaching four more pieces onto these main frames, completing two pairs of flanges for the bulkhead hatches.The Final Touches
While two flanges form the primary support structure around the hatches, Sven mentions there are two additional pieces required at each end to ensure comprehensive protection. This attention to detail highlights his commitment to producing a durable and reliable design. “Sailing is about finding your path, whether it’s across an ocean or within yourself.” – Sven Yrvind In conclusion, making flanges around bulkhead hatches may seem complex at first glance, but by following Sven Yrvind’s meticulous process, enthusiasts can achieve professional-level results. Remember that the journey of boatbuilding is as rewarding as reaching your destination; it tests one’s patience and dedication. For those seeking to embark on this adventure or simply gain more insight into marine craftsmanship, Sven’s wisdom is invaluable.Sven Yrvind, a renowned yacht designer and sailor, shares valuable insights on creating flanges around bulkhead hatches for canvas protection in this enlightening video. By following his expert guidance, boat enthusiasts can ensure their living areas remain secure while allowing unhindered access through the hatches.Step 1: Starting with the Flange
Sven begins by explaining that working on flanges vertically and horizontally is significantly easier than doing so in a flat position. To simplify the process further, he divides the task into two or three steps as suggested by fellow expert “for for.” This approach not only makes it more manageable but also allows for greater precision in crafting each component.Step 2: Applying Glue and Securing
Sven proceeds to apply glue along one edge of the flange, ensuring a secure bond when clamped into place. He emphasizes that this stage is crucial for maintaining the structural integrity of the flange, which in turn safeguards the living area beneath the canvas when hatches are open.Step 3: Allowing Time to Dry
After securely attaching the first portion of the flange, Sven allows ample time for it to dry before moving forward with additional steps. This patience and precision are key aspects of his successful boatbuilding methods.Step 4: Finishing Touches
Once the flange is fully dried, Sven removes the clamps carefully, ensuring no damage occurs during this process. He then moves on to attaching four more pieces onto these main frames, completing two pairs of flanges for the bulkhead hatches.The Final Touches
While two flanges form the primary support structure around the hatches, Sven mentions there are two additional pieces required at each end to ensure comprehensive protection. This attention to detail highlights his commitment to producing a durable and reliable design. “Sailing is about finding your path, whether it’s across an ocean or within yourself.” – Sven Yrvind In conclusion, making flanges around bulkhead hatches may seem complex at first glance, but by following Sven Yrvind’s meticulous process, enthusiasts can achieve professional-level results. Remember that the journey of boatbuilding is as rewarding as reaching your destination; it tests one’s patience and dedication. For those seeking to embark on this adventure or simply gain more insight into marine craftsmanship, Sven’s wisdom is invaluable.Making Flanges Around Bulkhead Hatches for Canvas
Sven Yrvind, a renowned yacht designer and sailor, shares valuable insights on creating flanges around bulkhead hatches for canvas protection in this enlightening video. By following his expert guidance, boat enthusiasts can ensure their living areas remain secure while allowing unhindered access through the hatches.Step 1: Starting with the Flange
Sven begins by explaining that working on flanges vertically and horizontally is significantly easier than doing so in a flat position. To simplify the process further, he divides the task into two or three steps as suggested by fellow expert “for for.” This approach not only makes it more manageable but also allows for greater precision in crafting each component.Step 2: Applying Glue and Securing
Sven proceeds to apply glue along one edge of the flange, ensuring a secure bond when clamped into place. He emphasizes that this stage is crucial for maintaining the structural integrity of the flange, which in turn safeguards the living area beneath the canvas when hatches are open.Step 3: Allowing Time to Dry
After securely attaching the first portion of the flange, Sven allows ample time for it to dry before moving forward with additional steps. This patience and precision are key aspects of his successful boatbuilding methods.Step 4: Finishing Touches
Once the flange is fully dried, Sven removes the clamps carefully, ensuring no damage occurs during this process. He then moves on to attaching four more pieces onto these main frames, completing two pairs of flanges for the bulkhead hatches.The Final Touches
While two flanges form the primary support structure around the hatches, Sven mentions there are two additional pieces required at each end to ensure comprehensive protection. This attention to detail highlights his commitment to producing a durable and reliable design. “Sailing is about finding your path, whether it’s across an ocean or within yourself.” – Sven Yrvind In conclusion, making flanges around bulkhead hatches may seem complex at first glance, but by following Sven Yrvind’s meticulous process, enthusiasts can achieve professional-level results. Remember that the journey of boatbuilding is as rewarding as reaching your destination; it tests one’s patience and dedication. For those seeking to embark on this adventure or simply gain more insight into marine craftsmanship, Sven’s wisdom is invaluable.Once the flange is fully dried, Sven removes the clamps carefully, ensuring no damage occurs during this process. He then moves on to attaching four more pieces onto these main frames, completing two pairs of flanges for the bulkhead hatches.The Final Touches
While two flanges form the primary support structure around the hatches, Sven mentions there are two additional pieces required at each end to ensure comprehensive protection. This attention to detail highlights his commitment to producing a durable and reliable design. “Sailing is about finding your path, whether it’s across an ocean or within yourself.” – Sven Yrvind In conclusion, making flanges around bulkhead hatches may seem complex at first glance, but by following Sven Yrvind’s meticulous process, enthusiasts can achieve professional-level results. Remember that the journey of boatbuilding is as rewarding as reaching your destination; it tests one’s patience and dedication. For those seeking to embark on this adventure or simply gain more insight into marine craftsmanship, Sven’s wisdom is invaluable.Sven begins by explaining that working on flanges vertically and horizontally is significantly easier than doing so in a flat position. To simplify the process further, he divides the task into two or three steps as suggested by fellow expert “for for.” This approach not only makes it more manageable but also allows for greater precision in crafting each component.Step 2: Applying Glue and Securing
Sven proceeds to apply glue along one edge of the flange, ensuring a secure bond when clamped into place. He emphasizes that this stage is crucial for maintaining the structural integrity of the flange, which in turn safeguards the living area beneath the canvas when hatches are open.Step 3: Allowing Time to Dry
After securely attaching the first portion of the flange, Sven allows ample time for it to dry before moving forward with additional steps. This patience and precision are key aspects of his successful boatbuilding methods.Step 4: Finishing Touches
Once the flange is fully dried, Sven removes the clamps carefully, ensuring no damage occurs during this process. He then moves on to attaching four more pieces onto these main frames, completing two pairs of flanges for the bulkhead hatches.The Final Touches
While two flanges form the primary support structure around the hatches, Sven mentions there are two additional pieces required at each end to ensure comprehensive protection. This attention to detail highlights his commitment to producing a durable and reliable design. “Sailing is about finding your path, whether it’s across an ocean or within yourself.” – Sven Yrvind In conclusion, making flanges around bulkhead hatches may seem complex at first glance, but by following Sven Yrvind’s meticulous process, enthusiasts can achieve professional-level results. Remember that the journey of boatbuilding is as rewarding as reaching your destination; it tests one’s patience and dedication. For those seeking to embark on this adventure or simply gain more insight into marine craftsmanship, Sven’s wisdom is invaluable.Sven Yrvind, a renowned yacht designer and sailor, shares valuable insights on creating flanges around bulkhead hatches for canvas protection in this enlightening video. By following his expert guidance, boat enthusiasts can ensure their living areas remain secure while allowing unhindered access through the hatches.Step 1: Starting with the Flange
Sven begins by explaining that working on flanges vertically and horizontally is significantly easier than doing so in a flat position. To simplify the process further, he divides the task into two or three steps as suggested by fellow expert “for for.” This approach not only makes it more manageable but also allows for greater precision in crafting each component.Step 2: Applying Glue and Securing
Sven proceeds to apply glue along one edge of the flange, ensuring a secure bond when clamped into place. He emphasizes that this stage is crucial for maintaining the structural integrity of the flange, which in turn safeguards the living area beneath the canvas when hatches are open.Step 3: Allowing Time to Dry
After securely attaching the first portion of the flange, Sven allows ample time for it to dry before moving forward with additional steps. This patience and precision are key aspects of his successful boatbuilding methods.Step 4: Finishing Touches
Once the flange is fully dried, Sven removes the clamps carefully, ensuring no damage occurs during this process. He then moves on to attaching four more pieces onto these main frames, completing two pairs of flanges for the bulkhead hatches.The Final Touches
While two flanges form the primary support structure around the hatches, Sven mentions there are two additional pieces required at each end to ensure comprehensive protection. This attention to detail highlights his commitment to producing a durable and reliable design. “Sailing is about finding your path, whether it’s across an ocean or within yourself.” – Sven Yrvind In conclusion, making flanges around bulkhead hatches may seem complex at first glance, but by following Sven Yrvind’s meticulous process, enthusiasts can achieve professional-level results. Remember that the journey of boatbuilding is as rewarding as reaching your destination; it tests one’s patience and dedication. For those seeking to embark on this adventure or simply gain more insight into marine craftsmanship, Sven’s wisdom is invaluable.Making Flanges Around Bulkhead Hatches for Canvas
Sven Yrvind, a renowned yacht designer and sailor, shares valuable insights on creating flanges around bulkhead hatches for canvas protection in this enlightening video. By following his expert guidance, boat enthusiasts can ensure their living areas remain secure while allowing unhindered access through the hatches.Step 1: Starting with the Flange
Sven begins by explaining that working on flanges vertically and horizontally is significantly easier than doing so in a flat position. To simplify the process further, he divides the task into two or three steps as suggested by fellow expert “for for.” This approach not only makes it more manageable but also allows for greater precision in crafting each component.Step 2: Applying Glue and Securing
Sven proceeds to apply glue along one edge of the flange, ensuring a secure bond when clamped into place. He emphasizes that this stage is crucial for maintaining the structural integrity of the flange, which in turn safeguards the living area beneath the canvas when hatches are open.Step 3: Allowing Time to Dry
After securely attaching the first portion of the flange, Sven allows ample time for it to dry before moving forward with additional steps. This patience and precision are key aspects of his successful boatbuilding methods.Step 4: Finishing Touches
Once the flange is fully dried, Sven removes the clamps carefully, ensuring no damage occurs during this process. He then moves on to attaching four more pieces onto these main frames, completing two pairs of flanges for the bulkhead hatches.The Final Touches
While two flanges form the primary support structure around the hatches, Sven mentions there are two additional pieces required at each end to ensure comprehensive protection. This attention to detail highlights his commitment to producing a durable and reliable design. “Sailing is about finding your path, whether it’s across an ocean or within yourself.” – Sven Yrvind In conclusion, making flanges around bulkhead hatches may seem complex at first glance, but by following Sven Yrvind’s meticulous process, enthusiasts can achieve professional-level results. Remember that the journey of boatbuilding is as rewarding as reaching your destination; it tests one’s patience and dedication. For those seeking to embark on this adventure or simply gain more insight into marine craftsmanship, Sven’s wisdom is invaluable.After securely attaching the first portion of the flange, Sven allows ample time for it to dry before moving forward with additional steps. This patience and precision are key aspects of his successful boatbuilding methods.Step 4: Finishing Touches
Once the flange is fully dried, Sven removes the clamps carefully, ensuring no damage occurs during this process. He then moves on to attaching four more pieces onto these main frames, completing two pairs of flanges for the bulkhead hatches.The Final Touches
While two flanges form the primary support structure around the hatches, Sven mentions there are two additional pieces required at each end to ensure comprehensive protection. This attention to detail highlights his commitment to producing a durable and reliable design. “Sailing is about finding your path, whether it’s across an ocean or within yourself.” – Sven Yrvind In conclusion, making flanges around bulkhead hatches may seem complex at first glance, but by following Sven Yrvind’s meticulous process, enthusiasts can achieve professional-level results. Remember that the journey of boatbuilding is as rewarding as reaching your destination; it tests one’s patience and dedication. For those seeking to embark on this adventure or simply gain more insight into marine craftsmanship, Sven’s wisdom is invaluable.Sven begins by explaining that working on flanges vertically and horizontally is significantly easier than doing so in a flat position. To simplify the process further, he divides the task into two or three steps as suggested by fellow expert “for for.” This approach not only makes it more manageable but also allows for greater precision in crafting each component.Step 2: Applying Glue and Securing
Sven proceeds to apply glue along one edge of the flange, ensuring a secure bond when clamped into place. He emphasizes that this stage is crucial for maintaining the structural integrity of the flange, which in turn safeguards the living area beneath the canvas when hatches are open.Step 3: Allowing Time to Dry
After securely attaching the first portion of the flange, Sven allows ample time for it to dry before moving forward with additional steps. This patience and precision are key aspects of his successful boatbuilding methods.Step 4: Finishing Touches
Once the flange is fully dried, Sven removes the clamps carefully, ensuring no damage occurs during this process. He then moves on to attaching four more pieces onto these main frames, completing two pairs of flanges for the bulkhead hatches.The Final Touches
While two flanges form the primary support structure around the hatches, Sven mentions there are two additional pieces required at each end to ensure comprehensive protection. This attention to detail highlights his commitment to producing a durable and reliable design. “Sailing is about finding your path, whether it’s across an ocean or within yourself.” – Sven Yrvind In conclusion, making flanges around bulkhead hatches may seem complex at first glance, but by following Sven Yrvind’s meticulous process, enthusiasts can achieve professional-level results. Remember that the journey of boatbuilding is as rewarding as reaching your destination; it tests one’s patience and dedication. For those seeking to embark on this adventure or simply gain more insight into marine craftsmanship, Sven’s wisdom is invaluable.Sven Yrvind, a renowned yacht designer and sailor, shares valuable insights on creating flanges around bulkhead hatches for canvas protection in this enlightening video. By following his expert guidance, boat enthusiasts can ensure their living areas remain secure while allowing unhindered access through the hatches.Step 1: Starting with the Flange
Sven begins by explaining that working on flanges vertically and horizontally is significantly easier than doing so in a flat position. To simplify the process further, he divides the task into two or three steps as suggested by fellow expert “for for.” This approach not only makes it more manageable but also allows for greater precision in crafting each component.Step 2: Applying Glue and Securing
Sven proceeds to apply glue along one edge of the flange, ensuring a secure bond when clamped into place. He emphasizes that this stage is crucial for maintaining the structural integrity of the flange, which in turn safeguards the living area beneath the canvas when hatches are open.Step 3: Allowing Time to Dry
After securely attaching the first portion of the flange, Sven allows ample time for it to dry before moving forward with additional steps. This patience and precision are key aspects of his successful boatbuilding methods.Step 4: Finishing Touches
Once the flange is fully dried, Sven removes the clamps carefully, ensuring no damage occurs during this process. He then moves on to attaching four more pieces onto these main frames, completing two pairs of flanges for the bulkhead hatches.The Final Touches
While two flanges form the primary support structure around the hatches, Sven mentions there are two additional pieces required at each end to ensure comprehensive protection. This attention to detail highlights his commitment to producing a durable and reliable design. “Sailing is about finding your path, whether it’s across an ocean or within yourself.” – Sven Yrvind In conclusion, making flanges around bulkhead hatches may seem complex at first glance, but by following Sven Yrvind’s meticulous process, enthusiasts can achieve professional-level results. Remember that the journey of boatbuilding is as rewarding as reaching your destination; it tests one’s patience and dedication. For those seeking to embark on this adventure or simply gain more insight into marine craftsmanship, Sven’s wisdom is invaluable.Making Flanges Around Bulkhead Hatches for Canvas
Sven Yrvind, a renowned yacht designer and sailor, shares valuable insights on creating flanges around bulkhead hatches for canvas protection in this enlightening video. By following his expert guidance, boat enthusiasts can ensure their living areas remain secure while allowing unhindered access through the hatches.Step 1: Starting with the Flange
Sven begins by explaining that working on flanges vertically and horizontally is significantly easier than doing so in a flat position. To simplify the process further, he divides the task into two or three steps as suggested by fellow expert “for for.” This approach not only makes it more manageable but also allows for greater precision in crafting each component.Step 2: Applying Glue and Securing
Sven proceeds to apply glue along one edge of the flange, ensuring a secure bond when clamped into place. He emphasizes that this stage is crucial for maintaining the structural integrity of the flange, which in turn safeguards the living area beneath the canvas when hatches are open.Step 3: Allowing Time to Dry
After securely attaching the first portion of the flange, Sven allows ample time for it to dry before moving forward with additional steps. This patience and precision are key aspects of his successful boatbuilding methods.Step 4: Finishing Touches
Once the flange is fully dried, Sven removes the clamps carefully, ensuring no damage occurs during this process. He then moves on to attaching four more pieces onto these main frames, completing two pairs of flanges for the bulkhead hatches.The Final Touches
While two flanges form the primary support structure around the hatches, Sven mentions there are two additional pieces required at each end to ensure comprehensive protection. This attention to detail highlights his commitment to producing a durable and reliable design. “Sailing is about finding your path, whether it’s across an ocean or within yourself.” – Sven Yrvind In conclusion, making flanges around bulkhead hatches may seem complex at first glance, but by following Sven Yrvind’s meticulous process, enthusiasts can achieve professional-level results. Remember that the journey of boatbuilding is as rewarding as reaching your destination; it tests one’s patience and dedication. For those seeking to embark on this adventure or simply gain more insight into marine craftsmanship, Sven’s wisdom is invaluable.Sven proceeds to apply glue along one edge of the flange, ensuring a secure bond when clamped into place. He emphasizes that this stage is crucial for maintaining the structural integrity of the flange, which in turn safeguards the living area beneath the canvas when hatches are open.Step 3: Allowing Time to Dry
After securely attaching the first portion of the flange, Sven allows ample time for it to dry before moving forward with additional steps. This patience and precision are key aspects of his successful boatbuilding methods.Step 4: Finishing Touches
Once the flange is fully dried, Sven removes the clamps carefully, ensuring no damage occurs during this process. He then moves on to attaching four more pieces onto these main frames, completing two pairs of flanges for the bulkhead hatches.The Final Touches
While two flanges form the primary support structure around the hatches, Sven mentions there are two additional pieces required at each end to ensure comprehensive protection. This attention to detail highlights his commitment to producing a durable and reliable design. “Sailing is about finding your path, whether it’s across an ocean or within yourself.” – Sven Yrvind In conclusion, making flanges around bulkhead hatches may seem complex at first glance, but by following Sven Yrvind’s meticulous process, enthusiasts can achieve professional-level results. Remember that the journey of boatbuilding is as rewarding as reaching your destination; it tests one’s patience and dedication. For those seeking to embark on this adventure or simply gain more insight into marine craftsmanship, Sven’s wisdom is invaluable.Sven begins by explaining that working on flanges vertically and horizontally is significantly easier than doing so in a flat position. To simplify the process further, he divides the task into two or three steps as suggested by fellow expert “for for.” This approach not only makes it more manageable but also allows for greater precision in crafting each component.Step 2: Applying Glue and Securing
Sven proceeds to apply glue along one edge of the flange, ensuring a secure bond when clamped into place. He emphasizes that this stage is crucial for maintaining the structural integrity of the flange, which in turn safeguards the living area beneath the canvas when hatches are open.Step 3: Allowing Time to Dry
After securely attaching the first portion of the flange, Sven allows ample time for it to dry before moving forward with additional steps. This patience and precision are key aspects of his successful boatbuilding methods.Step 4: Finishing Touches
Once the flange is fully dried, Sven removes the clamps carefully, ensuring no damage occurs during this process. He then moves on to attaching four more pieces onto these main frames, completing two pairs of flanges for the bulkhead hatches.The Final Touches
While two flanges form the primary support structure around the hatches, Sven mentions there are two additional pieces required at each end to ensure comprehensive protection. This attention to detail highlights his commitment to producing a durable and reliable design. “Sailing is about finding your path, whether it’s across an ocean or within yourself.” – Sven Yrvind In conclusion, making flanges around bulkhead hatches may seem complex at first glance, but by following Sven Yrvind’s meticulous process, enthusiasts can achieve professional-level results. Remember that the journey of boatbuilding is as rewarding as reaching your destination; it tests one’s patience and dedication. For those seeking to embark on this adventure or simply gain more insight into marine craftsmanship, Sven’s wisdom is invaluable.Sven Yrvind, a renowned yacht designer and sailor, shares valuable insights on creating flanges around bulkhead hatches for canvas protection in this enlightening video. By following his expert guidance, boat enthusiasts can ensure their living areas remain secure while allowing unhindered access through the hatches.Step 1: Starting with the Flange
Sven begins by explaining that working on flanges vertically and horizontally is significantly easier than doing so in a flat position. To simplify the process further, he divides the task into two or three steps as suggested by fellow expert “for for.” This approach not only makes it more manageable but also allows for greater precision in crafting each component.Step 2: Applying Glue and Securing
Sven proceeds to apply glue along one edge of the flange, ensuring a secure bond when clamped into place. He emphasizes that this stage is crucial for maintaining the structural integrity of the flange, which in turn safeguards the living area beneath the canvas when hatches are open.Step 3: Allowing Time to Dry
After securely attaching the first portion of the flange, Sven allows ample time for it to dry before moving forward with additional steps. This patience and precision are key aspects of his successful boatbuilding methods.Step 4: Finishing Touches
Once the flange is fully dried, Sven removes the clamps carefully, ensuring no damage occurs during this process. He then moves on to attaching four more pieces onto these main frames, completing two pairs of flanges for the bulkhead hatches.The Final Touches
While two flanges form the primary support structure around the hatches, Sven mentions there are two additional pieces required at each end to ensure comprehensive protection. This attention to detail highlights his commitment to producing a durable and reliable design. “Sailing is about finding your path, whether it’s across an ocean or within yourself.” – Sven Yrvind In conclusion, making flanges around bulkhead hatches may seem complex at first glance, but by following Sven Yrvind’s meticulous process, enthusiasts can achieve professional-level results. Remember that the journey of boatbuilding is as rewarding as reaching your destination; it tests one’s patience and dedication. For those seeking to embark on this adventure or simply gain more insight into marine craftsmanship, Sven’s wisdom is invaluable.Making Flanges Around Bulkhead Hatches for Canvas
Sven Yrvind, a renowned yacht designer and sailor, shares valuable insights on creating flanges around bulkhead hatches for canvas protection in this enlightening video. By following his expert guidance, boat enthusiasts can ensure their living areas remain secure while allowing unhindered access through the hatches.Step 1: Starting with the Flange
Sven begins by explaining that working on flanges vertically and horizontally is significantly easier than doing so in a flat position. To simplify the process further, he divides the task into two or three steps as suggested by fellow expert “for for.” This approach not only makes it more manageable but also allows for greater precision in crafting each component.Step 2: Applying Glue and Securing
Sven proceeds to apply glue along one edge of the flange, ensuring a secure bond when clamped into place. He emphasizes that this stage is crucial for maintaining the structural integrity of the flange, which in turn safeguards the living area beneath the canvas when hatches are open.Step 3: Allowing Time to Dry
After securely attaching the first portion of the flange, Sven allows ample time for it to dry before moving forward with additional steps. This patience and precision are key aspects of his successful boatbuilding methods.Step 4: Finishing Touches
Once the flange is fully dried, Sven removes the clamps carefully, ensuring no damage occurs during this process. He then moves on to attaching four more pieces onto these main frames, completing two pairs of flanges for the bulkhead hatches.The Final Touches
While two flanges form the primary support structure around the hatches, Sven mentions there are two additional pieces required at each end to ensure comprehensive protection. This attention to detail highlights his commitment to producing a durable and reliable design. “Sailing is about finding your path, whether it’s across an ocean or within yourself.” – Sven Yrvind In conclusion, making flanges around bulkhead hatches may seem complex at first glance, but by following Sven Yrvind’s meticulous process, enthusiasts can achieve professional-level results. Remember that the journey of boatbuilding is as rewarding as reaching your destination; it tests one’s patience and dedication. For those seeking to embark on this adventure or simply gain more insight into marine craftsmanship, Sven’s wisdom is invaluable.Once the flange is fully dried, Sven removes the clamps carefully, ensuring no damage occurs during this process. He then moves on to attaching four more pieces onto these main frames, completing two pairs of flanges for the bulkhead hatches.The Final Touches
While two flanges form the primary support structure around the hatches, Sven mentions there are two additional pieces required at each end to ensure comprehensive protection. This attention to detail highlights his commitment to producing a durable and reliable design. “Sailing is about finding your path, whether it’s across an ocean or within yourself.” – Sven Yrvind In conclusion, making flanges around bulkhead hatches may seem complex at first glance, but by following Sven Yrvind’s meticulous process, enthusiasts can achieve professional-level results. Remember that the journey of boatbuilding is as rewarding as reaching your destination; it tests one’s patience and dedication. For those seeking to embark on this adventure or simply gain more insight into marine craftsmanship, Sven’s wisdom is invaluable.Sven proceeds to apply glue along one edge of the flange, ensuring a secure bond when clamped into place. He emphasizes that this stage is crucial for maintaining the structural integrity of the flange, which in turn safeguards the living area beneath the canvas when hatches are open.Step 3: Allowing Time to Dry
After securely attaching the first portion of the flange, Sven allows ample time for it to dry before moving forward with additional steps. This patience and precision are key aspects of his successful boatbuilding methods.Step 4: Finishing Touches
Once the flange is fully dried, Sven removes the clamps carefully, ensuring no damage occurs during this process. He then moves on to attaching four more pieces onto these main frames, completing two pairs of flanges for the bulkhead hatches.The Final Touches
While two flanges form the primary support structure around the hatches, Sven mentions there are two additional pieces required at each end to ensure comprehensive protection. This attention to detail highlights his commitment to producing a durable and reliable design. “Sailing is about finding your path, whether it’s across an ocean or within yourself.” – Sven Yrvind In conclusion, making flanges around bulkhead hatches may seem complex at first glance, but by following Sven Yrvind’s meticulous process, enthusiasts can achieve professional-level results. Remember that the journey of boatbuilding is as rewarding as reaching your destination; it tests one’s patience and dedication. For those seeking to embark on this adventure or simply gain more insight into marine craftsmanship, Sven’s wisdom is invaluable.Sven begins by explaining that working on flanges vertically and horizontally is significantly easier than doing so in a flat position. To simplify the process further, he divides the task into two or three steps as suggested by fellow expert “for for.” This approach not only makes it more manageable but also allows for greater precision in crafting each component.Step 2: Applying Glue and Securing
Sven proceeds to apply glue along one edge of the flange, ensuring a secure bond when clamped into place. He emphasizes that this stage is crucial for maintaining the structural integrity of the flange, which in turn safeguards the living area beneath the canvas when hatches are open.Step 3: Allowing Time to Dry
After securely attaching the first portion of the flange, Sven allows ample time for it to dry before moving forward with additional steps. This patience and precision are key aspects of his successful boatbuilding methods.Step 4: Finishing Touches
Once the flange is fully dried, Sven removes the clamps carefully, ensuring no damage occurs during this process. He then moves on to attaching four more pieces onto these main frames, completing two pairs of flanges for the bulkhead hatches.The Final Touches
While two flanges form the primary support structure around the hatches, Sven mentions there are two additional pieces required at each end to ensure comprehensive protection. This attention to detail highlights his commitment to producing a durable and reliable design. “Sailing is about finding your path, whether it’s across an ocean or within yourself.” – Sven Yrvind In conclusion, making flanges around bulkhead hatches may seem complex at first glance, but by following Sven Yrvind’s meticulous process, enthusiasts can achieve professional-level results. Remember that the journey of boatbuilding is as rewarding as reaching your destination; it tests one’s patience and dedication. For those seeking to embark on this adventure or simply gain more insight into marine craftsmanship, Sven’s wisdom is invaluable.Sven Yrvind, a renowned yacht designer and sailor, shares valuable insights on creating flanges around bulkhead hatches for canvas protection in this enlightening video. By following his expert guidance, boat enthusiasts can ensure their living areas remain secure while allowing unhindered access through the hatches.Step 1: Starting with the Flange
Sven begins by explaining that working on flanges vertically and horizontally is significantly easier than doing so in a flat position. To simplify the process further, he divides the task into two or three steps as suggested by fellow expert “for for.” This approach not only makes it more manageable but also allows for greater precision in crafting each component.Step 2: Applying Glue and Securing
Sven proceeds to apply glue along one edge of the flange, ensuring a secure bond when clamped into place. He emphasizes that this stage is crucial for maintaining the structural integrity of the flange, which in turn safeguards the living area beneath the canvas when hatches are open.Step 3: Allowing Time to Dry
After securely attaching the first portion of the flange, Sven allows ample time for it to dry before moving forward with additional steps. This patience and precision are key aspects of his successful boatbuilding methods.Step 4: Finishing Touches
Once the flange is fully dried, Sven removes the clamps carefully, ensuring no damage occurs during this process. He then moves on to attaching four more pieces onto these main frames, completing two pairs of flanges for the bulkhead hatches.The Final Touches
While two flanges form the primary support structure around the hatches, Sven mentions there are two additional pieces required at each end to ensure comprehensive protection. This attention to detail highlights his commitment to producing a durable and reliable design. “Sailing is about finding your path, whether it’s across an ocean or within yourself.” – Sven Yrvind In conclusion, making flanges around bulkhead hatches may seem complex at first glance, but by following Sven Yrvind’s meticulous process, enthusiasts can achieve professional-level results. Remember that the journey of boatbuilding is as rewarding as reaching your destination; it tests one’s patience and dedication. For those seeking to embark on this adventure or simply gain more insight into marine craftsmanship, Sven’s wisdom is invaluable.Making Flanges Around Bulkhead Hatches for Canvas
Sven Yrvind, a renowned yacht designer and sailor, shares valuable insights on creating flanges around bulkhead hatches for canvas protection in this enlightening video. By following his expert guidance, boat enthusiasts can ensure their living areas remain secure while allowing unhindered access through the hatches.Step 1: Starting with the Flange
Sven begins by explaining that working on flanges vertically and horizontally is significantly easier than doing so in a flat position. To simplify the process further, he divides the task into two or three steps as suggested by fellow expert “for for.” This approach not only makes it more manageable but also allows for greater precision in crafting each component.Step 2: Applying Glue and Securing
Sven proceeds to apply glue along one edge of the flange, ensuring a secure bond when clamped into place. He emphasizes that this stage is crucial for maintaining the structural integrity of the flange, which in turn safeguards the living area beneath the canvas when hatches are open.Step 3: Allowing Time to Dry
After securely attaching the first portion of the flange, Sven allows ample time for it to dry before moving forward with additional steps. This patience and precision are key aspects of his successful boatbuilding methods.Step 4: Finishing Touches
Once the flange is fully dried, Sven removes the clamps carefully, ensuring no damage occurs during this process. He then moves on to attaching four more pieces onto these main frames, completing two pairs of flanges for the bulkhead hatches.The Final Touches
While two flanges form the primary support structure around the hatches, Sven mentions there are two additional pieces required at each end to ensure comprehensive protection. This attention to detail highlights his commitment to producing a durable and reliable design. “Sailing is about finding your path, whether it’s across an ocean or within yourself.” – Sven Yrvind In conclusion, making flanges around bulkhead hatches may seem complex at first glance, but by following Sven Yrvind’s meticulous process, enthusiasts can achieve professional-level results. Remember that the journey of boatbuilding is as rewarding as reaching your destination; it tests one’s patience and dedication. For those seeking to embark on this adventure or simply gain more insight into marine craftsmanship, Sven’s wisdom is invaluable.After securely attaching the first portion of the flange, Sven allows ample time for it to dry before moving forward with additional steps. This patience and precision are key aspects of his successful boatbuilding methods.Step 4: Finishing Touches
Once the flange is fully dried, Sven removes the clamps carefully, ensuring no damage occurs during this process. He then moves on to attaching four more pieces onto these main frames, completing two pairs of flanges for the bulkhead hatches.The Final Touches
While two flanges form the primary support structure around the hatches, Sven mentions there are two additional pieces required at each end to ensure comprehensive protection. This attention to detail highlights his commitment to producing a durable and reliable design. “Sailing is about finding your path, whether it’s across an ocean or within yourself.” – Sven Yrvind In conclusion, making flanges around bulkhead hatches may seem complex at first glance, but by following Sven Yrvind’s meticulous process, enthusiasts can achieve professional-level results. Remember that the journey of boatbuilding is as rewarding as reaching your destination; it tests one’s patience and dedication. For those seeking to embark on this adventure or simply gain more insight into marine craftsmanship, Sven’s wisdom is invaluable.Sven proceeds to apply glue along one edge of the flange, ensuring a secure bond when clamped into place. He emphasizes that this stage is crucial for maintaining the structural integrity of the flange, which in turn safeguards the living area beneath the canvas when hatches are open.Step 3: Allowing Time to Dry
After securely attaching the first portion of the flange, Sven allows ample time for it to dry before moving forward with additional steps. This patience and precision are key aspects of his successful boatbuilding methods.Step 4: Finishing Touches
Once the flange is fully dried, Sven removes the clamps carefully, ensuring no damage occurs during this process. He then moves on to attaching four more pieces onto these main frames, completing two pairs of flanges for the bulkhead hatches.The Final Touches
While two flanges form the primary support structure around the hatches, Sven mentions there are two additional pieces required at each end to ensure comprehensive protection. This attention to detail highlights his commitment to producing a durable and reliable design. “Sailing is about finding your path, whether it’s across an ocean or within yourself.” – Sven Yrvind In conclusion, making flanges around bulkhead hatches may seem complex at first glance, but by following Sven Yrvind’s meticulous process, enthusiasts can achieve professional-level results. Remember that the journey of boatbuilding is as rewarding as reaching your destination; it tests one’s patience and dedication. For those seeking to embark on this adventure or simply gain more insight into marine craftsmanship, Sven’s wisdom is invaluable.Sven begins by explaining that working on flanges vertically and horizontally is significantly easier than doing so in a flat position. To simplify the process further, he divides the task into two or three steps as suggested by fellow expert “for for.” This approach not only makes it more manageable but also allows for greater precision in crafting each component.Step 2: Applying Glue and Securing
Sven proceeds to apply glue along one edge of the flange, ensuring a secure bond when clamped into place. He emphasizes that this stage is crucial for maintaining the structural integrity of the flange, which in turn safeguards the living area beneath the canvas when hatches are open.Step 3: Allowing Time to Dry
After securely attaching the first portion of the flange, Sven allows ample time for it to dry before moving forward with additional steps. This patience and precision are key aspects of his successful boatbuilding methods.Step 4: Finishing Touches
Once the flange is fully dried, Sven removes the clamps carefully, ensuring no damage occurs during this process. He then moves on to attaching four more pieces onto these main frames, completing two pairs of flanges for the bulkhead hatches.The Final Touches
While two flanges form the primary support structure around the hatches, Sven mentions there are two additional pieces required at each end to ensure comprehensive protection. This attention to detail highlights his commitment to producing a durable and reliable design. “Sailing is about finding your path, whether it’s across an ocean or within yourself.” – Sven Yrvind In conclusion, making flanges around bulkhead hatches may seem complex at first glance, but by following Sven Yrvind’s meticulous process, enthusiasts can achieve professional-level results. Remember that the journey of boatbuilding is as rewarding as reaching your destination; it tests one’s patience and dedication. For those seeking to embark on this adventure or simply gain more insight into marine craftsmanship, Sven’s wisdom is invaluable.Sven Yrvind, a renowned yacht designer and sailor, shares valuable insights on creating flanges around bulkhead hatches for canvas protection in this enlightening video. By following his expert guidance, boat enthusiasts can ensure their living areas remain secure while allowing unhindered access through the hatches.Step 1: Starting with the Flange
Sven begins by explaining that working on flanges vertically and horizontally is significantly easier than doing so in a flat position. To simplify the process further, he divides the task into two or three steps as suggested by fellow expert “for for.” This approach not only makes it more manageable but also allows for greater precision in crafting each component.Step 2: Applying Glue and Securing
Sven proceeds to apply glue along one edge of the flange, ensuring a secure bond when clamped into place. He emphasizes that this stage is crucial for maintaining the structural integrity of the flange, which in turn safeguards the living area beneath the canvas when hatches are open.Step 3: Allowing Time to Dry
After securely attaching the first portion of the flange, Sven allows ample time for it to dry before moving forward with additional steps. This patience and precision are key aspects of his successful boatbuilding methods.Step 4: Finishing Touches
Once the flange is fully dried, Sven removes the clamps carefully, ensuring no damage occurs during this process. He then moves on to attaching four more pieces onto these main frames, completing two pairs of flanges for the bulkhead hatches.The Final Touches
While two flanges form the primary support structure around the hatches, Sven mentions there are two additional pieces required at each end to ensure comprehensive protection. This attention to detail highlights his commitment to producing a durable and reliable design. “Sailing is about finding your path, whether it’s across an ocean or within yourself.” – Sven Yrvind In conclusion, making flanges around bulkhead hatches may seem complex at first glance, but by following Sven Yrvind’s meticulous process, enthusiasts can achieve professional-level results. Remember that the journey of boatbuilding is as rewarding as reaching your destination; it tests one’s patience and dedication. For those seeking to embark on this adventure or simply gain more insight into marine craftsmanship, Sven’s wisdom is invaluable.Making Flanges Around Bulkhead Hatches for Canvas
Sven Yrvind, a renowned yacht designer and sailor, shares valuable insights on creating flanges around bulkhead hatches for canvas protection in this enlightening video. By following his expert guidance, boat enthusiasts can ensure their living areas remain secure while allowing unhindered access through the hatches.Step 1: Starting with the Flange
Sven begins by explaining that working on flanges vertically and horizontally is significantly easier than doing so in a flat position. To simplify the process further, he divides the task into two or three steps as suggested by fellow expert “for for.” This approach not only makes it more manageable but also allows for greater precision in crafting each component.Step 2: Applying Glue and Securing
Sven proceeds to apply glue along one edge of the flange, ensuring a secure bond when clamped into place. He emphasizes that this stage is crucial for maintaining the structural integrity of the flange, which in turn safeguards the living area beneath the canvas when hatches are open.Step 3: Allowing Time to Dry
After securely attaching the first portion of the flange, Sven allows ample time for it to dry before moving forward with additional steps. This patience and precision are key aspects of his successful boatbuilding methods.Step 4: Finishing Touches
Once the flange is fully dried, Sven removes the clamps carefully, ensuring no damage occurs during this process. He then moves on to attaching four more pieces onto these main frames, completing two pairs of flanges for the bulkhead hatches.The Final Touches
While two flanges form the primary support structure around the hatches, Sven mentions there are two additional pieces required at each end to ensure comprehensive protection. This attention to detail highlights his commitment to producing a durable and reliable design. “Sailing is about finding your path, whether it’s across an ocean or within yourself.” – Sven Yrvind In conclusion, making flanges around bulkhead hatches may seem complex at first glance, but by following Sven Yrvind’s meticulous process, enthusiasts can achieve professional-level results. Remember that the journey of boatbuilding is as rewarding as reaching your destination; it tests one’s patience and dedication. For those seeking to embark on this adventure or simply gain more insight into marine craftsmanship, Sven’s wisdom is invaluable.Once the flange is fully dried, Sven removes the clamps carefully, ensuring no damage occurs during this process. He then moves on to attaching four more pieces onto these main frames, completing two pairs of flanges for the bulkhead hatches.The Final Touches
While two flanges form the primary support structure around the hatches, Sven mentions there are two additional pieces required at each end to ensure comprehensive protection. This attention to detail highlights his commitment to producing a durable and reliable design. “Sailing is about finding your path, whether it’s across an ocean or within yourself.” – Sven Yrvind In conclusion, making flanges around bulkhead hatches may seem complex at first glance, but by following Sven Yrvind’s meticulous process, enthusiasts can achieve professional-level results. Remember that the journey of boatbuilding is as rewarding as reaching your destination; it tests one’s patience and dedication. For those seeking to embark on this adventure or simply gain more insight into marine craftsmanship, Sven’s wisdom is invaluable.After securely attaching the first portion of the flange, Sven allows ample time for it to dry before moving forward with additional steps. This patience and precision are key aspects of his successful boatbuilding methods.Step 4: Finishing Touches
Once the flange is fully dried, Sven removes the clamps carefully, ensuring no damage occurs during this process. He then moves on to attaching four more pieces onto these main frames, completing two pairs of flanges for the bulkhead hatches.The Final Touches
While two flanges form the primary support structure around the hatches, Sven mentions there are two additional pieces required at each end to ensure comprehensive protection. This attention to detail highlights his commitment to producing a durable and reliable design. “Sailing is about finding your path, whether it’s across an ocean or within yourself.” – Sven Yrvind In conclusion, making flanges around bulkhead hatches may seem complex at first glance, but by following Sven Yrvind’s meticulous process, enthusiasts can achieve professional-level results. Remember that the journey of boatbuilding is as rewarding as reaching your destination; it tests one’s patience and dedication. For those seeking to embark on this adventure or simply gain more insight into marine craftsmanship, Sven’s wisdom is invaluable.Sven proceeds to apply glue along one edge of the flange, ensuring a secure bond when clamped into place. He emphasizes that this stage is crucial for maintaining the structural integrity of the flange, which in turn safeguards the living area beneath the canvas when hatches are open.Step 3: Allowing Time to Dry
After securely attaching the first portion of the flange, Sven allows ample time for it to dry before moving forward with additional steps. This patience and precision are key aspects of his successful boatbuilding methods.Step 4: Finishing Touches
Once the flange is fully dried, Sven removes the clamps carefully, ensuring no damage occurs during this process. He then moves on to attaching four more pieces onto these main frames, completing two pairs of flanges for the bulkhead hatches.The Final Touches
While two flanges form the primary support structure around the hatches, Sven mentions there are two additional pieces required at each end to ensure comprehensive protection. This attention to detail highlights his commitment to producing a durable and reliable design. “Sailing is about finding your path, whether it’s across an ocean or within yourself.” – Sven Yrvind In conclusion, making flanges around bulkhead hatches may seem complex at first glance, but by following Sven Yrvind’s meticulous process, enthusiasts can achieve professional-level results. Remember that the journey of boatbuilding is as rewarding as reaching your destination; it tests one’s patience and dedication. For those seeking to embark on this adventure or simply gain more insight into marine craftsmanship, Sven’s wisdom is invaluable.Sven begins by explaining that working on flanges vertically and horizontally is significantly easier than doing so in a flat position. To simplify the process further, he divides the task into two or three steps as suggested by fellow expert “for for.” This approach not only makes it more manageable but also allows for greater precision in crafting each component.Step 2: Applying Glue and Securing
Sven proceeds to apply glue along one edge of the flange, ensuring a secure bond when clamped into place. He emphasizes that this stage is crucial for maintaining the structural integrity of the flange, which in turn safeguards the living area beneath the canvas when hatches are open.Step 3: Allowing Time to Dry
After securely attaching the first portion of the flange, Sven allows ample time for it to dry before moving forward with additional steps. This patience and precision are key aspects of his successful boatbuilding methods.Step 4: Finishing Touches
Once the flange is fully dried, Sven removes the clamps carefully, ensuring no damage occurs during this process. He then moves on to attaching four more pieces onto these main frames, completing two pairs of flanges for the bulkhead hatches.The Final Touches
While two flanges form the primary support structure around the hatches, Sven mentions there are two additional pieces required at each end to ensure comprehensive protection. This attention to detail highlights his commitment to producing a durable and reliable design. “Sailing is about finding your path, whether it’s across an ocean or within yourself.” – Sven Yrvind In conclusion, making flanges around bulkhead hatches may seem complex at first glance, but by following Sven Yrvind’s meticulous process, enthusiasts can achieve professional-level results. Remember that the journey of boatbuilding is as rewarding as reaching your destination; it tests one’s patience and dedication. For those seeking to embark on this adventure or simply gain more insight into marine craftsmanship, Sven’s wisdom is invaluable.Sven Yrvind, a renowned yacht designer and sailor, shares valuable insights on creating flanges around bulkhead hatches for canvas protection in this enlightening video. By following his expert guidance, boat enthusiasts can ensure their living areas remain secure while allowing unhindered access through the hatches.Step 1: Starting with the Flange
Sven begins by explaining that working on flanges vertically and horizontally is significantly easier than doing so in a flat position. To simplify the process further, he divides the task into two or three steps as suggested by fellow expert “for for.” This approach not only makes it more manageable but also allows for greater precision in crafting each component.Step 2: Applying Glue and Securing
Sven proceeds to apply glue along one edge of the flange, ensuring a secure bond when clamped into place. He emphasizes that this stage is crucial for maintaining the structural integrity of the flange, which in turn safeguards the living area beneath the canvas when hatches are open.Step 3: Allowing Time to Dry
After securely attaching the first portion of the flange, Sven allows ample time for it to dry before moving forward with additional steps. This patience and precision are key aspects of his successful boatbuilding methods.Step 4: Finishing Touches
Once the flange is fully dried, Sven removes the clamps carefully, ensuring no damage occurs during this process. He then moves on to attaching four more pieces onto these main frames, completing two pairs of flanges for the bulkhead hatches.The Final Touches
While two flanges form the primary support structure around the hatches, Sven mentions there are two additional pieces required at each end to ensure comprehensive protection. This attention to detail highlights his commitment to producing a durable and reliable design. “Sailing is about finding your path, whether it’s across an ocean or within yourself.” – Sven Yrvind In conclusion, making flanges around bulkhead hatches may seem complex at first glance, but by following Sven Yrvind’s meticulous process, enthusiasts can achieve professional-level results. Remember that the journey of boatbuilding is as rewarding as reaching your destination; it tests one’s patience and dedication. For those seeking to embark on this adventure or simply gain more insight into marine craftsmanship, Sven’s wisdom is invaluable.Making Flanges Around Bulkhead Hatches for Canvas
Sven Yrvind, a renowned yacht designer and sailor, shares valuable insights on creating flanges around bulkhead hatches for canvas protection in this enlightening video. By following his expert guidance, boat enthusiasts can ensure their living areas remain secure while allowing unhindered access through the hatches.Step 1: Starting with the Flange
Sven begins by explaining that working on flanges vertically and horizontally is significantly easier than doing so in a flat position. To simplify the process further, he divides the task into two or three steps as suggested by fellow expert “for for.” This approach not only makes it more manageable but also allows for greater precision in crafting each component.Step 2: Applying Glue and Securing
Sven proceeds to apply glue along one edge of the flange, ensuring a secure bond when clamped into place. He emphasizes that this stage is crucial for maintaining the structural integrity of the flange, which in turn safeguards the living area beneath the canvas when hatches are open.Step 3: Allowing Time to Dry
After securely attaching the first portion of the flange, Sven allows ample time for it to dry before moving forward with additional steps. This patience and precision are key aspects of his successful boatbuilding methods.Step 4: Finishing Touches
Once the flange is fully dried, Sven removes the clamps carefully, ensuring no damage occurs during this process. He then moves on to attaching four more pieces onto these main frames, completing two pairs of flanges for the bulkhead hatches.The Final Touches
While two flanges form the primary support structure around the hatches, Sven mentions there are two additional pieces required at each end to ensure comprehensive protection. This attention to detail highlights his commitment to producing a durable and reliable design. “Sailing is about finding your path, whether it’s across an ocean or within yourself.” – Sven Yrvind In conclusion, making flanges around bulkhead hatches may seem complex at first glance, but by following Sven Yrvind’s meticulous process, enthusiasts can achieve professional-level results. Remember that the journey of boatbuilding is as rewarding as reaching your destination; it tests one’s patience and dedication. For those seeking to embark on this adventure or simply gain more insight into marine craftsmanship, Sven’s wisdom is invaluable.Making Flanges Around Bulkhead Hatches for Canvas
Sven Yrvind, a renowned yacht designer and sailor, shares valuable insights on creating flanges around bulkhead hatches for canvas protection in this enlightening video. By following his expert guidance, boat enthusiasts can ensure their living areas remain secure while allowing unhindered access through the hatches.Step 1: Starting with the Flange
Sven begins by explaining that working on flanges vertically and horizontally is significantly easier than doing so in a flat position. To simplify the process further, he divides the task into two or three steps as suggested by fellow expert “for for.” This approach not only makes it more manageable but also allows for greater precision in crafting each component.Step 2: Applying Glue and Securing
Sven proceeds to apply glue along one edge of the flange, ensuring a secure bond when clamped into place. He emphasizes that this stage is crucial for maintaining the structural integrity of the flange, which in turn safeguards the living area beneath the canvas when hatches are open.Step 3: Allowing Time to Dry
After securely attaching the first portion of the flange, Sven allows ample time for it to dry before moving forward with additional steps. This patience and precision are key aspects of his successful boatbuilding methods.Step 4: Finishing Touches
Once the flange is fully dried, Sven removes the clamps carefully, ensuring no damage occurs during this process. He then moves on to attaching four more pieces onto these main frames, completing two pairs of flanges for the bulkhead hatches.The Final Touches
While two flanges form the primary support structure around the hatches, Sven mentions there are two additional pieces required at each end to ensure comprehensive protection. This attention to detail highlights his commitment to producing a durable and reliable design. “Sailing is about finding your path, whether it’s across an ocean or within yourself.” – Sven Yrvind In conclusion, making flanges around bulkhead hatches may seem complex at first glance, but by following Sven Yrvind’s meticulous process, enthusiasts can achieve professional-level results. Remember that the journey of boatbuilding is as rewarding as reaching your destination; it tests one’s patience and dedication. For those seeking to embark on this adventure or simply gain more insight into marine craftsmanship, Sven’s wisdom is invaluable.Once the flange is fully dried, Sven removes the clamps carefully, ensuring no damage occurs during this process. He then moves on to attaching four more pieces onto these main frames, completing two pairs of flanges for the bulkhead hatches.The Final Touches
While two flanges form the primary support structure around the hatches, Sven mentions there are two additional pieces required at each end to ensure comprehensive protection. This attention to detail highlights his commitment to producing a durable and reliable design. “Sailing is about finding your path, whether it’s across an ocean or within yourself.” – Sven Yrvind In conclusion, making flanges around bulkhead hatches may seem complex at first glance, but by following Sven Yrvind’s meticulous process, enthusiasts can achieve professional-level results. Remember that the journey of boatbuilding is as rewarding as reaching your destination; it tests one’s patience and dedication. For those seeking to embark on this adventure or simply gain more insight into marine craftsmanship, Sven’s wisdom is invaluable.Sven Yrvind, a renowned yacht designer and sailor, shares valuable insights on creating flanges around bulkhead hatches for canvas protection in this enlightening video. By following his expert guidance, boat enthusiasts can ensure their living areas remain secure while allowing unhindered access through the hatches.Step 1: Starting with the Flange
Sven begins by explaining that working on flanges vertically and horizontally is significantly easier than doing so in a flat position. To simplify the process further, he divides the task into two or three steps as suggested by fellow expert “for for.” This approach not only makes it more manageable but also allows for greater precision in crafting each component.Step 2: Applying Glue and Securing
Sven proceeds to apply glue along one edge of the flange, ensuring a secure bond when clamped into place. He emphasizes that this stage is crucial for maintaining the structural integrity of the flange, which in turn safeguards the living area beneath the canvas when hatches are open.Step 3: Allowing Time to Dry
After securely attaching the first portion of the flange, Sven allows ample time for it to dry before moving forward with additional steps. This patience and precision are key aspects of his successful boatbuilding methods.Step 4: Finishing Touches
Once the flange is fully dried, Sven removes the clamps carefully, ensuring no damage occurs during this process. He then moves on to attaching four more pieces onto these main frames, completing two pairs of flanges for the bulkhead hatches.The Final Touches
While two flanges form the primary support structure around the hatches, Sven mentions there are two additional pieces required at each end to ensure comprehensive protection. This attention to detail highlights his commitment to producing a durable and reliable design. “Sailing is about finding your path, whether it’s across an ocean or within yourself.” – Sven Yrvind In conclusion, making flanges around bulkhead hatches may seem complex at first glance, but by following Sven Yrvind’s meticulous process, enthusiasts can achieve professional-level results. Remember that the journey of boatbuilding is as rewarding as reaching your destination; it tests one’s patience and dedication. For those seeking to embark on this adventure or simply gain more insight into marine craftsmanship, Sven’s wisdom is invaluable.Making Flanges Around Bulkhead Hatches for Canvas
Sven Yrvind, a renowned yacht designer and sailor, shares valuable insights on creating flanges around bulkhead hatches for canvas protection in this enlightening video. By following his expert guidance, boat enthusiasts can ensure their living areas remain secure while allowing unhindered access through the hatches.Step 1: Starting with the Flange
Sven begins by explaining that working on flanges vertically and horizontally is significantly easier than doing so in a flat position. To simplify the process further, he divides the task into two or three steps as suggested by fellow expert “for for.” This approach not only makes it more manageable but also allows for greater precision in crafting each component.Step 2: Applying Glue and Securing
Sven proceeds to apply glue along one edge of the flange, ensuring a secure bond when clamped into place. He emphasizes that this stage is crucial for maintaining the structural integrity of the flange, which in turn safeguards the living area beneath the canvas when hatches are open.Step 3: Allowing Time to Dry
After securely attaching the first portion of the flange, Sven allows ample time for it to dry before moving forward with additional steps. This patience and precision are key aspects of his successful boatbuilding methods.Step 4: Finishing Touches
Once the flange is fully dried, Sven removes the clamps carefully, ensuring no damage occurs during this process. He then moves on to attaching four more pieces onto these main frames, completing two pairs of flanges for the bulkhead hatches.The Final Touches
While two flanges form the primary support structure around the hatches, Sven mentions there are two additional pieces required at each end to ensure comprehensive protection. This attention to detail highlights his commitment to producing a durable and reliable design. “Sailing is about finding your path, whether it’s across an ocean or within yourself.” – Sven Yrvind In conclusion, making flanges around bulkhead hatches may seem complex at first glance, but by following Sven Yrvind’s meticulous process, enthusiasts can achieve professional-level results. Remember that the journey of boatbuilding is as rewarding as reaching your destination; it tests one’s patience and dedication. For those seeking to embark on this adventure or simply gain more insight into marine craftsmanship, Sven’s wisdom is invaluable.After securely attaching the first portion of the flange, Sven allows ample time for it to dry before moving forward with additional steps. This patience and precision are key aspects of his successful boatbuilding methods.Step 4: Finishing Touches
Once the flange is fully dried, Sven removes the clamps carefully, ensuring no damage occurs during this process. He then moves on to attaching four more pieces onto these main frames, completing two pairs of flanges for the bulkhead hatches.The Final Touches
While two flanges form the primary support structure around the hatches, Sven mentions there are two additional pieces required at each end to ensure comprehensive protection. This attention to detail highlights his commitment to producing a durable and reliable design. “Sailing is about finding your path, whether it’s across an ocean or within yourself.” – Sven Yrvind In conclusion, making flanges around bulkhead hatches may seem complex at first glance, but by following Sven Yrvind’s meticulous process, enthusiasts can achieve professional-level results. Remember that the journey of boatbuilding is as rewarding as reaching your destination; it tests one’s patience and dedication. For those seeking to embark on this adventure or simply gain more insight into marine craftsmanship, Sven’s wisdom is invaluable.Sven Yrvind, a renowned yacht designer and sailor, shares valuable insights on creating flanges around bulkhead hatches for canvas protection in this enlightening video. By following his expert guidance, boat enthusiasts can ensure their living areas remain secure while allowing unhindered access through the hatches.Step 1: Starting with the Flange
Sven begins by explaining that working on flanges vertically and horizontally is significantly easier than doing so in a flat position. To simplify the process further, he divides the task into two or three steps as suggested by fellow expert “for for.” This approach not only makes it more manageable but also allows for greater precision in crafting each component.Step 2: Applying Glue and Securing
Sven proceeds to apply glue along one edge of the flange, ensuring a secure bond when clamped into place. He emphasizes that this stage is crucial for maintaining the structural integrity of the flange, which in turn safeguards the living area beneath the canvas when hatches are open.Step 3: Allowing Time to Dry
After securely attaching the first portion of the flange, Sven allows ample time for it to dry before moving forward with additional steps. This patience and precision are key aspects of his successful boatbuilding methods.Step 4: Finishing Touches
Once the flange is fully dried, Sven removes the clamps carefully, ensuring no damage occurs during this process. He then moves on to attaching four more pieces onto these main frames, completing two pairs of flanges for the bulkhead hatches.The Final Touches
While two flanges form the primary support structure around the hatches, Sven mentions there are two additional pieces required at each end to ensure comprehensive protection. This attention to detail highlights his commitment to producing a durable and reliable design. “Sailing is about finding your path, whether it’s across an ocean or within yourself.” – Sven Yrvind In conclusion, making flanges around bulkhead hatches may seem complex at first glance, but by following Sven Yrvind’s meticulous process, enthusiasts can achieve professional-level results. Remember that the journey of boatbuilding is as rewarding as reaching your destination; it tests one’s patience and dedication. For those seeking to embark on this adventure or simply gain more insight into marine craftsmanship, Sven’s wisdom is invaluable.Making Flanges Around Bulkhead Hatches for Canvas
Sven Yrvind, a renowned yacht designer and sailor, shares valuable insights on creating flanges around bulkhead hatches for canvas protection in this enlightening video. By following his expert guidance, boat enthusiasts can ensure their living areas remain secure while allowing unhindered access through the hatches.Step 1: Starting with the Flange
Sven begins by explaining that working on flanges vertically and horizontally is significantly easier than doing so in a flat position. To simplify the process further, he divides the task into two or three steps as suggested by fellow expert “for for.” This approach not only makes it more manageable but also allows for greater precision in crafting each component.Step 2: Applying Glue and Securing
Sven proceeds to apply glue along one edge of the flange, ensuring a secure bond when clamped into place. He emphasizes that this stage is crucial for maintaining the structural integrity of the flange, which in turn safeguards the living area beneath the canvas when hatches are open.Step 3: Allowing Time to Dry
After securely attaching the first portion of the flange, Sven allows ample time for it to dry before moving forward with additional steps. This patience and precision are key aspects of his successful boatbuilding methods.Step 4: Finishing Touches
Once the flange is fully dried, Sven removes the clamps carefully, ensuring no damage occurs during this process. He then moves on to attaching four more pieces onto these main frames, completing two pairs of flanges for the bulkhead hatches.The Final Touches
While two flanges form the primary support structure around the hatches, Sven mentions there are two additional pieces required at each end to ensure comprehensive protection. This attention to detail highlights his commitment to producing a durable and reliable design. “Sailing is about finding your path, whether it’s across an ocean or within yourself.” – Sven Yrvind In conclusion, making flanges around bulkhead hatches may seem complex at first glance, but by following Sven Yrvind’s meticulous process, enthusiasts can achieve professional-level results. Remember that the journey of boatbuilding is as rewarding as reaching your destination; it tests one’s patience and dedication. For those seeking to embark on this adventure or simply gain more insight into marine craftsmanship, Sven’s wisdom is invaluable.Sven proceeds to apply glue along one edge of the flange, ensuring a secure bond when clamped into place. He emphasizes that this stage is crucial for maintaining the structural integrity of the flange, which in turn safeguards the living area beneath the canvas when hatches are open.Step 3: Allowing Time to Dry
After securely attaching the first portion of the flange, Sven allows ample time for it to dry before moving forward with additional steps. This patience and precision are key aspects of his successful boatbuilding methods.Step 4: Finishing Touches
Once the flange is fully dried, Sven removes the clamps carefully, ensuring no damage occurs during this process. He then moves on to attaching four more pieces onto these main frames, completing two pairs of flanges for the bulkhead hatches.The Final Touches
While two flanges form the primary support structure around the hatches, Sven mentions there are two additional pieces required at each end to ensure comprehensive protection. This attention to detail highlights his commitment to producing a durable and reliable design. “Sailing is about finding your path, whether it’s across an ocean or within yourself.” – Sven Yrvind In conclusion, making flanges around bulkhead hatches may seem complex at first glance, but by following Sven Yrvind’s meticulous process, enthusiasts can achieve professional-level results. Remember that the journey of boatbuilding is as rewarding as reaching your destination; it tests one’s patience and dedication. For those seeking to embark on this adventure or simply gain more insight into marine craftsmanship, Sven’s wisdom is invaluable.Sven Yrvind, a renowned yacht designer and sailor, shares valuable insights on creating flanges around bulkhead hatches for canvas protection in this enlightening video. By following his expert guidance, boat enthusiasts can ensure their living areas remain secure while allowing unhindered access through the hatches.Step 1: Starting with the Flange
Sven begins by explaining that working on flanges vertically and horizontally is significantly easier than doing so in a flat position. To simplify the process further, he divides the task into two or three steps as suggested by fellow expert “for for.” This approach not only makes it more manageable but also allows for greater precision in crafting each component.Step 2: Applying Glue and Securing
Sven proceeds to apply glue along one edge of the flange, ensuring a secure bond when clamped into place. He emphasizes that this stage is crucial for maintaining the structural integrity of the flange, which in turn safeguards the living area beneath the canvas when hatches are open.Step 3: Allowing Time to Dry
After securely attaching the first portion of the flange, Sven allows ample time for it to dry before moving forward with additional steps. This patience and precision are key aspects of his successful boatbuilding methods.Step 4: Finishing Touches
Once the flange is fully dried, Sven removes the clamps carefully, ensuring no damage occurs during this process. He then moves on to attaching four more pieces onto these main frames, completing two pairs of flanges for the bulkhead hatches.The Final Touches
While two flanges form the primary support structure around the hatches, Sven mentions there are two additional pieces required at each end to ensure comprehensive protection. This attention to detail highlights his commitment to producing a durable and reliable design. “Sailing is about finding your path, whether it’s across an ocean or within yourself.” – Sven Yrvind In conclusion, making flanges around bulkhead hatches may seem complex at first glance, but by following Sven Yrvind’s meticulous process, enthusiasts can achieve professional-level results. Remember that the journey of boatbuilding is as rewarding as reaching your destination; it tests one’s patience and dedication. For those seeking to embark on this adventure or simply gain more insight into marine craftsmanship, Sven’s wisdom is invaluable.Making Flanges Around Bulkhead Hatches for Canvas
Sven Yrvind, a renowned yacht designer and sailor, shares valuable insights on creating flanges around bulkhead hatches for canvas protection in this enlightening video. By following his expert guidance, boat enthusiasts can ensure their living areas remain secure while allowing unhindered access through the hatches.Step 1: Starting with the Flange
Sven begins by explaining that working on flanges vertically and horizontally is significantly easier than doing so in a flat position. To simplify the process further, he divides the task into two or three steps as suggested by fellow expert “for for.” This approach not only makes it more manageable but also allows for greater precision in crafting each component.Step 2: Applying Glue and Securing
Sven proceeds to apply glue along one edge of the flange, ensuring a secure bond when clamped into place. He emphasizes that this stage is crucial for maintaining the structural integrity of the flange, which in turn safeguards the living area beneath the canvas when hatches are open.Step 3: Allowing Time to Dry
After securely attaching the first portion of the flange, Sven allows ample time for it to dry before moving forward with additional steps. This patience and precision are key aspects of his successful boatbuilding methods.Step 4: Finishing Touches
Once the flange is fully dried, Sven removes the clamps carefully, ensuring no damage occurs during this process. He then moves on to attaching four more pieces onto these main frames, completing two pairs of flanges for the bulkhead hatches.The Final Touches
While two flanges form the primary support structure around the hatches, Sven mentions there are two additional pieces required at each end to ensure comprehensive protection. This attention to detail highlights his commitment to producing a durable and reliable design. “Sailing is about finding your path, whether it’s across an ocean or within yourself.” – Sven Yrvind In conclusion, making flanges around bulkhead hatches may seem complex at first glance, but by following Sven Yrvind’s meticulous process, enthusiasts can achieve professional-level results. Remember that the journey of boatbuilding is as rewarding as reaching your destination; it tests one’s patience and dedication. For those seeking to embark on this adventure or simply gain more insight into marine craftsmanship, Sven’s wisdom is invaluable.Sven begins by explaining that working on flanges vertically and horizontally is significantly easier than doing so in a flat position. To simplify the process further, he divides the task into two or three steps as suggested by fellow expert “for for.” This approach not only makes it more manageable but also allows for greater precision in crafting each component.Step 2: Applying Glue and Securing
Sven proceeds to apply glue along one edge of the flange, ensuring a secure bond when clamped into place. He emphasizes that this stage is crucial for maintaining the structural integrity of the flange, which in turn safeguards the living area beneath the canvas when hatches are open.Step 3: Allowing Time to Dry
After securely attaching the first portion of the flange, Sven allows ample time for it to dry before moving forward with additional steps. This patience and precision are key aspects of his successful boatbuilding methods.Step 4: Finishing Touches
Once the flange is fully dried, Sven removes the clamps carefully, ensuring no damage occurs during this process. He then moves on to attaching four more pieces onto these main frames, completing two pairs of flanges for the bulkhead hatches.The Final Touches
While two flanges form the primary support structure around the hatches, Sven mentions there are two additional pieces required at each end to ensure comprehensive protection. This attention to detail highlights his commitment to producing a durable and reliable design. “Sailing is about finding your path, whether it’s across an ocean or within yourself.” – Sven Yrvind In conclusion, making flanges around bulkhead hatches may seem complex at first glance, but by following Sven Yrvind’s meticulous process, enthusiasts can achieve professional-level results. Remember that the journey of boatbuilding is as rewarding as reaching your destination; it tests one’s patience and dedication. For those seeking to embark on this adventure or simply gain more insight into marine craftsmanship, Sven’s wisdom is invaluable.Sven Yrvind, a renowned yacht designer and sailor, shares valuable insights on creating flanges around bulkhead hatches for canvas protection in this enlightening video. By following his expert guidance, boat enthusiasts can ensure their living areas remain secure while allowing unhindered access through the hatches.Step 1: Starting with the Flange
Sven begins by explaining that working on flanges vertically and horizontally is significantly easier than doing so in a flat position. To simplify the process further, he divides the task into two or three steps as suggested by fellow expert “for for.” This approach not only makes it more manageable but also allows for greater precision in crafting each component.Step 2: Applying Glue and Securing
Sven proceeds to apply glue along one edge of the flange, ensuring a secure bond when clamped into place. He emphasizes that this stage is crucial for maintaining the structural integrity of the flange, which in turn safeguards the living area beneath the canvas when hatches are open.Step 3: Allowing Time to Dry
After securely attaching the first portion of the flange, Sven allows ample time for it to dry before moving forward with additional steps. This patience and precision are key aspects of his successful boatbuilding methods.Step 4: Finishing Touches
Once the flange is fully dried, Sven removes the clamps carefully, ensuring no damage occurs during this process. He then moves on to attaching four more pieces onto these main frames, completing two pairs of flanges for the bulkhead hatches.The Final Touches
While two flanges form the primary support structure around the hatches, Sven mentions there are two additional pieces required at each end to ensure comprehensive protection. This attention to detail highlights his commitment to producing a durable and reliable design. “Sailing is about finding your path, whether it’s across an ocean or within yourself.” – Sven Yrvind In conclusion, making flanges around bulkhead hatches may seem complex at first glance, but by following Sven Yrvind’s meticulous process, enthusiasts can achieve professional-level results. Remember that the journey of boatbuilding is as rewarding as reaching your destination; it tests one’s patience and dedication. For those seeking to embark on this adventure or simply gain more insight into marine craftsmanship, Sven’s wisdom is invaluable.Making Flanges Around Bulkhead Hatches for Canvas
Sven Yrvind, a renowned yacht designer and sailor, shares valuable insights on creating flanges around bulkhead hatches for canvas protection in this enlightening video. By following his expert guidance, boat enthusiasts can ensure their living areas remain secure while allowing unhindered access through the hatches.Step 1: Starting with the Flange
Sven begins by explaining that working on flanges vertically and horizontally is significantly easier than doing so in a flat position. To simplify the process further, he divides the task into two or three steps as suggested by fellow expert “for for.” This approach not only makes it more manageable but also allows for greater precision in crafting each component.Step 2: Applying Glue and Securing
Sven proceeds to apply glue along one edge of the flange, ensuring a secure bond when clamped into place. He emphasizes that this stage is crucial for maintaining the structural integrity of the flange, which in turn safeguards the living area beneath the canvas when hatches are open.Step 3: Allowing Time to Dry
After securely attaching the first portion of the flange, Sven allows ample time for it to dry before moving forward with additional steps. This patience and precision are key aspects of his successful boatbuilding methods.Step 4: Finishing Touches
Once the flange is fully dried, Sven removes the clamps carefully, ensuring no damage occurs during this process. He then moves on to attaching four more pieces onto these main frames, completing two pairs of flanges for the bulkhead hatches.The Final Touches
While two flanges form the primary support structure around the hatches, Sven mentions there are two additional pieces required at each end to ensure comprehensive protection. This attention to detail highlights his commitment to producing a durable and reliable design. “Sailing is about finding your path, whether it’s across an ocean or within yourself.” – Sven Yrvind In conclusion, making flanges around bulkhead hatches may seem complex at first glance, but by following Sven Yrvind’s meticulous process, enthusiasts can achieve professional-level results. Remember that the journey of boatbuilding is as rewarding as reaching your destination; it tests one’s patience and dedication. For those seeking to embark on this adventure or simply gain more insight into marine craftsmanship, Sven’s wisdom is invaluable.Once the flange is fully dried, Sven removes the clamps carefully, ensuring no damage occurs during this process. He then moves on to attaching four more pieces onto these main frames, completing two pairs of flanges for the bulkhead hatches.The Final Touches
While two flanges form the primary support structure around the hatches, Sven mentions there are two additional pieces required at each end to ensure comprehensive protection. This attention to detail highlights his commitment to producing a durable and reliable design. “Sailing is about finding your path, whether it’s across an ocean or within yourself.” – Sven Yrvind In conclusion, making flanges around bulkhead hatches may seem complex at first glance, but by following Sven Yrvind’s meticulous process, enthusiasts can achieve professional-level results. Remember that the journey of boatbuilding is as rewarding as reaching your destination; it tests one’s patience and dedication. For those seeking to embark on this adventure or simply gain more insight into marine craftsmanship, Sven’s wisdom is invaluable.Sven begins by explaining that working on flanges vertically and horizontally is significantly easier than doing so in a flat position. To simplify the process further, he divides the task into two or three steps as suggested by fellow expert “for for.” This approach not only makes it more manageable but also allows for greater precision in crafting each component.Step 2: Applying Glue and Securing
Sven proceeds to apply glue along one edge of the flange, ensuring a secure bond when clamped into place. He emphasizes that this stage is crucial for maintaining the structural integrity of the flange, which in turn safeguards the living area beneath the canvas when hatches are open.Step 3: Allowing Time to Dry
After securely attaching the first portion of the flange, Sven allows ample time for it to dry before moving forward with additional steps. This patience and precision are key aspects of his successful boatbuilding methods.Step 4: Finishing Touches
Once the flange is fully dried, Sven removes the clamps carefully, ensuring no damage occurs during this process. He then moves on to attaching four more pieces onto these main frames, completing two pairs of flanges for the bulkhead hatches.The Final Touches
While two flanges form the primary support structure around the hatches, Sven mentions there are two additional pieces required at each end to ensure comprehensive protection. This attention to detail highlights his commitment to producing a durable and reliable design. “Sailing is about finding your path, whether it’s across an ocean or within yourself.” – Sven Yrvind In conclusion, making flanges around bulkhead hatches may seem complex at first glance, but by following Sven Yrvind’s meticulous process, enthusiasts can achieve professional-level results. Remember that the journey of boatbuilding is as rewarding as reaching your destination; it tests one’s patience and dedication. For those seeking to embark on this adventure or simply gain more insight into marine craftsmanship, Sven’s wisdom is invaluable.Sven Yrvind, a renowned yacht designer and sailor, shares valuable insights on creating flanges around bulkhead hatches for canvas protection in this enlightening video. By following his expert guidance, boat enthusiasts can ensure their living areas remain secure while allowing unhindered access through the hatches.Step 1: Starting with the Flange
Sven begins by explaining that working on flanges vertically and horizontally is significantly easier than doing so in a flat position. To simplify the process further, he divides the task into two or three steps as suggested by fellow expert “for for.” This approach not only makes it more manageable but also allows for greater precision in crafting each component.Step 2: Applying Glue and Securing
Sven proceeds to apply glue along one edge of the flange, ensuring a secure bond when clamped into place. He emphasizes that this stage is crucial for maintaining the structural integrity of the flange, which in turn safeguards the living area beneath the canvas when hatches are open.Step 3: Allowing Time to Dry
After securely attaching the first portion of the flange, Sven allows ample time for it to dry before moving forward with additional steps. This patience and precision are key aspects of his successful boatbuilding methods.Step 4: Finishing Touches
Once the flange is fully dried, Sven removes the clamps carefully, ensuring no damage occurs during this process. He then moves on to attaching four more pieces onto these main frames, completing two pairs of flanges for the bulkhead hatches.The Final Touches
While two flanges form the primary support structure around the hatches, Sven mentions there are two additional pieces required at each end to ensure comprehensive protection. This attention to detail highlights his commitment to producing a durable and reliable design. “Sailing is about finding your path, whether it’s across an ocean or within yourself.” – Sven Yrvind In conclusion, making flanges around bulkhead hatches may seem complex at first glance, but by following Sven Yrvind’s meticulous process, enthusiasts can achieve professional-level results. Remember that the journey of boatbuilding is as rewarding as reaching your destination; it tests one’s patience and dedication. For those seeking to embark on this adventure or simply gain more insight into marine craftsmanship, Sven’s wisdom is invaluable.Making Flanges Around Bulkhead Hatches for Canvas
Sven Yrvind, a renowned yacht designer and sailor, shares valuable insights on creating flanges around bulkhead hatches for canvas protection in this enlightening video. By following his expert guidance, boat enthusiasts can ensure their living areas remain secure while allowing unhindered access through the hatches.Step 1: Starting with the Flange
Sven begins by explaining that working on flanges vertically and horizontally is significantly easier than doing so in a flat position. To simplify the process further, he divides the task into two or three steps as suggested by fellow expert “for for.” This approach not only makes it more manageable but also allows for greater precision in crafting each component.Step 2: Applying Glue and Securing
Sven proceeds to apply glue along one edge of the flange, ensuring a secure bond when clamped into place. He emphasizes that this stage is crucial for maintaining the structural integrity of the flange, which in turn safeguards the living area beneath the canvas when hatches are open.Step 3: Allowing Time to Dry
After securely attaching the first portion of the flange, Sven allows ample time for it to dry before moving forward with additional steps. This patience and precision are key aspects of his successful boatbuilding methods.Step 4: Finishing Touches
Once the flange is fully dried, Sven removes the clamps carefully, ensuring no damage occurs during this process. He then moves on to attaching four more pieces onto these main frames, completing two pairs of flanges for the bulkhead hatches.The Final Touches
While two flanges form the primary support structure around the hatches, Sven mentions there are two additional pieces required at each end to ensure comprehensive protection. This attention to detail highlights his commitment to producing a durable and reliable design. “Sailing is about finding your path, whether it’s across an ocean or within yourself.” – Sven Yrvind In conclusion, making flanges around bulkhead hatches may seem complex at first glance, but by following Sven Yrvind’s meticulous process, enthusiasts can achieve professional-level results. Remember that the journey of boatbuilding is as rewarding as reaching your destination; it tests one’s patience and dedication. For those seeking to embark on this adventure or simply gain more insight into marine craftsmanship, Sven’s wisdom is invaluable.After securely attaching the first portion of the flange, Sven allows ample time for it to dry before moving forward with additional steps. This patience and precision are key aspects of his successful boatbuilding methods.Step 4: Finishing Touches
Once the flange is fully dried, Sven removes the clamps carefully, ensuring no damage occurs during this process. He then moves on to attaching four more pieces onto these main frames, completing two pairs of flanges for the bulkhead hatches.The Final Touches
While two flanges form the primary support structure around the hatches, Sven mentions there are two additional pieces required at each end to ensure comprehensive protection. This attention to detail highlights his commitment to producing a durable and reliable design. “Sailing is about finding your path, whether it’s across an ocean or within yourself.” – Sven Yrvind In conclusion, making flanges around bulkhead hatches may seem complex at first glance, but by following Sven Yrvind’s meticulous process, enthusiasts can achieve professional-level results. Remember that the journey of boatbuilding is as rewarding as reaching your destination; it tests one’s patience and dedication. For those seeking to embark on this adventure or simply gain more insight into marine craftsmanship, Sven’s wisdom is invaluable.Sven begins by explaining that working on flanges vertically and horizontally is significantly easier than doing so in a flat position. To simplify the process further, he divides the task into two or three steps as suggested by fellow expert “for for.” This approach not only makes it more manageable but also allows for greater precision in crafting each component.Step 2: Applying Glue and Securing
Sven proceeds to apply glue along one edge of the flange, ensuring a secure bond when clamped into place. He emphasizes that this stage is crucial for maintaining the structural integrity of the flange, which in turn safeguards the living area beneath the canvas when hatches are open.Step 3: Allowing Time to Dry
After securely attaching the first portion of the flange, Sven allows ample time for it to dry before moving forward with additional steps. This patience and precision are key aspects of his successful boatbuilding methods.Step 4: Finishing Touches
Once the flange is fully dried, Sven removes the clamps carefully, ensuring no damage occurs during this process. He then moves on to attaching four more pieces onto these main frames, completing two pairs of flanges for the bulkhead hatches.The Final Touches
While two flanges form the primary support structure around the hatches, Sven mentions there are two additional pieces required at each end to ensure comprehensive protection. This attention to detail highlights his commitment to producing a durable and reliable design. “Sailing is about finding your path, whether it’s across an ocean or within yourself.” – Sven Yrvind In conclusion, making flanges around bulkhead hatches may seem complex at first glance, but by following Sven Yrvind’s meticulous process, enthusiasts can achieve professional-level results. Remember that the journey of boatbuilding is as rewarding as reaching your destination; it tests one’s patience and dedication. For those seeking to embark on this adventure or simply gain more insight into marine craftsmanship, Sven’s wisdom is invaluable.Sven Yrvind, a renowned yacht designer and sailor, shares valuable insights on creating flanges around bulkhead hatches for canvas protection in this enlightening video. By following his expert guidance, boat enthusiasts can ensure their living areas remain secure while allowing unhindered access through the hatches.Step 1: Starting with the Flange
Sven begins by explaining that working on flanges vertically and horizontally is significantly easier than doing so in a flat position. To simplify the process further, he divides the task into two or three steps as suggested by fellow expert “for for.” This approach not only makes it more manageable but also allows for greater precision in crafting each component.Step 2: Applying Glue and Securing
Sven proceeds to apply glue along one edge of the flange, ensuring a secure bond when clamped into place. He emphasizes that this stage is crucial for maintaining the structural integrity of the flange, which in turn safeguards the living area beneath the canvas when hatches are open.Step 3: Allowing Time to Dry
After securely attaching the first portion of the flange, Sven allows ample time for it to dry before moving forward with additional steps. This patience and precision are key aspects of his successful boatbuilding methods.Step 4: Finishing Touches
Once the flange is fully dried, Sven removes the clamps carefully, ensuring no damage occurs during this process. He then moves on to attaching four more pieces onto these main frames, completing two pairs of flanges for the bulkhead hatches.The Final Touches
While two flanges form the primary support structure around the hatches, Sven mentions there are two additional pieces required at each end to ensure comprehensive protection. This attention to detail highlights his commitment to producing a durable and reliable design. “Sailing is about finding your path, whether it’s across an ocean or within yourself.” – Sven Yrvind In conclusion, making flanges around bulkhead hatches may seem complex at first glance, but by following Sven Yrvind’s meticulous process, enthusiasts can achieve professional-level results. Remember that the journey of boatbuilding is as rewarding as reaching your destination; it tests one’s patience and dedication. For those seeking to embark on this adventure or simply gain more insight into marine craftsmanship, Sven’s wisdom is invaluable.Making Flanges Around Bulkhead Hatches for Canvas
Sven Yrvind, a renowned yacht designer and sailor, shares valuable insights on creating flanges around bulkhead hatches for canvas protection in this enlightening video. By following his expert guidance, boat enthusiasts can ensure their living areas remain secure while allowing unhindered access through the hatches.Step 1: Starting with the Flange
Sven begins by explaining that working on flanges vertically and horizontally is significantly easier than doing so in a flat position. To simplify the process further, he divides the task into two or three steps as suggested by fellow expert “for for.” This approach not only makes it more manageable but also allows for greater precision in crafting each component.Step 2: Applying Glue and Securing
Sven proceeds to apply glue along one edge of the flange, ensuring a secure bond when clamped into place. He emphasizes that this stage is crucial for maintaining the structural integrity of the flange, which in turn safeguards the living area beneath the canvas when hatches are open.Step 3: Allowing Time to Dry
After securely attaching the first portion of the flange, Sven allows ample time for it to dry before moving forward with additional steps. This patience and precision are key aspects of his successful boatbuilding methods.Step 4: Finishing Touches
Once the flange is fully dried, Sven removes the clamps carefully, ensuring no damage occurs during this process. He then moves on to attaching four more pieces onto these main frames, completing two pairs of flanges for the bulkhead hatches.The Final Touches
While two flanges form the primary support structure around the hatches, Sven mentions there are two additional pieces required at each end to ensure comprehensive protection. This attention to detail highlights his commitment to producing a durable and reliable design. “Sailing is about finding your path, whether it’s across an ocean or within yourself.” – Sven Yrvind In conclusion, making flanges around bulkhead hatches may seem complex at first glance, but by following Sven Yrvind’s meticulous process, enthusiasts can achieve professional-level results. Remember that the journey of boatbuilding is as rewarding as reaching your destination; it tests one’s patience and dedication. For those seeking to embark on this adventure or simply gain more insight into marine craftsmanship, Sven’s wisdom is invaluable.Sven proceeds to apply glue along one edge of the flange, ensuring a secure bond when clamped into place. He emphasizes that this stage is crucial for maintaining the structural integrity of the flange, which in turn safeguards the living area beneath the canvas when hatches are open.Step 3: Allowing Time to Dry
After securely attaching the first portion of the flange, Sven allows ample time for it to dry before moving forward with additional steps. This patience and precision are key aspects of his successful boatbuilding methods.Step 4: Finishing Touches
Once the flange is fully dried, Sven removes the clamps carefully, ensuring no damage occurs during this process. He then moves on to attaching four more pieces onto these main frames, completing two pairs of flanges for the bulkhead hatches.The Final Touches
While two flanges form the primary support structure around the hatches, Sven mentions there are two additional pieces required at each end to ensure comprehensive protection. This attention to detail highlights his commitment to producing a durable and reliable design. “Sailing is about finding your path, whether it’s across an ocean or within yourself.” – Sven Yrvind In conclusion, making flanges around bulkhead hatches may seem complex at first glance, but by following Sven Yrvind’s meticulous process, enthusiasts can achieve professional-level results. Remember that the journey of boatbuilding is as rewarding as reaching your destination; it tests one’s patience and dedication. For those seeking to embark on this adventure or simply gain more insight into marine craftsmanship, Sven’s wisdom is invaluable.Sven begins by explaining that working on flanges vertically and horizontally is significantly easier than doing so in a flat position. To simplify the process further, he divides the task into two or three steps as suggested by fellow expert “for for.” This approach not only makes it more manageable but also allows for greater precision in crafting each component.Step 2: Applying Glue and Securing
Sven proceeds to apply glue along one edge of the flange, ensuring a secure bond when clamped into place. He emphasizes that this stage is crucial for maintaining the structural integrity of the flange, which in turn safeguards the living area beneath the canvas when hatches are open.Step 3: Allowing Time to Dry
After securely attaching the first portion of the flange, Sven allows ample time for it to dry before moving forward with additional steps. This patience and precision are key aspects of his successful boatbuilding methods.Step 4: Finishing Touches
Once the flange is fully dried, Sven removes the clamps carefully, ensuring no damage occurs during this process. He then moves on to attaching four more pieces onto these main frames, completing two pairs of flanges for the bulkhead hatches.The Final Touches
While two flanges form the primary support structure around the hatches, Sven mentions there are two additional pieces required at each end to ensure comprehensive protection. This attention to detail highlights his commitment to producing a durable and reliable design. “Sailing is about finding your path, whether it’s across an ocean or within yourself.” – Sven Yrvind In conclusion, making flanges around bulkhead hatches may seem complex at first glance, but by following Sven Yrvind’s meticulous process, enthusiasts can achieve professional-level results. Remember that the journey of boatbuilding is as rewarding as reaching your destination; it tests one’s patience and dedication. For those seeking to embark on this adventure or simply gain more insight into marine craftsmanship, Sven’s wisdom is invaluable.Sven Yrvind, a renowned yacht designer and sailor, shares valuable insights on creating flanges around bulkhead hatches for canvas protection in this enlightening video. By following his expert guidance, boat enthusiasts can ensure their living areas remain secure while allowing unhindered access through the hatches.Step 1: Starting with the Flange
Sven begins by explaining that working on flanges vertically and horizontally is significantly easier than doing so in a flat position. To simplify the process further, he divides the task into two or three steps as suggested by fellow expert “for for.” This approach not only makes it more manageable but also allows for greater precision in crafting each component.Step 2: Applying Glue and Securing
Sven proceeds to apply glue along one edge of the flange, ensuring a secure bond when clamped into place. He emphasizes that this stage is crucial for maintaining the structural integrity of the flange, which in turn safeguards the living area beneath the canvas when hatches are open.Step 3: Allowing Time to Dry
After securely attaching the first portion of the flange, Sven allows ample time for it to dry before moving forward with additional steps. This patience and precision are key aspects of his successful boatbuilding methods.Step 4: Finishing Touches
Once the flange is fully dried, Sven removes the clamps carefully, ensuring no damage occurs during this process. He then moves on to attaching four more pieces onto these main frames, completing two pairs of flanges for the bulkhead hatches.The Final Touches
While two flanges form the primary support structure around the hatches, Sven mentions there are two additional pieces required at each end to ensure comprehensive protection. This attention to detail highlights his commitment to producing a durable and reliable design. “Sailing is about finding your path, whether it’s across an ocean or within yourself.” – Sven Yrvind In conclusion, making flanges around bulkhead hatches may seem complex at first glance, but by following Sven Yrvind’s meticulous process, enthusiasts can achieve professional-level results. Remember that the journey of boatbuilding is as rewarding as reaching your destination; it tests one’s patience and dedication. For those seeking to embark on this adventure or simply gain more insight into marine craftsmanship, Sven’s wisdom is invaluable.Making Flanges Around Bulkhead Hatches for Canvas
Sven Yrvind, a renowned yacht designer and sailor, shares valuable insights on creating flanges around bulkhead hatches for canvas protection in this enlightening video. By following his expert guidance, boat enthusiasts can ensure their living areas remain secure while allowing unhindered access through the hatches.Step 1: Starting with the Flange
Sven begins by explaining that working on flanges vertically and horizontally is significantly easier than doing so in a flat position. To simplify the process further, he divides the task into two or three steps as suggested by fellow expert “for for.” This approach not only makes it more manageable but also allows for greater precision in crafting each component.Step 2: Applying Glue and Securing
Sven proceeds to apply glue along one edge of the flange, ensuring a secure bond when clamped into place. He emphasizes that this stage is crucial for maintaining the structural integrity of the flange, which in turn safeguards the living area beneath the canvas when hatches are open.Step 3: Allowing Time to Dry
After securely attaching the first portion of the flange, Sven allows ample time for it to dry before moving forward with additional steps. This patience and precision are key aspects of his successful boatbuilding methods.Step 4: Finishing Touches
Once the flange is fully dried, Sven removes the clamps carefully, ensuring no damage occurs during this process. He then moves on to attaching four more pieces onto these main frames, completing two pairs of flanges for the bulkhead hatches.The Final Touches
While two flanges form the primary support structure around the hatches, Sven mentions there are two additional pieces required at each end to ensure comprehensive protection. This attention to detail highlights his commitment to producing a durable and reliable design. “Sailing is about finding your path, whether it’s across an ocean or within yourself.” – Sven Yrvind In conclusion, making flanges around bulkhead hatches may seem complex at first glance, but by following Sven Yrvind’s meticulous process, enthusiasts can achieve professional-level results. Remember that the journey of boatbuilding is as rewarding as reaching your destination; it tests one’s patience and dedication. For those seeking to embark on this adventure or simply gain more insight into marine craftsmanship, Sven’s wisdom is invaluable.Once the flange is fully dried, Sven removes the clamps carefully, ensuring no damage occurs during this process. He then moves on to attaching four more pieces onto these main frames, completing two pairs of flanges for the bulkhead hatches.The Final Touches
While two flanges form the primary support structure around the hatches, Sven mentions there are two additional pieces required at each end to ensure comprehensive protection. This attention to detail highlights his commitment to producing a durable and reliable design. “Sailing is about finding your path, whether it’s across an ocean or within yourself.” – Sven Yrvind In conclusion, making flanges around bulkhead hatches may seem complex at first glance, but by following Sven Yrvind’s meticulous process, enthusiasts can achieve professional-level results. Remember that the journey of boatbuilding is as rewarding as reaching your destination; it tests one’s patience and dedication. For those seeking to embark on this adventure or simply gain more insight into marine craftsmanship, Sven’s wisdom is invaluable.Sven proceeds to apply glue along one edge of the flange, ensuring a secure bond when clamped into place. He emphasizes that this stage is crucial for maintaining the structural integrity of the flange, which in turn safeguards the living area beneath the canvas when hatches are open.Step 3: Allowing Time to Dry
After securely attaching the first portion of the flange, Sven allows ample time for it to dry before moving forward with additional steps. This patience and precision are key aspects of his successful boatbuilding methods.Step 4: Finishing Touches
Once the flange is fully dried, Sven removes the clamps carefully, ensuring no damage occurs during this process. He then moves on to attaching four more pieces onto these main frames, completing two pairs of flanges for the bulkhead hatches.The Final Touches
While two flanges form the primary support structure around the hatches, Sven mentions there are two additional pieces required at each end to ensure comprehensive protection. This attention to detail highlights his commitment to producing a durable and reliable design. “Sailing is about finding your path, whether it’s across an ocean or within yourself.” – Sven Yrvind In conclusion, making flanges around bulkhead hatches may seem complex at first glance, but by following Sven Yrvind’s meticulous process, enthusiasts can achieve professional-level results. Remember that the journey of boatbuilding is as rewarding as reaching your destination; it tests one’s patience and dedication. For those seeking to embark on this adventure or simply gain more insight into marine craftsmanship, Sven’s wisdom is invaluable.Sven begins by explaining that working on flanges vertically and horizontally is significantly easier than doing so in a flat position. To simplify the process further, he divides the task into two or three steps as suggested by fellow expert “for for.” This approach not only makes it more manageable but also allows for greater precision in crafting each component.Step 2: Applying Glue and Securing
Sven proceeds to apply glue along one edge of the flange, ensuring a secure bond when clamped into place. He emphasizes that this stage is crucial for maintaining the structural integrity of the flange, which in turn safeguards the living area beneath the canvas when hatches are open.Step 3: Allowing Time to Dry
After securely attaching the first portion of the flange, Sven allows ample time for it to dry before moving forward with additional steps. This patience and precision are key aspects of his successful boatbuilding methods.Step 4: Finishing Touches
Once the flange is fully dried, Sven removes the clamps carefully, ensuring no damage occurs during this process. He then moves on to attaching four more pieces onto these main frames, completing two pairs of flanges for the bulkhead hatches.The Final Touches
While two flanges form the primary support structure around the hatches, Sven mentions there are two additional pieces required at each end to ensure comprehensive protection. This attention to detail highlights his commitment to producing a durable and reliable design. “Sailing is about finding your path, whether it’s across an ocean or within yourself.” – Sven Yrvind In conclusion, making flanges around bulkhead hatches may seem complex at first glance, but by following Sven Yrvind’s meticulous process, enthusiasts can achieve professional-level results. Remember that the journey of boatbuilding is as rewarding as reaching your destination; it tests one’s patience and dedication. For those seeking to embark on this adventure or simply gain more insight into marine craftsmanship, Sven’s wisdom is invaluable.Sven Yrvind, a renowned yacht designer and sailor, shares valuable insights on creating flanges around bulkhead hatches for canvas protection in this enlightening video. By following his expert guidance, boat enthusiasts can ensure their living areas remain secure while allowing unhindered access through the hatches.Step 1: Starting with the Flange
Sven begins by explaining that working on flanges vertically and horizontally is significantly easier than doing so in a flat position. To simplify the process further, he divides the task into two or three steps as suggested by fellow expert “for for.” This approach not only makes it more manageable but also allows for greater precision in crafting each component.Step 2: Applying Glue and Securing
Sven proceeds to apply glue along one edge of the flange, ensuring a secure bond when clamped into place. He emphasizes that this stage is crucial for maintaining the structural integrity of the flange, which in turn safeguards the living area beneath the canvas when hatches are open.Step 3: Allowing Time to Dry
After securely attaching the first portion of the flange, Sven allows ample time for it to dry before moving forward with additional steps. This patience and precision are key aspects of his successful boatbuilding methods.Step 4: Finishing Touches
Once the flange is fully dried, Sven removes the clamps carefully, ensuring no damage occurs during this process. He then moves on to attaching four more pieces onto these main frames, completing two pairs of flanges for the bulkhead hatches.The Final Touches
While two flanges form the primary support structure around the hatches, Sven mentions there are two additional pieces required at each end to ensure comprehensive protection. This attention to detail highlights his commitment to producing a durable and reliable design. “Sailing is about finding your path, whether it’s across an ocean or within yourself.” – Sven Yrvind In conclusion, making flanges around bulkhead hatches may seem complex at first glance, but by following Sven Yrvind’s meticulous process, enthusiasts can achieve professional-level results. Remember that the journey of boatbuilding is as rewarding as reaching your destination; it tests one’s patience and dedication. For those seeking to embark on this adventure or simply gain more insight into marine craftsmanship, Sven’s wisdom is invaluable.Making Flanges Around Bulkhead Hatches for Canvas
Sven Yrvind, a renowned yacht designer and sailor, shares valuable insights on creating flanges around bulkhead hatches for canvas protection in this enlightening video. By following his expert guidance, boat enthusiasts can ensure their living areas remain secure while allowing unhindered access through the hatches.Step 1: Starting with the Flange
Sven begins by explaining that working on flanges vertically and horizontally is significantly easier than doing so in a flat position. To simplify the process further, he divides the task into two or three steps as suggested by fellow expert “for for.” This approach not only makes it more manageable but also allows for greater precision in crafting each component.Step 2: Applying Glue and Securing
Sven proceeds to apply glue along one edge of the flange, ensuring a secure bond when clamped into place. He emphasizes that this stage is crucial for maintaining the structural integrity of the flange, which in turn safeguards the living area beneath the canvas when hatches are open.Step 3: Allowing Time to Dry
After securely attaching the first portion of the flange, Sven allows ample time for it to dry before moving forward with additional steps. This patience and precision are key aspects of his successful boatbuilding methods.Step 4: Finishing Touches
Once the flange is fully dried, Sven removes the clamps carefully, ensuring no damage occurs during this process. He then moves on to attaching four more pieces onto these main frames, completing two pairs of flanges for the bulkhead hatches.The Final Touches
While two flanges form the primary support structure around the hatches, Sven mentions there are two additional pieces required at each end to ensure comprehensive protection. This attention to detail highlights his commitment to producing a durable and reliable design. “Sailing is about finding your path, whether it’s across an ocean or within yourself.” – Sven Yrvind In conclusion, making flanges around bulkhead hatches may seem complex at first glance, but by following Sven Yrvind’s meticulous process, enthusiasts can achieve professional-level results. Remember that the journey of boatbuilding is as rewarding as reaching your destination; it tests one’s patience and dedication. For those seeking to embark on this adventure or simply gain more insight into marine craftsmanship, Sven’s wisdom is invaluable.After securely attaching the first portion of the flange, Sven allows ample time for it to dry before moving forward with additional steps. This patience and precision are key aspects of his successful boatbuilding methods.Step 4: Finishing Touches
Once the flange is fully dried, Sven removes the clamps carefully, ensuring no damage occurs during this process. He then moves on to attaching four more pieces onto these main frames, completing two pairs of flanges for the bulkhead hatches.The Final Touches
While two flanges form the primary support structure around the hatches, Sven mentions there are two additional pieces required at each end to ensure comprehensive protection. This attention to detail highlights his commitment to producing a durable and reliable design. “Sailing is about finding your path, whether it’s across an ocean or within yourself.” – Sven Yrvind In conclusion, making flanges around bulkhead hatches may seem complex at first glance, but by following Sven Yrvind’s meticulous process, enthusiasts can achieve professional-level results. Remember that the journey of boatbuilding is as rewarding as reaching your destination; it tests one’s patience and dedication. For those seeking to embark on this adventure or simply gain more insight into marine craftsmanship, Sven’s wisdom is invaluable.Sven proceeds to apply glue along one edge of the flange, ensuring a secure bond when clamped into place. He emphasizes that this stage is crucial for maintaining the structural integrity of the flange, which in turn safeguards the living area beneath the canvas when hatches are open.Step 3: Allowing Time to Dry
After securely attaching the first portion of the flange, Sven allows ample time for it to dry before moving forward with additional steps. This patience and precision are key aspects of his successful boatbuilding methods.Step 4: Finishing Touches
Once the flange is fully dried, Sven removes the clamps carefully, ensuring no damage occurs during this process. He then moves on to attaching four more pieces onto these main frames, completing two pairs of flanges for the bulkhead hatches.The Final Touches
While two flanges form the primary support structure around the hatches, Sven mentions there are two additional pieces required at each end to ensure comprehensive protection. This attention to detail highlights his commitment to producing a durable and reliable design. “Sailing is about finding your path, whether it’s across an ocean or within yourself.” – Sven Yrvind In conclusion, making flanges around bulkhead hatches may seem complex at first glance, but by following Sven Yrvind’s meticulous process, enthusiasts can achieve professional-level results. Remember that the journey of boatbuilding is as rewarding as reaching your destination; it tests one’s patience and dedication. For those seeking to embark on this adventure or simply gain more insight into marine craftsmanship, Sven’s wisdom is invaluable.Sven begins by explaining that working on flanges vertically and horizontally is significantly easier than doing so in a flat position. To simplify the process further, he divides the task into two or three steps as suggested by fellow expert “for for.” This approach not only makes it more manageable but also allows for greater precision in crafting each component.Step 2: Applying Glue and Securing
Sven proceeds to apply glue along one edge of the flange, ensuring a secure bond when clamped into place. He emphasizes that this stage is crucial for maintaining the structural integrity of the flange, which in turn safeguards the living area beneath the canvas when hatches are open.Step 3: Allowing Time to Dry
After securely attaching the first portion of the flange, Sven allows ample time for it to dry before moving forward with additional steps. This patience and precision are key aspects of his successful boatbuilding methods.Step 4: Finishing Touches
Once the flange is fully dried, Sven removes the clamps carefully, ensuring no damage occurs during this process. He then moves on to attaching four more pieces onto these main frames, completing two pairs of flanges for the bulkhead hatches.The Final Touches
While two flanges form the primary support structure around the hatches, Sven mentions there are two additional pieces required at each end to ensure comprehensive protection. This attention to detail highlights his commitment to producing a durable and reliable design. “Sailing is about finding your path, whether it’s across an ocean or within yourself.” – Sven Yrvind In conclusion, making flanges around bulkhead hatches may seem complex at first glance, but by following Sven Yrvind’s meticulous process, enthusiasts can achieve professional-level results. Remember that the journey of boatbuilding is as rewarding as reaching your destination; it tests one’s patience and dedication. For those seeking to embark on this adventure or simply gain more insight into marine craftsmanship, Sven’s wisdom is invaluable.Sven Yrvind, a renowned yacht designer and sailor, shares valuable insights on creating flanges around bulkhead hatches for canvas protection in this enlightening video. By following his expert guidance, boat enthusiasts can ensure their living areas remain secure while allowing unhindered access through the hatches.Step 1: Starting with the Flange
Sven begins by explaining that working on flanges vertically and horizontally is significantly easier than doing so in a flat position. To simplify the process further, he divides the task into two or three steps as suggested by fellow expert “for for.” This approach not only makes it more manageable but also allows for greater precision in crafting each component.Step 2: Applying Glue and Securing
Sven proceeds to apply glue along one edge of the flange, ensuring a secure bond when clamped into place. He emphasizes that this stage is crucial for maintaining the structural integrity of the flange, which in turn safeguards the living area beneath the canvas when hatches are open.Step 3: Allowing Time to Dry
After securely attaching the first portion of the flange, Sven allows ample time for it to dry before moving forward with additional steps. This patience and precision are key aspects of his successful boatbuilding methods.Step 4: Finishing Touches
Once the flange is fully dried, Sven removes the clamps carefully, ensuring no damage occurs during this process. He then moves on to attaching four more pieces onto these main frames, completing two pairs of flanges for the bulkhead hatches.The Final Touches
While two flanges form the primary support structure around the hatches, Sven mentions there are two additional pieces required at each end to ensure comprehensive protection. This attention to detail highlights his commitment to producing a durable and reliable design. “Sailing is about finding your path, whether it’s across an ocean or within yourself.” – Sven Yrvind In conclusion, making flanges around bulkhead hatches may seem complex at first glance, but by following Sven Yrvind’s meticulous process, enthusiasts can achieve professional-level results. Remember that the journey of boatbuilding is as rewarding as reaching your destination; it tests one’s patience and dedication. For those seeking to embark on this adventure or simply gain more insight into marine craftsmanship, Sven’s wisdom is invaluable.Making Flanges Around Bulkhead Hatches for Canvas
Sven Yrvind, a renowned yacht designer and sailor, shares valuable insights on creating flanges around bulkhead hatches for canvas protection in this enlightening video. By following his expert guidance, boat enthusiasts can ensure their living areas remain secure while allowing unhindered access through the hatches.Step 1: Starting with the Flange
Sven begins by explaining that working on flanges vertically and horizontally is significantly easier than doing so in a flat position. To simplify the process further, he divides the task into two or three steps as suggested by fellow expert “for for.” This approach not only makes it more manageable but also allows for greater precision in crafting each component.Step 2: Applying Glue and Securing
Sven proceeds to apply glue along one edge of the flange, ensuring a secure bond when clamped into place. He emphasizes that this stage is crucial for maintaining the structural integrity of the flange, which in turn safeguards the living area beneath the canvas when hatches are open.Step 3: Allowing Time to Dry
After securely attaching the first portion of the flange, Sven allows ample time for it to dry before moving forward with additional steps. This patience and precision are key aspects of his successful boatbuilding methods.Step 4: Finishing Touches
Once the flange is fully dried, Sven removes the clamps carefully, ensuring no damage occurs during this process. He then moves on to attaching four more pieces onto these main frames, completing two pairs of flanges for the bulkhead hatches.The Final Touches
While two flanges form the primary support structure around the hatches, Sven mentions there are two additional pieces required at each end to ensure comprehensive protection. This attention to detail highlights his commitment to producing a durable and reliable design. “Sailing is about finding your path, whether it’s across an ocean or within yourself.” – Sven Yrvind In conclusion, making flanges around bulkhead hatches may seem complex at first glance, but by following Sven Yrvind’s meticulous process, enthusiasts can achieve professional-level results. Remember that the journey of boatbuilding is as rewarding as reaching your destination; it tests one’s patience and dedication. For those seeking to embark on this adventure or simply gain more insight into marine craftsmanship, Sven’s wisdom is invaluable.Once the flange is fully dried, Sven removes the clamps carefully, ensuring no damage occurs during this process. He then moves on to attaching four more pieces onto these main frames, completing two pairs of flanges for the bulkhead hatches.The Final Touches
While two flanges form the primary support structure around the hatches, Sven mentions there are two additional pieces required at each end to ensure comprehensive protection. This attention to detail highlights his commitment to producing a durable and reliable design. “Sailing is about finding your path, whether it’s across an ocean or within yourself.” – Sven Yrvind In conclusion, making flanges around bulkhead hatches may seem complex at first glance, but by following Sven Yrvind’s meticulous process, enthusiasts can achieve professional-level results. Remember that the journey of boatbuilding is as rewarding as reaching your destination; it tests one’s patience and dedication. For those seeking to embark on this adventure or simply gain more insight into marine craftsmanship, Sven’s wisdom is invaluable.After securely attaching the first portion of the flange, Sven allows ample time for it to dry before moving forward with additional steps. This patience and precision are key aspects of his successful boatbuilding methods.Step 4: Finishing Touches
Once the flange is fully dried, Sven removes the clamps carefully, ensuring no damage occurs during this process. He then moves on to attaching four more pieces onto these main frames, completing two pairs of flanges for the bulkhead hatches.The Final Touches
While two flanges form the primary support structure around the hatches, Sven mentions there are two additional pieces required at each end to ensure comprehensive protection. This attention to detail highlights his commitment to producing a durable and reliable design. “Sailing is about finding your path, whether it’s across an ocean or within yourself.” – Sven Yrvind In conclusion, making flanges around bulkhead hatches may seem complex at first glance, but by following Sven Yrvind’s meticulous process, enthusiasts can achieve professional-level results. Remember that the journey of boatbuilding is as rewarding as reaching your destination; it tests one’s patience and dedication. For those seeking to embark on this adventure or simply gain more insight into marine craftsmanship, Sven’s wisdom is invaluable.Sven proceeds to apply glue along one edge of the flange, ensuring a secure bond when clamped into place. He emphasizes that this stage is crucial for maintaining the structural integrity of the flange, which in turn safeguards the living area beneath the canvas when hatches are open.Step 3: Allowing Time to Dry
After securely attaching the first portion of the flange, Sven allows ample time for it to dry before moving forward with additional steps. This patience and precision are key aspects of his successful boatbuilding methods.Step 4: Finishing Touches
Once the flange is fully dried, Sven removes the clamps carefully, ensuring no damage occurs during this process. He then moves on to attaching four more pieces onto these main frames, completing two pairs of flanges for the bulkhead hatches.The Final Touches
While two flanges form the primary support structure around the hatches, Sven mentions there are two additional pieces required at each end to ensure comprehensive protection. This attention to detail highlights his commitment to producing a durable and reliable design. “Sailing is about finding your path, whether it’s across an ocean or within yourself.” – Sven Yrvind In conclusion, making flanges around bulkhead hatches may seem complex at first glance, but by following Sven Yrvind’s meticulous process, enthusiasts can achieve professional-level results. Remember that the journey of boatbuilding is as rewarding as reaching your destination; it tests one’s patience and dedication. For those seeking to embark on this adventure or simply gain more insight into marine craftsmanship, Sven’s wisdom is invaluable.Sven begins by explaining that working on flanges vertically and horizontally is significantly easier than doing so in a flat position. To simplify the process further, he divides the task into two or three steps as suggested by fellow expert “for for.” This approach not only makes it more manageable but also allows for greater precision in crafting each component.Step 2: Applying Glue and Securing
Sven proceeds to apply glue along one edge of the flange, ensuring a secure bond when clamped into place. He emphasizes that this stage is crucial for maintaining the structural integrity of the flange, which in turn safeguards the living area beneath the canvas when hatches are open.Step 3: Allowing Time to Dry
After securely attaching the first portion of the flange, Sven allows ample time for it to dry before moving forward with additional steps. This patience and precision are key aspects of his successful boatbuilding methods.Step 4: Finishing Touches
Once the flange is fully dried, Sven removes the clamps carefully, ensuring no damage occurs during this process. He then moves on to attaching four more pieces onto these main frames, completing two pairs of flanges for the bulkhead hatches.The Final Touches
While two flanges form the primary support structure around the hatches, Sven mentions there are two additional pieces required at each end to ensure comprehensive protection. This attention to detail highlights his commitment to producing a durable and reliable design. “Sailing is about finding your path, whether it’s across an ocean or within yourself.” – Sven Yrvind In conclusion, making flanges around bulkhead hatches may seem complex at first glance, but by following Sven Yrvind’s meticulous process, enthusiasts can achieve professional-level results. Remember that the journey of boatbuilding is as rewarding as reaching your destination; it tests one’s patience and dedication. For those seeking to embark on this adventure or simply gain more insight into marine craftsmanship, Sven’s wisdom is invaluable.Sven Yrvind, a renowned yacht designer and sailor, shares valuable insights on creating flanges around bulkhead hatches for canvas protection in this enlightening video. By following his expert guidance, boat enthusiasts can ensure their living areas remain secure while allowing unhindered access through the hatches.Step 1: Starting with the Flange
Sven begins by explaining that working on flanges vertically and horizontally is significantly easier than doing so in a flat position. To simplify the process further, he divides the task into two or three steps as suggested by fellow expert “for for.” This approach not only makes it more manageable but also allows for greater precision in crafting each component.Step 2: Applying Glue and Securing
Sven proceeds to apply glue along one edge of the flange, ensuring a secure bond when clamped into place. He emphasizes that this stage is crucial for maintaining the structural integrity of the flange, which in turn safeguards the living area beneath the canvas when hatches are open.Step 3: Allowing Time to Dry
After securely attaching the first portion of the flange, Sven allows ample time for it to dry before moving forward with additional steps. This patience and precision are key aspects of his successful boatbuilding methods.Step 4: Finishing Touches
Once the flange is fully dried, Sven removes the clamps carefully, ensuring no damage occurs during this process. He then moves on to attaching four more pieces onto these main frames, completing two pairs of flanges for the bulkhead hatches.The Final Touches
While two flanges form the primary support structure around the hatches, Sven mentions there are two additional pieces required at each end to ensure comprehensive protection. This attention to detail highlights his commitment to producing a durable and reliable design. “Sailing is about finding your path, whether it’s across an ocean or within yourself.” – Sven Yrvind In conclusion, making flanges around bulkhead hatches may seem complex at first glance, but by following Sven Yrvind’s meticulous process, enthusiasts can achieve professional-level results. Remember that the journey of boatbuilding is as rewarding as reaching your destination; it tests one’s patience and dedication. For those seeking to embark on this adventure or simply gain more insight into marine craftsmanship, Sven’s wisdom is invaluable.Making Flanges Around Bulkhead Hatches for Canvas
Sven Yrvind, a renowned yacht designer and sailor, shares valuable insights on creating flanges around bulkhead hatches for canvas protection in this enlightening video. By following his expert guidance, boat enthusiasts can ensure their living areas remain secure while allowing unhindered access through the hatches.Step 1: Starting with the Flange
Sven begins by explaining that working on flanges vertically and horizontally is significantly easier than doing so in a flat position. To simplify the process further, he divides the task into two or three steps as suggested by fellow expert “for for.” This approach not only makes it more manageable but also allows for greater precision in crafting each component.Step 2: Applying Glue and Securing
Sven proceeds to apply glue along one edge of the flange, ensuring a secure bond when clamped into place. He emphasizes that this stage is crucial for maintaining the structural integrity of the flange, which in turn safeguards the living area beneath the canvas when hatches are open.Step 3: Allowing Time to Dry
After securely attaching the first portion of the flange, Sven allows ample time for it to dry before moving forward with additional steps. This patience and precision are key aspects of his successful boatbuilding methods.Step 4: Finishing Touches
Once the flange is fully dried, Sven removes the clamps carefully, ensuring no damage occurs during this process. He then moves on to attaching four more pieces onto these main frames, completing two pairs of flanges for the bulkhead hatches.The Final Touches
While two flanges form the primary support structure around the hatches, Sven mentions there are two additional pieces required at each end to ensure comprehensive protection. This attention to detail highlights his commitment to producing a durable and reliable design. “Sailing is about finding your path, whether it’s across an ocean or within yourself.” – Sven Yrvind In conclusion, making flanges around bulkhead hatches may seem complex at first glance, but by following Sven Yrvind’s meticulous process, enthusiasts can achieve professional-level results. Remember that the journey of boatbuilding is as rewarding as reaching your destination; it tests one’s patience and dedication. For those seeking to embark on this adventure or simply gain more insight into marine craftsmanship, Sven’s wisdom is invaluable.Once the flange is fully dried, Sven removes the clamps carefully, ensuring no damage occurs during this process. He then moves on to attaching four more pieces onto these main frames, completing two pairs of flanges for the bulkhead hatches.The Final Touches
While two flanges form the primary support structure around the hatches, Sven mentions there are two additional pieces required at each end to ensure comprehensive protection. This attention to detail highlights his commitment to producing a durable and reliable design. “Sailing is about finding your path, whether it’s across an ocean or within yourself.” – Sven Yrvind In conclusion, making flanges around bulkhead hatches may seem complex at first glance, but by following Sven Yrvind’s meticulous process, enthusiasts can achieve professional-level results. Remember that the journey of boatbuilding is as rewarding as reaching your destination; it tests one’s patience and dedication. For those seeking to embark on this adventure or simply gain more insight into marine craftsmanship, Sven’s wisdom is invaluable.Making Flanges Around Bulkhead Hatches for Canvas
Sven Yrvind, a renowned yacht designer and sailor, shares valuable insights on creating flanges around bulkhead hatches for canvas protection in this enlightening video. By following his expert guidance, boat enthusiasts can ensure their living areas remain secure while allowing unhindered access through the hatches.Step 1: Starting with the Flange
Sven begins by explaining that working on flanges vertically and horizontally is significantly easier than doing so in a flat position. To simplify the process further, he divides the task into two or three steps as suggested by fellow expert “for for.” This approach not only makes it more manageable but also allows for greater precision in crafting each component.Step 2: Applying Glue and Securing
Sven proceeds to apply glue along one edge of the flange, ensuring a secure bond when clamped into place. He emphasizes that this stage is crucial for maintaining the structural integrity of the flange, which in turn safeguards the living area beneath the canvas when hatches are open.Step 3: Allowing Time to Dry
After securely attaching the first portion of the flange, Sven allows ample time for it to dry before moving forward with additional steps. This patience and precision are key aspects of his successful boatbuilding methods.Step 4: Finishing Touches
Once the flange is fully dried, Sven removes the clamps carefully, ensuring no damage occurs during this process. He then moves on to attaching four more pieces onto these main frames, completing two pairs of flanges for the bulkhead hatches.The Final Touches
While two flanges form the primary support structure around the hatches, Sven mentions there are two additional pieces required at each end to ensure comprehensive protection. This attention to detail highlights his commitment to producing a durable and reliable design. “Sailing is about finding your path, whether it’s across an ocean or within yourself.” – Sven Yrvind In conclusion, making flanges around bulkhead hatches may seem complex at first glance, but by following Sven Yrvind’s meticulous process, enthusiasts can achieve professional-level results. Remember that the journey of boatbuilding is as rewarding as reaching your destination; it tests one’s patience and dedication. For those seeking to embark on this adventure or simply gain more insight into marine craftsmanship, Sven’s wisdom is invaluable.Once the flange is fully dried, Sven removes the clamps carefully, ensuring no damage occurs during this process. He then moves on to attaching four more pieces onto these main frames, completing two pairs of flanges for the bulkhead hatches.The Final Touches
While two flanges form the primary support structure around the hatches, Sven mentions there are two additional pieces required at each end to ensure comprehensive protection. This attention to detail highlights his commitment to producing a durable and reliable design. “Sailing is about finding your path, whether it’s across an ocean or within yourself.” – Sven Yrvind In conclusion, making flanges around bulkhead hatches may seem complex at first glance, but by following Sven Yrvind’s meticulous process, enthusiasts can achieve professional-level results. Remember that the journey of boatbuilding is as rewarding as reaching your destination; it tests one’s patience and dedication. For those seeking to embark on this adventure or simply gain more insight into marine craftsmanship, Sven’s wisdom is invaluable.Sven Yrvind, a renowned yacht designer and sailor, shares valuable insights on creating flanges around bulkhead hatches for canvas protection in this enlightening video. By following his expert guidance, boat enthusiasts can ensure their living areas remain secure while allowing unhindered access through the hatches.Step 1: Starting with the Flange
Sven begins by explaining that working on flanges vertically and horizontally is significantly easier than doing so in a flat position. To simplify the process further, he divides the task into two or three steps as suggested by fellow expert “for for.” This approach not only makes it more manageable but also allows for greater precision in crafting each component.Step 2: Applying Glue and Securing
Sven proceeds to apply glue along one edge of the flange, ensuring a secure bond when clamped into place. He emphasizes that this stage is crucial for maintaining the structural integrity of the flange, which in turn safeguards the living area beneath the canvas when hatches are open.Step 3: Allowing Time to Dry
After securely attaching the first portion of the flange, Sven allows ample time for it to dry before moving forward with additional steps. This patience and precision are key aspects of his successful boatbuilding methods.Step 4: Finishing Touches
Once the flange is fully dried, Sven removes the clamps carefully, ensuring no damage occurs during this process. He then moves on to attaching four more pieces onto these main frames, completing two pairs of flanges for the bulkhead hatches.The Final Touches
While two flanges form the primary support structure around the hatches, Sven mentions there are two additional pieces required at each end to ensure comprehensive protection. This attention to detail highlights his commitment to producing a durable and reliable design. “Sailing is about finding your path, whether it’s across an ocean or within yourself.” – Sven Yrvind In conclusion, making flanges around bulkhead hatches may seem complex at first glance, but by following Sven Yrvind’s meticulous process, enthusiasts can achieve professional-level results. Remember that the journey of boatbuilding is as rewarding as reaching your destination; it tests one’s patience and dedication. For those seeking to embark on this adventure or simply gain more insight into marine craftsmanship, Sven’s wisdom is invaluable.Making Flanges Around Bulkhead Hatches for Canvas
Sven Yrvind, a renowned yacht designer and sailor, shares valuable insights on creating flanges around bulkhead hatches for canvas protection in this enlightening video. By following his expert guidance, boat enthusiasts can ensure their living areas remain secure while allowing unhindered access through the hatches.Step 1: Starting with the Flange
Sven begins by explaining that working on flanges vertically and horizontally is significantly easier than doing so in a flat position. To simplify the process further, he divides the task into two or three steps as suggested by fellow expert “for for.” This approach not only makes it more manageable but also allows for greater precision in crafting each component.Step 2: Applying Glue and Securing
Sven proceeds to apply glue along one edge of the flange, ensuring a secure bond when clamped into place. He emphasizes that this stage is crucial for maintaining the structural integrity of the flange, which in turn safeguards the living area beneath the canvas when hatches are open.Step 3: Allowing Time to Dry
After securely attaching the first portion of the flange, Sven allows ample time for it to dry before moving forward with additional steps. This patience and precision are key aspects of his successful boatbuilding methods.Step 4: Finishing Touches
Once the flange is fully dried, Sven removes the clamps carefully, ensuring no damage occurs during this process. He then moves on to attaching four more pieces onto these main frames, completing two pairs of flanges for the bulkhead hatches.The Final Touches
While two flanges form the primary support structure around the hatches, Sven mentions there are two additional pieces required at each end to ensure comprehensive protection. This attention to detail highlights his commitment to producing a durable and reliable design. “Sailing is about finding your path, whether it’s across an ocean or within yourself.” – Sven Yrvind In conclusion, making flanges around bulkhead hatches may seem complex at first glance, but by following Sven Yrvind’s meticulous process, enthusiasts can achieve professional-level results. Remember that the journey of boatbuilding is as rewarding as reaching your destination; it tests one’s patience and dedication. For those seeking to embark on this adventure or simply gain more insight into marine craftsmanship, Sven’s wisdom is invaluable.After securely attaching the first portion of the flange, Sven allows ample time for it to dry before moving forward with additional steps. This patience and precision are key aspects of his successful boatbuilding methods.Step 4: Finishing Touches
Once the flange is fully dried, Sven removes the clamps carefully, ensuring no damage occurs during this process. He then moves on to attaching four more pieces onto these main frames, completing two pairs of flanges for the bulkhead hatches.The Final Touches
While two flanges form the primary support structure around the hatches, Sven mentions there are two additional pieces required at each end to ensure comprehensive protection. This attention to detail highlights his commitment to producing a durable and reliable design. “Sailing is about finding your path, whether it’s across an ocean or within yourself.” – Sven Yrvind In conclusion, making flanges around bulkhead hatches may seem complex at first glance, but by following Sven Yrvind’s meticulous process, enthusiasts can achieve professional-level results. Remember that the journey of boatbuilding is as rewarding as reaching your destination; it tests one’s patience and dedication. For those seeking to embark on this adventure or simply gain more insight into marine craftsmanship, Sven’s wisdom is invaluable.Sven Yrvind, a renowned yacht designer and sailor, shares valuable insights on creating flanges around bulkhead hatches for canvas protection in this enlightening video. By following his expert guidance, boat enthusiasts can ensure their living areas remain secure while allowing unhindered access through the hatches.Step 1: Starting with the Flange
Sven begins by explaining that working on flanges vertically and horizontally is significantly easier than doing so in a flat position. To simplify the process further, he divides the task into two or three steps as suggested by fellow expert “for for.” This approach not only makes it more manageable but also allows for greater precision in crafting each component.Step 2: Applying Glue and Securing
Sven proceeds to apply glue along one edge of the flange, ensuring a secure bond when clamped into place. He emphasizes that this stage is crucial for maintaining the structural integrity of the flange, which in turn safeguards the living area beneath the canvas when hatches are open.Step 3: Allowing Time to Dry
After securely attaching the first portion of the flange, Sven allows ample time for it to dry before moving forward with additional steps. This patience and precision are key aspects of his successful boatbuilding methods.Step 4: Finishing Touches
Once the flange is fully dried, Sven removes the clamps carefully, ensuring no damage occurs during this process. He then moves on to attaching four more pieces onto these main frames, completing two pairs of flanges for the bulkhead hatches.The Final Touches
While two flanges form the primary support structure around the hatches, Sven mentions there are two additional pieces required at each end to ensure comprehensive protection. This attention to detail highlights his commitment to producing a durable and reliable design. “Sailing is about finding your path, whether it’s across an ocean or within yourself.” – Sven Yrvind In conclusion, making flanges around bulkhead hatches may seem complex at first glance, but by following Sven Yrvind’s meticulous process, enthusiasts can achieve professional-level results. Remember that the journey of boatbuilding is as rewarding as reaching your destination; it tests one’s patience and dedication. For those seeking to embark on this adventure or simply gain more insight into marine craftsmanship, Sven’s wisdom is invaluable.Making Flanges Around Bulkhead Hatches for Canvas
Sven Yrvind, a renowned yacht designer and sailor, shares valuable insights on creating flanges around bulkhead hatches for canvas protection in this enlightening video. By following his expert guidance, boat enthusiasts can ensure their living areas remain secure while allowing unhindered access through the hatches.Step 1: Starting with the Flange
Sven begins by explaining that working on flanges vertically and horizontally is significantly easier than doing so in a flat position. To simplify the process further, he divides the task into two or three steps as suggested by fellow expert “for for.” This approach not only makes it more manageable but also allows for greater precision in crafting each component.Step 2: Applying Glue and Securing
Sven proceeds to apply glue along one edge of the flange, ensuring a secure bond when clamped into place. He emphasizes that this stage is crucial for maintaining the structural integrity of the flange, which in turn safeguards the living area beneath the canvas when hatches are open.Step 3: Allowing Time to Dry
After securely attaching the first portion of the flange, Sven allows ample time for it to dry before moving forward with additional steps. This patience and precision are key aspects of his successful boatbuilding methods.Step 4: Finishing Touches
Once the flange is fully dried, Sven removes the clamps carefully, ensuring no damage occurs during this process. He then moves on to attaching four more pieces onto these main frames, completing two pairs of flanges for the bulkhead hatches.The Final Touches
While two flanges form the primary support structure around the hatches, Sven mentions there are two additional pieces required at each end to ensure comprehensive protection. This attention to detail highlights his commitment to producing a durable and reliable design. “Sailing is about finding your path, whether it’s across an ocean or within yourself.” – Sven Yrvind In conclusion, making flanges around bulkhead hatches may seem complex at first glance, but by following Sven Yrvind’s meticulous process, enthusiasts can achieve professional-level results. Remember that the journey of boatbuilding is as rewarding as reaching your destination; it tests one’s patience and dedication. For those seeking to embark on this adventure or simply gain more insight into marine craftsmanship, Sven’s wisdom is invaluable.Sven proceeds to apply glue along one edge of the flange, ensuring a secure bond when clamped into place. He emphasizes that this stage is crucial for maintaining the structural integrity of the flange, which in turn safeguards the living area beneath the canvas when hatches are open.Step 3: Allowing Time to Dry
After securely attaching the first portion of the flange, Sven allows ample time for it to dry before moving forward with additional steps. This patience and precision are key aspects of his successful boatbuilding methods.Step 4: Finishing Touches
Once the flange is fully dried, Sven removes the clamps carefully, ensuring no damage occurs during this process. He then moves on to attaching four more pieces onto these main frames, completing two pairs of flanges for the bulkhead hatches.The Final Touches
While two flanges form the primary support structure around the hatches, Sven mentions there are two additional pieces required at each end to ensure comprehensive protection. This attention to detail highlights his commitment to producing a durable and reliable design. “Sailing is about finding your path, whether it’s across an ocean or within yourself.” – Sven Yrvind In conclusion, making flanges around bulkhead hatches may seem complex at first glance, but by following Sven Yrvind’s meticulous process, enthusiasts can achieve professional-level results. Remember that the journey of boatbuilding is as rewarding as reaching your destination; it tests one’s patience and dedication. For those seeking to embark on this adventure or simply gain more insight into marine craftsmanship, Sven’s wisdom is invaluable.Sven Yrvind, a renowned yacht designer and sailor, shares valuable insights on creating flanges around bulkhead hatches for canvas protection in this enlightening video. By following his expert guidance, boat enthusiasts can ensure their living areas remain secure while allowing unhindered access through the hatches.Step 1: Starting with the Flange
Sven begins by explaining that working on flanges vertically and horizontally is significantly easier than doing so in a flat position. To simplify the process further, he divides the task into two or three steps as suggested by fellow expert “for for.” This approach not only makes it more manageable but also allows for greater precision in crafting each component.Step 2: Applying Glue and Securing
Sven proceeds to apply glue along one edge of the flange, ensuring a secure bond when clamped into place. He emphasizes that this stage is crucial for maintaining the structural integrity of the flange, which in turn safeguards the living area beneath the canvas when hatches are open.Step 3: Allowing Time to Dry
After securely attaching the first portion of the flange, Sven allows ample time for it to dry before moving forward with additional steps. This patience and precision are key aspects of his successful boatbuilding methods.Step 4: Finishing Touches
Once the flange is fully dried, Sven removes the clamps carefully, ensuring no damage occurs during this process. He then moves on to attaching four more pieces onto these main frames, completing two pairs of flanges for the bulkhead hatches.The Final Touches
While two flanges form the primary support structure around the hatches, Sven mentions there are two additional pieces required at each end to ensure comprehensive protection. This attention to detail highlights his commitment to producing a durable and reliable design. “Sailing is about finding your path, whether it’s across an ocean or within yourself.” – Sven Yrvind In conclusion, making flanges around bulkhead hatches may seem complex at first glance, but by following Sven Yrvind’s meticulous process, enthusiasts can achieve professional-level results. Remember that the journey of boatbuilding is as rewarding as reaching your destination; it tests one’s patience and dedication. For those seeking to embark on this adventure or simply gain more insight into marine craftsmanship, Sven’s wisdom is invaluable.Making Flanges Around Bulkhead Hatches for Canvas
Sven Yrvind, a renowned yacht designer and sailor, shares valuable insights on creating flanges around bulkhead hatches for canvas protection in this enlightening video. By following his expert guidance, boat enthusiasts can ensure their living areas remain secure while allowing unhindered access through the hatches.Step 1: Starting with the Flange
Sven begins by explaining that working on flanges vertically and horizontally is significantly easier than doing so in a flat position. To simplify the process further, he divides the task into two or three steps as suggested by fellow expert “for for.” This approach not only makes it more manageable but also allows for greater precision in crafting each component.Step 2: Applying Glue and Securing
Sven proceeds to apply glue along one edge of the flange, ensuring a secure bond when clamped into place. He emphasizes that this stage is crucial for maintaining the structural integrity of the flange, which in turn safeguards the living area beneath the canvas when hatches are open.Step 3: Allowing Time to Dry
After securely attaching the first portion of the flange, Sven allows ample time for it to dry before moving forward with additional steps. This patience and precision are key aspects of his successful boatbuilding methods.Step 4: Finishing Touches
Once the flange is fully dried, Sven removes the clamps carefully, ensuring no damage occurs during this process. He then moves on to attaching four more pieces onto these main frames, completing two pairs of flanges for the bulkhead hatches.The Final Touches
While two flanges form the primary support structure around the hatches, Sven mentions there are two additional pieces required at each end to ensure comprehensive protection. This attention to detail highlights his commitment to producing a durable and reliable design. “Sailing is about finding your path, whether it’s across an ocean or within yourself.” – Sven Yrvind In conclusion, making flanges around bulkhead hatches may seem complex at first glance, but by following Sven Yrvind’s meticulous process, enthusiasts can achieve professional-level results. Remember that the journey of boatbuilding is as rewarding as reaching your destination; it tests one’s patience and dedication. For those seeking to embark on this adventure or simply gain more insight into marine craftsmanship, Sven’s wisdom is invaluable.Sven begins by explaining that working on flanges vertically and horizontally is significantly easier than doing so in a flat position. To simplify the process further, he divides the task into two or three steps as suggested by fellow expert “for for.” This approach not only makes it more manageable but also allows for greater precision in crafting each component.Step 2: Applying Glue and Securing
Sven proceeds to apply glue along one edge of the flange, ensuring a secure bond when clamped into place. He emphasizes that this stage is crucial for maintaining the structural integrity of the flange, which in turn safeguards the living area beneath the canvas when hatches are open.Step 3: Allowing Time to Dry
After securely attaching the first portion of the flange, Sven allows ample time for it to dry before moving forward with additional steps. This patience and precision are key aspects of his successful boatbuilding methods.Step 4: Finishing Touches
Once the flange is fully dried, Sven removes the clamps carefully, ensuring no damage occurs during this process. He then moves on to attaching four more pieces onto these main frames, completing two pairs of flanges for the bulkhead hatches.The Final Touches
While two flanges form the primary support structure around the hatches, Sven mentions there are two additional pieces required at each end to ensure comprehensive protection. This attention to detail highlights his commitment to producing a durable and reliable design. “Sailing is about finding your path, whether it’s across an ocean or within yourself.” – Sven Yrvind In conclusion, making flanges around bulkhead hatches may seem complex at first glance, but by following Sven Yrvind’s meticulous process, enthusiasts can achieve professional-level results. Remember that the journey of boatbuilding is as rewarding as reaching your destination; it tests one’s patience and dedication. For those seeking to embark on this adventure or simply gain more insight into marine craftsmanship, Sven’s wisdom is invaluable.Sven Yrvind, a renowned yacht designer and sailor, shares valuable insights on creating flanges around bulkhead hatches for canvas protection in this enlightening video. By following his expert guidance, boat enthusiasts can ensure their living areas remain secure while allowing unhindered access through the hatches.Step 1: Starting with the Flange
Sven begins by explaining that working on flanges vertically and horizontally is significantly easier than doing so in a flat position. To simplify the process further, he divides the task into two or three steps as suggested by fellow expert “for for.” This approach not only makes it more manageable but also allows for greater precision in crafting each component.Step 2: Applying Glue and Securing
Sven proceeds to apply glue along one edge of the flange, ensuring a secure bond when clamped into place. He emphasizes that this stage is crucial for maintaining the structural integrity of the flange, which in turn safeguards the living area beneath the canvas when hatches are open.Step 3: Allowing Time to Dry
After securely attaching the first portion of the flange, Sven allows ample time for it to dry before moving forward with additional steps. This patience and precision are key aspects of his successful boatbuilding methods.Step 4: Finishing Touches
Once the flange is fully dried, Sven removes the clamps carefully, ensuring no damage occurs during this process. He then moves on to attaching four more pieces onto these main frames, completing two pairs of flanges for the bulkhead hatches.The Final Touches
While two flanges form the primary support structure around the hatches, Sven mentions there are two additional pieces required at each end to ensure comprehensive protection. This attention to detail highlights his commitment to producing a durable and reliable design. “Sailing is about finding your path, whether it’s across an ocean or within yourself.” – Sven Yrvind In conclusion, making flanges around bulkhead hatches may seem complex at first glance, but by following Sven Yrvind’s meticulous process, enthusiasts can achieve professional-level results. Remember that the journey of boatbuilding is as rewarding as reaching your destination; it tests one’s patience and dedication. For those seeking to embark on this adventure or simply gain more insight into marine craftsmanship, Sven’s wisdom is invaluable.Making Flanges Around Bulkhead Hatches for Canvas
Sven Yrvind, a renowned yacht designer and sailor, shares valuable insights on creating flanges around bulkhead hatches for canvas protection in this enlightening video. By following his expert guidance, boat enthusiasts can ensure their living areas remain secure while allowing unhindered access through the hatches.Step 1: Starting with the Flange
Sven begins by explaining that working on flanges vertically and horizontally is significantly easier than doing so in a flat position. To simplify the process further, he divides the task into two or three steps as suggested by fellow expert “for for.” This approach not only makes it more manageable but also allows for greater precision in crafting each component.Step 2: Applying Glue and Securing
Sven proceeds to apply glue along one edge of the flange, ensuring a secure bond when clamped into place. He emphasizes that this stage is crucial for maintaining the structural integrity of the flange, which in turn safeguards the living area beneath the canvas when hatches are open.Step 3: Allowing Time to Dry
After securely attaching the first portion of the flange, Sven allows ample time for it to dry before moving forward with additional steps. This patience and precision are key aspects of his successful boatbuilding methods.Step 4: Finishing Touches
Once the flange is fully dried, Sven removes the clamps carefully, ensuring no damage occurs during this process. He then moves on to attaching four more pieces onto these main frames, completing two pairs of flanges for the bulkhead hatches.The Final Touches
While two flanges form the primary support structure around the hatches, Sven mentions there are two additional pieces required at each end to ensure comprehensive protection. This attention to detail highlights his commitment to producing a durable and reliable design. “Sailing is about finding your path, whether it’s across an ocean or within yourself.” – Sven Yrvind In conclusion, making flanges around bulkhead hatches may seem complex at first glance, but by following Sven Yrvind’s meticulous process, enthusiasts can achieve professional-level results. Remember that the journey of boatbuilding is as rewarding as reaching your destination; it tests one’s patience and dedication. For those seeking to embark on this adventure or simply gain more insight into marine craftsmanship, Sven’s wisdom is invaluable.Once the flange is fully dried, Sven removes the clamps carefully, ensuring no damage occurs during this process. He then moves on to attaching four more pieces onto these main frames, completing two pairs of flanges for the bulkhead hatches.The Final Touches
While two flanges form the primary support structure around the hatches, Sven mentions there are two additional pieces required at each end to ensure comprehensive protection. This attention to detail highlights his commitment to producing a durable and reliable design. “Sailing is about finding your path, whether it’s across an ocean or within yourself.” – Sven Yrvind In conclusion, making flanges around bulkhead hatches may seem complex at first glance, but by following Sven Yrvind’s meticulous process, enthusiasts can achieve professional-level results. Remember that the journey of boatbuilding is as rewarding as reaching your destination; it tests one’s patience and dedication. For those seeking to embark on this adventure or simply gain more insight into marine craftsmanship, Sven’s wisdom is invaluable.Sven begins by explaining that working on flanges vertically and horizontally is significantly easier than doing so in a flat position. To simplify the process further, he divides the task into two or three steps as suggested by fellow expert “for for.” This approach not only makes it more manageable but also allows for greater precision in crafting each component.Step 2: Applying Glue and Securing
Sven proceeds to apply glue along one edge of the flange, ensuring a secure bond when clamped into place. He emphasizes that this stage is crucial for maintaining the structural integrity of the flange, which in turn safeguards the living area beneath the canvas when hatches are open.Step 3: Allowing Time to Dry
After securely attaching the first portion of the flange, Sven allows ample time for it to dry before moving forward with additional steps. This patience and precision are key aspects of his successful boatbuilding methods.Step 4: Finishing Touches
Once the flange is fully dried, Sven removes the clamps carefully, ensuring no damage occurs during this process. He then moves on to attaching four more pieces onto these main frames, completing two pairs of flanges for the bulkhead hatches.The Final Touches
While two flanges form the primary support structure around the hatches, Sven mentions there are two additional pieces required at each end to ensure comprehensive protection. This attention to detail highlights his commitment to producing a durable and reliable design. “Sailing is about finding your path, whether it’s across an ocean or within yourself.” – Sven Yrvind In conclusion, making flanges around bulkhead hatches may seem complex at first glance, but by following Sven Yrvind’s meticulous process, enthusiasts can achieve professional-level results. Remember that the journey of boatbuilding is as rewarding as reaching your destination; it tests one’s patience and dedication. For those seeking to embark on this adventure or simply gain more insight into marine craftsmanship, Sven’s wisdom is invaluable.Sven Yrvind, a renowned yacht designer and sailor, shares valuable insights on creating flanges around bulkhead hatches for canvas protection in this enlightening video. By following his expert guidance, boat enthusiasts can ensure their living areas remain secure while allowing unhindered access through the hatches.Step 1: Starting with the Flange
Sven begins by explaining that working on flanges vertically and horizontally is significantly easier than doing so in a flat position. To simplify the process further, he divides the task into two or three steps as suggested by fellow expert “for for.” This approach not only makes it more manageable but also allows for greater precision in crafting each component.Step 2: Applying Glue and Securing
Sven proceeds to apply glue along one edge of the flange, ensuring a secure bond when clamped into place. He emphasizes that this stage is crucial for maintaining the structural integrity of the flange, which in turn safeguards the living area beneath the canvas when hatches are open.Step 3: Allowing Time to Dry
After securely attaching the first portion of the flange, Sven allows ample time for it to dry before moving forward with additional steps. This patience and precision are key aspects of his successful boatbuilding methods.Step 4: Finishing Touches
Once the flange is fully dried, Sven removes the clamps carefully, ensuring no damage occurs during this process. He then moves on to attaching four more pieces onto these main frames, completing two pairs of flanges for the bulkhead hatches.The Final Touches
While two flanges form the primary support structure around the hatches, Sven mentions there are two additional pieces required at each end to ensure comprehensive protection. This attention to detail highlights his commitment to producing a durable and reliable design. “Sailing is about finding your path, whether it’s across an ocean or within yourself.” – Sven Yrvind In conclusion, making flanges around bulkhead hatches may seem complex at first glance, but by following Sven Yrvind’s meticulous process, enthusiasts can achieve professional-level results. Remember that the journey of boatbuilding is as rewarding as reaching your destination; it tests one’s patience and dedication. For those seeking to embark on this adventure or simply gain more insight into marine craftsmanship, Sven’s wisdom is invaluable.Making Flanges Around Bulkhead Hatches for Canvas
Sven Yrvind, a renowned yacht designer and sailor, shares valuable insights on creating flanges around bulkhead hatches for canvas protection in this enlightening video. By following his expert guidance, boat enthusiasts can ensure their living areas remain secure while allowing unhindered access through the hatches.Step 1: Starting with the Flange
Sven begins by explaining that working on flanges vertically and horizontally is significantly easier than doing so in a flat position. To simplify the process further, he divides the task into two or three steps as suggested by fellow expert “for for.” This approach not only makes it more manageable but also allows for greater precision in crafting each component.Step 2: Applying Glue and Securing
Sven proceeds to apply glue along one edge of the flange, ensuring a secure bond when clamped into place. He emphasizes that this stage is crucial for maintaining the structural integrity of the flange, which in turn safeguards the living area beneath the canvas when hatches are open.Step 3: Allowing Time to Dry
After securely attaching the first portion of the flange, Sven allows ample time for it to dry before moving forward with additional steps. This patience and precision are key aspects of his successful boatbuilding methods.Step 4: Finishing Touches
Once the flange is fully dried, Sven removes the clamps carefully, ensuring no damage occurs during this process. He then moves on to attaching four more pieces onto these main frames, completing two pairs of flanges for the bulkhead hatches.The Final Touches
While two flanges form the primary support structure around the hatches, Sven mentions there are two additional pieces required at each end to ensure comprehensive protection. This attention to detail highlights his commitment to producing a durable and reliable design. “Sailing is about finding your path, whether it’s across an ocean or within yourself.” – Sven Yrvind In conclusion, making flanges around bulkhead hatches may seem complex at first glance, but by following Sven Yrvind’s meticulous process, enthusiasts can achieve professional-level results. Remember that the journey of boatbuilding is as rewarding as reaching your destination; it tests one’s patience and dedication. For those seeking to embark on this adventure or simply gain more insight into marine craftsmanship, Sven’s wisdom is invaluable.After securely attaching the first portion of the flange, Sven allows ample time for it to dry before moving forward with additional steps. This patience and precision are key aspects of his successful boatbuilding methods.Step 4: Finishing Touches
Once the flange is fully dried, Sven removes the clamps carefully, ensuring no damage occurs during this process. He then moves on to attaching four more pieces onto these main frames, completing two pairs of flanges for the bulkhead hatches.The Final Touches
While two flanges form the primary support structure around the hatches, Sven mentions there are two additional pieces required at each end to ensure comprehensive protection. This attention to detail highlights his commitment to producing a durable and reliable design. “Sailing is about finding your path, whether it’s across an ocean or within yourself.” – Sven Yrvind In conclusion, making flanges around bulkhead hatches may seem complex at first glance, but by following Sven Yrvind’s meticulous process, enthusiasts can achieve professional-level results. Remember that the journey of boatbuilding is as rewarding as reaching your destination; it tests one’s patience and dedication. For those seeking to embark on this adventure or simply gain more insight into marine craftsmanship, Sven’s wisdom is invaluable.Sven begins by explaining that working on flanges vertically and horizontally is significantly easier than doing so in a flat position. To simplify the process further, he divides the task into two or three steps as suggested by fellow expert “for for.” This approach not only makes it more manageable but also allows for greater precision in crafting each component.Step 2: Applying Glue and Securing
Sven proceeds to apply glue along one edge of the flange, ensuring a secure bond when clamped into place. He emphasizes that this stage is crucial for maintaining the structural integrity of the flange, which in turn safeguards the living area beneath the canvas when hatches are open.Step 3: Allowing Time to Dry
After securely attaching the first portion of the flange, Sven allows ample time for it to dry before moving forward with additional steps. This patience and precision are key aspects of his successful boatbuilding methods.Step 4: Finishing Touches
Once the flange is fully dried, Sven removes the clamps carefully, ensuring no damage occurs during this process. He then moves on to attaching four more pieces onto these main frames, completing two pairs of flanges for the bulkhead hatches.The Final Touches
While two flanges form the primary support structure around the hatches, Sven mentions there are two additional pieces required at each end to ensure comprehensive protection. This attention to detail highlights his commitment to producing a durable and reliable design. “Sailing is about finding your path, whether it’s across an ocean or within yourself.” – Sven Yrvind In conclusion, making flanges around bulkhead hatches may seem complex at first glance, but by following Sven Yrvind’s meticulous process, enthusiasts can achieve professional-level results. Remember that the journey of boatbuilding is as rewarding as reaching your destination; it tests one’s patience and dedication. For those seeking to embark on this adventure or simply gain more insight into marine craftsmanship, Sven’s wisdom is invaluable.Sven Yrvind, a renowned yacht designer and sailor, shares valuable insights on creating flanges around bulkhead hatches for canvas protection in this enlightening video. By following his expert guidance, boat enthusiasts can ensure their living areas remain secure while allowing unhindered access through the hatches.Step 1: Starting with the Flange
Sven begins by explaining that working on flanges vertically and horizontally is significantly easier than doing so in a flat position. To simplify the process further, he divides the task into two or three steps as suggested by fellow expert “for for.” This approach not only makes it more manageable but also allows for greater precision in crafting each component.Step 2: Applying Glue and Securing
Sven proceeds to apply glue along one edge of the flange, ensuring a secure bond when clamped into place. He emphasizes that this stage is crucial for maintaining the structural integrity of the flange, which in turn safeguards the living area beneath the canvas when hatches are open.Step 3: Allowing Time to Dry
After securely attaching the first portion of the flange, Sven allows ample time for it to dry before moving forward with additional steps. This patience and precision are key aspects of his successful boatbuilding methods.Step 4: Finishing Touches
Once the flange is fully dried, Sven removes the clamps carefully, ensuring no damage occurs during this process. He then moves on to attaching four more pieces onto these main frames, completing two pairs of flanges for the bulkhead hatches.The Final Touches
While two flanges form the primary support structure around the hatches, Sven mentions there are two additional pieces required at each end to ensure comprehensive protection. This attention to detail highlights his commitment to producing a durable and reliable design. “Sailing is about finding your path, whether it’s across an ocean or within yourself.” – Sven Yrvind In conclusion, making flanges around bulkhead hatches may seem complex at first glance, but by following Sven Yrvind’s meticulous process, enthusiasts can achieve professional-level results. Remember that the journey of boatbuilding is as rewarding as reaching your destination; it tests one’s patience and dedication. For those seeking to embark on this adventure or simply gain more insight into marine craftsmanship, Sven’s wisdom is invaluable.Making Flanges Around Bulkhead Hatches for Canvas
Sven Yrvind, a renowned yacht designer and sailor, shares valuable insights on creating flanges around bulkhead hatches for canvas protection in this enlightening video. By following his expert guidance, boat enthusiasts can ensure their living areas remain secure while allowing unhindered access through the hatches.Step 1: Starting with the Flange
Sven begins by explaining that working on flanges vertically and horizontally is significantly easier than doing so in a flat position. To simplify the process further, he divides the task into two or three steps as suggested by fellow expert “for for.” This approach not only makes it more manageable but also allows for greater precision in crafting each component.Step 2: Applying Glue and Securing
Sven proceeds to apply glue along one edge of the flange, ensuring a secure bond when clamped into place. He emphasizes that this stage is crucial for maintaining the structural integrity of the flange, which in turn safeguards the living area beneath the canvas when hatches are open.Step 3: Allowing Time to Dry
After securely attaching the first portion of the flange, Sven allows ample time for it to dry before moving forward with additional steps. This patience and precision are key aspects of his successful boatbuilding methods.Step 4: Finishing Touches
Once the flange is fully dried, Sven removes the clamps carefully, ensuring no damage occurs during this process. He then moves on to attaching four more pieces onto these main frames, completing two pairs of flanges for the bulkhead hatches.The Final Touches
While two flanges form the primary support structure around the hatches, Sven mentions there are two additional pieces required at each end to ensure comprehensive protection. This attention to detail highlights his commitment to producing a durable and reliable design. “Sailing is about finding your path, whether it’s across an ocean or within yourself.” – Sven Yrvind In conclusion, making flanges around bulkhead hatches may seem complex at first glance, but by following Sven Yrvind’s meticulous process, enthusiasts can achieve professional-level results. Remember that the journey of boatbuilding is as rewarding as reaching your destination; it tests one’s patience and dedication. For those seeking to embark on this adventure or simply gain more insight into marine craftsmanship, Sven’s wisdom is invaluable.Sven proceeds to apply glue along one edge of the flange, ensuring a secure bond when clamped into place. He emphasizes that this stage is crucial for maintaining the structural integrity of the flange, which in turn safeguards the living area beneath the canvas when hatches are open.Step 3: Allowing Time to Dry
After securely attaching the first portion of the flange, Sven allows ample time for it to dry before moving forward with additional steps. This patience and precision are key aspects of his successful boatbuilding methods.Step 4: Finishing Touches
Once the flange is fully dried, Sven removes the clamps carefully, ensuring no damage occurs during this process. He then moves on to attaching four more pieces onto these main frames, completing two pairs of flanges for the bulkhead hatches.The Final Touches
While two flanges form the primary support structure around the hatches, Sven mentions there are two additional pieces required at each end to ensure comprehensive protection. This attention to detail highlights his commitment to producing a durable and reliable design. “Sailing is about finding your path, whether it’s across an ocean or within yourself.” – Sven Yrvind In conclusion, making flanges around bulkhead hatches may seem complex at first glance, but by following Sven Yrvind’s meticulous process, enthusiasts can achieve professional-level results. Remember that the journey of boatbuilding is as rewarding as reaching your destination; it tests one’s patience and dedication. For those seeking to embark on this adventure or simply gain more insight into marine craftsmanship, Sven’s wisdom is invaluable.Sven begins by explaining that working on flanges vertically and horizontally is significantly easier than doing so in a flat position. To simplify the process further, he divides the task into two or three steps as suggested by fellow expert “for for.” This approach not only makes it more manageable but also allows for greater precision in crafting each component.Step 2: Applying Glue and Securing
Sven proceeds to apply glue along one edge of the flange, ensuring a secure bond when clamped into place. He emphasizes that this stage is crucial for maintaining the structural integrity of the flange, which in turn safeguards the living area beneath the canvas when hatches are open.Step 3: Allowing Time to Dry
After securely attaching the first portion of the flange, Sven allows ample time for it to dry before moving forward with additional steps. This patience and precision are key aspects of his successful boatbuilding methods.Step 4: Finishing Touches
Once the flange is fully dried, Sven removes the clamps carefully, ensuring no damage occurs during this process. He then moves on to attaching four more pieces onto these main frames, completing two pairs of flanges for the bulkhead hatches.The Final Touches
While two flanges form the primary support structure around the hatches, Sven mentions there are two additional pieces required at each end to ensure comprehensive protection. This attention to detail highlights his commitment to producing a durable and reliable design. “Sailing is about finding your path, whether it’s across an ocean or within yourself.” – Sven Yrvind In conclusion, making flanges around bulkhead hatches may seem complex at first glance, but by following Sven Yrvind’s meticulous process, enthusiasts can achieve professional-level results. Remember that the journey of boatbuilding is as rewarding as reaching your destination; it tests one’s patience and dedication. For those seeking to embark on this adventure or simply gain more insight into marine craftsmanship, Sven’s wisdom is invaluable.Sven Yrvind, a renowned yacht designer and sailor, shares valuable insights on creating flanges around bulkhead hatches for canvas protection in this enlightening video. By following his expert guidance, boat enthusiasts can ensure their living areas remain secure while allowing unhindered access through the hatches.Step 1: Starting with the Flange
Sven begins by explaining that working on flanges vertically and horizontally is significantly easier than doing so in a flat position. To simplify the process further, he divides the task into two or three steps as suggested by fellow expert “for for.” This approach not only makes it more manageable but also allows for greater precision in crafting each component.Step 2: Applying Glue and Securing
Sven proceeds to apply glue along one edge of the flange, ensuring a secure bond when clamped into place. He emphasizes that this stage is crucial for maintaining the structural integrity of the flange, which in turn safeguards the living area beneath the canvas when hatches are open.Step 3: Allowing Time to Dry
After securely attaching the first portion of the flange, Sven allows ample time for it to dry before moving forward with additional steps. This patience and precision are key aspects of his successful boatbuilding methods.Step 4: Finishing Touches
Once the flange is fully dried, Sven removes the clamps carefully, ensuring no damage occurs during this process. He then moves on to attaching four more pieces onto these main frames, completing two pairs of flanges for the bulkhead hatches.The Final Touches
While two flanges form the primary support structure around the hatches, Sven mentions there are two additional pieces required at each end to ensure comprehensive protection. This attention to detail highlights his commitment to producing a durable and reliable design. “Sailing is about finding your path, whether it’s across an ocean or within yourself.” – Sven Yrvind In conclusion, making flanges around bulkhead hatches may seem complex at first glance, but by following Sven Yrvind’s meticulous process, enthusiasts can achieve professional-level results. Remember that the journey of boatbuilding is as rewarding as reaching your destination; it tests one’s patience and dedication. For those seeking to embark on this adventure or simply gain more insight into marine craftsmanship, Sven’s wisdom is invaluable.Making Flanges Around Bulkhead Hatches for Canvas
Sven Yrvind, a renowned yacht designer and sailor, shares valuable insights on creating flanges around bulkhead hatches for canvas protection in this enlightening video. By following his expert guidance, boat enthusiasts can ensure their living areas remain secure while allowing unhindered access through the hatches.Step 1: Starting with the Flange
Sven begins by explaining that working on flanges vertically and horizontally is significantly easier than doing so in a flat position. To simplify the process further, he divides the task into two or three steps as suggested by fellow expert “for for.” This approach not only makes it more manageable but also allows for greater precision in crafting each component.Step 2: Applying Glue and Securing
Sven proceeds to apply glue along one edge of the flange, ensuring a secure bond when clamped into place. He emphasizes that this stage is crucial for maintaining the structural integrity of the flange, which in turn safeguards the living area beneath the canvas when hatches are open.Step 3: Allowing Time to Dry
After securely attaching the first portion of the flange, Sven allows ample time for it to dry before moving forward with additional steps. This patience and precision are key aspects of his successful boatbuilding methods.Step 4: Finishing Touches
Once the flange is fully dried, Sven removes the clamps carefully, ensuring no damage occurs during this process. He then moves on to attaching four more pieces onto these main frames, completing two pairs of flanges for the bulkhead hatches.The Final Touches
While two flanges form the primary support structure around the hatches, Sven mentions there are two additional pieces required at each end to ensure comprehensive protection. This attention to detail highlights his commitment to producing a durable and reliable design. “Sailing is about finding your path, whether it’s across an ocean or within yourself.” – Sven Yrvind In conclusion, making flanges around bulkhead hatches may seem complex at first glance, but by following Sven Yrvind’s meticulous process, enthusiasts can achieve professional-level results. Remember that the journey of boatbuilding is as rewarding as reaching your destination; it tests one’s patience and dedication. For those seeking to embark on this adventure or simply gain more insight into marine craftsmanship, Sven’s wisdom is invaluable.Once the flange is fully dried, Sven removes the clamps carefully, ensuring no damage occurs during this process. He then moves on to attaching four more pieces onto these main frames, completing two pairs of flanges for the bulkhead hatches.The Final Touches
While two flanges form the primary support structure around the hatches, Sven mentions there are two additional pieces required at each end to ensure comprehensive protection. This attention to detail highlights his commitment to producing a durable and reliable design. “Sailing is about finding your path, whether it’s across an ocean or within yourself.” – Sven Yrvind In conclusion, making flanges around bulkhead hatches may seem complex at first glance, but by following Sven Yrvind’s meticulous process, enthusiasts can achieve professional-level results. Remember that the journey of boatbuilding is as rewarding as reaching your destination; it tests one’s patience and dedication. For those seeking to embark on this adventure or simply gain more insight into marine craftsmanship, Sven’s wisdom is invaluable.Sven proceeds to apply glue along one edge of the flange, ensuring a secure bond when clamped into place. He emphasizes that this stage is crucial for maintaining the structural integrity of the flange, which in turn safeguards the living area beneath the canvas when hatches are open.Step 3: Allowing Time to Dry
After securely attaching the first portion of the flange, Sven allows ample time for it to dry before moving forward with additional steps. This patience and precision are key aspects of his successful boatbuilding methods.Step 4: Finishing Touches
Once the flange is fully dried, Sven removes the clamps carefully, ensuring no damage occurs during this process. He then moves on to attaching four more pieces onto these main frames, completing two pairs of flanges for the bulkhead hatches.The Final Touches
While two flanges form the primary support structure around the hatches, Sven mentions there are two additional pieces required at each end to ensure comprehensive protection. This attention to detail highlights his commitment to producing a durable and reliable design. “Sailing is about finding your path, whether it’s across an ocean or within yourself.” – Sven Yrvind In conclusion, making flanges around bulkhead hatches may seem complex at first glance, but by following Sven Yrvind’s meticulous process, enthusiasts can achieve professional-level results. Remember that the journey of boatbuilding is as rewarding as reaching your destination; it tests one’s patience and dedication. For those seeking to embark on this adventure or simply gain more insight into marine craftsmanship, Sven’s wisdom is invaluable.Sven begins by explaining that working on flanges vertically and horizontally is significantly easier than doing so in a flat position. To simplify the process further, he divides the task into two or three steps as suggested by fellow expert “for for.” This approach not only makes it more manageable but also allows for greater precision in crafting each component.Step 2: Applying Glue and Securing
Sven proceeds to apply glue along one edge of the flange, ensuring a secure bond when clamped into place. He emphasizes that this stage is crucial for maintaining the structural integrity of the flange, which in turn safeguards the living area beneath the canvas when hatches are open.Step 3: Allowing Time to Dry
After securely attaching the first portion of the flange, Sven allows ample time for it to dry before moving forward with additional steps. This patience and precision are key aspects of his successful boatbuilding methods.Step 4: Finishing Touches
Once the flange is fully dried, Sven removes the clamps carefully, ensuring no damage occurs during this process. He then moves on to attaching four more pieces onto these main frames, completing two pairs of flanges for the bulkhead hatches.The Final Touches
While two flanges form the primary support structure around the hatches, Sven mentions there are two additional pieces required at each end to ensure comprehensive protection. This attention to detail highlights his commitment to producing a durable and reliable design. “Sailing is about finding your path, whether it’s across an ocean or within yourself.” – Sven Yrvind In conclusion, making flanges around bulkhead hatches may seem complex at first glance, but by following Sven Yrvind’s meticulous process, enthusiasts can achieve professional-level results. Remember that the journey of boatbuilding is as rewarding as reaching your destination; it tests one’s patience and dedication. For those seeking to embark on this adventure or simply gain more insight into marine craftsmanship, Sven’s wisdom is invaluable.Sven Yrvind, a renowned yacht designer and sailor, shares valuable insights on creating flanges around bulkhead hatches for canvas protection in this enlightening video. By following his expert guidance, boat enthusiasts can ensure their living areas remain secure while allowing unhindered access through the hatches.Step 1: Starting with the Flange
Sven begins by explaining that working on flanges vertically and horizontally is significantly easier than doing so in a flat position. To simplify the process further, he divides the task into two or three steps as suggested by fellow expert “for for.” This approach not only makes it more manageable but also allows for greater precision in crafting each component.Step 2: Applying Glue and Securing
Sven proceeds to apply glue along one edge of the flange, ensuring a secure bond when clamped into place. He emphasizes that this stage is crucial for maintaining the structural integrity of the flange, which in turn safeguards the living area beneath the canvas when hatches are open.Step 3: Allowing Time to Dry
After securely attaching the first portion of the flange, Sven allows ample time for it to dry before moving forward with additional steps. This patience and precision are key aspects of his successful boatbuilding methods.Step 4: Finishing Touches
Once the flange is fully dried, Sven removes the clamps carefully, ensuring no damage occurs during this process. He then moves on to attaching four more pieces onto these main frames, completing two pairs of flanges for the bulkhead hatches.The Final Touches
While two flanges form the primary support structure around the hatches, Sven mentions there are two additional pieces required at each end to ensure comprehensive protection. This attention to detail highlights his commitment to producing a durable and reliable design. “Sailing is about finding your path, whether it’s across an ocean or within yourself.” – Sven Yrvind In conclusion, making flanges around bulkhead hatches may seem complex at first glance, but by following Sven Yrvind’s meticulous process, enthusiasts can achieve professional-level results. Remember that the journey of boatbuilding is as rewarding as reaching your destination; it tests one’s patience and dedication. For those seeking to embark on this adventure or simply gain more insight into marine craftsmanship, Sven’s wisdom is invaluable.Making Flanges Around Bulkhead Hatches for Canvas
Sven Yrvind, a renowned yacht designer and sailor, shares valuable insights on creating flanges around bulkhead hatches for canvas protection in this enlightening video. By following his expert guidance, boat enthusiasts can ensure their living areas remain secure while allowing unhindered access through the hatches.Step 1: Starting with the Flange
Sven begins by explaining that working on flanges vertically and horizontally is significantly easier than doing so in a flat position. To simplify the process further, he divides the task into two or three steps as suggested by fellow expert “for for.” This approach not only makes it more manageable but also allows for greater precision in crafting each component.Step 2: Applying Glue and Securing
Sven proceeds to apply glue along one edge of the flange, ensuring a secure bond when clamped into place. He emphasizes that this stage is crucial for maintaining the structural integrity of the flange, which in turn safeguards the living area beneath the canvas when hatches are open.Step 3: Allowing Time to Dry
After securely attaching the first portion of the flange, Sven allows ample time for it to dry before moving forward with additional steps. This patience and precision are key aspects of his successful boatbuilding methods.Step 4: Finishing Touches
Once the flange is fully dried, Sven removes the clamps carefully, ensuring no damage occurs during this process. He then moves on to attaching four more pieces onto these main frames, completing two pairs of flanges for the bulkhead hatches.The Final Touches
While two flanges form the primary support structure around the hatches, Sven mentions there are two additional pieces required at each end to ensure comprehensive protection. This attention to detail highlights his commitment to producing a durable and reliable design. “Sailing is about finding your path, whether it’s across an ocean or within yourself.” – Sven Yrvind In conclusion, making flanges around bulkhead hatches may seem complex at first glance, but by following Sven Yrvind’s meticulous process, enthusiasts can achieve professional-level results. Remember that the journey of boatbuilding is as rewarding as reaching your destination; it tests one’s patience and dedication. For those seeking to embark on this adventure or simply gain more insight into marine craftsmanship, Sven’s wisdom is invaluable.After securely attaching the first portion of the flange, Sven allows ample time for it to dry before moving forward with additional steps. This patience and precision are key aspects of his successful boatbuilding methods.Step 4: Finishing Touches
Once the flange is fully dried, Sven removes the clamps carefully, ensuring no damage occurs during this process. He then moves on to attaching four more pieces onto these main frames, completing two pairs of flanges for the bulkhead hatches.The Final Touches
While two flanges form the primary support structure around the hatches, Sven mentions there are two additional pieces required at each end to ensure comprehensive protection. This attention to detail highlights his commitment to producing a durable and reliable design. “Sailing is about finding your path, whether it’s across an ocean or within yourself.” – Sven Yrvind In conclusion, making flanges around bulkhead hatches may seem complex at first glance, but by following Sven Yrvind’s meticulous process, enthusiasts can achieve professional-level results. Remember that the journey of boatbuilding is as rewarding as reaching your destination; it tests one’s patience and dedication. For those seeking to embark on this adventure or simply gain more insight into marine craftsmanship, Sven’s wisdom is invaluable.Sven proceeds to apply glue along one edge of the flange, ensuring a secure bond when clamped into place. He emphasizes that this stage is crucial for maintaining the structural integrity of the flange, which in turn safeguards the living area beneath the canvas when hatches are open.Step 3: Allowing Time to Dry
After securely attaching the first portion of the flange, Sven allows ample time for it to dry before moving forward with additional steps. This patience and precision are key aspects of his successful boatbuilding methods.Step 4: Finishing Touches
Once the flange is fully dried, Sven removes the clamps carefully, ensuring no damage occurs during this process. He then moves on to attaching four more pieces onto these main frames, completing two pairs of flanges for the bulkhead hatches.The Final Touches
While two flanges form the primary support structure around the hatches, Sven mentions there are two additional pieces required at each end to ensure comprehensive protection. This attention to detail highlights his commitment to producing a durable and reliable design. “Sailing is about finding your path, whether it’s across an ocean or within yourself.” – Sven Yrvind In conclusion, making flanges around bulkhead hatches may seem complex at first glance, but by following Sven Yrvind’s meticulous process, enthusiasts can achieve professional-level results. Remember that the journey of boatbuilding is as rewarding as reaching your destination; it tests one’s patience and dedication. For those seeking to embark on this adventure or simply gain more insight into marine craftsmanship, Sven’s wisdom is invaluable.Sven begins by explaining that working on flanges vertically and horizontally is significantly easier than doing so in a flat position. To simplify the process further, he divides the task into two or three steps as suggested by fellow expert “for for.” This approach not only makes it more manageable but also allows for greater precision in crafting each component.Step 2: Applying Glue and Securing
Sven proceeds to apply glue along one edge of the flange, ensuring a secure bond when clamped into place. He emphasizes that this stage is crucial for maintaining the structural integrity of the flange, which in turn safeguards the living area beneath the canvas when hatches are open.Step 3: Allowing Time to Dry
After securely attaching the first portion of the flange, Sven allows ample time for it to dry before moving forward with additional steps. This patience and precision are key aspects of his successful boatbuilding methods.Step 4: Finishing Touches
Once the flange is fully dried, Sven removes the clamps carefully, ensuring no damage occurs during this process. He then moves on to attaching four more pieces onto these main frames, completing two pairs of flanges for the bulkhead hatches.The Final Touches
While two flanges form the primary support structure around the hatches, Sven mentions there are two additional pieces required at each end to ensure comprehensive protection. This attention to detail highlights his commitment to producing a durable and reliable design. “Sailing is about finding your path, whether it’s across an ocean or within yourself.” – Sven Yrvind In conclusion, making flanges around bulkhead hatches may seem complex at first glance, but by following Sven Yrvind’s meticulous process, enthusiasts can achieve professional-level results. Remember that the journey of boatbuilding is as rewarding as reaching your destination; it tests one’s patience and dedication. For those seeking to embark on this adventure or simply gain more insight into marine craftsmanship, Sven’s wisdom is invaluable.Sven Yrvind, a renowned yacht designer and sailor, shares valuable insights on creating flanges around bulkhead hatches for canvas protection in this enlightening video. By following his expert guidance, boat enthusiasts can ensure their living areas remain secure while allowing unhindered access through the hatches.Step 1: Starting with the Flange
Sven begins by explaining that working on flanges vertically and horizontally is significantly easier than doing so in a flat position. To simplify the process further, he divides the task into two or three steps as suggested by fellow expert “for for.” This approach not only makes it more manageable but also allows for greater precision in crafting each component.Step 2: Applying Glue and Securing
Sven proceeds to apply glue along one edge of the flange, ensuring a secure bond when clamped into place. He emphasizes that this stage is crucial for maintaining the structural integrity of the flange, which in turn safeguards the living area beneath the canvas when hatches are open.Step 3: Allowing Time to Dry
After securely attaching the first portion of the flange, Sven allows ample time for it to dry before moving forward with additional steps. This patience and precision are key aspects of his successful boatbuilding methods.Step 4: Finishing Touches
Once the flange is fully dried, Sven removes the clamps carefully, ensuring no damage occurs during this process. He then moves on to attaching four more pieces onto these main frames, completing two pairs of flanges for the bulkhead hatches.The Final Touches
While two flanges form the primary support structure around the hatches, Sven mentions there are two additional pieces required at each end to ensure comprehensive protection. This attention to detail highlights his commitment to producing a durable and reliable design. “Sailing is about finding your path, whether it’s across an ocean or within yourself.” – Sven Yrvind In conclusion, making flanges around bulkhead hatches may seem complex at first glance, but by following Sven Yrvind’s meticulous process, enthusiasts can achieve professional-level results. Remember that the journey of boatbuilding is as rewarding as reaching your destination; it tests one’s patience and dedication. For those seeking to embark on this adventure or simply gain more insight into marine craftsmanship, Sven’s wisdom is invaluable.Making Flanges Around Bulkhead Hatches for Canvas
Sven Yrvind, a renowned yacht designer and sailor, shares valuable insights on creating flanges around bulkhead hatches for canvas protection in this enlightening video. By following his expert guidance, boat enthusiasts can ensure their living areas remain secure while allowing unhindered access through the hatches.Step 1: Starting with the Flange
Sven begins by explaining that working on flanges vertically and horizontally is significantly easier than doing so in a flat position. To simplify the process further, he divides the task into two or three steps as suggested by fellow expert “for for.” This approach not only makes it more manageable but also allows for greater precision in crafting each component.Step 2: Applying Glue and Securing
Sven proceeds to apply glue along one edge of the flange, ensuring a secure bond when clamped into place. He emphasizes that this stage is crucial for maintaining the structural integrity of the flange, which in turn safeguards the living area beneath the canvas when hatches are open.Step 3: Allowing Time to Dry
After securely attaching the first portion of the flange, Sven allows ample time for it to dry before moving forward with additional steps. This patience and precision are key aspects of his successful boatbuilding methods.Step 4: Finishing Touches
Once the flange is fully dried, Sven removes the clamps carefully, ensuring no damage occurs during this process. He then moves on to attaching four more pieces onto these main frames, completing two pairs of flanges for the bulkhead hatches.The Final Touches
While two flanges form the primary support structure around the hatches, Sven mentions there are two additional pieces required at each end to ensure comprehensive protection. This attention to detail highlights his commitment to producing a durable and reliable design. “Sailing is about finding your path, whether it’s across an ocean or within yourself.” – Sven Yrvind In conclusion, making flanges around bulkhead hatches may seem complex at first glance, but by following Sven Yrvind’s meticulous process, enthusiasts can achieve professional-level results. Remember that the journey of boatbuilding is as rewarding as reaching your destination; it tests one’s patience and dedication. For those seeking to embark on this adventure or simply gain more insight into marine craftsmanship, Sven’s wisdom is invaluable.Once the flange is fully dried, Sven removes the clamps carefully, ensuring no damage occurs during this process. He then moves on to attaching four more pieces onto these main frames, completing two pairs of flanges for the bulkhead hatches.The Final Touches
While two flanges form the primary support structure around the hatches, Sven mentions there are two additional pieces required at each end to ensure comprehensive protection. This attention to detail highlights his commitment to producing a durable and reliable design. “Sailing is about finding your path, whether it’s across an ocean or within yourself.” – Sven Yrvind In conclusion, making flanges around bulkhead hatches may seem complex at first glance, but by following Sven Yrvind’s meticulous process, enthusiasts can achieve professional-level results. Remember that the journey of boatbuilding is as rewarding as reaching your destination; it tests one’s patience and dedication. For those seeking to embark on this adventure or simply gain more insight into marine craftsmanship, Sven’s wisdom is invaluable.After securely attaching the first portion of the flange, Sven allows ample time for it to dry before moving forward with additional steps. This patience and precision are key aspects of his successful boatbuilding methods.Step 4: Finishing Touches
Once the flange is fully dried, Sven removes the clamps carefully, ensuring no damage occurs during this process. He then moves on to attaching four more pieces onto these main frames, completing two pairs of flanges for the bulkhead hatches.The Final Touches
While two flanges form the primary support structure around the hatches, Sven mentions there are two additional pieces required at each end to ensure comprehensive protection. This attention to detail highlights his commitment to producing a durable and reliable design. “Sailing is about finding your path, whether it’s across an ocean or within yourself.” – Sven Yrvind In conclusion, making flanges around bulkhead hatches may seem complex at first glance, but by following Sven Yrvind’s meticulous process, enthusiasts can achieve professional-level results. Remember that the journey of boatbuilding is as rewarding as reaching your destination; it tests one’s patience and dedication. For those seeking to embark on this adventure or simply gain more insight into marine craftsmanship, Sven’s wisdom is invaluable.Sven proceeds to apply glue along one edge of the flange, ensuring a secure bond when clamped into place. He emphasizes that this stage is crucial for maintaining the structural integrity of the flange, which in turn safeguards the living area beneath the canvas when hatches are open.Step 3: Allowing Time to Dry
After securely attaching the first portion of the flange, Sven allows ample time for it to dry before moving forward with additional steps. This patience and precision are key aspects of his successful boatbuilding methods.Step 4: Finishing Touches
Once the flange is fully dried, Sven removes the clamps carefully, ensuring no damage occurs during this process. He then moves on to attaching four more pieces onto these main frames, completing two pairs of flanges for the bulkhead hatches.The Final Touches
While two flanges form the primary support structure around the hatches, Sven mentions there are two additional pieces required at each end to ensure comprehensive protection. This attention to detail highlights his commitment to producing a durable and reliable design. “Sailing is about finding your path, whether it’s across an ocean or within yourself.” – Sven Yrvind In conclusion, making flanges around bulkhead hatches may seem complex at first glance, but by following Sven Yrvind’s meticulous process, enthusiasts can achieve professional-level results. Remember that the journey of boatbuilding is as rewarding as reaching your destination; it tests one’s patience and dedication. For those seeking to embark on this adventure or simply gain more insight into marine craftsmanship, Sven’s wisdom is invaluable.Sven begins by explaining that working on flanges vertically and horizontally is significantly easier than doing so in a flat position. To simplify the process further, he divides the task into two or three steps as suggested by fellow expert “for for.” This approach not only makes it more manageable but also allows for greater precision in crafting each component.Step 2: Applying Glue and Securing
Sven proceeds to apply glue along one edge of the flange, ensuring a secure bond when clamped into place. He emphasizes that this stage is crucial for maintaining the structural integrity of the flange, which in turn safeguards the living area beneath the canvas when hatches are open.Step 3: Allowing Time to Dry
After securely attaching the first portion of the flange, Sven allows ample time for it to dry before moving forward with additional steps. This patience and precision are key aspects of his successful boatbuilding methods.Step 4: Finishing Touches
Once the flange is fully dried, Sven removes the clamps carefully, ensuring no damage occurs during this process. He then moves on to attaching four more pieces onto these main frames, completing two pairs of flanges for the bulkhead hatches.The Final Touches
While two flanges form the primary support structure around the hatches, Sven mentions there are two additional pieces required at each end to ensure comprehensive protection. This attention to detail highlights his commitment to producing a durable and reliable design. “Sailing is about finding your path, whether it’s across an ocean or within yourself.” – Sven Yrvind In conclusion, making flanges around bulkhead hatches may seem complex at first glance, but by following Sven Yrvind’s meticulous process, enthusiasts can achieve professional-level results. Remember that the journey of boatbuilding is as rewarding as reaching your destination; it tests one’s patience and dedication. For those seeking to embark on this adventure or simply gain more insight into marine craftsmanship, Sven’s wisdom is invaluable.Sven Yrvind, a renowned yacht designer and sailor, shares valuable insights on creating flanges around bulkhead hatches for canvas protection in this enlightening video. By following his expert guidance, boat enthusiasts can ensure their living areas remain secure while allowing unhindered access through the hatches.Step 1: Starting with the Flange
Sven begins by explaining that working on flanges vertically and horizontally is significantly easier than doing so in a flat position. To simplify the process further, he divides the task into two or three steps as suggested by fellow expert “for for.” This approach not only makes it more manageable but also allows for greater precision in crafting each component.Step 2: Applying Glue and Securing
Sven proceeds to apply glue along one edge of the flange, ensuring a secure bond when clamped into place. He emphasizes that this stage is crucial for maintaining the structural integrity of the flange, which in turn safeguards the living area beneath the canvas when hatches are open.Step 3: Allowing Time to Dry
After securely attaching the first portion of the flange, Sven allows ample time for it to dry before moving forward with additional steps. This patience and precision are key aspects of his successful boatbuilding methods.Step 4: Finishing Touches
Once the flange is fully dried, Sven removes the clamps carefully, ensuring no damage occurs during this process. He then moves on to attaching four more pieces onto these main frames, completing two pairs of flanges for the bulkhead hatches.The Final Touches
While two flanges form the primary support structure around the hatches, Sven mentions there are two additional pieces required at each end to ensure comprehensive protection. This attention to detail highlights his commitment to producing a durable and reliable design. “Sailing is about finding your path, whether it’s across an ocean or within yourself.” – Sven Yrvind In conclusion, making flanges around bulkhead hatches may seem complex at first glance, but by following Sven Yrvind’s meticulous process, enthusiasts can achieve professional-level results. Remember that the journey of boatbuilding is as rewarding as reaching your destination; it tests one’s patience and dedication. For those seeking to embark on this adventure or simply gain more insight into marine craftsmanship, Sven’s wisdom is invaluable.Making Flanges Around Bulkhead Hatches for Canvas
Sven Yrvind, a renowned yacht designer and sailor, shares valuable insights on creating flanges around bulkhead hatches for canvas protection in this enlightening video. By following his expert guidance, boat enthusiasts can ensure their living areas remain secure while allowing unhindered access through the hatches.Step 1: Starting with the Flange
Sven begins by explaining that working on flanges vertically and horizontally is significantly easier than doing so in a flat position. To simplify the process further, he divides the task into two or three steps as suggested by fellow expert “for for.” This approach not only makes it more manageable but also allows for greater precision in crafting each component.Step 2: Applying Glue and Securing
Sven proceeds to apply glue along one edge of the flange, ensuring a secure bond when clamped into place. He emphasizes that this stage is crucial for maintaining the structural integrity of the flange, which in turn safeguards the living area beneath the canvas when hatches are open.Step 3: Allowing Time to Dry
After securely attaching the first portion of the flange, Sven allows ample time for it to dry before moving forward with additional steps. This patience and precision are key aspects of his successful boatbuilding methods.Step 4: Finishing Touches
Once the flange is fully dried, Sven removes the clamps carefully, ensuring no damage occurs during this process. He then moves on to attaching four more pieces onto these main frames, completing two pairs of flanges for the bulkhead hatches.The Final Touches
While two flanges form the primary support structure around the hatches, Sven mentions there are two additional pieces required at each end to ensure comprehensive protection. This attention to detail highlights his commitment to producing a durable and reliable design. “Sailing is about finding your path, whether it’s across an ocean or within yourself.” – Sven Yrvind In conclusion, making flanges around bulkhead hatches may seem complex at first glance, but by following Sven Yrvind’s meticulous process, enthusiasts can achieve professional-level results. Remember that the journey of boatbuilding is as rewarding as reaching your destination; it tests one’s patience and dedication. For those seeking to embark on this adventure or simply gain more insight into marine craftsmanship, Sven’s wisdom is invaluable.After securely attaching the first portion of the flange, Sven allows ample time for it to dry before moving forward with additional steps. This patience and precision are key aspects of his successful boatbuilding methods.Step 4: Finishing Touches
Once the flange is fully dried, Sven removes the clamps carefully, ensuring no damage occurs during this process. He then moves on to attaching four more pieces onto these main frames, completing two pairs of flanges for the bulkhead hatches.The Final Touches
While two flanges form the primary support structure around the hatches, Sven mentions there are two additional pieces required at each end to ensure comprehensive protection. This attention to detail highlights his commitment to producing a durable and reliable design. “Sailing is about finding your path, whether it’s across an ocean or within yourself.” – Sven Yrvind In conclusion, making flanges around bulkhead hatches may seem complex at first glance, but by following Sven Yrvind’s meticulous process, enthusiasts can achieve professional-level results. Remember that the journey of boatbuilding is as rewarding as reaching your destination; it tests one’s patience and dedication. For those seeking to embark on this adventure or simply gain more insight into marine craftsmanship, Sven’s wisdom is invaluable.Making Flanges Around Bulkhead Hatches for Canvas
Sven Yrvind, a renowned yacht designer and sailor, shares valuable insights on creating flanges around bulkhead hatches for canvas protection in this enlightening video. By following his expert guidance, boat enthusiasts can ensure their living areas remain secure while allowing unhindered access through the hatches.Step 1: Starting with the Flange
Sven begins by explaining that working on flanges vertically and horizontally is significantly easier than doing so in a flat position. To simplify the process further, he divides the task into two or three steps as suggested by fellow expert “for for.” This approach not only makes it more manageable but also allows for greater precision in crafting each component.Step 2: Applying Glue and Securing
Sven proceeds to apply glue along one edge of the flange, ensuring a secure bond when clamped into place. He emphasizes that this stage is crucial for maintaining the structural integrity of the flange, which in turn safeguards the living area beneath the canvas when hatches are open.Step 3: Allowing Time to Dry
After securely attaching the first portion of the flange, Sven allows ample time for it to dry before moving forward with additional steps. This patience and precision are key aspects of his successful boatbuilding methods.Step 4: Finishing Touches
Once the flange is fully dried, Sven removes the clamps carefully, ensuring no damage occurs during this process. He then moves on to attaching four more pieces onto these main frames, completing two pairs of flanges for the bulkhead hatches.The Final Touches
While two flanges form the primary support structure around the hatches, Sven mentions there are two additional pieces required at each end to ensure comprehensive protection. This attention to detail highlights his commitment to producing a durable and reliable design. “Sailing is about finding your path, whether it’s across an ocean or within yourself.” – Sven Yrvind In conclusion, making flanges around bulkhead hatches may seem complex at first glance, but by following Sven Yrvind’s meticulous process, enthusiasts can achieve professional-level results. Remember that the journey of boatbuilding is as rewarding as reaching your destination; it tests one’s patience and dedication. For those seeking to embark on this adventure or simply gain more insight into marine craftsmanship, Sven’s wisdom is invaluable.Once the flange is fully dried, Sven removes the clamps carefully, ensuring no damage occurs during this process. He then moves on to attaching four more pieces onto these main frames, completing two pairs of flanges for the bulkhead hatches.The Final Touches
While two flanges form the primary support structure around the hatches, Sven mentions there are two additional pieces required at each end to ensure comprehensive protection. This attention to detail highlights his commitment to producing a durable and reliable design. “Sailing is about finding your path, whether it’s across an ocean or within yourself.” – Sven Yrvind In conclusion, making flanges around bulkhead hatches may seem complex at first glance, but by following Sven Yrvind’s meticulous process, enthusiasts can achieve professional-level results. Remember that the journey of boatbuilding is as rewarding as reaching your destination; it tests one’s patience and dedication. For those seeking to embark on this adventure or simply gain more insight into marine craftsmanship, Sven’s wisdom is invaluable.Sven Yrvind, a renowned yacht designer and sailor, shares valuable insights on creating flanges around bulkhead hatches for canvas protection in this enlightening video. By following his expert guidance, boat enthusiasts can ensure their living areas remain secure while allowing unhindered access through the hatches.Step 1: Starting with the Flange
Sven begins by explaining that working on flanges vertically and horizontally is significantly easier than doing so in a flat position. To simplify the process further, he divides the task into two or three steps as suggested by fellow expert “for for.” This approach not only makes it more manageable but also allows for greater precision in crafting each component.Step 2: Applying Glue and Securing
Sven proceeds to apply glue along one edge of the flange, ensuring a secure bond when clamped into place. He emphasizes that this stage is crucial for maintaining the structural integrity of the flange, which in turn safeguards the living area beneath the canvas when hatches are open.Step 3: Allowing Time to Dry
After securely attaching the first portion of the flange, Sven allows ample time for it to dry before moving forward with additional steps. This patience and precision are key aspects of his successful boatbuilding methods.Step 4: Finishing Touches
Once the flange is fully dried, Sven removes the clamps carefully, ensuring no damage occurs during this process. He then moves on to attaching four more pieces onto these main frames, completing two pairs of flanges for the bulkhead hatches.The Final Touches
While two flanges form the primary support structure around the hatches, Sven mentions there are two additional pieces required at each end to ensure comprehensive protection. This attention to detail highlights his commitment to producing a durable and reliable design. “Sailing is about finding your path, whether it’s across an ocean or within yourself.” – Sven Yrvind In conclusion, making flanges around bulkhead hatches may seem complex at first glance, but by following Sven Yrvind’s meticulous process, enthusiasts can achieve professional-level results. Remember that the journey of boatbuilding is as rewarding as reaching your destination; it tests one’s patience and dedication. For those seeking to embark on this adventure or simply gain more insight into marine craftsmanship, Sven’s wisdom is invaluable.Making Flanges Around Bulkhead Hatches for Canvas
Sven Yrvind, a renowned yacht designer and sailor, shares valuable insights on creating flanges around bulkhead hatches for canvas protection in this enlightening video. By following his expert guidance, boat enthusiasts can ensure their living areas remain secure while allowing unhindered access through the hatches.Step 1: Starting with the Flange
Sven begins by explaining that working on flanges vertically and horizontally is significantly easier than doing so in a flat position. To simplify the process further, he divides the task into two or three steps as suggested by fellow expert “for for.” This approach not only makes it more manageable but also allows for greater precision in crafting each component.Step 2: Applying Glue and Securing
Sven proceeds to apply glue along one edge of the flange, ensuring a secure bond when clamped into place. He emphasizes that this stage is crucial for maintaining the structural integrity of the flange, which in turn safeguards the living area beneath the canvas when hatches are open.Step 3: Allowing Time to Dry
After securely attaching the first portion of the flange, Sven allows ample time for it to dry before moving forward with additional steps. This patience and precision are key aspects of his successful boatbuilding methods.Step 4: Finishing Touches
Once the flange is fully dried, Sven removes the clamps carefully, ensuring no damage occurs during this process. He then moves on to attaching four more pieces onto these main frames, completing two pairs of flanges for the bulkhead hatches.The Final Touches
While two flanges form the primary support structure around the hatches, Sven mentions there are two additional pieces required at each end to ensure comprehensive protection. This attention to detail highlights his commitment to producing a durable and reliable design. “Sailing is about finding your path, whether it’s across an ocean or within yourself.” – Sven Yrvind In conclusion, making flanges around bulkhead hatches may seem complex at first glance, but by following Sven Yrvind’s meticulous process, enthusiasts can achieve professional-level results. Remember that the journey of boatbuilding is as rewarding as reaching your destination; it tests one’s patience and dedication. For those seeking to embark on this adventure or simply gain more insight into marine craftsmanship, Sven’s wisdom is invaluable.After securely attaching the first portion of the flange, Sven allows ample time for it to dry before moving forward with additional steps. This patience and precision are key aspects of his successful boatbuilding methods.Step 4: Finishing Touches
Once the flange is fully dried, Sven removes the clamps carefully, ensuring no damage occurs during this process. He then moves on to attaching four more pieces onto these main frames, completing two pairs of flanges for the bulkhead hatches.The Final Touches
While two flanges form the primary support structure around the hatches, Sven mentions there are two additional pieces required at each end to ensure comprehensive protection. This attention to detail highlights his commitment to producing a durable and reliable design. “Sailing is about finding your path, whether it’s across an ocean or within yourself.” – Sven Yrvind In conclusion, making flanges around bulkhead hatches may seem complex at first glance, but by following Sven Yrvind’s meticulous process, enthusiasts can achieve professional-level results. Remember that the journey of boatbuilding is as rewarding as reaching your destination; it tests one’s patience and dedication. For those seeking to embark on this adventure or simply gain more insight into marine craftsmanship, Sven’s wisdom is invaluable.Sven Yrvind, a renowned yacht designer and sailor, shares valuable insights on creating flanges around bulkhead hatches for canvas protection in this enlightening video. By following his expert guidance, boat enthusiasts can ensure their living areas remain secure while allowing unhindered access through the hatches.Step 1: Starting with the Flange
Sven begins by explaining that working on flanges vertically and horizontally is significantly easier than doing so in a flat position. To simplify the process further, he divides the task into two or three steps as suggested by fellow expert “for for.” This approach not only makes it more manageable but also allows for greater precision in crafting each component.Step 2: Applying Glue and Securing
Sven proceeds to apply glue along one edge of the flange, ensuring a secure bond when clamped into place. He emphasizes that this stage is crucial for maintaining the structural integrity of the flange, which in turn safeguards the living area beneath the canvas when hatches are open.Step 3: Allowing Time to Dry
After securely attaching the first portion of the flange, Sven allows ample time for it to dry before moving forward with additional steps. This patience and precision are key aspects of his successful boatbuilding methods.Step 4: Finishing Touches
Once the flange is fully dried, Sven removes the clamps carefully, ensuring no damage occurs during this process. He then moves on to attaching four more pieces onto these main frames, completing two pairs of flanges for the bulkhead hatches.The Final Touches
While two flanges form the primary support structure around the hatches, Sven mentions there are two additional pieces required at each end to ensure comprehensive protection. This attention to detail highlights his commitment to producing a durable and reliable design. “Sailing is about finding your path, whether it’s across an ocean or within yourself.” – Sven Yrvind In conclusion, making flanges around bulkhead hatches may seem complex at first glance, but by following Sven Yrvind’s meticulous process, enthusiasts can achieve professional-level results. Remember that the journey of boatbuilding is as rewarding as reaching your destination; it tests one’s patience and dedication. For those seeking to embark on this adventure or simply gain more insight into marine craftsmanship, Sven’s wisdom is invaluable.Making Flanges Around Bulkhead Hatches for Canvas
Sven Yrvind, a renowned yacht designer and sailor, shares valuable insights on creating flanges around bulkhead hatches for canvas protection in this enlightening video. By following his expert guidance, boat enthusiasts can ensure their living areas remain secure while allowing unhindered access through the hatches.Step 1: Starting with the Flange
Sven begins by explaining that working on flanges vertically and horizontally is significantly easier than doing so in a flat position. To simplify the process further, he divides the task into two or three steps as suggested by fellow expert “for for.” This approach not only makes it more manageable but also allows for greater precision in crafting each component.Step 2: Applying Glue and Securing
Sven proceeds to apply glue along one edge of the flange, ensuring a secure bond when clamped into place. He emphasizes that this stage is crucial for maintaining the structural integrity of the flange, which in turn safeguards the living area beneath the canvas when hatches are open.Step 3: Allowing Time to Dry
After securely attaching the first portion of the flange, Sven allows ample time for it to dry before moving forward with additional steps. This patience and precision are key aspects of his successful boatbuilding methods.Step 4: Finishing Touches
Once the flange is fully dried, Sven removes the clamps carefully, ensuring no damage occurs during this process. He then moves on to attaching four more pieces onto these main frames, completing two pairs of flanges for the bulkhead hatches.The Final Touches
While two flanges form the primary support structure around the hatches, Sven mentions there are two additional pieces required at each end to ensure comprehensive protection. This attention to detail highlights his commitment to producing a durable and reliable design. “Sailing is about finding your path, whether it’s across an ocean or within yourself.” – Sven Yrvind In conclusion, making flanges around bulkhead hatches may seem complex at first glance, but by following Sven Yrvind’s meticulous process, enthusiasts can achieve professional-level results. Remember that the journey of boatbuilding is as rewarding as reaching your destination; it tests one’s patience and dedication. For those seeking to embark on this adventure or simply gain more insight into marine craftsmanship, Sven’s wisdom is invaluable.Sven proceeds to apply glue along one edge of the flange, ensuring a secure bond when clamped into place. He emphasizes that this stage is crucial for maintaining the structural integrity of the flange, which in turn safeguards the living area beneath the canvas when hatches are open.Step 3: Allowing Time to Dry
After securely attaching the first portion of the flange, Sven allows ample time for it to dry before moving forward with additional steps. This patience and precision are key aspects of his successful boatbuilding methods.Step 4: Finishing Touches
Once the flange is fully dried, Sven removes the clamps carefully, ensuring no damage occurs during this process. He then moves on to attaching four more pieces onto these main frames, completing two pairs of flanges for the bulkhead hatches.The Final Touches
While two flanges form the primary support structure around the hatches, Sven mentions there are two additional pieces required at each end to ensure comprehensive protection. This attention to detail highlights his commitment to producing a durable and reliable design. “Sailing is about finding your path, whether it’s across an ocean or within yourself.” – Sven Yrvind In conclusion, making flanges around bulkhead hatches may seem complex at first glance, but by following Sven Yrvind’s meticulous process, enthusiasts can achieve professional-level results. Remember that the journey of boatbuilding is as rewarding as reaching your destination; it tests one’s patience and dedication. For those seeking to embark on this adventure or simply gain more insight into marine craftsmanship, Sven’s wisdom is invaluable.Sven Yrvind, a renowned yacht designer and sailor, shares valuable insights on creating flanges around bulkhead hatches for canvas protection in this enlightening video. By following his expert guidance, boat enthusiasts can ensure their living areas remain secure while allowing unhindered access through the hatches.Step 1: Starting with the Flange
Sven begins by explaining that working on flanges vertically and horizontally is significantly easier than doing so in a flat position. To simplify the process further, he divides the task into two or three steps as suggested by fellow expert “for for.” This approach not only makes it more manageable but also allows for greater precision in crafting each component.Step 2: Applying Glue and Securing
Sven proceeds to apply glue along one edge of the flange, ensuring a secure bond when clamped into place. He emphasizes that this stage is crucial for maintaining the structural integrity of the flange, which in turn safeguards the living area beneath the canvas when hatches are open.Step 3: Allowing Time to Dry
After securely attaching the first portion of the flange, Sven allows ample time for it to dry before moving forward with additional steps. This patience and precision are key aspects of his successful boatbuilding methods.Step 4: Finishing Touches
Once the flange is fully dried, Sven removes the clamps carefully, ensuring no damage occurs during this process. He then moves on to attaching four more pieces onto these main frames, completing two pairs of flanges for the bulkhead hatches.The Final Touches
While two flanges form the primary support structure around the hatches, Sven mentions there are two additional pieces required at each end to ensure comprehensive protection. This attention to detail highlights his commitment to producing a durable and reliable design. “Sailing is about finding your path, whether it’s across an ocean or within yourself.” – Sven Yrvind In conclusion, making flanges around bulkhead hatches may seem complex at first glance, but by following Sven Yrvind’s meticulous process, enthusiasts can achieve professional-level results. Remember that the journey of boatbuilding is as rewarding as reaching your destination; it tests one’s patience and dedication. For those seeking to embark on this adventure or simply gain more insight into marine craftsmanship, Sven’s wisdom is invaluable.Making Flanges Around Bulkhead Hatches for Canvas
Sven Yrvind, a renowned yacht designer and sailor, shares valuable insights on creating flanges around bulkhead hatches for canvas protection in this enlightening video. By following his expert guidance, boat enthusiasts can ensure their living areas remain secure while allowing unhindered access through the hatches.Step 1: Starting with the Flange
Sven begins by explaining that working on flanges vertically and horizontally is significantly easier than doing so in a flat position. To simplify the process further, he divides the task into two or three steps as suggested by fellow expert “for for.” This approach not only makes it more manageable but also allows for greater precision in crafting each component.Step 2: Applying Glue and Securing
Sven proceeds to apply glue along one edge of the flange, ensuring a secure bond when clamped into place. He emphasizes that this stage is crucial for maintaining the structural integrity of the flange, which in turn safeguards the living area beneath the canvas when hatches are open.Step 3: Allowing Time to Dry
After securely attaching the first portion of the flange, Sven allows ample time for it to dry before moving forward with additional steps. This patience and precision are key aspects of his successful boatbuilding methods.Step 4: Finishing Touches
Once the flange is fully dried, Sven removes the clamps carefully, ensuring no damage occurs during this process. He then moves on to attaching four more pieces onto these main frames, completing two pairs of flanges for the bulkhead hatches.The Final Touches
While two flanges form the primary support structure around the hatches, Sven mentions there are two additional pieces required at each end to ensure comprehensive protection. This attention to detail highlights his commitment to producing a durable and reliable design. “Sailing is about finding your path, whether it’s across an ocean or within yourself.” – Sven Yrvind In conclusion, making flanges around bulkhead hatches may seem complex at first glance, but by following Sven Yrvind’s meticulous process, enthusiasts can achieve professional-level results. Remember that the journey of boatbuilding is as rewarding as reaching your destination; it tests one’s patience and dedication. For those seeking to embark on this adventure or simply gain more insight into marine craftsmanship, Sven’s wisdom is invaluable.Sven begins by explaining that working on flanges vertically and horizontally is significantly easier than doing so in a flat position. To simplify the process further, he divides the task into two or three steps as suggested by fellow expert “for for.” This approach not only makes it more manageable but also allows for greater precision in crafting each component.Step 2: Applying Glue and Securing
Sven proceeds to apply glue along one edge of the flange, ensuring a secure bond when clamped into place. He emphasizes that this stage is crucial for maintaining the structural integrity of the flange, which in turn safeguards the living area beneath the canvas when hatches are open.Step 3: Allowing Time to Dry
After securely attaching the first portion of the flange, Sven allows ample time for it to dry before moving forward with additional steps. This patience and precision are key aspects of his successful boatbuilding methods.Step 4: Finishing Touches
Once the flange is fully dried, Sven removes the clamps carefully, ensuring no damage occurs during this process. He then moves on to attaching four more pieces onto these main frames, completing two pairs of flanges for the bulkhead hatches.The Final Touches
While two flanges form the primary support structure around the hatches, Sven mentions there are two additional pieces required at each end to ensure comprehensive protection. This attention to detail highlights his commitment to producing a durable and reliable design. “Sailing is about finding your path, whether it’s across an ocean or within yourself.” – Sven Yrvind In conclusion, making flanges around bulkhead hatches may seem complex at first glance, but by following Sven Yrvind’s meticulous process, enthusiasts can achieve professional-level results. Remember that the journey of boatbuilding is as rewarding as reaching your destination; it tests one’s patience and dedication. For those seeking to embark on this adventure or simply gain more insight into marine craftsmanship, Sven’s wisdom is invaluable.Sven Yrvind, a renowned yacht designer and sailor, shares valuable insights on creating flanges around bulkhead hatches for canvas protection in this enlightening video. By following his expert guidance, boat enthusiasts can ensure their living areas remain secure while allowing unhindered access through the hatches.Step 1: Starting with the Flange
Sven begins by explaining that working on flanges vertically and horizontally is significantly easier than doing so in a flat position. To simplify the process further, he divides the task into two or three steps as suggested by fellow expert “for for.” This approach not only makes it more manageable but also allows for greater precision in crafting each component.Step 2: Applying Glue and Securing
Sven proceeds to apply glue along one edge of the flange, ensuring a secure bond when clamped into place. He emphasizes that this stage is crucial for maintaining the structural integrity of the flange, which in turn safeguards the living area beneath the canvas when hatches are open.Step 3: Allowing Time to Dry
After securely attaching the first portion of the flange, Sven allows ample time for it to dry before moving forward with additional steps. This patience and precision are key aspects of his successful boatbuilding methods.Step 4: Finishing Touches
Once the flange is fully dried, Sven removes the clamps carefully, ensuring no damage occurs during this process. He then moves on to attaching four more pieces onto these main frames, completing two pairs of flanges for the bulkhead hatches.The Final Touches
While two flanges form the primary support structure around the hatches, Sven mentions there are two additional pieces required at each end to ensure comprehensive protection. This attention to detail highlights his commitment to producing a durable and reliable design. “Sailing is about finding your path, whether it’s across an ocean or within yourself.” – Sven Yrvind In conclusion, making flanges around bulkhead hatches may seem complex at first glance, but by following Sven Yrvind’s meticulous process, enthusiasts can achieve professional-level results. Remember that the journey of boatbuilding is as rewarding as reaching your destination; it tests one’s patience and dedication. For those seeking to embark on this adventure or simply gain more insight into marine craftsmanship, Sven’s wisdom is invaluable.Making Flanges Around Bulkhead Hatches for Canvas
Sven Yrvind, a renowned yacht designer and sailor, shares valuable insights on creating flanges around bulkhead hatches for canvas protection in this enlightening video. By following his expert guidance, boat enthusiasts can ensure their living areas remain secure while allowing unhindered access through the hatches.Step 1: Starting with the Flange
Sven begins by explaining that working on flanges vertically and horizontally is significantly easier than doing so in a flat position. To simplify the process further, he divides the task into two or three steps as suggested by fellow expert “for for.” This approach not only makes it more manageable but also allows for greater precision in crafting each component.Step 2: Applying Glue and Securing
Sven proceeds to apply glue along one edge of the flange, ensuring a secure bond when clamped into place. He emphasizes that this stage is crucial for maintaining the structural integrity of the flange, which in turn safeguards the living area beneath the canvas when hatches are open.Step 3: Allowing Time to Dry
After securely attaching the first portion of the flange, Sven allows ample time for it to dry before moving forward with additional steps. This patience and precision are key aspects of his successful boatbuilding methods.Step 4: Finishing Touches
Once the flange is fully dried, Sven removes the clamps carefully, ensuring no damage occurs during this process. He then moves on to attaching four more pieces onto these main frames, completing two pairs of flanges for the bulkhead hatches.The Final Touches
While two flanges form the primary support structure around the hatches, Sven mentions there are two additional pieces required at each end to ensure comprehensive protection. This attention to detail highlights his commitment to producing a durable and reliable design. “Sailing is about finding your path, whether it’s across an ocean or within yourself.” – Sven Yrvind In conclusion, making flanges around bulkhead hatches may seem complex at first glance, but by following Sven Yrvind’s meticulous process, enthusiasts can achieve professional-level results. Remember that the journey of boatbuilding is as rewarding as reaching your destination; it tests one’s patience and dedication. For those seeking to embark on this adventure or simply gain more insight into marine craftsmanship, Sven’s wisdom is invaluable.Once the flange is fully dried, Sven removes the clamps carefully, ensuring no damage occurs during this process. He then moves on to attaching four more pieces onto these main frames, completing two pairs of flanges for the bulkhead hatches.The Final Touches
While two flanges form the primary support structure around the hatches, Sven mentions there are two additional pieces required at each end to ensure comprehensive protection. This attention to detail highlights his commitment to producing a durable and reliable design. “Sailing is about finding your path, whether it’s across an ocean or within yourself.” – Sven Yrvind In conclusion, making flanges around bulkhead hatches may seem complex at first glance, but by following Sven Yrvind’s meticulous process, enthusiasts can achieve professional-level results. Remember that the journey of boatbuilding is as rewarding as reaching your destination; it tests one’s patience and dedication. For those seeking to embark on this adventure or simply gain more insight into marine craftsmanship, Sven’s wisdom is invaluable.Sven begins by explaining that working on flanges vertically and horizontally is significantly easier than doing so in a flat position. To simplify the process further, he divides the task into two or three steps as suggested by fellow expert “for for.” This approach not only makes it more manageable but also allows for greater precision in crafting each component.Step 2: Applying Glue and Securing
Sven proceeds to apply glue along one edge of the flange, ensuring a secure bond when clamped into place. He emphasizes that this stage is crucial for maintaining the structural integrity of the flange, which in turn safeguards the living area beneath the canvas when hatches are open.Step 3: Allowing Time to Dry
After securely attaching the first portion of the flange, Sven allows ample time for it to dry before moving forward with additional steps. This patience and precision are key aspects of his successful boatbuilding methods.Step 4: Finishing Touches
Once the flange is fully dried, Sven removes the clamps carefully, ensuring no damage occurs during this process. He then moves on to attaching four more pieces onto these main frames, completing two pairs of flanges for the bulkhead hatches.The Final Touches
While two flanges form the primary support structure around the hatches, Sven mentions there are two additional pieces required at each end to ensure comprehensive protection. This attention to detail highlights his commitment to producing a durable and reliable design. “Sailing is about finding your path, whether it’s across an ocean or within yourself.” – Sven Yrvind In conclusion, making flanges around bulkhead hatches may seem complex at first glance, but by following Sven Yrvind’s meticulous process, enthusiasts can achieve professional-level results. Remember that the journey of boatbuilding is as rewarding as reaching your destination; it tests one’s patience and dedication. For those seeking to embark on this adventure or simply gain more insight into marine craftsmanship, Sven’s wisdom is invaluable.Sven Yrvind, a renowned yacht designer and sailor, shares valuable insights on creating flanges around bulkhead hatches for canvas protection in this enlightening video. By following his expert guidance, boat enthusiasts can ensure their living areas remain secure while allowing unhindered access through the hatches.Step 1: Starting with the Flange
Sven begins by explaining that working on flanges vertically and horizontally is significantly easier than doing so in a flat position. To simplify the process further, he divides the task into two or three steps as suggested by fellow expert “for for.” This approach not only makes it more manageable but also allows for greater precision in crafting each component.Step 2: Applying Glue and Securing
Sven proceeds to apply glue along one edge of the flange, ensuring a secure bond when clamped into place. He emphasizes that this stage is crucial for maintaining the structural integrity of the flange, which in turn safeguards the living area beneath the canvas when hatches are open.Step 3: Allowing Time to Dry
After securely attaching the first portion of the flange, Sven allows ample time for it to dry before moving forward with additional steps. This patience and precision are key aspects of his successful boatbuilding methods.Step 4: Finishing Touches
Once the flange is fully dried, Sven removes the clamps carefully, ensuring no damage occurs during this process. He then moves on to attaching four more pieces onto these main frames, completing two pairs of flanges for the bulkhead hatches.The Final Touches
While two flanges form the primary support structure around the hatches, Sven mentions there are two additional pieces required at each end to ensure comprehensive protection. This attention to detail highlights his commitment to producing a durable and reliable design. “Sailing is about finding your path, whether it’s across an ocean or within yourself.” – Sven Yrvind In conclusion, making flanges around bulkhead hatches may seem complex at first glance, but by following Sven Yrvind’s meticulous process, enthusiasts can achieve professional-level results. Remember that the journey of boatbuilding is as rewarding as reaching your destination; it tests one’s patience and dedication. For those seeking to embark on this adventure or simply gain more insight into marine craftsmanship, Sven’s wisdom is invaluable.Making Flanges Around Bulkhead Hatches for Canvas
Sven Yrvind, a renowned yacht designer and sailor, shares valuable insights on creating flanges around bulkhead hatches for canvas protection in this enlightening video. By following his expert guidance, boat enthusiasts can ensure their living areas remain secure while allowing unhindered access through the hatches.Step 1: Starting with the Flange
Sven begins by explaining that working on flanges vertically and horizontally is significantly easier than doing so in a flat position. To simplify the process further, he divides the task into two or three steps as suggested by fellow expert “for for.” This approach not only makes it more manageable but also allows for greater precision in crafting each component.Step 2: Applying Glue and Securing
Sven proceeds to apply glue along one edge of the flange, ensuring a secure bond when clamped into place. He emphasizes that this stage is crucial for maintaining the structural integrity of the flange, which in turn safeguards the living area beneath the canvas when hatches are open.Step 3: Allowing Time to Dry
After securely attaching the first portion of the flange, Sven allows ample time for it to dry before moving forward with additional steps. This patience and precision are key aspects of his successful boatbuilding methods.Step 4: Finishing Touches
Once the flange is fully dried, Sven removes the clamps carefully, ensuring no damage occurs during this process. He then moves on to attaching four more pieces onto these main frames, completing two pairs of flanges for the bulkhead hatches.The Final Touches
While two flanges form the primary support structure around the hatches, Sven mentions there are two additional pieces required at each end to ensure comprehensive protection. This attention to detail highlights his commitment to producing a durable and reliable design. “Sailing is about finding your path, whether it’s across an ocean or within yourself.” – Sven Yrvind In conclusion, making flanges around bulkhead hatches may seem complex at first glance, but by following Sven Yrvind’s meticulous process, enthusiasts can achieve professional-level results. Remember that the journey of boatbuilding is as rewarding as reaching your destination; it tests one’s patience and dedication. For those seeking to embark on this adventure or simply gain more insight into marine craftsmanship, Sven’s wisdom is invaluable.After securely attaching the first portion of the flange, Sven allows ample time for it to dry before moving forward with additional steps. This patience and precision are key aspects of his successful boatbuilding methods.Step 4: Finishing Touches
Once the flange is fully dried, Sven removes the clamps carefully, ensuring no damage occurs during this process. He then moves on to attaching four more pieces onto these main frames, completing two pairs of flanges for the bulkhead hatches.The Final Touches
While two flanges form the primary support structure around the hatches, Sven mentions there are two additional pieces required at each end to ensure comprehensive protection. This attention to detail highlights his commitment to producing a durable and reliable design. “Sailing is about finding your path, whether it’s across an ocean or within yourself.” – Sven Yrvind In conclusion, making flanges around bulkhead hatches may seem complex at first glance, but by following Sven Yrvind’s meticulous process, enthusiasts can achieve professional-level results. Remember that the journey of boatbuilding is as rewarding as reaching your destination; it tests one’s patience and dedication. For those seeking to embark on this adventure or simply gain more insight into marine craftsmanship, Sven’s wisdom is invaluable.Sven begins by explaining that working on flanges vertically and horizontally is significantly easier than doing so in a flat position. To simplify the process further, he divides the task into two or three steps as suggested by fellow expert “for for.” This approach not only makes it more manageable but also allows for greater precision in crafting each component.Step 2: Applying Glue and Securing
Sven proceeds to apply glue along one edge of the flange, ensuring a secure bond when clamped into place. He emphasizes that this stage is crucial for maintaining the structural integrity of the flange, which in turn safeguards the living area beneath the canvas when hatches are open.Step 3: Allowing Time to Dry
After securely attaching the first portion of the flange, Sven allows ample time for it to dry before moving forward with additional steps. This patience and precision are key aspects of his successful boatbuilding methods.Step 4: Finishing Touches
Once the flange is fully dried, Sven removes the clamps carefully, ensuring no damage occurs during this process. He then moves on to attaching four more pieces onto these main frames, completing two pairs of flanges for the bulkhead hatches.The Final Touches
While two flanges form the primary support structure around the hatches, Sven mentions there are two additional pieces required at each end to ensure comprehensive protection. This attention to detail highlights his commitment to producing a durable and reliable design. “Sailing is about finding your path, whether it’s across an ocean or within yourself.” – Sven Yrvind In conclusion, making flanges around bulkhead hatches may seem complex at first glance, but by following Sven Yrvind’s meticulous process, enthusiasts can achieve professional-level results. Remember that the journey of boatbuilding is as rewarding as reaching your destination; it tests one’s patience and dedication. For those seeking to embark on this adventure or simply gain more insight into marine craftsmanship, Sven’s wisdom is invaluable.Sven Yrvind, a renowned yacht designer and sailor, shares valuable insights on creating flanges around bulkhead hatches for canvas protection in this enlightening video. By following his expert guidance, boat enthusiasts can ensure their living areas remain secure while allowing unhindered access through the hatches.Step 1: Starting with the Flange
Sven begins by explaining that working on flanges vertically and horizontally is significantly easier than doing so in a flat position. To simplify the process further, he divides the task into two or three steps as suggested by fellow expert “for for.” This approach not only makes it more manageable but also allows for greater precision in crafting each component.Step 2: Applying Glue and Securing
Sven proceeds to apply glue along one edge of the flange, ensuring a secure bond when clamped into place. He emphasizes that this stage is crucial for maintaining the structural integrity of the flange, which in turn safeguards the living area beneath the canvas when hatches are open.Step 3: Allowing Time to Dry
After securely attaching the first portion of the flange, Sven allows ample time for it to dry before moving forward with additional steps. This patience and precision are key aspects of his successful boatbuilding methods.Step 4: Finishing Touches
Once the flange is fully dried, Sven removes the clamps carefully, ensuring no damage occurs during this process. He then moves on to attaching four more pieces onto these main frames, completing two pairs of flanges for the bulkhead hatches.The Final Touches
While two flanges form the primary support structure around the hatches, Sven mentions there are two additional pieces required at each end to ensure comprehensive protection. This attention to detail highlights his commitment to producing a durable and reliable design. “Sailing is about finding your path, whether it’s across an ocean or within yourself.” – Sven Yrvind In conclusion, making flanges around bulkhead hatches may seem complex at first glance, but by following Sven Yrvind’s meticulous process, enthusiasts can achieve professional-level results. Remember that the journey of boatbuilding is as rewarding as reaching your destination; it tests one’s patience and dedication. For those seeking to embark on this adventure or simply gain more insight into marine craftsmanship, Sven’s wisdom is invaluable.Making Flanges Around Bulkhead Hatches for Canvas
Sven Yrvind, a renowned yacht designer and sailor, shares valuable insights on creating flanges around bulkhead hatches for canvas protection in this enlightening video. By following his expert guidance, boat enthusiasts can ensure their living areas remain secure while allowing unhindered access through the hatches.Step 1: Starting with the Flange
Sven begins by explaining that working on flanges vertically and horizontally is significantly easier than doing so in a flat position. To simplify the process further, he divides the task into two or three steps as suggested by fellow expert “for for.” This approach not only makes it more manageable but also allows for greater precision in crafting each component.Step 2: Applying Glue and Securing
Sven proceeds to apply glue along one edge of the flange, ensuring a secure bond when clamped into place. He emphasizes that this stage is crucial for maintaining the structural integrity of the flange, which in turn safeguards the living area beneath the canvas when hatches are open.Step 3: Allowing Time to Dry
After securely attaching the first portion of the flange, Sven allows ample time for it to dry before moving forward with additional steps. This patience and precision are key aspects of his successful boatbuilding methods.Step 4: Finishing Touches
Once the flange is fully dried, Sven removes the clamps carefully, ensuring no damage occurs during this process. He then moves on to attaching four more pieces onto these main frames, completing two pairs of flanges for the bulkhead hatches.The Final Touches
While two flanges form the primary support structure around the hatches, Sven mentions there are two additional pieces required at each end to ensure comprehensive protection. This attention to detail highlights his commitment to producing a durable and reliable design. “Sailing is about finding your path, whether it’s across an ocean or within yourself.” – Sven Yrvind In conclusion, making flanges around bulkhead hatches may seem complex at first glance, but by following Sven Yrvind’s meticulous process, enthusiasts can achieve professional-level results. Remember that the journey of boatbuilding is as rewarding as reaching your destination; it tests one’s patience and dedication. For those seeking to embark on this adventure or simply gain more insight into marine craftsmanship, Sven’s wisdom is invaluable.Sven proceeds to apply glue along one edge of the flange, ensuring a secure bond when clamped into place. He emphasizes that this stage is crucial for maintaining the structural integrity of the flange, which in turn safeguards the living area beneath the canvas when hatches are open.Step 3: Allowing Time to Dry
After securely attaching the first portion of the flange, Sven allows ample time for it to dry before moving forward with additional steps. This patience and precision are key aspects of his successful boatbuilding methods.Step 4: Finishing Touches
Once the flange is fully dried, Sven removes the clamps carefully, ensuring no damage occurs during this process. He then moves on to attaching four more pieces onto these main frames, completing two pairs of flanges for the bulkhead hatches.The Final Touches
While two flanges form the primary support structure around the hatches, Sven mentions there are two additional pieces required at each end to ensure comprehensive protection. This attention to detail highlights his commitment to producing a durable and reliable design. “Sailing is about finding your path, whether it’s across an ocean or within yourself.” – Sven Yrvind In conclusion, making flanges around bulkhead hatches may seem complex at first glance, but by following Sven Yrvind’s meticulous process, enthusiasts can achieve professional-level results. Remember that the journey of boatbuilding is as rewarding as reaching your destination; it tests one’s patience and dedication. For those seeking to embark on this adventure or simply gain more insight into marine craftsmanship, Sven’s wisdom is invaluable.Sven begins by explaining that working on flanges vertically and horizontally is significantly easier than doing so in a flat position. To simplify the process further, he divides the task into two or three steps as suggested by fellow expert “for for.” This approach not only makes it more manageable but also allows for greater precision in crafting each component.Step 2: Applying Glue and Securing
Sven proceeds to apply glue along one edge of the flange, ensuring a secure bond when clamped into place. He emphasizes that this stage is crucial for maintaining the structural integrity of the flange, which in turn safeguards the living area beneath the canvas when hatches are open.Step 3: Allowing Time to Dry
After securely attaching the first portion of the flange, Sven allows ample time for it to dry before moving forward with additional steps. This patience and precision are key aspects of his successful boatbuilding methods.Step 4: Finishing Touches
Once the flange is fully dried, Sven removes the clamps carefully, ensuring no damage occurs during this process. He then moves on to attaching four more pieces onto these main frames, completing two pairs of flanges for the bulkhead hatches.The Final Touches
While two flanges form the primary support structure around the hatches, Sven mentions there are two additional pieces required at each end to ensure comprehensive protection. This attention to detail highlights his commitment to producing a durable and reliable design. “Sailing is about finding your path, whether it’s across an ocean or within yourself.” – Sven Yrvind In conclusion, making flanges around bulkhead hatches may seem complex at first glance, but by following Sven Yrvind’s meticulous process, enthusiasts can achieve professional-level results. Remember that the journey of boatbuilding is as rewarding as reaching your destination; it tests one’s patience and dedication. For those seeking to embark on this adventure or simply gain more insight into marine craftsmanship, Sven’s wisdom is invaluable.Sven Yrvind, a renowned yacht designer and sailor, shares valuable insights on creating flanges around bulkhead hatches for canvas protection in this enlightening video. By following his expert guidance, boat enthusiasts can ensure their living areas remain secure while allowing unhindered access through the hatches.Step 1: Starting with the Flange
Sven begins by explaining that working on flanges vertically and horizontally is significantly easier than doing so in a flat position. To simplify the process further, he divides the task into two or three steps as suggested by fellow expert “for for.” This approach not only makes it more manageable but also allows for greater precision in crafting each component.Step 2: Applying Glue and Securing
Sven proceeds to apply glue along one edge of the flange, ensuring a secure bond when clamped into place. He emphasizes that this stage is crucial for maintaining the structural integrity of the flange, which in turn safeguards the living area beneath the canvas when hatches are open.Step 3: Allowing Time to Dry
After securely attaching the first portion of the flange, Sven allows ample time for it to dry before moving forward with additional steps. This patience and precision are key aspects of his successful boatbuilding methods.Step 4: Finishing Touches
Once the flange is fully dried, Sven removes the clamps carefully, ensuring no damage occurs during this process. He then moves on to attaching four more pieces onto these main frames, completing two pairs of flanges for the bulkhead hatches.The Final Touches
While two flanges form the primary support structure around the hatches, Sven mentions there are two additional pieces required at each end to ensure comprehensive protection. This attention to detail highlights his commitment to producing a durable and reliable design. “Sailing is about finding your path, whether it’s across an ocean or within yourself.” – Sven Yrvind In conclusion, making flanges around bulkhead hatches may seem complex at first glance, but by following Sven Yrvind’s meticulous process, enthusiasts can achieve professional-level results. Remember that the journey of boatbuilding is as rewarding as reaching your destination; it tests one’s patience and dedication. For those seeking to embark on this adventure or simply gain more insight into marine craftsmanship, Sven’s wisdom is invaluable.Making Flanges Around Bulkhead Hatches for Canvas
Sven Yrvind, a renowned yacht designer and sailor, shares valuable insights on creating flanges around bulkhead hatches for canvas protection in this enlightening video. By following his expert guidance, boat enthusiasts can ensure their living areas remain secure while allowing unhindered access through the hatches.Step 1: Starting with the Flange
Sven begins by explaining that working on flanges vertically and horizontally is significantly easier than doing so in a flat position. To simplify the process further, he divides the task into two or three steps as suggested by fellow expert “for for.” This approach not only makes it more manageable but also allows for greater precision in crafting each component.Step 2: Applying Glue and Securing
Sven proceeds to apply glue along one edge of the flange, ensuring a secure bond when clamped into place. He emphasizes that this stage is crucial for maintaining the structural integrity of the flange, which in turn safeguards the living area beneath the canvas when hatches are open.Step 3: Allowing Time to Dry
After securely attaching the first portion of the flange, Sven allows ample time for it to dry before moving forward with additional steps. This patience and precision are key aspects of his successful boatbuilding methods.Step 4: Finishing Touches
Once the flange is fully dried, Sven removes the clamps carefully, ensuring no damage occurs during this process. He then moves on to attaching four more pieces onto these main frames, completing two pairs of flanges for the bulkhead hatches.The Final Touches
While two flanges form the primary support structure around the hatches, Sven mentions there are two additional pieces required at each end to ensure comprehensive protection. This attention to detail highlights his commitment to producing a durable and reliable design. “Sailing is about finding your path, whether it’s across an ocean or within yourself.” – Sven Yrvind In conclusion, making flanges around bulkhead hatches may seem complex at first glance, but by following Sven Yrvind’s meticulous process, enthusiasts can achieve professional-level results. Remember that the journey of boatbuilding is as rewarding as reaching your destination; it tests one’s patience and dedication. For those seeking to embark on this adventure or simply gain more insight into marine craftsmanship, Sven’s wisdom is invaluable.Once the flange is fully dried, Sven removes the clamps carefully, ensuring no damage occurs during this process. He then moves on to attaching four more pieces onto these main frames, completing two pairs of flanges for the bulkhead hatches.The Final Touches
While two flanges form the primary support structure around the hatches, Sven mentions there are two additional pieces required at each end to ensure comprehensive protection. This attention to detail highlights his commitment to producing a durable and reliable design. “Sailing is about finding your path, whether it’s across an ocean or within yourself.” – Sven Yrvind In conclusion, making flanges around bulkhead hatches may seem complex at first glance, but by following Sven Yrvind’s meticulous process, enthusiasts can achieve professional-level results. Remember that the journey of boatbuilding is as rewarding as reaching your destination; it tests one’s patience and dedication. For those seeking to embark on this adventure or simply gain more insight into marine craftsmanship, Sven’s wisdom is invaluable.Sven proceeds to apply glue along one edge of the flange, ensuring a secure bond when clamped into place. He emphasizes that this stage is crucial for maintaining the structural integrity of the flange, which in turn safeguards the living area beneath the canvas when hatches are open.Step 3: Allowing Time to Dry
After securely attaching the first portion of the flange, Sven allows ample time for it to dry before moving forward with additional steps. This patience and precision are key aspects of his successful boatbuilding methods.Step 4: Finishing Touches
Once the flange is fully dried, Sven removes the clamps carefully, ensuring no damage occurs during this process. He then moves on to attaching four more pieces onto these main frames, completing two pairs of flanges for the bulkhead hatches.The Final Touches
While two flanges form the primary support structure around the hatches, Sven mentions there are two additional pieces required at each end to ensure comprehensive protection. This attention to detail highlights his commitment to producing a durable and reliable design. “Sailing is about finding your path, whether it’s across an ocean or within yourself.” – Sven Yrvind In conclusion, making flanges around bulkhead hatches may seem complex at first glance, but by following Sven Yrvind’s meticulous process, enthusiasts can achieve professional-level results. Remember that the journey of boatbuilding is as rewarding as reaching your destination; it tests one’s patience and dedication. For those seeking to embark on this adventure or simply gain more insight into marine craftsmanship, Sven’s wisdom is invaluable.Sven begins by explaining that working on flanges vertically and horizontally is significantly easier than doing so in a flat position. To simplify the process further, he divides the task into two or three steps as suggested by fellow expert “for for.” This approach not only makes it more manageable but also allows for greater precision in crafting each component.Step 2: Applying Glue and Securing
Sven proceeds to apply glue along one edge of the flange, ensuring a secure bond when clamped into place. He emphasizes that this stage is crucial for maintaining the structural integrity of the flange, which in turn safeguards the living area beneath the canvas when hatches are open.Step 3: Allowing Time to Dry
After securely attaching the first portion of the flange, Sven allows ample time for it to dry before moving forward with additional steps. This patience and precision are key aspects of his successful boatbuilding methods.Step 4: Finishing Touches
Once the flange is fully dried, Sven removes the clamps carefully, ensuring no damage occurs during this process. He then moves on to attaching four more pieces onto these main frames, completing two pairs of flanges for the bulkhead hatches.The Final Touches
While two flanges form the primary support structure around the hatches, Sven mentions there are two additional pieces required at each end to ensure comprehensive protection. This attention to detail highlights his commitment to producing a durable and reliable design. “Sailing is about finding your path, whether it’s across an ocean or within yourself.” – Sven Yrvind In conclusion, making flanges around bulkhead hatches may seem complex at first glance, but by following Sven Yrvind’s meticulous process, enthusiasts can achieve professional-level results. Remember that the journey of boatbuilding is as rewarding as reaching your destination; it tests one’s patience and dedication. For those seeking to embark on this adventure or simply gain more insight into marine craftsmanship, Sven’s wisdom is invaluable.Sven Yrvind, a renowned yacht designer and sailor, shares valuable insights on creating flanges around bulkhead hatches for canvas protection in this enlightening video. By following his expert guidance, boat enthusiasts can ensure their living areas remain secure while allowing unhindered access through the hatches.Step 1: Starting with the Flange
Sven begins by explaining that working on flanges vertically and horizontally is significantly easier than doing so in a flat position. To simplify the process further, he divides the task into two or three steps as suggested by fellow expert “for for.” This approach not only makes it more manageable but also allows for greater precision in crafting each component.Step 2: Applying Glue and Securing
Sven proceeds to apply glue along one edge of the flange, ensuring a secure bond when clamped into place. He emphasizes that this stage is crucial for maintaining the structural integrity of the flange, which in turn safeguards the living area beneath the canvas when hatches are open.Step 3: Allowing Time to Dry
After securely attaching the first portion of the flange, Sven allows ample time for it to dry before moving forward with additional steps. This patience and precision are key aspects of his successful boatbuilding methods.Step 4: Finishing Touches
Once the flange is fully dried, Sven removes the clamps carefully, ensuring no damage occurs during this process. He then moves on to attaching four more pieces onto these main frames, completing two pairs of flanges for the bulkhead hatches.The Final Touches
While two flanges form the primary support structure around the hatches, Sven mentions there are two additional pieces required at each end to ensure comprehensive protection. This attention to detail highlights his commitment to producing a durable and reliable design. “Sailing is about finding your path, whether it’s across an ocean or within yourself.” – Sven Yrvind In conclusion, making flanges around bulkhead hatches may seem complex at first glance, but by following Sven Yrvind’s meticulous process, enthusiasts can achieve professional-level results. Remember that the journey of boatbuilding is as rewarding as reaching your destination; it tests one’s patience and dedication. For those seeking to embark on this adventure or simply gain more insight into marine craftsmanship, Sven’s wisdom is invaluable.Making Flanges Around Bulkhead Hatches for Canvas
Sven Yrvind, a renowned yacht designer and sailor, shares valuable insights on creating flanges around bulkhead hatches for canvas protection in this enlightening video. By following his expert guidance, boat enthusiasts can ensure their living areas remain secure while allowing unhindered access through the hatches.Step 1: Starting with the Flange
Sven begins by explaining that working on flanges vertically and horizontally is significantly easier than doing so in a flat position. To simplify the process further, he divides the task into two or three steps as suggested by fellow expert “for for.” This approach not only makes it more manageable but also allows for greater precision in crafting each component.Step 2: Applying Glue and Securing
Sven proceeds to apply glue along one edge of the flange, ensuring a secure bond when clamped into place. He emphasizes that this stage is crucial for maintaining the structural integrity of the flange, which in turn safeguards the living area beneath the canvas when hatches are open.Step 3: Allowing Time to Dry
After securely attaching the first portion of the flange, Sven allows ample time for it to dry before moving forward with additional steps. This patience and precision are key aspects of his successful boatbuilding methods.Step 4: Finishing Touches
Once the flange is fully dried, Sven removes the clamps carefully, ensuring no damage occurs during this process. He then moves on to attaching four more pieces onto these main frames, completing two pairs of flanges for the bulkhead hatches.The Final Touches
While two flanges form the primary support structure around the hatches, Sven mentions there are two additional pieces required at each end to ensure comprehensive protection. This attention to detail highlights his commitment to producing a durable and reliable design. “Sailing is about finding your path, whether it’s across an ocean or within yourself.” – Sven Yrvind In conclusion, making flanges around bulkhead hatches may seem complex at first glance, but by following Sven Yrvind’s meticulous process, enthusiasts can achieve professional-level results. Remember that the journey of boatbuilding is as rewarding as reaching your destination; it tests one’s patience and dedication. For those seeking to embark on this adventure or simply gain more insight into marine craftsmanship, Sven’s wisdom is invaluable.After securely attaching the first portion of the flange, Sven allows ample time for it to dry before moving forward with additional steps. This patience and precision are key aspects of his successful boatbuilding methods.Step 4: Finishing Touches
Once the flange is fully dried, Sven removes the clamps carefully, ensuring no damage occurs during this process. He then moves on to attaching four more pieces onto these main frames, completing two pairs of flanges for the bulkhead hatches.The Final Touches
While two flanges form the primary support structure around the hatches, Sven mentions there are two additional pieces required at each end to ensure comprehensive protection. This attention to detail highlights his commitment to producing a durable and reliable design. “Sailing is about finding your path, whether it’s across an ocean or within yourself.” – Sven Yrvind In conclusion, making flanges around bulkhead hatches may seem complex at first glance, but by following Sven Yrvind’s meticulous process, enthusiasts can achieve professional-level results. Remember that the journey of boatbuilding is as rewarding as reaching your destination; it tests one’s patience and dedication. For those seeking to embark on this adventure or simply gain more insight into marine craftsmanship, Sven’s wisdom is invaluable.Sven proceeds to apply glue along one edge of the flange, ensuring a secure bond when clamped into place. He emphasizes that this stage is crucial for maintaining the structural integrity of the flange, which in turn safeguards the living area beneath the canvas when hatches are open.Step 3: Allowing Time to Dry
After securely attaching the first portion of the flange, Sven allows ample time for it to dry before moving forward with additional steps. This patience and precision are key aspects of his successful boatbuilding methods.Step 4: Finishing Touches
Once the flange is fully dried, Sven removes the clamps carefully, ensuring no damage occurs during this process. He then moves on to attaching four more pieces onto these main frames, completing two pairs of flanges for the bulkhead hatches.The Final Touches
While two flanges form the primary support structure around the hatches, Sven mentions there are two additional pieces required at each end to ensure comprehensive protection. This attention to detail highlights his commitment to producing a durable and reliable design. “Sailing is about finding your path, whether it’s across an ocean or within yourself.” – Sven Yrvind In conclusion, making flanges around bulkhead hatches may seem complex at first glance, but by following Sven Yrvind’s meticulous process, enthusiasts can achieve professional-level results. Remember that the journey of boatbuilding is as rewarding as reaching your destination; it tests one’s patience and dedication. For those seeking to embark on this adventure or simply gain more insight into marine craftsmanship, Sven’s wisdom is invaluable.Sven begins by explaining that working on flanges vertically and horizontally is significantly easier than doing so in a flat position. To simplify the process further, he divides the task into two or three steps as suggested by fellow expert “for for.” This approach not only makes it more manageable but also allows for greater precision in crafting each component.Step 2: Applying Glue and Securing
Sven proceeds to apply glue along one edge of the flange, ensuring a secure bond when clamped into place. He emphasizes that this stage is crucial for maintaining the structural integrity of the flange, which in turn safeguards the living area beneath the canvas when hatches are open.Step 3: Allowing Time to Dry
After securely attaching the first portion of the flange, Sven allows ample time for it to dry before moving forward with additional steps. This patience and precision are key aspects of his successful boatbuilding methods.Step 4: Finishing Touches
Once the flange is fully dried, Sven removes the clamps carefully, ensuring no damage occurs during this process. He then moves on to attaching four more pieces onto these main frames, completing two pairs of flanges for the bulkhead hatches.The Final Touches
While two flanges form the primary support structure around the hatches, Sven mentions there are two additional pieces required at each end to ensure comprehensive protection. This attention to detail highlights his commitment to producing a durable and reliable design. “Sailing is about finding your path, whether it’s across an ocean or within yourself.” – Sven Yrvind In conclusion, making flanges around bulkhead hatches may seem complex at first glance, but by following Sven Yrvind’s meticulous process, enthusiasts can achieve professional-level results. Remember that the journey of boatbuilding is as rewarding as reaching your destination; it tests one’s patience and dedication. For those seeking to embark on this adventure or simply gain more insight into marine craftsmanship, Sven’s wisdom is invaluable.Sven Yrvind, a renowned yacht designer and sailor, shares valuable insights on creating flanges around bulkhead hatches for canvas protection in this enlightening video. By following his expert guidance, boat enthusiasts can ensure their living areas remain secure while allowing unhindered access through the hatches.Step 1: Starting with the Flange
Sven begins by explaining that working on flanges vertically and horizontally is significantly easier than doing so in a flat position. To simplify the process further, he divides the task into two or three steps as suggested by fellow expert “for for.” This approach not only makes it more manageable but also allows for greater precision in crafting each component.Step 2: Applying Glue and Securing
Sven proceeds to apply glue along one edge of the flange, ensuring a secure bond when clamped into place. He emphasizes that this stage is crucial for maintaining the structural integrity of the flange, which in turn safeguards the living area beneath the canvas when hatches are open.Step 3: Allowing Time to Dry
After securely attaching the first portion of the flange, Sven allows ample time for it to dry before moving forward with additional steps. This patience and precision are key aspects of his successful boatbuilding methods.Step 4: Finishing Touches
Once the flange is fully dried, Sven removes the clamps carefully, ensuring no damage occurs during this process. He then moves on to attaching four more pieces onto these main frames, completing two pairs of flanges for the bulkhead hatches.The Final Touches
While two flanges form the primary support structure around the hatches, Sven mentions there are two additional pieces required at each end to ensure comprehensive protection. This attention to detail highlights his commitment to producing a durable and reliable design. “Sailing is about finding your path, whether it’s across an ocean or within yourself.” – Sven Yrvind In conclusion, making flanges around bulkhead hatches may seem complex at first glance, but by following Sven Yrvind’s meticulous process, enthusiasts can achieve professional-level results. Remember that the journey of boatbuilding is as rewarding as reaching your destination; it tests one’s patience and dedication. For those seeking to embark on this adventure or simply gain more insight into marine craftsmanship, Sven’s wisdom is invaluable.Making Flanges Around Bulkhead Hatches for Canvas
Sven Yrvind, a renowned yacht designer and sailor, shares valuable insights on creating flanges around bulkhead hatches for canvas protection in this enlightening video. By following his expert guidance, boat enthusiasts can ensure their living areas remain secure while allowing unhindered access through the hatches.Step 1: Starting with the Flange
Sven begins by explaining that working on flanges vertically and horizontally is significantly easier than doing so in a flat position. To simplify the process further, he divides the task into two or three steps as suggested by fellow expert “for for.” This approach not only makes it more manageable but also allows for greater precision in crafting each component.Step 2: Applying Glue and Securing
Sven proceeds to apply glue along one edge of the flange, ensuring a secure bond when clamped into place. He emphasizes that this stage is crucial for maintaining the structural integrity of the flange, which in turn safeguards the living area beneath the canvas when hatches are open.Step 3: Allowing Time to Dry
After securely attaching the first portion of the flange, Sven allows ample time for it to dry before moving forward with additional steps. This patience and precision are key aspects of his successful boatbuilding methods.Step 4: Finishing Touches
Once the flange is fully dried, Sven removes the clamps carefully, ensuring no damage occurs during this process. He then moves on to attaching four more pieces onto these main frames, completing two pairs of flanges for the bulkhead hatches.The Final Touches
While two flanges form the primary support structure around the hatches, Sven mentions there are two additional pieces required at each end to ensure comprehensive protection. This attention to detail highlights his commitment to producing a durable and reliable design. “Sailing is about finding your path, whether it’s across an ocean or within yourself.” – Sven Yrvind In conclusion, making flanges around bulkhead hatches may seem complex at first glance, but by following Sven Yrvind’s meticulous process, enthusiasts can achieve professional-level results. Remember that the journey of boatbuilding is as rewarding as reaching your destination; it tests one’s patience and dedication. For those seeking to embark on this adventure or simply gain more insight into marine craftsmanship, Sven’s wisdom is invaluable.Once the flange is fully dried, Sven removes the clamps carefully, ensuring no damage occurs during this process. He then moves on to attaching four more pieces onto these main frames, completing two pairs of flanges for the bulkhead hatches.The Final Touches
While two flanges form the primary support structure around the hatches, Sven mentions there are two additional pieces required at each end to ensure comprehensive protection. This attention to detail highlights his commitment to producing a durable and reliable design. “Sailing is about finding your path, whether it’s across an ocean or within yourself.” – Sven Yrvind In conclusion, making flanges around bulkhead hatches may seem complex at first glance, but by following Sven Yrvind’s meticulous process, enthusiasts can achieve professional-level results. Remember that the journey of boatbuilding is as rewarding as reaching your destination; it tests one’s patience and dedication. For those seeking to embark on this adventure or simply gain more insight into marine craftsmanship, Sven’s wisdom is invaluable.After securely attaching the first portion of the flange, Sven allows ample time for it to dry before moving forward with additional steps. This patience and precision are key aspects of his successful boatbuilding methods.Step 4: Finishing Touches
Once the flange is fully dried, Sven removes the clamps carefully, ensuring no damage occurs during this process. He then moves on to attaching four more pieces onto these main frames, completing two pairs of flanges for the bulkhead hatches.The Final Touches
While two flanges form the primary support structure around the hatches, Sven mentions there are two additional pieces required at each end to ensure comprehensive protection. This attention to detail highlights his commitment to producing a durable and reliable design. “Sailing is about finding your path, whether it’s across an ocean or within yourself.” – Sven Yrvind In conclusion, making flanges around bulkhead hatches may seem complex at first glance, but by following Sven Yrvind’s meticulous process, enthusiasts can achieve professional-level results. Remember that the journey of boatbuilding is as rewarding as reaching your destination; it tests one’s patience and dedication. For those seeking to embark on this adventure or simply gain more insight into marine craftsmanship, Sven’s wisdom is invaluable.Sven proceeds to apply glue along one edge of the flange, ensuring a secure bond when clamped into place. He emphasizes that this stage is crucial for maintaining the structural integrity of the flange, which in turn safeguards the living area beneath the canvas when hatches are open.Step 3: Allowing Time to Dry
After securely attaching the first portion of the flange, Sven allows ample time for it to dry before moving forward with additional steps. This patience and precision are key aspects of his successful boatbuilding methods.Step 4: Finishing Touches
Once the flange is fully dried, Sven removes the clamps carefully, ensuring no damage occurs during this process. He then moves on to attaching four more pieces onto these main frames, completing two pairs of flanges for the bulkhead hatches.The Final Touches
While two flanges form the primary support structure around the hatches, Sven mentions there are two additional pieces required at each end to ensure comprehensive protection. This attention to detail highlights his commitment to producing a durable and reliable design. “Sailing is about finding your path, whether it’s across an ocean or within yourself.” – Sven Yrvind In conclusion, making flanges around bulkhead hatches may seem complex at first glance, but by following Sven Yrvind’s meticulous process, enthusiasts can achieve professional-level results. Remember that the journey of boatbuilding is as rewarding as reaching your destination; it tests one’s patience and dedication. For those seeking to embark on this adventure or simply gain more insight into marine craftsmanship, Sven’s wisdom is invaluable.Sven begins by explaining that working on flanges vertically and horizontally is significantly easier than doing so in a flat position. To simplify the process further, he divides the task into two or three steps as suggested by fellow expert “for for.” This approach not only makes it more manageable but also allows for greater precision in crafting each component.Step 2: Applying Glue and Securing
Sven proceeds to apply glue along one edge of the flange, ensuring a secure bond when clamped into place. He emphasizes that this stage is crucial for maintaining the structural integrity of the flange, which in turn safeguards the living area beneath the canvas when hatches are open.Step 3: Allowing Time to Dry
After securely attaching the first portion of the flange, Sven allows ample time for it to dry before moving forward with additional steps. This patience and precision are key aspects of his successful boatbuilding methods.Step 4: Finishing Touches
Once the flange is fully dried, Sven removes the clamps carefully, ensuring no damage occurs during this process. He then moves on to attaching four more pieces onto these main frames, completing two pairs of flanges for the bulkhead hatches.The Final Touches
While two flanges form the primary support structure around the hatches, Sven mentions there are two additional pieces required at each end to ensure comprehensive protection. This attention to detail highlights his commitment to producing a durable and reliable design. “Sailing is about finding your path, whether it’s across an ocean or within yourself.” – Sven Yrvind In conclusion, making flanges around bulkhead hatches may seem complex at first glance, but by following Sven Yrvind’s meticulous process, enthusiasts can achieve professional-level results. Remember that the journey of boatbuilding is as rewarding as reaching your destination; it tests one’s patience and dedication. For those seeking to embark on this adventure or simply gain more insight into marine craftsmanship, Sven’s wisdom is invaluable.Sven Yrvind, a renowned yacht designer and sailor, shares valuable insights on creating flanges around bulkhead hatches for canvas protection in this enlightening video. By following his expert guidance, boat enthusiasts can ensure their living areas remain secure while allowing unhindered access through the hatches.Step 1: Starting with the Flange
Sven begins by explaining that working on flanges vertically and horizontally is significantly easier than doing so in a flat position. To simplify the process further, he divides the task into two or three steps as suggested by fellow expert “for for.” This approach not only makes it more manageable but also allows for greater precision in crafting each component.Step 2: Applying Glue and Securing
Sven proceeds to apply glue along one edge of the flange, ensuring a secure bond when clamped into place. He emphasizes that this stage is crucial for maintaining the structural integrity of the flange, which in turn safeguards the living area beneath the canvas when hatches are open.Step 3: Allowing Time to Dry
After securely attaching the first portion of the flange, Sven allows ample time for it to dry before moving forward with additional steps. This patience and precision are key aspects of his successful boatbuilding methods.Step 4: Finishing Touches
Once the flange is fully dried, Sven removes the clamps carefully, ensuring no damage occurs during this process. He then moves on to attaching four more pieces onto these main frames, completing two pairs of flanges for the bulkhead hatches.The Final Touches
While two flanges form the primary support structure around the hatches, Sven mentions there are two additional pieces required at each end to ensure comprehensive protection. This attention to detail highlights his commitment to producing a durable and reliable design. “Sailing is about finding your path, whether it’s across an ocean or within yourself.” – Sven Yrvind In conclusion, making flanges around bulkhead hatches may seem complex at first glance, but by following Sven Yrvind’s meticulous process, enthusiasts can achieve professional-level results. Remember that the journey of boatbuilding is as rewarding as reaching your destination; it tests one’s patience and dedication. For those seeking to embark on this adventure or simply gain more insight into marine craftsmanship, Sven’s wisdom is invaluable.Making Flanges Around Bulkhead Hatches for Canvas
Sven Yrvind, a renowned yacht designer and sailor, shares valuable insights on creating flanges around bulkhead hatches for canvas protection in this enlightening video. By following his expert guidance, boat enthusiasts can ensure their living areas remain secure while allowing unhindered access through the hatches.Step 1: Starting with the Flange
Sven begins by explaining that working on flanges vertically and horizontally is significantly easier than doing so in a flat position. To simplify the process further, he divides the task into two or three steps as suggested by fellow expert “for for.” This approach not only makes it more manageable but also allows for greater precision in crafting each component.Step 2: Applying Glue and Securing
Sven proceeds to apply glue along one edge of the flange, ensuring a secure bond when clamped into place. He emphasizes that this stage is crucial for maintaining the structural integrity of the flange, which in turn safeguards the living area beneath the canvas when hatches are open.Step 3: Allowing Time to Dry
After securely attaching the first portion of the flange, Sven allows ample time for it to dry before moving forward with additional steps. This patience and precision are key aspects of his successful boatbuilding methods.Step 4: Finishing Touches
Once the flange is fully dried, Sven removes the clamps carefully, ensuring no damage occurs during this process. He then moves on to attaching four more pieces onto these main frames, completing two pairs of flanges for the bulkhead hatches.The Final Touches
While two flanges form the primary support structure around the hatches, Sven mentions there are two additional pieces required at each end to ensure comprehensive protection. This attention to detail highlights his commitment to producing a durable and reliable design. “Sailing is about finding your path, whether it’s across an ocean or within yourself.” – Sven Yrvind In conclusion, making flanges around bulkhead hatches may seem complex at first glance, but by following Sven Yrvind’s meticulous process, enthusiasts can achieve professional-level results. Remember that the journey of boatbuilding is as rewarding as reaching your destination; it tests one’s patience and dedication. For those seeking to embark on this adventure or simply gain more insight into marine craftsmanship, Sven’s wisdom is invaluable.Sven proceeds to apply glue along one edge of the flange, ensuring a secure bond when clamped into place. He emphasizes that this stage is crucial for maintaining the structural integrity of the flange, which in turn safeguards the living area beneath the canvas when hatches are open.Step 3: Allowing Time to Dry
After securely attaching the first portion of the flange, Sven allows ample time for it to dry before moving forward with additional steps. This patience and precision are key aspects of his successful boatbuilding methods.Step 4: Finishing Touches
Once the flange is fully dried, Sven removes the clamps carefully, ensuring no damage occurs during this process. He then moves on to attaching four more pieces onto these main frames, completing two pairs of flanges for the bulkhead hatches.The Final Touches
While two flanges form the primary support structure around the hatches, Sven mentions there are two additional pieces required at each end to ensure comprehensive protection. This attention to detail highlights his commitment to producing a durable and reliable design. “Sailing is about finding your path, whether it’s across an ocean or within yourself.” – Sven Yrvind In conclusion, making flanges around bulkhead hatches may seem complex at first glance, but by following Sven Yrvind’s meticulous process, enthusiasts can achieve professional-level results. Remember that the journey of boatbuilding is as rewarding as reaching your destination; it tests one’s patience and dedication. For those seeking to embark on this adventure or simply gain more insight into marine craftsmanship, Sven’s wisdom is invaluable.Making Flanges Around Bulkhead Hatches for Canvas
Sven Yrvind, a renowned yacht designer and sailor, shares valuable insights on creating flanges around bulkhead hatches for canvas protection in this enlightening video. By following his expert guidance, boat enthusiasts can ensure their living areas remain secure while allowing unhindered access through the hatches.Step 1: Starting with the Flange
Sven begins by explaining that working on flanges vertically and horizontally is significantly easier than doing so in a flat position. To simplify the process further, he divides the task into two or three steps as suggested by fellow expert “for for.” This approach not only makes it more manageable but also allows for greater precision in crafting each component.Step 2: Applying Glue and Securing
Sven proceeds to apply glue along one edge of the flange, ensuring a secure bond when clamped into place. He emphasizes that this stage is crucial for maintaining the structural integrity of the flange, which in turn safeguards the living area beneath the canvas when hatches are open.Step 3: Allowing Time to Dry
After securely attaching the first portion of the flange, Sven allows ample time for it to dry before moving forward with additional steps. This patience and precision are key aspects of his successful boatbuilding methods.Step 4: Finishing Touches
Once the flange is fully dried, Sven removes the clamps carefully, ensuring no damage occurs during this process. He then moves on to attaching four more pieces onto these main frames, completing two pairs of flanges for the bulkhead hatches.The Final Touches
While two flanges form the primary support structure around the hatches, Sven mentions there are two additional pieces required at each end to ensure comprehensive protection. This attention to detail highlights his commitment to producing a durable and reliable design. “Sailing is about finding your path, whether it’s across an ocean or within yourself.” – Sven Yrvind In conclusion, making flanges around bulkhead hatches may seem complex at first glance, but by following Sven Yrvind’s meticulous process, enthusiasts can achieve professional-level results. Remember that the journey of boatbuilding is as rewarding as reaching your destination; it tests one’s patience and dedication. For those seeking to embark on this adventure or simply gain more insight into marine craftsmanship, Sven’s wisdom is invaluable.Once the flange is fully dried, Sven removes the clamps carefully, ensuring no damage occurs during this process. He then moves on to attaching four more pieces onto these main frames, completing two pairs of flanges for the bulkhead hatches.The Final Touches
While two flanges form the primary support structure around the hatches, Sven mentions there are two additional pieces required at each end to ensure comprehensive protection. This attention to detail highlights his commitment to producing a durable and reliable design. “Sailing is about finding your path, whether it’s across an ocean or within yourself.” – Sven Yrvind In conclusion, making flanges around bulkhead hatches may seem complex at first glance, but by following Sven Yrvind’s meticulous process, enthusiasts can achieve professional-level results. Remember that the journey of boatbuilding is as rewarding as reaching your destination; it tests one’s patience and dedication. For those seeking to embark on this adventure or simply gain more insight into marine craftsmanship, Sven’s wisdom is invaluable.Sven Yrvind, a renowned yacht designer and sailor, shares valuable insights on creating flanges around bulkhead hatches for canvas protection in this enlightening video. By following his expert guidance, boat enthusiasts can ensure their living areas remain secure while allowing unhindered access through the hatches.Step 1: Starting with the Flange
Sven begins by explaining that working on flanges vertically and horizontally is significantly easier than doing so in a flat position. To simplify the process further, he divides the task into two or three steps as suggested by fellow expert “for for.” This approach not only makes it more manageable but also allows for greater precision in crafting each component.Step 2: Applying Glue and Securing
Sven proceeds to apply glue along one edge of the flange, ensuring a secure bond when clamped into place. He emphasizes that this stage is crucial for maintaining the structural integrity of the flange, which in turn safeguards the living area beneath the canvas when hatches are open.Step 3: Allowing Time to Dry
After securely attaching the first portion of the flange, Sven allows ample time for it to dry before moving forward with additional steps. This patience and precision are key aspects of his successful boatbuilding methods.Step 4: Finishing Touches
Once the flange is fully dried, Sven removes the clamps carefully, ensuring no damage occurs during this process. He then moves on to attaching four more pieces onto these main frames, completing two pairs of flanges for the bulkhead hatches.The Final Touches
While two flanges form the primary support structure around the hatches, Sven mentions there are two additional pieces required at each end to ensure comprehensive protection. This attention to detail highlights his commitment to producing a durable and reliable design. “Sailing is about finding your path, whether it’s across an ocean or within yourself.” – Sven Yrvind In conclusion, making flanges around bulkhead hatches may seem complex at first glance, but by following Sven Yrvind’s meticulous process, enthusiasts can achieve professional-level results. Remember that the journey of boatbuilding is as rewarding as reaching your destination; it tests one’s patience and dedication. For those seeking to embark on this adventure or simply gain more insight into marine craftsmanship, Sven’s wisdom is invaluable.Making Flanges Around Bulkhead Hatches for Canvas
Sven Yrvind, a renowned yacht designer and sailor, shares valuable insights on creating flanges around bulkhead hatches for canvas protection in this enlightening video. By following his expert guidance, boat enthusiasts can ensure their living areas remain secure while allowing unhindered access through the hatches.Step 1: Starting with the Flange
Sven begins by explaining that working on flanges vertically and horizontally is significantly easier than doing so in a flat position. To simplify the process further, he divides the task into two or three steps as suggested by fellow expert “for for.” This approach not only makes it more manageable but also allows for greater precision in crafting each component.Step 2: Applying Glue and Securing
Sven proceeds to apply glue along one edge of the flange, ensuring a secure bond when clamped into place. He emphasizes that this stage is crucial for maintaining the structural integrity of the flange, which in turn safeguards the living area beneath the canvas when hatches are open.Step 3: Allowing Time to Dry
After securely attaching the first portion of the flange, Sven allows ample time for it to dry before moving forward with additional steps. This patience and precision are key aspects of his successful boatbuilding methods.Step 4: Finishing Touches
Once the flange is fully dried, Sven removes the clamps carefully, ensuring no damage occurs during this process. He then moves on to attaching four more pieces onto these main frames, completing two pairs of flanges for the bulkhead hatches.The Final Touches
While two flanges form the primary support structure around the hatches, Sven mentions there are two additional pieces required at each end to ensure comprehensive protection. This attention to detail highlights his commitment to producing a durable and reliable design. “Sailing is about finding your path, whether it’s across an ocean or within yourself.” – Sven Yrvind In conclusion, making flanges around bulkhead hatches may seem complex at first glance, but by following Sven Yrvind’s meticulous process, enthusiasts can achieve professional-level results. Remember that the journey of boatbuilding is as rewarding as reaching your destination; it tests one’s patience and dedication. For those seeking to embark on this adventure or simply gain more insight into marine craftsmanship, Sven’s wisdom is invaluable.After securely attaching the first portion of the flange, Sven allows ample time for it to dry before moving forward with additional steps. This patience and precision are key aspects of his successful boatbuilding methods.Step 4: Finishing Touches
Once the flange is fully dried, Sven removes the clamps carefully, ensuring no damage occurs during this process. He then moves on to attaching four more pieces onto these main frames, completing two pairs of flanges for the bulkhead hatches.The Final Touches
While two flanges form the primary support structure around the hatches, Sven mentions there are two additional pieces required at each end to ensure comprehensive protection. This attention to detail highlights his commitment to producing a durable and reliable design. “Sailing is about finding your path, whether it’s across an ocean or within yourself.” – Sven Yrvind In conclusion, making flanges around bulkhead hatches may seem complex at first glance, but by following Sven Yrvind’s meticulous process, enthusiasts can achieve professional-level results. Remember that the journey of boatbuilding is as rewarding as reaching your destination; it tests one’s patience and dedication. For those seeking to embark on this adventure or simply gain more insight into marine craftsmanship, Sven’s wisdom is invaluable.Sven Yrvind, a renowned yacht designer and sailor, shares valuable insights on creating flanges around bulkhead hatches for canvas protection in this enlightening video. By following his expert guidance, boat enthusiasts can ensure their living areas remain secure while allowing unhindered access through the hatches.Step 1: Starting with the Flange
Sven begins by explaining that working on flanges vertically and horizontally is significantly easier than doing so in a flat position. To simplify the process further, he divides the task into two or three steps as suggested by fellow expert “for for.” This approach not only makes it more manageable but also allows for greater precision in crafting each component.Step 2: Applying Glue and Securing
Sven proceeds to apply glue along one edge of the flange, ensuring a secure bond when clamped into place. He emphasizes that this stage is crucial for maintaining the structural integrity of the flange, which in turn safeguards the living area beneath the canvas when hatches are open.Step 3: Allowing Time to Dry
After securely attaching the first portion of the flange, Sven allows ample time for it to dry before moving forward with additional steps. This patience and precision are key aspects of his successful boatbuilding methods.Step 4: Finishing Touches
Once the flange is fully dried, Sven removes the clamps carefully, ensuring no damage occurs during this process. He then moves on to attaching four more pieces onto these main frames, completing two pairs of flanges for the bulkhead hatches.The Final Touches
While two flanges form the primary support structure around the hatches, Sven mentions there are two additional pieces required at each end to ensure comprehensive protection. This attention to detail highlights his commitment to producing a durable and reliable design. “Sailing is about finding your path, whether it’s across an ocean or within yourself.” – Sven Yrvind In conclusion, making flanges around bulkhead hatches may seem complex at first glance, but by following Sven Yrvind’s meticulous process, enthusiasts can achieve professional-level results. Remember that the journey of boatbuilding is as rewarding as reaching your destination; it tests one’s patience and dedication. For those seeking to embark on this adventure or simply gain more insight into marine craftsmanship, Sven’s wisdom is invaluable.Making Flanges Around Bulkhead Hatches for Canvas
Sven Yrvind, a renowned yacht designer and sailor, shares valuable insights on creating flanges around bulkhead hatches for canvas protection in this enlightening video. By following his expert guidance, boat enthusiasts can ensure their living areas remain secure while allowing unhindered access through the hatches.Step 1: Starting with the Flange
Sven begins by explaining that working on flanges vertically and horizontally is significantly easier than doing so in a flat position. To simplify the process further, he divides the task into two or three steps as suggested by fellow expert “for for.” This approach not only makes it more manageable but also allows for greater precision in crafting each component.Step 2: Applying Glue and Securing
Sven proceeds to apply glue along one edge of the flange, ensuring a secure bond when clamped into place. He emphasizes that this stage is crucial for maintaining the structural integrity of the flange, which in turn safeguards the living area beneath the canvas when hatches are open.Step 3: Allowing Time to Dry
After securely attaching the first portion of the flange, Sven allows ample time for it to dry before moving forward with additional steps. This patience and precision are key aspects of his successful boatbuilding methods.Step 4: Finishing Touches
Once the flange is fully dried, Sven removes the clamps carefully, ensuring no damage occurs during this process. He then moves on to attaching four more pieces onto these main frames, completing two pairs of flanges for the bulkhead hatches.The Final Touches
While two flanges form the primary support structure around the hatches, Sven mentions there are two additional pieces required at each end to ensure comprehensive protection. This attention to detail highlights his commitment to producing a durable and reliable design. “Sailing is about finding your path, whether it’s across an ocean or within yourself.” – Sven Yrvind In conclusion, making flanges around bulkhead hatches may seem complex at first glance, but by following Sven Yrvind’s meticulous process, enthusiasts can achieve professional-level results. Remember that the journey of boatbuilding is as rewarding as reaching your destination; it tests one’s patience and dedication. For those seeking to embark on this adventure or simply gain more insight into marine craftsmanship, Sven’s wisdom is invaluable.Sven proceeds to apply glue along one edge of the flange, ensuring a secure bond when clamped into place. He emphasizes that this stage is crucial for maintaining the structural integrity of the flange, which in turn safeguards the living area beneath the canvas when hatches are open.Step 3: Allowing Time to Dry
After securely attaching the first portion of the flange, Sven allows ample time for it to dry before moving forward with additional steps. This patience and precision are key aspects of his successful boatbuilding methods.Step 4: Finishing Touches
Once the flange is fully dried, Sven removes the clamps carefully, ensuring no damage occurs during this process. He then moves on to attaching four more pieces onto these main frames, completing two pairs of flanges for the bulkhead hatches.The Final Touches
While two flanges form the primary support structure around the hatches, Sven mentions there are two additional pieces required at each end to ensure comprehensive protection. This attention to detail highlights his commitment to producing a durable and reliable design. “Sailing is about finding your path, whether it’s across an ocean or within yourself.” – Sven Yrvind In conclusion, making flanges around bulkhead hatches may seem complex at first glance, but by following Sven Yrvind’s meticulous process, enthusiasts can achieve professional-level results. Remember that the journey of boatbuilding is as rewarding as reaching your destination; it tests one’s patience and dedication. For those seeking to embark on this adventure or simply gain more insight into marine craftsmanship, Sven’s wisdom is invaluable.Sven Yrvind, a renowned yacht designer and sailor, shares valuable insights on creating flanges around bulkhead hatches for canvas protection in this enlightening video. By following his expert guidance, boat enthusiasts can ensure their living areas remain secure while allowing unhindered access through the hatches.Step 1: Starting with the Flange
Sven begins by explaining that working on flanges vertically and horizontally is significantly easier than doing so in a flat position. To simplify the process further, he divides the task into two or three steps as suggested by fellow expert “for for.” This approach not only makes it more manageable but also allows for greater precision in crafting each component.Step 2: Applying Glue and Securing
Sven proceeds to apply glue along one edge of the flange, ensuring a secure bond when clamped into place. He emphasizes that this stage is crucial for maintaining the structural integrity of the flange, which in turn safeguards the living area beneath the canvas when hatches are open.Step 3: Allowing Time to Dry
After securely attaching the first portion of the flange, Sven allows ample time for it to dry before moving forward with additional steps. This patience and precision are key aspects of his successful boatbuilding methods.Step 4: Finishing Touches
Once the flange is fully dried, Sven removes the clamps carefully, ensuring no damage occurs during this process. He then moves on to attaching four more pieces onto these main frames, completing two pairs of flanges for the bulkhead hatches.The Final Touches
While two flanges form the primary support structure around the hatches, Sven mentions there are two additional pieces required at each end to ensure comprehensive protection. This attention to detail highlights his commitment to producing a durable and reliable design. “Sailing is about finding your path, whether it’s across an ocean or within yourself.” – Sven Yrvind In conclusion, making flanges around bulkhead hatches may seem complex at first glance, but by following Sven Yrvind’s meticulous process, enthusiasts can achieve professional-level results. Remember that the journey of boatbuilding is as rewarding as reaching your destination; it tests one’s patience and dedication. For those seeking to embark on this adventure or simply gain more insight into marine craftsmanship, Sven’s wisdom is invaluable.Making Flanges Around Bulkhead Hatches for Canvas
Sven Yrvind, a renowned yacht designer and sailor, shares valuable insights on creating flanges around bulkhead hatches for canvas protection in this enlightening video. By following his expert guidance, boat enthusiasts can ensure their living areas remain secure while allowing unhindered access through the hatches.Step 1: Starting with the Flange
Sven begins by explaining that working on flanges vertically and horizontally is significantly easier than doing so in a flat position. To simplify the process further, he divides the task into two or three steps as suggested by fellow expert “for for.” This approach not only makes it more manageable but also allows for greater precision in crafting each component.Step 2: Applying Glue and Securing
Sven proceeds to apply glue along one edge of the flange, ensuring a secure bond when clamped into place. He emphasizes that this stage is crucial for maintaining the structural integrity of the flange, which in turn safeguards the living area beneath the canvas when hatches are open.Step 3: Allowing Time to Dry
After securely attaching the first portion of the flange, Sven allows ample time for it to dry before moving forward with additional steps. This patience and precision are key aspects of his successful boatbuilding methods.Step 4: Finishing Touches
Once the flange is fully dried, Sven removes the clamps carefully, ensuring no damage occurs during this process. He then moves on to attaching four more pieces onto these main frames, completing two pairs of flanges for the bulkhead hatches.The Final Touches
While two flanges form the primary support structure around the hatches, Sven mentions there are two additional pieces required at each end to ensure comprehensive protection. This attention to detail highlights his commitment to producing a durable and reliable design. “Sailing is about finding your path, whether it’s across an ocean or within yourself.” – Sven Yrvind In conclusion, making flanges around bulkhead hatches may seem complex at first glance, but by following Sven Yrvind’s meticulous process, enthusiasts can achieve professional-level results. Remember that the journey of boatbuilding is as rewarding as reaching your destination; it tests one’s patience and dedication. For those seeking to embark on this adventure or simply gain more insight into marine craftsmanship, Sven’s wisdom is invaluable.Sven begins by explaining that working on flanges vertically and horizontally is significantly easier than doing so in a flat position. To simplify the process further, he divides the task into two or three steps as suggested by fellow expert “for for.” This approach not only makes it more manageable but also allows for greater precision in crafting each component.Step 2: Applying Glue and Securing
Sven proceeds to apply glue along one edge of the flange, ensuring a secure bond when clamped into place. He emphasizes that this stage is crucial for maintaining the structural integrity of the flange, which in turn safeguards the living area beneath the canvas when hatches are open.Step 3: Allowing Time to Dry
After securely attaching the first portion of the flange, Sven allows ample time for it to dry before moving forward with additional steps. This patience and precision are key aspects of his successful boatbuilding methods.Step 4: Finishing Touches
Once the flange is fully dried, Sven removes the clamps carefully, ensuring no damage occurs during this process. He then moves on to attaching four more pieces onto these main frames, completing two pairs of flanges for the bulkhead hatches.The Final Touches
While two flanges form the primary support structure around the hatches, Sven mentions there are two additional pieces required at each end to ensure comprehensive protection. This attention to detail highlights his commitment to producing a durable and reliable design. “Sailing is about finding your path, whether it’s across an ocean or within yourself.” – Sven Yrvind In conclusion, making flanges around bulkhead hatches may seem complex at first glance, but by following Sven Yrvind’s meticulous process, enthusiasts can achieve professional-level results. Remember that the journey of boatbuilding is as rewarding as reaching your destination; it tests one’s patience and dedication. For those seeking to embark on this adventure or simply gain more insight into marine craftsmanship, Sven’s wisdom is invaluable.Sven Yrvind, a renowned yacht designer and sailor, shares valuable insights on creating flanges around bulkhead hatches for canvas protection in this enlightening video. By following his expert guidance, boat enthusiasts can ensure their living areas remain secure while allowing unhindered access through the hatches.Step 1: Starting with the Flange
Sven begins by explaining that working on flanges vertically and horizontally is significantly easier than doing so in a flat position. To simplify the process further, he divides the task into two or three steps as suggested by fellow expert “for for.” This approach not only makes it more manageable but also allows for greater precision in crafting each component.Step 2: Applying Glue and Securing
Sven proceeds to apply glue along one edge of the flange, ensuring a secure bond when clamped into place. He emphasizes that this stage is crucial for maintaining the structural integrity of the flange, which in turn safeguards the living area beneath the canvas when hatches are open.Step 3: Allowing Time to Dry
After securely attaching the first portion of the flange, Sven allows ample time for it to dry before moving forward with additional steps. This patience and precision are key aspects of his successful boatbuilding methods.Step 4: Finishing Touches
Once the flange is fully dried, Sven removes the clamps carefully, ensuring no damage occurs during this process. He then moves on to attaching four more pieces onto these main frames, completing two pairs of flanges for the bulkhead hatches.The Final Touches
While two flanges form the primary support structure around the hatches, Sven mentions there are two additional pieces required at each end to ensure comprehensive protection. This attention to detail highlights his commitment to producing a durable and reliable design. “Sailing is about finding your path, whether it’s across an ocean or within yourself.” – Sven Yrvind In conclusion, making flanges around bulkhead hatches may seem complex at first glance, but by following Sven Yrvind’s meticulous process, enthusiasts can achieve professional-level results. Remember that the journey of boatbuilding is as rewarding as reaching your destination; it tests one’s patience and dedication. For those seeking to embark on this adventure or simply gain more insight into marine craftsmanship, Sven’s wisdom is invaluable.Making Flanges Around Bulkhead Hatches for Canvas
Sven Yrvind, a renowned yacht designer and sailor, shares valuable insights on creating flanges around bulkhead hatches for canvas protection in this enlightening video. By following his expert guidance, boat enthusiasts can ensure their living areas remain secure while allowing unhindered access through the hatches.Step 1: Starting with the Flange
Sven begins by explaining that working on flanges vertically and horizontally is significantly easier than doing so in a flat position. To simplify the process further, he divides the task into two or three steps as suggested by fellow expert “for for.” This approach not only makes it more manageable but also allows for greater precision in crafting each component.Step 2: Applying Glue and Securing
Sven proceeds to apply glue along one edge of the flange, ensuring a secure bond when clamped into place. He emphasizes that this stage is crucial for maintaining the structural integrity of the flange, which in turn safeguards the living area beneath the canvas when hatches are open.Step 3: Allowing Time to Dry
After securely attaching the first portion of the flange, Sven allows ample time for it to dry before moving forward with additional steps. This patience and precision are key aspects of his successful boatbuilding methods.Step 4: Finishing Touches
Once the flange is fully dried, Sven removes the clamps carefully, ensuring no damage occurs during this process. He then moves on to attaching four more pieces onto these main frames, completing two pairs of flanges for the bulkhead hatches.The Final Touches
While two flanges form the primary support structure around the hatches, Sven mentions there are two additional pieces required at each end to ensure comprehensive protection. This attention to detail highlights his commitment to producing a durable and reliable design. “Sailing is about finding your path, whether it’s across an ocean or within yourself.” – Sven Yrvind In conclusion, making flanges around bulkhead hatches may seem complex at first glance, but by following Sven Yrvind’s meticulous process, enthusiasts can achieve professional-level results. Remember that the journey of boatbuilding is as rewarding as reaching your destination; it tests one’s patience and dedication. For those seeking to embark on this adventure or simply gain more insight into marine craftsmanship, Sven’s wisdom is invaluable.Once the flange is fully dried, Sven removes the clamps carefully, ensuring no damage occurs during this process. He then moves on to attaching four more pieces onto these main frames, completing two pairs of flanges for the bulkhead hatches.The Final Touches
While two flanges form the primary support structure around the hatches, Sven mentions there are two additional pieces required at each end to ensure comprehensive protection. This attention to detail highlights his commitment to producing a durable and reliable design. “Sailing is about finding your path, whether it’s across an ocean or within yourself.” – Sven Yrvind In conclusion, making flanges around bulkhead hatches may seem complex at first glance, but by following Sven Yrvind’s meticulous process, enthusiasts can achieve professional-level results. Remember that the journey of boatbuilding is as rewarding as reaching your destination; it tests one’s patience and dedication. For those seeking to embark on this adventure or simply gain more insight into marine craftsmanship, Sven’s wisdom is invaluable.Sven begins by explaining that working on flanges vertically and horizontally is significantly easier than doing so in a flat position. To simplify the process further, he divides the task into two or three steps as suggested by fellow expert “for for.” This approach not only makes it more manageable but also allows for greater precision in crafting each component.Step 2: Applying Glue and Securing
Sven proceeds to apply glue along one edge of the flange, ensuring a secure bond when clamped into place. He emphasizes that this stage is crucial for maintaining the structural integrity of the flange, which in turn safeguards the living area beneath the canvas when hatches are open.Step 3: Allowing Time to Dry
After securely attaching the first portion of the flange, Sven allows ample time for it to dry before moving forward with additional steps. This patience and precision are key aspects of his successful boatbuilding methods.Step 4: Finishing Touches
Once the flange is fully dried, Sven removes the clamps carefully, ensuring no damage occurs during this process. He then moves on to attaching four more pieces onto these main frames, completing two pairs of flanges for the bulkhead hatches.The Final Touches
While two flanges form the primary support structure around the hatches, Sven mentions there are two additional pieces required at each end to ensure comprehensive protection. This attention to detail highlights his commitment to producing a durable and reliable design. “Sailing is about finding your path, whether it’s across an ocean or within yourself.” – Sven Yrvind In conclusion, making flanges around bulkhead hatches may seem complex at first glance, but by following Sven Yrvind’s meticulous process, enthusiasts can achieve professional-level results. Remember that the journey of boatbuilding is as rewarding as reaching your destination; it tests one’s patience and dedication. For those seeking to embark on this adventure or simply gain more insight into marine craftsmanship, Sven’s wisdom is invaluable.Sven Yrvind, a renowned yacht designer and sailor, shares valuable insights on creating flanges around bulkhead hatches for canvas protection in this enlightening video. By following his expert guidance, boat enthusiasts can ensure their living areas remain secure while allowing unhindered access through the hatches.Step 1: Starting with the Flange
Sven begins by explaining that working on flanges vertically and horizontally is significantly easier than doing so in a flat position. To simplify the process further, he divides the task into two or three steps as suggested by fellow expert “for for.” This approach not only makes it more manageable but also allows for greater precision in crafting each component.Step 2: Applying Glue and Securing
Sven proceeds to apply glue along one edge of the flange, ensuring a secure bond when clamped into place. He emphasizes that this stage is crucial for maintaining the structural integrity of the flange, which in turn safeguards the living area beneath the canvas when hatches are open.Step 3: Allowing Time to Dry
After securely attaching the first portion of the flange, Sven allows ample time for it to dry before moving forward with additional steps. This patience and precision are key aspects of his successful boatbuilding methods.Step 4: Finishing Touches
Once the flange is fully dried, Sven removes the clamps carefully, ensuring no damage occurs during this process. He then moves on to attaching four more pieces onto these main frames, completing two pairs of flanges for the bulkhead hatches.The Final Touches
While two flanges form the primary support structure around the hatches, Sven mentions there are two additional pieces required at each end to ensure comprehensive protection. This attention to detail highlights his commitment to producing a durable and reliable design. “Sailing is about finding your path, whether it’s across an ocean or within yourself.” – Sven Yrvind In conclusion, making flanges around bulkhead hatches may seem complex at first glance, but by following Sven Yrvind’s meticulous process, enthusiasts can achieve professional-level results. Remember that the journey of boatbuilding is as rewarding as reaching your destination; it tests one’s patience and dedication. For those seeking to embark on this adventure or simply gain more insight into marine craftsmanship, Sven’s wisdom is invaluable.Making Flanges Around Bulkhead Hatches for Canvas
Sven Yrvind, a renowned yacht designer and sailor, shares valuable insights on creating flanges around bulkhead hatches for canvas protection in this enlightening video. By following his expert guidance, boat enthusiasts can ensure their living areas remain secure while allowing unhindered access through the hatches.Step 1: Starting with the Flange
Sven begins by explaining that working on flanges vertically and horizontally is significantly easier than doing so in a flat position. To simplify the process further, he divides the task into two or three steps as suggested by fellow expert “for for.” This approach not only makes it more manageable but also allows for greater precision in crafting each component.Step 2: Applying Glue and Securing
Sven proceeds to apply glue along one edge of the flange, ensuring a secure bond when clamped into place. He emphasizes that this stage is crucial for maintaining the structural integrity of the flange, which in turn safeguards the living area beneath the canvas when hatches are open.Step 3: Allowing Time to Dry
After securely attaching the first portion of the flange, Sven allows ample time for it to dry before moving forward with additional steps. This patience and precision are key aspects of his successful boatbuilding methods.Step 4: Finishing Touches
Once the flange is fully dried, Sven removes the clamps carefully, ensuring no damage occurs during this process. He then moves on to attaching four more pieces onto these main frames, completing two pairs of flanges for the bulkhead hatches.The Final Touches
While two flanges form the primary support structure around the hatches, Sven mentions there are two additional pieces required at each end to ensure comprehensive protection. This attention to detail highlights his commitment to producing a durable and reliable design. “Sailing is about finding your path, whether it’s across an ocean or within yourself.” – Sven Yrvind In conclusion, making flanges around bulkhead hatches may seem complex at first glance, but by following Sven Yrvind’s meticulous process, enthusiasts can achieve professional-level results. Remember that the journey of boatbuilding is as rewarding as reaching your destination; it tests one’s patience and dedication. For those seeking to embark on this adventure or simply gain more insight into marine craftsmanship, Sven’s wisdom is invaluable.After securely attaching the first portion of the flange, Sven allows ample time for it to dry before moving forward with additional steps. This patience and precision are key aspects of his successful boatbuilding methods.Step 4: Finishing Touches
Once the flange is fully dried, Sven removes the clamps carefully, ensuring no damage occurs during this process. He then moves on to attaching four more pieces onto these main frames, completing two pairs of flanges for the bulkhead hatches.The Final Touches
While two flanges form the primary support structure around the hatches, Sven mentions there are two additional pieces required at each end to ensure comprehensive protection. This attention to detail highlights his commitment to producing a durable and reliable design. “Sailing is about finding your path, whether it’s across an ocean or within yourself.” – Sven Yrvind In conclusion, making flanges around bulkhead hatches may seem complex at first glance, but by following Sven Yrvind’s meticulous process, enthusiasts can achieve professional-level results. Remember that the journey of boatbuilding is as rewarding as reaching your destination; it tests one’s patience and dedication. For those seeking to embark on this adventure or simply gain more insight into marine craftsmanship, Sven’s wisdom is invaluable.Sven begins by explaining that working on flanges vertically and horizontally is significantly easier than doing so in a flat position. To simplify the process further, he divides the task into two or three steps as suggested by fellow expert “for for.” This approach not only makes it more manageable but also allows for greater precision in crafting each component.Step 2: Applying Glue and Securing
Sven proceeds to apply glue along one edge of the flange, ensuring a secure bond when clamped into place. He emphasizes that this stage is crucial for maintaining the structural integrity of the flange, which in turn safeguards the living area beneath the canvas when hatches are open.Step 3: Allowing Time to Dry
After securely attaching the first portion of the flange, Sven allows ample time for it to dry before moving forward with additional steps. This patience and precision are key aspects of his successful boatbuilding methods.Step 4: Finishing Touches
Once the flange is fully dried, Sven removes the clamps carefully, ensuring no damage occurs during this process. He then moves on to attaching four more pieces onto these main frames, completing two pairs of flanges for the bulkhead hatches.The Final Touches
While two flanges form the primary support structure around the hatches, Sven mentions there are two additional pieces required at each end to ensure comprehensive protection. This attention to detail highlights his commitment to producing a durable and reliable design. “Sailing is about finding your path, whether it’s across an ocean or within yourself.” – Sven Yrvind In conclusion, making flanges around bulkhead hatches may seem complex at first glance, but by following Sven Yrvind’s meticulous process, enthusiasts can achieve professional-level results. Remember that the journey of boatbuilding is as rewarding as reaching your destination; it tests one’s patience and dedication. For those seeking to embark on this adventure or simply gain more insight into marine craftsmanship, Sven’s wisdom is invaluable.Sven Yrvind, a renowned yacht designer and sailor, shares valuable insights on creating flanges around bulkhead hatches for canvas protection in this enlightening video. By following his expert guidance, boat enthusiasts can ensure their living areas remain secure while allowing unhindered access through the hatches.Step 1: Starting with the Flange
Sven begins by explaining that working on flanges vertically and horizontally is significantly easier than doing so in a flat position. To simplify the process further, he divides the task into two or three steps as suggested by fellow expert “for for.” This approach not only makes it more manageable but also allows for greater precision in crafting each component.Step 2: Applying Glue and Securing
Sven proceeds to apply glue along one edge of the flange, ensuring a secure bond when clamped into place. He emphasizes that this stage is crucial for maintaining the structural integrity of the flange, which in turn safeguards the living area beneath the canvas when hatches are open.Step 3: Allowing Time to Dry
After securely attaching the first portion of the flange, Sven allows ample time for it to dry before moving forward with additional steps. This patience and precision are key aspects of his successful boatbuilding methods.Step 4: Finishing Touches
Once the flange is fully dried, Sven removes the clamps carefully, ensuring no damage occurs during this process. He then moves on to attaching four more pieces onto these main frames, completing two pairs of flanges for the bulkhead hatches.The Final Touches
While two flanges form the primary support structure around the hatches, Sven mentions there are two additional pieces required at each end to ensure comprehensive protection. This attention to detail highlights his commitment to producing a durable and reliable design. “Sailing is about finding your path, whether it’s across an ocean or within yourself.” – Sven Yrvind In conclusion, making flanges around bulkhead hatches may seem complex at first glance, but by following Sven Yrvind’s meticulous process, enthusiasts can achieve professional-level results. Remember that the journey of boatbuilding is as rewarding as reaching your destination; it tests one’s patience and dedication. For those seeking to embark on this adventure or simply gain more insight into marine craftsmanship, Sven’s wisdom is invaluable.Making Flanges Around Bulkhead Hatches for Canvas
Sven Yrvind, a renowned yacht designer and sailor, shares valuable insights on creating flanges around bulkhead hatches for canvas protection in this enlightening video. By following his expert guidance, boat enthusiasts can ensure their living areas remain secure while allowing unhindered access through the hatches.Step 1: Starting with the Flange
Sven begins by explaining that working on flanges vertically and horizontally is significantly easier than doing so in a flat position. To simplify the process further, he divides the task into two or three steps as suggested by fellow expert “for for.” This approach not only makes it more manageable but also allows for greater precision in crafting each component.Step 2: Applying Glue and Securing
Sven proceeds to apply glue along one edge of the flange, ensuring a secure bond when clamped into place. He emphasizes that this stage is crucial for maintaining the structural integrity of the flange, which in turn safeguards the living area beneath the canvas when hatches are open.Step 3: Allowing Time to Dry
After securely attaching the first portion of the flange, Sven allows ample time for it to dry before moving forward with additional steps. This patience and precision are key aspects of his successful boatbuilding methods.Step 4: Finishing Touches
Once the flange is fully dried, Sven removes the clamps carefully, ensuring no damage occurs during this process. He then moves on to attaching four more pieces onto these main frames, completing two pairs of flanges for the bulkhead hatches.The Final Touches
While two flanges form the primary support structure around the hatches, Sven mentions there are two additional pieces required at each end to ensure comprehensive protection. This attention to detail highlights his commitment to producing a durable and reliable design. “Sailing is about finding your path, whether it’s across an ocean or within yourself.” – Sven Yrvind In conclusion, making flanges around bulkhead hatches may seem complex at first glance, but by following Sven Yrvind’s meticulous process, enthusiasts can achieve professional-level results. Remember that the journey of boatbuilding is as rewarding as reaching your destination; it tests one’s patience and dedication. For those seeking to embark on this adventure or simply gain more insight into marine craftsmanship, Sven’s wisdom is invaluable.Sven proceeds to apply glue along one edge of the flange, ensuring a secure bond when clamped into place. He emphasizes that this stage is crucial for maintaining the structural integrity of the flange, which in turn safeguards the living area beneath the canvas when hatches are open.Step 3: Allowing Time to Dry
After securely attaching the first portion of the flange, Sven allows ample time for it to dry before moving forward with additional steps. This patience and precision are key aspects of his successful boatbuilding methods.Step 4: Finishing Touches
Once the flange is fully dried, Sven removes the clamps carefully, ensuring no damage occurs during this process. He then moves on to attaching four more pieces onto these main frames, completing two pairs of flanges for the bulkhead hatches.The Final Touches
While two flanges form the primary support structure around the hatches, Sven mentions there are two additional pieces required at each end to ensure comprehensive protection. This attention to detail highlights his commitment to producing a durable and reliable design. “Sailing is about finding your path, whether it’s across an ocean or within yourself.” – Sven Yrvind In conclusion, making flanges around bulkhead hatches may seem complex at first glance, but by following Sven Yrvind’s meticulous process, enthusiasts can achieve professional-level results. Remember that the journey of boatbuilding is as rewarding as reaching your destination; it tests one’s patience and dedication. For those seeking to embark on this adventure or simply gain more insight into marine craftsmanship, Sven’s wisdom is invaluable.Sven begins by explaining that working on flanges vertically and horizontally is significantly easier than doing so in a flat position. To simplify the process further, he divides the task into two or three steps as suggested by fellow expert “for for.” This approach not only makes it more manageable but also allows for greater precision in crafting each component.Step 2: Applying Glue and Securing
Sven proceeds to apply glue along one edge of the flange, ensuring a secure bond when clamped into place. He emphasizes that this stage is crucial for maintaining the structural integrity of the flange, which in turn safeguards the living area beneath the canvas when hatches are open.Step 3: Allowing Time to Dry
After securely attaching the first portion of the flange, Sven allows ample time for it to dry before moving forward with additional steps. This patience and precision are key aspects of his successful boatbuilding methods.Step 4: Finishing Touches
Once the flange is fully dried, Sven removes the clamps carefully, ensuring no damage occurs during this process. He then moves on to attaching four more pieces onto these main frames, completing two pairs of flanges for the bulkhead hatches.The Final Touches
While two flanges form the primary support structure around the hatches, Sven mentions there are two additional pieces required at each end to ensure comprehensive protection. This attention to detail highlights his commitment to producing a durable and reliable design. “Sailing is about finding your path, whether it’s across an ocean or within yourself.” – Sven Yrvind In conclusion, making flanges around bulkhead hatches may seem complex at first glance, but by following Sven Yrvind’s meticulous process, enthusiasts can achieve professional-level results. Remember that the journey of boatbuilding is as rewarding as reaching your destination; it tests one’s patience and dedication. For those seeking to embark on this adventure or simply gain more insight into marine craftsmanship, Sven’s wisdom is invaluable.Sven Yrvind, a renowned yacht designer and sailor, shares valuable insights on creating flanges around bulkhead hatches for canvas protection in this enlightening video. By following his expert guidance, boat enthusiasts can ensure their living areas remain secure while allowing unhindered access through the hatches.Step 1: Starting with the Flange
Sven begins by explaining that working on flanges vertically and horizontally is significantly easier than doing so in a flat position. To simplify the process further, he divides the task into two or three steps as suggested by fellow expert “for for.” This approach not only makes it more manageable but also allows for greater precision in crafting each component.Step 2: Applying Glue and Securing
Sven proceeds to apply glue along one edge of the flange, ensuring a secure bond when clamped into place. He emphasizes that this stage is crucial for maintaining the structural integrity of the flange, which in turn safeguards the living area beneath the canvas when hatches are open.Step 3: Allowing Time to Dry
After securely attaching the first portion of the flange, Sven allows ample time for it to dry before moving forward with additional steps. This patience and precision are key aspects of his successful boatbuilding methods.Step 4: Finishing Touches
Once the flange is fully dried, Sven removes the clamps carefully, ensuring no damage occurs during this process. He then moves on to attaching four more pieces onto these main frames, completing two pairs of flanges for the bulkhead hatches.The Final Touches
While two flanges form the primary support structure around the hatches, Sven mentions there are two additional pieces required at each end to ensure comprehensive protection. This attention to detail highlights his commitment to producing a durable and reliable design. “Sailing is about finding your path, whether it’s across an ocean or within yourself.” – Sven Yrvind In conclusion, making flanges around bulkhead hatches may seem complex at first glance, but by following Sven Yrvind’s meticulous process, enthusiasts can achieve professional-level results. Remember that the journey of boatbuilding is as rewarding as reaching your destination; it tests one’s patience and dedication. For those seeking to embark on this adventure or simply gain more insight into marine craftsmanship, Sven’s wisdom is invaluable.Making Flanges Around Bulkhead Hatches for Canvas
Sven Yrvind, a renowned yacht designer and sailor, shares valuable insights on creating flanges around bulkhead hatches for canvas protection in this enlightening video. By following his expert guidance, boat enthusiasts can ensure their living areas remain secure while allowing unhindered access through the hatches.Step 1: Starting with the Flange
Sven begins by explaining that working on flanges vertically and horizontally is significantly easier than doing so in a flat position. To simplify the process further, he divides the task into two or three steps as suggested by fellow expert “for for.” This approach not only makes it more manageable but also allows for greater precision in crafting each component.Step 2: Applying Glue and Securing
Sven proceeds to apply glue along one edge of the flange, ensuring a secure bond when clamped into place. He emphasizes that this stage is crucial for maintaining the structural integrity of the flange, which in turn safeguards the living area beneath the canvas when hatches are open.Step 3: Allowing Time to Dry
After securely attaching the first portion of the flange, Sven allows ample time for it to dry before moving forward with additional steps. This patience and precision are key aspects of his successful boatbuilding methods.Step 4: Finishing Touches
Once the flange is fully dried, Sven removes the clamps carefully, ensuring no damage occurs during this process. He then moves on to attaching four more pieces onto these main frames, completing two pairs of flanges for the bulkhead hatches.The Final Touches
While two flanges form the primary support structure around the hatches, Sven mentions there are two additional pieces required at each end to ensure comprehensive protection. This attention to detail highlights his commitment to producing a durable and reliable design. “Sailing is about finding your path, whether it’s across an ocean or within yourself.” – Sven Yrvind In conclusion, making flanges around bulkhead hatches may seem complex at first glance, but by following Sven Yrvind’s meticulous process, enthusiasts can achieve professional-level results. Remember that the journey of boatbuilding is as rewarding as reaching your destination; it tests one’s patience and dedication. For those seeking to embark on this adventure or simply gain more insight into marine craftsmanship, Sven’s wisdom is invaluable.Once the flange is fully dried, Sven removes the clamps carefully, ensuring no damage occurs during this process. He then moves on to attaching four more pieces onto these main frames, completing two pairs of flanges for the bulkhead hatches.The Final Touches
While two flanges form the primary support structure around the hatches, Sven mentions there are two additional pieces required at each end to ensure comprehensive protection. This attention to detail highlights his commitment to producing a durable and reliable design. “Sailing is about finding your path, whether it’s across an ocean or within yourself.” – Sven Yrvind In conclusion, making flanges around bulkhead hatches may seem complex at first glance, but by following Sven Yrvind’s meticulous process, enthusiasts can achieve professional-level results. Remember that the journey of boatbuilding is as rewarding as reaching your destination; it tests one’s patience and dedication. For those seeking to embark on this adventure or simply gain more insight into marine craftsmanship, Sven’s wisdom is invaluable.Sven proceeds to apply glue along one edge of the flange, ensuring a secure bond when clamped into place. He emphasizes that this stage is crucial for maintaining the structural integrity of the flange, which in turn safeguards the living area beneath the canvas when hatches are open.Step 3: Allowing Time to Dry
After securely attaching the first portion of the flange, Sven allows ample time for it to dry before moving forward with additional steps. This patience and precision are key aspects of his successful boatbuilding methods.Step 4: Finishing Touches
Once the flange is fully dried, Sven removes the clamps carefully, ensuring no damage occurs during this process. He then moves on to attaching four more pieces onto these main frames, completing two pairs of flanges for the bulkhead hatches.The Final Touches
While two flanges form the primary support structure around the hatches, Sven mentions there are two additional pieces required at each end to ensure comprehensive protection. This attention to detail highlights his commitment to producing a durable and reliable design. “Sailing is about finding your path, whether it’s across an ocean or within yourself.” – Sven Yrvind In conclusion, making flanges around bulkhead hatches may seem complex at first glance, but by following Sven Yrvind’s meticulous process, enthusiasts can achieve professional-level results. Remember that the journey of boatbuilding is as rewarding as reaching your destination; it tests one’s patience and dedication. For those seeking to embark on this adventure or simply gain more insight into marine craftsmanship, Sven’s wisdom is invaluable.Sven begins by explaining that working on flanges vertically and horizontally is significantly easier than doing so in a flat position. To simplify the process further, he divides the task into two or three steps as suggested by fellow expert “for for.” This approach not only makes it more manageable but also allows for greater precision in crafting each component.Step 2: Applying Glue and Securing
Sven proceeds to apply glue along one edge of the flange, ensuring a secure bond when clamped into place. He emphasizes that this stage is crucial for maintaining the structural integrity of the flange, which in turn safeguards the living area beneath the canvas when hatches are open.Step 3: Allowing Time to Dry
After securely attaching the first portion of the flange, Sven allows ample time for it to dry before moving forward with additional steps. This patience and precision are key aspects of his successful boatbuilding methods.Step 4: Finishing Touches
Once the flange is fully dried, Sven removes the clamps carefully, ensuring no damage occurs during this process. He then moves on to attaching four more pieces onto these main frames, completing two pairs of flanges for the bulkhead hatches.The Final Touches
While two flanges form the primary support structure around the hatches, Sven mentions there are two additional pieces required at each end to ensure comprehensive protection. This attention to detail highlights his commitment to producing a durable and reliable design. “Sailing is about finding your path, whether it’s across an ocean or within yourself.” – Sven Yrvind In conclusion, making flanges around bulkhead hatches may seem complex at first glance, but by following Sven Yrvind’s meticulous process, enthusiasts can achieve professional-level results. Remember that the journey of boatbuilding is as rewarding as reaching your destination; it tests one’s patience and dedication. For those seeking to embark on this adventure or simply gain more insight into marine craftsmanship, Sven’s wisdom is invaluable.Sven Yrvind, a renowned yacht designer and sailor, shares valuable insights on creating flanges around bulkhead hatches for canvas protection in this enlightening video. By following his expert guidance, boat enthusiasts can ensure their living areas remain secure while allowing unhindered access through the hatches.Step 1: Starting with the Flange
Sven begins by explaining that working on flanges vertically and horizontally is significantly easier than doing so in a flat position. To simplify the process further, he divides the task into two or three steps as suggested by fellow expert “for for.” This approach not only makes it more manageable but also allows for greater precision in crafting each component.Step 2: Applying Glue and Securing
Sven proceeds to apply glue along one edge of the flange, ensuring a secure bond when clamped into place. He emphasizes that this stage is crucial for maintaining the structural integrity of the flange, which in turn safeguards the living area beneath the canvas when hatches are open.Step 3: Allowing Time to Dry
After securely attaching the first portion of the flange, Sven allows ample time for it to dry before moving forward with additional steps. This patience and precision are key aspects of his successful boatbuilding methods.Step 4: Finishing Touches
Once the flange is fully dried, Sven removes the clamps carefully, ensuring no damage occurs during this process. He then moves on to attaching four more pieces onto these main frames, completing two pairs of flanges for the bulkhead hatches.The Final Touches
While two flanges form the primary support structure around the hatches, Sven mentions there are two additional pieces required at each end to ensure comprehensive protection. This attention to detail highlights his commitment to producing a durable and reliable design. “Sailing is about finding your path, whether it’s across an ocean or within yourself.” – Sven Yrvind In conclusion, making flanges around bulkhead hatches may seem complex at first glance, but by following Sven Yrvind’s meticulous process, enthusiasts can achieve professional-level results. Remember that the journey of boatbuilding is as rewarding as reaching your destination; it tests one’s patience and dedication. For those seeking to embark on this adventure or simply gain more insight into marine craftsmanship, Sven’s wisdom is invaluable.Making Flanges Around Bulkhead Hatches for Canvas
Sven Yrvind, a renowned yacht designer and sailor, shares valuable insights on creating flanges around bulkhead hatches for canvas protection in this enlightening video. By following his expert guidance, boat enthusiasts can ensure their living areas remain secure while allowing unhindered access through the hatches.Step 1: Starting with the Flange
Sven begins by explaining that working on flanges vertically and horizontally is significantly easier than doing so in a flat position. To simplify the process further, he divides the task into two or three steps as suggested by fellow expert “for for.” This approach not only makes it more manageable but also allows for greater precision in crafting each component.Step 2: Applying Glue and Securing
Sven proceeds to apply glue along one edge of the flange, ensuring a secure bond when clamped into place. He emphasizes that this stage is crucial for maintaining the structural integrity of the flange, which in turn safeguards the living area beneath the canvas when hatches are open.Step 3: Allowing Time to Dry
After securely attaching the first portion of the flange, Sven allows ample time for it to dry before moving forward with additional steps. This patience and precision are key aspects of his successful boatbuilding methods.Step 4: Finishing Touches
Once the flange is fully dried, Sven removes the clamps carefully, ensuring no damage occurs during this process. He then moves on to attaching four more pieces onto these main frames, completing two pairs of flanges for the bulkhead hatches.The Final Touches
While two flanges form the primary support structure around the hatches, Sven mentions there are two additional pieces required at each end to ensure comprehensive protection. This attention to detail highlights his commitment to producing a durable and reliable design. “Sailing is about finding your path, whether it’s across an ocean or within yourself.” – Sven Yrvind In conclusion, making flanges around bulkhead hatches may seem complex at first glance, but by following Sven Yrvind’s meticulous process, enthusiasts can achieve professional-level results. Remember that the journey of boatbuilding is as rewarding as reaching your destination; it tests one’s patience and dedication. For those seeking to embark on this adventure or simply gain more insight into marine craftsmanship, Sven’s wisdom is invaluable.After securely attaching the first portion of the flange, Sven allows ample time for it to dry before moving forward with additional steps. This patience and precision are key aspects of his successful boatbuilding methods.Step 4: Finishing Touches
Once the flange is fully dried, Sven removes the clamps carefully, ensuring no damage occurs during this process. He then moves on to attaching four more pieces onto these main frames, completing two pairs of flanges for the bulkhead hatches.The Final Touches
While two flanges form the primary support structure around the hatches, Sven mentions there are two additional pieces required at each end to ensure comprehensive protection. This attention to detail highlights his commitment to producing a durable and reliable design. “Sailing is about finding your path, whether it’s across an ocean or within yourself.” – Sven Yrvind In conclusion, making flanges around bulkhead hatches may seem complex at first glance, but by following Sven Yrvind’s meticulous process, enthusiasts can achieve professional-level results. Remember that the journey of boatbuilding is as rewarding as reaching your destination; it tests one’s patience and dedication. For those seeking to embark on this adventure or simply gain more insight into marine craftsmanship, Sven’s wisdom is invaluable.Sven proceeds to apply glue along one edge of the flange, ensuring a secure bond when clamped into place. He emphasizes that this stage is crucial for maintaining the structural integrity of the flange, which in turn safeguards the living area beneath the canvas when hatches are open.Step 3: Allowing Time to Dry
After securely attaching the first portion of the flange, Sven allows ample time for it to dry before moving forward with additional steps. This patience and precision are key aspects of his successful boatbuilding methods.Step 4: Finishing Touches
Once the flange is fully dried, Sven removes the clamps carefully, ensuring no damage occurs during this process. He then moves on to attaching four more pieces onto these main frames, completing two pairs of flanges for the bulkhead hatches.The Final Touches
While two flanges form the primary support structure around the hatches, Sven mentions there are two additional pieces required at each end to ensure comprehensive protection. This attention to detail highlights his commitment to producing a durable and reliable design. “Sailing is about finding your path, whether it’s across an ocean or within yourself.” – Sven Yrvind In conclusion, making flanges around bulkhead hatches may seem complex at first glance, but by following Sven Yrvind’s meticulous process, enthusiasts can achieve professional-level results. Remember that the journey of boatbuilding is as rewarding as reaching your destination; it tests one’s patience and dedication. For those seeking to embark on this adventure or simply gain more insight into marine craftsmanship, Sven’s wisdom is invaluable.Sven begins by explaining that working on flanges vertically and horizontally is significantly easier than doing so in a flat position. To simplify the process further, he divides the task into two or three steps as suggested by fellow expert “for for.” This approach not only makes it more manageable but also allows for greater precision in crafting each component.Step 2: Applying Glue and Securing
Sven proceeds to apply glue along one edge of the flange, ensuring a secure bond when clamped into place. He emphasizes that this stage is crucial for maintaining the structural integrity of the flange, which in turn safeguards the living area beneath the canvas when hatches are open.Step 3: Allowing Time to Dry
After securely attaching the first portion of the flange, Sven allows ample time for it to dry before moving forward with additional steps. This patience and precision are key aspects of his successful boatbuilding methods.Step 4: Finishing Touches
Once the flange is fully dried, Sven removes the clamps carefully, ensuring no damage occurs during this process. He then moves on to attaching four more pieces onto these main frames, completing two pairs of flanges for the bulkhead hatches.The Final Touches
While two flanges form the primary support structure around the hatches, Sven mentions there are two additional pieces required at each end to ensure comprehensive protection. This attention to detail highlights his commitment to producing a durable and reliable design. “Sailing is about finding your path, whether it’s across an ocean or within yourself.” – Sven Yrvind In conclusion, making flanges around bulkhead hatches may seem complex at first glance, but by following Sven Yrvind’s meticulous process, enthusiasts can achieve professional-level results. Remember that the journey of boatbuilding is as rewarding as reaching your destination; it tests one’s patience and dedication. For those seeking to embark on this adventure or simply gain more insight into marine craftsmanship, Sven’s wisdom is invaluable.Sven Yrvind, a renowned yacht designer and sailor, shares valuable insights on creating flanges around bulkhead hatches for canvas protection in this enlightening video. By following his expert guidance, boat enthusiasts can ensure their living areas remain secure while allowing unhindered access through the hatches.Step 1: Starting with the Flange
Sven begins by explaining that working on flanges vertically and horizontally is significantly easier than doing so in a flat position. To simplify the process further, he divides the task into two or three steps as suggested by fellow expert “for for.” This approach not only makes it more manageable but also allows for greater precision in crafting each component.Step 2: Applying Glue and Securing
Sven proceeds to apply glue along one edge of the flange, ensuring a secure bond when clamped into place. He emphasizes that this stage is crucial for maintaining the structural integrity of the flange, which in turn safeguards the living area beneath the canvas when hatches are open.Step 3: Allowing Time to Dry
After securely attaching the first portion of the flange, Sven allows ample time for it to dry before moving forward with additional steps. This patience and precision are key aspects of his successful boatbuilding methods.Step 4: Finishing Touches
Once the flange is fully dried, Sven removes the clamps carefully, ensuring no damage occurs during this process. He then moves on to attaching four more pieces onto these main frames, completing two pairs of flanges for the bulkhead hatches.The Final Touches
While two flanges form the primary support structure around the hatches, Sven mentions there are two additional pieces required at each end to ensure comprehensive protection. This attention to detail highlights his commitment to producing a durable and reliable design. “Sailing is about finding your path, whether it’s across an ocean or within yourself.” – Sven Yrvind In conclusion, making flanges around bulkhead hatches may seem complex at first glance, but by following Sven Yrvind’s meticulous process, enthusiasts can achieve professional-level results. Remember that the journey of boatbuilding is as rewarding as reaching your destination; it tests one’s patience and dedication. For those seeking to embark on this adventure or simply gain more insight into marine craftsmanship, Sven’s wisdom is invaluable.Making Flanges Around Bulkhead Hatches for Canvas
Sven Yrvind, a renowned yacht designer and sailor, shares valuable insights on creating flanges around bulkhead hatches for canvas protection in this enlightening video. By following his expert guidance, boat enthusiasts can ensure their living areas remain secure while allowing unhindered access through the hatches.Step 1: Starting with the Flange
Sven begins by explaining that working on flanges vertically and horizontally is significantly easier than doing so in a flat position. To simplify the process further, he divides the task into two or three steps as suggested by fellow expert “for for.” This approach not only makes it more manageable but also allows for greater precision in crafting each component.Step 2: Applying Glue and Securing
Sven proceeds to apply glue along one edge of the flange, ensuring a secure bond when clamped into place. He emphasizes that this stage is crucial for maintaining the structural integrity of the flange, which in turn safeguards the living area beneath the canvas when hatches are open.Step 3: Allowing Time to Dry
After securely attaching the first portion of the flange, Sven allows ample time for it to dry before moving forward with additional steps. This patience and precision are key aspects of his successful boatbuilding methods.Step 4: Finishing Touches
Once the flange is fully dried, Sven removes the clamps carefully, ensuring no damage occurs during this process. He then moves on to attaching four more pieces onto these main frames, completing two pairs of flanges for the bulkhead hatches.The Final Touches
While two flanges form the primary support structure around the hatches, Sven mentions there are two additional pieces required at each end to ensure comprehensive protection. This attention to detail highlights his commitment to producing a durable and reliable design. “Sailing is about finding your path, whether it’s across an ocean or within yourself.” – Sven Yrvind In conclusion, making flanges around bulkhead hatches may seem complex at first glance, but by following Sven Yrvind’s meticulous process, enthusiasts can achieve professional-level results. Remember that the journey of boatbuilding is as rewarding as reaching your destination; it tests one’s patience and dedication. For those seeking to embark on this adventure or simply gain more insight into marine craftsmanship, Sven’s wisdom is invaluable.Once the flange is fully dried, Sven removes the clamps carefully, ensuring no damage occurs during this process. He then moves on to attaching four more pieces onto these main frames, completing two pairs of flanges for the bulkhead hatches.The Final Touches
While two flanges form the primary support structure around the hatches, Sven mentions there are two additional pieces required at each end to ensure comprehensive protection. This attention to detail highlights his commitment to producing a durable and reliable design. “Sailing is about finding your path, whether it’s across an ocean or within yourself.” – Sven Yrvind In conclusion, making flanges around bulkhead hatches may seem complex at first glance, but by following Sven Yrvind’s meticulous process, enthusiasts can achieve professional-level results. Remember that the journey of boatbuilding is as rewarding as reaching your destination; it tests one’s patience and dedication. For those seeking to embark on this adventure or simply gain more insight into marine craftsmanship, Sven’s wisdom is invaluable.After securely attaching the first portion of the flange, Sven allows ample time for it to dry before moving forward with additional steps. This patience and precision are key aspects of his successful boatbuilding methods.Step 4: Finishing Touches
Once the flange is fully dried, Sven removes the clamps carefully, ensuring no damage occurs during this process. He then moves on to attaching four more pieces onto these main frames, completing two pairs of flanges for the bulkhead hatches.The Final Touches
While two flanges form the primary support structure around the hatches, Sven mentions there are two additional pieces required at each end to ensure comprehensive protection. This attention to detail highlights his commitment to producing a durable and reliable design. “Sailing is about finding your path, whether it’s across an ocean or within yourself.” – Sven Yrvind In conclusion, making flanges around bulkhead hatches may seem complex at first glance, but by following Sven Yrvind’s meticulous process, enthusiasts can achieve professional-level results. Remember that the journey of boatbuilding is as rewarding as reaching your destination; it tests one’s patience and dedication. For those seeking to embark on this adventure or simply gain more insight into marine craftsmanship, Sven’s wisdom is invaluable.Sven proceeds to apply glue along one edge of the flange, ensuring a secure bond when clamped into place. He emphasizes that this stage is crucial for maintaining the structural integrity of the flange, which in turn safeguards the living area beneath the canvas when hatches are open.Step 3: Allowing Time to Dry
After securely attaching the first portion of the flange, Sven allows ample time for it to dry before moving forward with additional steps. This patience and precision are key aspects of his successful boatbuilding methods.Step 4: Finishing Touches
Once the flange is fully dried, Sven removes the clamps carefully, ensuring no damage occurs during this process. He then moves on to attaching four more pieces onto these main frames, completing two pairs of flanges for the bulkhead hatches.The Final Touches
While two flanges form the primary support structure around the hatches, Sven mentions there are two additional pieces required at each end to ensure comprehensive protection. This attention to detail highlights his commitment to producing a durable and reliable design. “Sailing is about finding your path, whether it’s across an ocean or within yourself.” – Sven Yrvind In conclusion, making flanges around bulkhead hatches may seem complex at first glance, but by following Sven Yrvind’s meticulous process, enthusiasts can achieve professional-level results. Remember that the journey of boatbuilding is as rewarding as reaching your destination; it tests one’s patience and dedication. For those seeking to embark on this adventure or simply gain more insight into marine craftsmanship, Sven’s wisdom is invaluable.Sven begins by explaining that working on flanges vertically and horizontally is significantly easier than doing so in a flat position. To simplify the process further, he divides the task into two or three steps as suggested by fellow expert “for for.” This approach not only makes it more manageable but also allows for greater precision in crafting each component.Step 2: Applying Glue and Securing
Sven proceeds to apply glue along one edge of the flange, ensuring a secure bond when clamped into place. He emphasizes that this stage is crucial for maintaining the structural integrity of the flange, which in turn safeguards the living area beneath the canvas when hatches are open.Step 3: Allowing Time to Dry
After securely attaching the first portion of the flange, Sven allows ample time for it to dry before moving forward with additional steps. This patience and precision are key aspects of his successful boatbuilding methods.Step 4: Finishing Touches
Once the flange is fully dried, Sven removes the clamps carefully, ensuring no damage occurs during this process. He then moves on to attaching four more pieces onto these main frames, completing two pairs of flanges for the bulkhead hatches.The Final Touches
While two flanges form the primary support structure around the hatches, Sven mentions there are two additional pieces required at each end to ensure comprehensive protection. This attention to detail highlights his commitment to producing a durable and reliable design. “Sailing is about finding your path, whether it’s across an ocean or within yourself.” – Sven Yrvind In conclusion, making flanges around bulkhead hatches may seem complex at first glance, but by following Sven Yrvind’s meticulous process, enthusiasts can achieve professional-level results. Remember that the journey of boatbuilding is as rewarding as reaching your destination; it tests one’s patience and dedication. For those seeking to embark on this adventure or simply gain more insight into marine craftsmanship, Sven’s wisdom is invaluable.Sven Yrvind, a renowned yacht designer and sailor, shares valuable insights on creating flanges around bulkhead hatches for canvas protection in this enlightening video. By following his expert guidance, boat enthusiasts can ensure their living areas remain secure while allowing unhindered access through the hatches.Step 1: Starting with the Flange
Sven begins by explaining that working on flanges vertically and horizontally is significantly easier than doing so in a flat position. To simplify the process further, he divides the task into two or three steps as suggested by fellow expert “for for.” This approach not only makes it more manageable but also allows for greater precision in crafting each component.Step 2: Applying Glue and Securing
Sven proceeds to apply glue along one edge of the flange, ensuring a secure bond when clamped into place. He emphasizes that this stage is crucial for maintaining the structural integrity of the flange, which in turn safeguards the living area beneath the canvas when hatches are open.Step 3: Allowing Time to Dry
After securely attaching the first portion of the flange, Sven allows ample time for it to dry before moving forward with additional steps. This patience and precision are key aspects of his successful boatbuilding methods.Step 4: Finishing Touches
Once the flange is fully dried, Sven removes the clamps carefully, ensuring no damage occurs during this process. He then moves on to attaching four more pieces onto these main frames, completing two pairs of flanges for the bulkhead hatches.The Final Touches
While two flanges form the primary support structure around the hatches, Sven mentions there are two additional pieces required at each end to ensure comprehensive protection. This attention to detail highlights his commitment to producing a durable and reliable design. “Sailing is about finding your path, whether it’s across an ocean or within yourself.” – Sven Yrvind In conclusion, making flanges around bulkhead hatches may seem complex at first glance, but by following Sven Yrvind’s meticulous process, enthusiasts can achieve professional-level results. Remember that the journey of boatbuilding is as rewarding as reaching your destination; it tests one’s patience and dedication. For those seeking to embark on this adventure or simply gain more insight into marine craftsmanship, Sven’s wisdom is invaluable.Making Flanges Around Bulkhead Hatches for Canvas
Sven Yrvind, a renowned yacht designer and sailor, shares valuable insights on creating flanges around bulkhead hatches for canvas protection in this enlightening video. By following his expert guidance, boat enthusiasts can ensure their living areas remain secure while allowing unhindered access through the hatches.Step 1: Starting with the Flange
Sven begins by explaining that working on flanges vertically and horizontally is significantly easier than doing so in a flat position. To simplify the process further, he divides the task into two or three steps as suggested by fellow expert “for for.” This approach not only makes it more manageable but also allows for greater precision in crafting each component.Step 2: Applying Glue and Securing
Sven proceeds to apply glue along one edge of the flange, ensuring a secure bond when clamped into place. He emphasizes that this stage is crucial for maintaining the structural integrity of the flange, which in turn safeguards the living area beneath the canvas when hatches are open.Step 3: Allowing Time to Dry
After securely attaching the first portion of the flange, Sven allows ample time for it to dry before moving forward with additional steps. This patience and precision are key aspects of his successful boatbuilding methods.Step 4: Finishing Touches
Once the flange is fully dried, Sven removes the clamps carefully, ensuring no damage occurs during this process. He then moves on to attaching four more pieces onto these main frames, completing two pairs of flanges for the bulkhead hatches.The Final Touches
While two flanges form the primary support structure around the hatches, Sven mentions there are two additional pieces required at each end to ensure comprehensive protection. This attention to detail highlights his commitment to producing a durable and reliable design. “Sailing is about finding your path, whether it’s across an ocean or within yourself.” – Sven Yrvind In conclusion, making flanges around bulkhead hatches may seem complex at first glance, but by following Sven Yrvind’s meticulous process, enthusiasts can achieve professional-level results. Remember that the journey of boatbuilding is as rewarding as reaching your destination; it tests one’s patience and dedication. For those seeking to embark on this adventure or simply gain more insight into marine craftsmanship, Sven’s wisdom is invaluable.Sven begins by explaining that working on flanges vertically and horizontally is significantly easier than doing so in a flat position. To simplify the process further, he divides the task into two or three steps as suggested by fellow expert “for for.” This approach not only makes it more manageable but also allows for greater precision in crafting each component.Step 2: Applying Glue and Securing
Sven proceeds to apply glue along one edge of the flange, ensuring a secure bond when clamped into place. He emphasizes that this stage is crucial for maintaining the structural integrity of the flange, which in turn safeguards the living area beneath the canvas when hatches are open.Step 3: Allowing Time to Dry
After securely attaching the first portion of the flange, Sven allows ample time for it to dry before moving forward with additional steps. This patience and precision are key aspects of his successful boatbuilding methods.Step 4: Finishing Touches
Once the flange is fully dried, Sven removes the clamps carefully, ensuring no damage occurs during this process. He then moves on to attaching four more pieces onto these main frames, completing two pairs of flanges for the bulkhead hatches.The Final Touches
While two flanges form the primary support structure around the hatches, Sven mentions there are two additional pieces required at each end to ensure comprehensive protection. This attention to detail highlights his commitment to producing a durable and reliable design. “Sailing is about finding your path, whether it’s across an ocean or within yourself.” – Sven Yrvind In conclusion, making flanges around bulkhead hatches may seem complex at first glance, but by following Sven Yrvind’s meticulous process, enthusiasts can achieve professional-level results. Remember that the journey of boatbuilding is as rewarding as reaching your destination; it tests one’s patience and dedication. For those seeking to embark on this adventure or simply gain more insight into marine craftsmanship, Sven’s wisdom is invaluable.Making Flanges Around Bulkhead Hatches for Canvas
Sven Yrvind, a renowned yacht designer and sailor, shares valuable insights on creating flanges around bulkhead hatches for canvas protection in this enlightening video. By following his expert guidance, boat enthusiasts can ensure their living areas remain secure while allowing unhindered access through the hatches.Step 1: Starting with the Flange
Sven begins by explaining that working on flanges vertically and horizontally is significantly easier than doing so in a flat position. To simplify the process further, he divides the task into two or three steps as suggested by fellow expert “for for.” This approach not only makes it more manageable but also allows for greater precision in crafting each component.Step 2: Applying Glue and Securing
Sven proceeds to apply glue along one edge of the flange, ensuring a secure bond when clamped into place. He emphasizes that this stage is crucial for maintaining the structural integrity of the flange, which in turn safeguards the living area beneath the canvas when hatches are open.Step 3: Allowing Time to Dry
After securely attaching the first portion of the flange, Sven allows ample time for it to dry before moving forward with additional steps. This patience and precision are key aspects of his successful boatbuilding methods.Step 4: Finishing Touches
Once the flange is fully dried, Sven removes the clamps carefully, ensuring no damage occurs during this process. He then moves on to attaching four more pieces onto these main frames, completing two pairs of flanges for the bulkhead hatches.The Final Touches
While two flanges form the primary support structure around the hatches, Sven mentions there are two additional pieces required at each end to ensure comprehensive protection. This attention to detail highlights his commitment to producing a durable and reliable design. “Sailing is about finding your path, whether it’s across an ocean or within yourself.” – Sven Yrvind In conclusion, making flanges around bulkhead hatches may seem complex at first glance, but by following Sven Yrvind’s meticulous process, enthusiasts can achieve professional-level results. Remember that the journey of boatbuilding is as rewarding as reaching your destination; it tests one’s patience and dedication. For those seeking to embark on this adventure or simply gain more insight into marine craftsmanship, Sven’s wisdom is invaluable.Once the flange is fully dried, Sven removes the clamps carefully, ensuring no damage occurs during this process. He then moves on to attaching four more pieces onto these main frames, completing two pairs of flanges for the bulkhead hatches.The Final Touches
While two flanges form the primary support structure around the hatches, Sven mentions there are two additional pieces required at each end to ensure comprehensive protection. This attention to detail highlights his commitment to producing a durable and reliable design. “Sailing is about finding your path, whether it’s across an ocean or within yourself.” – Sven Yrvind In conclusion, making flanges around bulkhead hatches may seem complex at first glance, but by following Sven Yrvind’s meticulous process, enthusiasts can achieve professional-level results. Remember that the journey of boatbuilding is as rewarding as reaching your destination; it tests one’s patience and dedication. For those seeking to embark on this adventure or simply gain more insight into marine craftsmanship, Sven’s wisdom is invaluable.Sven Yrvind, a renowned yacht designer and sailor, shares valuable insights on creating flanges around bulkhead hatches for canvas protection in this enlightening video. By following his expert guidance, boat enthusiasts can ensure their living areas remain secure while allowing unhindered access through the hatches.Step 1: Starting with the Flange
Sven begins by explaining that working on flanges vertically and horizontally is significantly easier than doing so in a flat position. To simplify the process further, he divides the task into two or three steps as suggested by fellow expert “for for.” This approach not only makes it more manageable but also allows for greater precision in crafting each component.Step 2: Applying Glue and Securing
Sven proceeds to apply glue along one edge of the flange, ensuring a secure bond when clamped into place. He emphasizes that this stage is crucial for maintaining the structural integrity of the flange, which in turn safeguards the living area beneath the canvas when hatches are open.Step 3: Allowing Time to Dry
After securely attaching the first portion of the flange, Sven allows ample time for it to dry before moving forward with additional steps. This patience and precision are key aspects of his successful boatbuilding methods.Step 4: Finishing Touches
Once the flange is fully dried, Sven removes the clamps carefully, ensuring no damage occurs during this process. He then moves on to attaching four more pieces onto these main frames, completing two pairs of flanges for the bulkhead hatches.The Final Touches
While two flanges form the primary support structure around the hatches, Sven mentions there are two additional pieces required at each end to ensure comprehensive protection. This attention to detail highlights his commitment to producing a durable and reliable design. “Sailing is about finding your path, whether it’s across an ocean or within yourself.” – Sven Yrvind In conclusion, making flanges around bulkhead hatches may seem complex at first glance, but by following Sven Yrvind’s meticulous process, enthusiasts can achieve professional-level results. Remember that the journey of boatbuilding is as rewarding as reaching your destination; it tests one’s patience and dedication. For those seeking to embark on this adventure or simply gain more insight into marine craftsmanship, Sven’s wisdom is invaluable.Making Flanges Around Bulkhead Hatches for Canvas
Sven Yrvind, a renowned yacht designer and sailor, shares valuable insights on creating flanges around bulkhead hatches for canvas protection in this enlightening video. By following his expert guidance, boat enthusiasts can ensure their living areas remain secure while allowing unhindered access through the hatches.Step 1: Starting with the Flange
Sven begins by explaining that working on flanges vertically and horizontally is significantly easier than doing so in a flat position. To simplify the process further, he divides the task into two or three steps as suggested by fellow expert “for for.” This approach not only makes it more manageable but also allows for greater precision in crafting each component.Step 2: Applying Glue and Securing
Sven proceeds to apply glue along one edge of the flange, ensuring a secure bond when clamped into place. He emphasizes that this stage is crucial for maintaining the structural integrity of the flange, which in turn safeguards the living area beneath the canvas when hatches are open.Step 3: Allowing Time to Dry
After securely attaching the first portion of the flange, Sven allows ample time for it to dry before moving forward with additional steps. This patience and precision are key aspects of his successful boatbuilding methods.Step 4: Finishing Touches
Once the flange is fully dried, Sven removes the clamps carefully, ensuring no damage occurs during this process. He then moves on to attaching four more pieces onto these main frames, completing two pairs of flanges for the bulkhead hatches.The Final Touches
While two flanges form the primary support structure around the hatches, Sven mentions there are two additional pieces required at each end to ensure comprehensive protection. This attention to detail highlights his commitment to producing a durable and reliable design. “Sailing is about finding your path, whether it’s across an ocean or within yourself.” – Sven Yrvind In conclusion, making flanges around bulkhead hatches may seem complex at first glance, but by following Sven Yrvind’s meticulous process, enthusiasts can achieve professional-level results. Remember that the journey of boatbuilding is as rewarding as reaching your destination; it tests one’s patience and dedication. For those seeking to embark on this adventure or simply gain more insight into marine craftsmanship, Sven’s wisdom is invaluable.After securely attaching the first portion of the flange, Sven allows ample time for it to dry before moving forward with additional steps. This patience and precision are key aspects of his successful boatbuilding methods.Step 4: Finishing Touches
Once the flange is fully dried, Sven removes the clamps carefully, ensuring no damage occurs during this process. He then moves on to attaching four more pieces onto these main frames, completing two pairs of flanges for the bulkhead hatches.The Final Touches
While two flanges form the primary support structure around the hatches, Sven mentions there are two additional pieces required at each end to ensure comprehensive protection. This attention to detail highlights his commitment to producing a durable and reliable design. “Sailing is about finding your path, whether it’s across an ocean or within yourself.” – Sven Yrvind In conclusion, making flanges around bulkhead hatches may seem complex at first glance, but by following Sven Yrvind’s meticulous process, enthusiasts can achieve professional-level results. Remember that the journey of boatbuilding is as rewarding as reaching your destination; it tests one’s patience and dedication. For those seeking to embark on this adventure or simply gain more insight into marine craftsmanship, Sven’s wisdom is invaluable.Sven Yrvind, a renowned yacht designer and sailor, shares valuable insights on creating flanges around bulkhead hatches for canvas protection in this enlightening video. By following his expert guidance, boat enthusiasts can ensure their living areas remain secure while allowing unhindered access through the hatches.Step 1: Starting with the Flange
Sven begins by explaining that working on flanges vertically and horizontally is significantly easier than doing so in a flat position. To simplify the process further, he divides the task into two or three steps as suggested by fellow expert “for for.” This approach not only makes it more manageable but also allows for greater precision in crafting each component.Step 2: Applying Glue and Securing
Sven proceeds to apply glue along one edge of the flange, ensuring a secure bond when clamped into place. He emphasizes that this stage is crucial for maintaining the structural integrity of the flange, which in turn safeguards the living area beneath the canvas when hatches are open.Step 3: Allowing Time to Dry
After securely attaching the first portion of the flange, Sven allows ample time for it to dry before moving forward with additional steps. This patience and precision are key aspects of his successful boatbuilding methods.Step 4: Finishing Touches
Once the flange is fully dried, Sven removes the clamps carefully, ensuring no damage occurs during this process. He then moves on to attaching four more pieces onto these main frames, completing two pairs of flanges for the bulkhead hatches.The Final Touches
While two flanges form the primary support structure around the hatches, Sven mentions there are two additional pieces required at each end to ensure comprehensive protection. This attention to detail highlights his commitment to producing a durable and reliable design. “Sailing is about finding your path, whether it’s across an ocean or within yourself.” – Sven Yrvind In conclusion, making flanges around bulkhead hatches may seem complex at first glance, but by following Sven Yrvind’s meticulous process, enthusiasts can achieve professional-level results. Remember that the journey of boatbuilding is as rewarding as reaching your destination; it tests one’s patience and dedication. For those seeking to embark on this adventure or simply gain more insight into marine craftsmanship, Sven’s wisdom is invaluable.Making Flanges Around Bulkhead Hatches for Canvas
Sven Yrvind, a renowned yacht designer and sailor, shares valuable insights on creating flanges around bulkhead hatches for canvas protection in this enlightening video. By following his expert guidance, boat enthusiasts can ensure their living areas remain secure while allowing unhindered access through the hatches.Step 1: Starting with the Flange
Sven begins by explaining that working on flanges vertically and horizontally is significantly easier than doing so in a flat position. To simplify the process further, he divides the task into two or three steps as suggested by fellow expert “for for.” This approach not only makes it more manageable but also allows for greater precision in crafting each component.Step 2: Applying Glue and Securing
Sven proceeds to apply glue along one edge of the flange, ensuring a secure bond when clamped into place. He emphasizes that this stage is crucial for maintaining the structural integrity of the flange, which in turn safeguards the living area beneath the canvas when hatches are open.Step 3: Allowing Time to Dry
After securely attaching the first portion of the flange, Sven allows ample time for it to dry before moving forward with additional steps. This patience and precision are key aspects of his successful boatbuilding methods.Step 4: Finishing Touches
Once the flange is fully dried, Sven removes the clamps carefully, ensuring no damage occurs during this process. He then moves on to attaching four more pieces onto these main frames, completing two pairs of flanges for the bulkhead hatches.The Final Touches
While two flanges form the primary support structure around the hatches, Sven mentions there are two additional pieces required at each end to ensure comprehensive protection. This attention to detail highlights his commitment to producing a durable and reliable design. “Sailing is about finding your path, whether it’s across an ocean or within yourself.” – Sven Yrvind In conclusion, making flanges around bulkhead hatches may seem complex at first glance, but by following Sven Yrvind’s meticulous process, enthusiasts can achieve professional-level results. Remember that the journey of boatbuilding is as rewarding as reaching your destination; it tests one’s patience and dedication. For those seeking to embark on this adventure or simply gain more insight into marine craftsmanship, Sven’s wisdom is invaluable.Sven proceeds to apply glue along one edge of the flange, ensuring a secure bond when clamped into place. He emphasizes that this stage is crucial for maintaining the structural integrity of the flange, which in turn safeguards the living area beneath the canvas when hatches are open.Step 3: Allowing Time to Dry
After securely attaching the first portion of the flange, Sven allows ample time for it to dry before moving forward with additional steps. This patience and precision are key aspects of his successful boatbuilding methods.Step 4: Finishing Touches
Once the flange is fully dried, Sven removes the clamps carefully, ensuring no damage occurs during this process. He then moves on to attaching four more pieces onto these main frames, completing two pairs of flanges for the bulkhead hatches.The Final Touches
While two flanges form the primary support structure around the hatches, Sven mentions there are two additional pieces required at each end to ensure comprehensive protection. This attention to detail highlights his commitment to producing a durable and reliable design. “Sailing is about finding your path, whether it’s across an ocean or within yourself.” – Sven Yrvind In conclusion, making flanges around bulkhead hatches may seem complex at first glance, but by following Sven Yrvind’s meticulous process, enthusiasts can achieve professional-level results. Remember that the journey of boatbuilding is as rewarding as reaching your destination; it tests one’s patience and dedication. For those seeking to embark on this adventure or simply gain more insight into marine craftsmanship, Sven’s wisdom is invaluable.Sven Yrvind, a renowned yacht designer and sailor, shares valuable insights on creating flanges around bulkhead hatches for canvas protection in this enlightening video. By following his expert guidance, boat enthusiasts can ensure their living areas remain secure while allowing unhindered access through the hatches.Step 1: Starting with the Flange
Sven begins by explaining that working on flanges vertically and horizontally is significantly easier than doing so in a flat position. To simplify the process further, he divides the task into two or three steps as suggested by fellow expert “for for.” This approach not only makes it more manageable but also allows for greater precision in crafting each component.Step 2: Applying Glue and Securing
Sven proceeds to apply glue along one edge of the flange, ensuring a secure bond when clamped into place. He emphasizes that this stage is crucial for maintaining the structural integrity of the flange, which in turn safeguards the living area beneath the canvas when hatches are open.Step 3: Allowing Time to Dry
After securely attaching the first portion of the flange, Sven allows ample time for it to dry before moving forward with additional steps. This patience and precision are key aspects of his successful boatbuilding methods.Step 4: Finishing Touches
Once the flange is fully dried, Sven removes the clamps carefully, ensuring no damage occurs during this process. He then moves on to attaching four more pieces onto these main frames, completing two pairs of flanges for the bulkhead hatches.The Final Touches
While two flanges form the primary support structure around the hatches, Sven mentions there are two additional pieces required at each end to ensure comprehensive protection. This attention to detail highlights his commitment to producing a durable and reliable design. “Sailing is about finding your path, whether it’s across an ocean or within yourself.” – Sven Yrvind In conclusion, making flanges around bulkhead hatches may seem complex at first glance, but by following Sven Yrvind’s meticulous process, enthusiasts can achieve professional-level results. Remember that the journey of boatbuilding is as rewarding as reaching your destination; it tests one’s patience and dedication. For those seeking to embark on this adventure or simply gain more insight into marine craftsmanship, Sven’s wisdom is invaluable.Making Flanges Around Bulkhead Hatches for Canvas
Sven Yrvind, a renowned yacht designer and sailor, shares valuable insights on creating flanges around bulkhead hatches for canvas protection in this enlightening video. By following his expert guidance, boat enthusiasts can ensure their living areas remain secure while allowing unhindered access through the hatches.Step 1: Starting with the Flange
Sven begins by explaining that working on flanges vertically and horizontally is significantly easier than doing so in a flat position. To simplify the process further, he divides the task into two or three steps as suggested by fellow expert “for for.” This approach not only makes it more manageable but also allows for greater precision in crafting each component.Step 2: Applying Glue and Securing
Sven proceeds to apply glue along one edge of the flange, ensuring a secure bond when clamped into place. He emphasizes that this stage is crucial for maintaining the structural integrity of the flange, which in turn safeguards the living area beneath the canvas when hatches are open.Step 3: Allowing Time to Dry
After securely attaching the first portion of the flange, Sven allows ample time for it to dry before moving forward with additional steps. This patience and precision are key aspects of his successful boatbuilding methods.Step 4: Finishing Touches
Once the flange is fully dried, Sven removes the clamps carefully, ensuring no damage occurs during this process. He then moves on to attaching four more pieces onto these main frames, completing two pairs of flanges for the bulkhead hatches.The Final Touches
While two flanges form the primary support structure around the hatches, Sven mentions there are two additional pieces required at each end to ensure comprehensive protection. This attention to detail highlights his commitment to producing a durable and reliable design. “Sailing is about finding your path, whether it’s across an ocean or within yourself.” – Sven Yrvind In conclusion, making flanges around bulkhead hatches may seem complex at first glance, but by following Sven Yrvind’s meticulous process, enthusiasts can achieve professional-level results. Remember that the journey of boatbuilding is as rewarding as reaching your destination; it tests one’s patience and dedication. For those seeking to embark on this adventure or simply gain more insight into marine craftsmanship, Sven’s wisdom is invaluable.Sven begins by explaining that working on flanges vertically and horizontally is significantly easier than doing so in a flat position. To simplify the process further, he divides the task into two or three steps as suggested by fellow expert “for for.” This approach not only makes it more manageable but also allows for greater precision in crafting each component.Step 2: Applying Glue and Securing
Sven proceeds to apply glue along one edge of the flange, ensuring a secure bond when clamped into place. He emphasizes that this stage is crucial for maintaining the structural integrity of the flange, which in turn safeguards the living area beneath the canvas when hatches are open.Step 3: Allowing Time to Dry
After securely attaching the first portion of the flange, Sven allows ample time for it to dry before moving forward with additional steps. This patience and precision are key aspects of his successful boatbuilding methods.Step 4: Finishing Touches
Once the flange is fully dried, Sven removes the clamps carefully, ensuring no damage occurs during this process. He then moves on to attaching four more pieces onto these main frames, completing two pairs of flanges for the bulkhead hatches.The Final Touches
While two flanges form the primary support structure around the hatches, Sven mentions there are two additional pieces required at each end to ensure comprehensive protection. This attention to detail highlights his commitment to producing a durable and reliable design. “Sailing is about finding your path, whether it’s across an ocean or within yourself.” – Sven Yrvind In conclusion, making flanges around bulkhead hatches may seem complex at first glance, but by following Sven Yrvind’s meticulous process, enthusiasts can achieve professional-level results. Remember that the journey of boatbuilding is as rewarding as reaching your destination; it tests one’s patience and dedication. For those seeking to embark on this adventure or simply gain more insight into marine craftsmanship, Sven’s wisdom is invaluable.Sven Yrvind, a renowned yacht designer and sailor, shares valuable insights on creating flanges around bulkhead hatches for canvas protection in this enlightening video. By following his expert guidance, boat enthusiasts can ensure their living areas remain secure while allowing unhindered access through the hatches.Step 1: Starting with the Flange
Sven begins by explaining that working on flanges vertically and horizontally is significantly easier than doing so in a flat position. To simplify the process further, he divides the task into two or three steps as suggested by fellow expert “for for.” This approach not only makes it more manageable but also allows for greater precision in crafting each component.Step 2: Applying Glue and Securing
Sven proceeds to apply glue along one edge of the flange, ensuring a secure bond when clamped into place. He emphasizes that this stage is crucial for maintaining the structural integrity of the flange, which in turn safeguards the living area beneath the canvas when hatches are open.Step 3: Allowing Time to Dry
After securely attaching the first portion of the flange, Sven allows ample time for it to dry before moving forward with additional steps. This patience and precision are key aspects of his successful boatbuilding methods.Step 4: Finishing Touches
Once the flange is fully dried, Sven removes the clamps carefully, ensuring no damage occurs during this process. He then moves on to attaching four more pieces onto these main frames, completing two pairs of flanges for the bulkhead hatches.The Final Touches
While two flanges form the primary support structure around the hatches, Sven mentions there are two additional pieces required at each end to ensure comprehensive protection. This attention to detail highlights his commitment to producing a durable and reliable design. “Sailing is about finding your path, whether it’s across an ocean or within yourself.” – Sven Yrvind In conclusion, making flanges around bulkhead hatches may seem complex at first glance, but by following Sven Yrvind’s meticulous process, enthusiasts can achieve professional-level results. Remember that the journey of boatbuilding is as rewarding as reaching your destination; it tests one’s patience and dedication. For those seeking to embark on this adventure or simply gain more insight into marine craftsmanship, Sven’s wisdom is invaluable.Making Flanges Around Bulkhead Hatches for Canvas
Sven Yrvind, a renowned yacht designer and sailor, shares valuable insights on creating flanges around bulkhead hatches for canvas protection in this enlightening video. By following his expert guidance, boat enthusiasts can ensure their living areas remain secure while allowing unhindered access through the hatches.Step 1: Starting with the Flange
Sven begins by explaining that working on flanges vertically and horizontally is significantly easier than doing so in a flat position. To simplify the process further, he divides the task into two or three steps as suggested by fellow expert “for for.” This approach not only makes it more manageable but also allows for greater precision in crafting each component.Step 2: Applying Glue and Securing
Sven proceeds to apply glue along one edge of the flange, ensuring a secure bond when clamped into place. He emphasizes that this stage is crucial for maintaining the structural integrity of the flange, which in turn safeguards the living area beneath the canvas when hatches are open.Step 3: Allowing Time to Dry
After securely attaching the first portion of the flange, Sven allows ample time for it to dry before moving forward with additional steps. This patience and precision are key aspects of his successful boatbuilding methods.Step 4: Finishing Touches
Once the flange is fully dried, Sven removes the clamps carefully, ensuring no damage occurs during this process. He then moves on to attaching four more pieces onto these main frames, completing two pairs of flanges for the bulkhead hatches.The Final Touches
While two flanges form the primary support structure around the hatches, Sven mentions there are two additional pieces required at each end to ensure comprehensive protection. This attention to detail highlights his commitment to producing a durable and reliable design. “Sailing is about finding your path, whether it’s across an ocean or within yourself.” – Sven Yrvind In conclusion, making flanges around bulkhead hatches may seem complex at first glance, but by following Sven Yrvind’s meticulous process, enthusiasts can achieve professional-level results. Remember that the journey of boatbuilding is as rewarding as reaching your destination; it tests one’s patience and dedication. For those seeking to embark on this adventure or simply gain more insight into marine craftsmanship, Sven’s wisdom is invaluable.Once the flange is fully dried, Sven removes the clamps carefully, ensuring no damage occurs during this process. He then moves on to attaching four more pieces onto these main frames, completing two pairs of flanges for the bulkhead hatches.The Final Touches
While two flanges form the primary support structure around the hatches, Sven mentions there are two additional pieces required at each end to ensure comprehensive protection. This attention to detail highlights his commitment to producing a durable and reliable design. “Sailing is about finding your path, whether it’s across an ocean or within yourself.” – Sven Yrvind In conclusion, making flanges around bulkhead hatches may seem complex at first glance, but by following Sven Yrvind’s meticulous process, enthusiasts can achieve professional-level results. Remember that the journey of boatbuilding is as rewarding as reaching your destination; it tests one’s patience and dedication. For those seeking to embark on this adventure or simply gain more insight into marine craftsmanship, Sven’s wisdom is invaluable.Sven begins by explaining that working on flanges vertically and horizontally is significantly easier than doing so in a flat position. To simplify the process further, he divides the task into two or three steps as suggested by fellow expert “for for.” This approach not only makes it more manageable but also allows for greater precision in crafting each component.Step 2: Applying Glue and Securing
Sven proceeds to apply glue along one edge of the flange, ensuring a secure bond when clamped into place. He emphasizes that this stage is crucial for maintaining the structural integrity of the flange, which in turn safeguards the living area beneath the canvas when hatches are open.Step 3: Allowing Time to Dry
After securely attaching the first portion of the flange, Sven allows ample time for it to dry before moving forward with additional steps. This patience and precision are key aspects of his successful boatbuilding methods.Step 4: Finishing Touches
Once the flange is fully dried, Sven removes the clamps carefully, ensuring no damage occurs during this process. He then moves on to attaching four more pieces onto these main frames, completing two pairs of flanges for the bulkhead hatches.The Final Touches
While two flanges form the primary support structure around the hatches, Sven mentions there are two additional pieces required at each end to ensure comprehensive protection. This attention to detail highlights his commitment to producing a durable and reliable design. “Sailing is about finding your path, whether it’s across an ocean or within yourself.” – Sven Yrvind In conclusion, making flanges around bulkhead hatches may seem complex at first glance, but by following Sven Yrvind’s meticulous process, enthusiasts can achieve professional-level results. Remember that the journey of boatbuilding is as rewarding as reaching your destination; it tests one’s patience and dedication. For those seeking to embark on this adventure or simply gain more insight into marine craftsmanship, Sven’s wisdom is invaluable.Sven Yrvind, a renowned yacht designer and sailor, shares valuable insights on creating flanges around bulkhead hatches for canvas protection in this enlightening video. By following his expert guidance, boat enthusiasts can ensure their living areas remain secure while allowing unhindered access through the hatches.Step 1: Starting with the Flange
Sven begins by explaining that working on flanges vertically and horizontally is significantly easier than doing so in a flat position. To simplify the process further, he divides the task into two or three steps as suggested by fellow expert “for for.” This approach not only makes it more manageable but also allows for greater precision in crafting each component.Step 2: Applying Glue and Securing
Sven proceeds to apply glue along one edge of the flange, ensuring a secure bond when clamped into place. He emphasizes that this stage is crucial for maintaining the structural integrity of the flange, which in turn safeguards the living area beneath the canvas when hatches are open.Step 3: Allowing Time to Dry
After securely attaching the first portion of the flange, Sven allows ample time for it to dry before moving forward with additional steps. This patience and precision are key aspects of his successful boatbuilding methods.Step 4: Finishing Touches
Once the flange is fully dried, Sven removes the clamps carefully, ensuring no damage occurs during this process. He then moves on to attaching four more pieces onto these main frames, completing two pairs of flanges for the bulkhead hatches.The Final Touches
While two flanges form the primary support structure around the hatches, Sven mentions there are two additional pieces required at each end to ensure comprehensive protection. This attention to detail highlights his commitment to producing a durable and reliable design. “Sailing is about finding your path, whether it’s across an ocean or within yourself.” – Sven Yrvind In conclusion, making flanges around bulkhead hatches may seem complex at first glance, but by following Sven Yrvind’s meticulous process, enthusiasts can achieve professional-level results. Remember that the journey of boatbuilding is as rewarding as reaching your destination; it tests one’s patience and dedication. For those seeking to embark on this adventure or simply gain more insight into marine craftsmanship, Sven’s wisdom is invaluable.Making Flanges Around Bulkhead Hatches for Canvas
Sven Yrvind, a renowned yacht designer and sailor, shares valuable insights on creating flanges around bulkhead hatches for canvas protection in this enlightening video. By following his expert guidance, boat enthusiasts can ensure their living areas remain secure while allowing unhindered access through the hatches.Step 1: Starting with the Flange
Sven begins by explaining that working on flanges vertically and horizontally is significantly easier than doing so in a flat position. To simplify the process further, he divides the task into two or three steps as suggested by fellow expert “for for.” This approach not only makes it more manageable but also allows for greater precision in crafting each component.Step 2: Applying Glue and Securing
Sven proceeds to apply glue along one edge of the flange, ensuring a secure bond when clamped into place. He emphasizes that this stage is crucial for maintaining the structural integrity of the flange, which in turn safeguards the living area beneath the canvas when hatches are open.Step 3: Allowing Time to Dry
After securely attaching the first portion of the flange, Sven allows ample time for it to dry before moving forward with additional steps. This patience and precision are key aspects of his successful boatbuilding methods.Step 4: Finishing Touches
Once the flange is fully dried, Sven removes the clamps carefully, ensuring no damage occurs during this process. He then moves on to attaching four more pieces onto these main frames, completing two pairs of flanges for the bulkhead hatches.The Final Touches
While two flanges form the primary support structure around the hatches, Sven mentions there are two additional pieces required at each end to ensure comprehensive protection. This attention to detail highlights his commitment to producing a durable and reliable design. “Sailing is about finding your path, whether it’s across an ocean or within yourself.” – Sven Yrvind In conclusion, making flanges around bulkhead hatches may seem complex at first glance, but by following Sven Yrvind’s meticulous process, enthusiasts can achieve professional-level results. Remember that the journey of boatbuilding is as rewarding as reaching your destination; it tests one’s patience and dedication. For those seeking to embark on this adventure or simply gain more insight into marine craftsmanship, Sven’s wisdom is invaluable.After securely attaching the first portion of the flange, Sven allows ample time for it to dry before moving forward with additional steps. This patience and precision are key aspects of his successful boatbuilding methods.Step 4: Finishing Touches
Once the flange is fully dried, Sven removes the clamps carefully, ensuring no damage occurs during this process. He then moves on to attaching four more pieces onto these main frames, completing two pairs of flanges for the bulkhead hatches.The Final Touches
While two flanges form the primary support structure around the hatches, Sven mentions there are two additional pieces required at each end to ensure comprehensive protection. This attention to detail highlights his commitment to producing a durable and reliable design. “Sailing is about finding your path, whether it’s across an ocean or within yourself.” – Sven Yrvind In conclusion, making flanges around bulkhead hatches may seem complex at first glance, but by following Sven Yrvind’s meticulous process, enthusiasts can achieve professional-level results. Remember that the journey of boatbuilding is as rewarding as reaching your destination; it tests one’s patience and dedication. For those seeking to embark on this adventure or simply gain more insight into marine craftsmanship, Sven’s wisdom is invaluable.Sven begins by explaining that working on flanges vertically and horizontally is significantly easier than doing so in a flat position. To simplify the process further, he divides the task into two or three steps as suggested by fellow expert “for for.” This approach not only makes it more manageable but also allows for greater precision in crafting each component.Step 2: Applying Glue and Securing
Sven proceeds to apply glue along one edge of the flange, ensuring a secure bond when clamped into place. He emphasizes that this stage is crucial for maintaining the structural integrity of the flange, which in turn safeguards the living area beneath the canvas when hatches are open.Step 3: Allowing Time to Dry
After securely attaching the first portion of the flange, Sven allows ample time for it to dry before moving forward with additional steps. This patience and precision are key aspects of his successful boatbuilding methods.Step 4: Finishing Touches
Once the flange is fully dried, Sven removes the clamps carefully, ensuring no damage occurs during this process. He then moves on to attaching four more pieces onto these main frames, completing two pairs of flanges for the bulkhead hatches.The Final Touches
While two flanges form the primary support structure around the hatches, Sven mentions there are two additional pieces required at each end to ensure comprehensive protection. This attention to detail highlights his commitment to producing a durable and reliable design. “Sailing is about finding your path, whether it’s across an ocean or within yourself.” – Sven Yrvind In conclusion, making flanges around bulkhead hatches may seem complex at first glance, but by following Sven Yrvind’s meticulous process, enthusiasts can achieve professional-level results. Remember that the journey of boatbuilding is as rewarding as reaching your destination; it tests one’s patience and dedication. For those seeking to embark on this adventure or simply gain more insight into marine craftsmanship, Sven’s wisdom is invaluable.Sven Yrvind, a renowned yacht designer and sailor, shares valuable insights on creating flanges around bulkhead hatches for canvas protection in this enlightening video. By following his expert guidance, boat enthusiasts can ensure their living areas remain secure while allowing unhindered access through the hatches.Step 1: Starting with the Flange
Sven begins by explaining that working on flanges vertically and horizontally is significantly easier than doing so in a flat position. To simplify the process further, he divides the task into two or three steps as suggested by fellow expert “for for.” This approach not only makes it more manageable but also allows for greater precision in crafting each component.Step 2: Applying Glue and Securing
Sven proceeds to apply glue along one edge of the flange, ensuring a secure bond when clamped into place. He emphasizes that this stage is crucial for maintaining the structural integrity of the flange, which in turn safeguards the living area beneath the canvas when hatches are open.Step 3: Allowing Time to Dry
After securely attaching the first portion of the flange, Sven allows ample time for it to dry before moving forward with additional steps. This patience and precision are key aspects of his successful boatbuilding methods.Step 4: Finishing Touches
Once the flange is fully dried, Sven removes the clamps carefully, ensuring no damage occurs during this process. He then moves on to attaching four more pieces onto these main frames, completing two pairs of flanges for the bulkhead hatches.The Final Touches
While two flanges form the primary support structure around the hatches, Sven mentions there are two additional pieces required at each end to ensure comprehensive protection. This attention to detail highlights his commitment to producing a durable and reliable design. “Sailing is about finding your path, whether it’s across an ocean or within yourself.” – Sven Yrvind In conclusion, making flanges around bulkhead hatches may seem complex at first glance, but by following Sven Yrvind’s meticulous process, enthusiasts can achieve professional-level results. Remember that the journey of boatbuilding is as rewarding as reaching your destination; it tests one’s patience and dedication. For those seeking to embark on this adventure or simply gain more insight into marine craftsmanship, Sven’s wisdom is invaluable.Making Flanges Around Bulkhead Hatches for Canvas
Sven Yrvind, a renowned yacht designer and sailor, shares valuable insights on creating flanges around bulkhead hatches for canvas protection in this enlightening video. By following his expert guidance, boat enthusiasts can ensure their living areas remain secure while allowing unhindered access through the hatches.Step 1: Starting with the Flange
Sven begins by explaining that working on flanges vertically and horizontally is significantly easier than doing so in a flat position. To simplify the process further, he divides the task into two or three steps as suggested by fellow expert “for for.” This approach not only makes it more manageable but also allows for greater precision in crafting each component.Step 2: Applying Glue and Securing
Sven proceeds to apply glue along one edge of the flange, ensuring a secure bond when clamped into place. He emphasizes that this stage is crucial for maintaining the structural integrity of the flange, which in turn safeguards the living area beneath the canvas when hatches are open.Step 3: Allowing Time to Dry
After securely attaching the first portion of the flange, Sven allows ample time for it to dry before moving forward with additional steps. This patience and precision are key aspects of his successful boatbuilding methods.Step 4: Finishing Touches
Once the flange is fully dried, Sven removes the clamps carefully, ensuring no damage occurs during this process. He then moves on to attaching four more pieces onto these main frames, completing two pairs of flanges for the bulkhead hatches.The Final Touches
While two flanges form the primary support structure around the hatches, Sven mentions there are two additional pieces required at each end to ensure comprehensive protection. This attention to detail highlights his commitment to producing a durable and reliable design. “Sailing is about finding your path, whether it’s across an ocean or within yourself.” – Sven Yrvind In conclusion, making flanges around bulkhead hatches may seem complex at first glance, but by following Sven Yrvind’s meticulous process, enthusiasts can achieve professional-level results. Remember that the journey of boatbuilding is as rewarding as reaching your destination; it tests one’s patience and dedication. For those seeking to embark on this adventure or simply gain more insight into marine craftsmanship, Sven’s wisdom is invaluable.Sven proceeds to apply glue along one edge of the flange, ensuring a secure bond when clamped into place. He emphasizes that this stage is crucial for maintaining the structural integrity of the flange, which in turn safeguards the living area beneath the canvas when hatches are open.Step 3: Allowing Time to Dry
After securely attaching the first portion of the flange, Sven allows ample time for it to dry before moving forward with additional steps. This patience and precision are key aspects of his successful boatbuilding methods.Step 4: Finishing Touches
Once the flange is fully dried, Sven removes the clamps carefully, ensuring no damage occurs during this process. He then moves on to attaching four more pieces onto these main frames, completing two pairs of flanges for the bulkhead hatches.The Final Touches
While two flanges form the primary support structure around the hatches, Sven mentions there are two additional pieces required at each end to ensure comprehensive protection. This attention to detail highlights his commitment to producing a durable and reliable design. “Sailing is about finding your path, whether it’s across an ocean or within yourself.” – Sven Yrvind In conclusion, making flanges around bulkhead hatches may seem complex at first glance, but by following Sven Yrvind’s meticulous process, enthusiasts can achieve professional-level results. Remember that the journey of boatbuilding is as rewarding as reaching your destination; it tests one’s patience and dedication. For those seeking to embark on this adventure or simply gain more insight into marine craftsmanship, Sven’s wisdom is invaluable.Sven begins by explaining that working on flanges vertically and horizontally is significantly easier than doing so in a flat position. To simplify the process further, he divides the task into two or three steps as suggested by fellow expert “for for.” This approach not only makes it more manageable but also allows for greater precision in crafting each component.Step 2: Applying Glue and Securing
Sven proceeds to apply glue along one edge of the flange, ensuring a secure bond when clamped into place. He emphasizes that this stage is crucial for maintaining the structural integrity of the flange, which in turn safeguards the living area beneath the canvas when hatches are open.Step 3: Allowing Time to Dry
After securely attaching the first portion of the flange, Sven allows ample time for it to dry before moving forward with additional steps. This patience and precision are key aspects of his successful boatbuilding methods.Step 4: Finishing Touches
Once the flange is fully dried, Sven removes the clamps carefully, ensuring no damage occurs during this process. He then moves on to attaching four more pieces onto these main frames, completing two pairs of flanges for the bulkhead hatches.The Final Touches
While two flanges form the primary support structure around the hatches, Sven mentions there are two additional pieces required at each end to ensure comprehensive protection. This attention to detail highlights his commitment to producing a durable and reliable design. “Sailing is about finding your path, whether it’s across an ocean or within yourself.” – Sven Yrvind In conclusion, making flanges around bulkhead hatches may seem complex at first glance, but by following Sven Yrvind’s meticulous process, enthusiasts can achieve professional-level results. Remember that the journey of boatbuilding is as rewarding as reaching your destination; it tests one’s patience and dedication. For those seeking to embark on this adventure or simply gain more insight into marine craftsmanship, Sven’s wisdom is invaluable.Sven Yrvind, a renowned yacht designer and sailor, shares valuable insights on creating flanges around bulkhead hatches for canvas protection in this enlightening video. By following his expert guidance, boat enthusiasts can ensure their living areas remain secure while allowing unhindered access through the hatches.Step 1: Starting with the Flange
Sven begins by explaining that working on flanges vertically and horizontally is significantly easier than doing so in a flat position. To simplify the process further, he divides the task into two or three steps as suggested by fellow expert “for for.” This approach not only makes it more manageable but also allows for greater precision in crafting each component.Step 2: Applying Glue and Securing
Sven proceeds to apply glue along one edge of the flange, ensuring a secure bond when clamped into place. He emphasizes that this stage is crucial for maintaining the structural integrity of the flange, which in turn safeguards the living area beneath the canvas when hatches are open.Step 3: Allowing Time to Dry
After securely attaching the first portion of the flange, Sven allows ample time for it to dry before moving forward with additional steps. This patience and precision are key aspects of his successful boatbuilding methods.Step 4: Finishing Touches
Once the flange is fully dried, Sven removes the clamps carefully, ensuring no damage occurs during this process. He then moves on to attaching four more pieces onto these main frames, completing two pairs of flanges for the bulkhead hatches.The Final Touches
While two flanges form the primary support structure around the hatches, Sven mentions there are two additional pieces required at each end to ensure comprehensive protection. This attention to detail highlights his commitment to producing a durable and reliable design. “Sailing is about finding your path, whether it’s across an ocean or within yourself.” – Sven Yrvind In conclusion, making flanges around bulkhead hatches may seem complex at first glance, but by following Sven Yrvind’s meticulous process, enthusiasts can achieve professional-level results. Remember that the journey of boatbuilding is as rewarding as reaching your destination; it tests one’s patience and dedication. For those seeking to embark on this adventure or simply gain more insight into marine craftsmanship, Sven’s wisdom is invaluable.Making Flanges Around Bulkhead Hatches for Canvas
Sven Yrvind, a renowned yacht designer and sailor, shares valuable insights on creating flanges around bulkhead hatches for canvas protection in this enlightening video. By following his expert guidance, boat enthusiasts can ensure their living areas remain secure while allowing unhindered access through the hatches.Step 1: Starting with the Flange
Sven begins by explaining that working on flanges vertically and horizontally is significantly easier than doing so in a flat position. To simplify the process further, he divides the task into two or three steps as suggested by fellow expert “for for.” This approach not only makes it more manageable but also allows for greater precision in crafting each component.Step 2: Applying Glue and Securing
Sven proceeds to apply glue along one edge of the flange, ensuring a secure bond when clamped into place. He emphasizes that this stage is crucial for maintaining the structural integrity of the flange, which in turn safeguards the living area beneath the canvas when hatches are open.Step 3: Allowing Time to Dry
After securely attaching the first portion of the flange, Sven allows ample time for it to dry before moving forward with additional steps. This patience and precision are key aspects of his successful boatbuilding methods.Step 4: Finishing Touches
Once the flange is fully dried, Sven removes the clamps carefully, ensuring no damage occurs during this process. He then moves on to attaching four more pieces onto these main frames, completing two pairs of flanges for the bulkhead hatches.The Final Touches
While two flanges form the primary support structure around the hatches, Sven mentions there are two additional pieces required at each end to ensure comprehensive protection. This attention to detail highlights his commitment to producing a durable and reliable design. “Sailing is about finding your path, whether it’s across an ocean or within yourself.” – Sven Yrvind In conclusion, making flanges around bulkhead hatches may seem complex at first glance, but by following Sven Yrvind’s meticulous process, enthusiasts can achieve professional-level results. Remember that the journey of boatbuilding is as rewarding as reaching your destination; it tests one’s patience and dedication. For those seeking to embark on this adventure or simply gain more insight into marine craftsmanship, Sven’s wisdom is invaluable.Once the flange is fully dried, Sven removes the clamps carefully, ensuring no damage occurs during this process. He then moves on to attaching four more pieces onto these main frames, completing two pairs of flanges for the bulkhead hatches.The Final Touches
While two flanges form the primary support structure around the hatches, Sven mentions there are two additional pieces required at each end to ensure comprehensive protection. This attention to detail highlights his commitment to producing a durable and reliable design. “Sailing is about finding your path, whether it’s across an ocean or within yourself.” – Sven Yrvind In conclusion, making flanges around bulkhead hatches may seem complex at first glance, but by following Sven Yrvind’s meticulous process, enthusiasts can achieve professional-level results. Remember that the journey of boatbuilding is as rewarding as reaching your destination; it tests one’s patience and dedication. For those seeking to embark on this adventure or simply gain more insight into marine craftsmanship, Sven’s wisdom is invaluable.Sven proceeds to apply glue along one edge of the flange, ensuring a secure bond when clamped into place. He emphasizes that this stage is crucial for maintaining the structural integrity of the flange, which in turn safeguards the living area beneath the canvas when hatches are open.Step 3: Allowing Time to Dry
After securely attaching the first portion of the flange, Sven allows ample time for it to dry before moving forward with additional steps. This patience and precision are key aspects of his successful boatbuilding methods.Step 4: Finishing Touches
Once the flange is fully dried, Sven removes the clamps carefully, ensuring no damage occurs during this process. He then moves on to attaching four more pieces onto these main frames, completing two pairs of flanges for the bulkhead hatches.The Final Touches
While two flanges form the primary support structure around the hatches, Sven mentions there are two additional pieces required at each end to ensure comprehensive protection. This attention to detail highlights his commitment to producing a durable and reliable design. “Sailing is about finding your path, whether it’s across an ocean or within yourself.” – Sven Yrvind In conclusion, making flanges around bulkhead hatches may seem complex at first glance, but by following Sven Yrvind’s meticulous process, enthusiasts can achieve professional-level results. Remember that the journey of boatbuilding is as rewarding as reaching your destination; it tests one’s patience and dedication. For those seeking to embark on this adventure or simply gain more insight into marine craftsmanship, Sven’s wisdom is invaluable.Sven begins by explaining that working on flanges vertically and horizontally is significantly easier than doing so in a flat position. To simplify the process further, he divides the task into two or three steps as suggested by fellow expert “for for.” This approach not only makes it more manageable but also allows for greater precision in crafting each component.Step 2: Applying Glue and Securing
Sven proceeds to apply glue along one edge of the flange, ensuring a secure bond when clamped into place. He emphasizes that this stage is crucial for maintaining the structural integrity of the flange, which in turn safeguards the living area beneath the canvas when hatches are open.Step 3: Allowing Time to Dry
After securely attaching the first portion of the flange, Sven allows ample time for it to dry before moving forward with additional steps. This patience and precision are key aspects of his successful boatbuilding methods.Step 4: Finishing Touches
Once the flange is fully dried, Sven removes the clamps carefully, ensuring no damage occurs during this process. He then moves on to attaching four more pieces onto these main frames, completing two pairs of flanges for the bulkhead hatches.The Final Touches
While two flanges form the primary support structure around the hatches, Sven mentions there are two additional pieces required at each end to ensure comprehensive protection. This attention to detail highlights his commitment to producing a durable and reliable design. “Sailing is about finding your path, whether it’s across an ocean or within yourself.” – Sven Yrvind In conclusion, making flanges around bulkhead hatches may seem complex at first glance, but by following Sven Yrvind’s meticulous process, enthusiasts can achieve professional-level results. Remember that the journey of boatbuilding is as rewarding as reaching your destination; it tests one’s patience and dedication. For those seeking to embark on this adventure or simply gain more insight into marine craftsmanship, Sven’s wisdom is invaluable.Sven Yrvind, a renowned yacht designer and sailor, shares valuable insights on creating flanges around bulkhead hatches for canvas protection in this enlightening video. By following his expert guidance, boat enthusiasts can ensure their living areas remain secure while allowing unhindered access through the hatches.Step 1: Starting with the Flange
Sven begins by explaining that working on flanges vertically and horizontally is significantly easier than doing so in a flat position. To simplify the process further, he divides the task into two or three steps as suggested by fellow expert “for for.” This approach not only makes it more manageable but also allows for greater precision in crafting each component.Step 2: Applying Glue and Securing
Sven proceeds to apply glue along one edge of the flange, ensuring a secure bond when clamped into place. He emphasizes that this stage is crucial for maintaining the structural integrity of the flange, which in turn safeguards the living area beneath the canvas when hatches are open.Step 3: Allowing Time to Dry
After securely attaching the first portion of the flange, Sven allows ample time for it to dry before moving forward with additional steps. This patience and precision are key aspects of his successful boatbuilding methods.Step 4: Finishing Touches
Once the flange is fully dried, Sven removes the clamps carefully, ensuring no damage occurs during this process. He then moves on to attaching four more pieces onto these main frames, completing two pairs of flanges for the bulkhead hatches.The Final Touches
While two flanges form the primary support structure around the hatches, Sven mentions there are two additional pieces required at each end to ensure comprehensive protection. This attention to detail highlights his commitment to producing a durable and reliable design. “Sailing is about finding your path, whether it’s across an ocean or within yourself.” – Sven Yrvind In conclusion, making flanges around bulkhead hatches may seem complex at first glance, but by following Sven Yrvind’s meticulous process, enthusiasts can achieve professional-level results. Remember that the journey of boatbuilding is as rewarding as reaching your destination; it tests one’s patience and dedication. For those seeking to embark on this adventure or simply gain more insight into marine craftsmanship, Sven’s wisdom is invaluable.Making Flanges Around Bulkhead Hatches for Canvas
Sven Yrvind, a renowned yacht designer and sailor, shares valuable insights on creating flanges around bulkhead hatches for canvas protection in this enlightening video. By following his expert guidance, boat enthusiasts can ensure their living areas remain secure while allowing unhindered access through the hatches.Step 1: Starting with the Flange
Sven begins by explaining that working on flanges vertically and horizontally is significantly easier than doing so in a flat position. To simplify the process further, he divides the task into two or three steps as suggested by fellow expert “for for.” This approach not only makes it more manageable but also allows for greater precision in crafting each component.Step 2: Applying Glue and Securing
Sven proceeds to apply glue along one edge of the flange, ensuring a secure bond when clamped into place. He emphasizes that this stage is crucial for maintaining the structural integrity of the flange, which in turn safeguards the living area beneath the canvas when hatches are open.Step 3: Allowing Time to Dry
After securely attaching the first portion of the flange, Sven allows ample time for it to dry before moving forward with additional steps. This patience and precision are key aspects of his successful boatbuilding methods.Step 4: Finishing Touches
Once the flange is fully dried, Sven removes the clamps carefully, ensuring no damage occurs during this process. He then moves on to attaching four more pieces onto these main frames, completing two pairs of flanges for the bulkhead hatches.The Final Touches
While two flanges form the primary support structure around the hatches, Sven mentions there are two additional pieces required at each end to ensure comprehensive protection. This attention to detail highlights his commitment to producing a durable and reliable design. “Sailing is about finding your path, whether it’s across an ocean or within yourself.” – Sven Yrvind In conclusion, making flanges around bulkhead hatches may seem complex at first glance, but by following Sven Yrvind’s meticulous process, enthusiasts can achieve professional-level results. Remember that the journey of boatbuilding is as rewarding as reaching your destination; it tests one’s patience and dedication. For those seeking to embark on this adventure or simply gain more insight into marine craftsmanship, Sven’s wisdom is invaluable.After securely attaching the first portion of the flange, Sven allows ample time for it to dry before moving forward with additional steps. This patience and precision are key aspects of his successful boatbuilding methods.Step 4: Finishing Touches
Once the flange is fully dried, Sven removes the clamps carefully, ensuring no damage occurs during this process. He then moves on to attaching four more pieces onto these main frames, completing two pairs of flanges for the bulkhead hatches.The Final Touches
While two flanges form the primary support structure around the hatches, Sven mentions there are two additional pieces required at each end to ensure comprehensive protection. This attention to detail highlights his commitment to producing a durable and reliable design. “Sailing is about finding your path, whether it’s across an ocean or within yourself.” – Sven Yrvind In conclusion, making flanges around bulkhead hatches may seem complex at first glance, but by following Sven Yrvind’s meticulous process, enthusiasts can achieve professional-level results. Remember that the journey of boatbuilding is as rewarding as reaching your destination; it tests one’s patience and dedication. For those seeking to embark on this adventure or simply gain more insight into marine craftsmanship, Sven’s wisdom is invaluable.Sven proceeds to apply glue along one edge of the flange, ensuring a secure bond when clamped into place. He emphasizes that this stage is crucial for maintaining the structural integrity of the flange, which in turn safeguards the living area beneath the canvas when hatches are open.Step 3: Allowing Time to Dry
After securely attaching the first portion of the flange, Sven allows ample time for it to dry before moving forward with additional steps. This patience and precision are key aspects of his successful boatbuilding methods.Step 4: Finishing Touches
Once the flange is fully dried, Sven removes the clamps carefully, ensuring no damage occurs during this process. He then moves on to attaching four more pieces onto these main frames, completing two pairs of flanges for the bulkhead hatches.The Final Touches
While two flanges form the primary support structure around the hatches, Sven mentions there are two additional pieces required at each end to ensure comprehensive protection. This attention to detail highlights his commitment to producing a durable and reliable design. “Sailing is about finding your path, whether it’s across an ocean or within yourself.” – Sven Yrvind In conclusion, making flanges around bulkhead hatches may seem complex at first glance, but by following Sven Yrvind’s meticulous process, enthusiasts can achieve professional-level results. Remember that the journey of boatbuilding is as rewarding as reaching your destination; it tests one’s patience and dedication. For those seeking to embark on this adventure or simply gain more insight into marine craftsmanship, Sven’s wisdom is invaluable.Sven begins by explaining that working on flanges vertically and horizontally is significantly easier than doing so in a flat position. To simplify the process further, he divides the task into two or three steps as suggested by fellow expert “for for.” This approach not only makes it more manageable but also allows for greater precision in crafting each component.Step 2: Applying Glue and Securing
Sven proceeds to apply glue along one edge of the flange, ensuring a secure bond when clamped into place. He emphasizes that this stage is crucial for maintaining the structural integrity of the flange, which in turn safeguards the living area beneath the canvas when hatches are open.Step 3: Allowing Time to Dry
After securely attaching the first portion of the flange, Sven allows ample time for it to dry before moving forward with additional steps. This patience and precision are key aspects of his successful boatbuilding methods.Step 4: Finishing Touches
Once the flange is fully dried, Sven removes the clamps carefully, ensuring no damage occurs during this process. He then moves on to attaching four more pieces onto these main frames, completing two pairs of flanges for the bulkhead hatches.The Final Touches
While two flanges form the primary support structure around the hatches, Sven mentions there are two additional pieces required at each end to ensure comprehensive protection. This attention to detail highlights his commitment to producing a durable and reliable design. “Sailing is about finding your path, whether it’s across an ocean or within yourself.” – Sven Yrvind In conclusion, making flanges around bulkhead hatches may seem complex at first glance, but by following Sven Yrvind’s meticulous process, enthusiasts can achieve professional-level results. Remember that the journey of boatbuilding is as rewarding as reaching your destination; it tests one’s patience and dedication. For those seeking to embark on this adventure or simply gain more insight into marine craftsmanship, Sven’s wisdom is invaluable.Sven Yrvind, a renowned yacht designer and sailor, shares valuable insights on creating flanges around bulkhead hatches for canvas protection in this enlightening video. By following his expert guidance, boat enthusiasts can ensure their living areas remain secure while allowing unhindered access through the hatches.Step 1: Starting with the Flange
Sven begins by explaining that working on flanges vertically and horizontally is significantly easier than doing so in a flat position. To simplify the process further, he divides the task into two or three steps as suggested by fellow expert “for for.” This approach not only makes it more manageable but also allows for greater precision in crafting each component.Step 2: Applying Glue and Securing
Sven proceeds to apply glue along one edge of the flange, ensuring a secure bond when clamped into place. He emphasizes that this stage is crucial for maintaining the structural integrity of the flange, which in turn safeguards the living area beneath the canvas when hatches are open.Step 3: Allowing Time to Dry
After securely attaching the first portion of the flange, Sven allows ample time for it to dry before moving forward with additional steps. This patience and precision are key aspects of his successful boatbuilding methods.Step 4: Finishing Touches
Once the flange is fully dried, Sven removes the clamps carefully, ensuring no damage occurs during this process. He then moves on to attaching four more pieces onto these main frames, completing two pairs of flanges for the bulkhead hatches.The Final Touches
While two flanges form the primary support structure around the hatches, Sven mentions there are two additional pieces required at each end to ensure comprehensive protection. This attention to detail highlights his commitment to producing a durable and reliable design. “Sailing is about finding your path, whether it’s across an ocean or within yourself.” – Sven Yrvind In conclusion, making flanges around bulkhead hatches may seem complex at first glance, but by following Sven Yrvind’s meticulous process, enthusiasts can achieve professional-level results. Remember that the journey of boatbuilding is as rewarding as reaching your destination; it tests one’s patience and dedication. For those seeking to embark on this adventure or simply gain more insight into marine craftsmanship, Sven’s wisdom is invaluable.Making Flanges Around Bulkhead Hatches for Canvas
Sven Yrvind, a renowned yacht designer and sailor, shares valuable insights on creating flanges around bulkhead hatches for canvas protection in this enlightening video. By following his expert guidance, boat enthusiasts can ensure their living areas remain secure while allowing unhindered access through the hatches.Step 1: Starting with the Flange
Sven begins by explaining that working on flanges vertically and horizontally is significantly easier than doing so in a flat position. To simplify the process further, he divides the task into two or three steps as suggested by fellow expert “for for.” This approach not only makes it more manageable but also allows for greater precision in crafting each component.Step 2: Applying Glue and Securing
Sven proceeds to apply glue along one edge of the flange, ensuring a secure bond when clamped into place. He emphasizes that this stage is crucial for maintaining the structural integrity of the flange, which in turn safeguards the living area beneath the canvas when hatches are open.Step 3: Allowing Time to Dry
After securely attaching the first portion of the flange, Sven allows ample time for it to dry before moving forward with additional steps. This patience and precision are key aspects of his successful boatbuilding methods.Step 4: Finishing Touches
Once the flange is fully dried, Sven removes the clamps carefully, ensuring no damage occurs during this process. He then moves on to attaching four more pieces onto these main frames, completing two pairs of flanges for the bulkhead hatches.The Final Touches
While two flanges form the primary support structure around the hatches, Sven mentions there are two additional pieces required at each end to ensure comprehensive protection. This attention to detail highlights his commitment to producing a durable and reliable design. “Sailing is about finding your path, whether it’s across an ocean or within yourself.” – Sven Yrvind In conclusion, making flanges around bulkhead hatches may seem complex at first glance, but by following Sven Yrvind’s meticulous process, enthusiasts can achieve professional-level results. Remember that the journey of boatbuilding is as rewarding as reaching your destination; it tests one’s patience and dedication. For those seeking to embark on this adventure or simply gain more insight into marine craftsmanship, Sven’s wisdom is invaluable.Once the flange is fully dried, Sven removes the clamps carefully, ensuring no damage occurs during this process. He then moves on to attaching four more pieces onto these main frames, completing two pairs of flanges for the bulkhead hatches.The Final Touches
While two flanges form the primary support structure around the hatches, Sven mentions there are two additional pieces required at each end to ensure comprehensive protection. This attention to detail highlights his commitment to producing a durable and reliable design. “Sailing is about finding your path, whether it’s across an ocean or within yourself.” – Sven Yrvind In conclusion, making flanges around bulkhead hatches may seem complex at first glance, but by following Sven Yrvind’s meticulous process, enthusiasts can achieve professional-level results. Remember that the journey of boatbuilding is as rewarding as reaching your destination; it tests one’s patience and dedication. For those seeking to embark on this adventure or simply gain more insight into marine craftsmanship, Sven’s wisdom is invaluable.After securely attaching the first portion of the flange, Sven allows ample time for it to dry before moving forward with additional steps. This patience and precision are key aspects of his successful boatbuilding methods.Step 4: Finishing Touches
Once the flange is fully dried, Sven removes the clamps carefully, ensuring no damage occurs during this process. He then moves on to attaching four more pieces onto these main frames, completing two pairs of flanges for the bulkhead hatches.The Final Touches
While two flanges form the primary support structure around the hatches, Sven mentions there are two additional pieces required at each end to ensure comprehensive protection. This attention to detail highlights his commitment to producing a durable and reliable design. “Sailing is about finding your path, whether it’s across an ocean or within yourself.” – Sven Yrvind In conclusion, making flanges around bulkhead hatches may seem complex at first glance, but by following Sven Yrvind’s meticulous process, enthusiasts can achieve professional-level results. Remember that the journey of boatbuilding is as rewarding as reaching your destination; it tests one’s patience and dedication. For those seeking to embark on this adventure or simply gain more insight into marine craftsmanship, Sven’s wisdom is invaluable.Sven proceeds to apply glue along one edge of the flange, ensuring a secure bond when clamped into place. He emphasizes that this stage is crucial for maintaining the structural integrity of the flange, which in turn safeguards the living area beneath the canvas when hatches are open.Step 3: Allowing Time to Dry
After securely attaching the first portion of the flange, Sven allows ample time for it to dry before moving forward with additional steps. This patience and precision are key aspects of his successful boatbuilding methods.Step 4: Finishing Touches
Once the flange is fully dried, Sven removes the clamps carefully, ensuring no damage occurs during this process. He then moves on to attaching four more pieces onto these main frames, completing two pairs of flanges for the bulkhead hatches.The Final Touches
While two flanges form the primary support structure around the hatches, Sven mentions there are two additional pieces required at each end to ensure comprehensive protection. This attention to detail highlights his commitment to producing a durable and reliable design. “Sailing is about finding your path, whether it’s across an ocean or within yourself.” – Sven Yrvind In conclusion, making flanges around bulkhead hatches may seem complex at first glance, but by following Sven Yrvind’s meticulous process, enthusiasts can achieve professional-level results. Remember that the journey of boatbuilding is as rewarding as reaching your destination; it tests one’s patience and dedication. For those seeking to embark on this adventure or simply gain more insight into marine craftsmanship, Sven’s wisdom is invaluable.Sven begins by explaining that working on flanges vertically and horizontally is significantly easier than doing so in a flat position. To simplify the process further, he divides the task into two or three steps as suggested by fellow expert “for for.” This approach not only makes it more manageable but also allows for greater precision in crafting each component.Step 2: Applying Glue and Securing
Sven proceeds to apply glue along one edge of the flange, ensuring a secure bond when clamped into place. He emphasizes that this stage is crucial for maintaining the structural integrity of the flange, which in turn safeguards the living area beneath the canvas when hatches are open.Step 3: Allowing Time to Dry
After securely attaching the first portion of the flange, Sven allows ample time for it to dry before moving forward with additional steps. This patience and precision are key aspects of his successful boatbuilding methods.Step 4: Finishing Touches
Once the flange is fully dried, Sven removes the clamps carefully, ensuring no damage occurs during this process. He then moves on to attaching four more pieces onto these main frames, completing two pairs of flanges for the bulkhead hatches.The Final Touches
While two flanges form the primary support structure around the hatches, Sven mentions there are two additional pieces required at each end to ensure comprehensive protection. This attention to detail highlights his commitment to producing a durable and reliable design. “Sailing is about finding your path, whether it’s across an ocean or within yourself.” – Sven Yrvind In conclusion, making flanges around bulkhead hatches may seem complex at first glance, but by following Sven Yrvind’s meticulous process, enthusiasts can achieve professional-level results. Remember that the journey of boatbuilding is as rewarding as reaching your destination; it tests one’s patience and dedication. For those seeking to embark on this adventure or simply gain more insight into marine craftsmanship, Sven’s wisdom is invaluable.Sven Yrvind, a renowned yacht designer and sailor, shares valuable insights on creating flanges around bulkhead hatches for canvas protection in this enlightening video. By following his expert guidance, boat enthusiasts can ensure their living areas remain secure while allowing unhindered access through the hatches.Step 1: Starting with the Flange
Sven begins by explaining that working on flanges vertically and horizontally is significantly easier than doing so in a flat position. To simplify the process further, he divides the task into two or three steps as suggested by fellow expert “for for.” This approach not only makes it more manageable but also allows for greater precision in crafting each component.Step 2: Applying Glue and Securing
Sven proceeds to apply glue along one edge of the flange, ensuring a secure bond when clamped into place. He emphasizes that this stage is crucial for maintaining the structural integrity of the flange, which in turn safeguards the living area beneath the canvas when hatches are open.Step 3: Allowing Time to Dry
After securely attaching the first portion of the flange, Sven allows ample time for it to dry before moving forward with additional steps. This patience and precision are key aspects of his successful boatbuilding methods.Step 4: Finishing Touches
Once the flange is fully dried, Sven removes the clamps carefully, ensuring no damage occurs during this process. He then moves on to attaching four more pieces onto these main frames, completing two pairs of flanges for the bulkhead hatches.The Final Touches
While two flanges form the primary support structure around the hatches, Sven mentions there are two additional pieces required at each end to ensure comprehensive protection. This attention to detail highlights his commitment to producing a durable and reliable design. “Sailing is about finding your path, whether it’s across an ocean or within yourself.” – Sven Yrvind In conclusion, making flanges around bulkhead hatches may seem complex at first glance, but by following Sven Yrvind’s meticulous process, enthusiasts can achieve professional-level results. Remember that the journey of boatbuilding is as rewarding as reaching your destination; it tests one’s patience and dedication. For those seeking to embark on this adventure or simply gain more insight into marine craftsmanship, Sven’s wisdom is invaluable.Making Flanges Around Bulkhead Hatches for Canvas
Sven Yrvind, a renowned yacht designer and sailor, shares valuable insights on creating flanges around bulkhead hatches for canvas protection in this enlightening video. By following his expert guidance, boat enthusiasts can ensure their living areas remain secure while allowing unhindered access through the hatches.Step 1: Starting with the Flange
Sven begins by explaining that working on flanges vertically and horizontally is significantly easier than doing so in a flat position. To simplify the process further, he divides the task into two or three steps as suggested by fellow expert “for for.” This approach not only makes it more manageable but also allows for greater precision in crafting each component.Step 2: Applying Glue and Securing
Sven proceeds to apply glue along one edge of the flange, ensuring a secure bond when clamped into place. He emphasizes that this stage is crucial for maintaining the structural integrity of the flange, which in turn safeguards the living area beneath the canvas when hatches are open.Step 3: Allowing Time to Dry
After securely attaching the first portion of the flange, Sven allows ample time for it to dry before moving forward with additional steps. This patience and precision are key aspects of his successful boatbuilding methods.Step 4: Finishing Touches
Once the flange is fully dried, Sven removes the clamps carefully, ensuring no damage occurs during this process. He then moves on to attaching four more pieces onto these main frames, completing two pairs of flanges for the bulkhead hatches.The Final Touches
While two flanges form the primary support structure around the hatches, Sven mentions there are two additional pieces required at each end to ensure comprehensive protection. This attention to detail highlights his commitment to producing a durable and reliable design. “Sailing is about finding your path, whether it’s across an ocean or within yourself.” – Sven Yrvind In conclusion, making flanges around bulkhead hatches may seem complex at first glance, but by following Sven Yrvind’s meticulous process, enthusiasts can achieve professional-level results. Remember that the journey of boatbuilding is as rewarding as reaching your destination; it tests one’s patience and dedication. For those seeking to embark on this adventure or simply gain more insight into marine craftsmanship, Sven’s wisdom is invaluable.Sven Yrvind, a renowned yacht designer and sailor, shares valuable insights on creating flanges around bulkhead hatches for canvas protection in this enlightening video. By following his expert guidance, boat enthusiasts can ensure their living areas remain secure while allowing unhindered access through the hatches.Step 1: Starting with the Flange
Sven begins by explaining that working on flanges vertically and horizontally is significantly easier than doing so in a flat position. To simplify the process further, he divides the task into two or three steps as suggested by fellow expert “for for.” This approach not only makes it more manageable but also allows for greater precision in crafting each component.Step 2: Applying Glue and Securing
Sven proceeds to apply glue along one edge of the flange, ensuring a secure bond when clamped into place. He emphasizes that this stage is crucial for maintaining the structural integrity of the flange, which in turn safeguards the living area beneath the canvas when hatches are open.Step 3: Allowing Time to Dry
After securely attaching the first portion of the flange, Sven allows ample time for it to dry before moving forward with additional steps. This patience and precision are key aspects of his successful boatbuilding methods.Step 4: Finishing Touches
Once the flange is fully dried, Sven removes the clamps carefully, ensuring no damage occurs during this process. He then moves on to attaching four more pieces onto these main frames, completing two pairs of flanges for the bulkhead hatches.The Final Touches
While two flanges form the primary support structure around the hatches, Sven mentions there are two additional pieces required at each end to ensure comprehensive protection. This attention to detail highlights his commitment to producing a durable and reliable design. “Sailing is about finding your path, whether it’s across an ocean or within yourself.” – Sven Yrvind In conclusion, making flanges around bulkhead hatches may seem complex at first glance, but by following Sven Yrvind’s meticulous process, enthusiasts can achieve professional-level results. Remember that the journey of boatbuilding is as rewarding as reaching your destination; it tests one’s patience and dedication. For those seeking to embark on this adventure or simply gain more insight into marine craftsmanship, Sven’s wisdom is invaluable.Making Flanges Around Bulkhead Hatches for Canvas
Sven Yrvind, a renowned yacht designer and sailor, shares valuable insights on creating flanges around bulkhead hatches for canvas protection in this enlightening video. By following his expert guidance, boat enthusiasts can ensure their living areas remain secure while allowing unhindered access through the hatches.Step 1: Starting with the Flange
Sven begins by explaining that working on flanges vertically and horizontally is significantly easier than doing so in a flat position. To simplify the process further, he divides the task into two or three steps as suggested by fellow expert “for for.” This approach not only makes it more manageable but also allows for greater precision in crafting each component.Step 2: Applying Glue and Securing
Sven proceeds to apply glue along one edge of the flange, ensuring a secure bond when clamped into place. He emphasizes that this stage is crucial for maintaining the structural integrity of the flange, which in turn safeguards the living area beneath the canvas when hatches are open.Step 3: Allowing Time to Dry
After securely attaching the first portion of the flange, Sven allows ample time for it to dry before moving forward with additional steps. This patience and precision are key aspects of his successful boatbuilding methods.Step 4: Finishing Touches
Once the flange is fully dried, Sven removes the clamps carefully, ensuring no damage occurs during this process. He then moves on to attaching four more pieces onto these main frames, completing two pairs of flanges for the bulkhead hatches.The Final Touches
While two flanges form the primary support structure around the hatches, Sven mentions there are two additional pieces required at each end to ensure comprehensive protection. This attention to detail highlights his commitment to producing a durable and reliable design. “Sailing is about finding your path, whether it’s across an ocean or within yourself.” – Sven Yrvind In conclusion, making flanges around bulkhead hatches may seem complex at first glance, but by following Sven Yrvind’s meticulous process, enthusiasts can achieve professional-level results. Remember that the journey of boatbuilding is as rewarding as reaching your destination; it tests one’s patience and dedication. For those seeking to embark on this adventure or simply gain more insight into marine craftsmanship, Sven’s wisdom is invaluable.Once the flange is fully dried, Sven removes the clamps carefully, ensuring no damage occurs during this process. He then moves on to attaching four more pieces onto these main frames, completing two pairs of flanges for the bulkhead hatches.The Final Touches
While two flanges form the primary support structure around the hatches, Sven mentions there are two additional pieces required at each end to ensure comprehensive protection. This attention to detail highlights his commitment to producing a durable and reliable design. “Sailing is about finding your path, whether it’s across an ocean or within yourself.” – Sven Yrvind In conclusion, making flanges around bulkhead hatches may seem complex at first glance, but by following Sven Yrvind’s meticulous process, enthusiasts can achieve professional-level results. Remember that the journey of boatbuilding is as rewarding as reaching your destination; it tests one’s patience and dedication. For those seeking to embark on this adventure or simply gain more insight into marine craftsmanship, Sven’s wisdom is invaluable.Sven Yrvind, a renowned yacht designer and sailor, shares valuable insights on creating flanges around bulkhead hatches for canvas protection in this enlightening video. By following his expert guidance, boat enthusiasts can ensure their living areas remain secure while allowing unhindered access through the hatches.Step 1: Starting with the Flange
Sven begins by explaining that working on flanges vertically and horizontally is significantly easier than doing so in a flat position. To simplify the process further, he divides the task into two or three steps as suggested by fellow expert “for for.” This approach not only makes it more manageable but also allows for greater precision in crafting each component.Step 2: Applying Glue and Securing
Sven proceeds to apply glue along one edge of the flange, ensuring a secure bond when clamped into place. He emphasizes that this stage is crucial for maintaining the structural integrity of the flange, which in turn safeguards the living area beneath the canvas when hatches are open.Step 3: Allowing Time to Dry
After securely attaching the first portion of the flange, Sven allows ample time for it to dry before moving forward with additional steps. This patience and precision are key aspects of his successful boatbuilding methods.Step 4: Finishing Touches
Once the flange is fully dried, Sven removes the clamps carefully, ensuring no damage occurs during this process. He then moves on to attaching four more pieces onto these main frames, completing two pairs of flanges for the bulkhead hatches.The Final Touches
While two flanges form the primary support structure around the hatches, Sven mentions there are two additional pieces required at each end to ensure comprehensive protection. This attention to detail highlights his commitment to producing a durable and reliable design. “Sailing is about finding your path, whether it’s across an ocean or within yourself.” – Sven Yrvind In conclusion, making flanges around bulkhead hatches may seem complex at first glance, but by following Sven Yrvind’s meticulous process, enthusiasts can achieve professional-level results. Remember that the journey of boatbuilding is as rewarding as reaching your destination; it tests one’s patience and dedication. For those seeking to embark on this adventure or simply gain more insight into marine craftsmanship, Sven’s wisdom is invaluable.Making Flanges Around Bulkhead Hatches for Canvas
Sven Yrvind, a renowned yacht designer and sailor, shares valuable insights on creating flanges around bulkhead hatches for canvas protection in this enlightening video. By following his expert guidance, boat enthusiasts can ensure their living areas remain secure while allowing unhindered access through the hatches.Step 1: Starting with the Flange
Sven begins by explaining that working on flanges vertically and horizontally is significantly easier than doing so in a flat position. To simplify the process further, he divides the task into two or three steps as suggested by fellow expert “for for.” This approach not only makes it more manageable but also allows for greater precision in crafting each component.Step 2: Applying Glue and Securing
Sven proceeds to apply glue along one edge of the flange, ensuring a secure bond when clamped into place. He emphasizes that this stage is crucial for maintaining the structural integrity of the flange, which in turn safeguards the living area beneath the canvas when hatches are open.Step 3: Allowing Time to Dry
After securely attaching the first portion of the flange, Sven allows ample time for it to dry before moving forward with additional steps. This patience and precision are key aspects of his successful boatbuilding methods.Step 4: Finishing Touches
Once the flange is fully dried, Sven removes the clamps carefully, ensuring no damage occurs during this process. He then moves on to attaching four more pieces onto these main frames, completing two pairs of flanges for the bulkhead hatches.The Final Touches
While two flanges form the primary support structure around the hatches, Sven mentions there are two additional pieces required at each end to ensure comprehensive protection. This attention to detail highlights his commitment to producing a durable and reliable design. “Sailing is about finding your path, whether it’s across an ocean or within yourself.” – Sven Yrvind In conclusion, making flanges around bulkhead hatches may seem complex at first glance, but by following Sven Yrvind’s meticulous process, enthusiasts can achieve professional-level results. Remember that the journey of boatbuilding is as rewarding as reaching your destination; it tests one’s patience and dedication. For those seeking to embark on this adventure or simply gain more insight into marine craftsmanship, Sven’s wisdom is invaluable.After securely attaching the first portion of the flange, Sven allows ample time for it to dry before moving forward with additional steps. This patience and precision are key aspects of his successful boatbuilding methods.Step 4: Finishing Touches
Once the flange is fully dried, Sven removes the clamps carefully, ensuring no damage occurs during this process. He then moves on to attaching four more pieces onto these main frames, completing two pairs of flanges for the bulkhead hatches.The Final Touches
While two flanges form the primary support structure around the hatches, Sven mentions there are two additional pieces required at each end to ensure comprehensive protection. This attention to detail highlights his commitment to producing a durable and reliable design. “Sailing is about finding your path, whether it’s across an ocean or within yourself.” – Sven Yrvind In conclusion, making flanges around bulkhead hatches may seem complex at first glance, but by following Sven Yrvind’s meticulous process, enthusiasts can achieve professional-level results. Remember that the journey of boatbuilding is as rewarding as reaching your destination; it tests one’s patience and dedication. For those seeking to embark on this adventure or simply gain more insight into marine craftsmanship, Sven’s wisdom is invaluable.Sven Yrvind, a renowned yacht designer and sailor, shares valuable insights on creating flanges around bulkhead hatches for canvas protection in this enlightening video. By following his expert guidance, boat enthusiasts can ensure their living areas remain secure while allowing unhindered access through the hatches.Step 1: Starting with the Flange
Sven begins by explaining that working on flanges vertically and horizontally is significantly easier than doing so in a flat position. To simplify the process further, he divides the task into two or three steps as suggested by fellow expert “for for.” This approach not only makes it more manageable but also allows for greater precision in crafting each component.Step 2: Applying Glue and Securing
Sven proceeds to apply glue along one edge of the flange, ensuring a secure bond when clamped into place. He emphasizes that this stage is crucial for maintaining the structural integrity of the flange, which in turn safeguards the living area beneath the canvas when hatches are open.Step 3: Allowing Time to Dry
After securely attaching the first portion of the flange, Sven allows ample time for it to dry before moving forward with additional steps. This patience and precision are key aspects of his successful boatbuilding methods.Step 4: Finishing Touches
Once the flange is fully dried, Sven removes the clamps carefully, ensuring no damage occurs during this process. He then moves on to attaching four more pieces onto these main frames, completing two pairs of flanges for the bulkhead hatches.The Final Touches
While two flanges form the primary support structure around the hatches, Sven mentions there are two additional pieces required at each end to ensure comprehensive protection. This attention to detail highlights his commitment to producing a durable and reliable design. “Sailing is about finding your path, whether it’s across an ocean or within yourself.” – Sven Yrvind In conclusion, making flanges around bulkhead hatches may seem complex at first glance, but by following Sven Yrvind’s meticulous process, enthusiasts can achieve professional-level results. Remember that the journey of boatbuilding is as rewarding as reaching your destination; it tests one’s patience and dedication. For those seeking to embark on this adventure or simply gain more insight into marine craftsmanship, Sven’s wisdom is invaluable.Making Flanges Around Bulkhead Hatches for Canvas
Sven Yrvind, a renowned yacht designer and sailor, shares valuable insights on creating flanges around bulkhead hatches for canvas protection in this enlightening video. By following his expert guidance, boat enthusiasts can ensure their living areas remain secure while allowing unhindered access through the hatches.Step 1: Starting with the Flange
Sven begins by explaining that working on flanges vertically and horizontally is significantly easier than doing so in a flat position. To simplify the process further, he divides the task into two or three steps as suggested by fellow expert “for for.” This approach not only makes it more manageable but also allows for greater precision in crafting each component.Step 2: Applying Glue and Securing
Sven proceeds to apply glue along one edge of the flange, ensuring a secure bond when clamped into place. He emphasizes that this stage is crucial for maintaining the structural integrity of the flange, which in turn safeguards the living area beneath the canvas when hatches are open.Step 3: Allowing Time to Dry
After securely attaching the first portion of the flange, Sven allows ample time for it to dry before moving forward with additional steps. This patience and precision are key aspects of his successful boatbuilding methods.Step 4: Finishing Touches
Once the flange is fully dried, Sven removes the clamps carefully, ensuring no damage occurs during this process. He then moves on to attaching four more pieces onto these main frames, completing two pairs of flanges for the bulkhead hatches.The Final Touches
While two flanges form the primary support structure around the hatches, Sven mentions there are two additional pieces required at each end to ensure comprehensive protection. This attention to detail highlights his commitment to producing a durable and reliable design. “Sailing is about finding your path, whether it’s across an ocean or within yourself.” – Sven Yrvind In conclusion, making flanges around bulkhead hatches may seem complex at first glance, but by following Sven Yrvind’s meticulous process, enthusiasts can achieve professional-level results. Remember that the journey of boatbuilding is as rewarding as reaching your destination; it tests one’s patience and dedication. For those seeking to embark on this adventure or simply gain more insight into marine craftsmanship, Sven’s wisdom is invaluable.Sven proceeds to apply glue along one edge of the flange, ensuring a secure bond when clamped into place. He emphasizes that this stage is crucial for maintaining the structural integrity of the flange, which in turn safeguards the living area beneath the canvas when hatches are open.Step 3: Allowing Time to Dry
After securely attaching the first portion of the flange, Sven allows ample time for it to dry before moving forward with additional steps. This patience and precision are key aspects of his successful boatbuilding methods.Step 4: Finishing Touches
Once the flange is fully dried, Sven removes the clamps carefully, ensuring no damage occurs during this process. He then moves on to attaching four more pieces onto these main frames, completing two pairs of flanges for the bulkhead hatches.The Final Touches
While two flanges form the primary support structure around the hatches, Sven mentions there are two additional pieces required at each end to ensure comprehensive protection. This attention to detail highlights his commitment to producing a durable and reliable design. “Sailing is about finding your path, whether it’s across an ocean or within yourself.” – Sven Yrvind In conclusion, making flanges around bulkhead hatches may seem complex at first glance, but by following Sven Yrvind’s meticulous process, enthusiasts can achieve professional-level results. Remember that the journey of boatbuilding is as rewarding as reaching your destination; it tests one’s patience and dedication. For those seeking to embark on this adventure or simply gain more insight into marine craftsmanship, Sven’s wisdom is invaluable.Sven Yrvind, a renowned yacht designer and sailor, shares valuable insights on creating flanges around bulkhead hatches for canvas protection in this enlightening video. By following his expert guidance, boat enthusiasts can ensure their living areas remain secure while allowing unhindered access through the hatches.Step 1: Starting with the Flange
Sven begins by explaining that working on flanges vertically and horizontally is significantly easier than doing so in a flat position. To simplify the process further, he divides the task into two or three steps as suggested by fellow expert “for for.” This approach not only makes it more manageable but also allows for greater precision in crafting each component.Step 2: Applying Glue and Securing
Sven proceeds to apply glue along one edge of the flange, ensuring a secure bond when clamped into place. He emphasizes that this stage is crucial for maintaining the structural integrity of the flange, which in turn safeguards the living area beneath the canvas when hatches are open.Step 3: Allowing Time to Dry
After securely attaching the first portion of the flange, Sven allows ample time for it to dry before moving forward with additional steps. This patience and precision are key aspects of his successful boatbuilding methods.Step 4: Finishing Touches
Once the flange is fully dried, Sven removes the clamps carefully, ensuring no damage occurs during this process. He then moves on to attaching four more pieces onto these main frames, completing two pairs of flanges for the bulkhead hatches.The Final Touches
While two flanges form the primary support structure around the hatches, Sven mentions there are two additional pieces required at each end to ensure comprehensive protection. This attention to detail highlights his commitment to producing a durable and reliable design. “Sailing is about finding your path, whether it’s across an ocean or within yourself.” – Sven Yrvind In conclusion, making flanges around bulkhead hatches may seem complex at first glance, but by following Sven Yrvind’s meticulous process, enthusiasts can achieve professional-level results. Remember that the journey of boatbuilding is as rewarding as reaching your destination; it tests one’s patience and dedication. For those seeking to embark on this adventure or simply gain more insight into marine craftsmanship, Sven’s wisdom is invaluable.Making Flanges Around Bulkhead Hatches for Canvas
Sven Yrvind, a renowned yacht designer and sailor, shares valuable insights on creating flanges around bulkhead hatches for canvas protection in this enlightening video. By following his expert guidance, boat enthusiasts can ensure their living areas remain secure while allowing unhindered access through the hatches.Step 1: Starting with the Flange
Sven begins by explaining that working on flanges vertically and horizontally is significantly easier than doing so in a flat position. To simplify the process further, he divides the task into two or three steps as suggested by fellow expert “for for.” This approach not only makes it more manageable but also allows for greater precision in crafting each component.Step 2: Applying Glue and Securing
Sven proceeds to apply glue along one edge of the flange, ensuring a secure bond when clamped into place. He emphasizes that this stage is crucial for maintaining the structural integrity of the flange, which in turn safeguards the living area beneath the canvas when hatches are open.Step 3: Allowing Time to Dry
After securely attaching the first portion of the flange, Sven allows ample time for it to dry before moving forward with additional steps. This patience and precision are key aspects of his successful boatbuilding methods.Step 4: Finishing Touches
Once the flange is fully dried, Sven removes the clamps carefully, ensuring no damage occurs during this process. He then moves on to attaching four more pieces onto these main frames, completing two pairs of flanges for the bulkhead hatches.The Final Touches
While two flanges form the primary support structure around the hatches, Sven mentions there are two additional pieces required at each end to ensure comprehensive protection. This attention to detail highlights his commitment to producing a durable and reliable design. “Sailing is about finding your path, whether it’s across an ocean or within yourself.” – Sven Yrvind In conclusion, making flanges around bulkhead hatches may seem complex at first glance, but by following Sven Yrvind’s meticulous process, enthusiasts can achieve professional-level results. Remember that the journey of boatbuilding is as rewarding as reaching your destination; it tests one’s patience and dedication. For those seeking to embark on this adventure or simply gain more insight into marine craftsmanship, Sven’s wisdom is invaluable.Sven begins by explaining that working on flanges vertically and horizontally is significantly easier than doing so in a flat position. To simplify the process further, he divides the task into two or three steps as suggested by fellow expert “for for.” This approach not only makes it more manageable but also allows for greater precision in crafting each component.Step 2: Applying Glue and Securing
Sven proceeds to apply glue along one edge of the flange, ensuring a secure bond when clamped into place. He emphasizes that this stage is crucial for maintaining the structural integrity of the flange, which in turn safeguards the living area beneath the canvas when hatches are open.Step 3: Allowing Time to Dry
After securely attaching the first portion of the flange, Sven allows ample time for it to dry before moving forward with additional steps. This patience and precision are key aspects of his successful boatbuilding methods.Step 4: Finishing Touches
Once the flange is fully dried, Sven removes the clamps carefully, ensuring no damage occurs during this process. He then moves on to attaching four more pieces onto these main frames, completing two pairs of flanges for the bulkhead hatches.The Final Touches
While two flanges form the primary support structure around the hatches, Sven mentions there are two additional pieces required at each end to ensure comprehensive protection. This attention to detail highlights his commitment to producing a durable and reliable design. “Sailing is about finding your path, whether it’s across an ocean or within yourself.” – Sven Yrvind In conclusion, making flanges around bulkhead hatches may seem complex at first glance, but by following Sven Yrvind’s meticulous process, enthusiasts can achieve professional-level results. Remember that the journey of boatbuilding is as rewarding as reaching your destination; it tests one’s patience and dedication. For those seeking to embark on this adventure or simply gain more insight into marine craftsmanship, Sven’s wisdom is invaluable.Sven Yrvind, a renowned yacht designer and sailor, shares valuable insights on creating flanges around bulkhead hatches for canvas protection in this enlightening video. By following his expert guidance, boat enthusiasts can ensure their living areas remain secure while allowing unhindered access through the hatches.Step 1: Starting with the Flange
Sven begins by explaining that working on flanges vertically and horizontally is significantly easier than doing so in a flat position. To simplify the process further, he divides the task into two or three steps as suggested by fellow expert “for for.” This approach not only makes it more manageable but also allows for greater precision in crafting each component.Step 2: Applying Glue and Securing
Sven proceeds to apply glue along one edge of the flange, ensuring a secure bond when clamped into place. He emphasizes that this stage is crucial for maintaining the structural integrity of the flange, which in turn safeguards the living area beneath the canvas when hatches are open.Step 3: Allowing Time to Dry
After securely attaching the first portion of the flange, Sven allows ample time for it to dry before moving forward with additional steps. This patience and precision are key aspects of his successful boatbuilding methods.Step 4: Finishing Touches
Once the flange is fully dried, Sven removes the clamps carefully, ensuring no damage occurs during this process. He then moves on to attaching four more pieces onto these main frames, completing two pairs of flanges for the bulkhead hatches.The Final Touches
While two flanges form the primary support structure around the hatches, Sven mentions there are two additional pieces required at each end to ensure comprehensive protection. This attention to detail highlights his commitment to producing a durable and reliable design. “Sailing is about finding your path, whether it’s across an ocean or within yourself.” – Sven Yrvind In conclusion, making flanges around bulkhead hatches may seem complex at first glance, but by following Sven Yrvind’s meticulous process, enthusiasts can achieve professional-level results. Remember that the journey of boatbuilding is as rewarding as reaching your destination; it tests one’s patience and dedication. For those seeking to embark on this adventure or simply gain more insight into marine craftsmanship, Sven’s wisdom is invaluable.Making Flanges Around Bulkhead Hatches for Canvas
Sven Yrvind, a renowned yacht designer and sailor, shares valuable insights on creating flanges around bulkhead hatches for canvas protection in this enlightening video. By following his expert guidance, boat enthusiasts can ensure their living areas remain secure while allowing unhindered access through the hatches.Step 1: Starting with the Flange
Sven begins by explaining that working on flanges vertically and horizontally is significantly easier than doing so in a flat position. To simplify the process further, he divides the task into two or three steps as suggested by fellow expert “for for.” This approach not only makes it more manageable but also allows for greater precision in crafting each component.Step 2: Applying Glue and Securing
Sven proceeds to apply glue along one edge of the flange, ensuring a secure bond when clamped into place. He emphasizes that this stage is crucial for maintaining the structural integrity of the flange, which in turn safeguards the living area beneath the canvas when hatches are open.Step 3: Allowing Time to Dry
After securely attaching the first portion of the flange, Sven allows ample time for it to dry before moving forward with additional steps. This patience and precision are key aspects of his successful boatbuilding methods.Step 4: Finishing Touches
Once the flange is fully dried, Sven removes the clamps carefully, ensuring no damage occurs during this process. He then moves on to attaching four more pieces onto these main frames, completing two pairs of flanges for the bulkhead hatches.The Final Touches
While two flanges form the primary support structure around the hatches, Sven mentions there are two additional pieces required at each end to ensure comprehensive protection. This attention to detail highlights his commitment to producing a durable and reliable design. “Sailing is about finding your path, whether it’s across an ocean or within yourself.” – Sven Yrvind In conclusion, making flanges around bulkhead hatches may seem complex at first glance, but by following Sven Yrvind’s meticulous process, enthusiasts can achieve professional-level results. Remember that the journey of boatbuilding is as rewarding as reaching your destination; it tests one’s patience and dedication. For those seeking to embark on this adventure or simply gain more insight into marine craftsmanship, Sven’s wisdom is invaluable.Once the flange is fully dried, Sven removes the clamps carefully, ensuring no damage occurs during this process. He then moves on to attaching four more pieces onto these main frames, completing two pairs of flanges for the bulkhead hatches.The Final Touches
While two flanges form the primary support structure around the hatches, Sven mentions there are two additional pieces required at each end to ensure comprehensive protection. This attention to detail highlights his commitment to producing a durable and reliable design. “Sailing is about finding your path, whether it’s across an ocean or within yourself.” – Sven Yrvind In conclusion, making flanges around bulkhead hatches may seem complex at first glance, but by following Sven Yrvind’s meticulous process, enthusiasts can achieve professional-level results. Remember that the journey of boatbuilding is as rewarding as reaching your destination; it tests one’s patience and dedication. For those seeking to embark on this adventure or simply gain more insight into marine craftsmanship, Sven’s wisdom is invaluable.Sven begins by explaining that working on flanges vertically and horizontally is significantly easier than doing so in a flat position. To simplify the process further, he divides the task into two or three steps as suggested by fellow expert “for for.” This approach not only makes it more manageable but also allows for greater precision in crafting each component.Step 2: Applying Glue and Securing
Sven proceeds to apply glue along one edge of the flange, ensuring a secure bond when clamped into place. He emphasizes that this stage is crucial for maintaining the structural integrity of the flange, which in turn safeguards the living area beneath the canvas when hatches are open.Step 3: Allowing Time to Dry
After securely attaching the first portion of the flange, Sven allows ample time for it to dry before moving forward with additional steps. This patience and precision are key aspects of his successful boatbuilding methods.Step 4: Finishing Touches
Once the flange is fully dried, Sven removes the clamps carefully, ensuring no damage occurs during this process. He then moves on to attaching four more pieces onto these main frames, completing two pairs of flanges for the bulkhead hatches.The Final Touches
While two flanges form the primary support structure around the hatches, Sven mentions there are two additional pieces required at each end to ensure comprehensive protection. This attention to detail highlights his commitment to producing a durable and reliable design. “Sailing is about finding your path, whether it’s across an ocean or within yourself.” – Sven Yrvind In conclusion, making flanges around bulkhead hatches may seem complex at first glance, but by following Sven Yrvind’s meticulous process, enthusiasts can achieve professional-level results. Remember that the journey of boatbuilding is as rewarding as reaching your destination; it tests one’s patience and dedication. For those seeking to embark on this adventure or simply gain more insight into marine craftsmanship, Sven’s wisdom is invaluable.Sven Yrvind, a renowned yacht designer and sailor, shares valuable insights on creating flanges around bulkhead hatches for canvas protection in this enlightening video. By following his expert guidance, boat enthusiasts can ensure their living areas remain secure while allowing unhindered access through the hatches.Step 1: Starting with the Flange
Sven begins by explaining that working on flanges vertically and horizontally is significantly easier than doing so in a flat position. To simplify the process further, he divides the task into two or three steps as suggested by fellow expert “for for.” This approach not only makes it more manageable but also allows for greater precision in crafting each component.Step 2: Applying Glue and Securing
Sven proceeds to apply glue along one edge of the flange, ensuring a secure bond when clamped into place. He emphasizes that this stage is crucial for maintaining the structural integrity of the flange, which in turn safeguards the living area beneath the canvas when hatches are open.Step 3: Allowing Time to Dry
After securely attaching the first portion of the flange, Sven allows ample time for it to dry before moving forward with additional steps. This patience and precision are key aspects of his successful boatbuilding methods.Step 4: Finishing Touches
Once the flange is fully dried, Sven removes the clamps carefully, ensuring no damage occurs during this process. He then moves on to attaching four more pieces onto these main frames, completing two pairs of flanges for the bulkhead hatches.The Final Touches
While two flanges form the primary support structure around the hatches, Sven mentions there are two additional pieces required at each end to ensure comprehensive protection. This attention to detail highlights his commitment to producing a durable and reliable design. “Sailing is about finding your path, whether it’s across an ocean or within yourself.” – Sven Yrvind In conclusion, making flanges around bulkhead hatches may seem complex at first glance, but by following Sven Yrvind’s meticulous process, enthusiasts can achieve professional-level results. Remember that the journey of boatbuilding is as rewarding as reaching your destination; it tests one’s patience and dedication. For those seeking to embark on this adventure or simply gain more insight into marine craftsmanship, Sven’s wisdom is invaluable.Making Flanges Around Bulkhead Hatches for Canvas
Sven Yrvind, a renowned yacht designer and sailor, shares valuable insights on creating flanges around bulkhead hatches for canvas protection in this enlightening video. By following his expert guidance, boat enthusiasts can ensure their living areas remain secure while allowing unhindered access through the hatches.Step 1: Starting with the Flange
Sven begins by explaining that working on flanges vertically and horizontally is significantly easier than doing so in a flat position. To simplify the process further, he divides the task into two or three steps as suggested by fellow expert “for for.” This approach not only makes it more manageable but also allows for greater precision in crafting each component.Step 2: Applying Glue and Securing
Sven proceeds to apply glue along one edge of the flange, ensuring a secure bond when clamped into place. He emphasizes that this stage is crucial for maintaining the structural integrity of the flange, which in turn safeguards the living area beneath the canvas when hatches are open.Step 3: Allowing Time to Dry
After securely attaching the first portion of the flange, Sven allows ample time for it to dry before moving forward with additional steps. This patience and precision are key aspects of his successful boatbuilding methods.Step 4: Finishing Touches
Once the flange is fully dried, Sven removes the clamps carefully, ensuring no damage occurs during this process. He then moves on to attaching four more pieces onto these main frames, completing two pairs of flanges for the bulkhead hatches.The Final Touches
While two flanges form the primary support structure around the hatches, Sven mentions there are two additional pieces required at each end to ensure comprehensive protection. This attention to detail highlights his commitment to producing a durable and reliable design. “Sailing is about finding your path, whether it’s across an ocean or within yourself.” – Sven Yrvind In conclusion, making flanges around bulkhead hatches may seem complex at first glance, but by following Sven Yrvind’s meticulous process, enthusiasts can achieve professional-level results. Remember that the journey of boatbuilding is as rewarding as reaching your destination; it tests one’s patience and dedication. For those seeking to embark on this adventure or simply gain more insight into marine craftsmanship, Sven’s wisdom is invaluable.After securely attaching the first portion of the flange, Sven allows ample time for it to dry before moving forward with additional steps. This patience and precision are key aspects of his successful boatbuilding methods.Step 4: Finishing Touches
Once the flange is fully dried, Sven removes the clamps carefully, ensuring no damage occurs during this process. He then moves on to attaching four more pieces onto these main frames, completing two pairs of flanges for the bulkhead hatches.The Final Touches
While two flanges form the primary support structure around the hatches, Sven mentions there are two additional pieces required at each end to ensure comprehensive protection. This attention to detail highlights his commitment to producing a durable and reliable design. “Sailing is about finding your path, whether it’s across an ocean or within yourself.” – Sven Yrvind In conclusion, making flanges around bulkhead hatches may seem complex at first glance, but by following Sven Yrvind’s meticulous process, enthusiasts can achieve professional-level results. Remember that the journey of boatbuilding is as rewarding as reaching your destination; it tests one’s patience and dedication. For those seeking to embark on this adventure or simply gain more insight into marine craftsmanship, Sven’s wisdom is invaluable.Sven begins by explaining that working on flanges vertically and horizontally is significantly easier than doing so in a flat position. To simplify the process further, he divides the task into two or three steps as suggested by fellow expert “for for.” This approach not only makes it more manageable but also allows for greater precision in crafting each component.Step 2: Applying Glue and Securing
Sven proceeds to apply glue along one edge of the flange, ensuring a secure bond when clamped into place. He emphasizes that this stage is crucial for maintaining the structural integrity of the flange, which in turn safeguards the living area beneath the canvas when hatches are open.Step 3: Allowing Time to Dry
After securely attaching the first portion of the flange, Sven allows ample time for it to dry before moving forward with additional steps. This patience and precision are key aspects of his successful boatbuilding methods.Step 4: Finishing Touches
Once the flange is fully dried, Sven removes the clamps carefully, ensuring no damage occurs during this process. He then moves on to attaching four more pieces onto these main frames, completing two pairs of flanges for the bulkhead hatches.The Final Touches
While two flanges form the primary support structure around the hatches, Sven mentions there are two additional pieces required at each end to ensure comprehensive protection. This attention to detail highlights his commitment to producing a durable and reliable design. “Sailing is about finding your path, whether it’s across an ocean or within yourself.” – Sven Yrvind In conclusion, making flanges around bulkhead hatches may seem complex at first glance, but by following Sven Yrvind’s meticulous process, enthusiasts can achieve professional-level results. Remember that the journey of boatbuilding is as rewarding as reaching your destination; it tests one’s patience and dedication. For those seeking to embark on this adventure or simply gain more insight into marine craftsmanship, Sven’s wisdom is invaluable.Sven Yrvind, a renowned yacht designer and sailor, shares valuable insights on creating flanges around bulkhead hatches for canvas protection in this enlightening video. By following his expert guidance, boat enthusiasts can ensure their living areas remain secure while allowing unhindered access through the hatches.Step 1: Starting with the Flange
Sven begins by explaining that working on flanges vertically and horizontally is significantly easier than doing so in a flat position. To simplify the process further, he divides the task into two or three steps as suggested by fellow expert “for for.” This approach not only makes it more manageable but also allows for greater precision in crafting each component.Step 2: Applying Glue and Securing
Sven proceeds to apply glue along one edge of the flange, ensuring a secure bond when clamped into place. He emphasizes that this stage is crucial for maintaining the structural integrity of the flange, which in turn safeguards the living area beneath the canvas when hatches are open.Step 3: Allowing Time to Dry
After securely attaching the first portion of the flange, Sven allows ample time for it to dry before moving forward with additional steps. This patience and precision are key aspects of his successful boatbuilding methods.Step 4: Finishing Touches
Once the flange is fully dried, Sven removes the clamps carefully, ensuring no damage occurs during this process. He then moves on to attaching four more pieces onto these main frames, completing two pairs of flanges for the bulkhead hatches.The Final Touches
While two flanges form the primary support structure around the hatches, Sven mentions there are two additional pieces required at each end to ensure comprehensive protection. This attention to detail highlights his commitment to producing a durable and reliable design. “Sailing is about finding your path, whether it’s across an ocean or within yourself.” – Sven Yrvind In conclusion, making flanges around bulkhead hatches may seem complex at first glance, but by following Sven Yrvind’s meticulous process, enthusiasts can achieve professional-level results. Remember that the journey of boatbuilding is as rewarding as reaching your destination; it tests one’s patience and dedication. For those seeking to embark on this adventure or simply gain more insight into marine craftsmanship, Sven’s wisdom is invaluable.Making Flanges Around Bulkhead Hatches for Canvas
Sven Yrvind, a renowned yacht designer and sailor, shares valuable insights on creating flanges around bulkhead hatches for canvas protection in this enlightening video. By following his expert guidance, boat enthusiasts can ensure their living areas remain secure while allowing unhindered access through the hatches.Step 1: Starting with the Flange
Sven begins by explaining that working on flanges vertically and horizontally is significantly easier than doing so in a flat position. To simplify the process further, he divides the task into two or three steps as suggested by fellow expert “for for.” This approach not only makes it more manageable but also allows for greater precision in crafting each component.Step 2: Applying Glue and Securing
Sven proceeds to apply glue along one edge of the flange, ensuring a secure bond when clamped into place. He emphasizes that this stage is crucial for maintaining the structural integrity of the flange, which in turn safeguards the living area beneath the canvas when hatches are open.Step 3: Allowing Time to Dry
After securely attaching the first portion of the flange, Sven allows ample time for it to dry before moving forward with additional steps. This patience and precision are key aspects of his successful boatbuilding methods.Step 4: Finishing Touches
Once the flange is fully dried, Sven removes the clamps carefully, ensuring no damage occurs during this process. He then moves on to attaching four more pieces onto these main frames, completing two pairs of flanges for the bulkhead hatches.The Final Touches
While two flanges form the primary support structure around the hatches, Sven mentions there are two additional pieces required at each end to ensure comprehensive protection. This attention to detail highlights his commitment to producing a durable and reliable design. “Sailing is about finding your path, whether it’s across an ocean or within yourself.” – Sven Yrvind In conclusion, making flanges around bulkhead hatches may seem complex at first glance, but by following Sven Yrvind’s meticulous process, enthusiasts can achieve professional-level results. Remember that the journey of boatbuilding is as rewarding as reaching your destination; it tests one’s patience and dedication. For those seeking to embark on this adventure or simply gain more insight into marine craftsmanship, Sven’s wisdom is invaluable.Sven proceeds to apply glue along one edge of the flange, ensuring a secure bond when clamped into place. He emphasizes that this stage is crucial for maintaining the structural integrity of the flange, which in turn safeguards the living area beneath the canvas when hatches are open.Step 3: Allowing Time to Dry
After securely attaching the first portion of the flange, Sven allows ample time for it to dry before moving forward with additional steps. This patience and precision are key aspects of his successful boatbuilding methods.Step 4: Finishing Touches
Once the flange is fully dried, Sven removes the clamps carefully, ensuring no damage occurs during this process. He then moves on to attaching four more pieces onto these main frames, completing two pairs of flanges for the bulkhead hatches.The Final Touches
While two flanges form the primary support structure around the hatches, Sven mentions there are two additional pieces required at each end to ensure comprehensive protection. This attention to detail highlights his commitment to producing a durable and reliable design. “Sailing is about finding your path, whether it’s across an ocean or within yourself.” – Sven Yrvind In conclusion, making flanges around bulkhead hatches may seem complex at first glance, but by following Sven Yrvind’s meticulous process, enthusiasts can achieve professional-level results. Remember that the journey of boatbuilding is as rewarding as reaching your destination; it tests one’s patience and dedication. For those seeking to embark on this adventure or simply gain more insight into marine craftsmanship, Sven’s wisdom is invaluable.Sven begins by explaining that working on flanges vertically and horizontally is significantly easier than doing so in a flat position. To simplify the process further, he divides the task into two or three steps as suggested by fellow expert “for for.” This approach not only makes it more manageable but also allows for greater precision in crafting each component.Step 2: Applying Glue and Securing
Sven proceeds to apply glue along one edge of the flange, ensuring a secure bond when clamped into place. He emphasizes that this stage is crucial for maintaining the structural integrity of the flange, which in turn safeguards the living area beneath the canvas when hatches are open.Step 3: Allowing Time to Dry
After securely attaching the first portion of the flange, Sven allows ample time for it to dry before moving forward with additional steps. This patience and precision are key aspects of his successful boatbuilding methods.Step 4: Finishing Touches
Once the flange is fully dried, Sven removes the clamps carefully, ensuring no damage occurs during this process. He then moves on to attaching four more pieces onto these main frames, completing two pairs of flanges for the bulkhead hatches.The Final Touches
While two flanges form the primary support structure around the hatches, Sven mentions there are two additional pieces required at each end to ensure comprehensive protection. This attention to detail highlights his commitment to producing a durable and reliable design. “Sailing is about finding your path, whether it’s across an ocean or within yourself.” – Sven Yrvind In conclusion, making flanges around bulkhead hatches may seem complex at first glance, but by following Sven Yrvind’s meticulous process, enthusiasts can achieve professional-level results. Remember that the journey of boatbuilding is as rewarding as reaching your destination; it tests one’s patience and dedication. For those seeking to embark on this adventure or simply gain more insight into marine craftsmanship, Sven’s wisdom is invaluable.Sven Yrvind, a renowned yacht designer and sailor, shares valuable insights on creating flanges around bulkhead hatches for canvas protection in this enlightening video. By following his expert guidance, boat enthusiasts can ensure their living areas remain secure while allowing unhindered access through the hatches.Step 1: Starting with the Flange
Sven begins by explaining that working on flanges vertically and horizontally is significantly easier than doing so in a flat position. To simplify the process further, he divides the task into two or three steps as suggested by fellow expert “for for.” This approach not only makes it more manageable but also allows for greater precision in crafting each component.Step 2: Applying Glue and Securing
Sven proceeds to apply glue along one edge of the flange, ensuring a secure bond when clamped into place. He emphasizes that this stage is crucial for maintaining the structural integrity of the flange, which in turn safeguards the living area beneath the canvas when hatches are open.Step 3: Allowing Time to Dry
After securely attaching the first portion of the flange, Sven allows ample time for it to dry before moving forward with additional steps. This patience and precision are key aspects of his successful boatbuilding methods.Step 4: Finishing Touches
Once the flange is fully dried, Sven removes the clamps carefully, ensuring no damage occurs during this process. He then moves on to attaching four more pieces onto these main frames, completing two pairs of flanges for the bulkhead hatches.The Final Touches
While two flanges form the primary support structure around the hatches, Sven mentions there are two additional pieces required at each end to ensure comprehensive protection. This attention to detail highlights his commitment to producing a durable and reliable design. “Sailing is about finding your path, whether it’s across an ocean or within yourself.” – Sven Yrvind In conclusion, making flanges around bulkhead hatches may seem complex at first glance, but by following Sven Yrvind’s meticulous process, enthusiasts can achieve professional-level results. Remember that the journey of boatbuilding is as rewarding as reaching your destination; it tests one’s patience and dedication. For those seeking to embark on this adventure or simply gain more insight into marine craftsmanship, Sven’s wisdom is invaluable.Making Flanges Around Bulkhead Hatches for Canvas
Sven Yrvind, a renowned yacht designer and sailor, shares valuable insights on creating flanges around bulkhead hatches for canvas protection in this enlightening video. By following his expert guidance, boat enthusiasts can ensure their living areas remain secure while allowing unhindered access through the hatches.Step 1: Starting with the Flange
Sven begins by explaining that working on flanges vertically and horizontally is significantly easier than doing so in a flat position. To simplify the process further, he divides the task into two or three steps as suggested by fellow expert “for for.” This approach not only makes it more manageable but also allows for greater precision in crafting each component.Step 2: Applying Glue and Securing
Sven proceeds to apply glue along one edge of the flange, ensuring a secure bond when clamped into place. He emphasizes that this stage is crucial for maintaining the structural integrity of the flange, which in turn safeguards the living area beneath the canvas when hatches are open.Step 3: Allowing Time to Dry
After securely attaching the first portion of the flange, Sven allows ample time for it to dry before moving forward with additional steps. This patience and precision are key aspects of his successful boatbuilding methods.Step 4: Finishing Touches
Once the flange is fully dried, Sven removes the clamps carefully, ensuring no damage occurs during this process. He then moves on to attaching four more pieces onto these main frames, completing two pairs of flanges for the bulkhead hatches.The Final Touches
While two flanges form the primary support structure around the hatches, Sven mentions there are two additional pieces required at each end to ensure comprehensive protection. This attention to detail highlights his commitment to producing a durable and reliable design. “Sailing is about finding your path, whether it’s across an ocean or within yourself.” – Sven Yrvind In conclusion, making flanges around bulkhead hatches may seem complex at first glance, but by following Sven Yrvind’s meticulous process, enthusiasts can achieve professional-level results. Remember that the journey of boatbuilding is as rewarding as reaching your destination; it tests one’s patience and dedication. For those seeking to embark on this adventure or simply gain more insight into marine craftsmanship, Sven’s wisdom is invaluable.Once the flange is fully dried, Sven removes the clamps carefully, ensuring no damage occurs during this process. He then moves on to attaching four more pieces onto these main frames, completing two pairs of flanges for the bulkhead hatches.The Final Touches
While two flanges form the primary support structure around the hatches, Sven mentions there are two additional pieces required at each end to ensure comprehensive protection. This attention to detail highlights his commitment to producing a durable and reliable design. “Sailing is about finding your path, whether it’s across an ocean or within yourself.” – Sven Yrvind In conclusion, making flanges around bulkhead hatches may seem complex at first glance, but by following Sven Yrvind’s meticulous process, enthusiasts can achieve professional-level results. Remember that the journey of boatbuilding is as rewarding as reaching your destination; it tests one’s patience and dedication. For those seeking to embark on this adventure or simply gain more insight into marine craftsmanship, Sven’s wisdom is invaluable.Sven proceeds to apply glue along one edge of the flange, ensuring a secure bond when clamped into place. He emphasizes that this stage is crucial for maintaining the structural integrity of the flange, which in turn safeguards the living area beneath the canvas when hatches are open.Step 3: Allowing Time to Dry
After securely attaching the first portion of the flange, Sven allows ample time for it to dry before moving forward with additional steps. This patience and precision are key aspects of his successful boatbuilding methods.Step 4: Finishing Touches
Once the flange is fully dried, Sven removes the clamps carefully, ensuring no damage occurs during this process. He then moves on to attaching four more pieces onto these main frames, completing two pairs of flanges for the bulkhead hatches.The Final Touches
While two flanges form the primary support structure around the hatches, Sven mentions there are two additional pieces required at each end to ensure comprehensive protection. This attention to detail highlights his commitment to producing a durable and reliable design. “Sailing is about finding your path, whether it’s across an ocean or within yourself.” – Sven Yrvind In conclusion, making flanges around bulkhead hatches may seem complex at first glance, but by following Sven Yrvind’s meticulous process, enthusiasts can achieve professional-level results. Remember that the journey of boatbuilding is as rewarding as reaching your destination; it tests one’s patience and dedication. For those seeking to embark on this adventure or simply gain more insight into marine craftsmanship, Sven’s wisdom is invaluable.Sven begins by explaining that working on flanges vertically and horizontally is significantly easier than doing so in a flat position. To simplify the process further, he divides the task into two or three steps as suggested by fellow expert “for for.” This approach not only makes it more manageable but also allows for greater precision in crafting each component.Step 2: Applying Glue and Securing
Sven proceeds to apply glue along one edge of the flange, ensuring a secure bond when clamped into place. He emphasizes that this stage is crucial for maintaining the structural integrity of the flange, which in turn safeguards the living area beneath the canvas when hatches are open.Step 3: Allowing Time to Dry
After securely attaching the first portion of the flange, Sven allows ample time for it to dry before moving forward with additional steps. This patience and precision are key aspects of his successful boatbuilding methods.Step 4: Finishing Touches
Once the flange is fully dried, Sven removes the clamps carefully, ensuring no damage occurs during this process. He then moves on to attaching four more pieces onto these main frames, completing two pairs of flanges for the bulkhead hatches.The Final Touches
While two flanges form the primary support structure around the hatches, Sven mentions there are two additional pieces required at each end to ensure comprehensive protection. This attention to detail highlights his commitment to producing a durable and reliable design. “Sailing is about finding your path, whether it’s across an ocean or within yourself.” – Sven Yrvind In conclusion, making flanges around bulkhead hatches may seem complex at first glance, but by following Sven Yrvind’s meticulous process, enthusiasts can achieve professional-level results. Remember that the journey of boatbuilding is as rewarding as reaching your destination; it tests one’s patience and dedication. For those seeking to embark on this adventure or simply gain more insight into marine craftsmanship, Sven’s wisdom is invaluable.Sven Yrvind, a renowned yacht designer and sailor, shares valuable insights on creating flanges around bulkhead hatches for canvas protection in this enlightening video. By following his expert guidance, boat enthusiasts can ensure their living areas remain secure while allowing unhindered access through the hatches.Step 1: Starting with the Flange
Sven begins by explaining that working on flanges vertically and horizontally is significantly easier than doing so in a flat position. To simplify the process further, he divides the task into two or three steps as suggested by fellow expert “for for.” This approach not only makes it more manageable but also allows for greater precision in crafting each component.Step 2: Applying Glue and Securing
Sven proceeds to apply glue along one edge of the flange, ensuring a secure bond when clamped into place. He emphasizes that this stage is crucial for maintaining the structural integrity of the flange, which in turn safeguards the living area beneath the canvas when hatches are open.Step 3: Allowing Time to Dry
After securely attaching the first portion of the flange, Sven allows ample time for it to dry before moving forward with additional steps. This patience and precision are key aspects of his successful boatbuilding methods.Step 4: Finishing Touches
Once the flange is fully dried, Sven removes the clamps carefully, ensuring no damage occurs during this process. He then moves on to attaching four more pieces onto these main frames, completing two pairs of flanges for the bulkhead hatches.The Final Touches
While two flanges form the primary support structure around the hatches, Sven mentions there are two additional pieces required at each end to ensure comprehensive protection. This attention to detail highlights his commitment to producing a durable and reliable design. “Sailing is about finding your path, whether it’s across an ocean or within yourself.” – Sven Yrvind In conclusion, making flanges around bulkhead hatches may seem complex at first glance, but by following Sven Yrvind’s meticulous process, enthusiasts can achieve professional-level results. Remember that the journey of boatbuilding is as rewarding as reaching your destination; it tests one’s patience and dedication. For those seeking to embark on this adventure or simply gain more insight into marine craftsmanship, Sven’s wisdom is invaluable.Making Flanges Around Bulkhead Hatches for Canvas
Sven Yrvind, a renowned yacht designer and sailor, shares valuable insights on creating flanges around bulkhead hatches for canvas protection in this enlightening video. By following his expert guidance, boat enthusiasts can ensure their living areas remain secure while allowing unhindered access through the hatches.Step 1: Starting with the Flange
Sven begins by explaining that working on flanges vertically and horizontally is significantly easier than doing so in a flat position. To simplify the process further, he divides the task into two or three steps as suggested by fellow expert “for for.” This approach not only makes it more manageable but also allows for greater precision in crafting each component.Step 2: Applying Glue and Securing
Sven proceeds to apply glue along one edge of the flange, ensuring a secure bond when clamped into place. He emphasizes that this stage is crucial for maintaining the structural integrity of the flange, which in turn safeguards the living area beneath the canvas when hatches are open.Step 3: Allowing Time to Dry
After securely attaching the first portion of the flange, Sven allows ample time for it to dry before moving forward with additional steps. This patience and precision are key aspects of his successful boatbuilding methods.Step 4: Finishing Touches
Once the flange is fully dried, Sven removes the clamps carefully, ensuring no damage occurs during this process. He then moves on to attaching four more pieces onto these main frames, completing two pairs of flanges for the bulkhead hatches.The Final Touches
While two flanges form the primary support structure around the hatches, Sven mentions there are two additional pieces required at each end to ensure comprehensive protection. This attention to detail highlights his commitment to producing a durable and reliable design. “Sailing is about finding your path, whether it’s across an ocean or within yourself.” – Sven Yrvind In conclusion, making flanges around bulkhead hatches may seem complex at first glance, but by following Sven Yrvind’s meticulous process, enthusiasts can achieve professional-level results. Remember that the journey of boatbuilding is as rewarding as reaching your destination; it tests one’s patience and dedication. For those seeking to embark on this adventure or simply gain more insight into marine craftsmanship, Sven’s wisdom is invaluable.After securely attaching the first portion of the flange, Sven allows ample time for it to dry before moving forward with additional steps. This patience and precision are key aspects of his successful boatbuilding methods.Step 4: Finishing Touches
Once the flange is fully dried, Sven removes the clamps carefully, ensuring no damage occurs during this process. He then moves on to attaching four more pieces onto these main frames, completing two pairs of flanges for the bulkhead hatches.The Final Touches
While two flanges form the primary support structure around the hatches, Sven mentions there are two additional pieces required at each end to ensure comprehensive protection. This attention to detail highlights his commitment to producing a durable and reliable design. “Sailing is about finding your path, whether it’s across an ocean or within yourself.” – Sven Yrvind In conclusion, making flanges around bulkhead hatches may seem complex at first glance, but by following Sven Yrvind’s meticulous process, enthusiasts can achieve professional-level results. Remember that the journey of boatbuilding is as rewarding as reaching your destination; it tests one’s patience and dedication. For those seeking to embark on this adventure or simply gain more insight into marine craftsmanship, Sven’s wisdom is invaluable.Sven proceeds to apply glue along one edge of the flange, ensuring a secure bond when clamped into place. He emphasizes that this stage is crucial for maintaining the structural integrity of the flange, which in turn safeguards the living area beneath the canvas when hatches are open.Step 3: Allowing Time to Dry
After securely attaching the first portion of the flange, Sven allows ample time for it to dry before moving forward with additional steps. This patience and precision are key aspects of his successful boatbuilding methods.Step 4: Finishing Touches
Once the flange is fully dried, Sven removes the clamps carefully, ensuring no damage occurs during this process. He then moves on to attaching four more pieces onto these main frames, completing two pairs of flanges for the bulkhead hatches.The Final Touches
While two flanges form the primary support structure around the hatches, Sven mentions there are two additional pieces required at each end to ensure comprehensive protection. This attention to detail highlights his commitment to producing a durable and reliable design. “Sailing is about finding your path, whether it’s across an ocean or within yourself.” – Sven Yrvind In conclusion, making flanges around bulkhead hatches may seem complex at first glance, but by following Sven Yrvind’s meticulous process, enthusiasts can achieve professional-level results. Remember that the journey of boatbuilding is as rewarding as reaching your destination; it tests one’s patience and dedication. For those seeking to embark on this adventure or simply gain more insight into marine craftsmanship, Sven’s wisdom is invaluable.Sven begins by explaining that working on flanges vertically and horizontally is significantly easier than doing so in a flat position. To simplify the process further, he divides the task into two or three steps as suggested by fellow expert “for for.” This approach not only makes it more manageable but also allows for greater precision in crafting each component.Step 2: Applying Glue and Securing
Sven proceeds to apply glue along one edge of the flange, ensuring a secure bond when clamped into place. He emphasizes that this stage is crucial for maintaining the structural integrity of the flange, which in turn safeguards the living area beneath the canvas when hatches are open.Step 3: Allowing Time to Dry
After securely attaching the first portion of the flange, Sven allows ample time for it to dry before moving forward with additional steps. This patience and precision are key aspects of his successful boatbuilding methods.Step 4: Finishing Touches
Once the flange is fully dried, Sven removes the clamps carefully, ensuring no damage occurs during this process. He then moves on to attaching four more pieces onto these main frames, completing two pairs of flanges for the bulkhead hatches.The Final Touches
While two flanges form the primary support structure around the hatches, Sven mentions there are two additional pieces required at each end to ensure comprehensive protection. This attention to detail highlights his commitment to producing a durable and reliable design. “Sailing is about finding your path, whether it’s across an ocean or within yourself.” – Sven Yrvind In conclusion, making flanges around bulkhead hatches may seem complex at first glance, but by following Sven Yrvind’s meticulous process, enthusiasts can achieve professional-level results. Remember that the journey of boatbuilding is as rewarding as reaching your destination; it tests one’s patience and dedication. For those seeking to embark on this adventure or simply gain more insight into marine craftsmanship, Sven’s wisdom is invaluable.Sven Yrvind, a renowned yacht designer and sailor, shares valuable insights on creating flanges around bulkhead hatches for canvas protection in this enlightening video. By following his expert guidance, boat enthusiasts can ensure their living areas remain secure while allowing unhindered access through the hatches.Step 1: Starting with the Flange
Sven begins by explaining that working on flanges vertically and horizontally is significantly easier than doing so in a flat position. To simplify the process further, he divides the task into two or three steps as suggested by fellow expert “for for.” This approach not only makes it more manageable but also allows for greater precision in crafting each component.Step 2: Applying Glue and Securing
Sven proceeds to apply glue along one edge of the flange, ensuring a secure bond when clamped into place. He emphasizes that this stage is crucial for maintaining the structural integrity of the flange, which in turn safeguards the living area beneath the canvas when hatches are open.Step 3: Allowing Time to Dry
After securely attaching the first portion of the flange, Sven allows ample time for it to dry before moving forward with additional steps. This patience and precision are key aspects of his successful boatbuilding methods.Step 4: Finishing Touches
Once the flange is fully dried, Sven removes the clamps carefully, ensuring no damage occurs during this process. He then moves on to attaching four more pieces onto these main frames, completing two pairs of flanges for the bulkhead hatches.The Final Touches
While two flanges form the primary support structure around the hatches, Sven mentions there are two additional pieces required at each end to ensure comprehensive protection. This attention to detail highlights his commitment to producing a durable and reliable design. “Sailing is about finding your path, whether it’s across an ocean or within yourself.” – Sven Yrvind In conclusion, making flanges around bulkhead hatches may seem complex at first glance, but by following Sven Yrvind’s meticulous process, enthusiasts can achieve professional-level results. Remember that the journey of boatbuilding is as rewarding as reaching your destination; it tests one’s patience and dedication. For those seeking to embark on this adventure or simply gain more insight into marine craftsmanship, Sven’s wisdom is invaluable.Making Flanges Around Bulkhead Hatches for Canvas
Sven Yrvind, a renowned yacht designer and sailor, shares valuable insights on creating flanges around bulkhead hatches for canvas protection in this enlightening video. By following his expert guidance, boat enthusiasts can ensure their living areas remain secure while allowing unhindered access through the hatches.Step 1: Starting with the Flange
Sven begins by explaining that working on flanges vertically and horizontally is significantly easier than doing so in a flat position. To simplify the process further, he divides the task into two or three steps as suggested by fellow expert “for for.” This approach not only makes it more manageable but also allows for greater precision in crafting each component.Step 2: Applying Glue and Securing
Sven proceeds to apply glue along one edge of the flange, ensuring a secure bond when clamped into place. He emphasizes that this stage is crucial for maintaining the structural integrity of the flange, which in turn safeguards the living area beneath the canvas when hatches are open.Step 3: Allowing Time to Dry
After securely attaching the first portion of the flange, Sven allows ample time for it to dry before moving forward with additional steps. This patience and precision are key aspects of his successful boatbuilding methods.Step 4: Finishing Touches
Once the flange is fully dried, Sven removes the clamps carefully, ensuring no damage occurs during this process. He then moves on to attaching four more pieces onto these main frames, completing two pairs of flanges for the bulkhead hatches.The Final Touches
While two flanges form the primary support structure around the hatches, Sven mentions there are two additional pieces required at each end to ensure comprehensive protection. This attention to detail highlights his commitment to producing a durable and reliable design. “Sailing is about finding your path, whether it’s across an ocean or within yourself.” – Sven Yrvind In conclusion, making flanges around bulkhead hatches may seem complex at first glance, but by following Sven Yrvind’s meticulous process, enthusiasts can achieve professional-level results. Remember that the journey of boatbuilding is as rewarding as reaching your destination; it tests one’s patience and dedication. For those seeking to embark on this adventure or simply gain more insight into marine craftsmanship, Sven’s wisdom is invaluable.Once the flange is fully dried, Sven removes the clamps carefully, ensuring no damage occurs during this process. He then moves on to attaching four more pieces onto these main frames, completing two pairs of flanges for the bulkhead hatches.The Final Touches
While two flanges form the primary support structure around the hatches, Sven mentions there are two additional pieces required at each end to ensure comprehensive protection. This attention to detail highlights his commitment to producing a durable and reliable design. “Sailing is about finding your path, whether it’s across an ocean or within yourself.” – Sven Yrvind In conclusion, making flanges around bulkhead hatches may seem complex at first glance, but by following Sven Yrvind’s meticulous process, enthusiasts can achieve professional-level results. Remember that the journey of boatbuilding is as rewarding as reaching your destination; it tests one’s patience and dedication. For those seeking to embark on this adventure or simply gain more insight into marine craftsmanship, Sven’s wisdom is invaluable.After securely attaching the first portion of the flange, Sven allows ample time for it to dry before moving forward with additional steps. This patience and precision are key aspects of his successful boatbuilding methods.Step 4: Finishing Touches
Once the flange is fully dried, Sven removes the clamps carefully, ensuring no damage occurs during this process. He then moves on to attaching four more pieces onto these main frames, completing two pairs of flanges for the bulkhead hatches.The Final Touches
While two flanges form the primary support structure around the hatches, Sven mentions there are two additional pieces required at each end to ensure comprehensive protection. This attention to detail highlights his commitment to producing a durable and reliable design. “Sailing is about finding your path, whether it’s across an ocean or within yourself.” – Sven Yrvind In conclusion, making flanges around bulkhead hatches may seem complex at first glance, but by following Sven Yrvind’s meticulous process, enthusiasts can achieve professional-level results. Remember that the journey of boatbuilding is as rewarding as reaching your destination; it tests one’s patience and dedication. For those seeking to embark on this adventure or simply gain more insight into marine craftsmanship, Sven’s wisdom is invaluable.Sven proceeds to apply glue along one edge of the flange, ensuring a secure bond when clamped into place. He emphasizes that this stage is crucial for maintaining the structural integrity of the flange, which in turn safeguards the living area beneath the canvas when hatches are open.Step 3: Allowing Time to Dry
After securely attaching the first portion of the flange, Sven allows ample time for it to dry before moving forward with additional steps. This patience and precision are key aspects of his successful boatbuilding methods.Step 4: Finishing Touches
Once the flange is fully dried, Sven removes the clamps carefully, ensuring no damage occurs during this process. He then moves on to attaching four more pieces onto these main frames, completing two pairs of flanges for the bulkhead hatches.The Final Touches
While two flanges form the primary support structure around the hatches, Sven mentions there are two additional pieces required at each end to ensure comprehensive protection. This attention to detail highlights his commitment to producing a durable and reliable design. “Sailing is about finding your path, whether it’s across an ocean or within yourself.” – Sven Yrvind In conclusion, making flanges around bulkhead hatches may seem complex at first glance, but by following Sven Yrvind’s meticulous process, enthusiasts can achieve professional-level results. Remember that the journey of boatbuilding is as rewarding as reaching your destination; it tests one’s patience and dedication. For those seeking to embark on this adventure or simply gain more insight into marine craftsmanship, Sven’s wisdom is invaluable.Sven begins by explaining that working on flanges vertically and horizontally is significantly easier than doing so in a flat position. To simplify the process further, he divides the task into two or three steps as suggested by fellow expert “for for.” This approach not only makes it more manageable but also allows for greater precision in crafting each component.Step 2: Applying Glue and Securing
Sven proceeds to apply glue along one edge of the flange, ensuring a secure bond when clamped into place. He emphasizes that this stage is crucial for maintaining the structural integrity of the flange, which in turn safeguards the living area beneath the canvas when hatches are open.Step 3: Allowing Time to Dry
After securely attaching the first portion of the flange, Sven allows ample time for it to dry before moving forward with additional steps. This patience and precision are key aspects of his successful boatbuilding methods.Step 4: Finishing Touches
Once the flange is fully dried, Sven removes the clamps carefully, ensuring no damage occurs during this process. He then moves on to attaching four more pieces onto these main frames, completing two pairs of flanges for the bulkhead hatches.The Final Touches
While two flanges form the primary support structure around the hatches, Sven mentions there are two additional pieces required at each end to ensure comprehensive protection. This attention to detail highlights his commitment to producing a durable and reliable design. “Sailing is about finding your path, whether it’s across an ocean or within yourself.” – Sven Yrvind In conclusion, making flanges around bulkhead hatches may seem complex at first glance, but by following Sven Yrvind’s meticulous process, enthusiasts can achieve professional-level results. Remember that the journey of boatbuilding is as rewarding as reaching your destination; it tests one’s patience and dedication. For those seeking to embark on this adventure or simply gain more insight into marine craftsmanship, Sven’s wisdom is invaluable.Sven Yrvind, a renowned yacht designer and sailor, shares valuable insights on creating flanges around bulkhead hatches for canvas protection in this enlightening video. By following his expert guidance, boat enthusiasts can ensure their living areas remain secure while allowing unhindered access through the hatches.Step 1: Starting with the Flange
Sven begins by explaining that working on flanges vertically and horizontally is significantly easier than doing so in a flat position. To simplify the process further, he divides the task into two or three steps as suggested by fellow expert “for for.” This approach not only makes it more manageable but also allows for greater precision in crafting each component.Step 2: Applying Glue and Securing
Sven proceeds to apply glue along one edge of the flange, ensuring a secure bond when clamped into place. He emphasizes that this stage is crucial for maintaining the structural integrity of the flange, which in turn safeguards the living area beneath the canvas when hatches are open.Step 3: Allowing Time to Dry
After securely attaching the first portion of the flange, Sven allows ample time for it to dry before moving forward with additional steps. This patience and precision are key aspects of his successful boatbuilding methods.Step 4: Finishing Touches
Once the flange is fully dried, Sven removes the clamps carefully, ensuring no damage occurs during this process. He then moves on to attaching four more pieces onto these main frames, completing two pairs of flanges for the bulkhead hatches.The Final Touches
While two flanges form the primary support structure around the hatches, Sven mentions there are two additional pieces required at each end to ensure comprehensive protection. This attention to detail highlights his commitment to producing a durable and reliable design. “Sailing is about finding your path, whether it’s across an ocean or within yourself.” – Sven Yrvind In conclusion, making flanges around bulkhead hatches may seem complex at first glance, but by following Sven Yrvind’s meticulous process, enthusiasts can achieve professional-level results. Remember that the journey of boatbuilding is as rewarding as reaching your destination; it tests one’s patience and dedication. For those seeking to embark on this adventure or simply gain more insight into marine craftsmanship, Sven’s wisdom is invaluable.Making Flanges Around Bulkhead Hatches for Canvas
Sven Yrvind, a renowned yacht designer and sailor, shares valuable insights on creating flanges around bulkhead hatches for canvas protection in this enlightening video. By following his expert guidance, boat enthusiasts can ensure their living areas remain secure while allowing unhindered access through the hatches.Step 1: Starting with the Flange
Sven begins by explaining that working on flanges vertically and horizontally is significantly easier than doing so in a flat position. To simplify the process further, he divides the task into two or three steps as suggested by fellow expert “for for.” This approach not only makes it more manageable but also allows for greater precision in crafting each component.Step 2: Applying Glue and Securing
Sven proceeds to apply glue along one edge of the flange, ensuring a secure bond when clamped into place. He emphasizes that this stage is crucial for maintaining the structural integrity of the flange, which in turn safeguards the living area beneath the canvas when hatches are open.Step 3: Allowing Time to Dry
After securely attaching the first portion of the flange, Sven allows ample time for it to dry before moving forward with additional steps. This patience and precision are key aspects of his successful boatbuilding methods.Step 4: Finishing Touches
Once the flange is fully dried, Sven removes the clamps carefully, ensuring no damage occurs during this process. He then moves on to attaching four more pieces onto these main frames, completing two pairs of flanges for the bulkhead hatches.The Final Touches
While two flanges form the primary support structure around the hatches, Sven mentions there are two additional pieces required at each end to ensure comprehensive protection. This attention to detail highlights his commitment to producing a durable and reliable design. “Sailing is about finding your path, whether it’s across an ocean or within yourself.” – Sven Yrvind In conclusion, making flanges around bulkhead hatches may seem complex at first glance, but by following Sven Yrvind’s meticulous process, enthusiasts can achieve professional-level results. Remember that the journey of boatbuilding is as rewarding as reaching your destination; it tests one’s patience and dedication. For those seeking to embark on this adventure or simply gain more insight into marine craftsmanship, Sven’s wisdom is invaluable.After securely attaching the first portion of the flange, Sven allows ample time for it to dry before moving forward with additional steps. This patience and precision are key aspects of his successful boatbuilding methods.Step 4: Finishing Touches
Once the flange is fully dried, Sven removes the clamps carefully, ensuring no damage occurs during this process. He then moves on to attaching four more pieces onto these main frames, completing two pairs of flanges for the bulkhead hatches.The Final Touches
While two flanges form the primary support structure around the hatches, Sven mentions there are two additional pieces required at each end to ensure comprehensive protection. This attention to detail highlights his commitment to producing a durable and reliable design. “Sailing is about finding your path, whether it’s across an ocean or within yourself.” – Sven Yrvind In conclusion, making flanges around bulkhead hatches may seem complex at first glance, but by following Sven Yrvind’s meticulous process, enthusiasts can achieve professional-level results. Remember that the journey of boatbuilding is as rewarding as reaching your destination; it tests one’s patience and dedication. For those seeking to embark on this adventure or simply gain more insight into marine craftsmanship, Sven’s wisdom is invaluable.Sven Yrvind, a renowned yacht designer and sailor, shares valuable insights on creating flanges around bulkhead hatches for canvas protection in this enlightening video. By following his expert guidance, boat enthusiasts can ensure their living areas remain secure while allowing unhindered access through the hatches.Step 1: Starting with the Flange
Sven begins by explaining that working on flanges vertically and horizontally is significantly easier than doing so in a flat position. To simplify the process further, he divides the task into two or three steps as suggested by fellow expert “for for.” This approach not only makes it more manageable but also allows for greater precision in crafting each component.Step 2: Applying Glue and Securing
Sven proceeds to apply glue along one edge of the flange, ensuring a secure bond when clamped into place. He emphasizes that this stage is crucial for maintaining the structural integrity of the flange, which in turn safeguards the living area beneath the canvas when hatches are open.Step 3: Allowing Time to Dry
After securely attaching the first portion of the flange, Sven allows ample time for it to dry before moving forward with additional steps. This patience and precision are key aspects of his successful boatbuilding methods.Step 4: Finishing Touches
Once the flange is fully dried, Sven removes the clamps carefully, ensuring no damage occurs during this process. He then moves on to attaching four more pieces onto these main frames, completing two pairs of flanges for the bulkhead hatches.The Final Touches
While two flanges form the primary support structure around the hatches, Sven mentions there are two additional pieces required at each end to ensure comprehensive protection. This attention to detail highlights his commitment to producing a durable and reliable design. “Sailing is about finding your path, whether it’s across an ocean or within yourself.” – Sven Yrvind In conclusion, making flanges around bulkhead hatches may seem complex at first glance, but by following Sven Yrvind’s meticulous process, enthusiasts can achieve professional-level results. Remember that the journey of boatbuilding is as rewarding as reaching your destination; it tests one’s patience and dedication. For those seeking to embark on this adventure or simply gain more insight into marine craftsmanship, Sven’s wisdom is invaluable.Making Flanges Around Bulkhead Hatches for Canvas
Sven Yrvind, a renowned yacht designer and sailor, shares valuable insights on creating flanges around bulkhead hatches for canvas protection in this enlightening video. By following his expert guidance, boat enthusiasts can ensure their living areas remain secure while allowing unhindered access through the hatches.Step 1: Starting with the Flange
Sven begins by explaining that working on flanges vertically and horizontally is significantly easier than doing so in a flat position. To simplify the process further, he divides the task into two or three steps as suggested by fellow expert “for for.” This approach not only makes it more manageable but also allows for greater precision in crafting each component.Step 2: Applying Glue and Securing
Sven proceeds to apply glue along one edge of the flange, ensuring a secure bond when clamped into place. He emphasizes that this stage is crucial for maintaining the structural integrity of the flange, which in turn safeguards the living area beneath the canvas when hatches are open.Step 3: Allowing Time to Dry
After securely attaching the first portion of the flange, Sven allows ample time for it to dry before moving forward with additional steps. This patience and precision are key aspects of his successful boatbuilding methods.Step 4: Finishing Touches
Once the flange is fully dried, Sven removes the clamps carefully, ensuring no damage occurs during this process. He then moves on to attaching four more pieces onto these main frames, completing two pairs of flanges for the bulkhead hatches.The Final Touches
While two flanges form the primary support structure around the hatches, Sven mentions there are two additional pieces required at each end to ensure comprehensive protection. This attention to detail highlights his commitment to producing a durable and reliable design. “Sailing is about finding your path, whether it’s across an ocean or within yourself.” – Sven Yrvind In conclusion, making flanges around bulkhead hatches may seem complex at first glance, but by following Sven Yrvind’s meticulous process, enthusiasts can achieve professional-level results. Remember that the journey of boatbuilding is as rewarding as reaching your destination; it tests one’s patience and dedication. For those seeking to embark on this adventure or simply gain more insight into marine craftsmanship, Sven’s wisdom is invaluable.Once the flange is fully dried, Sven removes the clamps carefully, ensuring no damage occurs during this process. He then moves on to attaching four more pieces onto these main frames, completing two pairs of flanges for the bulkhead hatches.The Final Touches
While two flanges form the primary support structure around the hatches, Sven mentions there are two additional pieces required at each end to ensure comprehensive protection. This attention to detail highlights his commitment to producing a durable and reliable design. “Sailing is about finding your path, whether it’s across an ocean or within yourself.” – Sven Yrvind In conclusion, making flanges around bulkhead hatches may seem complex at first glance, but by following Sven Yrvind’s meticulous process, enthusiasts can achieve professional-level results. Remember that the journey of boatbuilding is as rewarding as reaching your destination; it tests one’s patience and dedication. For those seeking to embark on this adventure or simply gain more insight into marine craftsmanship, Sven’s wisdom is invaluable.Sven Yrvind, a renowned yacht designer and sailor, shares valuable insights on creating flanges around bulkhead hatches for canvas protection in this enlightening video. By following his expert guidance, boat enthusiasts can ensure their living areas remain secure while allowing unhindered access through the hatches.Step 1: Starting with the Flange
Sven begins by explaining that working on flanges vertically and horizontally is significantly easier than doing so in a flat position. To simplify the process further, he divides the task into two or three steps as suggested by fellow expert “for for.” This approach not only makes it more manageable but also allows for greater precision in crafting each component.Step 2: Applying Glue and Securing
Sven proceeds to apply glue along one edge of the flange, ensuring a secure bond when clamped into place. He emphasizes that this stage is crucial for maintaining the structural integrity of the flange, which in turn safeguards the living area beneath the canvas when hatches are open.Step 3: Allowing Time to Dry
After securely attaching the first portion of the flange, Sven allows ample time for it to dry before moving forward with additional steps. This patience and precision are key aspects of his successful boatbuilding methods.Step 4: Finishing Touches
Once the flange is fully dried, Sven removes the clamps carefully, ensuring no damage occurs during this process. He then moves on to attaching four more pieces onto these main frames, completing two pairs of flanges for the bulkhead hatches.The Final Touches
While two flanges form the primary support structure around the hatches, Sven mentions there are two additional pieces required at each end to ensure comprehensive protection. This attention to detail highlights his commitment to producing a durable and reliable design. “Sailing is about finding your path, whether it’s across an ocean or within yourself.” – Sven Yrvind In conclusion, making flanges around bulkhead hatches may seem complex at first glance, but by following Sven Yrvind’s meticulous process, enthusiasts can achieve professional-level results. Remember that the journey of boatbuilding is as rewarding as reaching your destination; it tests one’s patience and dedication. For those seeking to embark on this adventure or simply gain more insight into marine craftsmanship, Sven’s wisdom is invaluable.Making Flanges Around Bulkhead Hatches for Canvas
Sven Yrvind, a renowned yacht designer and sailor, shares valuable insights on creating flanges around bulkhead hatches for canvas protection in this enlightening video. By following his expert guidance, boat enthusiasts can ensure their living areas remain secure while allowing unhindered access through the hatches.Step 1: Starting with the Flange
Sven begins by explaining that working on flanges vertically and horizontally is significantly easier than doing so in a flat position. To simplify the process further, he divides the task into two or three steps as suggested by fellow expert “for for.” This approach not only makes it more manageable but also allows for greater precision in crafting each component.Step 2: Applying Glue and Securing
Sven proceeds to apply glue along one edge of the flange, ensuring a secure bond when clamped into place. He emphasizes that this stage is crucial for maintaining the structural integrity of the flange, which in turn safeguards the living area beneath the canvas when hatches are open.Step 3: Allowing Time to Dry
After securely attaching the first portion of the flange, Sven allows ample time for it to dry before moving forward with additional steps. This patience and precision are key aspects of his successful boatbuilding methods.Step 4: Finishing Touches
Once the flange is fully dried, Sven removes the clamps carefully, ensuring no damage occurs during this process. He then moves on to attaching four more pieces onto these main frames, completing two pairs of flanges for the bulkhead hatches.The Final Touches
While two flanges form the primary support structure around the hatches, Sven mentions there are two additional pieces required at each end to ensure comprehensive protection. This attention to detail highlights his commitment to producing a durable and reliable design. “Sailing is about finding your path, whether it’s across an ocean or within yourself.” – Sven Yrvind In conclusion, making flanges around bulkhead hatches may seem complex at first glance, but by following Sven Yrvind’s meticulous process, enthusiasts can achieve professional-level results. Remember that the journey of boatbuilding is as rewarding as reaching your destination; it tests one’s patience and dedication. For those seeking to embark on this adventure or simply gain more insight into marine craftsmanship, Sven’s wisdom is invaluable.After securely attaching the first portion of the flange, Sven allows ample time for it to dry before moving forward with additional steps. This patience and precision are key aspects of his successful boatbuilding methods.Step 4: Finishing Touches
Once the flange is fully dried, Sven removes the clamps carefully, ensuring no damage occurs during this process. He then moves on to attaching four more pieces onto these main frames, completing two pairs of flanges for the bulkhead hatches.The Final Touches
While two flanges form the primary support structure around the hatches, Sven mentions there are two additional pieces required at each end to ensure comprehensive protection. This attention to detail highlights his commitment to producing a durable and reliable design. “Sailing is about finding your path, whether it’s across an ocean or within yourself.” – Sven Yrvind In conclusion, making flanges around bulkhead hatches may seem complex at first glance, but by following Sven Yrvind’s meticulous process, enthusiasts can achieve professional-level results. Remember that the journey of boatbuilding is as rewarding as reaching your destination; it tests one’s patience and dedication. For those seeking to embark on this adventure or simply gain more insight into marine craftsmanship, Sven’s wisdom is invaluable.Sven Yrvind, a renowned yacht designer and sailor, shares valuable insights on creating flanges around bulkhead hatches for canvas protection in this enlightening video. By following his expert guidance, boat enthusiasts can ensure their living areas remain secure while allowing unhindered access through the hatches.Step 1: Starting with the Flange
Sven begins by explaining that working on flanges vertically and horizontally is significantly easier than doing so in a flat position. To simplify the process further, he divides the task into two or three steps as suggested by fellow expert “for for.” This approach not only makes it more manageable but also allows for greater precision in crafting each component.Step 2: Applying Glue and Securing
Sven proceeds to apply glue along one edge of the flange, ensuring a secure bond when clamped into place. He emphasizes that this stage is crucial for maintaining the structural integrity of the flange, which in turn safeguards the living area beneath the canvas when hatches are open.Step 3: Allowing Time to Dry
After securely attaching the first portion of the flange, Sven allows ample time for it to dry before moving forward with additional steps. This patience and precision are key aspects of his successful boatbuilding methods.Step 4: Finishing Touches
Once the flange is fully dried, Sven removes the clamps carefully, ensuring no damage occurs during this process. He then moves on to attaching four more pieces onto these main frames, completing two pairs of flanges for the bulkhead hatches.The Final Touches
While two flanges form the primary support structure around the hatches, Sven mentions there are two additional pieces required at each end to ensure comprehensive protection. This attention to detail highlights his commitment to producing a durable and reliable design. “Sailing is about finding your path, whether it’s across an ocean or within yourself.” – Sven Yrvind In conclusion, making flanges around bulkhead hatches may seem complex at first glance, but by following Sven Yrvind’s meticulous process, enthusiasts can achieve professional-level results. Remember that the journey of boatbuilding is as rewarding as reaching your destination; it tests one’s patience and dedication. For those seeking to embark on this adventure or simply gain more insight into marine craftsmanship, Sven’s wisdom is invaluable.Making Flanges Around Bulkhead Hatches for Canvas
Sven Yrvind, a renowned yacht designer and sailor, shares valuable insights on creating flanges around bulkhead hatches for canvas protection in this enlightening video. By following his expert guidance, boat enthusiasts can ensure their living areas remain secure while allowing unhindered access through the hatches.Step 1: Starting with the Flange
Sven begins by explaining that working on flanges vertically and horizontally is significantly easier than doing so in a flat position. To simplify the process further, he divides the task into two or three steps as suggested by fellow expert “for for.” This approach not only makes it more manageable but also allows for greater precision in crafting each component.Step 2: Applying Glue and Securing
Sven proceeds to apply glue along one edge of the flange, ensuring a secure bond when clamped into place. He emphasizes that this stage is crucial for maintaining the structural integrity of the flange, which in turn safeguards the living area beneath the canvas when hatches are open.Step 3: Allowing Time to Dry
After securely attaching the first portion of the flange, Sven allows ample time for it to dry before moving forward with additional steps. This patience and precision are key aspects of his successful boatbuilding methods.Step 4: Finishing Touches
Once the flange is fully dried, Sven removes the clamps carefully, ensuring no damage occurs during this process. He then moves on to attaching four more pieces onto these main frames, completing two pairs of flanges for the bulkhead hatches.The Final Touches
While two flanges form the primary support structure around the hatches, Sven mentions there are two additional pieces required at each end to ensure comprehensive protection. This attention to detail highlights his commitment to producing a durable and reliable design. “Sailing is about finding your path, whether it’s across an ocean or within yourself.” – Sven Yrvind In conclusion, making flanges around bulkhead hatches may seem complex at first glance, but by following Sven Yrvind’s meticulous process, enthusiasts can achieve professional-level results. Remember that the journey of boatbuilding is as rewarding as reaching your destination; it tests one’s patience and dedication. For those seeking to embark on this adventure or simply gain more insight into marine craftsmanship, Sven’s wisdom is invaluable.Sven proceeds to apply glue along one edge of the flange, ensuring a secure bond when clamped into place. He emphasizes that this stage is crucial for maintaining the structural integrity of the flange, which in turn safeguards the living area beneath the canvas when hatches are open.Step 3: Allowing Time to Dry
After securely attaching the first portion of the flange, Sven allows ample time for it to dry before moving forward with additional steps. This patience and precision are key aspects of his successful boatbuilding methods.Step 4: Finishing Touches
Once the flange is fully dried, Sven removes the clamps carefully, ensuring no damage occurs during this process. He then moves on to attaching four more pieces onto these main frames, completing two pairs of flanges for the bulkhead hatches.The Final Touches
While two flanges form the primary support structure around the hatches, Sven mentions there are two additional pieces required at each end to ensure comprehensive protection. This attention to detail highlights his commitment to producing a durable and reliable design. “Sailing is about finding your path, whether it’s across an ocean or within yourself.” – Sven Yrvind In conclusion, making flanges around bulkhead hatches may seem complex at first glance, but by following Sven Yrvind’s meticulous process, enthusiasts can achieve professional-level results. Remember that the journey of boatbuilding is as rewarding as reaching your destination; it tests one’s patience and dedication. For those seeking to embark on this adventure or simply gain more insight into marine craftsmanship, Sven’s wisdom is invaluable.Sven Yrvind, a renowned yacht designer and sailor, shares valuable insights on creating flanges around bulkhead hatches for canvas protection in this enlightening video. By following his expert guidance, boat enthusiasts can ensure their living areas remain secure while allowing unhindered access through the hatches.Step 1: Starting with the Flange
Sven begins by explaining that working on flanges vertically and horizontally is significantly easier than doing so in a flat position. To simplify the process further, he divides the task into two or three steps as suggested by fellow expert “for for.” This approach not only makes it more manageable but also allows for greater precision in crafting each component.Step 2: Applying Glue and Securing
Sven proceeds to apply glue along one edge of the flange, ensuring a secure bond when clamped into place. He emphasizes that this stage is crucial for maintaining the structural integrity of the flange, which in turn safeguards the living area beneath the canvas when hatches are open.Step 3: Allowing Time to Dry
After securely attaching the first portion of the flange, Sven allows ample time for it to dry before moving forward with additional steps. This patience and precision are key aspects of his successful boatbuilding methods.Step 4: Finishing Touches
Once the flange is fully dried, Sven removes the clamps carefully, ensuring no damage occurs during this process. He then moves on to attaching four more pieces onto these main frames, completing two pairs of flanges for the bulkhead hatches.The Final Touches
While two flanges form the primary support structure around the hatches, Sven mentions there are two additional pieces required at each end to ensure comprehensive protection. This attention to detail highlights his commitment to producing a durable and reliable design. “Sailing is about finding your path, whether it’s across an ocean or within yourself.” – Sven Yrvind In conclusion, making flanges around bulkhead hatches may seem complex at first glance, but by following Sven Yrvind’s meticulous process, enthusiasts can achieve professional-level results. Remember that the journey of boatbuilding is as rewarding as reaching your destination; it tests one’s patience and dedication. For those seeking to embark on this adventure or simply gain more insight into marine craftsmanship, Sven’s wisdom is invaluable.Making Flanges Around Bulkhead Hatches for Canvas
Sven Yrvind, a renowned yacht designer and sailor, shares valuable insights on creating flanges around bulkhead hatches for canvas protection in this enlightening video. By following his expert guidance, boat enthusiasts can ensure their living areas remain secure while allowing unhindered access through the hatches.Step 1: Starting with the Flange
Sven begins by explaining that working on flanges vertically and horizontally is significantly easier than doing so in a flat position. To simplify the process further, he divides the task into two or three steps as suggested by fellow expert “for for.” This approach not only makes it more manageable but also allows for greater precision in crafting each component.Step 2: Applying Glue and Securing
Sven proceeds to apply glue along one edge of the flange, ensuring a secure bond when clamped into place. He emphasizes that this stage is crucial for maintaining the structural integrity of the flange, which in turn safeguards the living area beneath the canvas when hatches are open.Step 3: Allowing Time to Dry
After securely attaching the first portion of the flange, Sven allows ample time for it to dry before moving forward with additional steps. This patience and precision are key aspects of his successful boatbuilding methods.Step 4: Finishing Touches
Once the flange is fully dried, Sven removes the clamps carefully, ensuring no damage occurs during this process. He then moves on to attaching four more pieces onto these main frames, completing two pairs of flanges for the bulkhead hatches.The Final Touches
While two flanges form the primary support structure around the hatches, Sven mentions there are two additional pieces required at each end to ensure comprehensive protection. This attention to detail highlights his commitment to producing a durable and reliable design. “Sailing is about finding your path, whether it’s across an ocean or within yourself.” – Sven Yrvind In conclusion, making flanges around bulkhead hatches may seem complex at first glance, but by following Sven Yrvind’s meticulous process, enthusiasts can achieve professional-level results. Remember that the journey of boatbuilding is as rewarding as reaching your destination; it tests one’s patience and dedication. For those seeking to embark on this adventure or simply gain more insight into marine craftsmanship, Sven’s wisdom is invaluable.Sven begins by explaining that working on flanges vertically and horizontally is significantly easier than doing so in a flat position. To simplify the process further, he divides the task into two or three steps as suggested by fellow expert “for for.” This approach not only makes it more manageable but also allows for greater precision in crafting each component.Step 2: Applying Glue and Securing
Sven proceeds to apply glue along one edge of the flange, ensuring a secure bond when clamped into place. He emphasizes that this stage is crucial for maintaining the structural integrity of the flange, which in turn safeguards the living area beneath the canvas when hatches are open.Step 3: Allowing Time to Dry
After securely attaching the first portion of the flange, Sven allows ample time for it to dry before moving forward with additional steps. This patience and precision are key aspects of his successful boatbuilding methods.Step 4: Finishing Touches
Once the flange is fully dried, Sven removes the clamps carefully, ensuring no damage occurs during this process. He then moves on to attaching four more pieces onto these main frames, completing two pairs of flanges for the bulkhead hatches.The Final Touches
While two flanges form the primary support structure around the hatches, Sven mentions there are two additional pieces required at each end to ensure comprehensive protection. This attention to detail highlights his commitment to producing a durable and reliable design. “Sailing is about finding your path, whether it’s across an ocean or within yourself.” – Sven Yrvind In conclusion, making flanges around bulkhead hatches may seem complex at first glance, but by following Sven Yrvind’s meticulous process, enthusiasts can achieve professional-level results. Remember that the journey of boatbuilding is as rewarding as reaching your destination; it tests one’s patience and dedication. For those seeking to embark on this adventure or simply gain more insight into marine craftsmanship, Sven’s wisdom is invaluable.Sven Yrvind, a renowned yacht designer and sailor, shares valuable insights on creating flanges around bulkhead hatches for canvas protection in this enlightening video. By following his expert guidance, boat enthusiasts can ensure their living areas remain secure while allowing unhindered access through the hatches.Step 1: Starting with the Flange
Sven begins by explaining that working on flanges vertically and horizontally is significantly easier than doing so in a flat position. To simplify the process further, he divides the task into two or three steps as suggested by fellow expert “for for.” This approach not only makes it more manageable but also allows for greater precision in crafting each component.Step 2: Applying Glue and Securing
Sven proceeds to apply glue along one edge of the flange, ensuring a secure bond when clamped into place. He emphasizes that this stage is crucial for maintaining the structural integrity of the flange, which in turn safeguards the living area beneath the canvas when hatches are open.Step 3: Allowing Time to Dry
After securely attaching the first portion of the flange, Sven allows ample time for it to dry before moving forward with additional steps. This patience and precision are key aspects of his successful boatbuilding methods.Step 4: Finishing Touches
Once the flange is fully dried, Sven removes the clamps carefully, ensuring no damage occurs during this process. He then moves on to attaching four more pieces onto these main frames, completing two pairs of flanges for the bulkhead hatches.The Final Touches
While two flanges form the primary support structure around the hatches, Sven mentions there are two additional pieces required at each end to ensure comprehensive protection. This attention to detail highlights his commitment to producing a durable and reliable design. “Sailing is about finding your path, whether it’s across an ocean or within yourself.” – Sven Yrvind In conclusion, making flanges around bulkhead hatches may seem complex at first glance, but by following Sven Yrvind’s meticulous process, enthusiasts can achieve professional-level results. Remember that the journey of boatbuilding is as rewarding as reaching your destination; it tests one’s patience and dedication. For those seeking to embark on this adventure or simply gain more insight into marine craftsmanship, Sven’s wisdom is invaluable.Making Flanges Around Bulkhead Hatches for Canvas
Sven Yrvind, a renowned yacht designer and sailor, shares valuable insights on creating flanges around bulkhead hatches for canvas protection in this enlightening video. By following his expert guidance, boat enthusiasts can ensure their living areas remain secure while allowing unhindered access through the hatches.Step 1: Starting with the Flange
Sven begins by explaining that working on flanges vertically and horizontally is significantly easier than doing so in a flat position. To simplify the process further, he divides the task into two or three steps as suggested by fellow expert “for for.” This approach not only makes it more manageable but also allows for greater precision in crafting each component.Step 2: Applying Glue and Securing
Sven proceeds to apply glue along one edge of the flange, ensuring a secure bond when clamped into place. He emphasizes that this stage is crucial for maintaining the structural integrity of the flange, which in turn safeguards the living area beneath the canvas when hatches are open.Step 3: Allowing Time to Dry
After securely attaching the first portion of the flange, Sven allows ample time for it to dry before moving forward with additional steps. This patience and precision are key aspects of his successful boatbuilding methods.Step 4: Finishing Touches
Once the flange is fully dried, Sven removes the clamps carefully, ensuring no damage occurs during this process. He then moves on to attaching four more pieces onto these main frames, completing two pairs of flanges for the bulkhead hatches.The Final Touches
While two flanges form the primary support structure around the hatches, Sven mentions there are two additional pieces required at each end to ensure comprehensive protection. This attention to detail highlights his commitment to producing a durable and reliable design. “Sailing is about finding your path, whether it’s across an ocean or within yourself.” – Sven Yrvind In conclusion, making flanges around bulkhead hatches may seem complex at first glance, but by following Sven Yrvind’s meticulous process, enthusiasts can achieve professional-level results. Remember that the journey of boatbuilding is as rewarding as reaching your destination; it tests one’s patience and dedication. For those seeking to embark on this adventure or simply gain more insight into marine craftsmanship, Sven’s wisdom is invaluable.Once the flange is fully dried, Sven removes the clamps carefully, ensuring no damage occurs during this process. He then moves on to attaching four more pieces onto these main frames, completing two pairs of flanges for the bulkhead hatches.The Final Touches
While two flanges form the primary support structure around the hatches, Sven mentions there are two additional pieces required at each end to ensure comprehensive protection. This attention to detail highlights his commitment to producing a durable and reliable design. “Sailing is about finding your path, whether it’s across an ocean or within yourself.” – Sven Yrvind In conclusion, making flanges around bulkhead hatches may seem complex at first glance, but by following Sven Yrvind’s meticulous process, enthusiasts can achieve professional-level results. Remember that the journey of boatbuilding is as rewarding as reaching your destination; it tests one’s patience and dedication. For those seeking to embark on this adventure or simply gain more insight into marine craftsmanship, Sven’s wisdom is invaluable.Sven begins by explaining that working on flanges vertically and horizontally is significantly easier than doing so in a flat position. To simplify the process further, he divides the task into two or three steps as suggested by fellow expert “for for.” This approach not only makes it more manageable but also allows for greater precision in crafting each component.Step 2: Applying Glue and Securing
Sven proceeds to apply glue along one edge of the flange, ensuring a secure bond when clamped into place. He emphasizes that this stage is crucial for maintaining the structural integrity of the flange, which in turn safeguards the living area beneath the canvas when hatches are open.Step 3: Allowing Time to Dry
After securely attaching the first portion of the flange, Sven allows ample time for it to dry before moving forward with additional steps. This patience and precision are key aspects of his successful boatbuilding methods.Step 4: Finishing Touches
Once the flange is fully dried, Sven removes the clamps carefully, ensuring no damage occurs during this process. He then moves on to attaching four more pieces onto these main frames, completing two pairs of flanges for the bulkhead hatches.The Final Touches
While two flanges form the primary support structure around the hatches, Sven mentions there are two additional pieces required at each end to ensure comprehensive protection. This attention to detail highlights his commitment to producing a durable and reliable design. “Sailing is about finding your path, whether it’s across an ocean or within yourself.” – Sven Yrvind In conclusion, making flanges around bulkhead hatches may seem complex at first glance, but by following Sven Yrvind’s meticulous process, enthusiasts can achieve professional-level results. Remember that the journey of boatbuilding is as rewarding as reaching your destination; it tests one’s patience and dedication. For those seeking to embark on this adventure or simply gain more insight into marine craftsmanship, Sven’s wisdom is invaluable.Sven Yrvind, a renowned yacht designer and sailor, shares valuable insights on creating flanges around bulkhead hatches for canvas protection in this enlightening video. By following his expert guidance, boat enthusiasts can ensure their living areas remain secure while allowing unhindered access through the hatches.Step 1: Starting with the Flange
Sven begins by explaining that working on flanges vertically and horizontally is significantly easier than doing so in a flat position. To simplify the process further, he divides the task into two or three steps as suggested by fellow expert “for for.” This approach not only makes it more manageable but also allows for greater precision in crafting each component.Step 2: Applying Glue and Securing
Sven proceeds to apply glue along one edge of the flange, ensuring a secure bond when clamped into place. He emphasizes that this stage is crucial for maintaining the structural integrity of the flange, which in turn safeguards the living area beneath the canvas when hatches are open.Step 3: Allowing Time to Dry
After securely attaching the first portion of the flange, Sven allows ample time for it to dry before moving forward with additional steps. This patience and precision are key aspects of his successful boatbuilding methods.Step 4: Finishing Touches
Once the flange is fully dried, Sven removes the clamps carefully, ensuring no damage occurs during this process. He then moves on to attaching four more pieces onto these main frames, completing two pairs of flanges for the bulkhead hatches.The Final Touches
While two flanges form the primary support structure around the hatches, Sven mentions there are two additional pieces required at each end to ensure comprehensive protection. This attention to detail highlights his commitment to producing a durable and reliable design. “Sailing is about finding your path, whether it’s across an ocean or within yourself.” – Sven Yrvind In conclusion, making flanges around bulkhead hatches may seem complex at first glance, but by following Sven Yrvind’s meticulous process, enthusiasts can achieve professional-level results. Remember that the journey of boatbuilding is as rewarding as reaching your destination; it tests one’s patience and dedication. For those seeking to embark on this adventure or simply gain more insight into marine craftsmanship, Sven’s wisdom is invaluable.Making Flanges Around Bulkhead Hatches for Canvas
Sven Yrvind, a renowned yacht designer and sailor, shares valuable insights on creating flanges around bulkhead hatches for canvas protection in this enlightening video. By following his expert guidance, boat enthusiasts can ensure their living areas remain secure while allowing unhindered access through the hatches.Step 1: Starting with the Flange
Sven begins by explaining that working on flanges vertically and horizontally is significantly easier than doing so in a flat position. To simplify the process further, he divides the task into two or three steps as suggested by fellow expert “for for.” This approach not only makes it more manageable but also allows for greater precision in crafting each component.Step 2: Applying Glue and Securing
Sven proceeds to apply glue along one edge of the flange, ensuring a secure bond when clamped into place. He emphasizes that this stage is crucial for maintaining the structural integrity of the flange, which in turn safeguards the living area beneath the canvas when hatches are open.Step 3: Allowing Time to Dry
After securely attaching the first portion of the flange, Sven allows ample time for it to dry before moving forward with additional steps. This patience and precision are key aspects of his successful boatbuilding methods.Step 4: Finishing Touches
Once the flange is fully dried, Sven removes the clamps carefully, ensuring no damage occurs during this process. He then moves on to attaching four more pieces onto these main frames, completing two pairs of flanges for the bulkhead hatches.The Final Touches
While two flanges form the primary support structure around the hatches, Sven mentions there are two additional pieces required at each end to ensure comprehensive protection. This attention to detail highlights his commitment to producing a durable and reliable design. “Sailing is about finding your path, whether it’s across an ocean or within yourself.” – Sven Yrvind In conclusion, making flanges around bulkhead hatches may seem complex at first glance, but by following Sven Yrvind’s meticulous process, enthusiasts can achieve professional-level results. Remember that the journey of boatbuilding is as rewarding as reaching your destination; it tests one’s patience and dedication. For those seeking to embark on this adventure or simply gain more insight into marine craftsmanship, Sven’s wisdom is invaluable.After securely attaching the first portion of the flange, Sven allows ample time for it to dry before moving forward with additional steps. This patience and precision are key aspects of his successful boatbuilding methods.Step 4: Finishing Touches
Once the flange is fully dried, Sven removes the clamps carefully, ensuring no damage occurs during this process. He then moves on to attaching four more pieces onto these main frames, completing two pairs of flanges for the bulkhead hatches.The Final Touches
While two flanges form the primary support structure around the hatches, Sven mentions there are two additional pieces required at each end to ensure comprehensive protection. This attention to detail highlights his commitment to producing a durable and reliable design. “Sailing is about finding your path, whether it’s across an ocean or within yourself.” – Sven Yrvind In conclusion, making flanges around bulkhead hatches may seem complex at first glance, but by following Sven Yrvind’s meticulous process, enthusiasts can achieve professional-level results. Remember that the journey of boatbuilding is as rewarding as reaching your destination; it tests one’s patience and dedication. For those seeking to embark on this adventure or simply gain more insight into marine craftsmanship, Sven’s wisdom is invaluable.Sven begins by explaining that working on flanges vertically and horizontally is significantly easier than doing so in a flat position. To simplify the process further, he divides the task into two or three steps as suggested by fellow expert “for for.” This approach not only makes it more manageable but also allows for greater precision in crafting each component.Step 2: Applying Glue and Securing
Sven proceeds to apply glue along one edge of the flange, ensuring a secure bond when clamped into place. He emphasizes that this stage is crucial for maintaining the structural integrity of the flange, which in turn safeguards the living area beneath the canvas when hatches are open.Step 3: Allowing Time to Dry
After securely attaching the first portion of the flange, Sven allows ample time for it to dry before moving forward with additional steps. This patience and precision are key aspects of his successful boatbuilding methods.Step 4: Finishing Touches
Once the flange is fully dried, Sven removes the clamps carefully, ensuring no damage occurs during this process. He then moves on to attaching four more pieces onto these main frames, completing two pairs of flanges for the bulkhead hatches.The Final Touches
While two flanges form the primary support structure around the hatches, Sven mentions there are two additional pieces required at each end to ensure comprehensive protection. This attention to detail highlights his commitment to producing a durable and reliable design. “Sailing is about finding your path, whether it’s across an ocean or within yourself.” – Sven Yrvind In conclusion, making flanges around bulkhead hatches may seem complex at first glance, but by following Sven Yrvind’s meticulous process, enthusiasts can achieve professional-level results. Remember that the journey of boatbuilding is as rewarding as reaching your destination; it tests one’s patience and dedication. For those seeking to embark on this adventure or simply gain more insight into marine craftsmanship, Sven’s wisdom is invaluable.Sven Yrvind, a renowned yacht designer and sailor, shares valuable insights on creating flanges around bulkhead hatches for canvas protection in this enlightening video. By following his expert guidance, boat enthusiasts can ensure their living areas remain secure while allowing unhindered access through the hatches.Step 1: Starting with the Flange
Sven begins by explaining that working on flanges vertically and horizontally is significantly easier than doing so in a flat position. To simplify the process further, he divides the task into two or three steps as suggested by fellow expert “for for.” This approach not only makes it more manageable but also allows for greater precision in crafting each component.Step 2: Applying Glue and Securing
Sven proceeds to apply glue along one edge of the flange, ensuring a secure bond when clamped into place. He emphasizes that this stage is crucial for maintaining the structural integrity of the flange, which in turn safeguards the living area beneath the canvas when hatches are open.Step 3: Allowing Time to Dry
After securely attaching the first portion of the flange, Sven allows ample time for it to dry before moving forward with additional steps. This patience and precision are key aspects of his successful boatbuilding methods.Step 4: Finishing Touches
Once the flange is fully dried, Sven removes the clamps carefully, ensuring no damage occurs during this process. He then moves on to attaching four more pieces onto these main frames, completing two pairs of flanges for the bulkhead hatches.The Final Touches
While two flanges form the primary support structure around the hatches, Sven mentions there are two additional pieces required at each end to ensure comprehensive protection. This attention to detail highlights his commitment to producing a durable and reliable design. “Sailing is about finding your path, whether it’s across an ocean or within yourself.” – Sven Yrvind In conclusion, making flanges around bulkhead hatches may seem complex at first glance, but by following Sven Yrvind’s meticulous process, enthusiasts can achieve professional-level results. Remember that the journey of boatbuilding is as rewarding as reaching your destination; it tests one’s patience and dedication. For those seeking to embark on this adventure or simply gain more insight into marine craftsmanship, Sven’s wisdom is invaluable.Making Flanges Around Bulkhead Hatches for Canvas
Sven Yrvind, a renowned yacht designer and sailor, shares valuable insights on creating flanges around bulkhead hatches for canvas protection in this enlightening video. By following his expert guidance, boat enthusiasts can ensure their living areas remain secure while allowing unhindered access through the hatches.Step 1: Starting with the Flange
Sven begins by explaining that working on flanges vertically and horizontally is significantly easier than doing so in a flat position. To simplify the process further, he divides the task into two or three steps as suggested by fellow expert “for for.” This approach not only makes it more manageable but also allows for greater precision in crafting each component.Step 2: Applying Glue and Securing
Sven proceeds to apply glue along one edge of the flange, ensuring a secure bond when clamped into place. He emphasizes that this stage is crucial for maintaining the structural integrity of the flange, which in turn safeguards the living area beneath the canvas when hatches are open.Step 3: Allowing Time to Dry
After securely attaching the first portion of the flange, Sven allows ample time for it to dry before moving forward with additional steps. This patience and precision are key aspects of his successful boatbuilding methods.Step 4: Finishing Touches
Once the flange is fully dried, Sven removes the clamps carefully, ensuring no damage occurs during this process. He then moves on to attaching four more pieces onto these main frames, completing two pairs of flanges for the bulkhead hatches.The Final Touches
While two flanges form the primary support structure around the hatches, Sven mentions there are two additional pieces required at each end to ensure comprehensive protection. This attention to detail highlights his commitment to producing a durable and reliable design. “Sailing is about finding your path, whether it’s across an ocean or within yourself.” – Sven Yrvind In conclusion, making flanges around bulkhead hatches may seem complex at first glance, but by following Sven Yrvind’s meticulous process, enthusiasts can achieve professional-level results. Remember that the journey of boatbuilding is as rewarding as reaching your destination; it tests one’s patience and dedication. For those seeking to embark on this adventure or simply gain more insight into marine craftsmanship, Sven’s wisdom is invaluable.Sven proceeds to apply glue along one edge of the flange, ensuring a secure bond when clamped into place. He emphasizes that this stage is crucial for maintaining the structural integrity of the flange, which in turn safeguards the living area beneath the canvas when hatches are open.Step 3: Allowing Time to Dry
After securely attaching the first portion of the flange, Sven allows ample time for it to dry before moving forward with additional steps. This patience and precision are key aspects of his successful boatbuilding methods.Step 4: Finishing Touches
Once the flange is fully dried, Sven removes the clamps carefully, ensuring no damage occurs during this process. He then moves on to attaching four more pieces onto these main frames, completing two pairs of flanges for the bulkhead hatches.The Final Touches
While two flanges form the primary support structure around the hatches, Sven mentions there are two additional pieces required at each end to ensure comprehensive protection. This attention to detail highlights his commitment to producing a durable and reliable design. “Sailing is about finding your path, whether it’s across an ocean or within yourself.” – Sven Yrvind In conclusion, making flanges around bulkhead hatches may seem complex at first glance, but by following Sven Yrvind’s meticulous process, enthusiasts can achieve professional-level results. Remember that the journey of boatbuilding is as rewarding as reaching your destination; it tests one’s patience and dedication. For those seeking to embark on this adventure or simply gain more insight into marine craftsmanship, Sven’s wisdom is invaluable.Sven begins by explaining that working on flanges vertically and horizontally is significantly easier than doing so in a flat position. To simplify the process further, he divides the task into two or three steps as suggested by fellow expert “for for.” This approach not only makes it more manageable but also allows for greater precision in crafting each component.Step 2: Applying Glue and Securing
Sven proceeds to apply glue along one edge of the flange, ensuring a secure bond when clamped into place. He emphasizes that this stage is crucial for maintaining the structural integrity of the flange, which in turn safeguards the living area beneath the canvas when hatches are open.Step 3: Allowing Time to Dry
After securely attaching the first portion of the flange, Sven allows ample time for it to dry before moving forward with additional steps. This patience and precision are key aspects of his successful boatbuilding methods.Step 4: Finishing Touches
Once the flange is fully dried, Sven removes the clamps carefully, ensuring no damage occurs during this process. He then moves on to attaching four more pieces onto these main frames, completing two pairs of flanges for the bulkhead hatches.The Final Touches
While two flanges form the primary support structure around the hatches, Sven mentions there are two additional pieces required at each end to ensure comprehensive protection. This attention to detail highlights his commitment to producing a durable and reliable design. “Sailing is about finding your path, whether it’s across an ocean or within yourself.” – Sven Yrvind In conclusion, making flanges around bulkhead hatches may seem complex at first glance, but by following Sven Yrvind’s meticulous process, enthusiasts can achieve professional-level results. Remember that the journey of boatbuilding is as rewarding as reaching your destination; it tests one’s patience and dedication. For those seeking to embark on this adventure or simply gain more insight into marine craftsmanship, Sven’s wisdom is invaluable.Sven Yrvind, a renowned yacht designer and sailor, shares valuable insights on creating flanges around bulkhead hatches for canvas protection in this enlightening video. By following his expert guidance, boat enthusiasts can ensure their living areas remain secure while allowing unhindered access through the hatches.Step 1: Starting with the Flange
Sven begins by explaining that working on flanges vertically and horizontally is significantly easier than doing so in a flat position. To simplify the process further, he divides the task into two or three steps as suggested by fellow expert “for for.” This approach not only makes it more manageable but also allows for greater precision in crafting each component.Step 2: Applying Glue and Securing
Sven proceeds to apply glue along one edge of the flange, ensuring a secure bond when clamped into place. He emphasizes that this stage is crucial for maintaining the structural integrity of the flange, which in turn safeguards the living area beneath the canvas when hatches are open.Step 3: Allowing Time to Dry
After securely attaching the first portion of the flange, Sven allows ample time for it to dry before moving forward with additional steps. This patience and precision are key aspects of his successful boatbuilding methods.Step 4: Finishing Touches
Once the flange is fully dried, Sven removes the clamps carefully, ensuring no damage occurs during this process. He then moves on to attaching four more pieces onto these main frames, completing two pairs of flanges for the bulkhead hatches.The Final Touches
While two flanges form the primary support structure around the hatches, Sven mentions there are two additional pieces required at each end to ensure comprehensive protection. This attention to detail highlights his commitment to producing a durable and reliable design. “Sailing is about finding your path, whether it’s across an ocean or within yourself.” – Sven Yrvind In conclusion, making flanges around bulkhead hatches may seem complex at first glance, but by following Sven Yrvind’s meticulous process, enthusiasts can achieve professional-level results. Remember that the journey of boatbuilding is as rewarding as reaching your destination; it tests one’s patience and dedication. For those seeking to embark on this adventure or simply gain more insight into marine craftsmanship, Sven’s wisdom is invaluable.Making Flanges Around Bulkhead Hatches for Canvas
Sven Yrvind, a renowned yacht designer and sailor, shares valuable insights on creating flanges around bulkhead hatches for canvas protection in this enlightening video. By following his expert guidance, boat enthusiasts can ensure their living areas remain secure while allowing unhindered access through the hatches.Step 1: Starting with the Flange
Sven begins by explaining that working on flanges vertically and horizontally is significantly easier than doing so in a flat position. To simplify the process further, he divides the task into two or three steps as suggested by fellow expert “for for.” This approach not only makes it more manageable but also allows for greater precision in crafting each component.Step 2: Applying Glue and Securing
Sven proceeds to apply glue along one edge of the flange, ensuring a secure bond when clamped into place. He emphasizes that this stage is crucial for maintaining the structural integrity of the flange, which in turn safeguards the living area beneath the canvas when hatches are open.Step 3: Allowing Time to Dry
After securely attaching the first portion of the flange, Sven allows ample time for it to dry before moving forward with additional steps. This patience and precision are key aspects of his successful boatbuilding methods.Step 4: Finishing Touches
Once the flange is fully dried, Sven removes the clamps carefully, ensuring no damage occurs during this process. He then moves on to attaching four more pieces onto these main frames, completing two pairs of flanges for the bulkhead hatches.The Final Touches
While two flanges form the primary support structure around the hatches, Sven mentions there are two additional pieces required at each end to ensure comprehensive protection. This attention to detail highlights his commitment to producing a durable and reliable design. “Sailing is about finding your path, whether it’s across an ocean or within yourself.” – Sven Yrvind In conclusion, making flanges around bulkhead hatches may seem complex at first glance, but by following Sven Yrvind’s meticulous process, enthusiasts can achieve professional-level results. Remember that the journey of boatbuilding is as rewarding as reaching your destination; it tests one’s patience and dedication. For those seeking to embark on this adventure or simply gain more insight into marine craftsmanship, Sven’s wisdom is invaluable.Once the flange is fully dried, Sven removes the clamps carefully, ensuring no damage occurs during this process. He then moves on to attaching four more pieces onto these main frames, completing two pairs of flanges for the bulkhead hatches.The Final Touches
While two flanges form the primary support structure around the hatches, Sven mentions there are two additional pieces required at each end to ensure comprehensive protection. This attention to detail highlights his commitment to producing a durable and reliable design. “Sailing is about finding your path, whether it’s across an ocean or within yourself.” – Sven Yrvind In conclusion, making flanges around bulkhead hatches may seem complex at first glance, but by following Sven Yrvind’s meticulous process, enthusiasts can achieve professional-level results. Remember that the journey of boatbuilding is as rewarding as reaching your destination; it tests one’s patience and dedication. For those seeking to embark on this adventure or simply gain more insight into marine craftsmanship, Sven’s wisdom is invaluable.Sven proceeds to apply glue along one edge of the flange, ensuring a secure bond when clamped into place. He emphasizes that this stage is crucial for maintaining the structural integrity of the flange, which in turn safeguards the living area beneath the canvas when hatches are open.Step 3: Allowing Time to Dry
After securely attaching the first portion of the flange, Sven allows ample time for it to dry before moving forward with additional steps. This patience and precision are key aspects of his successful boatbuilding methods.Step 4: Finishing Touches
Once the flange is fully dried, Sven removes the clamps carefully, ensuring no damage occurs during this process. He then moves on to attaching four more pieces onto these main frames, completing two pairs of flanges for the bulkhead hatches.The Final Touches
While two flanges form the primary support structure around the hatches, Sven mentions there are two additional pieces required at each end to ensure comprehensive protection. This attention to detail highlights his commitment to producing a durable and reliable design. “Sailing is about finding your path, whether it’s across an ocean or within yourself.” – Sven Yrvind In conclusion, making flanges around bulkhead hatches may seem complex at first glance, but by following Sven Yrvind’s meticulous process, enthusiasts can achieve professional-level results. Remember that the journey of boatbuilding is as rewarding as reaching your destination; it tests one’s patience and dedication. For those seeking to embark on this adventure or simply gain more insight into marine craftsmanship, Sven’s wisdom is invaluable.Sven begins by explaining that working on flanges vertically and horizontally is significantly easier than doing so in a flat position. To simplify the process further, he divides the task into two or three steps as suggested by fellow expert “for for.” This approach not only makes it more manageable but also allows for greater precision in crafting each component.Step 2: Applying Glue and Securing
Sven proceeds to apply glue along one edge of the flange, ensuring a secure bond when clamped into place. He emphasizes that this stage is crucial for maintaining the structural integrity of the flange, which in turn safeguards the living area beneath the canvas when hatches are open.Step 3: Allowing Time to Dry
After securely attaching the first portion of the flange, Sven allows ample time for it to dry before moving forward with additional steps. This patience and precision are key aspects of his successful boatbuilding methods.Step 4: Finishing Touches
Once the flange is fully dried, Sven removes the clamps carefully, ensuring no damage occurs during this process. He then moves on to attaching four more pieces onto these main frames, completing two pairs of flanges for the bulkhead hatches.The Final Touches
While two flanges form the primary support structure around the hatches, Sven mentions there are two additional pieces required at each end to ensure comprehensive protection. This attention to detail highlights his commitment to producing a durable and reliable design. “Sailing is about finding your path, whether it’s across an ocean or within yourself.” – Sven Yrvind In conclusion, making flanges around bulkhead hatches may seem complex at first glance, but by following Sven Yrvind’s meticulous process, enthusiasts can achieve professional-level results. Remember that the journey of boatbuilding is as rewarding as reaching your destination; it tests one’s patience and dedication. For those seeking to embark on this adventure or simply gain more insight into marine craftsmanship, Sven’s wisdom is invaluable.Sven Yrvind, a renowned yacht designer and sailor, shares valuable insights on creating flanges around bulkhead hatches for canvas protection in this enlightening video. By following his expert guidance, boat enthusiasts can ensure their living areas remain secure while allowing unhindered access through the hatches.Step 1: Starting with the Flange
Sven begins by explaining that working on flanges vertically and horizontally is significantly easier than doing so in a flat position. To simplify the process further, he divides the task into two or three steps as suggested by fellow expert “for for.” This approach not only makes it more manageable but also allows for greater precision in crafting each component.Step 2: Applying Glue and Securing
Sven proceeds to apply glue along one edge of the flange, ensuring a secure bond when clamped into place. He emphasizes that this stage is crucial for maintaining the structural integrity of the flange, which in turn safeguards the living area beneath the canvas when hatches are open.Step 3: Allowing Time to Dry
After securely attaching the first portion of the flange, Sven allows ample time for it to dry before moving forward with additional steps. This patience and precision are key aspects of his successful boatbuilding methods.Step 4: Finishing Touches
Once the flange is fully dried, Sven removes the clamps carefully, ensuring no damage occurs during this process. He then moves on to attaching four more pieces onto these main frames, completing two pairs of flanges for the bulkhead hatches.The Final Touches
While two flanges form the primary support structure around the hatches, Sven mentions there are two additional pieces required at each end to ensure comprehensive protection. This attention to detail highlights his commitment to producing a durable and reliable design. “Sailing is about finding your path, whether it’s across an ocean or within yourself.” – Sven Yrvind In conclusion, making flanges around bulkhead hatches may seem complex at first glance, but by following Sven Yrvind’s meticulous process, enthusiasts can achieve professional-level results. Remember that the journey of boatbuilding is as rewarding as reaching your destination; it tests one’s patience and dedication. For those seeking to embark on this adventure or simply gain more insight into marine craftsmanship, Sven’s wisdom is invaluable.Making Flanges Around Bulkhead Hatches for Canvas
Sven Yrvind, a renowned yacht designer and sailor, shares valuable insights on creating flanges around bulkhead hatches for canvas protection in this enlightening video. By following his expert guidance, boat enthusiasts can ensure their living areas remain secure while allowing unhindered access through the hatches.Step 1: Starting with the Flange
Sven begins by explaining that working on flanges vertically and horizontally is significantly easier than doing so in a flat position. To simplify the process further, he divides the task into two or three steps as suggested by fellow expert “for for.” This approach not only makes it more manageable but also allows for greater precision in crafting each component.Step 2: Applying Glue and Securing
Sven proceeds to apply glue along one edge of the flange, ensuring a secure bond when clamped into place. He emphasizes that this stage is crucial for maintaining the structural integrity of the flange, which in turn safeguards the living area beneath the canvas when hatches are open.Step 3: Allowing Time to Dry
After securely attaching the first portion of the flange, Sven allows ample time for it to dry before moving forward with additional steps. This patience and precision are key aspects of his successful boatbuilding methods.Step 4: Finishing Touches
Once the flange is fully dried, Sven removes the clamps carefully, ensuring no damage occurs during this process. He then moves on to attaching four more pieces onto these main frames, completing two pairs of flanges for the bulkhead hatches.The Final Touches
While two flanges form the primary support structure around the hatches, Sven mentions there are two additional pieces required at each end to ensure comprehensive protection. This attention to detail highlights his commitment to producing a durable and reliable design. “Sailing is about finding your path, whether it’s across an ocean or within yourself.” – Sven Yrvind In conclusion, making flanges around bulkhead hatches may seem complex at first glance, but by following Sven Yrvind’s meticulous process, enthusiasts can achieve professional-level results. Remember that the journey of boatbuilding is as rewarding as reaching your destination; it tests one’s patience and dedication. For those seeking to embark on this adventure or simply gain more insight into marine craftsmanship, Sven’s wisdom is invaluable.After securely attaching the first portion of the flange, Sven allows ample time for it to dry before moving forward with additional steps. This patience and precision are key aspects of his successful boatbuilding methods.Step 4: Finishing Touches
Once the flange is fully dried, Sven removes the clamps carefully, ensuring no damage occurs during this process. He then moves on to attaching four more pieces onto these main frames, completing two pairs of flanges for the bulkhead hatches.The Final Touches
While two flanges form the primary support structure around the hatches, Sven mentions there are two additional pieces required at each end to ensure comprehensive protection. This attention to detail highlights his commitment to producing a durable and reliable design. “Sailing is about finding your path, whether it’s across an ocean or within yourself.” – Sven Yrvind In conclusion, making flanges around bulkhead hatches may seem complex at first glance, but by following Sven Yrvind’s meticulous process, enthusiasts can achieve professional-level results. Remember that the journey of boatbuilding is as rewarding as reaching your destination; it tests one’s patience and dedication. For those seeking to embark on this adventure or simply gain more insight into marine craftsmanship, Sven’s wisdom is invaluable.Sven proceeds to apply glue along one edge of the flange, ensuring a secure bond when clamped into place. He emphasizes that this stage is crucial for maintaining the structural integrity of the flange, which in turn safeguards the living area beneath the canvas when hatches are open.Step 3: Allowing Time to Dry
After securely attaching the first portion of the flange, Sven allows ample time for it to dry before moving forward with additional steps. This patience and precision are key aspects of his successful boatbuilding methods.Step 4: Finishing Touches
Once the flange is fully dried, Sven removes the clamps carefully, ensuring no damage occurs during this process. He then moves on to attaching four more pieces onto these main frames, completing two pairs of flanges for the bulkhead hatches.The Final Touches
While two flanges form the primary support structure around the hatches, Sven mentions there are two additional pieces required at each end to ensure comprehensive protection. This attention to detail highlights his commitment to producing a durable and reliable design. “Sailing is about finding your path, whether it’s across an ocean or within yourself.” – Sven Yrvind In conclusion, making flanges around bulkhead hatches may seem complex at first glance, but by following Sven Yrvind’s meticulous process, enthusiasts can achieve professional-level results. Remember that the journey of boatbuilding is as rewarding as reaching your destination; it tests one’s patience and dedication. For those seeking to embark on this adventure or simply gain more insight into marine craftsmanship, Sven’s wisdom is invaluable.Sven begins by explaining that working on flanges vertically and horizontally is significantly easier than doing so in a flat position. To simplify the process further, he divides the task into two or three steps as suggested by fellow expert “for for.” This approach not only makes it more manageable but also allows for greater precision in crafting each component.Step 2: Applying Glue and Securing
Sven proceeds to apply glue along one edge of the flange, ensuring a secure bond when clamped into place. He emphasizes that this stage is crucial for maintaining the structural integrity of the flange, which in turn safeguards the living area beneath the canvas when hatches are open.Step 3: Allowing Time to Dry
After securely attaching the first portion of the flange, Sven allows ample time for it to dry before moving forward with additional steps. This patience and precision are key aspects of his successful boatbuilding methods.Step 4: Finishing Touches
Once the flange is fully dried, Sven removes the clamps carefully, ensuring no damage occurs during this process. He then moves on to attaching four more pieces onto these main frames, completing two pairs of flanges for the bulkhead hatches.The Final Touches
While two flanges form the primary support structure around the hatches, Sven mentions there are two additional pieces required at each end to ensure comprehensive protection. This attention to detail highlights his commitment to producing a durable and reliable design. “Sailing is about finding your path, whether it’s across an ocean or within yourself.” – Sven Yrvind In conclusion, making flanges around bulkhead hatches may seem complex at first glance, but by following Sven Yrvind’s meticulous process, enthusiasts can achieve professional-level results. Remember that the journey of boatbuilding is as rewarding as reaching your destination; it tests one’s patience and dedication. For those seeking to embark on this adventure or simply gain more insight into marine craftsmanship, Sven’s wisdom is invaluable.Sven Yrvind, a renowned yacht designer and sailor, shares valuable insights on creating flanges around bulkhead hatches for canvas protection in this enlightening video. By following his expert guidance, boat enthusiasts can ensure their living areas remain secure while allowing unhindered access through the hatches.Step 1: Starting with the Flange
Sven begins by explaining that working on flanges vertically and horizontally is significantly easier than doing so in a flat position. To simplify the process further, he divides the task into two or three steps as suggested by fellow expert “for for.” This approach not only makes it more manageable but also allows for greater precision in crafting each component.Step 2: Applying Glue and Securing
Sven proceeds to apply glue along one edge of the flange, ensuring a secure bond when clamped into place. He emphasizes that this stage is crucial for maintaining the structural integrity of the flange, which in turn safeguards the living area beneath the canvas when hatches are open.Step 3: Allowing Time to Dry
After securely attaching the first portion of the flange, Sven allows ample time for it to dry before moving forward with additional steps. This patience and precision are key aspects of his successful boatbuilding methods.Step 4: Finishing Touches
Once the flange is fully dried, Sven removes the clamps carefully, ensuring no damage occurs during this process. He then moves on to attaching four more pieces onto these main frames, completing two pairs of flanges for the bulkhead hatches.The Final Touches
While two flanges form the primary support structure around the hatches, Sven mentions there are two additional pieces required at each end to ensure comprehensive protection. This attention to detail highlights his commitment to producing a durable and reliable design. “Sailing is about finding your path, whether it’s across an ocean or within yourself.” – Sven Yrvind In conclusion, making flanges around bulkhead hatches may seem complex at first glance, but by following Sven Yrvind’s meticulous process, enthusiasts can achieve professional-level results. Remember that the journey of boatbuilding is as rewarding as reaching your destination; it tests one’s patience and dedication. For those seeking to embark on this adventure or simply gain more insight into marine craftsmanship, Sven’s wisdom is invaluable.Making Flanges Around Bulkhead Hatches for Canvas
Sven Yrvind, a renowned yacht designer and sailor, shares valuable insights on creating flanges around bulkhead hatches for canvas protection in this enlightening video. By following his expert guidance, boat enthusiasts can ensure their living areas remain secure while allowing unhindered access through the hatches.Step 1: Starting with the Flange
Sven begins by explaining that working on flanges vertically and horizontally is significantly easier than doing so in a flat position. To simplify the process further, he divides the task into two or three steps as suggested by fellow expert “for for.” This approach not only makes it more manageable but also allows for greater precision in crafting each component.Step 2: Applying Glue and Securing
Sven proceeds to apply glue along one edge of the flange, ensuring a secure bond when clamped into place. He emphasizes that this stage is crucial for maintaining the structural integrity of the flange, which in turn safeguards the living area beneath the canvas when hatches are open.Step 3: Allowing Time to Dry
After securely attaching the first portion of the flange, Sven allows ample time for it to dry before moving forward with additional steps. This patience and precision are key aspects of his successful boatbuilding methods.Step 4: Finishing Touches
Once the flange is fully dried, Sven removes the clamps carefully, ensuring no damage occurs during this process. He then moves on to attaching four more pieces onto these main frames, completing two pairs of flanges for the bulkhead hatches.The Final Touches
While two flanges form the primary support structure around the hatches, Sven mentions there are two additional pieces required at each end to ensure comprehensive protection. This attention to detail highlights his commitment to producing a durable and reliable design. “Sailing is about finding your path, whether it’s across an ocean or within yourself.” – Sven Yrvind In conclusion, making flanges around bulkhead hatches may seem complex at first glance, but by following Sven Yrvind’s meticulous process, enthusiasts can achieve professional-level results. Remember that the journey of boatbuilding is as rewarding as reaching your destination; it tests one’s patience and dedication. For those seeking to embark on this adventure or simply gain more insight into marine craftsmanship, Sven’s wisdom is invaluable.Once the flange is fully dried, Sven removes the clamps carefully, ensuring no damage occurs during this process. He then moves on to attaching four more pieces onto these main frames, completing two pairs of flanges for the bulkhead hatches.The Final Touches
While two flanges form the primary support structure around the hatches, Sven mentions there are two additional pieces required at each end to ensure comprehensive protection. This attention to detail highlights his commitment to producing a durable and reliable design. “Sailing is about finding your path, whether it’s across an ocean or within yourself.” – Sven Yrvind In conclusion, making flanges around bulkhead hatches may seem complex at first glance, but by following Sven Yrvind’s meticulous process, enthusiasts can achieve professional-level results. Remember that the journey of boatbuilding is as rewarding as reaching your destination; it tests one’s patience and dedication. For those seeking to embark on this adventure or simply gain more insight into marine craftsmanship, Sven’s wisdom is invaluable.After securely attaching the first portion of the flange, Sven allows ample time for it to dry before moving forward with additional steps. This patience and precision are key aspects of his successful boatbuilding methods.Step 4: Finishing Touches
Once the flange is fully dried, Sven removes the clamps carefully, ensuring no damage occurs during this process. He then moves on to attaching four more pieces onto these main frames, completing two pairs of flanges for the bulkhead hatches.The Final Touches
While two flanges form the primary support structure around the hatches, Sven mentions there are two additional pieces required at each end to ensure comprehensive protection. This attention to detail highlights his commitment to producing a durable and reliable design. “Sailing is about finding your path, whether it’s across an ocean or within yourself.” – Sven Yrvind In conclusion, making flanges around bulkhead hatches may seem complex at first glance, but by following Sven Yrvind’s meticulous process, enthusiasts can achieve professional-level results. Remember that the journey of boatbuilding is as rewarding as reaching your destination; it tests one’s patience and dedication. For those seeking to embark on this adventure or simply gain more insight into marine craftsmanship, Sven’s wisdom is invaluable.Sven proceeds to apply glue along one edge of the flange, ensuring a secure bond when clamped into place. He emphasizes that this stage is crucial for maintaining the structural integrity of the flange, which in turn safeguards the living area beneath the canvas when hatches are open.Step 3: Allowing Time to Dry
After securely attaching the first portion of the flange, Sven allows ample time for it to dry before moving forward with additional steps. This patience and precision are key aspects of his successful boatbuilding methods.Step 4: Finishing Touches
Once the flange is fully dried, Sven removes the clamps carefully, ensuring no damage occurs during this process. He then moves on to attaching four more pieces onto these main frames, completing two pairs of flanges for the bulkhead hatches.The Final Touches
While two flanges form the primary support structure around the hatches, Sven mentions there are two additional pieces required at each end to ensure comprehensive protection. This attention to detail highlights his commitment to producing a durable and reliable design. “Sailing is about finding your path, whether it’s across an ocean or within yourself.” – Sven Yrvind In conclusion, making flanges around bulkhead hatches may seem complex at first glance, but by following Sven Yrvind’s meticulous process, enthusiasts can achieve professional-level results. Remember that the journey of boatbuilding is as rewarding as reaching your destination; it tests one’s patience and dedication. For those seeking to embark on this adventure or simply gain more insight into marine craftsmanship, Sven’s wisdom is invaluable.Sven begins by explaining that working on flanges vertically and horizontally is significantly easier than doing so in a flat position. To simplify the process further, he divides the task into two or three steps as suggested by fellow expert “for for.” This approach not only makes it more manageable but also allows for greater precision in crafting each component.Step 2: Applying Glue and Securing
Sven proceeds to apply glue along one edge of the flange, ensuring a secure bond when clamped into place. He emphasizes that this stage is crucial for maintaining the structural integrity of the flange, which in turn safeguards the living area beneath the canvas when hatches are open.Step 3: Allowing Time to Dry
After securely attaching the first portion of the flange, Sven allows ample time for it to dry before moving forward with additional steps. This patience and precision are key aspects of his successful boatbuilding methods.Step 4: Finishing Touches
Once the flange is fully dried, Sven removes the clamps carefully, ensuring no damage occurs during this process. He then moves on to attaching four more pieces onto these main frames, completing two pairs of flanges for the bulkhead hatches.The Final Touches
While two flanges form the primary support structure around the hatches, Sven mentions there are two additional pieces required at each end to ensure comprehensive protection. This attention to detail highlights his commitment to producing a durable and reliable design. “Sailing is about finding your path, whether it’s across an ocean or within yourself.” – Sven Yrvind In conclusion, making flanges around bulkhead hatches may seem complex at first glance, but by following Sven Yrvind’s meticulous process, enthusiasts can achieve professional-level results. Remember that the journey of boatbuilding is as rewarding as reaching your destination; it tests one’s patience and dedication. For those seeking to embark on this adventure or simply gain more insight into marine craftsmanship, Sven’s wisdom is invaluable.Sven Yrvind, a renowned yacht designer and sailor, shares valuable insights on creating flanges around bulkhead hatches for canvas protection in this enlightening video. By following his expert guidance, boat enthusiasts can ensure their living areas remain secure while allowing unhindered access through the hatches.Step 1: Starting with the Flange
Sven begins by explaining that working on flanges vertically and horizontally is significantly easier than doing so in a flat position. To simplify the process further, he divides the task into two or three steps as suggested by fellow expert “for for.” This approach not only makes it more manageable but also allows for greater precision in crafting each component.Step 2: Applying Glue and Securing
Sven proceeds to apply glue along one edge of the flange, ensuring a secure bond when clamped into place. He emphasizes that this stage is crucial for maintaining the structural integrity of the flange, which in turn safeguards the living area beneath the canvas when hatches are open.Step 3: Allowing Time to Dry
After securely attaching the first portion of the flange, Sven allows ample time for it to dry before moving forward with additional steps. This patience and precision are key aspects of his successful boatbuilding methods.Step 4: Finishing Touches
Once the flange is fully dried, Sven removes the clamps carefully, ensuring no damage occurs during this process. He then moves on to attaching four more pieces onto these main frames, completing two pairs of flanges for the bulkhead hatches.The Final Touches
While two flanges form the primary support structure around the hatches, Sven mentions there are two additional pieces required at each end to ensure comprehensive protection. This attention to detail highlights his commitment to producing a durable and reliable design. “Sailing is about finding your path, whether it’s across an ocean or within yourself.” – Sven Yrvind In conclusion, making flanges around bulkhead hatches may seem complex at first glance, but by following Sven Yrvind’s meticulous process, enthusiasts can achieve professional-level results. Remember that the journey of boatbuilding is as rewarding as reaching your destination; it tests one’s patience and dedication. For those seeking to embark on this adventure or simply gain more insight into marine craftsmanship, Sven’s wisdom is invaluable.Making Flanges Around Bulkhead Hatches for Canvas
Sven Yrvind, a renowned yacht designer and sailor, shares valuable insights on creating flanges around bulkhead hatches for canvas protection in this enlightening video. By following his expert guidance, boat enthusiasts can ensure their living areas remain secure while allowing unhindered access through the hatches.Step 1: Starting with the Flange
Sven begins by explaining that working on flanges vertically and horizontally is significantly easier than doing so in a flat position. To simplify the process further, he divides the task into two or three steps as suggested by fellow expert “for for.” This approach not only makes it more manageable but also allows for greater precision in crafting each component.Step 2: Applying Glue and Securing
Sven proceeds to apply glue along one edge of the flange, ensuring a secure bond when clamped into place. He emphasizes that this stage is crucial for maintaining the structural integrity of the flange, which in turn safeguards the living area beneath the canvas when hatches are open.Step 3: Allowing Time to Dry
After securely attaching the first portion of the flange, Sven allows ample time for it to dry before moving forward with additional steps. This patience and precision are key aspects of his successful boatbuilding methods.Step 4: Finishing Touches
Once the flange is fully dried, Sven removes the clamps carefully, ensuring no damage occurs during this process. He then moves on to attaching four more pieces onto these main frames, completing two pairs of flanges for the bulkhead hatches.The Final Touches
While two flanges form the primary support structure around the hatches, Sven mentions there are two additional pieces required at each end to ensure comprehensive protection. This attention to detail highlights his commitment to producing a durable and reliable design. “Sailing is about finding your path, whether it’s across an ocean or within yourself.” – Sven Yrvind In conclusion, making flanges around bulkhead hatches may seem complex at first glance, but by following Sven Yrvind’s meticulous process, enthusiasts can achieve professional-level results. Remember that the journey of boatbuilding is as rewarding as reaching your destination; it tests one’s patience and dedication. For those seeking to embark on this adventure or simply gain more insight into marine craftsmanship, Sven’s wisdom is invaluable.Sven proceeds to apply glue along one edge of the flange, ensuring a secure bond when clamped into place. He emphasizes that this stage is crucial for maintaining the structural integrity of the flange, which in turn safeguards the living area beneath the canvas when hatches are open.Step 3: Allowing Time to Dry
After securely attaching the first portion of the flange, Sven allows ample time for it to dry before moving forward with additional steps. This patience and precision are key aspects of his successful boatbuilding methods.Step 4: Finishing Touches
Once the flange is fully dried, Sven removes the clamps carefully, ensuring no damage occurs during this process. He then moves on to attaching four more pieces onto these main frames, completing two pairs of flanges for the bulkhead hatches.The Final Touches
While two flanges form the primary support structure around the hatches, Sven mentions there are two additional pieces required at each end to ensure comprehensive protection. This attention to detail highlights his commitment to producing a durable and reliable design. “Sailing is about finding your path, whether it’s across an ocean or within yourself.” – Sven Yrvind In conclusion, making flanges around bulkhead hatches may seem complex at first glance, but by following Sven Yrvind’s meticulous process, enthusiasts can achieve professional-level results. Remember that the journey of boatbuilding is as rewarding as reaching your destination; it tests one’s patience and dedication. For those seeking to embark on this adventure or simply gain more insight into marine craftsmanship, Sven’s wisdom is invaluable.Sven Yrvind, a renowned yacht designer and sailor, shares valuable insights on creating flanges around bulkhead hatches for canvas protection in this enlightening video. By following his expert guidance, boat enthusiasts can ensure their living areas remain secure while allowing unhindered access through the hatches.Step 1: Starting with the Flange
Sven begins by explaining that working on flanges vertically and horizontally is significantly easier than doing so in a flat position. To simplify the process further, he divides the task into two or three steps as suggested by fellow expert “for for.” This approach not only makes it more manageable but also allows for greater precision in crafting each component.Step 2: Applying Glue and Securing
Sven proceeds to apply glue along one edge of the flange, ensuring a secure bond when clamped into place. He emphasizes that this stage is crucial for maintaining the structural integrity of the flange, which in turn safeguards the living area beneath the canvas when hatches are open.Step 3: Allowing Time to Dry
After securely attaching the first portion of the flange, Sven allows ample time for it to dry before moving forward with additional steps. This patience and precision are key aspects of his successful boatbuilding methods.Step 4: Finishing Touches
Once the flange is fully dried, Sven removes the clamps carefully, ensuring no damage occurs during this process. He then moves on to attaching four more pieces onto these main frames, completing two pairs of flanges for the bulkhead hatches.The Final Touches
While two flanges form the primary support structure around the hatches, Sven mentions there are two additional pieces required at each end to ensure comprehensive protection. This attention to detail highlights his commitment to producing a durable and reliable design. “Sailing is about finding your path, whether it’s across an ocean or within yourself.” – Sven Yrvind In conclusion, making flanges around bulkhead hatches may seem complex at first glance, but by following Sven Yrvind’s meticulous process, enthusiasts can achieve professional-level results. Remember that the journey of boatbuilding is as rewarding as reaching your destination; it tests one’s patience and dedication. For those seeking to embark on this adventure or simply gain more insight into marine craftsmanship, Sven’s wisdom is invaluable.Making Flanges Around Bulkhead Hatches for Canvas
Sven Yrvind, a renowned yacht designer and sailor, shares valuable insights on creating flanges around bulkhead hatches for canvas protection in this enlightening video. By following his expert guidance, boat enthusiasts can ensure their living areas remain secure while allowing unhindered access through the hatches.Step 1: Starting with the Flange
Sven begins by explaining that working on flanges vertically and horizontally is significantly easier than doing so in a flat position. To simplify the process further, he divides the task into two or three steps as suggested by fellow expert “for for.” This approach not only makes it more manageable but also allows for greater precision in crafting each component.Step 2: Applying Glue and Securing
Sven proceeds to apply glue along one edge of the flange, ensuring a secure bond when clamped into place. He emphasizes that this stage is crucial for maintaining the structural integrity of the flange, which in turn safeguards the living area beneath the canvas when hatches are open.Step 3: Allowing Time to Dry
After securely attaching the first portion of the flange, Sven allows ample time for it to dry before moving forward with additional steps. This patience and precision are key aspects of his successful boatbuilding methods.Step 4: Finishing Touches
Once the flange is fully dried, Sven removes the clamps carefully, ensuring no damage occurs during this process. He then moves on to attaching four more pieces onto these main frames, completing two pairs of flanges for the bulkhead hatches.The Final Touches
While two flanges form the primary support structure around the hatches, Sven mentions there are two additional pieces required at each end to ensure comprehensive protection. This attention to detail highlights his commitment to producing a durable and reliable design. “Sailing is about finding your path, whether it’s across an ocean or within yourself.” – Sven Yrvind In conclusion, making flanges around bulkhead hatches may seem complex at first glance, but by following Sven Yrvind’s meticulous process, enthusiasts can achieve professional-level results. Remember that the journey of boatbuilding is as rewarding as reaching your destination; it tests one’s patience and dedication. For those seeking to embark on this adventure or simply gain more insight into marine craftsmanship, Sven’s wisdom is invaluable.Once the flange is fully dried, Sven removes the clamps carefully, ensuring no damage occurs during this process. He then moves on to attaching four more pieces onto these main frames, completing two pairs of flanges for the bulkhead hatches.The Final Touches
While two flanges form the primary support structure around the hatches, Sven mentions there are two additional pieces required at each end to ensure comprehensive protection. This attention to detail highlights his commitment to producing a durable and reliable design. “Sailing is about finding your path, whether it’s across an ocean or within yourself.” – Sven Yrvind In conclusion, making flanges around bulkhead hatches may seem complex at first glance, but by following Sven Yrvind’s meticulous process, enthusiasts can achieve professional-level results. Remember that the journey of boatbuilding is as rewarding as reaching your destination; it tests one’s patience and dedication. For those seeking to embark on this adventure or simply gain more insight into marine craftsmanship, Sven’s wisdom is invaluable.Sven Yrvind, a renowned yacht designer and sailor, shares valuable insights on creating flanges around bulkhead hatches for canvas protection in this enlightening video. By following his expert guidance, boat enthusiasts can ensure their living areas remain secure while allowing unhindered access through the hatches.Step 1: Starting with the Flange
Sven begins by explaining that working on flanges vertically and horizontally is significantly easier than doing so in a flat position. To simplify the process further, he divides the task into two or three steps as suggested by fellow expert “for for.” This approach not only makes it more manageable but also allows for greater precision in crafting each component.Step 2: Applying Glue and Securing
Sven proceeds to apply glue along one edge of the flange, ensuring a secure bond when clamped into place. He emphasizes that this stage is crucial for maintaining the structural integrity of the flange, which in turn safeguards the living area beneath the canvas when hatches are open.Step 3: Allowing Time to Dry
After securely attaching the first portion of the flange, Sven allows ample time for it to dry before moving forward with additional steps. This patience and precision are key aspects of his successful boatbuilding methods.Step 4: Finishing Touches
Once the flange is fully dried, Sven removes the clamps carefully, ensuring no damage occurs during this process. He then moves on to attaching four more pieces onto these main frames, completing two pairs of flanges for the bulkhead hatches.The Final Touches
While two flanges form the primary support structure around the hatches, Sven mentions there are two additional pieces required at each end to ensure comprehensive protection. This attention to detail highlights his commitment to producing a durable and reliable design. “Sailing is about finding your path, whether it’s across an ocean or within yourself.” – Sven Yrvind In conclusion, making flanges around bulkhead hatches may seem complex at first glance, but by following Sven Yrvind’s meticulous process, enthusiasts can achieve professional-level results. Remember that the journey of boatbuilding is as rewarding as reaching your destination; it tests one’s patience and dedication. For those seeking to embark on this adventure or simply gain more insight into marine craftsmanship, Sven’s wisdom is invaluable.Making Flanges Around Bulkhead Hatches for Canvas
Sven Yrvind, a renowned yacht designer and sailor, shares valuable insights on creating flanges around bulkhead hatches for canvas protection in this enlightening video. By following his expert guidance, boat enthusiasts can ensure their living areas remain secure while allowing unhindered access through the hatches.Step 1: Starting with the Flange
Sven begins by explaining that working on flanges vertically and horizontally is significantly easier than doing so in a flat position. To simplify the process further, he divides the task into two or three steps as suggested by fellow expert “for for.” This approach not only makes it more manageable but also allows for greater precision in crafting each component.Step 2: Applying Glue and Securing
Sven proceeds to apply glue along one edge of the flange, ensuring a secure bond when clamped into place. He emphasizes that this stage is crucial for maintaining the structural integrity of the flange, which in turn safeguards the living area beneath the canvas when hatches are open.Step 3: Allowing Time to Dry
After securely attaching the first portion of the flange, Sven allows ample time for it to dry before moving forward with additional steps. This patience and precision are key aspects of his successful boatbuilding methods.Step 4: Finishing Touches
Once the flange is fully dried, Sven removes the clamps carefully, ensuring no damage occurs during this process. He then moves on to attaching four more pieces onto these main frames, completing two pairs of flanges for the bulkhead hatches.The Final Touches
While two flanges form the primary support structure around the hatches, Sven mentions there are two additional pieces required at each end to ensure comprehensive protection. This attention to detail highlights his commitment to producing a durable and reliable design. “Sailing is about finding your path, whether it’s across an ocean or within yourself.” – Sven Yrvind In conclusion, making flanges around bulkhead hatches may seem complex at first glance, but by following Sven Yrvind’s meticulous process, enthusiasts can achieve professional-level results. Remember that the journey of boatbuilding is as rewarding as reaching your destination; it tests one’s patience and dedication. For those seeking to embark on this adventure or simply gain more insight into marine craftsmanship, Sven’s wisdom is invaluable.After securely attaching the first portion of the flange, Sven allows ample time for it to dry before moving forward with additional steps. This patience and precision are key aspects of his successful boatbuilding methods.Step 4: Finishing Touches
Once the flange is fully dried, Sven removes the clamps carefully, ensuring no damage occurs during this process. He then moves on to attaching four more pieces onto these main frames, completing two pairs of flanges for the bulkhead hatches.The Final Touches
While two flanges form the primary support structure around the hatches, Sven mentions there are two additional pieces required at each end to ensure comprehensive protection. This attention to detail highlights his commitment to producing a durable and reliable design. “Sailing is about finding your path, whether it’s across an ocean or within yourself.” – Sven Yrvind In conclusion, making flanges around bulkhead hatches may seem complex at first glance, but by following Sven Yrvind’s meticulous process, enthusiasts can achieve professional-level results. Remember that the journey of boatbuilding is as rewarding as reaching your destination; it tests one’s patience and dedication. For those seeking to embark on this adventure or simply gain more insight into marine craftsmanship, Sven’s wisdom is invaluable.Sven Yrvind, a renowned yacht designer and sailor, shares valuable insights on creating flanges around bulkhead hatches for canvas protection in this enlightening video. By following his expert guidance, boat enthusiasts can ensure their living areas remain secure while allowing unhindered access through the hatches.Step 1: Starting with the Flange
Sven begins by explaining that working on flanges vertically and horizontally is significantly easier than doing so in a flat position. To simplify the process further, he divides the task into two or three steps as suggested by fellow expert “for for.” This approach not only makes it more manageable but also allows for greater precision in crafting each component.Step 2: Applying Glue and Securing
Sven proceeds to apply glue along one edge of the flange, ensuring a secure bond when clamped into place. He emphasizes that this stage is crucial for maintaining the structural integrity of the flange, which in turn safeguards the living area beneath the canvas when hatches are open.Step 3: Allowing Time to Dry
After securely attaching the first portion of the flange, Sven allows ample time for it to dry before moving forward with additional steps. This patience and precision are key aspects of his successful boatbuilding methods.Step 4: Finishing Touches
Once the flange is fully dried, Sven removes the clamps carefully, ensuring no damage occurs during this process. He then moves on to attaching four more pieces onto these main frames, completing two pairs of flanges for the bulkhead hatches.The Final Touches
While two flanges form the primary support structure around the hatches, Sven mentions there are two additional pieces required at each end to ensure comprehensive protection. This attention to detail highlights his commitment to producing a durable and reliable design. “Sailing is about finding your path, whether it’s across an ocean or within yourself.” – Sven Yrvind In conclusion, making flanges around bulkhead hatches may seem complex at first glance, but by following Sven Yrvind’s meticulous process, enthusiasts can achieve professional-level results. Remember that the journey of boatbuilding is as rewarding as reaching your destination; it tests one’s patience and dedication. For those seeking to embark on this adventure or simply gain more insight into marine craftsmanship, Sven’s wisdom is invaluable.Making Flanges Around Bulkhead Hatches for Canvas
Sven Yrvind, a renowned yacht designer and sailor, shares valuable insights on creating flanges around bulkhead hatches for canvas protection in this enlightening video. By following his expert guidance, boat enthusiasts can ensure their living areas remain secure while allowing unhindered access through the hatches.Step 1: Starting with the Flange
Sven begins by explaining that working on flanges vertically and horizontally is significantly easier than doing so in a flat position. To simplify the process further, he divides the task into two or three steps as suggested by fellow expert “for for.” This approach not only makes it more manageable but also allows for greater precision in crafting each component.Step 2: Applying Glue and Securing
Sven proceeds to apply glue along one edge of the flange, ensuring a secure bond when clamped into place. He emphasizes that this stage is crucial for maintaining the structural integrity of the flange, which in turn safeguards the living area beneath the canvas when hatches are open.Step 3: Allowing Time to Dry
After securely attaching the first portion of the flange, Sven allows ample time for it to dry before moving forward with additional steps. This patience and precision are key aspects of his successful boatbuilding methods.Step 4: Finishing Touches
Once the flange is fully dried, Sven removes the clamps carefully, ensuring no damage occurs during this process. He then moves on to attaching four more pieces onto these main frames, completing two pairs of flanges for the bulkhead hatches.The Final Touches
While two flanges form the primary support structure around the hatches, Sven mentions there are two additional pieces required at each end to ensure comprehensive protection. This attention to detail highlights his commitment to producing a durable and reliable design. “Sailing is about finding your path, whether it’s across an ocean or within yourself.” – Sven Yrvind In conclusion, making flanges around bulkhead hatches may seem complex at first glance, but by following Sven Yrvind’s meticulous process, enthusiasts can achieve professional-level results. Remember that the journey of boatbuilding is as rewarding as reaching your destination; it tests one’s patience and dedication. For those seeking to embark on this adventure or simply gain more insight into marine craftsmanship, Sven’s wisdom is invaluable.Sven proceeds to apply glue along one edge of the flange, ensuring a secure bond when clamped into place. He emphasizes that this stage is crucial for maintaining the structural integrity of the flange, which in turn safeguards the living area beneath the canvas when hatches are open.Step 3: Allowing Time to Dry
After securely attaching the first portion of the flange, Sven allows ample time for it to dry before moving forward with additional steps. This patience and precision are key aspects of his successful boatbuilding methods.Step 4: Finishing Touches
Once the flange is fully dried, Sven removes the clamps carefully, ensuring no damage occurs during this process. He then moves on to attaching four more pieces onto these main frames, completing two pairs of flanges for the bulkhead hatches.The Final Touches
While two flanges form the primary support structure around the hatches, Sven mentions there are two additional pieces required at each end to ensure comprehensive protection. This attention to detail highlights his commitment to producing a durable and reliable design. “Sailing is about finding your path, whether it’s across an ocean or within yourself.” – Sven Yrvind In conclusion, making flanges around bulkhead hatches may seem complex at first glance, but by following Sven Yrvind’s meticulous process, enthusiasts can achieve professional-level results. Remember that the journey of boatbuilding is as rewarding as reaching your destination; it tests one’s patience and dedication. For those seeking to embark on this adventure or simply gain more insight into marine craftsmanship, Sven’s wisdom is invaluable.Sven Yrvind, a renowned yacht designer and sailor, shares valuable insights on creating flanges around bulkhead hatches for canvas protection in this enlightening video. By following his expert guidance, boat enthusiasts can ensure their living areas remain secure while allowing unhindered access through the hatches.Step 1: Starting with the Flange
Sven begins by explaining that working on flanges vertically and horizontally is significantly easier than doing so in a flat position. To simplify the process further, he divides the task into two or three steps as suggested by fellow expert “for for.” This approach not only makes it more manageable but also allows for greater precision in crafting each component.Step 2: Applying Glue and Securing
Sven proceeds to apply glue along one edge of the flange, ensuring a secure bond when clamped into place. He emphasizes that this stage is crucial for maintaining the structural integrity of the flange, which in turn safeguards the living area beneath the canvas when hatches are open.Step 3: Allowing Time to Dry
After securely attaching the first portion of the flange, Sven allows ample time for it to dry before moving forward with additional steps. This patience and precision are key aspects of his successful boatbuilding methods.Step 4: Finishing Touches
Once the flange is fully dried, Sven removes the clamps carefully, ensuring no damage occurs during this process. He then moves on to attaching four more pieces onto these main frames, completing two pairs of flanges for the bulkhead hatches.The Final Touches
While two flanges form the primary support structure around the hatches, Sven mentions there are two additional pieces required at each end to ensure comprehensive protection. This attention to detail highlights his commitment to producing a durable and reliable design. “Sailing is about finding your path, whether it’s across an ocean or within yourself.” – Sven Yrvind In conclusion, making flanges around bulkhead hatches may seem complex at first glance, but by following Sven Yrvind’s meticulous process, enthusiasts can achieve professional-level results. Remember that the journey of boatbuilding is as rewarding as reaching your destination; it tests one’s patience and dedication. For those seeking to embark on this adventure or simply gain more insight into marine craftsmanship, Sven’s wisdom is invaluable.Making Flanges Around Bulkhead Hatches for Canvas
Sven Yrvind, a renowned yacht designer and sailor, shares valuable insights on creating flanges around bulkhead hatches for canvas protection in this enlightening video. By following his expert guidance, boat enthusiasts can ensure their living areas remain secure while allowing unhindered access through the hatches.Step 1: Starting with the Flange
Sven begins by explaining that working on flanges vertically and horizontally is significantly easier than doing so in a flat position. To simplify the process further, he divides the task into two or three steps as suggested by fellow expert “for for.” This approach not only makes it more manageable but also allows for greater precision in crafting each component.Step 2: Applying Glue and Securing
Sven proceeds to apply glue along one edge of the flange, ensuring a secure bond when clamped into place. He emphasizes that this stage is crucial for maintaining the structural integrity of the flange, which in turn safeguards the living area beneath the canvas when hatches are open.Step 3: Allowing Time to Dry
After securely attaching the first portion of the flange, Sven allows ample time for it to dry before moving forward with additional steps. This patience and precision are key aspects of his successful boatbuilding methods.Step 4: Finishing Touches
Once the flange is fully dried, Sven removes the clamps carefully, ensuring no damage occurs during this process. He then moves on to attaching four more pieces onto these main frames, completing two pairs of flanges for the bulkhead hatches.The Final Touches
While two flanges form the primary support structure around the hatches, Sven mentions there are two additional pieces required at each end to ensure comprehensive protection. This attention to detail highlights his commitment to producing a durable and reliable design. “Sailing is about finding your path, whether it’s across an ocean or within yourself.” – Sven Yrvind In conclusion, making flanges around bulkhead hatches may seem complex at first glance, but by following Sven Yrvind’s meticulous process, enthusiasts can achieve professional-level results. Remember that the journey of boatbuilding is as rewarding as reaching your destination; it tests one’s patience and dedication. For those seeking to embark on this adventure or simply gain more insight into marine craftsmanship, Sven’s wisdom is invaluable.Sven begins by explaining that working on flanges vertically and horizontally is significantly easier than doing so in a flat position. To simplify the process further, he divides the task into two or three steps as suggested by fellow expert “for for.” This approach not only makes it more manageable but also allows for greater precision in crafting each component.Step 2: Applying Glue and Securing
Sven proceeds to apply glue along one edge of the flange, ensuring a secure bond when clamped into place. He emphasizes that this stage is crucial for maintaining the structural integrity of the flange, which in turn safeguards the living area beneath the canvas when hatches are open.Step 3: Allowing Time to Dry
After securely attaching the first portion of the flange, Sven allows ample time for it to dry before moving forward with additional steps. This patience and precision are key aspects of his successful boatbuilding methods.Step 4: Finishing Touches
Once the flange is fully dried, Sven removes the clamps carefully, ensuring no damage occurs during this process. He then moves on to attaching four more pieces onto these main frames, completing two pairs of flanges for the bulkhead hatches.The Final Touches
While two flanges form the primary support structure around the hatches, Sven mentions there are two additional pieces required at each end to ensure comprehensive protection. This attention to detail highlights his commitment to producing a durable and reliable design. “Sailing is about finding your path, whether it’s across an ocean or within yourself.” – Sven Yrvind In conclusion, making flanges around bulkhead hatches may seem complex at first glance, but by following Sven Yrvind’s meticulous process, enthusiasts can achieve professional-level results. Remember that the journey of boatbuilding is as rewarding as reaching your destination; it tests one’s patience and dedication. For those seeking to embark on this adventure or simply gain more insight into marine craftsmanship, Sven’s wisdom is invaluable.Sven Yrvind, a renowned yacht designer and sailor, shares valuable insights on creating flanges around bulkhead hatches for canvas protection in this enlightening video. By following his expert guidance, boat enthusiasts can ensure their living areas remain secure while allowing unhindered access through the hatches.Step 1: Starting with the Flange
Sven begins by explaining that working on flanges vertically and horizontally is significantly easier than doing so in a flat position. To simplify the process further, he divides the task into two or three steps as suggested by fellow expert “for for.” This approach not only makes it more manageable but also allows for greater precision in crafting each component.Step 2: Applying Glue and Securing
Sven proceeds to apply glue along one edge of the flange, ensuring a secure bond when clamped into place. He emphasizes that this stage is crucial for maintaining the structural integrity of the flange, which in turn safeguards the living area beneath the canvas when hatches are open.Step 3: Allowing Time to Dry
After securely attaching the first portion of the flange, Sven allows ample time for it to dry before moving forward with additional steps. This patience and precision are key aspects of his successful boatbuilding methods.Step 4: Finishing Touches
Once the flange is fully dried, Sven removes the clamps carefully, ensuring no damage occurs during this process. He then moves on to attaching four more pieces onto these main frames, completing two pairs of flanges for the bulkhead hatches.The Final Touches
While two flanges form the primary support structure around the hatches, Sven mentions there are two additional pieces required at each end to ensure comprehensive protection. This attention to detail highlights his commitment to producing a durable and reliable design. “Sailing is about finding your path, whether it’s across an ocean or within yourself.” – Sven Yrvind In conclusion, making flanges around bulkhead hatches may seem complex at first glance, but by following Sven Yrvind’s meticulous process, enthusiasts can achieve professional-level results. Remember that the journey of boatbuilding is as rewarding as reaching your destination; it tests one’s patience and dedication. For those seeking to embark on this adventure or simply gain more insight into marine craftsmanship, Sven’s wisdom is invaluable.Making Flanges Around Bulkhead Hatches for Canvas
Sven Yrvind, a renowned yacht designer and sailor, shares valuable insights on creating flanges around bulkhead hatches for canvas protection in this enlightening video. By following his expert guidance, boat enthusiasts can ensure their living areas remain secure while allowing unhindered access through the hatches.Step 1: Starting with the Flange
Sven begins by explaining that working on flanges vertically and horizontally is significantly easier than doing so in a flat position. To simplify the process further, he divides the task into two or three steps as suggested by fellow expert “for for.” This approach not only makes it more manageable but also allows for greater precision in crafting each component.Step 2: Applying Glue and Securing
Sven proceeds to apply glue along one edge of the flange, ensuring a secure bond when clamped into place. He emphasizes that this stage is crucial for maintaining the structural integrity of the flange, which in turn safeguards the living area beneath the canvas when hatches are open.Step 3: Allowing Time to Dry
After securely attaching the first portion of the flange, Sven allows ample time for it to dry before moving forward with additional steps. This patience and precision are key aspects of his successful boatbuilding methods.Step 4: Finishing Touches
Once the flange is fully dried, Sven removes the clamps carefully, ensuring no damage occurs during this process. He then moves on to attaching four more pieces onto these main frames, completing two pairs of flanges for the bulkhead hatches.The Final Touches
While two flanges form the primary support structure around the hatches, Sven mentions there are two additional pieces required at each end to ensure comprehensive protection. This attention to detail highlights his commitment to producing a durable and reliable design. “Sailing is about finding your path, whether it’s across an ocean or within yourself.” – Sven Yrvind In conclusion, making flanges around bulkhead hatches may seem complex at first glance, but by following Sven Yrvind’s meticulous process, enthusiasts can achieve professional-level results. Remember that the journey of boatbuilding is as rewarding as reaching your destination; it tests one’s patience and dedication. For those seeking to embark on this adventure or simply gain more insight into marine craftsmanship, Sven’s wisdom is invaluable.Once the flange is fully dried, Sven removes the clamps carefully, ensuring no damage occurs during this process. He then moves on to attaching four more pieces onto these main frames, completing two pairs of flanges for the bulkhead hatches.The Final Touches
While two flanges form the primary support structure around the hatches, Sven mentions there are two additional pieces required at each end to ensure comprehensive protection. This attention to detail highlights his commitment to producing a durable and reliable design. “Sailing is about finding your path, whether it’s across an ocean or within yourself.” – Sven Yrvind In conclusion, making flanges around bulkhead hatches may seem complex at first glance, but by following Sven Yrvind’s meticulous process, enthusiasts can achieve professional-level results. Remember that the journey of boatbuilding is as rewarding as reaching your destination; it tests one’s patience and dedication. For those seeking to embark on this adventure or simply gain more insight into marine craftsmanship, Sven’s wisdom is invaluable.Sven begins by explaining that working on flanges vertically and horizontally is significantly easier than doing so in a flat position. To simplify the process further, he divides the task into two or three steps as suggested by fellow expert “for for.” This approach not only makes it more manageable but also allows for greater precision in crafting each component.Step 2: Applying Glue and Securing
Sven proceeds to apply glue along one edge of the flange, ensuring a secure bond when clamped into place. He emphasizes that this stage is crucial for maintaining the structural integrity of the flange, which in turn safeguards the living area beneath the canvas when hatches are open.Step 3: Allowing Time to Dry
After securely attaching the first portion of the flange, Sven allows ample time for it to dry before moving forward with additional steps. This patience and precision are key aspects of his successful boatbuilding methods.Step 4: Finishing Touches
Once the flange is fully dried, Sven removes the clamps carefully, ensuring no damage occurs during this process. He then moves on to attaching four more pieces onto these main frames, completing two pairs of flanges for the bulkhead hatches.The Final Touches
While two flanges form the primary support structure around the hatches, Sven mentions there are two additional pieces required at each end to ensure comprehensive protection. This attention to detail highlights his commitment to producing a durable and reliable design. “Sailing is about finding your path, whether it’s across an ocean or within yourself.” – Sven Yrvind In conclusion, making flanges around bulkhead hatches may seem complex at first glance, but by following Sven Yrvind’s meticulous process, enthusiasts can achieve professional-level results. Remember that the journey of boatbuilding is as rewarding as reaching your destination; it tests one’s patience and dedication. For those seeking to embark on this adventure or simply gain more insight into marine craftsmanship, Sven’s wisdom is invaluable.Sven Yrvind, a renowned yacht designer and sailor, shares valuable insights on creating flanges around bulkhead hatches for canvas protection in this enlightening video. By following his expert guidance, boat enthusiasts can ensure their living areas remain secure while allowing unhindered access through the hatches.Step 1: Starting with the Flange
Sven begins by explaining that working on flanges vertically and horizontally is significantly easier than doing so in a flat position. To simplify the process further, he divides the task into two or three steps as suggested by fellow expert “for for.” This approach not only makes it more manageable but also allows for greater precision in crafting each component.Step 2: Applying Glue and Securing
Sven proceeds to apply glue along one edge of the flange, ensuring a secure bond when clamped into place. He emphasizes that this stage is crucial for maintaining the structural integrity of the flange, which in turn safeguards the living area beneath the canvas when hatches are open.Step 3: Allowing Time to Dry
After securely attaching the first portion of the flange, Sven allows ample time for it to dry before moving forward with additional steps. This patience and precision are key aspects of his successful boatbuilding methods.Step 4: Finishing Touches
Once the flange is fully dried, Sven removes the clamps carefully, ensuring no damage occurs during this process. He then moves on to attaching four more pieces onto these main frames, completing two pairs of flanges for the bulkhead hatches.The Final Touches
While two flanges form the primary support structure around the hatches, Sven mentions there are two additional pieces required at each end to ensure comprehensive protection. This attention to detail highlights his commitment to producing a durable and reliable design. “Sailing is about finding your path, whether it’s across an ocean or within yourself.” – Sven Yrvind In conclusion, making flanges around bulkhead hatches may seem complex at first glance, but by following Sven Yrvind’s meticulous process, enthusiasts can achieve professional-level results. Remember that the journey of boatbuilding is as rewarding as reaching your destination; it tests one’s patience and dedication. For those seeking to embark on this adventure or simply gain more insight into marine craftsmanship, Sven’s wisdom is invaluable.Making Flanges Around Bulkhead Hatches for Canvas
Sven Yrvind, a renowned yacht designer and sailor, shares valuable insights on creating flanges around bulkhead hatches for canvas protection in this enlightening video. By following his expert guidance, boat enthusiasts can ensure their living areas remain secure while allowing unhindered access through the hatches.Step 1: Starting with the Flange
Sven begins by explaining that working on flanges vertically and horizontally is significantly easier than doing so in a flat position. To simplify the process further, he divides the task into two or three steps as suggested by fellow expert “for for.” This approach not only makes it more manageable but also allows for greater precision in crafting each component.Step 2: Applying Glue and Securing
Sven proceeds to apply glue along one edge of the flange, ensuring a secure bond when clamped into place. He emphasizes that this stage is crucial for maintaining the structural integrity of the flange, which in turn safeguards the living area beneath the canvas when hatches are open.Step 3: Allowing Time to Dry
After securely attaching the first portion of the flange, Sven allows ample time for it to dry before moving forward with additional steps. This patience and precision are key aspects of his successful boatbuilding methods.Step 4: Finishing Touches
Once the flange is fully dried, Sven removes the clamps carefully, ensuring no damage occurs during this process. He then moves on to attaching four more pieces onto these main frames, completing two pairs of flanges for the bulkhead hatches.The Final Touches
While two flanges form the primary support structure around the hatches, Sven mentions there are two additional pieces required at each end to ensure comprehensive protection. This attention to detail highlights his commitment to producing a durable and reliable design. “Sailing is about finding your path, whether it’s across an ocean or within yourself.” – Sven Yrvind In conclusion, making flanges around bulkhead hatches may seem complex at first glance, but by following Sven Yrvind’s meticulous process, enthusiasts can achieve professional-level results. Remember that the journey of boatbuilding is as rewarding as reaching your destination; it tests one’s patience and dedication. For those seeking to embark on this adventure or simply gain more insight into marine craftsmanship, Sven’s wisdom is invaluable.After securely attaching the first portion of the flange, Sven allows ample time for it to dry before moving forward with additional steps. This patience and precision are key aspects of his successful boatbuilding methods.Step 4: Finishing Touches
Once the flange is fully dried, Sven removes the clamps carefully, ensuring no damage occurs during this process. He then moves on to attaching four more pieces onto these main frames, completing two pairs of flanges for the bulkhead hatches.The Final Touches
While two flanges form the primary support structure around the hatches, Sven mentions there are two additional pieces required at each end to ensure comprehensive protection. This attention to detail highlights his commitment to producing a durable and reliable design. “Sailing is about finding your path, whether it’s across an ocean or within yourself.” – Sven Yrvind In conclusion, making flanges around bulkhead hatches may seem complex at first glance, but by following Sven Yrvind’s meticulous process, enthusiasts can achieve professional-level results. Remember that the journey of boatbuilding is as rewarding as reaching your destination; it tests one’s patience and dedication. For those seeking to embark on this adventure or simply gain more insight into marine craftsmanship, Sven’s wisdom is invaluable.Sven begins by explaining that working on flanges vertically and horizontally is significantly easier than doing so in a flat position. To simplify the process further, he divides the task into two or three steps as suggested by fellow expert “for for.” This approach not only makes it more manageable but also allows for greater precision in crafting each component.Step 2: Applying Glue and Securing
Sven proceeds to apply glue along one edge of the flange, ensuring a secure bond when clamped into place. He emphasizes that this stage is crucial for maintaining the structural integrity of the flange, which in turn safeguards the living area beneath the canvas when hatches are open.Step 3: Allowing Time to Dry
After securely attaching the first portion of the flange, Sven allows ample time for it to dry before moving forward with additional steps. This patience and precision are key aspects of his successful boatbuilding methods.Step 4: Finishing Touches
Once the flange is fully dried, Sven removes the clamps carefully, ensuring no damage occurs during this process. He then moves on to attaching four more pieces onto these main frames, completing two pairs of flanges for the bulkhead hatches.The Final Touches
While two flanges form the primary support structure around the hatches, Sven mentions there are two additional pieces required at each end to ensure comprehensive protection. This attention to detail highlights his commitment to producing a durable and reliable design. “Sailing is about finding your path, whether it’s across an ocean or within yourself.” – Sven Yrvind In conclusion, making flanges around bulkhead hatches may seem complex at first glance, but by following Sven Yrvind’s meticulous process, enthusiasts can achieve professional-level results. Remember that the journey of boatbuilding is as rewarding as reaching your destination; it tests one’s patience and dedication. For those seeking to embark on this adventure or simply gain more insight into marine craftsmanship, Sven’s wisdom is invaluable.Sven Yrvind, a renowned yacht designer and sailor, shares valuable insights on creating flanges around bulkhead hatches for canvas protection in this enlightening video. By following his expert guidance, boat enthusiasts can ensure their living areas remain secure while allowing unhindered access through the hatches.Step 1: Starting with the Flange
Sven begins by explaining that working on flanges vertically and horizontally is significantly easier than doing so in a flat position. To simplify the process further, he divides the task into two or three steps as suggested by fellow expert “for for.” This approach not only makes it more manageable but also allows for greater precision in crafting each component.Step 2: Applying Glue and Securing
Sven proceeds to apply glue along one edge of the flange, ensuring a secure bond when clamped into place. He emphasizes that this stage is crucial for maintaining the structural integrity of the flange, which in turn safeguards the living area beneath the canvas when hatches are open.Step 3: Allowing Time to Dry
After securely attaching the first portion of the flange, Sven allows ample time for it to dry before moving forward with additional steps. This patience and precision are key aspects of his successful boatbuilding methods.Step 4: Finishing Touches
Once the flange is fully dried, Sven removes the clamps carefully, ensuring no damage occurs during this process. He then moves on to attaching four more pieces onto these main frames, completing two pairs of flanges for the bulkhead hatches.The Final Touches
While two flanges form the primary support structure around the hatches, Sven mentions there are two additional pieces required at each end to ensure comprehensive protection. This attention to detail highlights his commitment to producing a durable and reliable design. “Sailing is about finding your path, whether it’s across an ocean or within yourself.” – Sven Yrvind In conclusion, making flanges around bulkhead hatches may seem complex at first glance, but by following Sven Yrvind’s meticulous process, enthusiasts can achieve professional-level results. Remember that the journey of boatbuilding is as rewarding as reaching your destination; it tests one’s patience and dedication. For those seeking to embark on this adventure or simply gain more insight into marine craftsmanship, Sven’s wisdom is invaluable.Making Flanges Around Bulkhead Hatches for Canvas
Sven Yrvind, a renowned yacht designer and sailor, shares valuable insights on creating flanges around bulkhead hatches for canvas protection in this enlightening video. By following his expert guidance, boat enthusiasts can ensure their living areas remain secure while allowing unhindered access through the hatches.Step 1: Starting with the Flange
Sven begins by explaining that working on flanges vertically and horizontally is significantly easier than doing so in a flat position. To simplify the process further, he divides the task into two or three steps as suggested by fellow expert “for for.” This approach not only makes it more manageable but also allows for greater precision in crafting each component.Step 2: Applying Glue and Securing
Sven proceeds to apply glue along one edge of the flange, ensuring a secure bond when clamped into place. He emphasizes that this stage is crucial for maintaining the structural integrity of the flange, which in turn safeguards the living area beneath the canvas when hatches are open.Step 3: Allowing Time to Dry
After securely attaching the first portion of the flange, Sven allows ample time for it to dry before moving forward with additional steps. This patience and precision are key aspects of his successful boatbuilding methods.Step 4: Finishing Touches
Once the flange is fully dried, Sven removes the clamps carefully, ensuring no damage occurs during this process. He then moves on to attaching four more pieces onto these main frames, completing two pairs of flanges for the bulkhead hatches.The Final Touches
While two flanges form the primary support structure around the hatches, Sven mentions there are two additional pieces required at each end to ensure comprehensive protection. This attention to detail highlights his commitment to producing a durable and reliable design. “Sailing is about finding your path, whether it’s across an ocean or within yourself.” – Sven Yrvind In conclusion, making flanges around bulkhead hatches may seem complex at first glance, but by following Sven Yrvind’s meticulous process, enthusiasts can achieve professional-level results. Remember that the journey of boatbuilding is as rewarding as reaching your destination; it tests one’s patience and dedication. For those seeking to embark on this adventure or simply gain more insight into marine craftsmanship, Sven’s wisdom is invaluable.Sven proceeds to apply glue along one edge of the flange, ensuring a secure bond when clamped into place. He emphasizes that this stage is crucial for maintaining the structural integrity of the flange, which in turn safeguards the living area beneath the canvas when hatches are open.Step 3: Allowing Time to Dry
After securely attaching the first portion of the flange, Sven allows ample time for it to dry before moving forward with additional steps. This patience and precision are key aspects of his successful boatbuilding methods.Step 4: Finishing Touches
Once the flange is fully dried, Sven removes the clamps carefully, ensuring no damage occurs during this process. He then moves on to attaching four more pieces onto these main frames, completing two pairs of flanges for the bulkhead hatches.The Final Touches
While two flanges form the primary support structure around the hatches, Sven mentions there are two additional pieces required at each end to ensure comprehensive protection. This attention to detail highlights his commitment to producing a durable and reliable design. “Sailing is about finding your path, whether it’s across an ocean or within yourself.” – Sven Yrvind In conclusion, making flanges around bulkhead hatches may seem complex at first glance, but by following Sven Yrvind’s meticulous process, enthusiasts can achieve professional-level results. Remember that the journey of boatbuilding is as rewarding as reaching your destination; it tests one’s patience and dedication. For those seeking to embark on this adventure or simply gain more insight into marine craftsmanship, Sven’s wisdom is invaluable.Sven begins by explaining that working on flanges vertically and horizontally is significantly easier than doing so in a flat position. To simplify the process further, he divides the task into two or three steps as suggested by fellow expert “for for.” This approach not only makes it more manageable but also allows for greater precision in crafting each component.Step 2: Applying Glue and Securing
Sven proceeds to apply glue along one edge of the flange, ensuring a secure bond when clamped into place. He emphasizes that this stage is crucial for maintaining the structural integrity of the flange, which in turn safeguards the living area beneath the canvas when hatches are open.Step 3: Allowing Time to Dry
After securely attaching the first portion of the flange, Sven allows ample time for it to dry before moving forward with additional steps. This patience and precision are key aspects of his successful boatbuilding methods.Step 4: Finishing Touches
Once the flange is fully dried, Sven removes the clamps carefully, ensuring no damage occurs during this process. He then moves on to attaching four more pieces onto these main frames, completing two pairs of flanges for the bulkhead hatches.The Final Touches
While two flanges form the primary support structure around the hatches, Sven mentions there are two additional pieces required at each end to ensure comprehensive protection. This attention to detail highlights his commitment to producing a durable and reliable design. “Sailing is about finding your path, whether it’s across an ocean or within yourself.” – Sven Yrvind In conclusion, making flanges around bulkhead hatches may seem complex at first glance, but by following Sven Yrvind’s meticulous process, enthusiasts can achieve professional-level results. Remember that the journey of boatbuilding is as rewarding as reaching your destination; it tests one’s patience and dedication. For those seeking to embark on this adventure or simply gain more insight into marine craftsmanship, Sven’s wisdom is invaluable.Sven Yrvind, a renowned yacht designer and sailor, shares valuable insights on creating flanges around bulkhead hatches for canvas protection in this enlightening video. By following his expert guidance, boat enthusiasts can ensure their living areas remain secure while allowing unhindered access through the hatches.Step 1: Starting with the Flange
Sven begins by explaining that working on flanges vertically and horizontally is significantly easier than doing so in a flat position. To simplify the process further, he divides the task into two or three steps as suggested by fellow expert “for for.” This approach not only makes it more manageable but also allows for greater precision in crafting each component.Step 2: Applying Glue and Securing
Sven proceeds to apply glue along one edge of the flange, ensuring a secure bond when clamped into place. He emphasizes that this stage is crucial for maintaining the structural integrity of the flange, which in turn safeguards the living area beneath the canvas when hatches are open.Step 3: Allowing Time to Dry
After securely attaching the first portion of the flange, Sven allows ample time for it to dry before moving forward with additional steps. This patience and precision are key aspects of his successful boatbuilding methods.Step 4: Finishing Touches
Once the flange is fully dried, Sven removes the clamps carefully, ensuring no damage occurs during this process. He then moves on to attaching four more pieces onto these main frames, completing two pairs of flanges for the bulkhead hatches.The Final Touches
While two flanges form the primary support structure around the hatches, Sven mentions there are two additional pieces required at each end to ensure comprehensive protection. This attention to detail highlights his commitment to producing a durable and reliable design. “Sailing is about finding your path, whether it’s across an ocean or within yourself.” – Sven Yrvind In conclusion, making flanges around bulkhead hatches may seem complex at first glance, but by following Sven Yrvind’s meticulous process, enthusiasts can achieve professional-level results. Remember that the journey of boatbuilding is as rewarding as reaching your destination; it tests one’s patience and dedication. For those seeking to embark on this adventure or simply gain more insight into marine craftsmanship, Sven’s wisdom is invaluable.Making Flanges Around Bulkhead Hatches for Canvas
Sven Yrvind, a renowned yacht designer and sailor, shares valuable insights on creating flanges around bulkhead hatches for canvas protection in this enlightening video. By following his expert guidance, boat enthusiasts can ensure their living areas remain secure while allowing unhindered access through the hatches.Step 1: Starting with the Flange
Sven begins by explaining that working on flanges vertically and horizontally is significantly easier than doing so in a flat position. To simplify the process further, he divides the task into two or three steps as suggested by fellow expert “for for.” This approach not only makes it more manageable but also allows for greater precision in crafting each component.Step 2: Applying Glue and Securing
Sven proceeds to apply glue along one edge of the flange, ensuring a secure bond when clamped into place. He emphasizes that this stage is crucial for maintaining the structural integrity of the flange, which in turn safeguards the living area beneath the canvas when hatches are open.Step 3: Allowing Time to Dry
After securely attaching the first portion of the flange, Sven allows ample time for it to dry before moving forward with additional steps. This patience and precision are key aspects of his successful boatbuilding methods.Step 4: Finishing Touches
Once the flange is fully dried, Sven removes the clamps carefully, ensuring no damage occurs during this process. He then moves on to attaching four more pieces onto these main frames, completing two pairs of flanges for the bulkhead hatches.The Final Touches
While two flanges form the primary support structure around the hatches, Sven mentions there are two additional pieces required at each end to ensure comprehensive protection. This attention to detail highlights his commitment to producing a durable and reliable design. “Sailing is about finding your path, whether it’s across an ocean or within yourself.” – Sven Yrvind In conclusion, making flanges around bulkhead hatches may seem complex at first glance, but by following Sven Yrvind’s meticulous process, enthusiasts can achieve professional-level results. Remember that the journey of boatbuilding is as rewarding as reaching your destination; it tests one’s patience and dedication. For those seeking to embark on this adventure or simply gain more insight into marine craftsmanship, Sven’s wisdom is invaluable.Once the flange is fully dried, Sven removes the clamps carefully, ensuring no damage occurs during this process. He then moves on to attaching four more pieces onto these main frames, completing two pairs of flanges for the bulkhead hatches.The Final Touches
While two flanges form the primary support structure around the hatches, Sven mentions there are two additional pieces required at each end to ensure comprehensive protection. This attention to detail highlights his commitment to producing a durable and reliable design. “Sailing is about finding your path, whether it’s across an ocean or within yourself.” – Sven Yrvind In conclusion, making flanges around bulkhead hatches may seem complex at first glance, but by following Sven Yrvind’s meticulous process, enthusiasts can achieve professional-level results. Remember that the journey of boatbuilding is as rewarding as reaching your destination; it tests one’s patience and dedication. For those seeking to embark on this adventure or simply gain more insight into marine craftsmanship, Sven’s wisdom is invaluable.Sven proceeds to apply glue along one edge of the flange, ensuring a secure bond when clamped into place. He emphasizes that this stage is crucial for maintaining the structural integrity of the flange, which in turn safeguards the living area beneath the canvas when hatches are open.Step 3: Allowing Time to Dry
After securely attaching the first portion of the flange, Sven allows ample time for it to dry before moving forward with additional steps. This patience and precision are key aspects of his successful boatbuilding methods.Step 4: Finishing Touches
Once the flange is fully dried, Sven removes the clamps carefully, ensuring no damage occurs during this process. He then moves on to attaching four more pieces onto these main frames, completing two pairs of flanges for the bulkhead hatches.The Final Touches
While two flanges form the primary support structure around the hatches, Sven mentions there are two additional pieces required at each end to ensure comprehensive protection. This attention to detail highlights his commitment to producing a durable and reliable design. “Sailing is about finding your path, whether it’s across an ocean or within yourself.” – Sven Yrvind In conclusion, making flanges around bulkhead hatches may seem complex at first glance, but by following Sven Yrvind’s meticulous process, enthusiasts can achieve professional-level results. Remember that the journey of boatbuilding is as rewarding as reaching your destination; it tests one’s patience and dedication. For those seeking to embark on this adventure or simply gain more insight into marine craftsmanship, Sven’s wisdom is invaluable.Sven begins by explaining that working on flanges vertically and horizontally is significantly easier than doing so in a flat position. To simplify the process further, he divides the task into two or three steps as suggested by fellow expert “for for.” This approach not only makes it more manageable but also allows for greater precision in crafting each component.Step 2: Applying Glue and Securing
Sven proceeds to apply glue along one edge of the flange, ensuring a secure bond when clamped into place. He emphasizes that this stage is crucial for maintaining the structural integrity of the flange, which in turn safeguards the living area beneath the canvas when hatches are open.Step 3: Allowing Time to Dry
After securely attaching the first portion of the flange, Sven allows ample time for it to dry before moving forward with additional steps. This patience and precision are key aspects of his successful boatbuilding methods.Step 4: Finishing Touches
Once the flange is fully dried, Sven removes the clamps carefully, ensuring no damage occurs during this process. He then moves on to attaching four more pieces onto these main frames, completing two pairs of flanges for the bulkhead hatches.The Final Touches
While two flanges form the primary support structure around the hatches, Sven mentions there are two additional pieces required at each end to ensure comprehensive protection. This attention to detail highlights his commitment to producing a durable and reliable design. “Sailing is about finding your path, whether it’s across an ocean or within yourself.” – Sven Yrvind In conclusion, making flanges around bulkhead hatches may seem complex at first glance, but by following Sven Yrvind’s meticulous process, enthusiasts can achieve professional-level results. Remember that the journey of boatbuilding is as rewarding as reaching your destination; it tests one’s patience and dedication. For those seeking to embark on this adventure or simply gain more insight into marine craftsmanship, Sven’s wisdom is invaluable.Sven Yrvind, a renowned yacht designer and sailor, shares valuable insights on creating flanges around bulkhead hatches for canvas protection in this enlightening video. By following his expert guidance, boat enthusiasts can ensure their living areas remain secure while allowing unhindered access through the hatches.Step 1: Starting with the Flange
Sven begins by explaining that working on flanges vertically and horizontally is significantly easier than doing so in a flat position. To simplify the process further, he divides the task into two or three steps as suggested by fellow expert “for for.” This approach not only makes it more manageable but also allows for greater precision in crafting each component.Step 2: Applying Glue and Securing
Sven proceeds to apply glue along one edge of the flange, ensuring a secure bond when clamped into place. He emphasizes that this stage is crucial for maintaining the structural integrity of the flange, which in turn safeguards the living area beneath the canvas when hatches are open.Step 3: Allowing Time to Dry
After securely attaching the first portion of the flange, Sven allows ample time for it to dry before moving forward with additional steps. This patience and precision are key aspects of his successful boatbuilding methods.Step 4: Finishing Touches
Once the flange is fully dried, Sven removes the clamps carefully, ensuring no damage occurs during this process. He then moves on to attaching four more pieces onto these main frames, completing two pairs of flanges for the bulkhead hatches.The Final Touches
While two flanges form the primary support structure around the hatches, Sven mentions there are two additional pieces required at each end to ensure comprehensive protection. This attention to detail highlights his commitment to producing a durable and reliable design. “Sailing is about finding your path, whether it’s across an ocean or within yourself.” – Sven Yrvind In conclusion, making flanges around bulkhead hatches may seem complex at first glance, but by following Sven Yrvind’s meticulous process, enthusiasts can achieve professional-level results. Remember that the journey of boatbuilding is as rewarding as reaching your destination; it tests one’s patience and dedication. For those seeking to embark on this adventure or simply gain more insight into marine craftsmanship, Sven’s wisdom is invaluable.Making Flanges Around Bulkhead Hatches for Canvas
Sven Yrvind, a renowned yacht designer and sailor, shares valuable insights on creating flanges around bulkhead hatches for canvas protection in this enlightening video. By following his expert guidance, boat enthusiasts can ensure their living areas remain secure while allowing unhindered access through the hatches.Step 1: Starting with the Flange
Sven begins by explaining that working on flanges vertically and horizontally is significantly easier than doing so in a flat position. To simplify the process further, he divides the task into two or three steps as suggested by fellow expert “for for.” This approach not only makes it more manageable but also allows for greater precision in crafting each component.Step 2: Applying Glue and Securing
Sven proceeds to apply glue along one edge of the flange, ensuring a secure bond when clamped into place. He emphasizes that this stage is crucial for maintaining the structural integrity of the flange, which in turn safeguards the living area beneath the canvas when hatches are open.Step 3: Allowing Time to Dry
After securely attaching the first portion of the flange, Sven allows ample time for it to dry before moving forward with additional steps. This patience and precision are key aspects of his successful boatbuilding methods.Step 4: Finishing Touches
Once the flange is fully dried, Sven removes the clamps carefully, ensuring no damage occurs during this process. He then moves on to attaching four more pieces onto these main frames, completing two pairs of flanges for the bulkhead hatches.The Final Touches
While two flanges form the primary support structure around the hatches, Sven mentions there are two additional pieces required at each end to ensure comprehensive protection. This attention to detail highlights his commitment to producing a durable and reliable design. “Sailing is about finding your path, whether it’s across an ocean or within yourself.” – Sven Yrvind In conclusion, making flanges around bulkhead hatches may seem complex at first glance, but by following Sven Yrvind’s meticulous process, enthusiasts can achieve professional-level results. Remember that the journey of boatbuilding is as rewarding as reaching your destination; it tests one’s patience and dedication. For those seeking to embark on this adventure or simply gain more insight into marine craftsmanship, Sven’s wisdom is invaluable.After securely attaching the first portion of the flange, Sven allows ample time for it to dry before moving forward with additional steps. This patience and precision are key aspects of his successful boatbuilding methods.Step 4: Finishing Touches
Once the flange is fully dried, Sven removes the clamps carefully, ensuring no damage occurs during this process. He then moves on to attaching four more pieces onto these main frames, completing two pairs of flanges for the bulkhead hatches.The Final Touches
While two flanges form the primary support structure around the hatches, Sven mentions there are two additional pieces required at each end to ensure comprehensive protection. This attention to detail highlights his commitment to producing a durable and reliable design. “Sailing is about finding your path, whether it’s across an ocean or within yourself.” – Sven Yrvind In conclusion, making flanges around bulkhead hatches may seem complex at first glance, but by following Sven Yrvind’s meticulous process, enthusiasts can achieve professional-level results. Remember that the journey of boatbuilding is as rewarding as reaching your destination; it tests one’s patience and dedication. For those seeking to embark on this adventure or simply gain more insight into marine craftsmanship, Sven’s wisdom is invaluable.Sven proceeds to apply glue along one edge of the flange, ensuring a secure bond when clamped into place. He emphasizes that this stage is crucial for maintaining the structural integrity of the flange, which in turn safeguards the living area beneath the canvas when hatches are open.Step 3: Allowing Time to Dry
After securely attaching the first portion of the flange, Sven allows ample time for it to dry before moving forward with additional steps. This patience and precision are key aspects of his successful boatbuilding methods.Step 4: Finishing Touches
Once the flange is fully dried, Sven removes the clamps carefully, ensuring no damage occurs during this process. He then moves on to attaching four more pieces onto these main frames, completing two pairs of flanges for the bulkhead hatches.The Final Touches
While two flanges form the primary support structure around the hatches, Sven mentions there are two additional pieces required at each end to ensure comprehensive protection. This attention to detail highlights his commitment to producing a durable and reliable design. “Sailing is about finding your path, whether it’s across an ocean or within yourself.” – Sven Yrvind In conclusion, making flanges around bulkhead hatches may seem complex at first glance, but by following Sven Yrvind’s meticulous process, enthusiasts can achieve professional-level results. Remember that the journey of boatbuilding is as rewarding as reaching your destination; it tests one’s patience and dedication. For those seeking to embark on this adventure or simply gain more insight into marine craftsmanship, Sven’s wisdom is invaluable.Sven begins by explaining that working on flanges vertically and horizontally is significantly easier than doing so in a flat position. To simplify the process further, he divides the task into two or three steps as suggested by fellow expert “for for.” This approach not only makes it more manageable but also allows for greater precision in crafting each component.Step 2: Applying Glue and Securing
Sven proceeds to apply glue along one edge of the flange, ensuring a secure bond when clamped into place. He emphasizes that this stage is crucial for maintaining the structural integrity of the flange, which in turn safeguards the living area beneath the canvas when hatches are open.Step 3: Allowing Time to Dry
After securely attaching the first portion of the flange, Sven allows ample time for it to dry before moving forward with additional steps. This patience and precision are key aspects of his successful boatbuilding methods.Step 4: Finishing Touches
Once the flange is fully dried, Sven removes the clamps carefully, ensuring no damage occurs during this process. He then moves on to attaching four more pieces onto these main frames, completing two pairs of flanges for the bulkhead hatches.The Final Touches
While two flanges form the primary support structure around the hatches, Sven mentions there are two additional pieces required at each end to ensure comprehensive protection. This attention to detail highlights his commitment to producing a durable and reliable design. “Sailing is about finding your path, whether it’s across an ocean or within yourself.” – Sven Yrvind In conclusion, making flanges around bulkhead hatches may seem complex at first glance, but by following Sven Yrvind’s meticulous process, enthusiasts can achieve professional-level results. Remember that the journey of boatbuilding is as rewarding as reaching your destination; it tests one’s patience and dedication. For those seeking to embark on this adventure or simply gain more insight into marine craftsmanship, Sven’s wisdom is invaluable.Sven Yrvind, a renowned yacht designer and sailor, shares valuable insights on creating flanges around bulkhead hatches for canvas protection in this enlightening video. By following his expert guidance, boat enthusiasts can ensure their living areas remain secure while allowing unhindered access through the hatches.Step 1: Starting with the Flange
Sven begins by explaining that working on flanges vertically and horizontally is significantly easier than doing so in a flat position. To simplify the process further, he divides the task into two or three steps as suggested by fellow expert “for for.” This approach not only makes it more manageable but also allows for greater precision in crafting each component.Step 2: Applying Glue and Securing
Sven proceeds to apply glue along one edge of the flange, ensuring a secure bond when clamped into place. He emphasizes that this stage is crucial for maintaining the structural integrity of the flange, which in turn safeguards the living area beneath the canvas when hatches are open.Step 3: Allowing Time to Dry
After securely attaching the first portion of the flange, Sven allows ample time for it to dry before moving forward with additional steps. This patience and precision are key aspects of his successful boatbuilding methods.Step 4: Finishing Touches
Once the flange is fully dried, Sven removes the clamps carefully, ensuring no damage occurs during this process. He then moves on to attaching four more pieces onto these main frames, completing two pairs of flanges for the bulkhead hatches.The Final Touches
While two flanges form the primary support structure around the hatches, Sven mentions there are two additional pieces required at each end to ensure comprehensive protection. This attention to detail highlights his commitment to producing a durable and reliable design. “Sailing is about finding your path, whether it’s across an ocean or within yourself.” – Sven Yrvind In conclusion, making flanges around bulkhead hatches may seem complex at first glance, but by following Sven Yrvind’s meticulous process, enthusiasts can achieve professional-level results. Remember that the journey of boatbuilding is as rewarding as reaching your destination; it tests one’s patience and dedication. For those seeking to embark on this adventure or simply gain more insight into marine craftsmanship, Sven’s wisdom is invaluable.Making Flanges Around Bulkhead Hatches for Canvas
Sven Yrvind, a renowned yacht designer and sailor, shares valuable insights on creating flanges around bulkhead hatches for canvas protection in this enlightening video. By following his expert guidance, boat enthusiasts can ensure their living areas remain secure while allowing unhindered access through the hatches.Step 1: Starting with the Flange
Sven begins by explaining that working on flanges vertically and horizontally is significantly easier than doing so in a flat position. To simplify the process further, he divides the task into two or three steps as suggested by fellow expert “for for.” This approach not only makes it more manageable but also allows for greater precision in crafting each component.Step 2: Applying Glue and Securing
Sven proceeds to apply glue along one edge of the flange, ensuring a secure bond when clamped into place. He emphasizes that this stage is crucial for maintaining the structural integrity of the flange, which in turn safeguards the living area beneath the canvas when hatches are open.Step 3: Allowing Time to Dry
After securely attaching the first portion of the flange, Sven allows ample time for it to dry before moving forward with additional steps. This patience and precision are key aspects of his successful boatbuilding methods.Step 4: Finishing Touches
Once the flange is fully dried, Sven removes the clamps carefully, ensuring no damage occurs during this process. He then moves on to attaching four more pieces onto these main frames, completing two pairs of flanges for the bulkhead hatches.The Final Touches
While two flanges form the primary support structure around the hatches, Sven mentions there are two additional pieces required at each end to ensure comprehensive protection. This attention to detail highlights his commitment to producing a durable and reliable design. “Sailing is about finding your path, whether it’s across an ocean or within yourself.” – Sven Yrvind In conclusion, making flanges around bulkhead hatches may seem complex at first glance, but by following Sven Yrvind’s meticulous process, enthusiasts can achieve professional-level results. Remember that the journey of boatbuilding is as rewarding as reaching your destination; it tests one’s patience and dedication. For those seeking to embark on this adventure or simply gain more insight into marine craftsmanship, Sven’s wisdom is invaluable.Once the flange is fully dried, Sven removes the clamps carefully, ensuring no damage occurs during this process. He then moves on to attaching four more pieces onto these main frames, completing two pairs of flanges for the bulkhead hatches.The Final Touches
While two flanges form the primary support structure around the hatches, Sven mentions there are two additional pieces required at each end to ensure comprehensive protection. This attention to detail highlights his commitment to producing a durable and reliable design. “Sailing is about finding your path, whether it’s across an ocean or within yourself.” – Sven Yrvind In conclusion, making flanges around bulkhead hatches may seem complex at first glance, but by following Sven Yrvind’s meticulous process, enthusiasts can achieve professional-level results. Remember that the journey of boatbuilding is as rewarding as reaching your destination; it tests one’s patience and dedication. For those seeking to embark on this adventure or simply gain more insight into marine craftsmanship, Sven’s wisdom is invaluable.After securely attaching the first portion of the flange, Sven allows ample time for it to dry before moving forward with additional steps. This patience and precision are key aspects of his successful boatbuilding methods.Step 4: Finishing Touches
Once the flange is fully dried, Sven removes the clamps carefully, ensuring no damage occurs during this process. He then moves on to attaching four more pieces onto these main frames, completing two pairs of flanges for the bulkhead hatches.The Final Touches
While two flanges form the primary support structure around the hatches, Sven mentions there are two additional pieces required at each end to ensure comprehensive protection. This attention to detail highlights his commitment to producing a durable and reliable design. “Sailing is about finding your path, whether it’s across an ocean or within yourself.” – Sven Yrvind In conclusion, making flanges around bulkhead hatches may seem complex at first glance, but by following Sven Yrvind’s meticulous process, enthusiasts can achieve professional-level results. Remember that the journey of boatbuilding is as rewarding as reaching your destination; it tests one’s patience and dedication. For those seeking to embark on this adventure or simply gain more insight into marine craftsmanship, Sven’s wisdom is invaluable.Sven proceeds to apply glue along one edge of the flange, ensuring a secure bond when clamped into place. He emphasizes that this stage is crucial for maintaining the structural integrity of the flange, which in turn safeguards the living area beneath the canvas when hatches are open.Step 3: Allowing Time to Dry
After securely attaching the first portion of the flange, Sven allows ample time for it to dry before moving forward with additional steps. This patience and precision are key aspects of his successful boatbuilding methods.Step 4: Finishing Touches
Once the flange is fully dried, Sven removes the clamps carefully, ensuring no damage occurs during this process. He then moves on to attaching four more pieces onto these main frames, completing two pairs of flanges for the bulkhead hatches.The Final Touches
While two flanges form the primary support structure around the hatches, Sven mentions there are two additional pieces required at each end to ensure comprehensive protection. This attention to detail highlights his commitment to producing a durable and reliable design. “Sailing is about finding your path, whether it’s across an ocean or within yourself.” – Sven Yrvind In conclusion, making flanges around bulkhead hatches may seem complex at first glance, but by following Sven Yrvind’s meticulous process, enthusiasts can achieve professional-level results. Remember that the journey of boatbuilding is as rewarding as reaching your destination; it tests one’s patience and dedication. For those seeking to embark on this adventure or simply gain more insight into marine craftsmanship, Sven’s wisdom is invaluable.Sven begins by explaining that working on flanges vertically and horizontally is significantly easier than doing so in a flat position. To simplify the process further, he divides the task into two or three steps as suggested by fellow expert “for for.” This approach not only makes it more manageable but also allows for greater precision in crafting each component.Step 2: Applying Glue and Securing
Sven proceeds to apply glue along one edge of the flange, ensuring a secure bond when clamped into place. He emphasizes that this stage is crucial for maintaining the structural integrity of the flange, which in turn safeguards the living area beneath the canvas when hatches are open.Step 3: Allowing Time to Dry
After securely attaching the first portion of the flange, Sven allows ample time for it to dry before moving forward with additional steps. This patience and precision are key aspects of his successful boatbuilding methods.Step 4: Finishing Touches
Once the flange is fully dried, Sven removes the clamps carefully, ensuring no damage occurs during this process. He then moves on to attaching four more pieces onto these main frames, completing two pairs of flanges for the bulkhead hatches.The Final Touches
While two flanges form the primary support structure around the hatches, Sven mentions there are two additional pieces required at each end to ensure comprehensive protection. This attention to detail highlights his commitment to producing a durable and reliable design. “Sailing is about finding your path, whether it’s across an ocean or within yourself.” – Sven Yrvind In conclusion, making flanges around bulkhead hatches may seem complex at first glance, but by following Sven Yrvind’s meticulous process, enthusiasts can achieve professional-level results. Remember that the journey of boatbuilding is as rewarding as reaching your destination; it tests one’s patience and dedication. For those seeking to embark on this adventure or simply gain more insight into marine craftsmanship, Sven’s wisdom is invaluable.Sven Yrvind, a renowned yacht designer and sailor, shares valuable insights on creating flanges around bulkhead hatches for canvas protection in this enlightening video. By following his expert guidance, boat enthusiasts can ensure their living areas remain secure while allowing unhindered access through the hatches.Step 1: Starting with the Flange
Sven begins by explaining that working on flanges vertically and horizontally is significantly easier than doing so in a flat position. To simplify the process further, he divides the task into two or three steps as suggested by fellow expert “for for.” This approach not only makes it more manageable but also allows for greater precision in crafting each component.Step 2: Applying Glue and Securing
Sven proceeds to apply glue along one edge of the flange, ensuring a secure bond when clamped into place. He emphasizes that this stage is crucial for maintaining the structural integrity of the flange, which in turn safeguards the living area beneath the canvas when hatches are open.Step 3: Allowing Time to Dry
After securely attaching the first portion of the flange, Sven allows ample time for it to dry before moving forward with additional steps. This patience and precision are key aspects of his successful boatbuilding methods.Step 4: Finishing Touches
Once the flange is fully dried, Sven removes the clamps carefully, ensuring no damage occurs during this process. He then moves on to attaching four more pieces onto these main frames, completing two pairs of flanges for the bulkhead hatches.The Final Touches
While two flanges form the primary support structure around the hatches, Sven mentions there are two additional pieces required at each end to ensure comprehensive protection. This attention to detail highlights his commitment to producing a durable and reliable design. “Sailing is about finding your path, whether it’s across an ocean or within yourself.” – Sven Yrvind In conclusion, making flanges around bulkhead hatches may seem complex at first glance, but by following Sven Yrvind’s meticulous process, enthusiasts can achieve professional-level results. Remember that the journey of boatbuilding is as rewarding as reaching your destination; it tests one’s patience and dedication. For those seeking to embark on this adventure or simply gain more insight into marine craftsmanship, Sven’s wisdom is invaluable.Making Flanges Around Bulkhead Hatches for Canvas
Sven Yrvind, a renowned yacht designer and sailor, shares valuable insights on creating flanges around bulkhead hatches for canvas protection in this enlightening video. By following his expert guidance, boat enthusiasts can ensure their living areas remain secure while allowing unhindered access through the hatches.Step 1: Starting with the Flange
Sven begins by explaining that working on flanges vertically and horizontally is significantly easier than doing so in a flat position. To simplify the process further, he divides the task into two or three steps as suggested by fellow expert “for for.” This approach not only makes it more manageable but also allows for greater precision in crafting each component.Step 2: Applying Glue and Securing
Sven proceeds to apply glue along one edge of the flange, ensuring a secure bond when clamped into place. He emphasizes that this stage is crucial for maintaining the structural integrity of the flange, which in turn safeguards the living area beneath the canvas when hatches are open.Step 3: Allowing Time to Dry
After securely attaching the first portion of the flange, Sven allows ample time for it to dry before moving forward with additional steps. This patience and precision are key aspects of his successful boatbuilding methods.Step 4: Finishing Touches
Once the flange is fully dried, Sven removes the clamps carefully, ensuring no damage occurs during this process. He then moves on to attaching four more pieces onto these main frames, completing two pairs of flanges for the bulkhead hatches.The Final Touches
While two flanges form the primary support structure around the hatches, Sven mentions there are two additional pieces required at each end to ensure comprehensive protection. This attention to detail highlights his commitment to producing a durable and reliable design. “Sailing is about finding your path, whether it’s across an ocean or within yourself.” – Sven Yrvind In conclusion, making flanges around bulkhead hatches may seem complex at first glance, but by following Sven Yrvind’s meticulous process, enthusiasts can achieve professional-level results. Remember that the journey of boatbuilding is as rewarding as reaching your destination; it tests one’s patience and dedication. For those seeking to embark on this adventure or simply gain more insight into marine craftsmanship, Sven’s wisdom is invaluable.Sven begins by explaining that working on flanges vertically and horizontally is significantly easier than doing so in a flat position. To simplify the process further, he divides the task into two or three steps as suggested by fellow expert “for for.” This approach not only makes it more manageable but also allows for greater precision in crafting each component.Step 2: Applying Glue and Securing
Sven proceeds to apply glue along one edge of the flange, ensuring a secure bond when clamped into place. He emphasizes that this stage is crucial for maintaining the structural integrity of the flange, which in turn safeguards the living area beneath the canvas when hatches are open.Step 3: Allowing Time to Dry
After securely attaching the first portion of the flange, Sven allows ample time for it to dry before moving forward with additional steps. This patience and precision are key aspects of his successful boatbuilding methods.Step 4: Finishing Touches
Once the flange is fully dried, Sven removes the clamps carefully, ensuring no damage occurs during this process. He then moves on to attaching four more pieces onto these main frames, completing two pairs of flanges for the bulkhead hatches.The Final Touches
While two flanges form the primary support structure around the hatches, Sven mentions there are two additional pieces required at each end to ensure comprehensive protection. This attention to detail highlights his commitment to producing a durable and reliable design. “Sailing is about finding your path, whether it’s across an ocean or within yourself.” – Sven Yrvind In conclusion, making flanges around bulkhead hatches may seem complex at first glance, but by following Sven Yrvind’s meticulous process, enthusiasts can achieve professional-level results. Remember that the journey of boatbuilding is as rewarding as reaching your destination; it tests one’s patience and dedication. For those seeking to embark on this adventure or simply gain more insight into marine craftsmanship, Sven’s wisdom is invaluable.Sven Yrvind, a renowned yacht designer and sailor, shares valuable insights on creating flanges around bulkhead hatches for canvas protection in this enlightening video. By following his expert guidance, boat enthusiasts can ensure their living areas remain secure while allowing unhindered access through the hatches.Step 1: Starting with the Flange
Sven begins by explaining that working on flanges vertically and horizontally is significantly easier than doing so in a flat position. To simplify the process further, he divides the task into two or three steps as suggested by fellow expert “for for.” This approach not only makes it more manageable but also allows for greater precision in crafting each component.Step 2: Applying Glue and Securing
Sven proceeds to apply glue along one edge of the flange, ensuring a secure bond when clamped into place. He emphasizes that this stage is crucial for maintaining the structural integrity of the flange, which in turn safeguards the living area beneath the canvas when hatches are open.Step 3: Allowing Time to Dry
After securely attaching the first portion of the flange, Sven allows ample time for it to dry before moving forward with additional steps. This patience and precision are key aspects of his successful boatbuilding methods.Step 4: Finishing Touches
Once the flange is fully dried, Sven removes the clamps carefully, ensuring no damage occurs during this process. He then moves on to attaching four more pieces onto these main frames, completing two pairs of flanges for the bulkhead hatches.The Final Touches
While two flanges form the primary support structure around the hatches, Sven mentions there are two additional pieces required at each end to ensure comprehensive protection. This attention to detail highlights his commitment to producing a durable and reliable design. “Sailing is about finding your path, whether it’s across an ocean or within yourself.” – Sven Yrvind In conclusion, making flanges around bulkhead hatches may seem complex at first glance, but by following Sven Yrvind’s meticulous process, enthusiasts can achieve professional-level results. Remember that the journey of boatbuilding is as rewarding as reaching your destination; it tests one’s patience and dedication. For those seeking to embark on this adventure or simply gain more insight into marine craftsmanship, Sven’s wisdom is invaluable.Making Flanges Around Bulkhead Hatches for Canvas
Sven Yrvind, a renowned yacht designer and sailor, shares valuable insights on creating flanges around bulkhead hatches for canvas protection in this enlightening video. By following his expert guidance, boat enthusiasts can ensure their living areas remain secure while allowing unhindered access through the hatches.Step 1: Starting with the Flange
Sven begins by explaining that working on flanges vertically and horizontally is significantly easier than doing so in a flat position. To simplify the process further, he divides the task into two or three steps as suggested by fellow expert “for for.” This approach not only makes it more manageable but also allows for greater precision in crafting each component.Step 2: Applying Glue and Securing
Sven proceeds to apply glue along one edge of the flange, ensuring a secure bond when clamped into place. He emphasizes that this stage is crucial for maintaining the structural integrity of the flange, which in turn safeguards the living area beneath the canvas when hatches are open.Step 3: Allowing Time to Dry
After securely attaching the first portion of the flange, Sven allows ample time for it to dry before moving forward with additional steps. This patience and precision are key aspects of his successful boatbuilding methods.Step 4: Finishing Touches
Once the flange is fully dried, Sven removes the clamps carefully, ensuring no damage occurs during this process. He then moves on to attaching four more pieces onto these main frames, completing two pairs of flanges for the bulkhead hatches.The Final Touches
While two flanges form the primary support structure around the hatches, Sven mentions there are two additional pieces required at each end to ensure comprehensive protection. This attention to detail highlights his commitment to producing a durable and reliable design. “Sailing is about finding your path, whether it’s across an ocean or within yourself.” – Sven Yrvind In conclusion, making flanges around bulkhead hatches may seem complex at first glance, but by following Sven Yrvind’s meticulous process, enthusiasts can achieve professional-level results. Remember that the journey of boatbuilding is as rewarding as reaching your destination; it tests one’s patience and dedication. For those seeking to embark on this adventure or simply gain more insight into marine craftsmanship, Sven’s wisdom is invaluable.Once the flange is fully dried, Sven removes the clamps carefully, ensuring no damage occurs during this process. He then moves on to attaching four more pieces onto these main frames, completing two pairs of flanges for the bulkhead hatches.The Final Touches
While two flanges form the primary support structure around the hatches, Sven mentions there are two additional pieces required at each end to ensure comprehensive protection. This attention to detail highlights his commitment to producing a durable and reliable design. “Sailing is about finding your path, whether it’s across an ocean or within yourself.” – Sven Yrvind In conclusion, making flanges around bulkhead hatches may seem complex at first glance, but by following Sven Yrvind’s meticulous process, enthusiasts can achieve professional-level results. Remember that the journey of boatbuilding is as rewarding as reaching your destination; it tests one’s patience and dedication. For those seeking to embark on this adventure or simply gain more insight into marine craftsmanship, Sven’s wisdom is invaluable.Sven Yrvind, a renowned yacht designer and sailor, shares valuable insights on creating flanges around bulkhead hatches for canvas protection in this enlightening video. By following his expert guidance, boat enthusiasts can ensure their living areas remain secure while allowing unhindered access through the hatches.Step 1: Starting with the Flange
Sven begins by explaining that working on flanges vertically and horizontally is significantly easier than doing so in a flat position. To simplify the process further, he divides the task into two or three steps as suggested by fellow expert “for for.” This approach not only makes it more manageable but also allows for greater precision in crafting each component.Step 2: Applying Glue and Securing
Sven proceeds to apply glue along one edge of the flange, ensuring a secure bond when clamped into place. He emphasizes that this stage is crucial for maintaining the structural integrity of the flange, which in turn safeguards the living area beneath the canvas when hatches are open.Step 3: Allowing Time to Dry
After securely attaching the first portion of the flange, Sven allows ample time for it to dry before moving forward with additional steps. This patience and precision are key aspects of his successful boatbuilding methods.Step 4: Finishing Touches
Once the flange is fully dried, Sven removes the clamps carefully, ensuring no damage occurs during this process. He then moves on to attaching four more pieces onto these main frames, completing two pairs of flanges for the bulkhead hatches.The Final Touches
While two flanges form the primary support structure around the hatches, Sven mentions there are two additional pieces required at each end to ensure comprehensive protection. This attention to detail highlights his commitment to producing a durable and reliable design. “Sailing is about finding your path, whether it’s across an ocean or within yourself.” – Sven Yrvind In conclusion, making flanges around bulkhead hatches may seem complex at first glance, but by following Sven Yrvind’s meticulous process, enthusiasts can achieve professional-level results. Remember that the journey of boatbuilding is as rewarding as reaching your destination; it tests one’s patience and dedication. For those seeking to embark on this adventure or simply gain more insight into marine craftsmanship, Sven’s wisdom is invaluable.Making Flanges Around Bulkhead Hatches for Canvas
Sven Yrvind, a renowned yacht designer and sailor, shares valuable insights on creating flanges around bulkhead hatches for canvas protection in this enlightening video. By following his expert guidance, boat enthusiasts can ensure their living areas remain secure while allowing unhindered access through the hatches.Step 1: Starting with the Flange
Sven begins by explaining that working on flanges vertically and horizontally is significantly easier than doing so in a flat position. To simplify the process further, he divides the task into two or three steps as suggested by fellow expert “for for.” This approach not only makes it more manageable but also allows for greater precision in crafting each component.Step 2: Applying Glue and Securing
Sven proceeds to apply glue along one edge of the flange, ensuring a secure bond when clamped into place. He emphasizes that this stage is crucial for maintaining the structural integrity of the flange, which in turn safeguards the living area beneath the canvas when hatches are open.Step 3: Allowing Time to Dry
After securely attaching the first portion of the flange, Sven allows ample time for it to dry before moving forward with additional steps. This patience and precision are key aspects of his successful boatbuilding methods.Step 4: Finishing Touches
Once the flange is fully dried, Sven removes the clamps carefully, ensuring no damage occurs during this process. He then moves on to attaching four more pieces onto these main frames, completing two pairs of flanges for the bulkhead hatches.The Final Touches
While two flanges form the primary support structure around the hatches, Sven mentions there are two additional pieces required at each end to ensure comprehensive protection. This attention to detail highlights his commitment to producing a durable and reliable design. “Sailing is about finding your path, whether it’s across an ocean or within yourself.” – Sven Yrvind In conclusion, making flanges around bulkhead hatches may seem complex at first glance, but by following Sven Yrvind’s meticulous process, enthusiasts can achieve professional-level results. Remember that the journey of boatbuilding is as rewarding as reaching your destination; it tests one’s patience and dedication. For those seeking to embark on this adventure or simply gain more insight into marine craftsmanship, Sven’s wisdom is invaluable.After securely attaching the first portion of the flange, Sven allows ample time for it to dry before moving forward with additional steps. This patience and precision are key aspects of his successful boatbuilding methods.Step 4: Finishing Touches
Once the flange is fully dried, Sven removes the clamps carefully, ensuring no damage occurs during this process. He then moves on to attaching four more pieces onto these main frames, completing two pairs of flanges for the bulkhead hatches.The Final Touches
While two flanges form the primary support structure around the hatches, Sven mentions there are two additional pieces required at each end to ensure comprehensive protection. This attention to detail highlights his commitment to producing a durable and reliable design. “Sailing is about finding your path, whether it’s across an ocean or within yourself.” – Sven Yrvind In conclusion, making flanges around bulkhead hatches may seem complex at first glance, but by following Sven Yrvind’s meticulous process, enthusiasts can achieve professional-level results. Remember that the journey of boatbuilding is as rewarding as reaching your destination; it tests one’s patience and dedication. For those seeking to embark on this adventure or simply gain more insight into marine craftsmanship, Sven’s wisdom is invaluable.Sven Yrvind, a renowned yacht designer and sailor, shares valuable insights on creating flanges around bulkhead hatches for canvas protection in this enlightening video. By following his expert guidance, boat enthusiasts can ensure their living areas remain secure while allowing unhindered access through the hatches.Step 1: Starting with the Flange
Sven begins by explaining that working on flanges vertically and horizontally is significantly easier than doing so in a flat position. To simplify the process further, he divides the task into two or three steps as suggested by fellow expert “for for.” This approach not only makes it more manageable but also allows for greater precision in crafting each component.Step 2: Applying Glue and Securing
Sven proceeds to apply glue along one edge of the flange, ensuring a secure bond when clamped into place. He emphasizes that this stage is crucial for maintaining the structural integrity of the flange, which in turn safeguards the living area beneath the canvas when hatches are open.Step 3: Allowing Time to Dry
After securely attaching the first portion of the flange, Sven allows ample time for it to dry before moving forward with additional steps. This patience and precision are key aspects of his successful boatbuilding methods.Step 4: Finishing Touches
Once the flange is fully dried, Sven removes the clamps carefully, ensuring no damage occurs during this process. He then moves on to attaching four more pieces onto these main frames, completing two pairs of flanges for the bulkhead hatches.The Final Touches
While two flanges form the primary support structure around the hatches, Sven mentions there are two additional pieces required at each end to ensure comprehensive protection. This attention to detail highlights his commitment to producing a durable and reliable design. “Sailing is about finding your path, whether it’s across an ocean or within yourself.” – Sven Yrvind In conclusion, making flanges around bulkhead hatches may seem complex at first glance, but by following Sven Yrvind’s meticulous process, enthusiasts can achieve professional-level results. Remember that the journey of boatbuilding is as rewarding as reaching your destination; it tests one’s patience and dedication. For those seeking to embark on this adventure or simply gain more insight into marine craftsmanship, Sven’s wisdom is invaluable.Making Flanges Around Bulkhead Hatches for Canvas
Sven Yrvind, a renowned yacht designer and sailor, shares valuable insights on creating flanges around bulkhead hatches for canvas protection in this enlightening video. By following his expert guidance, boat enthusiasts can ensure their living areas remain secure while allowing unhindered access through the hatches.Step 1: Starting with the Flange
Sven begins by explaining that working on flanges vertically and horizontally is significantly easier than doing so in a flat position. To simplify the process further, he divides the task into two or three steps as suggested by fellow expert “for for.” This approach not only makes it more manageable but also allows for greater precision in crafting each component.Step 2: Applying Glue and Securing
Sven proceeds to apply glue along one edge of the flange, ensuring a secure bond when clamped into place. He emphasizes that this stage is crucial for maintaining the structural integrity of the flange, which in turn safeguards the living area beneath the canvas when hatches are open.Step 3: Allowing Time to Dry
After securely attaching the first portion of the flange, Sven allows ample time for it to dry before moving forward with additional steps. This patience and precision are key aspects of his successful boatbuilding methods.Step 4: Finishing Touches
Once the flange is fully dried, Sven removes the clamps carefully, ensuring no damage occurs during this process. He then moves on to attaching four more pieces onto these main frames, completing two pairs of flanges for the bulkhead hatches.The Final Touches
While two flanges form the primary support structure around the hatches, Sven mentions there are two additional pieces required at each end to ensure comprehensive protection. This attention to detail highlights his commitment to producing a durable and reliable design. “Sailing is about finding your path, whether it’s across an ocean or within yourself.” – Sven Yrvind In conclusion, making flanges around bulkhead hatches may seem complex at first glance, but by following Sven Yrvind’s meticulous process, enthusiasts can achieve professional-level results. Remember that the journey of boatbuilding is as rewarding as reaching your destination; it tests one’s patience and dedication. For those seeking to embark on this adventure or simply gain more insight into marine craftsmanship, Sven’s wisdom is invaluable.Sven proceeds to apply glue along one edge of the flange, ensuring a secure bond when clamped into place. He emphasizes that this stage is crucial for maintaining the structural integrity of the flange, which in turn safeguards the living area beneath the canvas when hatches are open.Step 3: Allowing Time to Dry
After securely attaching the first portion of the flange, Sven allows ample time for it to dry before moving forward with additional steps. This patience and precision are key aspects of his successful boatbuilding methods.Step 4: Finishing Touches
Once the flange is fully dried, Sven removes the clamps carefully, ensuring no damage occurs during this process. He then moves on to attaching four more pieces onto these main frames, completing two pairs of flanges for the bulkhead hatches.The Final Touches
While two flanges form the primary support structure around the hatches, Sven mentions there are two additional pieces required at each end to ensure comprehensive protection. This attention to detail highlights his commitment to producing a durable and reliable design. “Sailing is about finding your path, whether it’s across an ocean or within yourself.” – Sven Yrvind In conclusion, making flanges around bulkhead hatches may seem complex at first glance, but by following Sven Yrvind’s meticulous process, enthusiasts can achieve professional-level results. Remember that the journey of boatbuilding is as rewarding as reaching your destination; it tests one’s patience and dedication. For those seeking to embark on this adventure or simply gain more insight into marine craftsmanship, Sven’s wisdom is invaluable.Sven Yrvind, a renowned yacht designer and sailor, shares valuable insights on creating flanges around bulkhead hatches for canvas protection in this enlightening video. By following his expert guidance, boat enthusiasts can ensure their living areas remain secure while allowing unhindered access through the hatches.Step 1: Starting with the Flange
Sven begins by explaining that working on flanges vertically and horizontally is significantly easier than doing so in a flat position. To simplify the process further, he divides the task into two or three steps as suggested by fellow expert “for for.” This approach not only makes it more manageable but also allows for greater precision in crafting each component.Step 2: Applying Glue and Securing
Sven proceeds to apply glue along one edge of the flange, ensuring a secure bond when clamped into place. He emphasizes that this stage is crucial for maintaining the structural integrity of the flange, which in turn safeguards the living area beneath the canvas when hatches are open.Step 3: Allowing Time to Dry
After securely attaching the first portion of the flange, Sven allows ample time for it to dry before moving forward with additional steps. This patience and precision are key aspects of his successful boatbuilding methods.Step 4: Finishing Touches
Once the flange is fully dried, Sven removes the clamps carefully, ensuring no damage occurs during this process. He then moves on to attaching four more pieces onto these main frames, completing two pairs of flanges for the bulkhead hatches.The Final Touches
While two flanges form the primary support structure around the hatches, Sven mentions there are two additional pieces required at each end to ensure comprehensive protection. This attention to detail highlights his commitment to producing a durable and reliable design. “Sailing is about finding your path, whether it’s across an ocean or within yourself.” – Sven Yrvind In conclusion, making flanges around bulkhead hatches may seem complex at first glance, but by following Sven Yrvind’s meticulous process, enthusiasts can achieve professional-level results. Remember that the journey of boatbuilding is as rewarding as reaching your destination; it tests one’s patience and dedication. For those seeking to embark on this adventure or simply gain more insight into marine craftsmanship, Sven’s wisdom is invaluable.Making Flanges Around Bulkhead Hatches for Canvas
Sven Yrvind, a renowned yacht designer and sailor, shares valuable insights on creating flanges around bulkhead hatches for canvas protection in this enlightening video. By following his expert guidance, boat enthusiasts can ensure their living areas remain secure while allowing unhindered access through the hatches.Step 1: Starting with the Flange
Sven begins by explaining that working on flanges vertically and horizontally is significantly easier than doing so in a flat position. To simplify the process further, he divides the task into two or three steps as suggested by fellow expert “for for.” This approach not only makes it more manageable but also allows for greater precision in crafting each component.Step 2: Applying Glue and Securing
Sven proceeds to apply glue along one edge of the flange, ensuring a secure bond when clamped into place. He emphasizes that this stage is crucial for maintaining the structural integrity of the flange, which in turn safeguards the living area beneath the canvas when hatches are open.Step 3: Allowing Time to Dry
After securely attaching the first portion of the flange, Sven allows ample time for it to dry before moving forward with additional steps. This patience and precision are key aspects of his successful boatbuilding methods.Step 4: Finishing Touches
Once the flange is fully dried, Sven removes the clamps carefully, ensuring no damage occurs during this process. He then moves on to attaching four more pieces onto these main frames, completing two pairs of flanges for the bulkhead hatches.The Final Touches
While two flanges form the primary support structure around the hatches, Sven mentions there are two additional pieces required at each end to ensure comprehensive protection. This attention to detail highlights his commitment to producing a durable and reliable design. “Sailing is about finding your path, whether it’s across an ocean or within yourself.” – Sven Yrvind In conclusion, making flanges around bulkhead hatches may seem complex at first glance, but by following Sven Yrvind’s meticulous process, enthusiasts can achieve professional-level results. Remember that the journey of boatbuilding is as rewarding as reaching your destination; it tests one’s patience and dedication. For those seeking to embark on this adventure or simply gain more insight into marine craftsmanship, Sven’s wisdom is invaluable.Sven begins by explaining that working on flanges vertically and horizontally is significantly easier than doing so in a flat position. To simplify the process further, he divides the task into two or three steps as suggested by fellow expert “for for.” This approach not only makes it more manageable but also allows for greater precision in crafting each component.Step 2: Applying Glue and Securing
Sven proceeds to apply glue along one edge of the flange, ensuring a secure bond when clamped into place. He emphasizes that this stage is crucial for maintaining the structural integrity of the flange, which in turn safeguards the living area beneath the canvas when hatches are open.Step 3: Allowing Time to Dry
After securely attaching the first portion of the flange, Sven allows ample time for it to dry before moving forward with additional steps. This patience and precision are key aspects of his successful boatbuilding methods.Step 4: Finishing Touches
Once the flange is fully dried, Sven removes the clamps carefully, ensuring no damage occurs during this process. He then moves on to attaching four more pieces onto these main frames, completing two pairs of flanges for the bulkhead hatches.The Final Touches
While two flanges form the primary support structure around the hatches, Sven mentions there are two additional pieces required at each end to ensure comprehensive protection. This attention to detail highlights his commitment to producing a durable and reliable design. “Sailing is about finding your path, whether it’s across an ocean or within yourself.” – Sven Yrvind In conclusion, making flanges around bulkhead hatches may seem complex at first glance, but by following Sven Yrvind’s meticulous process, enthusiasts can achieve professional-level results. Remember that the journey of boatbuilding is as rewarding as reaching your destination; it tests one’s patience and dedication. For those seeking to embark on this adventure or simply gain more insight into marine craftsmanship, Sven’s wisdom is invaluable.Sven Yrvind, a renowned yacht designer and sailor, shares valuable insights on creating flanges around bulkhead hatches for canvas protection in this enlightening video. By following his expert guidance, boat enthusiasts can ensure their living areas remain secure while allowing unhindered access through the hatches.Step 1: Starting with the Flange
Sven begins by explaining that working on flanges vertically and horizontally is significantly easier than doing so in a flat position. To simplify the process further, he divides the task into two or three steps as suggested by fellow expert “for for.” This approach not only makes it more manageable but also allows for greater precision in crafting each component.Step 2: Applying Glue and Securing
Sven proceeds to apply glue along one edge of the flange, ensuring a secure bond when clamped into place. He emphasizes that this stage is crucial for maintaining the structural integrity of the flange, which in turn safeguards the living area beneath the canvas when hatches are open.Step 3: Allowing Time to Dry
After securely attaching the first portion of the flange, Sven allows ample time for it to dry before moving forward with additional steps. This patience and precision are key aspects of his successful boatbuilding methods.Step 4: Finishing Touches
Once the flange is fully dried, Sven removes the clamps carefully, ensuring no damage occurs during this process. He then moves on to attaching four more pieces onto these main frames, completing two pairs of flanges for the bulkhead hatches.The Final Touches
While two flanges form the primary support structure around the hatches, Sven mentions there are two additional pieces required at each end to ensure comprehensive protection. This attention to detail highlights his commitment to producing a durable and reliable design. “Sailing is about finding your path, whether it’s across an ocean or within yourself.” – Sven Yrvind In conclusion, making flanges around bulkhead hatches may seem complex at first glance, but by following Sven Yrvind’s meticulous process, enthusiasts can achieve professional-level results. Remember that the journey of boatbuilding is as rewarding as reaching your destination; it tests one’s patience and dedication. For those seeking to embark on this adventure or simply gain more insight into marine craftsmanship, Sven’s wisdom is invaluable.Making Flanges Around Bulkhead Hatches for Canvas
Sven Yrvind, a renowned yacht designer and sailor, shares valuable insights on creating flanges around bulkhead hatches for canvas protection in this enlightening video. By following his expert guidance, boat enthusiasts can ensure their living areas remain secure while allowing unhindered access through the hatches.Step 1: Starting with the Flange
Sven begins by explaining that working on flanges vertically and horizontally is significantly easier than doing so in a flat position. To simplify the process further, he divides the task into two or three steps as suggested by fellow expert “for for.” This approach not only makes it more manageable but also allows for greater precision in crafting each component.Step 2: Applying Glue and Securing
Sven proceeds to apply glue along one edge of the flange, ensuring a secure bond when clamped into place. He emphasizes that this stage is crucial for maintaining the structural integrity of the flange, which in turn safeguards the living area beneath the canvas when hatches are open.Step 3: Allowing Time to Dry
After securely attaching the first portion of the flange, Sven allows ample time for it to dry before moving forward with additional steps. This patience and precision are key aspects of his successful boatbuilding methods.Step 4: Finishing Touches
Once the flange is fully dried, Sven removes the clamps carefully, ensuring no damage occurs during this process. He then moves on to attaching four more pieces onto these main frames, completing two pairs of flanges for the bulkhead hatches.The Final Touches
While two flanges form the primary support structure around the hatches, Sven mentions there are two additional pieces required at each end to ensure comprehensive protection. This attention to detail highlights his commitment to producing a durable and reliable design. “Sailing is about finding your path, whether it’s across an ocean or within yourself.” – Sven Yrvind In conclusion, making flanges around bulkhead hatches may seem complex at first glance, but by following Sven Yrvind’s meticulous process, enthusiasts can achieve professional-level results. Remember that the journey of boatbuilding is as rewarding as reaching your destination; it tests one’s patience and dedication. For those seeking to embark on this adventure or simply gain more insight into marine craftsmanship, Sven’s wisdom is invaluable.Once the flange is fully dried, Sven removes the clamps carefully, ensuring no damage occurs during this process. He then moves on to attaching four more pieces onto these main frames, completing two pairs of flanges for the bulkhead hatches.The Final Touches
While two flanges form the primary support structure around the hatches, Sven mentions there are two additional pieces required at each end to ensure comprehensive protection. This attention to detail highlights his commitment to producing a durable and reliable design. “Sailing is about finding your path, whether it’s across an ocean or within yourself.” – Sven Yrvind In conclusion, making flanges around bulkhead hatches may seem complex at first glance, but by following Sven Yrvind’s meticulous process, enthusiasts can achieve professional-level results. Remember that the journey of boatbuilding is as rewarding as reaching your destination; it tests one’s patience and dedication. For those seeking to embark on this adventure or simply gain more insight into marine craftsmanship, Sven’s wisdom is invaluable.Sven begins by explaining that working on flanges vertically and horizontally is significantly easier than doing so in a flat position. To simplify the process further, he divides the task into two or three steps as suggested by fellow expert “for for.” This approach not only makes it more manageable but also allows for greater precision in crafting each component.Step 2: Applying Glue and Securing
Sven proceeds to apply glue along one edge of the flange, ensuring a secure bond when clamped into place. He emphasizes that this stage is crucial for maintaining the structural integrity of the flange, which in turn safeguards the living area beneath the canvas when hatches are open.Step 3: Allowing Time to Dry
After securely attaching the first portion of the flange, Sven allows ample time for it to dry before moving forward with additional steps. This patience and precision are key aspects of his successful boatbuilding methods.Step 4: Finishing Touches
Once the flange is fully dried, Sven removes the clamps carefully, ensuring no damage occurs during this process. He then moves on to attaching four more pieces onto these main frames, completing two pairs of flanges for the bulkhead hatches.The Final Touches
While two flanges form the primary support structure around the hatches, Sven mentions there are two additional pieces required at each end to ensure comprehensive protection. This attention to detail highlights his commitment to producing a durable and reliable design. “Sailing is about finding your path, whether it’s across an ocean or within yourself.” – Sven Yrvind In conclusion, making flanges around bulkhead hatches may seem complex at first glance, but by following Sven Yrvind’s meticulous process, enthusiasts can achieve professional-level results. Remember that the journey of boatbuilding is as rewarding as reaching your destination; it tests one’s patience and dedication. For those seeking to embark on this adventure or simply gain more insight into marine craftsmanship, Sven’s wisdom is invaluable.Sven Yrvind, a renowned yacht designer and sailor, shares valuable insights on creating flanges around bulkhead hatches for canvas protection in this enlightening video. By following his expert guidance, boat enthusiasts can ensure their living areas remain secure while allowing unhindered access through the hatches.Step 1: Starting with the Flange
Sven begins by explaining that working on flanges vertically and horizontally is significantly easier than doing so in a flat position. To simplify the process further, he divides the task into two or three steps as suggested by fellow expert “for for.” This approach not only makes it more manageable but also allows for greater precision in crafting each component.Step 2: Applying Glue and Securing
Sven proceeds to apply glue along one edge of the flange, ensuring a secure bond when clamped into place. He emphasizes that this stage is crucial for maintaining the structural integrity of the flange, which in turn safeguards the living area beneath the canvas when hatches are open.Step 3: Allowing Time to Dry
After securely attaching the first portion of the flange, Sven allows ample time for it to dry before moving forward with additional steps. This patience and precision are key aspects of his successful boatbuilding methods.Step 4: Finishing Touches
Once the flange is fully dried, Sven removes the clamps carefully, ensuring no damage occurs during this process. He then moves on to attaching four more pieces onto these main frames, completing two pairs of flanges for the bulkhead hatches.The Final Touches
While two flanges form the primary support structure around the hatches, Sven mentions there are two additional pieces required at each end to ensure comprehensive protection. This attention to detail highlights his commitment to producing a durable and reliable design. “Sailing is about finding your path, whether it’s across an ocean or within yourself.” – Sven Yrvind In conclusion, making flanges around bulkhead hatches may seem complex at first glance, but by following Sven Yrvind’s meticulous process, enthusiasts can achieve professional-level results. Remember that the journey of boatbuilding is as rewarding as reaching your destination; it tests one’s patience and dedication. For those seeking to embark on this adventure or simply gain more insight into marine craftsmanship, Sven’s wisdom is invaluable.Making Flanges Around Bulkhead Hatches for Canvas
Sven Yrvind, a renowned yacht designer and sailor, shares valuable insights on creating flanges around bulkhead hatches for canvas protection in this enlightening video. By following his expert guidance, boat enthusiasts can ensure their living areas remain secure while allowing unhindered access through the hatches.Step 1: Starting with the Flange
Sven begins by explaining that working on flanges vertically and horizontally is significantly easier than doing so in a flat position. To simplify the process further, he divides the task into two or three steps as suggested by fellow expert “for for.” This approach not only makes it more manageable but also allows for greater precision in crafting each component.Step 2: Applying Glue and Securing
Sven proceeds to apply glue along one edge of the flange, ensuring a secure bond when clamped into place. He emphasizes that this stage is crucial for maintaining the structural integrity of the flange, which in turn safeguards the living area beneath the canvas when hatches are open.Step 3: Allowing Time to Dry
After securely attaching the first portion of the flange, Sven allows ample time for it to dry before moving forward with additional steps. This patience and precision are key aspects of his successful boatbuilding methods.Step 4: Finishing Touches
Once the flange is fully dried, Sven removes the clamps carefully, ensuring no damage occurs during this process. He then moves on to attaching four more pieces onto these main frames, completing two pairs of flanges for the bulkhead hatches.The Final Touches
While two flanges form the primary support structure around the hatches, Sven mentions there are two additional pieces required at each end to ensure comprehensive protection. This attention to detail highlights his commitment to producing a durable and reliable design. “Sailing is about finding your path, whether it’s across an ocean or within yourself.” – Sven Yrvind In conclusion, making flanges around bulkhead hatches may seem complex at first glance, but by following Sven Yrvind’s meticulous process, enthusiasts can achieve professional-level results. Remember that the journey of boatbuilding is as rewarding as reaching your destination; it tests one’s patience and dedication. For those seeking to embark on this adventure or simply gain more insight into marine craftsmanship, Sven’s wisdom is invaluable.After securely attaching the first portion of the flange, Sven allows ample time for it to dry before moving forward with additional steps. This patience and precision are key aspects of his successful boatbuilding methods.Step 4: Finishing Touches
Once the flange is fully dried, Sven removes the clamps carefully, ensuring no damage occurs during this process. He then moves on to attaching four more pieces onto these main frames, completing two pairs of flanges for the bulkhead hatches.The Final Touches
While two flanges form the primary support structure around the hatches, Sven mentions there are two additional pieces required at each end to ensure comprehensive protection. This attention to detail highlights his commitment to producing a durable and reliable design. “Sailing is about finding your path, whether it’s across an ocean or within yourself.” – Sven Yrvind In conclusion, making flanges around bulkhead hatches may seem complex at first glance, but by following Sven Yrvind’s meticulous process, enthusiasts can achieve professional-level results. Remember that the journey of boatbuilding is as rewarding as reaching your destination; it tests one’s patience and dedication. For those seeking to embark on this adventure or simply gain more insight into marine craftsmanship, Sven’s wisdom is invaluable.Sven begins by explaining that working on flanges vertically and horizontally is significantly easier than doing so in a flat position. To simplify the process further, he divides the task into two or three steps as suggested by fellow expert “for for.” This approach not only makes it more manageable but also allows for greater precision in crafting each component.Step 2: Applying Glue and Securing
Sven proceeds to apply glue along one edge of the flange, ensuring a secure bond when clamped into place. He emphasizes that this stage is crucial for maintaining the structural integrity of the flange, which in turn safeguards the living area beneath the canvas when hatches are open.Step 3: Allowing Time to Dry
After securely attaching the first portion of the flange, Sven allows ample time for it to dry before moving forward with additional steps. This patience and precision are key aspects of his successful boatbuilding methods.Step 4: Finishing Touches
Once the flange is fully dried, Sven removes the clamps carefully, ensuring no damage occurs during this process. He then moves on to attaching four more pieces onto these main frames, completing two pairs of flanges for the bulkhead hatches.The Final Touches
While two flanges form the primary support structure around the hatches, Sven mentions there are two additional pieces required at each end to ensure comprehensive protection. This attention to detail highlights his commitment to producing a durable and reliable design. “Sailing is about finding your path, whether it’s across an ocean or within yourself.” – Sven Yrvind In conclusion, making flanges around bulkhead hatches may seem complex at first glance, but by following Sven Yrvind’s meticulous process, enthusiasts can achieve professional-level results. Remember that the journey of boatbuilding is as rewarding as reaching your destination; it tests one’s patience and dedication. For those seeking to embark on this adventure or simply gain more insight into marine craftsmanship, Sven’s wisdom is invaluable.Sven Yrvind, a renowned yacht designer and sailor, shares valuable insights on creating flanges around bulkhead hatches for canvas protection in this enlightening video. By following his expert guidance, boat enthusiasts can ensure their living areas remain secure while allowing unhindered access through the hatches.Step 1: Starting with the Flange
Sven begins by explaining that working on flanges vertically and horizontally is significantly easier than doing so in a flat position. To simplify the process further, he divides the task into two or three steps as suggested by fellow expert “for for.” This approach not only makes it more manageable but also allows for greater precision in crafting each component.Step 2: Applying Glue and Securing
Sven proceeds to apply glue along one edge of the flange, ensuring a secure bond when clamped into place. He emphasizes that this stage is crucial for maintaining the structural integrity of the flange, which in turn safeguards the living area beneath the canvas when hatches are open.Step 3: Allowing Time to Dry
After securely attaching the first portion of the flange, Sven allows ample time for it to dry before moving forward with additional steps. This patience and precision are key aspects of his successful boatbuilding methods.Step 4: Finishing Touches
Once the flange is fully dried, Sven removes the clamps carefully, ensuring no damage occurs during this process. He then moves on to attaching four more pieces onto these main frames, completing two pairs of flanges for the bulkhead hatches.The Final Touches
While two flanges form the primary support structure around the hatches, Sven mentions there are two additional pieces required at each end to ensure comprehensive protection. This attention to detail highlights his commitment to producing a durable and reliable design. “Sailing is about finding your path, whether it’s across an ocean or within yourself.” – Sven Yrvind In conclusion, making flanges around bulkhead hatches may seem complex at first glance, but by following Sven Yrvind’s meticulous process, enthusiasts can achieve professional-level results. Remember that the journey of boatbuilding is as rewarding as reaching your destination; it tests one’s patience and dedication. For those seeking to embark on this adventure or simply gain more insight into marine craftsmanship, Sven’s wisdom is invaluable.Making Flanges Around Bulkhead Hatches for Canvas
Sven Yrvind, a renowned yacht designer and sailor, shares valuable insights on creating flanges around bulkhead hatches for canvas protection in this enlightening video. By following his expert guidance, boat enthusiasts can ensure their living areas remain secure while allowing unhindered access through the hatches.Step 1: Starting with the Flange
Sven begins by explaining that working on flanges vertically and horizontally is significantly easier than doing so in a flat position. To simplify the process further, he divides the task into two or three steps as suggested by fellow expert “for for.” This approach not only makes it more manageable but also allows for greater precision in crafting each component.Step 2: Applying Glue and Securing
Sven proceeds to apply glue along one edge of the flange, ensuring a secure bond when clamped into place. He emphasizes that this stage is crucial for maintaining the structural integrity of the flange, which in turn safeguards the living area beneath the canvas when hatches are open.Step 3: Allowing Time to Dry
After securely attaching the first portion of the flange, Sven allows ample time for it to dry before moving forward with additional steps. This patience and precision are key aspects of his successful boatbuilding methods.Step 4: Finishing Touches
Once the flange is fully dried, Sven removes the clamps carefully, ensuring no damage occurs during this process. He then moves on to attaching four more pieces onto these main frames, completing two pairs of flanges for the bulkhead hatches.The Final Touches
While two flanges form the primary support structure around the hatches, Sven mentions there are two additional pieces required at each end to ensure comprehensive protection. This attention to detail highlights his commitment to producing a durable and reliable design. “Sailing is about finding your path, whether it’s across an ocean or within yourself.” – Sven Yrvind In conclusion, making flanges around bulkhead hatches may seem complex at first glance, but by following Sven Yrvind’s meticulous process, enthusiasts can achieve professional-level results. Remember that the journey of boatbuilding is as rewarding as reaching your destination; it tests one’s patience and dedication. For those seeking to embark on this adventure or simply gain more insight into marine craftsmanship, Sven’s wisdom is invaluable.Sven proceeds to apply glue along one edge of the flange, ensuring a secure bond when clamped into place. He emphasizes that this stage is crucial for maintaining the structural integrity of the flange, which in turn safeguards the living area beneath the canvas when hatches are open.Step 3: Allowing Time to Dry
After securely attaching the first portion of the flange, Sven allows ample time for it to dry before moving forward with additional steps. This patience and precision are key aspects of his successful boatbuilding methods.Step 4: Finishing Touches
Once the flange is fully dried, Sven removes the clamps carefully, ensuring no damage occurs during this process. He then moves on to attaching four more pieces onto these main frames, completing two pairs of flanges for the bulkhead hatches.The Final Touches
While two flanges form the primary support structure around the hatches, Sven mentions there are two additional pieces required at each end to ensure comprehensive protection. This attention to detail highlights his commitment to producing a durable and reliable design. “Sailing is about finding your path, whether it’s across an ocean or within yourself.” – Sven Yrvind In conclusion, making flanges around bulkhead hatches may seem complex at first glance, but by following Sven Yrvind’s meticulous process, enthusiasts can achieve professional-level results. Remember that the journey of boatbuilding is as rewarding as reaching your destination; it tests one’s patience and dedication. For those seeking to embark on this adventure or simply gain more insight into marine craftsmanship, Sven’s wisdom is invaluable.Sven begins by explaining that working on flanges vertically and horizontally is significantly easier than doing so in a flat position. To simplify the process further, he divides the task into two or three steps as suggested by fellow expert “for for.” This approach not only makes it more manageable but also allows for greater precision in crafting each component.Step 2: Applying Glue and Securing
Sven proceeds to apply glue along one edge of the flange, ensuring a secure bond when clamped into place. He emphasizes that this stage is crucial for maintaining the structural integrity of the flange, which in turn safeguards the living area beneath the canvas when hatches are open.Step 3: Allowing Time to Dry
After securely attaching the first portion of the flange, Sven allows ample time for it to dry before moving forward with additional steps. This patience and precision are key aspects of his successful boatbuilding methods.Step 4: Finishing Touches
Once the flange is fully dried, Sven removes the clamps carefully, ensuring no damage occurs during this process. He then moves on to attaching four more pieces onto these main frames, completing two pairs of flanges for the bulkhead hatches.The Final Touches
While two flanges form the primary support structure around the hatches, Sven mentions there are two additional pieces required at each end to ensure comprehensive protection. This attention to detail highlights his commitment to producing a durable and reliable design. “Sailing is about finding your path, whether it’s across an ocean or within yourself.” – Sven Yrvind In conclusion, making flanges around bulkhead hatches may seem complex at first glance, but by following Sven Yrvind’s meticulous process, enthusiasts can achieve professional-level results. Remember that the journey of boatbuilding is as rewarding as reaching your destination; it tests one’s patience and dedication. For those seeking to embark on this adventure or simply gain more insight into marine craftsmanship, Sven’s wisdom is invaluable.Sven Yrvind, a renowned yacht designer and sailor, shares valuable insights on creating flanges around bulkhead hatches for canvas protection in this enlightening video. By following his expert guidance, boat enthusiasts can ensure their living areas remain secure while allowing unhindered access through the hatches.Step 1: Starting with the Flange
Sven begins by explaining that working on flanges vertically and horizontally is significantly easier than doing so in a flat position. To simplify the process further, he divides the task into two or three steps as suggested by fellow expert “for for.” This approach not only makes it more manageable but also allows for greater precision in crafting each component.Step 2: Applying Glue and Securing
Sven proceeds to apply glue along one edge of the flange, ensuring a secure bond when clamped into place. He emphasizes that this stage is crucial for maintaining the structural integrity of the flange, which in turn safeguards the living area beneath the canvas when hatches are open.Step 3: Allowing Time to Dry
After securely attaching the first portion of the flange, Sven allows ample time for it to dry before moving forward with additional steps. This patience and precision are key aspects of his successful boatbuilding methods.Step 4: Finishing Touches
Once the flange is fully dried, Sven removes the clamps carefully, ensuring no damage occurs during this process. He then moves on to attaching four more pieces onto these main frames, completing two pairs of flanges for the bulkhead hatches.The Final Touches
While two flanges form the primary support structure around the hatches, Sven mentions there are two additional pieces required at each end to ensure comprehensive protection. This attention to detail highlights his commitment to producing a durable and reliable design. “Sailing is about finding your path, whether it’s across an ocean or within yourself.” – Sven Yrvind In conclusion, making flanges around bulkhead hatches may seem complex at first glance, but by following Sven Yrvind’s meticulous process, enthusiasts can achieve professional-level results. Remember that the journey of boatbuilding is as rewarding as reaching your destination; it tests one’s patience and dedication. For those seeking to embark on this adventure or simply gain more insight into marine craftsmanship, Sven’s wisdom is invaluable.Making Flanges Around Bulkhead Hatches for Canvas
Sven Yrvind, a renowned yacht designer and sailor, shares valuable insights on creating flanges around bulkhead hatches for canvas protection in this enlightening video. By following his expert guidance, boat enthusiasts can ensure their living areas remain secure while allowing unhindered access through the hatches.Step 1: Starting with the Flange
Sven begins by explaining that working on flanges vertically and horizontally is significantly easier than doing so in a flat position. To simplify the process further, he divides the task into two or three steps as suggested by fellow expert “for for.” This approach not only makes it more manageable but also allows for greater precision in crafting each component.Step 2: Applying Glue and Securing
Sven proceeds to apply glue along one edge of the flange, ensuring a secure bond when clamped into place. He emphasizes that this stage is crucial for maintaining the structural integrity of the flange, which in turn safeguards the living area beneath the canvas when hatches are open.Step 3: Allowing Time to Dry
After securely attaching the first portion of the flange, Sven allows ample time for it to dry before moving forward with additional steps. This patience and precision are key aspects of his successful boatbuilding methods.Step 4: Finishing Touches
Once the flange is fully dried, Sven removes the clamps carefully, ensuring no damage occurs during this process. He then moves on to attaching four more pieces onto these main frames, completing two pairs of flanges for the bulkhead hatches.The Final Touches
While two flanges form the primary support structure around the hatches, Sven mentions there are two additional pieces required at each end to ensure comprehensive protection. This attention to detail highlights his commitment to producing a durable and reliable design. “Sailing is about finding your path, whether it’s across an ocean or within yourself.” – Sven Yrvind In conclusion, making flanges around bulkhead hatches may seem complex at first glance, but by following Sven Yrvind’s meticulous process, enthusiasts can achieve professional-level results. Remember that the journey of boatbuilding is as rewarding as reaching your destination; it tests one’s patience and dedication. For those seeking to embark on this adventure or simply gain more insight into marine craftsmanship, Sven’s wisdom is invaluable.Once the flange is fully dried, Sven removes the clamps carefully, ensuring no damage occurs during this process. He then moves on to attaching four more pieces onto these main frames, completing two pairs of flanges for the bulkhead hatches.The Final Touches
While two flanges form the primary support structure around the hatches, Sven mentions there are two additional pieces required at each end to ensure comprehensive protection. This attention to detail highlights his commitment to producing a durable and reliable design. “Sailing is about finding your path, whether it’s across an ocean or within yourself.” – Sven Yrvind In conclusion, making flanges around bulkhead hatches may seem complex at first glance, but by following Sven Yrvind’s meticulous process, enthusiasts can achieve professional-level results. Remember that the journey of boatbuilding is as rewarding as reaching your destination; it tests one’s patience and dedication. For those seeking to embark on this adventure or simply gain more insight into marine craftsmanship, Sven’s wisdom is invaluable.Sven proceeds to apply glue along one edge of the flange, ensuring a secure bond when clamped into place. He emphasizes that this stage is crucial for maintaining the structural integrity of the flange, which in turn safeguards the living area beneath the canvas when hatches are open.Step 3: Allowing Time to Dry
After securely attaching the first portion of the flange, Sven allows ample time for it to dry before moving forward with additional steps. This patience and precision are key aspects of his successful boatbuilding methods.Step 4: Finishing Touches
Once the flange is fully dried, Sven removes the clamps carefully, ensuring no damage occurs during this process. He then moves on to attaching four more pieces onto these main frames, completing two pairs of flanges for the bulkhead hatches.The Final Touches
While two flanges form the primary support structure around the hatches, Sven mentions there are two additional pieces required at each end to ensure comprehensive protection. This attention to detail highlights his commitment to producing a durable and reliable design. “Sailing is about finding your path, whether it’s across an ocean or within yourself.” – Sven Yrvind In conclusion, making flanges around bulkhead hatches may seem complex at first glance, but by following Sven Yrvind’s meticulous process, enthusiasts can achieve professional-level results. Remember that the journey of boatbuilding is as rewarding as reaching your destination; it tests one’s patience and dedication. For those seeking to embark on this adventure or simply gain more insight into marine craftsmanship, Sven’s wisdom is invaluable.Sven begins by explaining that working on flanges vertically and horizontally is significantly easier than doing so in a flat position. To simplify the process further, he divides the task into two or three steps as suggested by fellow expert “for for.” This approach not only makes it more manageable but also allows for greater precision in crafting each component.Step 2: Applying Glue and Securing
Sven proceeds to apply glue along one edge of the flange, ensuring a secure bond when clamped into place. He emphasizes that this stage is crucial for maintaining the structural integrity of the flange, which in turn safeguards the living area beneath the canvas when hatches are open.Step 3: Allowing Time to Dry
After securely attaching the first portion of the flange, Sven allows ample time for it to dry before moving forward with additional steps. This patience and precision are key aspects of his successful boatbuilding methods.Step 4: Finishing Touches
Once the flange is fully dried, Sven removes the clamps carefully, ensuring no damage occurs during this process. He then moves on to attaching four more pieces onto these main frames, completing two pairs of flanges for the bulkhead hatches.The Final Touches
While two flanges form the primary support structure around the hatches, Sven mentions there are two additional pieces required at each end to ensure comprehensive protection. This attention to detail highlights his commitment to producing a durable and reliable design. “Sailing is about finding your path, whether it’s across an ocean or within yourself.” – Sven Yrvind In conclusion, making flanges around bulkhead hatches may seem complex at first glance, but by following Sven Yrvind’s meticulous process, enthusiasts can achieve professional-level results. Remember that the journey of boatbuilding is as rewarding as reaching your destination; it tests one’s patience and dedication. For those seeking to embark on this adventure or simply gain more insight into marine craftsmanship, Sven’s wisdom is invaluable.Sven Yrvind, a renowned yacht designer and sailor, shares valuable insights on creating flanges around bulkhead hatches for canvas protection in this enlightening video. By following his expert guidance, boat enthusiasts can ensure their living areas remain secure while allowing unhindered access through the hatches.Step 1: Starting with the Flange
Sven begins by explaining that working on flanges vertically and horizontally is significantly easier than doing so in a flat position. To simplify the process further, he divides the task into two or three steps as suggested by fellow expert “for for.” This approach not only makes it more manageable but also allows for greater precision in crafting each component.Step 2: Applying Glue and Securing
Sven proceeds to apply glue along one edge of the flange, ensuring a secure bond when clamped into place. He emphasizes that this stage is crucial for maintaining the structural integrity of the flange, which in turn safeguards the living area beneath the canvas when hatches are open.Step 3: Allowing Time to Dry
After securely attaching the first portion of the flange, Sven allows ample time for it to dry before moving forward with additional steps. This patience and precision are key aspects of his successful boatbuilding methods.Step 4: Finishing Touches
Once the flange is fully dried, Sven removes the clamps carefully, ensuring no damage occurs during this process. He then moves on to attaching four more pieces onto these main frames, completing two pairs of flanges for the bulkhead hatches.The Final Touches
While two flanges form the primary support structure around the hatches, Sven mentions there are two additional pieces required at each end to ensure comprehensive protection. This attention to detail highlights his commitment to producing a durable and reliable design. “Sailing is about finding your path, whether it’s across an ocean or within yourself.” – Sven Yrvind In conclusion, making flanges around bulkhead hatches may seem complex at first glance, but by following Sven Yrvind’s meticulous process, enthusiasts can achieve professional-level results. Remember that the journey of boatbuilding is as rewarding as reaching your destination; it tests one’s patience and dedication. For those seeking to embark on this adventure or simply gain more insight into marine craftsmanship, Sven’s wisdom is invaluable.Making Flanges Around Bulkhead Hatches for Canvas
Sven Yrvind, a renowned yacht designer and sailor, shares valuable insights on creating flanges around bulkhead hatches for canvas protection in this enlightening video. By following his expert guidance, boat enthusiasts can ensure their living areas remain secure while allowing unhindered access through the hatches.Step 1: Starting with the Flange
Sven begins by explaining that working on flanges vertically and horizontally is significantly easier than doing so in a flat position. To simplify the process further, he divides the task into two or three steps as suggested by fellow expert “for for.” This approach not only makes it more manageable but also allows for greater precision in crafting each component.Step 2: Applying Glue and Securing
Sven proceeds to apply glue along one edge of the flange, ensuring a secure bond when clamped into place. He emphasizes that this stage is crucial for maintaining the structural integrity of the flange, which in turn safeguards the living area beneath the canvas when hatches are open.Step 3: Allowing Time to Dry
After securely attaching the first portion of the flange, Sven allows ample time for it to dry before moving forward with additional steps. This patience and precision are key aspects of his successful boatbuilding methods.Step 4: Finishing Touches
Once the flange is fully dried, Sven removes the clamps carefully, ensuring no damage occurs during this process. He then moves on to attaching four more pieces onto these main frames, completing two pairs of flanges for the bulkhead hatches.The Final Touches
While two flanges form the primary support structure around the hatches, Sven mentions there are two additional pieces required at each end to ensure comprehensive protection. This attention to detail highlights his commitment to producing a durable and reliable design. “Sailing is about finding your path, whether it’s across an ocean or within yourself.” – Sven Yrvind In conclusion, making flanges around bulkhead hatches may seem complex at first glance, but by following Sven Yrvind’s meticulous process, enthusiasts can achieve professional-level results. Remember that the journey of boatbuilding is as rewarding as reaching your destination; it tests one’s patience and dedication. For those seeking to embark on this adventure or simply gain more insight into marine craftsmanship, Sven’s wisdom is invaluable.After securely attaching the first portion of the flange, Sven allows ample time for it to dry before moving forward with additional steps. This patience and precision are key aspects of his successful boatbuilding methods.Step 4: Finishing Touches
Once the flange is fully dried, Sven removes the clamps carefully, ensuring no damage occurs during this process. He then moves on to attaching four more pieces onto these main frames, completing two pairs of flanges for the bulkhead hatches.The Final Touches
While two flanges form the primary support structure around the hatches, Sven mentions there are two additional pieces required at each end to ensure comprehensive protection. This attention to detail highlights his commitment to producing a durable and reliable design. “Sailing is about finding your path, whether it’s across an ocean or within yourself.” – Sven Yrvind In conclusion, making flanges around bulkhead hatches may seem complex at first glance, but by following Sven Yrvind’s meticulous process, enthusiasts can achieve professional-level results. Remember that the journey of boatbuilding is as rewarding as reaching your destination; it tests one’s patience and dedication. For those seeking to embark on this adventure or simply gain more insight into marine craftsmanship, Sven’s wisdom is invaluable.Sven proceeds to apply glue along one edge of the flange, ensuring a secure bond when clamped into place. He emphasizes that this stage is crucial for maintaining the structural integrity of the flange, which in turn safeguards the living area beneath the canvas when hatches are open.Step 3: Allowing Time to Dry
After securely attaching the first portion of the flange, Sven allows ample time for it to dry before moving forward with additional steps. This patience and precision are key aspects of his successful boatbuilding methods.Step 4: Finishing Touches
Once the flange is fully dried, Sven removes the clamps carefully, ensuring no damage occurs during this process. He then moves on to attaching four more pieces onto these main frames, completing two pairs of flanges for the bulkhead hatches.The Final Touches
While two flanges form the primary support structure around the hatches, Sven mentions there are two additional pieces required at each end to ensure comprehensive protection. This attention to detail highlights his commitment to producing a durable and reliable design. “Sailing is about finding your path, whether it’s across an ocean or within yourself.” – Sven Yrvind In conclusion, making flanges around bulkhead hatches may seem complex at first glance, but by following Sven Yrvind’s meticulous process, enthusiasts can achieve professional-level results. Remember that the journey of boatbuilding is as rewarding as reaching your destination; it tests one’s patience and dedication. For those seeking to embark on this adventure or simply gain more insight into marine craftsmanship, Sven’s wisdom is invaluable.Sven begins by explaining that working on flanges vertically and horizontally is significantly easier than doing so in a flat position. To simplify the process further, he divides the task into two or three steps as suggested by fellow expert “for for.” This approach not only makes it more manageable but also allows for greater precision in crafting each component.Step 2: Applying Glue and Securing
Sven proceeds to apply glue along one edge of the flange, ensuring a secure bond when clamped into place. He emphasizes that this stage is crucial for maintaining the structural integrity of the flange, which in turn safeguards the living area beneath the canvas when hatches are open.Step 3: Allowing Time to Dry
After securely attaching the first portion of the flange, Sven allows ample time for it to dry before moving forward with additional steps. This patience and precision are key aspects of his successful boatbuilding methods.Step 4: Finishing Touches
Once the flange is fully dried, Sven removes the clamps carefully, ensuring no damage occurs during this process. He then moves on to attaching four more pieces onto these main frames, completing two pairs of flanges for the bulkhead hatches.The Final Touches
While two flanges form the primary support structure around the hatches, Sven mentions there are two additional pieces required at each end to ensure comprehensive protection. This attention to detail highlights his commitment to producing a durable and reliable design. “Sailing is about finding your path, whether it’s across an ocean or within yourself.” – Sven Yrvind In conclusion, making flanges around bulkhead hatches may seem complex at first glance, but by following Sven Yrvind’s meticulous process, enthusiasts can achieve professional-level results. Remember that the journey of boatbuilding is as rewarding as reaching your destination; it tests one’s patience and dedication. For those seeking to embark on this adventure or simply gain more insight into marine craftsmanship, Sven’s wisdom is invaluable.Sven Yrvind, a renowned yacht designer and sailor, shares valuable insights on creating flanges around bulkhead hatches for canvas protection in this enlightening video. By following his expert guidance, boat enthusiasts can ensure their living areas remain secure while allowing unhindered access through the hatches.Step 1: Starting with the Flange
Sven begins by explaining that working on flanges vertically and horizontally is significantly easier than doing so in a flat position. To simplify the process further, he divides the task into two or three steps as suggested by fellow expert “for for.” This approach not only makes it more manageable but also allows for greater precision in crafting each component.Step 2: Applying Glue and Securing
Sven proceeds to apply glue along one edge of the flange, ensuring a secure bond when clamped into place. He emphasizes that this stage is crucial for maintaining the structural integrity of the flange, which in turn safeguards the living area beneath the canvas when hatches are open.Step 3: Allowing Time to Dry
After securely attaching the first portion of the flange, Sven allows ample time for it to dry before moving forward with additional steps. This patience and precision are key aspects of his successful boatbuilding methods.Step 4: Finishing Touches
Once the flange is fully dried, Sven removes the clamps carefully, ensuring no damage occurs during this process. He then moves on to attaching four more pieces onto these main frames, completing two pairs of flanges for the bulkhead hatches.The Final Touches
While two flanges form the primary support structure around the hatches, Sven mentions there are two additional pieces required at each end to ensure comprehensive protection. This attention to detail highlights his commitment to producing a durable and reliable design. “Sailing is about finding your path, whether it’s across an ocean or within yourself.” – Sven Yrvind In conclusion, making flanges around bulkhead hatches may seem complex at first glance, but by following Sven Yrvind’s meticulous process, enthusiasts can achieve professional-level results. Remember that the journey of boatbuilding is as rewarding as reaching your destination; it tests one’s patience and dedication. For those seeking to embark on this adventure or simply gain more insight into marine craftsmanship, Sven’s wisdom is invaluable.Making Flanges Around Bulkhead Hatches for Canvas
Sven Yrvind, a renowned yacht designer and sailor, shares valuable insights on creating flanges around bulkhead hatches for canvas protection in this enlightening video. By following his expert guidance, boat enthusiasts can ensure their living areas remain secure while allowing unhindered access through the hatches.Step 1: Starting with the Flange
Sven begins by explaining that working on flanges vertically and horizontally is significantly easier than doing so in a flat position. To simplify the process further, he divides the task into two or three steps as suggested by fellow expert “for for.” This approach not only makes it more manageable but also allows for greater precision in crafting each component.Step 2: Applying Glue and Securing
Sven proceeds to apply glue along one edge of the flange, ensuring a secure bond when clamped into place. He emphasizes that this stage is crucial for maintaining the structural integrity of the flange, which in turn safeguards the living area beneath the canvas when hatches are open.Step 3: Allowing Time to Dry
After securely attaching the first portion of the flange, Sven allows ample time for it to dry before moving forward with additional steps. This patience and precision are key aspects of his successful boatbuilding methods.Step 4: Finishing Touches
Once the flange is fully dried, Sven removes the clamps carefully, ensuring no damage occurs during this process. He then moves on to attaching four more pieces onto these main frames, completing two pairs of flanges for the bulkhead hatches.The Final Touches
While two flanges form the primary support structure around the hatches, Sven mentions there are two additional pieces required at each end to ensure comprehensive protection. This attention to detail highlights his commitment to producing a durable and reliable design. “Sailing is about finding your path, whether it’s across an ocean or within yourself.” – Sven Yrvind In conclusion, making flanges around bulkhead hatches may seem complex at first glance, but by following Sven Yrvind’s meticulous process, enthusiasts can achieve professional-level results. Remember that the journey of boatbuilding is as rewarding as reaching your destination; it tests one’s patience and dedication. For those seeking to embark on this adventure or simply gain more insight into marine craftsmanship, Sven’s wisdom is invaluable.Once the flange is fully dried, Sven removes the clamps carefully, ensuring no damage occurs during this process. He then moves on to attaching four more pieces onto these main frames, completing two pairs of flanges for the bulkhead hatches.The Final Touches
While two flanges form the primary support structure around the hatches, Sven mentions there are two additional pieces required at each end to ensure comprehensive protection. This attention to detail highlights his commitment to producing a durable and reliable design. “Sailing is about finding your path, whether it’s across an ocean or within yourself.” – Sven Yrvind In conclusion, making flanges around bulkhead hatches may seem complex at first glance, but by following Sven Yrvind’s meticulous process, enthusiasts can achieve professional-level results. Remember that the journey of boatbuilding is as rewarding as reaching your destination; it tests one’s patience and dedication. For those seeking to embark on this adventure or simply gain more insight into marine craftsmanship, Sven’s wisdom is invaluable.After securely attaching the first portion of the flange, Sven allows ample time for it to dry before moving forward with additional steps. This patience and precision are key aspects of his successful boatbuilding methods.Step 4: Finishing Touches
Once the flange is fully dried, Sven removes the clamps carefully, ensuring no damage occurs during this process. He then moves on to attaching four more pieces onto these main frames, completing two pairs of flanges for the bulkhead hatches.The Final Touches
While two flanges form the primary support structure around the hatches, Sven mentions there are two additional pieces required at each end to ensure comprehensive protection. This attention to detail highlights his commitment to producing a durable and reliable design. “Sailing is about finding your path, whether it’s across an ocean or within yourself.” – Sven Yrvind In conclusion, making flanges around bulkhead hatches may seem complex at first glance, but by following Sven Yrvind’s meticulous process, enthusiasts can achieve professional-level results. Remember that the journey of boatbuilding is as rewarding as reaching your destination; it tests one’s patience and dedication. For those seeking to embark on this adventure or simply gain more insight into marine craftsmanship, Sven’s wisdom is invaluable.Sven proceeds to apply glue along one edge of the flange, ensuring a secure bond when clamped into place. He emphasizes that this stage is crucial for maintaining the structural integrity of the flange, which in turn safeguards the living area beneath the canvas when hatches are open.Step 3: Allowing Time to Dry
After securely attaching the first portion of the flange, Sven allows ample time for it to dry before moving forward with additional steps. This patience and precision are key aspects of his successful boatbuilding methods.Step 4: Finishing Touches
Once the flange is fully dried, Sven removes the clamps carefully, ensuring no damage occurs during this process. He then moves on to attaching four more pieces onto these main frames, completing two pairs of flanges for the bulkhead hatches.The Final Touches
While two flanges form the primary support structure around the hatches, Sven mentions there are two additional pieces required at each end to ensure comprehensive protection. This attention to detail highlights his commitment to producing a durable and reliable design. “Sailing is about finding your path, whether it’s across an ocean or within yourself.” – Sven Yrvind In conclusion, making flanges around bulkhead hatches may seem complex at first glance, but by following Sven Yrvind’s meticulous process, enthusiasts can achieve professional-level results. Remember that the journey of boatbuilding is as rewarding as reaching your destination; it tests one’s patience and dedication. For those seeking to embark on this adventure or simply gain more insight into marine craftsmanship, Sven’s wisdom is invaluable.Sven begins by explaining that working on flanges vertically and horizontally is significantly easier than doing so in a flat position. To simplify the process further, he divides the task into two or three steps as suggested by fellow expert “for for.” This approach not only makes it more manageable but also allows for greater precision in crafting each component.Step 2: Applying Glue and Securing
Sven proceeds to apply glue along one edge of the flange, ensuring a secure bond when clamped into place. He emphasizes that this stage is crucial for maintaining the structural integrity of the flange, which in turn safeguards the living area beneath the canvas when hatches are open.Step 3: Allowing Time to Dry
After securely attaching the first portion of the flange, Sven allows ample time for it to dry before moving forward with additional steps. This patience and precision are key aspects of his successful boatbuilding methods.Step 4: Finishing Touches
Once the flange is fully dried, Sven removes the clamps carefully, ensuring no damage occurs during this process. He then moves on to attaching four more pieces onto these main frames, completing two pairs of flanges for the bulkhead hatches.The Final Touches
While two flanges form the primary support structure around the hatches, Sven mentions there are two additional pieces required at each end to ensure comprehensive protection. This attention to detail highlights his commitment to producing a durable and reliable design. “Sailing is about finding your path, whether it’s across an ocean or within yourself.” – Sven Yrvind In conclusion, making flanges around bulkhead hatches may seem complex at first glance, but by following Sven Yrvind’s meticulous process, enthusiasts can achieve professional-level results. Remember that the journey of boatbuilding is as rewarding as reaching your destination; it tests one’s patience and dedication. For those seeking to embark on this adventure or simply gain more insight into marine craftsmanship, Sven’s wisdom is invaluable.Sven Yrvind, a renowned yacht designer and sailor, shares valuable insights on creating flanges around bulkhead hatches for canvas protection in this enlightening video. By following his expert guidance, boat enthusiasts can ensure their living areas remain secure while allowing unhindered access through the hatches.Step 1: Starting with the Flange
Sven begins by explaining that working on flanges vertically and horizontally is significantly easier than doing so in a flat position. To simplify the process further, he divides the task into two or three steps as suggested by fellow expert “for for.” This approach not only makes it more manageable but also allows for greater precision in crafting each component.Step 2: Applying Glue and Securing
Sven proceeds to apply glue along one edge of the flange, ensuring a secure bond when clamped into place. He emphasizes that this stage is crucial for maintaining the structural integrity of the flange, which in turn safeguards the living area beneath the canvas when hatches are open.Step 3: Allowing Time to Dry
After securely attaching the first portion of the flange, Sven allows ample time for it to dry before moving forward with additional steps. This patience and precision are key aspects of his successful boatbuilding methods.Step 4: Finishing Touches
Once the flange is fully dried, Sven removes the clamps carefully, ensuring no damage occurs during this process. He then moves on to attaching four more pieces onto these main frames, completing two pairs of flanges for the bulkhead hatches.The Final Touches
While two flanges form the primary support structure around the hatches, Sven mentions there are two additional pieces required at each end to ensure comprehensive protection. This attention to detail highlights his commitment to producing a durable and reliable design. “Sailing is about finding your path, whether it’s across an ocean or within yourself.” – Sven Yrvind In conclusion, making flanges around bulkhead hatches may seem complex at first glance, but by following Sven Yrvind’s meticulous process, enthusiasts can achieve professional-level results. Remember that the journey of boatbuilding is as rewarding as reaching your destination; it tests one’s patience and dedication. For those seeking to embark on this adventure or simply gain more insight into marine craftsmanship, Sven’s wisdom is invaluable.Making Flanges Around Bulkhead Hatches for Canvas
Sven Yrvind, a renowned yacht designer and sailor, shares valuable insights on creating flanges around bulkhead hatches for canvas protection in this enlightening video. By following his expert guidance, boat enthusiasts can ensure their living areas remain secure while allowing unhindered access through the hatches.Step 1: Starting with the Flange
Sven begins by explaining that working on flanges vertically and horizontally is significantly easier than doing so in a flat position. To simplify the process further, he divides the task into two or three steps as suggested by fellow expert “for for.” This approach not only makes it more manageable but also allows for greater precision in crafting each component.Step 2: Applying Glue and Securing
Sven proceeds to apply glue along one edge of the flange, ensuring a secure bond when clamped into place. He emphasizes that this stage is crucial for maintaining the structural integrity of the flange, which in turn safeguards the living area beneath the canvas when hatches are open.Step 3: Allowing Time to Dry
After securely attaching the first portion of the flange, Sven allows ample time for it to dry before moving forward with additional steps. This patience and precision are key aspects of his successful boatbuilding methods.Step 4: Finishing Touches
Once the flange is fully dried, Sven removes the clamps carefully, ensuring no damage occurs during this process. He then moves on to attaching four more pieces onto these main frames, completing two pairs of flanges for the bulkhead hatches.The Final Touches
While two flanges form the primary support structure around the hatches, Sven mentions there are two additional pieces required at each end to ensure comprehensive protection. This attention to detail highlights his commitment to producing a durable and reliable design. “Sailing is about finding your path, whether it’s across an ocean or within yourself.” – Sven Yrvind In conclusion, making flanges around bulkhead hatches may seem complex at first glance, but by following Sven Yrvind’s meticulous process, enthusiasts can achieve professional-level results. Remember that the journey of boatbuilding is as rewarding as reaching your destination; it tests one’s patience and dedication. For those seeking to embark on this adventure or simply gain more insight into marine craftsmanship, Sven’s wisdom is invaluable.Sven Yrvind, a renowned yacht designer and sailor, shares valuable insights on creating flanges around bulkhead hatches for canvas protection in this enlightening video. By following his expert guidance, boat enthusiasts can ensure their living areas remain secure while allowing unhindered access through the hatches.Step 1: Starting with the Flange
Sven begins by explaining that working on flanges vertically and horizontally is significantly easier than doing so in a flat position. To simplify the process further, he divides the task into two or three steps as suggested by fellow expert “for for.” This approach not only makes it more manageable but also allows for greater precision in crafting each component.Step 2: Applying Glue and Securing
Sven proceeds to apply glue along one edge of the flange, ensuring a secure bond when clamped into place. He emphasizes that this stage is crucial for maintaining the structural integrity of the flange, which in turn safeguards the living area beneath the canvas when hatches are open.Step 3: Allowing Time to Dry
After securely attaching the first portion of the flange, Sven allows ample time for it to dry before moving forward with additional steps. This patience and precision are key aspects of his successful boatbuilding methods.Step 4: Finishing Touches
Once the flange is fully dried, Sven removes the clamps carefully, ensuring no damage occurs during this process. He then moves on to attaching four more pieces onto these main frames, completing two pairs of flanges for the bulkhead hatches.The Final Touches
While two flanges form the primary support structure around the hatches, Sven mentions there are two additional pieces required at each end to ensure comprehensive protection. This attention to detail highlights his commitment to producing a durable and reliable design. “Sailing is about finding your path, whether it’s across an ocean or within yourself.” – Sven Yrvind In conclusion, making flanges around bulkhead hatches may seem complex at first glance, but by following Sven Yrvind’s meticulous process, enthusiasts can achieve professional-level results. Remember that the journey of boatbuilding is as rewarding as reaching your destination; it tests one’s patience and dedication. For those seeking to embark on this adventure or simply gain more insight into marine craftsmanship, Sven’s wisdom is invaluable.Sven Yrvind, a renowned yacht designer and sailor, shares valuable insights on creating flanges around bulkhead hatches for canvas protection in this enlightening video. By following his expert guidance, boat enthusiasts can ensure their living areas remain secure while allowing unhindered access through the hatches.Step 1: Starting with the Flange
Sven begins by explaining that working on flanges vertically and horizontally is significantly easier than doing so in a flat position. To simplify the process further, he divides the task into two or three steps as suggested by fellow expert “for for.” This approach not only makes it more manageable but also allows for greater precision in crafting each component.Step 2: Applying Glue and Securing
Sven proceeds to apply glue along one edge of the flange, ensuring a secure bond when clamped into place. He emphasizes that this stage is crucial for maintaining the structural integrity of the flange, which in turn safeguards the living area beneath the canvas when hatches are open.Step 3: Allowing Time to Dry
After securely attaching the first portion of the flange, Sven allows ample time for it to dry before moving forward with additional steps. This patience and precision are key aspects of his successful boatbuilding methods.Step 4: Finishing Touches
Once the flange is fully dried, Sven removes the clamps carefully, ensuring no damage occurs during this process. He then moves on to attaching four more pieces onto these main frames, completing two pairs of flanges for the bulkhead hatches.The Final Touches
While two flanges form the primary support structure around the hatches, Sven mentions there are two additional pieces required at each end to ensure comprehensive protection. This attention to detail highlights his commitment to producing a durable and reliable design. “Sailing is about finding your path, whether it’s across an ocean or within yourself.” – Sven Yrvind In conclusion, making flanges around bulkhead hatches may seem complex at first glance, but by following Sven Yrvind’s meticulous process, enthusiasts can achieve professional-level results. Remember that the journey of boatbuilding is as rewarding as reaching your destination; it tests one’s patience and dedication. For those seeking to embark on this adventure or simply gain more insight into marine craftsmanship, Sven’s wisdom is invaluable.Making Flanges Around Bulkhead Hatches for Canvas
Sven Yrvind, a renowned yacht designer and sailor, shares valuable insights on creating flanges around bulkhead hatches for canvas protection in this enlightening video. By following his expert guidance, boat enthusiasts can ensure their living areas remain secure while allowing unhindered access through the hatches.Step 1: Starting with the Flange
Sven begins by explaining that working on flanges vertically and horizontally is significantly easier than doing so in a flat position. To simplify the process further, he divides the task into two or three steps as suggested by fellow expert “for for.” This approach not only makes it more manageable but also allows for greater precision in crafting each component.Step 2: Applying Glue and Securing
Sven proceeds to apply glue along one edge of the flange, ensuring a secure bond when clamped into place. He emphasizes that this stage is crucial for maintaining the structural integrity of the flange, which in turn safeguards the living area beneath the canvas when hatches are open.Step 3: Allowing Time to Dry
After securely attaching the first portion of the flange, Sven allows ample time for it to dry before moving forward with additional steps. This patience and precision are key aspects of his successful boatbuilding methods.Step 4: Finishing Touches
Once the flange is fully dried, Sven removes the clamps carefully, ensuring no damage occurs during this process. He then moves on to attaching four more pieces onto these main frames, completing two pairs of flanges for the bulkhead hatches.The Final Touches
While two flanges form the primary support structure around the hatches, Sven mentions there are two additional pieces required at each end to ensure comprehensive protection. This attention to detail highlights his commitment to producing a durable and reliable design. “Sailing is about finding your path, whether it’s across an ocean or within yourself.” – Sven Yrvind In conclusion, making flanges around bulkhead hatches may seem complex at first glance, but by following Sven Yrvind’s meticulous process, enthusiasts can achieve professional-level results. Remember that the journey of boatbuilding is as rewarding as reaching your destination; it tests one’s patience and dedication. For those seeking to embark on this adventure or simply gain more insight into marine craftsmanship, Sven’s wisdom is invaluable.Once the flange is fully dried, Sven removes the clamps carefully, ensuring no damage occurs during this process. He then moves on to attaching four more pieces onto these main frames, completing two pairs of flanges for the bulkhead hatches.The Final Touches
While two flanges form the primary support structure around the hatches, Sven mentions there are two additional pieces required at each end to ensure comprehensive protection. This attention to detail highlights his commitment to producing a durable and reliable design. “Sailing is about finding your path, whether it’s across an ocean or within yourself.” – Sven Yrvind In conclusion, making flanges around bulkhead hatches may seem complex at first glance, but by following Sven Yrvind’s meticulous process, enthusiasts can achieve professional-level results. Remember that the journey of boatbuilding is as rewarding as reaching your destination; it tests one’s patience and dedication. For those seeking to embark on this adventure or simply gain more insight into marine craftsmanship, Sven’s wisdom is invaluable.Sven Yrvind, a renowned yacht designer and sailor, shares valuable insights on creating flanges around bulkhead hatches for canvas protection in this enlightening video. By following his expert guidance, boat enthusiasts can ensure their living areas remain secure while allowing unhindered access through the hatches.Step 1: Starting with the Flange
Sven begins by explaining that working on flanges vertically and horizontally is significantly easier than doing so in a flat position. To simplify the process further, he divides the task into two or three steps as suggested by fellow expert “for for.” This approach not only makes it more manageable but also allows for greater precision in crafting each component.Step 2: Applying Glue and Securing
Sven proceeds to apply glue along one edge of the flange, ensuring a secure bond when clamped into place. He emphasizes that this stage is crucial for maintaining the structural integrity of the flange, which in turn safeguards the living area beneath the canvas when hatches are open.Step 3: Allowing Time to Dry
After securely attaching the first portion of the flange, Sven allows ample time for it to dry before moving forward with additional steps. This patience and precision are key aspects of his successful boatbuilding methods.Step 4: Finishing Touches
Once the flange is fully dried, Sven removes the clamps carefully, ensuring no damage occurs during this process. He then moves on to attaching four more pieces onto these main frames, completing two pairs of flanges for the bulkhead hatches.The Final Touches
While two flanges form the primary support structure around the hatches, Sven mentions there are two additional pieces required at each end to ensure comprehensive protection. This attention to detail highlights his commitment to producing a durable and reliable design. “Sailing is about finding your path, whether it’s across an ocean or within yourself.” – Sven Yrvind In conclusion, making flanges around bulkhead hatches may seem complex at first glance, but by following Sven Yrvind’s meticulous process, enthusiasts can achieve professional-level results. Remember that the journey of boatbuilding is as rewarding as reaching your destination; it tests one’s patience and dedication. For those seeking to embark on this adventure or simply gain more insight into marine craftsmanship, Sven’s wisdom is invaluable.Making Flanges Around Bulkhead Hatches for Canvas
Sven Yrvind, a renowned yacht designer and sailor, shares valuable insights on creating flanges around bulkhead hatches for canvas protection in this enlightening video. By following his expert guidance, boat enthusiasts can ensure their living areas remain secure while allowing unhindered access through the hatches.Step 1: Starting with the Flange
Sven begins by explaining that working on flanges vertically and horizontally is significantly easier than doing so in a flat position. To simplify the process further, he divides the task into two or three steps as suggested by fellow expert “for for.” This approach not only makes it more manageable but also allows for greater precision in crafting each component.Step 2: Applying Glue and Securing
Sven proceeds to apply glue along one edge of the flange, ensuring a secure bond when clamped into place. He emphasizes that this stage is crucial for maintaining the structural integrity of the flange, which in turn safeguards the living area beneath the canvas when hatches are open.Step 3: Allowing Time to Dry
After securely attaching the first portion of the flange, Sven allows ample time for it to dry before moving forward with additional steps. This patience and precision are key aspects of his successful boatbuilding methods.Step 4: Finishing Touches
Once the flange is fully dried, Sven removes the clamps carefully, ensuring no damage occurs during this process. He then moves on to attaching four more pieces onto these main frames, completing two pairs of flanges for the bulkhead hatches.The Final Touches
While two flanges form the primary support structure around the hatches, Sven mentions there are two additional pieces required at each end to ensure comprehensive protection. This attention to detail highlights his commitment to producing a durable and reliable design. “Sailing is about finding your path, whether it’s across an ocean or within yourself.” – Sven Yrvind In conclusion, making flanges around bulkhead hatches may seem complex at first glance, but by following Sven Yrvind’s meticulous process, enthusiasts can achieve professional-level results. Remember that the journey of boatbuilding is as rewarding as reaching your destination; it tests one’s patience and dedication. For those seeking to embark on this adventure or simply gain more insight into marine craftsmanship, Sven’s wisdom is invaluable.After securely attaching the first portion of the flange, Sven allows ample time for it to dry before moving forward with additional steps. This patience and precision are key aspects of his successful boatbuilding methods.Step 4: Finishing Touches
Once the flange is fully dried, Sven removes the clamps carefully, ensuring no damage occurs during this process. He then moves on to attaching four more pieces onto these main frames, completing two pairs of flanges for the bulkhead hatches.The Final Touches
While two flanges form the primary support structure around the hatches, Sven mentions there are two additional pieces required at each end to ensure comprehensive protection. This attention to detail highlights his commitment to producing a durable and reliable design. “Sailing is about finding your path, whether it’s across an ocean or within yourself.” – Sven Yrvind In conclusion, making flanges around bulkhead hatches may seem complex at first glance, but by following Sven Yrvind’s meticulous process, enthusiasts can achieve professional-level results. Remember that the journey of boatbuilding is as rewarding as reaching your destination; it tests one’s patience and dedication. For those seeking to embark on this adventure or simply gain more insight into marine craftsmanship, Sven’s wisdom is invaluable.Sven Yrvind, a renowned yacht designer and sailor, shares valuable insights on creating flanges around bulkhead hatches for canvas protection in this enlightening video. By following his expert guidance, boat enthusiasts can ensure their living areas remain secure while allowing unhindered access through the hatches.Step 1: Starting with the Flange
Sven begins by explaining that working on flanges vertically and horizontally is significantly easier than doing so in a flat position. To simplify the process further, he divides the task into two or three steps as suggested by fellow expert “for for.” This approach not only makes it more manageable but also allows for greater precision in crafting each component.Step 2: Applying Glue and Securing
Sven proceeds to apply glue along one edge of the flange, ensuring a secure bond when clamped into place. He emphasizes that this stage is crucial for maintaining the structural integrity of the flange, which in turn safeguards the living area beneath the canvas when hatches are open.Step 3: Allowing Time to Dry
After securely attaching the first portion of the flange, Sven allows ample time for it to dry before moving forward with additional steps. This patience and precision are key aspects of his successful boatbuilding methods.Step 4: Finishing Touches
Once the flange is fully dried, Sven removes the clamps carefully, ensuring no damage occurs during this process. He then moves on to attaching four more pieces onto these main frames, completing two pairs of flanges for the bulkhead hatches.The Final Touches
While two flanges form the primary support structure around the hatches, Sven mentions there are two additional pieces required at each end to ensure comprehensive protection. This attention to detail highlights his commitment to producing a durable and reliable design. “Sailing is about finding your path, whether it’s across an ocean or within yourself.” – Sven Yrvind In conclusion, making flanges around bulkhead hatches may seem complex at first glance, but by following Sven Yrvind’s meticulous process, enthusiasts can achieve professional-level results. Remember that the journey of boatbuilding is as rewarding as reaching your destination; it tests one’s patience and dedication. For those seeking to embark on this adventure or simply gain more insight into marine craftsmanship, Sven’s wisdom is invaluable.Making Flanges Around Bulkhead Hatches for Canvas
Sven Yrvind, a renowned yacht designer and sailor, shares valuable insights on creating flanges around bulkhead hatches for canvas protection in this enlightening video. By following his expert guidance, boat enthusiasts can ensure their living areas remain secure while allowing unhindered access through the hatches.Step 1: Starting with the Flange
Sven begins by explaining that working on flanges vertically and horizontally is significantly easier than doing so in a flat position. To simplify the process further, he divides the task into two or three steps as suggested by fellow expert “for for.” This approach not only makes it more manageable but also allows for greater precision in crafting each component.Step 2: Applying Glue and Securing
Sven proceeds to apply glue along one edge of the flange, ensuring a secure bond when clamped into place. He emphasizes that this stage is crucial for maintaining the structural integrity of the flange, which in turn safeguards the living area beneath the canvas when hatches are open.Step 3: Allowing Time to Dry
After securely attaching the first portion of the flange, Sven allows ample time for it to dry before moving forward with additional steps. This patience and precision are key aspects of his successful boatbuilding methods.Step 4: Finishing Touches
Once the flange is fully dried, Sven removes the clamps carefully, ensuring no damage occurs during this process. He then moves on to attaching four more pieces onto these main frames, completing two pairs of flanges for the bulkhead hatches.The Final Touches
While two flanges form the primary support structure around the hatches, Sven mentions there are two additional pieces required at each end to ensure comprehensive protection. This attention to detail highlights his commitment to producing a durable and reliable design. “Sailing is about finding your path, whether it’s across an ocean or within yourself.” – Sven Yrvind In conclusion, making flanges around bulkhead hatches may seem complex at first glance, but by following Sven Yrvind’s meticulous process, enthusiasts can achieve professional-level results. Remember that the journey of boatbuilding is as rewarding as reaching your destination; it tests one’s patience and dedication. For those seeking to embark on this adventure or simply gain more insight into marine craftsmanship, Sven’s wisdom is invaluable.Sven proceeds to apply glue along one edge of the flange, ensuring a secure bond when clamped into place. He emphasizes that this stage is crucial for maintaining the structural integrity of the flange, which in turn safeguards the living area beneath the canvas when hatches are open.Step 3: Allowing Time to Dry
After securely attaching the first portion of the flange, Sven allows ample time for it to dry before moving forward with additional steps. This patience and precision are key aspects of his successful boatbuilding methods.Step 4: Finishing Touches
Once the flange is fully dried, Sven removes the clamps carefully, ensuring no damage occurs during this process. He then moves on to attaching four more pieces onto these main frames, completing two pairs of flanges for the bulkhead hatches.The Final Touches
While two flanges form the primary support structure around the hatches, Sven mentions there are two additional pieces required at each end to ensure comprehensive protection. This attention to detail highlights his commitment to producing a durable and reliable design. “Sailing is about finding your path, whether it’s across an ocean or within yourself.” – Sven Yrvind In conclusion, making flanges around bulkhead hatches may seem complex at first glance, but by following Sven Yrvind’s meticulous process, enthusiasts can achieve professional-level results. Remember that the journey of boatbuilding is as rewarding as reaching your destination; it tests one’s patience and dedication. For those seeking to embark on this adventure or simply gain more insight into marine craftsmanship, Sven’s wisdom is invaluable.Sven Yrvind, a renowned yacht designer and sailor, shares valuable insights on creating flanges around bulkhead hatches for canvas protection in this enlightening video. By following his expert guidance, boat enthusiasts can ensure their living areas remain secure while allowing unhindered access through the hatches.Step 1: Starting with the Flange
Sven begins by explaining that working on flanges vertically and horizontally is significantly easier than doing so in a flat position. To simplify the process further, he divides the task into two or three steps as suggested by fellow expert “for for.” This approach not only makes it more manageable but also allows for greater precision in crafting each component.Step 2: Applying Glue and Securing
Sven proceeds to apply glue along one edge of the flange, ensuring a secure bond when clamped into place. He emphasizes that this stage is crucial for maintaining the structural integrity of the flange, which in turn safeguards the living area beneath the canvas when hatches are open.Step 3: Allowing Time to Dry
After securely attaching the first portion of the flange, Sven allows ample time for it to dry before moving forward with additional steps. This patience and precision are key aspects of his successful boatbuilding methods.Step 4: Finishing Touches
Once the flange is fully dried, Sven removes the clamps carefully, ensuring no damage occurs during this process. He then moves on to attaching four more pieces onto these main frames, completing two pairs of flanges for the bulkhead hatches.The Final Touches
While two flanges form the primary support structure around the hatches, Sven mentions there are two additional pieces required at each end to ensure comprehensive protection. This attention to detail highlights his commitment to producing a durable and reliable design. “Sailing is about finding your path, whether it’s across an ocean or within yourself.” – Sven Yrvind In conclusion, making flanges around bulkhead hatches may seem complex at first glance, but by following Sven Yrvind’s meticulous process, enthusiasts can achieve professional-level results. Remember that the journey of boatbuilding is as rewarding as reaching your destination; it tests one’s patience and dedication. For those seeking to embark on this adventure or simply gain more insight into marine craftsmanship, Sven’s wisdom is invaluable.Making Flanges Around Bulkhead Hatches for Canvas
Sven Yrvind, a renowned yacht designer and sailor, shares valuable insights on creating flanges around bulkhead hatches for canvas protection in this enlightening video. By following his expert guidance, boat enthusiasts can ensure their living areas remain secure while allowing unhindered access through the hatches.Step 1: Starting with the Flange
Sven begins by explaining that working on flanges vertically and horizontally is significantly easier than doing so in a flat position. To simplify the process further, he divides the task into two or three steps as suggested by fellow expert “for for.” This approach not only makes it more manageable but also allows for greater precision in crafting each component.Step 2: Applying Glue and Securing
Sven proceeds to apply glue along one edge of the flange, ensuring a secure bond when clamped into place. He emphasizes that this stage is crucial for maintaining the structural integrity of the flange, which in turn safeguards the living area beneath the canvas when hatches are open.Step 3: Allowing Time to Dry
After securely attaching the first portion of the flange, Sven allows ample time for it to dry before moving forward with additional steps. This patience and precision are key aspects of his successful boatbuilding methods.Step 4: Finishing Touches
Once the flange is fully dried, Sven removes the clamps carefully, ensuring no damage occurs during this process. He then moves on to attaching four more pieces onto these main frames, completing two pairs of flanges for the bulkhead hatches.The Final Touches
While two flanges form the primary support structure around the hatches, Sven mentions there are two additional pieces required at each end to ensure comprehensive protection. This attention to detail highlights his commitment to producing a durable and reliable design. “Sailing is about finding your path, whether it’s across an ocean or within yourself.” – Sven Yrvind In conclusion, making flanges around bulkhead hatches may seem complex at first glance, but by following Sven Yrvind’s meticulous process, enthusiasts can achieve professional-level results. Remember that the journey of boatbuilding is as rewarding as reaching your destination; it tests one’s patience and dedication. For those seeking to embark on this adventure or simply gain more insight into marine craftsmanship, Sven’s wisdom is invaluable.Sven begins by explaining that working on flanges vertically and horizontally is significantly easier than doing so in a flat position. To simplify the process further, he divides the task into two or three steps as suggested by fellow expert “for for.” This approach not only makes it more manageable but also allows for greater precision in crafting each component.Step 2: Applying Glue and Securing
Sven proceeds to apply glue along one edge of the flange, ensuring a secure bond when clamped into place. He emphasizes that this stage is crucial for maintaining the structural integrity of the flange, which in turn safeguards the living area beneath the canvas when hatches are open.Step 3: Allowing Time to Dry
After securely attaching the first portion of the flange, Sven allows ample time for it to dry before moving forward with additional steps. This patience and precision are key aspects of his successful boatbuilding methods.Step 4: Finishing Touches
Once the flange is fully dried, Sven removes the clamps carefully, ensuring no damage occurs during this process. He then moves on to attaching four more pieces onto these main frames, completing two pairs of flanges for the bulkhead hatches.The Final Touches
While two flanges form the primary support structure around the hatches, Sven mentions there are two additional pieces required at each end to ensure comprehensive protection. This attention to detail highlights his commitment to producing a durable and reliable design. “Sailing is about finding your path, whether it’s across an ocean or within yourself.” – Sven Yrvind In conclusion, making flanges around bulkhead hatches may seem complex at first glance, but by following Sven Yrvind’s meticulous process, enthusiasts can achieve professional-level results. Remember that the journey of boatbuilding is as rewarding as reaching your destination; it tests one’s patience and dedication. For those seeking to embark on this adventure or simply gain more insight into marine craftsmanship, Sven’s wisdom is invaluable.Sven Yrvind, a renowned yacht designer and sailor, shares valuable insights on creating flanges around bulkhead hatches for canvas protection in this enlightening video. By following his expert guidance, boat enthusiasts can ensure their living areas remain secure while allowing unhindered access through the hatches.Step 1: Starting with the Flange
Sven begins by explaining that working on flanges vertically and horizontally is significantly easier than doing so in a flat position. To simplify the process further, he divides the task into two or three steps as suggested by fellow expert “for for.” This approach not only makes it more manageable but also allows for greater precision in crafting each component.Step 2: Applying Glue and Securing
Sven proceeds to apply glue along one edge of the flange, ensuring a secure bond when clamped into place. He emphasizes that this stage is crucial for maintaining the structural integrity of the flange, which in turn safeguards the living area beneath the canvas when hatches are open.Step 3: Allowing Time to Dry
After securely attaching the first portion of the flange, Sven allows ample time for it to dry before moving forward with additional steps. This patience and precision are key aspects of his successful boatbuilding methods.Step 4: Finishing Touches
Once the flange is fully dried, Sven removes the clamps carefully, ensuring no damage occurs during this process. He then moves on to attaching four more pieces onto these main frames, completing two pairs of flanges for the bulkhead hatches.The Final Touches
While two flanges form the primary support structure around the hatches, Sven mentions there are two additional pieces required at each end to ensure comprehensive protection. This attention to detail highlights his commitment to producing a durable and reliable design. “Sailing is about finding your path, whether it’s across an ocean or within yourself.” – Sven Yrvind In conclusion, making flanges around bulkhead hatches may seem complex at first glance, but by following Sven Yrvind’s meticulous process, enthusiasts can achieve professional-level results. Remember that the journey of boatbuilding is as rewarding as reaching your destination; it tests one’s patience and dedication. For those seeking to embark on this adventure or simply gain more insight into marine craftsmanship, Sven’s wisdom is invaluable.Making Flanges Around Bulkhead Hatches for Canvas
Sven Yrvind, a renowned yacht designer and sailor, shares valuable insights on creating flanges around bulkhead hatches for canvas protection in this enlightening video. By following his expert guidance, boat enthusiasts can ensure their living areas remain secure while allowing unhindered access through the hatches.Step 1: Starting with the Flange
Sven begins by explaining that working on flanges vertically and horizontally is significantly easier than doing so in a flat position. To simplify the process further, he divides the task into two or three steps as suggested by fellow expert “for for.” This approach not only makes it more manageable but also allows for greater precision in crafting each component.Step 2: Applying Glue and Securing
Sven proceeds to apply glue along one edge of the flange, ensuring a secure bond when clamped into place. He emphasizes that this stage is crucial for maintaining the structural integrity of the flange, which in turn safeguards the living area beneath the canvas when hatches are open.Step 3: Allowing Time to Dry
After securely attaching the first portion of the flange, Sven allows ample time for it to dry before moving forward with additional steps. This patience and precision are key aspects of his successful boatbuilding methods.Step 4: Finishing Touches
Once the flange is fully dried, Sven removes the clamps carefully, ensuring no damage occurs during this process. He then moves on to attaching four more pieces onto these main frames, completing two pairs of flanges for the bulkhead hatches.The Final Touches
While two flanges form the primary support structure around the hatches, Sven mentions there are two additional pieces required at each end to ensure comprehensive protection. This attention to detail highlights his commitment to producing a durable and reliable design. “Sailing is about finding your path, whether it’s across an ocean or within yourself.” – Sven Yrvind In conclusion, making flanges around bulkhead hatches may seem complex at first glance, but by following Sven Yrvind’s meticulous process, enthusiasts can achieve professional-level results. Remember that the journey of boatbuilding is as rewarding as reaching your destination; it tests one’s patience and dedication. For those seeking to embark on this adventure or simply gain more insight into marine craftsmanship, Sven’s wisdom is invaluable.Once the flange is fully dried, Sven removes the clamps carefully, ensuring no damage occurs during this process. He then moves on to attaching four more pieces onto these main frames, completing two pairs of flanges for the bulkhead hatches.The Final Touches
While two flanges form the primary support structure around the hatches, Sven mentions there are two additional pieces required at each end to ensure comprehensive protection. This attention to detail highlights his commitment to producing a durable and reliable design. “Sailing is about finding your path, whether it’s across an ocean or within yourself.” – Sven Yrvind In conclusion, making flanges around bulkhead hatches may seem complex at first glance, but by following Sven Yrvind’s meticulous process, enthusiasts can achieve professional-level results. Remember that the journey of boatbuilding is as rewarding as reaching your destination; it tests one’s patience and dedication. For those seeking to embark on this adventure or simply gain more insight into marine craftsmanship, Sven’s wisdom is invaluable.Sven begins by explaining that working on flanges vertically and horizontally is significantly easier than doing so in a flat position. To simplify the process further, he divides the task into two or three steps as suggested by fellow expert “for for.” This approach not only makes it more manageable but also allows for greater precision in crafting each component.Step 2: Applying Glue and Securing
Sven proceeds to apply glue along one edge of the flange, ensuring a secure bond when clamped into place. He emphasizes that this stage is crucial for maintaining the structural integrity of the flange, which in turn safeguards the living area beneath the canvas when hatches are open.Step 3: Allowing Time to Dry
After securely attaching the first portion of the flange, Sven allows ample time for it to dry before moving forward with additional steps. This patience and precision are key aspects of his successful boatbuilding methods.Step 4: Finishing Touches
Once the flange is fully dried, Sven removes the clamps carefully, ensuring no damage occurs during this process. He then moves on to attaching four more pieces onto these main frames, completing two pairs of flanges for the bulkhead hatches.The Final Touches
While two flanges form the primary support structure around the hatches, Sven mentions there are two additional pieces required at each end to ensure comprehensive protection. This attention to detail highlights his commitment to producing a durable and reliable design. “Sailing is about finding your path, whether it’s across an ocean or within yourself.” – Sven Yrvind In conclusion, making flanges around bulkhead hatches may seem complex at first glance, but by following Sven Yrvind’s meticulous process, enthusiasts can achieve professional-level results. Remember that the journey of boatbuilding is as rewarding as reaching your destination; it tests one’s patience and dedication. For those seeking to embark on this adventure or simply gain more insight into marine craftsmanship, Sven’s wisdom is invaluable.Sven Yrvind, a renowned yacht designer and sailor, shares valuable insights on creating flanges around bulkhead hatches for canvas protection in this enlightening video. By following his expert guidance, boat enthusiasts can ensure their living areas remain secure while allowing unhindered access through the hatches.Step 1: Starting with the Flange
Sven begins by explaining that working on flanges vertically and horizontally is significantly easier than doing so in a flat position. To simplify the process further, he divides the task into two or three steps as suggested by fellow expert “for for.” This approach not only makes it more manageable but also allows for greater precision in crafting each component.Step 2: Applying Glue and Securing
Sven proceeds to apply glue along one edge of the flange, ensuring a secure bond when clamped into place. He emphasizes that this stage is crucial for maintaining the structural integrity of the flange, which in turn safeguards the living area beneath the canvas when hatches are open.Step 3: Allowing Time to Dry
After securely attaching the first portion of the flange, Sven allows ample time for it to dry before moving forward with additional steps. This patience and precision are key aspects of his successful boatbuilding methods.Step 4: Finishing Touches
Once the flange is fully dried, Sven removes the clamps carefully, ensuring no damage occurs during this process. He then moves on to attaching four more pieces onto these main frames, completing two pairs of flanges for the bulkhead hatches.The Final Touches
While two flanges form the primary support structure around the hatches, Sven mentions there are two additional pieces required at each end to ensure comprehensive protection. This attention to detail highlights his commitment to producing a durable and reliable design. “Sailing is about finding your path, whether it’s across an ocean or within yourself.” – Sven Yrvind In conclusion, making flanges around bulkhead hatches may seem complex at first glance, but by following Sven Yrvind’s meticulous process, enthusiasts can achieve professional-level results. Remember that the journey of boatbuilding is as rewarding as reaching your destination; it tests one’s patience and dedication. For those seeking to embark on this adventure or simply gain more insight into marine craftsmanship, Sven’s wisdom is invaluable.Making Flanges Around Bulkhead Hatches for Canvas
Sven Yrvind, a renowned yacht designer and sailor, shares valuable insights on creating flanges around bulkhead hatches for canvas protection in this enlightening video. By following his expert guidance, boat enthusiasts can ensure their living areas remain secure while allowing unhindered access through the hatches.Step 1: Starting with the Flange
Sven begins by explaining that working on flanges vertically and horizontally is significantly easier than doing so in a flat position. To simplify the process further, he divides the task into two or three steps as suggested by fellow expert “for for.” This approach not only makes it more manageable but also allows for greater precision in crafting each component.Step 2: Applying Glue and Securing
Sven proceeds to apply glue along one edge of the flange, ensuring a secure bond when clamped into place. He emphasizes that this stage is crucial for maintaining the structural integrity of the flange, which in turn safeguards the living area beneath the canvas when hatches are open.Step 3: Allowing Time to Dry
After securely attaching the first portion of the flange, Sven allows ample time for it to dry before moving forward with additional steps. This patience and precision are key aspects of his successful boatbuilding methods.Step 4: Finishing Touches
Once the flange is fully dried, Sven removes the clamps carefully, ensuring no damage occurs during this process. He then moves on to attaching four more pieces onto these main frames, completing two pairs of flanges for the bulkhead hatches.The Final Touches
While two flanges form the primary support structure around the hatches, Sven mentions there are two additional pieces required at each end to ensure comprehensive protection. This attention to detail highlights his commitment to producing a durable and reliable design. “Sailing is about finding your path, whether it’s across an ocean or within yourself.” – Sven Yrvind In conclusion, making flanges around bulkhead hatches may seem complex at first glance, but by following Sven Yrvind’s meticulous process, enthusiasts can achieve professional-level results. Remember that the journey of boatbuilding is as rewarding as reaching your destination; it tests one’s patience and dedication. For those seeking to embark on this adventure or simply gain more insight into marine craftsmanship, Sven’s wisdom is invaluable.After securely attaching the first portion of the flange, Sven allows ample time for it to dry before moving forward with additional steps. This patience and precision are key aspects of his successful boatbuilding methods.Step 4: Finishing Touches
Once the flange is fully dried, Sven removes the clamps carefully, ensuring no damage occurs during this process. He then moves on to attaching four more pieces onto these main frames, completing two pairs of flanges for the bulkhead hatches.The Final Touches
While two flanges form the primary support structure around the hatches, Sven mentions there are two additional pieces required at each end to ensure comprehensive protection. This attention to detail highlights his commitment to producing a durable and reliable design. “Sailing is about finding your path, whether it’s across an ocean or within yourself.” – Sven Yrvind In conclusion, making flanges around bulkhead hatches may seem complex at first glance, but by following Sven Yrvind’s meticulous process, enthusiasts can achieve professional-level results. Remember that the journey of boatbuilding is as rewarding as reaching your destination; it tests one’s patience and dedication. For those seeking to embark on this adventure or simply gain more insight into marine craftsmanship, Sven’s wisdom is invaluable.Sven begins by explaining that working on flanges vertically and horizontally is significantly easier than doing so in a flat position. To simplify the process further, he divides the task into two or three steps as suggested by fellow expert “for for.” This approach not only makes it more manageable but also allows for greater precision in crafting each component.Step 2: Applying Glue and Securing
Sven proceeds to apply glue along one edge of the flange, ensuring a secure bond when clamped into place. He emphasizes that this stage is crucial for maintaining the structural integrity of the flange, which in turn safeguards the living area beneath the canvas when hatches are open.Step 3: Allowing Time to Dry
After securely attaching the first portion of the flange, Sven allows ample time for it to dry before moving forward with additional steps. This patience and precision are key aspects of his successful boatbuilding methods.Step 4: Finishing Touches
Once the flange is fully dried, Sven removes the clamps carefully, ensuring no damage occurs during this process. He then moves on to attaching four more pieces onto these main frames, completing two pairs of flanges for the bulkhead hatches.The Final Touches
While two flanges form the primary support structure around the hatches, Sven mentions there are two additional pieces required at each end to ensure comprehensive protection. This attention to detail highlights his commitment to producing a durable and reliable design. “Sailing is about finding your path, whether it’s across an ocean or within yourself.” – Sven Yrvind In conclusion, making flanges around bulkhead hatches may seem complex at first glance, but by following Sven Yrvind’s meticulous process, enthusiasts can achieve professional-level results. Remember that the journey of boatbuilding is as rewarding as reaching your destination; it tests one’s patience and dedication. For those seeking to embark on this adventure or simply gain more insight into marine craftsmanship, Sven’s wisdom is invaluable.Sven Yrvind, a renowned yacht designer and sailor, shares valuable insights on creating flanges around bulkhead hatches for canvas protection in this enlightening video. By following his expert guidance, boat enthusiasts can ensure their living areas remain secure while allowing unhindered access through the hatches.Step 1: Starting with the Flange
Sven begins by explaining that working on flanges vertically and horizontally is significantly easier than doing so in a flat position. To simplify the process further, he divides the task into two or three steps as suggested by fellow expert “for for.” This approach not only makes it more manageable but also allows for greater precision in crafting each component.Step 2: Applying Glue and Securing
Sven proceeds to apply glue along one edge of the flange, ensuring a secure bond when clamped into place. He emphasizes that this stage is crucial for maintaining the structural integrity of the flange, which in turn safeguards the living area beneath the canvas when hatches are open.Step 3: Allowing Time to Dry
After securely attaching the first portion of the flange, Sven allows ample time for it to dry before moving forward with additional steps. This patience and precision are key aspects of his successful boatbuilding methods.Step 4: Finishing Touches
Once the flange is fully dried, Sven removes the clamps carefully, ensuring no damage occurs during this process. He then moves on to attaching four more pieces onto these main frames, completing two pairs of flanges for the bulkhead hatches.The Final Touches
While two flanges form the primary support structure around the hatches, Sven mentions there are two additional pieces required at each end to ensure comprehensive protection. This attention to detail highlights his commitment to producing a durable and reliable design. “Sailing is about finding your path, whether it’s across an ocean or within yourself.” – Sven Yrvind In conclusion, making flanges around bulkhead hatches may seem complex at first glance, but by following Sven Yrvind’s meticulous process, enthusiasts can achieve professional-level results. Remember that the journey of boatbuilding is as rewarding as reaching your destination; it tests one’s patience and dedication. For those seeking to embark on this adventure or simply gain more insight into marine craftsmanship, Sven’s wisdom is invaluable.Making Flanges Around Bulkhead Hatches for Canvas
Sven Yrvind, a renowned yacht designer and sailor, shares valuable insights on creating flanges around bulkhead hatches for canvas protection in this enlightening video. By following his expert guidance, boat enthusiasts can ensure their living areas remain secure while allowing unhindered access through the hatches.Step 1: Starting with the Flange
Sven begins by explaining that working on flanges vertically and horizontally is significantly easier than doing so in a flat position. To simplify the process further, he divides the task into two or three steps as suggested by fellow expert “for for.” This approach not only makes it more manageable but also allows for greater precision in crafting each component.Step 2: Applying Glue and Securing
Sven proceeds to apply glue along one edge of the flange, ensuring a secure bond when clamped into place. He emphasizes that this stage is crucial for maintaining the structural integrity of the flange, which in turn safeguards the living area beneath the canvas when hatches are open.Step 3: Allowing Time to Dry
After securely attaching the first portion of the flange, Sven allows ample time for it to dry before moving forward with additional steps. This patience and precision are key aspects of his successful boatbuilding methods.Step 4: Finishing Touches
Once the flange is fully dried, Sven removes the clamps carefully, ensuring no damage occurs during this process. He then moves on to attaching four more pieces onto these main frames, completing two pairs of flanges for the bulkhead hatches.The Final Touches
While two flanges form the primary support structure around the hatches, Sven mentions there are two additional pieces required at each end to ensure comprehensive protection. This attention to detail highlights his commitment to producing a durable and reliable design. “Sailing is about finding your path, whether it’s across an ocean or within yourself.” – Sven Yrvind In conclusion, making flanges around bulkhead hatches may seem complex at first glance, but by following Sven Yrvind’s meticulous process, enthusiasts can achieve professional-level results. Remember that the journey of boatbuilding is as rewarding as reaching your destination; it tests one’s patience and dedication. For those seeking to embark on this adventure or simply gain more insight into marine craftsmanship, Sven’s wisdom is invaluable.Sven proceeds to apply glue along one edge of the flange, ensuring a secure bond when clamped into place. He emphasizes that this stage is crucial for maintaining the structural integrity of the flange, which in turn safeguards the living area beneath the canvas when hatches are open.Step 3: Allowing Time to Dry
After securely attaching the first portion of the flange, Sven allows ample time for it to dry before moving forward with additional steps. This patience and precision are key aspects of his successful boatbuilding methods.Step 4: Finishing Touches
Once the flange is fully dried, Sven removes the clamps carefully, ensuring no damage occurs during this process. He then moves on to attaching four more pieces onto these main frames, completing two pairs of flanges for the bulkhead hatches.The Final Touches
While two flanges form the primary support structure around the hatches, Sven mentions there are two additional pieces required at each end to ensure comprehensive protection. This attention to detail highlights his commitment to producing a durable and reliable design. “Sailing is about finding your path, whether it’s across an ocean or within yourself.” – Sven Yrvind In conclusion, making flanges around bulkhead hatches may seem complex at first glance, but by following Sven Yrvind’s meticulous process, enthusiasts can achieve professional-level results. Remember that the journey of boatbuilding is as rewarding as reaching your destination; it tests one’s patience and dedication. For those seeking to embark on this adventure or simply gain more insight into marine craftsmanship, Sven’s wisdom is invaluable.Sven begins by explaining that working on flanges vertically and horizontally is significantly easier than doing so in a flat position. To simplify the process further, he divides the task into two or three steps as suggested by fellow expert “for for.” This approach not only makes it more manageable but also allows for greater precision in crafting each component.Step 2: Applying Glue and Securing
Sven proceeds to apply glue along one edge of the flange, ensuring a secure bond when clamped into place. He emphasizes that this stage is crucial for maintaining the structural integrity of the flange, which in turn safeguards the living area beneath the canvas when hatches are open.Step 3: Allowing Time to Dry
After securely attaching the first portion of the flange, Sven allows ample time for it to dry before moving forward with additional steps. This patience and precision are key aspects of his successful boatbuilding methods.Step 4: Finishing Touches
Once the flange is fully dried, Sven removes the clamps carefully, ensuring no damage occurs during this process. He then moves on to attaching four more pieces onto these main frames, completing two pairs of flanges for the bulkhead hatches.The Final Touches
While two flanges form the primary support structure around the hatches, Sven mentions there are two additional pieces required at each end to ensure comprehensive protection. This attention to detail highlights his commitment to producing a durable and reliable design. “Sailing is about finding your path, whether it’s across an ocean or within yourself.” – Sven Yrvind In conclusion, making flanges around bulkhead hatches may seem complex at first glance, but by following Sven Yrvind’s meticulous process, enthusiasts can achieve professional-level results. Remember that the journey of boatbuilding is as rewarding as reaching your destination; it tests one’s patience and dedication. For those seeking to embark on this adventure or simply gain more insight into marine craftsmanship, Sven’s wisdom is invaluable.Sven Yrvind, a renowned yacht designer and sailor, shares valuable insights on creating flanges around bulkhead hatches for canvas protection in this enlightening video. By following his expert guidance, boat enthusiasts can ensure their living areas remain secure while allowing unhindered access through the hatches.Step 1: Starting with the Flange
Sven begins by explaining that working on flanges vertically and horizontally is significantly easier than doing so in a flat position. To simplify the process further, he divides the task into two or three steps as suggested by fellow expert “for for.” This approach not only makes it more manageable but also allows for greater precision in crafting each component.Step 2: Applying Glue and Securing
Sven proceeds to apply glue along one edge of the flange, ensuring a secure bond when clamped into place. He emphasizes that this stage is crucial for maintaining the structural integrity of the flange, which in turn safeguards the living area beneath the canvas when hatches are open.Step 3: Allowing Time to Dry
After securely attaching the first portion of the flange, Sven allows ample time for it to dry before moving forward with additional steps. This patience and precision are key aspects of his successful boatbuilding methods.Step 4: Finishing Touches
Once the flange is fully dried, Sven removes the clamps carefully, ensuring no damage occurs during this process. He then moves on to attaching four more pieces onto these main frames, completing two pairs of flanges for the bulkhead hatches.The Final Touches
While two flanges form the primary support structure around the hatches, Sven mentions there are two additional pieces required at each end to ensure comprehensive protection. This attention to detail highlights his commitment to producing a durable and reliable design. “Sailing is about finding your path, whether it’s across an ocean or within yourself.” – Sven Yrvind In conclusion, making flanges around bulkhead hatches may seem complex at first glance, but by following Sven Yrvind’s meticulous process, enthusiasts can achieve professional-level results. Remember that the journey of boatbuilding is as rewarding as reaching your destination; it tests one’s patience and dedication. For those seeking to embark on this adventure or simply gain more insight into marine craftsmanship, Sven’s wisdom is invaluable.Making Flanges Around Bulkhead Hatches for Canvas
Sven Yrvind, a renowned yacht designer and sailor, shares valuable insights on creating flanges around bulkhead hatches for canvas protection in this enlightening video. By following his expert guidance, boat enthusiasts can ensure their living areas remain secure while allowing unhindered access through the hatches.Step 1: Starting with the Flange
Sven begins by explaining that working on flanges vertically and horizontally is significantly easier than doing so in a flat position. To simplify the process further, he divides the task into two or three steps as suggested by fellow expert “for for.” This approach not only makes it more manageable but also allows for greater precision in crafting each component.Step 2: Applying Glue and Securing
Sven proceeds to apply glue along one edge of the flange, ensuring a secure bond when clamped into place. He emphasizes that this stage is crucial for maintaining the structural integrity of the flange, which in turn safeguards the living area beneath the canvas when hatches are open.Step 3: Allowing Time to Dry
After securely attaching the first portion of the flange, Sven allows ample time for it to dry before moving forward with additional steps. This patience and precision are key aspects of his successful boatbuilding methods.Step 4: Finishing Touches
Once the flange is fully dried, Sven removes the clamps carefully, ensuring no damage occurs during this process. He then moves on to attaching four more pieces onto these main frames, completing two pairs of flanges for the bulkhead hatches.The Final Touches
While two flanges form the primary support structure around the hatches, Sven mentions there are two additional pieces required at each end to ensure comprehensive protection. This attention to detail highlights his commitment to producing a durable and reliable design. “Sailing is about finding your path, whether it’s across an ocean or within yourself.” – Sven Yrvind In conclusion, making flanges around bulkhead hatches may seem complex at first glance, but by following Sven Yrvind’s meticulous process, enthusiasts can achieve professional-level results. Remember that the journey of boatbuilding is as rewarding as reaching your destination; it tests one’s patience and dedication. For those seeking to embark on this adventure or simply gain more insight into marine craftsmanship, Sven’s wisdom is invaluable.Once the flange is fully dried, Sven removes the clamps carefully, ensuring no damage occurs during this process. He then moves on to attaching four more pieces onto these main frames, completing two pairs of flanges for the bulkhead hatches.The Final Touches
While two flanges form the primary support structure around the hatches, Sven mentions there are two additional pieces required at each end to ensure comprehensive protection. This attention to detail highlights his commitment to producing a durable and reliable design. “Sailing is about finding your path, whether it’s across an ocean or within yourself.” – Sven Yrvind In conclusion, making flanges around bulkhead hatches may seem complex at first glance, but by following Sven Yrvind’s meticulous process, enthusiasts can achieve professional-level results. Remember that the journey of boatbuilding is as rewarding as reaching your destination; it tests one’s patience and dedication. For those seeking to embark on this adventure or simply gain more insight into marine craftsmanship, Sven’s wisdom is invaluable.Sven proceeds to apply glue along one edge of the flange, ensuring a secure bond when clamped into place. He emphasizes that this stage is crucial for maintaining the structural integrity of the flange, which in turn safeguards the living area beneath the canvas when hatches are open.Step 3: Allowing Time to Dry
After securely attaching the first portion of the flange, Sven allows ample time for it to dry before moving forward with additional steps. This patience and precision are key aspects of his successful boatbuilding methods.Step 4: Finishing Touches
Once the flange is fully dried, Sven removes the clamps carefully, ensuring no damage occurs during this process. He then moves on to attaching four more pieces onto these main frames, completing two pairs of flanges for the bulkhead hatches.The Final Touches
While two flanges form the primary support structure around the hatches, Sven mentions there are two additional pieces required at each end to ensure comprehensive protection. This attention to detail highlights his commitment to producing a durable and reliable design. “Sailing is about finding your path, whether it’s across an ocean or within yourself.” – Sven Yrvind In conclusion, making flanges around bulkhead hatches may seem complex at first glance, but by following Sven Yrvind’s meticulous process, enthusiasts can achieve professional-level results. Remember that the journey of boatbuilding is as rewarding as reaching your destination; it tests one’s patience and dedication. For those seeking to embark on this adventure or simply gain more insight into marine craftsmanship, Sven’s wisdom is invaluable.Sven begins by explaining that working on flanges vertically and horizontally is significantly easier than doing so in a flat position. To simplify the process further, he divides the task into two or three steps as suggested by fellow expert “for for.” This approach not only makes it more manageable but also allows for greater precision in crafting each component.Step 2: Applying Glue and Securing
Sven proceeds to apply glue along one edge of the flange, ensuring a secure bond when clamped into place. He emphasizes that this stage is crucial for maintaining the structural integrity of the flange, which in turn safeguards the living area beneath the canvas when hatches are open.Step 3: Allowing Time to Dry
After securely attaching the first portion of the flange, Sven allows ample time for it to dry before moving forward with additional steps. This patience and precision are key aspects of his successful boatbuilding methods.Step 4: Finishing Touches
Once the flange is fully dried, Sven removes the clamps carefully, ensuring no damage occurs during this process. He then moves on to attaching four more pieces onto these main frames, completing two pairs of flanges for the bulkhead hatches.The Final Touches
While two flanges form the primary support structure around the hatches, Sven mentions there are two additional pieces required at each end to ensure comprehensive protection. This attention to detail highlights his commitment to producing a durable and reliable design. “Sailing is about finding your path, whether it’s across an ocean or within yourself.” – Sven Yrvind In conclusion, making flanges around bulkhead hatches may seem complex at first glance, but by following Sven Yrvind’s meticulous process, enthusiasts can achieve professional-level results. Remember that the journey of boatbuilding is as rewarding as reaching your destination; it tests one’s patience and dedication. For those seeking to embark on this adventure or simply gain more insight into marine craftsmanship, Sven’s wisdom is invaluable.Sven Yrvind, a renowned yacht designer and sailor, shares valuable insights on creating flanges around bulkhead hatches for canvas protection in this enlightening video. By following his expert guidance, boat enthusiasts can ensure their living areas remain secure while allowing unhindered access through the hatches.Step 1: Starting with the Flange
Sven begins by explaining that working on flanges vertically and horizontally is significantly easier than doing so in a flat position. To simplify the process further, he divides the task into two or three steps as suggested by fellow expert “for for.” This approach not only makes it more manageable but also allows for greater precision in crafting each component.Step 2: Applying Glue and Securing
Sven proceeds to apply glue along one edge of the flange, ensuring a secure bond when clamped into place. He emphasizes that this stage is crucial for maintaining the structural integrity of the flange, which in turn safeguards the living area beneath the canvas when hatches are open.Step 3: Allowing Time to Dry
After securely attaching the first portion of the flange, Sven allows ample time for it to dry before moving forward with additional steps. This patience and precision are key aspects of his successful boatbuilding methods.Step 4: Finishing Touches
Once the flange is fully dried, Sven removes the clamps carefully, ensuring no damage occurs during this process. He then moves on to attaching four more pieces onto these main frames, completing two pairs of flanges for the bulkhead hatches.The Final Touches
While two flanges form the primary support structure around the hatches, Sven mentions there are two additional pieces required at each end to ensure comprehensive protection. This attention to detail highlights his commitment to producing a durable and reliable design. “Sailing is about finding your path, whether it’s across an ocean or within yourself.” – Sven Yrvind In conclusion, making flanges around bulkhead hatches may seem complex at first glance, but by following Sven Yrvind’s meticulous process, enthusiasts can achieve professional-level results. Remember that the journey of boatbuilding is as rewarding as reaching your destination; it tests one’s patience and dedication. For those seeking to embark on this adventure or simply gain more insight into marine craftsmanship, Sven’s wisdom is invaluable.Making Flanges Around Bulkhead Hatches for Canvas
Sven Yrvind, a renowned yacht designer and sailor, shares valuable insights on creating flanges around bulkhead hatches for canvas protection in this enlightening video. By following his expert guidance, boat enthusiasts can ensure their living areas remain secure while allowing unhindered access through the hatches.Step 1: Starting with the Flange
Sven begins by explaining that working on flanges vertically and horizontally is significantly easier than doing so in a flat position. To simplify the process further, he divides the task into two or three steps as suggested by fellow expert “for for.” This approach not only makes it more manageable but also allows for greater precision in crafting each component.Step 2: Applying Glue and Securing
Sven proceeds to apply glue along one edge of the flange, ensuring a secure bond when clamped into place. He emphasizes that this stage is crucial for maintaining the structural integrity of the flange, which in turn safeguards the living area beneath the canvas when hatches are open.Step 3: Allowing Time to Dry
After securely attaching the first portion of the flange, Sven allows ample time for it to dry before moving forward with additional steps. This patience and precision are key aspects of his successful boatbuilding methods.Step 4: Finishing Touches
Once the flange is fully dried, Sven removes the clamps carefully, ensuring no damage occurs during this process. He then moves on to attaching four more pieces onto these main frames, completing two pairs of flanges for the bulkhead hatches.The Final Touches
While two flanges form the primary support structure around the hatches, Sven mentions there are two additional pieces required at each end to ensure comprehensive protection. This attention to detail highlights his commitment to producing a durable and reliable design. “Sailing is about finding your path, whether it’s across an ocean or within yourself.” – Sven Yrvind In conclusion, making flanges around bulkhead hatches may seem complex at first glance, but by following Sven Yrvind’s meticulous process, enthusiasts can achieve professional-level results. Remember that the journey of boatbuilding is as rewarding as reaching your destination; it tests one’s patience and dedication. For those seeking to embark on this adventure or simply gain more insight into marine craftsmanship, Sven’s wisdom is invaluable.After securely attaching the first portion of the flange, Sven allows ample time for it to dry before moving forward with additional steps. This patience and precision are key aspects of his successful boatbuilding methods.Step 4: Finishing Touches
Once the flange is fully dried, Sven removes the clamps carefully, ensuring no damage occurs during this process. He then moves on to attaching four more pieces onto these main frames, completing two pairs of flanges for the bulkhead hatches.The Final Touches
While two flanges form the primary support structure around the hatches, Sven mentions there are two additional pieces required at each end to ensure comprehensive protection. This attention to detail highlights his commitment to producing a durable and reliable design. “Sailing is about finding your path, whether it’s across an ocean or within yourself.” – Sven Yrvind In conclusion, making flanges around bulkhead hatches may seem complex at first glance, but by following Sven Yrvind’s meticulous process, enthusiasts can achieve professional-level results. Remember that the journey of boatbuilding is as rewarding as reaching your destination; it tests one’s patience and dedication. For those seeking to embark on this adventure or simply gain more insight into marine craftsmanship, Sven’s wisdom is invaluable.Sven proceeds to apply glue along one edge of the flange, ensuring a secure bond when clamped into place. He emphasizes that this stage is crucial for maintaining the structural integrity of the flange, which in turn safeguards the living area beneath the canvas when hatches are open.Step 3: Allowing Time to Dry
After securely attaching the first portion of the flange, Sven allows ample time for it to dry before moving forward with additional steps. This patience and precision are key aspects of his successful boatbuilding methods.Step 4: Finishing Touches
Once the flange is fully dried, Sven removes the clamps carefully, ensuring no damage occurs during this process. He then moves on to attaching four more pieces onto these main frames, completing two pairs of flanges for the bulkhead hatches.The Final Touches
While two flanges form the primary support structure around the hatches, Sven mentions there are two additional pieces required at each end to ensure comprehensive protection. This attention to detail highlights his commitment to producing a durable and reliable design. “Sailing is about finding your path, whether it’s across an ocean or within yourself.” – Sven Yrvind In conclusion, making flanges around bulkhead hatches may seem complex at first glance, but by following Sven Yrvind’s meticulous process, enthusiasts can achieve professional-level results. Remember that the journey of boatbuilding is as rewarding as reaching your destination; it tests one’s patience and dedication. For those seeking to embark on this adventure or simply gain more insight into marine craftsmanship, Sven’s wisdom is invaluable.Sven begins by explaining that working on flanges vertically and horizontally is significantly easier than doing so in a flat position. To simplify the process further, he divides the task into two or three steps as suggested by fellow expert “for for.” This approach not only makes it more manageable but also allows for greater precision in crafting each component.Step 2: Applying Glue and Securing
Sven proceeds to apply glue along one edge of the flange, ensuring a secure bond when clamped into place. He emphasizes that this stage is crucial for maintaining the structural integrity of the flange, which in turn safeguards the living area beneath the canvas when hatches are open.Step 3: Allowing Time to Dry
After securely attaching the first portion of the flange, Sven allows ample time for it to dry before moving forward with additional steps. This patience and precision are key aspects of his successful boatbuilding methods.Step 4: Finishing Touches
Once the flange is fully dried, Sven removes the clamps carefully, ensuring no damage occurs during this process. He then moves on to attaching four more pieces onto these main frames, completing two pairs of flanges for the bulkhead hatches.The Final Touches
While two flanges form the primary support structure around the hatches, Sven mentions there are two additional pieces required at each end to ensure comprehensive protection. This attention to detail highlights his commitment to producing a durable and reliable design. “Sailing is about finding your path, whether it’s across an ocean or within yourself.” – Sven Yrvind In conclusion, making flanges around bulkhead hatches may seem complex at first glance, but by following Sven Yrvind’s meticulous process, enthusiasts can achieve professional-level results. Remember that the journey of boatbuilding is as rewarding as reaching your destination; it tests one’s patience and dedication. For those seeking to embark on this adventure or simply gain more insight into marine craftsmanship, Sven’s wisdom is invaluable.Sven Yrvind, a renowned yacht designer and sailor, shares valuable insights on creating flanges around bulkhead hatches for canvas protection in this enlightening video. By following his expert guidance, boat enthusiasts can ensure their living areas remain secure while allowing unhindered access through the hatches.Step 1: Starting with the Flange
Sven begins by explaining that working on flanges vertically and horizontally is significantly easier than doing so in a flat position. To simplify the process further, he divides the task into two or three steps as suggested by fellow expert “for for.” This approach not only makes it more manageable but also allows for greater precision in crafting each component.Step 2: Applying Glue and Securing
Sven proceeds to apply glue along one edge of the flange, ensuring a secure bond when clamped into place. He emphasizes that this stage is crucial for maintaining the structural integrity of the flange, which in turn safeguards the living area beneath the canvas when hatches are open.Step 3: Allowing Time to Dry
After securely attaching the first portion of the flange, Sven allows ample time for it to dry before moving forward with additional steps. This patience and precision are key aspects of his successful boatbuilding methods.Step 4: Finishing Touches
Once the flange is fully dried, Sven removes the clamps carefully, ensuring no damage occurs during this process. He then moves on to attaching four more pieces onto these main frames, completing two pairs of flanges for the bulkhead hatches.The Final Touches
While two flanges form the primary support structure around the hatches, Sven mentions there are two additional pieces required at each end to ensure comprehensive protection. This attention to detail highlights his commitment to producing a durable and reliable design. “Sailing is about finding your path, whether it’s across an ocean or within yourself.” – Sven Yrvind In conclusion, making flanges around bulkhead hatches may seem complex at first glance, but by following Sven Yrvind’s meticulous process, enthusiasts can achieve professional-level results. Remember that the journey of boatbuilding is as rewarding as reaching your destination; it tests one’s patience and dedication. For those seeking to embark on this adventure or simply gain more insight into marine craftsmanship, Sven’s wisdom is invaluable.Making Flanges Around Bulkhead Hatches for Canvas
Sven Yrvind, a renowned yacht designer and sailor, shares valuable insights on creating flanges around bulkhead hatches for canvas protection in this enlightening video. By following his expert guidance, boat enthusiasts can ensure their living areas remain secure while allowing unhindered access through the hatches.Step 1: Starting with the Flange
Sven begins by explaining that working on flanges vertically and horizontally is significantly easier than doing so in a flat position. To simplify the process further, he divides the task into two or three steps as suggested by fellow expert “for for.” This approach not only makes it more manageable but also allows for greater precision in crafting each component.Step 2: Applying Glue and Securing
Sven proceeds to apply glue along one edge of the flange, ensuring a secure bond when clamped into place. He emphasizes that this stage is crucial for maintaining the structural integrity of the flange, which in turn safeguards the living area beneath the canvas when hatches are open.Step 3: Allowing Time to Dry
After securely attaching the first portion of the flange, Sven allows ample time for it to dry before moving forward with additional steps. This patience and precision are key aspects of his successful boatbuilding methods.Step 4: Finishing Touches
Once the flange is fully dried, Sven removes the clamps carefully, ensuring no damage occurs during this process. He then moves on to attaching four more pieces onto these main frames, completing two pairs of flanges for the bulkhead hatches.The Final Touches
While two flanges form the primary support structure around the hatches, Sven mentions there are two additional pieces required at each end to ensure comprehensive protection. This attention to detail highlights his commitment to producing a durable and reliable design. “Sailing is about finding your path, whether it’s across an ocean or within yourself.” – Sven Yrvind In conclusion, making flanges around bulkhead hatches may seem complex at first glance, but by following Sven Yrvind’s meticulous process, enthusiasts can achieve professional-level results. Remember that the journey of boatbuilding is as rewarding as reaching your destination; it tests one’s patience and dedication. For those seeking to embark on this adventure or simply gain more insight into marine craftsmanship, Sven’s wisdom is invaluable.Once the flange is fully dried, Sven removes the clamps carefully, ensuring no damage occurs during this process. He then moves on to attaching four more pieces onto these main frames, completing two pairs of flanges for the bulkhead hatches.The Final Touches
While two flanges form the primary support structure around the hatches, Sven mentions there are two additional pieces required at each end to ensure comprehensive protection. This attention to detail highlights his commitment to producing a durable and reliable design. “Sailing is about finding your path, whether it’s across an ocean or within yourself.” – Sven Yrvind In conclusion, making flanges around bulkhead hatches may seem complex at first glance, but by following Sven Yrvind’s meticulous process, enthusiasts can achieve professional-level results. Remember that the journey of boatbuilding is as rewarding as reaching your destination; it tests one’s patience and dedication. For those seeking to embark on this adventure or simply gain more insight into marine craftsmanship, Sven’s wisdom is invaluable.After securely attaching the first portion of the flange, Sven allows ample time for it to dry before moving forward with additional steps. This patience and precision are key aspects of his successful boatbuilding methods.Step 4: Finishing Touches
Once the flange is fully dried, Sven removes the clamps carefully, ensuring no damage occurs during this process. He then moves on to attaching four more pieces onto these main frames, completing two pairs of flanges for the bulkhead hatches.The Final Touches
While two flanges form the primary support structure around the hatches, Sven mentions there are two additional pieces required at each end to ensure comprehensive protection. This attention to detail highlights his commitment to producing a durable and reliable design. “Sailing is about finding your path, whether it’s across an ocean or within yourself.” – Sven Yrvind In conclusion, making flanges around bulkhead hatches may seem complex at first glance, but by following Sven Yrvind’s meticulous process, enthusiasts can achieve professional-level results. Remember that the journey of boatbuilding is as rewarding as reaching your destination; it tests one’s patience and dedication. For those seeking to embark on this adventure or simply gain more insight into marine craftsmanship, Sven’s wisdom is invaluable.Sven proceeds to apply glue along one edge of the flange, ensuring a secure bond when clamped into place. He emphasizes that this stage is crucial for maintaining the structural integrity of the flange, which in turn safeguards the living area beneath the canvas when hatches are open.Step 3: Allowing Time to Dry
After securely attaching the first portion of the flange, Sven allows ample time for it to dry before moving forward with additional steps. This patience and precision are key aspects of his successful boatbuilding methods.Step 4: Finishing Touches
Once the flange is fully dried, Sven removes the clamps carefully, ensuring no damage occurs during this process. He then moves on to attaching four more pieces onto these main frames, completing two pairs of flanges for the bulkhead hatches.The Final Touches
While two flanges form the primary support structure around the hatches, Sven mentions there are two additional pieces required at each end to ensure comprehensive protection. This attention to detail highlights his commitment to producing a durable and reliable design. “Sailing is about finding your path, whether it’s across an ocean or within yourself.” – Sven Yrvind In conclusion, making flanges around bulkhead hatches may seem complex at first glance, but by following Sven Yrvind’s meticulous process, enthusiasts can achieve professional-level results. Remember that the journey of boatbuilding is as rewarding as reaching your destination; it tests one’s patience and dedication. For those seeking to embark on this adventure or simply gain more insight into marine craftsmanship, Sven’s wisdom is invaluable.Sven begins by explaining that working on flanges vertically and horizontally is significantly easier than doing so in a flat position. To simplify the process further, he divides the task into two or three steps as suggested by fellow expert “for for.” This approach not only makes it more manageable but also allows for greater precision in crafting each component.Step 2: Applying Glue and Securing
Sven proceeds to apply glue along one edge of the flange, ensuring a secure bond when clamped into place. He emphasizes that this stage is crucial for maintaining the structural integrity of the flange, which in turn safeguards the living area beneath the canvas when hatches are open.Step 3: Allowing Time to Dry
After securely attaching the first portion of the flange, Sven allows ample time for it to dry before moving forward with additional steps. This patience and precision are key aspects of his successful boatbuilding methods.Step 4: Finishing Touches
Once the flange is fully dried, Sven removes the clamps carefully, ensuring no damage occurs during this process. He then moves on to attaching four more pieces onto these main frames, completing two pairs of flanges for the bulkhead hatches.The Final Touches
While two flanges form the primary support structure around the hatches, Sven mentions there are two additional pieces required at each end to ensure comprehensive protection. This attention to detail highlights his commitment to producing a durable and reliable design. “Sailing is about finding your path, whether it’s across an ocean or within yourself.” – Sven Yrvind In conclusion, making flanges around bulkhead hatches may seem complex at first glance, but by following Sven Yrvind’s meticulous process, enthusiasts can achieve professional-level results. Remember that the journey of boatbuilding is as rewarding as reaching your destination; it tests one’s patience and dedication. For those seeking to embark on this adventure or simply gain more insight into marine craftsmanship, Sven’s wisdom is invaluable.Sven Yrvind, a renowned yacht designer and sailor, shares valuable insights on creating flanges around bulkhead hatches for canvas protection in this enlightening video. By following his expert guidance, boat enthusiasts can ensure their living areas remain secure while allowing unhindered access through the hatches.Step 1: Starting with the Flange
Sven begins by explaining that working on flanges vertically and horizontally is significantly easier than doing so in a flat position. To simplify the process further, he divides the task into two or three steps as suggested by fellow expert “for for.” This approach not only makes it more manageable but also allows for greater precision in crafting each component.Step 2: Applying Glue and Securing
Sven proceeds to apply glue along one edge of the flange, ensuring a secure bond when clamped into place. He emphasizes that this stage is crucial for maintaining the structural integrity of the flange, which in turn safeguards the living area beneath the canvas when hatches are open.Step 3: Allowing Time to Dry
After securely attaching the first portion of the flange, Sven allows ample time for it to dry before moving forward with additional steps. This patience and precision are key aspects of his successful boatbuilding methods.Step 4: Finishing Touches
Once the flange is fully dried, Sven removes the clamps carefully, ensuring no damage occurs during this process. He then moves on to attaching four more pieces onto these main frames, completing two pairs of flanges for the bulkhead hatches.The Final Touches
While two flanges form the primary support structure around the hatches, Sven mentions there are two additional pieces required at each end to ensure comprehensive protection. This attention to detail highlights his commitment to producing a durable and reliable design. “Sailing is about finding your path, whether it’s across an ocean or within yourself.” – Sven Yrvind In conclusion, making flanges around bulkhead hatches may seem complex at first glance, but by following Sven Yrvind’s meticulous process, enthusiasts can achieve professional-level results. Remember that the journey of boatbuilding is as rewarding as reaching your destination; it tests one’s patience and dedication. For those seeking to embark on this adventure or simply gain more insight into marine craftsmanship, Sven’s wisdom is invaluable.Making Flanges Around Bulkhead Hatches for Canvas
Sven Yrvind, a renowned yacht designer and sailor, shares valuable insights on creating flanges around bulkhead hatches for canvas protection in this enlightening video. By following his expert guidance, boat enthusiasts can ensure their living areas remain secure while allowing unhindered access through the hatches.Step 1: Starting with the Flange
Sven begins by explaining that working on flanges vertically and horizontally is significantly easier than doing so in a flat position. To simplify the process further, he divides the task into two or three steps as suggested by fellow expert “for for.” This approach not only makes it more manageable but also allows for greater precision in crafting each component.Step 2: Applying Glue and Securing
Sven proceeds to apply glue along one edge of the flange, ensuring a secure bond when clamped into place. He emphasizes that this stage is crucial for maintaining the structural integrity of the flange, which in turn safeguards the living area beneath the canvas when hatches are open.Step 3: Allowing Time to Dry
After securely attaching the first portion of the flange, Sven allows ample time for it to dry before moving forward with additional steps. This patience and precision are key aspects of his successful boatbuilding methods.Step 4: Finishing Touches
Once the flange is fully dried, Sven removes the clamps carefully, ensuring no damage occurs during this process. He then moves on to attaching four more pieces onto these main frames, completing two pairs of flanges for the bulkhead hatches.The Final Touches
While two flanges form the primary support structure around the hatches, Sven mentions there are two additional pieces required at each end to ensure comprehensive protection. This attention to detail highlights his commitment to producing a durable and reliable design. “Sailing is about finding your path, whether it’s across an ocean or within yourself.” – Sven Yrvind In conclusion, making flanges around bulkhead hatches may seem complex at first glance, but by following Sven Yrvind’s meticulous process, enthusiasts can achieve professional-level results. Remember that the journey of boatbuilding is as rewarding as reaching your destination; it tests one’s patience and dedication. For those seeking to embark on this adventure or simply gain more insight into marine craftsmanship, Sven’s wisdom is invaluable.Making Flanges Around Bulkhead Hatches for Canvas
Sven Yrvind, a renowned yacht designer and sailor, shares valuable insights on creating flanges around bulkhead hatches for canvas protection in this enlightening video. By following his expert guidance, boat enthusiasts can ensure their living areas remain secure while allowing unhindered access through the hatches.Step 1: Starting with the Flange
Sven begins by explaining that working on flanges vertically and horizontally is significantly easier than doing so in a flat position. To simplify the process further, he divides the task into two or three steps as suggested by fellow expert “for for.” This approach not only makes it more manageable but also allows for greater precision in crafting each component.Step 2: Applying Glue and Securing
Sven proceeds to apply glue along one edge of the flange, ensuring a secure bond when clamped into place. He emphasizes that this stage is crucial for maintaining the structural integrity of the flange, which in turn safeguards the living area beneath the canvas when hatches are open.Step 3: Allowing Time to Dry
After securely attaching the first portion of the flange, Sven allows ample time for it to dry before moving forward with additional steps. This patience and precision are key aspects of his successful boatbuilding methods.Step 4: Finishing Touches
Once the flange is fully dried, Sven removes the clamps carefully, ensuring no damage occurs during this process. He then moves on to attaching four more pieces onto these main frames, completing two pairs of flanges for the bulkhead hatches.The Final Touches
While two flanges form the primary support structure around the hatches, Sven mentions there are two additional pieces required at each end to ensure comprehensive protection. This attention to detail highlights his commitment to producing a durable and reliable design. “Sailing is about finding your path, whether it’s across an ocean or within yourself.” – Sven Yrvind In conclusion, making flanges around bulkhead hatches may seem complex at first glance, but by following Sven Yrvind’s meticulous process, enthusiasts can achieve professional-level results. Remember that the journey of boatbuilding is as rewarding as reaching your destination; it tests one’s patience and dedication. For those seeking to embark on this adventure or simply gain more insight into marine craftsmanship, Sven’s wisdom is invaluable.Sven Yrvind, a renowned yacht designer and sailor, shares valuable insights on creating flanges around bulkhead hatches for canvas protection in this enlightening video. By following his expert guidance, boat enthusiasts can ensure their living areas remain secure while allowing unhindered access through the hatches.Step 1: Starting with the Flange
Sven begins by explaining that working on flanges vertically and horizontally is significantly easier than doing so in a flat position. To simplify the process further, he divides the task into two or three steps as suggested by fellow expert “for for.” This approach not only makes it more manageable but also allows for greater precision in crafting each component.Step 2: Applying Glue and Securing
Sven proceeds to apply glue along one edge of the flange, ensuring a secure bond when clamped into place. He emphasizes that this stage is crucial for maintaining the structural integrity of the flange, which in turn safeguards the living area beneath the canvas when hatches are open.Step 3: Allowing Time to Dry
After securely attaching the first portion of the flange, Sven allows ample time for it to dry before moving forward with additional steps. This patience and precision are key aspects of his successful boatbuilding methods.Step 4: Finishing Touches
Once the flange is fully dried, Sven removes the clamps carefully, ensuring no damage occurs during this process. He then moves on to attaching four more pieces onto these main frames, completing two pairs of flanges for the bulkhead hatches.The Final Touches
While two flanges form the primary support structure around the hatches, Sven mentions there are two additional pieces required at each end to ensure comprehensive protection. This attention to detail highlights his commitment to producing a durable and reliable design. “Sailing is about finding your path, whether it’s across an ocean or within yourself.” – Sven Yrvind In conclusion, making flanges around bulkhead hatches may seem complex at first glance, but by following Sven Yrvind’s meticulous process, enthusiasts can achieve professional-level results. Remember that the journey of boatbuilding is as rewarding as reaching your destination; it tests one’s patience and dedication. For those seeking to embark on this adventure or simply gain more insight into marine craftsmanship, Sven’s wisdom is invaluable.Making Flanges Around Bulkhead Hatches for Canvas
Sven Yrvind, a renowned yacht designer and sailor, shares valuable insights on creating flanges around bulkhead hatches for canvas protection in this enlightening video. By following his expert guidance, boat enthusiasts can ensure their living areas remain secure while allowing unhindered access through the hatches.Step 1: Starting with the Flange
Sven begins by explaining that working on flanges vertically and horizontally is significantly easier than doing so in a flat position. To simplify the process further, he divides the task into two or three steps as suggested by fellow expert “for for.” This approach not only makes it more manageable but also allows for greater precision in crafting each component.Step 2: Applying Glue and Securing
Sven proceeds to apply glue along one edge of the flange, ensuring a secure bond when clamped into place. He emphasizes that this stage is crucial for maintaining the structural integrity of the flange, which in turn safeguards the living area beneath the canvas when hatches are open.Step 3: Allowing Time to Dry
After securely attaching the first portion of the flange, Sven allows ample time for it to dry before moving forward with additional steps. This patience and precision are key aspects of his successful boatbuilding methods.Step 4: Finishing Touches
Once the flange is fully dried, Sven removes the clamps carefully, ensuring no damage occurs during this process. He then moves on to attaching four more pieces onto these main frames, completing two pairs of flanges for the bulkhead hatches.The Final Touches
While two flanges form the primary support structure around the hatches, Sven mentions there are two additional pieces required at each end to ensure comprehensive protection. This attention to detail highlights his commitment to producing a durable and reliable design. “Sailing is about finding your path, whether it’s across an ocean or within yourself.” – Sven Yrvind In conclusion, making flanges around bulkhead hatches may seem complex at first glance, but by following Sven Yrvind’s meticulous process, enthusiasts can achieve professional-level results. Remember that the journey of boatbuilding is as rewarding as reaching your destination; it tests one’s patience and dedication. For those seeking to embark on this adventure or simply gain more insight into marine craftsmanship, Sven’s wisdom is invaluable.Once the flange is fully dried, Sven removes the clamps carefully, ensuring no damage occurs during this process. He then moves on to attaching four more pieces onto these main frames, completing two pairs of flanges for the bulkhead hatches.The Final Touches
While two flanges form the primary support structure around the hatches, Sven mentions there are two additional pieces required at each end to ensure comprehensive protection. This attention to detail highlights his commitment to producing a durable and reliable design. “Sailing is about finding your path, whether it’s across an ocean or within yourself.” – Sven Yrvind In conclusion, making flanges around bulkhead hatches may seem complex at first glance, but by following Sven Yrvind’s meticulous process, enthusiasts can achieve professional-level results. Remember that the journey of boatbuilding is as rewarding as reaching your destination; it tests one’s patience and dedication. For those seeking to embark on this adventure or simply gain more insight into marine craftsmanship, Sven’s wisdom is invaluable.Sven Yrvind, a renowned yacht designer and sailor, shares valuable insights on creating flanges around bulkhead hatches for canvas protection in this enlightening video. By following his expert guidance, boat enthusiasts can ensure their living areas remain secure while allowing unhindered access through the hatches.Step 1: Starting with the Flange
Sven begins by explaining that working on flanges vertically and horizontally is significantly easier than doing so in a flat position. To simplify the process further, he divides the task into two or three steps as suggested by fellow expert “for for.” This approach not only makes it more manageable but also allows for greater precision in crafting each component.Step 2: Applying Glue and Securing
Sven proceeds to apply glue along one edge of the flange, ensuring a secure bond when clamped into place. He emphasizes that this stage is crucial for maintaining the structural integrity of the flange, which in turn safeguards the living area beneath the canvas when hatches are open.Step 3: Allowing Time to Dry
After securely attaching the first portion of the flange, Sven allows ample time for it to dry before moving forward with additional steps. This patience and precision are key aspects of his successful boatbuilding methods.Step 4: Finishing Touches
Once the flange is fully dried, Sven removes the clamps carefully, ensuring no damage occurs during this process. He then moves on to attaching four more pieces onto these main frames, completing two pairs of flanges for the bulkhead hatches.The Final Touches
While two flanges form the primary support structure around the hatches, Sven mentions there are two additional pieces required at each end to ensure comprehensive protection. This attention to detail highlights his commitment to producing a durable and reliable design. “Sailing is about finding your path, whether it’s across an ocean or within yourself.” – Sven Yrvind In conclusion, making flanges around bulkhead hatches may seem complex at first glance, but by following Sven Yrvind’s meticulous process, enthusiasts can achieve professional-level results. Remember that the journey of boatbuilding is as rewarding as reaching your destination; it tests one’s patience and dedication. For those seeking to embark on this adventure or simply gain more insight into marine craftsmanship, Sven’s wisdom is invaluable.Making Flanges Around Bulkhead Hatches for Canvas
Sven Yrvind, a renowned yacht designer and sailor, shares valuable insights on creating flanges around bulkhead hatches for canvas protection in this enlightening video. By following his expert guidance, boat enthusiasts can ensure their living areas remain secure while allowing unhindered access through the hatches.Step 1: Starting with the Flange
Sven begins by explaining that working on flanges vertically and horizontally is significantly easier than doing so in a flat position. To simplify the process further, he divides the task into two or three steps as suggested by fellow expert “for for.” This approach not only makes it more manageable but also allows for greater precision in crafting each component.Step 2: Applying Glue and Securing
Sven proceeds to apply glue along one edge of the flange, ensuring a secure bond when clamped into place. He emphasizes that this stage is crucial for maintaining the structural integrity of the flange, which in turn safeguards the living area beneath the canvas when hatches are open.Step 3: Allowing Time to Dry
After securely attaching the first portion of the flange, Sven allows ample time for it to dry before moving forward with additional steps. This patience and precision are key aspects of his successful boatbuilding methods.Step 4: Finishing Touches
Once the flange is fully dried, Sven removes the clamps carefully, ensuring no damage occurs during this process. He then moves on to attaching four more pieces onto these main frames, completing two pairs of flanges for the bulkhead hatches.The Final Touches
While two flanges form the primary support structure around the hatches, Sven mentions there are two additional pieces required at each end to ensure comprehensive protection. This attention to detail highlights his commitment to producing a durable and reliable design. “Sailing is about finding your path, whether it’s across an ocean or within yourself.” – Sven Yrvind In conclusion, making flanges around bulkhead hatches may seem complex at first glance, but by following Sven Yrvind’s meticulous process, enthusiasts can achieve professional-level results. Remember that the journey of boatbuilding is as rewarding as reaching your destination; it tests one’s patience and dedication. For those seeking to embark on this adventure or simply gain more insight into marine craftsmanship, Sven’s wisdom is invaluable.After securely attaching the first portion of the flange, Sven allows ample time for it to dry before moving forward with additional steps. This patience and precision are key aspects of his successful boatbuilding methods.Step 4: Finishing Touches
Once the flange is fully dried, Sven removes the clamps carefully, ensuring no damage occurs during this process. He then moves on to attaching four more pieces onto these main frames, completing two pairs of flanges for the bulkhead hatches.The Final Touches
While two flanges form the primary support structure around the hatches, Sven mentions there are two additional pieces required at each end to ensure comprehensive protection. This attention to detail highlights his commitment to producing a durable and reliable design. “Sailing is about finding your path, whether it’s across an ocean or within yourself.” – Sven Yrvind In conclusion, making flanges around bulkhead hatches may seem complex at first glance, but by following Sven Yrvind’s meticulous process, enthusiasts can achieve professional-level results. Remember that the journey of boatbuilding is as rewarding as reaching your destination; it tests one’s patience and dedication. For those seeking to embark on this adventure or simply gain more insight into marine craftsmanship, Sven’s wisdom is invaluable.Sven Yrvind, a renowned yacht designer and sailor, shares valuable insights on creating flanges around bulkhead hatches for canvas protection in this enlightening video. By following his expert guidance, boat enthusiasts can ensure their living areas remain secure while allowing unhindered access through the hatches.Step 1: Starting with the Flange
Sven begins by explaining that working on flanges vertically and horizontally is significantly easier than doing so in a flat position. To simplify the process further, he divides the task into two or three steps as suggested by fellow expert “for for.” This approach not only makes it more manageable but also allows for greater precision in crafting each component.Step 2: Applying Glue and Securing
Sven proceeds to apply glue along one edge of the flange, ensuring a secure bond when clamped into place. He emphasizes that this stage is crucial for maintaining the structural integrity of the flange, which in turn safeguards the living area beneath the canvas when hatches are open.Step 3: Allowing Time to Dry
After securely attaching the first portion of the flange, Sven allows ample time for it to dry before moving forward with additional steps. This patience and precision are key aspects of his successful boatbuilding methods.Step 4: Finishing Touches
Once the flange is fully dried, Sven removes the clamps carefully, ensuring no damage occurs during this process. He then moves on to attaching four more pieces onto these main frames, completing two pairs of flanges for the bulkhead hatches.The Final Touches
While two flanges form the primary support structure around the hatches, Sven mentions there are two additional pieces required at each end to ensure comprehensive protection. This attention to detail highlights his commitment to producing a durable and reliable design. “Sailing is about finding your path, whether it’s across an ocean or within yourself.” – Sven Yrvind In conclusion, making flanges around bulkhead hatches may seem complex at first glance, but by following Sven Yrvind’s meticulous process, enthusiasts can achieve professional-level results. Remember that the journey of boatbuilding is as rewarding as reaching your destination; it tests one’s patience and dedication. For those seeking to embark on this adventure or simply gain more insight into marine craftsmanship, Sven’s wisdom is invaluable.Making Flanges Around Bulkhead Hatches for Canvas
Sven Yrvind, a renowned yacht designer and sailor, shares valuable insights on creating flanges around bulkhead hatches for canvas protection in this enlightening video. By following his expert guidance, boat enthusiasts can ensure their living areas remain secure while allowing unhindered access through the hatches.Step 1: Starting with the Flange
Sven begins by explaining that working on flanges vertically and horizontally is significantly easier than doing so in a flat position. To simplify the process further, he divides the task into two or three steps as suggested by fellow expert “for for.” This approach not only makes it more manageable but also allows for greater precision in crafting each component.Step 2: Applying Glue and Securing
Sven proceeds to apply glue along one edge of the flange, ensuring a secure bond when clamped into place. He emphasizes that this stage is crucial for maintaining the structural integrity of the flange, which in turn safeguards the living area beneath the canvas when hatches are open.Step 3: Allowing Time to Dry
After securely attaching the first portion of the flange, Sven allows ample time for it to dry before moving forward with additional steps. This patience and precision are key aspects of his successful boatbuilding methods.Step 4: Finishing Touches
Once the flange is fully dried, Sven removes the clamps carefully, ensuring no damage occurs during this process. He then moves on to attaching four more pieces onto these main frames, completing two pairs of flanges for the bulkhead hatches.The Final Touches
While two flanges form the primary support structure around the hatches, Sven mentions there are two additional pieces required at each end to ensure comprehensive protection. This attention to detail highlights his commitment to producing a durable and reliable design. “Sailing is about finding your path, whether it’s across an ocean or within yourself.” – Sven Yrvind In conclusion, making flanges around bulkhead hatches may seem complex at first glance, but by following Sven Yrvind’s meticulous process, enthusiasts can achieve professional-level results. Remember that the journey of boatbuilding is as rewarding as reaching your destination; it tests one’s patience and dedication. For those seeking to embark on this adventure or simply gain more insight into marine craftsmanship, Sven’s wisdom is invaluable.Sven proceeds to apply glue along one edge of the flange, ensuring a secure bond when clamped into place. He emphasizes that this stage is crucial for maintaining the structural integrity of the flange, which in turn safeguards the living area beneath the canvas when hatches are open.Step 3: Allowing Time to Dry
After securely attaching the first portion of the flange, Sven allows ample time for it to dry before moving forward with additional steps. This patience and precision are key aspects of his successful boatbuilding methods.Step 4: Finishing Touches
Once the flange is fully dried, Sven removes the clamps carefully, ensuring no damage occurs during this process. He then moves on to attaching four more pieces onto these main frames, completing two pairs of flanges for the bulkhead hatches.The Final Touches
While two flanges form the primary support structure around the hatches, Sven mentions there are two additional pieces required at each end to ensure comprehensive protection. This attention to detail highlights his commitment to producing a durable and reliable design. “Sailing is about finding your path, whether it’s across an ocean or within yourself.” – Sven Yrvind In conclusion, making flanges around bulkhead hatches may seem complex at first glance, but by following Sven Yrvind’s meticulous process, enthusiasts can achieve professional-level results. Remember that the journey of boatbuilding is as rewarding as reaching your destination; it tests one’s patience and dedication. For those seeking to embark on this adventure or simply gain more insight into marine craftsmanship, Sven’s wisdom is invaluable.Sven Yrvind, a renowned yacht designer and sailor, shares valuable insights on creating flanges around bulkhead hatches for canvas protection in this enlightening video. By following his expert guidance, boat enthusiasts can ensure their living areas remain secure while allowing unhindered access through the hatches.Step 1: Starting with the Flange
Sven begins by explaining that working on flanges vertically and horizontally is significantly easier than doing so in a flat position. To simplify the process further, he divides the task into two or three steps as suggested by fellow expert “for for.” This approach not only makes it more manageable but also allows for greater precision in crafting each component.Step 2: Applying Glue and Securing
Sven proceeds to apply glue along one edge of the flange, ensuring a secure bond when clamped into place. He emphasizes that this stage is crucial for maintaining the structural integrity of the flange, which in turn safeguards the living area beneath the canvas when hatches are open.Step 3: Allowing Time to Dry
After securely attaching the first portion of the flange, Sven allows ample time for it to dry before moving forward with additional steps. This patience and precision are key aspects of his successful boatbuilding methods.Step 4: Finishing Touches
Once the flange is fully dried, Sven removes the clamps carefully, ensuring no damage occurs during this process. He then moves on to attaching four more pieces onto these main frames, completing two pairs of flanges for the bulkhead hatches.The Final Touches
While two flanges form the primary support structure around the hatches, Sven mentions there are two additional pieces required at each end to ensure comprehensive protection. This attention to detail highlights his commitment to producing a durable and reliable design. “Sailing is about finding your path, whether it’s across an ocean or within yourself.” – Sven Yrvind In conclusion, making flanges around bulkhead hatches may seem complex at first glance, but by following Sven Yrvind’s meticulous process, enthusiasts can achieve professional-level results. Remember that the journey of boatbuilding is as rewarding as reaching your destination; it tests one’s patience and dedication. For those seeking to embark on this adventure or simply gain more insight into marine craftsmanship, Sven’s wisdom is invaluable.Making Flanges Around Bulkhead Hatches for Canvas
Sven Yrvind, a renowned yacht designer and sailor, shares valuable insights on creating flanges around bulkhead hatches for canvas protection in this enlightening video. By following his expert guidance, boat enthusiasts can ensure their living areas remain secure while allowing unhindered access through the hatches.Step 1: Starting with the Flange
Sven begins by explaining that working on flanges vertically and horizontally is significantly easier than doing so in a flat position. To simplify the process further, he divides the task into two or three steps as suggested by fellow expert “for for.” This approach not only makes it more manageable but also allows for greater precision in crafting each component.Step 2: Applying Glue and Securing
Sven proceeds to apply glue along one edge of the flange, ensuring a secure bond when clamped into place. He emphasizes that this stage is crucial for maintaining the structural integrity of the flange, which in turn safeguards the living area beneath the canvas when hatches are open.Step 3: Allowing Time to Dry
After securely attaching the first portion of the flange, Sven allows ample time for it to dry before moving forward with additional steps. This patience and precision are key aspects of his successful boatbuilding methods.Step 4: Finishing Touches
Once the flange is fully dried, Sven removes the clamps carefully, ensuring no damage occurs during this process. He then moves on to attaching four more pieces onto these main frames, completing two pairs of flanges for the bulkhead hatches.The Final Touches
While two flanges form the primary support structure around the hatches, Sven mentions there are two additional pieces required at each end to ensure comprehensive protection. This attention to detail highlights his commitment to producing a durable and reliable design. “Sailing is about finding your path, whether it’s across an ocean or within yourself.” – Sven Yrvind In conclusion, making flanges around bulkhead hatches may seem complex at first glance, but by following Sven Yrvind’s meticulous process, enthusiasts can achieve professional-level results. Remember that the journey of boatbuilding is as rewarding as reaching your destination; it tests one’s patience and dedication. For those seeking to embark on this adventure or simply gain more insight into marine craftsmanship, Sven’s wisdom is invaluable.Sven begins by explaining that working on flanges vertically and horizontally is significantly easier than doing so in a flat position. To simplify the process further, he divides the task into two or three steps as suggested by fellow expert “for for.” This approach not only makes it more manageable but also allows for greater precision in crafting each component.Step 2: Applying Glue and Securing
Sven proceeds to apply glue along one edge of the flange, ensuring a secure bond when clamped into place. He emphasizes that this stage is crucial for maintaining the structural integrity of the flange, which in turn safeguards the living area beneath the canvas when hatches are open.Step 3: Allowing Time to Dry
After securely attaching the first portion of the flange, Sven allows ample time for it to dry before moving forward with additional steps. This patience and precision are key aspects of his successful boatbuilding methods.Step 4: Finishing Touches
Once the flange is fully dried, Sven removes the clamps carefully, ensuring no damage occurs during this process. He then moves on to attaching four more pieces onto these main frames, completing two pairs of flanges for the bulkhead hatches.The Final Touches
While two flanges form the primary support structure around the hatches, Sven mentions there are two additional pieces required at each end to ensure comprehensive protection. This attention to detail highlights his commitment to producing a durable and reliable design. “Sailing is about finding your path, whether it’s across an ocean or within yourself.” – Sven Yrvind In conclusion, making flanges around bulkhead hatches may seem complex at first glance, but by following Sven Yrvind’s meticulous process, enthusiasts can achieve professional-level results. Remember that the journey of boatbuilding is as rewarding as reaching your destination; it tests one’s patience and dedication. For those seeking to embark on this adventure or simply gain more insight into marine craftsmanship, Sven’s wisdom is invaluable.Sven Yrvind, a renowned yacht designer and sailor, shares valuable insights on creating flanges around bulkhead hatches for canvas protection in this enlightening video. By following his expert guidance, boat enthusiasts can ensure their living areas remain secure while allowing unhindered access through the hatches.Step 1: Starting with the Flange
Sven begins by explaining that working on flanges vertically and horizontally is significantly easier than doing so in a flat position. To simplify the process further, he divides the task into two or three steps as suggested by fellow expert “for for.” This approach not only makes it more manageable but also allows for greater precision in crafting each component.Step 2: Applying Glue and Securing
Sven proceeds to apply glue along one edge of the flange, ensuring a secure bond when clamped into place. He emphasizes that this stage is crucial for maintaining the structural integrity of the flange, which in turn safeguards the living area beneath the canvas when hatches are open.Step 3: Allowing Time to Dry
After securely attaching the first portion of the flange, Sven allows ample time for it to dry before moving forward with additional steps. This patience and precision are key aspects of his successful boatbuilding methods.Step 4: Finishing Touches
Once the flange is fully dried, Sven removes the clamps carefully, ensuring no damage occurs during this process. He then moves on to attaching four more pieces onto these main frames, completing two pairs of flanges for the bulkhead hatches.The Final Touches
While two flanges form the primary support structure around the hatches, Sven mentions there are two additional pieces required at each end to ensure comprehensive protection. This attention to detail highlights his commitment to producing a durable and reliable design. “Sailing is about finding your path, whether it’s across an ocean or within yourself.” – Sven Yrvind In conclusion, making flanges around bulkhead hatches may seem complex at first glance, but by following Sven Yrvind’s meticulous process, enthusiasts can achieve professional-level results. Remember that the journey of boatbuilding is as rewarding as reaching your destination; it tests one’s patience and dedication. For those seeking to embark on this adventure or simply gain more insight into marine craftsmanship, Sven’s wisdom is invaluable.Making Flanges Around Bulkhead Hatches for Canvas
Sven Yrvind, a renowned yacht designer and sailor, shares valuable insights on creating flanges around bulkhead hatches for canvas protection in this enlightening video. By following his expert guidance, boat enthusiasts can ensure their living areas remain secure while allowing unhindered access through the hatches.Step 1: Starting with the Flange
Sven begins by explaining that working on flanges vertically and horizontally is significantly easier than doing so in a flat position. To simplify the process further, he divides the task into two or three steps as suggested by fellow expert “for for.” This approach not only makes it more manageable but also allows for greater precision in crafting each component.Step 2: Applying Glue and Securing
Sven proceeds to apply glue along one edge of the flange, ensuring a secure bond when clamped into place. He emphasizes that this stage is crucial for maintaining the structural integrity of the flange, which in turn safeguards the living area beneath the canvas when hatches are open.Step 3: Allowing Time to Dry
After securely attaching the first portion of the flange, Sven allows ample time for it to dry before moving forward with additional steps. This patience and precision are key aspects of his successful boatbuilding methods.Step 4: Finishing Touches
Once the flange is fully dried, Sven removes the clamps carefully, ensuring no damage occurs during this process. He then moves on to attaching four more pieces onto these main frames, completing two pairs of flanges for the bulkhead hatches.The Final Touches
While two flanges form the primary support structure around the hatches, Sven mentions there are two additional pieces required at each end to ensure comprehensive protection. This attention to detail highlights his commitment to producing a durable and reliable design. “Sailing is about finding your path, whether it’s across an ocean or within yourself.” – Sven Yrvind In conclusion, making flanges around bulkhead hatches may seem complex at first glance, but by following Sven Yrvind’s meticulous process, enthusiasts can achieve professional-level results. Remember that the journey of boatbuilding is as rewarding as reaching your destination; it tests one’s patience and dedication. For those seeking to embark on this adventure or simply gain more insight into marine craftsmanship, Sven’s wisdom is invaluable.Once the flange is fully dried, Sven removes the clamps carefully, ensuring no damage occurs during this process. He then moves on to attaching four more pieces onto these main frames, completing two pairs of flanges for the bulkhead hatches.The Final Touches
While two flanges form the primary support structure around the hatches, Sven mentions there are two additional pieces required at each end to ensure comprehensive protection. This attention to detail highlights his commitment to producing a durable and reliable design. “Sailing is about finding your path, whether it’s across an ocean or within yourself.” – Sven Yrvind In conclusion, making flanges around bulkhead hatches may seem complex at first glance, but by following Sven Yrvind’s meticulous process, enthusiasts can achieve professional-level results. Remember that the journey of boatbuilding is as rewarding as reaching your destination; it tests one’s patience and dedication. For those seeking to embark on this adventure or simply gain more insight into marine craftsmanship, Sven’s wisdom is invaluable.Sven begins by explaining that working on flanges vertically and horizontally is significantly easier than doing so in a flat position. To simplify the process further, he divides the task into two or three steps as suggested by fellow expert “for for.” This approach not only makes it more manageable but also allows for greater precision in crafting each component.Step 2: Applying Glue and Securing
Sven proceeds to apply glue along one edge of the flange, ensuring a secure bond when clamped into place. He emphasizes that this stage is crucial for maintaining the structural integrity of the flange, which in turn safeguards the living area beneath the canvas when hatches are open.Step 3: Allowing Time to Dry
After securely attaching the first portion of the flange, Sven allows ample time for it to dry before moving forward with additional steps. This patience and precision are key aspects of his successful boatbuilding methods.Step 4: Finishing Touches
Once the flange is fully dried, Sven removes the clamps carefully, ensuring no damage occurs during this process. He then moves on to attaching four more pieces onto these main frames, completing two pairs of flanges for the bulkhead hatches.The Final Touches
While two flanges form the primary support structure around the hatches, Sven mentions there are two additional pieces required at each end to ensure comprehensive protection. This attention to detail highlights his commitment to producing a durable and reliable design. “Sailing is about finding your path, whether it’s across an ocean or within yourself.” – Sven Yrvind In conclusion, making flanges around bulkhead hatches may seem complex at first glance, but by following Sven Yrvind’s meticulous process, enthusiasts can achieve professional-level results. Remember that the journey of boatbuilding is as rewarding as reaching your destination; it tests one’s patience and dedication. For those seeking to embark on this adventure or simply gain more insight into marine craftsmanship, Sven’s wisdom is invaluable.Sven Yrvind, a renowned yacht designer and sailor, shares valuable insights on creating flanges around bulkhead hatches for canvas protection in this enlightening video. By following his expert guidance, boat enthusiasts can ensure their living areas remain secure while allowing unhindered access through the hatches.Step 1: Starting with the Flange
Sven begins by explaining that working on flanges vertically and horizontally is significantly easier than doing so in a flat position. To simplify the process further, he divides the task into two or three steps as suggested by fellow expert “for for.” This approach not only makes it more manageable but also allows for greater precision in crafting each component.Step 2: Applying Glue and Securing
Sven proceeds to apply glue along one edge of the flange, ensuring a secure bond when clamped into place. He emphasizes that this stage is crucial for maintaining the structural integrity of the flange, which in turn safeguards the living area beneath the canvas when hatches are open.Step 3: Allowing Time to Dry
After securely attaching the first portion of the flange, Sven allows ample time for it to dry before moving forward with additional steps. This patience and precision are key aspects of his successful boatbuilding methods.Step 4: Finishing Touches
Once the flange is fully dried, Sven removes the clamps carefully, ensuring no damage occurs during this process. He then moves on to attaching four more pieces onto these main frames, completing two pairs of flanges for the bulkhead hatches.The Final Touches
While two flanges form the primary support structure around the hatches, Sven mentions there are two additional pieces required at each end to ensure comprehensive protection. This attention to detail highlights his commitment to producing a durable and reliable design. “Sailing is about finding your path, whether it’s across an ocean or within yourself.” – Sven Yrvind In conclusion, making flanges around bulkhead hatches may seem complex at first glance, but by following Sven Yrvind’s meticulous process, enthusiasts can achieve professional-level results. Remember that the journey of boatbuilding is as rewarding as reaching your destination; it tests one’s patience and dedication. For those seeking to embark on this adventure or simply gain more insight into marine craftsmanship, Sven’s wisdom is invaluable.Making Flanges Around Bulkhead Hatches for Canvas
Sven Yrvind, a renowned yacht designer and sailor, shares valuable insights on creating flanges around bulkhead hatches for canvas protection in this enlightening video. By following his expert guidance, boat enthusiasts can ensure their living areas remain secure while allowing unhindered access through the hatches.Step 1: Starting with the Flange
Sven begins by explaining that working on flanges vertically and horizontally is significantly easier than doing so in a flat position. To simplify the process further, he divides the task into two or three steps as suggested by fellow expert “for for.” This approach not only makes it more manageable but also allows for greater precision in crafting each component.Step 2: Applying Glue and Securing
Sven proceeds to apply glue along one edge of the flange, ensuring a secure bond when clamped into place. He emphasizes that this stage is crucial for maintaining the structural integrity of the flange, which in turn safeguards the living area beneath the canvas when hatches are open.Step 3: Allowing Time to Dry
After securely attaching the first portion of the flange, Sven allows ample time for it to dry before moving forward with additional steps. This patience and precision are key aspects of his successful boatbuilding methods.Step 4: Finishing Touches
Once the flange is fully dried, Sven removes the clamps carefully, ensuring no damage occurs during this process. He then moves on to attaching four more pieces onto these main frames, completing two pairs of flanges for the bulkhead hatches.The Final Touches
While two flanges form the primary support structure around the hatches, Sven mentions there are two additional pieces required at each end to ensure comprehensive protection. This attention to detail highlights his commitment to producing a durable and reliable design. “Sailing is about finding your path, whether it’s across an ocean or within yourself.” – Sven Yrvind In conclusion, making flanges around bulkhead hatches may seem complex at first glance, but by following Sven Yrvind’s meticulous process, enthusiasts can achieve professional-level results. Remember that the journey of boatbuilding is as rewarding as reaching your destination; it tests one’s patience and dedication. For those seeking to embark on this adventure or simply gain more insight into marine craftsmanship, Sven’s wisdom is invaluable.After securely attaching the first portion of the flange, Sven allows ample time for it to dry before moving forward with additional steps. This patience and precision are key aspects of his successful boatbuilding methods.Step 4: Finishing Touches
Once the flange is fully dried, Sven removes the clamps carefully, ensuring no damage occurs during this process. He then moves on to attaching four more pieces onto these main frames, completing two pairs of flanges for the bulkhead hatches.The Final Touches
While two flanges form the primary support structure around the hatches, Sven mentions there are two additional pieces required at each end to ensure comprehensive protection. This attention to detail highlights his commitment to producing a durable and reliable design. “Sailing is about finding your path, whether it’s across an ocean or within yourself.” – Sven Yrvind In conclusion, making flanges around bulkhead hatches may seem complex at first glance, but by following Sven Yrvind’s meticulous process, enthusiasts can achieve professional-level results. Remember that the journey of boatbuilding is as rewarding as reaching your destination; it tests one’s patience and dedication. For those seeking to embark on this adventure or simply gain more insight into marine craftsmanship, Sven’s wisdom is invaluable.Sven begins by explaining that working on flanges vertically and horizontally is significantly easier than doing so in a flat position. To simplify the process further, he divides the task into two or three steps as suggested by fellow expert “for for.” This approach not only makes it more manageable but also allows for greater precision in crafting each component.Step 2: Applying Glue and Securing
Sven proceeds to apply glue along one edge of the flange, ensuring a secure bond when clamped into place. He emphasizes that this stage is crucial for maintaining the structural integrity of the flange, which in turn safeguards the living area beneath the canvas when hatches are open.Step 3: Allowing Time to Dry
After securely attaching the first portion of the flange, Sven allows ample time for it to dry before moving forward with additional steps. This patience and precision are key aspects of his successful boatbuilding methods.Step 4: Finishing Touches
Once the flange is fully dried, Sven removes the clamps carefully, ensuring no damage occurs during this process. He then moves on to attaching four more pieces onto these main frames, completing two pairs of flanges for the bulkhead hatches.The Final Touches
While two flanges form the primary support structure around the hatches, Sven mentions there are two additional pieces required at each end to ensure comprehensive protection. This attention to detail highlights his commitment to producing a durable and reliable design. “Sailing is about finding your path, whether it’s across an ocean or within yourself.” – Sven Yrvind In conclusion, making flanges around bulkhead hatches may seem complex at first glance, but by following Sven Yrvind’s meticulous process, enthusiasts can achieve professional-level results. Remember that the journey of boatbuilding is as rewarding as reaching your destination; it tests one’s patience and dedication. For those seeking to embark on this adventure or simply gain more insight into marine craftsmanship, Sven’s wisdom is invaluable.Sven Yrvind, a renowned yacht designer and sailor, shares valuable insights on creating flanges around bulkhead hatches for canvas protection in this enlightening video. By following his expert guidance, boat enthusiasts can ensure their living areas remain secure while allowing unhindered access through the hatches.Step 1: Starting with the Flange
Sven begins by explaining that working on flanges vertically and horizontally is significantly easier than doing so in a flat position. To simplify the process further, he divides the task into two or three steps as suggested by fellow expert “for for.” This approach not only makes it more manageable but also allows for greater precision in crafting each component.Step 2: Applying Glue and Securing
Sven proceeds to apply glue along one edge of the flange, ensuring a secure bond when clamped into place. He emphasizes that this stage is crucial for maintaining the structural integrity of the flange, which in turn safeguards the living area beneath the canvas when hatches are open.Step 3: Allowing Time to Dry
After securely attaching the first portion of the flange, Sven allows ample time for it to dry before moving forward with additional steps. This patience and precision are key aspects of his successful boatbuilding methods.Step 4: Finishing Touches
Once the flange is fully dried, Sven removes the clamps carefully, ensuring no damage occurs during this process. He then moves on to attaching four more pieces onto these main frames, completing two pairs of flanges for the bulkhead hatches.The Final Touches
While two flanges form the primary support structure around the hatches, Sven mentions there are two additional pieces required at each end to ensure comprehensive protection. This attention to detail highlights his commitment to producing a durable and reliable design. “Sailing is about finding your path, whether it’s across an ocean or within yourself.” – Sven Yrvind In conclusion, making flanges around bulkhead hatches may seem complex at first glance, but by following Sven Yrvind’s meticulous process, enthusiasts can achieve professional-level results. Remember that the journey of boatbuilding is as rewarding as reaching your destination; it tests one’s patience and dedication. For those seeking to embark on this adventure or simply gain more insight into marine craftsmanship, Sven’s wisdom is invaluable.Making Flanges Around Bulkhead Hatches for Canvas
Sven Yrvind, a renowned yacht designer and sailor, shares valuable insights on creating flanges around bulkhead hatches for canvas protection in this enlightening video. By following his expert guidance, boat enthusiasts can ensure their living areas remain secure while allowing unhindered access through the hatches.Step 1: Starting with the Flange
Sven begins by explaining that working on flanges vertically and horizontally is significantly easier than doing so in a flat position. To simplify the process further, he divides the task into two or three steps as suggested by fellow expert “for for.” This approach not only makes it more manageable but also allows for greater precision in crafting each component.Step 2: Applying Glue and Securing
Sven proceeds to apply glue along one edge of the flange, ensuring a secure bond when clamped into place. He emphasizes that this stage is crucial for maintaining the structural integrity of the flange, which in turn safeguards the living area beneath the canvas when hatches are open.Step 3: Allowing Time to Dry
After securely attaching the first portion of the flange, Sven allows ample time for it to dry before moving forward with additional steps. This patience and precision are key aspects of his successful boatbuilding methods.Step 4: Finishing Touches
Once the flange is fully dried, Sven removes the clamps carefully, ensuring no damage occurs during this process. He then moves on to attaching four more pieces onto these main frames, completing two pairs of flanges for the bulkhead hatches.The Final Touches
While two flanges form the primary support structure around the hatches, Sven mentions there are two additional pieces required at each end to ensure comprehensive protection. This attention to detail highlights his commitment to producing a durable and reliable design. “Sailing is about finding your path, whether it’s across an ocean or within yourself.” – Sven Yrvind In conclusion, making flanges around bulkhead hatches may seem complex at first glance, but by following Sven Yrvind’s meticulous process, enthusiasts can achieve professional-level results. Remember that the journey of boatbuilding is as rewarding as reaching your destination; it tests one’s patience and dedication. For those seeking to embark on this adventure or simply gain more insight into marine craftsmanship, Sven’s wisdom is invaluable.Sven proceeds to apply glue along one edge of the flange, ensuring a secure bond when clamped into place. He emphasizes that this stage is crucial for maintaining the structural integrity of the flange, which in turn safeguards the living area beneath the canvas when hatches are open.Step 3: Allowing Time to Dry
After securely attaching the first portion of the flange, Sven allows ample time for it to dry before moving forward with additional steps. This patience and precision are key aspects of his successful boatbuilding methods.Step 4: Finishing Touches
Once the flange is fully dried, Sven removes the clamps carefully, ensuring no damage occurs during this process. He then moves on to attaching four more pieces onto these main frames, completing two pairs of flanges for the bulkhead hatches.The Final Touches
While two flanges form the primary support structure around the hatches, Sven mentions there are two additional pieces required at each end to ensure comprehensive protection. This attention to detail highlights his commitment to producing a durable and reliable design. “Sailing is about finding your path, whether it’s across an ocean or within yourself.” – Sven Yrvind In conclusion, making flanges around bulkhead hatches may seem complex at first glance, but by following Sven Yrvind’s meticulous process, enthusiasts can achieve professional-level results. Remember that the journey of boatbuilding is as rewarding as reaching your destination; it tests one’s patience and dedication. For those seeking to embark on this adventure or simply gain more insight into marine craftsmanship, Sven’s wisdom is invaluable.Sven begins by explaining that working on flanges vertically and horizontally is significantly easier than doing so in a flat position. To simplify the process further, he divides the task into two or three steps as suggested by fellow expert “for for.” This approach not only makes it more manageable but also allows for greater precision in crafting each component.Step 2: Applying Glue and Securing
Sven proceeds to apply glue along one edge of the flange, ensuring a secure bond when clamped into place. He emphasizes that this stage is crucial for maintaining the structural integrity of the flange, which in turn safeguards the living area beneath the canvas when hatches are open.Step 3: Allowing Time to Dry
After securely attaching the first portion of the flange, Sven allows ample time for it to dry before moving forward with additional steps. This patience and precision are key aspects of his successful boatbuilding methods.Step 4: Finishing Touches
Once the flange is fully dried, Sven removes the clamps carefully, ensuring no damage occurs during this process. He then moves on to attaching four more pieces onto these main frames, completing two pairs of flanges for the bulkhead hatches.The Final Touches
While two flanges form the primary support structure around the hatches, Sven mentions there are two additional pieces required at each end to ensure comprehensive protection. This attention to detail highlights his commitment to producing a durable and reliable design. “Sailing is about finding your path, whether it’s across an ocean or within yourself.” – Sven Yrvind In conclusion, making flanges around bulkhead hatches may seem complex at first glance, but by following Sven Yrvind’s meticulous process, enthusiasts can achieve professional-level results. Remember that the journey of boatbuilding is as rewarding as reaching your destination; it tests one’s patience and dedication. For those seeking to embark on this adventure or simply gain more insight into marine craftsmanship, Sven’s wisdom is invaluable.Sven Yrvind, a renowned yacht designer and sailor, shares valuable insights on creating flanges around bulkhead hatches for canvas protection in this enlightening video. By following his expert guidance, boat enthusiasts can ensure their living areas remain secure while allowing unhindered access through the hatches.Step 1: Starting with the Flange
Sven begins by explaining that working on flanges vertically and horizontally is significantly easier than doing so in a flat position. To simplify the process further, he divides the task into two or three steps as suggested by fellow expert “for for.” This approach not only makes it more manageable but also allows for greater precision in crafting each component.Step 2: Applying Glue and Securing
Sven proceeds to apply glue along one edge of the flange, ensuring a secure bond when clamped into place. He emphasizes that this stage is crucial for maintaining the structural integrity of the flange, which in turn safeguards the living area beneath the canvas when hatches are open.Step 3: Allowing Time to Dry
After securely attaching the first portion of the flange, Sven allows ample time for it to dry before moving forward with additional steps. This patience and precision are key aspects of his successful boatbuilding methods.Step 4: Finishing Touches
Once the flange is fully dried, Sven removes the clamps carefully, ensuring no damage occurs during this process. He then moves on to attaching four more pieces onto these main frames, completing two pairs of flanges for the bulkhead hatches.The Final Touches
While two flanges form the primary support structure around the hatches, Sven mentions there are two additional pieces required at each end to ensure comprehensive protection. This attention to detail highlights his commitment to producing a durable and reliable design. “Sailing is about finding your path, whether it’s across an ocean or within yourself.” – Sven Yrvind In conclusion, making flanges around bulkhead hatches may seem complex at first glance, but by following Sven Yrvind’s meticulous process, enthusiasts can achieve professional-level results. Remember that the journey of boatbuilding is as rewarding as reaching your destination; it tests one’s patience and dedication. For those seeking to embark on this adventure or simply gain more insight into marine craftsmanship, Sven’s wisdom is invaluable.Making Flanges Around Bulkhead Hatches for Canvas
Sven Yrvind, a renowned yacht designer and sailor, shares valuable insights on creating flanges around bulkhead hatches for canvas protection in this enlightening video. By following his expert guidance, boat enthusiasts can ensure their living areas remain secure while allowing unhindered access through the hatches.Step 1: Starting with the Flange
Sven begins by explaining that working on flanges vertically and horizontally is significantly easier than doing so in a flat position. To simplify the process further, he divides the task into two or three steps as suggested by fellow expert “for for.” This approach not only makes it more manageable but also allows for greater precision in crafting each component.Step 2: Applying Glue and Securing
Sven proceeds to apply glue along one edge of the flange, ensuring a secure bond when clamped into place. He emphasizes that this stage is crucial for maintaining the structural integrity of the flange, which in turn safeguards the living area beneath the canvas when hatches are open.Step 3: Allowing Time to Dry
After securely attaching the first portion of the flange, Sven allows ample time for it to dry before moving forward with additional steps. This patience and precision are key aspects of his successful boatbuilding methods.Step 4: Finishing Touches
Once the flange is fully dried, Sven removes the clamps carefully, ensuring no damage occurs during this process. He then moves on to attaching four more pieces onto these main frames, completing two pairs of flanges for the bulkhead hatches.The Final Touches
While two flanges form the primary support structure around the hatches, Sven mentions there are two additional pieces required at each end to ensure comprehensive protection. This attention to detail highlights his commitment to producing a durable and reliable design. “Sailing is about finding your path, whether it’s across an ocean or within yourself.” – Sven Yrvind In conclusion, making flanges around bulkhead hatches may seem complex at first glance, but by following Sven Yrvind’s meticulous process, enthusiasts can achieve professional-level results. Remember that the journey of boatbuilding is as rewarding as reaching your destination; it tests one’s patience and dedication. For those seeking to embark on this adventure or simply gain more insight into marine craftsmanship, Sven’s wisdom is invaluable.Once the flange is fully dried, Sven removes the clamps carefully, ensuring no damage occurs during this process. He then moves on to attaching four more pieces onto these main frames, completing two pairs of flanges for the bulkhead hatches.The Final Touches
While two flanges form the primary support structure around the hatches, Sven mentions there are two additional pieces required at each end to ensure comprehensive protection. This attention to detail highlights his commitment to producing a durable and reliable design. “Sailing is about finding your path, whether it’s across an ocean or within yourself.” – Sven Yrvind In conclusion, making flanges around bulkhead hatches may seem complex at first glance, but by following Sven Yrvind’s meticulous process, enthusiasts can achieve professional-level results. Remember that the journey of boatbuilding is as rewarding as reaching your destination; it tests one’s patience and dedication. For those seeking to embark on this adventure or simply gain more insight into marine craftsmanship, Sven’s wisdom is invaluable.Sven proceeds to apply glue along one edge of the flange, ensuring a secure bond when clamped into place. He emphasizes that this stage is crucial for maintaining the structural integrity of the flange, which in turn safeguards the living area beneath the canvas when hatches are open.Step 3: Allowing Time to Dry
After securely attaching the first portion of the flange, Sven allows ample time for it to dry before moving forward with additional steps. This patience and precision are key aspects of his successful boatbuilding methods.Step 4: Finishing Touches
Once the flange is fully dried, Sven removes the clamps carefully, ensuring no damage occurs during this process. He then moves on to attaching four more pieces onto these main frames, completing two pairs of flanges for the bulkhead hatches.The Final Touches
While two flanges form the primary support structure around the hatches, Sven mentions there are two additional pieces required at each end to ensure comprehensive protection. This attention to detail highlights his commitment to producing a durable and reliable design. “Sailing is about finding your path, whether it’s across an ocean or within yourself.” – Sven Yrvind In conclusion, making flanges around bulkhead hatches may seem complex at first glance, but by following Sven Yrvind’s meticulous process, enthusiasts can achieve professional-level results. Remember that the journey of boatbuilding is as rewarding as reaching your destination; it tests one’s patience and dedication. For those seeking to embark on this adventure or simply gain more insight into marine craftsmanship, Sven’s wisdom is invaluable.Sven begins by explaining that working on flanges vertically and horizontally is significantly easier than doing so in a flat position. To simplify the process further, he divides the task into two or three steps as suggested by fellow expert “for for.” This approach not only makes it more manageable but also allows for greater precision in crafting each component.Step 2: Applying Glue and Securing
Sven proceeds to apply glue along one edge of the flange, ensuring a secure bond when clamped into place. He emphasizes that this stage is crucial for maintaining the structural integrity of the flange, which in turn safeguards the living area beneath the canvas when hatches are open.Step 3: Allowing Time to Dry
After securely attaching the first portion of the flange, Sven allows ample time for it to dry before moving forward with additional steps. This patience and precision are key aspects of his successful boatbuilding methods.Step 4: Finishing Touches
Once the flange is fully dried, Sven removes the clamps carefully, ensuring no damage occurs during this process. He then moves on to attaching four more pieces onto these main frames, completing two pairs of flanges for the bulkhead hatches.The Final Touches
While two flanges form the primary support structure around the hatches, Sven mentions there are two additional pieces required at each end to ensure comprehensive protection. This attention to detail highlights his commitment to producing a durable and reliable design. “Sailing is about finding your path, whether it’s across an ocean or within yourself.” – Sven Yrvind In conclusion, making flanges around bulkhead hatches may seem complex at first glance, but by following Sven Yrvind’s meticulous process, enthusiasts can achieve professional-level results. Remember that the journey of boatbuilding is as rewarding as reaching your destination; it tests one’s patience and dedication. For those seeking to embark on this adventure or simply gain more insight into marine craftsmanship, Sven’s wisdom is invaluable.Sven Yrvind, a renowned yacht designer and sailor, shares valuable insights on creating flanges around bulkhead hatches for canvas protection in this enlightening video. By following his expert guidance, boat enthusiasts can ensure their living areas remain secure while allowing unhindered access through the hatches.Step 1: Starting with the Flange
Sven begins by explaining that working on flanges vertically and horizontally is significantly easier than doing so in a flat position. To simplify the process further, he divides the task into two or three steps as suggested by fellow expert “for for.” This approach not only makes it more manageable but also allows for greater precision in crafting each component.Step 2: Applying Glue and Securing
Sven proceeds to apply glue along one edge of the flange, ensuring a secure bond when clamped into place. He emphasizes that this stage is crucial for maintaining the structural integrity of the flange, which in turn safeguards the living area beneath the canvas when hatches are open.Step 3: Allowing Time to Dry
After securely attaching the first portion of the flange, Sven allows ample time for it to dry before moving forward with additional steps. This patience and precision are key aspects of his successful boatbuilding methods.Step 4: Finishing Touches
Once the flange is fully dried, Sven removes the clamps carefully, ensuring no damage occurs during this process. He then moves on to attaching four more pieces onto these main frames, completing two pairs of flanges for the bulkhead hatches.The Final Touches
While two flanges form the primary support structure around the hatches, Sven mentions there are two additional pieces required at each end to ensure comprehensive protection. This attention to detail highlights his commitment to producing a durable and reliable design. “Sailing is about finding your path, whether it’s across an ocean or within yourself.” – Sven Yrvind In conclusion, making flanges around bulkhead hatches may seem complex at first glance, but by following Sven Yrvind’s meticulous process, enthusiasts can achieve professional-level results. Remember that the journey of boatbuilding is as rewarding as reaching your destination; it tests one’s patience and dedication. For those seeking to embark on this adventure or simply gain more insight into marine craftsmanship, Sven’s wisdom is invaluable.Making Flanges Around Bulkhead Hatches for Canvas
Sven Yrvind, a renowned yacht designer and sailor, shares valuable insights on creating flanges around bulkhead hatches for canvas protection in this enlightening video. By following his expert guidance, boat enthusiasts can ensure their living areas remain secure while allowing unhindered access through the hatches.Step 1: Starting with the Flange
Sven begins by explaining that working on flanges vertically and horizontally is significantly easier than doing so in a flat position. To simplify the process further, he divides the task into two or three steps as suggested by fellow expert “for for.” This approach not only makes it more manageable but also allows for greater precision in crafting each component.Step 2: Applying Glue and Securing
Sven proceeds to apply glue along one edge of the flange, ensuring a secure bond when clamped into place. He emphasizes that this stage is crucial for maintaining the structural integrity of the flange, which in turn safeguards the living area beneath the canvas when hatches are open.Step 3: Allowing Time to Dry
After securely attaching the first portion of the flange, Sven allows ample time for it to dry before moving forward with additional steps. This patience and precision are key aspects of his successful boatbuilding methods.Step 4: Finishing Touches
Once the flange is fully dried, Sven removes the clamps carefully, ensuring no damage occurs during this process. He then moves on to attaching four more pieces onto these main frames, completing two pairs of flanges for the bulkhead hatches.The Final Touches
While two flanges form the primary support structure around the hatches, Sven mentions there are two additional pieces required at each end to ensure comprehensive protection. This attention to detail highlights his commitment to producing a durable and reliable design. “Sailing is about finding your path, whether it’s across an ocean or within yourself.” – Sven Yrvind In conclusion, making flanges around bulkhead hatches may seem complex at first glance, but by following Sven Yrvind’s meticulous process, enthusiasts can achieve professional-level results. Remember that the journey of boatbuilding is as rewarding as reaching your destination; it tests one’s patience and dedication. For those seeking to embark on this adventure or simply gain more insight into marine craftsmanship, Sven’s wisdom is invaluable.After securely attaching the first portion of the flange, Sven allows ample time for it to dry before moving forward with additional steps. This patience and precision are key aspects of his successful boatbuilding methods.Step 4: Finishing Touches
Once the flange is fully dried, Sven removes the clamps carefully, ensuring no damage occurs during this process. He then moves on to attaching four more pieces onto these main frames, completing two pairs of flanges for the bulkhead hatches.The Final Touches
While two flanges form the primary support structure around the hatches, Sven mentions there are two additional pieces required at each end to ensure comprehensive protection. This attention to detail highlights his commitment to producing a durable and reliable design. “Sailing is about finding your path, whether it’s across an ocean or within yourself.” – Sven Yrvind In conclusion, making flanges around bulkhead hatches may seem complex at first glance, but by following Sven Yrvind’s meticulous process, enthusiasts can achieve professional-level results. Remember that the journey of boatbuilding is as rewarding as reaching your destination; it tests one’s patience and dedication. For those seeking to embark on this adventure or simply gain more insight into marine craftsmanship, Sven’s wisdom is invaluable.Sven proceeds to apply glue along one edge of the flange, ensuring a secure bond when clamped into place. He emphasizes that this stage is crucial for maintaining the structural integrity of the flange, which in turn safeguards the living area beneath the canvas when hatches are open.Step 3: Allowing Time to Dry
After securely attaching the first portion of the flange, Sven allows ample time for it to dry before moving forward with additional steps. This patience and precision are key aspects of his successful boatbuilding methods.Step 4: Finishing Touches
Once the flange is fully dried, Sven removes the clamps carefully, ensuring no damage occurs during this process. He then moves on to attaching four more pieces onto these main frames, completing two pairs of flanges for the bulkhead hatches.The Final Touches
While two flanges form the primary support structure around the hatches, Sven mentions there are two additional pieces required at each end to ensure comprehensive protection. This attention to detail highlights his commitment to producing a durable and reliable design. “Sailing is about finding your path, whether it’s across an ocean or within yourself.” – Sven Yrvind In conclusion, making flanges around bulkhead hatches may seem complex at first glance, but by following Sven Yrvind’s meticulous process, enthusiasts can achieve professional-level results. Remember that the journey of boatbuilding is as rewarding as reaching your destination; it tests one’s patience and dedication. For those seeking to embark on this adventure or simply gain more insight into marine craftsmanship, Sven’s wisdom is invaluable.Sven begins by explaining that working on flanges vertically and horizontally is significantly easier than doing so in a flat position. To simplify the process further, he divides the task into two or three steps as suggested by fellow expert “for for.” This approach not only makes it more manageable but also allows for greater precision in crafting each component.Step 2: Applying Glue and Securing
Sven proceeds to apply glue along one edge of the flange, ensuring a secure bond when clamped into place. He emphasizes that this stage is crucial for maintaining the structural integrity of the flange, which in turn safeguards the living area beneath the canvas when hatches are open.Step 3: Allowing Time to Dry
After securely attaching the first portion of the flange, Sven allows ample time for it to dry before moving forward with additional steps. This patience and precision are key aspects of his successful boatbuilding methods.Step 4: Finishing Touches
Once the flange is fully dried, Sven removes the clamps carefully, ensuring no damage occurs during this process. He then moves on to attaching four more pieces onto these main frames, completing two pairs of flanges for the bulkhead hatches.The Final Touches
While two flanges form the primary support structure around the hatches, Sven mentions there are two additional pieces required at each end to ensure comprehensive protection. This attention to detail highlights his commitment to producing a durable and reliable design. “Sailing is about finding your path, whether it’s across an ocean or within yourself.” – Sven Yrvind In conclusion, making flanges around bulkhead hatches may seem complex at first glance, but by following Sven Yrvind’s meticulous process, enthusiasts can achieve professional-level results. Remember that the journey of boatbuilding is as rewarding as reaching your destination; it tests one’s patience and dedication. For those seeking to embark on this adventure or simply gain more insight into marine craftsmanship, Sven’s wisdom is invaluable.Sven Yrvind, a renowned yacht designer and sailor, shares valuable insights on creating flanges around bulkhead hatches for canvas protection in this enlightening video. By following his expert guidance, boat enthusiasts can ensure their living areas remain secure while allowing unhindered access through the hatches.Step 1: Starting with the Flange
Sven begins by explaining that working on flanges vertically and horizontally is significantly easier than doing so in a flat position. To simplify the process further, he divides the task into two or three steps as suggested by fellow expert “for for.” This approach not only makes it more manageable but also allows for greater precision in crafting each component.Step 2: Applying Glue and Securing
Sven proceeds to apply glue along one edge of the flange, ensuring a secure bond when clamped into place. He emphasizes that this stage is crucial for maintaining the structural integrity of the flange, which in turn safeguards the living area beneath the canvas when hatches are open.Step 3: Allowing Time to Dry
After securely attaching the first portion of the flange, Sven allows ample time for it to dry before moving forward with additional steps. This patience and precision are key aspects of his successful boatbuilding methods.Step 4: Finishing Touches
Once the flange is fully dried, Sven removes the clamps carefully, ensuring no damage occurs during this process. He then moves on to attaching four more pieces onto these main frames, completing two pairs of flanges for the bulkhead hatches.The Final Touches
While two flanges form the primary support structure around the hatches, Sven mentions there are two additional pieces required at each end to ensure comprehensive protection. This attention to detail highlights his commitment to producing a durable and reliable design. “Sailing is about finding your path, whether it’s across an ocean or within yourself.” – Sven Yrvind In conclusion, making flanges around bulkhead hatches may seem complex at first glance, but by following Sven Yrvind’s meticulous process, enthusiasts can achieve professional-level results. Remember that the journey of boatbuilding is as rewarding as reaching your destination; it tests one’s patience and dedication. For those seeking to embark on this adventure or simply gain more insight into marine craftsmanship, Sven’s wisdom is invaluable.Making Flanges Around Bulkhead Hatches for Canvas
Sven Yrvind, a renowned yacht designer and sailor, shares valuable insights on creating flanges around bulkhead hatches for canvas protection in this enlightening video. By following his expert guidance, boat enthusiasts can ensure their living areas remain secure while allowing unhindered access through the hatches.Step 1: Starting with the Flange
Sven begins by explaining that working on flanges vertically and horizontally is significantly easier than doing so in a flat position. To simplify the process further, he divides the task into two or three steps as suggested by fellow expert “for for.” This approach not only makes it more manageable but also allows for greater precision in crafting each component.Step 2: Applying Glue and Securing
Sven proceeds to apply glue along one edge of the flange, ensuring a secure bond when clamped into place. He emphasizes that this stage is crucial for maintaining the structural integrity of the flange, which in turn safeguards the living area beneath the canvas when hatches are open.Step 3: Allowing Time to Dry
After securely attaching the first portion of the flange, Sven allows ample time for it to dry before moving forward with additional steps. This patience and precision are key aspects of his successful boatbuilding methods.Step 4: Finishing Touches
Once the flange is fully dried, Sven removes the clamps carefully, ensuring no damage occurs during this process. He then moves on to attaching four more pieces onto these main frames, completing two pairs of flanges for the bulkhead hatches.The Final Touches
While two flanges form the primary support structure around the hatches, Sven mentions there are two additional pieces required at each end to ensure comprehensive protection. This attention to detail highlights his commitment to producing a durable and reliable design. “Sailing is about finding your path, whether it’s across an ocean or within yourself.” – Sven Yrvind In conclusion, making flanges around bulkhead hatches may seem complex at first glance, but by following Sven Yrvind’s meticulous process, enthusiasts can achieve professional-level results. Remember that the journey of boatbuilding is as rewarding as reaching your destination; it tests one’s patience and dedication. For those seeking to embark on this adventure or simply gain more insight into marine craftsmanship, Sven’s wisdom is invaluable.Once the flange is fully dried, Sven removes the clamps carefully, ensuring no damage occurs during this process. He then moves on to attaching four more pieces onto these main frames, completing two pairs of flanges for the bulkhead hatches.The Final Touches
While two flanges form the primary support structure around the hatches, Sven mentions there are two additional pieces required at each end to ensure comprehensive protection. This attention to detail highlights his commitment to producing a durable and reliable design. “Sailing is about finding your path, whether it’s across an ocean or within yourself.” – Sven Yrvind In conclusion, making flanges around bulkhead hatches may seem complex at first glance, but by following Sven Yrvind’s meticulous process, enthusiasts can achieve professional-level results. Remember that the journey of boatbuilding is as rewarding as reaching your destination; it tests one’s patience and dedication. For those seeking to embark on this adventure or simply gain more insight into marine craftsmanship, Sven’s wisdom is invaluable.After securely attaching the first portion of the flange, Sven allows ample time for it to dry before moving forward with additional steps. This patience and precision are key aspects of his successful boatbuilding methods.Step 4: Finishing Touches
Once the flange is fully dried, Sven removes the clamps carefully, ensuring no damage occurs during this process. He then moves on to attaching four more pieces onto these main frames, completing two pairs of flanges for the bulkhead hatches.The Final Touches
While two flanges form the primary support structure around the hatches, Sven mentions there are two additional pieces required at each end to ensure comprehensive protection. This attention to detail highlights his commitment to producing a durable and reliable design. “Sailing is about finding your path, whether it’s across an ocean or within yourself.” – Sven Yrvind In conclusion, making flanges around bulkhead hatches may seem complex at first glance, but by following Sven Yrvind’s meticulous process, enthusiasts can achieve professional-level results. Remember that the journey of boatbuilding is as rewarding as reaching your destination; it tests one’s patience and dedication. For those seeking to embark on this adventure or simply gain more insight into marine craftsmanship, Sven’s wisdom is invaluable.Sven proceeds to apply glue along one edge of the flange, ensuring a secure bond when clamped into place. He emphasizes that this stage is crucial for maintaining the structural integrity of the flange, which in turn safeguards the living area beneath the canvas when hatches are open.Step 3: Allowing Time to Dry
After securely attaching the first portion of the flange, Sven allows ample time for it to dry before moving forward with additional steps. This patience and precision are key aspects of his successful boatbuilding methods.Step 4: Finishing Touches
Once the flange is fully dried, Sven removes the clamps carefully, ensuring no damage occurs during this process. He then moves on to attaching four more pieces onto these main frames, completing two pairs of flanges for the bulkhead hatches.The Final Touches
While two flanges form the primary support structure around the hatches, Sven mentions there are two additional pieces required at each end to ensure comprehensive protection. This attention to detail highlights his commitment to producing a durable and reliable design. “Sailing is about finding your path, whether it’s across an ocean or within yourself.” – Sven Yrvind In conclusion, making flanges around bulkhead hatches may seem complex at first glance, but by following Sven Yrvind’s meticulous process, enthusiasts can achieve professional-level results. Remember that the journey of boatbuilding is as rewarding as reaching your destination; it tests one’s patience and dedication. For those seeking to embark on this adventure or simply gain more insight into marine craftsmanship, Sven’s wisdom is invaluable.Sven begins by explaining that working on flanges vertically and horizontally is significantly easier than doing so in a flat position. To simplify the process further, he divides the task into two or three steps as suggested by fellow expert “for for.” This approach not only makes it more manageable but also allows for greater precision in crafting each component.Step 2: Applying Glue and Securing
Sven proceeds to apply glue along one edge of the flange, ensuring a secure bond when clamped into place. He emphasizes that this stage is crucial for maintaining the structural integrity of the flange, which in turn safeguards the living area beneath the canvas when hatches are open.Step 3: Allowing Time to Dry
After securely attaching the first portion of the flange, Sven allows ample time for it to dry before moving forward with additional steps. This patience and precision are key aspects of his successful boatbuilding methods.Step 4: Finishing Touches
Once the flange is fully dried, Sven removes the clamps carefully, ensuring no damage occurs during this process. He then moves on to attaching four more pieces onto these main frames, completing two pairs of flanges for the bulkhead hatches.The Final Touches
While two flanges form the primary support structure around the hatches, Sven mentions there are two additional pieces required at each end to ensure comprehensive protection. This attention to detail highlights his commitment to producing a durable and reliable design. “Sailing is about finding your path, whether it’s across an ocean or within yourself.” – Sven Yrvind In conclusion, making flanges around bulkhead hatches may seem complex at first glance, but by following Sven Yrvind’s meticulous process, enthusiasts can achieve professional-level results. Remember that the journey of boatbuilding is as rewarding as reaching your destination; it tests one’s patience and dedication. For those seeking to embark on this adventure or simply gain more insight into marine craftsmanship, Sven’s wisdom is invaluable.Sven Yrvind, a renowned yacht designer and sailor, shares valuable insights on creating flanges around bulkhead hatches for canvas protection in this enlightening video. By following his expert guidance, boat enthusiasts can ensure their living areas remain secure while allowing unhindered access through the hatches.Step 1: Starting with the Flange
Sven begins by explaining that working on flanges vertically and horizontally is significantly easier than doing so in a flat position. To simplify the process further, he divides the task into two or three steps as suggested by fellow expert “for for.” This approach not only makes it more manageable but also allows for greater precision in crafting each component.Step 2: Applying Glue and Securing
Sven proceeds to apply glue along one edge of the flange, ensuring a secure bond when clamped into place. He emphasizes that this stage is crucial for maintaining the structural integrity of the flange, which in turn safeguards the living area beneath the canvas when hatches are open.Step 3: Allowing Time to Dry
After securely attaching the first portion of the flange, Sven allows ample time for it to dry before moving forward with additional steps. This patience and precision are key aspects of his successful boatbuilding methods.Step 4: Finishing Touches
Once the flange is fully dried, Sven removes the clamps carefully, ensuring no damage occurs during this process. He then moves on to attaching four more pieces onto these main frames, completing two pairs of flanges for the bulkhead hatches.The Final Touches
While two flanges form the primary support structure around the hatches, Sven mentions there are two additional pieces required at each end to ensure comprehensive protection. This attention to detail highlights his commitment to producing a durable and reliable design. “Sailing is about finding your path, whether it’s across an ocean or within yourself.” – Sven Yrvind In conclusion, making flanges around bulkhead hatches may seem complex at first glance, but by following Sven Yrvind’s meticulous process, enthusiasts can achieve professional-level results. Remember that the journey of boatbuilding is as rewarding as reaching your destination; it tests one’s patience and dedication. For those seeking to embark on this adventure or simply gain more insight into marine craftsmanship, Sven’s wisdom is invaluable.Making Flanges Around Bulkhead Hatches for Canvas
Sven Yrvind, a renowned yacht designer and sailor, shares valuable insights on creating flanges around bulkhead hatches for canvas protection in this enlightening video. By following his expert guidance, boat enthusiasts can ensure their living areas remain secure while allowing unhindered access through the hatches.Step 1: Starting with the Flange
Sven begins by explaining that working on flanges vertically and horizontally is significantly easier than doing so in a flat position. To simplify the process further, he divides the task into two or three steps as suggested by fellow expert “for for.” This approach not only makes it more manageable but also allows for greater precision in crafting each component.Step 2: Applying Glue and Securing
Sven proceeds to apply glue along one edge of the flange, ensuring a secure bond when clamped into place. He emphasizes that this stage is crucial for maintaining the structural integrity of the flange, which in turn safeguards the living area beneath the canvas when hatches are open.Step 3: Allowing Time to Dry
After securely attaching the first portion of the flange, Sven allows ample time for it to dry before moving forward with additional steps. This patience and precision are key aspects of his successful boatbuilding methods.Step 4: Finishing Touches
Once the flange is fully dried, Sven removes the clamps carefully, ensuring no damage occurs during this process. He then moves on to attaching four more pieces onto these main frames, completing two pairs of flanges for the bulkhead hatches.The Final Touches
While two flanges form the primary support structure around the hatches, Sven mentions there are two additional pieces required at each end to ensure comprehensive protection. This attention to detail highlights his commitment to producing a durable and reliable design. “Sailing is about finding your path, whether it’s across an ocean or within yourself.” – Sven Yrvind In conclusion, making flanges around bulkhead hatches may seem complex at first glance, but by following Sven Yrvind’s meticulous process, enthusiasts can achieve professional-level results. Remember that the journey of boatbuilding is as rewarding as reaching your destination; it tests one’s patience and dedication. For those seeking to embark on this adventure or simply gain more insight into marine craftsmanship, Sven’s wisdom is invaluable.Once the flange is fully dried, Sven removes the clamps carefully, ensuring no damage occurs during this process. He then moves on to attaching four more pieces onto these main frames, completing two pairs of flanges for the bulkhead hatches.The Final Touches
While two flanges form the primary support structure around the hatches, Sven mentions there are two additional pieces required at each end to ensure comprehensive protection. This attention to detail highlights his commitment to producing a durable and reliable design. “Sailing is about finding your path, whether it’s across an ocean or within yourself.” – Sven Yrvind In conclusion, making flanges around bulkhead hatches may seem complex at first glance, but by following Sven Yrvind’s meticulous process, enthusiasts can achieve professional-level results. Remember that the journey of boatbuilding is as rewarding as reaching your destination; it tests one’s patience and dedication. For those seeking to embark on this adventure or simply gain more insight into marine craftsmanship, Sven’s wisdom is invaluable.Making Flanges Around Bulkhead Hatches for Canvas
Sven Yrvind, a renowned yacht designer and sailor, shares valuable insights on creating flanges around bulkhead hatches for canvas protection in this enlightening video. By following his expert guidance, boat enthusiasts can ensure their living areas remain secure while allowing unhindered access through the hatches.Step 1: Starting with the Flange
Sven begins by explaining that working on flanges vertically and horizontally is significantly easier than doing so in a flat position. To simplify the process further, he divides the task into two or three steps as suggested by fellow expert “for for.” This approach not only makes it more manageable but also allows for greater precision in crafting each component.Step 2: Applying Glue and Securing
Sven proceeds to apply glue along one edge of the flange, ensuring a secure bond when clamped into place. He emphasizes that this stage is crucial for maintaining the structural integrity of the flange, which in turn safeguards the living area beneath the canvas when hatches are open.Step 3: Allowing Time to Dry
After securely attaching the first portion of the flange, Sven allows ample time for it to dry before moving forward with additional steps. This patience and precision are key aspects of his successful boatbuilding methods.Step 4: Finishing Touches
Once the flange is fully dried, Sven removes the clamps carefully, ensuring no damage occurs during this process. He then moves on to attaching four more pieces onto these main frames, completing two pairs of flanges for the bulkhead hatches.The Final Touches
While two flanges form the primary support structure around the hatches, Sven mentions there are two additional pieces required at each end to ensure comprehensive protection. This attention to detail highlights his commitment to producing a durable and reliable design. “Sailing is about finding your path, whether it’s across an ocean or within yourself.” – Sven Yrvind In conclusion, making flanges around bulkhead hatches may seem complex at first glance, but by following Sven Yrvind’s meticulous process, enthusiasts can achieve professional-level results. Remember that the journey of boatbuilding is as rewarding as reaching your destination; it tests one’s patience and dedication. For those seeking to embark on this adventure or simply gain more insight into marine craftsmanship, Sven’s wisdom is invaluable.Sven Yrvind, a renowned yacht designer and sailor, shares valuable insights on creating flanges around bulkhead hatches for canvas protection in this enlightening video. By following his expert guidance, boat enthusiasts can ensure their living areas remain secure while allowing unhindered access through the hatches.Step 1: Starting with the Flange
Sven begins by explaining that working on flanges vertically and horizontally is significantly easier than doing so in a flat position. To simplify the process further, he divides the task into two or three steps as suggested by fellow expert “for for.” This approach not only makes it more manageable but also allows for greater precision in crafting each component.Step 2: Applying Glue and Securing
Sven proceeds to apply glue along one edge of the flange, ensuring a secure bond when clamped into place. He emphasizes that this stage is crucial for maintaining the structural integrity of the flange, which in turn safeguards the living area beneath the canvas when hatches are open.Step 3: Allowing Time to Dry
After securely attaching the first portion of the flange, Sven allows ample time for it to dry before moving forward with additional steps. This patience and precision are key aspects of his successful boatbuilding methods.Step 4: Finishing Touches
Once the flange is fully dried, Sven removes the clamps carefully, ensuring no damage occurs during this process. He then moves on to attaching four more pieces onto these main frames, completing two pairs of flanges for the bulkhead hatches.The Final Touches
While two flanges form the primary support structure around the hatches, Sven mentions there are two additional pieces required at each end to ensure comprehensive protection. This attention to detail highlights his commitment to producing a durable and reliable design. “Sailing is about finding your path, whether it’s across an ocean or within yourself.” – Sven Yrvind In conclusion, making flanges around bulkhead hatches may seem complex at first glance, but by following Sven Yrvind’s meticulous process, enthusiasts can achieve professional-level results. Remember that the journey of boatbuilding is as rewarding as reaching your destination; it tests one’s patience and dedication. For those seeking to embark on this adventure or simply gain more insight into marine craftsmanship, Sven’s wisdom is invaluable.Making Flanges Around Bulkhead Hatches for Canvas
Sven Yrvind, a renowned yacht designer and sailor, shares valuable insights on creating flanges around bulkhead hatches for canvas protection in this enlightening video. By following his expert guidance, boat enthusiasts can ensure their living areas remain secure while allowing unhindered access through the hatches.Step 1: Starting with the Flange
Sven begins by explaining that working on flanges vertically and horizontally is significantly easier than doing so in a flat position. To simplify the process further, he divides the task into two or three steps as suggested by fellow expert “for for.” This approach not only makes it more manageable but also allows for greater precision in crafting each component.Step 2: Applying Glue and Securing
Sven proceeds to apply glue along one edge of the flange, ensuring a secure bond when clamped into place. He emphasizes that this stage is crucial for maintaining the structural integrity of the flange, which in turn safeguards the living area beneath the canvas when hatches are open.Step 3: Allowing Time to Dry
After securely attaching the first portion of the flange, Sven allows ample time for it to dry before moving forward with additional steps. This patience and precision are key aspects of his successful boatbuilding methods.Step 4: Finishing Touches
Once the flange is fully dried, Sven removes the clamps carefully, ensuring no damage occurs during this process. He then moves on to attaching four more pieces onto these main frames, completing two pairs of flanges for the bulkhead hatches.The Final Touches
While two flanges form the primary support structure around the hatches, Sven mentions there are two additional pieces required at each end to ensure comprehensive protection. This attention to detail highlights his commitment to producing a durable and reliable design. “Sailing is about finding your path, whether it’s across an ocean or within yourself.” – Sven Yrvind In conclusion, making flanges around bulkhead hatches may seem complex at first glance, but by following Sven Yrvind’s meticulous process, enthusiasts can achieve professional-level results. Remember that the journey of boatbuilding is as rewarding as reaching your destination; it tests one’s patience and dedication. For those seeking to embark on this adventure or simply gain more insight into marine craftsmanship, Sven’s wisdom is invaluable.Once the flange is fully dried, Sven removes the clamps carefully, ensuring no damage occurs during this process. He then moves on to attaching four more pieces onto these main frames, completing two pairs of flanges for the bulkhead hatches.The Final Touches
While two flanges form the primary support structure around the hatches, Sven mentions there are two additional pieces required at each end to ensure comprehensive protection. This attention to detail highlights his commitment to producing a durable and reliable design. “Sailing is about finding your path, whether it’s across an ocean or within yourself.” – Sven Yrvind In conclusion, making flanges around bulkhead hatches may seem complex at first glance, but by following Sven Yrvind’s meticulous process, enthusiasts can achieve professional-level results. Remember that the journey of boatbuilding is as rewarding as reaching your destination; it tests one’s patience and dedication. For those seeking to embark on this adventure or simply gain more insight into marine craftsmanship, Sven’s wisdom is invaluable.Sven Yrvind, a renowned yacht designer and sailor, shares valuable insights on creating flanges around bulkhead hatches for canvas protection in this enlightening video. By following his expert guidance, boat enthusiasts can ensure their living areas remain secure while allowing unhindered access through the hatches.Step 1: Starting with the Flange
Sven begins by explaining that working on flanges vertically and horizontally is significantly easier than doing so in a flat position. To simplify the process further, he divides the task into two or three steps as suggested by fellow expert “for for.” This approach not only makes it more manageable but also allows for greater precision in crafting each component.Step 2: Applying Glue and Securing
Sven proceeds to apply glue along one edge of the flange, ensuring a secure bond when clamped into place. He emphasizes that this stage is crucial for maintaining the structural integrity of the flange, which in turn safeguards the living area beneath the canvas when hatches are open.Step 3: Allowing Time to Dry
After securely attaching the first portion of the flange, Sven allows ample time for it to dry before moving forward with additional steps. This patience and precision are key aspects of his successful boatbuilding methods.Step 4: Finishing Touches
Once the flange is fully dried, Sven removes the clamps carefully, ensuring no damage occurs during this process. He then moves on to attaching four more pieces onto these main frames, completing two pairs of flanges for the bulkhead hatches.The Final Touches
While two flanges form the primary support structure around the hatches, Sven mentions there are two additional pieces required at each end to ensure comprehensive protection. This attention to detail highlights his commitment to producing a durable and reliable design. “Sailing is about finding your path, whether it’s across an ocean or within yourself.” – Sven Yrvind In conclusion, making flanges around bulkhead hatches may seem complex at first glance, but by following Sven Yrvind’s meticulous process, enthusiasts can achieve professional-level results. Remember that the journey of boatbuilding is as rewarding as reaching your destination; it tests one’s patience and dedication. For those seeking to embark on this adventure or simply gain more insight into marine craftsmanship, Sven’s wisdom is invaluable.Making Flanges Around Bulkhead Hatches for Canvas
Sven Yrvind, a renowned yacht designer and sailor, shares valuable insights on creating flanges around bulkhead hatches for canvas protection in this enlightening video. By following his expert guidance, boat enthusiasts can ensure their living areas remain secure while allowing unhindered access through the hatches.Step 1: Starting with the Flange
Sven begins by explaining that working on flanges vertically and horizontally is significantly easier than doing so in a flat position. To simplify the process further, he divides the task into two or three steps as suggested by fellow expert “for for.” This approach not only makes it more manageable but also allows for greater precision in crafting each component.Step 2: Applying Glue and Securing
Sven proceeds to apply glue along one edge of the flange, ensuring a secure bond when clamped into place. He emphasizes that this stage is crucial for maintaining the structural integrity of the flange, which in turn safeguards the living area beneath the canvas when hatches are open.Step 3: Allowing Time to Dry
After securely attaching the first portion of the flange, Sven allows ample time for it to dry before moving forward with additional steps. This patience and precision are key aspects of his successful boatbuilding methods.Step 4: Finishing Touches
Once the flange is fully dried, Sven removes the clamps carefully, ensuring no damage occurs during this process. He then moves on to attaching four more pieces onto these main frames, completing two pairs of flanges for the bulkhead hatches.The Final Touches
While two flanges form the primary support structure around the hatches, Sven mentions there are two additional pieces required at each end to ensure comprehensive protection. This attention to detail highlights his commitment to producing a durable and reliable design. “Sailing is about finding your path, whether it’s across an ocean or within yourself.” – Sven Yrvind In conclusion, making flanges around bulkhead hatches may seem complex at first glance, but by following Sven Yrvind’s meticulous process, enthusiasts can achieve professional-level results. Remember that the journey of boatbuilding is as rewarding as reaching your destination; it tests one’s patience and dedication. For those seeking to embark on this adventure or simply gain more insight into marine craftsmanship, Sven’s wisdom is invaluable.After securely attaching the first portion of the flange, Sven allows ample time for it to dry before moving forward with additional steps. This patience and precision are key aspects of his successful boatbuilding methods.Step 4: Finishing Touches
Once the flange is fully dried, Sven removes the clamps carefully, ensuring no damage occurs during this process. He then moves on to attaching four more pieces onto these main frames, completing two pairs of flanges for the bulkhead hatches.The Final Touches
While two flanges form the primary support structure around the hatches, Sven mentions there are two additional pieces required at each end to ensure comprehensive protection. This attention to detail highlights his commitment to producing a durable and reliable design. “Sailing is about finding your path, whether it’s across an ocean or within yourself.” – Sven Yrvind In conclusion, making flanges around bulkhead hatches may seem complex at first glance, but by following Sven Yrvind’s meticulous process, enthusiasts can achieve professional-level results. Remember that the journey of boatbuilding is as rewarding as reaching your destination; it tests one’s patience and dedication. For those seeking to embark on this adventure or simply gain more insight into marine craftsmanship, Sven’s wisdom is invaluable.Sven Yrvind, a renowned yacht designer and sailor, shares valuable insights on creating flanges around bulkhead hatches for canvas protection in this enlightening video. By following his expert guidance, boat enthusiasts can ensure their living areas remain secure while allowing unhindered access through the hatches.Step 1: Starting with the Flange
Sven begins by explaining that working on flanges vertically and horizontally is significantly easier than doing so in a flat position. To simplify the process further, he divides the task into two or three steps as suggested by fellow expert “for for.” This approach not only makes it more manageable but also allows for greater precision in crafting each component.Step 2: Applying Glue and Securing
Sven proceeds to apply glue along one edge of the flange, ensuring a secure bond when clamped into place. He emphasizes that this stage is crucial for maintaining the structural integrity of the flange, which in turn safeguards the living area beneath the canvas when hatches are open.Step 3: Allowing Time to Dry
After securely attaching the first portion of the flange, Sven allows ample time for it to dry before moving forward with additional steps. This patience and precision are key aspects of his successful boatbuilding methods.Step 4: Finishing Touches
Once the flange is fully dried, Sven removes the clamps carefully, ensuring no damage occurs during this process. He then moves on to attaching four more pieces onto these main frames, completing two pairs of flanges for the bulkhead hatches.The Final Touches
While two flanges form the primary support structure around the hatches, Sven mentions there are two additional pieces required at each end to ensure comprehensive protection. This attention to detail highlights his commitment to producing a durable and reliable design. “Sailing is about finding your path, whether it’s across an ocean or within yourself.” – Sven Yrvind In conclusion, making flanges around bulkhead hatches may seem complex at first glance, but by following Sven Yrvind’s meticulous process, enthusiasts can achieve professional-level results. Remember that the journey of boatbuilding is as rewarding as reaching your destination; it tests one’s patience and dedication. For those seeking to embark on this adventure or simply gain more insight into marine craftsmanship, Sven’s wisdom is invaluable.Making Flanges Around Bulkhead Hatches for Canvas
Sven Yrvind, a renowned yacht designer and sailor, shares valuable insights on creating flanges around bulkhead hatches for canvas protection in this enlightening video. By following his expert guidance, boat enthusiasts can ensure their living areas remain secure while allowing unhindered access through the hatches.Step 1: Starting with the Flange
Sven begins by explaining that working on flanges vertically and horizontally is significantly easier than doing so in a flat position. To simplify the process further, he divides the task into two or three steps as suggested by fellow expert “for for.” This approach not only makes it more manageable but also allows for greater precision in crafting each component.Step 2: Applying Glue and Securing
Sven proceeds to apply glue along one edge of the flange, ensuring a secure bond when clamped into place. He emphasizes that this stage is crucial for maintaining the structural integrity of the flange, which in turn safeguards the living area beneath the canvas when hatches are open.Step 3: Allowing Time to Dry
After securely attaching the first portion of the flange, Sven allows ample time for it to dry before moving forward with additional steps. This patience and precision are key aspects of his successful boatbuilding methods.Step 4: Finishing Touches
Once the flange is fully dried, Sven removes the clamps carefully, ensuring no damage occurs during this process. He then moves on to attaching four more pieces onto these main frames, completing two pairs of flanges for the bulkhead hatches.The Final Touches
While two flanges form the primary support structure around the hatches, Sven mentions there are two additional pieces required at each end to ensure comprehensive protection. This attention to detail highlights his commitment to producing a durable and reliable design. “Sailing is about finding your path, whether it’s across an ocean or within yourself.” – Sven Yrvind In conclusion, making flanges around bulkhead hatches may seem complex at first glance, but by following Sven Yrvind’s meticulous process, enthusiasts can achieve professional-level results. Remember that the journey of boatbuilding is as rewarding as reaching your destination; it tests one’s patience and dedication. For those seeking to embark on this adventure or simply gain more insight into marine craftsmanship, Sven’s wisdom is invaluable.Sven proceeds to apply glue along one edge of the flange, ensuring a secure bond when clamped into place. He emphasizes that this stage is crucial for maintaining the structural integrity of the flange, which in turn safeguards the living area beneath the canvas when hatches are open.Step 3: Allowing Time to Dry
After securely attaching the first portion of the flange, Sven allows ample time for it to dry before moving forward with additional steps. This patience and precision are key aspects of his successful boatbuilding methods.Step 4: Finishing Touches
Once the flange is fully dried, Sven removes the clamps carefully, ensuring no damage occurs during this process. He then moves on to attaching four more pieces onto these main frames, completing two pairs of flanges for the bulkhead hatches.The Final Touches
While two flanges form the primary support structure around the hatches, Sven mentions there are two additional pieces required at each end to ensure comprehensive protection. This attention to detail highlights his commitment to producing a durable and reliable design. “Sailing is about finding your path, whether it’s across an ocean or within yourself.” – Sven Yrvind In conclusion, making flanges around bulkhead hatches may seem complex at first glance, but by following Sven Yrvind’s meticulous process, enthusiasts can achieve professional-level results. Remember that the journey of boatbuilding is as rewarding as reaching your destination; it tests one’s patience and dedication. For those seeking to embark on this adventure or simply gain more insight into marine craftsmanship, Sven’s wisdom is invaluable.Sven Yrvind, a renowned yacht designer and sailor, shares valuable insights on creating flanges around bulkhead hatches for canvas protection in this enlightening video. By following his expert guidance, boat enthusiasts can ensure their living areas remain secure while allowing unhindered access through the hatches.Step 1: Starting with the Flange
Sven begins by explaining that working on flanges vertically and horizontally is significantly easier than doing so in a flat position. To simplify the process further, he divides the task into two or three steps as suggested by fellow expert “for for.” This approach not only makes it more manageable but also allows for greater precision in crafting each component.Step 2: Applying Glue and Securing
Sven proceeds to apply glue along one edge of the flange, ensuring a secure bond when clamped into place. He emphasizes that this stage is crucial for maintaining the structural integrity of the flange, which in turn safeguards the living area beneath the canvas when hatches are open.Step 3: Allowing Time to Dry
After securely attaching the first portion of the flange, Sven allows ample time for it to dry before moving forward with additional steps. This patience and precision are key aspects of his successful boatbuilding methods.Step 4: Finishing Touches
Once the flange is fully dried, Sven removes the clamps carefully, ensuring no damage occurs during this process. He then moves on to attaching four more pieces onto these main frames, completing two pairs of flanges for the bulkhead hatches.The Final Touches
While two flanges form the primary support structure around the hatches, Sven mentions there are two additional pieces required at each end to ensure comprehensive protection. This attention to detail highlights his commitment to producing a durable and reliable design. “Sailing is about finding your path, whether it’s across an ocean or within yourself.” – Sven Yrvind In conclusion, making flanges around bulkhead hatches may seem complex at first glance, but by following Sven Yrvind’s meticulous process, enthusiasts can achieve professional-level results. Remember that the journey of boatbuilding is as rewarding as reaching your destination; it tests one’s patience and dedication. For those seeking to embark on this adventure or simply gain more insight into marine craftsmanship, Sven’s wisdom is invaluable.Making Flanges Around Bulkhead Hatches for Canvas
Sven Yrvind, a renowned yacht designer and sailor, shares valuable insights on creating flanges around bulkhead hatches for canvas protection in this enlightening video. By following his expert guidance, boat enthusiasts can ensure their living areas remain secure while allowing unhindered access through the hatches.Step 1: Starting with the Flange
Sven begins by explaining that working on flanges vertically and horizontally is significantly easier than doing so in a flat position. To simplify the process further, he divides the task into two or three steps as suggested by fellow expert “for for.” This approach not only makes it more manageable but also allows for greater precision in crafting each component.Step 2: Applying Glue and Securing
Sven proceeds to apply glue along one edge of the flange, ensuring a secure bond when clamped into place. He emphasizes that this stage is crucial for maintaining the structural integrity of the flange, which in turn safeguards the living area beneath the canvas when hatches are open.Step 3: Allowing Time to Dry
After securely attaching the first portion of the flange, Sven allows ample time for it to dry before moving forward with additional steps. This patience and precision are key aspects of his successful boatbuilding methods.Step 4: Finishing Touches
Once the flange is fully dried, Sven removes the clamps carefully, ensuring no damage occurs during this process. He then moves on to attaching four more pieces onto these main frames, completing two pairs of flanges for the bulkhead hatches.The Final Touches
While two flanges form the primary support structure around the hatches, Sven mentions there are two additional pieces required at each end to ensure comprehensive protection. This attention to detail highlights his commitment to producing a durable and reliable design. “Sailing is about finding your path, whether it’s across an ocean or within yourself.” – Sven Yrvind In conclusion, making flanges around bulkhead hatches may seem complex at first glance, but by following Sven Yrvind’s meticulous process, enthusiasts can achieve professional-level results. Remember that the journey of boatbuilding is as rewarding as reaching your destination; it tests one’s patience and dedication. For those seeking to embark on this adventure or simply gain more insight into marine craftsmanship, Sven’s wisdom is invaluable.Sven begins by explaining that working on flanges vertically and horizontally is significantly easier than doing so in a flat position. To simplify the process further, he divides the task into two or three steps as suggested by fellow expert “for for.” This approach not only makes it more manageable but also allows for greater precision in crafting each component.Step 2: Applying Glue and Securing
Sven proceeds to apply glue along one edge of the flange, ensuring a secure bond when clamped into place. He emphasizes that this stage is crucial for maintaining the structural integrity of the flange, which in turn safeguards the living area beneath the canvas when hatches are open.Step 3: Allowing Time to Dry
After securely attaching the first portion of the flange, Sven allows ample time for it to dry before moving forward with additional steps. This patience and precision are key aspects of his successful boatbuilding methods.Step 4: Finishing Touches
Once the flange is fully dried, Sven removes the clamps carefully, ensuring no damage occurs during this process. He then moves on to attaching four more pieces onto these main frames, completing two pairs of flanges for the bulkhead hatches.The Final Touches
While two flanges form the primary support structure around the hatches, Sven mentions there are two additional pieces required at each end to ensure comprehensive protection. This attention to detail highlights his commitment to producing a durable and reliable design. “Sailing is about finding your path, whether it’s across an ocean or within yourself.” – Sven Yrvind In conclusion, making flanges around bulkhead hatches may seem complex at first glance, but by following Sven Yrvind’s meticulous process, enthusiasts can achieve professional-level results. Remember that the journey of boatbuilding is as rewarding as reaching your destination; it tests one’s patience and dedication. For those seeking to embark on this adventure or simply gain more insight into marine craftsmanship, Sven’s wisdom is invaluable.Sven Yrvind, a renowned yacht designer and sailor, shares valuable insights on creating flanges around bulkhead hatches for canvas protection in this enlightening video. By following his expert guidance, boat enthusiasts can ensure their living areas remain secure while allowing unhindered access through the hatches.Step 1: Starting with the Flange
Sven begins by explaining that working on flanges vertically and horizontally is significantly easier than doing so in a flat position. To simplify the process further, he divides the task into two or three steps as suggested by fellow expert “for for.” This approach not only makes it more manageable but also allows for greater precision in crafting each component.Step 2: Applying Glue and Securing
Sven proceeds to apply glue along one edge of the flange, ensuring a secure bond when clamped into place. He emphasizes that this stage is crucial for maintaining the structural integrity of the flange, which in turn safeguards the living area beneath the canvas when hatches are open.Step 3: Allowing Time to Dry
After securely attaching the first portion of the flange, Sven allows ample time for it to dry before moving forward with additional steps. This patience and precision are key aspects of his successful boatbuilding methods.Step 4: Finishing Touches
Once the flange is fully dried, Sven removes the clamps carefully, ensuring no damage occurs during this process. He then moves on to attaching four more pieces onto these main frames, completing two pairs of flanges for the bulkhead hatches.The Final Touches
While two flanges form the primary support structure around the hatches, Sven mentions there are two additional pieces required at each end to ensure comprehensive protection. This attention to detail highlights his commitment to producing a durable and reliable design. “Sailing is about finding your path, whether it’s across an ocean or within yourself.” – Sven Yrvind In conclusion, making flanges around bulkhead hatches may seem complex at first glance, but by following Sven Yrvind’s meticulous process, enthusiasts can achieve professional-level results. Remember that the journey of boatbuilding is as rewarding as reaching your destination; it tests one’s patience and dedication. For those seeking to embark on this adventure or simply gain more insight into marine craftsmanship, Sven’s wisdom is invaluable.Making Flanges Around Bulkhead Hatches for Canvas
Sven Yrvind, a renowned yacht designer and sailor, shares valuable insights on creating flanges around bulkhead hatches for canvas protection in this enlightening video. By following his expert guidance, boat enthusiasts can ensure their living areas remain secure while allowing unhindered access through the hatches.Step 1: Starting with the Flange
Sven begins by explaining that working on flanges vertically and horizontally is significantly easier than doing so in a flat position. To simplify the process further, he divides the task into two or three steps as suggested by fellow expert “for for.” This approach not only makes it more manageable but also allows for greater precision in crafting each component.Step 2: Applying Glue and Securing
Sven proceeds to apply glue along one edge of the flange, ensuring a secure bond when clamped into place. He emphasizes that this stage is crucial for maintaining the structural integrity of the flange, which in turn safeguards the living area beneath the canvas when hatches are open.Step 3: Allowing Time to Dry
After securely attaching the first portion of the flange, Sven allows ample time for it to dry before moving forward with additional steps. This patience and precision are key aspects of his successful boatbuilding methods.Step 4: Finishing Touches
Once the flange is fully dried, Sven removes the clamps carefully, ensuring no damage occurs during this process. He then moves on to attaching four more pieces onto these main frames, completing two pairs of flanges for the bulkhead hatches.The Final Touches
While two flanges form the primary support structure around the hatches, Sven mentions there are two additional pieces required at each end to ensure comprehensive protection. This attention to detail highlights his commitment to producing a durable and reliable design. “Sailing is about finding your path, whether it’s across an ocean or within yourself.” – Sven Yrvind In conclusion, making flanges around bulkhead hatches may seem complex at first glance, but by following Sven Yrvind’s meticulous process, enthusiasts can achieve professional-level results. Remember that the journey of boatbuilding is as rewarding as reaching your destination; it tests one’s patience and dedication. For those seeking to embark on this adventure or simply gain more insight into marine craftsmanship, Sven’s wisdom is invaluable.Once the flange is fully dried, Sven removes the clamps carefully, ensuring no damage occurs during this process. He then moves on to attaching four more pieces onto these main frames, completing two pairs of flanges for the bulkhead hatches.The Final Touches
While two flanges form the primary support structure around the hatches, Sven mentions there are two additional pieces required at each end to ensure comprehensive protection. This attention to detail highlights his commitment to producing a durable and reliable design. “Sailing is about finding your path, whether it’s across an ocean or within yourself.” – Sven Yrvind In conclusion, making flanges around bulkhead hatches may seem complex at first glance, but by following Sven Yrvind’s meticulous process, enthusiasts can achieve professional-level results. Remember that the journey of boatbuilding is as rewarding as reaching your destination; it tests one’s patience and dedication. For those seeking to embark on this adventure or simply gain more insight into marine craftsmanship, Sven’s wisdom is invaluable.Sven begins by explaining that working on flanges vertically and horizontally is significantly easier than doing so in a flat position. To simplify the process further, he divides the task into two or three steps as suggested by fellow expert “for for.” This approach not only makes it more manageable but also allows for greater precision in crafting each component.Step 2: Applying Glue and Securing
Sven proceeds to apply glue along one edge of the flange, ensuring a secure bond when clamped into place. He emphasizes that this stage is crucial for maintaining the structural integrity of the flange, which in turn safeguards the living area beneath the canvas when hatches are open.Step 3: Allowing Time to Dry
After securely attaching the first portion of the flange, Sven allows ample time for it to dry before moving forward with additional steps. This patience and precision are key aspects of his successful boatbuilding methods.Step 4: Finishing Touches
Once the flange is fully dried, Sven removes the clamps carefully, ensuring no damage occurs during this process. He then moves on to attaching four more pieces onto these main frames, completing two pairs of flanges for the bulkhead hatches.The Final Touches
While two flanges form the primary support structure around the hatches, Sven mentions there are two additional pieces required at each end to ensure comprehensive protection. This attention to detail highlights his commitment to producing a durable and reliable design. “Sailing is about finding your path, whether it’s across an ocean or within yourself.” – Sven Yrvind In conclusion, making flanges around bulkhead hatches may seem complex at first glance, but by following Sven Yrvind’s meticulous process, enthusiasts can achieve professional-level results. Remember that the journey of boatbuilding is as rewarding as reaching your destination; it tests one’s patience and dedication. For those seeking to embark on this adventure or simply gain more insight into marine craftsmanship, Sven’s wisdom is invaluable.Sven Yrvind, a renowned yacht designer and sailor, shares valuable insights on creating flanges around bulkhead hatches for canvas protection in this enlightening video. By following his expert guidance, boat enthusiasts can ensure their living areas remain secure while allowing unhindered access through the hatches.Step 1: Starting with the Flange
Sven begins by explaining that working on flanges vertically and horizontally is significantly easier than doing so in a flat position. To simplify the process further, he divides the task into two or three steps as suggested by fellow expert “for for.” This approach not only makes it more manageable but also allows for greater precision in crafting each component.Step 2: Applying Glue and Securing
Sven proceeds to apply glue along one edge of the flange, ensuring a secure bond when clamped into place. He emphasizes that this stage is crucial for maintaining the structural integrity of the flange, which in turn safeguards the living area beneath the canvas when hatches are open.Step 3: Allowing Time to Dry
After securely attaching the first portion of the flange, Sven allows ample time for it to dry before moving forward with additional steps. This patience and precision are key aspects of his successful boatbuilding methods.Step 4: Finishing Touches
Once the flange is fully dried, Sven removes the clamps carefully, ensuring no damage occurs during this process. He then moves on to attaching four more pieces onto these main frames, completing two pairs of flanges for the bulkhead hatches.The Final Touches
While two flanges form the primary support structure around the hatches, Sven mentions there are two additional pieces required at each end to ensure comprehensive protection. This attention to detail highlights his commitment to producing a durable and reliable design. “Sailing is about finding your path, whether it’s across an ocean or within yourself.” – Sven Yrvind In conclusion, making flanges around bulkhead hatches may seem complex at first glance, but by following Sven Yrvind’s meticulous process, enthusiasts can achieve professional-level results. Remember that the journey of boatbuilding is as rewarding as reaching your destination; it tests one’s patience and dedication. For those seeking to embark on this adventure or simply gain more insight into marine craftsmanship, Sven’s wisdom is invaluable.Making Flanges Around Bulkhead Hatches for Canvas
Sven Yrvind, a renowned yacht designer and sailor, shares valuable insights on creating flanges around bulkhead hatches for canvas protection in this enlightening video. By following his expert guidance, boat enthusiasts can ensure their living areas remain secure while allowing unhindered access through the hatches.Step 1: Starting with the Flange
Sven begins by explaining that working on flanges vertically and horizontally is significantly easier than doing so in a flat position. To simplify the process further, he divides the task into two or three steps as suggested by fellow expert “for for.” This approach not only makes it more manageable but also allows for greater precision in crafting each component.Step 2: Applying Glue and Securing
Sven proceeds to apply glue along one edge of the flange, ensuring a secure bond when clamped into place. He emphasizes that this stage is crucial for maintaining the structural integrity of the flange, which in turn safeguards the living area beneath the canvas when hatches are open.Step 3: Allowing Time to Dry
After securely attaching the first portion of the flange, Sven allows ample time for it to dry before moving forward with additional steps. This patience and precision are key aspects of his successful boatbuilding methods.Step 4: Finishing Touches
Once the flange is fully dried, Sven removes the clamps carefully, ensuring no damage occurs during this process. He then moves on to attaching four more pieces onto these main frames, completing two pairs of flanges for the bulkhead hatches.The Final Touches
While two flanges form the primary support structure around the hatches, Sven mentions there are two additional pieces required at each end to ensure comprehensive protection. This attention to detail highlights his commitment to producing a durable and reliable design. “Sailing is about finding your path, whether it’s across an ocean or within yourself.” – Sven Yrvind In conclusion, making flanges around bulkhead hatches may seem complex at first glance, but by following Sven Yrvind’s meticulous process, enthusiasts can achieve professional-level results. Remember that the journey of boatbuilding is as rewarding as reaching your destination; it tests one’s patience and dedication. For those seeking to embark on this adventure or simply gain more insight into marine craftsmanship, Sven’s wisdom is invaluable.After securely attaching the first portion of the flange, Sven allows ample time for it to dry before moving forward with additional steps. This patience and precision are key aspects of his successful boatbuilding methods.Step 4: Finishing Touches
Once the flange is fully dried, Sven removes the clamps carefully, ensuring no damage occurs during this process. He then moves on to attaching four more pieces onto these main frames, completing two pairs of flanges for the bulkhead hatches.The Final Touches
While two flanges form the primary support structure around the hatches, Sven mentions there are two additional pieces required at each end to ensure comprehensive protection. This attention to detail highlights his commitment to producing a durable and reliable design. “Sailing is about finding your path, whether it’s across an ocean or within yourself.” – Sven Yrvind In conclusion, making flanges around bulkhead hatches may seem complex at first glance, but by following Sven Yrvind’s meticulous process, enthusiasts can achieve professional-level results. Remember that the journey of boatbuilding is as rewarding as reaching your destination; it tests one’s patience and dedication. For those seeking to embark on this adventure or simply gain more insight into marine craftsmanship, Sven’s wisdom is invaluable.Sven begins by explaining that working on flanges vertically and horizontally is significantly easier than doing so in a flat position. To simplify the process further, he divides the task into two or three steps as suggested by fellow expert “for for.” This approach not only makes it more manageable but also allows for greater precision in crafting each component.Step 2: Applying Glue and Securing
Sven proceeds to apply glue along one edge of the flange, ensuring a secure bond when clamped into place. He emphasizes that this stage is crucial for maintaining the structural integrity of the flange, which in turn safeguards the living area beneath the canvas when hatches are open.Step 3: Allowing Time to Dry
After securely attaching the first portion of the flange, Sven allows ample time for it to dry before moving forward with additional steps. This patience and precision are key aspects of his successful boatbuilding methods.Step 4: Finishing Touches
Once the flange is fully dried, Sven removes the clamps carefully, ensuring no damage occurs during this process. He then moves on to attaching four more pieces onto these main frames, completing two pairs of flanges for the bulkhead hatches.The Final Touches
While two flanges form the primary support structure around the hatches, Sven mentions there are two additional pieces required at each end to ensure comprehensive protection. This attention to detail highlights his commitment to producing a durable and reliable design. “Sailing is about finding your path, whether it’s across an ocean or within yourself.” – Sven Yrvind In conclusion, making flanges around bulkhead hatches may seem complex at first glance, but by following Sven Yrvind’s meticulous process, enthusiasts can achieve professional-level results. Remember that the journey of boatbuilding is as rewarding as reaching your destination; it tests one’s patience and dedication. For those seeking to embark on this adventure or simply gain more insight into marine craftsmanship, Sven’s wisdom is invaluable.Sven Yrvind, a renowned yacht designer and sailor, shares valuable insights on creating flanges around bulkhead hatches for canvas protection in this enlightening video. By following his expert guidance, boat enthusiasts can ensure their living areas remain secure while allowing unhindered access through the hatches.Step 1: Starting with the Flange
Sven begins by explaining that working on flanges vertically and horizontally is significantly easier than doing so in a flat position. To simplify the process further, he divides the task into two or three steps as suggested by fellow expert “for for.” This approach not only makes it more manageable but also allows for greater precision in crafting each component.Step 2: Applying Glue and Securing
Sven proceeds to apply glue along one edge of the flange, ensuring a secure bond when clamped into place. He emphasizes that this stage is crucial for maintaining the structural integrity of the flange, which in turn safeguards the living area beneath the canvas when hatches are open.Step 3: Allowing Time to Dry
After securely attaching the first portion of the flange, Sven allows ample time for it to dry before moving forward with additional steps. This patience and precision are key aspects of his successful boatbuilding methods.Step 4: Finishing Touches
Once the flange is fully dried, Sven removes the clamps carefully, ensuring no damage occurs during this process. He then moves on to attaching four more pieces onto these main frames, completing two pairs of flanges for the bulkhead hatches.The Final Touches
While two flanges form the primary support structure around the hatches, Sven mentions there are two additional pieces required at each end to ensure comprehensive protection. This attention to detail highlights his commitment to producing a durable and reliable design. “Sailing is about finding your path, whether it’s across an ocean or within yourself.” – Sven Yrvind In conclusion, making flanges around bulkhead hatches may seem complex at first glance, but by following Sven Yrvind’s meticulous process, enthusiasts can achieve professional-level results. Remember that the journey of boatbuilding is as rewarding as reaching your destination; it tests one’s patience and dedication. For those seeking to embark on this adventure or simply gain more insight into marine craftsmanship, Sven’s wisdom is invaluable.Making Flanges Around Bulkhead Hatches for Canvas
Sven Yrvind, a renowned yacht designer and sailor, shares valuable insights on creating flanges around bulkhead hatches for canvas protection in this enlightening video. By following his expert guidance, boat enthusiasts can ensure their living areas remain secure while allowing unhindered access through the hatches.Step 1: Starting with the Flange
Sven begins by explaining that working on flanges vertically and horizontally is significantly easier than doing so in a flat position. To simplify the process further, he divides the task into two or three steps as suggested by fellow expert “for for.” This approach not only makes it more manageable but also allows for greater precision in crafting each component.Step 2: Applying Glue and Securing
Sven proceeds to apply glue along one edge of the flange, ensuring a secure bond when clamped into place. He emphasizes that this stage is crucial for maintaining the structural integrity of the flange, which in turn safeguards the living area beneath the canvas when hatches are open.Step 3: Allowing Time to Dry
After securely attaching the first portion of the flange, Sven allows ample time for it to dry before moving forward with additional steps. This patience and precision are key aspects of his successful boatbuilding methods.Step 4: Finishing Touches
Once the flange is fully dried, Sven removes the clamps carefully, ensuring no damage occurs during this process. He then moves on to attaching four more pieces onto these main frames, completing two pairs of flanges for the bulkhead hatches.The Final Touches
While two flanges form the primary support structure around the hatches, Sven mentions there are two additional pieces required at each end to ensure comprehensive protection. This attention to detail highlights his commitment to producing a durable and reliable design. “Sailing is about finding your path, whether it’s across an ocean or within yourself.” – Sven Yrvind In conclusion, making flanges around bulkhead hatches may seem complex at first glance, but by following Sven Yrvind’s meticulous process, enthusiasts can achieve professional-level results. Remember that the journey of boatbuilding is as rewarding as reaching your destination; it tests one’s patience and dedication. For those seeking to embark on this adventure or simply gain more insight into marine craftsmanship, Sven’s wisdom is invaluable.Sven proceeds to apply glue along one edge of the flange, ensuring a secure bond when clamped into place. He emphasizes that this stage is crucial for maintaining the structural integrity of the flange, which in turn safeguards the living area beneath the canvas when hatches are open.Step 3: Allowing Time to Dry
After securely attaching the first portion of the flange, Sven allows ample time for it to dry before moving forward with additional steps. This patience and precision are key aspects of his successful boatbuilding methods.Step 4: Finishing Touches
Once the flange is fully dried, Sven removes the clamps carefully, ensuring no damage occurs during this process. He then moves on to attaching four more pieces onto these main frames, completing two pairs of flanges for the bulkhead hatches.The Final Touches
While two flanges form the primary support structure around the hatches, Sven mentions there are two additional pieces required at each end to ensure comprehensive protection. This attention to detail highlights his commitment to producing a durable and reliable design. “Sailing is about finding your path, whether it’s across an ocean or within yourself.” – Sven Yrvind In conclusion, making flanges around bulkhead hatches may seem complex at first glance, but by following Sven Yrvind’s meticulous process, enthusiasts can achieve professional-level results. Remember that the journey of boatbuilding is as rewarding as reaching your destination; it tests one’s patience and dedication. For those seeking to embark on this adventure or simply gain more insight into marine craftsmanship, Sven’s wisdom is invaluable.Sven begins by explaining that working on flanges vertically and horizontally is significantly easier than doing so in a flat position. To simplify the process further, he divides the task into two or three steps as suggested by fellow expert “for for.” This approach not only makes it more manageable but also allows for greater precision in crafting each component.Step 2: Applying Glue and Securing
Sven proceeds to apply glue along one edge of the flange, ensuring a secure bond when clamped into place. He emphasizes that this stage is crucial for maintaining the structural integrity of the flange, which in turn safeguards the living area beneath the canvas when hatches are open.Step 3: Allowing Time to Dry
After securely attaching the first portion of the flange, Sven allows ample time for it to dry before moving forward with additional steps. This patience and precision are key aspects of his successful boatbuilding methods.Step 4: Finishing Touches
Once the flange is fully dried, Sven removes the clamps carefully, ensuring no damage occurs during this process. He then moves on to attaching four more pieces onto these main frames, completing two pairs of flanges for the bulkhead hatches.The Final Touches
While two flanges form the primary support structure around the hatches, Sven mentions there are two additional pieces required at each end to ensure comprehensive protection. This attention to detail highlights his commitment to producing a durable and reliable design. “Sailing is about finding your path, whether it’s across an ocean or within yourself.” – Sven Yrvind In conclusion, making flanges around bulkhead hatches may seem complex at first glance, but by following Sven Yrvind’s meticulous process, enthusiasts can achieve professional-level results. Remember that the journey of boatbuilding is as rewarding as reaching your destination; it tests one’s patience and dedication. For those seeking to embark on this adventure or simply gain more insight into marine craftsmanship, Sven’s wisdom is invaluable.Sven Yrvind, a renowned yacht designer and sailor, shares valuable insights on creating flanges around bulkhead hatches for canvas protection in this enlightening video. By following his expert guidance, boat enthusiasts can ensure their living areas remain secure while allowing unhindered access through the hatches.Step 1: Starting with the Flange
Sven begins by explaining that working on flanges vertically and horizontally is significantly easier than doing so in a flat position. To simplify the process further, he divides the task into two or three steps as suggested by fellow expert “for for.” This approach not only makes it more manageable but also allows for greater precision in crafting each component.Step 2: Applying Glue and Securing
Sven proceeds to apply glue along one edge of the flange, ensuring a secure bond when clamped into place. He emphasizes that this stage is crucial for maintaining the structural integrity of the flange, which in turn safeguards the living area beneath the canvas when hatches are open.Step 3: Allowing Time to Dry
After securely attaching the first portion of the flange, Sven allows ample time for it to dry before moving forward with additional steps. This patience and precision are key aspects of his successful boatbuilding methods.Step 4: Finishing Touches
Once the flange is fully dried, Sven removes the clamps carefully, ensuring no damage occurs during this process. He then moves on to attaching four more pieces onto these main frames, completing two pairs of flanges for the bulkhead hatches.The Final Touches
While two flanges form the primary support structure around the hatches, Sven mentions there are two additional pieces required at each end to ensure comprehensive protection. This attention to detail highlights his commitment to producing a durable and reliable design. “Sailing is about finding your path, whether it’s across an ocean or within yourself.” – Sven Yrvind In conclusion, making flanges around bulkhead hatches may seem complex at first glance, but by following Sven Yrvind’s meticulous process, enthusiasts can achieve professional-level results. Remember that the journey of boatbuilding is as rewarding as reaching your destination; it tests one’s patience and dedication. For those seeking to embark on this adventure or simply gain more insight into marine craftsmanship, Sven’s wisdom is invaluable.Making Flanges Around Bulkhead Hatches for Canvas
Sven Yrvind, a renowned yacht designer and sailor, shares valuable insights on creating flanges around bulkhead hatches for canvas protection in this enlightening video. By following his expert guidance, boat enthusiasts can ensure their living areas remain secure while allowing unhindered access through the hatches.Step 1: Starting with the Flange
Sven begins by explaining that working on flanges vertically and horizontally is significantly easier than doing so in a flat position. To simplify the process further, he divides the task into two or three steps as suggested by fellow expert “for for.” This approach not only makes it more manageable but also allows for greater precision in crafting each component.Step 2: Applying Glue and Securing
Sven proceeds to apply glue along one edge of the flange, ensuring a secure bond when clamped into place. He emphasizes that this stage is crucial for maintaining the structural integrity of the flange, which in turn safeguards the living area beneath the canvas when hatches are open.Step 3: Allowing Time to Dry
After securely attaching the first portion of the flange, Sven allows ample time for it to dry before moving forward with additional steps. This patience and precision are key aspects of his successful boatbuilding methods.Step 4: Finishing Touches
Once the flange is fully dried, Sven removes the clamps carefully, ensuring no damage occurs during this process. He then moves on to attaching four more pieces onto these main frames, completing two pairs of flanges for the bulkhead hatches.The Final Touches
While two flanges form the primary support structure around the hatches, Sven mentions there are two additional pieces required at each end to ensure comprehensive protection. This attention to detail highlights his commitment to producing a durable and reliable design. “Sailing is about finding your path, whether it’s across an ocean or within yourself.” – Sven Yrvind In conclusion, making flanges around bulkhead hatches may seem complex at first glance, but by following Sven Yrvind’s meticulous process, enthusiasts can achieve professional-level results. Remember that the journey of boatbuilding is as rewarding as reaching your destination; it tests one’s patience and dedication. For those seeking to embark on this adventure or simply gain more insight into marine craftsmanship, Sven’s wisdom is invaluable.Once the flange is fully dried, Sven removes the clamps carefully, ensuring no damage occurs during this process. He then moves on to attaching four more pieces onto these main frames, completing two pairs of flanges for the bulkhead hatches.The Final Touches
While two flanges form the primary support structure around the hatches, Sven mentions there are two additional pieces required at each end to ensure comprehensive protection. This attention to detail highlights his commitment to producing a durable and reliable design. “Sailing is about finding your path, whether it’s across an ocean or within yourself.” – Sven Yrvind In conclusion, making flanges around bulkhead hatches may seem complex at first glance, but by following Sven Yrvind’s meticulous process, enthusiasts can achieve professional-level results. Remember that the journey of boatbuilding is as rewarding as reaching your destination; it tests one’s patience and dedication. For those seeking to embark on this adventure or simply gain more insight into marine craftsmanship, Sven’s wisdom is invaluable.Sven proceeds to apply glue along one edge of the flange, ensuring a secure bond when clamped into place. He emphasizes that this stage is crucial for maintaining the structural integrity of the flange, which in turn safeguards the living area beneath the canvas when hatches are open.Step 3: Allowing Time to Dry
After securely attaching the first portion of the flange, Sven allows ample time for it to dry before moving forward with additional steps. This patience and precision are key aspects of his successful boatbuilding methods.Step 4: Finishing Touches
Once the flange is fully dried, Sven removes the clamps carefully, ensuring no damage occurs during this process. He then moves on to attaching four more pieces onto these main frames, completing two pairs of flanges for the bulkhead hatches.The Final Touches
While two flanges form the primary support structure around the hatches, Sven mentions there are two additional pieces required at each end to ensure comprehensive protection. This attention to detail highlights his commitment to producing a durable and reliable design. “Sailing is about finding your path, whether it’s across an ocean or within yourself.” – Sven Yrvind In conclusion, making flanges around bulkhead hatches may seem complex at first glance, but by following Sven Yrvind’s meticulous process, enthusiasts can achieve professional-level results. Remember that the journey of boatbuilding is as rewarding as reaching your destination; it tests one’s patience and dedication. For those seeking to embark on this adventure or simply gain more insight into marine craftsmanship, Sven’s wisdom is invaluable.Sven begins by explaining that working on flanges vertically and horizontally is significantly easier than doing so in a flat position. To simplify the process further, he divides the task into two or three steps as suggested by fellow expert “for for.” This approach not only makes it more manageable but also allows for greater precision in crafting each component.Step 2: Applying Glue and Securing
Sven proceeds to apply glue along one edge of the flange, ensuring a secure bond when clamped into place. He emphasizes that this stage is crucial for maintaining the structural integrity of the flange, which in turn safeguards the living area beneath the canvas when hatches are open.Step 3: Allowing Time to Dry
After securely attaching the first portion of the flange, Sven allows ample time for it to dry before moving forward with additional steps. This patience and precision are key aspects of his successful boatbuilding methods.Step 4: Finishing Touches
Once the flange is fully dried, Sven removes the clamps carefully, ensuring no damage occurs during this process. He then moves on to attaching four more pieces onto these main frames, completing two pairs of flanges for the bulkhead hatches.The Final Touches
While two flanges form the primary support structure around the hatches, Sven mentions there are two additional pieces required at each end to ensure comprehensive protection. This attention to detail highlights his commitment to producing a durable and reliable design. “Sailing is about finding your path, whether it’s across an ocean or within yourself.” – Sven Yrvind In conclusion, making flanges around bulkhead hatches may seem complex at first glance, but by following Sven Yrvind’s meticulous process, enthusiasts can achieve professional-level results. Remember that the journey of boatbuilding is as rewarding as reaching your destination; it tests one’s patience and dedication. For those seeking to embark on this adventure or simply gain more insight into marine craftsmanship, Sven’s wisdom is invaluable.Sven Yrvind, a renowned yacht designer and sailor, shares valuable insights on creating flanges around bulkhead hatches for canvas protection in this enlightening video. By following his expert guidance, boat enthusiasts can ensure their living areas remain secure while allowing unhindered access through the hatches.Step 1: Starting with the Flange
Sven begins by explaining that working on flanges vertically and horizontally is significantly easier than doing so in a flat position. To simplify the process further, he divides the task into two or three steps as suggested by fellow expert “for for.” This approach not only makes it more manageable but also allows for greater precision in crafting each component.Step 2: Applying Glue and Securing
Sven proceeds to apply glue along one edge of the flange, ensuring a secure bond when clamped into place. He emphasizes that this stage is crucial for maintaining the structural integrity of the flange, which in turn safeguards the living area beneath the canvas when hatches are open.Step 3: Allowing Time to Dry
After securely attaching the first portion of the flange, Sven allows ample time for it to dry before moving forward with additional steps. This patience and precision are key aspects of his successful boatbuilding methods.Step 4: Finishing Touches
Once the flange is fully dried, Sven removes the clamps carefully, ensuring no damage occurs during this process. He then moves on to attaching four more pieces onto these main frames, completing two pairs of flanges for the bulkhead hatches.The Final Touches
While two flanges form the primary support structure around the hatches, Sven mentions there are two additional pieces required at each end to ensure comprehensive protection. This attention to detail highlights his commitment to producing a durable and reliable design. “Sailing is about finding your path, whether it’s across an ocean or within yourself.” – Sven Yrvind In conclusion, making flanges around bulkhead hatches may seem complex at first glance, but by following Sven Yrvind’s meticulous process, enthusiasts can achieve professional-level results. Remember that the journey of boatbuilding is as rewarding as reaching your destination; it tests one’s patience and dedication. For those seeking to embark on this adventure or simply gain more insight into marine craftsmanship, Sven’s wisdom is invaluable.Making Flanges Around Bulkhead Hatches for Canvas
Sven Yrvind, a renowned yacht designer and sailor, shares valuable insights on creating flanges around bulkhead hatches for canvas protection in this enlightening video. By following his expert guidance, boat enthusiasts can ensure their living areas remain secure while allowing unhindered access through the hatches.Step 1: Starting with the Flange
Sven begins by explaining that working on flanges vertically and horizontally is significantly easier than doing so in a flat position. To simplify the process further, he divides the task into two or three steps as suggested by fellow expert “for for.” This approach not only makes it more manageable but also allows for greater precision in crafting each component.Step 2: Applying Glue and Securing
Sven proceeds to apply glue along one edge of the flange, ensuring a secure bond when clamped into place. He emphasizes that this stage is crucial for maintaining the structural integrity of the flange, which in turn safeguards the living area beneath the canvas when hatches are open.Step 3: Allowing Time to Dry
After securely attaching the first portion of the flange, Sven allows ample time for it to dry before moving forward with additional steps. This patience and precision are key aspects of his successful boatbuilding methods.Step 4: Finishing Touches
Once the flange is fully dried, Sven removes the clamps carefully, ensuring no damage occurs during this process. He then moves on to attaching four more pieces onto these main frames, completing two pairs of flanges for the bulkhead hatches.The Final Touches
While two flanges form the primary support structure around the hatches, Sven mentions there are two additional pieces required at each end to ensure comprehensive protection. This attention to detail highlights his commitment to producing a durable and reliable design. “Sailing is about finding your path, whether it’s across an ocean or within yourself.” – Sven Yrvind In conclusion, making flanges around bulkhead hatches may seem complex at first glance, but by following Sven Yrvind’s meticulous process, enthusiasts can achieve professional-level results. Remember that the journey of boatbuilding is as rewarding as reaching your destination; it tests one’s patience and dedication. For those seeking to embark on this adventure or simply gain more insight into marine craftsmanship, Sven’s wisdom is invaluable.After securely attaching the first portion of the flange, Sven allows ample time for it to dry before moving forward with additional steps. This patience and precision are key aspects of his successful boatbuilding methods.Step 4: Finishing Touches
Once the flange is fully dried, Sven removes the clamps carefully, ensuring no damage occurs during this process. He then moves on to attaching four more pieces onto these main frames, completing two pairs of flanges for the bulkhead hatches.The Final Touches
While two flanges form the primary support structure around the hatches, Sven mentions there are two additional pieces required at each end to ensure comprehensive protection. This attention to detail highlights his commitment to producing a durable and reliable design. “Sailing is about finding your path, whether it’s across an ocean or within yourself.” – Sven Yrvind In conclusion, making flanges around bulkhead hatches may seem complex at first glance, but by following Sven Yrvind’s meticulous process, enthusiasts can achieve professional-level results. Remember that the journey of boatbuilding is as rewarding as reaching your destination; it tests one’s patience and dedication. For those seeking to embark on this adventure or simply gain more insight into marine craftsmanship, Sven’s wisdom is invaluable.Sven proceeds to apply glue along one edge of the flange, ensuring a secure bond when clamped into place. He emphasizes that this stage is crucial for maintaining the structural integrity of the flange, which in turn safeguards the living area beneath the canvas when hatches are open.Step 3: Allowing Time to Dry
After securely attaching the first portion of the flange, Sven allows ample time for it to dry before moving forward with additional steps. This patience and precision are key aspects of his successful boatbuilding methods.Step 4: Finishing Touches
Once the flange is fully dried, Sven removes the clamps carefully, ensuring no damage occurs during this process. He then moves on to attaching four more pieces onto these main frames, completing two pairs of flanges for the bulkhead hatches.The Final Touches
While two flanges form the primary support structure around the hatches, Sven mentions there are two additional pieces required at each end to ensure comprehensive protection. This attention to detail highlights his commitment to producing a durable and reliable design. “Sailing is about finding your path, whether it’s across an ocean or within yourself.” – Sven Yrvind In conclusion, making flanges around bulkhead hatches may seem complex at first glance, but by following Sven Yrvind’s meticulous process, enthusiasts can achieve professional-level results. Remember that the journey of boatbuilding is as rewarding as reaching your destination; it tests one’s patience and dedication. For those seeking to embark on this adventure or simply gain more insight into marine craftsmanship, Sven’s wisdom is invaluable.Sven begins by explaining that working on flanges vertically and horizontally is significantly easier than doing so in a flat position. To simplify the process further, he divides the task into two or three steps as suggested by fellow expert “for for.” This approach not only makes it more manageable but also allows for greater precision in crafting each component.Step 2: Applying Glue and Securing
Sven proceeds to apply glue along one edge of the flange, ensuring a secure bond when clamped into place. He emphasizes that this stage is crucial for maintaining the structural integrity of the flange, which in turn safeguards the living area beneath the canvas when hatches are open.Step 3: Allowing Time to Dry
After securely attaching the first portion of the flange, Sven allows ample time for it to dry before moving forward with additional steps. This patience and precision are key aspects of his successful boatbuilding methods.Step 4: Finishing Touches
Once the flange is fully dried, Sven removes the clamps carefully, ensuring no damage occurs during this process. He then moves on to attaching four more pieces onto these main frames, completing two pairs of flanges for the bulkhead hatches.The Final Touches
While two flanges form the primary support structure around the hatches, Sven mentions there are two additional pieces required at each end to ensure comprehensive protection. This attention to detail highlights his commitment to producing a durable and reliable design. “Sailing is about finding your path, whether it’s across an ocean or within yourself.” – Sven Yrvind In conclusion, making flanges around bulkhead hatches may seem complex at first glance, but by following Sven Yrvind’s meticulous process, enthusiasts can achieve professional-level results. Remember that the journey of boatbuilding is as rewarding as reaching your destination; it tests one’s patience and dedication. For those seeking to embark on this adventure or simply gain more insight into marine craftsmanship, Sven’s wisdom is invaluable.Sven Yrvind, a renowned yacht designer and sailor, shares valuable insights on creating flanges around bulkhead hatches for canvas protection in this enlightening video. By following his expert guidance, boat enthusiasts can ensure their living areas remain secure while allowing unhindered access through the hatches.Step 1: Starting with the Flange
Sven begins by explaining that working on flanges vertically and horizontally is significantly easier than doing so in a flat position. To simplify the process further, he divides the task into two or three steps as suggested by fellow expert “for for.” This approach not only makes it more manageable but also allows for greater precision in crafting each component.Step 2: Applying Glue and Securing
Sven proceeds to apply glue along one edge of the flange, ensuring a secure bond when clamped into place. He emphasizes that this stage is crucial for maintaining the structural integrity of the flange, which in turn safeguards the living area beneath the canvas when hatches are open.Step 3: Allowing Time to Dry
After securely attaching the first portion of the flange, Sven allows ample time for it to dry before moving forward with additional steps. This patience and precision are key aspects of his successful boatbuilding methods.Step 4: Finishing Touches
Once the flange is fully dried, Sven removes the clamps carefully, ensuring no damage occurs during this process. He then moves on to attaching four more pieces onto these main frames, completing two pairs of flanges for the bulkhead hatches.The Final Touches
While two flanges form the primary support structure around the hatches, Sven mentions there are two additional pieces required at each end to ensure comprehensive protection. This attention to detail highlights his commitment to producing a durable and reliable design. “Sailing is about finding your path, whether it’s across an ocean or within yourself.” – Sven Yrvind In conclusion, making flanges around bulkhead hatches may seem complex at first glance, but by following Sven Yrvind’s meticulous process, enthusiasts can achieve professional-level results. Remember that the journey of boatbuilding is as rewarding as reaching your destination; it tests one’s patience and dedication. For those seeking to embark on this adventure or simply gain more insight into marine craftsmanship, Sven’s wisdom is invaluable.Making Flanges Around Bulkhead Hatches for Canvas
Sven Yrvind, a renowned yacht designer and sailor, shares valuable insights on creating flanges around bulkhead hatches for canvas protection in this enlightening video. By following his expert guidance, boat enthusiasts can ensure their living areas remain secure while allowing unhindered access through the hatches.Step 1: Starting with the Flange
Sven begins by explaining that working on flanges vertically and horizontally is significantly easier than doing so in a flat position. To simplify the process further, he divides the task into two or three steps as suggested by fellow expert “for for.” This approach not only makes it more manageable but also allows for greater precision in crafting each component.Step 2: Applying Glue and Securing
Sven proceeds to apply glue along one edge of the flange, ensuring a secure bond when clamped into place. He emphasizes that this stage is crucial for maintaining the structural integrity of the flange, which in turn safeguards the living area beneath the canvas when hatches are open.Step 3: Allowing Time to Dry
After securely attaching the first portion of the flange, Sven allows ample time for it to dry before moving forward with additional steps. This patience and precision are key aspects of his successful boatbuilding methods.Step 4: Finishing Touches
Once the flange is fully dried, Sven removes the clamps carefully, ensuring no damage occurs during this process. He then moves on to attaching four more pieces onto these main frames, completing two pairs of flanges for the bulkhead hatches.The Final Touches
While two flanges form the primary support structure around the hatches, Sven mentions there are two additional pieces required at each end to ensure comprehensive protection. This attention to detail highlights his commitment to producing a durable and reliable design. “Sailing is about finding your path, whether it’s across an ocean or within yourself.” – Sven Yrvind In conclusion, making flanges around bulkhead hatches may seem complex at first glance, but by following Sven Yrvind’s meticulous process, enthusiasts can achieve professional-level results. Remember that the journey of boatbuilding is as rewarding as reaching your destination; it tests one’s patience and dedication. For those seeking to embark on this adventure or simply gain more insight into marine craftsmanship, Sven’s wisdom is invaluable.Once the flange is fully dried, Sven removes the clamps carefully, ensuring no damage occurs during this process. He then moves on to attaching four more pieces onto these main frames, completing two pairs of flanges for the bulkhead hatches.The Final Touches
While two flanges form the primary support structure around the hatches, Sven mentions there are two additional pieces required at each end to ensure comprehensive protection. This attention to detail highlights his commitment to producing a durable and reliable design. “Sailing is about finding your path, whether it’s across an ocean or within yourself.” – Sven Yrvind In conclusion, making flanges around bulkhead hatches may seem complex at first glance, but by following Sven Yrvind’s meticulous process, enthusiasts can achieve professional-level results. Remember that the journey of boatbuilding is as rewarding as reaching your destination; it tests one’s patience and dedication. For those seeking to embark on this adventure or simply gain more insight into marine craftsmanship, Sven’s wisdom is invaluable.After securely attaching the first portion of the flange, Sven allows ample time for it to dry before moving forward with additional steps. This patience and precision are key aspects of his successful boatbuilding methods.Step 4: Finishing Touches
Once the flange is fully dried, Sven removes the clamps carefully, ensuring no damage occurs during this process. He then moves on to attaching four more pieces onto these main frames, completing two pairs of flanges for the bulkhead hatches.The Final Touches
While two flanges form the primary support structure around the hatches, Sven mentions there are two additional pieces required at each end to ensure comprehensive protection. This attention to detail highlights his commitment to producing a durable and reliable design. “Sailing is about finding your path, whether it’s across an ocean or within yourself.” – Sven Yrvind In conclusion, making flanges around bulkhead hatches may seem complex at first glance, but by following Sven Yrvind’s meticulous process, enthusiasts can achieve professional-level results. Remember that the journey of boatbuilding is as rewarding as reaching your destination; it tests one’s patience and dedication. For those seeking to embark on this adventure or simply gain more insight into marine craftsmanship, Sven’s wisdom is invaluable.Sven proceeds to apply glue along one edge of the flange, ensuring a secure bond when clamped into place. He emphasizes that this stage is crucial for maintaining the structural integrity of the flange, which in turn safeguards the living area beneath the canvas when hatches are open.Step 3: Allowing Time to Dry
After securely attaching the first portion of the flange, Sven allows ample time for it to dry before moving forward with additional steps. This patience and precision are key aspects of his successful boatbuilding methods.Step 4: Finishing Touches
Once the flange is fully dried, Sven removes the clamps carefully, ensuring no damage occurs during this process. He then moves on to attaching four more pieces onto these main frames, completing two pairs of flanges for the bulkhead hatches.The Final Touches
While two flanges form the primary support structure around the hatches, Sven mentions there are two additional pieces required at each end to ensure comprehensive protection. This attention to detail highlights his commitment to producing a durable and reliable design. “Sailing is about finding your path, whether it’s across an ocean or within yourself.” – Sven Yrvind In conclusion, making flanges around bulkhead hatches may seem complex at first glance, but by following Sven Yrvind’s meticulous process, enthusiasts can achieve professional-level results. Remember that the journey of boatbuilding is as rewarding as reaching your destination; it tests one’s patience and dedication. For those seeking to embark on this adventure or simply gain more insight into marine craftsmanship, Sven’s wisdom is invaluable.Sven begins by explaining that working on flanges vertically and horizontally is significantly easier than doing so in a flat position. To simplify the process further, he divides the task into two or three steps as suggested by fellow expert “for for.” This approach not only makes it more manageable but also allows for greater precision in crafting each component.Step 2: Applying Glue and Securing
Sven proceeds to apply glue along one edge of the flange, ensuring a secure bond when clamped into place. He emphasizes that this stage is crucial for maintaining the structural integrity of the flange, which in turn safeguards the living area beneath the canvas when hatches are open.Step 3: Allowing Time to Dry
After securely attaching the first portion of the flange, Sven allows ample time for it to dry before moving forward with additional steps. This patience and precision are key aspects of his successful boatbuilding methods.Step 4: Finishing Touches
Once the flange is fully dried, Sven removes the clamps carefully, ensuring no damage occurs during this process. He then moves on to attaching four more pieces onto these main frames, completing two pairs of flanges for the bulkhead hatches.The Final Touches
While two flanges form the primary support structure around the hatches, Sven mentions there are two additional pieces required at each end to ensure comprehensive protection. This attention to detail highlights his commitment to producing a durable and reliable design. “Sailing is about finding your path, whether it’s across an ocean or within yourself.” – Sven Yrvind In conclusion, making flanges around bulkhead hatches may seem complex at first glance, but by following Sven Yrvind’s meticulous process, enthusiasts can achieve professional-level results. Remember that the journey of boatbuilding is as rewarding as reaching your destination; it tests one’s patience and dedication. For those seeking to embark on this adventure or simply gain more insight into marine craftsmanship, Sven’s wisdom is invaluable.Sven Yrvind, a renowned yacht designer and sailor, shares valuable insights on creating flanges around bulkhead hatches for canvas protection in this enlightening video. By following his expert guidance, boat enthusiasts can ensure their living areas remain secure while allowing unhindered access through the hatches.Step 1: Starting with the Flange
Sven begins by explaining that working on flanges vertically and horizontally is significantly easier than doing so in a flat position. To simplify the process further, he divides the task into two or three steps as suggested by fellow expert “for for.” This approach not only makes it more manageable but also allows for greater precision in crafting each component.Step 2: Applying Glue and Securing
Sven proceeds to apply glue along one edge of the flange, ensuring a secure bond when clamped into place. He emphasizes that this stage is crucial for maintaining the structural integrity of the flange, which in turn safeguards the living area beneath the canvas when hatches are open.Step 3: Allowing Time to Dry
After securely attaching the first portion of the flange, Sven allows ample time for it to dry before moving forward with additional steps. This patience and precision are key aspects of his successful boatbuilding methods.Step 4: Finishing Touches
Once the flange is fully dried, Sven removes the clamps carefully, ensuring no damage occurs during this process. He then moves on to attaching four more pieces onto these main frames, completing two pairs of flanges for the bulkhead hatches.The Final Touches
While two flanges form the primary support structure around the hatches, Sven mentions there are two additional pieces required at each end to ensure comprehensive protection. This attention to detail highlights his commitment to producing a durable and reliable design. “Sailing is about finding your path, whether it’s across an ocean or within yourself.” – Sven Yrvind In conclusion, making flanges around bulkhead hatches may seem complex at first glance, but by following Sven Yrvind’s meticulous process, enthusiasts can achieve professional-level results. Remember that the journey of boatbuilding is as rewarding as reaching your destination; it tests one’s patience and dedication. For those seeking to embark on this adventure or simply gain more insight into marine craftsmanship, Sven’s wisdom is invaluable.Making Flanges Around Bulkhead Hatches for Canvas
Sven Yrvind, a renowned yacht designer and sailor, shares valuable insights on creating flanges around bulkhead hatches for canvas protection in this enlightening video. By following his expert guidance, boat enthusiasts can ensure their living areas remain secure while allowing unhindered access through the hatches.Step 1: Starting with the Flange
Sven begins by explaining that working on flanges vertically and horizontally is significantly easier than doing so in a flat position. To simplify the process further, he divides the task into two or three steps as suggested by fellow expert “for for.” This approach not only makes it more manageable but also allows for greater precision in crafting each component.Step 2: Applying Glue and Securing
Sven proceeds to apply glue along one edge of the flange, ensuring a secure bond when clamped into place. He emphasizes that this stage is crucial for maintaining the structural integrity of the flange, which in turn safeguards the living area beneath the canvas when hatches are open.Step 3: Allowing Time to Dry
After securely attaching the first portion of the flange, Sven allows ample time for it to dry before moving forward with additional steps. This patience and precision are key aspects of his successful boatbuilding methods.Step 4: Finishing Touches
Once the flange is fully dried, Sven removes the clamps carefully, ensuring no damage occurs during this process. He then moves on to attaching four more pieces onto these main frames, completing two pairs of flanges for the bulkhead hatches.The Final Touches
While two flanges form the primary support structure around the hatches, Sven mentions there are two additional pieces required at each end to ensure comprehensive protection. This attention to detail highlights his commitment to producing a durable and reliable design. “Sailing is about finding your path, whether it’s across an ocean or within yourself.” – Sven Yrvind In conclusion, making flanges around bulkhead hatches may seem complex at first glance, but by following Sven Yrvind’s meticulous process, enthusiasts can achieve professional-level results. Remember that the journey of boatbuilding is as rewarding as reaching your destination; it tests one’s patience and dedication. For those seeking to embark on this adventure or simply gain more insight into marine craftsmanship, Sven’s wisdom is invaluable.After securely attaching the first portion of the flange, Sven allows ample time for it to dry before moving forward with additional steps. This patience and precision are key aspects of his successful boatbuilding methods.Step 4: Finishing Touches
Once the flange is fully dried, Sven removes the clamps carefully, ensuring no damage occurs during this process. He then moves on to attaching four more pieces onto these main frames, completing two pairs of flanges for the bulkhead hatches.The Final Touches
While two flanges form the primary support structure around the hatches, Sven mentions there are two additional pieces required at each end to ensure comprehensive protection. This attention to detail highlights his commitment to producing a durable and reliable design. “Sailing is about finding your path, whether it’s across an ocean or within yourself.” – Sven Yrvind In conclusion, making flanges around bulkhead hatches may seem complex at first glance, but by following Sven Yrvind’s meticulous process, enthusiasts can achieve professional-level results. Remember that the journey of boatbuilding is as rewarding as reaching your destination; it tests one’s patience and dedication. For those seeking to embark on this adventure or simply gain more insight into marine craftsmanship, Sven’s wisdom is invaluable.Making Flanges Around Bulkhead Hatches for Canvas
Sven Yrvind, a renowned yacht designer and sailor, shares valuable insights on creating flanges around bulkhead hatches for canvas protection in this enlightening video. By following his expert guidance, boat enthusiasts can ensure their living areas remain secure while allowing unhindered access through the hatches.Step 1: Starting with the Flange
Sven begins by explaining that working on flanges vertically and horizontally is significantly easier than doing so in a flat position. To simplify the process further, he divides the task into two or three steps as suggested by fellow expert “for for.” This approach not only makes it more manageable but also allows for greater precision in crafting each component.Step 2: Applying Glue and Securing
Sven proceeds to apply glue along one edge of the flange, ensuring a secure bond when clamped into place. He emphasizes that this stage is crucial for maintaining the structural integrity of the flange, which in turn safeguards the living area beneath the canvas when hatches are open.Step 3: Allowing Time to Dry
After securely attaching the first portion of the flange, Sven allows ample time for it to dry before moving forward with additional steps. This patience and precision are key aspects of his successful boatbuilding methods.Step 4: Finishing Touches
Once the flange is fully dried, Sven removes the clamps carefully, ensuring no damage occurs during this process. He then moves on to attaching four more pieces onto these main frames, completing two pairs of flanges for the bulkhead hatches.The Final Touches
While two flanges form the primary support structure around the hatches, Sven mentions there are two additional pieces required at each end to ensure comprehensive protection. This attention to detail highlights his commitment to producing a durable and reliable design. “Sailing is about finding your path, whether it’s across an ocean or within yourself.” – Sven Yrvind In conclusion, making flanges around bulkhead hatches may seem complex at first glance, but by following Sven Yrvind’s meticulous process, enthusiasts can achieve professional-level results. Remember that the journey of boatbuilding is as rewarding as reaching your destination; it tests one’s patience and dedication. For those seeking to embark on this adventure or simply gain more insight into marine craftsmanship, Sven’s wisdom is invaluable.Sven Yrvind, a renowned yacht designer and sailor, shares valuable insights on creating flanges around bulkhead hatches for canvas protection in this enlightening video. By following his expert guidance, boat enthusiasts can ensure their living areas remain secure while allowing unhindered access through the hatches.Step 1: Starting with the Flange
Sven begins by explaining that working on flanges vertically and horizontally is significantly easier than doing so in a flat position. To simplify the process further, he divides the task into two or three steps as suggested by fellow expert “for for.” This approach not only makes it more manageable but also allows for greater precision in crafting each component.Step 2: Applying Glue and Securing
Sven proceeds to apply glue along one edge of the flange, ensuring a secure bond when clamped into place. He emphasizes that this stage is crucial for maintaining the structural integrity of the flange, which in turn safeguards the living area beneath the canvas when hatches are open.Step 3: Allowing Time to Dry
After securely attaching the first portion of the flange, Sven allows ample time for it to dry before moving forward with additional steps. This patience and precision are key aspects of his successful boatbuilding methods.Step 4: Finishing Touches
Once the flange is fully dried, Sven removes the clamps carefully, ensuring no damage occurs during this process. He then moves on to attaching four more pieces onto these main frames, completing two pairs of flanges for the bulkhead hatches.The Final Touches
While two flanges form the primary support structure around the hatches, Sven mentions there are two additional pieces required at each end to ensure comprehensive protection. This attention to detail highlights his commitment to producing a durable and reliable design. “Sailing is about finding your path, whether it’s across an ocean or within yourself.” – Sven Yrvind In conclusion, making flanges around bulkhead hatches may seem complex at first glance, but by following Sven Yrvind’s meticulous process, enthusiasts can achieve professional-level results. Remember that the journey of boatbuilding is as rewarding as reaching your destination; it tests one’s patience and dedication. For those seeking to embark on this adventure or simply gain more insight into marine craftsmanship, Sven’s wisdom is invaluable.Making Flanges Around Bulkhead Hatches for Canvas
Sven Yrvind, a renowned yacht designer and sailor, shares valuable insights on creating flanges around bulkhead hatches for canvas protection in this enlightening video. By following his expert guidance, boat enthusiasts can ensure their living areas remain secure while allowing unhindered access through the hatches.Step 1: Starting with the Flange
Sven begins by explaining that working on flanges vertically and horizontally is significantly easier than doing so in a flat position. To simplify the process further, he divides the task into two or three steps as suggested by fellow expert “for for.” This approach not only makes it more manageable but also allows for greater precision in crafting each component.Step 2: Applying Glue and Securing
Sven proceeds to apply glue along one edge of the flange, ensuring a secure bond when clamped into place. He emphasizes that this stage is crucial for maintaining the structural integrity of the flange, which in turn safeguards the living area beneath the canvas when hatches are open.Step 3: Allowing Time to Dry
After securely attaching the first portion of the flange, Sven allows ample time for it to dry before moving forward with additional steps. This patience and precision are key aspects of his successful boatbuilding methods.Step 4: Finishing Touches
Once the flange is fully dried, Sven removes the clamps carefully, ensuring no damage occurs during this process. He then moves on to attaching four more pieces onto these main frames, completing two pairs of flanges for the bulkhead hatches.The Final Touches
While two flanges form the primary support structure around the hatches, Sven mentions there are two additional pieces required at each end to ensure comprehensive protection. This attention to detail highlights his commitment to producing a durable and reliable design. “Sailing is about finding your path, whether it’s across an ocean or within yourself.” – Sven Yrvind In conclusion, making flanges around bulkhead hatches may seem complex at first glance, but by following Sven Yrvind’s meticulous process, enthusiasts can achieve professional-level results. Remember that the journey of boatbuilding is as rewarding as reaching your destination; it tests one’s patience and dedication. For those seeking to embark on this adventure or simply gain more insight into marine craftsmanship, Sven’s wisdom is invaluable.Once the flange is fully dried, Sven removes the clamps carefully, ensuring no damage occurs during this process. He then moves on to attaching four more pieces onto these main frames, completing two pairs of flanges for the bulkhead hatches.The Final Touches
While two flanges form the primary support structure around the hatches, Sven mentions there are two additional pieces required at each end to ensure comprehensive protection. This attention to detail highlights his commitment to producing a durable and reliable design. “Sailing is about finding your path, whether it’s across an ocean or within yourself.” – Sven Yrvind In conclusion, making flanges around bulkhead hatches may seem complex at first glance, but by following Sven Yrvind’s meticulous process, enthusiasts can achieve professional-level results. Remember that the journey of boatbuilding is as rewarding as reaching your destination; it tests one’s patience and dedication. For those seeking to embark on this adventure or simply gain more insight into marine craftsmanship, Sven’s wisdom is invaluable.Sven Yrvind, a renowned yacht designer and sailor, shares valuable insights on creating flanges around bulkhead hatches for canvas protection in this enlightening video. By following his expert guidance, boat enthusiasts can ensure their living areas remain secure while allowing unhindered access through the hatches.Step 1: Starting with the Flange
Sven begins by explaining that working on flanges vertically and horizontally is significantly easier than doing so in a flat position. To simplify the process further, he divides the task into two or three steps as suggested by fellow expert “for for.” This approach not only makes it more manageable but also allows for greater precision in crafting each component.Step 2: Applying Glue and Securing
Sven proceeds to apply glue along one edge of the flange, ensuring a secure bond when clamped into place. He emphasizes that this stage is crucial for maintaining the structural integrity of the flange, which in turn safeguards the living area beneath the canvas when hatches are open.Step 3: Allowing Time to Dry
After securely attaching the first portion of the flange, Sven allows ample time for it to dry before moving forward with additional steps. This patience and precision are key aspects of his successful boatbuilding methods.Step 4: Finishing Touches
Once the flange is fully dried, Sven removes the clamps carefully, ensuring no damage occurs during this process. He then moves on to attaching four more pieces onto these main frames, completing two pairs of flanges for the bulkhead hatches.The Final Touches
While two flanges form the primary support structure around the hatches, Sven mentions there are two additional pieces required at each end to ensure comprehensive protection. This attention to detail highlights his commitment to producing a durable and reliable design. “Sailing is about finding your path, whether it’s across an ocean or within yourself.” – Sven Yrvind In conclusion, making flanges around bulkhead hatches may seem complex at first glance, but by following Sven Yrvind’s meticulous process, enthusiasts can achieve professional-level results. Remember that the journey of boatbuilding is as rewarding as reaching your destination; it tests one’s patience and dedication. For those seeking to embark on this adventure or simply gain more insight into marine craftsmanship, Sven’s wisdom is invaluable.Making Flanges Around Bulkhead Hatches for Canvas
Sven Yrvind, a renowned yacht designer and sailor, shares valuable insights on creating flanges around bulkhead hatches for canvas protection in this enlightening video. By following his expert guidance, boat enthusiasts can ensure their living areas remain secure while allowing unhindered access through the hatches.Step 1: Starting with the Flange
Sven begins by explaining that working on flanges vertically and horizontally is significantly easier than doing so in a flat position. To simplify the process further, he divides the task into two or three steps as suggested by fellow expert “for for.” This approach not only makes it more manageable but also allows for greater precision in crafting each component.Step 2: Applying Glue and Securing
Sven proceeds to apply glue along one edge of the flange, ensuring a secure bond when clamped into place. He emphasizes that this stage is crucial for maintaining the structural integrity of the flange, which in turn safeguards the living area beneath the canvas when hatches are open.Step 3: Allowing Time to Dry
After securely attaching the first portion of the flange, Sven allows ample time for it to dry before moving forward with additional steps. This patience and precision are key aspects of his successful boatbuilding methods.Step 4: Finishing Touches
Once the flange is fully dried, Sven removes the clamps carefully, ensuring no damage occurs during this process. He then moves on to attaching four more pieces onto these main frames, completing two pairs of flanges for the bulkhead hatches.The Final Touches
While two flanges form the primary support structure around the hatches, Sven mentions there are two additional pieces required at each end to ensure comprehensive protection. This attention to detail highlights his commitment to producing a durable and reliable design. “Sailing is about finding your path, whether it’s across an ocean or within yourself.” – Sven Yrvind In conclusion, making flanges around bulkhead hatches may seem complex at first glance, but by following Sven Yrvind’s meticulous process, enthusiasts can achieve professional-level results. Remember that the journey of boatbuilding is as rewarding as reaching your destination; it tests one’s patience and dedication. For those seeking to embark on this adventure or simply gain more insight into marine craftsmanship, Sven’s wisdom is invaluable.After securely attaching the first portion of the flange, Sven allows ample time for it to dry before moving forward with additional steps. This patience and precision are key aspects of his successful boatbuilding methods.Step 4: Finishing Touches
Once the flange is fully dried, Sven removes the clamps carefully, ensuring no damage occurs during this process. He then moves on to attaching four more pieces onto these main frames, completing two pairs of flanges for the bulkhead hatches.The Final Touches
While two flanges form the primary support structure around the hatches, Sven mentions there are two additional pieces required at each end to ensure comprehensive protection. This attention to detail highlights his commitment to producing a durable and reliable design. “Sailing is about finding your path, whether it’s across an ocean or within yourself.” – Sven Yrvind In conclusion, making flanges around bulkhead hatches may seem complex at first glance, but by following Sven Yrvind’s meticulous process, enthusiasts can achieve professional-level results. Remember that the journey of boatbuilding is as rewarding as reaching your destination; it tests one’s patience and dedication. For those seeking to embark on this adventure or simply gain more insight into marine craftsmanship, Sven’s wisdom is invaluable.Sven Yrvind, a renowned yacht designer and sailor, shares valuable insights on creating flanges around bulkhead hatches for canvas protection in this enlightening video. By following his expert guidance, boat enthusiasts can ensure their living areas remain secure while allowing unhindered access through the hatches.Step 1: Starting with the Flange
Sven begins by explaining that working on flanges vertically and horizontally is significantly easier than doing so in a flat position. To simplify the process further, he divides the task into two or three steps as suggested by fellow expert “for for.” This approach not only makes it more manageable but also allows for greater precision in crafting each component.Step 2: Applying Glue and Securing
Sven proceeds to apply glue along one edge of the flange, ensuring a secure bond when clamped into place. He emphasizes that this stage is crucial for maintaining the structural integrity of the flange, which in turn safeguards the living area beneath the canvas when hatches are open.Step 3: Allowing Time to Dry
After securely attaching the first portion of the flange, Sven allows ample time for it to dry before moving forward with additional steps. This patience and precision are key aspects of his successful boatbuilding methods.Step 4: Finishing Touches
Once the flange is fully dried, Sven removes the clamps carefully, ensuring no damage occurs during this process. He then moves on to attaching four more pieces onto these main frames, completing two pairs of flanges for the bulkhead hatches.The Final Touches
While two flanges form the primary support structure around the hatches, Sven mentions there are two additional pieces required at each end to ensure comprehensive protection. This attention to detail highlights his commitment to producing a durable and reliable design. “Sailing is about finding your path, whether it’s across an ocean or within yourself.” – Sven Yrvind In conclusion, making flanges around bulkhead hatches may seem complex at first glance, but by following Sven Yrvind’s meticulous process, enthusiasts can achieve professional-level results. Remember that the journey of boatbuilding is as rewarding as reaching your destination; it tests one’s patience and dedication. For those seeking to embark on this adventure or simply gain more insight into marine craftsmanship, Sven’s wisdom is invaluable.Making Flanges Around Bulkhead Hatches for Canvas
Sven Yrvind, a renowned yacht designer and sailor, shares valuable insights on creating flanges around bulkhead hatches for canvas protection in this enlightening video. By following his expert guidance, boat enthusiasts can ensure their living areas remain secure while allowing unhindered access through the hatches.Step 1: Starting with the Flange
Sven begins by explaining that working on flanges vertically and horizontally is significantly easier than doing so in a flat position. To simplify the process further, he divides the task into two or three steps as suggested by fellow expert “for for.” This approach not only makes it more manageable but also allows for greater precision in crafting each component.Step 2: Applying Glue and Securing
Sven proceeds to apply glue along one edge of the flange, ensuring a secure bond when clamped into place. He emphasizes that this stage is crucial for maintaining the structural integrity of the flange, which in turn safeguards the living area beneath the canvas when hatches are open.Step 3: Allowing Time to Dry
After securely attaching the first portion of the flange, Sven allows ample time for it to dry before moving forward with additional steps. This patience and precision are key aspects of his successful boatbuilding methods.Step 4: Finishing Touches
Once the flange is fully dried, Sven removes the clamps carefully, ensuring no damage occurs during this process. He then moves on to attaching four more pieces onto these main frames, completing two pairs of flanges for the bulkhead hatches.The Final Touches
While two flanges form the primary support structure around the hatches, Sven mentions there are two additional pieces required at each end to ensure comprehensive protection. This attention to detail highlights his commitment to producing a durable and reliable design. “Sailing is about finding your path, whether it’s across an ocean or within yourself.” – Sven Yrvind In conclusion, making flanges around bulkhead hatches may seem complex at first glance, but by following Sven Yrvind’s meticulous process, enthusiasts can achieve professional-level results. Remember that the journey of boatbuilding is as rewarding as reaching your destination; it tests one’s patience and dedication. For those seeking to embark on this adventure or simply gain more insight into marine craftsmanship, Sven’s wisdom is invaluable.Sven proceeds to apply glue along one edge of the flange, ensuring a secure bond when clamped into place. He emphasizes that this stage is crucial for maintaining the structural integrity of the flange, which in turn safeguards the living area beneath the canvas when hatches are open.Step 3: Allowing Time to Dry
After securely attaching the first portion of the flange, Sven allows ample time for it to dry before moving forward with additional steps. This patience and precision are key aspects of his successful boatbuilding methods.Step 4: Finishing Touches
Once the flange is fully dried, Sven removes the clamps carefully, ensuring no damage occurs during this process. He then moves on to attaching four more pieces onto these main frames, completing two pairs of flanges for the bulkhead hatches.The Final Touches
While two flanges form the primary support structure around the hatches, Sven mentions there are two additional pieces required at each end to ensure comprehensive protection. This attention to detail highlights his commitment to producing a durable and reliable design. “Sailing is about finding your path, whether it’s across an ocean or within yourself.” – Sven Yrvind In conclusion, making flanges around bulkhead hatches may seem complex at first glance, but by following Sven Yrvind’s meticulous process, enthusiasts can achieve professional-level results. Remember that the journey of boatbuilding is as rewarding as reaching your destination; it tests one’s patience and dedication. For those seeking to embark on this adventure or simply gain more insight into marine craftsmanship, Sven’s wisdom is invaluable.Sven Yrvind, a renowned yacht designer and sailor, shares valuable insights on creating flanges around bulkhead hatches for canvas protection in this enlightening video. By following his expert guidance, boat enthusiasts can ensure their living areas remain secure while allowing unhindered access through the hatches.Step 1: Starting with the Flange
Sven begins by explaining that working on flanges vertically and horizontally is significantly easier than doing so in a flat position. To simplify the process further, he divides the task into two or three steps as suggested by fellow expert “for for.” This approach not only makes it more manageable but also allows for greater precision in crafting each component.Step 2: Applying Glue and Securing
Sven proceeds to apply glue along one edge of the flange, ensuring a secure bond when clamped into place. He emphasizes that this stage is crucial for maintaining the structural integrity of the flange, which in turn safeguards the living area beneath the canvas when hatches are open.Step 3: Allowing Time to Dry
After securely attaching the first portion of the flange, Sven allows ample time for it to dry before moving forward with additional steps. This patience and precision are key aspects of his successful boatbuilding methods.Step 4: Finishing Touches
Once the flange is fully dried, Sven removes the clamps carefully, ensuring no damage occurs during this process. He then moves on to attaching four more pieces onto these main frames, completing two pairs of flanges for the bulkhead hatches.The Final Touches
While two flanges form the primary support structure around the hatches, Sven mentions there are two additional pieces required at each end to ensure comprehensive protection. This attention to detail highlights his commitment to producing a durable and reliable design. “Sailing is about finding your path, whether it’s across an ocean or within yourself.” – Sven Yrvind In conclusion, making flanges around bulkhead hatches may seem complex at first glance, but by following Sven Yrvind’s meticulous process, enthusiasts can achieve professional-level results. Remember that the journey of boatbuilding is as rewarding as reaching your destination; it tests one’s patience and dedication. For those seeking to embark on this adventure or simply gain more insight into marine craftsmanship, Sven’s wisdom is invaluable.Making Flanges Around Bulkhead Hatches for Canvas
Sven Yrvind, a renowned yacht designer and sailor, shares valuable insights on creating flanges around bulkhead hatches for canvas protection in this enlightening video. By following his expert guidance, boat enthusiasts can ensure their living areas remain secure while allowing unhindered access through the hatches.Step 1: Starting with the Flange
Sven begins by explaining that working on flanges vertically and horizontally is significantly easier than doing so in a flat position. To simplify the process further, he divides the task into two or three steps as suggested by fellow expert “for for.” This approach not only makes it more manageable but also allows for greater precision in crafting each component.Step 2: Applying Glue and Securing
Sven proceeds to apply glue along one edge of the flange, ensuring a secure bond when clamped into place. He emphasizes that this stage is crucial for maintaining the structural integrity of the flange, which in turn safeguards the living area beneath the canvas when hatches are open.Step 3: Allowing Time to Dry
After securely attaching the first portion of the flange, Sven allows ample time for it to dry before moving forward with additional steps. This patience and precision are key aspects of his successful boatbuilding methods.Step 4: Finishing Touches
Once the flange is fully dried, Sven removes the clamps carefully, ensuring no damage occurs during this process. He then moves on to attaching four more pieces onto these main frames, completing two pairs of flanges for the bulkhead hatches.The Final Touches
While two flanges form the primary support structure around the hatches, Sven mentions there are two additional pieces required at each end to ensure comprehensive protection. This attention to detail highlights his commitment to producing a durable and reliable design. “Sailing is about finding your path, whether it’s across an ocean or within yourself.” – Sven Yrvind In conclusion, making flanges around bulkhead hatches may seem complex at first glance, but by following Sven Yrvind’s meticulous process, enthusiasts can achieve professional-level results. Remember that the journey of boatbuilding is as rewarding as reaching your destination; it tests one’s patience and dedication. For those seeking to embark on this adventure or simply gain more insight into marine craftsmanship, Sven’s wisdom is invaluable.Sven begins by explaining that working on flanges vertically and horizontally is significantly easier than doing so in a flat position. To simplify the process further, he divides the task into two or three steps as suggested by fellow expert “for for.” This approach not only makes it more manageable but also allows for greater precision in crafting each component.Step 2: Applying Glue and Securing
Sven proceeds to apply glue along one edge of the flange, ensuring a secure bond when clamped into place. He emphasizes that this stage is crucial for maintaining the structural integrity of the flange, which in turn safeguards the living area beneath the canvas when hatches are open.Step 3: Allowing Time to Dry
After securely attaching the first portion of the flange, Sven allows ample time for it to dry before moving forward with additional steps. This patience and precision are key aspects of his successful boatbuilding methods.Step 4: Finishing Touches
Once the flange is fully dried, Sven removes the clamps carefully, ensuring no damage occurs during this process. He then moves on to attaching four more pieces onto these main frames, completing two pairs of flanges for the bulkhead hatches.The Final Touches
While two flanges form the primary support structure around the hatches, Sven mentions there are two additional pieces required at each end to ensure comprehensive protection. This attention to detail highlights his commitment to producing a durable and reliable design. “Sailing is about finding your path, whether it’s across an ocean or within yourself.” – Sven Yrvind In conclusion, making flanges around bulkhead hatches may seem complex at first glance, but by following Sven Yrvind’s meticulous process, enthusiasts can achieve professional-level results. Remember that the journey of boatbuilding is as rewarding as reaching your destination; it tests one’s patience and dedication. For those seeking to embark on this adventure or simply gain more insight into marine craftsmanship, Sven’s wisdom is invaluable.Sven Yrvind, a renowned yacht designer and sailor, shares valuable insights on creating flanges around bulkhead hatches for canvas protection in this enlightening video. By following his expert guidance, boat enthusiasts can ensure their living areas remain secure while allowing unhindered access through the hatches.Step 1: Starting with the Flange
Sven begins by explaining that working on flanges vertically and horizontally is significantly easier than doing so in a flat position. To simplify the process further, he divides the task into two or three steps as suggested by fellow expert “for for.” This approach not only makes it more manageable but also allows for greater precision in crafting each component.Step 2: Applying Glue and Securing
Sven proceeds to apply glue along one edge of the flange, ensuring a secure bond when clamped into place. He emphasizes that this stage is crucial for maintaining the structural integrity of the flange, which in turn safeguards the living area beneath the canvas when hatches are open.Step 3: Allowing Time to Dry
After securely attaching the first portion of the flange, Sven allows ample time for it to dry before moving forward with additional steps. This patience and precision are key aspects of his successful boatbuilding methods.Step 4: Finishing Touches
Once the flange is fully dried, Sven removes the clamps carefully, ensuring no damage occurs during this process. He then moves on to attaching four more pieces onto these main frames, completing two pairs of flanges for the bulkhead hatches.The Final Touches
While two flanges form the primary support structure around the hatches, Sven mentions there are two additional pieces required at each end to ensure comprehensive protection. This attention to detail highlights his commitment to producing a durable and reliable design. “Sailing is about finding your path, whether it’s across an ocean or within yourself.” – Sven Yrvind In conclusion, making flanges around bulkhead hatches may seem complex at first glance, but by following Sven Yrvind’s meticulous process, enthusiasts can achieve professional-level results. Remember that the journey of boatbuilding is as rewarding as reaching your destination; it tests one’s patience and dedication. For those seeking to embark on this adventure or simply gain more insight into marine craftsmanship, Sven’s wisdom is invaluable.Making Flanges Around Bulkhead Hatches for Canvas
Sven Yrvind, a renowned yacht designer and sailor, shares valuable insights on creating flanges around bulkhead hatches for canvas protection in this enlightening video. By following his expert guidance, boat enthusiasts can ensure their living areas remain secure while allowing unhindered access through the hatches.Step 1: Starting with the Flange
Sven begins by explaining that working on flanges vertically and horizontally is significantly easier than doing so in a flat position. To simplify the process further, he divides the task into two or three steps as suggested by fellow expert “for for.” This approach not only makes it more manageable but also allows for greater precision in crafting each component.Step 2: Applying Glue and Securing
Sven proceeds to apply glue along one edge of the flange, ensuring a secure bond when clamped into place. He emphasizes that this stage is crucial for maintaining the structural integrity of the flange, which in turn safeguards the living area beneath the canvas when hatches are open.Step 3: Allowing Time to Dry
After securely attaching the first portion of the flange, Sven allows ample time for it to dry before moving forward with additional steps. This patience and precision are key aspects of his successful boatbuilding methods.Step 4: Finishing Touches
Once the flange is fully dried, Sven removes the clamps carefully, ensuring no damage occurs during this process. He then moves on to attaching four more pieces onto these main frames, completing two pairs of flanges for the bulkhead hatches.The Final Touches
While two flanges form the primary support structure around the hatches, Sven mentions there are two additional pieces required at each end to ensure comprehensive protection. This attention to detail highlights his commitment to producing a durable and reliable design. “Sailing is about finding your path, whether it’s across an ocean or within yourself.” – Sven Yrvind In conclusion, making flanges around bulkhead hatches may seem complex at first glance, but by following Sven Yrvind’s meticulous process, enthusiasts can achieve professional-level results. Remember that the journey of boatbuilding is as rewarding as reaching your destination; it tests one’s patience and dedication. For those seeking to embark on this adventure or simply gain more insight into marine craftsmanship, Sven’s wisdom is invaluable.Once the flange is fully dried, Sven removes the clamps carefully, ensuring no damage occurs during this process. He then moves on to attaching four more pieces onto these main frames, completing two pairs of flanges for the bulkhead hatches.The Final Touches
While two flanges form the primary support structure around the hatches, Sven mentions there are two additional pieces required at each end to ensure comprehensive protection. This attention to detail highlights his commitment to producing a durable and reliable design. “Sailing is about finding your path, whether it’s across an ocean or within yourself.” – Sven Yrvind In conclusion, making flanges around bulkhead hatches may seem complex at first glance, but by following Sven Yrvind’s meticulous process, enthusiasts can achieve professional-level results. Remember that the journey of boatbuilding is as rewarding as reaching your destination; it tests one’s patience and dedication. For those seeking to embark on this adventure or simply gain more insight into marine craftsmanship, Sven’s wisdom is invaluable.Sven begins by explaining that working on flanges vertically and horizontally is significantly easier than doing so in a flat position. To simplify the process further, he divides the task into two or three steps as suggested by fellow expert “for for.” This approach not only makes it more manageable but also allows for greater precision in crafting each component.Step 2: Applying Glue and Securing
Sven proceeds to apply glue along one edge of the flange, ensuring a secure bond when clamped into place. He emphasizes that this stage is crucial for maintaining the structural integrity of the flange, which in turn safeguards the living area beneath the canvas when hatches are open.Step 3: Allowing Time to Dry
After securely attaching the first portion of the flange, Sven allows ample time for it to dry before moving forward with additional steps. This patience and precision are key aspects of his successful boatbuilding methods.Step 4: Finishing Touches
Once the flange is fully dried, Sven removes the clamps carefully, ensuring no damage occurs during this process. He then moves on to attaching four more pieces onto these main frames, completing two pairs of flanges for the bulkhead hatches.The Final Touches
While two flanges form the primary support structure around the hatches, Sven mentions there are two additional pieces required at each end to ensure comprehensive protection. This attention to detail highlights his commitment to producing a durable and reliable design. “Sailing is about finding your path, whether it’s across an ocean or within yourself.” – Sven Yrvind In conclusion, making flanges around bulkhead hatches may seem complex at first glance, but by following Sven Yrvind’s meticulous process, enthusiasts can achieve professional-level results. Remember that the journey of boatbuilding is as rewarding as reaching your destination; it tests one’s patience and dedication. For those seeking to embark on this adventure or simply gain more insight into marine craftsmanship, Sven’s wisdom is invaluable.Sven Yrvind, a renowned yacht designer and sailor, shares valuable insights on creating flanges around bulkhead hatches for canvas protection in this enlightening video. By following his expert guidance, boat enthusiasts can ensure their living areas remain secure while allowing unhindered access through the hatches.Step 1: Starting with the Flange
Sven begins by explaining that working on flanges vertically and horizontally is significantly easier than doing so in a flat position. To simplify the process further, he divides the task into two or three steps as suggested by fellow expert “for for.” This approach not only makes it more manageable but also allows for greater precision in crafting each component.Step 2: Applying Glue and Securing
Sven proceeds to apply glue along one edge of the flange, ensuring a secure bond when clamped into place. He emphasizes that this stage is crucial for maintaining the structural integrity of the flange, which in turn safeguards the living area beneath the canvas when hatches are open.Step 3: Allowing Time to Dry
After securely attaching the first portion of the flange, Sven allows ample time for it to dry before moving forward with additional steps. This patience and precision are key aspects of his successful boatbuilding methods.Step 4: Finishing Touches
Once the flange is fully dried, Sven removes the clamps carefully, ensuring no damage occurs during this process. He then moves on to attaching four more pieces onto these main frames, completing two pairs of flanges for the bulkhead hatches.The Final Touches
While two flanges form the primary support structure around the hatches, Sven mentions there are two additional pieces required at each end to ensure comprehensive protection. This attention to detail highlights his commitment to producing a durable and reliable design. “Sailing is about finding your path, whether it’s across an ocean or within yourself.” – Sven Yrvind In conclusion, making flanges around bulkhead hatches may seem complex at first glance, but by following Sven Yrvind’s meticulous process, enthusiasts can achieve professional-level results. Remember that the journey of boatbuilding is as rewarding as reaching your destination; it tests one’s patience and dedication. For those seeking to embark on this adventure or simply gain more insight into marine craftsmanship, Sven’s wisdom is invaluable.Making Flanges Around Bulkhead Hatches for Canvas
Sven Yrvind, a renowned yacht designer and sailor, shares valuable insights on creating flanges around bulkhead hatches for canvas protection in this enlightening video. By following his expert guidance, boat enthusiasts can ensure their living areas remain secure while allowing unhindered access through the hatches.Step 1: Starting with the Flange
Sven begins by explaining that working on flanges vertically and horizontally is significantly easier than doing so in a flat position. To simplify the process further, he divides the task into two or three steps as suggested by fellow expert “for for.” This approach not only makes it more manageable but also allows for greater precision in crafting each component.Step 2: Applying Glue and Securing
Sven proceeds to apply glue along one edge of the flange, ensuring a secure bond when clamped into place. He emphasizes that this stage is crucial for maintaining the structural integrity of the flange, which in turn safeguards the living area beneath the canvas when hatches are open.Step 3: Allowing Time to Dry
After securely attaching the first portion of the flange, Sven allows ample time for it to dry before moving forward with additional steps. This patience and precision are key aspects of his successful boatbuilding methods.Step 4: Finishing Touches
Once the flange is fully dried, Sven removes the clamps carefully, ensuring no damage occurs during this process. He then moves on to attaching four more pieces onto these main frames, completing two pairs of flanges for the bulkhead hatches.The Final Touches
While two flanges form the primary support structure around the hatches, Sven mentions there are two additional pieces required at each end to ensure comprehensive protection. This attention to detail highlights his commitment to producing a durable and reliable design. “Sailing is about finding your path, whether it’s across an ocean or within yourself.” – Sven Yrvind In conclusion, making flanges around bulkhead hatches may seem complex at first glance, but by following Sven Yrvind’s meticulous process, enthusiasts can achieve professional-level results. Remember that the journey of boatbuilding is as rewarding as reaching your destination; it tests one’s patience and dedication. For those seeking to embark on this adventure or simply gain more insight into marine craftsmanship, Sven’s wisdom is invaluable.After securely attaching the first portion of the flange, Sven allows ample time for it to dry before moving forward with additional steps. This patience and precision are key aspects of his successful boatbuilding methods.Step 4: Finishing Touches
Once the flange is fully dried, Sven removes the clamps carefully, ensuring no damage occurs during this process. He then moves on to attaching four more pieces onto these main frames, completing two pairs of flanges for the bulkhead hatches.The Final Touches
While two flanges form the primary support structure around the hatches, Sven mentions there are two additional pieces required at each end to ensure comprehensive protection. This attention to detail highlights his commitment to producing a durable and reliable design. “Sailing is about finding your path, whether it’s across an ocean or within yourself.” – Sven Yrvind In conclusion, making flanges around bulkhead hatches may seem complex at first glance, but by following Sven Yrvind’s meticulous process, enthusiasts can achieve professional-level results. Remember that the journey of boatbuilding is as rewarding as reaching your destination; it tests one’s patience and dedication. For those seeking to embark on this adventure or simply gain more insight into marine craftsmanship, Sven’s wisdom is invaluable.Sven begins by explaining that working on flanges vertically and horizontally is significantly easier than doing so in a flat position. To simplify the process further, he divides the task into two or three steps as suggested by fellow expert “for for.” This approach not only makes it more manageable but also allows for greater precision in crafting each component.Step 2: Applying Glue and Securing
Sven proceeds to apply glue along one edge of the flange, ensuring a secure bond when clamped into place. He emphasizes that this stage is crucial for maintaining the structural integrity of the flange, which in turn safeguards the living area beneath the canvas when hatches are open.Step 3: Allowing Time to Dry
After securely attaching the first portion of the flange, Sven allows ample time for it to dry before moving forward with additional steps. This patience and precision are key aspects of his successful boatbuilding methods.Step 4: Finishing Touches
Once the flange is fully dried, Sven removes the clamps carefully, ensuring no damage occurs during this process. He then moves on to attaching four more pieces onto these main frames, completing two pairs of flanges for the bulkhead hatches.The Final Touches
While two flanges form the primary support structure around the hatches, Sven mentions there are two additional pieces required at each end to ensure comprehensive protection. This attention to detail highlights his commitment to producing a durable and reliable design. “Sailing is about finding your path, whether it’s across an ocean or within yourself.” – Sven Yrvind In conclusion, making flanges around bulkhead hatches may seem complex at first glance, but by following Sven Yrvind’s meticulous process, enthusiasts can achieve professional-level results. Remember that the journey of boatbuilding is as rewarding as reaching your destination; it tests one’s patience and dedication. For those seeking to embark on this adventure or simply gain more insight into marine craftsmanship, Sven’s wisdom is invaluable.Sven Yrvind, a renowned yacht designer and sailor, shares valuable insights on creating flanges around bulkhead hatches for canvas protection in this enlightening video. By following his expert guidance, boat enthusiasts can ensure their living areas remain secure while allowing unhindered access through the hatches.Step 1: Starting with the Flange
Sven begins by explaining that working on flanges vertically and horizontally is significantly easier than doing so in a flat position. To simplify the process further, he divides the task into two or three steps as suggested by fellow expert “for for.” This approach not only makes it more manageable but also allows for greater precision in crafting each component.Step 2: Applying Glue and Securing
Sven proceeds to apply glue along one edge of the flange, ensuring a secure bond when clamped into place. He emphasizes that this stage is crucial for maintaining the structural integrity of the flange, which in turn safeguards the living area beneath the canvas when hatches are open.Step 3: Allowing Time to Dry
After securely attaching the first portion of the flange, Sven allows ample time for it to dry before moving forward with additional steps. This patience and precision are key aspects of his successful boatbuilding methods.Step 4: Finishing Touches
Once the flange is fully dried, Sven removes the clamps carefully, ensuring no damage occurs during this process. He then moves on to attaching four more pieces onto these main frames, completing two pairs of flanges for the bulkhead hatches.The Final Touches
While two flanges form the primary support structure around the hatches, Sven mentions there are two additional pieces required at each end to ensure comprehensive protection. This attention to detail highlights his commitment to producing a durable and reliable design. “Sailing is about finding your path, whether it’s across an ocean or within yourself.” – Sven Yrvind In conclusion, making flanges around bulkhead hatches may seem complex at first glance, but by following Sven Yrvind’s meticulous process, enthusiasts can achieve professional-level results. Remember that the journey of boatbuilding is as rewarding as reaching your destination; it tests one’s patience and dedication. For those seeking to embark on this adventure or simply gain more insight into marine craftsmanship, Sven’s wisdom is invaluable.Making Flanges Around Bulkhead Hatches for Canvas
Sven Yrvind, a renowned yacht designer and sailor, shares valuable insights on creating flanges around bulkhead hatches for canvas protection in this enlightening video. By following his expert guidance, boat enthusiasts can ensure their living areas remain secure while allowing unhindered access through the hatches.Step 1: Starting with the Flange
Sven begins by explaining that working on flanges vertically and horizontally is significantly easier than doing so in a flat position. To simplify the process further, he divides the task into two or three steps as suggested by fellow expert “for for.” This approach not only makes it more manageable but also allows for greater precision in crafting each component.Step 2: Applying Glue and Securing
Sven proceeds to apply glue along one edge of the flange, ensuring a secure bond when clamped into place. He emphasizes that this stage is crucial for maintaining the structural integrity of the flange, which in turn safeguards the living area beneath the canvas when hatches are open.Step 3: Allowing Time to Dry
After securely attaching the first portion of the flange, Sven allows ample time for it to dry before moving forward with additional steps. This patience and precision are key aspects of his successful boatbuilding methods.Step 4: Finishing Touches
Once the flange is fully dried, Sven removes the clamps carefully, ensuring no damage occurs during this process. He then moves on to attaching four more pieces onto these main frames, completing two pairs of flanges for the bulkhead hatches.The Final Touches
While two flanges form the primary support structure around the hatches, Sven mentions there are two additional pieces required at each end to ensure comprehensive protection. This attention to detail highlights his commitment to producing a durable and reliable design. “Sailing is about finding your path, whether it’s across an ocean or within yourself.” – Sven Yrvind In conclusion, making flanges around bulkhead hatches may seem complex at first glance, but by following Sven Yrvind’s meticulous process, enthusiasts can achieve professional-level results. Remember that the journey of boatbuilding is as rewarding as reaching your destination; it tests one’s patience and dedication. For those seeking to embark on this adventure or simply gain more insight into marine craftsmanship, Sven’s wisdom is invaluable.Sven proceeds to apply glue along one edge of the flange, ensuring a secure bond when clamped into place. He emphasizes that this stage is crucial for maintaining the structural integrity of the flange, which in turn safeguards the living area beneath the canvas when hatches are open.Step 3: Allowing Time to Dry
After securely attaching the first portion of the flange, Sven allows ample time for it to dry before moving forward with additional steps. This patience and precision are key aspects of his successful boatbuilding methods.Step 4: Finishing Touches
Once the flange is fully dried, Sven removes the clamps carefully, ensuring no damage occurs during this process. He then moves on to attaching four more pieces onto these main frames, completing two pairs of flanges for the bulkhead hatches.The Final Touches
While two flanges form the primary support structure around the hatches, Sven mentions there are two additional pieces required at each end to ensure comprehensive protection. This attention to detail highlights his commitment to producing a durable and reliable design. “Sailing is about finding your path, whether it’s across an ocean or within yourself.” – Sven Yrvind In conclusion, making flanges around bulkhead hatches may seem complex at first glance, but by following Sven Yrvind’s meticulous process, enthusiasts can achieve professional-level results. Remember that the journey of boatbuilding is as rewarding as reaching your destination; it tests one’s patience and dedication. For those seeking to embark on this adventure or simply gain more insight into marine craftsmanship, Sven’s wisdom is invaluable.Sven begins by explaining that working on flanges vertically and horizontally is significantly easier than doing so in a flat position. To simplify the process further, he divides the task into two or three steps as suggested by fellow expert “for for.” This approach not only makes it more manageable but also allows for greater precision in crafting each component.Step 2: Applying Glue and Securing
Sven proceeds to apply glue along one edge of the flange, ensuring a secure bond when clamped into place. He emphasizes that this stage is crucial for maintaining the structural integrity of the flange, which in turn safeguards the living area beneath the canvas when hatches are open.Step 3: Allowing Time to Dry
After securely attaching the first portion of the flange, Sven allows ample time for it to dry before moving forward with additional steps. This patience and precision are key aspects of his successful boatbuilding methods.Step 4: Finishing Touches
Once the flange is fully dried, Sven removes the clamps carefully, ensuring no damage occurs during this process. He then moves on to attaching four more pieces onto these main frames, completing two pairs of flanges for the bulkhead hatches.The Final Touches
While two flanges form the primary support structure around the hatches, Sven mentions there are two additional pieces required at each end to ensure comprehensive protection. This attention to detail highlights his commitment to producing a durable and reliable design. “Sailing is about finding your path, whether it’s across an ocean or within yourself.” – Sven Yrvind In conclusion, making flanges around bulkhead hatches may seem complex at first glance, but by following Sven Yrvind’s meticulous process, enthusiasts can achieve professional-level results. Remember that the journey of boatbuilding is as rewarding as reaching your destination; it tests one’s patience and dedication. For those seeking to embark on this adventure or simply gain more insight into marine craftsmanship, Sven’s wisdom is invaluable.Sven Yrvind, a renowned yacht designer and sailor, shares valuable insights on creating flanges around bulkhead hatches for canvas protection in this enlightening video. By following his expert guidance, boat enthusiasts can ensure their living areas remain secure while allowing unhindered access through the hatches.Step 1: Starting with the Flange
Sven begins by explaining that working on flanges vertically and horizontally is significantly easier than doing so in a flat position. To simplify the process further, he divides the task into two or three steps as suggested by fellow expert “for for.” This approach not only makes it more manageable but also allows for greater precision in crafting each component.Step 2: Applying Glue and Securing
Sven proceeds to apply glue along one edge of the flange, ensuring a secure bond when clamped into place. He emphasizes that this stage is crucial for maintaining the structural integrity of the flange, which in turn safeguards the living area beneath the canvas when hatches are open.Step 3: Allowing Time to Dry
After securely attaching the first portion of the flange, Sven allows ample time for it to dry before moving forward with additional steps. This patience and precision are key aspects of his successful boatbuilding methods.Step 4: Finishing Touches
Once the flange is fully dried, Sven removes the clamps carefully, ensuring no damage occurs during this process. He then moves on to attaching four more pieces onto these main frames, completing two pairs of flanges for the bulkhead hatches.The Final Touches
While two flanges form the primary support structure around the hatches, Sven mentions there are two additional pieces required at each end to ensure comprehensive protection. This attention to detail highlights his commitment to producing a durable and reliable design. “Sailing is about finding your path, whether it’s across an ocean or within yourself.” – Sven Yrvind In conclusion, making flanges around bulkhead hatches may seem complex at first glance, but by following Sven Yrvind’s meticulous process, enthusiasts can achieve professional-level results. Remember that the journey of boatbuilding is as rewarding as reaching your destination; it tests one’s patience and dedication. For those seeking to embark on this adventure or simply gain more insight into marine craftsmanship, Sven’s wisdom is invaluable.Making Flanges Around Bulkhead Hatches for Canvas
Sven Yrvind, a renowned yacht designer and sailor, shares valuable insights on creating flanges around bulkhead hatches for canvas protection in this enlightening video. By following his expert guidance, boat enthusiasts can ensure their living areas remain secure while allowing unhindered access through the hatches.Step 1: Starting with the Flange
Sven begins by explaining that working on flanges vertically and horizontally is significantly easier than doing so in a flat position. To simplify the process further, he divides the task into two or three steps as suggested by fellow expert “for for.” This approach not only makes it more manageable but also allows for greater precision in crafting each component.Step 2: Applying Glue and Securing
Sven proceeds to apply glue along one edge of the flange, ensuring a secure bond when clamped into place. He emphasizes that this stage is crucial for maintaining the structural integrity of the flange, which in turn safeguards the living area beneath the canvas when hatches are open.Step 3: Allowing Time to Dry
After securely attaching the first portion of the flange, Sven allows ample time for it to dry before moving forward with additional steps. This patience and precision are key aspects of his successful boatbuilding methods.Step 4: Finishing Touches
Once the flange is fully dried, Sven removes the clamps carefully, ensuring no damage occurs during this process. He then moves on to attaching four more pieces onto these main frames, completing two pairs of flanges for the bulkhead hatches.The Final Touches
While two flanges form the primary support structure around the hatches, Sven mentions there are two additional pieces required at each end to ensure comprehensive protection. This attention to detail highlights his commitment to producing a durable and reliable design. “Sailing is about finding your path, whether it’s across an ocean or within yourself.” – Sven Yrvind In conclusion, making flanges around bulkhead hatches may seem complex at first glance, but by following Sven Yrvind’s meticulous process, enthusiasts can achieve professional-level results. Remember that the journey of boatbuilding is as rewarding as reaching your destination; it tests one’s patience and dedication. For those seeking to embark on this adventure or simply gain more insight into marine craftsmanship, Sven’s wisdom is invaluable.Once the flange is fully dried, Sven removes the clamps carefully, ensuring no damage occurs during this process. He then moves on to attaching four more pieces onto these main frames, completing two pairs of flanges for the bulkhead hatches.The Final Touches
While two flanges form the primary support structure around the hatches, Sven mentions there are two additional pieces required at each end to ensure comprehensive protection. This attention to detail highlights his commitment to producing a durable and reliable design. “Sailing is about finding your path, whether it’s across an ocean or within yourself.” – Sven Yrvind In conclusion, making flanges around bulkhead hatches may seem complex at first glance, but by following Sven Yrvind’s meticulous process, enthusiasts can achieve professional-level results. Remember that the journey of boatbuilding is as rewarding as reaching your destination; it tests one’s patience and dedication. For those seeking to embark on this adventure or simply gain more insight into marine craftsmanship, Sven’s wisdom is invaluable.Sven proceeds to apply glue along one edge of the flange, ensuring a secure bond when clamped into place. He emphasizes that this stage is crucial for maintaining the structural integrity of the flange, which in turn safeguards the living area beneath the canvas when hatches are open.Step 3: Allowing Time to Dry
After securely attaching the first portion of the flange, Sven allows ample time for it to dry before moving forward with additional steps. This patience and precision are key aspects of his successful boatbuilding methods.Step 4: Finishing Touches
Once the flange is fully dried, Sven removes the clamps carefully, ensuring no damage occurs during this process. He then moves on to attaching four more pieces onto these main frames, completing two pairs of flanges for the bulkhead hatches.The Final Touches
While two flanges form the primary support structure around the hatches, Sven mentions there are two additional pieces required at each end to ensure comprehensive protection. This attention to detail highlights his commitment to producing a durable and reliable design. “Sailing is about finding your path, whether it’s across an ocean or within yourself.” – Sven Yrvind In conclusion, making flanges around bulkhead hatches may seem complex at first glance, but by following Sven Yrvind’s meticulous process, enthusiasts can achieve professional-level results. Remember that the journey of boatbuilding is as rewarding as reaching your destination; it tests one’s patience and dedication. For those seeking to embark on this adventure or simply gain more insight into marine craftsmanship, Sven’s wisdom is invaluable.Sven begins by explaining that working on flanges vertically and horizontally is significantly easier than doing so in a flat position. To simplify the process further, he divides the task into two or three steps as suggested by fellow expert “for for.” This approach not only makes it more manageable but also allows for greater precision in crafting each component.Step 2: Applying Glue and Securing
Sven proceeds to apply glue along one edge of the flange, ensuring a secure bond when clamped into place. He emphasizes that this stage is crucial for maintaining the structural integrity of the flange, which in turn safeguards the living area beneath the canvas when hatches are open.Step 3: Allowing Time to Dry
After securely attaching the first portion of the flange, Sven allows ample time for it to dry before moving forward with additional steps. This patience and precision are key aspects of his successful boatbuilding methods.Step 4: Finishing Touches
Once the flange is fully dried, Sven removes the clamps carefully, ensuring no damage occurs during this process. He then moves on to attaching four more pieces onto these main frames, completing two pairs of flanges for the bulkhead hatches.The Final Touches
While two flanges form the primary support structure around the hatches, Sven mentions there are two additional pieces required at each end to ensure comprehensive protection. This attention to detail highlights his commitment to producing a durable and reliable design. “Sailing is about finding your path, whether it’s across an ocean or within yourself.” – Sven Yrvind In conclusion, making flanges around bulkhead hatches may seem complex at first glance, but by following Sven Yrvind’s meticulous process, enthusiasts can achieve professional-level results. Remember that the journey of boatbuilding is as rewarding as reaching your destination; it tests one’s patience and dedication. For those seeking to embark on this adventure or simply gain more insight into marine craftsmanship, Sven’s wisdom is invaluable.Sven Yrvind, a renowned yacht designer and sailor, shares valuable insights on creating flanges around bulkhead hatches for canvas protection in this enlightening video. By following his expert guidance, boat enthusiasts can ensure their living areas remain secure while allowing unhindered access through the hatches.Step 1: Starting with the Flange
Sven begins by explaining that working on flanges vertically and horizontally is significantly easier than doing so in a flat position. To simplify the process further, he divides the task into two or three steps as suggested by fellow expert “for for.” This approach not only makes it more manageable but also allows for greater precision in crafting each component.Step 2: Applying Glue and Securing
Sven proceeds to apply glue along one edge of the flange, ensuring a secure bond when clamped into place. He emphasizes that this stage is crucial for maintaining the structural integrity of the flange, which in turn safeguards the living area beneath the canvas when hatches are open.Step 3: Allowing Time to Dry
After securely attaching the first portion of the flange, Sven allows ample time for it to dry before moving forward with additional steps. This patience and precision are key aspects of his successful boatbuilding methods.Step 4: Finishing Touches
Once the flange is fully dried, Sven removes the clamps carefully, ensuring no damage occurs during this process. He then moves on to attaching four more pieces onto these main frames, completing two pairs of flanges for the bulkhead hatches.The Final Touches
While two flanges form the primary support structure around the hatches, Sven mentions there are two additional pieces required at each end to ensure comprehensive protection. This attention to detail highlights his commitment to producing a durable and reliable design. “Sailing is about finding your path, whether it’s across an ocean or within yourself.” – Sven Yrvind In conclusion, making flanges around bulkhead hatches may seem complex at first glance, but by following Sven Yrvind’s meticulous process, enthusiasts can achieve professional-level results. Remember that the journey of boatbuilding is as rewarding as reaching your destination; it tests one’s patience and dedication. For those seeking to embark on this adventure or simply gain more insight into marine craftsmanship, Sven’s wisdom is invaluable.Making Flanges Around Bulkhead Hatches for Canvas
Sven Yrvind, a renowned yacht designer and sailor, shares valuable insights on creating flanges around bulkhead hatches for canvas protection in this enlightening video. By following his expert guidance, boat enthusiasts can ensure their living areas remain secure while allowing unhindered access through the hatches.Step 1: Starting with the Flange
Sven begins by explaining that working on flanges vertically and horizontally is significantly easier than doing so in a flat position. To simplify the process further, he divides the task into two or three steps as suggested by fellow expert “for for.” This approach not only makes it more manageable but also allows for greater precision in crafting each component.Step 2: Applying Glue and Securing
Sven proceeds to apply glue along one edge of the flange, ensuring a secure bond when clamped into place. He emphasizes that this stage is crucial for maintaining the structural integrity of the flange, which in turn safeguards the living area beneath the canvas when hatches are open.Step 3: Allowing Time to Dry
After securely attaching the first portion of the flange, Sven allows ample time for it to dry before moving forward with additional steps. This patience and precision are key aspects of his successful boatbuilding methods.Step 4: Finishing Touches
Once the flange is fully dried, Sven removes the clamps carefully, ensuring no damage occurs during this process. He then moves on to attaching four more pieces onto these main frames, completing two pairs of flanges for the bulkhead hatches.The Final Touches
While two flanges form the primary support structure around the hatches, Sven mentions there are two additional pieces required at each end to ensure comprehensive protection. This attention to detail highlights his commitment to producing a durable and reliable design. “Sailing is about finding your path, whether it’s across an ocean or within yourself.” – Sven Yrvind In conclusion, making flanges around bulkhead hatches may seem complex at first glance, but by following Sven Yrvind’s meticulous process, enthusiasts can achieve professional-level results. Remember that the journey of boatbuilding is as rewarding as reaching your destination; it tests one’s patience and dedication. For those seeking to embark on this adventure or simply gain more insight into marine craftsmanship, Sven’s wisdom is invaluable.After securely attaching the first portion of the flange, Sven allows ample time for it to dry before moving forward with additional steps. This patience and precision are key aspects of his successful boatbuilding methods.Step 4: Finishing Touches
Once the flange is fully dried, Sven removes the clamps carefully, ensuring no damage occurs during this process. He then moves on to attaching four more pieces onto these main frames, completing two pairs of flanges for the bulkhead hatches.The Final Touches
While two flanges form the primary support structure around the hatches, Sven mentions there are two additional pieces required at each end to ensure comprehensive protection. This attention to detail highlights his commitment to producing a durable and reliable design. “Sailing is about finding your path, whether it’s across an ocean or within yourself.” – Sven Yrvind In conclusion, making flanges around bulkhead hatches may seem complex at first glance, but by following Sven Yrvind’s meticulous process, enthusiasts can achieve professional-level results. Remember that the journey of boatbuilding is as rewarding as reaching your destination; it tests one’s patience and dedication. For those seeking to embark on this adventure or simply gain more insight into marine craftsmanship, Sven’s wisdom is invaluable.Sven proceeds to apply glue along one edge of the flange, ensuring a secure bond when clamped into place. He emphasizes that this stage is crucial for maintaining the structural integrity of the flange, which in turn safeguards the living area beneath the canvas when hatches are open.Step 3: Allowing Time to Dry
After securely attaching the first portion of the flange, Sven allows ample time for it to dry before moving forward with additional steps. This patience and precision are key aspects of his successful boatbuilding methods.Step 4: Finishing Touches
Once the flange is fully dried, Sven removes the clamps carefully, ensuring no damage occurs during this process. He then moves on to attaching four more pieces onto these main frames, completing two pairs of flanges for the bulkhead hatches.The Final Touches
While two flanges form the primary support structure around the hatches, Sven mentions there are two additional pieces required at each end to ensure comprehensive protection. This attention to detail highlights his commitment to producing a durable and reliable design. “Sailing is about finding your path, whether it’s across an ocean or within yourself.” – Sven Yrvind In conclusion, making flanges around bulkhead hatches may seem complex at first glance, but by following Sven Yrvind’s meticulous process, enthusiasts can achieve professional-level results. Remember that the journey of boatbuilding is as rewarding as reaching your destination; it tests one’s patience and dedication. For those seeking to embark on this adventure or simply gain more insight into marine craftsmanship, Sven’s wisdom is invaluable.Sven begins by explaining that working on flanges vertically and horizontally is significantly easier than doing so in a flat position. To simplify the process further, he divides the task into two or three steps as suggested by fellow expert “for for.” This approach not only makes it more manageable but also allows for greater precision in crafting each component.Step 2: Applying Glue and Securing
Sven proceeds to apply glue along one edge of the flange, ensuring a secure bond when clamped into place. He emphasizes that this stage is crucial for maintaining the structural integrity of the flange, which in turn safeguards the living area beneath the canvas when hatches are open.Step 3: Allowing Time to Dry
After securely attaching the first portion of the flange, Sven allows ample time for it to dry before moving forward with additional steps. This patience and precision are key aspects of his successful boatbuilding methods.Step 4: Finishing Touches
Once the flange is fully dried, Sven removes the clamps carefully, ensuring no damage occurs during this process. He then moves on to attaching four more pieces onto these main frames, completing two pairs of flanges for the bulkhead hatches.The Final Touches
While two flanges form the primary support structure around the hatches, Sven mentions there are two additional pieces required at each end to ensure comprehensive protection. This attention to detail highlights his commitment to producing a durable and reliable design. “Sailing is about finding your path, whether it’s across an ocean or within yourself.” – Sven Yrvind In conclusion, making flanges around bulkhead hatches may seem complex at first glance, but by following Sven Yrvind’s meticulous process, enthusiasts can achieve professional-level results. Remember that the journey of boatbuilding is as rewarding as reaching your destination; it tests one’s patience and dedication. For those seeking to embark on this adventure or simply gain more insight into marine craftsmanship, Sven’s wisdom is invaluable.Sven Yrvind, a renowned yacht designer and sailor, shares valuable insights on creating flanges around bulkhead hatches for canvas protection in this enlightening video. By following his expert guidance, boat enthusiasts can ensure their living areas remain secure while allowing unhindered access through the hatches.Step 1: Starting with the Flange
Sven begins by explaining that working on flanges vertically and horizontally is significantly easier than doing so in a flat position. To simplify the process further, he divides the task into two or three steps as suggested by fellow expert “for for.” This approach not only makes it more manageable but also allows for greater precision in crafting each component.Step 2: Applying Glue and Securing
Sven proceeds to apply glue along one edge of the flange, ensuring a secure bond when clamped into place. He emphasizes that this stage is crucial for maintaining the structural integrity of the flange, which in turn safeguards the living area beneath the canvas when hatches are open.Step 3: Allowing Time to Dry
After securely attaching the first portion of the flange, Sven allows ample time for it to dry before moving forward with additional steps. This patience and precision are key aspects of his successful boatbuilding methods.Step 4: Finishing Touches
Once the flange is fully dried, Sven removes the clamps carefully, ensuring no damage occurs during this process. He then moves on to attaching four more pieces onto these main frames, completing two pairs of flanges for the bulkhead hatches.The Final Touches
While two flanges form the primary support structure around the hatches, Sven mentions there are two additional pieces required at each end to ensure comprehensive protection. This attention to detail highlights his commitment to producing a durable and reliable design. “Sailing is about finding your path, whether it’s across an ocean or within yourself.” – Sven Yrvind In conclusion, making flanges around bulkhead hatches may seem complex at first glance, but by following Sven Yrvind’s meticulous process, enthusiasts can achieve professional-level results. Remember that the journey of boatbuilding is as rewarding as reaching your destination; it tests one’s patience and dedication. For those seeking to embark on this adventure or simply gain more insight into marine craftsmanship, Sven’s wisdom is invaluable.Making Flanges Around Bulkhead Hatches for Canvas
Sven Yrvind, a renowned yacht designer and sailor, shares valuable insights on creating flanges around bulkhead hatches for canvas protection in this enlightening video. By following his expert guidance, boat enthusiasts can ensure their living areas remain secure while allowing unhindered access through the hatches.Step 1: Starting with the Flange
Sven begins by explaining that working on flanges vertically and horizontally is significantly easier than doing so in a flat position. To simplify the process further, he divides the task into two or three steps as suggested by fellow expert “for for.” This approach not only makes it more manageable but also allows for greater precision in crafting each component.Step 2: Applying Glue and Securing
Sven proceeds to apply glue along one edge of the flange, ensuring a secure bond when clamped into place. He emphasizes that this stage is crucial for maintaining the structural integrity of the flange, which in turn safeguards the living area beneath the canvas when hatches are open.Step 3: Allowing Time to Dry
After securely attaching the first portion of the flange, Sven allows ample time for it to dry before moving forward with additional steps. This patience and precision are key aspects of his successful boatbuilding methods.Step 4: Finishing Touches
Once the flange is fully dried, Sven removes the clamps carefully, ensuring no damage occurs during this process. He then moves on to attaching four more pieces onto these main frames, completing two pairs of flanges for the bulkhead hatches.The Final Touches
While two flanges form the primary support structure around the hatches, Sven mentions there are two additional pieces required at each end to ensure comprehensive protection. This attention to detail highlights his commitment to producing a durable and reliable design. “Sailing is about finding your path, whether it’s across an ocean or within yourself.” – Sven Yrvind In conclusion, making flanges around bulkhead hatches may seem complex at first glance, but by following Sven Yrvind’s meticulous process, enthusiasts can achieve professional-level results. Remember that the journey of boatbuilding is as rewarding as reaching your destination; it tests one’s patience and dedication. For those seeking to embark on this adventure or simply gain more insight into marine craftsmanship, Sven’s wisdom is invaluable.Once the flange is fully dried, Sven removes the clamps carefully, ensuring no damage occurs during this process. He then moves on to attaching four more pieces onto these main frames, completing two pairs of flanges for the bulkhead hatches.The Final Touches
While two flanges form the primary support structure around the hatches, Sven mentions there are two additional pieces required at each end to ensure comprehensive protection. This attention to detail highlights his commitment to producing a durable and reliable design. “Sailing is about finding your path, whether it’s across an ocean or within yourself.” – Sven Yrvind In conclusion, making flanges around bulkhead hatches may seem complex at first glance, but by following Sven Yrvind’s meticulous process, enthusiasts can achieve professional-level results. Remember that the journey of boatbuilding is as rewarding as reaching your destination; it tests one’s patience and dedication. For those seeking to embark on this adventure or simply gain more insight into marine craftsmanship, Sven’s wisdom is invaluable.After securely attaching the first portion of the flange, Sven allows ample time for it to dry before moving forward with additional steps. This patience and precision are key aspects of his successful boatbuilding methods.Step 4: Finishing Touches
Once the flange is fully dried, Sven removes the clamps carefully, ensuring no damage occurs during this process. He then moves on to attaching four more pieces onto these main frames, completing two pairs of flanges for the bulkhead hatches.The Final Touches
While two flanges form the primary support structure around the hatches, Sven mentions there are two additional pieces required at each end to ensure comprehensive protection. This attention to detail highlights his commitment to producing a durable and reliable design. “Sailing is about finding your path, whether it’s across an ocean or within yourself.” – Sven Yrvind In conclusion, making flanges around bulkhead hatches may seem complex at first glance, but by following Sven Yrvind’s meticulous process, enthusiasts can achieve professional-level results. Remember that the journey of boatbuilding is as rewarding as reaching your destination; it tests one’s patience and dedication. For those seeking to embark on this adventure or simply gain more insight into marine craftsmanship, Sven’s wisdom is invaluable.Sven proceeds to apply glue along one edge of the flange, ensuring a secure bond when clamped into place. He emphasizes that this stage is crucial for maintaining the structural integrity of the flange, which in turn safeguards the living area beneath the canvas when hatches are open.Step 3: Allowing Time to Dry
After securely attaching the first portion of the flange, Sven allows ample time for it to dry before moving forward with additional steps. This patience and precision are key aspects of his successful boatbuilding methods.Step 4: Finishing Touches
Once the flange is fully dried, Sven removes the clamps carefully, ensuring no damage occurs during this process. He then moves on to attaching four more pieces onto these main frames, completing two pairs of flanges for the bulkhead hatches.The Final Touches
While two flanges form the primary support structure around the hatches, Sven mentions there are two additional pieces required at each end to ensure comprehensive protection. This attention to detail highlights his commitment to producing a durable and reliable design. “Sailing is about finding your path, whether it’s across an ocean or within yourself.” – Sven Yrvind In conclusion, making flanges around bulkhead hatches may seem complex at first glance, but by following Sven Yrvind’s meticulous process, enthusiasts can achieve professional-level results. Remember that the journey of boatbuilding is as rewarding as reaching your destination; it tests one’s patience and dedication. For those seeking to embark on this adventure or simply gain more insight into marine craftsmanship, Sven’s wisdom is invaluable.Sven begins by explaining that working on flanges vertically and horizontally is significantly easier than doing so in a flat position. To simplify the process further, he divides the task into two or three steps as suggested by fellow expert “for for.” This approach not only makes it more manageable but also allows for greater precision in crafting each component.Step 2: Applying Glue and Securing
Sven proceeds to apply glue along one edge of the flange, ensuring a secure bond when clamped into place. He emphasizes that this stage is crucial for maintaining the structural integrity of the flange, which in turn safeguards the living area beneath the canvas when hatches are open.Step 3: Allowing Time to Dry
After securely attaching the first portion of the flange, Sven allows ample time for it to dry before moving forward with additional steps. This patience and precision are key aspects of his successful boatbuilding methods.Step 4: Finishing Touches
Once the flange is fully dried, Sven removes the clamps carefully, ensuring no damage occurs during this process. He then moves on to attaching four more pieces onto these main frames, completing two pairs of flanges for the bulkhead hatches.The Final Touches
While two flanges form the primary support structure around the hatches, Sven mentions there are two additional pieces required at each end to ensure comprehensive protection. This attention to detail highlights his commitment to producing a durable and reliable design. “Sailing is about finding your path, whether it’s across an ocean or within yourself.” – Sven Yrvind In conclusion, making flanges around bulkhead hatches may seem complex at first glance, but by following Sven Yrvind’s meticulous process, enthusiasts can achieve professional-level results. Remember that the journey of boatbuilding is as rewarding as reaching your destination; it tests one’s patience and dedication. For those seeking to embark on this adventure or simply gain more insight into marine craftsmanship, Sven’s wisdom is invaluable.Sven Yrvind, a renowned yacht designer and sailor, shares valuable insights on creating flanges around bulkhead hatches for canvas protection in this enlightening video. By following his expert guidance, boat enthusiasts can ensure their living areas remain secure while allowing unhindered access through the hatches.Step 1: Starting with the Flange
Sven begins by explaining that working on flanges vertically and horizontally is significantly easier than doing so in a flat position. To simplify the process further, he divides the task into two or three steps as suggested by fellow expert “for for.” This approach not only makes it more manageable but also allows for greater precision in crafting each component.Step 2: Applying Glue and Securing
Sven proceeds to apply glue along one edge of the flange, ensuring a secure bond when clamped into place. He emphasizes that this stage is crucial for maintaining the structural integrity of the flange, which in turn safeguards the living area beneath the canvas when hatches are open.Step 3: Allowing Time to Dry
After securely attaching the first portion of the flange, Sven allows ample time for it to dry before moving forward with additional steps. This patience and precision are key aspects of his successful boatbuilding methods.Step 4: Finishing Touches
Once the flange is fully dried, Sven removes the clamps carefully, ensuring no damage occurs during this process. He then moves on to attaching four more pieces onto these main frames, completing two pairs of flanges for the bulkhead hatches.The Final Touches
While two flanges form the primary support structure around the hatches, Sven mentions there are two additional pieces required at each end to ensure comprehensive protection. This attention to detail highlights his commitment to producing a durable and reliable design. “Sailing is about finding your path, whether it’s across an ocean or within yourself.” – Sven Yrvind In conclusion, making flanges around bulkhead hatches may seem complex at first glance, but by following Sven Yrvind’s meticulous process, enthusiasts can achieve professional-level results. Remember that the journey of boatbuilding is as rewarding as reaching your destination; it tests one’s patience and dedication. For those seeking to embark on this adventure or simply gain more insight into marine craftsmanship, Sven’s wisdom is invaluable.Making Flanges Around Bulkhead Hatches for Canvas
Sven Yrvind, a renowned yacht designer and sailor, shares valuable insights on creating flanges around bulkhead hatches for canvas protection in this enlightening video. By following his expert guidance, boat enthusiasts can ensure their living areas remain secure while allowing unhindered access through the hatches.Step 1: Starting with the Flange
Sven begins by explaining that working on flanges vertically and horizontally is significantly easier than doing so in a flat position. To simplify the process further, he divides the task into two or three steps as suggested by fellow expert “for for.” This approach not only makes it more manageable but also allows for greater precision in crafting each component.Step 2: Applying Glue and Securing
Sven proceeds to apply glue along one edge of the flange, ensuring a secure bond when clamped into place. He emphasizes that this stage is crucial for maintaining the structural integrity of the flange, which in turn safeguards the living area beneath the canvas when hatches are open.Step 3: Allowing Time to Dry
After securely attaching the first portion of the flange, Sven allows ample time for it to dry before moving forward with additional steps. This patience and precision are key aspects of his successful boatbuilding methods.Step 4: Finishing Touches
Once the flange is fully dried, Sven removes the clamps carefully, ensuring no damage occurs during this process. He then moves on to attaching four more pieces onto these main frames, completing two pairs of flanges for the bulkhead hatches.The Final Touches
While two flanges form the primary support structure around the hatches, Sven mentions there are two additional pieces required at each end to ensure comprehensive protection. This attention to detail highlights his commitment to producing a durable and reliable design. “Sailing is about finding your path, whether it’s across an ocean or within yourself.” – Sven Yrvind In conclusion, making flanges around bulkhead hatches may seem complex at first glance, but by following Sven Yrvind’s meticulous process, enthusiasts can achieve professional-level results. Remember that the journey of boatbuilding is as rewarding as reaching your destination; it tests one’s patience and dedication. For those seeking to embark on this adventure or simply gain more insight into marine craftsmanship, Sven’s wisdom is invaluable.Sven proceeds to apply glue along one edge of the flange, ensuring a secure bond when clamped into place. He emphasizes that this stage is crucial for maintaining the structural integrity of the flange, which in turn safeguards the living area beneath the canvas when hatches are open.Step 3: Allowing Time to Dry
After securely attaching the first portion of the flange, Sven allows ample time for it to dry before moving forward with additional steps. This patience and precision are key aspects of his successful boatbuilding methods.Step 4: Finishing Touches
Once the flange is fully dried, Sven removes the clamps carefully, ensuring no damage occurs during this process. He then moves on to attaching four more pieces onto these main frames, completing two pairs of flanges for the bulkhead hatches.The Final Touches
While two flanges form the primary support structure around the hatches, Sven mentions there are two additional pieces required at each end to ensure comprehensive protection. This attention to detail highlights his commitment to producing a durable and reliable design. “Sailing is about finding your path, whether it’s across an ocean or within yourself.” – Sven Yrvind In conclusion, making flanges around bulkhead hatches may seem complex at first glance, but by following Sven Yrvind’s meticulous process, enthusiasts can achieve professional-level results. Remember that the journey of boatbuilding is as rewarding as reaching your destination; it tests one’s patience and dedication. For those seeking to embark on this adventure or simply gain more insight into marine craftsmanship, Sven’s wisdom is invaluable.Making Flanges Around Bulkhead Hatches for Canvas
Sven Yrvind, a renowned yacht designer and sailor, shares valuable insights on creating flanges around bulkhead hatches for canvas protection in this enlightening video. By following his expert guidance, boat enthusiasts can ensure their living areas remain secure while allowing unhindered access through the hatches.Step 1: Starting with the Flange
Sven begins by explaining that working on flanges vertically and horizontally is significantly easier than doing so in a flat position. To simplify the process further, he divides the task into two or three steps as suggested by fellow expert “for for.” This approach not only makes it more manageable but also allows for greater precision in crafting each component.Step 2: Applying Glue and Securing
Sven proceeds to apply glue along one edge of the flange, ensuring a secure bond when clamped into place. He emphasizes that this stage is crucial for maintaining the structural integrity of the flange, which in turn safeguards the living area beneath the canvas when hatches are open.Step 3: Allowing Time to Dry
After securely attaching the first portion of the flange, Sven allows ample time for it to dry before moving forward with additional steps. This patience and precision are key aspects of his successful boatbuilding methods.Step 4: Finishing Touches
Once the flange is fully dried, Sven removes the clamps carefully, ensuring no damage occurs during this process. He then moves on to attaching four more pieces onto these main frames, completing two pairs of flanges for the bulkhead hatches.The Final Touches
While two flanges form the primary support structure around the hatches, Sven mentions there are two additional pieces required at each end to ensure comprehensive protection. This attention to detail highlights his commitment to producing a durable and reliable design. “Sailing is about finding your path, whether it’s across an ocean or within yourself.” – Sven Yrvind In conclusion, making flanges around bulkhead hatches may seem complex at first glance, but by following Sven Yrvind’s meticulous process, enthusiasts can achieve professional-level results. Remember that the journey of boatbuilding is as rewarding as reaching your destination; it tests one’s patience and dedication. For those seeking to embark on this adventure or simply gain more insight into marine craftsmanship, Sven’s wisdom is invaluable.Sven Yrvind, a renowned yacht designer and sailor, shares valuable insights on creating flanges around bulkhead hatches for canvas protection in this enlightening video. By following his expert guidance, boat enthusiasts can ensure their living areas remain secure while allowing unhindered access through the hatches.Step 1: Starting with the Flange
Sven begins by explaining that working on flanges vertically and horizontally is significantly easier than doing so in a flat position. To simplify the process further, he divides the task into two or three steps as suggested by fellow expert “for for.” This approach not only makes it more manageable but also allows for greater precision in crafting each component.Step 2: Applying Glue and Securing
Sven proceeds to apply glue along one edge of the flange, ensuring a secure bond when clamped into place. He emphasizes that this stage is crucial for maintaining the structural integrity of the flange, which in turn safeguards the living area beneath the canvas when hatches are open.Step 3: Allowing Time to Dry
After securely attaching the first portion of the flange, Sven allows ample time for it to dry before moving forward with additional steps. This patience and precision are key aspects of his successful boatbuilding methods.Step 4: Finishing Touches
Once the flange is fully dried, Sven removes the clamps carefully, ensuring no damage occurs during this process. He then moves on to attaching four more pieces onto these main frames, completing two pairs of flanges for the bulkhead hatches.The Final Touches
While two flanges form the primary support structure around the hatches, Sven mentions there are two additional pieces required at each end to ensure comprehensive protection. This attention to detail highlights his commitment to producing a durable and reliable design. “Sailing is about finding your path, whether it’s across an ocean or within yourself.” – Sven Yrvind In conclusion, making flanges around bulkhead hatches may seem complex at first glance, but by following Sven Yrvind’s meticulous process, enthusiasts can achieve professional-level results. Remember that the journey of boatbuilding is as rewarding as reaching your destination; it tests one’s patience and dedication. For those seeking to embark on this adventure or simply gain more insight into marine craftsmanship, Sven’s wisdom is invaluable.Making Flanges Around Bulkhead Hatches for Canvas
Sven Yrvind, a renowned yacht designer and sailor, shares valuable insights on creating flanges around bulkhead hatches for canvas protection in this enlightening video. By following his expert guidance, boat enthusiasts can ensure their living areas remain secure while allowing unhindered access through the hatches.Step 1: Starting with the Flange
Sven begins by explaining that working on flanges vertically and horizontally is significantly easier than doing so in a flat position. To simplify the process further, he divides the task into two or three steps as suggested by fellow expert “for for.” This approach not only makes it more manageable but also allows for greater precision in crafting each component.Step 2: Applying Glue and Securing
Sven proceeds to apply glue along one edge of the flange, ensuring a secure bond when clamped into place. He emphasizes that this stage is crucial for maintaining the structural integrity of the flange, which in turn safeguards the living area beneath the canvas when hatches are open.Step 3: Allowing Time to Dry
After securely attaching the first portion of the flange, Sven allows ample time for it to dry before moving forward with additional steps. This patience and precision are key aspects of his successful boatbuilding methods.Step 4: Finishing Touches
Once the flange is fully dried, Sven removes the clamps carefully, ensuring no damage occurs during this process. He then moves on to attaching four more pieces onto these main frames, completing two pairs of flanges for the bulkhead hatches.The Final Touches
While two flanges form the primary support structure around the hatches, Sven mentions there are two additional pieces required at each end to ensure comprehensive protection. This attention to detail highlights his commitment to producing a durable and reliable design. “Sailing is about finding your path, whether it’s across an ocean or within yourself.” – Sven Yrvind In conclusion, making flanges around bulkhead hatches may seem complex at first glance, but by following Sven Yrvind’s meticulous process, enthusiasts can achieve professional-level results. Remember that the journey of boatbuilding is as rewarding as reaching your destination; it tests one’s patience and dedication. For those seeking to embark on this adventure or simply gain more insight into marine craftsmanship, Sven’s wisdom is invaluable.Once the flange is fully dried, Sven removes the clamps carefully, ensuring no damage occurs during this process. He then moves on to attaching four more pieces onto these main frames, completing two pairs of flanges for the bulkhead hatches.The Final Touches
While two flanges form the primary support structure around the hatches, Sven mentions there are two additional pieces required at each end to ensure comprehensive protection. This attention to detail highlights his commitment to producing a durable and reliable design. “Sailing is about finding your path, whether it’s across an ocean or within yourself.” – Sven Yrvind In conclusion, making flanges around bulkhead hatches may seem complex at first glance, but by following Sven Yrvind’s meticulous process, enthusiasts can achieve professional-level results. Remember that the journey of boatbuilding is as rewarding as reaching your destination; it tests one’s patience and dedication. For those seeking to embark on this adventure or simply gain more insight into marine craftsmanship, Sven’s wisdom is invaluable.Sven Yrvind, a renowned yacht designer and sailor, shares valuable insights on creating flanges around bulkhead hatches for canvas protection in this enlightening video. By following his expert guidance, boat enthusiasts can ensure their living areas remain secure while allowing unhindered access through the hatches.Step 1: Starting with the Flange
Sven begins by explaining that working on flanges vertically and horizontally is significantly easier than doing so in a flat position. To simplify the process further, he divides the task into two or three steps as suggested by fellow expert “for for.” This approach not only makes it more manageable but also allows for greater precision in crafting each component.Step 2: Applying Glue and Securing
Sven proceeds to apply glue along one edge of the flange, ensuring a secure bond when clamped into place. He emphasizes that this stage is crucial for maintaining the structural integrity of the flange, which in turn safeguards the living area beneath the canvas when hatches are open.Step 3: Allowing Time to Dry
After securely attaching the first portion of the flange, Sven allows ample time for it to dry before moving forward with additional steps. This patience and precision are key aspects of his successful boatbuilding methods.Step 4: Finishing Touches
Once the flange is fully dried, Sven removes the clamps carefully, ensuring no damage occurs during this process. He then moves on to attaching four more pieces onto these main frames, completing two pairs of flanges for the bulkhead hatches.The Final Touches
While two flanges form the primary support structure around the hatches, Sven mentions there are two additional pieces required at each end to ensure comprehensive protection. This attention to detail highlights his commitment to producing a durable and reliable design. “Sailing is about finding your path, whether it’s across an ocean or within yourself.” – Sven Yrvind In conclusion, making flanges around bulkhead hatches may seem complex at first glance, but by following Sven Yrvind’s meticulous process, enthusiasts can achieve professional-level results. Remember that the journey of boatbuilding is as rewarding as reaching your destination; it tests one’s patience and dedication. For those seeking to embark on this adventure or simply gain more insight into marine craftsmanship, Sven’s wisdom is invaluable.Making Flanges Around Bulkhead Hatches for Canvas
Sven Yrvind, a renowned yacht designer and sailor, shares valuable insights on creating flanges around bulkhead hatches for canvas protection in this enlightening video. By following his expert guidance, boat enthusiasts can ensure their living areas remain secure while allowing unhindered access through the hatches.Step 1: Starting with the Flange
Sven begins by explaining that working on flanges vertically and horizontally is significantly easier than doing so in a flat position. To simplify the process further, he divides the task into two or three steps as suggested by fellow expert “for for.” This approach not only makes it more manageable but also allows for greater precision in crafting each component.Step 2: Applying Glue and Securing
Sven proceeds to apply glue along one edge of the flange, ensuring a secure bond when clamped into place. He emphasizes that this stage is crucial for maintaining the structural integrity of the flange, which in turn safeguards the living area beneath the canvas when hatches are open.Step 3: Allowing Time to Dry
After securely attaching the first portion of the flange, Sven allows ample time for it to dry before moving forward with additional steps. This patience and precision are key aspects of his successful boatbuilding methods.Step 4: Finishing Touches
Once the flange is fully dried, Sven removes the clamps carefully, ensuring no damage occurs during this process. He then moves on to attaching four more pieces onto these main frames, completing two pairs of flanges for the bulkhead hatches.The Final Touches
While two flanges form the primary support structure around the hatches, Sven mentions there are two additional pieces required at each end to ensure comprehensive protection. This attention to detail highlights his commitment to producing a durable and reliable design. “Sailing is about finding your path, whether it’s across an ocean or within yourself.” – Sven Yrvind In conclusion, making flanges around bulkhead hatches may seem complex at first glance, but by following Sven Yrvind’s meticulous process, enthusiasts can achieve professional-level results. Remember that the journey of boatbuilding is as rewarding as reaching your destination; it tests one’s patience and dedication. For those seeking to embark on this adventure or simply gain more insight into marine craftsmanship, Sven’s wisdom is invaluable.After securely attaching the first portion of the flange, Sven allows ample time for it to dry before moving forward with additional steps. This patience and precision are key aspects of his successful boatbuilding methods.Step 4: Finishing Touches
Once the flange is fully dried, Sven removes the clamps carefully, ensuring no damage occurs during this process. He then moves on to attaching four more pieces onto these main frames, completing two pairs of flanges for the bulkhead hatches.The Final Touches
While two flanges form the primary support structure around the hatches, Sven mentions there are two additional pieces required at each end to ensure comprehensive protection. This attention to detail highlights his commitment to producing a durable and reliable design. “Sailing is about finding your path, whether it’s across an ocean or within yourself.” – Sven Yrvind In conclusion, making flanges around bulkhead hatches may seem complex at first glance, but by following Sven Yrvind’s meticulous process, enthusiasts can achieve professional-level results. Remember that the journey of boatbuilding is as rewarding as reaching your destination; it tests one’s patience and dedication. For those seeking to embark on this adventure or simply gain more insight into marine craftsmanship, Sven’s wisdom is invaluable.Sven Yrvind, a renowned yacht designer and sailor, shares valuable insights on creating flanges around bulkhead hatches for canvas protection in this enlightening video. By following his expert guidance, boat enthusiasts can ensure their living areas remain secure while allowing unhindered access through the hatches.Step 1: Starting with the Flange
Sven begins by explaining that working on flanges vertically and horizontally is significantly easier than doing so in a flat position. To simplify the process further, he divides the task into two or three steps as suggested by fellow expert “for for.” This approach not only makes it more manageable but also allows for greater precision in crafting each component.Step 2: Applying Glue and Securing
Sven proceeds to apply glue along one edge of the flange, ensuring a secure bond when clamped into place. He emphasizes that this stage is crucial for maintaining the structural integrity of the flange, which in turn safeguards the living area beneath the canvas when hatches are open.Step 3: Allowing Time to Dry
After securely attaching the first portion of the flange, Sven allows ample time for it to dry before moving forward with additional steps. This patience and precision are key aspects of his successful boatbuilding methods.Step 4: Finishing Touches
Once the flange is fully dried, Sven removes the clamps carefully, ensuring no damage occurs during this process. He then moves on to attaching four more pieces onto these main frames, completing two pairs of flanges for the bulkhead hatches.The Final Touches
While two flanges form the primary support structure around the hatches, Sven mentions there are two additional pieces required at each end to ensure comprehensive protection. This attention to detail highlights his commitment to producing a durable and reliable design. “Sailing is about finding your path, whether it’s across an ocean or within yourself.” – Sven Yrvind In conclusion, making flanges around bulkhead hatches may seem complex at first glance, but by following Sven Yrvind’s meticulous process, enthusiasts can achieve professional-level results. Remember that the journey of boatbuilding is as rewarding as reaching your destination; it tests one’s patience and dedication. For those seeking to embark on this adventure or simply gain more insight into marine craftsmanship, Sven’s wisdom is invaluable.Making Flanges Around Bulkhead Hatches for Canvas
Sven Yrvind, a renowned yacht designer and sailor, shares valuable insights on creating flanges around bulkhead hatches for canvas protection in this enlightening video. By following his expert guidance, boat enthusiasts can ensure their living areas remain secure while allowing unhindered access through the hatches.Step 1: Starting with the Flange
Sven begins by explaining that working on flanges vertically and horizontally is significantly easier than doing so in a flat position. To simplify the process further, he divides the task into two or three steps as suggested by fellow expert “for for.” This approach not only makes it more manageable but also allows for greater precision in crafting each component.Step 2: Applying Glue and Securing
Sven proceeds to apply glue along one edge of the flange, ensuring a secure bond when clamped into place. He emphasizes that this stage is crucial for maintaining the structural integrity of the flange, which in turn safeguards the living area beneath the canvas when hatches are open.Step 3: Allowing Time to Dry
After securely attaching the first portion of the flange, Sven allows ample time for it to dry before moving forward with additional steps. This patience and precision are key aspects of his successful boatbuilding methods.Step 4: Finishing Touches
Once the flange is fully dried, Sven removes the clamps carefully, ensuring no damage occurs during this process. He then moves on to attaching four more pieces onto these main frames, completing two pairs of flanges for the bulkhead hatches.The Final Touches
While two flanges form the primary support structure around the hatches, Sven mentions there are two additional pieces required at each end to ensure comprehensive protection. This attention to detail highlights his commitment to producing a durable and reliable design. “Sailing is about finding your path, whether it’s across an ocean or within yourself.” – Sven Yrvind In conclusion, making flanges around bulkhead hatches may seem complex at first glance, but by following Sven Yrvind’s meticulous process, enthusiasts can achieve professional-level results. Remember that the journey of boatbuilding is as rewarding as reaching your destination; it tests one’s patience and dedication. For those seeking to embark on this adventure or simply gain more insight into marine craftsmanship, Sven’s wisdom is invaluable.Sven proceeds to apply glue along one edge of the flange, ensuring a secure bond when clamped into place. He emphasizes that this stage is crucial for maintaining the structural integrity of the flange, which in turn safeguards the living area beneath the canvas when hatches are open.Step 3: Allowing Time to Dry
After securely attaching the first portion of the flange, Sven allows ample time for it to dry before moving forward with additional steps. This patience and precision are key aspects of his successful boatbuilding methods.Step 4: Finishing Touches
Once the flange is fully dried, Sven removes the clamps carefully, ensuring no damage occurs during this process. He then moves on to attaching four more pieces onto these main frames, completing two pairs of flanges for the bulkhead hatches.The Final Touches
While two flanges form the primary support structure around the hatches, Sven mentions there are two additional pieces required at each end to ensure comprehensive protection. This attention to detail highlights his commitment to producing a durable and reliable design. “Sailing is about finding your path, whether it’s across an ocean or within yourself.” – Sven Yrvind In conclusion, making flanges around bulkhead hatches may seem complex at first glance, but by following Sven Yrvind’s meticulous process, enthusiasts can achieve professional-level results. Remember that the journey of boatbuilding is as rewarding as reaching your destination; it tests one’s patience and dedication. For those seeking to embark on this adventure or simply gain more insight into marine craftsmanship, Sven’s wisdom is invaluable.Sven Yrvind, a renowned yacht designer and sailor, shares valuable insights on creating flanges around bulkhead hatches for canvas protection in this enlightening video. By following his expert guidance, boat enthusiasts can ensure their living areas remain secure while allowing unhindered access through the hatches.Step 1: Starting with the Flange
Sven begins by explaining that working on flanges vertically and horizontally is significantly easier than doing so in a flat position. To simplify the process further, he divides the task into two or three steps as suggested by fellow expert “for for.” This approach not only makes it more manageable but also allows for greater precision in crafting each component.Step 2: Applying Glue and Securing
Sven proceeds to apply glue along one edge of the flange, ensuring a secure bond when clamped into place. He emphasizes that this stage is crucial for maintaining the structural integrity of the flange, which in turn safeguards the living area beneath the canvas when hatches are open.Step 3: Allowing Time to Dry
After securely attaching the first portion of the flange, Sven allows ample time for it to dry before moving forward with additional steps. This patience and precision are key aspects of his successful boatbuilding methods.Step 4: Finishing Touches
Once the flange is fully dried, Sven removes the clamps carefully, ensuring no damage occurs during this process. He then moves on to attaching four more pieces onto these main frames, completing two pairs of flanges for the bulkhead hatches.The Final Touches
While two flanges form the primary support structure around the hatches, Sven mentions there are two additional pieces required at each end to ensure comprehensive protection. This attention to detail highlights his commitment to producing a durable and reliable design. “Sailing is about finding your path, whether it’s across an ocean or within yourself.” – Sven Yrvind In conclusion, making flanges around bulkhead hatches may seem complex at first glance, but by following Sven Yrvind’s meticulous process, enthusiasts can achieve professional-level results. Remember that the journey of boatbuilding is as rewarding as reaching your destination; it tests one’s patience and dedication. For those seeking to embark on this adventure or simply gain more insight into marine craftsmanship, Sven’s wisdom is invaluable.Making Flanges Around Bulkhead Hatches for Canvas
Sven Yrvind, a renowned yacht designer and sailor, shares valuable insights on creating flanges around bulkhead hatches for canvas protection in this enlightening video. By following his expert guidance, boat enthusiasts can ensure their living areas remain secure while allowing unhindered access through the hatches.Step 1: Starting with the Flange
Sven begins by explaining that working on flanges vertically and horizontally is significantly easier than doing so in a flat position. To simplify the process further, he divides the task into two or three steps as suggested by fellow expert “for for.” This approach not only makes it more manageable but also allows for greater precision in crafting each component.Step 2: Applying Glue and Securing
Sven proceeds to apply glue along one edge of the flange, ensuring a secure bond when clamped into place. He emphasizes that this stage is crucial for maintaining the structural integrity of the flange, which in turn safeguards the living area beneath the canvas when hatches are open.Step 3: Allowing Time to Dry
After securely attaching the first portion of the flange, Sven allows ample time for it to dry before moving forward with additional steps. This patience and precision are key aspects of his successful boatbuilding methods.Step 4: Finishing Touches
Once the flange is fully dried, Sven removes the clamps carefully, ensuring no damage occurs during this process. He then moves on to attaching four more pieces onto these main frames, completing two pairs of flanges for the bulkhead hatches.The Final Touches
While two flanges form the primary support structure around the hatches, Sven mentions there are two additional pieces required at each end to ensure comprehensive protection. This attention to detail highlights his commitment to producing a durable and reliable design. “Sailing is about finding your path, whether it’s across an ocean or within yourself.” – Sven Yrvind In conclusion, making flanges around bulkhead hatches may seem complex at first glance, but by following Sven Yrvind’s meticulous process, enthusiasts can achieve professional-level results. Remember that the journey of boatbuilding is as rewarding as reaching your destination; it tests one’s patience and dedication. For those seeking to embark on this adventure or simply gain more insight into marine craftsmanship, Sven’s wisdom is invaluable.Sven begins by explaining that working on flanges vertically and horizontally is significantly easier than doing so in a flat position. To simplify the process further, he divides the task into two or three steps as suggested by fellow expert “for for.” This approach not only makes it more manageable but also allows for greater precision in crafting each component.Step 2: Applying Glue and Securing
Sven proceeds to apply glue along one edge of the flange, ensuring a secure bond when clamped into place. He emphasizes that this stage is crucial for maintaining the structural integrity of the flange, which in turn safeguards the living area beneath the canvas when hatches are open.Step 3: Allowing Time to Dry
After securely attaching the first portion of the flange, Sven allows ample time for it to dry before moving forward with additional steps. This patience and precision are key aspects of his successful boatbuilding methods.Step 4: Finishing Touches
Once the flange is fully dried, Sven removes the clamps carefully, ensuring no damage occurs during this process. He then moves on to attaching four more pieces onto these main frames, completing two pairs of flanges for the bulkhead hatches.The Final Touches
While two flanges form the primary support structure around the hatches, Sven mentions there are two additional pieces required at each end to ensure comprehensive protection. This attention to detail highlights his commitment to producing a durable and reliable design. “Sailing is about finding your path, whether it’s across an ocean or within yourself.” – Sven Yrvind In conclusion, making flanges around bulkhead hatches may seem complex at first glance, but by following Sven Yrvind’s meticulous process, enthusiasts can achieve professional-level results. Remember that the journey of boatbuilding is as rewarding as reaching your destination; it tests one’s patience and dedication. For those seeking to embark on this adventure or simply gain more insight into marine craftsmanship, Sven’s wisdom is invaluable.Sven Yrvind, a renowned yacht designer and sailor, shares valuable insights on creating flanges around bulkhead hatches for canvas protection in this enlightening video. By following his expert guidance, boat enthusiasts can ensure their living areas remain secure while allowing unhindered access through the hatches.Step 1: Starting with the Flange
Sven begins by explaining that working on flanges vertically and horizontally is significantly easier than doing so in a flat position. To simplify the process further, he divides the task into two or three steps as suggested by fellow expert “for for.” This approach not only makes it more manageable but also allows for greater precision in crafting each component.Step 2: Applying Glue and Securing
Sven proceeds to apply glue along one edge of the flange, ensuring a secure bond when clamped into place. He emphasizes that this stage is crucial for maintaining the structural integrity of the flange, which in turn safeguards the living area beneath the canvas when hatches are open.Step 3: Allowing Time to Dry
After securely attaching the first portion of the flange, Sven allows ample time for it to dry before moving forward with additional steps. This patience and precision are key aspects of his successful boatbuilding methods.Step 4: Finishing Touches
Once the flange is fully dried, Sven removes the clamps carefully, ensuring no damage occurs during this process. He then moves on to attaching four more pieces onto these main frames, completing two pairs of flanges for the bulkhead hatches.The Final Touches
While two flanges form the primary support structure around the hatches, Sven mentions there are two additional pieces required at each end to ensure comprehensive protection. This attention to detail highlights his commitment to producing a durable and reliable design. “Sailing is about finding your path, whether it’s across an ocean or within yourself.” – Sven Yrvind In conclusion, making flanges around bulkhead hatches may seem complex at first glance, but by following Sven Yrvind’s meticulous process, enthusiasts can achieve professional-level results. Remember that the journey of boatbuilding is as rewarding as reaching your destination; it tests one’s patience and dedication. For those seeking to embark on this adventure or simply gain more insight into marine craftsmanship, Sven’s wisdom is invaluable.Making Flanges Around Bulkhead Hatches for Canvas
Sven Yrvind, a renowned yacht designer and sailor, shares valuable insights on creating flanges around bulkhead hatches for canvas protection in this enlightening video. By following his expert guidance, boat enthusiasts can ensure their living areas remain secure while allowing unhindered access through the hatches.Step 1: Starting with the Flange
Sven begins by explaining that working on flanges vertically and horizontally is significantly easier than doing so in a flat position. To simplify the process further, he divides the task into two or three steps as suggested by fellow expert “for for.” This approach not only makes it more manageable but also allows for greater precision in crafting each component.Step 2: Applying Glue and Securing
Sven proceeds to apply glue along one edge of the flange, ensuring a secure bond when clamped into place. He emphasizes that this stage is crucial for maintaining the structural integrity of the flange, which in turn safeguards the living area beneath the canvas when hatches are open.Step 3: Allowing Time to Dry
After securely attaching the first portion of the flange, Sven allows ample time for it to dry before moving forward with additional steps. This patience and precision are key aspects of his successful boatbuilding methods.Step 4: Finishing Touches
Once the flange is fully dried, Sven removes the clamps carefully, ensuring no damage occurs during this process. He then moves on to attaching four more pieces onto these main frames, completing two pairs of flanges for the bulkhead hatches.The Final Touches
While two flanges form the primary support structure around the hatches, Sven mentions there are two additional pieces required at each end to ensure comprehensive protection. This attention to detail highlights his commitment to producing a durable and reliable design. “Sailing is about finding your path, whether it’s across an ocean or within yourself.” – Sven Yrvind In conclusion, making flanges around bulkhead hatches may seem complex at first glance, but by following Sven Yrvind’s meticulous process, enthusiasts can achieve professional-level results. Remember that the journey of boatbuilding is as rewarding as reaching your destination; it tests one’s patience and dedication. For those seeking to embark on this adventure or simply gain more insight into marine craftsmanship, Sven’s wisdom is invaluable.Once the flange is fully dried, Sven removes the clamps carefully, ensuring no damage occurs during this process. He then moves on to attaching four more pieces onto these main frames, completing two pairs of flanges for the bulkhead hatches.The Final Touches
While two flanges form the primary support structure around the hatches, Sven mentions there are two additional pieces required at each end to ensure comprehensive protection. This attention to detail highlights his commitment to producing a durable and reliable design. “Sailing is about finding your path, whether it’s across an ocean or within yourself.” – Sven Yrvind In conclusion, making flanges around bulkhead hatches may seem complex at first glance, but by following Sven Yrvind’s meticulous process, enthusiasts can achieve professional-level results. Remember that the journey of boatbuilding is as rewarding as reaching your destination; it tests one’s patience and dedication. For those seeking to embark on this adventure or simply gain more insight into marine craftsmanship, Sven’s wisdom is invaluable.Sven begins by explaining that working on flanges vertically and horizontally is significantly easier than doing so in a flat position. To simplify the process further, he divides the task into two or three steps as suggested by fellow expert “for for.” This approach not only makes it more manageable but also allows for greater precision in crafting each component.Step 2: Applying Glue and Securing
Sven proceeds to apply glue along one edge of the flange, ensuring a secure bond when clamped into place. He emphasizes that this stage is crucial for maintaining the structural integrity of the flange, which in turn safeguards the living area beneath the canvas when hatches are open.Step 3: Allowing Time to Dry
After securely attaching the first portion of the flange, Sven allows ample time for it to dry before moving forward with additional steps. This patience and precision are key aspects of his successful boatbuilding methods.Step 4: Finishing Touches
Once the flange is fully dried, Sven removes the clamps carefully, ensuring no damage occurs during this process. He then moves on to attaching four more pieces onto these main frames, completing two pairs of flanges for the bulkhead hatches.The Final Touches
While two flanges form the primary support structure around the hatches, Sven mentions there are two additional pieces required at each end to ensure comprehensive protection. This attention to detail highlights his commitment to producing a durable and reliable design. “Sailing is about finding your path, whether it’s across an ocean or within yourself.” – Sven Yrvind In conclusion, making flanges around bulkhead hatches may seem complex at first glance, but by following Sven Yrvind’s meticulous process, enthusiasts can achieve professional-level results. Remember that the journey of boatbuilding is as rewarding as reaching your destination; it tests one’s patience and dedication. For those seeking to embark on this adventure or simply gain more insight into marine craftsmanship, Sven’s wisdom is invaluable.Sven Yrvind, a renowned yacht designer and sailor, shares valuable insights on creating flanges around bulkhead hatches for canvas protection in this enlightening video. By following his expert guidance, boat enthusiasts can ensure their living areas remain secure while allowing unhindered access through the hatches.Step 1: Starting with the Flange
Sven begins by explaining that working on flanges vertically and horizontally is significantly easier than doing so in a flat position. To simplify the process further, he divides the task into two or three steps as suggested by fellow expert “for for.” This approach not only makes it more manageable but also allows for greater precision in crafting each component.Step 2: Applying Glue and Securing
Sven proceeds to apply glue along one edge of the flange, ensuring a secure bond when clamped into place. He emphasizes that this stage is crucial for maintaining the structural integrity of the flange, which in turn safeguards the living area beneath the canvas when hatches are open.Step 3: Allowing Time to Dry
After securely attaching the first portion of the flange, Sven allows ample time for it to dry before moving forward with additional steps. This patience and precision are key aspects of his successful boatbuilding methods.Step 4: Finishing Touches
Once the flange is fully dried, Sven removes the clamps carefully, ensuring no damage occurs during this process. He then moves on to attaching four more pieces onto these main frames, completing two pairs of flanges for the bulkhead hatches.The Final Touches
While two flanges form the primary support structure around the hatches, Sven mentions there are two additional pieces required at each end to ensure comprehensive protection. This attention to detail highlights his commitment to producing a durable and reliable design. “Sailing is about finding your path, whether it’s across an ocean or within yourself.” – Sven Yrvind In conclusion, making flanges around bulkhead hatches may seem complex at first glance, but by following Sven Yrvind’s meticulous process, enthusiasts can achieve professional-level results. Remember that the journey of boatbuilding is as rewarding as reaching your destination; it tests one’s patience and dedication. For those seeking to embark on this adventure or simply gain more insight into marine craftsmanship, Sven’s wisdom is invaluable.Making Flanges Around Bulkhead Hatches for Canvas
Sven Yrvind, a renowned yacht designer and sailor, shares valuable insights on creating flanges around bulkhead hatches for canvas protection in this enlightening video. By following his expert guidance, boat enthusiasts can ensure their living areas remain secure while allowing unhindered access through the hatches.Step 1: Starting with the Flange
Sven begins by explaining that working on flanges vertically and horizontally is significantly easier than doing so in a flat position. To simplify the process further, he divides the task into two or three steps as suggested by fellow expert “for for.” This approach not only makes it more manageable but also allows for greater precision in crafting each component.Step 2: Applying Glue and Securing
Sven proceeds to apply glue along one edge of the flange, ensuring a secure bond when clamped into place. He emphasizes that this stage is crucial for maintaining the structural integrity of the flange, which in turn safeguards the living area beneath the canvas when hatches are open.Step 3: Allowing Time to Dry
After securely attaching the first portion of the flange, Sven allows ample time for it to dry before moving forward with additional steps. This patience and precision are key aspects of his successful boatbuilding methods.Step 4: Finishing Touches
Once the flange is fully dried, Sven removes the clamps carefully, ensuring no damage occurs during this process. He then moves on to attaching four more pieces onto these main frames, completing two pairs of flanges for the bulkhead hatches.The Final Touches
While two flanges form the primary support structure around the hatches, Sven mentions there are two additional pieces required at each end to ensure comprehensive protection. This attention to detail highlights his commitment to producing a durable and reliable design. “Sailing is about finding your path, whether it’s across an ocean or within yourself.” – Sven Yrvind In conclusion, making flanges around bulkhead hatches may seem complex at first glance, but by following Sven Yrvind’s meticulous process, enthusiasts can achieve professional-level results. Remember that the journey of boatbuilding is as rewarding as reaching your destination; it tests one’s patience and dedication. For those seeking to embark on this adventure or simply gain more insight into marine craftsmanship, Sven’s wisdom is invaluable.After securely attaching the first portion of the flange, Sven allows ample time for it to dry before moving forward with additional steps. This patience and precision are key aspects of his successful boatbuilding methods.Step 4: Finishing Touches
Once the flange is fully dried, Sven removes the clamps carefully, ensuring no damage occurs during this process. He then moves on to attaching four more pieces onto these main frames, completing two pairs of flanges for the bulkhead hatches.The Final Touches
While two flanges form the primary support structure around the hatches, Sven mentions there are two additional pieces required at each end to ensure comprehensive protection. This attention to detail highlights his commitment to producing a durable and reliable design. “Sailing is about finding your path, whether it’s across an ocean or within yourself.” – Sven Yrvind In conclusion, making flanges around bulkhead hatches may seem complex at first glance, but by following Sven Yrvind’s meticulous process, enthusiasts can achieve professional-level results. Remember that the journey of boatbuilding is as rewarding as reaching your destination; it tests one’s patience and dedication. For those seeking to embark on this adventure or simply gain more insight into marine craftsmanship, Sven’s wisdom is invaluable.Sven begins by explaining that working on flanges vertically and horizontally is significantly easier than doing so in a flat position. To simplify the process further, he divides the task into two or three steps as suggested by fellow expert “for for.” This approach not only makes it more manageable but also allows for greater precision in crafting each component.Step 2: Applying Glue and Securing
Sven proceeds to apply glue along one edge of the flange, ensuring a secure bond when clamped into place. He emphasizes that this stage is crucial for maintaining the structural integrity of the flange, which in turn safeguards the living area beneath the canvas when hatches are open.Step 3: Allowing Time to Dry
After securely attaching the first portion of the flange, Sven allows ample time for it to dry before moving forward with additional steps. This patience and precision are key aspects of his successful boatbuilding methods.Step 4: Finishing Touches
Once the flange is fully dried, Sven removes the clamps carefully, ensuring no damage occurs during this process. He then moves on to attaching four more pieces onto these main frames, completing two pairs of flanges for the bulkhead hatches.The Final Touches
While two flanges form the primary support structure around the hatches, Sven mentions there are two additional pieces required at each end to ensure comprehensive protection. This attention to detail highlights his commitment to producing a durable and reliable design. “Sailing is about finding your path, whether it’s across an ocean or within yourself.” – Sven Yrvind In conclusion, making flanges around bulkhead hatches may seem complex at first glance, but by following Sven Yrvind’s meticulous process, enthusiasts can achieve professional-level results. Remember that the journey of boatbuilding is as rewarding as reaching your destination; it tests one’s patience and dedication. For those seeking to embark on this adventure or simply gain more insight into marine craftsmanship, Sven’s wisdom is invaluable.Sven Yrvind, a renowned yacht designer and sailor, shares valuable insights on creating flanges around bulkhead hatches for canvas protection in this enlightening video. By following his expert guidance, boat enthusiasts can ensure their living areas remain secure while allowing unhindered access through the hatches.Step 1: Starting with the Flange
Sven begins by explaining that working on flanges vertically and horizontally is significantly easier than doing so in a flat position. To simplify the process further, he divides the task into two or three steps as suggested by fellow expert “for for.” This approach not only makes it more manageable but also allows for greater precision in crafting each component.Step 2: Applying Glue and Securing
Sven proceeds to apply glue along one edge of the flange, ensuring a secure bond when clamped into place. He emphasizes that this stage is crucial for maintaining the structural integrity of the flange, which in turn safeguards the living area beneath the canvas when hatches are open.Step 3: Allowing Time to Dry
After securely attaching the first portion of the flange, Sven allows ample time for it to dry before moving forward with additional steps. This patience and precision are key aspects of his successful boatbuilding methods.Step 4: Finishing Touches
Once the flange is fully dried, Sven removes the clamps carefully, ensuring no damage occurs during this process. He then moves on to attaching four more pieces onto these main frames, completing two pairs of flanges for the bulkhead hatches.The Final Touches
While two flanges form the primary support structure around the hatches, Sven mentions there are two additional pieces required at each end to ensure comprehensive protection. This attention to detail highlights his commitment to producing a durable and reliable design. “Sailing is about finding your path, whether it’s across an ocean or within yourself.” – Sven Yrvind In conclusion, making flanges around bulkhead hatches may seem complex at first glance, but by following Sven Yrvind’s meticulous process, enthusiasts can achieve professional-level results. Remember that the journey of boatbuilding is as rewarding as reaching your destination; it tests one’s patience and dedication. For those seeking to embark on this adventure or simply gain more insight into marine craftsmanship, Sven’s wisdom is invaluable.Making Flanges Around Bulkhead Hatches for Canvas
Sven Yrvind, a renowned yacht designer and sailor, shares valuable insights on creating flanges around bulkhead hatches for canvas protection in this enlightening video. By following his expert guidance, boat enthusiasts can ensure their living areas remain secure while allowing unhindered access through the hatches.Step 1: Starting with the Flange
Sven begins by explaining that working on flanges vertically and horizontally is significantly easier than doing so in a flat position. To simplify the process further, he divides the task into two or three steps as suggested by fellow expert “for for.” This approach not only makes it more manageable but also allows for greater precision in crafting each component.Step 2: Applying Glue and Securing
Sven proceeds to apply glue along one edge of the flange, ensuring a secure bond when clamped into place. He emphasizes that this stage is crucial for maintaining the structural integrity of the flange, which in turn safeguards the living area beneath the canvas when hatches are open.Step 3: Allowing Time to Dry
After securely attaching the first portion of the flange, Sven allows ample time for it to dry before moving forward with additional steps. This patience and precision are key aspects of his successful boatbuilding methods.Step 4: Finishing Touches
Once the flange is fully dried, Sven removes the clamps carefully, ensuring no damage occurs during this process. He then moves on to attaching four more pieces onto these main frames, completing two pairs of flanges for the bulkhead hatches.The Final Touches
While two flanges form the primary support structure around the hatches, Sven mentions there are two additional pieces required at each end to ensure comprehensive protection. This attention to detail highlights his commitment to producing a durable and reliable design. “Sailing is about finding your path, whether it’s across an ocean or within yourself.” – Sven Yrvind In conclusion, making flanges around bulkhead hatches may seem complex at first glance, but by following Sven Yrvind’s meticulous process, enthusiasts can achieve professional-level results. Remember that the journey of boatbuilding is as rewarding as reaching your destination; it tests one’s patience and dedication. For those seeking to embark on this adventure or simply gain more insight into marine craftsmanship, Sven’s wisdom is invaluable.Sven proceeds to apply glue along one edge of the flange, ensuring a secure bond when clamped into place. He emphasizes that this stage is crucial for maintaining the structural integrity of the flange, which in turn safeguards the living area beneath the canvas when hatches are open.Step 3: Allowing Time to Dry
After securely attaching the first portion of the flange, Sven allows ample time for it to dry before moving forward with additional steps. This patience and precision are key aspects of his successful boatbuilding methods.Step 4: Finishing Touches
Once the flange is fully dried, Sven removes the clamps carefully, ensuring no damage occurs during this process. He then moves on to attaching four more pieces onto these main frames, completing two pairs of flanges for the bulkhead hatches.The Final Touches
While two flanges form the primary support structure around the hatches, Sven mentions there are two additional pieces required at each end to ensure comprehensive protection. This attention to detail highlights his commitment to producing a durable and reliable design. “Sailing is about finding your path, whether it’s across an ocean or within yourself.” – Sven Yrvind In conclusion, making flanges around bulkhead hatches may seem complex at first glance, but by following Sven Yrvind’s meticulous process, enthusiasts can achieve professional-level results. Remember that the journey of boatbuilding is as rewarding as reaching your destination; it tests one’s patience and dedication. For those seeking to embark on this adventure or simply gain more insight into marine craftsmanship, Sven’s wisdom is invaluable.Sven begins by explaining that working on flanges vertically and horizontally is significantly easier than doing so in a flat position. To simplify the process further, he divides the task into two or three steps as suggested by fellow expert “for for.” This approach not only makes it more manageable but also allows for greater precision in crafting each component.Step 2: Applying Glue and Securing
Sven proceeds to apply glue along one edge of the flange, ensuring a secure bond when clamped into place. He emphasizes that this stage is crucial for maintaining the structural integrity of the flange, which in turn safeguards the living area beneath the canvas when hatches are open.Step 3: Allowing Time to Dry
After securely attaching the first portion of the flange, Sven allows ample time for it to dry before moving forward with additional steps. This patience and precision are key aspects of his successful boatbuilding methods.Step 4: Finishing Touches
Once the flange is fully dried, Sven removes the clamps carefully, ensuring no damage occurs during this process. He then moves on to attaching four more pieces onto these main frames, completing two pairs of flanges for the bulkhead hatches.The Final Touches
While two flanges form the primary support structure around the hatches, Sven mentions there are two additional pieces required at each end to ensure comprehensive protection. This attention to detail highlights his commitment to producing a durable and reliable design. “Sailing is about finding your path, whether it’s across an ocean or within yourself.” – Sven Yrvind In conclusion, making flanges around bulkhead hatches may seem complex at first glance, but by following Sven Yrvind’s meticulous process, enthusiasts can achieve professional-level results. Remember that the journey of boatbuilding is as rewarding as reaching your destination; it tests one’s patience and dedication. For those seeking to embark on this adventure or simply gain more insight into marine craftsmanship, Sven’s wisdom is invaluable.Sven Yrvind, a renowned yacht designer and sailor, shares valuable insights on creating flanges around bulkhead hatches for canvas protection in this enlightening video. By following his expert guidance, boat enthusiasts can ensure their living areas remain secure while allowing unhindered access through the hatches.Step 1: Starting with the Flange
Sven begins by explaining that working on flanges vertically and horizontally is significantly easier than doing so in a flat position. To simplify the process further, he divides the task into two or three steps as suggested by fellow expert “for for.” This approach not only makes it more manageable but also allows for greater precision in crafting each component.Step 2: Applying Glue and Securing
Sven proceeds to apply glue along one edge of the flange, ensuring a secure bond when clamped into place. He emphasizes that this stage is crucial for maintaining the structural integrity of the flange, which in turn safeguards the living area beneath the canvas when hatches are open.Step 3: Allowing Time to Dry
After securely attaching the first portion of the flange, Sven allows ample time for it to dry before moving forward with additional steps. This patience and precision are key aspects of his successful boatbuilding methods.Step 4: Finishing Touches
Once the flange is fully dried, Sven removes the clamps carefully, ensuring no damage occurs during this process. He then moves on to attaching four more pieces onto these main frames, completing two pairs of flanges for the bulkhead hatches.The Final Touches
While two flanges form the primary support structure around the hatches, Sven mentions there are two additional pieces required at each end to ensure comprehensive protection. This attention to detail highlights his commitment to producing a durable and reliable design. “Sailing is about finding your path, whether it’s across an ocean or within yourself.” – Sven Yrvind In conclusion, making flanges around bulkhead hatches may seem complex at first glance, but by following Sven Yrvind’s meticulous process, enthusiasts can achieve professional-level results. Remember that the journey of boatbuilding is as rewarding as reaching your destination; it tests one’s patience and dedication. For those seeking to embark on this adventure or simply gain more insight into marine craftsmanship, Sven’s wisdom is invaluable.Making Flanges Around Bulkhead Hatches for Canvas
Sven Yrvind, a renowned yacht designer and sailor, shares valuable insights on creating flanges around bulkhead hatches for canvas protection in this enlightening video. By following his expert guidance, boat enthusiasts can ensure their living areas remain secure while allowing unhindered access through the hatches.Step 1: Starting with the Flange
Sven begins by explaining that working on flanges vertically and horizontally is significantly easier than doing so in a flat position. To simplify the process further, he divides the task into two or three steps as suggested by fellow expert “for for.” This approach not only makes it more manageable but also allows for greater precision in crafting each component.Step 2: Applying Glue and Securing
Sven proceeds to apply glue along one edge of the flange, ensuring a secure bond when clamped into place. He emphasizes that this stage is crucial for maintaining the structural integrity of the flange, which in turn safeguards the living area beneath the canvas when hatches are open.Step 3: Allowing Time to Dry
After securely attaching the first portion of the flange, Sven allows ample time for it to dry before moving forward with additional steps. This patience and precision are key aspects of his successful boatbuilding methods.Step 4: Finishing Touches
Once the flange is fully dried, Sven removes the clamps carefully, ensuring no damage occurs during this process. He then moves on to attaching four more pieces onto these main frames, completing two pairs of flanges for the bulkhead hatches.The Final Touches
While two flanges form the primary support structure around the hatches, Sven mentions there are two additional pieces required at each end to ensure comprehensive protection. This attention to detail highlights his commitment to producing a durable and reliable design. “Sailing is about finding your path, whether it’s across an ocean or within yourself.” – Sven Yrvind In conclusion, making flanges around bulkhead hatches may seem complex at first glance, but by following Sven Yrvind’s meticulous process, enthusiasts can achieve professional-level results. Remember that the journey of boatbuilding is as rewarding as reaching your destination; it tests one’s patience and dedication. For those seeking to embark on this adventure or simply gain more insight into marine craftsmanship, Sven’s wisdom is invaluable.Once the flange is fully dried, Sven removes the clamps carefully, ensuring no damage occurs during this process. He then moves on to attaching four more pieces onto these main frames, completing two pairs of flanges for the bulkhead hatches.The Final Touches
While two flanges form the primary support structure around the hatches, Sven mentions there are two additional pieces required at each end to ensure comprehensive protection. This attention to detail highlights his commitment to producing a durable and reliable design. “Sailing is about finding your path, whether it’s across an ocean or within yourself.” – Sven Yrvind In conclusion, making flanges around bulkhead hatches may seem complex at first glance, but by following Sven Yrvind’s meticulous process, enthusiasts can achieve professional-level results. Remember that the journey of boatbuilding is as rewarding as reaching your destination; it tests one’s patience and dedication. For those seeking to embark on this adventure or simply gain more insight into marine craftsmanship, Sven’s wisdom is invaluable.Sven proceeds to apply glue along one edge of the flange, ensuring a secure bond when clamped into place. He emphasizes that this stage is crucial for maintaining the structural integrity of the flange, which in turn safeguards the living area beneath the canvas when hatches are open.Step 3: Allowing Time to Dry
After securely attaching the first portion of the flange, Sven allows ample time for it to dry before moving forward with additional steps. This patience and precision are key aspects of his successful boatbuilding methods.Step 4: Finishing Touches
Once the flange is fully dried, Sven removes the clamps carefully, ensuring no damage occurs during this process. He then moves on to attaching four more pieces onto these main frames, completing two pairs of flanges for the bulkhead hatches.The Final Touches
While two flanges form the primary support structure around the hatches, Sven mentions there are two additional pieces required at each end to ensure comprehensive protection. This attention to detail highlights his commitment to producing a durable and reliable design. “Sailing is about finding your path, whether it’s across an ocean or within yourself.” – Sven Yrvind In conclusion, making flanges around bulkhead hatches may seem complex at first glance, but by following Sven Yrvind’s meticulous process, enthusiasts can achieve professional-level results. Remember that the journey of boatbuilding is as rewarding as reaching your destination; it tests one’s patience and dedication. For those seeking to embark on this adventure or simply gain more insight into marine craftsmanship, Sven’s wisdom is invaluable.Sven begins by explaining that working on flanges vertically and horizontally is significantly easier than doing so in a flat position. To simplify the process further, he divides the task into two or three steps as suggested by fellow expert “for for.” This approach not only makes it more manageable but also allows for greater precision in crafting each component.Step 2: Applying Glue and Securing
Sven proceeds to apply glue along one edge of the flange, ensuring a secure bond when clamped into place. He emphasizes that this stage is crucial for maintaining the structural integrity of the flange, which in turn safeguards the living area beneath the canvas when hatches are open.Step 3: Allowing Time to Dry
After securely attaching the first portion of the flange, Sven allows ample time for it to dry before moving forward with additional steps. This patience and precision are key aspects of his successful boatbuilding methods.Step 4: Finishing Touches
Once the flange is fully dried, Sven removes the clamps carefully, ensuring no damage occurs during this process. He then moves on to attaching four more pieces onto these main frames, completing two pairs of flanges for the bulkhead hatches.The Final Touches
While two flanges form the primary support structure around the hatches, Sven mentions there are two additional pieces required at each end to ensure comprehensive protection. This attention to detail highlights his commitment to producing a durable and reliable design. “Sailing is about finding your path, whether it’s across an ocean or within yourself.” – Sven Yrvind In conclusion, making flanges around bulkhead hatches may seem complex at first glance, but by following Sven Yrvind’s meticulous process, enthusiasts can achieve professional-level results. Remember that the journey of boatbuilding is as rewarding as reaching your destination; it tests one’s patience and dedication. For those seeking to embark on this adventure or simply gain more insight into marine craftsmanship, Sven’s wisdom is invaluable.Sven Yrvind, a renowned yacht designer and sailor, shares valuable insights on creating flanges around bulkhead hatches for canvas protection in this enlightening video. By following his expert guidance, boat enthusiasts can ensure their living areas remain secure while allowing unhindered access through the hatches.Step 1: Starting with the Flange
Sven begins by explaining that working on flanges vertically and horizontally is significantly easier than doing so in a flat position. To simplify the process further, he divides the task into two or three steps as suggested by fellow expert “for for.” This approach not only makes it more manageable but also allows for greater precision in crafting each component.Step 2: Applying Glue and Securing
Sven proceeds to apply glue along one edge of the flange, ensuring a secure bond when clamped into place. He emphasizes that this stage is crucial for maintaining the structural integrity of the flange, which in turn safeguards the living area beneath the canvas when hatches are open.Step 3: Allowing Time to Dry
After securely attaching the first portion of the flange, Sven allows ample time for it to dry before moving forward with additional steps. This patience and precision are key aspects of his successful boatbuilding methods.Step 4: Finishing Touches
Once the flange is fully dried, Sven removes the clamps carefully, ensuring no damage occurs during this process. He then moves on to attaching four more pieces onto these main frames, completing two pairs of flanges for the bulkhead hatches.The Final Touches
While two flanges form the primary support structure around the hatches, Sven mentions there are two additional pieces required at each end to ensure comprehensive protection. This attention to detail highlights his commitment to producing a durable and reliable design. “Sailing is about finding your path, whether it’s across an ocean or within yourself.” – Sven Yrvind In conclusion, making flanges around bulkhead hatches may seem complex at first glance, but by following Sven Yrvind’s meticulous process, enthusiasts can achieve professional-level results. Remember that the journey of boatbuilding is as rewarding as reaching your destination; it tests one’s patience and dedication. For those seeking to embark on this adventure or simply gain more insight into marine craftsmanship, Sven’s wisdom is invaluable.Making Flanges Around Bulkhead Hatches for Canvas
Sven Yrvind, a renowned yacht designer and sailor, shares valuable insights on creating flanges around bulkhead hatches for canvas protection in this enlightening video. By following his expert guidance, boat enthusiasts can ensure their living areas remain secure while allowing unhindered access through the hatches.Step 1: Starting with the Flange
Sven begins by explaining that working on flanges vertically and horizontally is significantly easier than doing so in a flat position. To simplify the process further, he divides the task into two or three steps as suggested by fellow expert “for for.” This approach not only makes it more manageable but also allows for greater precision in crafting each component.Step 2: Applying Glue and Securing
Sven proceeds to apply glue along one edge of the flange, ensuring a secure bond when clamped into place. He emphasizes that this stage is crucial for maintaining the structural integrity of the flange, which in turn safeguards the living area beneath the canvas when hatches are open.Step 3: Allowing Time to Dry
After securely attaching the first portion of the flange, Sven allows ample time for it to dry before moving forward with additional steps. This patience and precision are key aspects of his successful boatbuilding methods.Step 4: Finishing Touches
Once the flange is fully dried, Sven removes the clamps carefully, ensuring no damage occurs during this process. He then moves on to attaching four more pieces onto these main frames, completing two pairs of flanges for the bulkhead hatches.The Final Touches
While two flanges form the primary support structure around the hatches, Sven mentions there are two additional pieces required at each end to ensure comprehensive protection. This attention to detail highlights his commitment to producing a durable and reliable design. “Sailing is about finding your path, whether it’s across an ocean or within yourself.” – Sven Yrvind In conclusion, making flanges around bulkhead hatches may seem complex at first glance, but by following Sven Yrvind’s meticulous process, enthusiasts can achieve professional-level results. Remember that the journey of boatbuilding is as rewarding as reaching your destination; it tests one’s patience and dedication. For those seeking to embark on this adventure or simply gain more insight into marine craftsmanship, Sven’s wisdom is invaluable.After securely attaching the first portion of the flange, Sven allows ample time for it to dry before moving forward with additional steps. This patience and precision are key aspects of his successful boatbuilding methods.Step 4: Finishing Touches
Once the flange is fully dried, Sven removes the clamps carefully, ensuring no damage occurs during this process. He then moves on to attaching four more pieces onto these main frames, completing two pairs of flanges for the bulkhead hatches.The Final Touches
While two flanges form the primary support structure around the hatches, Sven mentions there are two additional pieces required at each end to ensure comprehensive protection. This attention to detail highlights his commitment to producing a durable and reliable design. “Sailing is about finding your path, whether it’s across an ocean or within yourself.” – Sven Yrvind In conclusion, making flanges around bulkhead hatches may seem complex at first glance, but by following Sven Yrvind’s meticulous process, enthusiasts can achieve professional-level results. Remember that the journey of boatbuilding is as rewarding as reaching your destination; it tests one’s patience and dedication. For those seeking to embark on this adventure or simply gain more insight into marine craftsmanship, Sven’s wisdom is invaluable.Sven proceeds to apply glue along one edge of the flange, ensuring a secure bond when clamped into place. He emphasizes that this stage is crucial for maintaining the structural integrity of the flange, which in turn safeguards the living area beneath the canvas when hatches are open.Step 3: Allowing Time to Dry
After securely attaching the first portion of the flange, Sven allows ample time for it to dry before moving forward with additional steps. This patience and precision are key aspects of his successful boatbuilding methods.Step 4: Finishing Touches
Once the flange is fully dried, Sven removes the clamps carefully, ensuring no damage occurs during this process. He then moves on to attaching four more pieces onto these main frames, completing two pairs of flanges for the bulkhead hatches.The Final Touches
While two flanges form the primary support structure around the hatches, Sven mentions there are two additional pieces required at each end to ensure comprehensive protection. This attention to detail highlights his commitment to producing a durable and reliable design. “Sailing is about finding your path, whether it’s across an ocean or within yourself.” – Sven Yrvind In conclusion, making flanges around bulkhead hatches may seem complex at first glance, but by following Sven Yrvind’s meticulous process, enthusiasts can achieve professional-level results. Remember that the journey of boatbuilding is as rewarding as reaching your destination; it tests one’s patience and dedication. For those seeking to embark on this adventure or simply gain more insight into marine craftsmanship, Sven’s wisdom is invaluable.Sven begins by explaining that working on flanges vertically and horizontally is significantly easier than doing so in a flat position. To simplify the process further, he divides the task into two or three steps as suggested by fellow expert “for for.” This approach not only makes it more manageable but also allows for greater precision in crafting each component.Step 2: Applying Glue and Securing
Sven proceeds to apply glue along one edge of the flange, ensuring a secure bond when clamped into place. He emphasizes that this stage is crucial for maintaining the structural integrity of the flange, which in turn safeguards the living area beneath the canvas when hatches are open.Step 3: Allowing Time to Dry
After securely attaching the first portion of the flange, Sven allows ample time for it to dry before moving forward with additional steps. This patience and precision are key aspects of his successful boatbuilding methods.Step 4: Finishing Touches
Once the flange is fully dried, Sven removes the clamps carefully, ensuring no damage occurs during this process. He then moves on to attaching four more pieces onto these main frames, completing two pairs of flanges for the bulkhead hatches.The Final Touches
While two flanges form the primary support structure around the hatches, Sven mentions there are two additional pieces required at each end to ensure comprehensive protection. This attention to detail highlights his commitment to producing a durable and reliable design. “Sailing is about finding your path, whether it’s across an ocean or within yourself.” – Sven Yrvind In conclusion, making flanges around bulkhead hatches may seem complex at first glance, but by following Sven Yrvind’s meticulous process, enthusiasts can achieve professional-level results. Remember that the journey of boatbuilding is as rewarding as reaching your destination; it tests one’s patience and dedication. For those seeking to embark on this adventure or simply gain more insight into marine craftsmanship, Sven’s wisdom is invaluable.Sven Yrvind, a renowned yacht designer and sailor, shares valuable insights on creating flanges around bulkhead hatches for canvas protection in this enlightening video. By following his expert guidance, boat enthusiasts can ensure their living areas remain secure while allowing unhindered access through the hatches.Step 1: Starting with the Flange
Sven begins by explaining that working on flanges vertically and horizontally is significantly easier than doing so in a flat position. To simplify the process further, he divides the task into two or three steps as suggested by fellow expert “for for.” This approach not only makes it more manageable but also allows for greater precision in crafting each component.Step 2: Applying Glue and Securing
Sven proceeds to apply glue along one edge of the flange, ensuring a secure bond when clamped into place. He emphasizes that this stage is crucial for maintaining the structural integrity of the flange, which in turn safeguards the living area beneath the canvas when hatches are open.Step 3: Allowing Time to Dry
After securely attaching the first portion of the flange, Sven allows ample time for it to dry before moving forward with additional steps. This patience and precision are key aspects of his successful boatbuilding methods.Step 4: Finishing Touches
Once the flange is fully dried, Sven removes the clamps carefully, ensuring no damage occurs during this process. He then moves on to attaching four more pieces onto these main frames, completing two pairs of flanges for the bulkhead hatches.The Final Touches
While two flanges form the primary support structure around the hatches, Sven mentions there are two additional pieces required at each end to ensure comprehensive protection. This attention to detail highlights his commitment to producing a durable and reliable design. “Sailing is about finding your path, whether it’s across an ocean or within yourself.” – Sven Yrvind In conclusion, making flanges around bulkhead hatches may seem complex at first glance, but by following Sven Yrvind’s meticulous process, enthusiasts can achieve professional-level results. Remember that the journey of boatbuilding is as rewarding as reaching your destination; it tests one’s patience and dedication. For those seeking to embark on this adventure or simply gain more insight into marine craftsmanship, Sven’s wisdom is invaluable.Making Flanges Around Bulkhead Hatches for Canvas
Sven Yrvind, a renowned yacht designer and sailor, shares valuable insights on creating flanges around bulkhead hatches for canvas protection in this enlightening video. By following his expert guidance, boat enthusiasts can ensure their living areas remain secure while allowing unhindered access through the hatches.Step 1: Starting with the Flange
Sven begins by explaining that working on flanges vertically and horizontally is significantly easier than doing so in a flat position. To simplify the process further, he divides the task into two or three steps as suggested by fellow expert “for for.” This approach not only makes it more manageable but also allows for greater precision in crafting each component.Step 2: Applying Glue and Securing
Sven proceeds to apply glue along one edge of the flange, ensuring a secure bond when clamped into place. He emphasizes that this stage is crucial for maintaining the structural integrity of the flange, which in turn safeguards the living area beneath the canvas when hatches are open.Step 3: Allowing Time to Dry
After securely attaching the first portion of the flange, Sven allows ample time for it to dry before moving forward with additional steps. This patience and precision are key aspects of his successful boatbuilding methods.Step 4: Finishing Touches
Once the flange is fully dried, Sven removes the clamps carefully, ensuring no damage occurs during this process. He then moves on to attaching four more pieces onto these main frames, completing two pairs of flanges for the bulkhead hatches.The Final Touches
While two flanges form the primary support structure around the hatches, Sven mentions there are two additional pieces required at each end to ensure comprehensive protection. This attention to detail highlights his commitment to producing a durable and reliable design. “Sailing is about finding your path, whether it’s across an ocean or within yourself.” – Sven Yrvind In conclusion, making flanges around bulkhead hatches may seem complex at first glance, but by following Sven Yrvind’s meticulous process, enthusiasts can achieve professional-level results. Remember that the journey of boatbuilding is as rewarding as reaching your destination; it tests one’s patience and dedication. For those seeking to embark on this adventure or simply gain more insight into marine craftsmanship, Sven’s wisdom is invaluable.Once the flange is fully dried, Sven removes the clamps carefully, ensuring no damage occurs during this process. He then moves on to attaching four more pieces onto these main frames, completing two pairs of flanges for the bulkhead hatches.The Final Touches
While two flanges form the primary support structure around the hatches, Sven mentions there are two additional pieces required at each end to ensure comprehensive protection. This attention to detail highlights his commitment to producing a durable and reliable design. “Sailing is about finding your path, whether it’s across an ocean or within yourself.” – Sven Yrvind In conclusion, making flanges around bulkhead hatches may seem complex at first glance, but by following Sven Yrvind’s meticulous process, enthusiasts can achieve professional-level results. Remember that the journey of boatbuilding is as rewarding as reaching your destination; it tests one’s patience and dedication. For those seeking to embark on this adventure or simply gain more insight into marine craftsmanship, Sven’s wisdom is invaluable.After securely attaching the first portion of the flange, Sven allows ample time for it to dry before moving forward with additional steps. This patience and precision are key aspects of his successful boatbuilding methods.Step 4: Finishing Touches
Once the flange is fully dried, Sven removes the clamps carefully, ensuring no damage occurs during this process. He then moves on to attaching four more pieces onto these main frames, completing two pairs of flanges for the bulkhead hatches.The Final Touches
While two flanges form the primary support structure around the hatches, Sven mentions there are two additional pieces required at each end to ensure comprehensive protection. This attention to detail highlights his commitment to producing a durable and reliable design. “Sailing is about finding your path, whether it’s across an ocean or within yourself.” – Sven Yrvind In conclusion, making flanges around bulkhead hatches may seem complex at first glance, but by following Sven Yrvind’s meticulous process, enthusiasts can achieve professional-level results. Remember that the journey of boatbuilding is as rewarding as reaching your destination; it tests one’s patience and dedication. For those seeking to embark on this adventure or simply gain more insight into marine craftsmanship, Sven’s wisdom is invaluable.Sven proceeds to apply glue along one edge of the flange, ensuring a secure bond when clamped into place. He emphasizes that this stage is crucial for maintaining the structural integrity of the flange, which in turn safeguards the living area beneath the canvas when hatches are open.Step 3: Allowing Time to Dry
After securely attaching the first portion of the flange, Sven allows ample time for it to dry before moving forward with additional steps. This patience and precision are key aspects of his successful boatbuilding methods.Step 4: Finishing Touches
Once the flange is fully dried, Sven removes the clamps carefully, ensuring no damage occurs during this process. He then moves on to attaching four more pieces onto these main frames, completing two pairs of flanges for the bulkhead hatches.The Final Touches
While two flanges form the primary support structure around the hatches, Sven mentions there are two additional pieces required at each end to ensure comprehensive protection. This attention to detail highlights his commitment to producing a durable and reliable design. “Sailing is about finding your path, whether it’s across an ocean or within yourself.” – Sven Yrvind In conclusion, making flanges around bulkhead hatches may seem complex at first glance, but by following Sven Yrvind’s meticulous process, enthusiasts can achieve professional-level results. Remember that the journey of boatbuilding is as rewarding as reaching your destination; it tests one’s patience and dedication. For those seeking to embark on this adventure or simply gain more insight into marine craftsmanship, Sven’s wisdom is invaluable.Sven begins by explaining that working on flanges vertically and horizontally is significantly easier than doing so in a flat position. To simplify the process further, he divides the task into two or three steps as suggested by fellow expert “for for.” This approach not only makes it more manageable but also allows for greater precision in crafting each component.Step 2: Applying Glue and Securing
Sven proceeds to apply glue along one edge of the flange, ensuring a secure bond when clamped into place. He emphasizes that this stage is crucial for maintaining the structural integrity of the flange, which in turn safeguards the living area beneath the canvas when hatches are open.Step 3: Allowing Time to Dry
After securely attaching the first portion of the flange, Sven allows ample time for it to dry before moving forward with additional steps. This patience and precision are key aspects of his successful boatbuilding methods.Step 4: Finishing Touches
Once the flange is fully dried, Sven removes the clamps carefully, ensuring no damage occurs during this process. He then moves on to attaching four more pieces onto these main frames, completing two pairs of flanges for the bulkhead hatches.The Final Touches
While two flanges form the primary support structure around the hatches, Sven mentions there are two additional pieces required at each end to ensure comprehensive protection. This attention to detail highlights his commitment to producing a durable and reliable design. “Sailing is about finding your path, whether it’s across an ocean or within yourself.” – Sven Yrvind In conclusion, making flanges around bulkhead hatches may seem complex at first glance, but by following Sven Yrvind’s meticulous process, enthusiasts can achieve professional-level results. Remember that the journey of boatbuilding is as rewarding as reaching your destination; it tests one’s patience and dedication. For those seeking to embark on this adventure or simply gain more insight into marine craftsmanship, Sven’s wisdom is invaluable.Sven Yrvind, a renowned yacht designer and sailor, shares valuable insights on creating flanges around bulkhead hatches for canvas protection in this enlightening video. By following his expert guidance, boat enthusiasts can ensure their living areas remain secure while allowing unhindered access through the hatches.Step 1: Starting with the Flange
Sven begins by explaining that working on flanges vertically and horizontally is significantly easier than doing so in a flat position. To simplify the process further, he divides the task into two or three steps as suggested by fellow expert “for for.” This approach not only makes it more manageable but also allows for greater precision in crafting each component.Step 2: Applying Glue and Securing
Sven proceeds to apply glue along one edge of the flange, ensuring a secure bond when clamped into place. He emphasizes that this stage is crucial for maintaining the structural integrity of the flange, which in turn safeguards the living area beneath the canvas when hatches are open.Step 3: Allowing Time to Dry
After securely attaching the first portion of the flange, Sven allows ample time for it to dry before moving forward with additional steps. This patience and precision are key aspects of his successful boatbuilding methods.Step 4: Finishing Touches
Once the flange is fully dried, Sven removes the clamps carefully, ensuring no damage occurs during this process. He then moves on to attaching four more pieces onto these main frames, completing two pairs of flanges for the bulkhead hatches.The Final Touches
While two flanges form the primary support structure around the hatches, Sven mentions there are two additional pieces required at each end to ensure comprehensive protection. This attention to detail highlights his commitment to producing a durable and reliable design. “Sailing is about finding your path, whether it’s across an ocean or within yourself.” – Sven Yrvind In conclusion, making flanges around bulkhead hatches may seem complex at first glance, but by following Sven Yrvind’s meticulous process, enthusiasts can achieve professional-level results. Remember that the journey of boatbuilding is as rewarding as reaching your destination; it tests one’s patience and dedication. For those seeking to embark on this adventure or simply gain more insight into marine craftsmanship, Sven’s wisdom is invaluable.Making Flanges Around Bulkhead Hatches for Canvas
Sven Yrvind, a renowned yacht designer and sailor, shares valuable insights on creating flanges around bulkhead hatches for canvas protection in this enlightening video. By following his expert guidance, boat enthusiasts can ensure their living areas remain secure while allowing unhindered access through the hatches.Step 1: Starting with the Flange
Sven begins by explaining that working on flanges vertically and horizontally is significantly easier than doing so in a flat position. To simplify the process further, he divides the task into two or three steps as suggested by fellow expert “for for.” This approach not only makes it more manageable but also allows for greater precision in crafting each component.Step 2: Applying Glue and Securing
Sven proceeds to apply glue along one edge of the flange, ensuring a secure bond when clamped into place. He emphasizes that this stage is crucial for maintaining the structural integrity of the flange, which in turn safeguards the living area beneath the canvas when hatches are open.Step 3: Allowing Time to Dry
After securely attaching the first portion of the flange, Sven allows ample time for it to dry before moving forward with additional steps. This patience and precision are key aspects of his successful boatbuilding methods.Step 4: Finishing Touches
Once the flange is fully dried, Sven removes the clamps carefully, ensuring no damage occurs during this process. He then moves on to attaching four more pieces onto these main frames, completing two pairs of flanges for the bulkhead hatches.The Final Touches
While two flanges form the primary support structure around the hatches, Sven mentions there are two additional pieces required at each end to ensure comprehensive protection. This attention to detail highlights his commitment to producing a durable and reliable design. “Sailing is about finding your path, whether it’s across an ocean or within yourself.” – Sven Yrvind In conclusion, making flanges around bulkhead hatches may seem complex at first glance, but by following Sven Yrvind’s meticulous process, enthusiasts can achieve professional-level results. Remember that the journey of boatbuilding is as rewarding as reaching your destination; it tests one’s patience and dedication. For those seeking to embark on this adventure or simply gain more insight into marine craftsmanship, Sven’s wisdom is invaluable.Sven begins by explaining that working on flanges vertically and horizontally is significantly easier than doing so in a flat position. To simplify the process further, he divides the task into two or three steps as suggested by fellow expert “for for.” This approach not only makes it more manageable but also allows for greater precision in crafting each component.Step 2: Applying Glue and Securing
Sven proceeds to apply glue along one edge of the flange, ensuring a secure bond when clamped into place. He emphasizes that this stage is crucial for maintaining the structural integrity of the flange, which in turn safeguards the living area beneath the canvas when hatches are open.Step 3: Allowing Time to Dry
After securely attaching the first portion of the flange, Sven allows ample time for it to dry before moving forward with additional steps. This patience and precision are key aspects of his successful boatbuilding methods.Step 4: Finishing Touches
Once the flange is fully dried, Sven removes the clamps carefully, ensuring no damage occurs during this process. He then moves on to attaching four more pieces onto these main frames, completing two pairs of flanges for the bulkhead hatches.The Final Touches
While two flanges form the primary support structure around the hatches, Sven mentions there are two additional pieces required at each end to ensure comprehensive protection. This attention to detail highlights his commitment to producing a durable and reliable design. “Sailing is about finding your path, whether it’s across an ocean or within yourself.” – Sven Yrvind In conclusion, making flanges around bulkhead hatches may seem complex at first glance, but by following Sven Yrvind’s meticulous process, enthusiasts can achieve professional-level results. Remember that the journey of boatbuilding is as rewarding as reaching your destination; it tests one’s patience and dedication. For those seeking to embark on this adventure or simply gain more insight into marine craftsmanship, Sven’s wisdom is invaluable.Making Flanges Around Bulkhead Hatches for Canvas
Sven Yrvind, a renowned yacht designer and sailor, shares valuable insights on creating flanges around bulkhead hatches for canvas protection in this enlightening video. By following his expert guidance, boat enthusiasts can ensure their living areas remain secure while allowing unhindered access through the hatches.Step 1: Starting with the Flange
Sven begins by explaining that working on flanges vertically and horizontally is significantly easier than doing so in a flat position. To simplify the process further, he divides the task into two or three steps as suggested by fellow expert “for for.” This approach not only makes it more manageable but also allows for greater precision in crafting each component.Step 2: Applying Glue and Securing
Sven proceeds to apply glue along one edge of the flange, ensuring a secure bond when clamped into place. He emphasizes that this stage is crucial for maintaining the structural integrity of the flange, which in turn safeguards the living area beneath the canvas when hatches are open.Step 3: Allowing Time to Dry
After securely attaching the first portion of the flange, Sven allows ample time for it to dry before moving forward with additional steps. This patience and precision are key aspects of his successful boatbuilding methods.Step 4: Finishing Touches
Once the flange is fully dried, Sven removes the clamps carefully, ensuring no damage occurs during this process. He then moves on to attaching four more pieces onto these main frames, completing two pairs of flanges for the bulkhead hatches.The Final Touches
While two flanges form the primary support structure around the hatches, Sven mentions there are two additional pieces required at each end to ensure comprehensive protection. This attention to detail highlights his commitment to producing a durable and reliable design. “Sailing is about finding your path, whether it’s across an ocean or within yourself.” – Sven Yrvind In conclusion, making flanges around bulkhead hatches may seem complex at first glance, but by following Sven Yrvind’s meticulous process, enthusiasts can achieve professional-level results. Remember that the journey of boatbuilding is as rewarding as reaching your destination; it tests one’s patience and dedication. For those seeking to embark on this adventure or simply gain more insight into marine craftsmanship, Sven’s wisdom is invaluable.Sven Yrvind, a renowned yacht designer and sailor, shares valuable insights on creating flanges around bulkhead hatches for canvas protection in this enlightening video. By following his expert guidance, boat enthusiasts can ensure their living areas remain secure while allowing unhindered access through the hatches.Step 1: Starting with the Flange
Sven begins by explaining that working on flanges vertically and horizontally is significantly easier than doing so in a flat position. To simplify the process further, he divides the task into two or three steps as suggested by fellow expert “for for.” This approach not only makes it more manageable but also allows for greater precision in crafting each component.Step 2: Applying Glue and Securing
Sven proceeds to apply glue along one edge of the flange, ensuring a secure bond when clamped into place. He emphasizes that this stage is crucial for maintaining the structural integrity of the flange, which in turn safeguards the living area beneath the canvas when hatches are open.Step 3: Allowing Time to Dry
After securely attaching the first portion of the flange, Sven allows ample time for it to dry before moving forward with additional steps. This patience and precision are key aspects of his successful boatbuilding methods.Step 4: Finishing Touches
Once the flange is fully dried, Sven removes the clamps carefully, ensuring no damage occurs during this process. He then moves on to attaching four more pieces onto these main frames, completing two pairs of flanges for the bulkhead hatches.The Final Touches
While two flanges form the primary support structure around the hatches, Sven mentions there are two additional pieces required at each end to ensure comprehensive protection. This attention to detail highlights his commitment to producing a durable and reliable design. “Sailing is about finding your path, whether it’s across an ocean or within yourself.” – Sven Yrvind In conclusion, making flanges around bulkhead hatches may seem complex at first glance, but by following Sven Yrvind’s meticulous process, enthusiasts can achieve professional-level results. Remember that the journey of boatbuilding is as rewarding as reaching your destination; it tests one’s patience and dedication. For those seeking to embark on this adventure or simply gain more insight into marine craftsmanship, Sven’s wisdom is invaluable.Making Flanges Around Bulkhead Hatches for Canvas
Sven Yrvind, a renowned yacht designer and sailor, shares valuable insights on creating flanges around bulkhead hatches for canvas protection in this enlightening video. By following his expert guidance, boat enthusiasts can ensure their living areas remain secure while allowing unhindered access through the hatches.Step 1: Starting with the Flange
Sven begins by explaining that working on flanges vertically and horizontally is significantly easier than doing so in a flat position. To simplify the process further, he divides the task into two or three steps as suggested by fellow expert “for for.” This approach not only makes it more manageable but also allows for greater precision in crafting each component.Step 2: Applying Glue and Securing
Sven proceeds to apply glue along one edge of the flange, ensuring a secure bond when clamped into place. He emphasizes that this stage is crucial for maintaining the structural integrity of the flange, which in turn safeguards the living area beneath the canvas when hatches are open.Step 3: Allowing Time to Dry
After securely attaching the first portion of the flange, Sven allows ample time for it to dry before moving forward with additional steps. This patience and precision are key aspects of his successful boatbuilding methods.Step 4: Finishing Touches
Once the flange is fully dried, Sven removes the clamps carefully, ensuring no damage occurs during this process. He then moves on to attaching four more pieces onto these main frames, completing two pairs of flanges for the bulkhead hatches.The Final Touches
While two flanges form the primary support structure around the hatches, Sven mentions there are two additional pieces required at each end to ensure comprehensive protection. This attention to detail highlights his commitment to producing a durable and reliable design. “Sailing is about finding your path, whether it’s across an ocean or within yourself.” – Sven Yrvind In conclusion, making flanges around bulkhead hatches may seem complex at first glance, but by following Sven Yrvind’s meticulous process, enthusiasts can achieve professional-level results. Remember that the journey of boatbuilding is as rewarding as reaching your destination; it tests one’s patience and dedication. For those seeking to embark on this adventure or simply gain more insight into marine craftsmanship, Sven’s wisdom is invaluable.Once the flange is fully dried, Sven removes the clamps carefully, ensuring no damage occurs during this process. He then moves on to attaching four more pieces onto these main frames, completing two pairs of flanges for the bulkhead hatches.The Final Touches
While two flanges form the primary support structure around the hatches, Sven mentions there are two additional pieces required at each end to ensure comprehensive protection. This attention to detail highlights his commitment to producing a durable and reliable design. “Sailing is about finding your path, whether it’s across an ocean or within yourself.” – Sven Yrvind In conclusion, making flanges around bulkhead hatches may seem complex at first glance, but by following Sven Yrvind’s meticulous process, enthusiasts can achieve professional-level results. Remember that the journey of boatbuilding is as rewarding as reaching your destination; it tests one’s patience and dedication. For those seeking to embark on this adventure or simply gain more insight into marine craftsmanship, Sven’s wisdom is invaluable.Sven Yrvind, a renowned yacht designer and sailor, shares valuable insights on creating flanges around bulkhead hatches for canvas protection in this enlightening video. By following his expert guidance, boat enthusiasts can ensure their living areas remain secure while allowing unhindered access through the hatches.Step 1: Starting with the Flange
Sven begins by explaining that working on flanges vertically and horizontally is significantly easier than doing so in a flat position. To simplify the process further, he divides the task into two or three steps as suggested by fellow expert “for for.” This approach not only makes it more manageable but also allows for greater precision in crafting each component.Step 2: Applying Glue and Securing
Sven proceeds to apply glue along one edge of the flange, ensuring a secure bond when clamped into place. He emphasizes that this stage is crucial for maintaining the structural integrity of the flange, which in turn safeguards the living area beneath the canvas when hatches are open.Step 3: Allowing Time to Dry
After securely attaching the first portion of the flange, Sven allows ample time for it to dry before moving forward with additional steps. This patience and precision are key aspects of his successful boatbuilding methods.Step 4: Finishing Touches
Once the flange is fully dried, Sven removes the clamps carefully, ensuring no damage occurs during this process. He then moves on to attaching four more pieces onto these main frames, completing two pairs of flanges for the bulkhead hatches.The Final Touches
While two flanges form the primary support structure around the hatches, Sven mentions there are two additional pieces required at each end to ensure comprehensive protection. This attention to detail highlights his commitment to producing a durable and reliable design. “Sailing is about finding your path, whether it’s across an ocean or within yourself.” – Sven Yrvind In conclusion, making flanges around bulkhead hatches may seem complex at first glance, but by following Sven Yrvind’s meticulous process, enthusiasts can achieve professional-level results. Remember that the journey of boatbuilding is as rewarding as reaching your destination; it tests one’s patience and dedication. For those seeking to embark on this adventure or simply gain more insight into marine craftsmanship, Sven’s wisdom is invaluable.Making Flanges Around Bulkhead Hatches for Canvas
Sven Yrvind, a renowned yacht designer and sailor, shares valuable insights on creating flanges around bulkhead hatches for canvas protection in this enlightening video. By following his expert guidance, boat enthusiasts can ensure their living areas remain secure while allowing unhindered access through the hatches.Step 1: Starting with the Flange
Sven begins by explaining that working on flanges vertically and horizontally is significantly easier than doing so in a flat position. To simplify the process further, he divides the task into two or three steps as suggested by fellow expert “for for.” This approach not only makes it more manageable but also allows for greater precision in crafting each component.Step 2: Applying Glue and Securing
Sven proceeds to apply glue along one edge of the flange, ensuring a secure bond when clamped into place. He emphasizes that this stage is crucial for maintaining the structural integrity of the flange, which in turn safeguards the living area beneath the canvas when hatches are open.Step 3: Allowing Time to Dry
After securely attaching the first portion of the flange, Sven allows ample time for it to dry before moving forward with additional steps. This patience and precision are key aspects of his successful boatbuilding methods.Step 4: Finishing Touches
Once the flange is fully dried, Sven removes the clamps carefully, ensuring no damage occurs during this process. He then moves on to attaching four more pieces onto these main frames, completing two pairs of flanges for the bulkhead hatches.The Final Touches
While two flanges form the primary support structure around the hatches, Sven mentions there are two additional pieces required at each end to ensure comprehensive protection. This attention to detail highlights his commitment to producing a durable and reliable design. “Sailing is about finding your path, whether it’s across an ocean or within yourself.” – Sven Yrvind In conclusion, making flanges around bulkhead hatches may seem complex at first glance, but by following Sven Yrvind’s meticulous process, enthusiasts can achieve professional-level results. Remember that the journey of boatbuilding is as rewarding as reaching your destination; it tests one’s patience and dedication. For those seeking to embark on this adventure or simply gain more insight into marine craftsmanship, Sven’s wisdom is invaluable.After securely attaching the first portion of the flange, Sven allows ample time for it to dry before moving forward with additional steps. This patience and precision are key aspects of his successful boatbuilding methods.Step 4: Finishing Touches
Once the flange is fully dried, Sven removes the clamps carefully, ensuring no damage occurs during this process. He then moves on to attaching four more pieces onto these main frames, completing two pairs of flanges for the bulkhead hatches.The Final Touches
While two flanges form the primary support structure around the hatches, Sven mentions there are two additional pieces required at each end to ensure comprehensive protection. This attention to detail highlights his commitment to producing a durable and reliable design. “Sailing is about finding your path, whether it’s across an ocean or within yourself.” – Sven Yrvind In conclusion, making flanges around bulkhead hatches may seem complex at first glance, but by following Sven Yrvind’s meticulous process, enthusiasts can achieve professional-level results. Remember that the journey of boatbuilding is as rewarding as reaching your destination; it tests one’s patience and dedication. For those seeking to embark on this adventure or simply gain more insight into marine craftsmanship, Sven’s wisdom is invaluable.Sven Yrvind, a renowned yacht designer and sailor, shares valuable insights on creating flanges around bulkhead hatches for canvas protection in this enlightening video. By following his expert guidance, boat enthusiasts can ensure their living areas remain secure while allowing unhindered access through the hatches.Step 1: Starting with the Flange
Sven begins by explaining that working on flanges vertically and horizontally is significantly easier than doing so in a flat position. To simplify the process further, he divides the task into two or three steps as suggested by fellow expert “for for.” This approach not only makes it more manageable but also allows for greater precision in crafting each component.Step 2: Applying Glue and Securing
Sven proceeds to apply glue along one edge of the flange, ensuring a secure bond when clamped into place. He emphasizes that this stage is crucial for maintaining the structural integrity of the flange, which in turn safeguards the living area beneath the canvas when hatches are open.Step 3: Allowing Time to Dry
After securely attaching the first portion of the flange, Sven allows ample time for it to dry before moving forward with additional steps. This patience and precision are key aspects of his successful boatbuilding methods.Step 4: Finishing Touches
Once the flange is fully dried, Sven removes the clamps carefully, ensuring no damage occurs during this process. He then moves on to attaching four more pieces onto these main frames, completing two pairs of flanges for the bulkhead hatches.The Final Touches
While two flanges form the primary support structure around the hatches, Sven mentions there are two additional pieces required at each end to ensure comprehensive protection. This attention to detail highlights his commitment to producing a durable and reliable design. “Sailing is about finding your path, whether it’s across an ocean or within yourself.” – Sven Yrvind In conclusion, making flanges around bulkhead hatches may seem complex at first glance, but by following Sven Yrvind’s meticulous process, enthusiasts can achieve professional-level results. Remember that the journey of boatbuilding is as rewarding as reaching your destination; it tests one’s patience and dedication. For those seeking to embark on this adventure or simply gain more insight into marine craftsmanship, Sven’s wisdom is invaluable.Making Flanges Around Bulkhead Hatches for Canvas
Sven Yrvind, a renowned yacht designer and sailor, shares valuable insights on creating flanges around bulkhead hatches for canvas protection in this enlightening video. By following his expert guidance, boat enthusiasts can ensure their living areas remain secure while allowing unhindered access through the hatches.Step 1: Starting with the Flange
Sven begins by explaining that working on flanges vertically and horizontally is significantly easier than doing so in a flat position. To simplify the process further, he divides the task into two or three steps as suggested by fellow expert “for for.” This approach not only makes it more manageable but also allows for greater precision in crafting each component.Step 2: Applying Glue and Securing
Sven proceeds to apply glue along one edge of the flange, ensuring a secure bond when clamped into place. He emphasizes that this stage is crucial for maintaining the structural integrity of the flange, which in turn safeguards the living area beneath the canvas when hatches are open.Step 3: Allowing Time to Dry
After securely attaching the first portion of the flange, Sven allows ample time for it to dry before moving forward with additional steps. This patience and precision are key aspects of his successful boatbuilding methods.Step 4: Finishing Touches
Once the flange is fully dried, Sven removes the clamps carefully, ensuring no damage occurs during this process. He then moves on to attaching four more pieces onto these main frames, completing two pairs of flanges for the bulkhead hatches.The Final Touches
While two flanges form the primary support structure around the hatches, Sven mentions there are two additional pieces required at each end to ensure comprehensive protection. This attention to detail highlights his commitment to producing a durable and reliable design. “Sailing is about finding your path, whether it’s across an ocean or within yourself.” – Sven Yrvind In conclusion, making flanges around bulkhead hatches may seem complex at first glance, but by following Sven Yrvind’s meticulous process, enthusiasts can achieve professional-level results. Remember that the journey of boatbuilding is as rewarding as reaching your destination; it tests one’s patience and dedication. For those seeking to embark on this adventure or simply gain more insight into marine craftsmanship, Sven’s wisdom is invaluable.Sven proceeds to apply glue along one edge of the flange, ensuring a secure bond when clamped into place. He emphasizes that this stage is crucial for maintaining the structural integrity of the flange, which in turn safeguards the living area beneath the canvas when hatches are open.Step 3: Allowing Time to Dry
After securely attaching the first portion of the flange, Sven allows ample time for it to dry before moving forward with additional steps. This patience and precision are key aspects of his successful boatbuilding methods.Step 4: Finishing Touches
Once the flange is fully dried, Sven removes the clamps carefully, ensuring no damage occurs during this process. He then moves on to attaching four more pieces onto these main frames, completing two pairs of flanges for the bulkhead hatches.The Final Touches
While two flanges form the primary support structure around the hatches, Sven mentions there are two additional pieces required at each end to ensure comprehensive protection. This attention to detail highlights his commitment to producing a durable and reliable design. “Sailing is about finding your path, whether it’s across an ocean or within yourself.” – Sven Yrvind In conclusion, making flanges around bulkhead hatches may seem complex at first glance, but by following Sven Yrvind’s meticulous process, enthusiasts can achieve professional-level results. Remember that the journey of boatbuilding is as rewarding as reaching your destination; it tests one’s patience and dedication. For those seeking to embark on this adventure or simply gain more insight into marine craftsmanship, Sven’s wisdom is invaluable.Sven Yrvind, a renowned yacht designer and sailor, shares valuable insights on creating flanges around bulkhead hatches for canvas protection in this enlightening video. By following his expert guidance, boat enthusiasts can ensure their living areas remain secure while allowing unhindered access through the hatches.Step 1: Starting with the Flange
Sven begins by explaining that working on flanges vertically and horizontally is significantly easier than doing so in a flat position. To simplify the process further, he divides the task into two or three steps as suggested by fellow expert “for for.” This approach not only makes it more manageable but also allows for greater precision in crafting each component.Step 2: Applying Glue and Securing
Sven proceeds to apply glue along one edge of the flange, ensuring a secure bond when clamped into place. He emphasizes that this stage is crucial for maintaining the structural integrity of the flange, which in turn safeguards the living area beneath the canvas when hatches are open.Step 3: Allowing Time to Dry
After securely attaching the first portion of the flange, Sven allows ample time for it to dry before moving forward with additional steps. This patience and precision are key aspects of his successful boatbuilding methods.Step 4: Finishing Touches
Once the flange is fully dried, Sven removes the clamps carefully, ensuring no damage occurs during this process. He then moves on to attaching four more pieces onto these main frames, completing two pairs of flanges for the bulkhead hatches.The Final Touches
While two flanges form the primary support structure around the hatches, Sven mentions there are two additional pieces required at each end to ensure comprehensive protection. This attention to detail highlights his commitment to producing a durable and reliable design. “Sailing is about finding your path, whether it’s across an ocean or within yourself.” – Sven Yrvind In conclusion, making flanges around bulkhead hatches may seem complex at first glance, but by following Sven Yrvind’s meticulous process, enthusiasts can achieve professional-level results. Remember that the journey of boatbuilding is as rewarding as reaching your destination; it tests one’s patience and dedication. For those seeking to embark on this adventure or simply gain more insight into marine craftsmanship, Sven’s wisdom is invaluable.Making Flanges Around Bulkhead Hatches for Canvas
Sven Yrvind, a renowned yacht designer and sailor, shares valuable insights on creating flanges around bulkhead hatches for canvas protection in this enlightening video. By following his expert guidance, boat enthusiasts can ensure their living areas remain secure while allowing unhindered access through the hatches.Step 1: Starting with the Flange
Sven begins by explaining that working on flanges vertically and horizontally is significantly easier than doing so in a flat position. To simplify the process further, he divides the task into two or three steps as suggested by fellow expert “for for.” This approach not only makes it more manageable but also allows for greater precision in crafting each component.Step 2: Applying Glue and Securing
Sven proceeds to apply glue along one edge of the flange, ensuring a secure bond when clamped into place. He emphasizes that this stage is crucial for maintaining the structural integrity of the flange, which in turn safeguards the living area beneath the canvas when hatches are open.Step 3: Allowing Time to Dry
After securely attaching the first portion of the flange, Sven allows ample time for it to dry before moving forward with additional steps. This patience and precision are key aspects of his successful boatbuilding methods.Step 4: Finishing Touches
Once the flange is fully dried, Sven removes the clamps carefully, ensuring no damage occurs during this process. He then moves on to attaching four more pieces onto these main frames, completing two pairs of flanges for the bulkhead hatches.The Final Touches
While two flanges form the primary support structure around the hatches, Sven mentions there are two additional pieces required at each end to ensure comprehensive protection. This attention to detail highlights his commitment to producing a durable and reliable design. “Sailing is about finding your path, whether it’s across an ocean or within yourself.” – Sven Yrvind In conclusion, making flanges around bulkhead hatches may seem complex at first glance, but by following Sven Yrvind’s meticulous process, enthusiasts can achieve professional-level results. Remember that the journey of boatbuilding is as rewarding as reaching your destination; it tests one’s patience and dedication. For those seeking to embark on this adventure or simply gain more insight into marine craftsmanship, Sven’s wisdom is invaluable.Sven begins by explaining that working on flanges vertically and horizontally is significantly easier than doing so in a flat position. To simplify the process further, he divides the task into two or three steps as suggested by fellow expert “for for.” This approach not only makes it more manageable but also allows for greater precision in crafting each component.Step 2: Applying Glue and Securing
Sven proceeds to apply glue along one edge of the flange, ensuring a secure bond when clamped into place. He emphasizes that this stage is crucial for maintaining the structural integrity of the flange, which in turn safeguards the living area beneath the canvas when hatches are open.Step 3: Allowing Time to Dry
After securely attaching the first portion of the flange, Sven allows ample time for it to dry before moving forward with additional steps. This patience and precision are key aspects of his successful boatbuilding methods.Step 4: Finishing Touches
Once the flange is fully dried, Sven removes the clamps carefully, ensuring no damage occurs during this process. He then moves on to attaching four more pieces onto these main frames, completing two pairs of flanges for the bulkhead hatches.The Final Touches
While two flanges form the primary support structure around the hatches, Sven mentions there are two additional pieces required at each end to ensure comprehensive protection. This attention to detail highlights his commitment to producing a durable and reliable design. “Sailing is about finding your path, whether it’s across an ocean or within yourself.” – Sven Yrvind In conclusion, making flanges around bulkhead hatches may seem complex at first glance, but by following Sven Yrvind’s meticulous process, enthusiasts can achieve professional-level results. Remember that the journey of boatbuilding is as rewarding as reaching your destination; it tests one’s patience and dedication. For those seeking to embark on this adventure or simply gain more insight into marine craftsmanship, Sven’s wisdom is invaluable.Sven Yrvind, a renowned yacht designer and sailor, shares valuable insights on creating flanges around bulkhead hatches for canvas protection in this enlightening video. By following his expert guidance, boat enthusiasts can ensure their living areas remain secure while allowing unhindered access through the hatches.Step 1: Starting with the Flange
Sven begins by explaining that working on flanges vertically and horizontally is significantly easier than doing so in a flat position. To simplify the process further, he divides the task into two or three steps as suggested by fellow expert “for for.” This approach not only makes it more manageable but also allows for greater precision in crafting each component.Step 2: Applying Glue and Securing
Sven proceeds to apply glue along one edge of the flange, ensuring a secure bond when clamped into place. He emphasizes that this stage is crucial for maintaining the structural integrity of the flange, which in turn safeguards the living area beneath the canvas when hatches are open.Step 3: Allowing Time to Dry
After securely attaching the first portion of the flange, Sven allows ample time for it to dry before moving forward with additional steps. This patience and precision are key aspects of his successful boatbuilding methods.Step 4: Finishing Touches
Once the flange is fully dried, Sven removes the clamps carefully, ensuring no damage occurs during this process. He then moves on to attaching four more pieces onto these main frames, completing two pairs of flanges for the bulkhead hatches.The Final Touches
While two flanges form the primary support structure around the hatches, Sven mentions there are two additional pieces required at each end to ensure comprehensive protection. This attention to detail highlights his commitment to producing a durable and reliable design. “Sailing is about finding your path, whether it’s across an ocean or within yourself.” – Sven Yrvind In conclusion, making flanges around bulkhead hatches may seem complex at first glance, but by following Sven Yrvind’s meticulous process, enthusiasts can achieve professional-level results. Remember that the journey of boatbuilding is as rewarding as reaching your destination; it tests one’s patience and dedication. For those seeking to embark on this adventure or simply gain more insight into marine craftsmanship, Sven’s wisdom is invaluable.Making Flanges Around Bulkhead Hatches for Canvas
Sven Yrvind, a renowned yacht designer and sailor, shares valuable insights on creating flanges around bulkhead hatches for canvas protection in this enlightening video. By following his expert guidance, boat enthusiasts can ensure their living areas remain secure while allowing unhindered access through the hatches.Step 1: Starting with the Flange
Sven begins by explaining that working on flanges vertically and horizontally is significantly easier than doing so in a flat position. To simplify the process further, he divides the task into two or three steps as suggested by fellow expert “for for.” This approach not only makes it more manageable but also allows for greater precision in crafting each component.Step 2: Applying Glue and Securing
Sven proceeds to apply glue along one edge of the flange, ensuring a secure bond when clamped into place. He emphasizes that this stage is crucial for maintaining the structural integrity of the flange, which in turn safeguards the living area beneath the canvas when hatches are open.Step 3: Allowing Time to Dry
After securely attaching the first portion of the flange, Sven allows ample time for it to dry before moving forward with additional steps. This patience and precision are key aspects of his successful boatbuilding methods.Step 4: Finishing Touches
Once the flange is fully dried, Sven removes the clamps carefully, ensuring no damage occurs during this process. He then moves on to attaching four more pieces onto these main frames, completing two pairs of flanges for the bulkhead hatches.The Final Touches
While two flanges form the primary support structure around the hatches, Sven mentions there are two additional pieces required at each end to ensure comprehensive protection. This attention to detail highlights his commitment to producing a durable and reliable design. “Sailing is about finding your path, whether it’s across an ocean or within yourself.” – Sven Yrvind In conclusion, making flanges around bulkhead hatches may seem complex at first glance, but by following Sven Yrvind’s meticulous process, enthusiasts can achieve professional-level results. Remember that the journey of boatbuilding is as rewarding as reaching your destination; it tests one’s patience and dedication. For those seeking to embark on this adventure or simply gain more insight into marine craftsmanship, Sven’s wisdom is invaluable.Once the flange is fully dried, Sven removes the clamps carefully, ensuring no damage occurs during this process. He then moves on to attaching four more pieces onto these main frames, completing two pairs of flanges for the bulkhead hatches.The Final Touches
While two flanges form the primary support structure around the hatches, Sven mentions there are two additional pieces required at each end to ensure comprehensive protection. This attention to detail highlights his commitment to producing a durable and reliable design. “Sailing is about finding your path, whether it’s across an ocean or within yourself.” – Sven Yrvind In conclusion, making flanges around bulkhead hatches may seem complex at first glance, but by following Sven Yrvind’s meticulous process, enthusiasts can achieve professional-level results. Remember that the journey of boatbuilding is as rewarding as reaching your destination; it tests one’s patience and dedication. For those seeking to embark on this adventure or simply gain more insight into marine craftsmanship, Sven’s wisdom is invaluable.Sven begins by explaining that working on flanges vertically and horizontally is significantly easier than doing so in a flat position. To simplify the process further, he divides the task into two or three steps as suggested by fellow expert “for for.” This approach not only makes it more manageable but also allows for greater precision in crafting each component.Step 2: Applying Glue and Securing
Sven proceeds to apply glue along one edge of the flange, ensuring a secure bond when clamped into place. He emphasizes that this stage is crucial for maintaining the structural integrity of the flange, which in turn safeguards the living area beneath the canvas when hatches are open.Step 3: Allowing Time to Dry
After securely attaching the first portion of the flange, Sven allows ample time for it to dry before moving forward with additional steps. This patience and precision are key aspects of his successful boatbuilding methods.Step 4: Finishing Touches
Once the flange is fully dried, Sven removes the clamps carefully, ensuring no damage occurs during this process. He then moves on to attaching four more pieces onto these main frames, completing two pairs of flanges for the bulkhead hatches.The Final Touches
While two flanges form the primary support structure around the hatches, Sven mentions there are two additional pieces required at each end to ensure comprehensive protection. This attention to detail highlights his commitment to producing a durable and reliable design. “Sailing is about finding your path, whether it’s across an ocean or within yourself.” – Sven Yrvind In conclusion, making flanges around bulkhead hatches may seem complex at first glance, but by following Sven Yrvind’s meticulous process, enthusiasts can achieve professional-level results. Remember that the journey of boatbuilding is as rewarding as reaching your destination; it tests one’s patience and dedication. For those seeking to embark on this adventure or simply gain more insight into marine craftsmanship, Sven’s wisdom is invaluable.Sven Yrvind, a renowned yacht designer and sailor, shares valuable insights on creating flanges around bulkhead hatches for canvas protection in this enlightening video. By following his expert guidance, boat enthusiasts can ensure their living areas remain secure while allowing unhindered access through the hatches.Step 1: Starting with the Flange
Sven begins by explaining that working on flanges vertically and horizontally is significantly easier than doing so in a flat position. To simplify the process further, he divides the task into two or three steps as suggested by fellow expert “for for.” This approach not only makes it more manageable but also allows for greater precision in crafting each component.Step 2: Applying Glue and Securing
Sven proceeds to apply glue along one edge of the flange, ensuring a secure bond when clamped into place. He emphasizes that this stage is crucial for maintaining the structural integrity of the flange, which in turn safeguards the living area beneath the canvas when hatches are open.Step 3: Allowing Time to Dry
After securely attaching the first portion of the flange, Sven allows ample time for it to dry before moving forward with additional steps. This patience and precision are key aspects of his successful boatbuilding methods.Step 4: Finishing Touches
Once the flange is fully dried, Sven removes the clamps carefully, ensuring no damage occurs during this process. He then moves on to attaching four more pieces onto these main frames, completing two pairs of flanges for the bulkhead hatches.The Final Touches
While two flanges form the primary support structure around the hatches, Sven mentions there are two additional pieces required at each end to ensure comprehensive protection. This attention to detail highlights his commitment to producing a durable and reliable design. “Sailing is about finding your path, whether it’s across an ocean or within yourself.” – Sven Yrvind In conclusion, making flanges around bulkhead hatches may seem complex at first glance, but by following Sven Yrvind’s meticulous process, enthusiasts can achieve professional-level results. Remember that the journey of boatbuilding is as rewarding as reaching your destination; it tests one’s patience and dedication. For those seeking to embark on this adventure or simply gain more insight into marine craftsmanship, Sven’s wisdom is invaluable.Making Flanges Around Bulkhead Hatches for Canvas
Sven Yrvind, a renowned yacht designer and sailor, shares valuable insights on creating flanges around bulkhead hatches for canvas protection in this enlightening video. By following his expert guidance, boat enthusiasts can ensure their living areas remain secure while allowing unhindered access through the hatches.Step 1: Starting with the Flange
Sven begins by explaining that working on flanges vertically and horizontally is significantly easier than doing so in a flat position. To simplify the process further, he divides the task into two or three steps as suggested by fellow expert “for for.” This approach not only makes it more manageable but also allows for greater precision in crafting each component.Step 2: Applying Glue and Securing
Sven proceeds to apply glue along one edge of the flange, ensuring a secure bond when clamped into place. He emphasizes that this stage is crucial for maintaining the structural integrity of the flange, which in turn safeguards the living area beneath the canvas when hatches are open.Step 3: Allowing Time to Dry
After securely attaching the first portion of the flange, Sven allows ample time for it to dry before moving forward with additional steps. This patience and precision are key aspects of his successful boatbuilding methods.Step 4: Finishing Touches
Once the flange is fully dried, Sven removes the clamps carefully, ensuring no damage occurs during this process. He then moves on to attaching four more pieces onto these main frames, completing two pairs of flanges for the bulkhead hatches.The Final Touches
While two flanges form the primary support structure around the hatches, Sven mentions there are two additional pieces required at each end to ensure comprehensive protection. This attention to detail highlights his commitment to producing a durable and reliable design. “Sailing is about finding your path, whether it’s across an ocean or within yourself.” – Sven Yrvind In conclusion, making flanges around bulkhead hatches may seem complex at first glance, but by following Sven Yrvind’s meticulous process, enthusiasts can achieve professional-level results. Remember that the journey of boatbuilding is as rewarding as reaching your destination; it tests one’s patience and dedication. For those seeking to embark on this adventure or simply gain more insight into marine craftsmanship, Sven’s wisdom is invaluable.After securely attaching the first portion of the flange, Sven allows ample time for it to dry before moving forward with additional steps. This patience and precision are key aspects of his successful boatbuilding methods.Step 4: Finishing Touches
Once the flange is fully dried, Sven removes the clamps carefully, ensuring no damage occurs during this process. He then moves on to attaching four more pieces onto these main frames, completing two pairs of flanges for the bulkhead hatches.The Final Touches
While two flanges form the primary support structure around the hatches, Sven mentions there are two additional pieces required at each end to ensure comprehensive protection. This attention to detail highlights his commitment to producing a durable and reliable design. “Sailing is about finding your path, whether it’s across an ocean or within yourself.” – Sven Yrvind In conclusion, making flanges around bulkhead hatches may seem complex at first glance, but by following Sven Yrvind’s meticulous process, enthusiasts can achieve professional-level results. Remember that the journey of boatbuilding is as rewarding as reaching your destination; it tests one’s patience and dedication. For those seeking to embark on this adventure or simply gain more insight into marine craftsmanship, Sven’s wisdom is invaluable.Sven begins by explaining that working on flanges vertically and horizontally is significantly easier than doing so in a flat position. To simplify the process further, he divides the task into two or three steps as suggested by fellow expert “for for.” This approach not only makes it more manageable but also allows for greater precision in crafting each component.Step 2: Applying Glue and Securing
Sven proceeds to apply glue along one edge of the flange, ensuring a secure bond when clamped into place. He emphasizes that this stage is crucial for maintaining the structural integrity of the flange, which in turn safeguards the living area beneath the canvas when hatches are open.Step 3: Allowing Time to Dry
After securely attaching the first portion of the flange, Sven allows ample time for it to dry before moving forward with additional steps. This patience and precision are key aspects of his successful boatbuilding methods.Step 4: Finishing Touches
Once the flange is fully dried, Sven removes the clamps carefully, ensuring no damage occurs during this process. He then moves on to attaching four more pieces onto these main frames, completing two pairs of flanges for the bulkhead hatches.The Final Touches
While two flanges form the primary support structure around the hatches, Sven mentions there are two additional pieces required at each end to ensure comprehensive protection. This attention to detail highlights his commitment to producing a durable and reliable design. “Sailing is about finding your path, whether it’s across an ocean or within yourself.” – Sven Yrvind In conclusion, making flanges around bulkhead hatches may seem complex at first glance, but by following Sven Yrvind’s meticulous process, enthusiasts can achieve professional-level results. Remember that the journey of boatbuilding is as rewarding as reaching your destination; it tests one’s patience and dedication. For those seeking to embark on this adventure or simply gain more insight into marine craftsmanship, Sven’s wisdom is invaluable.Sven Yrvind, a renowned yacht designer and sailor, shares valuable insights on creating flanges around bulkhead hatches for canvas protection in this enlightening video. By following his expert guidance, boat enthusiasts can ensure their living areas remain secure while allowing unhindered access through the hatches.Step 1: Starting with the Flange
Sven begins by explaining that working on flanges vertically and horizontally is significantly easier than doing so in a flat position. To simplify the process further, he divides the task into two or three steps as suggested by fellow expert “for for.” This approach not only makes it more manageable but also allows for greater precision in crafting each component.Step 2: Applying Glue and Securing
Sven proceeds to apply glue along one edge of the flange, ensuring a secure bond when clamped into place. He emphasizes that this stage is crucial for maintaining the structural integrity of the flange, which in turn safeguards the living area beneath the canvas when hatches are open.Step 3: Allowing Time to Dry
After securely attaching the first portion of the flange, Sven allows ample time for it to dry before moving forward with additional steps. This patience and precision are key aspects of his successful boatbuilding methods.Step 4: Finishing Touches
Once the flange is fully dried, Sven removes the clamps carefully, ensuring no damage occurs during this process. He then moves on to attaching four more pieces onto these main frames, completing two pairs of flanges for the bulkhead hatches.The Final Touches
While two flanges form the primary support structure around the hatches, Sven mentions there are two additional pieces required at each end to ensure comprehensive protection. This attention to detail highlights his commitment to producing a durable and reliable design. “Sailing is about finding your path, whether it’s across an ocean or within yourself.” – Sven Yrvind In conclusion, making flanges around bulkhead hatches may seem complex at first glance, but by following Sven Yrvind’s meticulous process, enthusiasts can achieve professional-level results. Remember that the journey of boatbuilding is as rewarding as reaching your destination; it tests one’s patience and dedication. For those seeking to embark on this adventure or simply gain more insight into marine craftsmanship, Sven’s wisdom is invaluable.Making Flanges Around Bulkhead Hatches for Canvas
Sven Yrvind, a renowned yacht designer and sailor, shares valuable insights on creating flanges around bulkhead hatches for canvas protection in this enlightening video. By following his expert guidance, boat enthusiasts can ensure their living areas remain secure while allowing unhindered access through the hatches.Step 1: Starting with the Flange
Sven begins by explaining that working on flanges vertically and horizontally is significantly easier than doing so in a flat position. To simplify the process further, he divides the task into two or three steps as suggested by fellow expert “for for.” This approach not only makes it more manageable but also allows for greater precision in crafting each component.Step 2: Applying Glue and Securing
Sven proceeds to apply glue along one edge of the flange, ensuring a secure bond when clamped into place. He emphasizes that this stage is crucial for maintaining the structural integrity of the flange, which in turn safeguards the living area beneath the canvas when hatches are open.Step 3: Allowing Time to Dry
After securely attaching the first portion of the flange, Sven allows ample time for it to dry before moving forward with additional steps. This patience and precision are key aspects of his successful boatbuilding methods.Step 4: Finishing Touches
Once the flange is fully dried, Sven removes the clamps carefully, ensuring no damage occurs during this process. He then moves on to attaching four more pieces onto these main frames, completing two pairs of flanges for the bulkhead hatches.The Final Touches
While two flanges form the primary support structure around the hatches, Sven mentions there are two additional pieces required at each end to ensure comprehensive protection. This attention to detail highlights his commitment to producing a durable and reliable design. “Sailing is about finding your path, whether it’s across an ocean or within yourself.” – Sven Yrvind In conclusion, making flanges around bulkhead hatches may seem complex at first glance, but by following Sven Yrvind’s meticulous process, enthusiasts can achieve professional-level results. Remember that the journey of boatbuilding is as rewarding as reaching your destination; it tests one’s patience and dedication. For those seeking to embark on this adventure or simply gain more insight into marine craftsmanship, Sven’s wisdom is invaluable.Sven proceeds to apply glue along one edge of the flange, ensuring a secure bond when clamped into place. He emphasizes that this stage is crucial for maintaining the structural integrity of the flange, which in turn safeguards the living area beneath the canvas when hatches are open.Step 3: Allowing Time to Dry
After securely attaching the first portion of the flange, Sven allows ample time for it to dry before moving forward with additional steps. This patience and precision are key aspects of his successful boatbuilding methods.Step 4: Finishing Touches
Once the flange is fully dried, Sven removes the clamps carefully, ensuring no damage occurs during this process. He then moves on to attaching four more pieces onto these main frames, completing two pairs of flanges for the bulkhead hatches.The Final Touches
While two flanges form the primary support structure around the hatches, Sven mentions there are two additional pieces required at each end to ensure comprehensive protection. This attention to detail highlights his commitment to producing a durable and reliable design. “Sailing is about finding your path, whether it’s across an ocean or within yourself.” – Sven Yrvind In conclusion, making flanges around bulkhead hatches may seem complex at first glance, but by following Sven Yrvind’s meticulous process, enthusiasts can achieve professional-level results. Remember that the journey of boatbuilding is as rewarding as reaching your destination; it tests one’s patience and dedication. For those seeking to embark on this adventure or simply gain more insight into marine craftsmanship, Sven’s wisdom is invaluable.Sven begins by explaining that working on flanges vertically and horizontally is significantly easier than doing so in a flat position. To simplify the process further, he divides the task into two or three steps as suggested by fellow expert “for for.” This approach not only makes it more manageable but also allows for greater precision in crafting each component.Step 2: Applying Glue and Securing
Sven proceeds to apply glue along one edge of the flange, ensuring a secure bond when clamped into place. He emphasizes that this stage is crucial for maintaining the structural integrity of the flange, which in turn safeguards the living area beneath the canvas when hatches are open.Step 3: Allowing Time to Dry
After securely attaching the first portion of the flange, Sven allows ample time for it to dry before moving forward with additional steps. This patience and precision are key aspects of his successful boatbuilding methods.Step 4: Finishing Touches
Once the flange is fully dried, Sven removes the clamps carefully, ensuring no damage occurs during this process. He then moves on to attaching four more pieces onto these main frames, completing two pairs of flanges for the bulkhead hatches.The Final Touches
While two flanges form the primary support structure around the hatches, Sven mentions there are two additional pieces required at each end to ensure comprehensive protection. This attention to detail highlights his commitment to producing a durable and reliable design. “Sailing is about finding your path, whether it’s across an ocean or within yourself.” – Sven Yrvind In conclusion, making flanges around bulkhead hatches may seem complex at first glance, but by following Sven Yrvind’s meticulous process, enthusiasts can achieve professional-level results. Remember that the journey of boatbuilding is as rewarding as reaching your destination; it tests one’s patience and dedication. For those seeking to embark on this adventure or simply gain more insight into marine craftsmanship, Sven’s wisdom is invaluable.Sven Yrvind, a renowned yacht designer and sailor, shares valuable insights on creating flanges around bulkhead hatches for canvas protection in this enlightening video. By following his expert guidance, boat enthusiasts can ensure their living areas remain secure while allowing unhindered access through the hatches.Step 1: Starting with the Flange
Sven begins by explaining that working on flanges vertically and horizontally is significantly easier than doing so in a flat position. To simplify the process further, he divides the task into two or three steps as suggested by fellow expert “for for.” This approach not only makes it more manageable but also allows for greater precision in crafting each component.Step 2: Applying Glue and Securing
Sven proceeds to apply glue along one edge of the flange, ensuring a secure bond when clamped into place. He emphasizes that this stage is crucial for maintaining the structural integrity of the flange, which in turn safeguards the living area beneath the canvas when hatches are open.Step 3: Allowing Time to Dry
After securely attaching the first portion of the flange, Sven allows ample time for it to dry before moving forward with additional steps. This patience and precision are key aspects of his successful boatbuilding methods.Step 4: Finishing Touches
Once the flange is fully dried, Sven removes the clamps carefully, ensuring no damage occurs during this process. He then moves on to attaching four more pieces onto these main frames, completing two pairs of flanges for the bulkhead hatches.The Final Touches
While two flanges form the primary support structure around the hatches, Sven mentions there are two additional pieces required at each end to ensure comprehensive protection. This attention to detail highlights his commitment to producing a durable and reliable design. “Sailing is about finding your path, whether it’s across an ocean or within yourself.” – Sven Yrvind In conclusion, making flanges around bulkhead hatches may seem complex at first glance, but by following Sven Yrvind’s meticulous process, enthusiasts can achieve professional-level results. Remember that the journey of boatbuilding is as rewarding as reaching your destination; it tests one’s patience and dedication. For those seeking to embark on this adventure or simply gain more insight into marine craftsmanship, Sven’s wisdom is invaluable.Making Flanges Around Bulkhead Hatches for Canvas
Sven Yrvind, a renowned yacht designer and sailor, shares valuable insights on creating flanges around bulkhead hatches for canvas protection in this enlightening video. By following his expert guidance, boat enthusiasts can ensure their living areas remain secure while allowing unhindered access through the hatches.Step 1: Starting with the Flange
Sven begins by explaining that working on flanges vertically and horizontally is significantly easier than doing so in a flat position. To simplify the process further, he divides the task into two or three steps as suggested by fellow expert “for for.” This approach not only makes it more manageable but also allows for greater precision in crafting each component.Step 2: Applying Glue and Securing
Sven proceeds to apply glue along one edge of the flange, ensuring a secure bond when clamped into place. He emphasizes that this stage is crucial for maintaining the structural integrity of the flange, which in turn safeguards the living area beneath the canvas when hatches are open.Step 3: Allowing Time to Dry
After securely attaching the first portion of the flange, Sven allows ample time for it to dry before moving forward with additional steps. This patience and precision are key aspects of his successful boatbuilding methods.Step 4: Finishing Touches
Once the flange is fully dried, Sven removes the clamps carefully, ensuring no damage occurs during this process. He then moves on to attaching four more pieces onto these main frames, completing two pairs of flanges for the bulkhead hatches.The Final Touches
While two flanges form the primary support structure around the hatches, Sven mentions there are two additional pieces required at each end to ensure comprehensive protection. This attention to detail highlights his commitment to producing a durable and reliable design. “Sailing is about finding your path, whether it’s across an ocean or within yourself.” – Sven Yrvind In conclusion, making flanges around bulkhead hatches may seem complex at first glance, but by following Sven Yrvind’s meticulous process, enthusiasts can achieve professional-level results. Remember that the journey of boatbuilding is as rewarding as reaching your destination; it tests one’s patience and dedication. For those seeking to embark on this adventure or simply gain more insight into marine craftsmanship, Sven’s wisdom is invaluable.Once the flange is fully dried, Sven removes the clamps carefully, ensuring no damage occurs during this process. He then moves on to attaching four more pieces onto these main frames, completing two pairs of flanges for the bulkhead hatches.The Final Touches
While two flanges form the primary support structure around the hatches, Sven mentions there are two additional pieces required at each end to ensure comprehensive protection. This attention to detail highlights his commitment to producing a durable and reliable design. “Sailing is about finding your path, whether it’s across an ocean or within yourself.” – Sven Yrvind In conclusion, making flanges around bulkhead hatches may seem complex at first glance, but by following Sven Yrvind’s meticulous process, enthusiasts can achieve professional-level results. Remember that the journey of boatbuilding is as rewarding as reaching your destination; it tests one’s patience and dedication. For those seeking to embark on this adventure or simply gain more insight into marine craftsmanship, Sven’s wisdom is invaluable.Sven proceeds to apply glue along one edge of the flange, ensuring a secure bond when clamped into place. He emphasizes that this stage is crucial for maintaining the structural integrity of the flange, which in turn safeguards the living area beneath the canvas when hatches are open.Step 3: Allowing Time to Dry
After securely attaching the first portion of the flange, Sven allows ample time for it to dry before moving forward with additional steps. This patience and precision are key aspects of his successful boatbuilding methods.Step 4: Finishing Touches
Once the flange is fully dried, Sven removes the clamps carefully, ensuring no damage occurs during this process. He then moves on to attaching four more pieces onto these main frames, completing two pairs of flanges for the bulkhead hatches.The Final Touches
While two flanges form the primary support structure around the hatches, Sven mentions there are two additional pieces required at each end to ensure comprehensive protection. This attention to detail highlights his commitment to producing a durable and reliable design. “Sailing is about finding your path, whether it’s across an ocean or within yourself.” – Sven Yrvind In conclusion, making flanges around bulkhead hatches may seem complex at first glance, but by following Sven Yrvind’s meticulous process, enthusiasts can achieve professional-level results. Remember that the journey of boatbuilding is as rewarding as reaching your destination; it tests one’s patience and dedication. For those seeking to embark on this adventure or simply gain more insight into marine craftsmanship, Sven’s wisdom is invaluable.Sven begins by explaining that working on flanges vertically and horizontally is significantly easier than doing so in a flat position. To simplify the process further, he divides the task into two or three steps as suggested by fellow expert “for for.” This approach not only makes it more manageable but also allows for greater precision in crafting each component.Step 2: Applying Glue and Securing
Sven proceeds to apply glue along one edge of the flange, ensuring a secure bond when clamped into place. He emphasizes that this stage is crucial for maintaining the structural integrity of the flange, which in turn safeguards the living area beneath the canvas when hatches are open.Step 3: Allowing Time to Dry
After securely attaching the first portion of the flange, Sven allows ample time for it to dry before moving forward with additional steps. This patience and precision are key aspects of his successful boatbuilding methods.Step 4: Finishing Touches
Once the flange is fully dried, Sven removes the clamps carefully, ensuring no damage occurs during this process. He then moves on to attaching four more pieces onto these main frames, completing two pairs of flanges for the bulkhead hatches.The Final Touches
While two flanges form the primary support structure around the hatches, Sven mentions there are two additional pieces required at each end to ensure comprehensive protection. This attention to detail highlights his commitment to producing a durable and reliable design. “Sailing is about finding your path, whether it’s across an ocean or within yourself.” – Sven Yrvind In conclusion, making flanges around bulkhead hatches may seem complex at first glance, but by following Sven Yrvind’s meticulous process, enthusiasts can achieve professional-level results. Remember that the journey of boatbuilding is as rewarding as reaching your destination; it tests one’s patience and dedication. For those seeking to embark on this adventure or simply gain more insight into marine craftsmanship, Sven’s wisdom is invaluable.Sven Yrvind, a renowned yacht designer and sailor, shares valuable insights on creating flanges around bulkhead hatches for canvas protection in this enlightening video. By following his expert guidance, boat enthusiasts can ensure their living areas remain secure while allowing unhindered access through the hatches.Step 1: Starting with the Flange
Sven begins by explaining that working on flanges vertically and horizontally is significantly easier than doing so in a flat position. To simplify the process further, he divides the task into two or three steps as suggested by fellow expert “for for.” This approach not only makes it more manageable but also allows for greater precision in crafting each component.Step 2: Applying Glue and Securing
Sven proceeds to apply glue along one edge of the flange, ensuring a secure bond when clamped into place. He emphasizes that this stage is crucial for maintaining the structural integrity of the flange, which in turn safeguards the living area beneath the canvas when hatches are open.Step 3: Allowing Time to Dry
After securely attaching the first portion of the flange, Sven allows ample time for it to dry before moving forward with additional steps. This patience and precision are key aspects of his successful boatbuilding methods.Step 4: Finishing Touches
Once the flange is fully dried, Sven removes the clamps carefully, ensuring no damage occurs during this process. He then moves on to attaching four more pieces onto these main frames, completing two pairs of flanges for the bulkhead hatches.The Final Touches
While two flanges form the primary support structure around the hatches, Sven mentions there are two additional pieces required at each end to ensure comprehensive protection. This attention to detail highlights his commitment to producing a durable and reliable design. “Sailing is about finding your path, whether it’s across an ocean or within yourself.” – Sven Yrvind In conclusion, making flanges around bulkhead hatches may seem complex at first glance, but by following Sven Yrvind’s meticulous process, enthusiasts can achieve professional-level results. Remember that the journey of boatbuilding is as rewarding as reaching your destination; it tests one’s patience and dedication. For those seeking to embark on this adventure or simply gain more insight into marine craftsmanship, Sven’s wisdom is invaluable.Making Flanges Around Bulkhead Hatches for Canvas
Sven Yrvind, a renowned yacht designer and sailor, shares valuable insights on creating flanges around bulkhead hatches for canvas protection in this enlightening video. By following his expert guidance, boat enthusiasts can ensure their living areas remain secure while allowing unhindered access through the hatches.Step 1: Starting with the Flange
Sven begins by explaining that working on flanges vertically and horizontally is significantly easier than doing so in a flat position. To simplify the process further, he divides the task into two or three steps as suggested by fellow expert “for for.” This approach not only makes it more manageable but also allows for greater precision in crafting each component.Step 2: Applying Glue and Securing
Sven proceeds to apply glue along one edge of the flange, ensuring a secure bond when clamped into place. He emphasizes that this stage is crucial for maintaining the structural integrity of the flange, which in turn safeguards the living area beneath the canvas when hatches are open.Step 3: Allowing Time to Dry
After securely attaching the first portion of the flange, Sven allows ample time for it to dry before moving forward with additional steps. This patience and precision are key aspects of his successful boatbuilding methods.Step 4: Finishing Touches
Once the flange is fully dried, Sven removes the clamps carefully, ensuring no damage occurs during this process. He then moves on to attaching four more pieces onto these main frames, completing two pairs of flanges for the bulkhead hatches.The Final Touches
While two flanges form the primary support structure around the hatches, Sven mentions there are two additional pieces required at each end to ensure comprehensive protection. This attention to detail highlights his commitment to producing a durable and reliable design. “Sailing is about finding your path, whether it’s across an ocean or within yourself.” – Sven Yrvind In conclusion, making flanges around bulkhead hatches may seem complex at first glance, but by following Sven Yrvind’s meticulous process, enthusiasts can achieve professional-level results. Remember that the journey of boatbuilding is as rewarding as reaching your destination; it tests one’s patience and dedication. For those seeking to embark on this adventure or simply gain more insight into marine craftsmanship, Sven’s wisdom is invaluable.After securely attaching the first portion of the flange, Sven allows ample time for it to dry before moving forward with additional steps. This patience and precision are key aspects of his successful boatbuilding methods.Step 4: Finishing Touches
Once the flange is fully dried, Sven removes the clamps carefully, ensuring no damage occurs during this process. He then moves on to attaching four more pieces onto these main frames, completing two pairs of flanges for the bulkhead hatches.The Final Touches
While two flanges form the primary support structure around the hatches, Sven mentions there are two additional pieces required at each end to ensure comprehensive protection. This attention to detail highlights his commitment to producing a durable and reliable design. “Sailing is about finding your path, whether it’s across an ocean or within yourself.” – Sven Yrvind In conclusion, making flanges around bulkhead hatches may seem complex at first glance, but by following Sven Yrvind’s meticulous process, enthusiasts can achieve professional-level results. Remember that the journey of boatbuilding is as rewarding as reaching your destination; it tests one’s patience and dedication. For those seeking to embark on this adventure or simply gain more insight into marine craftsmanship, Sven’s wisdom is invaluable.Sven proceeds to apply glue along one edge of the flange, ensuring a secure bond when clamped into place. He emphasizes that this stage is crucial for maintaining the structural integrity of the flange, which in turn safeguards the living area beneath the canvas when hatches are open.Step 3: Allowing Time to Dry
After securely attaching the first portion of the flange, Sven allows ample time for it to dry before moving forward with additional steps. This patience and precision are key aspects of his successful boatbuilding methods.Step 4: Finishing Touches
Once the flange is fully dried, Sven removes the clamps carefully, ensuring no damage occurs during this process. He then moves on to attaching four more pieces onto these main frames, completing two pairs of flanges for the bulkhead hatches.The Final Touches
While two flanges form the primary support structure around the hatches, Sven mentions there are two additional pieces required at each end to ensure comprehensive protection. This attention to detail highlights his commitment to producing a durable and reliable design. “Sailing is about finding your path, whether it’s across an ocean or within yourself.” – Sven Yrvind In conclusion, making flanges around bulkhead hatches may seem complex at first glance, but by following Sven Yrvind’s meticulous process, enthusiasts can achieve professional-level results. Remember that the journey of boatbuilding is as rewarding as reaching your destination; it tests one’s patience and dedication. For those seeking to embark on this adventure or simply gain more insight into marine craftsmanship, Sven’s wisdom is invaluable.Sven begins by explaining that working on flanges vertically and horizontally is significantly easier than doing so in a flat position. To simplify the process further, he divides the task into two or three steps as suggested by fellow expert “for for.” This approach not only makes it more manageable but also allows for greater precision in crafting each component.Step 2: Applying Glue and Securing
Sven proceeds to apply glue along one edge of the flange, ensuring a secure bond when clamped into place. He emphasizes that this stage is crucial for maintaining the structural integrity of the flange, which in turn safeguards the living area beneath the canvas when hatches are open.Step 3: Allowing Time to Dry
After securely attaching the first portion of the flange, Sven allows ample time for it to dry before moving forward with additional steps. This patience and precision are key aspects of his successful boatbuilding methods.Step 4: Finishing Touches
Once the flange is fully dried, Sven removes the clamps carefully, ensuring no damage occurs during this process. He then moves on to attaching four more pieces onto these main frames, completing two pairs of flanges for the bulkhead hatches.The Final Touches
While two flanges form the primary support structure around the hatches, Sven mentions there are two additional pieces required at each end to ensure comprehensive protection. This attention to detail highlights his commitment to producing a durable and reliable design. “Sailing is about finding your path, whether it’s across an ocean or within yourself.” – Sven Yrvind In conclusion, making flanges around bulkhead hatches may seem complex at first glance, but by following Sven Yrvind’s meticulous process, enthusiasts can achieve professional-level results. Remember that the journey of boatbuilding is as rewarding as reaching your destination; it tests one’s patience and dedication. For those seeking to embark on this adventure or simply gain more insight into marine craftsmanship, Sven’s wisdom is invaluable.Sven Yrvind, a renowned yacht designer and sailor, shares valuable insights on creating flanges around bulkhead hatches for canvas protection in this enlightening video. By following his expert guidance, boat enthusiasts can ensure their living areas remain secure while allowing unhindered access through the hatches.Step 1: Starting with the Flange
Sven begins by explaining that working on flanges vertically and horizontally is significantly easier than doing so in a flat position. To simplify the process further, he divides the task into two or three steps as suggested by fellow expert “for for.” This approach not only makes it more manageable but also allows for greater precision in crafting each component.Step 2: Applying Glue and Securing
Sven proceeds to apply glue along one edge of the flange, ensuring a secure bond when clamped into place. He emphasizes that this stage is crucial for maintaining the structural integrity of the flange, which in turn safeguards the living area beneath the canvas when hatches are open.Step 3: Allowing Time to Dry
After securely attaching the first portion of the flange, Sven allows ample time for it to dry before moving forward with additional steps. This patience and precision are key aspects of his successful boatbuilding methods.Step 4: Finishing Touches
Once the flange is fully dried, Sven removes the clamps carefully, ensuring no damage occurs during this process. He then moves on to attaching four more pieces onto these main frames, completing two pairs of flanges for the bulkhead hatches.The Final Touches
While two flanges form the primary support structure around the hatches, Sven mentions there are two additional pieces required at each end to ensure comprehensive protection. This attention to detail highlights his commitment to producing a durable and reliable design. “Sailing is about finding your path, whether it’s across an ocean or within yourself.” – Sven Yrvind In conclusion, making flanges around bulkhead hatches may seem complex at first glance, but by following Sven Yrvind’s meticulous process, enthusiasts can achieve professional-level results. Remember that the journey of boatbuilding is as rewarding as reaching your destination; it tests one’s patience and dedication. For those seeking to embark on this adventure or simply gain more insight into marine craftsmanship, Sven’s wisdom is invaluable.Making Flanges Around Bulkhead Hatches for Canvas
Sven Yrvind, a renowned yacht designer and sailor, shares valuable insights on creating flanges around bulkhead hatches for canvas protection in this enlightening video. By following his expert guidance, boat enthusiasts can ensure their living areas remain secure while allowing unhindered access through the hatches.Step 1: Starting with the Flange
Sven begins by explaining that working on flanges vertically and horizontally is significantly easier than doing so in a flat position. To simplify the process further, he divides the task into two or three steps as suggested by fellow expert “for for.” This approach not only makes it more manageable but also allows for greater precision in crafting each component.Step 2: Applying Glue and Securing
Sven proceeds to apply glue along one edge of the flange, ensuring a secure bond when clamped into place. He emphasizes that this stage is crucial for maintaining the structural integrity of the flange, which in turn safeguards the living area beneath the canvas when hatches are open.Step 3: Allowing Time to Dry
After securely attaching the first portion of the flange, Sven allows ample time for it to dry before moving forward with additional steps. This patience and precision are key aspects of his successful boatbuilding methods.Step 4: Finishing Touches
Once the flange is fully dried, Sven removes the clamps carefully, ensuring no damage occurs during this process. He then moves on to attaching four more pieces onto these main frames, completing two pairs of flanges for the bulkhead hatches.The Final Touches
While two flanges form the primary support structure around the hatches, Sven mentions there are two additional pieces required at each end to ensure comprehensive protection. This attention to detail highlights his commitment to producing a durable and reliable design. “Sailing is about finding your path, whether it’s across an ocean or within yourself.” – Sven Yrvind In conclusion, making flanges around bulkhead hatches may seem complex at first glance, but by following Sven Yrvind’s meticulous process, enthusiasts can achieve professional-level results. Remember that the journey of boatbuilding is as rewarding as reaching your destination; it tests one’s patience and dedication. For those seeking to embark on this adventure or simply gain more insight into marine craftsmanship, Sven’s wisdom is invaluable.Once the flange is fully dried, Sven removes the clamps carefully, ensuring no damage occurs during this process. He then moves on to attaching four more pieces onto these main frames, completing two pairs of flanges for the bulkhead hatches.The Final Touches
While two flanges form the primary support structure around the hatches, Sven mentions there are two additional pieces required at each end to ensure comprehensive protection. This attention to detail highlights his commitment to producing a durable and reliable design. “Sailing is about finding your path, whether it’s across an ocean or within yourself.” – Sven Yrvind In conclusion, making flanges around bulkhead hatches may seem complex at first glance, but by following Sven Yrvind’s meticulous process, enthusiasts can achieve professional-level results. Remember that the journey of boatbuilding is as rewarding as reaching your destination; it tests one’s patience and dedication. For those seeking to embark on this adventure or simply gain more insight into marine craftsmanship, Sven’s wisdom is invaluable.After securely attaching the first portion of the flange, Sven allows ample time for it to dry before moving forward with additional steps. This patience and precision are key aspects of his successful boatbuilding methods.Step 4: Finishing Touches
Once the flange is fully dried, Sven removes the clamps carefully, ensuring no damage occurs during this process. He then moves on to attaching four more pieces onto these main frames, completing two pairs of flanges for the bulkhead hatches.The Final Touches
While two flanges form the primary support structure around the hatches, Sven mentions there are two additional pieces required at each end to ensure comprehensive protection. This attention to detail highlights his commitment to producing a durable and reliable design. “Sailing is about finding your path, whether it’s across an ocean or within yourself.” – Sven Yrvind In conclusion, making flanges around bulkhead hatches may seem complex at first glance, but by following Sven Yrvind’s meticulous process, enthusiasts can achieve professional-level results. Remember that the journey of boatbuilding is as rewarding as reaching your destination; it tests one’s patience and dedication. For those seeking to embark on this adventure or simply gain more insight into marine craftsmanship, Sven’s wisdom is invaluable.Sven proceeds to apply glue along one edge of the flange, ensuring a secure bond when clamped into place. He emphasizes that this stage is crucial for maintaining the structural integrity of the flange, which in turn safeguards the living area beneath the canvas when hatches are open.Step 3: Allowing Time to Dry
After securely attaching the first portion of the flange, Sven allows ample time for it to dry before moving forward with additional steps. This patience and precision are key aspects of his successful boatbuilding methods.Step 4: Finishing Touches
Once the flange is fully dried, Sven removes the clamps carefully, ensuring no damage occurs during this process. He then moves on to attaching four more pieces onto these main frames, completing two pairs of flanges for the bulkhead hatches.The Final Touches
While two flanges form the primary support structure around the hatches, Sven mentions there are two additional pieces required at each end to ensure comprehensive protection. This attention to detail highlights his commitment to producing a durable and reliable design. “Sailing is about finding your path, whether it’s across an ocean or within yourself.” – Sven Yrvind In conclusion, making flanges around bulkhead hatches may seem complex at first glance, but by following Sven Yrvind’s meticulous process, enthusiasts can achieve professional-level results. Remember that the journey of boatbuilding is as rewarding as reaching your destination; it tests one’s patience and dedication. For those seeking to embark on this adventure or simply gain more insight into marine craftsmanship, Sven’s wisdom is invaluable.Sven begins by explaining that working on flanges vertically and horizontally is significantly easier than doing so in a flat position. To simplify the process further, he divides the task into two or three steps as suggested by fellow expert “for for.” This approach not only makes it more manageable but also allows for greater precision in crafting each component.Step 2: Applying Glue and Securing
Sven proceeds to apply glue along one edge of the flange, ensuring a secure bond when clamped into place. He emphasizes that this stage is crucial for maintaining the structural integrity of the flange, which in turn safeguards the living area beneath the canvas when hatches are open.Step 3: Allowing Time to Dry
After securely attaching the first portion of the flange, Sven allows ample time for it to dry before moving forward with additional steps. This patience and precision are key aspects of his successful boatbuilding methods.Step 4: Finishing Touches
Once the flange is fully dried, Sven removes the clamps carefully, ensuring no damage occurs during this process. He then moves on to attaching four more pieces onto these main frames, completing two pairs of flanges for the bulkhead hatches.The Final Touches
While two flanges form the primary support structure around the hatches, Sven mentions there are two additional pieces required at each end to ensure comprehensive protection. This attention to detail highlights his commitment to producing a durable and reliable design. “Sailing is about finding your path, whether it’s across an ocean or within yourself.” – Sven Yrvind In conclusion, making flanges around bulkhead hatches may seem complex at first glance, but by following Sven Yrvind’s meticulous process, enthusiasts can achieve professional-level results. Remember that the journey of boatbuilding is as rewarding as reaching your destination; it tests one’s patience and dedication. For those seeking to embark on this adventure or simply gain more insight into marine craftsmanship, Sven’s wisdom is invaluable.Sven Yrvind, a renowned yacht designer and sailor, shares valuable insights on creating flanges around bulkhead hatches for canvas protection in this enlightening video. By following his expert guidance, boat enthusiasts can ensure their living areas remain secure while allowing unhindered access through the hatches.Step 1: Starting with the Flange
Sven begins by explaining that working on flanges vertically and horizontally is significantly easier than doing so in a flat position. To simplify the process further, he divides the task into two or three steps as suggested by fellow expert “for for.” This approach not only makes it more manageable but also allows for greater precision in crafting each component.Step 2: Applying Glue and Securing
Sven proceeds to apply glue along one edge of the flange, ensuring a secure bond when clamped into place. He emphasizes that this stage is crucial for maintaining the structural integrity of the flange, which in turn safeguards the living area beneath the canvas when hatches are open.Step 3: Allowing Time to Dry
After securely attaching the first portion of the flange, Sven allows ample time for it to dry before moving forward with additional steps. This patience and precision are key aspects of his successful boatbuilding methods.Step 4: Finishing Touches
Once the flange is fully dried, Sven removes the clamps carefully, ensuring no damage occurs during this process. He then moves on to attaching four more pieces onto these main frames, completing two pairs of flanges for the bulkhead hatches.The Final Touches
While two flanges form the primary support structure around the hatches, Sven mentions there are two additional pieces required at each end to ensure comprehensive protection. This attention to detail highlights his commitment to producing a durable and reliable design. “Sailing is about finding your path, whether it’s across an ocean or within yourself.” – Sven Yrvind In conclusion, making flanges around bulkhead hatches may seem complex at first glance, but by following Sven Yrvind’s meticulous process, enthusiasts can achieve professional-level results. Remember that the journey of boatbuilding is as rewarding as reaching your destination; it tests one’s patience and dedication. For those seeking to embark on this adventure or simply gain more insight into marine craftsmanship, Sven’s wisdom is invaluable.Making Flanges Around Bulkhead Hatches for Canvas
Sven Yrvind, a renowned yacht designer and sailor, shares valuable insights on creating flanges around bulkhead hatches for canvas protection in this enlightening video. By following his expert guidance, boat enthusiasts can ensure their living areas remain secure while allowing unhindered access through the hatches.Step 1: Starting with the Flange
Sven begins by explaining that working on flanges vertically and horizontally is significantly easier than doing so in a flat position. To simplify the process further, he divides the task into two or three steps as suggested by fellow expert “for for.” This approach not only makes it more manageable but also allows for greater precision in crafting each component.Step 2: Applying Glue and Securing
Sven proceeds to apply glue along one edge of the flange, ensuring a secure bond when clamped into place. He emphasizes that this stage is crucial for maintaining the structural integrity of the flange, which in turn safeguards the living area beneath the canvas when hatches are open.Step 3: Allowing Time to Dry
After securely attaching the first portion of the flange, Sven allows ample time for it to dry before moving forward with additional steps. This patience and precision are key aspects of his successful boatbuilding methods.Step 4: Finishing Touches
Once the flange is fully dried, Sven removes the clamps carefully, ensuring no damage occurs during this process. He then moves on to attaching four more pieces onto these main frames, completing two pairs of flanges for the bulkhead hatches.The Final Touches
While two flanges form the primary support structure around the hatches, Sven mentions there are two additional pieces required at each end to ensure comprehensive protection. This attention to detail highlights his commitment to producing a durable and reliable design. “Sailing is about finding your path, whether it’s across an ocean or within yourself.” – Sven Yrvind In conclusion, making flanges around bulkhead hatches may seem complex at first glance, but by following Sven Yrvind’s meticulous process, enthusiasts can achieve professional-level results. Remember that the journey of boatbuilding is as rewarding as reaching your destination; it tests one’s patience and dedication. For those seeking to embark on this adventure or simply gain more insight into marine craftsmanship, Sven’s wisdom is invaluable.After securely attaching the first portion of the flange, Sven allows ample time for it to dry before moving forward with additional steps. This patience and precision are key aspects of his successful boatbuilding methods.Step 4: Finishing Touches
Once the flange is fully dried, Sven removes the clamps carefully, ensuring no damage occurs during this process. He then moves on to attaching four more pieces onto these main frames, completing two pairs of flanges for the bulkhead hatches.The Final Touches
While two flanges form the primary support structure around the hatches, Sven mentions there are two additional pieces required at each end to ensure comprehensive protection. This attention to detail highlights his commitment to producing a durable and reliable design. “Sailing is about finding your path, whether it’s across an ocean or within yourself.” – Sven Yrvind In conclusion, making flanges around bulkhead hatches may seem complex at first glance, but by following Sven Yrvind’s meticulous process, enthusiasts can achieve professional-level results. Remember that the journey of boatbuilding is as rewarding as reaching your destination; it tests one’s patience and dedication. For those seeking to embark on this adventure or simply gain more insight into marine craftsmanship, Sven’s wisdom is invaluable.Sven begins by explaining that working on flanges vertically and horizontally is significantly easier than doing so in a flat position. To simplify the process further, he divides the task into two or three steps as suggested by fellow expert “for for.” This approach not only makes it more manageable but also allows for greater precision in crafting each component.Step 2: Applying Glue and Securing
Sven proceeds to apply glue along one edge of the flange, ensuring a secure bond when clamped into place. He emphasizes that this stage is crucial for maintaining the structural integrity of the flange, which in turn safeguards the living area beneath the canvas when hatches are open.Step 3: Allowing Time to Dry
After securely attaching the first portion of the flange, Sven allows ample time for it to dry before moving forward with additional steps. This patience and precision are key aspects of his successful boatbuilding methods.Step 4: Finishing Touches
Once the flange is fully dried, Sven removes the clamps carefully, ensuring no damage occurs during this process. He then moves on to attaching four more pieces onto these main frames, completing two pairs of flanges for the bulkhead hatches.The Final Touches
While two flanges form the primary support structure around the hatches, Sven mentions there are two additional pieces required at each end to ensure comprehensive protection. This attention to detail highlights his commitment to producing a durable and reliable design. “Sailing is about finding your path, whether it’s across an ocean or within yourself.” – Sven Yrvind In conclusion, making flanges around bulkhead hatches may seem complex at first glance, but by following Sven Yrvind’s meticulous process, enthusiasts can achieve professional-level results. Remember that the journey of boatbuilding is as rewarding as reaching your destination; it tests one’s patience and dedication. For those seeking to embark on this adventure or simply gain more insight into marine craftsmanship, Sven’s wisdom is invaluable.Making Flanges Around Bulkhead Hatches for Canvas
Sven Yrvind, a renowned yacht designer and sailor, shares valuable insights on creating flanges around bulkhead hatches for canvas protection in this enlightening video. By following his expert guidance, boat enthusiasts can ensure their living areas remain secure while allowing unhindered access through the hatches.Step 1: Starting with the Flange
Sven begins by explaining that working on flanges vertically and horizontally is significantly easier than doing so in a flat position. To simplify the process further, he divides the task into two or three steps as suggested by fellow expert “for for.” This approach not only makes it more manageable but also allows for greater precision in crafting each component.Step 2: Applying Glue and Securing
Sven proceeds to apply glue along one edge of the flange, ensuring a secure bond when clamped into place. He emphasizes that this stage is crucial for maintaining the structural integrity of the flange, which in turn safeguards the living area beneath the canvas when hatches are open.Step 3: Allowing Time to Dry
After securely attaching the first portion of the flange, Sven allows ample time for it to dry before moving forward with additional steps. This patience and precision are key aspects of his successful boatbuilding methods.Step 4: Finishing Touches
Once the flange is fully dried, Sven removes the clamps carefully, ensuring no damage occurs during this process. He then moves on to attaching four more pieces onto these main frames, completing two pairs of flanges for the bulkhead hatches.The Final Touches
While two flanges form the primary support structure around the hatches, Sven mentions there are two additional pieces required at each end to ensure comprehensive protection. This attention to detail highlights his commitment to producing a durable and reliable design. “Sailing is about finding your path, whether it’s across an ocean or within yourself.” – Sven Yrvind In conclusion, making flanges around bulkhead hatches may seem complex at first glance, but by following Sven Yrvind’s meticulous process, enthusiasts can achieve professional-level results. Remember that the journey of boatbuilding is as rewarding as reaching your destination; it tests one’s patience and dedication. For those seeking to embark on this adventure or simply gain more insight into marine craftsmanship, Sven’s wisdom is invaluable.Sven Yrvind, a renowned yacht designer and sailor, shares valuable insights on creating flanges around bulkhead hatches for canvas protection in this enlightening video. By following his expert guidance, boat enthusiasts can ensure their living areas remain secure while allowing unhindered access through the hatches.Step 1: Starting with the Flange
Sven begins by explaining that working on flanges vertically and horizontally is significantly easier than doing so in a flat position. To simplify the process further, he divides the task into two or three steps as suggested by fellow expert “for for.” This approach not only makes it more manageable but also allows for greater precision in crafting each component.Step 2: Applying Glue and Securing
Sven proceeds to apply glue along one edge of the flange, ensuring a secure bond when clamped into place. He emphasizes that this stage is crucial for maintaining the structural integrity of the flange, which in turn safeguards the living area beneath the canvas when hatches are open.Step 3: Allowing Time to Dry
After securely attaching the first portion of the flange, Sven allows ample time for it to dry before moving forward with additional steps. This patience and precision are key aspects of his successful boatbuilding methods.Step 4: Finishing Touches
Once the flange is fully dried, Sven removes the clamps carefully, ensuring no damage occurs during this process. He then moves on to attaching four more pieces onto these main frames, completing two pairs of flanges for the bulkhead hatches.The Final Touches
While two flanges form the primary support structure around the hatches, Sven mentions there are two additional pieces required at each end to ensure comprehensive protection. This attention to detail highlights his commitment to producing a durable and reliable design. “Sailing is about finding your path, whether it’s across an ocean or within yourself.” – Sven Yrvind In conclusion, making flanges around bulkhead hatches may seem complex at first glance, but by following Sven Yrvind’s meticulous process, enthusiasts can achieve professional-level results. Remember that the journey of boatbuilding is as rewarding as reaching your destination; it tests one’s patience and dedication. For those seeking to embark on this adventure or simply gain more insight into marine craftsmanship, Sven’s wisdom is invaluable.Making Flanges Around Bulkhead Hatches for Canvas
Sven Yrvind, a renowned yacht designer and sailor, shares valuable insights on creating flanges around bulkhead hatches for canvas protection in this enlightening video. By following his expert guidance, boat enthusiasts can ensure their living areas remain secure while allowing unhindered access through the hatches.Step 1: Starting with the Flange
Sven begins by explaining that working on flanges vertically and horizontally is significantly easier than doing so in a flat position. To simplify the process further, he divides the task into two or three steps as suggested by fellow expert “for for.” This approach not only makes it more manageable but also allows for greater precision in crafting each component.Step 2: Applying Glue and Securing
Sven proceeds to apply glue along one edge of the flange, ensuring a secure bond when clamped into place. He emphasizes that this stage is crucial for maintaining the structural integrity of the flange, which in turn safeguards the living area beneath the canvas when hatches are open.Step 3: Allowing Time to Dry
After securely attaching the first portion of the flange, Sven allows ample time for it to dry before moving forward with additional steps. This patience and precision are key aspects of his successful boatbuilding methods.Step 4: Finishing Touches
Once the flange is fully dried, Sven removes the clamps carefully, ensuring no damage occurs during this process. He then moves on to attaching four more pieces onto these main frames, completing two pairs of flanges for the bulkhead hatches.The Final Touches
While two flanges form the primary support structure around the hatches, Sven mentions there are two additional pieces required at each end to ensure comprehensive protection. This attention to detail highlights his commitment to producing a durable and reliable design. “Sailing is about finding your path, whether it’s across an ocean or within yourself.” – Sven Yrvind In conclusion, making flanges around bulkhead hatches may seem complex at first glance, but by following Sven Yrvind’s meticulous process, enthusiasts can achieve professional-level results. Remember that the journey of boatbuilding is as rewarding as reaching your destination; it tests one’s patience and dedication. For those seeking to embark on this adventure or simply gain more insight into marine craftsmanship, Sven’s wisdom is invaluable.Once the flange is fully dried, Sven removes the clamps carefully, ensuring no damage occurs during this process. He then moves on to attaching four more pieces onto these main frames, completing two pairs of flanges for the bulkhead hatches.The Final Touches
While two flanges form the primary support structure around the hatches, Sven mentions there are two additional pieces required at each end to ensure comprehensive protection. This attention to detail highlights his commitment to producing a durable and reliable design. “Sailing is about finding your path, whether it’s across an ocean or within yourself.” – Sven Yrvind In conclusion, making flanges around bulkhead hatches may seem complex at first glance, but by following Sven Yrvind’s meticulous process, enthusiasts can achieve professional-level results. Remember that the journey of boatbuilding is as rewarding as reaching your destination; it tests one’s patience and dedication. For those seeking to embark on this adventure or simply gain more insight into marine craftsmanship, Sven’s wisdom is invaluable.Sven Yrvind, a renowned yacht designer and sailor, shares valuable insights on creating flanges around bulkhead hatches for canvas protection in this enlightening video. By following his expert guidance, boat enthusiasts can ensure their living areas remain secure while allowing unhindered access through the hatches.Step 1: Starting with the Flange
Sven begins by explaining that working on flanges vertically and horizontally is significantly easier than doing so in a flat position. To simplify the process further, he divides the task into two or three steps as suggested by fellow expert “for for.” This approach not only makes it more manageable but also allows for greater precision in crafting each component.Step 2: Applying Glue and Securing
Sven proceeds to apply glue along one edge of the flange, ensuring a secure bond when clamped into place. He emphasizes that this stage is crucial for maintaining the structural integrity of the flange, which in turn safeguards the living area beneath the canvas when hatches are open.Step 3: Allowing Time to Dry
After securely attaching the first portion of the flange, Sven allows ample time for it to dry before moving forward with additional steps. This patience and precision are key aspects of his successful boatbuilding methods.Step 4: Finishing Touches
Once the flange is fully dried, Sven removes the clamps carefully, ensuring no damage occurs during this process. He then moves on to attaching four more pieces onto these main frames, completing two pairs of flanges for the bulkhead hatches.The Final Touches
While two flanges form the primary support structure around the hatches, Sven mentions there are two additional pieces required at each end to ensure comprehensive protection. This attention to detail highlights his commitment to producing a durable and reliable design. “Sailing is about finding your path, whether it’s across an ocean or within yourself.” – Sven Yrvind In conclusion, making flanges around bulkhead hatches may seem complex at first glance, but by following Sven Yrvind’s meticulous process, enthusiasts can achieve professional-level results. Remember that the journey of boatbuilding is as rewarding as reaching your destination; it tests one’s patience and dedication. For those seeking to embark on this adventure or simply gain more insight into marine craftsmanship, Sven’s wisdom is invaluable.Making Flanges Around Bulkhead Hatches for Canvas
Sven Yrvind, a renowned yacht designer and sailor, shares valuable insights on creating flanges around bulkhead hatches for canvas protection in this enlightening video. By following his expert guidance, boat enthusiasts can ensure their living areas remain secure while allowing unhindered access through the hatches.Step 1: Starting with the Flange
Sven begins by explaining that working on flanges vertically and horizontally is significantly easier than doing so in a flat position. To simplify the process further, he divides the task into two or three steps as suggested by fellow expert “for for.” This approach not only makes it more manageable but also allows for greater precision in crafting each component.Step 2: Applying Glue and Securing
Sven proceeds to apply glue along one edge of the flange, ensuring a secure bond when clamped into place. He emphasizes that this stage is crucial for maintaining the structural integrity of the flange, which in turn safeguards the living area beneath the canvas when hatches are open.Step 3: Allowing Time to Dry
After securely attaching the first portion of the flange, Sven allows ample time for it to dry before moving forward with additional steps. This patience and precision are key aspects of his successful boatbuilding methods.Step 4: Finishing Touches
Once the flange is fully dried, Sven removes the clamps carefully, ensuring no damage occurs during this process. He then moves on to attaching four more pieces onto these main frames, completing two pairs of flanges for the bulkhead hatches.The Final Touches
While two flanges form the primary support structure around the hatches, Sven mentions there are two additional pieces required at each end to ensure comprehensive protection. This attention to detail highlights his commitment to producing a durable and reliable design. “Sailing is about finding your path, whether it’s across an ocean or within yourself.” – Sven Yrvind In conclusion, making flanges around bulkhead hatches may seem complex at first glance, but by following Sven Yrvind’s meticulous process, enthusiasts can achieve professional-level results. Remember that the journey of boatbuilding is as rewarding as reaching your destination; it tests one’s patience and dedication. For those seeking to embark on this adventure or simply gain more insight into marine craftsmanship, Sven’s wisdom is invaluable.After securely attaching the first portion of the flange, Sven allows ample time for it to dry before moving forward with additional steps. This patience and precision are key aspects of his successful boatbuilding methods.Step 4: Finishing Touches
Once the flange is fully dried, Sven removes the clamps carefully, ensuring no damage occurs during this process. He then moves on to attaching four more pieces onto these main frames, completing two pairs of flanges for the bulkhead hatches.The Final Touches
While two flanges form the primary support structure around the hatches, Sven mentions there are two additional pieces required at each end to ensure comprehensive protection. This attention to detail highlights his commitment to producing a durable and reliable design. “Sailing is about finding your path, whether it’s across an ocean or within yourself.” – Sven Yrvind In conclusion, making flanges around bulkhead hatches may seem complex at first glance, but by following Sven Yrvind’s meticulous process, enthusiasts can achieve professional-level results. Remember that the journey of boatbuilding is as rewarding as reaching your destination; it tests one’s patience and dedication. For those seeking to embark on this adventure or simply gain more insight into marine craftsmanship, Sven’s wisdom is invaluable.Sven Yrvind, a renowned yacht designer and sailor, shares valuable insights on creating flanges around bulkhead hatches for canvas protection in this enlightening video. By following his expert guidance, boat enthusiasts can ensure their living areas remain secure while allowing unhindered access through the hatches.Step 1: Starting with the Flange
Sven begins by explaining that working on flanges vertically and horizontally is significantly easier than doing so in a flat position. To simplify the process further, he divides the task into two or three steps as suggested by fellow expert “for for.” This approach not only makes it more manageable but also allows for greater precision in crafting each component.Step 2: Applying Glue and Securing
Sven proceeds to apply glue along one edge of the flange, ensuring a secure bond when clamped into place. He emphasizes that this stage is crucial for maintaining the structural integrity of the flange, which in turn safeguards the living area beneath the canvas when hatches are open.Step 3: Allowing Time to Dry
After securely attaching the first portion of the flange, Sven allows ample time for it to dry before moving forward with additional steps. This patience and precision are key aspects of his successful boatbuilding methods.Step 4: Finishing Touches
Once the flange is fully dried, Sven removes the clamps carefully, ensuring no damage occurs during this process. He then moves on to attaching four more pieces onto these main frames, completing two pairs of flanges for the bulkhead hatches.The Final Touches
While two flanges form the primary support structure around the hatches, Sven mentions there are two additional pieces required at each end to ensure comprehensive protection. This attention to detail highlights his commitment to producing a durable and reliable design. “Sailing is about finding your path, whether it’s across an ocean or within yourself.” – Sven Yrvind In conclusion, making flanges around bulkhead hatches may seem complex at first glance, but by following Sven Yrvind’s meticulous process, enthusiasts can achieve professional-level results. Remember that the journey of boatbuilding is as rewarding as reaching your destination; it tests one’s patience and dedication. For those seeking to embark on this adventure or simply gain more insight into marine craftsmanship, Sven’s wisdom is invaluable.Making Flanges Around Bulkhead Hatches for Canvas
Sven Yrvind, a renowned yacht designer and sailor, shares valuable insights on creating flanges around bulkhead hatches for canvas protection in this enlightening video. By following his expert guidance, boat enthusiasts can ensure their living areas remain secure while allowing unhindered access through the hatches.Step 1: Starting with the Flange
Sven begins by explaining that working on flanges vertically and horizontally is significantly easier than doing so in a flat position. To simplify the process further, he divides the task into two or three steps as suggested by fellow expert “for for.” This approach not only makes it more manageable but also allows for greater precision in crafting each component.Step 2: Applying Glue and Securing
Sven proceeds to apply glue along one edge of the flange, ensuring a secure bond when clamped into place. He emphasizes that this stage is crucial for maintaining the structural integrity of the flange, which in turn safeguards the living area beneath the canvas when hatches are open.Step 3: Allowing Time to Dry
After securely attaching the first portion of the flange, Sven allows ample time for it to dry before moving forward with additional steps. This patience and precision are key aspects of his successful boatbuilding methods.Step 4: Finishing Touches
Once the flange is fully dried, Sven removes the clamps carefully, ensuring no damage occurs during this process. He then moves on to attaching four more pieces onto these main frames, completing two pairs of flanges for the bulkhead hatches.The Final Touches
While two flanges form the primary support structure around the hatches, Sven mentions there are two additional pieces required at each end to ensure comprehensive protection. This attention to detail highlights his commitment to producing a durable and reliable design. “Sailing is about finding your path, whether it’s across an ocean or within yourself.” – Sven Yrvind In conclusion, making flanges around bulkhead hatches may seem complex at first glance, but by following Sven Yrvind’s meticulous process, enthusiasts can achieve professional-level results. Remember that the journey of boatbuilding is as rewarding as reaching your destination; it tests one’s patience and dedication. For those seeking to embark on this adventure or simply gain more insight into marine craftsmanship, Sven’s wisdom is invaluable.Sven proceeds to apply glue along one edge of the flange, ensuring a secure bond when clamped into place. He emphasizes that this stage is crucial for maintaining the structural integrity of the flange, which in turn safeguards the living area beneath the canvas when hatches are open.Step 3: Allowing Time to Dry
After securely attaching the first portion of the flange, Sven allows ample time for it to dry before moving forward with additional steps. This patience and precision are key aspects of his successful boatbuilding methods.Step 4: Finishing Touches
Once the flange is fully dried, Sven removes the clamps carefully, ensuring no damage occurs during this process. He then moves on to attaching four more pieces onto these main frames, completing two pairs of flanges for the bulkhead hatches.The Final Touches
While two flanges form the primary support structure around the hatches, Sven mentions there are two additional pieces required at each end to ensure comprehensive protection. This attention to detail highlights his commitment to producing a durable and reliable design. “Sailing is about finding your path, whether it’s across an ocean or within yourself.” – Sven Yrvind In conclusion, making flanges around bulkhead hatches may seem complex at first glance, but by following Sven Yrvind’s meticulous process, enthusiasts can achieve professional-level results. Remember that the journey of boatbuilding is as rewarding as reaching your destination; it tests one’s patience and dedication. For those seeking to embark on this adventure or simply gain more insight into marine craftsmanship, Sven’s wisdom is invaluable.Sven Yrvind, a renowned yacht designer and sailor, shares valuable insights on creating flanges around bulkhead hatches for canvas protection in this enlightening video. By following his expert guidance, boat enthusiasts can ensure their living areas remain secure while allowing unhindered access through the hatches.Step 1: Starting with the Flange
Sven begins by explaining that working on flanges vertically and horizontally is significantly easier than doing so in a flat position. To simplify the process further, he divides the task into two or three steps as suggested by fellow expert “for for.” This approach not only makes it more manageable but also allows for greater precision in crafting each component.Step 2: Applying Glue and Securing
Sven proceeds to apply glue along one edge of the flange, ensuring a secure bond when clamped into place. He emphasizes that this stage is crucial for maintaining the structural integrity of the flange, which in turn safeguards the living area beneath the canvas when hatches are open.Step 3: Allowing Time to Dry
After securely attaching the first portion of the flange, Sven allows ample time for it to dry before moving forward with additional steps. This patience and precision are key aspects of his successful boatbuilding methods.Step 4: Finishing Touches
Once the flange is fully dried, Sven removes the clamps carefully, ensuring no damage occurs during this process. He then moves on to attaching four more pieces onto these main frames, completing two pairs of flanges for the bulkhead hatches.The Final Touches
While two flanges form the primary support structure around the hatches, Sven mentions there are two additional pieces required at each end to ensure comprehensive protection. This attention to detail highlights his commitment to producing a durable and reliable design. “Sailing is about finding your path, whether it’s across an ocean or within yourself.” – Sven Yrvind In conclusion, making flanges around bulkhead hatches may seem complex at first glance, but by following Sven Yrvind’s meticulous process, enthusiasts can achieve professional-level results. Remember that the journey of boatbuilding is as rewarding as reaching your destination; it tests one’s patience and dedication. For those seeking to embark on this adventure or simply gain more insight into marine craftsmanship, Sven’s wisdom is invaluable.Making Flanges Around Bulkhead Hatches for Canvas
Sven Yrvind, a renowned yacht designer and sailor, shares valuable insights on creating flanges around bulkhead hatches for canvas protection in this enlightening video. By following his expert guidance, boat enthusiasts can ensure their living areas remain secure while allowing unhindered access through the hatches.Step 1: Starting with the Flange
Sven begins by explaining that working on flanges vertically and horizontally is significantly easier than doing so in a flat position. To simplify the process further, he divides the task into two or three steps as suggested by fellow expert “for for.” This approach not only makes it more manageable but also allows for greater precision in crafting each component.Step 2: Applying Glue and Securing
Sven proceeds to apply glue along one edge of the flange, ensuring a secure bond when clamped into place. He emphasizes that this stage is crucial for maintaining the structural integrity of the flange, which in turn safeguards the living area beneath the canvas when hatches are open.Step 3: Allowing Time to Dry
After securely attaching the first portion of the flange, Sven allows ample time for it to dry before moving forward with additional steps. This patience and precision are key aspects of his successful boatbuilding methods.Step 4: Finishing Touches
Once the flange is fully dried, Sven removes the clamps carefully, ensuring no damage occurs during this process. He then moves on to attaching four more pieces onto these main frames, completing two pairs of flanges for the bulkhead hatches.The Final Touches
While two flanges form the primary support structure around the hatches, Sven mentions there are two additional pieces required at each end to ensure comprehensive protection. This attention to detail highlights his commitment to producing a durable and reliable design. “Sailing is about finding your path, whether it’s across an ocean or within yourself.” – Sven Yrvind In conclusion, making flanges around bulkhead hatches may seem complex at first glance, but by following Sven Yrvind’s meticulous process, enthusiasts can achieve professional-level results. Remember that the journey of boatbuilding is as rewarding as reaching your destination; it tests one’s patience and dedication. For those seeking to embark on this adventure or simply gain more insight into marine craftsmanship, Sven’s wisdom is invaluable.Sven begins by explaining that working on flanges vertically and horizontally is significantly easier than doing so in a flat position. To simplify the process further, he divides the task into two or three steps as suggested by fellow expert “for for.” This approach not only makes it more manageable but also allows for greater precision in crafting each component.Step 2: Applying Glue and Securing
Sven proceeds to apply glue along one edge of the flange, ensuring a secure bond when clamped into place. He emphasizes that this stage is crucial for maintaining the structural integrity of the flange, which in turn safeguards the living area beneath the canvas when hatches are open.Step 3: Allowing Time to Dry
After securely attaching the first portion of the flange, Sven allows ample time for it to dry before moving forward with additional steps. This patience and precision are key aspects of his successful boatbuilding methods.Step 4: Finishing Touches
Once the flange is fully dried, Sven removes the clamps carefully, ensuring no damage occurs during this process. He then moves on to attaching four more pieces onto these main frames, completing two pairs of flanges for the bulkhead hatches.The Final Touches
While two flanges form the primary support structure around the hatches, Sven mentions there are two additional pieces required at each end to ensure comprehensive protection. This attention to detail highlights his commitment to producing a durable and reliable design. “Sailing is about finding your path, whether it’s across an ocean or within yourself.” – Sven Yrvind In conclusion, making flanges around bulkhead hatches may seem complex at first glance, but by following Sven Yrvind’s meticulous process, enthusiasts can achieve professional-level results. Remember that the journey of boatbuilding is as rewarding as reaching your destination; it tests one’s patience and dedication. For those seeking to embark on this adventure or simply gain more insight into marine craftsmanship, Sven’s wisdom is invaluable.Sven Yrvind, a renowned yacht designer and sailor, shares valuable insights on creating flanges around bulkhead hatches for canvas protection in this enlightening video. By following his expert guidance, boat enthusiasts can ensure their living areas remain secure while allowing unhindered access through the hatches.Step 1: Starting with the Flange
Sven begins by explaining that working on flanges vertically and horizontally is significantly easier than doing so in a flat position. To simplify the process further, he divides the task into two or three steps as suggested by fellow expert “for for.” This approach not only makes it more manageable but also allows for greater precision in crafting each component.Step 2: Applying Glue and Securing
Sven proceeds to apply glue along one edge of the flange, ensuring a secure bond when clamped into place. He emphasizes that this stage is crucial for maintaining the structural integrity of the flange, which in turn safeguards the living area beneath the canvas when hatches are open.Step 3: Allowing Time to Dry
After securely attaching the first portion of the flange, Sven allows ample time for it to dry before moving forward with additional steps. This patience and precision are key aspects of his successful boatbuilding methods.Step 4: Finishing Touches
Once the flange is fully dried, Sven removes the clamps carefully, ensuring no damage occurs during this process. He then moves on to attaching four more pieces onto these main frames, completing two pairs of flanges for the bulkhead hatches.The Final Touches
While two flanges form the primary support structure around the hatches, Sven mentions there are two additional pieces required at each end to ensure comprehensive protection. This attention to detail highlights his commitment to producing a durable and reliable design. “Sailing is about finding your path, whether it’s across an ocean or within yourself.” – Sven Yrvind In conclusion, making flanges around bulkhead hatches may seem complex at first glance, but by following Sven Yrvind’s meticulous process, enthusiasts can achieve professional-level results. Remember that the journey of boatbuilding is as rewarding as reaching your destination; it tests one’s patience and dedication. For those seeking to embark on this adventure or simply gain more insight into marine craftsmanship, Sven’s wisdom is invaluable.Making Flanges Around Bulkhead Hatches for Canvas
Sven Yrvind, a renowned yacht designer and sailor, shares valuable insights on creating flanges around bulkhead hatches for canvas protection in this enlightening video. By following his expert guidance, boat enthusiasts can ensure their living areas remain secure while allowing unhindered access through the hatches.Step 1: Starting with the Flange
Sven begins by explaining that working on flanges vertically and horizontally is significantly easier than doing so in a flat position. To simplify the process further, he divides the task into two or three steps as suggested by fellow expert “for for.” This approach not only makes it more manageable but also allows for greater precision in crafting each component.Step 2: Applying Glue and Securing
Sven proceeds to apply glue along one edge of the flange, ensuring a secure bond when clamped into place. He emphasizes that this stage is crucial for maintaining the structural integrity of the flange, which in turn safeguards the living area beneath the canvas when hatches are open.Step 3: Allowing Time to Dry
After securely attaching the first portion of the flange, Sven allows ample time for it to dry before moving forward with additional steps. This patience and precision are key aspects of his successful boatbuilding methods.Step 4: Finishing Touches
Once the flange is fully dried, Sven removes the clamps carefully, ensuring no damage occurs during this process. He then moves on to attaching four more pieces onto these main frames, completing two pairs of flanges for the bulkhead hatches.The Final Touches
While two flanges form the primary support structure around the hatches, Sven mentions there are two additional pieces required at each end to ensure comprehensive protection. This attention to detail highlights his commitment to producing a durable and reliable design. “Sailing is about finding your path, whether it’s across an ocean or within yourself.” – Sven Yrvind In conclusion, making flanges around bulkhead hatches may seem complex at first glance, but by following Sven Yrvind’s meticulous process, enthusiasts can achieve professional-level results. Remember that the journey of boatbuilding is as rewarding as reaching your destination; it tests one’s patience and dedication. For those seeking to embark on this adventure or simply gain more insight into marine craftsmanship, Sven’s wisdom is invaluable.Once the flange is fully dried, Sven removes the clamps carefully, ensuring no damage occurs during this process. He then moves on to attaching four more pieces onto these main frames, completing two pairs of flanges for the bulkhead hatches.The Final Touches
While two flanges form the primary support structure around the hatches, Sven mentions there are two additional pieces required at each end to ensure comprehensive protection. This attention to detail highlights his commitment to producing a durable and reliable design. “Sailing is about finding your path, whether it’s across an ocean or within yourself.” – Sven Yrvind In conclusion, making flanges around bulkhead hatches may seem complex at first glance, but by following Sven Yrvind’s meticulous process, enthusiasts can achieve professional-level results. Remember that the journey of boatbuilding is as rewarding as reaching your destination; it tests one’s patience and dedication. For those seeking to embark on this adventure or simply gain more insight into marine craftsmanship, Sven’s wisdom is invaluable.Sven begins by explaining that working on flanges vertically and horizontally is significantly easier than doing so in a flat position. To simplify the process further, he divides the task into two or three steps as suggested by fellow expert “for for.” This approach not only makes it more manageable but also allows for greater precision in crafting each component.Step 2: Applying Glue and Securing
Sven proceeds to apply glue along one edge of the flange, ensuring a secure bond when clamped into place. He emphasizes that this stage is crucial for maintaining the structural integrity of the flange, which in turn safeguards the living area beneath the canvas when hatches are open.Step 3: Allowing Time to Dry
After securely attaching the first portion of the flange, Sven allows ample time for it to dry before moving forward with additional steps. This patience and precision are key aspects of his successful boatbuilding methods.Step 4: Finishing Touches
Once the flange is fully dried, Sven removes the clamps carefully, ensuring no damage occurs during this process. He then moves on to attaching four more pieces onto these main frames, completing two pairs of flanges for the bulkhead hatches.The Final Touches
While two flanges form the primary support structure around the hatches, Sven mentions there are two additional pieces required at each end to ensure comprehensive protection. This attention to detail highlights his commitment to producing a durable and reliable design. “Sailing is about finding your path, whether it’s across an ocean or within yourself.” – Sven Yrvind In conclusion, making flanges around bulkhead hatches may seem complex at first glance, but by following Sven Yrvind’s meticulous process, enthusiasts can achieve professional-level results. Remember that the journey of boatbuilding is as rewarding as reaching your destination; it tests one’s patience and dedication. For those seeking to embark on this adventure or simply gain more insight into marine craftsmanship, Sven’s wisdom is invaluable.Sven Yrvind, a renowned yacht designer and sailor, shares valuable insights on creating flanges around bulkhead hatches for canvas protection in this enlightening video. By following his expert guidance, boat enthusiasts can ensure their living areas remain secure while allowing unhindered access through the hatches.Step 1: Starting with the Flange
Sven begins by explaining that working on flanges vertically and horizontally is significantly easier than doing so in a flat position. To simplify the process further, he divides the task into two or three steps as suggested by fellow expert “for for.” This approach not only makes it more manageable but also allows for greater precision in crafting each component.Step 2: Applying Glue and Securing
Sven proceeds to apply glue along one edge of the flange, ensuring a secure bond when clamped into place. He emphasizes that this stage is crucial for maintaining the structural integrity of the flange, which in turn safeguards the living area beneath the canvas when hatches are open.Step 3: Allowing Time to Dry
After securely attaching the first portion of the flange, Sven allows ample time for it to dry before moving forward with additional steps. This patience and precision are key aspects of his successful boatbuilding methods.Step 4: Finishing Touches
Once the flange is fully dried, Sven removes the clamps carefully, ensuring no damage occurs during this process. He then moves on to attaching four more pieces onto these main frames, completing two pairs of flanges for the bulkhead hatches.The Final Touches
While two flanges form the primary support structure around the hatches, Sven mentions there are two additional pieces required at each end to ensure comprehensive protection. This attention to detail highlights his commitment to producing a durable and reliable design. “Sailing is about finding your path, whether it’s across an ocean or within yourself.” – Sven Yrvind In conclusion, making flanges around bulkhead hatches may seem complex at first glance, but by following Sven Yrvind’s meticulous process, enthusiasts can achieve professional-level results. Remember that the journey of boatbuilding is as rewarding as reaching your destination; it tests one’s patience and dedication. For those seeking to embark on this adventure or simply gain more insight into marine craftsmanship, Sven’s wisdom is invaluable.Making Flanges Around Bulkhead Hatches for Canvas
Sven Yrvind, a renowned yacht designer and sailor, shares valuable insights on creating flanges around bulkhead hatches for canvas protection in this enlightening video. By following his expert guidance, boat enthusiasts can ensure their living areas remain secure while allowing unhindered access through the hatches.Step 1: Starting with the Flange
Sven begins by explaining that working on flanges vertically and horizontally is significantly easier than doing so in a flat position. To simplify the process further, he divides the task into two or three steps as suggested by fellow expert “for for.” This approach not only makes it more manageable but also allows for greater precision in crafting each component.Step 2: Applying Glue and Securing
Sven proceeds to apply glue along one edge of the flange, ensuring a secure bond when clamped into place. He emphasizes that this stage is crucial for maintaining the structural integrity of the flange, which in turn safeguards the living area beneath the canvas when hatches are open.Step 3: Allowing Time to Dry
After securely attaching the first portion of the flange, Sven allows ample time for it to dry before moving forward with additional steps. This patience and precision are key aspects of his successful boatbuilding methods.Step 4: Finishing Touches
Once the flange is fully dried, Sven removes the clamps carefully, ensuring no damage occurs during this process. He then moves on to attaching four more pieces onto these main frames, completing two pairs of flanges for the bulkhead hatches.The Final Touches
While two flanges form the primary support structure around the hatches, Sven mentions there are two additional pieces required at each end to ensure comprehensive protection. This attention to detail highlights his commitment to producing a durable and reliable design. “Sailing is about finding your path, whether it’s across an ocean or within yourself.” – Sven Yrvind In conclusion, making flanges around bulkhead hatches may seem complex at first glance, but by following Sven Yrvind’s meticulous process, enthusiasts can achieve professional-level results. Remember that the journey of boatbuilding is as rewarding as reaching your destination; it tests one’s patience and dedication. For those seeking to embark on this adventure or simply gain more insight into marine craftsmanship, Sven’s wisdom is invaluable.After securely attaching the first portion of the flange, Sven allows ample time for it to dry before moving forward with additional steps. This patience and precision are key aspects of his successful boatbuilding methods.Step 4: Finishing Touches
Once the flange is fully dried, Sven removes the clamps carefully, ensuring no damage occurs during this process. He then moves on to attaching four more pieces onto these main frames, completing two pairs of flanges for the bulkhead hatches.The Final Touches
While two flanges form the primary support structure around the hatches, Sven mentions there are two additional pieces required at each end to ensure comprehensive protection. This attention to detail highlights his commitment to producing a durable and reliable design. “Sailing is about finding your path, whether it’s across an ocean or within yourself.” – Sven Yrvind In conclusion, making flanges around bulkhead hatches may seem complex at first glance, but by following Sven Yrvind’s meticulous process, enthusiasts can achieve professional-level results. Remember that the journey of boatbuilding is as rewarding as reaching your destination; it tests one’s patience and dedication. For those seeking to embark on this adventure or simply gain more insight into marine craftsmanship, Sven’s wisdom is invaluable.Sven begins by explaining that working on flanges vertically and horizontally is significantly easier than doing so in a flat position. To simplify the process further, he divides the task into two or three steps as suggested by fellow expert “for for.” This approach not only makes it more manageable but also allows for greater precision in crafting each component.Step 2: Applying Glue and Securing
Sven proceeds to apply glue along one edge of the flange, ensuring a secure bond when clamped into place. He emphasizes that this stage is crucial for maintaining the structural integrity of the flange, which in turn safeguards the living area beneath the canvas when hatches are open.Step 3: Allowing Time to Dry
After securely attaching the first portion of the flange, Sven allows ample time for it to dry before moving forward with additional steps. This patience and precision are key aspects of his successful boatbuilding methods.Step 4: Finishing Touches
Once the flange is fully dried, Sven removes the clamps carefully, ensuring no damage occurs during this process. He then moves on to attaching four more pieces onto these main frames, completing two pairs of flanges for the bulkhead hatches.The Final Touches
While two flanges form the primary support structure around the hatches, Sven mentions there are two additional pieces required at each end to ensure comprehensive protection. This attention to detail highlights his commitment to producing a durable and reliable design. “Sailing is about finding your path, whether it’s across an ocean or within yourself.” – Sven Yrvind In conclusion, making flanges around bulkhead hatches may seem complex at first glance, but by following Sven Yrvind’s meticulous process, enthusiasts can achieve professional-level results. Remember that the journey of boatbuilding is as rewarding as reaching your destination; it tests one’s patience and dedication. For those seeking to embark on this adventure or simply gain more insight into marine craftsmanship, Sven’s wisdom is invaluable.Sven Yrvind, a renowned yacht designer and sailor, shares valuable insights on creating flanges around bulkhead hatches for canvas protection in this enlightening video. By following his expert guidance, boat enthusiasts can ensure their living areas remain secure while allowing unhindered access through the hatches.Step 1: Starting with the Flange
Sven begins by explaining that working on flanges vertically and horizontally is significantly easier than doing so in a flat position. To simplify the process further, he divides the task into two or three steps as suggested by fellow expert “for for.” This approach not only makes it more manageable but also allows for greater precision in crafting each component.Step 2: Applying Glue and Securing
Sven proceeds to apply glue along one edge of the flange, ensuring a secure bond when clamped into place. He emphasizes that this stage is crucial for maintaining the structural integrity of the flange, which in turn safeguards the living area beneath the canvas when hatches are open.Step 3: Allowing Time to Dry
After securely attaching the first portion of the flange, Sven allows ample time for it to dry before moving forward with additional steps. This patience and precision are key aspects of his successful boatbuilding methods.Step 4: Finishing Touches
Once the flange is fully dried, Sven removes the clamps carefully, ensuring no damage occurs during this process. He then moves on to attaching four more pieces onto these main frames, completing two pairs of flanges for the bulkhead hatches.The Final Touches
While two flanges form the primary support structure around the hatches, Sven mentions there are two additional pieces required at each end to ensure comprehensive protection. This attention to detail highlights his commitment to producing a durable and reliable design. “Sailing is about finding your path, whether it’s across an ocean or within yourself.” – Sven Yrvind In conclusion, making flanges around bulkhead hatches may seem complex at first glance, but by following Sven Yrvind’s meticulous process, enthusiasts can achieve professional-level results. Remember that the journey of boatbuilding is as rewarding as reaching your destination; it tests one’s patience and dedication. For those seeking to embark on this adventure or simply gain more insight into marine craftsmanship, Sven’s wisdom is invaluable.Making Flanges Around Bulkhead Hatches for Canvas
Sven Yrvind, a renowned yacht designer and sailor, shares valuable insights on creating flanges around bulkhead hatches for canvas protection in this enlightening video. By following his expert guidance, boat enthusiasts can ensure their living areas remain secure while allowing unhindered access through the hatches.Step 1: Starting with the Flange
Sven begins by explaining that working on flanges vertically and horizontally is significantly easier than doing so in a flat position. To simplify the process further, he divides the task into two or three steps as suggested by fellow expert “for for.” This approach not only makes it more manageable but also allows for greater precision in crafting each component.Step 2: Applying Glue and Securing
Sven proceeds to apply glue along one edge of the flange, ensuring a secure bond when clamped into place. He emphasizes that this stage is crucial for maintaining the structural integrity of the flange, which in turn safeguards the living area beneath the canvas when hatches are open.Step 3: Allowing Time to Dry
After securely attaching the first portion of the flange, Sven allows ample time for it to dry before moving forward with additional steps. This patience and precision are key aspects of his successful boatbuilding methods.Step 4: Finishing Touches
Once the flange is fully dried, Sven removes the clamps carefully, ensuring no damage occurs during this process. He then moves on to attaching four more pieces onto these main frames, completing two pairs of flanges for the bulkhead hatches.The Final Touches
While two flanges form the primary support structure around the hatches, Sven mentions there are two additional pieces required at each end to ensure comprehensive protection. This attention to detail highlights his commitment to producing a durable and reliable design. “Sailing is about finding your path, whether it’s across an ocean or within yourself.” – Sven Yrvind In conclusion, making flanges around bulkhead hatches may seem complex at first glance, but by following Sven Yrvind’s meticulous process, enthusiasts can achieve professional-level results. Remember that the journey of boatbuilding is as rewarding as reaching your destination; it tests one’s patience and dedication. For those seeking to embark on this adventure or simply gain more insight into marine craftsmanship, Sven’s wisdom is invaluable.Sven proceeds to apply glue along one edge of the flange, ensuring a secure bond when clamped into place. He emphasizes that this stage is crucial for maintaining the structural integrity of the flange, which in turn safeguards the living area beneath the canvas when hatches are open.Step 3: Allowing Time to Dry
After securely attaching the first portion of the flange, Sven allows ample time for it to dry before moving forward with additional steps. This patience and precision are key aspects of his successful boatbuilding methods.Step 4: Finishing Touches
Once the flange is fully dried, Sven removes the clamps carefully, ensuring no damage occurs during this process. He then moves on to attaching four more pieces onto these main frames, completing two pairs of flanges for the bulkhead hatches.The Final Touches
While two flanges form the primary support structure around the hatches, Sven mentions there are two additional pieces required at each end to ensure comprehensive protection. This attention to detail highlights his commitment to producing a durable and reliable design. “Sailing is about finding your path, whether it’s across an ocean or within yourself.” – Sven Yrvind In conclusion, making flanges around bulkhead hatches may seem complex at first glance, but by following Sven Yrvind’s meticulous process, enthusiasts can achieve professional-level results. Remember that the journey of boatbuilding is as rewarding as reaching your destination; it tests one’s patience and dedication. For those seeking to embark on this adventure or simply gain more insight into marine craftsmanship, Sven’s wisdom is invaluable.Sven begins by explaining that working on flanges vertically and horizontally is significantly easier than doing so in a flat position. To simplify the process further, he divides the task into two or three steps as suggested by fellow expert “for for.” This approach not only makes it more manageable but also allows for greater precision in crafting each component.Step 2: Applying Glue and Securing
Sven proceeds to apply glue along one edge of the flange, ensuring a secure bond when clamped into place. He emphasizes that this stage is crucial for maintaining the structural integrity of the flange, which in turn safeguards the living area beneath the canvas when hatches are open.Step 3: Allowing Time to Dry
After securely attaching the first portion of the flange, Sven allows ample time for it to dry before moving forward with additional steps. This patience and precision are key aspects of his successful boatbuilding methods.Step 4: Finishing Touches
Once the flange is fully dried, Sven removes the clamps carefully, ensuring no damage occurs during this process. He then moves on to attaching four more pieces onto these main frames, completing two pairs of flanges for the bulkhead hatches.The Final Touches
While two flanges form the primary support structure around the hatches, Sven mentions there are two additional pieces required at each end to ensure comprehensive protection. This attention to detail highlights his commitment to producing a durable and reliable design. “Sailing is about finding your path, whether it’s across an ocean or within yourself.” – Sven Yrvind In conclusion, making flanges around bulkhead hatches may seem complex at first glance, but by following Sven Yrvind’s meticulous process, enthusiasts can achieve professional-level results. Remember that the journey of boatbuilding is as rewarding as reaching your destination; it tests one’s patience and dedication. For those seeking to embark on this adventure or simply gain more insight into marine craftsmanship, Sven’s wisdom is invaluable.Sven Yrvind, a renowned yacht designer and sailor, shares valuable insights on creating flanges around bulkhead hatches for canvas protection in this enlightening video. By following his expert guidance, boat enthusiasts can ensure their living areas remain secure while allowing unhindered access through the hatches.Step 1: Starting with the Flange
Sven begins by explaining that working on flanges vertically and horizontally is significantly easier than doing so in a flat position. To simplify the process further, he divides the task into two or three steps as suggested by fellow expert “for for.” This approach not only makes it more manageable but also allows for greater precision in crafting each component.Step 2: Applying Glue and Securing
Sven proceeds to apply glue along one edge of the flange, ensuring a secure bond when clamped into place. He emphasizes that this stage is crucial for maintaining the structural integrity of the flange, which in turn safeguards the living area beneath the canvas when hatches are open.Step 3: Allowing Time to Dry
After securely attaching the first portion of the flange, Sven allows ample time for it to dry before moving forward with additional steps. This patience and precision are key aspects of his successful boatbuilding methods.Step 4: Finishing Touches
Once the flange is fully dried, Sven removes the clamps carefully, ensuring no damage occurs during this process. He then moves on to attaching four more pieces onto these main frames, completing two pairs of flanges for the bulkhead hatches.The Final Touches
While two flanges form the primary support structure around the hatches, Sven mentions there are two additional pieces required at each end to ensure comprehensive protection. This attention to detail highlights his commitment to producing a durable and reliable design. “Sailing is about finding your path, whether it’s across an ocean or within yourself.” – Sven Yrvind In conclusion, making flanges around bulkhead hatches may seem complex at first glance, but by following Sven Yrvind’s meticulous process, enthusiasts can achieve professional-level results. Remember that the journey of boatbuilding is as rewarding as reaching your destination; it tests one’s patience and dedication. For those seeking to embark on this adventure or simply gain more insight into marine craftsmanship, Sven’s wisdom is invaluable.Making Flanges Around Bulkhead Hatches for Canvas
Sven Yrvind, a renowned yacht designer and sailor, shares valuable insights on creating flanges around bulkhead hatches for canvas protection in this enlightening video. By following his expert guidance, boat enthusiasts can ensure their living areas remain secure while allowing unhindered access through the hatches.Step 1: Starting with the Flange
Sven begins by explaining that working on flanges vertically and horizontally is significantly easier than doing so in a flat position. To simplify the process further, he divides the task into two or three steps as suggested by fellow expert “for for.” This approach not only makes it more manageable but also allows for greater precision in crafting each component.Step 2: Applying Glue and Securing
Sven proceeds to apply glue along one edge of the flange, ensuring a secure bond when clamped into place. He emphasizes that this stage is crucial for maintaining the structural integrity of the flange, which in turn safeguards the living area beneath the canvas when hatches are open.Step 3: Allowing Time to Dry
After securely attaching the first portion of the flange, Sven allows ample time for it to dry before moving forward with additional steps. This patience and precision are key aspects of his successful boatbuilding methods.Step 4: Finishing Touches
Once the flange is fully dried, Sven removes the clamps carefully, ensuring no damage occurs during this process. He then moves on to attaching four more pieces onto these main frames, completing two pairs of flanges for the bulkhead hatches.The Final Touches
While two flanges form the primary support structure around the hatches, Sven mentions there are two additional pieces required at each end to ensure comprehensive protection. This attention to detail highlights his commitment to producing a durable and reliable design. “Sailing is about finding your path, whether it’s across an ocean or within yourself.” – Sven Yrvind In conclusion, making flanges around bulkhead hatches may seem complex at first glance, but by following Sven Yrvind’s meticulous process, enthusiasts can achieve professional-level results. Remember that the journey of boatbuilding is as rewarding as reaching your destination; it tests one’s patience and dedication. For those seeking to embark on this adventure or simply gain more insight into marine craftsmanship, Sven’s wisdom is invaluable.Once the flange is fully dried, Sven removes the clamps carefully, ensuring no damage occurs during this process. He then moves on to attaching four more pieces onto these main frames, completing two pairs of flanges for the bulkhead hatches.The Final Touches
While two flanges form the primary support structure around the hatches, Sven mentions there are two additional pieces required at each end to ensure comprehensive protection. This attention to detail highlights his commitment to producing a durable and reliable design. “Sailing is about finding your path, whether it’s across an ocean or within yourself.” – Sven Yrvind In conclusion, making flanges around bulkhead hatches may seem complex at first glance, but by following Sven Yrvind’s meticulous process, enthusiasts can achieve professional-level results. Remember that the journey of boatbuilding is as rewarding as reaching your destination; it tests one’s patience and dedication. For those seeking to embark on this adventure or simply gain more insight into marine craftsmanship, Sven’s wisdom is invaluable.Sven proceeds to apply glue along one edge of the flange, ensuring a secure bond when clamped into place. He emphasizes that this stage is crucial for maintaining the structural integrity of the flange, which in turn safeguards the living area beneath the canvas when hatches are open.Step 3: Allowing Time to Dry
After securely attaching the first portion of the flange, Sven allows ample time for it to dry before moving forward with additional steps. This patience and precision are key aspects of his successful boatbuilding methods.Step 4: Finishing Touches
Once the flange is fully dried, Sven removes the clamps carefully, ensuring no damage occurs during this process. He then moves on to attaching four more pieces onto these main frames, completing two pairs of flanges for the bulkhead hatches.The Final Touches
While two flanges form the primary support structure around the hatches, Sven mentions there are two additional pieces required at each end to ensure comprehensive protection. This attention to detail highlights his commitment to producing a durable and reliable design. “Sailing is about finding your path, whether it’s across an ocean or within yourself.” – Sven Yrvind In conclusion, making flanges around bulkhead hatches may seem complex at first glance, but by following Sven Yrvind’s meticulous process, enthusiasts can achieve professional-level results. Remember that the journey of boatbuilding is as rewarding as reaching your destination; it tests one’s patience and dedication. For those seeking to embark on this adventure or simply gain more insight into marine craftsmanship, Sven’s wisdom is invaluable.Sven begins by explaining that working on flanges vertically and horizontally is significantly easier than doing so in a flat position. To simplify the process further, he divides the task into two or three steps as suggested by fellow expert “for for.” This approach not only makes it more manageable but also allows for greater precision in crafting each component.Step 2: Applying Glue and Securing
Sven proceeds to apply glue along one edge of the flange, ensuring a secure bond when clamped into place. He emphasizes that this stage is crucial for maintaining the structural integrity of the flange, which in turn safeguards the living area beneath the canvas when hatches are open.Step 3: Allowing Time to Dry
After securely attaching the first portion of the flange, Sven allows ample time for it to dry before moving forward with additional steps. This patience and precision are key aspects of his successful boatbuilding methods.Step 4: Finishing Touches
Once the flange is fully dried, Sven removes the clamps carefully, ensuring no damage occurs during this process. He then moves on to attaching four more pieces onto these main frames, completing two pairs of flanges for the bulkhead hatches.The Final Touches
While two flanges form the primary support structure around the hatches, Sven mentions there are two additional pieces required at each end to ensure comprehensive protection. This attention to detail highlights his commitment to producing a durable and reliable design. “Sailing is about finding your path, whether it’s across an ocean or within yourself.” – Sven Yrvind In conclusion, making flanges around bulkhead hatches may seem complex at first glance, but by following Sven Yrvind’s meticulous process, enthusiasts can achieve professional-level results. Remember that the journey of boatbuilding is as rewarding as reaching your destination; it tests one’s patience and dedication. For those seeking to embark on this adventure or simply gain more insight into marine craftsmanship, Sven’s wisdom is invaluable.Sven Yrvind, a renowned yacht designer and sailor, shares valuable insights on creating flanges around bulkhead hatches for canvas protection in this enlightening video. By following his expert guidance, boat enthusiasts can ensure their living areas remain secure while allowing unhindered access through the hatches.Step 1: Starting with the Flange
Sven begins by explaining that working on flanges vertically and horizontally is significantly easier than doing so in a flat position. To simplify the process further, he divides the task into two or three steps as suggested by fellow expert “for for.” This approach not only makes it more manageable but also allows for greater precision in crafting each component.Step 2: Applying Glue and Securing
Sven proceeds to apply glue along one edge of the flange, ensuring a secure bond when clamped into place. He emphasizes that this stage is crucial for maintaining the structural integrity of the flange, which in turn safeguards the living area beneath the canvas when hatches are open.Step 3: Allowing Time to Dry
After securely attaching the first portion of the flange, Sven allows ample time for it to dry before moving forward with additional steps. This patience and precision are key aspects of his successful boatbuilding methods.Step 4: Finishing Touches
Once the flange is fully dried, Sven removes the clamps carefully, ensuring no damage occurs during this process. He then moves on to attaching four more pieces onto these main frames, completing two pairs of flanges for the bulkhead hatches.The Final Touches
While two flanges form the primary support structure around the hatches, Sven mentions there are two additional pieces required at each end to ensure comprehensive protection. This attention to detail highlights his commitment to producing a durable and reliable design. “Sailing is about finding your path, whether it’s across an ocean or within yourself.” – Sven Yrvind In conclusion, making flanges around bulkhead hatches may seem complex at first glance, but by following Sven Yrvind’s meticulous process, enthusiasts can achieve professional-level results. Remember that the journey of boatbuilding is as rewarding as reaching your destination; it tests one’s patience and dedication. For those seeking to embark on this adventure or simply gain more insight into marine craftsmanship, Sven’s wisdom is invaluable.Making Flanges Around Bulkhead Hatches for Canvas
Sven Yrvind, a renowned yacht designer and sailor, shares valuable insights on creating flanges around bulkhead hatches for canvas protection in this enlightening video. By following his expert guidance, boat enthusiasts can ensure their living areas remain secure while allowing unhindered access through the hatches.Step 1: Starting with the Flange
Sven begins by explaining that working on flanges vertically and horizontally is significantly easier than doing so in a flat position. To simplify the process further, he divides the task into two or three steps as suggested by fellow expert “for for.” This approach not only makes it more manageable but also allows for greater precision in crafting each component.Step 2: Applying Glue and Securing
Sven proceeds to apply glue along one edge of the flange, ensuring a secure bond when clamped into place. He emphasizes that this stage is crucial for maintaining the structural integrity of the flange, which in turn safeguards the living area beneath the canvas when hatches are open.Step 3: Allowing Time to Dry
After securely attaching the first portion of the flange, Sven allows ample time for it to dry before moving forward with additional steps. This patience and precision are key aspects of his successful boatbuilding methods.Step 4: Finishing Touches
Once the flange is fully dried, Sven removes the clamps carefully, ensuring no damage occurs during this process. He then moves on to attaching four more pieces onto these main frames, completing two pairs of flanges for the bulkhead hatches.The Final Touches
While two flanges form the primary support structure around the hatches, Sven mentions there are two additional pieces required at each end to ensure comprehensive protection. This attention to detail highlights his commitment to producing a durable and reliable design. “Sailing is about finding your path, whether it’s across an ocean or within yourself.” – Sven Yrvind In conclusion, making flanges around bulkhead hatches may seem complex at first glance, but by following Sven Yrvind’s meticulous process, enthusiasts can achieve professional-level results. Remember that the journey of boatbuilding is as rewarding as reaching your destination; it tests one’s patience and dedication. For those seeking to embark on this adventure or simply gain more insight into marine craftsmanship, Sven’s wisdom is invaluable.After securely attaching the first portion of the flange, Sven allows ample time for it to dry before moving forward with additional steps. This patience and precision are key aspects of his successful boatbuilding methods.Step 4: Finishing Touches
Once the flange is fully dried, Sven removes the clamps carefully, ensuring no damage occurs during this process. He then moves on to attaching four more pieces onto these main frames, completing two pairs of flanges for the bulkhead hatches.The Final Touches
While two flanges form the primary support structure around the hatches, Sven mentions there are two additional pieces required at each end to ensure comprehensive protection. This attention to detail highlights his commitment to producing a durable and reliable design. “Sailing is about finding your path, whether it’s across an ocean or within yourself.” – Sven Yrvind In conclusion, making flanges around bulkhead hatches may seem complex at first glance, but by following Sven Yrvind’s meticulous process, enthusiasts can achieve professional-level results. Remember that the journey of boatbuilding is as rewarding as reaching your destination; it tests one’s patience and dedication. For those seeking to embark on this adventure or simply gain more insight into marine craftsmanship, Sven’s wisdom is invaluable.Sven proceeds to apply glue along one edge of the flange, ensuring a secure bond when clamped into place. He emphasizes that this stage is crucial for maintaining the structural integrity of the flange, which in turn safeguards the living area beneath the canvas when hatches are open.Step 3: Allowing Time to Dry
After securely attaching the first portion of the flange, Sven allows ample time for it to dry before moving forward with additional steps. This patience and precision are key aspects of his successful boatbuilding methods.Step 4: Finishing Touches
Once the flange is fully dried, Sven removes the clamps carefully, ensuring no damage occurs during this process. He then moves on to attaching four more pieces onto these main frames, completing two pairs of flanges for the bulkhead hatches.The Final Touches
While two flanges form the primary support structure around the hatches, Sven mentions there are two additional pieces required at each end to ensure comprehensive protection. This attention to detail highlights his commitment to producing a durable and reliable design. “Sailing is about finding your path, whether it’s across an ocean or within yourself.” – Sven Yrvind In conclusion, making flanges around bulkhead hatches may seem complex at first glance, but by following Sven Yrvind’s meticulous process, enthusiasts can achieve professional-level results. Remember that the journey of boatbuilding is as rewarding as reaching your destination; it tests one’s patience and dedication. For those seeking to embark on this adventure or simply gain more insight into marine craftsmanship, Sven’s wisdom is invaluable.Sven begins by explaining that working on flanges vertically and horizontally is significantly easier than doing so in a flat position. To simplify the process further, he divides the task into two or three steps as suggested by fellow expert “for for.” This approach not only makes it more manageable but also allows for greater precision in crafting each component.Step 2: Applying Glue and Securing
Sven proceeds to apply glue along one edge of the flange, ensuring a secure bond when clamped into place. He emphasizes that this stage is crucial for maintaining the structural integrity of the flange, which in turn safeguards the living area beneath the canvas when hatches are open.Step 3: Allowing Time to Dry
After securely attaching the first portion of the flange, Sven allows ample time for it to dry before moving forward with additional steps. This patience and precision are key aspects of his successful boatbuilding methods.Step 4: Finishing Touches
Once the flange is fully dried, Sven removes the clamps carefully, ensuring no damage occurs during this process. He then moves on to attaching four more pieces onto these main frames, completing two pairs of flanges for the bulkhead hatches.The Final Touches
While two flanges form the primary support structure around the hatches, Sven mentions there are two additional pieces required at each end to ensure comprehensive protection. This attention to detail highlights his commitment to producing a durable and reliable design. “Sailing is about finding your path, whether it’s across an ocean or within yourself.” – Sven Yrvind In conclusion, making flanges around bulkhead hatches may seem complex at first glance, but by following Sven Yrvind’s meticulous process, enthusiasts can achieve professional-level results. Remember that the journey of boatbuilding is as rewarding as reaching your destination; it tests one’s patience and dedication. For those seeking to embark on this adventure or simply gain more insight into marine craftsmanship, Sven’s wisdom is invaluable.Sven Yrvind, a renowned yacht designer and sailor, shares valuable insights on creating flanges around bulkhead hatches for canvas protection in this enlightening video. By following his expert guidance, boat enthusiasts can ensure their living areas remain secure while allowing unhindered access through the hatches.Step 1: Starting with the Flange
Sven begins by explaining that working on flanges vertically and horizontally is significantly easier than doing so in a flat position. To simplify the process further, he divides the task into two or three steps as suggested by fellow expert “for for.” This approach not only makes it more manageable but also allows for greater precision in crafting each component.Step 2: Applying Glue and Securing
Sven proceeds to apply glue along one edge of the flange, ensuring a secure bond when clamped into place. He emphasizes that this stage is crucial for maintaining the structural integrity of the flange, which in turn safeguards the living area beneath the canvas when hatches are open.Step 3: Allowing Time to Dry
After securely attaching the first portion of the flange, Sven allows ample time for it to dry before moving forward with additional steps. This patience and precision are key aspects of his successful boatbuilding methods.Step 4: Finishing Touches
Once the flange is fully dried, Sven removes the clamps carefully, ensuring no damage occurs during this process. He then moves on to attaching four more pieces onto these main frames, completing two pairs of flanges for the bulkhead hatches.The Final Touches
While two flanges form the primary support structure around the hatches, Sven mentions there are two additional pieces required at each end to ensure comprehensive protection. This attention to detail highlights his commitment to producing a durable and reliable design. “Sailing is about finding your path, whether it’s across an ocean or within yourself.” – Sven Yrvind In conclusion, making flanges around bulkhead hatches may seem complex at first glance, but by following Sven Yrvind’s meticulous process, enthusiasts can achieve professional-level results. Remember that the journey of boatbuilding is as rewarding as reaching your destination; it tests one’s patience and dedication. For those seeking to embark on this adventure or simply gain more insight into marine craftsmanship, Sven’s wisdom is invaluable.Making Flanges Around Bulkhead Hatches for Canvas
Sven Yrvind, a renowned yacht designer and sailor, shares valuable insights on creating flanges around bulkhead hatches for canvas protection in this enlightening video. By following his expert guidance, boat enthusiasts can ensure their living areas remain secure while allowing unhindered access through the hatches.Step 1: Starting with the Flange
Sven begins by explaining that working on flanges vertically and horizontally is significantly easier than doing so in a flat position. To simplify the process further, he divides the task into two or three steps as suggested by fellow expert “for for.” This approach not only makes it more manageable but also allows for greater precision in crafting each component.Step 2: Applying Glue and Securing
Sven proceeds to apply glue along one edge of the flange, ensuring a secure bond when clamped into place. He emphasizes that this stage is crucial for maintaining the structural integrity of the flange, which in turn safeguards the living area beneath the canvas when hatches are open.Step 3: Allowing Time to Dry
After securely attaching the first portion of the flange, Sven allows ample time for it to dry before moving forward with additional steps. This patience and precision are key aspects of his successful boatbuilding methods.Step 4: Finishing Touches
Once the flange is fully dried, Sven removes the clamps carefully, ensuring no damage occurs during this process. He then moves on to attaching four more pieces onto these main frames, completing two pairs of flanges for the bulkhead hatches.The Final Touches
While two flanges form the primary support structure around the hatches, Sven mentions there are two additional pieces required at each end to ensure comprehensive protection. This attention to detail highlights his commitment to producing a durable and reliable design. “Sailing is about finding your path, whether it’s across an ocean or within yourself.” – Sven Yrvind In conclusion, making flanges around bulkhead hatches may seem complex at first glance, but by following Sven Yrvind’s meticulous process, enthusiasts can achieve professional-level results. Remember that the journey of boatbuilding is as rewarding as reaching your destination; it tests one’s patience and dedication. For those seeking to embark on this adventure or simply gain more insight into marine craftsmanship, Sven’s wisdom is invaluable.Once the flange is fully dried, Sven removes the clamps carefully, ensuring no damage occurs during this process. He then moves on to attaching four more pieces onto these main frames, completing two pairs of flanges for the bulkhead hatches.The Final Touches
While two flanges form the primary support structure around the hatches, Sven mentions there are two additional pieces required at each end to ensure comprehensive protection. This attention to detail highlights his commitment to producing a durable and reliable design. “Sailing is about finding your path, whether it’s across an ocean or within yourself.” – Sven Yrvind In conclusion, making flanges around bulkhead hatches may seem complex at first glance, but by following Sven Yrvind’s meticulous process, enthusiasts can achieve professional-level results. Remember that the journey of boatbuilding is as rewarding as reaching your destination; it tests one’s patience and dedication. For those seeking to embark on this adventure or simply gain more insight into marine craftsmanship, Sven’s wisdom is invaluable.After securely attaching the first portion of the flange, Sven allows ample time for it to dry before moving forward with additional steps. This patience and precision are key aspects of his successful boatbuilding methods.Step 4: Finishing Touches
Once the flange is fully dried, Sven removes the clamps carefully, ensuring no damage occurs during this process. He then moves on to attaching four more pieces onto these main frames, completing two pairs of flanges for the bulkhead hatches.The Final Touches
While two flanges form the primary support structure around the hatches, Sven mentions there are two additional pieces required at each end to ensure comprehensive protection. This attention to detail highlights his commitment to producing a durable and reliable design. “Sailing is about finding your path, whether it’s across an ocean or within yourself.” – Sven Yrvind In conclusion, making flanges around bulkhead hatches may seem complex at first glance, but by following Sven Yrvind’s meticulous process, enthusiasts can achieve professional-level results. Remember that the journey of boatbuilding is as rewarding as reaching your destination; it tests one’s patience and dedication. For those seeking to embark on this adventure or simply gain more insight into marine craftsmanship, Sven’s wisdom is invaluable.Sven proceeds to apply glue along one edge of the flange, ensuring a secure bond when clamped into place. He emphasizes that this stage is crucial for maintaining the structural integrity of the flange, which in turn safeguards the living area beneath the canvas when hatches are open.Step 3: Allowing Time to Dry
After securely attaching the first portion of the flange, Sven allows ample time for it to dry before moving forward with additional steps. This patience and precision are key aspects of his successful boatbuilding methods.Step 4: Finishing Touches
Once the flange is fully dried, Sven removes the clamps carefully, ensuring no damage occurs during this process. He then moves on to attaching four more pieces onto these main frames, completing two pairs of flanges for the bulkhead hatches.The Final Touches
While two flanges form the primary support structure around the hatches, Sven mentions there are two additional pieces required at each end to ensure comprehensive protection. This attention to detail highlights his commitment to producing a durable and reliable design. “Sailing is about finding your path, whether it’s across an ocean or within yourself.” – Sven Yrvind In conclusion, making flanges around bulkhead hatches may seem complex at first glance, but by following Sven Yrvind’s meticulous process, enthusiasts can achieve professional-level results. Remember that the journey of boatbuilding is as rewarding as reaching your destination; it tests one’s patience and dedication. For those seeking to embark on this adventure or simply gain more insight into marine craftsmanship, Sven’s wisdom is invaluable.Sven begins by explaining that working on flanges vertically and horizontally is significantly easier than doing so in a flat position. To simplify the process further, he divides the task into two or three steps as suggested by fellow expert “for for.” This approach not only makes it more manageable but also allows for greater precision in crafting each component.Step 2: Applying Glue and Securing
Sven proceeds to apply glue along one edge of the flange, ensuring a secure bond when clamped into place. He emphasizes that this stage is crucial for maintaining the structural integrity of the flange, which in turn safeguards the living area beneath the canvas when hatches are open.Step 3: Allowing Time to Dry
After securely attaching the first portion of the flange, Sven allows ample time for it to dry before moving forward with additional steps. This patience and precision are key aspects of his successful boatbuilding methods.Step 4: Finishing Touches
Once the flange is fully dried, Sven removes the clamps carefully, ensuring no damage occurs during this process. He then moves on to attaching four more pieces onto these main frames, completing two pairs of flanges for the bulkhead hatches.The Final Touches
While two flanges form the primary support structure around the hatches, Sven mentions there are two additional pieces required at each end to ensure comprehensive protection. This attention to detail highlights his commitment to producing a durable and reliable design. “Sailing is about finding your path, whether it’s across an ocean or within yourself.” – Sven Yrvind In conclusion, making flanges around bulkhead hatches may seem complex at first glance, but by following Sven Yrvind’s meticulous process, enthusiasts can achieve professional-level results. Remember that the journey of boatbuilding is as rewarding as reaching your destination; it tests one’s patience and dedication. For those seeking to embark on this adventure or simply gain more insight into marine craftsmanship, Sven’s wisdom is invaluable.Sven Yrvind, a renowned yacht designer and sailor, shares valuable insights on creating flanges around bulkhead hatches for canvas protection in this enlightening video. By following his expert guidance, boat enthusiasts can ensure their living areas remain secure while allowing unhindered access through the hatches.Step 1: Starting with the Flange
Sven begins by explaining that working on flanges vertically and horizontally is significantly easier than doing so in a flat position. To simplify the process further, he divides the task into two or three steps as suggested by fellow expert “for for.” This approach not only makes it more manageable but also allows for greater precision in crafting each component.Step 2: Applying Glue and Securing
Sven proceeds to apply glue along one edge of the flange, ensuring a secure bond when clamped into place. He emphasizes that this stage is crucial for maintaining the structural integrity of the flange, which in turn safeguards the living area beneath the canvas when hatches are open.Step 3: Allowing Time to Dry
After securely attaching the first portion of the flange, Sven allows ample time for it to dry before moving forward with additional steps. This patience and precision are key aspects of his successful boatbuilding methods.Step 4: Finishing Touches
Once the flange is fully dried, Sven removes the clamps carefully, ensuring no damage occurs during this process. He then moves on to attaching four more pieces onto these main frames, completing two pairs of flanges for the bulkhead hatches.The Final Touches
While two flanges form the primary support structure around the hatches, Sven mentions there are two additional pieces required at each end to ensure comprehensive protection. This attention to detail highlights his commitment to producing a durable and reliable design. “Sailing is about finding your path, whether it’s across an ocean or within yourself.” – Sven Yrvind In conclusion, making flanges around bulkhead hatches may seem complex at first glance, but by following Sven Yrvind’s meticulous process, enthusiasts can achieve professional-level results. Remember that the journey of boatbuilding is as rewarding as reaching your destination; it tests one’s patience and dedication. For those seeking to embark on this adventure or simply gain more insight into marine craftsmanship, Sven’s wisdom is invaluable.Making Flanges Around Bulkhead Hatches for Canvas
Sven Yrvind, a renowned yacht designer and sailor, shares valuable insights on creating flanges around bulkhead hatches for canvas protection in this enlightening video. By following his expert guidance, boat enthusiasts can ensure their living areas remain secure while allowing unhindered access through the hatches.Step 1: Starting with the Flange
Sven begins by explaining that working on flanges vertically and horizontally is significantly easier than doing so in a flat position. To simplify the process further, he divides the task into two or three steps as suggested by fellow expert “for for.” This approach not only makes it more manageable but also allows for greater precision in crafting each component.Step 2: Applying Glue and Securing
Sven proceeds to apply glue along one edge of the flange, ensuring a secure bond when clamped into place. He emphasizes that this stage is crucial for maintaining the structural integrity of the flange, which in turn safeguards the living area beneath the canvas when hatches are open.Step 3: Allowing Time to Dry
After securely attaching the first portion of the flange, Sven allows ample time for it to dry before moving forward with additional steps. This patience and precision are key aspects of his successful boatbuilding methods.Step 4: Finishing Touches
Once the flange is fully dried, Sven removes the clamps carefully, ensuring no damage occurs during this process. He then moves on to attaching four more pieces onto these main frames, completing two pairs of flanges for the bulkhead hatches.The Final Touches
While two flanges form the primary support structure around the hatches, Sven mentions there are two additional pieces required at each end to ensure comprehensive protection. This attention to detail highlights his commitment to producing a durable and reliable design. “Sailing is about finding your path, whether it’s across an ocean or within yourself.” – Sven Yrvind In conclusion, making flanges around bulkhead hatches may seem complex at first glance, but by following Sven Yrvind’s meticulous process, enthusiasts can achieve professional-level results. Remember that the journey of boatbuilding is as rewarding as reaching your destination; it tests one’s patience and dedication. For those seeking to embark on this adventure or simply gain more insight into marine craftsmanship, Sven’s wisdom is invaluable.Sven proceeds to apply glue along one edge of the flange, ensuring a secure bond when clamped into place. He emphasizes that this stage is crucial for maintaining the structural integrity of the flange, which in turn safeguards the living area beneath the canvas when hatches are open.Step 3: Allowing Time to Dry
After securely attaching the first portion of the flange, Sven allows ample time for it to dry before moving forward with additional steps. This patience and precision are key aspects of his successful boatbuilding methods.Step 4: Finishing Touches
Once the flange is fully dried, Sven removes the clamps carefully, ensuring no damage occurs during this process. He then moves on to attaching four more pieces onto these main frames, completing two pairs of flanges for the bulkhead hatches.The Final Touches
While two flanges form the primary support structure around the hatches, Sven mentions there are two additional pieces required at each end to ensure comprehensive protection. This attention to detail highlights his commitment to producing a durable and reliable design. “Sailing is about finding your path, whether it’s across an ocean or within yourself.” – Sven Yrvind In conclusion, making flanges around bulkhead hatches may seem complex at first glance, but by following Sven Yrvind’s meticulous process, enthusiasts can achieve professional-level results. Remember that the journey of boatbuilding is as rewarding as reaching your destination; it tests one’s patience and dedication. For those seeking to embark on this adventure or simply gain more insight into marine craftsmanship, Sven’s wisdom is invaluable.Sven begins by explaining that working on flanges vertically and horizontally is significantly easier than doing so in a flat position. To simplify the process further, he divides the task into two or three steps as suggested by fellow expert “for for.” This approach not only makes it more manageable but also allows for greater precision in crafting each component.Step 2: Applying Glue and Securing
Sven proceeds to apply glue along one edge of the flange, ensuring a secure bond when clamped into place. He emphasizes that this stage is crucial for maintaining the structural integrity of the flange, which in turn safeguards the living area beneath the canvas when hatches are open.Step 3: Allowing Time to Dry
After securely attaching the first portion of the flange, Sven allows ample time for it to dry before moving forward with additional steps. This patience and precision are key aspects of his successful boatbuilding methods.Step 4: Finishing Touches
Once the flange is fully dried, Sven removes the clamps carefully, ensuring no damage occurs during this process. He then moves on to attaching four more pieces onto these main frames, completing two pairs of flanges for the bulkhead hatches.The Final Touches
While two flanges form the primary support structure around the hatches, Sven mentions there are two additional pieces required at each end to ensure comprehensive protection. This attention to detail highlights his commitment to producing a durable and reliable design. “Sailing is about finding your path, whether it’s across an ocean or within yourself.” – Sven Yrvind In conclusion, making flanges around bulkhead hatches may seem complex at first glance, but by following Sven Yrvind’s meticulous process, enthusiasts can achieve professional-level results. Remember that the journey of boatbuilding is as rewarding as reaching your destination; it tests one’s patience and dedication. For those seeking to embark on this adventure or simply gain more insight into marine craftsmanship, Sven’s wisdom is invaluable.Making Flanges Around Bulkhead Hatches for Canvas
Sven Yrvind, a renowned yacht designer and sailor, shares valuable insights on creating flanges around bulkhead hatches for canvas protection in this enlightening video. By following his expert guidance, boat enthusiasts can ensure their living areas remain secure while allowing unhindered access through the hatches.Step 1: Starting with the Flange
Sven begins by explaining that working on flanges vertically and horizontally is significantly easier than doing so in a flat position. To simplify the process further, he divides the task into two or three steps as suggested by fellow expert “for for.” This approach not only makes it more manageable but also allows for greater precision in crafting each component.Step 2: Applying Glue and Securing
Sven proceeds to apply glue along one edge of the flange, ensuring a secure bond when clamped into place. He emphasizes that this stage is crucial for maintaining the structural integrity of the flange, which in turn safeguards the living area beneath the canvas when hatches are open.Step 3: Allowing Time to Dry
After securely attaching the first portion of the flange, Sven allows ample time for it to dry before moving forward with additional steps. This patience and precision are key aspects of his successful boatbuilding methods.Step 4: Finishing Touches
Once the flange is fully dried, Sven removes the clamps carefully, ensuring no damage occurs during this process. He then moves on to attaching four more pieces onto these main frames, completing two pairs of flanges for the bulkhead hatches.The Final Touches
While two flanges form the primary support structure around the hatches, Sven mentions there are two additional pieces required at each end to ensure comprehensive protection. This attention to detail highlights his commitment to producing a durable and reliable design. “Sailing is about finding your path, whether it’s across an ocean or within yourself.” – Sven Yrvind In conclusion, making flanges around bulkhead hatches may seem complex at first glance, but by following Sven Yrvind’s meticulous process, enthusiasts can achieve professional-level results. Remember that the journey of boatbuilding is as rewarding as reaching your destination; it tests one’s patience and dedication. For those seeking to embark on this adventure or simply gain more insight into marine craftsmanship, Sven’s wisdom is invaluable.Sven Yrvind, a renowned yacht designer and sailor, shares valuable insights on creating flanges around bulkhead hatches for canvas protection in this enlightening video. By following his expert guidance, boat enthusiasts can ensure their living areas remain secure while allowing unhindered access through the hatches.Step 1: Starting with the Flange
Sven begins by explaining that working on flanges vertically and horizontally is significantly easier than doing so in a flat position. To simplify the process further, he divides the task into two or three steps as suggested by fellow expert “for for.” This approach not only makes it more manageable but also allows for greater precision in crafting each component.Step 2: Applying Glue and Securing
Sven proceeds to apply glue along one edge of the flange, ensuring a secure bond when clamped into place. He emphasizes that this stage is crucial for maintaining the structural integrity of the flange, which in turn safeguards the living area beneath the canvas when hatches are open.Step 3: Allowing Time to Dry
After securely attaching the first portion of the flange, Sven allows ample time for it to dry before moving forward with additional steps. This patience and precision are key aspects of his successful boatbuilding methods.Step 4: Finishing Touches
Once the flange is fully dried, Sven removes the clamps carefully, ensuring no damage occurs during this process. He then moves on to attaching four more pieces onto these main frames, completing two pairs of flanges for the bulkhead hatches.The Final Touches
While two flanges form the primary support structure around the hatches, Sven mentions there are two additional pieces required at each end to ensure comprehensive protection. This attention to detail highlights his commitment to producing a durable and reliable design. “Sailing is about finding your path, whether it’s across an ocean or within yourself.” – Sven Yrvind In conclusion, making flanges around bulkhead hatches may seem complex at first glance, but by following Sven Yrvind’s meticulous process, enthusiasts can achieve professional-level results. Remember that the journey of boatbuilding is as rewarding as reaching your destination; it tests one’s patience and dedication. For those seeking to embark on this adventure or simply gain more insight into marine craftsmanship, Sven’s wisdom is invaluable.Making Flanges Around Bulkhead Hatches for Canvas
Sven Yrvind, a renowned yacht designer and sailor, shares valuable insights on creating flanges around bulkhead hatches for canvas protection in this enlightening video. By following his expert guidance, boat enthusiasts can ensure their living areas remain secure while allowing unhindered access through the hatches.Step 1: Starting with the Flange
Sven begins by explaining that working on flanges vertically and horizontally is significantly easier than doing so in a flat position. To simplify the process further, he divides the task into two or three steps as suggested by fellow expert “for for.” This approach not only makes it more manageable but also allows for greater precision in crafting each component.Step 2: Applying Glue and Securing
Sven proceeds to apply glue along one edge of the flange, ensuring a secure bond when clamped into place. He emphasizes that this stage is crucial for maintaining the structural integrity of the flange, which in turn safeguards the living area beneath the canvas when hatches are open.Step 3: Allowing Time to Dry
After securely attaching the first portion of the flange, Sven allows ample time for it to dry before moving forward with additional steps. This patience and precision are key aspects of his successful boatbuilding methods.Step 4: Finishing Touches
Once the flange is fully dried, Sven removes the clamps carefully, ensuring no damage occurs during this process. He then moves on to attaching four more pieces onto these main frames, completing two pairs of flanges for the bulkhead hatches.The Final Touches
While two flanges form the primary support structure around the hatches, Sven mentions there are two additional pieces required at each end to ensure comprehensive protection. This attention to detail highlights his commitment to producing a durable and reliable design. “Sailing is about finding your path, whether it’s across an ocean or within yourself.” – Sven Yrvind In conclusion, making flanges around bulkhead hatches may seem complex at first glance, but by following Sven Yrvind’s meticulous process, enthusiasts can achieve professional-level results. Remember that the journey of boatbuilding is as rewarding as reaching your destination; it tests one’s patience and dedication. For those seeking to embark on this adventure or simply gain more insight into marine craftsmanship, Sven’s wisdom is invaluable.Once the flange is fully dried, Sven removes the clamps carefully, ensuring no damage occurs during this process. He then moves on to attaching four more pieces onto these main frames, completing two pairs of flanges for the bulkhead hatches.The Final Touches
While two flanges form the primary support structure around the hatches, Sven mentions there are two additional pieces required at each end to ensure comprehensive protection. This attention to detail highlights his commitment to producing a durable and reliable design. “Sailing is about finding your path, whether it’s across an ocean or within yourself.” – Sven Yrvind In conclusion, making flanges around bulkhead hatches may seem complex at first glance, but by following Sven Yrvind’s meticulous process, enthusiasts can achieve professional-level results. Remember that the journey of boatbuilding is as rewarding as reaching your destination; it tests one’s patience and dedication. For those seeking to embark on this adventure or simply gain more insight into marine craftsmanship, Sven’s wisdom is invaluable.Sven Yrvind, a renowned yacht designer and sailor, shares valuable insights on creating flanges around bulkhead hatches for canvas protection in this enlightening video. By following his expert guidance, boat enthusiasts can ensure their living areas remain secure while allowing unhindered access through the hatches.Step 1: Starting with the Flange
Sven begins by explaining that working on flanges vertically and horizontally is significantly easier than doing so in a flat position. To simplify the process further, he divides the task into two or three steps as suggested by fellow expert “for for.” This approach not only makes it more manageable but also allows for greater precision in crafting each component.Step 2: Applying Glue and Securing
Sven proceeds to apply glue along one edge of the flange, ensuring a secure bond when clamped into place. He emphasizes that this stage is crucial for maintaining the structural integrity of the flange, which in turn safeguards the living area beneath the canvas when hatches are open.Step 3: Allowing Time to Dry
After securely attaching the first portion of the flange, Sven allows ample time for it to dry before moving forward with additional steps. This patience and precision are key aspects of his successful boatbuilding methods.Step 4: Finishing Touches
Once the flange is fully dried, Sven removes the clamps carefully, ensuring no damage occurs during this process. He then moves on to attaching four more pieces onto these main frames, completing two pairs of flanges for the bulkhead hatches.The Final Touches
While two flanges form the primary support structure around the hatches, Sven mentions there are two additional pieces required at each end to ensure comprehensive protection. This attention to detail highlights his commitment to producing a durable and reliable design. “Sailing is about finding your path, whether it’s across an ocean or within yourself.” – Sven Yrvind In conclusion, making flanges around bulkhead hatches may seem complex at first glance, but by following Sven Yrvind’s meticulous process, enthusiasts can achieve professional-level results. Remember that the journey of boatbuilding is as rewarding as reaching your destination; it tests one’s patience and dedication. For those seeking to embark on this adventure or simply gain more insight into marine craftsmanship, Sven’s wisdom is invaluable.Making Flanges Around Bulkhead Hatches for Canvas
Sven Yrvind, a renowned yacht designer and sailor, shares valuable insights on creating flanges around bulkhead hatches for canvas protection in this enlightening video. By following his expert guidance, boat enthusiasts can ensure their living areas remain secure while allowing unhindered access through the hatches.Step 1: Starting with the Flange
Sven begins by explaining that working on flanges vertically and horizontally is significantly easier than doing so in a flat position. To simplify the process further, he divides the task into two or three steps as suggested by fellow expert “for for.” This approach not only makes it more manageable but also allows for greater precision in crafting each component.Step 2: Applying Glue and Securing
Sven proceeds to apply glue along one edge of the flange, ensuring a secure bond when clamped into place. He emphasizes that this stage is crucial for maintaining the structural integrity of the flange, which in turn safeguards the living area beneath the canvas when hatches are open.Step 3: Allowing Time to Dry
After securely attaching the first portion of the flange, Sven allows ample time for it to dry before moving forward with additional steps. This patience and precision are key aspects of his successful boatbuilding methods.Step 4: Finishing Touches
Once the flange is fully dried, Sven removes the clamps carefully, ensuring no damage occurs during this process. He then moves on to attaching four more pieces onto these main frames, completing two pairs of flanges for the bulkhead hatches.The Final Touches
While two flanges form the primary support structure around the hatches, Sven mentions there are two additional pieces required at each end to ensure comprehensive protection. This attention to detail highlights his commitment to producing a durable and reliable design. “Sailing is about finding your path, whether it’s across an ocean or within yourself.” – Sven Yrvind In conclusion, making flanges around bulkhead hatches may seem complex at first glance, but by following Sven Yrvind’s meticulous process, enthusiasts can achieve professional-level results. Remember that the journey of boatbuilding is as rewarding as reaching your destination; it tests one’s patience and dedication. For those seeking to embark on this adventure or simply gain more insight into marine craftsmanship, Sven’s wisdom is invaluable.After securely attaching the first portion of the flange, Sven allows ample time for it to dry before moving forward with additional steps. This patience and precision are key aspects of his successful boatbuilding methods.Step 4: Finishing Touches
Once the flange is fully dried, Sven removes the clamps carefully, ensuring no damage occurs during this process. He then moves on to attaching four more pieces onto these main frames, completing two pairs of flanges for the bulkhead hatches.The Final Touches
While two flanges form the primary support structure around the hatches, Sven mentions there are two additional pieces required at each end to ensure comprehensive protection. This attention to detail highlights his commitment to producing a durable and reliable design. “Sailing is about finding your path, whether it’s across an ocean or within yourself.” – Sven Yrvind In conclusion, making flanges around bulkhead hatches may seem complex at first glance, but by following Sven Yrvind’s meticulous process, enthusiasts can achieve professional-level results. Remember that the journey of boatbuilding is as rewarding as reaching your destination; it tests one’s patience and dedication. For those seeking to embark on this adventure or simply gain more insight into marine craftsmanship, Sven’s wisdom is invaluable.Sven Yrvind, a renowned yacht designer and sailor, shares valuable insights on creating flanges around bulkhead hatches for canvas protection in this enlightening video. By following his expert guidance, boat enthusiasts can ensure their living areas remain secure while allowing unhindered access through the hatches.Step 1: Starting with the Flange
Sven begins by explaining that working on flanges vertically and horizontally is significantly easier than doing so in a flat position. To simplify the process further, he divides the task into two or three steps as suggested by fellow expert “for for.” This approach not only makes it more manageable but also allows for greater precision in crafting each component.Step 2: Applying Glue and Securing
Sven proceeds to apply glue along one edge of the flange, ensuring a secure bond when clamped into place. He emphasizes that this stage is crucial for maintaining the structural integrity of the flange, which in turn safeguards the living area beneath the canvas when hatches are open.Step 3: Allowing Time to Dry
After securely attaching the first portion of the flange, Sven allows ample time for it to dry before moving forward with additional steps. This patience and precision are key aspects of his successful boatbuilding methods.Step 4: Finishing Touches
Once the flange is fully dried, Sven removes the clamps carefully, ensuring no damage occurs during this process. He then moves on to attaching four more pieces onto these main frames, completing two pairs of flanges for the bulkhead hatches.The Final Touches
While two flanges form the primary support structure around the hatches, Sven mentions there are two additional pieces required at each end to ensure comprehensive protection. This attention to detail highlights his commitment to producing a durable and reliable design. “Sailing is about finding your path, whether it’s across an ocean or within yourself.” – Sven Yrvind In conclusion, making flanges around bulkhead hatches may seem complex at first glance, but by following Sven Yrvind’s meticulous process, enthusiasts can achieve professional-level results. Remember that the journey of boatbuilding is as rewarding as reaching your destination; it tests one’s patience and dedication. For those seeking to embark on this adventure or simply gain more insight into marine craftsmanship, Sven’s wisdom is invaluable.Making Flanges Around Bulkhead Hatches for Canvas
Sven Yrvind, a renowned yacht designer and sailor, shares valuable insights on creating flanges around bulkhead hatches for canvas protection in this enlightening video. By following his expert guidance, boat enthusiasts can ensure their living areas remain secure while allowing unhindered access through the hatches.Step 1: Starting with the Flange
Sven begins by explaining that working on flanges vertically and horizontally is significantly easier than doing so in a flat position. To simplify the process further, he divides the task into two or three steps as suggested by fellow expert “for for.” This approach not only makes it more manageable but also allows for greater precision in crafting each component.Step 2: Applying Glue and Securing
Sven proceeds to apply glue along one edge of the flange, ensuring a secure bond when clamped into place. He emphasizes that this stage is crucial for maintaining the structural integrity of the flange, which in turn safeguards the living area beneath the canvas when hatches are open.Step 3: Allowing Time to Dry
After securely attaching the first portion of the flange, Sven allows ample time for it to dry before moving forward with additional steps. This patience and precision are key aspects of his successful boatbuilding methods.Step 4: Finishing Touches
Once the flange is fully dried, Sven removes the clamps carefully, ensuring no damage occurs during this process. He then moves on to attaching four more pieces onto these main frames, completing two pairs of flanges for the bulkhead hatches.The Final Touches
While two flanges form the primary support structure around the hatches, Sven mentions there are two additional pieces required at each end to ensure comprehensive protection. This attention to detail highlights his commitment to producing a durable and reliable design. “Sailing is about finding your path, whether it’s across an ocean or within yourself.” – Sven Yrvind In conclusion, making flanges around bulkhead hatches may seem complex at first glance, but by following Sven Yrvind’s meticulous process, enthusiasts can achieve professional-level results. Remember that the journey of boatbuilding is as rewarding as reaching your destination; it tests one’s patience and dedication. For those seeking to embark on this adventure or simply gain more insight into marine craftsmanship, Sven’s wisdom is invaluable.Sven proceeds to apply glue along one edge of the flange, ensuring a secure bond when clamped into place. He emphasizes that this stage is crucial for maintaining the structural integrity of the flange, which in turn safeguards the living area beneath the canvas when hatches are open.Step 3: Allowing Time to Dry
After securely attaching the first portion of the flange, Sven allows ample time for it to dry before moving forward with additional steps. This patience and precision are key aspects of his successful boatbuilding methods.Step 4: Finishing Touches
Once the flange is fully dried, Sven removes the clamps carefully, ensuring no damage occurs during this process. He then moves on to attaching four more pieces onto these main frames, completing two pairs of flanges for the bulkhead hatches.The Final Touches
While two flanges form the primary support structure around the hatches, Sven mentions there are two additional pieces required at each end to ensure comprehensive protection. This attention to detail highlights his commitment to producing a durable and reliable design. “Sailing is about finding your path, whether it’s across an ocean or within yourself.” – Sven Yrvind In conclusion, making flanges around bulkhead hatches may seem complex at first glance, but by following Sven Yrvind’s meticulous process, enthusiasts can achieve professional-level results. Remember that the journey of boatbuilding is as rewarding as reaching your destination; it tests one’s patience and dedication. For those seeking to embark on this adventure or simply gain more insight into marine craftsmanship, Sven’s wisdom is invaluable.Sven Yrvind, a renowned yacht designer and sailor, shares valuable insights on creating flanges around bulkhead hatches for canvas protection in this enlightening video. By following his expert guidance, boat enthusiasts can ensure their living areas remain secure while allowing unhindered access through the hatches.Step 1: Starting with the Flange
Sven begins by explaining that working on flanges vertically and horizontally is significantly easier than doing so in a flat position. To simplify the process further, he divides the task into two or three steps as suggested by fellow expert “for for.” This approach not only makes it more manageable but also allows for greater precision in crafting each component.Step 2: Applying Glue and Securing
Sven proceeds to apply glue along one edge of the flange, ensuring a secure bond when clamped into place. He emphasizes that this stage is crucial for maintaining the structural integrity of the flange, which in turn safeguards the living area beneath the canvas when hatches are open.Step 3: Allowing Time to Dry
After securely attaching the first portion of the flange, Sven allows ample time for it to dry before moving forward with additional steps. This patience and precision are key aspects of his successful boatbuilding methods.Step 4: Finishing Touches
Once the flange is fully dried, Sven removes the clamps carefully, ensuring no damage occurs during this process. He then moves on to attaching four more pieces onto these main frames, completing two pairs of flanges for the bulkhead hatches.The Final Touches
While two flanges form the primary support structure around the hatches, Sven mentions there are two additional pieces required at each end to ensure comprehensive protection. This attention to detail highlights his commitment to producing a durable and reliable design. “Sailing is about finding your path, whether it’s across an ocean or within yourself.” – Sven Yrvind In conclusion, making flanges around bulkhead hatches may seem complex at first glance, but by following Sven Yrvind’s meticulous process, enthusiasts can achieve professional-level results. Remember that the journey of boatbuilding is as rewarding as reaching your destination; it tests one’s patience and dedication. For those seeking to embark on this adventure or simply gain more insight into marine craftsmanship, Sven’s wisdom is invaluable.Making Flanges Around Bulkhead Hatches for Canvas
Sven Yrvind, a renowned yacht designer and sailor, shares valuable insights on creating flanges around bulkhead hatches for canvas protection in this enlightening video. By following his expert guidance, boat enthusiasts can ensure their living areas remain secure while allowing unhindered access through the hatches.Step 1: Starting with the Flange
Sven begins by explaining that working on flanges vertically and horizontally is significantly easier than doing so in a flat position. To simplify the process further, he divides the task into two or three steps as suggested by fellow expert “for for.” This approach not only makes it more manageable but also allows for greater precision in crafting each component.Step 2: Applying Glue and Securing
Sven proceeds to apply glue along one edge of the flange, ensuring a secure bond when clamped into place. He emphasizes that this stage is crucial for maintaining the structural integrity of the flange, which in turn safeguards the living area beneath the canvas when hatches are open.Step 3: Allowing Time to Dry
After securely attaching the first portion of the flange, Sven allows ample time for it to dry before moving forward with additional steps. This patience and precision are key aspects of his successful boatbuilding methods.Step 4: Finishing Touches
Once the flange is fully dried, Sven removes the clamps carefully, ensuring no damage occurs during this process. He then moves on to attaching four more pieces onto these main frames, completing two pairs of flanges for the bulkhead hatches.The Final Touches
While two flanges form the primary support structure around the hatches, Sven mentions there are two additional pieces required at each end to ensure comprehensive protection. This attention to detail highlights his commitment to producing a durable and reliable design. “Sailing is about finding your path, whether it’s across an ocean or within yourself.” – Sven Yrvind In conclusion, making flanges around bulkhead hatches may seem complex at first glance, but by following Sven Yrvind’s meticulous process, enthusiasts can achieve professional-level results. Remember that the journey of boatbuilding is as rewarding as reaching your destination; it tests one’s patience and dedication. For those seeking to embark on this adventure or simply gain more insight into marine craftsmanship, Sven’s wisdom is invaluable.Sven begins by explaining that working on flanges vertically and horizontally is significantly easier than doing so in a flat position. To simplify the process further, he divides the task into two or three steps as suggested by fellow expert “for for.” This approach not only makes it more manageable but also allows for greater precision in crafting each component.Step 2: Applying Glue and Securing
Sven proceeds to apply glue along one edge of the flange, ensuring a secure bond when clamped into place. He emphasizes that this stage is crucial for maintaining the structural integrity of the flange, which in turn safeguards the living area beneath the canvas when hatches are open.Step 3: Allowing Time to Dry
After securely attaching the first portion of the flange, Sven allows ample time for it to dry before moving forward with additional steps. This patience and precision are key aspects of his successful boatbuilding methods.Step 4: Finishing Touches
Once the flange is fully dried, Sven removes the clamps carefully, ensuring no damage occurs during this process. He then moves on to attaching four more pieces onto these main frames, completing two pairs of flanges for the bulkhead hatches.The Final Touches
While two flanges form the primary support structure around the hatches, Sven mentions there are two additional pieces required at each end to ensure comprehensive protection. This attention to detail highlights his commitment to producing a durable and reliable design. “Sailing is about finding your path, whether it’s across an ocean or within yourself.” – Sven Yrvind In conclusion, making flanges around bulkhead hatches may seem complex at first glance, but by following Sven Yrvind’s meticulous process, enthusiasts can achieve professional-level results. Remember that the journey of boatbuilding is as rewarding as reaching your destination; it tests one’s patience and dedication. For those seeking to embark on this adventure or simply gain more insight into marine craftsmanship, Sven’s wisdom is invaluable.Sven Yrvind, a renowned yacht designer and sailor, shares valuable insights on creating flanges around bulkhead hatches for canvas protection in this enlightening video. By following his expert guidance, boat enthusiasts can ensure their living areas remain secure while allowing unhindered access through the hatches.Step 1: Starting with the Flange
Sven begins by explaining that working on flanges vertically and horizontally is significantly easier than doing so in a flat position. To simplify the process further, he divides the task into two or three steps as suggested by fellow expert “for for.” This approach not only makes it more manageable but also allows for greater precision in crafting each component.Step 2: Applying Glue and Securing
Sven proceeds to apply glue along one edge of the flange, ensuring a secure bond when clamped into place. He emphasizes that this stage is crucial for maintaining the structural integrity of the flange, which in turn safeguards the living area beneath the canvas when hatches are open.Step 3: Allowing Time to Dry
After securely attaching the first portion of the flange, Sven allows ample time for it to dry before moving forward with additional steps. This patience and precision are key aspects of his successful boatbuilding methods.Step 4: Finishing Touches
Once the flange is fully dried, Sven removes the clamps carefully, ensuring no damage occurs during this process. He then moves on to attaching four more pieces onto these main frames, completing two pairs of flanges for the bulkhead hatches.The Final Touches
While two flanges form the primary support structure around the hatches, Sven mentions there are two additional pieces required at each end to ensure comprehensive protection. This attention to detail highlights his commitment to producing a durable and reliable design. “Sailing is about finding your path, whether it’s across an ocean or within yourself.” – Sven Yrvind In conclusion, making flanges around bulkhead hatches may seem complex at first glance, but by following Sven Yrvind’s meticulous process, enthusiasts can achieve professional-level results. Remember that the journey of boatbuilding is as rewarding as reaching your destination; it tests one’s patience and dedication. For those seeking to embark on this adventure or simply gain more insight into marine craftsmanship, Sven’s wisdom is invaluable.Making Flanges Around Bulkhead Hatches for Canvas
Sven Yrvind, a renowned yacht designer and sailor, shares valuable insights on creating flanges around bulkhead hatches for canvas protection in this enlightening video. By following his expert guidance, boat enthusiasts can ensure their living areas remain secure while allowing unhindered access through the hatches.Step 1: Starting with the Flange
Sven begins by explaining that working on flanges vertically and horizontally is significantly easier than doing so in a flat position. To simplify the process further, he divides the task into two or three steps as suggested by fellow expert “for for.” This approach not only makes it more manageable but also allows for greater precision in crafting each component.Step 2: Applying Glue and Securing
Sven proceeds to apply glue along one edge of the flange, ensuring a secure bond when clamped into place. He emphasizes that this stage is crucial for maintaining the structural integrity of the flange, which in turn safeguards the living area beneath the canvas when hatches are open.Step 3: Allowing Time to Dry
After securely attaching the first portion of the flange, Sven allows ample time for it to dry before moving forward with additional steps. This patience and precision are key aspects of his successful boatbuilding methods.Step 4: Finishing Touches
Once the flange is fully dried, Sven removes the clamps carefully, ensuring no damage occurs during this process. He then moves on to attaching four more pieces onto these main frames, completing two pairs of flanges for the bulkhead hatches.The Final Touches
While two flanges form the primary support structure around the hatches, Sven mentions there are two additional pieces required at each end to ensure comprehensive protection. This attention to detail highlights his commitment to producing a durable and reliable design. “Sailing is about finding your path, whether it’s across an ocean or within yourself.” – Sven Yrvind In conclusion, making flanges around bulkhead hatches may seem complex at first glance, but by following Sven Yrvind’s meticulous process, enthusiasts can achieve professional-level results. Remember that the journey of boatbuilding is as rewarding as reaching your destination; it tests one’s patience and dedication. For those seeking to embark on this adventure or simply gain more insight into marine craftsmanship, Sven’s wisdom is invaluable.Once the flange is fully dried, Sven removes the clamps carefully, ensuring no damage occurs during this process. He then moves on to attaching four more pieces onto these main frames, completing two pairs of flanges for the bulkhead hatches.The Final Touches
While two flanges form the primary support structure around the hatches, Sven mentions there are two additional pieces required at each end to ensure comprehensive protection. This attention to detail highlights his commitment to producing a durable and reliable design. “Sailing is about finding your path, whether it’s across an ocean or within yourself.” – Sven Yrvind In conclusion, making flanges around bulkhead hatches may seem complex at first glance, but by following Sven Yrvind’s meticulous process, enthusiasts can achieve professional-level results. Remember that the journey of boatbuilding is as rewarding as reaching your destination; it tests one’s patience and dedication. For those seeking to embark on this adventure or simply gain more insight into marine craftsmanship, Sven’s wisdom is invaluable.Sven begins by explaining that working on flanges vertically and horizontally is significantly easier than doing so in a flat position. To simplify the process further, he divides the task into two or three steps as suggested by fellow expert “for for.” This approach not only makes it more manageable but also allows for greater precision in crafting each component.Step 2: Applying Glue and Securing
Sven proceeds to apply glue along one edge of the flange, ensuring a secure bond when clamped into place. He emphasizes that this stage is crucial for maintaining the structural integrity of the flange, which in turn safeguards the living area beneath the canvas when hatches are open.Step 3: Allowing Time to Dry
After securely attaching the first portion of the flange, Sven allows ample time for it to dry before moving forward with additional steps. This patience and precision are key aspects of his successful boatbuilding methods.Step 4: Finishing Touches
Once the flange is fully dried, Sven removes the clamps carefully, ensuring no damage occurs during this process. He then moves on to attaching four more pieces onto these main frames, completing two pairs of flanges for the bulkhead hatches.The Final Touches
While two flanges form the primary support structure around the hatches, Sven mentions there are two additional pieces required at each end to ensure comprehensive protection. This attention to detail highlights his commitment to producing a durable and reliable design. “Sailing is about finding your path, whether it’s across an ocean or within yourself.” – Sven Yrvind In conclusion, making flanges around bulkhead hatches may seem complex at first glance, but by following Sven Yrvind’s meticulous process, enthusiasts can achieve professional-level results. Remember that the journey of boatbuilding is as rewarding as reaching your destination; it tests one’s patience and dedication. For those seeking to embark on this adventure or simply gain more insight into marine craftsmanship, Sven’s wisdom is invaluable.Sven Yrvind, a renowned yacht designer and sailor, shares valuable insights on creating flanges around bulkhead hatches for canvas protection in this enlightening video. By following his expert guidance, boat enthusiasts can ensure their living areas remain secure while allowing unhindered access through the hatches.Step 1: Starting with the Flange
Sven begins by explaining that working on flanges vertically and horizontally is significantly easier than doing so in a flat position. To simplify the process further, he divides the task into two or three steps as suggested by fellow expert “for for.” This approach not only makes it more manageable but also allows for greater precision in crafting each component.Step 2: Applying Glue and Securing
Sven proceeds to apply glue along one edge of the flange, ensuring a secure bond when clamped into place. He emphasizes that this stage is crucial for maintaining the structural integrity of the flange, which in turn safeguards the living area beneath the canvas when hatches are open.Step 3: Allowing Time to Dry
After securely attaching the first portion of the flange, Sven allows ample time for it to dry before moving forward with additional steps. This patience and precision are key aspects of his successful boatbuilding methods.Step 4: Finishing Touches
Once the flange is fully dried, Sven removes the clamps carefully, ensuring no damage occurs during this process. He then moves on to attaching four more pieces onto these main frames, completing two pairs of flanges for the bulkhead hatches.The Final Touches
While two flanges form the primary support structure around the hatches, Sven mentions there are two additional pieces required at each end to ensure comprehensive protection. This attention to detail highlights his commitment to producing a durable and reliable design. “Sailing is about finding your path, whether it’s across an ocean or within yourself.” – Sven Yrvind In conclusion, making flanges around bulkhead hatches may seem complex at first glance, but by following Sven Yrvind’s meticulous process, enthusiasts can achieve professional-level results. Remember that the journey of boatbuilding is as rewarding as reaching your destination; it tests one’s patience and dedication. For those seeking to embark on this adventure or simply gain more insight into marine craftsmanship, Sven’s wisdom is invaluable.Making Flanges Around Bulkhead Hatches for Canvas
Sven Yrvind, a renowned yacht designer and sailor, shares valuable insights on creating flanges around bulkhead hatches for canvas protection in this enlightening video. By following his expert guidance, boat enthusiasts can ensure their living areas remain secure while allowing unhindered access through the hatches.Step 1: Starting with the Flange
Sven begins by explaining that working on flanges vertically and horizontally is significantly easier than doing so in a flat position. To simplify the process further, he divides the task into two or three steps as suggested by fellow expert “for for.” This approach not only makes it more manageable but also allows for greater precision in crafting each component.Step 2: Applying Glue and Securing
Sven proceeds to apply glue along one edge of the flange, ensuring a secure bond when clamped into place. He emphasizes that this stage is crucial for maintaining the structural integrity of the flange, which in turn safeguards the living area beneath the canvas when hatches are open.Step 3: Allowing Time to Dry
After securely attaching the first portion of the flange, Sven allows ample time for it to dry before moving forward with additional steps. This patience and precision are key aspects of his successful boatbuilding methods.Step 4: Finishing Touches
Once the flange is fully dried, Sven removes the clamps carefully, ensuring no damage occurs during this process. He then moves on to attaching four more pieces onto these main frames, completing two pairs of flanges for the bulkhead hatches.The Final Touches
While two flanges form the primary support structure around the hatches, Sven mentions there are two additional pieces required at each end to ensure comprehensive protection. This attention to detail highlights his commitment to producing a durable and reliable design. “Sailing is about finding your path, whether it’s across an ocean or within yourself.” – Sven Yrvind In conclusion, making flanges around bulkhead hatches may seem complex at first glance, but by following Sven Yrvind’s meticulous process, enthusiasts can achieve professional-level results. Remember that the journey of boatbuilding is as rewarding as reaching your destination; it tests one’s patience and dedication. For those seeking to embark on this adventure or simply gain more insight into marine craftsmanship, Sven’s wisdom is invaluable.After securely attaching the first portion of the flange, Sven allows ample time for it to dry before moving forward with additional steps. This patience and precision are key aspects of his successful boatbuilding methods.Step 4: Finishing Touches
Once the flange is fully dried, Sven removes the clamps carefully, ensuring no damage occurs during this process. He then moves on to attaching four more pieces onto these main frames, completing two pairs of flanges for the bulkhead hatches.The Final Touches
While two flanges form the primary support structure around the hatches, Sven mentions there are two additional pieces required at each end to ensure comprehensive protection. This attention to detail highlights his commitment to producing a durable and reliable design. “Sailing is about finding your path, whether it’s across an ocean or within yourself.” – Sven Yrvind In conclusion, making flanges around bulkhead hatches may seem complex at first glance, but by following Sven Yrvind’s meticulous process, enthusiasts can achieve professional-level results. Remember that the journey of boatbuilding is as rewarding as reaching your destination; it tests one’s patience and dedication. For those seeking to embark on this adventure or simply gain more insight into marine craftsmanship, Sven’s wisdom is invaluable.Sven begins by explaining that working on flanges vertically and horizontally is significantly easier than doing so in a flat position. To simplify the process further, he divides the task into two or three steps as suggested by fellow expert “for for.” This approach not only makes it more manageable but also allows for greater precision in crafting each component.Step 2: Applying Glue and Securing
Sven proceeds to apply glue along one edge of the flange, ensuring a secure bond when clamped into place. He emphasizes that this stage is crucial for maintaining the structural integrity of the flange, which in turn safeguards the living area beneath the canvas when hatches are open.Step 3: Allowing Time to Dry
After securely attaching the first portion of the flange, Sven allows ample time for it to dry before moving forward with additional steps. This patience and precision are key aspects of his successful boatbuilding methods.Step 4: Finishing Touches
Once the flange is fully dried, Sven removes the clamps carefully, ensuring no damage occurs during this process. He then moves on to attaching four more pieces onto these main frames, completing two pairs of flanges for the bulkhead hatches.The Final Touches
While two flanges form the primary support structure around the hatches, Sven mentions there are two additional pieces required at each end to ensure comprehensive protection. This attention to detail highlights his commitment to producing a durable and reliable design. “Sailing is about finding your path, whether it’s across an ocean or within yourself.” – Sven Yrvind In conclusion, making flanges around bulkhead hatches may seem complex at first glance, but by following Sven Yrvind’s meticulous process, enthusiasts can achieve professional-level results. Remember that the journey of boatbuilding is as rewarding as reaching your destination; it tests one’s patience and dedication. For those seeking to embark on this adventure or simply gain more insight into marine craftsmanship, Sven’s wisdom is invaluable.Sven Yrvind, a renowned yacht designer and sailor, shares valuable insights on creating flanges around bulkhead hatches for canvas protection in this enlightening video. By following his expert guidance, boat enthusiasts can ensure their living areas remain secure while allowing unhindered access through the hatches.Step 1: Starting with the Flange
Sven begins by explaining that working on flanges vertically and horizontally is significantly easier than doing so in a flat position. To simplify the process further, he divides the task into two or three steps as suggested by fellow expert “for for.” This approach not only makes it more manageable but also allows for greater precision in crafting each component.Step 2: Applying Glue and Securing
Sven proceeds to apply glue along one edge of the flange, ensuring a secure bond when clamped into place. He emphasizes that this stage is crucial for maintaining the structural integrity of the flange, which in turn safeguards the living area beneath the canvas when hatches are open.Step 3: Allowing Time to Dry
After securely attaching the first portion of the flange, Sven allows ample time for it to dry before moving forward with additional steps. This patience and precision are key aspects of his successful boatbuilding methods.Step 4: Finishing Touches
Once the flange is fully dried, Sven removes the clamps carefully, ensuring no damage occurs during this process. He then moves on to attaching four more pieces onto these main frames, completing two pairs of flanges for the bulkhead hatches.The Final Touches
While two flanges form the primary support structure around the hatches, Sven mentions there are two additional pieces required at each end to ensure comprehensive protection. This attention to detail highlights his commitment to producing a durable and reliable design. “Sailing is about finding your path, whether it’s across an ocean or within yourself.” – Sven Yrvind In conclusion, making flanges around bulkhead hatches may seem complex at first glance, but by following Sven Yrvind’s meticulous process, enthusiasts can achieve professional-level results. Remember that the journey of boatbuilding is as rewarding as reaching your destination; it tests one’s patience and dedication. For those seeking to embark on this adventure or simply gain more insight into marine craftsmanship, Sven’s wisdom is invaluable.Making Flanges Around Bulkhead Hatches for Canvas
Sven Yrvind, a renowned yacht designer and sailor, shares valuable insights on creating flanges around bulkhead hatches for canvas protection in this enlightening video. By following his expert guidance, boat enthusiasts can ensure their living areas remain secure while allowing unhindered access through the hatches.Step 1: Starting with the Flange
Sven begins by explaining that working on flanges vertically and horizontally is significantly easier than doing so in a flat position. To simplify the process further, he divides the task into two or three steps as suggested by fellow expert “for for.” This approach not only makes it more manageable but also allows for greater precision in crafting each component.Step 2: Applying Glue and Securing
Sven proceeds to apply glue along one edge of the flange, ensuring a secure bond when clamped into place. He emphasizes that this stage is crucial for maintaining the structural integrity of the flange, which in turn safeguards the living area beneath the canvas when hatches are open.Step 3: Allowing Time to Dry
After securely attaching the first portion of the flange, Sven allows ample time for it to dry before moving forward with additional steps. This patience and precision are key aspects of his successful boatbuilding methods.Step 4: Finishing Touches
Once the flange is fully dried, Sven removes the clamps carefully, ensuring no damage occurs during this process. He then moves on to attaching four more pieces onto these main frames, completing two pairs of flanges for the bulkhead hatches.The Final Touches
While two flanges form the primary support structure around the hatches, Sven mentions there are two additional pieces required at each end to ensure comprehensive protection. This attention to detail highlights his commitment to producing a durable and reliable design. “Sailing is about finding your path, whether it’s across an ocean or within yourself.” – Sven Yrvind In conclusion, making flanges around bulkhead hatches may seem complex at first glance, but by following Sven Yrvind’s meticulous process, enthusiasts can achieve professional-level results. Remember that the journey of boatbuilding is as rewarding as reaching your destination; it tests one’s patience and dedication. For those seeking to embark on this adventure or simply gain more insight into marine craftsmanship, Sven’s wisdom is invaluable.Sven proceeds to apply glue along one edge of the flange, ensuring a secure bond when clamped into place. He emphasizes that this stage is crucial for maintaining the structural integrity of the flange, which in turn safeguards the living area beneath the canvas when hatches are open.Step 3: Allowing Time to Dry
After securely attaching the first portion of the flange, Sven allows ample time for it to dry before moving forward with additional steps. This patience and precision are key aspects of his successful boatbuilding methods.Step 4: Finishing Touches
Once the flange is fully dried, Sven removes the clamps carefully, ensuring no damage occurs during this process. He then moves on to attaching four more pieces onto these main frames, completing two pairs of flanges for the bulkhead hatches.The Final Touches
While two flanges form the primary support structure around the hatches, Sven mentions there are two additional pieces required at each end to ensure comprehensive protection. This attention to detail highlights his commitment to producing a durable and reliable design. “Sailing is about finding your path, whether it’s across an ocean or within yourself.” – Sven Yrvind In conclusion, making flanges around bulkhead hatches may seem complex at first glance, but by following Sven Yrvind’s meticulous process, enthusiasts can achieve professional-level results. Remember that the journey of boatbuilding is as rewarding as reaching your destination; it tests one’s patience and dedication. For those seeking to embark on this adventure or simply gain more insight into marine craftsmanship, Sven’s wisdom is invaluable.Sven begins by explaining that working on flanges vertically and horizontally is significantly easier than doing so in a flat position. To simplify the process further, he divides the task into two or three steps as suggested by fellow expert “for for.” This approach not only makes it more manageable but also allows for greater precision in crafting each component.Step 2: Applying Glue and Securing
Sven proceeds to apply glue along one edge of the flange, ensuring a secure bond when clamped into place. He emphasizes that this stage is crucial for maintaining the structural integrity of the flange, which in turn safeguards the living area beneath the canvas when hatches are open.Step 3: Allowing Time to Dry
After securely attaching the first portion of the flange, Sven allows ample time for it to dry before moving forward with additional steps. This patience and precision are key aspects of his successful boatbuilding methods.Step 4: Finishing Touches
Once the flange is fully dried, Sven removes the clamps carefully, ensuring no damage occurs during this process. He then moves on to attaching four more pieces onto these main frames, completing two pairs of flanges for the bulkhead hatches.The Final Touches
While two flanges form the primary support structure around the hatches, Sven mentions there are two additional pieces required at each end to ensure comprehensive protection. This attention to detail highlights his commitment to producing a durable and reliable design. “Sailing is about finding your path, whether it’s across an ocean or within yourself.” – Sven Yrvind In conclusion, making flanges around bulkhead hatches may seem complex at first glance, but by following Sven Yrvind’s meticulous process, enthusiasts can achieve professional-level results. Remember that the journey of boatbuilding is as rewarding as reaching your destination; it tests one’s patience and dedication. For those seeking to embark on this adventure or simply gain more insight into marine craftsmanship, Sven’s wisdom is invaluable.Sven Yrvind, a renowned yacht designer and sailor, shares valuable insights on creating flanges around bulkhead hatches for canvas protection in this enlightening video. By following his expert guidance, boat enthusiasts can ensure their living areas remain secure while allowing unhindered access through the hatches.Step 1: Starting with the Flange
Sven begins by explaining that working on flanges vertically and horizontally is significantly easier than doing so in a flat position. To simplify the process further, he divides the task into two or three steps as suggested by fellow expert “for for.” This approach not only makes it more manageable but also allows for greater precision in crafting each component.Step 2: Applying Glue and Securing
Sven proceeds to apply glue along one edge of the flange, ensuring a secure bond when clamped into place. He emphasizes that this stage is crucial for maintaining the structural integrity of the flange, which in turn safeguards the living area beneath the canvas when hatches are open.Step 3: Allowing Time to Dry
After securely attaching the first portion of the flange, Sven allows ample time for it to dry before moving forward with additional steps. This patience and precision are key aspects of his successful boatbuilding methods.Step 4: Finishing Touches
Once the flange is fully dried, Sven removes the clamps carefully, ensuring no damage occurs during this process. He then moves on to attaching four more pieces onto these main frames, completing two pairs of flanges for the bulkhead hatches.The Final Touches
While two flanges form the primary support structure around the hatches, Sven mentions there are two additional pieces required at each end to ensure comprehensive protection. This attention to detail highlights his commitment to producing a durable and reliable design. “Sailing is about finding your path, whether it’s across an ocean or within yourself.” – Sven Yrvind In conclusion, making flanges around bulkhead hatches may seem complex at first glance, but by following Sven Yrvind’s meticulous process, enthusiasts can achieve professional-level results. Remember that the journey of boatbuilding is as rewarding as reaching your destination; it tests one’s patience and dedication. For those seeking to embark on this adventure or simply gain more insight into marine craftsmanship, Sven’s wisdom is invaluable.Making Flanges Around Bulkhead Hatches for Canvas
Sven Yrvind, a renowned yacht designer and sailor, shares valuable insights on creating flanges around bulkhead hatches for canvas protection in this enlightening video. By following his expert guidance, boat enthusiasts can ensure their living areas remain secure while allowing unhindered access through the hatches.Step 1: Starting with the Flange
Sven begins by explaining that working on flanges vertically and horizontally is significantly easier than doing so in a flat position. To simplify the process further, he divides the task into two or three steps as suggested by fellow expert “for for.” This approach not only makes it more manageable but also allows for greater precision in crafting each component.Step 2: Applying Glue and Securing
Sven proceeds to apply glue along one edge of the flange, ensuring a secure bond when clamped into place. He emphasizes that this stage is crucial for maintaining the structural integrity of the flange, which in turn safeguards the living area beneath the canvas when hatches are open.Step 3: Allowing Time to Dry
After securely attaching the first portion of the flange, Sven allows ample time for it to dry before moving forward with additional steps. This patience and precision are key aspects of his successful boatbuilding methods.Step 4: Finishing Touches
Once the flange is fully dried, Sven removes the clamps carefully, ensuring no damage occurs during this process. He then moves on to attaching four more pieces onto these main frames, completing two pairs of flanges for the bulkhead hatches.The Final Touches
While two flanges form the primary support structure around the hatches, Sven mentions there are two additional pieces required at each end to ensure comprehensive protection. This attention to detail highlights his commitment to producing a durable and reliable design. “Sailing is about finding your path, whether it’s across an ocean or within yourself.” – Sven Yrvind In conclusion, making flanges around bulkhead hatches may seem complex at first glance, but by following Sven Yrvind’s meticulous process, enthusiasts can achieve professional-level results. Remember that the journey of boatbuilding is as rewarding as reaching your destination; it tests one’s patience and dedication. For those seeking to embark on this adventure or simply gain more insight into marine craftsmanship, Sven’s wisdom is invaluable.Once the flange is fully dried, Sven removes the clamps carefully, ensuring no damage occurs during this process. He then moves on to attaching four more pieces onto these main frames, completing two pairs of flanges for the bulkhead hatches.The Final Touches
While two flanges form the primary support structure around the hatches, Sven mentions there are two additional pieces required at each end to ensure comprehensive protection. This attention to detail highlights his commitment to producing a durable and reliable design. “Sailing is about finding your path, whether it’s across an ocean or within yourself.” – Sven Yrvind In conclusion, making flanges around bulkhead hatches may seem complex at first glance, but by following Sven Yrvind’s meticulous process, enthusiasts can achieve professional-level results. Remember that the journey of boatbuilding is as rewarding as reaching your destination; it tests one’s patience and dedication. For those seeking to embark on this adventure or simply gain more insight into marine craftsmanship, Sven’s wisdom is invaluable.Sven proceeds to apply glue along one edge of the flange, ensuring a secure bond when clamped into place. He emphasizes that this stage is crucial for maintaining the structural integrity of the flange, which in turn safeguards the living area beneath the canvas when hatches are open.Step 3: Allowing Time to Dry
After securely attaching the first portion of the flange, Sven allows ample time for it to dry before moving forward with additional steps. This patience and precision are key aspects of his successful boatbuilding methods.Step 4: Finishing Touches
Once the flange is fully dried, Sven removes the clamps carefully, ensuring no damage occurs during this process. He then moves on to attaching four more pieces onto these main frames, completing two pairs of flanges for the bulkhead hatches.The Final Touches
While two flanges form the primary support structure around the hatches, Sven mentions there are two additional pieces required at each end to ensure comprehensive protection. This attention to detail highlights his commitment to producing a durable and reliable design. “Sailing is about finding your path, whether it’s across an ocean or within yourself.” – Sven Yrvind In conclusion, making flanges around bulkhead hatches may seem complex at first glance, but by following Sven Yrvind’s meticulous process, enthusiasts can achieve professional-level results. Remember that the journey of boatbuilding is as rewarding as reaching your destination; it tests one’s patience and dedication. For those seeking to embark on this adventure or simply gain more insight into marine craftsmanship, Sven’s wisdom is invaluable.Sven begins by explaining that working on flanges vertically and horizontally is significantly easier than doing so in a flat position. To simplify the process further, he divides the task into two or three steps as suggested by fellow expert “for for.” This approach not only makes it more manageable but also allows for greater precision in crafting each component.Step 2: Applying Glue and Securing
Sven proceeds to apply glue along one edge of the flange, ensuring a secure bond when clamped into place. He emphasizes that this stage is crucial for maintaining the structural integrity of the flange, which in turn safeguards the living area beneath the canvas when hatches are open.Step 3: Allowing Time to Dry
After securely attaching the first portion of the flange, Sven allows ample time for it to dry before moving forward with additional steps. This patience and precision are key aspects of his successful boatbuilding methods.Step 4: Finishing Touches
Once the flange is fully dried, Sven removes the clamps carefully, ensuring no damage occurs during this process. He then moves on to attaching four more pieces onto these main frames, completing two pairs of flanges for the bulkhead hatches.The Final Touches
While two flanges form the primary support structure around the hatches, Sven mentions there are two additional pieces required at each end to ensure comprehensive protection. This attention to detail highlights his commitment to producing a durable and reliable design. “Sailing is about finding your path, whether it’s across an ocean or within yourself.” – Sven Yrvind In conclusion, making flanges around bulkhead hatches may seem complex at first glance, but by following Sven Yrvind’s meticulous process, enthusiasts can achieve professional-level results. Remember that the journey of boatbuilding is as rewarding as reaching your destination; it tests one’s patience and dedication. For those seeking to embark on this adventure or simply gain more insight into marine craftsmanship, Sven’s wisdom is invaluable.Sven Yrvind, a renowned yacht designer and sailor, shares valuable insights on creating flanges around bulkhead hatches for canvas protection in this enlightening video. By following his expert guidance, boat enthusiasts can ensure their living areas remain secure while allowing unhindered access through the hatches.Step 1: Starting with the Flange
Sven begins by explaining that working on flanges vertically and horizontally is significantly easier than doing so in a flat position. To simplify the process further, he divides the task into two or three steps as suggested by fellow expert “for for.” This approach not only makes it more manageable but also allows for greater precision in crafting each component.Step 2: Applying Glue and Securing
Sven proceeds to apply glue along one edge of the flange, ensuring a secure bond when clamped into place. He emphasizes that this stage is crucial for maintaining the structural integrity of the flange, which in turn safeguards the living area beneath the canvas when hatches are open.Step 3: Allowing Time to Dry
After securely attaching the first portion of the flange, Sven allows ample time for it to dry before moving forward with additional steps. This patience and precision are key aspects of his successful boatbuilding methods.Step 4: Finishing Touches
Once the flange is fully dried, Sven removes the clamps carefully, ensuring no damage occurs during this process. He then moves on to attaching four more pieces onto these main frames, completing two pairs of flanges for the bulkhead hatches.The Final Touches
While two flanges form the primary support structure around the hatches, Sven mentions there are two additional pieces required at each end to ensure comprehensive protection. This attention to detail highlights his commitment to producing a durable and reliable design. “Sailing is about finding your path, whether it’s across an ocean or within yourself.” – Sven Yrvind In conclusion, making flanges around bulkhead hatches may seem complex at first glance, but by following Sven Yrvind’s meticulous process, enthusiasts can achieve professional-level results. Remember that the journey of boatbuilding is as rewarding as reaching your destination; it tests one’s patience and dedication. For those seeking to embark on this adventure or simply gain more insight into marine craftsmanship, Sven’s wisdom is invaluable.Making Flanges Around Bulkhead Hatches for Canvas
Sven Yrvind, a renowned yacht designer and sailor, shares valuable insights on creating flanges around bulkhead hatches for canvas protection in this enlightening video. By following his expert guidance, boat enthusiasts can ensure their living areas remain secure while allowing unhindered access through the hatches.Step 1: Starting with the Flange
Sven begins by explaining that working on flanges vertically and horizontally is significantly easier than doing so in a flat position. To simplify the process further, he divides the task into two or three steps as suggested by fellow expert “for for.” This approach not only makes it more manageable but also allows for greater precision in crafting each component.Step 2: Applying Glue and Securing
Sven proceeds to apply glue along one edge of the flange, ensuring a secure bond when clamped into place. He emphasizes that this stage is crucial for maintaining the structural integrity of the flange, which in turn safeguards the living area beneath the canvas when hatches are open.Step 3: Allowing Time to Dry
After securely attaching the first portion of the flange, Sven allows ample time for it to dry before moving forward with additional steps. This patience and precision are key aspects of his successful boatbuilding methods.Step 4: Finishing Touches
Once the flange is fully dried, Sven removes the clamps carefully, ensuring no damage occurs during this process. He then moves on to attaching four more pieces onto these main frames, completing two pairs of flanges for the bulkhead hatches.The Final Touches
While two flanges form the primary support structure around the hatches, Sven mentions there are two additional pieces required at each end to ensure comprehensive protection. This attention to detail highlights his commitment to producing a durable and reliable design. “Sailing is about finding your path, whether it’s across an ocean or within yourself.” – Sven Yrvind In conclusion, making flanges around bulkhead hatches may seem complex at first glance, but by following Sven Yrvind’s meticulous process, enthusiasts can achieve professional-level results. Remember that the journey of boatbuilding is as rewarding as reaching your destination; it tests one’s patience and dedication. For those seeking to embark on this adventure or simply gain more insight into marine craftsmanship, Sven’s wisdom is invaluable.After securely attaching the first portion of the flange, Sven allows ample time for it to dry before moving forward with additional steps. This patience and precision are key aspects of his successful boatbuilding methods.Step 4: Finishing Touches
Once the flange is fully dried, Sven removes the clamps carefully, ensuring no damage occurs during this process. He then moves on to attaching four more pieces onto these main frames, completing two pairs of flanges for the bulkhead hatches.The Final Touches
While two flanges form the primary support structure around the hatches, Sven mentions there are two additional pieces required at each end to ensure comprehensive protection. This attention to detail highlights his commitment to producing a durable and reliable design. “Sailing is about finding your path, whether it’s across an ocean or within yourself.” – Sven Yrvind In conclusion, making flanges around bulkhead hatches may seem complex at first glance, but by following Sven Yrvind’s meticulous process, enthusiasts can achieve professional-level results. Remember that the journey of boatbuilding is as rewarding as reaching your destination; it tests one’s patience and dedication. For those seeking to embark on this adventure or simply gain more insight into marine craftsmanship, Sven’s wisdom is invaluable.Sven proceeds to apply glue along one edge of the flange, ensuring a secure bond when clamped into place. He emphasizes that this stage is crucial for maintaining the structural integrity of the flange, which in turn safeguards the living area beneath the canvas when hatches are open.Step 3: Allowing Time to Dry
After securely attaching the first portion of the flange, Sven allows ample time for it to dry before moving forward with additional steps. This patience and precision are key aspects of his successful boatbuilding methods.Step 4: Finishing Touches
Once the flange is fully dried, Sven removes the clamps carefully, ensuring no damage occurs during this process. He then moves on to attaching four more pieces onto these main frames, completing two pairs of flanges for the bulkhead hatches.The Final Touches
While two flanges form the primary support structure around the hatches, Sven mentions there are two additional pieces required at each end to ensure comprehensive protection. This attention to detail highlights his commitment to producing a durable and reliable design. “Sailing is about finding your path, whether it’s across an ocean or within yourself.” – Sven Yrvind In conclusion, making flanges around bulkhead hatches may seem complex at first glance, but by following Sven Yrvind’s meticulous process, enthusiasts can achieve professional-level results. Remember that the journey of boatbuilding is as rewarding as reaching your destination; it tests one’s patience and dedication. For those seeking to embark on this adventure or simply gain more insight into marine craftsmanship, Sven’s wisdom is invaluable.Sven begins by explaining that working on flanges vertically and horizontally is significantly easier than doing so in a flat position. To simplify the process further, he divides the task into two or three steps as suggested by fellow expert “for for.” This approach not only makes it more manageable but also allows for greater precision in crafting each component.Step 2: Applying Glue and Securing
Sven proceeds to apply glue along one edge of the flange, ensuring a secure bond when clamped into place. He emphasizes that this stage is crucial for maintaining the structural integrity of the flange, which in turn safeguards the living area beneath the canvas when hatches are open.Step 3: Allowing Time to Dry
After securely attaching the first portion of the flange, Sven allows ample time for it to dry before moving forward with additional steps. This patience and precision are key aspects of his successful boatbuilding methods.Step 4: Finishing Touches
Once the flange is fully dried, Sven removes the clamps carefully, ensuring no damage occurs during this process. He then moves on to attaching four more pieces onto these main frames, completing two pairs of flanges for the bulkhead hatches.The Final Touches
While two flanges form the primary support structure around the hatches, Sven mentions there are two additional pieces required at each end to ensure comprehensive protection. This attention to detail highlights his commitment to producing a durable and reliable design. “Sailing is about finding your path, whether it’s across an ocean or within yourself.” – Sven Yrvind In conclusion, making flanges around bulkhead hatches may seem complex at first glance, but by following Sven Yrvind’s meticulous process, enthusiasts can achieve professional-level results. Remember that the journey of boatbuilding is as rewarding as reaching your destination; it tests one’s patience and dedication. For those seeking to embark on this adventure or simply gain more insight into marine craftsmanship, Sven’s wisdom is invaluable.Sven Yrvind, a renowned yacht designer and sailor, shares valuable insights on creating flanges around bulkhead hatches for canvas protection in this enlightening video. By following his expert guidance, boat enthusiasts can ensure their living areas remain secure while allowing unhindered access through the hatches.Step 1: Starting with the Flange
Sven begins by explaining that working on flanges vertically and horizontally is significantly easier than doing so in a flat position. To simplify the process further, he divides the task into two or three steps as suggested by fellow expert “for for.” This approach not only makes it more manageable but also allows for greater precision in crafting each component.Step 2: Applying Glue and Securing
Sven proceeds to apply glue along one edge of the flange, ensuring a secure bond when clamped into place. He emphasizes that this stage is crucial for maintaining the structural integrity of the flange, which in turn safeguards the living area beneath the canvas when hatches are open.Step 3: Allowing Time to Dry
After securely attaching the first portion of the flange, Sven allows ample time for it to dry before moving forward with additional steps. This patience and precision are key aspects of his successful boatbuilding methods.Step 4: Finishing Touches
Once the flange is fully dried, Sven removes the clamps carefully, ensuring no damage occurs during this process. He then moves on to attaching four more pieces onto these main frames, completing two pairs of flanges for the bulkhead hatches.The Final Touches
While two flanges form the primary support structure around the hatches, Sven mentions there are two additional pieces required at each end to ensure comprehensive protection. This attention to detail highlights his commitment to producing a durable and reliable design. “Sailing is about finding your path, whether it’s across an ocean or within yourself.” – Sven Yrvind In conclusion, making flanges around bulkhead hatches may seem complex at first glance, but by following Sven Yrvind’s meticulous process, enthusiasts can achieve professional-level results. Remember that the journey of boatbuilding is as rewarding as reaching your destination; it tests one’s patience and dedication. For those seeking to embark on this adventure or simply gain more insight into marine craftsmanship, Sven’s wisdom is invaluable.Making Flanges Around Bulkhead Hatches for Canvas
Sven Yrvind, a renowned yacht designer and sailor, shares valuable insights on creating flanges around bulkhead hatches for canvas protection in this enlightening video. By following his expert guidance, boat enthusiasts can ensure their living areas remain secure while allowing unhindered access through the hatches.Step 1: Starting with the Flange
Sven begins by explaining that working on flanges vertically and horizontally is significantly easier than doing so in a flat position. To simplify the process further, he divides the task into two or three steps as suggested by fellow expert “for for.” This approach not only makes it more manageable but also allows for greater precision in crafting each component.Step 2: Applying Glue and Securing
Sven proceeds to apply glue along one edge of the flange, ensuring a secure bond when clamped into place. He emphasizes that this stage is crucial for maintaining the structural integrity of the flange, which in turn safeguards the living area beneath the canvas when hatches are open.Step 3: Allowing Time to Dry
After securely attaching the first portion of the flange, Sven allows ample time for it to dry before moving forward with additional steps. This patience and precision are key aspects of his successful boatbuilding methods.Step 4: Finishing Touches
Once the flange is fully dried, Sven removes the clamps carefully, ensuring no damage occurs during this process. He then moves on to attaching four more pieces onto these main frames, completing two pairs of flanges for the bulkhead hatches.The Final Touches
While two flanges form the primary support structure around the hatches, Sven mentions there are two additional pieces required at each end to ensure comprehensive protection. This attention to detail highlights his commitment to producing a durable and reliable design. “Sailing is about finding your path, whether it’s across an ocean or within yourself.” – Sven Yrvind In conclusion, making flanges around bulkhead hatches may seem complex at first glance, but by following Sven Yrvind’s meticulous process, enthusiasts can achieve professional-level results. Remember that the journey of boatbuilding is as rewarding as reaching your destination; it tests one’s patience and dedication. For those seeking to embark on this adventure or simply gain more insight into marine craftsmanship, Sven’s wisdom is invaluable.Once the flange is fully dried, Sven removes the clamps carefully, ensuring no damage occurs during this process. He then moves on to attaching four more pieces onto these main frames, completing two pairs of flanges for the bulkhead hatches.The Final Touches
While two flanges form the primary support structure around the hatches, Sven mentions there are two additional pieces required at each end to ensure comprehensive protection. This attention to detail highlights his commitment to producing a durable and reliable design. “Sailing is about finding your path, whether it’s across an ocean or within yourself.” – Sven Yrvind In conclusion, making flanges around bulkhead hatches may seem complex at first glance, but by following Sven Yrvind’s meticulous process, enthusiasts can achieve professional-level results. Remember that the journey of boatbuilding is as rewarding as reaching your destination; it tests one’s patience and dedication. For those seeking to embark on this adventure or simply gain more insight into marine craftsmanship, Sven’s wisdom is invaluable.After securely attaching the first portion of the flange, Sven allows ample time for it to dry before moving forward with additional steps. This patience and precision are key aspects of his successful boatbuilding methods.Step 4: Finishing Touches
Once the flange is fully dried, Sven removes the clamps carefully, ensuring no damage occurs during this process. He then moves on to attaching four more pieces onto these main frames, completing two pairs of flanges for the bulkhead hatches.The Final Touches
While two flanges form the primary support structure around the hatches, Sven mentions there are two additional pieces required at each end to ensure comprehensive protection. This attention to detail highlights his commitment to producing a durable and reliable design. “Sailing is about finding your path, whether it’s across an ocean or within yourself.” – Sven Yrvind In conclusion, making flanges around bulkhead hatches may seem complex at first glance, but by following Sven Yrvind’s meticulous process, enthusiasts can achieve professional-level results. Remember that the journey of boatbuilding is as rewarding as reaching your destination; it tests one’s patience and dedication. For those seeking to embark on this adventure or simply gain more insight into marine craftsmanship, Sven’s wisdom is invaluable.Sven proceeds to apply glue along one edge of the flange, ensuring a secure bond when clamped into place. He emphasizes that this stage is crucial for maintaining the structural integrity of the flange, which in turn safeguards the living area beneath the canvas when hatches are open.Step 3: Allowing Time to Dry
After securely attaching the first portion of the flange, Sven allows ample time for it to dry before moving forward with additional steps. This patience and precision are key aspects of his successful boatbuilding methods.Step 4: Finishing Touches
Once the flange is fully dried, Sven removes the clamps carefully, ensuring no damage occurs during this process. He then moves on to attaching four more pieces onto these main frames, completing two pairs of flanges for the bulkhead hatches.The Final Touches
While two flanges form the primary support structure around the hatches, Sven mentions there are two additional pieces required at each end to ensure comprehensive protection. This attention to detail highlights his commitment to producing a durable and reliable design. “Sailing is about finding your path, whether it’s across an ocean or within yourself.” – Sven Yrvind In conclusion, making flanges around bulkhead hatches may seem complex at first glance, but by following Sven Yrvind’s meticulous process, enthusiasts can achieve professional-level results. Remember that the journey of boatbuilding is as rewarding as reaching your destination; it tests one’s patience and dedication. For those seeking to embark on this adventure or simply gain more insight into marine craftsmanship, Sven’s wisdom is invaluable.Sven begins by explaining that working on flanges vertically and horizontally is significantly easier than doing so in a flat position. To simplify the process further, he divides the task into two or three steps as suggested by fellow expert “for for.” This approach not only makes it more manageable but also allows for greater precision in crafting each component.Step 2: Applying Glue and Securing
Sven proceeds to apply glue along one edge of the flange, ensuring a secure bond when clamped into place. He emphasizes that this stage is crucial for maintaining the structural integrity of the flange, which in turn safeguards the living area beneath the canvas when hatches are open.Step 3: Allowing Time to Dry
After securely attaching the first portion of the flange, Sven allows ample time for it to dry before moving forward with additional steps. This patience and precision are key aspects of his successful boatbuilding methods.Step 4: Finishing Touches
Once the flange is fully dried, Sven removes the clamps carefully, ensuring no damage occurs during this process. He then moves on to attaching four more pieces onto these main frames, completing two pairs of flanges for the bulkhead hatches.The Final Touches
While two flanges form the primary support structure around the hatches, Sven mentions there are two additional pieces required at each end to ensure comprehensive protection. This attention to detail highlights his commitment to producing a durable and reliable design. “Sailing is about finding your path, whether it’s across an ocean or within yourself.” – Sven Yrvind In conclusion, making flanges around bulkhead hatches may seem complex at first glance, but by following Sven Yrvind’s meticulous process, enthusiasts can achieve professional-level results. Remember that the journey of boatbuilding is as rewarding as reaching your destination; it tests one’s patience and dedication. For those seeking to embark on this adventure or simply gain more insight into marine craftsmanship, Sven’s wisdom is invaluable.Sven Yrvind, a renowned yacht designer and sailor, shares valuable insights on creating flanges around bulkhead hatches for canvas protection in this enlightening video. By following his expert guidance, boat enthusiasts can ensure their living areas remain secure while allowing unhindered access through the hatches.Step 1: Starting with the Flange
Sven begins by explaining that working on flanges vertically and horizontally is significantly easier than doing so in a flat position. To simplify the process further, he divides the task into two or three steps as suggested by fellow expert “for for.” This approach not only makes it more manageable but also allows for greater precision in crafting each component.Step 2: Applying Glue and Securing
Sven proceeds to apply glue along one edge of the flange, ensuring a secure bond when clamped into place. He emphasizes that this stage is crucial for maintaining the structural integrity of the flange, which in turn safeguards the living area beneath the canvas when hatches are open.Step 3: Allowing Time to Dry
After securely attaching the first portion of the flange, Sven allows ample time for it to dry before moving forward with additional steps. This patience and precision are key aspects of his successful boatbuilding methods.Step 4: Finishing Touches
Once the flange is fully dried, Sven removes the clamps carefully, ensuring no damage occurs during this process. He then moves on to attaching four more pieces onto these main frames, completing two pairs of flanges for the bulkhead hatches.The Final Touches
While two flanges form the primary support structure around the hatches, Sven mentions there are two additional pieces required at each end to ensure comprehensive protection. This attention to detail highlights his commitment to producing a durable and reliable design. “Sailing is about finding your path, whether it’s across an ocean or within yourself.” – Sven Yrvind In conclusion, making flanges around bulkhead hatches may seem complex at first glance, but by following Sven Yrvind’s meticulous process, enthusiasts can achieve professional-level results. Remember that the journey of boatbuilding is as rewarding as reaching your destination; it tests one’s patience and dedication. For those seeking to embark on this adventure or simply gain more insight into marine craftsmanship, Sven’s wisdom is invaluable.Making Flanges Around Bulkhead Hatches for Canvas
Sven Yrvind, a renowned yacht designer and sailor, shares valuable insights on creating flanges around bulkhead hatches for canvas protection in this enlightening video. By following his expert guidance, boat enthusiasts can ensure their living areas remain secure while allowing unhindered access through the hatches.Step 1: Starting with the Flange
Sven begins by explaining that working on flanges vertically and horizontally is significantly easier than doing so in a flat position. To simplify the process further, he divides the task into two or three steps as suggested by fellow expert “for for.” This approach not only makes it more manageable but also allows for greater precision in crafting each component.Step 2: Applying Glue and Securing
Sven proceeds to apply glue along one edge of the flange, ensuring a secure bond when clamped into place. He emphasizes that this stage is crucial for maintaining the structural integrity of the flange, which in turn safeguards the living area beneath the canvas when hatches are open.Step 3: Allowing Time to Dry
After securely attaching the first portion of the flange, Sven allows ample time for it to dry before moving forward with additional steps. This patience and precision are key aspects of his successful boatbuilding methods.Step 4: Finishing Touches
Once the flange is fully dried, Sven removes the clamps carefully, ensuring no damage occurs during this process. He then moves on to attaching four more pieces onto these main frames, completing two pairs of flanges for the bulkhead hatches.The Final Touches
While two flanges form the primary support structure around the hatches, Sven mentions there are two additional pieces required at each end to ensure comprehensive protection. This attention to detail highlights his commitment to producing a durable and reliable design. “Sailing is about finding your path, whether it’s across an ocean or within yourself.” – Sven Yrvind In conclusion, making flanges around bulkhead hatches may seem complex at first glance, but by following Sven Yrvind’s meticulous process, enthusiasts can achieve professional-level results. Remember that the journey of boatbuilding is as rewarding as reaching your destination; it tests one’s patience and dedication. For those seeking to embark on this adventure or simply gain more insight into marine craftsmanship, Sven’s wisdom is invaluable.Sven begins by explaining that working on flanges vertically and horizontally is significantly easier than doing so in a flat position. To simplify the process further, he divides the task into two or three steps as suggested by fellow expert “for for.” This approach not only makes it more manageable but also allows for greater precision in crafting each component.Step 2: Applying Glue and Securing
Sven proceeds to apply glue along one edge of the flange, ensuring a secure bond when clamped into place. He emphasizes that this stage is crucial for maintaining the structural integrity of the flange, which in turn safeguards the living area beneath the canvas when hatches are open.Step 3: Allowing Time to Dry
After securely attaching the first portion of the flange, Sven allows ample time for it to dry before moving forward with additional steps. This patience and precision are key aspects of his successful boatbuilding methods.Step 4: Finishing Touches
Once the flange is fully dried, Sven removes the clamps carefully, ensuring no damage occurs during this process. He then moves on to attaching four more pieces onto these main frames, completing two pairs of flanges for the bulkhead hatches.The Final Touches
While two flanges form the primary support structure around the hatches, Sven mentions there are two additional pieces required at each end to ensure comprehensive protection. This attention to detail highlights his commitment to producing a durable and reliable design. “Sailing is about finding your path, whether it’s across an ocean or within yourself.” – Sven Yrvind In conclusion, making flanges around bulkhead hatches may seem complex at first glance, but by following Sven Yrvind’s meticulous process, enthusiasts can achieve professional-level results. Remember that the journey of boatbuilding is as rewarding as reaching your destination; it tests one’s patience and dedication. For those seeking to embark on this adventure or simply gain more insight into marine craftsmanship, Sven’s wisdom is invaluable.Sven begins by explaining that working on flanges vertically and horizontally is significantly easier than doing so in a flat position. To simplify the process further, he divides the task into two or three steps as suggested by fellow expert “for for.” This approach not only makes it more manageable but also allows for greater precision in crafting each component.Step 2: Applying Glue and Securing
Sven proceeds to apply glue along one edge of the flange, ensuring a secure bond when clamped into place. He emphasizes that this stage is crucial for maintaining the structural integrity of the flange, which in turn safeguards the living area beneath the canvas when hatches are open.Step 3: Allowing Time to Dry
After securely attaching the first portion of the flange, Sven allows ample time for it to dry before moving forward with additional steps. This patience and precision are key aspects of his successful boatbuilding methods.Step 4: Finishing Touches
Once the flange is fully dried, Sven removes the clamps carefully, ensuring no damage occurs during this process. He then moves on to attaching four more pieces onto these main frames, completing two pairs of flanges for the bulkhead hatches.The Final Touches
While two flanges form the primary support structure around the hatches, Sven mentions there are two additional pieces required at each end to ensure comprehensive protection. This attention to detail highlights his commitment to producing a durable and reliable design. “Sailing is about finding your path, whether it’s across an ocean or within yourself.” – Sven Yrvind In conclusion, making flanges around bulkhead hatches may seem complex at first glance, but by following Sven Yrvind’s meticulous process, enthusiasts can achieve professional-level results. Remember that the journey of boatbuilding is as rewarding as reaching your destination; it tests one’s patience and dedication. For those seeking to embark on this adventure or simply gain more insight into marine craftsmanship, Sven’s wisdom is invaluable.Making Flanges Around Bulkhead Hatches for Canvas
Sven Yrvind, a renowned yacht designer and sailor, shares valuable insights on creating flanges around bulkhead hatches for canvas protection in this enlightening video. By following his expert guidance, boat enthusiasts can ensure their living areas remain secure while allowing unhindered access through the hatches.Step 1: Starting with the Flange
Sven begins by explaining that working on flanges vertically and horizontally is significantly easier than doing so in a flat position. To simplify the process further, he divides the task into two or three steps as suggested by fellow expert “for for.” This approach not only makes it more manageable but also allows for greater precision in crafting each component.Step 2: Applying Glue and Securing
Sven proceeds to apply glue along one edge of the flange, ensuring a secure bond when clamped into place. He emphasizes that this stage is crucial for maintaining the structural integrity of the flange, which in turn safeguards the living area beneath the canvas when hatches are open.Step 3: Allowing Time to Dry
After securely attaching the first portion of the flange, Sven allows ample time for it to dry before moving forward with additional steps. This patience and precision are key aspects of his successful boatbuilding methods.Step 4: Finishing Touches
Once the flange is fully dried, Sven removes the clamps carefully, ensuring no damage occurs during this process. He then moves on to attaching four more pieces onto these main frames, completing two pairs of flanges for the bulkhead hatches.The Final Touches
While two flanges form the primary support structure around the hatches, Sven mentions there are two additional pieces required at each end to ensure comprehensive protection. This attention to detail highlights his commitment to producing a durable and reliable design. “Sailing is about finding your path, whether it’s across an ocean or within yourself.” – Sven Yrvind In conclusion, making flanges around bulkhead hatches may seem complex at first glance, but by following Sven Yrvind’s meticulous process, enthusiasts can achieve professional-level results. Remember that the journey of boatbuilding is as rewarding as reaching your destination; it tests one’s patience and dedication. For those seeking to embark on this adventure or simply gain more insight into marine craftsmanship, Sven’s wisdom is invaluable.Sven Yrvind, a renowned yacht designer and sailor, shares valuable insights on creating flanges around bulkhead hatches for canvas protection in this enlightening video. By following his expert guidance, boat enthusiasts can ensure their living areas remain secure while allowing unhindered access through the hatches.Step 1: Starting with the Flange
Sven begins by explaining that working on flanges vertically and horizontally is significantly easier than doing so in a flat position. To simplify the process further, he divides the task into two or three steps as suggested by fellow expert “for for.” This approach not only makes it more manageable but also allows for greater precision in crafting each component.Step 2: Applying Glue and Securing
Sven proceeds to apply glue along one edge of the flange, ensuring a secure bond when clamped into place. He emphasizes that this stage is crucial for maintaining the structural integrity of the flange, which in turn safeguards the living area beneath the canvas when hatches are open.Step 3: Allowing Time to Dry
After securely attaching the first portion of the flange, Sven allows ample time for it to dry before moving forward with additional steps. This patience and precision are key aspects of his successful boatbuilding methods.Step 4: Finishing Touches
Once the flange is fully dried, Sven removes the clamps carefully, ensuring no damage occurs during this process. He then moves on to attaching four more pieces onto these main frames, completing two pairs of flanges for the bulkhead hatches.The Final Touches
While two flanges form the primary support structure around the hatches, Sven mentions there are two additional pieces required at each end to ensure comprehensive protection. This attention to detail highlights his commitment to producing a durable and reliable design. “Sailing is about finding your path, whether it’s across an ocean or within yourself.” – Sven Yrvind In conclusion, making flanges around bulkhead hatches may seem complex at first glance, but by following Sven Yrvind’s meticulous process, enthusiasts can achieve professional-level results. Remember that the journey of boatbuilding is as rewarding as reaching your destination; it tests one’s patience and dedication. For those seeking to embark on this adventure or simply gain more insight into marine craftsmanship, Sven’s wisdom is invaluable.Making Flanges Around Bulkhead Hatches for Canvas
Sven Yrvind, a renowned yacht designer and sailor, shares valuable insights on creating flanges around bulkhead hatches for canvas protection in this enlightening video. By following his expert guidance, boat enthusiasts can ensure their living areas remain secure while allowing unhindered access through the hatches.Step 1: Starting with the Flange
Sven begins by explaining that working on flanges vertically and horizontally is significantly easier than doing so in a flat position. To simplify the process further, he divides the task into two or three steps as suggested by fellow expert “for for.” This approach not only makes it more manageable but also allows for greater precision in crafting each component.Step 2: Applying Glue and Securing
Sven proceeds to apply glue along one edge of the flange, ensuring a secure bond when clamped into place. He emphasizes that this stage is crucial for maintaining the structural integrity of the flange, which in turn safeguards the living area beneath the canvas when hatches are open.Step 3: Allowing Time to Dry
After securely attaching the first portion of the flange, Sven allows ample time for it to dry before moving forward with additional steps. This patience and precision are key aspects of his successful boatbuilding methods.Step 4: Finishing Touches
Once the flange is fully dried, Sven removes the clamps carefully, ensuring no damage occurs during this process. He then moves on to attaching four more pieces onto these main frames, completing two pairs of flanges for the bulkhead hatches.The Final Touches
While two flanges form the primary support structure around the hatches, Sven mentions there are two additional pieces required at each end to ensure comprehensive protection. This attention to detail highlights his commitment to producing a durable and reliable design. “Sailing is about finding your path, whether it’s across an ocean or within yourself.” – Sven Yrvind In conclusion, making flanges around bulkhead hatches may seem complex at first glance, but by following Sven Yrvind’s meticulous process, enthusiasts can achieve professional-level results. Remember that the journey of boatbuilding is as rewarding as reaching your destination; it tests one’s patience and dedication. For those seeking to embark on this adventure or simply gain more insight into marine craftsmanship, Sven’s wisdom is invaluable.Once the flange is fully dried, Sven removes the clamps carefully, ensuring no damage occurs during this process. He then moves on to attaching four more pieces onto these main frames, completing two pairs of flanges for the bulkhead hatches.The Final Touches
While two flanges form the primary support structure around the hatches, Sven mentions there are two additional pieces required at each end to ensure comprehensive protection. This attention to detail highlights his commitment to producing a durable and reliable design. “Sailing is about finding your path, whether it’s across an ocean or within yourself.” – Sven Yrvind In conclusion, making flanges around bulkhead hatches may seem complex at first glance, but by following Sven Yrvind’s meticulous process, enthusiasts can achieve professional-level results. Remember that the journey of boatbuilding is as rewarding as reaching your destination; it tests one’s patience and dedication. For those seeking to embark on this adventure or simply gain more insight into marine craftsmanship, Sven’s wisdom is invaluable.Sven Yrvind, a renowned yacht designer and sailor, shares valuable insights on creating flanges around bulkhead hatches for canvas protection in this enlightening video. By following his expert guidance, boat enthusiasts can ensure their living areas remain secure while allowing unhindered access through the hatches.Step 1: Starting with the Flange
Sven begins by explaining that working on flanges vertically and horizontally is significantly easier than doing so in a flat position. To simplify the process further, he divides the task into two or three steps as suggested by fellow expert “for for.” This approach not only makes it more manageable but also allows for greater precision in crafting each component.Step 2: Applying Glue and Securing
Sven proceeds to apply glue along one edge of the flange, ensuring a secure bond when clamped into place. He emphasizes that this stage is crucial for maintaining the structural integrity of the flange, which in turn safeguards the living area beneath the canvas when hatches are open.Step 3: Allowing Time to Dry
After securely attaching the first portion of the flange, Sven allows ample time for it to dry before moving forward with additional steps. This patience and precision are key aspects of his successful boatbuilding methods.Step 4: Finishing Touches
Once the flange is fully dried, Sven removes the clamps carefully, ensuring no damage occurs during this process. He then moves on to attaching four more pieces onto these main frames, completing two pairs of flanges for the bulkhead hatches.The Final Touches
While two flanges form the primary support structure around the hatches, Sven mentions there are two additional pieces required at each end to ensure comprehensive protection. This attention to detail highlights his commitment to producing a durable and reliable design. “Sailing is about finding your path, whether it’s across an ocean or within yourself.” – Sven Yrvind In conclusion, making flanges around bulkhead hatches may seem complex at first glance, but by following Sven Yrvind’s meticulous process, enthusiasts can achieve professional-level results. Remember that the journey of boatbuilding is as rewarding as reaching your destination; it tests one’s patience and dedication. For those seeking to embark on this adventure or simply gain more insight into marine craftsmanship, Sven’s wisdom is invaluable.Making Flanges Around Bulkhead Hatches for Canvas
Sven Yrvind, a renowned yacht designer and sailor, shares valuable insights on creating flanges around bulkhead hatches for canvas protection in this enlightening video. By following his expert guidance, boat enthusiasts can ensure their living areas remain secure while allowing unhindered access through the hatches.Step 1: Starting with the Flange
Sven begins by explaining that working on flanges vertically and horizontally is significantly easier than doing so in a flat position. To simplify the process further, he divides the task into two or three steps as suggested by fellow expert “for for.” This approach not only makes it more manageable but also allows for greater precision in crafting each component.Step 2: Applying Glue and Securing
Sven proceeds to apply glue along one edge of the flange, ensuring a secure bond when clamped into place. He emphasizes that this stage is crucial for maintaining the structural integrity of the flange, which in turn safeguards the living area beneath the canvas when hatches are open.Step 3: Allowing Time to Dry
After securely attaching the first portion of the flange, Sven allows ample time for it to dry before moving forward with additional steps. This patience and precision are key aspects of his successful boatbuilding methods.Step 4: Finishing Touches
Once the flange is fully dried, Sven removes the clamps carefully, ensuring no damage occurs during this process. He then moves on to attaching four more pieces onto these main frames, completing two pairs of flanges for the bulkhead hatches.The Final Touches
While two flanges form the primary support structure around the hatches, Sven mentions there are two additional pieces required at each end to ensure comprehensive protection. This attention to detail highlights his commitment to producing a durable and reliable design. “Sailing is about finding your path, whether it’s across an ocean or within yourself.” – Sven Yrvind In conclusion, making flanges around bulkhead hatches may seem complex at first glance, but by following Sven Yrvind’s meticulous process, enthusiasts can achieve professional-level results. Remember that the journey of boatbuilding is as rewarding as reaching your destination; it tests one’s patience and dedication. For those seeking to embark on this adventure or simply gain more insight into marine craftsmanship, Sven’s wisdom is invaluable.After securely attaching the first portion of the flange, Sven allows ample time for it to dry before moving forward with additional steps. This patience and precision are key aspects of his successful boatbuilding methods.Step 4: Finishing Touches
Once the flange is fully dried, Sven removes the clamps carefully, ensuring no damage occurs during this process. He then moves on to attaching four more pieces onto these main frames, completing two pairs of flanges for the bulkhead hatches.The Final Touches
While two flanges form the primary support structure around the hatches, Sven mentions there are two additional pieces required at each end to ensure comprehensive protection. This attention to detail highlights his commitment to producing a durable and reliable design. “Sailing is about finding your path, whether it’s across an ocean or within yourself.” – Sven Yrvind In conclusion, making flanges around bulkhead hatches may seem complex at first glance, but by following Sven Yrvind’s meticulous process, enthusiasts can achieve professional-level results. Remember that the journey of boatbuilding is as rewarding as reaching your destination; it tests one’s patience and dedication. For those seeking to embark on this adventure or simply gain more insight into marine craftsmanship, Sven’s wisdom is invaluable.Sven Yrvind, a renowned yacht designer and sailor, shares valuable insights on creating flanges around bulkhead hatches for canvas protection in this enlightening video. By following his expert guidance, boat enthusiasts can ensure their living areas remain secure while allowing unhindered access through the hatches.Step 1: Starting with the Flange
Sven begins by explaining that working on flanges vertically and horizontally is significantly easier than doing so in a flat position. To simplify the process further, he divides the task into two or three steps as suggested by fellow expert “for for.” This approach not only makes it more manageable but also allows for greater precision in crafting each component.Step 2: Applying Glue and Securing
Sven proceeds to apply glue along one edge of the flange, ensuring a secure bond when clamped into place. He emphasizes that this stage is crucial for maintaining the structural integrity of the flange, which in turn safeguards the living area beneath the canvas when hatches are open.Step 3: Allowing Time to Dry
After securely attaching the first portion of the flange, Sven allows ample time for it to dry before moving forward with additional steps. This patience and precision are key aspects of his successful boatbuilding methods.Step 4: Finishing Touches
Once the flange is fully dried, Sven removes the clamps carefully, ensuring no damage occurs during this process. He then moves on to attaching four more pieces onto these main frames, completing two pairs of flanges for the bulkhead hatches.The Final Touches
While two flanges form the primary support structure around the hatches, Sven mentions there are two additional pieces required at each end to ensure comprehensive protection. This attention to detail highlights his commitment to producing a durable and reliable design. “Sailing is about finding your path, whether it’s across an ocean or within yourself.” – Sven Yrvind In conclusion, making flanges around bulkhead hatches may seem complex at first glance, but by following Sven Yrvind’s meticulous process, enthusiasts can achieve professional-level results. Remember that the journey of boatbuilding is as rewarding as reaching your destination; it tests one’s patience and dedication. For those seeking to embark on this adventure or simply gain more insight into marine craftsmanship, Sven’s wisdom is invaluable.Making Flanges Around Bulkhead Hatches for Canvas
Sven Yrvind, a renowned yacht designer and sailor, shares valuable insights on creating flanges around bulkhead hatches for canvas protection in this enlightening video. By following his expert guidance, boat enthusiasts can ensure their living areas remain secure while allowing unhindered access through the hatches.Step 1: Starting with the Flange
Sven begins by explaining that working on flanges vertically and horizontally is significantly easier than doing so in a flat position. To simplify the process further, he divides the task into two or three steps as suggested by fellow expert “for for.” This approach not only makes it more manageable but also allows for greater precision in crafting each component.Step 2: Applying Glue and Securing
Sven proceeds to apply glue along one edge of the flange, ensuring a secure bond when clamped into place. He emphasizes that this stage is crucial for maintaining the structural integrity of the flange, which in turn safeguards the living area beneath the canvas when hatches are open.Step 3: Allowing Time to Dry
After securely attaching the first portion of the flange, Sven allows ample time for it to dry before moving forward with additional steps. This patience and precision are key aspects of his successful boatbuilding methods.Step 4: Finishing Touches
Once the flange is fully dried, Sven removes the clamps carefully, ensuring no damage occurs during this process. He then moves on to attaching four more pieces onto these main frames, completing two pairs of flanges for the bulkhead hatches.The Final Touches
While two flanges form the primary support structure around the hatches, Sven mentions there are two additional pieces required at each end to ensure comprehensive protection. This attention to detail highlights his commitment to producing a durable and reliable design. “Sailing is about finding your path, whether it’s across an ocean or within yourself.” – Sven Yrvind In conclusion, making flanges around bulkhead hatches may seem complex at first glance, but by following Sven Yrvind’s meticulous process, enthusiasts can achieve professional-level results. Remember that the journey of boatbuilding is as rewarding as reaching your destination; it tests one’s patience and dedication. For those seeking to embark on this adventure or simply gain more insight into marine craftsmanship, Sven’s wisdom is invaluable.Sven proceeds to apply glue along one edge of the flange, ensuring a secure bond when clamped into place. He emphasizes that this stage is crucial for maintaining the structural integrity of the flange, which in turn safeguards the living area beneath the canvas when hatches are open.Step 3: Allowing Time to Dry
After securely attaching the first portion of the flange, Sven allows ample time for it to dry before moving forward with additional steps. This patience and precision are key aspects of his successful boatbuilding methods.Step 4: Finishing Touches
Once the flange is fully dried, Sven removes the clamps carefully, ensuring no damage occurs during this process. He then moves on to attaching four more pieces onto these main frames, completing two pairs of flanges for the bulkhead hatches.The Final Touches
While two flanges form the primary support structure around the hatches, Sven mentions there are two additional pieces required at each end to ensure comprehensive protection. This attention to detail highlights his commitment to producing a durable and reliable design. “Sailing is about finding your path, whether it’s across an ocean or within yourself.” – Sven Yrvind In conclusion, making flanges around bulkhead hatches may seem complex at first glance, but by following Sven Yrvind’s meticulous process, enthusiasts can achieve professional-level results. Remember that the journey of boatbuilding is as rewarding as reaching your destination; it tests one’s patience and dedication. For those seeking to embark on this adventure or simply gain more insight into marine craftsmanship, Sven’s wisdom is invaluable.Sven Yrvind, a renowned yacht designer and sailor, shares valuable insights on creating flanges around bulkhead hatches for canvas protection in this enlightening video. By following his expert guidance, boat enthusiasts can ensure their living areas remain secure while allowing unhindered access through the hatches.Step 1: Starting with the Flange
Sven begins by explaining that working on flanges vertically and horizontally is significantly easier than doing so in a flat position. To simplify the process further, he divides the task into two or three steps as suggested by fellow expert “for for.” This approach not only makes it more manageable but also allows for greater precision in crafting each component.Step 2: Applying Glue and Securing
Sven proceeds to apply glue along one edge of the flange, ensuring a secure bond when clamped into place. He emphasizes that this stage is crucial for maintaining the structural integrity of the flange, which in turn safeguards the living area beneath the canvas when hatches are open.Step 3: Allowing Time to Dry
After securely attaching the first portion of the flange, Sven allows ample time for it to dry before moving forward with additional steps. This patience and precision are key aspects of his successful boatbuilding methods.Step 4: Finishing Touches
Once the flange is fully dried, Sven removes the clamps carefully, ensuring no damage occurs during this process. He then moves on to attaching four more pieces onto these main frames, completing two pairs of flanges for the bulkhead hatches.The Final Touches
While two flanges form the primary support structure around the hatches, Sven mentions there are two additional pieces required at each end to ensure comprehensive protection. This attention to detail highlights his commitment to producing a durable and reliable design. “Sailing is about finding your path, whether it’s across an ocean or within yourself.” – Sven Yrvind In conclusion, making flanges around bulkhead hatches may seem complex at first glance, but by following Sven Yrvind’s meticulous process, enthusiasts can achieve professional-level results. Remember that the journey of boatbuilding is as rewarding as reaching your destination; it tests one’s patience and dedication. For those seeking to embark on this adventure or simply gain more insight into marine craftsmanship, Sven’s wisdom is invaluable.Making Flanges Around Bulkhead Hatches for Canvas
Sven Yrvind, a renowned yacht designer and sailor, shares valuable insights on creating flanges around bulkhead hatches for canvas protection in this enlightening video. By following his expert guidance, boat enthusiasts can ensure their living areas remain secure while allowing unhindered access through the hatches.Step 1: Starting with the Flange
Sven begins by explaining that working on flanges vertically and horizontally is significantly easier than doing so in a flat position. To simplify the process further, he divides the task into two or three steps as suggested by fellow expert “for for.” This approach not only makes it more manageable but also allows for greater precision in crafting each component.Step 2: Applying Glue and Securing
Sven proceeds to apply glue along one edge of the flange, ensuring a secure bond when clamped into place. He emphasizes that this stage is crucial for maintaining the structural integrity of the flange, which in turn safeguards the living area beneath the canvas when hatches are open.Step 3: Allowing Time to Dry
After securely attaching the first portion of the flange, Sven allows ample time for it to dry before moving forward with additional steps. This patience and precision are key aspects of his successful boatbuilding methods.Step 4: Finishing Touches
Once the flange is fully dried, Sven removes the clamps carefully, ensuring no damage occurs during this process. He then moves on to attaching four more pieces onto these main frames, completing two pairs of flanges for the bulkhead hatches.The Final Touches
While two flanges form the primary support structure around the hatches, Sven mentions there are two additional pieces required at each end to ensure comprehensive protection. This attention to detail highlights his commitment to producing a durable and reliable design. “Sailing is about finding your path, whether it’s across an ocean or within yourself.” – Sven Yrvind In conclusion, making flanges around bulkhead hatches may seem complex at first glance, but by following Sven Yrvind’s meticulous process, enthusiasts can achieve professional-level results. Remember that the journey of boatbuilding is as rewarding as reaching your destination; it tests one’s patience and dedication. For those seeking to embark on this adventure or simply gain more insight into marine craftsmanship, Sven’s wisdom is invaluable.Sven begins by explaining that working on flanges vertically and horizontally is significantly easier than doing so in a flat position. To simplify the process further, he divides the task into two or three steps as suggested by fellow expert “for for.” This approach not only makes it more manageable but also allows for greater precision in crafting each component.Step 2: Applying Glue and Securing
Sven proceeds to apply glue along one edge of the flange, ensuring a secure bond when clamped into place. He emphasizes that this stage is crucial for maintaining the structural integrity of the flange, which in turn safeguards the living area beneath the canvas when hatches are open.Step 3: Allowing Time to Dry
After securely attaching the first portion of the flange, Sven allows ample time for it to dry before moving forward with additional steps. This patience and precision are key aspects of his successful boatbuilding methods.Step 4: Finishing Touches
Once the flange is fully dried, Sven removes the clamps carefully, ensuring no damage occurs during this process. He then moves on to attaching four more pieces onto these main frames, completing two pairs of flanges for the bulkhead hatches.The Final Touches
While two flanges form the primary support structure around the hatches, Sven mentions there are two additional pieces required at each end to ensure comprehensive protection. This attention to detail highlights his commitment to producing a durable and reliable design. “Sailing is about finding your path, whether it’s across an ocean or within yourself.” – Sven Yrvind In conclusion, making flanges around bulkhead hatches may seem complex at first glance, but by following Sven Yrvind’s meticulous process, enthusiasts can achieve professional-level results. Remember that the journey of boatbuilding is as rewarding as reaching your destination; it tests one’s patience and dedication. For those seeking to embark on this adventure or simply gain more insight into marine craftsmanship, Sven’s wisdom is invaluable.Sven Yrvind, a renowned yacht designer and sailor, shares valuable insights on creating flanges around bulkhead hatches for canvas protection in this enlightening video. By following his expert guidance, boat enthusiasts can ensure their living areas remain secure while allowing unhindered access through the hatches.Step 1: Starting with the Flange
Sven begins by explaining that working on flanges vertically and horizontally is significantly easier than doing so in a flat position. To simplify the process further, he divides the task into two or three steps as suggested by fellow expert “for for.” This approach not only makes it more manageable but also allows for greater precision in crafting each component.Step 2: Applying Glue and Securing
Sven proceeds to apply glue along one edge of the flange, ensuring a secure bond when clamped into place. He emphasizes that this stage is crucial for maintaining the structural integrity of the flange, which in turn safeguards the living area beneath the canvas when hatches are open.Step 3: Allowing Time to Dry
After securely attaching the first portion of the flange, Sven allows ample time for it to dry before moving forward with additional steps. This patience and precision are key aspects of his successful boatbuilding methods.Step 4: Finishing Touches
Once the flange is fully dried, Sven removes the clamps carefully, ensuring no damage occurs during this process. He then moves on to attaching four more pieces onto these main frames, completing two pairs of flanges for the bulkhead hatches.The Final Touches
While two flanges form the primary support structure around the hatches, Sven mentions there are two additional pieces required at each end to ensure comprehensive protection. This attention to detail highlights his commitment to producing a durable and reliable design. “Sailing is about finding your path, whether it’s across an ocean or within yourself.” – Sven Yrvind In conclusion, making flanges around bulkhead hatches may seem complex at first glance, but by following Sven Yrvind’s meticulous process, enthusiasts can achieve professional-level results. Remember that the journey of boatbuilding is as rewarding as reaching your destination; it tests one’s patience and dedication. For those seeking to embark on this adventure or simply gain more insight into marine craftsmanship, Sven’s wisdom is invaluable.Making Flanges Around Bulkhead Hatches for Canvas
Sven Yrvind, a renowned yacht designer and sailor, shares valuable insights on creating flanges around bulkhead hatches for canvas protection in this enlightening video. By following his expert guidance, boat enthusiasts can ensure their living areas remain secure while allowing unhindered access through the hatches.Step 1: Starting with the Flange
Sven begins by explaining that working on flanges vertically and horizontally is significantly easier than doing so in a flat position. To simplify the process further, he divides the task into two or three steps as suggested by fellow expert “for for.” This approach not only makes it more manageable but also allows for greater precision in crafting each component.Step 2: Applying Glue and Securing
Sven proceeds to apply glue along one edge of the flange, ensuring a secure bond when clamped into place. He emphasizes that this stage is crucial for maintaining the structural integrity of the flange, which in turn safeguards the living area beneath the canvas when hatches are open.Step 3: Allowing Time to Dry
After securely attaching the first portion of the flange, Sven allows ample time for it to dry before moving forward with additional steps. This patience and precision are key aspects of his successful boatbuilding methods.Step 4: Finishing Touches
Once the flange is fully dried, Sven removes the clamps carefully, ensuring no damage occurs during this process. He then moves on to attaching four more pieces onto these main frames, completing two pairs of flanges for the bulkhead hatches.The Final Touches
While two flanges form the primary support structure around the hatches, Sven mentions there are two additional pieces required at each end to ensure comprehensive protection. This attention to detail highlights his commitment to producing a durable and reliable design. “Sailing is about finding your path, whether it’s across an ocean or within yourself.” – Sven Yrvind In conclusion, making flanges around bulkhead hatches may seem complex at first glance, but by following Sven Yrvind’s meticulous process, enthusiasts can achieve professional-level results. Remember that the journey of boatbuilding is as rewarding as reaching your destination; it tests one’s patience and dedication. For those seeking to embark on this adventure or simply gain more insight into marine craftsmanship, Sven’s wisdom is invaluable.Once the flange is fully dried, Sven removes the clamps carefully, ensuring no damage occurs during this process. He then moves on to attaching four more pieces onto these main frames, completing two pairs of flanges for the bulkhead hatches.The Final Touches
While two flanges form the primary support structure around the hatches, Sven mentions there are two additional pieces required at each end to ensure comprehensive protection. This attention to detail highlights his commitment to producing a durable and reliable design. “Sailing is about finding your path, whether it’s across an ocean or within yourself.” – Sven Yrvind In conclusion, making flanges around bulkhead hatches may seem complex at first glance, but by following Sven Yrvind’s meticulous process, enthusiasts can achieve professional-level results. Remember that the journey of boatbuilding is as rewarding as reaching your destination; it tests one’s patience and dedication. For those seeking to embark on this adventure or simply gain more insight into marine craftsmanship, Sven’s wisdom is invaluable.Sven begins by explaining that working on flanges vertically and horizontally is significantly easier than doing so in a flat position. To simplify the process further, he divides the task into two or three steps as suggested by fellow expert “for for.” This approach not only makes it more manageable but also allows for greater precision in crafting each component.Step 2: Applying Glue and Securing
Sven proceeds to apply glue along one edge of the flange, ensuring a secure bond when clamped into place. He emphasizes that this stage is crucial for maintaining the structural integrity of the flange, which in turn safeguards the living area beneath the canvas when hatches are open.Step 3: Allowing Time to Dry
After securely attaching the first portion of the flange, Sven allows ample time for it to dry before moving forward with additional steps. This patience and precision are key aspects of his successful boatbuilding methods.Step 4: Finishing Touches
Once the flange is fully dried, Sven removes the clamps carefully, ensuring no damage occurs during this process. He then moves on to attaching four more pieces onto these main frames, completing two pairs of flanges for the bulkhead hatches.The Final Touches
While two flanges form the primary support structure around the hatches, Sven mentions there are two additional pieces required at each end to ensure comprehensive protection. This attention to detail highlights his commitment to producing a durable and reliable design. “Sailing is about finding your path, whether it’s across an ocean or within yourself.” – Sven Yrvind In conclusion, making flanges around bulkhead hatches may seem complex at first glance, but by following Sven Yrvind’s meticulous process, enthusiasts can achieve professional-level results. Remember that the journey of boatbuilding is as rewarding as reaching your destination; it tests one’s patience and dedication. For those seeking to embark on this adventure or simply gain more insight into marine craftsmanship, Sven’s wisdom is invaluable.Sven Yrvind, a renowned yacht designer and sailor, shares valuable insights on creating flanges around bulkhead hatches for canvas protection in this enlightening video. By following his expert guidance, boat enthusiasts can ensure their living areas remain secure while allowing unhindered access through the hatches.Step 1: Starting with the Flange
Sven begins by explaining that working on flanges vertically and horizontally is significantly easier than doing so in a flat position. To simplify the process further, he divides the task into two or three steps as suggested by fellow expert “for for.” This approach not only makes it more manageable but also allows for greater precision in crafting each component.Step 2: Applying Glue and Securing
Sven proceeds to apply glue along one edge of the flange, ensuring a secure bond when clamped into place. He emphasizes that this stage is crucial for maintaining the structural integrity of the flange, which in turn safeguards the living area beneath the canvas when hatches are open.Step 3: Allowing Time to Dry
After securely attaching the first portion of the flange, Sven allows ample time for it to dry before moving forward with additional steps. This patience and precision are key aspects of his successful boatbuilding methods.Step 4: Finishing Touches
Once the flange is fully dried, Sven removes the clamps carefully, ensuring no damage occurs during this process. He then moves on to attaching four more pieces onto these main frames, completing two pairs of flanges for the bulkhead hatches.The Final Touches
While two flanges form the primary support structure around the hatches, Sven mentions there are two additional pieces required at each end to ensure comprehensive protection. This attention to detail highlights his commitment to producing a durable and reliable design. “Sailing is about finding your path, whether it’s across an ocean or within yourself.” – Sven Yrvind In conclusion, making flanges around bulkhead hatches may seem complex at first glance, but by following Sven Yrvind’s meticulous process, enthusiasts can achieve professional-level results. Remember that the journey of boatbuilding is as rewarding as reaching your destination; it tests one’s patience and dedication. For those seeking to embark on this adventure or simply gain more insight into marine craftsmanship, Sven’s wisdom is invaluable.Making Flanges Around Bulkhead Hatches for Canvas
Sven Yrvind, a renowned yacht designer and sailor, shares valuable insights on creating flanges around bulkhead hatches for canvas protection in this enlightening video. By following his expert guidance, boat enthusiasts can ensure their living areas remain secure while allowing unhindered access through the hatches.Step 1: Starting with the Flange
Sven begins by explaining that working on flanges vertically and horizontally is significantly easier than doing so in a flat position. To simplify the process further, he divides the task into two or three steps as suggested by fellow expert “for for.” This approach not only makes it more manageable but also allows for greater precision in crafting each component.Step 2: Applying Glue and Securing
Sven proceeds to apply glue along one edge of the flange, ensuring a secure bond when clamped into place. He emphasizes that this stage is crucial for maintaining the structural integrity of the flange, which in turn safeguards the living area beneath the canvas when hatches are open.Step 3: Allowing Time to Dry
After securely attaching the first portion of the flange, Sven allows ample time for it to dry before moving forward with additional steps. This patience and precision are key aspects of his successful boatbuilding methods.Step 4: Finishing Touches
Once the flange is fully dried, Sven removes the clamps carefully, ensuring no damage occurs during this process. He then moves on to attaching four more pieces onto these main frames, completing two pairs of flanges for the bulkhead hatches.The Final Touches
While two flanges form the primary support structure around the hatches, Sven mentions there are two additional pieces required at each end to ensure comprehensive protection. This attention to detail highlights his commitment to producing a durable and reliable design. “Sailing is about finding your path, whether it’s across an ocean or within yourself.” – Sven Yrvind In conclusion, making flanges around bulkhead hatches may seem complex at first glance, but by following Sven Yrvind’s meticulous process, enthusiasts can achieve professional-level results. Remember that the journey of boatbuilding is as rewarding as reaching your destination; it tests one’s patience and dedication. For those seeking to embark on this adventure or simply gain more insight into marine craftsmanship, Sven’s wisdom is invaluable.After securely attaching the first portion of the flange, Sven allows ample time for it to dry before moving forward with additional steps. This patience and precision are key aspects of his successful boatbuilding methods.Step 4: Finishing Touches
Once the flange is fully dried, Sven removes the clamps carefully, ensuring no damage occurs during this process. He then moves on to attaching four more pieces onto these main frames, completing two pairs of flanges for the bulkhead hatches.The Final Touches
While two flanges form the primary support structure around the hatches, Sven mentions there are two additional pieces required at each end to ensure comprehensive protection. This attention to detail highlights his commitment to producing a durable and reliable design. “Sailing is about finding your path, whether it’s across an ocean or within yourself.” – Sven Yrvind In conclusion, making flanges around bulkhead hatches may seem complex at first glance, but by following Sven Yrvind’s meticulous process, enthusiasts can achieve professional-level results. Remember that the journey of boatbuilding is as rewarding as reaching your destination; it tests one’s patience and dedication. For those seeking to embark on this adventure or simply gain more insight into marine craftsmanship, Sven’s wisdom is invaluable.Sven begins by explaining that working on flanges vertically and horizontally is significantly easier than doing so in a flat position. To simplify the process further, he divides the task into two or three steps as suggested by fellow expert “for for.” This approach not only makes it more manageable but also allows for greater precision in crafting each component.Step 2: Applying Glue and Securing
Sven proceeds to apply glue along one edge of the flange, ensuring a secure bond when clamped into place. He emphasizes that this stage is crucial for maintaining the structural integrity of the flange, which in turn safeguards the living area beneath the canvas when hatches are open.Step 3: Allowing Time to Dry
After securely attaching the first portion of the flange, Sven allows ample time for it to dry before moving forward with additional steps. This patience and precision are key aspects of his successful boatbuilding methods.Step 4: Finishing Touches
Once the flange is fully dried, Sven removes the clamps carefully, ensuring no damage occurs during this process. He then moves on to attaching four more pieces onto these main frames, completing two pairs of flanges for the bulkhead hatches.The Final Touches
While two flanges form the primary support structure around the hatches, Sven mentions there are two additional pieces required at each end to ensure comprehensive protection. This attention to detail highlights his commitment to producing a durable and reliable design. “Sailing is about finding your path, whether it’s across an ocean or within yourself.” – Sven Yrvind In conclusion, making flanges around bulkhead hatches may seem complex at first glance, but by following Sven Yrvind’s meticulous process, enthusiasts can achieve professional-level results. Remember that the journey of boatbuilding is as rewarding as reaching your destination; it tests one’s patience and dedication. For those seeking to embark on this adventure or simply gain more insight into marine craftsmanship, Sven’s wisdom is invaluable.Sven Yrvind, a renowned yacht designer and sailor, shares valuable insights on creating flanges around bulkhead hatches for canvas protection in this enlightening video. By following his expert guidance, boat enthusiasts can ensure their living areas remain secure while allowing unhindered access through the hatches.Step 1: Starting with the Flange
Sven begins by explaining that working on flanges vertically and horizontally is significantly easier than doing so in a flat position. To simplify the process further, he divides the task into two or three steps as suggested by fellow expert “for for.” This approach not only makes it more manageable but also allows for greater precision in crafting each component.Step 2: Applying Glue and Securing
Sven proceeds to apply glue along one edge of the flange, ensuring a secure bond when clamped into place. He emphasizes that this stage is crucial for maintaining the structural integrity of the flange, which in turn safeguards the living area beneath the canvas when hatches are open.Step 3: Allowing Time to Dry
After securely attaching the first portion of the flange, Sven allows ample time for it to dry before moving forward with additional steps. This patience and precision are key aspects of his successful boatbuilding methods.Step 4: Finishing Touches
Once the flange is fully dried, Sven removes the clamps carefully, ensuring no damage occurs during this process. He then moves on to attaching four more pieces onto these main frames, completing two pairs of flanges for the bulkhead hatches.The Final Touches
While two flanges form the primary support structure around the hatches, Sven mentions there are two additional pieces required at each end to ensure comprehensive protection. This attention to detail highlights his commitment to producing a durable and reliable design. “Sailing is about finding your path, whether it’s across an ocean or within yourself.” – Sven Yrvind In conclusion, making flanges around bulkhead hatches may seem complex at first glance, but by following Sven Yrvind’s meticulous process, enthusiasts can achieve professional-level results. Remember that the journey of boatbuilding is as rewarding as reaching your destination; it tests one’s patience and dedication. For those seeking to embark on this adventure or simply gain more insight into marine craftsmanship, Sven’s wisdom is invaluable.Making Flanges Around Bulkhead Hatches for Canvas
Sven Yrvind, a renowned yacht designer and sailor, shares valuable insights on creating flanges around bulkhead hatches for canvas protection in this enlightening video. By following his expert guidance, boat enthusiasts can ensure their living areas remain secure while allowing unhindered access through the hatches.Step 1: Starting with the Flange
Sven begins by explaining that working on flanges vertically and horizontally is significantly easier than doing so in a flat position. To simplify the process further, he divides the task into two or three steps as suggested by fellow expert “for for.” This approach not only makes it more manageable but also allows for greater precision in crafting each component.Step 2: Applying Glue and Securing
Sven proceeds to apply glue along one edge of the flange, ensuring a secure bond when clamped into place. He emphasizes that this stage is crucial for maintaining the structural integrity of the flange, which in turn safeguards the living area beneath the canvas when hatches are open.Step 3: Allowing Time to Dry
After securely attaching the first portion of the flange, Sven allows ample time for it to dry before moving forward with additional steps. This patience and precision are key aspects of his successful boatbuilding methods.Step 4: Finishing Touches
Once the flange is fully dried, Sven removes the clamps carefully, ensuring no damage occurs during this process. He then moves on to attaching four more pieces onto these main frames, completing two pairs of flanges for the bulkhead hatches.The Final Touches
While two flanges form the primary support structure around the hatches, Sven mentions there are two additional pieces required at each end to ensure comprehensive protection. This attention to detail highlights his commitment to producing a durable and reliable design. “Sailing is about finding your path, whether it’s across an ocean or within yourself.” – Sven Yrvind In conclusion, making flanges around bulkhead hatches may seem complex at first glance, but by following Sven Yrvind’s meticulous process, enthusiasts can achieve professional-level results. Remember that the journey of boatbuilding is as rewarding as reaching your destination; it tests one’s patience and dedication. For those seeking to embark on this adventure or simply gain more insight into marine craftsmanship, Sven’s wisdom is invaluable.Sven proceeds to apply glue along one edge of the flange, ensuring a secure bond when clamped into place. He emphasizes that this stage is crucial for maintaining the structural integrity of the flange, which in turn safeguards the living area beneath the canvas when hatches are open.Step 3: Allowing Time to Dry
After securely attaching the first portion of the flange, Sven allows ample time for it to dry before moving forward with additional steps. This patience and precision are key aspects of his successful boatbuilding methods.Step 4: Finishing Touches
Once the flange is fully dried, Sven removes the clamps carefully, ensuring no damage occurs during this process. He then moves on to attaching four more pieces onto these main frames, completing two pairs of flanges for the bulkhead hatches.The Final Touches
While two flanges form the primary support structure around the hatches, Sven mentions there are two additional pieces required at each end to ensure comprehensive protection. This attention to detail highlights his commitment to producing a durable and reliable design. “Sailing is about finding your path, whether it’s across an ocean or within yourself.” – Sven Yrvind In conclusion, making flanges around bulkhead hatches may seem complex at first glance, but by following Sven Yrvind’s meticulous process, enthusiasts can achieve professional-level results. Remember that the journey of boatbuilding is as rewarding as reaching your destination; it tests one’s patience and dedication. For those seeking to embark on this adventure or simply gain more insight into marine craftsmanship, Sven’s wisdom is invaluable.Sven begins by explaining that working on flanges vertically and horizontally is significantly easier than doing so in a flat position. To simplify the process further, he divides the task into two or three steps as suggested by fellow expert “for for.” This approach not only makes it more manageable but also allows for greater precision in crafting each component.Step 2: Applying Glue and Securing
Sven proceeds to apply glue along one edge of the flange, ensuring a secure bond when clamped into place. He emphasizes that this stage is crucial for maintaining the structural integrity of the flange, which in turn safeguards the living area beneath the canvas when hatches are open.Step 3: Allowing Time to Dry
After securely attaching the first portion of the flange, Sven allows ample time for it to dry before moving forward with additional steps. This patience and precision are key aspects of his successful boatbuilding methods.Step 4: Finishing Touches
Once the flange is fully dried, Sven removes the clamps carefully, ensuring no damage occurs during this process. He then moves on to attaching four more pieces onto these main frames, completing two pairs of flanges for the bulkhead hatches.The Final Touches
While two flanges form the primary support structure around the hatches, Sven mentions there are two additional pieces required at each end to ensure comprehensive protection. This attention to detail highlights his commitment to producing a durable and reliable design. “Sailing is about finding your path, whether it’s across an ocean or within yourself.” – Sven Yrvind In conclusion, making flanges around bulkhead hatches may seem complex at first glance, but by following Sven Yrvind’s meticulous process, enthusiasts can achieve professional-level results. Remember that the journey of boatbuilding is as rewarding as reaching your destination; it tests one’s patience and dedication. For those seeking to embark on this adventure or simply gain more insight into marine craftsmanship, Sven’s wisdom is invaluable.Sven Yrvind, a renowned yacht designer and sailor, shares valuable insights on creating flanges around bulkhead hatches for canvas protection in this enlightening video. By following his expert guidance, boat enthusiasts can ensure their living areas remain secure while allowing unhindered access through the hatches.Step 1: Starting with the Flange
Sven begins by explaining that working on flanges vertically and horizontally is significantly easier than doing so in a flat position. To simplify the process further, he divides the task into two or three steps as suggested by fellow expert “for for.” This approach not only makes it more manageable but also allows for greater precision in crafting each component.Step 2: Applying Glue and Securing
Sven proceeds to apply glue along one edge of the flange, ensuring a secure bond when clamped into place. He emphasizes that this stage is crucial for maintaining the structural integrity of the flange, which in turn safeguards the living area beneath the canvas when hatches are open.Step 3: Allowing Time to Dry
After securely attaching the first portion of the flange, Sven allows ample time for it to dry before moving forward with additional steps. This patience and precision are key aspects of his successful boatbuilding methods.Step 4: Finishing Touches
Once the flange is fully dried, Sven removes the clamps carefully, ensuring no damage occurs during this process. He then moves on to attaching four more pieces onto these main frames, completing two pairs of flanges for the bulkhead hatches.The Final Touches
While two flanges form the primary support structure around the hatches, Sven mentions there are two additional pieces required at each end to ensure comprehensive protection. This attention to detail highlights his commitment to producing a durable and reliable design. “Sailing is about finding your path, whether it’s across an ocean or within yourself.” – Sven Yrvind In conclusion, making flanges around bulkhead hatches may seem complex at first glance, but by following Sven Yrvind’s meticulous process, enthusiasts can achieve professional-level results. Remember that the journey of boatbuilding is as rewarding as reaching your destination; it tests one’s patience and dedication. For those seeking to embark on this adventure or simply gain more insight into marine craftsmanship, Sven’s wisdom is invaluable.Making Flanges Around Bulkhead Hatches for Canvas
Sven Yrvind, a renowned yacht designer and sailor, shares valuable insights on creating flanges around bulkhead hatches for canvas protection in this enlightening video. By following his expert guidance, boat enthusiasts can ensure their living areas remain secure while allowing unhindered access through the hatches.Step 1: Starting with the Flange
Sven begins by explaining that working on flanges vertically and horizontally is significantly easier than doing so in a flat position. To simplify the process further, he divides the task into two or three steps as suggested by fellow expert “for for.” This approach not only makes it more manageable but also allows for greater precision in crafting each component.Step 2: Applying Glue and Securing
Sven proceeds to apply glue along one edge of the flange, ensuring a secure bond when clamped into place. He emphasizes that this stage is crucial for maintaining the structural integrity of the flange, which in turn safeguards the living area beneath the canvas when hatches are open.Step 3: Allowing Time to Dry
After securely attaching the first portion of the flange, Sven allows ample time for it to dry before moving forward with additional steps. This patience and precision are key aspects of his successful boatbuilding methods.Step 4: Finishing Touches
Once the flange is fully dried, Sven removes the clamps carefully, ensuring no damage occurs during this process. He then moves on to attaching four more pieces onto these main frames, completing two pairs of flanges for the bulkhead hatches.The Final Touches
While two flanges form the primary support structure around the hatches, Sven mentions there are two additional pieces required at each end to ensure comprehensive protection. This attention to detail highlights his commitment to producing a durable and reliable design. “Sailing is about finding your path, whether it’s across an ocean or within yourself.” – Sven Yrvind In conclusion, making flanges around bulkhead hatches may seem complex at first glance, but by following Sven Yrvind’s meticulous process, enthusiasts can achieve professional-level results. Remember that the journey of boatbuilding is as rewarding as reaching your destination; it tests one’s patience and dedication. For those seeking to embark on this adventure or simply gain more insight into marine craftsmanship, Sven’s wisdom is invaluable.Once the flange is fully dried, Sven removes the clamps carefully, ensuring no damage occurs during this process. He then moves on to attaching four more pieces onto these main frames, completing two pairs of flanges for the bulkhead hatches.The Final Touches
While two flanges form the primary support structure around the hatches, Sven mentions there are two additional pieces required at each end to ensure comprehensive protection. This attention to detail highlights his commitment to producing a durable and reliable design. “Sailing is about finding your path, whether it’s across an ocean or within yourself.” – Sven Yrvind In conclusion, making flanges around bulkhead hatches may seem complex at first glance, but by following Sven Yrvind’s meticulous process, enthusiasts can achieve professional-level results. Remember that the journey of boatbuilding is as rewarding as reaching your destination; it tests one’s patience and dedication. For those seeking to embark on this adventure or simply gain more insight into marine craftsmanship, Sven’s wisdom is invaluable.Sven proceeds to apply glue along one edge of the flange, ensuring a secure bond when clamped into place. He emphasizes that this stage is crucial for maintaining the structural integrity of the flange, which in turn safeguards the living area beneath the canvas when hatches are open.Step 3: Allowing Time to Dry
After securely attaching the first portion of the flange, Sven allows ample time for it to dry before moving forward with additional steps. This patience and precision are key aspects of his successful boatbuilding methods.Step 4: Finishing Touches
Once the flange is fully dried, Sven removes the clamps carefully, ensuring no damage occurs during this process. He then moves on to attaching four more pieces onto these main frames, completing two pairs of flanges for the bulkhead hatches.The Final Touches
While two flanges form the primary support structure around the hatches, Sven mentions there are two additional pieces required at each end to ensure comprehensive protection. This attention to detail highlights his commitment to producing a durable and reliable design. “Sailing is about finding your path, whether it’s across an ocean or within yourself.” – Sven Yrvind In conclusion, making flanges around bulkhead hatches may seem complex at first glance, but by following Sven Yrvind’s meticulous process, enthusiasts can achieve professional-level results. Remember that the journey of boatbuilding is as rewarding as reaching your destination; it tests one’s patience and dedication. For those seeking to embark on this adventure or simply gain more insight into marine craftsmanship, Sven’s wisdom is invaluable.Sven begins by explaining that working on flanges vertically and horizontally is significantly easier than doing so in a flat position. To simplify the process further, he divides the task into two or three steps as suggested by fellow expert “for for.” This approach not only makes it more manageable but also allows for greater precision in crafting each component.Step 2: Applying Glue and Securing
Sven proceeds to apply glue along one edge of the flange, ensuring a secure bond when clamped into place. He emphasizes that this stage is crucial for maintaining the structural integrity of the flange, which in turn safeguards the living area beneath the canvas when hatches are open.Step 3: Allowing Time to Dry
After securely attaching the first portion of the flange, Sven allows ample time for it to dry before moving forward with additional steps. This patience and precision are key aspects of his successful boatbuilding methods.Step 4: Finishing Touches
Once the flange is fully dried, Sven removes the clamps carefully, ensuring no damage occurs during this process. He then moves on to attaching four more pieces onto these main frames, completing two pairs of flanges for the bulkhead hatches.The Final Touches
While two flanges form the primary support structure around the hatches, Sven mentions there are two additional pieces required at each end to ensure comprehensive protection. This attention to detail highlights his commitment to producing a durable and reliable design. “Sailing is about finding your path, whether it’s across an ocean or within yourself.” – Sven Yrvind In conclusion, making flanges around bulkhead hatches may seem complex at first glance, but by following Sven Yrvind’s meticulous process, enthusiasts can achieve professional-level results. Remember that the journey of boatbuilding is as rewarding as reaching your destination; it tests one’s patience and dedication. For those seeking to embark on this adventure or simply gain more insight into marine craftsmanship, Sven’s wisdom is invaluable.Sven Yrvind, a renowned yacht designer and sailor, shares valuable insights on creating flanges around bulkhead hatches for canvas protection in this enlightening video. By following his expert guidance, boat enthusiasts can ensure their living areas remain secure while allowing unhindered access through the hatches.Step 1: Starting with the Flange
Sven begins by explaining that working on flanges vertically and horizontally is significantly easier than doing so in a flat position. To simplify the process further, he divides the task into two or three steps as suggested by fellow expert “for for.” This approach not only makes it more manageable but also allows for greater precision in crafting each component.Step 2: Applying Glue and Securing
Sven proceeds to apply glue along one edge of the flange, ensuring a secure bond when clamped into place. He emphasizes that this stage is crucial for maintaining the structural integrity of the flange, which in turn safeguards the living area beneath the canvas when hatches are open.Step 3: Allowing Time to Dry
After securely attaching the first portion of the flange, Sven allows ample time for it to dry before moving forward with additional steps. This patience and precision are key aspects of his successful boatbuilding methods.Step 4: Finishing Touches
Once the flange is fully dried, Sven removes the clamps carefully, ensuring no damage occurs during this process. He then moves on to attaching four more pieces onto these main frames, completing two pairs of flanges for the bulkhead hatches.The Final Touches
While two flanges form the primary support structure around the hatches, Sven mentions there are two additional pieces required at each end to ensure comprehensive protection. This attention to detail highlights his commitment to producing a durable and reliable design. “Sailing is about finding your path, whether it’s across an ocean or within yourself.” – Sven Yrvind In conclusion, making flanges around bulkhead hatches may seem complex at first glance, but by following Sven Yrvind’s meticulous process, enthusiasts can achieve professional-level results. Remember that the journey of boatbuilding is as rewarding as reaching your destination; it tests one’s patience and dedication. For those seeking to embark on this adventure or simply gain more insight into marine craftsmanship, Sven’s wisdom is invaluable.Making Flanges Around Bulkhead Hatches for Canvas
Sven Yrvind, a renowned yacht designer and sailor, shares valuable insights on creating flanges around bulkhead hatches for canvas protection in this enlightening video. By following his expert guidance, boat enthusiasts can ensure their living areas remain secure while allowing unhindered access through the hatches.Step 1: Starting with the Flange
Sven begins by explaining that working on flanges vertically and horizontally is significantly easier than doing so in a flat position. To simplify the process further, he divides the task into two or three steps as suggested by fellow expert “for for.” This approach not only makes it more manageable but also allows for greater precision in crafting each component.Step 2: Applying Glue and Securing
Sven proceeds to apply glue along one edge of the flange, ensuring a secure bond when clamped into place. He emphasizes that this stage is crucial for maintaining the structural integrity of the flange, which in turn safeguards the living area beneath the canvas when hatches are open.Step 3: Allowing Time to Dry
After securely attaching the first portion of the flange, Sven allows ample time for it to dry before moving forward with additional steps. This patience and precision are key aspects of his successful boatbuilding methods.Step 4: Finishing Touches
Once the flange is fully dried, Sven removes the clamps carefully, ensuring no damage occurs during this process. He then moves on to attaching four more pieces onto these main frames, completing two pairs of flanges for the bulkhead hatches.The Final Touches
While two flanges form the primary support structure around the hatches, Sven mentions there are two additional pieces required at each end to ensure comprehensive protection. This attention to detail highlights his commitment to producing a durable and reliable design. “Sailing is about finding your path, whether it’s across an ocean or within yourself.” – Sven Yrvind In conclusion, making flanges around bulkhead hatches may seem complex at first glance, but by following Sven Yrvind’s meticulous process, enthusiasts can achieve professional-level results. Remember that the journey of boatbuilding is as rewarding as reaching your destination; it tests one’s patience and dedication. For those seeking to embark on this adventure or simply gain more insight into marine craftsmanship, Sven’s wisdom is invaluable.After securely attaching the first portion of the flange, Sven allows ample time for it to dry before moving forward with additional steps. This patience and precision are key aspects of his successful boatbuilding methods.Step 4: Finishing Touches
Once the flange is fully dried, Sven removes the clamps carefully, ensuring no damage occurs during this process. He then moves on to attaching four more pieces onto these main frames, completing two pairs of flanges for the bulkhead hatches.The Final Touches
While two flanges form the primary support structure around the hatches, Sven mentions there are two additional pieces required at each end to ensure comprehensive protection. This attention to detail highlights his commitment to producing a durable and reliable design. “Sailing is about finding your path, whether it’s across an ocean or within yourself.” – Sven Yrvind In conclusion, making flanges around bulkhead hatches may seem complex at first glance, but by following Sven Yrvind’s meticulous process, enthusiasts can achieve professional-level results. Remember that the journey of boatbuilding is as rewarding as reaching your destination; it tests one’s patience and dedication. For those seeking to embark on this adventure or simply gain more insight into marine craftsmanship, Sven’s wisdom is invaluable.Sven proceeds to apply glue along one edge of the flange, ensuring a secure bond when clamped into place. He emphasizes that this stage is crucial for maintaining the structural integrity of the flange, which in turn safeguards the living area beneath the canvas when hatches are open.Step 3: Allowing Time to Dry
After securely attaching the first portion of the flange, Sven allows ample time for it to dry before moving forward with additional steps. This patience and precision are key aspects of his successful boatbuilding methods.Step 4: Finishing Touches
Once the flange is fully dried, Sven removes the clamps carefully, ensuring no damage occurs during this process. He then moves on to attaching four more pieces onto these main frames, completing two pairs of flanges for the bulkhead hatches.The Final Touches
While two flanges form the primary support structure around the hatches, Sven mentions there are two additional pieces required at each end to ensure comprehensive protection. This attention to detail highlights his commitment to producing a durable and reliable design. “Sailing is about finding your path, whether it’s across an ocean or within yourself.” – Sven Yrvind In conclusion, making flanges around bulkhead hatches may seem complex at first glance, but by following Sven Yrvind’s meticulous process, enthusiasts can achieve professional-level results. Remember that the journey of boatbuilding is as rewarding as reaching your destination; it tests one’s patience and dedication. For those seeking to embark on this adventure or simply gain more insight into marine craftsmanship, Sven’s wisdom is invaluable.Sven begins by explaining that working on flanges vertically and horizontally is significantly easier than doing so in a flat position. To simplify the process further, he divides the task into two or three steps as suggested by fellow expert “for for.” This approach not only makes it more manageable but also allows for greater precision in crafting each component.Step 2: Applying Glue and Securing
Sven proceeds to apply glue along one edge of the flange, ensuring a secure bond when clamped into place. He emphasizes that this stage is crucial for maintaining the structural integrity of the flange, which in turn safeguards the living area beneath the canvas when hatches are open.Step 3: Allowing Time to Dry
After securely attaching the first portion of the flange, Sven allows ample time for it to dry before moving forward with additional steps. This patience and precision are key aspects of his successful boatbuilding methods.Step 4: Finishing Touches
Once the flange is fully dried, Sven removes the clamps carefully, ensuring no damage occurs during this process. He then moves on to attaching four more pieces onto these main frames, completing two pairs of flanges for the bulkhead hatches.The Final Touches
While two flanges form the primary support structure around the hatches, Sven mentions there are two additional pieces required at each end to ensure comprehensive protection. This attention to detail highlights his commitment to producing a durable and reliable design. “Sailing is about finding your path, whether it’s across an ocean or within yourself.” – Sven Yrvind In conclusion, making flanges around bulkhead hatches may seem complex at first glance, but by following Sven Yrvind’s meticulous process, enthusiasts can achieve professional-level results. Remember that the journey of boatbuilding is as rewarding as reaching your destination; it tests one’s patience and dedication. For those seeking to embark on this adventure or simply gain more insight into marine craftsmanship, Sven’s wisdom is invaluable.Sven Yrvind, a renowned yacht designer and sailor, shares valuable insights on creating flanges around bulkhead hatches for canvas protection in this enlightening video. By following his expert guidance, boat enthusiasts can ensure their living areas remain secure while allowing unhindered access through the hatches.Step 1: Starting with the Flange
Sven begins by explaining that working on flanges vertically and horizontally is significantly easier than doing so in a flat position. To simplify the process further, he divides the task into two or three steps as suggested by fellow expert “for for.” This approach not only makes it more manageable but also allows for greater precision in crafting each component.Step 2: Applying Glue and Securing
Sven proceeds to apply glue along one edge of the flange, ensuring a secure bond when clamped into place. He emphasizes that this stage is crucial for maintaining the structural integrity of the flange, which in turn safeguards the living area beneath the canvas when hatches are open.Step 3: Allowing Time to Dry
After securely attaching the first portion of the flange, Sven allows ample time for it to dry before moving forward with additional steps. This patience and precision are key aspects of his successful boatbuilding methods.Step 4: Finishing Touches
Once the flange is fully dried, Sven removes the clamps carefully, ensuring no damage occurs during this process. He then moves on to attaching four more pieces onto these main frames, completing two pairs of flanges for the bulkhead hatches.The Final Touches
While two flanges form the primary support structure around the hatches, Sven mentions there are two additional pieces required at each end to ensure comprehensive protection. This attention to detail highlights his commitment to producing a durable and reliable design. “Sailing is about finding your path, whether it’s across an ocean or within yourself.” – Sven Yrvind In conclusion, making flanges around bulkhead hatches may seem complex at first glance, but by following Sven Yrvind’s meticulous process, enthusiasts can achieve professional-level results. Remember that the journey of boatbuilding is as rewarding as reaching your destination; it tests one’s patience and dedication. For those seeking to embark on this adventure or simply gain more insight into marine craftsmanship, Sven’s wisdom is invaluable.Making Flanges Around Bulkhead Hatches for Canvas
Sven Yrvind, a renowned yacht designer and sailor, shares valuable insights on creating flanges around bulkhead hatches for canvas protection in this enlightening video. By following his expert guidance, boat enthusiasts can ensure their living areas remain secure while allowing unhindered access through the hatches.Step 1: Starting with the Flange
Sven begins by explaining that working on flanges vertically and horizontally is significantly easier than doing so in a flat position. To simplify the process further, he divides the task into two or three steps as suggested by fellow expert “for for.” This approach not only makes it more manageable but also allows for greater precision in crafting each component.Step 2: Applying Glue and Securing
Sven proceeds to apply glue along one edge of the flange, ensuring a secure bond when clamped into place. He emphasizes that this stage is crucial for maintaining the structural integrity of the flange, which in turn safeguards the living area beneath the canvas when hatches are open.Step 3: Allowing Time to Dry
After securely attaching the first portion of the flange, Sven allows ample time for it to dry before moving forward with additional steps. This patience and precision are key aspects of his successful boatbuilding methods.Step 4: Finishing Touches
Once the flange is fully dried, Sven removes the clamps carefully, ensuring no damage occurs during this process. He then moves on to attaching four more pieces onto these main frames, completing two pairs of flanges for the bulkhead hatches.The Final Touches
While two flanges form the primary support structure around the hatches, Sven mentions there are two additional pieces required at each end to ensure comprehensive protection. This attention to detail highlights his commitment to producing a durable and reliable design. “Sailing is about finding your path, whether it’s across an ocean or within yourself.” – Sven Yrvind In conclusion, making flanges around bulkhead hatches may seem complex at first glance, but by following Sven Yrvind’s meticulous process, enthusiasts can achieve professional-level results. Remember that the journey of boatbuilding is as rewarding as reaching your destination; it tests one’s patience and dedication. For those seeking to embark on this adventure or simply gain more insight into marine craftsmanship, Sven’s wisdom is invaluable.Once the flange is fully dried, Sven removes the clamps carefully, ensuring no damage occurs during this process. He then moves on to attaching four more pieces onto these main frames, completing two pairs of flanges for the bulkhead hatches.The Final Touches
While two flanges form the primary support structure around the hatches, Sven mentions there are two additional pieces required at each end to ensure comprehensive protection. This attention to detail highlights his commitment to producing a durable and reliable design. “Sailing is about finding your path, whether it’s across an ocean or within yourself.” – Sven Yrvind In conclusion, making flanges around bulkhead hatches may seem complex at first glance, but by following Sven Yrvind’s meticulous process, enthusiasts can achieve professional-level results. Remember that the journey of boatbuilding is as rewarding as reaching your destination; it tests one’s patience and dedication. For those seeking to embark on this adventure or simply gain more insight into marine craftsmanship, Sven’s wisdom is invaluable.After securely attaching the first portion of the flange, Sven allows ample time for it to dry before moving forward with additional steps. This patience and precision are key aspects of his successful boatbuilding methods.Step 4: Finishing Touches
Once the flange is fully dried, Sven removes the clamps carefully, ensuring no damage occurs during this process. He then moves on to attaching four more pieces onto these main frames, completing two pairs of flanges for the bulkhead hatches.The Final Touches
While two flanges form the primary support structure around the hatches, Sven mentions there are two additional pieces required at each end to ensure comprehensive protection. This attention to detail highlights his commitment to producing a durable and reliable design. “Sailing is about finding your path, whether it’s across an ocean or within yourself.” – Sven Yrvind In conclusion, making flanges around bulkhead hatches may seem complex at first glance, but by following Sven Yrvind’s meticulous process, enthusiasts can achieve professional-level results. Remember that the journey of boatbuilding is as rewarding as reaching your destination; it tests one’s patience and dedication. For those seeking to embark on this adventure or simply gain more insight into marine craftsmanship, Sven’s wisdom is invaluable.Sven proceeds to apply glue along one edge of the flange, ensuring a secure bond when clamped into place. He emphasizes that this stage is crucial for maintaining the structural integrity of the flange, which in turn safeguards the living area beneath the canvas when hatches are open.Step 3: Allowing Time to Dry
After securely attaching the first portion of the flange, Sven allows ample time for it to dry before moving forward with additional steps. This patience and precision are key aspects of his successful boatbuilding methods.Step 4: Finishing Touches
Once the flange is fully dried, Sven removes the clamps carefully, ensuring no damage occurs during this process. He then moves on to attaching four more pieces onto these main frames, completing two pairs of flanges for the bulkhead hatches.The Final Touches
While two flanges form the primary support structure around the hatches, Sven mentions there are two additional pieces required at each end to ensure comprehensive protection. This attention to detail highlights his commitment to producing a durable and reliable design. “Sailing is about finding your path, whether it’s across an ocean or within yourself.” – Sven Yrvind In conclusion, making flanges around bulkhead hatches may seem complex at first glance, but by following Sven Yrvind’s meticulous process, enthusiasts can achieve professional-level results. Remember that the journey of boatbuilding is as rewarding as reaching your destination; it tests one’s patience and dedication. For those seeking to embark on this adventure or simply gain more insight into marine craftsmanship, Sven’s wisdom is invaluable.Sven begins by explaining that working on flanges vertically and horizontally is significantly easier than doing so in a flat position. To simplify the process further, he divides the task into two or three steps as suggested by fellow expert “for for.” This approach not only makes it more manageable but also allows for greater precision in crafting each component.Step 2: Applying Glue and Securing
Sven proceeds to apply glue along one edge of the flange, ensuring a secure bond when clamped into place. He emphasizes that this stage is crucial for maintaining the structural integrity of the flange, which in turn safeguards the living area beneath the canvas when hatches are open.Step 3: Allowing Time to Dry
After securely attaching the first portion of the flange, Sven allows ample time for it to dry before moving forward with additional steps. This patience and precision are key aspects of his successful boatbuilding methods.Step 4: Finishing Touches
Once the flange is fully dried, Sven removes the clamps carefully, ensuring no damage occurs during this process. He then moves on to attaching four more pieces onto these main frames, completing two pairs of flanges for the bulkhead hatches.The Final Touches
While two flanges form the primary support structure around the hatches, Sven mentions there are two additional pieces required at each end to ensure comprehensive protection. This attention to detail highlights his commitment to producing a durable and reliable design. “Sailing is about finding your path, whether it’s across an ocean or within yourself.” – Sven Yrvind In conclusion, making flanges around bulkhead hatches may seem complex at first glance, but by following Sven Yrvind’s meticulous process, enthusiasts can achieve professional-level results. Remember that the journey of boatbuilding is as rewarding as reaching your destination; it tests one’s patience and dedication. For those seeking to embark on this adventure or simply gain more insight into marine craftsmanship, Sven’s wisdom is invaluable.Sven Yrvind, a renowned yacht designer and sailor, shares valuable insights on creating flanges around bulkhead hatches for canvas protection in this enlightening video. By following his expert guidance, boat enthusiasts can ensure their living areas remain secure while allowing unhindered access through the hatches.Step 1: Starting with the Flange
Sven begins by explaining that working on flanges vertically and horizontally is significantly easier than doing so in a flat position. To simplify the process further, he divides the task into two or three steps as suggested by fellow expert “for for.” This approach not only makes it more manageable but also allows for greater precision in crafting each component.Step 2: Applying Glue and Securing
Sven proceeds to apply glue along one edge of the flange, ensuring a secure bond when clamped into place. He emphasizes that this stage is crucial for maintaining the structural integrity of the flange, which in turn safeguards the living area beneath the canvas when hatches are open.Step 3: Allowing Time to Dry
After securely attaching the first portion of the flange, Sven allows ample time for it to dry before moving forward with additional steps. This patience and precision are key aspects of his successful boatbuilding methods.Step 4: Finishing Touches
Once the flange is fully dried, Sven removes the clamps carefully, ensuring no damage occurs during this process. He then moves on to attaching four more pieces onto these main frames, completing two pairs of flanges for the bulkhead hatches.The Final Touches
While two flanges form the primary support structure around the hatches, Sven mentions there are two additional pieces required at each end to ensure comprehensive protection. This attention to detail highlights his commitment to producing a durable and reliable design. “Sailing is about finding your path, whether it’s across an ocean or within yourself.” – Sven Yrvind In conclusion, making flanges around bulkhead hatches may seem complex at first glance, but by following Sven Yrvind’s meticulous process, enthusiasts can achieve professional-level results. Remember that the journey of boatbuilding is as rewarding as reaching your destination; it tests one’s patience and dedication. For those seeking to embark on this adventure or simply gain more insight into marine craftsmanship, Sven’s wisdom is invaluable.Making Flanges Around Bulkhead Hatches for Canvas
Sven Yrvind, a renowned yacht designer and sailor, shares valuable insights on creating flanges around bulkhead hatches for canvas protection in this enlightening video. By following his expert guidance, boat enthusiasts can ensure their living areas remain secure while allowing unhindered access through the hatches.Step 1: Starting with the Flange
Sven begins by explaining that working on flanges vertically and horizontally is significantly easier than doing so in a flat position. To simplify the process further, he divides the task into two or three steps as suggested by fellow expert “for for.” This approach not only makes it more manageable but also allows for greater precision in crafting each component.Step 2: Applying Glue and Securing
Sven proceeds to apply glue along one edge of the flange, ensuring a secure bond when clamped into place. He emphasizes that this stage is crucial for maintaining the structural integrity of the flange, which in turn safeguards the living area beneath the canvas when hatches are open.Step 3: Allowing Time to Dry
After securely attaching the first portion of the flange, Sven allows ample time for it to dry before moving forward with additional steps. This patience and precision are key aspects of his successful boatbuilding methods.Step 4: Finishing Touches
Once the flange is fully dried, Sven removes the clamps carefully, ensuring no damage occurs during this process. He then moves on to attaching four more pieces onto these main frames, completing two pairs of flanges for the bulkhead hatches.The Final Touches
While two flanges form the primary support structure around the hatches, Sven mentions there are two additional pieces required at each end to ensure comprehensive protection. This attention to detail highlights his commitment to producing a durable and reliable design. “Sailing is about finding your path, whether it’s across an ocean or within yourself.” – Sven Yrvind In conclusion, making flanges around bulkhead hatches may seem complex at first glance, but by following Sven Yrvind’s meticulous process, enthusiasts can achieve professional-level results. Remember that the journey of boatbuilding is as rewarding as reaching your destination; it tests one’s patience and dedication. For those seeking to embark on this adventure or simply gain more insight into marine craftsmanship, Sven’s wisdom is invaluable.Sven Yrvind, a renowned yacht designer and sailor, shares valuable insights on creating flanges around bulkhead hatches for canvas protection in this enlightening video. By following his expert guidance, boat enthusiasts can ensure their living areas remain secure while allowing unhindered access through the hatches.Step 1: Starting with the Flange
Sven begins by explaining that working on flanges vertically and horizontally is significantly easier than doing so in a flat position. To simplify the process further, he divides the task into two or three steps as suggested by fellow expert “for for.” This approach not only makes it more manageable but also allows for greater precision in crafting each component.Step 2: Applying Glue and Securing
Sven proceeds to apply glue along one edge of the flange, ensuring a secure bond when clamped into place. He emphasizes that this stage is crucial for maintaining the structural integrity of the flange, which in turn safeguards the living area beneath the canvas when hatches are open.Step 3: Allowing Time to Dry
After securely attaching the first portion of the flange, Sven allows ample time for it to dry before moving forward with additional steps. This patience and precision are key aspects of his successful boatbuilding methods.Step 4: Finishing Touches
Once the flange is fully dried, Sven removes the clamps carefully, ensuring no damage occurs during this process. He then moves on to attaching four more pieces onto these main frames, completing two pairs of flanges for the bulkhead hatches.The Final Touches
While two flanges form the primary support structure around the hatches, Sven mentions there are two additional pieces required at each end to ensure comprehensive protection. This attention to detail highlights his commitment to producing a durable and reliable design. “Sailing is about finding your path, whether it’s across an ocean or within yourself.” – Sven Yrvind In conclusion, making flanges around bulkhead hatches may seem complex at first glance, but by following Sven Yrvind’s meticulous process, enthusiasts can achieve professional-level results. Remember that the journey of boatbuilding is as rewarding as reaching your destination; it tests one’s patience and dedication. For those seeking to embark on this adventure or simply gain more insight into marine craftsmanship, Sven’s wisdom is invaluable.Sven begins by explaining that working on flanges vertically and horizontally is significantly easier than doing so in a flat position. To simplify the process further, he divides the task into two or three steps as suggested by fellow expert “for for.” This approach not only makes it more manageable but also allows for greater precision in crafting each component.Step 2: Applying Glue and Securing
Sven proceeds to apply glue along one edge of the flange, ensuring a secure bond when clamped into place. He emphasizes that this stage is crucial for maintaining the structural integrity of the flange, which in turn safeguards the living area beneath the canvas when hatches are open.Step 3: Allowing Time to Dry
After securely attaching the first portion of the flange, Sven allows ample time for it to dry before moving forward with additional steps. This patience and precision are key aspects of his successful boatbuilding methods.Step 4: Finishing Touches
Once the flange is fully dried, Sven removes the clamps carefully, ensuring no damage occurs during this process. He then moves on to attaching four more pieces onto these main frames, completing two pairs of flanges for the bulkhead hatches.The Final Touches
While two flanges form the primary support structure around the hatches, Sven mentions there are two additional pieces required at each end to ensure comprehensive protection. This attention to detail highlights his commitment to producing a durable and reliable design. “Sailing is about finding your path, whether it’s across an ocean or within yourself.” – Sven Yrvind In conclusion, making flanges around bulkhead hatches may seem complex at first glance, but by following Sven Yrvind’s meticulous process, enthusiasts can achieve professional-level results. Remember that the journey of boatbuilding is as rewarding as reaching your destination; it tests one’s patience and dedication. For those seeking to embark on this adventure or simply gain more insight into marine craftsmanship, Sven’s wisdom is invaluable.Making Flanges Around Bulkhead Hatches for Canvas
Sven Yrvind, a renowned yacht designer and sailor, shares valuable insights on creating flanges around bulkhead hatches for canvas protection in this enlightening video. By following his expert guidance, boat enthusiasts can ensure their living areas remain secure while allowing unhindered access through the hatches.Step 1: Starting with the Flange
Sven begins by explaining that working on flanges vertically and horizontally is significantly easier than doing so in a flat position. To simplify the process further, he divides the task into two or three steps as suggested by fellow expert “for for.” This approach not only makes it more manageable but also allows for greater precision in crafting each component.Step 2: Applying Glue and Securing
Sven proceeds to apply glue along one edge of the flange, ensuring a secure bond when clamped into place. He emphasizes that this stage is crucial for maintaining the structural integrity of the flange, which in turn safeguards the living area beneath the canvas when hatches are open.Step 3: Allowing Time to Dry
After securely attaching the first portion of the flange, Sven allows ample time for it to dry before moving forward with additional steps. This patience and precision are key aspects of his successful boatbuilding methods.Step 4: Finishing Touches
Once the flange is fully dried, Sven removes the clamps carefully, ensuring no damage occurs during this process. He then moves on to attaching four more pieces onto these main frames, completing two pairs of flanges for the bulkhead hatches.The Final Touches
While two flanges form the primary support structure around the hatches, Sven mentions there are two additional pieces required at each end to ensure comprehensive protection. This attention to detail highlights his commitment to producing a durable and reliable design. “Sailing is about finding your path, whether it’s across an ocean or within yourself.” – Sven Yrvind In conclusion, making flanges around bulkhead hatches may seem complex at first glance, but by following Sven Yrvind’s meticulous process, enthusiasts can achieve professional-level results. Remember that the journey of boatbuilding is as rewarding as reaching your destination; it tests one’s patience and dedication. For those seeking to embark on this adventure or simply gain more insight into marine craftsmanship, Sven’s wisdom is invaluable.Sven Yrvind, a renowned yacht designer and sailor, shares valuable insights on creating flanges around bulkhead hatches for canvas protection in this enlightening video. By following his expert guidance, boat enthusiasts can ensure their living areas remain secure while allowing unhindered access through the hatches.Step 1: Starting with the Flange
Sven begins by explaining that working on flanges vertically and horizontally is significantly easier than doing so in a flat position. To simplify the process further, he divides the task into two or three steps as suggested by fellow expert “for for.” This approach not only makes it more manageable but also allows for greater precision in crafting each component.Step 2: Applying Glue and Securing
Sven proceeds to apply glue along one edge of the flange, ensuring a secure bond when clamped into place. He emphasizes that this stage is crucial for maintaining the structural integrity of the flange, which in turn safeguards the living area beneath the canvas when hatches are open.Step 3: Allowing Time to Dry
After securely attaching the first portion of the flange, Sven allows ample time for it to dry before moving forward with additional steps. This patience and precision are key aspects of his successful boatbuilding methods.Step 4: Finishing Touches
Once the flange is fully dried, Sven removes the clamps carefully, ensuring no damage occurs during this process. He then moves on to attaching four more pieces onto these main frames, completing two pairs of flanges for the bulkhead hatches.The Final Touches
While two flanges form the primary support structure around the hatches, Sven mentions there are two additional pieces required at each end to ensure comprehensive protection. This attention to detail highlights his commitment to producing a durable and reliable design. “Sailing is about finding your path, whether it’s across an ocean or within yourself.” – Sven Yrvind In conclusion, making flanges around bulkhead hatches may seem complex at first glance, but by following Sven Yrvind’s meticulous process, enthusiasts can achieve professional-level results. Remember that the journey of boatbuilding is as rewarding as reaching your destination; it tests one’s patience and dedication. For those seeking to embark on this adventure or simply gain more insight into marine craftsmanship, Sven’s wisdom is invaluable.Making Flanges Around Bulkhead Hatches for Canvas
Sven Yrvind, a renowned yacht designer and sailor, shares valuable insights on creating flanges around bulkhead hatches for canvas protection in this enlightening video. By following his expert guidance, boat enthusiasts can ensure their living areas remain secure while allowing unhindered access through the hatches.Step 1: Starting with the Flange
Sven begins by explaining that working on flanges vertically and horizontally is significantly easier than doing so in a flat position. To simplify the process further, he divides the task into two or three steps as suggested by fellow expert “for for.” This approach not only makes it more manageable but also allows for greater precision in crafting each component.Step 2: Applying Glue and Securing
Sven proceeds to apply glue along one edge of the flange, ensuring a secure bond when clamped into place. He emphasizes that this stage is crucial for maintaining the structural integrity of the flange, which in turn safeguards the living area beneath the canvas when hatches are open.Step 3: Allowing Time to Dry
After securely attaching the first portion of the flange, Sven allows ample time for it to dry before moving forward with additional steps. This patience and precision are key aspects of his successful boatbuilding methods.Step 4: Finishing Touches
Once the flange is fully dried, Sven removes the clamps carefully, ensuring no damage occurs during this process. He then moves on to attaching four more pieces onto these main frames, completing two pairs of flanges for the bulkhead hatches.The Final Touches
While two flanges form the primary support structure around the hatches, Sven mentions there are two additional pieces required at each end to ensure comprehensive protection. This attention to detail highlights his commitment to producing a durable and reliable design. “Sailing is about finding your path, whether it’s across an ocean or within yourself.” – Sven Yrvind In conclusion, making flanges around bulkhead hatches may seem complex at first glance, but by following Sven Yrvind’s meticulous process, enthusiasts can achieve professional-level results. Remember that the journey of boatbuilding is as rewarding as reaching your destination; it tests one’s patience and dedication. For those seeking to embark on this adventure or simply gain more insight into marine craftsmanship, Sven’s wisdom is invaluable.Once the flange is fully dried, Sven removes the clamps carefully, ensuring no damage occurs during this process. He then moves on to attaching four more pieces onto these main frames, completing two pairs of flanges for the bulkhead hatches.The Final Touches
While two flanges form the primary support structure around the hatches, Sven mentions there are two additional pieces required at each end to ensure comprehensive protection. This attention to detail highlights his commitment to producing a durable and reliable design. “Sailing is about finding your path, whether it’s across an ocean or within yourself.” – Sven Yrvind In conclusion, making flanges around bulkhead hatches may seem complex at first glance, but by following Sven Yrvind’s meticulous process, enthusiasts can achieve professional-level results. Remember that the journey of boatbuilding is as rewarding as reaching your destination; it tests one’s patience and dedication. For those seeking to embark on this adventure or simply gain more insight into marine craftsmanship, Sven’s wisdom is invaluable.Sven Yrvind, a renowned yacht designer and sailor, shares valuable insights on creating flanges around bulkhead hatches for canvas protection in this enlightening video. By following his expert guidance, boat enthusiasts can ensure their living areas remain secure while allowing unhindered access through the hatches.Step 1: Starting with the Flange
Sven begins by explaining that working on flanges vertically and horizontally is significantly easier than doing so in a flat position. To simplify the process further, he divides the task into two or three steps as suggested by fellow expert “for for.” This approach not only makes it more manageable but also allows for greater precision in crafting each component.Step 2: Applying Glue and Securing
Sven proceeds to apply glue along one edge of the flange, ensuring a secure bond when clamped into place. He emphasizes that this stage is crucial for maintaining the structural integrity of the flange, which in turn safeguards the living area beneath the canvas when hatches are open.Step 3: Allowing Time to Dry
After securely attaching the first portion of the flange, Sven allows ample time for it to dry before moving forward with additional steps. This patience and precision are key aspects of his successful boatbuilding methods.Step 4: Finishing Touches
Once the flange is fully dried, Sven removes the clamps carefully, ensuring no damage occurs during this process. He then moves on to attaching four more pieces onto these main frames, completing two pairs of flanges for the bulkhead hatches.The Final Touches
While two flanges form the primary support structure around the hatches, Sven mentions there are two additional pieces required at each end to ensure comprehensive protection. This attention to detail highlights his commitment to producing a durable and reliable design. “Sailing is about finding your path, whether it’s across an ocean or within yourself.” – Sven Yrvind In conclusion, making flanges around bulkhead hatches may seem complex at first glance, but by following Sven Yrvind’s meticulous process, enthusiasts can achieve professional-level results. Remember that the journey of boatbuilding is as rewarding as reaching your destination; it tests one’s patience and dedication. For those seeking to embark on this adventure or simply gain more insight into marine craftsmanship, Sven’s wisdom is invaluable.Making Flanges Around Bulkhead Hatches for Canvas
Sven Yrvind, a renowned yacht designer and sailor, shares valuable insights on creating flanges around bulkhead hatches for canvas protection in this enlightening video. By following his expert guidance, boat enthusiasts can ensure their living areas remain secure while allowing unhindered access through the hatches.Step 1: Starting with the Flange
Sven begins by explaining that working on flanges vertically and horizontally is significantly easier than doing so in a flat position. To simplify the process further, he divides the task into two or three steps as suggested by fellow expert “for for.” This approach not only makes it more manageable but also allows for greater precision in crafting each component.Step 2: Applying Glue and Securing
Sven proceeds to apply glue along one edge of the flange, ensuring a secure bond when clamped into place. He emphasizes that this stage is crucial for maintaining the structural integrity of the flange, which in turn safeguards the living area beneath the canvas when hatches are open.Step 3: Allowing Time to Dry
After securely attaching the first portion of the flange, Sven allows ample time for it to dry before moving forward with additional steps. This patience and precision are key aspects of his successful boatbuilding methods.Step 4: Finishing Touches
Once the flange is fully dried, Sven removes the clamps carefully, ensuring no damage occurs during this process. He then moves on to attaching four more pieces onto these main frames, completing two pairs of flanges for the bulkhead hatches.The Final Touches
While two flanges form the primary support structure around the hatches, Sven mentions there are two additional pieces required at each end to ensure comprehensive protection. This attention to detail highlights his commitment to producing a durable and reliable design. “Sailing is about finding your path, whether it’s across an ocean or within yourself.” – Sven Yrvind In conclusion, making flanges around bulkhead hatches may seem complex at first glance, but by following Sven Yrvind’s meticulous process, enthusiasts can achieve professional-level results. Remember that the journey of boatbuilding is as rewarding as reaching your destination; it tests one’s patience and dedication. For those seeking to embark on this adventure or simply gain more insight into marine craftsmanship, Sven’s wisdom is invaluable.After securely attaching the first portion of the flange, Sven allows ample time for it to dry before moving forward with additional steps. This patience and precision are key aspects of his successful boatbuilding methods.Step 4: Finishing Touches
Once the flange is fully dried, Sven removes the clamps carefully, ensuring no damage occurs during this process. He then moves on to attaching four more pieces onto these main frames, completing two pairs of flanges for the bulkhead hatches.The Final Touches
While two flanges form the primary support structure around the hatches, Sven mentions there are two additional pieces required at each end to ensure comprehensive protection. This attention to detail highlights his commitment to producing a durable and reliable design. “Sailing is about finding your path, whether it’s across an ocean or within yourself.” – Sven Yrvind In conclusion, making flanges around bulkhead hatches may seem complex at first glance, but by following Sven Yrvind’s meticulous process, enthusiasts can achieve professional-level results. Remember that the journey of boatbuilding is as rewarding as reaching your destination; it tests one’s patience and dedication. For those seeking to embark on this adventure or simply gain more insight into marine craftsmanship, Sven’s wisdom is invaluable.Sven Yrvind, a renowned yacht designer and sailor, shares valuable insights on creating flanges around bulkhead hatches for canvas protection in this enlightening video. By following his expert guidance, boat enthusiasts can ensure their living areas remain secure while allowing unhindered access through the hatches.Step 1: Starting with the Flange
Sven begins by explaining that working on flanges vertically and horizontally is significantly easier than doing so in a flat position. To simplify the process further, he divides the task into two or three steps as suggested by fellow expert “for for.” This approach not only makes it more manageable but also allows for greater precision in crafting each component.Step 2: Applying Glue and Securing
Sven proceeds to apply glue along one edge of the flange, ensuring a secure bond when clamped into place. He emphasizes that this stage is crucial for maintaining the structural integrity of the flange, which in turn safeguards the living area beneath the canvas when hatches are open.Step 3: Allowing Time to Dry
After securely attaching the first portion of the flange, Sven allows ample time for it to dry before moving forward with additional steps. This patience and precision are key aspects of his successful boatbuilding methods.Step 4: Finishing Touches
Once the flange is fully dried, Sven removes the clamps carefully, ensuring no damage occurs during this process. He then moves on to attaching four more pieces onto these main frames, completing two pairs of flanges for the bulkhead hatches.The Final Touches
While two flanges form the primary support structure around the hatches, Sven mentions there are two additional pieces required at each end to ensure comprehensive protection. This attention to detail highlights his commitment to producing a durable and reliable design. “Sailing is about finding your path, whether it’s across an ocean or within yourself.” – Sven Yrvind In conclusion, making flanges around bulkhead hatches may seem complex at first glance, but by following Sven Yrvind’s meticulous process, enthusiasts can achieve professional-level results. Remember that the journey of boatbuilding is as rewarding as reaching your destination; it tests one’s patience and dedication. For those seeking to embark on this adventure or simply gain more insight into marine craftsmanship, Sven’s wisdom is invaluable.Making Flanges Around Bulkhead Hatches for Canvas
Sven Yrvind, a renowned yacht designer and sailor, shares valuable insights on creating flanges around bulkhead hatches for canvas protection in this enlightening video. By following his expert guidance, boat enthusiasts can ensure their living areas remain secure while allowing unhindered access through the hatches.Step 1: Starting with the Flange
Sven begins by explaining that working on flanges vertically and horizontally is significantly easier than doing so in a flat position. To simplify the process further, he divides the task into two or three steps as suggested by fellow expert “for for.” This approach not only makes it more manageable but also allows for greater precision in crafting each component.Step 2: Applying Glue and Securing
Sven proceeds to apply glue along one edge of the flange, ensuring a secure bond when clamped into place. He emphasizes that this stage is crucial for maintaining the structural integrity of the flange, which in turn safeguards the living area beneath the canvas when hatches are open.Step 3: Allowing Time to Dry
After securely attaching the first portion of the flange, Sven allows ample time for it to dry before moving forward with additional steps. This patience and precision are key aspects of his successful boatbuilding methods.Step 4: Finishing Touches
Once the flange is fully dried, Sven removes the clamps carefully, ensuring no damage occurs during this process. He then moves on to attaching four more pieces onto these main frames, completing two pairs of flanges for the bulkhead hatches.The Final Touches
While two flanges form the primary support structure around the hatches, Sven mentions there are two additional pieces required at each end to ensure comprehensive protection. This attention to detail highlights his commitment to producing a durable and reliable design. “Sailing is about finding your path, whether it’s across an ocean or within yourself.” – Sven Yrvind In conclusion, making flanges around bulkhead hatches may seem complex at first glance, but by following Sven Yrvind’s meticulous process, enthusiasts can achieve professional-level results. Remember that the journey of boatbuilding is as rewarding as reaching your destination; it tests one’s patience and dedication. For those seeking to embark on this adventure or simply gain more insight into marine craftsmanship, Sven’s wisdom is invaluable.Sven proceeds to apply glue along one edge of the flange, ensuring a secure bond when clamped into place. He emphasizes that this stage is crucial for maintaining the structural integrity of the flange, which in turn safeguards the living area beneath the canvas when hatches are open.Step 3: Allowing Time to Dry
After securely attaching the first portion of the flange, Sven allows ample time for it to dry before moving forward with additional steps. This patience and precision are key aspects of his successful boatbuilding methods.Step 4: Finishing Touches
Once the flange is fully dried, Sven removes the clamps carefully, ensuring no damage occurs during this process. He then moves on to attaching four more pieces onto these main frames, completing two pairs of flanges for the bulkhead hatches.The Final Touches
While two flanges form the primary support structure around the hatches, Sven mentions there are two additional pieces required at each end to ensure comprehensive protection. This attention to detail highlights his commitment to producing a durable and reliable design. “Sailing is about finding your path, whether it’s across an ocean or within yourself.” – Sven Yrvind In conclusion, making flanges around bulkhead hatches may seem complex at first glance, but by following Sven Yrvind’s meticulous process, enthusiasts can achieve professional-level results. Remember that the journey of boatbuilding is as rewarding as reaching your destination; it tests one’s patience and dedication. For those seeking to embark on this adventure or simply gain more insight into marine craftsmanship, Sven’s wisdom is invaluable.Sven Yrvind, a renowned yacht designer and sailor, shares valuable insights on creating flanges around bulkhead hatches for canvas protection in this enlightening video. By following his expert guidance, boat enthusiasts can ensure their living areas remain secure while allowing unhindered access through the hatches.Step 1: Starting with the Flange
Sven begins by explaining that working on flanges vertically and horizontally is significantly easier than doing so in a flat position. To simplify the process further, he divides the task into two or three steps as suggested by fellow expert “for for.” This approach not only makes it more manageable but also allows for greater precision in crafting each component.Step 2: Applying Glue and Securing
Sven proceeds to apply glue along one edge of the flange, ensuring a secure bond when clamped into place. He emphasizes that this stage is crucial for maintaining the structural integrity of the flange, which in turn safeguards the living area beneath the canvas when hatches are open.Step 3: Allowing Time to Dry
After securely attaching the first portion of the flange, Sven allows ample time for it to dry before moving forward with additional steps. This patience and precision are key aspects of his successful boatbuilding methods.Step 4: Finishing Touches
Once the flange is fully dried, Sven removes the clamps carefully, ensuring no damage occurs during this process. He then moves on to attaching four more pieces onto these main frames, completing two pairs of flanges for the bulkhead hatches.The Final Touches
While two flanges form the primary support structure around the hatches, Sven mentions there are two additional pieces required at each end to ensure comprehensive protection. This attention to detail highlights his commitment to producing a durable and reliable design. “Sailing is about finding your path, whether it’s across an ocean or within yourself.” – Sven Yrvind In conclusion, making flanges around bulkhead hatches may seem complex at first glance, but by following Sven Yrvind’s meticulous process, enthusiasts can achieve professional-level results. Remember that the journey of boatbuilding is as rewarding as reaching your destination; it tests one’s patience and dedication. For those seeking to embark on this adventure or simply gain more insight into marine craftsmanship, Sven’s wisdom is invaluable.Making Flanges Around Bulkhead Hatches for Canvas
Sven Yrvind, a renowned yacht designer and sailor, shares valuable insights on creating flanges around bulkhead hatches for canvas protection in this enlightening video. By following his expert guidance, boat enthusiasts can ensure their living areas remain secure while allowing unhindered access through the hatches.Step 1: Starting with the Flange
Sven begins by explaining that working on flanges vertically and horizontally is significantly easier than doing so in a flat position. To simplify the process further, he divides the task into two or three steps as suggested by fellow expert “for for.” This approach not only makes it more manageable but also allows for greater precision in crafting each component.Step 2: Applying Glue and Securing
Sven proceeds to apply glue along one edge of the flange, ensuring a secure bond when clamped into place. He emphasizes that this stage is crucial for maintaining the structural integrity of the flange, which in turn safeguards the living area beneath the canvas when hatches are open.Step 3: Allowing Time to Dry
After securely attaching the first portion of the flange, Sven allows ample time for it to dry before moving forward with additional steps. This patience and precision are key aspects of his successful boatbuilding methods.Step 4: Finishing Touches
Once the flange is fully dried, Sven removes the clamps carefully, ensuring no damage occurs during this process. He then moves on to attaching four more pieces onto these main frames, completing two pairs of flanges for the bulkhead hatches.The Final Touches
While two flanges form the primary support structure around the hatches, Sven mentions there are two additional pieces required at each end to ensure comprehensive protection. This attention to detail highlights his commitment to producing a durable and reliable design. “Sailing is about finding your path, whether it’s across an ocean or within yourself.” – Sven Yrvind In conclusion, making flanges around bulkhead hatches may seem complex at first glance, but by following Sven Yrvind’s meticulous process, enthusiasts can achieve professional-level results. Remember that the journey of boatbuilding is as rewarding as reaching your destination; it tests one’s patience and dedication. For those seeking to embark on this adventure or simply gain more insight into marine craftsmanship, Sven’s wisdom is invaluable.Sven begins by explaining that working on flanges vertically and horizontally is significantly easier than doing so in a flat position. To simplify the process further, he divides the task into two or three steps as suggested by fellow expert “for for.” This approach not only makes it more manageable but also allows for greater precision in crafting each component.Step 2: Applying Glue and Securing
Sven proceeds to apply glue along one edge of the flange, ensuring a secure bond when clamped into place. He emphasizes that this stage is crucial for maintaining the structural integrity of the flange, which in turn safeguards the living area beneath the canvas when hatches are open.Step 3: Allowing Time to Dry
After securely attaching the first portion of the flange, Sven allows ample time for it to dry before moving forward with additional steps. This patience and precision are key aspects of his successful boatbuilding methods.Step 4: Finishing Touches
Once the flange is fully dried, Sven removes the clamps carefully, ensuring no damage occurs during this process. He then moves on to attaching four more pieces onto these main frames, completing two pairs of flanges for the bulkhead hatches.The Final Touches
While two flanges form the primary support structure around the hatches, Sven mentions there are two additional pieces required at each end to ensure comprehensive protection. This attention to detail highlights his commitment to producing a durable and reliable design. “Sailing is about finding your path, whether it’s across an ocean or within yourself.” – Sven Yrvind In conclusion, making flanges around bulkhead hatches may seem complex at first glance, but by following Sven Yrvind’s meticulous process, enthusiasts can achieve professional-level results. Remember that the journey of boatbuilding is as rewarding as reaching your destination; it tests one’s patience and dedication. For those seeking to embark on this adventure or simply gain more insight into marine craftsmanship, Sven’s wisdom is invaluable.Sven Yrvind, a renowned yacht designer and sailor, shares valuable insights on creating flanges around bulkhead hatches for canvas protection in this enlightening video. By following his expert guidance, boat enthusiasts can ensure their living areas remain secure while allowing unhindered access through the hatches.Step 1: Starting with the Flange
Sven begins by explaining that working on flanges vertically and horizontally is significantly easier than doing so in a flat position. To simplify the process further, he divides the task into two or three steps as suggested by fellow expert “for for.” This approach not only makes it more manageable but also allows for greater precision in crafting each component.Step 2: Applying Glue and Securing
Sven proceeds to apply glue along one edge of the flange, ensuring a secure bond when clamped into place. He emphasizes that this stage is crucial for maintaining the structural integrity of the flange, which in turn safeguards the living area beneath the canvas when hatches are open.Step 3: Allowing Time to Dry
After securely attaching the first portion of the flange, Sven allows ample time for it to dry before moving forward with additional steps. This patience and precision are key aspects of his successful boatbuilding methods.Step 4: Finishing Touches
Once the flange is fully dried, Sven removes the clamps carefully, ensuring no damage occurs during this process. He then moves on to attaching four more pieces onto these main frames, completing two pairs of flanges for the bulkhead hatches.The Final Touches
While two flanges form the primary support structure around the hatches, Sven mentions there are two additional pieces required at each end to ensure comprehensive protection. This attention to detail highlights his commitment to producing a durable and reliable design. “Sailing is about finding your path, whether it’s across an ocean or within yourself.” – Sven Yrvind In conclusion, making flanges around bulkhead hatches may seem complex at first glance, but by following Sven Yrvind’s meticulous process, enthusiasts can achieve professional-level results. Remember that the journey of boatbuilding is as rewarding as reaching your destination; it tests one’s patience and dedication. For those seeking to embark on this adventure or simply gain more insight into marine craftsmanship, Sven’s wisdom is invaluable.Making Flanges Around Bulkhead Hatches for Canvas
Sven Yrvind, a renowned yacht designer and sailor, shares valuable insights on creating flanges around bulkhead hatches for canvas protection in this enlightening video. By following his expert guidance, boat enthusiasts can ensure their living areas remain secure while allowing unhindered access through the hatches.Step 1: Starting with the Flange
Sven begins by explaining that working on flanges vertically and horizontally is significantly easier than doing so in a flat position. To simplify the process further, he divides the task into two or three steps as suggested by fellow expert “for for.” This approach not only makes it more manageable but also allows for greater precision in crafting each component.Step 2: Applying Glue and Securing
Sven proceeds to apply glue along one edge of the flange, ensuring a secure bond when clamped into place. He emphasizes that this stage is crucial for maintaining the structural integrity of the flange, which in turn safeguards the living area beneath the canvas when hatches are open.Step 3: Allowing Time to Dry
After securely attaching the first portion of the flange, Sven allows ample time for it to dry before moving forward with additional steps. This patience and precision are key aspects of his successful boatbuilding methods.Step 4: Finishing Touches
Once the flange is fully dried, Sven removes the clamps carefully, ensuring no damage occurs during this process. He then moves on to attaching four more pieces onto these main frames, completing two pairs of flanges for the bulkhead hatches.The Final Touches
While two flanges form the primary support structure around the hatches, Sven mentions there are two additional pieces required at each end to ensure comprehensive protection. This attention to detail highlights his commitment to producing a durable and reliable design. “Sailing is about finding your path, whether it’s across an ocean or within yourself.” – Sven Yrvind In conclusion, making flanges around bulkhead hatches may seem complex at first glance, but by following Sven Yrvind’s meticulous process, enthusiasts can achieve professional-level results. Remember that the journey of boatbuilding is as rewarding as reaching your destination; it tests one’s patience and dedication. For those seeking to embark on this adventure or simply gain more insight into marine craftsmanship, Sven’s wisdom is invaluable.Once the flange is fully dried, Sven removes the clamps carefully, ensuring no damage occurs during this process. He then moves on to attaching four more pieces onto these main frames, completing two pairs of flanges for the bulkhead hatches.The Final Touches
While two flanges form the primary support structure around the hatches, Sven mentions there are two additional pieces required at each end to ensure comprehensive protection. This attention to detail highlights his commitment to producing a durable and reliable design. “Sailing is about finding your path, whether it’s across an ocean or within yourself.” – Sven Yrvind In conclusion, making flanges around bulkhead hatches may seem complex at first glance, but by following Sven Yrvind’s meticulous process, enthusiasts can achieve professional-level results. Remember that the journey of boatbuilding is as rewarding as reaching your destination; it tests one’s patience and dedication. For those seeking to embark on this adventure or simply gain more insight into marine craftsmanship, Sven’s wisdom is invaluable.Sven begins by explaining that working on flanges vertically and horizontally is significantly easier than doing so in a flat position. To simplify the process further, he divides the task into two or three steps as suggested by fellow expert “for for.” This approach not only makes it more manageable but also allows for greater precision in crafting each component.Step 2: Applying Glue and Securing
Sven proceeds to apply glue along one edge of the flange, ensuring a secure bond when clamped into place. He emphasizes that this stage is crucial for maintaining the structural integrity of the flange, which in turn safeguards the living area beneath the canvas when hatches are open.Step 3: Allowing Time to Dry
After securely attaching the first portion of the flange, Sven allows ample time for it to dry before moving forward with additional steps. This patience and precision are key aspects of his successful boatbuilding methods.Step 4: Finishing Touches
Once the flange is fully dried, Sven removes the clamps carefully, ensuring no damage occurs during this process. He then moves on to attaching four more pieces onto these main frames, completing two pairs of flanges for the bulkhead hatches.The Final Touches
While two flanges form the primary support structure around the hatches, Sven mentions there are two additional pieces required at each end to ensure comprehensive protection. This attention to detail highlights his commitment to producing a durable and reliable design. “Sailing is about finding your path, whether it’s across an ocean or within yourself.” – Sven Yrvind In conclusion, making flanges around bulkhead hatches may seem complex at first glance, but by following Sven Yrvind’s meticulous process, enthusiasts can achieve professional-level results. Remember that the journey of boatbuilding is as rewarding as reaching your destination; it tests one’s patience and dedication. For those seeking to embark on this adventure or simply gain more insight into marine craftsmanship, Sven’s wisdom is invaluable.Sven Yrvind, a renowned yacht designer and sailor, shares valuable insights on creating flanges around bulkhead hatches for canvas protection in this enlightening video. By following his expert guidance, boat enthusiasts can ensure their living areas remain secure while allowing unhindered access through the hatches.Step 1: Starting with the Flange
Sven begins by explaining that working on flanges vertically and horizontally is significantly easier than doing so in a flat position. To simplify the process further, he divides the task into two or three steps as suggested by fellow expert “for for.” This approach not only makes it more manageable but also allows for greater precision in crafting each component.Step 2: Applying Glue and Securing
Sven proceeds to apply glue along one edge of the flange, ensuring a secure bond when clamped into place. He emphasizes that this stage is crucial for maintaining the structural integrity of the flange, which in turn safeguards the living area beneath the canvas when hatches are open.Step 3: Allowing Time to Dry
After securely attaching the first portion of the flange, Sven allows ample time for it to dry before moving forward with additional steps. This patience and precision are key aspects of his successful boatbuilding methods.Step 4: Finishing Touches
Once the flange is fully dried, Sven removes the clamps carefully, ensuring no damage occurs during this process. He then moves on to attaching four more pieces onto these main frames, completing two pairs of flanges for the bulkhead hatches.The Final Touches
While two flanges form the primary support structure around the hatches, Sven mentions there are two additional pieces required at each end to ensure comprehensive protection. This attention to detail highlights his commitment to producing a durable and reliable design. “Sailing is about finding your path, whether it’s across an ocean or within yourself.” – Sven Yrvind In conclusion, making flanges around bulkhead hatches may seem complex at first glance, but by following Sven Yrvind’s meticulous process, enthusiasts can achieve professional-level results. Remember that the journey of boatbuilding is as rewarding as reaching your destination; it tests one’s patience and dedication. For those seeking to embark on this adventure or simply gain more insight into marine craftsmanship, Sven’s wisdom is invaluable.Making Flanges Around Bulkhead Hatches for Canvas
Sven Yrvind, a renowned yacht designer and sailor, shares valuable insights on creating flanges around bulkhead hatches for canvas protection in this enlightening video. By following his expert guidance, boat enthusiasts can ensure their living areas remain secure while allowing unhindered access through the hatches.Step 1: Starting with the Flange
Sven begins by explaining that working on flanges vertically and horizontally is significantly easier than doing so in a flat position. To simplify the process further, he divides the task into two or three steps as suggested by fellow expert “for for.” This approach not only makes it more manageable but also allows for greater precision in crafting each component.Step 2: Applying Glue and Securing
Sven proceeds to apply glue along one edge of the flange, ensuring a secure bond when clamped into place. He emphasizes that this stage is crucial for maintaining the structural integrity of the flange, which in turn safeguards the living area beneath the canvas when hatches are open.Step 3: Allowing Time to Dry
After securely attaching the first portion of the flange, Sven allows ample time for it to dry before moving forward with additional steps. This patience and precision are key aspects of his successful boatbuilding methods.Step 4: Finishing Touches
Once the flange is fully dried, Sven removes the clamps carefully, ensuring no damage occurs during this process. He then moves on to attaching four more pieces onto these main frames, completing two pairs of flanges for the bulkhead hatches.The Final Touches
While two flanges form the primary support structure around the hatches, Sven mentions there are two additional pieces required at each end to ensure comprehensive protection. This attention to detail highlights his commitment to producing a durable and reliable design. “Sailing is about finding your path, whether it’s across an ocean or within yourself.” – Sven Yrvind In conclusion, making flanges around bulkhead hatches may seem complex at first glance, but by following Sven Yrvind’s meticulous process, enthusiasts can achieve professional-level results. Remember that the journey of boatbuilding is as rewarding as reaching your destination; it tests one’s patience and dedication. For those seeking to embark on this adventure or simply gain more insight into marine craftsmanship, Sven’s wisdom is invaluable.After securely attaching the first portion of the flange, Sven allows ample time for it to dry before moving forward with additional steps. This patience and precision are key aspects of his successful boatbuilding methods.Step 4: Finishing Touches
Once the flange is fully dried, Sven removes the clamps carefully, ensuring no damage occurs during this process. He then moves on to attaching four more pieces onto these main frames, completing two pairs of flanges for the bulkhead hatches.The Final Touches
While two flanges form the primary support structure around the hatches, Sven mentions there are two additional pieces required at each end to ensure comprehensive protection. This attention to detail highlights his commitment to producing a durable and reliable design. “Sailing is about finding your path, whether it’s across an ocean or within yourself.” – Sven Yrvind In conclusion, making flanges around bulkhead hatches may seem complex at first glance, but by following Sven Yrvind’s meticulous process, enthusiasts can achieve professional-level results. Remember that the journey of boatbuilding is as rewarding as reaching your destination; it tests one’s patience and dedication. For those seeking to embark on this adventure or simply gain more insight into marine craftsmanship, Sven’s wisdom is invaluable.Sven begins by explaining that working on flanges vertically and horizontally is significantly easier than doing so in a flat position. To simplify the process further, he divides the task into two or three steps as suggested by fellow expert “for for.” This approach not only makes it more manageable but also allows for greater precision in crafting each component.Step 2: Applying Glue and Securing
Sven proceeds to apply glue along one edge of the flange, ensuring a secure bond when clamped into place. He emphasizes that this stage is crucial for maintaining the structural integrity of the flange, which in turn safeguards the living area beneath the canvas when hatches are open.Step 3: Allowing Time to Dry
After securely attaching the first portion of the flange, Sven allows ample time for it to dry before moving forward with additional steps. This patience and precision are key aspects of his successful boatbuilding methods.Step 4: Finishing Touches
Once the flange is fully dried, Sven removes the clamps carefully, ensuring no damage occurs during this process. He then moves on to attaching four more pieces onto these main frames, completing two pairs of flanges for the bulkhead hatches.The Final Touches
While two flanges form the primary support structure around the hatches, Sven mentions there are two additional pieces required at each end to ensure comprehensive protection. This attention to detail highlights his commitment to producing a durable and reliable design. “Sailing is about finding your path, whether it’s across an ocean or within yourself.” – Sven Yrvind In conclusion, making flanges around bulkhead hatches may seem complex at first glance, but by following Sven Yrvind’s meticulous process, enthusiasts can achieve professional-level results. Remember that the journey of boatbuilding is as rewarding as reaching your destination; it tests one’s patience and dedication. For those seeking to embark on this adventure or simply gain more insight into marine craftsmanship, Sven’s wisdom is invaluable.Sven Yrvind, a renowned yacht designer and sailor, shares valuable insights on creating flanges around bulkhead hatches for canvas protection in this enlightening video. By following his expert guidance, boat enthusiasts can ensure their living areas remain secure while allowing unhindered access through the hatches.Step 1: Starting with the Flange
Sven begins by explaining that working on flanges vertically and horizontally is significantly easier than doing so in a flat position. To simplify the process further, he divides the task into two or three steps as suggested by fellow expert “for for.” This approach not only makes it more manageable but also allows for greater precision in crafting each component.Step 2: Applying Glue and Securing
Sven proceeds to apply glue along one edge of the flange, ensuring a secure bond when clamped into place. He emphasizes that this stage is crucial for maintaining the structural integrity of the flange, which in turn safeguards the living area beneath the canvas when hatches are open.Step 3: Allowing Time to Dry
After securely attaching the first portion of the flange, Sven allows ample time for it to dry before moving forward with additional steps. This patience and precision are key aspects of his successful boatbuilding methods.Step 4: Finishing Touches
Once the flange is fully dried, Sven removes the clamps carefully, ensuring no damage occurs during this process. He then moves on to attaching four more pieces onto these main frames, completing two pairs of flanges for the bulkhead hatches.The Final Touches
While two flanges form the primary support structure around the hatches, Sven mentions there are two additional pieces required at each end to ensure comprehensive protection. This attention to detail highlights his commitment to producing a durable and reliable design. “Sailing is about finding your path, whether it’s across an ocean or within yourself.” – Sven Yrvind In conclusion, making flanges around bulkhead hatches may seem complex at first glance, but by following Sven Yrvind’s meticulous process, enthusiasts can achieve professional-level results. Remember that the journey of boatbuilding is as rewarding as reaching your destination; it tests one’s patience and dedication. For those seeking to embark on this adventure or simply gain more insight into marine craftsmanship, Sven’s wisdom is invaluable.Making Flanges Around Bulkhead Hatches for Canvas
Sven Yrvind, a renowned yacht designer and sailor, shares valuable insights on creating flanges around bulkhead hatches for canvas protection in this enlightening video. By following his expert guidance, boat enthusiasts can ensure their living areas remain secure while allowing unhindered access through the hatches.Step 1: Starting with the Flange
Sven begins by explaining that working on flanges vertically and horizontally is significantly easier than doing so in a flat position. To simplify the process further, he divides the task into two or three steps as suggested by fellow expert “for for.” This approach not only makes it more manageable but also allows for greater precision in crafting each component.Step 2: Applying Glue and Securing
Sven proceeds to apply glue along one edge of the flange, ensuring a secure bond when clamped into place. He emphasizes that this stage is crucial for maintaining the structural integrity of the flange, which in turn safeguards the living area beneath the canvas when hatches are open.Step 3: Allowing Time to Dry
After securely attaching the first portion of the flange, Sven allows ample time for it to dry before moving forward with additional steps. This patience and precision are key aspects of his successful boatbuilding methods.Step 4: Finishing Touches
Once the flange is fully dried, Sven removes the clamps carefully, ensuring no damage occurs during this process. He then moves on to attaching four more pieces onto these main frames, completing two pairs of flanges for the bulkhead hatches.The Final Touches
While two flanges form the primary support structure around the hatches, Sven mentions there are two additional pieces required at each end to ensure comprehensive protection. This attention to detail highlights his commitment to producing a durable and reliable design. “Sailing is about finding your path, whether it’s across an ocean or within yourself.” – Sven Yrvind In conclusion, making flanges around bulkhead hatches may seem complex at first glance, but by following Sven Yrvind’s meticulous process, enthusiasts can achieve professional-level results. Remember that the journey of boatbuilding is as rewarding as reaching your destination; it tests one’s patience and dedication. For those seeking to embark on this adventure or simply gain more insight into marine craftsmanship, Sven’s wisdom is invaluable.Sven proceeds to apply glue along one edge of the flange, ensuring a secure bond when clamped into place. He emphasizes that this stage is crucial for maintaining the structural integrity of the flange, which in turn safeguards the living area beneath the canvas when hatches are open.Step 3: Allowing Time to Dry
After securely attaching the first portion of the flange, Sven allows ample time for it to dry before moving forward with additional steps. This patience and precision are key aspects of his successful boatbuilding methods.Step 4: Finishing Touches
Once the flange is fully dried, Sven removes the clamps carefully, ensuring no damage occurs during this process. He then moves on to attaching four more pieces onto these main frames, completing two pairs of flanges for the bulkhead hatches.The Final Touches
While two flanges form the primary support structure around the hatches, Sven mentions there are two additional pieces required at each end to ensure comprehensive protection. This attention to detail highlights his commitment to producing a durable and reliable design. “Sailing is about finding your path, whether it’s across an ocean or within yourself.” – Sven Yrvind In conclusion, making flanges around bulkhead hatches may seem complex at first glance, but by following Sven Yrvind’s meticulous process, enthusiasts can achieve professional-level results. Remember that the journey of boatbuilding is as rewarding as reaching your destination; it tests one’s patience and dedication. For those seeking to embark on this adventure or simply gain more insight into marine craftsmanship, Sven’s wisdom is invaluable.Sven begins by explaining that working on flanges vertically and horizontally is significantly easier than doing so in a flat position. To simplify the process further, he divides the task into two or three steps as suggested by fellow expert “for for.” This approach not only makes it more manageable but also allows for greater precision in crafting each component.Step 2: Applying Glue and Securing
Sven proceeds to apply glue along one edge of the flange, ensuring a secure bond when clamped into place. He emphasizes that this stage is crucial for maintaining the structural integrity of the flange, which in turn safeguards the living area beneath the canvas when hatches are open.Step 3: Allowing Time to Dry
After securely attaching the first portion of the flange, Sven allows ample time for it to dry before moving forward with additional steps. This patience and precision are key aspects of his successful boatbuilding methods.Step 4: Finishing Touches
Once the flange is fully dried, Sven removes the clamps carefully, ensuring no damage occurs during this process. He then moves on to attaching four more pieces onto these main frames, completing two pairs of flanges for the bulkhead hatches.The Final Touches
While two flanges form the primary support structure around the hatches, Sven mentions there are two additional pieces required at each end to ensure comprehensive protection. This attention to detail highlights his commitment to producing a durable and reliable design. “Sailing is about finding your path, whether it’s across an ocean or within yourself.” – Sven Yrvind In conclusion, making flanges around bulkhead hatches may seem complex at first glance, but by following Sven Yrvind’s meticulous process, enthusiasts can achieve professional-level results. Remember that the journey of boatbuilding is as rewarding as reaching your destination; it tests one’s patience and dedication. For those seeking to embark on this adventure or simply gain more insight into marine craftsmanship, Sven’s wisdom is invaluable.Sven Yrvind, a renowned yacht designer and sailor, shares valuable insights on creating flanges around bulkhead hatches for canvas protection in this enlightening video. By following his expert guidance, boat enthusiasts can ensure their living areas remain secure while allowing unhindered access through the hatches.Step 1: Starting with the Flange
Sven begins by explaining that working on flanges vertically and horizontally is significantly easier than doing so in a flat position. To simplify the process further, he divides the task into two or three steps as suggested by fellow expert “for for.” This approach not only makes it more manageable but also allows for greater precision in crafting each component.Step 2: Applying Glue and Securing
Sven proceeds to apply glue along one edge of the flange, ensuring a secure bond when clamped into place. He emphasizes that this stage is crucial for maintaining the structural integrity of the flange, which in turn safeguards the living area beneath the canvas when hatches are open.Step 3: Allowing Time to Dry
After securely attaching the first portion of the flange, Sven allows ample time for it to dry before moving forward with additional steps. This patience and precision are key aspects of his successful boatbuilding methods.Step 4: Finishing Touches
Once the flange is fully dried, Sven removes the clamps carefully, ensuring no damage occurs during this process. He then moves on to attaching four more pieces onto these main frames, completing two pairs of flanges for the bulkhead hatches.The Final Touches
While two flanges form the primary support structure around the hatches, Sven mentions there are two additional pieces required at each end to ensure comprehensive protection. This attention to detail highlights his commitment to producing a durable and reliable design. “Sailing is about finding your path, whether it’s across an ocean or within yourself.” – Sven Yrvind In conclusion, making flanges around bulkhead hatches may seem complex at first glance, but by following Sven Yrvind’s meticulous process, enthusiasts can achieve professional-level results. Remember that the journey of boatbuilding is as rewarding as reaching your destination; it tests one’s patience and dedication. For those seeking to embark on this adventure or simply gain more insight into marine craftsmanship, Sven’s wisdom is invaluable.Making Flanges Around Bulkhead Hatches for Canvas
Sven Yrvind, a renowned yacht designer and sailor, shares valuable insights on creating flanges around bulkhead hatches for canvas protection in this enlightening video. By following his expert guidance, boat enthusiasts can ensure their living areas remain secure while allowing unhindered access through the hatches.Step 1: Starting with the Flange
Sven begins by explaining that working on flanges vertically and horizontally is significantly easier than doing so in a flat position. To simplify the process further, he divides the task into two or three steps as suggested by fellow expert “for for.” This approach not only makes it more manageable but also allows for greater precision in crafting each component.Step 2: Applying Glue and Securing
Sven proceeds to apply glue along one edge of the flange, ensuring a secure bond when clamped into place. He emphasizes that this stage is crucial for maintaining the structural integrity of the flange, which in turn safeguards the living area beneath the canvas when hatches are open.Step 3: Allowing Time to Dry
After securely attaching the first portion of the flange, Sven allows ample time for it to dry before moving forward with additional steps. This patience and precision are key aspects of his successful boatbuilding methods.Step 4: Finishing Touches
Once the flange is fully dried, Sven removes the clamps carefully, ensuring no damage occurs during this process. He then moves on to attaching four more pieces onto these main frames, completing two pairs of flanges for the bulkhead hatches.The Final Touches
While two flanges form the primary support structure around the hatches, Sven mentions there are two additional pieces required at each end to ensure comprehensive protection. This attention to detail highlights his commitment to producing a durable and reliable design. “Sailing is about finding your path, whether it’s across an ocean or within yourself.” – Sven Yrvind In conclusion, making flanges around bulkhead hatches may seem complex at first glance, but by following Sven Yrvind’s meticulous process, enthusiasts can achieve professional-level results. Remember that the journey of boatbuilding is as rewarding as reaching your destination; it tests one’s patience and dedication. For those seeking to embark on this adventure or simply gain more insight into marine craftsmanship, Sven’s wisdom is invaluable.Once the flange is fully dried, Sven removes the clamps carefully, ensuring no damage occurs during this process. He then moves on to attaching four more pieces onto these main frames, completing two pairs of flanges for the bulkhead hatches.The Final Touches
While two flanges form the primary support structure around the hatches, Sven mentions there are two additional pieces required at each end to ensure comprehensive protection. This attention to detail highlights his commitment to producing a durable and reliable design. “Sailing is about finding your path, whether it’s across an ocean or within yourself.” – Sven Yrvind In conclusion, making flanges around bulkhead hatches may seem complex at first glance, but by following Sven Yrvind’s meticulous process, enthusiasts can achieve professional-level results. Remember that the journey of boatbuilding is as rewarding as reaching your destination; it tests one’s patience and dedication. For those seeking to embark on this adventure or simply gain more insight into marine craftsmanship, Sven’s wisdom is invaluable.Sven proceeds to apply glue along one edge of the flange, ensuring a secure bond when clamped into place. He emphasizes that this stage is crucial for maintaining the structural integrity of the flange, which in turn safeguards the living area beneath the canvas when hatches are open.Step 3: Allowing Time to Dry
After securely attaching the first portion of the flange, Sven allows ample time for it to dry before moving forward with additional steps. This patience and precision are key aspects of his successful boatbuilding methods.Step 4: Finishing Touches
Once the flange is fully dried, Sven removes the clamps carefully, ensuring no damage occurs during this process. He then moves on to attaching four more pieces onto these main frames, completing two pairs of flanges for the bulkhead hatches.The Final Touches
While two flanges form the primary support structure around the hatches, Sven mentions there are two additional pieces required at each end to ensure comprehensive protection. This attention to detail highlights his commitment to producing a durable and reliable design. “Sailing is about finding your path, whether it’s across an ocean or within yourself.” – Sven Yrvind In conclusion, making flanges around bulkhead hatches may seem complex at first glance, but by following Sven Yrvind’s meticulous process, enthusiasts can achieve professional-level results. Remember that the journey of boatbuilding is as rewarding as reaching your destination; it tests one’s patience and dedication. For those seeking to embark on this adventure or simply gain more insight into marine craftsmanship, Sven’s wisdom is invaluable.Sven begins by explaining that working on flanges vertically and horizontally is significantly easier than doing so in a flat position. To simplify the process further, he divides the task into two or three steps as suggested by fellow expert “for for.” This approach not only makes it more manageable but also allows for greater precision in crafting each component.Step 2: Applying Glue and Securing
Sven proceeds to apply glue along one edge of the flange, ensuring a secure bond when clamped into place. He emphasizes that this stage is crucial for maintaining the structural integrity of the flange, which in turn safeguards the living area beneath the canvas when hatches are open.Step 3: Allowing Time to Dry
After securely attaching the first portion of the flange, Sven allows ample time for it to dry before moving forward with additional steps. This patience and precision are key aspects of his successful boatbuilding methods.Step 4: Finishing Touches
Once the flange is fully dried, Sven removes the clamps carefully, ensuring no damage occurs during this process. He then moves on to attaching four more pieces onto these main frames, completing two pairs of flanges for the bulkhead hatches.The Final Touches
While two flanges form the primary support structure around the hatches, Sven mentions there are two additional pieces required at each end to ensure comprehensive protection. This attention to detail highlights his commitment to producing a durable and reliable design. “Sailing is about finding your path, whether it’s across an ocean or within yourself.” – Sven Yrvind In conclusion, making flanges around bulkhead hatches may seem complex at first glance, but by following Sven Yrvind’s meticulous process, enthusiasts can achieve professional-level results. Remember that the journey of boatbuilding is as rewarding as reaching your destination; it tests one’s patience and dedication. For those seeking to embark on this adventure or simply gain more insight into marine craftsmanship, Sven’s wisdom is invaluable.Sven Yrvind, a renowned yacht designer and sailor, shares valuable insights on creating flanges around bulkhead hatches for canvas protection in this enlightening video. By following his expert guidance, boat enthusiasts can ensure their living areas remain secure while allowing unhindered access through the hatches.Step 1: Starting with the Flange
Sven begins by explaining that working on flanges vertically and horizontally is significantly easier than doing so in a flat position. To simplify the process further, he divides the task into two or three steps as suggested by fellow expert “for for.” This approach not only makes it more manageable but also allows for greater precision in crafting each component.Step 2: Applying Glue and Securing
Sven proceeds to apply glue along one edge of the flange, ensuring a secure bond when clamped into place. He emphasizes that this stage is crucial for maintaining the structural integrity of the flange, which in turn safeguards the living area beneath the canvas when hatches are open.Step 3: Allowing Time to Dry
After securely attaching the first portion of the flange, Sven allows ample time for it to dry before moving forward with additional steps. This patience and precision are key aspects of his successful boatbuilding methods.Step 4: Finishing Touches
Once the flange is fully dried, Sven removes the clamps carefully, ensuring no damage occurs during this process. He then moves on to attaching four more pieces onto these main frames, completing two pairs of flanges for the bulkhead hatches.The Final Touches
While two flanges form the primary support structure around the hatches, Sven mentions there are two additional pieces required at each end to ensure comprehensive protection. This attention to detail highlights his commitment to producing a durable and reliable design. “Sailing is about finding your path, whether it’s across an ocean or within yourself.” – Sven Yrvind In conclusion, making flanges around bulkhead hatches may seem complex at first glance, but by following Sven Yrvind’s meticulous process, enthusiasts can achieve professional-level results. Remember that the journey of boatbuilding is as rewarding as reaching your destination; it tests one’s patience and dedication. For those seeking to embark on this adventure or simply gain more insight into marine craftsmanship, Sven’s wisdom is invaluable.Making Flanges Around Bulkhead Hatches for Canvas
Sven Yrvind, a renowned yacht designer and sailor, shares valuable insights on creating flanges around bulkhead hatches for canvas protection in this enlightening video. By following his expert guidance, boat enthusiasts can ensure their living areas remain secure while allowing unhindered access through the hatches.Step 1: Starting with the Flange
Sven begins by explaining that working on flanges vertically and horizontally is significantly easier than doing so in a flat position. To simplify the process further, he divides the task into two or three steps as suggested by fellow expert “for for.” This approach not only makes it more manageable but also allows for greater precision in crafting each component.Step 2: Applying Glue and Securing
Sven proceeds to apply glue along one edge of the flange, ensuring a secure bond when clamped into place. He emphasizes that this stage is crucial for maintaining the structural integrity of the flange, which in turn safeguards the living area beneath the canvas when hatches are open.Step 3: Allowing Time to Dry
After securely attaching the first portion of the flange, Sven allows ample time for it to dry before moving forward with additional steps. This patience and precision are key aspects of his successful boatbuilding methods.Step 4: Finishing Touches
Once the flange is fully dried, Sven removes the clamps carefully, ensuring no damage occurs during this process. He then moves on to attaching four more pieces onto these main frames, completing two pairs of flanges for the bulkhead hatches.The Final Touches
While two flanges form the primary support structure around the hatches, Sven mentions there are two additional pieces required at each end to ensure comprehensive protection. This attention to detail highlights his commitment to producing a durable and reliable design. “Sailing is about finding your path, whether it’s across an ocean or within yourself.” – Sven Yrvind In conclusion, making flanges around bulkhead hatches may seem complex at first glance, but by following Sven Yrvind’s meticulous process, enthusiasts can achieve professional-level results. Remember that the journey of boatbuilding is as rewarding as reaching your destination; it tests one’s patience and dedication. For those seeking to embark on this adventure or simply gain more insight into marine craftsmanship, Sven’s wisdom is invaluable.After securely attaching the first portion of the flange, Sven allows ample time for it to dry before moving forward with additional steps. This patience and precision are key aspects of his successful boatbuilding methods.Step 4: Finishing Touches
Once the flange is fully dried, Sven removes the clamps carefully, ensuring no damage occurs during this process. He then moves on to attaching four more pieces onto these main frames, completing two pairs of flanges for the bulkhead hatches.The Final Touches
While two flanges form the primary support structure around the hatches, Sven mentions there are two additional pieces required at each end to ensure comprehensive protection. This attention to detail highlights his commitment to producing a durable and reliable design. “Sailing is about finding your path, whether it’s across an ocean or within yourself.” – Sven Yrvind In conclusion, making flanges around bulkhead hatches may seem complex at first glance, but by following Sven Yrvind’s meticulous process, enthusiasts can achieve professional-level results. Remember that the journey of boatbuilding is as rewarding as reaching your destination; it tests one’s patience and dedication. For those seeking to embark on this adventure or simply gain more insight into marine craftsmanship, Sven’s wisdom is invaluable.Sven proceeds to apply glue along one edge of the flange, ensuring a secure bond when clamped into place. He emphasizes that this stage is crucial for maintaining the structural integrity of the flange, which in turn safeguards the living area beneath the canvas when hatches are open.Step 3: Allowing Time to Dry
After securely attaching the first portion of the flange, Sven allows ample time for it to dry before moving forward with additional steps. This patience and precision are key aspects of his successful boatbuilding methods.Step 4: Finishing Touches
Once the flange is fully dried, Sven removes the clamps carefully, ensuring no damage occurs during this process. He then moves on to attaching four more pieces onto these main frames, completing two pairs of flanges for the bulkhead hatches.The Final Touches
While two flanges form the primary support structure around the hatches, Sven mentions there are two additional pieces required at each end to ensure comprehensive protection. This attention to detail highlights his commitment to producing a durable and reliable design. “Sailing is about finding your path, whether it’s across an ocean or within yourself.” – Sven Yrvind In conclusion, making flanges around bulkhead hatches may seem complex at first glance, but by following Sven Yrvind’s meticulous process, enthusiasts can achieve professional-level results. Remember that the journey of boatbuilding is as rewarding as reaching your destination; it tests one’s patience and dedication. For those seeking to embark on this adventure or simply gain more insight into marine craftsmanship, Sven’s wisdom is invaluable.Sven begins by explaining that working on flanges vertically and horizontally is significantly easier than doing so in a flat position. To simplify the process further, he divides the task into two or three steps as suggested by fellow expert “for for.” This approach not only makes it more manageable but also allows for greater precision in crafting each component.Step 2: Applying Glue and Securing
Sven proceeds to apply glue along one edge of the flange, ensuring a secure bond when clamped into place. He emphasizes that this stage is crucial for maintaining the structural integrity of the flange, which in turn safeguards the living area beneath the canvas when hatches are open.Step 3: Allowing Time to Dry
After securely attaching the first portion of the flange, Sven allows ample time for it to dry before moving forward with additional steps. This patience and precision are key aspects of his successful boatbuilding methods.Step 4: Finishing Touches
Once the flange is fully dried, Sven removes the clamps carefully, ensuring no damage occurs during this process. He then moves on to attaching four more pieces onto these main frames, completing two pairs of flanges for the bulkhead hatches.The Final Touches
While two flanges form the primary support structure around the hatches, Sven mentions there are two additional pieces required at each end to ensure comprehensive protection. This attention to detail highlights his commitment to producing a durable and reliable design. “Sailing is about finding your path, whether it’s across an ocean or within yourself.” – Sven Yrvind In conclusion, making flanges around bulkhead hatches may seem complex at first glance, but by following Sven Yrvind’s meticulous process, enthusiasts can achieve professional-level results. Remember that the journey of boatbuilding is as rewarding as reaching your destination; it tests one’s patience and dedication. For those seeking to embark on this adventure or simply gain more insight into marine craftsmanship, Sven’s wisdom is invaluable.Sven Yrvind, a renowned yacht designer and sailor, shares valuable insights on creating flanges around bulkhead hatches for canvas protection in this enlightening video. By following his expert guidance, boat enthusiasts can ensure their living areas remain secure while allowing unhindered access through the hatches.Step 1: Starting with the Flange
Sven begins by explaining that working on flanges vertically and horizontally is significantly easier than doing so in a flat position. To simplify the process further, he divides the task into two or three steps as suggested by fellow expert “for for.” This approach not only makes it more manageable but also allows for greater precision in crafting each component.Step 2: Applying Glue and Securing
Sven proceeds to apply glue along one edge of the flange, ensuring a secure bond when clamped into place. He emphasizes that this stage is crucial for maintaining the structural integrity of the flange, which in turn safeguards the living area beneath the canvas when hatches are open.Step 3: Allowing Time to Dry
After securely attaching the first portion of the flange, Sven allows ample time for it to dry before moving forward with additional steps. This patience and precision are key aspects of his successful boatbuilding methods.Step 4: Finishing Touches
Once the flange is fully dried, Sven removes the clamps carefully, ensuring no damage occurs during this process. He then moves on to attaching four more pieces onto these main frames, completing two pairs of flanges for the bulkhead hatches.The Final Touches
While two flanges form the primary support structure around the hatches, Sven mentions there are two additional pieces required at each end to ensure comprehensive protection. This attention to detail highlights his commitment to producing a durable and reliable design. “Sailing is about finding your path, whether it’s across an ocean or within yourself.” – Sven Yrvind In conclusion, making flanges around bulkhead hatches may seem complex at first glance, but by following Sven Yrvind’s meticulous process, enthusiasts can achieve professional-level results. Remember that the journey of boatbuilding is as rewarding as reaching your destination; it tests one’s patience and dedication. For those seeking to embark on this adventure or simply gain more insight into marine craftsmanship, Sven’s wisdom is invaluable.Making Flanges Around Bulkhead Hatches for Canvas
Sven Yrvind, a renowned yacht designer and sailor, shares valuable insights on creating flanges around bulkhead hatches for canvas protection in this enlightening video. By following his expert guidance, boat enthusiasts can ensure their living areas remain secure while allowing unhindered access through the hatches.Step 1: Starting with the Flange
Sven begins by explaining that working on flanges vertically and horizontally is significantly easier than doing so in a flat position. To simplify the process further, he divides the task into two or three steps as suggested by fellow expert “for for.” This approach not only makes it more manageable but also allows for greater precision in crafting each component.Step 2: Applying Glue and Securing
Sven proceeds to apply glue along one edge of the flange, ensuring a secure bond when clamped into place. He emphasizes that this stage is crucial for maintaining the structural integrity of the flange, which in turn safeguards the living area beneath the canvas when hatches are open.Step 3: Allowing Time to Dry
After securely attaching the first portion of the flange, Sven allows ample time for it to dry before moving forward with additional steps. This patience and precision are key aspects of his successful boatbuilding methods.Step 4: Finishing Touches
Once the flange is fully dried, Sven removes the clamps carefully, ensuring no damage occurs during this process. He then moves on to attaching four more pieces onto these main frames, completing two pairs of flanges for the bulkhead hatches.The Final Touches
While two flanges form the primary support structure around the hatches, Sven mentions there are two additional pieces required at each end to ensure comprehensive protection. This attention to detail highlights his commitment to producing a durable and reliable design. “Sailing is about finding your path, whether it’s across an ocean or within yourself.” – Sven Yrvind In conclusion, making flanges around bulkhead hatches may seem complex at first glance, but by following Sven Yrvind’s meticulous process, enthusiasts can achieve professional-level results. Remember that the journey of boatbuilding is as rewarding as reaching your destination; it tests one’s patience and dedication. For those seeking to embark on this adventure or simply gain more insight into marine craftsmanship, Sven’s wisdom is invaluable.Once the flange is fully dried, Sven removes the clamps carefully, ensuring no damage occurs during this process. He then moves on to attaching four more pieces onto these main frames, completing two pairs of flanges for the bulkhead hatches.The Final Touches
While two flanges form the primary support structure around the hatches, Sven mentions there are two additional pieces required at each end to ensure comprehensive protection. This attention to detail highlights his commitment to producing a durable and reliable design. “Sailing is about finding your path, whether it’s across an ocean or within yourself.” – Sven Yrvind In conclusion, making flanges around bulkhead hatches may seem complex at first glance, but by following Sven Yrvind’s meticulous process, enthusiasts can achieve professional-level results. Remember that the journey of boatbuilding is as rewarding as reaching your destination; it tests one’s patience and dedication. For those seeking to embark on this adventure or simply gain more insight into marine craftsmanship, Sven’s wisdom is invaluable.After securely attaching the first portion of the flange, Sven allows ample time for it to dry before moving forward with additional steps. This patience and precision are key aspects of his successful boatbuilding methods.Step 4: Finishing Touches
Once the flange is fully dried, Sven removes the clamps carefully, ensuring no damage occurs during this process. He then moves on to attaching four more pieces onto these main frames, completing two pairs of flanges for the bulkhead hatches.The Final Touches
While two flanges form the primary support structure around the hatches, Sven mentions there are two additional pieces required at each end to ensure comprehensive protection. This attention to detail highlights his commitment to producing a durable and reliable design. “Sailing is about finding your path, whether it’s across an ocean or within yourself.” – Sven Yrvind In conclusion, making flanges around bulkhead hatches may seem complex at first glance, but by following Sven Yrvind’s meticulous process, enthusiasts can achieve professional-level results. Remember that the journey of boatbuilding is as rewarding as reaching your destination; it tests one’s patience and dedication. For those seeking to embark on this adventure or simply gain more insight into marine craftsmanship, Sven’s wisdom is invaluable.Sven proceeds to apply glue along one edge of the flange, ensuring a secure bond when clamped into place. He emphasizes that this stage is crucial for maintaining the structural integrity of the flange, which in turn safeguards the living area beneath the canvas when hatches are open.Step 3: Allowing Time to Dry
After securely attaching the first portion of the flange, Sven allows ample time for it to dry before moving forward with additional steps. This patience and precision are key aspects of his successful boatbuilding methods.Step 4: Finishing Touches
Once the flange is fully dried, Sven removes the clamps carefully, ensuring no damage occurs during this process. He then moves on to attaching four more pieces onto these main frames, completing two pairs of flanges for the bulkhead hatches.The Final Touches
While two flanges form the primary support structure around the hatches, Sven mentions there are two additional pieces required at each end to ensure comprehensive protection. This attention to detail highlights his commitment to producing a durable and reliable design. “Sailing is about finding your path, whether it’s across an ocean or within yourself.” – Sven Yrvind In conclusion, making flanges around bulkhead hatches may seem complex at first glance, but by following Sven Yrvind’s meticulous process, enthusiasts can achieve professional-level results. Remember that the journey of boatbuilding is as rewarding as reaching your destination; it tests one’s patience and dedication. For those seeking to embark on this adventure or simply gain more insight into marine craftsmanship, Sven’s wisdom is invaluable.Sven begins by explaining that working on flanges vertically and horizontally is significantly easier than doing so in a flat position. To simplify the process further, he divides the task into two or three steps as suggested by fellow expert “for for.” This approach not only makes it more manageable but also allows for greater precision in crafting each component.Step 2: Applying Glue and Securing
Sven proceeds to apply glue along one edge of the flange, ensuring a secure bond when clamped into place. He emphasizes that this stage is crucial for maintaining the structural integrity of the flange, which in turn safeguards the living area beneath the canvas when hatches are open.Step 3: Allowing Time to Dry
After securely attaching the first portion of the flange, Sven allows ample time for it to dry before moving forward with additional steps. This patience and precision are key aspects of his successful boatbuilding methods.Step 4: Finishing Touches
Once the flange is fully dried, Sven removes the clamps carefully, ensuring no damage occurs during this process. He then moves on to attaching four more pieces onto these main frames, completing two pairs of flanges for the bulkhead hatches.The Final Touches
While two flanges form the primary support structure around the hatches, Sven mentions there are two additional pieces required at each end to ensure comprehensive protection. This attention to detail highlights his commitment to producing a durable and reliable design. “Sailing is about finding your path, whether it’s across an ocean or within yourself.” – Sven Yrvind In conclusion, making flanges around bulkhead hatches may seem complex at first glance, but by following Sven Yrvind’s meticulous process, enthusiasts can achieve professional-level results. Remember that the journey of boatbuilding is as rewarding as reaching your destination; it tests one’s patience and dedication. For those seeking to embark on this adventure or simply gain more insight into marine craftsmanship, Sven’s wisdom is invaluable.Sven Yrvind, a renowned yacht designer and sailor, shares valuable insights on creating flanges around bulkhead hatches for canvas protection in this enlightening video. By following his expert guidance, boat enthusiasts can ensure their living areas remain secure while allowing unhindered access through the hatches.Step 1: Starting with the Flange
Sven begins by explaining that working on flanges vertically and horizontally is significantly easier than doing so in a flat position. To simplify the process further, he divides the task into two or three steps as suggested by fellow expert “for for.” This approach not only makes it more manageable but also allows for greater precision in crafting each component.Step 2: Applying Glue and Securing
Sven proceeds to apply glue along one edge of the flange, ensuring a secure bond when clamped into place. He emphasizes that this stage is crucial for maintaining the structural integrity of the flange, which in turn safeguards the living area beneath the canvas when hatches are open.Step 3: Allowing Time to Dry
After securely attaching the first portion of the flange, Sven allows ample time for it to dry before moving forward with additional steps. This patience and precision are key aspects of his successful boatbuilding methods.Step 4: Finishing Touches
Once the flange is fully dried, Sven removes the clamps carefully, ensuring no damage occurs during this process. He then moves on to attaching four more pieces onto these main frames, completing two pairs of flanges for the bulkhead hatches.The Final Touches
While two flanges form the primary support structure around the hatches, Sven mentions there are two additional pieces required at each end to ensure comprehensive protection. This attention to detail highlights his commitment to producing a durable and reliable design. “Sailing is about finding your path, whether it’s across an ocean or within yourself.” – Sven Yrvind In conclusion, making flanges around bulkhead hatches may seem complex at first glance, but by following Sven Yrvind’s meticulous process, enthusiasts can achieve professional-level results. Remember that the journey of boatbuilding is as rewarding as reaching your destination; it tests one’s patience and dedication. For those seeking to embark on this adventure or simply gain more insight into marine craftsmanship, Sven’s wisdom is invaluable.Making Flanges Around Bulkhead Hatches for Canvas
Sven Yrvind, a renowned yacht designer and sailor, shares valuable insights on creating flanges around bulkhead hatches for canvas protection in this enlightening video. By following his expert guidance, boat enthusiasts can ensure their living areas remain secure while allowing unhindered access through the hatches.Step 1: Starting with the Flange
Sven begins by explaining that working on flanges vertically and horizontally is significantly easier than doing so in a flat position. To simplify the process further, he divides the task into two or three steps as suggested by fellow expert “for for.” This approach not only makes it more manageable but also allows for greater precision in crafting each component.Step 2: Applying Glue and Securing
Sven proceeds to apply glue along one edge of the flange, ensuring a secure bond when clamped into place. He emphasizes that this stage is crucial for maintaining the structural integrity of the flange, which in turn safeguards the living area beneath the canvas when hatches are open.Step 3: Allowing Time to Dry
After securely attaching the first portion of the flange, Sven allows ample time for it to dry before moving forward with additional steps. This patience and precision are key aspects of his successful boatbuilding methods.Step 4: Finishing Touches
Once the flange is fully dried, Sven removes the clamps carefully, ensuring no damage occurs during this process. He then moves on to attaching four more pieces onto these main frames, completing two pairs of flanges for the bulkhead hatches.The Final Touches
While two flanges form the primary support structure around the hatches, Sven mentions there are two additional pieces required at each end to ensure comprehensive protection. This attention to detail highlights his commitment to producing a durable and reliable design. “Sailing is about finding your path, whether it’s across an ocean or within yourself.” – Sven Yrvind In conclusion, making flanges around bulkhead hatches may seem complex at first glance, but by following Sven Yrvind’s meticulous process, enthusiasts can achieve professional-level results. Remember that the journey of boatbuilding is as rewarding as reaching your destination; it tests one’s patience and dedication. For those seeking to embark on this adventure or simply gain more insight into marine craftsmanship, Sven’s wisdom is invaluable.Making Flanges Around Bulkhead Hatches for Canvas
Sven Yrvind, a renowned yacht designer and sailor, shares valuable insights on creating flanges around bulkhead hatches for canvas protection in this enlightening video. By following his expert guidance, boat enthusiasts can ensure their living areas remain secure while allowing unhindered access through the hatches.Step 1: Starting with the Flange
Sven begins by explaining that working on flanges vertically and horizontally is significantly easier than doing so in a flat position. To simplify the process further, he divides the task into two or three steps as suggested by fellow expert “for for.” This approach not only makes it more manageable but also allows for greater precision in crafting each component.Step 2: Applying Glue and Securing
Sven proceeds to apply glue along one edge of the flange, ensuring a secure bond when clamped into place. He emphasizes that this stage is crucial for maintaining the structural integrity of the flange, which in turn safeguards the living area beneath the canvas when hatches are open.Step 3: Allowing Time to Dry
After securely attaching the first portion of the flange, Sven allows ample time for it to dry before moving forward with additional steps. This patience and precision are key aspects of his successful boatbuilding methods.Step 4: Finishing Touches
Once the flange is fully dried, Sven removes the clamps carefully, ensuring no damage occurs during this process. He then moves on to attaching four more pieces onto these main frames, completing two pairs of flanges for the bulkhead hatches.The Final Touches
While two flanges form the primary support structure around the hatches, Sven mentions there are two additional pieces required at each end to ensure comprehensive protection. This attention to detail highlights his commitment to producing a durable and reliable design. “Sailing is about finding your path, whether it’s across an ocean or within yourself.” – Sven Yrvind In conclusion, making flanges around bulkhead hatches may seem complex at first glance, but by following Sven Yrvind’s meticulous process, enthusiasts can achieve professional-level results. Remember that the journey of boatbuilding is as rewarding as reaching your destination; it tests one’s patience and dedication. For those seeking to embark on this adventure or simply gain more insight into marine craftsmanship, Sven’s wisdom is invaluable.Sven begins by explaining that working on flanges vertically and horizontally is significantly easier than doing so in a flat position. To simplify the process further, he divides the task into two or three steps as suggested by fellow expert “for for.” This approach not only makes it more manageable but also allows for greater precision in crafting each component.Step 2: Applying Glue and Securing
Sven proceeds to apply glue along one edge of the flange, ensuring a secure bond when clamped into place. He emphasizes that this stage is crucial for maintaining the structural integrity of the flange, which in turn safeguards the living area beneath the canvas when hatches are open.Step 3: Allowing Time to Dry
After securely attaching the first portion of the flange, Sven allows ample time for it to dry before moving forward with additional steps. This patience and precision are key aspects of his successful boatbuilding methods.Step 4: Finishing Touches
Once the flange is fully dried, Sven removes the clamps carefully, ensuring no damage occurs during this process. He then moves on to attaching four more pieces onto these main frames, completing two pairs of flanges for the bulkhead hatches.The Final Touches
While two flanges form the primary support structure around the hatches, Sven mentions there are two additional pieces required at each end to ensure comprehensive protection. This attention to detail highlights his commitment to producing a durable and reliable design. “Sailing is about finding your path, whether it’s across an ocean or within yourself.” – Sven Yrvind In conclusion, making flanges around bulkhead hatches may seem complex at first glance, but by following Sven Yrvind’s meticulous process, enthusiasts can achieve professional-level results. Remember that the journey of boatbuilding is as rewarding as reaching your destination; it tests one’s patience and dedication. For those seeking to embark on this adventure or simply gain more insight into marine craftsmanship, Sven’s wisdom is invaluable.Making Flanges Around Bulkhead Hatches for Canvas
Sven Yrvind, a renowned yacht designer and sailor, shares valuable insights on creating flanges around bulkhead hatches for canvas protection in this enlightening video. By following his expert guidance, boat enthusiasts can ensure their living areas remain secure while allowing unhindered access through the hatches.Step 1: Starting with the Flange
Sven begins by explaining that working on flanges vertically and horizontally is significantly easier than doing so in a flat position. To simplify the process further, he divides the task into two or three steps as suggested by fellow expert “for for.” This approach not only makes it more manageable but also allows for greater precision in crafting each component.Step 2: Applying Glue and Securing
Sven proceeds to apply glue along one edge of the flange, ensuring a secure bond when clamped into place. He emphasizes that this stage is crucial for maintaining the structural integrity of the flange, which in turn safeguards the living area beneath the canvas when hatches are open.Step 3: Allowing Time to Dry
After securely attaching the first portion of the flange, Sven allows ample time for it to dry before moving forward with additional steps. This patience and precision are key aspects of his successful boatbuilding methods.Step 4: Finishing Touches
Once the flange is fully dried, Sven removes the clamps carefully, ensuring no damage occurs during this process. He then moves on to attaching four more pieces onto these main frames, completing two pairs of flanges for the bulkhead hatches.The Final Touches
While two flanges form the primary support structure around the hatches, Sven mentions there are two additional pieces required at each end to ensure comprehensive protection. This attention to detail highlights his commitment to producing a durable and reliable design. “Sailing is about finding your path, whether it’s across an ocean or within yourself.” – Sven Yrvind In conclusion, making flanges around bulkhead hatches may seem complex at first glance, but by following Sven Yrvind’s meticulous process, enthusiasts can achieve professional-level results. Remember that the journey of boatbuilding is as rewarding as reaching your destination; it tests one’s patience and dedication. For those seeking to embark on this adventure or simply gain more insight into marine craftsmanship, Sven’s wisdom is invaluable.Sven Yrvind, a renowned yacht designer and sailor, shares valuable insights on creating flanges around bulkhead hatches for canvas protection in this enlightening video. By following his expert guidance, boat enthusiasts can ensure their living areas remain secure while allowing unhindered access through the hatches.Step 1: Starting with the Flange
Sven begins by explaining that working on flanges vertically and horizontally is significantly easier than doing so in a flat position. To simplify the process further, he divides the task into two or three steps as suggested by fellow expert “for for.” This approach not only makes it more manageable but also allows for greater precision in crafting each component.Step 2: Applying Glue and Securing
Sven proceeds to apply glue along one edge of the flange, ensuring a secure bond when clamped into place. He emphasizes that this stage is crucial for maintaining the structural integrity of the flange, which in turn safeguards the living area beneath the canvas when hatches are open.Step 3: Allowing Time to Dry
After securely attaching the first portion of the flange, Sven allows ample time for it to dry before moving forward with additional steps. This patience and precision are key aspects of his successful boatbuilding methods.Step 4: Finishing Touches
Once the flange is fully dried, Sven removes the clamps carefully, ensuring no damage occurs during this process. He then moves on to attaching four more pieces onto these main frames, completing two pairs of flanges for the bulkhead hatches.The Final Touches
While two flanges form the primary support structure around the hatches, Sven mentions there are two additional pieces required at each end to ensure comprehensive protection. This attention to detail highlights his commitment to producing a durable and reliable design. “Sailing is about finding your path, whether it’s across an ocean or within yourself.” – Sven Yrvind In conclusion, making flanges around bulkhead hatches may seem complex at first glance, but by following Sven Yrvind’s meticulous process, enthusiasts can achieve professional-level results. Remember that the journey of boatbuilding is as rewarding as reaching your destination; it tests one’s patience and dedication. For those seeking to embark on this adventure or simply gain more insight into marine craftsmanship, Sven’s wisdom is invaluable.Making Flanges Around Bulkhead Hatches for Canvas
Sven Yrvind, a renowned yacht designer and sailor, shares valuable insights on creating flanges around bulkhead hatches for canvas protection in this enlightening video. By following his expert guidance, boat enthusiasts can ensure their living areas remain secure while allowing unhindered access through the hatches.Step 1: Starting with the Flange
Sven begins by explaining that working on flanges vertically and horizontally is significantly easier than doing so in a flat position. To simplify the process further, he divides the task into two or three steps as suggested by fellow expert “for for.” This approach not only makes it more manageable but also allows for greater precision in crafting each component.Step 2: Applying Glue and Securing
Sven proceeds to apply glue along one edge of the flange, ensuring a secure bond when clamped into place. He emphasizes that this stage is crucial for maintaining the structural integrity of the flange, which in turn safeguards the living area beneath the canvas when hatches are open.Step 3: Allowing Time to Dry
After securely attaching the first portion of the flange, Sven allows ample time for it to dry before moving forward with additional steps. This patience and precision are key aspects of his successful boatbuilding methods.Step 4: Finishing Touches
Once the flange is fully dried, Sven removes the clamps carefully, ensuring no damage occurs during this process. He then moves on to attaching four more pieces onto these main frames, completing two pairs of flanges for the bulkhead hatches.The Final Touches
While two flanges form the primary support structure around the hatches, Sven mentions there are two additional pieces required at each end to ensure comprehensive protection. This attention to detail highlights his commitment to producing a durable and reliable design. “Sailing is about finding your path, whether it’s across an ocean or within yourself.” – Sven Yrvind In conclusion, making flanges around bulkhead hatches may seem complex at first glance, but by following Sven Yrvind’s meticulous process, enthusiasts can achieve professional-level results. Remember that the journey of boatbuilding is as rewarding as reaching your destination; it tests one’s patience and dedication. For those seeking to embark on this adventure or simply gain more insight into marine craftsmanship, Sven’s wisdom is invaluable.Once the flange is fully dried, Sven removes the clamps carefully, ensuring no damage occurs during this process. He then moves on to attaching four more pieces onto these main frames, completing two pairs of flanges for the bulkhead hatches.The Final Touches
While two flanges form the primary support structure around the hatches, Sven mentions there are two additional pieces required at each end to ensure comprehensive protection. This attention to detail highlights his commitment to producing a durable and reliable design. “Sailing is about finding your path, whether it’s across an ocean or within yourself.” – Sven Yrvind In conclusion, making flanges around bulkhead hatches may seem complex at first glance, but by following Sven Yrvind’s meticulous process, enthusiasts can achieve professional-level results. Remember that the journey of boatbuilding is as rewarding as reaching your destination; it tests one’s patience and dedication. For those seeking to embark on this adventure or simply gain more insight into marine craftsmanship, Sven’s wisdom is invaluable.Sven Yrvind, a renowned yacht designer and sailor, shares valuable insights on creating flanges around bulkhead hatches for canvas protection in this enlightening video. By following his expert guidance, boat enthusiasts can ensure their living areas remain secure while allowing unhindered access through the hatches.Step 1: Starting with the Flange
Sven begins by explaining that working on flanges vertically and horizontally is significantly easier than doing so in a flat position. To simplify the process further, he divides the task into two or three steps as suggested by fellow expert “for for.” This approach not only makes it more manageable but also allows for greater precision in crafting each component.Step 2: Applying Glue and Securing
Sven proceeds to apply glue along one edge of the flange, ensuring a secure bond when clamped into place. He emphasizes that this stage is crucial for maintaining the structural integrity of the flange, which in turn safeguards the living area beneath the canvas when hatches are open.Step 3: Allowing Time to Dry
After securely attaching the first portion of the flange, Sven allows ample time for it to dry before moving forward with additional steps. This patience and precision are key aspects of his successful boatbuilding methods.Step 4: Finishing Touches
Once the flange is fully dried, Sven removes the clamps carefully, ensuring no damage occurs during this process. He then moves on to attaching four more pieces onto these main frames, completing two pairs of flanges for the bulkhead hatches.The Final Touches
While two flanges form the primary support structure around the hatches, Sven mentions there are two additional pieces required at each end to ensure comprehensive protection. This attention to detail highlights his commitment to producing a durable and reliable design. “Sailing is about finding your path, whether it’s across an ocean or within yourself.” – Sven Yrvind In conclusion, making flanges around bulkhead hatches may seem complex at first glance, but by following Sven Yrvind’s meticulous process, enthusiasts can achieve professional-level results. Remember that the journey of boatbuilding is as rewarding as reaching your destination; it tests one’s patience and dedication. For those seeking to embark on this adventure or simply gain more insight into marine craftsmanship, Sven’s wisdom is invaluable.Making Flanges Around Bulkhead Hatches for Canvas
Sven Yrvind, a renowned yacht designer and sailor, shares valuable insights on creating flanges around bulkhead hatches for canvas protection in this enlightening video. By following his expert guidance, boat enthusiasts can ensure their living areas remain secure while allowing unhindered access through the hatches.Step 1: Starting with the Flange
Sven begins by explaining that working on flanges vertically and horizontally is significantly easier than doing so in a flat position. To simplify the process further, he divides the task into two or three steps as suggested by fellow expert “for for.” This approach not only makes it more manageable but also allows for greater precision in crafting each component.Step 2: Applying Glue and Securing
Sven proceeds to apply glue along one edge of the flange, ensuring a secure bond when clamped into place. He emphasizes that this stage is crucial for maintaining the structural integrity of the flange, which in turn safeguards the living area beneath the canvas when hatches are open.Step 3: Allowing Time to Dry
After securely attaching the first portion of the flange, Sven allows ample time for it to dry before moving forward with additional steps. This patience and precision are key aspects of his successful boatbuilding methods.Step 4: Finishing Touches
Once the flange is fully dried, Sven removes the clamps carefully, ensuring no damage occurs during this process. He then moves on to attaching four more pieces onto these main frames, completing two pairs of flanges for the bulkhead hatches.The Final Touches
While two flanges form the primary support structure around the hatches, Sven mentions there are two additional pieces required at each end to ensure comprehensive protection. This attention to detail highlights his commitment to producing a durable and reliable design. “Sailing is about finding your path, whether it’s across an ocean or within yourself.” – Sven Yrvind In conclusion, making flanges around bulkhead hatches may seem complex at first glance, but by following Sven Yrvind’s meticulous process, enthusiasts can achieve professional-level results. Remember that the journey of boatbuilding is as rewarding as reaching your destination; it tests one’s patience and dedication. For those seeking to embark on this adventure or simply gain more insight into marine craftsmanship, Sven’s wisdom is invaluable.After securely attaching the first portion of the flange, Sven allows ample time for it to dry before moving forward with additional steps. This patience and precision are key aspects of his successful boatbuilding methods.Step 4: Finishing Touches
Once the flange is fully dried, Sven removes the clamps carefully, ensuring no damage occurs during this process. He then moves on to attaching four more pieces onto these main frames, completing two pairs of flanges for the bulkhead hatches.The Final Touches
While two flanges form the primary support structure around the hatches, Sven mentions there are two additional pieces required at each end to ensure comprehensive protection. This attention to detail highlights his commitment to producing a durable and reliable design. “Sailing is about finding your path, whether it’s across an ocean or within yourself.” – Sven Yrvind In conclusion, making flanges around bulkhead hatches may seem complex at first glance, but by following Sven Yrvind’s meticulous process, enthusiasts can achieve professional-level results. Remember that the journey of boatbuilding is as rewarding as reaching your destination; it tests one’s patience and dedication. For those seeking to embark on this adventure or simply gain more insight into marine craftsmanship, Sven’s wisdom is invaluable.Sven Yrvind, a renowned yacht designer and sailor, shares valuable insights on creating flanges around bulkhead hatches for canvas protection in this enlightening video. By following his expert guidance, boat enthusiasts can ensure their living areas remain secure while allowing unhindered access through the hatches.Step 1: Starting with the Flange
Sven begins by explaining that working on flanges vertically and horizontally is significantly easier than doing so in a flat position. To simplify the process further, he divides the task into two or three steps as suggested by fellow expert “for for.” This approach not only makes it more manageable but also allows for greater precision in crafting each component.Step 2: Applying Glue and Securing
Sven proceeds to apply glue along one edge of the flange, ensuring a secure bond when clamped into place. He emphasizes that this stage is crucial for maintaining the structural integrity of the flange, which in turn safeguards the living area beneath the canvas when hatches are open.Step 3: Allowing Time to Dry
After securely attaching the first portion of the flange, Sven allows ample time for it to dry before moving forward with additional steps. This patience and precision are key aspects of his successful boatbuilding methods.Step 4: Finishing Touches
Once the flange is fully dried, Sven removes the clamps carefully, ensuring no damage occurs during this process. He then moves on to attaching four more pieces onto these main frames, completing two pairs of flanges for the bulkhead hatches.The Final Touches
While two flanges form the primary support structure around the hatches, Sven mentions there are two additional pieces required at each end to ensure comprehensive protection. This attention to detail highlights his commitment to producing a durable and reliable design. “Sailing is about finding your path, whether it’s across an ocean or within yourself.” – Sven Yrvind In conclusion, making flanges around bulkhead hatches may seem complex at first glance, but by following Sven Yrvind’s meticulous process, enthusiasts can achieve professional-level results. Remember that the journey of boatbuilding is as rewarding as reaching your destination; it tests one’s patience and dedication. For those seeking to embark on this adventure or simply gain more insight into marine craftsmanship, Sven’s wisdom is invaluable.Making Flanges Around Bulkhead Hatches for Canvas
Sven Yrvind, a renowned yacht designer and sailor, shares valuable insights on creating flanges around bulkhead hatches for canvas protection in this enlightening video. By following his expert guidance, boat enthusiasts can ensure their living areas remain secure while allowing unhindered access through the hatches.Step 1: Starting with the Flange
Sven begins by explaining that working on flanges vertically and horizontally is significantly easier than doing so in a flat position. To simplify the process further, he divides the task into two or three steps as suggested by fellow expert “for for.” This approach not only makes it more manageable but also allows for greater precision in crafting each component.Step 2: Applying Glue and Securing
Sven proceeds to apply glue along one edge of the flange, ensuring a secure bond when clamped into place. He emphasizes that this stage is crucial for maintaining the structural integrity of the flange, which in turn safeguards the living area beneath the canvas when hatches are open.Step 3: Allowing Time to Dry
After securely attaching the first portion of the flange, Sven allows ample time for it to dry before moving forward with additional steps. This patience and precision are key aspects of his successful boatbuilding methods.Step 4: Finishing Touches
Once the flange is fully dried, Sven removes the clamps carefully, ensuring no damage occurs during this process. He then moves on to attaching four more pieces onto these main frames, completing two pairs of flanges for the bulkhead hatches.The Final Touches
While two flanges form the primary support structure around the hatches, Sven mentions there are two additional pieces required at each end to ensure comprehensive protection. This attention to detail highlights his commitment to producing a durable and reliable design. “Sailing is about finding your path, whether it’s across an ocean or within yourself.” – Sven Yrvind In conclusion, making flanges around bulkhead hatches may seem complex at first glance, but by following Sven Yrvind’s meticulous process, enthusiasts can achieve professional-level results. Remember that the journey of boatbuilding is as rewarding as reaching your destination; it tests one’s patience and dedication. For those seeking to embark on this adventure or simply gain more insight into marine craftsmanship, Sven’s wisdom is invaluable.Sven proceeds to apply glue along one edge of the flange, ensuring a secure bond when clamped into place. He emphasizes that this stage is crucial for maintaining the structural integrity of the flange, which in turn safeguards the living area beneath the canvas when hatches are open.Step 3: Allowing Time to Dry
After securely attaching the first portion of the flange, Sven allows ample time for it to dry before moving forward with additional steps. This patience and precision are key aspects of his successful boatbuilding methods.Step 4: Finishing Touches
Once the flange is fully dried, Sven removes the clamps carefully, ensuring no damage occurs during this process. He then moves on to attaching four more pieces onto these main frames, completing two pairs of flanges for the bulkhead hatches.The Final Touches
While two flanges form the primary support structure around the hatches, Sven mentions there are two additional pieces required at each end to ensure comprehensive protection. This attention to detail highlights his commitment to producing a durable and reliable design. “Sailing is about finding your path, whether it’s across an ocean or within yourself.” – Sven Yrvind In conclusion, making flanges around bulkhead hatches may seem complex at first glance, but by following Sven Yrvind’s meticulous process, enthusiasts can achieve professional-level results. Remember that the journey of boatbuilding is as rewarding as reaching your destination; it tests one’s patience and dedication. For those seeking to embark on this adventure or simply gain more insight into marine craftsmanship, Sven’s wisdom is invaluable.Sven Yrvind, a renowned yacht designer and sailor, shares valuable insights on creating flanges around bulkhead hatches for canvas protection in this enlightening video. By following his expert guidance, boat enthusiasts can ensure their living areas remain secure while allowing unhindered access through the hatches.Step 1: Starting with the Flange
Sven begins by explaining that working on flanges vertically and horizontally is significantly easier than doing so in a flat position. To simplify the process further, he divides the task into two or three steps as suggested by fellow expert “for for.” This approach not only makes it more manageable but also allows for greater precision in crafting each component.Step 2: Applying Glue and Securing
Sven proceeds to apply glue along one edge of the flange, ensuring a secure bond when clamped into place. He emphasizes that this stage is crucial for maintaining the structural integrity of the flange, which in turn safeguards the living area beneath the canvas when hatches are open.Step 3: Allowing Time to Dry
After securely attaching the first portion of the flange, Sven allows ample time for it to dry before moving forward with additional steps. This patience and precision are key aspects of his successful boatbuilding methods.Step 4: Finishing Touches
Once the flange is fully dried, Sven removes the clamps carefully, ensuring no damage occurs during this process. He then moves on to attaching four more pieces onto these main frames, completing two pairs of flanges for the bulkhead hatches.The Final Touches
While two flanges form the primary support structure around the hatches, Sven mentions there are two additional pieces required at each end to ensure comprehensive protection. This attention to detail highlights his commitment to producing a durable and reliable design. “Sailing is about finding your path, whether it’s across an ocean or within yourself.” – Sven Yrvind In conclusion, making flanges around bulkhead hatches may seem complex at first glance, but by following Sven Yrvind’s meticulous process, enthusiasts can achieve professional-level results. Remember that the journey of boatbuilding is as rewarding as reaching your destination; it tests one’s patience and dedication. For those seeking to embark on this adventure or simply gain more insight into marine craftsmanship, Sven’s wisdom is invaluable.Making Flanges Around Bulkhead Hatches for Canvas
Sven Yrvind, a renowned yacht designer and sailor, shares valuable insights on creating flanges around bulkhead hatches for canvas protection in this enlightening video. By following his expert guidance, boat enthusiasts can ensure their living areas remain secure while allowing unhindered access through the hatches.Step 1: Starting with the Flange
Sven begins by explaining that working on flanges vertically and horizontally is significantly easier than doing so in a flat position. To simplify the process further, he divides the task into two or three steps as suggested by fellow expert “for for.” This approach not only makes it more manageable but also allows for greater precision in crafting each component.Step 2: Applying Glue and Securing
Sven proceeds to apply glue along one edge of the flange, ensuring a secure bond when clamped into place. He emphasizes that this stage is crucial for maintaining the structural integrity of the flange, which in turn safeguards the living area beneath the canvas when hatches are open.Step 3: Allowing Time to Dry
After securely attaching the first portion of the flange, Sven allows ample time for it to dry before moving forward with additional steps. This patience and precision are key aspects of his successful boatbuilding methods.Step 4: Finishing Touches
Once the flange is fully dried, Sven removes the clamps carefully, ensuring no damage occurs during this process. He then moves on to attaching four more pieces onto these main frames, completing two pairs of flanges for the bulkhead hatches.The Final Touches
While two flanges form the primary support structure around the hatches, Sven mentions there are two additional pieces required at each end to ensure comprehensive protection. This attention to detail highlights his commitment to producing a durable and reliable design. “Sailing is about finding your path, whether it’s across an ocean or within yourself.” – Sven Yrvind In conclusion, making flanges around bulkhead hatches may seem complex at first glance, but by following Sven Yrvind’s meticulous process, enthusiasts can achieve professional-level results. Remember that the journey of boatbuilding is as rewarding as reaching your destination; it tests one’s patience and dedication. For those seeking to embark on this adventure or simply gain more insight into marine craftsmanship, Sven’s wisdom is invaluable.Sven begins by explaining that working on flanges vertically and horizontally is significantly easier than doing so in a flat position. To simplify the process further, he divides the task into two or three steps as suggested by fellow expert “for for.” This approach not only makes it more manageable but also allows for greater precision in crafting each component.Step 2: Applying Glue and Securing
Sven proceeds to apply glue along one edge of the flange, ensuring a secure bond when clamped into place. He emphasizes that this stage is crucial for maintaining the structural integrity of the flange, which in turn safeguards the living area beneath the canvas when hatches are open.Step 3: Allowing Time to Dry
After securely attaching the first portion of the flange, Sven allows ample time for it to dry before moving forward with additional steps. This patience and precision are key aspects of his successful boatbuilding methods.Step 4: Finishing Touches
Once the flange is fully dried, Sven removes the clamps carefully, ensuring no damage occurs during this process. He then moves on to attaching four more pieces onto these main frames, completing two pairs of flanges for the bulkhead hatches.The Final Touches
While two flanges form the primary support structure around the hatches, Sven mentions there are two additional pieces required at each end to ensure comprehensive protection. This attention to detail highlights his commitment to producing a durable and reliable design. “Sailing is about finding your path, whether it’s across an ocean or within yourself.” – Sven Yrvind In conclusion, making flanges around bulkhead hatches may seem complex at first glance, but by following Sven Yrvind’s meticulous process, enthusiasts can achieve professional-level results. Remember that the journey of boatbuilding is as rewarding as reaching your destination; it tests one’s patience and dedication. For those seeking to embark on this adventure or simply gain more insight into marine craftsmanship, Sven’s wisdom is invaluable.Sven Yrvind, a renowned yacht designer and sailor, shares valuable insights on creating flanges around bulkhead hatches for canvas protection in this enlightening video. By following his expert guidance, boat enthusiasts can ensure their living areas remain secure while allowing unhindered access through the hatches.Step 1: Starting with the Flange
Sven begins by explaining that working on flanges vertically and horizontally is significantly easier than doing so in a flat position. To simplify the process further, he divides the task into two or three steps as suggested by fellow expert “for for.” This approach not only makes it more manageable but also allows for greater precision in crafting each component.Step 2: Applying Glue and Securing
Sven proceeds to apply glue along one edge of the flange, ensuring a secure bond when clamped into place. He emphasizes that this stage is crucial for maintaining the structural integrity of the flange, which in turn safeguards the living area beneath the canvas when hatches are open.Step 3: Allowing Time to Dry
After securely attaching the first portion of the flange, Sven allows ample time for it to dry before moving forward with additional steps. This patience and precision are key aspects of his successful boatbuilding methods.Step 4: Finishing Touches
Once the flange is fully dried, Sven removes the clamps carefully, ensuring no damage occurs during this process. He then moves on to attaching four more pieces onto these main frames, completing two pairs of flanges for the bulkhead hatches.The Final Touches
While two flanges form the primary support structure around the hatches, Sven mentions there are two additional pieces required at each end to ensure comprehensive protection. This attention to detail highlights his commitment to producing a durable and reliable design. “Sailing is about finding your path, whether it’s across an ocean or within yourself.” – Sven Yrvind In conclusion, making flanges around bulkhead hatches may seem complex at first glance, but by following Sven Yrvind’s meticulous process, enthusiasts can achieve professional-level results. Remember that the journey of boatbuilding is as rewarding as reaching your destination; it tests one’s patience and dedication. For those seeking to embark on this adventure or simply gain more insight into marine craftsmanship, Sven’s wisdom is invaluable.Making Flanges Around Bulkhead Hatches for Canvas
Sven Yrvind, a renowned yacht designer and sailor, shares valuable insights on creating flanges around bulkhead hatches for canvas protection in this enlightening video. By following his expert guidance, boat enthusiasts can ensure their living areas remain secure while allowing unhindered access through the hatches.Step 1: Starting with the Flange
Sven begins by explaining that working on flanges vertically and horizontally is significantly easier than doing so in a flat position. To simplify the process further, he divides the task into two or three steps as suggested by fellow expert “for for.” This approach not only makes it more manageable but also allows for greater precision in crafting each component.Step 2: Applying Glue and Securing
Sven proceeds to apply glue along one edge of the flange, ensuring a secure bond when clamped into place. He emphasizes that this stage is crucial for maintaining the structural integrity of the flange, which in turn safeguards the living area beneath the canvas when hatches are open.Step 3: Allowing Time to Dry
After securely attaching the first portion of the flange, Sven allows ample time for it to dry before moving forward with additional steps. This patience and precision are key aspects of his successful boatbuilding methods.Step 4: Finishing Touches
Once the flange is fully dried, Sven removes the clamps carefully, ensuring no damage occurs during this process. He then moves on to attaching four more pieces onto these main frames, completing two pairs of flanges for the bulkhead hatches.The Final Touches
While two flanges form the primary support structure around the hatches, Sven mentions there are two additional pieces required at each end to ensure comprehensive protection. This attention to detail highlights his commitment to producing a durable and reliable design. “Sailing is about finding your path, whether it’s across an ocean or within yourself.” – Sven Yrvind In conclusion, making flanges around bulkhead hatches may seem complex at first glance, but by following Sven Yrvind’s meticulous process, enthusiasts can achieve professional-level results. Remember that the journey of boatbuilding is as rewarding as reaching your destination; it tests one’s patience and dedication. For those seeking to embark on this adventure or simply gain more insight into marine craftsmanship, Sven’s wisdom is invaluable.Once the flange is fully dried, Sven removes the clamps carefully, ensuring no damage occurs during this process. He then moves on to attaching four more pieces onto these main frames, completing two pairs of flanges for the bulkhead hatches.The Final Touches
While two flanges form the primary support structure around the hatches, Sven mentions there are two additional pieces required at each end to ensure comprehensive protection. This attention to detail highlights his commitment to producing a durable and reliable design. “Sailing is about finding your path, whether it’s across an ocean or within yourself.” – Sven Yrvind In conclusion, making flanges around bulkhead hatches may seem complex at first glance, but by following Sven Yrvind’s meticulous process, enthusiasts can achieve professional-level results. Remember that the journey of boatbuilding is as rewarding as reaching your destination; it tests one’s patience and dedication. For those seeking to embark on this adventure or simply gain more insight into marine craftsmanship, Sven’s wisdom is invaluable.Sven begins by explaining that working on flanges vertically and horizontally is significantly easier than doing so in a flat position. To simplify the process further, he divides the task into two or three steps as suggested by fellow expert “for for.” This approach not only makes it more manageable but also allows for greater precision in crafting each component.Step 2: Applying Glue and Securing
Sven proceeds to apply glue along one edge of the flange, ensuring a secure bond when clamped into place. He emphasizes that this stage is crucial for maintaining the structural integrity of the flange, which in turn safeguards the living area beneath the canvas when hatches are open.Step 3: Allowing Time to Dry
After securely attaching the first portion of the flange, Sven allows ample time for it to dry before moving forward with additional steps. This patience and precision are key aspects of his successful boatbuilding methods.Step 4: Finishing Touches
Once the flange is fully dried, Sven removes the clamps carefully, ensuring no damage occurs during this process. He then moves on to attaching four more pieces onto these main frames, completing two pairs of flanges for the bulkhead hatches.The Final Touches
While two flanges form the primary support structure around the hatches, Sven mentions there are two additional pieces required at each end to ensure comprehensive protection. This attention to detail highlights his commitment to producing a durable and reliable design. “Sailing is about finding your path, whether it’s across an ocean or within yourself.” – Sven Yrvind In conclusion, making flanges around bulkhead hatches may seem complex at first glance, but by following Sven Yrvind’s meticulous process, enthusiasts can achieve professional-level results. Remember that the journey of boatbuilding is as rewarding as reaching your destination; it tests one’s patience and dedication. For those seeking to embark on this adventure or simply gain more insight into marine craftsmanship, Sven’s wisdom is invaluable.Sven Yrvind, a renowned yacht designer and sailor, shares valuable insights on creating flanges around bulkhead hatches for canvas protection in this enlightening video. By following his expert guidance, boat enthusiasts can ensure their living areas remain secure while allowing unhindered access through the hatches.Step 1: Starting with the Flange
Sven begins by explaining that working on flanges vertically and horizontally is significantly easier than doing so in a flat position. To simplify the process further, he divides the task into two or three steps as suggested by fellow expert “for for.” This approach not only makes it more manageable but also allows for greater precision in crafting each component.Step 2: Applying Glue and Securing
Sven proceeds to apply glue along one edge of the flange, ensuring a secure bond when clamped into place. He emphasizes that this stage is crucial for maintaining the structural integrity of the flange, which in turn safeguards the living area beneath the canvas when hatches are open.Step 3: Allowing Time to Dry
After securely attaching the first portion of the flange, Sven allows ample time for it to dry before moving forward with additional steps. This patience and precision are key aspects of his successful boatbuilding methods.Step 4: Finishing Touches
Once the flange is fully dried, Sven removes the clamps carefully, ensuring no damage occurs during this process. He then moves on to attaching four more pieces onto these main frames, completing two pairs of flanges for the bulkhead hatches.The Final Touches
While two flanges form the primary support structure around the hatches, Sven mentions there are two additional pieces required at each end to ensure comprehensive protection. This attention to detail highlights his commitment to producing a durable and reliable design. “Sailing is about finding your path, whether it’s across an ocean or within yourself.” – Sven Yrvind In conclusion, making flanges around bulkhead hatches may seem complex at first glance, but by following Sven Yrvind’s meticulous process, enthusiasts can achieve professional-level results. Remember that the journey of boatbuilding is as rewarding as reaching your destination; it tests one’s patience and dedication. For those seeking to embark on this adventure or simply gain more insight into marine craftsmanship, Sven’s wisdom is invaluable.Making Flanges Around Bulkhead Hatches for Canvas
Sven Yrvind, a renowned yacht designer and sailor, shares valuable insights on creating flanges around bulkhead hatches for canvas protection in this enlightening video. By following his expert guidance, boat enthusiasts can ensure their living areas remain secure while allowing unhindered access through the hatches.Step 1: Starting with the Flange
Sven begins by explaining that working on flanges vertically and horizontally is significantly easier than doing so in a flat position. To simplify the process further, he divides the task into two or three steps as suggested by fellow expert “for for.” This approach not only makes it more manageable but also allows for greater precision in crafting each component.Step 2: Applying Glue and Securing
Sven proceeds to apply glue along one edge of the flange, ensuring a secure bond when clamped into place. He emphasizes that this stage is crucial for maintaining the structural integrity of the flange, which in turn safeguards the living area beneath the canvas when hatches are open.Step 3: Allowing Time to Dry
After securely attaching the first portion of the flange, Sven allows ample time for it to dry before moving forward with additional steps. This patience and precision are key aspects of his successful boatbuilding methods.Step 4: Finishing Touches
Once the flange is fully dried, Sven removes the clamps carefully, ensuring no damage occurs during this process. He then moves on to attaching four more pieces onto these main frames, completing two pairs of flanges for the bulkhead hatches.The Final Touches
While two flanges form the primary support structure around the hatches, Sven mentions there are two additional pieces required at each end to ensure comprehensive protection. This attention to detail highlights his commitment to producing a durable and reliable design. “Sailing is about finding your path, whether it’s across an ocean or within yourself.” – Sven Yrvind In conclusion, making flanges around bulkhead hatches may seem complex at first glance, but by following Sven Yrvind’s meticulous process, enthusiasts can achieve professional-level results. Remember that the journey of boatbuilding is as rewarding as reaching your destination; it tests one’s patience and dedication. For those seeking to embark on this adventure or simply gain more insight into marine craftsmanship, Sven’s wisdom is invaluable.After securely attaching the first portion of the flange, Sven allows ample time for it to dry before moving forward with additional steps. This patience and precision are key aspects of his successful boatbuilding methods.Step 4: Finishing Touches
Once the flange is fully dried, Sven removes the clamps carefully, ensuring no damage occurs during this process. He then moves on to attaching four more pieces onto these main frames, completing two pairs of flanges for the bulkhead hatches.The Final Touches
While two flanges form the primary support structure around the hatches, Sven mentions there are two additional pieces required at each end to ensure comprehensive protection. This attention to detail highlights his commitment to producing a durable and reliable design. “Sailing is about finding your path, whether it’s across an ocean or within yourself.” – Sven Yrvind In conclusion, making flanges around bulkhead hatches may seem complex at first glance, but by following Sven Yrvind’s meticulous process, enthusiasts can achieve professional-level results. Remember that the journey of boatbuilding is as rewarding as reaching your destination; it tests one’s patience and dedication. For those seeking to embark on this adventure or simply gain more insight into marine craftsmanship, Sven’s wisdom is invaluable.Sven begins by explaining that working on flanges vertically and horizontally is significantly easier than doing so in a flat position. To simplify the process further, he divides the task into two or three steps as suggested by fellow expert “for for.” This approach not only makes it more manageable but also allows for greater precision in crafting each component.Step 2: Applying Glue and Securing
Sven proceeds to apply glue along one edge of the flange, ensuring a secure bond when clamped into place. He emphasizes that this stage is crucial for maintaining the structural integrity of the flange, which in turn safeguards the living area beneath the canvas when hatches are open.Step 3: Allowing Time to Dry
After securely attaching the first portion of the flange, Sven allows ample time for it to dry before moving forward with additional steps. This patience and precision are key aspects of his successful boatbuilding methods.Step 4: Finishing Touches
Once the flange is fully dried, Sven removes the clamps carefully, ensuring no damage occurs during this process. He then moves on to attaching four more pieces onto these main frames, completing two pairs of flanges for the bulkhead hatches.The Final Touches
While two flanges form the primary support structure around the hatches, Sven mentions there are two additional pieces required at each end to ensure comprehensive protection. This attention to detail highlights his commitment to producing a durable and reliable design. “Sailing is about finding your path, whether it’s across an ocean or within yourself.” – Sven Yrvind In conclusion, making flanges around bulkhead hatches may seem complex at first glance, but by following Sven Yrvind’s meticulous process, enthusiasts can achieve professional-level results. Remember that the journey of boatbuilding is as rewarding as reaching your destination; it tests one’s patience and dedication. For those seeking to embark on this adventure or simply gain more insight into marine craftsmanship, Sven’s wisdom is invaluable.Sven Yrvind, a renowned yacht designer and sailor, shares valuable insights on creating flanges around bulkhead hatches for canvas protection in this enlightening video. By following his expert guidance, boat enthusiasts can ensure their living areas remain secure while allowing unhindered access through the hatches.Step 1: Starting with the Flange
Sven begins by explaining that working on flanges vertically and horizontally is significantly easier than doing so in a flat position. To simplify the process further, he divides the task into two or three steps as suggested by fellow expert “for for.” This approach not only makes it more manageable but also allows for greater precision in crafting each component.Step 2: Applying Glue and Securing
Sven proceeds to apply glue along one edge of the flange, ensuring a secure bond when clamped into place. He emphasizes that this stage is crucial for maintaining the structural integrity of the flange, which in turn safeguards the living area beneath the canvas when hatches are open.Step 3: Allowing Time to Dry
After securely attaching the first portion of the flange, Sven allows ample time for it to dry before moving forward with additional steps. This patience and precision are key aspects of his successful boatbuilding methods.Step 4: Finishing Touches
Once the flange is fully dried, Sven removes the clamps carefully, ensuring no damage occurs during this process. He then moves on to attaching four more pieces onto these main frames, completing two pairs of flanges for the bulkhead hatches.The Final Touches
While two flanges form the primary support structure around the hatches, Sven mentions there are two additional pieces required at each end to ensure comprehensive protection. This attention to detail highlights his commitment to producing a durable and reliable design. “Sailing is about finding your path, whether it’s across an ocean or within yourself.” – Sven Yrvind In conclusion, making flanges around bulkhead hatches may seem complex at first glance, but by following Sven Yrvind’s meticulous process, enthusiasts can achieve professional-level results. Remember that the journey of boatbuilding is as rewarding as reaching your destination; it tests one’s patience and dedication. For those seeking to embark on this adventure or simply gain more insight into marine craftsmanship, Sven’s wisdom is invaluable.Making Flanges Around Bulkhead Hatches for Canvas
Sven Yrvind, a renowned yacht designer and sailor, shares valuable insights on creating flanges around bulkhead hatches for canvas protection in this enlightening video. By following his expert guidance, boat enthusiasts can ensure their living areas remain secure while allowing unhindered access through the hatches.Step 1: Starting with the Flange
Sven begins by explaining that working on flanges vertically and horizontally is significantly easier than doing so in a flat position. To simplify the process further, he divides the task into two or three steps as suggested by fellow expert “for for.” This approach not only makes it more manageable but also allows for greater precision in crafting each component.Step 2: Applying Glue and Securing
Sven proceeds to apply glue along one edge of the flange, ensuring a secure bond when clamped into place. He emphasizes that this stage is crucial for maintaining the structural integrity of the flange, which in turn safeguards the living area beneath the canvas when hatches are open.Step 3: Allowing Time to Dry
After securely attaching the first portion of the flange, Sven allows ample time for it to dry before moving forward with additional steps. This patience and precision are key aspects of his successful boatbuilding methods.Step 4: Finishing Touches
Once the flange is fully dried, Sven removes the clamps carefully, ensuring no damage occurs during this process. He then moves on to attaching four more pieces onto these main frames, completing two pairs of flanges for the bulkhead hatches.The Final Touches
While two flanges form the primary support structure around the hatches, Sven mentions there are two additional pieces required at each end to ensure comprehensive protection. This attention to detail highlights his commitment to producing a durable and reliable design. “Sailing is about finding your path, whether it’s across an ocean or within yourself.” – Sven Yrvind In conclusion, making flanges around bulkhead hatches may seem complex at first glance, but by following Sven Yrvind’s meticulous process, enthusiasts can achieve professional-level results. Remember that the journey of boatbuilding is as rewarding as reaching your destination; it tests one’s patience and dedication. For those seeking to embark on this adventure or simply gain more insight into marine craftsmanship, Sven’s wisdom is invaluable.Sven proceeds to apply glue along one edge of the flange, ensuring a secure bond when clamped into place. He emphasizes that this stage is crucial for maintaining the structural integrity of the flange, which in turn safeguards the living area beneath the canvas when hatches are open.Step 3: Allowing Time to Dry
After securely attaching the first portion of the flange, Sven allows ample time for it to dry before moving forward with additional steps. This patience and precision are key aspects of his successful boatbuilding methods.Step 4: Finishing Touches
Once the flange is fully dried, Sven removes the clamps carefully, ensuring no damage occurs during this process. He then moves on to attaching four more pieces onto these main frames, completing two pairs of flanges for the bulkhead hatches.The Final Touches
While two flanges form the primary support structure around the hatches, Sven mentions there are two additional pieces required at each end to ensure comprehensive protection. This attention to detail highlights his commitment to producing a durable and reliable design. “Sailing is about finding your path, whether it’s across an ocean or within yourself.” – Sven Yrvind In conclusion, making flanges around bulkhead hatches may seem complex at first glance, but by following Sven Yrvind’s meticulous process, enthusiasts can achieve professional-level results. Remember that the journey of boatbuilding is as rewarding as reaching your destination; it tests one’s patience and dedication. For those seeking to embark on this adventure or simply gain more insight into marine craftsmanship, Sven’s wisdom is invaluable.Sven begins by explaining that working on flanges vertically and horizontally is significantly easier than doing so in a flat position. To simplify the process further, he divides the task into two or three steps as suggested by fellow expert “for for.” This approach not only makes it more manageable but also allows for greater precision in crafting each component.Step 2: Applying Glue and Securing
Sven proceeds to apply glue along one edge of the flange, ensuring a secure bond when clamped into place. He emphasizes that this stage is crucial for maintaining the structural integrity of the flange, which in turn safeguards the living area beneath the canvas when hatches are open.Step 3: Allowing Time to Dry
After securely attaching the first portion of the flange, Sven allows ample time for it to dry before moving forward with additional steps. This patience and precision are key aspects of his successful boatbuilding methods.Step 4: Finishing Touches
Once the flange is fully dried, Sven removes the clamps carefully, ensuring no damage occurs during this process. He then moves on to attaching four more pieces onto these main frames, completing two pairs of flanges for the bulkhead hatches.The Final Touches
While two flanges form the primary support structure around the hatches, Sven mentions there are two additional pieces required at each end to ensure comprehensive protection. This attention to detail highlights his commitment to producing a durable and reliable design. “Sailing is about finding your path, whether it’s across an ocean or within yourself.” – Sven Yrvind In conclusion, making flanges around bulkhead hatches may seem complex at first glance, but by following Sven Yrvind’s meticulous process, enthusiasts can achieve professional-level results. Remember that the journey of boatbuilding is as rewarding as reaching your destination; it tests one’s patience and dedication. For those seeking to embark on this adventure or simply gain more insight into marine craftsmanship, Sven’s wisdom is invaluable.Sven Yrvind, a renowned yacht designer and sailor, shares valuable insights on creating flanges around bulkhead hatches for canvas protection in this enlightening video. By following his expert guidance, boat enthusiasts can ensure their living areas remain secure while allowing unhindered access through the hatches.Step 1: Starting with the Flange
Sven begins by explaining that working on flanges vertically and horizontally is significantly easier than doing so in a flat position. To simplify the process further, he divides the task into two or three steps as suggested by fellow expert “for for.” This approach not only makes it more manageable but also allows for greater precision in crafting each component.Step 2: Applying Glue and Securing
Sven proceeds to apply glue along one edge of the flange, ensuring a secure bond when clamped into place. He emphasizes that this stage is crucial for maintaining the structural integrity of the flange, which in turn safeguards the living area beneath the canvas when hatches are open.Step 3: Allowing Time to Dry
After securely attaching the first portion of the flange, Sven allows ample time for it to dry before moving forward with additional steps. This patience and precision are key aspects of his successful boatbuilding methods.Step 4: Finishing Touches
Once the flange is fully dried, Sven removes the clamps carefully, ensuring no damage occurs during this process. He then moves on to attaching four more pieces onto these main frames, completing two pairs of flanges for the bulkhead hatches.The Final Touches
While two flanges form the primary support structure around the hatches, Sven mentions there are two additional pieces required at each end to ensure comprehensive protection. This attention to detail highlights his commitment to producing a durable and reliable design. “Sailing is about finding your path, whether it’s across an ocean or within yourself.” – Sven Yrvind In conclusion, making flanges around bulkhead hatches may seem complex at first glance, but by following Sven Yrvind’s meticulous process, enthusiasts can achieve professional-level results. Remember that the journey of boatbuilding is as rewarding as reaching your destination; it tests one’s patience and dedication. For those seeking to embark on this adventure or simply gain more insight into marine craftsmanship, Sven’s wisdom is invaluable.Making Flanges Around Bulkhead Hatches for Canvas
Sven Yrvind, a renowned yacht designer and sailor, shares valuable insights on creating flanges around bulkhead hatches for canvas protection in this enlightening video. By following his expert guidance, boat enthusiasts can ensure their living areas remain secure while allowing unhindered access through the hatches.Step 1: Starting with the Flange
Sven begins by explaining that working on flanges vertically and horizontally is significantly easier than doing so in a flat position. To simplify the process further, he divides the task into two or three steps as suggested by fellow expert “for for.” This approach not only makes it more manageable but also allows for greater precision in crafting each component.Step 2: Applying Glue and Securing
Sven proceeds to apply glue along one edge of the flange, ensuring a secure bond when clamped into place. He emphasizes that this stage is crucial for maintaining the structural integrity of the flange, which in turn safeguards the living area beneath the canvas when hatches are open.Step 3: Allowing Time to Dry
After securely attaching the first portion of the flange, Sven allows ample time for it to dry before moving forward with additional steps. This patience and precision are key aspects of his successful boatbuilding methods.Step 4: Finishing Touches
Once the flange is fully dried, Sven removes the clamps carefully, ensuring no damage occurs during this process. He then moves on to attaching four more pieces onto these main frames, completing two pairs of flanges for the bulkhead hatches.The Final Touches
While two flanges form the primary support structure around the hatches, Sven mentions there are two additional pieces required at each end to ensure comprehensive protection. This attention to detail highlights his commitment to producing a durable and reliable design. “Sailing is about finding your path, whether it’s across an ocean or within yourself.” – Sven Yrvind In conclusion, making flanges around bulkhead hatches may seem complex at first glance, but by following Sven Yrvind’s meticulous process, enthusiasts can achieve professional-level results. Remember that the journey of boatbuilding is as rewarding as reaching your destination; it tests one’s patience and dedication. For those seeking to embark on this adventure or simply gain more insight into marine craftsmanship, Sven’s wisdom is invaluable.Once the flange is fully dried, Sven removes the clamps carefully, ensuring no damage occurs during this process. He then moves on to attaching four more pieces onto these main frames, completing two pairs of flanges for the bulkhead hatches.The Final Touches
While two flanges form the primary support structure around the hatches, Sven mentions there are two additional pieces required at each end to ensure comprehensive protection. This attention to detail highlights his commitment to producing a durable and reliable design. “Sailing is about finding your path, whether it’s across an ocean or within yourself.” – Sven Yrvind In conclusion, making flanges around bulkhead hatches may seem complex at first glance, but by following Sven Yrvind’s meticulous process, enthusiasts can achieve professional-level results. Remember that the journey of boatbuilding is as rewarding as reaching your destination; it tests one’s patience and dedication. For those seeking to embark on this adventure or simply gain more insight into marine craftsmanship, Sven’s wisdom is invaluable.Sven proceeds to apply glue along one edge of the flange, ensuring a secure bond when clamped into place. He emphasizes that this stage is crucial for maintaining the structural integrity of the flange, which in turn safeguards the living area beneath the canvas when hatches are open.Step 3: Allowing Time to Dry
After securely attaching the first portion of the flange, Sven allows ample time for it to dry before moving forward with additional steps. This patience and precision are key aspects of his successful boatbuilding methods.Step 4: Finishing Touches
Once the flange is fully dried, Sven removes the clamps carefully, ensuring no damage occurs during this process. He then moves on to attaching four more pieces onto these main frames, completing two pairs of flanges for the bulkhead hatches.The Final Touches
While two flanges form the primary support structure around the hatches, Sven mentions there are two additional pieces required at each end to ensure comprehensive protection. This attention to detail highlights his commitment to producing a durable and reliable design. “Sailing is about finding your path, whether it’s across an ocean or within yourself.” – Sven Yrvind In conclusion, making flanges around bulkhead hatches may seem complex at first glance, but by following Sven Yrvind’s meticulous process, enthusiasts can achieve professional-level results. Remember that the journey of boatbuilding is as rewarding as reaching your destination; it tests one’s patience and dedication. For those seeking to embark on this adventure or simply gain more insight into marine craftsmanship, Sven’s wisdom is invaluable.Sven begins by explaining that working on flanges vertically and horizontally is significantly easier than doing so in a flat position. To simplify the process further, he divides the task into two or three steps as suggested by fellow expert “for for.” This approach not only makes it more manageable but also allows for greater precision in crafting each component.Step 2: Applying Glue and Securing
Sven proceeds to apply glue along one edge of the flange, ensuring a secure bond when clamped into place. He emphasizes that this stage is crucial for maintaining the structural integrity of the flange, which in turn safeguards the living area beneath the canvas when hatches are open.Step 3: Allowing Time to Dry
After securely attaching the first portion of the flange, Sven allows ample time for it to dry before moving forward with additional steps. This patience and precision are key aspects of his successful boatbuilding methods.Step 4: Finishing Touches
Once the flange is fully dried, Sven removes the clamps carefully, ensuring no damage occurs during this process. He then moves on to attaching four more pieces onto these main frames, completing two pairs of flanges for the bulkhead hatches.The Final Touches
While two flanges form the primary support structure around the hatches, Sven mentions there are two additional pieces required at each end to ensure comprehensive protection. This attention to detail highlights his commitment to producing a durable and reliable design. “Sailing is about finding your path, whether it’s across an ocean or within yourself.” – Sven Yrvind In conclusion, making flanges around bulkhead hatches may seem complex at first glance, but by following Sven Yrvind’s meticulous process, enthusiasts can achieve professional-level results. Remember that the journey of boatbuilding is as rewarding as reaching your destination; it tests one’s patience and dedication. For those seeking to embark on this adventure or simply gain more insight into marine craftsmanship, Sven’s wisdom is invaluable.Sven Yrvind, a renowned yacht designer and sailor, shares valuable insights on creating flanges around bulkhead hatches for canvas protection in this enlightening video. By following his expert guidance, boat enthusiasts can ensure their living areas remain secure while allowing unhindered access through the hatches.Step 1: Starting with the Flange
Sven begins by explaining that working on flanges vertically and horizontally is significantly easier than doing so in a flat position. To simplify the process further, he divides the task into two or three steps as suggested by fellow expert “for for.” This approach not only makes it more manageable but also allows for greater precision in crafting each component.Step 2: Applying Glue and Securing
Sven proceeds to apply glue along one edge of the flange, ensuring a secure bond when clamped into place. He emphasizes that this stage is crucial for maintaining the structural integrity of the flange, which in turn safeguards the living area beneath the canvas when hatches are open.Step 3: Allowing Time to Dry
After securely attaching the first portion of the flange, Sven allows ample time for it to dry before moving forward with additional steps. This patience and precision are key aspects of his successful boatbuilding methods.Step 4: Finishing Touches
Once the flange is fully dried, Sven removes the clamps carefully, ensuring no damage occurs during this process. He then moves on to attaching four more pieces onto these main frames, completing two pairs of flanges for the bulkhead hatches.The Final Touches
While two flanges form the primary support structure around the hatches, Sven mentions there are two additional pieces required at each end to ensure comprehensive protection. This attention to detail highlights his commitment to producing a durable and reliable design. “Sailing is about finding your path, whether it’s across an ocean or within yourself.” – Sven Yrvind In conclusion, making flanges around bulkhead hatches may seem complex at first glance, but by following Sven Yrvind’s meticulous process, enthusiasts can achieve professional-level results. Remember that the journey of boatbuilding is as rewarding as reaching your destination; it tests one’s patience and dedication. For those seeking to embark on this adventure or simply gain more insight into marine craftsmanship, Sven’s wisdom is invaluable.Making Flanges Around Bulkhead Hatches for Canvas
Sven Yrvind, a renowned yacht designer and sailor, shares valuable insights on creating flanges around bulkhead hatches for canvas protection in this enlightening video. By following his expert guidance, boat enthusiasts can ensure their living areas remain secure while allowing unhindered access through the hatches.Step 1: Starting with the Flange
Sven begins by explaining that working on flanges vertically and horizontally is significantly easier than doing so in a flat position. To simplify the process further, he divides the task into two or three steps as suggested by fellow expert “for for.” This approach not only makes it more manageable but also allows for greater precision in crafting each component.Step 2: Applying Glue and Securing
Sven proceeds to apply glue along one edge of the flange, ensuring a secure bond when clamped into place. He emphasizes that this stage is crucial for maintaining the structural integrity of the flange, which in turn safeguards the living area beneath the canvas when hatches are open.Step 3: Allowing Time to Dry
After securely attaching the first portion of the flange, Sven allows ample time for it to dry before moving forward with additional steps. This patience and precision are key aspects of his successful boatbuilding methods.Step 4: Finishing Touches
Once the flange is fully dried, Sven removes the clamps carefully, ensuring no damage occurs during this process. He then moves on to attaching four more pieces onto these main frames, completing two pairs of flanges for the bulkhead hatches.The Final Touches
While two flanges form the primary support structure around the hatches, Sven mentions there are two additional pieces required at each end to ensure comprehensive protection. This attention to detail highlights his commitment to producing a durable and reliable design. “Sailing is about finding your path, whether it’s across an ocean or within yourself.” – Sven Yrvind In conclusion, making flanges around bulkhead hatches may seem complex at first glance, but by following Sven Yrvind’s meticulous process, enthusiasts can achieve professional-level results. Remember that the journey of boatbuilding is as rewarding as reaching your destination; it tests one’s patience and dedication. For those seeking to embark on this adventure or simply gain more insight into marine craftsmanship, Sven’s wisdom is invaluable.After securely attaching the first portion of the flange, Sven allows ample time for it to dry before moving forward with additional steps. This patience and precision are key aspects of his successful boatbuilding methods.Step 4: Finishing Touches
Once the flange is fully dried, Sven removes the clamps carefully, ensuring no damage occurs during this process. He then moves on to attaching four more pieces onto these main frames, completing two pairs of flanges for the bulkhead hatches.The Final Touches
While two flanges form the primary support structure around the hatches, Sven mentions there are two additional pieces required at each end to ensure comprehensive protection. This attention to detail highlights his commitment to producing a durable and reliable design. “Sailing is about finding your path, whether it’s across an ocean or within yourself.” – Sven Yrvind In conclusion, making flanges around bulkhead hatches may seem complex at first glance, but by following Sven Yrvind’s meticulous process, enthusiasts can achieve professional-level results. Remember that the journey of boatbuilding is as rewarding as reaching your destination; it tests one’s patience and dedication. For those seeking to embark on this adventure or simply gain more insight into marine craftsmanship, Sven’s wisdom is invaluable.Sven proceeds to apply glue along one edge of the flange, ensuring a secure bond when clamped into place. He emphasizes that this stage is crucial for maintaining the structural integrity of the flange, which in turn safeguards the living area beneath the canvas when hatches are open.Step 3: Allowing Time to Dry
After securely attaching the first portion of the flange, Sven allows ample time for it to dry before moving forward with additional steps. This patience and precision are key aspects of his successful boatbuilding methods.Step 4: Finishing Touches
Once the flange is fully dried, Sven removes the clamps carefully, ensuring no damage occurs during this process. He then moves on to attaching four more pieces onto these main frames, completing two pairs of flanges for the bulkhead hatches.The Final Touches
While two flanges form the primary support structure around the hatches, Sven mentions there are two additional pieces required at each end to ensure comprehensive protection. This attention to detail highlights his commitment to producing a durable and reliable design. “Sailing is about finding your path, whether it’s across an ocean or within yourself.” – Sven Yrvind In conclusion, making flanges around bulkhead hatches may seem complex at first glance, but by following Sven Yrvind’s meticulous process, enthusiasts can achieve professional-level results. Remember that the journey of boatbuilding is as rewarding as reaching your destination; it tests one’s patience and dedication. For those seeking to embark on this adventure or simply gain more insight into marine craftsmanship, Sven’s wisdom is invaluable.Sven begins by explaining that working on flanges vertically and horizontally is significantly easier than doing so in a flat position. To simplify the process further, he divides the task into two or three steps as suggested by fellow expert “for for.” This approach not only makes it more manageable but also allows for greater precision in crafting each component.Step 2: Applying Glue and Securing
Sven proceeds to apply glue along one edge of the flange, ensuring a secure bond when clamped into place. He emphasizes that this stage is crucial for maintaining the structural integrity of the flange, which in turn safeguards the living area beneath the canvas when hatches are open.Step 3: Allowing Time to Dry
After securely attaching the first portion of the flange, Sven allows ample time for it to dry before moving forward with additional steps. This patience and precision are key aspects of his successful boatbuilding methods.Step 4: Finishing Touches
Once the flange is fully dried, Sven removes the clamps carefully, ensuring no damage occurs during this process. He then moves on to attaching four more pieces onto these main frames, completing two pairs of flanges for the bulkhead hatches.The Final Touches
While two flanges form the primary support structure around the hatches, Sven mentions there are two additional pieces required at each end to ensure comprehensive protection. This attention to detail highlights his commitment to producing a durable and reliable design. “Sailing is about finding your path, whether it’s across an ocean or within yourself.” – Sven Yrvind In conclusion, making flanges around bulkhead hatches may seem complex at first glance, but by following Sven Yrvind’s meticulous process, enthusiasts can achieve professional-level results. Remember that the journey of boatbuilding is as rewarding as reaching your destination; it tests one’s patience and dedication. For those seeking to embark on this adventure or simply gain more insight into marine craftsmanship, Sven’s wisdom is invaluable.Sven Yrvind, a renowned yacht designer and sailor, shares valuable insights on creating flanges around bulkhead hatches for canvas protection in this enlightening video. By following his expert guidance, boat enthusiasts can ensure their living areas remain secure while allowing unhindered access through the hatches.Step 1: Starting with the Flange
Sven begins by explaining that working on flanges vertically and horizontally is significantly easier than doing so in a flat position. To simplify the process further, he divides the task into two or three steps as suggested by fellow expert “for for.” This approach not only makes it more manageable but also allows for greater precision in crafting each component.Step 2: Applying Glue and Securing
Sven proceeds to apply glue along one edge of the flange, ensuring a secure bond when clamped into place. He emphasizes that this stage is crucial for maintaining the structural integrity of the flange, which in turn safeguards the living area beneath the canvas when hatches are open.Step 3: Allowing Time to Dry
After securely attaching the first portion of the flange, Sven allows ample time for it to dry before moving forward with additional steps. This patience and precision are key aspects of his successful boatbuilding methods.Step 4: Finishing Touches
Once the flange is fully dried, Sven removes the clamps carefully, ensuring no damage occurs during this process. He then moves on to attaching four more pieces onto these main frames, completing two pairs of flanges for the bulkhead hatches.The Final Touches
While two flanges form the primary support structure around the hatches, Sven mentions there are two additional pieces required at each end to ensure comprehensive protection. This attention to detail highlights his commitment to producing a durable and reliable design. “Sailing is about finding your path, whether it’s across an ocean or within yourself.” – Sven Yrvind In conclusion, making flanges around bulkhead hatches may seem complex at first glance, but by following Sven Yrvind’s meticulous process, enthusiasts can achieve professional-level results. Remember that the journey of boatbuilding is as rewarding as reaching your destination; it tests one’s patience and dedication. For those seeking to embark on this adventure or simply gain more insight into marine craftsmanship, Sven’s wisdom is invaluable.Making Flanges Around Bulkhead Hatches for Canvas
Sven Yrvind, a renowned yacht designer and sailor, shares valuable insights on creating flanges around bulkhead hatches for canvas protection in this enlightening video. By following his expert guidance, boat enthusiasts can ensure their living areas remain secure while allowing unhindered access through the hatches.Step 1: Starting with the Flange
Sven begins by explaining that working on flanges vertically and horizontally is significantly easier than doing so in a flat position. To simplify the process further, he divides the task into two or three steps as suggested by fellow expert “for for.” This approach not only makes it more manageable but also allows for greater precision in crafting each component.Step 2: Applying Glue and Securing
Sven proceeds to apply glue along one edge of the flange, ensuring a secure bond when clamped into place. He emphasizes that this stage is crucial for maintaining the structural integrity of the flange, which in turn safeguards the living area beneath the canvas when hatches are open.Step 3: Allowing Time to Dry
After securely attaching the first portion of the flange, Sven allows ample time for it to dry before moving forward with additional steps. This patience and precision are key aspects of his successful boatbuilding methods.Step 4: Finishing Touches
Once the flange is fully dried, Sven removes the clamps carefully, ensuring no damage occurs during this process. He then moves on to attaching four more pieces onto these main frames, completing two pairs of flanges for the bulkhead hatches.The Final Touches
While two flanges form the primary support structure around the hatches, Sven mentions there are two additional pieces required at each end to ensure comprehensive protection. This attention to detail highlights his commitment to producing a durable and reliable design. “Sailing is about finding your path, whether it’s across an ocean or within yourself.” – Sven Yrvind In conclusion, making flanges around bulkhead hatches may seem complex at first glance, but by following Sven Yrvind’s meticulous process, enthusiasts can achieve professional-level results. Remember that the journey of boatbuilding is as rewarding as reaching your destination; it tests one’s patience and dedication. For those seeking to embark on this adventure or simply gain more insight into marine craftsmanship, Sven’s wisdom is invaluable.Once the flange is fully dried, Sven removes the clamps carefully, ensuring no damage occurs during this process. He then moves on to attaching four more pieces onto these main frames, completing two pairs of flanges for the bulkhead hatches.The Final Touches
While two flanges form the primary support structure around the hatches, Sven mentions there are two additional pieces required at each end to ensure comprehensive protection. This attention to detail highlights his commitment to producing a durable and reliable design. “Sailing is about finding your path, whether it’s across an ocean or within yourself.” – Sven Yrvind In conclusion, making flanges around bulkhead hatches may seem complex at first glance, but by following Sven Yrvind’s meticulous process, enthusiasts can achieve professional-level results. Remember that the journey of boatbuilding is as rewarding as reaching your destination; it tests one’s patience and dedication. For those seeking to embark on this adventure or simply gain more insight into marine craftsmanship, Sven’s wisdom is invaluable.After securely attaching the first portion of the flange, Sven allows ample time for it to dry before moving forward with additional steps. This patience and precision are key aspects of his successful boatbuilding methods.Step 4: Finishing Touches
Once the flange is fully dried, Sven removes the clamps carefully, ensuring no damage occurs during this process. He then moves on to attaching four more pieces onto these main frames, completing two pairs of flanges for the bulkhead hatches.The Final Touches
While two flanges form the primary support structure around the hatches, Sven mentions there are two additional pieces required at each end to ensure comprehensive protection. This attention to detail highlights his commitment to producing a durable and reliable design. “Sailing is about finding your path, whether it’s across an ocean or within yourself.” – Sven Yrvind In conclusion, making flanges around bulkhead hatches may seem complex at first glance, but by following Sven Yrvind’s meticulous process, enthusiasts can achieve professional-level results. Remember that the journey of boatbuilding is as rewarding as reaching your destination; it tests one’s patience and dedication. For those seeking to embark on this adventure or simply gain more insight into marine craftsmanship, Sven’s wisdom is invaluable.Sven proceeds to apply glue along one edge of the flange, ensuring a secure bond when clamped into place. He emphasizes that this stage is crucial for maintaining the structural integrity of the flange, which in turn safeguards the living area beneath the canvas when hatches are open.Step 3: Allowing Time to Dry
After securely attaching the first portion of the flange, Sven allows ample time for it to dry before moving forward with additional steps. This patience and precision are key aspects of his successful boatbuilding methods.Step 4: Finishing Touches
Once the flange is fully dried, Sven removes the clamps carefully, ensuring no damage occurs during this process. He then moves on to attaching four more pieces onto these main frames, completing two pairs of flanges for the bulkhead hatches.The Final Touches
While two flanges form the primary support structure around the hatches, Sven mentions there are two additional pieces required at each end to ensure comprehensive protection. This attention to detail highlights his commitment to producing a durable and reliable design. “Sailing is about finding your path, whether it’s across an ocean or within yourself.” – Sven Yrvind In conclusion, making flanges around bulkhead hatches may seem complex at first glance, but by following Sven Yrvind’s meticulous process, enthusiasts can achieve professional-level results. Remember that the journey of boatbuilding is as rewarding as reaching your destination; it tests one’s patience and dedication. For those seeking to embark on this adventure or simply gain more insight into marine craftsmanship, Sven’s wisdom is invaluable.Sven begins by explaining that working on flanges vertically and horizontally is significantly easier than doing so in a flat position. To simplify the process further, he divides the task into two or three steps as suggested by fellow expert “for for.” This approach not only makes it more manageable but also allows for greater precision in crafting each component.Step 2: Applying Glue and Securing
Sven proceeds to apply glue along one edge of the flange, ensuring a secure bond when clamped into place. He emphasizes that this stage is crucial for maintaining the structural integrity of the flange, which in turn safeguards the living area beneath the canvas when hatches are open.Step 3: Allowing Time to Dry
After securely attaching the first portion of the flange, Sven allows ample time for it to dry before moving forward with additional steps. This patience and precision are key aspects of his successful boatbuilding methods.Step 4: Finishing Touches
Once the flange is fully dried, Sven removes the clamps carefully, ensuring no damage occurs during this process. He then moves on to attaching four more pieces onto these main frames, completing two pairs of flanges for the bulkhead hatches.The Final Touches
While two flanges form the primary support structure around the hatches, Sven mentions there are two additional pieces required at each end to ensure comprehensive protection. This attention to detail highlights his commitment to producing a durable and reliable design. “Sailing is about finding your path, whether it’s across an ocean or within yourself.” – Sven Yrvind In conclusion, making flanges around bulkhead hatches may seem complex at first glance, but by following Sven Yrvind’s meticulous process, enthusiasts can achieve professional-level results. Remember that the journey of boatbuilding is as rewarding as reaching your destination; it tests one’s patience and dedication. For those seeking to embark on this adventure or simply gain more insight into marine craftsmanship, Sven’s wisdom is invaluable.Sven Yrvind, a renowned yacht designer and sailor, shares valuable insights on creating flanges around bulkhead hatches for canvas protection in this enlightening video. By following his expert guidance, boat enthusiasts can ensure their living areas remain secure while allowing unhindered access through the hatches.Step 1: Starting with the Flange
Sven begins by explaining that working on flanges vertically and horizontally is significantly easier than doing so in a flat position. To simplify the process further, he divides the task into two or three steps as suggested by fellow expert “for for.” This approach not only makes it more manageable but also allows for greater precision in crafting each component.Step 2: Applying Glue and Securing
Sven proceeds to apply glue along one edge of the flange, ensuring a secure bond when clamped into place. He emphasizes that this stage is crucial for maintaining the structural integrity of the flange, which in turn safeguards the living area beneath the canvas when hatches are open.Step 3: Allowing Time to Dry
After securely attaching the first portion of the flange, Sven allows ample time for it to dry before moving forward with additional steps. This patience and precision are key aspects of his successful boatbuilding methods.Step 4: Finishing Touches
Once the flange is fully dried, Sven removes the clamps carefully, ensuring no damage occurs during this process. He then moves on to attaching four more pieces onto these main frames, completing two pairs of flanges for the bulkhead hatches.The Final Touches
While two flanges form the primary support structure around the hatches, Sven mentions there are two additional pieces required at each end to ensure comprehensive protection. This attention to detail highlights his commitment to producing a durable and reliable design. “Sailing is about finding your path, whether it’s across an ocean or within yourself.” – Sven Yrvind In conclusion, making flanges around bulkhead hatches may seem complex at first glance, but by following Sven Yrvind’s meticulous process, enthusiasts can achieve professional-level results. Remember that the journey of boatbuilding is as rewarding as reaching your destination; it tests one’s patience and dedication. For those seeking to embark on this adventure or simply gain more insight into marine craftsmanship, Sven’s wisdom is invaluable.Making Flanges Around Bulkhead Hatches for Canvas
Sven Yrvind, a renowned yacht designer and sailor, shares valuable insights on creating flanges around bulkhead hatches for canvas protection in this enlightening video. By following his expert guidance, boat enthusiasts can ensure their living areas remain secure while allowing unhindered access through the hatches.Step 1: Starting with the Flange
Sven begins by explaining that working on flanges vertically and horizontally is significantly easier than doing so in a flat position. To simplify the process further, he divides the task into two or three steps as suggested by fellow expert “for for.” This approach not only makes it more manageable but also allows for greater precision in crafting each component.Step 2: Applying Glue and Securing
Sven proceeds to apply glue along one edge of the flange, ensuring a secure bond when clamped into place. He emphasizes that this stage is crucial for maintaining the structural integrity of the flange, which in turn safeguards the living area beneath the canvas when hatches are open.Step 3: Allowing Time to Dry
After securely attaching the first portion of the flange, Sven allows ample time for it to dry before moving forward with additional steps. This patience and precision are key aspects of his successful boatbuilding methods.Step 4: Finishing Touches
Once the flange is fully dried, Sven removes the clamps carefully, ensuring no damage occurs during this process. He then moves on to attaching four more pieces onto these main frames, completing two pairs of flanges for the bulkhead hatches.The Final Touches
While two flanges form the primary support structure around the hatches, Sven mentions there are two additional pieces required at each end to ensure comprehensive protection. This attention to detail highlights his commitment to producing a durable and reliable design. “Sailing is about finding your path, whether it’s across an ocean or within yourself.” – Sven Yrvind In conclusion, making flanges around bulkhead hatches may seem complex at first glance, but by following Sven Yrvind’s meticulous process, enthusiasts can achieve professional-level results. Remember that the journey of boatbuilding is as rewarding as reaching your destination; it tests one’s patience and dedication. For those seeking to embark on this adventure or simply gain more insight into marine craftsmanship, Sven’s wisdom is invaluable.Once the flange is fully dried, Sven removes the clamps carefully, ensuring no damage occurs during this process. He then moves on to attaching four more pieces onto these main frames, completing two pairs of flanges for the bulkhead hatches.The Final Touches
While two flanges form the primary support structure around the hatches, Sven mentions there are two additional pieces required at each end to ensure comprehensive protection. This attention to detail highlights his commitment to producing a durable and reliable design. “Sailing is about finding your path, whether it’s across an ocean or within yourself.” – Sven Yrvind In conclusion, making flanges around bulkhead hatches may seem complex at first glance, but by following Sven Yrvind’s meticulous process, enthusiasts can achieve professional-level results. Remember that the journey of boatbuilding is as rewarding as reaching your destination; it tests one’s patience and dedication. For those seeking to embark on this adventure or simply gain more insight into marine craftsmanship, Sven’s wisdom is invaluable.Making Flanges Around Bulkhead Hatches for Canvas
Sven Yrvind, a renowned yacht designer and sailor, shares valuable insights on creating flanges around bulkhead hatches for canvas protection in this enlightening video. By following his expert guidance, boat enthusiasts can ensure their living areas remain secure while allowing unhindered access through the hatches.Step 1: Starting with the Flange
Sven begins by explaining that working on flanges vertically and horizontally is significantly easier than doing so in a flat position. To simplify the process further, he divides the task into two or three steps as suggested by fellow expert “for for.” This approach not only makes it more manageable but also allows for greater precision in crafting each component.Step 2: Applying Glue and Securing
Sven proceeds to apply glue along one edge of the flange, ensuring a secure bond when clamped into place. He emphasizes that this stage is crucial for maintaining the structural integrity of the flange, which in turn safeguards the living area beneath the canvas when hatches are open.Step 3: Allowing Time to Dry
After securely attaching the first portion of the flange, Sven allows ample time for it to dry before moving forward with additional steps. This patience and precision are key aspects of his successful boatbuilding methods.Step 4: Finishing Touches
Once the flange is fully dried, Sven removes the clamps carefully, ensuring no damage occurs during this process. He then moves on to attaching four more pieces onto these main frames, completing two pairs of flanges for the bulkhead hatches.The Final Touches
While two flanges form the primary support structure around the hatches, Sven mentions there are two additional pieces required at each end to ensure comprehensive protection. This attention to detail highlights his commitment to producing a durable and reliable design. “Sailing is about finding your path, whether it’s across an ocean or within yourself.” – Sven Yrvind In conclusion, making flanges around bulkhead hatches may seem complex at first glance, but by following Sven Yrvind’s meticulous process, enthusiasts can achieve professional-level results. Remember that the journey of boatbuilding is as rewarding as reaching your destination; it tests one’s patience and dedication. For those seeking to embark on this adventure or simply gain more insight into marine craftsmanship, Sven’s wisdom is invaluable.Sven begins by explaining that working on flanges vertically and horizontally is significantly easier than doing so in a flat position. To simplify the process further, he divides the task into two or three steps as suggested by fellow expert “for for.” This approach not only makes it more manageable but also allows for greater precision in crafting each component.Step 2: Applying Glue and Securing
Sven proceeds to apply glue along one edge of the flange, ensuring a secure bond when clamped into place. He emphasizes that this stage is crucial for maintaining the structural integrity of the flange, which in turn safeguards the living area beneath the canvas when hatches are open.Step 3: Allowing Time to Dry
After securely attaching the first portion of the flange, Sven allows ample time for it to dry before moving forward with additional steps. This patience and precision are key aspects of his successful boatbuilding methods.Step 4: Finishing Touches
Once the flange is fully dried, Sven removes the clamps carefully, ensuring no damage occurs during this process. He then moves on to attaching four more pieces onto these main frames, completing two pairs of flanges for the bulkhead hatches.The Final Touches
While two flanges form the primary support structure around the hatches, Sven mentions there are two additional pieces required at each end to ensure comprehensive protection. This attention to detail highlights his commitment to producing a durable and reliable design. “Sailing is about finding your path, whether it’s across an ocean or within yourself.” – Sven Yrvind In conclusion, making flanges around bulkhead hatches may seem complex at first glance, but by following Sven Yrvind’s meticulous process, enthusiasts can achieve professional-level results. Remember that the journey of boatbuilding is as rewarding as reaching your destination; it tests one’s patience and dedication. For those seeking to embark on this adventure or simply gain more insight into marine craftsmanship, Sven’s wisdom is invaluable.Making Flanges Around Bulkhead Hatches for Canvas
Sven Yrvind, a renowned yacht designer and sailor, shares valuable insights on creating flanges around bulkhead hatches for canvas protection in this enlightening video. By following his expert guidance, boat enthusiasts can ensure their living areas remain secure while allowing unhindered access through the hatches.Step 1: Starting with the Flange
Sven begins by explaining that working on flanges vertically and horizontally is significantly easier than doing so in a flat position. To simplify the process further, he divides the task into two or three steps as suggested by fellow expert “for for.” This approach not only makes it more manageable but also allows for greater precision in crafting each component.Step 2: Applying Glue and Securing
Sven proceeds to apply glue along one edge of the flange, ensuring a secure bond when clamped into place. He emphasizes that this stage is crucial for maintaining the structural integrity of the flange, which in turn safeguards the living area beneath the canvas when hatches are open.Step 3: Allowing Time to Dry
After securely attaching the first portion of the flange, Sven allows ample time for it to dry before moving forward with additional steps. This patience and precision are key aspects of his successful boatbuilding methods.Step 4: Finishing Touches
Once the flange is fully dried, Sven removes the clamps carefully, ensuring no damage occurs during this process. He then moves on to attaching four more pieces onto these main frames, completing two pairs of flanges for the bulkhead hatches.The Final Touches
While two flanges form the primary support structure around the hatches, Sven mentions there are two additional pieces required at each end to ensure comprehensive protection. This attention to detail highlights his commitment to producing a durable and reliable design. “Sailing is about finding your path, whether it’s across an ocean or within yourself.” – Sven Yrvind In conclusion, making flanges around bulkhead hatches may seem complex at first glance, but by following Sven Yrvind’s meticulous process, enthusiasts can achieve professional-level results. Remember that the journey of boatbuilding is as rewarding as reaching your destination; it tests one’s patience and dedication. For those seeking to embark on this adventure or simply gain more insight into marine craftsmanship, Sven’s wisdom is invaluable.Sven Yrvind, a renowned yacht designer and sailor, shares valuable insights on creating flanges around bulkhead hatches for canvas protection in this enlightening video. By following his expert guidance, boat enthusiasts can ensure their living areas remain secure while allowing unhindered access through the hatches.Step 1: Starting with the Flange
Sven begins by explaining that working on flanges vertically and horizontally is significantly easier than doing so in a flat position. To simplify the process further, he divides the task into two or three steps as suggested by fellow expert “for for.” This approach not only makes it more manageable but also allows for greater precision in crafting each component.Step 2: Applying Glue and Securing
Sven proceeds to apply glue along one edge of the flange, ensuring a secure bond when clamped into place. He emphasizes that this stage is crucial for maintaining the structural integrity of the flange, which in turn safeguards the living area beneath the canvas when hatches are open.Step 3: Allowing Time to Dry
After securely attaching the first portion of the flange, Sven allows ample time for it to dry before moving forward with additional steps. This patience and precision are key aspects of his successful boatbuilding methods.Step 4: Finishing Touches
Once the flange is fully dried, Sven removes the clamps carefully, ensuring no damage occurs during this process. He then moves on to attaching four more pieces onto these main frames, completing two pairs of flanges for the bulkhead hatches.The Final Touches
While two flanges form the primary support structure around the hatches, Sven mentions there are two additional pieces required at each end to ensure comprehensive protection. This attention to detail highlights his commitment to producing a durable and reliable design. “Sailing is about finding your path, whether it’s across an ocean or within yourself.” – Sven Yrvind In conclusion, making flanges around bulkhead hatches may seem complex at first glance, but by following Sven Yrvind’s meticulous process, enthusiasts can achieve professional-level results. Remember that the journey of boatbuilding is as rewarding as reaching your destination; it tests one’s patience and dedication. For those seeking to embark on this adventure or simply gain more insight into marine craftsmanship, Sven’s wisdom is invaluable.Making Flanges Around Bulkhead Hatches for Canvas
Sven Yrvind, a renowned yacht designer and sailor, shares valuable insights on creating flanges around bulkhead hatches for canvas protection in this enlightening video. By following his expert guidance, boat enthusiasts can ensure their living areas remain secure while allowing unhindered access through the hatches.Step 1: Starting with the Flange
Sven begins by explaining that working on flanges vertically and horizontally is significantly easier than doing so in a flat position. To simplify the process further, he divides the task into two or three steps as suggested by fellow expert “for for.” This approach not only makes it more manageable but also allows for greater precision in crafting each component.Step 2: Applying Glue and Securing
Sven proceeds to apply glue along one edge of the flange, ensuring a secure bond when clamped into place. He emphasizes that this stage is crucial for maintaining the structural integrity of the flange, which in turn safeguards the living area beneath the canvas when hatches are open.Step 3: Allowing Time to Dry
After securely attaching the first portion of the flange, Sven allows ample time for it to dry before moving forward with additional steps. This patience and precision are key aspects of his successful boatbuilding methods.Step 4: Finishing Touches
Once the flange is fully dried, Sven removes the clamps carefully, ensuring no damage occurs during this process. He then moves on to attaching four more pieces onto these main frames, completing two pairs of flanges for the bulkhead hatches.The Final Touches
While two flanges form the primary support structure around the hatches, Sven mentions there are two additional pieces required at each end to ensure comprehensive protection. This attention to detail highlights his commitment to producing a durable and reliable design. “Sailing is about finding your path, whether it’s across an ocean or within yourself.” – Sven Yrvind In conclusion, making flanges around bulkhead hatches may seem complex at first glance, but by following Sven Yrvind’s meticulous process, enthusiasts can achieve professional-level results. Remember that the journey of boatbuilding is as rewarding as reaching your destination; it tests one’s patience and dedication. For those seeking to embark on this adventure or simply gain more insight into marine craftsmanship, Sven’s wisdom is invaluable.Once the flange is fully dried, Sven removes the clamps carefully, ensuring no damage occurs during this process. He then moves on to attaching four more pieces onto these main frames, completing two pairs of flanges for the bulkhead hatches.The Final Touches
While two flanges form the primary support structure around the hatches, Sven mentions there are two additional pieces required at each end to ensure comprehensive protection. This attention to detail highlights his commitment to producing a durable and reliable design. “Sailing is about finding your path, whether it’s across an ocean or within yourself.” – Sven Yrvind In conclusion, making flanges around bulkhead hatches may seem complex at first glance, but by following Sven Yrvind’s meticulous process, enthusiasts can achieve professional-level results. Remember that the journey of boatbuilding is as rewarding as reaching your destination; it tests one’s patience and dedication. For those seeking to embark on this adventure or simply gain more insight into marine craftsmanship, Sven’s wisdom is invaluable.Sven Yrvind, a renowned yacht designer and sailor, shares valuable insights on creating flanges around bulkhead hatches for canvas protection in this enlightening video. By following his expert guidance, boat enthusiasts can ensure their living areas remain secure while allowing unhindered access through the hatches.Step 1: Starting with the Flange
Sven begins by explaining that working on flanges vertically and horizontally is significantly easier than doing so in a flat position. To simplify the process further, he divides the task into two or three steps as suggested by fellow expert “for for.” This approach not only makes it more manageable but also allows for greater precision in crafting each component.Step 2: Applying Glue and Securing
Sven proceeds to apply glue along one edge of the flange, ensuring a secure bond when clamped into place. He emphasizes that this stage is crucial for maintaining the structural integrity of the flange, which in turn safeguards the living area beneath the canvas when hatches are open.Step 3: Allowing Time to Dry
After securely attaching the first portion of the flange, Sven allows ample time for it to dry before moving forward with additional steps. This patience and precision are key aspects of his successful boatbuilding methods.Step 4: Finishing Touches
Once the flange is fully dried, Sven removes the clamps carefully, ensuring no damage occurs during this process. He then moves on to attaching four more pieces onto these main frames, completing two pairs of flanges for the bulkhead hatches.The Final Touches
While two flanges form the primary support structure around the hatches, Sven mentions there are two additional pieces required at each end to ensure comprehensive protection. This attention to detail highlights his commitment to producing a durable and reliable design. “Sailing is about finding your path, whether it’s across an ocean or within yourself.” – Sven Yrvind In conclusion, making flanges around bulkhead hatches may seem complex at first glance, but by following Sven Yrvind’s meticulous process, enthusiasts can achieve professional-level results. Remember that the journey of boatbuilding is as rewarding as reaching your destination; it tests one’s patience and dedication. For those seeking to embark on this adventure or simply gain more insight into marine craftsmanship, Sven’s wisdom is invaluable.Making Flanges Around Bulkhead Hatches for Canvas
Sven Yrvind, a renowned yacht designer and sailor, shares valuable insights on creating flanges around bulkhead hatches for canvas protection in this enlightening video. By following his expert guidance, boat enthusiasts can ensure their living areas remain secure while allowing unhindered access through the hatches.Step 1: Starting with the Flange
Sven begins by explaining that working on flanges vertically and horizontally is significantly easier than doing so in a flat position. To simplify the process further, he divides the task into two or three steps as suggested by fellow expert “for for.” This approach not only makes it more manageable but also allows for greater precision in crafting each component.Step 2: Applying Glue and Securing
Sven proceeds to apply glue along one edge of the flange, ensuring a secure bond when clamped into place. He emphasizes that this stage is crucial for maintaining the structural integrity of the flange, which in turn safeguards the living area beneath the canvas when hatches are open.Step 3: Allowing Time to Dry
After securely attaching the first portion of the flange, Sven allows ample time for it to dry before moving forward with additional steps. This patience and precision are key aspects of his successful boatbuilding methods.Step 4: Finishing Touches
Once the flange is fully dried, Sven removes the clamps carefully, ensuring no damage occurs during this process. He then moves on to attaching four more pieces onto these main frames, completing two pairs of flanges for the bulkhead hatches.The Final Touches
While two flanges form the primary support structure around the hatches, Sven mentions there are two additional pieces required at each end to ensure comprehensive protection. This attention to detail highlights his commitment to producing a durable and reliable design. “Sailing is about finding your path, whether it’s across an ocean or within yourself.” – Sven Yrvind In conclusion, making flanges around bulkhead hatches may seem complex at first glance, but by following Sven Yrvind’s meticulous process, enthusiasts can achieve professional-level results. Remember that the journey of boatbuilding is as rewarding as reaching your destination; it tests one’s patience and dedication. For those seeking to embark on this adventure or simply gain more insight into marine craftsmanship, Sven’s wisdom is invaluable.After securely attaching the first portion of the flange, Sven allows ample time for it to dry before moving forward with additional steps. This patience and precision are key aspects of his successful boatbuilding methods.Step 4: Finishing Touches
Once the flange is fully dried, Sven removes the clamps carefully, ensuring no damage occurs during this process. He then moves on to attaching four more pieces onto these main frames, completing two pairs of flanges for the bulkhead hatches.The Final Touches
While two flanges form the primary support structure around the hatches, Sven mentions there are two additional pieces required at each end to ensure comprehensive protection. This attention to detail highlights his commitment to producing a durable and reliable design. “Sailing is about finding your path, whether it’s across an ocean or within yourself.” – Sven Yrvind In conclusion, making flanges around bulkhead hatches may seem complex at first glance, but by following Sven Yrvind’s meticulous process, enthusiasts can achieve professional-level results. Remember that the journey of boatbuilding is as rewarding as reaching your destination; it tests one’s patience and dedication. For those seeking to embark on this adventure or simply gain more insight into marine craftsmanship, Sven’s wisdom is invaluable.Sven Yrvind, a renowned yacht designer and sailor, shares valuable insights on creating flanges around bulkhead hatches for canvas protection in this enlightening video. By following his expert guidance, boat enthusiasts can ensure their living areas remain secure while allowing unhindered access through the hatches.Step 1: Starting with the Flange
Sven begins by explaining that working on flanges vertically and horizontally is significantly easier than doing so in a flat position. To simplify the process further, he divides the task into two or three steps as suggested by fellow expert “for for.” This approach not only makes it more manageable but also allows for greater precision in crafting each component.Step 2: Applying Glue and Securing
Sven proceeds to apply glue along one edge of the flange, ensuring a secure bond when clamped into place. He emphasizes that this stage is crucial for maintaining the structural integrity of the flange, which in turn safeguards the living area beneath the canvas when hatches are open.Step 3: Allowing Time to Dry
After securely attaching the first portion of the flange, Sven allows ample time for it to dry before moving forward with additional steps. This patience and precision are key aspects of his successful boatbuilding methods.Step 4: Finishing Touches
Once the flange is fully dried, Sven removes the clamps carefully, ensuring no damage occurs during this process. He then moves on to attaching four more pieces onto these main frames, completing two pairs of flanges for the bulkhead hatches.The Final Touches
While two flanges form the primary support structure around the hatches, Sven mentions there are two additional pieces required at each end to ensure comprehensive protection. This attention to detail highlights his commitment to producing a durable and reliable design. “Sailing is about finding your path, whether it’s across an ocean or within yourself.” – Sven Yrvind In conclusion, making flanges around bulkhead hatches may seem complex at first glance, but by following Sven Yrvind’s meticulous process, enthusiasts can achieve professional-level results. Remember that the journey of boatbuilding is as rewarding as reaching your destination; it tests one’s patience and dedication. For those seeking to embark on this adventure or simply gain more insight into marine craftsmanship, Sven’s wisdom is invaluable.Making Flanges Around Bulkhead Hatches for Canvas
Sven Yrvind, a renowned yacht designer and sailor, shares valuable insights on creating flanges around bulkhead hatches for canvas protection in this enlightening video. By following his expert guidance, boat enthusiasts can ensure their living areas remain secure while allowing unhindered access through the hatches.Step 1: Starting with the Flange
Sven begins by explaining that working on flanges vertically and horizontally is significantly easier than doing so in a flat position. To simplify the process further, he divides the task into two or three steps as suggested by fellow expert “for for.” This approach not only makes it more manageable but also allows for greater precision in crafting each component.Step 2: Applying Glue and Securing
Sven proceeds to apply glue along one edge of the flange, ensuring a secure bond when clamped into place. He emphasizes that this stage is crucial for maintaining the structural integrity of the flange, which in turn safeguards the living area beneath the canvas when hatches are open.Step 3: Allowing Time to Dry
After securely attaching the first portion of the flange, Sven allows ample time for it to dry before moving forward with additional steps. This patience and precision are key aspects of his successful boatbuilding methods.Step 4: Finishing Touches
Once the flange is fully dried, Sven removes the clamps carefully, ensuring no damage occurs during this process. He then moves on to attaching four more pieces onto these main frames, completing two pairs of flanges for the bulkhead hatches.The Final Touches
While two flanges form the primary support structure around the hatches, Sven mentions there are two additional pieces required at each end to ensure comprehensive protection. This attention to detail highlights his commitment to producing a durable and reliable design. “Sailing is about finding your path, whether it’s across an ocean or within yourself.” – Sven Yrvind In conclusion, making flanges around bulkhead hatches may seem complex at first glance, but by following Sven Yrvind’s meticulous process, enthusiasts can achieve professional-level results. Remember that the journey of boatbuilding is as rewarding as reaching your destination; it tests one’s patience and dedication. For those seeking to embark on this adventure or simply gain more insight into marine craftsmanship, Sven’s wisdom is invaluable.Sven proceeds to apply glue along one edge of the flange, ensuring a secure bond when clamped into place. He emphasizes that this stage is crucial for maintaining the structural integrity of the flange, which in turn safeguards the living area beneath the canvas when hatches are open.Step 3: Allowing Time to Dry
After securely attaching the first portion of the flange, Sven allows ample time for it to dry before moving forward with additional steps. This patience and precision are key aspects of his successful boatbuilding methods.Step 4: Finishing Touches
Once the flange is fully dried, Sven removes the clamps carefully, ensuring no damage occurs during this process. He then moves on to attaching four more pieces onto these main frames, completing two pairs of flanges for the bulkhead hatches.The Final Touches
While two flanges form the primary support structure around the hatches, Sven mentions there are two additional pieces required at each end to ensure comprehensive protection. This attention to detail highlights his commitment to producing a durable and reliable design. “Sailing is about finding your path, whether it’s across an ocean or within yourself.” – Sven Yrvind In conclusion, making flanges around bulkhead hatches may seem complex at first glance, but by following Sven Yrvind’s meticulous process, enthusiasts can achieve professional-level results. Remember that the journey of boatbuilding is as rewarding as reaching your destination; it tests one’s patience and dedication. For those seeking to embark on this adventure or simply gain more insight into marine craftsmanship, Sven’s wisdom is invaluable.Sven Yrvind, a renowned yacht designer and sailor, shares valuable insights on creating flanges around bulkhead hatches for canvas protection in this enlightening video. By following his expert guidance, boat enthusiasts can ensure their living areas remain secure while allowing unhindered access through the hatches.Step 1: Starting with the Flange
Sven begins by explaining that working on flanges vertically and horizontally is significantly easier than doing so in a flat position. To simplify the process further, he divides the task into two or three steps as suggested by fellow expert “for for.” This approach not only makes it more manageable but also allows for greater precision in crafting each component.Step 2: Applying Glue and Securing
Sven proceeds to apply glue along one edge of the flange, ensuring a secure bond when clamped into place. He emphasizes that this stage is crucial for maintaining the structural integrity of the flange, which in turn safeguards the living area beneath the canvas when hatches are open.Step 3: Allowing Time to Dry
After securely attaching the first portion of the flange, Sven allows ample time for it to dry before moving forward with additional steps. This patience and precision are key aspects of his successful boatbuilding methods.Step 4: Finishing Touches
Once the flange is fully dried, Sven removes the clamps carefully, ensuring no damage occurs during this process. He then moves on to attaching four more pieces onto these main frames, completing two pairs of flanges for the bulkhead hatches.The Final Touches
While two flanges form the primary support structure around the hatches, Sven mentions there are two additional pieces required at each end to ensure comprehensive protection. This attention to detail highlights his commitment to producing a durable and reliable design. “Sailing is about finding your path, whether it’s across an ocean or within yourself.” – Sven Yrvind In conclusion, making flanges around bulkhead hatches may seem complex at first glance, but by following Sven Yrvind’s meticulous process, enthusiasts can achieve professional-level results. Remember that the journey of boatbuilding is as rewarding as reaching your destination; it tests one’s patience and dedication. For those seeking to embark on this adventure or simply gain more insight into marine craftsmanship, Sven’s wisdom is invaluable.Making Flanges Around Bulkhead Hatches for Canvas
Sven Yrvind, a renowned yacht designer and sailor, shares valuable insights on creating flanges around bulkhead hatches for canvas protection in this enlightening video. By following his expert guidance, boat enthusiasts can ensure their living areas remain secure while allowing unhindered access through the hatches.Step 1: Starting with the Flange
Sven begins by explaining that working on flanges vertically and horizontally is significantly easier than doing so in a flat position. To simplify the process further, he divides the task into two or three steps as suggested by fellow expert “for for.” This approach not only makes it more manageable but also allows for greater precision in crafting each component.Step 2: Applying Glue and Securing
Sven proceeds to apply glue along one edge of the flange, ensuring a secure bond when clamped into place. He emphasizes that this stage is crucial for maintaining the structural integrity of the flange, which in turn safeguards the living area beneath the canvas when hatches are open.Step 3: Allowing Time to Dry
After securely attaching the first portion of the flange, Sven allows ample time for it to dry before moving forward with additional steps. This patience and precision are key aspects of his successful boatbuilding methods.Step 4: Finishing Touches
Once the flange is fully dried, Sven removes the clamps carefully, ensuring no damage occurs during this process. He then moves on to attaching four more pieces onto these main frames, completing two pairs of flanges for the bulkhead hatches.The Final Touches
While two flanges form the primary support structure around the hatches, Sven mentions there are two additional pieces required at each end to ensure comprehensive protection. This attention to detail highlights his commitment to producing a durable and reliable design. “Sailing is about finding your path, whether it’s across an ocean or within yourself.” – Sven Yrvind In conclusion, making flanges around bulkhead hatches may seem complex at first glance, but by following Sven Yrvind’s meticulous process, enthusiasts can achieve professional-level results. Remember that the journey of boatbuilding is as rewarding as reaching your destination; it tests one’s patience and dedication. For those seeking to embark on this adventure or simply gain more insight into marine craftsmanship, Sven’s wisdom is invaluable.Sven begins by explaining that working on flanges vertically and horizontally is significantly easier than doing so in a flat position. To simplify the process further, he divides the task into two or three steps as suggested by fellow expert “for for.” This approach not only makes it more manageable but also allows for greater precision in crafting each component.Step 2: Applying Glue and Securing
Sven proceeds to apply glue along one edge of the flange, ensuring a secure bond when clamped into place. He emphasizes that this stage is crucial for maintaining the structural integrity of the flange, which in turn safeguards the living area beneath the canvas when hatches are open.Step 3: Allowing Time to Dry
After securely attaching the first portion of the flange, Sven allows ample time for it to dry before moving forward with additional steps. This patience and precision are key aspects of his successful boatbuilding methods.Step 4: Finishing Touches
Once the flange is fully dried, Sven removes the clamps carefully, ensuring no damage occurs during this process. He then moves on to attaching four more pieces onto these main frames, completing two pairs of flanges for the bulkhead hatches.The Final Touches
While two flanges form the primary support structure around the hatches, Sven mentions there are two additional pieces required at each end to ensure comprehensive protection. This attention to detail highlights his commitment to producing a durable and reliable design. “Sailing is about finding your path, whether it’s across an ocean or within yourself.” – Sven Yrvind In conclusion, making flanges around bulkhead hatches may seem complex at first glance, but by following Sven Yrvind’s meticulous process, enthusiasts can achieve professional-level results. Remember that the journey of boatbuilding is as rewarding as reaching your destination; it tests one’s patience and dedication. For those seeking to embark on this adventure or simply gain more insight into marine craftsmanship, Sven’s wisdom is invaluable.Sven Yrvind, a renowned yacht designer and sailor, shares valuable insights on creating flanges around bulkhead hatches for canvas protection in this enlightening video. By following his expert guidance, boat enthusiasts can ensure their living areas remain secure while allowing unhindered access through the hatches.Step 1: Starting with the Flange
Sven begins by explaining that working on flanges vertically and horizontally is significantly easier than doing so in a flat position. To simplify the process further, he divides the task into two or three steps as suggested by fellow expert “for for.” This approach not only makes it more manageable but also allows for greater precision in crafting each component.Step 2: Applying Glue and Securing
Sven proceeds to apply glue along one edge of the flange, ensuring a secure bond when clamped into place. He emphasizes that this stage is crucial for maintaining the structural integrity of the flange, which in turn safeguards the living area beneath the canvas when hatches are open.Step 3: Allowing Time to Dry
After securely attaching the first portion of the flange, Sven allows ample time for it to dry before moving forward with additional steps. This patience and precision are key aspects of his successful boatbuilding methods.Step 4: Finishing Touches
Once the flange is fully dried, Sven removes the clamps carefully, ensuring no damage occurs during this process. He then moves on to attaching four more pieces onto these main frames, completing two pairs of flanges for the bulkhead hatches.The Final Touches
While two flanges form the primary support structure around the hatches, Sven mentions there are two additional pieces required at each end to ensure comprehensive protection. This attention to detail highlights his commitment to producing a durable and reliable design. “Sailing is about finding your path, whether it’s across an ocean or within yourself.” – Sven Yrvind In conclusion, making flanges around bulkhead hatches may seem complex at first glance, but by following Sven Yrvind’s meticulous process, enthusiasts can achieve professional-level results. Remember that the journey of boatbuilding is as rewarding as reaching your destination; it tests one’s patience and dedication. For those seeking to embark on this adventure or simply gain more insight into marine craftsmanship, Sven’s wisdom is invaluable.Making Flanges Around Bulkhead Hatches for Canvas
Sven Yrvind, a renowned yacht designer and sailor, shares valuable insights on creating flanges around bulkhead hatches for canvas protection in this enlightening video. By following his expert guidance, boat enthusiasts can ensure their living areas remain secure while allowing unhindered access through the hatches.Step 1: Starting with the Flange
Sven begins by explaining that working on flanges vertically and horizontally is significantly easier than doing so in a flat position. To simplify the process further, he divides the task into two or three steps as suggested by fellow expert “for for.” This approach not only makes it more manageable but also allows for greater precision in crafting each component.Step 2: Applying Glue and Securing
Sven proceeds to apply glue along one edge of the flange, ensuring a secure bond when clamped into place. He emphasizes that this stage is crucial for maintaining the structural integrity of the flange, which in turn safeguards the living area beneath the canvas when hatches are open.Step 3: Allowing Time to Dry
After securely attaching the first portion of the flange, Sven allows ample time for it to dry before moving forward with additional steps. This patience and precision are key aspects of his successful boatbuilding methods.Step 4: Finishing Touches
Once the flange is fully dried, Sven removes the clamps carefully, ensuring no damage occurs during this process. He then moves on to attaching four more pieces onto these main frames, completing two pairs of flanges for the bulkhead hatches.The Final Touches
While two flanges form the primary support structure around the hatches, Sven mentions there are two additional pieces required at each end to ensure comprehensive protection. This attention to detail highlights his commitment to producing a durable and reliable design. “Sailing is about finding your path, whether it’s across an ocean or within yourself.” – Sven Yrvind In conclusion, making flanges around bulkhead hatches may seem complex at first glance, but by following Sven Yrvind’s meticulous process, enthusiasts can achieve professional-level results. Remember that the journey of boatbuilding is as rewarding as reaching your destination; it tests one’s patience and dedication. For those seeking to embark on this adventure or simply gain more insight into marine craftsmanship, Sven’s wisdom is invaluable.Once the flange is fully dried, Sven removes the clamps carefully, ensuring no damage occurs during this process. He then moves on to attaching four more pieces onto these main frames, completing two pairs of flanges for the bulkhead hatches.The Final Touches
While two flanges form the primary support structure around the hatches, Sven mentions there are two additional pieces required at each end to ensure comprehensive protection. This attention to detail highlights his commitment to producing a durable and reliable design. “Sailing is about finding your path, whether it’s across an ocean or within yourself.” – Sven Yrvind In conclusion, making flanges around bulkhead hatches may seem complex at first glance, but by following Sven Yrvind’s meticulous process, enthusiasts can achieve professional-level results. Remember that the journey of boatbuilding is as rewarding as reaching your destination; it tests one’s patience and dedication. For those seeking to embark on this adventure or simply gain more insight into marine craftsmanship, Sven’s wisdom is invaluable.Sven begins by explaining that working on flanges vertically and horizontally is significantly easier than doing so in a flat position. To simplify the process further, he divides the task into two or three steps as suggested by fellow expert “for for.” This approach not only makes it more manageable but also allows for greater precision in crafting each component.Step 2: Applying Glue and Securing
Sven proceeds to apply glue along one edge of the flange, ensuring a secure bond when clamped into place. He emphasizes that this stage is crucial for maintaining the structural integrity of the flange, which in turn safeguards the living area beneath the canvas when hatches are open.Step 3: Allowing Time to Dry
After securely attaching the first portion of the flange, Sven allows ample time for it to dry before moving forward with additional steps. This patience and precision are key aspects of his successful boatbuilding methods.Step 4: Finishing Touches
Once the flange is fully dried, Sven removes the clamps carefully, ensuring no damage occurs during this process. He then moves on to attaching four more pieces onto these main frames, completing two pairs of flanges for the bulkhead hatches.The Final Touches
While two flanges form the primary support structure around the hatches, Sven mentions there are two additional pieces required at each end to ensure comprehensive protection. This attention to detail highlights his commitment to producing a durable and reliable design. “Sailing is about finding your path, whether it’s across an ocean or within yourself.” – Sven Yrvind In conclusion, making flanges around bulkhead hatches may seem complex at first glance, but by following Sven Yrvind’s meticulous process, enthusiasts can achieve professional-level results. Remember that the journey of boatbuilding is as rewarding as reaching your destination; it tests one’s patience and dedication. For those seeking to embark on this adventure or simply gain more insight into marine craftsmanship, Sven’s wisdom is invaluable.Sven Yrvind, a renowned yacht designer and sailor, shares valuable insights on creating flanges around bulkhead hatches for canvas protection in this enlightening video. By following his expert guidance, boat enthusiasts can ensure their living areas remain secure while allowing unhindered access through the hatches.Step 1: Starting with the Flange
Sven begins by explaining that working on flanges vertically and horizontally is significantly easier than doing so in a flat position. To simplify the process further, he divides the task into two or three steps as suggested by fellow expert “for for.” This approach not only makes it more manageable but also allows for greater precision in crafting each component.Step 2: Applying Glue and Securing
Sven proceeds to apply glue along one edge of the flange, ensuring a secure bond when clamped into place. He emphasizes that this stage is crucial for maintaining the structural integrity of the flange, which in turn safeguards the living area beneath the canvas when hatches are open.Step 3: Allowing Time to Dry
After securely attaching the first portion of the flange, Sven allows ample time for it to dry before moving forward with additional steps. This patience and precision are key aspects of his successful boatbuilding methods.Step 4: Finishing Touches
Once the flange is fully dried, Sven removes the clamps carefully, ensuring no damage occurs during this process. He then moves on to attaching four more pieces onto these main frames, completing two pairs of flanges for the bulkhead hatches.The Final Touches
While two flanges form the primary support structure around the hatches, Sven mentions there are two additional pieces required at each end to ensure comprehensive protection. This attention to detail highlights his commitment to producing a durable and reliable design. “Sailing is about finding your path, whether it’s across an ocean or within yourself.” – Sven Yrvind In conclusion, making flanges around bulkhead hatches may seem complex at first glance, but by following Sven Yrvind’s meticulous process, enthusiasts can achieve professional-level results. Remember that the journey of boatbuilding is as rewarding as reaching your destination; it tests one’s patience and dedication. For those seeking to embark on this adventure or simply gain more insight into marine craftsmanship, Sven’s wisdom is invaluable.Making Flanges Around Bulkhead Hatches for Canvas
Sven Yrvind, a renowned yacht designer and sailor, shares valuable insights on creating flanges around bulkhead hatches for canvas protection in this enlightening video. By following his expert guidance, boat enthusiasts can ensure their living areas remain secure while allowing unhindered access through the hatches.Step 1: Starting with the Flange
Sven begins by explaining that working on flanges vertically and horizontally is significantly easier than doing so in a flat position. To simplify the process further, he divides the task into two or three steps as suggested by fellow expert “for for.” This approach not only makes it more manageable but also allows for greater precision in crafting each component.Step 2: Applying Glue and Securing
Sven proceeds to apply glue along one edge of the flange, ensuring a secure bond when clamped into place. He emphasizes that this stage is crucial for maintaining the structural integrity of the flange, which in turn safeguards the living area beneath the canvas when hatches are open.Step 3: Allowing Time to Dry
After securely attaching the first portion of the flange, Sven allows ample time for it to dry before moving forward with additional steps. This patience and precision are key aspects of his successful boatbuilding methods.Step 4: Finishing Touches
Once the flange is fully dried, Sven removes the clamps carefully, ensuring no damage occurs during this process. He then moves on to attaching four more pieces onto these main frames, completing two pairs of flanges for the bulkhead hatches.The Final Touches
While two flanges form the primary support structure around the hatches, Sven mentions there are two additional pieces required at each end to ensure comprehensive protection. This attention to detail highlights his commitment to producing a durable and reliable design. “Sailing is about finding your path, whether it’s across an ocean or within yourself.” – Sven Yrvind In conclusion, making flanges around bulkhead hatches may seem complex at first glance, but by following Sven Yrvind’s meticulous process, enthusiasts can achieve professional-level results. Remember that the journey of boatbuilding is as rewarding as reaching your destination; it tests one’s patience and dedication. For those seeking to embark on this adventure or simply gain more insight into marine craftsmanship, Sven’s wisdom is invaluable.After securely attaching the first portion of the flange, Sven allows ample time for it to dry before moving forward with additional steps. This patience and precision are key aspects of his successful boatbuilding methods.Step 4: Finishing Touches
Once the flange is fully dried, Sven removes the clamps carefully, ensuring no damage occurs during this process. He then moves on to attaching four more pieces onto these main frames, completing two pairs of flanges for the bulkhead hatches.The Final Touches
While two flanges form the primary support structure around the hatches, Sven mentions there are two additional pieces required at each end to ensure comprehensive protection. This attention to detail highlights his commitment to producing a durable and reliable design. “Sailing is about finding your path, whether it’s across an ocean or within yourself.” – Sven Yrvind In conclusion, making flanges around bulkhead hatches may seem complex at first glance, but by following Sven Yrvind’s meticulous process, enthusiasts can achieve professional-level results. Remember that the journey of boatbuilding is as rewarding as reaching your destination; it tests one’s patience and dedication. For those seeking to embark on this adventure or simply gain more insight into marine craftsmanship, Sven’s wisdom is invaluable.Sven begins by explaining that working on flanges vertically and horizontally is significantly easier than doing so in a flat position. To simplify the process further, he divides the task into two or three steps as suggested by fellow expert “for for.” This approach not only makes it more manageable but also allows for greater precision in crafting each component.Step 2: Applying Glue and Securing
Sven proceeds to apply glue along one edge of the flange, ensuring a secure bond when clamped into place. He emphasizes that this stage is crucial for maintaining the structural integrity of the flange, which in turn safeguards the living area beneath the canvas when hatches are open.Step 3: Allowing Time to Dry
After securely attaching the first portion of the flange, Sven allows ample time for it to dry before moving forward with additional steps. This patience and precision are key aspects of his successful boatbuilding methods.Step 4: Finishing Touches
Once the flange is fully dried, Sven removes the clamps carefully, ensuring no damage occurs during this process. He then moves on to attaching four more pieces onto these main frames, completing two pairs of flanges for the bulkhead hatches.The Final Touches
While two flanges form the primary support structure around the hatches, Sven mentions there are two additional pieces required at each end to ensure comprehensive protection. This attention to detail highlights his commitment to producing a durable and reliable design. “Sailing is about finding your path, whether it’s across an ocean or within yourself.” – Sven Yrvind In conclusion, making flanges around bulkhead hatches may seem complex at first glance, but by following Sven Yrvind’s meticulous process, enthusiasts can achieve professional-level results. Remember that the journey of boatbuilding is as rewarding as reaching your destination; it tests one’s patience and dedication. For those seeking to embark on this adventure or simply gain more insight into marine craftsmanship, Sven’s wisdom is invaluable.Sven Yrvind, a renowned yacht designer and sailor, shares valuable insights on creating flanges around bulkhead hatches for canvas protection in this enlightening video. By following his expert guidance, boat enthusiasts can ensure their living areas remain secure while allowing unhindered access through the hatches.Step 1: Starting with the Flange
Sven begins by explaining that working on flanges vertically and horizontally is significantly easier than doing so in a flat position. To simplify the process further, he divides the task into two or three steps as suggested by fellow expert “for for.” This approach not only makes it more manageable but also allows for greater precision in crafting each component.Step 2: Applying Glue and Securing
Sven proceeds to apply glue along one edge of the flange, ensuring a secure bond when clamped into place. He emphasizes that this stage is crucial for maintaining the structural integrity of the flange, which in turn safeguards the living area beneath the canvas when hatches are open.Step 3: Allowing Time to Dry
After securely attaching the first portion of the flange, Sven allows ample time for it to dry before moving forward with additional steps. This patience and precision are key aspects of his successful boatbuilding methods.Step 4: Finishing Touches
Once the flange is fully dried, Sven removes the clamps carefully, ensuring no damage occurs during this process. He then moves on to attaching four more pieces onto these main frames, completing two pairs of flanges for the bulkhead hatches.The Final Touches
While two flanges form the primary support structure around the hatches, Sven mentions there are two additional pieces required at each end to ensure comprehensive protection. This attention to detail highlights his commitment to producing a durable and reliable design. “Sailing is about finding your path, whether it’s across an ocean or within yourself.” – Sven Yrvind In conclusion, making flanges around bulkhead hatches may seem complex at first glance, but by following Sven Yrvind’s meticulous process, enthusiasts can achieve professional-level results. Remember that the journey of boatbuilding is as rewarding as reaching your destination; it tests one’s patience and dedication. For those seeking to embark on this adventure or simply gain more insight into marine craftsmanship, Sven’s wisdom is invaluable.Making Flanges Around Bulkhead Hatches for Canvas
Sven Yrvind, a renowned yacht designer and sailor, shares valuable insights on creating flanges around bulkhead hatches for canvas protection in this enlightening video. By following his expert guidance, boat enthusiasts can ensure their living areas remain secure while allowing unhindered access through the hatches.Step 1: Starting with the Flange
Sven begins by explaining that working on flanges vertically and horizontally is significantly easier than doing so in a flat position. To simplify the process further, he divides the task into two or three steps as suggested by fellow expert “for for.” This approach not only makes it more manageable but also allows for greater precision in crafting each component.Step 2: Applying Glue and Securing
Sven proceeds to apply glue along one edge of the flange, ensuring a secure bond when clamped into place. He emphasizes that this stage is crucial for maintaining the structural integrity of the flange, which in turn safeguards the living area beneath the canvas when hatches are open.Step 3: Allowing Time to Dry
After securely attaching the first portion of the flange, Sven allows ample time for it to dry before moving forward with additional steps. This patience and precision are key aspects of his successful boatbuilding methods.Step 4: Finishing Touches
Once the flange is fully dried, Sven removes the clamps carefully, ensuring no damage occurs during this process. He then moves on to attaching four more pieces onto these main frames, completing two pairs of flanges for the bulkhead hatches.The Final Touches
While two flanges form the primary support structure around the hatches, Sven mentions there are two additional pieces required at each end to ensure comprehensive protection. This attention to detail highlights his commitment to producing a durable and reliable design. “Sailing is about finding your path, whether it’s across an ocean or within yourself.” – Sven Yrvind In conclusion, making flanges around bulkhead hatches may seem complex at first glance, but by following Sven Yrvind’s meticulous process, enthusiasts can achieve professional-level results. Remember that the journey of boatbuilding is as rewarding as reaching your destination; it tests one’s patience and dedication. For those seeking to embark on this adventure or simply gain more insight into marine craftsmanship, Sven’s wisdom is invaluable.Sven proceeds to apply glue along one edge of the flange, ensuring a secure bond when clamped into place. He emphasizes that this stage is crucial for maintaining the structural integrity of the flange, which in turn safeguards the living area beneath the canvas when hatches are open.Step 3: Allowing Time to Dry
After securely attaching the first portion of the flange, Sven allows ample time for it to dry before moving forward with additional steps. This patience and precision are key aspects of his successful boatbuilding methods.Step 4: Finishing Touches
Once the flange is fully dried, Sven removes the clamps carefully, ensuring no damage occurs during this process. He then moves on to attaching four more pieces onto these main frames, completing two pairs of flanges for the bulkhead hatches.The Final Touches
While two flanges form the primary support structure around the hatches, Sven mentions there are two additional pieces required at each end to ensure comprehensive protection. This attention to detail highlights his commitment to producing a durable and reliable design. “Sailing is about finding your path, whether it’s across an ocean or within yourself.” – Sven Yrvind In conclusion, making flanges around bulkhead hatches may seem complex at first glance, but by following Sven Yrvind’s meticulous process, enthusiasts can achieve professional-level results. Remember that the journey of boatbuilding is as rewarding as reaching your destination; it tests one’s patience and dedication. For those seeking to embark on this adventure or simply gain more insight into marine craftsmanship, Sven’s wisdom is invaluable.Sven begins by explaining that working on flanges vertically and horizontally is significantly easier than doing so in a flat position. To simplify the process further, he divides the task into two or three steps as suggested by fellow expert “for for.” This approach not only makes it more manageable but also allows for greater precision in crafting each component.Step 2: Applying Glue and Securing
Sven proceeds to apply glue along one edge of the flange, ensuring a secure bond when clamped into place. He emphasizes that this stage is crucial for maintaining the structural integrity of the flange, which in turn safeguards the living area beneath the canvas when hatches are open.Step 3: Allowing Time to Dry
After securely attaching the first portion of the flange, Sven allows ample time for it to dry before moving forward with additional steps. This patience and precision are key aspects of his successful boatbuilding methods.Step 4: Finishing Touches
Once the flange is fully dried, Sven removes the clamps carefully, ensuring no damage occurs during this process. He then moves on to attaching four more pieces onto these main frames, completing two pairs of flanges for the bulkhead hatches.The Final Touches
While two flanges form the primary support structure around the hatches, Sven mentions there are two additional pieces required at each end to ensure comprehensive protection. This attention to detail highlights his commitment to producing a durable and reliable design. “Sailing is about finding your path, whether it’s across an ocean or within yourself.” – Sven Yrvind In conclusion, making flanges around bulkhead hatches may seem complex at first glance, but by following Sven Yrvind’s meticulous process, enthusiasts can achieve professional-level results. Remember that the journey of boatbuilding is as rewarding as reaching your destination; it tests one’s patience and dedication. For those seeking to embark on this adventure or simply gain more insight into marine craftsmanship, Sven’s wisdom is invaluable.Sven Yrvind, a renowned yacht designer and sailor, shares valuable insights on creating flanges around bulkhead hatches for canvas protection in this enlightening video. By following his expert guidance, boat enthusiasts can ensure their living areas remain secure while allowing unhindered access through the hatches.Step 1: Starting with the Flange
Sven begins by explaining that working on flanges vertically and horizontally is significantly easier than doing so in a flat position. To simplify the process further, he divides the task into two or three steps as suggested by fellow expert “for for.” This approach not only makes it more manageable but also allows for greater precision in crafting each component.Step 2: Applying Glue and Securing
Sven proceeds to apply glue along one edge of the flange, ensuring a secure bond when clamped into place. He emphasizes that this stage is crucial for maintaining the structural integrity of the flange, which in turn safeguards the living area beneath the canvas when hatches are open.Step 3: Allowing Time to Dry
After securely attaching the first portion of the flange, Sven allows ample time for it to dry before moving forward with additional steps. This patience and precision are key aspects of his successful boatbuilding methods.Step 4: Finishing Touches
Once the flange is fully dried, Sven removes the clamps carefully, ensuring no damage occurs during this process. He then moves on to attaching four more pieces onto these main frames, completing two pairs of flanges for the bulkhead hatches.The Final Touches
While two flanges form the primary support structure around the hatches, Sven mentions there are two additional pieces required at each end to ensure comprehensive protection. This attention to detail highlights his commitment to producing a durable and reliable design. “Sailing is about finding your path, whether it’s across an ocean or within yourself.” – Sven Yrvind In conclusion, making flanges around bulkhead hatches may seem complex at first glance, but by following Sven Yrvind’s meticulous process, enthusiasts can achieve professional-level results. Remember that the journey of boatbuilding is as rewarding as reaching your destination; it tests one’s patience and dedication. For those seeking to embark on this adventure or simply gain more insight into marine craftsmanship, Sven’s wisdom is invaluable.Making Flanges Around Bulkhead Hatches for Canvas
Sven Yrvind, a renowned yacht designer and sailor, shares valuable insights on creating flanges around bulkhead hatches for canvas protection in this enlightening video. By following his expert guidance, boat enthusiasts can ensure their living areas remain secure while allowing unhindered access through the hatches.Step 1: Starting with the Flange
Sven begins by explaining that working on flanges vertically and horizontally is significantly easier than doing so in a flat position. To simplify the process further, he divides the task into two or three steps as suggested by fellow expert “for for.” This approach not only makes it more manageable but also allows for greater precision in crafting each component.Step 2: Applying Glue and Securing
Sven proceeds to apply glue along one edge of the flange, ensuring a secure bond when clamped into place. He emphasizes that this stage is crucial for maintaining the structural integrity of the flange, which in turn safeguards the living area beneath the canvas when hatches are open.Step 3: Allowing Time to Dry
After securely attaching the first portion of the flange, Sven allows ample time for it to dry before moving forward with additional steps. This patience and precision are key aspects of his successful boatbuilding methods.Step 4: Finishing Touches
Once the flange is fully dried, Sven removes the clamps carefully, ensuring no damage occurs during this process. He then moves on to attaching four more pieces onto these main frames, completing two pairs of flanges for the bulkhead hatches.The Final Touches
While two flanges form the primary support structure around the hatches, Sven mentions there are two additional pieces required at each end to ensure comprehensive protection. This attention to detail highlights his commitment to producing a durable and reliable design. “Sailing is about finding your path, whether it’s across an ocean or within yourself.” – Sven Yrvind In conclusion, making flanges around bulkhead hatches may seem complex at first glance, but by following Sven Yrvind’s meticulous process, enthusiasts can achieve professional-level results. Remember that the journey of boatbuilding is as rewarding as reaching your destination; it tests one’s patience and dedication. For those seeking to embark on this adventure or simply gain more insight into marine craftsmanship, Sven’s wisdom is invaluable.Once the flange is fully dried, Sven removes the clamps carefully, ensuring no damage occurs during this process. He then moves on to attaching four more pieces onto these main frames, completing two pairs of flanges for the bulkhead hatches.The Final Touches
While two flanges form the primary support structure around the hatches, Sven mentions there are two additional pieces required at each end to ensure comprehensive protection. This attention to detail highlights his commitment to producing a durable and reliable design. “Sailing is about finding your path, whether it’s across an ocean or within yourself.” – Sven Yrvind In conclusion, making flanges around bulkhead hatches may seem complex at first glance, but by following Sven Yrvind’s meticulous process, enthusiasts can achieve professional-level results. Remember that the journey of boatbuilding is as rewarding as reaching your destination; it tests one’s patience and dedication. For those seeking to embark on this adventure or simply gain more insight into marine craftsmanship, Sven’s wisdom is invaluable.Sven proceeds to apply glue along one edge of the flange, ensuring a secure bond when clamped into place. He emphasizes that this stage is crucial for maintaining the structural integrity of the flange, which in turn safeguards the living area beneath the canvas when hatches are open.Step 3: Allowing Time to Dry
After securely attaching the first portion of the flange, Sven allows ample time for it to dry before moving forward with additional steps. This patience and precision are key aspects of his successful boatbuilding methods.Step 4: Finishing Touches
Once the flange is fully dried, Sven removes the clamps carefully, ensuring no damage occurs during this process. He then moves on to attaching four more pieces onto these main frames, completing two pairs of flanges for the bulkhead hatches.The Final Touches
While two flanges form the primary support structure around the hatches, Sven mentions there are two additional pieces required at each end to ensure comprehensive protection. This attention to detail highlights his commitment to producing a durable and reliable design. “Sailing is about finding your path, whether it’s across an ocean or within yourself.” – Sven Yrvind In conclusion, making flanges around bulkhead hatches may seem complex at first glance, but by following Sven Yrvind’s meticulous process, enthusiasts can achieve professional-level results. Remember that the journey of boatbuilding is as rewarding as reaching your destination; it tests one’s patience and dedication. For those seeking to embark on this adventure or simply gain more insight into marine craftsmanship, Sven’s wisdom is invaluable.Sven begins by explaining that working on flanges vertically and horizontally is significantly easier than doing so in a flat position. To simplify the process further, he divides the task into two or three steps as suggested by fellow expert “for for.” This approach not only makes it more manageable but also allows for greater precision in crafting each component.Step 2: Applying Glue and Securing
Sven proceeds to apply glue along one edge of the flange, ensuring a secure bond when clamped into place. He emphasizes that this stage is crucial for maintaining the structural integrity of the flange, which in turn safeguards the living area beneath the canvas when hatches are open.Step 3: Allowing Time to Dry
After securely attaching the first portion of the flange, Sven allows ample time for it to dry before moving forward with additional steps. This patience and precision are key aspects of his successful boatbuilding methods.Step 4: Finishing Touches
Once the flange is fully dried, Sven removes the clamps carefully, ensuring no damage occurs during this process. He then moves on to attaching four more pieces onto these main frames, completing two pairs of flanges for the bulkhead hatches.The Final Touches
While two flanges form the primary support structure around the hatches, Sven mentions there are two additional pieces required at each end to ensure comprehensive protection. This attention to detail highlights his commitment to producing a durable and reliable design. “Sailing is about finding your path, whether it’s across an ocean or within yourself.” – Sven Yrvind In conclusion, making flanges around bulkhead hatches may seem complex at first glance, but by following Sven Yrvind’s meticulous process, enthusiasts can achieve professional-level results. Remember that the journey of boatbuilding is as rewarding as reaching your destination; it tests one’s patience and dedication. For those seeking to embark on this adventure or simply gain more insight into marine craftsmanship, Sven’s wisdom is invaluable.Sven Yrvind, a renowned yacht designer and sailor, shares valuable insights on creating flanges around bulkhead hatches for canvas protection in this enlightening video. By following his expert guidance, boat enthusiasts can ensure their living areas remain secure while allowing unhindered access through the hatches.Step 1: Starting with the Flange
Sven begins by explaining that working on flanges vertically and horizontally is significantly easier than doing so in a flat position. To simplify the process further, he divides the task into two or three steps as suggested by fellow expert “for for.” This approach not only makes it more manageable but also allows for greater precision in crafting each component.Step 2: Applying Glue and Securing
Sven proceeds to apply glue along one edge of the flange, ensuring a secure bond when clamped into place. He emphasizes that this stage is crucial for maintaining the structural integrity of the flange, which in turn safeguards the living area beneath the canvas when hatches are open.Step 3: Allowing Time to Dry
After securely attaching the first portion of the flange, Sven allows ample time for it to dry before moving forward with additional steps. This patience and precision are key aspects of his successful boatbuilding methods.Step 4: Finishing Touches
Once the flange is fully dried, Sven removes the clamps carefully, ensuring no damage occurs during this process. He then moves on to attaching four more pieces onto these main frames, completing two pairs of flanges for the bulkhead hatches.The Final Touches
While two flanges form the primary support structure around the hatches, Sven mentions there are two additional pieces required at each end to ensure comprehensive protection. This attention to detail highlights his commitment to producing a durable and reliable design. “Sailing is about finding your path, whether it’s across an ocean or within yourself.” – Sven Yrvind In conclusion, making flanges around bulkhead hatches may seem complex at first glance, but by following Sven Yrvind’s meticulous process, enthusiasts can achieve professional-level results. Remember that the journey of boatbuilding is as rewarding as reaching your destination; it tests one’s patience and dedication. For those seeking to embark on this adventure or simply gain more insight into marine craftsmanship, Sven’s wisdom is invaluable.Making Flanges Around Bulkhead Hatches for Canvas
Sven Yrvind, a renowned yacht designer and sailor, shares valuable insights on creating flanges around bulkhead hatches for canvas protection in this enlightening video. By following his expert guidance, boat enthusiasts can ensure their living areas remain secure while allowing unhindered access through the hatches.Step 1: Starting with the Flange
Sven begins by explaining that working on flanges vertically and horizontally is significantly easier than doing so in a flat position. To simplify the process further, he divides the task into two or three steps as suggested by fellow expert “for for.” This approach not only makes it more manageable but also allows for greater precision in crafting each component.Step 2: Applying Glue and Securing
Sven proceeds to apply glue along one edge of the flange, ensuring a secure bond when clamped into place. He emphasizes that this stage is crucial for maintaining the structural integrity of the flange, which in turn safeguards the living area beneath the canvas when hatches are open.Step 3: Allowing Time to Dry
After securely attaching the first portion of the flange, Sven allows ample time for it to dry before moving forward with additional steps. This patience and precision are key aspects of his successful boatbuilding methods.Step 4: Finishing Touches
Once the flange is fully dried, Sven removes the clamps carefully, ensuring no damage occurs during this process. He then moves on to attaching four more pieces onto these main frames, completing two pairs of flanges for the bulkhead hatches.The Final Touches
While two flanges form the primary support structure around the hatches, Sven mentions there are two additional pieces required at each end to ensure comprehensive protection. This attention to detail highlights his commitment to producing a durable and reliable design. “Sailing is about finding your path, whether it’s across an ocean or within yourself.” – Sven Yrvind In conclusion, making flanges around bulkhead hatches may seem complex at first glance, but by following Sven Yrvind’s meticulous process, enthusiasts can achieve professional-level results. Remember that the journey of boatbuilding is as rewarding as reaching your destination; it tests one’s patience and dedication. For those seeking to embark on this adventure or simply gain more insight into marine craftsmanship, Sven’s wisdom is invaluable.After securely attaching the first portion of the flange, Sven allows ample time for it to dry before moving forward with additional steps. This patience and precision are key aspects of his successful boatbuilding methods.Step 4: Finishing Touches
Once the flange is fully dried, Sven removes the clamps carefully, ensuring no damage occurs during this process. He then moves on to attaching four more pieces onto these main frames, completing two pairs of flanges for the bulkhead hatches.The Final Touches
While two flanges form the primary support structure around the hatches, Sven mentions there are two additional pieces required at each end to ensure comprehensive protection. This attention to detail highlights his commitment to producing a durable and reliable design. “Sailing is about finding your path, whether it’s across an ocean or within yourself.” – Sven Yrvind In conclusion, making flanges around bulkhead hatches may seem complex at first glance, but by following Sven Yrvind’s meticulous process, enthusiasts can achieve professional-level results. Remember that the journey of boatbuilding is as rewarding as reaching your destination; it tests one’s patience and dedication. For those seeking to embark on this adventure or simply gain more insight into marine craftsmanship, Sven’s wisdom is invaluable.Sven proceeds to apply glue along one edge of the flange, ensuring a secure bond when clamped into place. He emphasizes that this stage is crucial for maintaining the structural integrity of the flange, which in turn safeguards the living area beneath the canvas when hatches are open.Step 3: Allowing Time to Dry
After securely attaching the first portion of the flange, Sven allows ample time for it to dry before moving forward with additional steps. This patience and precision are key aspects of his successful boatbuilding methods.Step 4: Finishing Touches
Once the flange is fully dried, Sven removes the clamps carefully, ensuring no damage occurs during this process. He then moves on to attaching four more pieces onto these main frames, completing two pairs of flanges for the bulkhead hatches.The Final Touches
While two flanges form the primary support structure around the hatches, Sven mentions there are two additional pieces required at each end to ensure comprehensive protection. This attention to detail highlights his commitment to producing a durable and reliable design. “Sailing is about finding your path, whether it’s across an ocean or within yourself.” – Sven Yrvind In conclusion, making flanges around bulkhead hatches may seem complex at first glance, but by following Sven Yrvind’s meticulous process, enthusiasts can achieve professional-level results. Remember that the journey of boatbuilding is as rewarding as reaching your destination; it tests one’s patience and dedication. For those seeking to embark on this adventure or simply gain more insight into marine craftsmanship, Sven’s wisdom is invaluable.Sven begins by explaining that working on flanges vertically and horizontally is significantly easier than doing so in a flat position. To simplify the process further, he divides the task into two or three steps as suggested by fellow expert “for for.” This approach not only makes it more manageable but also allows for greater precision in crafting each component.Step 2: Applying Glue and Securing
Sven proceeds to apply glue along one edge of the flange, ensuring a secure bond when clamped into place. He emphasizes that this stage is crucial for maintaining the structural integrity of the flange, which in turn safeguards the living area beneath the canvas when hatches are open.Step 3: Allowing Time to Dry
After securely attaching the first portion of the flange, Sven allows ample time for it to dry before moving forward with additional steps. This patience and precision are key aspects of his successful boatbuilding methods.Step 4: Finishing Touches
Once the flange is fully dried, Sven removes the clamps carefully, ensuring no damage occurs during this process. He then moves on to attaching four more pieces onto these main frames, completing two pairs of flanges for the bulkhead hatches.The Final Touches
While two flanges form the primary support structure around the hatches, Sven mentions there are two additional pieces required at each end to ensure comprehensive protection. This attention to detail highlights his commitment to producing a durable and reliable design. “Sailing is about finding your path, whether it’s across an ocean or within yourself.” – Sven Yrvind In conclusion, making flanges around bulkhead hatches may seem complex at first glance, but by following Sven Yrvind’s meticulous process, enthusiasts can achieve professional-level results. Remember that the journey of boatbuilding is as rewarding as reaching your destination; it tests one’s patience and dedication. For those seeking to embark on this adventure or simply gain more insight into marine craftsmanship, Sven’s wisdom is invaluable.Sven Yrvind, a renowned yacht designer and sailor, shares valuable insights on creating flanges around bulkhead hatches for canvas protection in this enlightening video. By following his expert guidance, boat enthusiasts can ensure their living areas remain secure while allowing unhindered access through the hatches.Step 1: Starting with the Flange
Sven begins by explaining that working on flanges vertically and horizontally is significantly easier than doing so in a flat position. To simplify the process further, he divides the task into two or three steps as suggested by fellow expert “for for.” This approach not only makes it more manageable but also allows for greater precision in crafting each component.Step 2: Applying Glue and Securing
Sven proceeds to apply glue along one edge of the flange, ensuring a secure bond when clamped into place. He emphasizes that this stage is crucial for maintaining the structural integrity of the flange, which in turn safeguards the living area beneath the canvas when hatches are open.Step 3: Allowing Time to Dry
After securely attaching the first portion of the flange, Sven allows ample time for it to dry before moving forward with additional steps. This patience and precision are key aspects of his successful boatbuilding methods.Step 4: Finishing Touches
Once the flange is fully dried, Sven removes the clamps carefully, ensuring no damage occurs during this process. He then moves on to attaching four more pieces onto these main frames, completing two pairs of flanges for the bulkhead hatches.The Final Touches
While two flanges form the primary support structure around the hatches, Sven mentions there are two additional pieces required at each end to ensure comprehensive protection. This attention to detail highlights his commitment to producing a durable and reliable design. “Sailing is about finding your path, whether it’s across an ocean or within yourself.” – Sven Yrvind In conclusion, making flanges around bulkhead hatches may seem complex at first glance, but by following Sven Yrvind’s meticulous process, enthusiasts can achieve professional-level results. Remember that the journey of boatbuilding is as rewarding as reaching your destination; it tests one’s patience and dedication. For those seeking to embark on this adventure or simply gain more insight into marine craftsmanship, Sven’s wisdom is invaluable.Making Flanges Around Bulkhead Hatches for Canvas
Sven Yrvind, a renowned yacht designer and sailor, shares valuable insights on creating flanges around bulkhead hatches for canvas protection in this enlightening video. By following his expert guidance, boat enthusiasts can ensure their living areas remain secure while allowing unhindered access through the hatches.Step 1: Starting with the Flange
Sven begins by explaining that working on flanges vertically and horizontally is significantly easier than doing so in a flat position. To simplify the process further, he divides the task into two or three steps as suggested by fellow expert “for for.” This approach not only makes it more manageable but also allows for greater precision in crafting each component.Step 2: Applying Glue and Securing
Sven proceeds to apply glue along one edge of the flange, ensuring a secure bond when clamped into place. He emphasizes that this stage is crucial for maintaining the structural integrity of the flange, which in turn safeguards the living area beneath the canvas when hatches are open.Step 3: Allowing Time to Dry
After securely attaching the first portion of the flange, Sven allows ample time for it to dry before moving forward with additional steps. This patience and precision are key aspects of his successful boatbuilding methods.Step 4: Finishing Touches
Once the flange is fully dried, Sven removes the clamps carefully, ensuring no damage occurs during this process. He then moves on to attaching four more pieces onto these main frames, completing two pairs of flanges for the bulkhead hatches.The Final Touches
While two flanges form the primary support structure around the hatches, Sven mentions there are two additional pieces required at each end to ensure comprehensive protection. This attention to detail highlights his commitment to producing a durable and reliable design. “Sailing is about finding your path, whether it’s across an ocean or within yourself.” – Sven Yrvind In conclusion, making flanges around bulkhead hatches may seem complex at first glance, but by following Sven Yrvind’s meticulous process, enthusiasts can achieve professional-level results. Remember that the journey of boatbuilding is as rewarding as reaching your destination; it tests one’s patience and dedication. For those seeking to embark on this adventure or simply gain more insight into marine craftsmanship, Sven’s wisdom is invaluable.Once the flange is fully dried, Sven removes the clamps carefully, ensuring no damage occurs during this process. He then moves on to attaching four more pieces onto these main frames, completing two pairs of flanges for the bulkhead hatches.The Final Touches
While two flanges form the primary support structure around the hatches, Sven mentions there are two additional pieces required at each end to ensure comprehensive protection. This attention to detail highlights his commitment to producing a durable and reliable design. “Sailing is about finding your path, whether it’s across an ocean or within yourself.” – Sven Yrvind In conclusion, making flanges around bulkhead hatches may seem complex at first glance, but by following Sven Yrvind’s meticulous process, enthusiasts can achieve professional-level results. Remember that the journey of boatbuilding is as rewarding as reaching your destination; it tests one’s patience and dedication. For those seeking to embark on this adventure or simply gain more insight into marine craftsmanship, Sven’s wisdom is invaluable.After securely attaching the first portion of the flange, Sven allows ample time for it to dry before moving forward with additional steps. This patience and precision are key aspects of his successful boatbuilding methods.Step 4: Finishing Touches
Once the flange is fully dried, Sven removes the clamps carefully, ensuring no damage occurs during this process. He then moves on to attaching four more pieces onto these main frames, completing two pairs of flanges for the bulkhead hatches.The Final Touches
While two flanges form the primary support structure around the hatches, Sven mentions there are two additional pieces required at each end to ensure comprehensive protection. This attention to detail highlights his commitment to producing a durable and reliable design. “Sailing is about finding your path, whether it’s across an ocean or within yourself.” – Sven Yrvind In conclusion, making flanges around bulkhead hatches may seem complex at first glance, but by following Sven Yrvind’s meticulous process, enthusiasts can achieve professional-level results. Remember that the journey of boatbuilding is as rewarding as reaching your destination; it tests one’s patience and dedication. For those seeking to embark on this adventure or simply gain more insight into marine craftsmanship, Sven’s wisdom is invaluable.Sven proceeds to apply glue along one edge of the flange, ensuring a secure bond when clamped into place. He emphasizes that this stage is crucial for maintaining the structural integrity of the flange, which in turn safeguards the living area beneath the canvas when hatches are open.Step 3: Allowing Time to Dry
After securely attaching the first portion of the flange, Sven allows ample time for it to dry before moving forward with additional steps. This patience and precision are key aspects of his successful boatbuilding methods.Step 4: Finishing Touches
Once the flange is fully dried, Sven removes the clamps carefully, ensuring no damage occurs during this process. He then moves on to attaching four more pieces onto these main frames, completing two pairs of flanges for the bulkhead hatches.The Final Touches
While two flanges form the primary support structure around the hatches, Sven mentions there are two additional pieces required at each end to ensure comprehensive protection. This attention to detail highlights his commitment to producing a durable and reliable design. “Sailing is about finding your path, whether it’s across an ocean or within yourself.” – Sven Yrvind In conclusion, making flanges around bulkhead hatches may seem complex at first glance, but by following Sven Yrvind’s meticulous process, enthusiasts can achieve professional-level results. Remember that the journey of boatbuilding is as rewarding as reaching your destination; it tests one’s patience and dedication. For those seeking to embark on this adventure or simply gain more insight into marine craftsmanship, Sven’s wisdom is invaluable.Sven begins by explaining that working on flanges vertically and horizontally is significantly easier than doing so in a flat position. To simplify the process further, he divides the task into two or three steps as suggested by fellow expert “for for.” This approach not only makes it more manageable but also allows for greater precision in crafting each component.Step 2: Applying Glue and Securing
Sven proceeds to apply glue along one edge of the flange, ensuring a secure bond when clamped into place. He emphasizes that this stage is crucial for maintaining the structural integrity of the flange, which in turn safeguards the living area beneath the canvas when hatches are open.Step 3: Allowing Time to Dry
After securely attaching the first portion of the flange, Sven allows ample time for it to dry before moving forward with additional steps. This patience and precision are key aspects of his successful boatbuilding methods.Step 4: Finishing Touches
Once the flange is fully dried, Sven removes the clamps carefully, ensuring no damage occurs during this process. He then moves on to attaching four more pieces onto these main frames, completing two pairs of flanges for the bulkhead hatches.The Final Touches
While two flanges form the primary support structure around the hatches, Sven mentions there are two additional pieces required at each end to ensure comprehensive protection. This attention to detail highlights his commitment to producing a durable and reliable design. “Sailing is about finding your path, whether it’s across an ocean or within yourself.” – Sven Yrvind In conclusion, making flanges around bulkhead hatches may seem complex at first glance, but by following Sven Yrvind’s meticulous process, enthusiasts can achieve professional-level results. Remember that the journey of boatbuilding is as rewarding as reaching your destination; it tests one’s patience and dedication. For those seeking to embark on this adventure or simply gain more insight into marine craftsmanship, Sven’s wisdom is invaluable.Sven Yrvind, a renowned yacht designer and sailor, shares valuable insights on creating flanges around bulkhead hatches for canvas protection in this enlightening video. By following his expert guidance, boat enthusiasts can ensure their living areas remain secure while allowing unhindered access through the hatches.Step 1: Starting with the Flange
Sven begins by explaining that working on flanges vertically and horizontally is significantly easier than doing so in a flat position. To simplify the process further, he divides the task into two or three steps as suggested by fellow expert “for for.” This approach not only makes it more manageable but also allows for greater precision in crafting each component.Step 2: Applying Glue and Securing
Sven proceeds to apply glue along one edge of the flange, ensuring a secure bond when clamped into place. He emphasizes that this stage is crucial for maintaining the structural integrity of the flange, which in turn safeguards the living area beneath the canvas when hatches are open.Step 3: Allowing Time to Dry
After securely attaching the first portion of the flange, Sven allows ample time for it to dry before moving forward with additional steps. This patience and precision are key aspects of his successful boatbuilding methods.Step 4: Finishing Touches
Once the flange is fully dried, Sven removes the clamps carefully, ensuring no damage occurs during this process. He then moves on to attaching four more pieces onto these main frames, completing two pairs of flanges for the bulkhead hatches.The Final Touches
While two flanges form the primary support structure around the hatches, Sven mentions there are two additional pieces required at each end to ensure comprehensive protection. This attention to detail highlights his commitment to producing a durable and reliable design. “Sailing is about finding your path, whether it’s across an ocean or within yourself.” – Sven Yrvind In conclusion, making flanges around bulkhead hatches may seem complex at first glance, but by following Sven Yrvind’s meticulous process, enthusiasts can achieve professional-level results. Remember that the journey of boatbuilding is as rewarding as reaching your destination; it tests one’s patience and dedication. For those seeking to embark on this adventure or simply gain more insight into marine craftsmanship, Sven’s wisdom is invaluable.Making Flanges Around Bulkhead Hatches for Canvas
Sven Yrvind, a renowned yacht designer and sailor, shares valuable insights on creating flanges around bulkhead hatches for canvas protection in this enlightening video. By following his expert guidance, boat enthusiasts can ensure their living areas remain secure while allowing unhindered access through the hatches.Step 1: Starting with the Flange
Sven begins by explaining that working on flanges vertically and horizontally is significantly easier than doing so in a flat position. To simplify the process further, he divides the task into two or three steps as suggested by fellow expert “for for.” This approach not only makes it more manageable but also allows for greater precision in crafting each component.Step 2: Applying Glue and Securing
Sven proceeds to apply glue along one edge of the flange, ensuring a secure bond when clamped into place. He emphasizes that this stage is crucial for maintaining the structural integrity of the flange, which in turn safeguards the living area beneath the canvas when hatches are open.Step 3: Allowing Time to Dry
After securely attaching the first portion of the flange, Sven allows ample time for it to dry before moving forward with additional steps. This patience and precision are key aspects of his successful boatbuilding methods.Step 4: Finishing Touches
Once the flange is fully dried, Sven removes the clamps carefully, ensuring no damage occurs during this process. He then moves on to attaching four more pieces onto these main frames, completing two pairs of flanges for the bulkhead hatches.The Final Touches
While two flanges form the primary support structure around the hatches, Sven mentions there are two additional pieces required at each end to ensure comprehensive protection. This attention to detail highlights his commitment to producing a durable and reliable design. “Sailing is about finding your path, whether it’s across an ocean or within yourself.” – Sven Yrvind In conclusion, making flanges around bulkhead hatches may seem complex at first glance, but by following Sven Yrvind’s meticulous process, enthusiasts can achieve professional-level results. Remember that the journey of boatbuilding is as rewarding as reaching your destination; it tests one’s patience and dedication. For those seeking to embark on this adventure or simply gain more insight into marine craftsmanship, Sven’s wisdom is invaluable.After securely attaching the first portion of the flange, Sven allows ample time for it to dry before moving forward with additional steps. This patience and precision are key aspects of his successful boatbuilding methods.Step 4: Finishing Touches
Once the flange is fully dried, Sven removes the clamps carefully, ensuring no damage occurs during this process. He then moves on to attaching four more pieces onto these main frames, completing two pairs of flanges for the bulkhead hatches.The Final Touches
While two flanges form the primary support structure around the hatches, Sven mentions there are two additional pieces required at each end to ensure comprehensive protection. This attention to detail highlights his commitment to producing a durable and reliable design. “Sailing is about finding your path, whether it’s across an ocean or within yourself.” – Sven Yrvind In conclusion, making flanges around bulkhead hatches may seem complex at first glance, but by following Sven Yrvind’s meticulous process, enthusiasts can achieve professional-level results. Remember that the journey of boatbuilding is as rewarding as reaching your destination; it tests one’s patience and dedication. For those seeking to embark on this adventure or simply gain more insight into marine craftsmanship, Sven’s wisdom is invaluable.Making Flanges Around Bulkhead Hatches for Canvas
Sven Yrvind, a renowned yacht designer and sailor, shares valuable insights on creating flanges around bulkhead hatches for canvas protection in this enlightening video. By following his expert guidance, boat enthusiasts can ensure their living areas remain secure while allowing unhindered access through the hatches.Step 1: Starting with the Flange
Sven begins by explaining that working on flanges vertically and horizontally is significantly easier than doing so in a flat position. To simplify the process further, he divides the task into two or three steps as suggested by fellow expert “for for.” This approach not only makes it more manageable but also allows for greater precision in crafting each component.Step 2: Applying Glue and Securing
Sven proceeds to apply glue along one edge of the flange, ensuring a secure bond when clamped into place. He emphasizes that this stage is crucial for maintaining the structural integrity of the flange, which in turn safeguards the living area beneath the canvas when hatches are open.Step 3: Allowing Time to Dry
After securely attaching the first portion of the flange, Sven allows ample time for it to dry before moving forward with additional steps. This patience and precision are key aspects of his successful boatbuilding methods.Step 4: Finishing Touches
Once the flange is fully dried, Sven removes the clamps carefully, ensuring no damage occurs during this process. He then moves on to attaching four more pieces onto these main frames, completing two pairs of flanges for the bulkhead hatches.The Final Touches
While two flanges form the primary support structure around the hatches, Sven mentions there are two additional pieces required at each end to ensure comprehensive protection. This attention to detail highlights his commitment to producing a durable and reliable design. “Sailing is about finding your path, whether it’s across an ocean or within yourself.” – Sven Yrvind In conclusion, making flanges around bulkhead hatches may seem complex at first glance, but by following Sven Yrvind’s meticulous process, enthusiasts can achieve professional-level results. Remember that the journey of boatbuilding is as rewarding as reaching your destination; it tests one’s patience and dedication. For those seeking to embark on this adventure or simply gain more insight into marine craftsmanship, Sven’s wisdom is invaluable.Sven begins by explaining that working on flanges vertically and horizontally is significantly easier than doing so in a flat position. To simplify the process further, he divides the task into two or three steps as suggested by fellow expert “for for.” This approach not only makes it more manageable but also allows for greater precision in crafting each component.Step 2: Applying Glue and Securing
Sven proceeds to apply glue along one edge of the flange, ensuring a secure bond when clamped into place. He emphasizes that this stage is crucial for maintaining the structural integrity of the flange, which in turn safeguards the living area beneath the canvas when hatches are open.Step 3: Allowing Time to Dry
After securely attaching the first portion of the flange, Sven allows ample time for it to dry before moving forward with additional steps. This patience and precision are key aspects of his successful boatbuilding methods.Step 4: Finishing Touches
Once the flange is fully dried, Sven removes the clamps carefully, ensuring no damage occurs during this process. He then moves on to attaching four more pieces onto these main frames, completing two pairs of flanges for the bulkhead hatches.The Final Touches
While two flanges form the primary support structure around the hatches, Sven mentions there are two additional pieces required at each end to ensure comprehensive protection. This attention to detail highlights his commitment to producing a durable and reliable design. “Sailing is about finding your path, whether it’s across an ocean or within yourself.” – Sven Yrvind In conclusion, making flanges around bulkhead hatches may seem complex at first glance, but by following Sven Yrvind’s meticulous process, enthusiasts can achieve professional-level results. Remember that the journey of boatbuilding is as rewarding as reaching your destination; it tests one’s patience and dedication. For those seeking to embark on this adventure or simply gain more insight into marine craftsmanship, Sven’s wisdom is invaluable.Making Flanges Around Bulkhead Hatches for Canvas
Sven Yrvind, a renowned yacht designer and sailor, shares valuable insights on creating flanges around bulkhead hatches for canvas protection in this enlightening video. By following his expert guidance, boat enthusiasts can ensure their living areas remain secure while allowing unhindered access through the hatches.Step 1: Starting with the Flange
Sven begins by explaining that working on flanges vertically and horizontally is significantly easier than doing so in a flat position. To simplify the process further, he divides the task into two or three steps as suggested by fellow expert “for for.” This approach not only makes it more manageable but also allows for greater precision in crafting each component.Step 2: Applying Glue and Securing
Sven proceeds to apply glue along one edge of the flange, ensuring a secure bond when clamped into place. He emphasizes that this stage is crucial for maintaining the structural integrity of the flange, which in turn safeguards the living area beneath the canvas when hatches are open.Step 3: Allowing Time to Dry
After securely attaching the first portion of the flange, Sven allows ample time for it to dry before moving forward with additional steps. This patience and precision are key aspects of his successful boatbuilding methods.Step 4: Finishing Touches
Once the flange is fully dried, Sven removes the clamps carefully, ensuring no damage occurs during this process. He then moves on to attaching four more pieces onto these main frames, completing two pairs of flanges for the bulkhead hatches.The Final Touches
While two flanges form the primary support structure around the hatches, Sven mentions there are two additional pieces required at each end to ensure comprehensive protection. This attention to detail highlights his commitment to producing a durable and reliable design. “Sailing is about finding your path, whether it’s across an ocean or within yourself.” – Sven Yrvind In conclusion, making flanges around bulkhead hatches may seem complex at first glance, but by following Sven Yrvind’s meticulous process, enthusiasts can achieve professional-level results. Remember that the journey of boatbuilding is as rewarding as reaching your destination; it tests one’s patience and dedication. For those seeking to embark on this adventure or simply gain more insight into marine craftsmanship, Sven’s wisdom is invaluable.Sven Yrvind, a renowned yacht designer and sailor, shares valuable insights on creating flanges around bulkhead hatches for canvas protection in this enlightening video. By following his expert guidance, boat enthusiasts can ensure their living areas remain secure while allowing unhindered access through the hatches.Step 1: Starting with the Flange
Sven begins by explaining that working on flanges vertically and horizontally is significantly easier than doing so in a flat position. To simplify the process further, he divides the task into two or three steps as suggested by fellow expert “for for.” This approach not only makes it more manageable but also allows for greater precision in crafting each component.Step 2: Applying Glue and Securing
Sven proceeds to apply glue along one edge of the flange, ensuring a secure bond when clamped into place. He emphasizes that this stage is crucial for maintaining the structural integrity of the flange, which in turn safeguards the living area beneath the canvas when hatches are open.Step 3: Allowing Time to Dry
After securely attaching the first portion of the flange, Sven allows ample time for it to dry before moving forward with additional steps. This patience and precision are key aspects of his successful boatbuilding methods.Step 4: Finishing Touches
Once the flange is fully dried, Sven removes the clamps carefully, ensuring no damage occurs during this process. He then moves on to attaching four more pieces onto these main frames, completing two pairs of flanges for the bulkhead hatches.The Final Touches
While two flanges form the primary support structure around the hatches, Sven mentions there are two additional pieces required at each end to ensure comprehensive protection. This attention to detail highlights his commitment to producing a durable and reliable design. “Sailing is about finding your path, whether it’s across an ocean or within yourself.” – Sven Yrvind In conclusion, making flanges around bulkhead hatches may seem complex at first glance, but by following Sven Yrvind’s meticulous process, enthusiasts can achieve professional-level results. Remember that the journey of boatbuilding is as rewarding as reaching your destination; it tests one’s patience and dedication. For those seeking to embark on this adventure or simply gain more insight into marine craftsmanship, Sven’s wisdom is invaluable.Making Flanges Around Bulkhead Hatches for Canvas
Sven Yrvind, a renowned yacht designer and sailor, shares valuable insights on creating flanges around bulkhead hatches for canvas protection in this enlightening video. By following his expert guidance, boat enthusiasts can ensure their living areas remain secure while allowing unhindered access through the hatches.Step 1: Starting with the Flange
Sven begins by explaining that working on flanges vertically and horizontally is significantly easier than doing so in a flat position. To simplify the process further, he divides the task into two or three steps as suggested by fellow expert “for for.” This approach not only makes it more manageable but also allows for greater precision in crafting each component.Step 2: Applying Glue and Securing
Sven proceeds to apply glue along one edge of the flange, ensuring a secure bond when clamped into place. He emphasizes that this stage is crucial for maintaining the structural integrity of the flange, which in turn safeguards the living area beneath the canvas when hatches are open.Step 3: Allowing Time to Dry
After securely attaching the first portion of the flange, Sven allows ample time for it to dry before moving forward with additional steps. This patience and precision are key aspects of his successful boatbuilding methods.Step 4: Finishing Touches
Once the flange is fully dried, Sven removes the clamps carefully, ensuring no damage occurs during this process. He then moves on to attaching four more pieces onto these main frames, completing two pairs of flanges for the bulkhead hatches.The Final Touches
While two flanges form the primary support structure around the hatches, Sven mentions there are two additional pieces required at each end to ensure comprehensive protection. This attention to detail highlights his commitment to producing a durable and reliable design. “Sailing is about finding your path, whether it’s across an ocean or within yourself.” – Sven Yrvind In conclusion, making flanges around bulkhead hatches may seem complex at first glance, but by following Sven Yrvind’s meticulous process, enthusiasts can achieve professional-level results. Remember that the journey of boatbuilding is as rewarding as reaching your destination; it tests one’s patience and dedication. For those seeking to embark on this adventure or simply gain more insight into marine craftsmanship, Sven’s wisdom is invaluable.Once the flange is fully dried, Sven removes the clamps carefully, ensuring no damage occurs during this process. He then moves on to attaching four more pieces onto these main frames, completing two pairs of flanges for the bulkhead hatches.The Final Touches
While two flanges form the primary support structure around the hatches, Sven mentions there are two additional pieces required at each end to ensure comprehensive protection. This attention to detail highlights his commitment to producing a durable and reliable design. “Sailing is about finding your path, whether it’s across an ocean or within yourself.” – Sven Yrvind In conclusion, making flanges around bulkhead hatches may seem complex at first glance, but by following Sven Yrvind’s meticulous process, enthusiasts can achieve professional-level results. Remember that the journey of boatbuilding is as rewarding as reaching your destination; it tests one’s patience and dedication. For those seeking to embark on this adventure or simply gain more insight into marine craftsmanship, Sven’s wisdom is invaluable.Sven Yrvind, a renowned yacht designer and sailor, shares valuable insights on creating flanges around bulkhead hatches for canvas protection in this enlightening video. By following his expert guidance, boat enthusiasts can ensure their living areas remain secure while allowing unhindered access through the hatches.Step 1: Starting with the Flange
Sven begins by explaining that working on flanges vertically and horizontally is significantly easier than doing so in a flat position. To simplify the process further, he divides the task into two or three steps as suggested by fellow expert “for for.” This approach not only makes it more manageable but also allows for greater precision in crafting each component.Step 2: Applying Glue and Securing
Sven proceeds to apply glue along one edge of the flange, ensuring a secure bond when clamped into place. He emphasizes that this stage is crucial for maintaining the structural integrity of the flange, which in turn safeguards the living area beneath the canvas when hatches are open.Step 3: Allowing Time to Dry
After securely attaching the first portion of the flange, Sven allows ample time for it to dry before moving forward with additional steps. This patience and precision are key aspects of his successful boatbuilding methods.Step 4: Finishing Touches
Once the flange is fully dried, Sven removes the clamps carefully, ensuring no damage occurs during this process. He then moves on to attaching four more pieces onto these main frames, completing two pairs of flanges for the bulkhead hatches.The Final Touches
While two flanges form the primary support structure around the hatches, Sven mentions there are two additional pieces required at each end to ensure comprehensive protection. This attention to detail highlights his commitment to producing a durable and reliable design. “Sailing is about finding your path, whether it’s across an ocean or within yourself.” – Sven Yrvind In conclusion, making flanges around bulkhead hatches may seem complex at first glance, but by following Sven Yrvind’s meticulous process, enthusiasts can achieve professional-level results. Remember that the journey of boatbuilding is as rewarding as reaching your destination; it tests one’s patience and dedication. For those seeking to embark on this adventure or simply gain more insight into marine craftsmanship, Sven’s wisdom is invaluable.Making Flanges Around Bulkhead Hatches for Canvas
Sven Yrvind, a renowned yacht designer and sailor, shares valuable insights on creating flanges around bulkhead hatches for canvas protection in this enlightening video. By following his expert guidance, boat enthusiasts can ensure their living areas remain secure while allowing unhindered access through the hatches.Step 1: Starting with the Flange
Sven begins by explaining that working on flanges vertically and horizontally is significantly easier than doing so in a flat position. To simplify the process further, he divides the task into two or three steps as suggested by fellow expert “for for.” This approach not only makes it more manageable but also allows for greater precision in crafting each component.Step 2: Applying Glue and Securing
Sven proceeds to apply glue along one edge of the flange, ensuring a secure bond when clamped into place. He emphasizes that this stage is crucial for maintaining the structural integrity of the flange, which in turn safeguards the living area beneath the canvas when hatches are open.Step 3: Allowing Time to Dry
After securely attaching the first portion of the flange, Sven allows ample time for it to dry before moving forward with additional steps. This patience and precision are key aspects of his successful boatbuilding methods.Step 4: Finishing Touches
Once the flange is fully dried, Sven removes the clamps carefully, ensuring no damage occurs during this process. He then moves on to attaching four more pieces onto these main frames, completing two pairs of flanges for the bulkhead hatches.The Final Touches
While two flanges form the primary support structure around the hatches, Sven mentions there are two additional pieces required at each end to ensure comprehensive protection. This attention to detail highlights his commitment to producing a durable and reliable design. “Sailing is about finding your path, whether it’s across an ocean or within yourself.” – Sven Yrvind In conclusion, making flanges around bulkhead hatches may seem complex at first glance, but by following Sven Yrvind’s meticulous process, enthusiasts can achieve professional-level results. Remember that the journey of boatbuilding is as rewarding as reaching your destination; it tests one’s patience and dedication. For those seeking to embark on this adventure or simply gain more insight into marine craftsmanship, Sven’s wisdom is invaluable.After securely attaching the first portion of the flange, Sven allows ample time for it to dry before moving forward with additional steps. This patience and precision are key aspects of his successful boatbuilding methods.Step 4: Finishing Touches
Once the flange is fully dried, Sven removes the clamps carefully, ensuring no damage occurs during this process. He then moves on to attaching four more pieces onto these main frames, completing two pairs of flanges for the bulkhead hatches.The Final Touches
While two flanges form the primary support structure around the hatches, Sven mentions there are two additional pieces required at each end to ensure comprehensive protection. This attention to detail highlights his commitment to producing a durable and reliable design. “Sailing is about finding your path, whether it’s across an ocean or within yourself.” – Sven Yrvind In conclusion, making flanges around bulkhead hatches may seem complex at first glance, but by following Sven Yrvind’s meticulous process, enthusiasts can achieve professional-level results. Remember that the journey of boatbuilding is as rewarding as reaching your destination; it tests one’s patience and dedication. For those seeking to embark on this adventure or simply gain more insight into marine craftsmanship, Sven’s wisdom is invaluable.Sven Yrvind, a renowned yacht designer and sailor, shares valuable insights on creating flanges around bulkhead hatches for canvas protection in this enlightening video. By following his expert guidance, boat enthusiasts can ensure their living areas remain secure while allowing unhindered access through the hatches.Step 1: Starting with the Flange
Sven begins by explaining that working on flanges vertically and horizontally is significantly easier than doing so in a flat position. To simplify the process further, he divides the task into two or three steps as suggested by fellow expert “for for.” This approach not only makes it more manageable but also allows for greater precision in crafting each component.Step 2: Applying Glue and Securing
Sven proceeds to apply glue along one edge of the flange, ensuring a secure bond when clamped into place. He emphasizes that this stage is crucial for maintaining the structural integrity of the flange, which in turn safeguards the living area beneath the canvas when hatches are open.Step 3: Allowing Time to Dry
After securely attaching the first portion of the flange, Sven allows ample time for it to dry before moving forward with additional steps. This patience and precision are key aspects of his successful boatbuilding methods.Step 4: Finishing Touches
Once the flange is fully dried, Sven removes the clamps carefully, ensuring no damage occurs during this process. He then moves on to attaching four more pieces onto these main frames, completing two pairs of flanges for the bulkhead hatches.The Final Touches
While two flanges form the primary support structure around the hatches, Sven mentions there are two additional pieces required at each end to ensure comprehensive protection. This attention to detail highlights his commitment to producing a durable and reliable design. “Sailing is about finding your path, whether it’s across an ocean or within yourself.” – Sven Yrvind In conclusion, making flanges around bulkhead hatches may seem complex at first glance, but by following Sven Yrvind’s meticulous process, enthusiasts can achieve professional-level results. Remember that the journey of boatbuilding is as rewarding as reaching your destination; it tests one’s patience and dedication. For those seeking to embark on this adventure or simply gain more insight into marine craftsmanship, Sven’s wisdom is invaluable.Making Flanges Around Bulkhead Hatches for Canvas
Sven Yrvind, a renowned yacht designer and sailor, shares valuable insights on creating flanges around bulkhead hatches for canvas protection in this enlightening video. By following his expert guidance, boat enthusiasts can ensure their living areas remain secure while allowing unhindered access through the hatches.Step 1: Starting with the Flange
Sven begins by explaining that working on flanges vertically and horizontally is significantly easier than doing so in a flat position. To simplify the process further, he divides the task into two or three steps as suggested by fellow expert “for for.” This approach not only makes it more manageable but also allows for greater precision in crafting each component.Step 2: Applying Glue and Securing
Sven proceeds to apply glue along one edge of the flange, ensuring a secure bond when clamped into place. He emphasizes that this stage is crucial for maintaining the structural integrity of the flange, which in turn safeguards the living area beneath the canvas when hatches are open.Step 3: Allowing Time to Dry
After securely attaching the first portion of the flange, Sven allows ample time for it to dry before moving forward with additional steps. This patience and precision are key aspects of his successful boatbuilding methods.Step 4: Finishing Touches
Once the flange is fully dried, Sven removes the clamps carefully, ensuring no damage occurs during this process. He then moves on to attaching four more pieces onto these main frames, completing two pairs of flanges for the bulkhead hatches.The Final Touches
While two flanges form the primary support structure around the hatches, Sven mentions there are two additional pieces required at each end to ensure comprehensive protection. This attention to detail highlights his commitment to producing a durable and reliable design. “Sailing is about finding your path, whether it’s across an ocean or within yourself.” – Sven Yrvind In conclusion, making flanges around bulkhead hatches may seem complex at first glance, but by following Sven Yrvind’s meticulous process, enthusiasts can achieve professional-level results. Remember that the journey of boatbuilding is as rewarding as reaching your destination; it tests one’s patience and dedication. For those seeking to embark on this adventure or simply gain more insight into marine craftsmanship, Sven’s wisdom is invaluable.Sven proceeds to apply glue along one edge of the flange, ensuring a secure bond when clamped into place. He emphasizes that this stage is crucial for maintaining the structural integrity of the flange, which in turn safeguards the living area beneath the canvas when hatches are open.Step 3: Allowing Time to Dry
After securely attaching the first portion of the flange, Sven allows ample time for it to dry before moving forward with additional steps. This patience and precision are key aspects of his successful boatbuilding methods.Step 4: Finishing Touches
Once the flange is fully dried, Sven removes the clamps carefully, ensuring no damage occurs during this process. He then moves on to attaching four more pieces onto these main frames, completing two pairs of flanges for the bulkhead hatches.The Final Touches
While two flanges form the primary support structure around the hatches, Sven mentions there are two additional pieces required at each end to ensure comprehensive protection. This attention to detail highlights his commitment to producing a durable and reliable design. “Sailing is about finding your path, whether it’s across an ocean or within yourself.” – Sven Yrvind In conclusion, making flanges around bulkhead hatches may seem complex at first glance, but by following Sven Yrvind’s meticulous process, enthusiasts can achieve professional-level results. Remember that the journey of boatbuilding is as rewarding as reaching your destination; it tests one’s patience and dedication. For those seeking to embark on this adventure or simply gain more insight into marine craftsmanship, Sven’s wisdom is invaluable.Sven Yrvind, a renowned yacht designer and sailor, shares valuable insights on creating flanges around bulkhead hatches for canvas protection in this enlightening video. By following his expert guidance, boat enthusiasts can ensure their living areas remain secure while allowing unhindered access through the hatches.Step 1: Starting with the Flange
Sven begins by explaining that working on flanges vertically and horizontally is significantly easier than doing so in a flat position. To simplify the process further, he divides the task into two or three steps as suggested by fellow expert “for for.” This approach not only makes it more manageable but also allows for greater precision in crafting each component.Step 2: Applying Glue and Securing
Sven proceeds to apply glue along one edge of the flange, ensuring a secure bond when clamped into place. He emphasizes that this stage is crucial for maintaining the structural integrity of the flange, which in turn safeguards the living area beneath the canvas when hatches are open.Step 3: Allowing Time to Dry
After securely attaching the first portion of the flange, Sven allows ample time for it to dry before moving forward with additional steps. This patience and precision are key aspects of his successful boatbuilding methods.Step 4: Finishing Touches
Once the flange is fully dried, Sven removes the clamps carefully, ensuring no damage occurs during this process. He then moves on to attaching four more pieces onto these main frames, completing two pairs of flanges for the bulkhead hatches.The Final Touches
While two flanges form the primary support structure around the hatches, Sven mentions there are two additional pieces required at each end to ensure comprehensive protection. This attention to detail highlights his commitment to producing a durable and reliable design. “Sailing is about finding your path, whether it’s across an ocean or within yourself.” – Sven Yrvind In conclusion, making flanges around bulkhead hatches may seem complex at first glance, but by following Sven Yrvind’s meticulous process, enthusiasts can achieve professional-level results. Remember that the journey of boatbuilding is as rewarding as reaching your destination; it tests one’s patience and dedication. For those seeking to embark on this adventure or simply gain more insight into marine craftsmanship, Sven’s wisdom is invaluable.Making Flanges Around Bulkhead Hatches for Canvas
Sven Yrvind, a renowned yacht designer and sailor, shares valuable insights on creating flanges around bulkhead hatches for canvas protection in this enlightening video. By following his expert guidance, boat enthusiasts can ensure their living areas remain secure while allowing unhindered access through the hatches.Step 1: Starting with the Flange
Sven begins by explaining that working on flanges vertically and horizontally is significantly easier than doing so in a flat position. To simplify the process further, he divides the task into two or three steps as suggested by fellow expert “for for.” This approach not only makes it more manageable but also allows for greater precision in crafting each component.Step 2: Applying Glue and Securing
Sven proceeds to apply glue along one edge of the flange, ensuring a secure bond when clamped into place. He emphasizes that this stage is crucial for maintaining the structural integrity of the flange, which in turn safeguards the living area beneath the canvas when hatches are open.Step 3: Allowing Time to Dry
After securely attaching the first portion of the flange, Sven allows ample time for it to dry before moving forward with additional steps. This patience and precision are key aspects of his successful boatbuilding methods.Step 4: Finishing Touches
Once the flange is fully dried, Sven removes the clamps carefully, ensuring no damage occurs during this process. He then moves on to attaching four more pieces onto these main frames, completing two pairs of flanges for the bulkhead hatches.The Final Touches
While two flanges form the primary support structure around the hatches, Sven mentions there are two additional pieces required at each end to ensure comprehensive protection. This attention to detail highlights his commitment to producing a durable and reliable design. “Sailing is about finding your path, whether it’s across an ocean or within yourself.” – Sven Yrvind In conclusion, making flanges around bulkhead hatches may seem complex at first glance, but by following Sven Yrvind’s meticulous process, enthusiasts can achieve professional-level results. Remember that the journey of boatbuilding is as rewarding as reaching your destination; it tests one’s patience and dedication. For those seeking to embark on this adventure or simply gain more insight into marine craftsmanship, Sven’s wisdom is invaluable.Sven begins by explaining that working on flanges vertically and horizontally is significantly easier than doing so in a flat position. To simplify the process further, he divides the task into two or three steps as suggested by fellow expert “for for.” This approach not only makes it more manageable but also allows for greater precision in crafting each component.Step 2: Applying Glue and Securing
Sven proceeds to apply glue along one edge of the flange, ensuring a secure bond when clamped into place. He emphasizes that this stage is crucial for maintaining the structural integrity of the flange, which in turn safeguards the living area beneath the canvas when hatches are open.Step 3: Allowing Time to Dry
After securely attaching the first portion of the flange, Sven allows ample time for it to dry before moving forward with additional steps. This patience and precision are key aspects of his successful boatbuilding methods.Step 4: Finishing Touches
Once the flange is fully dried, Sven removes the clamps carefully, ensuring no damage occurs during this process. He then moves on to attaching four more pieces onto these main frames, completing two pairs of flanges for the bulkhead hatches.The Final Touches
While two flanges form the primary support structure around the hatches, Sven mentions there are two additional pieces required at each end to ensure comprehensive protection. This attention to detail highlights his commitment to producing a durable and reliable design. “Sailing is about finding your path, whether it’s across an ocean or within yourself.” – Sven Yrvind In conclusion, making flanges around bulkhead hatches may seem complex at first glance, but by following Sven Yrvind’s meticulous process, enthusiasts can achieve professional-level results. Remember that the journey of boatbuilding is as rewarding as reaching your destination; it tests one’s patience and dedication. For those seeking to embark on this adventure or simply gain more insight into marine craftsmanship, Sven’s wisdom is invaluable.Sven Yrvind, a renowned yacht designer and sailor, shares valuable insights on creating flanges around bulkhead hatches for canvas protection in this enlightening video. By following his expert guidance, boat enthusiasts can ensure their living areas remain secure while allowing unhindered access through the hatches.Step 1: Starting with the Flange
Sven begins by explaining that working on flanges vertically and horizontally is significantly easier than doing so in a flat position. To simplify the process further, he divides the task into two or three steps as suggested by fellow expert “for for.” This approach not only makes it more manageable but also allows for greater precision in crafting each component.Step 2: Applying Glue and Securing
Sven proceeds to apply glue along one edge of the flange, ensuring a secure bond when clamped into place. He emphasizes that this stage is crucial for maintaining the structural integrity of the flange, which in turn safeguards the living area beneath the canvas when hatches are open.Step 3: Allowing Time to Dry
After securely attaching the first portion of the flange, Sven allows ample time for it to dry before moving forward with additional steps. This patience and precision are key aspects of his successful boatbuilding methods.Step 4: Finishing Touches
Once the flange is fully dried, Sven removes the clamps carefully, ensuring no damage occurs during this process. He then moves on to attaching four more pieces onto these main frames, completing two pairs of flanges for the bulkhead hatches.The Final Touches
While two flanges form the primary support structure around the hatches, Sven mentions there are two additional pieces required at each end to ensure comprehensive protection. This attention to detail highlights his commitment to producing a durable and reliable design. “Sailing is about finding your path, whether it’s across an ocean or within yourself.” – Sven Yrvind In conclusion, making flanges around bulkhead hatches may seem complex at first glance, but by following Sven Yrvind’s meticulous process, enthusiasts can achieve professional-level results. Remember that the journey of boatbuilding is as rewarding as reaching your destination; it tests one’s patience and dedication. For those seeking to embark on this adventure or simply gain more insight into marine craftsmanship, Sven’s wisdom is invaluable.Making Flanges Around Bulkhead Hatches for Canvas
Sven Yrvind, a renowned yacht designer and sailor, shares valuable insights on creating flanges around bulkhead hatches for canvas protection in this enlightening video. By following his expert guidance, boat enthusiasts can ensure their living areas remain secure while allowing unhindered access through the hatches.Step 1: Starting with the Flange
Sven begins by explaining that working on flanges vertically and horizontally is significantly easier than doing so in a flat position. To simplify the process further, he divides the task into two or three steps as suggested by fellow expert “for for.” This approach not only makes it more manageable but also allows for greater precision in crafting each component.Step 2: Applying Glue and Securing
Sven proceeds to apply glue along one edge of the flange, ensuring a secure bond when clamped into place. He emphasizes that this stage is crucial for maintaining the structural integrity of the flange, which in turn safeguards the living area beneath the canvas when hatches are open.Step 3: Allowing Time to Dry
After securely attaching the first portion of the flange, Sven allows ample time for it to dry before moving forward with additional steps. This patience and precision are key aspects of his successful boatbuilding methods.Step 4: Finishing Touches
Once the flange is fully dried, Sven removes the clamps carefully, ensuring no damage occurs during this process. He then moves on to attaching four more pieces onto these main frames, completing two pairs of flanges for the bulkhead hatches.The Final Touches
While two flanges form the primary support structure around the hatches, Sven mentions there are two additional pieces required at each end to ensure comprehensive protection. This attention to detail highlights his commitment to producing a durable and reliable design. “Sailing is about finding your path, whether it’s across an ocean or within yourself.” – Sven Yrvind In conclusion, making flanges around bulkhead hatches may seem complex at first glance, but by following Sven Yrvind’s meticulous process, enthusiasts can achieve professional-level results. Remember that the journey of boatbuilding is as rewarding as reaching your destination; it tests one’s patience and dedication. For those seeking to embark on this adventure or simply gain more insight into marine craftsmanship, Sven’s wisdom is invaluable.Once the flange is fully dried, Sven removes the clamps carefully, ensuring no damage occurs during this process. He then moves on to attaching four more pieces onto these main frames, completing two pairs of flanges for the bulkhead hatches.The Final Touches
While two flanges form the primary support structure around the hatches, Sven mentions there are two additional pieces required at each end to ensure comprehensive protection. This attention to detail highlights his commitment to producing a durable and reliable design. “Sailing is about finding your path, whether it’s across an ocean or within yourself.” – Sven Yrvind In conclusion, making flanges around bulkhead hatches may seem complex at first glance, but by following Sven Yrvind’s meticulous process, enthusiasts can achieve professional-level results. Remember that the journey of boatbuilding is as rewarding as reaching your destination; it tests one’s patience and dedication. For those seeking to embark on this adventure or simply gain more insight into marine craftsmanship, Sven’s wisdom is invaluable.Sven begins by explaining that working on flanges vertically and horizontally is significantly easier than doing so in a flat position. To simplify the process further, he divides the task into two or three steps as suggested by fellow expert “for for.” This approach not only makes it more manageable but also allows for greater precision in crafting each component.Step 2: Applying Glue and Securing
Sven proceeds to apply glue along one edge of the flange, ensuring a secure bond when clamped into place. He emphasizes that this stage is crucial for maintaining the structural integrity of the flange, which in turn safeguards the living area beneath the canvas when hatches are open.Step 3: Allowing Time to Dry
After securely attaching the first portion of the flange, Sven allows ample time for it to dry before moving forward with additional steps. This patience and precision are key aspects of his successful boatbuilding methods.Step 4: Finishing Touches
Once the flange is fully dried, Sven removes the clamps carefully, ensuring no damage occurs during this process. He then moves on to attaching four more pieces onto these main frames, completing two pairs of flanges for the bulkhead hatches.The Final Touches
While two flanges form the primary support structure around the hatches, Sven mentions there are two additional pieces required at each end to ensure comprehensive protection. This attention to detail highlights his commitment to producing a durable and reliable design. “Sailing is about finding your path, whether it’s across an ocean or within yourself.” – Sven Yrvind In conclusion, making flanges around bulkhead hatches may seem complex at first glance, but by following Sven Yrvind’s meticulous process, enthusiasts can achieve professional-level results. Remember that the journey of boatbuilding is as rewarding as reaching your destination; it tests one’s patience and dedication. For those seeking to embark on this adventure or simply gain more insight into marine craftsmanship, Sven’s wisdom is invaluable.Sven Yrvind, a renowned yacht designer and sailor, shares valuable insights on creating flanges around bulkhead hatches for canvas protection in this enlightening video. By following his expert guidance, boat enthusiasts can ensure their living areas remain secure while allowing unhindered access through the hatches.Step 1: Starting with the Flange
Sven begins by explaining that working on flanges vertically and horizontally is significantly easier than doing so in a flat position. To simplify the process further, he divides the task into two or three steps as suggested by fellow expert “for for.” This approach not only makes it more manageable but also allows for greater precision in crafting each component.Step 2: Applying Glue and Securing
Sven proceeds to apply glue along one edge of the flange, ensuring a secure bond when clamped into place. He emphasizes that this stage is crucial for maintaining the structural integrity of the flange, which in turn safeguards the living area beneath the canvas when hatches are open.Step 3: Allowing Time to Dry
After securely attaching the first portion of the flange, Sven allows ample time for it to dry before moving forward with additional steps. This patience and precision are key aspects of his successful boatbuilding methods.Step 4: Finishing Touches
Once the flange is fully dried, Sven removes the clamps carefully, ensuring no damage occurs during this process. He then moves on to attaching four more pieces onto these main frames, completing two pairs of flanges for the bulkhead hatches.The Final Touches
While two flanges form the primary support structure around the hatches, Sven mentions there are two additional pieces required at each end to ensure comprehensive protection. This attention to detail highlights his commitment to producing a durable and reliable design. “Sailing is about finding your path, whether it’s across an ocean or within yourself.” – Sven Yrvind In conclusion, making flanges around bulkhead hatches may seem complex at first glance, but by following Sven Yrvind’s meticulous process, enthusiasts can achieve professional-level results. Remember that the journey of boatbuilding is as rewarding as reaching your destination; it tests one’s patience and dedication. For those seeking to embark on this adventure or simply gain more insight into marine craftsmanship, Sven’s wisdom is invaluable.Making Flanges Around Bulkhead Hatches for Canvas
Sven Yrvind, a renowned yacht designer and sailor, shares valuable insights on creating flanges around bulkhead hatches for canvas protection in this enlightening video. By following his expert guidance, boat enthusiasts can ensure their living areas remain secure while allowing unhindered access through the hatches.Step 1: Starting with the Flange
Sven begins by explaining that working on flanges vertically and horizontally is significantly easier than doing so in a flat position. To simplify the process further, he divides the task into two or three steps as suggested by fellow expert “for for.” This approach not only makes it more manageable but also allows for greater precision in crafting each component.Step 2: Applying Glue and Securing
Sven proceeds to apply glue along one edge of the flange, ensuring a secure bond when clamped into place. He emphasizes that this stage is crucial for maintaining the structural integrity of the flange, which in turn safeguards the living area beneath the canvas when hatches are open.Step 3: Allowing Time to Dry
After securely attaching the first portion of the flange, Sven allows ample time for it to dry before moving forward with additional steps. This patience and precision are key aspects of his successful boatbuilding methods.Step 4: Finishing Touches
Once the flange is fully dried, Sven removes the clamps carefully, ensuring no damage occurs during this process. He then moves on to attaching four more pieces onto these main frames, completing two pairs of flanges for the bulkhead hatches.The Final Touches
While two flanges form the primary support structure around the hatches, Sven mentions there are two additional pieces required at each end to ensure comprehensive protection. This attention to detail highlights his commitment to producing a durable and reliable design. “Sailing is about finding your path, whether it’s across an ocean or within yourself.” – Sven Yrvind In conclusion, making flanges around bulkhead hatches may seem complex at first glance, but by following Sven Yrvind’s meticulous process, enthusiasts can achieve professional-level results. Remember that the journey of boatbuilding is as rewarding as reaching your destination; it tests one’s patience and dedication. For those seeking to embark on this adventure or simply gain more insight into marine craftsmanship, Sven’s wisdom is invaluable.After securely attaching the first portion of the flange, Sven allows ample time for it to dry before moving forward with additional steps. This patience and precision are key aspects of his successful boatbuilding methods.Step 4: Finishing Touches
Once the flange is fully dried, Sven removes the clamps carefully, ensuring no damage occurs during this process. He then moves on to attaching four more pieces onto these main frames, completing two pairs of flanges for the bulkhead hatches.The Final Touches
While two flanges form the primary support structure around the hatches, Sven mentions there are two additional pieces required at each end to ensure comprehensive protection. This attention to detail highlights his commitment to producing a durable and reliable design. “Sailing is about finding your path, whether it’s across an ocean or within yourself.” – Sven Yrvind In conclusion, making flanges around bulkhead hatches may seem complex at first glance, but by following Sven Yrvind’s meticulous process, enthusiasts can achieve professional-level results. Remember that the journey of boatbuilding is as rewarding as reaching your destination; it tests one’s patience and dedication. For those seeking to embark on this adventure or simply gain more insight into marine craftsmanship, Sven’s wisdom is invaluable.Sven begins by explaining that working on flanges vertically and horizontally is significantly easier than doing so in a flat position. To simplify the process further, he divides the task into two or three steps as suggested by fellow expert “for for.” This approach not only makes it more manageable but also allows for greater precision in crafting each component.Step 2: Applying Glue and Securing
Sven proceeds to apply glue along one edge of the flange, ensuring a secure bond when clamped into place. He emphasizes that this stage is crucial for maintaining the structural integrity of the flange, which in turn safeguards the living area beneath the canvas when hatches are open.Step 3: Allowing Time to Dry
After securely attaching the first portion of the flange, Sven allows ample time for it to dry before moving forward with additional steps. This patience and precision are key aspects of his successful boatbuilding methods.Step 4: Finishing Touches
Once the flange is fully dried, Sven removes the clamps carefully, ensuring no damage occurs during this process. He then moves on to attaching four more pieces onto these main frames, completing two pairs of flanges for the bulkhead hatches.The Final Touches
While two flanges form the primary support structure around the hatches, Sven mentions there are two additional pieces required at each end to ensure comprehensive protection. This attention to detail highlights his commitment to producing a durable and reliable design. “Sailing is about finding your path, whether it’s across an ocean or within yourself.” – Sven Yrvind In conclusion, making flanges around bulkhead hatches may seem complex at first glance, but by following Sven Yrvind’s meticulous process, enthusiasts can achieve professional-level results. Remember that the journey of boatbuilding is as rewarding as reaching your destination; it tests one’s patience and dedication. For those seeking to embark on this adventure or simply gain more insight into marine craftsmanship, Sven’s wisdom is invaluable.Sven Yrvind, a renowned yacht designer and sailor, shares valuable insights on creating flanges around bulkhead hatches for canvas protection in this enlightening video. By following his expert guidance, boat enthusiasts can ensure their living areas remain secure while allowing unhindered access through the hatches.Step 1: Starting with the Flange
Sven begins by explaining that working on flanges vertically and horizontally is significantly easier than doing so in a flat position. To simplify the process further, he divides the task into two or three steps as suggested by fellow expert “for for.” This approach not only makes it more manageable but also allows for greater precision in crafting each component.Step 2: Applying Glue and Securing
Sven proceeds to apply glue along one edge of the flange, ensuring a secure bond when clamped into place. He emphasizes that this stage is crucial for maintaining the structural integrity of the flange, which in turn safeguards the living area beneath the canvas when hatches are open.Step 3: Allowing Time to Dry
After securely attaching the first portion of the flange, Sven allows ample time for it to dry before moving forward with additional steps. This patience and precision are key aspects of his successful boatbuilding methods.Step 4: Finishing Touches
Once the flange is fully dried, Sven removes the clamps carefully, ensuring no damage occurs during this process. He then moves on to attaching four more pieces onto these main frames, completing two pairs of flanges for the bulkhead hatches.The Final Touches
While two flanges form the primary support structure around the hatches, Sven mentions there are two additional pieces required at each end to ensure comprehensive protection. This attention to detail highlights his commitment to producing a durable and reliable design. “Sailing is about finding your path, whether it’s across an ocean or within yourself.” – Sven Yrvind In conclusion, making flanges around bulkhead hatches may seem complex at first glance, but by following Sven Yrvind’s meticulous process, enthusiasts can achieve professional-level results. Remember that the journey of boatbuilding is as rewarding as reaching your destination; it tests one’s patience and dedication. For those seeking to embark on this adventure or simply gain more insight into marine craftsmanship, Sven’s wisdom is invaluable.Making Flanges Around Bulkhead Hatches for Canvas
Sven Yrvind, a renowned yacht designer and sailor, shares valuable insights on creating flanges around bulkhead hatches for canvas protection in this enlightening video. By following his expert guidance, boat enthusiasts can ensure their living areas remain secure while allowing unhindered access through the hatches.Step 1: Starting with the Flange
Sven begins by explaining that working on flanges vertically and horizontally is significantly easier than doing so in a flat position. To simplify the process further, he divides the task into two or three steps as suggested by fellow expert “for for.” This approach not only makes it more manageable but also allows for greater precision in crafting each component.Step 2: Applying Glue and Securing
Sven proceeds to apply glue along one edge of the flange, ensuring a secure bond when clamped into place. He emphasizes that this stage is crucial for maintaining the structural integrity of the flange, which in turn safeguards the living area beneath the canvas when hatches are open.Step 3: Allowing Time to Dry
After securely attaching the first portion of the flange, Sven allows ample time for it to dry before moving forward with additional steps. This patience and precision are key aspects of his successful boatbuilding methods.Step 4: Finishing Touches
Once the flange is fully dried, Sven removes the clamps carefully, ensuring no damage occurs during this process. He then moves on to attaching four more pieces onto these main frames, completing two pairs of flanges for the bulkhead hatches.The Final Touches
While two flanges form the primary support structure around the hatches, Sven mentions there are two additional pieces required at each end to ensure comprehensive protection. This attention to detail highlights his commitment to producing a durable and reliable design. “Sailing is about finding your path, whether it’s across an ocean or within yourself.” – Sven Yrvind In conclusion, making flanges around bulkhead hatches may seem complex at first glance, but by following Sven Yrvind’s meticulous process, enthusiasts can achieve professional-level results. Remember that the journey of boatbuilding is as rewarding as reaching your destination; it tests one’s patience and dedication. For those seeking to embark on this adventure or simply gain more insight into marine craftsmanship, Sven’s wisdom is invaluable.Sven proceeds to apply glue along one edge of the flange, ensuring a secure bond when clamped into place. He emphasizes that this stage is crucial for maintaining the structural integrity of the flange, which in turn safeguards the living area beneath the canvas when hatches are open.Step 3: Allowing Time to Dry
After securely attaching the first portion of the flange, Sven allows ample time for it to dry before moving forward with additional steps. This patience and precision are key aspects of his successful boatbuilding methods.Step 4: Finishing Touches
Once the flange is fully dried, Sven removes the clamps carefully, ensuring no damage occurs during this process. He then moves on to attaching four more pieces onto these main frames, completing two pairs of flanges for the bulkhead hatches.The Final Touches
While two flanges form the primary support structure around the hatches, Sven mentions there are two additional pieces required at each end to ensure comprehensive protection. This attention to detail highlights his commitment to producing a durable and reliable design. “Sailing is about finding your path, whether it’s across an ocean or within yourself.” – Sven Yrvind In conclusion, making flanges around bulkhead hatches may seem complex at first glance, but by following Sven Yrvind’s meticulous process, enthusiasts can achieve professional-level results. Remember that the journey of boatbuilding is as rewarding as reaching your destination; it tests one’s patience and dedication. For those seeking to embark on this adventure or simply gain more insight into marine craftsmanship, Sven’s wisdom is invaluable.Sven begins by explaining that working on flanges vertically and horizontally is significantly easier than doing so in a flat position. To simplify the process further, he divides the task into two or three steps as suggested by fellow expert “for for.” This approach not only makes it more manageable but also allows for greater precision in crafting each component.Step 2: Applying Glue and Securing
Sven proceeds to apply glue along one edge of the flange, ensuring a secure bond when clamped into place. He emphasizes that this stage is crucial for maintaining the structural integrity of the flange, which in turn safeguards the living area beneath the canvas when hatches are open.Step 3: Allowing Time to Dry
After securely attaching the first portion of the flange, Sven allows ample time for it to dry before moving forward with additional steps. This patience and precision are key aspects of his successful boatbuilding methods.Step 4: Finishing Touches
Once the flange is fully dried, Sven removes the clamps carefully, ensuring no damage occurs during this process. He then moves on to attaching four more pieces onto these main frames, completing two pairs of flanges for the bulkhead hatches.The Final Touches
While two flanges form the primary support structure around the hatches, Sven mentions there are two additional pieces required at each end to ensure comprehensive protection. This attention to detail highlights his commitment to producing a durable and reliable design. “Sailing is about finding your path, whether it’s across an ocean or within yourself.” – Sven Yrvind In conclusion, making flanges around bulkhead hatches may seem complex at first glance, but by following Sven Yrvind’s meticulous process, enthusiasts can achieve professional-level results. Remember that the journey of boatbuilding is as rewarding as reaching your destination; it tests one’s patience and dedication. For those seeking to embark on this adventure or simply gain more insight into marine craftsmanship, Sven’s wisdom is invaluable.Sven Yrvind, a renowned yacht designer and sailor, shares valuable insights on creating flanges around bulkhead hatches for canvas protection in this enlightening video. By following his expert guidance, boat enthusiasts can ensure their living areas remain secure while allowing unhindered access through the hatches.Step 1: Starting with the Flange
Sven begins by explaining that working on flanges vertically and horizontally is significantly easier than doing so in a flat position. To simplify the process further, he divides the task into two or three steps as suggested by fellow expert “for for.” This approach not only makes it more manageable but also allows for greater precision in crafting each component.Step 2: Applying Glue and Securing
Sven proceeds to apply glue along one edge of the flange, ensuring a secure bond when clamped into place. He emphasizes that this stage is crucial for maintaining the structural integrity of the flange, which in turn safeguards the living area beneath the canvas when hatches are open.Step 3: Allowing Time to Dry
After securely attaching the first portion of the flange, Sven allows ample time for it to dry before moving forward with additional steps. This patience and precision are key aspects of his successful boatbuilding methods.Step 4: Finishing Touches
Once the flange is fully dried, Sven removes the clamps carefully, ensuring no damage occurs during this process. He then moves on to attaching four more pieces onto these main frames, completing two pairs of flanges for the bulkhead hatches.The Final Touches
While two flanges form the primary support structure around the hatches, Sven mentions there are two additional pieces required at each end to ensure comprehensive protection. This attention to detail highlights his commitment to producing a durable and reliable design. “Sailing is about finding your path, whether it’s across an ocean or within yourself.” – Sven Yrvind In conclusion, making flanges around bulkhead hatches may seem complex at first glance, but by following Sven Yrvind’s meticulous process, enthusiasts can achieve professional-level results. Remember that the journey of boatbuilding is as rewarding as reaching your destination; it tests one’s patience and dedication. For those seeking to embark on this adventure or simply gain more insight into marine craftsmanship, Sven’s wisdom is invaluable.Making Flanges Around Bulkhead Hatches for Canvas
Sven Yrvind, a renowned yacht designer and sailor, shares valuable insights on creating flanges around bulkhead hatches for canvas protection in this enlightening video. By following his expert guidance, boat enthusiasts can ensure their living areas remain secure while allowing unhindered access through the hatches.Step 1: Starting with the Flange
Sven begins by explaining that working on flanges vertically and horizontally is significantly easier than doing so in a flat position. To simplify the process further, he divides the task into two or three steps as suggested by fellow expert “for for.” This approach not only makes it more manageable but also allows for greater precision in crafting each component.Step 2: Applying Glue and Securing
Sven proceeds to apply glue along one edge of the flange, ensuring a secure bond when clamped into place. He emphasizes that this stage is crucial for maintaining the structural integrity of the flange, which in turn safeguards the living area beneath the canvas when hatches are open.Step 3: Allowing Time to Dry
After securely attaching the first portion of the flange, Sven allows ample time for it to dry before moving forward with additional steps. This patience and precision are key aspects of his successful boatbuilding methods.Step 4: Finishing Touches
Once the flange is fully dried, Sven removes the clamps carefully, ensuring no damage occurs during this process. He then moves on to attaching four more pieces onto these main frames, completing two pairs of flanges for the bulkhead hatches.The Final Touches
While two flanges form the primary support structure around the hatches, Sven mentions there are two additional pieces required at each end to ensure comprehensive protection. This attention to detail highlights his commitment to producing a durable and reliable design. “Sailing is about finding your path, whether it’s across an ocean or within yourself.” – Sven Yrvind In conclusion, making flanges around bulkhead hatches may seem complex at first glance, but by following Sven Yrvind’s meticulous process, enthusiasts can achieve professional-level results. Remember that the journey of boatbuilding is as rewarding as reaching your destination; it tests one’s patience and dedication. For those seeking to embark on this adventure or simply gain more insight into marine craftsmanship, Sven’s wisdom is invaluable.Once the flange is fully dried, Sven removes the clamps carefully, ensuring no damage occurs during this process. He then moves on to attaching four more pieces onto these main frames, completing two pairs of flanges for the bulkhead hatches.The Final Touches
While two flanges form the primary support structure around the hatches, Sven mentions there are two additional pieces required at each end to ensure comprehensive protection. This attention to detail highlights his commitment to producing a durable and reliable design. “Sailing is about finding your path, whether it’s across an ocean or within yourself.” – Sven Yrvind In conclusion, making flanges around bulkhead hatches may seem complex at first glance, but by following Sven Yrvind’s meticulous process, enthusiasts can achieve professional-level results. Remember that the journey of boatbuilding is as rewarding as reaching your destination; it tests one’s patience and dedication. For those seeking to embark on this adventure or simply gain more insight into marine craftsmanship, Sven’s wisdom is invaluable.Sven proceeds to apply glue along one edge of the flange, ensuring a secure bond when clamped into place. He emphasizes that this stage is crucial for maintaining the structural integrity of the flange, which in turn safeguards the living area beneath the canvas when hatches are open.Step 3: Allowing Time to Dry
After securely attaching the first portion of the flange, Sven allows ample time for it to dry before moving forward with additional steps. This patience and precision are key aspects of his successful boatbuilding methods.Step 4: Finishing Touches
Once the flange is fully dried, Sven removes the clamps carefully, ensuring no damage occurs during this process. He then moves on to attaching four more pieces onto these main frames, completing two pairs of flanges for the bulkhead hatches.The Final Touches
While two flanges form the primary support structure around the hatches, Sven mentions there are two additional pieces required at each end to ensure comprehensive protection. This attention to detail highlights his commitment to producing a durable and reliable design. “Sailing is about finding your path, whether it’s across an ocean or within yourself.” – Sven Yrvind In conclusion, making flanges around bulkhead hatches may seem complex at first glance, but by following Sven Yrvind’s meticulous process, enthusiasts can achieve professional-level results. Remember that the journey of boatbuilding is as rewarding as reaching your destination; it tests one’s patience and dedication. For those seeking to embark on this adventure or simply gain more insight into marine craftsmanship, Sven’s wisdom is invaluable.Sven begins by explaining that working on flanges vertically and horizontally is significantly easier than doing so in a flat position. To simplify the process further, he divides the task into two or three steps as suggested by fellow expert “for for.” This approach not only makes it more manageable but also allows for greater precision in crafting each component.Step 2: Applying Glue and Securing
Sven proceeds to apply glue along one edge of the flange, ensuring a secure bond when clamped into place. He emphasizes that this stage is crucial for maintaining the structural integrity of the flange, which in turn safeguards the living area beneath the canvas when hatches are open.Step 3: Allowing Time to Dry
After securely attaching the first portion of the flange, Sven allows ample time for it to dry before moving forward with additional steps. This patience and precision are key aspects of his successful boatbuilding methods.Step 4: Finishing Touches
Once the flange is fully dried, Sven removes the clamps carefully, ensuring no damage occurs during this process. He then moves on to attaching four more pieces onto these main frames, completing two pairs of flanges for the bulkhead hatches.The Final Touches
While two flanges form the primary support structure around the hatches, Sven mentions there are two additional pieces required at each end to ensure comprehensive protection. This attention to detail highlights his commitment to producing a durable and reliable design. “Sailing is about finding your path, whether it’s across an ocean or within yourself.” – Sven Yrvind In conclusion, making flanges around bulkhead hatches may seem complex at first glance, but by following Sven Yrvind’s meticulous process, enthusiasts can achieve professional-level results. Remember that the journey of boatbuilding is as rewarding as reaching your destination; it tests one’s patience and dedication. For those seeking to embark on this adventure or simply gain more insight into marine craftsmanship, Sven’s wisdom is invaluable.Sven Yrvind, a renowned yacht designer and sailor, shares valuable insights on creating flanges around bulkhead hatches for canvas protection in this enlightening video. By following his expert guidance, boat enthusiasts can ensure their living areas remain secure while allowing unhindered access through the hatches.Step 1: Starting with the Flange
Sven begins by explaining that working on flanges vertically and horizontally is significantly easier than doing so in a flat position. To simplify the process further, he divides the task into two or three steps as suggested by fellow expert “for for.” This approach not only makes it more manageable but also allows for greater precision in crafting each component.Step 2: Applying Glue and Securing
Sven proceeds to apply glue along one edge of the flange, ensuring a secure bond when clamped into place. He emphasizes that this stage is crucial for maintaining the structural integrity of the flange, which in turn safeguards the living area beneath the canvas when hatches are open.Step 3: Allowing Time to Dry
After securely attaching the first portion of the flange, Sven allows ample time for it to dry before moving forward with additional steps. This patience and precision are key aspects of his successful boatbuilding methods.Step 4: Finishing Touches
Once the flange is fully dried, Sven removes the clamps carefully, ensuring no damage occurs during this process. He then moves on to attaching four more pieces onto these main frames, completing two pairs of flanges for the bulkhead hatches.The Final Touches
While two flanges form the primary support structure around the hatches, Sven mentions there are two additional pieces required at each end to ensure comprehensive protection. This attention to detail highlights his commitment to producing a durable and reliable design. “Sailing is about finding your path, whether it’s across an ocean or within yourself.” – Sven Yrvind In conclusion, making flanges around bulkhead hatches may seem complex at first glance, but by following Sven Yrvind’s meticulous process, enthusiasts can achieve professional-level results. Remember that the journey of boatbuilding is as rewarding as reaching your destination; it tests one’s patience and dedication. For those seeking to embark on this adventure or simply gain more insight into marine craftsmanship, Sven’s wisdom is invaluable.Making Flanges Around Bulkhead Hatches for Canvas
Sven Yrvind, a renowned yacht designer and sailor, shares valuable insights on creating flanges around bulkhead hatches for canvas protection in this enlightening video. By following his expert guidance, boat enthusiasts can ensure their living areas remain secure while allowing unhindered access through the hatches.Step 1: Starting with the Flange
Sven begins by explaining that working on flanges vertically and horizontally is significantly easier than doing so in a flat position. To simplify the process further, he divides the task into two or three steps as suggested by fellow expert “for for.” This approach not only makes it more manageable but also allows for greater precision in crafting each component.Step 2: Applying Glue and Securing
Sven proceeds to apply glue along one edge of the flange, ensuring a secure bond when clamped into place. He emphasizes that this stage is crucial for maintaining the structural integrity of the flange, which in turn safeguards the living area beneath the canvas when hatches are open.Step 3: Allowing Time to Dry
After securely attaching the first portion of the flange, Sven allows ample time for it to dry before moving forward with additional steps. This patience and precision are key aspects of his successful boatbuilding methods.Step 4: Finishing Touches
Once the flange is fully dried, Sven removes the clamps carefully, ensuring no damage occurs during this process. He then moves on to attaching four more pieces onto these main frames, completing two pairs of flanges for the bulkhead hatches.The Final Touches
While two flanges form the primary support structure around the hatches, Sven mentions there are two additional pieces required at each end to ensure comprehensive protection. This attention to detail highlights his commitment to producing a durable and reliable design. “Sailing is about finding your path, whether it’s across an ocean or within yourself.” – Sven Yrvind In conclusion, making flanges around bulkhead hatches may seem complex at first glance, but by following Sven Yrvind’s meticulous process, enthusiasts can achieve professional-level results. Remember that the journey of boatbuilding is as rewarding as reaching your destination; it tests one’s patience and dedication. For those seeking to embark on this adventure or simply gain more insight into marine craftsmanship, Sven’s wisdom is invaluable.After securely attaching the first portion of the flange, Sven allows ample time for it to dry before moving forward with additional steps. This patience and precision are key aspects of his successful boatbuilding methods.Step 4: Finishing Touches
Once the flange is fully dried, Sven removes the clamps carefully, ensuring no damage occurs during this process. He then moves on to attaching four more pieces onto these main frames, completing two pairs of flanges for the bulkhead hatches.The Final Touches
While two flanges form the primary support structure around the hatches, Sven mentions there are two additional pieces required at each end to ensure comprehensive protection. This attention to detail highlights his commitment to producing a durable and reliable design. “Sailing is about finding your path, whether it’s across an ocean or within yourself.” – Sven Yrvind In conclusion, making flanges around bulkhead hatches may seem complex at first glance, but by following Sven Yrvind’s meticulous process, enthusiasts can achieve professional-level results. Remember that the journey of boatbuilding is as rewarding as reaching your destination; it tests one’s patience and dedication. For those seeking to embark on this adventure or simply gain more insight into marine craftsmanship, Sven’s wisdom is invaluable.Sven proceeds to apply glue along one edge of the flange, ensuring a secure bond when clamped into place. He emphasizes that this stage is crucial for maintaining the structural integrity of the flange, which in turn safeguards the living area beneath the canvas when hatches are open.Step 3: Allowing Time to Dry
After securely attaching the first portion of the flange, Sven allows ample time for it to dry before moving forward with additional steps. This patience and precision are key aspects of his successful boatbuilding methods.Step 4: Finishing Touches
Once the flange is fully dried, Sven removes the clamps carefully, ensuring no damage occurs during this process. He then moves on to attaching four more pieces onto these main frames, completing two pairs of flanges for the bulkhead hatches.The Final Touches
While two flanges form the primary support structure around the hatches, Sven mentions there are two additional pieces required at each end to ensure comprehensive protection. This attention to detail highlights his commitment to producing a durable and reliable design. “Sailing is about finding your path, whether it’s across an ocean or within yourself.” – Sven Yrvind In conclusion, making flanges around bulkhead hatches may seem complex at first glance, but by following Sven Yrvind’s meticulous process, enthusiasts can achieve professional-level results. Remember that the journey of boatbuilding is as rewarding as reaching your destination; it tests one’s patience and dedication. For those seeking to embark on this adventure or simply gain more insight into marine craftsmanship, Sven’s wisdom is invaluable.Sven begins by explaining that working on flanges vertically and horizontally is significantly easier than doing so in a flat position. To simplify the process further, he divides the task into two or three steps as suggested by fellow expert “for for.” This approach not only makes it more manageable but also allows for greater precision in crafting each component.Step 2: Applying Glue and Securing
Sven proceeds to apply glue along one edge of the flange, ensuring a secure bond when clamped into place. He emphasizes that this stage is crucial for maintaining the structural integrity of the flange, which in turn safeguards the living area beneath the canvas when hatches are open.Step 3: Allowing Time to Dry
After securely attaching the first portion of the flange, Sven allows ample time for it to dry before moving forward with additional steps. This patience and precision are key aspects of his successful boatbuilding methods.Step 4: Finishing Touches
Once the flange is fully dried, Sven removes the clamps carefully, ensuring no damage occurs during this process. He then moves on to attaching four more pieces onto these main frames, completing two pairs of flanges for the bulkhead hatches.The Final Touches
While two flanges form the primary support structure around the hatches, Sven mentions there are two additional pieces required at each end to ensure comprehensive protection. This attention to detail highlights his commitment to producing a durable and reliable design. “Sailing is about finding your path, whether it’s across an ocean or within yourself.” – Sven Yrvind In conclusion, making flanges around bulkhead hatches may seem complex at first glance, but by following Sven Yrvind’s meticulous process, enthusiasts can achieve professional-level results. Remember that the journey of boatbuilding is as rewarding as reaching your destination; it tests one’s patience and dedication. For those seeking to embark on this adventure or simply gain more insight into marine craftsmanship, Sven’s wisdom is invaluable.Sven Yrvind, a renowned yacht designer and sailor, shares valuable insights on creating flanges around bulkhead hatches for canvas protection in this enlightening video. By following his expert guidance, boat enthusiasts can ensure their living areas remain secure while allowing unhindered access through the hatches.Step 1: Starting with the Flange
Sven begins by explaining that working on flanges vertically and horizontally is significantly easier than doing so in a flat position. To simplify the process further, he divides the task into two or three steps as suggested by fellow expert “for for.” This approach not only makes it more manageable but also allows for greater precision in crafting each component.Step 2: Applying Glue and Securing
Sven proceeds to apply glue along one edge of the flange, ensuring a secure bond when clamped into place. He emphasizes that this stage is crucial for maintaining the structural integrity of the flange, which in turn safeguards the living area beneath the canvas when hatches are open.Step 3: Allowing Time to Dry
After securely attaching the first portion of the flange, Sven allows ample time for it to dry before moving forward with additional steps. This patience and precision are key aspects of his successful boatbuilding methods.Step 4: Finishing Touches
Once the flange is fully dried, Sven removes the clamps carefully, ensuring no damage occurs during this process. He then moves on to attaching four more pieces onto these main frames, completing two pairs of flanges for the bulkhead hatches.The Final Touches
While two flanges form the primary support structure around the hatches, Sven mentions there are two additional pieces required at each end to ensure comprehensive protection. This attention to detail highlights his commitment to producing a durable and reliable design. “Sailing is about finding your path, whether it’s across an ocean or within yourself.” – Sven Yrvind In conclusion, making flanges around bulkhead hatches may seem complex at first glance, but by following Sven Yrvind’s meticulous process, enthusiasts can achieve professional-level results. Remember that the journey of boatbuilding is as rewarding as reaching your destination; it tests one’s patience and dedication. For those seeking to embark on this adventure or simply gain more insight into marine craftsmanship, Sven’s wisdom is invaluable.Making Flanges Around Bulkhead Hatches for Canvas
Sven Yrvind, a renowned yacht designer and sailor, shares valuable insights on creating flanges around bulkhead hatches for canvas protection in this enlightening video. By following his expert guidance, boat enthusiasts can ensure their living areas remain secure while allowing unhindered access through the hatches.Step 1: Starting with the Flange
Sven begins by explaining that working on flanges vertically and horizontally is significantly easier than doing so in a flat position. To simplify the process further, he divides the task into two or three steps as suggested by fellow expert “for for.” This approach not only makes it more manageable but also allows for greater precision in crafting each component.Step 2: Applying Glue and Securing
Sven proceeds to apply glue along one edge of the flange, ensuring a secure bond when clamped into place. He emphasizes that this stage is crucial for maintaining the structural integrity of the flange, which in turn safeguards the living area beneath the canvas when hatches are open.Step 3: Allowing Time to Dry
After securely attaching the first portion of the flange, Sven allows ample time for it to dry before moving forward with additional steps. This patience and precision are key aspects of his successful boatbuilding methods.Step 4: Finishing Touches
Once the flange is fully dried, Sven removes the clamps carefully, ensuring no damage occurs during this process. He then moves on to attaching four more pieces onto these main frames, completing two pairs of flanges for the bulkhead hatches.The Final Touches
While two flanges form the primary support structure around the hatches, Sven mentions there are two additional pieces required at each end to ensure comprehensive protection. This attention to detail highlights his commitment to producing a durable and reliable design. “Sailing is about finding your path, whether it’s across an ocean or within yourself.” – Sven Yrvind In conclusion, making flanges around bulkhead hatches may seem complex at first glance, but by following Sven Yrvind’s meticulous process, enthusiasts can achieve professional-level results. Remember that the journey of boatbuilding is as rewarding as reaching your destination; it tests one’s patience and dedication. For those seeking to embark on this adventure or simply gain more insight into marine craftsmanship, Sven’s wisdom is invaluable.Once the flange is fully dried, Sven removes the clamps carefully, ensuring no damage occurs during this process. He then moves on to attaching four more pieces onto these main frames, completing two pairs of flanges for the bulkhead hatches.The Final Touches
While two flanges form the primary support structure around the hatches, Sven mentions there are two additional pieces required at each end to ensure comprehensive protection. This attention to detail highlights his commitment to producing a durable and reliable design. “Sailing is about finding your path, whether it’s across an ocean or within yourself.” – Sven Yrvind In conclusion, making flanges around bulkhead hatches may seem complex at first glance, but by following Sven Yrvind’s meticulous process, enthusiasts can achieve professional-level results. Remember that the journey of boatbuilding is as rewarding as reaching your destination; it tests one’s patience and dedication. For those seeking to embark on this adventure or simply gain more insight into marine craftsmanship, Sven’s wisdom is invaluable.After securely attaching the first portion of the flange, Sven allows ample time for it to dry before moving forward with additional steps. This patience and precision are key aspects of his successful boatbuilding methods.Step 4: Finishing Touches
Once the flange is fully dried, Sven removes the clamps carefully, ensuring no damage occurs during this process. He then moves on to attaching four more pieces onto these main frames, completing two pairs of flanges for the bulkhead hatches.The Final Touches
While two flanges form the primary support structure around the hatches, Sven mentions there are two additional pieces required at each end to ensure comprehensive protection. This attention to detail highlights his commitment to producing a durable and reliable design. “Sailing is about finding your path, whether it’s across an ocean or within yourself.” – Sven Yrvind In conclusion, making flanges around bulkhead hatches may seem complex at first glance, but by following Sven Yrvind’s meticulous process, enthusiasts can achieve professional-level results. Remember that the journey of boatbuilding is as rewarding as reaching your destination; it tests one’s patience and dedication. For those seeking to embark on this adventure or simply gain more insight into marine craftsmanship, Sven’s wisdom is invaluable.Sven proceeds to apply glue along one edge of the flange, ensuring a secure bond when clamped into place. He emphasizes that this stage is crucial for maintaining the structural integrity of the flange, which in turn safeguards the living area beneath the canvas when hatches are open.Step 3: Allowing Time to Dry
After securely attaching the first portion of the flange, Sven allows ample time for it to dry before moving forward with additional steps. This patience and precision are key aspects of his successful boatbuilding methods.Step 4: Finishing Touches
Once the flange is fully dried, Sven removes the clamps carefully, ensuring no damage occurs during this process. He then moves on to attaching four more pieces onto these main frames, completing two pairs of flanges for the bulkhead hatches.The Final Touches
While two flanges form the primary support structure around the hatches, Sven mentions there are two additional pieces required at each end to ensure comprehensive protection. This attention to detail highlights his commitment to producing a durable and reliable design. “Sailing is about finding your path, whether it’s across an ocean or within yourself.” – Sven Yrvind In conclusion, making flanges around bulkhead hatches may seem complex at first glance, but by following Sven Yrvind’s meticulous process, enthusiasts can achieve professional-level results. Remember that the journey of boatbuilding is as rewarding as reaching your destination; it tests one’s patience and dedication. For those seeking to embark on this adventure or simply gain more insight into marine craftsmanship, Sven’s wisdom is invaluable.Sven begins by explaining that working on flanges vertically and horizontally is significantly easier than doing so in a flat position. To simplify the process further, he divides the task into two or three steps as suggested by fellow expert “for for.” This approach not only makes it more manageable but also allows for greater precision in crafting each component.Step 2: Applying Glue and Securing
Sven proceeds to apply glue along one edge of the flange, ensuring a secure bond when clamped into place. He emphasizes that this stage is crucial for maintaining the structural integrity of the flange, which in turn safeguards the living area beneath the canvas when hatches are open.Step 3: Allowing Time to Dry
After securely attaching the first portion of the flange, Sven allows ample time for it to dry before moving forward with additional steps. This patience and precision are key aspects of his successful boatbuilding methods.Step 4: Finishing Touches
Once the flange is fully dried, Sven removes the clamps carefully, ensuring no damage occurs during this process. He then moves on to attaching four more pieces onto these main frames, completing two pairs of flanges for the bulkhead hatches.The Final Touches
While two flanges form the primary support structure around the hatches, Sven mentions there are two additional pieces required at each end to ensure comprehensive protection. This attention to detail highlights his commitment to producing a durable and reliable design. “Sailing is about finding your path, whether it’s across an ocean or within yourself.” – Sven Yrvind In conclusion, making flanges around bulkhead hatches may seem complex at first glance, but by following Sven Yrvind’s meticulous process, enthusiasts can achieve professional-level results. Remember that the journey of boatbuilding is as rewarding as reaching your destination; it tests one’s patience and dedication. For those seeking to embark on this adventure or simply gain more insight into marine craftsmanship, Sven’s wisdom is invaluable.Sven Yrvind, a renowned yacht designer and sailor, shares valuable insights on creating flanges around bulkhead hatches for canvas protection in this enlightening video. By following his expert guidance, boat enthusiasts can ensure their living areas remain secure while allowing unhindered access through the hatches.Step 1: Starting with the Flange
Sven begins by explaining that working on flanges vertically and horizontally is significantly easier than doing so in a flat position. To simplify the process further, he divides the task into two or three steps as suggested by fellow expert “for for.” This approach not only makes it more manageable but also allows for greater precision in crafting each component.Step 2: Applying Glue and Securing
Sven proceeds to apply glue along one edge of the flange, ensuring a secure bond when clamped into place. He emphasizes that this stage is crucial for maintaining the structural integrity of the flange, which in turn safeguards the living area beneath the canvas when hatches are open.Step 3: Allowing Time to Dry
After securely attaching the first portion of the flange, Sven allows ample time for it to dry before moving forward with additional steps. This patience and precision are key aspects of his successful boatbuilding methods.Step 4: Finishing Touches
Once the flange is fully dried, Sven removes the clamps carefully, ensuring no damage occurs during this process. He then moves on to attaching four more pieces onto these main frames, completing two pairs of flanges for the bulkhead hatches.The Final Touches
While two flanges form the primary support structure around the hatches, Sven mentions there are two additional pieces required at each end to ensure comprehensive protection. This attention to detail highlights his commitment to producing a durable and reliable design. “Sailing is about finding your path, whether it’s across an ocean or within yourself.” – Sven Yrvind In conclusion, making flanges around bulkhead hatches may seem complex at first glance, but by following Sven Yrvind’s meticulous process, enthusiasts can achieve professional-level results. Remember that the journey of boatbuilding is as rewarding as reaching your destination; it tests one’s patience and dedication. For those seeking to embark on this adventure or simply gain more insight into marine craftsmanship, Sven’s wisdom is invaluable.Making Flanges Around Bulkhead Hatches for Canvas
Sven Yrvind, a renowned yacht designer and sailor, shares valuable insights on creating flanges around bulkhead hatches for canvas protection in this enlightening video. By following his expert guidance, boat enthusiasts can ensure their living areas remain secure while allowing unhindered access through the hatches.Step 1: Starting with the Flange
Sven begins by explaining that working on flanges vertically and horizontally is significantly easier than doing so in a flat position. To simplify the process further, he divides the task into two or three steps as suggested by fellow expert “for for.” This approach not only makes it more manageable but also allows for greater precision in crafting each component.Step 2: Applying Glue and Securing
Sven proceeds to apply glue along one edge of the flange, ensuring a secure bond when clamped into place. He emphasizes that this stage is crucial for maintaining the structural integrity of the flange, which in turn safeguards the living area beneath the canvas when hatches are open.Step 3: Allowing Time to Dry
After securely attaching the first portion of the flange, Sven allows ample time for it to dry before moving forward with additional steps. This patience and precision are key aspects of his successful boatbuilding methods.Step 4: Finishing Touches
Once the flange is fully dried, Sven removes the clamps carefully, ensuring no damage occurs during this process. He then moves on to attaching four more pieces onto these main frames, completing two pairs of flanges for the bulkhead hatches.The Final Touches
While two flanges form the primary support structure around the hatches, Sven mentions there are two additional pieces required at each end to ensure comprehensive protection. This attention to detail highlights his commitment to producing a durable and reliable design. “Sailing is about finding your path, whether it’s across an ocean or within yourself.” – Sven Yrvind In conclusion, making flanges around bulkhead hatches may seem complex at first glance, but by following Sven Yrvind’s meticulous process, enthusiasts can achieve professional-level results. Remember that the journey of boatbuilding is as rewarding as reaching your destination; it tests one’s patience and dedication. For those seeking to embark on this adventure or simply gain more insight into marine craftsmanship, Sven’s wisdom is invaluable.Sven proceeds to apply glue along one edge of the flange, ensuring a secure bond when clamped into place. He emphasizes that this stage is crucial for maintaining the structural integrity of the flange, which in turn safeguards the living area beneath the canvas when hatches are open.Step 3: Allowing Time to Dry
After securely attaching the first portion of the flange, Sven allows ample time for it to dry before moving forward with additional steps. This patience and precision are key aspects of his successful boatbuilding methods.Step 4: Finishing Touches
Once the flange is fully dried, Sven removes the clamps carefully, ensuring no damage occurs during this process. He then moves on to attaching four more pieces onto these main frames, completing two pairs of flanges for the bulkhead hatches.The Final Touches
While two flanges form the primary support structure around the hatches, Sven mentions there are two additional pieces required at each end to ensure comprehensive protection. This attention to detail highlights his commitment to producing a durable and reliable design. “Sailing is about finding your path, whether it’s across an ocean or within yourself.” – Sven Yrvind In conclusion, making flanges around bulkhead hatches may seem complex at first glance, but by following Sven Yrvind’s meticulous process, enthusiasts can achieve professional-level results. Remember that the journey of boatbuilding is as rewarding as reaching your destination; it tests one’s patience and dedication. For those seeking to embark on this adventure or simply gain more insight into marine craftsmanship, Sven’s wisdom is invaluable.Making Flanges Around Bulkhead Hatches for Canvas
Sven Yrvind, a renowned yacht designer and sailor, shares valuable insights on creating flanges around bulkhead hatches for canvas protection in this enlightening video. By following his expert guidance, boat enthusiasts can ensure their living areas remain secure while allowing unhindered access through the hatches.Step 1: Starting with the Flange
Sven begins by explaining that working on flanges vertically and horizontally is significantly easier than doing so in a flat position. To simplify the process further, he divides the task into two or three steps as suggested by fellow expert “for for.” This approach not only makes it more manageable but also allows for greater precision in crafting each component.Step 2: Applying Glue and Securing
Sven proceeds to apply glue along one edge of the flange, ensuring a secure bond when clamped into place. He emphasizes that this stage is crucial for maintaining the structural integrity of the flange, which in turn safeguards the living area beneath the canvas when hatches are open.Step 3: Allowing Time to Dry
After securely attaching the first portion of the flange, Sven allows ample time for it to dry before moving forward with additional steps. This patience and precision are key aspects of his successful boatbuilding methods.Step 4: Finishing Touches
Once the flange is fully dried, Sven removes the clamps carefully, ensuring no damage occurs during this process. He then moves on to attaching four more pieces onto these main frames, completing two pairs of flanges for the bulkhead hatches.The Final Touches
While two flanges form the primary support structure around the hatches, Sven mentions there are two additional pieces required at each end to ensure comprehensive protection. This attention to detail highlights his commitment to producing a durable and reliable design. “Sailing is about finding your path, whether it’s across an ocean or within yourself.” – Sven Yrvind In conclusion, making flanges around bulkhead hatches may seem complex at first glance, but by following Sven Yrvind’s meticulous process, enthusiasts can achieve professional-level results. Remember that the journey of boatbuilding is as rewarding as reaching your destination; it tests one’s patience and dedication. For those seeking to embark on this adventure or simply gain more insight into marine craftsmanship, Sven’s wisdom is invaluable.Sven begins by explaining that working on flanges vertically and horizontally is significantly easier than doing so in a flat position. To simplify the process further, he divides the task into two or three steps as suggested by fellow expert “for for.” This approach not only makes it more manageable but also allows for greater precision in crafting each component.Step 2: Applying Glue and Securing
Sven proceeds to apply glue along one edge of the flange, ensuring a secure bond when clamped into place. He emphasizes that this stage is crucial for maintaining the structural integrity of the flange, which in turn safeguards the living area beneath the canvas when hatches are open.Step 3: Allowing Time to Dry
After securely attaching the first portion of the flange, Sven allows ample time for it to dry before moving forward with additional steps. This patience and precision are key aspects of his successful boatbuilding methods.Step 4: Finishing Touches
Once the flange is fully dried, Sven removes the clamps carefully, ensuring no damage occurs during this process. He then moves on to attaching four more pieces onto these main frames, completing two pairs of flanges for the bulkhead hatches.The Final Touches
While two flanges form the primary support structure around the hatches, Sven mentions there are two additional pieces required at each end to ensure comprehensive protection. This attention to detail highlights his commitment to producing a durable and reliable design. “Sailing is about finding your path, whether it’s across an ocean or within yourself.” – Sven Yrvind In conclusion, making flanges around bulkhead hatches may seem complex at first glance, but by following Sven Yrvind’s meticulous process, enthusiasts can achieve professional-level results. Remember that the journey of boatbuilding is as rewarding as reaching your destination; it tests one’s patience and dedication. For those seeking to embark on this adventure or simply gain more insight into marine craftsmanship, Sven’s wisdom is invaluable.Making Flanges Around Bulkhead Hatches for Canvas
Sven Yrvind, a renowned yacht designer and sailor, shares valuable insights on creating flanges around bulkhead hatches for canvas protection in this enlightening video. By following his expert guidance, boat enthusiasts can ensure their living areas remain secure while allowing unhindered access through the hatches.Step 1: Starting with the Flange
Sven begins by explaining that working on flanges vertically and horizontally is significantly easier than doing so in a flat position. To simplify the process further, he divides the task into two or three steps as suggested by fellow expert “for for.” This approach not only makes it more manageable but also allows for greater precision in crafting each component.Step 2: Applying Glue and Securing
Sven proceeds to apply glue along one edge of the flange, ensuring a secure bond when clamped into place. He emphasizes that this stage is crucial for maintaining the structural integrity of the flange, which in turn safeguards the living area beneath the canvas when hatches are open.Step 3: Allowing Time to Dry
After securely attaching the first portion of the flange, Sven allows ample time for it to dry before moving forward with additional steps. This patience and precision are key aspects of his successful boatbuilding methods.Step 4: Finishing Touches
Once the flange is fully dried, Sven removes the clamps carefully, ensuring no damage occurs during this process. He then moves on to attaching four more pieces onto these main frames, completing two pairs of flanges for the bulkhead hatches.The Final Touches
While two flanges form the primary support structure around the hatches, Sven mentions there are two additional pieces required at each end to ensure comprehensive protection. This attention to detail highlights his commitment to producing a durable and reliable design. “Sailing is about finding your path, whether it’s across an ocean or within yourself.” – Sven Yrvind In conclusion, making flanges around bulkhead hatches may seem complex at first glance, but by following Sven Yrvind’s meticulous process, enthusiasts can achieve professional-level results. Remember that the journey of boatbuilding is as rewarding as reaching your destination; it tests one’s patience and dedication. For those seeking to embark on this adventure or simply gain more insight into marine craftsmanship, Sven’s wisdom is invaluable.Sven Yrvind, a renowned yacht designer and sailor, shares valuable insights on creating flanges around bulkhead hatches for canvas protection in this enlightening video. By following his expert guidance, boat enthusiasts can ensure their living areas remain secure while allowing unhindered access through the hatches.Step 1: Starting with the Flange
Sven begins by explaining that working on flanges vertically and horizontally is significantly easier than doing so in a flat position. To simplify the process further, he divides the task into two or three steps as suggested by fellow expert “for for.” This approach not only makes it more manageable but also allows for greater precision in crafting each component.Step 2: Applying Glue and Securing
Sven proceeds to apply glue along one edge of the flange, ensuring a secure bond when clamped into place. He emphasizes that this stage is crucial for maintaining the structural integrity of the flange, which in turn safeguards the living area beneath the canvas when hatches are open.Step 3: Allowing Time to Dry
After securely attaching the first portion of the flange, Sven allows ample time for it to dry before moving forward with additional steps. This patience and precision are key aspects of his successful boatbuilding methods.Step 4: Finishing Touches
Once the flange is fully dried, Sven removes the clamps carefully, ensuring no damage occurs during this process. He then moves on to attaching four more pieces onto these main frames, completing two pairs of flanges for the bulkhead hatches.The Final Touches
While two flanges form the primary support structure around the hatches, Sven mentions there are two additional pieces required at each end to ensure comprehensive protection. This attention to detail highlights his commitment to producing a durable and reliable design. “Sailing is about finding your path, whether it’s across an ocean or within yourself.” – Sven Yrvind In conclusion, making flanges around bulkhead hatches may seem complex at first glance, but by following Sven Yrvind’s meticulous process, enthusiasts can achieve professional-level results. Remember that the journey of boatbuilding is as rewarding as reaching your destination; it tests one’s patience and dedication. For those seeking to embark on this adventure or simply gain more insight into marine craftsmanship, Sven’s wisdom is invaluable.Making Flanges Around Bulkhead Hatches for Canvas
Sven Yrvind, a renowned yacht designer and sailor, shares valuable insights on creating flanges around bulkhead hatches for canvas protection in this enlightening video. By following his expert guidance, boat enthusiasts can ensure their living areas remain secure while allowing unhindered access through the hatches.Step 1: Starting with the Flange
Sven begins by explaining that working on flanges vertically and horizontally is significantly easier than doing so in a flat position. To simplify the process further, he divides the task into two or three steps as suggested by fellow expert “for for.” This approach not only makes it more manageable but also allows for greater precision in crafting each component.Step 2: Applying Glue and Securing
Sven proceeds to apply glue along one edge of the flange, ensuring a secure bond when clamped into place. He emphasizes that this stage is crucial for maintaining the structural integrity of the flange, which in turn safeguards the living area beneath the canvas when hatches are open.Step 3: Allowing Time to Dry
After securely attaching the first portion of the flange, Sven allows ample time for it to dry before moving forward with additional steps. This patience and precision are key aspects of his successful boatbuilding methods.Step 4: Finishing Touches
Once the flange is fully dried, Sven removes the clamps carefully, ensuring no damage occurs during this process. He then moves on to attaching four more pieces onto these main frames, completing two pairs of flanges for the bulkhead hatches.The Final Touches
While two flanges form the primary support structure around the hatches, Sven mentions there are two additional pieces required at each end to ensure comprehensive protection. This attention to detail highlights his commitment to producing a durable and reliable design. “Sailing is about finding your path, whether it’s across an ocean or within yourself.” – Sven Yrvind In conclusion, making flanges around bulkhead hatches may seem complex at first glance, but by following Sven Yrvind’s meticulous process, enthusiasts can achieve professional-level results. Remember that the journey of boatbuilding is as rewarding as reaching your destination; it tests one’s patience and dedication. For those seeking to embark on this adventure or simply gain more insight into marine craftsmanship, Sven’s wisdom is invaluable.Once the flange is fully dried, Sven removes the clamps carefully, ensuring no damage occurs during this process. He then moves on to attaching four more pieces onto these main frames, completing two pairs of flanges for the bulkhead hatches.The Final Touches
While two flanges form the primary support structure around the hatches, Sven mentions there are two additional pieces required at each end to ensure comprehensive protection. This attention to detail highlights his commitment to producing a durable and reliable design. “Sailing is about finding your path, whether it’s across an ocean or within yourself.” – Sven Yrvind In conclusion, making flanges around bulkhead hatches may seem complex at first glance, but by following Sven Yrvind’s meticulous process, enthusiasts can achieve professional-level results. Remember that the journey of boatbuilding is as rewarding as reaching your destination; it tests one’s patience and dedication. For those seeking to embark on this adventure or simply gain more insight into marine craftsmanship, Sven’s wisdom is invaluable.Sven Yrvind, a renowned yacht designer and sailor, shares valuable insights on creating flanges around bulkhead hatches for canvas protection in this enlightening video. By following his expert guidance, boat enthusiasts can ensure their living areas remain secure while allowing unhindered access through the hatches.Step 1: Starting with the Flange
Sven begins by explaining that working on flanges vertically and horizontally is significantly easier than doing so in a flat position. To simplify the process further, he divides the task into two or three steps as suggested by fellow expert “for for.” This approach not only makes it more manageable but also allows for greater precision in crafting each component.Step 2: Applying Glue and Securing
Sven proceeds to apply glue along one edge of the flange, ensuring a secure bond when clamped into place. He emphasizes that this stage is crucial for maintaining the structural integrity of the flange, which in turn safeguards the living area beneath the canvas when hatches are open.Step 3: Allowing Time to Dry
After securely attaching the first portion of the flange, Sven allows ample time for it to dry before moving forward with additional steps. This patience and precision are key aspects of his successful boatbuilding methods.Step 4: Finishing Touches
Once the flange is fully dried, Sven removes the clamps carefully, ensuring no damage occurs during this process. He then moves on to attaching four more pieces onto these main frames, completing two pairs of flanges for the bulkhead hatches.The Final Touches
While two flanges form the primary support structure around the hatches, Sven mentions there are two additional pieces required at each end to ensure comprehensive protection. This attention to detail highlights his commitment to producing a durable and reliable design. “Sailing is about finding your path, whether it’s across an ocean or within yourself.” – Sven Yrvind In conclusion, making flanges around bulkhead hatches may seem complex at first glance, but by following Sven Yrvind’s meticulous process, enthusiasts can achieve professional-level results. Remember that the journey of boatbuilding is as rewarding as reaching your destination; it tests one’s patience and dedication. For those seeking to embark on this adventure or simply gain more insight into marine craftsmanship, Sven’s wisdom is invaluable.Making Flanges Around Bulkhead Hatches for Canvas
Sven Yrvind, a renowned yacht designer and sailor, shares valuable insights on creating flanges around bulkhead hatches for canvas protection in this enlightening video. By following his expert guidance, boat enthusiasts can ensure their living areas remain secure while allowing unhindered access through the hatches.Step 1: Starting with the Flange
Sven begins by explaining that working on flanges vertically and horizontally is significantly easier than doing so in a flat position. To simplify the process further, he divides the task into two or three steps as suggested by fellow expert “for for.” This approach not only makes it more manageable but also allows for greater precision in crafting each component.Step 2: Applying Glue and Securing
Sven proceeds to apply glue along one edge of the flange, ensuring a secure bond when clamped into place. He emphasizes that this stage is crucial for maintaining the structural integrity of the flange, which in turn safeguards the living area beneath the canvas when hatches are open.Step 3: Allowing Time to Dry
After securely attaching the first portion of the flange, Sven allows ample time for it to dry before moving forward with additional steps. This patience and precision are key aspects of his successful boatbuilding methods.Step 4: Finishing Touches
Once the flange is fully dried, Sven removes the clamps carefully, ensuring no damage occurs during this process. He then moves on to attaching four more pieces onto these main frames, completing two pairs of flanges for the bulkhead hatches.The Final Touches
While two flanges form the primary support structure around the hatches, Sven mentions there are two additional pieces required at each end to ensure comprehensive protection. This attention to detail highlights his commitment to producing a durable and reliable design. “Sailing is about finding your path, whether it’s across an ocean or within yourself.” – Sven Yrvind In conclusion, making flanges around bulkhead hatches may seem complex at first glance, but by following Sven Yrvind’s meticulous process, enthusiasts can achieve professional-level results. Remember that the journey of boatbuilding is as rewarding as reaching your destination; it tests one’s patience and dedication. For those seeking to embark on this adventure or simply gain more insight into marine craftsmanship, Sven’s wisdom is invaluable.After securely attaching the first portion of the flange, Sven allows ample time for it to dry before moving forward with additional steps. This patience and precision are key aspects of his successful boatbuilding methods.Step 4: Finishing Touches
Once the flange is fully dried, Sven removes the clamps carefully, ensuring no damage occurs during this process. He then moves on to attaching four more pieces onto these main frames, completing two pairs of flanges for the bulkhead hatches.The Final Touches
While two flanges form the primary support structure around the hatches, Sven mentions there are two additional pieces required at each end to ensure comprehensive protection. This attention to detail highlights his commitment to producing a durable and reliable design. “Sailing is about finding your path, whether it’s across an ocean or within yourself.” – Sven Yrvind In conclusion, making flanges around bulkhead hatches may seem complex at first glance, but by following Sven Yrvind’s meticulous process, enthusiasts can achieve professional-level results. Remember that the journey of boatbuilding is as rewarding as reaching your destination; it tests one’s patience and dedication. For those seeking to embark on this adventure or simply gain more insight into marine craftsmanship, Sven’s wisdom is invaluable.Sven Yrvind, a renowned yacht designer and sailor, shares valuable insights on creating flanges around bulkhead hatches for canvas protection in this enlightening video. By following his expert guidance, boat enthusiasts can ensure their living areas remain secure while allowing unhindered access through the hatches.Step 1: Starting with the Flange
Sven begins by explaining that working on flanges vertically and horizontally is significantly easier than doing so in a flat position. To simplify the process further, he divides the task into two or three steps as suggested by fellow expert “for for.” This approach not only makes it more manageable but also allows for greater precision in crafting each component.Step 2: Applying Glue and Securing
Sven proceeds to apply glue along one edge of the flange, ensuring a secure bond when clamped into place. He emphasizes that this stage is crucial for maintaining the structural integrity of the flange, which in turn safeguards the living area beneath the canvas when hatches are open.Step 3: Allowing Time to Dry
After securely attaching the first portion of the flange, Sven allows ample time for it to dry before moving forward with additional steps. This patience and precision are key aspects of his successful boatbuilding methods.Step 4: Finishing Touches
Once the flange is fully dried, Sven removes the clamps carefully, ensuring no damage occurs during this process. He then moves on to attaching four more pieces onto these main frames, completing two pairs of flanges for the bulkhead hatches.The Final Touches
While two flanges form the primary support structure around the hatches, Sven mentions there are two additional pieces required at each end to ensure comprehensive protection. This attention to detail highlights his commitment to producing a durable and reliable design. “Sailing is about finding your path, whether it’s across an ocean or within yourself.” – Sven Yrvind In conclusion, making flanges around bulkhead hatches may seem complex at first glance, but by following Sven Yrvind’s meticulous process, enthusiasts can achieve professional-level results. Remember that the journey of boatbuilding is as rewarding as reaching your destination; it tests one’s patience and dedication. For those seeking to embark on this adventure or simply gain more insight into marine craftsmanship, Sven’s wisdom is invaluable.Making Flanges Around Bulkhead Hatches for Canvas
Sven Yrvind, a renowned yacht designer and sailor, shares valuable insights on creating flanges around bulkhead hatches for canvas protection in this enlightening video. By following his expert guidance, boat enthusiasts can ensure their living areas remain secure while allowing unhindered access through the hatches.Step 1: Starting with the Flange
Sven begins by explaining that working on flanges vertically and horizontally is significantly easier than doing so in a flat position. To simplify the process further, he divides the task into two or three steps as suggested by fellow expert “for for.” This approach not only makes it more manageable but also allows for greater precision in crafting each component.Step 2: Applying Glue and Securing
Sven proceeds to apply glue along one edge of the flange, ensuring a secure bond when clamped into place. He emphasizes that this stage is crucial for maintaining the structural integrity of the flange, which in turn safeguards the living area beneath the canvas when hatches are open.Step 3: Allowing Time to Dry
After securely attaching the first portion of the flange, Sven allows ample time for it to dry before moving forward with additional steps. This patience and precision are key aspects of his successful boatbuilding methods.Step 4: Finishing Touches
Once the flange is fully dried, Sven removes the clamps carefully, ensuring no damage occurs during this process. He then moves on to attaching four more pieces onto these main frames, completing two pairs of flanges for the bulkhead hatches.The Final Touches
While two flanges form the primary support structure around the hatches, Sven mentions there are two additional pieces required at each end to ensure comprehensive protection. This attention to detail highlights his commitment to producing a durable and reliable design. “Sailing is about finding your path, whether it’s across an ocean or within yourself.” – Sven Yrvind In conclusion, making flanges around bulkhead hatches may seem complex at first glance, but by following Sven Yrvind’s meticulous process, enthusiasts can achieve professional-level results. Remember that the journey of boatbuilding is as rewarding as reaching your destination; it tests one’s patience and dedication. For those seeking to embark on this adventure or simply gain more insight into marine craftsmanship, Sven’s wisdom is invaluable.Sven proceeds to apply glue along one edge of the flange, ensuring a secure bond when clamped into place. He emphasizes that this stage is crucial for maintaining the structural integrity of the flange, which in turn safeguards the living area beneath the canvas when hatches are open.Step 3: Allowing Time to Dry
After securely attaching the first portion of the flange, Sven allows ample time for it to dry before moving forward with additional steps. This patience and precision are key aspects of his successful boatbuilding methods.Step 4: Finishing Touches
Once the flange is fully dried, Sven removes the clamps carefully, ensuring no damage occurs during this process. He then moves on to attaching four more pieces onto these main frames, completing two pairs of flanges for the bulkhead hatches.The Final Touches
While two flanges form the primary support structure around the hatches, Sven mentions there are two additional pieces required at each end to ensure comprehensive protection. This attention to detail highlights his commitment to producing a durable and reliable design. “Sailing is about finding your path, whether it’s across an ocean or within yourself.” – Sven Yrvind In conclusion, making flanges around bulkhead hatches may seem complex at first glance, but by following Sven Yrvind’s meticulous process, enthusiasts can achieve professional-level results. Remember that the journey of boatbuilding is as rewarding as reaching your destination; it tests one’s patience and dedication. For those seeking to embark on this adventure or simply gain more insight into marine craftsmanship, Sven’s wisdom is invaluable.Sven Yrvind, a renowned yacht designer and sailor, shares valuable insights on creating flanges around bulkhead hatches for canvas protection in this enlightening video. By following his expert guidance, boat enthusiasts can ensure their living areas remain secure while allowing unhindered access through the hatches.Step 1: Starting with the Flange
Sven begins by explaining that working on flanges vertically and horizontally is significantly easier than doing so in a flat position. To simplify the process further, he divides the task into two or three steps as suggested by fellow expert “for for.” This approach not only makes it more manageable but also allows for greater precision in crafting each component.Step 2: Applying Glue and Securing
Sven proceeds to apply glue along one edge of the flange, ensuring a secure bond when clamped into place. He emphasizes that this stage is crucial for maintaining the structural integrity of the flange, which in turn safeguards the living area beneath the canvas when hatches are open.Step 3: Allowing Time to Dry
After securely attaching the first portion of the flange, Sven allows ample time for it to dry before moving forward with additional steps. This patience and precision are key aspects of his successful boatbuilding methods.Step 4: Finishing Touches
Once the flange is fully dried, Sven removes the clamps carefully, ensuring no damage occurs during this process. He then moves on to attaching four more pieces onto these main frames, completing two pairs of flanges for the bulkhead hatches.The Final Touches
While two flanges form the primary support structure around the hatches, Sven mentions there are two additional pieces required at each end to ensure comprehensive protection. This attention to detail highlights his commitment to producing a durable and reliable design. “Sailing is about finding your path, whether it’s across an ocean or within yourself.” – Sven Yrvind In conclusion, making flanges around bulkhead hatches may seem complex at first glance, but by following Sven Yrvind’s meticulous process, enthusiasts can achieve professional-level results. Remember that the journey of boatbuilding is as rewarding as reaching your destination; it tests one’s patience and dedication. For those seeking to embark on this adventure or simply gain more insight into marine craftsmanship, Sven’s wisdom is invaluable.Making Flanges Around Bulkhead Hatches for Canvas
Sven Yrvind, a renowned yacht designer and sailor, shares valuable insights on creating flanges around bulkhead hatches for canvas protection in this enlightening video. By following his expert guidance, boat enthusiasts can ensure their living areas remain secure while allowing unhindered access through the hatches.Step 1: Starting with the Flange
Sven begins by explaining that working on flanges vertically and horizontally is significantly easier than doing so in a flat position. To simplify the process further, he divides the task into two or three steps as suggested by fellow expert “for for.” This approach not only makes it more manageable but also allows for greater precision in crafting each component.Step 2: Applying Glue and Securing
Sven proceeds to apply glue along one edge of the flange, ensuring a secure bond when clamped into place. He emphasizes that this stage is crucial for maintaining the structural integrity of the flange, which in turn safeguards the living area beneath the canvas when hatches are open.Step 3: Allowing Time to Dry
After securely attaching the first portion of the flange, Sven allows ample time for it to dry before moving forward with additional steps. This patience and precision are key aspects of his successful boatbuilding methods.Step 4: Finishing Touches
Once the flange is fully dried, Sven removes the clamps carefully, ensuring no damage occurs during this process. He then moves on to attaching four more pieces onto these main frames, completing two pairs of flanges for the bulkhead hatches.The Final Touches
While two flanges form the primary support structure around the hatches, Sven mentions there are two additional pieces required at each end to ensure comprehensive protection. This attention to detail highlights his commitment to producing a durable and reliable design. “Sailing is about finding your path, whether it’s across an ocean or within yourself.” – Sven Yrvind In conclusion, making flanges around bulkhead hatches may seem complex at first glance, but by following Sven Yrvind’s meticulous process, enthusiasts can achieve professional-level results. Remember that the journey of boatbuilding is as rewarding as reaching your destination; it tests one’s patience and dedication. For those seeking to embark on this adventure or simply gain more insight into marine craftsmanship, Sven’s wisdom is invaluable.Sven begins by explaining that working on flanges vertically and horizontally is significantly easier than doing so in a flat position. To simplify the process further, he divides the task into two or three steps as suggested by fellow expert “for for.” This approach not only makes it more manageable but also allows for greater precision in crafting each component.Step 2: Applying Glue and Securing
Sven proceeds to apply glue along one edge of the flange, ensuring a secure bond when clamped into place. He emphasizes that this stage is crucial for maintaining the structural integrity of the flange, which in turn safeguards the living area beneath the canvas when hatches are open.Step 3: Allowing Time to Dry
After securely attaching the first portion of the flange, Sven allows ample time for it to dry before moving forward with additional steps. This patience and precision are key aspects of his successful boatbuilding methods.Step 4: Finishing Touches
Once the flange is fully dried, Sven removes the clamps carefully, ensuring no damage occurs during this process. He then moves on to attaching four more pieces onto these main frames, completing two pairs of flanges for the bulkhead hatches.The Final Touches
While two flanges form the primary support structure around the hatches, Sven mentions there are two additional pieces required at each end to ensure comprehensive protection. This attention to detail highlights his commitment to producing a durable and reliable design. “Sailing is about finding your path, whether it’s across an ocean or within yourself.” – Sven Yrvind In conclusion, making flanges around bulkhead hatches may seem complex at first glance, but by following Sven Yrvind’s meticulous process, enthusiasts can achieve professional-level results. Remember that the journey of boatbuilding is as rewarding as reaching your destination; it tests one’s patience and dedication. For those seeking to embark on this adventure or simply gain more insight into marine craftsmanship, Sven’s wisdom is invaluable.Sven Yrvind, a renowned yacht designer and sailor, shares valuable insights on creating flanges around bulkhead hatches for canvas protection in this enlightening video. By following his expert guidance, boat enthusiasts can ensure their living areas remain secure while allowing unhindered access through the hatches.Step 1: Starting with the Flange
Sven begins by explaining that working on flanges vertically and horizontally is significantly easier than doing so in a flat position. To simplify the process further, he divides the task into two or three steps as suggested by fellow expert “for for.” This approach not only makes it more manageable but also allows for greater precision in crafting each component.Step 2: Applying Glue and Securing
Sven proceeds to apply glue along one edge of the flange, ensuring a secure bond when clamped into place. He emphasizes that this stage is crucial for maintaining the structural integrity of the flange, which in turn safeguards the living area beneath the canvas when hatches are open.Step 3: Allowing Time to Dry
After securely attaching the first portion of the flange, Sven allows ample time for it to dry before moving forward with additional steps. This patience and precision are key aspects of his successful boatbuilding methods.Step 4: Finishing Touches
Once the flange is fully dried, Sven removes the clamps carefully, ensuring no damage occurs during this process. He then moves on to attaching four more pieces onto these main frames, completing two pairs of flanges for the bulkhead hatches.The Final Touches
While two flanges form the primary support structure around the hatches, Sven mentions there are two additional pieces required at each end to ensure comprehensive protection. This attention to detail highlights his commitment to producing a durable and reliable design. “Sailing is about finding your path, whether it’s across an ocean or within yourself.” – Sven Yrvind In conclusion, making flanges around bulkhead hatches may seem complex at first glance, but by following Sven Yrvind’s meticulous process, enthusiasts can achieve professional-level results. Remember that the journey of boatbuilding is as rewarding as reaching your destination; it tests one’s patience and dedication. For those seeking to embark on this adventure or simply gain more insight into marine craftsmanship, Sven’s wisdom is invaluable.Making Flanges Around Bulkhead Hatches for Canvas
Sven Yrvind, a renowned yacht designer and sailor, shares valuable insights on creating flanges around bulkhead hatches for canvas protection in this enlightening video. By following his expert guidance, boat enthusiasts can ensure their living areas remain secure while allowing unhindered access through the hatches.Step 1: Starting with the Flange
Sven begins by explaining that working on flanges vertically and horizontally is significantly easier than doing so in a flat position. To simplify the process further, he divides the task into two or three steps as suggested by fellow expert “for for.” This approach not only makes it more manageable but also allows for greater precision in crafting each component.Step 2: Applying Glue and Securing
Sven proceeds to apply glue along one edge of the flange, ensuring a secure bond when clamped into place. He emphasizes that this stage is crucial for maintaining the structural integrity of the flange, which in turn safeguards the living area beneath the canvas when hatches are open.Step 3: Allowing Time to Dry
After securely attaching the first portion of the flange, Sven allows ample time for it to dry before moving forward with additional steps. This patience and precision are key aspects of his successful boatbuilding methods.Step 4: Finishing Touches
Once the flange is fully dried, Sven removes the clamps carefully, ensuring no damage occurs during this process. He then moves on to attaching four more pieces onto these main frames, completing two pairs of flanges for the bulkhead hatches.The Final Touches
While two flanges form the primary support structure around the hatches, Sven mentions there are two additional pieces required at each end to ensure comprehensive protection. This attention to detail highlights his commitment to producing a durable and reliable design. “Sailing is about finding your path, whether it’s across an ocean or within yourself.” – Sven Yrvind In conclusion, making flanges around bulkhead hatches may seem complex at first glance, but by following Sven Yrvind’s meticulous process, enthusiasts can achieve professional-level results. Remember that the journey of boatbuilding is as rewarding as reaching your destination; it tests one’s patience and dedication. For those seeking to embark on this adventure or simply gain more insight into marine craftsmanship, Sven’s wisdom is invaluable.Once the flange is fully dried, Sven removes the clamps carefully, ensuring no damage occurs during this process. He then moves on to attaching four more pieces onto these main frames, completing two pairs of flanges for the bulkhead hatches.The Final Touches
While two flanges form the primary support structure around the hatches, Sven mentions there are two additional pieces required at each end to ensure comprehensive protection. This attention to detail highlights his commitment to producing a durable and reliable design. “Sailing is about finding your path, whether it’s across an ocean or within yourself.” – Sven Yrvind In conclusion, making flanges around bulkhead hatches may seem complex at first glance, but by following Sven Yrvind’s meticulous process, enthusiasts can achieve professional-level results. Remember that the journey of boatbuilding is as rewarding as reaching your destination; it tests one’s patience and dedication. For those seeking to embark on this adventure or simply gain more insight into marine craftsmanship, Sven’s wisdom is invaluable.Sven begins by explaining that working on flanges vertically and horizontally is significantly easier than doing so in a flat position. To simplify the process further, he divides the task into two or three steps as suggested by fellow expert “for for.” This approach not only makes it more manageable but also allows for greater precision in crafting each component.Step 2: Applying Glue and Securing
Sven proceeds to apply glue along one edge of the flange, ensuring a secure bond when clamped into place. He emphasizes that this stage is crucial for maintaining the structural integrity of the flange, which in turn safeguards the living area beneath the canvas when hatches are open.Step 3: Allowing Time to Dry
After securely attaching the first portion of the flange, Sven allows ample time for it to dry before moving forward with additional steps. This patience and precision are key aspects of his successful boatbuilding methods.Step 4: Finishing Touches
Once the flange is fully dried, Sven removes the clamps carefully, ensuring no damage occurs during this process. He then moves on to attaching four more pieces onto these main frames, completing two pairs of flanges for the bulkhead hatches.The Final Touches
While two flanges form the primary support structure around the hatches, Sven mentions there are two additional pieces required at each end to ensure comprehensive protection. This attention to detail highlights his commitment to producing a durable and reliable design. “Sailing is about finding your path, whether it’s across an ocean or within yourself.” – Sven Yrvind In conclusion, making flanges around bulkhead hatches may seem complex at first glance, but by following Sven Yrvind’s meticulous process, enthusiasts can achieve professional-level results. Remember that the journey of boatbuilding is as rewarding as reaching your destination; it tests one’s patience and dedication. For those seeking to embark on this adventure or simply gain more insight into marine craftsmanship, Sven’s wisdom is invaluable.Sven Yrvind, a renowned yacht designer and sailor, shares valuable insights on creating flanges around bulkhead hatches for canvas protection in this enlightening video. By following his expert guidance, boat enthusiasts can ensure their living areas remain secure while allowing unhindered access through the hatches.Step 1: Starting with the Flange
Sven begins by explaining that working on flanges vertically and horizontally is significantly easier than doing so in a flat position. To simplify the process further, he divides the task into two or three steps as suggested by fellow expert “for for.” This approach not only makes it more manageable but also allows for greater precision in crafting each component.Step 2: Applying Glue and Securing
Sven proceeds to apply glue along one edge of the flange, ensuring a secure bond when clamped into place. He emphasizes that this stage is crucial for maintaining the structural integrity of the flange, which in turn safeguards the living area beneath the canvas when hatches are open.Step 3: Allowing Time to Dry
After securely attaching the first portion of the flange, Sven allows ample time for it to dry before moving forward with additional steps. This patience and precision are key aspects of his successful boatbuilding methods.Step 4: Finishing Touches
Once the flange is fully dried, Sven removes the clamps carefully, ensuring no damage occurs during this process. He then moves on to attaching four more pieces onto these main frames, completing two pairs of flanges for the bulkhead hatches.The Final Touches
While two flanges form the primary support structure around the hatches, Sven mentions there are two additional pieces required at each end to ensure comprehensive protection. This attention to detail highlights his commitment to producing a durable and reliable design. “Sailing is about finding your path, whether it’s across an ocean or within yourself.” – Sven Yrvind In conclusion, making flanges around bulkhead hatches may seem complex at first glance, but by following Sven Yrvind’s meticulous process, enthusiasts can achieve professional-level results. Remember that the journey of boatbuilding is as rewarding as reaching your destination; it tests one’s patience and dedication. For those seeking to embark on this adventure or simply gain more insight into marine craftsmanship, Sven’s wisdom is invaluable.Making Flanges Around Bulkhead Hatches for Canvas
Sven Yrvind, a renowned yacht designer and sailor, shares valuable insights on creating flanges around bulkhead hatches for canvas protection in this enlightening video. By following his expert guidance, boat enthusiasts can ensure their living areas remain secure while allowing unhindered access through the hatches.Step 1: Starting with the Flange
Sven begins by explaining that working on flanges vertically and horizontally is significantly easier than doing so in a flat position. To simplify the process further, he divides the task into two or three steps as suggested by fellow expert “for for.” This approach not only makes it more manageable but also allows for greater precision in crafting each component.Step 2: Applying Glue and Securing
Sven proceeds to apply glue along one edge of the flange, ensuring a secure bond when clamped into place. He emphasizes that this stage is crucial for maintaining the structural integrity of the flange, which in turn safeguards the living area beneath the canvas when hatches are open.Step 3: Allowing Time to Dry
After securely attaching the first portion of the flange, Sven allows ample time for it to dry before moving forward with additional steps. This patience and precision are key aspects of his successful boatbuilding methods.Step 4: Finishing Touches
Once the flange is fully dried, Sven removes the clamps carefully, ensuring no damage occurs during this process. He then moves on to attaching four more pieces onto these main frames, completing two pairs of flanges for the bulkhead hatches.The Final Touches
While two flanges form the primary support structure around the hatches, Sven mentions there are two additional pieces required at each end to ensure comprehensive protection. This attention to detail highlights his commitment to producing a durable and reliable design. “Sailing is about finding your path, whether it’s across an ocean or within yourself.” – Sven Yrvind In conclusion, making flanges around bulkhead hatches may seem complex at first glance, but by following Sven Yrvind’s meticulous process, enthusiasts can achieve professional-level results. Remember that the journey of boatbuilding is as rewarding as reaching your destination; it tests one’s patience and dedication. For those seeking to embark on this adventure or simply gain more insight into marine craftsmanship, Sven’s wisdom is invaluable.After securely attaching the first portion of the flange, Sven allows ample time for it to dry before moving forward with additional steps. This patience and precision are key aspects of his successful boatbuilding methods.Step 4: Finishing Touches
Once the flange is fully dried, Sven removes the clamps carefully, ensuring no damage occurs during this process. He then moves on to attaching four more pieces onto these main frames, completing two pairs of flanges for the bulkhead hatches.The Final Touches
While two flanges form the primary support structure around the hatches, Sven mentions there are two additional pieces required at each end to ensure comprehensive protection. This attention to detail highlights his commitment to producing a durable and reliable design. “Sailing is about finding your path, whether it’s across an ocean or within yourself.” – Sven Yrvind In conclusion, making flanges around bulkhead hatches may seem complex at first glance, but by following Sven Yrvind’s meticulous process, enthusiasts can achieve professional-level results. Remember that the journey of boatbuilding is as rewarding as reaching your destination; it tests one’s patience and dedication. For those seeking to embark on this adventure or simply gain more insight into marine craftsmanship, Sven’s wisdom is invaluable.Sven begins by explaining that working on flanges vertically and horizontally is significantly easier than doing so in a flat position. To simplify the process further, he divides the task into two or three steps as suggested by fellow expert “for for.” This approach not only makes it more manageable but also allows for greater precision in crafting each component.Step 2: Applying Glue and Securing
Sven proceeds to apply glue along one edge of the flange, ensuring a secure bond when clamped into place. He emphasizes that this stage is crucial for maintaining the structural integrity of the flange, which in turn safeguards the living area beneath the canvas when hatches are open.Step 3: Allowing Time to Dry
After securely attaching the first portion of the flange, Sven allows ample time for it to dry before moving forward with additional steps. This patience and precision are key aspects of his successful boatbuilding methods.Step 4: Finishing Touches
Once the flange is fully dried, Sven removes the clamps carefully, ensuring no damage occurs during this process. He then moves on to attaching four more pieces onto these main frames, completing two pairs of flanges for the bulkhead hatches.The Final Touches
While two flanges form the primary support structure around the hatches, Sven mentions there are two additional pieces required at each end to ensure comprehensive protection. This attention to detail highlights his commitment to producing a durable and reliable design. “Sailing is about finding your path, whether it’s across an ocean or within yourself.” – Sven Yrvind In conclusion, making flanges around bulkhead hatches may seem complex at first glance, but by following Sven Yrvind’s meticulous process, enthusiasts can achieve professional-level results. Remember that the journey of boatbuilding is as rewarding as reaching your destination; it tests one’s patience and dedication. For those seeking to embark on this adventure or simply gain more insight into marine craftsmanship, Sven’s wisdom is invaluable.Sven Yrvind, a renowned yacht designer and sailor, shares valuable insights on creating flanges around bulkhead hatches for canvas protection in this enlightening video. By following his expert guidance, boat enthusiasts can ensure their living areas remain secure while allowing unhindered access through the hatches.Step 1: Starting with the Flange
Sven begins by explaining that working on flanges vertically and horizontally is significantly easier than doing so in a flat position. To simplify the process further, he divides the task into two or three steps as suggested by fellow expert “for for.” This approach not only makes it more manageable but also allows for greater precision in crafting each component.Step 2: Applying Glue and Securing
Sven proceeds to apply glue along one edge of the flange, ensuring a secure bond when clamped into place. He emphasizes that this stage is crucial for maintaining the structural integrity of the flange, which in turn safeguards the living area beneath the canvas when hatches are open.Step 3: Allowing Time to Dry
After securely attaching the first portion of the flange, Sven allows ample time for it to dry before moving forward with additional steps. This patience and precision are key aspects of his successful boatbuilding methods.Step 4: Finishing Touches
Once the flange is fully dried, Sven removes the clamps carefully, ensuring no damage occurs during this process. He then moves on to attaching four more pieces onto these main frames, completing two pairs of flanges for the bulkhead hatches.The Final Touches
While two flanges form the primary support structure around the hatches, Sven mentions there are two additional pieces required at each end to ensure comprehensive protection. This attention to detail highlights his commitment to producing a durable and reliable design. “Sailing is about finding your path, whether it’s across an ocean or within yourself.” – Sven Yrvind In conclusion, making flanges around bulkhead hatches may seem complex at first glance, but by following Sven Yrvind’s meticulous process, enthusiasts can achieve professional-level results. Remember that the journey of boatbuilding is as rewarding as reaching your destination; it tests one’s patience and dedication. For those seeking to embark on this adventure or simply gain more insight into marine craftsmanship, Sven’s wisdom is invaluable.Making Flanges Around Bulkhead Hatches for Canvas
Sven Yrvind, a renowned yacht designer and sailor, shares valuable insights on creating flanges around bulkhead hatches for canvas protection in this enlightening video. By following his expert guidance, boat enthusiasts can ensure their living areas remain secure while allowing unhindered access through the hatches.Step 1: Starting with the Flange
Sven begins by explaining that working on flanges vertically and horizontally is significantly easier than doing so in a flat position. To simplify the process further, he divides the task into two or three steps as suggested by fellow expert “for for.” This approach not only makes it more manageable but also allows for greater precision in crafting each component.Step 2: Applying Glue and Securing
Sven proceeds to apply glue along one edge of the flange, ensuring a secure bond when clamped into place. He emphasizes that this stage is crucial for maintaining the structural integrity of the flange, which in turn safeguards the living area beneath the canvas when hatches are open.Step 3: Allowing Time to Dry
After securely attaching the first portion of the flange, Sven allows ample time for it to dry before moving forward with additional steps. This patience and precision are key aspects of his successful boatbuilding methods.Step 4: Finishing Touches
Once the flange is fully dried, Sven removes the clamps carefully, ensuring no damage occurs during this process. He then moves on to attaching four more pieces onto these main frames, completing two pairs of flanges for the bulkhead hatches.The Final Touches
While two flanges form the primary support structure around the hatches, Sven mentions there are two additional pieces required at each end to ensure comprehensive protection. This attention to detail highlights his commitment to producing a durable and reliable design. “Sailing is about finding your path, whether it’s across an ocean or within yourself.” – Sven Yrvind In conclusion, making flanges around bulkhead hatches may seem complex at first glance, but by following Sven Yrvind’s meticulous process, enthusiasts can achieve professional-level results. Remember that the journey of boatbuilding is as rewarding as reaching your destination; it tests one’s patience and dedication. For those seeking to embark on this adventure or simply gain more insight into marine craftsmanship, Sven’s wisdom is invaluable.Sven proceeds to apply glue along one edge of the flange, ensuring a secure bond when clamped into place. He emphasizes that this stage is crucial for maintaining the structural integrity of the flange, which in turn safeguards the living area beneath the canvas when hatches are open.Step 3: Allowing Time to Dry
After securely attaching the first portion of the flange, Sven allows ample time for it to dry before moving forward with additional steps. This patience and precision are key aspects of his successful boatbuilding methods.Step 4: Finishing Touches
Once the flange is fully dried, Sven removes the clamps carefully, ensuring no damage occurs during this process. He then moves on to attaching four more pieces onto these main frames, completing two pairs of flanges for the bulkhead hatches.The Final Touches
While two flanges form the primary support structure around the hatches, Sven mentions there are two additional pieces required at each end to ensure comprehensive protection. This attention to detail highlights his commitment to producing a durable and reliable design. “Sailing is about finding your path, whether it’s across an ocean or within yourself.” – Sven Yrvind In conclusion, making flanges around bulkhead hatches may seem complex at first glance, but by following Sven Yrvind’s meticulous process, enthusiasts can achieve professional-level results. Remember that the journey of boatbuilding is as rewarding as reaching your destination; it tests one’s patience and dedication. For those seeking to embark on this adventure or simply gain more insight into marine craftsmanship, Sven’s wisdom is invaluable.Sven begins by explaining that working on flanges vertically and horizontally is significantly easier than doing so in a flat position. To simplify the process further, he divides the task into two or three steps as suggested by fellow expert “for for.” This approach not only makes it more manageable but also allows for greater precision in crafting each component.Step 2: Applying Glue and Securing
Sven proceeds to apply glue along one edge of the flange, ensuring a secure bond when clamped into place. He emphasizes that this stage is crucial for maintaining the structural integrity of the flange, which in turn safeguards the living area beneath the canvas when hatches are open.Step 3: Allowing Time to Dry
After securely attaching the first portion of the flange, Sven allows ample time for it to dry before moving forward with additional steps. This patience and precision are key aspects of his successful boatbuilding methods.Step 4: Finishing Touches
Once the flange is fully dried, Sven removes the clamps carefully, ensuring no damage occurs during this process. He then moves on to attaching four more pieces onto these main frames, completing two pairs of flanges for the bulkhead hatches.The Final Touches
While two flanges form the primary support structure around the hatches, Sven mentions there are two additional pieces required at each end to ensure comprehensive protection. This attention to detail highlights his commitment to producing a durable and reliable design. “Sailing is about finding your path, whether it’s across an ocean or within yourself.” – Sven Yrvind In conclusion, making flanges around bulkhead hatches may seem complex at first glance, but by following Sven Yrvind’s meticulous process, enthusiasts can achieve professional-level results. Remember that the journey of boatbuilding is as rewarding as reaching your destination; it tests one’s patience and dedication. For those seeking to embark on this adventure or simply gain more insight into marine craftsmanship, Sven’s wisdom is invaluable.Sven Yrvind, a renowned yacht designer and sailor, shares valuable insights on creating flanges around bulkhead hatches for canvas protection in this enlightening video. By following his expert guidance, boat enthusiasts can ensure their living areas remain secure while allowing unhindered access through the hatches.Step 1: Starting with the Flange
Sven begins by explaining that working on flanges vertically and horizontally is significantly easier than doing so in a flat position. To simplify the process further, he divides the task into two or three steps as suggested by fellow expert “for for.” This approach not only makes it more manageable but also allows for greater precision in crafting each component.Step 2: Applying Glue and Securing
Sven proceeds to apply glue along one edge of the flange, ensuring a secure bond when clamped into place. He emphasizes that this stage is crucial for maintaining the structural integrity of the flange, which in turn safeguards the living area beneath the canvas when hatches are open.Step 3: Allowing Time to Dry
After securely attaching the first portion of the flange, Sven allows ample time for it to dry before moving forward with additional steps. This patience and precision are key aspects of his successful boatbuilding methods.Step 4: Finishing Touches
Once the flange is fully dried, Sven removes the clamps carefully, ensuring no damage occurs during this process. He then moves on to attaching four more pieces onto these main frames, completing two pairs of flanges for the bulkhead hatches.The Final Touches
While two flanges form the primary support structure around the hatches, Sven mentions there are two additional pieces required at each end to ensure comprehensive protection. This attention to detail highlights his commitment to producing a durable and reliable design. “Sailing is about finding your path, whether it’s across an ocean or within yourself.” – Sven Yrvind In conclusion, making flanges around bulkhead hatches may seem complex at first glance, but by following Sven Yrvind’s meticulous process, enthusiasts can achieve professional-level results. Remember that the journey of boatbuilding is as rewarding as reaching your destination; it tests one’s patience and dedication. For those seeking to embark on this adventure or simply gain more insight into marine craftsmanship, Sven’s wisdom is invaluable.Making Flanges Around Bulkhead Hatches for Canvas
Sven Yrvind, a renowned yacht designer and sailor, shares valuable insights on creating flanges around bulkhead hatches for canvas protection in this enlightening video. By following his expert guidance, boat enthusiasts can ensure their living areas remain secure while allowing unhindered access through the hatches.Step 1: Starting with the Flange
Sven begins by explaining that working on flanges vertically and horizontally is significantly easier than doing so in a flat position. To simplify the process further, he divides the task into two or three steps as suggested by fellow expert “for for.” This approach not only makes it more manageable but also allows for greater precision in crafting each component.Step 2: Applying Glue and Securing
Sven proceeds to apply glue along one edge of the flange, ensuring a secure bond when clamped into place. He emphasizes that this stage is crucial for maintaining the structural integrity of the flange, which in turn safeguards the living area beneath the canvas when hatches are open.Step 3: Allowing Time to Dry
After securely attaching the first portion of the flange, Sven allows ample time for it to dry before moving forward with additional steps. This patience and precision are key aspects of his successful boatbuilding methods.Step 4: Finishing Touches
Once the flange is fully dried, Sven removes the clamps carefully, ensuring no damage occurs during this process. He then moves on to attaching four more pieces onto these main frames, completing two pairs of flanges for the bulkhead hatches.The Final Touches
While two flanges form the primary support structure around the hatches, Sven mentions there are two additional pieces required at each end to ensure comprehensive protection. This attention to detail highlights his commitment to producing a durable and reliable design. “Sailing is about finding your path, whether it’s across an ocean or within yourself.” – Sven Yrvind In conclusion, making flanges around bulkhead hatches may seem complex at first glance, but by following Sven Yrvind’s meticulous process, enthusiasts can achieve professional-level results. Remember that the journey of boatbuilding is as rewarding as reaching your destination; it tests one’s patience and dedication. For those seeking to embark on this adventure or simply gain more insight into marine craftsmanship, Sven’s wisdom is invaluable.Once the flange is fully dried, Sven removes the clamps carefully, ensuring no damage occurs during this process. He then moves on to attaching four more pieces onto these main frames, completing two pairs of flanges for the bulkhead hatches.The Final Touches
While two flanges form the primary support structure around the hatches, Sven mentions there are two additional pieces required at each end to ensure comprehensive protection. This attention to detail highlights his commitment to producing a durable and reliable design. “Sailing is about finding your path, whether it’s across an ocean or within yourself.” – Sven Yrvind In conclusion, making flanges around bulkhead hatches may seem complex at first glance, but by following Sven Yrvind’s meticulous process, enthusiasts can achieve professional-level results. Remember that the journey of boatbuilding is as rewarding as reaching your destination; it tests one’s patience and dedication. For those seeking to embark on this adventure or simply gain more insight into marine craftsmanship, Sven’s wisdom is invaluable.Sven proceeds to apply glue along one edge of the flange, ensuring a secure bond when clamped into place. He emphasizes that this stage is crucial for maintaining the structural integrity of the flange, which in turn safeguards the living area beneath the canvas when hatches are open.Step 3: Allowing Time to Dry
After securely attaching the first portion of the flange, Sven allows ample time for it to dry before moving forward with additional steps. This patience and precision are key aspects of his successful boatbuilding methods.Step 4: Finishing Touches
Once the flange is fully dried, Sven removes the clamps carefully, ensuring no damage occurs during this process. He then moves on to attaching four more pieces onto these main frames, completing two pairs of flanges for the bulkhead hatches.The Final Touches
While two flanges form the primary support structure around the hatches, Sven mentions there are two additional pieces required at each end to ensure comprehensive protection. This attention to detail highlights his commitment to producing a durable and reliable design. “Sailing is about finding your path, whether it’s across an ocean or within yourself.” – Sven Yrvind In conclusion, making flanges around bulkhead hatches may seem complex at first glance, but by following Sven Yrvind’s meticulous process, enthusiasts can achieve professional-level results. Remember that the journey of boatbuilding is as rewarding as reaching your destination; it tests one’s patience and dedication. For those seeking to embark on this adventure or simply gain more insight into marine craftsmanship, Sven’s wisdom is invaluable.Sven begins by explaining that working on flanges vertically and horizontally is significantly easier than doing so in a flat position. To simplify the process further, he divides the task into two or three steps as suggested by fellow expert “for for.” This approach not only makes it more manageable but also allows for greater precision in crafting each component.Step 2: Applying Glue and Securing
Sven proceeds to apply glue along one edge of the flange, ensuring a secure bond when clamped into place. He emphasizes that this stage is crucial for maintaining the structural integrity of the flange, which in turn safeguards the living area beneath the canvas when hatches are open.Step 3: Allowing Time to Dry
After securely attaching the first portion of the flange, Sven allows ample time for it to dry before moving forward with additional steps. This patience and precision are key aspects of his successful boatbuilding methods.Step 4: Finishing Touches
Once the flange is fully dried, Sven removes the clamps carefully, ensuring no damage occurs during this process. He then moves on to attaching four more pieces onto these main frames, completing two pairs of flanges for the bulkhead hatches.The Final Touches
While two flanges form the primary support structure around the hatches, Sven mentions there are two additional pieces required at each end to ensure comprehensive protection. This attention to detail highlights his commitment to producing a durable and reliable design. “Sailing is about finding your path, whether it’s across an ocean or within yourself.” – Sven Yrvind In conclusion, making flanges around bulkhead hatches may seem complex at first glance, but by following Sven Yrvind’s meticulous process, enthusiasts can achieve professional-level results. Remember that the journey of boatbuilding is as rewarding as reaching your destination; it tests one’s patience and dedication. For those seeking to embark on this adventure or simply gain more insight into marine craftsmanship, Sven’s wisdom is invaluable.Sven Yrvind, a renowned yacht designer and sailor, shares valuable insights on creating flanges around bulkhead hatches for canvas protection in this enlightening video. By following his expert guidance, boat enthusiasts can ensure their living areas remain secure while allowing unhindered access through the hatches.Step 1: Starting with the Flange
Sven begins by explaining that working on flanges vertically and horizontally is significantly easier than doing so in a flat position. To simplify the process further, he divides the task into two or three steps as suggested by fellow expert “for for.” This approach not only makes it more manageable but also allows for greater precision in crafting each component.Step 2: Applying Glue and Securing
Sven proceeds to apply glue along one edge of the flange, ensuring a secure bond when clamped into place. He emphasizes that this stage is crucial for maintaining the structural integrity of the flange, which in turn safeguards the living area beneath the canvas when hatches are open.Step 3: Allowing Time to Dry
After securely attaching the first portion of the flange, Sven allows ample time for it to dry before moving forward with additional steps. This patience and precision are key aspects of his successful boatbuilding methods.Step 4: Finishing Touches
Once the flange is fully dried, Sven removes the clamps carefully, ensuring no damage occurs during this process. He then moves on to attaching four more pieces onto these main frames, completing two pairs of flanges for the bulkhead hatches.The Final Touches
While two flanges form the primary support structure around the hatches, Sven mentions there are two additional pieces required at each end to ensure comprehensive protection. This attention to detail highlights his commitment to producing a durable and reliable design. “Sailing is about finding your path, whether it’s across an ocean or within yourself.” – Sven Yrvind In conclusion, making flanges around bulkhead hatches may seem complex at first glance, but by following Sven Yrvind’s meticulous process, enthusiasts can achieve professional-level results. Remember that the journey of boatbuilding is as rewarding as reaching your destination; it tests one’s patience and dedication. For those seeking to embark on this adventure or simply gain more insight into marine craftsmanship, Sven’s wisdom is invaluable.Making Flanges Around Bulkhead Hatches for Canvas
Sven Yrvind, a renowned yacht designer and sailor, shares valuable insights on creating flanges around bulkhead hatches for canvas protection in this enlightening video. By following his expert guidance, boat enthusiasts can ensure their living areas remain secure while allowing unhindered access through the hatches.Step 1: Starting with the Flange
Sven begins by explaining that working on flanges vertically and horizontally is significantly easier than doing so in a flat position. To simplify the process further, he divides the task into two or three steps as suggested by fellow expert “for for.” This approach not only makes it more manageable but also allows for greater precision in crafting each component.Step 2: Applying Glue and Securing
Sven proceeds to apply glue along one edge of the flange, ensuring a secure bond when clamped into place. He emphasizes that this stage is crucial for maintaining the structural integrity of the flange, which in turn safeguards the living area beneath the canvas when hatches are open.Step 3: Allowing Time to Dry
After securely attaching the first portion of the flange, Sven allows ample time for it to dry before moving forward with additional steps. This patience and precision are key aspects of his successful boatbuilding methods.Step 4: Finishing Touches
Once the flange is fully dried, Sven removes the clamps carefully, ensuring no damage occurs during this process. He then moves on to attaching four more pieces onto these main frames, completing two pairs of flanges for the bulkhead hatches.The Final Touches
While two flanges form the primary support structure around the hatches, Sven mentions there are two additional pieces required at each end to ensure comprehensive protection. This attention to detail highlights his commitment to producing a durable and reliable design. “Sailing is about finding your path, whether it’s across an ocean or within yourself.” – Sven Yrvind In conclusion, making flanges around bulkhead hatches may seem complex at first glance, but by following Sven Yrvind’s meticulous process, enthusiasts can achieve professional-level results. Remember that the journey of boatbuilding is as rewarding as reaching your destination; it tests one’s patience and dedication. For those seeking to embark on this adventure or simply gain more insight into marine craftsmanship, Sven’s wisdom is invaluable.After securely attaching the first portion of the flange, Sven allows ample time for it to dry before moving forward with additional steps. This patience and precision are key aspects of his successful boatbuilding methods.Step 4: Finishing Touches
Once the flange is fully dried, Sven removes the clamps carefully, ensuring no damage occurs during this process. He then moves on to attaching four more pieces onto these main frames, completing two pairs of flanges for the bulkhead hatches.The Final Touches
While two flanges form the primary support structure around the hatches, Sven mentions there are two additional pieces required at each end to ensure comprehensive protection. This attention to detail highlights his commitment to producing a durable and reliable design. “Sailing is about finding your path, whether it’s across an ocean or within yourself.” – Sven Yrvind In conclusion, making flanges around bulkhead hatches may seem complex at first glance, but by following Sven Yrvind’s meticulous process, enthusiasts can achieve professional-level results. Remember that the journey of boatbuilding is as rewarding as reaching your destination; it tests one’s patience and dedication. For those seeking to embark on this adventure or simply gain more insight into marine craftsmanship, Sven’s wisdom is invaluable.Sven proceeds to apply glue along one edge of the flange, ensuring a secure bond when clamped into place. He emphasizes that this stage is crucial for maintaining the structural integrity of the flange, which in turn safeguards the living area beneath the canvas when hatches are open.Step 3: Allowing Time to Dry
After securely attaching the first portion of the flange, Sven allows ample time for it to dry before moving forward with additional steps. This patience and precision are key aspects of his successful boatbuilding methods.Step 4: Finishing Touches
Once the flange is fully dried, Sven removes the clamps carefully, ensuring no damage occurs during this process. He then moves on to attaching four more pieces onto these main frames, completing two pairs of flanges for the bulkhead hatches.The Final Touches
While two flanges form the primary support structure around the hatches, Sven mentions there are two additional pieces required at each end to ensure comprehensive protection. This attention to detail highlights his commitment to producing a durable and reliable design. “Sailing is about finding your path, whether it’s across an ocean or within yourself.” – Sven Yrvind In conclusion, making flanges around bulkhead hatches may seem complex at first glance, but by following Sven Yrvind’s meticulous process, enthusiasts can achieve professional-level results. Remember that the journey of boatbuilding is as rewarding as reaching your destination; it tests one’s patience and dedication. For those seeking to embark on this adventure or simply gain more insight into marine craftsmanship, Sven’s wisdom is invaluable.Sven begins by explaining that working on flanges vertically and horizontally is significantly easier than doing so in a flat position. To simplify the process further, he divides the task into two or three steps as suggested by fellow expert “for for.” This approach not only makes it more manageable but also allows for greater precision in crafting each component.Step 2: Applying Glue and Securing
Sven proceeds to apply glue along one edge of the flange, ensuring a secure bond when clamped into place. He emphasizes that this stage is crucial for maintaining the structural integrity of the flange, which in turn safeguards the living area beneath the canvas when hatches are open.Step 3: Allowing Time to Dry
After securely attaching the first portion of the flange, Sven allows ample time for it to dry before moving forward with additional steps. This patience and precision are key aspects of his successful boatbuilding methods.Step 4: Finishing Touches
Once the flange is fully dried, Sven removes the clamps carefully, ensuring no damage occurs during this process. He then moves on to attaching four more pieces onto these main frames, completing two pairs of flanges for the bulkhead hatches.The Final Touches
While two flanges form the primary support structure around the hatches, Sven mentions there are two additional pieces required at each end to ensure comprehensive protection. This attention to detail highlights his commitment to producing a durable and reliable design. “Sailing is about finding your path, whether it’s across an ocean or within yourself.” – Sven Yrvind In conclusion, making flanges around bulkhead hatches may seem complex at first glance, but by following Sven Yrvind’s meticulous process, enthusiasts can achieve professional-level results. Remember that the journey of boatbuilding is as rewarding as reaching your destination; it tests one’s patience and dedication. For those seeking to embark on this adventure or simply gain more insight into marine craftsmanship, Sven’s wisdom is invaluable.Sven Yrvind, a renowned yacht designer and sailor, shares valuable insights on creating flanges around bulkhead hatches for canvas protection in this enlightening video. By following his expert guidance, boat enthusiasts can ensure their living areas remain secure while allowing unhindered access through the hatches.Step 1: Starting with the Flange
Sven begins by explaining that working on flanges vertically and horizontally is significantly easier than doing so in a flat position. To simplify the process further, he divides the task into two or three steps as suggested by fellow expert “for for.” This approach not only makes it more manageable but also allows for greater precision in crafting each component.Step 2: Applying Glue and Securing
Sven proceeds to apply glue along one edge of the flange, ensuring a secure bond when clamped into place. He emphasizes that this stage is crucial for maintaining the structural integrity of the flange, which in turn safeguards the living area beneath the canvas when hatches are open.Step 3: Allowing Time to Dry
After securely attaching the first portion of the flange, Sven allows ample time for it to dry before moving forward with additional steps. This patience and precision are key aspects of his successful boatbuilding methods.Step 4: Finishing Touches
Once the flange is fully dried, Sven removes the clamps carefully, ensuring no damage occurs during this process. He then moves on to attaching four more pieces onto these main frames, completing two pairs of flanges for the bulkhead hatches.The Final Touches
While two flanges form the primary support structure around the hatches, Sven mentions there are two additional pieces required at each end to ensure comprehensive protection. This attention to detail highlights his commitment to producing a durable and reliable design. “Sailing is about finding your path, whether it’s across an ocean or within yourself.” – Sven Yrvind In conclusion, making flanges around bulkhead hatches may seem complex at first glance, but by following Sven Yrvind’s meticulous process, enthusiasts can achieve professional-level results. Remember that the journey of boatbuilding is as rewarding as reaching your destination; it tests one’s patience and dedication. For those seeking to embark on this adventure or simply gain more insight into marine craftsmanship, Sven’s wisdom is invaluable.Making Flanges Around Bulkhead Hatches for Canvas
Sven Yrvind, a renowned yacht designer and sailor, shares valuable insights on creating flanges around bulkhead hatches for canvas protection in this enlightening video. By following his expert guidance, boat enthusiasts can ensure their living areas remain secure while allowing unhindered access through the hatches.Step 1: Starting with the Flange
Sven begins by explaining that working on flanges vertically and horizontally is significantly easier than doing so in a flat position. To simplify the process further, he divides the task into two or three steps as suggested by fellow expert “for for.” This approach not only makes it more manageable but also allows for greater precision in crafting each component.Step 2: Applying Glue and Securing
Sven proceeds to apply glue along one edge of the flange, ensuring a secure bond when clamped into place. He emphasizes that this stage is crucial for maintaining the structural integrity of the flange, which in turn safeguards the living area beneath the canvas when hatches are open.Step 3: Allowing Time to Dry
After securely attaching the first portion of the flange, Sven allows ample time for it to dry before moving forward with additional steps. This patience and precision are key aspects of his successful boatbuilding methods.Step 4: Finishing Touches
Once the flange is fully dried, Sven removes the clamps carefully, ensuring no damage occurs during this process. He then moves on to attaching four more pieces onto these main frames, completing two pairs of flanges for the bulkhead hatches.The Final Touches
While two flanges form the primary support structure around the hatches, Sven mentions there are two additional pieces required at each end to ensure comprehensive protection. This attention to detail highlights his commitment to producing a durable and reliable design. “Sailing is about finding your path, whether it’s across an ocean or within yourself.” – Sven Yrvind In conclusion, making flanges around bulkhead hatches may seem complex at first glance, but by following Sven Yrvind’s meticulous process, enthusiasts can achieve professional-level results. Remember that the journey of boatbuilding is as rewarding as reaching your destination; it tests one’s patience and dedication. For those seeking to embark on this adventure or simply gain more insight into marine craftsmanship, Sven’s wisdom is invaluable.Once the flange is fully dried, Sven removes the clamps carefully, ensuring no damage occurs during this process. He then moves on to attaching four more pieces onto these main frames, completing two pairs of flanges for the bulkhead hatches.The Final Touches
While two flanges form the primary support structure around the hatches, Sven mentions there are two additional pieces required at each end to ensure comprehensive protection. This attention to detail highlights his commitment to producing a durable and reliable design. “Sailing is about finding your path, whether it’s across an ocean or within yourself.” – Sven Yrvind In conclusion, making flanges around bulkhead hatches may seem complex at first glance, but by following Sven Yrvind’s meticulous process, enthusiasts can achieve professional-level results. Remember that the journey of boatbuilding is as rewarding as reaching your destination; it tests one’s patience and dedication. For those seeking to embark on this adventure or simply gain more insight into marine craftsmanship, Sven’s wisdom is invaluable.After securely attaching the first portion of the flange, Sven allows ample time for it to dry before moving forward with additional steps. This patience and precision are key aspects of his successful boatbuilding methods.Step 4: Finishing Touches
Once the flange is fully dried, Sven removes the clamps carefully, ensuring no damage occurs during this process. He then moves on to attaching four more pieces onto these main frames, completing two pairs of flanges for the bulkhead hatches.The Final Touches
While two flanges form the primary support structure around the hatches, Sven mentions there are two additional pieces required at each end to ensure comprehensive protection. This attention to detail highlights his commitment to producing a durable and reliable design. “Sailing is about finding your path, whether it’s across an ocean or within yourself.” – Sven Yrvind In conclusion, making flanges around bulkhead hatches may seem complex at first glance, but by following Sven Yrvind’s meticulous process, enthusiasts can achieve professional-level results. Remember that the journey of boatbuilding is as rewarding as reaching your destination; it tests one’s patience and dedication. For those seeking to embark on this adventure or simply gain more insight into marine craftsmanship, Sven’s wisdom is invaluable.Sven proceeds to apply glue along one edge of the flange, ensuring a secure bond when clamped into place. He emphasizes that this stage is crucial for maintaining the structural integrity of the flange, which in turn safeguards the living area beneath the canvas when hatches are open.Step 3: Allowing Time to Dry
After securely attaching the first portion of the flange, Sven allows ample time for it to dry before moving forward with additional steps. This patience and precision are key aspects of his successful boatbuilding methods.Step 4: Finishing Touches
Once the flange is fully dried, Sven removes the clamps carefully, ensuring no damage occurs during this process. He then moves on to attaching four more pieces onto these main frames, completing two pairs of flanges for the bulkhead hatches.The Final Touches
While two flanges form the primary support structure around the hatches, Sven mentions there are two additional pieces required at each end to ensure comprehensive protection. This attention to detail highlights his commitment to producing a durable and reliable design. “Sailing is about finding your path, whether it’s across an ocean or within yourself.” – Sven Yrvind In conclusion, making flanges around bulkhead hatches may seem complex at first glance, but by following Sven Yrvind’s meticulous process, enthusiasts can achieve professional-level results. Remember that the journey of boatbuilding is as rewarding as reaching your destination; it tests one’s patience and dedication. For those seeking to embark on this adventure or simply gain more insight into marine craftsmanship, Sven’s wisdom is invaluable.Sven begins by explaining that working on flanges vertically and horizontally is significantly easier than doing so in a flat position. To simplify the process further, he divides the task into two or three steps as suggested by fellow expert “for for.” This approach not only makes it more manageable but also allows for greater precision in crafting each component.Step 2: Applying Glue and Securing
Sven proceeds to apply glue along one edge of the flange, ensuring a secure bond when clamped into place. He emphasizes that this stage is crucial for maintaining the structural integrity of the flange, which in turn safeguards the living area beneath the canvas when hatches are open.Step 3: Allowing Time to Dry
After securely attaching the first portion of the flange, Sven allows ample time for it to dry before moving forward with additional steps. This patience and precision are key aspects of his successful boatbuilding methods.Step 4: Finishing Touches
Once the flange is fully dried, Sven removes the clamps carefully, ensuring no damage occurs during this process. He then moves on to attaching four more pieces onto these main frames, completing two pairs of flanges for the bulkhead hatches.The Final Touches
While two flanges form the primary support structure around the hatches, Sven mentions there are two additional pieces required at each end to ensure comprehensive protection. This attention to detail highlights his commitment to producing a durable and reliable design. “Sailing is about finding your path, whether it’s across an ocean or within yourself.” – Sven Yrvind In conclusion, making flanges around bulkhead hatches may seem complex at first glance, but by following Sven Yrvind’s meticulous process, enthusiasts can achieve professional-level results. Remember that the journey of boatbuilding is as rewarding as reaching your destination; it tests one’s patience and dedication. For those seeking to embark on this adventure or simply gain more insight into marine craftsmanship, Sven’s wisdom is invaluable.Sven Yrvind, a renowned yacht designer and sailor, shares valuable insights on creating flanges around bulkhead hatches for canvas protection in this enlightening video. By following his expert guidance, boat enthusiasts can ensure their living areas remain secure while allowing unhindered access through the hatches.Step 1: Starting with the Flange
Sven begins by explaining that working on flanges vertically and horizontally is significantly easier than doing so in a flat position. To simplify the process further, he divides the task into two or three steps as suggested by fellow expert “for for.” This approach not only makes it more manageable but also allows for greater precision in crafting each component.Step 2: Applying Glue and Securing
Sven proceeds to apply glue along one edge of the flange, ensuring a secure bond when clamped into place. He emphasizes that this stage is crucial for maintaining the structural integrity of the flange, which in turn safeguards the living area beneath the canvas when hatches are open.Step 3: Allowing Time to Dry
After securely attaching the first portion of the flange, Sven allows ample time for it to dry before moving forward with additional steps. This patience and precision are key aspects of his successful boatbuilding methods.Step 4: Finishing Touches
Once the flange is fully dried, Sven removes the clamps carefully, ensuring no damage occurs during this process. He then moves on to attaching four more pieces onto these main frames, completing two pairs of flanges for the bulkhead hatches.The Final Touches
While two flanges form the primary support structure around the hatches, Sven mentions there are two additional pieces required at each end to ensure comprehensive protection. This attention to detail highlights his commitment to producing a durable and reliable design. “Sailing is about finding your path, whether it’s across an ocean or within yourself.” – Sven Yrvind In conclusion, making flanges around bulkhead hatches may seem complex at first glance, but by following Sven Yrvind’s meticulous process, enthusiasts can achieve professional-level results. Remember that the journey of boatbuilding is as rewarding as reaching your destination; it tests one’s patience and dedication. For those seeking to embark on this adventure or simply gain more insight into marine craftsmanship, Sven’s wisdom is invaluable.Making Flanges Around Bulkhead Hatches for Canvas
Sven Yrvind, a renowned yacht designer and sailor, shares valuable insights on creating flanges around bulkhead hatches for canvas protection in this enlightening video. By following his expert guidance, boat enthusiasts can ensure their living areas remain secure while allowing unhindered access through the hatches.Step 1: Starting with the Flange
Sven begins by explaining that working on flanges vertically and horizontally is significantly easier than doing so in a flat position. To simplify the process further, he divides the task into two or three steps as suggested by fellow expert “for for.” This approach not only makes it more manageable but also allows for greater precision in crafting each component.Step 2: Applying Glue and Securing
Sven proceeds to apply glue along one edge of the flange, ensuring a secure bond when clamped into place. He emphasizes that this stage is crucial for maintaining the structural integrity of the flange, which in turn safeguards the living area beneath the canvas when hatches are open.Step 3: Allowing Time to Dry
After securely attaching the first portion of the flange, Sven allows ample time for it to dry before moving forward with additional steps. This patience and precision are key aspects of his successful boatbuilding methods.Step 4: Finishing Touches
Once the flange is fully dried, Sven removes the clamps carefully, ensuring no damage occurs during this process. He then moves on to attaching four more pieces onto these main frames, completing two pairs of flanges for the bulkhead hatches.The Final Touches
While two flanges form the primary support structure around the hatches, Sven mentions there are two additional pieces required at each end to ensure comprehensive protection. This attention to detail highlights his commitment to producing a durable and reliable design. “Sailing is about finding your path, whether it’s across an ocean or within yourself.” – Sven Yrvind In conclusion, making flanges around bulkhead hatches may seem complex at first glance, but by following Sven Yrvind’s meticulous process, enthusiasts can achieve professional-level results. Remember that the journey of boatbuilding is as rewarding as reaching your destination; it tests one’s patience and dedication. For those seeking to embark on this adventure or simply gain more insight into marine craftsmanship, Sven’s wisdom is invaluable.After securely attaching the first portion of the flange, Sven allows ample time for it to dry before moving forward with additional steps. This patience and precision are key aspects of his successful boatbuilding methods.Step 4: Finishing Touches
Once the flange is fully dried, Sven removes the clamps carefully, ensuring no damage occurs during this process. He then moves on to attaching four more pieces onto these main frames, completing two pairs of flanges for the bulkhead hatches.The Final Touches
While two flanges form the primary support structure around the hatches, Sven mentions there are two additional pieces required at each end to ensure comprehensive protection. This attention to detail highlights his commitment to producing a durable and reliable design. “Sailing is about finding your path, whether it’s across an ocean or within yourself.” – Sven Yrvind In conclusion, making flanges around bulkhead hatches may seem complex at first glance, but by following Sven Yrvind’s meticulous process, enthusiasts can achieve professional-level results. Remember that the journey of boatbuilding is as rewarding as reaching your destination; it tests one’s patience and dedication. For those seeking to embark on this adventure or simply gain more insight into marine craftsmanship, Sven’s wisdom is invaluable.Sven proceeds to apply glue along one edge of the flange, ensuring a secure bond when clamped into place. He emphasizes that this stage is crucial for maintaining the structural integrity of the flange, which in turn safeguards the living area beneath the canvas when hatches are open.Step 3: Allowing Time to Dry
After securely attaching the first portion of the flange, Sven allows ample time for it to dry before moving forward with additional steps. This patience and precision are key aspects of his successful boatbuilding methods.Step 4: Finishing Touches
Once the flange is fully dried, Sven removes the clamps carefully, ensuring no damage occurs during this process. He then moves on to attaching four more pieces onto these main frames, completing two pairs of flanges for the bulkhead hatches.The Final Touches
While two flanges form the primary support structure around the hatches, Sven mentions there are two additional pieces required at each end to ensure comprehensive protection. This attention to detail highlights his commitment to producing a durable and reliable design. “Sailing is about finding your path, whether it’s across an ocean or within yourself.” – Sven Yrvind In conclusion, making flanges around bulkhead hatches may seem complex at first glance, but by following Sven Yrvind’s meticulous process, enthusiasts can achieve professional-level results. Remember that the journey of boatbuilding is as rewarding as reaching your destination; it tests one’s patience and dedication. For those seeking to embark on this adventure or simply gain more insight into marine craftsmanship, Sven’s wisdom is invaluable.Making Flanges Around Bulkhead Hatches for Canvas
Sven Yrvind, a renowned yacht designer and sailor, shares valuable insights on creating flanges around bulkhead hatches for canvas protection in this enlightening video. By following his expert guidance, boat enthusiasts can ensure their living areas remain secure while allowing unhindered access through the hatches.Step 1: Starting with the Flange
Sven begins by explaining that working on flanges vertically and horizontally is significantly easier than doing so in a flat position. To simplify the process further, he divides the task into two or three steps as suggested by fellow expert “for for.” This approach not only makes it more manageable but also allows for greater precision in crafting each component.Step 2: Applying Glue and Securing
Sven proceeds to apply glue along one edge of the flange, ensuring a secure bond when clamped into place. He emphasizes that this stage is crucial for maintaining the structural integrity of the flange, which in turn safeguards the living area beneath the canvas when hatches are open.Step 3: Allowing Time to Dry
After securely attaching the first portion of the flange, Sven allows ample time for it to dry before moving forward with additional steps. This patience and precision are key aspects of his successful boatbuilding methods.Step 4: Finishing Touches
Once the flange is fully dried, Sven removes the clamps carefully, ensuring no damage occurs during this process. He then moves on to attaching four more pieces onto these main frames, completing two pairs of flanges for the bulkhead hatches.The Final Touches
While two flanges form the primary support structure around the hatches, Sven mentions there are two additional pieces required at each end to ensure comprehensive protection. This attention to detail highlights his commitment to producing a durable and reliable design. “Sailing is about finding your path, whether it’s across an ocean or within yourself.” – Sven Yrvind In conclusion, making flanges around bulkhead hatches may seem complex at first glance, but by following Sven Yrvind’s meticulous process, enthusiasts can achieve professional-level results. Remember that the journey of boatbuilding is as rewarding as reaching your destination; it tests one’s patience and dedication. For those seeking to embark on this adventure or simply gain more insight into marine craftsmanship, Sven’s wisdom is invaluable.Sven begins by explaining that working on flanges vertically and horizontally is significantly easier than doing so in a flat position. To simplify the process further, he divides the task into two or three steps as suggested by fellow expert “for for.” This approach not only makes it more manageable but also allows for greater precision in crafting each component.Step 2: Applying Glue and Securing
Sven proceeds to apply glue along one edge of the flange, ensuring a secure bond when clamped into place. He emphasizes that this stage is crucial for maintaining the structural integrity of the flange, which in turn safeguards the living area beneath the canvas when hatches are open.Step 3: Allowing Time to Dry
After securely attaching the first portion of the flange, Sven allows ample time for it to dry before moving forward with additional steps. This patience and precision are key aspects of his successful boatbuilding methods.Step 4: Finishing Touches
Once the flange is fully dried, Sven removes the clamps carefully, ensuring no damage occurs during this process. He then moves on to attaching four more pieces onto these main frames, completing two pairs of flanges for the bulkhead hatches.The Final Touches
While two flanges form the primary support structure around the hatches, Sven mentions there are two additional pieces required at each end to ensure comprehensive protection. This attention to detail highlights his commitment to producing a durable and reliable design. “Sailing is about finding your path, whether it’s across an ocean or within yourself.” – Sven Yrvind In conclusion, making flanges around bulkhead hatches may seem complex at first glance, but by following Sven Yrvind’s meticulous process, enthusiasts can achieve professional-level results. Remember that the journey of boatbuilding is as rewarding as reaching your destination; it tests one’s patience and dedication. For those seeking to embark on this adventure or simply gain more insight into marine craftsmanship, Sven’s wisdom is invaluable.Making Flanges Around Bulkhead Hatches for Canvas
Sven Yrvind, a renowned yacht designer and sailor, shares valuable insights on creating flanges around bulkhead hatches for canvas protection in this enlightening video. By following his expert guidance, boat enthusiasts can ensure their living areas remain secure while allowing unhindered access through the hatches.Step 1: Starting with the Flange
Sven begins by explaining that working on flanges vertically and horizontally is significantly easier than doing so in a flat position. To simplify the process further, he divides the task into two or three steps as suggested by fellow expert “for for.” This approach not only makes it more manageable but also allows for greater precision in crafting each component.Step 2: Applying Glue and Securing
Sven proceeds to apply glue along one edge of the flange, ensuring a secure bond when clamped into place. He emphasizes that this stage is crucial for maintaining the structural integrity of the flange, which in turn safeguards the living area beneath the canvas when hatches are open.Step 3: Allowing Time to Dry
After securely attaching the first portion of the flange, Sven allows ample time for it to dry before moving forward with additional steps. This patience and precision are key aspects of his successful boatbuilding methods.Step 4: Finishing Touches
Once the flange is fully dried, Sven removes the clamps carefully, ensuring no damage occurs during this process. He then moves on to attaching four more pieces onto these main frames, completing two pairs of flanges for the bulkhead hatches.The Final Touches
While two flanges form the primary support structure around the hatches, Sven mentions there are two additional pieces required at each end to ensure comprehensive protection. This attention to detail highlights his commitment to producing a durable and reliable design. “Sailing is about finding your path, whether it’s across an ocean or within yourself.” – Sven Yrvind In conclusion, making flanges around bulkhead hatches may seem complex at first glance, but by following Sven Yrvind’s meticulous process, enthusiasts can achieve professional-level results. Remember that the journey of boatbuilding is as rewarding as reaching your destination; it tests one’s patience and dedication. For those seeking to embark on this adventure or simply gain more insight into marine craftsmanship, Sven’s wisdom is invaluable.Sven Yrvind, a renowned yacht designer and sailor, shares valuable insights on creating flanges around bulkhead hatches for canvas protection in this enlightening video. By following his expert guidance, boat enthusiasts can ensure their living areas remain secure while allowing unhindered access through the hatches.Step 1: Starting with the Flange
Sven begins by explaining that working on flanges vertically and horizontally is significantly easier than doing so in a flat position. To simplify the process further, he divides the task into two or three steps as suggested by fellow expert “for for.” This approach not only makes it more manageable but also allows for greater precision in crafting each component.Step 2: Applying Glue and Securing
Sven proceeds to apply glue along one edge of the flange, ensuring a secure bond when clamped into place. He emphasizes that this stage is crucial for maintaining the structural integrity of the flange, which in turn safeguards the living area beneath the canvas when hatches are open.Step 3: Allowing Time to Dry
After securely attaching the first portion of the flange, Sven allows ample time for it to dry before moving forward with additional steps. This patience and precision are key aspects of his successful boatbuilding methods.Step 4: Finishing Touches
Once the flange is fully dried, Sven removes the clamps carefully, ensuring no damage occurs during this process. He then moves on to attaching four more pieces onto these main frames, completing two pairs of flanges for the bulkhead hatches.The Final Touches
While two flanges form the primary support structure around the hatches, Sven mentions there are two additional pieces required at each end to ensure comprehensive protection. This attention to detail highlights his commitment to producing a durable and reliable design. “Sailing is about finding your path, whether it’s across an ocean or within yourself.” – Sven Yrvind In conclusion, making flanges around bulkhead hatches may seem complex at first glance, but by following Sven Yrvind’s meticulous process, enthusiasts can achieve professional-level results. Remember that the journey of boatbuilding is as rewarding as reaching your destination; it tests one’s patience and dedication. For those seeking to embark on this adventure or simply gain more insight into marine craftsmanship, Sven’s wisdom is invaluable.Making Flanges Around Bulkhead Hatches for Canvas
Sven Yrvind, a renowned yacht designer and sailor, shares valuable insights on creating flanges around bulkhead hatches for canvas protection in this enlightening video. By following his expert guidance, boat enthusiasts can ensure their living areas remain secure while allowing unhindered access through the hatches.Step 1: Starting with the Flange
Sven begins by explaining that working on flanges vertically and horizontally is significantly easier than doing so in a flat position. To simplify the process further, he divides the task into two or three steps as suggested by fellow expert “for for.” This approach not only makes it more manageable but also allows for greater precision in crafting each component.Step 2: Applying Glue and Securing
Sven proceeds to apply glue along one edge of the flange, ensuring a secure bond when clamped into place. He emphasizes that this stage is crucial for maintaining the structural integrity of the flange, which in turn safeguards the living area beneath the canvas when hatches are open.Step 3: Allowing Time to Dry
After securely attaching the first portion of the flange, Sven allows ample time for it to dry before moving forward with additional steps. This patience and precision are key aspects of his successful boatbuilding methods.Step 4: Finishing Touches
Once the flange is fully dried, Sven removes the clamps carefully, ensuring no damage occurs during this process. He then moves on to attaching four more pieces onto these main frames, completing two pairs of flanges for the bulkhead hatches.The Final Touches
While two flanges form the primary support structure around the hatches, Sven mentions there are two additional pieces required at each end to ensure comprehensive protection. This attention to detail highlights his commitment to producing a durable and reliable design. “Sailing is about finding your path, whether it’s across an ocean or within yourself.” – Sven Yrvind In conclusion, making flanges around bulkhead hatches may seem complex at first glance, but by following Sven Yrvind’s meticulous process, enthusiasts can achieve professional-level results. Remember that the journey of boatbuilding is as rewarding as reaching your destination; it tests one’s patience and dedication. For those seeking to embark on this adventure or simply gain more insight into marine craftsmanship, Sven’s wisdom is invaluable.Once the flange is fully dried, Sven removes the clamps carefully, ensuring no damage occurs during this process. He then moves on to attaching four more pieces onto these main frames, completing two pairs of flanges for the bulkhead hatches.The Final Touches
While two flanges form the primary support structure around the hatches, Sven mentions there are two additional pieces required at each end to ensure comprehensive protection. This attention to detail highlights his commitment to producing a durable and reliable design. “Sailing is about finding your path, whether it’s across an ocean or within yourself.” – Sven Yrvind In conclusion, making flanges around bulkhead hatches may seem complex at first glance, but by following Sven Yrvind’s meticulous process, enthusiasts can achieve professional-level results. Remember that the journey of boatbuilding is as rewarding as reaching your destination; it tests one’s patience and dedication. For those seeking to embark on this adventure or simply gain more insight into marine craftsmanship, Sven’s wisdom is invaluable.Sven Yrvind, a renowned yacht designer and sailor, shares valuable insights on creating flanges around bulkhead hatches for canvas protection in this enlightening video. By following his expert guidance, boat enthusiasts can ensure their living areas remain secure while allowing unhindered access through the hatches.Step 1: Starting with the Flange
Sven begins by explaining that working on flanges vertically and horizontally is significantly easier than doing so in a flat position. To simplify the process further, he divides the task into two or three steps as suggested by fellow expert “for for.” This approach not only makes it more manageable but also allows for greater precision in crafting each component.Step 2: Applying Glue and Securing
Sven proceeds to apply glue along one edge of the flange, ensuring a secure bond when clamped into place. He emphasizes that this stage is crucial for maintaining the structural integrity of the flange, which in turn safeguards the living area beneath the canvas when hatches are open.Step 3: Allowing Time to Dry
After securely attaching the first portion of the flange, Sven allows ample time for it to dry before moving forward with additional steps. This patience and precision are key aspects of his successful boatbuilding methods.Step 4: Finishing Touches
Once the flange is fully dried, Sven removes the clamps carefully, ensuring no damage occurs during this process. He then moves on to attaching four more pieces onto these main frames, completing two pairs of flanges for the bulkhead hatches.The Final Touches
While two flanges form the primary support structure around the hatches, Sven mentions there are two additional pieces required at each end to ensure comprehensive protection. This attention to detail highlights his commitment to producing a durable and reliable design. “Sailing is about finding your path, whether it’s across an ocean or within yourself.” – Sven Yrvind In conclusion, making flanges around bulkhead hatches may seem complex at first glance, but by following Sven Yrvind’s meticulous process, enthusiasts can achieve professional-level results. Remember that the journey of boatbuilding is as rewarding as reaching your destination; it tests one’s patience and dedication. For those seeking to embark on this adventure or simply gain more insight into marine craftsmanship, Sven’s wisdom is invaluable.Making Flanges Around Bulkhead Hatches for Canvas
Sven Yrvind, a renowned yacht designer and sailor, shares valuable insights on creating flanges around bulkhead hatches for canvas protection in this enlightening video. By following his expert guidance, boat enthusiasts can ensure their living areas remain secure while allowing unhindered access through the hatches.Step 1: Starting with the Flange
Sven begins by explaining that working on flanges vertically and horizontally is significantly easier than doing so in a flat position. To simplify the process further, he divides the task into two or three steps as suggested by fellow expert “for for.” This approach not only makes it more manageable but also allows for greater precision in crafting each component.Step 2: Applying Glue and Securing
Sven proceeds to apply glue along one edge of the flange, ensuring a secure bond when clamped into place. He emphasizes that this stage is crucial for maintaining the structural integrity of the flange, which in turn safeguards the living area beneath the canvas when hatches are open.Step 3: Allowing Time to Dry
After securely attaching the first portion of the flange, Sven allows ample time for it to dry before moving forward with additional steps. This patience and precision are key aspects of his successful boatbuilding methods.Step 4: Finishing Touches
Once the flange is fully dried, Sven removes the clamps carefully, ensuring no damage occurs during this process. He then moves on to attaching four more pieces onto these main frames, completing two pairs of flanges for the bulkhead hatches.The Final Touches
While two flanges form the primary support structure around the hatches, Sven mentions there are two additional pieces required at each end to ensure comprehensive protection. This attention to detail highlights his commitment to producing a durable and reliable design. “Sailing is about finding your path, whether it’s across an ocean or within yourself.” – Sven Yrvind In conclusion, making flanges around bulkhead hatches may seem complex at first glance, but by following Sven Yrvind’s meticulous process, enthusiasts can achieve professional-level results. Remember that the journey of boatbuilding is as rewarding as reaching your destination; it tests one’s patience and dedication. For those seeking to embark on this adventure or simply gain more insight into marine craftsmanship, Sven’s wisdom is invaluable.After securely attaching the first portion of the flange, Sven allows ample time for it to dry before moving forward with additional steps. This patience and precision are key aspects of his successful boatbuilding methods.Step 4: Finishing Touches
Once the flange is fully dried, Sven removes the clamps carefully, ensuring no damage occurs during this process. He then moves on to attaching four more pieces onto these main frames, completing two pairs of flanges for the bulkhead hatches.The Final Touches
While two flanges form the primary support structure around the hatches, Sven mentions there are two additional pieces required at each end to ensure comprehensive protection. This attention to detail highlights his commitment to producing a durable and reliable design. “Sailing is about finding your path, whether it’s across an ocean or within yourself.” – Sven Yrvind In conclusion, making flanges around bulkhead hatches may seem complex at first glance, but by following Sven Yrvind’s meticulous process, enthusiasts can achieve professional-level results. Remember that the journey of boatbuilding is as rewarding as reaching your destination; it tests one’s patience and dedication. For those seeking to embark on this adventure or simply gain more insight into marine craftsmanship, Sven’s wisdom is invaluable.Sven Yrvind, a renowned yacht designer and sailor, shares valuable insights on creating flanges around bulkhead hatches for canvas protection in this enlightening video. By following his expert guidance, boat enthusiasts can ensure their living areas remain secure while allowing unhindered access through the hatches.Step 1: Starting with the Flange
Sven begins by explaining that working on flanges vertically and horizontally is significantly easier than doing so in a flat position. To simplify the process further, he divides the task into two or three steps as suggested by fellow expert “for for.” This approach not only makes it more manageable but also allows for greater precision in crafting each component.Step 2: Applying Glue and Securing
Sven proceeds to apply glue along one edge of the flange, ensuring a secure bond when clamped into place. He emphasizes that this stage is crucial for maintaining the structural integrity of the flange, which in turn safeguards the living area beneath the canvas when hatches are open.Step 3: Allowing Time to Dry
After securely attaching the first portion of the flange, Sven allows ample time for it to dry before moving forward with additional steps. This patience and precision are key aspects of his successful boatbuilding methods.Step 4: Finishing Touches
Once the flange is fully dried, Sven removes the clamps carefully, ensuring no damage occurs during this process. He then moves on to attaching four more pieces onto these main frames, completing two pairs of flanges for the bulkhead hatches.The Final Touches
While two flanges form the primary support structure around the hatches, Sven mentions there are two additional pieces required at each end to ensure comprehensive protection. This attention to detail highlights his commitment to producing a durable and reliable design. “Sailing is about finding your path, whether it’s across an ocean or within yourself.” – Sven Yrvind In conclusion, making flanges around bulkhead hatches may seem complex at first glance, but by following Sven Yrvind’s meticulous process, enthusiasts can achieve professional-level results. Remember that the journey of boatbuilding is as rewarding as reaching your destination; it tests one’s patience and dedication. For those seeking to embark on this adventure or simply gain more insight into marine craftsmanship, Sven’s wisdom is invaluable.Making Flanges Around Bulkhead Hatches for Canvas
Sven Yrvind, a renowned yacht designer and sailor, shares valuable insights on creating flanges around bulkhead hatches for canvas protection in this enlightening video. By following his expert guidance, boat enthusiasts can ensure their living areas remain secure while allowing unhindered access through the hatches.Step 1: Starting with the Flange
Sven begins by explaining that working on flanges vertically and horizontally is significantly easier than doing so in a flat position. To simplify the process further, he divides the task into two or three steps as suggested by fellow expert “for for.” This approach not only makes it more manageable but also allows for greater precision in crafting each component.Step 2: Applying Glue and Securing
Sven proceeds to apply glue along one edge of the flange, ensuring a secure bond when clamped into place. He emphasizes that this stage is crucial for maintaining the structural integrity of the flange, which in turn safeguards the living area beneath the canvas when hatches are open.Step 3: Allowing Time to Dry
After securely attaching the first portion of the flange, Sven allows ample time for it to dry before moving forward with additional steps. This patience and precision are key aspects of his successful boatbuilding methods.Step 4: Finishing Touches
Once the flange is fully dried, Sven removes the clamps carefully, ensuring no damage occurs during this process. He then moves on to attaching four more pieces onto these main frames, completing two pairs of flanges for the bulkhead hatches.The Final Touches
While two flanges form the primary support structure around the hatches, Sven mentions there are two additional pieces required at each end to ensure comprehensive protection. This attention to detail highlights his commitment to producing a durable and reliable design. “Sailing is about finding your path, whether it’s across an ocean or within yourself.” – Sven Yrvind In conclusion, making flanges around bulkhead hatches may seem complex at first glance, but by following Sven Yrvind’s meticulous process, enthusiasts can achieve professional-level results. Remember that the journey of boatbuilding is as rewarding as reaching your destination; it tests one’s patience and dedication. For those seeking to embark on this adventure or simply gain more insight into marine craftsmanship, Sven’s wisdom is invaluable.Sven proceeds to apply glue along one edge of the flange, ensuring a secure bond when clamped into place. He emphasizes that this stage is crucial for maintaining the structural integrity of the flange, which in turn safeguards the living area beneath the canvas when hatches are open.Step 3: Allowing Time to Dry
After securely attaching the first portion of the flange, Sven allows ample time for it to dry before moving forward with additional steps. This patience and precision are key aspects of his successful boatbuilding methods.Step 4: Finishing Touches
Once the flange is fully dried, Sven removes the clamps carefully, ensuring no damage occurs during this process. He then moves on to attaching four more pieces onto these main frames, completing two pairs of flanges for the bulkhead hatches.The Final Touches
While two flanges form the primary support structure around the hatches, Sven mentions there are two additional pieces required at each end to ensure comprehensive protection. This attention to detail highlights his commitment to producing a durable and reliable design. “Sailing is about finding your path, whether it’s across an ocean or within yourself.” – Sven Yrvind In conclusion, making flanges around bulkhead hatches may seem complex at first glance, but by following Sven Yrvind’s meticulous process, enthusiasts can achieve professional-level results. Remember that the journey of boatbuilding is as rewarding as reaching your destination; it tests one’s patience and dedication. For those seeking to embark on this adventure or simply gain more insight into marine craftsmanship, Sven’s wisdom is invaluable.Sven Yrvind, a renowned yacht designer and sailor, shares valuable insights on creating flanges around bulkhead hatches for canvas protection in this enlightening video. By following his expert guidance, boat enthusiasts can ensure their living areas remain secure while allowing unhindered access through the hatches.Step 1: Starting with the Flange
Sven begins by explaining that working on flanges vertically and horizontally is significantly easier than doing so in a flat position. To simplify the process further, he divides the task into two or three steps as suggested by fellow expert “for for.” This approach not only makes it more manageable but also allows for greater precision in crafting each component.Step 2: Applying Glue and Securing
Sven proceeds to apply glue along one edge of the flange, ensuring a secure bond when clamped into place. He emphasizes that this stage is crucial for maintaining the structural integrity of the flange, which in turn safeguards the living area beneath the canvas when hatches are open.Step 3: Allowing Time to Dry
After securely attaching the first portion of the flange, Sven allows ample time for it to dry before moving forward with additional steps. This patience and precision are key aspects of his successful boatbuilding methods.Step 4: Finishing Touches
Once the flange is fully dried, Sven removes the clamps carefully, ensuring no damage occurs during this process. He then moves on to attaching four more pieces onto these main frames, completing two pairs of flanges for the bulkhead hatches.The Final Touches
While two flanges form the primary support structure around the hatches, Sven mentions there are two additional pieces required at each end to ensure comprehensive protection. This attention to detail highlights his commitment to producing a durable and reliable design. “Sailing is about finding your path, whether it’s across an ocean or within yourself.” – Sven Yrvind In conclusion, making flanges around bulkhead hatches may seem complex at first glance, but by following Sven Yrvind’s meticulous process, enthusiasts can achieve professional-level results. Remember that the journey of boatbuilding is as rewarding as reaching your destination; it tests one’s patience and dedication. For those seeking to embark on this adventure or simply gain more insight into marine craftsmanship, Sven’s wisdom is invaluable.Making Flanges Around Bulkhead Hatches for Canvas
Sven Yrvind, a renowned yacht designer and sailor, shares valuable insights on creating flanges around bulkhead hatches for canvas protection in this enlightening video. By following his expert guidance, boat enthusiasts can ensure their living areas remain secure while allowing unhindered access through the hatches.Step 1: Starting with the Flange
Sven begins by explaining that working on flanges vertically and horizontally is significantly easier than doing so in a flat position. To simplify the process further, he divides the task into two or three steps as suggested by fellow expert “for for.” This approach not only makes it more manageable but also allows for greater precision in crafting each component.Step 2: Applying Glue and Securing
Sven proceeds to apply glue along one edge of the flange, ensuring a secure bond when clamped into place. He emphasizes that this stage is crucial for maintaining the structural integrity of the flange, which in turn safeguards the living area beneath the canvas when hatches are open.Step 3: Allowing Time to Dry
After securely attaching the first portion of the flange, Sven allows ample time for it to dry before moving forward with additional steps. This patience and precision are key aspects of his successful boatbuilding methods.Step 4: Finishing Touches
Once the flange is fully dried, Sven removes the clamps carefully, ensuring no damage occurs during this process. He then moves on to attaching four more pieces onto these main frames, completing two pairs of flanges for the bulkhead hatches.The Final Touches
While two flanges form the primary support structure around the hatches, Sven mentions there are two additional pieces required at each end to ensure comprehensive protection. This attention to detail highlights his commitment to producing a durable and reliable design. “Sailing is about finding your path, whether it’s across an ocean or within yourself.” – Sven Yrvind In conclusion, making flanges around bulkhead hatches may seem complex at first glance, but by following Sven Yrvind’s meticulous process, enthusiasts can achieve professional-level results. Remember that the journey of boatbuilding is as rewarding as reaching your destination; it tests one’s patience and dedication. For those seeking to embark on this adventure or simply gain more insight into marine craftsmanship, Sven’s wisdom is invaluable.Sven begins by explaining that working on flanges vertically and horizontally is significantly easier than doing so in a flat position. To simplify the process further, he divides the task into two or three steps as suggested by fellow expert “for for.” This approach not only makes it more manageable but also allows for greater precision in crafting each component.Step 2: Applying Glue and Securing
Sven proceeds to apply glue along one edge of the flange, ensuring a secure bond when clamped into place. He emphasizes that this stage is crucial for maintaining the structural integrity of the flange, which in turn safeguards the living area beneath the canvas when hatches are open.Step 3: Allowing Time to Dry
After securely attaching the first portion of the flange, Sven allows ample time for it to dry before moving forward with additional steps. This patience and precision are key aspects of his successful boatbuilding methods.Step 4: Finishing Touches
Once the flange is fully dried, Sven removes the clamps carefully, ensuring no damage occurs during this process. He then moves on to attaching four more pieces onto these main frames, completing two pairs of flanges for the bulkhead hatches.The Final Touches
While two flanges form the primary support structure around the hatches, Sven mentions there are two additional pieces required at each end to ensure comprehensive protection. This attention to detail highlights his commitment to producing a durable and reliable design. “Sailing is about finding your path, whether it’s across an ocean or within yourself.” – Sven Yrvind In conclusion, making flanges around bulkhead hatches may seem complex at first glance, but by following Sven Yrvind’s meticulous process, enthusiasts can achieve professional-level results. Remember that the journey of boatbuilding is as rewarding as reaching your destination; it tests one’s patience and dedication. For those seeking to embark on this adventure or simply gain more insight into marine craftsmanship, Sven’s wisdom is invaluable.Sven Yrvind, a renowned yacht designer and sailor, shares valuable insights on creating flanges around bulkhead hatches for canvas protection in this enlightening video. By following his expert guidance, boat enthusiasts can ensure their living areas remain secure while allowing unhindered access through the hatches.Step 1: Starting with the Flange
Sven begins by explaining that working on flanges vertically and horizontally is significantly easier than doing so in a flat position. To simplify the process further, he divides the task into two or three steps as suggested by fellow expert “for for.” This approach not only makes it more manageable but also allows for greater precision in crafting each component.Step 2: Applying Glue and Securing
Sven proceeds to apply glue along one edge of the flange, ensuring a secure bond when clamped into place. He emphasizes that this stage is crucial for maintaining the structural integrity of the flange, which in turn safeguards the living area beneath the canvas when hatches are open.Step 3: Allowing Time to Dry
After securely attaching the first portion of the flange, Sven allows ample time for it to dry before moving forward with additional steps. This patience and precision are key aspects of his successful boatbuilding methods.Step 4: Finishing Touches
Once the flange is fully dried, Sven removes the clamps carefully, ensuring no damage occurs during this process. He then moves on to attaching four more pieces onto these main frames, completing two pairs of flanges for the bulkhead hatches.The Final Touches
While two flanges form the primary support structure around the hatches, Sven mentions there are two additional pieces required at each end to ensure comprehensive protection. This attention to detail highlights his commitment to producing a durable and reliable design. “Sailing is about finding your path, whether it’s across an ocean or within yourself.” – Sven Yrvind In conclusion, making flanges around bulkhead hatches may seem complex at first glance, but by following Sven Yrvind’s meticulous process, enthusiasts can achieve professional-level results. Remember that the journey of boatbuilding is as rewarding as reaching your destination; it tests one’s patience and dedication. For those seeking to embark on this adventure or simply gain more insight into marine craftsmanship, Sven’s wisdom is invaluable.Making Flanges Around Bulkhead Hatches for Canvas
Sven Yrvind, a renowned yacht designer and sailor, shares valuable insights on creating flanges around bulkhead hatches for canvas protection in this enlightening video. By following his expert guidance, boat enthusiasts can ensure their living areas remain secure while allowing unhindered access through the hatches.Step 1: Starting with the Flange
Sven begins by explaining that working on flanges vertically and horizontally is significantly easier than doing so in a flat position. To simplify the process further, he divides the task into two or three steps as suggested by fellow expert “for for.” This approach not only makes it more manageable but also allows for greater precision in crafting each component.Step 2: Applying Glue and Securing
Sven proceeds to apply glue along one edge of the flange, ensuring a secure bond when clamped into place. He emphasizes that this stage is crucial for maintaining the structural integrity of the flange, which in turn safeguards the living area beneath the canvas when hatches are open.Step 3: Allowing Time to Dry
After securely attaching the first portion of the flange, Sven allows ample time for it to dry before moving forward with additional steps. This patience and precision are key aspects of his successful boatbuilding methods.Step 4: Finishing Touches
Once the flange is fully dried, Sven removes the clamps carefully, ensuring no damage occurs during this process. He then moves on to attaching four more pieces onto these main frames, completing two pairs of flanges for the bulkhead hatches.The Final Touches
While two flanges form the primary support structure around the hatches, Sven mentions there are two additional pieces required at each end to ensure comprehensive protection. This attention to detail highlights his commitment to producing a durable and reliable design. “Sailing is about finding your path, whether it’s across an ocean or within yourself.” – Sven Yrvind In conclusion, making flanges around bulkhead hatches may seem complex at first glance, but by following Sven Yrvind’s meticulous process, enthusiasts can achieve professional-level results. Remember that the journey of boatbuilding is as rewarding as reaching your destination; it tests one’s patience and dedication. For those seeking to embark on this adventure or simply gain more insight into marine craftsmanship, Sven’s wisdom is invaluable.Once the flange is fully dried, Sven removes the clamps carefully, ensuring no damage occurs during this process. He then moves on to attaching four more pieces onto these main frames, completing two pairs of flanges for the bulkhead hatches.The Final Touches
While two flanges form the primary support structure around the hatches, Sven mentions there are two additional pieces required at each end to ensure comprehensive protection. This attention to detail highlights his commitment to producing a durable and reliable design. “Sailing is about finding your path, whether it’s across an ocean or within yourself.” – Sven Yrvind In conclusion, making flanges around bulkhead hatches may seem complex at first glance, but by following Sven Yrvind’s meticulous process, enthusiasts can achieve professional-level results. Remember that the journey of boatbuilding is as rewarding as reaching your destination; it tests one’s patience and dedication. For those seeking to embark on this adventure or simply gain more insight into marine craftsmanship, Sven’s wisdom is invaluable.Sven begins by explaining that working on flanges vertically and horizontally is significantly easier than doing so in a flat position. To simplify the process further, he divides the task into two or three steps as suggested by fellow expert “for for.” This approach not only makes it more manageable but also allows for greater precision in crafting each component.Step 2: Applying Glue and Securing
Sven proceeds to apply glue along one edge of the flange, ensuring a secure bond when clamped into place. He emphasizes that this stage is crucial for maintaining the structural integrity of the flange, which in turn safeguards the living area beneath the canvas when hatches are open.Step 3: Allowing Time to Dry
After securely attaching the first portion of the flange, Sven allows ample time for it to dry before moving forward with additional steps. This patience and precision are key aspects of his successful boatbuilding methods.Step 4: Finishing Touches
Once the flange is fully dried, Sven removes the clamps carefully, ensuring no damage occurs during this process. He then moves on to attaching four more pieces onto these main frames, completing two pairs of flanges for the bulkhead hatches.The Final Touches
While two flanges form the primary support structure around the hatches, Sven mentions there are two additional pieces required at each end to ensure comprehensive protection. This attention to detail highlights his commitment to producing a durable and reliable design. “Sailing is about finding your path, whether it’s across an ocean or within yourself.” – Sven Yrvind In conclusion, making flanges around bulkhead hatches may seem complex at first glance, but by following Sven Yrvind’s meticulous process, enthusiasts can achieve professional-level results. Remember that the journey of boatbuilding is as rewarding as reaching your destination; it tests one’s patience and dedication. For those seeking to embark on this adventure or simply gain more insight into marine craftsmanship, Sven’s wisdom is invaluable.Sven Yrvind, a renowned yacht designer and sailor, shares valuable insights on creating flanges around bulkhead hatches for canvas protection in this enlightening video. By following his expert guidance, boat enthusiasts can ensure their living areas remain secure while allowing unhindered access through the hatches.Step 1: Starting with the Flange
Sven begins by explaining that working on flanges vertically and horizontally is significantly easier than doing so in a flat position. To simplify the process further, he divides the task into two or three steps as suggested by fellow expert “for for.” This approach not only makes it more manageable but also allows for greater precision in crafting each component.Step 2: Applying Glue and Securing
Sven proceeds to apply glue along one edge of the flange, ensuring a secure bond when clamped into place. He emphasizes that this stage is crucial for maintaining the structural integrity of the flange, which in turn safeguards the living area beneath the canvas when hatches are open.Step 3: Allowing Time to Dry
After securely attaching the first portion of the flange, Sven allows ample time for it to dry before moving forward with additional steps. This patience and precision are key aspects of his successful boatbuilding methods.Step 4: Finishing Touches
Once the flange is fully dried, Sven removes the clamps carefully, ensuring no damage occurs during this process. He then moves on to attaching four more pieces onto these main frames, completing two pairs of flanges for the bulkhead hatches.The Final Touches
While two flanges form the primary support structure around the hatches, Sven mentions there are two additional pieces required at each end to ensure comprehensive protection. This attention to detail highlights his commitment to producing a durable and reliable design. “Sailing is about finding your path, whether it’s across an ocean or within yourself.” – Sven Yrvind In conclusion, making flanges around bulkhead hatches may seem complex at first glance, but by following Sven Yrvind’s meticulous process, enthusiasts can achieve professional-level results. Remember that the journey of boatbuilding is as rewarding as reaching your destination; it tests one’s patience and dedication. For those seeking to embark on this adventure or simply gain more insight into marine craftsmanship, Sven’s wisdom is invaluable.Making Flanges Around Bulkhead Hatches for Canvas
Sven Yrvind, a renowned yacht designer and sailor, shares valuable insights on creating flanges around bulkhead hatches for canvas protection in this enlightening video. By following his expert guidance, boat enthusiasts can ensure their living areas remain secure while allowing unhindered access through the hatches.Step 1: Starting with the Flange
Sven begins by explaining that working on flanges vertically and horizontally is significantly easier than doing so in a flat position. To simplify the process further, he divides the task into two or three steps as suggested by fellow expert “for for.” This approach not only makes it more manageable but also allows for greater precision in crafting each component.Step 2: Applying Glue and Securing
Sven proceeds to apply glue along one edge of the flange, ensuring a secure bond when clamped into place. He emphasizes that this stage is crucial for maintaining the structural integrity of the flange, which in turn safeguards the living area beneath the canvas when hatches are open.Step 3: Allowing Time to Dry
After securely attaching the first portion of the flange, Sven allows ample time for it to dry before moving forward with additional steps. This patience and precision are key aspects of his successful boatbuilding methods.Step 4: Finishing Touches
Once the flange is fully dried, Sven removes the clamps carefully, ensuring no damage occurs during this process. He then moves on to attaching four more pieces onto these main frames, completing two pairs of flanges for the bulkhead hatches.The Final Touches
While two flanges form the primary support structure around the hatches, Sven mentions there are two additional pieces required at each end to ensure comprehensive protection. This attention to detail highlights his commitment to producing a durable and reliable design. “Sailing is about finding your path, whether it’s across an ocean or within yourself.” – Sven Yrvind In conclusion, making flanges around bulkhead hatches may seem complex at first glance, but by following Sven Yrvind’s meticulous process, enthusiasts can achieve professional-level results. Remember that the journey of boatbuilding is as rewarding as reaching your destination; it tests one’s patience and dedication. For those seeking to embark on this adventure or simply gain more insight into marine craftsmanship, Sven’s wisdom is invaluable.After securely attaching the first portion of the flange, Sven allows ample time for it to dry before moving forward with additional steps. This patience and precision are key aspects of his successful boatbuilding methods.Step 4: Finishing Touches
Once the flange is fully dried, Sven removes the clamps carefully, ensuring no damage occurs during this process. He then moves on to attaching four more pieces onto these main frames, completing two pairs of flanges for the bulkhead hatches.The Final Touches
While two flanges form the primary support structure around the hatches, Sven mentions there are two additional pieces required at each end to ensure comprehensive protection. This attention to detail highlights his commitment to producing a durable and reliable design. “Sailing is about finding your path, whether it’s across an ocean or within yourself.” – Sven Yrvind In conclusion, making flanges around bulkhead hatches may seem complex at first glance, but by following Sven Yrvind’s meticulous process, enthusiasts can achieve professional-level results. Remember that the journey of boatbuilding is as rewarding as reaching your destination; it tests one’s patience and dedication. For those seeking to embark on this adventure or simply gain more insight into marine craftsmanship, Sven’s wisdom is invaluable.Sven begins by explaining that working on flanges vertically and horizontally is significantly easier than doing so in a flat position. To simplify the process further, he divides the task into two or three steps as suggested by fellow expert “for for.” This approach not only makes it more manageable but also allows for greater precision in crafting each component.Step 2: Applying Glue and Securing
Sven proceeds to apply glue along one edge of the flange, ensuring a secure bond when clamped into place. He emphasizes that this stage is crucial for maintaining the structural integrity of the flange, which in turn safeguards the living area beneath the canvas when hatches are open.Step 3: Allowing Time to Dry
After securely attaching the first portion of the flange, Sven allows ample time for it to dry before moving forward with additional steps. This patience and precision are key aspects of his successful boatbuilding methods.Step 4: Finishing Touches
Once the flange is fully dried, Sven removes the clamps carefully, ensuring no damage occurs during this process. He then moves on to attaching four more pieces onto these main frames, completing two pairs of flanges for the bulkhead hatches.The Final Touches
While two flanges form the primary support structure around the hatches, Sven mentions there are two additional pieces required at each end to ensure comprehensive protection. This attention to detail highlights his commitment to producing a durable and reliable design. “Sailing is about finding your path, whether it’s across an ocean or within yourself.” – Sven Yrvind In conclusion, making flanges around bulkhead hatches may seem complex at first glance, but by following Sven Yrvind’s meticulous process, enthusiasts can achieve professional-level results. Remember that the journey of boatbuilding is as rewarding as reaching your destination; it tests one’s patience and dedication. For those seeking to embark on this adventure or simply gain more insight into marine craftsmanship, Sven’s wisdom is invaluable.Sven Yrvind, a renowned yacht designer and sailor, shares valuable insights on creating flanges around bulkhead hatches for canvas protection in this enlightening video. By following his expert guidance, boat enthusiasts can ensure their living areas remain secure while allowing unhindered access through the hatches.Step 1: Starting with the Flange
Sven begins by explaining that working on flanges vertically and horizontally is significantly easier than doing so in a flat position. To simplify the process further, he divides the task into two or three steps as suggested by fellow expert “for for.” This approach not only makes it more manageable but also allows for greater precision in crafting each component.Step 2: Applying Glue and Securing
Sven proceeds to apply glue along one edge of the flange, ensuring a secure bond when clamped into place. He emphasizes that this stage is crucial for maintaining the structural integrity of the flange, which in turn safeguards the living area beneath the canvas when hatches are open.Step 3: Allowing Time to Dry
After securely attaching the first portion of the flange, Sven allows ample time for it to dry before moving forward with additional steps. This patience and precision are key aspects of his successful boatbuilding methods.Step 4: Finishing Touches
Once the flange is fully dried, Sven removes the clamps carefully, ensuring no damage occurs during this process. He then moves on to attaching four more pieces onto these main frames, completing two pairs of flanges for the bulkhead hatches.The Final Touches
While two flanges form the primary support structure around the hatches, Sven mentions there are two additional pieces required at each end to ensure comprehensive protection. This attention to detail highlights his commitment to producing a durable and reliable design. “Sailing is about finding your path, whether it’s across an ocean or within yourself.” – Sven Yrvind In conclusion, making flanges around bulkhead hatches may seem complex at first glance, but by following Sven Yrvind’s meticulous process, enthusiasts can achieve professional-level results. Remember that the journey of boatbuilding is as rewarding as reaching your destination; it tests one’s patience and dedication. For those seeking to embark on this adventure or simply gain more insight into marine craftsmanship, Sven’s wisdom is invaluable.Making Flanges Around Bulkhead Hatches for Canvas
Sven Yrvind, a renowned yacht designer and sailor, shares valuable insights on creating flanges around bulkhead hatches for canvas protection in this enlightening video. By following his expert guidance, boat enthusiasts can ensure their living areas remain secure while allowing unhindered access through the hatches.Step 1: Starting with the Flange
Sven begins by explaining that working on flanges vertically and horizontally is significantly easier than doing so in a flat position. To simplify the process further, he divides the task into two or three steps as suggested by fellow expert “for for.” This approach not only makes it more manageable but also allows for greater precision in crafting each component.Step 2: Applying Glue and Securing
Sven proceeds to apply glue along one edge of the flange, ensuring a secure bond when clamped into place. He emphasizes that this stage is crucial for maintaining the structural integrity of the flange, which in turn safeguards the living area beneath the canvas when hatches are open.Step 3: Allowing Time to Dry
After securely attaching the first portion of the flange, Sven allows ample time for it to dry before moving forward with additional steps. This patience and precision are key aspects of his successful boatbuilding methods.Step 4: Finishing Touches
Once the flange is fully dried, Sven removes the clamps carefully, ensuring no damage occurs during this process. He then moves on to attaching four more pieces onto these main frames, completing two pairs of flanges for the bulkhead hatches.The Final Touches
While two flanges form the primary support structure around the hatches, Sven mentions there are two additional pieces required at each end to ensure comprehensive protection. This attention to detail highlights his commitment to producing a durable and reliable design. “Sailing is about finding your path, whether it’s across an ocean or within yourself.” – Sven Yrvind In conclusion, making flanges around bulkhead hatches may seem complex at first glance, but by following Sven Yrvind’s meticulous process, enthusiasts can achieve professional-level results. Remember that the journey of boatbuilding is as rewarding as reaching your destination; it tests one’s patience and dedication. For those seeking to embark on this adventure or simply gain more insight into marine craftsmanship, Sven’s wisdom is invaluable.Sven proceeds to apply glue along one edge of the flange, ensuring a secure bond when clamped into place. He emphasizes that this stage is crucial for maintaining the structural integrity of the flange, which in turn safeguards the living area beneath the canvas when hatches are open.Step 3: Allowing Time to Dry
After securely attaching the first portion of the flange, Sven allows ample time for it to dry before moving forward with additional steps. This patience and precision are key aspects of his successful boatbuilding methods.Step 4: Finishing Touches
Once the flange is fully dried, Sven removes the clamps carefully, ensuring no damage occurs during this process. He then moves on to attaching four more pieces onto these main frames, completing two pairs of flanges for the bulkhead hatches.The Final Touches
While two flanges form the primary support structure around the hatches, Sven mentions there are two additional pieces required at each end to ensure comprehensive protection. This attention to detail highlights his commitment to producing a durable and reliable design. “Sailing is about finding your path, whether it’s across an ocean or within yourself.” – Sven Yrvind In conclusion, making flanges around bulkhead hatches may seem complex at first glance, but by following Sven Yrvind’s meticulous process, enthusiasts can achieve professional-level results. Remember that the journey of boatbuilding is as rewarding as reaching your destination; it tests one’s patience and dedication. For those seeking to embark on this adventure or simply gain more insight into marine craftsmanship, Sven’s wisdom is invaluable.Sven begins by explaining that working on flanges vertically and horizontally is significantly easier than doing so in a flat position. To simplify the process further, he divides the task into two or three steps as suggested by fellow expert “for for.” This approach not only makes it more manageable but also allows for greater precision in crafting each component.Step 2: Applying Glue and Securing
Sven proceeds to apply glue along one edge of the flange, ensuring a secure bond when clamped into place. He emphasizes that this stage is crucial for maintaining the structural integrity of the flange, which in turn safeguards the living area beneath the canvas when hatches are open.Step 3: Allowing Time to Dry
After securely attaching the first portion of the flange, Sven allows ample time for it to dry before moving forward with additional steps. This patience and precision are key aspects of his successful boatbuilding methods.Step 4: Finishing Touches
Once the flange is fully dried, Sven removes the clamps carefully, ensuring no damage occurs during this process. He then moves on to attaching four more pieces onto these main frames, completing two pairs of flanges for the bulkhead hatches.The Final Touches
While two flanges form the primary support structure around the hatches, Sven mentions there are two additional pieces required at each end to ensure comprehensive protection. This attention to detail highlights his commitment to producing a durable and reliable design. “Sailing is about finding your path, whether it’s across an ocean or within yourself.” – Sven Yrvind In conclusion, making flanges around bulkhead hatches may seem complex at first glance, but by following Sven Yrvind’s meticulous process, enthusiasts can achieve professional-level results. Remember that the journey of boatbuilding is as rewarding as reaching your destination; it tests one’s patience and dedication. For those seeking to embark on this adventure or simply gain more insight into marine craftsmanship, Sven’s wisdom is invaluable.Sven Yrvind, a renowned yacht designer and sailor, shares valuable insights on creating flanges around bulkhead hatches for canvas protection in this enlightening video. By following his expert guidance, boat enthusiasts can ensure their living areas remain secure while allowing unhindered access through the hatches.Step 1: Starting with the Flange
Sven begins by explaining that working on flanges vertically and horizontally is significantly easier than doing so in a flat position. To simplify the process further, he divides the task into two or three steps as suggested by fellow expert “for for.” This approach not only makes it more manageable but also allows for greater precision in crafting each component.Step 2: Applying Glue and Securing
Sven proceeds to apply glue along one edge of the flange, ensuring a secure bond when clamped into place. He emphasizes that this stage is crucial for maintaining the structural integrity of the flange, which in turn safeguards the living area beneath the canvas when hatches are open.Step 3: Allowing Time to Dry
After securely attaching the first portion of the flange, Sven allows ample time for it to dry before moving forward with additional steps. This patience and precision are key aspects of his successful boatbuilding methods.Step 4: Finishing Touches
Once the flange is fully dried, Sven removes the clamps carefully, ensuring no damage occurs during this process. He then moves on to attaching four more pieces onto these main frames, completing two pairs of flanges for the bulkhead hatches.The Final Touches
While two flanges form the primary support structure around the hatches, Sven mentions there are two additional pieces required at each end to ensure comprehensive protection. This attention to detail highlights his commitment to producing a durable and reliable design. “Sailing is about finding your path, whether it’s across an ocean or within yourself.” – Sven Yrvind In conclusion, making flanges around bulkhead hatches may seem complex at first glance, but by following Sven Yrvind’s meticulous process, enthusiasts can achieve professional-level results. Remember that the journey of boatbuilding is as rewarding as reaching your destination; it tests one’s patience and dedication. For those seeking to embark on this adventure or simply gain more insight into marine craftsmanship, Sven’s wisdom is invaluable.Making Flanges Around Bulkhead Hatches for Canvas
Sven Yrvind, a renowned yacht designer and sailor, shares valuable insights on creating flanges around bulkhead hatches for canvas protection in this enlightening video. By following his expert guidance, boat enthusiasts can ensure their living areas remain secure while allowing unhindered access through the hatches.Step 1: Starting with the Flange
Sven begins by explaining that working on flanges vertically and horizontally is significantly easier than doing so in a flat position. To simplify the process further, he divides the task into two or three steps as suggested by fellow expert “for for.” This approach not only makes it more manageable but also allows for greater precision in crafting each component.Step 2: Applying Glue and Securing
Sven proceeds to apply glue along one edge of the flange, ensuring a secure bond when clamped into place. He emphasizes that this stage is crucial for maintaining the structural integrity of the flange, which in turn safeguards the living area beneath the canvas when hatches are open.Step 3: Allowing Time to Dry
After securely attaching the first portion of the flange, Sven allows ample time for it to dry before moving forward with additional steps. This patience and precision are key aspects of his successful boatbuilding methods.Step 4: Finishing Touches
Once the flange is fully dried, Sven removes the clamps carefully, ensuring no damage occurs during this process. He then moves on to attaching four more pieces onto these main frames, completing two pairs of flanges for the bulkhead hatches.The Final Touches
While two flanges form the primary support structure around the hatches, Sven mentions there are two additional pieces required at each end to ensure comprehensive protection. This attention to detail highlights his commitment to producing a durable and reliable design. “Sailing is about finding your path, whether it’s across an ocean or within yourself.” – Sven Yrvind In conclusion, making flanges around bulkhead hatches may seem complex at first glance, but by following Sven Yrvind’s meticulous process, enthusiasts can achieve professional-level results. Remember that the journey of boatbuilding is as rewarding as reaching your destination; it tests one’s patience and dedication. For those seeking to embark on this adventure or simply gain more insight into marine craftsmanship, Sven’s wisdom is invaluable.Once the flange is fully dried, Sven removes the clamps carefully, ensuring no damage occurs during this process. He then moves on to attaching four more pieces onto these main frames, completing two pairs of flanges for the bulkhead hatches.The Final Touches
While two flanges form the primary support structure around the hatches, Sven mentions there are two additional pieces required at each end to ensure comprehensive protection. This attention to detail highlights his commitment to producing a durable and reliable design. “Sailing is about finding your path, whether it’s across an ocean or within yourself.” – Sven Yrvind In conclusion, making flanges around bulkhead hatches may seem complex at first glance, but by following Sven Yrvind’s meticulous process, enthusiasts can achieve professional-level results. Remember that the journey of boatbuilding is as rewarding as reaching your destination; it tests one’s patience and dedication. For those seeking to embark on this adventure or simply gain more insight into marine craftsmanship, Sven’s wisdom is invaluable.Sven proceeds to apply glue along one edge of the flange, ensuring a secure bond when clamped into place. He emphasizes that this stage is crucial for maintaining the structural integrity of the flange, which in turn safeguards the living area beneath the canvas when hatches are open.Step 3: Allowing Time to Dry
After securely attaching the first portion of the flange, Sven allows ample time for it to dry before moving forward with additional steps. This patience and precision are key aspects of his successful boatbuilding methods.Step 4: Finishing Touches
Once the flange is fully dried, Sven removes the clamps carefully, ensuring no damage occurs during this process. He then moves on to attaching four more pieces onto these main frames, completing two pairs of flanges for the bulkhead hatches.The Final Touches
While two flanges form the primary support structure around the hatches, Sven mentions there are two additional pieces required at each end to ensure comprehensive protection. This attention to detail highlights his commitment to producing a durable and reliable design. “Sailing is about finding your path, whether it’s across an ocean or within yourself.” – Sven Yrvind In conclusion, making flanges around bulkhead hatches may seem complex at first glance, but by following Sven Yrvind’s meticulous process, enthusiasts can achieve professional-level results. Remember that the journey of boatbuilding is as rewarding as reaching your destination; it tests one’s patience and dedication. For those seeking to embark on this adventure or simply gain more insight into marine craftsmanship, Sven’s wisdom is invaluable.Sven begins by explaining that working on flanges vertically and horizontally is significantly easier than doing so in a flat position. To simplify the process further, he divides the task into two or three steps as suggested by fellow expert “for for.” This approach not only makes it more manageable but also allows for greater precision in crafting each component.Step 2: Applying Glue and Securing
Sven proceeds to apply glue along one edge of the flange, ensuring a secure bond when clamped into place. He emphasizes that this stage is crucial for maintaining the structural integrity of the flange, which in turn safeguards the living area beneath the canvas when hatches are open.Step 3: Allowing Time to Dry
After securely attaching the first portion of the flange, Sven allows ample time for it to dry before moving forward with additional steps. This patience and precision are key aspects of his successful boatbuilding methods.Step 4: Finishing Touches
Once the flange is fully dried, Sven removes the clamps carefully, ensuring no damage occurs during this process. He then moves on to attaching four more pieces onto these main frames, completing two pairs of flanges for the bulkhead hatches.The Final Touches
While two flanges form the primary support structure around the hatches, Sven mentions there are two additional pieces required at each end to ensure comprehensive protection. This attention to detail highlights his commitment to producing a durable and reliable design. “Sailing is about finding your path, whether it’s across an ocean or within yourself.” – Sven Yrvind In conclusion, making flanges around bulkhead hatches may seem complex at first glance, but by following Sven Yrvind’s meticulous process, enthusiasts can achieve professional-level results. Remember that the journey of boatbuilding is as rewarding as reaching your destination; it tests one’s patience and dedication. For those seeking to embark on this adventure or simply gain more insight into marine craftsmanship, Sven’s wisdom is invaluable.Sven Yrvind, a renowned yacht designer and sailor, shares valuable insights on creating flanges around bulkhead hatches for canvas protection in this enlightening video. By following his expert guidance, boat enthusiasts can ensure their living areas remain secure while allowing unhindered access through the hatches.Step 1: Starting with the Flange
Sven begins by explaining that working on flanges vertically and horizontally is significantly easier than doing so in a flat position. To simplify the process further, he divides the task into two or three steps as suggested by fellow expert “for for.” This approach not only makes it more manageable but also allows for greater precision in crafting each component.Step 2: Applying Glue and Securing
Sven proceeds to apply glue along one edge of the flange, ensuring a secure bond when clamped into place. He emphasizes that this stage is crucial for maintaining the structural integrity of the flange, which in turn safeguards the living area beneath the canvas when hatches are open.Step 3: Allowing Time to Dry
After securely attaching the first portion of the flange, Sven allows ample time for it to dry before moving forward with additional steps. This patience and precision are key aspects of his successful boatbuilding methods.Step 4: Finishing Touches
Once the flange is fully dried, Sven removes the clamps carefully, ensuring no damage occurs during this process. He then moves on to attaching four more pieces onto these main frames, completing two pairs of flanges for the bulkhead hatches.The Final Touches
While two flanges form the primary support structure around the hatches, Sven mentions there are two additional pieces required at each end to ensure comprehensive protection. This attention to detail highlights his commitment to producing a durable and reliable design. “Sailing is about finding your path, whether it’s across an ocean or within yourself.” – Sven Yrvind In conclusion, making flanges around bulkhead hatches may seem complex at first glance, but by following Sven Yrvind’s meticulous process, enthusiasts can achieve professional-level results. Remember that the journey of boatbuilding is as rewarding as reaching your destination; it tests one’s patience and dedication. For those seeking to embark on this adventure or simply gain more insight into marine craftsmanship, Sven’s wisdom is invaluable.Making Flanges Around Bulkhead Hatches for Canvas
Sven Yrvind, a renowned yacht designer and sailor, shares valuable insights on creating flanges around bulkhead hatches for canvas protection in this enlightening video. By following his expert guidance, boat enthusiasts can ensure their living areas remain secure while allowing unhindered access through the hatches.Step 1: Starting with the Flange
Sven begins by explaining that working on flanges vertically and horizontally is significantly easier than doing so in a flat position. To simplify the process further, he divides the task into two or three steps as suggested by fellow expert “for for.” This approach not only makes it more manageable but also allows for greater precision in crafting each component.Step 2: Applying Glue and Securing
Sven proceeds to apply glue along one edge of the flange, ensuring a secure bond when clamped into place. He emphasizes that this stage is crucial for maintaining the structural integrity of the flange, which in turn safeguards the living area beneath the canvas when hatches are open.Step 3: Allowing Time to Dry
After securely attaching the first portion of the flange, Sven allows ample time for it to dry before moving forward with additional steps. This patience and precision are key aspects of his successful boatbuilding methods.Step 4: Finishing Touches
Once the flange is fully dried, Sven removes the clamps carefully, ensuring no damage occurs during this process. He then moves on to attaching four more pieces onto these main frames, completing two pairs of flanges for the bulkhead hatches.The Final Touches
While two flanges form the primary support structure around the hatches, Sven mentions there are two additional pieces required at each end to ensure comprehensive protection. This attention to detail highlights his commitment to producing a durable and reliable design. “Sailing is about finding your path, whether it’s across an ocean or within yourself.” – Sven Yrvind In conclusion, making flanges around bulkhead hatches may seem complex at first glance, but by following Sven Yrvind’s meticulous process, enthusiasts can achieve professional-level results. Remember that the journey of boatbuilding is as rewarding as reaching your destination; it tests one’s patience and dedication. For those seeking to embark on this adventure or simply gain more insight into marine craftsmanship, Sven’s wisdom is invaluable.After securely attaching the first portion of the flange, Sven allows ample time for it to dry before moving forward with additional steps. This patience and precision are key aspects of his successful boatbuilding methods.Step 4: Finishing Touches
Once the flange is fully dried, Sven removes the clamps carefully, ensuring no damage occurs during this process. He then moves on to attaching four more pieces onto these main frames, completing two pairs of flanges for the bulkhead hatches.The Final Touches
While two flanges form the primary support structure around the hatches, Sven mentions there are two additional pieces required at each end to ensure comprehensive protection. This attention to detail highlights his commitment to producing a durable and reliable design. “Sailing is about finding your path, whether it’s across an ocean or within yourself.” – Sven Yrvind In conclusion, making flanges around bulkhead hatches may seem complex at first glance, but by following Sven Yrvind’s meticulous process, enthusiasts can achieve professional-level results. Remember that the journey of boatbuilding is as rewarding as reaching your destination; it tests one’s patience and dedication. For those seeking to embark on this adventure or simply gain more insight into marine craftsmanship, Sven’s wisdom is invaluable.Sven proceeds to apply glue along one edge of the flange, ensuring a secure bond when clamped into place. He emphasizes that this stage is crucial for maintaining the structural integrity of the flange, which in turn safeguards the living area beneath the canvas when hatches are open.Step 3: Allowing Time to Dry
After securely attaching the first portion of the flange, Sven allows ample time for it to dry before moving forward with additional steps. This patience and precision are key aspects of his successful boatbuilding methods.Step 4: Finishing Touches
Once the flange is fully dried, Sven removes the clamps carefully, ensuring no damage occurs during this process. He then moves on to attaching four more pieces onto these main frames, completing two pairs of flanges for the bulkhead hatches.The Final Touches
While two flanges form the primary support structure around the hatches, Sven mentions there are two additional pieces required at each end to ensure comprehensive protection. This attention to detail highlights his commitment to producing a durable and reliable design. “Sailing is about finding your path, whether it’s across an ocean or within yourself.” – Sven Yrvind In conclusion, making flanges around bulkhead hatches may seem complex at first glance, but by following Sven Yrvind’s meticulous process, enthusiasts can achieve professional-level results. Remember that the journey of boatbuilding is as rewarding as reaching your destination; it tests one’s patience and dedication. For those seeking to embark on this adventure or simply gain more insight into marine craftsmanship, Sven’s wisdom is invaluable.Sven begins by explaining that working on flanges vertically and horizontally is significantly easier than doing so in a flat position. To simplify the process further, he divides the task into two or three steps as suggested by fellow expert “for for.” This approach not only makes it more manageable but also allows for greater precision in crafting each component.Step 2: Applying Glue and Securing
Sven proceeds to apply glue along one edge of the flange, ensuring a secure bond when clamped into place. He emphasizes that this stage is crucial for maintaining the structural integrity of the flange, which in turn safeguards the living area beneath the canvas when hatches are open.Step 3: Allowing Time to Dry
After securely attaching the first portion of the flange, Sven allows ample time for it to dry before moving forward with additional steps. This patience and precision are key aspects of his successful boatbuilding methods.Step 4: Finishing Touches
Once the flange is fully dried, Sven removes the clamps carefully, ensuring no damage occurs during this process. He then moves on to attaching four more pieces onto these main frames, completing two pairs of flanges for the bulkhead hatches.The Final Touches
While two flanges form the primary support structure around the hatches, Sven mentions there are two additional pieces required at each end to ensure comprehensive protection. This attention to detail highlights his commitment to producing a durable and reliable design. “Sailing is about finding your path, whether it’s across an ocean or within yourself.” – Sven Yrvind In conclusion, making flanges around bulkhead hatches may seem complex at first glance, but by following Sven Yrvind’s meticulous process, enthusiasts can achieve professional-level results. Remember that the journey of boatbuilding is as rewarding as reaching your destination; it tests one’s patience and dedication. For those seeking to embark on this adventure or simply gain more insight into marine craftsmanship, Sven’s wisdom is invaluable.Sven Yrvind, a renowned yacht designer and sailor, shares valuable insights on creating flanges around bulkhead hatches for canvas protection in this enlightening video. By following his expert guidance, boat enthusiasts can ensure their living areas remain secure while allowing unhindered access through the hatches.Step 1: Starting with the Flange
Sven begins by explaining that working on flanges vertically and horizontally is significantly easier than doing so in a flat position. To simplify the process further, he divides the task into two or three steps as suggested by fellow expert “for for.” This approach not only makes it more manageable but also allows for greater precision in crafting each component.Step 2: Applying Glue and Securing
Sven proceeds to apply glue along one edge of the flange, ensuring a secure bond when clamped into place. He emphasizes that this stage is crucial for maintaining the structural integrity of the flange, which in turn safeguards the living area beneath the canvas when hatches are open.Step 3: Allowing Time to Dry
After securely attaching the first portion of the flange, Sven allows ample time for it to dry before moving forward with additional steps. This patience and precision are key aspects of his successful boatbuilding methods.Step 4: Finishing Touches
Once the flange is fully dried, Sven removes the clamps carefully, ensuring no damage occurs during this process. He then moves on to attaching four more pieces onto these main frames, completing two pairs of flanges for the bulkhead hatches.The Final Touches
While two flanges form the primary support structure around the hatches, Sven mentions there are two additional pieces required at each end to ensure comprehensive protection. This attention to detail highlights his commitment to producing a durable and reliable design. “Sailing is about finding your path, whether it’s across an ocean or within yourself.” – Sven Yrvind In conclusion, making flanges around bulkhead hatches may seem complex at first glance, but by following Sven Yrvind’s meticulous process, enthusiasts can achieve professional-level results. Remember that the journey of boatbuilding is as rewarding as reaching your destination; it tests one’s patience and dedication. For those seeking to embark on this adventure or simply gain more insight into marine craftsmanship, Sven’s wisdom is invaluable.Making Flanges Around Bulkhead Hatches for Canvas
Sven Yrvind, a renowned yacht designer and sailor, shares valuable insights on creating flanges around bulkhead hatches for canvas protection in this enlightening video. By following his expert guidance, boat enthusiasts can ensure their living areas remain secure while allowing unhindered access through the hatches.Step 1: Starting with the Flange
Sven begins by explaining that working on flanges vertically and horizontally is significantly easier than doing so in a flat position. To simplify the process further, he divides the task into two or three steps as suggested by fellow expert “for for.” This approach not only makes it more manageable but also allows for greater precision in crafting each component.Step 2: Applying Glue and Securing
Sven proceeds to apply glue along one edge of the flange, ensuring a secure bond when clamped into place. He emphasizes that this stage is crucial for maintaining the structural integrity of the flange, which in turn safeguards the living area beneath the canvas when hatches are open.Step 3: Allowing Time to Dry
After securely attaching the first portion of the flange, Sven allows ample time for it to dry before moving forward with additional steps. This patience and precision are key aspects of his successful boatbuilding methods.Step 4: Finishing Touches
Once the flange is fully dried, Sven removes the clamps carefully, ensuring no damage occurs during this process. He then moves on to attaching four more pieces onto these main frames, completing two pairs of flanges for the bulkhead hatches.The Final Touches
While two flanges form the primary support structure around the hatches, Sven mentions there are two additional pieces required at each end to ensure comprehensive protection. This attention to detail highlights his commitment to producing a durable and reliable design. “Sailing is about finding your path, whether it’s across an ocean or within yourself.” – Sven Yrvind In conclusion, making flanges around bulkhead hatches may seem complex at first glance, but by following Sven Yrvind’s meticulous process, enthusiasts can achieve professional-level results. Remember that the journey of boatbuilding is as rewarding as reaching your destination; it tests one’s patience and dedication. For those seeking to embark on this adventure or simply gain more insight into marine craftsmanship, Sven’s wisdom is invaluable.Once the flange is fully dried, Sven removes the clamps carefully, ensuring no damage occurs during this process. He then moves on to attaching four more pieces onto these main frames, completing two pairs of flanges for the bulkhead hatches.The Final Touches
While two flanges form the primary support structure around the hatches, Sven mentions there are two additional pieces required at each end to ensure comprehensive protection. This attention to detail highlights his commitment to producing a durable and reliable design. “Sailing is about finding your path, whether it’s across an ocean or within yourself.” – Sven Yrvind In conclusion, making flanges around bulkhead hatches may seem complex at first glance, but by following Sven Yrvind’s meticulous process, enthusiasts can achieve professional-level results. Remember that the journey of boatbuilding is as rewarding as reaching your destination; it tests one’s patience and dedication. For those seeking to embark on this adventure or simply gain more insight into marine craftsmanship, Sven’s wisdom is invaluable.After securely attaching the first portion of the flange, Sven allows ample time for it to dry before moving forward with additional steps. This patience and precision are key aspects of his successful boatbuilding methods.Step 4: Finishing Touches
Once the flange is fully dried, Sven removes the clamps carefully, ensuring no damage occurs during this process. He then moves on to attaching four more pieces onto these main frames, completing two pairs of flanges for the bulkhead hatches.The Final Touches
While two flanges form the primary support structure around the hatches, Sven mentions there are two additional pieces required at each end to ensure comprehensive protection. This attention to detail highlights his commitment to producing a durable and reliable design. “Sailing is about finding your path, whether it’s across an ocean or within yourself.” – Sven Yrvind In conclusion, making flanges around bulkhead hatches may seem complex at first glance, but by following Sven Yrvind’s meticulous process, enthusiasts can achieve professional-level results. Remember that the journey of boatbuilding is as rewarding as reaching your destination; it tests one’s patience and dedication. For those seeking to embark on this adventure or simply gain more insight into marine craftsmanship, Sven’s wisdom is invaluable.Sven proceeds to apply glue along one edge of the flange, ensuring a secure bond when clamped into place. He emphasizes that this stage is crucial for maintaining the structural integrity of the flange, which in turn safeguards the living area beneath the canvas when hatches are open.Step 3: Allowing Time to Dry
After securely attaching the first portion of the flange, Sven allows ample time for it to dry before moving forward with additional steps. This patience and precision are key aspects of his successful boatbuilding methods.Step 4: Finishing Touches
Once the flange is fully dried, Sven removes the clamps carefully, ensuring no damage occurs during this process. He then moves on to attaching four more pieces onto these main frames, completing two pairs of flanges for the bulkhead hatches.The Final Touches
While two flanges form the primary support structure around the hatches, Sven mentions there are two additional pieces required at each end to ensure comprehensive protection. This attention to detail highlights his commitment to producing a durable and reliable design. “Sailing is about finding your path, whether it’s across an ocean or within yourself.” – Sven Yrvind In conclusion, making flanges around bulkhead hatches may seem complex at first glance, but by following Sven Yrvind’s meticulous process, enthusiasts can achieve professional-level results. Remember that the journey of boatbuilding is as rewarding as reaching your destination; it tests one’s patience and dedication. For those seeking to embark on this adventure or simply gain more insight into marine craftsmanship, Sven’s wisdom is invaluable.Sven begins by explaining that working on flanges vertically and horizontally is significantly easier than doing so in a flat position. To simplify the process further, he divides the task into two or three steps as suggested by fellow expert “for for.” This approach not only makes it more manageable but also allows for greater precision in crafting each component.Step 2: Applying Glue and Securing
Sven proceeds to apply glue along one edge of the flange, ensuring a secure bond when clamped into place. He emphasizes that this stage is crucial for maintaining the structural integrity of the flange, which in turn safeguards the living area beneath the canvas when hatches are open.Step 3: Allowing Time to Dry
After securely attaching the first portion of the flange, Sven allows ample time for it to dry before moving forward with additional steps. This patience and precision are key aspects of his successful boatbuilding methods.Step 4: Finishing Touches
Once the flange is fully dried, Sven removes the clamps carefully, ensuring no damage occurs during this process. He then moves on to attaching four more pieces onto these main frames, completing two pairs of flanges for the bulkhead hatches.The Final Touches
While two flanges form the primary support structure around the hatches, Sven mentions there are two additional pieces required at each end to ensure comprehensive protection. This attention to detail highlights his commitment to producing a durable and reliable design. “Sailing is about finding your path, whether it’s across an ocean or within yourself.” – Sven Yrvind In conclusion, making flanges around bulkhead hatches may seem complex at first glance, but by following Sven Yrvind’s meticulous process, enthusiasts can achieve professional-level results. Remember that the journey of boatbuilding is as rewarding as reaching your destination; it tests one’s patience and dedication. For those seeking to embark on this adventure or simply gain more insight into marine craftsmanship, Sven’s wisdom is invaluable.Sven Yrvind, a renowned yacht designer and sailor, shares valuable insights on creating flanges around bulkhead hatches for canvas protection in this enlightening video. By following his expert guidance, boat enthusiasts can ensure their living areas remain secure while allowing unhindered access through the hatches.Step 1: Starting with the Flange
Sven begins by explaining that working on flanges vertically and horizontally is significantly easier than doing so in a flat position. To simplify the process further, he divides the task into two or three steps as suggested by fellow expert “for for.” This approach not only makes it more manageable but also allows for greater precision in crafting each component.Step 2: Applying Glue and Securing
Sven proceeds to apply glue along one edge of the flange, ensuring a secure bond when clamped into place. He emphasizes that this stage is crucial for maintaining the structural integrity of the flange, which in turn safeguards the living area beneath the canvas when hatches are open.Step 3: Allowing Time to Dry
After securely attaching the first portion of the flange, Sven allows ample time for it to dry before moving forward with additional steps. This patience and precision are key aspects of his successful boatbuilding methods.Step 4: Finishing Touches
Once the flange is fully dried, Sven removes the clamps carefully, ensuring no damage occurs during this process. He then moves on to attaching four more pieces onto these main frames, completing two pairs of flanges for the bulkhead hatches.The Final Touches
While two flanges form the primary support structure around the hatches, Sven mentions there are two additional pieces required at each end to ensure comprehensive protection. This attention to detail highlights his commitment to producing a durable and reliable design. “Sailing is about finding your path, whether it’s across an ocean or within yourself.” – Sven Yrvind In conclusion, making flanges around bulkhead hatches may seem complex at first glance, but by following Sven Yrvind’s meticulous process, enthusiasts can achieve professional-level results. Remember that the journey of boatbuilding is as rewarding as reaching your destination; it tests one’s patience and dedication. For those seeking to embark on this adventure or simply gain more insight into marine craftsmanship, Sven’s wisdom is invaluable.Making Flanges Around Bulkhead Hatches for Canvas
Sven Yrvind, a renowned yacht designer and sailor, shares valuable insights on creating flanges around bulkhead hatches for canvas protection in this enlightening video. By following his expert guidance, boat enthusiasts can ensure their living areas remain secure while allowing unhindered access through the hatches.Step 1: Starting with the Flange
Sven begins by explaining that working on flanges vertically and horizontally is significantly easier than doing so in a flat position. To simplify the process further, he divides the task into two or three steps as suggested by fellow expert “for for.” This approach not only makes it more manageable but also allows for greater precision in crafting each component.Step 2: Applying Glue and Securing
Sven proceeds to apply glue along one edge of the flange, ensuring a secure bond when clamped into place. He emphasizes that this stage is crucial for maintaining the structural integrity of the flange, which in turn safeguards the living area beneath the canvas when hatches are open.Step 3: Allowing Time to Dry
After securely attaching the first portion of the flange, Sven allows ample time for it to dry before moving forward with additional steps. This patience and precision are key aspects of his successful boatbuilding methods.Step 4: Finishing Touches
Once the flange is fully dried, Sven removes the clamps carefully, ensuring no damage occurs during this process. He then moves on to attaching four more pieces onto these main frames, completing two pairs of flanges for the bulkhead hatches.The Final Touches
While two flanges form the primary support structure around the hatches, Sven mentions there are two additional pieces required at each end to ensure comprehensive protection. This attention to detail highlights his commitment to producing a durable and reliable design. “Sailing is about finding your path, whether it’s across an ocean or within yourself.” – Sven Yrvind In conclusion, making flanges around bulkhead hatches may seem complex at first glance, but by following Sven Yrvind’s meticulous process, enthusiasts can achieve professional-level results. Remember that the journey of boatbuilding is as rewarding as reaching your destination; it tests one’s patience and dedication. For those seeking to embark on this adventure or simply gain more insight into marine craftsmanship, Sven’s wisdom is invaluable.Sven proceeds to apply glue along one edge of the flange, ensuring a secure bond when clamped into place. He emphasizes that this stage is crucial for maintaining the structural integrity of the flange, which in turn safeguards the living area beneath the canvas when hatches are open.Step 3: Allowing Time to Dry
After securely attaching the first portion of the flange, Sven allows ample time for it to dry before moving forward with additional steps. This patience and precision are key aspects of his successful boatbuilding methods.Step 4: Finishing Touches
Once the flange is fully dried, Sven removes the clamps carefully, ensuring no damage occurs during this process. He then moves on to attaching four more pieces onto these main frames, completing two pairs of flanges for the bulkhead hatches.The Final Touches
While two flanges form the primary support structure around the hatches, Sven mentions there are two additional pieces required at each end to ensure comprehensive protection. This attention to detail highlights his commitment to producing a durable and reliable design. “Sailing is about finding your path, whether it’s across an ocean or within yourself.” – Sven Yrvind In conclusion, making flanges around bulkhead hatches may seem complex at first glance, but by following Sven Yrvind’s meticulous process, enthusiasts can achieve professional-level results. Remember that the journey of boatbuilding is as rewarding as reaching your destination; it tests one’s patience and dedication. For those seeking to embark on this adventure or simply gain more insight into marine craftsmanship, Sven’s wisdom is invaluable.Sven proceeds to apply glue along one edge of the flange, ensuring a secure bond when clamped into place. He emphasizes that this stage is crucial for maintaining the structural integrity of the flange, which in turn safeguards the living area beneath the canvas when hatches are open.Step 3: Allowing Time to Dry
After securely attaching the first portion of the flange, Sven allows ample time for it to dry before moving forward with additional steps. This patience and precision are key aspects of his successful boatbuilding methods.Step 4: Finishing Touches
Once the flange is fully dried, Sven removes the clamps carefully, ensuring no damage occurs during this process. He then moves on to attaching four more pieces onto these main frames, completing two pairs of flanges for the bulkhead hatches.The Final Touches
While two flanges form the primary support structure around the hatches, Sven mentions there are two additional pieces required at each end to ensure comprehensive protection. This attention to detail highlights his commitment to producing a durable and reliable design. “Sailing is about finding your path, whether it’s across an ocean or within yourself.” – Sven Yrvind In conclusion, making flanges around bulkhead hatches may seem complex at first glance, but by following Sven Yrvind’s meticulous process, enthusiasts can achieve professional-level results. Remember that the journey of boatbuilding is as rewarding as reaching your destination; it tests one’s patience and dedication. For those seeking to embark on this adventure or simply gain more insight into marine craftsmanship, Sven’s wisdom is invaluable.Making Flanges Around Bulkhead Hatches for Canvas
Sven Yrvind, a renowned yacht designer and sailor, shares valuable insights on creating flanges around bulkhead hatches for canvas protection in this enlightening video. By following his expert guidance, boat enthusiasts can ensure their living areas remain secure while allowing unhindered access through the hatches.Step 1: Starting with the Flange
Sven begins by explaining that working on flanges vertically and horizontally is significantly easier than doing so in a flat position. To simplify the process further, he divides the task into two or three steps as suggested by fellow expert “for for.” This approach not only makes it more manageable but also allows for greater precision in crafting each component.Step 2: Applying Glue and Securing
Sven proceeds to apply glue along one edge of the flange, ensuring a secure bond when clamped into place. He emphasizes that this stage is crucial for maintaining the structural integrity of the flange, which in turn safeguards the living area beneath the canvas when hatches are open.Step 3: Allowing Time to Dry
After securely attaching the first portion of the flange, Sven allows ample time for it to dry before moving forward with additional steps. This patience and precision are key aspects of his successful boatbuilding methods.Step 4: Finishing Touches
Once the flange is fully dried, Sven removes the clamps carefully, ensuring no damage occurs during this process. He then moves on to attaching four more pieces onto these main frames, completing two pairs of flanges for the bulkhead hatches.The Final Touches
While two flanges form the primary support structure around the hatches, Sven mentions there are two additional pieces required at each end to ensure comprehensive protection. This attention to detail highlights his commitment to producing a durable and reliable design. “Sailing is about finding your path, whether it’s across an ocean or within yourself.” – Sven Yrvind In conclusion, making flanges around bulkhead hatches may seem complex at first glance, but by following Sven Yrvind’s meticulous process, enthusiasts can achieve professional-level results. Remember that the journey of boatbuilding is as rewarding as reaching your destination; it tests one’s patience and dedication. For those seeking to embark on this adventure or simply gain more insight into marine craftsmanship, Sven’s wisdom is invaluable.Sven begins by explaining that working on flanges vertically and horizontally is significantly easier than doing so in a flat position. To simplify the process further, he divides the task into two or three steps as suggested by fellow expert “for for.” This approach not only makes it more manageable but also allows for greater precision in crafting each component.Step 2: Applying Glue and Securing
Sven proceeds to apply glue along one edge of the flange, ensuring a secure bond when clamped into place. He emphasizes that this stage is crucial for maintaining the structural integrity of the flange, which in turn safeguards the living area beneath the canvas when hatches are open.Step 3: Allowing Time to Dry
After securely attaching the first portion of the flange, Sven allows ample time for it to dry before moving forward with additional steps. This patience and precision are key aspects of his successful boatbuilding methods.Step 4: Finishing Touches
Once the flange is fully dried, Sven removes the clamps carefully, ensuring no damage occurs during this process. He then moves on to attaching four more pieces onto these main frames, completing two pairs of flanges for the bulkhead hatches.The Final Touches
While two flanges form the primary support structure around the hatches, Sven mentions there are two additional pieces required at each end to ensure comprehensive protection. This attention to detail highlights his commitment to producing a durable and reliable design. “Sailing is about finding your path, whether it’s across an ocean or within yourself.” – Sven Yrvind In conclusion, making flanges around bulkhead hatches may seem complex at first glance, but by following Sven Yrvind’s meticulous process, enthusiasts can achieve professional-level results. Remember that the journey of boatbuilding is as rewarding as reaching your destination; it tests one’s patience and dedication. For those seeking to embark on this adventure or simply gain more insight into marine craftsmanship, Sven’s wisdom is invaluable.Making Flanges Around Bulkhead Hatches for Canvas
Sven Yrvind, a renowned yacht designer and sailor, shares valuable insights on creating flanges around bulkhead hatches for canvas protection in this enlightening video. By following his expert guidance, boat enthusiasts can ensure their living areas remain secure while allowing unhindered access through the hatches.Step 1: Starting with the Flange
Sven begins by explaining that working on flanges vertically and horizontally is significantly easier than doing so in a flat position. To simplify the process further, he divides the task into two or three steps as suggested by fellow expert “for for.” This approach not only makes it more manageable but also allows for greater precision in crafting each component.Step 2: Applying Glue and Securing
Sven proceeds to apply glue along one edge of the flange, ensuring a secure bond when clamped into place. He emphasizes that this stage is crucial for maintaining the structural integrity of the flange, which in turn safeguards the living area beneath the canvas when hatches are open.Step 3: Allowing Time to Dry
After securely attaching the first portion of the flange, Sven allows ample time for it to dry before moving forward with additional steps. This patience and precision are key aspects of his successful boatbuilding methods.Step 4: Finishing Touches
Once the flange is fully dried, Sven removes the clamps carefully, ensuring no damage occurs during this process. He then moves on to attaching four more pieces onto these main frames, completing two pairs of flanges for the bulkhead hatches.The Final Touches
While two flanges form the primary support structure around the hatches, Sven mentions there are two additional pieces required at each end to ensure comprehensive protection. This attention to detail highlights his commitment to producing a durable and reliable design. “Sailing is about finding your path, whether it’s across an ocean or within yourself.” – Sven Yrvind In conclusion, making flanges around bulkhead hatches may seem complex at first glance, but by following Sven Yrvind’s meticulous process, enthusiasts can achieve professional-level results. Remember that the journey of boatbuilding is as rewarding as reaching your destination; it tests one’s patience and dedication. For those seeking to embark on this adventure or simply gain more insight into marine craftsmanship, Sven’s wisdom is invaluable.Sven Yrvind, a renowned yacht designer and sailor, shares valuable insights on creating flanges around bulkhead hatches for canvas protection in this enlightening video. By following his expert guidance, boat enthusiasts can ensure their living areas remain secure while allowing unhindered access through the hatches.Step 1: Starting with the Flange
Sven begins by explaining that working on flanges vertically and horizontally is significantly easier than doing so in a flat position. To simplify the process further, he divides the task into two or three steps as suggested by fellow expert “for for.” This approach not only makes it more manageable but also allows for greater precision in crafting each component.Step 2: Applying Glue and Securing
Sven proceeds to apply glue along one edge of the flange, ensuring a secure bond when clamped into place. He emphasizes that this stage is crucial for maintaining the structural integrity of the flange, which in turn safeguards the living area beneath the canvas when hatches are open.Step 3: Allowing Time to Dry
After securely attaching the first portion of the flange, Sven allows ample time for it to dry before moving forward with additional steps. This patience and precision are key aspects of his successful boatbuilding methods.Step 4: Finishing Touches
Once the flange is fully dried, Sven removes the clamps carefully, ensuring no damage occurs during this process. He then moves on to attaching four more pieces onto these main frames, completing two pairs of flanges for the bulkhead hatches.The Final Touches
While two flanges form the primary support structure around the hatches, Sven mentions there are two additional pieces required at each end to ensure comprehensive protection. This attention to detail highlights his commitment to producing a durable and reliable design. “Sailing is about finding your path, whether it’s across an ocean or within yourself.” – Sven Yrvind In conclusion, making flanges around bulkhead hatches may seem complex at first glance, but by following Sven Yrvind’s meticulous process, enthusiasts can achieve professional-level results. Remember that the journey of boatbuilding is as rewarding as reaching your destination; it tests one’s patience and dedication. For those seeking to embark on this adventure or simply gain more insight into marine craftsmanship, Sven’s wisdom is invaluable.Making Flanges Around Bulkhead Hatches for Canvas
Sven Yrvind, a renowned yacht designer and sailor, shares valuable insights on creating flanges around bulkhead hatches for canvas protection in this enlightening video. By following his expert guidance, boat enthusiasts can ensure their living areas remain secure while allowing unhindered access through the hatches.Step 1: Starting with the Flange
Sven begins by explaining that working on flanges vertically and horizontally is significantly easier than doing so in a flat position. To simplify the process further, he divides the task into two or three steps as suggested by fellow expert “for for.” This approach not only makes it more manageable but also allows for greater precision in crafting each component.Step 2: Applying Glue and Securing
Sven proceeds to apply glue along one edge of the flange, ensuring a secure bond when clamped into place. He emphasizes that this stage is crucial for maintaining the structural integrity of the flange, which in turn safeguards the living area beneath the canvas when hatches are open.Step 3: Allowing Time to Dry
After securely attaching the first portion of the flange, Sven allows ample time for it to dry before moving forward with additional steps. This patience and precision are key aspects of his successful boatbuilding methods.Step 4: Finishing Touches
Once the flange is fully dried, Sven removes the clamps carefully, ensuring no damage occurs during this process. He then moves on to attaching four more pieces onto these main frames, completing two pairs of flanges for the bulkhead hatches.The Final Touches
While two flanges form the primary support structure around the hatches, Sven mentions there are two additional pieces required at each end to ensure comprehensive protection. This attention to detail highlights his commitment to producing a durable and reliable design. “Sailing is about finding your path, whether it’s across an ocean or within yourself.” – Sven Yrvind In conclusion, making flanges around bulkhead hatches may seem complex at first glance, but by following Sven Yrvind’s meticulous process, enthusiasts can achieve professional-level results. Remember that the journey of boatbuilding is as rewarding as reaching your destination; it tests one’s patience and dedication. For those seeking to embark on this adventure or simply gain more insight into marine craftsmanship, Sven’s wisdom is invaluable.Once the flange is fully dried, Sven removes the clamps carefully, ensuring no damage occurs during this process. He then moves on to attaching four more pieces onto these main frames, completing two pairs of flanges for the bulkhead hatches.The Final Touches
While two flanges form the primary support structure around the hatches, Sven mentions there are two additional pieces required at each end to ensure comprehensive protection. This attention to detail highlights his commitment to producing a durable and reliable design. “Sailing is about finding your path, whether it’s across an ocean or within yourself.” – Sven Yrvind In conclusion, making flanges around bulkhead hatches may seem complex at first glance, but by following Sven Yrvind’s meticulous process, enthusiasts can achieve professional-level results. Remember that the journey of boatbuilding is as rewarding as reaching your destination; it tests one’s patience and dedication. For those seeking to embark on this adventure or simply gain more insight into marine craftsmanship, Sven’s wisdom is invaluable.Sven Yrvind, a renowned yacht designer and sailor, shares valuable insights on creating flanges around bulkhead hatches for canvas protection in this enlightening video. By following his expert guidance, boat enthusiasts can ensure their living areas remain secure while allowing unhindered access through the hatches.Step 1: Starting with the Flange
Sven begins by explaining that working on flanges vertically and horizontally is significantly easier than doing so in a flat position. To simplify the process further, he divides the task into two or three steps as suggested by fellow expert “for for.” This approach not only makes it more manageable but also allows for greater precision in crafting each component.Step 2: Applying Glue and Securing
Sven proceeds to apply glue along one edge of the flange, ensuring a secure bond when clamped into place. He emphasizes that this stage is crucial for maintaining the structural integrity of the flange, which in turn safeguards the living area beneath the canvas when hatches are open.Step 3: Allowing Time to Dry
After securely attaching the first portion of the flange, Sven allows ample time for it to dry before moving forward with additional steps. This patience and precision are key aspects of his successful boatbuilding methods.Step 4: Finishing Touches
Once the flange is fully dried, Sven removes the clamps carefully, ensuring no damage occurs during this process. He then moves on to attaching four more pieces onto these main frames, completing two pairs of flanges for the bulkhead hatches.The Final Touches
While two flanges form the primary support structure around the hatches, Sven mentions there are two additional pieces required at each end to ensure comprehensive protection. This attention to detail highlights his commitment to producing a durable and reliable design. “Sailing is about finding your path, whether it’s across an ocean or within yourself.” – Sven Yrvind In conclusion, making flanges around bulkhead hatches may seem complex at first glance, but by following Sven Yrvind’s meticulous process, enthusiasts can achieve professional-level results. Remember that the journey of boatbuilding is as rewarding as reaching your destination; it tests one’s patience and dedication. For those seeking to embark on this adventure or simply gain more insight into marine craftsmanship, Sven’s wisdom is invaluable.Making Flanges Around Bulkhead Hatches for Canvas
Sven Yrvind, a renowned yacht designer and sailor, shares valuable insights on creating flanges around bulkhead hatches for canvas protection in this enlightening video. By following his expert guidance, boat enthusiasts can ensure their living areas remain secure while allowing unhindered access through the hatches.Step 1: Starting with the Flange
Sven begins by explaining that working on flanges vertically and horizontally is significantly easier than doing so in a flat position. To simplify the process further, he divides the task into two or three steps as suggested by fellow expert “for for.” This approach not only makes it more manageable but also allows for greater precision in crafting each component.Step 2: Applying Glue and Securing
Sven proceeds to apply glue along one edge of the flange, ensuring a secure bond when clamped into place. He emphasizes that this stage is crucial for maintaining the structural integrity of the flange, which in turn safeguards the living area beneath the canvas when hatches are open.Step 3: Allowing Time to Dry
After securely attaching the first portion of the flange, Sven allows ample time for it to dry before moving forward with additional steps. This patience and precision are key aspects of his successful boatbuilding methods.Step 4: Finishing Touches
Once the flange is fully dried, Sven removes the clamps carefully, ensuring no damage occurs during this process. He then moves on to attaching four more pieces onto these main frames, completing two pairs of flanges for the bulkhead hatches.The Final Touches
While two flanges form the primary support structure around the hatches, Sven mentions there are two additional pieces required at each end to ensure comprehensive protection. This attention to detail highlights his commitment to producing a durable and reliable design. “Sailing is about finding your path, whether it’s across an ocean or within yourself.” – Sven Yrvind In conclusion, making flanges around bulkhead hatches may seem complex at first glance, but by following Sven Yrvind’s meticulous process, enthusiasts can achieve professional-level results. Remember that the journey of boatbuilding is as rewarding as reaching your destination; it tests one’s patience and dedication. For those seeking to embark on this adventure or simply gain more insight into marine craftsmanship, Sven’s wisdom is invaluable.After securely attaching the first portion of the flange, Sven allows ample time for it to dry before moving forward with additional steps. This patience and precision are key aspects of his successful boatbuilding methods.Step 4: Finishing Touches
Once the flange is fully dried, Sven removes the clamps carefully, ensuring no damage occurs during this process. He then moves on to attaching four more pieces onto these main frames, completing two pairs of flanges for the bulkhead hatches.The Final Touches
While two flanges form the primary support structure around the hatches, Sven mentions there are two additional pieces required at each end to ensure comprehensive protection. This attention to detail highlights his commitment to producing a durable and reliable design. “Sailing is about finding your path, whether it’s across an ocean or within yourself.” – Sven Yrvind In conclusion, making flanges around bulkhead hatches may seem complex at first glance, but by following Sven Yrvind’s meticulous process, enthusiasts can achieve professional-level results. Remember that the journey of boatbuilding is as rewarding as reaching your destination; it tests one’s patience and dedication. For those seeking to embark on this adventure or simply gain more insight into marine craftsmanship, Sven’s wisdom is invaluable.Sven Yrvind, a renowned yacht designer and sailor, shares valuable insights on creating flanges around bulkhead hatches for canvas protection in this enlightening video. By following his expert guidance, boat enthusiasts can ensure their living areas remain secure while allowing unhindered access through the hatches.Step 1: Starting with the Flange
Sven begins by explaining that working on flanges vertically and horizontally is significantly easier than doing so in a flat position. To simplify the process further, he divides the task into two or three steps as suggested by fellow expert “for for.” This approach not only makes it more manageable but also allows for greater precision in crafting each component.Step 2: Applying Glue and Securing
Sven proceeds to apply glue along one edge of the flange, ensuring a secure bond when clamped into place. He emphasizes that this stage is crucial for maintaining the structural integrity of the flange, which in turn safeguards the living area beneath the canvas when hatches are open.Step 3: Allowing Time to Dry
After securely attaching the first portion of the flange, Sven allows ample time for it to dry before moving forward with additional steps. This patience and precision are key aspects of his successful boatbuilding methods.Step 4: Finishing Touches
Once the flange is fully dried, Sven removes the clamps carefully, ensuring no damage occurs during this process. He then moves on to attaching four more pieces onto these main frames, completing two pairs of flanges for the bulkhead hatches.The Final Touches
While two flanges form the primary support structure around the hatches, Sven mentions there are two additional pieces required at each end to ensure comprehensive protection. This attention to detail highlights his commitment to producing a durable and reliable design. “Sailing is about finding your path, whether it’s across an ocean or within yourself.” – Sven Yrvind In conclusion, making flanges around bulkhead hatches may seem complex at first glance, but by following Sven Yrvind’s meticulous process, enthusiasts can achieve professional-level results. Remember that the journey of boatbuilding is as rewarding as reaching your destination; it tests one’s patience and dedication. For those seeking to embark on this adventure or simply gain more insight into marine craftsmanship, Sven’s wisdom is invaluable.Making Flanges Around Bulkhead Hatches for Canvas
Sven Yrvind, a renowned yacht designer and sailor, shares valuable insights on creating flanges around bulkhead hatches for canvas protection in this enlightening video. By following his expert guidance, boat enthusiasts can ensure their living areas remain secure while allowing unhindered access through the hatches.Step 1: Starting with the Flange
Sven begins by explaining that working on flanges vertically and horizontally is significantly easier than doing so in a flat position. To simplify the process further, he divides the task into two or three steps as suggested by fellow expert “for for.” This approach not only makes it more manageable but also allows for greater precision in crafting each component.Step 2: Applying Glue and Securing
Sven proceeds to apply glue along one edge of the flange, ensuring a secure bond when clamped into place. He emphasizes that this stage is crucial for maintaining the structural integrity of the flange, which in turn safeguards the living area beneath the canvas when hatches are open.Step 3: Allowing Time to Dry
After securely attaching the first portion of the flange, Sven allows ample time for it to dry before moving forward with additional steps. This patience and precision are key aspects of his successful boatbuilding methods.Step 4: Finishing Touches
Once the flange is fully dried, Sven removes the clamps carefully, ensuring no damage occurs during this process. He then moves on to attaching four more pieces onto these main frames, completing two pairs of flanges for the bulkhead hatches.The Final Touches
While two flanges form the primary support structure around the hatches, Sven mentions there are two additional pieces required at each end to ensure comprehensive protection. This attention to detail highlights his commitment to producing a durable and reliable design. “Sailing is about finding your path, whether it’s across an ocean or within yourself.” – Sven Yrvind In conclusion, making flanges around bulkhead hatches may seem complex at first glance, but by following Sven Yrvind’s meticulous process, enthusiasts can achieve professional-level results. Remember that the journey of boatbuilding is as rewarding as reaching your destination; it tests one’s patience and dedication. For those seeking to embark on this adventure or simply gain more insight into marine craftsmanship, Sven’s wisdom is invaluable.Sven proceeds to apply glue along one edge of the flange, ensuring a secure bond when clamped into place. He emphasizes that this stage is crucial for maintaining the structural integrity of the flange, which in turn safeguards the living area beneath the canvas when hatches are open.Step 3: Allowing Time to Dry
After securely attaching the first portion of the flange, Sven allows ample time for it to dry before moving forward with additional steps. This patience and precision are key aspects of his successful boatbuilding methods.Step 4: Finishing Touches
Once the flange is fully dried, Sven removes the clamps carefully, ensuring no damage occurs during this process. He then moves on to attaching four more pieces onto these main frames, completing two pairs of flanges for the bulkhead hatches.The Final Touches
While two flanges form the primary support structure around the hatches, Sven mentions there are two additional pieces required at each end to ensure comprehensive protection. This attention to detail highlights his commitment to producing a durable and reliable design. “Sailing is about finding your path, whether it’s across an ocean or within yourself.” – Sven Yrvind In conclusion, making flanges around bulkhead hatches may seem complex at first glance, but by following Sven Yrvind’s meticulous process, enthusiasts can achieve professional-level results. Remember that the journey of boatbuilding is as rewarding as reaching your destination; it tests one’s patience and dedication. For those seeking to embark on this adventure or simply gain more insight into marine craftsmanship, Sven’s wisdom is invaluable.Sven Yrvind, a renowned yacht designer and sailor, shares valuable insights on creating flanges around bulkhead hatches for canvas protection in this enlightening video. By following his expert guidance, boat enthusiasts can ensure their living areas remain secure while allowing unhindered access through the hatches.Step 1: Starting with the Flange
Sven begins by explaining that working on flanges vertically and horizontally is significantly easier than doing so in a flat position. To simplify the process further, he divides the task into two or three steps as suggested by fellow expert “for for.” This approach not only makes it more manageable but also allows for greater precision in crafting each component.Step 2: Applying Glue and Securing
Sven proceeds to apply glue along one edge of the flange, ensuring a secure bond when clamped into place. He emphasizes that this stage is crucial for maintaining the structural integrity of the flange, which in turn safeguards the living area beneath the canvas when hatches are open.Step 3: Allowing Time to Dry
After securely attaching the first portion of the flange, Sven allows ample time for it to dry before moving forward with additional steps. This patience and precision are key aspects of his successful boatbuilding methods.Step 4: Finishing Touches
Once the flange is fully dried, Sven removes the clamps carefully, ensuring no damage occurs during this process. He then moves on to attaching four more pieces onto these main frames, completing two pairs of flanges for the bulkhead hatches.The Final Touches
While two flanges form the primary support structure around the hatches, Sven mentions there are two additional pieces required at each end to ensure comprehensive protection. This attention to detail highlights his commitment to producing a durable and reliable design. “Sailing is about finding your path, whether it’s across an ocean or within yourself.” – Sven Yrvind In conclusion, making flanges around bulkhead hatches may seem complex at first glance, but by following Sven Yrvind’s meticulous process, enthusiasts can achieve professional-level results. Remember that the journey of boatbuilding is as rewarding as reaching your destination; it tests one’s patience and dedication. For those seeking to embark on this adventure or simply gain more insight into marine craftsmanship, Sven’s wisdom is invaluable.Making Flanges Around Bulkhead Hatches for Canvas
Sven Yrvind, a renowned yacht designer and sailor, shares valuable insights on creating flanges around bulkhead hatches for canvas protection in this enlightening video. By following his expert guidance, boat enthusiasts can ensure their living areas remain secure while allowing unhindered access through the hatches.Step 1: Starting with the Flange
Sven begins by explaining that working on flanges vertically and horizontally is significantly easier than doing so in a flat position. To simplify the process further, he divides the task into two or three steps as suggested by fellow expert “for for.” This approach not only makes it more manageable but also allows for greater precision in crafting each component.Step 2: Applying Glue and Securing
Sven proceeds to apply glue along one edge of the flange, ensuring a secure bond when clamped into place. He emphasizes that this stage is crucial for maintaining the structural integrity of the flange, which in turn safeguards the living area beneath the canvas when hatches are open.Step 3: Allowing Time to Dry
After securely attaching the first portion of the flange, Sven allows ample time for it to dry before moving forward with additional steps. This patience and precision are key aspects of his successful boatbuilding methods.Step 4: Finishing Touches
Once the flange is fully dried, Sven removes the clamps carefully, ensuring no damage occurs during this process. He then moves on to attaching four more pieces onto these main frames, completing two pairs of flanges for the bulkhead hatches.The Final Touches
While two flanges form the primary support structure around the hatches, Sven mentions there are two additional pieces required at each end to ensure comprehensive protection. This attention to detail highlights his commitment to producing a durable and reliable design. “Sailing is about finding your path, whether it’s across an ocean or within yourself.” – Sven Yrvind In conclusion, making flanges around bulkhead hatches may seem complex at first glance, but by following Sven Yrvind’s meticulous process, enthusiasts can achieve professional-level results. Remember that the journey of boatbuilding is as rewarding as reaching your destination; it tests one’s patience and dedication. For those seeking to embark on this adventure or simply gain more insight into marine craftsmanship, Sven’s wisdom is invaluable.Sven begins by explaining that working on flanges vertically and horizontally is significantly easier than doing so in a flat position. To simplify the process further, he divides the task into two or three steps as suggested by fellow expert “for for.” This approach not only makes it more manageable but also allows for greater precision in crafting each component.Step 2: Applying Glue and Securing
Sven proceeds to apply glue along one edge of the flange, ensuring a secure bond when clamped into place. He emphasizes that this stage is crucial for maintaining the structural integrity of the flange, which in turn safeguards the living area beneath the canvas when hatches are open.Step 3: Allowing Time to Dry
After securely attaching the first portion of the flange, Sven allows ample time for it to dry before moving forward with additional steps. This patience and precision are key aspects of his successful boatbuilding methods.Step 4: Finishing Touches
Once the flange is fully dried, Sven removes the clamps carefully, ensuring no damage occurs during this process. He then moves on to attaching four more pieces onto these main frames, completing two pairs of flanges for the bulkhead hatches.The Final Touches
While two flanges form the primary support structure around the hatches, Sven mentions there are two additional pieces required at each end to ensure comprehensive protection. This attention to detail highlights his commitment to producing a durable and reliable design. “Sailing is about finding your path, whether it’s across an ocean or within yourself.” – Sven Yrvind In conclusion, making flanges around bulkhead hatches may seem complex at first glance, but by following Sven Yrvind’s meticulous process, enthusiasts can achieve professional-level results. Remember that the journey of boatbuilding is as rewarding as reaching your destination; it tests one’s patience and dedication. For those seeking to embark on this adventure or simply gain more insight into marine craftsmanship, Sven’s wisdom is invaluable.Sven Yrvind, a renowned yacht designer and sailor, shares valuable insights on creating flanges around bulkhead hatches for canvas protection in this enlightening video. By following his expert guidance, boat enthusiasts can ensure their living areas remain secure while allowing unhindered access through the hatches.Step 1: Starting with the Flange
Sven begins by explaining that working on flanges vertically and horizontally is significantly easier than doing so in a flat position. To simplify the process further, he divides the task into two or three steps as suggested by fellow expert “for for.” This approach not only makes it more manageable but also allows for greater precision in crafting each component.Step 2: Applying Glue and Securing
Sven proceeds to apply glue along one edge of the flange, ensuring a secure bond when clamped into place. He emphasizes that this stage is crucial for maintaining the structural integrity of the flange, which in turn safeguards the living area beneath the canvas when hatches are open.Step 3: Allowing Time to Dry
After securely attaching the first portion of the flange, Sven allows ample time for it to dry before moving forward with additional steps. This patience and precision are key aspects of his successful boatbuilding methods.Step 4: Finishing Touches
Once the flange is fully dried, Sven removes the clamps carefully, ensuring no damage occurs during this process. He then moves on to attaching four more pieces onto these main frames, completing two pairs of flanges for the bulkhead hatches.The Final Touches
While two flanges form the primary support structure around the hatches, Sven mentions there are two additional pieces required at each end to ensure comprehensive protection. This attention to detail highlights his commitment to producing a durable and reliable design. “Sailing is about finding your path, whether it’s across an ocean or within yourself.” – Sven Yrvind In conclusion, making flanges around bulkhead hatches may seem complex at first glance, but by following Sven Yrvind’s meticulous process, enthusiasts can achieve professional-level results. Remember that the journey of boatbuilding is as rewarding as reaching your destination; it tests one’s patience and dedication. For those seeking to embark on this adventure or simply gain more insight into marine craftsmanship, Sven’s wisdom is invaluable.Making Flanges Around Bulkhead Hatches for Canvas
Sven Yrvind, a renowned yacht designer and sailor, shares valuable insights on creating flanges around bulkhead hatches for canvas protection in this enlightening video. By following his expert guidance, boat enthusiasts can ensure their living areas remain secure while allowing unhindered access through the hatches.Step 1: Starting with the Flange
Sven begins by explaining that working on flanges vertically and horizontally is significantly easier than doing so in a flat position. To simplify the process further, he divides the task into two or three steps as suggested by fellow expert “for for.” This approach not only makes it more manageable but also allows for greater precision in crafting each component.Step 2: Applying Glue and Securing
Sven proceeds to apply glue along one edge of the flange, ensuring a secure bond when clamped into place. He emphasizes that this stage is crucial for maintaining the structural integrity of the flange, which in turn safeguards the living area beneath the canvas when hatches are open.Step 3: Allowing Time to Dry
After securely attaching the first portion of the flange, Sven allows ample time for it to dry before moving forward with additional steps. This patience and precision are key aspects of his successful boatbuilding methods.Step 4: Finishing Touches
Once the flange is fully dried, Sven removes the clamps carefully, ensuring no damage occurs during this process. He then moves on to attaching four more pieces onto these main frames, completing two pairs of flanges for the bulkhead hatches.The Final Touches
While two flanges form the primary support structure around the hatches, Sven mentions there are two additional pieces required at each end to ensure comprehensive protection. This attention to detail highlights his commitment to producing a durable and reliable design. “Sailing is about finding your path, whether it’s across an ocean or within yourself.” – Sven Yrvind In conclusion, making flanges around bulkhead hatches may seem complex at first glance, but by following Sven Yrvind’s meticulous process, enthusiasts can achieve professional-level results. Remember that the journey of boatbuilding is as rewarding as reaching your destination; it tests one’s patience and dedication. For those seeking to embark on this adventure or simply gain more insight into marine craftsmanship, Sven’s wisdom is invaluable.Once the flange is fully dried, Sven removes the clamps carefully, ensuring no damage occurs during this process. He then moves on to attaching four more pieces onto these main frames, completing two pairs of flanges for the bulkhead hatches.The Final Touches
While two flanges form the primary support structure around the hatches, Sven mentions there are two additional pieces required at each end to ensure comprehensive protection. This attention to detail highlights his commitment to producing a durable and reliable design. “Sailing is about finding your path, whether it’s across an ocean or within yourself.” – Sven Yrvind In conclusion, making flanges around bulkhead hatches may seem complex at first glance, but by following Sven Yrvind’s meticulous process, enthusiasts can achieve professional-level results. Remember that the journey of boatbuilding is as rewarding as reaching your destination; it tests one’s patience and dedication. For those seeking to embark on this adventure or simply gain more insight into marine craftsmanship, Sven’s wisdom is invaluable.Sven begins by explaining that working on flanges vertically and horizontally is significantly easier than doing so in a flat position. To simplify the process further, he divides the task into two or three steps as suggested by fellow expert “for for.” This approach not only makes it more manageable but also allows for greater precision in crafting each component.Step 2: Applying Glue and Securing
Sven proceeds to apply glue along one edge of the flange, ensuring a secure bond when clamped into place. He emphasizes that this stage is crucial for maintaining the structural integrity of the flange, which in turn safeguards the living area beneath the canvas when hatches are open.Step 3: Allowing Time to Dry
After securely attaching the first portion of the flange, Sven allows ample time for it to dry before moving forward with additional steps. This patience and precision are key aspects of his successful boatbuilding methods.Step 4: Finishing Touches
Once the flange is fully dried, Sven removes the clamps carefully, ensuring no damage occurs during this process. He then moves on to attaching four more pieces onto these main frames, completing two pairs of flanges for the bulkhead hatches.The Final Touches
While two flanges form the primary support structure around the hatches, Sven mentions there are two additional pieces required at each end to ensure comprehensive protection. This attention to detail highlights his commitment to producing a durable and reliable design. “Sailing is about finding your path, whether it’s across an ocean or within yourself.” – Sven Yrvind In conclusion, making flanges around bulkhead hatches may seem complex at first glance, but by following Sven Yrvind’s meticulous process, enthusiasts can achieve professional-level results. Remember that the journey of boatbuilding is as rewarding as reaching your destination; it tests one’s patience and dedication. For those seeking to embark on this adventure or simply gain more insight into marine craftsmanship, Sven’s wisdom is invaluable.Sven Yrvind, a renowned yacht designer and sailor, shares valuable insights on creating flanges around bulkhead hatches for canvas protection in this enlightening video. By following his expert guidance, boat enthusiasts can ensure their living areas remain secure while allowing unhindered access through the hatches.Step 1: Starting with the Flange
Sven begins by explaining that working on flanges vertically and horizontally is significantly easier than doing so in a flat position. To simplify the process further, he divides the task into two or three steps as suggested by fellow expert “for for.” This approach not only makes it more manageable but also allows for greater precision in crafting each component.Step 2: Applying Glue and Securing
Sven proceeds to apply glue along one edge of the flange, ensuring a secure bond when clamped into place. He emphasizes that this stage is crucial for maintaining the structural integrity of the flange, which in turn safeguards the living area beneath the canvas when hatches are open.Step 3: Allowing Time to Dry
After securely attaching the first portion of the flange, Sven allows ample time for it to dry before moving forward with additional steps. This patience and precision are key aspects of his successful boatbuilding methods.Step 4: Finishing Touches
Once the flange is fully dried, Sven removes the clamps carefully, ensuring no damage occurs during this process. He then moves on to attaching four more pieces onto these main frames, completing two pairs of flanges for the bulkhead hatches.The Final Touches
While two flanges form the primary support structure around the hatches, Sven mentions there are two additional pieces required at each end to ensure comprehensive protection. This attention to detail highlights his commitment to producing a durable and reliable design. “Sailing is about finding your path, whether it’s across an ocean or within yourself.” – Sven Yrvind In conclusion, making flanges around bulkhead hatches may seem complex at first glance, but by following Sven Yrvind’s meticulous process, enthusiasts can achieve professional-level results. Remember that the journey of boatbuilding is as rewarding as reaching your destination; it tests one’s patience and dedication. For those seeking to embark on this adventure or simply gain more insight into marine craftsmanship, Sven’s wisdom is invaluable.Making Flanges Around Bulkhead Hatches for Canvas
Sven Yrvind, a renowned yacht designer and sailor, shares valuable insights on creating flanges around bulkhead hatches for canvas protection in this enlightening video. By following his expert guidance, boat enthusiasts can ensure their living areas remain secure while allowing unhindered access through the hatches.Step 1: Starting with the Flange
Sven begins by explaining that working on flanges vertically and horizontally is significantly easier than doing so in a flat position. To simplify the process further, he divides the task into two or three steps as suggested by fellow expert “for for.” This approach not only makes it more manageable but also allows for greater precision in crafting each component.Step 2: Applying Glue and Securing
Sven proceeds to apply glue along one edge of the flange, ensuring a secure bond when clamped into place. He emphasizes that this stage is crucial for maintaining the structural integrity of the flange, which in turn safeguards the living area beneath the canvas when hatches are open.Step 3: Allowing Time to Dry
After securely attaching the first portion of the flange, Sven allows ample time for it to dry before moving forward with additional steps. This patience and precision are key aspects of his successful boatbuilding methods.Step 4: Finishing Touches
Once the flange is fully dried, Sven removes the clamps carefully, ensuring no damage occurs during this process. He then moves on to attaching four more pieces onto these main frames, completing two pairs of flanges for the bulkhead hatches.The Final Touches
While two flanges form the primary support structure around the hatches, Sven mentions there are two additional pieces required at each end to ensure comprehensive protection. This attention to detail highlights his commitment to producing a durable and reliable design. “Sailing is about finding your path, whether it’s across an ocean or within yourself.” – Sven Yrvind In conclusion, making flanges around bulkhead hatches may seem complex at first glance, but by following Sven Yrvind’s meticulous process, enthusiasts can achieve professional-level results. Remember that the journey of boatbuilding is as rewarding as reaching your destination; it tests one’s patience and dedication. For those seeking to embark on this adventure or simply gain more insight into marine craftsmanship, Sven’s wisdom is invaluable.After securely attaching the first portion of the flange, Sven allows ample time for it to dry before moving forward with additional steps. This patience and precision are key aspects of his successful boatbuilding methods.Step 4: Finishing Touches
Once the flange is fully dried, Sven removes the clamps carefully, ensuring no damage occurs during this process. He then moves on to attaching four more pieces onto these main frames, completing two pairs of flanges for the bulkhead hatches.The Final Touches
While two flanges form the primary support structure around the hatches, Sven mentions there are two additional pieces required at each end to ensure comprehensive protection. This attention to detail highlights his commitment to producing a durable and reliable design. “Sailing is about finding your path, whether it’s across an ocean or within yourself.” – Sven Yrvind In conclusion, making flanges around bulkhead hatches may seem complex at first glance, but by following Sven Yrvind’s meticulous process, enthusiasts can achieve professional-level results. Remember that the journey of boatbuilding is as rewarding as reaching your destination; it tests one’s patience and dedication. For those seeking to embark on this adventure or simply gain more insight into marine craftsmanship, Sven’s wisdom is invaluable.Sven begins by explaining that working on flanges vertically and horizontally is significantly easier than doing so in a flat position. To simplify the process further, he divides the task into two or three steps as suggested by fellow expert “for for.” This approach not only makes it more manageable but also allows for greater precision in crafting each component.Step 2: Applying Glue and Securing
Sven proceeds to apply glue along one edge of the flange, ensuring a secure bond when clamped into place. He emphasizes that this stage is crucial for maintaining the structural integrity of the flange, which in turn safeguards the living area beneath the canvas when hatches are open.Step 3: Allowing Time to Dry
After securely attaching the first portion of the flange, Sven allows ample time for it to dry before moving forward with additional steps. This patience and precision are key aspects of his successful boatbuilding methods.Step 4: Finishing Touches
Once the flange is fully dried, Sven removes the clamps carefully, ensuring no damage occurs during this process. He then moves on to attaching four more pieces onto these main frames, completing two pairs of flanges for the bulkhead hatches.The Final Touches
While two flanges form the primary support structure around the hatches, Sven mentions there are two additional pieces required at each end to ensure comprehensive protection. This attention to detail highlights his commitment to producing a durable and reliable design. “Sailing is about finding your path, whether it’s across an ocean or within yourself.” – Sven Yrvind In conclusion, making flanges around bulkhead hatches may seem complex at first glance, but by following Sven Yrvind’s meticulous process, enthusiasts can achieve professional-level results. Remember that the journey of boatbuilding is as rewarding as reaching your destination; it tests one’s patience and dedication. For those seeking to embark on this adventure or simply gain more insight into marine craftsmanship, Sven’s wisdom is invaluable.Sven Yrvind, a renowned yacht designer and sailor, shares valuable insights on creating flanges around bulkhead hatches for canvas protection in this enlightening video. By following his expert guidance, boat enthusiasts can ensure their living areas remain secure while allowing unhindered access through the hatches.Step 1: Starting with the Flange
Sven begins by explaining that working on flanges vertically and horizontally is significantly easier than doing so in a flat position. To simplify the process further, he divides the task into two or three steps as suggested by fellow expert “for for.” This approach not only makes it more manageable but also allows for greater precision in crafting each component.Step 2: Applying Glue and Securing
Sven proceeds to apply glue along one edge of the flange, ensuring a secure bond when clamped into place. He emphasizes that this stage is crucial for maintaining the structural integrity of the flange, which in turn safeguards the living area beneath the canvas when hatches are open.Step 3: Allowing Time to Dry
After securely attaching the first portion of the flange, Sven allows ample time for it to dry before moving forward with additional steps. This patience and precision are key aspects of his successful boatbuilding methods.Step 4: Finishing Touches
Once the flange is fully dried, Sven removes the clamps carefully, ensuring no damage occurs during this process. He then moves on to attaching four more pieces onto these main frames, completing two pairs of flanges for the bulkhead hatches.The Final Touches
While two flanges form the primary support structure around the hatches, Sven mentions there are two additional pieces required at each end to ensure comprehensive protection. This attention to detail highlights his commitment to producing a durable and reliable design. “Sailing is about finding your path, whether it’s across an ocean or within yourself.” – Sven Yrvind In conclusion, making flanges around bulkhead hatches may seem complex at first glance, but by following Sven Yrvind’s meticulous process, enthusiasts can achieve professional-level results. Remember that the journey of boatbuilding is as rewarding as reaching your destination; it tests one’s patience and dedication. For those seeking to embark on this adventure or simply gain more insight into marine craftsmanship, Sven’s wisdom is invaluable.Making Flanges Around Bulkhead Hatches for Canvas
Sven Yrvind, a renowned yacht designer and sailor, shares valuable insights on creating flanges around bulkhead hatches for canvas protection in this enlightening video. By following his expert guidance, boat enthusiasts can ensure their living areas remain secure while allowing unhindered access through the hatches.Step 1: Starting with the Flange
Sven begins by explaining that working on flanges vertically and horizontally is significantly easier than doing so in a flat position. To simplify the process further, he divides the task into two or three steps as suggested by fellow expert “for for.” This approach not only makes it more manageable but also allows for greater precision in crafting each component.Step 2: Applying Glue and Securing
Sven proceeds to apply glue along one edge of the flange, ensuring a secure bond when clamped into place. He emphasizes that this stage is crucial for maintaining the structural integrity of the flange, which in turn safeguards the living area beneath the canvas when hatches are open.Step 3: Allowing Time to Dry
After securely attaching the first portion of the flange, Sven allows ample time for it to dry before moving forward with additional steps. This patience and precision are key aspects of his successful boatbuilding methods.Step 4: Finishing Touches
Once the flange is fully dried, Sven removes the clamps carefully, ensuring no damage occurs during this process. He then moves on to attaching four more pieces onto these main frames, completing two pairs of flanges for the bulkhead hatches.The Final Touches
While two flanges form the primary support structure around the hatches, Sven mentions there are two additional pieces required at each end to ensure comprehensive protection. This attention to detail highlights his commitment to producing a durable and reliable design. “Sailing is about finding your path, whether it’s across an ocean or within yourself.” – Sven Yrvind In conclusion, making flanges around bulkhead hatches may seem complex at first glance, but by following Sven Yrvind’s meticulous process, enthusiasts can achieve professional-level results. Remember that the journey of boatbuilding is as rewarding as reaching your destination; it tests one’s patience and dedication. For those seeking to embark on this adventure or simply gain more insight into marine craftsmanship, Sven’s wisdom is invaluable.Sven proceeds to apply glue along one edge of the flange, ensuring a secure bond when clamped into place. He emphasizes that this stage is crucial for maintaining the structural integrity of the flange, which in turn safeguards the living area beneath the canvas when hatches are open.Step 3: Allowing Time to Dry
After securely attaching the first portion of the flange, Sven allows ample time for it to dry before moving forward with additional steps. This patience and precision are key aspects of his successful boatbuilding methods.Step 4: Finishing Touches
Once the flange is fully dried, Sven removes the clamps carefully, ensuring no damage occurs during this process. He then moves on to attaching four more pieces onto these main frames, completing two pairs of flanges for the bulkhead hatches.The Final Touches
While two flanges form the primary support structure around the hatches, Sven mentions there are two additional pieces required at each end to ensure comprehensive protection. This attention to detail highlights his commitment to producing a durable and reliable design. “Sailing is about finding your path, whether it’s across an ocean or within yourself.” – Sven Yrvind In conclusion, making flanges around bulkhead hatches may seem complex at first glance, but by following Sven Yrvind’s meticulous process, enthusiasts can achieve professional-level results. Remember that the journey of boatbuilding is as rewarding as reaching your destination; it tests one’s patience and dedication. For those seeking to embark on this adventure or simply gain more insight into marine craftsmanship, Sven’s wisdom is invaluable.Sven begins by explaining that working on flanges vertically and horizontally is significantly easier than doing so in a flat position. To simplify the process further, he divides the task into two or three steps as suggested by fellow expert “for for.” This approach not only makes it more manageable but also allows for greater precision in crafting each component.Step 2: Applying Glue and Securing
Sven proceeds to apply glue along one edge of the flange, ensuring a secure bond when clamped into place. He emphasizes that this stage is crucial for maintaining the structural integrity of the flange, which in turn safeguards the living area beneath the canvas when hatches are open.Step 3: Allowing Time to Dry
After securely attaching the first portion of the flange, Sven allows ample time for it to dry before moving forward with additional steps. This patience and precision are key aspects of his successful boatbuilding methods.Step 4: Finishing Touches
Once the flange is fully dried, Sven removes the clamps carefully, ensuring no damage occurs during this process. He then moves on to attaching four more pieces onto these main frames, completing two pairs of flanges for the bulkhead hatches.The Final Touches
While two flanges form the primary support structure around the hatches, Sven mentions there are two additional pieces required at each end to ensure comprehensive protection. This attention to detail highlights his commitment to producing a durable and reliable design. “Sailing is about finding your path, whether it’s across an ocean or within yourself.” – Sven Yrvind In conclusion, making flanges around bulkhead hatches may seem complex at first glance, but by following Sven Yrvind’s meticulous process, enthusiasts can achieve professional-level results. Remember that the journey of boatbuilding is as rewarding as reaching your destination; it tests one’s patience and dedication. For those seeking to embark on this adventure or simply gain more insight into marine craftsmanship, Sven’s wisdom is invaluable.Sven Yrvind, a renowned yacht designer and sailor, shares valuable insights on creating flanges around bulkhead hatches for canvas protection in this enlightening video. By following his expert guidance, boat enthusiasts can ensure their living areas remain secure while allowing unhindered access through the hatches.Step 1: Starting with the Flange
Sven begins by explaining that working on flanges vertically and horizontally is significantly easier than doing so in a flat position. To simplify the process further, he divides the task into two or three steps as suggested by fellow expert “for for.” This approach not only makes it more manageable but also allows for greater precision in crafting each component.Step 2: Applying Glue and Securing
Sven proceeds to apply glue along one edge of the flange, ensuring a secure bond when clamped into place. He emphasizes that this stage is crucial for maintaining the structural integrity of the flange, which in turn safeguards the living area beneath the canvas when hatches are open.Step 3: Allowing Time to Dry
After securely attaching the first portion of the flange, Sven allows ample time for it to dry before moving forward with additional steps. This patience and precision are key aspects of his successful boatbuilding methods.Step 4: Finishing Touches
Once the flange is fully dried, Sven removes the clamps carefully, ensuring no damage occurs during this process. He then moves on to attaching four more pieces onto these main frames, completing two pairs of flanges for the bulkhead hatches.The Final Touches
While two flanges form the primary support structure around the hatches, Sven mentions there are two additional pieces required at each end to ensure comprehensive protection. This attention to detail highlights his commitment to producing a durable and reliable design. “Sailing is about finding your path, whether it’s across an ocean or within yourself.” – Sven Yrvind In conclusion, making flanges around bulkhead hatches may seem complex at first glance, but by following Sven Yrvind’s meticulous process, enthusiasts can achieve professional-level results. Remember that the journey of boatbuilding is as rewarding as reaching your destination; it tests one’s patience and dedication. For those seeking to embark on this adventure or simply gain more insight into marine craftsmanship, Sven’s wisdom is invaluable.Making Flanges Around Bulkhead Hatches for Canvas
Sven Yrvind, a renowned yacht designer and sailor, shares valuable insights on creating flanges around bulkhead hatches for canvas protection in this enlightening video. By following his expert guidance, boat enthusiasts can ensure their living areas remain secure while allowing unhindered access through the hatches.Step 1: Starting with the Flange
Sven begins by explaining that working on flanges vertically and horizontally is significantly easier than doing so in a flat position. To simplify the process further, he divides the task into two or three steps as suggested by fellow expert “for for.” This approach not only makes it more manageable but also allows for greater precision in crafting each component.Step 2: Applying Glue and Securing
Sven proceeds to apply glue along one edge of the flange, ensuring a secure bond when clamped into place. He emphasizes that this stage is crucial for maintaining the structural integrity of the flange, which in turn safeguards the living area beneath the canvas when hatches are open.Step 3: Allowing Time to Dry
After securely attaching the first portion of the flange, Sven allows ample time for it to dry before moving forward with additional steps. This patience and precision are key aspects of his successful boatbuilding methods.Step 4: Finishing Touches
Once the flange is fully dried, Sven removes the clamps carefully, ensuring no damage occurs during this process. He then moves on to attaching four more pieces onto these main frames, completing two pairs of flanges for the bulkhead hatches.The Final Touches
While two flanges form the primary support structure around the hatches, Sven mentions there are two additional pieces required at each end to ensure comprehensive protection. This attention to detail highlights his commitment to producing a durable and reliable design. “Sailing is about finding your path, whether it’s across an ocean or within yourself.” – Sven Yrvind In conclusion, making flanges around bulkhead hatches may seem complex at first glance, but by following Sven Yrvind’s meticulous process, enthusiasts can achieve professional-level results. Remember that the journey of boatbuilding is as rewarding as reaching your destination; it tests one’s patience and dedication. For those seeking to embark on this adventure or simply gain more insight into marine craftsmanship, Sven’s wisdom is invaluable.Once the flange is fully dried, Sven removes the clamps carefully, ensuring no damage occurs during this process. He then moves on to attaching four more pieces onto these main frames, completing two pairs of flanges for the bulkhead hatches.The Final Touches
While two flanges form the primary support structure around the hatches, Sven mentions there are two additional pieces required at each end to ensure comprehensive protection. This attention to detail highlights his commitment to producing a durable and reliable design. “Sailing is about finding your path, whether it’s across an ocean or within yourself.” – Sven Yrvind In conclusion, making flanges around bulkhead hatches may seem complex at first glance, but by following Sven Yrvind’s meticulous process, enthusiasts can achieve professional-level results. Remember that the journey of boatbuilding is as rewarding as reaching your destination; it tests one’s patience and dedication. For those seeking to embark on this adventure or simply gain more insight into marine craftsmanship, Sven’s wisdom is invaluable.Sven proceeds to apply glue along one edge of the flange, ensuring a secure bond when clamped into place. He emphasizes that this stage is crucial for maintaining the structural integrity of the flange, which in turn safeguards the living area beneath the canvas when hatches are open.Step 3: Allowing Time to Dry
After securely attaching the first portion of the flange, Sven allows ample time for it to dry before moving forward with additional steps. This patience and precision are key aspects of his successful boatbuilding methods.Step 4: Finishing Touches
Once the flange is fully dried, Sven removes the clamps carefully, ensuring no damage occurs during this process. He then moves on to attaching four more pieces onto these main frames, completing two pairs of flanges for the bulkhead hatches.The Final Touches
While two flanges form the primary support structure around the hatches, Sven mentions there are two additional pieces required at each end to ensure comprehensive protection. This attention to detail highlights his commitment to producing a durable and reliable design. “Sailing is about finding your path, whether it’s across an ocean or within yourself.” – Sven Yrvind In conclusion, making flanges around bulkhead hatches may seem complex at first glance, but by following Sven Yrvind’s meticulous process, enthusiasts can achieve professional-level results. Remember that the journey of boatbuilding is as rewarding as reaching your destination; it tests one’s patience and dedication. For those seeking to embark on this adventure or simply gain more insight into marine craftsmanship, Sven’s wisdom is invaluable.Sven begins by explaining that working on flanges vertically and horizontally is significantly easier than doing so in a flat position. To simplify the process further, he divides the task into two or three steps as suggested by fellow expert “for for.” This approach not only makes it more manageable but also allows for greater precision in crafting each component.Step 2: Applying Glue and Securing
Sven proceeds to apply glue along one edge of the flange, ensuring a secure bond when clamped into place. He emphasizes that this stage is crucial for maintaining the structural integrity of the flange, which in turn safeguards the living area beneath the canvas when hatches are open.Step 3: Allowing Time to Dry
After securely attaching the first portion of the flange, Sven allows ample time for it to dry before moving forward with additional steps. This patience and precision are key aspects of his successful boatbuilding methods.Step 4: Finishing Touches
Once the flange is fully dried, Sven removes the clamps carefully, ensuring no damage occurs during this process. He then moves on to attaching four more pieces onto these main frames, completing two pairs of flanges for the bulkhead hatches.The Final Touches
While two flanges form the primary support structure around the hatches, Sven mentions there are two additional pieces required at each end to ensure comprehensive protection. This attention to detail highlights his commitment to producing a durable and reliable design. “Sailing is about finding your path, whether it’s across an ocean or within yourself.” – Sven Yrvind In conclusion, making flanges around bulkhead hatches may seem complex at first glance, but by following Sven Yrvind’s meticulous process, enthusiasts can achieve professional-level results. Remember that the journey of boatbuilding is as rewarding as reaching your destination; it tests one’s patience and dedication. For those seeking to embark on this adventure or simply gain more insight into marine craftsmanship, Sven’s wisdom is invaluable.Sven Yrvind, a renowned yacht designer and sailor, shares valuable insights on creating flanges around bulkhead hatches for canvas protection in this enlightening video. By following his expert guidance, boat enthusiasts can ensure their living areas remain secure while allowing unhindered access through the hatches.Step 1: Starting with the Flange
Sven begins by explaining that working on flanges vertically and horizontally is significantly easier than doing so in a flat position. To simplify the process further, he divides the task into two or three steps as suggested by fellow expert “for for.” This approach not only makes it more manageable but also allows for greater precision in crafting each component.Step 2: Applying Glue and Securing
Sven proceeds to apply glue along one edge of the flange, ensuring a secure bond when clamped into place. He emphasizes that this stage is crucial for maintaining the structural integrity of the flange, which in turn safeguards the living area beneath the canvas when hatches are open.Step 3: Allowing Time to Dry
After securely attaching the first portion of the flange, Sven allows ample time for it to dry before moving forward with additional steps. This patience and precision are key aspects of his successful boatbuilding methods.Step 4: Finishing Touches
Once the flange is fully dried, Sven removes the clamps carefully, ensuring no damage occurs during this process. He then moves on to attaching four more pieces onto these main frames, completing two pairs of flanges for the bulkhead hatches.The Final Touches
While two flanges form the primary support structure around the hatches, Sven mentions there are two additional pieces required at each end to ensure comprehensive protection. This attention to detail highlights his commitment to producing a durable and reliable design. “Sailing is about finding your path, whether it’s across an ocean or within yourself.” – Sven Yrvind In conclusion, making flanges around bulkhead hatches may seem complex at first glance, but by following Sven Yrvind’s meticulous process, enthusiasts can achieve professional-level results. Remember that the journey of boatbuilding is as rewarding as reaching your destination; it tests one’s patience and dedication. For those seeking to embark on this adventure or simply gain more insight into marine craftsmanship, Sven’s wisdom is invaluable.Making Flanges Around Bulkhead Hatches for Canvas
Sven Yrvind, a renowned yacht designer and sailor, shares valuable insights on creating flanges around bulkhead hatches for canvas protection in this enlightening video. By following his expert guidance, boat enthusiasts can ensure their living areas remain secure while allowing unhindered access through the hatches.Step 1: Starting with the Flange
Sven begins by explaining that working on flanges vertically and horizontally is significantly easier than doing so in a flat position. To simplify the process further, he divides the task into two or three steps as suggested by fellow expert “for for.” This approach not only makes it more manageable but also allows for greater precision in crafting each component.Step 2: Applying Glue and Securing
Sven proceeds to apply glue along one edge of the flange, ensuring a secure bond when clamped into place. He emphasizes that this stage is crucial for maintaining the structural integrity of the flange, which in turn safeguards the living area beneath the canvas when hatches are open.Step 3: Allowing Time to Dry
After securely attaching the first portion of the flange, Sven allows ample time for it to dry before moving forward with additional steps. This patience and precision are key aspects of his successful boatbuilding methods.Step 4: Finishing Touches
Once the flange is fully dried, Sven removes the clamps carefully, ensuring no damage occurs during this process. He then moves on to attaching four more pieces onto these main frames, completing two pairs of flanges for the bulkhead hatches.The Final Touches
While two flanges form the primary support structure around the hatches, Sven mentions there are two additional pieces required at each end to ensure comprehensive protection. This attention to detail highlights his commitment to producing a durable and reliable design. “Sailing is about finding your path, whether it’s across an ocean or within yourself.” – Sven Yrvind In conclusion, making flanges around bulkhead hatches may seem complex at first glance, but by following Sven Yrvind’s meticulous process, enthusiasts can achieve professional-level results. Remember that the journey of boatbuilding is as rewarding as reaching your destination; it tests one’s patience and dedication. For those seeking to embark on this adventure or simply gain more insight into marine craftsmanship, Sven’s wisdom is invaluable.After securely attaching the first portion of the flange, Sven allows ample time for it to dry before moving forward with additional steps. This patience and precision are key aspects of his successful boatbuilding methods.Step 4: Finishing Touches
Once the flange is fully dried, Sven removes the clamps carefully, ensuring no damage occurs during this process. He then moves on to attaching four more pieces onto these main frames, completing two pairs of flanges for the bulkhead hatches.The Final Touches
While two flanges form the primary support structure around the hatches, Sven mentions there are two additional pieces required at each end to ensure comprehensive protection. This attention to detail highlights his commitment to producing a durable and reliable design. “Sailing is about finding your path, whether it’s across an ocean or within yourself.” – Sven Yrvind In conclusion, making flanges around bulkhead hatches may seem complex at first glance, but by following Sven Yrvind’s meticulous process, enthusiasts can achieve professional-level results. Remember that the journey of boatbuilding is as rewarding as reaching your destination; it tests one’s patience and dedication. For those seeking to embark on this adventure or simply gain more insight into marine craftsmanship, Sven’s wisdom is invaluable.Sven proceeds to apply glue along one edge of the flange, ensuring a secure bond when clamped into place. He emphasizes that this stage is crucial for maintaining the structural integrity of the flange, which in turn safeguards the living area beneath the canvas when hatches are open.Step 3: Allowing Time to Dry
After securely attaching the first portion of the flange, Sven allows ample time for it to dry before moving forward with additional steps. This patience and precision are key aspects of his successful boatbuilding methods.Step 4: Finishing Touches
Once the flange is fully dried, Sven removes the clamps carefully, ensuring no damage occurs during this process. He then moves on to attaching four more pieces onto these main frames, completing two pairs of flanges for the bulkhead hatches.The Final Touches
While two flanges form the primary support structure around the hatches, Sven mentions there are two additional pieces required at each end to ensure comprehensive protection. This attention to detail highlights his commitment to producing a durable and reliable design. “Sailing is about finding your path, whether it’s across an ocean or within yourself.” – Sven Yrvind In conclusion, making flanges around bulkhead hatches may seem complex at first glance, but by following Sven Yrvind’s meticulous process, enthusiasts can achieve professional-level results. Remember that the journey of boatbuilding is as rewarding as reaching your destination; it tests one’s patience and dedication. For those seeking to embark on this adventure or simply gain more insight into marine craftsmanship, Sven’s wisdom is invaluable.Sven begins by explaining that working on flanges vertically and horizontally is significantly easier than doing so in a flat position. To simplify the process further, he divides the task into two or three steps as suggested by fellow expert “for for.” This approach not only makes it more manageable but also allows for greater precision in crafting each component.Step 2: Applying Glue and Securing
Sven proceeds to apply glue along one edge of the flange, ensuring a secure bond when clamped into place. He emphasizes that this stage is crucial for maintaining the structural integrity of the flange, which in turn safeguards the living area beneath the canvas when hatches are open.Step 3: Allowing Time to Dry
After securely attaching the first portion of the flange, Sven allows ample time for it to dry before moving forward with additional steps. This patience and precision are key aspects of his successful boatbuilding methods.Step 4: Finishing Touches
Once the flange is fully dried, Sven removes the clamps carefully, ensuring no damage occurs during this process. He then moves on to attaching four more pieces onto these main frames, completing two pairs of flanges for the bulkhead hatches.The Final Touches
While two flanges form the primary support structure around the hatches, Sven mentions there are two additional pieces required at each end to ensure comprehensive protection. This attention to detail highlights his commitment to producing a durable and reliable design. “Sailing is about finding your path, whether it’s across an ocean or within yourself.” – Sven Yrvind In conclusion, making flanges around bulkhead hatches may seem complex at first glance, but by following Sven Yrvind’s meticulous process, enthusiasts can achieve professional-level results. Remember that the journey of boatbuilding is as rewarding as reaching your destination; it tests one’s patience and dedication. For those seeking to embark on this adventure or simply gain more insight into marine craftsmanship, Sven’s wisdom is invaluable.Sven Yrvind, a renowned yacht designer and sailor, shares valuable insights on creating flanges around bulkhead hatches for canvas protection in this enlightening video. By following his expert guidance, boat enthusiasts can ensure their living areas remain secure while allowing unhindered access through the hatches.Step 1: Starting with the Flange
Sven begins by explaining that working on flanges vertically and horizontally is significantly easier than doing so in a flat position. To simplify the process further, he divides the task into two or three steps as suggested by fellow expert “for for.” This approach not only makes it more manageable but also allows for greater precision in crafting each component.Step 2: Applying Glue and Securing
Sven proceeds to apply glue along one edge of the flange, ensuring a secure bond when clamped into place. He emphasizes that this stage is crucial for maintaining the structural integrity of the flange, which in turn safeguards the living area beneath the canvas when hatches are open.Step 3: Allowing Time to Dry
After securely attaching the first portion of the flange, Sven allows ample time for it to dry before moving forward with additional steps. This patience and precision are key aspects of his successful boatbuilding methods.Step 4: Finishing Touches
Once the flange is fully dried, Sven removes the clamps carefully, ensuring no damage occurs during this process. He then moves on to attaching four more pieces onto these main frames, completing two pairs of flanges for the bulkhead hatches.The Final Touches
While two flanges form the primary support structure around the hatches, Sven mentions there are two additional pieces required at each end to ensure comprehensive protection. This attention to detail highlights his commitment to producing a durable and reliable design. “Sailing is about finding your path, whether it’s across an ocean or within yourself.” – Sven Yrvind In conclusion, making flanges around bulkhead hatches may seem complex at first glance, but by following Sven Yrvind’s meticulous process, enthusiasts can achieve professional-level results. Remember that the journey of boatbuilding is as rewarding as reaching your destination; it tests one’s patience and dedication. For those seeking to embark on this adventure or simply gain more insight into marine craftsmanship, Sven’s wisdom is invaluable.Making Flanges Around Bulkhead Hatches for Canvas
Sven Yrvind, a renowned yacht designer and sailor, shares valuable insights on creating flanges around bulkhead hatches for canvas protection in this enlightening video. By following his expert guidance, boat enthusiasts can ensure their living areas remain secure while allowing unhindered access through the hatches.Step 1: Starting with the Flange
Sven begins by explaining that working on flanges vertically and horizontally is significantly easier than doing so in a flat position. To simplify the process further, he divides the task into two or three steps as suggested by fellow expert “for for.” This approach not only makes it more manageable but also allows for greater precision in crafting each component.Step 2: Applying Glue and Securing
Sven proceeds to apply glue along one edge of the flange, ensuring a secure bond when clamped into place. He emphasizes that this stage is crucial for maintaining the structural integrity of the flange, which in turn safeguards the living area beneath the canvas when hatches are open.Step 3: Allowing Time to Dry
After securely attaching the first portion of the flange, Sven allows ample time for it to dry before moving forward with additional steps. This patience and precision are key aspects of his successful boatbuilding methods.Step 4: Finishing Touches
Once the flange is fully dried, Sven removes the clamps carefully, ensuring no damage occurs during this process. He then moves on to attaching four more pieces onto these main frames, completing two pairs of flanges for the bulkhead hatches.The Final Touches
While two flanges form the primary support structure around the hatches, Sven mentions there are two additional pieces required at each end to ensure comprehensive protection. This attention to detail highlights his commitment to producing a durable and reliable design. “Sailing is about finding your path, whether it’s across an ocean or within yourself.” – Sven Yrvind In conclusion, making flanges around bulkhead hatches may seem complex at first glance, but by following Sven Yrvind’s meticulous process, enthusiasts can achieve professional-level results. Remember that the journey of boatbuilding is as rewarding as reaching your destination; it tests one’s patience and dedication. For those seeking to embark on this adventure or simply gain more insight into marine craftsmanship, Sven’s wisdom is invaluable.Once the flange is fully dried, Sven removes the clamps carefully, ensuring no damage occurs during this process. He then moves on to attaching four more pieces onto these main frames, completing two pairs of flanges for the bulkhead hatches.The Final Touches
While two flanges form the primary support structure around the hatches, Sven mentions there are two additional pieces required at each end to ensure comprehensive protection. This attention to detail highlights his commitment to producing a durable and reliable design. “Sailing is about finding your path, whether it’s across an ocean or within yourself.” – Sven Yrvind In conclusion, making flanges around bulkhead hatches may seem complex at first glance, but by following Sven Yrvind’s meticulous process, enthusiasts can achieve professional-level results. Remember that the journey of boatbuilding is as rewarding as reaching your destination; it tests one’s patience and dedication. For those seeking to embark on this adventure or simply gain more insight into marine craftsmanship, Sven’s wisdom is invaluable.After securely attaching the first portion of the flange, Sven allows ample time for it to dry before moving forward with additional steps. This patience and precision are key aspects of his successful boatbuilding methods.Step 4: Finishing Touches
Once the flange is fully dried, Sven removes the clamps carefully, ensuring no damage occurs during this process. He then moves on to attaching four more pieces onto these main frames, completing two pairs of flanges for the bulkhead hatches.The Final Touches
While two flanges form the primary support structure around the hatches, Sven mentions there are two additional pieces required at each end to ensure comprehensive protection. This attention to detail highlights his commitment to producing a durable and reliable design. “Sailing is about finding your path, whether it’s across an ocean or within yourself.” – Sven Yrvind In conclusion, making flanges around bulkhead hatches may seem complex at first glance, but by following Sven Yrvind’s meticulous process, enthusiasts can achieve professional-level results. Remember that the journey of boatbuilding is as rewarding as reaching your destination; it tests one’s patience and dedication. For those seeking to embark on this adventure or simply gain more insight into marine craftsmanship, Sven’s wisdom is invaluable.Sven proceeds to apply glue along one edge of the flange, ensuring a secure bond when clamped into place. He emphasizes that this stage is crucial for maintaining the structural integrity of the flange, which in turn safeguards the living area beneath the canvas when hatches are open.Step 3: Allowing Time to Dry
After securely attaching the first portion of the flange, Sven allows ample time for it to dry before moving forward with additional steps. This patience and precision are key aspects of his successful boatbuilding methods.Step 4: Finishing Touches
Once the flange is fully dried, Sven removes the clamps carefully, ensuring no damage occurs during this process. He then moves on to attaching four more pieces onto these main frames, completing two pairs of flanges for the bulkhead hatches.The Final Touches
While two flanges form the primary support structure around the hatches, Sven mentions there are two additional pieces required at each end to ensure comprehensive protection. This attention to detail highlights his commitment to producing a durable and reliable design. “Sailing is about finding your path, whether it’s across an ocean or within yourself.” – Sven Yrvind In conclusion, making flanges around bulkhead hatches may seem complex at first glance, but by following Sven Yrvind’s meticulous process, enthusiasts can achieve professional-level results. Remember that the journey of boatbuilding is as rewarding as reaching your destination; it tests one’s patience and dedication. For those seeking to embark on this adventure or simply gain more insight into marine craftsmanship, Sven’s wisdom is invaluable.Sven begins by explaining that working on flanges vertically and horizontally is significantly easier than doing so in a flat position. To simplify the process further, he divides the task into two or three steps as suggested by fellow expert “for for.” This approach not only makes it more manageable but also allows for greater precision in crafting each component.Step 2: Applying Glue and Securing
Sven proceeds to apply glue along one edge of the flange, ensuring a secure bond when clamped into place. He emphasizes that this stage is crucial for maintaining the structural integrity of the flange, which in turn safeguards the living area beneath the canvas when hatches are open.Step 3: Allowing Time to Dry
After securely attaching the first portion of the flange, Sven allows ample time for it to dry before moving forward with additional steps. This patience and precision are key aspects of his successful boatbuilding methods.Step 4: Finishing Touches
Once the flange is fully dried, Sven removes the clamps carefully, ensuring no damage occurs during this process. He then moves on to attaching four more pieces onto these main frames, completing two pairs of flanges for the bulkhead hatches.The Final Touches
While two flanges form the primary support structure around the hatches, Sven mentions there are two additional pieces required at each end to ensure comprehensive protection. This attention to detail highlights his commitment to producing a durable and reliable design. “Sailing is about finding your path, whether it’s across an ocean or within yourself.” – Sven Yrvind In conclusion, making flanges around bulkhead hatches may seem complex at first glance, but by following Sven Yrvind’s meticulous process, enthusiasts can achieve professional-level results. Remember that the journey of boatbuilding is as rewarding as reaching your destination; it tests one’s patience and dedication. For those seeking to embark on this adventure or simply gain more insight into marine craftsmanship, Sven’s wisdom is invaluable.Sven Yrvind, a renowned yacht designer and sailor, shares valuable insights on creating flanges around bulkhead hatches for canvas protection in this enlightening video. By following his expert guidance, boat enthusiasts can ensure their living areas remain secure while allowing unhindered access through the hatches.Step 1: Starting with the Flange
Sven begins by explaining that working on flanges vertically and horizontally is significantly easier than doing so in a flat position. To simplify the process further, he divides the task into two or three steps as suggested by fellow expert “for for.” This approach not only makes it more manageable but also allows for greater precision in crafting each component.Step 2: Applying Glue and Securing
Sven proceeds to apply glue along one edge of the flange, ensuring a secure bond when clamped into place. He emphasizes that this stage is crucial for maintaining the structural integrity of the flange, which in turn safeguards the living area beneath the canvas when hatches are open.Step 3: Allowing Time to Dry
After securely attaching the first portion of the flange, Sven allows ample time for it to dry before moving forward with additional steps. This patience and precision are key aspects of his successful boatbuilding methods.Step 4: Finishing Touches
Once the flange is fully dried, Sven removes the clamps carefully, ensuring no damage occurs during this process. He then moves on to attaching four more pieces onto these main frames, completing two pairs of flanges for the bulkhead hatches.The Final Touches
While two flanges form the primary support structure around the hatches, Sven mentions there are two additional pieces required at each end to ensure comprehensive protection. This attention to detail highlights his commitment to producing a durable and reliable design. “Sailing is about finding your path, whether it’s across an ocean or within yourself.” – Sven Yrvind In conclusion, making flanges around bulkhead hatches may seem complex at first glance, but by following Sven Yrvind’s meticulous process, enthusiasts can achieve professional-level results. Remember that the journey of boatbuilding is as rewarding as reaching your destination; it tests one’s patience and dedication. For those seeking to embark on this adventure or simply gain more insight into marine craftsmanship, Sven’s wisdom is invaluable.Making Flanges Around Bulkhead Hatches for Canvas
Sven Yrvind, a renowned yacht designer and sailor, shares valuable insights on creating flanges around bulkhead hatches for canvas protection in this enlightening video. By following his expert guidance, boat enthusiasts can ensure their living areas remain secure while allowing unhindered access through the hatches.Step 1: Starting with the Flange
Sven begins by explaining that working on flanges vertically and horizontally is significantly easier than doing so in a flat position. To simplify the process further, he divides the task into two or three steps as suggested by fellow expert “for for.” This approach not only makes it more manageable but also allows for greater precision in crafting each component.Step 2: Applying Glue and Securing
Sven proceeds to apply glue along one edge of the flange, ensuring a secure bond when clamped into place. He emphasizes that this stage is crucial for maintaining the structural integrity of the flange, which in turn safeguards the living area beneath the canvas when hatches are open.Step 3: Allowing Time to Dry
After securely attaching the first portion of the flange, Sven allows ample time for it to dry before moving forward with additional steps. This patience and precision are key aspects of his successful boatbuilding methods.Step 4: Finishing Touches
Once the flange is fully dried, Sven removes the clamps carefully, ensuring no damage occurs during this process. He then moves on to attaching four more pieces onto these main frames, completing two pairs of flanges for the bulkhead hatches.The Final Touches
While two flanges form the primary support structure around the hatches, Sven mentions there are two additional pieces required at each end to ensure comprehensive protection. This attention to detail highlights his commitment to producing a durable and reliable design. “Sailing is about finding your path, whether it’s across an ocean or within yourself.” – Sven Yrvind In conclusion, making flanges around bulkhead hatches may seem complex at first glance, but by following Sven Yrvind’s meticulous process, enthusiasts can achieve professional-level results. Remember that the journey of boatbuilding is as rewarding as reaching your destination; it tests one’s patience and dedication. For those seeking to embark on this adventure or simply gain more insight into marine craftsmanship, Sven’s wisdom is invaluable.Sven begins by explaining that working on flanges vertically and horizontally is significantly easier than doing so in a flat position. To simplify the process further, he divides the task into two or three steps as suggested by fellow expert “for for.” This approach not only makes it more manageable but also allows for greater precision in crafting each component.Step 2: Applying Glue and Securing
Sven proceeds to apply glue along one edge of the flange, ensuring a secure bond when clamped into place. He emphasizes that this stage is crucial for maintaining the structural integrity of the flange, which in turn safeguards the living area beneath the canvas when hatches are open.Step 3: Allowing Time to Dry
After securely attaching the first portion of the flange, Sven allows ample time for it to dry before moving forward with additional steps. This patience and precision are key aspects of his successful boatbuilding methods.Step 4: Finishing Touches
Once the flange is fully dried, Sven removes the clamps carefully, ensuring no damage occurs during this process. He then moves on to attaching four more pieces onto these main frames, completing two pairs of flanges for the bulkhead hatches.The Final Touches
While two flanges form the primary support structure around the hatches, Sven mentions there are two additional pieces required at each end to ensure comprehensive protection. This attention to detail highlights his commitment to producing a durable and reliable design. “Sailing is about finding your path, whether it’s across an ocean or within yourself.” – Sven Yrvind In conclusion, making flanges around bulkhead hatches may seem complex at first glance, but by following Sven Yrvind’s meticulous process, enthusiasts can achieve professional-level results. Remember that the journey of boatbuilding is as rewarding as reaching your destination; it tests one’s patience and dedication. For those seeking to embark on this adventure or simply gain more insight into marine craftsmanship, Sven’s wisdom is invaluable.Sven proceeds to apply glue along one edge of the flange, ensuring a secure bond when clamped into place. He emphasizes that this stage is crucial for maintaining the structural integrity of the flange, which in turn safeguards the living area beneath the canvas when hatches are open.Step 3: Allowing Time to Dry
After securely attaching the first portion of the flange, Sven allows ample time for it to dry before moving forward with additional steps. This patience and precision are key aspects of his successful boatbuilding methods.Step 4: Finishing Touches
Once the flange is fully dried, Sven removes the clamps carefully, ensuring no damage occurs during this process. He then moves on to attaching four more pieces onto these main frames, completing two pairs of flanges for the bulkhead hatches.The Final Touches
While two flanges form the primary support structure around the hatches, Sven mentions there are two additional pieces required at each end to ensure comprehensive protection. This attention to detail highlights his commitment to producing a durable and reliable design. “Sailing is about finding your path, whether it’s across an ocean or within yourself.” – Sven Yrvind In conclusion, making flanges around bulkhead hatches may seem complex at first glance, but by following Sven Yrvind’s meticulous process, enthusiasts can achieve professional-level results. Remember that the journey of boatbuilding is as rewarding as reaching your destination; it tests one’s patience and dedication. For those seeking to embark on this adventure or simply gain more insight into marine craftsmanship, Sven’s wisdom is invaluable.Making Flanges Around Bulkhead Hatches for Canvas
Sven Yrvind, a renowned yacht designer and sailor, shares valuable insights on creating flanges around bulkhead hatches for canvas protection in this enlightening video. By following his expert guidance, boat enthusiasts can ensure their living areas remain secure while allowing unhindered access through the hatches.Step 1: Starting with the Flange
Sven begins by explaining that working on flanges vertically and horizontally is significantly easier than doing so in a flat position. To simplify the process further, he divides the task into two or three steps as suggested by fellow expert “for for.” This approach not only makes it more manageable but also allows for greater precision in crafting each component.Step 2: Applying Glue and Securing
Sven proceeds to apply glue along one edge of the flange, ensuring a secure bond when clamped into place. He emphasizes that this stage is crucial for maintaining the structural integrity of the flange, which in turn safeguards the living area beneath the canvas when hatches are open.Step 3: Allowing Time to Dry
After securely attaching the first portion of the flange, Sven allows ample time for it to dry before moving forward with additional steps. This patience and precision are key aspects of his successful boatbuilding methods.Step 4: Finishing Touches
Once the flange is fully dried, Sven removes the clamps carefully, ensuring no damage occurs during this process. He then moves on to attaching four more pieces onto these main frames, completing two pairs of flanges for the bulkhead hatches.The Final Touches
While two flanges form the primary support structure around the hatches, Sven mentions there are two additional pieces required at each end to ensure comprehensive protection. This attention to detail highlights his commitment to producing a durable and reliable design. “Sailing is about finding your path, whether it’s across an ocean or within yourself.” – Sven Yrvind In conclusion, making flanges around bulkhead hatches may seem complex at first glance, but by following Sven Yrvind’s meticulous process, enthusiasts can achieve professional-level results. Remember that the journey of boatbuilding is as rewarding as reaching your destination; it tests one’s patience and dedication. For those seeking to embark on this adventure or simply gain more insight into marine craftsmanship, Sven’s wisdom is invaluable.Sven begins by explaining that working on flanges vertically and horizontally is significantly easier than doing so in a flat position. To simplify the process further, he divides the task into two or three steps as suggested by fellow expert “for for.” This approach not only makes it more manageable but also allows for greater precision in crafting each component.Step 2: Applying Glue and Securing
Sven proceeds to apply glue along one edge of the flange, ensuring a secure bond when clamped into place. He emphasizes that this stage is crucial for maintaining the structural integrity of the flange, which in turn safeguards the living area beneath the canvas when hatches are open.Step 3: Allowing Time to Dry
After securely attaching the first portion of the flange, Sven allows ample time for it to dry before moving forward with additional steps. This patience and precision are key aspects of his successful boatbuilding methods.Step 4: Finishing Touches
Once the flange is fully dried, Sven removes the clamps carefully, ensuring no damage occurs during this process. He then moves on to attaching four more pieces onto these main frames, completing two pairs of flanges for the bulkhead hatches.The Final Touches
While two flanges form the primary support structure around the hatches, Sven mentions there are two additional pieces required at each end to ensure comprehensive protection. This attention to detail highlights his commitment to producing a durable and reliable design. “Sailing is about finding your path, whether it’s across an ocean or within yourself.” – Sven Yrvind In conclusion, making flanges around bulkhead hatches may seem complex at first glance, but by following Sven Yrvind’s meticulous process, enthusiasts can achieve professional-level results. Remember that the journey of boatbuilding is as rewarding as reaching your destination; it tests one’s patience and dedication. For those seeking to embark on this adventure or simply gain more insight into marine craftsmanship, Sven’s wisdom is invaluable.Making Flanges Around Bulkhead Hatches for Canvas
Sven Yrvind, a renowned yacht designer and sailor, shares valuable insights on creating flanges around bulkhead hatches for canvas protection in this enlightening video. By following his expert guidance, boat enthusiasts can ensure their living areas remain secure while allowing unhindered access through the hatches.Step 1: Starting with the Flange
Sven begins by explaining that working on flanges vertically and horizontally is significantly easier than doing so in a flat position. To simplify the process further, he divides the task into two or three steps as suggested by fellow expert “for for.” This approach not only makes it more manageable but also allows for greater precision in crafting each component.Step 2: Applying Glue and Securing
Sven proceeds to apply glue along one edge of the flange, ensuring a secure bond when clamped into place. He emphasizes that this stage is crucial for maintaining the structural integrity of the flange, which in turn safeguards the living area beneath the canvas when hatches are open.Step 3: Allowing Time to Dry
After securely attaching the first portion of the flange, Sven allows ample time for it to dry before moving forward with additional steps. This patience and precision are key aspects of his successful boatbuilding methods.Step 4: Finishing Touches
Once the flange is fully dried, Sven removes the clamps carefully, ensuring no damage occurs during this process. He then moves on to attaching four more pieces onto these main frames, completing two pairs of flanges for the bulkhead hatches.The Final Touches
While two flanges form the primary support structure around the hatches, Sven mentions there are two additional pieces required at each end to ensure comprehensive protection. This attention to detail highlights his commitment to producing a durable and reliable design. “Sailing is about finding your path, whether it’s across an ocean or within yourself.” – Sven Yrvind In conclusion, making flanges around bulkhead hatches may seem complex at first glance, but by following Sven Yrvind’s meticulous process, enthusiasts can achieve professional-level results. Remember that the journey of boatbuilding is as rewarding as reaching your destination; it tests one’s patience and dedication. For those seeking to embark on this adventure or simply gain more insight into marine craftsmanship, Sven’s wisdom is invaluable.Sven Yrvind, a renowned yacht designer and sailor, shares valuable insights on creating flanges around bulkhead hatches for canvas protection in this enlightening video. By following his expert guidance, boat enthusiasts can ensure their living areas remain secure while allowing unhindered access through the hatches.Step 1: Starting with the Flange
Sven begins by explaining that working on flanges vertically and horizontally is significantly easier than doing so in a flat position. To simplify the process further, he divides the task into two or three steps as suggested by fellow expert “for for.” This approach not only makes it more manageable but also allows for greater precision in crafting each component.Step 2: Applying Glue and Securing
Sven proceeds to apply glue along one edge of the flange, ensuring a secure bond when clamped into place. He emphasizes that this stage is crucial for maintaining the structural integrity of the flange, which in turn safeguards the living area beneath the canvas when hatches are open.Step 3: Allowing Time to Dry
After securely attaching the first portion of the flange, Sven allows ample time for it to dry before moving forward with additional steps. This patience and precision are key aspects of his successful boatbuilding methods.Step 4: Finishing Touches
Once the flange is fully dried, Sven removes the clamps carefully, ensuring no damage occurs during this process. He then moves on to attaching four more pieces onto these main frames, completing two pairs of flanges for the bulkhead hatches.The Final Touches
While two flanges form the primary support structure around the hatches, Sven mentions there are two additional pieces required at each end to ensure comprehensive protection. This attention to detail highlights his commitment to producing a durable and reliable design. “Sailing is about finding your path, whether it’s across an ocean or within yourself.” – Sven Yrvind In conclusion, making flanges around bulkhead hatches may seem complex at first glance, but by following Sven Yrvind’s meticulous process, enthusiasts can achieve professional-level results. Remember that the journey of boatbuilding is as rewarding as reaching your destination; it tests one’s patience and dedication. For those seeking to embark on this adventure or simply gain more insight into marine craftsmanship, Sven’s wisdom is invaluable.Making Flanges Around Bulkhead Hatches for Canvas
Sven Yrvind, a renowned yacht designer and sailor, shares valuable insights on creating flanges around bulkhead hatches for canvas protection in this enlightening video. By following his expert guidance, boat enthusiasts can ensure their living areas remain secure while allowing unhindered access through the hatches.Step 1: Starting with the Flange
Sven begins by explaining that working on flanges vertically and horizontally is significantly easier than doing so in a flat position. To simplify the process further, he divides the task into two or three steps as suggested by fellow expert “for for.” This approach not only makes it more manageable but also allows for greater precision in crafting each component.Step 2: Applying Glue and Securing
Sven proceeds to apply glue along one edge of the flange, ensuring a secure bond when clamped into place. He emphasizes that this stage is crucial for maintaining the structural integrity of the flange, which in turn safeguards the living area beneath the canvas when hatches are open.Step 3: Allowing Time to Dry
After securely attaching the first portion of the flange, Sven allows ample time for it to dry before moving forward with additional steps. This patience and precision are key aspects of his successful boatbuilding methods.Step 4: Finishing Touches
Once the flange is fully dried, Sven removes the clamps carefully, ensuring no damage occurs during this process. He then moves on to attaching four more pieces onto these main frames, completing two pairs of flanges for the bulkhead hatches.The Final Touches
While two flanges form the primary support structure around the hatches, Sven mentions there are two additional pieces required at each end to ensure comprehensive protection. This attention to detail highlights his commitment to producing a durable and reliable design. “Sailing is about finding your path, whether it’s across an ocean or within yourself.” – Sven Yrvind In conclusion, making flanges around bulkhead hatches may seem complex at first glance, but by following Sven Yrvind’s meticulous process, enthusiasts can achieve professional-level results. Remember that the journey of boatbuilding is as rewarding as reaching your destination; it tests one’s patience and dedication. For those seeking to embark on this adventure or simply gain more insight into marine craftsmanship, Sven’s wisdom is invaluable.Once the flange is fully dried, Sven removes the clamps carefully, ensuring no damage occurs during this process. He then moves on to attaching four more pieces onto these main frames, completing two pairs of flanges for the bulkhead hatches.The Final Touches
While two flanges form the primary support structure around the hatches, Sven mentions there are two additional pieces required at each end to ensure comprehensive protection. This attention to detail highlights his commitment to producing a durable and reliable design. “Sailing is about finding your path, whether it’s across an ocean or within yourself.” – Sven Yrvind In conclusion, making flanges around bulkhead hatches may seem complex at first glance, but by following Sven Yrvind’s meticulous process, enthusiasts can achieve professional-level results. Remember that the journey of boatbuilding is as rewarding as reaching your destination; it tests one’s patience and dedication. For those seeking to embark on this adventure or simply gain more insight into marine craftsmanship, Sven’s wisdom is invaluable.Sven Yrvind, a renowned yacht designer and sailor, shares valuable insights on creating flanges around bulkhead hatches for canvas protection in this enlightening video. By following his expert guidance, boat enthusiasts can ensure their living areas remain secure while allowing unhindered access through the hatches.Step 1: Starting with the Flange
Sven begins by explaining that working on flanges vertically and horizontally is significantly easier than doing so in a flat position. To simplify the process further, he divides the task into two or three steps as suggested by fellow expert “for for.” This approach not only makes it more manageable but also allows for greater precision in crafting each component.Step 2: Applying Glue and Securing
Sven proceeds to apply glue along one edge of the flange, ensuring a secure bond when clamped into place. He emphasizes that this stage is crucial for maintaining the structural integrity of the flange, which in turn safeguards the living area beneath the canvas when hatches are open.Step 3: Allowing Time to Dry
After securely attaching the first portion of the flange, Sven allows ample time for it to dry before moving forward with additional steps. This patience and precision are key aspects of his successful boatbuilding methods.Step 4: Finishing Touches
Once the flange is fully dried, Sven removes the clamps carefully, ensuring no damage occurs during this process. He then moves on to attaching four more pieces onto these main frames, completing two pairs of flanges for the bulkhead hatches.The Final Touches
While two flanges form the primary support structure around the hatches, Sven mentions there are two additional pieces required at each end to ensure comprehensive protection. This attention to detail highlights his commitment to producing a durable and reliable design. “Sailing is about finding your path, whether it’s across an ocean or within yourself.” – Sven Yrvind In conclusion, making flanges around bulkhead hatches may seem complex at first glance, but by following Sven Yrvind’s meticulous process, enthusiasts can achieve professional-level results. Remember that the journey of boatbuilding is as rewarding as reaching your destination; it tests one’s patience and dedication. For those seeking to embark on this adventure or simply gain more insight into marine craftsmanship, Sven’s wisdom is invaluable.Making Flanges Around Bulkhead Hatches for Canvas
Sven Yrvind, a renowned yacht designer and sailor, shares valuable insights on creating flanges around bulkhead hatches for canvas protection in this enlightening video. By following his expert guidance, boat enthusiasts can ensure their living areas remain secure while allowing unhindered access through the hatches.Step 1: Starting with the Flange
Sven begins by explaining that working on flanges vertically and horizontally is significantly easier than doing so in a flat position. To simplify the process further, he divides the task into two or three steps as suggested by fellow expert “for for.” This approach not only makes it more manageable but also allows for greater precision in crafting each component.Step 2: Applying Glue and Securing
Sven proceeds to apply glue along one edge of the flange, ensuring a secure bond when clamped into place. He emphasizes that this stage is crucial for maintaining the structural integrity of the flange, which in turn safeguards the living area beneath the canvas when hatches are open.Step 3: Allowing Time to Dry
After securely attaching the first portion of the flange, Sven allows ample time for it to dry before moving forward with additional steps. This patience and precision are key aspects of his successful boatbuilding methods.Step 4: Finishing Touches
Once the flange is fully dried, Sven removes the clamps carefully, ensuring no damage occurs during this process. He then moves on to attaching four more pieces onto these main frames, completing two pairs of flanges for the bulkhead hatches.The Final Touches
While two flanges form the primary support structure around the hatches, Sven mentions there are two additional pieces required at each end to ensure comprehensive protection. This attention to detail highlights his commitment to producing a durable and reliable design. “Sailing is about finding your path, whether it’s across an ocean or within yourself.” – Sven Yrvind In conclusion, making flanges around bulkhead hatches may seem complex at first glance, but by following Sven Yrvind’s meticulous process, enthusiasts can achieve professional-level results. Remember that the journey of boatbuilding is as rewarding as reaching your destination; it tests one’s patience and dedication. For those seeking to embark on this adventure or simply gain more insight into marine craftsmanship, Sven’s wisdom is invaluable.After securely attaching the first portion of the flange, Sven allows ample time for it to dry before moving forward with additional steps. This patience and precision are key aspects of his successful boatbuilding methods.Step 4: Finishing Touches
Once the flange is fully dried, Sven removes the clamps carefully, ensuring no damage occurs during this process. He then moves on to attaching four more pieces onto these main frames, completing two pairs of flanges for the bulkhead hatches.The Final Touches
While two flanges form the primary support structure around the hatches, Sven mentions there are two additional pieces required at each end to ensure comprehensive protection. This attention to detail highlights his commitment to producing a durable and reliable design. “Sailing is about finding your path, whether it’s across an ocean or within yourself.” – Sven Yrvind In conclusion, making flanges around bulkhead hatches may seem complex at first glance, but by following Sven Yrvind’s meticulous process, enthusiasts can achieve professional-level results. Remember that the journey of boatbuilding is as rewarding as reaching your destination; it tests one’s patience and dedication. For those seeking to embark on this adventure or simply gain more insight into marine craftsmanship, Sven’s wisdom is invaluable.Sven Yrvind, a renowned yacht designer and sailor, shares valuable insights on creating flanges around bulkhead hatches for canvas protection in this enlightening video. By following his expert guidance, boat enthusiasts can ensure their living areas remain secure while allowing unhindered access through the hatches.Step 1: Starting with the Flange
Sven begins by explaining that working on flanges vertically and horizontally is significantly easier than doing so in a flat position. To simplify the process further, he divides the task into two or three steps as suggested by fellow expert “for for.” This approach not only makes it more manageable but also allows for greater precision in crafting each component.Step 2: Applying Glue and Securing
Sven proceeds to apply glue along one edge of the flange, ensuring a secure bond when clamped into place. He emphasizes that this stage is crucial for maintaining the structural integrity of the flange, which in turn safeguards the living area beneath the canvas when hatches are open.Step 3: Allowing Time to Dry
After securely attaching the first portion of the flange, Sven allows ample time for it to dry before moving forward with additional steps. This patience and precision are key aspects of his successful boatbuilding methods.Step 4: Finishing Touches
Once the flange is fully dried, Sven removes the clamps carefully, ensuring no damage occurs during this process. He then moves on to attaching four more pieces onto these main frames, completing two pairs of flanges for the bulkhead hatches.The Final Touches
While two flanges form the primary support structure around the hatches, Sven mentions there are two additional pieces required at each end to ensure comprehensive protection. This attention to detail highlights his commitment to producing a durable and reliable design. “Sailing is about finding your path, whether it’s across an ocean or within yourself.” – Sven Yrvind In conclusion, making flanges around bulkhead hatches may seem complex at first glance, but by following Sven Yrvind’s meticulous process, enthusiasts can achieve professional-level results. Remember that the journey of boatbuilding is as rewarding as reaching your destination; it tests one’s patience and dedication. For those seeking to embark on this adventure or simply gain more insight into marine craftsmanship, Sven’s wisdom is invaluable.Making Flanges Around Bulkhead Hatches for Canvas
Sven Yrvind, a renowned yacht designer and sailor, shares valuable insights on creating flanges around bulkhead hatches for canvas protection in this enlightening video. By following his expert guidance, boat enthusiasts can ensure their living areas remain secure while allowing unhindered access through the hatches.Step 1: Starting with the Flange
Sven begins by explaining that working on flanges vertically and horizontally is significantly easier than doing so in a flat position. To simplify the process further, he divides the task into two or three steps as suggested by fellow expert “for for.” This approach not only makes it more manageable but also allows for greater precision in crafting each component.Step 2: Applying Glue and Securing
Sven proceeds to apply glue along one edge of the flange, ensuring a secure bond when clamped into place. He emphasizes that this stage is crucial for maintaining the structural integrity of the flange, which in turn safeguards the living area beneath the canvas when hatches are open.Step 3: Allowing Time to Dry
After securely attaching the first portion of the flange, Sven allows ample time for it to dry before moving forward with additional steps. This patience and precision are key aspects of his successful boatbuilding methods.Step 4: Finishing Touches
Once the flange is fully dried, Sven removes the clamps carefully, ensuring no damage occurs during this process. He then moves on to attaching four more pieces onto these main frames, completing two pairs of flanges for the bulkhead hatches.The Final Touches
While two flanges form the primary support structure around the hatches, Sven mentions there are two additional pieces required at each end to ensure comprehensive protection. This attention to detail highlights his commitment to producing a durable and reliable design. “Sailing is about finding your path, whether it’s across an ocean or within yourself.” – Sven Yrvind In conclusion, making flanges around bulkhead hatches may seem complex at first glance, but by following Sven Yrvind’s meticulous process, enthusiasts can achieve professional-level results. Remember that the journey of boatbuilding is as rewarding as reaching your destination; it tests one’s patience and dedication. For those seeking to embark on this adventure or simply gain more insight into marine craftsmanship, Sven’s wisdom is invaluable.Sven proceeds to apply glue along one edge of the flange, ensuring a secure bond when clamped into place. He emphasizes that this stage is crucial for maintaining the structural integrity of the flange, which in turn safeguards the living area beneath the canvas when hatches are open.Step 3: Allowing Time to Dry
After securely attaching the first portion of the flange, Sven allows ample time for it to dry before moving forward with additional steps. This patience and precision are key aspects of his successful boatbuilding methods.Step 4: Finishing Touches
Once the flange is fully dried, Sven removes the clamps carefully, ensuring no damage occurs during this process. He then moves on to attaching four more pieces onto these main frames, completing two pairs of flanges for the bulkhead hatches.The Final Touches
While two flanges form the primary support structure around the hatches, Sven mentions there are two additional pieces required at each end to ensure comprehensive protection. This attention to detail highlights his commitment to producing a durable and reliable design. “Sailing is about finding your path, whether it’s across an ocean or within yourself.” – Sven Yrvind In conclusion, making flanges around bulkhead hatches may seem complex at first glance, but by following Sven Yrvind’s meticulous process, enthusiasts can achieve professional-level results. Remember that the journey of boatbuilding is as rewarding as reaching your destination; it tests one’s patience and dedication. For those seeking to embark on this adventure or simply gain more insight into marine craftsmanship, Sven’s wisdom is invaluable.Sven Yrvind, a renowned yacht designer and sailor, shares valuable insights on creating flanges around bulkhead hatches for canvas protection in this enlightening video. By following his expert guidance, boat enthusiasts can ensure their living areas remain secure while allowing unhindered access through the hatches.Step 1: Starting with the Flange
Sven begins by explaining that working on flanges vertically and horizontally is significantly easier than doing so in a flat position. To simplify the process further, he divides the task into two or three steps as suggested by fellow expert “for for.” This approach not only makes it more manageable but also allows for greater precision in crafting each component.Step 2: Applying Glue and Securing
Sven proceeds to apply glue along one edge of the flange, ensuring a secure bond when clamped into place. He emphasizes that this stage is crucial for maintaining the structural integrity of the flange, which in turn safeguards the living area beneath the canvas when hatches are open.Step 3: Allowing Time to Dry
After securely attaching the first portion of the flange, Sven allows ample time for it to dry before moving forward with additional steps. This patience and precision are key aspects of his successful boatbuilding methods.Step 4: Finishing Touches
Once the flange is fully dried, Sven removes the clamps carefully, ensuring no damage occurs during this process. He then moves on to attaching four more pieces onto these main frames, completing two pairs of flanges for the bulkhead hatches.The Final Touches
While two flanges form the primary support structure around the hatches, Sven mentions there are two additional pieces required at each end to ensure comprehensive protection. This attention to detail highlights his commitment to producing a durable and reliable design. “Sailing is about finding your path, whether it’s across an ocean or within yourself.” – Sven Yrvind In conclusion, making flanges around bulkhead hatches may seem complex at first glance, but by following Sven Yrvind’s meticulous process, enthusiasts can achieve professional-level results. Remember that the journey of boatbuilding is as rewarding as reaching your destination; it tests one’s patience and dedication. For those seeking to embark on this adventure or simply gain more insight into marine craftsmanship, Sven’s wisdom is invaluable.Making Flanges Around Bulkhead Hatches for Canvas
Sven Yrvind, a renowned yacht designer and sailor, shares valuable insights on creating flanges around bulkhead hatches for canvas protection in this enlightening video. By following his expert guidance, boat enthusiasts can ensure their living areas remain secure while allowing unhindered access through the hatches.Step 1: Starting with the Flange
Sven begins by explaining that working on flanges vertically and horizontally is significantly easier than doing so in a flat position. To simplify the process further, he divides the task into two or three steps as suggested by fellow expert “for for.” This approach not only makes it more manageable but also allows for greater precision in crafting each component.Step 2: Applying Glue and Securing
Sven proceeds to apply glue along one edge of the flange, ensuring a secure bond when clamped into place. He emphasizes that this stage is crucial for maintaining the structural integrity of the flange, which in turn safeguards the living area beneath the canvas when hatches are open.Step 3: Allowing Time to Dry
After securely attaching the first portion of the flange, Sven allows ample time for it to dry before moving forward with additional steps. This patience and precision are key aspects of his successful boatbuilding methods.Step 4: Finishing Touches
Once the flange is fully dried, Sven removes the clamps carefully, ensuring no damage occurs during this process. He then moves on to attaching four more pieces onto these main frames, completing two pairs of flanges for the bulkhead hatches.The Final Touches
While two flanges form the primary support structure around the hatches, Sven mentions there are two additional pieces required at each end to ensure comprehensive protection. This attention to detail highlights his commitment to producing a durable and reliable design. “Sailing is about finding your path, whether it’s across an ocean or within yourself.” – Sven Yrvind In conclusion, making flanges around bulkhead hatches may seem complex at first glance, but by following Sven Yrvind’s meticulous process, enthusiasts can achieve professional-level results. Remember that the journey of boatbuilding is as rewarding as reaching your destination; it tests one’s patience and dedication. For those seeking to embark on this adventure or simply gain more insight into marine craftsmanship, Sven’s wisdom is invaluable.Sven begins by explaining that working on flanges vertically and horizontally is significantly easier than doing so in a flat position. To simplify the process further, he divides the task into two or three steps as suggested by fellow expert “for for.” This approach not only makes it more manageable but also allows for greater precision in crafting each component.Step 2: Applying Glue and Securing
Sven proceeds to apply glue along one edge of the flange, ensuring a secure bond when clamped into place. He emphasizes that this stage is crucial for maintaining the structural integrity of the flange, which in turn safeguards the living area beneath the canvas when hatches are open.Step 3: Allowing Time to Dry
After securely attaching the first portion of the flange, Sven allows ample time for it to dry before moving forward with additional steps. This patience and precision are key aspects of his successful boatbuilding methods.Step 4: Finishing Touches
Once the flange is fully dried, Sven removes the clamps carefully, ensuring no damage occurs during this process. He then moves on to attaching four more pieces onto these main frames, completing two pairs of flanges for the bulkhead hatches.The Final Touches
While two flanges form the primary support structure around the hatches, Sven mentions there are two additional pieces required at each end to ensure comprehensive protection. This attention to detail highlights his commitment to producing a durable and reliable design. “Sailing is about finding your path, whether it’s across an ocean or within yourself.” – Sven Yrvind In conclusion, making flanges around bulkhead hatches may seem complex at first glance, but by following Sven Yrvind’s meticulous process, enthusiasts can achieve professional-level results. Remember that the journey of boatbuilding is as rewarding as reaching your destination; it tests one’s patience and dedication. For those seeking to embark on this adventure or simply gain more insight into marine craftsmanship, Sven’s wisdom is invaluable.Sven Yrvind, a renowned yacht designer and sailor, shares valuable insights on creating flanges around bulkhead hatches for canvas protection in this enlightening video. By following his expert guidance, boat enthusiasts can ensure their living areas remain secure while allowing unhindered access through the hatches.Step 1: Starting with the Flange
Sven begins by explaining that working on flanges vertically and horizontally is significantly easier than doing so in a flat position. To simplify the process further, he divides the task into two or three steps as suggested by fellow expert “for for.” This approach not only makes it more manageable but also allows for greater precision in crafting each component.Step 2: Applying Glue and Securing
Sven proceeds to apply glue along one edge of the flange, ensuring a secure bond when clamped into place. He emphasizes that this stage is crucial for maintaining the structural integrity of the flange, which in turn safeguards the living area beneath the canvas when hatches are open.Step 3: Allowing Time to Dry
After securely attaching the first portion of the flange, Sven allows ample time for it to dry before moving forward with additional steps. This patience and precision are key aspects of his successful boatbuilding methods.Step 4: Finishing Touches
Once the flange is fully dried, Sven removes the clamps carefully, ensuring no damage occurs during this process. He then moves on to attaching four more pieces onto these main frames, completing two pairs of flanges for the bulkhead hatches.The Final Touches
While two flanges form the primary support structure around the hatches, Sven mentions there are two additional pieces required at each end to ensure comprehensive protection. This attention to detail highlights his commitment to producing a durable and reliable design. “Sailing is about finding your path, whether it’s across an ocean or within yourself.” – Sven Yrvind In conclusion, making flanges around bulkhead hatches may seem complex at first glance, but by following Sven Yrvind’s meticulous process, enthusiasts can achieve professional-level results. Remember that the journey of boatbuilding is as rewarding as reaching your destination; it tests one’s patience and dedication. For those seeking to embark on this adventure or simply gain more insight into marine craftsmanship, Sven’s wisdom is invaluable.Making Flanges Around Bulkhead Hatches for Canvas
Sven Yrvind, a renowned yacht designer and sailor, shares valuable insights on creating flanges around bulkhead hatches for canvas protection in this enlightening video. By following his expert guidance, boat enthusiasts can ensure their living areas remain secure while allowing unhindered access through the hatches.Step 1: Starting with the Flange
Sven begins by explaining that working on flanges vertically and horizontally is significantly easier than doing so in a flat position. To simplify the process further, he divides the task into two or three steps as suggested by fellow expert “for for.” This approach not only makes it more manageable but also allows for greater precision in crafting each component.Step 2: Applying Glue and Securing
Sven proceeds to apply glue along one edge of the flange, ensuring a secure bond when clamped into place. He emphasizes that this stage is crucial for maintaining the structural integrity of the flange, which in turn safeguards the living area beneath the canvas when hatches are open.Step 3: Allowing Time to Dry
After securely attaching the first portion of the flange, Sven allows ample time for it to dry before moving forward with additional steps. This patience and precision are key aspects of his successful boatbuilding methods.Step 4: Finishing Touches
Once the flange is fully dried, Sven removes the clamps carefully, ensuring no damage occurs during this process. He then moves on to attaching four more pieces onto these main frames, completing two pairs of flanges for the bulkhead hatches.The Final Touches
While two flanges form the primary support structure around the hatches, Sven mentions there are two additional pieces required at each end to ensure comprehensive protection. This attention to detail highlights his commitment to producing a durable and reliable design. “Sailing is about finding your path, whether it’s across an ocean or within yourself.” – Sven Yrvind In conclusion, making flanges around bulkhead hatches may seem complex at first glance, but by following Sven Yrvind’s meticulous process, enthusiasts can achieve professional-level results. Remember that the journey of boatbuilding is as rewarding as reaching your destination; it tests one’s patience and dedication. For those seeking to embark on this adventure or simply gain more insight into marine craftsmanship, Sven’s wisdom is invaluable.Once the flange is fully dried, Sven removes the clamps carefully, ensuring no damage occurs during this process. He then moves on to attaching four more pieces onto these main frames, completing two pairs of flanges for the bulkhead hatches.The Final Touches
While two flanges form the primary support structure around the hatches, Sven mentions there are two additional pieces required at each end to ensure comprehensive protection. This attention to detail highlights his commitment to producing a durable and reliable design. “Sailing is about finding your path, whether it’s across an ocean or within yourself.” – Sven Yrvind In conclusion, making flanges around bulkhead hatches may seem complex at first glance, but by following Sven Yrvind’s meticulous process, enthusiasts can achieve professional-level results. Remember that the journey of boatbuilding is as rewarding as reaching your destination; it tests one’s patience and dedication. For those seeking to embark on this adventure or simply gain more insight into marine craftsmanship, Sven’s wisdom is invaluable.Sven begins by explaining that working on flanges vertically and horizontally is significantly easier than doing so in a flat position. To simplify the process further, he divides the task into two or three steps as suggested by fellow expert “for for.” This approach not only makes it more manageable but also allows for greater precision in crafting each component.Step 2: Applying Glue and Securing
Sven proceeds to apply glue along one edge of the flange, ensuring a secure bond when clamped into place. He emphasizes that this stage is crucial for maintaining the structural integrity of the flange, which in turn safeguards the living area beneath the canvas when hatches are open.Step 3: Allowing Time to Dry
After securely attaching the first portion of the flange, Sven allows ample time for it to dry before moving forward with additional steps. This patience and precision are key aspects of his successful boatbuilding methods.Step 4: Finishing Touches
Once the flange is fully dried, Sven removes the clamps carefully, ensuring no damage occurs during this process. He then moves on to attaching four more pieces onto these main frames, completing two pairs of flanges for the bulkhead hatches.The Final Touches
While two flanges form the primary support structure around the hatches, Sven mentions there are two additional pieces required at each end to ensure comprehensive protection. This attention to detail highlights his commitment to producing a durable and reliable design. “Sailing is about finding your path, whether it’s across an ocean or within yourself.” – Sven Yrvind In conclusion, making flanges around bulkhead hatches may seem complex at first glance, but by following Sven Yrvind’s meticulous process, enthusiasts can achieve professional-level results. Remember that the journey of boatbuilding is as rewarding as reaching your destination; it tests one’s patience and dedication. For those seeking to embark on this adventure or simply gain more insight into marine craftsmanship, Sven’s wisdom is invaluable.Sven Yrvind, a renowned yacht designer and sailor, shares valuable insights on creating flanges around bulkhead hatches for canvas protection in this enlightening video. By following his expert guidance, boat enthusiasts can ensure their living areas remain secure while allowing unhindered access through the hatches.Step 1: Starting with the Flange
Sven begins by explaining that working on flanges vertically and horizontally is significantly easier than doing so in a flat position. To simplify the process further, he divides the task into two or three steps as suggested by fellow expert “for for.” This approach not only makes it more manageable but also allows for greater precision in crafting each component.Step 2: Applying Glue and Securing
Sven proceeds to apply glue along one edge of the flange, ensuring a secure bond when clamped into place. He emphasizes that this stage is crucial for maintaining the structural integrity of the flange, which in turn safeguards the living area beneath the canvas when hatches are open.Step 3: Allowing Time to Dry
After securely attaching the first portion of the flange, Sven allows ample time for it to dry before moving forward with additional steps. This patience and precision are key aspects of his successful boatbuilding methods.Step 4: Finishing Touches
Once the flange is fully dried, Sven removes the clamps carefully, ensuring no damage occurs during this process. He then moves on to attaching four more pieces onto these main frames, completing two pairs of flanges for the bulkhead hatches.The Final Touches
While two flanges form the primary support structure around the hatches, Sven mentions there are two additional pieces required at each end to ensure comprehensive protection. This attention to detail highlights his commitment to producing a durable and reliable design. “Sailing is about finding your path, whether it’s across an ocean or within yourself.” – Sven Yrvind In conclusion, making flanges around bulkhead hatches may seem complex at first glance, but by following Sven Yrvind’s meticulous process, enthusiasts can achieve professional-level results. Remember that the journey of boatbuilding is as rewarding as reaching your destination; it tests one’s patience and dedication. For those seeking to embark on this adventure or simply gain more insight into marine craftsmanship, Sven’s wisdom is invaluable.Making Flanges Around Bulkhead Hatches for Canvas
Sven Yrvind, a renowned yacht designer and sailor, shares valuable insights on creating flanges around bulkhead hatches for canvas protection in this enlightening video. By following his expert guidance, boat enthusiasts can ensure their living areas remain secure while allowing unhindered access through the hatches.Step 1: Starting with the Flange
Sven begins by explaining that working on flanges vertically and horizontally is significantly easier than doing so in a flat position. To simplify the process further, he divides the task into two or three steps as suggested by fellow expert “for for.” This approach not only makes it more manageable but also allows for greater precision in crafting each component.Step 2: Applying Glue and Securing
Sven proceeds to apply glue along one edge of the flange, ensuring a secure bond when clamped into place. He emphasizes that this stage is crucial for maintaining the structural integrity of the flange, which in turn safeguards the living area beneath the canvas when hatches are open.Step 3: Allowing Time to Dry
After securely attaching the first portion of the flange, Sven allows ample time for it to dry before moving forward with additional steps. This patience and precision are key aspects of his successful boatbuilding methods.Step 4: Finishing Touches
Once the flange is fully dried, Sven removes the clamps carefully, ensuring no damage occurs during this process. He then moves on to attaching four more pieces onto these main frames, completing two pairs of flanges for the bulkhead hatches.The Final Touches
While two flanges form the primary support structure around the hatches, Sven mentions there are two additional pieces required at each end to ensure comprehensive protection. This attention to detail highlights his commitment to producing a durable and reliable design. “Sailing is about finding your path, whether it’s across an ocean or within yourself.” – Sven Yrvind In conclusion, making flanges around bulkhead hatches may seem complex at first glance, but by following Sven Yrvind’s meticulous process, enthusiasts can achieve professional-level results. Remember that the journey of boatbuilding is as rewarding as reaching your destination; it tests one’s patience and dedication. For those seeking to embark on this adventure or simply gain more insight into marine craftsmanship, Sven’s wisdom is invaluable.After securely attaching the first portion of the flange, Sven allows ample time for it to dry before moving forward with additional steps. This patience and precision are key aspects of his successful boatbuilding methods.Step 4: Finishing Touches
Once the flange is fully dried, Sven removes the clamps carefully, ensuring no damage occurs during this process. He then moves on to attaching four more pieces onto these main frames, completing two pairs of flanges for the bulkhead hatches.The Final Touches
While two flanges form the primary support structure around the hatches, Sven mentions there are two additional pieces required at each end to ensure comprehensive protection. This attention to detail highlights his commitment to producing a durable and reliable design. “Sailing is about finding your path, whether it’s across an ocean or within yourself.” – Sven Yrvind In conclusion, making flanges around bulkhead hatches may seem complex at first glance, but by following Sven Yrvind’s meticulous process, enthusiasts can achieve professional-level results. Remember that the journey of boatbuilding is as rewarding as reaching your destination; it tests one’s patience and dedication. For those seeking to embark on this adventure or simply gain more insight into marine craftsmanship, Sven’s wisdom is invaluable.Sven begins by explaining that working on flanges vertically and horizontally is significantly easier than doing so in a flat position. To simplify the process further, he divides the task into two or three steps as suggested by fellow expert “for for.” This approach not only makes it more manageable but also allows for greater precision in crafting each component.Step 2: Applying Glue and Securing
Sven proceeds to apply glue along one edge of the flange, ensuring a secure bond when clamped into place. He emphasizes that this stage is crucial for maintaining the structural integrity of the flange, which in turn safeguards the living area beneath the canvas when hatches are open.Step 3: Allowing Time to Dry
After securely attaching the first portion of the flange, Sven allows ample time for it to dry before moving forward with additional steps. This patience and precision are key aspects of his successful boatbuilding methods.Step 4: Finishing Touches
Once the flange is fully dried, Sven removes the clamps carefully, ensuring no damage occurs during this process. He then moves on to attaching four more pieces onto these main frames, completing two pairs of flanges for the bulkhead hatches.The Final Touches
While two flanges form the primary support structure around the hatches, Sven mentions there are two additional pieces required at each end to ensure comprehensive protection. This attention to detail highlights his commitment to producing a durable and reliable design. “Sailing is about finding your path, whether it’s across an ocean or within yourself.” – Sven Yrvind In conclusion, making flanges around bulkhead hatches may seem complex at first glance, but by following Sven Yrvind’s meticulous process, enthusiasts can achieve professional-level results. Remember that the journey of boatbuilding is as rewarding as reaching your destination; it tests one’s patience and dedication. For those seeking to embark on this adventure or simply gain more insight into marine craftsmanship, Sven’s wisdom is invaluable.Sven Yrvind, a renowned yacht designer and sailor, shares valuable insights on creating flanges around bulkhead hatches for canvas protection in this enlightening video. By following his expert guidance, boat enthusiasts can ensure their living areas remain secure while allowing unhindered access through the hatches.Step 1: Starting with the Flange
Sven begins by explaining that working on flanges vertically and horizontally is significantly easier than doing so in a flat position. To simplify the process further, he divides the task into two or three steps as suggested by fellow expert “for for.” This approach not only makes it more manageable but also allows for greater precision in crafting each component.Step 2: Applying Glue and Securing
Sven proceeds to apply glue along one edge of the flange, ensuring a secure bond when clamped into place. He emphasizes that this stage is crucial for maintaining the structural integrity of the flange, which in turn safeguards the living area beneath the canvas when hatches are open.Step 3: Allowing Time to Dry
After securely attaching the first portion of the flange, Sven allows ample time for it to dry before moving forward with additional steps. This patience and precision are key aspects of his successful boatbuilding methods.Step 4: Finishing Touches
Once the flange is fully dried, Sven removes the clamps carefully, ensuring no damage occurs during this process. He then moves on to attaching four more pieces onto these main frames, completing two pairs of flanges for the bulkhead hatches.The Final Touches
While two flanges form the primary support structure around the hatches, Sven mentions there are two additional pieces required at each end to ensure comprehensive protection. This attention to detail highlights his commitment to producing a durable and reliable design. “Sailing is about finding your path, whether it’s across an ocean or within yourself.” – Sven Yrvind In conclusion, making flanges around bulkhead hatches may seem complex at first glance, but by following Sven Yrvind’s meticulous process, enthusiasts can achieve professional-level results. Remember that the journey of boatbuilding is as rewarding as reaching your destination; it tests one’s patience and dedication. For those seeking to embark on this adventure or simply gain more insight into marine craftsmanship, Sven’s wisdom is invaluable.Making Flanges Around Bulkhead Hatches for Canvas
Sven Yrvind, a renowned yacht designer and sailor, shares valuable insights on creating flanges around bulkhead hatches for canvas protection in this enlightening video. By following his expert guidance, boat enthusiasts can ensure their living areas remain secure while allowing unhindered access through the hatches.Step 1: Starting with the Flange
Sven begins by explaining that working on flanges vertically and horizontally is significantly easier than doing so in a flat position. To simplify the process further, he divides the task into two or three steps as suggested by fellow expert “for for.” This approach not only makes it more manageable but also allows for greater precision in crafting each component.Step 2: Applying Glue and Securing
Sven proceeds to apply glue along one edge of the flange, ensuring a secure bond when clamped into place. He emphasizes that this stage is crucial for maintaining the structural integrity of the flange, which in turn safeguards the living area beneath the canvas when hatches are open.Step 3: Allowing Time to Dry
After securely attaching the first portion of the flange, Sven allows ample time for it to dry before moving forward with additional steps. This patience and precision are key aspects of his successful boatbuilding methods.Step 4: Finishing Touches
Once the flange is fully dried, Sven removes the clamps carefully, ensuring no damage occurs during this process. He then moves on to attaching four more pieces onto these main frames, completing two pairs of flanges for the bulkhead hatches.The Final Touches
While two flanges form the primary support structure around the hatches, Sven mentions there are two additional pieces required at each end to ensure comprehensive protection. This attention to detail highlights his commitment to producing a durable and reliable design. “Sailing is about finding your path, whether it’s across an ocean or within yourself.” – Sven Yrvind In conclusion, making flanges around bulkhead hatches may seem complex at first glance, but by following Sven Yrvind’s meticulous process, enthusiasts can achieve professional-level results. Remember that the journey of boatbuilding is as rewarding as reaching your destination; it tests one’s patience and dedication. For those seeking to embark on this adventure or simply gain more insight into marine craftsmanship, Sven’s wisdom is invaluable.Sven proceeds to apply glue along one edge of the flange, ensuring a secure bond when clamped into place. He emphasizes that this stage is crucial for maintaining the structural integrity of the flange, which in turn safeguards the living area beneath the canvas when hatches are open.Step 3: Allowing Time to Dry
After securely attaching the first portion of the flange, Sven allows ample time for it to dry before moving forward with additional steps. This patience and precision are key aspects of his successful boatbuilding methods.Step 4: Finishing Touches
Once the flange is fully dried, Sven removes the clamps carefully, ensuring no damage occurs during this process. He then moves on to attaching four more pieces onto these main frames, completing two pairs of flanges for the bulkhead hatches.The Final Touches
While two flanges form the primary support structure around the hatches, Sven mentions there are two additional pieces required at each end to ensure comprehensive protection. This attention to detail highlights his commitment to producing a durable and reliable design. “Sailing is about finding your path, whether it’s across an ocean or within yourself.” – Sven Yrvind In conclusion, making flanges around bulkhead hatches may seem complex at first glance, but by following Sven Yrvind’s meticulous process, enthusiasts can achieve professional-level results. Remember that the journey of boatbuilding is as rewarding as reaching your destination; it tests one’s patience and dedication. For those seeking to embark on this adventure or simply gain more insight into marine craftsmanship, Sven’s wisdom is invaluable.Sven begins by explaining that working on flanges vertically and horizontally is significantly easier than doing so in a flat position. To simplify the process further, he divides the task into two or three steps as suggested by fellow expert “for for.” This approach not only makes it more manageable but also allows for greater precision in crafting each component.Step 2: Applying Glue and Securing
Sven proceeds to apply glue along one edge of the flange, ensuring a secure bond when clamped into place. He emphasizes that this stage is crucial for maintaining the structural integrity of the flange, which in turn safeguards the living area beneath the canvas when hatches are open.Step 3: Allowing Time to Dry
After securely attaching the first portion of the flange, Sven allows ample time for it to dry before moving forward with additional steps. This patience and precision are key aspects of his successful boatbuilding methods.Step 4: Finishing Touches
Once the flange is fully dried, Sven removes the clamps carefully, ensuring no damage occurs during this process. He then moves on to attaching four more pieces onto these main frames, completing two pairs of flanges for the bulkhead hatches.The Final Touches
While two flanges form the primary support structure around the hatches, Sven mentions there are two additional pieces required at each end to ensure comprehensive protection. This attention to detail highlights his commitment to producing a durable and reliable design. “Sailing is about finding your path, whether it’s across an ocean or within yourself.” – Sven Yrvind In conclusion, making flanges around bulkhead hatches may seem complex at first glance, but by following Sven Yrvind’s meticulous process, enthusiasts can achieve professional-level results. Remember that the journey of boatbuilding is as rewarding as reaching your destination; it tests one’s patience and dedication. For those seeking to embark on this adventure or simply gain more insight into marine craftsmanship, Sven’s wisdom is invaluable.Sven Yrvind, a renowned yacht designer and sailor, shares valuable insights on creating flanges around bulkhead hatches for canvas protection in this enlightening video. By following his expert guidance, boat enthusiasts can ensure their living areas remain secure while allowing unhindered access through the hatches.Step 1: Starting with the Flange
Sven begins by explaining that working on flanges vertically and horizontally is significantly easier than doing so in a flat position. To simplify the process further, he divides the task into two or three steps as suggested by fellow expert “for for.” This approach not only makes it more manageable but also allows for greater precision in crafting each component.Step 2: Applying Glue and Securing
Sven proceeds to apply glue along one edge of the flange, ensuring a secure bond when clamped into place. He emphasizes that this stage is crucial for maintaining the structural integrity of the flange, which in turn safeguards the living area beneath the canvas when hatches are open.Step 3: Allowing Time to Dry
After securely attaching the first portion of the flange, Sven allows ample time for it to dry before moving forward with additional steps. This patience and precision are key aspects of his successful boatbuilding methods.Step 4: Finishing Touches
Once the flange is fully dried, Sven removes the clamps carefully, ensuring no damage occurs during this process. He then moves on to attaching four more pieces onto these main frames, completing two pairs of flanges for the bulkhead hatches.The Final Touches
While two flanges form the primary support structure around the hatches, Sven mentions there are two additional pieces required at each end to ensure comprehensive protection. This attention to detail highlights his commitment to producing a durable and reliable design. “Sailing is about finding your path, whether it’s across an ocean or within yourself.” – Sven Yrvind In conclusion, making flanges around bulkhead hatches may seem complex at first glance, but by following Sven Yrvind’s meticulous process, enthusiasts can achieve professional-level results. Remember that the journey of boatbuilding is as rewarding as reaching your destination; it tests one’s patience and dedication. For those seeking to embark on this adventure or simply gain more insight into marine craftsmanship, Sven’s wisdom is invaluable.Making Flanges Around Bulkhead Hatches for Canvas
Sven Yrvind, a renowned yacht designer and sailor, shares valuable insights on creating flanges around bulkhead hatches for canvas protection in this enlightening video. By following his expert guidance, boat enthusiasts can ensure their living areas remain secure while allowing unhindered access through the hatches.Step 1: Starting with the Flange
Sven begins by explaining that working on flanges vertically and horizontally is significantly easier than doing so in a flat position. To simplify the process further, he divides the task into two or three steps as suggested by fellow expert “for for.” This approach not only makes it more manageable but also allows for greater precision in crafting each component.Step 2: Applying Glue and Securing
Sven proceeds to apply glue along one edge of the flange, ensuring a secure bond when clamped into place. He emphasizes that this stage is crucial for maintaining the structural integrity of the flange, which in turn safeguards the living area beneath the canvas when hatches are open.Step 3: Allowing Time to Dry
After securely attaching the first portion of the flange, Sven allows ample time for it to dry before moving forward with additional steps. This patience and precision are key aspects of his successful boatbuilding methods.Step 4: Finishing Touches
Once the flange is fully dried, Sven removes the clamps carefully, ensuring no damage occurs during this process. He then moves on to attaching four more pieces onto these main frames, completing two pairs of flanges for the bulkhead hatches.The Final Touches
While two flanges form the primary support structure around the hatches, Sven mentions there are two additional pieces required at each end to ensure comprehensive protection. This attention to detail highlights his commitment to producing a durable and reliable design. “Sailing is about finding your path, whether it’s across an ocean or within yourself.” – Sven Yrvind In conclusion, making flanges around bulkhead hatches may seem complex at first glance, but by following Sven Yrvind’s meticulous process, enthusiasts can achieve professional-level results. Remember that the journey of boatbuilding is as rewarding as reaching your destination; it tests one’s patience and dedication. For those seeking to embark on this adventure or simply gain more insight into marine craftsmanship, Sven’s wisdom is invaluable.Once the flange is fully dried, Sven removes the clamps carefully, ensuring no damage occurs during this process. He then moves on to attaching four more pieces onto these main frames, completing two pairs of flanges for the bulkhead hatches.The Final Touches
While two flanges form the primary support structure around the hatches, Sven mentions there are two additional pieces required at each end to ensure comprehensive protection. This attention to detail highlights his commitment to producing a durable and reliable design. “Sailing is about finding your path, whether it’s across an ocean or within yourself.” – Sven Yrvind In conclusion, making flanges around bulkhead hatches may seem complex at first glance, but by following Sven Yrvind’s meticulous process, enthusiasts can achieve professional-level results. Remember that the journey of boatbuilding is as rewarding as reaching your destination; it tests one’s patience and dedication. For those seeking to embark on this adventure or simply gain more insight into marine craftsmanship, Sven’s wisdom is invaluable.Sven proceeds to apply glue along one edge of the flange, ensuring a secure bond when clamped into place. He emphasizes that this stage is crucial for maintaining the structural integrity of the flange, which in turn safeguards the living area beneath the canvas when hatches are open.Step 3: Allowing Time to Dry
After securely attaching the first portion of the flange, Sven allows ample time for it to dry before moving forward with additional steps. This patience and precision are key aspects of his successful boatbuilding methods.Step 4: Finishing Touches
Once the flange is fully dried, Sven removes the clamps carefully, ensuring no damage occurs during this process. He then moves on to attaching four more pieces onto these main frames, completing two pairs of flanges for the bulkhead hatches.The Final Touches
While two flanges form the primary support structure around the hatches, Sven mentions there are two additional pieces required at each end to ensure comprehensive protection. This attention to detail highlights his commitment to producing a durable and reliable design. “Sailing is about finding your path, whether it’s across an ocean or within yourself.” – Sven Yrvind In conclusion, making flanges around bulkhead hatches may seem complex at first glance, but by following Sven Yrvind’s meticulous process, enthusiasts can achieve professional-level results. Remember that the journey of boatbuilding is as rewarding as reaching your destination; it tests one’s patience and dedication. For those seeking to embark on this adventure or simply gain more insight into marine craftsmanship, Sven’s wisdom is invaluable.Sven begins by explaining that working on flanges vertically and horizontally is significantly easier than doing so in a flat position. To simplify the process further, he divides the task into two or three steps as suggested by fellow expert “for for.” This approach not only makes it more manageable but also allows for greater precision in crafting each component.Step 2: Applying Glue and Securing
Sven proceeds to apply glue along one edge of the flange, ensuring a secure bond when clamped into place. He emphasizes that this stage is crucial for maintaining the structural integrity of the flange, which in turn safeguards the living area beneath the canvas when hatches are open.Step 3: Allowing Time to Dry
After securely attaching the first portion of the flange, Sven allows ample time for it to dry before moving forward with additional steps. This patience and precision are key aspects of his successful boatbuilding methods.Step 4: Finishing Touches
Once the flange is fully dried, Sven removes the clamps carefully, ensuring no damage occurs during this process. He then moves on to attaching four more pieces onto these main frames, completing two pairs of flanges for the bulkhead hatches.The Final Touches
While two flanges form the primary support structure around the hatches, Sven mentions there are two additional pieces required at each end to ensure comprehensive protection. This attention to detail highlights his commitment to producing a durable and reliable design. “Sailing is about finding your path, whether it’s across an ocean or within yourself.” – Sven Yrvind In conclusion, making flanges around bulkhead hatches may seem complex at first glance, but by following Sven Yrvind’s meticulous process, enthusiasts can achieve professional-level results. Remember that the journey of boatbuilding is as rewarding as reaching your destination; it tests one’s patience and dedication. For those seeking to embark on this adventure or simply gain more insight into marine craftsmanship, Sven’s wisdom is invaluable.Sven Yrvind, a renowned yacht designer and sailor, shares valuable insights on creating flanges around bulkhead hatches for canvas protection in this enlightening video. By following his expert guidance, boat enthusiasts can ensure their living areas remain secure while allowing unhindered access through the hatches.Step 1: Starting with the Flange
Sven begins by explaining that working on flanges vertically and horizontally is significantly easier than doing so in a flat position. To simplify the process further, he divides the task into two or three steps as suggested by fellow expert “for for.” This approach not only makes it more manageable but also allows for greater precision in crafting each component.Step 2: Applying Glue and Securing
Sven proceeds to apply glue along one edge of the flange, ensuring a secure bond when clamped into place. He emphasizes that this stage is crucial for maintaining the structural integrity of the flange, which in turn safeguards the living area beneath the canvas when hatches are open.Step 3: Allowing Time to Dry
After securely attaching the first portion of the flange, Sven allows ample time for it to dry before moving forward with additional steps. This patience and precision are key aspects of his successful boatbuilding methods.Step 4: Finishing Touches
Once the flange is fully dried, Sven removes the clamps carefully, ensuring no damage occurs during this process. He then moves on to attaching four more pieces onto these main frames, completing two pairs of flanges for the bulkhead hatches.The Final Touches
While two flanges form the primary support structure around the hatches, Sven mentions there are two additional pieces required at each end to ensure comprehensive protection. This attention to detail highlights his commitment to producing a durable and reliable design. “Sailing is about finding your path, whether it’s across an ocean or within yourself.” – Sven Yrvind In conclusion, making flanges around bulkhead hatches may seem complex at first glance, but by following Sven Yrvind’s meticulous process, enthusiasts can achieve professional-level results. Remember that the journey of boatbuilding is as rewarding as reaching your destination; it tests one’s patience and dedication. For those seeking to embark on this adventure or simply gain more insight into marine craftsmanship, Sven’s wisdom is invaluable.Making Flanges Around Bulkhead Hatches for Canvas
Sven Yrvind, a renowned yacht designer and sailor, shares valuable insights on creating flanges around bulkhead hatches for canvas protection in this enlightening video. By following his expert guidance, boat enthusiasts can ensure their living areas remain secure while allowing unhindered access through the hatches.Step 1: Starting with the Flange
Sven begins by explaining that working on flanges vertically and horizontally is significantly easier than doing so in a flat position. To simplify the process further, he divides the task into two or three steps as suggested by fellow expert “for for.” This approach not only makes it more manageable but also allows for greater precision in crafting each component.Step 2: Applying Glue and Securing
Sven proceeds to apply glue along one edge of the flange, ensuring a secure bond when clamped into place. He emphasizes that this stage is crucial for maintaining the structural integrity of the flange, which in turn safeguards the living area beneath the canvas when hatches are open.Step 3: Allowing Time to Dry
After securely attaching the first portion of the flange, Sven allows ample time for it to dry before moving forward with additional steps. This patience and precision are key aspects of his successful boatbuilding methods.Step 4: Finishing Touches
Once the flange is fully dried, Sven removes the clamps carefully, ensuring no damage occurs during this process. He then moves on to attaching four more pieces onto these main frames, completing two pairs of flanges for the bulkhead hatches.The Final Touches
While two flanges form the primary support structure around the hatches, Sven mentions there are two additional pieces required at each end to ensure comprehensive protection. This attention to detail highlights his commitment to producing a durable and reliable design. “Sailing is about finding your path, whether it’s across an ocean or within yourself.” – Sven Yrvind In conclusion, making flanges around bulkhead hatches may seem complex at first glance, but by following Sven Yrvind’s meticulous process, enthusiasts can achieve professional-level results. Remember that the journey of boatbuilding is as rewarding as reaching your destination; it tests one’s patience and dedication. For those seeking to embark on this adventure or simply gain more insight into marine craftsmanship, Sven’s wisdom is invaluable.After securely attaching the first portion of the flange, Sven allows ample time for it to dry before moving forward with additional steps. This patience and precision are key aspects of his successful boatbuilding methods.Step 4: Finishing Touches
Once the flange is fully dried, Sven removes the clamps carefully, ensuring no damage occurs during this process. He then moves on to attaching four more pieces onto these main frames, completing two pairs of flanges for the bulkhead hatches.The Final Touches
While two flanges form the primary support structure around the hatches, Sven mentions there are two additional pieces required at each end to ensure comprehensive protection. This attention to detail highlights his commitment to producing a durable and reliable design. “Sailing is about finding your path, whether it’s across an ocean or within yourself.” – Sven Yrvind In conclusion, making flanges around bulkhead hatches may seem complex at first glance, but by following Sven Yrvind’s meticulous process, enthusiasts can achieve professional-level results. Remember that the journey of boatbuilding is as rewarding as reaching your destination; it tests one’s patience and dedication. For those seeking to embark on this adventure or simply gain more insight into marine craftsmanship, Sven’s wisdom is invaluable.Sven proceeds to apply glue along one edge of the flange, ensuring a secure bond when clamped into place. He emphasizes that this stage is crucial for maintaining the structural integrity of the flange, which in turn safeguards the living area beneath the canvas when hatches are open.Step 3: Allowing Time to Dry
After securely attaching the first portion of the flange, Sven allows ample time for it to dry before moving forward with additional steps. This patience and precision are key aspects of his successful boatbuilding methods.Step 4: Finishing Touches
Once the flange is fully dried, Sven removes the clamps carefully, ensuring no damage occurs during this process. He then moves on to attaching four more pieces onto these main frames, completing two pairs of flanges for the bulkhead hatches.The Final Touches
While two flanges form the primary support structure around the hatches, Sven mentions there are two additional pieces required at each end to ensure comprehensive protection. This attention to detail highlights his commitment to producing a durable and reliable design. “Sailing is about finding your path, whether it’s across an ocean or within yourself.” – Sven Yrvind In conclusion, making flanges around bulkhead hatches may seem complex at first glance, but by following Sven Yrvind’s meticulous process, enthusiasts can achieve professional-level results. Remember that the journey of boatbuilding is as rewarding as reaching your destination; it tests one’s patience and dedication. For those seeking to embark on this adventure or simply gain more insight into marine craftsmanship, Sven’s wisdom is invaluable.Sven begins by explaining that working on flanges vertically and horizontally is significantly easier than doing so in a flat position. To simplify the process further, he divides the task into two or three steps as suggested by fellow expert “for for.” This approach not only makes it more manageable but also allows for greater precision in crafting each component.Step 2: Applying Glue and Securing
Sven proceeds to apply glue along one edge of the flange, ensuring a secure bond when clamped into place. He emphasizes that this stage is crucial for maintaining the structural integrity of the flange, which in turn safeguards the living area beneath the canvas when hatches are open.Step 3: Allowing Time to Dry
After securely attaching the first portion of the flange, Sven allows ample time for it to dry before moving forward with additional steps. This patience and precision are key aspects of his successful boatbuilding methods.Step 4: Finishing Touches
Once the flange is fully dried, Sven removes the clamps carefully, ensuring no damage occurs during this process. He then moves on to attaching four more pieces onto these main frames, completing two pairs of flanges for the bulkhead hatches.The Final Touches
While two flanges form the primary support structure around the hatches, Sven mentions there are two additional pieces required at each end to ensure comprehensive protection. This attention to detail highlights his commitment to producing a durable and reliable design. “Sailing is about finding your path, whether it’s across an ocean or within yourself.” – Sven Yrvind In conclusion, making flanges around bulkhead hatches may seem complex at first glance, but by following Sven Yrvind’s meticulous process, enthusiasts can achieve professional-level results. Remember that the journey of boatbuilding is as rewarding as reaching your destination; it tests one’s patience and dedication. For those seeking to embark on this adventure or simply gain more insight into marine craftsmanship, Sven’s wisdom is invaluable.Sven Yrvind, a renowned yacht designer and sailor, shares valuable insights on creating flanges around bulkhead hatches for canvas protection in this enlightening video. By following his expert guidance, boat enthusiasts can ensure their living areas remain secure while allowing unhindered access through the hatches.Step 1: Starting with the Flange
Sven begins by explaining that working on flanges vertically and horizontally is significantly easier than doing so in a flat position. To simplify the process further, he divides the task into two or three steps as suggested by fellow expert “for for.” This approach not only makes it more manageable but also allows for greater precision in crafting each component.Step 2: Applying Glue and Securing
Sven proceeds to apply glue along one edge of the flange, ensuring a secure bond when clamped into place. He emphasizes that this stage is crucial for maintaining the structural integrity of the flange, which in turn safeguards the living area beneath the canvas when hatches are open.Step 3: Allowing Time to Dry
After securely attaching the first portion of the flange, Sven allows ample time for it to dry before moving forward with additional steps. This patience and precision are key aspects of his successful boatbuilding methods.Step 4: Finishing Touches
Once the flange is fully dried, Sven removes the clamps carefully, ensuring no damage occurs during this process. He then moves on to attaching four more pieces onto these main frames, completing two pairs of flanges for the bulkhead hatches.The Final Touches
While two flanges form the primary support structure around the hatches, Sven mentions there are two additional pieces required at each end to ensure comprehensive protection. This attention to detail highlights his commitment to producing a durable and reliable design. “Sailing is about finding your path, whether it’s across an ocean or within yourself.” – Sven Yrvind In conclusion, making flanges around bulkhead hatches may seem complex at first glance, but by following Sven Yrvind’s meticulous process, enthusiasts can achieve professional-level results. Remember that the journey of boatbuilding is as rewarding as reaching your destination; it tests one’s patience and dedication. For those seeking to embark on this adventure or simply gain more insight into marine craftsmanship, Sven’s wisdom is invaluable.Making Flanges Around Bulkhead Hatches for Canvas
Sven Yrvind, a renowned yacht designer and sailor, shares valuable insights on creating flanges around bulkhead hatches for canvas protection in this enlightening video. By following his expert guidance, boat enthusiasts can ensure their living areas remain secure while allowing unhindered access through the hatches.Step 1: Starting with the Flange
Sven begins by explaining that working on flanges vertically and horizontally is significantly easier than doing so in a flat position. To simplify the process further, he divides the task into two or three steps as suggested by fellow expert “for for.” This approach not only makes it more manageable but also allows for greater precision in crafting each component.Step 2: Applying Glue and Securing
Sven proceeds to apply glue along one edge of the flange, ensuring a secure bond when clamped into place. He emphasizes that this stage is crucial for maintaining the structural integrity of the flange, which in turn safeguards the living area beneath the canvas when hatches are open.Step 3: Allowing Time to Dry
After securely attaching the first portion of the flange, Sven allows ample time for it to dry before moving forward with additional steps. This patience and precision are key aspects of his successful boatbuilding methods.Step 4: Finishing Touches
Once the flange is fully dried, Sven removes the clamps carefully, ensuring no damage occurs during this process. He then moves on to attaching four more pieces onto these main frames, completing two pairs of flanges for the bulkhead hatches.The Final Touches
While two flanges form the primary support structure around the hatches, Sven mentions there are two additional pieces required at each end to ensure comprehensive protection. This attention to detail highlights his commitment to producing a durable and reliable design. “Sailing is about finding your path, whether it’s across an ocean or within yourself.” – Sven Yrvind In conclusion, making flanges around bulkhead hatches may seem complex at first glance, but by following Sven Yrvind’s meticulous process, enthusiasts can achieve professional-level results. Remember that the journey of boatbuilding is as rewarding as reaching your destination; it tests one’s patience and dedication. For those seeking to embark on this adventure or simply gain more insight into marine craftsmanship, Sven’s wisdom is invaluable.Once the flange is fully dried, Sven removes the clamps carefully, ensuring no damage occurs during this process. He then moves on to attaching four more pieces onto these main frames, completing two pairs of flanges for the bulkhead hatches.The Final Touches
While two flanges form the primary support structure around the hatches, Sven mentions there are two additional pieces required at each end to ensure comprehensive protection. This attention to detail highlights his commitment to producing a durable and reliable design. “Sailing is about finding your path, whether it’s across an ocean or within yourself.” – Sven Yrvind In conclusion, making flanges around bulkhead hatches may seem complex at first glance, but by following Sven Yrvind’s meticulous process, enthusiasts can achieve professional-level results. Remember that the journey of boatbuilding is as rewarding as reaching your destination; it tests one’s patience and dedication. For those seeking to embark on this adventure or simply gain more insight into marine craftsmanship, Sven’s wisdom is invaluable.After securely attaching the first portion of the flange, Sven allows ample time for it to dry before moving forward with additional steps. This patience and precision are key aspects of his successful boatbuilding methods.Step 4: Finishing Touches
Once the flange is fully dried, Sven removes the clamps carefully, ensuring no damage occurs during this process. He then moves on to attaching four more pieces onto these main frames, completing two pairs of flanges for the bulkhead hatches.The Final Touches
While two flanges form the primary support structure around the hatches, Sven mentions there are two additional pieces required at each end to ensure comprehensive protection. This attention to detail highlights his commitment to producing a durable and reliable design. “Sailing is about finding your path, whether it’s across an ocean or within yourself.” – Sven Yrvind In conclusion, making flanges around bulkhead hatches may seem complex at first glance, but by following Sven Yrvind’s meticulous process, enthusiasts can achieve professional-level results. Remember that the journey of boatbuilding is as rewarding as reaching your destination; it tests one’s patience and dedication. For those seeking to embark on this adventure or simply gain more insight into marine craftsmanship, Sven’s wisdom is invaluable.Sven proceeds to apply glue along one edge of the flange, ensuring a secure bond when clamped into place. He emphasizes that this stage is crucial for maintaining the structural integrity of the flange, which in turn safeguards the living area beneath the canvas when hatches are open.Step 3: Allowing Time to Dry
After securely attaching the first portion of the flange, Sven allows ample time for it to dry before moving forward with additional steps. This patience and precision are key aspects of his successful boatbuilding methods.Step 4: Finishing Touches
Once the flange is fully dried, Sven removes the clamps carefully, ensuring no damage occurs during this process. He then moves on to attaching four more pieces onto these main frames, completing two pairs of flanges for the bulkhead hatches.The Final Touches
While two flanges form the primary support structure around the hatches, Sven mentions there are two additional pieces required at each end to ensure comprehensive protection. This attention to detail highlights his commitment to producing a durable and reliable design. “Sailing is about finding your path, whether it’s across an ocean or within yourself.” – Sven Yrvind In conclusion, making flanges around bulkhead hatches may seem complex at first glance, but by following Sven Yrvind’s meticulous process, enthusiasts can achieve professional-level results. Remember that the journey of boatbuilding is as rewarding as reaching your destination; it tests one’s patience and dedication. For those seeking to embark on this adventure or simply gain more insight into marine craftsmanship, Sven’s wisdom is invaluable.Sven begins by explaining that working on flanges vertically and horizontally is significantly easier than doing so in a flat position. To simplify the process further, he divides the task into two or three steps as suggested by fellow expert “for for.” This approach not only makes it more manageable but also allows for greater precision in crafting each component.Step 2: Applying Glue and Securing
Sven proceeds to apply glue along one edge of the flange, ensuring a secure bond when clamped into place. He emphasizes that this stage is crucial for maintaining the structural integrity of the flange, which in turn safeguards the living area beneath the canvas when hatches are open.Step 3: Allowing Time to Dry
After securely attaching the first portion of the flange, Sven allows ample time for it to dry before moving forward with additional steps. This patience and precision are key aspects of his successful boatbuilding methods.Step 4: Finishing Touches
Once the flange is fully dried, Sven removes the clamps carefully, ensuring no damage occurs during this process. He then moves on to attaching four more pieces onto these main frames, completing two pairs of flanges for the bulkhead hatches.The Final Touches
While two flanges form the primary support structure around the hatches, Sven mentions there are two additional pieces required at each end to ensure comprehensive protection. This attention to detail highlights his commitment to producing a durable and reliable design. “Sailing is about finding your path, whether it’s across an ocean or within yourself.” – Sven Yrvind In conclusion, making flanges around bulkhead hatches may seem complex at first glance, but by following Sven Yrvind’s meticulous process, enthusiasts can achieve professional-level results. Remember that the journey of boatbuilding is as rewarding as reaching your destination; it tests one’s patience and dedication. For those seeking to embark on this adventure or simply gain more insight into marine craftsmanship, Sven’s wisdom is invaluable.Sven Yrvind, a renowned yacht designer and sailor, shares valuable insights on creating flanges around bulkhead hatches for canvas protection in this enlightening video. By following his expert guidance, boat enthusiasts can ensure their living areas remain secure while allowing unhindered access through the hatches.Step 1: Starting with the Flange
Sven begins by explaining that working on flanges vertically and horizontally is significantly easier than doing so in a flat position. To simplify the process further, he divides the task into two or three steps as suggested by fellow expert “for for.” This approach not only makes it more manageable but also allows for greater precision in crafting each component.Step 2: Applying Glue and Securing
Sven proceeds to apply glue along one edge of the flange, ensuring a secure bond when clamped into place. He emphasizes that this stage is crucial for maintaining the structural integrity of the flange, which in turn safeguards the living area beneath the canvas when hatches are open.Step 3: Allowing Time to Dry
After securely attaching the first portion of the flange, Sven allows ample time for it to dry before moving forward with additional steps. This patience and precision are key aspects of his successful boatbuilding methods.Step 4: Finishing Touches
Once the flange is fully dried, Sven removes the clamps carefully, ensuring no damage occurs during this process. He then moves on to attaching four more pieces onto these main frames, completing two pairs of flanges for the bulkhead hatches.The Final Touches
While two flanges form the primary support structure around the hatches, Sven mentions there are two additional pieces required at each end to ensure comprehensive protection. This attention to detail highlights his commitment to producing a durable and reliable design. “Sailing is about finding your path, whether it’s across an ocean or within yourself.” – Sven Yrvind In conclusion, making flanges around bulkhead hatches may seem complex at first glance, but by following Sven Yrvind’s meticulous process, enthusiasts can achieve professional-level results. Remember that the journey of boatbuilding is as rewarding as reaching your destination; it tests one’s patience and dedication. For those seeking to embark on this adventure or simply gain more insight into marine craftsmanship, Sven’s wisdom is invaluable.Making Flanges Around Bulkhead Hatches for Canvas
Sven Yrvind, a renowned yacht designer and sailor, shares valuable insights on creating flanges around bulkhead hatches for canvas protection in this enlightening video. By following his expert guidance, boat enthusiasts can ensure their living areas remain secure while allowing unhindered access through the hatches.Step 1: Starting with the Flange
Sven begins by explaining that working on flanges vertically and horizontally is significantly easier than doing so in a flat position. To simplify the process further, he divides the task into two or three steps as suggested by fellow expert “for for.” This approach not only makes it more manageable but also allows for greater precision in crafting each component.Step 2: Applying Glue and Securing
Sven proceeds to apply glue along one edge of the flange, ensuring a secure bond when clamped into place. He emphasizes that this stage is crucial for maintaining the structural integrity of the flange, which in turn safeguards the living area beneath the canvas when hatches are open.Step 3: Allowing Time to Dry
After securely attaching the first portion of the flange, Sven allows ample time for it to dry before moving forward with additional steps. This patience and precision are key aspects of his successful boatbuilding methods.Step 4: Finishing Touches
Once the flange is fully dried, Sven removes the clamps carefully, ensuring no damage occurs during this process. He then moves on to attaching four more pieces onto these main frames, completing two pairs of flanges for the bulkhead hatches.The Final Touches
While two flanges form the primary support structure around the hatches, Sven mentions there are two additional pieces required at each end to ensure comprehensive protection. This attention to detail highlights his commitment to producing a durable and reliable design. “Sailing is about finding your path, whether it’s across an ocean or within yourself.” – Sven Yrvind In conclusion, making flanges around bulkhead hatches may seem complex at first glance, but by following Sven Yrvind’s meticulous process, enthusiasts can achieve professional-level results. Remember that the journey of boatbuilding is as rewarding as reaching your destination; it tests one’s patience and dedication. For those seeking to embark on this adventure or simply gain more insight into marine craftsmanship, Sven’s wisdom is invaluable.Sven Yrvind, a renowned yacht designer and sailor, shares valuable insights on creating flanges around bulkhead hatches for canvas protection in this enlightening video. By following his expert guidance, boat enthusiasts can ensure their living areas remain secure while allowing unhindered access through the hatches.Step 1: Starting with the Flange
Sven begins by explaining that working on flanges vertically and horizontally is significantly easier than doing so in a flat position. To simplify the process further, he divides the task into two or three steps as suggested by fellow expert “for for.” This approach not only makes it more manageable but also allows for greater precision in crafting each component.Step 2: Applying Glue and Securing
Sven proceeds to apply glue along one edge of the flange, ensuring a secure bond when clamped into place. He emphasizes that this stage is crucial for maintaining the structural integrity of the flange, which in turn safeguards the living area beneath the canvas when hatches are open.Step 3: Allowing Time to Dry
After securely attaching the first portion of the flange, Sven allows ample time for it to dry before moving forward with additional steps. This patience and precision are key aspects of his successful boatbuilding methods.Step 4: Finishing Touches
Once the flange is fully dried, Sven removes the clamps carefully, ensuring no damage occurs during this process. He then moves on to attaching four more pieces onto these main frames, completing two pairs of flanges for the bulkhead hatches.The Final Touches
While two flanges form the primary support structure around the hatches, Sven mentions there are two additional pieces required at each end to ensure comprehensive protection. This attention to detail highlights his commitment to producing a durable and reliable design. “Sailing is about finding your path, whether it’s across an ocean or within yourself.” – Sven Yrvind In conclusion, making flanges around bulkhead hatches may seem complex at first glance, but by following Sven Yrvind’s meticulous process, enthusiasts can achieve professional-level results. Remember that the journey of boatbuilding is as rewarding as reaching your destination; it tests one’s patience and dedication. For those seeking to embark on this adventure or simply gain more insight into marine craftsmanship, Sven’s wisdom is invaluable.Sven proceeds to apply glue along one edge of the flange, ensuring a secure bond when clamped into place. He emphasizes that this stage is crucial for maintaining the structural integrity of the flange, which in turn safeguards the living area beneath the canvas when hatches are open.Step 3: Allowing Time to Dry
After securely attaching the first portion of the flange, Sven allows ample time for it to dry before moving forward with additional steps. This patience and precision are key aspects of his successful boatbuilding methods.Step 4: Finishing Touches
Once the flange is fully dried, Sven removes the clamps carefully, ensuring no damage occurs during this process. He then moves on to attaching four more pieces onto these main frames, completing two pairs of flanges for the bulkhead hatches.The Final Touches
While two flanges form the primary support structure around the hatches, Sven mentions there are two additional pieces required at each end to ensure comprehensive protection. This attention to detail highlights his commitment to producing a durable and reliable design. “Sailing is about finding your path, whether it’s across an ocean or within yourself.” – Sven Yrvind In conclusion, making flanges around bulkhead hatches may seem complex at first glance, but by following Sven Yrvind’s meticulous process, enthusiasts can achieve professional-level results. Remember that the journey of boatbuilding is as rewarding as reaching your destination; it tests one’s patience and dedication. For those seeking to embark on this adventure or simply gain more insight into marine craftsmanship, Sven’s wisdom is invaluable.Making Flanges Around Bulkhead Hatches for Canvas
Sven Yrvind, a renowned yacht designer and sailor, shares valuable insights on creating flanges around bulkhead hatches for canvas protection in this enlightening video. By following his expert guidance, boat enthusiasts can ensure their living areas remain secure while allowing unhindered access through the hatches.Step 1: Starting with the Flange
Sven begins by explaining that working on flanges vertically and horizontally is significantly easier than doing so in a flat position. To simplify the process further, he divides the task into two or three steps as suggested by fellow expert “for for.” This approach not only makes it more manageable but also allows for greater precision in crafting each component.Step 2: Applying Glue and Securing
Sven proceeds to apply glue along one edge of the flange, ensuring a secure bond when clamped into place. He emphasizes that this stage is crucial for maintaining the structural integrity of the flange, which in turn safeguards the living area beneath the canvas when hatches are open.Step 3: Allowing Time to Dry
After securely attaching the first portion of the flange, Sven allows ample time for it to dry before moving forward with additional steps. This patience and precision are key aspects of his successful boatbuilding methods.Step 4: Finishing Touches
Once the flange is fully dried, Sven removes the clamps carefully, ensuring no damage occurs during this process. He then moves on to attaching four more pieces onto these main frames, completing two pairs of flanges for the bulkhead hatches.The Final Touches
While two flanges form the primary support structure around the hatches, Sven mentions there are two additional pieces required at each end to ensure comprehensive protection. This attention to detail highlights his commitment to producing a durable and reliable design. “Sailing is about finding your path, whether it’s across an ocean or within yourself.” – Sven Yrvind In conclusion, making flanges around bulkhead hatches may seem complex at first glance, but by following Sven Yrvind’s meticulous process, enthusiasts can achieve professional-level results. Remember that the journey of boatbuilding is as rewarding as reaching your destination; it tests one’s patience and dedication. For those seeking to embark on this adventure or simply gain more insight into marine craftsmanship, Sven’s wisdom is invaluable.Sven begins by explaining that working on flanges vertically and horizontally is significantly easier than doing so in a flat position. To simplify the process further, he divides the task into two or three steps as suggested by fellow expert “for for.” This approach not only makes it more manageable but also allows for greater precision in crafting each component.Step 2: Applying Glue and Securing
Sven proceeds to apply glue along one edge of the flange, ensuring a secure bond when clamped into place. He emphasizes that this stage is crucial for maintaining the structural integrity of the flange, which in turn safeguards the living area beneath the canvas when hatches are open.Step 3: Allowing Time to Dry
After securely attaching the first portion of the flange, Sven allows ample time for it to dry before moving forward with additional steps. This patience and precision are key aspects of his successful boatbuilding methods.Step 4: Finishing Touches
Once the flange is fully dried, Sven removes the clamps carefully, ensuring no damage occurs during this process. He then moves on to attaching four more pieces onto these main frames, completing two pairs of flanges for the bulkhead hatches.The Final Touches
While two flanges form the primary support structure around the hatches, Sven mentions there are two additional pieces required at each end to ensure comprehensive protection. This attention to detail highlights his commitment to producing a durable and reliable design. “Sailing is about finding your path, whether it’s across an ocean or within yourself.” – Sven Yrvind In conclusion, making flanges around bulkhead hatches may seem complex at first glance, but by following Sven Yrvind’s meticulous process, enthusiasts can achieve professional-level results. Remember that the journey of boatbuilding is as rewarding as reaching your destination; it tests one’s patience and dedication. For those seeking to embark on this adventure or simply gain more insight into marine craftsmanship, Sven’s wisdom is invaluable.Making Flanges Around Bulkhead Hatches for Canvas
Sven Yrvind, a renowned yacht designer and sailor, shares valuable insights on creating flanges around bulkhead hatches for canvas protection in this enlightening video. By following his expert guidance, boat enthusiasts can ensure their living areas remain secure while allowing unhindered access through the hatches.Step 1: Starting with the Flange
Sven begins by explaining that working on flanges vertically and horizontally is significantly easier than doing so in a flat position. To simplify the process further, he divides the task into two or three steps as suggested by fellow expert “for for.” This approach not only makes it more manageable but also allows for greater precision in crafting each component.Step 2: Applying Glue and Securing
Sven proceeds to apply glue along one edge of the flange, ensuring a secure bond when clamped into place. He emphasizes that this stage is crucial for maintaining the structural integrity of the flange, which in turn safeguards the living area beneath the canvas when hatches are open.Step 3: Allowing Time to Dry
After securely attaching the first portion of the flange, Sven allows ample time for it to dry before moving forward with additional steps. This patience and precision are key aspects of his successful boatbuilding methods.Step 4: Finishing Touches
Once the flange is fully dried, Sven removes the clamps carefully, ensuring no damage occurs during this process. He then moves on to attaching four more pieces onto these main frames, completing two pairs of flanges for the bulkhead hatches.The Final Touches
While two flanges form the primary support structure around the hatches, Sven mentions there are two additional pieces required at each end to ensure comprehensive protection. This attention to detail highlights his commitment to producing a durable and reliable design. “Sailing is about finding your path, whether it’s across an ocean or within yourself.” – Sven Yrvind In conclusion, making flanges around bulkhead hatches may seem complex at first glance, but by following Sven Yrvind’s meticulous process, enthusiasts can achieve professional-level results. Remember that the journey of boatbuilding is as rewarding as reaching your destination; it tests one’s patience and dedication. For those seeking to embark on this adventure or simply gain more insight into marine craftsmanship, Sven’s wisdom is invaluable.Sven Yrvind, a renowned yacht designer and sailor, shares valuable insights on creating flanges around bulkhead hatches for canvas protection in this enlightening video. By following his expert guidance, boat enthusiasts can ensure their living areas remain secure while allowing unhindered access through the hatches.Step 1: Starting with the Flange
Sven begins by explaining that working on flanges vertically and horizontally is significantly easier than doing so in a flat position. To simplify the process further, he divides the task into two or three steps as suggested by fellow expert “for for.” This approach not only makes it more manageable but also allows for greater precision in crafting each component.Step 2: Applying Glue and Securing
Sven proceeds to apply glue along one edge of the flange, ensuring a secure bond when clamped into place. He emphasizes that this stage is crucial for maintaining the structural integrity of the flange, which in turn safeguards the living area beneath the canvas when hatches are open.Step 3: Allowing Time to Dry
After securely attaching the first portion of the flange, Sven allows ample time for it to dry before moving forward with additional steps. This patience and precision are key aspects of his successful boatbuilding methods.Step 4: Finishing Touches
Once the flange is fully dried, Sven removes the clamps carefully, ensuring no damage occurs during this process. He then moves on to attaching four more pieces onto these main frames, completing two pairs of flanges for the bulkhead hatches.The Final Touches
While two flanges form the primary support structure around the hatches, Sven mentions there are two additional pieces required at each end to ensure comprehensive protection. This attention to detail highlights his commitment to producing a durable and reliable design. “Sailing is about finding your path, whether it’s across an ocean or within yourself.” – Sven Yrvind In conclusion, making flanges around bulkhead hatches may seem complex at first glance, but by following Sven Yrvind’s meticulous process, enthusiasts can achieve professional-level results. Remember that the journey of boatbuilding is as rewarding as reaching your destination; it tests one’s patience and dedication. For those seeking to embark on this adventure or simply gain more insight into marine craftsmanship, Sven’s wisdom is invaluable.Making Flanges Around Bulkhead Hatches for Canvas
Sven Yrvind, a renowned yacht designer and sailor, shares valuable insights on creating flanges around bulkhead hatches for canvas protection in this enlightening video. By following his expert guidance, boat enthusiasts can ensure their living areas remain secure while allowing unhindered access through the hatches.Step 1: Starting with the Flange
Sven begins by explaining that working on flanges vertically and horizontally is significantly easier than doing so in a flat position. To simplify the process further, he divides the task into two or three steps as suggested by fellow expert “for for.” This approach not only makes it more manageable but also allows for greater precision in crafting each component.Step 2: Applying Glue and Securing
Sven proceeds to apply glue along one edge of the flange, ensuring a secure bond when clamped into place. He emphasizes that this stage is crucial for maintaining the structural integrity of the flange, which in turn safeguards the living area beneath the canvas when hatches are open.Step 3: Allowing Time to Dry
After securely attaching the first portion of the flange, Sven allows ample time for it to dry before moving forward with additional steps. This patience and precision are key aspects of his successful boatbuilding methods.Step 4: Finishing Touches
Once the flange is fully dried, Sven removes the clamps carefully, ensuring no damage occurs during this process. He then moves on to attaching four more pieces onto these main frames, completing two pairs of flanges for the bulkhead hatches.The Final Touches
While two flanges form the primary support structure around the hatches, Sven mentions there are two additional pieces required at each end to ensure comprehensive protection. This attention to detail highlights his commitment to producing a durable and reliable design. “Sailing is about finding your path, whether it’s across an ocean or within yourself.” – Sven Yrvind In conclusion, making flanges around bulkhead hatches may seem complex at first glance, but by following Sven Yrvind’s meticulous process, enthusiasts can achieve professional-level results. Remember that the journey of boatbuilding is as rewarding as reaching your destination; it tests one’s patience and dedication. For those seeking to embark on this adventure or simply gain more insight into marine craftsmanship, Sven’s wisdom is invaluable.Once the flange is fully dried, Sven removes the clamps carefully, ensuring no damage occurs during this process. He then moves on to attaching four more pieces onto these main frames, completing two pairs of flanges for the bulkhead hatches.The Final Touches
While two flanges form the primary support structure around the hatches, Sven mentions there are two additional pieces required at each end to ensure comprehensive protection. This attention to detail highlights his commitment to producing a durable and reliable design. “Sailing is about finding your path, whether it’s across an ocean or within yourself.” – Sven Yrvind In conclusion, making flanges around bulkhead hatches may seem complex at first glance, but by following Sven Yrvind’s meticulous process, enthusiasts can achieve professional-level results. Remember that the journey of boatbuilding is as rewarding as reaching your destination; it tests one’s patience and dedication. For those seeking to embark on this adventure or simply gain more insight into marine craftsmanship, Sven’s wisdom is invaluable.Sven Yrvind, a renowned yacht designer and sailor, shares valuable insights on creating flanges around bulkhead hatches for canvas protection in this enlightening video. By following his expert guidance, boat enthusiasts can ensure their living areas remain secure while allowing unhindered access through the hatches.Step 1: Starting with the Flange
Sven begins by explaining that working on flanges vertically and horizontally is significantly easier than doing so in a flat position. To simplify the process further, he divides the task into two or three steps as suggested by fellow expert “for for.” This approach not only makes it more manageable but also allows for greater precision in crafting each component.Step 2: Applying Glue and Securing
Sven proceeds to apply glue along one edge of the flange, ensuring a secure bond when clamped into place. He emphasizes that this stage is crucial for maintaining the structural integrity of the flange, which in turn safeguards the living area beneath the canvas when hatches are open.Step 3: Allowing Time to Dry
After securely attaching the first portion of the flange, Sven allows ample time for it to dry before moving forward with additional steps. This patience and precision are key aspects of his successful boatbuilding methods.Step 4: Finishing Touches
Once the flange is fully dried, Sven removes the clamps carefully, ensuring no damage occurs during this process. He then moves on to attaching four more pieces onto these main frames, completing two pairs of flanges for the bulkhead hatches.The Final Touches
While two flanges form the primary support structure around the hatches, Sven mentions there are two additional pieces required at each end to ensure comprehensive protection. This attention to detail highlights his commitment to producing a durable and reliable design. “Sailing is about finding your path, whether it’s across an ocean or within yourself.” – Sven Yrvind In conclusion, making flanges around bulkhead hatches may seem complex at first glance, but by following Sven Yrvind’s meticulous process, enthusiasts can achieve professional-level results. Remember that the journey of boatbuilding is as rewarding as reaching your destination; it tests one’s patience and dedication. For those seeking to embark on this adventure or simply gain more insight into marine craftsmanship, Sven’s wisdom is invaluable.Making Flanges Around Bulkhead Hatches for Canvas
Sven Yrvind, a renowned yacht designer and sailor, shares valuable insights on creating flanges around bulkhead hatches for canvas protection in this enlightening video. By following his expert guidance, boat enthusiasts can ensure their living areas remain secure while allowing unhindered access through the hatches.Step 1: Starting with the Flange
Sven begins by explaining that working on flanges vertically and horizontally is significantly easier than doing so in a flat position. To simplify the process further, he divides the task into two or three steps as suggested by fellow expert “for for.” This approach not only makes it more manageable but also allows for greater precision in crafting each component.Step 2: Applying Glue and Securing
Sven proceeds to apply glue along one edge of the flange, ensuring a secure bond when clamped into place. He emphasizes that this stage is crucial for maintaining the structural integrity of the flange, which in turn safeguards the living area beneath the canvas when hatches are open.Step 3: Allowing Time to Dry
After securely attaching the first portion of the flange, Sven allows ample time for it to dry before moving forward with additional steps. This patience and precision are key aspects of his successful boatbuilding methods.Step 4: Finishing Touches
Once the flange is fully dried, Sven removes the clamps carefully, ensuring no damage occurs during this process. He then moves on to attaching four more pieces onto these main frames, completing two pairs of flanges for the bulkhead hatches.The Final Touches
While two flanges form the primary support structure around the hatches, Sven mentions there are two additional pieces required at each end to ensure comprehensive protection. This attention to detail highlights his commitment to producing a durable and reliable design. “Sailing is about finding your path, whether it’s across an ocean or within yourself.” – Sven Yrvind In conclusion, making flanges around bulkhead hatches may seem complex at first glance, but by following Sven Yrvind’s meticulous process, enthusiasts can achieve professional-level results. Remember that the journey of boatbuilding is as rewarding as reaching your destination; it tests one’s patience and dedication. For those seeking to embark on this adventure or simply gain more insight into marine craftsmanship, Sven’s wisdom is invaluable.After securely attaching the first portion of the flange, Sven allows ample time for it to dry before moving forward with additional steps. This patience and precision are key aspects of his successful boatbuilding methods.Step 4: Finishing Touches
Once the flange is fully dried, Sven removes the clamps carefully, ensuring no damage occurs during this process. He then moves on to attaching four more pieces onto these main frames, completing two pairs of flanges for the bulkhead hatches.The Final Touches
While two flanges form the primary support structure around the hatches, Sven mentions there are two additional pieces required at each end to ensure comprehensive protection. This attention to detail highlights his commitment to producing a durable and reliable design. “Sailing is about finding your path, whether it’s across an ocean or within yourself.” – Sven Yrvind In conclusion, making flanges around bulkhead hatches may seem complex at first glance, but by following Sven Yrvind’s meticulous process, enthusiasts can achieve professional-level results. Remember that the journey of boatbuilding is as rewarding as reaching your destination; it tests one’s patience and dedication. For those seeking to embark on this adventure or simply gain more insight into marine craftsmanship, Sven’s wisdom is invaluable.Sven Yrvind, a renowned yacht designer and sailor, shares valuable insights on creating flanges around bulkhead hatches for canvas protection in this enlightening video. By following his expert guidance, boat enthusiasts can ensure their living areas remain secure while allowing unhindered access through the hatches.Step 1: Starting with the Flange
Sven begins by explaining that working on flanges vertically and horizontally is significantly easier than doing so in a flat position. To simplify the process further, he divides the task into two or three steps as suggested by fellow expert “for for.” This approach not only makes it more manageable but also allows for greater precision in crafting each component.Step 2: Applying Glue and Securing
Sven proceeds to apply glue along one edge of the flange, ensuring a secure bond when clamped into place. He emphasizes that this stage is crucial for maintaining the structural integrity of the flange, which in turn safeguards the living area beneath the canvas when hatches are open.Step 3: Allowing Time to Dry
After securely attaching the first portion of the flange, Sven allows ample time for it to dry before moving forward with additional steps. This patience and precision are key aspects of his successful boatbuilding methods.Step 4: Finishing Touches
Once the flange is fully dried, Sven removes the clamps carefully, ensuring no damage occurs during this process. He then moves on to attaching four more pieces onto these main frames, completing two pairs of flanges for the bulkhead hatches.The Final Touches
While two flanges form the primary support structure around the hatches, Sven mentions there are two additional pieces required at each end to ensure comprehensive protection. This attention to detail highlights his commitment to producing a durable and reliable design. “Sailing is about finding your path, whether it’s across an ocean or within yourself.” – Sven Yrvind In conclusion, making flanges around bulkhead hatches may seem complex at first glance, but by following Sven Yrvind’s meticulous process, enthusiasts can achieve professional-level results. Remember that the journey of boatbuilding is as rewarding as reaching your destination; it tests one’s patience and dedication. For those seeking to embark on this adventure or simply gain more insight into marine craftsmanship, Sven’s wisdom is invaluable.Making Flanges Around Bulkhead Hatches for Canvas
Sven Yrvind, a renowned yacht designer and sailor, shares valuable insights on creating flanges around bulkhead hatches for canvas protection in this enlightening video. By following his expert guidance, boat enthusiasts can ensure their living areas remain secure while allowing unhindered access through the hatches.Step 1: Starting with the Flange
Sven begins by explaining that working on flanges vertically and horizontally is significantly easier than doing so in a flat position. To simplify the process further, he divides the task into two or three steps as suggested by fellow expert “for for.” This approach not only makes it more manageable but also allows for greater precision in crafting each component.Step 2: Applying Glue and Securing
Sven proceeds to apply glue along one edge of the flange, ensuring a secure bond when clamped into place. He emphasizes that this stage is crucial for maintaining the structural integrity of the flange, which in turn safeguards the living area beneath the canvas when hatches are open.Step 3: Allowing Time to Dry
After securely attaching the first portion of the flange, Sven allows ample time for it to dry before moving forward with additional steps. This patience and precision are key aspects of his successful boatbuilding methods.Step 4: Finishing Touches
Once the flange is fully dried, Sven removes the clamps carefully, ensuring no damage occurs during this process. He then moves on to attaching four more pieces onto these main frames, completing two pairs of flanges for the bulkhead hatches.The Final Touches
While two flanges form the primary support structure around the hatches, Sven mentions there are two additional pieces required at each end to ensure comprehensive protection. This attention to detail highlights his commitment to producing a durable and reliable design. “Sailing is about finding your path, whether it’s across an ocean or within yourself.” – Sven Yrvind In conclusion, making flanges around bulkhead hatches may seem complex at first glance, but by following Sven Yrvind’s meticulous process, enthusiasts can achieve professional-level results. Remember that the journey of boatbuilding is as rewarding as reaching your destination; it tests one’s patience and dedication. For those seeking to embark on this adventure or simply gain more insight into marine craftsmanship, Sven’s wisdom is invaluable.Sven proceeds to apply glue along one edge of the flange, ensuring a secure bond when clamped into place. He emphasizes that this stage is crucial for maintaining the structural integrity of the flange, which in turn safeguards the living area beneath the canvas when hatches are open.Step 3: Allowing Time to Dry
After securely attaching the first portion of the flange, Sven allows ample time for it to dry before moving forward with additional steps. This patience and precision are key aspects of his successful boatbuilding methods.Step 4: Finishing Touches
Once the flange is fully dried, Sven removes the clamps carefully, ensuring no damage occurs during this process. He then moves on to attaching four more pieces onto these main frames, completing two pairs of flanges for the bulkhead hatches.The Final Touches
While two flanges form the primary support structure around the hatches, Sven mentions there are two additional pieces required at each end to ensure comprehensive protection. This attention to detail highlights his commitment to producing a durable and reliable design. “Sailing is about finding your path, whether it’s across an ocean or within yourself.” – Sven Yrvind In conclusion, making flanges around bulkhead hatches may seem complex at first glance, but by following Sven Yrvind’s meticulous process, enthusiasts can achieve professional-level results. Remember that the journey of boatbuilding is as rewarding as reaching your destination; it tests one’s patience and dedication. For those seeking to embark on this adventure or simply gain more insight into marine craftsmanship, Sven’s wisdom is invaluable.Sven Yrvind, a renowned yacht designer and sailor, shares valuable insights on creating flanges around bulkhead hatches for canvas protection in this enlightening video. By following his expert guidance, boat enthusiasts can ensure their living areas remain secure while allowing unhindered access through the hatches.Step 1: Starting with the Flange
Sven begins by explaining that working on flanges vertically and horizontally is significantly easier than doing so in a flat position. To simplify the process further, he divides the task into two or three steps as suggested by fellow expert “for for.” This approach not only makes it more manageable but also allows for greater precision in crafting each component.Step 2: Applying Glue and Securing
Sven proceeds to apply glue along one edge of the flange, ensuring a secure bond when clamped into place. He emphasizes that this stage is crucial for maintaining the structural integrity of the flange, which in turn safeguards the living area beneath the canvas when hatches are open.Step 3: Allowing Time to Dry
After securely attaching the first portion of the flange, Sven allows ample time for it to dry before moving forward with additional steps. This patience and precision are key aspects of his successful boatbuilding methods.Step 4: Finishing Touches
Once the flange is fully dried, Sven removes the clamps carefully, ensuring no damage occurs during this process. He then moves on to attaching four more pieces onto these main frames, completing two pairs of flanges for the bulkhead hatches.The Final Touches
While two flanges form the primary support structure around the hatches, Sven mentions there are two additional pieces required at each end to ensure comprehensive protection. This attention to detail highlights his commitment to producing a durable and reliable design. “Sailing is about finding your path, whether it’s across an ocean or within yourself.” – Sven Yrvind In conclusion, making flanges around bulkhead hatches may seem complex at first glance, but by following Sven Yrvind’s meticulous process, enthusiasts can achieve professional-level results. Remember that the journey of boatbuilding is as rewarding as reaching your destination; it tests one’s patience and dedication. For those seeking to embark on this adventure or simply gain more insight into marine craftsmanship, Sven’s wisdom is invaluable.Making Flanges Around Bulkhead Hatches for Canvas
Sven Yrvind, a renowned yacht designer and sailor, shares valuable insights on creating flanges around bulkhead hatches for canvas protection in this enlightening video. By following his expert guidance, boat enthusiasts can ensure their living areas remain secure while allowing unhindered access through the hatches.Step 1: Starting with the Flange
Sven begins by explaining that working on flanges vertically and horizontally is significantly easier than doing so in a flat position. To simplify the process further, he divides the task into two or three steps as suggested by fellow expert “for for.” This approach not only makes it more manageable but also allows for greater precision in crafting each component.Step 2: Applying Glue and Securing
Sven proceeds to apply glue along one edge of the flange, ensuring a secure bond when clamped into place. He emphasizes that this stage is crucial for maintaining the structural integrity of the flange, which in turn safeguards the living area beneath the canvas when hatches are open.Step 3: Allowing Time to Dry
After securely attaching the first portion of the flange, Sven allows ample time for it to dry before moving forward with additional steps. This patience and precision are key aspects of his successful boatbuilding methods.Step 4: Finishing Touches
Once the flange is fully dried, Sven removes the clamps carefully, ensuring no damage occurs during this process. He then moves on to attaching four more pieces onto these main frames, completing two pairs of flanges for the bulkhead hatches.The Final Touches
While two flanges form the primary support structure around the hatches, Sven mentions there are two additional pieces required at each end to ensure comprehensive protection. This attention to detail highlights his commitment to producing a durable and reliable design. “Sailing is about finding your path, whether it’s across an ocean or within yourself.” – Sven Yrvind In conclusion, making flanges around bulkhead hatches may seem complex at first glance, but by following Sven Yrvind’s meticulous process, enthusiasts can achieve professional-level results. Remember that the journey of boatbuilding is as rewarding as reaching your destination; it tests one’s patience and dedication. For those seeking to embark on this adventure or simply gain more insight into marine craftsmanship, Sven’s wisdom is invaluable.Sven begins by explaining that working on flanges vertically and horizontally is significantly easier than doing so in a flat position. To simplify the process further, he divides the task into two or three steps as suggested by fellow expert “for for.” This approach not only makes it more manageable but also allows for greater precision in crafting each component.Step 2: Applying Glue and Securing
Sven proceeds to apply glue along one edge of the flange, ensuring a secure bond when clamped into place. He emphasizes that this stage is crucial for maintaining the structural integrity of the flange, which in turn safeguards the living area beneath the canvas when hatches are open.Step 3: Allowing Time to Dry
After securely attaching the first portion of the flange, Sven allows ample time for it to dry before moving forward with additional steps. This patience and precision are key aspects of his successful boatbuilding methods.Step 4: Finishing Touches
Once the flange is fully dried, Sven removes the clamps carefully, ensuring no damage occurs during this process. He then moves on to attaching four more pieces onto these main frames, completing two pairs of flanges for the bulkhead hatches.The Final Touches
While two flanges form the primary support structure around the hatches, Sven mentions there are two additional pieces required at each end to ensure comprehensive protection. This attention to detail highlights his commitment to producing a durable and reliable design. “Sailing is about finding your path, whether it’s across an ocean or within yourself.” – Sven Yrvind In conclusion, making flanges around bulkhead hatches may seem complex at first glance, but by following Sven Yrvind’s meticulous process, enthusiasts can achieve professional-level results. Remember that the journey of boatbuilding is as rewarding as reaching your destination; it tests one’s patience and dedication. For those seeking to embark on this adventure or simply gain more insight into marine craftsmanship, Sven’s wisdom is invaluable.Sven Yrvind, a renowned yacht designer and sailor, shares valuable insights on creating flanges around bulkhead hatches for canvas protection in this enlightening video. By following his expert guidance, boat enthusiasts can ensure their living areas remain secure while allowing unhindered access through the hatches.Step 1: Starting with the Flange
Sven begins by explaining that working on flanges vertically and horizontally is significantly easier than doing so in a flat position. To simplify the process further, he divides the task into two or three steps as suggested by fellow expert “for for.” This approach not only makes it more manageable but also allows for greater precision in crafting each component.Step 2: Applying Glue and Securing
Sven proceeds to apply glue along one edge of the flange, ensuring a secure bond when clamped into place. He emphasizes that this stage is crucial for maintaining the structural integrity of the flange, which in turn safeguards the living area beneath the canvas when hatches are open.Step 3: Allowing Time to Dry
After securely attaching the first portion of the flange, Sven allows ample time for it to dry before moving forward with additional steps. This patience and precision are key aspects of his successful boatbuilding methods.Step 4: Finishing Touches
Once the flange is fully dried, Sven removes the clamps carefully, ensuring no damage occurs during this process. He then moves on to attaching four more pieces onto these main frames, completing two pairs of flanges for the bulkhead hatches.The Final Touches
While two flanges form the primary support structure around the hatches, Sven mentions there are two additional pieces required at each end to ensure comprehensive protection. This attention to detail highlights his commitment to producing a durable and reliable design. “Sailing is about finding your path, whether it’s across an ocean or within yourself.” – Sven Yrvind In conclusion, making flanges around bulkhead hatches may seem complex at first glance, but by following Sven Yrvind’s meticulous process, enthusiasts can achieve professional-level results. Remember that the journey of boatbuilding is as rewarding as reaching your destination; it tests one’s patience and dedication. For those seeking to embark on this adventure or simply gain more insight into marine craftsmanship, Sven’s wisdom is invaluable.Making Flanges Around Bulkhead Hatches for Canvas
Sven Yrvind, a renowned yacht designer and sailor, shares valuable insights on creating flanges around bulkhead hatches for canvas protection in this enlightening video. By following his expert guidance, boat enthusiasts can ensure their living areas remain secure while allowing unhindered access through the hatches.Step 1: Starting with the Flange
Sven begins by explaining that working on flanges vertically and horizontally is significantly easier than doing so in a flat position. To simplify the process further, he divides the task into two or three steps as suggested by fellow expert “for for.” This approach not only makes it more manageable but also allows for greater precision in crafting each component.Step 2: Applying Glue and Securing
Sven proceeds to apply glue along one edge of the flange, ensuring a secure bond when clamped into place. He emphasizes that this stage is crucial for maintaining the structural integrity of the flange, which in turn safeguards the living area beneath the canvas when hatches are open.Step 3: Allowing Time to Dry
After securely attaching the first portion of the flange, Sven allows ample time for it to dry before moving forward with additional steps. This patience and precision are key aspects of his successful boatbuilding methods.Step 4: Finishing Touches
Once the flange is fully dried, Sven removes the clamps carefully, ensuring no damage occurs during this process. He then moves on to attaching four more pieces onto these main frames, completing two pairs of flanges for the bulkhead hatches.The Final Touches
While two flanges form the primary support structure around the hatches, Sven mentions there are two additional pieces required at each end to ensure comprehensive protection. This attention to detail highlights his commitment to producing a durable and reliable design. “Sailing is about finding your path, whether it’s across an ocean or within yourself.” – Sven Yrvind In conclusion, making flanges around bulkhead hatches may seem complex at first glance, but by following Sven Yrvind’s meticulous process, enthusiasts can achieve professional-level results. Remember that the journey of boatbuilding is as rewarding as reaching your destination; it tests one’s patience and dedication. For those seeking to embark on this adventure or simply gain more insight into marine craftsmanship, Sven’s wisdom is invaluable.Once the flange is fully dried, Sven removes the clamps carefully, ensuring no damage occurs during this process. He then moves on to attaching four more pieces onto these main frames, completing two pairs of flanges for the bulkhead hatches.The Final Touches
While two flanges form the primary support structure around the hatches, Sven mentions there are two additional pieces required at each end to ensure comprehensive protection. This attention to detail highlights his commitment to producing a durable and reliable design. “Sailing is about finding your path, whether it’s across an ocean or within yourself.” – Sven Yrvind In conclusion, making flanges around bulkhead hatches may seem complex at first glance, but by following Sven Yrvind’s meticulous process, enthusiasts can achieve professional-level results. Remember that the journey of boatbuilding is as rewarding as reaching your destination; it tests one’s patience and dedication. For those seeking to embark on this adventure or simply gain more insight into marine craftsmanship, Sven’s wisdom is invaluable.Sven begins by explaining that working on flanges vertically and horizontally is significantly easier than doing so in a flat position. To simplify the process further, he divides the task into two or three steps as suggested by fellow expert “for for.” This approach not only makes it more manageable but also allows for greater precision in crafting each component.Step 2: Applying Glue and Securing
Sven proceeds to apply glue along one edge of the flange, ensuring a secure bond when clamped into place. He emphasizes that this stage is crucial for maintaining the structural integrity of the flange, which in turn safeguards the living area beneath the canvas when hatches are open.Step 3: Allowing Time to Dry
After securely attaching the first portion of the flange, Sven allows ample time for it to dry before moving forward with additional steps. This patience and precision are key aspects of his successful boatbuilding methods.Step 4: Finishing Touches
Once the flange is fully dried, Sven removes the clamps carefully, ensuring no damage occurs during this process. He then moves on to attaching four more pieces onto these main frames, completing two pairs of flanges for the bulkhead hatches.The Final Touches
While two flanges form the primary support structure around the hatches, Sven mentions there are two additional pieces required at each end to ensure comprehensive protection. This attention to detail highlights his commitment to producing a durable and reliable design. “Sailing is about finding your path, whether it’s across an ocean or within yourself.” – Sven Yrvind In conclusion, making flanges around bulkhead hatches may seem complex at first glance, but by following Sven Yrvind’s meticulous process, enthusiasts can achieve professional-level results. Remember that the journey of boatbuilding is as rewarding as reaching your destination; it tests one’s patience and dedication. For those seeking to embark on this adventure or simply gain more insight into marine craftsmanship, Sven’s wisdom is invaluable.Sven Yrvind, a renowned yacht designer and sailor, shares valuable insights on creating flanges around bulkhead hatches for canvas protection in this enlightening video. By following his expert guidance, boat enthusiasts can ensure their living areas remain secure while allowing unhindered access through the hatches.Step 1: Starting with the Flange
Sven begins by explaining that working on flanges vertically and horizontally is significantly easier than doing so in a flat position. To simplify the process further, he divides the task into two or three steps as suggested by fellow expert “for for.” This approach not only makes it more manageable but also allows for greater precision in crafting each component.Step 2: Applying Glue and Securing
Sven proceeds to apply glue along one edge of the flange, ensuring a secure bond when clamped into place. He emphasizes that this stage is crucial for maintaining the structural integrity of the flange, which in turn safeguards the living area beneath the canvas when hatches are open.Step 3: Allowing Time to Dry
After securely attaching the first portion of the flange, Sven allows ample time for it to dry before moving forward with additional steps. This patience and precision are key aspects of his successful boatbuilding methods.Step 4: Finishing Touches
Once the flange is fully dried, Sven removes the clamps carefully, ensuring no damage occurs during this process. He then moves on to attaching four more pieces onto these main frames, completing two pairs of flanges for the bulkhead hatches.The Final Touches
While two flanges form the primary support structure around the hatches, Sven mentions there are two additional pieces required at each end to ensure comprehensive protection. This attention to detail highlights his commitment to producing a durable and reliable design. “Sailing is about finding your path, whether it’s across an ocean or within yourself.” – Sven Yrvind In conclusion, making flanges around bulkhead hatches may seem complex at first glance, but by following Sven Yrvind’s meticulous process, enthusiasts can achieve professional-level results. Remember that the journey of boatbuilding is as rewarding as reaching your destination; it tests one’s patience and dedication. For those seeking to embark on this adventure or simply gain more insight into marine craftsmanship, Sven’s wisdom is invaluable.Making Flanges Around Bulkhead Hatches for Canvas
Sven Yrvind, a renowned yacht designer and sailor, shares valuable insights on creating flanges around bulkhead hatches for canvas protection in this enlightening video. By following his expert guidance, boat enthusiasts can ensure their living areas remain secure while allowing unhindered access through the hatches.Step 1: Starting with the Flange
Sven begins by explaining that working on flanges vertically and horizontally is significantly easier than doing so in a flat position. To simplify the process further, he divides the task into two or three steps as suggested by fellow expert “for for.” This approach not only makes it more manageable but also allows for greater precision in crafting each component.Step 2: Applying Glue and Securing
Sven proceeds to apply glue along one edge of the flange, ensuring a secure bond when clamped into place. He emphasizes that this stage is crucial for maintaining the structural integrity of the flange, which in turn safeguards the living area beneath the canvas when hatches are open.Step 3: Allowing Time to Dry
After securely attaching the first portion of the flange, Sven allows ample time for it to dry before moving forward with additional steps. This patience and precision are key aspects of his successful boatbuilding methods.Step 4: Finishing Touches
Once the flange is fully dried, Sven removes the clamps carefully, ensuring no damage occurs during this process. He then moves on to attaching four more pieces onto these main frames, completing two pairs of flanges for the bulkhead hatches.The Final Touches
While two flanges form the primary support structure around the hatches, Sven mentions there are two additional pieces required at each end to ensure comprehensive protection. This attention to detail highlights his commitment to producing a durable and reliable design. “Sailing is about finding your path, whether it’s across an ocean or within yourself.” – Sven Yrvind In conclusion, making flanges around bulkhead hatches may seem complex at first glance, but by following Sven Yrvind’s meticulous process, enthusiasts can achieve professional-level results. Remember that the journey of boatbuilding is as rewarding as reaching your destination; it tests one’s patience and dedication. For those seeking to embark on this adventure or simply gain more insight into marine craftsmanship, Sven’s wisdom is invaluable.After securely attaching the first portion of the flange, Sven allows ample time for it to dry before moving forward with additional steps. This patience and precision are key aspects of his successful boatbuilding methods.Step 4: Finishing Touches
Once the flange is fully dried, Sven removes the clamps carefully, ensuring no damage occurs during this process. He then moves on to attaching four more pieces onto these main frames, completing two pairs of flanges for the bulkhead hatches.The Final Touches
While two flanges form the primary support structure around the hatches, Sven mentions there are two additional pieces required at each end to ensure comprehensive protection. This attention to detail highlights his commitment to producing a durable and reliable design. “Sailing is about finding your path, whether it’s across an ocean or within yourself.” – Sven Yrvind In conclusion, making flanges around bulkhead hatches may seem complex at first glance, but by following Sven Yrvind’s meticulous process, enthusiasts can achieve professional-level results. Remember that the journey of boatbuilding is as rewarding as reaching your destination; it tests one’s patience and dedication. For those seeking to embark on this adventure or simply gain more insight into marine craftsmanship, Sven’s wisdom is invaluable.Sven begins by explaining that working on flanges vertically and horizontally is significantly easier than doing so in a flat position. To simplify the process further, he divides the task into two or three steps as suggested by fellow expert “for for.” This approach not only makes it more manageable but also allows for greater precision in crafting each component.Step 2: Applying Glue and Securing
Sven proceeds to apply glue along one edge of the flange, ensuring a secure bond when clamped into place. He emphasizes that this stage is crucial for maintaining the structural integrity of the flange, which in turn safeguards the living area beneath the canvas when hatches are open.Step 3: Allowing Time to Dry
After securely attaching the first portion of the flange, Sven allows ample time for it to dry before moving forward with additional steps. This patience and precision are key aspects of his successful boatbuilding methods.Step 4: Finishing Touches
Once the flange is fully dried, Sven removes the clamps carefully, ensuring no damage occurs during this process. He then moves on to attaching four more pieces onto these main frames, completing two pairs of flanges for the bulkhead hatches.The Final Touches
While two flanges form the primary support structure around the hatches, Sven mentions there are two additional pieces required at each end to ensure comprehensive protection. This attention to detail highlights his commitment to producing a durable and reliable design. “Sailing is about finding your path, whether it’s across an ocean or within yourself.” – Sven Yrvind In conclusion, making flanges around bulkhead hatches may seem complex at first glance, but by following Sven Yrvind’s meticulous process, enthusiasts can achieve professional-level results. Remember that the journey of boatbuilding is as rewarding as reaching your destination; it tests one’s patience and dedication. For those seeking to embark on this adventure or simply gain more insight into marine craftsmanship, Sven’s wisdom is invaluable.Sven Yrvind, a renowned yacht designer and sailor, shares valuable insights on creating flanges around bulkhead hatches for canvas protection in this enlightening video. By following his expert guidance, boat enthusiasts can ensure their living areas remain secure while allowing unhindered access through the hatches.Step 1: Starting with the Flange
Sven begins by explaining that working on flanges vertically and horizontally is significantly easier than doing so in a flat position. To simplify the process further, he divides the task into two or three steps as suggested by fellow expert “for for.” This approach not only makes it more manageable but also allows for greater precision in crafting each component.Step 2: Applying Glue and Securing
Sven proceeds to apply glue along one edge of the flange, ensuring a secure bond when clamped into place. He emphasizes that this stage is crucial for maintaining the structural integrity of the flange, which in turn safeguards the living area beneath the canvas when hatches are open.Step 3: Allowing Time to Dry
After securely attaching the first portion of the flange, Sven allows ample time for it to dry before moving forward with additional steps. This patience and precision are key aspects of his successful boatbuilding methods.Step 4: Finishing Touches
Once the flange is fully dried, Sven removes the clamps carefully, ensuring no damage occurs during this process. He then moves on to attaching four more pieces onto these main frames, completing two pairs of flanges for the bulkhead hatches.The Final Touches
While two flanges form the primary support structure around the hatches, Sven mentions there are two additional pieces required at each end to ensure comprehensive protection. This attention to detail highlights his commitment to producing a durable and reliable design. “Sailing is about finding your path, whether it’s across an ocean or within yourself.” – Sven Yrvind In conclusion, making flanges around bulkhead hatches may seem complex at first glance, but by following Sven Yrvind’s meticulous process, enthusiasts can achieve professional-level results. Remember that the journey of boatbuilding is as rewarding as reaching your destination; it tests one’s patience and dedication. For those seeking to embark on this adventure or simply gain more insight into marine craftsmanship, Sven’s wisdom is invaluable.Making Flanges Around Bulkhead Hatches for Canvas
Sven Yrvind, a renowned yacht designer and sailor, shares valuable insights on creating flanges around bulkhead hatches for canvas protection in this enlightening video. By following his expert guidance, boat enthusiasts can ensure their living areas remain secure while allowing unhindered access through the hatches.Step 1: Starting with the Flange
Sven begins by explaining that working on flanges vertically and horizontally is significantly easier than doing so in a flat position. To simplify the process further, he divides the task into two or three steps as suggested by fellow expert “for for.” This approach not only makes it more manageable but also allows for greater precision in crafting each component.Step 2: Applying Glue and Securing
Sven proceeds to apply glue along one edge of the flange, ensuring a secure bond when clamped into place. He emphasizes that this stage is crucial for maintaining the structural integrity of the flange, which in turn safeguards the living area beneath the canvas when hatches are open.Step 3: Allowing Time to Dry
After securely attaching the first portion of the flange, Sven allows ample time for it to dry before moving forward with additional steps. This patience and precision are key aspects of his successful boatbuilding methods.Step 4: Finishing Touches
Once the flange is fully dried, Sven removes the clamps carefully, ensuring no damage occurs during this process. He then moves on to attaching four more pieces onto these main frames, completing two pairs of flanges for the bulkhead hatches.The Final Touches
While two flanges form the primary support structure around the hatches, Sven mentions there are two additional pieces required at each end to ensure comprehensive protection. This attention to detail highlights his commitment to producing a durable and reliable design. “Sailing is about finding your path, whether it’s across an ocean or within yourself.” – Sven Yrvind In conclusion, making flanges around bulkhead hatches may seem complex at first glance, but by following Sven Yrvind’s meticulous process, enthusiasts can achieve professional-level results. Remember that the journey of boatbuilding is as rewarding as reaching your destination; it tests one’s patience and dedication. For those seeking to embark on this adventure or simply gain more insight into marine craftsmanship, Sven’s wisdom is invaluable.Sven proceeds to apply glue along one edge of the flange, ensuring a secure bond when clamped into place. He emphasizes that this stage is crucial for maintaining the structural integrity of the flange, which in turn safeguards the living area beneath the canvas when hatches are open.Step 3: Allowing Time to Dry
After securely attaching the first portion of the flange, Sven allows ample time for it to dry before moving forward with additional steps. This patience and precision are key aspects of his successful boatbuilding methods.Step 4: Finishing Touches
Once the flange is fully dried, Sven removes the clamps carefully, ensuring no damage occurs during this process. He then moves on to attaching four more pieces onto these main frames, completing two pairs of flanges for the bulkhead hatches.The Final Touches
While two flanges form the primary support structure around the hatches, Sven mentions there are two additional pieces required at each end to ensure comprehensive protection. This attention to detail highlights his commitment to producing a durable and reliable design. “Sailing is about finding your path, whether it’s across an ocean or within yourself.” – Sven Yrvind In conclusion, making flanges around bulkhead hatches may seem complex at first glance, but by following Sven Yrvind’s meticulous process, enthusiasts can achieve professional-level results. Remember that the journey of boatbuilding is as rewarding as reaching your destination; it tests one’s patience and dedication. For those seeking to embark on this adventure or simply gain more insight into marine craftsmanship, Sven’s wisdom is invaluable.Sven begins by explaining that working on flanges vertically and horizontally is significantly easier than doing so in a flat position. To simplify the process further, he divides the task into two or three steps as suggested by fellow expert “for for.” This approach not only makes it more manageable but also allows for greater precision in crafting each component.Step 2: Applying Glue and Securing
Sven proceeds to apply glue along one edge of the flange, ensuring a secure bond when clamped into place. He emphasizes that this stage is crucial for maintaining the structural integrity of the flange, which in turn safeguards the living area beneath the canvas when hatches are open.Step 3: Allowing Time to Dry
After securely attaching the first portion of the flange, Sven allows ample time for it to dry before moving forward with additional steps. This patience and precision are key aspects of his successful boatbuilding methods.Step 4: Finishing Touches
Once the flange is fully dried, Sven removes the clamps carefully, ensuring no damage occurs during this process. He then moves on to attaching four more pieces onto these main frames, completing two pairs of flanges for the bulkhead hatches.The Final Touches
While two flanges form the primary support structure around the hatches, Sven mentions there are two additional pieces required at each end to ensure comprehensive protection. This attention to detail highlights his commitment to producing a durable and reliable design. “Sailing is about finding your path, whether it’s across an ocean or within yourself.” – Sven Yrvind In conclusion, making flanges around bulkhead hatches may seem complex at first glance, but by following Sven Yrvind’s meticulous process, enthusiasts can achieve professional-level results. Remember that the journey of boatbuilding is as rewarding as reaching your destination; it tests one’s patience and dedication. For those seeking to embark on this adventure or simply gain more insight into marine craftsmanship, Sven’s wisdom is invaluable.Sven Yrvind, a renowned yacht designer and sailor, shares valuable insights on creating flanges around bulkhead hatches for canvas protection in this enlightening video. By following his expert guidance, boat enthusiasts can ensure their living areas remain secure while allowing unhindered access through the hatches.Step 1: Starting with the Flange
Sven begins by explaining that working on flanges vertically and horizontally is significantly easier than doing so in a flat position. To simplify the process further, he divides the task into two or three steps as suggested by fellow expert “for for.” This approach not only makes it more manageable but also allows for greater precision in crafting each component.Step 2: Applying Glue and Securing
Sven proceeds to apply glue along one edge of the flange, ensuring a secure bond when clamped into place. He emphasizes that this stage is crucial for maintaining the structural integrity of the flange, which in turn safeguards the living area beneath the canvas when hatches are open.Step 3: Allowing Time to Dry
After securely attaching the first portion of the flange, Sven allows ample time for it to dry before moving forward with additional steps. This patience and precision are key aspects of his successful boatbuilding methods.Step 4: Finishing Touches
Once the flange is fully dried, Sven removes the clamps carefully, ensuring no damage occurs during this process. He then moves on to attaching four more pieces onto these main frames, completing two pairs of flanges for the bulkhead hatches.The Final Touches
While two flanges form the primary support structure around the hatches, Sven mentions there are two additional pieces required at each end to ensure comprehensive protection. This attention to detail highlights his commitment to producing a durable and reliable design. “Sailing is about finding your path, whether it’s across an ocean or within yourself.” – Sven Yrvind In conclusion, making flanges around bulkhead hatches may seem complex at first glance, but by following Sven Yrvind’s meticulous process, enthusiasts can achieve professional-level results. Remember that the journey of boatbuilding is as rewarding as reaching your destination; it tests one’s patience and dedication. For those seeking to embark on this adventure or simply gain more insight into marine craftsmanship, Sven’s wisdom is invaluable.Making Flanges Around Bulkhead Hatches for Canvas
Sven Yrvind, a renowned yacht designer and sailor, shares valuable insights on creating flanges around bulkhead hatches for canvas protection in this enlightening video. By following his expert guidance, boat enthusiasts can ensure their living areas remain secure while allowing unhindered access through the hatches.Step 1: Starting with the Flange
Sven begins by explaining that working on flanges vertically and horizontally is significantly easier than doing so in a flat position. To simplify the process further, he divides the task into two or three steps as suggested by fellow expert “for for.” This approach not only makes it more manageable but also allows for greater precision in crafting each component.Step 2: Applying Glue and Securing
Sven proceeds to apply glue along one edge of the flange, ensuring a secure bond when clamped into place. He emphasizes that this stage is crucial for maintaining the structural integrity of the flange, which in turn safeguards the living area beneath the canvas when hatches are open.Step 3: Allowing Time to Dry
After securely attaching the first portion of the flange, Sven allows ample time for it to dry before moving forward with additional steps. This patience and precision are key aspects of his successful boatbuilding methods.Step 4: Finishing Touches
Once the flange is fully dried, Sven removes the clamps carefully, ensuring no damage occurs during this process. He then moves on to attaching four more pieces onto these main frames, completing two pairs of flanges for the bulkhead hatches.The Final Touches
While two flanges form the primary support structure around the hatches, Sven mentions there are two additional pieces required at each end to ensure comprehensive protection. This attention to detail highlights his commitment to producing a durable and reliable design. “Sailing is about finding your path, whether it’s across an ocean or within yourself.” – Sven Yrvind In conclusion, making flanges around bulkhead hatches may seem complex at first glance, but by following Sven Yrvind’s meticulous process, enthusiasts can achieve professional-level results. Remember that the journey of boatbuilding is as rewarding as reaching your destination; it tests one’s patience and dedication. For those seeking to embark on this adventure or simply gain more insight into marine craftsmanship, Sven’s wisdom is invaluable.Once the flange is fully dried, Sven removes the clamps carefully, ensuring no damage occurs during this process. He then moves on to attaching four more pieces onto these main frames, completing two pairs of flanges for the bulkhead hatches.The Final Touches
While two flanges form the primary support structure around the hatches, Sven mentions there are two additional pieces required at each end to ensure comprehensive protection. This attention to detail highlights his commitment to producing a durable and reliable design. “Sailing is about finding your path, whether it’s across an ocean or within yourself.” – Sven Yrvind In conclusion, making flanges around bulkhead hatches may seem complex at first glance, but by following Sven Yrvind’s meticulous process, enthusiasts can achieve professional-level results. Remember that the journey of boatbuilding is as rewarding as reaching your destination; it tests one’s patience and dedication. For those seeking to embark on this adventure or simply gain more insight into marine craftsmanship, Sven’s wisdom is invaluable.Sven proceeds to apply glue along one edge of the flange, ensuring a secure bond when clamped into place. He emphasizes that this stage is crucial for maintaining the structural integrity of the flange, which in turn safeguards the living area beneath the canvas when hatches are open.Step 3: Allowing Time to Dry
After securely attaching the first portion of the flange, Sven allows ample time for it to dry before moving forward with additional steps. This patience and precision are key aspects of his successful boatbuilding methods.Step 4: Finishing Touches
Once the flange is fully dried, Sven removes the clamps carefully, ensuring no damage occurs during this process. He then moves on to attaching four more pieces onto these main frames, completing two pairs of flanges for the bulkhead hatches.The Final Touches
While two flanges form the primary support structure around the hatches, Sven mentions there are two additional pieces required at each end to ensure comprehensive protection. This attention to detail highlights his commitment to producing a durable and reliable design. “Sailing is about finding your path, whether it’s across an ocean or within yourself.” – Sven Yrvind In conclusion, making flanges around bulkhead hatches may seem complex at first glance, but by following Sven Yrvind’s meticulous process, enthusiasts can achieve professional-level results. Remember that the journey of boatbuilding is as rewarding as reaching your destination; it tests one’s patience and dedication. For those seeking to embark on this adventure or simply gain more insight into marine craftsmanship, Sven’s wisdom is invaluable.Sven begins by explaining that working on flanges vertically and horizontally is significantly easier than doing so in a flat position. To simplify the process further, he divides the task into two or three steps as suggested by fellow expert “for for.” This approach not only makes it more manageable but also allows for greater precision in crafting each component.Step 2: Applying Glue and Securing
Sven proceeds to apply glue along one edge of the flange, ensuring a secure bond when clamped into place. He emphasizes that this stage is crucial for maintaining the structural integrity of the flange, which in turn safeguards the living area beneath the canvas when hatches are open.Step 3: Allowing Time to Dry
After securely attaching the first portion of the flange, Sven allows ample time for it to dry before moving forward with additional steps. This patience and precision are key aspects of his successful boatbuilding methods.Step 4: Finishing Touches
Once the flange is fully dried, Sven removes the clamps carefully, ensuring no damage occurs during this process. He then moves on to attaching four more pieces onto these main frames, completing two pairs of flanges for the bulkhead hatches.The Final Touches
While two flanges form the primary support structure around the hatches, Sven mentions there are two additional pieces required at each end to ensure comprehensive protection. This attention to detail highlights his commitment to producing a durable and reliable design. “Sailing is about finding your path, whether it’s across an ocean or within yourself.” – Sven Yrvind In conclusion, making flanges around bulkhead hatches may seem complex at first glance, but by following Sven Yrvind’s meticulous process, enthusiasts can achieve professional-level results. Remember that the journey of boatbuilding is as rewarding as reaching your destination; it tests one’s patience and dedication. For those seeking to embark on this adventure or simply gain more insight into marine craftsmanship, Sven’s wisdom is invaluable.Sven Yrvind, a renowned yacht designer and sailor, shares valuable insights on creating flanges around bulkhead hatches for canvas protection in this enlightening video. By following his expert guidance, boat enthusiasts can ensure their living areas remain secure while allowing unhindered access through the hatches.Step 1: Starting with the Flange
Sven begins by explaining that working on flanges vertically and horizontally is significantly easier than doing so in a flat position. To simplify the process further, he divides the task into two or three steps as suggested by fellow expert “for for.” This approach not only makes it more manageable but also allows for greater precision in crafting each component.Step 2: Applying Glue and Securing
Sven proceeds to apply glue along one edge of the flange, ensuring a secure bond when clamped into place. He emphasizes that this stage is crucial for maintaining the structural integrity of the flange, which in turn safeguards the living area beneath the canvas when hatches are open.Step 3: Allowing Time to Dry
After securely attaching the first portion of the flange, Sven allows ample time for it to dry before moving forward with additional steps. This patience and precision are key aspects of his successful boatbuilding methods.Step 4: Finishing Touches
Once the flange is fully dried, Sven removes the clamps carefully, ensuring no damage occurs during this process. He then moves on to attaching four more pieces onto these main frames, completing two pairs of flanges for the bulkhead hatches.The Final Touches
While two flanges form the primary support structure around the hatches, Sven mentions there are two additional pieces required at each end to ensure comprehensive protection. This attention to detail highlights his commitment to producing a durable and reliable design. “Sailing is about finding your path, whether it’s across an ocean or within yourself.” – Sven Yrvind In conclusion, making flanges around bulkhead hatches may seem complex at first glance, but by following Sven Yrvind’s meticulous process, enthusiasts can achieve professional-level results. Remember that the journey of boatbuilding is as rewarding as reaching your destination; it tests one’s patience and dedication. For those seeking to embark on this adventure or simply gain more insight into marine craftsmanship, Sven’s wisdom is invaluable.Making Flanges Around Bulkhead Hatches for Canvas
Sven Yrvind, a renowned yacht designer and sailor, shares valuable insights on creating flanges around bulkhead hatches for canvas protection in this enlightening video. By following his expert guidance, boat enthusiasts can ensure their living areas remain secure while allowing unhindered access through the hatches.Step 1: Starting with the Flange
Sven begins by explaining that working on flanges vertically and horizontally is significantly easier than doing so in a flat position. To simplify the process further, he divides the task into two or three steps as suggested by fellow expert “for for.” This approach not only makes it more manageable but also allows for greater precision in crafting each component.Step 2: Applying Glue and Securing
Sven proceeds to apply glue along one edge of the flange, ensuring a secure bond when clamped into place. He emphasizes that this stage is crucial for maintaining the structural integrity of the flange, which in turn safeguards the living area beneath the canvas when hatches are open.Step 3: Allowing Time to Dry
After securely attaching the first portion of the flange, Sven allows ample time for it to dry before moving forward with additional steps. This patience and precision are key aspects of his successful boatbuilding methods.Step 4: Finishing Touches
Once the flange is fully dried, Sven removes the clamps carefully, ensuring no damage occurs during this process. He then moves on to attaching four more pieces onto these main frames, completing two pairs of flanges for the bulkhead hatches.The Final Touches
While two flanges form the primary support structure around the hatches, Sven mentions there are two additional pieces required at each end to ensure comprehensive protection. This attention to detail highlights his commitment to producing a durable and reliable design. “Sailing is about finding your path, whether it’s across an ocean or within yourself.” – Sven Yrvind In conclusion, making flanges around bulkhead hatches may seem complex at first glance, but by following Sven Yrvind’s meticulous process, enthusiasts can achieve professional-level results. Remember that the journey of boatbuilding is as rewarding as reaching your destination; it tests one’s patience and dedication. For those seeking to embark on this adventure or simply gain more insight into marine craftsmanship, Sven’s wisdom is invaluable.After securely attaching the first portion of the flange, Sven allows ample time for it to dry before moving forward with additional steps. This patience and precision are key aspects of his successful boatbuilding methods.Step 4: Finishing Touches
Once the flange is fully dried, Sven removes the clamps carefully, ensuring no damage occurs during this process. He then moves on to attaching four more pieces onto these main frames, completing two pairs of flanges for the bulkhead hatches.The Final Touches
While two flanges form the primary support structure around the hatches, Sven mentions there are two additional pieces required at each end to ensure comprehensive protection. This attention to detail highlights his commitment to producing a durable and reliable design. “Sailing is about finding your path, whether it’s across an ocean or within yourself.” – Sven Yrvind In conclusion, making flanges around bulkhead hatches may seem complex at first glance, but by following Sven Yrvind’s meticulous process, enthusiasts can achieve professional-level results. Remember that the journey of boatbuilding is as rewarding as reaching your destination; it tests one’s patience and dedication. For those seeking to embark on this adventure or simply gain more insight into marine craftsmanship, Sven’s wisdom is invaluable.Sven proceeds to apply glue along one edge of the flange, ensuring a secure bond when clamped into place. He emphasizes that this stage is crucial for maintaining the structural integrity of the flange, which in turn safeguards the living area beneath the canvas when hatches are open.Step 3: Allowing Time to Dry
After securely attaching the first portion of the flange, Sven allows ample time for it to dry before moving forward with additional steps. This patience and precision are key aspects of his successful boatbuilding methods.Step 4: Finishing Touches
Once the flange is fully dried, Sven removes the clamps carefully, ensuring no damage occurs during this process. He then moves on to attaching four more pieces onto these main frames, completing two pairs of flanges for the bulkhead hatches.The Final Touches
While two flanges form the primary support structure around the hatches, Sven mentions there are two additional pieces required at each end to ensure comprehensive protection. This attention to detail highlights his commitment to producing a durable and reliable design. “Sailing is about finding your path, whether it’s across an ocean or within yourself.” – Sven Yrvind In conclusion, making flanges around bulkhead hatches may seem complex at first glance, but by following Sven Yrvind’s meticulous process, enthusiasts can achieve professional-level results. Remember that the journey of boatbuilding is as rewarding as reaching your destination; it tests one’s patience and dedication. For those seeking to embark on this adventure or simply gain more insight into marine craftsmanship, Sven’s wisdom is invaluable.Sven begins by explaining that working on flanges vertically and horizontally is significantly easier than doing so in a flat position. To simplify the process further, he divides the task into two or three steps as suggested by fellow expert “for for.” This approach not only makes it more manageable but also allows for greater precision in crafting each component.Step 2: Applying Glue and Securing
Sven proceeds to apply glue along one edge of the flange, ensuring a secure bond when clamped into place. He emphasizes that this stage is crucial for maintaining the structural integrity of the flange, which in turn safeguards the living area beneath the canvas when hatches are open.Step 3: Allowing Time to Dry
After securely attaching the first portion of the flange, Sven allows ample time for it to dry before moving forward with additional steps. This patience and precision are key aspects of his successful boatbuilding methods.Step 4: Finishing Touches
Once the flange is fully dried, Sven removes the clamps carefully, ensuring no damage occurs during this process. He then moves on to attaching four more pieces onto these main frames, completing two pairs of flanges for the bulkhead hatches.The Final Touches
While two flanges form the primary support structure around the hatches, Sven mentions there are two additional pieces required at each end to ensure comprehensive protection. This attention to detail highlights his commitment to producing a durable and reliable design. “Sailing is about finding your path, whether it’s across an ocean or within yourself.” – Sven Yrvind In conclusion, making flanges around bulkhead hatches may seem complex at first glance, but by following Sven Yrvind’s meticulous process, enthusiasts can achieve professional-level results. Remember that the journey of boatbuilding is as rewarding as reaching your destination; it tests one’s patience and dedication. For those seeking to embark on this adventure or simply gain more insight into marine craftsmanship, Sven’s wisdom is invaluable.Sven Yrvind, a renowned yacht designer and sailor, shares valuable insights on creating flanges around bulkhead hatches for canvas protection in this enlightening video. By following his expert guidance, boat enthusiasts can ensure their living areas remain secure while allowing unhindered access through the hatches.Step 1: Starting with the Flange
Sven begins by explaining that working on flanges vertically and horizontally is significantly easier than doing so in a flat position. To simplify the process further, he divides the task into two or three steps as suggested by fellow expert “for for.” This approach not only makes it more manageable but also allows for greater precision in crafting each component.Step 2: Applying Glue and Securing
Sven proceeds to apply glue along one edge of the flange, ensuring a secure bond when clamped into place. He emphasizes that this stage is crucial for maintaining the structural integrity of the flange, which in turn safeguards the living area beneath the canvas when hatches are open.Step 3: Allowing Time to Dry
After securely attaching the first portion of the flange, Sven allows ample time for it to dry before moving forward with additional steps. This patience and precision are key aspects of his successful boatbuilding methods.Step 4: Finishing Touches
Once the flange is fully dried, Sven removes the clamps carefully, ensuring no damage occurs during this process. He then moves on to attaching four more pieces onto these main frames, completing two pairs of flanges for the bulkhead hatches.The Final Touches
While two flanges form the primary support structure around the hatches, Sven mentions there are two additional pieces required at each end to ensure comprehensive protection. This attention to detail highlights his commitment to producing a durable and reliable design. “Sailing is about finding your path, whether it’s across an ocean or within yourself.” – Sven Yrvind In conclusion, making flanges around bulkhead hatches may seem complex at first glance, but by following Sven Yrvind’s meticulous process, enthusiasts can achieve professional-level results. Remember that the journey of boatbuilding is as rewarding as reaching your destination; it tests one’s patience and dedication. For those seeking to embark on this adventure or simply gain more insight into marine craftsmanship, Sven’s wisdom is invaluable.Making Flanges Around Bulkhead Hatches for Canvas
Sven Yrvind, a renowned yacht designer and sailor, shares valuable insights on creating flanges around bulkhead hatches for canvas protection in this enlightening video. By following his expert guidance, boat enthusiasts can ensure their living areas remain secure while allowing unhindered access through the hatches.Step 1: Starting with the Flange
Sven begins by explaining that working on flanges vertically and horizontally is significantly easier than doing so in a flat position. To simplify the process further, he divides the task into two or three steps as suggested by fellow expert “for for.” This approach not only makes it more manageable but also allows for greater precision in crafting each component.Step 2: Applying Glue and Securing
Sven proceeds to apply glue along one edge of the flange, ensuring a secure bond when clamped into place. He emphasizes that this stage is crucial for maintaining the structural integrity of the flange, which in turn safeguards the living area beneath the canvas when hatches are open.Step 3: Allowing Time to Dry
After securely attaching the first portion of the flange, Sven allows ample time for it to dry before moving forward with additional steps. This patience and precision are key aspects of his successful boatbuilding methods.Step 4: Finishing Touches
Once the flange is fully dried, Sven removes the clamps carefully, ensuring no damage occurs during this process. He then moves on to attaching four more pieces onto these main frames, completing two pairs of flanges for the bulkhead hatches.The Final Touches
While two flanges form the primary support structure around the hatches, Sven mentions there are two additional pieces required at each end to ensure comprehensive protection. This attention to detail highlights his commitment to producing a durable and reliable design. “Sailing is about finding your path, whether it’s across an ocean or within yourself.” – Sven Yrvind In conclusion, making flanges around bulkhead hatches may seem complex at first glance, but by following Sven Yrvind’s meticulous process, enthusiasts can achieve professional-level results. Remember that the journey of boatbuilding is as rewarding as reaching your destination; it tests one’s patience and dedication. For those seeking to embark on this adventure or simply gain more insight into marine craftsmanship, Sven’s wisdom is invaluable.Once the flange is fully dried, Sven removes the clamps carefully, ensuring no damage occurs during this process. He then moves on to attaching four more pieces onto these main frames, completing two pairs of flanges for the bulkhead hatches.The Final Touches
While two flanges form the primary support structure around the hatches, Sven mentions there are two additional pieces required at each end to ensure comprehensive protection. This attention to detail highlights his commitment to producing a durable and reliable design. “Sailing is about finding your path, whether it’s across an ocean or within yourself.” – Sven Yrvind In conclusion, making flanges around bulkhead hatches may seem complex at first glance, but by following Sven Yrvind’s meticulous process, enthusiasts can achieve professional-level results. Remember that the journey of boatbuilding is as rewarding as reaching your destination; it tests one’s patience and dedication. For those seeking to embark on this adventure or simply gain more insight into marine craftsmanship, Sven’s wisdom is invaluable.After securely attaching the first portion of the flange, Sven allows ample time for it to dry before moving forward with additional steps. This patience and precision are key aspects of his successful boatbuilding methods.Step 4: Finishing Touches
Once the flange is fully dried, Sven removes the clamps carefully, ensuring no damage occurs during this process. He then moves on to attaching four more pieces onto these main frames, completing two pairs of flanges for the bulkhead hatches.The Final Touches
While two flanges form the primary support structure around the hatches, Sven mentions there are two additional pieces required at each end to ensure comprehensive protection. This attention to detail highlights his commitment to producing a durable and reliable design. “Sailing is about finding your path, whether it’s across an ocean or within yourself.” – Sven Yrvind In conclusion, making flanges around bulkhead hatches may seem complex at first glance, but by following Sven Yrvind’s meticulous process, enthusiasts can achieve professional-level results. Remember that the journey of boatbuilding is as rewarding as reaching your destination; it tests one’s patience and dedication. For those seeking to embark on this adventure or simply gain more insight into marine craftsmanship, Sven’s wisdom is invaluable.Sven proceeds to apply glue along one edge of the flange, ensuring a secure bond when clamped into place. He emphasizes that this stage is crucial for maintaining the structural integrity of the flange, which in turn safeguards the living area beneath the canvas when hatches are open.Step 3: Allowing Time to Dry
After securely attaching the first portion of the flange, Sven allows ample time for it to dry before moving forward with additional steps. This patience and precision are key aspects of his successful boatbuilding methods.Step 4: Finishing Touches
Once the flange is fully dried, Sven removes the clamps carefully, ensuring no damage occurs during this process. He then moves on to attaching four more pieces onto these main frames, completing two pairs of flanges for the bulkhead hatches.The Final Touches
While two flanges form the primary support structure around the hatches, Sven mentions there are two additional pieces required at each end to ensure comprehensive protection. This attention to detail highlights his commitment to producing a durable and reliable design. “Sailing is about finding your path, whether it’s across an ocean or within yourself.” – Sven Yrvind In conclusion, making flanges around bulkhead hatches may seem complex at first glance, but by following Sven Yrvind’s meticulous process, enthusiasts can achieve professional-level results. Remember that the journey of boatbuilding is as rewarding as reaching your destination; it tests one’s patience and dedication. For those seeking to embark on this adventure or simply gain more insight into marine craftsmanship, Sven’s wisdom is invaluable.Sven begins by explaining that working on flanges vertically and horizontally is significantly easier than doing so in a flat position. To simplify the process further, he divides the task into two or three steps as suggested by fellow expert “for for.” This approach not only makes it more manageable but also allows for greater precision in crafting each component.Step 2: Applying Glue and Securing
Sven proceeds to apply glue along one edge of the flange, ensuring a secure bond when clamped into place. He emphasizes that this stage is crucial for maintaining the structural integrity of the flange, which in turn safeguards the living area beneath the canvas when hatches are open.Step 3: Allowing Time to Dry
After securely attaching the first portion of the flange, Sven allows ample time for it to dry before moving forward with additional steps. This patience and precision are key aspects of his successful boatbuilding methods.Step 4: Finishing Touches
Once the flange is fully dried, Sven removes the clamps carefully, ensuring no damage occurs during this process. He then moves on to attaching four more pieces onto these main frames, completing two pairs of flanges for the bulkhead hatches.The Final Touches
While two flanges form the primary support structure around the hatches, Sven mentions there are two additional pieces required at each end to ensure comprehensive protection. This attention to detail highlights his commitment to producing a durable and reliable design. “Sailing is about finding your path, whether it’s across an ocean or within yourself.” – Sven Yrvind In conclusion, making flanges around bulkhead hatches may seem complex at first glance, but by following Sven Yrvind’s meticulous process, enthusiasts can achieve professional-level results. Remember that the journey of boatbuilding is as rewarding as reaching your destination; it tests one’s patience and dedication. For those seeking to embark on this adventure or simply gain more insight into marine craftsmanship, Sven’s wisdom is invaluable.Sven Yrvind, a renowned yacht designer and sailor, shares valuable insights on creating flanges around bulkhead hatches for canvas protection in this enlightening video. By following his expert guidance, boat enthusiasts can ensure their living areas remain secure while allowing unhindered access through the hatches.Step 1: Starting with the Flange
Sven begins by explaining that working on flanges vertically and horizontally is significantly easier than doing so in a flat position. To simplify the process further, he divides the task into two or three steps as suggested by fellow expert “for for.” This approach not only makes it more manageable but also allows for greater precision in crafting each component.Step 2: Applying Glue and Securing
Sven proceeds to apply glue along one edge of the flange, ensuring a secure bond when clamped into place. He emphasizes that this stage is crucial for maintaining the structural integrity of the flange, which in turn safeguards the living area beneath the canvas when hatches are open.Step 3: Allowing Time to Dry
After securely attaching the first portion of the flange, Sven allows ample time for it to dry before moving forward with additional steps. This patience and precision are key aspects of his successful boatbuilding methods.Step 4: Finishing Touches
Once the flange is fully dried, Sven removes the clamps carefully, ensuring no damage occurs during this process. He then moves on to attaching four more pieces onto these main frames, completing two pairs of flanges for the bulkhead hatches.The Final Touches
While two flanges form the primary support structure around the hatches, Sven mentions there are two additional pieces required at each end to ensure comprehensive protection. This attention to detail highlights his commitment to producing a durable and reliable design. “Sailing is about finding your path, whether it’s across an ocean or within yourself.” – Sven Yrvind In conclusion, making flanges around bulkhead hatches may seem complex at first glance, but by following Sven Yrvind’s meticulous process, enthusiasts can achieve professional-level results. Remember that the journey of boatbuilding is as rewarding as reaching your destination; it tests one’s patience and dedication. For those seeking to embark on this adventure or simply gain more insight into marine craftsmanship, Sven’s wisdom is invaluable.Making Flanges Around Bulkhead Hatches for Canvas
Sven Yrvind, a renowned yacht designer and sailor, shares valuable insights on creating flanges around bulkhead hatches for canvas protection in this enlightening video. By following his expert guidance, boat enthusiasts can ensure their living areas remain secure while allowing unhindered access through the hatches.Step 1: Starting with the Flange
Sven begins by explaining that working on flanges vertically and horizontally is significantly easier than doing so in a flat position. To simplify the process further, he divides the task into two or three steps as suggested by fellow expert “for for.” This approach not only makes it more manageable but also allows for greater precision in crafting each component.Step 2: Applying Glue and Securing
Sven proceeds to apply glue along one edge of the flange, ensuring a secure bond when clamped into place. He emphasizes that this stage is crucial for maintaining the structural integrity of the flange, which in turn safeguards the living area beneath the canvas when hatches are open.Step 3: Allowing Time to Dry
After securely attaching the first portion of the flange, Sven allows ample time for it to dry before moving forward with additional steps. This patience and precision are key aspects of his successful boatbuilding methods.Step 4: Finishing Touches
Once the flange is fully dried, Sven removes the clamps carefully, ensuring no damage occurs during this process. He then moves on to attaching four more pieces onto these main frames, completing two pairs of flanges for the bulkhead hatches.The Final Touches
While two flanges form the primary support structure around the hatches, Sven mentions there are two additional pieces required at each end to ensure comprehensive protection. This attention to detail highlights his commitment to producing a durable and reliable design. “Sailing is about finding your path, whether it’s across an ocean or within yourself.” – Sven Yrvind In conclusion, making flanges around bulkhead hatches may seem complex at first glance, but by following Sven Yrvind’s meticulous process, enthusiasts can achieve professional-level results. Remember that the journey of boatbuilding is as rewarding as reaching your destination; it tests one’s patience and dedication. For those seeking to embark on this adventure or simply gain more insight into marine craftsmanship, Sven’s wisdom is invaluable.Making Flanges Around Bulkhead Hatches for Canvas
Sven Yrvind, a renowned yacht designer and sailor, shares valuable insights on creating flanges around bulkhead hatches for canvas protection in this enlightening video. By following his expert guidance, boat enthusiasts can ensure their living areas remain secure while allowing unhindered access through the hatches.Step 1: Starting with the Flange
Sven begins by explaining that working on flanges vertically and horizontally is significantly easier than doing so in a flat position. To simplify the process further, he divides the task into two or three steps as suggested by fellow expert “for for.” This approach not only makes it more manageable but also allows for greater precision in crafting each component.Step 2: Applying Glue and Securing
Sven proceeds to apply glue along one edge of the flange, ensuring a secure bond when clamped into place. He emphasizes that this stage is crucial for maintaining the structural integrity of the flange, which in turn safeguards the living area beneath the canvas when hatches are open.Step 3: Allowing Time to Dry
After securely attaching the first portion of the flange, Sven allows ample time for it to dry before moving forward with additional steps. This patience and precision are key aspects of his successful boatbuilding methods.Step 4: Finishing Touches
Once the flange is fully dried, Sven removes the clamps carefully, ensuring no damage occurs during this process. He then moves on to attaching four more pieces onto these main frames, completing two pairs of flanges for the bulkhead hatches.The Final Touches
While two flanges form the primary support structure around the hatches, Sven mentions there are two additional pieces required at each end to ensure comprehensive protection. This attention to detail highlights his commitment to producing a durable and reliable design. “Sailing is about finding your path, whether it’s across an ocean or within yourself.” – Sven Yrvind In conclusion, making flanges around bulkhead hatches may seem complex at first glance, but by following Sven Yrvind’s meticulous process, enthusiasts can achieve professional-level results. Remember that the journey of boatbuilding is as rewarding as reaching your destination; it tests one’s patience and dedication. For those seeking to embark on this adventure or simply gain more insight into marine craftsmanship, Sven’s wisdom is invaluable.Sven proceeds to apply glue along one edge of the flange, ensuring a secure bond when clamped into place. He emphasizes that this stage is crucial for maintaining the structural integrity of the flange, which in turn safeguards the living area beneath the canvas when hatches are open.Step 3: Allowing Time to Dry
After securely attaching the first portion of the flange, Sven allows ample time for it to dry before moving forward with additional steps. This patience and precision are key aspects of his successful boatbuilding methods.Step 4: Finishing Touches
Once the flange is fully dried, Sven removes the clamps carefully, ensuring no damage occurs during this process. He then moves on to attaching four more pieces onto these main frames, completing two pairs of flanges for the bulkhead hatches.The Final Touches
While two flanges form the primary support structure around the hatches, Sven mentions there are two additional pieces required at each end to ensure comprehensive protection. This attention to detail highlights his commitment to producing a durable and reliable design. “Sailing is about finding your path, whether it’s across an ocean or within yourself.” – Sven Yrvind In conclusion, making flanges around bulkhead hatches may seem complex at first glance, but by following Sven Yrvind’s meticulous process, enthusiasts can achieve professional-level results. Remember that the journey of boatbuilding is as rewarding as reaching your destination; it tests one’s patience and dedication. For those seeking to embark on this adventure or simply gain more insight into marine craftsmanship, Sven’s wisdom is invaluable.Making Flanges Around Bulkhead Hatches for Canvas
Sven Yrvind, a renowned yacht designer and sailor, shares valuable insights on creating flanges around bulkhead hatches for canvas protection in this enlightening video. By following his expert guidance, boat enthusiasts can ensure their living areas remain secure while allowing unhindered access through the hatches.Step 1: Starting with the Flange
Sven begins by explaining that working on flanges vertically and horizontally is significantly easier than doing so in a flat position. To simplify the process further, he divides the task into two or three steps as suggested by fellow expert “for for.” This approach not only makes it more manageable but also allows for greater precision in crafting each component.Step 2: Applying Glue and Securing
Sven proceeds to apply glue along one edge of the flange, ensuring a secure bond when clamped into place. He emphasizes that this stage is crucial for maintaining the structural integrity of the flange, which in turn safeguards the living area beneath the canvas when hatches are open.Step 3: Allowing Time to Dry
After securely attaching the first portion of the flange, Sven allows ample time for it to dry before moving forward with additional steps. This patience and precision are key aspects of his successful boatbuilding methods.Step 4: Finishing Touches
Once the flange is fully dried, Sven removes the clamps carefully, ensuring no damage occurs during this process. He then moves on to attaching four more pieces onto these main frames, completing two pairs of flanges for the bulkhead hatches.The Final Touches
While two flanges form the primary support structure around the hatches, Sven mentions there are two additional pieces required at each end to ensure comprehensive protection. This attention to detail highlights his commitment to producing a durable and reliable design. “Sailing is about finding your path, whether it’s across an ocean or within yourself.” – Sven Yrvind In conclusion, making flanges around bulkhead hatches may seem complex at first glance, but by following Sven Yrvind’s meticulous process, enthusiasts can achieve professional-level results. Remember that the journey of boatbuilding is as rewarding as reaching your destination; it tests one’s patience and dedication. For those seeking to embark on this adventure or simply gain more insight into marine craftsmanship, Sven’s wisdom is invaluable.Sven begins by explaining that working on flanges vertically and horizontally is significantly easier than doing so in a flat position. To simplify the process further, he divides the task into two or three steps as suggested by fellow expert “for for.” This approach not only makes it more manageable but also allows for greater precision in crafting each component.Step 2: Applying Glue and Securing
Sven proceeds to apply glue along one edge of the flange, ensuring a secure bond when clamped into place. He emphasizes that this stage is crucial for maintaining the structural integrity of the flange, which in turn safeguards the living area beneath the canvas when hatches are open.Step 3: Allowing Time to Dry
After securely attaching the first portion of the flange, Sven allows ample time for it to dry before moving forward with additional steps. This patience and precision are key aspects of his successful boatbuilding methods.Step 4: Finishing Touches
Once the flange is fully dried, Sven removes the clamps carefully, ensuring no damage occurs during this process. He then moves on to attaching four more pieces onto these main frames, completing two pairs of flanges for the bulkhead hatches.The Final Touches
While two flanges form the primary support structure around the hatches, Sven mentions there are two additional pieces required at each end to ensure comprehensive protection. This attention to detail highlights his commitment to producing a durable and reliable design. “Sailing is about finding your path, whether it’s across an ocean or within yourself.” – Sven Yrvind In conclusion, making flanges around bulkhead hatches may seem complex at first glance, but by following Sven Yrvind’s meticulous process, enthusiasts can achieve professional-level results. Remember that the journey of boatbuilding is as rewarding as reaching your destination; it tests one’s patience and dedication. For those seeking to embark on this adventure or simply gain more insight into marine craftsmanship, Sven’s wisdom is invaluable.Making Flanges Around Bulkhead Hatches for Canvas
Sven Yrvind, a renowned yacht designer and sailor, shares valuable insights on creating flanges around bulkhead hatches for canvas protection in this enlightening video. By following his expert guidance, boat enthusiasts can ensure their living areas remain secure while allowing unhindered access through the hatches.Step 1: Starting with the Flange
Sven begins by explaining that working on flanges vertically and horizontally is significantly easier than doing so in a flat position. To simplify the process further, he divides the task into two or three steps as suggested by fellow expert “for for.” This approach not only makes it more manageable but also allows for greater precision in crafting each component.Step 2: Applying Glue and Securing
Sven proceeds to apply glue along one edge of the flange, ensuring a secure bond when clamped into place. He emphasizes that this stage is crucial for maintaining the structural integrity of the flange, which in turn safeguards the living area beneath the canvas when hatches are open.Step 3: Allowing Time to Dry
After securely attaching the first portion of the flange, Sven allows ample time for it to dry before moving forward with additional steps. This patience and precision are key aspects of his successful boatbuilding methods.Step 4: Finishing Touches
Once the flange is fully dried, Sven removes the clamps carefully, ensuring no damage occurs during this process. He then moves on to attaching four more pieces onto these main frames, completing two pairs of flanges for the bulkhead hatches.The Final Touches
While two flanges form the primary support structure around the hatches, Sven mentions there are two additional pieces required at each end to ensure comprehensive protection. This attention to detail highlights his commitment to producing a durable and reliable design. “Sailing is about finding your path, whether it’s across an ocean or within yourself.” – Sven Yrvind In conclusion, making flanges around bulkhead hatches may seem complex at first glance, but by following Sven Yrvind’s meticulous process, enthusiasts can achieve professional-level results. Remember that the journey of boatbuilding is as rewarding as reaching your destination; it tests one’s patience and dedication. For those seeking to embark on this adventure or simply gain more insight into marine craftsmanship, Sven’s wisdom is invaluable.Sven Yrvind, a renowned yacht designer and sailor, shares valuable insights on creating flanges around bulkhead hatches for canvas protection in this enlightening video. By following his expert guidance, boat enthusiasts can ensure their living areas remain secure while allowing unhindered access through the hatches.Step 1: Starting with the Flange
Sven begins by explaining that working on flanges vertically and horizontally is significantly easier than doing so in a flat position. To simplify the process further, he divides the task into two or three steps as suggested by fellow expert “for for.” This approach not only makes it more manageable but also allows for greater precision in crafting each component.Step 2: Applying Glue and Securing
Sven proceeds to apply glue along one edge of the flange, ensuring a secure bond when clamped into place. He emphasizes that this stage is crucial for maintaining the structural integrity of the flange, which in turn safeguards the living area beneath the canvas when hatches are open.Step 3: Allowing Time to Dry
After securely attaching the first portion of the flange, Sven allows ample time for it to dry before moving forward with additional steps. This patience and precision are key aspects of his successful boatbuilding methods.Step 4: Finishing Touches
Once the flange is fully dried, Sven removes the clamps carefully, ensuring no damage occurs during this process. He then moves on to attaching four more pieces onto these main frames, completing two pairs of flanges for the bulkhead hatches.The Final Touches
While two flanges form the primary support structure around the hatches, Sven mentions there are two additional pieces required at each end to ensure comprehensive protection. This attention to detail highlights his commitment to producing a durable and reliable design. “Sailing is about finding your path, whether it’s across an ocean or within yourself.” – Sven Yrvind In conclusion, making flanges around bulkhead hatches may seem complex at first glance, but by following Sven Yrvind’s meticulous process, enthusiasts can achieve professional-level results. Remember that the journey of boatbuilding is as rewarding as reaching your destination; it tests one’s patience and dedication. For those seeking to embark on this adventure or simply gain more insight into marine craftsmanship, Sven’s wisdom is invaluable.Making Flanges Around Bulkhead Hatches for Canvas
Sven Yrvind, a renowned yacht designer and sailor, shares valuable insights on creating flanges around bulkhead hatches for canvas protection in this enlightening video. By following his expert guidance, boat enthusiasts can ensure their living areas remain secure while allowing unhindered access through the hatches.Step 1: Starting with the Flange
Sven begins by explaining that working on flanges vertically and horizontally is significantly easier than doing so in a flat position. To simplify the process further, he divides the task into two or three steps as suggested by fellow expert “for for.” This approach not only makes it more manageable but also allows for greater precision in crafting each component.Step 2: Applying Glue and Securing
Sven proceeds to apply glue along one edge of the flange, ensuring a secure bond when clamped into place. He emphasizes that this stage is crucial for maintaining the structural integrity of the flange, which in turn safeguards the living area beneath the canvas when hatches are open.Step 3: Allowing Time to Dry
After securely attaching the first portion of the flange, Sven allows ample time for it to dry before moving forward with additional steps. This patience and precision are key aspects of his successful boatbuilding methods.Step 4: Finishing Touches
Once the flange is fully dried, Sven removes the clamps carefully, ensuring no damage occurs during this process. He then moves on to attaching four more pieces onto these main frames, completing two pairs of flanges for the bulkhead hatches.The Final Touches
While two flanges form the primary support structure around the hatches, Sven mentions there are two additional pieces required at each end to ensure comprehensive protection. This attention to detail highlights his commitment to producing a durable and reliable design. “Sailing is about finding your path, whether it’s across an ocean or within yourself.” – Sven Yrvind In conclusion, making flanges around bulkhead hatches may seem complex at first glance, but by following Sven Yrvind’s meticulous process, enthusiasts can achieve professional-level results. Remember that the journey of boatbuilding is as rewarding as reaching your destination; it tests one’s patience and dedication. For those seeking to embark on this adventure or simply gain more insight into marine craftsmanship, Sven’s wisdom is invaluable.Once the flange is fully dried, Sven removes the clamps carefully, ensuring no damage occurs during this process. He then moves on to attaching four more pieces onto these main frames, completing two pairs of flanges for the bulkhead hatches.The Final Touches
While two flanges form the primary support structure around the hatches, Sven mentions there are two additional pieces required at each end to ensure comprehensive protection. This attention to detail highlights his commitment to producing a durable and reliable design. “Sailing is about finding your path, whether it’s across an ocean or within yourself.” – Sven Yrvind In conclusion, making flanges around bulkhead hatches may seem complex at first glance, but by following Sven Yrvind’s meticulous process, enthusiasts can achieve professional-level results. Remember that the journey of boatbuilding is as rewarding as reaching your destination; it tests one’s patience and dedication. For those seeking to embark on this adventure or simply gain more insight into marine craftsmanship, Sven’s wisdom is invaluable.Sven Yrvind, a renowned yacht designer and sailor, shares valuable insights on creating flanges around bulkhead hatches for canvas protection in this enlightening video. By following his expert guidance, boat enthusiasts can ensure their living areas remain secure while allowing unhindered access through the hatches.Step 1: Starting with the Flange
Sven begins by explaining that working on flanges vertically and horizontally is significantly easier than doing so in a flat position. To simplify the process further, he divides the task into two or three steps as suggested by fellow expert “for for.” This approach not only makes it more manageable but also allows for greater precision in crafting each component.Step 2: Applying Glue and Securing
Sven proceeds to apply glue along one edge of the flange, ensuring a secure bond when clamped into place. He emphasizes that this stage is crucial for maintaining the structural integrity of the flange, which in turn safeguards the living area beneath the canvas when hatches are open.Step 3: Allowing Time to Dry
After securely attaching the first portion of the flange, Sven allows ample time for it to dry before moving forward with additional steps. This patience and precision are key aspects of his successful boatbuilding methods.Step 4: Finishing Touches
Once the flange is fully dried, Sven removes the clamps carefully, ensuring no damage occurs during this process. He then moves on to attaching four more pieces onto these main frames, completing two pairs of flanges for the bulkhead hatches.The Final Touches
While two flanges form the primary support structure around the hatches, Sven mentions there are two additional pieces required at each end to ensure comprehensive protection. This attention to detail highlights his commitment to producing a durable and reliable design. “Sailing is about finding your path, whether it’s across an ocean or within yourself.” – Sven Yrvind In conclusion, making flanges around bulkhead hatches may seem complex at first glance, but by following Sven Yrvind’s meticulous process, enthusiasts can achieve professional-level results. Remember that the journey of boatbuilding is as rewarding as reaching your destination; it tests one’s patience and dedication. For those seeking to embark on this adventure or simply gain more insight into marine craftsmanship, Sven’s wisdom is invaluable.Making Flanges Around Bulkhead Hatches for Canvas
Sven Yrvind, a renowned yacht designer and sailor, shares valuable insights on creating flanges around bulkhead hatches for canvas protection in this enlightening video. By following his expert guidance, boat enthusiasts can ensure their living areas remain secure while allowing unhindered access through the hatches.Step 1: Starting with the Flange
Sven begins by explaining that working on flanges vertically and horizontally is significantly easier than doing so in a flat position. To simplify the process further, he divides the task into two or three steps as suggested by fellow expert “for for.” This approach not only makes it more manageable but also allows for greater precision in crafting each component.Step 2: Applying Glue and Securing
Sven proceeds to apply glue along one edge of the flange, ensuring a secure bond when clamped into place. He emphasizes that this stage is crucial for maintaining the structural integrity of the flange, which in turn safeguards the living area beneath the canvas when hatches are open.Step 3: Allowing Time to Dry
After securely attaching the first portion of the flange, Sven allows ample time for it to dry before moving forward with additional steps. This patience and precision are key aspects of his successful boatbuilding methods.Step 4: Finishing Touches
Once the flange is fully dried, Sven removes the clamps carefully, ensuring no damage occurs during this process. He then moves on to attaching four more pieces onto these main frames, completing two pairs of flanges for the bulkhead hatches.The Final Touches
While two flanges form the primary support structure around the hatches, Sven mentions there are two additional pieces required at each end to ensure comprehensive protection. This attention to detail highlights his commitment to producing a durable and reliable design. “Sailing is about finding your path, whether it’s across an ocean or within yourself.” – Sven Yrvind In conclusion, making flanges around bulkhead hatches may seem complex at first glance, but by following Sven Yrvind’s meticulous process, enthusiasts can achieve professional-level results. Remember that the journey of boatbuilding is as rewarding as reaching your destination; it tests one’s patience and dedication. For those seeking to embark on this adventure or simply gain more insight into marine craftsmanship, Sven’s wisdom is invaluable.After securely attaching the first portion of the flange, Sven allows ample time for it to dry before moving forward with additional steps. This patience and precision are key aspects of his successful boatbuilding methods.Step 4: Finishing Touches
Once the flange is fully dried, Sven removes the clamps carefully, ensuring no damage occurs during this process. He then moves on to attaching four more pieces onto these main frames, completing two pairs of flanges for the bulkhead hatches.The Final Touches
While two flanges form the primary support structure around the hatches, Sven mentions there are two additional pieces required at each end to ensure comprehensive protection. This attention to detail highlights his commitment to producing a durable and reliable design. “Sailing is about finding your path, whether it’s across an ocean or within yourself.” – Sven Yrvind In conclusion, making flanges around bulkhead hatches may seem complex at first glance, but by following Sven Yrvind’s meticulous process, enthusiasts can achieve professional-level results. Remember that the journey of boatbuilding is as rewarding as reaching your destination; it tests one’s patience and dedication. For those seeking to embark on this adventure or simply gain more insight into marine craftsmanship, Sven’s wisdom is invaluable.Sven Yrvind, a renowned yacht designer and sailor, shares valuable insights on creating flanges around bulkhead hatches for canvas protection in this enlightening video. By following his expert guidance, boat enthusiasts can ensure their living areas remain secure while allowing unhindered access through the hatches.Step 1: Starting with the Flange
Sven begins by explaining that working on flanges vertically and horizontally is significantly easier than doing so in a flat position. To simplify the process further, he divides the task into two or three steps as suggested by fellow expert “for for.” This approach not only makes it more manageable but also allows for greater precision in crafting each component.Step 2: Applying Glue and Securing
Sven proceeds to apply glue along one edge of the flange, ensuring a secure bond when clamped into place. He emphasizes that this stage is crucial for maintaining the structural integrity of the flange, which in turn safeguards the living area beneath the canvas when hatches are open.Step 3: Allowing Time to Dry
After securely attaching the first portion of the flange, Sven allows ample time for it to dry before moving forward with additional steps. This patience and precision are key aspects of his successful boatbuilding methods.Step 4: Finishing Touches
Once the flange is fully dried, Sven removes the clamps carefully, ensuring no damage occurs during this process. He then moves on to attaching four more pieces onto these main frames, completing two pairs of flanges for the bulkhead hatches.The Final Touches
While two flanges form the primary support structure around the hatches, Sven mentions there are two additional pieces required at each end to ensure comprehensive protection. This attention to detail highlights his commitment to producing a durable and reliable design. “Sailing is about finding your path, whether it’s across an ocean or within yourself.” – Sven Yrvind In conclusion, making flanges around bulkhead hatches may seem complex at first glance, but by following Sven Yrvind’s meticulous process, enthusiasts can achieve professional-level results. Remember that the journey of boatbuilding is as rewarding as reaching your destination; it tests one’s patience and dedication. For those seeking to embark on this adventure or simply gain more insight into marine craftsmanship, Sven’s wisdom is invaluable.Making Flanges Around Bulkhead Hatches for Canvas
Sven Yrvind, a renowned yacht designer and sailor, shares valuable insights on creating flanges around bulkhead hatches for canvas protection in this enlightening video. By following his expert guidance, boat enthusiasts can ensure their living areas remain secure while allowing unhindered access through the hatches.Step 1: Starting with the Flange
Sven begins by explaining that working on flanges vertically and horizontally is significantly easier than doing so in a flat position. To simplify the process further, he divides the task into two or three steps as suggested by fellow expert “for for.” This approach not only makes it more manageable but also allows for greater precision in crafting each component.Step 2: Applying Glue and Securing
Sven proceeds to apply glue along one edge of the flange, ensuring a secure bond when clamped into place. He emphasizes that this stage is crucial for maintaining the structural integrity of the flange, which in turn safeguards the living area beneath the canvas when hatches are open.Step 3: Allowing Time to Dry
After securely attaching the first portion of the flange, Sven allows ample time for it to dry before moving forward with additional steps. This patience and precision are key aspects of his successful boatbuilding methods.Step 4: Finishing Touches
Once the flange is fully dried, Sven removes the clamps carefully, ensuring no damage occurs during this process. He then moves on to attaching four more pieces onto these main frames, completing two pairs of flanges for the bulkhead hatches.The Final Touches
While two flanges form the primary support structure around the hatches, Sven mentions there are two additional pieces required at each end to ensure comprehensive protection. This attention to detail highlights his commitment to producing a durable and reliable design. “Sailing is about finding your path, whether it’s across an ocean or within yourself.” – Sven Yrvind In conclusion, making flanges around bulkhead hatches may seem complex at first glance, but by following Sven Yrvind’s meticulous process, enthusiasts can achieve professional-level results. Remember that the journey of boatbuilding is as rewarding as reaching your destination; it tests one’s patience and dedication. For those seeking to embark on this adventure or simply gain more insight into marine craftsmanship, Sven’s wisdom is invaluable.Sven proceeds to apply glue along one edge of the flange, ensuring a secure bond when clamped into place. He emphasizes that this stage is crucial for maintaining the structural integrity of the flange, which in turn safeguards the living area beneath the canvas when hatches are open.Step 3: Allowing Time to Dry
After securely attaching the first portion of the flange, Sven allows ample time for it to dry before moving forward with additional steps. This patience and precision are key aspects of his successful boatbuilding methods.Step 4: Finishing Touches
Once the flange is fully dried, Sven removes the clamps carefully, ensuring no damage occurs during this process. He then moves on to attaching four more pieces onto these main frames, completing two pairs of flanges for the bulkhead hatches.The Final Touches
While two flanges form the primary support structure around the hatches, Sven mentions there are two additional pieces required at each end to ensure comprehensive protection. This attention to detail highlights his commitment to producing a durable and reliable design. “Sailing is about finding your path, whether it’s across an ocean or within yourself.” – Sven Yrvind In conclusion, making flanges around bulkhead hatches may seem complex at first glance, but by following Sven Yrvind’s meticulous process, enthusiasts can achieve professional-level results. Remember that the journey of boatbuilding is as rewarding as reaching your destination; it tests one’s patience and dedication. For those seeking to embark on this adventure or simply gain more insight into marine craftsmanship, Sven’s wisdom is invaluable.Sven Yrvind, a renowned yacht designer and sailor, shares valuable insights on creating flanges around bulkhead hatches for canvas protection in this enlightening video. By following his expert guidance, boat enthusiasts can ensure their living areas remain secure while allowing unhindered access through the hatches.Step 1: Starting with the Flange
Sven begins by explaining that working on flanges vertically and horizontally is significantly easier than doing so in a flat position. To simplify the process further, he divides the task into two or three steps as suggested by fellow expert “for for.” This approach not only makes it more manageable but also allows for greater precision in crafting each component.Step 2: Applying Glue and Securing
Sven proceeds to apply glue along one edge of the flange, ensuring a secure bond when clamped into place. He emphasizes that this stage is crucial for maintaining the structural integrity of the flange, which in turn safeguards the living area beneath the canvas when hatches are open.Step 3: Allowing Time to Dry
After securely attaching the first portion of the flange, Sven allows ample time for it to dry before moving forward with additional steps. This patience and precision are key aspects of his successful boatbuilding methods.Step 4: Finishing Touches
Once the flange is fully dried, Sven removes the clamps carefully, ensuring no damage occurs during this process. He then moves on to attaching four more pieces onto these main frames, completing two pairs of flanges for the bulkhead hatches.The Final Touches
While two flanges form the primary support structure around the hatches, Sven mentions there are two additional pieces required at each end to ensure comprehensive protection. This attention to detail highlights his commitment to producing a durable and reliable design. “Sailing is about finding your path, whether it’s across an ocean or within yourself.” – Sven Yrvind In conclusion, making flanges around bulkhead hatches may seem complex at first glance, but by following Sven Yrvind’s meticulous process, enthusiasts can achieve professional-level results. Remember that the journey of boatbuilding is as rewarding as reaching your destination; it tests one’s patience and dedication. For those seeking to embark on this adventure or simply gain more insight into marine craftsmanship, Sven’s wisdom is invaluable.Making Flanges Around Bulkhead Hatches for Canvas
Sven Yrvind, a renowned yacht designer and sailor, shares valuable insights on creating flanges around bulkhead hatches for canvas protection in this enlightening video. By following his expert guidance, boat enthusiasts can ensure their living areas remain secure while allowing unhindered access through the hatches.Step 1: Starting with the Flange
Sven begins by explaining that working on flanges vertically and horizontally is significantly easier than doing so in a flat position. To simplify the process further, he divides the task into two or three steps as suggested by fellow expert “for for.” This approach not only makes it more manageable but also allows for greater precision in crafting each component.Step 2: Applying Glue and Securing
Sven proceeds to apply glue along one edge of the flange, ensuring a secure bond when clamped into place. He emphasizes that this stage is crucial for maintaining the structural integrity of the flange, which in turn safeguards the living area beneath the canvas when hatches are open.Step 3: Allowing Time to Dry
After securely attaching the first portion of the flange, Sven allows ample time for it to dry before moving forward with additional steps. This patience and precision are key aspects of his successful boatbuilding methods.Step 4: Finishing Touches
Once the flange is fully dried, Sven removes the clamps carefully, ensuring no damage occurs during this process. He then moves on to attaching four more pieces onto these main frames, completing two pairs of flanges for the bulkhead hatches.The Final Touches
While two flanges form the primary support structure around the hatches, Sven mentions there are two additional pieces required at each end to ensure comprehensive protection. This attention to detail highlights his commitment to producing a durable and reliable design. “Sailing is about finding your path, whether it’s across an ocean or within yourself.” – Sven Yrvind In conclusion, making flanges around bulkhead hatches may seem complex at first glance, but by following Sven Yrvind’s meticulous process, enthusiasts can achieve professional-level results. Remember that the journey of boatbuilding is as rewarding as reaching your destination; it tests one’s patience and dedication. For those seeking to embark on this adventure or simply gain more insight into marine craftsmanship, Sven’s wisdom is invaluable.Sven begins by explaining that working on flanges vertically and horizontally is significantly easier than doing so in a flat position. To simplify the process further, he divides the task into two or three steps as suggested by fellow expert “for for.” This approach not only makes it more manageable but also allows for greater precision in crafting each component.Step 2: Applying Glue and Securing
Sven proceeds to apply glue along one edge of the flange, ensuring a secure bond when clamped into place. He emphasizes that this stage is crucial for maintaining the structural integrity of the flange, which in turn safeguards the living area beneath the canvas when hatches are open.Step 3: Allowing Time to Dry
After securely attaching the first portion of the flange, Sven allows ample time for it to dry before moving forward with additional steps. This patience and precision are key aspects of his successful boatbuilding methods.Step 4: Finishing Touches
Once the flange is fully dried, Sven removes the clamps carefully, ensuring no damage occurs during this process. He then moves on to attaching four more pieces onto these main frames, completing two pairs of flanges for the bulkhead hatches.The Final Touches
While two flanges form the primary support structure around the hatches, Sven mentions there are two additional pieces required at each end to ensure comprehensive protection. This attention to detail highlights his commitment to producing a durable and reliable design. “Sailing is about finding your path, whether it’s across an ocean or within yourself.” – Sven Yrvind In conclusion, making flanges around bulkhead hatches may seem complex at first glance, but by following Sven Yrvind’s meticulous process, enthusiasts can achieve professional-level results. Remember that the journey of boatbuilding is as rewarding as reaching your destination; it tests one’s patience and dedication. For those seeking to embark on this adventure or simply gain more insight into marine craftsmanship, Sven’s wisdom is invaluable.Sven Yrvind, a renowned yacht designer and sailor, shares valuable insights on creating flanges around bulkhead hatches for canvas protection in this enlightening video. By following his expert guidance, boat enthusiasts can ensure their living areas remain secure while allowing unhindered access through the hatches.Step 1: Starting with the Flange
Sven begins by explaining that working on flanges vertically and horizontally is significantly easier than doing so in a flat position. To simplify the process further, he divides the task into two or three steps as suggested by fellow expert “for for.” This approach not only makes it more manageable but also allows for greater precision in crafting each component.Step 2: Applying Glue and Securing
Sven proceeds to apply glue along one edge of the flange, ensuring a secure bond when clamped into place. He emphasizes that this stage is crucial for maintaining the structural integrity of the flange, which in turn safeguards the living area beneath the canvas when hatches are open.Step 3: Allowing Time to Dry
After securely attaching the first portion of the flange, Sven allows ample time for it to dry before moving forward with additional steps. This patience and precision are key aspects of his successful boatbuilding methods.Step 4: Finishing Touches
Once the flange is fully dried, Sven removes the clamps carefully, ensuring no damage occurs during this process. He then moves on to attaching four more pieces onto these main frames, completing two pairs of flanges for the bulkhead hatches.The Final Touches
While two flanges form the primary support structure around the hatches, Sven mentions there are two additional pieces required at each end to ensure comprehensive protection. This attention to detail highlights his commitment to producing a durable and reliable design. “Sailing is about finding your path, whether it’s across an ocean or within yourself.” – Sven Yrvind In conclusion, making flanges around bulkhead hatches may seem complex at first glance, but by following Sven Yrvind’s meticulous process, enthusiasts can achieve professional-level results. Remember that the journey of boatbuilding is as rewarding as reaching your destination; it tests one’s patience and dedication. For those seeking to embark on this adventure or simply gain more insight into marine craftsmanship, Sven’s wisdom is invaluable.Making Flanges Around Bulkhead Hatches for Canvas
Sven Yrvind, a renowned yacht designer and sailor, shares valuable insights on creating flanges around bulkhead hatches for canvas protection in this enlightening video. By following his expert guidance, boat enthusiasts can ensure their living areas remain secure while allowing unhindered access through the hatches.Step 1: Starting with the Flange
Sven begins by explaining that working on flanges vertically and horizontally is significantly easier than doing so in a flat position. To simplify the process further, he divides the task into two or three steps as suggested by fellow expert “for for.” This approach not only makes it more manageable but also allows for greater precision in crafting each component.Step 2: Applying Glue and Securing
Sven proceeds to apply glue along one edge of the flange, ensuring a secure bond when clamped into place. He emphasizes that this stage is crucial for maintaining the structural integrity of the flange, which in turn safeguards the living area beneath the canvas when hatches are open.Step 3: Allowing Time to Dry
After securely attaching the first portion of the flange, Sven allows ample time for it to dry before moving forward with additional steps. This patience and precision are key aspects of his successful boatbuilding methods.Step 4: Finishing Touches
Once the flange is fully dried, Sven removes the clamps carefully, ensuring no damage occurs during this process. He then moves on to attaching four more pieces onto these main frames, completing two pairs of flanges for the bulkhead hatches.The Final Touches
While two flanges form the primary support structure around the hatches, Sven mentions there are two additional pieces required at each end to ensure comprehensive protection. This attention to detail highlights his commitment to producing a durable and reliable design. “Sailing is about finding your path, whether it’s across an ocean or within yourself.” – Sven Yrvind In conclusion, making flanges around bulkhead hatches may seem complex at first glance, but by following Sven Yrvind’s meticulous process, enthusiasts can achieve professional-level results. Remember that the journey of boatbuilding is as rewarding as reaching your destination; it tests one’s patience and dedication. For those seeking to embark on this adventure or simply gain more insight into marine craftsmanship, Sven’s wisdom is invaluable.Once the flange is fully dried, Sven removes the clamps carefully, ensuring no damage occurs during this process. He then moves on to attaching four more pieces onto these main frames, completing two pairs of flanges for the bulkhead hatches.The Final Touches
While two flanges form the primary support structure around the hatches, Sven mentions there are two additional pieces required at each end to ensure comprehensive protection. This attention to detail highlights his commitment to producing a durable and reliable design. “Sailing is about finding your path, whether it’s across an ocean or within yourself.” – Sven Yrvind In conclusion, making flanges around bulkhead hatches may seem complex at first glance, but by following Sven Yrvind’s meticulous process, enthusiasts can achieve professional-level results. Remember that the journey of boatbuilding is as rewarding as reaching your destination; it tests one’s patience and dedication. For those seeking to embark on this adventure or simply gain more insight into marine craftsmanship, Sven’s wisdom is invaluable.Sven begins by explaining that working on flanges vertically and horizontally is significantly easier than doing so in a flat position. To simplify the process further, he divides the task into two or three steps as suggested by fellow expert “for for.” This approach not only makes it more manageable but also allows for greater precision in crafting each component.Step 2: Applying Glue and Securing
Sven proceeds to apply glue along one edge of the flange, ensuring a secure bond when clamped into place. He emphasizes that this stage is crucial for maintaining the structural integrity of the flange, which in turn safeguards the living area beneath the canvas when hatches are open.Step 3: Allowing Time to Dry
After securely attaching the first portion of the flange, Sven allows ample time for it to dry before moving forward with additional steps. This patience and precision are key aspects of his successful boatbuilding methods.Step 4: Finishing Touches
Once the flange is fully dried, Sven removes the clamps carefully, ensuring no damage occurs during this process. He then moves on to attaching four more pieces onto these main frames, completing two pairs of flanges for the bulkhead hatches.The Final Touches
While two flanges form the primary support structure around the hatches, Sven mentions there are two additional pieces required at each end to ensure comprehensive protection. This attention to detail highlights his commitment to producing a durable and reliable design. “Sailing is about finding your path, whether it’s across an ocean or within yourself.” – Sven Yrvind In conclusion, making flanges around bulkhead hatches may seem complex at first glance, but by following Sven Yrvind’s meticulous process, enthusiasts can achieve professional-level results. Remember that the journey of boatbuilding is as rewarding as reaching your destination; it tests one’s patience and dedication. For those seeking to embark on this adventure or simply gain more insight into marine craftsmanship, Sven’s wisdom is invaluable.Sven Yrvind, a renowned yacht designer and sailor, shares valuable insights on creating flanges around bulkhead hatches for canvas protection in this enlightening video. By following his expert guidance, boat enthusiasts can ensure their living areas remain secure while allowing unhindered access through the hatches.Step 1: Starting with the Flange
Sven begins by explaining that working on flanges vertically and horizontally is significantly easier than doing so in a flat position. To simplify the process further, he divides the task into two or three steps as suggested by fellow expert “for for.” This approach not only makes it more manageable but also allows for greater precision in crafting each component.Step 2: Applying Glue and Securing
Sven proceeds to apply glue along one edge of the flange, ensuring a secure bond when clamped into place. He emphasizes that this stage is crucial for maintaining the structural integrity of the flange, which in turn safeguards the living area beneath the canvas when hatches are open.Step 3: Allowing Time to Dry
After securely attaching the first portion of the flange, Sven allows ample time for it to dry before moving forward with additional steps. This patience and precision are key aspects of his successful boatbuilding methods.Step 4: Finishing Touches
Once the flange is fully dried, Sven removes the clamps carefully, ensuring no damage occurs during this process. He then moves on to attaching four more pieces onto these main frames, completing two pairs of flanges for the bulkhead hatches.The Final Touches
While two flanges form the primary support structure around the hatches, Sven mentions there are two additional pieces required at each end to ensure comprehensive protection. This attention to detail highlights his commitment to producing a durable and reliable design. “Sailing is about finding your path, whether it’s across an ocean or within yourself.” – Sven Yrvind In conclusion, making flanges around bulkhead hatches may seem complex at first glance, but by following Sven Yrvind’s meticulous process, enthusiasts can achieve professional-level results. Remember that the journey of boatbuilding is as rewarding as reaching your destination; it tests one’s patience and dedication. For those seeking to embark on this adventure or simply gain more insight into marine craftsmanship, Sven’s wisdom is invaluable.Making Flanges Around Bulkhead Hatches for Canvas
Sven Yrvind, a renowned yacht designer and sailor, shares valuable insights on creating flanges around bulkhead hatches for canvas protection in this enlightening video. By following his expert guidance, boat enthusiasts can ensure their living areas remain secure while allowing unhindered access through the hatches.Step 1: Starting with the Flange
Sven begins by explaining that working on flanges vertically and horizontally is significantly easier than doing so in a flat position. To simplify the process further, he divides the task into two or three steps as suggested by fellow expert “for for.” This approach not only makes it more manageable but also allows for greater precision in crafting each component.Step 2: Applying Glue and Securing
Sven proceeds to apply glue along one edge of the flange, ensuring a secure bond when clamped into place. He emphasizes that this stage is crucial for maintaining the structural integrity of the flange, which in turn safeguards the living area beneath the canvas when hatches are open.Step 3: Allowing Time to Dry
After securely attaching the first portion of the flange, Sven allows ample time for it to dry before moving forward with additional steps. This patience and precision are key aspects of his successful boatbuilding methods.Step 4: Finishing Touches
Once the flange is fully dried, Sven removes the clamps carefully, ensuring no damage occurs during this process. He then moves on to attaching four more pieces onto these main frames, completing two pairs of flanges for the bulkhead hatches.The Final Touches
While two flanges form the primary support structure around the hatches, Sven mentions there are two additional pieces required at each end to ensure comprehensive protection. This attention to detail highlights his commitment to producing a durable and reliable design. “Sailing is about finding your path, whether it’s across an ocean or within yourself.” – Sven Yrvind In conclusion, making flanges around bulkhead hatches may seem complex at first glance, but by following Sven Yrvind’s meticulous process, enthusiasts can achieve professional-level results. Remember that the journey of boatbuilding is as rewarding as reaching your destination; it tests one’s patience and dedication. For those seeking to embark on this adventure or simply gain more insight into marine craftsmanship, Sven’s wisdom is invaluable.After securely attaching the first portion of the flange, Sven allows ample time for it to dry before moving forward with additional steps. This patience and precision are key aspects of his successful boatbuilding methods.Step 4: Finishing Touches
Once the flange is fully dried, Sven removes the clamps carefully, ensuring no damage occurs during this process. He then moves on to attaching four more pieces onto these main frames, completing two pairs of flanges for the bulkhead hatches.The Final Touches
While two flanges form the primary support structure around the hatches, Sven mentions there are two additional pieces required at each end to ensure comprehensive protection. This attention to detail highlights his commitment to producing a durable and reliable design. “Sailing is about finding your path, whether it’s across an ocean or within yourself.” – Sven Yrvind In conclusion, making flanges around bulkhead hatches may seem complex at first glance, but by following Sven Yrvind’s meticulous process, enthusiasts can achieve professional-level results. Remember that the journey of boatbuilding is as rewarding as reaching your destination; it tests one’s patience and dedication. For those seeking to embark on this adventure or simply gain more insight into marine craftsmanship, Sven’s wisdom is invaluable.Sven begins by explaining that working on flanges vertically and horizontally is significantly easier than doing so in a flat position. To simplify the process further, he divides the task into two or three steps as suggested by fellow expert “for for.” This approach not only makes it more manageable but also allows for greater precision in crafting each component.Step 2: Applying Glue and Securing
Sven proceeds to apply glue along one edge of the flange, ensuring a secure bond when clamped into place. He emphasizes that this stage is crucial for maintaining the structural integrity of the flange, which in turn safeguards the living area beneath the canvas when hatches are open.Step 3: Allowing Time to Dry
After securely attaching the first portion of the flange, Sven allows ample time for it to dry before moving forward with additional steps. This patience and precision are key aspects of his successful boatbuilding methods.Step 4: Finishing Touches
Once the flange is fully dried, Sven removes the clamps carefully, ensuring no damage occurs during this process. He then moves on to attaching four more pieces onto these main frames, completing two pairs of flanges for the bulkhead hatches.The Final Touches
While two flanges form the primary support structure around the hatches, Sven mentions there are two additional pieces required at each end to ensure comprehensive protection. This attention to detail highlights his commitment to producing a durable and reliable design. “Sailing is about finding your path, whether it’s across an ocean or within yourself.” – Sven Yrvind In conclusion, making flanges around bulkhead hatches may seem complex at first glance, but by following Sven Yrvind’s meticulous process, enthusiasts can achieve professional-level results. Remember that the journey of boatbuilding is as rewarding as reaching your destination; it tests one’s patience and dedication. For those seeking to embark on this adventure or simply gain more insight into marine craftsmanship, Sven’s wisdom is invaluable.Sven Yrvind, a renowned yacht designer and sailor, shares valuable insights on creating flanges around bulkhead hatches for canvas protection in this enlightening video. By following his expert guidance, boat enthusiasts can ensure their living areas remain secure while allowing unhindered access through the hatches.Step 1: Starting with the Flange
Sven begins by explaining that working on flanges vertically and horizontally is significantly easier than doing so in a flat position. To simplify the process further, he divides the task into two or three steps as suggested by fellow expert “for for.” This approach not only makes it more manageable but also allows for greater precision in crafting each component.Step 2: Applying Glue and Securing
Sven proceeds to apply glue along one edge of the flange, ensuring a secure bond when clamped into place. He emphasizes that this stage is crucial for maintaining the structural integrity of the flange, which in turn safeguards the living area beneath the canvas when hatches are open.Step 3: Allowing Time to Dry
After securely attaching the first portion of the flange, Sven allows ample time for it to dry before moving forward with additional steps. This patience and precision are key aspects of his successful boatbuilding methods.Step 4: Finishing Touches
Once the flange is fully dried, Sven removes the clamps carefully, ensuring no damage occurs during this process. He then moves on to attaching four more pieces onto these main frames, completing two pairs of flanges for the bulkhead hatches.The Final Touches
While two flanges form the primary support structure around the hatches, Sven mentions there are two additional pieces required at each end to ensure comprehensive protection. This attention to detail highlights his commitment to producing a durable and reliable design. “Sailing is about finding your path, whether it’s across an ocean or within yourself.” – Sven Yrvind In conclusion, making flanges around bulkhead hatches may seem complex at first glance, but by following Sven Yrvind’s meticulous process, enthusiasts can achieve professional-level results. Remember that the journey of boatbuilding is as rewarding as reaching your destination; it tests one’s patience and dedication. For those seeking to embark on this adventure or simply gain more insight into marine craftsmanship, Sven’s wisdom is invaluable.Making Flanges Around Bulkhead Hatches for Canvas
Sven Yrvind, a renowned yacht designer and sailor, shares valuable insights on creating flanges around bulkhead hatches for canvas protection in this enlightening video. By following his expert guidance, boat enthusiasts can ensure their living areas remain secure while allowing unhindered access through the hatches.Step 1: Starting with the Flange
Sven begins by explaining that working on flanges vertically and horizontally is significantly easier than doing so in a flat position. To simplify the process further, he divides the task into two or three steps as suggested by fellow expert “for for.” This approach not only makes it more manageable but also allows for greater precision in crafting each component.Step 2: Applying Glue and Securing
Sven proceeds to apply glue along one edge of the flange, ensuring a secure bond when clamped into place. He emphasizes that this stage is crucial for maintaining the structural integrity of the flange, which in turn safeguards the living area beneath the canvas when hatches are open.Step 3: Allowing Time to Dry
After securely attaching the first portion of the flange, Sven allows ample time for it to dry before moving forward with additional steps. This patience and precision are key aspects of his successful boatbuilding methods.Step 4: Finishing Touches
Once the flange is fully dried, Sven removes the clamps carefully, ensuring no damage occurs during this process. He then moves on to attaching four more pieces onto these main frames, completing two pairs of flanges for the bulkhead hatches.The Final Touches
While two flanges form the primary support structure around the hatches, Sven mentions there are two additional pieces required at each end to ensure comprehensive protection. This attention to detail highlights his commitment to producing a durable and reliable design. “Sailing is about finding your path, whether it’s across an ocean or within yourself.” – Sven Yrvind In conclusion, making flanges around bulkhead hatches may seem complex at first glance, but by following Sven Yrvind’s meticulous process, enthusiasts can achieve professional-level results. Remember that the journey of boatbuilding is as rewarding as reaching your destination; it tests one’s patience and dedication. For those seeking to embark on this adventure or simply gain more insight into marine craftsmanship, Sven’s wisdom is invaluable.Sven proceeds to apply glue along one edge of the flange, ensuring a secure bond when clamped into place. He emphasizes that this stage is crucial for maintaining the structural integrity of the flange, which in turn safeguards the living area beneath the canvas when hatches are open.Step 3: Allowing Time to Dry
After securely attaching the first portion of the flange, Sven allows ample time for it to dry before moving forward with additional steps. This patience and precision are key aspects of his successful boatbuilding methods.Step 4: Finishing Touches
Once the flange is fully dried, Sven removes the clamps carefully, ensuring no damage occurs during this process. He then moves on to attaching four more pieces onto these main frames, completing two pairs of flanges for the bulkhead hatches.The Final Touches
While two flanges form the primary support structure around the hatches, Sven mentions there are two additional pieces required at each end to ensure comprehensive protection. This attention to detail highlights his commitment to producing a durable and reliable design. “Sailing is about finding your path, whether it’s across an ocean or within yourself.” – Sven Yrvind In conclusion, making flanges around bulkhead hatches may seem complex at first glance, but by following Sven Yrvind’s meticulous process, enthusiasts can achieve professional-level results. Remember that the journey of boatbuilding is as rewarding as reaching your destination; it tests one’s patience and dedication. For those seeking to embark on this adventure or simply gain more insight into marine craftsmanship, Sven’s wisdom is invaluable.Sven begins by explaining that working on flanges vertically and horizontally is significantly easier than doing so in a flat position. To simplify the process further, he divides the task into two or three steps as suggested by fellow expert “for for.” This approach not only makes it more manageable but also allows for greater precision in crafting each component.Step 2: Applying Glue and Securing
Sven proceeds to apply glue along one edge of the flange, ensuring a secure bond when clamped into place. He emphasizes that this stage is crucial for maintaining the structural integrity of the flange, which in turn safeguards the living area beneath the canvas when hatches are open.Step 3: Allowing Time to Dry
After securely attaching the first portion of the flange, Sven allows ample time for it to dry before moving forward with additional steps. This patience and precision are key aspects of his successful boatbuilding methods.Step 4: Finishing Touches
Once the flange is fully dried, Sven removes the clamps carefully, ensuring no damage occurs during this process. He then moves on to attaching four more pieces onto these main frames, completing two pairs of flanges for the bulkhead hatches.The Final Touches
While two flanges form the primary support structure around the hatches, Sven mentions there are two additional pieces required at each end to ensure comprehensive protection. This attention to detail highlights his commitment to producing a durable and reliable design. “Sailing is about finding your path, whether it’s across an ocean or within yourself.” – Sven Yrvind In conclusion, making flanges around bulkhead hatches may seem complex at first glance, but by following Sven Yrvind’s meticulous process, enthusiasts can achieve professional-level results. Remember that the journey of boatbuilding is as rewarding as reaching your destination; it tests one’s patience and dedication. For those seeking to embark on this adventure or simply gain more insight into marine craftsmanship, Sven’s wisdom is invaluable.Sven Yrvind, a renowned yacht designer and sailor, shares valuable insights on creating flanges around bulkhead hatches for canvas protection in this enlightening video. By following his expert guidance, boat enthusiasts can ensure their living areas remain secure while allowing unhindered access through the hatches.Step 1: Starting with the Flange
Sven begins by explaining that working on flanges vertically and horizontally is significantly easier than doing so in a flat position. To simplify the process further, he divides the task into two or three steps as suggested by fellow expert “for for.” This approach not only makes it more manageable but also allows for greater precision in crafting each component.Step 2: Applying Glue and Securing
Sven proceeds to apply glue along one edge of the flange, ensuring a secure bond when clamped into place. He emphasizes that this stage is crucial for maintaining the structural integrity of the flange, which in turn safeguards the living area beneath the canvas when hatches are open.Step 3: Allowing Time to Dry
After securely attaching the first portion of the flange, Sven allows ample time for it to dry before moving forward with additional steps. This patience and precision are key aspects of his successful boatbuilding methods.Step 4: Finishing Touches
Once the flange is fully dried, Sven removes the clamps carefully, ensuring no damage occurs during this process. He then moves on to attaching four more pieces onto these main frames, completing two pairs of flanges for the bulkhead hatches.The Final Touches
While two flanges form the primary support structure around the hatches, Sven mentions there are two additional pieces required at each end to ensure comprehensive protection. This attention to detail highlights his commitment to producing a durable and reliable design. “Sailing is about finding your path, whether it’s across an ocean or within yourself.” – Sven Yrvind In conclusion, making flanges around bulkhead hatches may seem complex at first glance, but by following Sven Yrvind’s meticulous process, enthusiasts can achieve professional-level results. Remember that the journey of boatbuilding is as rewarding as reaching your destination; it tests one’s patience and dedication. For those seeking to embark on this adventure or simply gain more insight into marine craftsmanship, Sven’s wisdom is invaluable.Making Flanges Around Bulkhead Hatches for Canvas
Sven Yrvind, a renowned yacht designer and sailor, shares valuable insights on creating flanges around bulkhead hatches for canvas protection in this enlightening video. By following his expert guidance, boat enthusiasts can ensure their living areas remain secure while allowing unhindered access through the hatches.Step 1: Starting with the Flange
Sven begins by explaining that working on flanges vertically and horizontally is significantly easier than doing so in a flat position. To simplify the process further, he divides the task into two or three steps as suggested by fellow expert “for for.” This approach not only makes it more manageable but also allows for greater precision in crafting each component.Step 2: Applying Glue and Securing
Sven proceeds to apply glue along one edge of the flange, ensuring a secure bond when clamped into place. He emphasizes that this stage is crucial for maintaining the structural integrity of the flange, which in turn safeguards the living area beneath the canvas when hatches are open.Step 3: Allowing Time to Dry
After securely attaching the first portion of the flange, Sven allows ample time for it to dry before moving forward with additional steps. This patience and precision are key aspects of his successful boatbuilding methods.Step 4: Finishing Touches
Once the flange is fully dried, Sven removes the clamps carefully, ensuring no damage occurs during this process. He then moves on to attaching four more pieces onto these main frames, completing two pairs of flanges for the bulkhead hatches.The Final Touches
While two flanges form the primary support structure around the hatches, Sven mentions there are two additional pieces required at each end to ensure comprehensive protection. This attention to detail highlights his commitment to producing a durable and reliable design. “Sailing is about finding your path, whether it’s across an ocean or within yourself.” – Sven Yrvind In conclusion, making flanges around bulkhead hatches may seem complex at first glance, but by following Sven Yrvind’s meticulous process, enthusiasts can achieve professional-level results. Remember that the journey of boatbuilding is as rewarding as reaching your destination; it tests one’s patience and dedication. For those seeking to embark on this adventure or simply gain more insight into marine craftsmanship, Sven’s wisdom is invaluable.Once the flange is fully dried, Sven removes the clamps carefully, ensuring no damage occurs during this process. He then moves on to attaching four more pieces onto these main frames, completing two pairs of flanges for the bulkhead hatches.The Final Touches
While two flanges form the primary support structure around the hatches, Sven mentions there are two additional pieces required at each end to ensure comprehensive protection. This attention to detail highlights his commitment to producing a durable and reliable design. “Sailing is about finding your path, whether it’s across an ocean or within yourself.” – Sven Yrvind In conclusion, making flanges around bulkhead hatches may seem complex at first glance, but by following Sven Yrvind’s meticulous process, enthusiasts can achieve professional-level results. Remember that the journey of boatbuilding is as rewarding as reaching your destination; it tests one’s patience and dedication. For those seeking to embark on this adventure or simply gain more insight into marine craftsmanship, Sven’s wisdom is invaluable.Sven proceeds to apply glue along one edge of the flange, ensuring a secure bond when clamped into place. He emphasizes that this stage is crucial for maintaining the structural integrity of the flange, which in turn safeguards the living area beneath the canvas when hatches are open.Step 3: Allowing Time to Dry
After securely attaching the first portion of the flange, Sven allows ample time for it to dry before moving forward with additional steps. This patience and precision are key aspects of his successful boatbuilding methods.Step 4: Finishing Touches
Once the flange is fully dried, Sven removes the clamps carefully, ensuring no damage occurs during this process. He then moves on to attaching four more pieces onto these main frames, completing two pairs of flanges for the bulkhead hatches.The Final Touches
While two flanges form the primary support structure around the hatches, Sven mentions there are two additional pieces required at each end to ensure comprehensive protection. This attention to detail highlights his commitment to producing a durable and reliable design. “Sailing is about finding your path, whether it’s across an ocean or within yourself.” – Sven Yrvind In conclusion, making flanges around bulkhead hatches may seem complex at first glance, but by following Sven Yrvind’s meticulous process, enthusiasts can achieve professional-level results. Remember that the journey of boatbuilding is as rewarding as reaching your destination; it tests one’s patience and dedication. For those seeking to embark on this adventure or simply gain more insight into marine craftsmanship, Sven’s wisdom is invaluable.Sven begins by explaining that working on flanges vertically and horizontally is significantly easier than doing so in a flat position. To simplify the process further, he divides the task into two or three steps as suggested by fellow expert “for for.” This approach not only makes it more manageable but also allows for greater precision in crafting each component.Step 2: Applying Glue and Securing
Sven proceeds to apply glue along one edge of the flange, ensuring a secure bond when clamped into place. He emphasizes that this stage is crucial for maintaining the structural integrity of the flange, which in turn safeguards the living area beneath the canvas when hatches are open.Step 3: Allowing Time to Dry
After securely attaching the first portion of the flange, Sven allows ample time for it to dry before moving forward with additional steps. This patience and precision are key aspects of his successful boatbuilding methods.Step 4: Finishing Touches
Once the flange is fully dried, Sven removes the clamps carefully, ensuring no damage occurs during this process. He then moves on to attaching four more pieces onto these main frames, completing two pairs of flanges for the bulkhead hatches.The Final Touches
While two flanges form the primary support structure around the hatches, Sven mentions there are two additional pieces required at each end to ensure comprehensive protection. This attention to detail highlights his commitment to producing a durable and reliable design. “Sailing is about finding your path, whether it’s across an ocean or within yourself.” – Sven Yrvind In conclusion, making flanges around bulkhead hatches may seem complex at first glance, but by following Sven Yrvind’s meticulous process, enthusiasts can achieve professional-level results. Remember that the journey of boatbuilding is as rewarding as reaching your destination; it tests one’s patience and dedication. For those seeking to embark on this adventure or simply gain more insight into marine craftsmanship, Sven’s wisdom is invaluable.Sven Yrvind, a renowned yacht designer and sailor, shares valuable insights on creating flanges around bulkhead hatches for canvas protection in this enlightening video. By following his expert guidance, boat enthusiasts can ensure their living areas remain secure while allowing unhindered access through the hatches.Step 1: Starting with the Flange
Sven begins by explaining that working on flanges vertically and horizontally is significantly easier than doing so in a flat position. To simplify the process further, he divides the task into two or three steps as suggested by fellow expert “for for.” This approach not only makes it more manageable but also allows for greater precision in crafting each component.Step 2: Applying Glue and Securing
Sven proceeds to apply glue along one edge of the flange, ensuring a secure bond when clamped into place. He emphasizes that this stage is crucial for maintaining the structural integrity of the flange, which in turn safeguards the living area beneath the canvas when hatches are open.Step 3: Allowing Time to Dry
After securely attaching the first portion of the flange, Sven allows ample time for it to dry before moving forward with additional steps. This patience and precision are key aspects of his successful boatbuilding methods.Step 4: Finishing Touches
Once the flange is fully dried, Sven removes the clamps carefully, ensuring no damage occurs during this process. He then moves on to attaching four more pieces onto these main frames, completing two pairs of flanges for the bulkhead hatches.The Final Touches
While two flanges form the primary support structure around the hatches, Sven mentions there are two additional pieces required at each end to ensure comprehensive protection. This attention to detail highlights his commitment to producing a durable and reliable design. “Sailing is about finding your path, whether it’s across an ocean or within yourself.” – Sven Yrvind In conclusion, making flanges around bulkhead hatches may seem complex at first glance, but by following Sven Yrvind’s meticulous process, enthusiasts can achieve professional-level results. Remember that the journey of boatbuilding is as rewarding as reaching your destination; it tests one’s patience and dedication. For those seeking to embark on this adventure or simply gain more insight into marine craftsmanship, Sven’s wisdom is invaluable.Making Flanges Around Bulkhead Hatches for Canvas
Sven Yrvind, a renowned yacht designer and sailor, shares valuable insights on creating flanges around bulkhead hatches for canvas protection in this enlightening video. By following his expert guidance, boat enthusiasts can ensure their living areas remain secure while allowing unhindered access through the hatches.Step 1: Starting with the Flange
Sven begins by explaining that working on flanges vertically and horizontally is significantly easier than doing so in a flat position. To simplify the process further, he divides the task into two or three steps as suggested by fellow expert “for for.” This approach not only makes it more manageable but also allows for greater precision in crafting each component.Step 2: Applying Glue and Securing
Sven proceeds to apply glue along one edge of the flange, ensuring a secure bond when clamped into place. He emphasizes that this stage is crucial for maintaining the structural integrity of the flange, which in turn safeguards the living area beneath the canvas when hatches are open.Step 3: Allowing Time to Dry
After securely attaching the first portion of the flange, Sven allows ample time for it to dry before moving forward with additional steps. This patience and precision are key aspects of his successful boatbuilding methods.Step 4: Finishing Touches
Once the flange is fully dried, Sven removes the clamps carefully, ensuring no damage occurs during this process. He then moves on to attaching four more pieces onto these main frames, completing two pairs of flanges for the bulkhead hatches.The Final Touches
While two flanges form the primary support structure around the hatches, Sven mentions there are two additional pieces required at each end to ensure comprehensive protection. This attention to detail highlights his commitment to producing a durable and reliable design. “Sailing is about finding your path, whether it’s across an ocean or within yourself.” – Sven Yrvind In conclusion, making flanges around bulkhead hatches may seem complex at first glance, but by following Sven Yrvind’s meticulous process, enthusiasts can achieve professional-level results. Remember that the journey of boatbuilding is as rewarding as reaching your destination; it tests one’s patience and dedication. For those seeking to embark on this adventure or simply gain more insight into marine craftsmanship, Sven’s wisdom is invaluable.After securely attaching the first portion of the flange, Sven allows ample time for it to dry before moving forward with additional steps. This patience and precision are key aspects of his successful boatbuilding methods.Step 4: Finishing Touches
Once the flange is fully dried, Sven removes the clamps carefully, ensuring no damage occurs during this process. He then moves on to attaching four more pieces onto these main frames, completing two pairs of flanges for the bulkhead hatches.The Final Touches
While two flanges form the primary support structure around the hatches, Sven mentions there are two additional pieces required at each end to ensure comprehensive protection. This attention to detail highlights his commitment to producing a durable and reliable design. “Sailing is about finding your path, whether it’s across an ocean or within yourself.” – Sven Yrvind In conclusion, making flanges around bulkhead hatches may seem complex at first glance, but by following Sven Yrvind’s meticulous process, enthusiasts can achieve professional-level results. Remember that the journey of boatbuilding is as rewarding as reaching your destination; it tests one’s patience and dedication. For those seeking to embark on this adventure or simply gain more insight into marine craftsmanship, Sven’s wisdom is invaluable.Sven proceeds to apply glue along one edge of the flange, ensuring a secure bond when clamped into place. He emphasizes that this stage is crucial for maintaining the structural integrity of the flange, which in turn safeguards the living area beneath the canvas when hatches are open.Step 3: Allowing Time to Dry
After securely attaching the first portion of the flange, Sven allows ample time for it to dry before moving forward with additional steps. This patience and precision are key aspects of his successful boatbuilding methods.Step 4: Finishing Touches
Once the flange is fully dried, Sven removes the clamps carefully, ensuring no damage occurs during this process. He then moves on to attaching four more pieces onto these main frames, completing two pairs of flanges for the bulkhead hatches.The Final Touches
While two flanges form the primary support structure around the hatches, Sven mentions there are two additional pieces required at each end to ensure comprehensive protection. This attention to detail highlights his commitment to producing a durable and reliable design. “Sailing is about finding your path, whether it’s across an ocean or within yourself.” – Sven Yrvind In conclusion, making flanges around bulkhead hatches may seem complex at first glance, but by following Sven Yrvind’s meticulous process, enthusiasts can achieve professional-level results. Remember that the journey of boatbuilding is as rewarding as reaching your destination; it tests one’s patience and dedication. For those seeking to embark on this adventure or simply gain more insight into marine craftsmanship, Sven’s wisdom is invaluable.Sven begins by explaining that working on flanges vertically and horizontally is significantly easier than doing so in a flat position. To simplify the process further, he divides the task into two or three steps as suggested by fellow expert “for for.” This approach not only makes it more manageable but also allows for greater precision in crafting each component.Step 2: Applying Glue and Securing
Sven proceeds to apply glue along one edge of the flange, ensuring a secure bond when clamped into place. He emphasizes that this stage is crucial for maintaining the structural integrity of the flange, which in turn safeguards the living area beneath the canvas when hatches are open.Step 3: Allowing Time to Dry
After securely attaching the first portion of the flange, Sven allows ample time for it to dry before moving forward with additional steps. This patience and precision are key aspects of his successful boatbuilding methods.Step 4: Finishing Touches
Once the flange is fully dried, Sven removes the clamps carefully, ensuring no damage occurs during this process. He then moves on to attaching four more pieces onto these main frames, completing two pairs of flanges for the bulkhead hatches.The Final Touches
While two flanges form the primary support structure around the hatches, Sven mentions there are two additional pieces required at each end to ensure comprehensive protection. This attention to detail highlights his commitment to producing a durable and reliable design. “Sailing is about finding your path, whether it’s across an ocean or within yourself.” – Sven Yrvind In conclusion, making flanges around bulkhead hatches may seem complex at first glance, but by following Sven Yrvind’s meticulous process, enthusiasts can achieve professional-level results. Remember that the journey of boatbuilding is as rewarding as reaching your destination; it tests one’s patience and dedication. For those seeking to embark on this adventure or simply gain more insight into marine craftsmanship, Sven’s wisdom is invaluable.Sven Yrvind, a renowned yacht designer and sailor, shares valuable insights on creating flanges around bulkhead hatches for canvas protection in this enlightening video. By following his expert guidance, boat enthusiasts can ensure their living areas remain secure while allowing unhindered access through the hatches.Step 1: Starting with the Flange
Sven begins by explaining that working on flanges vertically and horizontally is significantly easier than doing so in a flat position. To simplify the process further, he divides the task into two or three steps as suggested by fellow expert “for for.” This approach not only makes it more manageable but also allows for greater precision in crafting each component.Step 2: Applying Glue and Securing
Sven proceeds to apply glue along one edge of the flange, ensuring a secure bond when clamped into place. He emphasizes that this stage is crucial for maintaining the structural integrity of the flange, which in turn safeguards the living area beneath the canvas when hatches are open.Step 3: Allowing Time to Dry
After securely attaching the first portion of the flange, Sven allows ample time for it to dry before moving forward with additional steps. This patience and precision are key aspects of his successful boatbuilding methods.Step 4: Finishing Touches
Once the flange is fully dried, Sven removes the clamps carefully, ensuring no damage occurs during this process. He then moves on to attaching four more pieces onto these main frames, completing two pairs of flanges for the bulkhead hatches.The Final Touches
While two flanges form the primary support structure around the hatches, Sven mentions there are two additional pieces required at each end to ensure comprehensive protection. This attention to detail highlights his commitment to producing a durable and reliable design. “Sailing is about finding your path, whether it’s across an ocean or within yourself.” – Sven Yrvind In conclusion, making flanges around bulkhead hatches may seem complex at first glance, but by following Sven Yrvind’s meticulous process, enthusiasts can achieve professional-level results. Remember that the journey of boatbuilding is as rewarding as reaching your destination; it tests one’s patience and dedication. For those seeking to embark on this adventure or simply gain more insight into marine craftsmanship, Sven’s wisdom is invaluable.Making Flanges Around Bulkhead Hatches for Canvas
Sven Yrvind, a renowned yacht designer and sailor, shares valuable insights on creating flanges around bulkhead hatches for canvas protection in this enlightening video. By following his expert guidance, boat enthusiasts can ensure their living areas remain secure while allowing unhindered access through the hatches.Step 1: Starting with the Flange
Sven begins by explaining that working on flanges vertically and horizontally is significantly easier than doing so in a flat position. To simplify the process further, he divides the task into two or three steps as suggested by fellow expert “for for.” This approach not only makes it more manageable but also allows for greater precision in crafting each component.Step 2: Applying Glue and Securing
Sven proceeds to apply glue along one edge of the flange, ensuring a secure bond when clamped into place. He emphasizes that this stage is crucial for maintaining the structural integrity of the flange, which in turn safeguards the living area beneath the canvas when hatches are open.Step 3: Allowing Time to Dry
After securely attaching the first portion of the flange, Sven allows ample time for it to dry before moving forward with additional steps. This patience and precision are key aspects of his successful boatbuilding methods.Step 4: Finishing Touches
Once the flange is fully dried, Sven removes the clamps carefully, ensuring no damage occurs during this process. He then moves on to attaching four more pieces onto these main frames, completing two pairs of flanges for the bulkhead hatches.The Final Touches
While two flanges form the primary support structure around the hatches, Sven mentions there are two additional pieces required at each end to ensure comprehensive protection. This attention to detail highlights his commitment to producing a durable and reliable design. “Sailing is about finding your path, whether it’s across an ocean or within yourself.” – Sven Yrvind In conclusion, making flanges around bulkhead hatches may seem complex at first glance, but by following Sven Yrvind’s meticulous process, enthusiasts can achieve professional-level results. Remember that the journey of boatbuilding is as rewarding as reaching your destination; it tests one’s patience and dedication. For those seeking to embark on this adventure or simply gain more insight into marine craftsmanship, Sven’s wisdom is invaluable.Once the flange is fully dried, Sven removes the clamps carefully, ensuring no damage occurs during this process. He then moves on to attaching four more pieces onto these main frames, completing two pairs of flanges for the bulkhead hatches.The Final Touches
While two flanges form the primary support structure around the hatches, Sven mentions there are two additional pieces required at each end to ensure comprehensive protection. This attention to detail highlights his commitment to producing a durable and reliable design. “Sailing is about finding your path, whether it’s across an ocean or within yourself.” – Sven Yrvind In conclusion, making flanges around bulkhead hatches may seem complex at first glance, but by following Sven Yrvind’s meticulous process, enthusiasts can achieve professional-level results. Remember that the journey of boatbuilding is as rewarding as reaching your destination; it tests one’s patience and dedication. For those seeking to embark on this adventure or simply gain more insight into marine craftsmanship, Sven’s wisdom is invaluable.After securely attaching the first portion of the flange, Sven allows ample time for it to dry before moving forward with additional steps. This patience and precision are key aspects of his successful boatbuilding methods.Step 4: Finishing Touches
Once the flange is fully dried, Sven removes the clamps carefully, ensuring no damage occurs during this process. He then moves on to attaching four more pieces onto these main frames, completing two pairs of flanges for the bulkhead hatches.The Final Touches
While two flanges form the primary support structure around the hatches, Sven mentions there are two additional pieces required at each end to ensure comprehensive protection. This attention to detail highlights his commitment to producing a durable and reliable design. “Sailing is about finding your path, whether it’s across an ocean or within yourself.” – Sven Yrvind In conclusion, making flanges around bulkhead hatches may seem complex at first glance, but by following Sven Yrvind’s meticulous process, enthusiasts can achieve professional-level results. Remember that the journey of boatbuilding is as rewarding as reaching your destination; it tests one’s patience and dedication. For those seeking to embark on this adventure or simply gain more insight into marine craftsmanship, Sven’s wisdom is invaluable.Sven proceeds to apply glue along one edge of the flange, ensuring a secure bond when clamped into place. He emphasizes that this stage is crucial for maintaining the structural integrity of the flange, which in turn safeguards the living area beneath the canvas when hatches are open.Step 3: Allowing Time to Dry
After securely attaching the first portion of the flange, Sven allows ample time for it to dry before moving forward with additional steps. This patience and precision are key aspects of his successful boatbuilding methods.Step 4: Finishing Touches
Once the flange is fully dried, Sven removes the clamps carefully, ensuring no damage occurs during this process. He then moves on to attaching four more pieces onto these main frames, completing two pairs of flanges for the bulkhead hatches.The Final Touches
While two flanges form the primary support structure around the hatches, Sven mentions there are two additional pieces required at each end to ensure comprehensive protection. This attention to detail highlights his commitment to producing a durable and reliable design. “Sailing is about finding your path, whether it’s across an ocean or within yourself.” – Sven Yrvind In conclusion, making flanges around bulkhead hatches may seem complex at first glance, but by following Sven Yrvind’s meticulous process, enthusiasts can achieve professional-level results. Remember that the journey of boatbuilding is as rewarding as reaching your destination; it tests one’s patience and dedication. For those seeking to embark on this adventure or simply gain more insight into marine craftsmanship, Sven’s wisdom is invaluable.Sven begins by explaining that working on flanges vertically and horizontally is significantly easier than doing so in a flat position. To simplify the process further, he divides the task into two or three steps as suggested by fellow expert “for for.” This approach not only makes it more manageable but also allows for greater precision in crafting each component.Step 2: Applying Glue and Securing
Sven proceeds to apply glue along one edge of the flange, ensuring a secure bond when clamped into place. He emphasizes that this stage is crucial for maintaining the structural integrity of the flange, which in turn safeguards the living area beneath the canvas when hatches are open.Step 3: Allowing Time to Dry
After securely attaching the first portion of the flange, Sven allows ample time for it to dry before moving forward with additional steps. This patience and precision are key aspects of his successful boatbuilding methods.Step 4: Finishing Touches
Once the flange is fully dried, Sven removes the clamps carefully, ensuring no damage occurs during this process. He then moves on to attaching four more pieces onto these main frames, completing two pairs of flanges for the bulkhead hatches.The Final Touches
While two flanges form the primary support structure around the hatches, Sven mentions there are two additional pieces required at each end to ensure comprehensive protection. This attention to detail highlights his commitment to producing a durable and reliable design. “Sailing is about finding your path, whether it’s across an ocean or within yourself.” – Sven Yrvind In conclusion, making flanges around bulkhead hatches may seem complex at first glance, but by following Sven Yrvind’s meticulous process, enthusiasts can achieve professional-level results. Remember that the journey of boatbuilding is as rewarding as reaching your destination; it tests one’s patience and dedication. For those seeking to embark on this adventure or simply gain more insight into marine craftsmanship, Sven’s wisdom is invaluable.Sven Yrvind, a renowned yacht designer and sailor, shares valuable insights on creating flanges around bulkhead hatches for canvas protection in this enlightening video. By following his expert guidance, boat enthusiasts can ensure their living areas remain secure while allowing unhindered access through the hatches.Step 1: Starting with the Flange
Sven begins by explaining that working on flanges vertically and horizontally is significantly easier than doing so in a flat position. To simplify the process further, he divides the task into two or three steps as suggested by fellow expert “for for.” This approach not only makes it more manageable but also allows for greater precision in crafting each component.Step 2: Applying Glue and Securing
Sven proceeds to apply glue along one edge of the flange, ensuring a secure bond when clamped into place. He emphasizes that this stage is crucial for maintaining the structural integrity of the flange, which in turn safeguards the living area beneath the canvas when hatches are open.Step 3: Allowing Time to Dry
After securely attaching the first portion of the flange, Sven allows ample time for it to dry before moving forward with additional steps. This patience and precision are key aspects of his successful boatbuilding methods.Step 4: Finishing Touches
Once the flange is fully dried, Sven removes the clamps carefully, ensuring no damage occurs during this process. He then moves on to attaching four more pieces onto these main frames, completing two pairs of flanges for the bulkhead hatches.The Final Touches
While two flanges form the primary support structure around the hatches, Sven mentions there are two additional pieces required at each end to ensure comprehensive protection. This attention to detail highlights his commitment to producing a durable and reliable design. “Sailing is about finding your path, whether it’s across an ocean or within yourself.” – Sven Yrvind In conclusion, making flanges around bulkhead hatches may seem complex at first glance, but by following Sven Yrvind’s meticulous process, enthusiasts can achieve professional-level results. Remember that the journey of boatbuilding is as rewarding as reaching your destination; it tests one’s patience and dedication. For those seeking to embark on this adventure or simply gain more insight into marine craftsmanship, Sven’s wisdom is invaluable.Making Flanges Around Bulkhead Hatches for Canvas
Sven Yrvind, a renowned yacht designer and sailor, shares valuable insights on creating flanges around bulkhead hatches for canvas protection in this enlightening video. By following his expert guidance, boat enthusiasts can ensure their living areas remain secure while allowing unhindered access through the hatches.Step 1: Starting with the Flange
Sven begins by explaining that working on flanges vertically and horizontally is significantly easier than doing so in a flat position. To simplify the process further, he divides the task into two or three steps as suggested by fellow expert “for for.” This approach not only makes it more manageable but also allows for greater precision in crafting each component.Step 2: Applying Glue and Securing
Sven proceeds to apply glue along one edge of the flange, ensuring a secure bond when clamped into place. He emphasizes that this stage is crucial for maintaining the structural integrity of the flange, which in turn safeguards the living area beneath the canvas when hatches are open.Step 3: Allowing Time to Dry
After securely attaching the first portion of the flange, Sven allows ample time for it to dry before moving forward with additional steps. This patience and precision are key aspects of his successful boatbuilding methods.Step 4: Finishing Touches
Once the flange is fully dried, Sven removes the clamps carefully, ensuring no damage occurs during this process. He then moves on to attaching four more pieces onto these main frames, completing two pairs of flanges for the bulkhead hatches.The Final Touches
While two flanges form the primary support structure around the hatches, Sven mentions there are two additional pieces required at each end to ensure comprehensive protection. This attention to detail highlights his commitment to producing a durable and reliable design. “Sailing is about finding your path, whether it’s across an ocean or within yourself.” – Sven Yrvind In conclusion, making flanges around bulkhead hatches may seem complex at first glance, but by following Sven Yrvind’s meticulous process, enthusiasts can achieve professional-level results. Remember that the journey of boatbuilding is as rewarding as reaching your destination; it tests one’s patience and dedication. For those seeking to embark on this adventure or simply gain more insight into marine craftsmanship, Sven’s wisdom is invaluable.Once the flange is fully dried, Sven removes the clamps carefully, ensuring no damage occurs during this process. He then moves on to attaching four more pieces onto these main frames, completing two pairs of flanges for the bulkhead hatches.The Final Touches
While two flanges form the primary support structure around the hatches, Sven mentions there are two additional pieces required at each end to ensure comprehensive protection. This attention to detail highlights his commitment to producing a durable and reliable design. “Sailing is about finding your path, whether it’s across an ocean or within yourself.” – Sven Yrvind In conclusion, making flanges around bulkhead hatches may seem complex at first glance, but by following Sven Yrvind’s meticulous process, enthusiasts can achieve professional-level results. Remember that the journey of boatbuilding is as rewarding as reaching your destination; it tests one’s patience and dedication. For those seeking to embark on this adventure or simply gain more insight into marine craftsmanship, Sven’s wisdom is invaluable.Making Flanges Around Bulkhead Hatches for Canvas
Sven Yrvind, a renowned yacht designer and sailor, shares valuable insights on creating flanges around bulkhead hatches for canvas protection in this enlightening video. By following his expert guidance, boat enthusiasts can ensure their living areas remain secure while allowing unhindered access through the hatches.Step 1: Starting with the Flange
Sven begins by explaining that working on flanges vertically and horizontally is significantly easier than doing so in a flat position. To simplify the process further, he divides the task into two or three steps as suggested by fellow expert “for for.” This approach not only makes it more manageable but also allows for greater precision in crafting each component.Step 2: Applying Glue and Securing
Sven proceeds to apply glue along one edge of the flange, ensuring a secure bond when clamped into place. He emphasizes that this stage is crucial for maintaining the structural integrity of the flange, which in turn safeguards the living area beneath the canvas when hatches are open.Step 3: Allowing Time to Dry
After securely attaching the first portion of the flange, Sven allows ample time for it to dry before moving forward with additional steps. This patience and precision are key aspects of his successful boatbuilding methods.Step 4: Finishing Touches
Once the flange is fully dried, Sven removes the clamps carefully, ensuring no damage occurs during this process. He then moves on to attaching four more pieces onto these main frames, completing two pairs of flanges for the bulkhead hatches.The Final Touches
While two flanges form the primary support structure around the hatches, Sven mentions there are two additional pieces required at each end to ensure comprehensive protection. This attention to detail highlights his commitment to producing a durable and reliable design. “Sailing is about finding your path, whether it’s across an ocean or within yourself.” – Sven Yrvind In conclusion, making flanges around bulkhead hatches may seem complex at first glance, but by following Sven Yrvind’s meticulous process, enthusiasts can achieve professional-level results. Remember that the journey of boatbuilding is as rewarding as reaching your destination; it tests one’s patience and dedication. For those seeking to embark on this adventure or simply gain more insight into marine craftsmanship, Sven’s wisdom is invaluable.Sven proceeds to apply glue along one edge of the flange, ensuring a secure bond when clamped into place. He emphasizes that this stage is crucial for maintaining the structural integrity of the flange, which in turn safeguards the living area beneath the canvas when hatches are open.Step 3: Allowing Time to Dry
After securely attaching the first portion of the flange, Sven allows ample time for it to dry before moving forward with additional steps. This patience and precision are key aspects of his successful boatbuilding methods.Step 4: Finishing Touches
Once the flange is fully dried, Sven removes the clamps carefully, ensuring no damage occurs during this process. He then moves on to attaching four more pieces onto these main frames, completing two pairs of flanges for the bulkhead hatches.The Final Touches
While two flanges form the primary support structure around the hatches, Sven mentions there are two additional pieces required at each end to ensure comprehensive protection. This attention to detail highlights his commitment to producing a durable and reliable design. “Sailing is about finding your path, whether it’s across an ocean or within yourself.” – Sven Yrvind In conclusion, making flanges around bulkhead hatches may seem complex at first glance, but by following Sven Yrvind’s meticulous process, enthusiasts can achieve professional-level results. Remember that the journey of boatbuilding is as rewarding as reaching your destination; it tests one’s patience and dedication. For those seeking to embark on this adventure or simply gain more insight into marine craftsmanship, Sven’s wisdom is invaluable.Making Flanges Around Bulkhead Hatches for Canvas
Sven Yrvind, a renowned yacht designer and sailor, shares valuable insights on creating flanges around bulkhead hatches for canvas protection in this enlightening video. By following his expert guidance, boat enthusiasts can ensure their living areas remain secure while allowing unhindered access through the hatches.Step 1: Starting with the Flange
Sven begins by explaining that working on flanges vertically and horizontally is significantly easier than doing so in a flat position. To simplify the process further, he divides the task into two or three steps as suggested by fellow expert “for for.” This approach not only makes it more manageable but also allows for greater precision in crafting each component.Step 2: Applying Glue and Securing
Sven proceeds to apply glue along one edge of the flange, ensuring a secure bond when clamped into place. He emphasizes that this stage is crucial for maintaining the structural integrity of the flange, which in turn safeguards the living area beneath the canvas when hatches are open.Step 3: Allowing Time to Dry
After securely attaching the first portion of the flange, Sven allows ample time for it to dry before moving forward with additional steps. This patience and precision are key aspects of his successful boatbuilding methods.Step 4: Finishing Touches
Once the flange is fully dried, Sven removes the clamps carefully, ensuring no damage occurs during this process. He then moves on to attaching four more pieces onto these main frames, completing two pairs of flanges for the bulkhead hatches.The Final Touches
While two flanges form the primary support structure around the hatches, Sven mentions there are two additional pieces required at each end to ensure comprehensive protection. This attention to detail highlights his commitment to producing a durable and reliable design. “Sailing is about finding your path, whether it’s across an ocean or within yourself.” – Sven Yrvind In conclusion, making flanges around bulkhead hatches may seem complex at first glance, but by following Sven Yrvind’s meticulous process, enthusiasts can achieve professional-level results. Remember that the journey of boatbuilding is as rewarding as reaching your destination; it tests one’s patience and dedication. For those seeking to embark on this adventure or simply gain more insight into marine craftsmanship, Sven’s wisdom is invaluable.Sven begins by explaining that working on flanges vertically and horizontally is significantly easier than doing so in a flat position. To simplify the process further, he divides the task into two or three steps as suggested by fellow expert “for for.” This approach not only makes it more manageable but also allows for greater precision in crafting each component.Step 2: Applying Glue and Securing
Sven proceeds to apply glue along one edge of the flange, ensuring a secure bond when clamped into place. He emphasizes that this stage is crucial for maintaining the structural integrity of the flange, which in turn safeguards the living area beneath the canvas when hatches are open.Step 3: Allowing Time to Dry
After securely attaching the first portion of the flange, Sven allows ample time for it to dry before moving forward with additional steps. This patience and precision are key aspects of his successful boatbuilding methods.Step 4: Finishing Touches
Once the flange is fully dried, Sven removes the clamps carefully, ensuring no damage occurs during this process. He then moves on to attaching four more pieces onto these main frames, completing two pairs of flanges for the bulkhead hatches.The Final Touches
While two flanges form the primary support structure around the hatches, Sven mentions there are two additional pieces required at each end to ensure comprehensive protection. This attention to detail highlights his commitment to producing a durable and reliable design. “Sailing is about finding your path, whether it’s across an ocean or within yourself.” – Sven Yrvind In conclusion, making flanges around bulkhead hatches may seem complex at first glance, but by following Sven Yrvind’s meticulous process, enthusiasts can achieve professional-level results. Remember that the journey of boatbuilding is as rewarding as reaching your destination; it tests one’s patience and dedication. For those seeking to embark on this adventure or simply gain more insight into marine craftsmanship, Sven’s wisdom is invaluable.Making Flanges Around Bulkhead Hatches for Canvas
Sven Yrvind, a renowned yacht designer and sailor, shares valuable insights on creating flanges around bulkhead hatches for canvas protection in this enlightening video. By following his expert guidance, boat enthusiasts can ensure their living areas remain secure while allowing unhindered access through the hatches.Step 1: Starting with the Flange
Sven begins by explaining that working on flanges vertically and horizontally is significantly easier than doing so in a flat position. To simplify the process further, he divides the task into two or three steps as suggested by fellow expert “for for.” This approach not only makes it more manageable but also allows for greater precision in crafting each component.Step 2: Applying Glue and Securing
Sven proceeds to apply glue along one edge of the flange, ensuring a secure bond when clamped into place. He emphasizes that this stage is crucial for maintaining the structural integrity of the flange, which in turn safeguards the living area beneath the canvas when hatches are open.Step 3: Allowing Time to Dry
After securely attaching the first portion of the flange, Sven allows ample time for it to dry before moving forward with additional steps. This patience and precision are key aspects of his successful boatbuilding methods.Step 4: Finishing Touches
Once the flange is fully dried, Sven removes the clamps carefully, ensuring no damage occurs during this process. He then moves on to attaching four more pieces onto these main frames, completing two pairs of flanges for the bulkhead hatches.The Final Touches
While two flanges form the primary support structure around the hatches, Sven mentions there are two additional pieces required at each end to ensure comprehensive protection. This attention to detail highlights his commitment to producing a durable and reliable design. “Sailing is about finding your path, whether it’s across an ocean or within yourself.” – Sven Yrvind In conclusion, making flanges around bulkhead hatches may seem complex at first glance, but by following Sven Yrvind’s meticulous process, enthusiasts can achieve professional-level results. Remember that the journey of boatbuilding is as rewarding as reaching your destination; it tests one’s patience and dedication. For those seeking to embark on this adventure or simply gain more insight into marine craftsmanship, Sven’s wisdom is invaluable.Sven Yrvind, a renowned yacht designer and sailor, shares valuable insights on creating flanges around bulkhead hatches for canvas protection in this enlightening video. By following his expert guidance, boat enthusiasts can ensure their living areas remain secure while allowing unhindered access through the hatches.Step 1: Starting with the Flange
Sven begins by explaining that working on flanges vertically and horizontally is significantly easier than doing so in a flat position. To simplify the process further, he divides the task into two or three steps as suggested by fellow expert “for for.” This approach not only makes it more manageable but also allows for greater precision in crafting each component.Step 2: Applying Glue and Securing
Sven proceeds to apply glue along one edge of the flange, ensuring a secure bond when clamped into place. He emphasizes that this stage is crucial for maintaining the structural integrity of the flange, which in turn safeguards the living area beneath the canvas when hatches are open.Step 3: Allowing Time to Dry
After securely attaching the first portion of the flange, Sven allows ample time for it to dry before moving forward with additional steps. This patience and precision are key aspects of his successful boatbuilding methods.Step 4: Finishing Touches
Once the flange is fully dried, Sven removes the clamps carefully, ensuring no damage occurs during this process. He then moves on to attaching four more pieces onto these main frames, completing two pairs of flanges for the bulkhead hatches.The Final Touches
While two flanges form the primary support structure around the hatches, Sven mentions there are two additional pieces required at each end to ensure comprehensive protection. This attention to detail highlights his commitment to producing a durable and reliable design. “Sailing is about finding your path, whether it’s across an ocean or within yourself.” – Sven Yrvind In conclusion, making flanges around bulkhead hatches may seem complex at first glance, but by following Sven Yrvind’s meticulous process, enthusiasts can achieve professional-level results. Remember that the journey of boatbuilding is as rewarding as reaching your destination; it tests one’s patience and dedication. For those seeking to embark on this adventure or simply gain more insight into marine craftsmanship, Sven’s wisdom is invaluable.Making Flanges Around Bulkhead Hatches for Canvas
Sven Yrvind, a renowned yacht designer and sailor, shares valuable insights on creating flanges around bulkhead hatches for canvas protection in this enlightening video. By following his expert guidance, boat enthusiasts can ensure their living areas remain secure while allowing unhindered access through the hatches.Step 1: Starting with the Flange
Sven begins by explaining that working on flanges vertically and horizontally is significantly easier than doing so in a flat position. To simplify the process further, he divides the task into two or three steps as suggested by fellow expert “for for.” This approach not only makes it more manageable but also allows for greater precision in crafting each component.Step 2: Applying Glue and Securing
Sven proceeds to apply glue along one edge of the flange, ensuring a secure bond when clamped into place. He emphasizes that this stage is crucial for maintaining the structural integrity of the flange, which in turn safeguards the living area beneath the canvas when hatches are open.Step 3: Allowing Time to Dry
After securely attaching the first portion of the flange, Sven allows ample time for it to dry before moving forward with additional steps. This patience and precision are key aspects of his successful boatbuilding methods.Step 4: Finishing Touches
Once the flange is fully dried, Sven removes the clamps carefully, ensuring no damage occurs during this process. He then moves on to attaching four more pieces onto these main frames, completing two pairs of flanges for the bulkhead hatches.The Final Touches
While two flanges form the primary support structure around the hatches, Sven mentions there are two additional pieces required at each end to ensure comprehensive protection. This attention to detail highlights his commitment to producing a durable and reliable design. “Sailing is about finding your path, whether it’s across an ocean or within yourself.” – Sven Yrvind In conclusion, making flanges around bulkhead hatches may seem complex at first glance, but by following Sven Yrvind’s meticulous process, enthusiasts can achieve professional-level results. Remember that the journey of boatbuilding is as rewarding as reaching your destination; it tests one’s patience and dedication. For those seeking to embark on this adventure or simply gain more insight into marine craftsmanship, Sven’s wisdom is invaluable.Once the flange is fully dried, Sven removes the clamps carefully, ensuring no damage occurs during this process. He then moves on to attaching four more pieces onto these main frames, completing two pairs of flanges for the bulkhead hatches.The Final Touches
While two flanges form the primary support structure around the hatches, Sven mentions there are two additional pieces required at each end to ensure comprehensive protection. This attention to detail highlights his commitment to producing a durable and reliable design. “Sailing is about finding your path, whether it’s across an ocean or within yourself.” – Sven Yrvind In conclusion, making flanges around bulkhead hatches may seem complex at first glance, but by following Sven Yrvind’s meticulous process, enthusiasts can achieve professional-level results. Remember that the journey of boatbuilding is as rewarding as reaching your destination; it tests one’s patience and dedication. For those seeking to embark on this adventure or simply gain more insight into marine craftsmanship, Sven’s wisdom is invaluable.Sven Yrvind, a renowned yacht designer and sailor, shares valuable insights on creating flanges around bulkhead hatches for canvas protection in this enlightening video. By following his expert guidance, boat enthusiasts can ensure their living areas remain secure while allowing unhindered access through the hatches.Step 1: Starting with the Flange
Sven begins by explaining that working on flanges vertically and horizontally is significantly easier than doing so in a flat position. To simplify the process further, he divides the task into two or three steps as suggested by fellow expert “for for.” This approach not only makes it more manageable but also allows for greater precision in crafting each component.Step 2: Applying Glue and Securing
Sven proceeds to apply glue along one edge of the flange, ensuring a secure bond when clamped into place. He emphasizes that this stage is crucial for maintaining the structural integrity of the flange, which in turn safeguards the living area beneath the canvas when hatches are open.Step 3: Allowing Time to Dry
After securely attaching the first portion of the flange, Sven allows ample time for it to dry before moving forward with additional steps. This patience and precision are key aspects of his successful boatbuilding methods.Step 4: Finishing Touches
Once the flange is fully dried, Sven removes the clamps carefully, ensuring no damage occurs during this process. He then moves on to attaching four more pieces onto these main frames, completing two pairs of flanges for the bulkhead hatches.The Final Touches
While two flanges form the primary support structure around the hatches, Sven mentions there are two additional pieces required at each end to ensure comprehensive protection. This attention to detail highlights his commitment to producing a durable and reliable design. “Sailing is about finding your path, whether it’s across an ocean or within yourself.” – Sven Yrvind In conclusion, making flanges around bulkhead hatches may seem complex at first glance, but by following Sven Yrvind’s meticulous process, enthusiasts can achieve professional-level results. Remember that the journey of boatbuilding is as rewarding as reaching your destination; it tests one’s patience and dedication. For those seeking to embark on this adventure or simply gain more insight into marine craftsmanship, Sven’s wisdom is invaluable.Making Flanges Around Bulkhead Hatches for Canvas
Sven Yrvind, a renowned yacht designer and sailor, shares valuable insights on creating flanges around bulkhead hatches for canvas protection in this enlightening video. By following his expert guidance, boat enthusiasts can ensure their living areas remain secure while allowing unhindered access through the hatches.Step 1: Starting with the Flange
Sven begins by explaining that working on flanges vertically and horizontally is significantly easier than doing so in a flat position. To simplify the process further, he divides the task into two or three steps as suggested by fellow expert “for for.” This approach not only makes it more manageable but also allows for greater precision in crafting each component.Step 2: Applying Glue and Securing
Sven proceeds to apply glue along one edge of the flange, ensuring a secure bond when clamped into place. He emphasizes that this stage is crucial for maintaining the structural integrity of the flange, which in turn safeguards the living area beneath the canvas when hatches are open.Step 3: Allowing Time to Dry
After securely attaching the first portion of the flange, Sven allows ample time for it to dry before moving forward with additional steps. This patience and precision are key aspects of his successful boatbuilding methods.Step 4: Finishing Touches
Once the flange is fully dried, Sven removes the clamps carefully, ensuring no damage occurs during this process. He then moves on to attaching four more pieces onto these main frames, completing two pairs of flanges for the bulkhead hatches.The Final Touches
While two flanges form the primary support structure around the hatches, Sven mentions there are two additional pieces required at each end to ensure comprehensive protection. This attention to detail highlights his commitment to producing a durable and reliable design. “Sailing is about finding your path, whether it’s across an ocean or within yourself.” – Sven Yrvind In conclusion, making flanges around bulkhead hatches may seem complex at first glance, but by following Sven Yrvind’s meticulous process, enthusiasts can achieve professional-level results. Remember that the journey of boatbuilding is as rewarding as reaching your destination; it tests one’s patience and dedication. For those seeking to embark on this adventure or simply gain more insight into marine craftsmanship, Sven’s wisdom is invaluable.After securely attaching the first portion of the flange, Sven allows ample time for it to dry before moving forward with additional steps. This patience and precision are key aspects of his successful boatbuilding methods.Step 4: Finishing Touches
Once the flange is fully dried, Sven removes the clamps carefully, ensuring no damage occurs during this process. He then moves on to attaching four more pieces onto these main frames, completing two pairs of flanges for the bulkhead hatches.The Final Touches
While two flanges form the primary support structure around the hatches, Sven mentions there are two additional pieces required at each end to ensure comprehensive protection. This attention to detail highlights his commitment to producing a durable and reliable design. “Sailing is about finding your path, whether it’s across an ocean or within yourself.” – Sven Yrvind In conclusion, making flanges around bulkhead hatches may seem complex at first glance, but by following Sven Yrvind’s meticulous process, enthusiasts can achieve professional-level results. Remember that the journey of boatbuilding is as rewarding as reaching your destination; it tests one’s patience and dedication. For those seeking to embark on this adventure or simply gain more insight into marine craftsmanship, Sven’s wisdom is invaluable.Sven Yrvind, a renowned yacht designer and sailor, shares valuable insights on creating flanges around bulkhead hatches for canvas protection in this enlightening video. By following his expert guidance, boat enthusiasts can ensure their living areas remain secure while allowing unhindered access through the hatches.Step 1: Starting with the Flange
Sven begins by explaining that working on flanges vertically and horizontally is significantly easier than doing so in a flat position. To simplify the process further, he divides the task into two or three steps as suggested by fellow expert “for for.” This approach not only makes it more manageable but also allows for greater precision in crafting each component.Step 2: Applying Glue and Securing
Sven proceeds to apply glue along one edge of the flange, ensuring a secure bond when clamped into place. He emphasizes that this stage is crucial for maintaining the structural integrity of the flange, which in turn safeguards the living area beneath the canvas when hatches are open.Step 3: Allowing Time to Dry
After securely attaching the first portion of the flange, Sven allows ample time for it to dry before moving forward with additional steps. This patience and precision are key aspects of his successful boatbuilding methods.Step 4: Finishing Touches
Once the flange is fully dried, Sven removes the clamps carefully, ensuring no damage occurs during this process. He then moves on to attaching four more pieces onto these main frames, completing two pairs of flanges for the bulkhead hatches.The Final Touches
While two flanges form the primary support structure around the hatches, Sven mentions there are two additional pieces required at each end to ensure comprehensive protection. This attention to detail highlights his commitment to producing a durable and reliable design. “Sailing is about finding your path, whether it’s across an ocean or within yourself.” – Sven Yrvind In conclusion, making flanges around bulkhead hatches may seem complex at first glance, but by following Sven Yrvind’s meticulous process, enthusiasts can achieve professional-level results. Remember that the journey of boatbuilding is as rewarding as reaching your destination; it tests one’s patience and dedication. For those seeking to embark on this adventure or simply gain more insight into marine craftsmanship, Sven’s wisdom is invaluable.Making Flanges Around Bulkhead Hatches for Canvas
Sven Yrvind, a renowned yacht designer and sailor, shares valuable insights on creating flanges around bulkhead hatches for canvas protection in this enlightening video. By following his expert guidance, boat enthusiasts can ensure their living areas remain secure while allowing unhindered access through the hatches.Step 1: Starting with the Flange
Sven begins by explaining that working on flanges vertically and horizontally is significantly easier than doing so in a flat position. To simplify the process further, he divides the task into two or three steps as suggested by fellow expert “for for.” This approach not only makes it more manageable but also allows for greater precision in crafting each component.Step 2: Applying Glue and Securing
Sven proceeds to apply glue along one edge of the flange, ensuring a secure bond when clamped into place. He emphasizes that this stage is crucial for maintaining the structural integrity of the flange, which in turn safeguards the living area beneath the canvas when hatches are open.Step 3: Allowing Time to Dry
After securely attaching the first portion of the flange, Sven allows ample time for it to dry before moving forward with additional steps. This patience and precision are key aspects of his successful boatbuilding methods.Step 4: Finishing Touches
Once the flange is fully dried, Sven removes the clamps carefully, ensuring no damage occurs during this process. He then moves on to attaching four more pieces onto these main frames, completing two pairs of flanges for the bulkhead hatches.The Final Touches
While two flanges form the primary support structure around the hatches, Sven mentions there are two additional pieces required at each end to ensure comprehensive protection. This attention to detail highlights his commitment to producing a durable and reliable design. “Sailing is about finding your path, whether it’s across an ocean or within yourself.” – Sven Yrvind In conclusion, making flanges around bulkhead hatches may seem complex at first glance, but by following Sven Yrvind’s meticulous process, enthusiasts can achieve professional-level results. Remember that the journey of boatbuilding is as rewarding as reaching your destination; it tests one’s patience and dedication. For those seeking to embark on this adventure or simply gain more insight into marine craftsmanship, Sven’s wisdom is invaluable.Sven proceeds to apply glue along one edge of the flange, ensuring a secure bond when clamped into place. He emphasizes that this stage is crucial for maintaining the structural integrity of the flange, which in turn safeguards the living area beneath the canvas when hatches are open.Step 3: Allowing Time to Dry
After securely attaching the first portion of the flange, Sven allows ample time for it to dry before moving forward with additional steps. This patience and precision are key aspects of his successful boatbuilding methods.Step 4: Finishing Touches
Once the flange is fully dried, Sven removes the clamps carefully, ensuring no damage occurs during this process. He then moves on to attaching four more pieces onto these main frames, completing two pairs of flanges for the bulkhead hatches.The Final Touches
While two flanges form the primary support structure around the hatches, Sven mentions there are two additional pieces required at each end to ensure comprehensive protection. This attention to detail highlights his commitment to producing a durable and reliable design. “Sailing is about finding your path, whether it’s across an ocean or within yourself.” – Sven Yrvind In conclusion, making flanges around bulkhead hatches may seem complex at first glance, but by following Sven Yrvind’s meticulous process, enthusiasts can achieve professional-level results. Remember that the journey of boatbuilding is as rewarding as reaching your destination; it tests one’s patience and dedication. For those seeking to embark on this adventure or simply gain more insight into marine craftsmanship, Sven’s wisdom is invaluable.Sven Yrvind, a renowned yacht designer and sailor, shares valuable insights on creating flanges around bulkhead hatches for canvas protection in this enlightening video. By following his expert guidance, boat enthusiasts can ensure their living areas remain secure while allowing unhindered access through the hatches.Step 1: Starting with the Flange
Sven begins by explaining that working on flanges vertically and horizontally is significantly easier than doing so in a flat position. To simplify the process further, he divides the task into two or three steps as suggested by fellow expert “for for.” This approach not only makes it more manageable but also allows for greater precision in crafting each component.Step 2: Applying Glue and Securing
Sven proceeds to apply glue along one edge of the flange, ensuring a secure bond when clamped into place. He emphasizes that this stage is crucial for maintaining the structural integrity of the flange, which in turn safeguards the living area beneath the canvas when hatches are open.Step 3: Allowing Time to Dry
After securely attaching the first portion of the flange, Sven allows ample time for it to dry before moving forward with additional steps. This patience and precision are key aspects of his successful boatbuilding methods.Step 4: Finishing Touches
Once the flange is fully dried, Sven removes the clamps carefully, ensuring no damage occurs during this process. He then moves on to attaching four more pieces onto these main frames, completing two pairs of flanges for the bulkhead hatches.The Final Touches
While two flanges form the primary support structure around the hatches, Sven mentions there are two additional pieces required at each end to ensure comprehensive protection. This attention to detail highlights his commitment to producing a durable and reliable design. “Sailing is about finding your path, whether it’s across an ocean or within yourself.” – Sven Yrvind In conclusion, making flanges around bulkhead hatches may seem complex at first glance, but by following Sven Yrvind’s meticulous process, enthusiasts can achieve professional-level results. Remember that the journey of boatbuilding is as rewarding as reaching your destination; it tests one’s patience and dedication. For those seeking to embark on this adventure or simply gain more insight into marine craftsmanship, Sven’s wisdom is invaluable.Making Flanges Around Bulkhead Hatches for Canvas
Sven Yrvind, a renowned yacht designer and sailor, shares valuable insights on creating flanges around bulkhead hatches for canvas protection in this enlightening video. By following his expert guidance, boat enthusiasts can ensure their living areas remain secure while allowing unhindered access through the hatches.Step 1: Starting with the Flange
Sven begins by explaining that working on flanges vertically and horizontally is significantly easier than doing so in a flat position. To simplify the process further, he divides the task into two or three steps as suggested by fellow expert “for for.” This approach not only makes it more manageable but also allows for greater precision in crafting each component.Step 2: Applying Glue and Securing
Sven proceeds to apply glue along one edge of the flange, ensuring a secure bond when clamped into place. He emphasizes that this stage is crucial for maintaining the structural integrity of the flange, which in turn safeguards the living area beneath the canvas when hatches are open.Step 3: Allowing Time to Dry
After securely attaching the first portion of the flange, Sven allows ample time for it to dry before moving forward with additional steps. This patience and precision are key aspects of his successful boatbuilding methods.Step 4: Finishing Touches
Once the flange is fully dried, Sven removes the clamps carefully, ensuring no damage occurs during this process. He then moves on to attaching four more pieces onto these main frames, completing two pairs of flanges for the bulkhead hatches.The Final Touches
While two flanges form the primary support structure around the hatches, Sven mentions there are two additional pieces required at each end to ensure comprehensive protection. This attention to detail highlights his commitment to producing a durable and reliable design. “Sailing is about finding your path, whether it’s across an ocean or within yourself.” – Sven Yrvind In conclusion, making flanges around bulkhead hatches may seem complex at first glance, but by following Sven Yrvind’s meticulous process, enthusiasts can achieve professional-level results. Remember that the journey of boatbuilding is as rewarding as reaching your destination; it tests one’s patience and dedication. For those seeking to embark on this adventure or simply gain more insight into marine craftsmanship, Sven’s wisdom is invaluable.Sven begins by explaining that working on flanges vertically and horizontally is significantly easier than doing so in a flat position. To simplify the process further, he divides the task into two or three steps as suggested by fellow expert “for for.” This approach not only makes it more manageable but also allows for greater precision in crafting each component.Step 2: Applying Glue and Securing
Sven proceeds to apply glue along one edge of the flange, ensuring a secure bond when clamped into place. He emphasizes that this stage is crucial for maintaining the structural integrity of the flange, which in turn safeguards the living area beneath the canvas when hatches are open.Step 3: Allowing Time to Dry
After securely attaching the first portion of the flange, Sven allows ample time for it to dry before moving forward with additional steps. This patience and precision are key aspects of his successful boatbuilding methods.Step 4: Finishing Touches
Once the flange is fully dried, Sven removes the clamps carefully, ensuring no damage occurs during this process. He then moves on to attaching four more pieces onto these main frames, completing two pairs of flanges for the bulkhead hatches.The Final Touches
While two flanges form the primary support structure around the hatches, Sven mentions there are two additional pieces required at each end to ensure comprehensive protection. This attention to detail highlights his commitment to producing a durable and reliable design. “Sailing is about finding your path, whether it’s across an ocean or within yourself.” – Sven Yrvind In conclusion, making flanges around bulkhead hatches may seem complex at first glance, but by following Sven Yrvind’s meticulous process, enthusiasts can achieve professional-level results. Remember that the journey of boatbuilding is as rewarding as reaching your destination; it tests one’s patience and dedication. For those seeking to embark on this adventure or simply gain more insight into marine craftsmanship, Sven’s wisdom is invaluable.Sven Yrvind, a renowned yacht designer and sailor, shares valuable insights on creating flanges around bulkhead hatches for canvas protection in this enlightening video. By following his expert guidance, boat enthusiasts can ensure their living areas remain secure while allowing unhindered access through the hatches.Step 1: Starting with the Flange
Sven begins by explaining that working on flanges vertically and horizontally is significantly easier than doing so in a flat position. To simplify the process further, he divides the task into two or three steps as suggested by fellow expert “for for.” This approach not only makes it more manageable but also allows for greater precision in crafting each component.Step 2: Applying Glue and Securing
Sven proceeds to apply glue along one edge of the flange, ensuring a secure bond when clamped into place. He emphasizes that this stage is crucial for maintaining the structural integrity of the flange, which in turn safeguards the living area beneath the canvas when hatches are open.Step 3: Allowing Time to Dry
After securely attaching the first portion of the flange, Sven allows ample time for it to dry before moving forward with additional steps. This patience and precision are key aspects of his successful boatbuilding methods.Step 4: Finishing Touches
Once the flange is fully dried, Sven removes the clamps carefully, ensuring no damage occurs during this process. He then moves on to attaching four more pieces onto these main frames, completing two pairs of flanges for the bulkhead hatches.The Final Touches
While two flanges form the primary support structure around the hatches, Sven mentions there are two additional pieces required at each end to ensure comprehensive protection. This attention to detail highlights his commitment to producing a durable and reliable design. “Sailing is about finding your path, whether it’s across an ocean or within yourself.” – Sven Yrvind In conclusion, making flanges around bulkhead hatches may seem complex at first glance, but by following Sven Yrvind’s meticulous process, enthusiasts can achieve professional-level results. Remember that the journey of boatbuilding is as rewarding as reaching your destination; it tests one’s patience and dedication. For those seeking to embark on this adventure or simply gain more insight into marine craftsmanship, Sven’s wisdom is invaluable.Making Flanges Around Bulkhead Hatches for Canvas
Sven Yrvind, a renowned yacht designer and sailor, shares valuable insights on creating flanges around bulkhead hatches for canvas protection in this enlightening video. By following his expert guidance, boat enthusiasts can ensure their living areas remain secure while allowing unhindered access through the hatches.Step 1: Starting with the Flange
Sven begins by explaining that working on flanges vertically and horizontally is significantly easier than doing so in a flat position. To simplify the process further, he divides the task into two or three steps as suggested by fellow expert “for for.” This approach not only makes it more manageable but also allows for greater precision in crafting each component.Step 2: Applying Glue and Securing
Sven proceeds to apply glue along one edge of the flange, ensuring a secure bond when clamped into place. He emphasizes that this stage is crucial for maintaining the structural integrity of the flange, which in turn safeguards the living area beneath the canvas when hatches are open.Step 3: Allowing Time to Dry
After securely attaching the first portion of the flange, Sven allows ample time for it to dry before moving forward with additional steps. This patience and precision are key aspects of his successful boatbuilding methods.Step 4: Finishing Touches
Once the flange is fully dried, Sven removes the clamps carefully, ensuring no damage occurs during this process. He then moves on to attaching four more pieces onto these main frames, completing two pairs of flanges for the bulkhead hatches.The Final Touches
While two flanges form the primary support structure around the hatches, Sven mentions there are two additional pieces required at each end to ensure comprehensive protection. This attention to detail highlights his commitment to producing a durable and reliable design. “Sailing is about finding your path, whether it’s across an ocean or within yourself.” – Sven Yrvind In conclusion, making flanges around bulkhead hatches may seem complex at first glance, but by following Sven Yrvind’s meticulous process, enthusiasts can achieve professional-level results. Remember that the journey of boatbuilding is as rewarding as reaching your destination; it tests one’s patience and dedication. For those seeking to embark on this adventure or simply gain more insight into marine craftsmanship, Sven’s wisdom is invaluable.Once the flange is fully dried, Sven removes the clamps carefully, ensuring no damage occurs during this process. He then moves on to attaching four more pieces onto these main frames, completing two pairs of flanges for the bulkhead hatches.The Final Touches
While two flanges form the primary support structure around the hatches, Sven mentions there are two additional pieces required at each end to ensure comprehensive protection. This attention to detail highlights his commitment to producing a durable and reliable design. “Sailing is about finding your path, whether it’s across an ocean or within yourself.” – Sven Yrvind In conclusion, making flanges around bulkhead hatches may seem complex at first glance, but by following Sven Yrvind’s meticulous process, enthusiasts can achieve professional-level results. Remember that the journey of boatbuilding is as rewarding as reaching your destination; it tests one’s patience and dedication. For those seeking to embark on this adventure or simply gain more insight into marine craftsmanship, Sven’s wisdom is invaluable.Sven begins by explaining that working on flanges vertically and horizontally is significantly easier than doing so in a flat position. To simplify the process further, he divides the task into two or three steps as suggested by fellow expert “for for.” This approach not only makes it more manageable but also allows for greater precision in crafting each component.Step 2: Applying Glue and Securing
Sven proceeds to apply glue along one edge of the flange, ensuring a secure bond when clamped into place. He emphasizes that this stage is crucial for maintaining the structural integrity of the flange, which in turn safeguards the living area beneath the canvas when hatches are open.Step 3: Allowing Time to Dry
After securely attaching the first portion of the flange, Sven allows ample time for it to dry before moving forward with additional steps. This patience and precision are key aspects of his successful boatbuilding methods.Step 4: Finishing Touches
Once the flange is fully dried, Sven removes the clamps carefully, ensuring no damage occurs during this process. He then moves on to attaching four more pieces onto these main frames, completing two pairs of flanges for the bulkhead hatches.The Final Touches
While two flanges form the primary support structure around the hatches, Sven mentions there are two additional pieces required at each end to ensure comprehensive protection. This attention to detail highlights his commitment to producing a durable and reliable design. “Sailing is about finding your path, whether it’s across an ocean or within yourself.” – Sven Yrvind In conclusion, making flanges around bulkhead hatches may seem complex at first glance, but by following Sven Yrvind’s meticulous process, enthusiasts can achieve professional-level results. Remember that the journey of boatbuilding is as rewarding as reaching your destination; it tests one’s patience and dedication. For those seeking to embark on this adventure or simply gain more insight into marine craftsmanship, Sven’s wisdom is invaluable.Sven Yrvind, a renowned yacht designer and sailor, shares valuable insights on creating flanges around bulkhead hatches for canvas protection in this enlightening video. By following his expert guidance, boat enthusiasts can ensure their living areas remain secure while allowing unhindered access through the hatches.Step 1: Starting with the Flange
Sven begins by explaining that working on flanges vertically and horizontally is significantly easier than doing so in a flat position. To simplify the process further, he divides the task into two or three steps as suggested by fellow expert “for for.” This approach not only makes it more manageable but also allows for greater precision in crafting each component.Step 2: Applying Glue and Securing
Sven proceeds to apply glue along one edge of the flange, ensuring a secure bond when clamped into place. He emphasizes that this stage is crucial for maintaining the structural integrity of the flange, which in turn safeguards the living area beneath the canvas when hatches are open.Step 3: Allowing Time to Dry
After securely attaching the first portion of the flange, Sven allows ample time for it to dry before moving forward with additional steps. This patience and precision are key aspects of his successful boatbuilding methods.Step 4: Finishing Touches
Once the flange is fully dried, Sven removes the clamps carefully, ensuring no damage occurs during this process. He then moves on to attaching four more pieces onto these main frames, completing two pairs of flanges for the bulkhead hatches.The Final Touches
While two flanges form the primary support structure around the hatches, Sven mentions there are two additional pieces required at each end to ensure comprehensive protection. This attention to detail highlights his commitment to producing a durable and reliable design. “Sailing is about finding your path, whether it’s across an ocean or within yourself.” – Sven Yrvind In conclusion, making flanges around bulkhead hatches may seem complex at first glance, but by following Sven Yrvind’s meticulous process, enthusiasts can achieve professional-level results. Remember that the journey of boatbuilding is as rewarding as reaching your destination; it tests one’s patience and dedication. For those seeking to embark on this adventure or simply gain more insight into marine craftsmanship, Sven’s wisdom is invaluable.Making Flanges Around Bulkhead Hatches for Canvas
Sven Yrvind, a renowned yacht designer and sailor, shares valuable insights on creating flanges around bulkhead hatches for canvas protection in this enlightening video. By following his expert guidance, boat enthusiasts can ensure their living areas remain secure while allowing unhindered access through the hatches.Step 1: Starting with the Flange
Sven begins by explaining that working on flanges vertically and horizontally is significantly easier than doing so in a flat position. To simplify the process further, he divides the task into two or three steps as suggested by fellow expert “for for.” This approach not only makes it more manageable but also allows for greater precision in crafting each component.Step 2: Applying Glue and Securing
Sven proceeds to apply glue along one edge of the flange, ensuring a secure bond when clamped into place. He emphasizes that this stage is crucial for maintaining the structural integrity of the flange, which in turn safeguards the living area beneath the canvas when hatches are open.Step 3: Allowing Time to Dry
After securely attaching the first portion of the flange, Sven allows ample time for it to dry before moving forward with additional steps. This patience and precision are key aspects of his successful boatbuilding methods.Step 4: Finishing Touches
Once the flange is fully dried, Sven removes the clamps carefully, ensuring no damage occurs during this process. He then moves on to attaching four more pieces onto these main frames, completing two pairs of flanges for the bulkhead hatches.The Final Touches
While two flanges form the primary support structure around the hatches, Sven mentions there are two additional pieces required at each end to ensure comprehensive protection. This attention to detail highlights his commitment to producing a durable and reliable design. “Sailing is about finding your path, whether it’s across an ocean or within yourself.” – Sven Yrvind In conclusion, making flanges around bulkhead hatches may seem complex at first glance, but by following Sven Yrvind’s meticulous process, enthusiasts can achieve professional-level results. Remember that the journey of boatbuilding is as rewarding as reaching your destination; it tests one’s patience and dedication. For those seeking to embark on this adventure or simply gain more insight into marine craftsmanship, Sven’s wisdom is invaluable.After securely attaching the first portion of the flange, Sven allows ample time for it to dry before moving forward with additional steps. This patience and precision are key aspects of his successful boatbuilding methods.Step 4: Finishing Touches
Once the flange is fully dried, Sven removes the clamps carefully, ensuring no damage occurs during this process. He then moves on to attaching four more pieces onto these main frames, completing two pairs of flanges for the bulkhead hatches.The Final Touches
While two flanges form the primary support structure around the hatches, Sven mentions there are two additional pieces required at each end to ensure comprehensive protection. This attention to detail highlights his commitment to producing a durable and reliable design. “Sailing is about finding your path, whether it’s across an ocean or within yourself.” – Sven Yrvind In conclusion, making flanges around bulkhead hatches may seem complex at first glance, but by following Sven Yrvind’s meticulous process, enthusiasts can achieve professional-level results. Remember that the journey of boatbuilding is as rewarding as reaching your destination; it tests one’s patience and dedication. For those seeking to embark on this adventure or simply gain more insight into marine craftsmanship, Sven’s wisdom is invaluable.Sven begins by explaining that working on flanges vertically and horizontally is significantly easier than doing so in a flat position. To simplify the process further, he divides the task into two or three steps as suggested by fellow expert “for for.” This approach not only makes it more manageable but also allows for greater precision in crafting each component.Step 2: Applying Glue and Securing
Sven proceeds to apply glue along one edge of the flange, ensuring a secure bond when clamped into place. He emphasizes that this stage is crucial for maintaining the structural integrity of the flange, which in turn safeguards the living area beneath the canvas when hatches are open.Step 3: Allowing Time to Dry
After securely attaching the first portion of the flange, Sven allows ample time for it to dry before moving forward with additional steps. This patience and precision are key aspects of his successful boatbuilding methods.Step 4: Finishing Touches
Once the flange is fully dried, Sven removes the clamps carefully, ensuring no damage occurs during this process. He then moves on to attaching four more pieces onto these main frames, completing two pairs of flanges for the bulkhead hatches.The Final Touches
While two flanges form the primary support structure around the hatches, Sven mentions there are two additional pieces required at each end to ensure comprehensive protection. This attention to detail highlights his commitment to producing a durable and reliable design. “Sailing is about finding your path, whether it’s across an ocean or within yourself.” – Sven Yrvind In conclusion, making flanges around bulkhead hatches may seem complex at first glance, but by following Sven Yrvind’s meticulous process, enthusiasts can achieve professional-level results. Remember that the journey of boatbuilding is as rewarding as reaching your destination; it tests one’s patience and dedication. For those seeking to embark on this adventure or simply gain more insight into marine craftsmanship, Sven’s wisdom is invaluable.Sven Yrvind, a renowned yacht designer and sailor, shares valuable insights on creating flanges around bulkhead hatches for canvas protection in this enlightening video. By following his expert guidance, boat enthusiasts can ensure their living areas remain secure while allowing unhindered access through the hatches.Step 1: Starting with the Flange
Sven begins by explaining that working on flanges vertically and horizontally is significantly easier than doing so in a flat position. To simplify the process further, he divides the task into two or three steps as suggested by fellow expert “for for.” This approach not only makes it more manageable but also allows for greater precision in crafting each component.Step 2: Applying Glue and Securing
Sven proceeds to apply glue along one edge of the flange, ensuring a secure bond when clamped into place. He emphasizes that this stage is crucial for maintaining the structural integrity of the flange, which in turn safeguards the living area beneath the canvas when hatches are open.Step 3: Allowing Time to Dry
After securely attaching the first portion of the flange, Sven allows ample time for it to dry before moving forward with additional steps. This patience and precision are key aspects of his successful boatbuilding methods.Step 4: Finishing Touches
Once the flange is fully dried, Sven removes the clamps carefully, ensuring no damage occurs during this process. He then moves on to attaching four more pieces onto these main frames, completing two pairs of flanges for the bulkhead hatches.The Final Touches
While two flanges form the primary support structure around the hatches, Sven mentions there are two additional pieces required at each end to ensure comprehensive protection. This attention to detail highlights his commitment to producing a durable and reliable design. “Sailing is about finding your path, whether it’s across an ocean or within yourself.” – Sven Yrvind In conclusion, making flanges around bulkhead hatches may seem complex at first glance, but by following Sven Yrvind’s meticulous process, enthusiasts can achieve professional-level results. Remember that the journey of boatbuilding is as rewarding as reaching your destination; it tests one’s patience and dedication. For those seeking to embark on this adventure or simply gain more insight into marine craftsmanship, Sven’s wisdom is invaluable.Making Flanges Around Bulkhead Hatches for Canvas
Sven Yrvind, a renowned yacht designer and sailor, shares valuable insights on creating flanges around bulkhead hatches for canvas protection in this enlightening video. By following his expert guidance, boat enthusiasts can ensure their living areas remain secure while allowing unhindered access through the hatches.Step 1: Starting with the Flange
Sven begins by explaining that working on flanges vertically and horizontally is significantly easier than doing so in a flat position. To simplify the process further, he divides the task into two or three steps as suggested by fellow expert “for for.” This approach not only makes it more manageable but also allows for greater precision in crafting each component.Step 2: Applying Glue and Securing
Sven proceeds to apply glue along one edge of the flange, ensuring a secure bond when clamped into place. He emphasizes that this stage is crucial for maintaining the structural integrity of the flange, which in turn safeguards the living area beneath the canvas when hatches are open.Step 3: Allowing Time to Dry
After securely attaching the first portion of the flange, Sven allows ample time for it to dry before moving forward with additional steps. This patience and precision are key aspects of his successful boatbuilding methods.Step 4: Finishing Touches
Once the flange is fully dried, Sven removes the clamps carefully, ensuring no damage occurs during this process. He then moves on to attaching four more pieces onto these main frames, completing two pairs of flanges for the bulkhead hatches.The Final Touches
While two flanges form the primary support structure around the hatches, Sven mentions there are two additional pieces required at each end to ensure comprehensive protection. This attention to detail highlights his commitment to producing a durable and reliable design. “Sailing is about finding your path, whether it’s across an ocean or within yourself.” – Sven Yrvind In conclusion, making flanges around bulkhead hatches may seem complex at first glance, but by following Sven Yrvind’s meticulous process, enthusiasts can achieve professional-level results. Remember that the journey of boatbuilding is as rewarding as reaching your destination; it tests one’s patience and dedication. For those seeking to embark on this adventure or simply gain more insight into marine craftsmanship, Sven’s wisdom is invaluable.Sven proceeds to apply glue along one edge of the flange, ensuring a secure bond when clamped into place. He emphasizes that this stage is crucial for maintaining the structural integrity of the flange, which in turn safeguards the living area beneath the canvas when hatches are open.Step 3: Allowing Time to Dry
After securely attaching the first portion of the flange, Sven allows ample time for it to dry before moving forward with additional steps. This patience and precision are key aspects of his successful boatbuilding methods.Step 4: Finishing Touches
Once the flange is fully dried, Sven removes the clamps carefully, ensuring no damage occurs during this process. He then moves on to attaching four more pieces onto these main frames, completing two pairs of flanges for the bulkhead hatches.The Final Touches
While two flanges form the primary support structure around the hatches, Sven mentions there are two additional pieces required at each end to ensure comprehensive protection. This attention to detail highlights his commitment to producing a durable and reliable design. “Sailing is about finding your path, whether it’s across an ocean or within yourself.” – Sven Yrvind In conclusion, making flanges around bulkhead hatches may seem complex at first glance, but by following Sven Yrvind’s meticulous process, enthusiasts can achieve professional-level results. Remember that the journey of boatbuilding is as rewarding as reaching your destination; it tests one’s patience and dedication. For those seeking to embark on this adventure or simply gain more insight into marine craftsmanship, Sven’s wisdom is invaluable.Sven begins by explaining that working on flanges vertically and horizontally is significantly easier than doing so in a flat position. To simplify the process further, he divides the task into two or three steps as suggested by fellow expert “for for.” This approach not only makes it more manageable but also allows for greater precision in crafting each component.Step 2: Applying Glue and Securing
Sven proceeds to apply glue along one edge of the flange, ensuring a secure bond when clamped into place. He emphasizes that this stage is crucial for maintaining the structural integrity of the flange, which in turn safeguards the living area beneath the canvas when hatches are open.Step 3: Allowing Time to Dry
After securely attaching the first portion of the flange, Sven allows ample time for it to dry before moving forward with additional steps. This patience and precision are key aspects of his successful boatbuilding methods.Step 4: Finishing Touches
Once the flange is fully dried, Sven removes the clamps carefully, ensuring no damage occurs during this process. He then moves on to attaching four more pieces onto these main frames, completing two pairs of flanges for the bulkhead hatches.The Final Touches
While two flanges form the primary support structure around the hatches, Sven mentions there are two additional pieces required at each end to ensure comprehensive protection. This attention to detail highlights his commitment to producing a durable and reliable design. “Sailing is about finding your path, whether it’s across an ocean or within yourself.” – Sven Yrvind In conclusion, making flanges around bulkhead hatches may seem complex at first glance, but by following Sven Yrvind’s meticulous process, enthusiasts can achieve professional-level results. Remember that the journey of boatbuilding is as rewarding as reaching your destination; it tests one’s patience and dedication. For those seeking to embark on this adventure or simply gain more insight into marine craftsmanship, Sven’s wisdom is invaluable.Sven Yrvind, a renowned yacht designer and sailor, shares valuable insights on creating flanges around bulkhead hatches for canvas protection in this enlightening video. By following his expert guidance, boat enthusiasts can ensure their living areas remain secure while allowing unhindered access through the hatches.Step 1: Starting with the Flange
Sven begins by explaining that working on flanges vertically and horizontally is significantly easier than doing so in a flat position. To simplify the process further, he divides the task into two or three steps as suggested by fellow expert “for for.” This approach not only makes it more manageable but also allows for greater precision in crafting each component.Step 2: Applying Glue and Securing
Sven proceeds to apply glue along one edge of the flange, ensuring a secure bond when clamped into place. He emphasizes that this stage is crucial for maintaining the structural integrity of the flange, which in turn safeguards the living area beneath the canvas when hatches are open.Step 3: Allowing Time to Dry
After securely attaching the first portion of the flange, Sven allows ample time for it to dry before moving forward with additional steps. This patience and precision are key aspects of his successful boatbuilding methods.Step 4: Finishing Touches
Once the flange is fully dried, Sven removes the clamps carefully, ensuring no damage occurs during this process. He then moves on to attaching four more pieces onto these main frames, completing two pairs of flanges for the bulkhead hatches.The Final Touches
While two flanges form the primary support structure around the hatches, Sven mentions there are two additional pieces required at each end to ensure comprehensive protection. This attention to detail highlights his commitment to producing a durable and reliable design. “Sailing is about finding your path, whether it’s across an ocean or within yourself.” – Sven Yrvind In conclusion, making flanges around bulkhead hatches may seem complex at first glance, but by following Sven Yrvind’s meticulous process, enthusiasts can achieve professional-level results. Remember that the journey of boatbuilding is as rewarding as reaching your destination; it tests one’s patience and dedication. For those seeking to embark on this adventure or simply gain more insight into marine craftsmanship, Sven’s wisdom is invaluable.Making Flanges Around Bulkhead Hatches for Canvas
Sven Yrvind, a renowned yacht designer and sailor, shares valuable insights on creating flanges around bulkhead hatches for canvas protection in this enlightening video. By following his expert guidance, boat enthusiasts can ensure their living areas remain secure while allowing unhindered access through the hatches.Step 1: Starting with the Flange
Sven begins by explaining that working on flanges vertically and horizontally is significantly easier than doing so in a flat position. To simplify the process further, he divides the task into two or three steps as suggested by fellow expert “for for.” This approach not only makes it more manageable but also allows for greater precision in crafting each component.Step 2: Applying Glue and Securing
Sven proceeds to apply glue along one edge of the flange, ensuring a secure bond when clamped into place. He emphasizes that this stage is crucial for maintaining the structural integrity of the flange, which in turn safeguards the living area beneath the canvas when hatches are open.Step 3: Allowing Time to Dry
After securely attaching the first portion of the flange, Sven allows ample time for it to dry before moving forward with additional steps. This patience and precision are key aspects of his successful boatbuilding methods.Step 4: Finishing Touches
Once the flange is fully dried, Sven removes the clamps carefully, ensuring no damage occurs during this process. He then moves on to attaching four more pieces onto these main frames, completing two pairs of flanges for the bulkhead hatches.The Final Touches
While two flanges form the primary support structure around the hatches, Sven mentions there are two additional pieces required at each end to ensure comprehensive protection. This attention to detail highlights his commitment to producing a durable and reliable design. “Sailing is about finding your path, whether it’s across an ocean or within yourself.” – Sven Yrvind In conclusion, making flanges around bulkhead hatches may seem complex at first glance, but by following Sven Yrvind’s meticulous process, enthusiasts can achieve professional-level results. Remember that the journey of boatbuilding is as rewarding as reaching your destination; it tests one’s patience and dedication. For those seeking to embark on this adventure or simply gain more insight into marine craftsmanship, Sven’s wisdom is invaluable.Once the flange is fully dried, Sven removes the clamps carefully, ensuring no damage occurs during this process. He then moves on to attaching four more pieces onto these main frames, completing two pairs of flanges for the bulkhead hatches.The Final Touches
While two flanges form the primary support structure around the hatches, Sven mentions there are two additional pieces required at each end to ensure comprehensive protection. This attention to detail highlights his commitment to producing a durable and reliable design. “Sailing is about finding your path, whether it’s across an ocean or within yourself.” – Sven Yrvind In conclusion, making flanges around bulkhead hatches may seem complex at first glance, but by following Sven Yrvind’s meticulous process, enthusiasts can achieve professional-level results. Remember that the journey of boatbuilding is as rewarding as reaching your destination; it tests one’s patience and dedication. For those seeking to embark on this adventure or simply gain more insight into marine craftsmanship, Sven’s wisdom is invaluable.Sven proceeds to apply glue along one edge of the flange, ensuring a secure bond when clamped into place. He emphasizes that this stage is crucial for maintaining the structural integrity of the flange, which in turn safeguards the living area beneath the canvas when hatches are open.Step 3: Allowing Time to Dry
After securely attaching the first portion of the flange, Sven allows ample time for it to dry before moving forward with additional steps. This patience and precision are key aspects of his successful boatbuilding methods.Step 4: Finishing Touches
Once the flange is fully dried, Sven removes the clamps carefully, ensuring no damage occurs during this process. He then moves on to attaching four more pieces onto these main frames, completing two pairs of flanges for the bulkhead hatches.The Final Touches
While two flanges form the primary support structure around the hatches, Sven mentions there are two additional pieces required at each end to ensure comprehensive protection. This attention to detail highlights his commitment to producing a durable and reliable design. “Sailing is about finding your path, whether it’s across an ocean or within yourself.” – Sven Yrvind In conclusion, making flanges around bulkhead hatches may seem complex at first glance, but by following Sven Yrvind’s meticulous process, enthusiasts can achieve professional-level results. Remember that the journey of boatbuilding is as rewarding as reaching your destination; it tests one’s patience and dedication. For those seeking to embark on this adventure or simply gain more insight into marine craftsmanship, Sven’s wisdom is invaluable.Sven begins by explaining that working on flanges vertically and horizontally is significantly easier than doing so in a flat position. To simplify the process further, he divides the task into two or three steps as suggested by fellow expert “for for.” This approach not only makes it more manageable but also allows for greater precision in crafting each component.Step 2: Applying Glue and Securing
Sven proceeds to apply glue along one edge of the flange, ensuring a secure bond when clamped into place. He emphasizes that this stage is crucial for maintaining the structural integrity of the flange, which in turn safeguards the living area beneath the canvas when hatches are open.Step 3: Allowing Time to Dry
After securely attaching the first portion of the flange, Sven allows ample time for it to dry before moving forward with additional steps. This patience and precision are key aspects of his successful boatbuilding methods.Step 4: Finishing Touches
Once the flange is fully dried, Sven removes the clamps carefully, ensuring no damage occurs during this process. He then moves on to attaching four more pieces onto these main frames, completing two pairs of flanges for the bulkhead hatches.The Final Touches
While two flanges form the primary support structure around the hatches, Sven mentions there are two additional pieces required at each end to ensure comprehensive protection. This attention to detail highlights his commitment to producing a durable and reliable design. “Sailing is about finding your path, whether it’s across an ocean or within yourself.” – Sven Yrvind In conclusion, making flanges around bulkhead hatches may seem complex at first glance, but by following Sven Yrvind’s meticulous process, enthusiasts can achieve professional-level results. Remember that the journey of boatbuilding is as rewarding as reaching your destination; it tests one’s patience and dedication. For those seeking to embark on this adventure or simply gain more insight into marine craftsmanship, Sven’s wisdom is invaluable.Sven Yrvind, a renowned yacht designer and sailor, shares valuable insights on creating flanges around bulkhead hatches for canvas protection in this enlightening video. By following his expert guidance, boat enthusiasts can ensure their living areas remain secure while allowing unhindered access through the hatches.Step 1: Starting with the Flange
Sven begins by explaining that working on flanges vertically and horizontally is significantly easier than doing so in a flat position. To simplify the process further, he divides the task into two or three steps as suggested by fellow expert “for for.” This approach not only makes it more manageable but also allows for greater precision in crafting each component.Step 2: Applying Glue and Securing
Sven proceeds to apply glue along one edge of the flange, ensuring a secure bond when clamped into place. He emphasizes that this stage is crucial for maintaining the structural integrity of the flange, which in turn safeguards the living area beneath the canvas when hatches are open.Step 3: Allowing Time to Dry
After securely attaching the first portion of the flange, Sven allows ample time for it to dry before moving forward with additional steps. This patience and precision are key aspects of his successful boatbuilding methods.Step 4: Finishing Touches
Once the flange is fully dried, Sven removes the clamps carefully, ensuring no damage occurs during this process. He then moves on to attaching four more pieces onto these main frames, completing two pairs of flanges for the bulkhead hatches.The Final Touches
While two flanges form the primary support structure around the hatches, Sven mentions there are two additional pieces required at each end to ensure comprehensive protection. This attention to detail highlights his commitment to producing a durable and reliable design. “Sailing is about finding your path, whether it’s across an ocean or within yourself.” – Sven Yrvind In conclusion, making flanges around bulkhead hatches may seem complex at first glance, but by following Sven Yrvind’s meticulous process, enthusiasts can achieve professional-level results. Remember that the journey of boatbuilding is as rewarding as reaching your destination; it tests one’s patience and dedication. For those seeking to embark on this adventure or simply gain more insight into marine craftsmanship, Sven’s wisdom is invaluable.Making Flanges Around Bulkhead Hatches for Canvas
Sven Yrvind, a renowned yacht designer and sailor, shares valuable insights on creating flanges around bulkhead hatches for canvas protection in this enlightening video. By following his expert guidance, boat enthusiasts can ensure their living areas remain secure while allowing unhindered access through the hatches.Step 1: Starting with the Flange
Sven begins by explaining that working on flanges vertically and horizontally is significantly easier than doing so in a flat position. To simplify the process further, he divides the task into two or three steps as suggested by fellow expert “for for.” This approach not only makes it more manageable but also allows for greater precision in crafting each component.Step 2: Applying Glue and Securing
Sven proceeds to apply glue along one edge of the flange, ensuring a secure bond when clamped into place. He emphasizes that this stage is crucial for maintaining the structural integrity of the flange, which in turn safeguards the living area beneath the canvas when hatches are open.Step 3: Allowing Time to Dry
After securely attaching the first portion of the flange, Sven allows ample time for it to dry before moving forward with additional steps. This patience and precision are key aspects of his successful boatbuilding methods.Step 4: Finishing Touches
Once the flange is fully dried, Sven removes the clamps carefully, ensuring no damage occurs during this process. He then moves on to attaching four more pieces onto these main frames, completing two pairs of flanges for the bulkhead hatches.The Final Touches
While two flanges form the primary support structure around the hatches, Sven mentions there are two additional pieces required at each end to ensure comprehensive protection. This attention to detail highlights his commitment to producing a durable and reliable design. “Sailing is about finding your path, whether it’s across an ocean or within yourself.” – Sven Yrvind In conclusion, making flanges around bulkhead hatches may seem complex at first glance, but by following Sven Yrvind’s meticulous process, enthusiasts can achieve professional-level results. Remember that the journey of boatbuilding is as rewarding as reaching your destination; it tests one’s patience and dedication. For those seeking to embark on this adventure or simply gain more insight into marine craftsmanship, Sven’s wisdom is invaluable.After securely attaching the first portion of the flange, Sven allows ample time for it to dry before moving forward with additional steps. This patience and precision are key aspects of his successful boatbuilding methods.Step 4: Finishing Touches
Once the flange is fully dried, Sven removes the clamps carefully, ensuring no damage occurs during this process. He then moves on to attaching four more pieces onto these main frames, completing two pairs of flanges for the bulkhead hatches.The Final Touches
While two flanges form the primary support structure around the hatches, Sven mentions there are two additional pieces required at each end to ensure comprehensive protection. This attention to detail highlights his commitment to producing a durable and reliable design. “Sailing is about finding your path, whether it’s across an ocean or within yourself.” – Sven Yrvind In conclusion, making flanges around bulkhead hatches may seem complex at first glance, but by following Sven Yrvind’s meticulous process, enthusiasts can achieve professional-level results. Remember that the journey of boatbuilding is as rewarding as reaching your destination; it tests one’s patience and dedication. For those seeking to embark on this adventure or simply gain more insight into marine craftsmanship, Sven’s wisdom is invaluable.Sven proceeds to apply glue along one edge of the flange, ensuring a secure bond when clamped into place. He emphasizes that this stage is crucial for maintaining the structural integrity of the flange, which in turn safeguards the living area beneath the canvas when hatches are open.Step 3: Allowing Time to Dry
After securely attaching the first portion of the flange, Sven allows ample time for it to dry before moving forward with additional steps. This patience and precision are key aspects of his successful boatbuilding methods.Step 4: Finishing Touches
Once the flange is fully dried, Sven removes the clamps carefully, ensuring no damage occurs during this process. He then moves on to attaching four more pieces onto these main frames, completing two pairs of flanges for the bulkhead hatches.The Final Touches
While two flanges form the primary support structure around the hatches, Sven mentions there are two additional pieces required at each end to ensure comprehensive protection. This attention to detail highlights his commitment to producing a durable and reliable design. “Sailing is about finding your path, whether it’s across an ocean or within yourself.” – Sven Yrvind In conclusion, making flanges around bulkhead hatches may seem complex at first glance, but by following Sven Yrvind’s meticulous process, enthusiasts can achieve professional-level results. Remember that the journey of boatbuilding is as rewarding as reaching your destination; it tests one’s patience and dedication. For those seeking to embark on this adventure or simply gain more insight into marine craftsmanship, Sven’s wisdom is invaluable.Sven begins by explaining that working on flanges vertically and horizontally is significantly easier than doing so in a flat position. To simplify the process further, he divides the task into two or three steps as suggested by fellow expert “for for.” This approach not only makes it more manageable but also allows for greater precision in crafting each component.Step 2: Applying Glue and Securing
Sven proceeds to apply glue along one edge of the flange, ensuring a secure bond when clamped into place. He emphasizes that this stage is crucial for maintaining the structural integrity of the flange, which in turn safeguards the living area beneath the canvas when hatches are open.Step 3: Allowing Time to Dry
After securely attaching the first portion of the flange, Sven allows ample time for it to dry before moving forward with additional steps. This patience and precision are key aspects of his successful boatbuilding methods.Step 4: Finishing Touches
Once the flange is fully dried, Sven removes the clamps carefully, ensuring no damage occurs during this process. He then moves on to attaching four more pieces onto these main frames, completing two pairs of flanges for the bulkhead hatches.The Final Touches
While two flanges form the primary support structure around the hatches, Sven mentions there are two additional pieces required at each end to ensure comprehensive protection. This attention to detail highlights his commitment to producing a durable and reliable design. “Sailing is about finding your path, whether it’s across an ocean or within yourself.” – Sven Yrvind In conclusion, making flanges around bulkhead hatches may seem complex at first glance, but by following Sven Yrvind’s meticulous process, enthusiasts can achieve professional-level results. Remember that the journey of boatbuilding is as rewarding as reaching your destination; it tests one’s patience and dedication. For those seeking to embark on this adventure or simply gain more insight into marine craftsmanship, Sven’s wisdom is invaluable.Sven Yrvind, a renowned yacht designer and sailor, shares valuable insights on creating flanges around bulkhead hatches for canvas protection in this enlightening video. By following his expert guidance, boat enthusiasts can ensure their living areas remain secure while allowing unhindered access through the hatches.Step 1: Starting with the Flange
Sven begins by explaining that working on flanges vertically and horizontally is significantly easier than doing so in a flat position. To simplify the process further, he divides the task into two or three steps as suggested by fellow expert “for for.” This approach not only makes it more manageable but also allows for greater precision in crafting each component.Step 2: Applying Glue and Securing
Sven proceeds to apply glue along one edge of the flange, ensuring a secure bond when clamped into place. He emphasizes that this stage is crucial for maintaining the structural integrity of the flange, which in turn safeguards the living area beneath the canvas when hatches are open.Step 3: Allowing Time to Dry
After securely attaching the first portion of the flange, Sven allows ample time for it to dry before moving forward with additional steps. This patience and precision are key aspects of his successful boatbuilding methods.Step 4: Finishing Touches
Once the flange is fully dried, Sven removes the clamps carefully, ensuring no damage occurs during this process. He then moves on to attaching four more pieces onto these main frames, completing two pairs of flanges for the bulkhead hatches.The Final Touches
While two flanges form the primary support structure around the hatches, Sven mentions there are two additional pieces required at each end to ensure comprehensive protection. This attention to detail highlights his commitment to producing a durable and reliable design. “Sailing is about finding your path, whether it’s across an ocean or within yourself.” – Sven Yrvind In conclusion, making flanges around bulkhead hatches may seem complex at first glance, but by following Sven Yrvind’s meticulous process, enthusiasts can achieve professional-level results. Remember that the journey of boatbuilding is as rewarding as reaching your destination; it tests one’s patience and dedication. For those seeking to embark on this adventure or simply gain more insight into marine craftsmanship, Sven’s wisdom is invaluable.Making Flanges Around Bulkhead Hatches for Canvas
Sven Yrvind, a renowned yacht designer and sailor, shares valuable insights on creating flanges around bulkhead hatches for canvas protection in this enlightening video. By following his expert guidance, boat enthusiasts can ensure their living areas remain secure while allowing unhindered access through the hatches.Step 1: Starting with the Flange
Sven begins by explaining that working on flanges vertically and horizontally is significantly easier than doing so in a flat position. To simplify the process further, he divides the task into two or three steps as suggested by fellow expert “for for.” This approach not only makes it more manageable but also allows for greater precision in crafting each component.Step 2: Applying Glue and Securing
Sven proceeds to apply glue along one edge of the flange, ensuring a secure bond when clamped into place. He emphasizes that this stage is crucial for maintaining the structural integrity of the flange, which in turn safeguards the living area beneath the canvas when hatches are open.Step 3: Allowing Time to Dry
After securely attaching the first portion of the flange, Sven allows ample time for it to dry before moving forward with additional steps. This patience and precision are key aspects of his successful boatbuilding methods.Step 4: Finishing Touches
Once the flange is fully dried, Sven removes the clamps carefully, ensuring no damage occurs during this process. He then moves on to attaching four more pieces onto these main frames, completing two pairs of flanges for the bulkhead hatches.The Final Touches
While two flanges form the primary support structure around the hatches, Sven mentions there are two additional pieces required at each end to ensure comprehensive protection. This attention to detail highlights his commitment to producing a durable and reliable design. “Sailing is about finding your path, whether it’s across an ocean or within yourself.” – Sven Yrvind In conclusion, making flanges around bulkhead hatches may seem complex at first glance, but by following Sven Yrvind’s meticulous process, enthusiasts can achieve professional-level results. Remember that the journey of boatbuilding is as rewarding as reaching your destination; it tests one’s patience and dedication. For those seeking to embark on this adventure or simply gain more insight into marine craftsmanship, Sven’s wisdom is invaluable.Once the flange is fully dried, Sven removes the clamps carefully, ensuring no damage occurs during this process. He then moves on to attaching four more pieces onto these main frames, completing two pairs of flanges for the bulkhead hatches.The Final Touches
While two flanges form the primary support structure around the hatches, Sven mentions there are two additional pieces required at each end to ensure comprehensive protection. This attention to detail highlights his commitment to producing a durable and reliable design. “Sailing is about finding your path, whether it’s across an ocean or within yourself.” – Sven Yrvind In conclusion, making flanges around bulkhead hatches may seem complex at first glance, but by following Sven Yrvind’s meticulous process, enthusiasts can achieve professional-level results. Remember that the journey of boatbuilding is as rewarding as reaching your destination; it tests one’s patience and dedication. For those seeking to embark on this adventure or simply gain more insight into marine craftsmanship, Sven’s wisdom is invaluable.After securely attaching the first portion of the flange, Sven allows ample time for it to dry before moving forward with additional steps. This patience and precision are key aspects of his successful boatbuilding methods.Step 4: Finishing Touches
Once the flange is fully dried, Sven removes the clamps carefully, ensuring no damage occurs during this process. He then moves on to attaching four more pieces onto these main frames, completing two pairs of flanges for the bulkhead hatches.The Final Touches
While two flanges form the primary support structure around the hatches, Sven mentions there are two additional pieces required at each end to ensure comprehensive protection. This attention to detail highlights his commitment to producing a durable and reliable design. “Sailing is about finding your path, whether it’s across an ocean or within yourself.” – Sven Yrvind In conclusion, making flanges around bulkhead hatches may seem complex at first glance, but by following Sven Yrvind’s meticulous process, enthusiasts can achieve professional-level results. Remember that the journey of boatbuilding is as rewarding as reaching your destination; it tests one’s patience and dedication. For those seeking to embark on this adventure or simply gain more insight into marine craftsmanship, Sven’s wisdom is invaluable.Sven proceeds to apply glue along one edge of the flange, ensuring a secure bond when clamped into place. He emphasizes that this stage is crucial for maintaining the structural integrity of the flange, which in turn safeguards the living area beneath the canvas when hatches are open.Step 3: Allowing Time to Dry
After securely attaching the first portion of the flange, Sven allows ample time for it to dry before moving forward with additional steps. This patience and precision are key aspects of his successful boatbuilding methods.Step 4: Finishing Touches
Once the flange is fully dried, Sven removes the clamps carefully, ensuring no damage occurs during this process. He then moves on to attaching four more pieces onto these main frames, completing two pairs of flanges for the bulkhead hatches.The Final Touches
While two flanges form the primary support structure around the hatches, Sven mentions there are two additional pieces required at each end to ensure comprehensive protection. This attention to detail highlights his commitment to producing a durable and reliable design. “Sailing is about finding your path, whether it’s across an ocean or within yourself.” – Sven Yrvind In conclusion, making flanges around bulkhead hatches may seem complex at first glance, but by following Sven Yrvind’s meticulous process, enthusiasts can achieve professional-level results. Remember that the journey of boatbuilding is as rewarding as reaching your destination; it tests one’s patience and dedication. For those seeking to embark on this adventure or simply gain more insight into marine craftsmanship, Sven’s wisdom is invaluable.Sven begins by explaining that working on flanges vertically and horizontally is significantly easier than doing so in a flat position. To simplify the process further, he divides the task into two or three steps as suggested by fellow expert “for for.” This approach not only makes it more manageable but also allows for greater precision in crafting each component.Step 2: Applying Glue and Securing
Sven proceeds to apply glue along one edge of the flange, ensuring a secure bond when clamped into place. He emphasizes that this stage is crucial for maintaining the structural integrity of the flange, which in turn safeguards the living area beneath the canvas when hatches are open.Step 3: Allowing Time to Dry
After securely attaching the first portion of the flange, Sven allows ample time for it to dry before moving forward with additional steps. This patience and precision are key aspects of his successful boatbuilding methods.Step 4: Finishing Touches
Once the flange is fully dried, Sven removes the clamps carefully, ensuring no damage occurs during this process. He then moves on to attaching four more pieces onto these main frames, completing two pairs of flanges for the bulkhead hatches.The Final Touches
While two flanges form the primary support structure around the hatches, Sven mentions there are two additional pieces required at each end to ensure comprehensive protection. This attention to detail highlights his commitment to producing a durable and reliable design. “Sailing is about finding your path, whether it’s across an ocean or within yourself.” – Sven Yrvind In conclusion, making flanges around bulkhead hatches may seem complex at first glance, but by following Sven Yrvind’s meticulous process, enthusiasts can achieve professional-level results. Remember that the journey of boatbuilding is as rewarding as reaching your destination; it tests one’s patience and dedication. For those seeking to embark on this adventure or simply gain more insight into marine craftsmanship, Sven’s wisdom is invaluable.Sven Yrvind, a renowned yacht designer and sailor, shares valuable insights on creating flanges around bulkhead hatches for canvas protection in this enlightening video. By following his expert guidance, boat enthusiasts can ensure their living areas remain secure while allowing unhindered access through the hatches.Step 1: Starting with the Flange
Sven begins by explaining that working on flanges vertically and horizontally is significantly easier than doing so in a flat position. To simplify the process further, he divides the task into two or three steps as suggested by fellow expert “for for.” This approach not only makes it more manageable but also allows for greater precision in crafting each component.Step 2: Applying Glue and Securing
Sven proceeds to apply glue along one edge of the flange, ensuring a secure bond when clamped into place. He emphasizes that this stage is crucial for maintaining the structural integrity of the flange, which in turn safeguards the living area beneath the canvas when hatches are open.Step 3: Allowing Time to Dry
After securely attaching the first portion of the flange, Sven allows ample time for it to dry before moving forward with additional steps. This patience and precision are key aspects of his successful boatbuilding methods.Step 4: Finishing Touches
Once the flange is fully dried, Sven removes the clamps carefully, ensuring no damage occurs during this process. He then moves on to attaching four more pieces onto these main frames, completing two pairs of flanges for the bulkhead hatches.The Final Touches
While two flanges form the primary support structure around the hatches, Sven mentions there are two additional pieces required at each end to ensure comprehensive protection. This attention to detail highlights his commitment to producing a durable and reliable design. “Sailing is about finding your path, whether it’s across an ocean or within yourself.” – Sven Yrvind In conclusion, making flanges around bulkhead hatches may seem complex at first glance, but by following Sven Yrvind’s meticulous process, enthusiasts can achieve professional-level results. Remember that the journey of boatbuilding is as rewarding as reaching your destination; it tests one’s patience and dedication. For those seeking to embark on this adventure or simply gain more insight into marine craftsmanship, Sven’s wisdom is invaluable.Making Flanges Around Bulkhead Hatches for Canvas
Sven Yrvind, a renowned yacht designer and sailor, shares valuable insights on creating flanges around bulkhead hatches for canvas protection in this enlightening video. By following his expert guidance, boat enthusiasts can ensure their living areas remain secure while allowing unhindered access through the hatches.Step 1: Starting with the Flange
Sven begins by explaining that working on flanges vertically and horizontally is significantly easier than doing so in a flat position. To simplify the process further, he divides the task into two or three steps as suggested by fellow expert “for for.” This approach not only makes it more manageable but also allows for greater precision in crafting each component.Step 2: Applying Glue and Securing
Sven proceeds to apply glue along one edge of the flange, ensuring a secure bond when clamped into place. He emphasizes that this stage is crucial for maintaining the structural integrity of the flange, which in turn safeguards the living area beneath the canvas when hatches are open.Step 3: Allowing Time to Dry
After securely attaching the first portion of the flange, Sven allows ample time for it to dry before moving forward with additional steps. This patience and precision are key aspects of his successful boatbuilding methods.Step 4: Finishing Touches
Once the flange is fully dried, Sven removes the clamps carefully, ensuring no damage occurs during this process. He then moves on to attaching four more pieces onto these main frames, completing two pairs of flanges for the bulkhead hatches.The Final Touches
While two flanges form the primary support structure around the hatches, Sven mentions there are two additional pieces required at each end to ensure comprehensive protection. This attention to detail highlights his commitment to producing a durable and reliable design. “Sailing is about finding your path, whether it’s across an ocean or within yourself.” – Sven Yrvind In conclusion, making flanges around bulkhead hatches may seem complex at first glance, but by following Sven Yrvind’s meticulous process, enthusiasts can achieve professional-level results. Remember that the journey of boatbuilding is as rewarding as reaching your destination; it tests one’s patience and dedication. For those seeking to embark on this adventure or simply gain more insight into marine craftsmanship, Sven’s wisdom is invaluable.After securely attaching the first portion of the flange, Sven allows ample time for it to dry before moving forward with additional steps. This patience and precision are key aspects of his successful boatbuilding methods.Step 4: Finishing Touches
Once the flange is fully dried, Sven removes the clamps carefully, ensuring no damage occurs during this process. He then moves on to attaching four more pieces onto these main frames, completing two pairs of flanges for the bulkhead hatches.The Final Touches
While two flanges form the primary support structure around the hatches, Sven mentions there are two additional pieces required at each end to ensure comprehensive protection. This attention to detail highlights his commitment to producing a durable and reliable design. “Sailing is about finding your path, whether it’s across an ocean or within yourself.” – Sven Yrvind In conclusion, making flanges around bulkhead hatches may seem complex at first glance, but by following Sven Yrvind’s meticulous process, enthusiasts can achieve professional-level results. Remember that the journey of boatbuilding is as rewarding as reaching your destination; it tests one’s patience and dedication. For those seeking to embark on this adventure or simply gain more insight into marine craftsmanship, Sven’s wisdom is invaluable.Making Flanges Around Bulkhead Hatches for Canvas
Sven Yrvind, a renowned yacht designer and sailor, shares valuable insights on creating flanges around bulkhead hatches for canvas protection in this enlightening video. By following his expert guidance, boat enthusiasts can ensure their living areas remain secure while allowing unhindered access through the hatches.Step 1: Starting with the Flange
Sven begins by explaining that working on flanges vertically and horizontally is significantly easier than doing so in a flat position. To simplify the process further, he divides the task into two or three steps as suggested by fellow expert “for for.” This approach not only makes it more manageable but also allows for greater precision in crafting each component.Step 2: Applying Glue and Securing
Sven proceeds to apply glue along one edge of the flange, ensuring a secure bond when clamped into place. He emphasizes that this stage is crucial for maintaining the structural integrity of the flange, which in turn safeguards the living area beneath the canvas when hatches are open.Step 3: Allowing Time to Dry
After securely attaching the first portion of the flange, Sven allows ample time for it to dry before moving forward with additional steps. This patience and precision are key aspects of his successful boatbuilding methods.Step 4: Finishing Touches
Once the flange is fully dried, Sven removes the clamps carefully, ensuring no damage occurs during this process. He then moves on to attaching four more pieces onto these main frames, completing two pairs of flanges for the bulkhead hatches.The Final Touches
While two flanges form the primary support structure around the hatches, Sven mentions there are two additional pieces required at each end to ensure comprehensive protection. This attention to detail highlights his commitment to producing a durable and reliable design. “Sailing is about finding your path, whether it’s across an ocean or within yourself.” – Sven Yrvind In conclusion, making flanges around bulkhead hatches may seem complex at first glance, but by following Sven Yrvind’s meticulous process, enthusiasts can achieve professional-level results. Remember that the journey of boatbuilding is as rewarding as reaching your destination; it tests one’s patience and dedication. For those seeking to embark on this adventure or simply gain more insight into marine craftsmanship, Sven’s wisdom is invaluable.Sven proceeds to apply glue along one edge of the flange, ensuring a secure bond when clamped into place. He emphasizes that this stage is crucial for maintaining the structural integrity of the flange, which in turn safeguards the living area beneath the canvas when hatches are open.Step 3: Allowing Time to Dry
After securely attaching the first portion of the flange, Sven allows ample time for it to dry before moving forward with additional steps. This patience and precision are key aspects of his successful boatbuilding methods.Step 4: Finishing Touches
Once the flange is fully dried, Sven removes the clamps carefully, ensuring no damage occurs during this process. He then moves on to attaching four more pieces onto these main frames, completing two pairs of flanges for the bulkhead hatches.The Final Touches
While two flanges form the primary support structure around the hatches, Sven mentions there are two additional pieces required at each end to ensure comprehensive protection. This attention to detail highlights his commitment to producing a durable and reliable design. “Sailing is about finding your path, whether it’s across an ocean or within yourself.” – Sven Yrvind In conclusion, making flanges around bulkhead hatches may seem complex at first glance, but by following Sven Yrvind’s meticulous process, enthusiasts can achieve professional-level results. Remember that the journey of boatbuilding is as rewarding as reaching your destination; it tests one’s patience and dedication. For those seeking to embark on this adventure or simply gain more insight into marine craftsmanship, Sven’s wisdom is invaluable.Making Flanges Around Bulkhead Hatches for Canvas
Sven Yrvind, a renowned yacht designer and sailor, shares valuable insights on creating flanges around bulkhead hatches for canvas protection in this enlightening video. By following his expert guidance, boat enthusiasts can ensure their living areas remain secure while allowing unhindered access through the hatches.Step 1: Starting with the Flange
Sven begins by explaining that working on flanges vertically and horizontally is significantly easier than doing so in a flat position. To simplify the process further, he divides the task into two or three steps as suggested by fellow expert “for for.” This approach not only makes it more manageable but also allows for greater precision in crafting each component.Step 2: Applying Glue and Securing
Sven proceeds to apply glue along one edge of the flange, ensuring a secure bond when clamped into place. He emphasizes that this stage is crucial for maintaining the structural integrity of the flange, which in turn safeguards the living area beneath the canvas when hatches are open.Step 3: Allowing Time to Dry
After securely attaching the first portion of the flange, Sven allows ample time for it to dry before moving forward with additional steps. This patience and precision are key aspects of his successful boatbuilding methods.Step 4: Finishing Touches
Once the flange is fully dried, Sven removes the clamps carefully, ensuring no damage occurs during this process. He then moves on to attaching four more pieces onto these main frames, completing two pairs of flanges for the bulkhead hatches.The Final Touches
While two flanges form the primary support structure around the hatches, Sven mentions there are two additional pieces required at each end to ensure comprehensive protection. This attention to detail highlights his commitment to producing a durable and reliable design. “Sailing is about finding your path, whether it’s across an ocean or within yourself.” – Sven Yrvind In conclusion, making flanges around bulkhead hatches may seem complex at first glance, but by following Sven Yrvind’s meticulous process, enthusiasts can achieve professional-level results. Remember that the journey of boatbuilding is as rewarding as reaching your destination; it tests one’s patience and dedication. For those seeking to embark on this adventure or simply gain more insight into marine craftsmanship, Sven’s wisdom is invaluable.Sven begins by explaining that working on flanges vertically and horizontally is significantly easier than doing so in a flat position. To simplify the process further, he divides the task into two or three steps as suggested by fellow expert “for for.” This approach not only makes it more manageable but also allows for greater precision in crafting each component.Step 2: Applying Glue and Securing
Sven proceeds to apply glue along one edge of the flange, ensuring a secure bond when clamped into place. He emphasizes that this stage is crucial for maintaining the structural integrity of the flange, which in turn safeguards the living area beneath the canvas when hatches are open.Step 3: Allowing Time to Dry
After securely attaching the first portion of the flange, Sven allows ample time for it to dry before moving forward with additional steps. This patience and precision are key aspects of his successful boatbuilding methods.Step 4: Finishing Touches
Once the flange is fully dried, Sven removes the clamps carefully, ensuring no damage occurs during this process. He then moves on to attaching four more pieces onto these main frames, completing two pairs of flanges for the bulkhead hatches.The Final Touches
While two flanges form the primary support structure around the hatches, Sven mentions there are two additional pieces required at each end to ensure comprehensive protection. This attention to detail highlights his commitment to producing a durable and reliable design. “Sailing is about finding your path, whether it’s across an ocean or within yourself.” – Sven Yrvind In conclusion, making flanges around bulkhead hatches may seem complex at first glance, but by following Sven Yrvind’s meticulous process, enthusiasts can achieve professional-level results. Remember that the journey of boatbuilding is as rewarding as reaching your destination; it tests one’s patience and dedication. For those seeking to embark on this adventure or simply gain more insight into marine craftsmanship, Sven’s wisdom is invaluable.Making Flanges Around Bulkhead Hatches for Canvas
Sven Yrvind, a renowned yacht designer and sailor, shares valuable insights on creating flanges around bulkhead hatches for canvas protection in this enlightening video. By following his expert guidance, boat enthusiasts can ensure their living areas remain secure while allowing unhindered access through the hatches.Step 1: Starting with the Flange
Sven begins by explaining that working on flanges vertically and horizontally is significantly easier than doing so in a flat position. To simplify the process further, he divides the task into two or three steps as suggested by fellow expert “for for.” This approach not only makes it more manageable but also allows for greater precision in crafting each component.Step 2: Applying Glue and Securing
Sven proceeds to apply glue along one edge of the flange, ensuring a secure bond when clamped into place. He emphasizes that this stage is crucial for maintaining the structural integrity of the flange, which in turn safeguards the living area beneath the canvas when hatches are open.Step 3: Allowing Time to Dry
After securely attaching the first portion of the flange, Sven allows ample time for it to dry before moving forward with additional steps. This patience and precision are key aspects of his successful boatbuilding methods.Step 4: Finishing Touches
Once the flange is fully dried, Sven removes the clamps carefully, ensuring no damage occurs during this process. He then moves on to attaching four more pieces onto these main frames, completing two pairs of flanges for the bulkhead hatches.The Final Touches
While two flanges form the primary support structure around the hatches, Sven mentions there are two additional pieces required at each end to ensure comprehensive protection. This attention to detail highlights his commitment to producing a durable and reliable design. “Sailing is about finding your path, whether it’s across an ocean or within yourself.” – Sven Yrvind In conclusion, making flanges around bulkhead hatches may seem complex at first glance, but by following Sven Yrvind’s meticulous process, enthusiasts can achieve professional-level results. Remember that the journey of boatbuilding is as rewarding as reaching your destination; it tests one’s patience and dedication. For those seeking to embark on this adventure or simply gain more insight into marine craftsmanship, Sven’s wisdom is invaluable.Sven Yrvind, a renowned yacht designer and sailor, shares valuable insights on creating flanges around bulkhead hatches for canvas protection in this enlightening video. By following his expert guidance, boat enthusiasts can ensure their living areas remain secure while allowing unhindered access through the hatches.Step 1: Starting with the Flange
Sven begins by explaining that working on flanges vertically and horizontally is significantly easier than doing so in a flat position. To simplify the process further, he divides the task into two or three steps as suggested by fellow expert “for for.” This approach not only makes it more manageable but also allows for greater precision in crafting each component.Step 2: Applying Glue and Securing
Sven proceeds to apply glue along one edge of the flange, ensuring a secure bond when clamped into place. He emphasizes that this stage is crucial for maintaining the structural integrity of the flange, which in turn safeguards the living area beneath the canvas when hatches are open.Step 3: Allowing Time to Dry
After securely attaching the first portion of the flange, Sven allows ample time for it to dry before moving forward with additional steps. This patience and precision are key aspects of his successful boatbuilding methods.Step 4: Finishing Touches
Once the flange is fully dried, Sven removes the clamps carefully, ensuring no damage occurs during this process. He then moves on to attaching four more pieces onto these main frames, completing two pairs of flanges for the bulkhead hatches.The Final Touches
While two flanges form the primary support structure around the hatches, Sven mentions there are two additional pieces required at each end to ensure comprehensive protection. This attention to detail highlights his commitment to producing a durable and reliable design. “Sailing is about finding your path, whether it’s across an ocean or within yourself.” – Sven Yrvind In conclusion, making flanges around bulkhead hatches may seem complex at first glance, but by following Sven Yrvind’s meticulous process, enthusiasts can achieve professional-level results. Remember that the journey of boatbuilding is as rewarding as reaching your destination; it tests one’s patience and dedication. For those seeking to embark on this adventure or simply gain more insight into marine craftsmanship, Sven’s wisdom is invaluable.Making Flanges Around Bulkhead Hatches for Canvas
Sven Yrvind, a renowned yacht designer and sailor, shares valuable insights on creating flanges around bulkhead hatches for canvas protection in this enlightening video. By following his expert guidance, boat enthusiasts can ensure their living areas remain secure while allowing unhindered access through the hatches.Step 1: Starting with the Flange
Sven begins by explaining that working on flanges vertically and horizontally is significantly easier than doing so in a flat position. To simplify the process further, he divides the task into two or three steps as suggested by fellow expert “for for.” This approach not only makes it more manageable but also allows for greater precision in crafting each component.Step 2: Applying Glue and Securing
Sven proceeds to apply glue along one edge of the flange, ensuring a secure bond when clamped into place. He emphasizes that this stage is crucial for maintaining the structural integrity of the flange, which in turn safeguards the living area beneath the canvas when hatches are open.Step 3: Allowing Time to Dry
After securely attaching the first portion of the flange, Sven allows ample time for it to dry before moving forward with additional steps. This patience and precision are key aspects of his successful boatbuilding methods.Step 4: Finishing Touches
Once the flange is fully dried, Sven removes the clamps carefully, ensuring no damage occurs during this process. He then moves on to attaching four more pieces onto these main frames, completing two pairs of flanges for the bulkhead hatches.The Final Touches
While two flanges form the primary support structure around the hatches, Sven mentions there are two additional pieces required at each end to ensure comprehensive protection. This attention to detail highlights his commitment to producing a durable and reliable design. “Sailing is about finding your path, whether it’s across an ocean or within yourself.” – Sven Yrvind In conclusion, making flanges around bulkhead hatches may seem complex at first glance, but by following Sven Yrvind’s meticulous process, enthusiasts can achieve professional-level results. Remember that the journey of boatbuilding is as rewarding as reaching your destination; it tests one’s patience and dedication. For those seeking to embark on this adventure or simply gain more insight into marine craftsmanship, Sven’s wisdom is invaluable.Once the flange is fully dried, Sven removes the clamps carefully, ensuring no damage occurs during this process. He then moves on to attaching four more pieces onto these main frames, completing two pairs of flanges for the bulkhead hatches.The Final Touches
While two flanges form the primary support structure around the hatches, Sven mentions there are two additional pieces required at each end to ensure comprehensive protection. This attention to detail highlights his commitment to producing a durable and reliable design. “Sailing is about finding your path, whether it’s across an ocean or within yourself.” – Sven Yrvind In conclusion, making flanges around bulkhead hatches may seem complex at first glance, but by following Sven Yrvind’s meticulous process, enthusiasts can achieve professional-level results. Remember that the journey of boatbuilding is as rewarding as reaching your destination; it tests one’s patience and dedication. For those seeking to embark on this adventure or simply gain more insight into marine craftsmanship, Sven’s wisdom is invaluable.Sven Yrvind, a renowned yacht designer and sailor, shares valuable insights on creating flanges around bulkhead hatches for canvas protection in this enlightening video. By following his expert guidance, boat enthusiasts can ensure their living areas remain secure while allowing unhindered access through the hatches.Step 1: Starting with the Flange
Sven begins by explaining that working on flanges vertically and horizontally is significantly easier than doing so in a flat position. To simplify the process further, he divides the task into two or three steps as suggested by fellow expert “for for.” This approach not only makes it more manageable but also allows for greater precision in crafting each component.Step 2: Applying Glue and Securing
Sven proceeds to apply glue along one edge of the flange, ensuring a secure bond when clamped into place. He emphasizes that this stage is crucial for maintaining the structural integrity of the flange, which in turn safeguards the living area beneath the canvas when hatches are open.Step 3: Allowing Time to Dry
After securely attaching the first portion of the flange, Sven allows ample time for it to dry before moving forward with additional steps. This patience and precision are key aspects of his successful boatbuilding methods.Step 4: Finishing Touches
Once the flange is fully dried, Sven removes the clamps carefully, ensuring no damage occurs during this process. He then moves on to attaching four more pieces onto these main frames, completing two pairs of flanges for the bulkhead hatches.The Final Touches
While two flanges form the primary support structure around the hatches, Sven mentions there are two additional pieces required at each end to ensure comprehensive protection. This attention to detail highlights his commitment to producing a durable and reliable design. “Sailing is about finding your path, whether it’s across an ocean or within yourself.” – Sven Yrvind In conclusion, making flanges around bulkhead hatches may seem complex at first glance, but by following Sven Yrvind’s meticulous process, enthusiasts can achieve professional-level results. Remember that the journey of boatbuilding is as rewarding as reaching your destination; it tests one’s patience and dedication. For those seeking to embark on this adventure or simply gain more insight into marine craftsmanship, Sven’s wisdom is invaluable.Making Flanges Around Bulkhead Hatches for Canvas
Sven Yrvind, a renowned yacht designer and sailor, shares valuable insights on creating flanges around bulkhead hatches for canvas protection in this enlightening video. By following his expert guidance, boat enthusiasts can ensure their living areas remain secure while allowing unhindered access through the hatches.Step 1: Starting with the Flange
Sven begins by explaining that working on flanges vertically and horizontally is significantly easier than doing so in a flat position. To simplify the process further, he divides the task into two or three steps as suggested by fellow expert “for for.” This approach not only makes it more manageable but also allows for greater precision in crafting each component.Step 2: Applying Glue and Securing
Sven proceeds to apply glue along one edge of the flange, ensuring a secure bond when clamped into place. He emphasizes that this stage is crucial for maintaining the structural integrity of the flange, which in turn safeguards the living area beneath the canvas when hatches are open.Step 3: Allowing Time to Dry
After securely attaching the first portion of the flange, Sven allows ample time for it to dry before moving forward with additional steps. This patience and precision are key aspects of his successful boatbuilding methods.Step 4: Finishing Touches
Once the flange is fully dried, Sven removes the clamps carefully, ensuring no damage occurs during this process. He then moves on to attaching four more pieces onto these main frames, completing two pairs of flanges for the bulkhead hatches.The Final Touches
While two flanges form the primary support structure around the hatches, Sven mentions there are two additional pieces required at each end to ensure comprehensive protection. This attention to detail highlights his commitment to producing a durable and reliable design. “Sailing is about finding your path, whether it’s across an ocean or within yourself.” – Sven Yrvind In conclusion, making flanges around bulkhead hatches may seem complex at first glance, but by following Sven Yrvind’s meticulous process, enthusiasts can achieve professional-level results. Remember that the journey of boatbuilding is as rewarding as reaching your destination; it tests one’s patience and dedication. For those seeking to embark on this adventure or simply gain more insight into marine craftsmanship, Sven’s wisdom is invaluable.After securely attaching the first portion of the flange, Sven allows ample time for it to dry before moving forward with additional steps. This patience and precision are key aspects of his successful boatbuilding methods.Step 4: Finishing Touches
Once the flange is fully dried, Sven removes the clamps carefully, ensuring no damage occurs during this process. He then moves on to attaching four more pieces onto these main frames, completing two pairs of flanges for the bulkhead hatches.The Final Touches
While two flanges form the primary support structure around the hatches, Sven mentions there are two additional pieces required at each end to ensure comprehensive protection. This attention to detail highlights his commitment to producing a durable and reliable design. “Sailing is about finding your path, whether it’s across an ocean or within yourself.” – Sven Yrvind In conclusion, making flanges around bulkhead hatches may seem complex at first glance, but by following Sven Yrvind’s meticulous process, enthusiasts can achieve professional-level results. Remember that the journey of boatbuilding is as rewarding as reaching your destination; it tests one’s patience and dedication. For those seeking to embark on this adventure or simply gain more insight into marine craftsmanship, Sven’s wisdom is invaluable.Sven Yrvind, a renowned yacht designer and sailor, shares valuable insights on creating flanges around bulkhead hatches for canvas protection in this enlightening video. By following his expert guidance, boat enthusiasts can ensure their living areas remain secure while allowing unhindered access through the hatches.Step 1: Starting with the Flange
Sven begins by explaining that working on flanges vertically and horizontally is significantly easier than doing so in a flat position. To simplify the process further, he divides the task into two or three steps as suggested by fellow expert “for for.” This approach not only makes it more manageable but also allows for greater precision in crafting each component.Step 2: Applying Glue and Securing
Sven proceeds to apply glue along one edge of the flange, ensuring a secure bond when clamped into place. He emphasizes that this stage is crucial for maintaining the structural integrity of the flange, which in turn safeguards the living area beneath the canvas when hatches are open.Step 3: Allowing Time to Dry
After securely attaching the first portion of the flange, Sven allows ample time for it to dry before moving forward with additional steps. This patience and precision are key aspects of his successful boatbuilding methods.Step 4: Finishing Touches
Once the flange is fully dried, Sven removes the clamps carefully, ensuring no damage occurs during this process. He then moves on to attaching four more pieces onto these main frames, completing two pairs of flanges for the bulkhead hatches.The Final Touches
While two flanges form the primary support structure around the hatches, Sven mentions there are two additional pieces required at each end to ensure comprehensive protection. This attention to detail highlights his commitment to producing a durable and reliable design. “Sailing is about finding your path, whether it’s across an ocean or within yourself.” – Sven Yrvind In conclusion, making flanges around bulkhead hatches may seem complex at first glance, but by following Sven Yrvind’s meticulous process, enthusiasts can achieve professional-level results. Remember that the journey of boatbuilding is as rewarding as reaching your destination; it tests one’s patience and dedication. For those seeking to embark on this adventure or simply gain more insight into marine craftsmanship, Sven’s wisdom is invaluable.Making Flanges Around Bulkhead Hatches for Canvas
Sven Yrvind, a renowned yacht designer and sailor, shares valuable insights on creating flanges around bulkhead hatches for canvas protection in this enlightening video. By following his expert guidance, boat enthusiasts can ensure their living areas remain secure while allowing unhindered access through the hatches.Step 1: Starting with the Flange
Sven begins by explaining that working on flanges vertically and horizontally is significantly easier than doing so in a flat position. To simplify the process further, he divides the task into two or three steps as suggested by fellow expert “for for.” This approach not only makes it more manageable but also allows for greater precision in crafting each component.Step 2: Applying Glue and Securing
Sven proceeds to apply glue along one edge of the flange, ensuring a secure bond when clamped into place. He emphasizes that this stage is crucial for maintaining the structural integrity of the flange, which in turn safeguards the living area beneath the canvas when hatches are open.Step 3: Allowing Time to Dry
After securely attaching the first portion of the flange, Sven allows ample time for it to dry before moving forward with additional steps. This patience and precision are key aspects of his successful boatbuilding methods.Step 4: Finishing Touches
Once the flange is fully dried, Sven removes the clamps carefully, ensuring no damage occurs during this process. He then moves on to attaching four more pieces onto these main frames, completing two pairs of flanges for the bulkhead hatches.The Final Touches
While two flanges form the primary support structure around the hatches, Sven mentions there are two additional pieces required at each end to ensure comprehensive protection. This attention to detail highlights his commitment to producing a durable and reliable design. “Sailing is about finding your path, whether it’s across an ocean or within yourself.” – Sven Yrvind In conclusion, making flanges around bulkhead hatches may seem complex at first glance, but by following Sven Yrvind’s meticulous process, enthusiasts can achieve professional-level results. Remember that the journey of boatbuilding is as rewarding as reaching your destination; it tests one’s patience and dedication. For those seeking to embark on this adventure or simply gain more insight into marine craftsmanship, Sven’s wisdom is invaluable.Sven proceeds to apply glue along one edge of the flange, ensuring a secure bond when clamped into place. He emphasizes that this stage is crucial for maintaining the structural integrity of the flange, which in turn safeguards the living area beneath the canvas when hatches are open.Step 3: Allowing Time to Dry
After securely attaching the first portion of the flange, Sven allows ample time for it to dry before moving forward with additional steps. This patience and precision are key aspects of his successful boatbuilding methods.Step 4: Finishing Touches
Once the flange is fully dried, Sven removes the clamps carefully, ensuring no damage occurs during this process. He then moves on to attaching four more pieces onto these main frames, completing two pairs of flanges for the bulkhead hatches.The Final Touches
While two flanges form the primary support structure around the hatches, Sven mentions there are two additional pieces required at each end to ensure comprehensive protection. This attention to detail highlights his commitment to producing a durable and reliable design. “Sailing is about finding your path, whether it’s across an ocean or within yourself.” – Sven Yrvind In conclusion, making flanges around bulkhead hatches may seem complex at first glance, but by following Sven Yrvind’s meticulous process, enthusiasts can achieve professional-level results. Remember that the journey of boatbuilding is as rewarding as reaching your destination; it tests one’s patience and dedication. For those seeking to embark on this adventure or simply gain more insight into marine craftsmanship, Sven’s wisdom is invaluable.Sven Yrvind, a renowned yacht designer and sailor, shares valuable insights on creating flanges around bulkhead hatches for canvas protection in this enlightening video. By following his expert guidance, boat enthusiasts can ensure their living areas remain secure while allowing unhindered access through the hatches.Step 1: Starting with the Flange
Sven begins by explaining that working on flanges vertically and horizontally is significantly easier than doing so in a flat position. To simplify the process further, he divides the task into two or three steps as suggested by fellow expert “for for.” This approach not only makes it more manageable but also allows for greater precision in crafting each component.Step 2: Applying Glue and Securing
Sven proceeds to apply glue along one edge of the flange, ensuring a secure bond when clamped into place. He emphasizes that this stage is crucial for maintaining the structural integrity of the flange, which in turn safeguards the living area beneath the canvas when hatches are open.Step 3: Allowing Time to Dry
After securely attaching the first portion of the flange, Sven allows ample time for it to dry before moving forward with additional steps. This patience and precision are key aspects of his successful boatbuilding methods.Step 4: Finishing Touches
Once the flange is fully dried, Sven removes the clamps carefully, ensuring no damage occurs during this process. He then moves on to attaching four more pieces onto these main frames, completing two pairs of flanges for the bulkhead hatches.The Final Touches
While two flanges form the primary support structure around the hatches, Sven mentions there are two additional pieces required at each end to ensure comprehensive protection. This attention to detail highlights his commitment to producing a durable and reliable design. “Sailing is about finding your path, whether it’s across an ocean or within yourself.” – Sven Yrvind In conclusion, making flanges around bulkhead hatches may seem complex at first glance, but by following Sven Yrvind’s meticulous process, enthusiasts can achieve professional-level results. Remember that the journey of boatbuilding is as rewarding as reaching your destination; it tests one’s patience and dedication. For those seeking to embark on this adventure or simply gain more insight into marine craftsmanship, Sven’s wisdom is invaluable.Making Flanges Around Bulkhead Hatches for Canvas
Sven Yrvind, a renowned yacht designer and sailor, shares valuable insights on creating flanges around bulkhead hatches for canvas protection in this enlightening video. By following his expert guidance, boat enthusiasts can ensure their living areas remain secure while allowing unhindered access through the hatches.Step 1: Starting with the Flange
Sven begins by explaining that working on flanges vertically and horizontally is significantly easier than doing so in a flat position. To simplify the process further, he divides the task into two or three steps as suggested by fellow expert “for for.” This approach not only makes it more manageable but also allows for greater precision in crafting each component.Step 2: Applying Glue and Securing
Sven proceeds to apply glue along one edge of the flange, ensuring a secure bond when clamped into place. He emphasizes that this stage is crucial for maintaining the structural integrity of the flange, which in turn safeguards the living area beneath the canvas when hatches are open.Step 3: Allowing Time to Dry
After securely attaching the first portion of the flange, Sven allows ample time for it to dry before moving forward with additional steps. This patience and precision are key aspects of his successful boatbuilding methods.Step 4: Finishing Touches
Once the flange is fully dried, Sven removes the clamps carefully, ensuring no damage occurs during this process. He then moves on to attaching four more pieces onto these main frames, completing two pairs of flanges for the bulkhead hatches.The Final Touches
While two flanges form the primary support structure around the hatches, Sven mentions there are two additional pieces required at each end to ensure comprehensive protection. This attention to detail highlights his commitment to producing a durable and reliable design. “Sailing is about finding your path, whether it’s across an ocean or within yourself.” – Sven Yrvind In conclusion, making flanges around bulkhead hatches may seem complex at first glance, but by following Sven Yrvind’s meticulous process, enthusiasts can achieve professional-level results. Remember that the journey of boatbuilding is as rewarding as reaching your destination; it tests one’s patience and dedication. For those seeking to embark on this adventure or simply gain more insight into marine craftsmanship, Sven’s wisdom is invaluable.Sven begins by explaining that working on flanges vertically and horizontally is significantly easier than doing so in a flat position. To simplify the process further, he divides the task into two or three steps as suggested by fellow expert “for for.” This approach not only makes it more manageable but also allows for greater precision in crafting each component.Step 2: Applying Glue and Securing
Sven proceeds to apply glue along one edge of the flange, ensuring a secure bond when clamped into place. He emphasizes that this stage is crucial for maintaining the structural integrity of the flange, which in turn safeguards the living area beneath the canvas when hatches are open.Step 3: Allowing Time to Dry
After securely attaching the first portion of the flange, Sven allows ample time for it to dry before moving forward with additional steps. This patience and precision are key aspects of his successful boatbuilding methods.Step 4: Finishing Touches
Once the flange is fully dried, Sven removes the clamps carefully, ensuring no damage occurs during this process. He then moves on to attaching four more pieces onto these main frames, completing two pairs of flanges for the bulkhead hatches.The Final Touches
While two flanges form the primary support structure around the hatches, Sven mentions there are two additional pieces required at each end to ensure comprehensive protection. This attention to detail highlights his commitment to producing a durable and reliable design. “Sailing is about finding your path, whether it’s across an ocean or within yourself.” – Sven Yrvind In conclusion, making flanges around bulkhead hatches may seem complex at first glance, but by following Sven Yrvind’s meticulous process, enthusiasts can achieve professional-level results. Remember that the journey of boatbuilding is as rewarding as reaching your destination; it tests one’s patience and dedication. For those seeking to embark on this adventure or simply gain more insight into marine craftsmanship, Sven’s wisdom is invaluable.Sven Yrvind, a renowned yacht designer and sailor, shares valuable insights on creating flanges around bulkhead hatches for canvas protection in this enlightening video. By following his expert guidance, boat enthusiasts can ensure their living areas remain secure while allowing unhindered access through the hatches.Step 1: Starting with the Flange
Sven begins by explaining that working on flanges vertically and horizontally is significantly easier than doing so in a flat position. To simplify the process further, he divides the task into two or three steps as suggested by fellow expert “for for.” This approach not only makes it more manageable but also allows for greater precision in crafting each component.Step 2: Applying Glue and Securing
Sven proceeds to apply glue along one edge of the flange, ensuring a secure bond when clamped into place. He emphasizes that this stage is crucial for maintaining the structural integrity of the flange, which in turn safeguards the living area beneath the canvas when hatches are open.Step 3: Allowing Time to Dry
After securely attaching the first portion of the flange, Sven allows ample time for it to dry before moving forward with additional steps. This patience and precision are key aspects of his successful boatbuilding methods.Step 4: Finishing Touches
Once the flange is fully dried, Sven removes the clamps carefully, ensuring no damage occurs during this process. He then moves on to attaching four more pieces onto these main frames, completing two pairs of flanges for the bulkhead hatches.The Final Touches
While two flanges form the primary support structure around the hatches, Sven mentions there are two additional pieces required at each end to ensure comprehensive protection. This attention to detail highlights his commitment to producing a durable and reliable design. “Sailing is about finding your path, whether it’s across an ocean or within yourself.” – Sven Yrvind In conclusion, making flanges around bulkhead hatches may seem complex at first glance, but by following Sven Yrvind’s meticulous process, enthusiasts can achieve professional-level results. Remember that the journey of boatbuilding is as rewarding as reaching your destination; it tests one’s patience and dedication. For those seeking to embark on this adventure or simply gain more insight into marine craftsmanship, Sven’s wisdom is invaluable.Making Flanges Around Bulkhead Hatches for Canvas
Sven Yrvind, a renowned yacht designer and sailor, shares valuable insights on creating flanges around bulkhead hatches for canvas protection in this enlightening video. By following his expert guidance, boat enthusiasts can ensure their living areas remain secure while allowing unhindered access through the hatches.Step 1: Starting with the Flange
Sven begins by explaining that working on flanges vertically and horizontally is significantly easier than doing so in a flat position. To simplify the process further, he divides the task into two or three steps as suggested by fellow expert “for for.” This approach not only makes it more manageable but also allows for greater precision in crafting each component.Step 2: Applying Glue and Securing
Sven proceeds to apply glue along one edge of the flange, ensuring a secure bond when clamped into place. He emphasizes that this stage is crucial for maintaining the structural integrity of the flange, which in turn safeguards the living area beneath the canvas when hatches are open.Step 3: Allowing Time to Dry
After securely attaching the first portion of the flange, Sven allows ample time for it to dry before moving forward with additional steps. This patience and precision are key aspects of his successful boatbuilding methods.Step 4: Finishing Touches
Once the flange is fully dried, Sven removes the clamps carefully, ensuring no damage occurs during this process. He then moves on to attaching four more pieces onto these main frames, completing two pairs of flanges for the bulkhead hatches.The Final Touches
While two flanges form the primary support structure around the hatches, Sven mentions there are two additional pieces required at each end to ensure comprehensive protection. This attention to detail highlights his commitment to producing a durable and reliable design. “Sailing is about finding your path, whether it’s across an ocean or within yourself.” – Sven Yrvind In conclusion, making flanges around bulkhead hatches may seem complex at first glance, but by following Sven Yrvind’s meticulous process, enthusiasts can achieve professional-level results. Remember that the journey of boatbuilding is as rewarding as reaching your destination; it tests one’s patience and dedication. For those seeking to embark on this adventure or simply gain more insight into marine craftsmanship, Sven’s wisdom is invaluable.Once the flange is fully dried, Sven removes the clamps carefully, ensuring no damage occurs during this process. He then moves on to attaching four more pieces onto these main frames, completing two pairs of flanges for the bulkhead hatches.The Final Touches
While two flanges form the primary support structure around the hatches, Sven mentions there are two additional pieces required at each end to ensure comprehensive protection. This attention to detail highlights his commitment to producing a durable and reliable design. “Sailing is about finding your path, whether it’s across an ocean or within yourself.” – Sven Yrvind In conclusion, making flanges around bulkhead hatches may seem complex at first glance, but by following Sven Yrvind’s meticulous process, enthusiasts can achieve professional-level results. Remember that the journey of boatbuilding is as rewarding as reaching your destination; it tests one’s patience and dedication. For those seeking to embark on this adventure or simply gain more insight into marine craftsmanship, Sven’s wisdom is invaluable.Sven begins by explaining that working on flanges vertically and horizontally is significantly easier than doing so in a flat position. To simplify the process further, he divides the task into two or three steps as suggested by fellow expert “for for.” This approach not only makes it more manageable but also allows for greater precision in crafting each component.Step 2: Applying Glue and Securing
Sven proceeds to apply glue along one edge of the flange, ensuring a secure bond when clamped into place. He emphasizes that this stage is crucial for maintaining the structural integrity of the flange, which in turn safeguards the living area beneath the canvas when hatches are open.Step 3: Allowing Time to Dry
After securely attaching the first portion of the flange, Sven allows ample time for it to dry before moving forward with additional steps. This patience and precision are key aspects of his successful boatbuilding methods.Step 4: Finishing Touches
Once the flange is fully dried, Sven removes the clamps carefully, ensuring no damage occurs during this process. He then moves on to attaching four more pieces onto these main frames, completing two pairs of flanges for the bulkhead hatches.The Final Touches
While two flanges form the primary support structure around the hatches, Sven mentions there are two additional pieces required at each end to ensure comprehensive protection. This attention to detail highlights his commitment to producing a durable and reliable design. “Sailing is about finding your path, whether it’s across an ocean or within yourself.” – Sven Yrvind In conclusion, making flanges around bulkhead hatches may seem complex at first glance, but by following Sven Yrvind’s meticulous process, enthusiasts can achieve professional-level results. Remember that the journey of boatbuilding is as rewarding as reaching your destination; it tests one’s patience and dedication. For those seeking to embark on this adventure or simply gain more insight into marine craftsmanship, Sven’s wisdom is invaluable.Sven Yrvind, a renowned yacht designer and sailor, shares valuable insights on creating flanges around bulkhead hatches for canvas protection in this enlightening video. By following his expert guidance, boat enthusiasts can ensure their living areas remain secure while allowing unhindered access through the hatches.Step 1: Starting with the Flange
Sven begins by explaining that working on flanges vertically and horizontally is significantly easier than doing so in a flat position. To simplify the process further, he divides the task into two or three steps as suggested by fellow expert “for for.” This approach not only makes it more manageable but also allows for greater precision in crafting each component.Step 2: Applying Glue and Securing
Sven proceeds to apply glue along one edge of the flange, ensuring a secure bond when clamped into place. He emphasizes that this stage is crucial for maintaining the structural integrity of the flange, which in turn safeguards the living area beneath the canvas when hatches are open.Step 3: Allowing Time to Dry
After securely attaching the first portion of the flange, Sven allows ample time for it to dry before moving forward with additional steps. This patience and precision are key aspects of his successful boatbuilding methods.Step 4: Finishing Touches
Once the flange is fully dried, Sven removes the clamps carefully, ensuring no damage occurs during this process. He then moves on to attaching four more pieces onto these main frames, completing two pairs of flanges for the bulkhead hatches.The Final Touches
While two flanges form the primary support structure around the hatches, Sven mentions there are two additional pieces required at each end to ensure comprehensive protection. This attention to detail highlights his commitment to producing a durable and reliable design. “Sailing is about finding your path, whether it’s across an ocean or within yourself.” – Sven Yrvind In conclusion, making flanges around bulkhead hatches may seem complex at first glance, but by following Sven Yrvind’s meticulous process, enthusiasts can achieve professional-level results. Remember that the journey of boatbuilding is as rewarding as reaching your destination; it tests one’s patience and dedication. For those seeking to embark on this adventure or simply gain more insight into marine craftsmanship, Sven’s wisdom is invaluable.Making Flanges Around Bulkhead Hatches for Canvas
Sven Yrvind, a renowned yacht designer and sailor, shares valuable insights on creating flanges around bulkhead hatches for canvas protection in this enlightening video. By following his expert guidance, boat enthusiasts can ensure their living areas remain secure while allowing unhindered access through the hatches.Step 1: Starting with the Flange
Sven begins by explaining that working on flanges vertically and horizontally is significantly easier than doing so in a flat position. To simplify the process further, he divides the task into two or three steps as suggested by fellow expert “for for.” This approach not only makes it more manageable but also allows for greater precision in crafting each component.Step 2: Applying Glue and Securing
Sven proceeds to apply glue along one edge of the flange, ensuring a secure bond when clamped into place. He emphasizes that this stage is crucial for maintaining the structural integrity of the flange, which in turn safeguards the living area beneath the canvas when hatches are open.Step 3: Allowing Time to Dry
After securely attaching the first portion of the flange, Sven allows ample time for it to dry before moving forward with additional steps. This patience and precision are key aspects of his successful boatbuilding methods.Step 4: Finishing Touches
Once the flange is fully dried, Sven removes the clamps carefully, ensuring no damage occurs during this process. He then moves on to attaching four more pieces onto these main frames, completing two pairs of flanges for the bulkhead hatches.The Final Touches
While two flanges form the primary support structure around the hatches, Sven mentions there are two additional pieces required at each end to ensure comprehensive protection. This attention to detail highlights his commitment to producing a durable and reliable design. “Sailing is about finding your path, whether it’s across an ocean or within yourself.” – Sven Yrvind In conclusion, making flanges around bulkhead hatches may seem complex at first glance, but by following Sven Yrvind’s meticulous process, enthusiasts can achieve professional-level results. Remember that the journey of boatbuilding is as rewarding as reaching your destination; it tests one’s patience and dedication. For those seeking to embark on this adventure or simply gain more insight into marine craftsmanship, Sven’s wisdom is invaluable.After securely attaching the first portion of the flange, Sven allows ample time for it to dry before moving forward with additional steps. This patience and precision are key aspects of his successful boatbuilding methods.Step 4: Finishing Touches
Once the flange is fully dried, Sven removes the clamps carefully, ensuring no damage occurs during this process. He then moves on to attaching four more pieces onto these main frames, completing two pairs of flanges for the bulkhead hatches.The Final Touches
While two flanges form the primary support structure around the hatches, Sven mentions there are two additional pieces required at each end to ensure comprehensive protection. This attention to detail highlights his commitment to producing a durable and reliable design. “Sailing is about finding your path, whether it’s across an ocean or within yourself.” – Sven Yrvind In conclusion, making flanges around bulkhead hatches may seem complex at first glance, but by following Sven Yrvind’s meticulous process, enthusiasts can achieve professional-level results. Remember that the journey of boatbuilding is as rewarding as reaching your destination; it tests one’s patience and dedication. For those seeking to embark on this adventure or simply gain more insight into marine craftsmanship, Sven’s wisdom is invaluable.Sven begins by explaining that working on flanges vertically and horizontally is significantly easier than doing so in a flat position. To simplify the process further, he divides the task into two or three steps as suggested by fellow expert “for for.” This approach not only makes it more manageable but also allows for greater precision in crafting each component.Step 2: Applying Glue and Securing
Sven proceeds to apply glue along one edge of the flange, ensuring a secure bond when clamped into place. He emphasizes that this stage is crucial for maintaining the structural integrity of the flange, which in turn safeguards the living area beneath the canvas when hatches are open.Step 3: Allowing Time to Dry
After securely attaching the first portion of the flange, Sven allows ample time for it to dry before moving forward with additional steps. This patience and precision are key aspects of his successful boatbuilding methods.Step 4: Finishing Touches
Once the flange is fully dried, Sven removes the clamps carefully, ensuring no damage occurs during this process. He then moves on to attaching four more pieces onto these main frames, completing two pairs of flanges for the bulkhead hatches.The Final Touches
While two flanges form the primary support structure around the hatches, Sven mentions there are two additional pieces required at each end to ensure comprehensive protection. This attention to detail highlights his commitment to producing a durable and reliable design. “Sailing is about finding your path, whether it’s across an ocean or within yourself.” – Sven Yrvind In conclusion, making flanges around bulkhead hatches may seem complex at first glance, but by following Sven Yrvind’s meticulous process, enthusiasts can achieve professional-level results. Remember that the journey of boatbuilding is as rewarding as reaching your destination; it tests one’s patience and dedication. For those seeking to embark on this adventure or simply gain more insight into marine craftsmanship, Sven’s wisdom is invaluable.Sven Yrvind, a renowned yacht designer and sailor, shares valuable insights on creating flanges around bulkhead hatches for canvas protection in this enlightening video. By following his expert guidance, boat enthusiasts can ensure their living areas remain secure while allowing unhindered access through the hatches.Step 1: Starting with the Flange
Sven begins by explaining that working on flanges vertically and horizontally is significantly easier than doing so in a flat position. To simplify the process further, he divides the task into two or three steps as suggested by fellow expert “for for.” This approach not only makes it more manageable but also allows for greater precision in crafting each component.Step 2: Applying Glue and Securing
Sven proceeds to apply glue along one edge of the flange, ensuring a secure bond when clamped into place. He emphasizes that this stage is crucial for maintaining the structural integrity of the flange, which in turn safeguards the living area beneath the canvas when hatches are open.Step 3: Allowing Time to Dry
After securely attaching the first portion of the flange, Sven allows ample time for it to dry before moving forward with additional steps. This patience and precision are key aspects of his successful boatbuilding methods.Step 4: Finishing Touches
Once the flange is fully dried, Sven removes the clamps carefully, ensuring no damage occurs during this process. He then moves on to attaching four more pieces onto these main frames, completing two pairs of flanges for the bulkhead hatches.The Final Touches
While two flanges form the primary support structure around the hatches, Sven mentions there are two additional pieces required at each end to ensure comprehensive protection. This attention to detail highlights his commitment to producing a durable and reliable design. “Sailing is about finding your path, whether it’s across an ocean or within yourself.” – Sven Yrvind In conclusion, making flanges around bulkhead hatches may seem complex at first glance, but by following Sven Yrvind’s meticulous process, enthusiasts can achieve professional-level results. Remember that the journey of boatbuilding is as rewarding as reaching your destination; it tests one’s patience and dedication. For those seeking to embark on this adventure or simply gain more insight into marine craftsmanship, Sven’s wisdom is invaluable.Making Flanges Around Bulkhead Hatches for Canvas
Sven Yrvind, a renowned yacht designer and sailor, shares valuable insights on creating flanges around bulkhead hatches for canvas protection in this enlightening video. By following his expert guidance, boat enthusiasts can ensure their living areas remain secure while allowing unhindered access through the hatches.Step 1: Starting with the Flange
Sven begins by explaining that working on flanges vertically and horizontally is significantly easier than doing so in a flat position. To simplify the process further, he divides the task into two or three steps as suggested by fellow expert “for for.” This approach not only makes it more manageable but also allows for greater precision in crafting each component.Step 2: Applying Glue and Securing
Sven proceeds to apply glue along one edge of the flange, ensuring a secure bond when clamped into place. He emphasizes that this stage is crucial for maintaining the structural integrity of the flange, which in turn safeguards the living area beneath the canvas when hatches are open.Step 3: Allowing Time to Dry
After securely attaching the first portion of the flange, Sven allows ample time for it to dry before moving forward with additional steps. This patience and precision are key aspects of his successful boatbuilding methods.Step 4: Finishing Touches
Once the flange is fully dried, Sven removes the clamps carefully, ensuring no damage occurs during this process. He then moves on to attaching four more pieces onto these main frames, completing two pairs of flanges for the bulkhead hatches.The Final Touches
While two flanges form the primary support structure around the hatches, Sven mentions there are two additional pieces required at each end to ensure comprehensive protection. This attention to detail highlights his commitment to producing a durable and reliable design. “Sailing is about finding your path, whether it’s across an ocean or within yourself.” – Sven Yrvind In conclusion, making flanges around bulkhead hatches may seem complex at first glance, but by following Sven Yrvind’s meticulous process, enthusiasts can achieve professional-level results. Remember that the journey of boatbuilding is as rewarding as reaching your destination; it tests one’s patience and dedication. For those seeking to embark on this adventure or simply gain more insight into marine craftsmanship, Sven’s wisdom is invaluable.Sven proceeds to apply glue along one edge of the flange, ensuring a secure bond when clamped into place. He emphasizes that this stage is crucial for maintaining the structural integrity of the flange, which in turn safeguards the living area beneath the canvas when hatches are open.Step 3: Allowing Time to Dry
After securely attaching the first portion of the flange, Sven allows ample time for it to dry before moving forward with additional steps. This patience and precision are key aspects of his successful boatbuilding methods.Step 4: Finishing Touches
Once the flange is fully dried, Sven removes the clamps carefully, ensuring no damage occurs during this process. He then moves on to attaching four more pieces onto these main frames, completing two pairs of flanges for the bulkhead hatches.The Final Touches
While two flanges form the primary support structure around the hatches, Sven mentions there are two additional pieces required at each end to ensure comprehensive protection. This attention to detail highlights his commitment to producing a durable and reliable design. “Sailing is about finding your path, whether it’s across an ocean or within yourself.” – Sven Yrvind In conclusion, making flanges around bulkhead hatches may seem complex at first glance, but by following Sven Yrvind’s meticulous process, enthusiasts can achieve professional-level results. Remember that the journey of boatbuilding is as rewarding as reaching your destination; it tests one’s patience and dedication. For those seeking to embark on this adventure or simply gain more insight into marine craftsmanship, Sven’s wisdom is invaluable.Sven begins by explaining that working on flanges vertically and horizontally is significantly easier than doing so in a flat position. To simplify the process further, he divides the task into two or three steps as suggested by fellow expert “for for.” This approach not only makes it more manageable but also allows for greater precision in crafting each component.Step 2: Applying Glue and Securing
Sven proceeds to apply glue along one edge of the flange, ensuring a secure bond when clamped into place. He emphasizes that this stage is crucial for maintaining the structural integrity of the flange, which in turn safeguards the living area beneath the canvas when hatches are open.Step 3: Allowing Time to Dry
After securely attaching the first portion of the flange, Sven allows ample time for it to dry before moving forward with additional steps. This patience and precision are key aspects of his successful boatbuilding methods.Step 4: Finishing Touches
Once the flange is fully dried, Sven removes the clamps carefully, ensuring no damage occurs during this process. He then moves on to attaching four more pieces onto these main frames, completing two pairs of flanges for the bulkhead hatches.The Final Touches
While two flanges form the primary support structure around the hatches, Sven mentions there are two additional pieces required at each end to ensure comprehensive protection. This attention to detail highlights his commitment to producing a durable and reliable design. “Sailing is about finding your path, whether it’s across an ocean or within yourself.” – Sven Yrvind In conclusion, making flanges around bulkhead hatches may seem complex at first glance, but by following Sven Yrvind’s meticulous process, enthusiasts can achieve professional-level results. Remember that the journey of boatbuilding is as rewarding as reaching your destination; it tests one’s patience and dedication. For those seeking to embark on this adventure or simply gain more insight into marine craftsmanship, Sven’s wisdom is invaluable.Sven Yrvind, a renowned yacht designer and sailor, shares valuable insights on creating flanges around bulkhead hatches for canvas protection in this enlightening video. By following his expert guidance, boat enthusiasts can ensure their living areas remain secure while allowing unhindered access through the hatches.Step 1: Starting with the Flange
Sven begins by explaining that working on flanges vertically and horizontally is significantly easier than doing so in a flat position. To simplify the process further, he divides the task into two or three steps as suggested by fellow expert “for for.” This approach not only makes it more manageable but also allows for greater precision in crafting each component.Step 2: Applying Glue and Securing
Sven proceeds to apply glue along one edge of the flange, ensuring a secure bond when clamped into place. He emphasizes that this stage is crucial for maintaining the structural integrity of the flange, which in turn safeguards the living area beneath the canvas when hatches are open.Step 3: Allowing Time to Dry
After securely attaching the first portion of the flange, Sven allows ample time for it to dry before moving forward with additional steps. This patience and precision are key aspects of his successful boatbuilding methods.Step 4: Finishing Touches
Once the flange is fully dried, Sven removes the clamps carefully, ensuring no damage occurs during this process. He then moves on to attaching four more pieces onto these main frames, completing two pairs of flanges for the bulkhead hatches.The Final Touches
While two flanges form the primary support structure around the hatches, Sven mentions there are two additional pieces required at each end to ensure comprehensive protection. This attention to detail highlights his commitment to producing a durable and reliable design. “Sailing is about finding your path, whether it’s across an ocean or within yourself.” – Sven Yrvind In conclusion, making flanges around bulkhead hatches may seem complex at first glance, but by following Sven Yrvind’s meticulous process, enthusiasts can achieve professional-level results. Remember that the journey of boatbuilding is as rewarding as reaching your destination; it tests one’s patience and dedication. For those seeking to embark on this adventure or simply gain more insight into marine craftsmanship, Sven’s wisdom is invaluable.Making Flanges Around Bulkhead Hatches for Canvas
Sven Yrvind, a renowned yacht designer and sailor, shares valuable insights on creating flanges around bulkhead hatches for canvas protection in this enlightening video. By following his expert guidance, boat enthusiasts can ensure their living areas remain secure while allowing unhindered access through the hatches.Step 1: Starting with the Flange
Sven begins by explaining that working on flanges vertically and horizontally is significantly easier than doing so in a flat position. To simplify the process further, he divides the task into two or three steps as suggested by fellow expert “for for.” This approach not only makes it more manageable but also allows for greater precision in crafting each component.Step 2: Applying Glue and Securing
Sven proceeds to apply glue along one edge of the flange, ensuring a secure bond when clamped into place. He emphasizes that this stage is crucial for maintaining the structural integrity of the flange, which in turn safeguards the living area beneath the canvas when hatches are open.Step 3: Allowing Time to Dry
After securely attaching the first portion of the flange, Sven allows ample time for it to dry before moving forward with additional steps. This patience and precision are key aspects of his successful boatbuilding methods.Step 4: Finishing Touches
Once the flange is fully dried, Sven removes the clamps carefully, ensuring no damage occurs during this process. He then moves on to attaching four more pieces onto these main frames, completing two pairs of flanges for the bulkhead hatches.The Final Touches
While two flanges form the primary support structure around the hatches, Sven mentions there are two additional pieces required at each end to ensure comprehensive protection. This attention to detail highlights his commitment to producing a durable and reliable design. “Sailing is about finding your path, whether it’s across an ocean or within yourself.” – Sven Yrvind In conclusion, making flanges around bulkhead hatches may seem complex at first glance, but by following Sven Yrvind’s meticulous process, enthusiasts can achieve professional-level results. Remember that the journey of boatbuilding is as rewarding as reaching your destination; it tests one’s patience and dedication. For those seeking to embark on this adventure or simply gain more insight into marine craftsmanship, Sven’s wisdom is invaluable.Once the flange is fully dried, Sven removes the clamps carefully, ensuring no damage occurs during this process. He then moves on to attaching four more pieces onto these main frames, completing two pairs of flanges for the bulkhead hatches.The Final Touches
While two flanges form the primary support structure around the hatches, Sven mentions there are two additional pieces required at each end to ensure comprehensive protection. This attention to detail highlights his commitment to producing a durable and reliable design. “Sailing is about finding your path, whether it’s across an ocean or within yourself.” – Sven Yrvind In conclusion, making flanges around bulkhead hatches may seem complex at first glance, but by following Sven Yrvind’s meticulous process, enthusiasts can achieve professional-level results. Remember that the journey of boatbuilding is as rewarding as reaching your destination; it tests one’s patience and dedication. For those seeking to embark on this adventure or simply gain more insight into marine craftsmanship, Sven’s wisdom is invaluable.Sven proceeds to apply glue along one edge of the flange, ensuring a secure bond when clamped into place. He emphasizes that this stage is crucial for maintaining the structural integrity of the flange, which in turn safeguards the living area beneath the canvas when hatches are open.Step 3: Allowing Time to Dry
After securely attaching the first portion of the flange, Sven allows ample time for it to dry before moving forward with additional steps. This patience and precision are key aspects of his successful boatbuilding methods.Step 4: Finishing Touches
Once the flange is fully dried, Sven removes the clamps carefully, ensuring no damage occurs during this process. He then moves on to attaching four more pieces onto these main frames, completing two pairs of flanges for the bulkhead hatches.The Final Touches
While two flanges form the primary support structure around the hatches, Sven mentions there are two additional pieces required at each end to ensure comprehensive protection. This attention to detail highlights his commitment to producing a durable and reliable design. “Sailing is about finding your path, whether it’s across an ocean or within yourself.” – Sven Yrvind In conclusion, making flanges around bulkhead hatches may seem complex at first glance, but by following Sven Yrvind’s meticulous process, enthusiasts can achieve professional-level results. Remember that the journey of boatbuilding is as rewarding as reaching your destination; it tests one’s patience and dedication. For those seeking to embark on this adventure or simply gain more insight into marine craftsmanship, Sven’s wisdom is invaluable.Sven begins by explaining that working on flanges vertically and horizontally is significantly easier than doing so in a flat position. To simplify the process further, he divides the task into two or three steps as suggested by fellow expert “for for.” This approach not only makes it more manageable but also allows for greater precision in crafting each component.Step 2: Applying Glue and Securing
Sven proceeds to apply glue along one edge of the flange, ensuring a secure bond when clamped into place. He emphasizes that this stage is crucial for maintaining the structural integrity of the flange, which in turn safeguards the living area beneath the canvas when hatches are open.Step 3: Allowing Time to Dry
After securely attaching the first portion of the flange, Sven allows ample time for it to dry before moving forward with additional steps. This patience and precision are key aspects of his successful boatbuilding methods.Step 4: Finishing Touches
Once the flange is fully dried, Sven removes the clamps carefully, ensuring no damage occurs during this process. He then moves on to attaching four more pieces onto these main frames, completing two pairs of flanges for the bulkhead hatches.The Final Touches
While two flanges form the primary support structure around the hatches, Sven mentions there are two additional pieces required at each end to ensure comprehensive protection. This attention to detail highlights his commitment to producing a durable and reliable design. “Sailing is about finding your path, whether it’s across an ocean or within yourself.” – Sven Yrvind In conclusion, making flanges around bulkhead hatches may seem complex at first glance, but by following Sven Yrvind’s meticulous process, enthusiasts can achieve professional-level results. Remember that the journey of boatbuilding is as rewarding as reaching your destination; it tests one’s patience and dedication. For those seeking to embark on this adventure or simply gain more insight into marine craftsmanship, Sven’s wisdom is invaluable.Sven Yrvind, a renowned yacht designer and sailor, shares valuable insights on creating flanges around bulkhead hatches for canvas protection in this enlightening video. By following his expert guidance, boat enthusiasts can ensure their living areas remain secure while allowing unhindered access through the hatches.Step 1: Starting with the Flange
Sven begins by explaining that working on flanges vertically and horizontally is significantly easier than doing so in a flat position. To simplify the process further, he divides the task into two or three steps as suggested by fellow expert “for for.” This approach not only makes it more manageable but also allows for greater precision in crafting each component.Step 2: Applying Glue and Securing
Sven proceeds to apply glue along one edge of the flange, ensuring a secure bond when clamped into place. He emphasizes that this stage is crucial for maintaining the structural integrity of the flange, which in turn safeguards the living area beneath the canvas when hatches are open.Step 3: Allowing Time to Dry
After securely attaching the first portion of the flange, Sven allows ample time for it to dry before moving forward with additional steps. This patience and precision are key aspects of his successful boatbuilding methods.Step 4: Finishing Touches
Once the flange is fully dried, Sven removes the clamps carefully, ensuring no damage occurs during this process. He then moves on to attaching four more pieces onto these main frames, completing two pairs of flanges for the bulkhead hatches.The Final Touches
While two flanges form the primary support structure around the hatches, Sven mentions there are two additional pieces required at each end to ensure comprehensive protection. This attention to detail highlights his commitment to producing a durable and reliable design. “Sailing is about finding your path, whether it’s across an ocean or within yourself.” – Sven Yrvind In conclusion, making flanges around bulkhead hatches may seem complex at first glance, but by following Sven Yrvind’s meticulous process, enthusiasts can achieve professional-level results. Remember that the journey of boatbuilding is as rewarding as reaching your destination; it tests one’s patience and dedication. For those seeking to embark on this adventure or simply gain more insight into marine craftsmanship, Sven’s wisdom is invaluable.Making Flanges Around Bulkhead Hatches for Canvas
Sven Yrvind, a renowned yacht designer and sailor, shares valuable insights on creating flanges around bulkhead hatches for canvas protection in this enlightening video. By following his expert guidance, boat enthusiasts can ensure their living areas remain secure while allowing unhindered access through the hatches.Step 1: Starting with the Flange
Sven begins by explaining that working on flanges vertically and horizontally is significantly easier than doing so in a flat position. To simplify the process further, he divides the task into two or three steps as suggested by fellow expert “for for.” This approach not only makes it more manageable but also allows for greater precision in crafting each component.Step 2: Applying Glue and Securing
Sven proceeds to apply glue along one edge of the flange, ensuring a secure bond when clamped into place. He emphasizes that this stage is crucial for maintaining the structural integrity of the flange, which in turn safeguards the living area beneath the canvas when hatches are open.Step 3: Allowing Time to Dry
After securely attaching the first portion of the flange, Sven allows ample time for it to dry before moving forward with additional steps. This patience and precision are key aspects of his successful boatbuilding methods.Step 4: Finishing Touches
Once the flange is fully dried, Sven removes the clamps carefully, ensuring no damage occurs during this process. He then moves on to attaching four more pieces onto these main frames, completing two pairs of flanges for the bulkhead hatches.The Final Touches
While two flanges form the primary support structure around the hatches, Sven mentions there are two additional pieces required at each end to ensure comprehensive protection. This attention to detail highlights his commitment to producing a durable and reliable design. “Sailing is about finding your path, whether it’s across an ocean or within yourself.” – Sven Yrvind In conclusion, making flanges around bulkhead hatches may seem complex at first glance, but by following Sven Yrvind’s meticulous process, enthusiasts can achieve professional-level results. Remember that the journey of boatbuilding is as rewarding as reaching your destination; it tests one’s patience and dedication. For those seeking to embark on this adventure or simply gain more insight into marine craftsmanship, Sven’s wisdom is invaluable.After securely attaching the first portion of the flange, Sven allows ample time for it to dry before moving forward with additional steps. This patience and precision are key aspects of his successful boatbuilding methods.Step 4: Finishing Touches
Once the flange is fully dried, Sven removes the clamps carefully, ensuring no damage occurs during this process. He then moves on to attaching four more pieces onto these main frames, completing two pairs of flanges for the bulkhead hatches.The Final Touches
While two flanges form the primary support structure around the hatches, Sven mentions there are two additional pieces required at each end to ensure comprehensive protection. This attention to detail highlights his commitment to producing a durable and reliable design. “Sailing is about finding your path, whether it’s across an ocean or within yourself.” – Sven Yrvind In conclusion, making flanges around bulkhead hatches may seem complex at first glance, but by following Sven Yrvind’s meticulous process, enthusiasts can achieve professional-level results. Remember that the journey of boatbuilding is as rewarding as reaching your destination; it tests one’s patience and dedication. For those seeking to embark on this adventure or simply gain more insight into marine craftsmanship, Sven’s wisdom is invaluable.Sven proceeds to apply glue along one edge of the flange, ensuring a secure bond when clamped into place. He emphasizes that this stage is crucial for maintaining the structural integrity of the flange, which in turn safeguards the living area beneath the canvas when hatches are open.Step 3: Allowing Time to Dry
After securely attaching the first portion of the flange, Sven allows ample time for it to dry before moving forward with additional steps. This patience and precision are key aspects of his successful boatbuilding methods.Step 4: Finishing Touches
Once the flange is fully dried, Sven removes the clamps carefully, ensuring no damage occurs during this process. He then moves on to attaching four more pieces onto these main frames, completing two pairs of flanges for the bulkhead hatches.The Final Touches
While two flanges form the primary support structure around the hatches, Sven mentions there are two additional pieces required at each end to ensure comprehensive protection. This attention to detail highlights his commitment to producing a durable and reliable design. “Sailing is about finding your path, whether it’s across an ocean or within yourself.” – Sven Yrvind In conclusion, making flanges around bulkhead hatches may seem complex at first glance, but by following Sven Yrvind’s meticulous process, enthusiasts can achieve professional-level results. Remember that the journey of boatbuilding is as rewarding as reaching your destination; it tests one’s patience and dedication. For those seeking to embark on this adventure or simply gain more insight into marine craftsmanship, Sven’s wisdom is invaluable.Sven begins by explaining that working on flanges vertically and horizontally is significantly easier than doing so in a flat position. To simplify the process further, he divides the task into two or three steps as suggested by fellow expert “for for.” This approach not only makes it more manageable but also allows for greater precision in crafting each component.Step 2: Applying Glue and Securing
Sven proceeds to apply glue along one edge of the flange, ensuring a secure bond when clamped into place. He emphasizes that this stage is crucial for maintaining the structural integrity of the flange, which in turn safeguards the living area beneath the canvas when hatches are open.Step 3: Allowing Time to Dry
After securely attaching the first portion of the flange, Sven allows ample time for it to dry before moving forward with additional steps. This patience and precision are key aspects of his successful boatbuilding methods.Step 4: Finishing Touches
Once the flange is fully dried, Sven removes the clamps carefully, ensuring no damage occurs during this process. He then moves on to attaching four more pieces onto these main frames, completing two pairs of flanges for the bulkhead hatches.The Final Touches
While two flanges form the primary support structure around the hatches, Sven mentions there are two additional pieces required at each end to ensure comprehensive protection. This attention to detail highlights his commitment to producing a durable and reliable design. “Sailing is about finding your path, whether it’s across an ocean or within yourself.” – Sven Yrvind In conclusion, making flanges around bulkhead hatches may seem complex at first glance, but by following Sven Yrvind’s meticulous process, enthusiasts can achieve professional-level results. Remember that the journey of boatbuilding is as rewarding as reaching your destination; it tests one’s patience and dedication. For those seeking to embark on this adventure or simply gain more insight into marine craftsmanship, Sven’s wisdom is invaluable.Sven Yrvind, a renowned yacht designer and sailor, shares valuable insights on creating flanges around bulkhead hatches for canvas protection in this enlightening video. By following his expert guidance, boat enthusiasts can ensure their living areas remain secure while allowing unhindered access through the hatches.Step 1: Starting with the Flange
Sven begins by explaining that working on flanges vertically and horizontally is significantly easier than doing so in a flat position. To simplify the process further, he divides the task into two or three steps as suggested by fellow expert “for for.” This approach not only makes it more manageable but also allows for greater precision in crafting each component.Step 2: Applying Glue and Securing
Sven proceeds to apply glue along one edge of the flange, ensuring a secure bond when clamped into place. He emphasizes that this stage is crucial for maintaining the structural integrity of the flange, which in turn safeguards the living area beneath the canvas when hatches are open.Step 3: Allowing Time to Dry
After securely attaching the first portion of the flange, Sven allows ample time for it to dry before moving forward with additional steps. This patience and precision are key aspects of his successful boatbuilding methods.Step 4: Finishing Touches
Once the flange is fully dried, Sven removes the clamps carefully, ensuring no damage occurs during this process. He then moves on to attaching four more pieces onto these main frames, completing two pairs of flanges for the bulkhead hatches.The Final Touches
While two flanges form the primary support structure around the hatches, Sven mentions there are two additional pieces required at each end to ensure comprehensive protection. This attention to detail highlights his commitment to producing a durable and reliable design. “Sailing is about finding your path, whether it’s across an ocean or within yourself.” – Sven Yrvind In conclusion, making flanges around bulkhead hatches may seem complex at first glance, but by following Sven Yrvind’s meticulous process, enthusiasts can achieve professional-level results. Remember that the journey of boatbuilding is as rewarding as reaching your destination; it tests one’s patience and dedication. For those seeking to embark on this adventure or simply gain more insight into marine craftsmanship, Sven’s wisdom is invaluable.Making Flanges Around Bulkhead Hatches for Canvas
Sven Yrvind, a renowned yacht designer and sailor, shares valuable insights on creating flanges around bulkhead hatches for canvas protection in this enlightening video. By following his expert guidance, boat enthusiasts can ensure their living areas remain secure while allowing unhindered access through the hatches.Step 1: Starting with the Flange
Sven begins by explaining that working on flanges vertically and horizontally is significantly easier than doing so in a flat position. To simplify the process further, he divides the task into two or three steps as suggested by fellow expert “for for.” This approach not only makes it more manageable but also allows for greater precision in crafting each component.Step 2: Applying Glue and Securing
Sven proceeds to apply glue along one edge of the flange, ensuring a secure bond when clamped into place. He emphasizes that this stage is crucial for maintaining the structural integrity of the flange, which in turn safeguards the living area beneath the canvas when hatches are open.Step 3: Allowing Time to Dry
After securely attaching the first portion of the flange, Sven allows ample time for it to dry before moving forward with additional steps. This patience and precision are key aspects of his successful boatbuilding methods.Step 4: Finishing Touches
Once the flange is fully dried, Sven removes the clamps carefully, ensuring no damage occurs during this process. He then moves on to attaching four more pieces onto these main frames, completing two pairs of flanges for the bulkhead hatches.The Final Touches
While two flanges form the primary support structure around the hatches, Sven mentions there are two additional pieces required at each end to ensure comprehensive protection. This attention to detail highlights his commitment to producing a durable and reliable design. “Sailing is about finding your path, whether it’s across an ocean or within yourself.” – Sven Yrvind In conclusion, making flanges around bulkhead hatches may seem complex at first glance, but by following Sven Yrvind’s meticulous process, enthusiasts can achieve professional-level results. Remember that the journey of boatbuilding is as rewarding as reaching your destination; it tests one’s patience and dedication. For those seeking to embark on this adventure or simply gain more insight into marine craftsmanship, Sven’s wisdom is invaluable.Once the flange is fully dried, Sven removes the clamps carefully, ensuring no damage occurs during this process. He then moves on to attaching four more pieces onto these main frames, completing two pairs of flanges for the bulkhead hatches.The Final Touches
While two flanges form the primary support structure around the hatches, Sven mentions there are two additional pieces required at each end to ensure comprehensive protection. This attention to detail highlights his commitment to producing a durable and reliable design. “Sailing is about finding your path, whether it’s across an ocean or within yourself.” – Sven Yrvind In conclusion, making flanges around bulkhead hatches may seem complex at first glance, but by following Sven Yrvind’s meticulous process, enthusiasts can achieve professional-level results. Remember that the journey of boatbuilding is as rewarding as reaching your destination; it tests one’s patience and dedication. For those seeking to embark on this adventure or simply gain more insight into marine craftsmanship, Sven’s wisdom is invaluable.After securely attaching the first portion of the flange, Sven allows ample time for it to dry before moving forward with additional steps. This patience and precision are key aspects of his successful boatbuilding methods.Step 4: Finishing Touches
Once the flange is fully dried, Sven removes the clamps carefully, ensuring no damage occurs during this process. He then moves on to attaching four more pieces onto these main frames, completing two pairs of flanges for the bulkhead hatches.The Final Touches
While two flanges form the primary support structure around the hatches, Sven mentions there are two additional pieces required at each end to ensure comprehensive protection. This attention to detail highlights his commitment to producing a durable and reliable design. “Sailing is about finding your path, whether it’s across an ocean or within yourself.” – Sven Yrvind In conclusion, making flanges around bulkhead hatches may seem complex at first glance, but by following Sven Yrvind’s meticulous process, enthusiasts can achieve professional-level results. Remember that the journey of boatbuilding is as rewarding as reaching your destination; it tests one’s patience and dedication. For those seeking to embark on this adventure or simply gain more insight into marine craftsmanship, Sven’s wisdom is invaluable.Sven proceeds to apply glue along one edge of the flange, ensuring a secure bond when clamped into place. He emphasizes that this stage is crucial for maintaining the structural integrity of the flange, which in turn safeguards the living area beneath the canvas when hatches are open.Step 3: Allowing Time to Dry
After securely attaching the first portion of the flange, Sven allows ample time for it to dry before moving forward with additional steps. This patience and precision are key aspects of his successful boatbuilding methods.Step 4: Finishing Touches
Once the flange is fully dried, Sven removes the clamps carefully, ensuring no damage occurs during this process. He then moves on to attaching four more pieces onto these main frames, completing two pairs of flanges for the bulkhead hatches.The Final Touches
While two flanges form the primary support structure around the hatches, Sven mentions there are two additional pieces required at each end to ensure comprehensive protection. This attention to detail highlights his commitment to producing a durable and reliable design. “Sailing is about finding your path, whether it’s across an ocean or within yourself.” – Sven Yrvind In conclusion, making flanges around bulkhead hatches may seem complex at first glance, but by following Sven Yrvind’s meticulous process, enthusiasts can achieve professional-level results. Remember that the journey of boatbuilding is as rewarding as reaching your destination; it tests one’s patience and dedication. For those seeking to embark on this adventure or simply gain more insight into marine craftsmanship, Sven’s wisdom is invaluable.Sven begins by explaining that working on flanges vertically and horizontally is significantly easier than doing so in a flat position. To simplify the process further, he divides the task into two or three steps as suggested by fellow expert “for for.” This approach not only makes it more manageable but also allows for greater precision in crafting each component.Step 2: Applying Glue and Securing
Sven proceeds to apply glue along one edge of the flange, ensuring a secure bond when clamped into place. He emphasizes that this stage is crucial for maintaining the structural integrity of the flange, which in turn safeguards the living area beneath the canvas when hatches are open.Step 3: Allowing Time to Dry
After securely attaching the first portion of the flange, Sven allows ample time for it to dry before moving forward with additional steps. This patience and precision are key aspects of his successful boatbuilding methods.Step 4: Finishing Touches
Once the flange is fully dried, Sven removes the clamps carefully, ensuring no damage occurs during this process. He then moves on to attaching four more pieces onto these main frames, completing two pairs of flanges for the bulkhead hatches.The Final Touches
While two flanges form the primary support structure around the hatches, Sven mentions there are two additional pieces required at each end to ensure comprehensive protection. This attention to detail highlights his commitment to producing a durable and reliable design. “Sailing is about finding your path, whether it’s across an ocean or within yourself.” – Sven Yrvind In conclusion, making flanges around bulkhead hatches may seem complex at first glance, but by following Sven Yrvind’s meticulous process, enthusiasts can achieve professional-level results. Remember that the journey of boatbuilding is as rewarding as reaching your destination; it tests one’s patience and dedication. For those seeking to embark on this adventure or simply gain more insight into marine craftsmanship, Sven’s wisdom is invaluable.Sven Yrvind, a renowned yacht designer and sailor, shares valuable insights on creating flanges around bulkhead hatches for canvas protection in this enlightening video. By following his expert guidance, boat enthusiasts can ensure their living areas remain secure while allowing unhindered access through the hatches.Step 1: Starting with the Flange
Sven begins by explaining that working on flanges vertically and horizontally is significantly easier than doing so in a flat position. To simplify the process further, he divides the task into two or three steps as suggested by fellow expert “for for.” This approach not only makes it more manageable but also allows for greater precision in crafting each component.Step 2: Applying Glue and Securing
Sven proceeds to apply glue along one edge of the flange, ensuring a secure bond when clamped into place. He emphasizes that this stage is crucial for maintaining the structural integrity of the flange, which in turn safeguards the living area beneath the canvas when hatches are open.Step 3: Allowing Time to Dry
After securely attaching the first portion of the flange, Sven allows ample time for it to dry before moving forward with additional steps. This patience and precision are key aspects of his successful boatbuilding methods.Step 4: Finishing Touches
Once the flange is fully dried, Sven removes the clamps carefully, ensuring no damage occurs during this process. He then moves on to attaching four more pieces onto these main frames, completing two pairs of flanges for the bulkhead hatches.The Final Touches
While two flanges form the primary support structure around the hatches, Sven mentions there are two additional pieces required at each end to ensure comprehensive protection. This attention to detail highlights his commitment to producing a durable and reliable design. “Sailing is about finding your path, whether it’s across an ocean or within yourself.” – Sven Yrvind In conclusion, making flanges around bulkhead hatches may seem complex at first glance, but by following Sven Yrvind’s meticulous process, enthusiasts can achieve professional-level results. Remember that the journey of boatbuilding is as rewarding as reaching your destination; it tests one’s patience and dedication. For those seeking to embark on this adventure or simply gain more insight into marine craftsmanship, Sven’s wisdom is invaluable.Making Flanges Around Bulkhead Hatches for Canvas
Sven Yrvind, a renowned yacht designer and sailor, shares valuable insights on creating flanges around bulkhead hatches for canvas protection in this enlightening video. By following his expert guidance, boat enthusiasts can ensure their living areas remain secure while allowing unhindered access through the hatches.Step 1: Starting with the Flange
Sven begins by explaining that working on flanges vertically and horizontally is significantly easier than doing so in a flat position. To simplify the process further, he divides the task into two or three steps as suggested by fellow expert “for for.” This approach not only makes it more manageable but also allows for greater precision in crafting each component.Step 2: Applying Glue and Securing
Sven proceeds to apply glue along one edge of the flange, ensuring a secure bond when clamped into place. He emphasizes that this stage is crucial for maintaining the structural integrity of the flange, which in turn safeguards the living area beneath the canvas when hatches are open.Step 3: Allowing Time to Dry
After securely attaching the first portion of the flange, Sven allows ample time for it to dry before moving forward with additional steps. This patience and precision are key aspects of his successful boatbuilding methods.Step 4: Finishing Touches
Once the flange is fully dried, Sven removes the clamps carefully, ensuring no damage occurs during this process. He then moves on to attaching four more pieces onto these main frames, completing two pairs of flanges for the bulkhead hatches.The Final Touches
While two flanges form the primary support structure around the hatches, Sven mentions there are two additional pieces required at each end to ensure comprehensive protection. This attention to detail highlights his commitment to producing a durable and reliable design. “Sailing is about finding your path, whether it’s across an ocean or within yourself.” – Sven Yrvind In conclusion, making flanges around bulkhead hatches may seem complex at first glance, but by following Sven Yrvind’s meticulous process, enthusiasts can achieve professional-level results. Remember that the journey of boatbuilding is as rewarding as reaching your destination; it tests one’s patience and dedication. For those seeking to embark on this adventure or simply gain more insight into marine craftsmanship, Sven’s wisdom is invaluable.After securely attaching the first portion of the flange, Sven allows ample time for it to dry before moving forward with additional steps. This patience and precision are key aspects of his successful boatbuilding methods.Step 4: Finishing Touches
Once the flange is fully dried, Sven removes the clamps carefully, ensuring no damage occurs during this process. He then moves on to attaching four more pieces onto these main frames, completing two pairs of flanges for the bulkhead hatches.The Final Touches
While two flanges form the primary support structure around the hatches, Sven mentions there are two additional pieces required at each end to ensure comprehensive protection. This attention to detail highlights his commitment to producing a durable and reliable design. “Sailing is about finding your path, whether it’s across an ocean or within yourself.” – Sven Yrvind In conclusion, making flanges around bulkhead hatches may seem complex at first glance, but by following Sven Yrvind’s meticulous process, enthusiasts can achieve professional-level results. Remember that the journey of boatbuilding is as rewarding as reaching your destination; it tests one’s patience and dedication. For those seeking to embark on this adventure or simply gain more insight into marine craftsmanship, Sven’s wisdom is invaluable.After securely attaching the first portion of the flange, Sven allows ample time for it to dry before moving forward with additional steps. This patience and precision are key aspects of his successful boatbuilding methods.Step 4: Finishing Touches
Once the flange is fully dried, Sven removes the clamps carefully, ensuring no damage occurs during this process. He then moves on to attaching four more pieces onto these main frames, completing two pairs of flanges for the bulkhead hatches.The Final Touches
While two flanges form the primary support structure around the hatches, Sven mentions there are two additional pieces required at each end to ensure comprehensive protection. This attention to detail highlights his commitment to producing a durable and reliable design. “Sailing is about finding your path, whether it’s across an ocean or within yourself.” – Sven Yrvind In conclusion, making flanges around bulkhead hatches may seem complex at first glance, but by following Sven Yrvind’s meticulous process, enthusiasts can achieve professional-level results. Remember that the journey of boatbuilding is as rewarding as reaching your destination; it tests one’s patience and dedication. For those seeking to embark on this adventure or simply gain more insight into marine craftsmanship, Sven’s wisdom is invaluable.Making Flanges Around Bulkhead Hatches for Canvas
Sven Yrvind, a renowned yacht designer and sailor, shares valuable insights on creating flanges around bulkhead hatches for canvas protection in this enlightening video. By following his expert guidance, boat enthusiasts can ensure their living areas remain secure while allowing unhindered access through the hatches.Step 1: Starting with the Flange
Sven begins by explaining that working on flanges vertically and horizontally is significantly easier than doing so in a flat position. To simplify the process further, he divides the task into two or three steps as suggested by fellow expert “for for.” This approach not only makes it more manageable but also allows for greater precision in crafting each component.Step 2: Applying Glue and Securing
Sven proceeds to apply glue along one edge of the flange, ensuring a secure bond when clamped into place. He emphasizes that this stage is crucial for maintaining the structural integrity of the flange, which in turn safeguards the living area beneath the canvas when hatches are open.Step 3: Allowing Time to Dry
After securely attaching the first portion of the flange, Sven allows ample time for it to dry before moving forward with additional steps. This patience and precision are key aspects of his successful boatbuilding methods.Step 4: Finishing Touches
Once the flange is fully dried, Sven removes the clamps carefully, ensuring no damage occurs during this process. He then moves on to attaching four more pieces onto these main frames, completing two pairs of flanges for the bulkhead hatches.The Final Touches
While two flanges form the primary support structure around the hatches, Sven mentions there are two additional pieces required at each end to ensure comprehensive protection. This attention to detail highlights his commitment to producing a durable and reliable design. “Sailing is about finding your path, whether it’s across an ocean or within yourself.” – Sven Yrvind In conclusion, making flanges around bulkhead hatches may seem complex at first glance, but by following Sven Yrvind’s meticulous process, enthusiasts can achieve professional-level results. Remember that the journey of boatbuilding is as rewarding as reaching your destination; it tests one’s patience and dedication. For those seeking to embark on this adventure or simply gain more insight into marine craftsmanship, Sven’s wisdom is invaluable.Sven proceeds to apply glue along one edge of the flange, ensuring a secure bond when clamped into place. He emphasizes that this stage is crucial for maintaining the structural integrity of the flange, which in turn safeguards the living area beneath the canvas when hatches are open.Step 3: Allowing Time to Dry
After securely attaching the first portion of the flange, Sven allows ample time for it to dry before moving forward with additional steps. This patience and precision are key aspects of his successful boatbuilding methods.Step 4: Finishing Touches
Once the flange is fully dried, Sven removes the clamps carefully, ensuring no damage occurs during this process. He then moves on to attaching four more pieces onto these main frames, completing two pairs of flanges for the bulkhead hatches.The Final Touches
While two flanges form the primary support structure around the hatches, Sven mentions there are two additional pieces required at each end to ensure comprehensive protection. This attention to detail highlights his commitment to producing a durable and reliable design. “Sailing is about finding your path, whether it’s across an ocean or within yourself.” – Sven Yrvind In conclusion, making flanges around bulkhead hatches may seem complex at first glance, but by following Sven Yrvind’s meticulous process, enthusiasts can achieve professional-level results. Remember that the journey of boatbuilding is as rewarding as reaching your destination; it tests one’s patience and dedication. For those seeking to embark on this adventure or simply gain more insight into marine craftsmanship, Sven’s wisdom is invaluable.Making Flanges Around Bulkhead Hatches for Canvas
Sven Yrvind, a renowned yacht designer and sailor, shares valuable insights on creating flanges around bulkhead hatches for canvas protection in this enlightening video. By following his expert guidance, boat enthusiasts can ensure their living areas remain secure while allowing unhindered access through the hatches.Step 1: Starting with the Flange
Sven begins by explaining that working on flanges vertically and horizontally is significantly easier than doing so in a flat position. To simplify the process further, he divides the task into two or three steps as suggested by fellow expert “for for.” This approach not only makes it more manageable but also allows for greater precision in crafting each component.Step 2: Applying Glue and Securing
Sven proceeds to apply glue along one edge of the flange, ensuring a secure bond when clamped into place. He emphasizes that this stage is crucial for maintaining the structural integrity of the flange, which in turn safeguards the living area beneath the canvas when hatches are open.Step 3: Allowing Time to Dry
After securely attaching the first portion of the flange, Sven allows ample time for it to dry before moving forward with additional steps. This patience and precision are key aspects of his successful boatbuilding methods.Step 4: Finishing Touches
Once the flange is fully dried, Sven removes the clamps carefully, ensuring no damage occurs during this process. He then moves on to attaching four more pieces onto these main frames, completing two pairs of flanges for the bulkhead hatches.The Final Touches
While two flanges form the primary support structure around the hatches, Sven mentions there are two additional pieces required at each end to ensure comprehensive protection. This attention to detail highlights his commitment to producing a durable and reliable design. “Sailing is about finding your path, whether it’s across an ocean or within yourself.” – Sven Yrvind In conclusion, making flanges around bulkhead hatches may seem complex at first glance, but by following Sven Yrvind’s meticulous process, enthusiasts can achieve professional-level results. Remember that the journey of boatbuilding is as rewarding as reaching your destination; it tests one’s patience and dedication. For those seeking to embark on this adventure or simply gain more insight into marine craftsmanship, Sven’s wisdom is invaluable.Sven begins by explaining that working on flanges vertically and horizontally is significantly easier than doing so in a flat position. To simplify the process further, he divides the task into two or three steps as suggested by fellow expert “for for.” This approach not only makes it more manageable but also allows for greater precision in crafting each component.Step 2: Applying Glue and Securing
Sven proceeds to apply glue along one edge of the flange, ensuring a secure bond when clamped into place. He emphasizes that this stage is crucial for maintaining the structural integrity of the flange, which in turn safeguards the living area beneath the canvas when hatches are open.Step 3: Allowing Time to Dry
After securely attaching the first portion of the flange, Sven allows ample time for it to dry before moving forward with additional steps. This patience and precision are key aspects of his successful boatbuilding methods.Step 4: Finishing Touches
Once the flange is fully dried, Sven removes the clamps carefully, ensuring no damage occurs during this process. He then moves on to attaching four more pieces onto these main frames, completing two pairs of flanges for the bulkhead hatches.The Final Touches
While two flanges form the primary support structure around the hatches, Sven mentions there are two additional pieces required at each end to ensure comprehensive protection. This attention to detail highlights his commitment to producing a durable and reliable design. “Sailing is about finding your path, whether it’s across an ocean or within yourself.” – Sven Yrvind In conclusion, making flanges around bulkhead hatches may seem complex at first glance, but by following Sven Yrvind’s meticulous process, enthusiasts can achieve professional-level results. Remember that the journey of boatbuilding is as rewarding as reaching your destination; it tests one’s patience and dedication. For those seeking to embark on this adventure or simply gain more insight into marine craftsmanship, Sven’s wisdom is invaluable.Making Flanges Around Bulkhead Hatches for Canvas
Sven Yrvind, a renowned yacht designer and sailor, shares valuable insights on creating flanges around bulkhead hatches for canvas protection in this enlightening video. By following his expert guidance, boat enthusiasts can ensure their living areas remain secure while allowing unhindered access through the hatches.Step 1: Starting with the Flange
Sven begins by explaining that working on flanges vertically and horizontally is significantly easier than doing so in a flat position. To simplify the process further, he divides the task into two or three steps as suggested by fellow expert “for for.” This approach not only makes it more manageable but also allows for greater precision in crafting each component.Step 2: Applying Glue and Securing
Sven proceeds to apply glue along one edge of the flange, ensuring a secure bond when clamped into place. He emphasizes that this stage is crucial for maintaining the structural integrity of the flange, which in turn safeguards the living area beneath the canvas when hatches are open.Step 3: Allowing Time to Dry
After securely attaching the first portion of the flange, Sven allows ample time for it to dry before moving forward with additional steps. This patience and precision are key aspects of his successful boatbuilding methods.Step 4: Finishing Touches
Once the flange is fully dried, Sven removes the clamps carefully, ensuring no damage occurs during this process. He then moves on to attaching four more pieces onto these main frames, completing two pairs of flanges for the bulkhead hatches.The Final Touches
While two flanges form the primary support structure around the hatches, Sven mentions there are two additional pieces required at each end to ensure comprehensive protection. This attention to detail highlights his commitment to producing a durable and reliable design. “Sailing is about finding your path, whether it’s across an ocean or within yourself.” – Sven Yrvind In conclusion, making flanges around bulkhead hatches may seem complex at first glance, but by following Sven Yrvind’s meticulous process, enthusiasts can achieve professional-level results. Remember that the journey of boatbuilding is as rewarding as reaching your destination; it tests one’s patience and dedication. For those seeking to embark on this adventure or simply gain more insight into marine craftsmanship, Sven’s wisdom is invaluable.Sven Yrvind, a renowned yacht designer and sailor, shares valuable insights on creating flanges around bulkhead hatches for canvas protection in this enlightening video. By following his expert guidance, boat enthusiasts can ensure their living areas remain secure while allowing unhindered access through the hatches.Step 1: Starting with the Flange
Sven begins by explaining that working on flanges vertically and horizontally is significantly easier than doing so in a flat position. To simplify the process further, he divides the task into two or three steps as suggested by fellow expert “for for.” This approach not only makes it more manageable but also allows for greater precision in crafting each component.Step 2: Applying Glue and Securing
Sven proceeds to apply glue along one edge of the flange, ensuring a secure bond when clamped into place. He emphasizes that this stage is crucial for maintaining the structural integrity of the flange, which in turn safeguards the living area beneath the canvas when hatches are open.Step 3: Allowing Time to Dry
After securely attaching the first portion of the flange, Sven allows ample time for it to dry before moving forward with additional steps. This patience and precision are key aspects of his successful boatbuilding methods.Step 4: Finishing Touches
Once the flange is fully dried, Sven removes the clamps carefully, ensuring no damage occurs during this process. He then moves on to attaching four more pieces onto these main frames, completing two pairs of flanges for the bulkhead hatches.The Final Touches
While two flanges form the primary support structure around the hatches, Sven mentions there are two additional pieces required at each end to ensure comprehensive protection. This attention to detail highlights his commitment to producing a durable and reliable design. “Sailing is about finding your path, whether it’s across an ocean or within yourself.” – Sven Yrvind In conclusion, making flanges around bulkhead hatches may seem complex at first glance, but by following Sven Yrvind’s meticulous process, enthusiasts can achieve professional-level results. Remember that the journey of boatbuilding is as rewarding as reaching your destination; it tests one’s patience and dedication. For those seeking to embark on this adventure or simply gain more insight into marine craftsmanship, Sven’s wisdom is invaluable.Making Flanges Around Bulkhead Hatches for Canvas
Sven Yrvind, a renowned yacht designer and sailor, shares valuable insights on creating flanges around bulkhead hatches for canvas protection in this enlightening video. By following his expert guidance, boat enthusiasts can ensure their living areas remain secure while allowing unhindered access through the hatches.Step 1: Starting with the Flange
Sven begins by explaining that working on flanges vertically and horizontally is significantly easier than doing so in a flat position. To simplify the process further, he divides the task into two or three steps as suggested by fellow expert “for for.” This approach not only makes it more manageable but also allows for greater precision in crafting each component.Step 2: Applying Glue and Securing
Sven proceeds to apply glue along one edge of the flange, ensuring a secure bond when clamped into place. He emphasizes that this stage is crucial for maintaining the structural integrity of the flange, which in turn safeguards the living area beneath the canvas when hatches are open.Step 3: Allowing Time to Dry
After securely attaching the first portion of the flange, Sven allows ample time for it to dry before moving forward with additional steps. This patience and precision are key aspects of his successful boatbuilding methods.Step 4: Finishing Touches
Once the flange is fully dried, Sven removes the clamps carefully, ensuring no damage occurs during this process. He then moves on to attaching four more pieces onto these main frames, completing two pairs of flanges for the bulkhead hatches.The Final Touches
While two flanges form the primary support structure around the hatches, Sven mentions there are two additional pieces required at each end to ensure comprehensive protection. This attention to detail highlights his commitment to producing a durable and reliable design. “Sailing is about finding your path, whether it’s across an ocean or within yourself.” – Sven Yrvind In conclusion, making flanges around bulkhead hatches may seem complex at first glance, but by following Sven Yrvind’s meticulous process, enthusiasts can achieve professional-level results. Remember that the journey of boatbuilding is as rewarding as reaching your destination; it tests one’s patience and dedication. For those seeking to embark on this adventure or simply gain more insight into marine craftsmanship, Sven’s wisdom is invaluable.Once the flange is fully dried, Sven removes the clamps carefully, ensuring no damage occurs during this process. He then moves on to attaching four more pieces onto these main frames, completing two pairs of flanges for the bulkhead hatches.The Final Touches
While two flanges form the primary support structure around the hatches, Sven mentions there are two additional pieces required at each end to ensure comprehensive protection. This attention to detail highlights his commitment to producing a durable and reliable design. “Sailing is about finding your path, whether it’s across an ocean or within yourself.” – Sven Yrvind In conclusion, making flanges around bulkhead hatches may seem complex at first glance, but by following Sven Yrvind’s meticulous process, enthusiasts can achieve professional-level results. Remember that the journey of boatbuilding is as rewarding as reaching your destination; it tests one’s patience and dedication. For those seeking to embark on this adventure or simply gain more insight into marine craftsmanship, Sven’s wisdom is invaluable.Sven Yrvind, a renowned yacht designer and sailor, shares valuable insights on creating flanges around bulkhead hatches for canvas protection in this enlightening video. By following his expert guidance, boat enthusiasts can ensure their living areas remain secure while allowing unhindered access through the hatches.Step 1: Starting with the Flange
Sven begins by explaining that working on flanges vertically and horizontally is significantly easier than doing so in a flat position. To simplify the process further, he divides the task into two or three steps as suggested by fellow expert “for for.” This approach not only makes it more manageable but also allows for greater precision in crafting each component.Step 2: Applying Glue and Securing
Sven proceeds to apply glue along one edge of the flange, ensuring a secure bond when clamped into place. He emphasizes that this stage is crucial for maintaining the structural integrity of the flange, which in turn safeguards the living area beneath the canvas when hatches are open.Step 3: Allowing Time to Dry
After securely attaching the first portion of the flange, Sven allows ample time for it to dry before moving forward with additional steps. This patience and precision are key aspects of his successful boatbuilding methods.Step 4: Finishing Touches
Once the flange is fully dried, Sven removes the clamps carefully, ensuring no damage occurs during this process. He then moves on to attaching four more pieces onto these main frames, completing two pairs of flanges for the bulkhead hatches.The Final Touches
While two flanges form the primary support structure around the hatches, Sven mentions there are two additional pieces required at each end to ensure comprehensive protection. This attention to detail highlights his commitment to producing a durable and reliable design. “Sailing is about finding your path, whether it’s across an ocean or within yourself.” – Sven Yrvind In conclusion, making flanges around bulkhead hatches may seem complex at first glance, but by following Sven Yrvind’s meticulous process, enthusiasts can achieve professional-level results. Remember that the journey of boatbuilding is as rewarding as reaching your destination; it tests one’s patience and dedication. For those seeking to embark on this adventure or simply gain more insight into marine craftsmanship, Sven’s wisdom is invaluable.Making Flanges Around Bulkhead Hatches for Canvas
Sven Yrvind, a renowned yacht designer and sailor, shares valuable insights on creating flanges around bulkhead hatches for canvas protection in this enlightening video. By following his expert guidance, boat enthusiasts can ensure their living areas remain secure while allowing unhindered access through the hatches.Step 1: Starting with the Flange
Sven begins by explaining that working on flanges vertically and horizontally is significantly easier than doing so in a flat position. To simplify the process further, he divides the task into two or three steps as suggested by fellow expert “for for.” This approach not only makes it more manageable but also allows for greater precision in crafting each component.Step 2: Applying Glue and Securing
Sven proceeds to apply glue along one edge of the flange, ensuring a secure bond when clamped into place. He emphasizes that this stage is crucial for maintaining the structural integrity of the flange, which in turn safeguards the living area beneath the canvas when hatches are open.Step 3: Allowing Time to Dry
After securely attaching the first portion of the flange, Sven allows ample time for it to dry before moving forward with additional steps. This patience and precision are key aspects of his successful boatbuilding methods.Step 4: Finishing Touches
Once the flange is fully dried, Sven removes the clamps carefully, ensuring no damage occurs during this process. He then moves on to attaching four more pieces onto these main frames, completing two pairs of flanges for the bulkhead hatches.The Final Touches
While two flanges form the primary support structure around the hatches, Sven mentions there are two additional pieces required at each end to ensure comprehensive protection. This attention to detail highlights his commitment to producing a durable and reliable design. “Sailing is about finding your path, whether it’s across an ocean or within yourself.” – Sven Yrvind In conclusion, making flanges around bulkhead hatches may seem complex at first glance, but by following Sven Yrvind’s meticulous process, enthusiasts can achieve professional-level results. Remember that the journey of boatbuilding is as rewarding as reaching your destination; it tests one’s patience and dedication. For those seeking to embark on this adventure or simply gain more insight into marine craftsmanship, Sven’s wisdom is invaluable.After securely attaching the first portion of the flange, Sven allows ample time for it to dry before moving forward with additional steps. This patience and precision are key aspects of his successful boatbuilding methods.Step 4: Finishing Touches
Once the flange is fully dried, Sven removes the clamps carefully, ensuring no damage occurs during this process. He then moves on to attaching four more pieces onto these main frames, completing two pairs of flanges for the bulkhead hatches.The Final Touches
While two flanges form the primary support structure around the hatches, Sven mentions there are two additional pieces required at each end to ensure comprehensive protection. This attention to detail highlights his commitment to producing a durable and reliable design. “Sailing is about finding your path, whether it’s across an ocean or within yourself.” – Sven Yrvind In conclusion, making flanges around bulkhead hatches may seem complex at first glance, but by following Sven Yrvind’s meticulous process, enthusiasts can achieve professional-level results. Remember that the journey of boatbuilding is as rewarding as reaching your destination; it tests one’s patience and dedication. For those seeking to embark on this adventure or simply gain more insight into marine craftsmanship, Sven’s wisdom is invaluable.Sven Yrvind, a renowned yacht designer and sailor, shares valuable insights on creating flanges around bulkhead hatches for canvas protection in this enlightening video. By following his expert guidance, boat enthusiasts can ensure their living areas remain secure while allowing unhindered access through the hatches.Step 1: Starting with the Flange
Sven begins by explaining that working on flanges vertically and horizontally is significantly easier than doing so in a flat position. To simplify the process further, he divides the task into two or three steps as suggested by fellow expert “for for.” This approach not only makes it more manageable but also allows for greater precision in crafting each component.Step 2: Applying Glue and Securing
Sven proceeds to apply glue along one edge of the flange, ensuring a secure bond when clamped into place. He emphasizes that this stage is crucial for maintaining the structural integrity of the flange, which in turn safeguards the living area beneath the canvas when hatches are open.Step 3: Allowing Time to Dry
After securely attaching the first portion of the flange, Sven allows ample time for it to dry before moving forward with additional steps. This patience and precision are key aspects of his successful boatbuilding methods.Step 4: Finishing Touches
Once the flange is fully dried, Sven removes the clamps carefully, ensuring no damage occurs during this process. He then moves on to attaching four more pieces onto these main frames, completing two pairs of flanges for the bulkhead hatches.The Final Touches
While two flanges form the primary support structure around the hatches, Sven mentions there are two additional pieces required at each end to ensure comprehensive protection. This attention to detail highlights his commitment to producing a durable and reliable design. “Sailing is about finding your path, whether it’s across an ocean or within yourself.” – Sven Yrvind In conclusion, making flanges around bulkhead hatches may seem complex at first glance, but by following Sven Yrvind’s meticulous process, enthusiasts can achieve professional-level results. Remember that the journey of boatbuilding is as rewarding as reaching your destination; it tests one’s patience and dedication. For those seeking to embark on this adventure or simply gain more insight into marine craftsmanship, Sven’s wisdom is invaluable.Making Flanges Around Bulkhead Hatches for Canvas
Sven Yrvind, a renowned yacht designer and sailor, shares valuable insights on creating flanges around bulkhead hatches for canvas protection in this enlightening video. By following his expert guidance, boat enthusiasts can ensure their living areas remain secure while allowing unhindered access through the hatches.Step 1: Starting with the Flange
Sven begins by explaining that working on flanges vertically and horizontally is significantly easier than doing so in a flat position. To simplify the process further, he divides the task into two or three steps as suggested by fellow expert “for for.” This approach not only makes it more manageable but also allows for greater precision in crafting each component.Step 2: Applying Glue and Securing
Sven proceeds to apply glue along one edge of the flange, ensuring a secure bond when clamped into place. He emphasizes that this stage is crucial for maintaining the structural integrity of the flange, which in turn safeguards the living area beneath the canvas when hatches are open.Step 3: Allowing Time to Dry
After securely attaching the first portion of the flange, Sven allows ample time for it to dry before moving forward with additional steps. This patience and precision are key aspects of his successful boatbuilding methods.Step 4: Finishing Touches
Once the flange is fully dried, Sven removes the clamps carefully, ensuring no damage occurs during this process. He then moves on to attaching four more pieces onto these main frames, completing two pairs of flanges for the bulkhead hatches.The Final Touches
While two flanges form the primary support structure around the hatches, Sven mentions there are two additional pieces required at each end to ensure comprehensive protection. This attention to detail highlights his commitment to producing a durable and reliable design. “Sailing is about finding your path, whether it’s across an ocean or within yourself.” – Sven Yrvind In conclusion, making flanges around bulkhead hatches may seem complex at first glance, but by following Sven Yrvind’s meticulous process, enthusiasts can achieve professional-level results. Remember that the journey of boatbuilding is as rewarding as reaching your destination; it tests one’s patience and dedication. For those seeking to embark on this adventure or simply gain more insight into marine craftsmanship, Sven’s wisdom is invaluable.Sven proceeds to apply glue along one edge of the flange, ensuring a secure bond when clamped into place. He emphasizes that this stage is crucial for maintaining the structural integrity of the flange, which in turn safeguards the living area beneath the canvas when hatches are open.Step 3: Allowing Time to Dry
After securely attaching the first portion of the flange, Sven allows ample time for it to dry before moving forward with additional steps. This patience and precision are key aspects of his successful boatbuilding methods.Step 4: Finishing Touches
Once the flange is fully dried, Sven removes the clamps carefully, ensuring no damage occurs during this process. He then moves on to attaching four more pieces onto these main frames, completing two pairs of flanges for the bulkhead hatches.The Final Touches
While two flanges form the primary support structure around the hatches, Sven mentions there are two additional pieces required at each end to ensure comprehensive protection. This attention to detail highlights his commitment to producing a durable and reliable design. “Sailing is about finding your path, whether it’s across an ocean or within yourself.” – Sven Yrvind In conclusion, making flanges around bulkhead hatches may seem complex at first glance, but by following Sven Yrvind’s meticulous process, enthusiasts can achieve professional-level results. Remember that the journey of boatbuilding is as rewarding as reaching your destination; it tests one’s patience and dedication. For those seeking to embark on this adventure or simply gain more insight into marine craftsmanship, Sven’s wisdom is invaluable.Sven Yrvind, a renowned yacht designer and sailor, shares valuable insights on creating flanges around bulkhead hatches for canvas protection in this enlightening video. By following his expert guidance, boat enthusiasts can ensure their living areas remain secure while allowing unhindered access through the hatches.Step 1: Starting with the Flange
Sven begins by explaining that working on flanges vertically and horizontally is significantly easier than doing so in a flat position. To simplify the process further, he divides the task into two or three steps as suggested by fellow expert “for for.” This approach not only makes it more manageable but also allows for greater precision in crafting each component.Step 2: Applying Glue and Securing
Sven proceeds to apply glue along one edge of the flange, ensuring a secure bond when clamped into place. He emphasizes that this stage is crucial for maintaining the structural integrity of the flange, which in turn safeguards the living area beneath the canvas when hatches are open.Step 3: Allowing Time to Dry
After securely attaching the first portion of the flange, Sven allows ample time for it to dry before moving forward with additional steps. This patience and precision are key aspects of his successful boatbuilding methods.Step 4: Finishing Touches
Once the flange is fully dried, Sven removes the clamps carefully, ensuring no damage occurs during this process. He then moves on to attaching four more pieces onto these main frames, completing two pairs of flanges for the bulkhead hatches.The Final Touches
While two flanges form the primary support structure around the hatches, Sven mentions there are two additional pieces required at each end to ensure comprehensive protection. This attention to detail highlights his commitment to producing a durable and reliable design. “Sailing is about finding your path, whether it’s across an ocean or within yourself.” – Sven Yrvind In conclusion, making flanges around bulkhead hatches may seem complex at first glance, but by following Sven Yrvind’s meticulous process, enthusiasts can achieve professional-level results. Remember that the journey of boatbuilding is as rewarding as reaching your destination; it tests one’s patience and dedication. For those seeking to embark on this adventure or simply gain more insight into marine craftsmanship, Sven’s wisdom is invaluable.Making Flanges Around Bulkhead Hatches for Canvas
Sven Yrvind, a renowned yacht designer and sailor, shares valuable insights on creating flanges around bulkhead hatches for canvas protection in this enlightening video. By following his expert guidance, boat enthusiasts can ensure their living areas remain secure while allowing unhindered access through the hatches.Step 1: Starting with the Flange
Sven begins by explaining that working on flanges vertically and horizontally is significantly easier than doing so in a flat position. To simplify the process further, he divides the task into two or three steps as suggested by fellow expert “for for.” This approach not only makes it more manageable but also allows for greater precision in crafting each component.Step 2: Applying Glue and Securing
Sven proceeds to apply glue along one edge of the flange, ensuring a secure bond when clamped into place. He emphasizes that this stage is crucial for maintaining the structural integrity of the flange, which in turn safeguards the living area beneath the canvas when hatches are open.Step 3: Allowing Time to Dry
After securely attaching the first portion of the flange, Sven allows ample time for it to dry before moving forward with additional steps. This patience and precision are key aspects of his successful boatbuilding methods.Step 4: Finishing Touches
Once the flange is fully dried, Sven removes the clamps carefully, ensuring no damage occurs during this process. He then moves on to attaching four more pieces onto these main frames, completing two pairs of flanges for the bulkhead hatches.The Final Touches
While two flanges form the primary support structure around the hatches, Sven mentions there are two additional pieces required at each end to ensure comprehensive protection. This attention to detail highlights his commitment to producing a durable and reliable design. “Sailing is about finding your path, whether it’s across an ocean or within yourself.” – Sven Yrvind In conclusion, making flanges around bulkhead hatches may seem complex at first glance, but by following Sven Yrvind’s meticulous process, enthusiasts can achieve professional-level results. Remember that the journey of boatbuilding is as rewarding as reaching your destination; it tests one’s patience and dedication. For those seeking to embark on this adventure or simply gain more insight into marine craftsmanship, Sven’s wisdom is invaluable.Sven begins by explaining that working on flanges vertically and horizontally is significantly easier than doing so in a flat position. To simplify the process further, he divides the task into two or three steps as suggested by fellow expert “for for.” This approach not only makes it more manageable but also allows for greater precision in crafting each component.Step 2: Applying Glue and Securing
Sven proceeds to apply glue along one edge of the flange, ensuring a secure bond when clamped into place. He emphasizes that this stage is crucial for maintaining the structural integrity of the flange, which in turn safeguards the living area beneath the canvas when hatches are open.Step 3: Allowing Time to Dry
After securely attaching the first portion of the flange, Sven allows ample time for it to dry before moving forward with additional steps. This patience and precision are key aspects of his successful boatbuilding methods.Step 4: Finishing Touches
Once the flange is fully dried, Sven removes the clamps carefully, ensuring no damage occurs during this process. He then moves on to attaching four more pieces onto these main frames, completing two pairs of flanges for the bulkhead hatches.The Final Touches
While two flanges form the primary support structure around the hatches, Sven mentions there are two additional pieces required at each end to ensure comprehensive protection. This attention to detail highlights his commitment to producing a durable and reliable design. “Sailing is about finding your path, whether it’s across an ocean or within yourself.” – Sven Yrvind In conclusion, making flanges around bulkhead hatches may seem complex at first glance, but by following Sven Yrvind’s meticulous process, enthusiasts can achieve professional-level results. Remember that the journey of boatbuilding is as rewarding as reaching your destination; it tests one’s patience and dedication. For those seeking to embark on this adventure or simply gain more insight into marine craftsmanship, Sven’s wisdom is invaluable.Sven Yrvind, a renowned yacht designer and sailor, shares valuable insights on creating flanges around bulkhead hatches for canvas protection in this enlightening video. By following his expert guidance, boat enthusiasts can ensure their living areas remain secure while allowing unhindered access through the hatches.Step 1: Starting with the Flange
Sven begins by explaining that working on flanges vertically and horizontally is significantly easier than doing so in a flat position. To simplify the process further, he divides the task into two or three steps as suggested by fellow expert “for for.” This approach not only makes it more manageable but also allows for greater precision in crafting each component.Step 2: Applying Glue and Securing
Sven proceeds to apply glue along one edge of the flange, ensuring a secure bond when clamped into place. He emphasizes that this stage is crucial for maintaining the structural integrity of the flange, which in turn safeguards the living area beneath the canvas when hatches are open.Step 3: Allowing Time to Dry
After securely attaching the first portion of the flange, Sven allows ample time for it to dry before moving forward with additional steps. This patience and precision are key aspects of his successful boatbuilding methods.Step 4: Finishing Touches
Once the flange is fully dried, Sven removes the clamps carefully, ensuring no damage occurs during this process. He then moves on to attaching four more pieces onto these main frames, completing two pairs of flanges for the bulkhead hatches.The Final Touches
While two flanges form the primary support structure around the hatches, Sven mentions there are two additional pieces required at each end to ensure comprehensive protection. This attention to detail highlights his commitment to producing a durable and reliable design. “Sailing is about finding your path, whether it’s across an ocean or within yourself.” – Sven Yrvind In conclusion, making flanges around bulkhead hatches may seem complex at first glance, but by following Sven Yrvind’s meticulous process, enthusiasts can achieve professional-level results. Remember that the journey of boatbuilding is as rewarding as reaching your destination; it tests one’s patience and dedication. For those seeking to embark on this adventure or simply gain more insight into marine craftsmanship, Sven’s wisdom is invaluable.Making Flanges Around Bulkhead Hatches for Canvas
Sven Yrvind, a renowned yacht designer and sailor, shares valuable insights on creating flanges around bulkhead hatches for canvas protection in this enlightening video. By following his expert guidance, boat enthusiasts can ensure their living areas remain secure while allowing unhindered access through the hatches.Step 1: Starting with the Flange
Sven begins by explaining that working on flanges vertically and horizontally is significantly easier than doing so in a flat position. To simplify the process further, he divides the task into two or three steps as suggested by fellow expert “for for.” This approach not only makes it more manageable but also allows for greater precision in crafting each component.Step 2: Applying Glue and Securing
Sven proceeds to apply glue along one edge of the flange, ensuring a secure bond when clamped into place. He emphasizes that this stage is crucial for maintaining the structural integrity of the flange, which in turn safeguards the living area beneath the canvas when hatches are open.Step 3: Allowing Time to Dry
After securely attaching the first portion of the flange, Sven allows ample time for it to dry before moving forward with additional steps. This patience and precision are key aspects of his successful boatbuilding methods.Step 4: Finishing Touches
Once the flange is fully dried, Sven removes the clamps carefully, ensuring no damage occurs during this process. He then moves on to attaching four more pieces onto these main frames, completing two pairs of flanges for the bulkhead hatches.The Final Touches
While two flanges form the primary support structure around the hatches, Sven mentions there are two additional pieces required at each end to ensure comprehensive protection. This attention to detail highlights his commitment to producing a durable and reliable design. “Sailing is about finding your path, whether it’s across an ocean or within yourself.” – Sven Yrvind In conclusion, making flanges around bulkhead hatches may seem complex at first glance, but by following Sven Yrvind’s meticulous process, enthusiasts can achieve professional-level results. Remember that the journey of boatbuilding is as rewarding as reaching your destination; it tests one’s patience and dedication. For those seeking to embark on this adventure or simply gain more insight into marine craftsmanship, Sven’s wisdom is invaluable.Once the flange is fully dried, Sven removes the clamps carefully, ensuring no damage occurs during this process. He then moves on to attaching four more pieces onto these main frames, completing two pairs of flanges for the bulkhead hatches.The Final Touches
While two flanges form the primary support structure around the hatches, Sven mentions there are two additional pieces required at each end to ensure comprehensive protection. This attention to detail highlights his commitment to producing a durable and reliable design. “Sailing is about finding your path, whether it’s across an ocean or within yourself.” – Sven Yrvind In conclusion, making flanges around bulkhead hatches may seem complex at first glance, but by following Sven Yrvind’s meticulous process, enthusiasts can achieve professional-level results. Remember that the journey of boatbuilding is as rewarding as reaching your destination; it tests one’s patience and dedication. For those seeking to embark on this adventure or simply gain more insight into marine craftsmanship, Sven’s wisdom is invaluable.Sven begins by explaining that working on flanges vertically and horizontally is significantly easier than doing so in a flat position. To simplify the process further, he divides the task into two or three steps as suggested by fellow expert “for for.” This approach not only makes it more manageable but also allows for greater precision in crafting each component.Step 2: Applying Glue and Securing
Sven proceeds to apply glue along one edge of the flange, ensuring a secure bond when clamped into place. He emphasizes that this stage is crucial for maintaining the structural integrity of the flange, which in turn safeguards the living area beneath the canvas when hatches are open.Step 3: Allowing Time to Dry
After securely attaching the first portion of the flange, Sven allows ample time for it to dry before moving forward with additional steps. This patience and precision are key aspects of his successful boatbuilding methods.Step 4: Finishing Touches
Once the flange is fully dried, Sven removes the clamps carefully, ensuring no damage occurs during this process. He then moves on to attaching four more pieces onto these main frames, completing two pairs of flanges for the bulkhead hatches.The Final Touches
While two flanges form the primary support structure around the hatches, Sven mentions there are two additional pieces required at each end to ensure comprehensive protection. This attention to detail highlights his commitment to producing a durable and reliable design. “Sailing is about finding your path, whether it’s across an ocean or within yourself.” – Sven Yrvind In conclusion, making flanges around bulkhead hatches may seem complex at first glance, but by following Sven Yrvind’s meticulous process, enthusiasts can achieve professional-level results. Remember that the journey of boatbuilding is as rewarding as reaching your destination; it tests one’s patience and dedication. For those seeking to embark on this adventure or simply gain more insight into marine craftsmanship, Sven’s wisdom is invaluable.Sven Yrvind, a renowned yacht designer and sailor, shares valuable insights on creating flanges around bulkhead hatches for canvas protection in this enlightening video. By following his expert guidance, boat enthusiasts can ensure their living areas remain secure while allowing unhindered access through the hatches.Step 1: Starting with the Flange
Sven begins by explaining that working on flanges vertically and horizontally is significantly easier than doing so in a flat position. To simplify the process further, he divides the task into two or three steps as suggested by fellow expert “for for.” This approach not only makes it more manageable but also allows for greater precision in crafting each component.Step 2: Applying Glue and Securing
Sven proceeds to apply glue along one edge of the flange, ensuring a secure bond when clamped into place. He emphasizes that this stage is crucial for maintaining the structural integrity of the flange, which in turn safeguards the living area beneath the canvas when hatches are open.Step 3: Allowing Time to Dry
After securely attaching the first portion of the flange, Sven allows ample time for it to dry before moving forward with additional steps. This patience and precision are key aspects of his successful boatbuilding methods.Step 4: Finishing Touches
Once the flange is fully dried, Sven removes the clamps carefully, ensuring no damage occurs during this process. He then moves on to attaching four more pieces onto these main frames, completing two pairs of flanges for the bulkhead hatches.The Final Touches
While two flanges form the primary support structure around the hatches, Sven mentions there are two additional pieces required at each end to ensure comprehensive protection. This attention to detail highlights his commitment to producing a durable and reliable design. “Sailing is about finding your path, whether it’s across an ocean or within yourself.” – Sven Yrvind In conclusion, making flanges around bulkhead hatches may seem complex at first glance, but by following Sven Yrvind’s meticulous process, enthusiasts can achieve professional-level results. Remember that the journey of boatbuilding is as rewarding as reaching your destination; it tests one’s patience and dedication. For those seeking to embark on this adventure or simply gain more insight into marine craftsmanship, Sven’s wisdom is invaluable.Making Flanges Around Bulkhead Hatches for Canvas
Sven Yrvind, a renowned yacht designer and sailor, shares valuable insights on creating flanges around bulkhead hatches for canvas protection in this enlightening video. By following his expert guidance, boat enthusiasts can ensure their living areas remain secure while allowing unhindered access through the hatches.Step 1: Starting with the Flange
Sven begins by explaining that working on flanges vertically and horizontally is significantly easier than doing so in a flat position. To simplify the process further, he divides the task into two or three steps as suggested by fellow expert “for for.” This approach not only makes it more manageable but also allows for greater precision in crafting each component.Step 2: Applying Glue and Securing
Sven proceeds to apply glue along one edge of the flange, ensuring a secure bond when clamped into place. He emphasizes that this stage is crucial for maintaining the structural integrity of the flange, which in turn safeguards the living area beneath the canvas when hatches are open.Step 3: Allowing Time to Dry
After securely attaching the first portion of the flange, Sven allows ample time for it to dry before moving forward with additional steps. This patience and precision are key aspects of his successful boatbuilding methods.Step 4: Finishing Touches
Once the flange is fully dried, Sven removes the clamps carefully, ensuring no damage occurs during this process. He then moves on to attaching four more pieces onto these main frames, completing two pairs of flanges for the bulkhead hatches.The Final Touches
While two flanges form the primary support structure around the hatches, Sven mentions there are two additional pieces required at each end to ensure comprehensive protection. This attention to detail highlights his commitment to producing a durable and reliable design. “Sailing is about finding your path, whether it’s across an ocean or within yourself.” – Sven Yrvind In conclusion, making flanges around bulkhead hatches may seem complex at first glance, but by following Sven Yrvind’s meticulous process, enthusiasts can achieve professional-level results. Remember that the journey of boatbuilding is as rewarding as reaching your destination; it tests one’s patience and dedication. For those seeking to embark on this adventure or simply gain more insight into marine craftsmanship, Sven’s wisdom is invaluable.After securely attaching the first portion of the flange, Sven allows ample time for it to dry before moving forward with additional steps. This patience and precision are key aspects of his successful boatbuilding methods.Step 4: Finishing Touches
Once the flange is fully dried, Sven removes the clamps carefully, ensuring no damage occurs during this process. He then moves on to attaching four more pieces onto these main frames, completing two pairs of flanges for the bulkhead hatches.The Final Touches
While two flanges form the primary support structure around the hatches, Sven mentions there are two additional pieces required at each end to ensure comprehensive protection. This attention to detail highlights his commitment to producing a durable and reliable design. “Sailing is about finding your path, whether it’s across an ocean or within yourself.” – Sven Yrvind In conclusion, making flanges around bulkhead hatches may seem complex at first glance, but by following Sven Yrvind’s meticulous process, enthusiasts can achieve professional-level results. Remember that the journey of boatbuilding is as rewarding as reaching your destination; it tests one’s patience and dedication. For those seeking to embark on this adventure or simply gain more insight into marine craftsmanship, Sven’s wisdom is invaluable.Sven begins by explaining that working on flanges vertically and horizontally is significantly easier than doing so in a flat position. To simplify the process further, he divides the task into two or three steps as suggested by fellow expert “for for.” This approach not only makes it more manageable but also allows for greater precision in crafting each component.Step 2: Applying Glue and Securing
Sven proceeds to apply glue along one edge of the flange, ensuring a secure bond when clamped into place. He emphasizes that this stage is crucial for maintaining the structural integrity of the flange, which in turn safeguards the living area beneath the canvas when hatches are open.Step 3: Allowing Time to Dry
After securely attaching the first portion of the flange, Sven allows ample time for it to dry before moving forward with additional steps. This patience and precision are key aspects of his successful boatbuilding methods.Step 4: Finishing Touches
Once the flange is fully dried, Sven removes the clamps carefully, ensuring no damage occurs during this process. He then moves on to attaching four more pieces onto these main frames, completing two pairs of flanges for the bulkhead hatches.The Final Touches
While two flanges form the primary support structure around the hatches, Sven mentions there are two additional pieces required at each end to ensure comprehensive protection. This attention to detail highlights his commitment to producing a durable and reliable design. “Sailing is about finding your path, whether it’s across an ocean or within yourself.” – Sven Yrvind In conclusion, making flanges around bulkhead hatches may seem complex at first glance, but by following Sven Yrvind’s meticulous process, enthusiasts can achieve professional-level results. Remember that the journey of boatbuilding is as rewarding as reaching your destination; it tests one’s patience and dedication. For those seeking to embark on this adventure or simply gain more insight into marine craftsmanship, Sven’s wisdom is invaluable.Sven Yrvind, a renowned yacht designer and sailor, shares valuable insights on creating flanges around bulkhead hatches for canvas protection in this enlightening video. By following his expert guidance, boat enthusiasts can ensure their living areas remain secure while allowing unhindered access through the hatches.Step 1: Starting with the Flange
Sven begins by explaining that working on flanges vertically and horizontally is significantly easier than doing so in a flat position. To simplify the process further, he divides the task into two or three steps as suggested by fellow expert “for for.” This approach not only makes it more manageable but also allows for greater precision in crafting each component.Step 2: Applying Glue and Securing
Sven proceeds to apply glue along one edge of the flange, ensuring a secure bond when clamped into place. He emphasizes that this stage is crucial for maintaining the structural integrity of the flange, which in turn safeguards the living area beneath the canvas when hatches are open.Step 3: Allowing Time to Dry
After securely attaching the first portion of the flange, Sven allows ample time for it to dry before moving forward with additional steps. This patience and precision are key aspects of his successful boatbuilding methods.Step 4: Finishing Touches
Once the flange is fully dried, Sven removes the clamps carefully, ensuring no damage occurs during this process. He then moves on to attaching four more pieces onto these main frames, completing two pairs of flanges for the bulkhead hatches.The Final Touches
While two flanges form the primary support structure around the hatches, Sven mentions there are two additional pieces required at each end to ensure comprehensive protection. This attention to detail highlights his commitment to producing a durable and reliable design. “Sailing is about finding your path, whether it’s across an ocean or within yourself.” – Sven Yrvind In conclusion, making flanges around bulkhead hatches may seem complex at first glance, but by following Sven Yrvind’s meticulous process, enthusiasts can achieve professional-level results. Remember that the journey of boatbuilding is as rewarding as reaching your destination; it tests one’s patience and dedication. For those seeking to embark on this adventure or simply gain more insight into marine craftsmanship, Sven’s wisdom is invaluable.Making Flanges Around Bulkhead Hatches for Canvas
Sven Yrvind, a renowned yacht designer and sailor, shares valuable insights on creating flanges around bulkhead hatches for canvas protection in this enlightening video. By following his expert guidance, boat enthusiasts can ensure their living areas remain secure while allowing unhindered access through the hatches.Step 1: Starting with the Flange
Sven begins by explaining that working on flanges vertically and horizontally is significantly easier than doing so in a flat position. To simplify the process further, he divides the task into two or three steps as suggested by fellow expert “for for.” This approach not only makes it more manageable but also allows for greater precision in crafting each component.Step 2: Applying Glue and Securing
Sven proceeds to apply glue along one edge of the flange, ensuring a secure bond when clamped into place. He emphasizes that this stage is crucial for maintaining the structural integrity of the flange, which in turn safeguards the living area beneath the canvas when hatches are open.Step 3: Allowing Time to Dry
After securely attaching the first portion of the flange, Sven allows ample time for it to dry before moving forward with additional steps. This patience and precision are key aspects of his successful boatbuilding methods.Step 4: Finishing Touches
Once the flange is fully dried, Sven removes the clamps carefully, ensuring no damage occurs during this process. He then moves on to attaching four more pieces onto these main frames, completing two pairs of flanges for the bulkhead hatches.The Final Touches
While two flanges form the primary support structure around the hatches, Sven mentions there are two additional pieces required at each end to ensure comprehensive protection. This attention to detail highlights his commitment to producing a durable and reliable design. “Sailing is about finding your path, whether it’s across an ocean or within yourself.” – Sven Yrvind In conclusion, making flanges around bulkhead hatches may seem complex at first glance, but by following Sven Yrvind’s meticulous process, enthusiasts can achieve professional-level results. Remember that the journey of boatbuilding is as rewarding as reaching your destination; it tests one’s patience and dedication. For those seeking to embark on this adventure or simply gain more insight into marine craftsmanship, Sven’s wisdom is invaluable.Sven proceeds to apply glue along one edge of the flange, ensuring a secure bond when clamped into place. He emphasizes that this stage is crucial for maintaining the structural integrity of the flange, which in turn safeguards the living area beneath the canvas when hatches are open.Step 3: Allowing Time to Dry
After securely attaching the first portion of the flange, Sven allows ample time for it to dry before moving forward with additional steps. This patience and precision are key aspects of his successful boatbuilding methods.Step 4: Finishing Touches
Once the flange is fully dried, Sven removes the clamps carefully, ensuring no damage occurs during this process. He then moves on to attaching four more pieces onto these main frames, completing two pairs of flanges for the bulkhead hatches.The Final Touches
While two flanges form the primary support structure around the hatches, Sven mentions there are two additional pieces required at each end to ensure comprehensive protection. This attention to detail highlights his commitment to producing a durable and reliable design. “Sailing is about finding your path, whether it’s across an ocean or within yourself.” – Sven Yrvind In conclusion, making flanges around bulkhead hatches may seem complex at first glance, but by following Sven Yrvind’s meticulous process, enthusiasts can achieve professional-level results. Remember that the journey of boatbuilding is as rewarding as reaching your destination; it tests one’s patience and dedication. For those seeking to embark on this adventure or simply gain more insight into marine craftsmanship, Sven’s wisdom is invaluable.Sven begins by explaining that working on flanges vertically and horizontally is significantly easier than doing so in a flat position. To simplify the process further, he divides the task into two or three steps as suggested by fellow expert “for for.” This approach not only makes it more manageable but also allows for greater precision in crafting each component.Step 2: Applying Glue and Securing
Sven proceeds to apply glue along one edge of the flange, ensuring a secure bond when clamped into place. He emphasizes that this stage is crucial for maintaining the structural integrity of the flange, which in turn safeguards the living area beneath the canvas when hatches are open.Step 3: Allowing Time to Dry
After securely attaching the first portion of the flange, Sven allows ample time for it to dry before moving forward with additional steps. This patience and precision are key aspects of his successful boatbuilding methods.Step 4: Finishing Touches
Once the flange is fully dried, Sven removes the clamps carefully, ensuring no damage occurs during this process. He then moves on to attaching four more pieces onto these main frames, completing two pairs of flanges for the bulkhead hatches.The Final Touches
While two flanges form the primary support structure around the hatches, Sven mentions there are two additional pieces required at each end to ensure comprehensive protection. This attention to detail highlights his commitment to producing a durable and reliable design. “Sailing is about finding your path, whether it’s across an ocean or within yourself.” – Sven Yrvind In conclusion, making flanges around bulkhead hatches may seem complex at first glance, but by following Sven Yrvind’s meticulous process, enthusiasts can achieve professional-level results. Remember that the journey of boatbuilding is as rewarding as reaching your destination; it tests one’s patience and dedication. For those seeking to embark on this adventure or simply gain more insight into marine craftsmanship, Sven’s wisdom is invaluable.Sven Yrvind, a renowned yacht designer and sailor, shares valuable insights on creating flanges around bulkhead hatches for canvas protection in this enlightening video. By following his expert guidance, boat enthusiasts can ensure their living areas remain secure while allowing unhindered access through the hatches.Step 1: Starting with the Flange
Sven begins by explaining that working on flanges vertically and horizontally is significantly easier than doing so in a flat position. To simplify the process further, he divides the task into two or three steps as suggested by fellow expert “for for.” This approach not only makes it more manageable but also allows for greater precision in crafting each component.Step 2: Applying Glue and Securing
Sven proceeds to apply glue along one edge of the flange, ensuring a secure bond when clamped into place. He emphasizes that this stage is crucial for maintaining the structural integrity of the flange, which in turn safeguards the living area beneath the canvas when hatches are open.Step 3: Allowing Time to Dry
After securely attaching the first portion of the flange, Sven allows ample time for it to dry before moving forward with additional steps. This patience and precision are key aspects of his successful boatbuilding methods.Step 4: Finishing Touches
Once the flange is fully dried, Sven removes the clamps carefully, ensuring no damage occurs during this process. He then moves on to attaching four more pieces onto these main frames, completing two pairs of flanges for the bulkhead hatches.The Final Touches
While two flanges form the primary support structure around the hatches, Sven mentions there are two additional pieces required at each end to ensure comprehensive protection. This attention to detail highlights his commitment to producing a durable and reliable design. “Sailing is about finding your path, whether it’s across an ocean or within yourself.” – Sven Yrvind In conclusion, making flanges around bulkhead hatches may seem complex at first glance, but by following Sven Yrvind’s meticulous process, enthusiasts can achieve professional-level results. Remember that the journey of boatbuilding is as rewarding as reaching your destination; it tests one’s patience and dedication. For those seeking to embark on this adventure or simply gain more insight into marine craftsmanship, Sven’s wisdom is invaluable.Making Flanges Around Bulkhead Hatches for Canvas
Sven Yrvind, a renowned yacht designer and sailor, shares valuable insights on creating flanges around bulkhead hatches for canvas protection in this enlightening video. By following his expert guidance, boat enthusiasts can ensure their living areas remain secure while allowing unhindered access through the hatches.Step 1: Starting with the Flange
Sven begins by explaining that working on flanges vertically and horizontally is significantly easier than doing so in a flat position. To simplify the process further, he divides the task into two or three steps as suggested by fellow expert “for for.” This approach not only makes it more manageable but also allows for greater precision in crafting each component.Step 2: Applying Glue and Securing
Sven proceeds to apply glue along one edge of the flange, ensuring a secure bond when clamped into place. He emphasizes that this stage is crucial for maintaining the structural integrity of the flange, which in turn safeguards the living area beneath the canvas when hatches are open.Step 3: Allowing Time to Dry
After securely attaching the first portion of the flange, Sven allows ample time for it to dry before moving forward with additional steps. This patience and precision are key aspects of his successful boatbuilding methods.Step 4: Finishing Touches
Once the flange is fully dried, Sven removes the clamps carefully, ensuring no damage occurs during this process. He then moves on to attaching four more pieces onto these main frames, completing two pairs of flanges for the bulkhead hatches.The Final Touches
While two flanges form the primary support structure around the hatches, Sven mentions there are two additional pieces required at each end to ensure comprehensive protection. This attention to detail highlights his commitment to producing a durable and reliable design. “Sailing is about finding your path, whether it’s across an ocean or within yourself.” – Sven Yrvind In conclusion, making flanges around bulkhead hatches may seem complex at first glance, but by following Sven Yrvind’s meticulous process, enthusiasts can achieve professional-level results. Remember that the journey of boatbuilding is as rewarding as reaching your destination; it tests one’s patience and dedication. For those seeking to embark on this adventure or simply gain more insight into marine craftsmanship, Sven’s wisdom is invaluable.Once the flange is fully dried, Sven removes the clamps carefully, ensuring no damage occurs during this process. He then moves on to attaching four more pieces onto these main frames, completing two pairs of flanges for the bulkhead hatches.The Final Touches
While two flanges form the primary support structure around the hatches, Sven mentions there are two additional pieces required at each end to ensure comprehensive protection. This attention to detail highlights his commitment to producing a durable and reliable design. “Sailing is about finding your path, whether it’s across an ocean or within yourself.” – Sven Yrvind In conclusion, making flanges around bulkhead hatches may seem complex at first glance, but by following Sven Yrvind’s meticulous process, enthusiasts can achieve professional-level results. Remember that the journey of boatbuilding is as rewarding as reaching your destination; it tests one’s patience and dedication. For those seeking to embark on this adventure or simply gain more insight into marine craftsmanship, Sven’s wisdom is invaluable.Sven proceeds to apply glue along one edge of the flange, ensuring a secure bond when clamped into place. He emphasizes that this stage is crucial for maintaining the structural integrity of the flange, which in turn safeguards the living area beneath the canvas when hatches are open.Step 3: Allowing Time to Dry
After securely attaching the first portion of the flange, Sven allows ample time for it to dry before moving forward with additional steps. This patience and precision are key aspects of his successful boatbuilding methods.Step 4: Finishing Touches
Once the flange is fully dried, Sven removes the clamps carefully, ensuring no damage occurs during this process. He then moves on to attaching four more pieces onto these main frames, completing two pairs of flanges for the bulkhead hatches.The Final Touches
While two flanges form the primary support structure around the hatches, Sven mentions there are two additional pieces required at each end to ensure comprehensive protection. This attention to detail highlights his commitment to producing a durable and reliable design. “Sailing is about finding your path, whether it’s across an ocean or within yourself.” – Sven Yrvind In conclusion, making flanges around bulkhead hatches may seem complex at first glance, but by following Sven Yrvind’s meticulous process, enthusiasts can achieve professional-level results. Remember that the journey of boatbuilding is as rewarding as reaching your destination; it tests one’s patience and dedication. For those seeking to embark on this adventure or simply gain more insight into marine craftsmanship, Sven’s wisdom is invaluable.Sven begins by explaining that working on flanges vertically and horizontally is significantly easier than doing so in a flat position. To simplify the process further, he divides the task into two or three steps as suggested by fellow expert “for for.” This approach not only makes it more manageable but also allows for greater precision in crafting each component.Step 2: Applying Glue and Securing
Sven proceeds to apply glue along one edge of the flange, ensuring a secure bond when clamped into place. He emphasizes that this stage is crucial for maintaining the structural integrity of the flange, which in turn safeguards the living area beneath the canvas when hatches are open.Step 3: Allowing Time to Dry
After securely attaching the first portion of the flange, Sven allows ample time for it to dry before moving forward with additional steps. This patience and precision are key aspects of his successful boatbuilding methods.Step 4: Finishing Touches
Once the flange is fully dried, Sven removes the clamps carefully, ensuring no damage occurs during this process. He then moves on to attaching four more pieces onto these main frames, completing two pairs of flanges for the bulkhead hatches.The Final Touches
While two flanges form the primary support structure around the hatches, Sven mentions there are two additional pieces required at each end to ensure comprehensive protection. This attention to detail highlights his commitment to producing a durable and reliable design. “Sailing is about finding your path, whether it’s across an ocean or within yourself.” – Sven Yrvind In conclusion, making flanges around bulkhead hatches may seem complex at first glance, but by following Sven Yrvind’s meticulous process, enthusiasts can achieve professional-level results. Remember that the journey of boatbuilding is as rewarding as reaching your destination; it tests one’s patience and dedication. For those seeking to embark on this adventure or simply gain more insight into marine craftsmanship, Sven’s wisdom is invaluable.Sven Yrvind, a renowned yacht designer and sailor, shares valuable insights on creating flanges around bulkhead hatches for canvas protection in this enlightening video. By following his expert guidance, boat enthusiasts can ensure their living areas remain secure while allowing unhindered access through the hatches.Step 1: Starting with the Flange
Sven begins by explaining that working on flanges vertically and horizontally is significantly easier than doing so in a flat position. To simplify the process further, he divides the task into two or three steps as suggested by fellow expert “for for.” This approach not only makes it more manageable but also allows for greater precision in crafting each component.Step 2: Applying Glue and Securing
Sven proceeds to apply glue along one edge of the flange, ensuring a secure bond when clamped into place. He emphasizes that this stage is crucial for maintaining the structural integrity of the flange, which in turn safeguards the living area beneath the canvas when hatches are open.Step 3: Allowing Time to Dry
After securely attaching the first portion of the flange, Sven allows ample time for it to dry before moving forward with additional steps. This patience and precision are key aspects of his successful boatbuilding methods.Step 4: Finishing Touches
Once the flange is fully dried, Sven removes the clamps carefully, ensuring no damage occurs during this process. He then moves on to attaching four more pieces onto these main frames, completing two pairs of flanges for the bulkhead hatches.The Final Touches
While two flanges form the primary support structure around the hatches, Sven mentions there are two additional pieces required at each end to ensure comprehensive protection. This attention to detail highlights his commitment to producing a durable and reliable design. “Sailing is about finding your path, whether it’s across an ocean or within yourself.” – Sven Yrvind In conclusion, making flanges around bulkhead hatches may seem complex at first glance, but by following Sven Yrvind’s meticulous process, enthusiasts can achieve professional-level results. Remember that the journey of boatbuilding is as rewarding as reaching your destination; it tests one’s patience and dedication. For those seeking to embark on this adventure or simply gain more insight into marine craftsmanship, Sven’s wisdom is invaluable.Making Flanges Around Bulkhead Hatches for Canvas
Sven Yrvind, a renowned yacht designer and sailor, shares valuable insights on creating flanges around bulkhead hatches for canvas protection in this enlightening video. By following his expert guidance, boat enthusiasts can ensure their living areas remain secure while allowing unhindered access through the hatches.Step 1: Starting with the Flange
Sven begins by explaining that working on flanges vertically and horizontally is significantly easier than doing so in a flat position. To simplify the process further, he divides the task into two or three steps as suggested by fellow expert “for for.” This approach not only makes it more manageable but also allows for greater precision in crafting each component.Step 2: Applying Glue and Securing
Sven proceeds to apply glue along one edge of the flange, ensuring a secure bond when clamped into place. He emphasizes that this stage is crucial for maintaining the structural integrity of the flange, which in turn safeguards the living area beneath the canvas when hatches are open.Step 3: Allowing Time to Dry
After securely attaching the first portion of the flange, Sven allows ample time for it to dry before moving forward with additional steps. This patience and precision are key aspects of his successful boatbuilding methods.Step 4: Finishing Touches
Once the flange is fully dried, Sven removes the clamps carefully, ensuring no damage occurs during this process. He then moves on to attaching four more pieces onto these main frames, completing two pairs of flanges for the bulkhead hatches.The Final Touches
While two flanges form the primary support structure around the hatches, Sven mentions there are two additional pieces required at each end to ensure comprehensive protection. This attention to detail highlights his commitment to producing a durable and reliable design. “Sailing is about finding your path, whether it’s across an ocean or within yourself.” – Sven Yrvind In conclusion, making flanges around bulkhead hatches may seem complex at first glance, but by following Sven Yrvind’s meticulous process, enthusiasts can achieve professional-level results. Remember that the journey of boatbuilding is as rewarding as reaching your destination; it tests one’s patience and dedication. For those seeking to embark on this adventure or simply gain more insight into marine craftsmanship, Sven’s wisdom is invaluable.After securely attaching the first portion of the flange, Sven allows ample time for it to dry before moving forward with additional steps. This patience and precision are key aspects of his successful boatbuilding methods.Step 4: Finishing Touches
Once the flange is fully dried, Sven removes the clamps carefully, ensuring no damage occurs during this process. He then moves on to attaching four more pieces onto these main frames, completing two pairs of flanges for the bulkhead hatches.The Final Touches
While two flanges form the primary support structure around the hatches, Sven mentions there are two additional pieces required at each end to ensure comprehensive protection. This attention to detail highlights his commitment to producing a durable and reliable design. “Sailing is about finding your path, whether it’s across an ocean or within yourself.” – Sven Yrvind In conclusion, making flanges around bulkhead hatches may seem complex at first glance, but by following Sven Yrvind’s meticulous process, enthusiasts can achieve professional-level results. Remember that the journey of boatbuilding is as rewarding as reaching your destination; it tests one’s patience and dedication. For those seeking to embark on this adventure or simply gain more insight into marine craftsmanship, Sven’s wisdom is invaluable.Sven proceeds to apply glue along one edge of the flange, ensuring a secure bond when clamped into place. He emphasizes that this stage is crucial for maintaining the structural integrity of the flange, which in turn safeguards the living area beneath the canvas when hatches are open.Step 3: Allowing Time to Dry
After securely attaching the first portion of the flange, Sven allows ample time for it to dry before moving forward with additional steps. This patience and precision are key aspects of his successful boatbuilding methods.Step 4: Finishing Touches
Once the flange is fully dried, Sven removes the clamps carefully, ensuring no damage occurs during this process. He then moves on to attaching four more pieces onto these main frames, completing two pairs of flanges for the bulkhead hatches.The Final Touches
While two flanges form the primary support structure around the hatches, Sven mentions there are two additional pieces required at each end to ensure comprehensive protection. This attention to detail highlights his commitment to producing a durable and reliable design. “Sailing is about finding your path, whether it’s across an ocean or within yourself.” – Sven Yrvind In conclusion, making flanges around bulkhead hatches may seem complex at first glance, but by following Sven Yrvind’s meticulous process, enthusiasts can achieve professional-level results. Remember that the journey of boatbuilding is as rewarding as reaching your destination; it tests one’s patience and dedication. For those seeking to embark on this adventure or simply gain more insight into marine craftsmanship, Sven’s wisdom is invaluable.Sven begins by explaining that working on flanges vertically and horizontally is significantly easier than doing so in a flat position. To simplify the process further, he divides the task into two or three steps as suggested by fellow expert “for for.” This approach not only makes it more manageable but also allows for greater precision in crafting each component.Step 2: Applying Glue and Securing
Sven proceeds to apply glue along one edge of the flange, ensuring a secure bond when clamped into place. He emphasizes that this stage is crucial for maintaining the structural integrity of the flange, which in turn safeguards the living area beneath the canvas when hatches are open.Step 3: Allowing Time to Dry
After securely attaching the first portion of the flange, Sven allows ample time for it to dry before moving forward with additional steps. This patience and precision are key aspects of his successful boatbuilding methods.Step 4: Finishing Touches
Once the flange is fully dried, Sven removes the clamps carefully, ensuring no damage occurs during this process. He then moves on to attaching four more pieces onto these main frames, completing two pairs of flanges for the bulkhead hatches.The Final Touches
While two flanges form the primary support structure around the hatches, Sven mentions there are two additional pieces required at each end to ensure comprehensive protection. This attention to detail highlights his commitment to producing a durable and reliable design. “Sailing is about finding your path, whether it’s across an ocean or within yourself.” – Sven Yrvind In conclusion, making flanges around bulkhead hatches may seem complex at first glance, but by following Sven Yrvind’s meticulous process, enthusiasts can achieve professional-level results. Remember that the journey of boatbuilding is as rewarding as reaching your destination; it tests one’s patience and dedication. For those seeking to embark on this adventure or simply gain more insight into marine craftsmanship, Sven’s wisdom is invaluable.Sven Yrvind, a renowned yacht designer and sailor, shares valuable insights on creating flanges around bulkhead hatches for canvas protection in this enlightening video. By following his expert guidance, boat enthusiasts can ensure their living areas remain secure while allowing unhindered access through the hatches.Step 1: Starting with the Flange
Sven begins by explaining that working on flanges vertically and horizontally is significantly easier than doing so in a flat position. To simplify the process further, he divides the task into two or three steps as suggested by fellow expert “for for.” This approach not only makes it more manageable but also allows for greater precision in crafting each component.Step 2: Applying Glue and Securing
Sven proceeds to apply glue along one edge of the flange, ensuring a secure bond when clamped into place. He emphasizes that this stage is crucial for maintaining the structural integrity of the flange, which in turn safeguards the living area beneath the canvas when hatches are open.Step 3: Allowing Time to Dry
After securely attaching the first portion of the flange, Sven allows ample time for it to dry before moving forward with additional steps. This patience and precision are key aspects of his successful boatbuilding methods.Step 4: Finishing Touches
Once the flange is fully dried, Sven removes the clamps carefully, ensuring no damage occurs during this process. He then moves on to attaching four more pieces onto these main frames, completing two pairs of flanges for the bulkhead hatches.The Final Touches
While two flanges form the primary support structure around the hatches, Sven mentions there are two additional pieces required at each end to ensure comprehensive protection. This attention to detail highlights his commitment to producing a durable and reliable design. “Sailing is about finding your path, whether it’s across an ocean or within yourself.” – Sven Yrvind In conclusion, making flanges around bulkhead hatches may seem complex at first glance, but by following Sven Yrvind’s meticulous process, enthusiasts can achieve professional-level results. Remember that the journey of boatbuilding is as rewarding as reaching your destination; it tests one’s patience and dedication. For those seeking to embark on this adventure or simply gain more insight into marine craftsmanship, Sven’s wisdom is invaluable.Making Flanges Around Bulkhead Hatches for Canvas
Sven Yrvind, a renowned yacht designer and sailor, shares valuable insights on creating flanges around bulkhead hatches for canvas protection in this enlightening video. By following his expert guidance, boat enthusiasts can ensure their living areas remain secure while allowing unhindered access through the hatches.Step 1: Starting with the Flange
Sven begins by explaining that working on flanges vertically and horizontally is significantly easier than doing so in a flat position. To simplify the process further, he divides the task into two or three steps as suggested by fellow expert “for for.” This approach not only makes it more manageable but also allows for greater precision in crafting each component.Step 2: Applying Glue and Securing
Sven proceeds to apply glue along one edge of the flange, ensuring a secure bond when clamped into place. He emphasizes that this stage is crucial for maintaining the structural integrity of the flange, which in turn safeguards the living area beneath the canvas when hatches are open.Step 3: Allowing Time to Dry
After securely attaching the first portion of the flange, Sven allows ample time for it to dry before moving forward with additional steps. This patience and precision are key aspects of his successful boatbuilding methods.Step 4: Finishing Touches
Once the flange is fully dried, Sven removes the clamps carefully, ensuring no damage occurs during this process. He then moves on to attaching four more pieces onto these main frames, completing two pairs of flanges for the bulkhead hatches.The Final Touches
While two flanges form the primary support structure around the hatches, Sven mentions there are two additional pieces required at each end to ensure comprehensive protection. This attention to detail highlights his commitment to producing a durable and reliable design. “Sailing is about finding your path, whether it’s across an ocean or within yourself.” – Sven Yrvind In conclusion, making flanges around bulkhead hatches may seem complex at first glance, but by following Sven Yrvind’s meticulous process, enthusiasts can achieve professional-level results. Remember that the journey of boatbuilding is as rewarding as reaching your destination; it tests one’s patience and dedication. For those seeking to embark on this adventure or simply gain more insight into marine craftsmanship, Sven’s wisdom is invaluable.Once the flange is fully dried, Sven removes the clamps carefully, ensuring no damage occurs during this process. He then moves on to attaching four more pieces onto these main frames, completing two pairs of flanges for the bulkhead hatches.The Final Touches
While two flanges form the primary support structure around the hatches, Sven mentions there are two additional pieces required at each end to ensure comprehensive protection. This attention to detail highlights his commitment to producing a durable and reliable design. “Sailing is about finding your path, whether it’s across an ocean or within yourself.” – Sven Yrvind In conclusion, making flanges around bulkhead hatches may seem complex at first glance, but by following Sven Yrvind’s meticulous process, enthusiasts can achieve professional-level results. Remember that the journey of boatbuilding is as rewarding as reaching your destination; it tests one’s patience and dedication. For those seeking to embark on this adventure or simply gain more insight into marine craftsmanship, Sven’s wisdom is invaluable.After securely attaching the first portion of the flange, Sven allows ample time for it to dry before moving forward with additional steps. This patience and precision are key aspects of his successful boatbuilding methods.Step 4: Finishing Touches
Once the flange is fully dried, Sven removes the clamps carefully, ensuring no damage occurs during this process. He then moves on to attaching four more pieces onto these main frames, completing two pairs of flanges for the bulkhead hatches.The Final Touches
While two flanges form the primary support structure around the hatches, Sven mentions there are two additional pieces required at each end to ensure comprehensive protection. This attention to detail highlights his commitment to producing a durable and reliable design. “Sailing is about finding your path, whether it’s across an ocean or within yourself.” – Sven Yrvind In conclusion, making flanges around bulkhead hatches may seem complex at first glance, but by following Sven Yrvind’s meticulous process, enthusiasts can achieve professional-level results. Remember that the journey of boatbuilding is as rewarding as reaching your destination; it tests one’s patience and dedication. For those seeking to embark on this adventure or simply gain more insight into marine craftsmanship, Sven’s wisdom is invaluable.Sven proceeds to apply glue along one edge of the flange, ensuring a secure bond when clamped into place. He emphasizes that this stage is crucial for maintaining the structural integrity of the flange, which in turn safeguards the living area beneath the canvas when hatches are open.Step 3: Allowing Time to Dry
After securely attaching the first portion of the flange, Sven allows ample time for it to dry before moving forward with additional steps. This patience and precision are key aspects of his successful boatbuilding methods.Step 4: Finishing Touches
Once the flange is fully dried, Sven removes the clamps carefully, ensuring no damage occurs during this process. He then moves on to attaching four more pieces onto these main frames, completing two pairs of flanges for the bulkhead hatches.The Final Touches
While two flanges form the primary support structure around the hatches, Sven mentions there are two additional pieces required at each end to ensure comprehensive protection. This attention to detail highlights his commitment to producing a durable and reliable design. “Sailing is about finding your path, whether it’s across an ocean or within yourself.” – Sven Yrvind In conclusion, making flanges around bulkhead hatches may seem complex at first glance, but by following Sven Yrvind’s meticulous process, enthusiasts can achieve professional-level results. Remember that the journey of boatbuilding is as rewarding as reaching your destination; it tests one’s patience and dedication. For those seeking to embark on this adventure or simply gain more insight into marine craftsmanship, Sven’s wisdom is invaluable.Sven begins by explaining that working on flanges vertically and horizontally is significantly easier than doing so in a flat position. To simplify the process further, he divides the task into two or three steps as suggested by fellow expert “for for.” This approach not only makes it more manageable but also allows for greater precision in crafting each component.Step 2: Applying Glue and Securing
Sven proceeds to apply glue along one edge of the flange, ensuring a secure bond when clamped into place. He emphasizes that this stage is crucial for maintaining the structural integrity of the flange, which in turn safeguards the living area beneath the canvas when hatches are open.Step 3: Allowing Time to Dry
After securely attaching the first portion of the flange, Sven allows ample time for it to dry before moving forward with additional steps. This patience and precision are key aspects of his successful boatbuilding methods.Step 4: Finishing Touches
Once the flange is fully dried, Sven removes the clamps carefully, ensuring no damage occurs during this process. He then moves on to attaching four more pieces onto these main frames, completing two pairs of flanges for the bulkhead hatches.The Final Touches
While two flanges form the primary support structure around the hatches, Sven mentions there are two additional pieces required at each end to ensure comprehensive protection. This attention to detail highlights his commitment to producing a durable and reliable design. “Sailing is about finding your path, whether it’s across an ocean or within yourself.” – Sven Yrvind In conclusion, making flanges around bulkhead hatches may seem complex at first glance, but by following Sven Yrvind’s meticulous process, enthusiasts can achieve professional-level results. Remember that the journey of boatbuilding is as rewarding as reaching your destination; it tests one’s patience and dedication. For those seeking to embark on this adventure or simply gain more insight into marine craftsmanship, Sven’s wisdom is invaluable.Sven Yrvind, a renowned yacht designer and sailor, shares valuable insights on creating flanges around bulkhead hatches for canvas protection in this enlightening video. By following his expert guidance, boat enthusiasts can ensure their living areas remain secure while allowing unhindered access through the hatches.Step 1: Starting with the Flange
Sven begins by explaining that working on flanges vertically and horizontally is significantly easier than doing so in a flat position. To simplify the process further, he divides the task into two or three steps as suggested by fellow expert “for for.” This approach not only makes it more manageable but also allows for greater precision in crafting each component.Step 2: Applying Glue and Securing
Sven proceeds to apply glue along one edge of the flange, ensuring a secure bond when clamped into place. He emphasizes that this stage is crucial for maintaining the structural integrity of the flange, which in turn safeguards the living area beneath the canvas when hatches are open.Step 3: Allowing Time to Dry
After securely attaching the first portion of the flange, Sven allows ample time for it to dry before moving forward with additional steps. This patience and precision are key aspects of his successful boatbuilding methods.Step 4: Finishing Touches
Once the flange is fully dried, Sven removes the clamps carefully, ensuring no damage occurs during this process. He then moves on to attaching four more pieces onto these main frames, completing two pairs of flanges for the bulkhead hatches.The Final Touches
While two flanges form the primary support structure around the hatches, Sven mentions there are two additional pieces required at each end to ensure comprehensive protection. This attention to detail highlights his commitment to producing a durable and reliable design. “Sailing is about finding your path, whether it’s across an ocean or within yourself.” – Sven Yrvind In conclusion, making flanges around bulkhead hatches may seem complex at first glance, but by following Sven Yrvind’s meticulous process, enthusiasts can achieve professional-level results. Remember that the journey of boatbuilding is as rewarding as reaching your destination; it tests one’s patience and dedication. For those seeking to embark on this adventure or simply gain more insight into marine craftsmanship, Sven’s wisdom is invaluable.Making Flanges Around Bulkhead Hatches for Canvas
Sven Yrvind, a renowned yacht designer and sailor, shares valuable insights on creating flanges around bulkhead hatches for canvas protection in this enlightening video. By following his expert guidance, boat enthusiasts can ensure their living areas remain secure while allowing unhindered access through the hatches.Step 1: Starting with the Flange
Sven begins by explaining that working on flanges vertically and horizontally is significantly easier than doing so in a flat position. To simplify the process further, he divides the task into two or three steps as suggested by fellow expert “for for.” This approach not only makes it more manageable but also allows for greater precision in crafting each component.Step 2: Applying Glue and Securing
Sven proceeds to apply glue along one edge of the flange, ensuring a secure bond when clamped into place. He emphasizes that this stage is crucial for maintaining the structural integrity of the flange, which in turn safeguards the living area beneath the canvas when hatches are open.Step 3: Allowing Time to Dry
After securely attaching the first portion of the flange, Sven allows ample time for it to dry before moving forward with additional steps. This patience and precision are key aspects of his successful boatbuilding methods.Step 4: Finishing Touches
Once the flange is fully dried, Sven removes the clamps carefully, ensuring no damage occurs during this process. He then moves on to attaching four more pieces onto these main frames, completing two pairs of flanges for the bulkhead hatches.The Final Touches
While two flanges form the primary support structure around the hatches, Sven mentions there are two additional pieces required at each end to ensure comprehensive protection. This attention to detail highlights his commitment to producing a durable and reliable design. “Sailing is about finding your path, whether it’s across an ocean or within yourself.” – Sven Yrvind In conclusion, making flanges around bulkhead hatches may seem complex at first glance, but by following Sven Yrvind’s meticulous process, enthusiasts can achieve professional-level results. Remember that the journey of boatbuilding is as rewarding as reaching your destination; it tests one’s patience and dedication. For those seeking to embark on this adventure or simply gain more insight into marine craftsmanship, Sven’s wisdom is invaluable.Sven proceeds to apply glue along one edge of the flange, ensuring a secure bond when clamped into place. He emphasizes that this stage is crucial for maintaining the structural integrity of the flange, which in turn safeguards the living area beneath the canvas when hatches are open.Step 3: Allowing Time to Dry
After securely attaching the first portion of the flange, Sven allows ample time for it to dry before moving forward with additional steps. This patience and precision are key aspects of his successful boatbuilding methods.Step 4: Finishing Touches
Once the flange is fully dried, Sven removes the clamps carefully, ensuring no damage occurs during this process. He then moves on to attaching four more pieces onto these main frames, completing two pairs of flanges for the bulkhead hatches.The Final Touches
While two flanges form the primary support structure around the hatches, Sven mentions there are two additional pieces required at each end to ensure comprehensive protection. This attention to detail highlights his commitment to producing a durable and reliable design. “Sailing is about finding your path, whether it’s across an ocean or within yourself.” – Sven Yrvind In conclusion, making flanges around bulkhead hatches may seem complex at first glance, but by following Sven Yrvind’s meticulous process, enthusiasts can achieve professional-level results. Remember that the journey of boatbuilding is as rewarding as reaching your destination; it tests one’s patience and dedication. For those seeking to embark on this adventure or simply gain more insight into marine craftsmanship, Sven’s wisdom is invaluable.After securely attaching the first portion of the flange, Sven allows ample time for it to dry before moving forward with additional steps. This patience and precision are key aspects of his successful boatbuilding methods.Step 4: Finishing Touches
Once the flange is fully dried, Sven removes the clamps carefully, ensuring no damage occurs during this process. He then moves on to attaching four more pieces onto these main frames, completing two pairs of flanges for the bulkhead hatches.The Final Touches
While two flanges form the primary support structure around the hatches, Sven mentions there are two additional pieces required at each end to ensure comprehensive protection. This attention to detail highlights his commitment to producing a durable and reliable design. “Sailing is about finding your path, whether it’s across an ocean or within yourself.” – Sven Yrvind In conclusion, making flanges around bulkhead hatches may seem complex at first glance, but by following Sven Yrvind’s meticulous process, enthusiasts can achieve professional-level results. Remember that the journey of boatbuilding is as rewarding as reaching your destination; it tests one’s patience and dedication. For those seeking to embark on this adventure or simply gain more insight into marine craftsmanship, Sven’s wisdom is invaluable.Making Flanges Around Bulkhead Hatches for Canvas
Sven Yrvind, a renowned yacht designer and sailor, shares valuable insights on creating flanges around bulkhead hatches for canvas protection in this enlightening video. By following his expert guidance, boat enthusiasts can ensure their living areas remain secure while allowing unhindered access through the hatches.Step 1: Starting with the Flange
Sven begins by explaining that working on flanges vertically and horizontally is significantly easier than doing so in a flat position. To simplify the process further, he divides the task into two or three steps as suggested by fellow expert “for for.” This approach not only makes it more manageable but also allows for greater precision in crafting each component.Step 2: Applying Glue and Securing
Sven proceeds to apply glue along one edge of the flange, ensuring a secure bond when clamped into place. He emphasizes that this stage is crucial for maintaining the structural integrity of the flange, which in turn safeguards the living area beneath the canvas when hatches are open.Step 3: Allowing Time to Dry
After securely attaching the first portion of the flange, Sven allows ample time for it to dry before moving forward with additional steps. This patience and precision are key aspects of his successful boatbuilding methods.Step 4: Finishing Touches
Once the flange is fully dried, Sven removes the clamps carefully, ensuring no damage occurs during this process. He then moves on to attaching four more pieces onto these main frames, completing two pairs of flanges for the bulkhead hatches.The Final Touches
While two flanges form the primary support structure around the hatches, Sven mentions there are two additional pieces required at each end to ensure comprehensive protection. This attention to detail highlights his commitment to producing a durable and reliable design. “Sailing is about finding your path, whether it’s across an ocean or within yourself.” – Sven Yrvind In conclusion, making flanges around bulkhead hatches may seem complex at first glance, but by following Sven Yrvind’s meticulous process, enthusiasts can achieve professional-level results. Remember that the journey of boatbuilding is as rewarding as reaching your destination; it tests one’s patience and dedication. For those seeking to embark on this adventure or simply gain more insight into marine craftsmanship, Sven’s wisdom is invaluable.Sven proceeds to apply glue along one edge of the flange, ensuring a secure bond when clamped into place. He emphasizes that this stage is crucial for maintaining the structural integrity of the flange, which in turn safeguards the living area beneath the canvas when hatches are open.Step 3: Allowing Time to Dry
After securely attaching the first portion of the flange, Sven allows ample time for it to dry before moving forward with additional steps. This patience and precision are key aspects of his successful boatbuilding methods.Step 4: Finishing Touches
Once the flange is fully dried, Sven removes the clamps carefully, ensuring no damage occurs during this process. He then moves on to attaching four more pieces onto these main frames, completing two pairs of flanges for the bulkhead hatches.The Final Touches
While two flanges form the primary support structure around the hatches, Sven mentions there are two additional pieces required at each end to ensure comprehensive protection. This attention to detail highlights his commitment to producing a durable and reliable design. “Sailing is about finding your path, whether it’s across an ocean or within yourself.” – Sven Yrvind In conclusion, making flanges around bulkhead hatches may seem complex at first glance, but by following Sven Yrvind’s meticulous process, enthusiasts can achieve professional-level results. Remember that the journey of boatbuilding is as rewarding as reaching your destination; it tests one’s patience and dedication. For those seeking to embark on this adventure or simply gain more insight into marine craftsmanship, Sven’s wisdom is invaluable.Making Flanges Around Bulkhead Hatches for Canvas
Sven Yrvind, a renowned yacht designer and sailor, shares valuable insights on creating flanges around bulkhead hatches for canvas protection in this enlightening video. By following his expert guidance, boat enthusiasts can ensure their living areas remain secure while allowing unhindered access through the hatches.Step 1: Starting with the Flange
Sven begins by explaining that working on flanges vertically and horizontally is significantly easier than doing so in a flat position. To simplify the process further, he divides the task into two or three steps as suggested by fellow expert “for for.” This approach not only makes it more manageable but also allows for greater precision in crafting each component.Step 2: Applying Glue and Securing
Sven proceeds to apply glue along one edge of the flange, ensuring a secure bond when clamped into place. He emphasizes that this stage is crucial for maintaining the structural integrity of the flange, which in turn safeguards the living area beneath the canvas when hatches are open.Step 3: Allowing Time to Dry
After securely attaching the first portion of the flange, Sven allows ample time for it to dry before moving forward with additional steps. This patience and precision are key aspects of his successful boatbuilding methods.Step 4: Finishing Touches
Once the flange is fully dried, Sven removes the clamps carefully, ensuring no damage occurs during this process. He then moves on to attaching four more pieces onto these main frames, completing two pairs of flanges for the bulkhead hatches.The Final Touches
While two flanges form the primary support structure around the hatches, Sven mentions there are two additional pieces required at each end to ensure comprehensive protection. This attention to detail highlights his commitment to producing a durable and reliable design. “Sailing is about finding your path, whether it’s across an ocean or within yourself.” – Sven Yrvind In conclusion, making flanges around bulkhead hatches may seem complex at first glance, but by following Sven Yrvind’s meticulous process, enthusiasts can achieve professional-level results. Remember that the journey of boatbuilding is as rewarding as reaching your destination; it tests one’s patience and dedication. For those seeking to embark on this adventure or simply gain more insight into marine craftsmanship, Sven’s wisdom is invaluable.Sven begins by explaining that working on flanges vertically and horizontally is significantly easier than doing so in a flat position. To simplify the process further, he divides the task into two or three steps as suggested by fellow expert “for for.” This approach not only makes it more manageable but also allows for greater precision in crafting each component.Step 2: Applying Glue and Securing
Sven proceeds to apply glue along one edge of the flange, ensuring a secure bond when clamped into place. He emphasizes that this stage is crucial for maintaining the structural integrity of the flange, which in turn safeguards the living area beneath the canvas when hatches are open.Step 3: Allowing Time to Dry
After securely attaching the first portion of the flange, Sven allows ample time for it to dry before moving forward with additional steps. This patience and precision are key aspects of his successful boatbuilding methods.Step 4: Finishing Touches
Once the flange is fully dried, Sven removes the clamps carefully, ensuring no damage occurs during this process. He then moves on to attaching four more pieces onto these main frames, completing two pairs of flanges for the bulkhead hatches.The Final Touches
While two flanges form the primary support structure around the hatches, Sven mentions there are two additional pieces required at each end to ensure comprehensive protection. This attention to detail highlights his commitment to producing a durable and reliable design. “Sailing is about finding your path, whether it’s across an ocean or within yourself.” – Sven Yrvind In conclusion, making flanges around bulkhead hatches may seem complex at first glance, but by following Sven Yrvind’s meticulous process, enthusiasts can achieve professional-level results. Remember that the journey of boatbuilding is as rewarding as reaching your destination; it tests one’s patience and dedication. For those seeking to embark on this adventure or simply gain more insight into marine craftsmanship, Sven’s wisdom is invaluable.Making Flanges Around Bulkhead Hatches for Canvas
Sven Yrvind, a renowned yacht designer and sailor, shares valuable insights on creating flanges around bulkhead hatches for canvas protection in this enlightening video. By following his expert guidance, boat enthusiasts can ensure their living areas remain secure while allowing unhindered access through the hatches.Step 1: Starting with the Flange
Sven begins by explaining that working on flanges vertically and horizontally is significantly easier than doing so in a flat position. To simplify the process further, he divides the task into two or three steps as suggested by fellow expert “for for.” This approach not only makes it more manageable but also allows for greater precision in crafting each component.Step 2: Applying Glue and Securing
Sven proceeds to apply glue along one edge of the flange, ensuring a secure bond when clamped into place. He emphasizes that this stage is crucial for maintaining the structural integrity of the flange, which in turn safeguards the living area beneath the canvas when hatches are open.Step 3: Allowing Time to Dry
After securely attaching the first portion of the flange, Sven allows ample time for it to dry before moving forward with additional steps. This patience and precision are key aspects of his successful boatbuilding methods.Step 4: Finishing Touches
Once the flange is fully dried, Sven removes the clamps carefully, ensuring no damage occurs during this process. He then moves on to attaching four more pieces onto these main frames, completing two pairs of flanges for the bulkhead hatches.The Final Touches
While two flanges form the primary support structure around the hatches, Sven mentions there are two additional pieces required at each end to ensure comprehensive protection. This attention to detail highlights his commitment to producing a durable and reliable design. “Sailing is about finding your path, whether it’s across an ocean or within yourself.” – Sven Yrvind In conclusion, making flanges around bulkhead hatches may seem complex at first glance, but by following Sven Yrvind’s meticulous process, enthusiasts can achieve professional-level results. Remember that the journey of boatbuilding is as rewarding as reaching your destination; it tests one’s patience and dedication. For those seeking to embark on this adventure or simply gain more insight into marine craftsmanship, Sven’s wisdom is invaluable.Sven Yrvind, a renowned yacht designer and sailor, shares valuable insights on creating flanges around bulkhead hatches for canvas protection in this enlightening video. By following his expert guidance, boat enthusiasts can ensure their living areas remain secure while allowing unhindered access through the hatches.Step 1: Starting with the Flange
Sven begins by explaining that working on flanges vertically and horizontally is significantly easier than doing so in a flat position. To simplify the process further, he divides the task into two or three steps as suggested by fellow expert “for for.” This approach not only makes it more manageable but also allows for greater precision in crafting each component.Step 2: Applying Glue and Securing
Sven proceeds to apply glue along one edge of the flange, ensuring a secure bond when clamped into place. He emphasizes that this stage is crucial for maintaining the structural integrity of the flange, which in turn safeguards the living area beneath the canvas when hatches are open.Step 3: Allowing Time to Dry
After securely attaching the first portion of the flange, Sven allows ample time for it to dry before moving forward with additional steps. This patience and precision are key aspects of his successful boatbuilding methods.Step 4: Finishing Touches
Once the flange is fully dried, Sven removes the clamps carefully, ensuring no damage occurs during this process. He then moves on to attaching four more pieces onto these main frames, completing two pairs of flanges for the bulkhead hatches.The Final Touches
While two flanges form the primary support structure around the hatches, Sven mentions there are two additional pieces required at each end to ensure comprehensive protection. This attention to detail highlights his commitment to producing a durable and reliable design. “Sailing is about finding your path, whether it’s across an ocean or within yourself.” – Sven Yrvind In conclusion, making flanges around bulkhead hatches may seem complex at first glance, but by following Sven Yrvind’s meticulous process, enthusiasts can achieve professional-level results. Remember that the journey of boatbuilding is as rewarding as reaching your destination; it tests one’s patience and dedication. For those seeking to embark on this adventure or simply gain more insight into marine craftsmanship, Sven’s wisdom is invaluable.Making Flanges Around Bulkhead Hatches for Canvas
Sven Yrvind, a renowned yacht designer and sailor, shares valuable insights on creating flanges around bulkhead hatches for canvas protection in this enlightening video. By following his expert guidance, boat enthusiasts can ensure their living areas remain secure while allowing unhindered access through the hatches.Step 1: Starting with the Flange
Sven begins by explaining that working on flanges vertically and horizontally is significantly easier than doing so in a flat position. To simplify the process further, he divides the task into two or three steps as suggested by fellow expert “for for.” This approach not only makes it more manageable but also allows for greater precision in crafting each component.Step 2: Applying Glue and Securing
Sven proceeds to apply glue along one edge of the flange, ensuring a secure bond when clamped into place. He emphasizes that this stage is crucial for maintaining the structural integrity of the flange, which in turn safeguards the living area beneath the canvas when hatches are open.Step 3: Allowing Time to Dry
After securely attaching the first portion of the flange, Sven allows ample time for it to dry before moving forward with additional steps. This patience and precision are key aspects of his successful boatbuilding methods.Step 4: Finishing Touches
Once the flange is fully dried, Sven removes the clamps carefully, ensuring no damage occurs during this process. He then moves on to attaching four more pieces onto these main frames, completing two pairs of flanges for the bulkhead hatches.The Final Touches
While two flanges form the primary support structure around the hatches, Sven mentions there are two additional pieces required at each end to ensure comprehensive protection. This attention to detail highlights his commitment to producing a durable and reliable design. “Sailing is about finding your path, whether it’s across an ocean or within yourself.” – Sven Yrvind In conclusion, making flanges around bulkhead hatches may seem complex at first glance, but by following Sven Yrvind’s meticulous process, enthusiasts can achieve professional-level results. Remember that the journey of boatbuilding is as rewarding as reaching your destination; it tests one’s patience and dedication. For those seeking to embark on this adventure or simply gain more insight into marine craftsmanship, Sven’s wisdom is invaluable.Once the flange is fully dried, Sven removes the clamps carefully, ensuring no damage occurs during this process. He then moves on to attaching four more pieces onto these main frames, completing two pairs of flanges for the bulkhead hatches.The Final Touches
While two flanges form the primary support structure around the hatches, Sven mentions there are two additional pieces required at each end to ensure comprehensive protection. This attention to detail highlights his commitment to producing a durable and reliable design. “Sailing is about finding your path, whether it’s across an ocean or within yourself.” – Sven Yrvind In conclusion, making flanges around bulkhead hatches may seem complex at first glance, but by following Sven Yrvind’s meticulous process, enthusiasts can achieve professional-level results. Remember that the journey of boatbuilding is as rewarding as reaching your destination; it tests one’s patience and dedication. For those seeking to embark on this adventure or simply gain more insight into marine craftsmanship, Sven’s wisdom is invaluable.Sven Yrvind, a renowned yacht designer and sailor, shares valuable insights on creating flanges around bulkhead hatches for canvas protection in this enlightening video. By following his expert guidance, boat enthusiasts can ensure their living areas remain secure while allowing unhindered access through the hatches.Step 1: Starting with the Flange
Sven begins by explaining that working on flanges vertically and horizontally is significantly easier than doing so in a flat position. To simplify the process further, he divides the task into two or three steps as suggested by fellow expert “for for.” This approach not only makes it more manageable but also allows for greater precision in crafting each component.Step 2: Applying Glue and Securing
Sven proceeds to apply glue along one edge of the flange, ensuring a secure bond when clamped into place. He emphasizes that this stage is crucial for maintaining the structural integrity of the flange, which in turn safeguards the living area beneath the canvas when hatches are open.Step 3: Allowing Time to Dry
After securely attaching the first portion of the flange, Sven allows ample time for it to dry before moving forward with additional steps. This patience and precision are key aspects of his successful boatbuilding methods.Step 4: Finishing Touches
Once the flange is fully dried, Sven removes the clamps carefully, ensuring no damage occurs during this process. He then moves on to attaching four more pieces onto these main frames, completing two pairs of flanges for the bulkhead hatches.The Final Touches
While two flanges form the primary support structure around the hatches, Sven mentions there are two additional pieces required at each end to ensure comprehensive protection. This attention to detail highlights his commitment to producing a durable and reliable design. “Sailing is about finding your path, whether it’s across an ocean or within yourself.” – Sven Yrvind In conclusion, making flanges around bulkhead hatches may seem complex at first glance, but by following Sven Yrvind’s meticulous process, enthusiasts can achieve professional-level results. Remember that the journey of boatbuilding is as rewarding as reaching your destination; it tests one’s patience and dedication. For those seeking to embark on this adventure or simply gain more insight into marine craftsmanship, Sven’s wisdom is invaluable.Making Flanges Around Bulkhead Hatches for Canvas
Sven Yrvind, a renowned yacht designer and sailor, shares valuable insights on creating flanges around bulkhead hatches for canvas protection in this enlightening video. By following his expert guidance, boat enthusiasts can ensure their living areas remain secure while allowing unhindered access through the hatches.Step 1: Starting with the Flange
Sven begins by explaining that working on flanges vertically and horizontally is significantly easier than doing so in a flat position. To simplify the process further, he divides the task into two or three steps as suggested by fellow expert “for for.” This approach not only makes it more manageable but also allows for greater precision in crafting each component.Step 2: Applying Glue and Securing
Sven proceeds to apply glue along one edge of the flange, ensuring a secure bond when clamped into place. He emphasizes that this stage is crucial for maintaining the structural integrity of the flange, which in turn safeguards the living area beneath the canvas when hatches are open.Step 3: Allowing Time to Dry
After securely attaching the first portion of the flange, Sven allows ample time for it to dry before moving forward with additional steps. This patience and precision are key aspects of his successful boatbuilding methods.Step 4: Finishing Touches
Once the flange is fully dried, Sven removes the clamps carefully, ensuring no damage occurs during this process. He then moves on to attaching four more pieces onto these main frames, completing two pairs of flanges for the bulkhead hatches.The Final Touches
While two flanges form the primary support structure around the hatches, Sven mentions there are two additional pieces required at each end to ensure comprehensive protection. This attention to detail highlights his commitment to producing a durable and reliable design. “Sailing is about finding your path, whether it’s across an ocean or within yourself.” – Sven Yrvind In conclusion, making flanges around bulkhead hatches may seem complex at first glance, but by following Sven Yrvind’s meticulous process, enthusiasts can achieve professional-level results. Remember that the journey of boatbuilding is as rewarding as reaching your destination; it tests one’s patience and dedication. For those seeking to embark on this adventure or simply gain more insight into marine craftsmanship, Sven’s wisdom is invaluable.After securely attaching the first portion of the flange, Sven allows ample time for it to dry before moving forward with additional steps. This patience and precision are key aspects of his successful boatbuilding methods.Step 4: Finishing Touches
Once the flange is fully dried, Sven removes the clamps carefully, ensuring no damage occurs during this process. He then moves on to attaching four more pieces onto these main frames, completing two pairs of flanges for the bulkhead hatches.The Final Touches
While two flanges form the primary support structure around the hatches, Sven mentions there are two additional pieces required at each end to ensure comprehensive protection. This attention to detail highlights his commitment to producing a durable and reliable design. “Sailing is about finding your path, whether it’s across an ocean or within yourself.” – Sven Yrvind In conclusion, making flanges around bulkhead hatches may seem complex at first glance, but by following Sven Yrvind’s meticulous process, enthusiasts can achieve professional-level results. Remember that the journey of boatbuilding is as rewarding as reaching your destination; it tests one’s patience and dedication. For those seeking to embark on this adventure or simply gain more insight into marine craftsmanship, Sven’s wisdom is invaluable.Sven Yrvind, a renowned yacht designer and sailor, shares valuable insights on creating flanges around bulkhead hatches for canvas protection in this enlightening video. By following his expert guidance, boat enthusiasts can ensure their living areas remain secure while allowing unhindered access through the hatches.Step 1: Starting with the Flange
Sven begins by explaining that working on flanges vertically and horizontally is significantly easier than doing so in a flat position. To simplify the process further, he divides the task into two or three steps as suggested by fellow expert “for for.” This approach not only makes it more manageable but also allows for greater precision in crafting each component.Step 2: Applying Glue and Securing
Sven proceeds to apply glue along one edge of the flange, ensuring a secure bond when clamped into place. He emphasizes that this stage is crucial for maintaining the structural integrity of the flange, which in turn safeguards the living area beneath the canvas when hatches are open.Step 3: Allowing Time to Dry
After securely attaching the first portion of the flange, Sven allows ample time for it to dry before moving forward with additional steps. This patience and precision are key aspects of his successful boatbuilding methods.Step 4: Finishing Touches
Once the flange is fully dried, Sven removes the clamps carefully, ensuring no damage occurs during this process. He then moves on to attaching four more pieces onto these main frames, completing two pairs of flanges for the bulkhead hatches.The Final Touches
While two flanges form the primary support structure around the hatches, Sven mentions there are two additional pieces required at each end to ensure comprehensive protection. This attention to detail highlights his commitment to producing a durable and reliable design. “Sailing is about finding your path, whether it’s across an ocean or within yourself.” – Sven Yrvind In conclusion, making flanges around bulkhead hatches may seem complex at first glance, but by following Sven Yrvind’s meticulous process, enthusiasts can achieve professional-level results. Remember that the journey of boatbuilding is as rewarding as reaching your destination; it tests one’s patience and dedication. For those seeking to embark on this adventure or simply gain more insight into marine craftsmanship, Sven’s wisdom is invaluable.Making Flanges Around Bulkhead Hatches for Canvas
Sven Yrvind, a renowned yacht designer and sailor, shares valuable insights on creating flanges around bulkhead hatches for canvas protection in this enlightening video. By following his expert guidance, boat enthusiasts can ensure their living areas remain secure while allowing unhindered access through the hatches.Step 1: Starting with the Flange
Sven begins by explaining that working on flanges vertically and horizontally is significantly easier than doing so in a flat position. To simplify the process further, he divides the task into two or three steps as suggested by fellow expert “for for.” This approach not only makes it more manageable but also allows for greater precision in crafting each component.Step 2: Applying Glue and Securing
Sven proceeds to apply glue along one edge of the flange, ensuring a secure bond when clamped into place. He emphasizes that this stage is crucial for maintaining the structural integrity of the flange, which in turn safeguards the living area beneath the canvas when hatches are open.Step 3: Allowing Time to Dry
After securely attaching the first portion of the flange, Sven allows ample time for it to dry before moving forward with additional steps. This patience and precision are key aspects of his successful boatbuilding methods.Step 4: Finishing Touches
Once the flange is fully dried, Sven removes the clamps carefully, ensuring no damage occurs during this process. He then moves on to attaching four more pieces onto these main frames, completing two pairs of flanges for the bulkhead hatches.The Final Touches
While two flanges form the primary support structure around the hatches, Sven mentions there are two additional pieces required at each end to ensure comprehensive protection. This attention to detail highlights his commitment to producing a durable and reliable design. “Sailing is about finding your path, whether it’s across an ocean or within yourself.” – Sven Yrvind In conclusion, making flanges around bulkhead hatches may seem complex at first glance, but by following Sven Yrvind’s meticulous process, enthusiasts can achieve professional-level results. Remember that the journey of boatbuilding is as rewarding as reaching your destination; it tests one’s patience and dedication. For those seeking to embark on this adventure or simply gain more insight into marine craftsmanship, Sven’s wisdom is invaluable.Sven proceeds to apply glue along one edge of the flange, ensuring a secure bond when clamped into place. He emphasizes that this stage is crucial for maintaining the structural integrity of the flange, which in turn safeguards the living area beneath the canvas when hatches are open.Step 3: Allowing Time to Dry
After securely attaching the first portion of the flange, Sven allows ample time for it to dry before moving forward with additional steps. This patience and precision are key aspects of his successful boatbuilding methods.Step 4: Finishing Touches
Once the flange is fully dried, Sven removes the clamps carefully, ensuring no damage occurs during this process. He then moves on to attaching four more pieces onto these main frames, completing two pairs of flanges for the bulkhead hatches.The Final Touches
While two flanges form the primary support structure around the hatches, Sven mentions there are two additional pieces required at each end to ensure comprehensive protection. This attention to detail highlights his commitment to producing a durable and reliable design. “Sailing is about finding your path, whether it’s across an ocean or within yourself.” – Sven Yrvind In conclusion, making flanges around bulkhead hatches may seem complex at first glance, but by following Sven Yrvind’s meticulous process, enthusiasts can achieve professional-level results. Remember that the journey of boatbuilding is as rewarding as reaching your destination; it tests one’s patience and dedication. For those seeking to embark on this adventure or simply gain more insight into marine craftsmanship, Sven’s wisdom is invaluable.Sven Yrvind, a renowned yacht designer and sailor, shares valuable insights on creating flanges around bulkhead hatches for canvas protection in this enlightening video. By following his expert guidance, boat enthusiasts can ensure their living areas remain secure while allowing unhindered access through the hatches.Step 1: Starting with the Flange
Sven begins by explaining that working on flanges vertically and horizontally is significantly easier than doing so in a flat position. To simplify the process further, he divides the task into two or three steps as suggested by fellow expert “for for.” This approach not only makes it more manageable but also allows for greater precision in crafting each component.Step 2: Applying Glue and Securing
Sven proceeds to apply glue along one edge of the flange, ensuring a secure bond when clamped into place. He emphasizes that this stage is crucial for maintaining the structural integrity of the flange, which in turn safeguards the living area beneath the canvas when hatches are open.Step 3: Allowing Time to Dry
After securely attaching the first portion of the flange, Sven allows ample time for it to dry before moving forward with additional steps. This patience and precision are key aspects of his successful boatbuilding methods.Step 4: Finishing Touches
Once the flange is fully dried, Sven removes the clamps carefully, ensuring no damage occurs during this process. He then moves on to attaching four more pieces onto these main frames, completing two pairs of flanges for the bulkhead hatches.The Final Touches
While two flanges form the primary support structure around the hatches, Sven mentions there are two additional pieces required at each end to ensure comprehensive protection. This attention to detail highlights his commitment to producing a durable and reliable design. “Sailing is about finding your path, whether it’s across an ocean or within yourself.” – Sven Yrvind In conclusion, making flanges around bulkhead hatches may seem complex at first glance, but by following Sven Yrvind’s meticulous process, enthusiasts can achieve professional-level results. Remember that the journey of boatbuilding is as rewarding as reaching your destination; it tests one’s patience and dedication. For those seeking to embark on this adventure or simply gain more insight into marine craftsmanship, Sven’s wisdom is invaluable.Making Flanges Around Bulkhead Hatches for Canvas
Sven Yrvind, a renowned yacht designer and sailor, shares valuable insights on creating flanges around bulkhead hatches for canvas protection in this enlightening video. By following his expert guidance, boat enthusiasts can ensure their living areas remain secure while allowing unhindered access through the hatches.Step 1: Starting with the Flange
Sven begins by explaining that working on flanges vertically and horizontally is significantly easier than doing so in a flat position. To simplify the process further, he divides the task into two or three steps as suggested by fellow expert “for for.” This approach not only makes it more manageable but also allows for greater precision in crafting each component.Step 2: Applying Glue and Securing
Sven proceeds to apply glue along one edge of the flange, ensuring a secure bond when clamped into place. He emphasizes that this stage is crucial for maintaining the structural integrity of the flange, which in turn safeguards the living area beneath the canvas when hatches are open.Step 3: Allowing Time to Dry
After securely attaching the first portion of the flange, Sven allows ample time for it to dry before moving forward with additional steps. This patience and precision are key aspects of his successful boatbuilding methods.Step 4: Finishing Touches
Once the flange is fully dried, Sven removes the clamps carefully, ensuring no damage occurs during this process. He then moves on to attaching four more pieces onto these main frames, completing two pairs of flanges for the bulkhead hatches.The Final Touches
While two flanges form the primary support structure around the hatches, Sven mentions there are two additional pieces required at each end to ensure comprehensive protection. This attention to detail highlights his commitment to producing a durable and reliable design. “Sailing is about finding your path, whether it’s across an ocean or within yourself.” – Sven Yrvind In conclusion, making flanges around bulkhead hatches may seem complex at first glance, but by following Sven Yrvind’s meticulous process, enthusiasts can achieve professional-level results. Remember that the journey of boatbuilding is as rewarding as reaching your destination; it tests one’s patience and dedication. For those seeking to embark on this adventure or simply gain more insight into marine craftsmanship, Sven’s wisdom is invaluable.Sven begins by explaining that working on flanges vertically and horizontally is significantly easier than doing so in a flat position. To simplify the process further, he divides the task into two or three steps as suggested by fellow expert “for for.” This approach not only makes it more manageable but also allows for greater precision in crafting each component.Step 2: Applying Glue and Securing
Sven proceeds to apply glue along one edge of the flange, ensuring a secure bond when clamped into place. He emphasizes that this stage is crucial for maintaining the structural integrity of the flange, which in turn safeguards the living area beneath the canvas when hatches are open.Step 3: Allowing Time to Dry
After securely attaching the first portion of the flange, Sven allows ample time for it to dry before moving forward with additional steps. This patience and precision are key aspects of his successful boatbuilding methods.Step 4: Finishing Touches
Once the flange is fully dried, Sven removes the clamps carefully, ensuring no damage occurs during this process. He then moves on to attaching four more pieces onto these main frames, completing two pairs of flanges for the bulkhead hatches.The Final Touches
While two flanges form the primary support structure around the hatches, Sven mentions there are two additional pieces required at each end to ensure comprehensive protection. This attention to detail highlights his commitment to producing a durable and reliable design. “Sailing is about finding your path, whether it’s across an ocean or within yourself.” – Sven Yrvind In conclusion, making flanges around bulkhead hatches may seem complex at first glance, but by following Sven Yrvind’s meticulous process, enthusiasts can achieve professional-level results. Remember that the journey of boatbuilding is as rewarding as reaching your destination; it tests one’s patience and dedication. For those seeking to embark on this adventure or simply gain more insight into marine craftsmanship, Sven’s wisdom is invaluable.Sven Yrvind, a renowned yacht designer and sailor, shares valuable insights on creating flanges around bulkhead hatches for canvas protection in this enlightening video. By following his expert guidance, boat enthusiasts can ensure their living areas remain secure while allowing unhindered access through the hatches.Step 1: Starting with the Flange
Sven begins by explaining that working on flanges vertically and horizontally is significantly easier than doing so in a flat position. To simplify the process further, he divides the task into two or three steps as suggested by fellow expert “for for.” This approach not only makes it more manageable but also allows for greater precision in crafting each component.Step 2: Applying Glue and Securing
Sven proceeds to apply glue along one edge of the flange, ensuring a secure bond when clamped into place. He emphasizes that this stage is crucial for maintaining the structural integrity of the flange, which in turn safeguards the living area beneath the canvas when hatches are open.Step 3: Allowing Time to Dry
After securely attaching the first portion of the flange, Sven allows ample time for it to dry before moving forward with additional steps. This patience and precision are key aspects of his successful boatbuilding methods.Step 4: Finishing Touches
Once the flange is fully dried, Sven removes the clamps carefully, ensuring no damage occurs during this process. He then moves on to attaching four more pieces onto these main frames, completing two pairs of flanges for the bulkhead hatches.The Final Touches
While two flanges form the primary support structure around the hatches, Sven mentions there are two additional pieces required at each end to ensure comprehensive protection. This attention to detail highlights his commitment to producing a durable and reliable design. “Sailing is about finding your path, whether it’s across an ocean or within yourself.” – Sven Yrvind In conclusion, making flanges around bulkhead hatches may seem complex at first glance, but by following Sven Yrvind’s meticulous process, enthusiasts can achieve professional-level results. Remember that the journey of boatbuilding is as rewarding as reaching your destination; it tests one’s patience and dedication. For those seeking to embark on this adventure or simply gain more insight into marine craftsmanship, Sven’s wisdom is invaluable.Making Flanges Around Bulkhead Hatches for Canvas
Sven Yrvind, a renowned yacht designer and sailor, shares valuable insights on creating flanges around bulkhead hatches for canvas protection in this enlightening video. By following his expert guidance, boat enthusiasts can ensure their living areas remain secure while allowing unhindered access through the hatches.Step 1: Starting with the Flange
Sven begins by explaining that working on flanges vertically and horizontally is significantly easier than doing so in a flat position. To simplify the process further, he divides the task into two or three steps as suggested by fellow expert “for for.” This approach not only makes it more manageable but also allows for greater precision in crafting each component.Step 2: Applying Glue and Securing
Sven proceeds to apply glue along one edge of the flange, ensuring a secure bond when clamped into place. He emphasizes that this stage is crucial for maintaining the structural integrity of the flange, which in turn safeguards the living area beneath the canvas when hatches are open.Step 3: Allowing Time to Dry
After securely attaching the first portion of the flange, Sven allows ample time for it to dry before moving forward with additional steps. This patience and precision are key aspects of his successful boatbuilding methods.Step 4: Finishing Touches
Once the flange is fully dried, Sven removes the clamps carefully, ensuring no damage occurs during this process. He then moves on to attaching four more pieces onto these main frames, completing two pairs of flanges for the bulkhead hatches.The Final Touches
While two flanges form the primary support structure around the hatches, Sven mentions there are two additional pieces required at each end to ensure comprehensive protection. This attention to detail highlights his commitment to producing a durable and reliable design. “Sailing is about finding your path, whether it’s across an ocean or within yourself.” – Sven Yrvind In conclusion, making flanges around bulkhead hatches may seem complex at first glance, but by following Sven Yrvind’s meticulous process, enthusiasts can achieve professional-level results. Remember that the journey of boatbuilding is as rewarding as reaching your destination; it tests one’s patience and dedication. For those seeking to embark on this adventure or simply gain more insight into marine craftsmanship, Sven’s wisdom is invaluable.Once the flange is fully dried, Sven removes the clamps carefully, ensuring no damage occurs during this process. He then moves on to attaching four more pieces onto these main frames, completing two pairs of flanges for the bulkhead hatches.The Final Touches
While two flanges form the primary support structure around the hatches, Sven mentions there are two additional pieces required at each end to ensure comprehensive protection. This attention to detail highlights his commitment to producing a durable and reliable design. “Sailing is about finding your path, whether it’s across an ocean or within yourself.” – Sven Yrvind In conclusion, making flanges around bulkhead hatches may seem complex at first glance, but by following Sven Yrvind’s meticulous process, enthusiasts can achieve professional-level results. Remember that the journey of boatbuilding is as rewarding as reaching your destination; it tests one’s patience and dedication. For those seeking to embark on this adventure or simply gain more insight into marine craftsmanship, Sven’s wisdom is invaluable.Sven begins by explaining that working on flanges vertically and horizontally is significantly easier than doing so in a flat position. To simplify the process further, he divides the task into two or three steps as suggested by fellow expert “for for.” This approach not only makes it more manageable but also allows for greater precision in crafting each component.Step 2: Applying Glue and Securing
Sven proceeds to apply glue along one edge of the flange, ensuring a secure bond when clamped into place. He emphasizes that this stage is crucial for maintaining the structural integrity of the flange, which in turn safeguards the living area beneath the canvas when hatches are open.Step 3: Allowing Time to Dry
After securely attaching the first portion of the flange, Sven allows ample time for it to dry before moving forward with additional steps. This patience and precision are key aspects of his successful boatbuilding methods.Step 4: Finishing Touches
Once the flange is fully dried, Sven removes the clamps carefully, ensuring no damage occurs during this process. He then moves on to attaching four more pieces onto these main frames, completing two pairs of flanges for the bulkhead hatches.The Final Touches
While two flanges form the primary support structure around the hatches, Sven mentions there are two additional pieces required at each end to ensure comprehensive protection. This attention to detail highlights his commitment to producing a durable and reliable design. “Sailing is about finding your path, whether it’s across an ocean or within yourself.” – Sven Yrvind In conclusion, making flanges around bulkhead hatches may seem complex at first glance, but by following Sven Yrvind’s meticulous process, enthusiasts can achieve professional-level results. Remember that the journey of boatbuilding is as rewarding as reaching your destination; it tests one’s patience and dedication. For those seeking to embark on this adventure or simply gain more insight into marine craftsmanship, Sven’s wisdom is invaluable.Sven Yrvind, a renowned yacht designer and sailor, shares valuable insights on creating flanges around bulkhead hatches for canvas protection in this enlightening video. By following his expert guidance, boat enthusiasts can ensure their living areas remain secure while allowing unhindered access through the hatches.Step 1: Starting with the Flange
Sven begins by explaining that working on flanges vertically and horizontally is significantly easier than doing so in a flat position. To simplify the process further, he divides the task into two or three steps as suggested by fellow expert “for for.” This approach not only makes it more manageable but also allows for greater precision in crafting each component.Step 2: Applying Glue and Securing
Sven proceeds to apply glue along one edge of the flange, ensuring a secure bond when clamped into place. He emphasizes that this stage is crucial for maintaining the structural integrity of the flange, which in turn safeguards the living area beneath the canvas when hatches are open.Step 3: Allowing Time to Dry
After securely attaching the first portion of the flange, Sven allows ample time for it to dry before moving forward with additional steps. This patience and precision are key aspects of his successful boatbuilding methods.Step 4: Finishing Touches
Once the flange is fully dried, Sven removes the clamps carefully, ensuring no damage occurs during this process. He then moves on to attaching four more pieces onto these main frames, completing two pairs of flanges for the bulkhead hatches.The Final Touches
While two flanges form the primary support structure around the hatches, Sven mentions there are two additional pieces required at each end to ensure comprehensive protection. This attention to detail highlights his commitment to producing a durable and reliable design. “Sailing is about finding your path, whether it’s across an ocean or within yourself.” – Sven Yrvind In conclusion, making flanges around bulkhead hatches may seem complex at first glance, but by following Sven Yrvind’s meticulous process, enthusiasts can achieve professional-level results. Remember that the journey of boatbuilding is as rewarding as reaching your destination; it tests one’s patience and dedication. For those seeking to embark on this adventure or simply gain more insight into marine craftsmanship, Sven’s wisdom is invaluable.Making Flanges Around Bulkhead Hatches for Canvas
Sven Yrvind, a renowned yacht designer and sailor, shares valuable insights on creating flanges around bulkhead hatches for canvas protection in this enlightening video. By following his expert guidance, boat enthusiasts can ensure their living areas remain secure while allowing unhindered access through the hatches.Step 1: Starting with the Flange
Sven begins by explaining that working on flanges vertically and horizontally is significantly easier than doing so in a flat position. To simplify the process further, he divides the task into two or three steps as suggested by fellow expert “for for.” This approach not only makes it more manageable but also allows for greater precision in crafting each component.Step 2: Applying Glue and Securing
Sven proceeds to apply glue along one edge of the flange, ensuring a secure bond when clamped into place. He emphasizes that this stage is crucial for maintaining the structural integrity of the flange, which in turn safeguards the living area beneath the canvas when hatches are open.Step 3: Allowing Time to Dry
After securely attaching the first portion of the flange, Sven allows ample time for it to dry before moving forward with additional steps. This patience and precision are key aspects of his successful boatbuilding methods.Step 4: Finishing Touches
Once the flange is fully dried, Sven removes the clamps carefully, ensuring no damage occurs during this process. He then moves on to attaching four more pieces onto these main frames, completing two pairs of flanges for the bulkhead hatches.The Final Touches
While two flanges form the primary support structure around the hatches, Sven mentions there are two additional pieces required at each end to ensure comprehensive protection. This attention to detail highlights his commitment to producing a durable and reliable design. “Sailing is about finding your path, whether it’s across an ocean or within yourself.” – Sven Yrvind In conclusion, making flanges around bulkhead hatches may seem complex at first glance, but by following Sven Yrvind’s meticulous process, enthusiasts can achieve professional-level results. Remember that the journey of boatbuilding is as rewarding as reaching your destination; it tests one’s patience and dedication. For those seeking to embark on this adventure or simply gain more insight into marine craftsmanship, Sven’s wisdom is invaluable.After securely attaching the first portion of the flange, Sven allows ample time for it to dry before moving forward with additional steps. This patience and precision are key aspects of his successful boatbuilding methods.Step 4: Finishing Touches
Once the flange is fully dried, Sven removes the clamps carefully, ensuring no damage occurs during this process. He then moves on to attaching four more pieces onto these main frames, completing two pairs of flanges for the bulkhead hatches.The Final Touches
While two flanges form the primary support structure around the hatches, Sven mentions there are two additional pieces required at each end to ensure comprehensive protection. This attention to detail highlights his commitment to producing a durable and reliable design. “Sailing is about finding your path, whether it’s across an ocean or within yourself.” – Sven Yrvind In conclusion, making flanges around bulkhead hatches may seem complex at first glance, but by following Sven Yrvind’s meticulous process, enthusiasts can achieve professional-level results. Remember that the journey of boatbuilding is as rewarding as reaching your destination; it tests one’s patience and dedication. For those seeking to embark on this adventure or simply gain more insight into marine craftsmanship, Sven’s wisdom is invaluable.Sven begins by explaining that working on flanges vertically and horizontally is significantly easier than doing so in a flat position. To simplify the process further, he divides the task into two or three steps as suggested by fellow expert “for for.” This approach not only makes it more manageable but also allows for greater precision in crafting each component.Step 2: Applying Glue and Securing
Sven proceeds to apply glue along one edge of the flange, ensuring a secure bond when clamped into place. He emphasizes that this stage is crucial for maintaining the structural integrity of the flange, which in turn safeguards the living area beneath the canvas when hatches are open.Step 3: Allowing Time to Dry
After securely attaching the first portion of the flange, Sven allows ample time for it to dry before moving forward with additional steps. This patience and precision are key aspects of his successful boatbuilding methods.Step 4: Finishing Touches
Once the flange is fully dried, Sven removes the clamps carefully, ensuring no damage occurs during this process. He then moves on to attaching four more pieces onto these main frames, completing two pairs of flanges for the bulkhead hatches.The Final Touches
While two flanges form the primary support structure around the hatches, Sven mentions there are two additional pieces required at each end to ensure comprehensive protection. This attention to detail highlights his commitment to producing a durable and reliable design. “Sailing is about finding your path, whether it’s across an ocean or within yourself.” – Sven Yrvind In conclusion, making flanges around bulkhead hatches may seem complex at first glance, but by following Sven Yrvind’s meticulous process, enthusiasts can achieve professional-level results. Remember that the journey of boatbuilding is as rewarding as reaching your destination; it tests one’s patience and dedication. For those seeking to embark on this adventure or simply gain more insight into marine craftsmanship, Sven’s wisdom is invaluable.Sven Yrvind, a renowned yacht designer and sailor, shares valuable insights on creating flanges around bulkhead hatches for canvas protection in this enlightening video. By following his expert guidance, boat enthusiasts can ensure their living areas remain secure while allowing unhindered access through the hatches.Step 1: Starting with the Flange
Sven begins by explaining that working on flanges vertically and horizontally is significantly easier than doing so in a flat position. To simplify the process further, he divides the task into two or three steps as suggested by fellow expert “for for.” This approach not only makes it more manageable but also allows for greater precision in crafting each component.Step 2: Applying Glue and Securing
Sven proceeds to apply glue along one edge of the flange, ensuring a secure bond when clamped into place. He emphasizes that this stage is crucial for maintaining the structural integrity of the flange, which in turn safeguards the living area beneath the canvas when hatches are open.Step 3: Allowing Time to Dry
After securely attaching the first portion of the flange, Sven allows ample time for it to dry before moving forward with additional steps. This patience and precision are key aspects of his successful boatbuilding methods.Step 4: Finishing Touches
Once the flange is fully dried, Sven removes the clamps carefully, ensuring no damage occurs during this process. He then moves on to attaching four more pieces onto these main frames, completing two pairs of flanges for the bulkhead hatches.The Final Touches
While two flanges form the primary support structure around the hatches, Sven mentions there are two additional pieces required at each end to ensure comprehensive protection. This attention to detail highlights his commitment to producing a durable and reliable design. “Sailing is about finding your path, whether it’s across an ocean or within yourself.” – Sven Yrvind In conclusion, making flanges around bulkhead hatches may seem complex at first glance, but by following Sven Yrvind’s meticulous process, enthusiasts can achieve professional-level results. Remember that the journey of boatbuilding is as rewarding as reaching your destination; it tests one’s patience and dedication. For those seeking to embark on this adventure or simply gain more insight into marine craftsmanship, Sven’s wisdom is invaluable.Making Flanges Around Bulkhead Hatches for Canvas
Sven Yrvind, a renowned yacht designer and sailor, shares valuable insights on creating flanges around bulkhead hatches for canvas protection in this enlightening video. By following his expert guidance, boat enthusiasts can ensure their living areas remain secure while allowing unhindered access through the hatches.Step 1: Starting with the Flange
Sven begins by explaining that working on flanges vertically and horizontally is significantly easier than doing so in a flat position. To simplify the process further, he divides the task into two or three steps as suggested by fellow expert “for for.” This approach not only makes it more manageable but also allows for greater precision in crafting each component.Step 2: Applying Glue and Securing
Sven proceeds to apply glue along one edge of the flange, ensuring a secure bond when clamped into place. He emphasizes that this stage is crucial for maintaining the structural integrity of the flange, which in turn safeguards the living area beneath the canvas when hatches are open.Step 3: Allowing Time to Dry
After securely attaching the first portion of the flange, Sven allows ample time for it to dry before moving forward with additional steps. This patience and precision are key aspects of his successful boatbuilding methods.Step 4: Finishing Touches
Once the flange is fully dried, Sven removes the clamps carefully, ensuring no damage occurs during this process. He then moves on to attaching four more pieces onto these main frames, completing two pairs of flanges for the bulkhead hatches.The Final Touches
While two flanges form the primary support structure around the hatches, Sven mentions there are two additional pieces required at each end to ensure comprehensive protection. This attention to detail highlights his commitment to producing a durable and reliable design. “Sailing is about finding your path, whether it’s across an ocean or within yourself.” – Sven Yrvind In conclusion, making flanges around bulkhead hatches may seem complex at first glance, but by following Sven Yrvind’s meticulous process, enthusiasts can achieve professional-level results. Remember that the journey of boatbuilding is as rewarding as reaching your destination; it tests one’s patience and dedication. For those seeking to embark on this adventure or simply gain more insight into marine craftsmanship, Sven’s wisdom is invaluable.Sven proceeds to apply glue along one edge of the flange, ensuring a secure bond when clamped into place. He emphasizes that this stage is crucial for maintaining the structural integrity of the flange, which in turn safeguards the living area beneath the canvas when hatches are open.Step 3: Allowing Time to Dry
After securely attaching the first portion of the flange, Sven allows ample time for it to dry before moving forward with additional steps. This patience and precision are key aspects of his successful boatbuilding methods.Step 4: Finishing Touches
Once the flange is fully dried, Sven removes the clamps carefully, ensuring no damage occurs during this process. He then moves on to attaching four more pieces onto these main frames, completing two pairs of flanges for the bulkhead hatches.The Final Touches
While two flanges form the primary support structure around the hatches, Sven mentions there are two additional pieces required at each end to ensure comprehensive protection. This attention to detail highlights his commitment to producing a durable and reliable design. “Sailing is about finding your path, whether it’s across an ocean or within yourself.” – Sven Yrvind In conclusion, making flanges around bulkhead hatches may seem complex at first glance, but by following Sven Yrvind’s meticulous process, enthusiasts can achieve professional-level results. Remember that the journey of boatbuilding is as rewarding as reaching your destination; it tests one’s patience and dedication. For those seeking to embark on this adventure or simply gain more insight into marine craftsmanship, Sven’s wisdom is invaluable.Sven begins by explaining that working on flanges vertically and horizontally is significantly easier than doing so in a flat position. To simplify the process further, he divides the task into two or three steps as suggested by fellow expert “for for.” This approach not only makes it more manageable but also allows for greater precision in crafting each component.Step 2: Applying Glue and Securing
Sven proceeds to apply glue along one edge of the flange, ensuring a secure bond when clamped into place. He emphasizes that this stage is crucial for maintaining the structural integrity of the flange, which in turn safeguards the living area beneath the canvas when hatches are open.Step 3: Allowing Time to Dry
After securely attaching the first portion of the flange, Sven allows ample time for it to dry before moving forward with additional steps. This patience and precision are key aspects of his successful boatbuilding methods.Step 4: Finishing Touches
Once the flange is fully dried, Sven removes the clamps carefully, ensuring no damage occurs during this process. He then moves on to attaching four more pieces onto these main frames, completing two pairs of flanges for the bulkhead hatches.The Final Touches
While two flanges form the primary support structure around the hatches, Sven mentions there are two additional pieces required at each end to ensure comprehensive protection. This attention to detail highlights his commitment to producing a durable and reliable design. “Sailing is about finding your path, whether it’s across an ocean or within yourself.” – Sven Yrvind In conclusion, making flanges around bulkhead hatches may seem complex at first glance, but by following Sven Yrvind’s meticulous process, enthusiasts can achieve professional-level results. Remember that the journey of boatbuilding is as rewarding as reaching your destination; it tests one’s patience and dedication. For those seeking to embark on this adventure or simply gain more insight into marine craftsmanship, Sven’s wisdom is invaluable.Sven Yrvind, a renowned yacht designer and sailor, shares valuable insights on creating flanges around bulkhead hatches for canvas protection in this enlightening video. By following his expert guidance, boat enthusiasts can ensure their living areas remain secure while allowing unhindered access through the hatches.Step 1: Starting with the Flange
Sven begins by explaining that working on flanges vertically and horizontally is significantly easier than doing so in a flat position. To simplify the process further, he divides the task into two or three steps as suggested by fellow expert “for for.” This approach not only makes it more manageable but also allows for greater precision in crafting each component.Step 2: Applying Glue and Securing
Sven proceeds to apply glue along one edge of the flange, ensuring a secure bond when clamped into place. He emphasizes that this stage is crucial for maintaining the structural integrity of the flange, which in turn safeguards the living area beneath the canvas when hatches are open.Step 3: Allowing Time to Dry
After securely attaching the first portion of the flange, Sven allows ample time for it to dry before moving forward with additional steps. This patience and precision are key aspects of his successful boatbuilding methods.Step 4: Finishing Touches
Once the flange is fully dried, Sven removes the clamps carefully, ensuring no damage occurs during this process. He then moves on to attaching four more pieces onto these main frames, completing two pairs of flanges for the bulkhead hatches.The Final Touches
While two flanges form the primary support structure around the hatches, Sven mentions there are two additional pieces required at each end to ensure comprehensive protection. This attention to detail highlights his commitment to producing a durable and reliable design. “Sailing is about finding your path, whether it’s across an ocean or within yourself.” – Sven Yrvind In conclusion, making flanges around bulkhead hatches may seem complex at first glance, but by following Sven Yrvind’s meticulous process, enthusiasts can achieve professional-level results. Remember that the journey of boatbuilding is as rewarding as reaching your destination; it tests one’s patience and dedication. For those seeking to embark on this adventure or simply gain more insight into marine craftsmanship, Sven’s wisdom is invaluable.Making Flanges Around Bulkhead Hatches for Canvas
Sven Yrvind, a renowned yacht designer and sailor, shares valuable insights on creating flanges around bulkhead hatches for canvas protection in this enlightening video. By following his expert guidance, boat enthusiasts can ensure their living areas remain secure while allowing unhindered access through the hatches.Step 1: Starting with the Flange
Sven begins by explaining that working on flanges vertically and horizontally is significantly easier than doing so in a flat position. To simplify the process further, he divides the task into two or three steps as suggested by fellow expert “for for.” This approach not only makes it more manageable but also allows for greater precision in crafting each component.Step 2: Applying Glue and Securing
Sven proceeds to apply glue along one edge of the flange, ensuring a secure bond when clamped into place. He emphasizes that this stage is crucial for maintaining the structural integrity of the flange, which in turn safeguards the living area beneath the canvas when hatches are open.Step 3: Allowing Time to Dry
After securely attaching the first portion of the flange, Sven allows ample time for it to dry before moving forward with additional steps. This patience and precision are key aspects of his successful boatbuilding methods.Step 4: Finishing Touches
Once the flange is fully dried, Sven removes the clamps carefully, ensuring no damage occurs during this process. He then moves on to attaching four more pieces onto these main frames, completing two pairs of flanges for the bulkhead hatches.The Final Touches
While two flanges form the primary support structure around the hatches, Sven mentions there are two additional pieces required at each end to ensure comprehensive protection. This attention to detail highlights his commitment to producing a durable and reliable design. “Sailing is about finding your path, whether it’s across an ocean or within yourself.” – Sven Yrvind In conclusion, making flanges around bulkhead hatches may seem complex at first glance, but by following Sven Yrvind’s meticulous process, enthusiasts can achieve professional-level results. Remember that the journey of boatbuilding is as rewarding as reaching your destination; it tests one’s patience and dedication. For those seeking to embark on this adventure or simply gain more insight into marine craftsmanship, Sven’s wisdom is invaluable.Once the flange is fully dried, Sven removes the clamps carefully, ensuring no damage occurs during this process. He then moves on to attaching four more pieces onto these main frames, completing two pairs of flanges for the bulkhead hatches.The Final Touches
While two flanges form the primary support structure around the hatches, Sven mentions there are two additional pieces required at each end to ensure comprehensive protection. This attention to detail highlights his commitment to producing a durable and reliable design. “Sailing is about finding your path, whether it’s across an ocean or within yourself.” – Sven Yrvind In conclusion, making flanges around bulkhead hatches may seem complex at first glance, but by following Sven Yrvind’s meticulous process, enthusiasts can achieve professional-level results. Remember that the journey of boatbuilding is as rewarding as reaching your destination; it tests one’s patience and dedication. For those seeking to embark on this adventure or simply gain more insight into marine craftsmanship, Sven’s wisdom is invaluable.Sven proceeds to apply glue along one edge of the flange, ensuring a secure bond when clamped into place. He emphasizes that this stage is crucial for maintaining the structural integrity of the flange, which in turn safeguards the living area beneath the canvas when hatches are open.Step 3: Allowing Time to Dry
After securely attaching the first portion of the flange, Sven allows ample time for it to dry before moving forward with additional steps. This patience and precision are key aspects of his successful boatbuilding methods.Step 4: Finishing Touches
Once the flange is fully dried, Sven removes the clamps carefully, ensuring no damage occurs during this process. He then moves on to attaching four more pieces onto these main frames, completing two pairs of flanges for the bulkhead hatches.The Final Touches
While two flanges form the primary support structure around the hatches, Sven mentions there are two additional pieces required at each end to ensure comprehensive protection. This attention to detail highlights his commitment to producing a durable and reliable design. “Sailing is about finding your path, whether it’s across an ocean or within yourself.” – Sven Yrvind In conclusion, making flanges around bulkhead hatches may seem complex at first glance, but by following Sven Yrvind’s meticulous process, enthusiasts can achieve professional-level results. Remember that the journey of boatbuilding is as rewarding as reaching your destination; it tests one’s patience and dedication. For those seeking to embark on this adventure or simply gain more insight into marine craftsmanship, Sven’s wisdom is invaluable.Sven begins by explaining that working on flanges vertically and horizontally is significantly easier than doing so in a flat position. To simplify the process further, he divides the task into two or three steps as suggested by fellow expert “for for.” This approach not only makes it more manageable but also allows for greater precision in crafting each component.Step 2: Applying Glue and Securing
Sven proceeds to apply glue along one edge of the flange, ensuring a secure bond when clamped into place. He emphasizes that this stage is crucial for maintaining the structural integrity of the flange, which in turn safeguards the living area beneath the canvas when hatches are open.Step 3: Allowing Time to Dry
After securely attaching the first portion of the flange, Sven allows ample time for it to dry before moving forward with additional steps. This patience and precision are key aspects of his successful boatbuilding methods.Step 4: Finishing Touches
Once the flange is fully dried, Sven removes the clamps carefully, ensuring no damage occurs during this process. He then moves on to attaching four more pieces onto these main frames, completing two pairs of flanges for the bulkhead hatches.The Final Touches
While two flanges form the primary support structure around the hatches, Sven mentions there are two additional pieces required at each end to ensure comprehensive protection. This attention to detail highlights his commitment to producing a durable and reliable design. “Sailing is about finding your path, whether it’s across an ocean or within yourself.” – Sven Yrvind In conclusion, making flanges around bulkhead hatches may seem complex at first glance, but by following Sven Yrvind’s meticulous process, enthusiasts can achieve professional-level results. Remember that the journey of boatbuilding is as rewarding as reaching your destination; it tests one’s patience and dedication. For those seeking to embark on this adventure or simply gain more insight into marine craftsmanship, Sven’s wisdom is invaluable.Sven Yrvind, a renowned yacht designer and sailor, shares valuable insights on creating flanges around bulkhead hatches for canvas protection in this enlightening video. By following his expert guidance, boat enthusiasts can ensure their living areas remain secure while allowing unhindered access through the hatches.Step 1: Starting with the Flange
Sven begins by explaining that working on flanges vertically and horizontally is significantly easier than doing so in a flat position. To simplify the process further, he divides the task into two or three steps as suggested by fellow expert “for for.” This approach not only makes it more manageable but also allows for greater precision in crafting each component.Step 2: Applying Glue and Securing
Sven proceeds to apply glue along one edge of the flange, ensuring a secure bond when clamped into place. He emphasizes that this stage is crucial for maintaining the structural integrity of the flange, which in turn safeguards the living area beneath the canvas when hatches are open.Step 3: Allowing Time to Dry
After securely attaching the first portion of the flange, Sven allows ample time for it to dry before moving forward with additional steps. This patience and precision are key aspects of his successful boatbuilding methods.Step 4: Finishing Touches
Once the flange is fully dried, Sven removes the clamps carefully, ensuring no damage occurs during this process. He then moves on to attaching four more pieces onto these main frames, completing two pairs of flanges for the bulkhead hatches.The Final Touches
While two flanges form the primary support structure around the hatches, Sven mentions there are two additional pieces required at each end to ensure comprehensive protection. This attention to detail highlights his commitment to producing a durable and reliable design. “Sailing is about finding your path, whether it’s across an ocean or within yourself.” – Sven Yrvind In conclusion, making flanges around bulkhead hatches may seem complex at first glance, but by following Sven Yrvind’s meticulous process, enthusiasts can achieve professional-level results. Remember that the journey of boatbuilding is as rewarding as reaching your destination; it tests one’s patience and dedication. For those seeking to embark on this adventure or simply gain more insight into marine craftsmanship, Sven’s wisdom is invaluable.Making Flanges Around Bulkhead Hatches for Canvas
Sven Yrvind, a renowned yacht designer and sailor, shares valuable insights on creating flanges around bulkhead hatches for canvas protection in this enlightening video. By following his expert guidance, boat enthusiasts can ensure their living areas remain secure while allowing unhindered access through the hatches.Step 1: Starting with the Flange
Sven begins by explaining that working on flanges vertically and horizontally is significantly easier than doing so in a flat position. To simplify the process further, he divides the task into two or three steps as suggested by fellow expert “for for.” This approach not only makes it more manageable but also allows for greater precision in crafting each component.Step 2: Applying Glue and Securing
Sven proceeds to apply glue along one edge of the flange, ensuring a secure bond when clamped into place. He emphasizes that this stage is crucial for maintaining the structural integrity of the flange, which in turn safeguards the living area beneath the canvas when hatches are open.Step 3: Allowing Time to Dry
After securely attaching the first portion of the flange, Sven allows ample time for it to dry before moving forward with additional steps. This patience and precision are key aspects of his successful boatbuilding methods.Step 4: Finishing Touches
Once the flange is fully dried, Sven removes the clamps carefully, ensuring no damage occurs during this process. He then moves on to attaching four more pieces onto these main frames, completing two pairs of flanges for the bulkhead hatches.The Final Touches
While two flanges form the primary support structure around the hatches, Sven mentions there are two additional pieces required at each end to ensure comprehensive protection. This attention to detail highlights his commitment to producing a durable and reliable design. “Sailing is about finding your path, whether it’s across an ocean or within yourself.” – Sven Yrvind In conclusion, making flanges around bulkhead hatches may seem complex at first glance, but by following Sven Yrvind’s meticulous process, enthusiasts can achieve professional-level results. Remember that the journey of boatbuilding is as rewarding as reaching your destination; it tests one’s patience and dedication. For those seeking to embark on this adventure or simply gain more insight into marine craftsmanship, Sven’s wisdom is invaluable.After securely attaching the first portion of the flange, Sven allows ample time for it to dry before moving forward with additional steps. This patience and precision are key aspects of his successful boatbuilding methods.Step 4: Finishing Touches
Once the flange is fully dried, Sven removes the clamps carefully, ensuring no damage occurs during this process. He then moves on to attaching four more pieces onto these main frames, completing two pairs of flanges for the bulkhead hatches.The Final Touches
While two flanges form the primary support structure around the hatches, Sven mentions there are two additional pieces required at each end to ensure comprehensive protection. This attention to detail highlights his commitment to producing a durable and reliable design. “Sailing is about finding your path, whether it’s across an ocean or within yourself.” – Sven Yrvind In conclusion, making flanges around bulkhead hatches may seem complex at first glance, but by following Sven Yrvind’s meticulous process, enthusiasts can achieve professional-level results. Remember that the journey of boatbuilding is as rewarding as reaching your destination; it tests one’s patience and dedication. For those seeking to embark on this adventure or simply gain more insight into marine craftsmanship, Sven’s wisdom is invaluable.Sven proceeds to apply glue along one edge of the flange, ensuring a secure bond when clamped into place. He emphasizes that this stage is crucial for maintaining the structural integrity of the flange, which in turn safeguards the living area beneath the canvas when hatches are open.Step 3: Allowing Time to Dry
After securely attaching the first portion of the flange, Sven allows ample time for it to dry before moving forward with additional steps. This patience and precision are key aspects of his successful boatbuilding methods.Step 4: Finishing Touches
Once the flange is fully dried, Sven removes the clamps carefully, ensuring no damage occurs during this process. He then moves on to attaching four more pieces onto these main frames, completing two pairs of flanges for the bulkhead hatches.The Final Touches
While two flanges form the primary support structure around the hatches, Sven mentions there are two additional pieces required at each end to ensure comprehensive protection. This attention to detail highlights his commitment to producing a durable and reliable design. “Sailing is about finding your path, whether it’s across an ocean or within yourself.” – Sven Yrvind In conclusion, making flanges around bulkhead hatches may seem complex at first glance, but by following Sven Yrvind’s meticulous process, enthusiasts can achieve professional-level results. Remember that the journey of boatbuilding is as rewarding as reaching your destination; it tests one’s patience and dedication. For those seeking to embark on this adventure or simply gain more insight into marine craftsmanship, Sven’s wisdom is invaluable.Sven begins by explaining that working on flanges vertically and horizontally is significantly easier than doing so in a flat position. To simplify the process further, he divides the task into two or three steps as suggested by fellow expert “for for.” This approach not only makes it more manageable but also allows for greater precision in crafting each component.Step 2: Applying Glue and Securing
Sven proceeds to apply glue along one edge of the flange, ensuring a secure bond when clamped into place. He emphasizes that this stage is crucial for maintaining the structural integrity of the flange, which in turn safeguards the living area beneath the canvas when hatches are open.Step 3: Allowing Time to Dry
After securely attaching the first portion of the flange, Sven allows ample time for it to dry before moving forward with additional steps. This patience and precision are key aspects of his successful boatbuilding methods.Step 4: Finishing Touches
Once the flange is fully dried, Sven removes the clamps carefully, ensuring no damage occurs during this process. He then moves on to attaching four more pieces onto these main frames, completing two pairs of flanges for the bulkhead hatches.The Final Touches
While two flanges form the primary support structure around the hatches, Sven mentions there are two additional pieces required at each end to ensure comprehensive protection. This attention to detail highlights his commitment to producing a durable and reliable design. “Sailing is about finding your path, whether it’s across an ocean or within yourself.” – Sven Yrvind In conclusion, making flanges around bulkhead hatches may seem complex at first glance, but by following Sven Yrvind’s meticulous process, enthusiasts can achieve professional-level results. Remember that the journey of boatbuilding is as rewarding as reaching your destination; it tests one’s patience and dedication. For those seeking to embark on this adventure or simply gain more insight into marine craftsmanship, Sven’s wisdom is invaluable.Sven Yrvind, a renowned yacht designer and sailor, shares valuable insights on creating flanges around bulkhead hatches for canvas protection in this enlightening video. By following his expert guidance, boat enthusiasts can ensure their living areas remain secure while allowing unhindered access through the hatches.Step 1: Starting with the Flange
Sven begins by explaining that working on flanges vertically and horizontally is significantly easier than doing so in a flat position. To simplify the process further, he divides the task into two or three steps as suggested by fellow expert “for for.” This approach not only makes it more manageable but also allows for greater precision in crafting each component.Step 2: Applying Glue and Securing
Sven proceeds to apply glue along one edge of the flange, ensuring a secure bond when clamped into place. He emphasizes that this stage is crucial for maintaining the structural integrity of the flange, which in turn safeguards the living area beneath the canvas when hatches are open.Step 3: Allowing Time to Dry
After securely attaching the first portion of the flange, Sven allows ample time for it to dry before moving forward with additional steps. This patience and precision are key aspects of his successful boatbuilding methods.Step 4: Finishing Touches
Once the flange is fully dried, Sven removes the clamps carefully, ensuring no damage occurs during this process. He then moves on to attaching four more pieces onto these main frames, completing two pairs of flanges for the bulkhead hatches.The Final Touches
While two flanges form the primary support structure around the hatches, Sven mentions there are two additional pieces required at each end to ensure comprehensive protection. This attention to detail highlights his commitment to producing a durable and reliable design. “Sailing is about finding your path, whether it’s across an ocean or within yourself.” – Sven Yrvind In conclusion, making flanges around bulkhead hatches may seem complex at first glance, but by following Sven Yrvind’s meticulous process, enthusiasts can achieve professional-level results. Remember that the journey of boatbuilding is as rewarding as reaching your destination; it tests one’s patience and dedication. For those seeking to embark on this adventure or simply gain more insight into marine craftsmanship, Sven’s wisdom is invaluable.Making Flanges Around Bulkhead Hatches for Canvas
Sven Yrvind, a renowned yacht designer and sailor, shares valuable insights on creating flanges around bulkhead hatches for canvas protection in this enlightening video. By following his expert guidance, boat enthusiasts can ensure their living areas remain secure while allowing unhindered access through the hatches.Step 1: Starting with the Flange
Sven begins by explaining that working on flanges vertically and horizontally is significantly easier than doing so in a flat position. To simplify the process further, he divides the task into two or three steps as suggested by fellow expert “for for.” This approach not only makes it more manageable but also allows for greater precision in crafting each component.Step 2: Applying Glue and Securing
Sven proceeds to apply glue along one edge of the flange, ensuring a secure bond when clamped into place. He emphasizes that this stage is crucial for maintaining the structural integrity of the flange, which in turn safeguards the living area beneath the canvas when hatches are open.Step 3: Allowing Time to Dry
After securely attaching the first portion of the flange, Sven allows ample time for it to dry before moving forward with additional steps. This patience and precision are key aspects of his successful boatbuilding methods.Step 4: Finishing Touches
Once the flange is fully dried, Sven removes the clamps carefully, ensuring no damage occurs during this process. He then moves on to attaching four more pieces onto these main frames, completing two pairs of flanges for the bulkhead hatches.The Final Touches
While two flanges form the primary support structure around the hatches, Sven mentions there are two additional pieces required at each end to ensure comprehensive protection. This attention to detail highlights his commitment to producing a durable and reliable design. “Sailing is about finding your path, whether it’s across an ocean or within yourself.” – Sven Yrvind In conclusion, making flanges around bulkhead hatches may seem complex at first glance, but by following Sven Yrvind’s meticulous process, enthusiasts can achieve professional-level results. Remember that the journey of boatbuilding is as rewarding as reaching your destination; it tests one’s patience and dedication. For those seeking to embark on this adventure or simply gain more insight into marine craftsmanship, Sven’s wisdom is invaluable.Once the flange is fully dried, Sven removes the clamps carefully, ensuring no damage occurs during this process. He then moves on to attaching four more pieces onto these main frames, completing two pairs of flanges for the bulkhead hatches.The Final Touches
While two flanges form the primary support structure around the hatches, Sven mentions there are two additional pieces required at each end to ensure comprehensive protection. This attention to detail highlights his commitment to producing a durable and reliable design. “Sailing is about finding your path, whether it’s across an ocean or within yourself.” – Sven Yrvind In conclusion, making flanges around bulkhead hatches may seem complex at first glance, but by following Sven Yrvind’s meticulous process, enthusiasts can achieve professional-level results. Remember that the journey of boatbuilding is as rewarding as reaching your destination; it tests one’s patience and dedication. For those seeking to embark on this adventure or simply gain more insight into marine craftsmanship, Sven’s wisdom is invaluable.After securely attaching the first portion of the flange, Sven allows ample time for it to dry before moving forward with additional steps. This patience and precision are key aspects of his successful boatbuilding methods.Step 4: Finishing Touches
Once the flange is fully dried, Sven removes the clamps carefully, ensuring no damage occurs during this process. He then moves on to attaching four more pieces onto these main frames, completing two pairs of flanges for the bulkhead hatches.The Final Touches
While two flanges form the primary support structure around the hatches, Sven mentions there are two additional pieces required at each end to ensure comprehensive protection. This attention to detail highlights his commitment to producing a durable and reliable design. “Sailing is about finding your path, whether it’s across an ocean or within yourself.” – Sven Yrvind In conclusion, making flanges around bulkhead hatches may seem complex at first glance, but by following Sven Yrvind’s meticulous process, enthusiasts can achieve professional-level results. Remember that the journey of boatbuilding is as rewarding as reaching your destination; it tests one’s patience and dedication. For those seeking to embark on this adventure or simply gain more insight into marine craftsmanship, Sven’s wisdom is invaluable.Sven proceeds to apply glue along one edge of the flange, ensuring a secure bond when clamped into place. He emphasizes that this stage is crucial for maintaining the structural integrity of the flange, which in turn safeguards the living area beneath the canvas when hatches are open.Step 3: Allowing Time to Dry
After securely attaching the first portion of the flange, Sven allows ample time for it to dry before moving forward with additional steps. This patience and precision are key aspects of his successful boatbuilding methods.Step 4: Finishing Touches
Once the flange is fully dried, Sven removes the clamps carefully, ensuring no damage occurs during this process. He then moves on to attaching four more pieces onto these main frames, completing two pairs of flanges for the bulkhead hatches.The Final Touches
While two flanges form the primary support structure around the hatches, Sven mentions there are two additional pieces required at each end to ensure comprehensive protection. This attention to detail highlights his commitment to producing a durable and reliable design. “Sailing is about finding your path, whether it’s across an ocean or within yourself.” – Sven Yrvind In conclusion, making flanges around bulkhead hatches may seem complex at first glance, but by following Sven Yrvind’s meticulous process, enthusiasts can achieve professional-level results. Remember that the journey of boatbuilding is as rewarding as reaching your destination; it tests one’s patience and dedication. For those seeking to embark on this adventure or simply gain more insight into marine craftsmanship, Sven’s wisdom is invaluable.Sven begins by explaining that working on flanges vertically and horizontally is significantly easier than doing so in a flat position. To simplify the process further, he divides the task into two or three steps as suggested by fellow expert “for for.” This approach not only makes it more manageable but also allows for greater precision in crafting each component.Step 2: Applying Glue and Securing
Sven proceeds to apply glue along one edge of the flange, ensuring a secure bond when clamped into place. He emphasizes that this stage is crucial for maintaining the structural integrity of the flange, which in turn safeguards the living area beneath the canvas when hatches are open.Step 3: Allowing Time to Dry
After securely attaching the first portion of the flange, Sven allows ample time for it to dry before moving forward with additional steps. This patience and precision are key aspects of his successful boatbuilding methods.Step 4: Finishing Touches
Once the flange is fully dried, Sven removes the clamps carefully, ensuring no damage occurs during this process. He then moves on to attaching four more pieces onto these main frames, completing two pairs of flanges for the bulkhead hatches.The Final Touches
While two flanges form the primary support structure around the hatches, Sven mentions there are two additional pieces required at each end to ensure comprehensive protection. This attention to detail highlights his commitment to producing a durable and reliable design. “Sailing is about finding your path, whether it’s across an ocean or within yourself.” – Sven Yrvind In conclusion, making flanges around bulkhead hatches may seem complex at first glance, but by following Sven Yrvind’s meticulous process, enthusiasts can achieve professional-level results. Remember that the journey of boatbuilding is as rewarding as reaching your destination; it tests one’s patience and dedication. For those seeking to embark on this adventure or simply gain more insight into marine craftsmanship, Sven’s wisdom is invaluable.Sven Yrvind, a renowned yacht designer and sailor, shares valuable insights on creating flanges around bulkhead hatches for canvas protection in this enlightening video. By following his expert guidance, boat enthusiasts can ensure their living areas remain secure while allowing unhindered access through the hatches.Step 1: Starting with the Flange
Sven begins by explaining that working on flanges vertically and horizontally is significantly easier than doing so in a flat position. To simplify the process further, he divides the task into two or three steps as suggested by fellow expert “for for.” This approach not only makes it more manageable but also allows for greater precision in crafting each component.Step 2: Applying Glue and Securing
Sven proceeds to apply glue along one edge of the flange, ensuring a secure bond when clamped into place. He emphasizes that this stage is crucial for maintaining the structural integrity of the flange, which in turn safeguards the living area beneath the canvas when hatches are open.Step 3: Allowing Time to Dry
After securely attaching the first portion of the flange, Sven allows ample time for it to dry before moving forward with additional steps. This patience and precision are key aspects of his successful boatbuilding methods.Step 4: Finishing Touches
Once the flange is fully dried, Sven removes the clamps carefully, ensuring no damage occurs during this process. He then moves on to attaching four more pieces onto these main frames, completing two pairs of flanges for the bulkhead hatches.The Final Touches
While two flanges form the primary support structure around the hatches, Sven mentions there are two additional pieces required at each end to ensure comprehensive protection. This attention to detail highlights his commitment to producing a durable and reliable design. “Sailing is about finding your path, whether it’s across an ocean or within yourself.” – Sven Yrvind In conclusion, making flanges around bulkhead hatches may seem complex at first glance, but by following Sven Yrvind’s meticulous process, enthusiasts can achieve professional-level results. Remember that the journey of boatbuilding is as rewarding as reaching your destination; it tests one’s patience and dedication. For those seeking to embark on this adventure or simply gain more insight into marine craftsmanship, Sven’s wisdom is invaluable.Making Flanges Around Bulkhead Hatches for Canvas
Sven Yrvind, a renowned yacht designer and sailor, shares valuable insights on creating flanges around bulkhead hatches for canvas protection in this enlightening video. By following his expert guidance, boat enthusiasts can ensure their living areas remain secure while allowing unhindered access through the hatches.Step 1: Starting with the Flange
Sven begins by explaining that working on flanges vertically and horizontally is significantly easier than doing so in a flat position. To simplify the process further, he divides the task into two or three steps as suggested by fellow expert “for for.” This approach not only makes it more manageable but also allows for greater precision in crafting each component.Step 2: Applying Glue and Securing
Sven proceeds to apply glue along one edge of the flange, ensuring a secure bond when clamped into place. He emphasizes that this stage is crucial for maintaining the structural integrity of the flange, which in turn safeguards the living area beneath the canvas when hatches are open.Step 3: Allowing Time to Dry
After securely attaching the first portion of the flange, Sven allows ample time for it to dry before moving forward with additional steps. This patience and precision are key aspects of his successful boatbuilding methods.Step 4: Finishing Touches
Once the flange is fully dried, Sven removes the clamps carefully, ensuring no damage occurs during this process. He then moves on to attaching four more pieces onto these main frames, completing two pairs of flanges for the bulkhead hatches.The Final Touches
While two flanges form the primary support structure around the hatches, Sven mentions there are two additional pieces required at each end to ensure comprehensive protection. This attention to detail highlights his commitment to producing a durable and reliable design. “Sailing is about finding your path, whether it’s across an ocean or within yourself.” – Sven Yrvind In conclusion, making flanges around bulkhead hatches may seem complex at first glance, but by following Sven Yrvind’s meticulous process, enthusiasts can achieve professional-level results. Remember that the journey of boatbuilding is as rewarding as reaching your destination; it tests one’s patience and dedication. For those seeking to embark on this adventure or simply gain more insight into marine craftsmanship, Sven’s wisdom is invaluable.Sven begins by explaining that working on flanges vertically and horizontally is significantly easier than doing so in a flat position. To simplify the process further, he divides the task into two or three steps as suggested by fellow expert “for for.” This approach not only makes it more manageable but also allows for greater precision in crafting each component.Step 2: Applying Glue and Securing
Sven proceeds to apply glue along one edge of the flange, ensuring a secure bond when clamped into place. He emphasizes that this stage is crucial for maintaining the structural integrity of the flange, which in turn safeguards the living area beneath the canvas when hatches are open.Step 3: Allowing Time to Dry
After securely attaching the first portion of the flange, Sven allows ample time for it to dry before moving forward with additional steps. This patience and precision are key aspects of his successful boatbuilding methods.Step 4: Finishing Touches
Once the flange is fully dried, Sven removes the clamps carefully, ensuring no damage occurs during this process. He then moves on to attaching four more pieces onto these main frames, completing two pairs of flanges for the bulkhead hatches.The Final Touches
While two flanges form the primary support structure around the hatches, Sven mentions there are two additional pieces required at each end to ensure comprehensive protection. This attention to detail highlights his commitment to producing a durable and reliable design. “Sailing is about finding your path, whether it’s across an ocean or within yourself.” – Sven Yrvind In conclusion, making flanges around bulkhead hatches may seem complex at first glance, but by following Sven Yrvind’s meticulous process, enthusiasts can achieve professional-level results. Remember that the journey of boatbuilding is as rewarding as reaching your destination; it tests one’s patience and dedication. For those seeking to embark on this adventure or simply gain more insight into marine craftsmanship, Sven’s wisdom is invaluable.After securely attaching the first portion of the flange, Sven allows ample time for it to dry before moving forward with additional steps. This patience and precision are key aspects of his successful boatbuilding methods.Step 4: Finishing Touches
Once the flange is fully dried, Sven removes the clamps carefully, ensuring no damage occurs during this process. He then moves on to attaching four more pieces onto these main frames, completing two pairs of flanges for the bulkhead hatches.The Final Touches
While two flanges form the primary support structure around the hatches, Sven mentions there are two additional pieces required at each end to ensure comprehensive protection. This attention to detail highlights his commitment to producing a durable and reliable design. “Sailing is about finding your path, whether it’s across an ocean or within yourself.” – Sven Yrvind In conclusion, making flanges around bulkhead hatches may seem complex at first glance, but by following Sven Yrvind’s meticulous process, enthusiasts can achieve professional-level results. Remember that the journey of boatbuilding is as rewarding as reaching your destination; it tests one’s patience and dedication. For those seeking to embark on this adventure or simply gain more insight into marine craftsmanship, Sven’s wisdom is invaluable.Making Flanges Around Bulkhead Hatches for Canvas
Sven Yrvind, a renowned yacht designer and sailor, shares valuable insights on creating flanges around bulkhead hatches for canvas protection in this enlightening video. By following his expert guidance, boat enthusiasts can ensure their living areas remain secure while allowing unhindered access through the hatches.Step 1: Starting with the Flange
Sven begins by explaining that working on flanges vertically and horizontally is significantly easier than doing so in a flat position. To simplify the process further, he divides the task into two or three steps as suggested by fellow expert “for for.” This approach not only makes it more manageable but also allows for greater precision in crafting each component.Step 2: Applying Glue and Securing
Sven proceeds to apply glue along one edge of the flange, ensuring a secure bond when clamped into place. He emphasizes that this stage is crucial for maintaining the structural integrity of the flange, which in turn safeguards the living area beneath the canvas when hatches are open.Step 3: Allowing Time to Dry
After securely attaching the first portion of the flange, Sven allows ample time for it to dry before moving forward with additional steps. This patience and precision are key aspects of his successful boatbuilding methods.Step 4: Finishing Touches
Once the flange is fully dried, Sven removes the clamps carefully, ensuring no damage occurs during this process. He then moves on to attaching four more pieces onto these main frames, completing two pairs of flanges for the bulkhead hatches.The Final Touches
While two flanges form the primary support structure around the hatches, Sven mentions there are two additional pieces required at each end to ensure comprehensive protection. This attention to detail highlights his commitment to producing a durable and reliable design. “Sailing is about finding your path, whether it’s across an ocean or within yourself.” – Sven Yrvind In conclusion, making flanges around bulkhead hatches may seem complex at first glance, but by following Sven Yrvind’s meticulous process, enthusiasts can achieve professional-level results. Remember that the journey of boatbuilding is as rewarding as reaching your destination; it tests one’s patience and dedication. For those seeking to embark on this adventure or simply gain more insight into marine craftsmanship, Sven’s wisdom is invaluable.Sven proceeds to apply glue along one edge of the flange, ensuring a secure bond when clamped into place. He emphasizes that this stage is crucial for maintaining the structural integrity of the flange, which in turn safeguards the living area beneath the canvas when hatches are open.Step 3: Allowing Time to Dry
After securely attaching the first portion of the flange, Sven allows ample time for it to dry before moving forward with additional steps. This patience and precision are key aspects of his successful boatbuilding methods.Step 4: Finishing Touches
Once the flange is fully dried, Sven removes the clamps carefully, ensuring no damage occurs during this process. He then moves on to attaching four more pieces onto these main frames, completing two pairs of flanges for the bulkhead hatches.The Final Touches
While two flanges form the primary support structure around the hatches, Sven mentions there are two additional pieces required at each end to ensure comprehensive protection. This attention to detail highlights his commitment to producing a durable and reliable design. “Sailing is about finding your path, whether it’s across an ocean or within yourself.” – Sven Yrvind In conclusion, making flanges around bulkhead hatches may seem complex at first glance, but by following Sven Yrvind’s meticulous process, enthusiasts can achieve professional-level results. Remember that the journey of boatbuilding is as rewarding as reaching your destination; it tests one’s patience and dedication. For those seeking to embark on this adventure or simply gain more insight into marine craftsmanship, Sven’s wisdom is invaluable.Making Flanges Around Bulkhead Hatches for Canvas
Sven Yrvind, a renowned yacht designer and sailor, shares valuable insights on creating flanges around bulkhead hatches for canvas protection in this enlightening video. By following his expert guidance, boat enthusiasts can ensure their living areas remain secure while allowing unhindered access through the hatches.Step 1: Starting with the Flange
Sven begins by explaining that working on flanges vertically and horizontally is significantly easier than doing so in a flat position. To simplify the process further, he divides the task into two or three steps as suggested by fellow expert “for for.” This approach not only makes it more manageable but also allows for greater precision in crafting each component.Step 2: Applying Glue and Securing
Sven proceeds to apply glue along one edge of the flange, ensuring a secure bond when clamped into place. He emphasizes that this stage is crucial for maintaining the structural integrity of the flange, which in turn safeguards the living area beneath the canvas when hatches are open.Step 3: Allowing Time to Dry
After securely attaching the first portion of the flange, Sven allows ample time for it to dry before moving forward with additional steps. This patience and precision are key aspects of his successful boatbuilding methods.Step 4: Finishing Touches
Once the flange is fully dried, Sven removes the clamps carefully, ensuring no damage occurs during this process. He then moves on to attaching four more pieces onto these main frames, completing two pairs of flanges for the bulkhead hatches.The Final Touches
While two flanges form the primary support structure around the hatches, Sven mentions there are two additional pieces required at each end to ensure comprehensive protection. This attention to detail highlights his commitment to producing a durable and reliable design. “Sailing is about finding your path, whether it’s across an ocean or within yourself.” – Sven Yrvind In conclusion, making flanges around bulkhead hatches may seem complex at first glance, but by following Sven Yrvind’s meticulous process, enthusiasts can achieve professional-level results. Remember that the journey of boatbuilding is as rewarding as reaching your destination; it tests one’s patience and dedication. For those seeking to embark on this adventure or simply gain more insight into marine craftsmanship, Sven’s wisdom is invaluable.Sven begins by explaining that working on flanges vertically and horizontally is significantly easier than doing so in a flat position. To simplify the process further, he divides the task into two or three steps as suggested by fellow expert “for for.” This approach not only makes it more manageable but also allows for greater precision in crafting each component.Step 2: Applying Glue and Securing
Sven proceeds to apply glue along one edge of the flange, ensuring a secure bond when clamped into place. He emphasizes that this stage is crucial for maintaining the structural integrity of the flange, which in turn safeguards the living area beneath the canvas when hatches are open.Step 3: Allowing Time to Dry
After securely attaching the first portion of the flange, Sven allows ample time for it to dry before moving forward with additional steps. This patience and precision are key aspects of his successful boatbuilding methods.Step 4: Finishing Touches
Once the flange is fully dried, Sven removes the clamps carefully, ensuring no damage occurs during this process. He then moves on to attaching four more pieces onto these main frames, completing two pairs of flanges for the bulkhead hatches.The Final Touches
While two flanges form the primary support structure around the hatches, Sven mentions there are two additional pieces required at each end to ensure comprehensive protection. This attention to detail highlights his commitment to producing a durable and reliable design. “Sailing is about finding your path, whether it’s across an ocean or within yourself.” – Sven Yrvind In conclusion, making flanges around bulkhead hatches may seem complex at first glance, but by following Sven Yrvind’s meticulous process, enthusiasts can achieve professional-level results. Remember that the journey of boatbuilding is as rewarding as reaching your destination; it tests one’s patience and dedication. For those seeking to embark on this adventure or simply gain more insight into marine craftsmanship, Sven’s wisdom is invaluable.Making Flanges Around Bulkhead Hatches for Canvas
Sven Yrvind, a renowned yacht designer and sailor, shares valuable insights on creating flanges around bulkhead hatches for canvas protection in this enlightening video. By following his expert guidance, boat enthusiasts can ensure their living areas remain secure while allowing unhindered access through the hatches.Step 1: Starting with the Flange
Sven begins by explaining that working on flanges vertically and horizontally is significantly easier than doing so in a flat position. To simplify the process further, he divides the task into two or three steps as suggested by fellow expert “for for.” This approach not only makes it more manageable but also allows for greater precision in crafting each component.Step 2: Applying Glue and Securing
Sven proceeds to apply glue along one edge of the flange, ensuring a secure bond when clamped into place. He emphasizes that this stage is crucial for maintaining the structural integrity of the flange, which in turn safeguards the living area beneath the canvas when hatches are open.Step 3: Allowing Time to Dry
After securely attaching the first portion of the flange, Sven allows ample time for it to dry before moving forward with additional steps. This patience and precision are key aspects of his successful boatbuilding methods.Step 4: Finishing Touches
Once the flange is fully dried, Sven removes the clamps carefully, ensuring no damage occurs during this process. He then moves on to attaching four more pieces onto these main frames, completing two pairs of flanges for the bulkhead hatches.The Final Touches
While two flanges form the primary support structure around the hatches, Sven mentions there are two additional pieces required at each end to ensure comprehensive protection. This attention to detail highlights his commitment to producing a durable and reliable design. “Sailing is about finding your path, whether it’s across an ocean or within yourself.” – Sven Yrvind In conclusion, making flanges around bulkhead hatches may seem complex at first glance, but by following Sven Yrvind’s meticulous process, enthusiasts can achieve professional-level results. Remember that the journey of boatbuilding is as rewarding as reaching your destination; it tests one’s patience and dedication. For those seeking to embark on this adventure or simply gain more insight into marine craftsmanship, Sven’s wisdom is invaluable.Sven Yrvind, a renowned yacht designer and sailor, shares valuable insights on creating flanges around bulkhead hatches for canvas protection in this enlightening video. By following his expert guidance, boat enthusiasts can ensure their living areas remain secure while allowing unhindered access through the hatches.Step 1: Starting with the Flange
Sven begins by explaining that working on flanges vertically and horizontally is significantly easier than doing so in a flat position. To simplify the process further, he divides the task into two or three steps as suggested by fellow expert “for for.” This approach not only makes it more manageable but also allows for greater precision in crafting each component.Step 2: Applying Glue and Securing
Sven proceeds to apply glue along one edge of the flange, ensuring a secure bond when clamped into place. He emphasizes that this stage is crucial for maintaining the structural integrity of the flange, which in turn safeguards the living area beneath the canvas when hatches are open.Step 3: Allowing Time to Dry
After securely attaching the first portion of the flange, Sven allows ample time for it to dry before moving forward with additional steps. This patience and precision are key aspects of his successful boatbuilding methods.Step 4: Finishing Touches
Once the flange is fully dried, Sven removes the clamps carefully, ensuring no damage occurs during this process. He then moves on to attaching four more pieces onto these main frames, completing two pairs of flanges for the bulkhead hatches.The Final Touches
While two flanges form the primary support structure around the hatches, Sven mentions there are two additional pieces required at each end to ensure comprehensive protection. This attention to detail highlights his commitment to producing a durable and reliable design. “Sailing is about finding your path, whether it’s across an ocean or within yourself.” – Sven Yrvind In conclusion, making flanges around bulkhead hatches may seem complex at first glance, but by following Sven Yrvind’s meticulous process, enthusiasts can achieve professional-level results. Remember that the journey of boatbuilding is as rewarding as reaching your destination; it tests one’s patience and dedication. For those seeking to embark on this adventure or simply gain more insight into marine craftsmanship, Sven’s wisdom is invaluable.Making Flanges Around Bulkhead Hatches for Canvas
Sven Yrvind, a renowned yacht designer and sailor, shares valuable insights on creating flanges around bulkhead hatches for canvas protection in this enlightening video. By following his expert guidance, boat enthusiasts can ensure their living areas remain secure while allowing unhindered access through the hatches.Step 1: Starting with the Flange
Sven begins by explaining that working on flanges vertically and horizontally is significantly easier than doing so in a flat position. To simplify the process further, he divides the task into two or three steps as suggested by fellow expert “for for.” This approach not only makes it more manageable but also allows for greater precision in crafting each component.Step 2: Applying Glue and Securing
Sven proceeds to apply glue along one edge of the flange, ensuring a secure bond when clamped into place. He emphasizes that this stage is crucial for maintaining the structural integrity of the flange, which in turn safeguards the living area beneath the canvas when hatches are open.Step 3: Allowing Time to Dry
After securely attaching the first portion of the flange, Sven allows ample time for it to dry before moving forward with additional steps. This patience and precision are key aspects of his successful boatbuilding methods.Step 4: Finishing Touches
Once the flange is fully dried, Sven removes the clamps carefully, ensuring no damage occurs during this process. He then moves on to attaching four more pieces onto these main frames, completing two pairs of flanges for the bulkhead hatches.The Final Touches
While two flanges form the primary support structure around the hatches, Sven mentions there are two additional pieces required at each end to ensure comprehensive protection. This attention to detail highlights his commitment to producing a durable and reliable design. “Sailing is about finding your path, whether it’s across an ocean or within yourself.” – Sven Yrvind In conclusion, making flanges around bulkhead hatches may seem complex at first glance, but by following Sven Yrvind’s meticulous process, enthusiasts can achieve professional-level results. Remember that the journey of boatbuilding is as rewarding as reaching your destination; it tests one’s patience and dedication. For those seeking to embark on this adventure or simply gain more insight into marine craftsmanship, Sven’s wisdom is invaluable.Once the flange is fully dried, Sven removes the clamps carefully, ensuring no damage occurs during this process. He then moves on to attaching four more pieces onto these main frames, completing two pairs of flanges for the bulkhead hatches.The Final Touches
While two flanges form the primary support structure around the hatches, Sven mentions there are two additional pieces required at each end to ensure comprehensive protection. This attention to detail highlights his commitment to producing a durable and reliable design. “Sailing is about finding your path, whether it’s across an ocean or within yourself.” – Sven Yrvind In conclusion, making flanges around bulkhead hatches may seem complex at first glance, but by following Sven Yrvind’s meticulous process, enthusiasts can achieve professional-level results. Remember that the journey of boatbuilding is as rewarding as reaching your destination; it tests one’s patience and dedication. For those seeking to embark on this adventure or simply gain more insight into marine craftsmanship, Sven’s wisdom is invaluable.Sven Yrvind, a renowned yacht designer and sailor, shares valuable insights on creating flanges around bulkhead hatches for canvas protection in this enlightening video. By following his expert guidance, boat enthusiasts can ensure their living areas remain secure while allowing unhindered access through the hatches.Step 1: Starting with the Flange
Sven begins by explaining that working on flanges vertically and horizontally is significantly easier than doing so in a flat position. To simplify the process further, he divides the task into two or three steps as suggested by fellow expert “for for.” This approach not only makes it more manageable but also allows for greater precision in crafting each component.Step 2: Applying Glue and Securing
Sven proceeds to apply glue along one edge of the flange, ensuring a secure bond when clamped into place. He emphasizes that this stage is crucial for maintaining the structural integrity of the flange, which in turn safeguards the living area beneath the canvas when hatches are open.Step 3: Allowing Time to Dry
After securely attaching the first portion of the flange, Sven allows ample time for it to dry before moving forward with additional steps. This patience and precision are key aspects of his successful boatbuilding methods.Step 4: Finishing Touches
Once the flange is fully dried, Sven removes the clamps carefully, ensuring no damage occurs during this process. He then moves on to attaching four more pieces onto these main frames, completing two pairs of flanges for the bulkhead hatches.The Final Touches
While two flanges form the primary support structure around the hatches, Sven mentions there are two additional pieces required at each end to ensure comprehensive protection. This attention to detail highlights his commitment to producing a durable and reliable design. “Sailing is about finding your path, whether it’s across an ocean or within yourself.” – Sven Yrvind In conclusion, making flanges around bulkhead hatches may seem complex at first glance, but by following Sven Yrvind’s meticulous process, enthusiasts can achieve professional-level results. Remember that the journey of boatbuilding is as rewarding as reaching your destination; it tests one’s patience and dedication. For those seeking to embark on this adventure or simply gain more insight into marine craftsmanship, Sven’s wisdom is invaluable.Making Flanges Around Bulkhead Hatches for Canvas
Sven Yrvind, a renowned yacht designer and sailor, shares valuable insights on creating flanges around bulkhead hatches for canvas protection in this enlightening video. By following his expert guidance, boat enthusiasts can ensure their living areas remain secure while allowing unhindered access through the hatches.Step 1: Starting with the Flange
Sven begins by explaining that working on flanges vertically and horizontally is significantly easier than doing so in a flat position. To simplify the process further, he divides the task into two or three steps as suggested by fellow expert “for for.” This approach not only makes it more manageable but also allows for greater precision in crafting each component.Step 2: Applying Glue and Securing
Sven proceeds to apply glue along one edge of the flange, ensuring a secure bond when clamped into place. He emphasizes that this stage is crucial for maintaining the structural integrity of the flange, which in turn safeguards the living area beneath the canvas when hatches are open.Step 3: Allowing Time to Dry
After securely attaching the first portion of the flange, Sven allows ample time for it to dry before moving forward with additional steps. This patience and precision are key aspects of his successful boatbuilding methods.Step 4: Finishing Touches
Once the flange is fully dried, Sven removes the clamps carefully, ensuring no damage occurs during this process. He then moves on to attaching four more pieces onto these main frames, completing two pairs of flanges for the bulkhead hatches.The Final Touches
While two flanges form the primary support structure around the hatches, Sven mentions there are two additional pieces required at each end to ensure comprehensive protection. This attention to detail highlights his commitment to producing a durable and reliable design. “Sailing is about finding your path, whether it’s across an ocean or within yourself.” – Sven Yrvind In conclusion, making flanges around bulkhead hatches may seem complex at first glance, but by following Sven Yrvind’s meticulous process, enthusiasts can achieve professional-level results. Remember that the journey of boatbuilding is as rewarding as reaching your destination; it tests one’s patience and dedication. For those seeking to embark on this adventure or simply gain more insight into marine craftsmanship, Sven’s wisdom is invaluable.After securely attaching the first portion of the flange, Sven allows ample time for it to dry before moving forward with additional steps. This patience and precision are key aspects of his successful boatbuilding methods.Step 4: Finishing Touches
Once the flange is fully dried, Sven removes the clamps carefully, ensuring no damage occurs during this process. He then moves on to attaching four more pieces onto these main frames, completing two pairs of flanges for the bulkhead hatches.The Final Touches
While two flanges form the primary support structure around the hatches, Sven mentions there are two additional pieces required at each end to ensure comprehensive protection. This attention to detail highlights his commitment to producing a durable and reliable design. “Sailing is about finding your path, whether it’s across an ocean or within yourself.” – Sven Yrvind In conclusion, making flanges around bulkhead hatches may seem complex at first glance, but by following Sven Yrvind’s meticulous process, enthusiasts can achieve professional-level results. Remember that the journey of boatbuilding is as rewarding as reaching your destination; it tests one’s patience and dedication. For those seeking to embark on this adventure or simply gain more insight into marine craftsmanship, Sven’s wisdom is invaluable.Sven Yrvind, a renowned yacht designer and sailor, shares valuable insights on creating flanges around bulkhead hatches for canvas protection in this enlightening video. By following his expert guidance, boat enthusiasts can ensure their living areas remain secure while allowing unhindered access through the hatches.Step 1: Starting with the Flange
Sven begins by explaining that working on flanges vertically and horizontally is significantly easier than doing so in a flat position. To simplify the process further, he divides the task into two or three steps as suggested by fellow expert “for for.” This approach not only makes it more manageable but also allows for greater precision in crafting each component.Step 2: Applying Glue and Securing
Sven proceeds to apply glue along one edge of the flange, ensuring a secure bond when clamped into place. He emphasizes that this stage is crucial for maintaining the structural integrity of the flange, which in turn safeguards the living area beneath the canvas when hatches are open.Step 3: Allowing Time to Dry
After securely attaching the first portion of the flange, Sven allows ample time for it to dry before moving forward with additional steps. This patience and precision are key aspects of his successful boatbuilding methods.Step 4: Finishing Touches
Once the flange is fully dried, Sven removes the clamps carefully, ensuring no damage occurs during this process. He then moves on to attaching four more pieces onto these main frames, completing two pairs of flanges for the bulkhead hatches.The Final Touches
While two flanges form the primary support structure around the hatches, Sven mentions there are two additional pieces required at each end to ensure comprehensive protection. This attention to detail highlights his commitment to producing a durable and reliable design. “Sailing is about finding your path, whether it’s across an ocean or within yourself.” – Sven Yrvind In conclusion, making flanges around bulkhead hatches may seem complex at first glance, but by following Sven Yrvind’s meticulous process, enthusiasts can achieve professional-level results. Remember that the journey of boatbuilding is as rewarding as reaching your destination; it tests one’s patience and dedication. For those seeking to embark on this adventure or simply gain more insight into marine craftsmanship, Sven’s wisdom is invaluable.Making Flanges Around Bulkhead Hatches for Canvas
Sven Yrvind, a renowned yacht designer and sailor, shares valuable insights on creating flanges around bulkhead hatches for canvas protection in this enlightening video. By following his expert guidance, boat enthusiasts can ensure their living areas remain secure while allowing unhindered access through the hatches.Step 1: Starting with the Flange
Sven begins by explaining that working on flanges vertically and horizontally is significantly easier than doing so in a flat position. To simplify the process further, he divides the task into two or three steps as suggested by fellow expert “for for.” This approach not only makes it more manageable but also allows for greater precision in crafting each component.Step 2: Applying Glue and Securing
Sven proceeds to apply glue along one edge of the flange, ensuring a secure bond when clamped into place. He emphasizes that this stage is crucial for maintaining the structural integrity of the flange, which in turn safeguards the living area beneath the canvas when hatches are open.Step 3: Allowing Time to Dry
After securely attaching the first portion of the flange, Sven allows ample time for it to dry before moving forward with additional steps. This patience and precision are key aspects of his successful boatbuilding methods.Step 4: Finishing Touches
Once the flange is fully dried, Sven removes the clamps carefully, ensuring no damage occurs during this process. He then moves on to attaching four more pieces onto these main frames, completing two pairs of flanges for the bulkhead hatches.The Final Touches
While two flanges form the primary support structure around the hatches, Sven mentions there are two additional pieces required at each end to ensure comprehensive protection. This attention to detail highlights his commitment to producing a durable and reliable design. “Sailing is about finding your path, whether it’s across an ocean or within yourself.” – Sven Yrvind In conclusion, making flanges around bulkhead hatches may seem complex at first glance, but by following Sven Yrvind’s meticulous process, enthusiasts can achieve professional-level results. Remember that the journey of boatbuilding is as rewarding as reaching your destination; it tests one’s patience and dedication. For those seeking to embark on this adventure or simply gain more insight into marine craftsmanship, Sven’s wisdom is invaluable.Sven proceeds to apply glue along one edge of the flange, ensuring a secure bond when clamped into place. He emphasizes that this stage is crucial for maintaining the structural integrity of the flange, which in turn safeguards the living area beneath the canvas when hatches are open.Step 3: Allowing Time to Dry
After securely attaching the first portion of the flange, Sven allows ample time for it to dry before moving forward with additional steps. This patience and precision are key aspects of his successful boatbuilding methods.Step 4: Finishing Touches
Once the flange is fully dried, Sven removes the clamps carefully, ensuring no damage occurs during this process. He then moves on to attaching four more pieces onto these main frames, completing two pairs of flanges for the bulkhead hatches.The Final Touches
While two flanges form the primary support structure around the hatches, Sven mentions there are two additional pieces required at each end to ensure comprehensive protection. This attention to detail highlights his commitment to producing a durable and reliable design. “Sailing is about finding your path, whether it’s across an ocean or within yourself.” – Sven Yrvind In conclusion, making flanges around bulkhead hatches may seem complex at first glance, but by following Sven Yrvind’s meticulous process, enthusiasts can achieve professional-level results. Remember that the journey of boatbuilding is as rewarding as reaching your destination; it tests one’s patience and dedication. For those seeking to embark on this adventure or simply gain more insight into marine craftsmanship, Sven’s wisdom is invaluable.Sven Yrvind, a renowned yacht designer and sailor, shares valuable insights on creating flanges around bulkhead hatches for canvas protection in this enlightening video. By following his expert guidance, boat enthusiasts can ensure their living areas remain secure while allowing unhindered access through the hatches.Step 1: Starting with the Flange
Sven begins by explaining that working on flanges vertically and horizontally is significantly easier than doing so in a flat position. To simplify the process further, he divides the task into two or three steps as suggested by fellow expert “for for.” This approach not only makes it more manageable but also allows for greater precision in crafting each component.Step 2: Applying Glue and Securing
Sven proceeds to apply glue along one edge of the flange, ensuring a secure bond when clamped into place. He emphasizes that this stage is crucial for maintaining the structural integrity of the flange, which in turn safeguards the living area beneath the canvas when hatches are open.Step 3: Allowing Time to Dry
After securely attaching the first portion of the flange, Sven allows ample time for it to dry before moving forward with additional steps. This patience and precision are key aspects of his successful boatbuilding methods.Step 4: Finishing Touches
Once the flange is fully dried, Sven removes the clamps carefully, ensuring no damage occurs during this process. He then moves on to attaching four more pieces onto these main frames, completing two pairs of flanges for the bulkhead hatches.The Final Touches
While two flanges form the primary support structure around the hatches, Sven mentions there are two additional pieces required at each end to ensure comprehensive protection. This attention to detail highlights his commitment to producing a durable and reliable design. “Sailing is about finding your path, whether it’s across an ocean or within yourself.” – Sven Yrvind In conclusion, making flanges around bulkhead hatches may seem complex at first glance, but by following Sven Yrvind’s meticulous process, enthusiasts can achieve professional-level results. Remember that the journey of boatbuilding is as rewarding as reaching your destination; it tests one’s patience and dedication. For those seeking to embark on this adventure or simply gain more insight into marine craftsmanship, Sven’s wisdom is invaluable.Making Flanges Around Bulkhead Hatches for Canvas
Sven Yrvind, a renowned yacht designer and sailor, shares valuable insights on creating flanges around bulkhead hatches for canvas protection in this enlightening video. By following his expert guidance, boat enthusiasts can ensure their living areas remain secure while allowing unhindered access through the hatches.Step 1: Starting with the Flange
Sven begins by explaining that working on flanges vertically and horizontally is significantly easier than doing so in a flat position. To simplify the process further, he divides the task into two or three steps as suggested by fellow expert “for for.” This approach not only makes it more manageable but also allows for greater precision in crafting each component.Step 2: Applying Glue and Securing
Sven proceeds to apply glue along one edge of the flange, ensuring a secure bond when clamped into place. He emphasizes that this stage is crucial for maintaining the structural integrity of the flange, which in turn safeguards the living area beneath the canvas when hatches are open.Step 3: Allowing Time to Dry
After securely attaching the first portion of the flange, Sven allows ample time for it to dry before moving forward with additional steps. This patience and precision are key aspects of his successful boatbuilding methods.Step 4: Finishing Touches
Once the flange is fully dried, Sven removes the clamps carefully, ensuring no damage occurs during this process. He then moves on to attaching four more pieces onto these main frames, completing two pairs of flanges for the bulkhead hatches.The Final Touches
While two flanges form the primary support structure around the hatches, Sven mentions there are two additional pieces required at each end to ensure comprehensive protection. This attention to detail highlights his commitment to producing a durable and reliable design. “Sailing is about finding your path, whether it’s across an ocean or within yourself.” – Sven Yrvind In conclusion, making flanges around bulkhead hatches may seem complex at first glance, but by following Sven Yrvind’s meticulous process, enthusiasts can achieve professional-level results. Remember that the journey of boatbuilding is as rewarding as reaching your destination; it tests one’s patience and dedication. For those seeking to embark on this adventure or simply gain more insight into marine craftsmanship, Sven’s wisdom is invaluable.Sven begins by explaining that working on flanges vertically and horizontally is significantly easier than doing so in a flat position. To simplify the process further, he divides the task into two or three steps as suggested by fellow expert “for for.” This approach not only makes it more manageable but also allows for greater precision in crafting each component.Step 2: Applying Glue and Securing
Sven proceeds to apply glue along one edge of the flange, ensuring a secure bond when clamped into place. He emphasizes that this stage is crucial for maintaining the structural integrity of the flange, which in turn safeguards the living area beneath the canvas when hatches are open.Step 3: Allowing Time to Dry
After securely attaching the first portion of the flange, Sven allows ample time for it to dry before moving forward with additional steps. This patience and precision are key aspects of his successful boatbuilding methods.Step 4: Finishing Touches
Once the flange is fully dried, Sven removes the clamps carefully, ensuring no damage occurs during this process. He then moves on to attaching four more pieces onto these main frames, completing two pairs of flanges for the bulkhead hatches.The Final Touches
While two flanges form the primary support structure around the hatches, Sven mentions there are two additional pieces required at each end to ensure comprehensive protection. This attention to detail highlights his commitment to producing a durable and reliable design. “Sailing is about finding your path, whether it’s across an ocean or within yourself.” – Sven Yrvind In conclusion, making flanges around bulkhead hatches may seem complex at first glance, but by following Sven Yrvind’s meticulous process, enthusiasts can achieve professional-level results. Remember that the journey of boatbuilding is as rewarding as reaching your destination; it tests one’s patience and dedication. For those seeking to embark on this adventure or simply gain more insight into marine craftsmanship, Sven’s wisdom is invaluable.Sven Yrvind, a renowned yacht designer and sailor, shares valuable insights on creating flanges around bulkhead hatches for canvas protection in this enlightening video. By following his expert guidance, boat enthusiasts can ensure their living areas remain secure while allowing unhindered access through the hatches.Step 1: Starting with the Flange
Sven begins by explaining that working on flanges vertically and horizontally is significantly easier than doing so in a flat position. To simplify the process further, he divides the task into two or three steps as suggested by fellow expert “for for.” This approach not only makes it more manageable but also allows for greater precision in crafting each component.Step 2: Applying Glue and Securing
Sven proceeds to apply glue along one edge of the flange, ensuring a secure bond when clamped into place. He emphasizes that this stage is crucial for maintaining the structural integrity of the flange, which in turn safeguards the living area beneath the canvas when hatches are open.Step 3: Allowing Time to Dry
After securely attaching the first portion of the flange, Sven allows ample time for it to dry before moving forward with additional steps. This patience and precision are key aspects of his successful boatbuilding methods.Step 4: Finishing Touches
Once the flange is fully dried, Sven removes the clamps carefully, ensuring no damage occurs during this process. He then moves on to attaching four more pieces onto these main frames, completing two pairs of flanges for the bulkhead hatches.The Final Touches
While two flanges form the primary support structure around the hatches, Sven mentions there are two additional pieces required at each end to ensure comprehensive protection. This attention to detail highlights his commitment to producing a durable and reliable design. “Sailing is about finding your path, whether it’s across an ocean or within yourself.” – Sven Yrvind In conclusion, making flanges around bulkhead hatches may seem complex at first glance, but by following Sven Yrvind’s meticulous process, enthusiasts can achieve professional-level results. Remember that the journey of boatbuilding is as rewarding as reaching your destination; it tests one’s patience and dedication. For those seeking to embark on this adventure or simply gain more insight into marine craftsmanship, Sven’s wisdom is invaluable.Making Flanges Around Bulkhead Hatches for Canvas
Sven Yrvind, a renowned yacht designer and sailor, shares valuable insights on creating flanges around bulkhead hatches for canvas protection in this enlightening video. By following his expert guidance, boat enthusiasts can ensure their living areas remain secure while allowing unhindered access through the hatches.Step 1: Starting with the Flange
Sven begins by explaining that working on flanges vertically and horizontally is significantly easier than doing so in a flat position. To simplify the process further, he divides the task into two or three steps as suggested by fellow expert “for for.” This approach not only makes it more manageable but also allows for greater precision in crafting each component.Step 2: Applying Glue and Securing
Sven proceeds to apply glue along one edge of the flange, ensuring a secure bond when clamped into place. He emphasizes that this stage is crucial for maintaining the structural integrity of the flange, which in turn safeguards the living area beneath the canvas when hatches are open.Step 3: Allowing Time to Dry
After securely attaching the first portion of the flange, Sven allows ample time for it to dry before moving forward with additional steps. This patience and precision are key aspects of his successful boatbuilding methods.Step 4: Finishing Touches
Once the flange is fully dried, Sven removes the clamps carefully, ensuring no damage occurs during this process. He then moves on to attaching four more pieces onto these main frames, completing two pairs of flanges for the bulkhead hatches.The Final Touches
While two flanges form the primary support structure around the hatches, Sven mentions there are two additional pieces required at each end to ensure comprehensive protection. This attention to detail highlights his commitment to producing a durable and reliable design. “Sailing is about finding your path, whether it’s across an ocean or within yourself.” – Sven Yrvind In conclusion, making flanges around bulkhead hatches may seem complex at first glance, but by following Sven Yrvind’s meticulous process, enthusiasts can achieve professional-level results. Remember that the journey of boatbuilding is as rewarding as reaching your destination; it tests one’s patience and dedication. For those seeking to embark on this adventure or simply gain more insight into marine craftsmanship, Sven’s wisdom is invaluable.Once the flange is fully dried, Sven removes the clamps carefully, ensuring no damage occurs during this process. He then moves on to attaching four more pieces onto these main frames, completing two pairs of flanges for the bulkhead hatches.The Final Touches
While two flanges form the primary support structure around the hatches, Sven mentions there are two additional pieces required at each end to ensure comprehensive protection. This attention to detail highlights his commitment to producing a durable and reliable design. “Sailing is about finding your path, whether it’s across an ocean or within yourself.” – Sven Yrvind In conclusion, making flanges around bulkhead hatches may seem complex at first glance, but by following Sven Yrvind’s meticulous process, enthusiasts can achieve professional-level results. Remember that the journey of boatbuilding is as rewarding as reaching your destination; it tests one’s patience and dedication. For those seeking to embark on this adventure or simply gain more insight into marine craftsmanship, Sven’s wisdom is invaluable.Sven begins by explaining that working on flanges vertically and horizontally is significantly easier than doing so in a flat position. To simplify the process further, he divides the task into two or three steps as suggested by fellow expert “for for.” This approach not only makes it more manageable but also allows for greater precision in crafting each component.Step 2: Applying Glue and Securing
Sven proceeds to apply glue along one edge of the flange, ensuring a secure bond when clamped into place. He emphasizes that this stage is crucial for maintaining the structural integrity of the flange, which in turn safeguards the living area beneath the canvas when hatches are open.Step 3: Allowing Time to Dry
After securely attaching the first portion of the flange, Sven allows ample time for it to dry before moving forward with additional steps. This patience and precision are key aspects of his successful boatbuilding methods.Step 4: Finishing Touches
Once the flange is fully dried, Sven removes the clamps carefully, ensuring no damage occurs during this process. He then moves on to attaching four more pieces onto these main frames, completing two pairs of flanges for the bulkhead hatches.The Final Touches
While two flanges form the primary support structure around the hatches, Sven mentions there are two additional pieces required at each end to ensure comprehensive protection. This attention to detail highlights his commitment to producing a durable and reliable design. “Sailing is about finding your path, whether it’s across an ocean or within yourself.” – Sven Yrvind In conclusion, making flanges around bulkhead hatches may seem complex at first glance, but by following Sven Yrvind’s meticulous process, enthusiasts can achieve professional-level results. Remember that the journey of boatbuilding is as rewarding as reaching your destination; it tests one’s patience and dedication. For those seeking to embark on this adventure or simply gain more insight into marine craftsmanship, Sven’s wisdom is invaluable.Sven Yrvind, a renowned yacht designer and sailor, shares valuable insights on creating flanges around bulkhead hatches for canvas protection in this enlightening video. By following his expert guidance, boat enthusiasts can ensure their living areas remain secure while allowing unhindered access through the hatches.Step 1: Starting with the Flange
Sven begins by explaining that working on flanges vertically and horizontally is significantly easier than doing so in a flat position. To simplify the process further, he divides the task into two or three steps as suggested by fellow expert “for for.” This approach not only makes it more manageable but also allows for greater precision in crafting each component.Step 2: Applying Glue and Securing
Sven proceeds to apply glue along one edge of the flange, ensuring a secure bond when clamped into place. He emphasizes that this stage is crucial for maintaining the structural integrity of the flange, which in turn safeguards the living area beneath the canvas when hatches are open.Step 3: Allowing Time to Dry
After securely attaching the first portion of the flange, Sven allows ample time for it to dry before moving forward with additional steps. This patience and precision are key aspects of his successful boatbuilding methods.Step 4: Finishing Touches
Once the flange is fully dried, Sven removes the clamps carefully, ensuring no damage occurs during this process. He then moves on to attaching four more pieces onto these main frames, completing two pairs of flanges for the bulkhead hatches.The Final Touches
While two flanges form the primary support structure around the hatches, Sven mentions there are two additional pieces required at each end to ensure comprehensive protection. This attention to detail highlights his commitment to producing a durable and reliable design. “Sailing is about finding your path, whether it’s across an ocean or within yourself.” – Sven Yrvind In conclusion, making flanges around bulkhead hatches may seem complex at first glance, but by following Sven Yrvind’s meticulous process, enthusiasts can achieve professional-level results. Remember that the journey of boatbuilding is as rewarding as reaching your destination; it tests one’s patience and dedication. For those seeking to embark on this adventure or simply gain more insight into marine craftsmanship, Sven’s wisdom is invaluable.Making Flanges Around Bulkhead Hatches for Canvas
Sven Yrvind, a renowned yacht designer and sailor, shares valuable insights on creating flanges around bulkhead hatches for canvas protection in this enlightening video. By following his expert guidance, boat enthusiasts can ensure their living areas remain secure while allowing unhindered access through the hatches.Step 1: Starting with the Flange
Sven begins by explaining that working on flanges vertically and horizontally is significantly easier than doing so in a flat position. To simplify the process further, he divides the task into two or three steps as suggested by fellow expert “for for.” This approach not only makes it more manageable but also allows for greater precision in crafting each component.Step 2: Applying Glue and Securing
Sven proceeds to apply glue along one edge of the flange, ensuring a secure bond when clamped into place. He emphasizes that this stage is crucial for maintaining the structural integrity of the flange, which in turn safeguards the living area beneath the canvas when hatches are open.Step 3: Allowing Time to Dry
After securely attaching the first portion of the flange, Sven allows ample time for it to dry before moving forward with additional steps. This patience and precision are key aspects of his successful boatbuilding methods.Step 4: Finishing Touches
Once the flange is fully dried, Sven removes the clamps carefully, ensuring no damage occurs during this process. He then moves on to attaching four more pieces onto these main frames, completing two pairs of flanges for the bulkhead hatches.The Final Touches
While two flanges form the primary support structure around the hatches, Sven mentions there are two additional pieces required at each end to ensure comprehensive protection. This attention to detail highlights his commitment to producing a durable and reliable design. “Sailing is about finding your path, whether it’s across an ocean or within yourself.” – Sven Yrvind In conclusion, making flanges around bulkhead hatches may seem complex at first glance, but by following Sven Yrvind’s meticulous process, enthusiasts can achieve professional-level results. Remember that the journey of boatbuilding is as rewarding as reaching your destination; it tests one’s patience and dedication. For those seeking to embark on this adventure or simply gain more insight into marine craftsmanship, Sven’s wisdom is invaluable.After securely attaching the first portion of the flange, Sven allows ample time for it to dry before moving forward with additional steps. This patience and precision are key aspects of his successful boatbuilding methods.Step 4: Finishing Touches
Once the flange is fully dried, Sven removes the clamps carefully, ensuring no damage occurs during this process. He then moves on to attaching four more pieces onto these main frames, completing two pairs of flanges for the bulkhead hatches.The Final Touches
While two flanges form the primary support structure around the hatches, Sven mentions there are two additional pieces required at each end to ensure comprehensive protection. This attention to detail highlights his commitment to producing a durable and reliable design. “Sailing is about finding your path, whether it’s across an ocean or within yourself.” – Sven Yrvind In conclusion, making flanges around bulkhead hatches may seem complex at first glance, but by following Sven Yrvind’s meticulous process, enthusiasts can achieve professional-level results. Remember that the journey of boatbuilding is as rewarding as reaching your destination; it tests one’s patience and dedication. For those seeking to embark on this adventure or simply gain more insight into marine craftsmanship, Sven’s wisdom is invaluable.Sven begins by explaining that working on flanges vertically and horizontally is significantly easier than doing so in a flat position. To simplify the process further, he divides the task into two or three steps as suggested by fellow expert “for for.” This approach not only makes it more manageable but also allows for greater precision in crafting each component.Step 2: Applying Glue and Securing
Sven proceeds to apply glue along one edge of the flange, ensuring a secure bond when clamped into place. He emphasizes that this stage is crucial for maintaining the structural integrity of the flange, which in turn safeguards the living area beneath the canvas when hatches are open.Step 3: Allowing Time to Dry
After securely attaching the first portion of the flange, Sven allows ample time for it to dry before moving forward with additional steps. This patience and precision are key aspects of his successful boatbuilding methods.Step 4: Finishing Touches
Once the flange is fully dried, Sven removes the clamps carefully, ensuring no damage occurs during this process. He then moves on to attaching four more pieces onto these main frames, completing two pairs of flanges for the bulkhead hatches.The Final Touches
While two flanges form the primary support structure around the hatches, Sven mentions there are two additional pieces required at each end to ensure comprehensive protection. This attention to detail highlights his commitment to producing a durable and reliable design. “Sailing is about finding your path, whether it’s across an ocean or within yourself.” – Sven Yrvind In conclusion, making flanges around bulkhead hatches may seem complex at first glance, but by following Sven Yrvind’s meticulous process, enthusiasts can achieve professional-level results. Remember that the journey of boatbuilding is as rewarding as reaching your destination; it tests one’s patience and dedication. For those seeking to embark on this adventure or simply gain more insight into marine craftsmanship, Sven’s wisdom is invaluable.Sven Yrvind, a renowned yacht designer and sailor, shares valuable insights on creating flanges around bulkhead hatches for canvas protection in this enlightening video. By following his expert guidance, boat enthusiasts can ensure their living areas remain secure while allowing unhindered access through the hatches.Step 1: Starting with the Flange
Sven begins by explaining that working on flanges vertically and horizontally is significantly easier than doing so in a flat position. To simplify the process further, he divides the task into two or three steps as suggested by fellow expert “for for.” This approach not only makes it more manageable but also allows for greater precision in crafting each component.Step 2: Applying Glue and Securing
Sven proceeds to apply glue along one edge of the flange, ensuring a secure bond when clamped into place. He emphasizes that this stage is crucial for maintaining the structural integrity of the flange, which in turn safeguards the living area beneath the canvas when hatches are open.Step 3: Allowing Time to Dry
After securely attaching the first portion of the flange, Sven allows ample time for it to dry before moving forward with additional steps. This patience and precision are key aspects of his successful boatbuilding methods.Step 4: Finishing Touches
Once the flange is fully dried, Sven removes the clamps carefully, ensuring no damage occurs during this process. He then moves on to attaching four more pieces onto these main frames, completing two pairs of flanges for the bulkhead hatches.The Final Touches
While two flanges form the primary support structure around the hatches, Sven mentions there are two additional pieces required at each end to ensure comprehensive protection. This attention to detail highlights his commitment to producing a durable and reliable design. “Sailing is about finding your path, whether it’s across an ocean or within yourself.” – Sven Yrvind In conclusion, making flanges around bulkhead hatches may seem complex at first glance, but by following Sven Yrvind’s meticulous process, enthusiasts can achieve professional-level results. Remember that the journey of boatbuilding is as rewarding as reaching your destination; it tests one’s patience and dedication. For those seeking to embark on this adventure or simply gain more insight into marine craftsmanship, Sven’s wisdom is invaluable.Making Flanges Around Bulkhead Hatches for Canvas
Sven Yrvind, a renowned yacht designer and sailor, shares valuable insights on creating flanges around bulkhead hatches for canvas protection in this enlightening video. By following his expert guidance, boat enthusiasts can ensure their living areas remain secure while allowing unhindered access through the hatches.Step 1: Starting with the Flange
Sven begins by explaining that working on flanges vertically and horizontally is significantly easier than doing so in a flat position. To simplify the process further, he divides the task into two or three steps as suggested by fellow expert “for for.” This approach not only makes it more manageable but also allows for greater precision in crafting each component.Step 2: Applying Glue and Securing
Sven proceeds to apply glue along one edge of the flange, ensuring a secure bond when clamped into place. He emphasizes that this stage is crucial for maintaining the structural integrity of the flange, which in turn safeguards the living area beneath the canvas when hatches are open.Step 3: Allowing Time to Dry
After securely attaching the first portion of the flange, Sven allows ample time for it to dry before moving forward with additional steps. This patience and precision are key aspects of his successful boatbuilding methods.Step 4: Finishing Touches
Once the flange is fully dried, Sven removes the clamps carefully, ensuring no damage occurs during this process. He then moves on to attaching four more pieces onto these main frames, completing two pairs of flanges for the bulkhead hatches.The Final Touches
While two flanges form the primary support structure around the hatches, Sven mentions there are two additional pieces required at each end to ensure comprehensive protection. This attention to detail highlights his commitment to producing a durable and reliable design. “Sailing is about finding your path, whether it’s across an ocean or within yourself.” – Sven Yrvind In conclusion, making flanges around bulkhead hatches may seem complex at first glance, but by following Sven Yrvind’s meticulous process, enthusiasts can achieve professional-level results. Remember that the journey of boatbuilding is as rewarding as reaching your destination; it tests one’s patience and dedication. For those seeking to embark on this adventure or simply gain more insight into marine craftsmanship, Sven’s wisdom is invaluable.Sven proceeds to apply glue along one edge of the flange, ensuring a secure bond when clamped into place. He emphasizes that this stage is crucial for maintaining the structural integrity of the flange, which in turn safeguards the living area beneath the canvas when hatches are open.Step 3: Allowing Time to Dry
After securely attaching the first portion of the flange, Sven allows ample time for it to dry before moving forward with additional steps. This patience and precision are key aspects of his successful boatbuilding methods.Step 4: Finishing Touches
Once the flange is fully dried, Sven removes the clamps carefully, ensuring no damage occurs during this process. He then moves on to attaching four more pieces onto these main frames, completing two pairs of flanges for the bulkhead hatches.The Final Touches
While two flanges form the primary support structure around the hatches, Sven mentions there are two additional pieces required at each end to ensure comprehensive protection. This attention to detail highlights his commitment to producing a durable and reliable design. “Sailing is about finding your path, whether it’s across an ocean or within yourself.” – Sven Yrvind In conclusion, making flanges around bulkhead hatches may seem complex at first glance, but by following Sven Yrvind’s meticulous process, enthusiasts can achieve professional-level results. Remember that the journey of boatbuilding is as rewarding as reaching your destination; it tests one’s patience and dedication. For those seeking to embark on this adventure or simply gain more insight into marine craftsmanship, Sven’s wisdom is invaluable.Sven begins by explaining that working on flanges vertically and horizontally is significantly easier than doing so in a flat position. To simplify the process further, he divides the task into two or three steps as suggested by fellow expert “for for.” This approach not only makes it more manageable but also allows for greater precision in crafting each component.Step 2: Applying Glue and Securing
Sven proceeds to apply glue along one edge of the flange, ensuring a secure bond when clamped into place. He emphasizes that this stage is crucial for maintaining the structural integrity of the flange, which in turn safeguards the living area beneath the canvas when hatches are open.Step 3: Allowing Time to Dry
After securely attaching the first portion of the flange, Sven allows ample time for it to dry before moving forward with additional steps. This patience and precision are key aspects of his successful boatbuilding methods.Step 4: Finishing Touches
Once the flange is fully dried, Sven removes the clamps carefully, ensuring no damage occurs during this process. He then moves on to attaching four more pieces onto these main frames, completing two pairs of flanges for the bulkhead hatches.The Final Touches
While two flanges form the primary support structure around the hatches, Sven mentions there are two additional pieces required at each end to ensure comprehensive protection. This attention to detail highlights his commitment to producing a durable and reliable design. “Sailing is about finding your path, whether it’s across an ocean or within yourself.” – Sven Yrvind In conclusion, making flanges around bulkhead hatches may seem complex at first glance, but by following Sven Yrvind’s meticulous process, enthusiasts can achieve professional-level results. Remember that the journey of boatbuilding is as rewarding as reaching your destination; it tests one’s patience and dedication. For those seeking to embark on this adventure or simply gain more insight into marine craftsmanship, Sven’s wisdom is invaluable.Sven Yrvind, a renowned yacht designer and sailor, shares valuable insights on creating flanges around bulkhead hatches for canvas protection in this enlightening video. By following his expert guidance, boat enthusiasts can ensure their living areas remain secure while allowing unhindered access through the hatches.Step 1: Starting with the Flange
Sven begins by explaining that working on flanges vertically and horizontally is significantly easier than doing so in a flat position. To simplify the process further, he divides the task into two or three steps as suggested by fellow expert “for for.” This approach not only makes it more manageable but also allows for greater precision in crafting each component.Step 2: Applying Glue and Securing
Sven proceeds to apply glue along one edge of the flange, ensuring a secure bond when clamped into place. He emphasizes that this stage is crucial for maintaining the structural integrity of the flange, which in turn safeguards the living area beneath the canvas when hatches are open.Step 3: Allowing Time to Dry
After securely attaching the first portion of the flange, Sven allows ample time for it to dry before moving forward with additional steps. This patience and precision are key aspects of his successful boatbuilding methods.Step 4: Finishing Touches
Once the flange is fully dried, Sven removes the clamps carefully, ensuring no damage occurs during this process. He then moves on to attaching four more pieces onto these main frames, completing two pairs of flanges for the bulkhead hatches.The Final Touches
While two flanges form the primary support structure around the hatches, Sven mentions there are two additional pieces required at each end to ensure comprehensive protection. This attention to detail highlights his commitment to producing a durable and reliable design. “Sailing is about finding your path, whether it’s across an ocean or within yourself.” – Sven Yrvind In conclusion, making flanges around bulkhead hatches may seem complex at first glance, but by following Sven Yrvind’s meticulous process, enthusiasts can achieve professional-level results. Remember that the journey of boatbuilding is as rewarding as reaching your destination; it tests one’s patience and dedication. For those seeking to embark on this adventure or simply gain more insight into marine craftsmanship, Sven’s wisdom is invaluable.Making Flanges Around Bulkhead Hatches for Canvas
Sven Yrvind, a renowned yacht designer and sailor, shares valuable insights on creating flanges around bulkhead hatches for canvas protection in this enlightening video. By following his expert guidance, boat enthusiasts can ensure their living areas remain secure while allowing unhindered access through the hatches.Step 1: Starting with the Flange
Sven begins by explaining that working on flanges vertically and horizontally is significantly easier than doing so in a flat position. To simplify the process further, he divides the task into two or three steps as suggested by fellow expert “for for.” This approach not only makes it more manageable but also allows for greater precision in crafting each component.Step 2: Applying Glue and Securing
Sven proceeds to apply glue along one edge of the flange, ensuring a secure bond when clamped into place. He emphasizes that this stage is crucial for maintaining the structural integrity of the flange, which in turn safeguards the living area beneath the canvas when hatches are open.Step 3: Allowing Time to Dry
After securely attaching the first portion of the flange, Sven allows ample time for it to dry before moving forward with additional steps. This patience and precision are key aspects of his successful boatbuilding methods.Step 4: Finishing Touches
Once the flange is fully dried, Sven removes the clamps carefully, ensuring no damage occurs during this process. He then moves on to attaching four more pieces onto these main frames, completing two pairs of flanges for the bulkhead hatches.The Final Touches
While two flanges form the primary support structure around the hatches, Sven mentions there are two additional pieces required at each end to ensure comprehensive protection. This attention to detail highlights his commitment to producing a durable and reliable design. “Sailing is about finding your path, whether it’s across an ocean or within yourself.” – Sven Yrvind In conclusion, making flanges around bulkhead hatches may seem complex at first glance, but by following Sven Yrvind’s meticulous process, enthusiasts can achieve professional-level results. Remember that the journey of boatbuilding is as rewarding as reaching your destination; it tests one’s patience and dedication. For those seeking to embark on this adventure or simply gain more insight into marine craftsmanship, Sven’s wisdom is invaluable.Once the flange is fully dried, Sven removes the clamps carefully, ensuring no damage occurs during this process. He then moves on to attaching four more pieces onto these main frames, completing two pairs of flanges for the bulkhead hatches.The Final Touches
While two flanges form the primary support structure around the hatches, Sven mentions there are two additional pieces required at each end to ensure comprehensive protection. This attention to detail highlights his commitment to producing a durable and reliable design. “Sailing is about finding your path, whether it’s across an ocean or within yourself.” – Sven Yrvind In conclusion, making flanges around bulkhead hatches may seem complex at first glance, but by following Sven Yrvind’s meticulous process, enthusiasts can achieve professional-level results. Remember that the journey of boatbuilding is as rewarding as reaching your destination; it tests one’s patience and dedication. For those seeking to embark on this adventure or simply gain more insight into marine craftsmanship, Sven’s wisdom is invaluable.Sven proceeds to apply glue along one edge of the flange, ensuring a secure bond when clamped into place. He emphasizes that this stage is crucial for maintaining the structural integrity of the flange, which in turn safeguards the living area beneath the canvas when hatches are open.Step 3: Allowing Time to Dry
After securely attaching the first portion of the flange, Sven allows ample time for it to dry before moving forward with additional steps. This patience and precision are key aspects of his successful boatbuilding methods.Step 4: Finishing Touches
Once the flange is fully dried, Sven removes the clamps carefully, ensuring no damage occurs during this process. He then moves on to attaching four more pieces onto these main frames, completing two pairs of flanges for the bulkhead hatches.The Final Touches
While two flanges form the primary support structure around the hatches, Sven mentions there are two additional pieces required at each end to ensure comprehensive protection. This attention to detail highlights his commitment to producing a durable and reliable design. “Sailing is about finding your path, whether it’s across an ocean or within yourself.” – Sven Yrvind In conclusion, making flanges around bulkhead hatches may seem complex at first glance, but by following Sven Yrvind’s meticulous process, enthusiasts can achieve professional-level results. Remember that the journey of boatbuilding is as rewarding as reaching your destination; it tests one’s patience and dedication. For those seeking to embark on this adventure or simply gain more insight into marine craftsmanship, Sven’s wisdom is invaluable.Sven begins by explaining that working on flanges vertically and horizontally is significantly easier than doing so in a flat position. To simplify the process further, he divides the task into two or three steps as suggested by fellow expert “for for.” This approach not only makes it more manageable but also allows for greater precision in crafting each component.Step 2: Applying Glue and Securing
Sven proceeds to apply glue along one edge of the flange, ensuring a secure bond when clamped into place. He emphasizes that this stage is crucial for maintaining the structural integrity of the flange, which in turn safeguards the living area beneath the canvas when hatches are open.Step 3: Allowing Time to Dry
After securely attaching the first portion of the flange, Sven allows ample time for it to dry before moving forward with additional steps. This patience and precision are key aspects of his successful boatbuilding methods.Step 4: Finishing Touches
Once the flange is fully dried, Sven removes the clamps carefully, ensuring no damage occurs during this process. He then moves on to attaching four more pieces onto these main frames, completing two pairs of flanges for the bulkhead hatches.The Final Touches
While two flanges form the primary support structure around the hatches, Sven mentions there are two additional pieces required at each end to ensure comprehensive protection. This attention to detail highlights his commitment to producing a durable and reliable design. “Sailing is about finding your path, whether it’s across an ocean or within yourself.” – Sven Yrvind In conclusion, making flanges around bulkhead hatches may seem complex at first glance, but by following Sven Yrvind’s meticulous process, enthusiasts can achieve professional-level results. Remember that the journey of boatbuilding is as rewarding as reaching your destination; it tests one’s patience and dedication. For those seeking to embark on this adventure or simply gain more insight into marine craftsmanship, Sven’s wisdom is invaluable.Sven Yrvind, a renowned yacht designer and sailor, shares valuable insights on creating flanges around bulkhead hatches for canvas protection in this enlightening video. By following his expert guidance, boat enthusiasts can ensure their living areas remain secure while allowing unhindered access through the hatches.Step 1: Starting with the Flange
Sven begins by explaining that working on flanges vertically and horizontally is significantly easier than doing so in a flat position. To simplify the process further, he divides the task into two or three steps as suggested by fellow expert “for for.” This approach not only makes it more manageable but also allows for greater precision in crafting each component.Step 2: Applying Glue and Securing
Sven proceeds to apply glue along one edge of the flange, ensuring a secure bond when clamped into place. He emphasizes that this stage is crucial for maintaining the structural integrity of the flange, which in turn safeguards the living area beneath the canvas when hatches are open.Step 3: Allowing Time to Dry
After securely attaching the first portion of the flange, Sven allows ample time for it to dry before moving forward with additional steps. This patience and precision are key aspects of his successful boatbuilding methods.Step 4: Finishing Touches
Once the flange is fully dried, Sven removes the clamps carefully, ensuring no damage occurs during this process. He then moves on to attaching four more pieces onto these main frames, completing two pairs of flanges for the bulkhead hatches.The Final Touches
While two flanges form the primary support structure around the hatches, Sven mentions there are two additional pieces required at each end to ensure comprehensive protection. This attention to detail highlights his commitment to producing a durable and reliable design. “Sailing is about finding your path, whether it’s across an ocean or within yourself.” – Sven Yrvind In conclusion, making flanges around bulkhead hatches may seem complex at first glance, but by following Sven Yrvind’s meticulous process, enthusiasts can achieve professional-level results. Remember that the journey of boatbuilding is as rewarding as reaching your destination; it tests one’s patience and dedication. For those seeking to embark on this adventure or simply gain more insight into marine craftsmanship, Sven’s wisdom is invaluable.Making Flanges Around Bulkhead Hatches for Canvas
Sven Yrvind, a renowned yacht designer and sailor, shares valuable insights on creating flanges around bulkhead hatches for canvas protection in this enlightening video. By following his expert guidance, boat enthusiasts can ensure their living areas remain secure while allowing unhindered access through the hatches.Step 1: Starting with the Flange
Sven begins by explaining that working on flanges vertically and horizontally is significantly easier than doing so in a flat position. To simplify the process further, he divides the task into two or three steps as suggested by fellow expert “for for.” This approach not only makes it more manageable but also allows for greater precision in crafting each component.Step 2: Applying Glue and Securing
Sven proceeds to apply glue along one edge of the flange, ensuring a secure bond when clamped into place. He emphasizes that this stage is crucial for maintaining the structural integrity of the flange, which in turn safeguards the living area beneath the canvas when hatches are open.Step 3: Allowing Time to Dry
After securely attaching the first portion of the flange, Sven allows ample time for it to dry before moving forward with additional steps. This patience and precision are key aspects of his successful boatbuilding methods.Step 4: Finishing Touches
Once the flange is fully dried, Sven removes the clamps carefully, ensuring no damage occurs during this process. He then moves on to attaching four more pieces onto these main frames, completing two pairs of flanges for the bulkhead hatches.The Final Touches
While two flanges form the primary support structure around the hatches, Sven mentions there are two additional pieces required at each end to ensure comprehensive protection. This attention to detail highlights his commitment to producing a durable and reliable design. “Sailing is about finding your path, whether it’s across an ocean or within yourself.” – Sven Yrvind In conclusion, making flanges around bulkhead hatches may seem complex at first glance, but by following Sven Yrvind’s meticulous process, enthusiasts can achieve professional-level results. Remember that the journey of boatbuilding is as rewarding as reaching your destination; it tests one’s patience and dedication. For those seeking to embark on this adventure or simply gain more insight into marine craftsmanship, Sven’s wisdom is invaluable.After securely attaching the first portion of the flange, Sven allows ample time for it to dry before moving forward with additional steps. This patience and precision are key aspects of his successful boatbuilding methods.Step 4: Finishing Touches
Once the flange is fully dried, Sven removes the clamps carefully, ensuring no damage occurs during this process. He then moves on to attaching four more pieces onto these main frames, completing two pairs of flanges for the bulkhead hatches.The Final Touches
While two flanges form the primary support structure around the hatches, Sven mentions there are two additional pieces required at each end to ensure comprehensive protection. This attention to detail highlights his commitment to producing a durable and reliable design. “Sailing is about finding your path, whether it’s across an ocean or within yourself.” – Sven Yrvind In conclusion, making flanges around bulkhead hatches may seem complex at first glance, but by following Sven Yrvind’s meticulous process, enthusiasts can achieve professional-level results. Remember that the journey of boatbuilding is as rewarding as reaching your destination; it tests one’s patience and dedication. For those seeking to embark on this adventure or simply gain more insight into marine craftsmanship, Sven’s wisdom is invaluable.Sven proceeds to apply glue along one edge of the flange, ensuring a secure bond when clamped into place. He emphasizes that this stage is crucial for maintaining the structural integrity of the flange, which in turn safeguards the living area beneath the canvas when hatches are open.Step 3: Allowing Time to Dry
After securely attaching the first portion of the flange, Sven allows ample time for it to dry before moving forward with additional steps. This patience and precision are key aspects of his successful boatbuilding methods.Step 4: Finishing Touches
Once the flange is fully dried, Sven removes the clamps carefully, ensuring no damage occurs during this process. He then moves on to attaching four more pieces onto these main frames, completing two pairs of flanges for the bulkhead hatches.The Final Touches
While two flanges form the primary support structure around the hatches, Sven mentions there are two additional pieces required at each end to ensure comprehensive protection. This attention to detail highlights his commitment to producing a durable and reliable design. “Sailing is about finding your path, whether it’s across an ocean or within yourself.” – Sven Yrvind In conclusion, making flanges around bulkhead hatches may seem complex at first glance, but by following Sven Yrvind’s meticulous process, enthusiasts can achieve professional-level results. Remember that the journey of boatbuilding is as rewarding as reaching your destination; it tests one’s patience and dedication. For those seeking to embark on this adventure or simply gain more insight into marine craftsmanship, Sven’s wisdom is invaluable.Sven begins by explaining that working on flanges vertically and horizontally is significantly easier than doing so in a flat position. To simplify the process further, he divides the task into two or three steps as suggested by fellow expert “for for.” This approach not only makes it more manageable but also allows for greater precision in crafting each component.Step 2: Applying Glue and Securing
Sven proceeds to apply glue along one edge of the flange, ensuring a secure bond when clamped into place. He emphasizes that this stage is crucial for maintaining the structural integrity of the flange, which in turn safeguards the living area beneath the canvas when hatches are open.Step 3: Allowing Time to Dry
After securely attaching the first portion of the flange, Sven allows ample time for it to dry before moving forward with additional steps. This patience and precision are key aspects of his successful boatbuilding methods.Step 4: Finishing Touches
Once the flange is fully dried, Sven removes the clamps carefully, ensuring no damage occurs during this process. He then moves on to attaching four more pieces onto these main frames, completing two pairs of flanges for the bulkhead hatches.The Final Touches
While two flanges form the primary support structure around the hatches, Sven mentions there are two additional pieces required at each end to ensure comprehensive protection. This attention to detail highlights his commitment to producing a durable and reliable design. “Sailing is about finding your path, whether it’s across an ocean or within yourself.” – Sven Yrvind In conclusion, making flanges around bulkhead hatches may seem complex at first glance, but by following Sven Yrvind’s meticulous process, enthusiasts can achieve professional-level results. Remember that the journey of boatbuilding is as rewarding as reaching your destination; it tests one’s patience and dedication. For those seeking to embark on this adventure or simply gain more insight into marine craftsmanship, Sven’s wisdom is invaluable.Sven Yrvind, a renowned yacht designer and sailor, shares valuable insights on creating flanges around bulkhead hatches for canvas protection in this enlightening video. By following his expert guidance, boat enthusiasts can ensure their living areas remain secure while allowing unhindered access through the hatches.Step 1: Starting with the Flange
Sven begins by explaining that working on flanges vertically and horizontally is significantly easier than doing so in a flat position. To simplify the process further, he divides the task into two or three steps as suggested by fellow expert “for for.” This approach not only makes it more manageable but also allows for greater precision in crafting each component.Step 2: Applying Glue and Securing
Sven proceeds to apply glue along one edge of the flange, ensuring a secure bond when clamped into place. He emphasizes that this stage is crucial for maintaining the structural integrity of the flange, which in turn safeguards the living area beneath the canvas when hatches are open.Step 3: Allowing Time to Dry
After securely attaching the first portion of the flange, Sven allows ample time for it to dry before moving forward with additional steps. This patience and precision are key aspects of his successful boatbuilding methods.Step 4: Finishing Touches
Once the flange is fully dried, Sven removes the clamps carefully, ensuring no damage occurs during this process. He then moves on to attaching four more pieces onto these main frames, completing two pairs of flanges for the bulkhead hatches.The Final Touches
While two flanges form the primary support structure around the hatches, Sven mentions there are two additional pieces required at each end to ensure comprehensive protection. This attention to detail highlights his commitment to producing a durable and reliable design. “Sailing is about finding your path, whether it’s across an ocean or within yourself.” – Sven Yrvind In conclusion, making flanges around bulkhead hatches may seem complex at first glance, but by following Sven Yrvind’s meticulous process, enthusiasts can achieve professional-level results. Remember that the journey of boatbuilding is as rewarding as reaching your destination; it tests one’s patience and dedication. For those seeking to embark on this adventure or simply gain more insight into marine craftsmanship, Sven’s wisdom is invaluable.Making Flanges Around Bulkhead Hatches for Canvas
Sven Yrvind, a renowned yacht designer and sailor, shares valuable insights on creating flanges around bulkhead hatches for canvas protection in this enlightening video. By following his expert guidance, boat enthusiasts can ensure their living areas remain secure while allowing unhindered access through the hatches.Step 1: Starting with the Flange
Sven begins by explaining that working on flanges vertically and horizontally is significantly easier than doing so in a flat position. To simplify the process further, he divides the task into two or three steps as suggested by fellow expert “for for.” This approach not only makes it more manageable but also allows for greater precision in crafting each component.Step 2: Applying Glue and Securing
Sven proceeds to apply glue along one edge of the flange, ensuring a secure bond when clamped into place. He emphasizes that this stage is crucial for maintaining the structural integrity of the flange, which in turn safeguards the living area beneath the canvas when hatches are open.Step 3: Allowing Time to Dry
After securely attaching the first portion of the flange, Sven allows ample time for it to dry before moving forward with additional steps. This patience and precision are key aspects of his successful boatbuilding methods.Step 4: Finishing Touches
Once the flange is fully dried, Sven removes the clamps carefully, ensuring no damage occurs during this process. He then moves on to attaching four more pieces onto these main frames, completing two pairs of flanges for the bulkhead hatches.The Final Touches
While two flanges form the primary support structure around the hatches, Sven mentions there are two additional pieces required at each end to ensure comprehensive protection. This attention to detail highlights his commitment to producing a durable and reliable design. “Sailing is about finding your path, whether it’s across an ocean or within yourself.” – Sven Yrvind In conclusion, making flanges around bulkhead hatches may seem complex at first glance, but by following Sven Yrvind’s meticulous process, enthusiasts can achieve professional-level results. Remember that the journey of boatbuilding is as rewarding as reaching your destination; it tests one’s patience and dedication. For those seeking to embark on this adventure or simply gain more insight into marine craftsmanship, Sven’s wisdom is invaluable.Once the flange is fully dried, Sven removes the clamps carefully, ensuring no damage occurs during this process. He then moves on to attaching four more pieces onto these main frames, completing two pairs of flanges for the bulkhead hatches.The Final Touches
While two flanges form the primary support structure around the hatches, Sven mentions there are two additional pieces required at each end to ensure comprehensive protection. This attention to detail highlights his commitment to producing a durable and reliable design. “Sailing is about finding your path, whether it’s across an ocean or within yourself.” – Sven Yrvind In conclusion, making flanges around bulkhead hatches may seem complex at first glance, but by following Sven Yrvind’s meticulous process, enthusiasts can achieve professional-level results. Remember that the journey of boatbuilding is as rewarding as reaching your destination; it tests one’s patience and dedication. For those seeking to embark on this adventure or simply gain more insight into marine craftsmanship, Sven’s wisdom is invaluable.After securely attaching the first portion of the flange, Sven allows ample time for it to dry before moving forward with additional steps. This patience and precision are key aspects of his successful boatbuilding methods.Step 4: Finishing Touches
Once the flange is fully dried, Sven removes the clamps carefully, ensuring no damage occurs during this process. He then moves on to attaching four more pieces onto these main frames, completing two pairs of flanges for the bulkhead hatches.The Final Touches
While two flanges form the primary support structure around the hatches, Sven mentions there are two additional pieces required at each end to ensure comprehensive protection. This attention to detail highlights his commitment to producing a durable and reliable design. “Sailing is about finding your path, whether it’s across an ocean or within yourself.” – Sven Yrvind In conclusion, making flanges around bulkhead hatches may seem complex at first glance, but by following Sven Yrvind’s meticulous process, enthusiasts can achieve professional-level results. Remember that the journey of boatbuilding is as rewarding as reaching your destination; it tests one’s patience and dedication. For those seeking to embark on this adventure or simply gain more insight into marine craftsmanship, Sven’s wisdom is invaluable.Sven proceeds to apply glue along one edge of the flange, ensuring a secure bond when clamped into place. He emphasizes that this stage is crucial for maintaining the structural integrity of the flange, which in turn safeguards the living area beneath the canvas when hatches are open.Step 3: Allowing Time to Dry
After securely attaching the first portion of the flange, Sven allows ample time for it to dry before moving forward with additional steps. This patience and precision are key aspects of his successful boatbuilding methods.Step 4: Finishing Touches
Once the flange is fully dried, Sven removes the clamps carefully, ensuring no damage occurs during this process. He then moves on to attaching four more pieces onto these main frames, completing two pairs of flanges for the bulkhead hatches.The Final Touches
While two flanges form the primary support structure around the hatches, Sven mentions there are two additional pieces required at each end to ensure comprehensive protection. This attention to detail highlights his commitment to producing a durable and reliable design. “Sailing is about finding your path, whether it’s across an ocean or within yourself.” – Sven Yrvind In conclusion, making flanges around bulkhead hatches may seem complex at first glance, but by following Sven Yrvind’s meticulous process, enthusiasts can achieve professional-level results. Remember that the journey of boatbuilding is as rewarding as reaching your destination; it tests one’s patience and dedication. For those seeking to embark on this adventure or simply gain more insight into marine craftsmanship, Sven’s wisdom is invaluable.Sven begins by explaining that working on flanges vertically and horizontally is significantly easier than doing so in a flat position. To simplify the process further, he divides the task into two or three steps as suggested by fellow expert “for for.” This approach not only makes it more manageable but also allows for greater precision in crafting each component.Step 2: Applying Glue and Securing
Sven proceeds to apply glue along one edge of the flange, ensuring a secure bond when clamped into place. He emphasizes that this stage is crucial for maintaining the structural integrity of the flange, which in turn safeguards the living area beneath the canvas when hatches are open.Step 3: Allowing Time to Dry
After securely attaching the first portion of the flange, Sven allows ample time for it to dry before moving forward with additional steps. This patience and precision are key aspects of his successful boatbuilding methods.Step 4: Finishing Touches
Once the flange is fully dried, Sven removes the clamps carefully, ensuring no damage occurs during this process. He then moves on to attaching four more pieces onto these main frames, completing two pairs of flanges for the bulkhead hatches.The Final Touches
While two flanges form the primary support structure around the hatches, Sven mentions there are two additional pieces required at each end to ensure comprehensive protection. This attention to detail highlights his commitment to producing a durable and reliable design. “Sailing is about finding your path, whether it’s across an ocean or within yourself.” – Sven Yrvind In conclusion, making flanges around bulkhead hatches may seem complex at first glance, but by following Sven Yrvind’s meticulous process, enthusiasts can achieve professional-level results. Remember that the journey of boatbuilding is as rewarding as reaching your destination; it tests one’s patience and dedication. For those seeking to embark on this adventure or simply gain more insight into marine craftsmanship, Sven’s wisdom is invaluable.Sven Yrvind, a renowned yacht designer and sailor, shares valuable insights on creating flanges around bulkhead hatches for canvas protection in this enlightening video. By following his expert guidance, boat enthusiasts can ensure their living areas remain secure while allowing unhindered access through the hatches.Step 1: Starting with the Flange
Sven begins by explaining that working on flanges vertically and horizontally is significantly easier than doing so in a flat position. To simplify the process further, he divides the task into two or three steps as suggested by fellow expert “for for.” This approach not only makes it more manageable but also allows for greater precision in crafting each component.Step 2: Applying Glue and Securing
Sven proceeds to apply glue along one edge of the flange, ensuring a secure bond when clamped into place. He emphasizes that this stage is crucial for maintaining the structural integrity of the flange, which in turn safeguards the living area beneath the canvas when hatches are open.Step 3: Allowing Time to Dry
After securely attaching the first portion of the flange, Sven allows ample time for it to dry before moving forward with additional steps. This patience and precision are key aspects of his successful boatbuilding methods.Step 4: Finishing Touches
Once the flange is fully dried, Sven removes the clamps carefully, ensuring no damage occurs during this process. He then moves on to attaching four more pieces onto these main frames, completing two pairs of flanges for the bulkhead hatches.The Final Touches
While two flanges form the primary support structure around the hatches, Sven mentions there are two additional pieces required at each end to ensure comprehensive protection. This attention to detail highlights his commitment to producing a durable and reliable design. “Sailing is about finding your path, whether it’s across an ocean or within yourself.” – Sven Yrvind In conclusion, making flanges around bulkhead hatches may seem complex at first glance, but by following Sven Yrvind’s meticulous process, enthusiasts can achieve professional-level results. Remember that the journey of boatbuilding is as rewarding as reaching your destination; it tests one’s patience and dedication. For those seeking to embark on this adventure or simply gain more insight into marine craftsmanship, Sven’s wisdom is invaluable.Making Flanges Around Bulkhead Hatches for Canvas
Sven Yrvind, a renowned yacht designer and sailor, shares valuable insights on creating flanges around bulkhead hatches for canvas protection in this enlightening video. By following his expert guidance, boat enthusiasts can ensure their living areas remain secure while allowing unhindered access through the hatches.Step 1: Starting with the Flange
Sven begins by explaining that working on flanges vertically and horizontally is significantly easier than doing so in a flat position. To simplify the process further, he divides the task into two or three steps as suggested by fellow expert “for for.” This approach not only makes it more manageable but also allows for greater precision in crafting each component.Step 2: Applying Glue and Securing
Sven proceeds to apply glue along one edge of the flange, ensuring a secure bond when clamped into place. He emphasizes that this stage is crucial for maintaining the structural integrity of the flange, which in turn safeguards the living area beneath the canvas when hatches are open.Step 3: Allowing Time to Dry
After securely attaching the first portion of the flange, Sven allows ample time for it to dry before moving forward with additional steps. This patience and precision are key aspects of his successful boatbuilding methods.Step 4: Finishing Touches
Once the flange is fully dried, Sven removes the clamps carefully, ensuring no damage occurs during this process. He then moves on to attaching four more pieces onto these main frames, completing two pairs of flanges for the bulkhead hatches.The Final Touches
While two flanges form the primary support structure around the hatches, Sven mentions there are two additional pieces required at each end to ensure comprehensive protection. This attention to detail highlights his commitment to producing a durable and reliable design. “Sailing is about finding your path, whether it’s across an ocean or within yourself.” – Sven Yrvind In conclusion, making flanges around bulkhead hatches may seem complex at first glance, but by following Sven Yrvind’s meticulous process, enthusiasts can achieve professional-level results. Remember that the journey of boatbuilding is as rewarding as reaching your destination; it tests one’s patience and dedication. For those seeking to embark on this adventure or simply gain more insight into marine craftsmanship, Sven’s wisdom is invaluable.Sven Yrvind, a renowned yacht designer and sailor, shares valuable insights on creating flanges around bulkhead hatches for canvas protection in this enlightening video. By following his expert guidance, boat enthusiasts can ensure their living areas remain secure while allowing unhindered access through the hatches.Step 1: Starting with the Flange
Sven begins by explaining that working on flanges vertically and horizontally is significantly easier than doing so in a flat position. To simplify the process further, he divides the task into two or three steps as suggested by fellow expert “for for.” This approach not only makes it more manageable but also allows for greater precision in crafting each component.Step 2: Applying Glue and Securing
Sven proceeds to apply glue along one edge of the flange, ensuring a secure bond when clamped into place. He emphasizes that this stage is crucial for maintaining the structural integrity of the flange, which in turn safeguards the living area beneath the canvas when hatches are open.Step 3: Allowing Time to Dry
After securely attaching the first portion of the flange, Sven allows ample time for it to dry before moving forward with additional steps. This patience and precision are key aspects of his successful boatbuilding methods.Step 4: Finishing Touches
Once the flange is fully dried, Sven removes the clamps carefully, ensuring no damage occurs during this process. He then moves on to attaching four more pieces onto these main frames, completing two pairs of flanges for the bulkhead hatches.The Final Touches
While two flanges form the primary support structure around the hatches, Sven mentions there are two additional pieces required at each end to ensure comprehensive protection. This attention to detail highlights his commitment to producing a durable and reliable design. “Sailing is about finding your path, whether it’s across an ocean or within yourself.” – Sven Yrvind In conclusion, making flanges around bulkhead hatches may seem complex at first glance, but by following Sven Yrvind’s meticulous process, enthusiasts can achieve professional-level results. Remember that the journey of boatbuilding is as rewarding as reaching your destination; it tests one’s patience and dedication. For those seeking to embark on this adventure or simply gain more insight into marine craftsmanship, Sven’s wisdom is invaluable.After securely attaching the first portion of the flange, Sven allows ample time for it to dry before moving forward with additional steps. This patience and precision are key aspects of his successful boatbuilding methods.Step 4: Finishing Touches
Once the flange is fully dried, Sven removes the clamps carefully, ensuring no damage occurs during this process. He then moves on to attaching four more pieces onto these main frames, completing two pairs of flanges for the bulkhead hatches.The Final Touches
While two flanges form the primary support structure around the hatches, Sven mentions there are two additional pieces required at each end to ensure comprehensive protection. This attention to detail highlights his commitment to producing a durable and reliable design. “Sailing is about finding your path, whether it’s across an ocean or within yourself.” – Sven Yrvind In conclusion, making flanges around bulkhead hatches may seem complex at first glance, but by following Sven Yrvind’s meticulous process, enthusiasts can achieve professional-level results. Remember that the journey of boatbuilding is as rewarding as reaching your destination; it tests one’s patience and dedication. For those seeking to embark on this adventure or simply gain more insight into marine craftsmanship, Sven’s wisdom is invaluable.Making Flanges Around Bulkhead Hatches for Canvas
Sven Yrvind, a renowned yacht designer and sailor, shares valuable insights on creating flanges around bulkhead hatches for canvas protection in this enlightening video. By following his expert guidance, boat enthusiasts can ensure their living areas remain secure while allowing unhindered access through the hatches.Step 1: Starting with the Flange
Sven begins by explaining that working on flanges vertically and horizontally is significantly easier than doing so in a flat position. To simplify the process further, he divides the task into two or three steps as suggested by fellow expert “for for.” This approach not only makes it more manageable but also allows for greater precision in crafting each component.Step 2: Applying Glue and Securing
Sven proceeds to apply glue along one edge of the flange, ensuring a secure bond when clamped into place. He emphasizes that this stage is crucial for maintaining the structural integrity of the flange, which in turn safeguards the living area beneath the canvas when hatches are open.Step 3: Allowing Time to Dry
After securely attaching the first portion of the flange, Sven allows ample time for it to dry before moving forward with additional steps. This patience and precision are key aspects of his successful boatbuilding methods.Step 4: Finishing Touches
Once the flange is fully dried, Sven removes the clamps carefully, ensuring no damage occurs during this process. He then moves on to attaching four more pieces onto these main frames, completing two pairs of flanges for the bulkhead hatches.The Final Touches
While two flanges form the primary support structure around the hatches, Sven mentions there are two additional pieces required at each end to ensure comprehensive protection. This attention to detail highlights his commitment to producing a durable and reliable design. “Sailing is about finding your path, whether it’s across an ocean or within yourself.” – Sven Yrvind In conclusion, making flanges around bulkhead hatches may seem complex at first glance, but by following Sven Yrvind’s meticulous process, enthusiasts can achieve professional-level results. Remember that the journey of boatbuilding is as rewarding as reaching your destination; it tests one’s patience and dedication. For those seeking to embark on this adventure or simply gain more insight into marine craftsmanship, Sven’s wisdom is invaluable.Sven proceeds to apply glue along one edge of the flange, ensuring a secure bond when clamped into place. He emphasizes that this stage is crucial for maintaining the structural integrity of the flange, which in turn safeguards the living area beneath the canvas when hatches are open.Step 3: Allowing Time to Dry
After securely attaching the first portion of the flange, Sven allows ample time for it to dry before moving forward with additional steps. This patience and precision are key aspects of his successful boatbuilding methods.Step 4: Finishing Touches
Once the flange is fully dried, Sven removes the clamps carefully, ensuring no damage occurs during this process. He then moves on to attaching four more pieces onto these main frames, completing two pairs of flanges for the bulkhead hatches.The Final Touches
While two flanges form the primary support structure around the hatches, Sven mentions there are two additional pieces required at each end to ensure comprehensive protection. This attention to detail highlights his commitment to producing a durable and reliable design. “Sailing is about finding your path, whether it’s across an ocean or within yourself.” – Sven Yrvind In conclusion, making flanges around bulkhead hatches may seem complex at first glance, but by following Sven Yrvind’s meticulous process, enthusiasts can achieve professional-level results. Remember that the journey of boatbuilding is as rewarding as reaching your destination; it tests one’s patience and dedication. For those seeking to embark on this adventure or simply gain more insight into marine craftsmanship, Sven’s wisdom is invaluable.Making Flanges Around Bulkhead Hatches for Canvas
Sven Yrvind, a renowned yacht designer and sailor, shares valuable insights on creating flanges around bulkhead hatches for canvas protection in this enlightening video. By following his expert guidance, boat enthusiasts can ensure their living areas remain secure while allowing unhindered access through the hatches.Step 1: Starting with the Flange
Sven begins by explaining that working on flanges vertically and horizontally is significantly easier than doing so in a flat position. To simplify the process further, he divides the task into two or three steps as suggested by fellow expert “for for.” This approach not only makes it more manageable but also allows for greater precision in crafting each component.Step 2: Applying Glue and Securing
Sven proceeds to apply glue along one edge of the flange, ensuring a secure bond when clamped into place. He emphasizes that this stage is crucial for maintaining the structural integrity of the flange, which in turn safeguards the living area beneath the canvas when hatches are open.Step 3: Allowing Time to Dry
After securely attaching the first portion of the flange, Sven allows ample time for it to dry before moving forward with additional steps. This patience and precision are key aspects of his successful boatbuilding methods.Step 4: Finishing Touches
Once the flange is fully dried, Sven removes the clamps carefully, ensuring no damage occurs during this process. He then moves on to attaching four more pieces onto these main frames, completing two pairs of flanges for the bulkhead hatches.The Final Touches
While two flanges form the primary support structure around the hatches, Sven mentions there are two additional pieces required at each end to ensure comprehensive protection. This attention to detail highlights his commitment to producing a durable and reliable design. “Sailing is about finding your path, whether it’s across an ocean or within yourself.” – Sven Yrvind In conclusion, making flanges around bulkhead hatches may seem complex at first glance, but by following Sven Yrvind’s meticulous process, enthusiasts can achieve professional-level results. Remember that the journey of boatbuilding is as rewarding as reaching your destination; it tests one’s patience and dedication. For those seeking to embark on this adventure or simply gain more insight into marine craftsmanship, Sven’s wisdom is invaluable.Sven begins by explaining that working on flanges vertically and horizontally is significantly easier than doing so in a flat position. To simplify the process further, he divides the task into two or three steps as suggested by fellow expert “for for.” This approach not only makes it more manageable but also allows for greater precision in crafting each component.Step 2: Applying Glue and Securing
Sven proceeds to apply glue along one edge of the flange, ensuring a secure bond when clamped into place. He emphasizes that this stage is crucial for maintaining the structural integrity of the flange, which in turn safeguards the living area beneath the canvas when hatches are open.Step 3: Allowing Time to Dry
After securely attaching the first portion of the flange, Sven allows ample time for it to dry before moving forward with additional steps. This patience and precision are key aspects of his successful boatbuilding methods.Step 4: Finishing Touches
Once the flange is fully dried, Sven removes the clamps carefully, ensuring no damage occurs during this process. He then moves on to attaching four more pieces onto these main frames, completing two pairs of flanges for the bulkhead hatches.The Final Touches
While two flanges form the primary support structure around the hatches, Sven mentions there are two additional pieces required at each end to ensure comprehensive protection. This attention to detail highlights his commitment to producing a durable and reliable design. “Sailing is about finding your path, whether it’s across an ocean or within yourself.” – Sven Yrvind In conclusion, making flanges around bulkhead hatches may seem complex at first glance, but by following Sven Yrvind’s meticulous process, enthusiasts can achieve professional-level results. Remember that the journey of boatbuilding is as rewarding as reaching your destination; it tests one’s patience and dedication. For those seeking to embark on this adventure or simply gain more insight into marine craftsmanship, Sven’s wisdom is invaluable.Making Flanges Around Bulkhead Hatches for Canvas
Sven Yrvind, a renowned yacht designer and sailor, shares valuable insights on creating flanges around bulkhead hatches for canvas protection in this enlightening video. By following his expert guidance, boat enthusiasts can ensure their living areas remain secure while allowing unhindered access through the hatches.Step 1: Starting with the Flange
Sven begins by explaining that working on flanges vertically and horizontally is significantly easier than doing so in a flat position. To simplify the process further, he divides the task into two or three steps as suggested by fellow expert “for for.” This approach not only makes it more manageable but also allows for greater precision in crafting each component.Step 2: Applying Glue and Securing
Sven proceeds to apply glue along one edge of the flange, ensuring a secure bond when clamped into place. He emphasizes that this stage is crucial for maintaining the structural integrity of the flange, which in turn safeguards the living area beneath the canvas when hatches are open.Step 3: Allowing Time to Dry
After securely attaching the first portion of the flange, Sven allows ample time for it to dry before moving forward with additional steps. This patience and precision are key aspects of his successful boatbuilding methods.Step 4: Finishing Touches
Once the flange is fully dried, Sven removes the clamps carefully, ensuring no damage occurs during this process. He then moves on to attaching four more pieces onto these main frames, completing two pairs of flanges for the bulkhead hatches.The Final Touches
While two flanges form the primary support structure around the hatches, Sven mentions there are two additional pieces required at each end to ensure comprehensive protection. This attention to detail highlights his commitment to producing a durable and reliable design. “Sailing is about finding your path, whether it’s across an ocean or within yourself.” – Sven Yrvind In conclusion, making flanges around bulkhead hatches may seem complex at first glance, but by following Sven Yrvind’s meticulous process, enthusiasts can achieve professional-level results. Remember that the journey of boatbuilding is as rewarding as reaching your destination; it tests one’s patience and dedication. For those seeking to embark on this adventure or simply gain more insight into marine craftsmanship, Sven’s wisdom is invaluable.Sven Yrvind, a renowned yacht designer and sailor, shares valuable insights on creating flanges around bulkhead hatches for canvas protection in this enlightening video. By following his expert guidance, boat enthusiasts can ensure their living areas remain secure while allowing unhindered access through the hatches.Step 1: Starting with the Flange
Sven begins by explaining that working on flanges vertically and horizontally is significantly easier than doing so in a flat position. To simplify the process further, he divides the task into two or three steps as suggested by fellow expert “for for.” This approach not only makes it more manageable but also allows for greater precision in crafting each component.Step 2: Applying Glue and Securing
Sven proceeds to apply glue along one edge of the flange, ensuring a secure bond when clamped into place. He emphasizes that this stage is crucial for maintaining the structural integrity of the flange, which in turn safeguards the living area beneath the canvas when hatches are open.Step 3: Allowing Time to Dry
After securely attaching the first portion of the flange, Sven allows ample time for it to dry before moving forward with additional steps. This patience and precision are key aspects of his successful boatbuilding methods.Step 4: Finishing Touches
Once the flange is fully dried, Sven removes the clamps carefully, ensuring no damage occurs during this process. He then moves on to attaching four more pieces onto these main frames, completing two pairs of flanges for the bulkhead hatches.The Final Touches
While two flanges form the primary support structure around the hatches, Sven mentions there are two additional pieces required at each end to ensure comprehensive protection. This attention to detail highlights his commitment to producing a durable and reliable design. “Sailing is about finding your path, whether it’s across an ocean or within yourself.” – Sven Yrvind In conclusion, making flanges around bulkhead hatches may seem complex at first glance, but by following Sven Yrvind’s meticulous process, enthusiasts can achieve professional-level results. Remember that the journey of boatbuilding is as rewarding as reaching your destination; it tests one’s patience and dedication. For those seeking to embark on this adventure or simply gain more insight into marine craftsmanship, Sven’s wisdom is invaluable.Making Flanges Around Bulkhead Hatches for Canvas
Sven Yrvind, a renowned yacht designer and sailor, shares valuable insights on creating flanges around bulkhead hatches for canvas protection in this enlightening video. By following his expert guidance, boat enthusiasts can ensure their living areas remain secure while allowing unhindered access through the hatches.Step 1: Starting with the Flange
Sven begins by explaining that working on flanges vertically and horizontally is significantly easier than doing so in a flat position. To simplify the process further, he divides the task into two or three steps as suggested by fellow expert “for for.” This approach not only makes it more manageable but also allows for greater precision in crafting each component.Step 2: Applying Glue and Securing
Sven proceeds to apply glue along one edge of the flange, ensuring a secure bond when clamped into place. He emphasizes that this stage is crucial for maintaining the structural integrity of the flange, which in turn safeguards the living area beneath the canvas when hatches are open.Step 3: Allowing Time to Dry
After securely attaching the first portion of the flange, Sven allows ample time for it to dry before moving forward with additional steps. This patience and precision are key aspects of his successful boatbuilding methods.Step 4: Finishing Touches
Once the flange is fully dried, Sven removes the clamps carefully, ensuring no damage occurs during this process. He then moves on to attaching four more pieces onto these main frames, completing two pairs of flanges for the bulkhead hatches.The Final Touches
While two flanges form the primary support structure around the hatches, Sven mentions there are two additional pieces required at each end to ensure comprehensive protection. This attention to detail highlights his commitment to producing a durable and reliable design. “Sailing is about finding your path, whether it’s across an ocean or within yourself.” – Sven Yrvind In conclusion, making flanges around bulkhead hatches may seem complex at first glance, but by following Sven Yrvind’s meticulous process, enthusiasts can achieve professional-level results. Remember that the journey of boatbuilding is as rewarding as reaching your destination; it tests one’s patience and dedication. For those seeking to embark on this adventure or simply gain more insight into marine craftsmanship, Sven’s wisdom is invaluable.Once the flange is fully dried, Sven removes the clamps carefully, ensuring no damage occurs during this process. He then moves on to attaching four more pieces onto these main frames, completing two pairs of flanges for the bulkhead hatches.The Final Touches
While two flanges form the primary support structure around the hatches, Sven mentions there are two additional pieces required at each end to ensure comprehensive protection. This attention to detail highlights his commitment to producing a durable and reliable design. “Sailing is about finding your path, whether it’s across an ocean or within yourself.” – Sven Yrvind In conclusion, making flanges around bulkhead hatches may seem complex at first glance, but by following Sven Yrvind’s meticulous process, enthusiasts can achieve professional-level results. Remember that the journey of boatbuilding is as rewarding as reaching your destination; it tests one’s patience and dedication. For those seeking to embark on this adventure or simply gain more insight into marine craftsmanship, Sven’s wisdom is invaluable.Sven Yrvind, a renowned yacht designer and sailor, shares valuable insights on creating flanges around bulkhead hatches for canvas protection in this enlightening video. By following his expert guidance, boat enthusiasts can ensure their living areas remain secure while allowing unhindered access through the hatches.Step 1: Starting with the Flange
Sven begins by explaining that working on flanges vertically and horizontally is significantly easier than doing so in a flat position. To simplify the process further, he divides the task into two or three steps as suggested by fellow expert “for for.” This approach not only makes it more manageable but also allows for greater precision in crafting each component.Step 2: Applying Glue and Securing
Sven proceeds to apply glue along one edge of the flange, ensuring a secure bond when clamped into place. He emphasizes that this stage is crucial for maintaining the structural integrity of the flange, which in turn safeguards the living area beneath the canvas when hatches are open.Step 3: Allowing Time to Dry
After securely attaching the first portion of the flange, Sven allows ample time for it to dry before moving forward with additional steps. This patience and precision are key aspects of his successful boatbuilding methods.Step 4: Finishing Touches
Once the flange is fully dried, Sven removes the clamps carefully, ensuring no damage occurs during this process. He then moves on to attaching four more pieces onto these main frames, completing two pairs of flanges for the bulkhead hatches.The Final Touches
While two flanges form the primary support structure around the hatches, Sven mentions there are two additional pieces required at each end to ensure comprehensive protection. This attention to detail highlights his commitment to producing a durable and reliable design. “Sailing is about finding your path, whether it’s across an ocean or within yourself.” – Sven Yrvind In conclusion, making flanges around bulkhead hatches may seem complex at first glance, but by following Sven Yrvind’s meticulous process, enthusiasts can achieve professional-level results. Remember that the journey of boatbuilding is as rewarding as reaching your destination; it tests one’s patience and dedication. For those seeking to embark on this adventure or simply gain more insight into marine craftsmanship, Sven’s wisdom is invaluable.Making Flanges Around Bulkhead Hatches for Canvas
Sven Yrvind, a renowned yacht designer and sailor, shares valuable insights on creating flanges around bulkhead hatches for canvas protection in this enlightening video. By following his expert guidance, boat enthusiasts can ensure their living areas remain secure while allowing unhindered access through the hatches.Step 1: Starting with the Flange
Sven begins by explaining that working on flanges vertically and horizontally is significantly easier than doing so in a flat position. To simplify the process further, he divides the task into two or three steps as suggested by fellow expert “for for.” This approach not only makes it more manageable but also allows for greater precision in crafting each component.Step 2: Applying Glue and Securing
Sven proceeds to apply glue along one edge of the flange, ensuring a secure bond when clamped into place. He emphasizes that this stage is crucial for maintaining the structural integrity of the flange, which in turn safeguards the living area beneath the canvas when hatches are open.Step 3: Allowing Time to Dry
After securely attaching the first portion of the flange, Sven allows ample time for it to dry before moving forward with additional steps. This patience and precision are key aspects of his successful boatbuilding methods.Step 4: Finishing Touches
Once the flange is fully dried, Sven removes the clamps carefully, ensuring no damage occurs during this process. He then moves on to attaching four more pieces onto these main frames, completing two pairs of flanges for the bulkhead hatches.The Final Touches
While two flanges form the primary support structure around the hatches, Sven mentions there are two additional pieces required at each end to ensure comprehensive protection. This attention to detail highlights his commitment to producing a durable and reliable design. “Sailing is about finding your path, whether it’s across an ocean or within yourself.” – Sven Yrvind In conclusion, making flanges around bulkhead hatches may seem complex at first glance, but by following Sven Yrvind’s meticulous process, enthusiasts can achieve professional-level results. Remember that the journey of boatbuilding is as rewarding as reaching your destination; it tests one’s patience and dedication. For those seeking to embark on this adventure or simply gain more insight into marine craftsmanship, Sven’s wisdom is invaluable.After securely attaching the first portion of the flange, Sven allows ample time for it to dry before moving forward with additional steps. This patience and precision are key aspects of his successful boatbuilding methods.Step 4: Finishing Touches
Once the flange is fully dried, Sven removes the clamps carefully, ensuring no damage occurs during this process. He then moves on to attaching four more pieces onto these main frames, completing two pairs of flanges for the bulkhead hatches.The Final Touches
While two flanges form the primary support structure around the hatches, Sven mentions there are two additional pieces required at each end to ensure comprehensive protection. This attention to detail highlights his commitment to producing a durable and reliable design. “Sailing is about finding your path, whether it’s across an ocean or within yourself.” – Sven Yrvind In conclusion, making flanges around bulkhead hatches may seem complex at first glance, but by following Sven Yrvind’s meticulous process, enthusiasts can achieve professional-level results. Remember that the journey of boatbuilding is as rewarding as reaching your destination; it tests one’s patience and dedication. For those seeking to embark on this adventure or simply gain more insight into marine craftsmanship, Sven’s wisdom is invaluable.Sven Yrvind, a renowned yacht designer and sailor, shares valuable insights on creating flanges around bulkhead hatches for canvas protection in this enlightening video. By following his expert guidance, boat enthusiasts can ensure their living areas remain secure while allowing unhindered access through the hatches.Step 1: Starting with the Flange
Sven begins by explaining that working on flanges vertically and horizontally is significantly easier than doing so in a flat position. To simplify the process further, he divides the task into two or three steps as suggested by fellow expert “for for.” This approach not only makes it more manageable but also allows for greater precision in crafting each component.Step 2: Applying Glue and Securing
Sven proceeds to apply glue along one edge of the flange, ensuring a secure bond when clamped into place. He emphasizes that this stage is crucial for maintaining the structural integrity of the flange, which in turn safeguards the living area beneath the canvas when hatches are open.Step 3: Allowing Time to Dry
After securely attaching the first portion of the flange, Sven allows ample time for it to dry before moving forward with additional steps. This patience and precision are key aspects of his successful boatbuilding methods.Step 4: Finishing Touches
Once the flange is fully dried, Sven removes the clamps carefully, ensuring no damage occurs during this process. He then moves on to attaching four more pieces onto these main frames, completing two pairs of flanges for the bulkhead hatches.The Final Touches
While two flanges form the primary support structure around the hatches, Sven mentions there are two additional pieces required at each end to ensure comprehensive protection. This attention to detail highlights his commitment to producing a durable and reliable design. “Sailing is about finding your path, whether it’s across an ocean or within yourself.” – Sven Yrvind In conclusion, making flanges around bulkhead hatches may seem complex at first glance, but by following Sven Yrvind’s meticulous process, enthusiasts can achieve professional-level results. Remember that the journey of boatbuilding is as rewarding as reaching your destination; it tests one’s patience and dedication. For those seeking to embark on this adventure or simply gain more insight into marine craftsmanship, Sven’s wisdom is invaluable.Making Flanges Around Bulkhead Hatches for Canvas
Sven Yrvind, a renowned yacht designer and sailor, shares valuable insights on creating flanges around bulkhead hatches for canvas protection in this enlightening video. By following his expert guidance, boat enthusiasts can ensure their living areas remain secure while allowing unhindered access through the hatches.Step 1: Starting with the Flange
Sven begins by explaining that working on flanges vertically and horizontally is significantly easier than doing so in a flat position. To simplify the process further, he divides the task into two or three steps as suggested by fellow expert “for for.” This approach not only makes it more manageable but also allows for greater precision in crafting each component.Step 2: Applying Glue and Securing
Sven proceeds to apply glue along one edge of the flange, ensuring a secure bond when clamped into place. He emphasizes that this stage is crucial for maintaining the structural integrity of the flange, which in turn safeguards the living area beneath the canvas when hatches are open.Step 3: Allowing Time to Dry
After securely attaching the first portion of the flange, Sven allows ample time for it to dry before moving forward with additional steps. This patience and precision are key aspects of his successful boatbuilding methods.Step 4: Finishing Touches
Once the flange is fully dried, Sven removes the clamps carefully, ensuring no damage occurs during this process. He then moves on to attaching four more pieces onto these main frames, completing two pairs of flanges for the bulkhead hatches.The Final Touches
While two flanges form the primary support structure around the hatches, Sven mentions there are two additional pieces required at each end to ensure comprehensive protection. This attention to detail highlights his commitment to producing a durable and reliable design. “Sailing is about finding your path, whether it’s across an ocean or within yourself.” – Sven Yrvind In conclusion, making flanges around bulkhead hatches may seem complex at first glance, but by following Sven Yrvind’s meticulous process, enthusiasts can achieve professional-level results. Remember that the journey of boatbuilding is as rewarding as reaching your destination; it tests one’s patience and dedication. For those seeking to embark on this adventure or simply gain more insight into marine craftsmanship, Sven’s wisdom is invaluable.Sven proceeds to apply glue along one edge of the flange, ensuring a secure bond when clamped into place. He emphasizes that this stage is crucial for maintaining the structural integrity of the flange, which in turn safeguards the living area beneath the canvas when hatches are open.Step 3: Allowing Time to Dry
After securely attaching the first portion of the flange, Sven allows ample time for it to dry before moving forward with additional steps. This patience and precision are key aspects of his successful boatbuilding methods.Step 4: Finishing Touches
Once the flange is fully dried, Sven removes the clamps carefully, ensuring no damage occurs during this process. He then moves on to attaching four more pieces onto these main frames, completing two pairs of flanges for the bulkhead hatches.The Final Touches
While two flanges form the primary support structure around the hatches, Sven mentions there are two additional pieces required at each end to ensure comprehensive protection. This attention to detail highlights his commitment to producing a durable and reliable design. “Sailing is about finding your path, whether it’s across an ocean or within yourself.” – Sven Yrvind In conclusion, making flanges around bulkhead hatches may seem complex at first glance, but by following Sven Yrvind’s meticulous process, enthusiasts can achieve professional-level results. Remember that the journey of boatbuilding is as rewarding as reaching your destination; it tests one’s patience and dedication. For those seeking to embark on this adventure or simply gain more insight into marine craftsmanship, Sven’s wisdom is invaluable.Sven Yrvind, a renowned yacht designer and sailor, shares valuable insights on creating flanges around bulkhead hatches for canvas protection in this enlightening video. By following his expert guidance, boat enthusiasts can ensure their living areas remain secure while allowing unhindered access through the hatches.Step 1: Starting with the Flange
Sven begins by explaining that working on flanges vertically and horizontally is significantly easier than doing so in a flat position. To simplify the process further, he divides the task into two or three steps as suggested by fellow expert “for for.” This approach not only makes it more manageable but also allows for greater precision in crafting each component.Step 2: Applying Glue and Securing
Sven proceeds to apply glue along one edge of the flange, ensuring a secure bond when clamped into place. He emphasizes that this stage is crucial for maintaining the structural integrity of the flange, which in turn safeguards the living area beneath the canvas when hatches are open.Step 3: Allowing Time to Dry
After securely attaching the first portion of the flange, Sven allows ample time for it to dry before moving forward with additional steps. This patience and precision are key aspects of his successful boatbuilding methods.Step 4: Finishing Touches
Once the flange is fully dried, Sven removes the clamps carefully, ensuring no damage occurs during this process. He then moves on to attaching four more pieces onto these main frames, completing two pairs of flanges for the bulkhead hatches.The Final Touches
While two flanges form the primary support structure around the hatches, Sven mentions there are two additional pieces required at each end to ensure comprehensive protection. This attention to detail highlights his commitment to producing a durable and reliable design. “Sailing is about finding your path, whether it’s across an ocean or within yourself.” – Sven Yrvind In conclusion, making flanges around bulkhead hatches may seem complex at first glance, but by following Sven Yrvind’s meticulous process, enthusiasts can achieve professional-level results. Remember that the journey of boatbuilding is as rewarding as reaching your destination; it tests one’s patience and dedication. For those seeking to embark on this adventure or simply gain more insight into marine craftsmanship, Sven’s wisdom is invaluable.Making Flanges Around Bulkhead Hatches for Canvas
Sven Yrvind, a renowned yacht designer and sailor, shares valuable insights on creating flanges around bulkhead hatches for canvas protection in this enlightening video. By following his expert guidance, boat enthusiasts can ensure their living areas remain secure while allowing unhindered access through the hatches.Step 1: Starting with the Flange
Sven begins by explaining that working on flanges vertically and horizontally is significantly easier than doing so in a flat position. To simplify the process further, he divides the task into two or three steps as suggested by fellow expert “for for.” This approach not only makes it more manageable but also allows for greater precision in crafting each component.Step 2: Applying Glue and Securing
Sven proceeds to apply glue along one edge of the flange, ensuring a secure bond when clamped into place. He emphasizes that this stage is crucial for maintaining the structural integrity of the flange, which in turn safeguards the living area beneath the canvas when hatches are open.Step 3: Allowing Time to Dry
After securely attaching the first portion of the flange, Sven allows ample time for it to dry before moving forward with additional steps. This patience and precision are key aspects of his successful boatbuilding methods.Step 4: Finishing Touches
Once the flange is fully dried, Sven removes the clamps carefully, ensuring no damage occurs during this process. He then moves on to attaching four more pieces onto these main frames, completing two pairs of flanges for the bulkhead hatches.The Final Touches
While two flanges form the primary support structure around the hatches, Sven mentions there are two additional pieces required at each end to ensure comprehensive protection. This attention to detail highlights his commitment to producing a durable and reliable design. “Sailing is about finding your path, whether it’s across an ocean or within yourself.” – Sven Yrvind In conclusion, making flanges around bulkhead hatches may seem complex at first glance, but by following Sven Yrvind’s meticulous process, enthusiasts can achieve professional-level results. Remember that the journey of boatbuilding is as rewarding as reaching your destination; it tests one’s patience and dedication. For those seeking to embark on this adventure or simply gain more insight into marine craftsmanship, Sven’s wisdom is invaluable.Sven begins by explaining that working on flanges vertically and horizontally is significantly easier than doing so in a flat position. To simplify the process further, he divides the task into two or three steps as suggested by fellow expert “for for.” This approach not only makes it more manageable but also allows for greater precision in crafting each component.Step 2: Applying Glue and Securing
Sven proceeds to apply glue along one edge of the flange, ensuring a secure bond when clamped into place. He emphasizes that this stage is crucial for maintaining the structural integrity of the flange, which in turn safeguards the living area beneath the canvas when hatches are open.Step 3: Allowing Time to Dry
After securely attaching the first portion of the flange, Sven allows ample time for it to dry before moving forward with additional steps. This patience and precision are key aspects of his successful boatbuilding methods.Step 4: Finishing Touches
Once the flange is fully dried, Sven removes the clamps carefully, ensuring no damage occurs during this process. He then moves on to attaching four more pieces onto these main frames, completing two pairs of flanges for the bulkhead hatches.The Final Touches
While two flanges form the primary support structure around the hatches, Sven mentions there are two additional pieces required at each end to ensure comprehensive protection. This attention to detail highlights his commitment to producing a durable and reliable design. “Sailing is about finding your path, whether it’s across an ocean or within yourself.” – Sven Yrvind In conclusion, making flanges around bulkhead hatches may seem complex at first glance, but by following Sven Yrvind’s meticulous process, enthusiasts can achieve professional-level results. Remember that the journey of boatbuilding is as rewarding as reaching your destination; it tests one’s patience and dedication. For those seeking to embark on this adventure or simply gain more insight into marine craftsmanship, Sven’s wisdom is invaluable.Sven Yrvind, a renowned yacht designer and sailor, shares valuable insights on creating flanges around bulkhead hatches for canvas protection in this enlightening video. By following his expert guidance, boat enthusiasts can ensure their living areas remain secure while allowing unhindered access through the hatches.Step 1: Starting with the Flange
Sven begins by explaining that working on flanges vertically and horizontally is significantly easier than doing so in a flat position. To simplify the process further, he divides the task into two or three steps as suggested by fellow expert “for for.” This approach not only makes it more manageable but also allows for greater precision in crafting each component.Step 2: Applying Glue and Securing
Sven proceeds to apply glue along one edge of the flange, ensuring a secure bond when clamped into place. He emphasizes that this stage is crucial for maintaining the structural integrity of the flange, which in turn safeguards the living area beneath the canvas when hatches are open.Step 3: Allowing Time to Dry
After securely attaching the first portion of the flange, Sven allows ample time for it to dry before moving forward with additional steps. This patience and precision are key aspects of his successful boatbuilding methods.Step 4: Finishing Touches
Once the flange is fully dried, Sven removes the clamps carefully, ensuring no damage occurs during this process. He then moves on to attaching four more pieces onto these main frames, completing two pairs of flanges for the bulkhead hatches.The Final Touches
While two flanges form the primary support structure around the hatches, Sven mentions there are two additional pieces required at each end to ensure comprehensive protection. This attention to detail highlights his commitment to producing a durable and reliable design. “Sailing is about finding your path, whether it’s across an ocean or within yourself.” – Sven Yrvind In conclusion, making flanges around bulkhead hatches may seem complex at first glance, but by following Sven Yrvind’s meticulous process, enthusiasts can achieve professional-level results. Remember that the journey of boatbuilding is as rewarding as reaching your destination; it tests one’s patience and dedication. For those seeking to embark on this adventure or simply gain more insight into marine craftsmanship, Sven’s wisdom is invaluable.Making Flanges Around Bulkhead Hatches for Canvas
Sven Yrvind, a renowned yacht designer and sailor, shares valuable insights on creating flanges around bulkhead hatches for canvas protection in this enlightening video. By following his expert guidance, boat enthusiasts can ensure their living areas remain secure while allowing unhindered access through the hatches.Step 1: Starting with the Flange
Sven begins by explaining that working on flanges vertically and horizontally is significantly easier than doing so in a flat position. To simplify the process further, he divides the task into two or three steps as suggested by fellow expert “for for.” This approach not only makes it more manageable but also allows for greater precision in crafting each component.Step 2: Applying Glue and Securing
Sven proceeds to apply glue along one edge of the flange, ensuring a secure bond when clamped into place. He emphasizes that this stage is crucial for maintaining the structural integrity of the flange, which in turn safeguards the living area beneath the canvas when hatches are open.Step 3: Allowing Time to Dry
After securely attaching the first portion of the flange, Sven allows ample time for it to dry before moving forward with additional steps. This patience and precision are key aspects of his successful boatbuilding methods.Step 4: Finishing Touches
Once the flange is fully dried, Sven removes the clamps carefully, ensuring no damage occurs during this process. He then moves on to attaching four more pieces onto these main frames, completing two pairs of flanges for the bulkhead hatches.The Final Touches
While two flanges form the primary support structure around the hatches, Sven mentions there are two additional pieces required at each end to ensure comprehensive protection. This attention to detail highlights his commitment to producing a durable and reliable design. “Sailing is about finding your path, whether it’s across an ocean or within yourself.” – Sven Yrvind In conclusion, making flanges around bulkhead hatches may seem complex at first glance, but by following Sven Yrvind’s meticulous process, enthusiasts can achieve professional-level results. Remember that the journey of boatbuilding is as rewarding as reaching your destination; it tests one’s patience and dedication. For those seeking to embark on this adventure or simply gain more insight into marine craftsmanship, Sven’s wisdom is invaluable.Once the flange is fully dried, Sven removes the clamps carefully, ensuring no damage occurs during this process. He then moves on to attaching four more pieces onto these main frames, completing two pairs of flanges for the bulkhead hatches.The Final Touches
While two flanges form the primary support structure around the hatches, Sven mentions there are two additional pieces required at each end to ensure comprehensive protection. This attention to detail highlights his commitment to producing a durable and reliable design. “Sailing is about finding your path, whether it’s across an ocean or within yourself.” – Sven Yrvind In conclusion, making flanges around bulkhead hatches may seem complex at first glance, but by following Sven Yrvind’s meticulous process, enthusiasts can achieve professional-level results. Remember that the journey of boatbuilding is as rewarding as reaching your destination; it tests one’s patience and dedication. For those seeking to embark on this adventure or simply gain more insight into marine craftsmanship, Sven’s wisdom is invaluable.Sven begins by explaining that working on flanges vertically and horizontally is significantly easier than doing so in a flat position. To simplify the process further, he divides the task into two or three steps as suggested by fellow expert “for for.” This approach not only makes it more manageable but also allows for greater precision in crafting each component.Step 2: Applying Glue and Securing
Sven proceeds to apply glue along one edge of the flange, ensuring a secure bond when clamped into place. He emphasizes that this stage is crucial for maintaining the structural integrity of the flange, which in turn safeguards the living area beneath the canvas when hatches are open.Step 3: Allowing Time to Dry
After securely attaching the first portion of the flange, Sven allows ample time for it to dry before moving forward with additional steps. This patience and precision are key aspects of his successful boatbuilding methods.Step 4: Finishing Touches
Once the flange is fully dried, Sven removes the clamps carefully, ensuring no damage occurs during this process. He then moves on to attaching four more pieces onto these main frames, completing two pairs of flanges for the bulkhead hatches.The Final Touches
While two flanges form the primary support structure around the hatches, Sven mentions there are two additional pieces required at each end to ensure comprehensive protection. This attention to detail highlights his commitment to producing a durable and reliable design. “Sailing is about finding your path, whether it’s across an ocean or within yourself.” – Sven Yrvind In conclusion, making flanges around bulkhead hatches may seem complex at first glance, but by following Sven Yrvind’s meticulous process, enthusiasts can achieve professional-level results. Remember that the journey of boatbuilding is as rewarding as reaching your destination; it tests one’s patience and dedication. For those seeking to embark on this adventure or simply gain more insight into marine craftsmanship, Sven’s wisdom is invaluable.Sven Yrvind, a renowned yacht designer and sailor, shares valuable insights on creating flanges around bulkhead hatches for canvas protection in this enlightening video. By following his expert guidance, boat enthusiasts can ensure their living areas remain secure while allowing unhindered access through the hatches.Step 1: Starting with the Flange
Sven begins by explaining that working on flanges vertically and horizontally is significantly easier than doing so in a flat position. To simplify the process further, he divides the task into two or three steps as suggested by fellow expert “for for.” This approach not only makes it more manageable but also allows for greater precision in crafting each component.Step 2: Applying Glue and Securing
Sven proceeds to apply glue along one edge of the flange, ensuring a secure bond when clamped into place. He emphasizes that this stage is crucial for maintaining the structural integrity of the flange, which in turn safeguards the living area beneath the canvas when hatches are open.Step 3: Allowing Time to Dry
After securely attaching the first portion of the flange, Sven allows ample time for it to dry before moving forward with additional steps. This patience and precision are key aspects of his successful boatbuilding methods.Step 4: Finishing Touches
Once the flange is fully dried, Sven removes the clamps carefully, ensuring no damage occurs during this process. He then moves on to attaching four more pieces onto these main frames, completing two pairs of flanges for the bulkhead hatches.The Final Touches
While two flanges form the primary support structure around the hatches, Sven mentions there are two additional pieces required at each end to ensure comprehensive protection. This attention to detail highlights his commitment to producing a durable and reliable design. “Sailing is about finding your path, whether it’s across an ocean or within yourself.” – Sven Yrvind In conclusion, making flanges around bulkhead hatches may seem complex at first glance, but by following Sven Yrvind’s meticulous process, enthusiasts can achieve professional-level results. Remember that the journey of boatbuilding is as rewarding as reaching your destination; it tests one’s patience and dedication. For those seeking to embark on this adventure or simply gain more insight into marine craftsmanship, Sven’s wisdom is invaluable.Making Flanges Around Bulkhead Hatches for Canvas
Sven Yrvind, a renowned yacht designer and sailor, shares valuable insights on creating flanges around bulkhead hatches for canvas protection in this enlightening video. By following his expert guidance, boat enthusiasts can ensure their living areas remain secure while allowing unhindered access through the hatches.Step 1: Starting with the Flange
Sven begins by explaining that working on flanges vertically and horizontally is significantly easier than doing so in a flat position. To simplify the process further, he divides the task into two or three steps as suggested by fellow expert “for for.” This approach not only makes it more manageable but also allows for greater precision in crafting each component.Step 2: Applying Glue and Securing
Sven proceeds to apply glue along one edge of the flange, ensuring a secure bond when clamped into place. He emphasizes that this stage is crucial for maintaining the structural integrity of the flange, which in turn safeguards the living area beneath the canvas when hatches are open.Step 3: Allowing Time to Dry
After securely attaching the first portion of the flange, Sven allows ample time for it to dry before moving forward with additional steps. This patience and precision are key aspects of his successful boatbuilding methods.Step 4: Finishing Touches
Once the flange is fully dried, Sven removes the clamps carefully, ensuring no damage occurs during this process. He then moves on to attaching four more pieces onto these main frames, completing two pairs of flanges for the bulkhead hatches.The Final Touches
While two flanges form the primary support structure around the hatches, Sven mentions there are two additional pieces required at each end to ensure comprehensive protection. This attention to detail highlights his commitment to producing a durable and reliable design. “Sailing is about finding your path, whether it’s across an ocean or within yourself.” – Sven Yrvind In conclusion, making flanges around bulkhead hatches may seem complex at first glance, but by following Sven Yrvind’s meticulous process, enthusiasts can achieve professional-level results. Remember that the journey of boatbuilding is as rewarding as reaching your destination; it tests one’s patience and dedication. For those seeking to embark on this adventure or simply gain more insight into marine craftsmanship, Sven’s wisdom is invaluable.After securely attaching the first portion of the flange, Sven allows ample time for it to dry before moving forward with additional steps. This patience and precision are key aspects of his successful boatbuilding methods.Step 4: Finishing Touches
Once the flange is fully dried, Sven removes the clamps carefully, ensuring no damage occurs during this process. He then moves on to attaching four more pieces onto these main frames, completing two pairs of flanges for the bulkhead hatches.The Final Touches
While two flanges form the primary support structure around the hatches, Sven mentions there are two additional pieces required at each end to ensure comprehensive protection. This attention to detail highlights his commitment to producing a durable and reliable design. “Sailing is about finding your path, whether it’s across an ocean or within yourself.” – Sven Yrvind In conclusion, making flanges around bulkhead hatches may seem complex at first glance, but by following Sven Yrvind’s meticulous process, enthusiasts can achieve professional-level results. Remember that the journey of boatbuilding is as rewarding as reaching your destination; it tests one’s patience and dedication. For those seeking to embark on this adventure or simply gain more insight into marine craftsmanship, Sven’s wisdom is invaluable.Sven begins by explaining that working on flanges vertically and horizontally is significantly easier than doing so in a flat position. To simplify the process further, he divides the task into two or three steps as suggested by fellow expert “for for.” This approach not only makes it more manageable but also allows for greater precision in crafting each component.Step 2: Applying Glue and Securing
Sven proceeds to apply glue along one edge of the flange, ensuring a secure bond when clamped into place. He emphasizes that this stage is crucial for maintaining the structural integrity of the flange, which in turn safeguards the living area beneath the canvas when hatches are open.Step 3: Allowing Time to Dry
After securely attaching the first portion of the flange, Sven allows ample time for it to dry before moving forward with additional steps. This patience and precision are key aspects of his successful boatbuilding methods.Step 4: Finishing Touches
Once the flange is fully dried, Sven removes the clamps carefully, ensuring no damage occurs during this process. He then moves on to attaching four more pieces onto these main frames, completing two pairs of flanges for the bulkhead hatches.The Final Touches
While two flanges form the primary support structure around the hatches, Sven mentions there are two additional pieces required at each end to ensure comprehensive protection. This attention to detail highlights his commitment to producing a durable and reliable design. “Sailing is about finding your path, whether it’s across an ocean or within yourself.” – Sven Yrvind In conclusion, making flanges around bulkhead hatches may seem complex at first glance, but by following Sven Yrvind’s meticulous process, enthusiasts can achieve professional-level results. Remember that the journey of boatbuilding is as rewarding as reaching your destination; it tests one’s patience and dedication. For those seeking to embark on this adventure or simply gain more insight into marine craftsmanship, Sven’s wisdom is invaluable.Sven Yrvind, a renowned yacht designer and sailor, shares valuable insights on creating flanges around bulkhead hatches for canvas protection in this enlightening video. By following his expert guidance, boat enthusiasts can ensure their living areas remain secure while allowing unhindered access through the hatches.Step 1: Starting with the Flange
Sven begins by explaining that working on flanges vertically and horizontally is significantly easier than doing so in a flat position. To simplify the process further, he divides the task into two or three steps as suggested by fellow expert “for for.” This approach not only makes it more manageable but also allows for greater precision in crafting each component.Step 2: Applying Glue and Securing
Sven proceeds to apply glue along one edge of the flange, ensuring a secure bond when clamped into place. He emphasizes that this stage is crucial for maintaining the structural integrity of the flange, which in turn safeguards the living area beneath the canvas when hatches are open.Step 3: Allowing Time to Dry
After securely attaching the first portion of the flange, Sven allows ample time for it to dry before moving forward with additional steps. This patience and precision are key aspects of his successful boatbuilding methods.Step 4: Finishing Touches
Once the flange is fully dried, Sven removes the clamps carefully, ensuring no damage occurs during this process. He then moves on to attaching four more pieces onto these main frames, completing two pairs of flanges for the bulkhead hatches.The Final Touches
While two flanges form the primary support structure around the hatches, Sven mentions there are two additional pieces required at each end to ensure comprehensive protection. This attention to detail highlights his commitment to producing a durable and reliable design. “Sailing is about finding your path, whether it’s across an ocean or within yourself.” – Sven Yrvind In conclusion, making flanges around bulkhead hatches may seem complex at first glance, but by following Sven Yrvind’s meticulous process, enthusiasts can achieve professional-level results. Remember that the journey of boatbuilding is as rewarding as reaching your destination; it tests one’s patience and dedication. For those seeking to embark on this adventure or simply gain more insight into marine craftsmanship, Sven’s wisdom is invaluable.Making Flanges Around Bulkhead Hatches for Canvas
Sven Yrvind, a renowned yacht designer and sailor, shares valuable insights on creating flanges around bulkhead hatches for canvas protection in this enlightening video. By following his expert guidance, boat enthusiasts can ensure their living areas remain secure while allowing unhindered access through the hatches.Step 1: Starting with the Flange
Sven begins by explaining that working on flanges vertically and horizontally is significantly easier than doing so in a flat position. To simplify the process further, he divides the task into two or three steps as suggested by fellow expert “for for.” This approach not only makes it more manageable but also allows for greater precision in crafting each component.Step 2: Applying Glue and Securing
Sven proceeds to apply glue along one edge of the flange, ensuring a secure bond when clamped into place. He emphasizes that this stage is crucial for maintaining the structural integrity of the flange, which in turn safeguards the living area beneath the canvas when hatches are open.Step 3: Allowing Time to Dry
After securely attaching the first portion of the flange, Sven allows ample time for it to dry before moving forward with additional steps. This patience and precision are key aspects of his successful boatbuilding methods.Step 4: Finishing Touches
Once the flange is fully dried, Sven removes the clamps carefully, ensuring no damage occurs during this process. He then moves on to attaching four more pieces onto these main frames, completing two pairs of flanges for the bulkhead hatches.The Final Touches
While two flanges form the primary support structure around the hatches, Sven mentions there are two additional pieces required at each end to ensure comprehensive protection. This attention to detail highlights his commitment to producing a durable and reliable design. “Sailing is about finding your path, whether it’s across an ocean or within yourself.” – Sven Yrvind In conclusion, making flanges around bulkhead hatches may seem complex at first glance, but by following Sven Yrvind’s meticulous process, enthusiasts can achieve professional-level results. Remember that the journey of boatbuilding is as rewarding as reaching your destination; it tests one’s patience and dedication. For those seeking to embark on this adventure or simply gain more insight into marine craftsmanship, Sven’s wisdom is invaluable.Sven proceeds to apply glue along one edge of the flange, ensuring a secure bond when clamped into place. He emphasizes that this stage is crucial for maintaining the structural integrity of the flange, which in turn safeguards the living area beneath the canvas when hatches are open.Step 3: Allowing Time to Dry
After securely attaching the first portion of the flange, Sven allows ample time for it to dry before moving forward with additional steps. This patience and precision are key aspects of his successful boatbuilding methods.Step 4: Finishing Touches
Once the flange is fully dried, Sven removes the clamps carefully, ensuring no damage occurs during this process. He then moves on to attaching four more pieces onto these main frames, completing two pairs of flanges for the bulkhead hatches.The Final Touches
While two flanges form the primary support structure around the hatches, Sven mentions there are two additional pieces required at each end to ensure comprehensive protection. This attention to detail highlights his commitment to producing a durable and reliable design. “Sailing is about finding your path, whether it’s across an ocean or within yourself.” – Sven Yrvind In conclusion, making flanges around bulkhead hatches may seem complex at first glance, but by following Sven Yrvind’s meticulous process, enthusiasts can achieve professional-level results. Remember that the journey of boatbuilding is as rewarding as reaching your destination; it tests one’s patience and dedication. For those seeking to embark on this adventure or simply gain more insight into marine craftsmanship, Sven’s wisdom is invaluable.Sven begins by explaining that working on flanges vertically and horizontally is significantly easier than doing so in a flat position. To simplify the process further, he divides the task into two or three steps as suggested by fellow expert “for for.” This approach not only makes it more manageable but also allows for greater precision in crafting each component.Step 2: Applying Glue and Securing
Sven proceeds to apply glue along one edge of the flange, ensuring a secure bond when clamped into place. He emphasizes that this stage is crucial for maintaining the structural integrity of the flange, which in turn safeguards the living area beneath the canvas when hatches are open.Step 3: Allowing Time to Dry
After securely attaching the first portion of the flange, Sven allows ample time for it to dry before moving forward with additional steps. This patience and precision are key aspects of his successful boatbuilding methods.Step 4: Finishing Touches
Once the flange is fully dried, Sven removes the clamps carefully, ensuring no damage occurs during this process. He then moves on to attaching four more pieces onto these main frames, completing two pairs of flanges for the bulkhead hatches.The Final Touches
While two flanges form the primary support structure around the hatches, Sven mentions there are two additional pieces required at each end to ensure comprehensive protection. This attention to detail highlights his commitment to producing a durable and reliable design. “Sailing is about finding your path, whether it’s across an ocean or within yourself.” – Sven Yrvind In conclusion, making flanges around bulkhead hatches may seem complex at first glance, but by following Sven Yrvind’s meticulous process, enthusiasts can achieve professional-level results. Remember that the journey of boatbuilding is as rewarding as reaching your destination; it tests one’s patience and dedication. For those seeking to embark on this adventure or simply gain more insight into marine craftsmanship, Sven’s wisdom is invaluable.Sven Yrvind, a renowned yacht designer and sailor, shares valuable insights on creating flanges around bulkhead hatches for canvas protection in this enlightening video. By following his expert guidance, boat enthusiasts can ensure their living areas remain secure while allowing unhindered access through the hatches.Step 1: Starting with the Flange
Sven begins by explaining that working on flanges vertically and horizontally is significantly easier than doing so in a flat position. To simplify the process further, he divides the task into two or three steps as suggested by fellow expert “for for.” This approach not only makes it more manageable but also allows for greater precision in crafting each component.Step 2: Applying Glue and Securing
Sven proceeds to apply glue along one edge of the flange, ensuring a secure bond when clamped into place. He emphasizes that this stage is crucial for maintaining the structural integrity of the flange, which in turn safeguards the living area beneath the canvas when hatches are open.Step 3: Allowing Time to Dry
After securely attaching the first portion of the flange, Sven allows ample time for it to dry before moving forward with additional steps. This patience and precision are key aspects of his successful boatbuilding methods.Step 4: Finishing Touches
Once the flange is fully dried, Sven removes the clamps carefully, ensuring no damage occurs during this process. He then moves on to attaching four more pieces onto these main frames, completing two pairs of flanges for the bulkhead hatches.The Final Touches
While two flanges form the primary support structure around the hatches, Sven mentions there are two additional pieces required at each end to ensure comprehensive protection. This attention to detail highlights his commitment to producing a durable and reliable design. “Sailing is about finding your path, whether it’s across an ocean or within yourself.” – Sven Yrvind In conclusion, making flanges around bulkhead hatches may seem complex at first glance, but by following Sven Yrvind’s meticulous process, enthusiasts can achieve professional-level results. Remember that the journey of boatbuilding is as rewarding as reaching your destination; it tests one’s patience and dedication. For those seeking to embark on this adventure or simply gain more insight into marine craftsmanship, Sven’s wisdom is invaluable.Making Flanges Around Bulkhead Hatches for Canvas
Sven Yrvind, a renowned yacht designer and sailor, shares valuable insights on creating flanges around bulkhead hatches for canvas protection in this enlightening video. By following his expert guidance, boat enthusiasts can ensure their living areas remain secure while allowing unhindered access through the hatches.Step 1: Starting with the Flange
Sven begins by explaining that working on flanges vertically and horizontally is significantly easier than doing so in a flat position. To simplify the process further, he divides the task into two or three steps as suggested by fellow expert “for for.” This approach not only makes it more manageable but also allows for greater precision in crafting each component.Step 2: Applying Glue and Securing
Sven proceeds to apply glue along one edge of the flange, ensuring a secure bond when clamped into place. He emphasizes that this stage is crucial for maintaining the structural integrity of the flange, which in turn safeguards the living area beneath the canvas when hatches are open.Step 3: Allowing Time to Dry
After securely attaching the first portion of the flange, Sven allows ample time for it to dry before moving forward with additional steps. This patience and precision are key aspects of his successful boatbuilding methods.Step 4: Finishing Touches
Once the flange is fully dried, Sven removes the clamps carefully, ensuring no damage occurs during this process. He then moves on to attaching four more pieces onto these main frames, completing two pairs of flanges for the bulkhead hatches.The Final Touches
While two flanges form the primary support structure around the hatches, Sven mentions there are two additional pieces required at each end to ensure comprehensive protection. This attention to detail highlights his commitment to producing a durable and reliable design. “Sailing is about finding your path, whether it’s across an ocean or within yourself.” – Sven Yrvind In conclusion, making flanges around bulkhead hatches may seem complex at first glance, but by following Sven Yrvind’s meticulous process, enthusiasts can achieve professional-level results. Remember that the journey of boatbuilding is as rewarding as reaching your destination; it tests one’s patience and dedication. For those seeking to embark on this adventure or simply gain more insight into marine craftsmanship, Sven’s wisdom is invaluable.Once the flange is fully dried, Sven removes the clamps carefully, ensuring no damage occurs during this process. He then moves on to attaching four more pieces onto these main frames, completing two pairs of flanges for the bulkhead hatches.The Final Touches
While two flanges form the primary support structure around the hatches, Sven mentions there are two additional pieces required at each end to ensure comprehensive protection. This attention to detail highlights his commitment to producing a durable and reliable design. “Sailing is about finding your path, whether it’s across an ocean or within yourself.” – Sven Yrvind In conclusion, making flanges around bulkhead hatches may seem complex at first glance, but by following Sven Yrvind’s meticulous process, enthusiasts can achieve professional-level results. Remember that the journey of boatbuilding is as rewarding as reaching your destination; it tests one’s patience and dedication. For those seeking to embark on this adventure or simply gain more insight into marine craftsmanship, Sven’s wisdom is invaluable.Sven proceeds to apply glue along one edge of the flange, ensuring a secure bond when clamped into place. He emphasizes that this stage is crucial for maintaining the structural integrity of the flange, which in turn safeguards the living area beneath the canvas when hatches are open.Step 3: Allowing Time to Dry
After securely attaching the first portion of the flange, Sven allows ample time for it to dry before moving forward with additional steps. This patience and precision are key aspects of his successful boatbuilding methods.Step 4: Finishing Touches
Once the flange is fully dried, Sven removes the clamps carefully, ensuring no damage occurs during this process. He then moves on to attaching four more pieces onto these main frames, completing two pairs of flanges for the bulkhead hatches.The Final Touches
While two flanges form the primary support structure around the hatches, Sven mentions there are two additional pieces required at each end to ensure comprehensive protection. This attention to detail highlights his commitment to producing a durable and reliable design. “Sailing is about finding your path, whether it’s across an ocean or within yourself.” – Sven Yrvind In conclusion, making flanges around bulkhead hatches may seem complex at first glance, but by following Sven Yrvind’s meticulous process, enthusiasts can achieve professional-level results. Remember that the journey of boatbuilding is as rewarding as reaching your destination; it tests one’s patience and dedication. For those seeking to embark on this adventure or simply gain more insight into marine craftsmanship, Sven’s wisdom is invaluable.Sven begins by explaining that working on flanges vertically and horizontally is significantly easier than doing so in a flat position. To simplify the process further, he divides the task into two or three steps as suggested by fellow expert “for for.” This approach not only makes it more manageable but also allows for greater precision in crafting each component.Step 2: Applying Glue and Securing
Sven proceeds to apply glue along one edge of the flange, ensuring a secure bond when clamped into place. He emphasizes that this stage is crucial for maintaining the structural integrity of the flange, which in turn safeguards the living area beneath the canvas when hatches are open.Step 3: Allowing Time to Dry
After securely attaching the first portion of the flange, Sven allows ample time for it to dry before moving forward with additional steps. This patience and precision are key aspects of his successful boatbuilding methods.Step 4: Finishing Touches
Once the flange is fully dried, Sven removes the clamps carefully, ensuring no damage occurs during this process. He then moves on to attaching four more pieces onto these main frames, completing two pairs of flanges for the bulkhead hatches.The Final Touches
While two flanges form the primary support structure around the hatches, Sven mentions there are two additional pieces required at each end to ensure comprehensive protection. This attention to detail highlights his commitment to producing a durable and reliable design. “Sailing is about finding your path, whether it’s across an ocean or within yourself.” – Sven Yrvind In conclusion, making flanges around bulkhead hatches may seem complex at first glance, but by following Sven Yrvind’s meticulous process, enthusiasts can achieve professional-level results. Remember that the journey of boatbuilding is as rewarding as reaching your destination; it tests one’s patience and dedication. For those seeking to embark on this adventure or simply gain more insight into marine craftsmanship, Sven’s wisdom is invaluable.Sven Yrvind, a renowned yacht designer and sailor, shares valuable insights on creating flanges around bulkhead hatches for canvas protection in this enlightening video. By following his expert guidance, boat enthusiasts can ensure their living areas remain secure while allowing unhindered access through the hatches.Step 1: Starting with the Flange
Sven begins by explaining that working on flanges vertically and horizontally is significantly easier than doing so in a flat position. To simplify the process further, he divides the task into two or three steps as suggested by fellow expert “for for.” This approach not only makes it more manageable but also allows for greater precision in crafting each component.Step 2: Applying Glue and Securing
Sven proceeds to apply glue along one edge of the flange, ensuring a secure bond when clamped into place. He emphasizes that this stage is crucial for maintaining the structural integrity of the flange, which in turn safeguards the living area beneath the canvas when hatches are open.Step 3: Allowing Time to Dry
After securely attaching the first portion of the flange, Sven allows ample time for it to dry before moving forward with additional steps. This patience and precision are key aspects of his successful boatbuilding methods.Step 4: Finishing Touches
Once the flange is fully dried, Sven removes the clamps carefully, ensuring no damage occurs during this process. He then moves on to attaching four more pieces onto these main frames, completing two pairs of flanges for the bulkhead hatches.The Final Touches
While two flanges form the primary support structure around the hatches, Sven mentions there are two additional pieces required at each end to ensure comprehensive protection. This attention to detail highlights his commitment to producing a durable and reliable design. “Sailing is about finding your path, whether it’s across an ocean or within yourself.” – Sven Yrvind In conclusion, making flanges around bulkhead hatches may seem complex at first glance, but by following Sven Yrvind’s meticulous process, enthusiasts can achieve professional-level results. Remember that the journey of boatbuilding is as rewarding as reaching your destination; it tests one’s patience and dedication. For those seeking to embark on this adventure or simply gain more insight into marine craftsmanship, Sven’s wisdom is invaluable.Making Flanges Around Bulkhead Hatches for Canvas
Sven Yrvind, a renowned yacht designer and sailor, shares valuable insights on creating flanges around bulkhead hatches for canvas protection in this enlightening video. By following his expert guidance, boat enthusiasts can ensure their living areas remain secure while allowing unhindered access through the hatches.Step 1: Starting with the Flange
Sven begins by explaining that working on flanges vertically and horizontally is significantly easier than doing so in a flat position. To simplify the process further, he divides the task into two or three steps as suggested by fellow expert “for for.” This approach not only makes it more manageable but also allows for greater precision in crafting each component.Step 2: Applying Glue and Securing
Sven proceeds to apply glue along one edge of the flange, ensuring a secure bond when clamped into place. He emphasizes that this stage is crucial for maintaining the structural integrity of the flange, which in turn safeguards the living area beneath the canvas when hatches are open.Step 3: Allowing Time to Dry
After securely attaching the first portion of the flange, Sven allows ample time for it to dry before moving forward with additional steps. This patience and precision are key aspects of his successful boatbuilding methods.Step 4: Finishing Touches
Once the flange is fully dried, Sven removes the clamps carefully, ensuring no damage occurs during this process. He then moves on to attaching four more pieces onto these main frames, completing two pairs of flanges for the bulkhead hatches.The Final Touches
While two flanges form the primary support structure around the hatches, Sven mentions there are two additional pieces required at each end to ensure comprehensive protection. This attention to detail highlights his commitment to producing a durable and reliable design. “Sailing is about finding your path, whether it’s across an ocean or within yourself.” – Sven Yrvind In conclusion, making flanges around bulkhead hatches may seem complex at first glance, but by following Sven Yrvind’s meticulous process, enthusiasts can achieve professional-level results. Remember that the journey of boatbuilding is as rewarding as reaching your destination; it tests one’s patience and dedication. For those seeking to embark on this adventure or simply gain more insight into marine craftsmanship, Sven’s wisdom is invaluable.After securely attaching the first portion of the flange, Sven allows ample time for it to dry before moving forward with additional steps. This patience and precision are key aspects of his successful boatbuilding methods.Step 4: Finishing Touches
Once the flange is fully dried, Sven removes the clamps carefully, ensuring no damage occurs during this process. He then moves on to attaching four more pieces onto these main frames, completing two pairs of flanges for the bulkhead hatches.The Final Touches
While two flanges form the primary support structure around the hatches, Sven mentions there are two additional pieces required at each end to ensure comprehensive protection. This attention to detail highlights his commitment to producing a durable and reliable design. “Sailing is about finding your path, whether it’s across an ocean or within yourself.” – Sven Yrvind In conclusion, making flanges around bulkhead hatches may seem complex at first glance, but by following Sven Yrvind’s meticulous process, enthusiasts can achieve professional-level results. Remember that the journey of boatbuilding is as rewarding as reaching your destination; it tests one’s patience and dedication. For those seeking to embark on this adventure or simply gain more insight into marine craftsmanship, Sven’s wisdom is invaluable.Sven proceeds to apply glue along one edge of the flange, ensuring a secure bond when clamped into place. He emphasizes that this stage is crucial for maintaining the structural integrity of the flange, which in turn safeguards the living area beneath the canvas when hatches are open.Step 3: Allowing Time to Dry
After securely attaching the first portion of the flange, Sven allows ample time for it to dry before moving forward with additional steps. This patience and precision are key aspects of his successful boatbuilding methods.Step 4: Finishing Touches
Once the flange is fully dried, Sven removes the clamps carefully, ensuring no damage occurs during this process. He then moves on to attaching four more pieces onto these main frames, completing two pairs of flanges for the bulkhead hatches.The Final Touches
While two flanges form the primary support structure around the hatches, Sven mentions there are two additional pieces required at each end to ensure comprehensive protection. This attention to detail highlights his commitment to producing a durable and reliable design. “Sailing is about finding your path, whether it’s across an ocean or within yourself.” – Sven Yrvind In conclusion, making flanges around bulkhead hatches may seem complex at first glance, but by following Sven Yrvind’s meticulous process, enthusiasts can achieve professional-level results. Remember that the journey of boatbuilding is as rewarding as reaching your destination; it tests one’s patience and dedication. For those seeking to embark on this adventure or simply gain more insight into marine craftsmanship, Sven’s wisdom is invaluable.Sven begins by explaining that working on flanges vertically and horizontally is significantly easier than doing so in a flat position. To simplify the process further, he divides the task into two or three steps as suggested by fellow expert “for for.” This approach not only makes it more manageable but also allows for greater precision in crafting each component.Step 2: Applying Glue and Securing
Sven proceeds to apply glue along one edge of the flange, ensuring a secure bond when clamped into place. He emphasizes that this stage is crucial for maintaining the structural integrity of the flange, which in turn safeguards the living area beneath the canvas when hatches are open.Step 3: Allowing Time to Dry
After securely attaching the first portion of the flange, Sven allows ample time for it to dry before moving forward with additional steps. This patience and precision are key aspects of his successful boatbuilding methods.Step 4: Finishing Touches
Once the flange is fully dried, Sven removes the clamps carefully, ensuring no damage occurs during this process. He then moves on to attaching four more pieces onto these main frames, completing two pairs of flanges for the bulkhead hatches.The Final Touches
While two flanges form the primary support structure around the hatches, Sven mentions there are two additional pieces required at each end to ensure comprehensive protection. This attention to detail highlights his commitment to producing a durable and reliable design. “Sailing is about finding your path, whether it’s across an ocean or within yourself.” – Sven Yrvind In conclusion, making flanges around bulkhead hatches may seem complex at first glance, but by following Sven Yrvind’s meticulous process, enthusiasts can achieve professional-level results. Remember that the journey of boatbuilding is as rewarding as reaching your destination; it tests one’s patience and dedication. For those seeking to embark on this adventure or simply gain more insight into marine craftsmanship, Sven’s wisdom is invaluable.Sven Yrvind, a renowned yacht designer and sailor, shares valuable insights on creating flanges around bulkhead hatches for canvas protection in this enlightening video. By following his expert guidance, boat enthusiasts can ensure their living areas remain secure while allowing unhindered access through the hatches.Step 1: Starting with the Flange
Sven begins by explaining that working on flanges vertically and horizontally is significantly easier than doing so in a flat position. To simplify the process further, he divides the task into two or three steps as suggested by fellow expert “for for.” This approach not only makes it more manageable but also allows for greater precision in crafting each component.Step 2: Applying Glue and Securing
Sven proceeds to apply glue along one edge of the flange, ensuring a secure bond when clamped into place. He emphasizes that this stage is crucial for maintaining the structural integrity of the flange, which in turn safeguards the living area beneath the canvas when hatches are open.Step 3: Allowing Time to Dry
After securely attaching the first portion of the flange, Sven allows ample time for it to dry before moving forward with additional steps. This patience and precision are key aspects of his successful boatbuilding methods.Step 4: Finishing Touches
Once the flange is fully dried, Sven removes the clamps carefully, ensuring no damage occurs during this process. He then moves on to attaching four more pieces onto these main frames, completing two pairs of flanges for the bulkhead hatches.The Final Touches
While two flanges form the primary support structure around the hatches, Sven mentions there are two additional pieces required at each end to ensure comprehensive protection. This attention to detail highlights his commitment to producing a durable and reliable design. “Sailing is about finding your path, whether it’s across an ocean or within yourself.” – Sven Yrvind In conclusion, making flanges around bulkhead hatches may seem complex at first glance, but by following Sven Yrvind’s meticulous process, enthusiasts can achieve professional-level results. Remember that the journey of boatbuilding is as rewarding as reaching your destination; it tests one’s patience and dedication. For those seeking to embark on this adventure or simply gain more insight into marine craftsmanship, Sven’s wisdom is invaluable.Making Flanges Around Bulkhead Hatches for Canvas
Sven Yrvind, a renowned yacht designer and sailor, shares valuable insights on creating flanges around bulkhead hatches for canvas protection in this enlightening video. By following his expert guidance, boat enthusiasts can ensure their living areas remain secure while allowing unhindered access through the hatches.Step 1: Starting with the Flange
Sven begins by explaining that working on flanges vertically and horizontally is significantly easier than doing so in a flat position. To simplify the process further, he divides the task into two or three steps as suggested by fellow expert “for for.” This approach not only makes it more manageable but also allows for greater precision in crafting each component.Step 2: Applying Glue and Securing
Sven proceeds to apply glue along one edge of the flange, ensuring a secure bond when clamped into place. He emphasizes that this stage is crucial for maintaining the structural integrity of the flange, which in turn safeguards the living area beneath the canvas when hatches are open.Step 3: Allowing Time to Dry
After securely attaching the first portion of the flange, Sven allows ample time for it to dry before moving forward with additional steps. This patience and precision are key aspects of his successful boatbuilding methods.Step 4: Finishing Touches
Once the flange is fully dried, Sven removes the clamps carefully, ensuring no damage occurs during this process. He then moves on to attaching four more pieces onto these main frames, completing two pairs of flanges for the bulkhead hatches.The Final Touches
While two flanges form the primary support structure around the hatches, Sven mentions there are two additional pieces required at each end to ensure comprehensive protection. This attention to detail highlights his commitment to producing a durable and reliable design. “Sailing is about finding your path, whether it’s across an ocean or within yourself.” – Sven Yrvind In conclusion, making flanges around bulkhead hatches may seem complex at first glance, but by following Sven Yrvind’s meticulous process, enthusiasts can achieve professional-level results. Remember that the journey of boatbuilding is as rewarding as reaching your destination; it tests one’s patience and dedication. For those seeking to embark on this adventure or simply gain more insight into marine craftsmanship, Sven’s wisdom is invaluable.Once the flange is fully dried, Sven removes the clamps carefully, ensuring no damage occurs during this process. He then moves on to attaching four more pieces onto these main frames, completing two pairs of flanges for the bulkhead hatches.The Final Touches
While two flanges form the primary support structure around the hatches, Sven mentions there are two additional pieces required at each end to ensure comprehensive protection. This attention to detail highlights his commitment to producing a durable and reliable design. “Sailing is about finding your path, whether it’s across an ocean or within yourself.” – Sven Yrvind In conclusion, making flanges around bulkhead hatches may seem complex at first glance, but by following Sven Yrvind’s meticulous process, enthusiasts can achieve professional-level results. Remember that the journey of boatbuilding is as rewarding as reaching your destination; it tests one’s patience and dedication. For those seeking to embark on this adventure or simply gain more insight into marine craftsmanship, Sven’s wisdom is invaluable.After securely attaching the first portion of the flange, Sven allows ample time for it to dry before moving forward with additional steps. This patience and precision are key aspects of his successful boatbuilding methods.Step 4: Finishing Touches
Once the flange is fully dried, Sven removes the clamps carefully, ensuring no damage occurs during this process. He then moves on to attaching four more pieces onto these main frames, completing two pairs of flanges for the bulkhead hatches.The Final Touches
While two flanges form the primary support structure around the hatches, Sven mentions there are two additional pieces required at each end to ensure comprehensive protection. This attention to detail highlights his commitment to producing a durable and reliable design. “Sailing is about finding your path, whether it’s across an ocean or within yourself.” – Sven Yrvind In conclusion, making flanges around bulkhead hatches may seem complex at first glance, but by following Sven Yrvind’s meticulous process, enthusiasts can achieve professional-level results. Remember that the journey of boatbuilding is as rewarding as reaching your destination; it tests one’s patience and dedication. For those seeking to embark on this adventure or simply gain more insight into marine craftsmanship, Sven’s wisdom is invaluable.Sven proceeds to apply glue along one edge of the flange, ensuring a secure bond when clamped into place. He emphasizes that this stage is crucial for maintaining the structural integrity of the flange, which in turn safeguards the living area beneath the canvas when hatches are open.Step 3: Allowing Time to Dry
After securely attaching the first portion of the flange, Sven allows ample time for it to dry before moving forward with additional steps. This patience and precision are key aspects of his successful boatbuilding methods.Step 4: Finishing Touches
Once the flange is fully dried, Sven removes the clamps carefully, ensuring no damage occurs during this process. He then moves on to attaching four more pieces onto these main frames, completing two pairs of flanges for the bulkhead hatches.The Final Touches
While two flanges form the primary support structure around the hatches, Sven mentions there are two additional pieces required at each end to ensure comprehensive protection. This attention to detail highlights his commitment to producing a durable and reliable design. “Sailing is about finding your path, whether it’s across an ocean or within yourself.” – Sven Yrvind In conclusion, making flanges around bulkhead hatches may seem complex at first glance, but by following Sven Yrvind’s meticulous process, enthusiasts can achieve professional-level results. Remember that the journey of boatbuilding is as rewarding as reaching your destination; it tests one’s patience and dedication. For those seeking to embark on this adventure or simply gain more insight into marine craftsmanship, Sven’s wisdom is invaluable.Sven begins by explaining that working on flanges vertically and horizontally is significantly easier than doing so in a flat position. To simplify the process further, he divides the task into two or three steps as suggested by fellow expert “for for.” This approach not only makes it more manageable but also allows for greater precision in crafting each component.Step 2: Applying Glue and Securing
Sven proceeds to apply glue along one edge of the flange, ensuring a secure bond when clamped into place. He emphasizes that this stage is crucial for maintaining the structural integrity of the flange, which in turn safeguards the living area beneath the canvas when hatches are open.Step 3: Allowing Time to Dry
After securely attaching the first portion of the flange, Sven allows ample time for it to dry before moving forward with additional steps. This patience and precision are key aspects of his successful boatbuilding methods.Step 4: Finishing Touches
Once the flange is fully dried, Sven removes the clamps carefully, ensuring no damage occurs during this process. He then moves on to attaching four more pieces onto these main frames, completing two pairs of flanges for the bulkhead hatches.The Final Touches
While two flanges form the primary support structure around the hatches, Sven mentions there are two additional pieces required at each end to ensure comprehensive protection. This attention to detail highlights his commitment to producing a durable and reliable design. “Sailing is about finding your path, whether it’s across an ocean or within yourself.” – Sven Yrvind In conclusion, making flanges around bulkhead hatches may seem complex at first glance, but by following Sven Yrvind’s meticulous process, enthusiasts can achieve professional-level results. Remember that the journey of boatbuilding is as rewarding as reaching your destination; it tests one’s patience and dedication. For those seeking to embark on this adventure or simply gain more insight into marine craftsmanship, Sven’s wisdom is invaluable.Sven Yrvind, a renowned yacht designer and sailor, shares valuable insights on creating flanges around bulkhead hatches for canvas protection in this enlightening video. By following his expert guidance, boat enthusiasts can ensure their living areas remain secure while allowing unhindered access through the hatches.Step 1: Starting with the Flange
Sven begins by explaining that working on flanges vertically and horizontally is significantly easier than doing so in a flat position. To simplify the process further, he divides the task into two or three steps as suggested by fellow expert “for for.” This approach not only makes it more manageable but also allows for greater precision in crafting each component.Step 2: Applying Glue and Securing
Sven proceeds to apply glue along one edge of the flange, ensuring a secure bond when clamped into place. He emphasizes that this stage is crucial for maintaining the structural integrity of the flange, which in turn safeguards the living area beneath the canvas when hatches are open.Step 3: Allowing Time to Dry
After securely attaching the first portion of the flange, Sven allows ample time for it to dry before moving forward with additional steps. This patience and precision are key aspects of his successful boatbuilding methods.Step 4: Finishing Touches
Once the flange is fully dried, Sven removes the clamps carefully, ensuring no damage occurs during this process. He then moves on to attaching four more pieces onto these main frames, completing two pairs of flanges for the bulkhead hatches.The Final Touches
While two flanges form the primary support structure around the hatches, Sven mentions there are two additional pieces required at each end to ensure comprehensive protection. This attention to detail highlights his commitment to producing a durable and reliable design. “Sailing is about finding your path, whether it’s across an ocean or within yourself.” – Sven Yrvind In conclusion, making flanges around bulkhead hatches may seem complex at first glance, but by following Sven Yrvind’s meticulous process, enthusiasts can achieve professional-level results. Remember that the journey of boatbuilding is as rewarding as reaching your destination; it tests one’s patience and dedication. For those seeking to embark on this adventure or simply gain more insight into marine craftsmanship, Sven’s wisdom is invaluable.Making Flanges Around Bulkhead Hatches for Canvas
Sven Yrvind, a renowned yacht designer and sailor, shares valuable insights on creating flanges around bulkhead hatches for canvas protection in this enlightening video. By following his expert guidance, boat enthusiasts can ensure their living areas remain secure while allowing unhindered access through the hatches.Step 1: Starting with the Flange
Sven begins by explaining that working on flanges vertically and horizontally is significantly easier than doing so in a flat position. To simplify the process further, he divides the task into two or three steps as suggested by fellow expert “for for.” This approach not only makes it more manageable but also allows for greater precision in crafting each component.Step 2: Applying Glue and Securing
Sven proceeds to apply glue along one edge of the flange, ensuring a secure bond when clamped into place. He emphasizes that this stage is crucial for maintaining the structural integrity of the flange, which in turn safeguards the living area beneath the canvas when hatches are open.Step 3: Allowing Time to Dry
After securely attaching the first portion of the flange, Sven allows ample time for it to dry before moving forward with additional steps. This patience and precision are key aspects of his successful boatbuilding methods.Step 4: Finishing Touches
Once the flange is fully dried, Sven removes the clamps carefully, ensuring no damage occurs during this process. He then moves on to attaching four more pieces onto these main frames, completing two pairs of flanges for the bulkhead hatches.The Final Touches
While two flanges form the primary support structure around the hatches, Sven mentions there are two additional pieces required at each end to ensure comprehensive protection. This attention to detail highlights his commitment to producing a durable and reliable design. “Sailing is about finding your path, whether it’s across an ocean or within yourself.” – Sven Yrvind In conclusion, making flanges around bulkhead hatches may seem complex at first glance, but by following Sven Yrvind’s meticulous process, enthusiasts can achieve professional-level results. Remember that the journey of boatbuilding is as rewarding as reaching your destination; it tests one’s patience and dedication. For those seeking to embark on this adventure or simply gain more insight into marine craftsmanship, Sven’s wisdom is invaluable.Making Flanges Around Bulkhead Hatches for Canvas
Sven Yrvind, a renowned yacht designer and sailor, shares valuable insights on creating flanges around bulkhead hatches for canvas protection in this enlightening video. By following his expert guidance, boat enthusiasts can ensure their living areas remain secure while allowing unhindered access through the hatches.Step 1: Starting with the Flange
Sven begins by explaining that working on flanges vertically and horizontally is significantly easier than doing so in a flat position. To simplify the process further, he divides the task into two or three steps as suggested by fellow expert “for for.” This approach not only makes it more manageable but also allows for greater precision in crafting each component.Step 2: Applying Glue and Securing
Sven proceeds to apply glue along one edge of the flange, ensuring a secure bond when clamped into place. He emphasizes that this stage is crucial for maintaining the structural integrity of the flange, which in turn safeguards the living area beneath the canvas when hatches are open.Step 3: Allowing Time to Dry
After securely attaching the first portion of the flange, Sven allows ample time for it to dry before moving forward with additional steps. This patience and precision are key aspects of his successful boatbuilding methods.Step 4: Finishing Touches
Once the flange is fully dried, Sven removes the clamps carefully, ensuring no damage occurs during this process. He then moves on to attaching four more pieces onto these main frames, completing two pairs of flanges for the bulkhead hatches.The Final Touches
While two flanges form the primary support structure around the hatches, Sven mentions there are two additional pieces required at each end to ensure comprehensive protection. This attention to detail highlights his commitment to producing a durable and reliable design. “Sailing is about finding your path, whether it’s across an ocean or within yourself.” – Sven Yrvind In conclusion, making flanges around bulkhead hatches may seem complex at first glance, but by following Sven Yrvind’s meticulous process, enthusiasts can achieve professional-level results. Remember that the journey of boatbuilding is as rewarding as reaching your destination; it tests one’s patience and dedication. For those seeking to embark on this adventure or simply gain more insight into marine craftsmanship, Sven’s wisdom is invaluable.After securely attaching the first portion of the flange, Sven allows ample time for it to dry before moving forward with additional steps. This patience and precision are key aspects of his successful boatbuilding methods.Step 4: Finishing Touches
Once the flange is fully dried, Sven removes the clamps carefully, ensuring no damage occurs during this process. He then moves on to attaching four more pieces onto these main frames, completing two pairs of flanges for the bulkhead hatches.The Final Touches
While two flanges form the primary support structure around the hatches, Sven mentions there are two additional pieces required at each end to ensure comprehensive protection. This attention to detail highlights his commitment to producing a durable and reliable design. “Sailing is about finding your path, whether it’s across an ocean or within yourself.” – Sven Yrvind In conclusion, making flanges around bulkhead hatches may seem complex at first glance, but by following Sven Yrvind’s meticulous process, enthusiasts can achieve professional-level results. Remember that the journey of boatbuilding is as rewarding as reaching your destination; it tests one’s patience and dedication. For those seeking to embark on this adventure or simply gain more insight into marine craftsmanship, Sven’s wisdom is invaluable.Making Flanges Around Bulkhead Hatches for Canvas
Sven Yrvind, a renowned yacht designer and sailor, shares valuable insights on creating flanges around bulkhead hatches for canvas protection in this enlightening video. By following his expert guidance, boat enthusiasts can ensure their living areas remain secure while allowing unhindered access through the hatches.Step 1: Starting with the Flange
Sven begins by explaining that working on flanges vertically and horizontally is significantly easier than doing so in a flat position. To simplify the process further, he divides the task into two or three steps as suggested by fellow expert “for for.” This approach not only makes it more manageable but also allows for greater precision in crafting each component.Step 2: Applying Glue and Securing
Sven proceeds to apply glue along one edge of the flange, ensuring a secure bond when clamped into place. He emphasizes that this stage is crucial for maintaining the structural integrity of the flange, which in turn safeguards the living area beneath the canvas when hatches are open.Step 3: Allowing Time to Dry
After securely attaching the first portion of the flange, Sven allows ample time for it to dry before moving forward with additional steps. This patience and precision are key aspects of his successful boatbuilding methods.Step 4: Finishing Touches
Once the flange is fully dried, Sven removes the clamps carefully, ensuring no damage occurs during this process. He then moves on to attaching four more pieces onto these main frames, completing two pairs of flanges for the bulkhead hatches.The Final Touches
While two flanges form the primary support structure around the hatches, Sven mentions there are two additional pieces required at each end to ensure comprehensive protection. This attention to detail highlights his commitment to producing a durable and reliable design. “Sailing is about finding your path, whether it’s across an ocean or within yourself.” – Sven Yrvind In conclusion, making flanges around bulkhead hatches may seem complex at first glance, but by following Sven Yrvind’s meticulous process, enthusiasts can achieve professional-level results. Remember that the journey of boatbuilding is as rewarding as reaching your destination; it tests one’s patience and dedication. For those seeking to embark on this adventure or simply gain more insight into marine craftsmanship, Sven’s wisdom is invaluable.Sven proceeds to apply glue along one edge of the flange, ensuring a secure bond when clamped into place. He emphasizes that this stage is crucial for maintaining the structural integrity of the flange, which in turn safeguards the living area beneath the canvas when hatches are open.Step 3: Allowing Time to Dry
After securely attaching the first portion of the flange, Sven allows ample time for it to dry before moving forward with additional steps. This patience and precision are key aspects of his successful boatbuilding methods.Step 4: Finishing Touches
Once the flange is fully dried, Sven removes the clamps carefully, ensuring no damage occurs during this process. He then moves on to attaching four more pieces onto these main frames, completing two pairs of flanges for the bulkhead hatches.The Final Touches
While two flanges form the primary support structure around the hatches, Sven mentions there are two additional pieces required at each end to ensure comprehensive protection. This attention to detail highlights his commitment to producing a durable and reliable design. “Sailing is about finding your path, whether it’s across an ocean or within yourself.” – Sven Yrvind In conclusion, making flanges around bulkhead hatches may seem complex at first glance, but by following Sven Yrvind’s meticulous process, enthusiasts can achieve professional-level results. Remember that the journey of boatbuilding is as rewarding as reaching your destination; it tests one’s patience and dedication. For those seeking to embark on this adventure or simply gain more insight into marine craftsmanship, Sven’s wisdom is invaluable.Making Flanges Around Bulkhead Hatches for Canvas
Sven Yrvind, a renowned yacht designer and sailor, shares valuable insights on creating flanges around bulkhead hatches for canvas protection in this enlightening video. By following his expert guidance, boat enthusiasts can ensure their living areas remain secure while allowing unhindered access through the hatches.Step 1: Starting with the Flange
Sven begins by explaining that working on flanges vertically and horizontally is significantly easier than doing so in a flat position. To simplify the process further, he divides the task into two or three steps as suggested by fellow expert “for for.” This approach not only makes it more manageable but also allows for greater precision in crafting each component.Step 2: Applying Glue and Securing
Sven proceeds to apply glue along one edge of the flange, ensuring a secure bond when clamped into place. He emphasizes that this stage is crucial for maintaining the structural integrity of the flange, which in turn safeguards the living area beneath the canvas when hatches are open.Step 3: Allowing Time to Dry
After securely attaching the first portion of the flange, Sven allows ample time for it to dry before moving forward with additional steps. This patience and precision are key aspects of his successful boatbuilding methods.Step 4: Finishing Touches
Once the flange is fully dried, Sven removes the clamps carefully, ensuring no damage occurs during this process. He then moves on to attaching four more pieces onto these main frames, completing two pairs of flanges for the bulkhead hatches.The Final Touches
While two flanges form the primary support structure around the hatches, Sven mentions there are two additional pieces required at each end to ensure comprehensive protection. This attention to detail highlights his commitment to producing a durable and reliable design. “Sailing is about finding your path, whether it’s across an ocean or within yourself.” – Sven Yrvind In conclusion, making flanges around bulkhead hatches may seem complex at first glance, but by following Sven Yrvind’s meticulous process, enthusiasts can achieve professional-level results. Remember that the journey of boatbuilding is as rewarding as reaching your destination; it tests one’s patience and dedication. For those seeking to embark on this adventure or simply gain more insight into marine craftsmanship, Sven’s wisdom is invaluable.Sven begins by explaining that working on flanges vertically and horizontally is significantly easier than doing so in a flat position. To simplify the process further, he divides the task into two or three steps as suggested by fellow expert “for for.” This approach not only makes it more manageable but also allows for greater precision in crafting each component.Step 2: Applying Glue and Securing
Sven proceeds to apply glue along one edge of the flange, ensuring a secure bond when clamped into place. He emphasizes that this stage is crucial for maintaining the structural integrity of the flange, which in turn safeguards the living area beneath the canvas when hatches are open.Step 3: Allowing Time to Dry
After securely attaching the first portion of the flange, Sven allows ample time for it to dry before moving forward with additional steps. This patience and precision are key aspects of his successful boatbuilding methods.Step 4: Finishing Touches
Once the flange is fully dried, Sven removes the clamps carefully, ensuring no damage occurs during this process. He then moves on to attaching four more pieces onto these main frames, completing two pairs of flanges for the bulkhead hatches.The Final Touches
While two flanges form the primary support structure around the hatches, Sven mentions there are two additional pieces required at each end to ensure comprehensive protection. This attention to detail highlights his commitment to producing a durable and reliable design. “Sailing is about finding your path, whether it’s across an ocean or within yourself.” – Sven Yrvind In conclusion, making flanges around bulkhead hatches may seem complex at first glance, but by following Sven Yrvind’s meticulous process, enthusiasts can achieve professional-level results. Remember that the journey of boatbuilding is as rewarding as reaching your destination; it tests one’s patience and dedication. For those seeking to embark on this adventure or simply gain more insight into marine craftsmanship, Sven’s wisdom is invaluable.Making Flanges Around Bulkhead Hatches for Canvas
Sven Yrvind, a renowned yacht designer and sailor, shares valuable insights on creating flanges around bulkhead hatches for canvas protection in this enlightening video. By following his expert guidance, boat enthusiasts can ensure their living areas remain secure while allowing unhindered access through the hatches.Step 1: Starting with the Flange
Sven begins by explaining that working on flanges vertically and horizontally is significantly easier than doing so in a flat position. To simplify the process further, he divides the task into two or three steps as suggested by fellow expert “for for.” This approach not only makes it more manageable but also allows for greater precision in crafting each component.Step 2: Applying Glue and Securing
Sven proceeds to apply glue along one edge of the flange, ensuring a secure bond when clamped into place. He emphasizes that this stage is crucial for maintaining the structural integrity of the flange, which in turn safeguards the living area beneath the canvas when hatches are open.Step 3: Allowing Time to Dry
After securely attaching the first portion of the flange, Sven allows ample time for it to dry before moving forward with additional steps. This patience and precision are key aspects of his successful boatbuilding methods.Step 4: Finishing Touches
Once the flange is fully dried, Sven removes the clamps carefully, ensuring no damage occurs during this process. He then moves on to attaching four more pieces onto these main frames, completing two pairs of flanges for the bulkhead hatches.The Final Touches
While two flanges form the primary support structure around the hatches, Sven mentions there are two additional pieces required at each end to ensure comprehensive protection. This attention to detail highlights his commitment to producing a durable and reliable design. “Sailing is about finding your path, whether it’s across an ocean or within yourself.” – Sven Yrvind In conclusion, making flanges around bulkhead hatches may seem complex at first glance, but by following Sven Yrvind’s meticulous process, enthusiasts can achieve professional-level results. Remember that the journey of boatbuilding is as rewarding as reaching your destination; it tests one’s patience and dedication. For those seeking to embark on this adventure or simply gain more insight into marine craftsmanship, Sven’s wisdom is invaluable.Sven Yrvind, a renowned yacht designer and sailor, shares valuable insights on creating flanges around bulkhead hatches for canvas protection in this enlightening video. By following his expert guidance, boat enthusiasts can ensure their living areas remain secure while allowing unhindered access through the hatches.Step 1: Starting with the Flange
Sven begins by explaining that working on flanges vertically and horizontally is significantly easier than doing so in a flat position. To simplify the process further, he divides the task into two or three steps as suggested by fellow expert “for for.” This approach not only makes it more manageable but also allows for greater precision in crafting each component.Step 2: Applying Glue and Securing
Sven proceeds to apply glue along one edge of the flange, ensuring a secure bond when clamped into place. He emphasizes that this stage is crucial for maintaining the structural integrity of the flange, which in turn safeguards the living area beneath the canvas when hatches are open.Step 3: Allowing Time to Dry
After securely attaching the first portion of the flange, Sven allows ample time for it to dry before moving forward with additional steps. This patience and precision are key aspects of his successful boatbuilding methods.Step 4: Finishing Touches
Once the flange is fully dried, Sven removes the clamps carefully, ensuring no damage occurs during this process. He then moves on to attaching four more pieces onto these main frames, completing two pairs of flanges for the bulkhead hatches.The Final Touches
While two flanges form the primary support structure around the hatches, Sven mentions there are two additional pieces required at each end to ensure comprehensive protection. This attention to detail highlights his commitment to producing a durable and reliable design. “Sailing is about finding your path, whether it’s across an ocean or within yourself.” – Sven Yrvind In conclusion, making flanges around bulkhead hatches may seem complex at first glance, but by following Sven Yrvind’s meticulous process, enthusiasts can achieve professional-level results. Remember that the journey of boatbuilding is as rewarding as reaching your destination; it tests one’s patience and dedication. For those seeking to embark on this adventure or simply gain more insight into marine craftsmanship, Sven’s wisdom is invaluable.Making Flanges Around Bulkhead Hatches for Canvas
Sven Yrvind, a renowned yacht designer and sailor, shares valuable insights on creating flanges around bulkhead hatches for canvas protection in this enlightening video. By following his expert guidance, boat enthusiasts can ensure their living areas remain secure while allowing unhindered access through the hatches.Step 1: Starting with the Flange
Sven begins by explaining that working on flanges vertically and horizontally is significantly easier than doing so in a flat position. To simplify the process further, he divides the task into two or three steps as suggested by fellow expert “for for.” This approach not only makes it more manageable but also allows for greater precision in crafting each component.Step 2: Applying Glue and Securing
Sven proceeds to apply glue along one edge of the flange, ensuring a secure bond when clamped into place. He emphasizes that this stage is crucial for maintaining the structural integrity of the flange, which in turn safeguards the living area beneath the canvas when hatches are open.Step 3: Allowing Time to Dry
After securely attaching the first portion of the flange, Sven allows ample time for it to dry before moving forward with additional steps. This patience and precision are key aspects of his successful boatbuilding methods.Step 4: Finishing Touches
Once the flange is fully dried, Sven removes the clamps carefully, ensuring no damage occurs during this process. He then moves on to attaching four more pieces onto these main frames, completing two pairs of flanges for the bulkhead hatches.The Final Touches
While two flanges form the primary support structure around the hatches, Sven mentions there are two additional pieces required at each end to ensure comprehensive protection. This attention to detail highlights his commitment to producing a durable and reliable design. “Sailing is about finding your path, whether it’s across an ocean or within yourself.” – Sven Yrvind In conclusion, making flanges around bulkhead hatches may seem complex at first glance, but by following Sven Yrvind’s meticulous process, enthusiasts can achieve professional-level results. Remember that the journey of boatbuilding is as rewarding as reaching your destination; it tests one’s patience and dedication. For those seeking to embark on this adventure or simply gain more insight into marine craftsmanship, Sven’s wisdom is invaluable.Once the flange is fully dried, Sven removes the clamps carefully, ensuring no damage occurs during this process. He then moves on to attaching four more pieces onto these main frames, completing two pairs of flanges for the bulkhead hatches.The Final Touches
While two flanges form the primary support structure around the hatches, Sven mentions there are two additional pieces required at each end to ensure comprehensive protection. This attention to detail highlights his commitment to producing a durable and reliable design. “Sailing is about finding your path, whether it’s across an ocean or within yourself.” – Sven Yrvind In conclusion, making flanges around bulkhead hatches may seem complex at first glance, but by following Sven Yrvind’s meticulous process, enthusiasts can achieve professional-level results. Remember that the journey of boatbuilding is as rewarding as reaching your destination; it tests one’s patience and dedication. For those seeking to embark on this adventure or simply gain more insight into marine craftsmanship, Sven’s wisdom is invaluable.Sven Yrvind, a renowned yacht designer and sailor, shares valuable insights on creating flanges around bulkhead hatches for canvas protection in this enlightening video. By following his expert guidance, boat enthusiasts can ensure their living areas remain secure while allowing unhindered access through the hatches.Step 1: Starting with the Flange
Sven begins by explaining that working on flanges vertically and horizontally is significantly easier than doing so in a flat position. To simplify the process further, he divides the task into two or three steps as suggested by fellow expert “for for.” This approach not only makes it more manageable but also allows for greater precision in crafting each component.Step 2: Applying Glue and Securing
Sven proceeds to apply glue along one edge of the flange, ensuring a secure bond when clamped into place. He emphasizes that this stage is crucial for maintaining the structural integrity of the flange, which in turn safeguards the living area beneath the canvas when hatches are open.Step 3: Allowing Time to Dry
After securely attaching the first portion of the flange, Sven allows ample time for it to dry before moving forward with additional steps. This patience and precision are key aspects of his successful boatbuilding methods.Step 4: Finishing Touches
Once the flange is fully dried, Sven removes the clamps carefully, ensuring no damage occurs during this process. He then moves on to attaching four more pieces onto these main frames, completing two pairs of flanges for the bulkhead hatches.The Final Touches
While two flanges form the primary support structure around the hatches, Sven mentions there are two additional pieces required at each end to ensure comprehensive protection. This attention to detail highlights his commitment to producing a durable and reliable design. “Sailing is about finding your path, whether it’s across an ocean or within yourself.” – Sven Yrvind In conclusion, making flanges around bulkhead hatches may seem complex at first glance, but by following Sven Yrvind’s meticulous process, enthusiasts can achieve professional-level results. Remember that the journey of boatbuilding is as rewarding as reaching your destination; it tests one’s patience and dedication. For those seeking to embark on this adventure or simply gain more insight into marine craftsmanship, Sven’s wisdom is invaluable.Making Flanges Around Bulkhead Hatches for Canvas
Sven Yrvind, a renowned yacht designer and sailor, shares valuable insights on creating flanges around bulkhead hatches for canvas protection in this enlightening video. By following his expert guidance, boat enthusiasts can ensure their living areas remain secure while allowing unhindered access through the hatches.Step 1: Starting with the Flange
Sven begins by explaining that working on flanges vertically and horizontally is significantly easier than doing so in a flat position. To simplify the process further, he divides the task into two or three steps as suggested by fellow expert “for for.” This approach not only makes it more manageable but also allows for greater precision in crafting each component.Step 2: Applying Glue and Securing
Sven proceeds to apply glue along one edge of the flange, ensuring a secure bond when clamped into place. He emphasizes that this stage is crucial for maintaining the structural integrity of the flange, which in turn safeguards the living area beneath the canvas when hatches are open.Step 3: Allowing Time to Dry
After securely attaching the first portion of the flange, Sven allows ample time for it to dry before moving forward with additional steps. This patience and precision are key aspects of his successful boatbuilding methods.Step 4: Finishing Touches
Once the flange is fully dried, Sven removes the clamps carefully, ensuring no damage occurs during this process. He then moves on to attaching four more pieces onto these main frames, completing two pairs of flanges for the bulkhead hatches.The Final Touches
While two flanges form the primary support structure around the hatches, Sven mentions there are two additional pieces required at each end to ensure comprehensive protection. This attention to detail highlights his commitment to producing a durable and reliable design. “Sailing is about finding your path, whether it’s across an ocean or within yourself.” – Sven Yrvind In conclusion, making flanges around bulkhead hatches may seem complex at first glance, but by following Sven Yrvind’s meticulous process, enthusiasts can achieve professional-level results. Remember that the journey of boatbuilding is as rewarding as reaching your destination; it tests one’s patience and dedication. For those seeking to embark on this adventure or simply gain more insight into marine craftsmanship, Sven’s wisdom is invaluable.After securely attaching the first portion of the flange, Sven allows ample time for it to dry before moving forward with additional steps. This patience and precision are key aspects of his successful boatbuilding methods.Step 4: Finishing Touches
Once the flange is fully dried, Sven removes the clamps carefully, ensuring no damage occurs during this process. He then moves on to attaching four more pieces onto these main frames, completing two pairs of flanges for the bulkhead hatches.The Final Touches
While two flanges form the primary support structure around the hatches, Sven mentions there are two additional pieces required at each end to ensure comprehensive protection. This attention to detail highlights his commitment to producing a durable and reliable design. “Sailing is about finding your path, whether it’s across an ocean or within yourself.” – Sven Yrvind In conclusion, making flanges around bulkhead hatches may seem complex at first glance, but by following Sven Yrvind’s meticulous process, enthusiasts can achieve professional-level results. Remember that the journey of boatbuilding is as rewarding as reaching your destination; it tests one’s patience and dedication. For those seeking to embark on this adventure or simply gain more insight into marine craftsmanship, Sven’s wisdom is invaluable.Sven Yrvind, a renowned yacht designer and sailor, shares valuable insights on creating flanges around bulkhead hatches for canvas protection in this enlightening video. By following his expert guidance, boat enthusiasts can ensure their living areas remain secure while allowing unhindered access through the hatches.Step 1: Starting with the Flange
Sven begins by explaining that working on flanges vertically and horizontally is significantly easier than doing so in a flat position. To simplify the process further, he divides the task into two or three steps as suggested by fellow expert “for for.” This approach not only makes it more manageable but also allows for greater precision in crafting each component.Step 2: Applying Glue and Securing
Sven proceeds to apply glue along one edge of the flange, ensuring a secure bond when clamped into place. He emphasizes that this stage is crucial for maintaining the structural integrity of the flange, which in turn safeguards the living area beneath the canvas when hatches are open.Step 3: Allowing Time to Dry
After securely attaching the first portion of the flange, Sven allows ample time for it to dry before moving forward with additional steps. This patience and precision are key aspects of his successful boatbuilding methods.Step 4: Finishing Touches
Once the flange is fully dried, Sven removes the clamps carefully, ensuring no damage occurs during this process. He then moves on to attaching four more pieces onto these main frames, completing two pairs of flanges for the bulkhead hatches.The Final Touches
While two flanges form the primary support structure around the hatches, Sven mentions there are two additional pieces required at each end to ensure comprehensive protection. This attention to detail highlights his commitment to producing a durable and reliable design. “Sailing is about finding your path, whether it’s across an ocean or within yourself.” – Sven Yrvind In conclusion, making flanges around bulkhead hatches may seem complex at first glance, but by following Sven Yrvind’s meticulous process, enthusiasts can achieve professional-level results. Remember that the journey of boatbuilding is as rewarding as reaching your destination; it tests one’s patience and dedication. For those seeking to embark on this adventure or simply gain more insight into marine craftsmanship, Sven’s wisdom is invaluable.Making Flanges Around Bulkhead Hatches for Canvas
Sven Yrvind, a renowned yacht designer and sailor, shares valuable insights on creating flanges around bulkhead hatches for canvas protection in this enlightening video. By following his expert guidance, boat enthusiasts can ensure their living areas remain secure while allowing unhindered access through the hatches.Step 1: Starting with the Flange
Sven begins by explaining that working on flanges vertically and horizontally is significantly easier than doing so in a flat position. To simplify the process further, he divides the task into two or three steps as suggested by fellow expert “for for.” This approach not only makes it more manageable but also allows for greater precision in crafting each component.Step 2: Applying Glue and Securing
Sven proceeds to apply glue along one edge of the flange, ensuring a secure bond when clamped into place. He emphasizes that this stage is crucial for maintaining the structural integrity of the flange, which in turn safeguards the living area beneath the canvas when hatches are open.Step 3: Allowing Time to Dry
After securely attaching the first portion of the flange, Sven allows ample time for it to dry before moving forward with additional steps. This patience and precision are key aspects of his successful boatbuilding methods.Step 4: Finishing Touches
Once the flange is fully dried, Sven removes the clamps carefully, ensuring no damage occurs during this process. He then moves on to attaching four more pieces onto these main frames, completing two pairs of flanges for the bulkhead hatches.The Final Touches
While two flanges form the primary support structure around the hatches, Sven mentions there are two additional pieces required at each end to ensure comprehensive protection. This attention to detail highlights his commitment to producing a durable and reliable design. “Sailing is about finding your path, whether it’s across an ocean or within yourself.” – Sven Yrvind In conclusion, making flanges around bulkhead hatches may seem complex at first glance, but by following Sven Yrvind’s meticulous process, enthusiasts can achieve professional-level results. Remember that the journey of boatbuilding is as rewarding as reaching your destination; it tests one’s patience and dedication. For those seeking to embark on this adventure or simply gain more insight into marine craftsmanship, Sven’s wisdom is invaluable.Sven proceeds to apply glue along one edge of the flange, ensuring a secure bond when clamped into place. He emphasizes that this stage is crucial for maintaining the structural integrity of the flange, which in turn safeguards the living area beneath the canvas when hatches are open.Step 3: Allowing Time to Dry
After securely attaching the first portion of the flange, Sven allows ample time for it to dry before moving forward with additional steps. This patience and precision are key aspects of his successful boatbuilding methods.Step 4: Finishing Touches
Once the flange is fully dried, Sven removes the clamps carefully, ensuring no damage occurs during this process. He then moves on to attaching four more pieces onto these main frames, completing two pairs of flanges for the bulkhead hatches.The Final Touches
While two flanges form the primary support structure around the hatches, Sven mentions there are two additional pieces required at each end to ensure comprehensive protection. This attention to detail highlights his commitment to producing a durable and reliable design. “Sailing is about finding your path, whether it’s across an ocean or within yourself.” – Sven Yrvind In conclusion, making flanges around bulkhead hatches may seem complex at first glance, but by following Sven Yrvind’s meticulous process, enthusiasts can achieve professional-level results. Remember that the journey of boatbuilding is as rewarding as reaching your destination; it tests one’s patience and dedication. For those seeking to embark on this adventure or simply gain more insight into marine craftsmanship, Sven’s wisdom is invaluable.Sven Yrvind, a renowned yacht designer and sailor, shares valuable insights on creating flanges around bulkhead hatches for canvas protection in this enlightening video. By following his expert guidance, boat enthusiasts can ensure their living areas remain secure while allowing unhindered access through the hatches.Step 1: Starting with the Flange
Sven begins by explaining that working on flanges vertically and horizontally is significantly easier than doing so in a flat position. To simplify the process further, he divides the task into two or three steps as suggested by fellow expert “for for.” This approach not only makes it more manageable but also allows for greater precision in crafting each component.Step 2: Applying Glue and Securing
Sven proceeds to apply glue along one edge of the flange, ensuring a secure bond when clamped into place. He emphasizes that this stage is crucial for maintaining the structural integrity of the flange, which in turn safeguards the living area beneath the canvas when hatches are open.Step 3: Allowing Time to Dry
After securely attaching the first portion of the flange, Sven allows ample time for it to dry before moving forward with additional steps. This patience and precision are key aspects of his successful boatbuilding methods.Step 4: Finishing Touches
Once the flange is fully dried, Sven removes the clamps carefully, ensuring no damage occurs during this process. He then moves on to attaching four more pieces onto these main frames, completing two pairs of flanges for the bulkhead hatches.The Final Touches
While two flanges form the primary support structure around the hatches, Sven mentions there are two additional pieces required at each end to ensure comprehensive protection. This attention to detail highlights his commitment to producing a durable and reliable design. “Sailing is about finding your path, whether it’s across an ocean or within yourself.” – Sven Yrvind In conclusion, making flanges around bulkhead hatches may seem complex at first glance, but by following Sven Yrvind’s meticulous process, enthusiasts can achieve professional-level results. Remember that the journey of boatbuilding is as rewarding as reaching your destination; it tests one’s patience and dedication. For those seeking to embark on this adventure or simply gain more insight into marine craftsmanship, Sven’s wisdom is invaluable.Making Flanges Around Bulkhead Hatches for Canvas
Sven Yrvind, a renowned yacht designer and sailor, shares valuable insights on creating flanges around bulkhead hatches for canvas protection in this enlightening video. By following his expert guidance, boat enthusiasts can ensure their living areas remain secure while allowing unhindered access through the hatches.Step 1: Starting with the Flange
Sven begins by explaining that working on flanges vertically and horizontally is significantly easier than doing so in a flat position. To simplify the process further, he divides the task into two or three steps as suggested by fellow expert “for for.” This approach not only makes it more manageable but also allows for greater precision in crafting each component.Step 2: Applying Glue and Securing
Sven proceeds to apply glue along one edge of the flange, ensuring a secure bond when clamped into place. He emphasizes that this stage is crucial for maintaining the structural integrity of the flange, which in turn safeguards the living area beneath the canvas when hatches are open.Step 3: Allowing Time to Dry
After securely attaching the first portion of the flange, Sven allows ample time for it to dry before moving forward with additional steps. This patience and precision are key aspects of his successful boatbuilding methods.Step 4: Finishing Touches
Once the flange is fully dried, Sven removes the clamps carefully, ensuring no damage occurs during this process. He then moves on to attaching four more pieces onto these main frames, completing two pairs of flanges for the bulkhead hatches.The Final Touches
While two flanges form the primary support structure around the hatches, Sven mentions there are two additional pieces required at each end to ensure comprehensive protection. This attention to detail highlights his commitment to producing a durable and reliable design. “Sailing is about finding your path, whether it’s across an ocean or within yourself.” – Sven Yrvind In conclusion, making flanges around bulkhead hatches may seem complex at first glance, but by following Sven Yrvind’s meticulous process, enthusiasts can achieve professional-level results. Remember that the journey of boatbuilding is as rewarding as reaching your destination; it tests one’s patience and dedication. For those seeking to embark on this adventure or simply gain more insight into marine craftsmanship, Sven’s wisdom is invaluable.Sven begins by explaining that working on flanges vertically and horizontally is significantly easier than doing so in a flat position. To simplify the process further, he divides the task into two or three steps as suggested by fellow expert “for for.” This approach not only makes it more manageable but also allows for greater precision in crafting each component.Step 2: Applying Glue and Securing
Sven proceeds to apply glue along one edge of the flange, ensuring a secure bond when clamped into place. He emphasizes that this stage is crucial for maintaining the structural integrity of the flange, which in turn safeguards the living area beneath the canvas when hatches are open.Step 3: Allowing Time to Dry
After securely attaching the first portion of the flange, Sven allows ample time for it to dry before moving forward with additional steps. This patience and precision are key aspects of his successful boatbuilding methods.Step 4: Finishing Touches
Once the flange is fully dried, Sven removes the clamps carefully, ensuring no damage occurs during this process. He then moves on to attaching four more pieces onto these main frames, completing two pairs of flanges for the bulkhead hatches.The Final Touches
While two flanges form the primary support structure around the hatches, Sven mentions there are two additional pieces required at each end to ensure comprehensive protection. This attention to detail highlights his commitment to producing a durable and reliable design. “Sailing is about finding your path, whether it’s across an ocean or within yourself.” – Sven Yrvind In conclusion, making flanges around bulkhead hatches may seem complex at first glance, but by following Sven Yrvind’s meticulous process, enthusiasts can achieve professional-level results. Remember that the journey of boatbuilding is as rewarding as reaching your destination; it tests one’s patience and dedication. For those seeking to embark on this adventure or simply gain more insight into marine craftsmanship, Sven’s wisdom is invaluable.Sven Yrvind, a renowned yacht designer and sailor, shares valuable insights on creating flanges around bulkhead hatches for canvas protection in this enlightening video. By following his expert guidance, boat enthusiasts can ensure their living areas remain secure while allowing unhindered access through the hatches.Step 1: Starting with the Flange
Sven begins by explaining that working on flanges vertically and horizontally is significantly easier than doing so in a flat position. To simplify the process further, he divides the task into two or three steps as suggested by fellow expert “for for.” This approach not only makes it more manageable but also allows for greater precision in crafting each component.Step 2: Applying Glue and Securing
Sven proceeds to apply glue along one edge of the flange, ensuring a secure bond when clamped into place. He emphasizes that this stage is crucial for maintaining the structural integrity of the flange, which in turn safeguards the living area beneath the canvas when hatches are open.Step 3: Allowing Time to Dry
After securely attaching the first portion of the flange, Sven allows ample time for it to dry before moving forward with additional steps. This patience and precision are key aspects of his successful boatbuilding methods.Step 4: Finishing Touches
Once the flange is fully dried, Sven removes the clamps carefully, ensuring no damage occurs during this process. He then moves on to attaching four more pieces onto these main frames, completing two pairs of flanges for the bulkhead hatches.The Final Touches
While two flanges form the primary support structure around the hatches, Sven mentions there are two additional pieces required at each end to ensure comprehensive protection. This attention to detail highlights his commitment to producing a durable and reliable design. “Sailing is about finding your path, whether it’s across an ocean or within yourself.” – Sven Yrvind In conclusion, making flanges around bulkhead hatches may seem complex at first glance, but by following Sven Yrvind’s meticulous process, enthusiasts can achieve professional-level results. Remember that the journey of boatbuilding is as rewarding as reaching your destination; it tests one’s patience and dedication. For those seeking to embark on this adventure or simply gain more insight into marine craftsmanship, Sven’s wisdom is invaluable.Making Flanges Around Bulkhead Hatches for Canvas
Sven Yrvind, a renowned yacht designer and sailor, shares valuable insights on creating flanges around bulkhead hatches for canvas protection in this enlightening video. By following his expert guidance, boat enthusiasts can ensure their living areas remain secure while allowing unhindered access through the hatches.Step 1: Starting with the Flange
Sven begins by explaining that working on flanges vertically and horizontally is significantly easier than doing so in a flat position. To simplify the process further, he divides the task into two or three steps as suggested by fellow expert “for for.” This approach not only makes it more manageable but also allows for greater precision in crafting each component.Step 2: Applying Glue and Securing
Sven proceeds to apply glue along one edge of the flange, ensuring a secure bond when clamped into place. He emphasizes that this stage is crucial for maintaining the structural integrity of the flange, which in turn safeguards the living area beneath the canvas when hatches are open.Step 3: Allowing Time to Dry
After securely attaching the first portion of the flange, Sven allows ample time for it to dry before moving forward with additional steps. This patience and precision are key aspects of his successful boatbuilding methods.Step 4: Finishing Touches
Once the flange is fully dried, Sven removes the clamps carefully, ensuring no damage occurs during this process. He then moves on to attaching four more pieces onto these main frames, completing two pairs of flanges for the bulkhead hatches.The Final Touches
While two flanges form the primary support structure around the hatches, Sven mentions there are two additional pieces required at each end to ensure comprehensive protection. This attention to detail highlights his commitment to producing a durable and reliable design. “Sailing is about finding your path, whether it’s across an ocean or within yourself.” – Sven Yrvind In conclusion, making flanges around bulkhead hatches may seem complex at first glance, but by following Sven Yrvind’s meticulous process, enthusiasts can achieve professional-level results. Remember that the journey of boatbuilding is as rewarding as reaching your destination; it tests one’s patience and dedication. For those seeking to embark on this adventure or simply gain more insight into marine craftsmanship, Sven’s wisdom is invaluable.Once the flange is fully dried, Sven removes the clamps carefully, ensuring no damage occurs during this process. He then moves on to attaching four more pieces onto these main frames, completing two pairs of flanges for the bulkhead hatches.The Final Touches
While two flanges form the primary support structure around the hatches, Sven mentions there are two additional pieces required at each end to ensure comprehensive protection. This attention to detail highlights his commitment to producing a durable and reliable design. “Sailing is about finding your path, whether it’s across an ocean or within yourself.” – Sven Yrvind In conclusion, making flanges around bulkhead hatches may seem complex at first glance, but by following Sven Yrvind’s meticulous process, enthusiasts can achieve professional-level results. Remember that the journey of boatbuilding is as rewarding as reaching your destination; it tests one’s patience and dedication. For those seeking to embark on this adventure or simply gain more insight into marine craftsmanship, Sven’s wisdom is invaluable.Sven begins by explaining that working on flanges vertically and horizontally is significantly easier than doing so in a flat position. To simplify the process further, he divides the task into two or three steps as suggested by fellow expert “for for.” This approach not only makes it more manageable but also allows for greater precision in crafting each component.Step 2: Applying Glue and Securing
Sven proceeds to apply glue along one edge of the flange, ensuring a secure bond when clamped into place. He emphasizes that this stage is crucial for maintaining the structural integrity of the flange, which in turn safeguards the living area beneath the canvas when hatches are open.Step 3: Allowing Time to Dry
After securely attaching the first portion of the flange, Sven allows ample time for it to dry before moving forward with additional steps. This patience and precision are key aspects of his successful boatbuilding methods.Step 4: Finishing Touches
Once the flange is fully dried, Sven removes the clamps carefully, ensuring no damage occurs during this process. He then moves on to attaching four more pieces onto these main frames, completing two pairs of flanges for the bulkhead hatches.The Final Touches
While two flanges form the primary support structure around the hatches, Sven mentions there are two additional pieces required at each end to ensure comprehensive protection. This attention to detail highlights his commitment to producing a durable and reliable design. “Sailing is about finding your path, whether it’s across an ocean or within yourself.” – Sven Yrvind In conclusion, making flanges around bulkhead hatches may seem complex at first glance, but by following Sven Yrvind’s meticulous process, enthusiasts can achieve professional-level results. Remember that the journey of boatbuilding is as rewarding as reaching your destination; it tests one’s patience and dedication. For those seeking to embark on this adventure or simply gain more insight into marine craftsmanship, Sven’s wisdom is invaluable.Sven Yrvind, a renowned yacht designer and sailor, shares valuable insights on creating flanges around bulkhead hatches for canvas protection in this enlightening video. By following his expert guidance, boat enthusiasts can ensure their living areas remain secure while allowing unhindered access through the hatches.Step 1: Starting with the Flange
Sven begins by explaining that working on flanges vertically and horizontally is significantly easier than doing so in a flat position. To simplify the process further, he divides the task into two or three steps as suggested by fellow expert “for for.” This approach not only makes it more manageable but also allows for greater precision in crafting each component.Step 2: Applying Glue and Securing
Sven proceeds to apply glue along one edge of the flange, ensuring a secure bond when clamped into place. He emphasizes that this stage is crucial for maintaining the structural integrity of the flange, which in turn safeguards the living area beneath the canvas when hatches are open.Step 3: Allowing Time to Dry
After securely attaching the first portion of the flange, Sven allows ample time for it to dry before moving forward with additional steps. This patience and precision are key aspects of his successful boatbuilding methods.Step 4: Finishing Touches
Once the flange is fully dried, Sven removes the clamps carefully, ensuring no damage occurs during this process. He then moves on to attaching four more pieces onto these main frames, completing two pairs of flanges for the bulkhead hatches.The Final Touches
While two flanges form the primary support structure around the hatches, Sven mentions there are two additional pieces required at each end to ensure comprehensive protection. This attention to detail highlights his commitment to producing a durable and reliable design. “Sailing is about finding your path, whether it’s across an ocean or within yourself.” – Sven Yrvind In conclusion, making flanges around bulkhead hatches may seem complex at first glance, but by following Sven Yrvind’s meticulous process, enthusiasts can achieve professional-level results. Remember that the journey of boatbuilding is as rewarding as reaching your destination; it tests one’s patience and dedication. For those seeking to embark on this adventure or simply gain more insight into marine craftsmanship, Sven’s wisdom is invaluable.Making Flanges Around Bulkhead Hatches for Canvas
Sven Yrvind, a renowned yacht designer and sailor, shares valuable insights on creating flanges around bulkhead hatches for canvas protection in this enlightening video. By following his expert guidance, boat enthusiasts can ensure their living areas remain secure while allowing unhindered access through the hatches.Step 1: Starting with the Flange
Sven begins by explaining that working on flanges vertically and horizontally is significantly easier than doing so in a flat position. To simplify the process further, he divides the task into two or three steps as suggested by fellow expert “for for.” This approach not only makes it more manageable but also allows for greater precision in crafting each component.Step 2: Applying Glue and Securing
Sven proceeds to apply glue along one edge of the flange, ensuring a secure bond when clamped into place. He emphasizes that this stage is crucial for maintaining the structural integrity of the flange, which in turn safeguards the living area beneath the canvas when hatches are open.Step 3: Allowing Time to Dry
After securely attaching the first portion of the flange, Sven allows ample time for it to dry before moving forward with additional steps. This patience and precision are key aspects of his successful boatbuilding methods.Step 4: Finishing Touches
Once the flange is fully dried, Sven removes the clamps carefully, ensuring no damage occurs during this process. He then moves on to attaching four more pieces onto these main frames, completing two pairs of flanges for the bulkhead hatches.The Final Touches
While two flanges form the primary support structure around the hatches, Sven mentions there are two additional pieces required at each end to ensure comprehensive protection. This attention to detail highlights his commitment to producing a durable and reliable design. “Sailing is about finding your path, whether it’s across an ocean or within yourself.” – Sven Yrvind In conclusion, making flanges around bulkhead hatches may seem complex at first glance, but by following Sven Yrvind’s meticulous process, enthusiasts can achieve professional-level results. Remember that the journey of boatbuilding is as rewarding as reaching your destination; it tests one’s patience and dedication. For those seeking to embark on this adventure or simply gain more insight into marine craftsmanship, Sven’s wisdom is invaluable.After securely attaching the first portion of the flange, Sven allows ample time for it to dry before moving forward with additional steps. This patience and precision are key aspects of his successful boatbuilding methods.Step 4: Finishing Touches
Once the flange is fully dried, Sven removes the clamps carefully, ensuring no damage occurs during this process. He then moves on to attaching four more pieces onto these main frames, completing two pairs of flanges for the bulkhead hatches.The Final Touches
While two flanges form the primary support structure around the hatches, Sven mentions there are two additional pieces required at each end to ensure comprehensive protection. This attention to detail highlights his commitment to producing a durable and reliable design. “Sailing is about finding your path, whether it’s across an ocean or within yourself.” – Sven Yrvind In conclusion, making flanges around bulkhead hatches may seem complex at first glance, but by following Sven Yrvind’s meticulous process, enthusiasts can achieve professional-level results. Remember that the journey of boatbuilding is as rewarding as reaching your destination; it tests one’s patience and dedication. For those seeking to embark on this adventure or simply gain more insight into marine craftsmanship, Sven’s wisdom is invaluable.Sven begins by explaining that working on flanges vertically and horizontally is significantly easier than doing so in a flat position. To simplify the process further, he divides the task into two or three steps as suggested by fellow expert “for for.” This approach not only makes it more manageable but also allows for greater precision in crafting each component.Step 2: Applying Glue and Securing
Sven proceeds to apply glue along one edge of the flange, ensuring a secure bond when clamped into place. He emphasizes that this stage is crucial for maintaining the structural integrity of the flange, which in turn safeguards the living area beneath the canvas when hatches are open.Step 3: Allowing Time to Dry
After securely attaching the first portion of the flange, Sven allows ample time for it to dry before moving forward with additional steps. This patience and precision are key aspects of his successful boatbuilding methods.Step 4: Finishing Touches
Once the flange is fully dried, Sven removes the clamps carefully, ensuring no damage occurs during this process. He then moves on to attaching four more pieces onto these main frames, completing two pairs of flanges for the bulkhead hatches.The Final Touches
While two flanges form the primary support structure around the hatches, Sven mentions there are two additional pieces required at each end to ensure comprehensive protection. This attention to detail highlights his commitment to producing a durable and reliable design. “Sailing is about finding your path, whether it’s across an ocean or within yourself.” – Sven Yrvind In conclusion, making flanges around bulkhead hatches may seem complex at first glance, but by following Sven Yrvind’s meticulous process, enthusiasts can achieve professional-level results. Remember that the journey of boatbuilding is as rewarding as reaching your destination; it tests one’s patience and dedication. For those seeking to embark on this adventure or simply gain more insight into marine craftsmanship, Sven’s wisdom is invaluable.Sven Yrvind, a renowned yacht designer and sailor, shares valuable insights on creating flanges around bulkhead hatches for canvas protection in this enlightening video. By following his expert guidance, boat enthusiasts can ensure their living areas remain secure while allowing unhindered access through the hatches.Step 1: Starting with the Flange
Sven begins by explaining that working on flanges vertically and horizontally is significantly easier than doing so in a flat position. To simplify the process further, he divides the task into two or three steps as suggested by fellow expert “for for.” This approach not only makes it more manageable but also allows for greater precision in crafting each component.Step 2: Applying Glue and Securing
Sven proceeds to apply glue along one edge of the flange, ensuring a secure bond when clamped into place. He emphasizes that this stage is crucial for maintaining the structural integrity of the flange, which in turn safeguards the living area beneath the canvas when hatches are open.Step 3: Allowing Time to Dry
After securely attaching the first portion of the flange, Sven allows ample time for it to dry before moving forward with additional steps. This patience and precision are key aspects of his successful boatbuilding methods.Step 4: Finishing Touches
Once the flange is fully dried, Sven removes the clamps carefully, ensuring no damage occurs during this process. He then moves on to attaching four more pieces onto these main frames, completing two pairs of flanges for the bulkhead hatches.The Final Touches
While two flanges form the primary support structure around the hatches, Sven mentions there are two additional pieces required at each end to ensure comprehensive protection. This attention to detail highlights his commitment to producing a durable and reliable design. “Sailing is about finding your path, whether it’s across an ocean or within yourself.” – Sven Yrvind In conclusion, making flanges around bulkhead hatches may seem complex at first glance, but by following Sven Yrvind’s meticulous process, enthusiasts can achieve professional-level results. Remember that the journey of boatbuilding is as rewarding as reaching your destination; it tests one’s patience and dedication. For those seeking to embark on this adventure or simply gain more insight into marine craftsmanship, Sven’s wisdom is invaluable.Making Flanges Around Bulkhead Hatches for Canvas
Sven Yrvind, a renowned yacht designer and sailor, shares valuable insights on creating flanges around bulkhead hatches for canvas protection in this enlightening video. By following his expert guidance, boat enthusiasts can ensure their living areas remain secure while allowing unhindered access through the hatches.Step 1: Starting with the Flange
Sven begins by explaining that working on flanges vertically and horizontally is significantly easier than doing so in a flat position. To simplify the process further, he divides the task into two or three steps as suggested by fellow expert “for for.” This approach not only makes it more manageable but also allows for greater precision in crafting each component.Step 2: Applying Glue and Securing
Sven proceeds to apply glue along one edge of the flange, ensuring a secure bond when clamped into place. He emphasizes that this stage is crucial for maintaining the structural integrity of the flange, which in turn safeguards the living area beneath the canvas when hatches are open.Step 3: Allowing Time to Dry
After securely attaching the first portion of the flange, Sven allows ample time for it to dry before moving forward with additional steps. This patience and precision are key aspects of his successful boatbuilding methods.Step 4: Finishing Touches
Once the flange is fully dried, Sven removes the clamps carefully, ensuring no damage occurs during this process. He then moves on to attaching four more pieces onto these main frames, completing two pairs of flanges for the bulkhead hatches.The Final Touches
While two flanges form the primary support structure around the hatches, Sven mentions there are two additional pieces required at each end to ensure comprehensive protection. This attention to detail highlights his commitment to producing a durable and reliable design. “Sailing is about finding your path, whether it’s across an ocean or within yourself.” – Sven Yrvind In conclusion, making flanges around bulkhead hatches may seem complex at first glance, but by following Sven Yrvind’s meticulous process, enthusiasts can achieve professional-level results. Remember that the journey of boatbuilding is as rewarding as reaching your destination; it tests one’s patience and dedication. For those seeking to embark on this adventure or simply gain more insight into marine craftsmanship, Sven’s wisdom is invaluable.Sven proceeds to apply glue along one edge of the flange, ensuring a secure bond when clamped into place. He emphasizes that this stage is crucial for maintaining the structural integrity of the flange, which in turn safeguards the living area beneath the canvas when hatches are open.Step 3: Allowing Time to Dry
After securely attaching the first portion of the flange, Sven allows ample time for it to dry before moving forward with additional steps. This patience and precision are key aspects of his successful boatbuilding methods.Step 4: Finishing Touches
Once the flange is fully dried, Sven removes the clamps carefully, ensuring no damage occurs during this process. He then moves on to attaching four more pieces onto these main frames, completing two pairs of flanges for the bulkhead hatches.The Final Touches
While two flanges form the primary support structure around the hatches, Sven mentions there are two additional pieces required at each end to ensure comprehensive protection. This attention to detail highlights his commitment to producing a durable and reliable design. “Sailing is about finding your path, whether it’s across an ocean or within yourself.” – Sven Yrvind In conclusion, making flanges around bulkhead hatches may seem complex at first glance, but by following Sven Yrvind’s meticulous process, enthusiasts can achieve professional-level results. Remember that the journey of boatbuilding is as rewarding as reaching your destination; it tests one’s patience and dedication. For those seeking to embark on this adventure or simply gain more insight into marine craftsmanship, Sven’s wisdom is invaluable.Sven begins by explaining that working on flanges vertically and horizontally is significantly easier than doing so in a flat position. To simplify the process further, he divides the task into two or three steps as suggested by fellow expert “for for.” This approach not only makes it more manageable but also allows for greater precision in crafting each component.Step 2: Applying Glue and Securing
Sven proceeds to apply glue along one edge of the flange, ensuring a secure bond when clamped into place. He emphasizes that this stage is crucial for maintaining the structural integrity of the flange, which in turn safeguards the living area beneath the canvas when hatches are open.Step 3: Allowing Time to Dry
After securely attaching the first portion of the flange, Sven allows ample time for it to dry before moving forward with additional steps. This patience and precision are key aspects of his successful boatbuilding methods.Step 4: Finishing Touches
Once the flange is fully dried, Sven removes the clamps carefully, ensuring no damage occurs during this process. He then moves on to attaching four more pieces onto these main frames, completing two pairs of flanges for the bulkhead hatches.The Final Touches
While two flanges form the primary support structure around the hatches, Sven mentions there are two additional pieces required at each end to ensure comprehensive protection. This attention to detail highlights his commitment to producing a durable and reliable design. “Sailing is about finding your path, whether it’s across an ocean or within yourself.” – Sven Yrvind In conclusion, making flanges around bulkhead hatches may seem complex at first glance, but by following Sven Yrvind’s meticulous process, enthusiasts can achieve professional-level results. Remember that the journey of boatbuilding is as rewarding as reaching your destination; it tests one’s patience and dedication. For those seeking to embark on this adventure or simply gain more insight into marine craftsmanship, Sven’s wisdom is invaluable.Sven Yrvind, a renowned yacht designer and sailor, shares valuable insights on creating flanges around bulkhead hatches for canvas protection in this enlightening video. By following his expert guidance, boat enthusiasts can ensure their living areas remain secure while allowing unhindered access through the hatches.Step 1: Starting with the Flange
Sven begins by explaining that working on flanges vertically and horizontally is significantly easier than doing so in a flat position. To simplify the process further, he divides the task into two or three steps as suggested by fellow expert “for for.” This approach not only makes it more manageable but also allows for greater precision in crafting each component.Step 2: Applying Glue and Securing
Sven proceeds to apply glue along one edge of the flange, ensuring a secure bond when clamped into place. He emphasizes that this stage is crucial for maintaining the structural integrity of the flange, which in turn safeguards the living area beneath the canvas when hatches are open.Step 3: Allowing Time to Dry
After securely attaching the first portion of the flange, Sven allows ample time for it to dry before moving forward with additional steps. This patience and precision are key aspects of his successful boatbuilding methods.Step 4: Finishing Touches
Once the flange is fully dried, Sven removes the clamps carefully, ensuring no damage occurs during this process. He then moves on to attaching four more pieces onto these main frames, completing two pairs of flanges for the bulkhead hatches.The Final Touches
While two flanges form the primary support structure around the hatches, Sven mentions there are two additional pieces required at each end to ensure comprehensive protection. This attention to detail highlights his commitment to producing a durable and reliable design. “Sailing is about finding your path, whether it’s across an ocean or within yourself.” – Sven Yrvind In conclusion, making flanges around bulkhead hatches may seem complex at first glance, but by following Sven Yrvind’s meticulous process, enthusiasts can achieve professional-level results. Remember that the journey of boatbuilding is as rewarding as reaching your destination; it tests one’s patience and dedication. For those seeking to embark on this adventure or simply gain more insight into marine craftsmanship, Sven’s wisdom is invaluable.Making Flanges Around Bulkhead Hatches for Canvas
Sven Yrvind, a renowned yacht designer and sailor, shares valuable insights on creating flanges around bulkhead hatches for canvas protection in this enlightening video. By following his expert guidance, boat enthusiasts can ensure their living areas remain secure while allowing unhindered access through the hatches.Step 1: Starting with the Flange
Sven begins by explaining that working on flanges vertically and horizontally is significantly easier than doing so in a flat position. To simplify the process further, he divides the task into two or three steps as suggested by fellow expert “for for.” This approach not only makes it more manageable but also allows for greater precision in crafting each component.Step 2: Applying Glue and Securing
Sven proceeds to apply glue along one edge of the flange, ensuring a secure bond when clamped into place. He emphasizes that this stage is crucial for maintaining the structural integrity of the flange, which in turn safeguards the living area beneath the canvas when hatches are open.Step 3: Allowing Time to Dry
After securely attaching the first portion of the flange, Sven allows ample time for it to dry before moving forward with additional steps. This patience and precision are key aspects of his successful boatbuilding methods.Step 4: Finishing Touches
Once the flange is fully dried, Sven removes the clamps carefully, ensuring no damage occurs during this process. He then moves on to attaching four more pieces onto these main frames, completing two pairs of flanges for the bulkhead hatches.The Final Touches
While two flanges form the primary support structure around the hatches, Sven mentions there are two additional pieces required at each end to ensure comprehensive protection. This attention to detail highlights his commitment to producing a durable and reliable design. “Sailing is about finding your path, whether it’s across an ocean or within yourself.” – Sven Yrvind In conclusion, making flanges around bulkhead hatches may seem complex at first glance, but by following Sven Yrvind’s meticulous process, enthusiasts can achieve professional-level results. Remember that the journey of boatbuilding is as rewarding as reaching your destination; it tests one’s patience and dedication. For those seeking to embark on this adventure or simply gain more insight into marine craftsmanship, Sven’s wisdom is invaluable.Once the flange is fully dried, Sven removes the clamps carefully, ensuring no damage occurs during this process. He then moves on to attaching four more pieces onto these main frames, completing two pairs of flanges for the bulkhead hatches.The Final Touches
While two flanges form the primary support structure around the hatches, Sven mentions there are two additional pieces required at each end to ensure comprehensive protection. This attention to detail highlights his commitment to producing a durable and reliable design. “Sailing is about finding your path, whether it’s across an ocean or within yourself.” – Sven Yrvind In conclusion, making flanges around bulkhead hatches may seem complex at first glance, but by following Sven Yrvind’s meticulous process, enthusiasts can achieve professional-level results. Remember that the journey of boatbuilding is as rewarding as reaching your destination; it tests one’s patience and dedication. For those seeking to embark on this adventure or simply gain more insight into marine craftsmanship, Sven’s wisdom is invaluable.Sven proceeds to apply glue along one edge of the flange, ensuring a secure bond when clamped into place. He emphasizes that this stage is crucial for maintaining the structural integrity of the flange, which in turn safeguards the living area beneath the canvas when hatches are open.Step 3: Allowing Time to Dry
After securely attaching the first portion of the flange, Sven allows ample time for it to dry before moving forward with additional steps. This patience and precision are key aspects of his successful boatbuilding methods.Step 4: Finishing Touches
Once the flange is fully dried, Sven removes the clamps carefully, ensuring no damage occurs during this process. He then moves on to attaching four more pieces onto these main frames, completing two pairs of flanges for the bulkhead hatches.The Final Touches
While two flanges form the primary support structure around the hatches, Sven mentions there are two additional pieces required at each end to ensure comprehensive protection. This attention to detail highlights his commitment to producing a durable and reliable design. “Sailing is about finding your path, whether it’s across an ocean or within yourself.” – Sven Yrvind In conclusion, making flanges around bulkhead hatches may seem complex at first glance, but by following Sven Yrvind’s meticulous process, enthusiasts can achieve professional-level results. Remember that the journey of boatbuilding is as rewarding as reaching your destination; it tests one’s patience and dedication. For those seeking to embark on this adventure or simply gain more insight into marine craftsmanship, Sven’s wisdom is invaluable.Sven begins by explaining that working on flanges vertically and horizontally is significantly easier than doing so in a flat position. To simplify the process further, he divides the task into two or three steps as suggested by fellow expert “for for.” This approach not only makes it more manageable but also allows for greater precision in crafting each component.Step 2: Applying Glue and Securing
Sven proceeds to apply glue along one edge of the flange, ensuring a secure bond when clamped into place. He emphasizes that this stage is crucial for maintaining the structural integrity of the flange, which in turn safeguards the living area beneath the canvas when hatches are open.Step 3: Allowing Time to Dry
After securely attaching the first portion of the flange, Sven allows ample time for it to dry before moving forward with additional steps. This patience and precision are key aspects of his successful boatbuilding methods.Step 4: Finishing Touches
Once the flange is fully dried, Sven removes the clamps carefully, ensuring no damage occurs during this process. He then moves on to attaching four more pieces onto these main frames, completing two pairs of flanges for the bulkhead hatches.The Final Touches
While two flanges form the primary support structure around the hatches, Sven mentions there are two additional pieces required at each end to ensure comprehensive protection. This attention to detail highlights his commitment to producing a durable and reliable design. “Sailing is about finding your path, whether it’s across an ocean or within yourself.” – Sven Yrvind In conclusion, making flanges around bulkhead hatches may seem complex at first glance, but by following Sven Yrvind’s meticulous process, enthusiasts can achieve professional-level results. Remember that the journey of boatbuilding is as rewarding as reaching your destination; it tests one’s patience and dedication. For those seeking to embark on this adventure or simply gain more insight into marine craftsmanship, Sven’s wisdom is invaluable.Sven Yrvind, a renowned yacht designer and sailor, shares valuable insights on creating flanges around bulkhead hatches for canvas protection in this enlightening video. By following his expert guidance, boat enthusiasts can ensure their living areas remain secure while allowing unhindered access through the hatches.Step 1: Starting with the Flange
Sven begins by explaining that working on flanges vertically and horizontally is significantly easier than doing so in a flat position. To simplify the process further, he divides the task into two or three steps as suggested by fellow expert “for for.” This approach not only makes it more manageable but also allows for greater precision in crafting each component.Step 2: Applying Glue and Securing
Sven proceeds to apply glue along one edge of the flange, ensuring a secure bond when clamped into place. He emphasizes that this stage is crucial for maintaining the structural integrity of the flange, which in turn safeguards the living area beneath the canvas when hatches are open.Step 3: Allowing Time to Dry
After securely attaching the first portion of the flange, Sven allows ample time for it to dry before moving forward with additional steps. This patience and precision are key aspects of his successful boatbuilding methods.Step 4: Finishing Touches
Once the flange is fully dried, Sven removes the clamps carefully, ensuring no damage occurs during this process. He then moves on to attaching four more pieces onto these main frames, completing two pairs of flanges for the bulkhead hatches.The Final Touches
While two flanges form the primary support structure around the hatches, Sven mentions there are two additional pieces required at each end to ensure comprehensive protection. This attention to detail highlights his commitment to producing a durable and reliable design. “Sailing is about finding your path, whether it’s across an ocean or within yourself.” – Sven Yrvind In conclusion, making flanges around bulkhead hatches may seem complex at first glance, but by following Sven Yrvind’s meticulous process, enthusiasts can achieve professional-level results. Remember that the journey of boatbuilding is as rewarding as reaching your destination; it tests one’s patience and dedication. For those seeking to embark on this adventure or simply gain more insight into marine craftsmanship, Sven’s wisdom is invaluable.Making Flanges Around Bulkhead Hatches for Canvas
Sven Yrvind, a renowned yacht designer and sailor, shares valuable insights on creating flanges around bulkhead hatches for canvas protection in this enlightening video. By following his expert guidance, boat enthusiasts can ensure their living areas remain secure while allowing unhindered access through the hatches.Step 1: Starting with the Flange
Sven begins by explaining that working on flanges vertically and horizontally is significantly easier than doing so in a flat position. To simplify the process further, he divides the task into two or three steps as suggested by fellow expert “for for.” This approach not only makes it more manageable but also allows for greater precision in crafting each component.Step 2: Applying Glue and Securing
Sven proceeds to apply glue along one edge of the flange, ensuring a secure bond when clamped into place. He emphasizes that this stage is crucial for maintaining the structural integrity of the flange, which in turn safeguards the living area beneath the canvas when hatches are open.Step 3: Allowing Time to Dry
After securely attaching the first portion of the flange, Sven allows ample time for it to dry before moving forward with additional steps. This patience and precision are key aspects of his successful boatbuilding methods.Step 4: Finishing Touches
Once the flange is fully dried, Sven removes the clamps carefully, ensuring no damage occurs during this process. He then moves on to attaching four more pieces onto these main frames, completing two pairs of flanges for the bulkhead hatches.The Final Touches
While two flanges form the primary support structure around the hatches, Sven mentions there are two additional pieces required at each end to ensure comprehensive protection. This attention to detail highlights his commitment to producing a durable and reliable design. “Sailing is about finding your path, whether it’s across an ocean or within yourself.” – Sven Yrvind In conclusion, making flanges around bulkhead hatches may seem complex at first glance, but by following Sven Yrvind’s meticulous process, enthusiasts can achieve professional-level results. Remember that the journey of boatbuilding is as rewarding as reaching your destination; it tests one’s patience and dedication. For those seeking to embark on this adventure or simply gain more insight into marine craftsmanship, Sven’s wisdom is invaluable.After securely attaching the first portion of the flange, Sven allows ample time for it to dry before moving forward with additional steps. This patience and precision are key aspects of his successful boatbuilding methods.Step 4: Finishing Touches
Once the flange is fully dried, Sven removes the clamps carefully, ensuring no damage occurs during this process. He then moves on to attaching four more pieces onto these main frames, completing two pairs of flanges for the bulkhead hatches.The Final Touches
While two flanges form the primary support structure around the hatches, Sven mentions there are two additional pieces required at each end to ensure comprehensive protection. This attention to detail highlights his commitment to producing a durable and reliable design. “Sailing is about finding your path, whether it’s across an ocean or within yourself.” – Sven Yrvind In conclusion, making flanges around bulkhead hatches may seem complex at first glance, but by following Sven Yrvind’s meticulous process, enthusiasts can achieve professional-level results. Remember that the journey of boatbuilding is as rewarding as reaching your destination; it tests one’s patience and dedication. For those seeking to embark on this adventure or simply gain more insight into marine craftsmanship, Sven’s wisdom is invaluable.Sven proceeds to apply glue along one edge of the flange, ensuring a secure bond when clamped into place. He emphasizes that this stage is crucial for maintaining the structural integrity of the flange, which in turn safeguards the living area beneath the canvas when hatches are open.Step 3: Allowing Time to Dry
After securely attaching the first portion of the flange, Sven allows ample time for it to dry before moving forward with additional steps. This patience and precision are key aspects of his successful boatbuilding methods.Step 4: Finishing Touches
Once the flange is fully dried, Sven removes the clamps carefully, ensuring no damage occurs during this process. He then moves on to attaching four more pieces onto these main frames, completing two pairs of flanges for the bulkhead hatches.The Final Touches
While two flanges form the primary support structure around the hatches, Sven mentions there are two additional pieces required at each end to ensure comprehensive protection. This attention to detail highlights his commitment to producing a durable and reliable design. “Sailing is about finding your path, whether it’s across an ocean or within yourself.” – Sven Yrvind In conclusion, making flanges around bulkhead hatches may seem complex at first glance, but by following Sven Yrvind’s meticulous process, enthusiasts can achieve professional-level results. Remember that the journey of boatbuilding is as rewarding as reaching your destination; it tests one’s patience and dedication. For those seeking to embark on this adventure or simply gain more insight into marine craftsmanship, Sven’s wisdom is invaluable.Sven begins by explaining that working on flanges vertically and horizontally is significantly easier than doing so in a flat position. To simplify the process further, he divides the task into two or three steps as suggested by fellow expert “for for.” This approach not only makes it more manageable but also allows for greater precision in crafting each component.Step 2: Applying Glue and Securing
Sven proceeds to apply glue along one edge of the flange, ensuring a secure bond when clamped into place. He emphasizes that this stage is crucial for maintaining the structural integrity of the flange, which in turn safeguards the living area beneath the canvas when hatches are open.Step 3: Allowing Time to Dry
After securely attaching the first portion of the flange, Sven allows ample time for it to dry before moving forward with additional steps. This patience and precision are key aspects of his successful boatbuilding methods.Step 4: Finishing Touches
Once the flange is fully dried, Sven removes the clamps carefully, ensuring no damage occurs during this process. He then moves on to attaching four more pieces onto these main frames, completing two pairs of flanges for the bulkhead hatches.The Final Touches
While two flanges form the primary support structure around the hatches, Sven mentions there are two additional pieces required at each end to ensure comprehensive protection. This attention to detail highlights his commitment to producing a durable and reliable design. “Sailing is about finding your path, whether it’s across an ocean or within yourself.” – Sven Yrvind In conclusion, making flanges around bulkhead hatches may seem complex at first glance, but by following Sven Yrvind’s meticulous process, enthusiasts can achieve professional-level results. Remember that the journey of boatbuilding is as rewarding as reaching your destination; it tests one’s patience and dedication. For those seeking to embark on this adventure or simply gain more insight into marine craftsmanship, Sven’s wisdom is invaluable.Sven Yrvind, a renowned yacht designer and sailor, shares valuable insights on creating flanges around bulkhead hatches for canvas protection in this enlightening video. By following his expert guidance, boat enthusiasts can ensure their living areas remain secure while allowing unhindered access through the hatches.Step 1: Starting with the Flange
Sven begins by explaining that working on flanges vertically and horizontally is significantly easier than doing so in a flat position. To simplify the process further, he divides the task into two or three steps as suggested by fellow expert “for for.” This approach not only makes it more manageable but also allows for greater precision in crafting each component.Step 2: Applying Glue and Securing
Sven proceeds to apply glue along one edge of the flange, ensuring a secure bond when clamped into place. He emphasizes that this stage is crucial for maintaining the structural integrity of the flange, which in turn safeguards the living area beneath the canvas when hatches are open.Step 3: Allowing Time to Dry
After securely attaching the first portion of the flange, Sven allows ample time for it to dry before moving forward with additional steps. This patience and precision are key aspects of his successful boatbuilding methods.Step 4: Finishing Touches
Once the flange is fully dried, Sven removes the clamps carefully, ensuring no damage occurs during this process. He then moves on to attaching four more pieces onto these main frames, completing two pairs of flanges for the bulkhead hatches.The Final Touches
While two flanges form the primary support structure around the hatches, Sven mentions there are two additional pieces required at each end to ensure comprehensive protection. This attention to detail highlights his commitment to producing a durable and reliable design. “Sailing is about finding your path, whether it’s across an ocean or within yourself.” – Sven Yrvind In conclusion, making flanges around bulkhead hatches may seem complex at first glance, but by following Sven Yrvind’s meticulous process, enthusiasts can achieve professional-level results. Remember that the journey of boatbuilding is as rewarding as reaching your destination; it tests one’s patience and dedication. For those seeking to embark on this adventure or simply gain more insight into marine craftsmanship, Sven’s wisdom is invaluable.Making Flanges Around Bulkhead Hatches for Canvas
Sven Yrvind, a renowned yacht designer and sailor, shares valuable insights on creating flanges around bulkhead hatches for canvas protection in this enlightening video. By following his expert guidance, boat enthusiasts can ensure their living areas remain secure while allowing unhindered access through the hatches.Step 1: Starting with the Flange
Sven begins by explaining that working on flanges vertically and horizontally is significantly easier than doing so in a flat position. To simplify the process further, he divides the task into two or three steps as suggested by fellow expert “for for.” This approach not only makes it more manageable but also allows for greater precision in crafting each component.Step 2: Applying Glue and Securing
Sven proceeds to apply glue along one edge of the flange, ensuring a secure bond when clamped into place. He emphasizes that this stage is crucial for maintaining the structural integrity of the flange, which in turn safeguards the living area beneath the canvas when hatches are open.Step 3: Allowing Time to Dry
After securely attaching the first portion of the flange, Sven allows ample time for it to dry before moving forward with additional steps. This patience and precision are key aspects of his successful boatbuilding methods.Step 4: Finishing Touches
Once the flange is fully dried, Sven removes the clamps carefully, ensuring no damage occurs during this process. He then moves on to attaching four more pieces onto these main frames, completing two pairs of flanges for the bulkhead hatches.The Final Touches
While two flanges form the primary support structure around the hatches, Sven mentions there are two additional pieces required at each end to ensure comprehensive protection. This attention to detail highlights his commitment to producing a durable and reliable design. “Sailing is about finding your path, whether it’s across an ocean or within yourself.” – Sven Yrvind In conclusion, making flanges around bulkhead hatches may seem complex at first glance, but by following Sven Yrvind’s meticulous process, enthusiasts can achieve professional-level results. Remember that the journey of boatbuilding is as rewarding as reaching your destination; it tests one’s patience and dedication. For those seeking to embark on this adventure or simply gain more insight into marine craftsmanship, Sven’s wisdom is invaluable.Once the flange is fully dried, Sven removes the clamps carefully, ensuring no damage occurs during this process. He then moves on to attaching four more pieces onto these main frames, completing two pairs of flanges for the bulkhead hatches.The Final Touches
While two flanges form the primary support structure around the hatches, Sven mentions there are two additional pieces required at each end to ensure comprehensive protection. This attention to detail highlights his commitment to producing a durable and reliable design. “Sailing is about finding your path, whether it’s across an ocean or within yourself.” – Sven Yrvind In conclusion, making flanges around bulkhead hatches may seem complex at first glance, but by following Sven Yrvind’s meticulous process, enthusiasts can achieve professional-level results. Remember that the journey of boatbuilding is as rewarding as reaching your destination; it tests one’s patience and dedication. For those seeking to embark on this adventure or simply gain more insight into marine craftsmanship, Sven’s wisdom is invaluable.After securely attaching the first portion of the flange, Sven allows ample time for it to dry before moving forward with additional steps. This patience and precision are key aspects of his successful boatbuilding methods.Step 4: Finishing Touches
Once the flange is fully dried, Sven removes the clamps carefully, ensuring no damage occurs during this process. He then moves on to attaching four more pieces onto these main frames, completing two pairs of flanges for the bulkhead hatches.The Final Touches
While two flanges form the primary support structure around the hatches, Sven mentions there are two additional pieces required at each end to ensure comprehensive protection. This attention to detail highlights his commitment to producing a durable and reliable design. “Sailing is about finding your path, whether it’s across an ocean or within yourself.” – Sven Yrvind In conclusion, making flanges around bulkhead hatches may seem complex at first glance, but by following Sven Yrvind’s meticulous process, enthusiasts can achieve professional-level results. Remember that the journey of boatbuilding is as rewarding as reaching your destination; it tests one’s patience and dedication. For those seeking to embark on this adventure or simply gain more insight into marine craftsmanship, Sven’s wisdom is invaluable.Sven proceeds to apply glue along one edge of the flange, ensuring a secure bond when clamped into place. He emphasizes that this stage is crucial for maintaining the structural integrity of the flange, which in turn safeguards the living area beneath the canvas when hatches are open.Step 3: Allowing Time to Dry
After securely attaching the first portion of the flange, Sven allows ample time for it to dry before moving forward with additional steps. This patience and precision are key aspects of his successful boatbuilding methods.Step 4: Finishing Touches
Once the flange is fully dried, Sven removes the clamps carefully, ensuring no damage occurs during this process. He then moves on to attaching four more pieces onto these main frames, completing two pairs of flanges for the bulkhead hatches.The Final Touches
While two flanges form the primary support structure around the hatches, Sven mentions there are two additional pieces required at each end to ensure comprehensive protection. This attention to detail highlights his commitment to producing a durable and reliable design. “Sailing is about finding your path, whether it’s across an ocean or within yourself.” – Sven Yrvind In conclusion, making flanges around bulkhead hatches may seem complex at first glance, but by following Sven Yrvind’s meticulous process, enthusiasts can achieve professional-level results. Remember that the journey of boatbuilding is as rewarding as reaching your destination; it tests one’s patience and dedication. For those seeking to embark on this adventure or simply gain more insight into marine craftsmanship, Sven’s wisdom is invaluable.Sven begins by explaining that working on flanges vertically and horizontally is significantly easier than doing so in a flat position. To simplify the process further, he divides the task into two or three steps as suggested by fellow expert “for for.” This approach not only makes it more manageable but also allows for greater precision in crafting each component.Step 2: Applying Glue and Securing
Sven proceeds to apply glue along one edge of the flange, ensuring a secure bond when clamped into place. He emphasizes that this stage is crucial for maintaining the structural integrity of the flange, which in turn safeguards the living area beneath the canvas when hatches are open.Step 3: Allowing Time to Dry
After securely attaching the first portion of the flange, Sven allows ample time for it to dry before moving forward with additional steps. This patience and precision are key aspects of his successful boatbuilding methods.Step 4: Finishing Touches
Once the flange is fully dried, Sven removes the clamps carefully, ensuring no damage occurs during this process. He then moves on to attaching four more pieces onto these main frames, completing two pairs of flanges for the bulkhead hatches.The Final Touches
While two flanges form the primary support structure around the hatches, Sven mentions there are two additional pieces required at each end to ensure comprehensive protection. This attention to detail highlights his commitment to producing a durable and reliable design. “Sailing is about finding your path, whether it’s across an ocean or within yourself.” – Sven Yrvind In conclusion, making flanges around bulkhead hatches may seem complex at first glance, but by following Sven Yrvind’s meticulous process, enthusiasts can achieve professional-level results. Remember that the journey of boatbuilding is as rewarding as reaching your destination; it tests one’s patience and dedication. For those seeking to embark on this adventure or simply gain more insight into marine craftsmanship, Sven’s wisdom is invaluable.Sven Yrvind, a renowned yacht designer and sailor, shares valuable insights on creating flanges around bulkhead hatches for canvas protection in this enlightening video. By following his expert guidance, boat enthusiasts can ensure their living areas remain secure while allowing unhindered access through the hatches.Step 1: Starting with the Flange
Sven begins by explaining that working on flanges vertically and horizontally is significantly easier than doing so in a flat position. To simplify the process further, he divides the task into two or three steps as suggested by fellow expert “for for.” This approach not only makes it more manageable but also allows for greater precision in crafting each component.Step 2: Applying Glue and Securing
Sven proceeds to apply glue along one edge of the flange, ensuring a secure bond when clamped into place. He emphasizes that this stage is crucial for maintaining the structural integrity of the flange, which in turn safeguards the living area beneath the canvas when hatches are open.Step 3: Allowing Time to Dry
After securely attaching the first portion of the flange, Sven allows ample time for it to dry before moving forward with additional steps. This patience and precision are key aspects of his successful boatbuilding methods.Step 4: Finishing Touches
Once the flange is fully dried, Sven removes the clamps carefully, ensuring no damage occurs during this process. He then moves on to attaching four more pieces onto these main frames, completing two pairs of flanges for the bulkhead hatches.The Final Touches
While two flanges form the primary support structure around the hatches, Sven mentions there are two additional pieces required at each end to ensure comprehensive protection. This attention to detail highlights his commitment to producing a durable and reliable design. “Sailing is about finding your path, whether it’s across an ocean or within yourself.” – Sven Yrvind In conclusion, making flanges around bulkhead hatches may seem complex at first glance, but by following Sven Yrvind’s meticulous process, enthusiasts can achieve professional-level results. Remember that the journey of boatbuilding is as rewarding as reaching your destination; it tests one’s patience and dedication. For those seeking to embark on this adventure or simply gain more insight into marine craftsmanship, Sven’s wisdom is invaluable.Making Flanges Around Bulkhead Hatches for Canvas
Sven Yrvind, a renowned yacht designer and sailor, shares valuable insights on creating flanges around bulkhead hatches for canvas protection in this enlightening video. By following his expert guidance, boat enthusiasts can ensure their living areas remain secure while allowing unhindered access through the hatches.Step 1: Starting with the Flange
Sven begins by explaining that working on flanges vertically and horizontally is significantly easier than doing so in a flat position. To simplify the process further, he divides the task into two or three steps as suggested by fellow expert “for for.” This approach not only makes it more manageable but also allows for greater precision in crafting each component.Step 2: Applying Glue and Securing
Sven proceeds to apply glue along one edge of the flange, ensuring a secure bond when clamped into place. He emphasizes that this stage is crucial for maintaining the structural integrity of the flange, which in turn safeguards the living area beneath the canvas when hatches are open.Step 3: Allowing Time to Dry
After securely attaching the first portion of the flange, Sven allows ample time for it to dry before moving forward with additional steps. This patience and precision are key aspects of his successful boatbuilding methods.Step 4: Finishing Touches
Once the flange is fully dried, Sven removes the clamps carefully, ensuring no damage occurs during this process. He then moves on to attaching four more pieces onto these main frames, completing two pairs of flanges for the bulkhead hatches.The Final Touches
While two flanges form the primary support structure around the hatches, Sven mentions there are two additional pieces required at each end to ensure comprehensive protection. This attention to detail highlights his commitment to producing a durable and reliable design. “Sailing is about finding your path, whether it’s across an ocean or within yourself.” – Sven Yrvind In conclusion, making flanges around bulkhead hatches may seem complex at first glance, but by following Sven Yrvind’s meticulous process, enthusiasts can achieve professional-level results. Remember that the journey of boatbuilding is as rewarding as reaching your destination; it tests one’s patience and dedication. For those seeking to embark on this adventure or simply gain more insight into marine craftsmanship, Sven’s wisdom is invaluable.Once the flange is fully dried, Sven removes the clamps carefully, ensuring no damage occurs during this process. He then moves on to attaching four more pieces onto these main frames, completing two pairs of flanges for the bulkhead hatches.The Final Touches
While two flanges form the primary support structure around the hatches, Sven mentions there are two additional pieces required at each end to ensure comprehensive protection. This attention to detail highlights his commitment to producing a durable and reliable design. “Sailing is about finding your path, whether it’s across an ocean or within yourself.” – Sven Yrvind In conclusion, making flanges around bulkhead hatches may seem complex at first glance, but by following Sven Yrvind’s meticulous process, enthusiasts can achieve professional-level results. Remember that the journey of boatbuilding is as rewarding as reaching your destination; it tests one’s patience and dedication. For those seeking to embark on this adventure or simply gain more insight into marine craftsmanship, Sven’s wisdom is invaluable.Making Flanges Around Bulkhead Hatches for Canvas
Sven Yrvind, a renowned yacht designer and sailor, shares valuable insights on creating flanges around bulkhead hatches for canvas protection in this enlightening video. By following his expert guidance, boat enthusiasts can ensure their living areas remain secure while allowing unhindered access through the hatches.Step 1: Starting with the Flange
Sven begins by explaining that working on flanges vertically and horizontally is significantly easier than doing so in a flat position. To simplify the process further, he divides the task into two or three steps as suggested by fellow expert “for for.” This approach not only makes it more manageable but also allows for greater precision in crafting each component.Step 2: Applying Glue and Securing
Sven proceeds to apply glue along one edge of the flange, ensuring a secure bond when clamped into place. He emphasizes that this stage is crucial for maintaining the structural integrity of the flange, which in turn safeguards the living area beneath the canvas when hatches are open.Step 3: Allowing Time to Dry
After securely attaching the first portion of the flange, Sven allows ample time for it to dry before moving forward with additional steps. This patience and precision are key aspects of his successful boatbuilding methods.Step 4: Finishing Touches
Once the flange is fully dried, Sven removes the clamps carefully, ensuring no damage occurs during this process. He then moves on to attaching four more pieces onto these main frames, completing two pairs of flanges for the bulkhead hatches.The Final Touches
While two flanges form the primary support structure around the hatches, Sven mentions there are two additional pieces required at each end to ensure comprehensive protection. This attention to detail highlights his commitment to producing a durable and reliable design. “Sailing is about finding your path, whether it’s across an ocean or within yourself.” – Sven Yrvind In conclusion, making flanges around bulkhead hatches may seem complex at first glance, but by following Sven Yrvind’s meticulous process, enthusiasts can achieve professional-level results. Remember that the journey of boatbuilding is as rewarding as reaching your destination; it tests one’s patience and dedication. For those seeking to embark on this adventure or simply gain more insight into marine craftsmanship, Sven’s wisdom is invaluable.After securely attaching the first portion of the flange, Sven allows ample time for it to dry before moving forward with additional steps. This patience and precision are key aspects of his successful boatbuilding methods.Step 4: Finishing Touches
Once the flange is fully dried, Sven removes the clamps carefully, ensuring no damage occurs during this process. He then moves on to attaching four more pieces onto these main frames, completing two pairs of flanges for the bulkhead hatches.The Final Touches
While two flanges form the primary support structure around the hatches, Sven mentions there are two additional pieces required at each end to ensure comprehensive protection. This attention to detail highlights his commitment to producing a durable and reliable design. “Sailing is about finding your path, whether it’s across an ocean or within yourself.” – Sven Yrvind In conclusion, making flanges around bulkhead hatches may seem complex at first glance, but by following Sven Yrvind’s meticulous process, enthusiasts can achieve professional-level results. Remember that the journey of boatbuilding is as rewarding as reaching your destination; it tests one’s patience and dedication. For those seeking to embark on this adventure or simply gain more insight into marine craftsmanship, Sven’s wisdom is invaluable.Making Flanges Around Bulkhead Hatches for Canvas
Sven Yrvind, a renowned yacht designer and sailor, shares valuable insights on creating flanges around bulkhead hatches for canvas protection in this enlightening video. By following his expert guidance, boat enthusiasts can ensure their living areas remain secure while allowing unhindered access through the hatches.Step 1: Starting with the Flange
Sven begins by explaining that working on flanges vertically and horizontally is significantly easier than doing so in a flat position. To simplify the process further, he divides the task into two or three steps as suggested by fellow expert “for for.” This approach not only makes it more manageable but also allows for greater precision in crafting each component.Step 2: Applying Glue and Securing
Sven proceeds to apply glue along one edge of the flange, ensuring a secure bond when clamped into place. He emphasizes that this stage is crucial for maintaining the structural integrity of the flange, which in turn safeguards the living area beneath the canvas when hatches are open.Step 3: Allowing Time to Dry
After securely attaching the first portion of the flange, Sven allows ample time for it to dry before moving forward with additional steps. This patience and precision are key aspects of his successful boatbuilding methods.Step 4: Finishing Touches
Once the flange is fully dried, Sven removes the clamps carefully, ensuring no damage occurs during this process. He then moves on to attaching four more pieces onto these main frames, completing two pairs of flanges for the bulkhead hatches.The Final Touches
While two flanges form the primary support structure around the hatches, Sven mentions there are two additional pieces required at each end to ensure comprehensive protection. This attention to detail highlights his commitment to producing a durable and reliable design. “Sailing is about finding your path, whether it’s across an ocean or within yourself.” – Sven Yrvind In conclusion, making flanges around bulkhead hatches may seem complex at first glance, but by following Sven Yrvind’s meticulous process, enthusiasts can achieve professional-level results. Remember that the journey of boatbuilding is as rewarding as reaching your destination; it tests one’s patience and dedication. For those seeking to embark on this adventure or simply gain more insight into marine craftsmanship, Sven’s wisdom is invaluable.Sven proceeds to apply glue along one edge of the flange, ensuring a secure bond when clamped into place. He emphasizes that this stage is crucial for maintaining the structural integrity of the flange, which in turn safeguards the living area beneath the canvas when hatches are open.Step 3: Allowing Time to Dry
After securely attaching the first portion of the flange, Sven allows ample time for it to dry before moving forward with additional steps. This patience and precision are key aspects of his successful boatbuilding methods.Step 4: Finishing Touches
Once the flange is fully dried, Sven removes the clamps carefully, ensuring no damage occurs during this process. He then moves on to attaching four more pieces onto these main frames, completing two pairs of flanges for the bulkhead hatches.The Final Touches
While two flanges form the primary support structure around the hatches, Sven mentions there are two additional pieces required at each end to ensure comprehensive protection. This attention to detail highlights his commitment to producing a durable and reliable design. “Sailing is about finding your path, whether it’s across an ocean or within yourself.” – Sven Yrvind In conclusion, making flanges around bulkhead hatches may seem complex at first glance, but by following Sven Yrvind’s meticulous process, enthusiasts can achieve professional-level results. Remember that the journey of boatbuilding is as rewarding as reaching your destination; it tests one’s patience and dedication. For those seeking to embark on this adventure or simply gain more insight into marine craftsmanship, Sven’s wisdom is invaluable.Making Flanges Around Bulkhead Hatches for Canvas
Sven Yrvind, a renowned yacht designer and sailor, shares valuable insights on creating flanges around bulkhead hatches for canvas protection in this enlightening video. By following his expert guidance, boat enthusiasts can ensure their living areas remain secure while allowing unhindered access through the hatches.Step 1: Starting with the Flange
Sven begins by explaining that working on flanges vertically and horizontally is significantly easier than doing so in a flat position. To simplify the process further, he divides the task into two or three steps as suggested by fellow expert “for for.” This approach not only makes it more manageable but also allows for greater precision in crafting each component.Step 2: Applying Glue and Securing
Sven proceeds to apply glue along one edge of the flange, ensuring a secure bond when clamped into place. He emphasizes that this stage is crucial for maintaining the structural integrity of the flange, which in turn safeguards the living area beneath the canvas when hatches are open.Step 3: Allowing Time to Dry
After securely attaching the first portion of the flange, Sven allows ample time for it to dry before moving forward with additional steps. This patience and precision are key aspects of his successful boatbuilding methods.Step 4: Finishing Touches
Once the flange is fully dried, Sven removes the clamps carefully, ensuring no damage occurs during this process. He then moves on to attaching four more pieces onto these main frames, completing two pairs of flanges for the bulkhead hatches.The Final Touches
While two flanges form the primary support structure around the hatches, Sven mentions there are two additional pieces required at each end to ensure comprehensive protection. This attention to detail highlights his commitment to producing a durable and reliable design. “Sailing is about finding your path, whether it’s across an ocean or within yourself.” – Sven Yrvind In conclusion, making flanges around bulkhead hatches may seem complex at first glance, but by following Sven Yrvind’s meticulous process, enthusiasts can achieve professional-level results. Remember that the journey of boatbuilding is as rewarding as reaching your destination; it tests one’s patience and dedication. For those seeking to embark on this adventure or simply gain more insight into marine craftsmanship, Sven’s wisdom is invaluable.Sven begins by explaining that working on flanges vertically and horizontally is significantly easier than doing so in a flat position. To simplify the process further, he divides the task into two or three steps as suggested by fellow expert “for for.” This approach not only makes it more manageable but also allows for greater precision in crafting each component.Step 2: Applying Glue and Securing
Sven proceeds to apply glue along one edge of the flange, ensuring a secure bond when clamped into place. He emphasizes that this stage is crucial for maintaining the structural integrity of the flange, which in turn safeguards the living area beneath the canvas when hatches are open.Step 3: Allowing Time to Dry
After securely attaching the first portion of the flange, Sven allows ample time for it to dry before moving forward with additional steps. This patience and precision are key aspects of his successful boatbuilding methods.Step 4: Finishing Touches
Once the flange is fully dried, Sven removes the clamps carefully, ensuring no damage occurs during this process. He then moves on to attaching four more pieces onto these main frames, completing two pairs of flanges for the bulkhead hatches.The Final Touches
While two flanges form the primary support structure around the hatches, Sven mentions there are two additional pieces required at each end to ensure comprehensive protection. This attention to detail highlights his commitment to producing a durable and reliable design. “Sailing is about finding your path, whether it’s across an ocean or within yourself.” – Sven Yrvind In conclusion, making flanges around bulkhead hatches may seem complex at first glance, but by following Sven Yrvind’s meticulous process, enthusiasts can achieve professional-level results. Remember that the journey of boatbuilding is as rewarding as reaching your destination; it tests one’s patience and dedication. For those seeking to embark on this adventure or simply gain more insight into marine craftsmanship, Sven’s wisdom is invaluable.Making Flanges Around Bulkhead Hatches for Canvas
Sven Yrvind, a renowned yacht designer and sailor, shares valuable insights on creating flanges around bulkhead hatches for canvas protection in this enlightening video. By following his expert guidance, boat enthusiasts can ensure their living areas remain secure while allowing unhindered access through the hatches.Step 1: Starting with the Flange
Sven begins by explaining that working on flanges vertically and horizontally is significantly easier than doing so in a flat position. To simplify the process further, he divides the task into two or three steps as suggested by fellow expert “for for.” This approach not only makes it more manageable but also allows for greater precision in crafting each component.Step 2: Applying Glue and Securing
Sven proceeds to apply glue along one edge of the flange, ensuring a secure bond when clamped into place. He emphasizes that this stage is crucial for maintaining the structural integrity of the flange, which in turn safeguards the living area beneath the canvas when hatches are open.Step 3: Allowing Time to Dry
After securely attaching the first portion of the flange, Sven allows ample time for it to dry before moving forward with additional steps. This patience and precision are key aspects of his successful boatbuilding methods.Step 4: Finishing Touches
Once the flange is fully dried, Sven removes the clamps carefully, ensuring no damage occurs during this process. He then moves on to attaching four more pieces onto these main frames, completing two pairs of flanges for the bulkhead hatches.The Final Touches
While two flanges form the primary support structure around the hatches, Sven mentions there are two additional pieces required at each end to ensure comprehensive protection. This attention to detail highlights his commitment to producing a durable and reliable design. “Sailing is about finding your path, whether it’s across an ocean or within yourself.” – Sven Yrvind In conclusion, making flanges around bulkhead hatches may seem complex at first glance, but by following Sven Yrvind’s meticulous process, enthusiasts can achieve professional-level results. Remember that the journey of boatbuilding is as rewarding as reaching your destination; it tests one’s patience and dedication. For those seeking to embark on this adventure or simply gain more insight into marine craftsmanship, Sven’s wisdom is invaluable.Sven Yrvind, a renowned yacht designer and sailor, shares valuable insights on creating flanges around bulkhead hatches for canvas protection in this enlightening video. By following his expert guidance, boat enthusiasts can ensure their living areas remain secure while allowing unhindered access through the hatches.Step 1: Starting with the Flange
Sven begins by explaining that working on flanges vertically and horizontally is significantly easier than doing so in a flat position. To simplify the process further, he divides the task into two or three steps as suggested by fellow expert “for for.” This approach not only makes it more manageable but also allows for greater precision in crafting each component.Step 2: Applying Glue and Securing
Sven proceeds to apply glue along one edge of the flange, ensuring a secure bond when clamped into place. He emphasizes that this stage is crucial for maintaining the structural integrity of the flange, which in turn safeguards the living area beneath the canvas when hatches are open.Step 3: Allowing Time to Dry
After securely attaching the first portion of the flange, Sven allows ample time for it to dry before moving forward with additional steps. This patience and precision are key aspects of his successful boatbuilding methods.Step 4: Finishing Touches
Once the flange is fully dried, Sven removes the clamps carefully, ensuring no damage occurs during this process. He then moves on to attaching four more pieces onto these main frames, completing two pairs of flanges for the bulkhead hatches.The Final Touches
While two flanges form the primary support structure around the hatches, Sven mentions there are two additional pieces required at each end to ensure comprehensive protection. This attention to detail highlights his commitment to producing a durable and reliable design. “Sailing is about finding your path, whether it’s across an ocean or within yourself.” – Sven Yrvind In conclusion, making flanges around bulkhead hatches may seem complex at first glance, but by following Sven Yrvind’s meticulous process, enthusiasts can achieve professional-level results. Remember that the journey of boatbuilding is as rewarding as reaching your destination; it tests one’s patience and dedication. For those seeking to embark on this adventure or simply gain more insight into marine craftsmanship, Sven’s wisdom is invaluable.Making Flanges Around Bulkhead Hatches for Canvas
Sven Yrvind, a renowned yacht designer and sailor, shares valuable insights on creating flanges around bulkhead hatches for canvas protection in this enlightening video. By following his expert guidance, boat enthusiasts can ensure their living areas remain secure while allowing unhindered access through the hatches.Step 1: Starting with the Flange
Sven begins by explaining that working on flanges vertically and horizontally is significantly easier than doing so in a flat position. To simplify the process further, he divides the task into two or three steps as suggested by fellow expert “for for.” This approach not only makes it more manageable but also allows for greater precision in crafting each component.Step 2: Applying Glue and Securing
Sven proceeds to apply glue along one edge of the flange, ensuring a secure bond when clamped into place. He emphasizes that this stage is crucial for maintaining the structural integrity of the flange, which in turn safeguards the living area beneath the canvas when hatches are open.Step 3: Allowing Time to Dry
After securely attaching the first portion of the flange, Sven allows ample time for it to dry before moving forward with additional steps. This patience and precision are key aspects of his successful boatbuilding methods.Step 4: Finishing Touches
Once the flange is fully dried, Sven removes the clamps carefully, ensuring no damage occurs during this process. He then moves on to attaching four more pieces onto these main frames, completing two pairs of flanges for the bulkhead hatches.The Final Touches
While two flanges form the primary support structure around the hatches, Sven mentions there are two additional pieces required at each end to ensure comprehensive protection. This attention to detail highlights his commitment to producing a durable and reliable design. “Sailing is about finding your path, whether it’s across an ocean or within yourself.” – Sven Yrvind In conclusion, making flanges around bulkhead hatches may seem complex at first glance, but by following Sven Yrvind’s meticulous process, enthusiasts can achieve professional-level results. Remember that the journey of boatbuilding is as rewarding as reaching your destination; it tests one’s patience and dedication. For those seeking to embark on this adventure or simply gain more insight into marine craftsmanship, Sven’s wisdom is invaluable.Once the flange is fully dried, Sven removes the clamps carefully, ensuring no damage occurs during this process. He then moves on to attaching four more pieces onto these main frames, completing two pairs of flanges for the bulkhead hatches.The Final Touches
While two flanges form the primary support structure around the hatches, Sven mentions there are two additional pieces required at each end to ensure comprehensive protection. This attention to detail highlights his commitment to producing a durable and reliable design. “Sailing is about finding your path, whether it’s across an ocean or within yourself.” – Sven Yrvind In conclusion, making flanges around bulkhead hatches may seem complex at first glance, but by following Sven Yrvind’s meticulous process, enthusiasts can achieve professional-level results. Remember that the journey of boatbuilding is as rewarding as reaching your destination; it tests one’s patience and dedication. For those seeking to embark on this adventure or simply gain more insight into marine craftsmanship, Sven’s wisdom is invaluable.Sven Yrvind, a renowned yacht designer and sailor, shares valuable insights on creating flanges around bulkhead hatches for canvas protection in this enlightening video. By following his expert guidance, boat enthusiasts can ensure their living areas remain secure while allowing unhindered access through the hatches.Step 1: Starting with the Flange
Sven begins by explaining that working on flanges vertically and horizontally is significantly easier than doing so in a flat position. To simplify the process further, he divides the task into two or three steps as suggested by fellow expert “for for.” This approach not only makes it more manageable but also allows for greater precision in crafting each component.Step 2: Applying Glue and Securing
Sven proceeds to apply glue along one edge of the flange, ensuring a secure bond when clamped into place. He emphasizes that this stage is crucial for maintaining the structural integrity of the flange, which in turn safeguards the living area beneath the canvas when hatches are open.Step 3: Allowing Time to Dry
After securely attaching the first portion of the flange, Sven allows ample time for it to dry before moving forward with additional steps. This patience and precision are key aspects of his successful boatbuilding methods.Step 4: Finishing Touches
Once the flange is fully dried, Sven removes the clamps carefully, ensuring no damage occurs during this process. He then moves on to attaching four more pieces onto these main frames, completing two pairs of flanges for the bulkhead hatches.The Final Touches
While two flanges form the primary support structure around the hatches, Sven mentions there are two additional pieces required at each end to ensure comprehensive protection. This attention to detail highlights his commitment to producing a durable and reliable design. “Sailing is about finding your path, whether it’s across an ocean or within yourself.” – Sven Yrvind In conclusion, making flanges around bulkhead hatches may seem complex at first glance, but by following Sven Yrvind’s meticulous process, enthusiasts can achieve professional-level results. Remember that the journey of boatbuilding is as rewarding as reaching your destination; it tests one’s patience and dedication. For those seeking to embark on this adventure or simply gain more insight into marine craftsmanship, Sven’s wisdom is invaluable.Making Flanges Around Bulkhead Hatches for Canvas
Sven Yrvind, a renowned yacht designer and sailor, shares valuable insights on creating flanges around bulkhead hatches for canvas protection in this enlightening video. By following his expert guidance, boat enthusiasts can ensure their living areas remain secure while allowing unhindered access through the hatches.Step 1: Starting with the Flange
Sven begins by explaining that working on flanges vertically and horizontally is significantly easier than doing so in a flat position. To simplify the process further, he divides the task into two or three steps as suggested by fellow expert “for for.” This approach not only makes it more manageable but also allows for greater precision in crafting each component.Step 2: Applying Glue and Securing
Sven proceeds to apply glue along one edge of the flange, ensuring a secure bond when clamped into place. He emphasizes that this stage is crucial for maintaining the structural integrity of the flange, which in turn safeguards the living area beneath the canvas when hatches are open.Step 3: Allowing Time to Dry
After securely attaching the first portion of the flange, Sven allows ample time for it to dry before moving forward with additional steps. This patience and precision are key aspects of his successful boatbuilding methods.Step 4: Finishing Touches
Once the flange is fully dried, Sven removes the clamps carefully, ensuring no damage occurs during this process. He then moves on to attaching four more pieces onto these main frames, completing two pairs of flanges for the bulkhead hatches.The Final Touches
While two flanges form the primary support structure around the hatches, Sven mentions there are two additional pieces required at each end to ensure comprehensive protection. This attention to detail highlights his commitment to producing a durable and reliable design. “Sailing is about finding your path, whether it’s across an ocean or within yourself.” – Sven Yrvind In conclusion, making flanges around bulkhead hatches may seem complex at first glance, but by following Sven Yrvind’s meticulous process, enthusiasts can achieve professional-level results. Remember that the journey of boatbuilding is as rewarding as reaching your destination; it tests one’s patience and dedication. For those seeking to embark on this adventure or simply gain more insight into marine craftsmanship, Sven’s wisdom is invaluable.After securely attaching the first portion of the flange, Sven allows ample time for it to dry before moving forward with additional steps. This patience and precision are key aspects of his successful boatbuilding methods.Step 4: Finishing Touches
Once the flange is fully dried, Sven removes the clamps carefully, ensuring no damage occurs during this process. He then moves on to attaching four more pieces onto these main frames, completing two pairs of flanges for the bulkhead hatches.The Final Touches
While two flanges form the primary support structure around the hatches, Sven mentions there are two additional pieces required at each end to ensure comprehensive protection. This attention to detail highlights his commitment to producing a durable and reliable design. “Sailing is about finding your path, whether it’s across an ocean or within yourself.” – Sven Yrvind In conclusion, making flanges around bulkhead hatches may seem complex at first glance, but by following Sven Yrvind’s meticulous process, enthusiasts can achieve professional-level results. Remember that the journey of boatbuilding is as rewarding as reaching your destination; it tests one’s patience and dedication. For those seeking to embark on this adventure or simply gain more insight into marine craftsmanship, Sven’s wisdom is invaluable.Sven Yrvind, a renowned yacht designer and sailor, shares valuable insights on creating flanges around bulkhead hatches for canvas protection in this enlightening video. By following his expert guidance, boat enthusiasts can ensure their living areas remain secure while allowing unhindered access through the hatches.Step 1: Starting with the Flange
Sven begins by explaining that working on flanges vertically and horizontally is significantly easier than doing so in a flat position. To simplify the process further, he divides the task into two or three steps as suggested by fellow expert “for for.” This approach not only makes it more manageable but also allows for greater precision in crafting each component.Step 2: Applying Glue and Securing
Sven proceeds to apply glue along one edge of the flange, ensuring a secure bond when clamped into place. He emphasizes that this stage is crucial for maintaining the structural integrity of the flange, which in turn safeguards the living area beneath the canvas when hatches are open.Step 3: Allowing Time to Dry
After securely attaching the first portion of the flange, Sven allows ample time for it to dry before moving forward with additional steps. This patience and precision are key aspects of his successful boatbuilding methods.Step 4: Finishing Touches
Once the flange is fully dried, Sven removes the clamps carefully, ensuring no damage occurs during this process. He then moves on to attaching four more pieces onto these main frames, completing two pairs of flanges for the bulkhead hatches.The Final Touches
While two flanges form the primary support structure around the hatches, Sven mentions there are two additional pieces required at each end to ensure comprehensive protection. This attention to detail highlights his commitment to producing a durable and reliable design. “Sailing is about finding your path, whether it’s across an ocean or within yourself.” – Sven Yrvind In conclusion, making flanges around bulkhead hatches may seem complex at first glance, but by following Sven Yrvind’s meticulous process, enthusiasts can achieve professional-level results. Remember that the journey of boatbuilding is as rewarding as reaching your destination; it tests one’s patience and dedication. For those seeking to embark on this adventure or simply gain more insight into marine craftsmanship, Sven’s wisdom is invaluable.Making Flanges Around Bulkhead Hatches for Canvas
Sven Yrvind, a renowned yacht designer and sailor, shares valuable insights on creating flanges around bulkhead hatches for canvas protection in this enlightening video. By following his expert guidance, boat enthusiasts can ensure their living areas remain secure while allowing unhindered access through the hatches.Step 1: Starting with the Flange
Sven begins by explaining that working on flanges vertically and horizontally is significantly easier than doing so in a flat position. To simplify the process further, he divides the task into two or three steps as suggested by fellow expert “for for.” This approach not only makes it more manageable but also allows for greater precision in crafting each component.Step 2: Applying Glue and Securing
Sven proceeds to apply glue along one edge of the flange, ensuring a secure bond when clamped into place. He emphasizes that this stage is crucial for maintaining the structural integrity of the flange, which in turn safeguards the living area beneath the canvas when hatches are open.Step 3: Allowing Time to Dry
After securely attaching the first portion of the flange, Sven allows ample time for it to dry before moving forward with additional steps. This patience and precision are key aspects of his successful boatbuilding methods.Step 4: Finishing Touches
Once the flange is fully dried, Sven removes the clamps carefully, ensuring no damage occurs during this process. He then moves on to attaching four more pieces onto these main frames, completing two pairs of flanges for the bulkhead hatches.The Final Touches
While two flanges form the primary support structure around the hatches, Sven mentions there are two additional pieces required at each end to ensure comprehensive protection. This attention to detail highlights his commitment to producing a durable and reliable design. “Sailing is about finding your path, whether it’s across an ocean or within yourself.” – Sven Yrvind In conclusion, making flanges around bulkhead hatches may seem complex at first glance, but by following Sven Yrvind’s meticulous process, enthusiasts can achieve professional-level results. Remember that the journey of boatbuilding is as rewarding as reaching your destination; it tests one’s patience and dedication. For those seeking to embark on this adventure or simply gain more insight into marine craftsmanship, Sven’s wisdom is invaluable.Sven proceeds to apply glue along one edge of the flange, ensuring a secure bond when clamped into place. He emphasizes that this stage is crucial for maintaining the structural integrity of the flange, which in turn safeguards the living area beneath the canvas when hatches are open.Step 3: Allowing Time to Dry
After securely attaching the first portion of the flange, Sven allows ample time for it to dry before moving forward with additional steps. This patience and precision are key aspects of his successful boatbuilding methods.Step 4: Finishing Touches
Once the flange is fully dried, Sven removes the clamps carefully, ensuring no damage occurs during this process. He then moves on to attaching four more pieces onto these main frames, completing two pairs of flanges for the bulkhead hatches.The Final Touches
While two flanges form the primary support structure around the hatches, Sven mentions there are two additional pieces required at each end to ensure comprehensive protection. This attention to detail highlights his commitment to producing a durable and reliable design. “Sailing is about finding your path, whether it’s across an ocean or within yourself.” – Sven Yrvind In conclusion, making flanges around bulkhead hatches may seem complex at first glance, but by following Sven Yrvind’s meticulous process, enthusiasts can achieve professional-level results. Remember that the journey of boatbuilding is as rewarding as reaching your destination; it tests one’s patience and dedication. For those seeking to embark on this adventure or simply gain more insight into marine craftsmanship, Sven’s wisdom is invaluable.Sven Yrvind, a renowned yacht designer and sailor, shares valuable insights on creating flanges around bulkhead hatches for canvas protection in this enlightening video. By following his expert guidance, boat enthusiasts can ensure their living areas remain secure while allowing unhindered access through the hatches.Step 1: Starting with the Flange
Sven begins by explaining that working on flanges vertically and horizontally is significantly easier than doing so in a flat position. To simplify the process further, he divides the task into two or three steps as suggested by fellow expert “for for.” This approach not only makes it more manageable but also allows for greater precision in crafting each component.Step 2: Applying Glue and Securing
Sven proceeds to apply glue along one edge of the flange, ensuring a secure bond when clamped into place. He emphasizes that this stage is crucial for maintaining the structural integrity of the flange, which in turn safeguards the living area beneath the canvas when hatches are open.Step 3: Allowing Time to Dry
After securely attaching the first portion of the flange, Sven allows ample time for it to dry before moving forward with additional steps. This patience and precision are key aspects of his successful boatbuilding methods.Step 4: Finishing Touches
Once the flange is fully dried, Sven removes the clamps carefully, ensuring no damage occurs during this process. He then moves on to attaching four more pieces onto these main frames, completing two pairs of flanges for the bulkhead hatches.The Final Touches
While two flanges form the primary support structure around the hatches, Sven mentions there are two additional pieces required at each end to ensure comprehensive protection. This attention to detail highlights his commitment to producing a durable and reliable design. “Sailing is about finding your path, whether it’s across an ocean or within yourself.” – Sven Yrvind In conclusion, making flanges around bulkhead hatches may seem complex at first glance, but by following Sven Yrvind’s meticulous process, enthusiasts can achieve professional-level results. Remember that the journey of boatbuilding is as rewarding as reaching your destination; it tests one’s patience and dedication. For those seeking to embark on this adventure or simply gain more insight into marine craftsmanship, Sven’s wisdom is invaluable.Making Flanges Around Bulkhead Hatches for Canvas
Sven Yrvind, a renowned yacht designer and sailor, shares valuable insights on creating flanges around bulkhead hatches for canvas protection in this enlightening video. By following his expert guidance, boat enthusiasts can ensure their living areas remain secure while allowing unhindered access through the hatches.Step 1: Starting with the Flange
Sven begins by explaining that working on flanges vertically and horizontally is significantly easier than doing so in a flat position. To simplify the process further, he divides the task into two or three steps as suggested by fellow expert “for for.” This approach not only makes it more manageable but also allows for greater precision in crafting each component.Step 2: Applying Glue and Securing
Sven proceeds to apply glue along one edge of the flange, ensuring a secure bond when clamped into place. He emphasizes that this stage is crucial for maintaining the structural integrity of the flange, which in turn safeguards the living area beneath the canvas when hatches are open.Step 3: Allowing Time to Dry
After securely attaching the first portion of the flange, Sven allows ample time for it to dry before moving forward with additional steps. This patience and precision are key aspects of his successful boatbuilding methods.Step 4: Finishing Touches
Once the flange is fully dried, Sven removes the clamps carefully, ensuring no damage occurs during this process. He then moves on to attaching four more pieces onto these main frames, completing two pairs of flanges for the bulkhead hatches.The Final Touches
While two flanges form the primary support structure around the hatches, Sven mentions there are two additional pieces required at each end to ensure comprehensive protection. This attention to detail highlights his commitment to producing a durable and reliable design. “Sailing is about finding your path, whether it’s across an ocean or within yourself.” – Sven Yrvind In conclusion, making flanges around bulkhead hatches may seem complex at first glance, but by following Sven Yrvind’s meticulous process, enthusiasts can achieve professional-level results. Remember that the journey of boatbuilding is as rewarding as reaching your destination; it tests one’s patience and dedication. For those seeking to embark on this adventure or simply gain more insight into marine craftsmanship, Sven’s wisdom is invaluable.Sven begins by explaining that working on flanges vertically and horizontally is significantly easier than doing so in a flat position. To simplify the process further, he divides the task into two or three steps as suggested by fellow expert “for for.” This approach not only makes it more manageable but also allows for greater precision in crafting each component.Step 2: Applying Glue and Securing
Sven proceeds to apply glue along one edge of the flange, ensuring a secure bond when clamped into place. He emphasizes that this stage is crucial for maintaining the structural integrity of the flange, which in turn safeguards the living area beneath the canvas when hatches are open.Step 3: Allowing Time to Dry
After securely attaching the first portion of the flange, Sven allows ample time for it to dry before moving forward with additional steps. This patience and precision are key aspects of his successful boatbuilding methods.Step 4: Finishing Touches
Once the flange is fully dried, Sven removes the clamps carefully, ensuring no damage occurs during this process. He then moves on to attaching four more pieces onto these main frames, completing two pairs of flanges for the bulkhead hatches.The Final Touches
While two flanges form the primary support structure around the hatches, Sven mentions there are two additional pieces required at each end to ensure comprehensive protection. This attention to detail highlights his commitment to producing a durable and reliable design. “Sailing is about finding your path, whether it’s across an ocean or within yourself.” – Sven Yrvind In conclusion, making flanges around bulkhead hatches may seem complex at first glance, but by following Sven Yrvind’s meticulous process, enthusiasts can achieve professional-level results. Remember that the journey of boatbuilding is as rewarding as reaching your destination; it tests one’s patience and dedication. For those seeking to embark on this adventure or simply gain more insight into marine craftsmanship, Sven’s wisdom is invaluable.Sven Yrvind, a renowned yacht designer and sailor, shares valuable insights on creating flanges around bulkhead hatches for canvas protection in this enlightening video. By following his expert guidance, boat enthusiasts can ensure their living areas remain secure while allowing unhindered access through the hatches.Step 1: Starting with the Flange
Sven begins by explaining that working on flanges vertically and horizontally is significantly easier than doing so in a flat position. To simplify the process further, he divides the task into two or three steps as suggested by fellow expert “for for.” This approach not only makes it more manageable but also allows for greater precision in crafting each component.Step 2: Applying Glue and Securing
Sven proceeds to apply glue along one edge of the flange, ensuring a secure bond when clamped into place. He emphasizes that this stage is crucial for maintaining the structural integrity of the flange, which in turn safeguards the living area beneath the canvas when hatches are open.Step 3: Allowing Time to Dry
After securely attaching the first portion of the flange, Sven allows ample time for it to dry before moving forward with additional steps. This patience and precision are key aspects of his successful boatbuilding methods.Step 4: Finishing Touches
Once the flange is fully dried, Sven removes the clamps carefully, ensuring no damage occurs during this process. He then moves on to attaching four more pieces onto these main frames, completing two pairs of flanges for the bulkhead hatches.The Final Touches
While two flanges form the primary support structure around the hatches, Sven mentions there are two additional pieces required at each end to ensure comprehensive protection. This attention to detail highlights his commitment to producing a durable and reliable design. “Sailing is about finding your path, whether it’s across an ocean or within yourself.” – Sven Yrvind In conclusion, making flanges around bulkhead hatches may seem complex at first glance, but by following Sven Yrvind’s meticulous process, enthusiasts can achieve professional-level results. Remember that the journey of boatbuilding is as rewarding as reaching your destination; it tests one’s patience and dedication. For those seeking to embark on this adventure or simply gain more insight into marine craftsmanship, Sven’s wisdom is invaluable.Making Flanges Around Bulkhead Hatches for Canvas
Sven Yrvind, a renowned yacht designer and sailor, shares valuable insights on creating flanges around bulkhead hatches for canvas protection in this enlightening video. By following his expert guidance, boat enthusiasts can ensure their living areas remain secure while allowing unhindered access through the hatches.Step 1: Starting with the Flange
Sven begins by explaining that working on flanges vertically and horizontally is significantly easier than doing so in a flat position. To simplify the process further, he divides the task into two or three steps as suggested by fellow expert “for for.” This approach not only makes it more manageable but also allows for greater precision in crafting each component.Step 2: Applying Glue and Securing
Sven proceeds to apply glue along one edge of the flange, ensuring a secure bond when clamped into place. He emphasizes that this stage is crucial for maintaining the structural integrity of the flange, which in turn safeguards the living area beneath the canvas when hatches are open.Step 3: Allowing Time to Dry
After securely attaching the first portion of the flange, Sven allows ample time for it to dry before moving forward with additional steps. This patience and precision are key aspects of his successful boatbuilding methods.Step 4: Finishing Touches
Once the flange is fully dried, Sven removes the clamps carefully, ensuring no damage occurs during this process. He then moves on to attaching four more pieces onto these main frames, completing two pairs of flanges for the bulkhead hatches.The Final Touches
While two flanges form the primary support structure around the hatches, Sven mentions there are two additional pieces required at each end to ensure comprehensive protection. This attention to detail highlights his commitment to producing a durable and reliable design. “Sailing is about finding your path, whether it’s across an ocean or within yourself.” – Sven Yrvind In conclusion, making flanges around bulkhead hatches may seem complex at first glance, but by following Sven Yrvind’s meticulous process, enthusiasts can achieve professional-level results. Remember that the journey of boatbuilding is as rewarding as reaching your destination; it tests one’s patience and dedication. For those seeking to embark on this adventure or simply gain more insight into marine craftsmanship, Sven’s wisdom is invaluable.Once the flange is fully dried, Sven removes the clamps carefully, ensuring no damage occurs during this process. He then moves on to attaching four more pieces onto these main frames, completing two pairs of flanges for the bulkhead hatches.The Final Touches
While two flanges form the primary support structure around the hatches, Sven mentions there are two additional pieces required at each end to ensure comprehensive protection. This attention to detail highlights his commitment to producing a durable and reliable design. “Sailing is about finding your path, whether it’s across an ocean or within yourself.” – Sven Yrvind In conclusion, making flanges around bulkhead hatches may seem complex at first glance, but by following Sven Yrvind’s meticulous process, enthusiasts can achieve professional-level results. Remember that the journey of boatbuilding is as rewarding as reaching your destination; it tests one’s patience and dedication. For those seeking to embark on this adventure or simply gain more insight into marine craftsmanship, Sven’s wisdom is invaluable.Sven begins by explaining that working on flanges vertically and horizontally is significantly easier than doing so in a flat position. To simplify the process further, he divides the task into two or three steps as suggested by fellow expert “for for.” This approach not only makes it more manageable but also allows for greater precision in crafting each component.Step 2: Applying Glue and Securing
Sven proceeds to apply glue along one edge of the flange, ensuring a secure bond when clamped into place. He emphasizes that this stage is crucial for maintaining the structural integrity of the flange, which in turn safeguards the living area beneath the canvas when hatches are open.Step 3: Allowing Time to Dry
After securely attaching the first portion of the flange, Sven allows ample time for it to dry before moving forward with additional steps. This patience and precision are key aspects of his successful boatbuilding methods.Step 4: Finishing Touches
Once the flange is fully dried, Sven removes the clamps carefully, ensuring no damage occurs during this process. He then moves on to attaching four more pieces onto these main frames, completing two pairs of flanges for the bulkhead hatches.The Final Touches
While two flanges form the primary support structure around the hatches, Sven mentions there are two additional pieces required at each end to ensure comprehensive protection. This attention to detail highlights his commitment to producing a durable and reliable design. “Sailing is about finding your path, whether it’s across an ocean or within yourself.” – Sven Yrvind In conclusion, making flanges around bulkhead hatches may seem complex at first glance, but by following Sven Yrvind’s meticulous process, enthusiasts can achieve professional-level results. Remember that the journey of boatbuilding is as rewarding as reaching your destination; it tests one’s patience and dedication. For those seeking to embark on this adventure or simply gain more insight into marine craftsmanship, Sven’s wisdom is invaluable.Sven Yrvind, a renowned yacht designer and sailor, shares valuable insights on creating flanges around bulkhead hatches for canvas protection in this enlightening video. By following his expert guidance, boat enthusiasts can ensure their living areas remain secure while allowing unhindered access through the hatches.Step 1: Starting with the Flange
Sven begins by explaining that working on flanges vertically and horizontally is significantly easier than doing so in a flat position. To simplify the process further, he divides the task into two or three steps as suggested by fellow expert “for for.” This approach not only makes it more manageable but also allows for greater precision in crafting each component.Step 2: Applying Glue and Securing
Sven proceeds to apply glue along one edge of the flange, ensuring a secure bond when clamped into place. He emphasizes that this stage is crucial for maintaining the structural integrity of the flange, which in turn safeguards the living area beneath the canvas when hatches are open.Step 3: Allowing Time to Dry
After securely attaching the first portion of the flange, Sven allows ample time for it to dry before moving forward with additional steps. This patience and precision are key aspects of his successful boatbuilding methods.Step 4: Finishing Touches
Once the flange is fully dried, Sven removes the clamps carefully, ensuring no damage occurs during this process. He then moves on to attaching four more pieces onto these main frames, completing two pairs of flanges for the bulkhead hatches.The Final Touches
While two flanges form the primary support structure around the hatches, Sven mentions there are two additional pieces required at each end to ensure comprehensive protection. This attention to detail highlights his commitment to producing a durable and reliable design. “Sailing is about finding your path, whether it’s across an ocean or within yourself.” – Sven Yrvind In conclusion, making flanges around bulkhead hatches may seem complex at first glance, but by following Sven Yrvind’s meticulous process, enthusiasts can achieve professional-level results. Remember that the journey of boatbuilding is as rewarding as reaching your destination; it tests one’s patience and dedication. For those seeking to embark on this adventure or simply gain more insight into marine craftsmanship, Sven’s wisdom is invaluable.Making Flanges Around Bulkhead Hatches for Canvas
Sven Yrvind, a renowned yacht designer and sailor, shares valuable insights on creating flanges around bulkhead hatches for canvas protection in this enlightening video. By following his expert guidance, boat enthusiasts can ensure their living areas remain secure while allowing unhindered access through the hatches.Step 1: Starting with the Flange
Sven begins by explaining that working on flanges vertically and horizontally is significantly easier than doing so in a flat position. To simplify the process further, he divides the task into two or three steps as suggested by fellow expert “for for.” This approach not only makes it more manageable but also allows for greater precision in crafting each component.Step 2: Applying Glue and Securing
Sven proceeds to apply glue along one edge of the flange, ensuring a secure bond when clamped into place. He emphasizes that this stage is crucial for maintaining the structural integrity of the flange, which in turn safeguards the living area beneath the canvas when hatches are open.Step 3: Allowing Time to Dry
After securely attaching the first portion of the flange, Sven allows ample time for it to dry before moving forward with additional steps. This patience and precision are key aspects of his successful boatbuilding methods.Step 4: Finishing Touches
Once the flange is fully dried, Sven removes the clamps carefully, ensuring no damage occurs during this process. He then moves on to attaching four more pieces onto these main frames, completing two pairs of flanges for the bulkhead hatches.The Final Touches
While two flanges form the primary support structure around the hatches, Sven mentions there are two additional pieces required at each end to ensure comprehensive protection. This attention to detail highlights his commitment to producing a durable and reliable design. “Sailing is about finding your path, whether it’s across an ocean or within yourself.” – Sven Yrvind In conclusion, making flanges around bulkhead hatches may seem complex at first glance, but by following Sven Yrvind’s meticulous process, enthusiasts can achieve professional-level results. Remember that the journey of boatbuilding is as rewarding as reaching your destination; it tests one’s patience and dedication. For those seeking to embark on this adventure or simply gain more insight into marine craftsmanship, Sven’s wisdom is invaluable.After securely attaching the first portion of the flange, Sven allows ample time for it to dry before moving forward with additional steps. This patience and precision are key aspects of his successful boatbuilding methods.Step 4: Finishing Touches
Once the flange is fully dried, Sven removes the clamps carefully, ensuring no damage occurs during this process. He then moves on to attaching four more pieces onto these main frames, completing two pairs of flanges for the bulkhead hatches.The Final Touches
While two flanges form the primary support structure around the hatches, Sven mentions there are two additional pieces required at each end to ensure comprehensive protection. This attention to detail highlights his commitment to producing a durable and reliable design. “Sailing is about finding your path, whether it’s across an ocean or within yourself.” – Sven Yrvind In conclusion, making flanges around bulkhead hatches may seem complex at first glance, but by following Sven Yrvind’s meticulous process, enthusiasts can achieve professional-level results. Remember that the journey of boatbuilding is as rewarding as reaching your destination; it tests one’s patience and dedication. For those seeking to embark on this adventure or simply gain more insight into marine craftsmanship, Sven’s wisdom is invaluable.Sven begins by explaining that working on flanges vertically and horizontally is significantly easier than doing so in a flat position. To simplify the process further, he divides the task into two or three steps as suggested by fellow expert “for for.” This approach not only makes it more manageable but also allows for greater precision in crafting each component.Step 2: Applying Glue and Securing
Sven proceeds to apply glue along one edge of the flange, ensuring a secure bond when clamped into place. He emphasizes that this stage is crucial for maintaining the structural integrity of the flange, which in turn safeguards the living area beneath the canvas when hatches are open.Step 3: Allowing Time to Dry
After securely attaching the first portion of the flange, Sven allows ample time for it to dry before moving forward with additional steps. This patience and precision are key aspects of his successful boatbuilding methods.Step 4: Finishing Touches
Once the flange is fully dried, Sven removes the clamps carefully, ensuring no damage occurs during this process. He then moves on to attaching four more pieces onto these main frames, completing two pairs of flanges for the bulkhead hatches.The Final Touches
While two flanges form the primary support structure around the hatches, Sven mentions there are two additional pieces required at each end to ensure comprehensive protection. This attention to detail highlights his commitment to producing a durable and reliable design. “Sailing is about finding your path, whether it’s across an ocean or within yourself.” – Sven Yrvind In conclusion, making flanges around bulkhead hatches may seem complex at first glance, but by following Sven Yrvind’s meticulous process, enthusiasts can achieve professional-level results. Remember that the journey of boatbuilding is as rewarding as reaching your destination; it tests one’s patience and dedication. For those seeking to embark on this adventure or simply gain more insight into marine craftsmanship, Sven’s wisdom is invaluable.Sven Yrvind, a renowned yacht designer and sailor, shares valuable insights on creating flanges around bulkhead hatches for canvas protection in this enlightening video. By following his expert guidance, boat enthusiasts can ensure their living areas remain secure while allowing unhindered access through the hatches.Step 1: Starting with the Flange
Sven begins by explaining that working on flanges vertically and horizontally is significantly easier than doing so in a flat position. To simplify the process further, he divides the task into two or three steps as suggested by fellow expert “for for.” This approach not only makes it more manageable but also allows for greater precision in crafting each component.Step 2: Applying Glue and Securing
Sven proceeds to apply glue along one edge of the flange, ensuring a secure bond when clamped into place. He emphasizes that this stage is crucial for maintaining the structural integrity of the flange, which in turn safeguards the living area beneath the canvas when hatches are open.Step 3: Allowing Time to Dry
After securely attaching the first portion of the flange, Sven allows ample time for it to dry before moving forward with additional steps. This patience and precision are key aspects of his successful boatbuilding methods.Step 4: Finishing Touches
Once the flange is fully dried, Sven removes the clamps carefully, ensuring no damage occurs during this process. He then moves on to attaching four more pieces onto these main frames, completing two pairs of flanges for the bulkhead hatches.The Final Touches
While two flanges form the primary support structure around the hatches, Sven mentions there are two additional pieces required at each end to ensure comprehensive protection. This attention to detail highlights his commitment to producing a durable and reliable design. “Sailing is about finding your path, whether it’s across an ocean or within yourself.” – Sven Yrvind In conclusion, making flanges around bulkhead hatches may seem complex at first glance, but by following Sven Yrvind’s meticulous process, enthusiasts can achieve professional-level results. Remember that the journey of boatbuilding is as rewarding as reaching your destination; it tests one’s patience and dedication. For those seeking to embark on this adventure or simply gain more insight into marine craftsmanship, Sven’s wisdom is invaluable.Making Flanges Around Bulkhead Hatches for Canvas
Sven Yrvind, a renowned yacht designer and sailor, shares valuable insights on creating flanges around bulkhead hatches for canvas protection in this enlightening video. By following his expert guidance, boat enthusiasts can ensure their living areas remain secure while allowing unhindered access through the hatches.Step 1: Starting with the Flange
Sven begins by explaining that working on flanges vertically and horizontally is significantly easier than doing so in a flat position. To simplify the process further, he divides the task into two or three steps as suggested by fellow expert “for for.” This approach not only makes it more manageable but also allows for greater precision in crafting each component.Step 2: Applying Glue and Securing
Sven proceeds to apply glue along one edge of the flange, ensuring a secure bond when clamped into place. He emphasizes that this stage is crucial for maintaining the structural integrity of the flange, which in turn safeguards the living area beneath the canvas when hatches are open.Step 3: Allowing Time to Dry
After securely attaching the first portion of the flange, Sven allows ample time for it to dry before moving forward with additional steps. This patience and precision are key aspects of his successful boatbuilding methods.Step 4: Finishing Touches
Once the flange is fully dried, Sven removes the clamps carefully, ensuring no damage occurs during this process. He then moves on to attaching four more pieces onto these main frames, completing two pairs of flanges for the bulkhead hatches.The Final Touches
While two flanges form the primary support structure around the hatches, Sven mentions there are two additional pieces required at each end to ensure comprehensive protection. This attention to detail highlights his commitment to producing a durable and reliable design. “Sailing is about finding your path, whether it’s across an ocean or within yourself.” – Sven Yrvind In conclusion, making flanges around bulkhead hatches may seem complex at first glance, but by following Sven Yrvind’s meticulous process, enthusiasts can achieve professional-level results. Remember that the journey of boatbuilding is as rewarding as reaching your destination; it tests one’s patience and dedication. For those seeking to embark on this adventure or simply gain more insight into marine craftsmanship, Sven’s wisdom is invaluable.Sven proceeds to apply glue along one edge of the flange, ensuring a secure bond when clamped into place. He emphasizes that this stage is crucial for maintaining the structural integrity of the flange, which in turn safeguards the living area beneath the canvas when hatches are open.Step 3: Allowing Time to Dry
After securely attaching the first portion of the flange, Sven allows ample time for it to dry before moving forward with additional steps. This patience and precision are key aspects of his successful boatbuilding methods.Step 4: Finishing Touches
Once the flange is fully dried, Sven removes the clamps carefully, ensuring no damage occurs during this process. He then moves on to attaching four more pieces onto these main frames, completing two pairs of flanges for the bulkhead hatches.The Final Touches
While two flanges form the primary support structure around the hatches, Sven mentions there are two additional pieces required at each end to ensure comprehensive protection. This attention to detail highlights his commitment to producing a durable and reliable design. “Sailing is about finding your path, whether it’s across an ocean or within yourself.” – Sven Yrvind In conclusion, making flanges around bulkhead hatches may seem complex at first glance, but by following Sven Yrvind’s meticulous process, enthusiasts can achieve professional-level results. Remember that the journey of boatbuilding is as rewarding as reaching your destination; it tests one’s patience and dedication. For those seeking to embark on this adventure or simply gain more insight into marine craftsmanship, Sven’s wisdom is invaluable.Sven begins by explaining that working on flanges vertically and horizontally is significantly easier than doing so in a flat position. To simplify the process further, he divides the task into two or three steps as suggested by fellow expert “for for.” This approach not only makes it more manageable but also allows for greater precision in crafting each component.Step 2: Applying Glue and Securing
Sven proceeds to apply glue along one edge of the flange, ensuring a secure bond when clamped into place. He emphasizes that this stage is crucial for maintaining the structural integrity of the flange, which in turn safeguards the living area beneath the canvas when hatches are open.Step 3: Allowing Time to Dry
After securely attaching the first portion of the flange, Sven allows ample time for it to dry before moving forward with additional steps. This patience and precision are key aspects of his successful boatbuilding methods.Step 4: Finishing Touches
Once the flange is fully dried, Sven removes the clamps carefully, ensuring no damage occurs during this process. He then moves on to attaching four more pieces onto these main frames, completing two pairs of flanges for the bulkhead hatches.The Final Touches
While two flanges form the primary support structure around the hatches, Sven mentions there are two additional pieces required at each end to ensure comprehensive protection. This attention to detail highlights his commitment to producing a durable and reliable design. “Sailing is about finding your path, whether it’s across an ocean or within yourself.” – Sven Yrvind In conclusion, making flanges around bulkhead hatches may seem complex at first glance, but by following Sven Yrvind’s meticulous process, enthusiasts can achieve professional-level results. Remember that the journey of boatbuilding is as rewarding as reaching your destination; it tests one’s patience and dedication. For those seeking to embark on this adventure or simply gain more insight into marine craftsmanship, Sven’s wisdom is invaluable.Sven Yrvind, a renowned yacht designer and sailor, shares valuable insights on creating flanges around bulkhead hatches for canvas protection in this enlightening video. By following his expert guidance, boat enthusiasts can ensure their living areas remain secure while allowing unhindered access through the hatches.Step 1: Starting with the Flange
Sven begins by explaining that working on flanges vertically and horizontally is significantly easier than doing so in a flat position. To simplify the process further, he divides the task into two or three steps as suggested by fellow expert “for for.” This approach not only makes it more manageable but also allows for greater precision in crafting each component.Step 2: Applying Glue and Securing
Sven proceeds to apply glue along one edge of the flange, ensuring a secure bond when clamped into place. He emphasizes that this stage is crucial for maintaining the structural integrity of the flange, which in turn safeguards the living area beneath the canvas when hatches are open.Step 3: Allowing Time to Dry
After securely attaching the first portion of the flange, Sven allows ample time for it to dry before moving forward with additional steps. This patience and precision are key aspects of his successful boatbuilding methods.Step 4: Finishing Touches
Once the flange is fully dried, Sven removes the clamps carefully, ensuring no damage occurs during this process. He then moves on to attaching four more pieces onto these main frames, completing two pairs of flanges for the bulkhead hatches.The Final Touches
While two flanges form the primary support structure around the hatches, Sven mentions there are two additional pieces required at each end to ensure comprehensive protection. This attention to detail highlights his commitment to producing a durable and reliable design. “Sailing is about finding your path, whether it’s across an ocean or within yourself.” – Sven Yrvind In conclusion, making flanges around bulkhead hatches may seem complex at first glance, but by following Sven Yrvind’s meticulous process, enthusiasts can achieve professional-level results. Remember that the journey of boatbuilding is as rewarding as reaching your destination; it tests one’s patience and dedication. For those seeking to embark on this adventure or simply gain more insight into marine craftsmanship, Sven’s wisdom is invaluable.Making Flanges Around Bulkhead Hatches for Canvas
Sven Yrvind, a renowned yacht designer and sailor, shares valuable insights on creating flanges around bulkhead hatches for canvas protection in this enlightening video. By following his expert guidance, boat enthusiasts can ensure their living areas remain secure while allowing unhindered access through the hatches.Step 1: Starting with the Flange
Sven begins by explaining that working on flanges vertically and horizontally is significantly easier than doing so in a flat position. To simplify the process further, he divides the task into two or three steps as suggested by fellow expert “for for.” This approach not only makes it more manageable but also allows for greater precision in crafting each component.Step 2: Applying Glue and Securing
Sven proceeds to apply glue along one edge of the flange, ensuring a secure bond when clamped into place. He emphasizes that this stage is crucial for maintaining the structural integrity of the flange, which in turn safeguards the living area beneath the canvas when hatches are open.Step 3: Allowing Time to Dry
After securely attaching the first portion of the flange, Sven allows ample time for it to dry before moving forward with additional steps. This patience and precision are key aspects of his successful boatbuilding methods.Step 4: Finishing Touches
Once the flange is fully dried, Sven removes the clamps carefully, ensuring no damage occurs during this process. He then moves on to attaching four more pieces onto these main frames, completing two pairs of flanges for the bulkhead hatches.The Final Touches
While two flanges form the primary support structure around the hatches, Sven mentions there are two additional pieces required at each end to ensure comprehensive protection. This attention to detail highlights his commitment to producing a durable and reliable design. “Sailing is about finding your path, whether it’s across an ocean or within yourself.” – Sven Yrvind In conclusion, making flanges around bulkhead hatches may seem complex at first glance, but by following Sven Yrvind’s meticulous process, enthusiasts can achieve professional-level results. Remember that the journey of boatbuilding is as rewarding as reaching your destination; it tests one’s patience and dedication. For those seeking to embark on this adventure or simply gain more insight into marine craftsmanship, Sven’s wisdom is invaluable.Once the flange is fully dried, Sven removes the clamps carefully, ensuring no damage occurs during this process. He then moves on to attaching four more pieces onto these main frames, completing two pairs of flanges for the bulkhead hatches.The Final Touches
While two flanges form the primary support structure around the hatches, Sven mentions there are two additional pieces required at each end to ensure comprehensive protection. This attention to detail highlights his commitment to producing a durable and reliable design. “Sailing is about finding your path, whether it’s across an ocean or within yourself.” – Sven Yrvind In conclusion, making flanges around bulkhead hatches may seem complex at first glance, but by following Sven Yrvind’s meticulous process, enthusiasts can achieve professional-level results. Remember that the journey of boatbuilding is as rewarding as reaching your destination; it tests one’s patience and dedication. For those seeking to embark on this adventure or simply gain more insight into marine craftsmanship, Sven’s wisdom is invaluable.Sven proceeds to apply glue along one edge of the flange, ensuring a secure bond when clamped into place. He emphasizes that this stage is crucial for maintaining the structural integrity of the flange, which in turn safeguards the living area beneath the canvas when hatches are open.Step 3: Allowing Time to Dry
After securely attaching the first portion of the flange, Sven allows ample time for it to dry before moving forward with additional steps. This patience and precision are key aspects of his successful boatbuilding methods.Step 4: Finishing Touches
Once the flange is fully dried, Sven removes the clamps carefully, ensuring no damage occurs during this process. He then moves on to attaching four more pieces onto these main frames, completing two pairs of flanges for the bulkhead hatches.The Final Touches
While two flanges form the primary support structure around the hatches, Sven mentions there are two additional pieces required at each end to ensure comprehensive protection. This attention to detail highlights his commitment to producing a durable and reliable design. “Sailing is about finding your path, whether it’s across an ocean or within yourself.” – Sven Yrvind In conclusion, making flanges around bulkhead hatches may seem complex at first glance, but by following Sven Yrvind’s meticulous process, enthusiasts can achieve professional-level results. Remember that the journey of boatbuilding is as rewarding as reaching your destination; it tests one’s patience and dedication. For those seeking to embark on this adventure or simply gain more insight into marine craftsmanship, Sven’s wisdom is invaluable.Sven begins by explaining that working on flanges vertically and horizontally is significantly easier than doing so in a flat position. To simplify the process further, he divides the task into two or three steps as suggested by fellow expert “for for.” This approach not only makes it more manageable but also allows for greater precision in crafting each component.Step 2: Applying Glue and Securing
Sven proceeds to apply glue along one edge of the flange, ensuring a secure bond when clamped into place. He emphasizes that this stage is crucial for maintaining the structural integrity of the flange, which in turn safeguards the living area beneath the canvas when hatches are open.Step 3: Allowing Time to Dry
After securely attaching the first portion of the flange, Sven allows ample time for it to dry before moving forward with additional steps. This patience and precision are key aspects of his successful boatbuilding methods.Step 4: Finishing Touches
Once the flange is fully dried, Sven removes the clamps carefully, ensuring no damage occurs during this process. He then moves on to attaching four more pieces onto these main frames, completing two pairs of flanges for the bulkhead hatches.The Final Touches
While two flanges form the primary support structure around the hatches, Sven mentions there are two additional pieces required at each end to ensure comprehensive protection. This attention to detail highlights his commitment to producing a durable and reliable design. “Sailing is about finding your path, whether it’s across an ocean or within yourself.” – Sven Yrvind In conclusion, making flanges around bulkhead hatches may seem complex at first glance, but by following Sven Yrvind’s meticulous process, enthusiasts can achieve professional-level results. Remember that the journey of boatbuilding is as rewarding as reaching your destination; it tests one’s patience and dedication. For those seeking to embark on this adventure or simply gain more insight into marine craftsmanship, Sven’s wisdom is invaluable.Sven Yrvind, a renowned yacht designer and sailor, shares valuable insights on creating flanges around bulkhead hatches for canvas protection in this enlightening video. By following his expert guidance, boat enthusiasts can ensure their living areas remain secure while allowing unhindered access through the hatches.Step 1: Starting with the Flange
Sven begins by explaining that working on flanges vertically and horizontally is significantly easier than doing so in a flat position. To simplify the process further, he divides the task into two or three steps as suggested by fellow expert “for for.” This approach not only makes it more manageable but also allows for greater precision in crafting each component.Step 2: Applying Glue and Securing
Sven proceeds to apply glue along one edge of the flange, ensuring a secure bond when clamped into place. He emphasizes that this stage is crucial for maintaining the structural integrity of the flange, which in turn safeguards the living area beneath the canvas when hatches are open.Step 3: Allowing Time to Dry
After securely attaching the first portion of the flange, Sven allows ample time for it to dry before moving forward with additional steps. This patience and precision are key aspects of his successful boatbuilding methods.Step 4: Finishing Touches
Once the flange is fully dried, Sven removes the clamps carefully, ensuring no damage occurs during this process. He then moves on to attaching four more pieces onto these main frames, completing two pairs of flanges for the bulkhead hatches.The Final Touches
While two flanges form the primary support structure around the hatches, Sven mentions there are two additional pieces required at each end to ensure comprehensive protection. This attention to detail highlights his commitment to producing a durable and reliable design. “Sailing is about finding your path, whether it’s across an ocean or within yourself.” – Sven Yrvind In conclusion, making flanges around bulkhead hatches may seem complex at first glance, but by following Sven Yrvind’s meticulous process, enthusiasts can achieve professional-level results. Remember that the journey of boatbuilding is as rewarding as reaching your destination; it tests one’s patience and dedication. For those seeking to embark on this adventure or simply gain more insight into marine craftsmanship, Sven’s wisdom is invaluable.Making Flanges Around Bulkhead Hatches for Canvas
Sven Yrvind, a renowned yacht designer and sailor, shares valuable insights on creating flanges around bulkhead hatches for canvas protection in this enlightening video. By following his expert guidance, boat enthusiasts can ensure their living areas remain secure while allowing unhindered access through the hatches.Step 1: Starting with the Flange
Sven begins by explaining that working on flanges vertically and horizontally is significantly easier than doing so in a flat position. To simplify the process further, he divides the task into two or three steps as suggested by fellow expert “for for.” This approach not only makes it more manageable but also allows for greater precision in crafting each component.Step 2: Applying Glue and Securing
Sven proceeds to apply glue along one edge of the flange, ensuring a secure bond when clamped into place. He emphasizes that this stage is crucial for maintaining the structural integrity of the flange, which in turn safeguards the living area beneath the canvas when hatches are open.Step 3: Allowing Time to Dry
After securely attaching the first portion of the flange, Sven allows ample time for it to dry before moving forward with additional steps. This patience and precision are key aspects of his successful boatbuilding methods.Step 4: Finishing Touches
Once the flange is fully dried, Sven removes the clamps carefully, ensuring no damage occurs during this process. He then moves on to attaching four more pieces onto these main frames, completing two pairs of flanges for the bulkhead hatches.The Final Touches
While two flanges form the primary support structure around the hatches, Sven mentions there are two additional pieces required at each end to ensure comprehensive protection. This attention to detail highlights his commitment to producing a durable and reliable design. “Sailing is about finding your path, whether it’s across an ocean or within yourself.” – Sven Yrvind In conclusion, making flanges around bulkhead hatches may seem complex at first glance, but by following Sven Yrvind’s meticulous process, enthusiasts can achieve professional-level results. Remember that the journey of boatbuilding is as rewarding as reaching your destination; it tests one’s patience and dedication. For those seeking to embark on this adventure or simply gain more insight into marine craftsmanship, Sven’s wisdom is invaluable.After securely attaching the first portion of the flange, Sven allows ample time for it to dry before moving forward with additional steps. This patience and precision are key aspects of his successful boatbuilding methods.Step 4: Finishing Touches
Once the flange is fully dried, Sven removes the clamps carefully, ensuring no damage occurs during this process. He then moves on to attaching four more pieces onto these main frames, completing two pairs of flanges for the bulkhead hatches.The Final Touches
While two flanges form the primary support structure around the hatches, Sven mentions there are two additional pieces required at each end to ensure comprehensive protection. This attention to detail highlights his commitment to producing a durable and reliable design. “Sailing is about finding your path, whether it’s across an ocean or within yourself.” – Sven Yrvind In conclusion, making flanges around bulkhead hatches may seem complex at first glance, but by following Sven Yrvind’s meticulous process, enthusiasts can achieve professional-level results. Remember that the journey of boatbuilding is as rewarding as reaching your destination; it tests one’s patience and dedication. For those seeking to embark on this adventure or simply gain more insight into marine craftsmanship, Sven’s wisdom is invaluable.Sven proceeds to apply glue along one edge of the flange, ensuring a secure bond when clamped into place. He emphasizes that this stage is crucial for maintaining the structural integrity of the flange, which in turn safeguards the living area beneath the canvas when hatches are open.Step 3: Allowing Time to Dry
After securely attaching the first portion of the flange, Sven allows ample time for it to dry before moving forward with additional steps. This patience and precision are key aspects of his successful boatbuilding methods.Step 4: Finishing Touches
Once the flange is fully dried, Sven removes the clamps carefully, ensuring no damage occurs during this process. He then moves on to attaching four more pieces onto these main frames, completing two pairs of flanges for the bulkhead hatches.The Final Touches
While two flanges form the primary support structure around the hatches, Sven mentions there are two additional pieces required at each end to ensure comprehensive protection. This attention to detail highlights his commitment to producing a durable and reliable design. “Sailing is about finding your path, whether it’s across an ocean or within yourself.” – Sven Yrvind In conclusion, making flanges around bulkhead hatches may seem complex at first glance, but by following Sven Yrvind’s meticulous process, enthusiasts can achieve professional-level results. Remember that the journey of boatbuilding is as rewarding as reaching your destination; it tests one’s patience and dedication. For those seeking to embark on this adventure or simply gain more insight into marine craftsmanship, Sven’s wisdom is invaluable.Sven begins by explaining that working on flanges vertically and horizontally is significantly easier than doing so in a flat position. To simplify the process further, he divides the task into two or three steps as suggested by fellow expert “for for.” This approach not only makes it more manageable but also allows for greater precision in crafting each component.Step 2: Applying Glue and Securing
Sven proceeds to apply glue along one edge of the flange, ensuring a secure bond when clamped into place. He emphasizes that this stage is crucial for maintaining the structural integrity of the flange, which in turn safeguards the living area beneath the canvas when hatches are open.Step 3: Allowing Time to Dry
After securely attaching the first portion of the flange, Sven allows ample time for it to dry before moving forward with additional steps. This patience and precision are key aspects of his successful boatbuilding methods.Step 4: Finishing Touches
Once the flange is fully dried, Sven removes the clamps carefully, ensuring no damage occurs during this process. He then moves on to attaching four more pieces onto these main frames, completing two pairs of flanges for the bulkhead hatches.The Final Touches
While two flanges form the primary support structure around the hatches, Sven mentions there are two additional pieces required at each end to ensure comprehensive protection. This attention to detail highlights his commitment to producing a durable and reliable design. “Sailing is about finding your path, whether it’s across an ocean or within yourself.” – Sven Yrvind In conclusion, making flanges around bulkhead hatches may seem complex at first glance, but by following Sven Yrvind’s meticulous process, enthusiasts can achieve professional-level results. Remember that the journey of boatbuilding is as rewarding as reaching your destination; it tests one’s patience and dedication. For those seeking to embark on this adventure or simply gain more insight into marine craftsmanship, Sven’s wisdom is invaluable.Sven Yrvind, a renowned yacht designer and sailor, shares valuable insights on creating flanges around bulkhead hatches for canvas protection in this enlightening video. By following his expert guidance, boat enthusiasts can ensure their living areas remain secure while allowing unhindered access through the hatches.Step 1: Starting with the Flange
Sven begins by explaining that working on flanges vertically and horizontally is significantly easier than doing so in a flat position. To simplify the process further, he divides the task into two or three steps as suggested by fellow expert “for for.” This approach not only makes it more manageable but also allows for greater precision in crafting each component.Step 2: Applying Glue and Securing
Sven proceeds to apply glue along one edge of the flange, ensuring a secure bond when clamped into place. He emphasizes that this stage is crucial for maintaining the structural integrity of the flange, which in turn safeguards the living area beneath the canvas when hatches are open.Step 3: Allowing Time to Dry
After securely attaching the first portion of the flange, Sven allows ample time for it to dry before moving forward with additional steps. This patience and precision are key aspects of his successful boatbuilding methods.Step 4: Finishing Touches
Once the flange is fully dried, Sven removes the clamps carefully, ensuring no damage occurs during this process. He then moves on to attaching four more pieces onto these main frames, completing two pairs of flanges for the bulkhead hatches.The Final Touches
While two flanges form the primary support structure around the hatches, Sven mentions there are two additional pieces required at each end to ensure comprehensive protection. This attention to detail highlights his commitment to producing a durable and reliable design. “Sailing is about finding your path, whether it’s across an ocean or within yourself.” – Sven Yrvind In conclusion, making flanges around bulkhead hatches may seem complex at first glance, but by following Sven Yrvind’s meticulous process, enthusiasts can achieve professional-level results. Remember that the journey of boatbuilding is as rewarding as reaching your destination; it tests one’s patience and dedication. For those seeking to embark on this adventure or simply gain more insight into marine craftsmanship, Sven’s wisdom is invaluable.Making Flanges Around Bulkhead Hatches for Canvas
Sven Yrvind, a renowned yacht designer and sailor, shares valuable insights on creating flanges around bulkhead hatches for canvas protection in this enlightening video. By following his expert guidance, boat enthusiasts can ensure their living areas remain secure while allowing unhindered access through the hatches.Step 1: Starting with the Flange
Sven begins by explaining that working on flanges vertically and horizontally is significantly easier than doing so in a flat position. To simplify the process further, he divides the task into two or three steps as suggested by fellow expert “for for.” This approach not only makes it more manageable but also allows for greater precision in crafting each component.Step 2: Applying Glue and Securing
Sven proceeds to apply glue along one edge of the flange, ensuring a secure bond when clamped into place. He emphasizes that this stage is crucial for maintaining the structural integrity of the flange, which in turn safeguards the living area beneath the canvas when hatches are open.Step 3: Allowing Time to Dry
After securely attaching the first portion of the flange, Sven allows ample time for it to dry before moving forward with additional steps. This patience and precision are key aspects of his successful boatbuilding methods.Step 4: Finishing Touches
Once the flange is fully dried, Sven removes the clamps carefully, ensuring no damage occurs during this process. He then moves on to attaching four more pieces onto these main frames, completing two pairs of flanges for the bulkhead hatches.The Final Touches
While two flanges form the primary support structure around the hatches, Sven mentions there are two additional pieces required at each end to ensure comprehensive protection. This attention to detail highlights his commitment to producing a durable and reliable design. “Sailing is about finding your path, whether it’s across an ocean or within yourself.” – Sven Yrvind In conclusion, making flanges around bulkhead hatches may seem complex at first glance, but by following Sven Yrvind’s meticulous process, enthusiasts can achieve professional-level results. Remember that the journey of boatbuilding is as rewarding as reaching your destination; it tests one’s patience and dedication. For those seeking to embark on this adventure or simply gain more insight into marine craftsmanship, Sven’s wisdom is invaluable.Once the flange is fully dried, Sven removes the clamps carefully, ensuring no damage occurs during this process. He then moves on to attaching four more pieces onto these main frames, completing two pairs of flanges for the bulkhead hatches.The Final Touches
While two flanges form the primary support structure around the hatches, Sven mentions there are two additional pieces required at each end to ensure comprehensive protection. This attention to detail highlights his commitment to producing a durable and reliable design. “Sailing is about finding your path, whether it’s across an ocean or within yourself.” – Sven Yrvind In conclusion, making flanges around bulkhead hatches may seem complex at first glance, but by following Sven Yrvind’s meticulous process, enthusiasts can achieve professional-level results. Remember that the journey of boatbuilding is as rewarding as reaching your destination; it tests one’s patience and dedication. For those seeking to embark on this adventure or simply gain more insight into marine craftsmanship, Sven’s wisdom is invaluable.After securely attaching the first portion of the flange, Sven allows ample time for it to dry before moving forward with additional steps. This patience and precision are key aspects of his successful boatbuilding methods.Step 4: Finishing Touches
Once the flange is fully dried, Sven removes the clamps carefully, ensuring no damage occurs during this process. He then moves on to attaching four more pieces onto these main frames, completing two pairs of flanges for the bulkhead hatches.The Final Touches
While two flanges form the primary support structure around the hatches, Sven mentions there are two additional pieces required at each end to ensure comprehensive protection. This attention to detail highlights his commitment to producing a durable and reliable design. “Sailing is about finding your path, whether it’s across an ocean or within yourself.” – Sven Yrvind In conclusion, making flanges around bulkhead hatches may seem complex at first glance, but by following Sven Yrvind’s meticulous process, enthusiasts can achieve professional-level results. Remember that the journey of boatbuilding is as rewarding as reaching your destination; it tests one’s patience and dedication. For those seeking to embark on this adventure or simply gain more insight into marine craftsmanship, Sven’s wisdom is invaluable.Sven proceeds to apply glue along one edge of the flange, ensuring a secure bond when clamped into place. He emphasizes that this stage is crucial for maintaining the structural integrity of the flange, which in turn safeguards the living area beneath the canvas when hatches are open.Step 3: Allowing Time to Dry
After securely attaching the first portion of the flange, Sven allows ample time for it to dry before moving forward with additional steps. This patience and precision are key aspects of his successful boatbuilding methods.Step 4: Finishing Touches
Once the flange is fully dried, Sven removes the clamps carefully, ensuring no damage occurs during this process. He then moves on to attaching four more pieces onto these main frames, completing two pairs of flanges for the bulkhead hatches.The Final Touches
While two flanges form the primary support structure around the hatches, Sven mentions there are two additional pieces required at each end to ensure comprehensive protection. This attention to detail highlights his commitment to producing a durable and reliable design. “Sailing is about finding your path, whether it’s across an ocean or within yourself.” – Sven Yrvind In conclusion, making flanges around bulkhead hatches may seem complex at first glance, but by following Sven Yrvind’s meticulous process, enthusiasts can achieve professional-level results. Remember that the journey of boatbuilding is as rewarding as reaching your destination; it tests one’s patience and dedication. For those seeking to embark on this adventure or simply gain more insight into marine craftsmanship, Sven’s wisdom is invaluable.Sven begins by explaining that working on flanges vertically and horizontally is significantly easier than doing so in a flat position. To simplify the process further, he divides the task into two or three steps as suggested by fellow expert “for for.” This approach not only makes it more manageable but also allows for greater precision in crafting each component.Step 2: Applying Glue and Securing
Sven proceeds to apply glue along one edge of the flange, ensuring a secure bond when clamped into place. He emphasizes that this stage is crucial for maintaining the structural integrity of the flange, which in turn safeguards the living area beneath the canvas when hatches are open.Step 3: Allowing Time to Dry
After securely attaching the first portion of the flange, Sven allows ample time for it to dry before moving forward with additional steps. This patience and precision are key aspects of his successful boatbuilding methods.Step 4: Finishing Touches
Once the flange is fully dried, Sven removes the clamps carefully, ensuring no damage occurs during this process. He then moves on to attaching four more pieces onto these main frames, completing two pairs of flanges for the bulkhead hatches.The Final Touches
While two flanges form the primary support structure around the hatches, Sven mentions there are two additional pieces required at each end to ensure comprehensive protection. This attention to detail highlights his commitment to producing a durable and reliable design. “Sailing is about finding your path, whether it’s across an ocean or within yourself.” – Sven Yrvind In conclusion, making flanges around bulkhead hatches may seem complex at first glance, but by following Sven Yrvind’s meticulous process, enthusiasts can achieve professional-level results. Remember that the journey of boatbuilding is as rewarding as reaching your destination; it tests one’s patience and dedication. For those seeking to embark on this adventure or simply gain more insight into marine craftsmanship, Sven’s wisdom is invaluable.Sven Yrvind, a renowned yacht designer and sailor, shares valuable insights on creating flanges around bulkhead hatches for canvas protection in this enlightening video. By following his expert guidance, boat enthusiasts can ensure their living areas remain secure while allowing unhindered access through the hatches.Step 1: Starting with the Flange
Sven begins by explaining that working on flanges vertically and horizontally is significantly easier than doing so in a flat position. To simplify the process further, he divides the task into two or three steps as suggested by fellow expert “for for.” This approach not only makes it more manageable but also allows for greater precision in crafting each component.Step 2: Applying Glue and Securing
Sven proceeds to apply glue along one edge of the flange, ensuring a secure bond when clamped into place. He emphasizes that this stage is crucial for maintaining the structural integrity of the flange, which in turn safeguards the living area beneath the canvas when hatches are open.Step 3: Allowing Time to Dry
After securely attaching the first portion of the flange, Sven allows ample time for it to dry before moving forward with additional steps. This patience and precision are key aspects of his successful boatbuilding methods.Step 4: Finishing Touches
Once the flange is fully dried, Sven removes the clamps carefully, ensuring no damage occurs during this process. He then moves on to attaching four more pieces onto these main frames, completing two pairs of flanges for the bulkhead hatches.The Final Touches
While two flanges form the primary support structure around the hatches, Sven mentions there are two additional pieces required at each end to ensure comprehensive protection. This attention to detail highlights his commitment to producing a durable and reliable design. “Sailing is about finding your path, whether it’s across an ocean or within yourself.” – Sven Yrvind In conclusion, making flanges around bulkhead hatches may seem complex at first glance, but by following Sven Yrvind’s meticulous process, enthusiasts can achieve professional-level results. Remember that the journey of boatbuilding is as rewarding as reaching your destination; it tests one’s patience and dedication. For those seeking to embark on this adventure or simply gain more insight into marine craftsmanship, Sven’s wisdom is invaluable.Making Flanges Around Bulkhead Hatches for Canvas
Sven Yrvind, a renowned yacht designer and sailor, shares valuable insights on creating flanges around bulkhead hatches for canvas protection in this enlightening video. By following his expert guidance, boat enthusiasts can ensure their living areas remain secure while allowing unhindered access through the hatches.Step 1: Starting with the Flange
Sven begins by explaining that working on flanges vertically and horizontally is significantly easier than doing so in a flat position. To simplify the process further, he divides the task into two or three steps as suggested by fellow expert “for for.” This approach not only makes it more manageable but also allows for greater precision in crafting each component.Step 2: Applying Glue and Securing
Sven proceeds to apply glue along one edge of the flange, ensuring a secure bond when clamped into place. He emphasizes that this stage is crucial for maintaining the structural integrity of the flange, which in turn safeguards the living area beneath the canvas when hatches are open.Step 3: Allowing Time to Dry
After securely attaching the first portion of the flange, Sven allows ample time for it to dry before moving forward with additional steps. This patience and precision are key aspects of his successful boatbuilding methods.Step 4: Finishing Touches
Once the flange is fully dried, Sven removes the clamps carefully, ensuring no damage occurs during this process. He then moves on to attaching four more pieces onto these main frames, completing two pairs of flanges for the bulkhead hatches.The Final Touches
While two flanges form the primary support structure around the hatches, Sven mentions there are two additional pieces required at each end to ensure comprehensive protection. This attention to detail highlights his commitment to producing a durable and reliable design. “Sailing is about finding your path, whether it’s across an ocean or within yourself.” – Sven Yrvind In conclusion, making flanges around bulkhead hatches may seem complex at first glance, but by following Sven Yrvind’s meticulous process, enthusiasts can achieve professional-level results. Remember that the journey of boatbuilding is as rewarding as reaching your destination; it tests one’s patience and dedication. For those seeking to embark on this adventure or simply gain more insight into marine craftsmanship, Sven’s wisdom is invaluable.After securely attaching the first portion of the flange, Sven allows ample time for it to dry before moving forward with additional steps. This patience and precision are key aspects of his successful boatbuilding methods.Step 4: Finishing Touches
Once the flange is fully dried, Sven removes the clamps carefully, ensuring no damage occurs during this process. He then moves on to attaching four more pieces onto these main frames, completing two pairs of flanges for the bulkhead hatches.The Final Touches
While two flanges form the primary support structure around the hatches, Sven mentions there are two additional pieces required at each end to ensure comprehensive protection. This attention to detail highlights his commitment to producing a durable and reliable design. “Sailing is about finding your path, whether it’s across an ocean or within yourself.” – Sven Yrvind In conclusion, making flanges around bulkhead hatches may seem complex at first glance, but by following Sven Yrvind’s meticulous process, enthusiasts can achieve professional-level results. Remember that the journey of boatbuilding is as rewarding as reaching your destination; it tests one’s patience and dedication. For those seeking to embark on this adventure or simply gain more insight into marine craftsmanship, Sven’s wisdom is invaluable.Once the flange is fully dried, Sven removes the clamps carefully, ensuring no damage occurs during this process. He then moves on to attaching four more pieces onto these main frames, completing two pairs of flanges for the bulkhead hatches.The Final Touches
While two flanges form the primary support structure around the hatches, Sven mentions there are two additional pieces required at each end to ensure comprehensive protection. This attention to detail highlights his commitment to producing a durable and reliable design. “Sailing is about finding your path, whether it’s across an ocean or within yourself.” – Sven Yrvind In conclusion, making flanges around bulkhead hatches may seem complex at first glance, but by following Sven Yrvind’s meticulous process, enthusiasts can achieve professional-level results. Remember that the journey of boatbuilding is as rewarding as reaching your destination; it tests one’s patience and dedication. For those seeking to embark on this adventure or simply gain more insight into marine craftsmanship, Sven’s wisdom is invaluable.Making Flanges Around Bulkhead Hatches for Canvas
Sven Yrvind, a renowned yacht designer and sailor, shares valuable insights on creating flanges around bulkhead hatches for canvas protection in this enlightening video. By following his expert guidance, boat enthusiasts can ensure their living areas remain secure while allowing unhindered access through the hatches.Step 1: Starting with the Flange
Sven begins by explaining that working on flanges vertically and horizontally is significantly easier than doing so in a flat position. To simplify the process further, he divides the task into two or three steps as suggested by fellow expert “for for.” This approach not only makes it more manageable but also allows for greater precision in crafting each component.Step 2: Applying Glue and Securing
Sven proceeds to apply glue along one edge of the flange, ensuring a secure bond when clamped into place. He emphasizes that this stage is crucial for maintaining the structural integrity of the flange, which in turn safeguards the living area beneath the canvas when hatches are open.Step 3: Allowing Time to Dry
After securely attaching the first portion of the flange, Sven allows ample time for it to dry before moving forward with additional steps. This patience and precision are key aspects of his successful boatbuilding methods.Step 4: Finishing Touches
Once the flange is fully dried, Sven removes the clamps carefully, ensuring no damage occurs during this process. He then moves on to attaching four more pieces onto these main frames, completing two pairs of flanges for the bulkhead hatches.The Final Touches
While two flanges form the primary support structure around the hatches, Sven mentions there are two additional pieces required at each end to ensure comprehensive protection. This attention to detail highlights his commitment to producing a durable and reliable design. “Sailing is about finding your path, whether it’s across an ocean or within yourself.” – Sven Yrvind In conclusion, making flanges around bulkhead hatches may seem complex at first glance, but by following Sven Yrvind’s meticulous process, enthusiasts can achieve professional-level results. Remember that the journey of boatbuilding is as rewarding as reaching your destination; it tests one’s patience and dedication. For those seeking to embark on this adventure or simply gain more insight into marine craftsmanship, Sven’s wisdom is invaluable.After securely attaching the first portion of the flange, Sven allows ample time for it to dry before moving forward with additional steps. This patience and precision are key aspects of his successful boatbuilding methods.Step 4: Finishing Touches
Once the flange is fully dried, Sven removes the clamps carefully, ensuring no damage occurs during this process. He then moves on to attaching four more pieces onto these main frames, completing two pairs of flanges for the bulkhead hatches.The Final Touches
While two flanges form the primary support structure around the hatches, Sven mentions there are two additional pieces required at each end to ensure comprehensive protection. This attention to detail highlights his commitment to producing a durable and reliable design. “Sailing is about finding your path, whether it’s across an ocean or within yourself.” – Sven Yrvind In conclusion, making flanges around bulkhead hatches may seem complex at first glance, but by following Sven Yrvind’s meticulous process, enthusiasts can achieve professional-level results. Remember that the journey of boatbuilding is as rewarding as reaching your destination; it tests one’s patience and dedication. For those seeking to embark on this adventure or simply gain more insight into marine craftsmanship, Sven’s wisdom is invaluable.Making Flanges Around Bulkhead Hatches for Canvas
Sven Yrvind, a renowned yacht designer and sailor, shares valuable insights on creating flanges around bulkhead hatches for canvas protection in this enlightening video. By following his expert guidance, boat enthusiasts can ensure their living areas remain secure while allowing unhindered access through the hatches.Step 1: Starting with the Flange
Sven begins by explaining that working on flanges vertically and horizontally is significantly easier than doing so in a flat position. To simplify the process further, he divides the task into two or three steps as suggested by fellow expert “for for.” This approach not only makes it more manageable but also allows for greater precision in crafting each component.Step 2: Applying Glue and Securing
Sven proceeds to apply glue along one edge of the flange, ensuring a secure bond when clamped into place. He emphasizes that this stage is crucial for maintaining the structural integrity of the flange, which in turn safeguards the living area beneath the canvas when hatches are open.Step 3: Allowing Time to Dry
After securely attaching the first portion of the flange, Sven allows ample time for it to dry before moving forward with additional steps. This patience and precision are key aspects of his successful boatbuilding methods.Step 4: Finishing Touches
Once the flange is fully dried, Sven removes the clamps carefully, ensuring no damage occurs during this process. He then moves on to attaching four more pieces onto these main frames, completing two pairs of flanges for the bulkhead hatches.The Final Touches
While two flanges form the primary support structure around the hatches, Sven mentions there are two additional pieces required at each end to ensure comprehensive protection. This attention to detail highlights his commitment to producing a durable and reliable design. “Sailing is about finding your path, whether it’s across an ocean or within yourself.” – Sven Yrvind In conclusion, making flanges around bulkhead hatches may seem complex at first glance, but by following Sven Yrvind’s meticulous process, enthusiasts can achieve professional-level results. Remember that the journey of boatbuilding is as rewarding as reaching your destination; it tests one’s patience and dedication. For those seeking to embark on this adventure or simply gain more insight into marine craftsmanship, Sven’s wisdom is invaluable.Sven proceeds to apply glue along one edge of the flange, ensuring a secure bond when clamped into place. He emphasizes that this stage is crucial for maintaining the structural integrity of the flange, which in turn safeguards the living area beneath the canvas when hatches are open.Step 3: Allowing Time to Dry
After securely attaching the first portion of the flange, Sven allows ample time for it to dry before moving forward with additional steps. This patience and precision are key aspects of his successful boatbuilding methods.Step 4: Finishing Touches
Once the flange is fully dried, Sven removes the clamps carefully, ensuring no damage occurs during this process. He then moves on to attaching four more pieces onto these main frames, completing two pairs of flanges for the bulkhead hatches.The Final Touches
While two flanges form the primary support structure around the hatches, Sven mentions there are two additional pieces required at each end to ensure comprehensive protection. This attention to detail highlights his commitment to producing a durable and reliable design. “Sailing is about finding your path, whether it’s across an ocean or within yourself.” – Sven Yrvind In conclusion, making flanges around bulkhead hatches may seem complex at first glance, but by following Sven Yrvind’s meticulous process, enthusiasts can achieve professional-level results. Remember that the journey of boatbuilding is as rewarding as reaching your destination; it tests one’s patience and dedication. For those seeking to embark on this adventure or simply gain more insight into marine craftsmanship, Sven’s wisdom is invaluable.Making Flanges Around Bulkhead Hatches for Canvas
Sven Yrvind, a renowned yacht designer and sailor, shares valuable insights on creating flanges around bulkhead hatches for canvas protection in this enlightening video. By following his expert guidance, boat enthusiasts can ensure their living areas remain secure while allowing unhindered access through the hatches.Step 1: Starting with the Flange
Sven begins by explaining that working on flanges vertically and horizontally is significantly easier than doing so in a flat position. To simplify the process further, he divides the task into two or three steps as suggested by fellow expert “for for.” This approach not only makes it more manageable but also allows for greater precision in crafting each component.Step 2: Applying Glue and Securing
Sven proceeds to apply glue along one edge of the flange, ensuring a secure bond when clamped into place. He emphasizes that this stage is crucial for maintaining the structural integrity of the flange, which in turn safeguards the living area beneath the canvas when hatches are open.Step 3: Allowing Time to Dry
After securely attaching the first portion of the flange, Sven allows ample time for it to dry before moving forward with additional steps. This patience and precision are key aspects of his successful boatbuilding methods.Step 4: Finishing Touches
Once the flange is fully dried, Sven removes the clamps carefully, ensuring no damage occurs during this process. He then moves on to attaching four more pieces onto these main frames, completing two pairs of flanges for the bulkhead hatches.The Final Touches
While two flanges form the primary support structure around the hatches, Sven mentions there are two additional pieces required at each end to ensure comprehensive protection. This attention to detail highlights his commitment to producing a durable and reliable design. “Sailing is about finding your path, whether it’s across an ocean or within yourself.” – Sven Yrvind In conclusion, making flanges around bulkhead hatches may seem complex at first glance, but by following Sven Yrvind’s meticulous process, enthusiasts can achieve professional-level results. Remember that the journey of boatbuilding is as rewarding as reaching your destination; it tests one’s patience and dedication. For those seeking to embark on this adventure or simply gain more insight into marine craftsmanship, Sven’s wisdom is invaluable.Sven begins by explaining that working on flanges vertically and horizontally is significantly easier than doing so in a flat position. To simplify the process further, he divides the task into two or three steps as suggested by fellow expert “for for.” This approach not only makes it more manageable but also allows for greater precision in crafting each component.Step 2: Applying Glue and Securing
Sven proceeds to apply glue along one edge of the flange, ensuring a secure bond when clamped into place. He emphasizes that this stage is crucial for maintaining the structural integrity of the flange, which in turn safeguards the living area beneath the canvas when hatches are open.Step 3: Allowing Time to Dry
After securely attaching the first portion of the flange, Sven allows ample time for it to dry before moving forward with additional steps. This patience and precision are key aspects of his successful boatbuilding methods.Step 4: Finishing Touches
Once the flange is fully dried, Sven removes the clamps carefully, ensuring no damage occurs during this process. He then moves on to attaching four more pieces onto these main frames, completing two pairs of flanges for the bulkhead hatches.The Final Touches
While two flanges form the primary support structure around the hatches, Sven mentions there are two additional pieces required at each end to ensure comprehensive protection. This attention to detail highlights his commitment to producing a durable and reliable design. “Sailing is about finding your path, whether it’s across an ocean or within yourself.” – Sven Yrvind In conclusion, making flanges around bulkhead hatches may seem complex at first glance, but by following Sven Yrvind’s meticulous process, enthusiasts can achieve professional-level results. Remember that the journey of boatbuilding is as rewarding as reaching your destination; it tests one’s patience and dedication. For those seeking to embark on this adventure or simply gain more insight into marine craftsmanship, Sven’s wisdom is invaluable.Making Flanges Around Bulkhead Hatches for Canvas
Sven Yrvind, a renowned yacht designer and sailor, shares valuable insights on creating flanges around bulkhead hatches for canvas protection in this enlightening video. By following his expert guidance, boat enthusiasts can ensure their living areas remain secure while allowing unhindered access through the hatches.Step 1: Starting with the Flange
Sven begins by explaining that working on flanges vertically and horizontally is significantly easier than doing so in a flat position. To simplify the process further, he divides the task into two or three steps as suggested by fellow expert “for for.” This approach not only makes it more manageable but also allows for greater precision in crafting each component.Step 2: Applying Glue and Securing
Sven proceeds to apply glue along one edge of the flange, ensuring a secure bond when clamped into place. He emphasizes that this stage is crucial for maintaining the structural integrity of the flange, which in turn safeguards the living area beneath the canvas when hatches are open.Step 3: Allowing Time to Dry
After securely attaching the first portion of the flange, Sven allows ample time for it to dry before moving forward with additional steps. This patience and precision are key aspects of his successful boatbuilding methods.Step 4: Finishing Touches
Once the flange is fully dried, Sven removes the clamps carefully, ensuring no damage occurs during this process. He then moves on to attaching four more pieces onto these main frames, completing two pairs of flanges for the bulkhead hatches.The Final Touches
While two flanges form the primary support structure around the hatches, Sven mentions there are two additional pieces required at each end to ensure comprehensive protection. This attention to detail highlights his commitment to producing a durable and reliable design. “Sailing is about finding your path, whether it’s across an ocean or within yourself.” – Sven Yrvind In conclusion, making flanges around bulkhead hatches may seem complex at first glance, but by following Sven Yrvind’s meticulous process, enthusiasts can achieve professional-level results. Remember that the journey of boatbuilding is as rewarding as reaching your destination; it tests one’s patience and dedication. For those seeking to embark on this adventure or simply gain more insight into marine craftsmanship, Sven’s wisdom is invaluable.Sven Yrvind, a renowned yacht designer and sailor, shares valuable insights on creating flanges around bulkhead hatches for canvas protection in this enlightening video. By following his expert guidance, boat enthusiasts can ensure their living areas remain secure while allowing unhindered access through the hatches.Step 1: Starting with the Flange
Sven begins by explaining that working on flanges vertically and horizontally is significantly easier than doing so in a flat position. To simplify the process further, he divides the task into two or three steps as suggested by fellow expert “for for.” This approach not only makes it more manageable but also allows for greater precision in crafting each component.Step 2: Applying Glue and Securing
Sven proceeds to apply glue along one edge of the flange, ensuring a secure bond when clamped into place. He emphasizes that this stage is crucial for maintaining the structural integrity of the flange, which in turn safeguards the living area beneath the canvas when hatches are open.Step 3: Allowing Time to Dry
After securely attaching the first portion of the flange, Sven allows ample time for it to dry before moving forward with additional steps. This patience and precision are key aspects of his successful boatbuilding methods.Step 4: Finishing Touches
Once the flange is fully dried, Sven removes the clamps carefully, ensuring no damage occurs during this process. He then moves on to attaching four more pieces onto these main frames, completing two pairs of flanges for the bulkhead hatches.The Final Touches
While two flanges form the primary support structure around the hatches, Sven mentions there are two additional pieces required at each end to ensure comprehensive protection. This attention to detail highlights his commitment to producing a durable and reliable design. “Sailing is about finding your path, whether it’s across an ocean or within yourself.” – Sven Yrvind In conclusion, making flanges around bulkhead hatches may seem complex at first glance, but by following Sven Yrvind’s meticulous process, enthusiasts can achieve professional-level results. Remember that the journey of boatbuilding is as rewarding as reaching your destination; it tests one’s patience and dedication. For those seeking to embark on this adventure or simply gain more insight into marine craftsmanship, Sven’s wisdom is invaluable.Making Flanges Around Bulkhead Hatches for Canvas
Sven Yrvind, a renowned yacht designer and sailor, shares valuable insights on creating flanges around bulkhead hatches for canvas protection in this enlightening video. By following his expert guidance, boat enthusiasts can ensure their living areas remain secure while allowing unhindered access through the hatches.Step 1: Starting with the Flange
Sven begins by explaining that working on flanges vertically and horizontally is significantly easier than doing so in a flat position. To simplify the process further, he divides the task into two or three steps as suggested by fellow expert “for for.” This approach not only makes it more manageable but also allows for greater precision in crafting each component.Step 2: Applying Glue and Securing
Sven proceeds to apply glue along one edge of the flange, ensuring a secure bond when clamped into place. He emphasizes that this stage is crucial for maintaining the structural integrity of the flange, which in turn safeguards the living area beneath the canvas when hatches are open.Step 3: Allowing Time to Dry
After securely attaching the first portion of the flange, Sven allows ample time for it to dry before moving forward with additional steps. This patience and precision are key aspects of his successful boatbuilding methods.Step 4: Finishing Touches
Once the flange is fully dried, Sven removes the clamps carefully, ensuring no damage occurs during this process. He then moves on to attaching four more pieces onto these main frames, completing two pairs of flanges for the bulkhead hatches.The Final Touches
While two flanges form the primary support structure around the hatches, Sven mentions there are two additional pieces required at each end to ensure comprehensive protection. This attention to detail highlights his commitment to producing a durable and reliable design. “Sailing is about finding your path, whether it’s across an ocean or within yourself.” – Sven Yrvind In conclusion, making flanges around bulkhead hatches may seem complex at first glance, but by following Sven Yrvind’s meticulous process, enthusiasts can achieve professional-level results. Remember that the journey of boatbuilding is as rewarding as reaching your destination; it tests one’s patience and dedication. For those seeking to embark on this adventure or simply gain more insight into marine craftsmanship, Sven’s wisdom is invaluable.Once the flange is fully dried, Sven removes the clamps carefully, ensuring no damage occurs during this process. He then moves on to attaching four more pieces onto these main frames, completing two pairs of flanges for the bulkhead hatches.The Final Touches
While two flanges form the primary support structure around the hatches, Sven mentions there are two additional pieces required at each end to ensure comprehensive protection. This attention to detail highlights his commitment to producing a durable and reliable design. “Sailing is about finding your path, whether it’s across an ocean or within yourself.” – Sven Yrvind In conclusion, making flanges around bulkhead hatches may seem complex at first glance, but by following Sven Yrvind’s meticulous process, enthusiasts can achieve professional-level results. Remember that the journey of boatbuilding is as rewarding as reaching your destination; it tests one’s patience and dedication. For those seeking to embark on this adventure or simply gain more insight into marine craftsmanship, Sven’s wisdom is invaluable.Sven Yrvind, a renowned yacht designer and sailor, shares valuable insights on creating flanges around bulkhead hatches for canvas protection in this enlightening video. By following his expert guidance, boat enthusiasts can ensure their living areas remain secure while allowing unhindered access through the hatches.Step 1: Starting with the Flange
Sven begins by explaining that working on flanges vertically and horizontally is significantly easier than doing so in a flat position. To simplify the process further, he divides the task into two or three steps as suggested by fellow expert “for for.” This approach not only makes it more manageable but also allows for greater precision in crafting each component.Step 2: Applying Glue and Securing
Sven proceeds to apply glue along one edge of the flange, ensuring a secure bond when clamped into place. He emphasizes that this stage is crucial for maintaining the structural integrity of the flange, which in turn safeguards the living area beneath the canvas when hatches are open.Step 3: Allowing Time to Dry
After securely attaching the first portion of the flange, Sven allows ample time for it to dry before moving forward with additional steps. This patience and precision are key aspects of his successful boatbuilding methods.Step 4: Finishing Touches
Once the flange is fully dried, Sven removes the clamps carefully, ensuring no damage occurs during this process. He then moves on to attaching four more pieces onto these main frames, completing two pairs of flanges for the bulkhead hatches.The Final Touches
While two flanges form the primary support structure around the hatches, Sven mentions there are two additional pieces required at each end to ensure comprehensive protection. This attention to detail highlights his commitment to producing a durable and reliable design. “Sailing is about finding your path, whether it’s across an ocean or within yourself.” – Sven Yrvind In conclusion, making flanges around bulkhead hatches may seem complex at first glance, but by following Sven Yrvind’s meticulous process, enthusiasts can achieve professional-level results. Remember that the journey of boatbuilding is as rewarding as reaching your destination; it tests one’s patience and dedication. For those seeking to embark on this adventure or simply gain more insight into marine craftsmanship, Sven’s wisdom is invaluable.Making Flanges Around Bulkhead Hatches for Canvas
Sven Yrvind, a renowned yacht designer and sailor, shares valuable insights on creating flanges around bulkhead hatches for canvas protection in this enlightening video. By following his expert guidance, boat enthusiasts can ensure their living areas remain secure while allowing unhindered access through the hatches.Step 1: Starting with the Flange
Sven begins by explaining that working on flanges vertically and horizontally is significantly easier than doing so in a flat position. To simplify the process further, he divides the task into two or three steps as suggested by fellow expert “for for.” This approach not only makes it more manageable but also allows for greater precision in crafting each component.Step 2: Applying Glue and Securing
Sven proceeds to apply glue along one edge of the flange, ensuring a secure bond when clamped into place. He emphasizes that this stage is crucial for maintaining the structural integrity of the flange, which in turn safeguards the living area beneath the canvas when hatches are open.Step 3: Allowing Time to Dry
After securely attaching the first portion of the flange, Sven allows ample time for it to dry before moving forward with additional steps. This patience and precision are key aspects of his successful boatbuilding methods.Step 4: Finishing Touches
Once the flange is fully dried, Sven removes the clamps carefully, ensuring no damage occurs during this process. He then moves on to attaching four more pieces onto these main frames, completing two pairs of flanges for the bulkhead hatches.The Final Touches
While two flanges form the primary support structure around the hatches, Sven mentions there are two additional pieces required at each end to ensure comprehensive protection. This attention to detail highlights his commitment to producing a durable and reliable design. “Sailing is about finding your path, whether it’s across an ocean or within yourself.” – Sven Yrvind In conclusion, making flanges around bulkhead hatches may seem complex at first glance, but by following Sven Yrvind’s meticulous process, enthusiasts can achieve professional-level results. Remember that the journey of boatbuilding is as rewarding as reaching your destination; it tests one’s patience and dedication. For those seeking to embark on this adventure or simply gain more insight into marine craftsmanship, Sven’s wisdom is invaluable.After securely attaching the first portion of the flange, Sven allows ample time for it to dry before moving forward with additional steps. This patience and precision are key aspects of his successful boatbuilding methods.Step 4: Finishing Touches
Once the flange is fully dried, Sven removes the clamps carefully, ensuring no damage occurs during this process. He then moves on to attaching four more pieces onto these main frames, completing two pairs of flanges for the bulkhead hatches.The Final Touches
While two flanges form the primary support structure around the hatches, Sven mentions there are two additional pieces required at each end to ensure comprehensive protection. This attention to detail highlights his commitment to producing a durable and reliable design. “Sailing is about finding your path, whether it’s across an ocean or within yourself.” – Sven Yrvind In conclusion, making flanges around bulkhead hatches may seem complex at first glance, but by following Sven Yrvind’s meticulous process, enthusiasts can achieve professional-level results. Remember that the journey of boatbuilding is as rewarding as reaching your destination; it tests one’s patience and dedication. For those seeking to embark on this adventure or simply gain more insight into marine craftsmanship, Sven’s wisdom is invaluable.Sven Yrvind, a renowned yacht designer and sailor, shares valuable insights on creating flanges around bulkhead hatches for canvas protection in this enlightening video. By following his expert guidance, boat enthusiasts can ensure their living areas remain secure while allowing unhindered access through the hatches.Step 1: Starting with the Flange
Sven begins by explaining that working on flanges vertically and horizontally is significantly easier than doing so in a flat position. To simplify the process further, he divides the task into two or three steps as suggested by fellow expert “for for.” This approach not only makes it more manageable but also allows for greater precision in crafting each component.Step 2: Applying Glue and Securing
Sven proceeds to apply glue along one edge of the flange, ensuring a secure bond when clamped into place. He emphasizes that this stage is crucial for maintaining the structural integrity of the flange, which in turn safeguards the living area beneath the canvas when hatches are open.Step 3: Allowing Time to Dry
After securely attaching the first portion of the flange, Sven allows ample time for it to dry before moving forward with additional steps. This patience and precision are key aspects of his successful boatbuilding methods.Step 4: Finishing Touches
Once the flange is fully dried, Sven removes the clamps carefully, ensuring no damage occurs during this process. He then moves on to attaching four more pieces onto these main frames, completing two pairs of flanges for the bulkhead hatches.The Final Touches
While two flanges form the primary support structure around the hatches, Sven mentions there are two additional pieces required at each end to ensure comprehensive protection. This attention to detail highlights his commitment to producing a durable and reliable design. “Sailing is about finding your path, whether it’s across an ocean or within yourself.” – Sven Yrvind In conclusion, making flanges around bulkhead hatches may seem complex at first glance, but by following Sven Yrvind’s meticulous process, enthusiasts can achieve professional-level results. Remember that the journey of boatbuilding is as rewarding as reaching your destination; it tests one’s patience and dedication. For those seeking to embark on this adventure or simply gain more insight into marine craftsmanship, Sven’s wisdom is invaluable.Making Flanges Around Bulkhead Hatches for Canvas
Sven Yrvind, a renowned yacht designer and sailor, shares valuable insights on creating flanges around bulkhead hatches for canvas protection in this enlightening video. By following his expert guidance, boat enthusiasts can ensure their living areas remain secure while allowing unhindered access through the hatches.Step 1: Starting with the Flange
Sven begins by explaining that working on flanges vertically and horizontally is significantly easier than doing so in a flat position. To simplify the process further, he divides the task into two or three steps as suggested by fellow expert “for for.” This approach not only makes it more manageable but also allows for greater precision in crafting each component.Step 2: Applying Glue and Securing
Sven proceeds to apply glue along one edge of the flange, ensuring a secure bond when clamped into place. He emphasizes that this stage is crucial for maintaining the structural integrity of the flange, which in turn safeguards the living area beneath the canvas when hatches are open.Step 3: Allowing Time to Dry
After securely attaching the first portion of the flange, Sven allows ample time for it to dry before moving forward with additional steps. This patience and precision are key aspects of his successful boatbuilding methods.Step 4: Finishing Touches
Once the flange is fully dried, Sven removes the clamps carefully, ensuring no damage occurs during this process. He then moves on to attaching four more pieces onto these main frames, completing two pairs of flanges for the bulkhead hatches.The Final Touches
While two flanges form the primary support structure around the hatches, Sven mentions there are two additional pieces required at each end to ensure comprehensive protection. This attention to detail highlights his commitment to producing a durable and reliable design. “Sailing is about finding your path, whether it’s across an ocean or within yourself.” – Sven Yrvind In conclusion, making flanges around bulkhead hatches may seem complex at first glance, but by following Sven Yrvind’s meticulous process, enthusiasts can achieve professional-level results. Remember that the journey of boatbuilding is as rewarding as reaching your destination; it tests one’s patience and dedication. For those seeking to embark on this adventure or simply gain more insight into marine craftsmanship, Sven’s wisdom is invaluable.Sven proceeds to apply glue along one edge of the flange, ensuring a secure bond when clamped into place. He emphasizes that this stage is crucial for maintaining the structural integrity of the flange, which in turn safeguards the living area beneath the canvas when hatches are open.Step 3: Allowing Time to Dry
After securely attaching the first portion of the flange, Sven allows ample time for it to dry before moving forward with additional steps. This patience and precision are key aspects of his successful boatbuilding methods.Step 4: Finishing Touches
Once the flange is fully dried, Sven removes the clamps carefully, ensuring no damage occurs during this process. He then moves on to attaching four more pieces onto these main frames, completing two pairs of flanges for the bulkhead hatches.The Final Touches
While two flanges form the primary support structure around the hatches, Sven mentions there are two additional pieces required at each end to ensure comprehensive protection. This attention to detail highlights his commitment to producing a durable and reliable design. “Sailing is about finding your path, whether it’s across an ocean or within yourself.” – Sven Yrvind In conclusion, making flanges around bulkhead hatches may seem complex at first glance, but by following Sven Yrvind’s meticulous process, enthusiasts can achieve professional-level results. Remember that the journey of boatbuilding is as rewarding as reaching your destination; it tests one’s patience and dedication. For those seeking to embark on this adventure or simply gain more insight into marine craftsmanship, Sven’s wisdom is invaluable.Sven Yrvind, a renowned yacht designer and sailor, shares valuable insights on creating flanges around bulkhead hatches for canvas protection in this enlightening video. By following his expert guidance, boat enthusiasts can ensure their living areas remain secure while allowing unhindered access through the hatches.Step 1: Starting with the Flange
Sven begins by explaining that working on flanges vertically and horizontally is significantly easier than doing so in a flat position. To simplify the process further, he divides the task into two or three steps as suggested by fellow expert “for for.” This approach not only makes it more manageable but also allows for greater precision in crafting each component.Step 2: Applying Glue and Securing
Sven proceeds to apply glue along one edge of the flange, ensuring a secure bond when clamped into place. He emphasizes that this stage is crucial for maintaining the structural integrity of the flange, which in turn safeguards the living area beneath the canvas when hatches are open.Step 3: Allowing Time to Dry
After securely attaching the first portion of the flange, Sven allows ample time for it to dry before moving forward with additional steps. This patience and precision are key aspects of his successful boatbuilding methods.Step 4: Finishing Touches
Once the flange is fully dried, Sven removes the clamps carefully, ensuring no damage occurs during this process. He then moves on to attaching four more pieces onto these main frames, completing two pairs of flanges for the bulkhead hatches.The Final Touches
While two flanges form the primary support structure around the hatches, Sven mentions there are two additional pieces required at each end to ensure comprehensive protection. This attention to detail highlights his commitment to producing a durable and reliable design. “Sailing is about finding your path, whether it’s across an ocean or within yourself.” – Sven Yrvind In conclusion, making flanges around bulkhead hatches may seem complex at first glance, but by following Sven Yrvind’s meticulous process, enthusiasts can achieve professional-level results. Remember that the journey of boatbuilding is as rewarding as reaching your destination; it tests one’s patience and dedication. For those seeking to embark on this adventure or simply gain more insight into marine craftsmanship, Sven’s wisdom is invaluable.Making Flanges Around Bulkhead Hatches for Canvas
Sven Yrvind, a renowned yacht designer and sailor, shares valuable insights on creating flanges around bulkhead hatches for canvas protection in this enlightening video. By following his expert guidance, boat enthusiasts can ensure their living areas remain secure while allowing unhindered access through the hatches.Step 1: Starting with the Flange
Sven begins by explaining that working on flanges vertically and horizontally is significantly easier than doing so in a flat position. To simplify the process further, he divides the task into two or three steps as suggested by fellow expert “for for.” This approach not only makes it more manageable but also allows for greater precision in crafting each component.Step 2: Applying Glue and Securing
Sven proceeds to apply glue along one edge of the flange, ensuring a secure bond when clamped into place. He emphasizes that this stage is crucial for maintaining the structural integrity of the flange, which in turn safeguards the living area beneath the canvas when hatches are open.Step 3: Allowing Time to Dry
After securely attaching the first portion of the flange, Sven allows ample time for it to dry before moving forward with additional steps. This patience and precision are key aspects of his successful boatbuilding methods.Step 4: Finishing Touches
Once the flange is fully dried, Sven removes the clamps carefully, ensuring no damage occurs during this process. He then moves on to attaching four more pieces onto these main frames, completing two pairs of flanges for the bulkhead hatches.The Final Touches
While two flanges form the primary support structure around the hatches, Sven mentions there are two additional pieces required at each end to ensure comprehensive protection. This attention to detail highlights his commitment to producing a durable and reliable design. “Sailing is about finding your path, whether it’s across an ocean or within yourself.” – Sven Yrvind In conclusion, making flanges around bulkhead hatches may seem complex at first glance, but by following Sven Yrvind’s meticulous process, enthusiasts can achieve professional-level results. Remember that the journey of boatbuilding is as rewarding as reaching your destination; it tests one’s patience and dedication. For those seeking to embark on this adventure or simply gain more insight into marine craftsmanship, Sven’s wisdom is invaluable.Sven begins by explaining that working on flanges vertically and horizontally is significantly easier than doing so in a flat position. To simplify the process further, he divides the task into two or three steps as suggested by fellow expert “for for.” This approach not only makes it more manageable but also allows for greater precision in crafting each component.Step 2: Applying Glue and Securing
Sven proceeds to apply glue along one edge of the flange, ensuring a secure bond when clamped into place. He emphasizes that this stage is crucial for maintaining the structural integrity of the flange, which in turn safeguards the living area beneath the canvas when hatches are open.Step 3: Allowing Time to Dry
After securely attaching the first portion of the flange, Sven allows ample time for it to dry before moving forward with additional steps. This patience and precision are key aspects of his successful boatbuilding methods.Step 4: Finishing Touches
Once the flange is fully dried, Sven removes the clamps carefully, ensuring no damage occurs during this process. He then moves on to attaching four more pieces onto these main frames, completing two pairs of flanges for the bulkhead hatches.The Final Touches
While two flanges form the primary support structure around the hatches, Sven mentions there are two additional pieces required at each end to ensure comprehensive protection. This attention to detail highlights his commitment to producing a durable and reliable design. “Sailing is about finding your path, whether it’s across an ocean or within yourself.” – Sven Yrvind In conclusion, making flanges around bulkhead hatches may seem complex at first glance, but by following Sven Yrvind’s meticulous process, enthusiasts can achieve professional-level results. Remember that the journey of boatbuilding is as rewarding as reaching your destination; it tests one’s patience and dedication. For those seeking to embark on this adventure or simply gain more insight into marine craftsmanship, Sven’s wisdom is invaluable.Sven Yrvind, a renowned yacht designer and sailor, shares valuable insights on creating flanges around bulkhead hatches for canvas protection in this enlightening video. By following his expert guidance, boat enthusiasts can ensure their living areas remain secure while allowing unhindered access through the hatches.Step 1: Starting with the Flange
Sven begins by explaining that working on flanges vertically and horizontally is significantly easier than doing so in a flat position. To simplify the process further, he divides the task into two or three steps as suggested by fellow expert “for for.” This approach not only makes it more manageable but also allows for greater precision in crafting each component.Step 2: Applying Glue and Securing
Sven proceeds to apply glue along one edge of the flange, ensuring a secure bond when clamped into place. He emphasizes that this stage is crucial for maintaining the structural integrity of the flange, which in turn safeguards the living area beneath the canvas when hatches are open.Step 3: Allowing Time to Dry
After securely attaching the first portion of the flange, Sven allows ample time for it to dry before moving forward with additional steps. This patience and precision are key aspects of his successful boatbuilding methods.Step 4: Finishing Touches
Once the flange is fully dried, Sven removes the clamps carefully, ensuring no damage occurs during this process. He then moves on to attaching four more pieces onto these main frames, completing two pairs of flanges for the bulkhead hatches.The Final Touches
While two flanges form the primary support structure around the hatches, Sven mentions there are two additional pieces required at each end to ensure comprehensive protection. This attention to detail highlights his commitment to producing a durable and reliable design. “Sailing is about finding your path, whether it’s across an ocean or within yourself.” – Sven Yrvind In conclusion, making flanges around bulkhead hatches may seem complex at first glance, but by following Sven Yrvind’s meticulous process, enthusiasts can achieve professional-level results. Remember that the journey of boatbuilding is as rewarding as reaching your destination; it tests one’s patience and dedication. For those seeking to embark on this adventure or simply gain more insight into marine craftsmanship, Sven’s wisdom is invaluable.Making Flanges Around Bulkhead Hatches for Canvas
Sven Yrvind, a renowned yacht designer and sailor, shares valuable insights on creating flanges around bulkhead hatches for canvas protection in this enlightening video. By following his expert guidance, boat enthusiasts can ensure their living areas remain secure while allowing unhindered access through the hatches.Step 1: Starting with the Flange
Sven begins by explaining that working on flanges vertically and horizontally is significantly easier than doing so in a flat position. To simplify the process further, he divides the task into two or three steps as suggested by fellow expert “for for.” This approach not only makes it more manageable but also allows for greater precision in crafting each component.Step 2: Applying Glue and Securing
Sven proceeds to apply glue along one edge of the flange, ensuring a secure bond when clamped into place. He emphasizes that this stage is crucial for maintaining the structural integrity of the flange, which in turn safeguards the living area beneath the canvas when hatches are open.Step 3: Allowing Time to Dry
After securely attaching the first portion of the flange, Sven allows ample time for it to dry before moving forward with additional steps. This patience and precision are key aspects of his successful boatbuilding methods.Step 4: Finishing Touches
Once the flange is fully dried, Sven removes the clamps carefully, ensuring no damage occurs during this process. He then moves on to attaching four more pieces onto these main frames, completing two pairs of flanges for the bulkhead hatches.The Final Touches
While two flanges form the primary support structure around the hatches, Sven mentions there are two additional pieces required at each end to ensure comprehensive protection. This attention to detail highlights his commitment to producing a durable and reliable design. “Sailing is about finding your path, whether it’s across an ocean or within yourself.” – Sven Yrvind In conclusion, making flanges around bulkhead hatches may seem complex at first glance, but by following Sven Yrvind’s meticulous process, enthusiasts can achieve professional-level results. Remember that the journey of boatbuilding is as rewarding as reaching your destination; it tests one’s patience and dedication. For those seeking to embark on this adventure or simply gain more insight into marine craftsmanship, Sven’s wisdom is invaluable.Once the flange is fully dried, Sven removes the clamps carefully, ensuring no damage occurs during this process. He then moves on to attaching four more pieces onto these main frames, completing two pairs of flanges for the bulkhead hatches.The Final Touches
While two flanges form the primary support structure around the hatches, Sven mentions there are two additional pieces required at each end to ensure comprehensive protection. This attention to detail highlights his commitment to producing a durable and reliable design. “Sailing is about finding your path, whether it’s across an ocean or within yourself.” – Sven Yrvind In conclusion, making flanges around bulkhead hatches may seem complex at first glance, but by following Sven Yrvind’s meticulous process, enthusiasts can achieve professional-level results. Remember that the journey of boatbuilding is as rewarding as reaching your destination; it tests one’s patience and dedication. For those seeking to embark on this adventure or simply gain more insight into marine craftsmanship, Sven’s wisdom is invaluable.Sven begins by explaining that working on flanges vertically and horizontally is significantly easier than doing so in a flat position. To simplify the process further, he divides the task into two or three steps as suggested by fellow expert “for for.” This approach not only makes it more manageable but also allows for greater precision in crafting each component.Step 2: Applying Glue and Securing
Sven proceeds to apply glue along one edge of the flange, ensuring a secure bond when clamped into place. He emphasizes that this stage is crucial for maintaining the structural integrity of the flange, which in turn safeguards the living area beneath the canvas when hatches are open.Step 3: Allowing Time to Dry
After securely attaching the first portion of the flange, Sven allows ample time for it to dry before moving forward with additional steps. This patience and precision are key aspects of his successful boatbuilding methods.Step 4: Finishing Touches
Once the flange is fully dried, Sven removes the clamps carefully, ensuring no damage occurs during this process. He then moves on to attaching four more pieces onto these main frames, completing two pairs of flanges for the bulkhead hatches.The Final Touches
While two flanges form the primary support structure around the hatches, Sven mentions there are two additional pieces required at each end to ensure comprehensive protection. This attention to detail highlights his commitment to producing a durable and reliable design. “Sailing is about finding your path, whether it’s across an ocean or within yourself.” – Sven Yrvind In conclusion, making flanges around bulkhead hatches may seem complex at first glance, but by following Sven Yrvind’s meticulous process, enthusiasts can achieve professional-level results. Remember that the journey of boatbuilding is as rewarding as reaching your destination; it tests one’s patience and dedication. For those seeking to embark on this adventure or simply gain more insight into marine craftsmanship, Sven’s wisdom is invaluable.Sven Yrvind, a renowned yacht designer and sailor, shares valuable insights on creating flanges around bulkhead hatches for canvas protection in this enlightening video. By following his expert guidance, boat enthusiasts can ensure their living areas remain secure while allowing unhindered access through the hatches.Step 1: Starting with the Flange
Sven begins by explaining that working on flanges vertically and horizontally is significantly easier than doing so in a flat position. To simplify the process further, he divides the task into two or three steps as suggested by fellow expert “for for.” This approach not only makes it more manageable but also allows for greater precision in crafting each component.Step 2: Applying Glue and Securing
Sven proceeds to apply glue along one edge of the flange, ensuring a secure bond when clamped into place. He emphasizes that this stage is crucial for maintaining the structural integrity of the flange, which in turn safeguards the living area beneath the canvas when hatches are open.Step 3: Allowing Time to Dry
After securely attaching the first portion of the flange, Sven allows ample time for it to dry before moving forward with additional steps. This patience and precision are key aspects of his successful boatbuilding methods.Step 4: Finishing Touches
Once the flange is fully dried, Sven removes the clamps carefully, ensuring no damage occurs during this process. He then moves on to attaching four more pieces onto these main frames, completing two pairs of flanges for the bulkhead hatches.The Final Touches
While two flanges form the primary support structure around the hatches, Sven mentions there are two additional pieces required at each end to ensure comprehensive protection. This attention to detail highlights his commitment to producing a durable and reliable design. “Sailing is about finding your path, whether it’s across an ocean or within yourself.” – Sven Yrvind In conclusion, making flanges around bulkhead hatches may seem complex at first glance, but by following Sven Yrvind’s meticulous process, enthusiasts can achieve professional-level results. Remember that the journey of boatbuilding is as rewarding as reaching your destination; it tests one’s patience and dedication. For those seeking to embark on this adventure or simply gain more insight into marine craftsmanship, Sven’s wisdom is invaluable.Making Flanges Around Bulkhead Hatches for Canvas
Sven Yrvind, a renowned yacht designer and sailor, shares valuable insights on creating flanges around bulkhead hatches for canvas protection in this enlightening video. By following his expert guidance, boat enthusiasts can ensure their living areas remain secure while allowing unhindered access through the hatches.Step 1: Starting with the Flange
Sven begins by explaining that working on flanges vertically and horizontally is significantly easier than doing so in a flat position. To simplify the process further, he divides the task into two or three steps as suggested by fellow expert “for for.” This approach not only makes it more manageable but also allows for greater precision in crafting each component.Step 2: Applying Glue and Securing
Sven proceeds to apply glue along one edge of the flange, ensuring a secure bond when clamped into place. He emphasizes that this stage is crucial for maintaining the structural integrity of the flange, which in turn safeguards the living area beneath the canvas when hatches are open.Step 3: Allowing Time to Dry
After securely attaching the first portion of the flange, Sven allows ample time for it to dry before moving forward with additional steps. This patience and precision are key aspects of his successful boatbuilding methods.Step 4: Finishing Touches
Once the flange is fully dried, Sven removes the clamps carefully, ensuring no damage occurs during this process. He then moves on to attaching four more pieces onto these main frames, completing two pairs of flanges for the bulkhead hatches.The Final Touches
While two flanges form the primary support structure around the hatches, Sven mentions there are two additional pieces required at each end to ensure comprehensive protection. This attention to detail highlights his commitment to producing a durable and reliable design. “Sailing is about finding your path, whether it’s across an ocean or within yourself.” – Sven Yrvind In conclusion, making flanges around bulkhead hatches may seem complex at first glance, but by following Sven Yrvind’s meticulous process, enthusiasts can achieve professional-level results. Remember that the journey of boatbuilding is as rewarding as reaching your destination; it tests one’s patience and dedication. For those seeking to embark on this adventure or simply gain more insight into marine craftsmanship, Sven’s wisdom is invaluable.After securely attaching the first portion of the flange, Sven allows ample time for it to dry before moving forward with additional steps. This patience and precision are key aspects of his successful boatbuilding methods.Step 4: Finishing Touches
Once the flange is fully dried, Sven removes the clamps carefully, ensuring no damage occurs during this process. He then moves on to attaching four more pieces onto these main frames, completing two pairs of flanges for the bulkhead hatches.The Final Touches
While two flanges form the primary support structure around the hatches, Sven mentions there are two additional pieces required at each end to ensure comprehensive protection. This attention to detail highlights his commitment to producing a durable and reliable design. “Sailing is about finding your path, whether it’s across an ocean or within yourself.” – Sven Yrvind In conclusion, making flanges around bulkhead hatches may seem complex at first glance, but by following Sven Yrvind’s meticulous process, enthusiasts can achieve professional-level results. Remember that the journey of boatbuilding is as rewarding as reaching your destination; it tests one’s patience and dedication. For those seeking to embark on this adventure or simply gain more insight into marine craftsmanship, Sven’s wisdom is invaluable.Sven begins by explaining that working on flanges vertically and horizontally is significantly easier than doing so in a flat position. To simplify the process further, he divides the task into two or three steps as suggested by fellow expert “for for.” This approach not only makes it more manageable but also allows for greater precision in crafting each component.Step 2: Applying Glue and Securing
Sven proceeds to apply glue along one edge of the flange, ensuring a secure bond when clamped into place. He emphasizes that this stage is crucial for maintaining the structural integrity of the flange, which in turn safeguards the living area beneath the canvas when hatches are open.Step 3: Allowing Time to Dry
After securely attaching the first portion of the flange, Sven allows ample time for it to dry before moving forward with additional steps. This patience and precision are key aspects of his successful boatbuilding methods.Step 4: Finishing Touches
Once the flange is fully dried, Sven removes the clamps carefully, ensuring no damage occurs during this process. He then moves on to attaching four more pieces onto these main frames, completing two pairs of flanges for the bulkhead hatches.The Final Touches
While two flanges form the primary support structure around the hatches, Sven mentions there are two additional pieces required at each end to ensure comprehensive protection. This attention to detail highlights his commitment to producing a durable and reliable design. “Sailing is about finding your path, whether it’s across an ocean or within yourself.” – Sven Yrvind In conclusion, making flanges around bulkhead hatches may seem complex at first glance, but by following Sven Yrvind’s meticulous process, enthusiasts can achieve professional-level results. Remember that the journey of boatbuilding is as rewarding as reaching your destination; it tests one’s patience and dedication. For those seeking to embark on this adventure or simply gain more insight into marine craftsmanship, Sven’s wisdom is invaluable.Sven Yrvind, a renowned yacht designer and sailor, shares valuable insights on creating flanges around bulkhead hatches for canvas protection in this enlightening video. By following his expert guidance, boat enthusiasts can ensure their living areas remain secure while allowing unhindered access through the hatches.Step 1: Starting with the Flange
Sven begins by explaining that working on flanges vertically and horizontally is significantly easier than doing so in a flat position. To simplify the process further, he divides the task into two or three steps as suggested by fellow expert “for for.” This approach not only makes it more manageable but also allows for greater precision in crafting each component.Step 2: Applying Glue and Securing
Sven proceeds to apply glue along one edge of the flange, ensuring a secure bond when clamped into place. He emphasizes that this stage is crucial for maintaining the structural integrity of the flange, which in turn safeguards the living area beneath the canvas when hatches are open.Step 3: Allowing Time to Dry
After securely attaching the first portion of the flange, Sven allows ample time for it to dry before moving forward with additional steps. This patience and precision are key aspects of his successful boatbuilding methods.Step 4: Finishing Touches
Once the flange is fully dried, Sven removes the clamps carefully, ensuring no damage occurs during this process. He then moves on to attaching four more pieces onto these main frames, completing two pairs of flanges for the bulkhead hatches.The Final Touches
While two flanges form the primary support structure around the hatches, Sven mentions there are two additional pieces required at each end to ensure comprehensive protection. This attention to detail highlights his commitment to producing a durable and reliable design. “Sailing is about finding your path, whether it’s across an ocean or within yourself.” – Sven Yrvind In conclusion, making flanges around bulkhead hatches may seem complex at first glance, but by following Sven Yrvind’s meticulous process, enthusiasts can achieve professional-level results. Remember that the journey of boatbuilding is as rewarding as reaching your destination; it tests one’s patience and dedication. For those seeking to embark on this adventure or simply gain more insight into marine craftsmanship, Sven’s wisdom is invaluable.Making Flanges Around Bulkhead Hatches for Canvas
Sven Yrvind, a renowned yacht designer and sailor, shares valuable insights on creating flanges around bulkhead hatches for canvas protection in this enlightening video. By following his expert guidance, boat enthusiasts can ensure their living areas remain secure while allowing unhindered access through the hatches.Step 1: Starting with the Flange
Sven begins by explaining that working on flanges vertically and horizontally is significantly easier than doing so in a flat position. To simplify the process further, he divides the task into two or three steps as suggested by fellow expert “for for.” This approach not only makes it more manageable but also allows for greater precision in crafting each component.Step 2: Applying Glue and Securing
Sven proceeds to apply glue along one edge of the flange, ensuring a secure bond when clamped into place. He emphasizes that this stage is crucial for maintaining the structural integrity of the flange, which in turn safeguards the living area beneath the canvas when hatches are open.Step 3: Allowing Time to Dry
After securely attaching the first portion of the flange, Sven allows ample time for it to dry before moving forward with additional steps. This patience and precision are key aspects of his successful boatbuilding methods.Step 4: Finishing Touches
Once the flange is fully dried, Sven removes the clamps carefully, ensuring no damage occurs during this process. He then moves on to attaching four more pieces onto these main frames, completing two pairs of flanges for the bulkhead hatches.The Final Touches
While two flanges form the primary support structure around the hatches, Sven mentions there are two additional pieces required at each end to ensure comprehensive protection. This attention to detail highlights his commitment to producing a durable and reliable design. “Sailing is about finding your path, whether it’s across an ocean or within yourself.” – Sven Yrvind In conclusion, making flanges around bulkhead hatches may seem complex at first glance, but by following Sven Yrvind’s meticulous process, enthusiasts can achieve professional-level results. Remember that the journey of boatbuilding is as rewarding as reaching your destination; it tests one’s patience and dedication. For those seeking to embark on this adventure or simply gain more insight into marine craftsmanship, Sven’s wisdom is invaluable.Sven proceeds to apply glue along one edge of the flange, ensuring a secure bond when clamped into place. He emphasizes that this stage is crucial for maintaining the structural integrity of the flange, which in turn safeguards the living area beneath the canvas when hatches are open.Step 3: Allowing Time to Dry
After securely attaching the first portion of the flange, Sven allows ample time for it to dry before moving forward with additional steps. This patience and precision are key aspects of his successful boatbuilding methods.Step 4: Finishing Touches
Once the flange is fully dried, Sven removes the clamps carefully, ensuring no damage occurs during this process. He then moves on to attaching four more pieces onto these main frames, completing two pairs of flanges for the bulkhead hatches.The Final Touches
While two flanges form the primary support structure around the hatches, Sven mentions there are two additional pieces required at each end to ensure comprehensive protection. This attention to detail highlights his commitment to producing a durable and reliable design. “Sailing is about finding your path, whether it’s across an ocean or within yourself.” – Sven Yrvind In conclusion, making flanges around bulkhead hatches may seem complex at first glance, but by following Sven Yrvind’s meticulous process, enthusiasts can achieve professional-level results. Remember that the journey of boatbuilding is as rewarding as reaching your destination; it tests one’s patience and dedication. For those seeking to embark on this adventure or simply gain more insight into marine craftsmanship, Sven’s wisdom is invaluable.Sven begins by explaining that working on flanges vertically and horizontally is significantly easier than doing so in a flat position. To simplify the process further, he divides the task into two or three steps as suggested by fellow expert “for for.” This approach not only makes it more manageable but also allows for greater precision in crafting each component.Step 2: Applying Glue and Securing
Sven proceeds to apply glue along one edge of the flange, ensuring a secure bond when clamped into place. He emphasizes that this stage is crucial for maintaining the structural integrity of the flange, which in turn safeguards the living area beneath the canvas when hatches are open.Step 3: Allowing Time to Dry
After securely attaching the first portion of the flange, Sven allows ample time for it to dry before moving forward with additional steps. This patience and precision are key aspects of his successful boatbuilding methods.Step 4: Finishing Touches
Once the flange is fully dried, Sven removes the clamps carefully, ensuring no damage occurs during this process. He then moves on to attaching four more pieces onto these main frames, completing two pairs of flanges for the bulkhead hatches.The Final Touches
While two flanges form the primary support structure around the hatches, Sven mentions there are two additional pieces required at each end to ensure comprehensive protection. This attention to detail highlights his commitment to producing a durable and reliable design. “Sailing is about finding your path, whether it’s across an ocean or within yourself.” – Sven Yrvind In conclusion, making flanges around bulkhead hatches may seem complex at first glance, but by following Sven Yrvind’s meticulous process, enthusiasts can achieve professional-level results. Remember that the journey of boatbuilding is as rewarding as reaching your destination; it tests one’s patience and dedication. For those seeking to embark on this adventure or simply gain more insight into marine craftsmanship, Sven’s wisdom is invaluable.Sven Yrvind, a renowned yacht designer and sailor, shares valuable insights on creating flanges around bulkhead hatches for canvas protection in this enlightening video. By following his expert guidance, boat enthusiasts can ensure their living areas remain secure while allowing unhindered access through the hatches.Step 1: Starting with the Flange
Sven begins by explaining that working on flanges vertically and horizontally is significantly easier than doing so in a flat position. To simplify the process further, he divides the task into two or three steps as suggested by fellow expert “for for.” This approach not only makes it more manageable but also allows for greater precision in crafting each component.Step 2: Applying Glue and Securing
Sven proceeds to apply glue along one edge of the flange, ensuring a secure bond when clamped into place. He emphasizes that this stage is crucial for maintaining the structural integrity of the flange, which in turn safeguards the living area beneath the canvas when hatches are open.Step 3: Allowing Time to Dry
After securely attaching the first portion of the flange, Sven allows ample time for it to dry before moving forward with additional steps. This patience and precision are key aspects of his successful boatbuilding methods.Step 4: Finishing Touches
Once the flange is fully dried, Sven removes the clamps carefully, ensuring no damage occurs during this process. He then moves on to attaching four more pieces onto these main frames, completing two pairs of flanges for the bulkhead hatches.The Final Touches
While two flanges form the primary support structure around the hatches, Sven mentions there are two additional pieces required at each end to ensure comprehensive protection. This attention to detail highlights his commitment to producing a durable and reliable design. “Sailing is about finding your path, whether it’s across an ocean or within yourself.” – Sven Yrvind In conclusion, making flanges around bulkhead hatches may seem complex at first glance, but by following Sven Yrvind’s meticulous process, enthusiasts can achieve professional-level results. Remember that the journey of boatbuilding is as rewarding as reaching your destination; it tests one’s patience and dedication. For those seeking to embark on this adventure or simply gain more insight into marine craftsmanship, Sven’s wisdom is invaluable.Making Flanges Around Bulkhead Hatches for Canvas
Sven Yrvind, a renowned yacht designer and sailor, shares valuable insights on creating flanges around bulkhead hatches for canvas protection in this enlightening video. By following his expert guidance, boat enthusiasts can ensure their living areas remain secure while allowing unhindered access through the hatches.Step 1: Starting with the Flange
Sven begins by explaining that working on flanges vertically and horizontally is significantly easier than doing so in a flat position. To simplify the process further, he divides the task into two or three steps as suggested by fellow expert “for for.” This approach not only makes it more manageable but also allows for greater precision in crafting each component.Step 2: Applying Glue and Securing
Sven proceeds to apply glue along one edge of the flange, ensuring a secure bond when clamped into place. He emphasizes that this stage is crucial for maintaining the structural integrity of the flange, which in turn safeguards the living area beneath the canvas when hatches are open.Step 3: Allowing Time to Dry
After securely attaching the first portion of the flange, Sven allows ample time for it to dry before moving forward with additional steps. This patience and precision are key aspects of his successful boatbuilding methods.Step 4: Finishing Touches
Once the flange is fully dried, Sven removes the clamps carefully, ensuring no damage occurs during this process. He then moves on to attaching four more pieces onto these main frames, completing two pairs of flanges for the bulkhead hatches.The Final Touches
While two flanges form the primary support structure around the hatches, Sven mentions there are two additional pieces required at each end to ensure comprehensive protection. This attention to detail highlights his commitment to producing a durable and reliable design. “Sailing is about finding your path, whether it’s across an ocean or within yourself.” – Sven Yrvind In conclusion, making flanges around bulkhead hatches may seem complex at first glance, but by following Sven Yrvind’s meticulous process, enthusiasts can achieve professional-level results. Remember that the journey of boatbuilding is as rewarding as reaching your destination; it tests one’s patience and dedication. For those seeking to embark on this adventure or simply gain more insight into marine craftsmanship, Sven’s wisdom is invaluable.Once the flange is fully dried, Sven removes the clamps carefully, ensuring no damage occurs during this process. He then moves on to attaching four more pieces onto these main frames, completing two pairs of flanges for the bulkhead hatches.The Final Touches
While two flanges form the primary support structure around the hatches, Sven mentions there are two additional pieces required at each end to ensure comprehensive protection. This attention to detail highlights his commitment to producing a durable and reliable design. “Sailing is about finding your path, whether it’s across an ocean or within yourself.” – Sven Yrvind In conclusion, making flanges around bulkhead hatches may seem complex at first glance, but by following Sven Yrvind’s meticulous process, enthusiasts can achieve professional-level results. Remember that the journey of boatbuilding is as rewarding as reaching your destination; it tests one’s patience and dedication. For those seeking to embark on this adventure or simply gain more insight into marine craftsmanship, Sven’s wisdom is invaluable.Sven proceeds to apply glue along one edge of the flange, ensuring a secure bond when clamped into place. He emphasizes that this stage is crucial for maintaining the structural integrity of the flange, which in turn safeguards the living area beneath the canvas when hatches are open.Step 3: Allowing Time to Dry
After securely attaching the first portion of the flange, Sven allows ample time for it to dry before moving forward with additional steps. This patience and precision are key aspects of his successful boatbuilding methods.Step 4: Finishing Touches
Once the flange is fully dried, Sven removes the clamps carefully, ensuring no damage occurs during this process. He then moves on to attaching four more pieces onto these main frames, completing two pairs of flanges for the bulkhead hatches.The Final Touches
While two flanges form the primary support structure around the hatches, Sven mentions there are two additional pieces required at each end to ensure comprehensive protection. This attention to detail highlights his commitment to producing a durable and reliable design. “Sailing is about finding your path, whether it’s across an ocean or within yourself.” – Sven Yrvind In conclusion, making flanges around bulkhead hatches may seem complex at first glance, but by following Sven Yrvind’s meticulous process, enthusiasts can achieve professional-level results. Remember that the journey of boatbuilding is as rewarding as reaching your destination; it tests one’s patience and dedication. For those seeking to embark on this adventure or simply gain more insight into marine craftsmanship, Sven’s wisdom is invaluable.Sven begins by explaining that working on flanges vertically and horizontally is significantly easier than doing so in a flat position. To simplify the process further, he divides the task into two or three steps as suggested by fellow expert “for for.” This approach not only makes it more manageable but also allows for greater precision in crafting each component.Step 2: Applying Glue and Securing
Sven proceeds to apply glue along one edge of the flange, ensuring a secure bond when clamped into place. He emphasizes that this stage is crucial for maintaining the structural integrity of the flange, which in turn safeguards the living area beneath the canvas when hatches are open.Step 3: Allowing Time to Dry
After securely attaching the first portion of the flange, Sven allows ample time for it to dry before moving forward with additional steps. This patience and precision are key aspects of his successful boatbuilding methods.Step 4: Finishing Touches
Once the flange is fully dried, Sven removes the clamps carefully, ensuring no damage occurs during this process. He then moves on to attaching four more pieces onto these main frames, completing two pairs of flanges for the bulkhead hatches.The Final Touches
While two flanges form the primary support structure around the hatches, Sven mentions there are two additional pieces required at each end to ensure comprehensive protection. This attention to detail highlights his commitment to producing a durable and reliable design. “Sailing is about finding your path, whether it’s across an ocean or within yourself.” – Sven Yrvind In conclusion, making flanges around bulkhead hatches may seem complex at first glance, but by following Sven Yrvind’s meticulous process, enthusiasts can achieve professional-level results. Remember that the journey of boatbuilding is as rewarding as reaching your destination; it tests one’s patience and dedication. For those seeking to embark on this adventure or simply gain more insight into marine craftsmanship, Sven’s wisdom is invaluable.Sven Yrvind, a renowned yacht designer and sailor, shares valuable insights on creating flanges around bulkhead hatches for canvas protection in this enlightening video. By following his expert guidance, boat enthusiasts can ensure their living areas remain secure while allowing unhindered access through the hatches.Step 1: Starting with the Flange
Sven begins by explaining that working on flanges vertically and horizontally is significantly easier than doing so in a flat position. To simplify the process further, he divides the task into two or three steps as suggested by fellow expert “for for.” This approach not only makes it more manageable but also allows for greater precision in crafting each component.Step 2: Applying Glue and Securing
Sven proceeds to apply glue along one edge of the flange, ensuring a secure bond when clamped into place. He emphasizes that this stage is crucial for maintaining the structural integrity of the flange, which in turn safeguards the living area beneath the canvas when hatches are open.Step 3: Allowing Time to Dry
After securely attaching the first portion of the flange, Sven allows ample time for it to dry before moving forward with additional steps. This patience and precision are key aspects of his successful boatbuilding methods.Step 4: Finishing Touches
Once the flange is fully dried, Sven removes the clamps carefully, ensuring no damage occurs during this process. He then moves on to attaching four more pieces onto these main frames, completing two pairs of flanges for the bulkhead hatches.The Final Touches
While two flanges form the primary support structure around the hatches, Sven mentions there are two additional pieces required at each end to ensure comprehensive protection. This attention to detail highlights his commitment to producing a durable and reliable design. “Sailing is about finding your path, whether it’s across an ocean or within yourself.” – Sven Yrvind In conclusion, making flanges around bulkhead hatches may seem complex at first glance, but by following Sven Yrvind’s meticulous process, enthusiasts can achieve professional-level results. Remember that the journey of boatbuilding is as rewarding as reaching your destination; it tests one’s patience and dedication. For those seeking to embark on this adventure or simply gain more insight into marine craftsmanship, Sven’s wisdom is invaluable.Making Flanges Around Bulkhead Hatches for Canvas
Sven Yrvind, a renowned yacht designer and sailor, shares valuable insights on creating flanges around bulkhead hatches for canvas protection in this enlightening video. By following his expert guidance, boat enthusiasts can ensure their living areas remain secure while allowing unhindered access through the hatches.Step 1: Starting with the Flange
Sven begins by explaining that working on flanges vertically and horizontally is significantly easier than doing so in a flat position. To simplify the process further, he divides the task into two or three steps as suggested by fellow expert “for for.” This approach not only makes it more manageable but also allows for greater precision in crafting each component.Step 2: Applying Glue and Securing
Sven proceeds to apply glue along one edge of the flange, ensuring a secure bond when clamped into place. He emphasizes that this stage is crucial for maintaining the structural integrity of the flange, which in turn safeguards the living area beneath the canvas when hatches are open.Step 3: Allowing Time to Dry
After securely attaching the first portion of the flange, Sven allows ample time for it to dry before moving forward with additional steps. This patience and precision are key aspects of his successful boatbuilding methods.Step 4: Finishing Touches
Once the flange is fully dried, Sven removes the clamps carefully, ensuring no damage occurs during this process. He then moves on to attaching four more pieces onto these main frames, completing two pairs of flanges for the bulkhead hatches.The Final Touches
While two flanges form the primary support structure around the hatches, Sven mentions there are two additional pieces required at each end to ensure comprehensive protection. This attention to detail highlights his commitment to producing a durable and reliable design. “Sailing is about finding your path, whether it’s across an ocean or within yourself.” – Sven Yrvind In conclusion, making flanges around bulkhead hatches may seem complex at first glance, but by following Sven Yrvind’s meticulous process, enthusiasts can achieve professional-level results. Remember that the journey of boatbuilding is as rewarding as reaching your destination; it tests one’s patience and dedication. For those seeking to embark on this adventure or simply gain more insight into marine craftsmanship, Sven’s wisdom is invaluable.After securely attaching the first portion of the flange, Sven allows ample time for it to dry before moving forward with additional steps. This patience and precision are key aspects of his successful boatbuilding methods.Step 4: Finishing Touches
Once the flange is fully dried, Sven removes the clamps carefully, ensuring no damage occurs during this process. He then moves on to attaching four more pieces onto these main frames, completing two pairs of flanges for the bulkhead hatches.The Final Touches
While two flanges form the primary support structure around the hatches, Sven mentions there are two additional pieces required at each end to ensure comprehensive protection. This attention to detail highlights his commitment to producing a durable and reliable design. “Sailing is about finding your path, whether it’s across an ocean or within yourself.” – Sven Yrvind In conclusion, making flanges around bulkhead hatches may seem complex at first glance, but by following Sven Yrvind’s meticulous process, enthusiasts can achieve professional-level results. Remember that the journey of boatbuilding is as rewarding as reaching your destination; it tests one’s patience and dedication. For those seeking to embark on this adventure or simply gain more insight into marine craftsmanship, Sven’s wisdom is invaluable.Sven proceeds to apply glue along one edge of the flange, ensuring a secure bond when clamped into place. He emphasizes that this stage is crucial for maintaining the structural integrity of the flange, which in turn safeguards the living area beneath the canvas when hatches are open.Step 3: Allowing Time to Dry
After securely attaching the first portion of the flange, Sven allows ample time for it to dry before moving forward with additional steps. This patience and precision are key aspects of his successful boatbuilding methods.Step 4: Finishing Touches
Once the flange is fully dried, Sven removes the clamps carefully, ensuring no damage occurs during this process. He then moves on to attaching four more pieces onto these main frames, completing two pairs of flanges for the bulkhead hatches.The Final Touches
While two flanges form the primary support structure around the hatches, Sven mentions there are two additional pieces required at each end to ensure comprehensive protection. This attention to detail highlights his commitment to producing a durable and reliable design. “Sailing is about finding your path, whether it’s across an ocean or within yourself.” – Sven Yrvind In conclusion, making flanges around bulkhead hatches may seem complex at first glance, but by following Sven Yrvind’s meticulous process, enthusiasts can achieve professional-level results. Remember that the journey of boatbuilding is as rewarding as reaching your destination; it tests one’s patience and dedication. For those seeking to embark on this adventure or simply gain more insight into marine craftsmanship, Sven’s wisdom is invaluable.Sven begins by explaining that working on flanges vertically and horizontally is significantly easier than doing so in a flat position. To simplify the process further, he divides the task into two or three steps as suggested by fellow expert “for for.” This approach not only makes it more manageable but also allows for greater precision in crafting each component.Step 2: Applying Glue and Securing
Sven proceeds to apply glue along one edge of the flange, ensuring a secure bond when clamped into place. He emphasizes that this stage is crucial for maintaining the structural integrity of the flange, which in turn safeguards the living area beneath the canvas when hatches are open.Step 3: Allowing Time to Dry
After securely attaching the first portion of the flange, Sven allows ample time for it to dry before moving forward with additional steps. This patience and precision are key aspects of his successful boatbuilding methods.Step 4: Finishing Touches
Once the flange is fully dried, Sven removes the clamps carefully, ensuring no damage occurs during this process. He then moves on to attaching four more pieces onto these main frames, completing two pairs of flanges for the bulkhead hatches.The Final Touches
While two flanges form the primary support structure around the hatches, Sven mentions there are two additional pieces required at each end to ensure comprehensive protection. This attention to detail highlights his commitment to producing a durable and reliable design. “Sailing is about finding your path, whether it’s across an ocean or within yourself.” – Sven Yrvind In conclusion, making flanges around bulkhead hatches may seem complex at first glance, but by following Sven Yrvind’s meticulous process, enthusiasts can achieve professional-level results. Remember that the journey of boatbuilding is as rewarding as reaching your destination; it tests one’s patience and dedication. For those seeking to embark on this adventure or simply gain more insight into marine craftsmanship, Sven’s wisdom is invaluable.Sven Yrvind, a renowned yacht designer and sailor, shares valuable insights on creating flanges around bulkhead hatches for canvas protection in this enlightening video. By following his expert guidance, boat enthusiasts can ensure their living areas remain secure while allowing unhindered access through the hatches.Step 1: Starting with the Flange
Sven begins by explaining that working on flanges vertically and horizontally is significantly easier than doing so in a flat position. To simplify the process further, he divides the task into two or three steps as suggested by fellow expert “for for.” This approach not only makes it more manageable but also allows for greater precision in crafting each component.Step 2: Applying Glue and Securing
Sven proceeds to apply glue along one edge of the flange, ensuring a secure bond when clamped into place. He emphasizes that this stage is crucial for maintaining the structural integrity of the flange, which in turn safeguards the living area beneath the canvas when hatches are open.Step 3: Allowing Time to Dry
After securely attaching the first portion of the flange, Sven allows ample time for it to dry before moving forward with additional steps. This patience and precision are key aspects of his successful boatbuilding methods.Step 4: Finishing Touches
Once the flange is fully dried, Sven removes the clamps carefully, ensuring no damage occurs during this process. He then moves on to attaching four more pieces onto these main frames, completing two pairs of flanges for the bulkhead hatches.The Final Touches
While two flanges form the primary support structure around the hatches, Sven mentions there are two additional pieces required at each end to ensure comprehensive protection. This attention to detail highlights his commitment to producing a durable and reliable design. “Sailing is about finding your path, whether it’s across an ocean or within yourself.” – Sven Yrvind In conclusion, making flanges around bulkhead hatches may seem complex at first glance, but by following Sven Yrvind’s meticulous process, enthusiasts can achieve professional-level results. Remember that the journey of boatbuilding is as rewarding as reaching your destination; it tests one’s patience and dedication. For those seeking to embark on this adventure or simply gain more insight into marine craftsmanship, Sven’s wisdom is invaluable.Making Flanges Around Bulkhead Hatches for Canvas
Sven Yrvind, a renowned yacht designer and sailor, shares valuable insights on creating flanges around bulkhead hatches for canvas protection in this enlightening video. By following his expert guidance, boat enthusiasts can ensure their living areas remain secure while allowing unhindered access through the hatches.Step 1: Starting with the Flange
Sven begins by explaining that working on flanges vertically and horizontally is significantly easier than doing so in a flat position. To simplify the process further, he divides the task into two or three steps as suggested by fellow expert “for for.” This approach not only makes it more manageable but also allows for greater precision in crafting each component.Step 2: Applying Glue and Securing
Sven proceeds to apply glue along one edge of the flange, ensuring a secure bond when clamped into place. He emphasizes that this stage is crucial for maintaining the structural integrity of the flange, which in turn safeguards the living area beneath the canvas when hatches are open.Step 3: Allowing Time to Dry
After securely attaching the first portion of the flange, Sven allows ample time for it to dry before moving forward with additional steps. This patience and precision are key aspects of his successful boatbuilding methods.Step 4: Finishing Touches
Once the flange is fully dried, Sven removes the clamps carefully, ensuring no damage occurs during this process. He then moves on to attaching four more pieces onto these main frames, completing two pairs of flanges for the bulkhead hatches.The Final Touches
While two flanges form the primary support structure around the hatches, Sven mentions there are two additional pieces required at each end to ensure comprehensive protection. This attention to detail highlights his commitment to producing a durable and reliable design. “Sailing is about finding your path, whether it’s across an ocean or within yourself.” – Sven Yrvind In conclusion, making flanges around bulkhead hatches may seem complex at first glance, but by following Sven Yrvind’s meticulous process, enthusiasts can achieve professional-level results. Remember that the journey of boatbuilding is as rewarding as reaching your destination; it tests one’s patience and dedication. For those seeking to embark on this adventure or simply gain more insight into marine craftsmanship, Sven’s wisdom is invaluable.Once the flange is fully dried, Sven removes the clamps carefully, ensuring no damage occurs during this process. He then moves on to attaching four more pieces onto these main frames, completing two pairs of flanges for the bulkhead hatches.The Final Touches
While two flanges form the primary support structure around the hatches, Sven mentions there are two additional pieces required at each end to ensure comprehensive protection. This attention to detail highlights his commitment to producing a durable and reliable design. “Sailing is about finding your path, whether it’s across an ocean or within yourself.” – Sven Yrvind In conclusion, making flanges around bulkhead hatches may seem complex at first glance, but by following Sven Yrvind’s meticulous process, enthusiasts can achieve professional-level results. Remember that the journey of boatbuilding is as rewarding as reaching your destination; it tests one’s patience and dedication. For those seeking to embark on this adventure or simply gain more insight into marine craftsmanship, Sven’s wisdom is invaluable.After securely attaching the first portion of the flange, Sven allows ample time for it to dry before moving forward with additional steps. This patience and precision are key aspects of his successful boatbuilding methods.Step 4: Finishing Touches
Once the flange is fully dried, Sven removes the clamps carefully, ensuring no damage occurs during this process. He then moves on to attaching four more pieces onto these main frames, completing two pairs of flanges for the bulkhead hatches.The Final Touches
While two flanges form the primary support structure around the hatches, Sven mentions there are two additional pieces required at each end to ensure comprehensive protection. This attention to detail highlights his commitment to producing a durable and reliable design. “Sailing is about finding your path, whether it’s across an ocean or within yourself.” – Sven Yrvind In conclusion, making flanges around bulkhead hatches may seem complex at first glance, but by following Sven Yrvind’s meticulous process, enthusiasts can achieve professional-level results. Remember that the journey of boatbuilding is as rewarding as reaching your destination; it tests one’s patience and dedication. For those seeking to embark on this adventure or simply gain more insight into marine craftsmanship, Sven’s wisdom is invaluable.Sven proceeds to apply glue along one edge of the flange, ensuring a secure bond when clamped into place. He emphasizes that this stage is crucial for maintaining the structural integrity of the flange, which in turn safeguards the living area beneath the canvas when hatches are open.Step 3: Allowing Time to Dry
After securely attaching the first portion of the flange, Sven allows ample time for it to dry before moving forward with additional steps. This patience and precision are key aspects of his successful boatbuilding methods.Step 4: Finishing Touches
Once the flange is fully dried, Sven removes the clamps carefully, ensuring no damage occurs during this process. He then moves on to attaching four more pieces onto these main frames, completing two pairs of flanges for the bulkhead hatches.The Final Touches
While two flanges form the primary support structure around the hatches, Sven mentions there are two additional pieces required at each end to ensure comprehensive protection. This attention to detail highlights his commitment to producing a durable and reliable design. “Sailing is about finding your path, whether it’s across an ocean or within yourself.” – Sven Yrvind In conclusion, making flanges around bulkhead hatches may seem complex at first glance, but by following Sven Yrvind’s meticulous process, enthusiasts can achieve professional-level results. Remember that the journey of boatbuilding is as rewarding as reaching your destination; it tests one’s patience and dedication. For those seeking to embark on this adventure or simply gain more insight into marine craftsmanship, Sven’s wisdom is invaluable.Sven begins by explaining that working on flanges vertically and horizontally is significantly easier than doing so in a flat position. To simplify the process further, he divides the task into two or three steps as suggested by fellow expert “for for.” This approach not only makes it more manageable but also allows for greater precision in crafting each component.Step 2: Applying Glue and Securing
Sven proceeds to apply glue along one edge of the flange, ensuring a secure bond when clamped into place. He emphasizes that this stage is crucial for maintaining the structural integrity of the flange, which in turn safeguards the living area beneath the canvas when hatches are open.Step 3: Allowing Time to Dry
After securely attaching the first portion of the flange, Sven allows ample time for it to dry before moving forward with additional steps. This patience and precision are key aspects of his successful boatbuilding methods.Step 4: Finishing Touches
Once the flange is fully dried, Sven removes the clamps carefully, ensuring no damage occurs during this process. He then moves on to attaching four more pieces onto these main frames, completing two pairs of flanges for the bulkhead hatches.The Final Touches
While two flanges form the primary support structure around the hatches, Sven mentions there are two additional pieces required at each end to ensure comprehensive protection. This attention to detail highlights his commitment to producing a durable and reliable design. “Sailing is about finding your path, whether it’s across an ocean or within yourself.” – Sven Yrvind In conclusion, making flanges around bulkhead hatches may seem complex at first glance, but by following Sven Yrvind’s meticulous process, enthusiasts can achieve professional-level results. Remember that the journey of boatbuilding is as rewarding as reaching your destination; it tests one’s patience and dedication. For those seeking to embark on this adventure or simply gain more insight into marine craftsmanship, Sven’s wisdom is invaluable.Sven Yrvind, a renowned yacht designer and sailor, shares valuable insights on creating flanges around bulkhead hatches for canvas protection in this enlightening video. By following his expert guidance, boat enthusiasts can ensure their living areas remain secure while allowing unhindered access through the hatches.Step 1: Starting with the Flange
Sven begins by explaining that working on flanges vertically and horizontally is significantly easier than doing so in a flat position. To simplify the process further, he divides the task into two or three steps as suggested by fellow expert “for for.” This approach not only makes it more manageable but also allows for greater precision in crafting each component.Step 2: Applying Glue and Securing
Sven proceeds to apply glue along one edge of the flange, ensuring a secure bond when clamped into place. He emphasizes that this stage is crucial for maintaining the structural integrity of the flange, which in turn safeguards the living area beneath the canvas when hatches are open.Step 3: Allowing Time to Dry
After securely attaching the first portion of the flange, Sven allows ample time for it to dry before moving forward with additional steps. This patience and precision are key aspects of his successful boatbuilding methods.Step 4: Finishing Touches
Once the flange is fully dried, Sven removes the clamps carefully, ensuring no damage occurs during this process. He then moves on to attaching four more pieces onto these main frames, completing two pairs of flanges for the bulkhead hatches.The Final Touches
While two flanges form the primary support structure around the hatches, Sven mentions there are two additional pieces required at each end to ensure comprehensive protection. This attention to detail highlights his commitment to producing a durable and reliable design. “Sailing is about finding your path, whether it’s across an ocean or within yourself.” – Sven Yrvind In conclusion, making flanges around bulkhead hatches may seem complex at first glance, but by following Sven Yrvind’s meticulous process, enthusiasts can achieve professional-level results. Remember that the journey of boatbuilding is as rewarding as reaching your destination; it tests one’s patience and dedication. For those seeking to embark on this adventure or simply gain more insight into marine craftsmanship, Sven’s wisdom is invaluable.Making Flanges Around Bulkhead Hatches for Canvas
Sven Yrvind, a renowned yacht designer and sailor, shares valuable insights on creating flanges around bulkhead hatches for canvas protection in this enlightening video. By following his expert guidance, boat enthusiasts can ensure their living areas remain secure while allowing unhindered access through the hatches.Step 1: Starting with the Flange
Sven begins by explaining that working on flanges vertically and horizontally is significantly easier than doing so in a flat position. To simplify the process further, he divides the task into two or three steps as suggested by fellow expert “for for.” This approach not only makes it more manageable but also allows for greater precision in crafting each component.Step 2: Applying Glue and Securing
Sven proceeds to apply glue along one edge of the flange, ensuring a secure bond when clamped into place. He emphasizes that this stage is crucial for maintaining the structural integrity of the flange, which in turn safeguards the living area beneath the canvas when hatches are open.Step 3: Allowing Time to Dry
After securely attaching the first portion of the flange, Sven allows ample time for it to dry before moving forward with additional steps. This patience and precision are key aspects of his successful boatbuilding methods.Step 4: Finishing Touches
Once the flange is fully dried, Sven removes the clamps carefully, ensuring no damage occurs during this process. He then moves on to attaching four more pieces onto these main frames, completing two pairs of flanges for the bulkhead hatches.The Final Touches
While two flanges form the primary support structure around the hatches, Sven mentions there are two additional pieces required at each end to ensure comprehensive protection. This attention to detail highlights his commitment to producing a durable and reliable design. “Sailing is about finding your path, whether it’s across an ocean or within yourself.” – Sven Yrvind In conclusion, making flanges around bulkhead hatches may seem complex at first glance, but by following Sven Yrvind’s meticulous process, enthusiasts can achieve professional-level results. Remember that the journey of boatbuilding is as rewarding as reaching your destination; it tests one’s patience and dedication. For those seeking to embark on this adventure or simply gain more insight into marine craftsmanship, Sven’s wisdom is invaluable.Sven proceeds to apply glue along one edge of the flange, ensuring a secure bond when clamped into place. He emphasizes that this stage is crucial for maintaining the structural integrity of the flange, which in turn safeguards the living area beneath the canvas when hatches are open.Step 3: Allowing Time to Dry
After securely attaching the first portion of the flange, Sven allows ample time for it to dry before moving forward with additional steps. This patience and precision are key aspects of his successful boatbuilding methods.Step 4: Finishing Touches
Once the flange is fully dried, Sven removes the clamps carefully, ensuring no damage occurs during this process. He then moves on to attaching four more pieces onto these main frames, completing two pairs of flanges for the bulkhead hatches.The Final Touches
While two flanges form the primary support structure around the hatches, Sven mentions there are two additional pieces required at each end to ensure comprehensive protection. This attention to detail highlights his commitment to producing a durable and reliable design. “Sailing is about finding your path, whether it’s across an ocean or within yourself.” – Sven Yrvind In conclusion, making flanges around bulkhead hatches may seem complex at first glance, but by following Sven Yrvind’s meticulous process, enthusiasts can achieve professional-level results. Remember that the journey of boatbuilding is as rewarding as reaching your destination; it tests one’s patience and dedication. For those seeking to embark on this adventure or simply gain more insight into marine craftsmanship, Sven’s wisdom is invaluable.Once the flange is fully dried, Sven removes the clamps carefully, ensuring no damage occurs during this process. He then moves on to attaching four more pieces onto these main frames, completing two pairs of flanges for the bulkhead hatches.The Final Touches
While two flanges form the primary support structure around the hatches, Sven mentions there are two additional pieces required at each end to ensure comprehensive protection. This attention to detail highlights his commitment to producing a durable and reliable design. “Sailing is about finding your path, whether it’s across an ocean or within yourself.” – Sven Yrvind In conclusion, making flanges around bulkhead hatches may seem complex at first glance, but by following Sven Yrvind’s meticulous process, enthusiasts can achieve professional-level results. Remember that the journey of boatbuilding is as rewarding as reaching your destination; it tests one’s patience and dedication. For those seeking to embark on this adventure or simply gain more insight into marine craftsmanship, Sven’s wisdom is invaluable.Making Flanges Around Bulkhead Hatches for Canvas
Sven Yrvind, a renowned yacht designer and sailor, shares valuable insights on creating flanges around bulkhead hatches for canvas protection in this enlightening video. By following his expert guidance, boat enthusiasts can ensure their living areas remain secure while allowing unhindered access through the hatches.Step 1: Starting with the Flange
Sven begins by explaining that working on flanges vertically and horizontally is significantly easier than doing so in a flat position. To simplify the process further, he divides the task into two or three steps as suggested by fellow expert “for for.” This approach not only makes it more manageable but also allows for greater precision in crafting each component.Step 2: Applying Glue and Securing
Sven proceeds to apply glue along one edge of the flange, ensuring a secure bond when clamped into place. He emphasizes that this stage is crucial for maintaining the structural integrity of the flange, which in turn safeguards the living area beneath the canvas when hatches are open.Step 3: Allowing Time to Dry
After securely attaching the first portion of the flange, Sven allows ample time for it to dry before moving forward with additional steps. This patience and precision are key aspects of his successful boatbuilding methods.Step 4: Finishing Touches
Once the flange is fully dried, Sven removes the clamps carefully, ensuring no damage occurs during this process. He then moves on to attaching four more pieces onto these main frames, completing two pairs of flanges for the bulkhead hatches.The Final Touches
While two flanges form the primary support structure around the hatches, Sven mentions there are two additional pieces required at each end to ensure comprehensive protection. This attention to detail highlights his commitment to producing a durable and reliable design. “Sailing is about finding your path, whether it’s across an ocean or within yourself.” – Sven Yrvind In conclusion, making flanges around bulkhead hatches may seem complex at first glance, but by following Sven Yrvind’s meticulous process, enthusiasts can achieve professional-level results. Remember that the journey of boatbuilding is as rewarding as reaching your destination; it tests one’s patience and dedication. For those seeking to embark on this adventure or simply gain more insight into marine craftsmanship, Sven’s wisdom is invaluable.After securely attaching the first portion of the flange, Sven allows ample time for it to dry before moving forward with additional steps. This patience and precision are key aspects of his successful boatbuilding methods.Step 4: Finishing Touches
Once the flange is fully dried, Sven removes the clamps carefully, ensuring no damage occurs during this process. He then moves on to attaching four more pieces onto these main frames, completing two pairs of flanges for the bulkhead hatches.The Final Touches
While two flanges form the primary support structure around the hatches, Sven mentions there are two additional pieces required at each end to ensure comprehensive protection. This attention to detail highlights his commitment to producing a durable and reliable design. “Sailing is about finding your path, whether it’s across an ocean or within yourself.” – Sven Yrvind In conclusion, making flanges around bulkhead hatches may seem complex at first glance, but by following Sven Yrvind’s meticulous process, enthusiasts can achieve professional-level results. Remember that the journey of boatbuilding is as rewarding as reaching your destination; it tests one’s patience and dedication. For those seeking to embark on this adventure or simply gain more insight into marine craftsmanship, Sven’s wisdom is invaluable.Making Flanges Around Bulkhead Hatches for Canvas
Sven Yrvind, a renowned yacht designer and sailor, shares valuable insights on creating flanges around bulkhead hatches for canvas protection in this enlightening video. By following his expert guidance, boat enthusiasts can ensure their living areas remain secure while allowing unhindered access through the hatches.Step 1: Starting with the Flange
Sven begins by explaining that working on flanges vertically and horizontally is significantly easier than doing so in a flat position. To simplify the process further, he divides the task into two or three steps as suggested by fellow expert “for for.” This approach not only makes it more manageable but also allows for greater precision in crafting each component.Step 2: Applying Glue and Securing
Sven proceeds to apply glue along one edge of the flange, ensuring a secure bond when clamped into place. He emphasizes that this stage is crucial for maintaining the structural integrity of the flange, which in turn safeguards the living area beneath the canvas when hatches are open.Step 3: Allowing Time to Dry
After securely attaching the first portion of the flange, Sven allows ample time for it to dry before moving forward with additional steps. This patience and precision are key aspects of his successful boatbuilding methods.Step 4: Finishing Touches
Once the flange is fully dried, Sven removes the clamps carefully, ensuring no damage occurs during this process. He then moves on to attaching four more pieces onto these main frames, completing two pairs of flanges for the bulkhead hatches.The Final Touches
While two flanges form the primary support structure around the hatches, Sven mentions there are two additional pieces required at each end to ensure comprehensive protection. This attention to detail highlights his commitment to producing a durable and reliable design. “Sailing is about finding your path, whether it’s across an ocean or within yourself.” – Sven Yrvind In conclusion, making flanges around bulkhead hatches may seem complex at first glance, but by following Sven Yrvind’s meticulous process, enthusiasts can achieve professional-level results. Remember that the journey of boatbuilding is as rewarding as reaching your destination; it tests one’s patience and dedication. For those seeking to embark on this adventure or simply gain more insight into marine craftsmanship, Sven’s wisdom is invaluable.Sven proceeds to apply glue along one edge of the flange, ensuring a secure bond when clamped into place. He emphasizes that this stage is crucial for maintaining the structural integrity of the flange, which in turn safeguards the living area beneath the canvas when hatches are open.Step 3: Allowing Time to Dry
After securely attaching the first portion of the flange, Sven allows ample time for it to dry before moving forward with additional steps. This patience and precision are key aspects of his successful boatbuilding methods.Step 4: Finishing Touches
Once the flange is fully dried, Sven removes the clamps carefully, ensuring no damage occurs during this process. He then moves on to attaching four more pieces onto these main frames, completing two pairs of flanges for the bulkhead hatches.The Final Touches
While two flanges form the primary support structure around the hatches, Sven mentions there are two additional pieces required at each end to ensure comprehensive protection. This attention to detail highlights his commitment to producing a durable and reliable design. “Sailing is about finding your path, whether it’s across an ocean or within yourself.” – Sven Yrvind In conclusion, making flanges around bulkhead hatches may seem complex at first glance, but by following Sven Yrvind’s meticulous process, enthusiasts can achieve professional-level results. Remember that the journey of boatbuilding is as rewarding as reaching your destination; it tests one’s patience and dedication. For those seeking to embark on this adventure or simply gain more insight into marine craftsmanship, Sven’s wisdom is invaluable.Making Flanges Around Bulkhead Hatches for Canvas
Sven Yrvind, a renowned yacht designer and sailor, shares valuable insights on creating flanges around bulkhead hatches for canvas protection in this enlightening video. By following his expert guidance, boat enthusiasts can ensure their living areas remain secure while allowing unhindered access through the hatches.Step 1: Starting with the Flange
Sven begins by explaining that working on flanges vertically and horizontally is significantly easier than doing so in a flat position. To simplify the process further, he divides the task into two or three steps as suggested by fellow expert “for for.” This approach not only makes it more manageable but also allows for greater precision in crafting each component.Step 2: Applying Glue and Securing
Sven proceeds to apply glue along one edge of the flange, ensuring a secure bond when clamped into place. He emphasizes that this stage is crucial for maintaining the structural integrity of the flange, which in turn safeguards the living area beneath the canvas when hatches are open.Step 3: Allowing Time to Dry
After securely attaching the first portion of the flange, Sven allows ample time for it to dry before moving forward with additional steps. This patience and precision are key aspects of his successful boatbuilding methods.Step 4: Finishing Touches
Once the flange is fully dried, Sven removes the clamps carefully, ensuring no damage occurs during this process. He then moves on to attaching four more pieces onto these main frames, completing two pairs of flanges for the bulkhead hatches.The Final Touches
While two flanges form the primary support structure around the hatches, Sven mentions there are two additional pieces required at each end to ensure comprehensive protection. This attention to detail highlights his commitment to producing a durable and reliable design. “Sailing is about finding your path, whether it’s across an ocean or within yourself.” – Sven Yrvind In conclusion, making flanges around bulkhead hatches may seem complex at first glance, but by following Sven Yrvind’s meticulous process, enthusiasts can achieve professional-level results. Remember that the journey of boatbuilding is as rewarding as reaching your destination; it tests one’s patience and dedication. For those seeking to embark on this adventure or simply gain more insight into marine craftsmanship, Sven’s wisdom is invaluable.Sven begins by explaining that working on flanges vertically and horizontally is significantly easier than doing so in a flat position. To simplify the process further, he divides the task into two or three steps as suggested by fellow expert “for for.” This approach not only makes it more manageable but also allows for greater precision in crafting each component.Step 2: Applying Glue and Securing
Sven proceeds to apply glue along one edge of the flange, ensuring a secure bond when clamped into place. He emphasizes that this stage is crucial for maintaining the structural integrity of the flange, which in turn safeguards the living area beneath the canvas when hatches are open.Step 3: Allowing Time to Dry
After securely attaching the first portion of the flange, Sven allows ample time for it to dry before moving forward with additional steps. This patience and precision are key aspects of his successful boatbuilding methods.Step 4: Finishing Touches
Once the flange is fully dried, Sven removes the clamps carefully, ensuring no damage occurs during this process. He then moves on to attaching four more pieces onto these main frames, completing two pairs of flanges for the bulkhead hatches.The Final Touches
While two flanges form the primary support structure around the hatches, Sven mentions there are two additional pieces required at each end to ensure comprehensive protection. This attention to detail highlights his commitment to producing a durable and reliable design. “Sailing is about finding your path, whether it’s across an ocean or within yourself.” – Sven Yrvind In conclusion, making flanges around bulkhead hatches may seem complex at first glance, but by following Sven Yrvind’s meticulous process, enthusiasts can achieve professional-level results. Remember that the journey of boatbuilding is as rewarding as reaching your destination; it tests one’s patience and dedication. For those seeking to embark on this adventure or simply gain more insight into marine craftsmanship, Sven’s wisdom is invaluable.Making Flanges Around Bulkhead Hatches for Canvas
Sven Yrvind, a renowned yacht designer and sailor, shares valuable insights on creating flanges around bulkhead hatches for canvas protection in this enlightening video. By following his expert guidance, boat enthusiasts can ensure their living areas remain secure while allowing unhindered access through the hatches.Step 1: Starting with the Flange
Sven begins by explaining that working on flanges vertically and horizontally is significantly easier than doing so in a flat position. To simplify the process further, he divides the task into two or three steps as suggested by fellow expert “for for.” This approach not only makes it more manageable but also allows for greater precision in crafting each component.Step 2: Applying Glue and Securing
Sven proceeds to apply glue along one edge of the flange, ensuring a secure bond when clamped into place. He emphasizes that this stage is crucial for maintaining the structural integrity of the flange, which in turn safeguards the living area beneath the canvas when hatches are open.Step 3: Allowing Time to Dry
After securely attaching the first portion of the flange, Sven allows ample time for it to dry before moving forward with additional steps. This patience and precision are key aspects of his successful boatbuilding methods.Step 4: Finishing Touches
Once the flange is fully dried, Sven removes the clamps carefully, ensuring no damage occurs during this process. He then moves on to attaching four more pieces onto these main frames, completing two pairs of flanges for the bulkhead hatches.The Final Touches
While two flanges form the primary support structure around the hatches, Sven mentions there are two additional pieces required at each end to ensure comprehensive protection. This attention to detail highlights his commitment to producing a durable and reliable design. “Sailing is about finding your path, whether it’s across an ocean or within yourself.” – Sven Yrvind In conclusion, making flanges around bulkhead hatches may seem complex at first glance, but by following Sven Yrvind’s meticulous process, enthusiasts can achieve professional-level results. Remember that the journey of boatbuilding is as rewarding as reaching your destination; it tests one’s patience and dedication. For those seeking to embark on this adventure or simply gain more insight into marine craftsmanship, Sven’s wisdom is invaluable.Sven Yrvind, a renowned yacht designer and sailor, shares valuable insights on creating flanges around bulkhead hatches for canvas protection in this enlightening video. By following his expert guidance, boat enthusiasts can ensure their living areas remain secure while allowing unhindered access through the hatches.Step 1: Starting with the Flange
Sven begins by explaining that working on flanges vertically and horizontally is significantly easier than doing so in a flat position. To simplify the process further, he divides the task into two or three steps as suggested by fellow expert “for for.” This approach not only makes it more manageable but also allows for greater precision in crafting each component.Step 2: Applying Glue and Securing
Sven proceeds to apply glue along one edge of the flange, ensuring a secure bond when clamped into place. He emphasizes that this stage is crucial for maintaining the structural integrity of the flange, which in turn safeguards the living area beneath the canvas when hatches are open.Step 3: Allowing Time to Dry
After securely attaching the first portion of the flange, Sven allows ample time for it to dry before moving forward with additional steps. This patience and precision are key aspects of his successful boatbuilding methods.Step 4: Finishing Touches
Once the flange is fully dried, Sven removes the clamps carefully, ensuring no damage occurs during this process. He then moves on to attaching four more pieces onto these main frames, completing two pairs of flanges for the bulkhead hatches.The Final Touches
While two flanges form the primary support structure around the hatches, Sven mentions there are two additional pieces required at each end to ensure comprehensive protection. This attention to detail highlights his commitment to producing a durable and reliable design. “Sailing is about finding your path, whether it’s across an ocean or within yourself.” – Sven Yrvind In conclusion, making flanges around bulkhead hatches may seem complex at first glance, but by following Sven Yrvind’s meticulous process, enthusiasts can achieve professional-level results. Remember that the journey of boatbuilding is as rewarding as reaching your destination; it tests one’s patience and dedication. For those seeking to embark on this adventure or simply gain more insight into marine craftsmanship, Sven’s wisdom is invaluable.Making Flanges Around Bulkhead Hatches for Canvas
Sven Yrvind, a renowned yacht designer and sailor, shares valuable insights on creating flanges around bulkhead hatches for canvas protection in this enlightening video. By following his expert guidance, boat enthusiasts can ensure their living areas remain secure while allowing unhindered access through the hatches.Step 1: Starting with the Flange
Sven begins by explaining that working on flanges vertically and horizontally is significantly easier than doing so in a flat position. To simplify the process further, he divides the task into two or three steps as suggested by fellow expert “for for.” This approach not only makes it more manageable but also allows for greater precision in crafting each component.Step 2: Applying Glue and Securing
Sven proceeds to apply glue along one edge of the flange, ensuring a secure bond when clamped into place. He emphasizes that this stage is crucial for maintaining the structural integrity of the flange, which in turn safeguards the living area beneath the canvas when hatches are open.Step 3: Allowing Time to Dry
After securely attaching the first portion of the flange, Sven allows ample time for it to dry before moving forward with additional steps. This patience and precision are key aspects of his successful boatbuilding methods.Step 4: Finishing Touches
Once the flange is fully dried, Sven removes the clamps carefully, ensuring no damage occurs during this process. He then moves on to attaching four more pieces onto these main frames, completing two pairs of flanges for the bulkhead hatches.The Final Touches
While two flanges form the primary support structure around the hatches, Sven mentions there are two additional pieces required at each end to ensure comprehensive protection. This attention to detail highlights his commitment to producing a durable and reliable design. “Sailing is about finding your path, whether it’s across an ocean or within yourself.” – Sven Yrvind In conclusion, making flanges around bulkhead hatches may seem complex at first glance, but by following Sven Yrvind’s meticulous process, enthusiasts can achieve professional-level results. Remember that the journey of boatbuilding is as rewarding as reaching your destination; it tests one’s patience and dedication. For those seeking to embark on this adventure or simply gain more insight into marine craftsmanship, Sven’s wisdom is invaluable.Once the flange is fully dried, Sven removes the clamps carefully, ensuring no damage occurs during this process. He then moves on to attaching four more pieces onto these main frames, completing two pairs of flanges for the bulkhead hatches.The Final Touches
While two flanges form the primary support structure around the hatches, Sven mentions there are two additional pieces required at each end to ensure comprehensive protection. This attention to detail highlights his commitment to producing a durable and reliable design. “Sailing is about finding your path, whether it’s across an ocean or within yourself.” – Sven Yrvind In conclusion, making flanges around bulkhead hatches may seem complex at first glance, but by following Sven Yrvind’s meticulous process, enthusiasts can achieve professional-level results. Remember that the journey of boatbuilding is as rewarding as reaching your destination; it tests one’s patience and dedication. For those seeking to embark on this adventure or simply gain more insight into marine craftsmanship, Sven’s wisdom is invaluable.Sven Yrvind, a renowned yacht designer and sailor, shares valuable insights on creating flanges around bulkhead hatches for canvas protection in this enlightening video. By following his expert guidance, boat enthusiasts can ensure their living areas remain secure while allowing unhindered access through the hatches.Step 1: Starting with the Flange
Sven begins by explaining that working on flanges vertically and horizontally is significantly easier than doing so in a flat position. To simplify the process further, he divides the task into two or three steps as suggested by fellow expert “for for.” This approach not only makes it more manageable but also allows for greater precision in crafting each component.Step 2: Applying Glue and Securing
Sven proceeds to apply glue along one edge of the flange, ensuring a secure bond when clamped into place. He emphasizes that this stage is crucial for maintaining the structural integrity of the flange, which in turn safeguards the living area beneath the canvas when hatches are open.Step 3: Allowing Time to Dry
After securely attaching the first portion of the flange, Sven allows ample time for it to dry before moving forward with additional steps. This patience and precision are key aspects of his successful boatbuilding methods.Step 4: Finishing Touches
Once the flange is fully dried, Sven removes the clamps carefully, ensuring no damage occurs during this process. He then moves on to attaching four more pieces onto these main frames, completing two pairs of flanges for the bulkhead hatches.The Final Touches
While two flanges form the primary support structure around the hatches, Sven mentions there are two additional pieces required at each end to ensure comprehensive protection. This attention to detail highlights his commitment to producing a durable and reliable design. “Sailing is about finding your path, whether it’s across an ocean or within yourself.” – Sven Yrvind In conclusion, making flanges around bulkhead hatches may seem complex at first glance, but by following Sven Yrvind’s meticulous process, enthusiasts can achieve professional-level results. Remember that the journey of boatbuilding is as rewarding as reaching your destination; it tests one’s patience and dedication. For those seeking to embark on this adventure or simply gain more insight into marine craftsmanship, Sven’s wisdom is invaluable.Making Flanges Around Bulkhead Hatches for Canvas
Sven Yrvind, a renowned yacht designer and sailor, shares valuable insights on creating flanges around bulkhead hatches for canvas protection in this enlightening video. By following his expert guidance, boat enthusiasts can ensure their living areas remain secure while allowing unhindered access through the hatches.Step 1: Starting with the Flange
Sven begins by explaining that working on flanges vertically and horizontally is significantly easier than doing so in a flat position. To simplify the process further, he divides the task into two or three steps as suggested by fellow expert “for for.” This approach not only makes it more manageable but also allows for greater precision in crafting each component.Step 2: Applying Glue and Securing
Sven proceeds to apply glue along one edge of the flange, ensuring a secure bond when clamped into place. He emphasizes that this stage is crucial for maintaining the structural integrity of the flange, which in turn safeguards the living area beneath the canvas when hatches are open.Step 3: Allowing Time to Dry
After securely attaching the first portion of the flange, Sven allows ample time for it to dry before moving forward with additional steps. This patience and precision are key aspects of his successful boatbuilding methods.Step 4: Finishing Touches
Once the flange is fully dried, Sven removes the clamps carefully, ensuring no damage occurs during this process. He then moves on to attaching four more pieces onto these main frames, completing two pairs of flanges for the bulkhead hatches.The Final Touches
While two flanges form the primary support structure around the hatches, Sven mentions there are two additional pieces required at each end to ensure comprehensive protection. This attention to detail highlights his commitment to producing a durable and reliable design. “Sailing is about finding your path, whether it’s across an ocean or within yourself.” – Sven Yrvind In conclusion, making flanges around bulkhead hatches may seem complex at first glance, but by following Sven Yrvind’s meticulous process, enthusiasts can achieve professional-level results. Remember that the journey of boatbuilding is as rewarding as reaching your destination; it tests one’s patience and dedication. For those seeking to embark on this adventure or simply gain more insight into marine craftsmanship, Sven’s wisdom is invaluable.After securely attaching the first portion of the flange, Sven allows ample time for it to dry before moving forward with additional steps. This patience and precision are key aspects of his successful boatbuilding methods.Step 4: Finishing Touches
Once the flange is fully dried, Sven removes the clamps carefully, ensuring no damage occurs during this process. He then moves on to attaching four more pieces onto these main frames, completing two pairs of flanges for the bulkhead hatches.The Final Touches
While two flanges form the primary support structure around the hatches, Sven mentions there are two additional pieces required at each end to ensure comprehensive protection. This attention to detail highlights his commitment to producing a durable and reliable design. “Sailing is about finding your path, whether it’s across an ocean or within yourself.” – Sven Yrvind In conclusion, making flanges around bulkhead hatches may seem complex at first glance, but by following Sven Yrvind’s meticulous process, enthusiasts can achieve professional-level results. Remember that the journey of boatbuilding is as rewarding as reaching your destination; it tests one’s patience and dedication. For those seeking to embark on this adventure or simply gain more insight into marine craftsmanship, Sven’s wisdom is invaluable.Sven Yrvind, a renowned yacht designer and sailor, shares valuable insights on creating flanges around bulkhead hatches for canvas protection in this enlightening video. By following his expert guidance, boat enthusiasts can ensure their living areas remain secure while allowing unhindered access through the hatches.Step 1: Starting with the Flange
Sven begins by explaining that working on flanges vertically and horizontally is significantly easier than doing so in a flat position. To simplify the process further, he divides the task into two or three steps as suggested by fellow expert “for for.” This approach not only makes it more manageable but also allows for greater precision in crafting each component.Step 2: Applying Glue and Securing
Sven proceeds to apply glue along one edge of the flange, ensuring a secure bond when clamped into place. He emphasizes that this stage is crucial for maintaining the structural integrity of the flange, which in turn safeguards the living area beneath the canvas when hatches are open.Step 3: Allowing Time to Dry
After securely attaching the first portion of the flange, Sven allows ample time for it to dry before moving forward with additional steps. This patience and precision are key aspects of his successful boatbuilding methods.Step 4: Finishing Touches
Once the flange is fully dried, Sven removes the clamps carefully, ensuring no damage occurs during this process. He then moves on to attaching four more pieces onto these main frames, completing two pairs of flanges for the bulkhead hatches.The Final Touches
While two flanges form the primary support structure around the hatches, Sven mentions there are two additional pieces required at each end to ensure comprehensive protection. This attention to detail highlights his commitment to producing a durable and reliable design. “Sailing is about finding your path, whether it’s across an ocean or within yourself.” – Sven Yrvind In conclusion, making flanges around bulkhead hatches may seem complex at first glance, but by following Sven Yrvind’s meticulous process, enthusiasts can achieve professional-level results. Remember that the journey of boatbuilding is as rewarding as reaching your destination; it tests one’s patience and dedication. For those seeking to embark on this adventure or simply gain more insight into marine craftsmanship, Sven’s wisdom is invaluable.Making Flanges Around Bulkhead Hatches for Canvas
Sven Yrvind, a renowned yacht designer and sailor, shares valuable insights on creating flanges around bulkhead hatches for canvas protection in this enlightening video. By following his expert guidance, boat enthusiasts can ensure their living areas remain secure while allowing unhindered access through the hatches.Step 1: Starting with the Flange
Sven begins by explaining that working on flanges vertically and horizontally is significantly easier than doing so in a flat position. To simplify the process further, he divides the task into two or three steps as suggested by fellow expert “for for.” This approach not only makes it more manageable but also allows for greater precision in crafting each component.Step 2: Applying Glue and Securing
Sven proceeds to apply glue along one edge of the flange, ensuring a secure bond when clamped into place. He emphasizes that this stage is crucial for maintaining the structural integrity of the flange, which in turn safeguards the living area beneath the canvas when hatches are open.Step 3: Allowing Time to Dry
After securely attaching the first portion of the flange, Sven allows ample time for it to dry before moving forward with additional steps. This patience and precision are key aspects of his successful boatbuilding methods.Step 4: Finishing Touches
Once the flange is fully dried, Sven removes the clamps carefully, ensuring no damage occurs during this process. He then moves on to attaching four more pieces onto these main frames, completing two pairs of flanges for the bulkhead hatches.The Final Touches
While two flanges form the primary support structure around the hatches, Sven mentions there are two additional pieces required at each end to ensure comprehensive protection. This attention to detail highlights his commitment to producing a durable and reliable design. “Sailing is about finding your path, whether it’s across an ocean or within yourself.” – Sven Yrvind In conclusion, making flanges around bulkhead hatches may seem complex at first glance, but by following Sven Yrvind’s meticulous process, enthusiasts can achieve professional-level results. Remember that the journey of boatbuilding is as rewarding as reaching your destination; it tests one’s patience and dedication. For those seeking to embark on this adventure or simply gain more insight into marine craftsmanship, Sven’s wisdom is invaluable.Sven proceeds to apply glue along one edge of the flange, ensuring a secure bond when clamped into place. He emphasizes that this stage is crucial for maintaining the structural integrity of the flange, which in turn safeguards the living area beneath the canvas when hatches are open.Step 3: Allowing Time to Dry
After securely attaching the first portion of the flange, Sven allows ample time for it to dry before moving forward with additional steps. This patience and precision are key aspects of his successful boatbuilding methods.Step 4: Finishing Touches
Once the flange is fully dried, Sven removes the clamps carefully, ensuring no damage occurs during this process. He then moves on to attaching four more pieces onto these main frames, completing two pairs of flanges for the bulkhead hatches.The Final Touches
While two flanges form the primary support structure around the hatches, Sven mentions there are two additional pieces required at each end to ensure comprehensive protection. This attention to detail highlights his commitment to producing a durable and reliable design. “Sailing is about finding your path, whether it’s across an ocean or within yourself.” – Sven Yrvind In conclusion, making flanges around bulkhead hatches may seem complex at first glance, but by following Sven Yrvind’s meticulous process, enthusiasts can achieve professional-level results. Remember that the journey of boatbuilding is as rewarding as reaching your destination; it tests one’s patience and dedication. For those seeking to embark on this adventure or simply gain more insight into marine craftsmanship, Sven’s wisdom is invaluable.Sven Yrvind, a renowned yacht designer and sailor, shares valuable insights on creating flanges around bulkhead hatches for canvas protection in this enlightening video. By following his expert guidance, boat enthusiasts can ensure their living areas remain secure while allowing unhindered access through the hatches.Step 1: Starting with the Flange
Sven begins by explaining that working on flanges vertically and horizontally is significantly easier than doing so in a flat position. To simplify the process further, he divides the task into two or three steps as suggested by fellow expert “for for.” This approach not only makes it more manageable but also allows for greater precision in crafting each component.Step 2: Applying Glue and Securing
Sven proceeds to apply glue along one edge of the flange, ensuring a secure bond when clamped into place. He emphasizes that this stage is crucial for maintaining the structural integrity of the flange, which in turn safeguards the living area beneath the canvas when hatches are open.Step 3: Allowing Time to Dry
After securely attaching the first portion of the flange, Sven allows ample time for it to dry before moving forward with additional steps. This patience and precision are key aspects of his successful boatbuilding methods.Step 4: Finishing Touches
Once the flange is fully dried, Sven removes the clamps carefully, ensuring no damage occurs during this process. He then moves on to attaching four more pieces onto these main frames, completing two pairs of flanges for the bulkhead hatches.The Final Touches
While two flanges form the primary support structure around the hatches, Sven mentions there are two additional pieces required at each end to ensure comprehensive protection. This attention to detail highlights his commitment to producing a durable and reliable design. “Sailing is about finding your path, whether it’s across an ocean or within yourself.” – Sven Yrvind In conclusion, making flanges around bulkhead hatches may seem complex at first glance, but by following Sven Yrvind’s meticulous process, enthusiasts can achieve professional-level results. Remember that the journey of boatbuilding is as rewarding as reaching your destination; it tests one’s patience and dedication. For those seeking to embark on this adventure or simply gain more insight into marine craftsmanship, Sven’s wisdom is invaluable.Making Flanges Around Bulkhead Hatches for Canvas
Sven Yrvind, a renowned yacht designer and sailor, shares valuable insights on creating flanges around bulkhead hatches for canvas protection in this enlightening video. By following his expert guidance, boat enthusiasts can ensure their living areas remain secure while allowing unhindered access through the hatches.Step 1: Starting with the Flange
Sven begins by explaining that working on flanges vertically and horizontally is significantly easier than doing so in a flat position. To simplify the process further, he divides the task into two or three steps as suggested by fellow expert “for for.” This approach not only makes it more manageable but also allows for greater precision in crafting each component.Step 2: Applying Glue and Securing
Sven proceeds to apply glue along one edge of the flange, ensuring a secure bond when clamped into place. He emphasizes that this stage is crucial for maintaining the structural integrity of the flange, which in turn safeguards the living area beneath the canvas when hatches are open.Step 3: Allowing Time to Dry
After securely attaching the first portion of the flange, Sven allows ample time for it to dry before moving forward with additional steps. This patience and precision are key aspects of his successful boatbuilding methods.Step 4: Finishing Touches
Once the flange is fully dried, Sven removes the clamps carefully, ensuring no damage occurs during this process. He then moves on to attaching four more pieces onto these main frames, completing two pairs of flanges for the bulkhead hatches.The Final Touches
While two flanges form the primary support structure around the hatches, Sven mentions there are two additional pieces required at each end to ensure comprehensive protection. This attention to detail highlights his commitment to producing a durable and reliable design. “Sailing is about finding your path, whether it’s across an ocean or within yourself.” – Sven Yrvind In conclusion, making flanges around bulkhead hatches may seem complex at first glance, but by following Sven Yrvind’s meticulous process, enthusiasts can achieve professional-level results. Remember that the journey of boatbuilding is as rewarding as reaching your destination; it tests one’s patience and dedication. For those seeking to embark on this adventure or simply gain more insight into marine craftsmanship, Sven’s wisdom is invaluable.Sven begins by explaining that working on flanges vertically and horizontally is significantly easier than doing so in a flat position. To simplify the process further, he divides the task into two or three steps as suggested by fellow expert “for for.” This approach not only makes it more manageable but also allows for greater precision in crafting each component.Step 2: Applying Glue and Securing
Sven proceeds to apply glue along one edge of the flange, ensuring a secure bond when clamped into place. He emphasizes that this stage is crucial for maintaining the structural integrity of the flange, which in turn safeguards the living area beneath the canvas when hatches are open.Step 3: Allowing Time to Dry
After securely attaching the first portion of the flange, Sven allows ample time for it to dry before moving forward with additional steps. This patience and precision are key aspects of his successful boatbuilding methods.Step 4: Finishing Touches
Once the flange is fully dried, Sven removes the clamps carefully, ensuring no damage occurs during this process. He then moves on to attaching four more pieces onto these main frames, completing two pairs of flanges for the bulkhead hatches.The Final Touches
While two flanges form the primary support structure around the hatches, Sven mentions there are two additional pieces required at each end to ensure comprehensive protection. This attention to detail highlights his commitment to producing a durable and reliable design. “Sailing is about finding your path, whether it’s across an ocean or within yourself.” – Sven Yrvind In conclusion, making flanges around bulkhead hatches may seem complex at first glance, but by following Sven Yrvind’s meticulous process, enthusiasts can achieve professional-level results. Remember that the journey of boatbuilding is as rewarding as reaching your destination; it tests one’s patience and dedication. For those seeking to embark on this adventure or simply gain more insight into marine craftsmanship, Sven’s wisdom is invaluable.Sven Yrvind, a renowned yacht designer and sailor, shares valuable insights on creating flanges around bulkhead hatches for canvas protection in this enlightening video. By following his expert guidance, boat enthusiasts can ensure their living areas remain secure while allowing unhindered access through the hatches.Step 1: Starting with the Flange
Sven begins by explaining that working on flanges vertically and horizontally is significantly easier than doing so in a flat position. To simplify the process further, he divides the task into two or three steps as suggested by fellow expert “for for.” This approach not only makes it more manageable but also allows for greater precision in crafting each component.Step 2: Applying Glue and Securing
Sven proceeds to apply glue along one edge of the flange, ensuring a secure bond when clamped into place. He emphasizes that this stage is crucial for maintaining the structural integrity of the flange, which in turn safeguards the living area beneath the canvas when hatches are open.Step 3: Allowing Time to Dry
After securely attaching the first portion of the flange, Sven allows ample time for it to dry before moving forward with additional steps. This patience and precision are key aspects of his successful boatbuilding methods.Step 4: Finishing Touches
Once the flange is fully dried, Sven removes the clamps carefully, ensuring no damage occurs during this process. He then moves on to attaching four more pieces onto these main frames, completing two pairs of flanges for the bulkhead hatches.The Final Touches
While two flanges form the primary support structure around the hatches, Sven mentions there are two additional pieces required at each end to ensure comprehensive protection. This attention to detail highlights his commitment to producing a durable and reliable design. “Sailing is about finding your path, whether it’s across an ocean or within yourself.” – Sven Yrvind In conclusion, making flanges around bulkhead hatches may seem complex at first glance, but by following Sven Yrvind’s meticulous process, enthusiasts can achieve professional-level results. Remember that the journey of boatbuilding is as rewarding as reaching your destination; it tests one’s patience and dedication. For those seeking to embark on this adventure or simply gain more insight into marine craftsmanship, Sven’s wisdom is invaluable.Making Flanges Around Bulkhead Hatches for Canvas
Sven Yrvind, a renowned yacht designer and sailor, shares valuable insights on creating flanges around bulkhead hatches for canvas protection in this enlightening video. By following his expert guidance, boat enthusiasts can ensure their living areas remain secure while allowing unhindered access through the hatches.Step 1: Starting with the Flange
Sven begins by explaining that working on flanges vertically and horizontally is significantly easier than doing so in a flat position. To simplify the process further, he divides the task into two or three steps as suggested by fellow expert “for for.” This approach not only makes it more manageable but also allows for greater precision in crafting each component.Step 2: Applying Glue and Securing
Sven proceeds to apply glue along one edge of the flange, ensuring a secure bond when clamped into place. He emphasizes that this stage is crucial for maintaining the structural integrity of the flange, which in turn safeguards the living area beneath the canvas when hatches are open.Step 3: Allowing Time to Dry
After securely attaching the first portion of the flange, Sven allows ample time for it to dry before moving forward with additional steps. This patience and precision are key aspects of his successful boatbuilding methods.Step 4: Finishing Touches
Once the flange is fully dried, Sven removes the clamps carefully, ensuring no damage occurs during this process. He then moves on to attaching four more pieces onto these main frames, completing two pairs of flanges for the bulkhead hatches.The Final Touches
While two flanges form the primary support structure around the hatches, Sven mentions there are two additional pieces required at each end to ensure comprehensive protection. This attention to detail highlights his commitment to producing a durable and reliable design. “Sailing is about finding your path, whether it’s across an ocean or within yourself.” – Sven Yrvind In conclusion, making flanges around bulkhead hatches may seem complex at first glance, but by following Sven Yrvind’s meticulous process, enthusiasts can achieve professional-level results. Remember that the journey of boatbuilding is as rewarding as reaching your destination; it tests one’s patience and dedication. For those seeking to embark on this adventure or simply gain more insight into marine craftsmanship, Sven’s wisdom is invaluable.Once the flange is fully dried, Sven removes the clamps carefully, ensuring no damage occurs during this process. He then moves on to attaching four more pieces onto these main frames, completing two pairs of flanges for the bulkhead hatches.The Final Touches
While two flanges form the primary support structure around the hatches, Sven mentions there are two additional pieces required at each end to ensure comprehensive protection. This attention to detail highlights his commitment to producing a durable and reliable design. “Sailing is about finding your path, whether it’s across an ocean or within yourself.” – Sven Yrvind In conclusion, making flanges around bulkhead hatches may seem complex at first glance, but by following Sven Yrvind’s meticulous process, enthusiasts can achieve professional-level results. Remember that the journey of boatbuilding is as rewarding as reaching your destination; it tests one’s patience and dedication. For those seeking to embark on this adventure or simply gain more insight into marine craftsmanship, Sven’s wisdom is invaluable.Sven begins by explaining that working on flanges vertically and horizontally is significantly easier than doing so in a flat position. To simplify the process further, he divides the task into two or three steps as suggested by fellow expert “for for.” This approach not only makes it more manageable but also allows for greater precision in crafting each component.Step 2: Applying Glue and Securing
Sven proceeds to apply glue along one edge of the flange, ensuring a secure bond when clamped into place. He emphasizes that this stage is crucial for maintaining the structural integrity of the flange, which in turn safeguards the living area beneath the canvas when hatches are open.Step 3: Allowing Time to Dry
After securely attaching the first portion of the flange, Sven allows ample time for it to dry before moving forward with additional steps. This patience and precision are key aspects of his successful boatbuilding methods.Step 4: Finishing Touches
Once the flange is fully dried, Sven removes the clamps carefully, ensuring no damage occurs during this process. He then moves on to attaching four more pieces onto these main frames, completing two pairs of flanges for the bulkhead hatches.The Final Touches
While two flanges form the primary support structure around the hatches, Sven mentions there are two additional pieces required at each end to ensure comprehensive protection. This attention to detail highlights his commitment to producing a durable and reliable design. “Sailing is about finding your path, whether it’s across an ocean or within yourself.” – Sven Yrvind In conclusion, making flanges around bulkhead hatches may seem complex at first glance, but by following Sven Yrvind’s meticulous process, enthusiasts can achieve professional-level results. Remember that the journey of boatbuilding is as rewarding as reaching your destination; it tests one’s patience and dedication. For those seeking to embark on this adventure or simply gain more insight into marine craftsmanship, Sven’s wisdom is invaluable.Sven Yrvind, a renowned yacht designer and sailor, shares valuable insights on creating flanges around bulkhead hatches for canvas protection in this enlightening video. By following his expert guidance, boat enthusiasts can ensure their living areas remain secure while allowing unhindered access through the hatches.Step 1: Starting with the Flange
Sven begins by explaining that working on flanges vertically and horizontally is significantly easier than doing so in a flat position. To simplify the process further, he divides the task into two or three steps as suggested by fellow expert “for for.” This approach not only makes it more manageable but also allows for greater precision in crafting each component.Step 2: Applying Glue and Securing
Sven proceeds to apply glue along one edge of the flange, ensuring a secure bond when clamped into place. He emphasizes that this stage is crucial for maintaining the structural integrity of the flange, which in turn safeguards the living area beneath the canvas when hatches are open.Step 3: Allowing Time to Dry
After securely attaching the first portion of the flange, Sven allows ample time for it to dry before moving forward with additional steps. This patience and precision are key aspects of his successful boatbuilding methods.Step 4: Finishing Touches
Once the flange is fully dried, Sven removes the clamps carefully, ensuring no damage occurs during this process. He then moves on to attaching four more pieces onto these main frames, completing two pairs of flanges for the bulkhead hatches.The Final Touches
While two flanges form the primary support structure around the hatches, Sven mentions there are two additional pieces required at each end to ensure comprehensive protection. This attention to detail highlights his commitment to producing a durable and reliable design. “Sailing is about finding your path, whether it’s across an ocean or within yourself.” – Sven Yrvind In conclusion, making flanges around bulkhead hatches may seem complex at first glance, but by following Sven Yrvind’s meticulous process, enthusiasts can achieve professional-level results. Remember that the journey of boatbuilding is as rewarding as reaching your destination; it tests one’s patience and dedication. For those seeking to embark on this adventure or simply gain more insight into marine craftsmanship, Sven’s wisdom is invaluable.Making Flanges Around Bulkhead Hatches for Canvas
Sven Yrvind, a renowned yacht designer and sailor, shares valuable insights on creating flanges around bulkhead hatches for canvas protection in this enlightening video. By following his expert guidance, boat enthusiasts can ensure their living areas remain secure while allowing unhindered access through the hatches.Step 1: Starting with the Flange
Sven begins by explaining that working on flanges vertically and horizontally is significantly easier than doing so in a flat position. To simplify the process further, he divides the task into two or three steps as suggested by fellow expert “for for.” This approach not only makes it more manageable but also allows for greater precision in crafting each component.Step 2: Applying Glue and Securing
Sven proceeds to apply glue along one edge of the flange, ensuring a secure bond when clamped into place. He emphasizes that this stage is crucial for maintaining the structural integrity of the flange, which in turn safeguards the living area beneath the canvas when hatches are open.Step 3: Allowing Time to Dry
After securely attaching the first portion of the flange, Sven allows ample time for it to dry before moving forward with additional steps. This patience and precision are key aspects of his successful boatbuilding methods.Step 4: Finishing Touches
Once the flange is fully dried, Sven removes the clamps carefully, ensuring no damage occurs during this process. He then moves on to attaching four more pieces onto these main frames, completing two pairs of flanges for the bulkhead hatches.The Final Touches
While two flanges form the primary support structure around the hatches, Sven mentions there are two additional pieces required at each end to ensure comprehensive protection. This attention to detail highlights his commitment to producing a durable and reliable design. “Sailing is about finding your path, whether it’s across an ocean or within yourself.” – Sven Yrvind In conclusion, making flanges around bulkhead hatches may seem complex at first glance, but by following Sven Yrvind’s meticulous process, enthusiasts can achieve professional-level results. Remember that the journey of boatbuilding is as rewarding as reaching your destination; it tests one’s patience and dedication. For those seeking to embark on this adventure or simply gain more insight into marine craftsmanship, Sven’s wisdom is invaluable.After securely attaching the first portion of the flange, Sven allows ample time for it to dry before moving forward with additional steps. This patience and precision are key aspects of his successful boatbuilding methods.Step 4: Finishing Touches
Once the flange is fully dried, Sven removes the clamps carefully, ensuring no damage occurs during this process. He then moves on to attaching four more pieces onto these main frames, completing two pairs of flanges for the bulkhead hatches.The Final Touches
While two flanges form the primary support structure around the hatches, Sven mentions there are two additional pieces required at each end to ensure comprehensive protection. This attention to detail highlights his commitment to producing a durable and reliable design. “Sailing is about finding your path, whether it’s across an ocean or within yourself.” – Sven Yrvind In conclusion, making flanges around bulkhead hatches may seem complex at first glance, but by following Sven Yrvind’s meticulous process, enthusiasts can achieve professional-level results. Remember that the journey of boatbuilding is as rewarding as reaching your destination; it tests one’s patience and dedication. For those seeking to embark on this adventure or simply gain more insight into marine craftsmanship, Sven’s wisdom is invaluable.Sven begins by explaining that working on flanges vertically and horizontally is significantly easier than doing so in a flat position. To simplify the process further, he divides the task into two or three steps as suggested by fellow expert “for for.” This approach not only makes it more manageable but also allows for greater precision in crafting each component.Step 2: Applying Glue and Securing
Sven proceeds to apply glue along one edge of the flange, ensuring a secure bond when clamped into place. He emphasizes that this stage is crucial for maintaining the structural integrity of the flange, which in turn safeguards the living area beneath the canvas when hatches are open.Step 3: Allowing Time to Dry
After securely attaching the first portion of the flange, Sven allows ample time for it to dry before moving forward with additional steps. This patience and precision are key aspects of his successful boatbuilding methods.Step 4: Finishing Touches
Once the flange is fully dried, Sven removes the clamps carefully, ensuring no damage occurs during this process. He then moves on to attaching four more pieces onto these main frames, completing two pairs of flanges for the bulkhead hatches.The Final Touches
While two flanges form the primary support structure around the hatches, Sven mentions there are two additional pieces required at each end to ensure comprehensive protection. This attention to detail highlights his commitment to producing a durable and reliable design. “Sailing is about finding your path, whether it’s across an ocean or within yourself.” – Sven Yrvind In conclusion, making flanges around bulkhead hatches may seem complex at first glance, but by following Sven Yrvind’s meticulous process, enthusiasts can achieve professional-level results. Remember that the journey of boatbuilding is as rewarding as reaching your destination; it tests one’s patience and dedication. For those seeking to embark on this adventure or simply gain more insight into marine craftsmanship, Sven’s wisdom is invaluable.Sven Yrvind, a renowned yacht designer and sailor, shares valuable insights on creating flanges around bulkhead hatches for canvas protection in this enlightening video. By following his expert guidance, boat enthusiasts can ensure their living areas remain secure while allowing unhindered access through the hatches.Step 1: Starting with the Flange
Sven begins by explaining that working on flanges vertically and horizontally is significantly easier than doing so in a flat position. To simplify the process further, he divides the task into two or three steps as suggested by fellow expert “for for.” This approach not only makes it more manageable but also allows for greater precision in crafting each component.Step 2: Applying Glue and Securing
Sven proceeds to apply glue along one edge of the flange, ensuring a secure bond when clamped into place. He emphasizes that this stage is crucial for maintaining the structural integrity of the flange, which in turn safeguards the living area beneath the canvas when hatches are open.Step 3: Allowing Time to Dry
After securely attaching the first portion of the flange, Sven allows ample time for it to dry before moving forward with additional steps. This patience and precision are key aspects of his successful boatbuilding methods.Step 4: Finishing Touches
Once the flange is fully dried, Sven removes the clamps carefully, ensuring no damage occurs during this process. He then moves on to attaching four more pieces onto these main frames, completing two pairs of flanges for the bulkhead hatches.The Final Touches
While two flanges form the primary support structure around the hatches, Sven mentions there are two additional pieces required at each end to ensure comprehensive protection. This attention to detail highlights his commitment to producing a durable and reliable design. “Sailing is about finding your path, whether it’s across an ocean or within yourself.” – Sven Yrvind In conclusion, making flanges around bulkhead hatches may seem complex at first glance, but by following Sven Yrvind’s meticulous process, enthusiasts can achieve professional-level results. Remember that the journey of boatbuilding is as rewarding as reaching your destination; it tests one’s patience and dedication. For those seeking to embark on this adventure or simply gain more insight into marine craftsmanship, Sven’s wisdom is invaluable.Making Flanges Around Bulkhead Hatches for Canvas
Sven Yrvind, a renowned yacht designer and sailor, shares valuable insights on creating flanges around bulkhead hatches for canvas protection in this enlightening video. By following his expert guidance, boat enthusiasts can ensure their living areas remain secure while allowing unhindered access through the hatches.Step 1: Starting with the Flange
Sven begins by explaining that working on flanges vertically and horizontally is significantly easier than doing so in a flat position. To simplify the process further, he divides the task into two or three steps as suggested by fellow expert “for for.” This approach not only makes it more manageable but also allows for greater precision in crafting each component.Step 2: Applying Glue and Securing
Sven proceeds to apply glue along one edge of the flange, ensuring a secure bond when clamped into place. He emphasizes that this stage is crucial for maintaining the structural integrity of the flange, which in turn safeguards the living area beneath the canvas when hatches are open.Step 3: Allowing Time to Dry
After securely attaching the first portion of the flange, Sven allows ample time for it to dry before moving forward with additional steps. This patience and precision are key aspects of his successful boatbuilding methods.Step 4: Finishing Touches
Once the flange is fully dried, Sven removes the clamps carefully, ensuring no damage occurs during this process. He then moves on to attaching four more pieces onto these main frames, completing two pairs of flanges for the bulkhead hatches.The Final Touches
While two flanges form the primary support structure around the hatches, Sven mentions there are two additional pieces required at each end to ensure comprehensive protection. This attention to detail highlights his commitment to producing a durable and reliable design. “Sailing is about finding your path, whether it’s across an ocean or within yourself.” – Sven Yrvind In conclusion, making flanges around bulkhead hatches may seem complex at first glance, but by following Sven Yrvind’s meticulous process, enthusiasts can achieve professional-level results. Remember that the journey of boatbuilding is as rewarding as reaching your destination; it tests one’s patience and dedication. For those seeking to embark on this adventure or simply gain more insight into marine craftsmanship, Sven’s wisdom is invaluable.Sven proceeds to apply glue along one edge of the flange, ensuring a secure bond when clamped into place. He emphasizes that this stage is crucial for maintaining the structural integrity of the flange, which in turn safeguards the living area beneath the canvas when hatches are open.Step 3: Allowing Time to Dry
After securely attaching the first portion of the flange, Sven allows ample time for it to dry before moving forward with additional steps. This patience and precision are key aspects of his successful boatbuilding methods.Step 4: Finishing Touches
Once the flange is fully dried, Sven removes the clamps carefully, ensuring no damage occurs during this process. He then moves on to attaching four more pieces onto these main frames, completing two pairs of flanges for the bulkhead hatches.The Final Touches
While two flanges form the primary support structure around the hatches, Sven mentions there are two additional pieces required at each end to ensure comprehensive protection. This attention to detail highlights his commitment to producing a durable and reliable design. “Sailing is about finding your path, whether it’s across an ocean or within yourself.” – Sven Yrvind In conclusion, making flanges around bulkhead hatches may seem complex at first glance, but by following Sven Yrvind’s meticulous process, enthusiasts can achieve professional-level results. Remember that the journey of boatbuilding is as rewarding as reaching your destination; it tests one’s patience and dedication. For those seeking to embark on this adventure or simply gain more insight into marine craftsmanship, Sven’s wisdom is invaluable.Sven begins by explaining that working on flanges vertically and horizontally is significantly easier than doing so in a flat position. To simplify the process further, he divides the task into two or three steps as suggested by fellow expert “for for.” This approach not only makes it more manageable but also allows for greater precision in crafting each component.Step 2: Applying Glue and Securing
Sven proceeds to apply glue along one edge of the flange, ensuring a secure bond when clamped into place. He emphasizes that this stage is crucial for maintaining the structural integrity of the flange, which in turn safeguards the living area beneath the canvas when hatches are open.Step 3: Allowing Time to Dry
After securely attaching the first portion of the flange, Sven allows ample time for it to dry before moving forward with additional steps. This patience and precision are key aspects of his successful boatbuilding methods.Step 4: Finishing Touches
Once the flange is fully dried, Sven removes the clamps carefully, ensuring no damage occurs during this process. He then moves on to attaching four more pieces onto these main frames, completing two pairs of flanges for the bulkhead hatches.The Final Touches
While two flanges form the primary support structure around the hatches, Sven mentions there are two additional pieces required at each end to ensure comprehensive protection. This attention to detail highlights his commitment to producing a durable and reliable design. “Sailing is about finding your path, whether it’s across an ocean or within yourself.” – Sven Yrvind In conclusion, making flanges around bulkhead hatches may seem complex at first glance, but by following Sven Yrvind’s meticulous process, enthusiasts can achieve professional-level results. Remember that the journey of boatbuilding is as rewarding as reaching your destination; it tests one’s patience and dedication. For those seeking to embark on this adventure or simply gain more insight into marine craftsmanship, Sven’s wisdom is invaluable.Sven Yrvind, a renowned yacht designer and sailor, shares valuable insights on creating flanges around bulkhead hatches for canvas protection in this enlightening video. By following his expert guidance, boat enthusiasts can ensure their living areas remain secure while allowing unhindered access through the hatches.Step 1: Starting with the Flange
Sven begins by explaining that working on flanges vertically and horizontally is significantly easier than doing so in a flat position. To simplify the process further, he divides the task into two or three steps as suggested by fellow expert “for for.” This approach not only makes it more manageable but also allows for greater precision in crafting each component.Step 2: Applying Glue and Securing
Sven proceeds to apply glue along one edge of the flange, ensuring a secure bond when clamped into place. He emphasizes that this stage is crucial for maintaining the structural integrity of the flange, which in turn safeguards the living area beneath the canvas when hatches are open.Step 3: Allowing Time to Dry
After securely attaching the first portion of the flange, Sven allows ample time for it to dry before moving forward with additional steps. This patience and precision are key aspects of his successful boatbuilding methods.Step 4: Finishing Touches
Once the flange is fully dried, Sven removes the clamps carefully, ensuring no damage occurs during this process. He then moves on to attaching four more pieces onto these main frames, completing two pairs of flanges for the bulkhead hatches.The Final Touches
While two flanges form the primary support structure around the hatches, Sven mentions there are two additional pieces required at each end to ensure comprehensive protection. This attention to detail highlights his commitment to producing a durable and reliable design. “Sailing is about finding your path, whether it’s across an ocean or within yourself.” – Sven Yrvind In conclusion, making flanges around bulkhead hatches may seem complex at first glance, but by following Sven Yrvind’s meticulous process, enthusiasts can achieve professional-level results. Remember that the journey of boatbuilding is as rewarding as reaching your destination; it tests one’s patience and dedication. For those seeking to embark on this adventure or simply gain more insight into marine craftsmanship, Sven’s wisdom is invaluable.Making Flanges Around Bulkhead Hatches for Canvas
Sven Yrvind, a renowned yacht designer and sailor, shares valuable insights on creating flanges around bulkhead hatches for canvas protection in this enlightening video. By following his expert guidance, boat enthusiasts can ensure their living areas remain secure while allowing unhindered access through the hatches.Step 1: Starting with the Flange
Sven begins by explaining that working on flanges vertically and horizontally is significantly easier than doing so in a flat position. To simplify the process further, he divides the task into two or three steps as suggested by fellow expert “for for.” This approach not only makes it more manageable but also allows for greater precision in crafting each component.Step 2: Applying Glue and Securing
Sven proceeds to apply glue along one edge of the flange, ensuring a secure bond when clamped into place. He emphasizes that this stage is crucial for maintaining the structural integrity of the flange, which in turn safeguards the living area beneath the canvas when hatches are open.Step 3: Allowing Time to Dry
After securely attaching the first portion of the flange, Sven allows ample time for it to dry before moving forward with additional steps. This patience and precision are key aspects of his successful boatbuilding methods.Step 4: Finishing Touches
Once the flange is fully dried, Sven removes the clamps carefully, ensuring no damage occurs during this process. He then moves on to attaching four more pieces onto these main frames, completing two pairs of flanges for the bulkhead hatches.The Final Touches
While two flanges form the primary support structure around the hatches, Sven mentions there are two additional pieces required at each end to ensure comprehensive protection. This attention to detail highlights his commitment to producing a durable and reliable design. “Sailing is about finding your path, whether it’s across an ocean or within yourself.” – Sven Yrvind In conclusion, making flanges around bulkhead hatches may seem complex at first glance, but by following Sven Yrvind’s meticulous process, enthusiasts can achieve professional-level results. Remember that the journey of boatbuilding is as rewarding as reaching your destination; it tests one’s patience and dedication. For those seeking to embark on this adventure or simply gain more insight into marine craftsmanship, Sven’s wisdom is invaluable.Once the flange is fully dried, Sven removes the clamps carefully, ensuring no damage occurs during this process. He then moves on to attaching four more pieces onto these main frames, completing two pairs of flanges for the bulkhead hatches.The Final Touches
While two flanges form the primary support structure around the hatches, Sven mentions there are two additional pieces required at each end to ensure comprehensive protection. This attention to detail highlights his commitment to producing a durable and reliable design. “Sailing is about finding your path, whether it’s across an ocean or within yourself.” – Sven Yrvind In conclusion, making flanges around bulkhead hatches may seem complex at first glance, but by following Sven Yrvind’s meticulous process, enthusiasts can achieve professional-level results. Remember that the journey of boatbuilding is as rewarding as reaching your destination; it tests one’s patience and dedication. For those seeking to embark on this adventure or simply gain more insight into marine craftsmanship, Sven’s wisdom is invaluable.Sven proceeds to apply glue along one edge of the flange, ensuring a secure bond when clamped into place. He emphasizes that this stage is crucial for maintaining the structural integrity of the flange, which in turn safeguards the living area beneath the canvas when hatches are open.Step 3: Allowing Time to Dry
After securely attaching the first portion of the flange, Sven allows ample time for it to dry before moving forward with additional steps. This patience and precision are key aspects of his successful boatbuilding methods.Step 4: Finishing Touches
Once the flange is fully dried, Sven removes the clamps carefully, ensuring no damage occurs during this process. He then moves on to attaching four more pieces onto these main frames, completing two pairs of flanges for the bulkhead hatches.The Final Touches
While two flanges form the primary support structure around the hatches, Sven mentions there are two additional pieces required at each end to ensure comprehensive protection. This attention to detail highlights his commitment to producing a durable and reliable design. “Sailing is about finding your path, whether it’s across an ocean or within yourself.” – Sven Yrvind In conclusion, making flanges around bulkhead hatches may seem complex at first glance, but by following Sven Yrvind’s meticulous process, enthusiasts can achieve professional-level results. Remember that the journey of boatbuilding is as rewarding as reaching your destination; it tests one’s patience and dedication. For those seeking to embark on this adventure or simply gain more insight into marine craftsmanship, Sven’s wisdom is invaluable.Sven begins by explaining that working on flanges vertically and horizontally is significantly easier than doing so in a flat position. To simplify the process further, he divides the task into two or three steps as suggested by fellow expert “for for.” This approach not only makes it more manageable but also allows for greater precision in crafting each component.Step 2: Applying Glue and Securing
Sven proceeds to apply glue along one edge of the flange, ensuring a secure bond when clamped into place. He emphasizes that this stage is crucial for maintaining the structural integrity of the flange, which in turn safeguards the living area beneath the canvas when hatches are open.Step 3: Allowing Time to Dry
After securely attaching the first portion of the flange, Sven allows ample time for it to dry before moving forward with additional steps. This patience and precision are key aspects of his successful boatbuilding methods.Step 4: Finishing Touches
Once the flange is fully dried, Sven removes the clamps carefully, ensuring no damage occurs during this process. He then moves on to attaching four more pieces onto these main frames, completing two pairs of flanges for the bulkhead hatches.The Final Touches
While two flanges form the primary support structure around the hatches, Sven mentions there are two additional pieces required at each end to ensure comprehensive protection. This attention to detail highlights his commitment to producing a durable and reliable design. “Sailing is about finding your path, whether it’s across an ocean or within yourself.” – Sven Yrvind In conclusion, making flanges around bulkhead hatches may seem complex at first glance, but by following Sven Yrvind’s meticulous process, enthusiasts can achieve professional-level results. Remember that the journey of boatbuilding is as rewarding as reaching your destination; it tests one’s patience and dedication. For those seeking to embark on this adventure or simply gain more insight into marine craftsmanship, Sven’s wisdom is invaluable.Sven Yrvind, a renowned yacht designer and sailor, shares valuable insights on creating flanges around bulkhead hatches for canvas protection in this enlightening video. By following his expert guidance, boat enthusiasts can ensure their living areas remain secure while allowing unhindered access through the hatches.Step 1: Starting with the Flange
Sven begins by explaining that working on flanges vertically and horizontally is significantly easier than doing so in a flat position. To simplify the process further, he divides the task into two or three steps as suggested by fellow expert “for for.” This approach not only makes it more manageable but also allows for greater precision in crafting each component.Step 2: Applying Glue and Securing
Sven proceeds to apply glue along one edge of the flange, ensuring a secure bond when clamped into place. He emphasizes that this stage is crucial for maintaining the structural integrity of the flange, which in turn safeguards the living area beneath the canvas when hatches are open.Step 3: Allowing Time to Dry
After securely attaching the first portion of the flange, Sven allows ample time for it to dry before moving forward with additional steps. This patience and precision are key aspects of his successful boatbuilding methods.Step 4: Finishing Touches
Once the flange is fully dried, Sven removes the clamps carefully, ensuring no damage occurs during this process. He then moves on to attaching four more pieces onto these main frames, completing two pairs of flanges for the bulkhead hatches.The Final Touches
While two flanges form the primary support structure around the hatches, Sven mentions there are two additional pieces required at each end to ensure comprehensive protection. This attention to detail highlights his commitment to producing a durable and reliable design. “Sailing is about finding your path, whether it’s across an ocean or within yourself.” – Sven Yrvind In conclusion, making flanges around bulkhead hatches may seem complex at first glance, but by following Sven Yrvind’s meticulous process, enthusiasts can achieve professional-level results. Remember that the journey of boatbuilding is as rewarding as reaching your destination; it tests one’s patience and dedication. For those seeking to embark on this adventure or simply gain more insight into marine craftsmanship, Sven’s wisdom is invaluable.Making Flanges Around Bulkhead Hatches for Canvas
Sven Yrvind, a renowned yacht designer and sailor, shares valuable insights on creating flanges around bulkhead hatches for canvas protection in this enlightening video. By following his expert guidance, boat enthusiasts can ensure their living areas remain secure while allowing unhindered access through the hatches.Step 1: Starting with the Flange
Sven begins by explaining that working on flanges vertically and horizontally is significantly easier than doing so in a flat position. To simplify the process further, he divides the task into two or three steps as suggested by fellow expert “for for.” This approach not only makes it more manageable but also allows for greater precision in crafting each component.Step 2: Applying Glue and Securing
Sven proceeds to apply glue along one edge of the flange, ensuring a secure bond when clamped into place. He emphasizes that this stage is crucial for maintaining the structural integrity of the flange, which in turn safeguards the living area beneath the canvas when hatches are open.Step 3: Allowing Time to Dry
After securely attaching the first portion of the flange, Sven allows ample time for it to dry before moving forward with additional steps. This patience and precision are key aspects of his successful boatbuilding methods.Step 4: Finishing Touches
Once the flange is fully dried, Sven removes the clamps carefully, ensuring no damage occurs during this process. He then moves on to attaching four more pieces onto these main frames, completing two pairs of flanges for the bulkhead hatches.The Final Touches
While two flanges form the primary support structure around the hatches, Sven mentions there are two additional pieces required at each end to ensure comprehensive protection. This attention to detail highlights his commitment to producing a durable and reliable design. “Sailing is about finding your path, whether it’s across an ocean or within yourself.” – Sven Yrvind In conclusion, making flanges around bulkhead hatches may seem complex at first glance, but by following Sven Yrvind’s meticulous process, enthusiasts can achieve professional-level results. Remember that the journey of boatbuilding is as rewarding as reaching your destination; it tests one’s patience and dedication. For those seeking to embark on this adventure or simply gain more insight into marine craftsmanship, Sven’s wisdom is invaluable.After securely attaching the first portion of the flange, Sven allows ample time for it to dry before moving forward with additional steps. This patience and precision are key aspects of his successful boatbuilding methods.Step 4: Finishing Touches
Once the flange is fully dried, Sven removes the clamps carefully, ensuring no damage occurs during this process. He then moves on to attaching four more pieces onto these main frames, completing two pairs of flanges for the bulkhead hatches.The Final Touches
While two flanges form the primary support structure around the hatches, Sven mentions there are two additional pieces required at each end to ensure comprehensive protection. This attention to detail highlights his commitment to producing a durable and reliable design. “Sailing is about finding your path, whether it’s across an ocean or within yourself.” – Sven Yrvind In conclusion, making flanges around bulkhead hatches may seem complex at first glance, but by following Sven Yrvind’s meticulous process, enthusiasts can achieve professional-level results. Remember that the journey of boatbuilding is as rewarding as reaching your destination; it tests one’s patience and dedication. For those seeking to embark on this adventure or simply gain more insight into marine craftsmanship, Sven’s wisdom is invaluable.Sven proceeds to apply glue along one edge of the flange, ensuring a secure bond when clamped into place. He emphasizes that this stage is crucial for maintaining the structural integrity of the flange, which in turn safeguards the living area beneath the canvas when hatches are open.Step 3: Allowing Time to Dry
After securely attaching the first portion of the flange, Sven allows ample time for it to dry before moving forward with additional steps. This patience and precision are key aspects of his successful boatbuilding methods.Step 4: Finishing Touches
Once the flange is fully dried, Sven removes the clamps carefully, ensuring no damage occurs during this process. He then moves on to attaching four more pieces onto these main frames, completing two pairs of flanges for the bulkhead hatches.The Final Touches
While two flanges form the primary support structure around the hatches, Sven mentions there are two additional pieces required at each end to ensure comprehensive protection. This attention to detail highlights his commitment to producing a durable and reliable design. “Sailing is about finding your path, whether it’s across an ocean or within yourself.” – Sven Yrvind In conclusion, making flanges around bulkhead hatches may seem complex at first glance, but by following Sven Yrvind’s meticulous process, enthusiasts can achieve professional-level results. Remember that the journey of boatbuilding is as rewarding as reaching your destination; it tests one’s patience and dedication. For those seeking to embark on this adventure or simply gain more insight into marine craftsmanship, Sven’s wisdom is invaluable.Sven begins by explaining that working on flanges vertically and horizontally is significantly easier than doing so in a flat position. To simplify the process further, he divides the task into two or three steps as suggested by fellow expert “for for.” This approach not only makes it more manageable but also allows for greater precision in crafting each component.Step 2: Applying Glue and Securing
Sven proceeds to apply glue along one edge of the flange, ensuring a secure bond when clamped into place. He emphasizes that this stage is crucial for maintaining the structural integrity of the flange, which in turn safeguards the living area beneath the canvas when hatches are open.Step 3: Allowing Time to Dry
After securely attaching the first portion of the flange, Sven allows ample time for it to dry before moving forward with additional steps. This patience and precision are key aspects of his successful boatbuilding methods.Step 4: Finishing Touches
Once the flange is fully dried, Sven removes the clamps carefully, ensuring no damage occurs during this process. He then moves on to attaching four more pieces onto these main frames, completing two pairs of flanges for the bulkhead hatches.The Final Touches
While two flanges form the primary support structure around the hatches, Sven mentions there are two additional pieces required at each end to ensure comprehensive protection. This attention to detail highlights his commitment to producing a durable and reliable design. “Sailing is about finding your path, whether it’s across an ocean or within yourself.” – Sven Yrvind In conclusion, making flanges around bulkhead hatches may seem complex at first glance, but by following Sven Yrvind’s meticulous process, enthusiasts can achieve professional-level results. Remember that the journey of boatbuilding is as rewarding as reaching your destination; it tests one’s patience and dedication. For those seeking to embark on this adventure or simply gain more insight into marine craftsmanship, Sven’s wisdom is invaluable.Sven Yrvind, a renowned yacht designer and sailor, shares valuable insights on creating flanges around bulkhead hatches for canvas protection in this enlightening video. By following his expert guidance, boat enthusiasts can ensure their living areas remain secure while allowing unhindered access through the hatches.Step 1: Starting with the Flange
Sven begins by explaining that working on flanges vertically and horizontally is significantly easier than doing so in a flat position. To simplify the process further, he divides the task into two or three steps as suggested by fellow expert “for for.” This approach not only makes it more manageable but also allows for greater precision in crafting each component.Step 2: Applying Glue and Securing
Sven proceeds to apply glue along one edge of the flange, ensuring a secure bond when clamped into place. He emphasizes that this stage is crucial for maintaining the structural integrity of the flange, which in turn safeguards the living area beneath the canvas when hatches are open.Step 3: Allowing Time to Dry
After securely attaching the first portion of the flange, Sven allows ample time for it to dry before moving forward with additional steps. This patience and precision are key aspects of his successful boatbuilding methods.Step 4: Finishing Touches
Once the flange is fully dried, Sven removes the clamps carefully, ensuring no damage occurs during this process. He then moves on to attaching four more pieces onto these main frames, completing two pairs of flanges for the bulkhead hatches.The Final Touches
While two flanges form the primary support structure around the hatches, Sven mentions there are two additional pieces required at each end to ensure comprehensive protection. This attention to detail highlights his commitment to producing a durable and reliable design. “Sailing is about finding your path, whether it’s across an ocean or within yourself.” – Sven Yrvind In conclusion, making flanges around bulkhead hatches may seem complex at first glance, but by following Sven Yrvind’s meticulous process, enthusiasts can achieve professional-level results. Remember that the journey of boatbuilding is as rewarding as reaching your destination; it tests one’s patience and dedication. For those seeking to embark on this adventure or simply gain more insight into marine craftsmanship, Sven’s wisdom is invaluable.Making Flanges Around Bulkhead Hatches for Canvas
Sven Yrvind, a renowned yacht designer and sailor, shares valuable insights on creating flanges around bulkhead hatches for canvas protection in this enlightening video. By following his expert guidance, boat enthusiasts can ensure their living areas remain secure while allowing unhindered access through the hatches.Step 1: Starting with the Flange
Sven begins by explaining that working on flanges vertically and horizontally is significantly easier than doing so in a flat position. To simplify the process further, he divides the task into two or three steps as suggested by fellow expert “for for.” This approach not only makes it more manageable but also allows for greater precision in crafting each component.Step 2: Applying Glue and Securing
Sven proceeds to apply glue along one edge of the flange, ensuring a secure bond when clamped into place. He emphasizes that this stage is crucial for maintaining the structural integrity of the flange, which in turn safeguards the living area beneath the canvas when hatches are open.Step 3: Allowing Time to Dry
After securely attaching the first portion of the flange, Sven allows ample time for it to dry before moving forward with additional steps. This patience and precision are key aspects of his successful boatbuilding methods.Step 4: Finishing Touches
Once the flange is fully dried, Sven removes the clamps carefully, ensuring no damage occurs during this process. He then moves on to attaching four more pieces onto these main frames, completing two pairs of flanges for the bulkhead hatches.The Final Touches
While two flanges form the primary support structure around the hatches, Sven mentions there are two additional pieces required at each end to ensure comprehensive protection. This attention to detail highlights his commitment to producing a durable and reliable design. “Sailing is about finding your path, whether it’s across an ocean or within yourself.” – Sven Yrvind In conclusion, making flanges around bulkhead hatches may seem complex at first glance, but by following Sven Yrvind’s meticulous process, enthusiasts can achieve professional-level results. Remember that the journey of boatbuilding is as rewarding as reaching your destination; it tests one’s patience and dedication. For those seeking to embark on this adventure or simply gain more insight into marine craftsmanship, Sven’s wisdom is invaluable.Once the flange is fully dried, Sven removes the clamps carefully, ensuring no damage occurs during this process. He then moves on to attaching four more pieces onto these main frames, completing two pairs of flanges for the bulkhead hatches.The Final Touches
While two flanges form the primary support structure around the hatches, Sven mentions there are two additional pieces required at each end to ensure comprehensive protection. This attention to detail highlights his commitment to producing a durable and reliable design. “Sailing is about finding your path, whether it’s across an ocean or within yourself.” – Sven Yrvind In conclusion, making flanges around bulkhead hatches may seem complex at first glance, but by following Sven Yrvind’s meticulous process, enthusiasts can achieve professional-level results. Remember that the journey of boatbuilding is as rewarding as reaching your destination; it tests one’s patience and dedication. For those seeking to embark on this adventure or simply gain more insight into marine craftsmanship, Sven’s wisdom is invaluable.After securely attaching the first portion of the flange, Sven allows ample time for it to dry before moving forward with additional steps. This patience and precision are key aspects of his successful boatbuilding methods.Step 4: Finishing Touches
Once the flange is fully dried, Sven removes the clamps carefully, ensuring no damage occurs during this process. He then moves on to attaching four more pieces onto these main frames, completing two pairs of flanges for the bulkhead hatches.The Final Touches
While two flanges form the primary support structure around the hatches, Sven mentions there are two additional pieces required at each end to ensure comprehensive protection. This attention to detail highlights his commitment to producing a durable and reliable design. “Sailing is about finding your path, whether it’s across an ocean or within yourself.” – Sven Yrvind In conclusion, making flanges around bulkhead hatches may seem complex at first glance, but by following Sven Yrvind’s meticulous process, enthusiasts can achieve professional-level results. Remember that the journey of boatbuilding is as rewarding as reaching your destination; it tests one’s patience and dedication. For those seeking to embark on this adventure or simply gain more insight into marine craftsmanship, Sven’s wisdom is invaluable.Sven proceeds to apply glue along one edge of the flange, ensuring a secure bond when clamped into place. He emphasizes that this stage is crucial for maintaining the structural integrity of the flange, which in turn safeguards the living area beneath the canvas when hatches are open.Step 3: Allowing Time to Dry
After securely attaching the first portion of the flange, Sven allows ample time for it to dry before moving forward with additional steps. This patience and precision are key aspects of his successful boatbuilding methods.Step 4: Finishing Touches
Once the flange is fully dried, Sven removes the clamps carefully, ensuring no damage occurs during this process. He then moves on to attaching four more pieces onto these main frames, completing two pairs of flanges for the bulkhead hatches.The Final Touches
While two flanges form the primary support structure around the hatches, Sven mentions there are two additional pieces required at each end to ensure comprehensive protection. This attention to detail highlights his commitment to producing a durable and reliable design. “Sailing is about finding your path, whether it’s across an ocean or within yourself.” – Sven Yrvind In conclusion, making flanges around bulkhead hatches may seem complex at first glance, but by following Sven Yrvind’s meticulous process, enthusiasts can achieve professional-level results. Remember that the journey of boatbuilding is as rewarding as reaching your destination; it tests one’s patience and dedication. For those seeking to embark on this adventure or simply gain more insight into marine craftsmanship, Sven’s wisdom is invaluable.Sven begins by explaining that working on flanges vertically and horizontally is significantly easier than doing so in a flat position. To simplify the process further, he divides the task into two or three steps as suggested by fellow expert “for for.” This approach not only makes it more manageable but also allows for greater precision in crafting each component.Step 2: Applying Glue and Securing
Sven proceeds to apply glue along one edge of the flange, ensuring a secure bond when clamped into place. He emphasizes that this stage is crucial for maintaining the structural integrity of the flange, which in turn safeguards the living area beneath the canvas when hatches are open.Step 3: Allowing Time to Dry
After securely attaching the first portion of the flange, Sven allows ample time for it to dry before moving forward with additional steps. This patience and precision are key aspects of his successful boatbuilding methods.Step 4: Finishing Touches
Once the flange is fully dried, Sven removes the clamps carefully, ensuring no damage occurs during this process. He then moves on to attaching four more pieces onto these main frames, completing two pairs of flanges for the bulkhead hatches.The Final Touches
While two flanges form the primary support structure around the hatches, Sven mentions there are two additional pieces required at each end to ensure comprehensive protection. This attention to detail highlights his commitment to producing a durable and reliable design. “Sailing is about finding your path, whether it’s across an ocean or within yourself.” – Sven Yrvind In conclusion, making flanges around bulkhead hatches may seem complex at first glance, but by following Sven Yrvind’s meticulous process, enthusiasts can achieve professional-level results. Remember that the journey of boatbuilding is as rewarding as reaching your destination; it tests one’s patience and dedication. For those seeking to embark on this adventure or simply gain more insight into marine craftsmanship, Sven’s wisdom is invaluable.Sven Yrvind, a renowned yacht designer and sailor, shares valuable insights on creating flanges around bulkhead hatches for canvas protection in this enlightening video. By following his expert guidance, boat enthusiasts can ensure their living areas remain secure while allowing unhindered access through the hatches.Step 1: Starting with the Flange
Sven begins by explaining that working on flanges vertically and horizontally is significantly easier than doing so in a flat position. To simplify the process further, he divides the task into two or three steps as suggested by fellow expert “for for.” This approach not only makes it more manageable but also allows for greater precision in crafting each component.Step 2: Applying Glue and Securing
Sven proceeds to apply glue along one edge of the flange, ensuring a secure bond when clamped into place. He emphasizes that this stage is crucial for maintaining the structural integrity of the flange, which in turn safeguards the living area beneath the canvas when hatches are open.Step 3: Allowing Time to Dry
After securely attaching the first portion of the flange, Sven allows ample time for it to dry before moving forward with additional steps. This patience and precision are key aspects of his successful boatbuilding methods.Step 4: Finishing Touches
Once the flange is fully dried, Sven removes the clamps carefully, ensuring no damage occurs during this process. He then moves on to attaching four more pieces onto these main frames, completing two pairs of flanges for the bulkhead hatches.The Final Touches
While two flanges form the primary support structure around the hatches, Sven mentions there are two additional pieces required at each end to ensure comprehensive protection. This attention to detail highlights his commitment to producing a durable and reliable design. “Sailing is about finding your path, whether it’s across an ocean or within yourself.” – Sven Yrvind In conclusion, making flanges around bulkhead hatches may seem complex at first glance, but by following Sven Yrvind’s meticulous process, enthusiasts can achieve professional-level results. Remember that the journey of boatbuilding is as rewarding as reaching your destination; it tests one’s patience and dedication. For those seeking to embark on this adventure or simply gain more insight into marine craftsmanship, Sven’s wisdom is invaluable.Making Flanges Around Bulkhead Hatches for Canvas
Sven Yrvind, a renowned yacht designer and sailor, shares valuable insights on creating flanges around bulkhead hatches for canvas protection in this enlightening video. By following his expert guidance, boat enthusiasts can ensure their living areas remain secure while allowing unhindered access through the hatches.Step 1: Starting with the Flange
Sven begins by explaining that working on flanges vertically and horizontally is significantly easier than doing so in a flat position. To simplify the process further, he divides the task into two or three steps as suggested by fellow expert “for for.” This approach not only makes it more manageable but also allows for greater precision in crafting each component.Step 2: Applying Glue and Securing
Sven proceeds to apply glue along one edge of the flange, ensuring a secure bond when clamped into place. He emphasizes that this stage is crucial for maintaining the structural integrity of the flange, which in turn safeguards the living area beneath the canvas when hatches are open.Step 3: Allowing Time to Dry
After securely attaching the first portion of the flange, Sven allows ample time for it to dry before moving forward with additional steps. This patience and precision are key aspects of his successful boatbuilding methods.Step 4: Finishing Touches
Once the flange is fully dried, Sven removes the clamps carefully, ensuring no damage occurs during this process. He then moves on to attaching four more pieces onto these main frames, completing two pairs of flanges for the bulkhead hatches.The Final Touches
While two flanges form the primary support structure around the hatches, Sven mentions there are two additional pieces required at each end to ensure comprehensive protection. This attention to detail highlights his commitment to producing a durable and reliable design. “Sailing is about finding your path, whether it’s across an ocean or within yourself.” – Sven Yrvind In conclusion, making flanges around bulkhead hatches may seem complex at first glance, but by following Sven Yrvind’s meticulous process, enthusiasts can achieve professional-level results. Remember that the journey of boatbuilding is as rewarding as reaching your destination; it tests one’s patience and dedication. For those seeking to embark on this adventure or simply gain more insight into marine craftsmanship, Sven’s wisdom is invaluable.Sven begins by explaining that working on flanges vertically and horizontally is significantly easier than doing so in a flat position. To simplify the process further, he divides the task into two or three steps as suggested by fellow expert “for for.” This approach not only makes it more manageable but also allows for greater precision in crafting each component.Step 2: Applying Glue and Securing
Sven proceeds to apply glue along one edge of the flange, ensuring a secure bond when clamped into place. He emphasizes that this stage is crucial for maintaining the structural integrity of the flange, which in turn safeguards the living area beneath the canvas when hatches are open.Step 3: Allowing Time to Dry
After securely attaching the first portion of the flange, Sven allows ample time for it to dry before moving forward with additional steps. This patience and precision are key aspects of his successful boatbuilding methods.Step 4: Finishing Touches
Once the flange is fully dried, Sven removes the clamps carefully, ensuring no damage occurs during this process. He then moves on to attaching four more pieces onto these main frames, completing two pairs of flanges for the bulkhead hatches.The Final Touches
While two flanges form the primary support structure around the hatches, Sven mentions there are two additional pieces required at each end to ensure comprehensive protection. This attention to detail highlights his commitment to producing a durable and reliable design. “Sailing is about finding your path, whether it’s across an ocean or within yourself.” – Sven Yrvind In conclusion, making flanges around bulkhead hatches may seem complex at first glance, but by following Sven Yrvind’s meticulous process, enthusiasts can achieve professional-level results. Remember that the journey of boatbuilding is as rewarding as reaching your destination; it tests one’s patience and dedication. For those seeking to embark on this adventure or simply gain more insight into marine craftsmanship, Sven’s wisdom is invaluable.Once the flange is fully dried, Sven removes the clamps carefully, ensuring no damage occurs during this process. He then moves on to attaching four more pieces onto these main frames, completing two pairs of flanges for the bulkhead hatches.The Final Touches
While two flanges form the primary support structure around the hatches, Sven mentions there are two additional pieces required at each end to ensure comprehensive protection. This attention to detail highlights his commitment to producing a durable and reliable design. “Sailing is about finding your path, whether it’s across an ocean or within yourself.” – Sven Yrvind In conclusion, making flanges around bulkhead hatches may seem complex at first glance, but by following Sven Yrvind’s meticulous process, enthusiasts can achieve professional-level results. Remember that the journey of boatbuilding is as rewarding as reaching your destination; it tests one’s patience and dedication. For those seeking to embark on this adventure or simply gain more insight into marine craftsmanship, Sven’s wisdom is invaluable.Making Flanges Around Bulkhead Hatches for Canvas
Sven Yrvind, a renowned yacht designer and sailor, shares valuable insights on creating flanges around bulkhead hatches for canvas protection in this enlightening video. By following his expert guidance, boat enthusiasts can ensure their living areas remain secure while allowing unhindered access through the hatches.Step 1: Starting with the Flange
Sven begins by explaining that working on flanges vertically and horizontally is significantly easier than doing so in a flat position. To simplify the process further, he divides the task into two or three steps as suggested by fellow expert “for for.” This approach not only makes it more manageable but also allows for greater precision in crafting each component.Step 2: Applying Glue and Securing
Sven proceeds to apply glue along one edge of the flange, ensuring a secure bond when clamped into place. He emphasizes that this stage is crucial for maintaining the structural integrity of the flange, which in turn safeguards the living area beneath the canvas when hatches are open.Step 3: Allowing Time to Dry
After securely attaching the first portion of the flange, Sven allows ample time for it to dry before moving forward with additional steps. This patience and precision are key aspects of his successful boatbuilding methods.Step 4: Finishing Touches
Once the flange is fully dried, Sven removes the clamps carefully, ensuring no damage occurs during this process. He then moves on to attaching four more pieces onto these main frames, completing two pairs of flanges for the bulkhead hatches.The Final Touches
While two flanges form the primary support structure around the hatches, Sven mentions there are two additional pieces required at each end to ensure comprehensive protection. This attention to detail highlights his commitment to producing a durable and reliable design. “Sailing is about finding your path, whether it’s across an ocean or within yourself.” – Sven Yrvind In conclusion, making flanges around bulkhead hatches may seem complex at first glance, but by following Sven Yrvind’s meticulous process, enthusiasts can achieve professional-level results. Remember that the journey of boatbuilding is as rewarding as reaching your destination; it tests one’s patience and dedication. For those seeking to embark on this adventure or simply gain more insight into marine craftsmanship, Sven’s wisdom is invaluable.After securely attaching the first portion of the flange, Sven allows ample time for it to dry before moving forward with additional steps. This patience and precision are key aspects of his successful boatbuilding methods.Step 4: Finishing Touches
Once the flange is fully dried, Sven removes the clamps carefully, ensuring no damage occurs during this process. He then moves on to attaching four more pieces onto these main frames, completing two pairs of flanges for the bulkhead hatches.The Final Touches
While two flanges form the primary support structure around the hatches, Sven mentions there are two additional pieces required at each end to ensure comprehensive protection. This attention to detail highlights his commitment to producing a durable and reliable design. “Sailing is about finding your path, whether it’s across an ocean or within yourself.” – Sven Yrvind In conclusion, making flanges around bulkhead hatches may seem complex at first glance, but by following Sven Yrvind’s meticulous process, enthusiasts can achieve professional-level results. Remember that the journey of boatbuilding is as rewarding as reaching your destination; it tests one’s patience and dedication. For those seeking to embark on this adventure or simply gain more insight into marine craftsmanship, Sven’s wisdom is invaluable.Making Flanges Around Bulkhead Hatches for Canvas
Sven Yrvind, a renowned yacht designer and sailor, shares valuable insights on creating flanges around bulkhead hatches for canvas protection in this enlightening video. By following his expert guidance, boat enthusiasts can ensure their living areas remain secure while allowing unhindered access through the hatches.Step 1: Starting with the Flange
Sven begins by explaining that working on flanges vertically and horizontally is significantly easier than doing so in a flat position. To simplify the process further, he divides the task into two or three steps as suggested by fellow expert “for for.” This approach not only makes it more manageable but also allows for greater precision in crafting each component.Step 2: Applying Glue and Securing
Sven proceeds to apply glue along one edge of the flange, ensuring a secure bond when clamped into place. He emphasizes that this stage is crucial for maintaining the structural integrity of the flange, which in turn safeguards the living area beneath the canvas when hatches are open.Step 3: Allowing Time to Dry
After securely attaching the first portion of the flange, Sven allows ample time for it to dry before moving forward with additional steps. This patience and precision are key aspects of his successful boatbuilding methods.Step 4: Finishing Touches
Once the flange is fully dried, Sven removes the clamps carefully, ensuring no damage occurs during this process. He then moves on to attaching four more pieces onto these main frames, completing two pairs of flanges for the bulkhead hatches.The Final Touches
While two flanges form the primary support structure around the hatches, Sven mentions there are two additional pieces required at each end to ensure comprehensive protection. This attention to detail highlights his commitment to producing a durable and reliable design. “Sailing is about finding your path, whether it’s across an ocean or within yourself.” – Sven Yrvind In conclusion, making flanges around bulkhead hatches may seem complex at first glance, but by following Sven Yrvind’s meticulous process, enthusiasts can achieve professional-level results. Remember that the journey of boatbuilding is as rewarding as reaching your destination; it tests one’s patience and dedication. For those seeking to embark on this adventure or simply gain more insight into marine craftsmanship, Sven’s wisdom is invaluable.Sven proceeds to apply glue along one edge of the flange, ensuring a secure bond when clamped into place. He emphasizes that this stage is crucial for maintaining the structural integrity of the flange, which in turn safeguards the living area beneath the canvas when hatches are open.Step 3: Allowing Time to Dry
After securely attaching the first portion of the flange, Sven allows ample time for it to dry before moving forward with additional steps. This patience and precision are key aspects of his successful boatbuilding methods.Step 4: Finishing Touches
Once the flange is fully dried, Sven removes the clamps carefully, ensuring no damage occurs during this process. He then moves on to attaching four more pieces onto these main frames, completing two pairs of flanges for the bulkhead hatches.The Final Touches
While two flanges form the primary support structure around the hatches, Sven mentions there are two additional pieces required at each end to ensure comprehensive protection. This attention to detail highlights his commitment to producing a durable and reliable design. “Sailing is about finding your path, whether it’s across an ocean or within yourself.” – Sven Yrvind In conclusion, making flanges around bulkhead hatches may seem complex at first glance, but by following Sven Yrvind’s meticulous process, enthusiasts can achieve professional-level results. Remember that the journey of boatbuilding is as rewarding as reaching your destination; it tests one’s patience and dedication. For those seeking to embark on this adventure or simply gain more insight into marine craftsmanship, Sven’s wisdom is invaluable.Making Flanges Around Bulkhead Hatches for Canvas
Sven Yrvind, a renowned yacht designer and sailor, shares valuable insights on creating flanges around bulkhead hatches for canvas protection in this enlightening video. By following his expert guidance, boat enthusiasts can ensure their living areas remain secure while allowing unhindered access through the hatches.Step 1: Starting with the Flange
Sven begins by explaining that working on flanges vertically and horizontally is significantly easier than doing so in a flat position. To simplify the process further, he divides the task into two or three steps as suggested by fellow expert “for for.” This approach not only makes it more manageable but also allows for greater precision in crafting each component.Step 2: Applying Glue and Securing
Sven proceeds to apply glue along one edge of the flange, ensuring a secure bond when clamped into place. He emphasizes that this stage is crucial for maintaining the structural integrity of the flange, which in turn safeguards the living area beneath the canvas when hatches are open.Step 3: Allowing Time to Dry
After securely attaching the first portion of the flange, Sven allows ample time for it to dry before moving forward with additional steps. This patience and precision are key aspects of his successful boatbuilding methods.Step 4: Finishing Touches
Once the flange is fully dried, Sven removes the clamps carefully, ensuring no damage occurs during this process. He then moves on to attaching four more pieces onto these main frames, completing two pairs of flanges for the bulkhead hatches.The Final Touches
While two flanges form the primary support structure around the hatches, Sven mentions there are two additional pieces required at each end to ensure comprehensive protection. This attention to detail highlights his commitment to producing a durable and reliable design. “Sailing is about finding your path, whether it’s across an ocean or within yourself.” – Sven Yrvind In conclusion, making flanges around bulkhead hatches may seem complex at first glance, but by following Sven Yrvind’s meticulous process, enthusiasts can achieve professional-level results. Remember that the journey of boatbuilding is as rewarding as reaching your destination; it tests one’s patience and dedication. For those seeking to embark on this adventure or simply gain more insight into marine craftsmanship, Sven’s wisdom is invaluable.Sven begins by explaining that working on flanges vertically and horizontally is significantly easier than doing so in a flat position. To simplify the process further, he divides the task into two or three steps as suggested by fellow expert “for for.” This approach not only makes it more manageable but also allows for greater precision in crafting each component.Step 2: Applying Glue and Securing
Sven proceeds to apply glue along one edge of the flange, ensuring a secure bond when clamped into place. He emphasizes that this stage is crucial for maintaining the structural integrity of the flange, which in turn safeguards the living area beneath the canvas when hatches are open.Step 3: Allowing Time to Dry
After securely attaching the first portion of the flange, Sven allows ample time for it to dry before moving forward with additional steps. This patience and precision are key aspects of his successful boatbuilding methods.Step 4: Finishing Touches
Once the flange is fully dried, Sven removes the clamps carefully, ensuring no damage occurs during this process. He then moves on to attaching four more pieces onto these main frames, completing two pairs of flanges for the bulkhead hatches.The Final Touches
While two flanges form the primary support structure around the hatches, Sven mentions there are two additional pieces required at each end to ensure comprehensive protection. This attention to detail highlights his commitment to producing a durable and reliable design. “Sailing is about finding your path, whether it’s across an ocean or within yourself.” – Sven Yrvind In conclusion, making flanges around bulkhead hatches may seem complex at first glance, but by following Sven Yrvind’s meticulous process, enthusiasts can achieve professional-level results. Remember that the journey of boatbuilding is as rewarding as reaching your destination; it tests one’s patience and dedication. For those seeking to embark on this adventure or simply gain more insight into marine craftsmanship, Sven’s wisdom is invaluable.Making Flanges Around Bulkhead Hatches for Canvas
Sven Yrvind, a renowned yacht designer and sailor, shares valuable insights on creating flanges around bulkhead hatches for canvas protection in this enlightening video. By following his expert guidance, boat enthusiasts can ensure their living areas remain secure while allowing unhindered access through the hatches.Step 1: Starting with the Flange
Sven begins by explaining that working on flanges vertically and horizontally is significantly easier than doing so in a flat position. To simplify the process further, he divides the task into two or three steps as suggested by fellow expert “for for.” This approach not only makes it more manageable but also allows for greater precision in crafting each component.Step 2: Applying Glue and Securing
Sven proceeds to apply glue along one edge of the flange, ensuring a secure bond when clamped into place. He emphasizes that this stage is crucial for maintaining the structural integrity of the flange, which in turn safeguards the living area beneath the canvas when hatches are open.Step 3: Allowing Time to Dry
After securely attaching the first portion of the flange, Sven allows ample time for it to dry before moving forward with additional steps. This patience and precision are key aspects of his successful boatbuilding methods.Step 4: Finishing Touches
Once the flange is fully dried, Sven removes the clamps carefully, ensuring no damage occurs during this process. He then moves on to attaching four more pieces onto these main frames, completing two pairs of flanges for the bulkhead hatches.The Final Touches
While two flanges form the primary support structure around the hatches, Sven mentions there are two additional pieces required at each end to ensure comprehensive protection. This attention to detail highlights his commitment to producing a durable and reliable design. “Sailing is about finding your path, whether it’s across an ocean or within yourself.” – Sven Yrvind In conclusion, making flanges around bulkhead hatches may seem complex at first glance, but by following Sven Yrvind’s meticulous process, enthusiasts can achieve professional-level results. Remember that the journey of boatbuilding is as rewarding as reaching your destination; it tests one’s patience and dedication. For those seeking to embark on this adventure or simply gain more insight into marine craftsmanship, Sven’s wisdom is invaluable.Sven Yrvind, a renowned yacht designer and sailor, shares valuable insights on creating flanges around bulkhead hatches for canvas protection in this enlightening video. By following his expert guidance, boat enthusiasts can ensure their living areas remain secure while allowing unhindered access through the hatches.Step 1: Starting with the Flange
Sven begins by explaining that working on flanges vertically and horizontally is significantly easier than doing so in a flat position. To simplify the process further, he divides the task into two or three steps as suggested by fellow expert “for for.” This approach not only makes it more manageable but also allows for greater precision in crafting each component.Step 2: Applying Glue and Securing
Sven proceeds to apply glue along one edge of the flange, ensuring a secure bond when clamped into place. He emphasizes that this stage is crucial for maintaining the structural integrity of the flange, which in turn safeguards the living area beneath the canvas when hatches are open.Step 3: Allowing Time to Dry
After securely attaching the first portion of the flange, Sven allows ample time for it to dry before moving forward with additional steps. This patience and precision are key aspects of his successful boatbuilding methods.Step 4: Finishing Touches
Once the flange is fully dried, Sven removes the clamps carefully, ensuring no damage occurs during this process. He then moves on to attaching four more pieces onto these main frames, completing two pairs of flanges for the bulkhead hatches.The Final Touches
While two flanges form the primary support structure around the hatches, Sven mentions there are two additional pieces required at each end to ensure comprehensive protection. This attention to detail highlights his commitment to producing a durable and reliable design. “Sailing is about finding your path, whether it’s across an ocean or within yourself.” – Sven Yrvind In conclusion, making flanges around bulkhead hatches may seem complex at first glance, but by following Sven Yrvind’s meticulous process, enthusiasts can achieve professional-level results. Remember that the journey of boatbuilding is as rewarding as reaching your destination; it tests one’s patience and dedication. For those seeking to embark on this adventure or simply gain more insight into marine craftsmanship, Sven’s wisdom is invaluable.Making Flanges Around Bulkhead Hatches for Canvas
Sven Yrvind, a renowned yacht designer and sailor, shares valuable insights on creating flanges around bulkhead hatches for canvas protection in this enlightening video. By following his expert guidance, boat enthusiasts can ensure their living areas remain secure while allowing unhindered access through the hatches.Step 1: Starting with the Flange
Sven begins by explaining that working on flanges vertically and horizontally is significantly easier than doing so in a flat position. To simplify the process further, he divides the task into two or three steps as suggested by fellow expert “for for.” This approach not only makes it more manageable but also allows for greater precision in crafting each component.Step 2: Applying Glue and Securing
Sven proceeds to apply glue along one edge of the flange, ensuring a secure bond when clamped into place. He emphasizes that this stage is crucial for maintaining the structural integrity of the flange, which in turn safeguards the living area beneath the canvas when hatches are open.Step 3: Allowing Time to Dry
After securely attaching the first portion of the flange, Sven allows ample time for it to dry before moving forward with additional steps. This patience and precision are key aspects of his successful boatbuilding methods.Step 4: Finishing Touches
Once the flange is fully dried, Sven removes the clamps carefully, ensuring no damage occurs during this process. He then moves on to attaching four more pieces onto these main frames, completing two pairs of flanges for the bulkhead hatches.The Final Touches
While two flanges form the primary support structure around the hatches, Sven mentions there are two additional pieces required at each end to ensure comprehensive protection. This attention to detail highlights his commitment to producing a durable and reliable design. “Sailing is about finding your path, whether it’s across an ocean or within yourself.” – Sven Yrvind In conclusion, making flanges around bulkhead hatches may seem complex at first glance, but by following Sven Yrvind’s meticulous process, enthusiasts can achieve professional-level results. Remember that the journey of boatbuilding is as rewarding as reaching your destination; it tests one’s patience and dedication. For those seeking to embark on this adventure or simply gain more insight into marine craftsmanship, Sven’s wisdom is invaluable.Once the flange is fully dried, Sven removes the clamps carefully, ensuring no damage occurs during this process. He then moves on to attaching four more pieces onto these main frames, completing two pairs of flanges for the bulkhead hatches.The Final Touches
While two flanges form the primary support structure around the hatches, Sven mentions there are two additional pieces required at each end to ensure comprehensive protection. This attention to detail highlights his commitment to producing a durable and reliable design. “Sailing is about finding your path, whether it’s across an ocean or within yourself.” – Sven Yrvind In conclusion, making flanges around bulkhead hatches may seem complex at first glance, but by following Sven Yrvind’s meticulous process, enthusiasts can achieve professional-level results. Remember that the journey of boatbuilding is as rewarding as reaching your destination; it tests one’s patience and dedication. For those seeking to embark on this adventure or simply gain more insight into marine craftsmanship, Sven’s wisdom is invaluable.Sven Yrvind, a renowned yacht designer and sailor, shares valuable insights on creating flanges around bulkhead hatches for canvas protection in this enlightening video. By following his expert guidance, boat enthusiasts can ensure their living areas remain secure while allowing unhindered access through the hatches.Step 1: Starting with the Flange
Sven begins by explaining that working on flanges vertically and horizontally is significantly easier than doing so in a flat position. To simplify the process further, he divides the task into two or three steps as suggested by fellow expert “for for.” This approach not only makes it more manageable but also allows for greater precision in crafting each component.Step 2: Applying Glue and Securing
Sven proceeds to apply glue along one edge of the flange, ensuring a secure bond when clamped into place. He emphasizes that this stage is crucial for maintaining the structural integrity of the flange, which in turn safeguards the living area beneath the canvas when hatches are open.Step 3: Allowing Time to Dry
After securely attaching the first portion of the flange, Sven allows ample time for it to dry before moving forward with additional steps. This patience and precision are key aspects of his successful boatbuilding methods.Step 4: Finishing Touches
Once the flange is fully dried, Sven removes the clamps carefully, ensuring no damage occurs during this process. He then moves on to attaching four more pieces onto these main frames, completing two pairs of flanges for the bulkhead hatches.The Final Touches
While two flanges form the primary support structure around the hatches, Sven mentions there are two additional pieces required at each end to ensure comprehensive protection. This attention to detail highlights his commitment to producing a durable and reliable design. “Sailing is about finding your path, whether it’s across an ocean or within yourself.” – Sven Yrvind In conclusion, making flanges around bulkhead hatches may seem complex at first glance, but by following Sven Yrvind’s meticulous process, enthusiasts can achieve professional-level results. Remember that the journey of boatbuilding is as rewarding as reaching your destination; it tests one’s patience and dedication. For those seeking to embark on this adventure or simply gain more insight into marine craftsmanship, Sven’s wisdom is invaluable.Making Flanges Around Bulkhead Hatches for Canvas
Sven Yrvind, a renowned yacht designer and sailor, shares valuable insights on creating flanges around bulkhead hatches for canvas protection in this enlightening video. By following his expert guidance, boat enthusiasts can ensure their living areas remain secure while allowing unhindered access through the hatches.Step 1: Starting with the Flange
Sven begins by explaining that working on flanges vertically and horizontally is significantly easier than doing so in a flat position. To simplify the process further, he divides the task into two or three steps as suggested by fellow expert “for for.” This approach not only makes it more manageable but also allows for greater precision in crafting each component.Step 2: Applying Glue and Securing
Sven proceeds to apply glue along one edge of the flange, ensuring a secure bond when clamped into place. He emphasizes that this stage is crucial for maintaining the structural integrity of the flange, which in turn safeguards the living area beneath the canvas when hatches are open.Step 3: Allowing Time to Dry
After securely attaching the first portion of the flange, Sven allows ample time for it to dry before moving forward with additional steps. This patience and precision are key aspects of his successful boatbuilding methods.Step 4: Finishing Touches
Once the flange is fully dried, Sven removes the clamps carefully, ensuring no damage occurs during this process. He then moves on to attaching four more pieces onto these main frames, completing two pairs of flanges for the bulkhead hatches.The Final Touches
While two flanges form the primary support structure around the hatches, Sven mentions there are two additional pieces required at each end to ensure comprehensive protection. This attention to detail highlights his commitment to producing a durable and reliable design. “Sailing is about finding your path, whether it’s across an ocean or within yourself.” – Sven Yrvind In conclusion, making flanges around bulkhead hatches may seem complex at first glance, but by following Sven Yrvind’s meticulous process, enthusiasts can achieve professional-level results. Remember that the journey of boatbuilding is as rewarding as reaching your destination; it tests one’s patience and dedication. For those seeking to embark on this adventure or simply gain more insight into marine craftsmanship, Sven’s wisdom is invaluable.After securely attaching the first portion of the flange, Sven allows ample time for it to dry before moving forward with additional steps. This patience and precision are key aspects of his successful boatbuilding methods.Step 4: Finishing Touches
Once the flange is fully dried, Sven removes the clamps carefully, ensuring no damage occurs during this process. He then moves on to attaching four more pieces onto these main frames, completing two pairs of flanges for the bulkhead hatches.The Final Touches
While two flanges form the primary support structure around the hatches, Sven mentions there are two additional pieces required at each end to ensure comprehensive protection. This attention to detail highlights his commitment to producing a durable and reliable design. “Sailing is about finding your path, whether it’s across an ocean or within yourself.” – Sven Yrvind In conclusion, making flanges around bulkhead hatches may seem complex at first glance, but by following Sven Yrvind’s meticulous process, enthusiasts can achieve professional-level results. Remember that the journey of boatbuilding is as rewarding as reaching your destination; it tests one’s patience and dedication. For those seeking to embark on this adventure or simply gain more insight into marine craftsmanship, Sven’s wisdom is invaluable.Sven Yrvind, a renowned yacht designer and sailor, shares valuable insights on creating flanges around bulkhead hatches for canvas protection in this enlightening video. By following his expert guidance, boat enthusiasts can ensure their living areas remain secure while allowing unhindered access through the hatches.Step 1: Starting with the Flange
Sven begins by explaining that working on flanges vertically and horizontally is significantly easier than doing so in a flat position. To simplify the process further, he divides the task into two or three steps as suggested by fellow expert “for for.” This approach not only makes it more manageable but also allows for greater precision in crafting each component.Step 2: Applying Glue and Securing
Sven proceeds to apply glue along one edge of the flange, ensuring a secure bond when clamped into place. He emphasizes that this stage is crucial for maintaining the structural integrity of the flange, which in turn safeguards the living area beneath the canvas when hatches are open.Step 3: Allowing Time to Dry
After securely attaching the first portion of the flange, Sven allows ample time for it to dry before moving forward with additional steps. This patience and precision are key aspects of his successful boatbuilding methods.Step 4: Finishing Touches
Once the flange is fully dried, Sven removes the clamps carefully, ensuring no damage occurs during this process. He then moves on to attaching four more pieces onto these main frames, completing two pairs of flanges for the bulkhead hatches.The Final Touches
While two flanges form the primary support structure around the hatches, Sven mentions there are two additional pieces required at each end to ensure comprehensive protection. This attention to detail highlights his commitment to producing a durable and reliable design. “Sailing is about finding your path, whether it’s across an ocean or within yourself.” – Sven Yrvind In conclusion, making flanges around bulkhead hatches may seem complex at first glance, but by following Sven Yrvind’s meticulous process, enthusiasts can achieve professional-level results. Remember that the journey of boatbuilding is as rewarding as reaching your destination; it tests one’s patience and dedication. For those seeking to embark on this adventure or simply gain more insight into marine craftsmanship, Sven’s wisdom is invaluable.Making Flanges Around Bulkhead Hatches for Canvas
Sven Yrvind, a renowned yacht designer and sailor, shares valuable insights on creating flanges around bulkhead hatches for canvas protection in this enlightening video. By following his expert guidance, boat enthusiasts can ensure their living areas remain secure while allowing unhindered access through the hatches.Step 1: Starting with the Flange
Sven begins by explaining that working on flanges vertically and horizontally is significantly easier than doing so in a flat position. To simplify the process further, he divides the task into two or three steps as suggested by fellow expert “for for.” This approach not only makes it more manageable but also allows for greater precision in crafting each component.Step 2: Applying Glue and Securing
Sven proceeds to apply glue along one edge of the flange, ensuring a secure bond when clamped into place. He emphasizes that this stage is crucial for maintaining the structural integrity of the flange, which in turn safeguards the living area beneath the canvas when hatches are open.Step 3: Allowing Time to Dry
After securely attaching the first portion of the flange, Sven allows ample time for it to dry before moving forward with additional steps. This patience and precision are key aspects of his successful boatbuilding methods.Step 4: Finishing Touches
Once the flange is fully dried, Sven removes the clamps carefully, ensuring no damage occurs during this process. He then moves on to attaching four more pieces onto these main frames, completing two pairs of flanges for the bulkhead hatches.The Final Touches
While two flanges form the primary support structure around the hatches, Sven mentions there are two additional pieces required at each end to ensure comprehensive protection. This attention to detail highlights his commitment to producing a durable and reliable design. “Sailing is about finding your path, whether it’s across an ocean or within yourself.” – Sven Yrvind In conclusion, making flanges around bulkhead hatches may seem complex at first glance, but by following Sven Yrvind’s meticulous process, enthusiasts can achieve professional-level results. Remember that the journey of boatbuilding is as rewarding as reaching your destination; it tests one’s patience and dedication. For those seeking to embark on this adventure or simply gain more insight into marine craftsmanship, Sven’s wisdom is invaluable.Sven proceeds to apply glue along one edge of the flange, ensuring a secure bond when clamped into place. He emphasizes that this stage is crucial for maintaining the structural integrity of the flange, which in turn safeguards the living area beneath the canvas when hatches are open.Step 3: Allowing Time to Dry
After securely attaching the first portion of the flange, Sven allows ample time for it to dry before moving forward with additional steps. This patience and precision are key aspects of his successful boatbuilding methods.Step 4: Finishing Touches
Once the flange is fully dried, Sven removes the clamps carefully, ensuring no damage occurs during this process. He then moves on to attaching four more pieces onto these main frames, completing two pairs of flanges for the bulkhead hatches.The Final Touches
While two flanges form the primary support structure around the hatches, Sven mentions there are two additional pieces required at each end to ensure comprehensive protection. This attention to detail highlights his commitment to producing a durable and reliable design. “Sailing is about finding your path, whether it’s across an ocean or within yourself.” – Sven Yrvind In conclusion, making flanges around bulkhead hatches may seem complex at first glance, but by following Sven Yrvind’s meticulous process, enthusiasts can achieve professional-level results. Remember that the journey of boatbuilding is as rewarding as reaching your destination; it tests one’s patience and dedication. For those seeking to embark on this adventure or simply gain more insight into marine craftsmanship, Sven’s wisdom is invaluable.Sven Yrvind, a renowned yacht designer and sailor, shares valuable insights on creating flanges around bulkhead hatches for canvas protection in this enlightening video. By following his expert guidance, boat enthusiasts can ensure their living areas remain secure while allowing unhindered access through the hatches.Step 1: Starting with the Flange
Sven begins by explaining that working on flanges vertically and horizontally is significantly easier than doing so in a flat position. To simplify the process further, he divides the task into two or three steps as suggested by fellow expert “for for.” This approach not only makes it more manageable but also allows for greater precision in crafting each component.Step 2: Applying Glue and Securing
Sven proceeds to apply glue along one edge of the flange, ensuring a secure bond when clamped into place. He emphasizes that this stage is crucial for maintaining the structural integrity of the flange, which in turn safeguards the living area beneath the canvas when hatches are open.Step 3: Allowing Time to Dry
After securely attaching the first portion of the flange, Sven allows ample time for it to dry before moving forward with additional steps. This patience and precision are key aspects of his successful boatbuilding methods.Step 4: Finishing Touches
Once the flange is fully dried, Sven removes the clamps carefully, ensuring no damage occurs during this process. He then moves on to attaching four more pieces onto these main frames, completing two pairs of flanges for the bulkhead hatches.The Final Touches
While two flanges form the primary support structure around the hatches, Sven mentions there are two additional pieces required at each end to ensure comprehensive protection. This attention to detail highlights his commitment to producing a durable and reliable design. “Sailing is about finding your path, whether it’s across an ocean or within yourself.” – Sven Yrvind In conclusion, making flanges around bulkhead hatches may seem complex at first glance, but by following Sven Yrvind’s meticulous process, enthusiasts can achieve professional-level results. Remember that the journey of boatbuilding is as rewarding as reaching your destination; it tests one’s patience and dedication. For those seeking to embark on this adventure or simply gain more insight into marine craftsmanship, Sven’s wisdom is invaluable.Making Flanges Around Bulkhead Hatches for Canvas
Sven Yrvind, a renowned yacht designer and sailor, shares valuable insights on creating flanges around bulkhead hatches for canvas protection in this enlightening video. By following his expert guidance, boat enthusiasts can ensure their living areas remain secure while allowing unhindered access through the hatches.Step 1: Starting with the Flange
Sven begins by explaining that working on flanges vertically and horizontally is significantly easier than doing so in a flat position. To simplify the process further, he divides the task into two or three steps as suggested by fellow expert “for for.” This approach not only makes it more manageable but also allows for greater precision in crafting each component.Step 2: Applying Glue and Securing
Sven proceeds to apply glue along one edge of the flange, ensuring a secure bond when clamped into place. He emphasizes that this stage is crucial for maintaining the structural integrity of the flange, which in turn safeguards the living area beneath the canvas when hatches are open.Step 3: Allowing Time to Dry
After securely attaching the first portion of the flange, Sven allows ample time for it to dry before moving forward with additional steps. This patience and precision are key aspects of his successful boatbuilding methods.Step 4: Finishing Touches
Once the flange is fully dried, Sven removes the clamps carefully, ensuring no damage occurs during this process. He then moves on to attaching four more pieces onto these main frames, completing two pairs of flanges for the bulkhead hatches.The Final Touches
While two flanges form the primary support structure around the hatches, Sven mentions there are two additional pieces required at each end to ensure comprehensive protection. This attention to detail highlights his commitment to producing a durable and reliable design. “Sailing is about finding your path, whether it’s across an ocean or within yourself.” – Sven Yrvind In conclusion, making flanges around bulkhead hatches may seem complex at first glance, but by following Sven Yrvind’s meticulous process, enthusiasts can achieve professional-level results. Remember that the journey of boatbuilding is as rewarding as reaching your destination; it tests one’s patience and dedication. For those seeking to embark on this adventure or simply gain more insight into marine craftsmanship, Sven’s wisdom is invaluable.Sven begins by explaining that working on flanges vertically and horizontally is significantly easier than doing so in a flat position. To simplify the process further, he divides the task into two or three steps as suggested by fellow expert “for for.” This approach not only makes it more manageable but also allows for greater precision in crafting each component.Step 2: Applying Glue and Securing
Sven proceeds to apply glue along one edge of the flange, ensuring a secure bond when clamped into place. He emphasizes that this stage is crucial for maintaining the structural integrity of the flange, which in turn safeguards the living area beneath the canvas when hatches are open.Step 3: Allowing Time to Dry
After securely attaching the first portion of the flange, Sven allows ample time for it to dry before moving forward with additional steps. This patience and precision are key aspects of his successful boatbuilding methods.Step 4: Finishing Touches
Once the flange is fully dried, Sven removes the clamps carefully, ensuring no damage occurs during this process. He then moves on to attaching four more pieces onto these main frames, completing two pairs of flanges for the bulkhead hatches.The Final Touches
While two flanges form the primary support structure around the hatches, Sven mentions there are two additional pieces required at each end to ensure comprehensive protection. This attention to detail highlights his commitment to producing a durable and reliable design. “Sailing is about finding your path, whether it’s across an ocean or within yourself.” – Sven Yrvind In conclusion, making flanges around bulkhead hatches may seem complex at first glance, but by following Sven Yrvind’s meticulous process, enthusiasts can achieve professional-level results. Remember that the journey of boatbuilding is as rewarding as reaching your destination; it tests one’s patience and dedication. For those seeking to embark on this adventure or simply gain more insight into marine craftsmanship, Sven’s wisdom is invaluable.Sven Yrvind, a renowned yacht designer and sailor, shares valuable insights on creating flanges around bulkhead hatches for canvas protection in this enlightening video. By following his expert guidance, boat enthusiasts can ensure their living areas remain secure while allowing unhindered access through the hatches.Step 1: Starting with the Flange
Sven begins by explaining that working on flanges vertically and horizontally is significantly easier than doing so in a flat position. To simplify the process further, he divides the task into two or three steps as suggested by fellow expert “for for.” This approach not only makes it more manageable but also allows for greater precision in crafting each component.Step 2: Applying Glue and Securing
Sven proceeds to apply glue along one edge of the flange, ensuring a secure bond when clamped into place. He emphasizes that this stage is crucial for maintaining the structural integrity of the flange, which in turn safeguards the living area beneath the canvas when hatches are open.Step 3: Allowing Time to Dry
After securely attaching the first portion of the flange, Sven allows ample time for it to dry before moving forward with additional steps. This patience and precision are key aspects of his successful boatbuilding methods.Step 4: Finishing Touches
Once the flange is fully dried, Sven removes the clamps carefully, ensuring no damage occurs during this process. He then moves on to attaching four more pieces onto these main frames, completing two pairs of flanges for the bulkhead hatches.The Final Touches
While two flanges form the primary support structure around the hatches, Sven mentions there are two additional pieces required at each end to ensure comprehensive protection. This attention to detail highlights his commitment to producing a durable and reliable design. “Sailing is about finding your path, whether it’s across an ocean or within yourself.” – Sven Yrvind In conclusion, making flanges around bulkhead hatches may seem complex at first glance, but by following Sven Yrvind’s meticulous process, enthusiasts can achieve professional-level results. Remember that the journey of boatbuilding is as rewarding as reaching your destination; it tests one’s patience and dedication. For those seeking to embark on this adventure or simply gain more insight into marine craftsmanship, Sven’s wisdom is invaluable.Making Flanges Around Bulkhead Hatches for Canvas
Sven Yrvind, a renowned yacht designer and sailor, shares valuable insights on creating flanges around bulkhead hatches for canvas protection in this enlightening video. By following his expert guidance, boat enthusiasts can ensure their living areas remain secure while allowing unhindered access through the hatches.Step 1: Starting with the Flange
Sven begins by explaining that working on flanges vertically and horizontally is significantly easier than doing so in a flat position. To simplify the process further, he divides the task into two or three steps as suggested by fellow expert “for for.” This approach not only makes it more manageable but also allows for greater precision in crafting each component.Step 2: Applying Glue and Securing
Sven proceeds to apply glue along one edge of the flange, ensuring a secure bond when clamped into place. He emphasizes that this stage is crucial for maintaining the structural integrity of the flange, which in turn safeguards the living area beneath the canvas when hatches are open.Step 3: Allowing Time to Dry
After securely attaching the first portion of the flange, Sven allows ample time for it to dry before moving forward with additional steps. This patience and precision are key aspects of his successful boatbuilding methods.Step 4: Finishing Touches
Once the flange is fully dried, Sven removes the clamps carefully, ensuring no damage occurs during this process. He then moves on to attaching four more pieces onto these main frames, completing two pairs of flanges for the bulkhead hatches.The Final Touches
While two flanges form the primary support structure around the hatches, Sven mentions there are two additional pieces required at each end to ensure comprehensive protection. This attention to detail highlights his commitment to producing a durable and reliable design. “Sailing is about finding your path, whether it’s across an ocean or within yourself.” – Sven Yrvind In conclusion, making flanges around bulkhead hatches may seem complex at first glance, but by following Sven Yrvind’s meticulous process, enthusiasts can achieve professional-level results. Remember that the journey of boatbuilding is as rewarding as reaching your destination; it tests one’s patience and dedication. For those seeking to embark on this adventure or simply gain more insight into marine craftsmanship, Sven’s wisdom is invaluable.Once the flange is fully dried, Sven removes the clamps carefully, ensuring no damage occurs during this process. He then moves on to attaching four more pieces onto these main frames, completing two pairs of flanges for the bulkhead hatches.The Final Touches
While two flanges form the primary support structure around the hatches, Sven mentions there are two additional pieces required at each end to ensure comprehensive protection. This attention to detail highlights his commitment to producing a durable and reliable design. “Sailing is about finding your path, whether it’s across an ocean or within yourself.” – Sven Yrvind In conclusion, making flanges around bulkhead hatches may seem complex at first glance, but by following Sven Yrvind’s meticulous process, enthusiasts can achieve professional-level results. Remember that the journey of boatbuilding is as rewarding as reaching your destination; it tests one’s patience and dedication. For those seeking to embark on this adventure or simply gain more insight into marine craftsmanship, Sven’s wisdom is invaluable.Sven begins by explaining that working on flanges vertically and horizontally is significantly easier than doing so in a flat position. To simplify the process further, he divides the task into two or three steps as suggested by fellow expert “for for.” This approach not only makes it more manageable but also allows for greater precision in crafting each component.Step 2: Applying Glue and Securing
Sven proceeds to apply glue along one edge of the flange, ensuring a secure bond when clamped into place. He emphasizes that this stage is crucial for maintaining the structural integrity of the flange, which in turn safeguards the living area beneath the canvas when hatches are open.Step 3: Allowing Time to Dry
After securely attaching the first portion of the flange, Sven allows ample time for it to dry before moving forward with additional steps. This patience and precision are key aspects of his successful boatbuilding methods.Step 4: Finishing Touches
Once the flange is fully dried, Sven removes the clamps carefully, ensuring no damage occurs during this process. He then moves on to attaching four more pieces onto these main frames, completing two pairs of flanges for the bulkhead hatches.The Final Touches
While two flanges form the primary support structure around the hatches, Sven mentions there are two additional pieces required at each end to ensure comprehensive protection. This attention to detail highlights his commitment to producing a durable and reliable design. “Sailing is about finding your path, whether it’s across an ocean or within yourself.” – Sven Yrvind In conclusion, making flanges around bulkhead hatches may seem complex at first glance, but by following Sven Yrvind’s meticulous process, enthusiasts can achieve professional-level results. Remember that the journey of boatbuilding is as rewarding as reaching your destination; it tests one’s patience and dedication. For those seeking to embark on this adventure or simply gain more insight into marine craftsmanship, Sven’s wisdom is invaluable.Sven Yrvind, a renowned yacht designer and sailor, shares valuable insights on creating flanges around bulkhead hatches for canvas protection in this enlightening video. By following his expert guidance, boat enthusiasts can ensure their living areas remain secure while allowing unhindered access through the hatches.Step 1: Starting with the Flange
Sven begins by explaining that working on flanges vertically and horizontally is significantly easier than doing so in a flat position. To simplify the process further, he divides the task into two or three steps as suggested by fellow expert “for for.” This approach not only makes it more manageable but also allows for greater precision in crafting each component.Step 2: Applying Glue and Securing
Sven proceeds to apply glue along one edge of the flange, ensuring a secure bond when clamped into place. He emphasizes that this stage is crucial for maintaining the structural integrity of the flange, which in turn safeguards the living area beneath the canvas when hatches are open.Step 3: Allowing Time to Dry
After securely attaching the first portion of the flange, Sven allows ample time for it to dry before moving forward with additional steps. This patience and precision are key aspects of his successful boatbuilding methods.Step 4: Finishing Touches
Once the flange is fully dried, Sven removes the clamps carefully, ensuring no damage occurs during this process. He then moves on to attaching four more pieces onto these main frames, completing two pairs of flanges for the bulkhead hatches.The Final Touches
While two flanges form the primary support structure around the hatches, Sven mentions there are two additional pieces required at each end to ensure comprehensive protection. This attention to detail highlights his commitment to producing a durable and reliable design. “Sailing is about finding your path, whether it’s across an ocean or within yourself.” – Sven Yrvind In conclusion, making flanges around bulkhead hatches may seem complex at first glance, but by following Sven Yrvind’s meticulous process, enthusiasts can achieve professional-level results. Remember that the journey of boatbuilding is as rewarding as reaching your destination; it tests one’s patience and dedication. For those seeking to embark on this adventure or simply gain more insight into marine craftsmanship, Sven’s wisdom is invaluable.Making Flanges Around Bulkhead Hatches for Canvas
Sven Yrvind, a renowned yacht designer and sailor, shares valuable insights on creating flanges around bulkhead hatches for canvas protection in this enlightening video. By following his expert guidance, boat enthusiasts can ensure their living areas remain secure while allowing unhindered access through the hatches.Step 1: Starting with the Flange
Sven begins by explaining that working on flanges vertically and horizontally is significantly easier than doing so in a flat position. To simplify the process further, he divides the task into two or three steps as suggested by fellow expert “for for.” This approach not only makes it more manageable but also allows for greater precision in crafting each component.Step 2: Applying Glue and Securing
Sven proceeds to apply glue along one edge of the flange, ensuring a secure bond when clamped into place. He emphasizes that this stage is crucial for maintaining the structural integrity of the flange, which in turn safeguards the living area beneath the canvas when hatches are open.Step 3: Allowing Time to Dry
After securely attaching the first portion of the flange, Sven allows ample time for it to dry before moving forward with additional steps. This patience and precision are key aspects of his successful boatbuilding methods.Step 4: Finishing Touches
Once the flange is fully dried, Sven removes the clamps carefully, ensuring no damage occurs during this process. He then moves on to attaching four more pieces onto these main frames, completing two pairs of flanges for the bulkhead hatches.The Final Touches
While two flanges form the primary support structure around the hatches, Sven mentions there are two additional pieces required at each end to ensure comprehensive protection. This attention to detail highlights his commitment to producing a durable and reliable design. “Sailing is about finding your path, whether it’s across an ocean or within yourself.” – Sven Yrvind In conclusion, making flanges around bulkhead hatches may seem complex at first glance, but by following Sven Yrvind’s meticulous process, enthusiasts can achieve professional-level results. Remember that the journey of boatbuilding is as rewarding as reaching your destination; it tests one’s patience and dedication. For those seeking to embark on this adventure or simply gain more insight into marine craftsmanship, Sven’s wisdom is invaluable.After securely attaching the first portion of the flange, Sven allows ample time for it to dry before moving forward with additional steps. This patience and precision are key aspects of his successful boatbuilding methods.Step 4: Finishing Touches
Once the flange is fully dried, Sven removes the clamps carefully, ensuring no damage occurs during this process. He then moves on to attaching four more pieces onto these main frames, completing two pairs of flanges for the bulkhead hatches.The Final Touches
While two flanges form the primary support structure around the hatches, Sven mentions there are two additional pieces required at each end to ensure comprehensive protection. This attention to detail highlights his commitment to producing a durable and reliable design. “Sailing is about finding your path, whether it’s across an ocean or within yourself.” – Sven Yrvind In conclusion, making flanges around bulkhead hatches may seem complex at first glance, but by following Sven Yrvind’s meticulous process, enthusiasts can achieve professional-level results. Remember that the journey of boatbuilding is as rewarding as reaching your destination; it tests one’s patience and dedication. For those seeking to embark on this adventure or simply gain more insight into marine craftsmanship, Sven’s wisdom is invaluable.Sven begins by explaining that working on flanges vertically and horizontally is significantly easier than doing so in a flat position. To simplify the process further, he divides the task into two or three steps as suggested by fellow expert “for for.” This approach not only makes it more manageable but also allows for greater precision in crafting each component.Step 2: Applying Glue and Securing
Sven proceeds to apply glue along one edge of the flange, ensuring a secure bond when clamped into place. He emphasizes that this stage is crucial for maintaining the structural integrity of the flange, which in turn safeguards the living area beneath the canvas when hatches are open.Step 3: Allowing Time to Dry
After securely attaching the first portion of the flange, Sven allows ample time for it to dry before moving forward with additional steps. This patience and precision are key aspects of his successful boatbuilding methods.Step 4: Finishing Touches
Once the flange is fully dried, Sven removes the clamps carefully, ensuring no damage occurs during this process. He then moves on to attaching four more pieces onto these main frames, completing two pairs of flanges for the bulkhead hatches.The Final Touches
While two flanges form the primary support structure around the hatches, Sven mentions there are two additional pieces required at each end to ensure comprehensive protection. This attention to detail highlights his commitment to producing a durable and reliable design. “Sailing is about finding your path, whether it’s across an ocean or within yourself.” – Sven Yrvind In conclusion, making flanges around bulkhead hatches may seem complex at first glance, but by following Sven Yrvind’s meticulous process, enthusiasts can achieve professional-level results. Remember that the journey of boatbuilding is as rewarding as reaching your destination; it tests one’s patience and dedication. For those seeking to embark on this adventure or simply gain more insight into marine craftsmanship, Sven’s wisdom is invaluable.Sven Yrvind, a renowned yacht designer and sailor, shares valuable insights on creating flanges around bulkhead hatches for canvas protection in this enlightening video. By following his expert guidance, boat enthusiasts can ensure their living areas remain secure while allowing unhindered access through the hatches.Step 1: Starting with the Flange
Sven begins by explaining that working on flanges vertically and horizontally is significantly easier than doing so in a flat position. To simplify the process further, he divides the task into two or three steps as suggested by fellow expert “for for.” This approach not only makes it more manageable but also allows for greater precision in crafting each component.Step 2: Applying Glue and Securing
Sven proceeds to apply glue along one edge of the flange, ensuring a secure bond when clamped into place. He emphasizes that this stage is crucial for maintaining the structural integrity of the flange, which in turn safeguards the living area beneath the canvas when hatches are open.Step 3: Allowing Time to Dry
After securely attaching the first portion of the flange, Sven allows ample time for it to dry before moving forward with additional steps. This patience and precision are key aspects of his successful boatbuilding methods.Step 4: Finishing Touches
Once the flange is fully dried, Sven removes the clamps carefully, ensuring no damage occurs during this process. He then moves on to attaching four more pieces onto these main frames, completing two pairs of flanges for the bulkhead hatches.The Final Touches
While two flanges form the primary support structure around the hatches, Sven mentions there are two additional pieces required at each end to ensure comprehensive protection. This attention to detail highlights his commitment to producing a durable and reliable design. “Sailing is about finding your path, whether it’s across an ocean or within yourself.” – Sven Yrvind In conclusion, making flanges around bulkhead hatches may seem complex at first glance, but by following Sven Yrvind’s meticulous process, enthusiasts can achieve professional-level results. Remember that the journey of boatbuilding is as rewarding as reaching your destination; it tests one’s patience and dedication. For those seeking to embark on this adventure or simply gain more insight into marine craftsmanship, Sven’s wisdom is invaluable.Making Flanges Around Bulkhead Hatches for Canvas
Sven Yrvind, a renowned yacht designer and sailor, shares valuable insights on creating flanges around bulkhead hatches for canvas protection in this enlightening video. By following his expert guidance, boat enthusiasts can ensure their living areas remain secure while allowing unhindered access through the hatches.Step 1: Starting with the Flange
Sven begins by explaining that working on flanges vertically and horizontally is significantly easier than doing so in a flat position. To simplify the process further, he divides the task into two or three steps as suggested by fellow expert “for for.” This approach not only makes it more manageable but also allows for greater precision in crafting each component.Step 2: Applying Glue and Securing
Sven proceeds to apply glue along one edge of the flange, ensuring a secure bond when clamped into place. He emphasizes that this stage is crucial for maintaining the structural integrity of the flange, which in turn safeguards the living area beneath the canvas when hatches are open.Step 3: Allowing Time to Dry
After securely attaching the first portion of the flange, Sven allows ample time for it to dry before moving forward with additional steps. This patience and precision are key aspects of his successful boatbuilding methods.Step 4: Finishing Touches
Once the flange is fully dried, Sven removes the clamps carefully, ensuring no damage occurs during this process. He then moves on to attaching four more pieces onto these main frames, completing two pairs of flanges for the bulkhead hatches.The Final Touches
While two flanges form the primary support structure around the hatches, Sven mentions there are two additional pieces required at each end to ensure comprehensive protection. This attention to detail highlights his commitment to producing a durable and reliable design. “Sailing is about finding your path, whether it’s across an ocean or within yourself.” – Sven Yrvind In conclusion, making flanges around bulkhead hatches may seem complex at first glance, but by following Sven Yrvind’s meticulous process, enthusiasts can achieve professional-level results. Remember that the journey of boatbuilding is as rewarding as reaching your destination; it tests one’s patience and dedication. For those seeking to embark on this adventure or simply gain more insight into marine craftsmanship, Sven’s wisdom is invaluable.Sven proceeds to apply glue along one edge of the flange, ensuring a secure bond when clamped into place. He emphasizes that this stage is crucial for maintaining the structural integrity of the flange, which in turn safeguards the living area beneath the canvas when hatches are open.Step 3: Allowing Time to Dry
After securely attaching the first portion of the flange, Sven allows ample time for it to dry before moving forward with additional steps. This patience and precision are key aspects of his successful boatbuilding methods.Step 4: Finishing Touches
Once the flange is fully dried, Sven removes the clamps carefully, ensuring no damage occurs during this process. He then moves on to attaching four more pieces onto these main frames, completing two pairs of flanges for the bulkhead hatches.The Final Touches
While two flanges form the primary support structure around the hatches, Sven mentions there are two additional pieces required at each end to ensure comprehensive protection. This attention to detail highlights his commitment to producing a durable and reliable design. “Sailing is about finding your path, whether it’s across an ocean or within yourself.” – Sven Yrvind In conclusion, making flanges around bulkhead hatches may seem complex at first glance, but by following Sven Yrvind’s meticulous process, enthusiasts can achieve professional-level results. Remember that the journey of boatbuilding is as rewarding as reaching your destination; it tests one’s patience and dedication. For those seeking to embark on this adventure or simply gain more insight into marine craftsmanship, Sven’s wisdom is invaluable.Sven begins by explaining that working on flanges vertically and horizontally is significantly easier than doing so in a flat position. To simplify the process further, he divides the task into two or three steps as suggested by fellow expert “for for.” This approach not only makes it more manageable but also allows for greater precision in crafting each component.Step 2: Applying Glue and Securing
Sven proceeds to apply glue along one edge of the flange, ensuring a secure bond when clamped into place. He emphasizes that this stage is crucial for maintaining the structural integrity of the flange, which in turn safeguards the living area beneath the canvas when hatches are open.Step 3: Allowing Time to Dry
After securely attaching the first portion of the flange, Sven allows ample time for it to dry before moving forward with additional steps. This patience and precision are key aspects of his successful boatbuilding methods.Step 4: Finishing Touches
Once the flange is fully dried, Sven removes the clamps carefully, ensuring no damage occurs during this process. He then moves on to attaching four more pieces onto these main frames, completing two pairs of flanges for the bulkhead hatches.The Final Touches
While two flanges form the primary support structure around the hatches, Sven mentions there are two additional pieces required at each end to ensure comprehensive protection. This attention to detail highlights his commitment to producing a durable and reliable design. “Sailing is about finding your path, whether it’s across an ocean or within yourself.” – Sven Yrvind In conclusion, making flanges around bulkhead hatches may seem complex at first glance, but by following Sven Yrvind’s meticulous process, enthusiasts can achieve professional-level results. Remember that the journey of boatbuilding is as rewarding as reaching your destination; it tests one’s patience and dedication. For those seeking to embark on this adventure or simply gain more insight into marine craftsmanship, Sven’s wisdom is invaluable.Sven Yrvind, a renowned yacht designer and sailor, shares valuable insights on creating flanges around bulkhead hatches for canvas protection in this enlightening video. By following his expert guidance, boat enthusiasts can ensure their living areas remain secure while allowing unhindered access through the hatches.Step 1: Starting with the Flange
Sven begins by explaining that working on flanges vertically and horizontally is significantly easier than doing so in a flat position. To simplify the process further, he divides the task into two or three steps as suggested by fellow expert “for for.” This approach not only makes it more manageable but also allows for greater precision in crafting each component.Step 2: Applying Glue and Securing
Sven proceeds to apply glue along one edge of the flange, ensuring a secure bond when clamped into place. He emphasizes that this stage is crucial for maintaining the structural integrity of the flange, which in turn safeguards the living area beneath the canvas when hatches are open.Step 3: Allowing Time to Dry
After securely attaching the first portion of the flange, Sven allows ample time for it to dry before moving forward with additional steps. This patience and precision are key aspects of his successful boatbuilding methods.Step 4: Finishing Touches
Once the flange is fully dried, Sven removes the clamps carefully, ensuring no damage occurs during this process. He then moves on to attaching four more pieces onto these main frames, completing two pairs of flanges for the bulkhead hatches.The Final Touches
While two flanges form the primary support structure around the hatches, Sven mentions there are two additional pieces required at each end to ensure comprehensive protection. This attention to detail highlights his commitment to producing a durable and reliable design. “Sailing is about finding your path, whether it’s across an ocean or within yourself.” – Sven Yrvind In conclusion, making flanges around bulkhead hatches may seem complex at first glance, but by following Sven Yrvind’s meticulous process, enthusiasts can achieve professional-level results. Remember that the journey of boatbuilding is as rewarding as reaching your destination; it tests one’s patience and dedication. For those seeking to embark on this adventure or simply gain more insight into marine craftsmanship, Sven’s wisdom is invaluable.Making Flanges Around Bulkhead Hatches for Canvas
Sven Yrvind, a renowned yacht designer and sailor, shares valuable insights on creating flanges around bulkhead hatches for canvas protection in this enlightening video. By following his expert guidance, boat enthusiasts can ensure their living areas remain secure while allowing unhindered access through the hatches.Step 1: Starting with the Flange
Sven begins by explaining that working on flanges vertically and horizontally is significantly easier than doing so in a flat position. To simplify the process further, he divides the task into two or three steps as suggested by fellow expert “for for.” This approach not only makes it more manageable but also allows for greater precision in crafting each component.Step 2: Applying Glue and Securing
Sven proceeds to apply glue along one edge of the flange, ensuring a secure bond when clamped into place. He emphasizes that this stage is crucial for maintaining the structural integrity of the flange, which in turn safeguards the living area beneath the canvas when hatches are open.Step 3: Allowing Time to Dry
After securely attaching the first portion of the flange, Sven allows ample time for it to dry before moving forward with additional steps. This patience and precision are key aspects of his successful boatbuilding methods.Step 4: Finishing Touches
Once the flange is fully dried, Sven removes the clamps carefully, ensuring no damage occurs during this process. He then moves on to attaching four more pieces onto these main frames, completing two pairs of flanges for the bulkhead hatches.The Final Touches
While two flanges form the primary support structure around the hatches, Sven mentions there are two additional pieces required at each end to ensure comprehensive protection. This attention to detail highlights his commitment to producing a durable and reliable design. “Sailing is about finding your path, whether it’s across an ocean or within yourself.” – Sven Yrvind In conclusion, making flanges around bulkhead hatches may seem complex at first glance, but by following Sven Yrvind’s meticulous process, enthusiasts can achieve professional-level results. Remember that the journey of boatbuilding is as rewarding as reaching your destination; it tests one’s patience and dedication. For those seeking to embark on this adventure or simply gain more insight into marine craftsmanship, Sven’s wisdom is invaluable.Once the flange is fully dried, Sven removes the clamps carefully, ensuring no damage occurs during this process. He then moves on to attaching four more pieces onto these main frames, completing two pairs of flanges for the bulkhead hatches.The Final Touches
While two flanges form the primary support structure around the hatches, Sven mentions there are two additional pieces required at each end to ensure comprehensive protection. This attention to detail highlights his commitment to producing a durable and reliable design. “Sailing is about finding your path, whether it’s across an ocean or within yourself.” – Sven Yrvind In conclusion, making flanges around bulkhead hatches may seem complex at first glance, but by following Sven Yrvind’s meticulous process, enthusiasts can achieve professional-level results. Remember that the journey of boatbuilding is as rewarding as reaching your destination; it tests one’s patience and dedication. For those seeking to embark on this adventure or simply gain more insight into marine craftsmanship, Sven’s wisdom is invaluable.Sven proceeds to apply glue along one edge of the flange, ensuring a secure bond when clamped into place. He emphasizes that this stage is crucial for maintaining the structural integrity of the flange, which in turn safeguards the living area beneath the canvas when hatches are open.Step 3: Allowing Time to Dry
After securely attaching the first portion of the flange, Sven allows ample time for it to dry before moving forward with additional steps. This patience and precision are key aspects of his successful boatbuilding methods.Step 4: Finishing Touches
Once the flange is fully dried, Sven removes the clamps carefully, ensuring no damage occurs during this process. He then moves on to attaching four more pieces onto these main frames, completing two pairs of flanges for the bulkhead hatches.The Final Touches
While two flanges form the primary support structure around the hatches, Sven mentions there are two additional pieces required at each end to ensure comprehensive protection. This attention to detail highlights his commitment to producing a durable and reliable design. “Sailing is about finding your path, whether it’s across an ocean or within yourself.” – Sven Yrvind In conclusion, making flanges around bulkhead hatches may seem complex at first glance, but by following Sven Yrvind’s meticulous process, enthusiasts can achieve professional-level results. Remember that the journey of boatbuilding is as rewarding as reaching your destination; it tests one’s patience and dedication. For those seeking to embark on this adventure or simply gain more insight into marine craftsmanship, Sven’s wisdom is invaluable.Sven begins by explaining that working on flanges vertically and horizontally is significantly easier than doing so in a flat position. To simplify the process further, he divides the task into two or three steps as suggested by fellow expert “for for.” This approach not only makes it more manageable but also allows for greater precision in crafting each component.Step 2: Applying Glue and Securing
Sven proceeds to apply glue along one edge of the flange, ensuring a secure bond when clamped into place. He emphasizes that this stage is crucial for maintaining the structural integrity of the flange, which in turn safeguards the living area beneath the canvas when hatches are open.Step 3: Allowing Time to Dry
After securely attaching the first portion of the flange, Sven allows ample time for it to dry before moving forward with additional steps. This patience and precision are key aspects of his successful boatbuilding methods.Step 4: Finishing Touches
Once the flange is fully dried, Sven removes the clamps carefully, ensuring no damage occurs during this process. He then moves on to attaching four more pieces onto these main frames, completing two pairs of flanges for the bulkhead hatches.The Final Touches
While two flanges form the primary support structure around the hatches, Sven mentions there are two additional pieces required at each end to ensure comprehensive protection. This attention to detail highlights his commitment to producing a durable and reliable design. “Sailing is about finding your path, whether it’s across an ocean or within yourself.” – Sven Yrvind In conclusion, making flanges around bulkhead hatches may seem complex at first glance, but by following Sven Yrvind’s meticulous process, enthusiasts can achieve professional-level results. Remember that the journey of boatbuilding is as rewarding as reaching your destination; it tests one’s patience and dedication. For those seeking to embark on this adventure or simply gain more insight into marine craftsmanship, Sven’s wisdom is invaluable.Sven Yrvind, a renowned yacht designer and sailor, shares valuable insights on creating flanges around bulkhead hatches for canvas protection in this enlightening video. By following his expert guidance, boat enthusiasts can ensure their living areas remain secure while allowing unhindered access through the hatches.Step 1: Starting with the Flange
Sven begins by explaining that working on flanges vertically and horizontally is significantly easier than doing so in a flat position. To simplify the process further, he divides the task into two or three steps as suggested by fellow expert “for for.” This approach not only makes it more manageable but also allows for greater precision in crafting each component.Step 2: Applying Glue and Securing
Sven proceeds to apply glue along one edge of the flange, ensuring a secure bond when clamped into place. He emphasizes that this stage is crucial for maintaining the structural integrity of the flange, which in turn safeguards the living area beneath the canvas when hatches are open.Step 3: Allowing Time to Dry
After securely attaching the first portion of the flange, Sven allows ample time for it to dry before moving forward with additional steps. This patience and precision are key aspects of his successful boatbuilding methods.Step 4: Finishing Touches
Once the flange is fully dried, Sven removes the clamps carefully, ensuring no damage occurs during this process. He then moves on to attaching four more pieces onto these main frames, completing two pairs of flanges for the bulkhead hatches.The Final Touches
While two flanges form the primary support structure around the hatches, Sven mentions there are two additional pieces required at each end to ensure comprehensive protection. This attention to detail highlights his commitment to producing a durable and reliable design. “Sailing is about finding your path, whether it’s across an ocean or within yourself.” – Sven Yrvind In conclusion, making flanges around bulkhead hatches may seem complex at first glance, but by following Sven Yrvind’s meticulous process, enthusiasts can achieve professional-level results. Remember that the journey of boatbuilding is as rewarding as reaching your destination; it tests one’s patience and dedication. For those seeking to embark on this adventure or simply gain more insight into marine craftsmanship, Sven’s wisdom is invaluable.Making Flanges Around Bulkhead Hatches for Canvas
Sven Yrvind, a renowned yacht designer and sailor, shares valuable insights on creating flanges around bulkhead hatches for canvas protection in this enlightening video. By following his expert guidance, boat enthusiasts can ensure their living areas remain secure while allowing unhindered access through the hatches.Step 1: Starting with the Flange
Sven begins by explaining that working on flanges vertically and horizontally is significantly easier than doing so in a flat position. To simplify the process further, he divides the task into two or three steps as suggested by fellow expert “for for.” This approach not only makes it more manageable but also allows for greater precision in crafting each component.Step 2: Applying Glue and Securing
Sven proceeds to apply glue along one edge of the flange, ensuring a secure bond when clamped into place. He emphasizes that this stage is crucial for maintaining the structural integrity of the flange, which in turn safeguards the living area beneath the canvas when hatches are open.Step 3: Allowing Time to Dry
After securely attaching the first portion of the flange, Sven allows ample time for it to dry before moving forward with additional steps. This patience and precision are key aspects of his successful boatbuilding methods.Step 4: Finishing Touches
Once the flange is fully dried, Sven removes the clamps carefully, ensuring no damage occurs during this process. He then moves on to attaching four more pieces onto these main frames, completing two pairs of flanges for the bulkhead hatches.The Final Touches
While two flanges form the primary support structure around the hatches, Sven mentions there are two additional pieces required at each end to ensure comprehensive protection. This attention to detail highlights his commitment to producing a durable and reliable design. “Sailing is about finding your path, whether it’s across an ocean or within yourself.” – Sven Yrvind In conclusion, making flanges around bulkhead hatches may seem complex at first glance, but by following Sven Yrvind’s meticulous process, enthusiasts can achieve professional-level results. Remember that the journey of boatbuilding is as rewarding as reaching your destination; it tests one’s patience and dedication. For those seeking to embark on this adventure or simply gain more insight into marine craftsmanship, Sven’s wisdom is invaluable.After securely attaching the first portion of the flange, Sven allows ample time for it to dry before moving forward with additional steps. This patience and precision are key aspects of his successful boatbuilding methods.Step 4: Finishing Touches
Once the flange is fully dried, Sven removes the clamps carefully, ensuring no damage occurs during this process. He then moves on to attaching four more pieces onto these main frames, completing two pairs of flanges for the bulkhead hatches.The Final Touches
While two flanges form the primary support structure around the hatches, Sven mentions there are two additional pieces required at each end to ensure comprehensive protection. This attention to detail highlights his commitment to producing a durable and reliable design. “Sailing is about finding your path, whether it’s across an ocean or within yourself.” – Sven Yrvind In conclusion, making flanges around bulkhead hatches may seem complex at first glance, but by following Sven Yrvind’s meticulous process, enthusiasts can achieve professional-level results. Remember that the journey of boatbuilding is as rewarding as reaching your destination; it tests one’s patience and dedication. For those seeking to embark on this adventure or simply gain more insight into marine craftsmanship, Sven’s wisdom is invaluable.Sven proceeds to apply glue along one edge of the flange, ensuring a secure bond when clamped into place. He emphasizes that this stage is crucial for maintaining the structural integrity of the flange, which in turn safeguards the living area beneath the canvas when hatches are open.Step 3: Allowing Time to Dry
After securely attaching the first portion of the flange, Sven allows ample time for it to dry before moving forward with additional steps. This patience and precision are key aspects of his successful boatbuilding methods.Step 4: Finishing Touches
Once the flange is fully dried, Sven removes the clamps carefully, ensuring no damage occurs during this process. He then moves on to attaching four more pieces onto these main frames, completing two pairs of flanges for the bulkhead hatches.The Final Touches
While two flanges form the primary support structure around the hatches, Sven mentions there are two additional pieces required at each end to ensure comprehensive protection. This attention to detail highlights his commitment to producing a durable and reliable design. “Sailing is about finding your path, whether it’s across an ocean or within yourself.” – Sven Yrvind In conclusion, making flanges around bulkhead hatches may seem complex at first glance, but by following Sven Yrvind’s meticulous process, enthusiasts can achieve professional-level results. Remember that the journey of boatbuilding is as rewarding as reaching your destination; it tests one’s patience and dedication. For those seeking to embark on this adventure or simply gain more insight into marine craftsmanship, Sven’s wisdom is invaluable.Sven begins by explaining that working on flanges vertically and horizontally is significantly easier than doing so in a flat position. To simplify the process further, he divides the task into two or three steps as suggested by fellow expert “for for.” This approach not only makes it more manageable but also allows for greater precision in crafting each component.Step 2: Applying Glue and Securing
Sven proceeds to apply glue along one edge of the flange, ensuring a secure bond when clamped into place. He emphasizes that this stage is crucial for maintaining the structural integrity of the flange, which in turn safeguards the living area beneath the canvas when hatches are open.Step 3: Allowing Time to Dry
After securely attaching the first portion of the flange, Sven allows ample time for it to dry before moving forward with additional steps. This patience and precision are key aspects of his successful boatbuilding methods.Step 4: Finishing Touches
Once the flange is fully dried, Sven removes the clamps carefully, ensuring no damage occurs during this process. He then moves on to attaching four more pieces onto these main frames, completing two pairs of flanges for the bulkhead hatches.The Final Touches
While two flanges form the primary support structure around the hatches, Sven mentions there are two additional pieces required at each end to ensure comprehensive protection. This attention to detail highlights his commitment to producing a durable and reliable design. “Sailing is about finding your path, whether it’s across an ocean or within yourself.” – Sven Yrvind In conclusion, making flanges around bulkhead hatches may seem complex at first glance, but by following Sven Yrvind’s meticulous process, enthusiasts can achieve professional-level results. Remember that the journey of boatbuilding is as rewarding as reaching your destination; it tests one’s patience and dedication. For those seeking to embark on this adventure or simply gain more insight into marine craftsmanship, Sven’s wisdom is invaluable.Sven Yrvind, a renowned yacht designer and sailor, shares valuable insights on creating flanges around bulkhead hatches for canvas protection in this enlightening video. By following his expert guidance, boat enthusiasts can ensure their living areas remain secure while allowing unhindered access through the hatches.Step 1: Starting with the Flange
Sven begins by explaining that working on flanges vertically and horizontally is significantly easier than doing so in a flat position. To simplify the process further, he divides the task into two or three steps as suggested by fellow expert “for for.” This approach not only makes it more manageable but also allows for greater precision in crafting each component.Step 2: Applying Glue and Securing
Sven proceeds to apply glue along one edge of the flange, ensuring a secure bond when clamped into place. He emphasizes that this stage is crucial for maintaining the structural integrity of the flange, which in turn safeguards the living area beneath the canvas when hatches are open.Step 3: Allowing Time to Dry
After securely attaching the first portion of the flange, Sven allows ample time for it to dry before moving forward with additional steps. This patience and precision are key aspects of his successful boatbuilding methods.Step 4: Finishing Touches
Once the flange is fully dried, Sven removes the clamps carefully, ensuring no damage occurs during this process. He then moves on to attaching four more pieces onto these main frames, completing two pairs of flanges for the bulkhead hatches.The Final Touches
While two flanges form the primary support structure around the hatches, Sven mentions there are two additional pieces required at each end to ensure comprehensive protection. This attention to detail highlights his commitment to producing a durable and reliable design. “Sailing is about finding your path, whether it’s across an ocean or within yourself.” – Sven Yrvind In conclusion, making flanges around bulkhead hatches may seem complex at first glance, but by following Sven Yrvind’s meticulous process, enthusiasts can achieve professional-level results. Remember that the journey of boatbuilding is as rewarding as reaching your destination; it tests one’s patience and dedication. For those seeking to embark on this adventure or simply gain more insight into marine craftsmanship, Sven’s wisdom is invaluable.Making Flanges Around Bulkhead Hatches for Canvas
Sven Yrvind, a renowned yacht designer and sailor, shares valuable insights on creating flanges around bulkhead hatches for canvas protection in this enlightening video. By following his expert guidance, boat enthusiasts can ensure their living areas remain secure while allowing unhindered access through the hatches.Step 1: Starting with the Flange
Sven begins by explaining that working on flanges vertically and horizontally is significantly easier than doing so in a flat position. To simplify the process further, he divides the task into two or three steps as suggested by fellow expert “for for.” This approach not only makes it more manageable but also allows for greater precision in crafting each component.Step 2: Applying Glue and Securing
Sven proceeds to apply glue along one edge of the flange, ensuring a secure bond when clamped into place. He emphasizes that this stage is crucial for maintaining the structural integrity of the flange, which in turn safeguards the living area beneath the canvas when hatches are open.Step 3: Allowing Time to Dry
After securely attaching the first portion of the flange, Sven allows ample time for it to dry before moving forward with additional steps. This patience and precision are key aspects of his successful boatbuilding methods.Step 4: Finishing Touches
Once the flange is fully dried, Sven removes the clamps carefully, ensuring no damage occurs during this process. He then moves on to attaching four more pieces onto these main frames, completing two pairs of flanges for the bulkhead hatches.The Final Touches
While two flanges form the primary support structure around the hatches, Sven mentions there are two additional pieces required at each end to ensure comprehensive protection. This attention to detail highlights his commitment to producing a durable and reliable design. “Sailing is about finding your path, whether it’s across an ocean or within yourself.” – Sven Yrvind In conclusion, making flanges around bulkhead hatches may seem complex at first glance, but by following Sven Yrvind’s meticulous process, enthusiasts can achieve professional-level results. Remember that the journey of boatbuilding is as rewarding as reaching your destination; it tests one’s patience and dedication. For those seeking to embark on this adventure or simply gain more insight into marine craftsmanship, Sven’s wisdom is invaluable.Once the flange is fully dried, Sven removes the clamps carefully, ensuring no damage occurs during this process. He then moves on to attaching four more pieces onto these main frames, completing two pairs of flanges for the bulkhead hatches.The Final Touches
While two flanges form the primary support structure around the hatches, Sven mentions there are two additional pieces required at each end to ensure comprehensive protection. This attention to detail highlights his commitment to producing a durable and reliable design. “Sailing is about finding your path, whether it’s across an ocean or within yourself.” – Sven Yrvind In conclusion, making flanges around bulkhead hatches may seem complex at first glance, but by following Sven Yrvind’s meticulous process, enthusiasts can achieve professional-level results. Remember that the journey of boatbuilding is as rewarding as reaching your destination; it tests one’s patience and dedication. For those seeking to embark on this adventure or simply gain more insight into marine craftsmanship, Sven’s wisdom is invaluable.After securely attaching the first portion of the flange, Sven allows ample time for it to dry before moving forward with additional steps. This patience and precision are key aspects of his successful boatbuilding methods.Step 4: Finishing Touches
Once the flange is fully dried, Sven removes the clamps carefully, ensuring no damage occurs during this process. He then moves on to attaching four more pieces onto these main frames, completing two pairs of flanges for the bulkhead hatches.The Final Touches
While two flanges form the primary support structure around the hatches, Sven mentions there are two additional pieces required at each end to ensure comprehensive protection. This attention to detail highlights his commitment to producing a durable and reliable design. “Sailing is about finding your path, whether it’s across an ocean or within yourself.” – Sven Yrvind In conclusion, making flanges around bulkhead hatches may seem complex at first glance, but by following Sven Yrvind’s meticulous process, enthusiasts can achieve professional-level results. Remember that the journey of boatbuilding is as rewarding as reaching your destination; it tests one’s patience and dedication. For those seeking to embark on this adventure or simply gain more insight into marine craftsmanship, Sven’s wisdom is invaluable.Sven proceeds to apply glue along one edge of the flange, ensuring a secure bond when clamped into place. He emphasizes that this stage is crucial for maintaining the structural integrity of the flange, which in turn safeguards the living area beneath the canvas when hatches are open.Step 3: Allowing Time to Dry
After securely attaching the first portion of the flange, Sven allows ample time for it to dry before moving forward with additional steps. This patience and precision are key aspects of his successful boatbuilding methods.Step 4: Finishing Touches
Once the flange is fully dried, Sven removes the clamps carefully, ensuring no damage occurs during this process. He then moves on to attaching four more pieces onto these main frames, completing two pairs of flanges for the bulkhead hatches.The Final Touches
While two flanges form the primary support structure around the hatches, Sven mentions there are two additional pieces required at each end to ensure comprehensive protection. This attention to detail highlights his commitment to producing a durable and reliable design. “Sailing is about finding your path, whether it’s across an ocean or within yourself.” – Sven Yrvind In conclusion, making flanges around bulkhead hatches may seem complex at first glance, but by following Sven Yrvind’s meticulous process, enthusiasts can achieve professional-level results. Remember that the journey of boatbuilding is as rewarding as reaching your destination; it tests one’s patience and dedication. For those seeking to embark on this adventure or simply gain more insight into marine craftsmanship, Sven’s wisdom is invaluable.Sven begins by explaining that working on flanges vertically and horizontally is significantly easier than doing so in a flat position. To simplify the process further, he divides the task into two or three steps as suggested by fellow expert “for for.” This approach not only makes it more manageable but also allows for greater precision in crafting each component.Step 2: Applying Glue and Securing
Sven proceeds to apply glue along one edge of the flange, ensuring a secure bond when clamped into place. He emphasizes that this stage is crucial for maintaining the structural integrity of the flange, which in turn safeguards the living area beneath the canvas when hatches are open.Step 3: Allowing Time to Dry
After securely attaching the first portion of the flange, Sven allows ample time for it to dry before moving forward with additional steps. This patience and precision are key aspects of his successful boatbuilding methods.Step 4: Finishing Touches
Once the flange is fully dried, Sven removes the clamps carefully, ensuring no damage occurs during this process. He then moves on to attaching four more pieces onto these main frames, completing two pairs of flanges for the bulkhead hatches.The Final Touches
While two flanges form the primary support structure around the hatches, Sven mentions there are two additional pieces required at each end to ensure comprehensive protection. This attention to detail highlights his commitment to producing a durable and reliable design. “Sailing is about finding your path, whether it’s across an ocean or within yourself.” – Sven Yrvind In conclusion, making flanges around bulkhead hatches may seem complex at first glance, but by following Sven Yrvind’s meticulous process, enthusiasts can achieve professional-level results. Remember that the journey of boatbuilding is as rewarding as reaching your destination; it tests one’s patience and dedication. For those seeking to embark on this adventure or simply gain more insight into marine craftsmanship, Sven’s wisdom is invaluable.Sven Yrvind, a renowned yacht designer and sailor, shares valuable insights on creating flanges around bulkhead hatches for canvas protection in this enlightening video. By following his expert guidance, boat enthusiasts can ensure their living areas remain secure while allowing unhindered access through the hatches.Step 1: Starting with the Flange
Sven begins by explaining that working on flanges vertically and horizontally is significantly easier than doing so in a flat position. To simplify the process further, he divides the task into two or three steps as suggested by fellow expert “for for.” This approach not only makes it more manageable but also allows for greater precision in crafting each component.Step 2: Applying Glue and Securing
Sven proceeds to apply glue along one edge of the flange, ensuring a secure bond when clamped into place. He emphasizes that this stage is crucial for maintaining the structural integrity of the flange, which in turn safeguards the living area beneath the canvas when hatches are open.Step 3: Allowing Time to Dry
After securely attaching the first portion of the flange, Sven allows ample time for it to dry before moving forward with additional steps. This patience and precision are key aspects of his successful boatbuilding methods.Step 4: Finishing Touches
Once the flange is fully dried, Sven removes the clamps carefully, ensuring no damage occurs during this process. He then moves on to attaching four more pieces onto these main frames, completing two pairs of flanges for the bulkhead hatches.The Final Touches
While two flanges form the primary support structure around the hatches, Sven mentions there are two additional pieces required at each end to ensure comprehensive protection. This attention to detail highlights his commitment to producing a durable and reliable design. “Sailing is about finding your path, whether it’s across an ocean or within yourself.” – Sven Yrvind In conclusion, making flanges around bulkhead hatches may seem complex at first glance, but by following Sven Yrvind’s meticulous process, enthusiasts can achieve professional-level results. Remember that the journey of boatbuilding is as rewarding as reaching your destination; it tests one’s patience and dedication. For those seeking to embark on this adventure or simply gain more insight into marine craftsmanship, Sven’s wisdom is invaluable.Making Flanges Around Bulkhead Hatches for Canvas
Sven Yrvind, a renowned yacht designer and sailor, shares valuable insights on creating flanges around bulkhead hatches for canvas protection in this enlightening video. By following his expert guidance, boat enthusiasts can ensure their living areas remain secure while allowing unhindered access through the hatches.Step 1: Starting with the Flange
Sven begins by explaining that working on flanges vertically and horizontally is significantly easier than doing so in a flat position. To simplify the process further, he divides the task into two or three steps as suggested by fellow expert “for for.” This approach not only makes it more manageable but also allows for greater precision in crafting each component.Step 2: Applying Glue and Securing
Sven proceeds to apply glue along one edge of the flange, ensuring a secure bond when clamped into place. He emphasizes that this stage is crucial for maintaining the structural integrity of the flange, which in turn safeguards the living area beneath the canvas when hatches are open.Step 3: Allowing Time to Dry
After securely attaching the first portion of the flange, Sven allows ample time for it to dry before moving forward with additional steps. This patience and precision are key aspects of his successful boatbuilding methods.Step 4: Finishing Touches
Once the flange is fully dried, Sven removes the clamps carefully, ensuring no damage occurs during this process. He then moves on to attaching four more pieces onto these main frames, completing two pairs of flanges for the bulkhead hatches.The Final Touches
While two flanges form the primary support structure around the hatches, Sven mentions there are two additional pieces required at each end to ensure comprehensive protection. This attention to detail highlights his commitment to producing a durable and reliable design. “Sailing is about finding your path, whether it’s across an ocean or within yourself.” – Sven Yrvind In conclusion, making flanges around bulkhead hatches may seem complex at first glance, but by following Sven Yrvind’s meticulous process, enthusiasts can achieve professional-level results. Remember that the journey of boatbuilding is as rewarding as reaching your destination; it tests one’s patience and dedication. For those seeking to embark on this adventure or simply gain more insight into marine craftsmanship, Sven’s wisdom is invaluable.Sven Yrvind, a renowned yacht designer and sailor, shares valuable insights on creating flanges around bulkhead hatches for canvas protection in this enlightening video. By following his expert guidance, boat enthusiasts can ensure their living areas remain secure while allowing unhindered access through the hatches.Step 1: Starting with the Flange
Sven begins by explaining that working on flanges vertically and horizontally is significantly easier than doing so in a flat position. To simplify the process further, he divides the task into two or three steps as suggested by fellow expert “for for.” This approach not only makes it more manageable but also allows for greater precision in crafting each component.Step 2: Applying Glue and Securing
Sven proceeds to apply glue along one edge of the flange, ensuring a secure bond when clamped into place. He emphasizes that this stage is crucial for maintaining the structural integrity of the flange, which in turn safeguards the living area beneath the canvas when hatches are open.Step 3: Allowing Time to Dry
After securely attaching the first portion of the flange, Sven allows ample time for it to dry before moving forward with additional steps. This patience and precision are key aspects of his successful boatbuilding methods.Step 4: Finishing Touches
Once the flange is fully dried, Sven removes the clamps carefully, ensuring no damage occurs during this process. He then moves on to attaching four more pieces onto these main frames, completing two pairs of flanges for the bulkhead hatches.The Final Touches
While two flanges form the primary support structure around the hatches, Sven mentions there are two additional pieces required at each end to ensure comprehensive protection. This attention to detail highlights his commitment to producing a durable and reliable design. “Sailing is about finding your path, whether it’s across an ocean or within yourself.” – Sven Yrvind In conclusion, making flanges around bulkhead hatches may seem complex at first glance, but by following Sven Yrvind’s meticulous process, enthusiasts can achieve professional-level results. Remember that the journey of boatbuilding is as rewarding as reaching your destination; it tests one’s patience and dedication. For those seeking to embark on this adventure or simply gain more insight into marine craftsmanship, Sven’s wisdom is invaluable.Once the flange is fully dried, Sven removes the clamps carefully, ensuring no damage occurs during this process. He then moves on to attaching four more pieces onto these main frames, completing two pairs of flanges for the bulkhead hatches.The Final Touches
While two flanges form the primary support structure around the hatches, Sven mentions there are two additional pieces required at each end to ensure comprehensive protection. This attention to detail highlights his commitment to producing a durable and reliable design. “Sailing is about finding your path, whether it’s across an ocean or within yourself.” – Sven Yrvind In conclusion, making flanges around bulkhead hatches may seem complex at first glance, but by following Sven Yrvind’s meticulous process, enthusiasts can achieve professional-level results. Remember that the journey of boatbuilding is as rewarding as reaching your destination; it tests one’s patience and dedication. For those seeking to embark on this adventure or simply gain more insight into marine craftsmanship, Sven’s wisdom is invaluable.Making Flanges Around Bulkhead Hatches for Canvas
Sven Yrvind, a renowned yacht designer and sailor, shares valuable insights on creating flanges around bulkhead hatches for canvas protection in this enlightening video. By following his expert guidance, boat enthusiasts can ensure their living areas remain secure while allowing unhindered access through the hatches.Step 1: Starting with the Flange
Sven begins by explaining that working on flanges vertically and horizontally is significantly easier than doing so in a flat position. To simplify the process further, he divides the task into two or three steps as suggested by fellow expert “for for.” This approach not only makes it more manageable but also allows for greater precision in crafting each component.Step 2: Applying Glue and Securing
Sven proceeds to apply glue along one edge of the flange, ensuring a secure bond when clamped into place. He emphasizes that this stage is crucial for maintaining the structural integrity of the flange, which in turn safeguards the living area beneath the canvas when hatches are open.Step 3: Allowing Time to Dry
After securely attaching the first portion of the flange, Sven allows ample time for it to dry before moving forward with additional steps. This patience and precision are key aspects of his successful boatbuilding methods.Step 4: Finishing Touches
Once the flange is fully dried, Sven removes the clamps carefully, ensuring no damage occurs during this process. He then moves on to attaching four more pieces onto these main frames, completing two pairs of flanges for the bulkhead hatches.The Final Touches
While two flanges form the primary support structure around the hatches, Sven mentions there are two additional pieces required at each end to ensure comprehensive protection. This attention to detail highlights his commitment to producing a durable and reliable design. “Sailing is about finding your path, whether it’s across an ocean or within yourself.” – Sven Yrvind In conclusion, making flanges around bulkhead hatches may seem complex at first glance, but by following Sven Yrvind’s meticulous process, enthusiasts can achieve professional-level results. Remember that the journey of boatbuilding is as rewarding as reaching your destination; it tests one’s patience and dedication. For those seeking to embark on this adventure or simply gain more insight into marine craftsmanship, Sven’s wisdom is invaluable.After securely attaching the first portion of the flange, Sven allows ample time for it to dry before moving forward with additional steps. This patience and precision are key aspects of his successful boatbuilding methods.Step 4: Finishing Touches
Once the flange is fully dried, Sven removes the clamps carefully, ensuring no damage occurs during this process. He then moves on to attaching four more pieces onto these main frames, completing two pairs of flanges for the bulkhead hatches.The Final Touches
While two flanges form the primary support structure around the hatches, Sven mentions there are two additional pieces required at each end to ensure comprehensive protection. This attention to detail highlights his commitment to producing a durable and reliable design. “Sailing is about finding your path, whether it’s across an ocean or within yourself.” – Sven Yrvind In conclusion, making flanges around bulkhead hatches may seem complex at first glance, but by following Sven Yrvind’s meticulous process, enthusiasts can achieve professional-level results. Remember that the journey of boatbuilding is as rewarding as reaching your destination; it tests one’s patience and dedication. For those seeking to embark on this adventure or simply gain more insight into marine craftsmanship, Sven’s wisdom is invaluable.Making Flanges Around Bulkhead Hatches for Canvas
Sven Yrvind, a renowned yacht designer and sailor, shares valuable insights on creating flanges around bulkhead hatches for canvas protection in this enlightening video. By following his expert guidance, boat enthusiasts can ensure their living areas remain secure while allowing unhindered access through the hatches.Step 1: Starting with the Flange
Sven begins by explaining that working on flanges vertically and horizontally is significantly easier than doing so in a flat position. To simplify the process further, he divides the task into two or three steps as suggested by fellow expert “for for.” This approach not only makes it more manageable but also allows for greater precision in crafting each component.Step 2: Applying Glue and Securing
Sven proceeds to apply glue along one edge of the flange, ensuring a secure bond when clamped into place. He emphasizes that this stage is crucial for maintaining the structural integrity of the flange, which in turn safeguards the living area beneath the canvas when hatches are open.Step 3: Allowing Time to Dry
After securely attaching the first portion of the flange, Sven allows ample time for it to dry before moving forward with additional steps. This patience and precision are key aspects of his successful boatbuilding methods.Step 4: Finishing Touches
Once the flange is fully dried, Sven removes the clamps carefully, ensuring no damage occurs during this process. He then moves on to attaching four more pieces onto these main frames, completing two pairs of flanges for the bulkhead hatches.The Final Touches
While two flanges form the primary support structure around the hatches, Sven mentions there are two additional pieces required at each end to ensure comprehensive protection. This attention to detail highlights his commitment to producing a durable and reliable design. “Sailing is about finding your path, whether it’s across an ocean or within yourself.” – Sven Yrvind In conclusion, making flanges around bulkhead hatches may seem complex at first glance, but by following Sven Yrvind’s meticulous process, enthusiasts can achieve professional-level results. Remember that the journey of boatbuilding is as rewarding as reaching your destination; it tests one’s patience and dedication. For those seeking to embark on this adventure or simply gain more insight into marine craftsmanship, Sven’s wisdom is invaluable.Sven proceeds to apply glue along one edge of the flange, ensuring a secure bond when clamped into place. He emphasizes that this stage is crucial for maintaining the structural integrity of the flange, which in turn safeguards the living area beneath the canvas when hatches are open.Step 3: Allowing Time to Dry
After securely attaching the first portion of the flange, Sven allows ample time for it to dry before moving forward with additional steps. This patience and precision are key aspects of his successful boatbuilding methods.Step 4: Finishing Touches
Once the flange is fully dried, Sven removes the clamps carefully, ensuring no damage occurs during this process. He then moves on to attaching four more pieces onto these main frames, completing two pairs of flanges for the bulkhead hatches.The Final Touches
While two flanges form the primary support structure around the hatches, Sven mentions there are two additional pieces required at each end to ensure comprehensive protection. This attention to detail highlights his commitment to producing a durable and reliable design. “Sailing is about finding your path, whether it’s across an ocean or within yourself.” – Sven Yrvind In conclusion, making flanges around bulkhead hatches may seem complex at first glance, but by following Sven Yrvind’s meticulous process, enthusiasts can achieve professional-level results. Remember that the journey of boatbuilding is as rewarding as reaching your destination; it tests one’s patience and dedication. For those seeking to embark on this adventure or simply gain more insight into marine craftsmanship, Sven’s wisdom is invaluable.Making Flanges Around Bulkhead Hatches for Canvas
Sven Yrvind, a renowned yacht designer and sailor, shares valuable insights on creating flanges around bulkhead hatches for canvas protection in this enlightening video. By following his expert guidance, boat enthusiasts can ensure their living areas remain secure while allowing unhindered access through the hatches.Step 1: Starting with the Flange
Sven begins by explaining that working on flanges vertically and horizontally is significantly easier than doing so in a flat position. To simplify the process further, he divides the task into two or three steps as suggested by fellow expert “for for.” This approach not only makes it more manageable but also allows for greater precision in crafting each component.Step 2: Applying Glue and Securing
Sven proceeds to apply glue along one edge of the flange, ensuring a secure bond when clamped into place. He emphasizes that this stage is crucial for maintaining the structural integrity of the flange, which in turn safeguards the living area beneath the canvas when hatches are open.Step 3: Allowing Time to Dry
After securely attaching the first portion of the flange, Sven allows ample time for it to dry before moving forward with additional steps. This patience and precision are key aspects of his successful boatbuilding methods.Step 4: Finishing Touches
Once the flange is fully dried, Sven removes the clamps carefully, ensuring no damage occurs during this process. He then moves on to attaching four more pieces onto these main frames, completing two pairs of flanges for the bulkhead hatches.The Final Touches
While two flanges form the primary support structure around the hatches, Sven mentions there are two additional pieces required at each end to ensure comprehensive protection. This attention to detail highlights his commitment to producing a durable and reliable design. “Sailing is about finding your path, whether it’s across an ocean or within yourself.” – Sven Yrvind In conclusion, making flanges around bulkhead hatches may seem complex at first glance, but by following Sven Yrvind’s meticulous process, enthusiasts can achieve professional-level results. Remember that the journey of boatbuilding is as rewarding as reaching your destination; it tests one’s patience and dedication. For those seeking to embark on this adventure or simply gain more insight into marine craftsmanship, Sven’s wisdom is invaluable.Sven begins by explaining that working on flanges vertically and horizontally is significantly easier than doing so in a flat position. To simplify the process further, he divides the task into two or three steps as suggested by fellow expert “for for.” This approach not only makes it more manageable but also allows for greater precision in crafting each component.Step 2: Applying Glue and Securing
Sven proceeds to apply glue along one edge of the flange, ensuring a secure bond when clamped into place. He emphasizes that this stage is crucial for maintaining the structural integrity of the flange, which in turn safeguards the living area beneath the canvas when hatches are open.Step 3: Allowing Time to Dry
After securely attaching the first portion of the flange, Sven allows ample time for it to dry before moving forward with additional steps. This patience and precision are key aspects of his successful boatbuilding methods.Step 4: Finishing Touches
Once the flange is fully dried, Sven removes the clamps carefully, ensuring no damage occurs during this process. He then moves on to attaching four more pieces onto these main frames, completing two pairs of flanges for the bulkhead hatches.The Final Touches
While two flanges form the primary support structure around the hatches, Sven mentions there are two additional pieces required at each end to ensure comprehensive protection. This attention to detail highlights his commitment to producing a durable and reliable design. “Sailing is about finding your path, whether it’s across an ocean or within yourself.” – Sven Yrvind In conclusion, making flanges around bulkhead hatches may seem complex at first glance, but by following Sven Yrvind’s meticulous process, enthusiasts can achieve professional-level results. Remember that the journey of boatbuilding is as rewarding as reaching your destination; it tests one’s patience and dedication. For those seeking to embark on this adventure or simply gain more insight into marine craftsmanship, Sven’s wisdom is invaluable.Making Flanges Around Bulkhead Hatches for Canvas
Sven Yrvind, a renowned yacht designer and sailor, shares valuable insights on creating flanges around bulkhead hatches for canvas protection in this enlightening video. By following his expert guidance, boat enthusiasts can ensure their living areas remain secure while allowing unhindered access through the hatches.Step 1: Starting with the Flange
Sven begins by explaining that working on flanges vertically and horizontally is significantly easier than doing so in a flat position. To simplify the process further, he divides the task into two or three steps as suggested by fellow expert “for for.” This approach not only makes it more manageable but also allows for greater precision in crafting each component.Step 2: Applying Glue and Securing
Sven proceeds to apply glue along one edge of the flange, ensuring a secure bond when clamped into place. He emphasizes that this stage is crucial for maintaining the structural integrity of the flange, which in turn safeguards the living area beneath the canvas when hatches are open.Step 3: Allowing Time to Dry
After securely attaching the first portion of the flange, Sven allows ample time for it to dry before moving forward with additional steps. This patience and precision are key aspects of his successful boatbuilding methods.Step 4: Finishing Touches
Once the flange is fully dried, Sven removes the clamps carefully, ensuring no damage occurs during this process. He then moves on to attaching four more pieces onto these main frames, completing two pairs of flanges for the bulkhead hatches.The Final Touches
While two flanges form the primary support structure around the hatches, Sven mentions there are two additional pieces required at each end to ensure comprehensive protection. This attention to detail highlights his commitment to producing a durable and reliable design. “Sailing is about finding your path, whether it’s across an ocean or within yourself.” – Sven Yrvind In conclusion, making flanges around bulkhead hatches may seem complex at first glance, but by following Sven Yrvind’s meticulous process, enthusiasts can achieve professional-level results. Remember that the journey of boatbuilding is as rewarding as reaching your destination; it tests one’s patience and dedication. For those seeking to embark on this adventure or simply gain more insight into marine craftsmanship, Sven’s wisdom is invaluable.Sven Yrvind, a renowned yacht designer and sailor, shares valuable insights on creating flanges around bulkhead hatches for canvas protection in this enlightening video. By following his expert guidance, boat enthusiasts can ensure their living areas remain secure while allowing unhindered access through the hatches.Step 1: Starting with the Flange
Sven begins by explaining that working on flanges vertically and horizontally is significantly easier than doing so in a flat position. To simplify the process further, he divides the task into two or three steps as suggested by fellow expert “for for.” This approach not only makes it more manageable but also allows for greater precision in crafting each component.Step 2: Applying Glue and Securing
Sven proceeds to apply glue along one edge of the flange, ensuring a secure bond when clamped into place. He emphasizes that this stage is crucial for maintaining the structural integrity of the flange, which in turn safeguards the living area beneath the canvas when hatches are open.Step 3: Allowing Time to Dry
After securely attaching the first portion of the flange, Sven allows ample time for it to dry before moving forward with additional steps. This patience and precision are key aspects of his successful boatbuilding methods.Step 4: Finishing Touches
Once the flange is fully dried, Sven removes the clamps carefully, ensuring no damage occurs during this process. He then moves on to attaching four more pieces onto these main frames, completing two pairs of flanges for the bulkhead hatches.The Final Touches
While two flanges form the primary support structure around the hatches, Sven mentions there are two additional pieces required at each end to ensure comprehensive protection. This attention to detail highlights his commitment to producing a durable and reliable design. “Sailing is about finding your path, whether it’s across an ocean or within yourself.” – Sven Yrvind In conclusion, making flanges around bulkhead hatches may seem complex at first glance, but by following Sven Yrvind’s meticulous process, enthusiasts can achieve professional-level results. Remember that the journey of boatbuilding is as rewarding as reaching your destination; it tests one’s patience and dedication. For those seeking to embark on this adventure or simply gain more insight into marine craftsmanship, Sven’s wisdom is invaluable.Making Flanges Around Bulkhead Hatches for Canvas
Sven Yrvind, a renowned yacht designer and sailor, shares valuable insights on creating flanges around bulkhead hatches for canvas protection in this enlightening video. By following his expert guidance, boat enthusiasts can ensure their living areas remain secure while allowing unhindered access through the hatches.Step 1: Starting with the Flange
Sven begins by explaining that working on flanges vertically and horizontally is significantly easier than doing so in a flat position. To simplify the process further, he divides the task into two or three steps as suggested by fellow expert “for for.” This approach not only makes it more manageable but also allows for greater precision in crafting each component.Step 2: Applying Glue and Securing
Sven proceeds to apply glue along one edge of the flange, ensuring a secure bond when clamped into place. He emphasizes that this stage is crucial for maintaining the structural integrity of the flange, which in turn safeguards the living area beneath the canvas when hatches are open.Step 3: Allowing Time to Dry
After securely attaching the first portion of the flange, Sven allows ample time for it to dry before moving forward with additional steps. This patience and precision are key aspects of his successful boatbuilding methods.Step 4: Finishing Touches
Once the flange is fully dried, Sven removes the clamps carefully, ensuring no damage occurs during this process. He then moves on to attaching four more pieces onto these main frames, completing two pairs of flanges for the bulkhead hatches.The Final Touches
While two flanges form the primary support structure around the hatches, Sven mentions there are two additional pieces required at each end to ensure comprehensive protection. This attention to detail highlights his commitment to producing a durable and reliable design. “Sailing is about finding your path, whether it’s across an ocean or within yourself.” – Sven Yrvind In conclusion, making flanges around bulkhead hatches may seem complex at first glance, but by following Sven Yrvind’s meticulous process, enthusiasts can achieve professional-level results. Remember that the journey of boatbuilding is as rewarding as reaching your destination; it tests one’s patience and dedication. For those seeking to embark on this adventure or simply gain more insight into marine craftsmanship, Sven’s wisdom is invaluable.Once the flange is fully dried, Sven removes the clamps carefully, ensuring no damage occurs during this process. He then moves on to attaching four more pieces onto these main frames, completing two pairs of flanges for the bulkhead hatches.The Final Touches
While two flanges form the primary support structure around the hatches, Sven mentions there are two additional pieces required at each end to ensure comprehensive protection. This attention to detail highlights his commitment to producing a durable and reliable design. “Sailing is about finding your path, whether it’s across an ocean or within yourself.” – Sven Yrvind In conclusion, making flanges around bulkhead hatches may seem complex at first glance, but by following Sven Yrvind’s meticulous process, enthusiasts can achieve professional-level results. Remember that the journey of boatbuilding is as rewarding as reaching your destination; it tests one’s patience and dedication. For those seeking to embark on this adventure or simply gain more insight into marine craftsmanship, Sven’s wisdom is invaluable.Sven Yrvind, a renowned yacht designer and sailor, shares valuable insights on creating flanges around bulkhead hatches for canvas protection in this enlightening video. By following his expert guidance, boat enthusiasts can ensure their living areas remain secure while allowing unhindered access through the hatches.Step 1: Starting with the Flange
Sven begins by explaining that working on flanges vertically and horizontally is significantly easier than doing so in a flat position. To simplify the process further, he divides the task into two or three steps as suggested by fellow expert “for for.” This approach not only makes it more manageable but also allows for greater precision in crafting each component.Step 2: Applying Glue and Securing
Sven proceeds to apply glue along one edge of the flange, ensuring a secure bond when clamped into place. He emphasizes that this stage is crucial for maintaining the structural integrity of the flange, which in turn safeguards the living area beneath the canvas when hatches are open.Step 3: Allowing Time to Dry
After securely attaching the first portion of the flange, Sven allows ample time for it to dry before moving forward with additional steps. This patience and precision are key aspects of his successful boatbuilding methods.Step 4: Finishing Touches
Once the flange is fully dried, Sven removes the clamps carefully, ensuring no damage occurs during this process. He then moves on to attaching four more pieces onto these main frames, completing two pairs of flanges for the bulkhead hatches.The Final Touches
While two flanges form the primary support structure around the hatches, Sven mentions there are two additional pieces required at each end to ensure comprehensive protection. This attention to detail highlights his commitment to producing a durable and reliable design. “Sailing is about finding your path, whether it’s across an ocean or within yourself.” – Sven Yrvind In conclusion, making flanges around bulkhead hatches may seem complex at first glance, but by following Sven Yrvind’s meticulous process, enthusiasts can achieve professional-level results. Remember that the journey of boatbuilding is as rewarding as reaching your destination; it tests one’s patience and dedication. For those seeking to embark on this adventure or simply gain more insight into marine craftsmanship, Sven’s wisdom is invaluable.Making Flanges Around Bulkhead Hatches for Canvas
Sven Yrvind, a renowned yacht designer and sailor, shares valuable insights on creating flanges around bulkhead hatches for canvas protection in this enlightening video. By following his expert guidance, boat enthusiasts can ensure their living areas remain secure while allowing unhindered access through the hatches.Step 1: Starting with the Flange
Sven begins by explaining that working on flanges vertically and horizontally is significantly easier than doing so in a flat position. To simplify the process further, he divides the task into two or three steps as suggested by fellow expert “for for.” This approach not only makes it more manageable but also allows for greater precision in crafting each component.Step 2: Applying Glue and Securing
Sven proceeds to apply glue along one edge of the flange, ensuring a secure bond when clamped into place. He emphasizes that this stage is crucial for maintaining the structural integrity of the flange, which in turn safeguards the living area beneath the canvas when hatches are open.Step 3: Allowing Time to Dry
After securely attaching the first portion of the flange, Sven allows ample time for it to dry before moving forward with additional steps. This patience and precision are key aspects of his successful boatbuilding methods.Step 4: Finishing Touches
Once the flange is fully dried, Sven removes the clamps carefully, ensuring no damage occurs during this process. He then moves on to attaching four more pieces onto these main frames, completing two pairs of flanges for the bulkhead hatches.The Final Touches
While two flanges form the primary support structure around the hatches, Sven mentions there are two additional pieces required at each end to ensure comprehensive protection. This attention to detail highlights his commitment to producing a durable and reliable design. “Sailing is about finding your path, whether it’s across an ocean or within yourself.” – Sven Yrvind In conclusion, making flanges around bulkhead hatches may seem complex at first glance, but by following Sven Yrvind’s meticulous process, enthusiasts can achieve professional-level results. Remember that the journey of boatbuilding is as rewarding as reaching your destination; it tests one’s patience and dedication. For those seeking to embark on this adventure or simply gain more insight into marine craftsmanship, Sven’s wisdom is invaluable.After securely attaching the first portion of the flange, Sven allows ample time for it to dry before moving forward with additional steps. This patience and precision are key aspects of his successful boatbuilding methods.Step 4: Finishing Touches
Once the flange is fully dried, Sven removes the clamps carefully, ensuring no damage occurs during this process. He then moves on to attaching four more pieces onto these main frames, completing two pairs of flanges for the bulkhead hatches.The Final Touches
While two flanges form the primary support structure around the hatches, Sven mentions there are two additional pieces required at each end to ensure comprehensive protection. This attention to detail highlights his commitment to producing a durable and reliable design. “Sailing is about finding your path, whether it’s across an ocean or within yourself.” – Sven Yrvind In conclusion, making flanges around bulkhead hatches may seem complex at first glance, but by following Sven Yrvind’s meticulous process, enthusiasts can achieve professional-level results. Remember that the journey of boatbuilding is as rewarding as reaching your destination; it tests one’s patience and dedication. For those seeking to embark on this adventure or simply gain more insight into marine craftsmanship, Sven’s wisdom is invaluable.Sven Yrvind, a renowned yacht designer and sailor, shares valuable insights on creating flanges around bulkhead hatches for canvas protection in this enlightening video. By following his expert guidance, boat enthusiasts can ensure their living areas remain secure while allowing unhindered access through the hatches.Step 1: Starting with the Flange
Sven begins by explaining that working on flanges vertically and horizontally is significantly easier than doing so in a flat position. To simplify the process further, he divides the task into two or three steps as suggested by fellow expert “for for.” This approach not only makes it more manageable but also allows for greater precision in crafting each component.Step 2: Applying Glue and Securing
Sven proceeds to apply glue along one edge of the flange, ensuring a secure bond when clamped into place. He emphasizes that this stage is crucial for maintaining the structural integrity of the flange, which in turn safeguards the living area beneath the canvas when hatches are open.Step 3: Allowing Time to Dry
After securely attaching the first portion of the flange, Sven allows ample time for it to dry before moving forward with additional steps. This patience and precision are key aspects of his successful boatbuilding methods.Step 4: Finishing Touches
Once the flange is fully dried, Sven removes the clamps carefully, ensuring no damage occurs during this process. He then moves on to attaching four more pieces onto these main frames, completing two pairs of flanges for the bulkhead hatches.The Final Touches
While two flanges form the primary support structure around the hatches, Sven mentions there are two additional pieces required at each end to ensure comprehensive protection. This attention to detail highlights his commitment to producing a durable and reliable design. “Sailing is about finding your path, whether it’s across an ocean or within yourself.” – Sven Yrvind In conclusion, making flanges around bulkhead hatches may seem complex at first glance, but by following Sven Yrvind’s meticulous process, enthusiasts can achieve professional-level results. Remember that the journey of boatbuilding is as rewarding as reaching your destination; it tests one’s patience and dedication. For those seeking to embark on this adventure or simply gain more insight into marine craftsmanship, Sven’s wisdom is invaluable.Making Flanges Around Bulkhead Hatches for Canvas
Sven Yrvind, a renowned yacht designer and sailor, shares valuable insights on creating flanges around bulkhead hatches for canvas protection in this enlightening video. By following his expert guidance, boat enthusiasts can ensure their living areas remain secure while allowing unhindered access through the hatches.Step 1: Starting with the Flange
Sven begins by explaining that working on flanges vertically and horizontally is significantly easier than doing so in a flat position. To simplify the process further, he divides the task into two or three steps as suggested by fellow expert “for for.” This approach not only makes it more manageable but also allows for greater precision in crafting each component.Step 2: Applying Glue and Securing
Sven proceeds to apply glue along one edge of the flange, ensuring a secure bond when clamped into place. He emphasizes that this stage is crucial for maintaining the structural integrity of the flange, which in turn safeguards the living area beneath the canvas when hatches are open.Step 3: Allowing Time to Dry
After securely attaching the first portion of the flange, Sven allows ample time for it to dry before moving forward with additional steps. This patience and precision are key aspects of his successful boatbuilding methods.Step 4: Finishing Touches
Once the flange is fully dried, Sven removes the clamps carefully, ensuring no damage occurs during this process. He then moves on to attaching four more pieces onto these main frames, completing two pairs of flanges for the bulkhead hatches.The Final Touches
While two flanges form the primary support structure around the hatches, Sven mentions there are two additional pieces required at each end to ensure comprehensive protection. This attention to detail highlights his commitment to producing a durable and reliable design. “Sailing is about finding your path, whether it’s across an ocean or within yourself.” – Sven Yrvind In conclusion, making flanges around bulkhead hatches may seem complex at first glance, but by following Sven Yrvind’s meticulous process, enthusiasts can achieve professional-level results. Remember that the journey of boatbuilding is as rewarding as reaching your destination; it tests one’s patience and dedication. For those seeking to embark on this adventure or simply gain more insight into marine craftsmanship, Sven’s wisdom is invaluable.Sven proceeds to apply glue along one edge of the flange, ensuring a secure bond when clamped into place. He emphasizes that this stage is crucial for maintaining the structural integrity of the flange, which in turn safeguards the living area beneath the canvas when hatches are open.Step 3: Allowing Time to Dry
After securely attaching the first portion of the flange, Sven allows ample time for it to dry before moving forward with additional steps. This patience and precision are key aspects of his successful boatbuilding methods.Step 4: Finishing Touches
Once the flange is fully dried, Sven removes the clamps carefully, ensuring no damage occurs during this process. He then moves on to attaching four more pieces onto these main frames, completing two pairs of flanges for the bulkhead hatches.The Final Touches
While two flanges form the primary support structure around the hatches, Sven mentions there are two additional pieces required at each end to ensure comprehensive protection. This attention to detail highlights his commitment to producing a durable and reliable design. “Sailing is about finding your path, whether it’s across an ocean or within yourself.” – Sven Yrvind In conclusion, making flanges around bulkhead hatches may seem complex at first glance, but by following Sven Yrvind’s meticulous process, enthusiasts can achieve professional-level results. Remember that the journey of boatbuilding is as rewarding as reaching your destination; it tests one’s patience and dedication. For those seeking to embark on this adventure or simply gain more insight into marine craftsmanship, Sven’s wisdom is invaluable.Sven Yrvind, a renowned yacht designer and sailor, shares valuable insights on creating flanges around bulkhead hatches for canvas protection in this enlightening video. By following his expert guidance, boat enthusiasts can ensure their living areas remain secure while allowing unhindered access through the hatches.Step 1: Starting with the Flange
Sven begins by explaining that working on flanges vertically and horizontally is significantly easier than doing so in a flat position. To simplify the process further, he divides the task into two or three steps as suggested by fellow expert “for for.” This approach not only makes it more manageable but also allows for greater precision in crafting each component.Step 2: Applying Glue and Securing
Sven proceeds to apply glue along one edge of the flange, ensuring a secure bond when clamped into place. He emphasizes that this stage is crucial for maintaining the structural integrity of the flange, which in turn safeguards the living area beneath the canvas when hatches are open.Step 3: Allowing Time to Dry
After securely attaching the first portion of the flange, Sven allows ample time for it to dry before moving forward with additional steps. This patience and precision are key aspects of his successful boatbuilding methods.Step 4: Finishing Touches
Once the flange is fully dried, Sven removes the clamps carefully, ensuring no damage occurs during this process. He then moves on to attaching four more pieces onto these main frames, completing two pairs of flanges for the bulkhead hatches.The Final Touches
While two flanges form the primary support structure around the hatches, Sven mentions there are two additional pieces required at each end to ensure comprehensive protection. This attention to detail highlights his commitment to producing a durable and reliable design. “Sailing is about finding your path, whether it’s across an ocean or within yourself.” – Sven Yrvind In conclusion, making flanges around bulkhead hatches may seem complex at first glance, but by following Sven Yrvind’s meticulous process, enthusiasts can achieve professional-level results. Remember that the journey of boatbuilding is as rewarding as reaching your destination; it tests one’s patience and dedication. For those seeking to embark on this adventure or simply gain more insight into marine craftsmanship, Sven’s wisdom is invaluable.Making Flanges Around Bulkhead Hatches for Canvas
Sven Yrvind, a renowned yacht designer and sailor, shares valuable insights on creating flanges around bulkhead hatches for canvas protection in this enlightening video. By following his expert guidance, boat enthusiasts can ensure their living areas remain secure while allowing unhindered access through the hatches.Step 1: Starting with the Flange
Sven begins by explaining that working on flanges vertically and horizontally is significantly easier than doing so in a flat position. To simplify the process further, he divides the task into two or three steps as suggested by fellow expert “for for.” This approach not only makes it more manageable but also allows for greater precision in crafting each component.Step 2: Applying Glue and Securing
Sven proceeds to apply glue along one edge of the flange, ensuring a secure bond when clamped into place. He emphasizes that this stage is crucial for maintaining the structural integrity of the flange, which in turn safeguards the living area beneath the canvas when hatches are open.Step 3: Allowing Time to Dry
After securely attaching the first portion of the flange, Sven allows ample time for it to dry before moving forward with additional steps. This patience and precision are key aspects of his successful boatbuilding methods.Step 4: Finishing Touches
Once the flange is fully dried, Sven removes the clamps carefully, ensuring no damage occurs during this process. He then moves on to attaching four more pieces onto these main frames, completing two pairs of flanges for the bulkhead hatches.The Final Touches
While two flanges form the primary support structure around the hatches, Sven mentions there are two additional pieces required at each end to ensure comprehensive protection. This attention to detail highlights his commitment to producing a durable and reliable design. “Sailing is about finding your path, whether it’s across an ocean or within yourself.” – Sven Yrvind In conclusion, making flanges around bulkhead hatches may seem complex at first glance, but by following Sven Yrvind’s meticulous process, enthusiasts can achieve professional-level results. Remember that the journey of boatbuilding is as rewarding as reaching your destination; it tests one’s patience and dedication. For those seeking to embark on this adventure or simply gain more insight into marine craftsmanship, Sven’s wisdom is invaluable.Sven begins by explaining that working on flanges vertically and horizontally is significantly easier than doing so in a flat position. To simplify the process further, he divides the task into two or three steps as suggested by fellow expert “for for.” This approach not only makes it more manageable but also allows for greater precision in crafting each component.Step 2: Applying Glue and Securing
Sven proceeds to apply glue along one edge of the flange, ensuring a secure bond when clamped into place. He emphasizes that this stage is crucial for maintaining the structural integrity of the flange, which in turn safeguards the living area beneath the canvas when hatches are open.Step 3: Allowing Time to Dry
After securely attaching the first portion of the flange, Sven allows ample time for it to dry before moving forward with additional steps. This patience and precision are key aspects of his successful boatbuilding methods.Step 4: Finishing Touches
Once the flange is fully dried, Sven removes the clamps carefully, ensuring no damage occurs during this process. He then moves on to attaching four more pieces onto these main frames, completing two pairs of flanges for the bulkhead hatches.The Final Touches
While two flanges form the primary support structure around the hatches, Sven mentions there are two additional pieces required at each end to ensure comprehensive protection. This attention to detail highlights his commitment to producing a durable and reliable design. “Sailing is about finding your path, whether it’s across an ocean or within yourself.” – Sven Yrvind In conclusion, making flanges around bulkhead hatches may seem complex at first glance, but by following Sven Yrvind’s meticulous process, enthusiasts can achieve professional-level results. Remember that the journey of boatbuilding is as rewarding as reaching your destination; it tests one’s patience and dedication. For those seeking to embark on this adventure or simply gain more insight into marine craftsmanship, Sven’s wisdom is invaluable.Sven Yrvind, a renowned yacht designer and sailor, shares valuable insights on creating flanges around bulkhead hatches for canvas protection in this enlightening video. By following his expert guidance, boat enthusiasts can ensure their living areas remain secure while allowing unhindered access through the hatches.Step 1: Starting with the Flange
Sven begins by explaining that working on flanges vertically and horizontally is significantly easier than doing so in a flat position. To simplify the process further, he divides the task into two or three steps as suggested by fellow expert “for for.” This approach not only makes it more manageable but also allows for greater precision in crafting each component.Step 2: Applying Glue and Securing
Sven proceeds to apply glue along one edge of the flange, ensuring a secure bond when clamped into place. He emphasizes that this stage is crucial for maintaining the structural integrity of the flange, which in turn safeguards the living area beneath the canvas when hatches are open.Step 3: Allowing Time to Dry
After securely attaching the first portion of the flange, Sven allows ample time for it to dry before moving forward with additional steps. This patience and precision are key aspects of his successful boatbuilding methods.Step 4: Finishing Touches
Once the flange is fully dried, Sven removes the clamps carefully, ensuring no damage occurs during this process. He then moves on to attaching four more pieces onto these main frames, completing two pairs of flanges for the bulkhead hatches.The Final Touches
While two flanges form the primary support structure around the hatches, Sven mentions there are two additional pieces required at each end to ensure comprehensive protection. This attention to detail highlights his commitment to producing a durable and reliable design. “Sailing is about finding your path, whether it’s across an ocean or within yourself.” – Sven Yrvind In conclusion, making flanges around bulkhead hatches may seem complex at first glance, but by following Sven Yrvind’s meticulous process, enthusiasts can achieve professional-level results. Remember that the journey of boatbuilding is as rewarding as reaching your destination; it tests one’s patience and dedication. For those seeking to embark on this adventure or simply gain more insight into marine craftsmanship, Sven’s wisdom is invaluable.Making Flanges Around Bulkhead Hatches for Canvas
Sven Yrvind, a renowned yacht designer and sailor, shares valuable insights on creating flanges around bulkhead hatches for canvas protection in this enlightening video. By following his expert guidance, boat enthusiasts can ensure their living areas remain secure while allowing unhindered access through the hatches.Step 1: Starting with the Flange
Sven begins by explaining that working on flanges vertically and horizontally is significantly easier than doing so in a flat position. To simplify the process further, he divides the task into two or three steps as suggested by fellow expert “for for.” This approach not only makes it more manageable but also allows for greater precision in crafting each component.Step 2: Applying Glue and Securing
Sven proceeds to apply glue along one edge of the flange, ensuring a secure bond when clamped into place. He emphasizes that this stage is crucial for maintaining the structural integrity of the flange, which in turn safeguards the living area beneath the canvas when hatches are open.Step 3: Allowing Time to Dry
After securely attaching the first portion of the flange, Sven allows ample time for it to dry before moving forward with additional steps. This patience and precision are key aspects of his successful boatbuilding methods.Step 4: Finishing Touches
Once the flange is fully dried, Sven removes the clamps carefully, ensuring no damage occurs during this process. He then moves on to attaching four more pieces onto these main frames, completing two pairs of flanges for the bulkhead hatches.The Final Touches
While two flanges form the primary support structure around the hatches, Sven mentions there are two additional pieces required at each end to ensure comprehensive protection. This attention to detail highlights his commitment to producing a durable and reliable design. “Sailing is about finding your path, whether it’s across an ocean or within yourself.” – Sven Yrvind In conclusion, making flanges around bulkhead hatches may seem complex at first glance, but by following Sven Yrvind’s meticulous process, enthusiasts can achieve professional-level results. Remember that the journey of boatbuilding is as rewarding as reaching your destination; it tests one’s patience and dedication. For those seeking to embark on this adventure or simply gain more insight into marine craftsmanship, Sven’s wisdom is invaluable.Once the flange is fully dried, Sven removes the clamps carefully, ensuring no damage occurs during this process. He then moves on to attaching four more pieces onto these main frames, completing two pairs of flanges for the bulkhead hatches.The Final Touches
While two flanges form the primary support structure around the hatches, Sven mentions there are two additional pieces required at each end to ensure comprehensive protection. This attention to detail highlights his commitment to producing a durable and reliable design. “Sailing is about finding your path, whether it’s across an ocean or within yourself.” – Sven Yrvind In conclusion, making flanges around bulkhead hatches may seem complex at first glance, but by following Sven Yrvind’s meticulous process, enthusiasts can achieve professional-level results. Remember that the journey of boatbuilding is as rewarding as reaching your destination; it tests one’s patience and dedication. For those seeking to embark on this adventure or simply gain more insight into marine craftsmanship, Sven’s wisdom is invaluable.Sven begins by explaining that working on flanges vertically and horizontally is significantly easier than doing so in a flat position. To simplify the process further, he divides the task into two or three steps as suggested by fellow expert “for for.” This approach not only makes it more manageable but also allows for greater precision in crafting each component.Step 2: Applying Glue and Securing
Sven proceeds to apply glue along one edge of the flange, ensuring a secure bond when clamped into place. He emphasizes that this stage is crucial for maintaining the structural integrity of the flange, which in turn safeguards the living area beneath the canvas when hatches are open.Step 3: Allowing Time to Dry
After securely attaching the first portion of the flange, Sven allows ample time for it to dry before moving forward with additional steps. This patience and precision are key aspects of his successful boatbuilding methods.Step 4: Finishing Touches
Once the flange is fully dried, Sven removes the clamps carefully, ensuring no damage occurs during this process. He then moves on to attaching four more pieces onto these main frames, completing two pairs of flanges for the bulkhead hatches.The Final Touches
While two flanges form the primary support structure around the hatches, Sven mentions there are two additional pieces required at each end to ensure comprehensive protection. This attention to detail highlights his commitment to producing a durable and reliable design. “Sailing is about finding your path, whether it’s across an ocean or within yourself.” – Sven Yrvind In conclusion, making flanges around bulkhead hatches may seem complex at first glance, but by following Sven Yrvind’s meticulous process, enthusiasts can achieve professional-level results. Remember that the journey of boatbuilding is as rewarding as reaching your destination; it tests one’s patience and dedication. For those seeking to embark on this adventure or simply gain more insight into marine craftsmanship, Sven’s wisdom is invaluable.Sven Yrvind, a renowned yacht designer and sailor, shares valuable insights on creating flanges around bulkhead hatches for canvas protection in this enlightening video. By following his expert guidance, boat enthusiasts can ensure their living areas remain secure while allowing unhindered access through the hatches.Step 1: Starting with the Flange
Sven begins by explaining that working on flanges vertically and horizontally is significantly easier than doing so in a flat position. To simplify the process further, he divides the task into two or three steps as suggested by fellow expert “for for.” This approach not only makes it more manageable but also allows for greater precision in crafting each component.Step 2: Applying Glue and Securing
Sven proceeds to apply glue along one edge of the flange, ensuring a secure bond when clamped into place. He emphasizes that this stage is crucial for maintaining the structural integrity of the flange, which in turn safeguards the living area beneath the canvas when hatches are open.Step 3: Allowing Time to Dry
After securely attaching the first portion of the flange, Sven allows ample time for it to dry before moving forward with additional steps. This patience and precision are key aspects of his successful boatbuilding methods.Step 4: Finishing Touches
Once the flange is fully dried, Sven removes the clamps carefully, ensuring no damage occurs during this process. He then moves on to attaching four more pieces onto these main frames, completing two pairs of flanges for the bulkhead hatches.The Final Touches
While two flanges form the primary support structure around the hatches, Sven mentions there are two additional pieces required at each end to ensure comprehensive protection. This attention to detail highlights his commitment to producing a durable and reliable design. “Sailing is about finding your path, whether it’s across an ocean or within yourself.” – Sven Yrvind In conclusion, making flanges around bulkhead hatches may seem complex at first glance, but by following Sven Yrvind’s meticulous process, enthusiasts can achieve professional-level results. Remember that the journey of boatbuilding is as rewarding as reaching your destination; it tests one’s patience and dedication. For those seeking to embark on this adventure or simply gain more insight into marine craftsmanship, Sven’s wisdom is invaluable.Making Flanges Around Bulkhead Hatches for Canvas
Sven Yrvind, a renowned yacht designer and sailor, shares valuable insights on creating flanges around bulkhead hatches for canvas protection in this enlightening video. By following his expert guidance, boat enthusiasts can ensure their living areas remain secure while allowing unhindered access through the hatches.Step 1: Starting with the Flange
Sven begins by explaining that working on flanges vertically and horizontally is significantly easier than doing so in a flat position. To simplify the process further, he divides the task into two or three steps as suggested by fellow expert “for for.” This approach not only makes it more manageable but also allows for greater precision in crafting each component.Step 2: Applying Glue and Securing
Sven proceeds to apply glue along one edge of the flange, ensuring a secure bond when clamped into place. He emphasizes that this stage is crucial for maintaining the structural integrity of the flange, which in turn safeguards the living area beneath the canvas when hatches are open.Step 3: Allowing Time to Dry
After securely attaching the first portion of the flange, Sven allows ample time for it to dry before moving forward with additional steps. This patience and precision are key aspects of his successful boatbuilding methods.Step 4: Finishing Touches
Once the flange is fully dried, Sven removes the clamps carefully, ensuring no damage occurs during this process. He then moves on to attaching four more pieces onto these main frames, completing two pairs of flanges for the bulkhead hatches.The Final Touches
While two flanges form the primary support structure around the hatches, Sven mentions there are two additional pieces required at each end to ensure comprehensive protection. This attention to detail highlights his commitment to producing a durable and reliable design. “Sailing is about finding your path, whether it’s across an ocean or within yourself.” – Sven Yrvind In conclusion, making flanges around bulkhead hatches may seem complex at first glance, but by following Sven Yrvind’s meticulous process, enthusiasts can achieve professional-level results. Remember that the journey of boatbuilding is as rewarding as reaching your destination; it tests one’s patience and dedication. For those seeking to embark on this adventure or simply gain more insight into marine craftsmanship, Sven’s wisdom is invaluable.After securely attaching the first portion of the flange, Sven allows ample time for it to dry before moving forward with additional steps. This patience and precision are key aspects of his successful boatbuilding methods.Step 4: Finishing Touches
Once the flange is fully dried, Sven removes the clamps carefully, ensuring no damage occurs during this process. He then moves on to attaching four more pieces onto these main frames, completing two pairs of flanges for the bulkhead hatches.The Final Touches
While two flanges form the primary support structure around the hatches, Sven mentions there are two additional pieces required at each end to ensure comprehensive protection. This attention to detail highlights his commitment to producing a durable and reliable design. “Sailing is about finding your path, whether it’s across an ocean or within yourself.” – Sven Yrvind In conclusion, making flanges around bulkhead hatches may seem complex at first glance, but by following Sven Yrvind’s meticulous process, enthusiasts can achieve professional-level results. Remember that the journey of boatbuilding is as rewarding as reaching your destination; it tests one’s patience and dedication. For those seeking to embark on this adventure or simply gain more insight into marine craftsmanship, Sven’s wisdom is invaluable.Sven begins by explaining that working on flanges vertically and horizontally is significantly easier than doing so in a flat position. To simplify the process further, he divides the task into two or three steps as suggested by fellow expert “for for.” This approach not only makes it more manageable but also allows for greater precision in crafting each component.Step 2: Applying Glue and Securing
Sven proceeds to apply glue along one edge of the flange, ensuring a secure bond when clamped into place. He emphasizes that this stage is crucial for maintaining the structural integrity of the flange, which in turn safeguards the living area beneath the canvas when hatches are open.Step 3: Allowing Time to Dry
After securely attaching the first portion of the flange, Sven allows ample time for it to dry before moving forward with additional steps. This patience and precision are key aspects of his successful boatbuilding methods.Step 4: Finishing Touches
Once the flange is fully dried, Sven removes the clamps carefully, ensuring no damage occurs during this process. He then moves on to attaching four more pieces onto these main frames, completing two pairs of flanges for the bulkhead hatches.The Final Touches
While two flanges form the primary support structure around the hatches, Sven mentions there are two additional pieces required at each end to ensure comprehensive protection. This attention to detail highlights his commitment to producing a durable and reliable design. “Sailing is about finding your path, whether it’s across an ocean or within yourself.” – Sven Yrvind In conclusion, making flanges around bulkhead hatches may seem complex at first glance, but by following Sven Yrvind’s meticulous process, enthusiasts can achieve professional-level results. Remember that the journey of boatbuilding is as rewarding as reaching your destination; it tests one’s patience and dedication. For those seeking to embark on this adventure or simply gain more insight into marine craftsmanship, Sven’s wisdom is invaluable.Sven Yrvind, a renowned yacht designer and sailor, shares valuable insights on creating flanges around bulkhead hatches for canvas protection in this enlightening video. By following his expert guidance, boat enthusiasts can ensure their living areas remain secure while allowing unhindered access through the hatches.Step 1: Starting with the Flange
Sven begins by explaining that working on flanges vertically and horizontally is significantly easier than doing so in a flat position. To simplify the process further, he divides the task into two or three steps as suggested by fellow expert “for for.” This approach not only makes it more manageable but also allows for greater precision in crafting each component.Step 2: Applying Glue and Securing
Sven proceeds to apply glue along one edge of the flange, ensuring a secure bond when clamped into place. He emphasizes that this stage is crucial for maintaining the structural integrity of the flange, which in turn safeguards the living area beneath the canvas when hatches are open.Step 3: Allowing Time to Dry
After securely attaching the first portion of the flange, Sven allows ample time for it to dry before moving forward with additional steps. This patience and precision are key aspects of his successful boatbuilding methods.Step 4: Finishing Touches
Once the flange is fully dried, Sven removes the clamps carefully, ensuring no damage occurs during this process. He then moves on to attaching four more pieces onto these main frames, completing two pairs of flanges for the bulkhead hatches.The Final Touches
While two flanges form the primary support structure around the hatches, Sven mentions there are two additional pieces required at each end to ensure comprehensive protection. This attention to detail highlights his commitment to producing a durable and reliable design. “Sailing is about finding your path, whether it’s across an ocean or within yourself.” – Sven Yrvind In conclusion, making flanges around bulkhead hatches may seem complex at first glance, but by following Sven Yrvind’s meticulous process, enthusiasts can achieve professional-level results. Remember that the journey of boatbuilding is as rewarding as reaching your destination; it tests one’s patience and dedication. For those seeking to embark on this adventure or simply gain more insight into marine craftsmanship, Sven’s wisdom is invaluable.Making Flanges Around Bulkhead Hatches for Canvas
Sven Yrvind, a renowned yacht designer and sailor, shares valuable insights on creating flanges around bulkhead hatches for canvas protection in this enlightening video. By following his expert guidance, boat enthusiasts can ensure their living areas remain secure while allowing unhindered access through the hatches.Step 1: Starting with the Flange
Sven begins by explaining that working on flanges vertically and horizontally is significantly easier than doing so in a flat position. To simplify the process further, he divides the task into two or three steps as suggested by fellow expert “for for.” This approach not only makes it more manageable but also allows for greater precision in crafting each component.Step 2: Applying Glue and Securing
Sven proceeds to apply glue along one edge of the flange, ensuring a secure bond when clamped into place. He emphasizes that this stage is crucial for maintaining the structural integrity of the flange, which in turn safeguards the living area beneath the canvas when hatches are open.Step 3: Allowing Time to Dry
After securely attaching the first portion of the flange, Sven allows ample time for it to dry before moving forward with additional steps. This patience and precision are key aspects of his successful boatbuilding methods.Step 4: Finishing Touches
Once the flange is fully dried, Sven removes the clamps carefully, ensuring no damage occurs during this process. He then moves on to attaching four more pieces onto these main frames, completing two pairs of flanges for the bulkhead hatches.The Final Touches
While two flanges form the primary support structure around the hatches, Sven mentions there are two additional pieces required at each end to ensure comprehensive protection. This attention to detail highlights his commitment to producing a durable and reliable design. “Sailing is about finding your path, whether it’s across an ocean or within yourself.” – Sven Yrvind In conclusion, making flanges around bulkhead hatches may seem complex at first glance, but by following Sven Yrvind’s meticulous process, enthusiasts can achieve professional-level results. Remember that the journey of boatbuilding is as rewarding as reaching your destination; it tests one’s patience and dedication. For those seeking to embark on this adventure or simply gain more insight into marine craftsmanship, Sven’s wisdom is invaluable.Sven proceeds to apply glue along one edge of the flange, ensuring a secure bond when clamped into place. He emphasizes that this stage is crucial for maintaining the structural integrity of the flange, which in turn safeguards the living area beneath the canvas when hatches are open.Step 3: Allowing Time to Dry
After securely attaching the first portion of the flange, Sven allows ample time for it to dry before moving forward with additional steps. This patience and precision are key aspects of his successful boatbuilding methods.Step 4: Finishing Touches
Once the flange is fully dried, Sven removes the clamps carefully, ensuring no damage occurs during this process. He then moves on to attaching four more pieces onto these main frames, completing two pairs of flanges for the bulkhead hatches.The Final Touches
While two flanges form the primary support structure around the hatches, Sven mentions there are two additional pieces required at each end to ensure comprehensive protection. This attention to detail highlights his commitment to producing a durable and reliable design. “Sailing is about finding your path, whether it’s across an ocean or within yourself.” – Sven Yrvind In conclusion, making flanges around bulkhead hatches may seem complex at first glance, but by following Sven Yrvind’s meticulous process, enthusiasts can achieve professional-level results. Remember that the journey of boatbuilding is as rewarding as reaching your destination; it tests one’s patience and dedication. For those seeking to embark on this adventure or simply gain more insight into marine craftsmanship, Sven’s wisdom is invaluable.Sven begins by explaining that working on flanges vertically and horizontally is significantly easier than doing so in a flat position. To simplify the process further, he divides the task into two or three steps as suggested by fellow expert “for for.” This approach not only makes it more manageable but also allows for greater precision in crafting each component.Step 2: Applying Glue and Securing
Sven proceeds to apply glue along one edge of the flange, ensuring a secure bond when clamped into place. He emphasizes that this stage is crucial for maintaining the structural integrity of the flange, which in turn safeguards the living area beneath the canvas when hatches are open.Step 3: Allowing Time to Dry
After securely attaching the first portion of the flange, Sven allows ample time for it to dry before moving forward with additional steps. This patience and precision are key aspects of his successful boatbuilding methods.Step 4: Finishing Touches
Once the flange is fully dried, Sven removes the clamps carefully, ensuring no damage occurs during this process. He then moves on to attaching four more pieces onto these main frames, completing two pairs of flanges for the bulkhead hatches.The Final Touches
While two flanges form the primary support structure around the hatches, Sven mentions there are two additional pieces required at each end to ensure comprehensive protection. This attention to detail highlights his commitment to producing a durable and reliable design. “Sailing is about finding your path, whether it’s across an ocean or within yourself.” – Sven Yrvind In conclusion, making flanges around bulkhead hatches may seem complex at first glance, but by following Sven Yrvind’s meticulous process, enthusiasts can achieve professional-level results. Remember that the journey of boatbuilding is as rewarding as reaching your destination; it tests one’s patience and dedication. For those seeking to embark on this adventure or simply gain more insight into marine craftsmanship, Sven’s wisdom is invaluable.Sven Yrvind, a renowned yacht designer and sailor, shares valuable insights on creating flanges around bulkhead hatches for canvas protection in this enlightening video. By following his expert guidance, boat enthusiasts can ensure their living areas remain secure while allowing unhindered access through the hatches.Step 1: Starting with the Flange
Sven begins by explaining that working on flanges vertically and horizontally is significantly easier than doing so in a flat position. To simplify the process further, he divides the task into two or three steps as suggested by fellow expert “for for.” This approach not only makes it more manageable but also allows for greater precision in crafting each component.Step 2: Applying Glue and Securing
Sven proceeds to apply glue along one edge of the flange, ensuring a secure bond when clamped into place. He emphasizes that this stage is crucial for maintaining the structural integrity of the flange, which in turn safeguards the living area beneath the canvas when hatches are open.Step 3: Allowing Time to Dry
After securely attaching the first portion of the flange, Sven allows ample time for it to dry before moving forward with additional steps. This patience and precision are key aspects of his successful boatbuilding methods.Step 4: Finishing Touches
Once the flange is fully dried, Sven removes the clamps carefully, ensuring no damage occurs during this process. He then moves on to attaching four more pieces onto these main frames, completing two pairs of flanges for the bulkhead hatches.The Final Touches
While two flanges form the primary support structure around the hatches, Sven mentions there are two additional pieces required at each end to ensure comprehensive protection. This attention to detail highlights his commitment to producing a durable and reliable design. “Sailing is about finding your path, whether it’s across an ocean or within yourself.” – Sven Yrvind In conclusion, making flanges around bulkhead hatches may seem complex at first glance, but by following Sven Yrvind’s meticulous process, enthusiasts can achieve professional-level results. Remember that the journey of boatbuilding is as rewarding as reaching your destination; it tests one’s patience and dedication. For those seeking to embark on this adventure or simply gain more insight into marine craftsmanship, Sven’s wisdom is invaluable.Making Flanges Around Bulkhead Hatches for Canvas
Sven Yrvind, a renowned yacht designer and sailor, shares valuable insights on creating flanges around bulkhead hatches for canvas protection in this enlightening video. By following his expert guidance, boat enthusiasts can ensure their living areas remain secure while allowing unhindered access through the hatches.Step 1: Starting with the Flange
Sven begins by explaining that working on flanges vertically and horizontally is significantly easier than doing so in a flat position. To simplify the process further, he divides the task into two or three steps as suggested by fellow expert “for for.” This approach not only makes it more manageable but also allows for greater precision in crafting each component.Step 2: Applying Glue and Securing
Sven proceeds to apply glue along one edge of the flange, ensuring a secure bond when clamped into place. He emphasizes that this stage is crucial for maintaining the structural integrity of the flange, which in turn safeguards the living area beneath the canvas when hatches are open.Step 3: Allowing Time to Dry
After securely attaching the first portion of the flange, Sven allows ample time for it to dry before moving forward with additional steps. This patience and precision are key aspects of his successful boatbuilding methods.Step 4: Finishing Touches
Once the flange is fully dried, Sven removes the clamps carefully, ensuring no damage occurs during this process. He then moves on to attaching four more pieces onto these main frames, completing two pairs of flanges for the bulkhead hatches.The Final Touches
While two flanges form the primary support structure around the hatches, Sven mentions there are two additional pieces required at each end to ensure comprehensive protection. This attention to detail highlights his commitment to producing a durable and reliable design. “Sailing is about finding your path, whether it’s across an ocean or within yourself.” – Sven Yrvind In conclusion, making flanges around bulkhead hatches may seem complex at first glance, but by following Sven Yrvind’s meticulous process, enthusiasts can achieve professional-level results. Remember that the journey of boatbuilding is as rewarding as reaching your destination; it tests one’s patience and dedication. For those seeking to embark on this adventure or simply gain more insight into marine craftsmanship, Sven’s wisdom is invaluable.Once the flange is fully dried, Sven removes the clamps carefully, ensuring no damage occurs during this process. He then moves on to attaching four more pieces onto these main frames, completing two pairs of flanges for the bulkhead hatches.The Final Touches
While two flanges form the primary support structure around the hatches, Sven mentions there are two additional pieces required at each end to ensure comprehensive protection. This attention to detail highlights his commitment to producing a durable and reliable design. “Sailing is about finding your path, whether it’s across an ocean or within yourself.” – Sven Yrvind In conclusion, making flanges around bulkhead hatches may seem complex at first glance, but by following Sven Yrvind’s meticulous process, enthusiasts can achieve professional-level results. Remember that the journey of boatbuilding is as rewarding as reaching your destination; it tests one’s patience and dedication. For those seeking to embark on this adventure or simply gain more insight into marine craftsmanship, Sven’s wisdom is invaluable.Sven proceeds to apply glue along one edge of the flange, ensuring a secure bond when clamped into place. He emphasizes that this stage is crucial for maintaining the structural integrity of the flange, which in turn safeguards the living area beneath the canvas when hatches are open.Step 3: Allowing Time to Dry
After securely attaching the first portion of the flange, Sven allows ample time for it to dry before moving forward with additional steps. This patience and precision are key aspects of his successful boatbuilding methods.Step 4: Finishing Touches
Once the flange is fully dried, Sven removes the clamps carefully, ensuring no damage occurs during this process. He then moves on to attaching four more pieces onto these main frames, completing two pairs of flanges for the bulkhead hatches.The Final Touches
While two flanges form the primary support structure around the hatches, Sven mentions there are two additional pieces required at each end to ensure comprehensive protection. This attention to detail highlights his commitment to producing a durable and reliable design. “Sailing is about finding your path, whether it’s across an ocean or within yourself.” – Sven Yrvind In conclusion, making flanges around bulkhead hatches may seem complex at first glance, but by following Sven Yrvind’s meticulous process, enthusiasts can achieve professional-level results. Remember that the journey of boatbuilding is as rewarding as reaching your destination; it tests one’s patience and dedication. For those seeking to embark on this adventure or simply gain more insight into marine craftsmanship, Sven’s wisdom is invaluable.Sven begins by explaining that working on flanges vertically and horizontally is significantly easier than doing so in a flat position. To simplify the process further, he divides the task into two or three steps as suggested by fellow expert “for for.” This approach not only makes it more manageable but also allows for greater precision in crafting each component.Step 2: Applying Glue and Securing
Sven proceeds to apply glue along one edge of the flange, ensuring a secure bond when clamped into place. He emphasizes that this stage is crucial for maintaining the structural integrity of the flange, which in turn safeguards the living area beneath the canvas when hatches are open.Step 3: Allowing Time to Dry
After securely attaching the first portion of the flange, Sven allows ample time for it to dry before moving forward with additional steps. This patience and precision are key aspects of his successful boatbuilding methods.Step 4: Finishing Touches
Once the flange is fully dried, Sven removes the clamps carefully, ensuring no damage occurs during this process. He then moves on to attaching four more pieces onto these main frames, completing two pairs of flanges for the bulkhead hatches.The Final Touches
While two flanges form the primary support structure around the hatches, Sven mentions there are two additional pieces required at each end to ensure comprehensive protection. This attention to detail highlights his commitment to producing a durable and reliable design. “Sailing is about finding your path, whether it’s across an ocean or within yourself.” – Sven Yrvind In conclusion, making flanges around bulkhead hatches may seem complex at first glance, but by following Sven Yrvind’s meticulous process, enthusiasts can achieve professional-level results. Remember that the journey of boatbuilding is as rewarding as reaching your destination; it tests one’s patience and dedication. For those seeking to embark on this adventure or simply gain more insight into marine craftsmanship, Sven’s wisdom is invaluable.Sven Yrvind, a renowned yacht designer and sailor, shares valuable insights on creating flanges around bulkhead hatches for canvas protection in this enlightening video. By following his expert guidance, boat enthusiasts can ensure their living areas remain secure while allowing unhindered access through the hatches.Step 1: Starting with the Flange
Sven begins by explaining that working on flanges vertically and horizontally is significantly easier than doing so in a flat position. To simplify the process further, he divides the task into two or three steps as suggested by fellow expert “for for.” This approach not only makes it more manageable but also allows for greater precision in crafting each component.Step 2: Applying Glue and Securing
Sven proceeds to apply glue along one edge of the flange, ensuring a secure bond when clamped into place. He emphasizes that this stage is crucial for maintaining the structural integrity of the flange, which in turn safeguards the living area beneath the canvas when hatches are open.Step 3: Allowing Time to Dry
After securely attaching the first portion of the flange, Sven allows ample time for it to dry before moving forward with additional steps. This patience and precision are key aspects of his successful boatbuilding methods.Step 4: Finishing Touches
Once the flange is fully dried, Sven removes the clamps carefully, ensuring no damage occurs during this process. He then moves on to attaching four more pieces onto these main frames, completing two pairs of flanges for the bulkhead hatches.The Final Touches
While two flanges form the primary support structure around the hatches, Sven mentions there are two additional pieces required at each end to ensure comprehensive protection. This attention to detail highlights his commitment to producing a durable and reliable design. “Sailing is about finding your path, whether it’s across an ocean or within yourself.” – Sven Yrvind In conclusion, making flanges around bulkhead hatches may seem complex at first glance, but by following Sven Yrvind’s meticulous process, enthusiasts can achieve professional-level results. Remember that the journey of boatbuilding is as rewarding as reaching your destination; it tests one’s patience and dedication. For those seeking to embark on this adventure or simply gain more insight into marine craftsmanship, Sven’s wisdom is invaluable.Making Flanges Around Bulkhead Hatches for Canvas
Sven Yrvind, a renowned yacht designer and sailor, shares valuable insights on creating flanges around bulkhead hatches for canvas protection in this enlightening video. By following his expert guidance, boat enthusiasts can ensure their living areas remain secure while allowing unhindered access through the hatches.Step 1: Starting with the Flange
Sven begins by explaining that working on flanges vertically and horizontally is significantly easier than doing so in a flat position. To simplify the process further, he divides the task into two or three steps as suggested by fellow expert “for for.” This approach not only makes it more manageable but also allows for greater precision in crafting each component.Step 2: Applying Glue and Securing
Sven proceeds to apply glue along one edge of the flange, ensuring a secure bond when clamped into place. He emphasizes that this stage is crucial for maintaining the structural integrity of the flange, which in turn safeguards the living area beneath the canvas when hatches are open.Step 3: Allowing Time to Dry
After securely attaching the first portion of the flange, Sven allows ample time for it to dry before moving forward with additional steps. This patience and precision are key aspects of his successful boatbuilding methods.Step 4: Finishing Touches
Once the flange is fully dried, Sven removes the clamps carefully, ensuring no damage occurs during this process. He then moves on to attaching four more pieces onto these main frames, completing two pairs of flanges for the bulkhead hatches.The Final Touches
While two flanges form the primary support structure around the hatches, Sven mentions there are two additional pieces required at each end to ensure comprehensive protection. This attention to detail highlights his commitment to producing a durable and reliable design. “Sailing is about finding your path, whether it’s across an ocean or within yourself.” – Sven Yrvind In conclusion, making flanges around bulkhead hatches may seem complex at first glance, but by following Sven Yrvind’s meticulous process, enthusiasts can achieve professional-level results. Remember that the journey of boatbuilding is as rewarding as reaching your destination; it tests one’s patience and dedication. For those seeking to embark on this adventure or simply gain more insight into marine craftsmanship, Sven’s wisdom is invaluable.After securely attaching the first portion of the flange, Sven allows ample time for it to dry before moving forward with additional steps. This patience and precision are key aspects of his successful boatbuilding methods.Step 4: Finishing Touches
Once the flange is fully dried, Sven removes the clamps carefully, ensuring no damage occurs during this process. He then moves on to attaching four more pieces onto these main frames, completing two pairs of flanges for the bulkhead hatches.The Final Touches
While two flanges form the primary support structure around the hatches, Sven mentions there are two additional pieces required at each end to ensure comprehensive protection. This attention to detail highlights his commitment to producing a durable and reliable design. “Sailing is about finding your path, whether it’s across an ocean or within yourself.” – Sven Yrvind In conclusion, making flanges around bulkhead hatches may seem complex at first glance, but by following Sven Yrvind’s meticulous process, enthusiasts can achieve professional-level results. Remember that the journey of boatbuilding is as rewarding as reaching your destination; it tests one’s patience and dedication. For those seeking to embark on this adventure or simply gain more insight into marine craftsmanship, Sven’s wisdom is invaluable.Sven proceeds to apply glue along one edge of the flange, ensuring a secure bond when clamped into place. He emphasizes that this stage is crucial for maintaining the structural integrity of the flange, which in turn safeguards the living area beneath the canvas when hatches are open.Step 3: Allowing Time to Dry
After securely attaching the first portion of the flange, Sven allows ample time for it to dry before moving forward with additional steps. This patience and precision are key aspects of his successful boatbuilding methods.Step 4: Finishing Touches
Once the flange is fully dried, Sven removes the clamps carefully, ensuring no damage occurs during this process. He then moves on to attaching four more pieces onto these main frames, completing two pairs of flanges for the bulkhead hatches.The Final Touches
While two flanges form the primary support structure around the hatches, Sven mentions there are two additional pieces required at each end to ensure comprehensive protection. This attention to detail highlights his commitment to producing a durable and reliable design. “Sailing is about finding your path, whether it’s across an ocean or within yourself.” – Sven Yrvind In conclusion, making flanges around bulkhead hatches may seem complex at first glance, but by following Sven Yrvind’s meticulous process, enthusiasts can achieve professional-level results. Remember that the journey of boatbuilding is as rewarding as reaching your destination; it tests one’s patience and dedication. For those seeking to embark on this adventure or simply gain more insight into marine craftsmanship, Sven’s wisdom is invaluable.Sven begins by explaining that working on flanges vertically and horizontally is significantly easier than doing so in a flat position. To simplify the process further, he divides the task into two or three steps as suggested by fellow expert “for for.” This approach not only makes it more manageable but also allows for greater precision in crafting each component.Step 2: Applying Glue and Securing
Sven proceeds to apply glue along one edge of the flange, ensuring a secure bond when clamped into place. He emphasizes that this stage is crucial for maintaining the structural integrity of the flange, which in turn safeguards the living area beneath the canvas when hatches are open.Step 3: Allowing Time to Dry
After securely attaching the first portion of the flange, Sven allows ample time for it to dry before moving forward with additional steps. This patience and precision are key aspects of his successful boatbuilding methods.Step 4: Finishing Touches
Once the flange is fully dried, Sven removes the clamps carefully, ensuring no damage occurs during this process. He then moves on to attaching four more pieces onto these main frames, completing two pairs of flanges for the bulkhead hatches.The Final Touches
While two flanges form the primary support structure around the hatches, Sven mentions there are two additional pieces required at each end to ensure comprehensive protection. This attention to detail highlights his commitment to producing a durable and reliable design. “Sailing is about finding your path, whether it’s across an ocean or within yourself.” – Sven Yrvind In conclusion, making flanges around bulkhead hatches may seem complex at first glance, but by following Sven Yrvind’s meticulous process, enthusiasts can achieve professional-level results. Remember that the journey of boatbuilding is as rewarding as reaching your destination; it tests one’s patience and dedication. For those seeking to embark on this adventure or simply gain more insight into marine craftsmanship, Sven’s wisdom is invaluable.Sven Yrvind, a renowned yacht designer and sailor, shares valuable insights on creating flanges around bulkhead hatches for canvas protection in this enlightening video. By following his expert guidance, boat enthusiasts can ensure their living areas remain secure while allowing unhindered access through the hatches.Step 1: Starting with the Flange
Sven begins by explaining that working on flanges vertically and horizontally is significantly easier than doing so in a flat position. To simplify the process further, he divides the task into two or three steps as suggested by fellow expert “for for.” This approach not only makes it more manageable but also allows for greater precision in crafting each component.Step 2: Applying Glue and Securing
Sven proceeds to apply glue along one edge of the flange, ensuring a secure bond when clamped into place. He emphasizes that this stage is crucial for maintaining the structural integrity of the flange, which in turn safeguards the living area beneath the canvas when hatches are open.Step 3: Allowing Time to Dry
After securely attaching the first portion of the flange, Sven allows ample time for it to dry before moving forward with additional steps. This patience and precision are key aspects of his successful boatbuilding methods.Step 4: Finishing Touches
Once the flange is fully dried, Sven removes the clamps carefully, ensuring no damage occurs during this process. He then moves on to attaching four more pieces onto these main frames, completing two pairs of flanges for the bulkhead hatches.The Final Touches
While two flanges form the primary support structure around the hatches, Sven mentions there are two additional pieces required at each end to ensure comprehensive protection. This attention to detail highlights his commitment to producing a durable and reliable design. “Sailing is about finding your path, whether it’s across an ocean or within yourself.” – Sven Yrvind In conclusion, making flanges around bulkhead hatches may seem complex at first glance, but by following Sven Yrvind’s meticulous process, enthusiasts can achieve professional-level results. Remember that the journey of boatbuilding is as rewarding as reaching your destination; it tests one’s patience and dedication. For those seeking to embark on this adventure or simply gain more insight into marine craftsmanship, Sven’s wisdom is invaluable.Making Flanges Around Bulkhead Hatches for Canvas
Sven Yrvind, a renowned yacht designer and sailor, shares valuable insights on creating flanges around bulkhead hatches for canvas protection in this enlightening video. By following his expert guidance, boat enthusiasts can ensure their living areas remain secure while allowing unhindered access through the hatches.Step 1: Starting with the Flange
Sven begins by explaining that working on flanges vertically and horizontally is significantly easier than doing so in a flat position. To simplify the process further, he divides the task into two or three steps as suggested by fellow expert “for for.” This approach not only makes it more manageable but also allows for greater precision in crafting each component.Step 2: Applying Glue and Securing
Sven proceeds to apply glue along one edge of the flange, ensuring a secure bond when clamped into place. He emphasizes that this stage is crucial for maintaining the structural integrity of the flange, which in turn safeguards the living area beneath the canvas when hatches are open.Step 3: Allowing Time to Dry
After securely attaching the first portion of the flange, Sven allows ample time for it to dry before moving forward with additional steps. This patience and precision are key aspects of his successful boatbuilding methods.Step 4: Finishing Touches
Once the flange is fully dried, Sven removes the clamps carefully, ensuring no damage occurs during this process. He then moves on to attaching four more pieces onto these main frames, completing two pairs of flanges for the bulkhead hatches.The Final Touches
While two flanges form the primary support structure around the hatches, Sven mentions there are two additional pieces required at each end to ensure comprehensive protection. This attention to detail highlights his commitment to producing a durable and reliable design. “Sailing is about finding your path, whether it’s across an ocean or within yourself.” – Sven Yrvind In conclusion, making flanges around bulkhead hatches may seem complex at first glance, but by following Sven Yrvind’s meticulous process, enthusiasts can achieve professional-level results. Remember that the journey of boatbuilding is as rewarding as reaching your destination; it tests one’s patience and dedication. For those seeking to embark on this adventure or simply gain more insight into marine craftsmanship, Sven’s wisdom is invaluable.Once the flange is fully dried, Sven removes the clamps carefully, ensuring no damage occurs during this process. He then moves on to attaching four more pieces onto these main frames, completing two pairs of flanges for the bulkhead hatches.The Final Touches
While two flanges form the primary support structure around the hatches, Sven mentions there are two additional pieces required at each end to ensure comprehensive protection. This attention to detail highlights his commitment to producing a durable and reliable design. “Sailing is about finding your path, whether it’s across an ocean or within yourself.” – Sven Yrvind In conclusion, making flanges around bulkhead hatches may seem complex at first glance, but by following Sven Yrvind’s meticulous process, enthusiasts can achieve professional-level results. Remember that the journey of boatbuilding is as rewarding as reaching your destination; it tests one’s patience and dedication. For those seeking to embark on this adventure or simply gain more insight into marine craftsmanship, Sven’s wisdom is invaluable.After securely attaching the first portion of the flange, Sven allows ample time for it to dry before moving forward with additional steps. This patience and precision are key aspects of his successful boatbuilding methods.Step 4: Finishing Touches
Once the flange is fully dried, Sven removes the clamps carefully, ensuring no damage occurs during this process. He then moves on to attaching four more pieces onto these main frames, completing two pairs of flanges for the bulkhead hatches.The Final Touches
While two flanges form the primary support structure around the hatches, Sven mentions there are two additional pieces required at each end to ensure comprehensive protection. This attention to detail highlights his commitment to producing a durable and reliable design. “Sailing is about finding your path, whether it’s across an ocean or within yourself.” – Sven Yrvind In conclusion, making flanges around bulkhead hatches may seem complex at first glance, but by following Sven Yrvind’s meticulous process, enthusiasts can achieve professional-level results. Remember that the journey of boatbuilding is as rewarding as reaching your destination; it tests one’s patience and dedication. For those seeking to embark on this adventure or simply gain more insight into marine craftsmanship, Sven’s wisdom is invaluable.Sven proceeds to apply glue along one edge of the flange, ensuring a secure bond when clamped into place. He emphasizes that this stage is crucial for maintaining the structural integrity of the flange, which in turn safeguards the living area beneath the canvas when hatches are open.Step 3: Allowing Time to Dry
After securely attaching the first portion of the flange, Sven allows ample time for it to dry before moving forward with additional steps. This patience and precision are key aspects of his successful boatbuilding methods.Step 4: Finishing Touches
Once the flange is fully dried, Sven removes the clamps carefully, ensuring no damage occurs during this process. He then moves on to attaching four more pieces onto these main frames, completing two pairs of flanges for the bulkhead hatches.The Final Touches
While two flanges form the primary support structure around the hatches, Sven mentions there are two additional pieces required at each end to ensure comprehensive protection. This attention to detail highlights his commitment to producing a durable and reliable design. “Sailing is about finding your path, whether it’s across an ocean or within yourself.” – Sven Yrvind In conclusion, making flanges around bulkhead hatches may seem complex at first glance, but by following Sven Yrvind’s meticulous process, enthusiasts can achieve professional-level results. Remember that the journey of boatbuilding is as rewarding as reaching your destination; it tests one’s patience and dedication. For those seeking to embark on this adventure or simply gain more insight into marine craftsmanship, Sven’s wisdom is invaluable.Sven begins by explaining that working on flanges vertically and horizontally is significantly easier than doing so in a flat position. To simplify the process further, he divides the task into two or three steps as suggested by fellow expert “for for.” This approach not only makes it more manageable but also allows for greater precision in crafting each component.Step 2: Applying Glue and Securing
Sven proceeds to apply glue along one edge of the flange, ensuring a secure bond when clamped into place. He emphasizes that this stage is crucial for maintaining the structural integrity of the flange, which in turn safeguards the living area beneath the canvas when hatches are open.Step 3: Allowing Time to Dry
After securely attaching the first portion of the flange, Sven allows ample time for it to dry before moving forward with additional steps. This patience and precision are key aspects of his successful boatbuilding methods.Step 4: Finishing Touches
Once the flange is fully dried, Sven removes the clamps carefully, ensuring no damage occurs during this process. He then moves on to attaching four more pieces onto these main frames, completing two pairs of flanges for the bulkhead hatches.The Final Touches
While two flanges form the primary support structure around the hatches, Sven mentions there are two additional pieces required at each end to ensure comprehensive protection. This attention to detail highlights his commitment to producing a durable and reliable design. “Sailing is about finding your path, whether it’s across an ocean or within yourself.” – Sven Yrvind In conclusion, making flanges around bulkhead hatches may seem complex at first glance, but by following Sven Yrvind’s meticulous process, enthusiasts can achieve professional-level results. Remember that the journey of boatbuilding is as rewarding as reaching your destination; it tests one’s patience and dedication. For those seeking to embark on this adventure or simply gain more insight into marine craftsmanship, Sven’s wisdom is invaluable.Sven Yrvind, a renowned yacht designer and sailor, shares valuable insights on creating flanges around bulkhead hatches for canvas protection in this enlightening video. By following his expert guidance, boat enthusiasts can ensure their living areas remain secure while allowing unhindered access through the hatches.Step 1: Starting with the Flange
Sven begins by explaining that working on flanges vertically and horizontally is significantly easier than doing so in a flat position. To simplify the process further, he divides the task into two or three steps as suggested by fellow expert “for for.” This approach not only makes it more manageable but also allows for greater precision in crafting each component.Step 2: Applying Glue and Securing
Sven proceeds to apply glue along one edge of the flange, ensuring a secure bond when clamped into place. He emphasizes that this stage is crucial for maintaining the structural integrity of the flange, which in turn safeguards the living area beneath the canvas when hatches are open.Step 3: Allowing Time to Dry
After securely attaching the first portion of the flange, Sven allows ample time for it to dry before moving forward with additional steps. This patience and precision are key aspects of his successful boatbuilding methods.Step 4: Finishing Touches
Once the flange is fully dried, Sven removes the clamps carefully, ensuring no damage occurs during this process. He then moves on to attaching four more pieces onto these main frames, completing two pairs of flanges for the bulkhead hatches.The Final Touches
While two flanges form the primary support structure around the hatches, Sven mentions there are two additional pieces required at each end to ensure comprehensive protection. This attention to detail highlights his commitment to producing a durable and reliable design. “Sailing is about finding your path, whether it’s across an ocean or within yourself.” – Sven Yrvind In conclusion, making flanges around bulkhead hatches may seem complex at first glance, but by following Sven Yrvind’s meticulous process, enthusiasts can achieve professional-level results. Remember that the journey of boatbuilding is as rewarding as reaching your destination; it tests one’s patience and dedication. For those seeking to embark on this adventure or simply gain more insight into marine craftsmanship, Sven’s wisdom is invaluable.Making Flanges Around Bulkhead Hatches for Canvas
Sven Yrvind, a renowned yacht designer and sailor, shares valuable insights on creating flanges around bulkhead hatches for canvas protection in this enlightening video. By following his expert guidance, boat enthusiasts can ensure their living areas remain secure while allowing unhindered access through the hatches.Step 1: Starting with the Flange
Sven begins by explaining that working on flanges vertically and horizontally is significantly easier than doing so in a flat position. To simplify the process further, he divides the task into two or three steps as suggested by fellow expert “for for.” This approach not only makes it more manageable but also allows for greater precision in crafting each component.Step 2: Applying Glue and Securing
Sven proceeds to apply glue along one edge of the flange, ensuring a secure bond when clamped into place. He emphasizes that this stage is crucial for maintaining the structural integrity of the flange, which in turn safeguards the living area beneath the canvas when hatches are open.Step 3: Allowing Time to Dry
After securely attaching the first portion of the flange, Sven allows ample time for it to dry before moving forward with additional steps. This patience and precision are key aspects of his successful boatbuilding methods.Step 4: Finishing Touches
Once the flange is fully dried, Sven removes the clamps carefully, ensuring no damage occurs during this process. He then moves on to attaching four more pieces onto these main frames, completing two pairs of flanges for the bulkhead hatches.The Final Touches
While two flanges form the primary support structure around the hatches, Sven mentions there are two additional pieces required at each end to ensure comprehensive protection. This attention to detail highlights his commitment to producing a durable and reliable design. “Sailing is about finding your path, whether it’s across an ocean or within yourself.” – Sven Yrvind In conclusion, making flanges around bulkhead hatches may seem complex at first glance, but by following Sven Yrvind’s meticulous process, enthusiasts can achieve professional-level results. Remember that the journey of boatbuilding is as rewarding as reaching your destination; it tests one’s patience and dedication. For those seeking to embark on this adventure or simply gain more insight into marine craftsmanship, Sven’s wisdom is invaluable.Making Flanges Around Bulkhead Hatches for Canvas
Sven Yrvind, a renowned yacht designer and sailor, shares valuable insights on creating flanges around bulkhead hatches for canvas protection in this enlightening video. By following his expert guidance, boat enthusiasts can ensure their living areas remain secure while allowing unhindered access through the hatches.Step 1: Starting with the Flange
Sven begins by explaining that working on flanges vertically and horizontally is significantly easier than doing so in a flat position. To simplify the process further, he divides the task into two or three steps as suggested by fellow expert “for for.” This approach not only makes it more manageable but also allows for greater precision in crafting each component.Step 2: Applying Glue and Securing
Sven proceeds to apply glue along one edge of the flange, ensuring a secure bond when clamped into place. He emphasizes that this stage is crucial for maintaining the structural integrity of the flange, which in turn safeguards the living area beneath the canvas when hatches are open.Step 3: Allowing Time to Dry
After securely attaching the first portion of the flange, Sven allows ample time for it to dry before moving forward with additional steps. This patience and precision are key aspects of his successful boatbuilding methods.Step 4: Finishing Touches
Once the flange is fully dried, Sven removes the clamps carefully, ensuring no damage occurs during this process. He then moves on to attaching four more pieces onto these main frames, completing two pairs of flanges for the bulkhead hatches.The Final Touches
While two flanges form the primary support structure around the hatches, Sven mentions there are two additional pieces required at each end to ensure comprehensive protection. This attention to detail highlights his commitment to producing a durable and reliable design. “Sailing is about finding your path, whether it’s across an ocean or within yourself.” – Sven Yrvind In conclusion, making flanges around bulkhead hatches may seem complex at first glance, but by following Sven Yrvind’s meticulous process, enthusiasts can achieve professional-level results. Remember that the journey of boatbuilding is as rewarding as reaching your destination; it tests one’s patience and dedication. For those seeking to embark on this adventure or simply gain more insight into marine craftsmanship, Sven’s wisdom is invaluable.Once the flange is fully dried, Sven removes the clamps carefully, ensuring no damage occurs during this process. He then moves on to attaching four more pieces onto these main frames, completing two pairs of flanges for the bulkhead hatches.The Final Touches
While two flanges form the primary support structure around the hatches, Sven mentions there are two additional pieces required at each end to ensure comprehensive protection. This attention to detail highlights his commitment to producing a durable and reliable design. “Sailing is about finding your path, whether it’s across an ocean or within yourself.” – Sven Yrvind In conclusion, making flanges around bulkhead hatches may seem complex at first glance, but by following Sven Yrvind’s meticulous process, enthusiasts can achieve professional-level results. Remember that the journey of boatbuilding is as rewarding as reaching your destination; it tests one’s patience and dedication. For those seeking to embark on this adventure or simply gain more insight into marine craftsmanship, Sven’s wisdom is invaluable.Making Flanges Around Bulkhead Hatches for Canvas
Sven Yrvind, a renowned yacht designer and sailor, shares valuable insights on creating flanges around bulkhead hatches for canvas protection in this enlightening video. By following his expert guidance, boat enthusiasts can ensure their living areas remain secure while allowing unhindered access through the hatches.Step 1: Starting with the Flange
Sven begins by explaining that working on flanges vertically and horizontally is significantly easier than doing so in a flat position. To simplify the process further, he divides the task into two or three steps as suggested by fellow expert “for for.” This approach not only makes it more manageable but also allows for greater precision in crafting each component.Step 2: Applying Glue and Securing
Sven proceeds to apply glue along one edge of the flange, ensuring a secure bond when clamped into place. He emphasizes that this stage is crucial for maintaining the structural integrity of the flange, which in turn safeguards the living area beneath the canvas when hatches are open.Step 3: Allowing Time to Dry
After securely attaching the first portion of the flange, Sven allows ample time for it to dry before moving forward with additional steps. This patience and precision are key aspects of his successful boatbuilding methods.Step 4: Finishing Touches
Once the flange is fully dried, Sven removes the clamps carefully, ensuring no damage occurs during this process. He then moves on to attaching four more pieces onto these main frames, completing two pairs of flanges for the bulkhead hatches.The Final Touches
While two flanges form the primary support structure around the hatches, Sven mentions there are two additional pieces required at each end to ensure comprehensive protection. This attention to detail highlights his commitment to producing a durable and reliable design. “Sailing is about finding your path, whether it’s across an ocean or within yourself.” – Sven Yrvind In conclusion, making flanges around bulkhead hatches may seem complex at first glance, but by following Sven Yrvind’s meticulous process, enthusiasts can achieve professional-level results. Remember that the journey of boatbuilding is as rewarding as reaching your destination; it tests one’s patience and dedication. For those seeking to embark on this adventure or simply gain more insight into marine craftsmanship, Sven’s wisdom is invaluable.After securely attaching the first portion of the flange, Sven allows ample time for it to dry before moving forward with additional steps. This patience and precision are key aspects of his successful boatbuilding methods.Step 4: Finishing Touches
Once the flange is fully dried, Sven removes the clamps carefully, ensuring no damage occurs during this process. He then moves on to attaching four more pieces onto these main frames, completing two pairs of flanges for the bulkhead hatches.The Final Touches
While two flanges form the primary support structure around the hatches, Sven mentions there are two additional pieces required at each end to ensure comprehensive protection. This attention to detail highlights his commitment to producing a durable and reliable design. “Sailing is about finding your path, whether it’s across an ocean or within yourself.” – Sven Yrvind In conclusion, making flanges around bulkhead hatches may seem complex at first glance, but by following Sven Yrvind’s meticulous process, enthusiasts can achieve professional-level results. Remember that the journey of boatbuilding is as rewarding as reaching your destination; it tests one’s patience and dedication. For those seeking to embark on this adventure or simply gain more insight into marine craftsmanship, Sven’s wisdom is invaluable.Making Flanges Around Bulkhead Hatches for Canvas
Sven Yrvind, a renowned yacht designer and sailor, shares valuable insights on creating flanges around bulkhead hatches for canvas protection in this enlightening video. By following his expert guidance, boat enthusiasts can ensure their living areas remain secure while allowing unhindered access through the hatches.Step 1: Starting with the Flange
Sven begins by explaining that working on flanges vertically and horizontally is significantly easier than doing so in a flat position. To simplify the process further, he divides the task into two or three steps as suggested by fellow expert “for for.” This approach not only makes it more manageable but also allows for greater precision in crafting each component.Step 2: Applying Glue and Securing
Sven proceeds to apply glue along one edge of the flange, ensuring a secure bond when clamped into place. He emphasizes that this stage is crucial for maintaining the structural integrity of the flange, which in turn safeguards the living area beneath the canvas when hatches are open.Step 3: Allowing Time to Dry
After securely attaching the first portion of the flange, Sven allows ample time for it to dry before moving forward with additional steps. This patience and precision are key aspects of his successful boatbuilding methods.Step 4: Finishing Touches
Once the flange is fully dried, Sven removes the clamps carefully, ensuring no damage occurs during this process. He then moves on to attaching four more pieces onto these main frames, completing two pairs of flanges for the bulkhead hatches.The Final Touches
While two flanges form the primary support structure around the hatches, Sven mentions there are two additional pieces required at each end to ensure comprehensive protection. This attention to detail highlights his commitment to producing a durable and reliable design. “Sailing is about finding your path, whether it’s across an ocean or within yourself.” – Sven Yrvind In conclusion, making flanges around bulkhead hatches may seem complex at first glance, but by following Sven Yrvind’s meticulous process, enthusiasts can achieve professional-level results. Remember that the journey of boatbuilding is as rewarding as reaching your destination; it tests one’s patience and dedication. For those seeking to embark on this adventure or simply gain more insight into marine craftsmanship, Sven’s wisdom is invaluable.Sven proceeds to apply glue along one edge of the flange, ensuring a secure bond when clamped into place. He emphasizes that this stage is crucial for maintaining the structural integrity of the flange, which in turn safeguards the living area beneath the canvas when hatches are open.Step 3: Allowing Time to Dry
After securely attaching the first portion of the flange, Sven allows ample time for it to dry before moving forward with additional steps. This patience and precision are key aspects of his successful boatbuilding methods.Step 4: Finishing Touches
Once the flange is fully dried, Sven removes the clamps carefully, ensuring no damage occurs during this process. He then moves on to attaching four more pieces onto these main frames, completing two pairs of flanges for the bulkhead hatches.The Final Touches
While two flanges form the primary support structure around the hatches, Sven mentions there are two additional pieces required at each end to ensure comprehensive protection. This attention to detail highlights his commitment to producing a durable and reliable design. “Sailing is about finding your path, whether it’s across an ocean or within yourself.” – Sven Yrvind In conclusion, making flanges around bulkhead hatches may seem complex at first glance, but by following Sven Yrvind’s meticulous process, enthusiasts can achieve professional-level results. Remember that the journey of boatbuilding is as rewarding as reaching your destination; it tests one’s patience and dedication. For those seeking to embark on this adventure or simply gain more insight into marine craftsmanship, Sven’s wisdom is invaluable.Making Flanges Around Bulkhead Hatches for Canvas
Sven Yrvind, a renowned yacht designer and sailor, shares valuable insights on creating flanges around bulkhead hatches for canvas protection in this enlightening video. By following his expert guidance, boat enthusiasts can ensure their living areas remain secure while allowing unhindered access through the hatches.Step 1: Starting with the Flange
Sven begins by explaining that working on flanges vertically and horizontally is significantly easier than doing so in a flat position. To simplify the process further, he divides the task into two or three steps as suggested by fellow expert “for for.” This approach not only makes it more manageable but also allows for greater precision in crafting each component.Step 2: Applying Glue and Securing
Sven proceeds to apply glue along one edge of the flange, ensuring a secure bond when clamped into place. He emphasizes that this stage is crucial for maintaining the structural integrity of the flange, which in turn safeguards the living area beneath the canvas when hatches are open.Step 3: Allowing Time to Dry
After securely attaching the first portion of the flange, Sven allows ample time for it to dry before moving forward with additional steps. This patience and precision are key aspects of his successful boatbuilding methods.Step 4: Finishing Touches
Once the flange is fully dried, Sven removes the clamps carefully, ensuring no damage occurs during this process. He then moves on to attaching four more pieces onto these main frames, completing two pairs of flanges for the bulkhead hatches.The Final Touches
While two flanges form the primary support structure around the hatches, Sven mentions there are two additional pieces required at each end to ensure comprehensive protection. This attention to detail highlights his commitment to producing a durable and reliable design. “Sailing is about finding your path, whether it’s across an ocean or within yourself.” – Sven Yrvind In conclusion, making flanges around bulkhead hatches may seem complex at first glance, but by following Sven Yrvind’s meticulous process, enthusiasts can achieve professional-level results. Remember that the journey of boatbuilding is as rewarding as reaching your destination; it tests one’s patience and dedication. For those seeking to embark on this adventure or simply gain more insight into marine craftsmanship, Sven’s wisdom is invaluable.Sven begins by explaining that working on flanges vertically and horizontally is significantly easier than doing so in a flat position. To simplify the process further, he divides the task into two or three steps as suggested by fellow expert “for for.” This approach not only makes it more manageable but also allows for greater precision in crafting each component.Step 2: Applying Glue and Securing
Sven proceeds to apply glue along one edge of the flange, ensuring a secure bond when clamped into place. He emphasizes that this stage is crucial for maintaining the structural integrity of the flange, which in turn safeguards the living area beneath the canvas when hatches are open.Step 3: Allowing Time to Dry
After securely attaching the first portion of the flange, Sven allows ample time for it to dry before moving forward with additional steps. This patience and precision are key aspects of his successful boatbuilding methods.Step 4: Finishing Touches
Once the flange is fully dried, Sven removes the clamps carefully, ensuring no damage occurs during this process. He then moves on to attaching four more pieces onto these main frames, completing two pairs of flanges for the bulkhead hatches.The Final Touches
While two flanges form the primary support structure around the hatches, Sven mentions there are two additional pieces required at each end to ensure comprehensive protection. This attention to detail highlights his commitment to producing a durable and reliable design. “Sailing is about finding your path, whether it’s across an ocean or within yourself.” – Sven Yrvind In conclusion, making flanges around bulkhead hatches may seem complex at first glance, but by following Sven Yrvind’s meticulous process, enthusiasts can achieve professional-level results. Remember that the journey of boatbuilding is as rewarding as reaching your destination; it tests one’s patience and dedication. For those seeking to embark on this adventure or simply gain more insight into marine craftsmanship, Sven’s wisdom is invaluable.Making Flanges Around Bulkhead Hatches for Canvas
Sven Yrvind, a renowned yacht designer and sailor, shares valuable insights on creating flanges around bulkhead hatches for canvas protection in this enlightening video. By following his expert guidance, boat enthusiasts can ensure their living areas remain secure while allowing unhindered access through the hatches.Step 1: Starting with the Flange
Sven begins by explaining that working on flanges vertically and horizontally is significantly easier than doing so in a flat position. To simplify the process further, he divides the task into two or three steps as suggested by fellow expert “for for.” This approach not only makes it more manageable but also allows for greater precision in crafting each component.Step 2: Applying Glue and Securing
Sven proceeds to apply glue along one edge of the flange, ensuring a secure bond when clamped into place. He emphasizes that this stage is crucial for maintaining the structural integrity of the flange, which in turn safeguards the living area beneath the canvas when hatches are open.Step 3: Allowing Time to Dry
After securely attaching the first portion of the flange, Sven allows ample time for it to dry before moving forward with additional steps. This patience and precision are key aspects of his successful boatbuilding methods.Step 4: Finishing Touches
Once the flange is fully dried, Sven removes the clamps carefully, ensuring no damage occurs during this process. He then moves on to attaching four more pieces onto these main frames, completing two pairs of flanges for the bulkhead hatches.The Final Touches
While two flanges form the primary support structure around the hatches, Sven mentions there are two additional pieces required at each end to ensure comprehensive protection. This attention to detail highlights his commitment to producing a durable and reliable design. “Sailing is about finding your path, whether it’s across an ocean or within yourself.” – Sven Yrvind In conclusion, making flanges around bulkhead hatches may seem complex at first glance, but by following Sven Yrvind’s meticulous process, enthusiasts can achieve professional-level results. Remember that the journey of boatbuilding is as rewarding as reaching your destination; it tests one’s patience and dedication. For those seeking to embark on this adventure or simply gain more insight into marine craftsmanship, Sven’s wisdom is invaluable.Sven Yrvind, a renowned yacht designer and sailor, shares valuable insights on creating flanges around bulkhead hatches for canvas protection in this enlightening video. By following his expert guidance, boat enthusiasts can ensure their living areas remain secure while allowing unhindered access through the hatches.Step 1: Starting with the Flange
Sven begins by explaining that working on flanges vertically and horizontally is significantly easier than doing so in a flat position. To simplify the process further, he divides the task into two or three steps as suggested by fellow expert “for for.” This approach not only makes it more manageable but also allows for greater precision in crafting each component.Step 2: Applying Glue and Securing
Sven proceeds to apply glue along one edge of the flange, ensuring a secure bond when clamped into place. He emphasizes that this stage is crucial for maintaining the structural integrity of the flange, which in turn safeguards the living area beneath the canvas when hatches are open.Step 3: Allowing Time to Dry
After securely attaching the first portion of the flange, Sven allows ample time for it to dry before moving forward with additional steps. This patience and precision are key aspects of his successful boatbuilding methods.Step 4: Finishing Touches
Once the flange is fully dried, Sven removes the clamps carefully, ensuring no damage occurs during this process. He then moves on to attaching four more pieces onto these main frames, completing two pairs of flanges for the bulkhead hatches.The Final Touches
While two flanges form the primary support structure around the hatches, Sven mentions there are two additional pieces required at each end to ensure comprehensive protection. This attention to detail highlights his commitment to producing a durable and reliable design. “Sailing is about finding your path, whether it’s across an ocean or within yourself.” – Sven Yrvind In conclusion, making flanges around bulkhead hatches may seem complex at first glance, but by following Sven Yrvind’s meticulous process, enthusiasts can achieve professional-level results. Remember that the journey of boatbuilding is as rewarding as reaching your destination; it tests one’s patience and dedication. For those seeking to embark on this adventure or simply gain more insight into marine craftsmanship, Sven’s wisdom is invaluable.Making Flanges Around Bulkhead Hatches for Canvas
Sven Yrvind, a renowned yacht designer and sailor, shares valuable insights on creating flanges around bulkhead hatches for canvas protection in this enlightening video. By following his expert guidance, boat enthusiasts can ensure their living areas remain secure while allowing unhindered access through the hatches.Step 1: Starting with the Flange
Sven begins by explaining that working on flanges vertically and horizontally is significantly easier than doing so in a flat position. To simplify the process further, he divides the task into two or three steps as suggested by fellow expert “for for.” This approach not only makes it more manageable but also allows for greater precision in crafting each component.Step 2: Applying Glue and Securing
Sven proceeds to apply glue along one edge of the flange, ensuring a secure bond when clamped into place. He emphasizes that this stage is crucial for maintaining the structural integrity of the flange, which in turn safeguards the living area beneath the canvas when hatches are open.Step 3: Allowing Time to Dry
After securely attaching the first portion of the flange, Sven allows ample time for it to dry before moving forward with additional steps. This patience and precision are key aspects of his successful boatbuilding methods.Step 4: Finishing Touches
Once the flange is fully dried, Sven removes the clamps carefully, ensuring no damage occurs during this process. He then moves on to attaching four more pieces onto these main frames, completing two pairs of flanges for the bulkhead hatches.The Final Touches
While two flanges form the primary support structure around the hatches, Sven mentions there are two additional pieces required at each end to ensure comprehensive protection. This attention to detail highlights his commitment to producing a durable and reliable design. “Sailing is about finding your path, whether it’s across an ocean or within yourself.” – Sven Yrvind In conclusion, making flanges around bulkhead hatches may seem complex at first glance, but by following Sven Yrvind’s meticulous process, enthusiasts can achieve professional-level results. Remember that the journey of boatbuilding is as rewarding as reaching your destination; it tests one’s patience and dedication. For those seeking to embark on this adventure or simply gain more insight into marine craftsmanship, Sven’s wisdom is invaluable.Once the flange is fully dried, Sven removes the clamps carefully, ensuring no damage occurs during this process. He then moves on to attaching four more pieces onto these main frames, completing two pairs of flanges for the bulkhead hatches.The Final Touches
While two flanges form the primary support structure around the hatches, Sven mentions there are two additional pieces required at each end to ensure comprehensive protection. This attention to detail highlights his commitment to producing a durable and reliable design. “Sailing is about finding your path, whether it’s across an ocean or within yourself.” – Sven Yrvind In conclusion, making flanges around bulkhead hatches may seem complex at first glance, but by following Sven Yrvind’s meticulous process, enthusiasts can achieve professional-level results. Remember that the journey of boatbuilding is as rewarding as reaching your destination; it tests one’s patience and dedication. For those seeking to embark on this adventure or simply gain more insight into marine craftsmanship, Sven’s wisdom is invaluable.Sven Yrvind, a renowned yacht designer and sailor, shares valuable insights on creating flanges around bulkhead hatches for canvas protection in this enlightening video. By following his expert guidance, boat enthusiasts can ensure their living areas remain secure while allowing unhindered access through the hatches.Step 1: Starting with the Flange
Sven begins by explaining that working on flanges vertically and horizontally is significantly easier than doing so in a flat position. To simplify the process further, he divides the task into two or three steps as suggested by fellow expert “for for.” This approach not only makes it more manageable but also allows for greater precision in crafting each component.Step 2: Applying Glue and Securing
Sven proceeds to apply glue along one edge of the flange, ensuring a secure bond when clamped into place. He emphasizes that this stage is crucial for maintaining the structural integrity of the flange, which in turn safeguards the living area beneath the canvas when hatches are open.Step 3: Allowing Time to Dry
After securely attaching the first portion of the flange, Sven allows ample time for it to dry before moving forward with additional steps. This patience and precision are key aspects of his successful boatbuilding methods.Step 4: Finishing Touches
Once the flange is fully dried, Sven removes the clamps carefully, ensuring no damage occurs during this process. He then moves on to attaching four more pieces onto these main frames, completing two pairs of flanges for the bulkhead hatches.The Final Touches
While two flanges form the primary support structure around the hatches, Sven mentions there are two additional pieces required at each end to ensure comprehensive protection. This attention to detail highlights his commitment to producing a durable and reliable design. “Sailing is about finding your path, whether it’s across an ocean or within yourself.” – Sven Yrvind In conclusion, making flanges around bulkhead hatches may seem complex at first glance, but by following Sven Yrvind’s meticulous process, enthusiasts can achieve professional-level results. Remember that the journey of boatbuilding is as rewarding as reaching your destination; it tests one’s patience and dedication. For those seeking to embark on this adventure or simply gain more insight into marine craftsmanship, Sven’s wisdom is invaluable.Making Flanges Around Bulkhead Hatches for Canvas
Sven Yrvind, a renowned yacht designer and sailor, shares valuable insights on creating flanges around bulkhead hatches for canvas protection in this enlightening video. By following his expert guidance, boat enthusiasts can ensure their living areas remain secure while allowing unhindered access through the hatches.Step 1: Starting with the Flange
Sven begins by explaining that working on flanges vertically and horizontally is significantly easier than doing so in a flat position. To simplify the process further, he divides the task into two or three steps as suggested by fellow expert “for for.” This approach not only makes it more manageable but also allows for greater precision in crafting each component.Step 2: Applying Glue and Securing
Sven proceeds to apply glue along one edge of the flange, ensuring a secure bond when clamped into place. He emphasizes that this stage is crucial for maintaining the structural integrity of the flange, which in turn safeguards the living area beneath the canvas when hatches are open.Step 3: Allowing Time to Dry
After securely attaching the first portion of the flange, Sven allows ample time for it to dry before moving forward with additional steps. This patience and precision are key aspects of his successful boatbuilding methods.Step 4: Finishing Touches
Once the flange is fully dried, Sven removes the clamps carefully, ensuring no damage occurs during this process. He then moves on to attaching four more pieces onto these main frames, completing two pairs of flanges for the bulkhead hatches.The Final Touches
While two flanges form the primary support structure around the hatches, Sven mentions there are two additional pieces required at each end to ensure comprehensive protection. This attention to detail highlights his commitment to producing a durable and reliable design. “Sailing is about finding your path, whether it’s across an ocean or within yourself.” – Sven Yrvind In conclusion, making flanges around bulkhead hatches may seem complex at first glance, but by following Sven Yrvind’s meticulous process, enthusiasts can achieve professional-level results. Remember that the journey of boatbuilding is as rewarding as reaching your destination; it tests one’s patience and dedication. For those seeking to embark on this adventure or simply gain more insight into marine craftsmanship, Sven’s wisdom is invaluable.After securely attaching the first portion of the flange, Sven allows ample time for it to dry before moving forward with additional steps. This patience and precision are key aspects of his successful boatbuilding methods.Step 4: Finishing Touches
Once the flange is fully dried, Sven removes the clamps carefully, ensuring no damage occurs during this process. He then moves on to attaching four more pieces onto these main frames, completing two pairs of flanges for the bulkhead hatches.The Final Touches
While two flanges form the primary support structure around the hatches, Sven mentions there are two additional pieces required at each end to ensure comprehensive protection. This attention to detail highlights his commitment to producing a durable and reliable design. “Sailing is about finding your path, whether it’s across an ocean or within yourself.” – Sven Yrvind In conclusion, making flanges around bulkhead hatches may seem complex at first glance, but by following Sven Yrvind’s meticulous process, enthusiasts can achieve professional-level results. Remember that the journey of boatbuilding is as rewarding as reaching your destination; it tests one’s patience and dedication. For those seeking to embark on this adventure or simply gain more insight into marine craftsmanship, Sven’s wisdom is invaluable.Sven Yrvind, a renowned yacht designer and sailor, shares valuable insights on creating flanges around bulkhead hatches for canvas protection in this enlightening video. By following his expert guidance, boat enthusiasts can ensure their living areas remain secure while allowing unhindered access through the hatches.Step 1: Starting with the Flange
Sven begins by explaining that working on flanges vertically and horizontally is significantly easier than doing so in a flat position. To simplify the process further, he divides the task into two or three steps as suggested by fellow expert “for for.” This approach not only makes it more manageable but also allows for greater precision in crafting each component.Step 2: Applying Glue and Securing
Sven proceeds to apply glue along one edge of the flange, ensuring a secure bond when clamped into place. He emphasizes that this stage is crucial for maintaining the structural integrity of the flange, which in turn safeguards the living area beneath the canvas when hatches are open.Step 3: Allowing Time to Dry
After securely attaching the first portion of the flange, Sven allows ample time for it to dry before moving forward with additional steps. This patience and precision are key aspects of his successful boatbuilding methods.Step 4: Finishing Touches
Once the flange is fully dried, Sven removes the clamps carefully, ensuring no damage occurs during this process. He then moves on to attaching four more pieces onto these main frames, completing two pairs of flanges for the bulkhead hatches.The Final Touches
While two flanges form the primary support structure around the hatches, Sven mentions there are two additional pieces required at each end to ensure comprehensive protection. This attention to detail highlights his commitment to producing a durable and reliable design. “Sailing is about finding your path, whether it’s across an ocean or within yourself.” – Sven Yrvind In conclusion, making flanges around bulkhead hatches may seem complex at first glance, but by following Sven Yrvind’s meticulous process, enthusiasts can achieve professional-level results. Remember that the journey of boatbuilding is as rewarding as reaching your destination; it tests one’s patience and dedication. For those seeking to embark on this adventure or simply gain more insight into marine craftsmanship, Sven’s wisdom is invaluable.Making Flanges Around Bulkhead Hatches for Canvas
Sven Yrvind, a renowned yacht designer and sailor, shares valuable insights on creating flanges around bulkhead hatches for canvas protection in this enlightening video. By following his expert guidance, boat enthusiasts can ensure their living areas remain secure while allowing unhindered access through the hatches.Step 1: Starting with the Flange
Sven begins by explaining that working on flanges vertically and horizontally is significantly easier than doing so in a flat position. To simplify the process further, he divides the task into two or three steps as suggested by fellow expert “for for.” This approach not only makes it more manageable but also allows for greater precision in crafting each component.Step 2: Applying Glue and Securing
Sven proceeds to apply glue along one edge of the flange, ensuring a secure bond when clamped into place. He emphasizes that this stage is crucial for maintaining the structural integrity of the flange, which in turn safeguards the living area beneath the canvas when hatches are open.Step 3: Allowing Time to Dry
After securely attaching the first portion of the flange, Sven allows ample time for it to dry before moving forward with additional steps. This patience and precision are key aspects of his successful boatbuilding methods.Step 4: Finishing Touches
Once the flange is fully dried, Sven removes the clamps carefully, ensuring no damage occurs during this process. He then moves on to attaching four more pieces onto these main frames, completing two pairs of flanges for the bulkhead hatches.The Final Touches
While two flanges form the primary support structure around the hatches, Sven mentions there are two additional pieces required at each end to ensure comprehensive protection. This attention to detail highlights his commitment to producing a durable and reliable design. “Sailing is about finding your path, whether it’s across an ocean or within yourself.” – Sven Yrvind In conclusion, making flanges around bulkhead hatches may seem complex at first glance, but by following Sven Yrvind’s meticulous process, enthusiasts can achieve professional-level results. Remember that the journey of boatbuilding is as rewarding as reaching your destination; it tests one’s patience and dedication. For those seeking to embark on this adventure or simply gain more insight into marine craftsmanship, Sven’s wisdom is invaluable.Sven proceeds to apply glue along one edge of the flange, ensuring a secure bond when clamped into place. He emphasizes that this stage is crucial for maintaining the structural integrity of the flange, which in turn safeguards the living area beneath the canvas when hatches are open.Step 3: Allowing Time to Dry
After securely attaching the first portion of the flange, Sven allows ample time for it to dry before moving forward with additional steps. This patience and precision are key aspects of his successful boatbuilding methods.Step 4: Finishing Touches
Once the flange is fully dried, Sven removes the clamps carefully, ensuring no damage occurs during this process. He then moves on to attaching four more pieces onto these main frames, completing two pairs of flanges for the bulkhead hatches.The Final Touches
While two flanges form the primary support structure around the hatches, Sven mentions there are two additional pieces required at each end to ensure comprehensive protection. This attention to detail highlights his commitment to producing a durable and reliable design. “Sailing is about finding your path, whether it’s across an ocean or within yourself.” – Sven Yrvind In conclusion, making flanges around bulkhead hatches may seem complex at first glance, but by following Sven Yrvind’s meticulous process, enthusiasts can achieve professional-level results. Remember that the journey of boatbuilding is as rewarding as reaching your destination; it tests one’s patience and dedication. For those seeking to embark on this adventure or simply gain more insight into marine craftsmanship, Sven’s wisdom is invaluable.Sven Yrvind, a renowned yacht designer and sailor, shares valuable insights on creating flanges around bulkhead hatches for canvas protection in this enlightening video. By following his expert guidance, boat enthusiasts can ensure their living areas remain secure while allowing unhindered access through the hatches.Step 1: Starting with the Flange
Sven begins by explaining that working on flanges vertically and horizontally is significantly easier than doing so in a flat position. To simplify the process further, he divides the task into two or three steps as suggested by fellow expert “for for.” This approach not only makes it more manageable but also allows for greater precision in crafting each component.Step 2: Applying Glue and Securing
Sven proceeds to apply glue along one edge of the flange, ensuring a secure bond when clamped into place. He emphasizes that this stage is crucial for maintaining the structural integrity of the flange, which in turn safeguards the living area beneath the canvas when hatches are open.Step 3: Allowing Time to Dry
After securely attaching the first portion of the flange, Sven allows ample time for it to dry before moving forward with additional steps. This patience and precision are key aspects of his successful boatbuilding methods.Step 4: Finishing Touches
Once the flange is fully dried, Sven removes the clamps carefully, ensuring no damage occurs during this process. He then moves on to attaching four more pieces onto these main frames, completing two pairs of flanges for the bulkhead hatches.The Final Touches
While two flanges form the primary support structure around the hatches, Sven mentions there are two additional pieces required at each end to ensure comprehensive protection. This attention to detail highlights his commitment to producing a durable and reliable design. “Sailing is about finding your path, whether it’s across an ocean or within yourself.” – Sven Yrvind In conclusion, making flanges around bulkhead hatches may seem complex at first glance, but by following Sven Yrvind’s meticulous process, enthusiasts can achieve professional-level results. Remember that the journey of boatbuilding is as rewarding as reaching your destination; it tests one’s patience and dedication. For those seeking to embark on this adventure or simply gain more insight into marine craftsmanship, Sven’s wisdom is invaluable.Making Flanges Around Bulkhead Hatches for Canvas
Sven Yrvind, a renowned yacht designer and sailor, shares valuable insights on creating flanges around bulkhead hatches for canvas protection in this enlightening video. By following his expert guidance, boat enthusiasts can ensure their living areas remain secure while allowing unhindered access through the hatches.Step 1: Starting with the Flange
Sven begins by explaining that working on flanges vertically and horizontally is significantly easier than doing so in a flat position. To simplify the process further, he divides the task into two or three steps as suggested by fellow expert “for for.” This approach not only makes it more manageable but also allows for greater precision in crafting each component.Step 2: Applying Glue and Securing
Sven proceeds to apply glue along one edge of the flange, ensuring a secure bond when clamped into place. He emphasizes that this stage is crucial for maintaining the structural integrity of the flange, which in turn safeguards the living area beneath the canvas when hatches are open.Step 3: Allowing Time to Dry
After securely attaching the first portion of the flange, Sven allows ample time for it to dry before moving forward with additional steps. This patience and precision are key aspects of his successful boatbuilding methods.Step 4: Finishing Touches
Once the flange is fully dried, Sven removes the clamps carefully, ensuring no damage occurs during this process. He then moves on to attaching four more pieces onto these main frames, completing two pairs of flanges for the bulkhead hatches.The Final Touches
While two flanges form the primary support structure around the hatches, Sven mentions there are two additional pieces required at each end to ensure comprehensive protection. This attention to detail highlights his commitment to producing a durable and reliable design. “Sailing is about finding your path, whether it’s across an ocean or within yourself.” – Sven Yrvind In conclusion, making flanges around bulkhead hatches may seem complex at first glance, but by following Sven Yrvind’s meticulous process, enthusiasts can achieve professional-level results. Remember that the journey of boatbuilding is as rewarding as reaching your destination; it tests one’s patience and dedication. For those seeking to embark on this adventure or simply gain more insight into marine craftsmanship, Sven’s wisdom is invaluable.Sven begins by explaining that working on flanges vertically and horizontally is significantly easier than doing so in a flat position. To simplify the process further, he divides the task into two or three steps as suggested by fellow expert “for for.” This approach not only makes it more manageable but also allows for greater precision in crafting each component.Step 2: Applying Glue and Securing
Sven proceeds to apply glue along one edge of the flange, ensuring a secure bond when clamped into place. He emphasizes that this stage is crucial for maintaining the structural integrity of the flange, which in turn safeguards the living area beneath the canvas when hatches are open.Step 3: Allowing Time to Dry
After securely attaching the first portion of the flange, Sven allows ample time for it to dry before moving forward with additional steps. This patience and precision are key aspects of his successful boatbuilding methods.Step 4: Finishing Touches
Once the flange is fully dried, Sven removes the clamps carefully, ensuring no damage occurs during this process. He then moves on to attaching four more pieces onto these main frames, completing two pairs of flanges for the bulkhead hatches.The Final Touches
While two flanges form the primary support structure around the hatches, Sven mentions there are two additional pieces required at each end to ensure comprehensive protection. This attention to detail highlights his commitment to producing a durable and reliable design. “Sailing is about finding your path, whether it’s across an ocean or within yourself.” – Sven Yrvind In conclusion, making flanges around bulkhead hatches may seem complex at first glance, but by following Sven Yrvind’s meticulous process, enthusiasts can achieve professional-level results. Remember that the journey of boatbuilding is as rewarding as reaching your destination; it tests one’s patience and dedication. For those seeking to embark on this adventure or simply gain more insight into marine craftsmanship, Sven’s wisdom is invaluable.Sven Yrvind, a renowned yacht designer and sailor, shares valuable insights on creating flanges around bulkhead hatches for canvas protection in this enlightening video. By following his expert guidance, boat enthusiasts can ensure their living areas remain secure while allowing unhindered access through the hatches.Step 1: Starting with the Flange
Sven begins by explaining that working on flanges vertically and horizontally is significantly easier than doing so in a flat position. To simplify the process further, he divides the task into two or three steps as suggested by fellow expert “for for.” This approach not only makes it more manageable but also allows for greater precision in crafting each component.Step 2: Applying Glue and Securing
Sven proceeds to apply glue along one edge of the flange, ensuring a secure bond when clamped into place. He emphasizes that this stage is crucial for maintaining the structural integrity of the flange, which in turn safeguards the living area beneath the canvas when hatches are open.Step 3: Allowing Time to Dry
After securely attaching the first portion of the flange, Sven allows ample time for it to dry before moving forward with additional steps. This patience and precision are key aspects of his successful boatbuilding methods.Step 4: Finishing Touches
Once the flange is fully dried, Sven removes the clamps carefully, ensuring no damage occurs during this process. He then moves on to attaching four more pieces onto these main frames, completing two pairs of flanges for the bulkhead hatches.The Final Touches
While two flanges form the primary support structure around the hatches, Sven mentions there are two additional pieces required at each end to ensure comprehensive protection. This attention to detail highlights his commitment to producing a durable and reliable design. “Sailing is about finding your path, whether it’s across an ocean or within yourself.” – Sven Yrvind In conclusion, making flanges around bulkhead hatches may seem complex at first glance, but by following Sven Yrvind’s meticulous process, enthusiasts can achieve professional-level results. Remember that the journey of boatbuilding is as rewarding as reaching your destination; it tests one’s patience and dedication. For those seeking to embark on this adventure or simply gain more insight into marine craftsmanship, Sven’s wisdom is invaluable.Making Flanges Around Bulkhead Hatches for Canvas
Sven Yrvind, a renowned yacht designer and sailor, shares valuable insights on creating flanges around bulkhead hatches for canvas protection in this enlightening video. By following his expert guidance, boat enthusiasts can ensure their living areas remain secure while allowing unhindered access through the hatches.Step 1: Starting with the Flange
Sven begins by explaining that working on flanges vertically and horizontally is significantly easier than doing so in a flat position. To simplify the process further, he divides the task into two or three steps as suggested by fellow expert “for for.” This approach not only makes it more manageable but also allows for greater precision in crafting each component.Step 2: Applying Glue and Securing
Sven proceeds to apply glue along one edge of the flange, ensuring a secure bond when clamped into place. He emphasizes that this stage is crucial for maintaining the structural integrity of the flange, which in turn safeguards the living area beneath the canvas when hatches are open.Step 3: Allowing Time to Dry
After securely attaching the first portion of the flange, Sven allows ample time for it to dry before moving forward with additional steps. This patience and precision are key aspects of his successful boatbuilding methods.Step 4: Finishing Touches
Once the flange is fully dried, Sven removes the clamps carefully, ensuring no damage occurs during this process. He then moves on to attaching four more pieces onto these main frames, completing two pairs of flanges for the bulkhead hatches.The Final Touches
While two flanges form the primary support structure around the hatches, Sven mentions there are two additional pieces required at each end to ensure comprehensive protection. This attention to detail highlights his commitment to producing a durable and reliable design. “Sailing is about finding your path, whether it’s across an ocean or within yourself.” – Sven Yrvind In conclusion, making flanges around bulkhead hatches may seem complex at first glance, but by following Sven Yrvind’s meticulous process, enthusiasts can achieve professional-level results. Remember that the journey of boatbuilding is as rewarding as reaching your destination; it tests one’s patience and dedication. For those seeking to embark on this adventure or simply gain more insight into marine craftsmanship, Sven’s wisdom is invaluable.Once the flange is fully dried, Sven removes the clamps carefully, ensuring no damage occurs during this process. He then moves on to attaching four more pieces onto these main frames, completing two pairs of flanges for the bulkhead hatches.The Final Touches
While two flanges form the primary support structure around the hatches, Sven mentions there are two additional pieces required at each end to ensure comprehensive protection. This attention to detail highlights his commitment to producing a durable and reliable design. “Sailing is about finding your path, whether it’s across an ocean or within yourself.” – Sven Yrvind In conclusion, making flanges around bulkhead hatches may seem complex at first glance, but by following Sven Yrvind’s meticulous process, enthusiasts can achieve professional-level results. Remember that the journey of boatbuilding is as rewarding as reaching your destination; it tests one’s patience and dedication. For those seeking to embark on this adventure or simply gain more insight into marine craftsmanship, Sven’s wisdom is invaluable.Sven begins by explaining that working on flanges vertically and horizontally is significantly easier than doing so in a flat position. To simplify the process further, he divides the task into two or three steps as suggested by fellow expert “for for.” This approach not only makes it more manageable but also allows for greater precision in crafting each component.Step 2: Applying Glue and Securing
Sven proceeds to apply glue along one edge of the flange, ensuring a secure bond when clamped into place. He emphasizes that this stage is crucial for maintaining the structural integrity of the flange, which in turn safeguards the living area beneath the canvas when hatches are open.Step 3: Allowing Time to Dry
After securely attaching the first portion of the flange, Sven allows ample time for it to dry before moving forward with additional steps. This patience and precision are key aspects of his successful boatbuilding methods.Step 4: Finishing Touches
Once the flange is fully dried, Sven removes the clamps carefully, ensuring no damage occurs during this process. He then moves on to attaching four more pieces onto these main frames, completing two pairs of flanges for the bulkhead hatches.The Final Touches
While two flanges form the primary support structure around the hatches, Sven mentions there are two additional pieces required at each end to ensure comprehensive protection. This attention to detail highlights his commitment to producing a durable and reliable design. “Sailing is about finding your path, whether it’s across an ocean or within yourself.” – Sven Yrvind In conclusion, making flanges around bulkhead hatches may seem complex at first glance, but by following Sven Yrvind’s meticulous process, enthusiasts can achieve professional-level results. Remember that the journey of boatbuilding is as rewarding as reaching your destination; it tests one’s patience and dedication. For those seeking to embark on this adventure or simply gain more insight into marine craftsmanship, Sven’s wisdom is invaluable.Sven Yrvind, a renowned yacht designer and sailor, shares valuable insights on creating flanges around bulkhead hatches for canvas protection in this enlightening video. By following his expert guidance, boat enthusiasts can ensure their living areas remain secure while allowing unhindered access through the hatches.Step 1: Starting with the Flange
Sven begins by explaining that working on flanges vertically and horizontally is significantly easier than doing so in a flat position. To simplify the process further, he divides the task into two or three steps as suggested by fellow expert “for for.” This approach not only makes it more manageable but also allows for greater precision in crafting each component.Step 2: Applying Glue and Securing
Sven proceeds to apply glue along one edge of the flange, ensuring a secure bond when clamped into place. He emphasizes that this stage is crucial for maintaining the structural integrity of the flange, which in turn safeguards the living area beneath the canvas when hatches are open.Step 3: Allowing Time to Dry
After securely attaching the first portion of the flange, Sven allows ample time for it to dry before moving forward with additional steps. This patience and precision are key aspects of his successful boatbuilding methods.Step 4: Finishing Touches
Once the flange is fully dried, Sven removes the clamps carefully, ensuring no damage occurs during this process. He then moves on to attaching four more pieces onto these main frames, completing two pairs of flanges for the bulkhead hatches.The Final Touches
While two flanges form the primary support structure around the hatches, Sven mentions there are two additional pieces required at each end to ensure comprehensive protection. This attention to detail highlights his commitment to producing a durable and reliable design. “Sailing is about finding your path, whether it’s across an ocean or within yourself.” – Sven Yrvind In conclusion, making flanges around bulkhead hatches may seem complex at first glance, but by following Sven Yrvind’s meticulous process, enthusiasts can achieve professional-level results. Remember that the journey of boatbuilding is as rewarding as reaching your destination; it tests one’s patience and dedication. For those seeking to embark on this adventure or simply gain more insight into marine craftsmanship, Sven’s wisdom is invaluable.Making Flanges Around Bulkhead Hatches for Canvas
Sven Yrvind, a renowned yacht designer and sailor, shares valuable insights on creating flanges around bulkhead hatches for canvas protection in this enlightening video. By following his expert guidance, boat enthusiasts can ensure their living areas remain secure while allowing unhindered access through the hatches.Step 1: Starting with the Flange
Sven begins by explaining that working on flanges vertically and horizontally is significantly easier than doing so in a flat position. To simplify the process further, he divides the task into two or three steps as suggested by fellow expert “for for.” This approach not only makes it more manageable but also allows for greater precision in crafting each component.Step 2: Applying Glue and Securing
Sven proceeds to apply glue along one edge of the flange, ensuring a secure bond when clamped into place. He emphasizes that this stage is crucial for maintaining the structural integrity of the flange, which in turn safeguards the living area beneath the canvas when hatches are open.Step 3: Allowing Time to Dry
After securely attaching the first portion of the flange, Sven allows ample time for it to dry before moving forward with additional steps. This patience and precision are key aspects of his successful boatbuilding methods.Step 4: Finishing Touches
Once the flange is fully dried, Sven removes the clamps carefully, ensuring no damage occurs during this process. He then moves on to attaching four more pieces onto these main frames, completing two pairs of flanges for the bulkhead hatches.The Final Touches
While two flanges form the primary support structure around the hatches, Sven mentions there are two additional pieces required at each end to ensure comprehensive protection. This attention to detail highlights his commitment to producing a durable and reliable design. “Sailing is about finding your path, whether it’s across an ocean or within yourself.” – Sven Yrvind In conclusion, making flanges around bulkhead hatches may seem complex at first glance, but by following Sven Yrvind’s meticulous process, enthusiasts can achieve professional-level results. Remember that the journey of boatbuilding is as rewarding as reaching your destination; it tests one’s patience and dedication. For those seeking to embark on this adventure or simply gain more insight into marine craftsmanship, Sven’s wisdom is invaluable.After securely attaching the first portion of the flange, Sven allows ample time for it to dry before moving forward with additional steps. This patience and precision are key aspects of his successful boatbuilding methods.Step 4: Finishing Touches
Once the flange is fully dried, Sven removes the clamps carefully, ensuring no damage occurs during this process. He then moves on to attaching four more pieces onto these main frames, completing two pairs of flanges for the bulkhead hatches.The Final Touches
While two flanges form the primary support structure around the hatches, Sven mentions there are two additional pieces required at each end to ensure comprehensive protection. This attention to detail highlights his commitment to producing a durable and reliable design. “Sailing is about finding your path, whether it’s across an ocean or within yourself.” – Sven Yrvind In conclusion, making flanges around bulkhead hatches may seem complex at first glance, but by following Sven Yrvind’s meticulous process, enthusiasts can achieve professional-level results. Remember that the journey of boatbuilding is as rewarding as reaching your destination; it tests one’s patience and dedication. For those seeking to embark on this adventure or simply gain more insight into marine craftsmanship, Sven’s wisdom is invaluable.Sven begins by explaining that working on flanges vertically and horizontally is significantly easier than doing so in a flat position. To simplify the process further, he divides the task into two or three steps as suggested by fellow expert “for for.” This approach not only makes it more manageable but also allows for greater precision in crafting each component.Step 2: Applying Glue and Securing
Sven proceeds to apply glue along one edge of the flange, ensuring a secure bond when clamped into place. He emphasizes that this stage is crucial for maintaining the structural integrity of the flange, which in turn safeguards the living area beneath the canvas when hatches are open.Step 3: Allowing Time to Dry
After securely attaching the first portion of the flange, Sven allows ample time for it to dry before moving forward with additional steps. This patience and precision are key aspects of his successful boatbuilding methods.Step 4: Finishing Touches
Once the flange is fully dried, Sven removes the clamps carefully, ensuring no damage occurs during this process. He then moves on to attaching four more pieces onto these main frames, completing two pairs of flanges for the bulkhead hatches.The Final Touches
While two flanges form the primary support structure around the hatches, Sven mentions there are two additional pieces required at each end to ensure comprehensive protection. This attention to detail highlights his commitment to producing a durable and reliable design. “Sailing is about finding your path, whether it’s across an ocean or within yourself.” – Sven Yrvind In conclusion, making flanges around bulkhead hatches may seem complex at first glance, but by following Sven Yrvind’s meticulous process, enthusiasts can achieve professional-level results. Remember that the journey of boatbuilding is as rewarding as reaching your destination; it tests one’s patience and dedication. For those seeking to embark on this adventure or simply gain more insight into marine craftsmanship, Sven’s wisdom is invaluable.Sven Yrvind, a renowned yacht designer and sailor, shares valuable insights on creating flanges around bulkhead hatches for canvas protection in this enlightening video. By following his expert guidance, boat enthusiasts can ensure their living areas remain secure while allowing unhindered access through the hatches.Step 1: Starting with the Flange
Sven begins by explaining that working on flanges vertically and horizontally is significantly easier than doing so in a flat position. To simplify the process further, he divides the task into two or three steps as suggested by fellow expert “for for.” This approach not only makes it more manageable but also allows for greater precision in crafting each component.Step 2: Applying Glue and Securing
Sven proceeds to apply glue along one edge of the flange, ensuring a secure bond when clamped into place. He emphasizes that this stage is crucial for maintaining the structural integrity of the flange, which in turn safeguards the living area beneath the canvas when hatches are open.Step 3: Allowing Time to Dry
After securely attaching the first portion of the flange, Sven allows ample time for it to dry before moving forward with additional steps. This patience and precision are key aspects of his successful boatbuilding methods.Step 4: Finishing Touches
Once the flange is fully dried, Sven removes the clamps carefully, ensuring no damage occurs during this process. He then moves on to attaching four more pieces onto these main frames, completing two pairs of flanges for the bulkhead hatches.The Final Touches
While two flanges form the primary support structure around the hatches, Sven mentions there are two additional pieces required at each end to ensure comprehensive protection. This attention to detail highlights his commitment to producing a durable and reliable design. “Sailing is about finding your path, whether it’s across an ocean or within yourself.” – Sven Yrvind In conclusion, making flanges around bulkhead hatches may seem complex at first glance, but by following Sven Yrvind’s meticulous process, enthusiasts can achieve professional-level results. Remember that the journey of boatbuilding is as rewarding as reaching your destination; it tests one’s patience and dedication. For those seeking to embark on this adventure or simply gain more insight into marine craftsmanship, Sven’s wisdom is invaluable.Making Flanges Around Bulkhead Hatches for Canvas
Sven Yrvind, a renowned yacht designer and sailor, shares valuable insights on creating flanges around bulkhead hatches for canvas protection in this enlightening video. By following his expert guidance, boat enthusiasts can ensure their living areas remain secure while allowing unhindered access through the hatches.Step 1: Starting with the Flange
Sven begins by explaining that working on flanges vertically and horizontally is significantly easier than doing so in a flat position. To simplify the process further, he divides the task into two or three steps as suggested by fellow expert “for for.” This approach not only makes it more manageable but also allows for greater precision in crafting each component.Step 2: Applying Glue and Securing
Sven proceeds to apply glue along one edge of the flange, ensuring a secure bond when clamped into place. He emphasizes that this stage is crucial for maintaining the structural integrity of the flange, which in turn safeguards the living area beneath the canvas when hatches are open.Step 3: Allowing Time to Dry
After securely attaching the first portion of the flange, Sven allows ample time for it to dry before moving forward with additional steps. This patience and precision are key aspects of his successful boatbuilding methods.Step 4: Finishing Touches
Once the flange is fully dried, Sven removes the clamps carefully, ensuring no damage occurs during this process. He then moves on to attaching four more pieces onto these main frames, completing two pairs of flanges for the bulkhead hatches.The Final Touches
While two flanges form the primary support structure around the hatches, Sven mentions there are two additional pieces required at each end to ensure comprehensive protection. This attention to detail highlights his commitment to producing a durable and reliable design. “Sailing is about finding your path, whether it’s across an ocean or within yourself.” – Sven Yrvind In conclusion, making flanges around bulkhead hatches may seem complex at first glance, but by following Sven Yrvind’s meticulous process, enthusiasts can achieve professional-level results. Remember that the journey of boatbuilding is as rewarding as reaching your destination; it tests one’s patience and dedication. For those seeking to embark on this adventure or simply gain more insight into marine craftsmanship, Sven’s wisdom is invaluable.Sven proceeds to apply glue along one edge of the flange, ensuring a secure bond when clamped into place. He emphasizes that this stage is crucial for maintaining the structural integrity of the flange, which in turn safeguards the living area beneath the canvas when hatches are open.Step 3: Allowing Time to Dry
After securely attaching the first portion of the flange, Sven allows ample time for it to dry before moving forward with additional steps. This patience and precision are key aspects of his successful boatbuilding methods.Step 4: Finishing Touches
Once the flange is fully dried, Sven removes the clamps carefully, ensuring no damage occurs during this process. He then moves on to attaching four more pieces onto these main frames, completing two pairs of flanges for the bulkhead hatches.The Final Touches
While two flanges form the primary support structure around the hatches, Sven mentions there are two additional pieces required at each end to ensure comprehensive protection. This attention to detail highlights his commitment to producing a durable and reliable design. “Sailing is about finding your path, whether it’s across an ocean or within yourself.” – Sven Yrvind In conclusion, making flanges around bulkhead hatches may seem complex at first glance, but by following Sven Yrvind’s meticulous process, enthusiasts can achieve professional-level results. Remember that the journey of boatbuilding is as rewarding as reaching your destination; it tests one’s patience and dedication. For those seeking to embark on this adventure or simply gain more insight into marine craftsmanship, Sven’s wisdom is invaluable.Sven begins by explaining that working on flanges vertically and horizontally is significantly easier than doing so in a flat position. To simplify the process further, he divides the task into two or three steps as suggested by fellow expert “for for.” This approach not only makes it more manageable but also allows for greater precision in crafting each component.Step 2: Applying Glue and Securing
Sven proceeds to apply glue along one edge of the flange, ensuring a secure bond when clamped into place. He emphasizes that this stage is crucial for maintaining the structural integrity of the flange, which in turn safeguards the living area beneath the canvas when hatches are open.Step 3: Allowing Time to Dry
After securely attaching the first portion of the flange, Sven allows ample time for it to dry before moving forward with additional steps. This patience and precision are key aspects of his successful boatbuilding methods.Step 4: Finishing Touches
Once the flange is fully dried, Sven removes the clamps carefully, ensuring no damage occurs during this process. He then moves on to attaching four more pieces onto these main frames, completing two pairs of flanges for the bulkhead hatches.The Final Touches
While two flanges form the primary support structure around the hatches, Sven mentions there are two additional pieces required at each end to ensure comprehensive protection. This attention to detail highlights his commitment to producing a durable and reliable design. “Sailing is about finding your path, whether it’s across an ocean or within yourself.” – Sven Yrvind In conclusion, making flanges around bulkhead hatches may seem complex at first glance, but by following Sven Yrvind’s meticulous process, enthusiasts can achieve professional-level results. Remember that the journey of boatbuilding is as rewarding as reaching your destination; it tests one’s patience and dedication. For those seeking to embark on this adventure or simply gain more insight into marine craftsmanship, Sven’s wisdom is invaluable.Sven Yrvind, a renowned yacht designer and sailor, shares valuable insights on creating flanges around bulkhead hatches for canvas protection in this enlightening video. By following his expert guidance, boat enthusiasts can ensure their living areas remain secure while allowing unhindered access through the hatches.Step 1: Starting with the Flange
Sven begins by explaining that working on flanges vertically and horizontally is significantly easier than doing so in a flat position. To simplify the process further, he divides the task into two or three steps as suggested by fellow expert “for for.” This approach not only makes it more manageable but also allows for greater precision in crafting each component.Step 2: Applying Glue and Securing
Sven proceeds to apply glue along one edge of the flange, ensuring a secure bond when clamped into place. He emphasizes that this stage is crucial for maintaining the structural integrity of the flange, which in turn safeguards the living area beneath the canvas when hatches are open.Step 3: Allowing Time to Dry
After securely attaching the first portion of the flange, Sven allows ample time for it to dry before moving forward with additional steps. This patience and precision are key aspects of his successful boatbuilding methods.Step 4: Finishing Touches
Once the flange is fully dried, Sven removes the clamps carefully, ensuring no damage occurs during this process. He then moves on to attaching four more pieces onto these main frames, completing two pairs of flanges for the bulkhead hatches.The Final Touches
While two flanges form the primary support structure around the hatches, Sven mentions there are two additional pieces required at each end to ensure comprehensive protection. This attention to detail highlights his commitment to producing a durable and reliable design. “Sailing is about finding your path, whether it’s across an ocean or within yourself.” – Sven Yrvind In conclusion, making flanges around bulkhead hatches may seem complex at first glance, but by following Sven Yrvind’s meticulous process, enthusiasts can achieve professional-level results. Remember that the journey of boatbuilding is as rewarding as reaching your destination; it tests one’s patience and dedication. For those seeking to embark on this adventure or simply gain more insight into marine craftsmanship, Sven’s wisdom is invaluable.Making Flanges Around Bulkhead Hatches for Canvas
Sven Yrvind, a renowned yacht designer and sailor, shares valuable insights on creating flanges around bulkhead hatches for canvas protection in this enlightening video. By following his expert guidance, boat enthusiasts can ensure their living areas remain secure while allowing unhindered access through the hatches.Step 1: Starting with the Flange
Sven begins by explaining that working on flanges vertically and horizontally is significantly easier than doing so in a flat position. To simplify the process further, he divides the task into two or three steps as suggested by fellow expert “for for.” This approach not only makes it more manageable but also allows for greater precision in crafting each component.Step 2: Applying Glue and Securing
Sven proceeds to apply glue along one edge of the flange, ensuring a secure bond when clamped into place. He emphasizes that this stage is crucial for maintaining the structural integrity of the flange, which in turn safeguards the living area beneath the canvas when hatches are open.Step 3: Allowing Time to Dry
After securely attaching the first portion of the flange, Sven allows ample time for it to dry before moving forward with additional steps. This patience and precision are key aspects of his successful boatbuilding methods.Step 4: Finishing Touches
Once the flange is fully dried, Sven removes the clamps carefully, ensuring no damage occurs during this process. He then moves on to attaching four more pieces onto these main frames, completing two pairs of flanges for the bulkhead hatches.The Final Touches
While two flanges form the primary support structure around the hatches, Sven mentions there are two additional pieces required at each end to ensure comprehensive protection. This attention to detail highlights his commitment to producing a durable and reliable design. “Sailing is about finding your path, whether it’s across an ocean or within yourself.” – Sven Yrvind In conclusion, making flanges around bulkhead hatches may seem complex at first glance, but by following Sven Yrvind’s meticulous process, enthusiasts can achieve professional-level results. Remember that the journey of boatbuilding is as rewarding as reaching your destination; it tests one’s patience and dedication. For those seeking to embark on this adventure or simply gain more insight into marine craftsmanship, Sven’s wisdom is invaluable.Once the flange is fully dried, Sven removes the clamps carefully, ensuring no damage occurs during this process. He then moves on to attaching four more pieces onto these main frames, completing two pairs of flanges for the bulkhead hatches.The Final Touches
While two flanges form the primary support structure around the hatches, Sven mentions there are two additional pieces required at each end to ensure comprehensive protection. This attention to detail highlights his commitment to producing a durable and reliable design. “Sailing is about finding your path, whether it’s across an ocean or within yourself.” – Sven Yrvind In conclusion, making flanges around bulkhead hatches may seem complex at first glance, but by following Sven Yrvind’s meticulous process, enthusiasts can achieve professional-level results. Remember that the journey of boatbuilding is as rewarding as reaching your destination; it tests one’s patience and dedication. For those seeking to embark on this adventure or simply gain more insight into marine craftsmanship, Sven’s wisdom is invaluable.Sven proceeds to apply glue along one edge of the flange, ensuring a secure bond when clamped into place. He emphasizes that this stage is crucial for maintaining the structural integrity of the flange, which in turn safeguards the living area beneath the canvas when hatches are open.Step 3: Allowing Time to Dry
After securely attaching the first portion of the flange, Sven allows ample time for it to dry before moving forward with additional steps. This patience and precision are key aspects of his successful boatbuilding methods.Step 4: Finishing Touches
Once the flange is fully dried, Sven removes the clamps carefully, ensuring no damage occurs during this process. He then moves on to attaching four more pieces onto these main frames, completing two pairs of flanges for the bulkhead hatches.The Final Touches
While two flanges form the primary support structure around the hatches, Sven mentions there are two additional pieces required at each end to ensure comprehensive protection. This attention to detail highlights his commitment to producing a durable and reliable design. “Sailing is about finding your path, whether it’s across an ocean or within yourself.” – Sven Yrvind In conclusion, making flanges around bulkhead hatches may seem complex at first glance, but by following Sven Yrvind’s meticulous process, enthusiasts can achieve professional-level results. Remember that the journey of boatbuilding is as rewarding as reaching your destination; it tests one’s patience and dedication. For those seeking to embark on this adventure or simply gain more insight into marine craftsmanship, Sven’s wisdom is invaluable.Sven begins by explaining that working on flanges vertically and horizontally is significantly easier than doing so in a flat position. To simplify the process further, he divides the task into two or three steps as suggested by fellow expert “for for.” This approach not only makes it more manageable but also allows for greater precision in crafting each component.Step 2: Applying Glue and Securing
Sven proceeds to apply glue along one edge of the flange, ensuring a secure bond when clamped into place. He emphasizes that this stage is crucial for maintaining the structural integrity of the flange, which in turn safeguards the living area beneath the canvas when hatches are open.Step 3: Allowing Time to Dry
After securely attaching the first portion of the flange, Sven allows ample time for it to dry before moving forward with additional steps. This patience and precision are key aspects of his successful boatbuilding methods.Step 4: Finishing Touches
Once the flange is fully dried, Sven removes the clamps carefully, ensuring no damage occurs during this process. He then moves on to attaching four more pieces onto these main frames, completing two pairs of flanges for the bulkhead hatches.The Final Touches
While two flanges form the primary support structure around the hatches, Sven mentions there are two additional pieces required at each end to ensure comprehensive protection. This attention to detail highlights his commitment to producing a durable and reliable design. “Sailing is about finding your path, whether it’s across an ocean or within yourself.” – Sven Yrvind In conclusion, making flanges around bulkhead hatches may seem complex at first glance, but by following Sven Yrvind’s meticulous process, enthusiasts can achieve professional-level results. Remember that the journey of boatbuilding is as rewarding as reaching your destination; it tests one’s patience and dedication. For those seeking to embark on this adventure or simply gain more insight into marine craftsmanship, Sven’s wisdom is invaluable.Sven Yrvind, a renowned yacht designer and sailor, shares valuable insights on creating flanges around bulkhead hatches for canvas protection in this enlightening video. By following his expert guidance, boat enthusiasts can ensure their living areas remain secure while allowing unhindered access through the hatches.Step 1: Starting with the Flange
Sven begins by explaining that working on flanges vertically and horizontally is significantly easier than doing so in a flat position. To simplify the process further, he divides the task into two or three steps as suggested by fellow expert “for for.” This approach not only makes it more manageable but also allows for greater precision in crafting each component.Step 2: Applying Glue and Securing
Sven proceeds to apply glue along one edge of the flange, ensuring a secure bond when clamped into place. He emphasizes that this stage is crucial for maintaining the structural integrity of the flange, which in turn safeguards the living area beneath the canvas when hatches are open.Step 3: Allowing Time to Dry
After securely attaching the first portion of the flange, Sven allows ample time for it to dry before moving forward with additional steps. This patience and precision are key aspects of his successful boatbuilding methods.Step 4: Finishing Touches
Once the flange is fully dried, Sven removes the clamps carefully, ensuring no damage occurs during this process. He then moves on to attaching four more pieces onto these main frames, completing two pairs of flanges for the bulkhead hatches.The Final Touches
While two flanges form the primary support structure around the hatches, Sven mentions there are two additional pieces required at each end to ensure comprehensive protection. This attention to detail highlights his commitment to producing a durable and reliable design. “Sailing is about finding your path, whether it’s across an ocean or within yourself.” – Sven Yrvind In conclusion, making flanges around bulkhead hatches may seem complex at first glance, but by following Sven Yrvind’s meticulous process, enthusiasts can achieve professional-level results. Remember that the journey of boatbuilding is as rewarding as reaching your destination; it tests one’s patience and dedication. For those seeking to embark on this adventure or simply gain more insight into marine craftsmanship, Sven’s wisdom is invaluable.Making Flanges Around Bulkhead Hatches for Canvas
Sven Yrvind, a renowned yacht designer and sailor, shares valuable insights on creating flanges around bulkhead hatches for canvas protection in this enlightening video. By following his expert guidance, boat enthusiasts can ensure their living areas remain secure while allowing unhindered access through the hatches.Step 1: Starting with the Flange
Sven begins by explaining that working on flanges vertically and horizontally is significantly easier than doing so in a flat position. To simplify the process further, he divides the task into two or three steps as suggested by fellow expert “for for.” This approach not only makes it more manageable but also allows for greater precision in crafting each component.Step 2: Applying Glue and Securing
Sven proceeds to apply glue along one edge of the flange, ensuring a secure bond when clamped into place. He emphasizes that this stage is crucial for maintaining the structural integrity of the flange, which in turn safeguards the living area beneath the canvas when hatches are open.Step 3: Allowing Time to Dry
After securely attaching the first portion of the flange, Sven allows ample time for it to dry before moving forward with additional steps. This patience and precision are key aspects of his successful boatbuilding methods.Step 4: Finishing Touches
Once the flange is fully dried, Sven removes the clamps carefully, ensuring no damage occurs during this process. He then moves on to attaching four more pieces onto these main frames, completing two pairs of flanges for the bulkhead hatches.The Final Touches
While two flanges form the primary support structure around the hatches, Sven mentions there are two additional pieces required at each end to ensure comprehensive protection. This attention to detail highlights his commitment to producing a durable and reliable design. “Sailing is about finding your path, whether it’s across an ocean or within yourself.” – Sven Yrvind In conclusion, making flanges around bulkhead hatches may seem complex at first glance, but by following Sven Yrvind’s meticulous process, enthusiasts can achieve professional-level results. Remember that the journey of boatbuilding is as rewarding as reaching your destination; it tests one’s patience and dedication. For those seeking to embark on this adventure or simply gain more insight into marine craftsmanship, Sven’s wisdom is invaluable.After securely attaching the first portion of the flange, Sven allows ample time for it to dry before moving forward with additional steps. This patience and precision are key aspects of his successful boatbuilding methods.Step 4: Finishing Touches
Once the flange is fully dried, Sven removes the clamps carefully, ensuring no damage occurs during this process. He then moves on to attaching four more pieces onto these main frames, completing two pairs of flanges for the bulkhead hatches.The Final Touches
While two flanges form the primary support structure around the hatches, Sven mentions there are two additional pieces required at each end to ensure comprehensive protection. This attention to detail highlights his commitment to producing a durable and reliable design. “Sailing is about finding your path, whether it’s across an ocean or within yourself.” – Sven Yrvind In conclusion, making flanges around bulkhead hatches may seem complex at first glance, but by following Sven Yrvind’s meticulous process, enthusiasts can achieve professional-level results. Remember that the journey of boatbuilding is as rewarding as reaching your destination; it tests one’s patience and dedication. For those seeking to embark on this adventure or simply gain more insight into marine craftsmanship, Sven’s wisdom is invaluable.Sven proceeds to apply glue along one edge of the flange, ensuring a secure bond when clamped into place. He emphasizes that this stage is crucial for maintaining the structural integrity of the flange, which in turn safeguards the living area beneath the canvas when hatches are open.Step 3: Allowing Time to Dry
After securely attaching the first portion of the flange, Sven allows ample time for it to dry before moving forward with additional steps. This patience and precision are key aspects of his successful boatbuilding methods.Step 4: Finishing Touches
Once the flange is fully dried, Sven removes the clamps carefully, ensuring no damage occurs during this process. He then moves on to attaching four more pieces onto these main frames, completing two pairs of flanges for the bulkhead hatches.The Final Touches
While two flanges form the primary support structure around the hatches, Sven mentions there are two additional pieces required at each end to ensure comprehensive protection. This attention to detail highlights his commitment to producing a durable and reliable design. “Sailing is about finding your path, whether it’s across an ocean or within yourself.” – Sven Yrvind In conclusion, making flanges around bulkhead hatches may seem complex at first glance, but by following Sven Yrvind’s meticulous process, enthusiasts can achieve professional-level results. Remember that the journey of boatbuilding is as rewarding as reaching your destination; it tests one’s patience and dedication. For those seeking to embark on this adventure or simply gain more insight into marine craftsmanship, Sven’s wisdom is invaluable.Sven begins by explaining that working on flanges vertically and horizontally is significantly easier than doing so in a flat position. To simplify the process further, he divides the task into two or three steps as suggested by fellow expert “for for.” This approach not only makes it more manageable but also allows for greater precision in crafting each component.Step 2: Applying Glue and Securing
Sven proceeds to apply glue along one edge of the flange, ensuring a secure bond when clamped into place. He emphasizes that this stage is crucial for maintaining the structural integrity of the flange, which in turn safeguards the living area beneath the canvas when hatches are open.Step 3: Allowing Time to Dry
After securely attaching the first portion of the flange, Sven allows ample time for it to dry before moving forward with additional steps. This patience and precision are key aspects of his successful boatbuilding methods.Step 4: Finishing Touches
Once the flange is fully dried, Sven removes the clamps carefully, ensuring no damage occurs during this process. He then moves on to attaching four more pieces onto these main frames, completing two pairs of flanges for the bulkhead hatches.The Final Touches
While two flanges form the primary support structure around the hatches, Sven mentions there are two additional pieces required at each end to ensure comprehensive protection. This attention to detail highlights his commitment to producing a durable and reliable design. “Sailing is about finding your path, whether it’s across an ocean or within yourself.” – Sven Yrvind In conclusion, making flanges around bulkhead hatches may seem complex at first glance, but by following Sven Yrvind’s meticulous process, enthusiasts can achieve professional-level results. Remember that the journey of boatbuilding is as rewarding as reaching your destination; it tests one’s patience and dedication. For those seeking to embark on this adventure or simply gain more insight into marine craftsmanship, Sven’s wisdom is invaluable.Sven Yrvind, a renowned yacht designer and sailor, shares valuable insights on creating flanges around bulkhead hatches for canvas protection in this enlightening video. By following his expert guidance, boat enthusiasts can ensure their living areas remain secure while allowing unhindered access through the hatches.Step 1: Starting with the Flange
Sven begins by explaining that working on flanges vertically and horizontally is significantly easier than doing so in a flat position. To simplify the process further, he divides the task into two or three steps as suggested by fellow expert “for for.” This approach not only makes it more manageable but also allows for greater precision in crafting each component.Step 2: Applying Glue and Securing
Sven proceeds to apply glue along one edge of the flange, ensuring a secure bond when clamped into place. He emphasizes that this stage is crucial for maintaining the structural integrity of the flange, which in turn safeguards the living area beneath the canvas when hatches are open.Step 3: Allowing Time to Dry
After securely attaching the first portion of the flange, Sven allows ample time for it to dry before moving forward with additional steps. This patience and precision are key aspects of his successful boatbuilding methods.Step 4: Finishing Touches
Once the flange is fully dried, Sven removes the clamps carefully, ensuring no damage occurs during this process. He then moves on to attaching four more pieces onto these main frames, completing two pairs of flanges for the bulkhead hatches.The Final Touches
While two flanges form the primary support structure around the hatches, Sven mentions there are two additional pieces required at each end to ensure comprehensive protection. This attention to detail highlights his commitment to producing a durable and reliable design. “Sailing is about finding your path, whether it’s across an ocean or within yourself.” – Sven Yrvind In conclusion, making flanges around bulkhead hatches may seem complex at first glance, but by following Sven Yrvind’s meticulous process, enthusiasts can achieve professional-level results. Remember that the journey of boatbuilding is as rewarding as reaching your destination; it tests one’s patience and dedication. For those seeking to embark on this adventure or simply gain more insight into marine craftsmanship, Sven’s wisdom is invaluable.Making Flanges Around Bulkhead Hatches for Canvas
Sven Yrvind, a renowned yacht designer and sailor, shares valuable insights on creating flanges around bulkhead hatches for canvas protection in this enlightening video. By following his expert guidance, boat enthusiasts can ensure their living areas remain secure while allowing unhindered access through the hatches.Step 1: Starting with the Flange
Sven begins by explaining that working on flanges vertically and horizontally is significantly easier than doing so in a flat position. To simplify the process further, he divides the task into two or three steps as suggested by fellow expert “for for.” This approach not only makes it more manageable but also allows for greater precision in crafting each component.Step 2: Applying Glue and Securing
Sven proceeds to apply glue along one edge of the flange, ensuring a secure bond when clamped into place. He emphasizes that this stage is crucial for maintaining the structural integrity of the flange, which in turn safeguards the living area beneath the canvas when hatches are open.Step 3: Allowing Time to Dry
After securely attaching the first portion of the flange, Sven allows ample time for it to dry before moving forward with additional steps. This patience and precision are key aspects of his successful boatbuilding methods.Step 4: Finishing Touches
Once the flange is fully dried, Sven removes the clamps carefully, ensuring no damage occurs during this process. He then moves on to attaching four more pieces onto these main frames, completing two pairs of flanges for the bulkhead hatches.The Final Touches
While two flanges form the primary support structure around the hatches, Sven mentions there are two additional pieces required at each end to ensure comprehensive protection. This attention to detail highlights his commitment to producing a durable and reliable design. “Sailing is about finding your path, whether it’s across an ocean or within yourself.” – Sven Yrvind In conclusion, making flanges around bulkhead hatches may seem complex at first glance, but by following Sven Yrvind’s meticulous process, enthusiasts can achieve professional-level results. Remember that the journey of boatbuilding is as rewarding as reaching your destination; it tests one’s patience and dedication. For those seeking to embark on this adventure or simply gain more insight into marine craftsmanship, Sven’s wisdom is invaluable.Once the flange is fully dried, Sven removes the clamps carefully, ensuring no damage occurs during this process. He then moves on to attaching four more pieces onto these main frames, completing two pairs of flanges for the bulkhead hatches.The Final Touches
While two flanges form the primary support structure around the hatches, Sven mentions there are two additional pieces required at each end to ensure comprehensive protection. This attention to detail highlights his commitment to producing a durable and reliable design. “Sailing is about finding your path, whether it’s across an ocean or within yourself.” – Sven Yrvind In conclusion, making flanges around bulkhead hatches may seem complex at first glance, but by following Sven Yrvind’s meticulous process, enthusiasts can achieve professional-level results. Remember that the journey of boatbuilding is as rewarding as reaching your destination; it tests one’s patience and dedication. For those seeking to embark on this adventure or simply gain more insight into marine craftsmanship, Sven’s wisdom is invaluable.After securely attaching the first portion of the flange, Sven allows ample time for it to dry before moving forward with additional steps. This patience and precision are key aspects of his successful boatbuilding methods.Step 4: Finishing Touches
Once the flange is fully dried, Sven removes the clamps carefully, ensuring no damage occurs during this process. He then moves on to attaching four more pieces onto these main frames, completing two pairs of flanges for the bulkhead hatches.The Final Touches
While two flanges form the primary support structure around the hatches, Sven mentions there are two additional pieces required at each end to ensure comprehensive protection. This attention to detail highlights his commitment to producing a durable and reliable design. “Sailing is about finding your path, whether it’s across an ocean or within yourself.” – Sven Yrvind In conclusion, making flanges around bulkhead hatches may seem complex at first glance, but by following Sven Yrvind’s meticulous process, enthusiasts can achieve professional-level results. Remember that the journey of boatbuilding is as rewarding as reaching your destination; it tests one’s patience and dedication. For those seeking to embark on this adventure or simply gain more insight into marine craftsmanship, Sven’s wisdom is invaluable.Sven proceeds to apply glue along one edge of the flange, ensuring a secure bond when clamped into place. He emphasizes that this stage is crucial for maintaining the structural integrity of the flange, which in turn safeguards the living area beneath the canvas when hatches are open.Step 3: Allowing Time to Dry
After securely attaching the first portion of the flange, Sven allows ample time for it to dry before moving forward with additional steps. This patience and precision are key aspects of his successful boatbuilding methods.Step 4: Finishing Touches
Once the flange is fully dried, Sven removes the clamps carefully, ensuring no damage occurs during this process. He then moves on to attaching four more pieces onto these main frames, completing two pairs of flanges for the bulkhead hatches.The Final Touches
While two flanges form the primary support structure around the hatches, Sven mentions there are two additional pieces required at each end to ensure comprehensive protection. This attention to detail highlights his commitment to producing a durable and reliable design. “Sailing is about finding your path, whether it’s across an ocean or within yourself.” – Sven Yrvind In conclusion, making flanges around bulkhead hatches may seem complex at first glance, but by following Sven Yrvind’s meticulous process, enthusiasts can achieve professional-level results. Remember that the journey of boatbuilding is as rewarding as reaching your destination; it tests one’s patience and dedication. For those seeking to embark on this adventure or simply gain more insight into marine craftsmanship, Sven’s wisdom is invaluable.Sven begins by explaining that working on flanges vertically and horizontally is significantly easier than doing so in a flat position. To simplify the process further, he divides the task into two or three steps as suggested by fellow expert “for for.” This approach not only makes it more manageable but also allows for greater precision in crafting each component.Step 2: Applying Glue and Securing
Sven proceeds to apply glue along one edge of the flange, ensuring a secure bond when clamped into place. He emphasizes that this stage is crucial for maintaining the structural integrity of the flange, which in turn safeguards the living area beneath the canvas when hatches are open.Step 3: Allowing Time to Dry
After securely attaching the first portion of the flange, Sven allows ample time for it to dry before moving forward with additional steps. This patience and precision are key aspects of his successful boatbuilding methods.Step 4: Finishing Touches
Once the flange is fully dried, Sven removes the clamps carefully, ensuring no damage occurs during this process. He then moves on to attaching four more pieces onto these main frames, completing two pairs of flanges for the bulkhead hatches.The Final Touches
While two flanges form the primary support structure around the hatches, Sven mentions there are two additional pieces required at each end to ensure comprehensive protection. This attention to detail highlights his commitment to producing a durable and reliable design. “Sailing is about finding your path, whether it’s across an ocean or within yourself.” – Sven Yrvind In conclusion, making flanges around bulkhead hatches may seem complex at first glance, but by following Sven Yrvind’s meticulous process, enthusiasts can achieve professional-level results. Remember that the journey of boatbuilding is as rewarding as reaching your destination; it tests one’s patience and dedication. For those seeking to embark on this adventure or simply gain more insight into marine craftsmanship, Sven’s wisdom is invaluable.Sven Yrvind, a renowned yacht designer and sailor, shares valuable insights on creating flanges around bulkhead hatches for canvas protection in this enlightening video. By following his expert guidance, boat enthusiasts can ensure their living areas remain secure while allowing unhindered access through the hatches.Step 1: Starting with the Flange
Sven begins by explaining that working on flanges vertically and horizontally is significantly easier than doing so in a flat position. To simplify the process further, he divides the task into two or three steps as suggested by fellow expert “for for.” This approach not only makes it more manageable but also allows for greater precision in crafting each component.Step 2: Applying Glue and Securing
Sven proceeds to apply glue along one edge of the flange, ensuring a secure bond when clamped into place. He emphasizes that this stage is crucial for maintaining the structural integrity of the flange, which in turn safeguards the living area beneath the canvas when hatches are open.Step 3: Allowing Time to Dry
After securely attaching the first portion of the flange, Sven allows ample time for it to dry before moving forward with additional steps. This patience and precision are key aspects of his successful boatbuilding methods.Step 4: Finishing Touches
Once the flange is fully dried, Sven removes the clamps carefully, ensuring no damage occurs during this process. He then moves on to attaching four more pieces onto these main frames, completing two pairs of flanges for the bulkhead hatches.The Final Touches
While two flanges form the primary support structure around the hatches, Sven mentions there are two additional pieces required at each end to ensure comprehensive protection. This attention to detail highlights his commitment to producing a durable and reliable design. “Sailing is about finding your path, whether it’s across an ocean or within yourself.” – Sven Yrvind In conclusion, making flanges around bulkhead hatches may seem complex at first glance, but by following Sven Yrvind’s meticulous process, enthusiasts can achieve professional-level results. Remember that the journey of boatbuilding is as rewarding as reaching your destination; it tests one’s patience and dedication. For those seeking to embark on this adventure or simply gain more insight into marine craftsmanship, Sven’s wisdom is invaluable.Making Flanges Around Bulkhead Hatches for Canvas
Sven Yrvind, a renowned yacht designer and sailor, shares valuable insights on creating flanges around bulkhead hatches for canvas protection in this enlightening video. By following his expert guidance, boat enthusiasts can ensure their living areas remain secure while allowing unhindered access through the hatches.Step 1: Starting with the Flange
Sven begins by explaining that working on flanges vertically and horizontally is significantly easier than doing so in a flat position. To simplify the process further, he divides the task into two or three steps as suggested by fellow expert “for for.” This approach not only makes it more manageable but also allows for greater precision in crafting each component.Step 2: Applying Glue and Securing
Sven proceeds to apply glue along one edge of the flange, ensuring a secure bond when clamped into place. He emphasizes that this stage is crucial for maintaining the structural integrity of the flange, which in turn safeguards the living area beneath the canvas when hatches are open.Step 3: Allowing Time to Dry
After securely attaching the first portion of the flange, Sven allows ample time for it to dry before moving forward with additional steps. This patience and precision are key aspects of his successful boatbuilding methods.Step 4: Finishing Touches
Once the flange is fully dried, Sven removes the clamps carefully, ensuring no damage occurs during this process. He then moves on to attaching four more pieces onto these main frames, completing two pairs of flanges for the bulkhead hatches.The Final Touches
While two flanges form the primary support structure around the hatches, Sven mentions there are two additional pieces required at each end to ensure comprehensive protection. This attention to detail highlights his commitment to producing a durable and reliable design. “Sailing is about finding your path, whether it’s across an ocean or within yourself.” – Sven Yrvind In conclusion, making flanges around bulkhead hatches may seem complex at first glance, but by following Sven Yrvind’s meticulous process, enthusiasts can achieve professional-level results. Remember that the journey of boatbuilding is as rewarding as reaching your destination; it tests one’s patience and dedication. For those seeking to embark on this adventure or simply gain more insight into marine craftsmanship, Sven’s wisdom is invaluable.After securely attaching the first portion of the flange, Sven allows ample time for it to dry before moving forward with additional steps. This patience and precision are key aspects of his successful boatbuilding methods.Step 4: Finishing Touches
Once the flange is fully dried, Sven removes the clamps carefully, ensuring no damage occurs during this process. He then moves on to attaching four more pieces onto these main frames, completing two pairs of flanges for the bulkhead hatches.The Final Touches
While two flanges form the primary support structure around the hatches, Sven mentions there are two additional pieces required at each end to ensure comprehensive protection. This attention to detail highlights his commitment to producing a durable and reliable design. “Sailing is about finding your path, whether it’s across an ocean or within yourself.” – Sven Yrvind In conclusion, making flanges around bulkhead hatches may seem complex at first glance, but by following Sven Yrvind’s meticulous process, enthusiasts can achieve professional-level results. Remember that the journey of boatbuilding is as rewarding as reaching your destination; it tests one’s patience and dedication. For those seeking to embark on this adventure or simply gain more insight into marine craftsmanship, Sven’s wisdom is invaluable.Making Flanges Around Bulkhead Hatches for Canvas
Sven Yrvind, a renowned yacht designer and sailor, shares valuable insights on creating flanges around bulkhead hatches for canvas protection in this enlightening video. By following his expert guidance, boat enthusiasts can ensure their living areas remain secure while allowing unhindered access through the hatches.Step 1: Starting with the Flange
Sven begins by explaining that working on flanges vertically and horizontally is significantly easier than doing so in a flat position. To simplify the process further, he divides the task into two or three steps as suggested by fellow expert “for for.” This approach not only makes it more manageable but also allows for greater precision in crafting each component.Step 2: Applying Glue and Securing
Sven proceeds to apply glue along one edge of the flange, ensuring a secure bond when clamped into place. He emphasizes that this stage is crucial for maintaining the structural integrity of the flange, which in turn safeguards the living area beneath the canvas when hatches are open.Step 3: Allowing Time to Dry
After securely attaching the first portion of the flange, Sven allows ample time for it to dry before moving forward with additional steps. This patience and precision are key aspects of his successful boatbuilding methods.Step 4: Finishing Touches
Once the flange is fully dried, Sven removes the clamps carefully, ensuring no damage occurs during this process. He then moves on to attaching four more pieces onto these main frames, completing two pairs of flanges for the bulkhead hatches.The Final Touches
While two flanges form the primary support structure around the hatches, Sven mentions there are two additional pieces required at each end to ensure comprehensive protection. This attention to detail highlights his commitment to producing a durable and reliable design. “Sailing is about finding your path, whether it’s across an ocean or within yourself.” – Sven Yrvind In conclusion, making flanges around bulkhead hatches may seem complex at first glance, but by following Sven Yrvind’s meticulous process, enthusiasts can achieve professional-level results. Remember that the journey of boatbuilding is as rewarding as reaching your destination; it tests one’s patience and dedication. For those seeking to embark on this adventure or simply gain more insight into marine craftsmanship, Sven’s wisdom is invaluable.Once the flange is fully dried, Sven removes the clamps carefully, ensuring no damage occurs during this process. He then moves on to attaching four more pieces onto these main frames, completing two pairs of flanges for the bulkhead hatches.The Final Touches
While two flanges form the primary support structure around the hatches, Sven mentions there are two additional pieces required at each end to ensure comprehensive protection. This attention to detail highlights his commitment to producing a durable and reliable design. “Sailing is about finding your path, whether it’s across an ocean or within yourself.” – Sven Yrvind In conclusion, making flanges around bulkhead hatches may seem complex at first glance, but by following Sven Yrvind’s meticulous process, enthusiasts can achieve professional-level results. Remember that the journey of boatbuilding is as rewarding as reaching your destination; it tests one’s patience and dedication. For those seeking to embark on this adventure or simply gain more insight into marine craftsmanship, Sven’s wisdom is invaluable.Making Flanges Around Bulkhead Hatches for Canvas
Sven Yrvind, a renowned yacht designer and sailor, shares valuable insights on creating flanges around bulkhead hatches for canvas protection in this enlightening video. By following his expert guidance, boat enthusiasts can ensure their living areas remain secure while allowing unhindered access through the hatches.Step 1: Starting with the Flange
Sven begins by explaining that working on flanges vertically and horizontally is significantly easier than doing so in a flat position. To simplify the process further, he divides the task into two or three steps as suggested by fellow expert “for for.” This approach not only makes it more manageable but also allows for greater precision in crafting each component.Step 2: Applying Glue and Securing
Sven proceeds to apply glue along one edge of the flange, ensuring a secure bond when clamped into place. He emphasizes that this stage is crucial for maintaining the structural integrity of the flange, which in turn safeguards the living area beneath the canvas when hatches are open.Step 3: Allowing Time to Dry
After securely attaching the first portion of the flange, Sven allows ample time for it to dry before moving forward with additional steps. This patience and precision are key aspects of his successful boatbuilding methods.Step 4: Finishing Touches
Once the flange is fully dried, Sven removes the clamps carefully, ensuring no damage occurs during this process. He then moves on to attaching four more pieces onto these main frames, completing two pairs of flanges for the bulkhead hatches.The Final Touches
While two flanges form the primary support structure around the hatches, Sven mentions there are two additional pieces required at each end to ensure comprehensive protection. This attention to detail highlights his commitment to producing a durable and reliable design. “Sailing is about finding your path, whether it’s across an ocean or within yourself.” – Sven Yrvind In conclusion, making flanges around bulkhead hatches may seem complex at first glance, but by following Sven Yrvind’s meticulous process, enthusiasts can achieve professional-level results. Remember that the journey of boatbuilding is as rewarding as reaching your destination; it tests one’s patience and dedication. For those seeking to embark on this adventure or simply gain more insight into marine craftsmanship, Sven’s wisdom is invaluable.After securely attaching the first portion of the flange, Sven allows ample time for it to dry before moving forward with additional steps. This patience and precision are key aspects of his successful boatbuilding methods.Step 4: Finishing Touches
Once the flange is fully dried, Sven removes the clamps carefully, ensuring no damage occurs during this process. He then moves on to attaching four more pieces onto these main frames, completing two pairs of flanges for the bulkhead hatches.The Final Touches
While two flanges form the primary support structure around the hatches, Sven mentions there are two additional pieces required at each end to ensure comprehensive protection. This attention to detail highlights his commitment to producing a durable and reliable design. “Sailing is about finding your path, whether it’s across an ocean or within yourself.” – Sven Yrvind In conclusion, making flanges around bulkhead hatches may seem complex at first glance, but by following Sven Yrvind’s meticulous process, enthusiasts can achieve professional-level results. Remember that the journey of boatbuilding is as rewarding as reaching your destination; it tests one’s patience and dedication. For those seeking to embark on this adventure or simply gain more insight into marine craftsmanship, Sven’s wisdom is invaluable.Making Flanges Around Bulkhead Hatches for Canvas
Sven Yrvind, a renowned yacht designer and sailor, shares valuable insights on creating flanges around bulkhead hatches for canvas protection in this enlightening video. By following his expert guidance, boat enthusiasts can ensure their living areas remain secure while allowing unhindered access through the hatches.Step 1: Starting with the Flange
Sven begins by explaining that working on flanges vertically and horizontally is significantly easier than doing so in a flat position. To simplify the process further, he divides the task into two or three steps as suggested by fellow expert “for for.” This approach not only makes it more manageable but also allows for greater precision in crafting each component.Step 2: Applying Glue and Securing
Sven proceeds to apply glue along one edge of the flange, ensuring a secure bond when clamped into place. He emphasizes that this stage is crucial for maintaining the structural integrity of the flange, which in turn safeguards the living area beneath the canvas when hatches are open.Step 3: Allowing Time to Dry
After securely attaching the first portion of the flange, Sven allows ample time for it to dry before moving forward with additional steps. This patience and precision are key aspects of his successful boatbuilding methods.Step 4: Finishing Touches
Once the flange is fully dried, Sven removes the clamps carefully, ensuring no damage occurs during this process. He then moves on to attaching four more pieces onto these main frames, completing two pairs of flanges for the bulkhead hatches.The Final Touches
While two flanges form the primary support structure around the hatches, Sven mentions there are two additional pieces required at each end to ensure comprehensive protection. This attention to detail highlights his commitment to producing a durable and reliable design. “Sailing is about finding your path, whether it’s across an ocean or within yourself.” – Sven Yrvind In conclusion, making flanges around bulkhead hatches may seem complex at first glance, but by following Sven Yrvind’s meticulous process, enthusiasts can achieve professional-level results. Remember that the journey of boatbuilding is as rewarding as reaching your destination; it tests one’s patience and dedication. For those seeking to embark on this adventure or simply gain more insight into marine craftsmanship, Sven’s wisdom is invaluable.Sven proceeds to apply glue along one edge of the flange, ensuring a secure bond when clamped into place. He emphasizes that this stage is crucial for maintaining the structural integrity of the flange, which in turn safeguards the living area beneath the canvas when hatches are open.Step 3: Allowing Time to Dry
After securely attaching the first portion of the flange, Sven allows ample time for it to dry before moving forward with additional steps. This patience and precision are key aspects of his successful boatbuilding methods.Step 4: Finishing Touches
Once the flange is fully dried, Sven removes the clamps carefully, ensuring no damage occurs during this process. He then moves on to attaching four more pieces onto these main frames, completing two pairs of flanges for the bulkhead hatches.The Final Touches
While two flanges form the primary support structure around the hatches, Sven mentions there are two additional pieces required at each end to ensure comprehensive protection. This attention to detail highlights his commitment to producing a durable and reliable design. “Sailing is about finding your path, whether it’s across an ocean or within yourself.” – Sven Yrvind In conclusion, making flanges around bulkhead hatches may seem complex at first glance, but by following Sven Yrvind’s meticulous process, enthusiasts can achieve professional-level results. Remember that the journey of boatbuilding is as rewarding as reaching your destination; it tests one’s patience and dedication. For those seeking to embark on this adventure or simply gain more insight into marine craftsmanship, Sven’s wisdom is invaluable.Making Flanges Around Bulkhead Hatches for Canvas
Sven Yrvind, a renowned yacht designer and sailor, shares valuable insights on creating flanges around bulkhead hatches for canvas protection in this enlightening video. By following his expert guidance, boat enthusiasts can ensure their living areas remain secure while allowing unhindered access through the hatches.Step 1: Starting with the Flange
Sven begins by explaining that working on flanges vertically and horizontally is significantly easier than doing so in a flat position. To simplify the process further, he divides the task into two or three steps as suggested by fellow expert “for for.” This approach not only makes it more manageable but also allows for greater precision in crafting each component.Step 2: Applying Glue and Securing
Sven proceeds to apply glue along one edge of the flange, ensuring a secure bond when clamped into place. He emphasizes that this stage is crucial for maintaining the structural integrity of the flange, which in turn safeguards the living area beneath the canvas when hatches are open.Step 3: Allowing Time to Dry
After securely attaching the first portion of the flange, Sven allows ample time for it to dry before moving forward with additional steps. This patience and precision are key aspects of his successful boatbuilding methods.Step 4: Finishing Touches
Once the flange is fully dried, Sven removes the clamps carefully, ensuring no damage occurs during this process. He then moves on to attaching four more pieces onto these main frames, completing two pairs of flanges for the bulkhead hatches.The Final Touches
While two flanges form the primary support structure around the hatches, Sven mentions there are two additional pieces required at each end to ensure comprehensive protection. This attention to detail highlights his commitment to producing a durable and reliable design. “Sailing is about finding your path, whether it’s across an ocean or within yourself.” – Sven Yrvind In conclusion, making flanges around bulkhead hatches may seem complex at first glance, but by following Sven Yrvind’s meticulous process, enthusiasts can achieve professional-level results. Remember that the journey of boatbuilding is as rewarding as reaching your destination; it tests one’s patience and dedication. For those seeking to embark on this adventure or simply gain more insight into marine craftsmanship, Sven’s wisdom is invaluable.Sven begins by explaining that working on flanges vertically and horizontally is significantly easier than doing so in a flat position. To simplify the process further, he divides the task into two or three steps as suggested by fellow expert “for for.” This approach not only makes it more manageable but also allows for greater precision in crafting each component.Step 2: Applying Glue and Securing
Sven proceeds to apply glue along one edge of the flange, ensuring a secure bond when clamped into place. He emphasizes that this stage is crucial for maintaining the structural integrity of the flange, which in turn safeguards the living area beneath the canvas when hatches are open.Step 3: Allowing Time to Dry
After securely attaching the first portion of the flange, Sven allows ample time for it to dry before moving forward with additional steps. This patience and precision are key aspects of his successful boatbuilding methods.Step 4: Finishing Touches
Once the flange is fully dried, Sven removes the clamps carefully, ensuring no damage occurs during this process. He then moves on to attaching four more pieces onto these main frames, completing two pairs of flanges for the bulkhead hatches.The Final Touches
While two flanges form the primary support structure around the hatches, Sven mentions there are two additional pieces required at each end to ensure comprehensive protection. This attention to detail highlights his commitment to producing a durable and reliable design. “Sailing is about finding your path, whether it’s across an ocean or within yourself.” – Sven Yrvind In conclusion, making flanges around bulkhead hatches may seem complex at first glance, but by following Sven Yrvind’s meticulous process, enthusiasts can achieve professional-level results. Remember that the journey of boatbuilding is as rewarding as reaching your destination; it tests one’s patience and dedication. For those seeking to embark on this adventure or simply gain more insight into marine craftsmanship, Sven’s wisdom is invaluable.Making Flanges Around Bulkhead Hatches for Canvas
Sven Yrvind, a renowned yacht designer and sailor, shares valuable insights on creating flanges around bulkhead hatches for canvas protection in this enlightening video. By following his expert guidance, boat enthusiasts can ensure their living areas remain secure while allowing unhindered access through the hatches.Step 1: Starting with the Flange
Sven begins by explaining that working on flanges vertically and horizontally is significantly easier than doing so in a flat position. To simplify the process further, he divides the task into two or three steps as suggested by fellow expert “for for.” This approach not only makes it more manageable but also allows for greater precision in crafting each component.Step 2: Applying Glue and Securing
Sven proceeds to apply glue along one edge of the flange, ensuring a secure bond when clamped into place. He emphasizes that this stage is crucial for maintaining the structural integrity of the flange, which in turn safeguards the living area beneath the canvas when hatches are open.Step 3: Allowing Time to Dry
After securely attaching the first portion of the flange, Sven allows ample time for it to dry before moving forward with additional steps. This patience and precision are key aspects of his successful boatbuilding methods.Step 4: Finishing Touches
Once the flange is fully dried, Sven removes the clamps carefully, ensuring no damage occurs during this process. He then moves on to attaching four more pieces onto these main frames, completing two pairs of flanges for the bulkhead hatches.The Final Touches
While two flanges form the primary support structure around the hatches, Sven mentions there are two additional pieces required at each end to ensure comprehensive protection. This attention to detail highlights his commitment to producing a durable and reliable design. “Sailing is about finding your path, whether it’s across an ocean or within yourself.” – Sven Yrvind In conclusion, making flanges around bulkhead hatches may seem complex at first glance, but by following Sven Yrvind’s meticulous process, enthusiasts can achieve professional-level results. Remember that the journey of boatbuilding is as rewarding as reaching your destination; it tests one’s patience and dedication. For those seeking to embark on this adventure or simply gain more insight into marine craftsmanship, Sven’s wisdom is invaluable.Sven Yrvind, a renowned yacht designer and sailor, shares valuable insights on creating flanges around bulkhead hatches for canvas protection in this enlightening video. By following his expert guidance, boat enthusiasts can ensure their living areas remain secure while allowing unhindered access through the hatches.Step 1: Starting with the Flange
Sven begins by explaining that working on flanges vertically and horizontally is significantly easier than doing so in a flat position. To simplify the process further, he divides the task into two or three steps as suggested by fellow expert “for for.” This approach not only makes it more manageable but also allows for greater precision in crafting each component.Step 2: Applying Glue and Securing
Sven proceeds to apply glue along one edge of the flange, ensuring a secure bond when clamped into place. He emphasizes that this stage is crucial for maintaining the structural integrity of the flange, which in turn safeguards the living area beneath the canvas when hatches are open.Step 3: Allowing Time to Dry
After securely attaching the first portion of the flange, Sven allows ample time for it to dry before moving forward with additional steps. This patience and precision are key aspects of his successful boatbuilding methods.Step 4: Finishing Touches
Once the flange is fully dried, Sven removes the clamps carefully, ensuring no damage occurs during this process. He then moves on to attaching four more pieces onto these main frames, completing two pairs of flanges for the bulkhead hatches.The Final Touches
While two flanges form the primary support structure around the hatches, Sven mentions there are two additional pieces required at each end to ensure comprehensive protection. This attention to detail highlights his commitment to producing a durable and reliable design. “Sailing is about finding your path, whether it’s across an ocean or within yourself.” – Sven Yrvind In conclusion, making flanges around bulkhead hatches may seem complex at first glance, but by following Sven Yrvind’s meticulous process, enthusiasts can achieve professional-level results. Remember that the journey of boatbuilding is as rewarding as reaching your destination; it tests one’s patience and dedication. For those seeking to embark on this adventure or simply gain more insight into marine craftsmanship, Sven’s wisdom is invaluable.Making Flanges Around Bulkhead Hatches for Canvas
Sven Yrvind, a renowned yacht designer and sailor, shares valuable insights on creating flanges around bulkhead hatches for canvas protection in this enlightening video. By following his expert guidance, boat enthusiasts can ensure their living areas remain secure while allowing unhindered access through the hatches.Step 1: Starting with the Flange
Sven begins by explaining that working on flanges vertically and horizontally is significantly easier than doing so in a flat position. To simplify the process further, he divides the task into two or three steps as suggested by fellow expert “for for.” This approach not only makes it more manageable but also allows for greater precision in crafting each component.Step 2: Applying Glue and Securing
Sven proceeds to apply glue along one edge of the flange, ensuring a secure bond when clamped into place. He emphasizes that this stage is crucial for maintaining the structural integrity of the flange, which in turn safeguards the living area beneath the canvas when hatches are open.Step 3: Allowing Time to Dry
After securely attaching the first portion of the flange, Sven allows ample time for it to dry before moving forward with additional steps. This patience and precision are key aspects of his successful boatbuilding methods.Step 4: Finishing Touches
Once the flange is fully dried, Sven removes the clamps carefully, ensuring no damage occurs during this process. He then moves on to attaching four more pieces onto these main frames, completing two pairs of flanges for the bulkhead hatches.The Final Touches
While two flanges form the primary support structure around the hatches, Sven mentions there are two additional pieces required at each end to ensure comprehensive protection. This attention to detail highlights his commitment to producing a durable and reliable design. “Sailing is about finding your path, whether it’s across an ocean or within yourself.” – Sven Yrvind In conclusion, making flanges around bulkhead hatches may seem complex at first glance, but by following Sven Yrvind’s meticulous process, enthusiasts can achieve professional-level results. Remember that the journey of boatbuilding is as rewarding as reaching your destination; it tests one’s patience and dedication. For those seeking to embark on this adventure or simply gain more insight into marine craftsmanship, Sven’s wisdom is invaluable.Once the flange is fully dried, Sven removes the clamps carefully, ensuring no damage occurs during this process. He then moves on to attaching four more pieces onto these main frames, completing two pairs of flanges for the bulkhead hatches.The Final Touches
While two flanges form the primary support structure around the hatches, Sven mentions there are two additional pieces required at each end to ensure comprehensive protection. This attention to detail highlights his commitment to producing a durable and reliable design. “Sailing is about finding your path, whether it’s across an ocean or within yourself.” – Sven Yrvind In conclusion, making flanges around bulkhead hatches may seem complex at first glance, but by following Sven Yrvind’s meticulous process, enthusiasts can achieve professional-level results. Remember that the journey of boatbuilding is as rewarding as reaching your destination; it tests one’s patience and dedication. For those seeking to embark on this adventure or simply gain more insight into marine craftsmanship, Sven’s wisdom is invaluable.Sven Yrvind, a renowned yacht designer and sailor, shares valuable insights on creating flanges around bulkhead hatches for canvas protection in this enlightening video. By following his expert guidance, boat enthusiasts can ensure their living areas remain secure while allowing unhindered access through the hatches.Step 1: Starting with the Flange
Sven begins by explaining that working on flanges vertically and horizontally is significantly easier than doing so in a flat position. To simplify the process further, he divides the task into two or three steps as suggested by fellow expert “for for.” This approach not only makes it more manageable but also allows for greater precision in crafting each component.Step 2: Applying Glue and Securing
Sven proceeds to apply glue along one edge of the flange, ensuring a secure bond when clamped into place. He emphasizes that this stage is crucial for maintaining the structural integrity of the flange, which in turn safeguards the living area beneath the canvas when hatches are open.Step 3: Allowing Time to Dry
After securely attaching the first portion of the flange, Sven allows ample time for it to dry before moving forward with additional steps. This patience and precision are key aspects of his successful boatbuilding methods.Step 4: Finishing Touches
Once the flange is fully dried, Sven removes the clamps carefully, ensuring no damage occurs during this process. He then moves on to attaching four more pieces onto these main frames, completing two pairs of flanges for the bulkhead hatches.The Final Touches
While two flanges form the primary support structure around the hatches, Sven mentions there are two additional pieces required at each end to ensure comprehensive protection. This attention to detail highlights his commitment to producing a durable and reliable design. “Sailing is about finding your path, whether it’s across an ocean or within yourself.” – Sven Yrvind In conclusion, making flanges around bulkhead hatches may seem complex at first glance, but by following Sven Yrvind’s meticulous process, enthusiasts can achieve professional-level results. Remember that the journey of boatbuilding is as rewarding as reaching your destination; it tests one’s patience and dedication. For those seeking to embark on this adventure or simply gain more insight into marine craftsmanship, Sven’s wisdom is invaluable.Making Flanges Around Bulkhead Hatches for Canvas
Sven Yrvind, a renowned yacht designer and sailor, shares valuable insights on creating flanges around bulkhead hatches for canvas protection in this enlightening video. By following his expert guidance, boat enthusiasts can ensure their living areas remain secure while allowing unhindered access through the hatches.Step 1: Starting with the Flange
Sven begins by explaining that working on flanges vertically and horizontally is significantly easier than doing so in a flat position. To simplify the process further, he divides the task into two or three steps as suggested by fellow expert “for for.” This approach not only makes it more manageable but also allows for greater precision in crafting each component.Step 2: Applying Glue and Securing
Sven proceeds to apply glue along one edge of the flange, ensuring a secure bond when clamped into place. He emphasizes that this stage is crucial for maintaining the structural integrity of the flange, which in turn safeguards the living area beneath the canvas when hatches are open.Step 3: Allowing Time to Dry
After securely attaching the first portion of the flange, Sven allows ample time for it to dry before moving forward with additional steps. This patience and precision are key aspects of his successful boatbuilding methods.Step 4: Finishing Touches
Once the flange is fully dried, Sven removes the clamps carefully, ensuring no damage occurs during this process. He then moves on to attaching four more pieces onto these main frames, completing two pairs of flanges for the bulkhead hatches.The Final Touches
While two flanges form the primary support structure around the hatches, Sven mentions there are two additional pieces required at each end to ensure comprehensive protection. This attention to detail highlights his commitment to producing a durable and reliable design. “Sailing is about finding your path, whether it’s across an ocean or within yourself.” – Sven Yrvind In conclusion, making flanges around bulkhead hatches may seem complex at first glance, but by following Sven Yrvind’s meticulous process, enthusiasts can achieve professional-level results. Remember that the journey of boatbuilding is as rewarding as reaching your destination; it tests one’s patience and dedication. For those seeking to embark on this adventure or simply gain more insight into marine craftsmanship, Sven’s wisdom is invaluable.After securely attaching the first portion of the flange, Sven allows ample time for it to dry before moving forward with additional steps. This patience and precision are key aspects of his successful boatbuilding methods.Step 4: Finishing Touches
Once the flange is fully dried, Sven removes the clamps carefully, ensuring no damage occurs during this process. He then moves on to attaching four more pieces onto these main frames, completing two pairs of flanges for the bulkhead hatches.The Final Touches
While two flanges form the primary support structure around the hatches, Sven mentions there are two additional pieces required at each end to ensure comprehensive protection. This attention to detail highlights his commitment to producing a durable and reliable design. “Sailing is about finding your path, whether it’s across an ocean or within yourself.” – Sven Yrvind In conclusion, making flanges around bulkhead hatches may seem complex at first glance, but by following Sven Yrvind’s meticulous process, enthusiasts can achieve professional-level results. Remember that the journey of boatbuilding is as rewarding as reaching your destination; it tests one’s patience and dedication. For those seeking to embark on this adventure or simply gain more insight into marine craftsmanship, Sven’s wisdom is invaluable.Sven Yrvind, a renowned yacht designer and sailor, shares valuable insights on creating flanges around bulkhead hatches for canvas protection in this enlightening video. By following his expert guidance, boat enthusiasts can ensure their living areas remain secure while allowing unhindered access through the hatches.Step 1: Starting with the Flange
Sven begins by explaining that working on flanges vertically and horizontally is significantly easier than doing so in a flat position. To simplify the process further, he divides the task into two or three steps as suggested by fellow expert “for for.” This approach not only makes it more manageable but also allows for greater precision in crafting each component.Step 2: Applying Glue and Securing
Sven proceeds to apply glue along one edge of the flange, ensuring a secure bond when clamped into place. He emphasizes that this stage is crucial for maintaining the structural integrity of the flange, which in turn safeguards the living area beneath the canvas when hatches are open.Step 3: Allowing Time to Dry
After securely attaching the first portion of the flange, Sven allows ample time for it to dry before moving forward with additional steps. This patience and precision are key aspects of his successful boatbuilding methods.Step 4: Finishing Touches
Once the flange is fully dried, Sven removes the clamps carefully, ensuring no damage occurs during this process. He then moves on to attaching four more pieces onto these main frames, completing two pairs of flanges for the bulkhead hatches.The Final Touches
While two flanges form the primary support structure around the hatches, Sven mentions there are two additional pieces required at each end to ensure comprehensive protection. This attention to detail highlights his commitment to producing a durable and reliable design. “Sailing is about finding your path, whether it’s across an ocean or within yourself.” – Sven Yrvind In conclusion, making flanges around bulkhead hatches may seem complex at first glance, but by following Sven Yrvind’s meticulous process, enthusiasts can achieve professional-level results. Remember that the journey of boatbuilding is as rewarding as reaching your destination; it tests one’s patience and dedication. For those seeking to embark on this adventure or simply gain more insight into marine craftsmanship, Sven’s wisdom is invaluable.Making Flanges Around Bulkhead Hatches for Canvas
Sven Yrvind, a renowned yacht designer and sailor, shares valuable insights on creating flanges around bulkhead hatches for canvas protection in this enlightening video. By following his expert guidance, boat enthusiasts can ensure their living areas remain secure while allowing unhindered access through the hatches.Step 1: Starting with the Flange
Sven begins by explaining that working on flanges vertically and horizontally is significantly easier than doing so in a flat position. To simplify the process further, he divides the task into two or three steps as suggested by fellow expert “for for.” This approach not only makes it more manageable but also allows for greater precision in crafting each component.Step 2: Applying Glue and Securing
Sven proceeds to apply glue along one edge of the flange, ensuring a secure bond when clamped into place. He emphasizes that this stage is crucial for maintaining the structural integrity of the flange, which in turn safeguards the living area beneath the canvas when hatches are open.Step 3: Allowing Time to Dry
After securely attaching the first portion of the flange, Sven allows ample time for it to dry before moving forward with additional steps. This patience and precision are key aspects of his successful boatbuilding methods.Step 4: Finishing Touches
Once the flange is fully dried, Sven removes the clamps carefully, ensuring no damage occurs during this process. He then moves on to attaching four more pieces onto these main frames, completing two pairs of flanges for the bulkhead hatches.The Final Touches
While two flanges form the primary support structure around the hatches, Sven mentions there are two additional pieces required at each end to ensure comprehensive protection. This attention to detail highlights his commitment to producing a durable and reliable design. “Sailing is about finding your path, whether it’s across an ocean or within yourself.” – Sven Yrvind In conclusion, making flanges around bulkhead hatches may seem complex at first glance, but by following Sven Yrvind’s meticulous process, enthusiasts can achieve professional-level results. Remember that the journey of boatbuilding is as rewarding as reaching your destination; it tests one’s patience and dedication. For those seeking to embark on this adventure or simply gain more insight into marine craftsmanship, Sven’s wisdom is invaluable.Sven proceeds to apply glue along one edge of the flange, ensuring a secure bond when clamped into place. He emphasizes that this stage is crucial for maintaining the structural integrity of the flange, which in turn safeguards the living area beneath the canvas when hatches are open.Step 3: Allowing Time to Dry
After securely attaching the first portion of the flange, Sven allows ample time for it to dry before moving forward with additional steps. This patience and precision are key aspects of his successful boatbuilding methods.Step 4: Finishing Touches
Once the flange is fully dried, Sven removes the clamps carefully, ensuring no damage occurs during this process. He then moves on to attaching four more pieces onto these main frames, completing two pairs of flanges for the bulkhead hatches.The Final Touches
While two flanges form the primary support structure around the hatches, Sven mentions there are two additional pieces required at each end to ensure comprehensive protection. This attention to detail highlights his commitment to producing a durable and reliable design. “Sailing is about finding your path, whether it’s across an ocean or within yourself.” – Sven Yrvind In conclusion, making flanges around bulkhead hatches may seem complex at first glance, but by following Sven Yrvind’s meticulous process, enthusiasts can achieve professional-level results. Remember that the journey of boatbuilding is as rewarding as reaching your destination; it tests one’s patience and dedication. For those seeking to embark on this adventure or simply gain more insight into marine craftsmanship, Sven’s wisdom is invaluable.Sven Yrvind, a renowned yacht designer and sailor, shares valuable insights on creating flanges around bulkhead hatches for canvas protection in this enlightening video. By following his expert guidance, boat enthusiasts can ensure their living areas remain secure while allowing unhindered access through the hatches.Step 1: Starting with the Flange
Sven begins by explaining that working on flanges vertically and horizontally is significantly easier than doing so in a flat position. To simplify the process further, he divides the task into two or three steps as suggested by fellow expert “for for.” This approach not only makes it more manageable but also allows for greater precision in crafting each component.Step 2: Applying Glue and Securing
Sven proceeds to apply glue along one edge of the flange, ensuring a secure bond when clamped into place. He emphasizes that this stage is crucial for maintaining the structural integrity of the flange, which in turn safeguards the living area beneath the canvas when hatches are open.Step 3: Allowing Time to Dry
After securely attaching the first portion of the flange, Sven allows ample time for it to dry before moving forward with additional steps. This patience and precision are key aspects of his successful boatbuilding methods.Step 4: Finishing Touches
Once the flange is fully dried, Sven removes the clamps carefully, ensuring no damage occurs during this process. He then moves on to attaching four more pieces onto these main frames, completing two pairs of flanges for the bulkhead hatches.The Final Touches
While two flanges form the primary support structure around the hatches, Sven mentions there are two additional pieces required at each end to ensure comprehensive protection. This attention to detail highlights his commitment to producing a durable and reliable design. “Sailing is about finding your path, whether it’s across an ocean or within yourself.” – Sven Yrvind In conclusion, making flanges around bulkhead hatches may seem complex at first glance, but by following Sven Yrvind’s meticulous process, enthusiasts can achieve professional-level results. Remember that the journey of boatbuilding is as rewarding as reaching your destination; it tests one’s patience and dedication. For those seeking to embark on this adventure or simply gain more insight into marine craftsmanship, Sven’s wisdom is invaluable.Making Flanges Around Bulkhead Hatches for Canvas
Sven Yrvind, a renowned yacht designer and sailor, shares valuable insights on creating flanges around bulkhead hatches for canvas protection in this enlightening video. By following his expert guidance, boat enthusiasts can ensure their living areas remain secure while allowing unhindered access through the hatches.Step 1: Starting with the Flange
Sven begins by explaining that working on flanges vertically and horizontally is significantly easier than doing so in a flat position. To simplify the process further, he divides the task into two or three steps as suggested by fellow expert “for for.” This approach not only makes it more manageable but also allows for greater precision in crafting each component.Step 2: Applying Glue and Securing
Sven proceeds to apply glue along one edge of the flange, ensuring a secure bond when clamped into place. He emphasizes that this stage is crucial for maintaining the structural integrity of the flange, which in turn safeguards the living area beneath the canvas when hatches are open.Step 3: Allowing Time to Dry
After securely attaching the first portion of the flange, Sven allows ample time for it to dry before moving forward with additional steps. This patience and precision are key aspects of his successful boatbuilding methods.Step 4: Finishing Touches
Once the flange is fully dried, Sven removes the clamps carefully, ensuring no damage occurs during this process. He then moves on to attaching four more pieces onto these main frames, completing two pairs of flanges for the bulkhead hatches.The Final Touches
While two flanges form the primary support structure around the hatches, Sven mentions there are two additional pieces required at each end to ensure comprehensive protection. This attention to detail highlights his commitment to producing a durable and reliable design. “Sailing is about finding your path, whether it’s across an ocean or within yourself.” – Sven Yrvind In conclusion, making flanges around bulkhead hatches may seem complex at first glance, but by following Sven Yrvind’s meticulous process, enthusiasts can achieve professional-level results. Remember that the journey of boatbuilding is as rewarding as reaching your destination; it tests one’s patience and dedication. For those seeking to embark on this adventure or simply gain more insight into marine craftsmanship, Sven’s wisdom is invaluable.Sven begins by explaining that working on flanges vertically and horizontally is significantly easier than doing so in a flat position. To simplify the process further, he divides the task into two or three steps as suggested by fellow expert “for for.” This approach not only makes it more manageable but also allows for greater precision in crafting each component.Step 2: Applying Glue and Securing
Sven proceeds to apply glue along one edge of the flange, ensuring a secure bond when clamped into place. He emphasizes that this stage is crucial for maintaining the structural integrity of the flange, which in turn safeguards the living area beneath the canvas when hatches are open.Step 3: Allowing Time to Dry
After securely attaching the first portion of the flange, Sven allows ample time for it to dry before moving forward with additional steps. This patience and precision are key aspects of his successful boatbuilding methods.Step 4: Finishing Touches
Once the flange is fully dried, Sven removes the clamps carefully, ensuring no damage occurs during this process. He then moves on to attaching four more pieces onto these main frames, completing two pairs of flanges for the bulkhead hatches.The Final Touches
While two flanges form the primary support structure around the hatches, Sven mentions there are two additional pieces required at each end to ensure comprehensive protection. This attention to detail highlights his commitment to producing a durable and reliable design. “Sailing is about finding your path, whether it’s across an ocean or within yourself.” – Sven Yrvind In conclusion, making flanges around bulkhead hatches may seem complex at first glance, but by following Sven Yrvind’s meticulous process, enthusiasts can achieve professional-level results. Remember that the journey of boatbuilding is as rewarding as reaching your destination; it tests one’s patience and dedication. For those seeking to embark on this adventure or simply gain more insight into marine craftsmanship, Sven’s wisdom is invaluable.Sven Yrvind, a renowned yacht designer and sailor, shares valuable insights on creating flanges around bulkhead hatches for canvas protection in this enlightening video. By following his expert guidance, boat enthusiasts can ensure their living areas remain secure while allowing unhindered access through the hatches.Step 1: Starting with the Flange
Sven begins by explaining that working on flanges vertically and horizontally is significantly easier than doing so in a flat position. To simplify the process further, he divides the task into two or three steps as suggested by fellow expert “for for.” This approach not only makes it more manageable but also allows for greater precision in crafting each component.Step 2: Applying Glue and Securing
Sven proceeds to apply glue along one edge of the flange, ensuring a secure bond when clamped into place. He emphasizes that this stage is crucial for maintaining the structural integrity of the flange, which in turn safeguards the living area beneath the canvas when hatches are open.Step 3: Allowing Time to Dry
After securely attaching the first portion of the flange, Sven allows ample time for it to dry before moving forward with additional steps. This patience and precision are key aspects of his successful boatbuilding methods.Step 4: Finishing Touches
Once the flange is fully dried, Sven removes the clamps carefully, ensuring no damage occurs during this process. He then moves on to attaching four more pieces onto these main frames, completing two pairs of flanges for the bulkhead hatches.The Final Touches
While two flanges form the primary support structure around the hatches, Sven mentions there are two additional pieces required at each end to ensure comprehensive protection. This attention to detail highlights his commitment to producing a durable and reliable design. “Sailing is about finding your path, whether it’s across an ocean or within yourself.” – Sven Yrvind In conclusion, making flanges around bulkhead hatches may seem complex at first glance, but by following Sven Yrvind’s meticulous process, enthusiasts can achieve professional-level results. Remember that the journey of boatbuilding is as rewarding as reaching your destination; it tests one’s patience and dedication. For those seeking to embark on this adventure or simply gain more insight into marine craftsmanship, Sven’s wisdom is invaluable.Making Flanges Around Bulkhead Hatches for Canvas
Sven Yrvind, a renowned yacht designer and sailor, shares valuable insights on creating flanges around bulkhead hatches for canvas protection in this enlightening video. By following his expert guidance, boat enthusiasts can ensure their living areas remain secure while allowing unhindered access through the hatches.Step 1: Starting with the Flange
Sven begins by explaining that working on flanges vertically and horizontally is significantly easier than doing so in a flat position. To simplify the process further, he divides the task into two or three steps as suggested by fellow expert “for for.” This approach not only makes it more manageable but also allows for greater precision in crafting each component.Step 2: Applying Glue and Securing
Sven proceeds to apply glue along one edge of the flange, ensuring a secure bond when clamped into place. He emphasizes that this stage is crucial for maintaining the structural integrity of the flange, which in turn safeguards the living area beneath the canvas when hatches are open.Step 3: Allowing Time to Dry
After securely attaching the first portion of the flange, Sven allows ample time for it to dry before moving forward with additional steps. This patience and precision are key aspects of his successful boatbuilding methods.Step 4: Finishing Touches
Once the flange is fully dried, Sven removes the clamps carefully, ensuring no damage occurs during this process. He then moves on to attaching four more pieces onto these main frames, completing two pairs of flanges for the bulkhead hatches.The Final Touches
While two flanges form the primary support structure around the hatches, Sven mentions there are two additional pieces required at each end to ensure comprehensive protection. This attention to detail highlights his commitment to producing a durable and reliable design. “Sailing is about finding your path, whether it’s across an ocean or within yourself.” – Sven Yrvind In conclusion, making flanges around bulkhead hatches may seem complex at first glance, but by following Sven Yrvind’s meticulous process, enthusiasts can achieve professional-level results. Remember that the journey of boatbuilding is as rewarding as reaching your destination; it tests one’s patience and dedication. For those seeking to embark on this adventure or simply gain more insight into marine craftsmanship, Sven’s wisdom is invaluable.Once the flange is fully dried, Sven removes the clamps carefully, ensuring no damage occurs during this process. He then moves on to attaching four more pieces onto these main frames, completing two pairs of flanges for the bulkhead hatches.The Final Touches
While two flanges form the primary support structure around the hatches, Sven mentions there are two additional pieces required at each end to ensure comprehensive protection. This attention to detail highlights his commitment to producing a durable and reliable design. “Sailing is about finding your path, whether it’s across an ocean or within yourself.” – Sven Yrvind In conclusion, making flanges around bulkhead hatches may seem complex at first glance, but by following Sven Yrvind’s meticulous process, enthusiasts can achieve professional-level results. Remember that the journey of boatbuilding is as rewarding as reaching your destination; it tests one’s patience and dedication. For those seeking to embark on this adventure or simply gain more insight into marine craftsmanship, Sven’s wisdom is invaluable.Sven begins by explaining that working on flanges vertically and horizontally is significantly easier than doing so in a flat position. To simplify the process further, he divides the task into two or three steps as suggested by fellow expert “for for.” This approach not only makes it more manageable but also allows for greater precision in crafting each component.Step 2: Applying Glue and Securing
Sven proceeds to apply glue along one edge of the flange, ensuring a secure bond when clamped into place. He emphasizes that this stage is crucial for maintaining the structural integrity of the flange, which in turn safeguards the living area beneath the canvas when hatches are open.Step 3: Allowing Time to Dry
After securely attaching the first portion of the flange, Sven allows ample time for it to dry before moving forward with additional steps. This patience and precision are key aspects of his successful boatbuilding methods.Step 4: Finishing Touches
Once the flange is fully dried, Sven removes the clamps carefully, ensuring no damage occurs during this process. He then moves on to attaching four more pieces onto these main frames, completing two pairs of flanges for the bulkhead hatches.The Final Touches
While two flanges form the primary support structure around the hatches, Sven mentions there are two additional pieces required at each end to ensure comprehensive protection. This attention to detail highlights his commitment to producing a durable and reliable design. “Sailing is about finding your path, whether it’s across an ocean or within yourself.” – Sven Yrvind In conclusion, making flanges around bulkhead hatches may seem complex at first glance, but by following Sven Yrvind’s meticulous process, enthusiasts can achieve professional-level results. Remember that the journey of boatbuilding is as rewarding as reaching your destination; it tests one’s patience and dedication. For those seeking to embark on this adventure or simply gain more insight into marine craftsmanship, Sven’s wisdom is invaluable.Sven Yrvind, a renowned yacht designer and sailor, shares valuable insights on creating flanges around bulkhead hatches for canvas protection in this enlightening video. By following his expert guidance, boat enthusiasts can ensure their living areas remain secure while allowing unhindered access through the hatches.Step 1: Starting with the Flange
Sven begins by explaining that working on flanges vertically and horizontally is significantly easier than doing so in a flat position. To simplify the process further, he divides the task into two or three steps as suggested by fellow expert “for for.” This approach not only makes it more manageable but also allows for greater precision in crafting each component.Step 2: Applying Glue and Securing
Sven proceeds to apply glue along one edge of the flange, ensuring a secure bond when clamped into place. He emphasizes that this stage is crucial for maintaining the structural integrity of the flange, which in turn safeguards the living area beneath the canvas when hatches are open.Step 3: Allowing Time to Dry
After securely attaching the first portion of the flange, Sven allows ample time for it to dry before moving forward with additional steps. This patience and precision are key aspects of his successful boatbuilding methods.Step 4: Finishing Touches
Once the flange is fully dried, Sven removes the clamps carefully, ensuring no damage occurs during this process. He then moves on to attaching four more pieces onto these main frames, completing two pairs of flanges for the bulkhead hatches.The Final Touches
While two flanges form the primary support structure around the hatches, Sven mentions there are two additional pieces required at each end to ensure comprehensive protection. This attention to detail highlights his commitment to producing a durable and reliable design. “Sailing is about finding your path, whether it’s across an ocean or within yourself.” – Sven Yrvind In conclusion, making flanges around bulkhead hatches may seem complex at first glance, but by following Sven Yrvind’s meticulous process, enthusiasts can achieve professional-level results. Remember that the journey of boatbuilding is as rewarding as reaching your destination; it tests one’s patience and dedication. For those seeking to embark on this adventure or simply gain more insight into marine craftsmanship, Sven’s wisdom is invaluable.Making Flanges Around Bulkhead Hatches for Canvas
Sven Yrvind, a renowned yacht designer and sailor, shares valuable insights on creating flanges around bulkhead hatches for canvas protection in this enlightening video. By following his expert guidance, boat enthusiasts can ensure their living areas remain secure while allowing unhindered access through the hatches.Step 1: Starting with the Flange
Sven begins by explaining that working on flanges vertically and horizontally is significantly easier than doing so in a flat position. To simplify the process further, he divides the task into two or three steps as suggested by fellow expert “for for.” This approach not only makes it more manageable but also allows for greater precision in crafting each component.Step 2: Applying Glue and Securing
Sven proceeds to apply glue along one edge of the flange, ensuring a secure bond when clamped into place. He emphasizes that this stage is crucial for maintaining the structural integrity of the flange, which in turn safeguards the living area beneath the canvas when hatches are open.Step 3: Allowing Time to Dry
After securely attaching the first portion of the flange, Sven allows ample time for it to dry before moving forward with additional steps. This patience and precision are key aspects of his successful boatbuilding methods.Step 4: Finishing Touches
Once the flange is fully dried, Sven removes the clamps carefully, ensuring no damage occurs during this process. He then moves on to attaching four more pieces onto these main frames, completing two pairs of flanges for the bulkhead hatches.The Final Touches
While two flanges form the primary support structure around the hatches, Sven mentions there are two additional pieces required at each end to ensure comprehensive protection. This attention to detail highlights his commitment to producing a durable and reliable design. “Sailing is about finding your path, whether it’s across an ocean or within yourself.” – Sven Yrvind In conclusion, making flanges around bulkhead hatches may seem complex at first glance, but by following Sven Yrvind’s meticulous process, enthusiasts can achieve professional-level results. Remember that the journey of boatbuilding is as rewarding as reaching your destination; it tests one’s patience and dedication. For those seeking to embark on this adventure or simply gain more insight into marine craftsmanship, Sven’s wisdom is invaluable.After securely attaching the first portion of the flange, Sven allows ample time for it to dry before moving forward with additional steps. This patience and precision are key aspects of his successful boatbuilding methods.Step 4: Finishing Touches
Once the flange is fully dried, Sven removes the clamps carefully, ensuring no damage occurs during this process. He then moves on to attaching four more pieces onto these main frames, completing two pairs of flanges for the bulkhead hatches.The Final Touches
While two flanges form the primary support structure around the hatches, Sven mentions there are two additional pieces required at each end to ensure comprehensive protection. This attention to detail highlights his commitment to producing a durable and reliable design. “Sailing is about finding your path, whether it’s across an ocean or within yourself.” – Sven Yrvind In conclusion, making flanges around bulkhead hatches may seem complex at first glance, but by following Sven Yrvind’s meticulous process, enthusiasts can achieve professional-level results. Remember that the journey of boatbuilding is as rewarding as reaching your destination; it tests one’s patience and dedication. For those seeking to embark on this adventure or simply gain more insight into marine craftsmanship, Sven’s wisdom is invaluable.Sven begins by explaining that working on flanges vertically and horizontally is significantly easier than doing so in a flat position. To simplify the process further, he divides the task into two or three steps as suggested by fellow expert “for for.” This approach not only makes it more manageable but also allows for greater precision in crafting each component.Step 2: Applying Glue and Securing
Sven proceeds to apply glue along one edge of the flange, ensuring a secure bond when clamped into place. He emphasizes that this stage is crucial for maintaining the structural integrity of the flange, which in turn safeguards the living area beneath the canvas when hatches are open.Step 3: Allowing Time to Dry
After securely attaching the first portion of the flange, Sven allows ample time for it to dry before moving forward with additional steps. This patience and precision are key aspects of his successful boatbuilding methods.Step 4: Finishing Touches
Once the flange is fully dried, Sven removes the clamps carefully, ensuring no damage occurs during this process. He then moves on to attaching four more pieces onto these main frames, completing two pairs of flanges for the bulkhead hatches.The Final Touches
While two flanges form the primary support structure around the hatches, Sven mentions there are two additional pieces required at each end to ensure comprehensive protection. This attention to detail highlights his commitment to producing a durable and reliable design. “Sailing is about finding your path, whether it’s across an ocean or within yourself.” – Sven Yrvind In conclusion, making flanges around bulkhead hatches may seem complex at first glance, but by following Sven Yrvind’s meticulous process, enthusiasts can achieve professional-level results. Remember that the journey of boatbuilding is as rewarding as reaching your destination; it tests one’s patience and dedication. For those seeking to embark on this adventure or simply gain more insight into marine craftsmanship, Sven’s wisdom is invaluable.Sven Yrvind, a renowned yacht designer and sailor, shares valuable insights on creating flanges around bulkhead hatches for canvas protection in this enlightening video. By following his expert guidance, boat enthusiasts can ensure their living areas remain secure while allowing unhindered access through the hatches.Step 1: Starting with the Flange
Sven begins by explaining that working on flanges vertically and horizontally is significantly easier than doing so in a flat position. To simplify the process further, he divides the task into two or three steps as suggested by fellow expert “for for.” This approach not only makes it more manageable but also allows for greater precision in crafting each component.Step 2: Applying Glue and Securing
Sven proceeds to apply glue along one edge of the flange, ensuring a secure bond when clamped into place. He emphasizes that this stage is crucial for maintaining the structural integrity of the flange, which in turn safeguards the living area beneath the canvas when hatches are open.Step 3: Allowing Time to Dry
After securely attaching the first portion of the flange, Sven allows ample time for it to dry before moving forward with additional steps. This patience and precision are key aspects of his successful boatbuilding methods.Step 4: Finishing Touches
Once the flange is fully dried, Sven removes the clamps carefully, ensuring no damage occurs during this process. He then moves on to attaching four more pieces onto these main frames, completing two pairs of flanges for the bulkhead hatches.The Final Touches
While two flanges form the primary support structure around the hatches, Sven mentions there are two additional pieces required at each end to ensure comprehensive protection. This attention to detail highlights his commitment to producing a durable and reliable design. “Sailing is about finding your path, whether it’s across an ocean or within yourself.” – Sven Yrvind In conclusion, making flanges around bulkhead hatches may seem complex at first glance, but by following Sven Yrvind’s meticulous process, enthusiasts can achieve professional-level results. Remember that the journey of boatbuilding is as rewarding as reaching your destination; it tests one’s patience and dedication. For those seeking to embark on this adventure or simply gain more insight into marine craftsmanship, Sven’s wisdom is invaluable.Making Flanges Around Bulkhead Hatches for Canvas
Sven Yrvind, a renowned yacht designer and sailor, shares valuable insights on creating flanges around bulkhead hatches for canvas protection in this enlightening video. By following his expert guidance, boat enthusiasts can ensure their living areas remain secure while allowing unhindered access through the hatches.Step 1: Starting with the Flange
Sven begins by explaining that working on flanges vertically and horizontally is significantly easier than doing so in a flat position. To simplify the process further, he divides the task into two or three steps as suggested by fellow expert “for for.” This approach not only makes it more manageable but also allows for greater precision in crafting each component.Step 2: Applying Glue and Securing
Sven proceeds to apply glue along one edge of the flange, ensuring a secure bond when clamped into place. He emphasizes that this stage is crucial for maintaining the structural integrity of the flange, which in turn safeguards the living area beneath the canvas when hatches are open.Step 3: Allowing Time to Dry
After securely attaching the first portion of the flange, Sven allows ample time for it to dry before moving forward with additional steps. This patience and precision are key aspects of his successful boatbuilding methods.Step 4: Finishing Touches
Once the flange is fully dried, Sven removes the clamps carefully, ensuring no damage occurs during this process. He then moves on to attaching four more pieces onto these main frames, completing two pairs of flanges for the bulkhead hatches.The Final Touches
While two flanges form the primary support structure around the hatches, Sven mentions there are two additional pieces required at each end to ensure comprehensive protection. This attention to detail highlights his commitment to producing a durable and reliable design. “Sailing is about finding your path, whether it’s across an ocean or within yourself.” – Sven Yrvind In conclusion, making flanges around bulkhead hatches may seem complex at first glance, but by following Sven Yrvind’s meticulous process, enthusiasts can achieve professional-level results. Remember that the journey of boatbuilding is as rewarding as reaching your destination; it tests one’s patience and dedication. For those seeking to embark on this adventure or simply gain more insight into marine craftsmanship, Sven’s wisdom is invaluable.Sven proceeds to apply glue along one edge of the flange, ensuring a secure bond when clamped into place. He emphasizes that this stage is crucial for maintaining the structural integrity of the flange, which in turn safeguards the living area beneath the canvas when hatches are open.Step 3: Allowing Time to Dry
After securely attaching the first portion of the flange, Sven allows ample time for it to dry before moving forward with additional steps. This patience and precision are key aspects of his successful boatbuilding methods.Step 4: Finishing Touches
Once the flange is fully dried, Sven removes the clamps carefully, ensuring no damage occurs during this process. He then moves on to attaching four more pieces onto these main frames, completing two pairs of flanges for the bulkhead hatches.The Final Touches
While two flanges form the primary support structure around the hatches, Sven mentions there are two additional pieces required at each end to ensure comprehensive protection. This attention to detail highlights his commitment to producing a durable and reliable design. “Sailing is about finding your path, whether it’s across an ocean or within yourself.” – Sven Yrvind In conclusion, making flanges around bulkhead hatches may seem complex at first glance, but by following Sven Yrvind’s meticulous process, enthusiasts can achieve professional-level results. Remember that the journey of boatbuilding is as rewarding as reaching your destination; it tests one’s patience and dedication. For those seeking to embark on this adventure or simply gain more insight into marine craftsmanship, Sven’s wisdom is invaluable.Sven begins by explaining that working on flanges vertically and horizontally is significantly easier than doing so in a flat position. To simplify the process further, he divides the task into two or three steps as suggested by fellow expert “for for.” This approach not only makes it more manageable but also allows for greater precision in crafting each component.Step 2: Applying Glue and Securing
Sven proceeds to apply glue along one edge of the flange, ensuring a secure bond when clamped into place. He emphasizes that this stage is crucial for maintaining the structural integrity of the flange, which in turn safeguards the living area beneath the canvas when hatches are open.Step 3: Allowing Time to Dry
After securely attaching the first portion of the flange, Sven allows ample time for it to dry before moving forward with additional steps. This patience and precision are key aspects of his successful boatbuilding methods.Step 4: Finishing Touches
Once the flange is fully dried, Sven removes the clamps carefully, ensuring no damage occurs during this process. He then moves on to attaching four more pieces onto these main frames, completing two pairs of flanges for the bulkhead hatches.The Final Touches
While two flanges form the primary support structure around the hatches, Sven mentions there are two additional pieces required at each end to ensure comprehensive protection. This attention to detail highlights his commitment to producing a durable and reliable design. “Sailing is about finding your path, whether it’s across an ocean or within yourself.” – Sven Yrvind In conclusion, making flanges around bulkhead hatches may seem complex at first glance, but by following Sven Yrvind’s meticulous process, enthusiasts can achieve professional-level results. Remember that the journey of boatbuilding is as rewarding as reaching your destination; it tests one’s patience and dedication. For those seeking to embark on this adventure or simply gain more insight into marine craftsmanship, Sven’s wisdom is invaluable.Sven Yrvind, a renowned yacht designer and sailor, shares valuable insights on creating flanges around bulkhead hatches for canvas protection in this enlightening video. By following his expert guidance, boat enthusiasts can ensure their living areas remain secure while allowing unhindered access through the hatches.Step 1: Starting with the Flange
Sven begins by explaining that working on flanges vertically and horizontally is significantly easier than doing so in a flat position. To simplify the process further, he divides the task into two or three steps as suggested by fellow expert “for for.” This approach not only makes it more manageable but also allows for greater precision in crafting each component.Step 2: Applying Glue and Securing
Sven proceeds to apply glue along one edge of the flange, ensuring a secure bond when clamped into place. He emphasizes that this stage is crucial for maintaining the structural integrity of the flange, which in turn safeguards the living area beneath the canvas when hatches are open.Step 3: Allowing Time to Dry
After securely attaching the first portion of the flange, Sven allows ample time for it to dry before moving forward with additional steps. This patience and precision are key aspects of his successful boatbuilding methods.Step 4: Finishing Touches
Once the flange is fully dried, Sven removes the clamps carefully, ensuring no damage occurs during this process. He then moves on to attaching four more pieces onto these main frames, completing two pairs of flanges for the bulkhead hatches.The Final Touches
While two flanges form the primary support structure around the hatches, Sven mentions there are two additional pieces required at each end to ensure comprehensive protection. This attention to detail highlights his commitment to producing a durable and reliable design. “Sailing is about finding your path, whether it’s across an ocean or within yourself.” – Sven Yrvind In conclusion, making flanges around bulkhead hatches may seem complex at first glance, but by following Sven Yrvind’s meticulous process, enthusiasts can achieve professional-level results. Remember that the journey of boatbuilding is as rewarding as reaching your destination; it tests one’s patience and dedication. For those seeking to embark on this adventure or simply gain more insight into marine craftsmanship, Sven’s wisdom is invaluable.Making Flanges Around Bulkhead Hatches for Canvas
Sven Yrvind, a renowned yacht designer and sailor, shares valuable insights on creating flanges around bulkhead hatches for canvas protection in this enlightening video. By following his expert guidance, boat enthusiasts can ensure their living areas remain secure while allowing unhindered access through the hatches.Step 1: Starting with the Flange
Sven begins by explaining that working on flanges vertically and horizontally is significantly easier than doing so in a flat position. To simplify the process further, he divides the task into two or three steps as suggested by fellow expert “for for.” This approach not only makes it more manageable but also allows for greater precision in crafting each component.Step 2: Applying Glue and Securing
Sven proceeds to apply glue along one edge of the flange, ensuring a secure bond when clamped into place. He emphasizes that this stage is crucial for maintaining the structural integrity of the flange, which in turn safeguards the living area beneath the canvas when hatches are open.Step 3: Allowing Time to Dry
After securely attaching the first portion of the flange, Sven allows ample time for it to dry before moving forward with additional steps. This patience and precision are key aspects of his successful boatbuilding methods.Step 4: Finishing Touches
Once the flange is fully dried, Sven removes the clamps carefully, ensuring no damage occurs during this process. He then moves on to attaching four more pieces onto these main frames, completing two pairs of flanges for the bulkhead hatches.The Final Touches
While two flanges form the primary support structure around the hatches, Sven mentions there are two additional pieces required at each end to ensure comprehensive protection. This attention to detail highlights his commitment to producing a durable and reliable design. “Sailing is about finding your path, whether it’s across an ocean or within yourself.” – Sven Yrvind In conclusion, making flanges around bulkhead hatches may seem complex at first glance, but by following Sven Yrvind’s meticulous process, enthusiasts can achieve professional-level results. Remember that the journey of boatbuilding is as rewarding as reaching your destination; it tests one’s patience and dedication. For those seeking to embark on this adventure or simply gain more insight into marine craftsmanship, Sven’s wisdom is invaluable.Once the flange is fully dried, Sven removes the clamps carefully, ensuring no damage occurs during this process. He then moves on to attaching four more pieces onto these main frames, completing two pairs of flanges for the bulkhead hatches.The Final Touches
While two flanges form the primary support structure around the hatches, Sven mentions there are two additional pieces required at each end to ensure comprehensive protection. This attention to detail highlights his commitment to producing a durable and reliable design. “Sailing is about finding your path, whether it’s across an ocean or within yourself.” – Sven Yrvind In conclusion, making flanges around bulkhead hatches may seem complex at first glance, but by following Sven Yrvind’s meticulous process, enthusiasts can achieve professional-level results. Remember that the journey of boatbuilding is as rewarding as reaching your destination; it tests one’s patience and dedication. For those seeking to embark on this adventure or simply gain more insight into marine craftsmanship, Sven’s wisdom is invaluable.Sven proceeds to apply glue along one edge of the flange, ensuring a secure bond when clamped into place. He emphasizes that this stage is crucial for maintaining the structural integrity of the flange, which in turn safeguards the living area beneath the canvas when hatches are open.Step 3: Allowing Time to Dry
After securely attaching the first portion of the flange, Sven allows ample time for it to dry before moving forward with additional steps. This patience and precision are key aspects of his successful boatbuilding methods.Step 4: Finishing Touches
Once the flange is fully dried, Sven removes the clamps carefully, ensuring no damage occurs during this process. He then moves on to attaching four more pieces onto these main frames, completing two pairs of flanges for the bulkhead hatches.The Final Touches
While two flanges form the primary support structure around the hatches, Sven mentions there are two additional pieces required at each end to ensure comprehensive protection. This attention to detail highlights his commitment to producing a durable and reliable design. “Sailing is about finding your path, whether it’s across an ocean or within yourself.” – Sven Yrvind In conclusion, making flanges around bulkhead hatches may seem complex at first glance, but by following Sven Yrvind’s meticulous process, enthusiasts can achieve professional-level results. Remember that the journey of boatbuilding is as rewarding as reaching your destination; it tests one’s patience and dedication. For those seeking to embark on this adventure or simply gain more insight into marine craftsmanship, Sven’s wisdom is invaluable.Sven begins by explaining that working on flanges vertically and horizontally is significantly easier than doing so in a flat position. To simplify the process further, he divides the task into two or three steps as suggested by fellow expert “for for.” This approach not only makes it more manageable but also allows for greater precision in crafting each component.Step 2: Applying Glue and Securing
Sven proceeds to apply glue along one edge of the flange, ensuring a secure bond when clamped into place. He emphasizes that this stage is crucial for maintaining the structural integrity of the flange, which in turn safeguards the living area beneath the canvas when hatches are open.Step 3: Allowing Time to Dry
After securely attaching the first portion of the flange, Sven allows ample time for it to dry before moving forward with additional steps. This patience and precision are key aspects of his successful boatbuilding methods.Step 4: Finishing Touches
Once the flange is fully dried, Sven removes the clamps carefully, ensuring no damage occurs during this process. He then moves on to attaching four more pieces onto these main frames, completing two pairs of flanges for the bulkhead hatches.The Final Touches
While two flanges form the primary support structure around the hatches, Sven mentions there are two additional pieces required at each end to ensure comprehensive protection. This attention to detail highlights his commitment to producing a durable and reliable design. “Sailing is about finding your path, whether it’s across an ocean or within yourself.” – Sven Yrvind In conclusion, making flanges around bulkhead hatches may seem complex at first glance, but by following Sven Yrvind’s meticulous process, enthusiasts can achieve professional-level results. Remember that the journey of boatbuilding is as rewarding as reaching your destination; it tests one’s patience and dedication. For those seeking to embark on this adventure or simply gain more insight into marine craftsmanship, Sven’s wisdom is invaluable.Sven Yrvind, a renowned yacht designer and sailor, shares valuable insights on creating flanges around bulkhead hatches for canvas protection in this enlightening video. By following his expert guidance, boat enthusiasts can ensure their living areas remain secure while allowing unhindered access through the hatches.Step 1: Starting with the Flange
Sven begins by explaining that working on flanges vertically and horizontally is significantly easier than doing so in a flat position. To simplify the process further, he divides the task into two or three steps as suggested by fellow expert “for for.” This approach not only makes it more manageable but also allows for greater precision in crafting each component.Step 2: Applying Glue and Securing
Sven proceeds to apply glue along one edge of the flange, ensuring a secure bond when clamped into place. He emphasizes that this stage is crucial for maintaining the structural integrity of the flange, which in turn safeguards the living area beneath the canvas when hatches are open.Step 3: Allowing Time to Dry
After securely attaching the first portion of the flange, Sven allows ample time for it to dry before moving forward with additional steps. This patience and precision are key aspects of his successful boatbuilding methods.Step 4: Finishing Touches
Once the flange is fully dried, Sven removes the clamps carefully, ensuring no damage occurs during this process. He then moves on to attaching four more pieces onto these main frames, completing two pairs of flanges for the bulkhead hatches.The Final Touches
While two flanges form the primary support structure around the hatches, Sven mentions there are two additional pieces required at each end to ensure comprehensive protection. This attention to detail highlights his commitment to producing a durable and reliable design. “Sailing is about finding your path, whether it’s across an ocean or within yourself.” – Sven Yrvind In conclusion, making flanges around bulkhead hatches may seem complex at first glance, but by following Sven Yrvind’s meticulous process, enthusiasts can achieve professional-level results. Remember that the journey of boatbuilding is as rewarding as reaching your destination; it tests one’s patience and dedication. For those seeking to embark on this adventure or simply gain more insight into marine craftsmanship, Sven’s wisdom is invaluable.Making Flanges Around Bulkhead Hatches for Canvas
Sven Yrvind, a renowned yacht designer and sailor, shares valuable insights on creating flanges around bulkhead hatches for canvas protection in this enlightening video. By following his expert guidance, boat enthusiasts can ensure their living areas remain secure while allowing unhindered access through the hatches.Step 1: Starting with the Flange
Sven begins by explaining that working on flanges vertically and horizontally is significantly easier than doing so in a flat position. To simplify the process further, he divides the task into two or three steps as suggested by fellow expert “for for.” This approach not only makes it more manageable but also allows for greater precision in crafting each component.Step 2: Applying Glue and Securing
Sven proceeds to apply glue along one edge of the flange, ensuring a secure bond when clamped into place. He emphasizes that this stage is crucial for maintaining the structural integrity of the flange, which in turn safeguards the living area beneath the canvas when hatches are open.Step 3: Allowing Time to Dry
After securely attaching the first portion of the flange, Sven allows ample time for it to dry before moving forward with additional steps. This patience and precision are key aspects of his successful boatbuilding methods.Step 4: Finishing Touches
Once the flange is fully dried, Sven removes the clamps carefully, ensuring no damage occurs during this process. He then moves on to attaching four more pieces onto these main frames, completing two pairs of flanges for the bulkhead hatches.The Final Touches
While two flanges form the primary support structure around the hatches, Sven mentions there are two additional pieces required at each end to ensure comprehensive protection. This attention to detail highlights his commitment to producing a durable and reliable design. “Sailing is about finding your path, whether it’s across an ocean or within yourself.” – Sven Yrvind In conclusion, making flanges around bulkhead hatches may seem complex at first glance, but by following Sven Yrvind’s meticulous process, enthusiasts can achieve professional-level results. Remember that the journey of boatbuilding is as rewarding as reaching your destination; it tests one’s patience and dedication. For those seeking to embark on this adventure or simply gain more insight into marine craftsmanship, Sven’s wisdom is invaluable.After securely attaching the first portion of the flange, Sven allows ample time for it to dry before moving forward with additional steps. This patience and precision are key aspects of his successful boatbuilding methods.Step 4: Finishing Touches
Once the flange is fully dried, Sven removes the clamps carefully, ensuring no damage occurs during this process. He then moves on to attaching four more pieces onto these main frames, completing two pairs of flanges for the bulkhead hatches.The Final Touches
While two flanges form the primary support structure around the hatches, Sven mentions there are two additional pieces required at each end to ensure comprehensive protection. This attention to detail highlights his commitment to producing a durable and reliable design. “Sailing is about finding your path, whether it’s across an ocean or within yourself.” – Sven Yrvind In conclusion, making flanges around bulkhead hatches may seem complex at first glance, but by following Sven Yrvind’s meticulous process, enthusiasts can achieve professional-level results. Remember that the journey of boatbuilding is as rewarding as reaching your destination; it tests one’s patience and dedication. For those seeking to embark on this adventure or simply gain more insight into marine craftsmanship, Sven’s wisdom is invaluable.Sven proceeds to apply glue along one edge of the flange, ensuring a secure bond when clamped into place. He emphasizes that this stage is crucial for maintaining the structural integrity of the flange, which in turn safeguards the living area beneath the canvas when hatches are open.Step 3: Allowing Time to Dry
After securely attaching the first portion of the flange, Sven allows ample time for it to dry before moving forward with additional steps. This patience and precision are key aspects of his successful boatbuilding methods.Step 4: Finishing Touches
Once the flange is fully dried, Sven removes the clamps carefully, ensuring no damage occurs during this process. He then moves on to attaching four more pieces onto these main frames, completing two pairs of flanges for the bulkhead hatches.The Final Touches
While two flanges form the primary support structure around the hatches, Sven mentions there are two additional pieces required at each end to ensure comprehensive protection. This attention to detail highlights his commitment to producing a durable and reliable design. “Sailing is about finding your path, whether it’s across an ocean or within yourself.” – Sven Yrvind In conclusion, making flanges around bulkhead hatches may seem complex at first glance, but by following Sven Yrvind’s meticulous process, enthusiasts can achieve professional-level results. Remember that the journey of boatbuilding is as rewarding as reaching your destination; it tests one’s patience and dedication. For those seeking to embark on this adventure or simply gain more insight into marine craftsmanship, Sven’s wisdom is invaluable.Sven begins by explaining that working on flanges vertically and horizontally is significantly easier than doing so in a flat position. To simplify the process further, he divides the task into two or three steps as suggested by fellow expert “for for.” This approach not only makes it more manageable but also allows for greater precision in crafting each component.Step 2: Applying Glue and Securing
Sven proceeds to apply glue along one edge of the flange, ensuring a secure bond when clamped into place. He emphasizes that this stage is crucial for maintaining the structural integrity of the flange, which in turn safeguards the living area beneath the canvas when hatches are open.Step 3: Allowing Time to Dry
After securely attaching the first portion of the flange, Sven allows ample time for it to dry before moving forward with additional steps. This patience and precision are key aspects of his successful boatbuilding methods.Step 4: Finishing Touches
Once the flange is fully dried, Sven removes the clamps carefully, ensuring no damage occurs during this process. He then moves on to attaching four more pieces onto these main frames, completing two pairs of flanges for the bulkhead hatches.The Final Touches
While two flanges form the primary support structure around the hatches, Sven mentions there are two additional pieces required at each end to ensure comprehensive protection. This attention to detail highlights his commitment to producing a durable and reliable design. “Sailing is about finding your path, whether it’s across an ocean or within yourself.” – Sven Yrvind In conclusion, making flanges around bulkhead hatches may seem complex at first glance, but by following Sven Yrvind’s meticulous process, enthusiasts can achieve professional-level results. Remember that the journey of boatbuilding is as rewarding as reaching your destination; it tests one’s patience and dedication. For those seeking to embark on this adventure or simply gain more insight into marine craftsmanship, Sven’s wisdom is invaluable.Sven Yrvind, a renowned yacht designer and sailor, shares valuable insights on creating flanges around bulkhead hatches for canvas protection in this enlightening video. By following his expert guidance, boat enthusiasts can ensure their living areas remain secure while allowing unhindered access through the hatches.Step 1: Starting with the Flange
Sven begins by explaining that working on flanges vertically and horizontally is significantly easier than doing so in a flat position. To simplify the process further, he divides the task into two or three steps as suggested by fellow expert “for for.” This approach not only makes it more manageable but also allows for greater precision in crafting each component.Step 2: Applying Glue and Securing
Sven proceeds to apply glue along one edge of the flange, ensuring a secure bond when clamped into place. He emphasizes that this stage is crucial for maintaining the structural integrity of the flange, which in turn safeguards the living area beneath the canvas when hatches are open.Step 3: Allowing Time to Dry
After securely attaching the first portion of the flange, Sven allows ample time for it to dry before moving forward with additional steps. This patience and precision are key aspects of his successful boatbuilding methods.Step 4: Finishing Touches
Once the flange is fully dried, Sven removes the clamps carefully, ensuring no damage occurs during this process. He then moves on to attaching four more pieces onto these main frames, completing two pairs of flanges for the bulkhead hatches.The Final Touches
While two flanges form the primary support structure around the hatches, Sven mentions there are two additional pieces required at each end to ensure comprehensive protection. This attention to detail highlights his commitment to producing a durable and reliable design. “Sailing is about finding your path, whether it’s across an ocean or within yourself.” – Sven Yrvind In conclusion, making flanges around bulkhead hatches may seem complex at first glance, but by following Sven Yrvind’s meticulous process, enthusiasts can achieve professional-level results. Remember that the journey of boatbuilding is as rewarding as reaching your destination; it tests one’s patience and dedication. For those seeking to embark on this adventure or simply gain more insight into marine craftsmanship, Sven’s wisdom is invaluable.Making Flanges Around Bulkhead Hatches for Canvas
Sven Yrvind, a renowned yacht designer and sailor, shares valuable insights on creating flanges around bulkhead hatches for canvas protection in this enlightening video. By following his expert guidance, boat enthusiasts can ensure their living areas remain secure while allowing unhindered access through the hatches.Step 1: Starting with the Flange
Sven begins by explaining that working on flanges vertically and horizontally is significantly easier than doing so in a flat position. To simplify the process further, he divides the task into two or three steps as suggested by fellow expert “for for.” This approach not only makes it more manageable but also allows for greater precision in crafting each component.Step 2: Applying Glue and Securing
Sven proceeds to apply glue along one edge of the flange, ensuring a secure bond when clamped into place. He emphasizes that this stage is crucial for maintaining the structural integrity of the flange, which in turn safeguards the living area beneath the canvas when hatches are open.Step 3: Allowing Time to Dry
After securely attaching the first portion of the flange, Sven allows ample time for it to dry before moving forward with additional steps. This patience and precision are key aspects of his successful boatbuilding methods.Step 4: Finishing Touches
Once the flange is fully dried, Sven removes the clamps carefully, ensuring no damage occurs during this process. He then moves on to attaching four more pieces onto these main frames, completing two pairs of flanges for the bulkhead hatches.The Final Touches
While two flanges form the primary support structure around the hatches, Sven mentions there are two additional pieces required at each end to ensure comprehensive protection. This attention to detail highlights his commitment to producing a durable and reliable design. “Sailing is about finding your path, whether it’s across an ocean or within yourself.” – Sven Yrvind In conclusion, making flanges around bulkhead hatches may seem complex at first glance, but by following Sven Yrvind’s meticulous process, enthusiasts can achieve professional-level results. Remember that the journey of boatbuilding is as rewarding as reaching your destination; it tests one’s patience and dedication. For those seeking to embark on this adventure or simply gain more insight into marine craftsmanship, Sven’s wisdom is invaluable.Once the flange is fully dried, Sven removes the clamps carefully, ensuring no damage occurs during this process. He then moves on to attaching four more pieces onto these main frames, completing two pairs of flanges for the bulkhead hatches.The Final Touches
While two flanges form the primary support structure around the hatches, Sven mentions there are two additional pieces required at each end to ensure comprehensive protection. This attention to detail highlights his commitment to producing a durable and reliable design. “Sailing is about finding your path, whether it’s across an ocean or within yourself.” – Sven Yrvind In conclusion, making flanges around bulkhead hatches may seem complex at first glance, but by following Sven Yrvind’s meticulous process, enthusiasts can achieve professional-level results. Remember that the journey of boatbuilding is as rewarding as reaching your destination; it tests one’s patience and dedication. For those seeking to embark on this adventure or simply gain more insight into marine craftsmanship, Sven’s wisdom is invaluable.After securely attaching the first portion of the flange, Sven allows ample time for it to dry before moving forward with additional steps. This patience and precision are key aspects of his successful boatbuilding methods.Step 4: Finishing Touches
Once the flange is fully dried, Sven removes the clamps carefully, ensuring no damage occurs during this process. He then moves on to attaching four more pieces onto these main frames, completing two pairs of flanges for the bulkhead hatches.The Final Touches
While two flanges form the primary support structure around the hatches, Sven mentions there are two additional pieces required at each end to ensure comprehensive protection. This attention to detail highlights his commitment to producing a durable and reliable design. “Sailing is about finding your path, whether it’s across an ocean or within yourself.” – Sven Yrvind In conclusion, making flanges around bulkhead hatches may seem complex at first glance, but by following Sven Yrvind’s meticulous process, enthusiasts can achieve professional-level results. Remember that the journey of boatbuilding is as rewarding as reaching your destination; it tests one’s patience and dedication. For those seeking to embark on this adventure or simply gain more insight into marine craftsmanship, Sven’s wisdom is invaluable.Sven proceeds to apply glue along one edge of the flange, ensuring a secure bond when clamped into place. He emphasizes that this stage is crucial for maintaining the structural integrity of the flange, which in turn safeguards the living area beneath the canvas when hatches are open.Step 3: Allowing Time to Dry
After securely attaching the first portion of the flange, Sven allows ample time for it to dry before moving forward with additional steps. This patience and precision are key aspects of his successful boatbuilding methods.Step 4: Finishing Touches
Once the flange is fully dried, Sven removes the clamps carefully, ensuring no damage occurs during this process. He then moves on to attaching four more pieces onto these main frames, completing two pairs of flanges for the bulkhead hatches.The Final Touches
While two flanges form the primary support structure around the hatches, Sven mentions there are two additional pieces required at each end to ensure comprehensive protection. This attention to detail highlights his commitment to producing a durable and reliable design. “Sailing is about finding your path, whether it’s across an ocean or within yourself.” – Sven Yrvind In conclusion, making flanges around bulkhead hatches may seem complex at first glance, but by following Sven Yrvind’s meticulous process, enthusiasts can achieve professional-level results. Remember that the journey of boatbuilding is as rewarding as reaching your destination; it tests one’s patience and dedication. For those seeking to embark on this adventure or simply gain more insight into marine craftsmanship, Sven’s wisdom is invaluable.Sven begins by explaining that working on flanges vertically and horizontally is significantly easier than doing so in a flat position. To simplify the process further, he divides the task into two or three steps as suggested by fellow expert “for for.” This approach not only makes it more manageable but also allows for greater precision in crafting each component.Step 2: Applying Glue and Securing
Sven proceeds to apply glue along one edge of the flange, ensuring a secure bond when clamped into place. He emphasizes that this stage is crucial for maintaining the structural integrity of the flange, which in turn safeguards the living area beneath the canvas when hatches are open.Step 3: Allowing Time to Dry
After securely attaching the first portion of the flange, Sven allows ample time for it to dry before moving forward with additional steps. This patience and precision are key aspects of his successful boatbuilding methods.Step 4: Finishing Touches
Once the flange is fully dried, Sven removes the clamps carefully, ensuring no damage occurs during this process. He then moves on to attaching four more pieces onto these main frames, completing two pairs of flanges for the bulkhead hatches.The Final Touches
While two flanges form the primary support structure around the hatches, Sven mentions there are two additional pieces required at each end to ensure comprehensive protection. This attention to detail highlights his commitment to producing a durable and reliable design. “Sailing is about finding your path, whether it’s across an ocean or within yourself.” – Sven Yrvind In conclusion, making flanges around bulkhead hatches may seem complex at first glance, but by following Sven Yrvind’s meticulous process, enthusiasts can achieve professional-level results. Remember that the journey of boatbuilding is as rewarding as reaching your destination; it tests one’s patience and dedication. For those seeking to embark on this adventure or simply gain more insight into marine craftsmanship, Sven’s wisdom is invaluable.Sven Yrvind, a renowned yacht designer and sailor, shares valuable insights on creating flanges around bulkhead hatches for canvas protection in this enlightening video. By following his expert guidance, boat enthusiasts can ensure their living areas remain secure while allowing unhindered access through the hatches.Step 1: Starting with the Flange
Sven begins by explaining that working on flanges vertically and horizontally is significantly easier than doing so in a flat position. To simplify the process further, he divides the task into two or three steps as suggested by fellow expert “for for.” This approach not only makes it more manageable but also allows for greater precision in crafting each component.Step 2: Applying Glue and Securing
Sven proceeds to apply glue along one edge of the flange, ensuring a secure bond when clamped into place. He emphasizes that this stage is crucial for maintaining the structural integrity of the flange, which in turn safeguards the living area beneath the canvas when hatches are open.Step 3: Allowing Time to Dry
After securely attaching the first portion of the flange, Sven allows ample time for it to dry before moving forward with additional steps. This patience and precision are key aspects of his successful boatbuilding methods.Step 4: Finishing Touches
Once the flange is fully dried, Sven removes the clamps carefully, ensuring no damage occurs during this process. He then moves on to attaching four more pieces onto these main frames, completing two pairs of flanges for the bulkhead hatches.The Final Touches
While two flanges form the primary support structure around the hatches, Sven mentions there are two additional pieces required at each end to ensure comprehensive protection. This attention to detail highlights his commitment to producing a durable and reliable design. “Sailing is about finding your path, whether it’s across an ocean or within yourself.” – Sven Yrvind In conclusion, making flanges around bulkhead hatches may seem complex at first glance, but by following Sven Yrvind’s meticulous process, enthusiasts can achieve professional-level results. Remember that the journey of boatbuilding is as rewarding as reaching your destination; it tests one’s patience and dedication. For those seeking to embark on this adventure or simply gain more insight into marine craftsmanship, Sven’s wisdom is invaluable.Making Flanges Around Bulkhead Hatches for Canvas
Sven Yrvind, a renowned yacht designer and sailor, shares valuable insights on creating flanges around bulkhead hatches for canvas protection in this enlightening video. By following his expert guidance, boat enthusiasts can ensure their living areas remain secure while allowing unhindered access through the hatches.Step 1: Starting with the Flange
Sven begins by explaining that working on flanges vertically and horizontally is significantly easier than doing so in a flat position. To simplify the process further, he divides the task into two or three steps as suggested by fellow expert “for for.” This approach not only makes it more manageable but also allows for greater precision in crafting each component.Step 2: Applying Glue and Securing
Sven proceeds to apply glue along one edge of the flange, ensuring a secure bond when clamped into place. He emphasizes that this stage is crucial for maintaining the structural integrity of the flange, which in turn safeguards the living area beneath the canvas when hatches are open.Step 3: Allowing Time to Dry
After securely attaching the first portion of the flange, Sven allows ample time for it to dry before moving forward with additional steps. This patience and precision are key aspects of his successful boatbuilding methods.Step 4: Finishing Touches
Once the flange is fully dried, Sven removes the clamps carefully, ensuring no damage occurs during this process. He then moves on to attaching four more pieces onto these main frames, completing two pairs of flanges for the bulkhead hatches.The Final Touches
While two flanges form the primary support structure around the hatches, Sven mentions there are two additional pieces required at each end to ensure comprehensive protection. This attention to detail highlights his commitment to producing a durable and reliable design. “Sailing is about finding your path, whether it’s across an ocean or within yourself.” – Sven Yrvind In conclusion, making flanges around bulkhead hatches may seem complex at first glance, but by following Sven Yrvind’s meticulous process, enthusiasts can achieve professional-level results. Remember that the journey of boatbuilding is as rewarding as reaching your destination; it tests one’s patience and dedication. For those seeking to embark on this adventure or simply gain more insight into marine craftsmanship, Sven’s wisdom is invaluable.Sven proceeds to apply glue along one edge of the flange, ensuring a secure bond when clamped into place. He emphasizes that this stage is crucial for maintaining the structural integrity of the flange, which in turn safeguards the living area beneath the canvas when hatches are open.Step 3: Allowing Time to Dry
After securely attaching the first portion of the flange, Sven allows ample time for it to dry before moving forward with additional steps. This patience and precision are key aspects of his successful boatbuilding methods.Step 4: Finishing Touches
Once the flange is fully dried, Sven removes the clamps carefully, ensuring no damage occurs during this process. He then moves on to attaching four more pieces onto these main frames, completing two pairs of flanges for the bulkhead hatches.The Final Touches
While two flanges form the primary support structure around the hatches, Sven mentions there are two additional pieces required at each end to ensure comprehensive protection. This attention to detail highlights his commitment to producing a durable and reliable design. “Sailing is about finding your path, whether it’s across an ocean or within yourself.” – Sven Yrvind In conclusion, making flanges around bulkhead hatches may seem complex at first glance, but by following Sven Yrvind’s meticulous process, enthusiasts can achieve professional-level results. Remember that the journey of boatbuilding is as rewarding as reaching your destination; it tests one’s patience and dedication. For those seeking to embark on this adventure or simply gain more insight into marine craftsmanship, Sven’s wisdom is invaluable.Making Flanges Around Bulkhead Hatches for Canvas
Sven Yrvind, a renowned yacht designer and sailor, shares valuable insights on creating flanges around bulkhead hatches for canvas protection in this enlightening video. By following his expert guidance, boat enthusiasts can ensure their living areas remain secure while allowing unhindered access through the hatches.Step 1: Starting with the Flange
Sven begins by explaining that working on flanges vertically and horizontally is significantly easier than doing so in a flat position. To simplify the process further, he divides the task into two or three steps as suggested by fellow expert “for for.” This approach not only makes it more manageable but also allows for greater precision in crafting each component.Step 2: Applying Glue and Securing
Sven proceeds to apply glue along one edge of the flange, ensuring a secure bond when clamped into place. He emphasizes that this stage is crucial for maintaining the structural integrity of the flange, which in turn safeguards the living area beneath the canvas when hatches are open.Step 3: Allowing Time to Dry
After securely attaching the first portion of the flange, Sven allows ample time for it to dry before moving forward with additional steps. This patience and precision are key aspects of his successful boatbuilding methods.Step 4: Finishing Touches
Once the flange is fully dried, Sven removes the clamps carefully, ensuring no damage occurs during this process. He then moves on to attaching four more pieces onto these main frames, completing two pairs of flanges for the bulkhead hatches.The Final Touches
While two flanges form the primary support structure around the hatches, Sven mentions there are two additional pieces required at each end to ensure comprehensive protection. This attention to detail highlights his commitment to producing a durable and reliable design. “Sailing is about finding your path, whether it’s across an ocean or within yourself.” – Sven Yrvind In conclusion, making flanges around bulkhead hatches may seem complex at first glance, but by following Sven Yrvind’s meticulous process, enthusiasts can achieve professional-level results. Remember that the journey of boatbuilding is as rewarding as reaching your destination; it tests one’s patience and dedication. For those seeking to embark on this adventure or simply gain more insight into marine craftsmanship, Sven’s wisdom is invaluable.Once the flange is fully dried, Sven removes the clamps carefully, ensuring no damage occurs during this process. He then moves on to attaching four more pieces onto these main frames, completing two pairs of flanges for the bulkhead hatches.The Final Touches
While two flanges form the primary support structure around the hatches, Sven mentions there are two additional pieces required at each end to ensure comprehensive protection. This attention to detail highlights his commitment to producing a durable and reliable design. “Sailing is about finding your path, whether it’s across an ocean or within yourself.” – Sven Yrvind In conclusion, making flanges around bulkhead hatches may seem complex at first glance, but by following Sven Yrvind’s meticulous process, enthusiasts can achieve professional-level results. Remember that the journey of boatbuilding is as rewarding as reaching your destination; it tests one’s patience and dedication. For those seeking to embark on this adventure or simply gain more insight into marine craftsmanship, Sven’s wisdom is invaluable.Making Flanges Around Bulkhead Hatches for Canvas
Sven Yrvind, a renowned yacht designer and sailor, shares valuable insights on creating flanges around bulkhead hatches for canvas protection in this enlightening video. By following his expert guidance, boat enthusiasts can ensure their living areas remain secure while allowing unhindered access through the hatches.Step 1: Starting with the Flange
Sven begins by explaining that working on flanges vertically and horizontally is significantly easier than doing so in a flat position. To simplify the process further, he divides the task into two or three steps as suggested by fellow expert “for for.” This approach not only makes it more manageable but also allows for greater precision in crafting each component.Step 2: Applying Glue and Securing
Sven proceeds to apply glue along one edge of the flange, ensuring a secure bond when clamped into place. He emphasizes that this stage is crucial for maintaining the structural integrity of the flange, which in turn safeguards the living area beneath the canvas when hatches are open.Step 3: Allowing Time to Dry
After securely attaching the first portion of the flange, Sven allows ample time for it to dry before moving forward with additional steps. This patience and precision are key aspects of his successful boatbuilding methods.Step 4: Finishing Touches
Once the flange is fully dried, Sven removes the clamps carefully, ensuring no damage occurs during this process. He then moves on to attaching four more pieces onto these main frames, completing two pairs of flanges for the bulkhead hatches.The Final Touches
While two flanges form the primary support structure around the hatches, Sven mentions there are two additional pieces required at each end to ensure comprehensive protection. This attention to detail highlights his commitment to producing a durable and reliable design. “Sailing is about finding your path, whether it’s across an ocean or within yourself.” – Sven Yrvind In conclusion, making flanges around bulkhead hatches may seem complex at first glance, but by following Sven Yrvind’s meticulous process, enthusiasts can achieve professional-level results. Remember that the journey of boatbuilding is as rewarding as reaching your destination; it tests one’s patience and dedication. For those seeking to embark on this adventure or simply gain more insight into marine craftsmanship, Sven’s wisdom is invaluable.After securely attaching the first portion of the flange, Sven allows ample time for it to dry before moving forward with additional steps. This patience and precision are key aspects of his successful boatbuilding methods.Step 4: Finishing Touches
Once the flange is fully dried, Sven removes the clamps carefully, ensuring no damage occurs during this process. He then moves on to attaching four more pieces onto these main frames, completing two pairs of flanges for the bulkhead hatches.The Final Touches
While two flanges form the primary support structure around the hatches, Sven mentions there are two additional pieces required at each end to ensure comprehensive protection. This attention to detail highlights his commitment to producing a durable and reliable design. “Sailing is about finding your path, whether it’s across an ocean or within yourself.” – Sven Yrvind In conclusion, making flanges around bulkhead hatches may seem complex at first glance, but by following Sven Yrvind’s meticulous process, enthusiasts can achieve professional-level results. Remember that the journey of boatbuilding is as rewarding as reaching your destination; it tests one’s patience and dedication. For those seeking to embark on this adventure or simply gain more insight into marine craftsmanship, Sven’s wisdom is invaluable.Making Flanges Around Bulkhead Hatches for Canvas
Sven Yrvind, a renowned yacht designer and sailor, shares valuable insights on creating flanges around bulkhead hatches for canvas protection in this enlightening video. By following his expert guidance, boat enthusiasts can ensure their living areas remain secure while allowing unhindered access through the hatches.Step 1: Starting with the Flange
Sven begins by explaining that working on flanges vertically and horizontally is significantly easier than doing so in a flat position. To simplify the process further, he divides the task into two or three steps as suggested by fellow expert “for for.” This approach not only makes it more manageable but also allows for greater precision in crafting each component.Step 2: Applying Glue and Securing
Sven proceeds to apply glue along one edge of the flange, ensuring a secure bond when clamped into place. He emphasizes that this stage is crucial for maintaining the structural integrity of the flange, which in turn safeguards the living area beneath the canvas when hatches are open.Step 3: Allowing Time to Dry
After securely attaching the first portion of the flange, Sven allows ample time for it to dry before moving forward with additional steps. This patience and precision are key aspects of his successful boatbuilding methods.Step 4: Finishing Touches
Once the flange is fully dried, Sven removes the clamps carefully, ensuring no damage occurs during this process. He then moves on to attaching four more pieces onto these main frames, completing two pairs of flanges for the bulkhead hatches.The Final Touches
While two flanges form the primary support structure around the hatches, Sven mentions there are two additional pieces required at each end to ensure comprehensive protection. This attention to detail highlights his commitment to producing a durable and reliable design. “Sailing is about finding your path, whether it’s across an ocean or within yourself.” – Sven Yrvind In conclusion, making flanges around bulkhead hatches may seem complex at first glance, but by following Sven Yrvind’s meticulous process, enthusiasts can achieve professional-level results. Remember that the journey of boatbuilding is as rewarding as reaching your destination; it tests one’s patience and dedication. For those seeking to embark on this adventure or simply gain more insight into marine craftsmanship, Sven’s wisdom is invaluable.Sven proceeds to apply glue along one edge of the flange, ensuring a secure bond when clamped into place. He emphasizes that this stage is crucial for maintaining the structural integrity of the flange, which in turn safeguards the living area beneath the canvas when hatches are open.Step 3: Allowing Time to Dry
After securely attaching the first portion of the flange, Sven allows ample time for it to dry before moving forward with additional steps. This patience and precision are key aspects of his successful boatbuilding methods.Step 4: Finishing Touches
Once the flange is fully dried, Sven removes the clamps carefully, ensuring no damage occurs during this process. He then moves on to attaching four more pieces onto these main frames, completing two pairs of flanges for the bulkhead hatches.The Final Touches
While two flanges form the primary support structure around the hatches, Sven mentions there are two additional pieces required at each end to ensure comprehensive protection. This attention to detail highlights his commitment to producing a durable and reliable design. “Sailing is about finding your path, whether it’s across an ocean or within yourself.” – Sven Yrvind In conclusion, making flanges around bulkhead hatches may seem complex at first glance, but by following Sven Yrvind’s meticulous process, enthusiasts can achieve professional-level results. Remember that the journey of boatbuilding is as rewarding as reaching your destination; it tests one’s patience and dedication. For those seeking to embark on this adventure or simply gain more insight into marine craftsmanship, Sven’s wisdom is invaluable.Making Flanges Around Bulkhead Hatches for Canvas
Sven Yrvind, a renowned yacht designer and sailor, shares valuable insights on creating flanges around bulkhead hatches for canvas protection in this enlightening video. By following his expert guidance, boat enthusiasts can ensure their living areas remain secure while allowing unhindered access through the hatches.Step 1: Starting with the Flange
Sven begins by explaining that working on flanges vertically and horizontally is significantly easier than doing so in a flat position. To simplify the process further, he divides the task into two or three steps as suggested by fellow expert “for for.” This approach not only makes it more manageable but also allows for greater precision in crafting each component.Step 2: Applying Glue and Securing
Sven proceeds to apply glue along one edge of the flange, ensuring a secure bond when clamped into place. He emphasizes that this stage is crucial for maintaining the structural integrity of the flange, which in turn safeguards the living area beneath the canvas when hatches are open.Step 3: Allowing Time to Dry
After securely attaching the first portion of the flange, Sven allows ample time for it to dry before moving forward with additional steps. This patience and precision are key aspects of his successful boatbuilding methods.Step 4: Finishing Touches
Once the flange is fully dried, Sven removes the clamps carefully, ensuring no damage occurs during this process. He then moves on to attaching four more pieces onto these main frames, completing two pairs of flanges for the bulkhead hatches.The Final Touches
While two flanges form the primary support structure around the hatches, Sven mentions there are two additional pieces required at each end to ensure comprehensive protection. This attention to detail highlights his commitment to producing a durable and reliable design. “Sailing is about finding your path, whether it’s across an ocean or within yourself.” – Sven Yrvind In conclusion, making flanges around bulkhead hatches may seem complex at first glance, but by following Sven Yrvind’s meticulous process, enthusiasts can achieve professional-level results. Remember that the journey of boatbuilding is as rewarding as reaching your destination; it tests one’s patience and dedication. For those seeking to embark on this adventure or simply gain more insight into marine craftsmanship, Sven’s wisdom is invaluable.Sven begins by explaining that working on flanges vertically and horizontally is significantly easier than doing so in a flat position. To simplify the process further, he divides the task into two or three steps as suggested by fellow expert “for for.” This approach not only makes it more manageable but also allows for greater precision in crafting each component.Step 2: Applying Glue and Securing
Sven proceeds to apply glue along one edge of the flange, ensuring a secure bond when clamped into place. He emphasizes that this stage is crucial for maintaining the structural integrity of the flange, which in turn safeguards the living area beneath the canvas when hatches are open.Step 3: Allowing Time to Dry
After securely attaching the first portion of the flange, Sven allows ample time for it to dry before moving forward with additional steps. This patience and precision are key aspects of his successful boatbuilding methods.Step 4: Finishing Touches
Once the flange is fully dried, Sven removes the clamps carefully, ensuring no damage occurs during this process. He then moves on to attaching four more pieces onto these main frames, completing two pairs of flanges for the bulkhead hatches.The Final Touches
While two flanges form the primary support structure around the hatches, Sven mentions there are two additional pieces required at each end to ensure comprehensive protection. This attention to detail highlights his commitment to producing a durable and reliable design. “Sailing is about finding your path, whether it’s across an ocean or within yourself.” – Sven Yrvind In conclusion, making flanges around bulkhead hatches may seem complex at first glance, but by following Sven Yrvind’s meticulous process, enthusiasts can achieve professional-level results. Remember that the journey of boatbuilding is as rewarding as reaching your destination; it tests one’s patience and dedication. For those seeking to embark on this adventure or simply gain more insight into marine craftsmanship, Sven’s wisdom is invaluable.Making Flanges Around Bulkhead Hatches for Canvas
Sven Yrvind, a renowned yacht designer and sailor, shares valuable insights on creating flanges around bulkhead hatches for canvas protection in this enlightening video. By following his expert guidance, boat enthusiasts can ensure their living areas remain secure while allowing unhindered access through the hatches.Step 1: Starting with the Flange
Sven begins by explaining that working on flanges vertically and horizontally is significantly easier than doing so in a flat position. To simplify the process further, he divides the task into two or three steps as suggested by fellow expert “for for.” This approach not only makes it more manageable but also allows for greater precision in crafting each component.Step 2: Applying Glue and Securing
Sven proceeds to apply glue along one edge of the flange, ensuring a secure bond when clamped into place. He emphasizes that this stage is crucial for maintaining the structural integrity of the flange, which in turn safeguards the living area beneath the canvas when hatches are open.Step 3: Allowing Time to Dry
After securely attaching the first portion of the flange, Sven allows ample time for it to dry before moving forward with additional steps. This patience and precision are key aspects of his successful boatbuilding methods.Step 4: Finishing Touches
Once the flange is fully dried, Sven removes the clamps carefully, ensuring no damage occurs during this process. He then moves on to attaching four more pieces onto these main frames, completing two pairs of flanges for the bulkhead hatches.The Final Touches
While two flanges form the primary support structure around the hatches, Sven mentions there are two additional pieces required at each end to ensure comprehensive protection. This attention to detail highlights his commitment to producing a durable and reliable design. “Sailing is about finding your path, whether it’s across an ocean or within yourself.” – Sven Yrvind In conclusion, making flanges around bulkhead hatches may seem complex at first glance, but by following Sven Yrvind’s meticulous process, enthusiasts can achieve professional-level results. Remember that the journey of boatbuilding is as rewarding as reaching your destination; it tests one’s patience and dedication. For those seeking to embark on this adventure or simply gain more insight into marine craftsmanship, Sven’s wisdom is invaluable.Sven Yrvind, a renowned yacht designer and sailor, shares valuable insights on creating flanges around bulkhead hatches for canvas protection in this enlightening video. By following his expert guidance, boat enthusiasts can ensure their living areas remain secure while allowing unhindered access through the hatches.Step 1: Starting with the Flange
Sven begins by explaining that working on flanges vertically and horizontally is significantly easier than doing so in a flat position. To simplify the process further, he divides the task into two or three steps as suggested by fellow expert “for for.” This approach not only makes it more manageable but also allows for greater precision in crafting each component.Step 2: Applying Glue and Securing
Sven proceeds to apply glue along one edge of the flange, ensuring a secure bond when clamped into place. He emphasizes that this stage is crucial for maintaining the structural integrity of the flange, which in turn safeguards the living area beneath the canvas when hatches are open.Step 3: Allowing Time to Dry
After securely attaching the first portion of the flange, Sven allows ample time for it to dry before moving forward with additional steps. This patience and precision are key aspects of his successful boatbuilding methods.Step 4: Finishing Touches
Once the flange is fully dried, Sven removes the clamps carefully, ensuring no damage occurs during this process. He then moves on to attaching four more pieces onto these main frames, completing two pairs of flanges for the bulkhead hatches.The Final Touches
While two flanges form the primary support structure around the hatches, Sven mentions there are two additional pieces required at each end to ensure comprehensive protection. This attention to detail highlights his commitment to producing a durable and reliable design. “Sailing is about finding your path, whether it’s across an ocean or within yourself.” – Sven Yrvind In conclusion, making flanges around bulkhead hatches may seem complex at first glance, but by following Sven Yrvind’s meticulous process, enthusiasts can achieve professional-level results. Remember that the journey of boatbuilding is as rewarding as reaching your destination; it tests one’s patience and dedication. For those seeking to embark on this adventure or simply gain more insight into marine craftsmanship, Sven’s wisdom is invaluable.Making Flanges Around Bulkhead Hatches for Canvas
Sven Yrvind, a renowned yacht designer and sailor, shares valuable insights on creating flanges around bulkhead hatches for canvas protection in this enlightening video. By following his expert guidance, boat enthusiasts can ensure their living areas remain secure while allowing unhindered access through the hatches.Step 1: Starting with the Flange
Sven begins by explaining that working on flanges vertically and horizontally is significantly easier than doing so in a flat position. To simplify the process further, he divides the task into two or three steps as suggested by fellow expert “for for.” This approach not only makes it more manageable but also allows for greater precision in crafting each component.Step 2: Applying Glue and Securing
Sven proceeds to apply glue along one edge of the flange, ensuring a secure bond when clamped into place. He emphasizes that this stage is crucial for maintaining the structural integrity of the flange, which in turn safeguards the living area beneath the canvas when hatches are open.Step 3: Allowing Time to Dry
After securely attaching the first portion of the flange, Sven allows ample time for it to dry before moving forward with additional steps. This patience and precision are key aspects of his successful boatbuilding methods.Step 4: Finishing Touches
Once the flange is fully dried, Sven removes the clamps carefully, ensuring no damage occurs during this process. He then moves on to attaching four more pieces onto these main frames, completing two pairs of flanges for the bulkhead hatches.The Final Touches
While two flanges form the primary support structure around the hatches, Sven mentions there are two additional pieces required at each end to ensure comprehensive protection. This attention to detail highlights his commitment to producing a durable and reliable design. “Sailing is about finding your path, whether it’s across an ocean or within yourself.” – Sven Yrvind In conclusion, making flanges around bulkhead hatches may seem complex at first glance, but by following Sven Yrvind’s meticulous process, enthusiasts can achieve professional-level results. Remember that the journey of boatbuilding is as rewarding as reaching your destination; it tests one’s patience and dedication. For those seeking to embark on this adventure or simply gain more insight into marine craftsmanship, Sven’s wisdom is invaluable.Once the flange is fully dried, Sven removes the clamps carefully, ensuring no damage occurs during this process. He then moves on to attaching four more pieces onto these main frames, completing two pairs of flanges for the bulkhead hatches.The Final Touches
While two flanges form the primary support structure around the hatches, Sven mentions there are two additional pieces required at each end to ensure comprehensive protection. This attention to detail highlights his commitment to producing a durable and reliable design. “Sailing is about finding your path, whether it’s across an ocean or within yourself.” – Sven Yrvind In conclusion, making flanges around bulkhead hatches may seem complex at first glance, but by following Sven Yrvind’s meticulous process, enthusiasts can achieve professional-level results. Remember that the journey of boatbuilding is as rewarding as reaching your destination; it tests one’s patience and dedication. For those seeking to embark on this adventure or simply gain more insight into marine craftsmanship, Sven’s wisdom is invaluable.Sven Yrvind, a renowned yacht designer and sailor, shares valuable insights on creating flanges around bulkhead hatches for canvas protection in this enlightening video. By following his expert guidance, boat enthusiasts can ensure their living areas remain secure while allowing unhindered access through the hatches.Step 1: Starting with the Flange
Sven begins by explaining that working on flanges vertically and horizontally is significantly easier than doing so in a flat position. To simplify the process further, he divides the task into two or three steps as suggested by fellow expert “for for.” This approach not only makes it more manageable but also allows for greater precision in crafting each component.Step 2: Applying Glue and Securing
Sven proceeds to apply glue along one edge of the flange, ensuring a secure bond when clamped into place. He emphasizes that this stage is crucial for maintaining the structural integrity of the flange, which in turn safeguards the living area beneath the canvas when hatches are open.Step 3: Allowing Time to Dry
After securely attaching the first portion of the flange, Sven allows ample time for it to dry before moving forward with additional steps. This patience and precision are key aspects of his successful boatbuilding methods.Step 4: Finishing Touches
Once the flange is fully dried, Sven removes the clamps carefully, ensuring no damage occurs during this process. He then moves on to attaching four more pieces onto these main frames, completing two pairs of flanges for the bulkhead hatches.The Final Touches
While two flanges form the primary support structure around the hatches, Sven mentions there are two additional pieces required at each end to ensure comprehensive protection. This attention to detail highlights his commitment to producing a durable and reliable design. “Sailing is about finding your path, whether it’s across an ocean or within yourself.” – Sven Yrvind In conclusion, making flanges around bulkhead hatches may seem complex at first glance, but by following Sven Yrvind’s meticulous process, enthusiasts can achieve professional-level results. Remember that the journey of boatbuilding is as rewarding as reaching your destination; it tests one’s patience and dedication. For those seeking to embark on this adventure or simply gain more insight into marine craftsmanship, Sven’s wisdom is invaluable.Making Flanges Around Bulkhead Hatches for Canvas
Sven Yrvind, a renowned yacht designer and sailor, shares valuable insights on creating flanges around bulkhead hatches for canvas protection in this enlightening video. By following his expert guidance, boat enthusiasts can ensure their living areas remain secure while allowing unhindered access through the hatches.Step 1: Starting with the Flange
Sven begins by explaining that working on flanges vertically and horizontally is significantly easier than doing so in a flat position. To simplify the process further, he divides the task into two or three steps as suggested by fellow expert “for for.” This approach not only makes it more manageable but also allows for greater precision in crafting each component.Step 2: Applying Glue and Securing
Sven proceeds to apply glue along one edge of the flange, ensuring a secure bond when clamped into place. He emphasizes that this stage is crucial for maintaining the structural integrity of the flange, which in turn safeguards the living area beneath the canvas when hatches are open.Step 3: Allowing Time to Dry
After securely attaching the first portion of the flange, Sven allows ample time for it to dry before moving forward with additional steps. This patience and precision are key aspects of his successful boatbuilding methods.Step 4: Finishing Touches
Once the flange is fully dried, Sven removes the clamps carefully, ensuring no damage occurs during this process. He then moves on to attaching four more pieces onto these main frames, completing two pairs of flanges for the bulkhead hatches.The Final Touches
While two flanges form the primary support structure around the hatches, Sven mentions there are two additional pieces required at each end to ensure comprehensive protection. This attention to detail highlights his commitment to producing a durable and reliable design. “Sailing is about finding your path, whether it’s across an ocean or within yourself.” – Sven Yrvind In conclusion, making flanges around bulkhead hatches may seem complex at first glance, but by following Sven Yrvind’s meticulous process, enthusiasts can achieve professional-level results. Remember that the journey of boatbuilding is as rewarding as reaching your destination; it tests one’s patience and dedication. For those seeking to embark on this adventure or simply gain more insight into marine craftsmanship, Sven’s wisdom is invaluable.After securely attaching the first portion of the flange, Sven allows ample time for it to dry before moving forward with additional steps. This patience and precision are key aspects of his successful boatbuilding methods.Step 4: Finishing Touches
Once the flange is fully dried, Sven removes the clamps carefully, ensuring no damage occurs during this process. He then moves on to attaching four more pieces onto these main frames, completing two pairs of flanges for the bulkhead hatches.The Final Touches
While two flanges form the primary support structure around the hatches, Sven mentions there are two additional pieces required at each end to ensure comprehensive protection. This attention to detail highlights his commitment to producing a durable and reliable design. “Sailing is about finding your path, whether it’s across an ocean or within yourself.” – Sven Yrvind In conclusion, making flanges around bulkhead hatches may seem complex at first glance, but by following Sven Yrvind’s meticulous process, enthusiasts can achieve professional-level results. Remember that the journey of boatbuilding is as rewarding as reaching your destination; it tests one’s patience and dedication. For those seeking to embark on this adventure or simply gain more insight into marine craftsmanship, Sven’s wisdom is invaluable.Sven Yrvind, a renowned yacht designer and sailor, shares valuable insights on creating flanges around bulkhead hatches for canvas protection in this enlightening video. By following his expert guidance, boat enthusiasts can ensure their living areas remain secure while allowing unhindered access through the hatches.Step 1: Starting with the Flange
Sven begins by explaining that working on flanges vertically and horizontally is significantly easier than doing so in a flat position. To simplify the process further, he divides the task into two or three steps as suggested by fellow expert “for for.” This approach not only makes it more manageable but also allows for greater precision in crafting each component.Step 2: Applying Glue and Securing
Sven proceeds to apply glue along one edge of the flange, ensuring a secure bond when clamped into place. He emphasizes that this stage is crucial for maintaining the structural integrity of the flange, which in turn safeguards the living area beneath the canvas when hatches are open.Step 3: Allowing Time to Dry
After securely attaching the first portion of the flange, Sven allows ample time for it to dry before moving forward with additional steps. This patience and precision are key aspects of his successful boatbuilding methods.Step 4: Finishing Touches
Once the flange is fully dried, Sven removes the clamps carefully, ensuring no damage occurs during this process. He then moves on to attaching four more pieces onto these main frames, completing two pairs of flanges for the bulkhead hatches.The Final Touches
While two flanges form the primary support structure around the hatches, Sven mentions there are two additional pieces required at each end to ensure comprehensive protection. This attention to detail highlights his commitment to producing a durable and reliable design. “Sailing is about finding your path, whether it’s across an ocean or within yourself.” – Sven Yrvind In conclusion, making flanges around bulkhead hatches may seem complex at first glance, but by following Sven Yrvind’s meticulous process, enthusiasts can achieve professional-level results. Remember that the journey of boatbuilding is as rewarding as reaching your destination; it tests one’s patience and dedication. For those seeking to embark on this adventure or simply gain more insight into marine craftsmanship, Sven’s wisdom is invaluable.Making Flanges Around Bulkhead Hatches for Canvas
Sven Yrvind, a renowned yacht designer and sailor, shares valuable insights on creating flanges around bulkhead hatches for canvas protection in this enlightening video. By following his expert guidance, boat enthusiasts can ensure their living areas remain secure while allowing unhindered access through the hatches.Step 1: Starting with the Flange
Sven begins by explaining that working on flanges vertically and horizontally is significantly easier than doing so in a flat position. To simplify the process further, he divides the task into two or three steps as suggested by fellow expert “for for.” This approach not only makes it more manageable but also allows for greater precision in crafting each component.Step 2: Applying Glue and Securing
Sven proceeds to apply glue along one edge of the flange, ensuring a secure bond when clamped into place. He emphasizes that this stage is crucial for maintaining the structural integrity of the flange, which in turn safeguards the living area beneath the canvas when hatches are open.Step 3: Allowing Time to Dry
After securely attaching the first portion of the flange, Sven allows ample time for it to dry before moving forward with additional steps. This patience and precision are key aspects of his successful boatbuilding methods.Step 4: Finishing Touches
Once the flange is fully dried, Sven removes the clamps carefully, ensuring no damage occurs during this process. He then moves on to attaching four more pieces onto these main frames, completing two pairs of flanges for the bulkhead hatches.The Final Touches
While two flanges form the primary support structure around the hatches, Sven mentions there are two additional pieces required at each end to ensure comprehensive protection. This attention to detail highlights his commitment to producing a durable and reliable design. “Sailing is about finding your path, whether it’s across an ocean or within yourself.” – Sven Yrvind In conclusion, making flanges around bulkhead hatches may seem complex at first glance, but by following Sven Yrvind’s meticulous process, enthusiasts can achieve professional-level results. Remember that the journey of boatbuilding is as rewarding as reaching your destination; it tests one’s patience and dedication. For those seeking to embark on this adventure or simply gain more insight into marine craftsmanship, Sven’s wisdom is invaluable.Sven proceeds to apply glue along one edge of the flange, ensuring a secure bond when clamped into place. He emphasizes that this stage is crucial for maintaining the structural integrity of the flange, which in turn safeguards the living area beneath the canvas when hatches are open.Step 3: Allowing Time to Dry
After securely attaching the first portion of the flange, Sven allows ample time for it to dry before moving forward with additional steps. This patience and precision are key aspects of his successful boatbuilding methods.Step 4: Finishing Touches
Once the flange is fully dried, Sven removes the clamps carefully, ensuring no damage occurs during this process. He then moves on to attaching four more pieces onto these main frames, completing two pairs of flanges for the bulkhead hatches.The Final Touches
While two flanges form the primary support structure around the hatches, Sven mentions there are two additional pieces required at each end to ensure comprehensive protection. This attention to detail highlights his commitment to producing a durable and reliable design. “Sailing is about finding your path, whether it’s across an ocean or within yourself.” – Sven Yrvind In conclusion, making flanges around bulkhead hatches may seem complex at first glance, but by following Sven Yrvind’s meticulous process, enthusiasts can achieve professional-level results. Remember that the journey of boatbuilding is as rewarding as reaching your destination; it tests one’s patience and dedication. For those seeking to embark on this adventure or simply gain more insight into marine craftsmanship, Sven’s wisdom is invaluable.Sven Yrvind, a renowned yacht designer and sailor, shares valuable insights on creating flanges around bulkhead hatches for canvas protection in this enlightening video. By following his expert guidance, boat enthusiasts can ensure their living areas remain secure while allowing unhindered access through the hatches.Step 1: Starting with the Flange
Sven begins by explaining that working on flanges vertically and horizontally is significantly easier than doing so in a flat position. To simplify the process further, he divides the task into two or three steps as suggested by fellow expert “for for.” This approach not only makes it more manageable but also allows for greater precision in crafting each component.Step 2: Applying Glue and Securing
Sven proceeds to apply glue along one edge of the flange, ensuring a secure bond when clamped into place. He emphasizes that this stage is crucial for maintaining the structural integrity of the flange, which in turn safeguards the living area beneath the canvas when hatches are open.Step 3: Allowing Time to Dry
After securely attaching the first portion of the flange, Sven allows ample time for it to dry before moving forward with additional steps. This patience and precision are key aspects of his successful boatbuilding methods.Step 4: Finishing Touches
Once the flange is fully dried, Sven removes the clamps carefully, ensuring no damage occurs during this process. He then moves on to attaching four more pieces onto these main frames, completing two pairs of flanges for the bulkhead hatches.The Final Touches
While two flanges form the primary support structure around the hatches, Sven mentions there are two additional pieces required at each end to ensure comprehensive protection. This attention to detail highlights his commitment to producing a durable and reliable design. “Sailing is about finding your path, whether it’s across an ocean or within yourself.” – Sven Yrvind In conclusion, making flanges around bulkhead hatches may seem complex at first glance, but by following Sven Yrvind’s meticulous process, enthusiasts can achieve professional-level results. Remember that the journey of boatbuilding is as rewarding as reaching your destination; it tests one’s patience and dedication. For those seeking to embark on this adventure or simply gain more insight into marine craftsmanship, Sven’s wisdom is invaluable.Making Flanges Around Bulkhead Hatches for Canvas
Sven Yrvind, a renowned yacht designer and sailor, shares valuable insights on creating flanges around bulkhead hatches for canvas protection in this enlightening video. By following his expert guidance, boat enthusiasts can ensure their living areas remain secure while allowing unhindered access through the hatches.Step 1: Starting with the Flange
Sven begins by explaining that working on flanges vertically and horizontally is significantly easier than doing so in a flat position. To simplify the process further, he divides the task into two or three steps as suggested by fellow expert “for for.” This approach not only makes it more manageable but also allows for greater precision in crafting each component.Step 2: Applying Glue and Securing
Sven proceeds to apply glue along one edge of the flange, ensuring a secure bond when clamped into place. He emphasizes that this stage is crucial for maintaining the structural integrity of the flange, which in turn safeguards the living area beneath the canvas when hatches are open.Step 3: Allowing Time to Dry
After securely attaching the first portion of the flange, Sven allows ample time for it to dry before moving forward with additional steps. This patience and precision are key aspects of his successful boatbuilding methods.Step 4: Finishing Touches
Once the flange is fully dried, Sven removes the clamps carefully, ensuring no damage occurs during this process. He then moves on to attaching four more pieces onto these main frames, completing two pairs of flanges for the bulkhead hatches.The Final Touches
While two flanges form the primary support structure around the hatches, Sven mentions there are two additional pieces required at each end to ensure comprehensive protection. This attention to detail highlights his commitment to producing a durable and reliable design. “Sailing is about finding your path, whether it’s across an ocean or within yourself.” – Sven Yrvind In conclusion, making flanges around bulkhead hatches may seem complex at first glance, but by following Sven Yrvind’s meticulous process, enthusiasts can achieve professional-level results. Remember that the journey of boatbuilding is as rewarding as reaching your destination; it tests one’s patience and dedication. For those seeking to embark on this adventure or simply gain more insight into marine craftsmanship, Sven’s wisdom is invaluable.Sven begins by explaining that working on flanges vertically and horizontally is significantly easier than doing so in a flat position. To simplify the process further, he divides the task into two or three steps as suggested by fellow expert “for for.” This approach not only makes it more manageable but also allows for greater precision in crafting each component.Step 2: Applying Glue and Securing
Sven proceeds to apply glue along one edge of the flange, ensuring a secure bond when clamped into place. He emphasizes that this stage is crucial for maintaining the structural integrity of the flange, which in turn safeguards the living area beneath the canvas when hatches are open.Step 3: Allowing Time to Dry
After securely attaching the first portion of the flange, Sven allows ample time for it to dry before moving forward with additional steps. This patience and precision are key aspects of his successful boatbuilding methods.Step 4: Finishing Touches
Once the flange is fully dried, Sven removes the clamps carefully, ensuring no damage occurs during this process. He then moves on to attaching four more pieces onto these main frames, completing two pairs of flanges for the bulkhead hatches.The Final Touches
While two flanges form the primary support structure around the hatches, Sven mentions there are two additional pieces required at each end to ensure comprehensive protection. This attention to detail highlights his commitment to producing a durable and reliable design. “Sailing is about finding your path, whether it’s across an ocean or within yourself.” – Sven Yrvind In conclusion, making flanges around bulkhead hatches may seem complex at first glance, but by following Sven Yrvind’s meticulous process, enthusiasts can achieve professional-level results. Remember that the journey of boatbuilding is as rewarding as reaching your destination; it tests one’s patience and dedication. For those seeking to embark on this adventure or simply gain more insight into marine craftsmanship, Sven’s wisdom is invaluable.Sven Yrvind, a renowned yacht designer and sailor, shares valuable insights on creating flanges around bulkhead hatches for canvas protection in this enlightening video. By following his expert guidance, boat enthusiasts can ensure their living areas remain secure while allowing unhindered access through the hatches.Step 1: Starting with the Flange
Sven begins by explaining that working on flanges vertically and horizontally is significantly easier than doing so in a flat position. To simplify the process further, he divides the task into two or three steps as suggested by fellow expert “for for.” This approach not only makes it more manageable but also allows for greater precision in crafting each component.Step 2: Applying Glue and Securing
Sven proceeds to apply glue along one edge of the flange, ensuring a secure bond when clamped into place. He emphasizes that this stage is crucial for maintaining the structural integrity of the flange, which in turn safeguards the living area beneath the canvas when hatches are open.Step 3: Allowing Time to Dry
After securely attaching the first portion of the flange, Sven allows ample time for it to dry before moving forward with additional steps. This patience and precision are key aspects of his successful boatbuilding methods.Step 4: Finishing Touches
Once the flange is fully dried, Sven removes the clamps carefully, ensuring no damage occurs during this process. He then moves on to attaching four more pieces onto these main frames, completing two pairs of flanges for the bulkhead hatches.The Final Touches
While two flanges form the primary support structure around the hatches, Sven mentions there are two additional pieces required at each end to ensure comprehensive protection. This attention to detail highlights his commitment to producing a durable and reliable design. “Sailing is about finding your path, whether it’s across an ocean or within yourself.” – Sven Yrvind In conclusion, making flanges around bulkhead hatches may seem complex at first glance, but by following Sven Yrvind’s meticulous process, enthusiasts can achieve professional-level results. Remember that the journey of boatbuilding is as rewarding as reaching your destination; it tests one’s patience and dedication. For those seeking to embark on this adventure or simply gain more insight into marine craftsmanship, Sven’s wisdom is invaluable.Making Flanges Around Bulkhead Hatches for Canvas
Sven Yrvind, a renowned yacht designer and sailor, shares valuable insights on creating flanges around bulkhead hatches for canvas protection in this enlightening video. By following his expert guidance, boat enthusiasts can ensure their living areas remain secure while allowing unhindered access through the hatches.Step 1: Starting with the Flange
Sven begins by explaining that working on flanges vertically and horizontally is significantly easier than doing so in a flat position. To simplify the process further, he divides the task into two or three steps as suggested by fellow expert “for for.” This approach not only makes it more manageable but also allows for greater precision in crafting each component.Step 2: Applying Glue and Securing
Sven proceeds to apply glue along one edge of the flange, ensuring a secure bond when clamped into place. He emphasizes that this stage is crucial for maintaining the structural integrity of the flange, which in turn safeguards the living area beneath the canvas when hatches are open.Step 3: Allowing Time to Dry
After securely attaching the first portion of the flange, Sven allows ample time for it to dry before moving forward with additional steps. This patience and precision are key aspects of his successful boatbuilding methods.Step 4: Finishing Touches
Once the flange is fully dried, Sven removes the clamps carefully, ensuring no damage occurs during this process. He then moves on to attaching four more pieces onto these main frames, completing two pairs of flanges for the bulkhead hatches.The Final Touches
While two flanges form the primary support structure around the hatches, Sven mentions there are two additional pieces required at each end to ensure comprehensive protection. This attention to detail highlights his commitment to producing a durable and reliable design. “Sailing is about finding your path, whether it’s across an ocean or within yourself.” – Sven Yrvind In conclusion, making flanges around bulkhead hatches may seem complex at first glance, but by following Sven Yrvind’s meticulous process, enthusiasts can achieve professional-level results. Remember that the journey of boatbuilding is as rewarding as reaching your destination; it tests one’s patience and dedication. For those seeking to embark on this adventure or simply gain more insight into marine craftsmanship, Sven’s wisdom is invaluable.Once the flange is fully dried, Sven removes the clamps carefully, ensuring no damage occurs during this process. He then moves on to attaching four more pieces onto these main frames, completing two pairs of flanges for the bulkhead hatches.The Final Touches
While two flanges form the primary support structure around the hatches, Sven mentions there are two additional pieces required at each end to ensure comprehensive protection. This attention to detail highlights his commitment to producing a durable and reliable design. “Sailing is about finding your path, whether it’s across an ocean or within yourself.” – Sven Yrvind In conclusion, making flanges around bulkhead hatches may seem complex at first glance, but by following Sven Yrvind’s meticulous process, enthusiasts can achieve professional-level results. Remember that the journey of boatbuilding is as rewarding as reaching your destination; it tests one’s patience and dedication. For those seeking to embark on this adventure or simply gain more insight into marine craftsmanship, Sven’s wisdom is invaluable.Sven begins by explaining that working on flanges vertically and horizontally is significantly easier than doing so in a flat position. To simplify the process further, he divides the task into two or three steps as suggested by fellow expert “for for.” This approach not only makes it more manageable but also allows for greater precision in crafting each component.Step 2: Applying Glue and Securing
Sven proceeds to apply glue along one edge of the flange, ensuring a secure bond when clamped into place. He emphasizes that this stage is crucial for maintaining the structural integrity of the flange, which in turn safeguards the living area beneath the canvas when hatches are open.Step 3: Allowing Time to Dry
After securely attaching the first portion of the flange, Sven allows ample time for it to dry before moving forward with additional steps. This patience and precision are key aspects of his successful boatbuilding methods.Step 4: Finishing Touches
Once the flange is fully dried, Sven removes the clamps carefully, ensuring no damage occurs during this process. He then moves on to attaching four more pieces onto these main frames, completing two pairs of flanges for the bulkhead hatches.The Final Touches
While two flanges form the primary support structure around the hatches, Sven mentions there are two additional pieces required at each end to ensure comprehensive protection. This attention to detail highlights his commitment to producing a durable and reliable design. “Sailing is about finding your path, whether it’s across an ocean or within yourself.” – Sven Yrvind In conclusion, making flanges around bulkhead hatches may seem complex at first glance, but by following Sven Yrvind’s meticulous process, enthusiasts can achieve professional-level results. Remember that the journey of boatbuilding is as rewarding as reaching your destination; it tests one’s patience and dedication. For those seeking to embark on this adventure or simply gain more insight into marine craftsmanship, Sven’s wisdom is invaluable.Sven Yrvind, a renowned yacht designer and sailor, shares valuable insights on creating flanges around bulkhead hatches for canvas protection in this enlightening video. By following his expert guidance, boat enthusiasts can ensure their living areas remain secure while allowing unhindered access through the hatches.Step 1: Starting with the Flange
Sven begins by explaining that working on flanges vertically and horizontally is significantly easier than doing so in a flat position. To simplify the process further, he divides the task into two or three steps as suggested by fellow expert “for for.” This approach not only makes it more manageable but also allows for greater precision in crafting each component.Step 2: Applying Glue and Securing
Sven proceeds to apply glue along one edge of the flange, ensuring a secure bond when clamped into place. He emphasizes that this stage is crucial for maintaining the structural integrity of the flange, which in turn safeguards the living area beneath the canvas when hatches are open.Step 3: Allowing Time to Dry
After securely attaching the first portion of the flange, Sven allows ample time for it to dry before moving forward with additional steps. This patience and precision are key aspects of his successful boatbuilding methods.Step 4: Finishing Touches
Once the flange is fully dried, Sven removes the clamps carefully, ensuring no damage occurs during this process. He then moves on to attaching four more pieces onto these main frames, completing two pairs of flanges for the bulkhead hatches.The Final Touches
While two flanges form the primary support structure around the hatches, Sven mentions there are two additional pieces required at each end to ensure comprehensive protection. This attention to detail highlights his commitment to producing a durable and reliable design. “Sailing is about finding your path, whether it’s across an ocean or within yourself.” – Sven Yrvind In conclusion, making flanges around bulkhead hatches may seem complex at first glance, but by following Sven Yrvind’s meticulous process, enthusiasts can achieve professional-level results. Remember that the journey of boatbuilding is as rewarding as reaching your destination; it tests one’s patience and dedication. For those seeking to embark on this adventure or simply gain more insight into marine craftsmanship, Sven’s wisdom is invaluable.Making Flanges Around Bulkhead Hatches for Canvas
Sven Yrvind, a renowned yacht designer and sailor, shares valuable insights on creating flanges around bulkhead hatches for canvas protection in this enlightening video. By following his expert guidance, boat enthusiasts can ensure their living areas remain secure while allowing unhindered access through the hatches.Step 1: Starting with the Flange
Sven begins by explaining that working on flanges vertically and horizontally is significantly easier than doing so in a flat position. To simplify the process further, he divides the task into two or three steps as suggested by fellow expert “for for.” This approach not only makes it more manageable but also allows for greater precision in crafting each component.Step 2: Applying Glue and Securing
Sven proceeds to apply glue along one edge of the flange, ensuring a secure bond when clamped into place. He emphasizes that this stage is crucial for maintaining the structural integrity of the flange, which in turn safeguards the living area beneath the canvas when hatches are open.Step 3: Allowing Time to Dry
After securely attaching the first portion of the flange, Sven allows ample time for it to dry before moving forward with additional steps. This patience and precision are key aspects of his successful boatbuilding methods.Step 4: Finishing Touches
Once the flange is fully dried, Sven removes the clamps carefully, ensuring no damage occurs during this process. He then moves on to attaching four more pieces onto these main frames, completing two pairs of flanges for the bulkhead hatches.The Final Touches
While two flanges form the primary support structure around the hatches, Sven mentions there are two additional pieces required at each end to ensure comprehensive protection. This attention to detail highlights his commitment to producing a durable and reliable design. “Sailing is about finding your path, whether it’s across an ocean or within yourself.” – Sven Yrvind In conclusion, making flanges around bulkhead hatches may seem complex at first glance, but by following Sven Yrvind’s meticulous process, enthusiasts can achieve professional-level results. Remember that the journey of boatbuilding is as rewarding as reaching your destination; it tests one’s patience and dedication. For those seeking to embark on this adventure or simply gain more insight into marine craftsmanship, Sven’s wisdom is invaluable.After securely attaching the first portion of the flange, Sven allows ample time for it to dry before moving forward with additional steps. This patience and precision are key aspects of his successful boatbuilding methods.Step 4: Finishing Touches
Once the flange is fully dried, Sven removes the clamps carefully, ensuring no damage occurs during this process. He then moves on to attaching four more pieces onto these main frames, completing two pairs of flanges for the bulkhead hatches.The Final Touches
While two flanges form the primary support structure around the hatches, Sven mentions there are two additional pieces required at each end to ensure comprehensive protection. This attention to detail highlights his commitment to producing a durable and reliable design. “Sailing is about finding your path, whether it’s across an ocean or within yourself.” – Sven Yrvind In conclusion, making flanges around bulkhead hatches may seem complex at first glance, but by following Sven Yrvind’s meticulous process, enthusiasts can achieve professional-level results. Remember that the journey of boatbuilding is as rewarding as reaching your destination; it tests one’s patience and dedication. For those seeking to embark on this adventure or simply gain more insight into marine craftsmanship, Sven’s wisdom is invaluable.Sven begins by explaining that working on flanges vertically and horizontally is significantly easier than doing so in a flat position. To simplify the process further, he divides the task into two or three steps as suggested by fellow expert “for for.” This approach not only makes it more manageable but also allows for greater precision in crafting each component.Step 2: Applying Glue and Securing
Sven proceeds to apply glue along one edge of the flange, ensuring a secure bond when clamped into place. He emphasizes that this stage is crucial for maintaining the structural integrity of the flange, which in turn safeguards the living area beneath the canvas when hatches are open.Step 3: Allowing Time to Dry
After securely attaching the first portion of the flange, Sven allows ample time for it to dry before moving forward with additional steps. This patience and precision are key aspects of his successful boatbuilding methods.Step 4: Finishing Touches
Once the flange is fully dried, Sven removes the clamps carefully, ensuring no damage occurs during this process. He then moves on to attaching four more pieces onto these main frames, completing two pairs of flanges for the bulkhead hatches.The Final Touches
While two flanges form the primary support structure around the hatches, Sven mentions there are two additional pieces required at each end to ensure comprehensive protection. This attention to detail highlights his commitment to producing a durable and reliable design. “Sailing is about finding your path, whether it’s across an ocean or within yourself.” – Sven Yrvind In conclusion, making flanges around bulkhead hatches may seem complex at first glance, but by following Sven Yrvind’s meticulous process, enthusiasts can achieve professional-level results. Remember that the journey of boatbuilding is as rewarding as reaching your destination; it tests one’s patience and dedication. For those seeking to embark on this adventure or simply gain more insight into marine craftsmanship, Sven’s wisdom is invaluable.Sven Yrvind, a renowned yacht designer and sailor, shares valuable insights on creating flanges around bulkhead hatches for canvas protection in this enlightening video. By following his expert guidance, boat enthusiasts can ensure their living areas remain secure while allowing unhindered access through the hatches.Step 1: Starting with the Flange
Sven begins by explaining that working on flanges vertically and horizontally is significantly easier than doing so in a flat position. To simplify the process further, he divides the task into two or three steps as suggested by fellow expert “for for.” This approach not only makes it more manageable but also allows for greater precision in crafting each component.Step 2: Applying Glue and Securing
Sven proceeds to apply glue along one edge of the flange, ensuring a secure bond when clamped into place. He emphasizes that this stage is crucial for maintaining the structural integrity of the flange, which in turn safeguards the living area beneath the canvas when hatches are open.Step 3: Allowing Time to Dry
After securely attaching the first portion of the flange, Sven allows ample time for it to dry before moving forward with additional steps. This patience and precision are key aspects of his successful boatbuilding methods.Step 4: Finishing Touches
Once the flange is fully dried, Sven removes the clamps carefully, ensuring no damage occurs during this process. He then moves on to attaching four more pieces onto these main frames, completing two pairs of flanges for the bulkhead hatches.The Final Touches
While two flanges form the primary support structure around the hatches, Sven mentions there are two additional pieces required at each end to ensure comprehensive protection. This attention to detail highlights his commitment to producing a durable and reliable design. “Sailing is about finding your path, whether it’s across an ocean or within yourself.” – Sven Yrvind In conclusion, making flanges around bulkhead hatches may seem complex at first glance, but by following Sven Yrvind’s meticulous process, enthusiasts can achieve professional-level results. Remember that the journey of boatbuilding is as rewarding as reaching your destination; it tests one’s patience and dedication. For those seeking to embark on this adventure or simply gain more insight into marine craftsmanship, Sven’s wisdom is invaluable.Making Flanges Around Bulkhead Hatches for Canvas
Sven Yrvind, a renowned yacht designer and sailor, shares valuable insights on creating flanges around bulkhead hatches for canvas protection in this enlightening video. By following his expert guidance, boat enthusiasts can ensure their living areas remain secure while allowing unhindered access through the hatches.Step 1: Starting with the Flange
Sven begins by explaining that working on flanges vertically and horizontally is significantly easier than doing so in a flat position. To simplify the process further, he divides the task into two or three steps as suggested by fellow expert “for for.” This approach not only makes it more manageable but also allows for greater precision in crafting each component.Step 2: Applying Glue and Securing
Sven proceeds to apply glue along one edge of the flange, ensuring a secure bond when clamped into place. He emphasizes that this stage is crucial for maintaining the structural integrity of the flange, which in turn safeguards the living area beneath the canvas when hatches are open.Step 3: Allowing Time to Dry
After securely attaching the first portion of the flange, Sven allows ample time for it to dry before moving forward with additional steps. This patience and precision are key aspects of his successful boatbuilding methods.Step 4: Finishing Touches
Once the flange is fully dried, Sven removes the clamps carefully, ensuring no damage occurs during this process. He then moves on to attaching four more pieces onto these main frames, completing two pairs of flanges for the bulkhead hatches.The Final Touches
While two flanges form the primary support structure around the hatches, Sven mentions there are two additional pieces required at each end to ensure comprehensive protection. This attention to detail highlights his commitment to producing a durable and reliable design. “Sailing is about finding your path, whether it’s across an ocean or within yourself.” – Sven Yrvind In conclusion, making flanges around bulkhead hatches may seem complex at first glance, but by following Sven Yrvind’s meticulous process, enthusiasts can achieve professional-level results. Remember that the journey of boatbuilding is as rewarding as reaching your destination; it tests one’s patience and dedication. For those seeking to embark on this adventure or simply gain more insight into marine craftsmanship, Sven’s wisdom is invaluable.Sven proceeds to apply glue along one edge of the flange, ensuring a secure bond when clamped into place. He emphasizes that this stage is crucial for maintaining the structural integrity of the flange, which in turn safeguards the living area beneath the canvas when hatches are open.Step 3: Allowing Time to Dry
After securely attaching the first portion of the flange, Sven allows ample time for it to dry before moving forward with additional steps. This patience and precision are key aspects of his successful boatbuilding methods.Step 4: Finishing Touches
Once the flange is fully dried, Sven removes the clamps carefully, ensuring no damage occurs during this process. He then moves on to attaching four more pieces onto these main frames, completing two pairs of flanges for the bulkhead hatches.The Final Touches
While two flanges form the primary support structure around the hatches, Sven mentions there are two additional pieces required at each end to ensure comprehensive protection. This attention to detail highlights his commitment to producing a durable and reliable design. “Sailing is about finding your path, whether it’s across an ocean or within yourself.” – Sven Yrvind In conclusion, making flanges around bulkhead hatches may seem complex at first glance, but by following Sven Yrvind’s meticulous process, enthusiasts can achieve professional-level results. Remember that the journey of boatbuilding is as rewarding as reaching your destination; it tests one’s patience and dedication. For those seeking to embark on this adventure or simply gain more insight into marine craftsmanship, Sven’s wisdom is invaluable.Sven begins by explaining that working on flanges vertically and horizontally is significantly easier than doing so in a flat position. To simplify the process further, he divides the task into two or three steps as suggested by fellow expert “for for.” This approach not only makes it more manageable but also allows for greater precision in crafting each component.Step 2: Applying Glue and Securing
Sven proceeds to apply glue along one edge of the flange, ensuring a secure bond when clamped into place. He emphasizes that this stage is crucial for maintaining the structural integrity of the flange, which in turn safeguards the living area beneath the canvas when hatches are open.Step 3: Allowing Time to Dry
After securely attaching the first portion of the flange, Sven allows ample time for it to dry before moving forward with additional steps. This patience and precision are key aspects of his successful boatbuilding methods.Step 4: Finishing Touches
Once the flange is fully dried, Sven removes the clamps carefully, ensuring no damage occurs during this process. He then moves on to attaching four more pieces onto these main frames, completing two pairs of flanges for the bulkhead hatches.The Final Touches
While two flanges form the primary support structure around the hatches, Sven mentions there are two additional pieces required at each end to ensure comprehensive protection. This attention to detail highlights his commitment to producing a durable and reliable design. “Sailing is about finding your path, whether it’s across an ocean or within yourself.” – Sven Yrvind In conclusion, making flanges around bulkhead hatches may seem complex at first glance, but by following Sven Yrvind’s meticulous process, enthusiasts can achieve professional-level results. Remember that the journey of boatbuilding is as rewarding as reaching your destination; it tests one’s patience and dedication. For those seeking to embark on this adventure or simply gain more insight into marine craftsmanship, Sven’s wisdom is invaluable.Sven Yrvind, a renowned yacht designer and sailor, shares valuable insights on creating flanges around bulkhead hatches for canvas protection in this enlightening video. By following his expert guidance, boat enthusiasts can ensure their living areas remain secure while allowing unhindered access through the hatches.Step 1: Starting with the Flange
Sven begins by explaining that working on flanges vertically and horizontally is significantly easier than doing so in a flat position. To simplify the process further, he divides the task into two or three steps as suggested by fellow expert “for for.” This approach not only makes it more manageable but also allows for greater precision in crafting each component.Step 2: Applying Glue and Securing
Sven proceeds to apply glue along one edge of the flange, ensuring a secure bond when clamped into place. He emphasizes that this stage is crucial for maintaining the structural integrity of the flange, which in turn safeguards the living area beneath the canvas when hatches are open.Step 3: Allowing Time to Dry
After securely attaching the first portion of the flange, Sven allows ample time for it to dry before moving forward with additional steps. This patience and precision are key aspects of his successful boatbuilding methods.Step 4: Finishing Touches
Once the flange is fully dried, Sven removes the clamps carefully, ensuring no damage occurs during this process. He then moves on to attaching four more pieces onto these main frames, completing two pairs of flanges for the bulkhead hatches.The Final Touches
While two flanges form the primary support structure around the hatches, Sven mentions there are two additional pieces required at each end to ensure comprehensive protection. This attention to detail highlights his commitment to producing a durable and reliable design. “Sailing is about finding your path, whether it’s across an ocean or within yourself.” – Sven Yrvind In conclusion, making flanges around bulkhead hatches may seem complex at first glance, but by following Sven Yrvind’s meticulous process, enthusiasts can achieve professional-level results. Remember that the journey of boatbuilding is as rewarding as reaching your destination; it tests one’s patience and dedication. For those seeking to embark on this adventure or simply gain more insight into marine craftsmanship, Sven’s wisdom is invaluable.Making Flanges Around Bulkhead Hatches for Canvas
Sven Yrvind, a renowned yacht designer and sailor, shares valuable insights on creating flanges around bulkhead hatches for canvas protection in this enlightening video. By following his expert guidance, boat enthusiasts can ensure their living areas remain secure while allowing unhindered access through the hatches.Step 1: Starting with the Flange
Sven begins by explaining that working on flanges vertically and horizontally is significantly easier than doing so in a flat position. To simplify the process further, he divides the task into two or three steps as suggested by fellow expert “for for.” This approach not only makes it more manageable but also allows for greater precision in crafting each component.Step 2: Applying Glue and Securing
Sven proceeds to apply glue along one edge of the flange, ensuring a secure bond when clamped into place. He emphasizes that this stage is crucial for maintaining the structural integrity of the flange, which in turn safeguards the living area beneath the canvas when hatches are open.Step 3: Allowing Time to Dry
After securely attaching the first portion of the flange, Sven allows ample time for it to dry before moving forward with additional steps. This patience and precision are key aspects of his successful boatbuilding methods.Step 4: Finishing Touches
Once the flange is fully dried, Sven removes the clamps carefully, ensuring no damage occurs during this process. He then moves on to attaching four more pieces onto these main frames, completing two pairs of flanges for the bulkhead hatches.The Final Touches
While two flanges form the primary support structure around the hatches, Sven mentions there are two additional pieces required at each end to ensure comprehensive protection. This attention to detail highlights his commitment to producing a durable and reliable design. “Sailing is about finding your path, whether it’s across an ocean or within yourself.” – Sven Yrvind In conclusion, making flanges around bulkhead hatches may seem complex at first glance, but by following Sven Yrvind’s meticulous process, enthusiasts can achieve professional-level results. Remember that the journey of boatbuilding is as rewarding as reaching your destination; it tests one’s patience and dedication. For those seeking to embark on this adventure or simply gain more insight into marine craftsmanship, Sven’s wisdom is invaluable.Once the flange is fully dried, Sven removes the clamps carefully, ensuring no damage occurs during this process. He then moves on to attaching four more pieces onto these main frames, completing two pairs of flanges for the bulkhead hatches.The Final Touches
While two flanges form the primary support structure around the hatches, Sven mentions there are two additional pieces required at each end to ensure comprehensive protection. This attention to detail highlights his commitment to producing a durable and reliable design. “Sailing is about finding your path, whether it’s across an ocean or within yourself.” – Sven Yrvind In conclusion, making flanges around bulkhead hatches may seem complex at first glance, but by following Sven Yrvind’s meticulous process, enthusiasts can achieve professional-level results. Remember that the journey of boatbuilding is as rewarding as reaching your destination; it tests one’s patience and dedication. For those seeking to embark on this adventure or simply gain more insight into marine craftsmanship, Sven’s wisdom is invaluable.Sven proceeds to apply glue along one edge of the flange, ensuring a secure bond when clamped into place. He emphasizes that this stage is crucial for maintaining the structural integrity of the flange, which in turn safeguards the living area beneath the canvas when hatches are open.Step 3: Allowing Time to Dry
After securely attaching the first portion of the flange, Sven allows ample time for it to dry before moving forward with additional steps. This patience and precision are key aspects of his successful boatbuilding methods.Step 4: Finishing Touches
Once the flange is fully dried, Sven removes the clamps carefully, ensuring no damage occurs during this process. He then moves on to attaching four more pieces onto these main frames, completing two pairs of flanges for the bulkhead hatches.The Final Touches
While two flanges form the primary support structure around the hatches, Sven mentions there are two additional pieces required at each end to ensure comprehensive protection. This attention to detail highlights his commitment to producing a durable and reliable design. “Sailing is about finding your path, whether it’s across an ocean or within yourself.” – Sven Yrvind In conclusion, making flanges around bulkhead hatches may seem complex at first glance, but by following Sven Yrvind’s meticulous process, enthusiasts can achieve professional-level results. Remember that the journey of boatbuilding is as rewarding as reaching your destination; it tests one’s patience and dedication. For those seeking to embark on this adventure or simply gain more insight into marine craftsmanship, Sven’s wisdom is invaluable.Sven begins by explaining that working on flanges vertically and horizontally is significantly easier than doing so in a flat position. To simplify the process further, he divides the task into two or three steps as suggested by fellow expert “for for.” This approach not only makes it more manageable but also allows for greater precision in crafting each component.Step 2: Applying Glue and Securing
Sven proceeds to apply glue along one edge of the flange, ensuring a secure bond when clamped into place. He emphasizes that this stage is crucial for maintaining the structural integrity of the flange, which in turn safeguards the living area beneath the canvas when hatches are open.Step 3: Allowing Time to Dry
After securely attaching the first portion of the flange, Sven allows ample time for it to dry before moving forward with additional steps. This patience and precision are key aspects of his successful boatbuilding methods.Step 4: Finishing Touches
Once the flange is fully dried, Sven removes the clamps carefully, ensuring no damage occurs during this process. He then moves on to attaching four more pieces onto these main frames, completing two pairs of flanges for the bulkhead hatches.The Final Touches
While two flanges form the primary support structure around the hatches, Sven mentions there are two additional pieces required at each end to ensure comprehensive protection. This attention to detail highlights his commitment to producing a durable and reliable design. “Sailing is about finding your path, whether it’s across an ocean or within yourself.” – Sven Yrvind In conclusion, making flanges around bulkhead hatches may seem complex at first glance, but by following Sven Yrvind’s meticulous process, enthusiasts can achieve professional-level results. Remember that the journey of boatbuilding is as rewarding as reaching your destination; it tests one’s patience and dedication. For those seeking to embark on this adventure or simply gain more insight into marine craftsmanship, Sven’s wisdom is invaluable.Sven Yrvind, a renowned yacht designer and sailor, shares valuable insights on creating flanges around bulkhead hatches for canvas protection in this enlightening video. By following his expert guidance, boat enthusiasts can ensure their living areas remain secure while allowing unhindered access through the hatches.Step 1: Starting with the Flange
Sven begins by explaining that working on flanges vertically and horizontally is significantly easier than doing so in a flat position. To simplify the process further, he divides the task into two or three steps as suggested by fellow expert “for for.” This approach not only makes it more manageable but also allows for greater precision in crafting each component.Step 2: Applying Glue and Securing
Sven proceeds to apply glue along one edge of the flange, ensuring a secure bond when clamped into place. He emphasizes that this stage is crucial for maintaining the structural integrity of the flange, which in turn safeguards the living area beneath the canvas when hatches are open.Step 3: Allowing Time to Dry
After securely attaching the first portion of the flange, Sven allows ample time for it to dry before moving forward with additional steps. This patience and precision are key aspects of his successful boatbuilding methods.Step 4: Finishing Touches
Once the flange is fully dried, Sven removes the clamps carefully, ensuring no damage occurs during this process. He then moves on to attaching four more pieces onto these main frames, completing two pairs of flanges for the bulkhead hatches.The Final Touches
While two flanges form the primary support structure around the hatches, Sven mentions there are two additional pieces required at each end to ensure comprehensive protection. This attention to detail highlights his commitment to producing a durable and reliable design. “Sailing is about finding your path, whether it’s across an ocean or within yourself.” – Sven Yrvind In conclusion, making flanges around bulkhead hatches may seem complex at first glance, but by following Sven Yrvind’s meticulous process, enthusiasts can achieve professional-level results. Remember that the journey of boatbuilding is as rewarding as reaching your destination; it tests one’s patience and dedication. For those seeking to embark on this adventure or simply gain more insight into marine craftsmanship, Sven’s wisdom is invaluable.Making Flanges Around Bulkhead Hatches for Canvas
Sven Yrvind, a renowned yacht designer and sailor, shares valuable insights on creating flanges around bulkhead hatches for canvas protection in this enlightening video. By following his expert guidance, boat enthusiasts can ensure their living areas remain secure while allowing unhindered access through the hatches.Step 1: Starting with the Flange
Sven begins by explaining that working on flanges vertically and horizontally is significantly easier than doing so in a flat position. To simplify the process further, he divides the task into two or three steps as suggested by fellow expert “for for.” This approach not only makes it more manageable but also allows for greater precision in crafting each component.Step 2: Applying Glue and Securing
Sven proceeds to apply glue along one edge of the flange, ensuring a secure bond when clamped into place. He emphasizes that this stage is crucial for maintaining the structural integrity of the flange, which in turn safeguards the living area beneath the canvas when hatches are open.Step 3: Allowing Time to Dry
After securely attaching the first portion of the flange, Sven allows ample time for it to dry before moving forward with additional steps. This patience and precision are key aspects of his successful boatbuilding methods.Step 4: Finishing Touches
Once the flange is fully dried, Sven removes the clamps carefully, ensuring no damage occurs during this process. He then moves on to attaching four more pieces onto these main frames, completing two pairs of flanges for the bulkhead hatches.The Final Touches
While two flanges form the primary support structure around the hatches, Sven mentions there are two additional pieces required at each end to ensure comprehensive protection. This attention to detail highlights his commitment to producing a durable and reliable design. “Sailing is about finding your path, whether it’s across an ocean or within yourself.” – Sven Yrvind In conclusion, making flanges around bulkhead hatches may seem complex at first glance, but by following Sven Yrvind’s meticulous process, enthusiasts can achieve professional-level results. Remember that the journey of boatbuilding is as rewarding as reaching your destination; it tests one’s patience and dedication. For those seeking to embark on this adventure or simply gain more insight into marine craftsmanship, Sven’s wisdom is invaluable.After securely attaching the first portion of the flange, Sven allows ample time for it to dry before moving forward with additional steps. This patience and precision are key aspects of his successful boatbuilding methods.Step 4: Finishing Touches
Once the flange is fully dried, Sven removes the clamps carefully, ensuring no damage occurs during this process. He then moves on to attaching four more pieces onto these main frames, completing two pairs of flanges for the bulkhead hatches.The Final Touches
While two flanges form the primary support structure around the hatches, Sven mentions there are two additional pieces required at each end to ensure comprehensive protection. This attention to detail highlights his commitment to producing a durable and reliable design. “Sailing is about finding your path, whether it’s across an ocean or within yourself.” – Sven Yrvind In conclusion, making flanges around bulkhead hatches may seem complex at first glance, but by following Sven Yrvind’s meticulous process, enthusiasts can achieve professional-level results. Remember that the journey of boatbuilding is as rewarding as reaching your destination; it tests one’s patience and dedication. For those seeking to embark on this adventure or simply gain more insight into marine craftsmanship, Sven’s wisdom is invaluable.Sven proceeds to apply glue along one edge of the flange, ensuring a secure bond when clamped into place. He emphasizes that this stage is crucial for maintaining the structural integrity of the flange, which in turn safeguards the living area beneath the canvas when hatches are open.Step 3: Allowing Time to Dry
After securely attaching the first portion of the flange, Sven allows ample time for it to dry before moving forward with additional steps. This patience and precision are key aspects of his successful boatbuilding methods.Step 4: Finishing Touches
Once the flange is fully dried, Sven removes the clamps carefully, ensuring no damage occurs during this process. He then moves on to attaching four more pieces onto these main frames, completing two pairs of flanges for the bulkhead hatches.The Final Touches
While two flanges form the primary support structure around the hatches, Sven mentions there are two additional pieces required at each end to ensure comprehensive protection. This attention to detail highlights his commitment to producing a durable and reliable design. “Sailing is about finding your path, whether it’s across an ocean or within yourself.” – Sven Yrvind In conclusion, making flanges around bulkhead hatches may seem complex at first glance, but by following Sven Yrvind’s meticulous process, enthusiasts can achieve professional-level results. Remember that the journey of boatbuilding is as rewarding as reaching your destination; it tests one’s patience and dedication. For those seeking to embark on this adventure or simply gain more insight into marine craftsmanship, Sven’s wisdom is invaluable.Sven begins by explaining that working on flanges vertically and horizontally is significantly easier than doing so in a flat position. To simplify the process further, he divides the task into two or three steps as suggested by fellow expert “for for.” This approach not only makes it more manageable but also allows for greater precision in crafting each component.Step 2: Applying Glue and Securing
Sven proceeds to apply glue along one edge of the flange, ensuring a secure bond when clamped into place. He emphasizes that this stage is crucial for maintaining the structural integrity of the flange, which in turn safeguards the living area beneath the canvas when hatches are open.Step 3: Allowing Time to Dry
After securely attaching the first portion of the flange, Sven allows ample time for it to dry before moving forward with additional steps. This patience and precision are key aspects of his successful boatbuilding methods.Step 4: Finishing Touches
Once the flange is fully dried, Sven removes the clamps carefully, ensuring no damage occurs during this process. He then moves on to attaching four more pieces onto these main frames, completing two pairs of flanges for the bulkhead hatches.The Final Touches
While two flanges form the primary support structure around the hatches, Sven mentions there are two additional pieces required at each end to ensure comprehensive protection. This attention to detail highlights his commitment to producing a durable and reliable design. “Sailing is about finding your path, whether it’s across an ocean or within yourself.” – Sven Yrvind In conclusion, making flanges around bulkhead hatches may seem complex at first glance, but by following Sven Yrvind’s meticulous process, enthusiasts can achieve professional-level results. Remember that the journey of boatbuilding is as rewarding as reaching your destination; it tests one’s patience and dedication. For those seeking to embark on this adventure or simply gain more insight into marine craftsmanship, Sven’s wisdom is invaluable.Sven Yrvind, a renowned yacht designer and sailor, shares valuable insights on creating flanges around bulkhead hatches for canvas protection in this enlightening video. By following his expert guidance, boat enthusiasts can ensure their living areas remain secure while allowing unhindered access through the hatches.Step 1: Starting with the Flange
Sven begins by explaining that working on flanges vertically and horizontally is significantly easier than doing so in a flat position. To simplify the process further, he divides the task into two or three steps as suggested by fellow expert “for for.” This approach not only makes it more manageable but also allows for greater precision in crafting each component.Step 2: Applying Glue and Securing
Sven proceeds to apply glue along one edge of the flange, ensuring a secure bond when clamped into place. He emphasizes that this stage is crucial for maintaining the structural integrity of the flange, which in turn safeguards the living area beneath the canvas when hatches are open.Step 3: Allowing Time to Dry
After securely attaching the first portion of the flange, Sven allows ample time for it to dry before moving forward with additional steps. This patience and precision are key aspects of his successful boatbuilding methods.Step 4: Finishing Touches
Once the flange is fully dried, Sven removes the clamps carefully, ensuring no damage occurs during this process. He then moves on to attaching four more pieces onto these main frames, completing two pairs of flanges for the bulkhead hatches.The Final Touches
While two flanges form the primary support structure around the hatches, Sven mentions there are two additional pieces required at each end to ensure comprehensive protection. This attention to detail highlights his commitment to producing a durable and reliable design. “Sailing is about finding your path, whether it’s across an ocean or within yourself.” – Sven Yrvind In conclusion, making flanges around bulkhead hatches may seem complex at first glance, but by following Sven Yrvind’s meticulous process, enthusiasts can achieve professional-level results. Remember that the journey of boatbuilding is as rewarding as reaching your destination; it tests one’s patience and dedication. For those seeking to embark on this adventure or simply gain more insight into marine craftsmanship, Sven’s wisdom is invaluable.Making Flanges Around Bulkhead Hatches for Canvas
Sven Yrvind, a renowned yacht designer and sailor, shares valuable insights on creating flanges around bulkhead hatches for canvas protection in this enlightening video. By following his expert guidance, boat enthusiasts can ensure their living areas remain secure while allowing unhindered access through the hatches.Step 1: Starting with the Flange
Sven begins by explaining that working on flanges vertically and horizontally is significantly easier than doing so in a flat position. To simplify the process further, he divides the task into two or three steps as suggested by fellow expert “for for.” This approach not only makes it more manageable but also allows for greater precision in crafting each component.Step 2: Applying Glue and Securing
Sven proceeds to apply glue along one edge of the flange, ensuring a secure bond when clamped into place. He emphasizes that this stage is crucial for maintaining the structural integrity of the flange, which in turn safeguards the living area beneath the canvas when hatches are open.Step 3: Allowing Time to Dry
After securely attaching the first portion of the flange, Sven allows ample time for it to dry before moving forward with additional steps. This patience and precision are key aspects of his successful boatbuilding methods.Step 4: Finishing Touches
Once the flange is fully dried, Sven removes the clamps carefully, ensuring no damage occurs during this process. He then moves on to attaching four more pieces onto these main frames, completing two pairs of flanges for the bulkhead hatches.The Final Touches
While two flanges form the primary support structure around the hatches, Sven mentions there are two additional pieces required at each end to ensure comprehensive protection. This attention to detail highlights his commitment to producing a durable and reliable design. “Sailing is about finding your path, whether it’s across an ocean or within yourself.” – Sven Yrvind In conclusion, making flanges around bulkhead hatches may seem complex at first glance, but by following Sven Yrvind’s meticulous process, enthusiasts can achieve professional-level results. Remember that the journey of boatbuilding is as rewarding as reaching your destination; it tests one’s patience and dedication. For those seeking to embark on this adventure or simply gain more insight into marine craftsmanship, Sven’s wisdom is invaluable.Once the flange is fully dried, Sven removes the clamps carefully, ensuring no damage occurs during this process. He then moves on to attaching four more pieces onto these main frames, completing two pairs of flanges for the bulkhead hatches.The Final Touches
While two flanges form the primary support structure around the hatches, Sven mentions there are two additional pieces required at each end to ensure comprehensive protection. This attention to detail highlights his commitment to producing a durable and reliable design. “Sailing is about finding your path, whether it’s across an ocean or within yourself.” – Sven Yrvind In conclusion, making flanges around bulkhead hatches may seem complex at first glance, but by following Sven Yrvind’s meticulous process, enthusiasts can achieve professional-level results. Remember that the journey of boatbuilding is as rewarding as reaching your destination; it tests one’s patience and dedication. For those seeking to embark on this adventure or simply gain more insight into marine craftsmanship, Sven’s wisdom is invaluable.After securely attaching the first portion of the flange, Sven allows ample time for it to dry before moving forward with additional steps. This patience and precision are key aspects of his successful boatbuilding methods.Step 4: Finishing Touches
Once the flange is fully dried, Sven removes the clamps carefully, ensuring no damage occurs during this process. He then moves on to attaching four more pieces onto these main frames, completing two pairs of flanges for the bulkhead hatches.The Final Touches
While two flanges form the primary support structure around the hatches, Sven mentions there are two additional pieces required at each end to ensure comprehensive protection. This attention to detail highlights his commitment to producing a durable and reliable design. “Sailing is about finding your path, whether it’s across an ocean or within yourself.” – Sven Yrvind In conclusion, making flanges around bulkhead hatches may seem complex at first glance, but by following Sven Yrvind’s meticulous process, enthusiasts can achieve professional-level results. Remember that the journey of boatbuilding is as rewarding as reaching your destination; it tests one’s patience and dedication. For those seeking to embark on this adventure or simply gain more insight into marine craftsmanship, Sven’s wisdom is invaluable.Sven proceeds to apply glue along one edge of the flange, ensuring a secure bond when clamped into place. He emphasizes that this stage is crucial for maintaining the structural integrity of the flange, which in turn safeguards the living area beneath the canvas when hatches are open.Step 3: Allowing Time to Dry
After securely attaching the first portion of the flange, Sven allows ample time for it to dry before moving forward with additional steps. This patience and precision are key aspects of his successful boatbuilding methods.Step 4: Finishing Touches
Once the flange is fully dried, Sven removes the clamps carefully, ensuring no damage occurs during this process. He then moves on to attaching four more pieces onto these main frames, completing two pairs of flanges for the bulkhead hatches.The Final Touches
While two flanges form the primary support structure around the hatches, Sven mentions there are two additional pieces required at each end to ensure comprehensive protection. This attention to detail highlights his commitment to producing a durable and reliable design. “Sailing is about finding your path, whether it’s across an ocean or within yourself.” – Sven Yrvind In conclusion, making flanges around bulkhead hatches may seem complex at first glance, but by following Sven Yrvind’s meticulous process, enthusiasts can achieve professional-level results. Remember that the journey of boatbuilding is as rewarding as reaching your destination; it tests one’s patience and dedication. For those seeking to embark on this adventure or simply gain more insight into marine craftsmanship, Sven’s wisdom is invaluable.Sven begins by explaining that working on flanges vertically and horizontally is significantly easier than doing so in a flat position. To simplify the process further, he divides the task into two or three steps as suggested by fellow expert “for for.” This approach not only makes it more manageable but also allows for greater precision in crafting each component.Step 2: Applying Glue and Securing
Sven proceeds to apply glue along one edge of the flange, ensuring a secure bond when clamped into place. He emphasizes that this stage is crucial for maintaining the structural integrity of the flange, which in turn safeguards the living area beneath the canvas when hatches are open.Step 3: Allowing Time to Dry
After securely attaching the first portion of the flange, Sven allows ample time for it to dry before moving forward with additional steps. This patience and precision are key aspects of his successful boatbuilding methods.Step 4: Finishing Touches
Once the flange is fully dried, Sven removes the clamps carefully, ensuring no damage occurs during this process. He then moves on to attaching four more pieces onto these main frames, completing two pairs of flanges for the bulkhead hatches.The Final Touches
While two flanges form the primary support structure around the hatches, Sven mentions there are two additional pieces required at each end to ensure comprehensive protection. This attention to detail highlights his commitment to producing a durable and reliable design. “Sailing is about finding your path, whether it’s across an ocean or within yourself.” – Sven Yrvind In conclusion, making flanges around bulkhead hatches may seem complex at first glance, but by following Sven Yrvind’s meticulous process, enthusiasts can achieve professional-level results. Remember that the journey of boatbuilding is as rewarding as reaching your destination; it tests one’s patience and dedication. For those seeking to embark on this adventure or simply gain more insight into marine craftsmanship, Sven’s wisdom is invaluable.Sven Yrvind, a renowned yacht designer and sailor, shares valuable insights on creating flanges around bulkhead hatches for canvas protection in this enlightening video. By following his expert guidance, boat enthusiasts can ensure their living areas remain secure while allowing unhindered access through the hatches.Step 1: Starting with the Flange
Sven begins by explaining that working on flanges vertically and horizontally is significantly easier than doing so in a flat position. To simplify the process further, he divides the task into two or three steps as suggested by fellow expert “for for.” This approach not only makes it more manageable but also allows for greater precision in crafting each component.Step 2: Applying Glue and Securing
Sven proceeds to apply glue along one edge of the flange, ensuring a secure bond when clamped into place. He emphasizes that this stage is crucial for maintaining the structural integrity of the flange, which in turn safeguards the living area beneath the canvas when hatches are open.Step 3: Allowing Time to Dry
After securely attaching the first portion of the flange, Sven allows ample time for it to dry before moving forward with additional steps. This patience and precision are key aspects of his successful boatbuilding methods.Step 4: Finishing Touches
Once the flange is fully dried, Sven removes the clamps carefully, ensuring no damage occurs during this process. He then moves on to attaching four more pieces onto these main frames, completing two pairs of flanges for the bulkhead hatches.The Final Touches
While two flanges form the primary support structure around the hatches, Sven mentions there are two additional pieces required at each end to ensure comprehensive protection. This attention to detail highlights his commitment to producing a durable and reliable design. “Sailing is about finding your path, whether it’s across an ocean or within yourself.” – Sven Yrvind In conclusion, making flanges around bulkhead hatches may seem complex at first glance, but by following Sven Yrvind’s meticulous process, enthusiasts can achieve professional-level results. Remember that the journey of boatbuilding is as rewarding as reaching your destination; it tests one’s patience and dedication. For those seeking to embark on this adventure or simply gain more insight into marine craftsmanship, Sven’s wisdom is invaluable.Making Flanges Around Bulkhead Hatches for Canvas
Sven Yrvind, a renowned yacht designer and sailor, shares valuable insights on creating flanges around bulkhead hatches for canvas protection in this enlightening video. By following his expert guidance, boat enthusiasts can ensure their living areas remain secure while allowing unhindered access through the hatches.Step 1: Starting with the Flange
Sven begins by explaining that working on flanges vertically and horizontally is significantly easier than doing so in a flat position. To simplify the process further, he divides the task into two or three steps as suggested by fellow expert “for for.” This approach not only makes it more manageable but also allows for greater precision in crafting each component.Step 2: Applying Glue and Securing
Sven proceeds to apply glue along one edge of the flange, ensuring a secure bond when clamped into place. He emphasizes that this stage is crucial for maintaining the structural integrity of the flange, which in turn safeguards the living area beneath the canvas when hatches are open.Step 3: Allowing Time to Dry
After securely attaching the first portion of the flange, Sven allows ample time for it to dry before moving forward with additional steps. This patience and precision are key aspects of his successful boatbuilding methods.Step 4: Finishing Touches
Once the flange is fully dried, Sven removes the clamps carefully, ensuring no damage occurs during this process. He then moves on to attaching four more pieces onto these main frames, completing two pairs of flanges for the bulkhead hatches.The Final Touches
While two flanges form the primary support structure around the hatches, Sven mentions there are two additional pieces required at each end to ensure comprehensive protection. This attention to detail highlights his commitment to producing a durable and reliable design. “Sailing is about finding your path, whether it’s across an ocean or within yourself.” – Sven Yrvind In conclusion, making flanges around bulkhead hatches may seem complex at first glance, but by following Sven Yrvind’s meticulous process, enthusiasts can achieve professional-level results. Remember that the journey of boatbuilding is as rewarding as reaching your destination; it tests one’s patience and dedication. For those seeking to embark on this adventure or simply gain more insight into marine craftsmanship, Sven’s wisdom is invaluable.Sven begins by explaining that working on flanges vertically and horizontally is significantly easier than doing so in a flat position. To simplify the process further, he divides the task into two or three steps as suggested by fellow expert “for for.” This approach not only makes it more manageable but also allows for greater precision in crafting each component.Step 2: Applying Glue and Securing
Sven proceeds to apply glue along one edge of the flange, ensuring a secure bond when clamped into place. He emphasizes that this stage is crucial for maintaining the structural integrity of the flange, which in turn safeguards the living area beneath the canvas when hatches are open.Step 3: Allowing Time to Dry
After securely attaching the first portion of the flange, Sven allows ample time for it to dry before moving forward with additional steps. This patience and precision are key aspects of his successful boatbuilding methods.Step 4: Finishing Touches
Once the flange is fully dried, Sven removes the clamps carefully, ensuring no damage occurs during this process. He then moves on to attaching four more pieces onto these main frames, completing two pairs of flanges for the bulkhead hatches.The Final Touches
While two flanges form the primary support structure around the hatches, Sven mentions there are two additional pieces required at each end to ensure comprehensive protection. This attention to detail highlights his commitment to producing a durable and reliable design. “Sailing is about finding your path, whether it’s across an ocean or within yourself.” – Sven Yrvind In conclusion, making flanges around bulkhead hatches may seem complex at first glance, but by following Sven Yrvind’s meticulous process, enthusiasts can achieve professional-level results. Remember that the journey of boatbuilding is as rewarding as reaching your destination; it tests one’s patience and dedication. For those seeking to embark on this adventure or simply gain more insight into marine craftsmanship, Sven’s wisdom is invaluable.Making Flanges Around Bulkhead Hatches for Canvas
Sven Yrvind, a renowned yacht designer and sailor, shares valuable insights on creating flanges around bulkhead hatches for canvas protection in this enlightening video. By following his expert guidance, boat enthusiasts can ensure their living areas remain secure while allowing unhindered access through the hatches.Step 1: Starting with the Flange
Sven begins by explaining that working on flanges vertically and horizontally is significantly easier than doing so in a flat position. To simplify the process further, he divides the task into two or three steps as suggested by fellow expert “for for.” This approach not only makes it more manageable but also allows for greater precision in crafting each component.Step 2: Applying Glue and Securing
Sven proceeds to apply glue along one edge of the flange, ensuring a secure bond when clamped into place. He emphasizes that this stage is crucial for maintaining the structural integrity of the flange, which in turn safeguards the living area beneath the canvas when hatches are open.Step 3: Allowing Time to Dry
After securely attaching the first portion of the flange, Sven allows ample time for it to dry before moving forward with additional steps. This patience and precision are key aspects of his successful boatbuilding methods.Step 4: Finishing Touches
Once the flange is fully dried, Sven removes the clamps carefully, ensuring no damage occurs during this process. He then moves on to attaching four more pieces onto these main frames, completing two pairs of flanges for the bulkhead hatches.The Final Touches
While two flanges form the primary support structure around the hatches, Sven mentions there are two additional pieces required at each end to ensure comprehensive protection. This attention to detail highlights his commitment to producing a durable and reliable design. “Sailing is about finding your path, whether it’s across an ocean or within yourself.” – Sven Yrvind In conclusion, making flanges around bulkhead hatches may seem complex at first glance, but by following Sven Yrvind’s meticulous process, enthusiasts can achieve professional-level results. Remember that the journey of boatbuilding is as rewarding as reaching your destination; it tests one’s patience and dedication. For those seeking to embark on this adventure or simply gain more insight into marine craftsmanship, Sven’s wisdom is invaluable.Once the flange is fully dried, Sven removes the clamps carefully, ensuring no damage occurs during this process. He then moves on to attaching four more pieces onto these main frames, completing two pairs of flanges for the bulkhead hatches.The Final Touches
While two flanges form the primary support structure around the hatches, Sven mentions there are two additional pieces required at each end to ensure comprehensive protection. This attention to detail highlights his commitment to producing a durable and reliable design. “Sailing is about finding your path, whether it’s across an ocean or within yourself.” – Sven Yrvind In conclusion, making flanges around bulkhead hatches may seem complex at first glance, but by following Sven Yrvind’s meticulous process, enthusiasts can achieve professional-level results. Remember that the journey of boatbuilding is as rewarding as reaching your destination; it tests one’s patience and dedication. For those seeking to embark on this adventure or simply gain more insight into marine craftsmanship, Sven’s wisdom is invaluable.Making Flanges Around Bulkhead Hatches for Canvas
Sven Yrvind, a renowned yacht designer and sailor, shares valuable insights on creating flanges around bulkhead hatches for canvas protection in this enlightening video. By following his expert guidance, boat enthusiasts can ensure their living areas remain secure while allowing unhindered access through the hatches.Step 1: Starting with the Flange
Sven begins by explaining that working on flanges vertically and horizontally is significantly easier than doing so in a flat position. To simplify the process further, he divides the task into two or three steps as suggested by fellow expert “for for.” This approach not only makes it more manageable but also allows for greater precision in crafting each component.Step 2: Applying Glue and Securing
Sven proceeds to apply glue along one edge of the flange, ensuring a secure bond when clamped into place. He emphasizes that this stage is crucial for maintaining the structural integrity of the flange, which in turn safeguards the living area beneath the canvas when hatches are open.Step 3: Allowing Time to Dry
After securely attaching the first portion of the flange, Sven allows ample time for it to dry before moving forward with additional steps. This patience and precision are key aspects of his successful boatbuilding methods.Step 4: Finishing Touches
Once the flange is fully dried, Sven removes the clamps carefully, ensuring no damage occurs during this process. He then moves on to attaching four more pieces onto these main frames, completing two pairs of flanges for the bulkhead hatches.The Final Touches
While two flanges form the primary support structure around the hatches, Sven mentions there are two additional pieces required at each end to ensure comprehensive protection. This attention to detail highlights his commitment to producing a durable and reliable design. “Sailing is about finding your path, whether it’s across an ocean or within yourself.” – Sven Yrvind In conclusion, making flanges around bulkhead hatches may seem complex at first glance, but by following Sven Yrvind’s meticulous process, enthusiasts can achieve professional-level results. Remember that the journey of boatbuilding is as rewarding as reaching your destination; it tests one’s patience and dedication. For those seeking to embark on this adventure or simply gain more insight into marine craftsmanship, Sven’s wisdom is invaluable.After securely attaching the first portion of the flange, Sven allows ample time for it to dry before moving forward with additional steps. This patience and precision are key aspects of his successful boatbuilding methods.Step 4: Finishing Touches
Once the flange is fully dried, Sven removes the clamps carefully, ensuring no damage occurs during this process. He then moves on to attaching four more pieces onto these main frames, completing two pairs of flanges for the bulkhead hatches.The Final Touches
While two flanges form the primary support structure around the hatches, Sven mentions there are two additional pieces required at each end to ensure comprehensive protection. This attention to detail highlights his commitment to producing a durable and reliable design. “Sailing is about finding your path, whether it’s across an ocean or within yourself.” – Sven Yrvind In conclusion, making flanges around bulkhead hatches may seem complex at first glance, but by following Sven Yrvind’s meticulous process, enthusiasts can achieve professional-level results. Remember that the journey of boatbuilding is as rewarding as reaching your destination; it tests one’s patience and dedication. For those seeking to embark on this adventure or simply gain more insight into marine craftsmanship, Sven’s wisdom is invaluable.Making Flanges Around Bulkhead Hatches for Canvas
Sven Yrvind, a renowned yacht designer and sailor, shares valuable insights on creating flanges around bulkhead hatches for canvas protection in this enlightening video. By following his expert guidance, boat enthusiasts can ensure their living areas remain secure while allowing unhindered access through the hatches.Step 1: Starting with the Flange
Sven begins by explaining that working on flanges vertically and horizontally is significantly easier than doing so in a flat position. To simplify the process further, he divides the task into two or three steps as suggested by fellow expert “for for.” This approach not only makes it more manageable but also allows for greater precision in crafting each component.Step 2: Applying Glue and Securing
Sven proceeds to apply glue along one edge of the flange, ensuring a secure bond when clamped into place. He emphasizes that this stage is crucial for maintaining the structural integrity of the flange, which in turn safeguards the living area beneath the canvas when hatches are open.Step 3: Allowing Time to Dry
After securely attaching the first portion of the flange, Sven allows ample time for it to dry before moving forward with additional steps. This patience and precision are key aspects of his successful boatbuilding methods.Step 4: Finishing Touches
Once the flange is fully dried, Sven removes the clamps carefully, ensuring no damage occurs during this process. He then moves on to attaching four more pieces onto these main frames, completing two pairs of flanges for the bulkhead hatches.The Final Touches
While two flanges form the primary support structure around the hatches, Sven mentions there are two additional pieces required at each end to ensure comprehensive protection. This attention to detail highlights his commitment to producing a durable and reliable design. “Sailing is about finding your path, whether it’s across an ocean or within yourself.” – Sven Yrvind In conclusion, making flanges around bulkhead hatches may seem complex at first glance, but by following Sven Yrvind’s meticulous process, enthusiasts can achieve professional-level results. Remember that the journey of boatbuilding is as rewarding as reaching your destination; it tests one’s patience and dedication. For those seeking to embark on this adventure or simply gain more insight into marine craftsmanship, Sven’s wisdom is invaluable.Sven proceeds to apply glue along one edge of the flange, ensuring a secure bond when clamped into place. He emphasizes that this stage is crucial for maintaining the structural integrity of the flange, which in turn safeguards the living area beneath the canvas when hatches are open.Step 3: Allowing Time to Dry
After securely attaching the first portion of the flange, Sven allows ample time for it to dry before moving forward with additional steps. This patience and precision are key aspects of his successful boatbuilding methods.Step 4: Finishing Touches
Once the flange is fully dried, Sven removes the clamps carefully, ensuring no damage occurs during this process. He then moves on to attaching four more pieces onto these main frames, completing two pairs of flanges for the bulkhead hatches.The Final Touches
While two flanges form the primary support structure around the hatches, Sven mentions there are two additional pieces required at each end to ensure comprehensive protection. This attention to detail highlights his commitment to producing a durable and reliable design. “Sailing is about finding your path, whether it’s across an ocean or within yourself.” – Sven Yrvind In conclusion, making flanges around bulkhead hatches may seem complex at first glance, but by following Sven Yrvind’s meticulous process, enthusiasts can achieve professional-level results. Remember that the journey of boatbuilding is as rewarding as reaching your destination; it tests one’s patience and dedication. For those seeking to embark on this adventure or simply gain more insight into marine craftsmanship, Sven’s wisdom is invaluable.Making Flanges Around Bulkhead Hatches for Canvas
Sven Yrvind, a renowned yacht designer and sailor, shares valuable insights on creating flanges around bulkhead hatches for canvas protection in this enlightening video. By following his expert guidance, boat enthusiasts can ensure their living areas remain secure while allowing unhindered access through the hatches.Step 1: Starting with the Flange
Sven begins by explaining that working on flanges vertically and horizontally is significantly easier than doing so in a flat position. To simplify the process further, he divides the task into two or three steps as suggested by fellow expert “for for.” This approach not only makes it more manageable but also allows for greater precision in crafting each component.Step 2: Applying Glue and Securing
Sven proceeds to apply glue along one edge of the flange, ensuring a secure bond when clamped into place. He emphasizes that this stage is crucial for maintaining the structural integrity of the flange, which in turn safeguards the living area beneath the canvas when hatches are open.Step 3: Allowing Time to Dry
After securely attaching the first portion of the flange, Sven allows ample time for it to dry before moving forward with additional steps. This patience and precision are key aspects of his successful boatbuilding methods.Step 4: Finishing Touches
Once the flange is fully dried, Sven removes the clamps carefully, ensuring no damage occurs during this process. He then moves on to attaching four more pieces onto these main frames, completing two pairs of flanges for the bulkhead hatches.The Final Touches
While two flanges form the primary support structure around the hatches, Sven mentions there are two additional pieces required at each end to ensure comprehensive protection. This attention to detail highlights his commitment to producing a durable and reliable design. “Sailing is about finding your path, whether it’s across an ocean or within yourself.” – Sven Yrvind In conclusion, making flanges around bulkhead hatches may seem complex at first glance, but by following Sven Yrvind’s meticulous process, enthusiasts can achieve professional-level results. Remember that the journey of boatbuilding is as rewarding as reaching your destination; it tests one’s patience and dedication. For those seeking to embark on this adventure or simply gain more insight into marine craftsmanship, Sven’s wisdom is invaluable.Sven begins by explaining that working on flanges vertically and horizontally is significantly easier than doing so in a flat position. To simplify the process further, he divides the task into two or three steps as suggested by fellow expert “for for.” This approach not only makes it more manageable but also allows for greater precision in crafting each component.Step 2: Applying Glue and Securing
Sven proceeds to apply glue along one edge of the flange, ensuring a secure bond when clamped into place. He emphasizes that this stage is crucial for maintaining the structural integrity of the flange, which in turn safeguards the living area beneath the canvas when hatches are open.Step 3: Allowing Time to Dry
After securely attaching the first portion of the flange, Sven allows ample time for it to dry before moving forward with additional steps. This patience and precision are key aspects of his successful boatbuilding methods.Step 4: Finishing Touches
Once the flange is fully dried, Sven removes the clamps carefully, ensuring no damage occurs during this process. He then moves on to attaching four more pieces onto these main frames, completing two pairs of flanges for the bulkhead hatches.The Final Touches
While two flanges form the primary support structure around the hatches, Sven mentions there are two additional pieces required at each end to ensure comprehensive protection. This attention to detail highlights his commitment to producing a durable and reliable design. “Sailing is about finding your path, whether it’s across an ocean or within yourself.” – Sven Yrvind In conclusion, making flanges around bulkhead hatches may seem complex at first glance, but by following Sven Yrvind’s meticulous process, enthusiasts can achieve professional-level results. Remember that the journey of boatbuilding is as rewarding as reaching your destination; it tests one’s patience and dedication. For those seeking to embark on this adventure or simply gain more insight into marine craftsmanship, Sven’s wisdom is invaluable.Making Flanges Around Bulkhead Hatches for Canvas
Sven Yrvind, a renowned yacht designer and sailor, shares valuable insights on creating flanges around bulkhead hatches for canvas protection in this enlightening video. By following his expert guidance, boat enthusiasts can ensure their living areas remain secure while allowing unhindered access through the hatches.Step 1: Starting with the Flange
Sven begins by explaining that working on flanges vertically and horizontally is significantly easier than doing so in a flat position. To simplify the process further, he divides the task into two or three steps as suggested by fellow expert “for for.” This approach not only makes it more manageable but also allows for greater precision in crafting each component.Step 2: Applying Glue and Securing
Sven proceeds to apply glue along one edge of the flange, ensuring a secure bond when clamped into place. He emphasizes that this stage is crucial for maintaining the structural integrity of the flange, which in turn safeguards the living area beneath the canvas when hatches are open.Step 3: Allowing Time to Dry
After securely attaching the first portion of the flange, Sven allows ample time for it to dry before moving forward with additional steps. This patience and precision are key aspects of his successful boatbuilding methods.Step 4: Finishing Touches
Once the flange is fully dried, Sven removes the clamps carefully, ensuring no damage occurs during this process. He then moves on to attaching four more pieces onto these main frames, completing two pairs of flanges for the bulkhead hatches.The Final Touches
While two flanges form the primary support structure around the hatches, Sven mentions there are two additional pieces required at each end to ensure comprehensive protection. This attention to detail highlights his commitment to producing a durable and reliable design. “Sailing is about finding your path, whether it’s across an ocean or within yourself.” – Sven Yrvind In conclusion, making flanges around bulkhead hatches may seem complex at first glance, but by following Sven Yrvind’s meticulous process, enthusiasts can achieve professional-level results. Remember that the journey of boatbuilding is as rewarding as reaching your destination; it tests one’s patience and dedication. For those seeking to embark on this adventure or simply gain more insight into marine craftsmanship, Sven’s wisdom is invaluable.Sven Yrvind, a renowned yacht designer and sailor, shares valuable insights on creating flanges around bulkhead hatches for canvas protection in this enlightening video. By following his expert guidance, boat enthusiasts can ensure their living areas remain secure while allowing unhindered access through the hatches.Step 1: Starting with the Flange
Sven begins by explaining that working on flanges vertically and horizontally is significantly easier than doing so in a flat position. To simplify the process further, he divides the task into two or three steps as suggested by fellow expert “for for.” This approach not only makes it more manageable but also allows for greater precision in crafting each component.Step 2: Applying Glue and Securing
Sven proceeds to apply glue along one edge of the flange, ensuring a secure bond when clamped into place. He emphasizes that this stage is crucial for maintaining the structural integrity of the flange, which in turn safeguards the living area beneath the canvas when hatches are open.Step 3: Allowing Time to Dry
After securely attaching the first portion of the flange, Sven allows ample time for it to dry before moving forward with additional steps. This patience and precision are key aspects of his successful boatbuilding methods.Step 4: Finishing Touches
Once the flange is fully dried, Sven removes the clamps carefully, ensuring no damage occurs during this process. He then moves on to attaching four more pieces onto these main frames, completing two pairs of flanges for the bulkhead hatches.The Final Touches
While two flanges form the primary support structure around the hatches, Sven mentions there are two additional pieces required at each end to ensure comprehensive protection. This attention to detail highlights his commitment to producing a durable and reliable design. “Sailing is about finding your path, whether it’s across an ocean or within yourself.” – Sven Yrvind In conclusion, making flanges around bulkhead hatches may seem complex at first glance, but by following Sven Yrvind’s meticulous process, enthusiasts can achieve professional-level results. Remember that the journey of boatbuilding is as rewarding as reaching your destination; it tests one’s patience and dedication. For those seeking to embark on this adventure or simply gain more insight into marine craftsmanship, Sven’s wisdom is invaluable.Making Flanges Around Bulkhead Hatches for Canvas
Sven Yrvind, a renowned yacht designer and sailor, shares valuable insights on creating flanges around bulkhead hatches for canvas protection in this enlightening video. By following his expert guidance, boat enthusiasts can ensure their living areas remain secure while allowing unhindered access through the hatches.Step 1: Starting with the Flange
Sven begins by explaining that working on flanges vertically and horizontally is significantly easier than doing so in a flat position. To simplify the process further, he divides the task into two or three steps as suggested by fellow expert “for for.” This approach not only makes it more manageable but also allows for greater precision in crafting each component.Step 2: Applying Glue and Securing
Sven proceeds to apply glue along one edge of the flange, ensuring a secure bond when clamped into place. He emphasizes that this stage is crucial for maintaining the structural integrity of the flange, which in turn safeguards the living area beneath the canvas when hatches are open.Step 3: Allowing Time to Dry
After securely attaching the first portion of the flange, Sven allows ample time for it to dry before moving forward with additional steps. This patience and precision are key aspects of his successful boatbuilding methods.Step 4: Finishing Touches
Once the flange is fully dried, Sven removes the clamps carefully, ensuring no damage occurs during this process. He then moves on to attaching four more pieces onto these main frames, completing two pairs of flanges for the bulkhead hatches.The Final Touches
While two flanges form the primary support structure around the hatches, Sven mentions there are two additional pieces required at each end to ensure comprehensive protection. This attention to detail highlights his commitment to producing a durable and reliable design. “Sailing is about finding your path, whether it’s across an ocean or within yourself.” – Sven Yrvind In conclusion, making flanges around bulkhead hatches may seem complex at first glance, but by following Sven Yrvind’s meticulous process, enthusiasts can achieve professional-level results. Remember that the journey of boatbuilding is as rewarding as reaching your destination; it tests one’s patience and dedication. For those seeking to embark on this adventure or simply gain more insight into marine craftsmanship, Sven’s wisdom is invaluable.Once the flange is fully dried, Sven removes the clamps carefully, ensuring no damage occurs during this process. He then moves on to attaching four more pieces onto these main frames, completing two pairs of flanges for the bulkhead hatches.The Final Touches
While two flanges form the primary support structure around the hatches, Sven mentions there are two additional pieces required at each end to ensure comprehensive protection. This attention to detail highlights his commitment to producing a durable and reliable design. “Sailing is about finding your path, whether it’s across an ocean or within yourself.” – Sven Yrvind In conclusion, making flanges around bulkhead hatches may seem complex at first glance, but by following Sven Yrvind’s meticulous process, enthusiasts can achieve professional-level results. Remember that the journey of boatbuilding is as rewarding as reaching your destination; it tests one’s patience and dedication. For those seeking to embark on this adventure or simply gain more insight into marine craftsmanship, Sven’s wisdom is invaluable.Sven Yrvind, a renowned yacht designer and sailor, shares valuable insights on creating flanges around bulkhead hatches for canvas protection in this enlightening video. By following his expert guidance, boat enthusiasts can ensure their living areas remain secure while allowing unhindered access through the hatches.Step 1: Starting with the Flange
Sven begins by explaining that working on flanges vertically and horizontally is significantly easier than doing so in a flat position. To simplify the process further, he divides the task into two or three steps as suggested by fellow expert “for for.” This approach not only makes it more manageable but also allows for greater precision in crafting each component.Step 2: Applying Glue and Securing
Sven proceeds to apply glue along one edge of the flange, ensuring a secure bond when clamped into place. He emphasizes that this stage is crucial for maintaining the structural integrity of the flange, which in turn safeguards the living area beneath the canvas when hatches are open.Step 3: Allowing Time to Dry
After securely attaching the first portion of the flange, Sven allows ample time for it to dry before moving forward with additional steps. This patience and precision are key aspects of his successful boatbuilding methods.Step 4: Finishing Touches
Once the flange is fully dried, Sven removes the clamps carefully, ensuring no damage occurs during this process. He then moves on to attaching four more pieces onto these main frames, completing two pairs of flanges for the bulkhead hatches.The Final Touches
While two flanges form the primary support structure around the hatches, Sven mentions there are two additional pieces required at each end to ensure comprehensive protection. This attention to detail highlights his commitment to producing a durable and reliable design. “Sailing is about finding your path, whether it’s across an ocean or within yourself.” – Sven Yrvind In conclusion, making flanges around bulkhead hatches may seem complex at first glance, but by following Sven Yrvind’s meticulous process, enthusiasts can achieve professional-level results. Remember that the journey of boatbuilding is as rewarding as reaching your destination; it tests one’s patience and dedication. For those seeking to embark on this adventure or simply gain more insight into marine craftsmanship, Sven’s wisdom is invaluable.Making Flanges Around Bulkhead Hatches for Canvas
Sven Yrvind, a renowned yacht designer and sailor, shares valuable insights on creating flanges around bulkhead hatches for canvas protection in this enlightening video. By following his expert guidance, boat enthusiasts can ensure their living areas remain secure while allowing unhindered access through the hatches.Step 1: Starting with the Flange
Sven begins by explaining that working on flanges vertically and horizontally is significantly easier than doing so in a flat position. To simplify the process further, he divides the task into two or three steps as suggested by fellow expert “for for.” This approach not only makes it more manageable but also allows for greater precision in crafting each component.Step 2: Applying Glue and Securing
Sven proceeds to apply glue along one edge of the flange, ensuring a secure bond when clamped into place. He emphasizes that this stage is crucial for maintaining the structural integrity of the flange, which in turn safeguards the living area beneath the canvas when hatches are open.Step 3: Allowing Time to Dry
After securely attaching the first portion of the flange, Sven allows ample time for it to dry before moving forward with additional steps. This patience and precision are key aspects of his successful boatbuilding methods.Step 4: Finishing Touches
Once the flange is fully dried, Sven removes the clamps carefully, ensuring no damage occurs during this process. He then moves on to attaching four more pieces onto these main frames, completing two pairs of flanges for the bulkhead hatches.The Final Touches
While two flanges form the primary support structure around the hatches, Sven mentions there are two additional pieces required at each end to ensure comprehensive protection. This attention to detail highlights his commitment to producing a durable and reliable design. “Sailing is about finding your path, whether it’s across an ocean or within yourself.” – Sven Yrvind In conclusion, making flanges around bulkhead hatches may seem complex at first glance, but by following Sven Yrvind’s meticulous process, enthusiasts can achieve professional-level results. Remember that the journey of boatbuilding is as rewarding as reaching your destination; it tests one’s patience and dedication. For those seeking to embark on this adventure or simply gain more insight into marine craftsmanship, Sven’s wisdom is invaluable.After securely attaching the first portion of the flange, Sven allows ample time for it to dry before moving forward with additional steps. This patience and precision are key aspects of his successful boatbuilding methods.Step 4: Finishing Touches
Once the flange is fully dried, Sven removes the clamps carefully, ensuring no damage occurs during this process. He then moves on to attaching four more pieces onto these main frames, completing two pairs of flanges for the bulkhead hatches.The Final Touches
While two flanges form the primary support structure around the hatches, Sven mentions there are two additional pieces required at each end to ensure comprehensive protection. This attention to detail highlights his commitment to producing a durable and reliable design. “Sailing is about finding your path, whether it’s across an ocean or within yourself.” – Sven Yrvind In conclusion, making flanges around bulkhead hatches may seem complex at first glance, but by following Sven Yrvind’s meticulous process, enthusiasts can achieve professional-level results. Remember that the journey of boatbuilding is as rewarding as reaching your destination; it tests one’s patience and dedication. For those seeking to embark on this adventure or simply gain more insight into marine craftsmanship, Sven’s wisdom is invaluable.Sven Yrvind, a renowned yacht designer and sailor, shares valuable insights on creating flanges around bulkhead hatches for canvas protection in this enlightening video. By following his expert guidance, boat enthusiasts can ensure their living areas remain secure while allowing unhindered access through the hatches.Step 1: Starting with the Flange
Sven begins by explaining that working on flanges vertically and horizontally is significantly easier than doing so in a flat position. To simplify the process further, he divides the task into two or three steps as suggested by fellow expert “for for.” This approach not only makes it more manageable but also allows for greater precision in crafting each component.Step 2: Applying Glue and Securing
Sven proceeds to apply glue along one edge of the flange, ensuring a secure bond when clamped into place. He emphasizes that this stage is crucial for maintaining the structural integrity of the flange, which in turn safeguards the living area beneath the canvas when hatches are open.Step 3: Allowing Time to Dry
After securely attaching the first portion of the flange, Sven allows ample time for it to dry before moving forward with additional steps. This patience and precision are key aspects of his successful boatbuilding methods.Step 4: Finishing Touches
Once the flange is fully dried, Sven removes the clamps carefully, ensuring no damage occurs during this process. He then moves on to attaching four more pieces onto these main frames, completing two pairs of flanges for the bulkhead hatches.The Final Touches
While two flanges form the primary support structure around the hatches, Sven mentions there are two additional pieces required at each end to ensure comprehensive protection. This attention to detail highlights his commitment to producing a durable and reliable design. “Sailing is about finding your path, whether it’s across an ocean or within yourself.” – Sven Yrvind In conclusion, making flanges around bulkhead hatches may seem complex at first glance, but by following Sven Yrvind’s meticulous process, enthusiasts can achieve professional-level results. Remember that the journey of boatbuilding is as rewarding as reaching your destination; it tests one’s patience and dedication. For those seeking to embark on this adventure or simply gain more insight into marine craftsmanship, Sven’s wisdom is invaluable.Making Flanges Around Bulkhead Hatches for Canvas
Sven Yrvind, a renowned yacht designer and sailor, shares valuable insights on creating flanges around bulkhead hatches for canvas protection in this enlightening video. By following his expert guidance, boat enthusiasts can ensure their living areas remain secure while allowing unhindered access through the hatches.Step 1: Starting with the Flange
Sven begins by explaining that working on flanges vertically and horizontally is significantly easier than doing so in a flat position. To simplify the process further, he divides the task into two or three steps as suggested by fellow expert “for for.” This approach not only makes it more manageable but also allows for greater precision in crafting each component.Step 2: Applying Glue and Securing
Sven proceeds to apply glue along one edge of the flange, ensuring a secure bond when clamped into place. He emphasizes that this stage is crucial for maintaining the structural integrity of the flange, which in turn safeguards the living area beneath the canvas when hatches are open.Step 3: Allowing Time to Dry
After securely attaching the first portion of the flange, Sven allows ample time for it to dry before moving forward with additional steps. This patience and precision are key aspects of his successful boatbuilding methods.Step 4: Finishing Touches
Once the flange is fully dried, Sven removes the clamps carefully, ensuring no damage occurs during this process. He then moves on to attaching four more pieces onto these main frames, completing two pairs of flanges for the bulkhead hatches.The Final Touches
While two flanges form the primary support structure around the hatches, Sven mentions there are two additional pieces required at each end to ensure comprehensive protection. This attention to detail highlights his commitment to producing a durable and reliable design. “Sailing is about finding your path, whether it’s across an ocean or within yourself.” – Sven Yrvind In conclusion, making flanges around bulkhead hatches may seem complex at first glance, but by following Sven Yrvind’s meticulous process, enthusiasts can achieve professional-level results. Remember that the journey of boatbuilding is as rewarding as reaching your destination; it tests one’s patience and dedication. For those seeking to embark on this adventure or simply gain more insight into marine craftsmanship, Sven’s wisdom is invaluable.Sven proceeds to apply glue along one edge of the flange, ensuring a secure bond when clamped into place. He emphasizes that this stage is crucial for maintaining the structural integrity of the flange, which in turn safeguards the living area beneath the canvas when hatches are open.Step 3: Allowing Time to Dry
After securely attaching the first portion of the flange, Sven allows ample time for it to dry before moving forward with additional steps. This patience and precision are key aspects of his successful boatbuilding methods.Step 4: Finishing Touches
Once the flange is fully dried, Sven removes the clamps carefully, ensuring no damage occurs during this process. He then moves on to attaching four more pieces onto these main frames, completing two pairs of flanges for the bulkhead hatches.The Final Touches
While two flanges form the primary support structure around the hatches, Sven mentions there are two additional pieces required at each end to ensure comprehensive protection. This attention to detail highlights his commitment to producing a durable and reliable design. “Sailing is about finding your path, whether it’s across an ocean or within yourself.” – Sven Yrvind In conclusion, making flanges around bulkhead hatches may seem complex at first glance, but by following Sven Yrvind’s meticulous process, enthusiasts can achieve professional-level results. Remember that the journey of boatbuilding is as rewarding as reaching your destination; it tests one’s patience and dedication. For those seeking to embark on this adventure or simply gain more insight into marine craftsmanship, Sven’s wisdom is invaluable.Sven Yrvind, a renowned yacht designer and sailor, shares valuable insights on creating flanges around bulkhead hatches for canvas protection in this enlightening video. By following his expert guidance, boat enthusiasts can ensure their living areas remain secure while allowing unhindered access through the hatches.Step 1: Starting with the Flange
Sven begins by explaining that working on flanges vertically and horizontally is significantly easier than doing so in a flat position. To simplify the process further, he divides the task into two or three steps as suggested by fellow expert “for for.” This approach not only makes it more manageable but also allows for greater precision in crafting each component.Step 2: Applying Glue and Securing
Sven proceeds to apply glue along one edge of the flange, ensuring a secure bond when clamped into place. He emphasizes that this stage is crucial for maintaining the structural integrity of the flange, which in turn safeguards the living area beneath the canvas when hatches are open.Step 3: Allowing Time to Dry
After securely attaching the first portion of the flange, Sven allows ample time for it to dry before moving forward with additional steps. This patience and precision are key aspects of his successful boatbuilding methods.Step 4: Finishing Touches
Once the flange is fully dried, Sven removes the clamps carefully, ensuring no damage occurs during this process. He then moves on to attaching four more pieces onto these main frames, completing two pairs of flanges for the bulkhead hatches.The Final Touches
While two flanges form the primary support structure around the hatches, Sven mentions there are two additional pieces required at each end to ensure comprehensive protection. This attention to detail highlights his commitment to producing a durable and reliable design. “Sailing is about finding your path, whether it’s across an ocean or within yourself.” – Sven Yrvind In conclusion, making flanges around bulkhead hatches may seem complex at first glance, but by following Sven Yrvind’s meticulous process, enthusiasts can achieve professional-level results. Remember that the journey of boatbuilding is as rewarding as reaching your destination; it tests one’s patience and dedication. For those seeking to embark on this adventure or simply gain more insight into marine craftsmanship, Sven’s wisdom is invaluable.Making Flanges Around Bulkhead Hatches for Canvas
Sven Yrvind, a renowned yacht designer and sailor, shares valuable insights on creating flanges around bulkhead hatches for canvas protection in this enlightening video. By following his expert guidance, boat enthusiasts can ensure their living areas remain secure while allowing unhindered access through the hatches.Step 1: Starting with the Flange
Sven begins by explaining that working on flanges vertically and horizontally is significantly easier than doing so in a flat position. To simplify the process further, he divides the task into two or three steps as suggested by fellow expert “for for.” This approach not only makes it more manageable but also allows for greater precision in crafting each component.Step 2: Applying Glue and Securing
Sven proceeds to apply glue along one edge of the flange, ensuring a secure bond when clamped into place. He emphasizes that this stage is crucial for maintaining the structural integrity of the flange, which in turn safeguards the living area beneath the canvas when hatches are open.Step 3: Allowing Time to Dry
After securely attaching the first portion of the flange, Sven allows ample time for it to dry before moving forward with additional steps. This patience and precision are key aspects of his successful boatbuilding methods.Step 4: Finishing Touches
Once the flange is fully dried, Sven removes the clamps carefully, ensuring no damage occurs during this process. He then moves on to attaching four more pieces onto these main frames, completing two pairs of flanges for the bulkhead hatches.The Final Touches
While two flanges form the primary support structure around the hatches, Sven mentions there are two additional pieces required at each end to ensure comprehensive protection. This attention to detail highlights his commitment to producing a durable and reliable design. “Sailing is about finding your path, whether it’s across an ocean or within yourself.” – Sven Yrvind In conclusion, making flanges around bulkhead hatches may seem complex at first glance, but by following Sven Yrvind’s meticulous process, enthusiasts can achieve professional-level results. Remember that the journey of boatbuilding is as rewarding as reaching your destination; it tests one’s patience and dedication. For those seeking to embark on this adventure or simply gain more insight into marine craftsmanship, Sven’s wisdom is invaluable.Sven begins by explaining that working on flanges vertically and horizontally is significantly easier than doing so in a flat position. To simplify the process further, he divides the task into two or three steps as suggested by fellow expert “for for.” This approach not only makes it more manageable but also allows for greater precision in crafting each component.Step 2: Applying Glue and Securing
Sven proceeds to apply glue along one edge of the flange, ensuring a secure bond when clamped into place. He emphasizes that this stage is crucial for maintaining the structural integrity of the flange, which in turn safeguards the living area beneath the canvas when hatches are open.Step 3: Allowing Time to Dry
After securely attaching the first portion of the flange, Sven allows ample time for it to dry before moving forward with additional steps. This patience and precision are key aspects of his successful boatbuilding methods.Step 4: Finishing Touches
Once the flange is fully dried, Sven removes the clamps carefully, ensuring no damage occurs during this process. He then moves on to attaching four more pieces onto these main frames, completing two pairs of flanges for the bulkhead hatches.The Final Touches
While two flanges form the primary support structure around the hatches, Sven mentions there are two additional pieces required at each end to ensure comprehensive protection. This attention to detail highlights his commitment to producing a durable and reliable design. “Sailing is about finding your path, whether it’s across an ocean or within yourself.” – Sven Yrvind In conclusion, making flanges around bulkhead hatches may seem complex at first glance, but by following Sven Yrvind’s meticulous process, enthusiasts can achieve professional-level results. Remember that the journey of boatbuilding is as rewarding as reaching your destination; it tests one’s patience and dedication. For those seeking to embark on this adventure or simply gain more insight into marine craftsmanship, Sven’s wisdom is invaluable.Sven Yrvind, a renowned yacht designer and sailor, shares valuable insights on creating flanges around bulkhead hatches for canvas protection in this enlightening video. By following his expert guidance, boat enthusiasts can ensure their living areas remain secure while allowing unhindered access through the hatches.Step 1: Starting with the Flange
Sven begins by explaining that working on flanges vertically and horizontally is significantly easier than doing so in a flat position. To simplify the process further, he divides the task into two or three steps as suggested by fellow expert “for for.” This approach not only makes it more manageable but also allows for greater precision in crafting each component.Step 2: Applying Glue and Securing
Sven proceeds to apply glue along one edge of the flange, ensuring a secure bond when clamped into place. He emphasizes that this stage is crucial for maintaining the structural integrity of the flange, which in turn safeguards the living area beneath the canvas when hatches are open.Step 3: Allowing Time to Dry
After securely attaching the first portion of the flange, Sven allows ample time for it to dry before moving forward with additional steps. This patience and precision are key aspects of his successful boatbuilding methods.Step 4: Finishing Touches
Once the flange is fully dried, Sven removes the clamps carefully, ensuring no damage occurs during this process. He then moves on to attaching four more pieces onto these main frames, completing two pairs of flanges for the bulkhead hatches.The Final Touches
While two flanges form the primary support structure around the hatches, Sven mentions there are two additional pieces required at each end to ensure comprehensive protection. This attention to detail highlights his commitment to producing a durable and reliable design. “Sailing is about finding your path, whether it’s across an ocean or within yourself.” – Sven Yrvind In conclusion, making flanges around bulkhead hatches may seem complex at first glance, but by following Sven Yrvind’s meticulous process, enthusiasts can achieve professional-level results. Remember that the journey of boatbuilding is as rewarding as reaching your destination; it tests one’s patience and dedication. For those seeking to embark on this adventure or simply gain more insight into marine craftsmanship, Sven’s wisdom is invaluable.Making Flanges Around Bulkhead Hatches for Canvas
Sven Yrvind, a renowned yacht designer and sailor, shares valuable insights on creating flanges around bulkhead hatches for canvas protection in this enlightening video. By following his expert guidance, boat enthusiasts can ensure their living areas remain secure while allowing unhindered access through the hatches.Step 1: Starting with the Flange
Sven begins by explaining that working on flanges vertically and horizontally is significantly easier than doing so in a flat position. To simplify the process further, he divides the task into two or three steps as suggested by fellow expert “for for.” This approach not only makes it more manageable but also allows for greater precision in crafting each component.Step 2: Applying Glue and Securing
Sven proceeds to apply glue along one edge of the flange, ensuring a secure bond when clamped into place. He emphasizes that this stage is crucial for maintaining the structural integrity of the flange, which in turn safeguards the living area beneath the canvas when hatches are open.Step 3: Allowing Time to Dry
After securely attaching the first portion of the flange, Sven allows ample time for it to dry before moving forward with additional steps. This patience and precision are key aspects of his successful boatbuilding methods.Step 4: Finishing Touches
Once the flange is fully dried, Sven removes the clamps carefully, ensuring no damage occurs during this process. He then moves on to attaching four more pieces onto these main frames, completing two pairs of flanges for the bulkhead hatches.The Final Touches
While two flanges form the primary support structure around the hatches, Sven mentions there are two additional pieces required at each end to ensure comprehensive protection. This attention to detail highlights his commitment to producing a durable and reliable design. “Sailing is about finding your path, whether it’s across an ocean or within yourself.” – Sven Yrvind In conclusion, making flanges around bulkhead hatches may seem complex at first glance, but by following Sven Yrvind’s meticulous process, enthusiasts can achieve professional-level results. Remember that the journey of boatbuilding is as rewarding as reaching your destination; it tests one’s patience and dedication. For those seeking to embark on this adventure or simply gain more insight into marine craftsmanship, Sven’s wisdom is invaluable.Once the flange is fully dried, Sven removes the clamps carefully, ensuring no damage occurs during this process. He then moves on to attaching four more pieces onto these main frames, completing two pairs of flanges for the bulkhead hatches.The Final Touches
While two flanges form the primary support structure around the hatches, Sven mentions there are two additional pieces required at each end to ensure comprehensive protection. This attention to detail highlights his commitment to producing a durable and reliable design. “Sailing is about finding your path, whether it’s across an ocean or within yourself.” – Sven Yrvind In conclusion, making flanges around bulkhead hatches may seem complex at first glance, but by following Sven Yrvind’s meticulous process, enthusiasts can achieve professional-level results. Remember that the journey of boatbuilding is as rewarding as reaching your destination; it tests one’s patience and dedication. For those seeking to embark on this adventure or simply gain more insight into marine craftsmanship, Sven’s wisdom is invaluable.Sven begins by explaining that working on flanges vertically and horizontally is significantly easier than doing so in a flat position. To simplify the process further, he divides the task into two or three steps as suggested by fellow expert “for for.” This approach not only makes it more manageable but also allows for greater precision in crafting each component.Step 2: Applying Glue and Securing
Sven proceeds to apply glue along one edge of the flange, ensuring a secure bond when clamped into place. He emphasizes that this stage is crucial for maintaining the structural integrity of the flange, which in turn safeguards the living area beneath the canvas when hatches are open.Step 3: Allowing Time to Dry
After securely attaching the first portion of the flange, Sven allows ample time for it to dry before moving forward with additional steps. This patience and precision are key aspects of his successful boatbuilding methods.Step 4: Finishing Touches
Once the flange is fully dried, Sven removes the clamps carefully, ensuring no damage occurs during this process. He then moves on to attaching four more pieces onto these main frames, completing two pairs of flanges for the bulkhead hatches.The Final Touches
While two flanges form the primary support structure around the hatches, Sven mentions there are two additional pieces required at each end to ensure comprehensive protection. This attention to detail highlights his commitment to producing a durable and reliable design. “Sailing is about finding your path, whether it’s across an ocean or within yourself.” – Sven Yrvind In conclusion, making flanges around bulkhead hatches may seem complex at first glance, but by following Sven Yrvind’s meticulous process, enthusiasts can achieve professional-level results. Remember that the journey of boatbuilding is as rewarding as reaching your destination; it tests one’s patience and dedication. For those seeking to embark on this adventure or simply gain more insight into marine craftsmanship, Sven’s wisdom is invaluable.Sven Yrvind, a renowned yacht designer and sailor, shares valuable insights on creating flanges around bulkhead hatches for canvas protection in this enlightening video. By following his expert guidance, boat enthusiasts can ensure their living areas remain secure while allowing unhindered access through the hatches.Step 1: Starting with the Flange
Sven begins by explaining that working on flanges vertically and horizontally is significantly easier than doing so in a flat position. To simplify the process further, he divides the task into two or three steps as suggested by fellow expert “for for.” This approach not only makes it more manageable but also allows for greater precision in crafting each component.Step 2: Applying Glue and Securing
Sven proceeds to apply glue along one edge of the flange, ensuring a secure bond when clamped into place. He emphasizes that this stage is crucial for maintaining the structural integrity of the flange, which in turn safeguards the living area beneath the canvas when hatches are open.Step 3: Allowing Time to Dry
After securely attaching the first portion of the flange, Sven allows ample time for it to dry before moving forward with additional steps. This patience and precision are key aspects of his successful boatbuilding methods.Step 4: Finishing Touches
Once the flange is fully dried, Sven removes the clamps carefully, ensuring no damage occurs during this process. He then moves on to attaching four more pieces onto these main frames, completing two pairs of flanges for the bulkhead hatches.The Final Touches
While two flanges form the primary support structure around the hatches, Sven mentions there are two additional pieces required at each end to ensure comprehensive protection. This attention to detail highlights his commitment to producing a durable and reliable design. “Sailing is about finding your path, whether it’s across an ocean or within yourself.” – Sven Yrvind In conclusion, making flanges around bulkhead hatches may seem complex at first glance, but by following Sven Yrvind’s meticulous process, enthusiasts can achieve professional-level results. Remember that the journey of boatbuilding is as rewarding as reaching your destination; it tests one’s patience and dedication. For those seeking to embark on this adventure or simply gain more insight into marine craftsmanship, Sven’s wisdom is invaluable.Making Flanges Around Bulkhead Hatches for Canvas
Sven Yrvind, a renowned yacht designer and sailor, shares valuable insights on creating flanges around bulkhead hatches for canvas protection in this enlightening video. By following his expert guidance, boat enthusiasts can ensure their living areas remain secure while allowing unhindered access through the hatches.Step 1: Starting with the Flange
Sven begins by explaining that working on flanges vertically and horizontally is significantly easier than doing so in a flat position. To simplify the process further, he divides the task into two or three steps as suggested by fellow expert “for for.” This approach not only makes it more manageable but also allows for greater precision in crafting each component.Step 2: Applying Glue and Securing
Sven proceeds to apply glue along one edge of the flange, ensuring a secure bond when clamped into place. He emphasizes that this stage is crucial for maintaining the structural integrity of the flange, which in turn safeguards the living area beneath the canvas when hatches are open.Step 3: Allowing Time to Dry
After securely attaching the first portion of the flange, Sven allows ample time for it to dry before moving forward with additional steps. This patience and precision are key aspects of his successful boatbuilding methods.Step 4: Finishing Touches
Once the flange is fully dried, Sven removes the clamps carefully, ensuring no damage occurs during this process. He then moves on to attaching four more pieces onto these main frames, completing two pairs of flanges for the bulkhead hatches.The Final Touches
While two flanges form the primary support structure around the hatches, Sven mentions there are two additional pieces required at each end to ensure comprehensive protection. This attention to detail highlights his commitment to producing a durable and reliable design. “Sailing is about finding your path, whether it’s across an ocean or within yourself.” – Sven Yrvind In conclusion, making flanges around bulkhead hatches may seem complex at first glance, but by following Sven Yrvind’s meticulous process, enthusiasts can achieve professional-level results. Remember that the journey of boatbuilding is as rewarding as reaching your destination; it tests one’s patience and dedication. For those seeking to embark on this adventure or simply gain more insight into marine craftsmanship, Sven’s wisdom is invaluable.After securely attaching the first portion of the flange, Sven allows ample time for it to dry before moving forward with additional steps. This patience and precision are key aspects of his successful boatbuilding methods.Step 4: Finishing Touches
Once the flange is fully dried, Sven removes the clamps carefully, ensuring no damage occurs during this process. He then moves on to attaching four more pieces onto these main frames, completing two pairs of flanges for the bulkhead hatches.The Final Touches
While two flanges form the primary support structure around the hatches, Sven mentions there are two additional pieces required at each end to ensure comprehensive protection. This attention to detail highlights his commitment to producing a durable and reliable design. “Sailing is about finding your path, whether it’s across an ocean or within yourself.” – Sven Yrvind In conclusion, making flanges around bulkhead hatches may seem complex at first glance, but by following Sven Yrvind’s meticulous process, enthusiasts can achieve professional-level results. Remember that the journey of boatbuilding is as rewarding as reaching your destination; it tests one’s patience and dedication. For those seeking to embark on this adventure or simply gain more insight into marine craftsmanship, Sven’s wisdom is invaluable.Sven begins by explaining that working on flanges vertically and horizontally is significantly easier than doing so in a flat position. To simplify the process further, he divides the task into two or three steps as suggested by fellow expert “for for.” This approach not only makes it more manageable but also allows for greater precision in crafting each component.Step 2: Applying Glue and Securing
Sven proceeds to apply glue along one edge of the flange, ensuring a secure bond when clamped into place. He emphasizes that this stage is crucial for maintaining the structural integrity of the flange, which in turn safeguards the living area beneath the canvas when hatches are open.Step 3: Allowing Time to Dry
After securely attaching the first portion of the flange, Sven allows ample time for it to dry before moving forward with additional steps. This patience and precision are key aspects of his successful boatbuilding methods.Step 4: Finishing Touches
Once the flange is fully dried, Sven removes the clamps carefully, ensuring no damage occurs during this process. He then moves on to attaching four more pieces onto these main frames, completing two pairs of flanges for the bulkhead hatches.The Final Touches
While two flanges form the primary support structure around the hatches, Sven mentions there are two additional pieces required at each end to ensure comprehensive protection. This attention to detail highlights his commitment to producing a durable and reliable design. “Sailing is about finding your path, whether it’s across an ocean or within yourself.” – Sven Yrvind In conclusion, making flanges around bulkhead hatches may seem complex at first glance, but by following Sven Yrvind’s meticulous process, enthusiasts can achieve professional-level results. Remember that the journey of boatbuilding is as rewarding as reaching your destination; it tests one’s patience and dedication. For those seeking to embark on this adventure or simply gain more insight into marine craftsmanship, Sven’s wisdom is invaluable.Sven Yrvind, a renowned yacht designer and sailor, shares valuable insights on creating flanges around bulkhead hatches for canvas protection in this enlightening video. By following his expert guidance, boat enthusiasts can ensure their living areas remain secure while allowing unhindered access through the hatches.Step 1: Starting with the Flange
Sven begins by explaining that working on flanges vertically and horizontally is significantly easier than doing so in a flat position. To simplify the process further, he divides the task into two or three steps as suggested by fellow expert “for for.” This approach not only makes it more manageable but also allows for greater precision in crafting each component.Step 2: Applying Glue and Securing
Sven proceeds to apply glue along one edge of the flange, ensuring a secure bond when clamped into place. He emphasizes that this stage is crucial for maintaining the structural integrity of the flange, which in turn safeguards the living area beneath the canvas when hatches are open.Step 3: Allowing Time to Dry
After securely attaching the first portion of the flange, Sven allows ample time for it to dry before moving forward with additional steps. This patience and precision are key aspects of his successful boatbuilding methods.Step 4: Finishing Touches
Once the flange is fully dried, Sven removes the clamps carefully, ensuring no damage occurs during this process. He then moves on to attaching four more pieces onto these main frames, completing two pairs of flanges for the bulkhead hatches.The Final Touches
While two flanges form the primary support structure around the hatches, Sven mentions there are two additional pieces required at each end to ensure comprehensive protection. This attention to detail highlights his commitment to producing a durable and reliable design. “Sailing is about finding your path, whether it’s across an ocean or within yourself.” – Sven Yrvind In conclusion, making flanges around bulkhead hatches may seem complex at first glance, but by following Sven Yrvind’s meticulous process, enthusiasts can achieve professional-level results. Remember that the journey of boatbuilding is as rewarding as reaching your destination; it tests one’s patience and dedication. For those seeking to embark on this adventure or simply gain more insight into marine craftsmanship, Sven’s wisdom is invaluable.Making Flanges Around Bulkhead Hatches for Canvas
Sven Yrvind, a renowned yacht designer and sailor, shares valuable insights on creating flanges around bulkhead hatches for canvas protection in this enlightening video. By following his expert guidance, boat enthusiasts can ensure their living areas remain secure while allowing unhindered access through the hatches.Step 1: Starting with the Flange
Sven begins by explaining that working on flanges vertically and horizontally is significantly easier than doing so in a flat position. To simplify the process further, he divides the task into two or three steps as suggested by fellow expert “for for.” This approach not only makes it more manageable but also allows for greater precision in crafting each component.Step 2: Applying Glue and Securing
Sven proceeds to apply glue along one edge of the flange, ensuring a secure bond when clamped into place. He emphasizes that this stage is crucial for maintaining the structural integrity of the flange, which in turn safeguards the living area beneath the canvas when hatches are open.Step 3: Allowing Time to Dry
After securely attaching the first portion of the flange, Sven allows ample time for it to dry before moving forward with additional steps. This patience and precision are key aspects of his successful boatbuilding methods.Step 4: Finishing Touches
Once the flange is fully dried, Sven removes the clamps carefully, ensuring no damage occurs during this process. He then moves on to attaching four more pieces onto these main frames, completing two pairs of flanges for the bulkhead hatches.The Final Touches
While two flanges form the primary support structure around the hatches, Sven mentions there are two additional pieces required at each end to ensure comprehensive protection. This attention to detail highlights his commitment to producing a durable and reliable design. “Sailing is about finding your path, whether it’s across an ocean or within yourself.” – Sven Yrvind In conclusion, making flanges around bulkhead hatches may seem complex at first glance, but by following Sven Yrvind’s meticulous process, enthusiasts can achieve professional-level results. Remember that the journey of boatbuilding is as rewarding as reaching your destination; it tests one’s patience and dedication. For those seeking to embark on this adventure or simply gain more insight into marine craftsmanship, Sven’s wisdom is invaluable.Sven proceeds to apply glue along one edge of the flange, ensuring a secure bond when clamped into place. He emphasizes that this stage is crucial for maintaining the structural integrity of the flange, which in turn safeguards the living area beneath the canvas when hatches are open.Step 3: Allowing Time to Dry
After securely attaching the first portion of the flange, Sven allows ample time for it to dry before moving forward with additional steps. This patience and precision are key aspects of his successful boatbuilding methods.Step 4: Finishing Touches
Once the flange is fully dried, Sven removes the clamps carefully, ensuring no damage occurs during this process. He then moves on to attaching four more pieces onto these main frames, completing two pairs of flanges for the bulkhead hatches.The Final Touches
While two flanges form the primary support structure around the hatches, Sven mentions there are two additional pieces required at each end to ensure comprehensive protection. This attention to detail highlights his commitment to producing a durable and reliable design. “Sailing is about finding your path, whether it’s across an ocean or within yourself.” – Sven Yrvind In conclusion, making flanges around bulkhead hatches may seem complex at first glance, but by following Sven Yrvind’s meticulous process, enthusiasts can achieve professional-level results. Remember that the journey of boatbuilding is as rewarding as reaching your destination; it tests one’s patience and dedication. For those seeking to embark on this adventure or simply gain more insight into marine craftsmanship, Sven’s wisdom is invaluable.Sven begins by explaining that working on flanges vertically and horizontally is significantly easier than doing so in a flat position. To simplify the process further, he divides the task into two or three steps as suggested by fellow expert “for for.” This approach not only makes it more manageable but also allows for greater precision in crafting each component.Step 2: Applying Glue and Securing
Sven proceeds to apply glue along one edge of the flange, ensuring a secure bond when clamped into place. He emphasizes that this stage is crucial for maintaining the structural integrity of the flange, which in turn safeguards the living area beneath the canvas when hatches are open.Step 3: Allowing Time to Dry
After securely attaching the first portion of the flange, Sven allows ample time for it to dry before moving forward with additional steps. This patience and precision are key aspects of his successful boatbuilding methods.Step 4: Finishing Touches
Once the flange is fully dried, Sven removes the clamps carefully, ensuring no damage occurs during this process. He then moves on to attaching four more pieces onto these main frames, completing two pairs of flanges for the bulkhead hatches.The Final Touches
While two flanges form the primary support structure around the hatches, Sven mentions there are two additional pieces required at each end to ensure comprehensive protection. This attention to detail highlights his commitment to producing a durable and reliable design. “Sailing is about finding your path, whether it’s across an ocean or within yourself.” – Sven Yrvind In conclusion, making flanges around bulkhead hatches may seem complex at first glance, but by following Sven Yrvind’s meticulous process, enthusiasts can achieve professional-level results. Remember that the journey of boatbuilding is as rewarding as reaching your destination; it tests one’s patience and dedication. For those seeking to embark on this adventure or simply gain more insight into marine craftsmanship, Sven’s wisdom is invaluable.Sven Yrvind, a renowned yacht designer and sailor, shares valuable insights on creating flanges around bulkhead hatches for canvas protection in this enlightening video. By following his expert guidance, boat enthusiasts can ensure their living areas remain secure while allowing unhindered access through the hatches.Step 1: Starting with the Flange
Sven begins by explaining that working on flanges vertically and horizontally is significantly easier than doing so in a flat position. To simplify the process further, he divides the task into two or three steps as suggested by fellow expert “for for.” This approach not only makes it more manageable but also allows for greater precision in crafting each component.Step 2: Applying Glue and Securing
Sven proceeds to apply glue along one edge of the flange, ensuring a secure bond when clamped into place. He emphasizes that this stage is crucial for maintaining the structural integrity of the flange, which in turn safeguards the living area beneath the canvas when hatches are open.Step 3: Allowing Time to Dry
After securely attaching the first portion of the flange, Sven allows ample time for it to dry before moving forward with additional steps. This patience and precision are key aspects of his successful boatbuilding methods.Step 4: Finishing Touches
Once the flange is fully dried, Sven removes the clamps carefully, ensuring no damage occurs during this process. He then moves on to attaching four more pieces onto these main frames, completing two pairs of flanges for the bulkhead hatches.The Final Touches
While two flanges form the primary support structure around the hatches, Sven mentions there are two additional pieces required at each end to ensure comprehensive protection. This attention to detail highlights his commitment to producing a durable and reliable design. “Sailing is about finding your path, whether it’s across an ocean or within yourself.” – Sven Yrvind In conclusion, making flanges around bulkhead hatches may seem complex at first glance, but by following Sven Yrvind’s meticulous process, enthusiasts can achieve professional-level results. Remember that the journey of boatbuilding is as rewarding as reaching your destination; it tests one’s patience and dedication. For those seeking to embark on this adventure or simply gain more insight into marine craftsmanship, Sven’s wisdom is invaluable.Making Flanges Around Bulkhead Hatches for Canvas
Sven Yrvind, a renowned yacht designer and sailor, shares valuable insights on creating flanges around bulkhead hatches for canvas protection in this enlightening video. By following his expert guidance, boat enthusiasts can ensure their living areas remain secure while allowing unhindered access through the hatches.Step 1: Starting with the Flange
Sven begins by explaining that working on flanges vertically and horizontally is significantly easier than doing so in a flat position. To simplify the process further, he divides the task into two or three steps as suggested by fellow expert “for for.” This approach not only makes it more manageable but also allows for greater precision in crafting each component.Step 2: Applying Glue and Securing
Sven proceeds to apply glue along one edge of the flange, ensuring a secure bond when clamped into place. He emphasizes that this stage is crucial for maintaining the structural integrity of the flange, which in turn safeguards the living area beneath the canvas when hatches are open.Step 3: Allowing Time to Dry
After securely attaching the first portion of the flange, Sven allows ample time for it to dry before moving forward with additional steps. This patience and precision are key aspects of his successful boatbuilding methods.Step 4: Finishing Touches
Once the flange is fully dried, Sven removes the clamps carefully, ensuring no damage occurs during this process. He then moves on to attaching four more pieces onto these main frames, completing two pairs of flanges for the bulkhead hatches.The Final Touches
While two flanges form the primary support structure around the hatches, Sven mentions there are two additional pieces required at each end to ensure comprehensive protection. This attention to detail highlights his commitment to producing a durable and reliable design. “Sailing is about finding your path, whether it’s across an ocean or within yourself.” – Sven Yrvind In conclusion, making flanges around bulkhead hatches may seem complex at first glance, but by following Sven Yrvind’s meticulous process, enthusiasts can achieve professional-level results. Remember that the journey of boatbuilding is as rewarding as reaching your destination; it tests one’s patience and dedication. For those seeking to embark on this adventure or simply gain more insight into marine craftsmanship, Sven’s wisdom is invaluable.Once the flange is fully dried, Sven removes the clamps carefully, ensuring no damage occurs during this process. He then moves on to attaching four more pieces onto these main frames, completing two pairs of flanges for the bulkhead hatches.The Final Touches
While two flanges form the primary support structure around the hatches, Sven mentions there are two additional pieces required at each end to ensure comprehensive protection. This attention to detail highlights his commitment to producing a durable and reliable design. “Sailing is about finding your path, whether it’s across an ocean or within yourself.” – Sven Yrvind In conclusion, making flanges around bulkhead hatches may seem complex at first glance, but by following Sven Yrvind’s meticulous process, enthusiasts can achieve professional-level results. Remember that the journey of boatbuilding is as rewarding as reaching your destination; it tests one’s patience and dedication. For those seeking to embark on this adventure or simply gain more insight into marine craftsmanship, Sven’s wisdom is invaluable.Sven proceeds to apply glue along one edge of the flange, ensuring a secure bond when clamped into place. He emphasizes that this stage is crucial for maintaining the structural integrity of the flange, which in turn safeguards the living area beneath the canvas when hatches are open.Step 3: Allowing Time to Dry
After securely attaching the first portion of the flange, Sven allows ample time for it to dry before moving forward with additional steps. This patience and precision are key aspects of his successful boatbuilding methods.Step 4: Finishing Touches
Once the flange is fully dried, Sven removes the clamps carefully, ensuring no damage occurs during this process. He then moves on to attaching four more pieces onto these main frames, completing two pairs of flanges for the bulkhead hatches.The Final Touches
While two flanges form the primary support structure around the hatches, Sven mentions there are two additional pieces required at each end to ensure comprehensive protection. This attention to detail highlights his commitment to producing a durable and reliable design. “Sailing is about finding your path, whether it’s across an ocean or within yourself.” – Sven Yrvind In conclusion, making flanges around bulkhead hatches may seem complex at first glance, but by following Sven Yrvind’s meticulous process, enthusiasts can achieve professional-level results. Remember that the journey of boatbuilding is as rewarding as reaching your destination; it tests one’s patience and dedication. For those seeking to embark on this adventure or simply gain more insight into marine craftsmanship, Sven’s wisdom is invaluable.Sven begins by explaining that working on flanges vertically and horizontally is significantly easier than doing so in a flat position. To simplify the process further, he divides the task into two or three steps as suggested by fellow expert “for for.” This approach not only makes it more manageable but also allows for greater precision in crafting each component.Step 2: Applying Glue and Securing
Sven proceeds to apply glue along one edge of the flange, ensuring a secure bond when clamped into place. He emphasizes that this stage is crucial for maintaining the structural integrity of the flange, which in turn safeguards the living area beneath the canvas when hatches are open.Step 3: Allowing Time to Dry
After securely attaching the first portion of the flange, Sven allows ample time for it to dry before moving forward with additional steps. This patience and precision are key aspects of his successful boatbuilding methods.Step 4: Finishing Touches
Once the flange is fully dried, Sven removes the clamps carefully, ensuring no damage occurs during this process. He then moves on to attaching four more pieces onto these main frames, completing two pairs of flanges for the bulkhead hatches.The Final Touches
While two flanges form the primary support structure around the hatches, Sven mentions there are two additional pieces required at each end to ensure comprehensive protection. This attention to detail highlights his commitment to producing a durable and reliable design. “Sailing is about finding your path, whether it’s across an ocean or within yourself.” – Sven Yrvind In conclusion, making flanges around bulkhead hatches may seem complex at first glance, but by following Sven Yrvind’s meticulous process, enthusiasts can achieve professional-level results. Remember that the journey of boatbuilding is as rewarding as reaching your destination; it tests one’s patience and dedication. For those seeking to embark on this adventure or simply gain more insight into marine craftsmanship, Sven’s wisdom is invaluable.Sven Yrvind, a renowned yacht designer and sailor, shares valuable insights on creating flanges around bulkhead hatches for canvas protection in this enlightening video. By following his expert guidance, boat enthusiasts can ensure their living areas remain secure while allowing unhindered access through the hatches.Step 1: Starting with the Flange
Sven begins by explaining that working on flanges vertically and horizontally is significantly easier than doing so in a flat position. To simplify the process further, he divides the task into two or three steps as suggested by fellow expert “for for.” This approach not only makes it more manageable but also allows for greater precision in crafting each component.Step 2: Applying Glue and Securing
Sven proceeds to apply glue along one edge of the flange, ensuring a secure bond when clamped into place. He emphasizes that this stage is crucial for maintaining the structural integrity of the flange, which in turn safeguards the living area beneath the canvas when hatches are open.Step 3: Allowing Time to Dry
After securely attaching the first portion of the flange, Sven allows ample time for it to dry before moving forward with additional steps. This patience and precision are key aspects of his successful boatbuilding methods.Step 4: Finishing Touches
Once the flange is fully dried, Sven removes the clamps carefully, ensuring no damage occurs during this process. He then moves on to attaching four more pieces onto these main frames, completing two pairs of flanges for the bulkhead hatches.The Final Touches
While two flanges form the primary support structure around the hatches, Sven mentions there are two additional pieces required at each end to ensure comprehensive protection. This attention to detail highlights his commitment to producing a durable and reliable design. “Sailing is about finding your path, whether it’s across an ocean or within yourself.” – Sven Yrvind In conclusion, making flanges around bulkhead hatches may seem complex at first glance, but by following Sven Yrvind’s meticulous process, enthusiasts can achieve professional-level results. Remember that the journey of boatbuilding is as rewarding as reaching your destination; it tests one’s patience and dedication. For those seeking to embark on this adventure or simply gain more insight into marine craftsmanship, Sven’s wisdom is invaluable.Making Flanges Around Bulkhead Hatches for Canvas
Sven Yrvind, a renowned yacht designer and sailor, shares valuable insights on creating flanges around bulkhead hatches for canvas protection in this enlightening video. By following his expert guidance, boat enthusiasts can ensure their living areas remain secure while allowing unhindered access through the hatches.Step 1: Starting with the Flange
Sven begins by explaining that working on flanges vertically and horizontally is significantly easier than doing so in a flat position. To simplify the process further, he divides the task into two or three steps as suggested by fellow expert “for for.” This approach not only makes it more manageable but also allows for greater precision in crafting each component.Step 2: Applying Glue and Securing
Sven proceeds to apply glue along one edge of the flange, ensuring a secure bond when clamped into place. He emphasizes that this stage is crucial for maintaining the structural integrity of the flange, which in turn safeguards the living area beneath the canvas when hatches are open.Step 3: Allowing Time to Dry
After securely attaching the first portion of the flange, Sven allows ample time for it to dry before moving forward with additional steps. This patience and precision are key aspects of his successful boatbuilding methods.Step 4: Finishing Touches
Once the flange is fully dried, Sven removes the clamps carefully, ensuring no damage occurs during this process. He then moves on to attaching four more pieces onto these main frames, completing two pairs of flanges for the bulkhead hatches.The Final Touches
While two flanges form the primary support structure around the hatches, Sven mentions there are two additional pieces required at each end to ensure comprehensive protection. This attention to detail highlights his commitment to producing a durable and reliable design. “Sailing is about finding your path, whether it’s across an ocean or within yourself.” – Sven Yrvind In conclusion, making flanges around bulkhead hatches may seem complex at first glance, but by following Sven Yrvind’s meticulous process, enthusiasts can achieve professional-level results. Remember that the journey of boatbuilding is as rewarding as reaching your destination; it tests one’s patience and dedication. For those seeking to embark on this adventure or simply gain more insight into marine craftsmanship, Sven’s wisdom is invaluable.After securely attaching the first portion of the flange, Sven allows ample time for it to dry before moving forward with additional steps. This patience and precision are key aspects of his successful boatbuilding methods.Step 4: Finishing Touches
Once the flange is fully dried, Sven removes the clamps carefully, ensuring no damage occurs during this process. He then moves on to attaching four more pieces onto these main frames, completing two pairs of flanges for the bulkhead hatches.The Final Touches
While two flanges form the primary support structure around the hatches, Sven mentions there are two additional pieces required at each end to ensure comprehensive protection. This attention to detail highlights his commitment to producing a durable and reliable design. “Sailing is about finding your path, whether it’s across an ocean or within yourself.” – Sven Yrvind In conclusion, making flanges around bulkhead hatches may seem complex at first glance, but by following Sven Yrvind’s meticulous process, enthusiasts can achieve professional-level results. Remember that the journey of boatbuilding is as rewarding as reaching your destination; it tests one’s patience and dedication. For those seeking to embark on this adventure or simply gain more insight into marine craftsmanship, Sven’s wisdom is invaluable.Sven proceeds to apply glue along one edge of the flange, ensuring a secure bond when clamped into place. He emphasizes that this stage is crucial for maintaining the structural integrity of the flange, which in turn safeguards the living area beneath the canvas when hatches are open.Step 3: Allowing Time to Dry
After securely attaching the first portion of the flange, Sven allows ample time for it to dry before moving forward with additional steps. This patience and precision are key aspects of his successful boatbuilding methods.Step 4: Finishing Touches
Once the flange is fully dried, Sven removes the clamps carefully, ensuring no damage occurs during this process. He then moves on to attaching four more pieces onto these main frames, completing two pairs of flanges for the bulkhead hatches.The Final Touches
While two flanges form the primary support structure around the hatches, Sven mentions there are two additional pieces required at each end to ensure comprehensive protection. This attention to detail highlights his commitment to producing a durable and reliable design. “Sailing is about finding your path, whether it’s across an ocean or within yourself.” – Sven Yrvind In conclusion, making flanges around bulkhead hatches may seem complex at first glance, but by following Sven Yrvind’s meticulous process, enthusiasts can achieve professional-level results. Remember that the journey of boatbuilding is as rewarding as reaching your destination; it tests one’s patience and dedication. For those seeking to embark on this adventure or simply gain more insight into marine craftsmanship, Sven’s wisdom is invaluable.Sven begins by explaining that working on flanges vertically and horizontally is significantly easier than doing so in a flat position. To simplify the process further, he divides the task into two or three steps as suggested by fellow expert “for for.” This approach not only makes it more manageable but also allows for greater precision in crafting each component.Step 2: Applying Glue and Securing
Sven proceeds to apply glue along one edge of the flange, ensuring a secure bond when clamped into place. He emphasizes that this stage is crucial for maintaining the structural integrity of the flange, which in turn safeguards the living area beneath the canvas when hatches are open.Step 3: Allowing Time to Dry
After securely attaching the first portion of the flange, Sven allows ample time for it to dry before moving forward with additional steps. This patience and precision are key aspects of his successful boatbuilding methods.Step 4: Finishing Touches
Once the flange is fully dried, Sven removes the clamps carefully, ensuring no damage occurs during this process. He then moves on to attaching four more pieces onto these main frames, completing two pairs of flanges for the bulkhead hatches.The Final Touches
While two flanges form the primary support structure around the hatches, Sven mentions there are two additional pieces required at each end to ensure comprehensive protection. This attention to detail highlights his commitment to producing a durable and reliable design. “Sailing is about finding your path, whether it’s across an ocean or within yourself.” – Sven Yrvind In conclusion, making flanges around bulkhead hatches may seem complex at first glance, but by following Sven Yrvind’s meticulous process, enthusiasts can achieve professional-level results. Remember that the journey of boatbuilding is as rewarding as reaching your destination; it tests one’s patience and dedication. For those seeking to embark on this adventure or simply gain more insight into marine craftsmanship, Sven’s wisdom is invaluable.Sven Yrvind, a renowned yacht designer and sailor, shares valuable insights on creating flanges around bulkhead hatches for canvas protection in this enlightening video. By following his expert guidance, boat enthusiasts can ensure their living areas remain secure while allowing unhindered access through the hatches.Step 1: Starting with the Flange
Sven begins by explaining that working on flanges vertically and horizontally is significantly easier than doing so in a flat position. To simplify the process further, he divides the task into two or three steps as suggested by fellow expert “for for.” This approach not only makes it more manageable but also allows for greater precision in crafting each component.Step 2: Applying Glue and Securing
Sven proceeds to apply glue along one edge of the flange, ensuring a secure bond when clamped into place. He emphasizes that this stage is crucial for maintaining the structural integrity of the flange, which in turn safeguards the living area beneath the canvas when hatches are open.Step 3: Allowing Time to Dry
After securely attaching the first portion of the flange, Sven allows ample time for it to dry before moving forward with additional steps. This patience and precision are key aspects of his successful boatbuilding methods.Step 4: Finishing Touches
Once the flange is fully dried, Sven removes the clamps carefully, ensuring no damage occurs during this process. He then moves on to attaching four more pieces onto these main frames, completing two pairs of flanges for the bulkhead hatches.The Final Touches
While two flanges form the primary support structure around the hatches, Sven mentions there are two additional pieces required at each end to ensure comprehensive protection. This attention to detail highlights his commitment to producing a durable and reliable design. “Sailing is about finding your path, whether it’s across an ocean or within yourself.” – Sven Yrvind In conclusion, making flanges around bulkhead hatches may seem complex at first glance, but by following Sven Yrvind’s meticulous process, enthusiasts can achieve professional-level results. Remember that the journey of boatbuilding is as rewarding as reaching your destination; it tests one’s patience and dedication. For those seeking to embark on this adventure or simply gain more insight into marine craftsmanship, Sven’s wisdom is invaluable.Making Flanges Around Bulkhead Hatches for Canvas
Sven Yrvind, a renowned yacht designer and sailor, shares valuable insights on creating flanges around bulkhead hatches for canvas protection in this enlightening video. By following his expert guidance, boat enthusiasts can ensure their living areas remain secure while allowing unhindered access through the hatches.Step 1: Starting with the Flange
Sven begins by explaining that working on flanges vertically and horizontally is significantly easier than doing so in a flat position. To simplify the process further, he divides the task into two or three steps as suggested by fellow expert “for for.” This approach not only makes it more manageable but also allows for greater precision in crafting each component.Step 2: Applying Glue and Securing
Sven proceeds to apply glue along one edge of the flange, ensuring a secure bond when clamped into place. He emphasizes that this stage is crucial for maintaining the structural integrity of the flange, which in turn safeguards the living area beneath the canvas when hatches are open.Step 3: Allowing Time to Dry
After securely attaching the first portion of the flange, Sven allows ample time for it to dry before moving forward with additional steps. This patience and precision are key aspects of his successful boatbuilding methods.Step 4: Finishing Touches
Once the flange is fully dried, Sven removes the clamps carefully, ensuring no damage occurs during this process. He then moves on to attaching four more pieces onto these main frames, completing two pairs of flanges for the bulkhead hatches.The Final Touches
While two flanges form the primary support structure around the hatches, Sven mentions there are two additional pieces required at each end to ensure comprehensive protection. This attention to detail highlights his commitment to producing a durable and reliable design. “Sailing is about finding your path, whether it’s across an ocean or within yourself.” – Sven Yrvind In conclusion, making flanges around bulkhead hatches may seem complex at first glance, but by following Sven Yrvind’s meticulous process, enthusiasts can achieve professional-level results. Remember that the journey of boatbuilding is as rewarding as reaching your destination; it tests one’s patience and dedication. For those seeking to embark on this adventure or simply gain more insight into marine craftsmanship, Sven’s wisdom is invaluable.Once the flange is fully dried, Sven removes the clamps carefully, ensuring no damage occurs during this process. He then moves on to attaching four more pieces onto these main frames, completing two pairs of flanges for the bulkhead hatches.The Final Touches
While two flanges form the primary support structure around the hatches, Sven mentions there are two additional pieces required at each end to ensure comprehensive protection. This attention to detail highlights his commitment to producing a durable and reliable design. “Sailing is about finding your path, whether it’s across an ocean or within yourself.” – Sven Yrvind In conclusion, making flanges around bulkhead hatches may seem complex at first glance, but by following Sven Yrvind’s meticulous process, enthusiasts can achieve professional-level results. Remember that the journey of boatbuilding is as rewarding as reaching your destination; it tests one’s patience and dedication. For those seeking to embark on this adventure or simply gain more insight into marine craftsmanship, Sven’s wisdom is invaluable.After securely attaching the first portion of the flange, Sven allows ample time for it to dry before moving forward with additional steps. This patience and precision are key aspects of his successful boatbuilding methods.Step 4: Finishing Touches
Once the flange is fully dried, Sven removes the clamps carefully, ensuring no damage occurs during this process. He then moves on to attaching four more pieces onto these main frames, completing two pairs of flanges for the bulkhead hatches.The Final Touches
While two flanges form the primary support structure around the hatches, Sven mentions there are two additional pieces required at each end to ensure comprehensive protection. This attention to detail highlights his commitment to producing a durable and reliable design. “Sailing is about finding your path, whether it’s across an ocean or within yourself.” – Sven Yrvind In conclusion, making flanges around bulkhead hatches may seem complex at first glance, but by following Sven Yrvind’s meticulous process, enthusiasts can achieve professional-level results. Remember that the journey of boatbuilding is as rewarding as reaching your destination; it tests one’s patience and dedication. For those seeking to embark on this adventure or simply gain more insight into marine craftsmanship, Sven’s wisdom is invaluable.Sven proceeds to apply glue along one edge of the flange, ensuring a secure bond when clamped into place. He emphasizes that this stage is crucial for maintaining the structural integrity of the flange, which in turn safeguards the living area beneath the canvas when hatches are open.Step 3: Allowing Time to Dry
After securely attaching the first portion of the flange, Sven allows ample time for it to dry before moving forward with additional steps. This patience and precision are key aspects of his successful boatbuilding methods.Step 4: Finishing Touches
Once the flange is fully dried, Sven removes the clamps carefully, ensuring no damage occurs during this process. He then moves on to attaching four more pieces onto these main frames, completing two pairs of flanges for the bulkhead hatches.The Final Touches
While two flanges form the primary support structure around the hatches, Sven mentions there are two additional pieces required at each end to ensure comprehensive protection. This attention to detail highlights his commitment to producing a durable and reliable design. “Sailing is about finding your path, whether it’s across an ocean or within yourself.” – Sven Yrvind In conclusion, making flanges around bulkhead hatches may seem complex at first glance, but by following Sven Yrvind’s meticulous process, enthusiasts can achieve professional-level results. Remember that the journey of boatbuilding is as rewarding as reaching your destination; it tests one’s patience and dedication. For those seeking to embark on this adventure or simply gain more insight into marine craftsmanship, Sven’s wisdom is invaluable.Sven begins by explaining that working on flanges vertically and horizontally is significantly easier than doing so in a flat position. To simplify the process further, he divides the task into two or three steps as suggested by fellow expert “for for.” This approach not only makes it more manageable but also allows for greater precision in crafting each component.Step 2: Applying Glue and Securing
Sven proceeds to apply glue along one edge of the flange, ensuring a secure bond when clamped into place. He emphasizes that this stage is crucial for maintaining the structural integrity of the flange, which in turn safeguards the living area beneath the canvas when hatches are open.Step 3: Allowing Time to Dry
After securely attaching the first portion of the flange, Sven allows ample time for it to dry before moving forward with additional steps. This patience and precision are key aspects of his successful boatbuilding methods.Step 4: Finishing Touches
Once the flange is fully dried, Sven removes the clamps carefully, ensuring no damage occurs during this process. He then moves on to attaching four more pieces onto these main frames, completing two pairs of flanges for the bulkhead hatches.The Final Touches
While two flanges form the primary support structure around the hatches, Sven mentions there are two additional pieces required at each end to ensure comprehensive protection. This attention to detail highlights his commitment to producing a durable and reliable design. “Sailing is about finding your path, whether it’s across an ocean or within yourself.” – Sven Yrvind In conclusion, making flanges around bulkhead hatches may seem complex at first glance, but by following Sven Yrvind’s meticulous process, enthusiasts can achieve professional-level results. Remember that the journey of boatbuilding is as rewarding as reaching your destination; it tests one’s patience and dedication. For those seeking to embark on this adventure or simply gain more insight into marine craftsmanship, Sven’s wisdom is invaluable.Sven Yrvind, a renowned yacht designer and sailor, shares valuable insights on creating flanges around bulkhead hatches for canvas protection in this enlightening video. By following his expert guidance, boat enthusiasts can ensure their living areas remain secure while allowing unhindered access through the hatches.Step 1: Starting with the Flange
Sven begins by explaining that working on flanges vertically and horizontally is significantly easier than doing so in a flat position. To simplify the process further, he divides the task into two or three steps as suggested by fellow expert “for for.” This approach not only makes it more manageable but also allows for greater precision in crafting each component.Step 2: Applying Glue and Securing
Sven proceeds to apply glue along one edge of the flange, ensuring a secure bond when clamped into place. He emphasizes that this stage is crucial for maintaining the structural integrity of the flange, which in turn safeguards the living area beneath the canvas when hatches are open.Step 3: Allowing Time to Dry
After securely attaching the first portion of the flange, Sven allows ample time for it to dry before moving forward with additional steps. This patience and precision are key aspects of his successful boatbuilding methods.Step 4: Finishing Touches
Once the flange is fully dried, Sven removes the clamps carefully, ensuring no damage occurs during this process. He then moves on to attaching four more pieces onto these main frames, completing two pairs of flanges for the bulkhead hatches.The Final Touches
While two flanges form the primary support structure around the hatches, Sven mentions there are two additional pieces required at each end to ensure comprehensive protection. This attention to detail highlights his commitment to producing a durable and reliable design. “Sailing is about finding your path, whether it’s across an ocean or within yourself.” – Sven Yrvind In conclusion, making flanges around bulkhead hatches may seem complex at first glance, but by following Sven Yrvind’s meticulous process, enthusiasts can achieve professional-level results. Remember that the journey of boatbuilding is as rewarding as reaching your destination; it tests one’s patience and dedication. For those seeking to embark on this adventure or simply gain more insight into marine craftsmanship, Sven’s wisdom is invaluable.Making Flanges Around Bulkhead Hatches for Canvas
Sven Yrvind, a renowned yacht designer and sailor, shares valuable insights on creating flanges around bulkhead hatches for canvas protection in this enlightening video. By following his expert guidance, boat enthusiasts can ensure their living areas remain secure while allowing unhindered access through the hatches.Step 1: Starting with the Flange
Sven begins by explaining that working on flanges vertically and horizontally is significantly easier than doing so in a flat position. To simplify the process further, he divides the task into two or three steps as suggested by fellow expert “for for.” This approach not only makes it more manageable but also allows for greater precision in crafting each component.Step 2: Applying Glue and Securing
Sven proceeds to apply glue along one edge of the flange, ensuring a secure bond when clamped into place. He emphasizes that this stage is crucial for maintaining the structural integrity of the flange, which in turn safeguards the living area beneath the canvas when hatches are open.Step 3: Allowing Time to Dry
After securely attaching the first portion of the flange, Sven allows ample time for it to dry before moving forward with additional steps. This patience and precision are key aspects of his successful boatbuilding methods.Step 4: Finishing Touches
Once the flange is fully dried, Sven removes the clamps carefully, ensuring no damage occurs during this process. He then moves on to attaching four more pieces onto these main frames, completing two pairs of flanges for the bulkhead hatches.The Final Touches
While two flanges form the primary support structure around the hatches, Sven mentions there are two additional pieces required at each end to ensure comprehensive protection. This attention to detail highlights his commitment to producing a durable and reliable design. “Sailing is about finding your path, whether it’s across an ocean or within yourself.” – Sven Yrvind In conclusion, making flanges around bulkhead hatches may seem complex at first glance, but by following Sven Yrvind’s meticulous process, enthusiasts can achieve professional-level results. Remember that the journey of boatbuilding is as rewarding as reaching your destination; it tests one’s patience and dedication. For those seeking to embark on this adventure or simply gain more insight into marine craftsmanship, Sven’s wisdom is invaluable.Sven Yrvind, a renowned yacht designer and sailor, shares valuable insights on creating flanges around bulkhead hatches for canvas protection in this enlightening video. By following his expert guidance, boat enthusiasts can ensure their living areas remain secure while allowing unhindered access through the hatches.Step 1: Starting with the Flange
Sven begins by explaining that working on flanges vertically and horizontally is significantly easier than doing so in a flat position. To simplify the process further, he divides the task into two or three steps as suggested by fellow expert “for for.” This approach not only makes it more manageable but also allows for greater precision in crafting each component.Step 2: Applying Glue and Securing
Sven proceeds to apply glue along one edge of the flange, ensuring a secure bond when clamped into place. He emphasizes that this stage is crucial for maintaining the structural integrity of the flange, which in turn safeguards the living area beneath the canvas when hatches are open.Step 3: Allowing Time to Dry
After securely attaching the first portion of the flange, Sven allows ample time for it to dry before moving forward with additional steps. This patience and precision are key aspects of his successful boatbuilding methods.Step 4: Finishing Touches
Once the flange is fully dried, Sven removes the clamps carefully, ensuring no damage occurs during this process. He then moves on to attaching four more pieces onto these main frames, completing two pairs of flanges for the bulkhead hatches.The Final Touches
While two flanges form the primary support structure around the hatches, Sven mentions there are two additional pieces required at each end to ensure comprehensive protection. This attention to detail highlights his commitment to producing a durable and reliable design. “Sailing is about finding your path, whether it’s across an ocean or within yourself.” – Sven Yrvind In conclusion, making flanges around bulkhead hatches may seem complex at first glance, but by following Sven Yrvind’s meticulous process, enthusiasts can achieve professional-level results. Remember that the journey of boatbuilding is as rewarding as reaching your destination; it tests one’s patience and dedication. For those seeking to embark on this adventure or simply gain more insight into marine craftsmanship, Sven’s wisdom is invaluable.Making Flanges Around Bulkhead Hatches for Canvas
Sven Yrvind, a renowned yacht designer and sailor, shares valuable insights on creating flanges around bulkhead hatches for canvas protection in this enlightening video. By following his expert guidance, boat enthusiasts can ensure their living areas remain secure while allowing unhindered access through the hatches.Step 1: Starting with the Flange
Sven begins by explaining that working on flanges vertically and horizontally is significantly easier than doing so in a flat position. To simplify the process further, he divides the task into two or three steps as suggested by fellow expert “for for.” This approach not only makes it more manageable but also allows for greater precision in crafting each component.Step 2: Applying Glue and Securing
Sven proceeds to apply glue along one edge of the flange, ensuring a secure bond when clamped into place. He emphasizes that this stage is crucial for maintaining the structural integrity of the flange, which in turn safeguards the living area beneath the canvas when hatches are open.Step 3: Allowing Time to Dry
After securely attaching the first portion of the flange, Sven allows ample time for it to dry before moving forward with additional steps. This patience and precision are key aspects of his successful boatbuilding methods.Step 4: Finishing Touches
Once the flange is fully dried, Sven removes the clamps carefully, ensuring no damage occurs during this process. He then moves on to attaching four more pieces onto these main frames, completing two pairs of flanges for the bulkhead hatches.The Final Touches
While two flanges form the primary support structure around the hatches, Sven mentions there are two additional pieces required at each end to ensure comprehensive protection. This attention to detail highlights his commitment to producing a durable and reliable design. “Sailing is about finding your path, whether it’s across an ocean or within yourself.” – Sven Yrvind In conclusion, making flanges around bulkhead hatches may seem complex at first glance, but by following Sven Yrvind’s meticulous process, enthusiasts can achieve professional-level results. Remember that the journey of boatbuilding is as rewarding as reaching your destination; it tests one’s patience and dedication. For those seeking to embark on this adventure or simply gain more insight into marine craftsmanship, Sven’s wisdom is invaluable.Once the flange is fully dried, Sven removes the clamps carefully, ensuring no damage occurs during this process. He then moves on to attaching four more pieces onto these main frames, completing two pairs of flanges for the bulkhead hatches.The Final Touches
While two flanges form the primary support structure around the hatches, Sven mentions there are two additional pieces required at each end to ensure comprehensive protection. This attention to detail highlights his commitment to producing a durable and reliable design. “Sailing is about finding your path, whether it’s across an ocean or within yourself.” – Sven Yrvind In conclusion, making flanges around bulkhead hatches may seem complex at first glance, but by following Sven Yrvind’s meticulous process, enthusiasts can achieve professional-level results. Remember that the journey of boatbuilding is as rewarding as reaching your destination; it tests one’s patience and dedication. For those seeking to embark on this adventure or simply gain more insight into marine craftsmanship, Sven’s wisdom is invaluable.Making Flanges Around Bulkhead Hatches for Canvas
Sven Yrvind, a renowned yacht designer and sailor, shares valuable insights on creating flanges around bulkhead hatches for canvas protection in this enlightening video. By following his expert guidance, boat enthusiasts can ensure their living areas remain secure while allowing unhindered access through the hatches.Step 1: Starting with the Flange
Sven begins by explaining that working on flanges vertically and horizontally is significantly easier than doing so in a flat position. To simplify the process further, he divides the task into two or three steps as suggested by fellow expert “for for.” This approach not only makes it more manageable but also allows for greater precision in crafting each component.Step 2: Applying Glue and Securing
Sven proceeds to apply glue along one edge of the flange, ensuring a secure bond when clamped into place. He emphasizes that this stage is crucial for maintaining the structural integrity of the flange, which in turn safeguards the living area beneath the canvas when hatches are open.Step 3: Allowing Time to Dry
After securely attaching the first portion of the flange, Sven allows ample time for it to dry before moving forward with additional steps. This patience and precision are key aspects of his successful boatbuilding methods.Step 4: Finishing Touches
Once the flange is fully dried, Sven removes the clamps carefully, ensuring no damage occurs during this process. He then moves on to attaching four more pieces onto these main frames, completing two pairs of flanges for the bulkhead hatches.The Final Touches
While two flanges form the primary support structure around the hatches, Sven mentions there are two additional pieces required at each end to ensure comprehensive protection. This attention to detail highlights his commitment to producing a durable and reliable design. “Sailing is about finding your path, whether it’s across an ocean or within yourself.” – Sven Yrvind In conclusion, making flanges around bulkhead hatches may seem complex at first glance, but by following Sven Yrvind’s meticulous process, enthusiasts can achieve professional-level results. Remember that the journey of boatbuilding is as rewarding as reaching your destination; it tests one’s patience and dedication. For those seeking to embark on this adventure or simply gain more insight into marine craftsmanship, Sven’s wisdom is invaluable.After securely attaching the first portion of the flange, Sven allows ample time for it to dry before moving forward with additional steps. This patience and precision are key aspects of his successful boatbuilding methods.Step 4: Finishing Touches
Once the flange is fully dried, Sven removes the clamps carefully, ensuring no damage occurs during this process. He then moves on to attaching four more pieces onto these main frames, completing two pairs of flanges for the bulkhead hatches.The Final Touches
While two flanges form the primary support structure around the hatches, Sven mentions there are two additional pieces required at each end to ensure comprehensive protection. This attention to detail highlights his commitment to producing a durable and reliable design. “Sailing is about finding your path, whether it’s across an ocean or within yourself.” – Sven Yrvind In conclusion, making flanges around bulkhead hatches may seem complex at first glance, but by following Sven Yrvind’s meticulous process, enthusiasts can achieve professional-level results. Remember that the journey of boatbuilding is as rewarding as reaching your destination; it tests one’s patience and dedication. For those seeking to embark on this adventure or simply gain more insight into marine craftsmanship, Sven’s wisdom is invaluable.Making Flanges Around Bulkhead Hatches for Canvas
Sven Yrvind, a renowned yacht designer and sailor, shares valuable insights on creating flanges around bulkhead hatches for canvas protection in this enlightening video. By following his expert guidance, boat enthusiasts can ensure their living areas remain secure while allowing unhindered access through the hatches.Step 1: Starting with the Flange
Sven begins by explaining that working on flanges vertically and horizontally is significantly easier than doing so in a flat position. To simplify the process further, he divides the task into two or three steps as suggested by fellow expert “for for.” This approach not only makes it more manageable but also allows for greater precision in crafting each component.Step 2: Applying Glue and Securing
Sven proceeds to apply glue along one edge of the flange, ensuring a secure bond when clamped into place. He emphasizes that this stage is crucial for maintaining the structural integrity of the flange, which in turn safeguards the living area beneath the canvas when hatches are open.Step 3: Allowing Time to Dry
After securely attaching the first portion of the flange, Sven allows ample time for it to dry before moving forward with additional steps. This patience and precision are key aspects of his successful boatbuilding methods.Step 4: Finishing Touches
Once the flange is fully dried, Sven removes the clamps carefully, ensuring no damage occurs during this process. He then moves on to attaching four more pieces onto these main frames, completing two pairs of flanges for the bulkhead hatches.The Final Touches
While two flanges form the primary support structure around the hatches, Sven mentions there are two additional pieces required at each end to ensure comprehensive protection. This attention to detail highlights his commitment to producing a durable and reliable design. “Sailing is about finding your path, whether it’s across an ocean or within yourself.” – Sven Yrvind In conclusion, making flanges around bulkhead hatches may seem complex at first glance, but by following Sven Yrvind’s meticulous process, enthusiasts can achieve professional-level results. Remember that the journey of boatbuilding is as rewarding as reaching your destination; it tests one’s patience and dedication. For those seeking to embark on this adventure or simply gain more insight into marine craftsmanship, Sven’s wisdom is invaluable.Sven proceeds to apply glue along one edge of the flange, ensuring a secure bond when clamped into place. He emphasizes that this stage is crucial for maintaining the structural integrity of the flange, which in turn safeguards the living area beneath the canvas when hatches are open.Step 3: Allowing Time to Dry
After securely attaching the first portion of the flange, Sven allows ample time for it to dry before moving forward with additional steps. This patience and precision are key aspects of his successful boatbuilding methods.Step 4: Finishing Touches
Once the flange is fully dried, Sven removes the clamps carefully, ensuring no damage occurs during this process. He then moves on to attaching four more pieces onto these main frames, completing two pairs of flanges for the bulkhead hatches.The Final Touches
While two flanges form the primary support structure around the hatches, Sven mentions there are two additional pieces required at each end to ensure comprehensive protection. This attention to detail highlights his commitment to producing a durable and reliable design. “Sailing is about finding your path, whether it’s across an ocean or within yourself.” – Sven Yrvind In conclusion, making flanges around bulkhead hatches may seem complex at first glance, but by following Sven Yrvind’s meticulous process, enthusiasts can achieve professional-level results. Remember that the journey of boatbuilding is as rewarding as reaching your destination; it tests one’s patience and dedication. For those seeking to embark on this adventure or simply gain more insight into marine craftsmanship, Sven’s wisdom is invaluable.Making Flanges Around Bulkhead Hatches for Canvas
Sven Yrvind, a renowned yacht designer and sailor, shares valuable insights on creating flanges around bulkhead hatches for canvas protection in this enlightening video. By following his expert guidance, boat enthusiasts can ensure their living areas remain secure while allowing unhindered access through the hatches.Step 1: Starting with the Flange
Sven begins by explaining that working on flanges vertically and horizontally is significantly easier than doing so in a flat position. To simplify the process further, he divides the task into two or three steps as suggested by fellow expert “for for.” This approach not only makes it more manageable but also allows for greater precision in crafting each component.Step 2: Applying Glue and Securing
Sven proceeds to apply glue along one edge of the flange, ensuring a secure bond when clamped into place. He emphasizes that this stage is crucial for maintaining the structural integrity of the flange, which in turn safeguards the living area beneath the canvas when hatches are open.Step 3: Allowing Time to Dry
After securely attaching the first portion of the flange, Sven allows ample time for it to dry before moving forward with additional steps. This patience and precision are key aspects of his successful boatbuilding methods.Step 4: Finishing Touches
Once the flange is fully dried, Sven removes the clamps carefully, ensuring no damage occurs during this process. He then moves on to attaching four more pieces onto these main frames, completing two pairs of flanges for the bulkhead hatches.The Final Touches
While two flanges form the primary support structure around the hatches, Sven mentions there are two additional pieces required at each end to ensure comprehensive protection. This attention to detail highlights his commitment to producing a durable and reliable design. “Sailing is about finding your path, whether it’s across an ocean or within yourself.” – Sven Yrvind In conclusion, making flanges around bulkhead hatches may seem complex at first glance, but by following Sven Yrvind’s meticulous process, enthusiasts can achieve professional-level results. Remember that the journey of boatbuilding is as rewarding as reaching your destination; it tests one’s patience and dedication. For those seeking to embark on this adventure or simply gain more insight into marine craftsmanship, Sven’s wisdom is invaluable.Sven begins by explaining that working on flanges vertically and horizontally is significantly easier than doing so in a flat position. To simplify the process further, he divides the task into two or three steps as suggested by fellow expert “for for.” This approach not only makes it more manageable but also allows for greater precision in crafting each component.Step 2: Applying Glue and Securing
Sven proceeds to apply glue along one edge of the flange, ensuring a secure bond when clamped into place. He emphasizes that this stage is crucial for maintaining the structural integrity of the flange, which in turn safeguards the living area beneath the canvas when hatches are open.Step 3: Allowing Time to Dry
After securely attaching the first portion of the flange, Sven allows ample time for it to dry before moving forward with additional steps. This patience and precision are key aspects of his successful boatbuilding methods.Step 4: Finishing Touches
Once the flange is fully dried, Sven removes the clamps carefully, ensuring no damage occurs during this process. He then moves on to attaching four more pieces onto these main frames, completing two pairs of flanges for the bulkhead hatches.The Final Touches
While two flanges form the primary support structure around the hatches, Sven mentions there are two additional pieces required at each end to ensure comprehensive protection. This attention to detail highlights his commitment to producing a durable and reliable design. “Sailing is about finding your path, whether it’s across an ocean or within yourself.” – Sven Yrvind In conclusion, making flanges around bulkhead hatches may seem complex at first glance, but by following Sven Yrvind’s meticulous process, enthusiasts can achieve professional-level results. Remember that the journey of boatbuilding is as rewarding as reaching your destination; it tests one’s patience and dedication. For those seeking to embark on this adventure or simply gain more insight into marine craftsmanship, Sven’s wisdom is invaluable.Making Flanges Around Bulkhead Hatches for Canvas
Sven Yrvind, a renowned yacht designer and sailor, shares valuable insights on creating flanges around bulkhead hatches for canvas protection in this enlightening video. By following his expert guidance, boat enthusiasts can ensure their living areas remain secure while allowing unhindered access through the hatches.Step 1: Starting with the Flange
Sven begins by explaining that working on flanges vertically and horizontally is significantly easier than doing so in a flat position. To simplify the process further, he divides the task into two or three steps as suggested by fellow expert “for for.” This approach not only makes it more manageable but also allows for greater precision in crafting each component.Step 2: Applying Glue and Securing
Sven proceeds to apply glue along one edge of the flange, ensuring a secure bond when clamped into place. He emphasizes that this stage is crucial for maintaining the structural integrity of the flange, which in turn safeguards the living area beneath the canvas when hatches are open.Step 3: Allowing Time to Dry
After securely attaching the first portion of the flange, Sven allows ample time for it to dry before moving forward with additional steps. This patience and precision are key aspects of his successful boatbuilding methods.Step 4: Finishing Touches
Once the flange is fully dried, Sven removes the clamps carefully, ensuring no damage occurs during this process. He then moves on to attaching four more pieces onto these main frames, completing two pairs of flanges for the bulkhead hatches.The Final Touches
While two flanges form the primary support structure around the hatches, Sven mentions there are two additional pieces required at each end to ensure comprehensive protection. This attention to detail highlights his commitment to producing a durable and reliable design. “Sailing is about finding your path, whether it’s across an ocean or within yourself.” – Sven Yrvind In conclusion, making flanges around bulkhead hatches may seem complex at first glance, but by following Sven Yrvind’s meticulous process, enthusiasts can achieve professional-level results. Remember that the journey of boatbuilding is as rewarding as reaching your destination; it tests one’s patience and dedication. For those seeking to embark on this adventure or simply gain more insight into marine craftsmanship, Sven’s wisdom is invaluable.Sven Yrvind, a renowned yacht designer and sailor, shares valuable insights on creating flanges around bulkhead hatches for canvas protection in this enlightening video. By following his expert guidance, boat enthusiasts can ensure their living areas remain secure while allowing unhindered access through the hatches.Step 1: Starting with the Flange
Sven begins by explaining that working on flanges vertically and horizontally is significantly easier than doing so in a flat position. To simplify the process further, he divides the task into two or three steps as suggested by fellow expert “for for.” This approach not only makes it more manageable but also allows for greater precision in crafting each component.Step 2: Applying Glue and Securing
Sven proceeds to apply glue along one edge of the flange, ensuring a secure bond when clamped into place. He emphasizes that this stage is crucial for maintaining the structural integrity of the flange, which in turn safeguards the living area beneath the canvas when hatches are open.Step 3: Allowing Time to Dry
After securely attaching the first portion of the flange, Sven allows ample time for it to dry before moving forward with additional steps. This patience and precision are key aspects of his successful boatbuilding methods.Step 4: Finishing Touches
Once the flange is fully dried, Sven removes the clamps carefully, ensuring no damage occurs during this process. He then moves on to attaching four more pieces onto these main frames, completing two pairs of flanges for the bulkhead hatches.The Final Touches
While two flanges form the primary support structure around the hatches, Sven mentions there are two additional pieces required at each end to ensure comprehensive protection. This attention to detail highlights his commitment to producing a durable and reliable design. “Sailing is about finding your path, whether it’s across an ocean or within yourself.” – Sven Yrvind In conclusion, making flanges around bulkhead hatches may seem complex at first glance, but by following Sven Yrvind’s meticulous process, enthusiasts can achieve professional-level results. Remember that the journey of boatbuilding is as rewarding as reaching your destination; it tests one’s patience and dedication. For those seeking to embark on this adventure or simply gain more insight into marine craftsmanship, Sven’s wisdom is invaluable.Making Flanges Around Bulkhead Hatches for Canvas
Sven Yrvind, a renowned yacht designer and sailor, shares valuable insights on creating flanges around bulkhead hatches for canvas protection in this enlightening video. By following his expert guidance, boat enthusiasts can ensure their living areas remain secure while allowing unhindered access through the hatches.Step 1: Starting with the Flange
Sven begins by explaining that working on flanges vertically and horizontally is significantly easier than doing so in a flat position. To simplify the process further, he divides the task into two or three steps as suggested by fellow expert “for for.” This approach not only makes it more manageable but also allows for greater precision in crafting each component.Step 2: Applying Glue and Securing
Sven proceeds to apply glue along one edge of the flange, ensuring a secure bond when clamped into place. He emphasizes that this stage is crucial for maintaining the structural integrity of the flange, which in turn safeguards the living area beneath the canvas when hatches are open.Step 3: Allowing Time to Dry
After securely attaching the first portion of the flange, Sven allows ample time for it to dry before moving forward with additional steps. This patience and precision are key aspects of his successful boatbuilding methods.Step 4: Finishing Touches
Once the flange is fully dried, Sven removes the clamps carefully, ensuring no damage occurs during this process. He then moves on to attaching four more pieces onto these main frames, completing two pairs of flanges for the bulkhead hatches.The Final Touches
While two flanges form the primary support structure around the hatches, Sven mentions there are two additional pieces required at each end to ensure comprehensive protection. This attention to detail highlights his commitment to producing a durable and reliable design. “Sailing is about finding your path, whether it’s across an ocean or within yourself.” – Sven Yrvind In conclusion, making flanges around bulkhead hatches may seem complex at first glance, but by following Sven Yrvind’s meticulous process, enthusiasts can achieve professional-level results. Remember that the journey of boatbuilding is as rewarding as reaching your destination; it tests one’s patience and dedication. For those seeking to embark on this adventure or simply gain more insight into marine craftsmanship, Sven’s wisdom is invaluable.Once the flange is fully dried, Sven removes the clamps carefully, ensuring no damage occurs during this process. He then moves on to attaching four more pieces onto these main frames, completing two pairs of flanges for the bulkhead hatches.The Final Touches
While two flanges form the primary support structure around the hatches, Sven mentions there are two additional pieces required at each end to ensure comprehensive protection. This attention to detail highlights his commitment to producing a durable and reliable design. “Sailing is about finding your path, whether it’s across an ocean or within yourself.” – Sven Yrvind In conclusion, making flanges around bulkhead hatches may seem complex at first glance, but by following Sven Yrvind’s meticulous process, enthusiasts can achieve professional-level results. Remember that the journey of boatbuilding is as rewarding as reaching your destination; it tests one’s patience and dedication. For those seeking to embark on this adventure or simply gain more insight into marine craftsmanship, Sven’s wisdom is invaluable.Sven Yrvind, a renowned yacht designer and sailor, shares valuable insights on creating flanges around bulkhead hatches for canvas protection in this enlightening video. By following his expert guidance, boat enthusiasts can ensure their living areas remain secure while allowing unhindered access through the hatches.Step 1: Starting with the Flange
Sven begins by explaining that working on flanges vertically and horizontally is significantly easier than doing so in a flat position. To simplify the process further, he divides the task into two or three steps as suggested by fellow expert “for for.” This approach not only makes it more manageable but also allows for greater precision in crafting each component.Step 2: Applying Glue and Securing
Sven proceeds to apply glue along one edge of the flange, ensuring a secure bond when clamped into place. He emphasizes that this stage is crucial for maintaining the structural integrity of the flange, which in turn safeguards the living area beneath the canvas when hatches are open.Step 3: Allowing Time to Dry
After securely attaching the first portion of the flange, Sven allows ample time for it to dry before moving forward with additional steps. This patience and precision are key aspects of his successful boatbuilding methods.Step 4: Finishing Touches
Once the flange is fully dried, Sven removes the clamps carefully, ensuring no damage occurs during this process. He then moves on to attaching four more pieces onto these main frames, completing two pairs of flanges for the bulkhead hatches.The Final Touches
While two flanges form the primary support structure around the hatches, Sven mentions there are two additional pieces required at each end to ensure comprehensive protection. This attention to detail highlights his commitment to producing a durable and reliable design. “Sailing is about finding your path, whether it’s across an ocean or within yourself.” – Sven Yrvind In conclusion, making flanges around bulkhead hatches may seem complex at first glance, but by following Sven Yrvind’s meticulous process, enthusiasts can achieve professional-level results. Remember that the journey of boatbuilding is as rewarding as reaching your destination; it tests one’s patience and dedication. For those seeking to embark on this adventure or simply gain more insight into marine craftsmanship, Sven’s wisdom is invaluable.Making Flanges Around Bulkhead Hatches for Canvas
Sven Yrvind, a renowned yacht designer and sailor, shares valuable insights on creating flanges around bulkhead hatches for canvas protection in this enlightening video. By following his expert guidance, boat enthusiasts can ensure their living areas remain secure while allowing unhindered access through the hatches.Step 1: Starting with the Flange
Sven begins by explaining that working on flanges vertically and horizontally is significantly easier than doing so in a flat position. To simplify the process further, he divides the task into two or three steps as suggested by fellow expert “for for.” This approach not only makes it more manageable but also allows for greater precision in crafting each component.Step 2: Applying Glue and Securing
Sven proceeds to apply glue along one edge of the flange, ensuring a secure bond when clamped into place. He emphasizes that this stage is crucial for maintaining the structural integrity of the flange, which in turn safeguards the living area beneath the canvas when hatches are open.Step 3: Allowing Time to Dry
After securely attaching the first portion of the flange, Sven allows ample time for it to dry before moving forward with additional steps. This patience and precision are key aspects of his successful boatbuilding methods.Step 4: Finishing Touches
Once the flange is fully dried, Sven removes the clamps carefully, ensuring no damage occurs during this process. He then moves on to attaching four more pieces onto these main frames, completing two pairs of flanges for the bulkhead hatches.The Final Touches
While two flanges form the primary support structure around the hatches, Sven mentions there are two additional pieces required at each end to ensure comprehensive protection. This attention to detail highlights his commitment to producing a durable and reliable design. “Sailing is about finding your path, whether it’s across an ocean or within yourself.” – Sven Yrvind In conclusion, making flanges around bulkhead hatches may seem complex at first glance, but by following Sven Yrvind’s meticulous process, enthusiasts can achieve professional-level results. Remember that the journey of boatbuilding is as rewarding as reaching your destination; it tests one’s patience and dedication. For those seeking to embark on this adventure or simply gain more insight into marine craftsmanship, Sven’s wisdom is invaluable.After securely attaching the first portion of the flange, Sven allows ample time for it to dry before moving forward with additional steps. This patience and precision are key aspects of his successful boatbuilding methods.Step 4: Finishing Touches
Once the flange is fully dried, Sven removes the clamps carefully, ensuring no damage occurs during this process. He then moves on to attaching four more pieces onto these main frames, completing two pairs of flanges for the bulkhead hatches.The Final Touches
While two flanges form the primary support structure around the hatches, Sven mentions there are two additional pieces required at each end to ensure comprehensive protection. This attention to detail highlights his commitment to producing a durable and reliable design. “Sailing is about finding your path, whether it’s across an ocean or within yourself.” – Sven Yrvind In conclusion, making flanges around bulkhead hatches may seem complex at first glance, but by following Sven Yrvind’s meticulous process, enthusiasts can achieve professional-level results. Remember that the journey of boatbuilding is as rewarding as reaching your destination; it tests one’s patience and dedication. For those seeking to embark on this adventure or simply gain more insight into marine craftsmanship, Sven’s wisdom is invaluable.Sven Yrvind, a renowned yacht designer and sailor, shares valuable insights on creating flanges around bulkhead hatches for canvas protection in this enlightening video. By following his expert guidance, boat enthusiasts can ensure their living areas remain secure while allowing unhindered access through the hatches.Step 1: Starting with the Flange
Sven begins by explaining that working on flanges vertically and horizontally is significantly easier than doing so in a flat position. To simplify the process further, he divides the task into two or three steps as suggested by fellow expert “for for.” This approach not only makes it more manageable but also allows for greater precision in crafting each component.Step 2: Applying Glue and Securing
Sven proceeds to apply glue along one edge of the flange, ensuring a secure bond when clamped into place. He emphasizes that this stage is crucial for maintaining the structural integrity of the flange, which in turn safeguards the living area beneath the canvas when hatches are open.Step 3: Allowing Time to Dry
After securely attaching the first portion of the flange, Sven allows ample time for it to dry before moving forward with additional steps. This patience and precision are key aspects of his successful boatbuilding methods.Step 4: Finishing Touches
Once the flange is fully dried, Sven removes the clamps carefully, ensuring no damage occurs during this process. He then moves on to attaching four more pieces onto these main frames, completing two pairs of flanges for the bulkhead hatches.The Final Touches
While two flanges form the primary support structure around the hatches, Sven mentions there are two additional pieces required at each end to ensure comprehensive protection. This attention to detail highlights his commitment to producing a durable and reliable design. “Sailing is about finding your path, whether it’s across an ocean or within yourself.” – Sven Yrvind In conclusion, making flanges around bulkhead hatches may seem complex at first glance, but by following Sven Yrvind’s meticulous process, enthusiasts can achieve professional-level results. Remember that the journey of boatbuilding is as rewarding as reaching your destination; it tests one’s patience and dedication. For those seeking to embark on this adventure or simply gain more insight into marine craftsmanship, Sven’s wisdom is invaluable.Making Flanges Around Bulkhead Hatches for Canvas
Sven Yrvind, a renowned yacht designer and sailor, shares valuable insights on creating flanges around bulkhead hatches for canvas protection in this enlightening video. By following his expert guidance, boat enthusiasts can ensure their living areas remain secure while allowing unhindered access through the hatches.Step 1: Starting with the Flange
Sven begins by explaining that working on flanges vertically and horizontally is significantly easier than doing so in a flat position. To simplify the process further, he divides the task into two or three steps as suggested by fellow expert “for for.” This approach not only makes it more manageable but also allows for greater precision in crafting each component.Step 2: Applying Glue and Securing
Sven proceeds to apply glue along one edge of the flange, ensuring a secure bond when clamped into place. He emphasizes that this stage is crucial for maintaining the structural integrity of the flange, which in turn safeguards the living area beneath the canvas when hatches are open.Step 3: Allowing Time to Dry
After securely attaching the first portion of the flange, Sven allows ample time for it to dry before moving forward with additional steps. This patience and precision are key aspects of his successful boatbuilding methods.Step 4: Finishing Touches
Once the flange is fully dried, Sven removes the clamps carefully, ensuring no damage occurs during this process. He then moves on to attaching four more pieces onto these main frames, completing two pairs of flanges for the bulkhead hatches.The Final Touches
While two flanges form the primary support structure around the hatches, Sven mentions there are two additional pieces required at each end to ensure comprehensive protection. This attention to detail highlights his commitment to producing a durable and reliable design. “Sailing is about finding your path, whether it’s across an ocean or within yourself.” – Sven Yrvind In conclusion, making flanges around bulkhead hatches may seem complex at first glance, but by following Sven Yrvind’s meticulous process, enthusiasts can achieve professional-level results. Remember that the journey of boatbuilding is as rewarding as reaching your destination; it tests one’s patience and dedication. For those seeking to embark on this adventure or simply gain more insight into marine craftsmanship, Sven’s wisdom is invaluable.Sven proceeds to apply glue along one edge of the flange, ensuring a secure bond when clamped into place. He emphasizes that this stage is crucial for maintaining the structural integrity of the flange, which in turn safeguards the living area beneath the canvas when hatches are open.Step 3: Allowing Time to Dry
After securely attaching the first portion of the flange, Sven allows ample time for it to dry before moving forward with additional steps. This patience and precision are key aspects of his successful boatbuilding methods.Step 4: Finishing Touches
Once the flange is fully dried, Sven removes the clamps carefully, ensuring no damage occurs during this process. He then moves on to attaching four more pieces onto these main frames, completing two pairs of flanges for the bulkhead hatches.The Final Touches
While two flanges form the primary support structure around the hatches, Sven mentions there are two additional pieces required at each end to ensure comprehensive protection. This attention to detail highlights his commitment to producing a durable and reliable design. “Sailing is about finding your path, whether it’s across an ocean or within yourself.” – Sven Yrvind In conclusion, making flanges around bulkhead hatches may seem complex at first glance, but by following Sven Yrvind’s meticulous process, enthusiasts can achieve professional-level results. Remember that the journey of boatbuilding is as rewarding as reaching your destination; it tests one’s patience and dedication. For those seeking to embark on this adventure or simply gain more insight into marine craftsmanship, Sven’s wisdom is invaluable.Sven Yrvind, a renowned yacht designer and sailor, shares valuable insights on creating flanges around bulkhead hatches for canvas protection in this enlightening video. By following his expert guidance, boat enthusiasts can ensure their living areas remain secure while allowing unhindered access through the hatches.Step 1: Starting with the Flange
Sven begins by explaining that working on flanges vertically and horizontally is significantly easier than doing so in a flat position. To simplify the process further, he divides the task into two or three steps as suggested by fellow expert “for for.” This approach not only makes it more manageable but also allows for greater precision in crafting each component.Step 2: Applying Glue and Securing
Sven proceeds to apply glue along one edge of the flange, ensuring a secure bond when clamped into place. He emphasizes that this stage is crucial for maintaining the structural integrity of the flange, which in turn safeguards the living area beneath the canvas when hatches are open.Step 3: Allowing Time to Dry
After securely attaching the first portion of the flange, Sven allows ample time for it to dry before moving forward with additional steps. This patience and precision are key aspects of his successful boatbuilding methods.Step 4: Finishing Touches
Once the flange is fully dried, Sven removes the clamps carefully, ensuring no damage occurs during this process. He then moves on to attaching four more pieces onto these main frames, completing two pairs of flanges for the bulkhead hatches.The Final Touches
While two flanges form the primary support structure around the hatches, Sven mentions there are two additional pieces required at each end to ensure comprehensive protection. This attention to detail highlights his commitment to producing a durable and reliable design. “Sailing is about finding your path, whether it’s across an ocean or within yourself.” – Sven Yrvind In conclusion, making flanges around bulkhead hatches may seem complex at first glance, but by following Sven Yrvind’s meticulous process, enthusiasts can achieve professional-level results. Remember that the journey of boatbuilding is as rewarding as reaching your destination; it tests one’s patience and dedication. For those seeking to embark on this adventure or simply gain more insight into marine craftsmanship, Sven’s wisdom is invaluable.Making Flanges Around Bulkhead Hatches for Canvas
Sven Yrvind, a renowned yacht designer and sailor, shares valuable insights on creating flanges around bulkhead hatches for canvas protection in this enlightening video. By following his expert guidance, boat enthusiasts can ensure their living areas remain secure while allowing unhindered access through the hatches.Step 1: Starting with the Flange
Sven begins by explaining that working on flanges vertically and horizontally is significantly easier than doing so in a flat position. To simplify the process further, he divides the task into two or three steps as suggested by fellow expert “for for.” This approach not only makes it more manageable but also allows for greater precision in crafting each component.Step 2: Applying Glue and Securing
Sven proceeds to apply glue along one edge of the flange, ensuring a secure bond when clamped into place. He emphasizes that this stage is crucial for maintaining the structural integrity of the flange, which in turn safeguards the living area beneath the canvas when hatches are open.Step 3: Allowing Time to Dry
After securely attaching the first portion of the flange, Sven allows ample time for it to dry before moving forward with additional steps. This patience and precision are key aspects of his successful boatbuilding methods.Step 4: Finishing Touches
Once the flange is fully dried, Sven removes the clamps carefully, ensuring no damage occurs during this process. He then moves on to attaching four more pieces onto these main frames, completing two pairs of flanges for the bulkhead hatches.The Final Touches
While two flanges form the primary support structure around the hatches, Sven mentions there are two additional pieces required at each end to ensure comprehensive protection. This attention to detail highlights his commitment to producing a durable and reliable design. “Sailing is about finding your path, whether it’s across an ocean or within yourself.” – Sven Yrvind In conclusion, making flanges around bulkhead hatches may seem complex at first glance, but by following Sven Yrvind’s meticulous process, enthusiasts can achieve professional-level results. Remember that the journey of boatbuilding is as rewarding as reaching your destination; it tests one’s patience and dedication. For those seeking to embark on this adventure or simply gain more insight into marine craftsmanship, Sven’s wisdom is invaluable.Sven begins by explaining that working on flanges vertically and horizontally is significantly easier than doing so in a flat position. To simplify the process further, he divides the task into two or three steps as suggested by fellow expert “for for.” This approach not only makes it more manageable but also allows for greater precision in crafting each component.Step 2: Applying Glue and Securing
Sven proceeds to apply glue along one edge of the flange, ensuring a secure bond when clamped into place. He emphasizes that this stage is crucial for maintaining the structural integrity of the flange, which in turn safeguards the living area beneath the canvas when hatches are open.Step 3: Allowing Time to Dry
After securely attaching the first portion of the flange, Sven allows ample time for it to dry before moving forward with additional steps. This patience and precision are key aspects of his successful boatbuilding methods.Step 4: Finishing Touches
Once the flange is fully dried, Sven removes the clamps carefully, ensuring no damage occurs during this process. He then moves on to attaching four more pieces onto these main frames, completing two pairs of flanges for the bulkhead hatches.The Final Touches
While two flanges form the primary support structure around the hatches, Sven mentions there are two additional pieces required at each end to ensure comprehensive protection. This attention to detail highlights his commitment to producing a durable and reliable design. “Sailing is about finding your path, whether it’s across an ocean or within yourself.” – Sven Yrvind In conclusion, making flanges around bulkhead hatches may seem complex at first glance, but by following Sven Yrvind’s meticulous process, enthusiasts can achieve professional-level results. Remember that the journey of boatbuilding is as rewarding as reaching your destination; it tests one’s patience and dedication. For those seeking to embark on this adventure or simply gain more insight into marine craftsmanship, Sven’s wisdom is invaluable.Sven Yrvind, a renowned yacht designer and sailor, shares valuable insights on creating flanges around bulkhead hatches for canvas protection in this enlightening video. By following his expert guidance, boat enthusiasts can ensure their living areas remain secure while allowing unhindered access through the hatches.Step 1: Starting with the Flange
Sven begins by explaining that working on flanges vertically and horizontally is significantly easier than doing so in a flat position. To simplify the process further, he divides the task into two or three steps as suggested by fellow expert “for for.” This approach not only makes it more manageable but also allows for greater precision in crafting each component.Step 2: Applying Glue and Securing
Sven proceeds to apply glue along one edge of the flange, ensuring a secure bond when clamped into place. He emphasizes that this stage is crucial for maintaining the structural integrity of the flange, which in turn safeguards the living area beneath the canvas when hatches are open.Step 3: Allowing Time to Dry
After securely attaching the first portion of the flange, Sven allows ample time for it to dry before moving forward with additional steps. This patience and precision are key aspects of his successful boatbuilding methods.Step 4: Finishing Touches
Once the flange is fully dried, Sven removes the clamps carefully, ensuring no damage occurs during this process. He then moves on to attaching four more pieces onto these main frames, completing two pairs of flanges for the bulkhead hatches.The Final Touches
While two flanges form the primary support structure around the hatches, Sven mentions there are two additional pieces required at each end to ensure comprehensive protection. This attention to detail highlights his commitment to producing a durable and reliable design. “Sailing is about finding your path, whether it’s across an ocean or within yourself.” – Sven Yrvind In conclusion, making flanges around bulkhead hatches may seem complex at first glance, but by following Sven Yrvind’s meticulous process, enthusiasts can achieve professional-level results. Remember that the journey of boatbuilding is as rewarding as reaching your destination; it tests one’s patience and dedication. For those seeking to embark on this adventure or simply gain more insight into marine craftsmanship, Sven’s wisdom is invaluable.Making Flanges Around Bulkhead Hatches for Canvas
Sven Yrvind, a renowned yacht designer and sailor, shares valuable insights on creating flanges around bulkhead hatches for canvas protection in this enlightening video. By following his expert guidance, boat enthusiasts can ensure their living areas remain secure while allowing unhindered access through the hatches.Step 1: Starting with the Flange
Sven begins by explaining that working on flanges vertically and horizontally is significantly easier than doing so in a flat position. To simplify the process further, he divides the task into two or three steps as suggested by fellow expert “for for.” This approach not only makes it more manageable but also allows for greater precision in crafting each component.Step 2: Applying Glue and Securing
Sven proceeds to apply glue along one edge of the flange, ensuring a secure bond when clamped into place. He emphasizes that this stage is crucial for maintaining the structural integrity of the flange, which in turn safeguards the living area beneath the canvas when hatches are open.Step 3: Allowing Time to Dry
After securely attaching the first portion of the flange, Sven allows ample time for it to dry before moving forward with additional steps. This patience and precision are key aspects of his successful boatbuilding methods.Step 4: Finishing Touches
Once the flange is fully dried, Sven removes the clamps carefully, ensuring no damage occurs during this process. He then moves on to attaching four more pieces onto these main frames, completing two pairs of flanges for the bulkhead hatches.The Final Touches
While two flanges form the primary support structure around the hatches, Sven mentions there are two additional pieces required at each end to ensure comprehensive protection. This attention to detail highlights his commitment to producing a durable and reliable design. “Sailing is about finding your path, whether it’s across an ocean or within yourself.” – Sven Yrvind In conclusion, making flanges around bulkhead hatches may seem complex at first glance, but by following Sven Yrvind’s meticulous process, enthusiasts can achieve professional-level results. Remember that the journey of boatbuilding is as rewarding as reaching your destination; it tests one’s patience and dedication. For those seeking to embark on this adventure or simply gain more insight into marine craftsmanship, Sven’s wisdom is invaluable.Once the flange is fully dried, Sven removes the clamps carefully, ensuring no damage occurs during this process. He then moves on to attaching four more pieces onto these main frames, completing two pairs of flanges for the bulkhead hatches.The Final Touches
While two flanges form the primary support structure around the hatches, Sven mentions there are two additional pieces required at each end to ensure comprehensive protection. This attention to detail highlights his commitment to producing a durable and reliable design. “Sailing is about finding your path, whether it’s across an ocean or within yourself.” – Sven Yrvind In conclusion, making flanges around bulkhead hatches may seem complex at first glance, but by following Sven Yrvind’s meticulous process, enthusiasts can achieve professional-level results. Remember that the journey of boatbuilding is as rewarding as reaching your destination; it tests one’s patience and dedication. For those seeking to embark on this adventure or simply gain more insight into marine craftsmanship, Sven’s wisdom is invaluable.Sven begins by explaining that working on flanges vertically and horizontally is significantly easier than doing so in a flat position. To simplify the process further, he divides the task into two or three steps as suggested by fellow expert “for for.” This approach not only makes it more manageable but also allows for greater precision in crafting each component.Step 2: Applying Glue and Securing
Sven proceeds to apply glue along one edge of the flange, ensuring a secure bond when clamped into place. He emphasizes that this stage is crucial for maintaining the structural integrity of the flange, which in turn safeguards the living area beneath the canvas when hatches are open.Step 3: Allowing Time to Dry
After securely attaching the first portion of the flange, Sven allows ample time for it to dry before moving forward with additional steps. This patience and precision are key aspects of his successful boatbuilding methods.Step 4: Finishing Touches
Once the flange is fully dried, Sven removes the clamps carefully, ensuring no damage occurs during this process. He then moves on to attaching four more pieces onto these main frames, completing two pairs of flanges for the bulkhead hatches.The Final Touches
While two flanges form the primary support structure around the hatches, Sven mentions there are two additional pieces required at each end to ensure comprehensive protection. This attention to detail highlights his commitment to producing a durable and reliable design. “Sailing is about finding your path, whether it’s across an ocean or within yourself.” – Sven Yrvind In conclusion, making flanges around bulkhead hatches may seem complex at first glance, but by following Sven Yrvind’s meticulous process, enthusiasts can achieve professional-level results. Remember that the journey of boatbuilding is as rewarding as reaching your destination; it tests one’s patience and dedication. For those seeking to embark on this adventure or simply gain more insight into marine craftsmanship, Sven’s wisdom is invaluable.Sven Yrvind, a renowned yacht designer and sailor, shares valuable insights on creating flanges around bulkhead hatches for canvas protection in this enlightening video. By following his expert guidance, boat enthusiasts can ensure their living areas remain secure while allowing unhindered access through the hatches.Step 1: Starting with the Flange
Sven begins by explaining that working on flanges vertically and horizontally is significantly easier than doing so in a flat position. To simplify the process further, he divides the task into two or three steps as suggested by fellow expert “for for.” This approach not only makes it more manageable but also allows for greater precision in crafting each component.Step 2: Applying Glue and Securing
Sven proceeds to apply glue along one edge of the flange, ensuring a secure bond when clamped into place. He emphasizes that this stage is crucial for maintaining the structural integrity of the flange, which in turn safeguards the living area beneath the canvas when hatches are open.Step 3: Allowing Time to Dry
After securely attaching the first portion of the flange, Sven allows ample time for it to dry before moving forward with additional steps. This patience and precision are key aspects of his successful boatbuilding methods.Step 4: Finishing Touches
Once the flange is fully dried, Sven removes the clamps carefully, ensuring no damage occurs during this process. He then moves on to attaching four more pieces onto these main frames, completing two pairs of flanges for the bulkhead hatches.The Final Touches
While two flanges form the primary support structure around the hatches, Sven mentions there are two additional pieces required at each end to ensure comprehensive protection. This attention to detail highlights his commitment to producing a durable and reliable design. “Sailing is about finding your path, whether it’s across an ocean or within yourself.” – Sven Yrvind In conclusion, making flanges around bulkhead hatches may seem complex at first glance, but by following Sven Yrvind’s meticulous process, enthusiasts can achieve professional-level results. Remember that the journey of boatbuilding is as rewarding as reaching your destination; it tests one’s patience and dedication. For those seeking to embark on this adventure or simply gain more insight into marine craftsmanship, Sven’s wisdom is invaluable.Making Flanges Around Bulkhead Hatches for Canvas
Sven Yrvind, a renowned yacht designer and sailor, shares valuable insights on creating flanges around bulkhead hatches for canvas protection in this enlightening video. By following his expert guidance, boat enthusiasts can ensure their living areas remain secure while allowing unhindered access through the hatches.Step 1: Starting with the Flange
Sven begins by explaining that working on flanges vertically and horizontally is significantly easier than doing so in a flat position. To simplify the process further, he divides the task into two or three steps as suggested by fellow expert “for for.” This approach not only makes it more manageable but also allows for greater precision in crafting each component.Step 2: Applying Glue and Securing
Sven proceeds to apply glue along one edge of the flange, ensuring a secure bond when clamped into place. He emphasizes that this stage is crucial for maintaining the structural integrity of the flange, which in turn safeguards the living area beneath the canvas when hatches are open.Step 3: Allowing Time to Dry
After securely attaching the first portion of the flange, Sven allows ample time for it to dry before moving forward with additional steps. This patience and precision are key aspects of his successful boatbuilding methods.Step 4: Finishing Touches
Once the flange is fully dried, Sven removes the clamps carefully, ensuring no damage occurs during this process. He then moves on to attaching four more pieces onto these main frames, completing two pairs of flanges for the bulkhead hatches.The Final Touches
While two flanges form the primary support structure around the hatches, Sven mentions there are two additional pieces required at each end to ensure comprehensive protection. This attention to detail highlights his commitment to producing a durable and reliable design. “Sailing is about finding your path, whether it’s across an ocean or within yourself.” – Sven Yrvind In conclusion, making flanges around bulkhead hatches may seem complex at first glance, but by following Sven Yrvind’s meticulous process, enthusiasts can achieve professional-level results. Remember that the journey of boatbuilding is as rewarding as reaching your destination; it tests one’s patience and dedication. For those seeking to embark on this adventure or simply gain more insight into marine craftsmanship, Sven’s wisdom is invaluable.After securely attaching the first portion of the flange, Sven allows ample time for it to dry before moving forward with additional steps. This patience and precision are key aspects of his successful boatbuilding methods.Step 4: Finishing Touches
Once the flange is fully dried, Sven removes the clamps carefully, ensuring no damage occurs during this process. He then moves on to attaching four more pieces onto these main frames, completing two pairs of flanges for the bulkhead hatches.The Final Touches
While two flanges form the primary support structure around the hatches, Sven mentions there are two additional pieces required at each end to ensure comprehensive protection. This attention to detail highlights his commitment to producing a durable and reliable design. “Sailing is about finding your path, whether it’s across an ocean or within yourself.” – Sven Yrvind In conclusion, making flanges around bulkhead hatches may seem complex at first glance, but by following Sven Yrvind’s meticulous process, enthusiasts can achieve professional-level results. Remember that the journey of boatbuilding is as rewarding as reaching your destination; it tests one’s patience and dedication. For those seeking to embark on this adventure or simply gain more insight into marine craftsmanship, Sven’s wisdom is invaluable.Sven begins by explaining that working on flanges vertically and horizontally is significantly easier than doing so in a flat position. To simplify the process further, he divides the task into two or three steps as suggested by fellow expert “for for.” This approach not only makes it more manageable but also allows for greater precision in crafting each component.Step 2: Applying Glue and Securing
Sven proceeds to apply glue along one edge of the flange, ensuring a secure bond when clamped into place. He emphasizes that this stage is crucial for maintaining the structural integrity of the flange, which in turn safeguards the living area beneath the canvas when hatches are open.Step 3: Allowing Time to Dry
After securely attaching the first portion of the flange, Sven allows ample time for it to dry before moving forward with additional steps. This patience and precision are key aspects of his successful boatbuilding methods.Step 4: Finishing Touches
Once the flange is fully dried, Sven removes the clamps carefully, ensuring no damage occurs during this process. He then moves on to attaching four more pieces onto these main frames, completing two pairs of flanges for the bulkhead hatches.The Final Touches
While two flanges form the primary support structure around the hatches, Sven mentions there are two additional pieces required at each end to ensure comprehensive protection. This attention to detail highlights his commitment to producing a durable and reliable design. “Sailing is about finding your path, whether it’s across an ocean or within yourself.” – Sven Yrvind In conclusion, making flanges around bulkhead hatches may seem complex at first glance, but by following Sven Yrvind’s meticulous process, enthusiasts can achieve professional-level results. Remember that the journey of boatbuilding is as rewarding as reaching your destination; it tests one’s patience and dedication. For those seeking to embark on this adventure or simply gain more insight into marine craftsmanship, Sven’s wisdom is invaluable.Sven Yrvind, a renowned yacht designer and sailor, shares valuable insights on creating flanges around bulkhead hatches for canvas protection in this enlightening video. By following his expert guidance, boat enthusiasts can ensure their living areas remain secure while allowing unhindered access through the hatches.Step 1: Starting with the Flange
Sven begins by explaining that working on flanges vertically and horizontally is significantly easier than doing so in a flat position. To simplify the process further, he divides the task into two or three steps as suggested by fellow expert “for for.” This approach not only makes it more manageable but also allows for greater precision in crafting each component.Step 2: Applying Glue and Securing
Sven proceeds to apply glue along one edge of the flange, ensuring a secure bond when clamped into place. He emphasizes that this stage is crucial for maintaining the structural integrity of the flange, which in turn safeguards the living area beneath the canvas when hatches are open.Step 3: Allowing Time to Dry
After securely attaching the first portion of the flange, Sven allows ample time for it to dry before moving forward with additional steps. This patience and precision are key aspects of his successful boatbuilding methods.Step 4: Finishing Touches
Once the flange is fully dried, Sven removes the clamps carefully, ensuring no damage occurs during this process. He then moves on to attaching four more pieces onto these main frames, completing two pairs of flanges for the bulkhead hatches.The Final Touches
While two flanges form the primary support structure around the hatches, Sven mentions there are two additional pieces required at each end to ensure comprehensive protection. This attention to detail highlights his commitment to producing a durable and reliable design. “Sailing is about finding your path, whether it’s across an ocean or within yourself.” – Sven Yrvind In conclusion, making flanges around bulkhead hatches may seem complex at first glance, but by following Sven Yrvind’s meticulous process, enthusiasts can achieve professional-level results. Remember that the journey of boatbuilding is as rewarding as reaching your destination; it tests one’s patience and dedication. For those seeking to embark on this adventure or simply gain more insight into marine craftsmanship, Sven’s wisdom is invaluable.Making Flanges Around Bulkhead Hatches for Canvas
Sven Yrvind, a renowned yacht designer and sailor, shares valuable insights on creating flanges around bulkhead hatches for canvas protection in this enlightening video. By following his expert guidance, boat enthusiasts can ensure their living areas remain secure while allowing unhindered access through the hatches.Step 1: Starting with the Flange
Sven begins by explaining that working on flanges vertically and horizontally is significantly easier than doing so in a flat position. To simplify the process further, he divides the task into two or three steps as suggested by fellow expert “for for.” This approach not only makes it more manageable but also allows for greater precision in crafting each component.Step 2: Applying Glue and Securing
Sven proceeds to apply glue along one edge of the flange, ensuring a secure bond when clamped into place. He emphasizes that this stage is crucial for maintaining the structural integrity of the flange, which in turn safeguards the living area beneath the canvas when hatches are open.Step 3: Allowing Time to Dry
After securely attaching the first portion of the flange, Sven allows ample time for it to dry before moving forward with additional steps. This patience and precision are key aspects of his successful boatbuilding methods.Step 4: Finishing Touches
Once the flange is fully dried, Sven removes the clamps carefully, ensuring no damage occurs during this process. He then moves on to attaching four more pieces onto these main frames, completing two pairs of flanges for the bulkhead hatches.The Final Touches
While two flanges form the primary support structure around the hatches, Sven mentions there are two additional pieces required at each end to ensure comprehensive protection. This attention to detail highlights his commitment to producing a durable and reliable design. “Sailing is about finding your path, whether it’s across an ocean or within yourself.” – Sven Yrvind In conclusion, making flanges around bulkhead hatches may seem complex at first glance, but by following Sven Yrvind’s meticulous process, enthusiasts can achieve professional-level results. Remember that the journey of boatbuilding is as rewarding as reaching your destination; it tests one’s patience and dedication. For those seeking to embark on this adventure or simply gain more insight into marine craftsmanship, Sven’s wisdom is invaluable.Sven proceeds to apply glue along one edge of the flange, ensuring a secure bond when clamped into place. He emphasizes that this stage is crucial for maintaining the structural integrity of the flange, which in turn safeguards the living area beneath the canvas when hatches are open.Step 3: Allowing Time to Dry
After securely attaching the first portion of the flange, Sven allows ample time for it to dry before moving forward with additional steps. This patience and precision are key aspects of his successful boatbuilding methods.Step 4: Finishing Touches
Once the flange is fully dried, Sven removes the clamps carefully, ensuring no damage occurs during this process. He then moves on to attaching four more pieces onto these main frames, completing two pairs of flanges for the bulkhead hatches.The Final Touches
While two flanges form the primary support structure around the hatches, Sven mentions there are two additional pieces required at each end to ensure comprehensive protection. This attention to detail highlights his commitment to producing a durable and reliable design. “Sailing is about finding your path, whether it’s across an ocean or within yourself.” – Sven Yrvind In conclusion, making flanges around bulkhead hatches may seem complex at first glance, but by following Sven Yrvind’s meticulous process, enthusiasts can achieve professional-level results. Remember that the journey of boatbuilding is as rewarding as reaching your destination; it tests one’s patience and dedication. For those seeking to embark on this adventure or simply gain more insight into marine craftsmanship, Sven’s wisdom is invaluable.Sven begins by explaining that working on flanges vertically and horizontally is significantly easier than doing so in a flat position. To simplify the process further, he divides the task into two or three steps as suggested by fellow expert “for for.” This approach not only makes it more manageable but also allows for greater precision in crafting each component.Step 2: Applying Glue and Securing
Sven proceeds to apply glue along one edge of the flange, ensuring a secure bond when clamped into place. He emphasizes that this stage is crucial for maintaining the structural integrity of the flange, which in turn safeguards the living area beneath the canvas when hatches are open.Step 3: Allowing Time to Dry
After securely attaching the first portion of the flange, Sven allows ample time for it to dry before moving forward with additional steps. This patience and precision are key aspects of his successful boatbuilding methods.Step 4: Finishing Touches
Once the flange is fully dried, Sven removes the clamps carefully, ensuring no damage occurs during this process. He then moves on to attaching four more pieces onto these main frames, completing two pairs of flanges for the bulkhead hatches.The Final Touches
While two flanges form the primary support structure around the hatches, Sven mentions there are two additional pieces required at each end to ensure comprehensive protection. This attention to detail highlights his commitment to producing a durable and reliable design. “Sailing is about finding your path, whether it’s across an ocean or within yourself.” – Sven Yrvind In conclusion, making flanges around bulkhead hatches may seem complex at first glance, but by following Sven Yrvind’s meticulous process, enthusiasts can achieve professional-level results. Remember that the journey of boatbuilding is as rewarding as reaching your destination; it tests one’s patience and dedication. For those seeking to embark on this adventure or simply gain more insight into marine craftsmanship, Sven’s wisdom is invaluable.Sven Yrvind, a renowned yacht designer and sailor, shares valuable insights on creating flanges around bulkhead hatches for canvas protection in this enlightening video. By following his expert guidance, boat enthusiasts can ensure their living areas remain secure while allowing unhindered access through the hatches.Step 1: Starting with the Flange
Sven begins by explaining that working on flanges vertically and horizontally is significantly easier than doing so in a flat position. To simplify the process further, he divides the task into two or three steps as suggested by fellow expert “for for.” This approach not only makes it more manageable but also allows for greater precision in crafting each component.Step 2: Applying Glue and Securing
Sven proceeds to apply glue along one edge of the flange, ensuring a secure bond when clamped into place. He emphasizes that this stage is crucial for maintaining the structural integrity of the flange, which in turn safeguards the living area beneath the canvas when hatches are open.Step 3: Allowing Time to Dry
After securely attaching the first portion of the flange, Sven allows ample time for it to dry before moving forward with additional steps. This patience and precision are key aspects of his successful boatbuilding methods.Step 4: Finishing Touches
Once the flange is fully dried, Sven removes the clamps carefully, ensuring no damage occurs during this process. He then moves on to attaching four more pieces onto these main frames, completing two pairs of flanges for the bulkhead hatches.The Final Touches
While two flanges form the primary support structure around the hatches, Sven mentions there are two additional pieces required at each end to ensure comprehensive protection. This attention to detail highlights his commitment to producing a durable and reliable design. “Sailing is about finding your path, whether it’s across an ocean or within yourself.” – Sven Yrvind In conclusion, making flanges around bulkhead hatches may seem complex at first glance, but by following Sven Yrvind’s meticulous process, enthusiasts can achieve professional-level results. Remember that the journey of boatbuilding is as rewarding as reaching your destination; it tests one’s patience and dedication. For those seeking to embark on this adventure or simply gain more insight into marine craftsmanship, Sven’s wisdom is invaluable.Making Flanges Around Bulkhead Hatches for Canvas
Sven Yrvind, a renowned yacht designer and sailor, shares valuable insights on creating flanges around bulkhead hatches for canvas protection in this enlightening video. By following his expert guidance, boat enthusiasts can ensure their living areas remain secure while allowing unhindered access through the hatches.Step 1: Starting with the Flange
Sven begins by explaining that working on flanges vertically and horizontally is significantly easier than doing so in a flat position. To simplify the process further, he divides the task into two or three steps as suggested by fellow expert “for for.” This approach not only makes it more manageable but also allows for greater precision in crafting each component.Step 2: Applying Glue and Securing
Sven proceeds to apply glue along one edge of the flange, ensuring a secure bond when clamped into place. He emphasizes that this stage is crucial for maintaining the structural integrity of the flange, which in turn safeguards the living area beneath the canvas when hatches are open.Step 3: Allowing Time to Dry
After securely attaching the first portion of the flange, Sven allows ample time for it to dry before moving forward with additional steps. This patience and precision are key aspects of his successful boatbuilding methods.Step 4: Finishing Touches
Once the flange is fully dried, Sven removes the clamps carefully, ensuring no damage occurs during this process. He then moves on to attaching four more pieces onto these main frames, completing two pairs of flanges for the bulkhead hatches.The Final Touches
While two flanges form the primary support structure around the hatches, Sven mentions there are two additional pieces required at each end to ensure comprehensive protection. This attention to detail highlights his commitment to producing a durable and reliable design. “Sailing is about finding your path, whether it’s across an ocean or within yourself.” – Sven Yrvind In conclusion, making flanges around bulkhead hatches may seem complex at first glance, but by following Sven Yrvind’s meticulous process, enthusiasts can achieve professional-level results. Remember that the journey of boatbuilding is as rewarding as reaching your destination; it tests one’s patience and dedication. For those seeking to embark on this adventure or simply gain more insight into marine craftsmanship, Sven’s wisdom is invaluable.Once the flange is fully dried, Sven removes the clamps carefully, ensuring no damage occurs during this process. He then moves on to attaching four more pieces onto these main frames, completing two pairs of flanges for the bulkhead hatches.The Final Touches
While two flanges form the primary support structure around the hatches, Sven mentions there are two additional pieces required at each end to ensure comprehensive protection. This attention to detail highlights his commitment to producing a durable and reliable design. “Sailing is about finding your path, whether it’s across an ocean or within yourself.” – Sven Yrvind In conclusion, making flanges around bulkhead hatches may seem complex at first glance, but by following Sven Yrvind’s meticulous process, enthusiasts can achieve professional-level results. Remember that the journey of boatbuilding is as rewarding as reaching your destination; it tests one’s patience and dedication. For those seeking to embark on this adventure or simply gain more insight into marine craftsmanship, Sven’s wisdom is invaluable.Sven proceeds to apply glue along one edge of the flange, ensuring a secure bond when clamped into place. He emphasizes that this stage is crucial for maintaining the structural integrity of the flange, which in turn safeguards the living area beneath the canvas when hatches are open.Step 3: Allowing Time to Dry
After securely attaching the first portion of the flange, Sven allows ample time for it to dry before moving forward with additional steps. This patience and precision are key aspects of his successful boatbuilding methods.Step 4: Finishing Touches
Once the flange is fully dried, Sven removes the clamps carefully, ensuring no damage occurs during this process. He then moves on to attaching four more pieces onto these main frames, completing two pairs of flanges for the bulkhead hatches.The Final Touches
While two flanges form the primary support structure around the hatches, Sven mentions there are two additional pieces required at each end to ensure comprehensive protection. This attention to detail highlights his commitment to producing a durable and reliable design. “Sailing is about finding your path, whether it’s across an ocean or within yourself.” – Sven Yrvind In conclusion, making flanges around bulkhead hatches may seem complex at first glance, but by following Sven Yrvind’s meticulous process, enthusiasts can achieve professional-level results. Remember that the journey of boatbuilding is as rewarding as reaching your destination; it tests one’s patience and dedication. For those seeking to embark on this adventure or simply gain more insight into marine craftsmanship, Sven’s wisdom is invaluable.Sven begins by explaining that working on flanges vertically and horizontally is significantly easier than doing so in a flat position. To simplify the process further, he divides the task into two or three steps as suggested by fellow expert “for for.” This approach not only makes it more manageable but also allows for greater precision in crafting each component.Step 2: Applying Glue and Securing
Sven proceeds to apply glue along one edge of the flange, ensuring a secure bond when clamped into place. He emphasizes that this stage is crucial for maintaining the structural integrity of the flange, which in turn safeguards the living area beneath the canvas when hatches are open.Step 3: Allowing Time to Dry
After securely attaching the first portion of the flange, Sven allows ample time for it to dry before moving forward with additional steps. This patience and precision are key aspects of his successful boatbuilding methods.Step 4: Finishing Touches
Once the flange is fully dried, Sven removes the clamps carefully, ensuring no damage occurs during this process. He then moves on to attaching four more pieces onto these main frames, completing two pairs of flanges for the bulkhead hatches.The Final Touches
While two flanges form the primary support structure around the hatches, Sven mentions there are two additional pieces required at each end to ensure comprehensive protection. This attention to detail highlights his commitment to producing a durable and reliable design. “Sailing is about finding your path, whether it’s across an ocean or within yourself.” – Sven Yrvind In conclusion, making flanges around bulkhead hatches may seem complex at first glance, but by following Sven Yrvind’s meticulous process, enthusiasts can achieve professional-level results. Remember that the journey of boatbuilding is as rewarding as reaching your destination; it tests one’s patience and dedication. For those seeking to embark on this adventure or simply gain more insight into marine craftsmanship, Sven’s wisdom is invaluable.Sven Yrvind, a renowned yacht designer and sailor, shares valuable insights on creating flanges around bulkhead hatches for canvas protection in this enlightening video. By following his expert guidance, boat enthusiasts can ensure their living areas remain secure while allowing unhindered access through the hatches.Step 1: Starting with the Flange
Sven begins by explaining that working on flanges vertically and horizontally is significantly easier than doing so in a flat position. To simplify the process further, he divides the task into two or three steps as suggested by fellow expert “for for.” This approach not only makes it more manageable but also allows for greater precision in crafting each component.Step 2: Applying Glue and Securing
Sven proceeds to apply glue along one edge of the flange, ensuring a secure bond when clamped into place. He emphasizes that this stage is crucial for maintaining the structural integrity of the flange, which in turn safeguards the living area beneath the canvas when hatches are open.Step 3: Allowing Time to Dry
After securely attaching the first portion of the flange, Sven allows ample time for it to dry before moving forward with additional steps. This patience and precision are key aspects of his successful boatbuilding methods.Step 4: Finishing Touches
Once the flange is fully dried, Sven removes the clamps carefully, ensuring no damage occurs during this process. He then moves on to attaching four more pieces onto these main frames, completing two pairs of flanges for the bulkhead hatches.The Final Touches
While two flanges form the primary support structure around the hatches, Sven mentions there are two additional pieces required at each end to ensure comprehensive protection. This attention to detail highlights his commitment to producing a durable and reliable design. “Sailing is about finding your path, whether it’s across an ocean or within yourself.” – Sven Yrvind In conclusion, making flanges around bulkhead hatches may seem complex at first glance, but by following Sven Yrvind’s meticulous process, enthusiasts can achieve professional-level results. Remember that the journey of boatbuilding is as rewarding as reaching your destination; it tests one’s patience and dedication. For those seeking to embark on this adventure or simply gain more insight into marine craftsmanship, Sven’s wisdom is invaluable.Making Flanges Around Bulkhead Hatches for Canvas
Sven Yrvind, a renowned yacht designer and sailor, shares valuable insights on creating flanges around bulkhead hatches for canvas protection in this enlightening video. By following his expert guidance, boat enthusiasts can ensure their living areas remain secure while allowing unhindered access through the hatches.Step 1: Starting with the Flange
Sven begins by explaining that working on flanges vertically and horizontally is significantly easier than doing so in a flat position. To simplify the process further, he divides the task into two or three steps as suggested by fellow expert “for for.” This approach not only makes it more manageable but also allows for greater precision in crafting each component.Step 2: Applying Glue and Securing
Sven proceeds to apply glue along one edge of the flange, ensuring a secure bond when clamped into place. He emphasizes that this stage is crucial for maintaining the structural integrity of the flange, which in turn safeguards the living area beneath the canvas when hatches are open.Step 3: Allowing Time to Dry
After securely attaching the first portion of the flange, Sven allows ample time for it to dry before moving forward with additional steps. This patience and precision are key aspects of his successful boatbuilding methods.Step 4: Finishing Touches
Once the flange is fully dried, Sven removes the clamps carefully, ensuring no damage occurs during this process. He then moves on to attaching four more pieces onto these main frames, completing two pairs of flanges for the bulkhead hatches.The Final Touches
While two flanges form the primary support structure around the hatches, Sven mentions there are two additional pieces required at each end to ensure comprehensive protection. This attention to detail highlights his commitment to producing a durable and reliable design. “Sailing is about finding your path, whether it’s across an ocean or within yourself.” – Sven Yrvind In conclusion, making flanges around bulkhead hatches may seem complex at first glance, but by following Sven Yrvind’s meticulous process, enthusiasts can achieve professional-level results. Remember that the journey of boatbuilding is as rewarding as reaching your destination; it tests one’s patience and dedication. For those seeking to embark on this adventure or simply gain more insight into marine craftsmanship, Sven’s wisdom is invaluable.After securely attaching the first portion of the flange, Sven allows ample time for it to dry before moving forward with additional steps. This patience and precision are key aspects of his successful boatbuilding methods.Step 4: Finishing Touches
Once the flange is fully dried, Sven removes the clamps carefully, ensuring no damage occurs during this process. He then moves on to attaching four more pieces onto these main frames, completing two pairs of flanges for the bulkhead hatches.The Final Touches
While two flanges form the primary support structure around the hatches, Sven mentions there are two additional pieces required at each end to ensure comprehensive protection. This attention to detail highlights his commitment to producing a durable and reliable design. “Sailing is about finding your path, whether it’s across an ocean or within yourself.” – Sven Yrvind In conclusion, making flanges around bulkhead hatches may seem complex at first glance, but by following Sven Yrvind’s meticulous process, enthusiasts can achieve professional-level results. Remember that the journey of boatbuilding is as rewarding as reaching your destination; it tests one’s patience and dedication. For those seeking to embark on this adventure or simply gain more insight into marine craftsmanship, Sven’s wisdom is invaluable.Sven proceeds to apply glue along one edge of the flange, ensuring a secure bond when clamped into place. He emphasizes that this stage is crucial for maintaining the structural integrity of the flange, which in turn safeguards the living area beneath the canvas when hatches are open.Step 3: Allowing Time to Dry
After securely attaching the first portion of the flange, Sven allows ample time for it to dry before moving forward with additional steps. This patience and precision are key aspects of his successful boatbuilding methods.Step 4: Finishing Touches
Once the flange is fully dried, Sven removes the clamps carefully, ensuring no damage occurs during this process. He then moves on to attaching four more pieces onto these main frames, completing two pairs of flanges for the bulkhead hatches.The Final Touches
While two flanges form the primary support structure around the hatches, Sven mentions there are two additional pieces required at each end to ensure comprehensive protection. This attention to detail highlights his commitment to producing a durable and reliable design. “Sailing is about finding your path, whether it’s across an ocean or within yourself.” – Sven Yrvind In conclusion, making flanges around bulkhead hatches may seem complex at first glance, but by following Sven Yrvind’s meticulous process, enthusiasts can achieve professional-level results. Remember that the journey of boatbuilding is as rewarding as reaching your destination; it tests one’s patience and dedication. For those seeking to embark on this adventure or simply gain more insight into marine craftsmanship, Sven’s wisdom is invaluable.Sven begins by explaining that working on flanges vertically and horizontally is significantly easier than doing so in a flat position. To simplify the process further, he divides the task into two or three steps as suggested by fellow expert “for for.” This approach not only makes it more manageable but also allows for greater precision in crafting each component.Step 2: Applying Glue and Securing
Sven proceeds to apply glue along one edge of the flange, ensuring a secure bond when clamped into place. He emphasizes that this stage is crucial for maintaining the structural integrity of the flange, which in turn safeguards the living area beneath the canvas when hatches are open.Step 3: Allowing Time to Dry
After securely attaching the first portion of the flange, Sven allows ample time for it to dry before moving forward with additional steps. This patience and precision are key aspects of his successful boatbuilding methods.Step 4: Finishing Touches
Once the flange is fully dried, Sven removes the clamps carefully, ensuring no damage occurs during this process. He then moves on to attaching four more pieces onto these main frames, completing two pairs of flanges for the bulkhead hatches.The Final Touches
While two flanges form the primary support structure around the hatches, Sven mentions there are two additional pieces required at each end to ensure comprehensive protection. This attention to detail highlights his commitment to producing a durable and reliable design. “Sailing is about finding your path, whether it’s across an ocean or within yourself.” – Sven Yrvind In conclusion, making flanges around bulkhead hatches may seem complex at first glance, but by following Sven Yrvind’s meticulous process, enthusiasts can achieve professional-level results. Remember that the journey of boatbuilding is as rewarding as reaching your destination; it tests one’s patience and dedication. For those seeking to embark on this adventure or simply gain more insight into marine craftsmanship, Sven’s wisdom is invaluable.Sven Yrvind, a renowned yacht designer and sailor, shares valuable insights on creating flanges around bulkhead hatches for canvas protection in this enlightening video. By following his expert guidance, boat enthusiasts can ensure their living areas remain secure while allowing unhindered access through the hatches.Step 1: Starting with the Flange
Sven begins by explaining that working on flanges vertically and horizontally is significantly easier than doing so in a flat position. To simplify the process further, he divides the task into two or three steps as suggested by fellow expert “for for.” This approach not only makes it more manageable but also allows for greater precision in crafting each component.Step 2: Applying Glue and Securing
Sven proceeds to apply glue along one edge of the flange, ensuring a secure bond when clamped into place. He emphasizes that this stage is crucial for maintaining the structural integrity of the flange, which in turn safeguards the living area beneath the canvas when hatches are open.Step 3: Allowing Time to Dry
After securely attaching the first portion of the flange, Sven allows ample time for it to dry before moving forward with additional steps. This patience and precision are key aspects of his successful boatbuilding methods.Step 4: Finishing Touches
Once the flange is fully dried, Sven removes the clamps carefully, ensuring no damage occurs during this process. He then moves on to attaching four more pieces onto these main frames, completing two pairs of flanges for the bulkhead hatches.The Final Touches
While two flanges form the primary support structure around the hatches, Sven mentions there are two additional pieces required at each end to ensure comprehensive protection. This attention to detail highlights his commitment to producing a durable and reliable design. “Sailing is about finding your path, whether it’s across an ocean or within yourself.” – Sven Yrvind In conclusion, making flanges around bulkhead hatches may seem complex at first glance, but by following Sven Yrvind’s meticulous process, enthusiasts can achieve professional-level results. Remember that the journey of boatbuilding is as rewarding as reaching your destination; it tests one’s patience and dedication. For those seeking to embark on this adventure or simply gain more insight into marine craftsmanship, Sven’s wisdom is invaluable.Making Flanges Around Bulkhead Hatches for Canvas
Sven Yrvind, a renowned yacht designer and sailor, shares valuable insights on creating flanges around bulkhead hatches for canvas protection in this enlightening video. By following his expert guidance, boat enthusiasts can ensure their living areas remain secure while allowing unhindered access through the hatches.Step 1: Starting with the Flange
Sven begins by explaining that working on flanges vertically and horizontally is significantly easier than doing so in a flat position. To simplify the process further, he divides the task into two or three steps as suggested by fellow expert “for for.” This approach not only makes it more manageable but also allows for greater precision in crafting each component.Step 2: Applying Glue and Securing
Sven proceeds to apply glue along one edge of the flange, ensuring a secure bond when clamped into place. He emphasizes that this stage is crucial for maintaining the structural integrity of the flange, which in turn safeguards the living area beneath the canvas when hatches are open.Step 3: Allowing Time to Dry
After securely attaching the first portion of the flange, Sven allows ample time for it to dry before moving forward with additional steps. This patience and precision are key aspects of his successful boatbuilding methods.Step 4: Finishing Touches
Once the flange is fully dried, Sven removes the clamps carefully, ensuring no damage occurs during this process. He then moves on to attaching four more pieces onto these main frames, completing two pairs of flanges for the bulkhead hatches.The Final Touches
While two flanges form the primary support structure around the hatches, Sven mentions there are two additional pieces required at each end to ensure comprehensive protection. This attention to detail highlights his commitment to producing a durable and reliable design. “Sailing is about finding your path, whether it’s across an ocean or within yourself.” – Sven Yrvind In conclusion, making flanges around bulkhead hatches may seem complex at first glance, but by following Sven Yrvind’s meticulous process, enthusiasts can achieve professional-level results. Remember that the journey of boatbuilding is as rewarding as reaching your destination; it tests one’s patience and dedication. For those seeking to embark on this adventure or simply gain more insight into marine craftsmanship, Sven’s wisdom is invaluable.Once the flange is fully dried, Sven removes the clamps carefully, ensuring no damage occurs during this process. He then moves on to attaching four more pieces onto these main frames, completing two pairs of flanges for the bulkhead hatches.The Final Touches
While two flanges form the primary support structure around the hatches, Sven mentions there are two additional pieces required at each end to ensure comprehensive protection. This attention to detail highlights his commitment to producing a durable and reliable design. “Sailing is about finding your path, whether it’s across an ocean or within yourself.” – Sven Yrvind In conclusion, making flanges around bulkhead hatches may seem complex at first glance, but by following Sven Yrvind’s meticulous process, enthusiasts can achieve professional-level results. Remember that the journey of boatbuilding is as rewarding as reaching your destination; it tests one’s patience and dedication. For those seeking to embark on this adventure or simply gain more insight into marine craftsmanship, Sven’s wisdom is invaluable.After securely attaching the first portion of the flange, Sven allows ample time for it to dry before moving forward with additional steps. This patience and precision are key aspects of his successful boatbuilding methods.Step 4: Finishing Touches
Once the flange is fully dried, Sven removes the clamps carefully, ensuring no damage occurs during this process. He then moves on to attaching four more pieces onto these main frames, completing two pairs of flanges for the bulkhead hatches.The Final Touches
While two flanges form the primary support structure around the hatches, Sven mentions there are two additional pieces required at each end to ensure comprehensive protection. This attention to detail highlights his commitment to producing a durable and reliable design. “Sailing is about finding your path, whether it’s across an ocean or within yourself.” – Sven Yrvind In conclusion, making flanges around bulkhead hatches may seem complex at first glance, but by following Sven Yrvind’s meticulous process, enthusiasts can achieve professional-level results. Remember that the journey of boatbuilding is as rewarding as reaching your destination; it tests one’s patience and dedication. For those seeking to embark on this adventure or simply gain more insight into marine craftsmanship, Sven’s wisdom is invaluable.Sven proceeds to apply glue along one edge of the flange, ensuring a secure bond when clamped into place. He emphasizes that this stage is crucial for maintaining the structural integrity of the flange, which in turn safeguards the living area beneath the canvas when hatches are open.Step 3: Allowing Time to Dry
After securely attaching the first portion of the flange, Sven allows ample time for it to dry before moving forward with additional steps. This patience and precision are key aspects of his successful boatbuilding methods.Step 4: Finishing Touches
Once the flange is fully dried, Sven removes the clamps carefully, ensuring no damage occurs during this process. He then moves on to attaching four more pieces onto these main frames, completing two pairs of flanges for the bulkhead hatches.The Final Touches
While two flanges form the primary support structure around the hatches, Sven mentions there are two additional pieces required at each end to ensure comprehensive protection. This attention to detail highlights his commitment to producing a durable and reliable design. “Sailing is about finding your path, whether it’s across an ocean or within yourself.” – Sven Yrvind In conclusion, making flanges around bulkhead hatches may seem complex at first glance, but by following Sven Yrvind’s meticulous process, enthusiasts can achieve professional-level results. Remember that the journey of boatbuilding is as rewarding as reaching your destination; it tests one’s patience and dedication. For those seeking to embark on this adventure or simply gain more insight into marine craftsmanship, Sven’s wisdom is invaluable.Sven begins by explaining that working on flanges vertically and horizontally is significantly easier than doing so in a flat position. To simplify the process further, he divides the task into two or three steps as suggested by fellow expert “for for.” This approach not only makes it more manageable but also allows for greater precision in crafting each component.Step 2: Applying Glue and Securing
Sven proceeds to apply glue along one edge of the flange, ensuring a secure bond when clamped into place. He emphasizes that this stage is crucial for maintaining the structural integrity of the flange, which in turn safeguards the living area beneath the canvas when hatches are open.Step 3: Allowing Time to Dry
After securely attaching the first portion of the flange, Sven allows ample time for it to dry before moving forward with additional steps. This patience and precision are key aspects of his successful boatbuilding methods.Step 4: Finishing Touches
Once the flange is fully dried, Sven removes the clamps carefully, ensuring no damage occurs during this process. He then moves on to attaching four more pieces onto these main frames, completing two pairs of flanges for the bulkhead hatches.The Final Touches
While two flanges form the primary support structure around the hatches, Sven mentions there are two additional pieces required at each end to ensure comprehensive protection. This attention to detail highlights his commitment to producing a durable and reliable design. “Sailing is about finding your path, whether it’s across an ocean or within yourself.” – Sven Yrvind In conclusion, making flanges around bulkhead hatches may seem complex at first glance, but by following Sven Yrvind’s meticulous process, enthusiasts can achieve professional-level results. Remember that the journey of boatbuilding is as rewarding as reaching your destination; it tests one’s patience and dedication. For those seeking to embark on this adventure or simply gain more insight into marine craftsmanship, Sven’s wisdom is invaluable.Sven Yrvind, a renowned yacht designer and sailor, shares valuable insights on creating flanges around bulkhead hatches for canvas protection in this enlightening video. By following his expert guidance, boat enthusiasts can ensure their living areas remain secure while allowing unhindered access through the hatches.Step 1: Starting with the Flange
Sven begins by explaining that working on flanges vertically and horizontally is significantly easier than doing so in a flat position. To simplify the process further, he divides the task into two or three steps as suggested by fellow expert “for for.” This approach not only makes it more manageable but also allows for greater precision in crafting each component.Step 2: Applying Glue and Securing
Sven proceeds to apply glue along one edge of the flange, ensuring a secure bond when clamped into place. He emphasizes that this stage is crucial for maintaining the structural integrity of the flange, which in turn safeguards the living area beneath the canvas when hatches are open.Step 3: Allowing Time to Dry
After securely attaching the first portion of the flange, Sven allows ample time for it to dry before moving forward with additional steps. This patience and precision are key aspects of his successful boatbuilding methods.Step 4: Finishing Touches
Once the flange is fully dried, Sven removes the clamps carefully, ensuring no damage occurs during this process. He then moves on to attaching four more pieces onto these main frames, completing two pairs of flanges for the bulkhead hatches.The Final Touches
While two flanges form the primary support structure around the hatches, Sven mentions there are two additional pieces required at each end to ensure comprehensive protection. This attention to detail highlights his commitment to producing a durable and reliable design. “Sailing is about finding your path, whether it’s across an ocean or within yourself.” – Sven Yrvind In conclusion, making flanges around bulkhead hatches may seem complex at first glance, but by following Sven Yrvind’s meticulous process, enthusiasts can achieve professional-level results. Remember that the journey of boatbuilding is as rewarding as reaching your destination; it tests one’s patience and dedication. For those seeking to embark on this adventure or simply gain more insight into marine craftsmanship, Sven’s wisdom is invaluable.Making Flanges Around Bulkhead Hatches for Canvas
Sven Yrvind, a renowned yacht designer and sailor, shares valuable insights on creating flanges around bulkhead hatches for canvas protection in this enlightening video. By following his expert guidance, boat enthusiasts can ensure their living areas remain secure while allowing unhindered access through the hatches.Step 1: Starting with the Flange
Sven begins by explaining that working on flanges vertically and horizontally is significantly easier than doing so in a flat position. To simplify the process further, he divides the task into two or three steps as suggested by fellow expert “for for.” This approach not only makes it more manageable but also allows for greater precision in crafting each component.Step 2: Applying Glue and Securing
Sven proceeds to apply glue along one edge of the flange, ensuring a secure bond when clamped into place. He emphasizes that this stage is crucial for maintaining the structural integrity of the flange, which in turn safeguards the living area beneath the canvas when hatches are open.Step 3: Allowing Time to Dry
After securely attaching the first portion of the flange, Sven allows ample time for it to dry before moving forward with additional steps. This patience and precision are key aspects of his successful boatbuilding methods.Step 4: Finishing Touches
Once the flange is fully dried, Sven removes the clamps carefully, ensuring no damage occurs during this process. He then moves on to attaching four more pieces onto these main frames, completing two pairs of flanges for the bulkhead hatches.The Final Touches
While two flanges form the primary support structure around the hatches, Sven mentions there are two additional pieces required at each end to ensure comprehensive protection. This attention to detail highlights his commitment to producing a durable and reliable design. “Sailing is about finding your path, whether it’s across an ocean or within yourself.” – Sven Yrvind In conclusion, making flanges around bulkhead hatches may seem complex at first glance, but by following Sven Yrvind’s meticulous process, enthusiasts can achieve professional-level results. Remember that the journey of boatbuilding is as rewarding as reaching your destination; it tests one’s patience and dedication. For those seeking to embark on this adventure or simply gain more insight into marine craftsmanship, Sven’s wisdom is invaluable.After securely attaching the first portion of the flange, Sven allows ample time for it to dry before moving forward with additional steps. This patience and precision are key aspects of his successful boatbuilding methods.Step 4: Finishing Touches
Once the flange is fully dried, Sven removes the clamps carefully, ensuring no damage occurs during this process. He then moves on to attaching four more pieces onto these main frames, completing two pairs of flanges for the bulkhead hatches.The Final Touches
While two flanges form the primary support structure around the hatches, Sven mentions there are two additional pieces required at each end to ensure comprehensive protection. This attention to detail highlights his commitment to producing a durable and reliable design. “Sailing is about finding your path, whether it’s across an ocean or within yourself.” – Sven Yrvind In conclusion, making flanges around bulkhead hatches may seem complex at first glance, but by following Sven Yrvind’s meticulous process, enthusiasts can achieve professional-level results. Remember that the journey of boatbuilding is as rewarding as reaching your destination; it tests one’s patience and dedication. For those seeking to embark on this adventure or simply gain more insight into marine craftsmanship, Sven’s wisdom is invaluable.Sven Yrvind, a renowned yacht designer and sailor, shares valuable insights on creating flanges around bulkhead hatches for canvas protection in this enlightening video. By following his expert guidance, boat enthusiasts can ensure their living areas remain secure while allowing unhindered access through the hatches.Step 1: Starting with the Flange
Sven begins by explaining that working on flanges vertically and horizontally is significantly easier than doing so in a flat position. To simplify the process further, he divides the task into two or three steps as suggested by fellow expert “for for.” This approach not only makes it more manageable but also allows for greater precision in crafting each component.Step 2: Applying Glue and Securing
Sven proceeds to apply glue along one edge of the flange, ensuring a secure bond when clamped into place. He emphasizes that this stage is crucial for maintaining the structural integrity of the flange, which in turn safeguards the living area beneath the canvas when hatches are open.Step 3: Allowing Time to Dry
After securely attaching the first portion of the flange, Sven allows ample time for it to dry before moving forward with additional steps. This patience and precision are key aspects of his successful boatbuilding methods.Step 4: Finishing Touches
Once the flange is fully dried, Sven removes the clamps carefully, ensuring no damage occurs during this process. He then moves on to attaching four more pieces onto these main frames, completing two pairs of flanges for the bulkhead hatches.The Final Touches
While two flanges form the primary support structure around the hatches, Sven mentions there are two additional pieces required at each end to ensure comprehensive protection. This attention to detail highlights his commitment to producing a durable and reliable design. “Sailing is about finding your path, whether it’s across an ocean or within yourself.” – Sven Yrvind In conclusion, making flanges around bulkhead hatches may seem complex at first glance, but by following Sven Yrvind’s meticulous process, enthusiasts can achieve professional-level results. Remember that the journey of boatbuilding is as rewarding as reaching your destination; it tests one’s patience and dedication. For those seeking to embark on this adventure or simply gain more insight into marine craftsmanship, Sven’s wisdom is invaluable.Making Flanges Around Bulkhead Hatches for Canvas
Sven Yrvind, a renowned yacht designer and sailor, shares valuable insights on creating flanges around bulkhead hatches for canvas protection in this enlightening video. By following his expert guidance, boat enthusiasts can ensure their living areas remain secure while allowing unhindered access through the hatches.Step 1: Starting with the Flange
Sven begins by explaining that working on flanges vertically and horizontally is significantly easier than doing so in a flat position. To simplify the process further, he divides the task into two or three steps as suggested by fellow expert “for for.” This approach not only makes it more manageable but also allows for greater precision in crafting each component.Step 2: Applying Glue and Securing
Sven proceeds to apply glue along one edge of the flange, ensuring a secure bond when clamped into place. He emphasizes that this stage is crucial for maintaining the structural integrity of the flange, which in turn safeguards the living area beneath the canvas when hatches are open.Step 3: Allowing Time to Dry
After securely attaching the first portion of the flange, Sven allows ample time for it to dry before moving forward with additional steps. This patience and precision are key aspects of his successful boatbuilding methods.Step 4: Finishing Touches
Once the flange is fully dried, Sven removes the clamps carefully, ensuring no damage occurs during this process. He then moves on to attaching four more pieces onto these main frames, completing two pairs of flanges for the bulkhead hatches.The Final Touches
While two flanges form the primary support structure around the hatches, Sven mentions there are two additional pieces required at each end to ensure comprehensive protection. This attention to detail highlights his commitment to producing a durable and reliable design. “Sailing is about finding your path, whether it’s across an ocean or within yourself.” – Sven Yrvind In conclusion, making flanges around bulkhead hatches may seem complex at first glance, but by following Sven Yrvind’s meticulous process, enthusiasts can achieve professional-level results. Remember that the journey of boatbuilding is as rewarding as reaching your destination; it tests one’s patience and dedication. For those seeking to embark on this adventure or simply gain more insight into marine craftsmanship, Sven’s wisdom is invaluable.Once the flange is fully dried, Sven removes the clamps carefully, ensuring no damage occurs during this process. He then moves on to attaching four more pieces onto these main frames, completing two pairs of flanges for the bulkhead hatches.The Final Touches
While two flanges form the primary support structure around the hatches, Sven mentions there are two additional pieces required at each end to ensure comprehensive protection. This attention to detail highlights his commitment to producing a durable and reliable design. “Sailing is about finding your path, whether it’s across an ocean or within yourself.” – Sven Yrvind In conclusion, making flanges around bulkhead hatches may seem complex at first glance, but by following Sven Yrvind’s meticulous process, enthusiasts can achieve professional-level results. Remember that the journey of boatbuilding is as rewarding as reaching your destination; it tests one’s patience and dedication. For those seeking to embark on this adventure or simply gain more insight into marine craftsmanship, Sven’s wisdom is invaluable.Making Flanges Around Bulkhead Hatches for Canvas
Sven Yrvind, a renowned yacht designer and sailor, shares valuable insights on creating flanges around bulkhead hatches for canvas protection in this enlightening video. By following his expert guidance, boat enthusiasts can ensure their living areas remain secure while allowing unhindered access through the hatches.Step 1: Starting with the Flange
Sven begins by explaining that working on flanges vertically and horizontally is significantly easier than doing so in a flat position. To simplify the process further, he divides the task into two or three steps as suggested by fellow expert “for for.” This approach not only makes it more manageable but also allows for greater precision in crafting each component.Step 2: Applying Glue and Securing
Sven proceeds to apply glue along one edge of the flange, ensuring a secure bond when clamped into place. He emphasizes that this stage is crucial for maintaining the structural integrity of the flange, which in turn safeguards the living area beneath the canvas when hatches are open.Step 3: Allowing Time to Dry
After securely attaching the first portion of the flange, Sven allows ample time for it to dry before moving forward with additional steps. This patience and precision are key aspects of his successful boatbuilding methods.Step 4: Finishing Touches
Once the flange is fully dried, Sven removes the clamps carefully, ensuring no damage occurs during this process. He then moves on to attaching four more pieces onto these main frames, completing two pairs of flanges for the bulkhead hatches.The Final Touches
While two flanges form the primary support structure around the hatches, Sven mentions there are two additional pieces required at each end to ensure comprehensive protection. This attention to detail highlights his commitment to producing a durable and reliable design. “Sailing is about finding your path, whether it’s across an ocean or within yourself.” – Sven Yrvind In conclusion, making flanges around bulkhead hatches may seem complex at first glance, but by following Sven Yrvind’s meticulous process, enthusiasts can achieve professional-level results. Remember that the journey of boatbuilding is as rewarding as reaching your destination; it tests one’s patience and dedication. For those seeking to embark on this adventure or simply gain more insight into marine craftsmanship, Sven’s wisdom is invaluable.After securely attaching the first portion of the flange, Sven allows ample time for it to dry before moving forward with additional steps. This patience and precision are key aspects of his successful boatbuilding methods.Step 4: Finishing Touches
Once the flange is fully dried, Sven removes the clamps carefully, ensuring no damage occurs during this process. He then moves on to attaching four more pieces onto these main frames, completing two pairs of flanges for the bulkhead hatches.The Final Touches
While two flanges form the primary support structure around the hatches, Sven mentions there are two additional pieces required at each end to ensure comprehensive protection. This attention to detail highlights his commitment to producing a durable and reliable design. “Sailing is about finding your path, whether it’s across an ocean or within yourself.” – Sven Yrvind In conclusion, making flanges around bulkhead hatches may seem complex at first glance, but by following Sven Yrvind’s meticulous process, enthusiasts can achieve professional-level results. Remember that the journey of boatbuilding is as rewarding as reaching your destination; it tests one’s patience and dedication. For those seeking to embark on this adventure or simply gain more insight into marine craftsmanship, Sven’s wisdom is invaluable.Making Flanges Around Bulkhead Hatches for Canvas
Sven Yrvind, a renowned yacht designer and sailor, shares valuable insights on creating flanges around bulkhead hatches for canvas protection in this enlightening video. By following his expert guidance, boat enthusiasts can ensure their living areas remain secure while allowing unhindered access through the hatches.Step 1: Starting with the Flange
Sven begins by explaining that working on flanges vertically and horizontally is significantly easier than doing so in a flat position. To simplify the process further, he divides the task into two or three steps as suggested by fellow expert “for for.” This approach not only makes it more manageable but also allows for greater precision in crafting each component.Step 2: Applying Glue and Securing
Sven proceeds to apply glue along one edge of the flange, ensuring a secure bond when clamped into place. He emphasizes that this stage is crucial for maintaining the structural integrity of the flange, which in turn safeguards the living area beneath the canvas when hatches are open.Step 3: Allowing Time to Dry
After securely attaching the first portion of the flange, Sven allows ample time for it to dry before moving forward with additional steps. This patience and precision are key aspects of his successful boatbuilding methods.Step 4: Finishing Touches
Once the flange is fully dried, Sven removes the clamps carefully, ensuring no damage occurs during this process. He then moves on to attaching four more pieces onto these main frames, completing two pairs of flanges for the bulkhead hatches.The Final Touches
While two flanges form the primary support structure around the hatches, Sven mentions there are two additional pieces required at each end to ensure comprehensive protection. This attention to detail highlights his commitment to producing a durable and reliable design. “Sailing is about finding your path, whether it’s across an ocean or within yourself.” – Sven Yrvind In conclusion, making flanges around bulkhead hatches may seem complex at first glance, but by following Sven Yrvind’s meticulous process, enthusiasts can achieve professional-level results. Remember that the journey of boatbuilding is as rewarding as reaching your destination; it tests one’s patience and dedication. For those seeking to embark on this adventure or simply gain more insight into marine craftsmanship, Sven’s wisdom is invaluable.Sven proceeds to apply glue along one edge of the flange, ensuring a secure bond when clamped into place. He emphasizes that this stage is crucial for maintaining the structural integrity of the flange, which in turn safeguards the living area beneath the canvas when hatches are open.Step 3: Allowing Time to Dry
After securely attaching the first portion of the flange, Sven allows ample time for it to dry before moving forward with additional steps. This patience and precision are key aspects of his successful boatbuilding methods.Step 4: Finishing Touches
Once the flange is fully dried, Sven removes the clamps carefully, ensuring no damage occurs during this process. He then moves on to attaching four more pieces onto these main frames, completing two pairs of flanges for the bulkhead hatches.The Final Touches
While two flanges form the primary support structure around the hatches, Sven mentions there are two additional pieces required at each end to ensure comprehensive protection. This attention to detail highlights his commitment to producing a durable and reliable design. “Sailing is about finding your path, whether it’s across an ocean or within yourself.” – Sven Yrvind In conclusion, making flanges around bulkhead hatches may seem complex at first glance, but by following Sven Yrvind’s meticulous process, enthusiasts can achieve professional-level results. Remember that the journey of boatbuilding is as rewarding as reaching your destination; it tests one’s patience and dedication. For those seeking to embark on this adventure or simply gain more insight into marine craftsmanship, Sven’s wisdom is invaluable.Making Flanges Around Bulkhead Hatches for Canvas
Sven Yrvind, a renowned yacht designer and sailor, shares valuable insights on creating flanges around bulkhead hatches for canvas protection in this enlightening video. By following his expert guidance, boat enthusiasts can ensure their living areas remain secure while allowing unhindered access through the hatches.Step 1: Starting with the Flange
Sven begins by explaining that working on flanges vertically and horizontally is significantly easier than doing so in a flat position. To simplify the process further, he divides the task into two or three steps as suggested by fellow expert “for for.” This approach not only makes it more manageable but also allows for greater precision in crafting each component.Step 2: Applying Glue and Securing
Sven proceeds to apply glue along one edge of the flange, ensuring a secure bond when clamped into place. He emphasizes that this stage is crucial for maintaining the structural integrity of the flange, which in turn safeguards the living area beneath the canvas when hatches are open.Step 3: Allowing Time to Dry
After securely attaching the first portion of the flange, Sven allows ample time for it to dry before moving forward with additional steps. This patience and precision are key aspects of his successful boatbuilding methods.Step 4: Finishing Touches
Once the flange is fully dried, Sven removes the clamps carefully, ensuring no damage occurs during this process. He then moves on to attaching four more pieces onto these main frames, completing two pairs of flanges for the bulkhead hatches.The Final Touches
While two flanges form the primary support structure around the hatches, Sven mentions there are two additional pieces required at each end to ensure comprehensive protection. This attention to detail highlights his commitment to producing a durable and reliable design. “Sailing is about finding your path, whether it’s across an ocean or within yourself.” – Sven Yrvind In conclusion, making flanges around bulkhead hatches may seem complex at first glance, but by following Sven Yrvind’s meticulous process, enthusiasts can achieve professional-level results. Remember that the journey of boatbuilding is as rewarding as reaching your destination; it tests one’s patience and dedication. For those seeking to embark on this adventure or simply gain more insight into marine craftsmanship, Sven’s wisdom is invaluable.Sven begins by explaining that working on flanges vertically and horizontally is significantly easier than doing so in a flat position. To simplify the process further, he divides the task into two or three steps as suggested by fellow expert “for for.” This approach not only makes it more manageable but also allows for greater precision in crafting each component.Step 2: Applying Glue and Securing
Sven proceeds to apply glue along one edge of the flange, ensuring a secure bond when clamped into place. He emphasizes that this stage is crucial for maintaining the structural integrity of the flange, which in turn safeguards the living area beneath the canvas when hatches are open.Step 3: Allowing Time to Dry
After securely attaching the first portion of the flange, Sven allows ample time for it to dry before moving forward with additional steps. This patience and precision are key aspects of his successful boatbuilding methods.Step 4: Finishing Touches
Once the flange is fully dried, Sven removes the clamps carefully, ensuring no damage occurs during this process. He then moves on to attaching four more pieces onto these main frames, completing two pairs of flanges for the bulkhead hatches.The Final Touches
While two flanges form the primary support structure around the hatches, Sven mentions there are two additional pieces required at each end to ensure comprehensive protection. This attention to detail highlights his commitment to producing a durable and reliable design. “Sailing is about finding your path, whether it’s across an ocean or within yourself.” – Sven Yrvind In conclusion, making flanges around bulkhead hatches may seem complex at first glance, but by following Sven Yrvind’s meticulous process, enthusiasts can achieve professional-level results. Remember that the journey of boatbuilding is as rewarding as reaching your destination; it tests one’s patience and dedication. For those seeking to embark on this adventure or simply gain more insight into marine craftsmanship, Sven’s wisdom is invaluable.Making Flanges Around Bulkhead Hatches for Canvas
Sven Yrvind, a renowned yacht designer and sailor, shares valuable insights on creating flanges around bulkhead hatches for canvas protection in this enlightening video. By following his expert guidance, boat enthusiasts can ensure their living areas remain secure while allowing unhindered access through the hatches.Step 1: Starting with the Flange
Sven begins by explaining that working on flanges vertically and horizontally is significantly easier than doing so in a flat position. To simplify the process further, he divides the task into two or three steps as suggested by fellow expert “for for.” This approach not only makes it more manageable but also allows for greater precision in crafting each component.Step 2: Applying Glue and Securing
Sven proceeds to apply glue along one edge of the flange, ensuring a secure bond when clamped into place. He emphasizes that this stage is crucial for maintaining the structural integrity of the flange, which in turn safeguards the living area beneath the canvas when hatches are open.Step 3: Allowing Time to Dry
After securely attaching the first portion of the flange, Sven allows ample time for it to dry before moving forward with additional steps. This patience and precision are key aspects of his successful boatbuilding methods.Step 4: Finishing Touches
Once the flange is fully dried, Sven removes the clamps carefully, ensuring no damage occurs during this process. He then moves on to attaching four more pieces onto these main frames, completing two pairs of flanges for the bulkhead hatches.The Final Touches
While two flanges form the primary support structure around the hatches, Sven mentions there are two additional pieces required at each end to ensure comprehensive protection. This attention to detail highlights his commitment to producing a durable and reliable design. “Sailing is about finding your path, whether it’s across an ocean or within yourself.” – Sven Yrvind In conclusion, making flanges around bulkhead hatches may seem complex at first glance, but by following Sven Yrvind’s meticulous process, enthusiasts can achieve professional-level results. Remember that the journey of boatbuilding is as rewarding as reaching your destination; it tests one’s patience and dedication. For those seeking to embark on this adventure or simply gain more insight into marine craftsmanship, Sven’s wisdom is invaluable.Sven Yrvind, a renowned yacht designer and sailor, shares valuable insights on creating flanges around bulkhead hatches for canvas protection in this enlightening video. By following his expert guidance, boat enthusiasts can ensure their living areas remain secure while allowing unhindered access through the hatches.Step 1: Starting with the Flange
Sven begins by explaining that working on flanges vertically and horizontally is significantly easier than doing so in a flat position. To simplify the process further, he divides the task into two or three steps as suggested by fellow expert “for for.” This approach not only makes it more manageable but also allows for greater precision in crafting each component.Step 2: Applying Glue and Securing
Sven proceeds to apply glue along one edge of the flange, ensuring a secure bond when clamped into place. He emphasizes that this stage is crucial for maintaining the structural integrity of the flange, which in turn safeguards the living area beneath the canvas when hatches are open.Step 3: Allowing Time to Dry
After securely attaching the first portion of the flange, Sven allows ample time for it to dry before moving forward with additional steps. This patience and precision are key aspects of his successful boatbuilding methods.Step 4: Finishing Touches
Once the flange is fully dried, Sven removes the clamps carefully, ensuring no damage occurs during this process. He then moves on to attaching four more pieces onto these main frames, completing two pairs of flanges for the bulkhead hatches.The Final Touches
While two flanges form the primary support structure around the hatches, Sven mentions there are two additional pieces required at each end to ensure comprehensive protection. This attention to detail highlights his commitment to producing a durable and reliable design. “Sailing is about finding your path, whether it’s across an ocean or within yourself.” – Sven Yrvind In conclusion, making flanges around bulkhead hatches may seem complex at first glance, but by following Sven Yrvind’s meticulous process, enthusiasts can achieve professional-level results. Remember that the journey of boatbuilding is as rewarding as reaching your destination; it tests one’s patience and dedication. For those seeking to embark on this adventure or simply gain more insight into marine craftsmanship, Sven’s wisdom is invaluable.Making Flanges Around Bulkhead Hatches for Canvas
Sven Yrvind, a renowned yacht designer and sailor, shares valuable insights on creating flanges around bulkhead hatches for canvas protection in this enlightening video. By following his expert guidance, boat enthusiasts can ensure their living areas remain secure while allowing unhindered access through the hatches.Step 1: Starting with the Flange
Sven begins by explaining that working on flanges vertically and horizontally is significantly easier than doing so in a flat position. To simplify the process further, he divides the task into two or three steps as suggested by fellow expert “for for.” This approach not only makes it more manageable but also allows for greater precision in crafting each component.Step 2: Applying Glue and Securing
Sven proceeds to apply glue along one edge of the flange, ensuring a secure bond when clamped into place. He emphasizes that this stage is crucial for maintaining the structural integrity of the flange, which in turn safeguards the living area beneath the canvas when hatches are open.Step 3: Allowing Time to Dry
After securely attaching the first portion of the flange, Sven allows ample time for it to dry before moving forward with additional steps. This patience and precision are key aspects of his successful boatbuilding methods.Step 4: Finishing Touches
Once the flange is fully dried, Sven removes the clamps carefully, ensuring no damage occurs during this process. He then moves on to attaching four more pieces onto these main frames, completing two pairs of flanges for the bulkhead hatches.The Final Touches
While two flanges form the primary support structure around the hatches, Sven mentions there are two additional pieces required at each end to ensure comprehensive protection. This attention to detail highlights his commitment to producing a durable and reliable design. “Sailing is about finding your path, whether it’s across an ocean or within yourself.” – Sven Yrvind In conclusion, making flanges around bulkhead hatches may seem complex at first glance, but by following Sven Yrvind’s meticulous process, enthusiasts can achieve professional-level results. Remember that the journey of boatbuilding is as rewarding as reaching your destination; it tests one’s patience and dedication. For those seeking to embark on this adventure or simply gain more insight into marine craftsmanship, Sven’s wisdom is invaluable.Once the flange is fully dried, Sven removes the clamps carefully, ensuring no damage occurs during this process. He then moves on to attaching four more pieces onto these main frames, completing two pairs of flanges for the bulkhead hatches.The Final Touches
While two flanges form the primary support structure around the hatches, Sven mentions there are two additional pieces required at each end to ensure comprehensive protection. This attention to detail highlights his commitment to producing a durable and reliable design. “Sailing is about finding your path, whether it’s across an ocean or within yourself.” – Sven Yrvind In conclusion, making flanges around bulkhead hatches may seem complex at first glance, but by following Sven Yrvind’s meticulous process, enthusiasts can achieve professional-level results. Remember that the journey of boatbuilding is as rewarding as reaching your destination; it tests one’s patience and dedication. For those seeking to embark on this adventure or simply gain more insight into marine craftsmanship, Sven’s wisdom is invaluable.Sven Yrvind, a renowned yacht designer and sailor, shares valuable insights on creating flanges around bulkhead hatches for canvas protection in this enlightening video. By following his expert guidance, boat enthusiasts can ensure their living areas remain secure while allowing unhindered access through the hatches.Step 1: Starting with the Flange
Sven begins by explaining that working on flanges vertically and horizontally is significantly easier than doing so in a flat position. To simplify the process further, he divides the task into two or three steps as suggested by fellow expert “for for.” This approach not only makes it more manageable but also allows for greater precision in crafting each component.Step 2: Applying Glue and Securing
Sven proceeds to apply glue along one edge of the flange, ensuring a secure bond when clamped into place. He emphasizes that this stage is crucial for maintaining the structural integrity of the flange, which in turn safeguards the living area beneath the canvas when hatches are open.Step 3: Allowing Time to Dry
After securely attaching the first portion of the flange, Sven allows ample time for it to dry before moving forward with additional steps. This patience and precision are key aspects of his successful boatbuilding methods.Step 4: Finishing Touches
Once the flange is fully dried, Sven removes the clamps carefully, ensuring no damage occurs during this process. He then moves on to attaching four more pieces onto these main frames, completing two pairs of flanges for the bulkhead hatches.The Final Touches
While two flanges form the primary support structure around the hatches, Sven mentions there are two additional pieces required at each end to ensure comprehensive protection. This attention to detail highlights his commitment to producing a durable and reliable design. “Sailing is about finding your path, whether it’s across an ocean or within yourself.” – Sven Yrvind In conclusion, making flanges around bulkhead hatches may seem complex at first glance, but by following Sven Yrvind’s meticulous process, enthusiasts can achieve professional-level results. Remember that the journey of boatbuilding is as rewarding as reaching your destination; it tests one’s patience and dedication. For those seeking to embark on this adventure or simply gain more insight into marine craftsmanship, Sven’s wisdom is invaluable.Making Flanges Around Bulkhead Hatches for Canvas
Sven Yrvind, a renowned yacht designer and sailor, shares valuable insights on creating flanges around bulkhead hatches for canvas protection in this enlightening video. By following his expert guidance, boat enthusiasts can ensure their living areas remain secure while allowing unhindered access through the hatches.Step 1: Starting with the Flange
Sven begins by explaining that working on flanges vertically and horizontally is significantly easier than doing so in a flat position. To simplify the process further, he divides the task into two or three steps as suggested by fellow expert “for for.” This approach not only makes it more manageable but also allows for greater precision in crafting each component.Step 2: Applying Glue and Securing
Sven proceeds to apply glue along one edge of the flange, ensuring a secure bond when clamped into place. He emphasizes that this stage is crucial for maintaining the structural integrity of the flange, which in turn safeguards the living area beneath the canvas when hatches are open.Step 3: Allowing Time to Dry
After securely attaching the first portion of the flange, Sven allows ample time for it to dry before moving forward with additional steps. This patience and precision are key aspects of his successful boatbuilding methods.Step 4: Finishing Touches
Once the flange is fully dried, Sven removes the clamps carefully, ensuring no damage occurs during this process. He then moves on to attaching four more pieces onto these main frames, completing two pairs of flanges for the bulkhead hatches.The Final Touches
While two flanges form the primary support structure around the hatches, Sven mentions there are two additional pieces required at each end to ensure comprehensive protection. This attention to detail highlights his commitment to producing a durable and reliable design. “Sailing is about finding your path, whether it’s across an ocean or within yourself.” – Sven Yrvind In conclusion, making flanges around bulkhead hatches may seem complex at first glance, but by following Sven Yrvind’s meticulous process, enthusiasts can achieve professional-level results. Remember that the journey of boatbuilding is as rewarding as reaching your destination; it tests one’s patience and dedication. For those seeking to embark on this adventure or simply gain more insight into marine craftsmanship, Sven’s wisdom is invaluable.After securely attaching the first portion of the flange, Sven allows ample time for it to dry before moving forward with additional steps. This patience and precision are key aspects of his successful boatbuilding methods.Step 4: Finishing Touches
Once the flange is fully dried, Sven removes the clamps carefully, ensuring no damage occurs during this process. He then moves on to attaching four more pieces onto these main frames, completing two pairs of flanges for the bulkhead hatches.The Final Touches
While two flanges form the primary support structure around the hatches, Sven mentions there are two additional pieces required at each end to ensure comprehensive protection. This attention to detail highlights his commitment to producing a durable and reliable design. “Sailing is about finding your path, whether it’s across an ocean or within yourself.” – Sven Yrvind In conclusion, making flanges around bulkhead hatches may seem complex at first glance, but by following Sven Yrvind’s meticulous process, enthusiasts can achieve professional-level results. Remember that the journey of boatbuilding is as rewarding as reaching your destination; it tests one’s patience and dedication. For those seeking to embark on this adventure or simply gain more insight into marine craftsmanship, Sven’s wisdom is invaluable.Sven Yrvind, a renowned yacht designer and sailor, shares valuable insights on creating flanges around bulkhead hatches for canvas protection in this enlightening video. By following his expert guidance, boat enthusiasts can ensure their living areas remain secure while allowing unhindered access through the hatches.Step 1: Starting with the Flange
Sven begins by explaining that working on flanges vertically and horizontally is significantly easier than doing so in a flat position. To simplify the process further, he divides the task into two or three steps as suggested by fellow expert “for for.” This approach not only makes it more manageable but also allows for greater precision in crafting each component.Step 2: Applying Glue and Securing
Sven proceeds to apply glue along one edge of the flange, ensuring a secure bond when clamped into place. He emphasizes that this stage is crucial for maintaining the structural integrity of the flange, which in turn safeguards the living area beneath the canvas when hatches are open.Step 3: Allowing Time to Dry
After securely attaching the first portion of the flange, Sven allows ample time for it to dry before moving forward with additional steps. This patience and precision are key aspects of his successful boatbuilding methods.Step 4: Finishing Touches
Once the flange is fully dried, Sven removes the clamps carefully, ensuring no damage occurs during this process. He then moves on to attaching four more pieces onto these main frames, completing two pairs of flanges for the bulkhead hatches.The Final Touches
While two flanges form the primary support structure around the hatches, Sven mentions there are two additional pieces required at each end to ensure comprehensive protection. This attention to detail highlights his commitment to producing a durable and reliable design. “Sailing is about finding your path, whether it’s across an ocean or within yourself.” – Sven Yrvind In conclusion, making flanges around bulkhead hatches may seem complex at first glance, but by following Sven Yrvind’s meticulous process, enthusiasts can achieve professional-level results. Remember that the journey of boatbuilding is as rewarding as reaching your destination; it tests one’s patience and dedication. For those seeking to embark on this adventure or simply gain more insight into marine craftsmanship, Sven’s wisdom is invaluable.Making Flanges Around Bulkhead Hatches for Canvas
Sven Yrvind, a renowned yacht designer and sailor, shares valuable insights on creating flanges around bulkhead hatches for canvas protection in this enlightening video. By following his expert guidance, boat enthusiasts can ensure their living areas remain secure while allowing unhindered access through the hatches.Step 1: Starting with the Flange
Sven begins by explaining that working on flanges vertically and horizontally is significantly easier than doing so in a flat position. To simplify the process further, he divides the task into two or three steps as suggested by fellow expert “for for.” This approach not only makes it more manageable but also allows for greater precision in crafting each component.Step 2: Applying Glue and Securing
Sven proceeds to apply glue along one edge of the flange, ensuring a secure bond when clamped into place. He emphasizes that this stage is crucial for maintaining the structural integrity of the flange, which in turn safeguards the living area beneath the canvas when hatches are open.Step 3: Allowing Time to Dry
After securely attaching the first portion of the flange, Sven allows ample time for it to dry before moving forward with additional steps. This patience and precision are key aspects of his successful boatbuilding methods.Step 4: Finishing Touches
Once the flange is fully dried, Sven removes the clamps carefully, ensuring no damage occurs during this process. He then moves on to attaching four more pieces onto these main frames, completing two pairs of flanges for the bulkhead hatches.The Final Touches
While two flanges form the primary support structure around the hatches, Sven mentions there are two additional pieces required at each end to ensure comprehensive protection. This attention to detail highlights his commitment to producing a durable and reliable design. “Sailing is about finding your path, whether it’s across an ocean or within yourself.” – Sven Yrvind In conclusion, making flanges around bulkhead hatches may seem complex at first glance, but by following Sven Yrvind’s meticulous process, enthusiasts can achieve professional-level results. Remember that the journey of boatbuilding is as rewarding as reaching your destination; it tests one’s patience and dedication. For those seeking to embark on this adventure or simply gain more insight into marine craftsmanship, Sven’s wisdom is invaluable.Sven proceeds to apply glue along one edge of the flange, ensuring a secure bond when clamped into place. He emphasizes that this stage is crucial for maintaining the structural integrity of the flange, which in turn safeguards the living area beneath the canvas when hatches are open.Step 3: Allowing Time to Dry
After securely attaching the first portion of the flange, Sven allows ample time for it to dry before moving forward with additional steps. This patience and precision are key aspects of his successful boatbuilding methods.Step 4: Finishing Touches
Once the flange is fully dried, Sven removes the clamps carefully, ensuring no damage occurs during this process. He then moves on to attaching four more pieces onto these main frames, completing two pairs of flanges for the bulkhead hatches.The Final Touches
While two flanges form the primary support structure around the hatches, Sven mentions there are two additional pieces required at each end to ensure comprehensive protection. This attention to detail highlights his commitment to producing a durable and reliable design. “Sailing is about finding your path, whether it’s across an ocean or within yourself.” – Sven Yrvind In conclusion, making flanges around bulkhead hatches may seem complex at first glance, but by following Sven Yrvind’s meticulous process, enthusiasts can achieve professional-level results. Remember that the journey of boatbuilding is as rewarding as reaching your destination; it tests one’s patience and dedication. For those seeking to embark on this adventure or simply gain more insight into marine craftsmanship, Sven’s wisdom is invaluable.Sven Yrvind, a renowned yacht designer and sailor, shares valuable insights on creating flanges around bulkhead hatches for canvas protection in this enlightening video. By following his expert guidance, boat enthusiasts can ensure their living areas remain secure while allowing unhindered access through the hatches.Step 1: Starting with the Flange
Sven begins by explaining that working on flanges vertically and horizontally is significantly easier than doing so in a flat position. To simplify the process further, he divides the task into two or three steps as suggested by fellow expert “for for.” This approach not only makes it more manageable but also allows for greater precision in crafting each component.Step 2: Applying Glue and Securing
Sven proceeds to apply glue along one edge of the flange, ensuring a secure bond when clamped into place. He emphasizes that this stage is crucial for maintaining the structural integrity of the flange, which in turn safeguards the living area beneath the canvas when hatches are open.Step 3: Allowing Time to Dry
After securely attaching the first portion of the flange, Sven allows ample time for it to dry before moving forward with additional steps. This patience and precision are key aspects of his successful boatbuilding methods.Step 4: Finishing Touches
Once the flange is fully dried, Sven removes the clamps carefully, ensuring no damage occurs during this process. He then moves on to attaching four more pieces onto these main frames, completing two pairs of flanges for the bulkhead hatches.The Final Touches
While two flanges form the primary support structure around the hatches, Sven mentions there are two additional pieces required at each end to ensure comprehensive protection. This attention to detail highlights his commitment to producing a durable and reliable design. “Sailing is about finding your path, whether it’s across an ocean or within yourself.” – Sven Yrvind In conclusion, making flanges around bulkhead hatches may seem complex at first glance, but by following Sven Yrvind’s meticulous process, enthusiasts can achieve professional-level results. Remember that the journey of boatbuilding is as rewarding as reaching your destination; it tests one’s patience and dedication. For those seeking to embark on this adventure or simply gain more insight into marine craftsmanship, Sven’s wisdom is invaluable.Making Flanges Around Bulkhead Hatches for Canvas
Sven Yrvind, a renowned yacht designer and sailor, shares valuable insights on creating flanges around bulkhead hatches for canvas protection in this enlightening video. By following his expert guidance, boat enthusiasts can ensure their living areas remain secure while allowing unhindered access through the hatches.Step 1: Starting with the Flange
Sven begins by explaining that working on flanges vertically and horizontally is significantly easier than doing so in a flat position. To simplify the process further, he divides the task into two or three steps as suggested by fellow expert “for for.” This approach not only makes it more manageable but also allows for greater precision in crafting each component.Step 2: Applying Glue and Securing
Sven proceeds to apply glue along one edge of the flange, ensuring a secure bond when clamped into place. He emphasizes that this stage is crucial for maintaining the structural integrity of the flange, which in turn safeguards the living area beneath the canvas when hatches are open.Step 3: Allowing Time to Dry
After securely attaching the first portion of the flange, Sven allows ample time for it to dry before moving forward with additional steps. This patience and precision are key aspects of his successful boatbuilding methods.Step 4: Finishing Touches
Once the flange is fully dried, Sven removes the clamps carefully, ensuring no damage occurs during this process. He then moves on to attaching four more pieces onto these main frames, completing two pairs of flanges for the bulkhead hatches.The Final Touches
While two flanges form the primary support structure around the hatches, Sven mentions there are two additional pieces required at each end to ensure comprehensive protection. This attention to detail highlights his commitment to producing a durable and reliable design. “Sailing is about finding your path, whether it’s across an ocean or within yourself.” – Sven Yrvind In conclusion, making flanges around bulkhead hatches may seem complex at first glance, but by following Sven Yrvind’s meticulous process, enthusiasts can achieve professional-level results. Remember that the journey of boatbuilding is as rewarding as reaching your destination; it tests one’s patience and dedication. For those seeking to embark on this adventure or simply gain more insight into marine craftsmanship, Sven’s wisdom is invaluable.Sven begins by explaining that working on flanges vertically and horizontally is significantly easier than doing so in a flat position. To simplify the process further, he divides the task into two or three steps as suggested by fellow expert “for for.” This approach not only makes it more manageable but also allows for greater precision in crafting each component.Step 2: Applying Glue and Securing
Sven proceeds to apply glue along one edge of the flange, ensuring a secure bond when clamped into place. He emphasizes that this stage is crucial for maintaining the structural integrity of the flange, which in turn safeguards the living area beneath the canvas when hatches are open.Step 3: Allowing Time to Dry
After securely attaching the first portion of the flange, Sven allows ample time for it to dry before moving forward with additional steps. This patience and precision are key aspects of his successful boatbuilding methods.Step 4: Finishing Touches
Once the flange is fully dried, Sven removes the clamps carefully, ensuring no damage occurs during this process. He then moves on to attaching four more pieces onto these main frames, completing two pairs of flanges for the bulkhead hatches.The Final Touches
While two flanges form the primary support structure around the hatches, Sven mentions there are two additional pieces required at each end to ensure comprehensive protection. This attention to detail highlights his commitment to producing a durable and reliable design. “Sailing is about finding your path, whether it’s across an ocean or within yourself.” – Sven Yrvind In conclusion, making flanges around bulkhead hatches may seem complex at first glance, but by following Sven Yrvind’s meticulous process, enthusiasts can achieve professional-level results. Remember that the journey of boatbuilding is as rewarding as reaching your destination; it tests one’s patience and dedication. For those seeking to embark on this adventure or simply gain more insight into marine craftsmanship, Sven’s wisdom is invaluable.Sven Yrvind, a renowned yacht designer and sailor, shares valuable insights on creating flanges around bulkhead hatches for canvas protection in this enlightening video. By following his expert guidance, boat enthusiasts can ensure their living areas remain secure while allowing unhindered access through the hatches.Step 1: Starting with the Flange
Sven begins by explaining that working on flanges vertically and horizontally is significantly easier than doing so in a flat position. To simplify the process further, he divides the task into two or three steps as suggested by fellow expert “for for.” This approach not only makes it more manageable but also allows for greater precision in crafting each component.Step 2: Applying Glue and Securing
Sven proceeds to apply glue along one edge of the flange, ensuring a secure bond when clamped into place. He emphasizes that this stage is crucial for maintaining the structural integrity of the flange, which in turn safeguards the living area beneath the canvas when hatches are open.Step 3: Allowing Time to Dry
After securely attaching the first portion of the flange, Sven allows ample time for it to dry before moving forward with additional steps. This patience and precision are key aspects of his successful boatbuilding methods.Step 4: Finishing Touches
Once the flange is fully dried, Sven removes the clamps carefully, ensuring no damage occurs during this process. He then moves on to attaching four more pieces onto these main frames, completing two pairs of flanges for the bulkhead hatches.The Final Touches
While two flanges form the primary support structure around the hatches, Sven mentions there are two additional pieces required at each end to ensure comprehensive protection. This attention to detail highlights his commitment to producing a durable and reliable design. “Sailing is about finding your path, whether it’s across an ocean or within yourself.” – Sven Yrvind In conclusion, making flanges around bulkhead hatches may seem complex at first glance, but by following Sven Yrvind’s meticulous process, enthusiasts can achieve professional-level results. Remember that the journey of boatbuilding is as rewarding as reaching your destination; it tests one’s patience and dedication. For those seeking to embark on this adventure or simply gain more insight into marine craftsmanship, Sven’s wisdom is invaluable.Making Flanges Around Bulkhead Hatches for Canvas
Sven Yrvind, a renowned yacht designer and sailor, shares valuable insights on creating flanges around bulkhead hatches for canvas protection in this enlightening video. By following his expert guidance, boat enthusiasts can ensure their living areas remain secure while allowing unhindered access through the hatches.Step 1: Starting with the Flange
Sven begins by explaining that working on flanges vertically and horizontally is significantly easier than doing so in a flat position. To simplify the process further, he divides the task into two or three steps as suggested by fellow expert “for for.” This approach not only makes it more manageable but also allows for greater precision in crafting each component.Step 2: Applying Glue and Securing
Sven proceeds to apply glue along one edge of the flange, ensuring a secure bond when clamped into place. He emphasizes that this stage is crucial for maintaining the structural integrity of the flange, which in turn safeguards the living area beneath the canvas when hatches are open.Step 3: Allowing Time to Dry
After securely attaching the first portion of the flange, Sven allows ample time for it to dry before moving forward with additional steps. This patience and precision are key aspects of his successful boatbuilding methods.Step 4: Finishing Touches
Once the flange is fully dried, Sven removes the clamps carefully, ensuring no damage occurs during this process. He then moves on to attaching four more pieces onto these main frames, completing two pairs of flanges for the bulkhead hatches.The Final Touches
While two flanges form the primary support structure around the hatches, Sven mentions there are two additional pieces required at each end to ensure comprehensive protection. This attention to detail highlights his commitment to producing a durable and reliable design. “Sailing is about finding your path, whether it’s across an ocean or within yourself.” – Sven Yrvind In conclusion, making flanges around bulkhead hatches may seem complex at first glance, but by following Sven Yrvind’s meticulous process, enthusiasts can achieve professional-level results. Remember that the journey of boatbuilding is as rewarding as reaching your destination; it tests one’s patience and dedication. For those seeking to embark on this adventure or simply gain more insight into marine craftsmanship, Sven’s wisdom is invaluable.Once the flange is fully dried, Sven removes the clamps carefully, ensuring no damage occurs during this process. He then moves on to attaching four more pieces onto these main frames, completing two pairs of flanges for the bulkhead hatches.The Final Touches
While two flanges form the primary support structure around the hatches, Sven mentions there are two additional pieces required at each end to ensure comprehensive protection. This attention to detail highlights his commitment to producing a durable and reliable design. “Sailing is about finding your path, whether it’s across an ocean or within yourself.” – Sven Yrvind In conclusion, making flanges around bulkhead hatches may seem complex at first glance, but by following Sven Yrvind’s meticulous process, enthusiasts can achieve professional-level results. Remember that the journey of boatbuilding is as rewarding as reaching your destination; it tests one’s patience and dedication. For those seeking to embark on this adventure or simply gain more insight into marine craftsmanship, Sven’s wisdom is invaluable.Sven begins by explaining that working on flanges vertically and horizontally is significantly easier than doing so in a flat position. To simplify the process further, he divides the task into two or three steps as suggested by fellow expert “for for.” This approach not only makes it more manageable but also allows for greater precision in crafting each component.Step 2: Applying Glue and Securing
Sven proceeds to apply glue along one edge of the flange, ensuring a secure bond when clamped into place. He emphasizes that this stage is crucial for maintaining the structural integrity of the flange, which in turn safeguards the living area beneath the canvas when hatches are open.Step 3: Allowing Time to Dry
After securely attaching the first portion of the flange, Sven allows ample time for it to dry before moving forward with additional steps. This patience and precision are key aspects of his successful boatbuilding methods.Step 4: Finishing Touches
Once the flange is fully dried, Sven removes the clamps carefully, ensuring no damage occurs during this process. He then moves on to attaching four more pieces onto these main frames, completing two pairs of flanges for the bulkhead hatches.The Final Touches
While two flanges form the primary support structure around the hatches, Sven mentions there are two additional pieces required at each end to ensure comprehensive protection. This attention to detail highlights his commitment to producing a durable and reliable design. “Sailing is about finding your path, whether it’s across an ocean or within yourself.” – Sven Yrvind In conclusion, making flanges around bulkhead hatches may seem complex at first glance, but by following Sven Yrvind’s meticulous process, enthusiasts can achieve professional-level results. Remember that the journey of boatbuilding is as rewarding as reaching your destination; it tests one’s patience and dedication. For those seeking to embark on this adventure or simply gain more insight into marine craftsmanship, Sven’s wisdom is invaluable.Sven Yrvind, a renowned yacht designer and sailor, shares valuable insights on creating flanges around bulkhead hatches for canvas protection in this enlightening video. By following his expert guidance, boat enthusiasts can ensure their living areas remain secure while allowing unhindered access through the hatches.Step 1: Starting with the Flange
Sven begins by explaining that working on flanges vertically and horizontally is significantly easier than doing so in a flat position. To simplify the process further, he divides the task into two or three steps as suggested by fellow expert “for for.” This approach not only makes it more manageable but also allows for greater precision in crafting each component.Step 2: Applying Glue and Securing
Sven proceeds to apply glue along one edge of the flange, ensuring a secure bond when clamped into place. He emphasizes that this stage is crucial for maintaining the structural integrity of the flange, which in turn safeguards the living area beneath the canvas when hatches are open.Step 3: Allowing Time to Dry
After securely attaching the first portion of the flange, Sven allows ample time for it to dry before moving forward with additional steps. This patience and precision are key aspects of his successful boatbuilding methods.Step 4: Finishing Touches
Once the flange is fully dried, Sven removes the clamps carefully, ensuring no damage occurs during this process. He then moves on to attaching four more pieces onto these main frames, completing two pairs of flanges for the bulkhead hatches.The Final Touches
While two flanges form the primary support structure around the hatches, Sven mentions there are two additional pieces required at each end to ensure comprehensive protection. This attention to detail highlights his commitment to producing a durable and reliable design. “Sailing is about finding your path, whether it’s across an ocean or within yourself.” – Sven Yrvind In conclusion, making flanges around bulkhead hatches may seem complex at first glance, but by following Sven Yrvind’s meticulous process, enthusiasts can achieve professional-level results. Remember that the journey of boatbuilding is as rewarding as reaching your destination; it tests one’s patience and dedication. For those seeking to embark on this adventure or simply gain more insight into marine craftsmanship, Sven’s wisdom is invaluable.Making Flanges Around Bulkhead Hatches for Canvas
Sven Yrvind, a renowned yacht designer and sailor, shares valuable insights on creating flanges around bulkhead hatches for canvas protection in this enlightening video. By following his expert guidance, boat enthusiasts can ensure their living areas remain secure while allowing unhindered access through the hatches.Step 1: Starting with the Flange
Sven begins by explaining that working on flanges vertically and horizontally is significantly easier than doing so in a flat position. To simplify the process further, he divides the task into two or three steps as suggested by fellow expert “for for.” This approach not only makes it more manageable but also allows for greater precision in crafting each component.Step 2: Applying Glue and Securing
Sven proceeds to apply glue along one edge of the flange, ensuring a secure bond when clamped into place. He emphasizes that this stage is crucial for maintaining the structural integrity of the flange, which in turn safeguards the living area beneath the canvas when hatches are open.Step 3: Allowing Time to Dry
After securely attaching the first portion of the flange, Sven allows ample time for it to dry before moving forward with additional steps. This patience and precision are key aspects of his successful boatbuilding methods.Step 4: Finishing Touches
Once the flange is fully dried, Sven removes the clamps carefully, ensuring no damage occurs during this process. He then moves on to attaching four more pieces onto these main frames, completing two pairs of flanges for the bulkhead hatches.The Final Touches
While two flanges form the primary support structure around the hatches, Sven mentions there are two additional pieces required at each end to ensure comprehensive protection. This attention to detail highlights his commitment to producing a durable and reliable design. “Sailing is about finding your path, whether it’s across an ocean or within yourself.” – Sven Yrvind In conclusion, making flanges around bulkhead hatches may seem complex at first glance, but by following Sven Yrvind’s meticulous process, enthusiasts can achieve professional-level results. Remember that the journey of boatbuilding is as rewarding as reaching your destination; it tests one’s patience and dedication. For those seeking to embark on this adventure or simply gain more insight into marine craftsmanship, Sven’s wisdom is invaluable.After securely attaching the first portion of the flange, Sven allows ample time for it to dry before moving forward with additional steps. This patience and precision are key aspects of his successful boatbuilding methods.Step 4: Finishing Touches
Once the flange is fully dried, Sven removes the clamps carefully, ensuring no damage occurs during this process. He then moves on to attaching four more pieces onto these main frames, completing two pairs of flanges for the bulkhead hatches.The Final Touches
While two flanges form the primary support structure around the hatches, Sven mentions there are two additional pieces required at each end to ensure comprehensive protection. This attention to detail highlights his commitment to producing a durable and reliable design. “Sailing is about finding your path, whether it’s across an ocean or within yourself.” – Sven Yrvind In conclusion, making flanges around bulkhead hatches may seem complex at first glance, but by following Sven Yrvind’s meticulous process, enthusiasts can achieve professional-level results. Remember that the journey of boatbuilding is as rewarding as reaching your destination; it tests one’s patience and dedication. For those seeking to embark on this adventure or simply gain more insight into marine craftsmanship, Sven’s wisdom is invaluable.Sven begins by explaining that working on flanges vertically and horizontally is significantly easier than doing so in a flat position. To simplify the process further, he divides the task into two or three steps as suggested by fellow expert “for for.” This approach not only makes it more manageable but also allows for greater precision in crafting each component.Step 2: Applying Glue and Securing
Sven proceeds to apply glue along one edge of the flange, ensuring a secure bond when clamped into place. He emphasizes that this stage is crucial for maintaining the structural integrity of the flange, which in turn safeguards the living area beneath the canvas when hatches are open.Step 3: Allowing Time to Dry
After securely attaching the first portion of the flange, Sven allows ample time for it to dry before moving forward with additional steps. This patience and precision are key aspects of his successful boatbuilding methods.Step 4: Finishing Touches
Once the flange is fully dried, Sven removes the clamps carefully, ensuring no damage occurs during this process. He then moves on to attaching four more pieces onto these main frames, completing two pairs of flanges for the bulkhead hatches.The Final Touches
While two flanges form the primary support structure around the hatches, Sven mentions there are two additional pieces required at each end to ensure comprehensive protection. This attention to detail highlights his commitment to producing a durable and reliable design. “Sailing is about finding your path, whether it’s across an ocean or within yourself.” – Sven Yrvind In conclusion, making flanges around bulkhead hatches may seem complex at first glance, but by following Sven Yrvind’s meticulous process, enthusiasts can achieve professional-level results. Remember that the journey of boatbuilding is as rewarding as reaching your destination; it tests one’s patience and dedication. For those seeking to embark on this adventure or simply gain more insight into marine craftsmanship, Sven’s wisdom is invaluable.Sven Yrvind, a renowned yacht designer and sailor, shares valuable insights on creating flanges around bulkhead hatches for canvas protection in this enlightening video. By following his expert guidance, boat enthusiasts can ensure their living areas remain secure while allowing unhindered access through the hatches.Step 1: Starting with the Flange
Sven begins by explaining that working on flanges vertically and horizontally is significantly easier than doing so in a flat position. To simplify the process further, he divides the task into two or three steps as suggested by fellow expert “for for.” This approach not only makes it more manageable but also allows for greater precision in crafting each component.Step 2: Applying Glue and Securing
Sven proceeds to apply glue along one edge of the flange, ensuring a secure bond when clamped into place. He emphasizes that this stage is crucial for maintaining the structural integrity of the flange, which in turn safeguards the living area beneath the canvas when hatches are open.Step 3: Allowing Time to Dry
After securely attaching the first portion of the flange, Sven allows ample time for it to dry before moving forward with additional steps. This patience and precision are key aspects of his successful boatbuilding methods.Step 4: Finishing Touches
Once the flange is fully dried, Sven removes the clamps carefully, ensuring no damage occurs during this process. He then moves on to attaching four more pieces onto these main frames, completing two pairs of flanges for the bulkhead hatches.The Final Touches
While two flanges form the primary support structure around the hatches, Sven mentions there are two additional pieces required at each end to ensure comprehensive protection. This attention to detail highlights his commitment to producing a durable and reliable design. “Sailing is about finding your path, whether it’s across an ocean or within yourself.” – Sven Yrvind In conclusion, making flanges around bulkhead hatches may seem complex at first glance, but by following Sven Yrvind’s meticulous process, enthusiasts can achieve professional-level results. Remember that the journey of boatbuilding is as rewarding as reaching your destination; it tests one’s patience and dedication. For those seeking to embark on this adventure or simply gain more insight into marine craftsmanship, Sven’s wisdom is invaluable.Making Flanges Around Bulkhead Hatches for Canvas
Sven Yrvind, a renowned yacht designer and sailor, shares valuable insights on creating flanges around bulkhead hatches for canvas protection in this enlightening video. By following his expert guidance, boat enthusiasts can ensure their living areas remain secure while allowing unhindered access through the hatches.Step 1: Starting with the Flange
Sven begins by explaining that working on flanges vertically and horizontally is significantly easier than doing so in a flat position. To simplify the process further, he divides the task into two or three steps as suggested by fellow expert “for for.” This approach not only makes it more manageable but also allows for greater precision in crafting each component.Step 2: Applying Glue and Securing
Sven proceeds to apply glue along one edge of the flange, ensuring a secure bond when clamped into place. He emphasizes that this stage is crucial for maintaining the structural integrity of the flange, which in turn safeguards the living area beneath the canvas when hatches are open.Step 3: Allowing Time to Dry
After securely attaching the first portion of the flange, Sven allows ample time for it to dry before moving forward with additional steps. This patience and precision are key aspects of his successful boatbuilding methods.Step 4: Finishing Touches
Once the flange is fully dried, Sven removes the clamps carefully, ensuring no damage occurs during this process. He then moves on to attaching four more pieces onto these main frames, completing two pairs of flanges for the bulkhead hatches.The Final Touches
While two flanges form the primary support structure around the hatches, Sven mentions there are two additional pieces required at each end to ensure comprehensive protection. This attention to detail highlights his commitment to producing a durable and reliable design. “Sailing is about finding your path, whether it’s across an ocean or within yourself.” – Sven Yrvind In conclusion, making flanges around bulkhead hatches may seem complex at first glance, but by following Sven Yrvind’s meticulous process, enthusiasts can achieve professional-level results. Remember that the journey of boatbuilding is as rewarding as reaching your destination; it tests one’s patience and dedication. For those seeking to embark on this adventure or simply gain more insight into marine craftsmanship, Sven’s wisdom is invaluable.Sven proceeds to apply glue along one edge of the flange, ensuring a secure bond when clamped into place. He emphasizes that this stage is crucial for maintaining the structural integrity of the flange, which in turn safeguards the living area beneath the canvas when hatches are open.Step 3: Allowing Time to Dry
After securely attaching the first portion of the flange, Sven allows ample time for it to dry before moving forward with additional steps. This patience and precision are key aspects of his successful boatbuilding methods.Step 4: Finishing Touches
Once the flange is fully dried, Sven removes the clamps carefully, ensuring no damage occurs during this process. He then moves on to attaching four more pieces onto these main frames, completing two pairs of flanges for the bulkhead hatches.The Final Touches
While two flanges form the primary support structure around the hatches, Sven mentions there are two additional pieces required at each end to ensure comprehensive protection. This attention to detail highlights his commitment to producing a durable and reliable design. “Sailing is about finding your path, whether it’s across an ocean or within yourself.” – Sven Yrvind In conclusion, making flanges around bulkhead hatches may seem complex at first glance, but by following Sven Yrvind’s meticulous process, enthusiasts can achieve professional-level results. Remember that the journey of boatbuilding is as rewarding as reaching your destination; it tests one’s patience and dedication. For those seeking to embark on this adventure or simply gain more insight into marine craftsmanship, Sven’s wisdom is invaluable.Sven begins by explaining that working on flanges vertically and horizontally is significantly easier than doing so in a flat position. To simplify the process further, he divides the task into two or three steps as suggested by fellow expert “for for.” This approach not only makes it more manageable but also allows for greater precision in crafting each component.Step 2: Applying Glue and Securing
Sven proceeds to apply glue along one edge of the flange, ensuring a secure bond when clamped into place. He emphasizes that this stage is crucial for maintaining the structural integrity of the flange, which in turn safeguards the living area beneath the canvas when hatches are open.Step 3: Allowing Time to Dry
After securely attaching the first portion of the flange, Sven allows ample time for it to dry before moving forward with additional steps. This patience and precision are key aspects of his successful boatbuilding methods.Step 4: Finishing Touches
Once the flange is fully dried, Sven removes the clamps carefully, ensuring no damage occurs during this process. He then moves on to attaching four more pieces onto these main frames, completing two pairs of flanges for the bulkhead hatches.The Final Touches
While two flanges form the primary support structure around the hatches, Sven mentions there are two additional pieces required at each end to ensure comprehensive protection. This attention to detail highlights his commitment to producing a durable and reliable design. “Sailing is about finding your path, whether it’s across an ocean or within yourself.” – Sven Yrvind In conclusion, making flanges around bulkhead hatches may seem complex at first glance, but by following Sven Yrvind’s meticulous process, enthusiasts can achieve professional-level results. Remember that the journey of boatbuilding is as rewarding as reaching your destination; it tests one’s patience and dedication. For those seeking to embark on this adventure or simply gain more insight into marine craftsmanship, Sven’s wisdom is invaluable.Sven Yrvind, a renowned yacht designer and sailor, shares valuable insights on creating flanges around bulkhead hatches for canvas protection in this enlightening video. By following his expert guidance, boat enthusiasts can ensure their living areas remain secure while allowing unhindered access through the hatches.Step 1: Starting with the Flange
Sven begins by explaining that working on flanges vertically and horizontally is significantly easier than doing so in a flat position. To simplify the process further, he divides the task into two or three steps as suggested by fellow expert “for for.” This approach not only makes it more manageable but also allows for greater precision in crafting each component.Step 2: Applying Glue and Securing
Sven proceeds to apply glue along one edge of the flange, ensuring a secure bond when clamped into place. He emphasizes that this stage is crucial for maintaining the structural integrity of the flange, which in turn safeguards the living area beneath the canvas when hatches are open.Step 3: Allowing Time to Dry
After securely attaching the first portion of the flange, Sven allows ample time for it to dry before moving forward with additional steps. This patience and precision are key aspects of his successful boatbuilding methods.Step 4: Finishing Touches
Once the flange is fully dried, Sven removes the clamps carefully, ensuring no damage occurs during this process. He then moves on to attaching four more pieces onto these main frames, completing two pairs of flanges for the bulkhead hatches.The Final Touches
While two flanges form the primary support structure around the hatches, Sven mentions there are two additional pieces required at each end to ensure comprehensive protection. This attention to detail highlights his commitment to producing a durable and reliable design. “Sailing is about finding your path, whether it’s across an ocean or within yourself.” – Sven Yrvind In conclusion, making flanges around bulkhead hatches may seem complex at first glance, but by following Sven Yrvind’s meticulous process, enthusiasts can achieve professional-level results. Remember that the journey of boatbuilding is as rewarding as reaching your destination; it tests one’s patience and dedication. For those seeking to embark on this adventure or simply gain more insight into marine craftsmanship, Sven’s wisdom is invaluable.Making Flanges Around Bulkhead Hatches for Canvas
Sven Yrvind, a renowned yacht designer and sailor, shares valuable insights on creating flanges around bulkhead hatches for canvas protection in this enlightening video. By following his expert guidance, boat enthusiasts can ensure their living areas remain secure while allowing unhindered access through the hatches.Step 1: Starting with the Flange
Sven begins by explaining that working on flanges vertically and horizontally is significantly easier than doing so in a flat position. To simplify the process further, he divides the task into two or three steps as suggested by fellow expert “for for.” This approach not only makes it more manageable but also allows for greater precision in crafting each component.Step 2: Applying Glue and Securing
Sven proceeds to apply glue along one edge of the flange, ensuring a secure bond when clamped into place. He emphasizes that this stage is crucial for maintaining the structural integrity of the flange, which in turn safeguards the living area beneath the canvas when hatches are open.Step 3: Allowing Time to Dry
After securely attaching the first portion of the flange, Sven allows ample time for it to dry before moving forward with additional steps. This patience and precision are key aspects of his successful boatbuilding methods.Step 4: Finishing Touches
Once the flange is fully dried, Sven removes the clamps carefully, ensuring no damage occurs during this process. He then moves on to attaching four more pieces onto these main frames, completing two pairs of flanges for the bulkhead hatches.The Final Touches
While two flanges form the primary support structure around the hatches, Sven mentions there are two additional pieces required at each end to ensure comprehensive protection. This attention to detail highlights his commitment to producing a durable and reliable design. “Sailing is about finding your path, whether it’s across an ocean or within yourself.” – Sven Yrvind In conclusion, making flanges around bulkhead hatches may seem complex at first glance, but by following Sven Yrvind’s meticulous process, enthusiasts can achieve professional-level results. Remember that the journey of boatbuilding is as rewarding as reaching your destination; it tests one’s patience and dedication. For those seeking to embark on this adventure or simply gain more insight into marine craftsmanship, Sven’s wisdom is invaluable.Once the flange is fully dried, Sven removes the clamps carefully, ensuring no damage occurs during this process. He then moves on to attaching four more pieces onto these main frames, completing two pairs of flanges for the bulkhead hatches.The Final Touches
While two flanges form the primary support structure around the hatches, Sven mentions there are two additional pieces required at each end to ensure comprehensive protection. This attention to detail highlights his commitment to producing a durable and reliable design. “Sailing is about finding your path, whether it’s across an ocean or within yourself.” – Sven Yrvind In conclusion, making flanges around bulkhead hatches may seem complex at first glance, but by following Sven Yrvind’s meticulous process, enthusiasts can achieve professional-level results. Remember that the journey of boatbuilding is as rewarding as reaching your destination; it tests one’s patience and dedication. For those seeking to embark on this adventure or simply gain more insight into marine craftsmanship, Sven’s wisdom is invaluable.Sven proceeds to apply glue along one edge of the flange, ensuring a secure bond when clamped into place. He emphasizes that this stage is crucial for maintaining the structural integrity of the flange, which in turn safeguards the living area beneath the canvas when hatches are open.Step 3: Allowing Time to Dry
After securely attaching the first portion of the flange, Sven allows ample time for it to dry before moving forward with additional steps. This patience and precision are key aspects of his successful boatbuilding methods.Step 4: Finishing Touches
Once the flange is fully dried, Sven removes the clamps carefully, ensuring no damage occurs during this process. He then moves on to attaching four more pieces onto these main frames, completing two pairs of flanges for the bulkhead hatches.The Final Touches
While two flanges form the primary support structure around the hatches, Sven mentions there are two additional pieces required at each end to ensure comprehensive protection. This attention to detail highlights his commitment to producing a durable and reliable design. “Sailing is about finding your path, whether it’s across an ocean or within yourself.” – Sven Yrvind In conclusion, making flanges around bulkhead hatches may seem complex at first glance, but by following Sven Yrvind’s meticulous process, enthusiasts can achieve professional-level results. Remember that the journey of boatbuilding is as rewarding as reaching your destination; it tests one’s patience and dedication. For those seeking to embark on this adventure or simply gain more insight into marine craftsmanship, Sven’s wisdom is invaluable.Sven begins by explaining that working on flanges vertically and horizontally is significantly easier than doing so in a flat position. To simplify the process further, he divides the task into two or three steps as suggested by fellow expert “for for.” This approach not only makes it more manageable but also allows for greater precision in crafting each component.Step 2: Applying Glue and Securing
Sven proceeds to apply glue along one edge of the flange, ensuring a secure bond when clamped into place. He emphasizes that this stage is crucial for maintaining the structural integrity of the flange, which in turn safeguards the living area beneath the canvas when hatches are open.Step 3: Allowing Time to Dry
After securely attaching the first portion of the flange, Sven allows ample time for it to dry before moving forward with additional steps. This patience and precision are key aspects of his successful boatbuilding methods.Step 4: Finishing Touches
Once the flange is fully dried, Sven removes the clamps carefully, ensuring no damage occurs during this process. He then moves on to attaching four more pieces onto these main frames, completing two pairs of flanges for the bulkhead hatches.The Final Touches
While two flanges form the primary support structure around the hatches, Sven mentions there are two additional pieces required at each end to ensure comprehensive protection. This attention to detail highlights his commitment to producing a durable and reliable design. “Sailing is about finding your path, whether it’s across an ocean or within yourself.” – Sven Yrvind In conclusion, making flanges around bulkhead hatches may seem complex at first glance, but by following Sven Yrvind’s meticulous process, enthusiasts can achieve professional-level results. Remember that the journey of boatbuilding is as rewarding as reaching your destination; it tests one’s patience and dedication. For those seeking to embark on this adventure or simply gain more insight into marine craftsmanship, Sven’s wisdom is invaluable.Sven Yrvind, a renowned yacht designer and sailor, shares valuable insights on creating flanges around bulkhead hatches for canvas protection in this enlightening video. By following his expert guidance, boat enthusiasts can ensure their living areas remain secure while allowing unhindered access through the hatches.Step 1: Starting with the Flange
Sven begins by explaining that working on flanges vertically and horizontally is significantly easier than doing so in a flat position. To simplify the process further, he divides the task into two or three steps as suggested by fellow expert “for for.” This approach not only makes it more manageable but also allows for greater precision in crafting each component.Step 2: Applying Glue and Securing
Sven proceeds to apply glue along one edge of the flange, ensuring a secure bond when clamped into place. He emphasizes that this stage is crucial for maintaining the structural integrity of the flange, which in turn safeguards the living area beneath the canvas when hatches are open.Step 3: Allowing Time to Dry
After securely attaching the first portion of the flange, Sven allows ample time for it to dry before moving forward with additional steps. This patience and precision are key aspects of his successful boatbuilding methods.Step 4: Finishing Touches
Once the flange is fully dried, Sven removes the clamps carefully, ensuring no damage occurs during this process. He then moves on to attaching four more pieces onto these main frames, completing two pairs of flanges for the bulkhead hatches.The Final Touches
While two flanges form the primary support structure around the hatches, Sven mentions there are two additional pieces required at each end to ensure comprehensive protection. This attention to detail highlights his commitment to producing a durable and reliable design. “Sailing is about finding your path, whether it’s across an ocean or within yourself.” – Sven Yrvind In conclusion, making flanges around bulkhead hatches may seem complex at first glance, but by following Sven Yrvind’s meticulous process, enthusiasts can achieve professional-level results. Remember that the journey of boatbuilding is as rewarding as reaching your destination; it tests one’s patience and dedication. For those seeking to embark on this adventure or simply gain more insight into marine craftsmanship, Sven’s wisdom is invaluable.Making Flanges Around Bulkhead Hatches for Canvas
Sven Yrvind, a renowned yacht designer and sailor, shares valuable insights on creating flanges around bulkhead hatches for canvas protection in this enlightening video. By following his expert guidance, boat enthusiasts can ensure their living areas remain secure while allowing unhindered access through the hatches.Step 1: Starting with the Flange
Sven begins by explaining that working on flanges vertically and horizontally is significantly easier than doing so in a flat position. To simplify the process further, he divides the task into two or three steps as suggested by fellow expert “for for.” This approach not only makes it more manageable but also allows for greater precision in crafting each component.Step 2: Applying Glue and Securing
Sven proceeds to apply glue along one edge of the flange, ensuring a secure bond when clamped into place. He emphasizes that this stage is crucial for maintaining the structural integrity of the flange, which in turn safeguards the living area beneath the canvas when hatches are open.Step 3: Allowing Time to Dry
After securely attaching the first portion of the flange, Sven allows ample time for it to dry before moving forward with additional steps. This patience and precision are key aspects of his successful boatbuilding methods.Step 4: Finishing Touches
Once the flange is fully dried, Sven removes the clamps carefully, ensuring no damage occurs during this process. He then moves on to attaching four more pieces onto these main frames, completing two pairs of flanges for the bulkhead hatches.The Final Touches
While two flanges form the primary support structure around the hatches, Sven mentions there are two additional pieces required at each end to ensure comprehensive protection. This attention to detail highlights his commitment to producing a durable and reliable design. “Sailing is about finding your path, whether it’s across an ocean or within yourself.” – Sven Yrvind In conclusion, making flanges around bulkhead hatches may seem complex at first glance, but by following Sven Yrvind’s meticulous process, enthusiasts can achieve professional-level results. Remember that the journey of boatbuilding is as rewarding as reaching your destination; it tests one’s patience and dedication. For those seeking to embark on this adventure or simply gain more insight into marine craftsmanship, Sven’s wisdom is invaluable.After securely attaching the first portion of the flange, Sven allows ample time for it to dry before moving forward with additional steps. This patience and precision are key aspects of his successful boatbuilding methods.Step 4: Finishing Touches
Once the flange is fully dried, Sven removes the clamps carefully, ensuring no damage occurs during this process. He then moves on to attaching four more pieces onto these main frames, completing two pairs of flanges for the bulkhead hatches.The Final Touches
While two flanges form the primary support structure around the hatches, Sven mentions there are two additional pieces required at each end to ensure comprehensive protection. This attention to detail highlights his commitment to producing a durable and reliable design. “Sailing is about finding your path, whether it’s across an ocean or within yourself.” – Sven Yrvind In conclusion, making flanges around bulkhead hatches may seem complex at first glance, but by following Sven Yrvind’s meticulous process, enthusiasts can achieve professional-level results. Remember that the journey of boatbuilding is as rewarding as reaching your destination; it tests one’s patience and dedication. For those seeking to embark on this adventure or simply gain more insight into marine craftsmanship, Sven’s wisdom is invaluable.Sven proceeds to apply glue along one edge of the flange, ensuring a secure bond when clamped into place. He emphasizes that this stage is crucial for maintaining the structural integrity of the flange, which in turn safeguards the living area beneath the canvas when hatches are open.Step 3: Allowing Time to Dry
After securely attaching the first portion of the flange, Sven allows ample time for it to dry before moving forward with additional steps. This patience and precision are key aspects of his successful boatbuilding methods.Step 4: Finishing Touches
Once the flange is fully dried, Sven removes the clamps carefully, ensuring no damage occurs during this process. He then moves on to attaching four more pieces onto these main frames, completing two pairs of flanges for the bulkhead hatches.The Final Touches
While two flanges form the primary support structure around the hatches, Sven mentions there are two additional pieces required at each end to ensure comprehensive protection. This attention to detail highlights his commitment to producing a durable and reliable design. “Sailing is about finding your path, whether it’s across an ocean or within yourself.” – Sven Yrvind In conclusion, making flanges around bulkhead hatches may seem complex at first glance, but by following Sven Yrvind’s meticulous process, enthusiasts can achieve professional-level results. Remember that the journey of boatbuilding is as rewarding as reaching your destination; it tests one’s patience and dedication. For those seeking to embark on this adventure or simply gain more insight into marine craftsmanship, Sven’s wisdom is invaluable.Sven begins by explaining that working on flanges vertically and horizontally is significantly easier than doing so in a flat position. To simplify the process further, he divides the task into two or three steps as suggested by fellow expert “for for.” This approach not only makes it more manageable but also allows for greater precision in crafting each component.Step 2: Applying Glue and Securing
Sven proceeds to apply glue along one edge of the flange, ensuring a secure bond when clamped into place. He emphasizes that this stage is crucial for maintaining the structural integrity of the flange, which in turn safeguards the living area beneath the canvas when hatches are open.Step 3: Allowing Time to Dry
After securely attaching the first portion of the flange, Sven allows ample time for it to dry before moving forward with additional steps. This patience and precision are key aspects of his successful boatbuilding methods.Step 4: Finishing Touches
Once the flange is fully dried, Sven removes the clamps carefully, ensuring no damage occurs during this process. He then moves on to attaching four more pieces onto these main frames, completing two pairs of flanges for the bulkhead hatches.The Final Touches
While two flanges form the primary support structure around the hatches, Sven mentions there are two additional pieces required at each end to ensure comprehensive protection. This attention to detail highlights his commitment to producing a durable and reliable design. “Sailing is about finding your path, whether it’s across an ocean or within yourself.” – Sven Yrvind In conclusion, making flanges around bulkhead hatches may seem complex at first glance, but by following Sven Yrvind’s meticulous process, enthusiasts can achieve professional-level results. Remember that the journey of boatbuilding is as rewarding as reaching your destination; it tests one’s patience and dedication. For those seeking to embark on this adventure or simply gain more insight into marine craftsmanship, Sven’s wisdom is invaluable.Sven Yrvind, a renowned yacht designer and sailor, shares valuable insights on creating flanges around bulkhead hatches for canvas protection in this enlightening video. By following his expert guidance, boat enthusiasts can ensure their living areas remain secure while allowing unhindered access through the hatches.Step 1: Starting with the Flange
Sven begins by explaining that working on flanges vertically and horizontally is significantly easier than doing so in a flat position. To simplify the process further, he divides the task into two or three steps as suggested by fellow expert “for for.” This approach not only makes it more manageable but also allows for greater precision in crafting each component.Step 2: Applying Glue and Securing
Sven proceeds to apply glue along one edge of the flange, ensuring a secure bond when clamped into place. He emphasizes that this stage is crucial for maintaining the structural integrity of the flange, which in turn safeguards the living area beneath the canvas when hatches are open.Step 3: Allowing Time to Dry
After securely attaching the first portion of the flange, Sven allows ample time for it to dry before moving forward with additional steps. This patience and precision are key aspects of his successful boatbuilding methods.Step 4: Finishing Touches
Once the flange is fully dried, Sven removes the clamps carefully, ensuring no damage occurs during this process. He then moves on to attaching four more pieces onto these main frames, completing two pairs of flanges for the bulkhead hatches.The Final Touches
While two flanges form the primary support structure around the hatches, Sven mentions there are two additional pieces required at each end to ensure comprehensive protection. This attention to detail highlights his commitment to producing a durable and reliable design. “Sailing is about finding your path, whether it’s across an ocean or within yourself.” – Sven Yrvind In conclusion, making flanges around bulkhead hatches may seem complex at first glance, but by following Sven Yrvind’s meticulous process, enthusiasts can achieve professional-level results. Remember that the journey of boatbuilding is as rewarding as reaching your destination; it tests one’s patience and dedication. For those seeking to embark on this adventure or simply gain more insight into marine craftsmanship, Sven’s wisdom is invaluable.Making Flanges Around Bulkhead Hatches for Canvas
Sven Yrvind, a renowned yacht designer and sailor, shares valuable insights on creating flanges around bulkhead hatches for canvas protection in this enlightening video. By following his expert guidance, boat enthusiasts can ensure their living areas remain secure while allowing unhindered access through the hatches.Step 1: Starting with the Flange
Sven begins by explaining that working on flanges vertically and horizontally is significantly easier than doing so in a flat position. To simplify the process further, he divides the task into two or three steps as suggested by fellow expert “for for.” This approach not only makes it more manageable but also allows for greater precision in crafting each component.Step 2: Applying Glue and Securing
Sven proceeds to apply glue along one edge of the flange, ensuring a secure bond when clamped into place. He emphasizes that this stage is crucial for maintaining the structural integrity of the flange, which in turn safeguards the living area beneath the canvas when hatches are open.Step 3: Allowing Time to Dry
After securely attaching the first portion of the flange, Sven allows ample time for it to dry before moving forward with additional steps. This patience and precision are key aspects of his successful boatbuilding methods.Step 4: Finishing Touches
Once the flange is fully dried, Sven removes the clamps carefully, ensuring no damage occurs during this process. He then moves on to attaching four more pieces onto these main frames, completing two pairs of flanges for the bulkhead hatches.The Final Touches
While two flanges form the primary support structure around the hatches, Sven mentions there are two additional pieces required at each end to ensure comprehensive protection. This attention to detail highlights his commitment to producing a durable and reliable design. “Sailing is about finding your path, whether it’s across an ocean or within yourself.” – Sven Yrvind In conclusion, making flanges around bulkhead hatches may seem complex at first glance, but by following Sven Yrvind’s meticulous process, enthusiasts can achieve professional-level results. Remember that the journey of boatbuilding is as rewarding as reaching your destination; it tests one’s patience and dedication. For those seeking to embark on this adventure or simply gain more insight into marine craftsmanship, Sven’s wisdom is invaluable.Once the flange is fully dried, Sven removes the clamps carefully, ensuring no damage occurs during this process. He then moves on to attaching four more pieces onto these main frames, completing two pairs of flanges for the bulkhead hatches.The Final Touches
While two flanges form the primary support structure around the hatches, Sven mentions there are two additional pieces required at each end to ensure comprehensive protection. This attention to detail highlights his commitment to producing a durable and reliable design. “Sailing is about finding your path, whether it’s across an ocean or within yourself.” – Sven Yrvind In conclusion, making flanges around bulkhead hatches may seem complex at first glance, but by following Sven Yrvind’s meticulous process, enthusiasts can achieve professional-level results. Remember that the journey of boatbuilding is as rewarding as reaching your destination; it tests one’s patience and dedication. For those seeking to embark on this adventure or simply gain more insight into marine craftsmanship, Sven’s wisdom is invaluable.After securely attaching the first portion of the flange, Sven allows ample time for it to dry before moving forward with additional steps. This patience and precision are key aspects of his successful boatbuilding methods.Step 4: Finishing Touches
Once the flange is fully dried, Sven removes the clamps carefully, ensuring no damage occurs during this process. He then moves on to attaching four more pieces onto these main frames, completing two pairs of flanges for the bulkhead hatches.The Final Touches
While two flanges form the primary support structure around the hatches, Sven mentions there are two additional pieces required at each end to ensure comprehensive protection. This attention to detail highlights his commitment to producing a durable and reliable design. “Sailing is about finding your path, whether it’s across an ocean or within yourself.” – Sven Yrvind In conclusion, making flanges around bulkhead hatches may seem complex at first glance, but by following Sven Yrvind’s meticulous process, enthusiasts can achieve professional-level results. Remember that the journey of boatbuilding is as rewarding as reaching your destination; it tests one’s patience and dedication. For those seeking to embark on this adventure or simply gain more insight into marine craftsmanship, Sven’s wisdom is invaluable.Sven proceeds to apply glue along one edge of the flange, ensuring a secure bond when clamped into place. He emphasizes that this stage is crucial for maintaining the structural integrity of the flange, which in turn safeguards the living area beneath the canvas when hatches are open.Step 3: Allowing Time to Dry
After securely attaching the first portion of the flange, Sven allows ample time for it to dry before moving forward with additional steps. This patience and precision are key aspects of his successful boatbuilding methods.Step 4: Finishing Touches
Once the flange is fully dried, Sven removes the clamps carefully, ensuring no damage occurs during this process. He then moves on to attaching four more pieces onto these main frames, completing two pairs of flanges for the bulkhead hatches.The Final Touches
While two flanges form the primary support structure around the hatches, Sven mentions there are two additional pieces required at each end to ensure comprehensive protection. This attention to detail highlights his commitment to producing a durable and reliable design. “Sailing is about finding your path, whether it’s across an ocean or within yourself.” – Sven Yrvind In conclusion, making flanges around bulkhead hatches may seem complex at first glance, but by following Sven Yrvind’s meticulous process, enthusiasts can achieve professional-level results. Remember that the journey of boatbuilding is as rewarding as reaching your destination; it tests one’s patience and dedication. For those seeking to embark on this adventure or simply gain more insight into marine craftsmanship, Sven’s wisdom is invaluable.Sven begins by explaining that working on flanges vertically and horizontally is significantly easier than doing so in a flat position. To simplify the process further, he divides the task into two or three steps as suggested by fellow expert “for for.” This approach not only makes it more manageable but also allows for greater precision in crafting each component.Step 2: Applying Glue and Securing
Sven proceeds to apply glue along one edge of the flange, ensuring a secure bond when clamped into place. He emphasizes that this stage is crucial for maintaining the structural integrity of the flange, which in turn safeguards the living area beneath the canvas when hatches are open.Step 3: Allowing Time to Dry
After securely attaching the first portion of the flange, Sven allows ample time for it to dry before moving forward with additional steps. This patience and precision are key aspects of his successful boatbuilding methods.Step 4: Finishing Touches
Once the flange is fully dried, Sven removes the clamps carefully, ensuring no damage occurs during this process. He then moves on to attaching four more pieces onto these main frames, completing two pairs of flanges for the bulkhead hatches.The Final Touches
While two flanges form the primary support structure around the hatches, Sven mentions there are two additional pieces required at each end to ensure comprehensive protection. This attention to detail highlights his commitment to producing a durable and reliable design. “Sailing is about finding your path, whether it’s across an ocean or within yourself.” – Sven Yrvind In conclusion, making flanges around bulkhead hatches may seem complex at first glance, but by following Sven Yrvind’s meticulous process, enthusiasts can achieve professional-level results. Remember that the journey of boatbuilding is as rewarding as reaching your destination; it tests one’s patience and dedication. For those seeking to embark on this adventure or simply gain more insight into marine craftsmanship, Sven’s wisdom is invaluable.Sven Yrvind, a renowned yacht designer and sailor, shares valuable insights on creating flanges around bulkhead hatches for canvas protection in this enlightening video. By following his expert guidance, boat enthusiasts can ensure their living areas remain secure while allowing unhindered access through the hatches.Step 1: Starting with the Flange
Sven begins by explaining that working on flanges vertically and horizontally is significantly easier than doing so in a flat position. To simplify the process further, he divides the task into two or three steps as suggested by fellow expert “for for.” This approach not only makes it more manageable but also allows for greater precision in crafting each component.Step 2: Applying Glue and Securing
Sven proceeds to apply glue along one edge of the flange, ensuring a secure bond when clamped into place. He emphasizes that this stage is crucial for maintaining the structural integrity of the flange, which in turn safeguards the living area beneath the canvas when hatches are open.Step 3: Allowing Time to Dry
After securely attaching the first portion of the flange, Sven allows ample time for it to dry before moving forward with additional steps. This patience and precision are key aspects of his successful boatbuilding methods.Step 4: Finishing Touches
Once the flange is fully dried, Sven removes the clamps carefully, ensuring no damage occurs during this process. He then moves on to attaching four more pieces onto these main frames, completing two pairs of flanges for the bulkhead hatches.The Final Touches
While two flanges form the primary support structure around the hatches, Sven mentions there are two additional pieces required at each end to ensure comprehensive protection. This attention to detail highlights his commitment to producing a durable and reliable design. “Sailing is about finding your path, whether it’s across an ocean or within yourself.” – Sven Yrvind In conclusion, making flanges around bulkhead hatches may seem complex at first glance, but by following Sven Yrvind’s meticulous process, enthusiasts can achieve professional-level results. Remember that the journey of boatbuilding is as rewarding as reaching your destination; it tests one’s patience and dedication. For those seeking to embark on this adventure or simply gain more insight into marine craftsmanship, Sven’s wisdom is invaluable.Making Flanges Around Bulkhead Hatches for Canvas
Sven Yrvind, a renowned yacht designer and sailor, shares valuable insights on creating flanges around bulkhead hatches for canvas protection in this enlightening video. By following his expert guidance, boat enthusiasts can ensure their living areas remain secure while allowing unhindered access through the hatches.Step 1: Starting with the Flange
Sven begins by explaining that working on flanges vertically and horizontally is significantly easier than doing so in a flat position. To simplify the process further, he divides the task into two or three steps as suggested by fellow expert “for for.” This approach not only makes it more manageable but also allows for greater precision in crafting each component.Step 2: Applying Glue and Securing
Sven proceeds to apply glue along one edge of the flange, ensuring a secure bond when clamped into place. He emphasizes that this stage is crucial for maintaining the structural integrity of the flange, which in turn safeguards the living area beneath the canvas when hatches are open.Step 3: Allowing Time to Dry
After securely attaching the first portion of the flange, Sven allows ample time for it to dry before moving forward with additional steps. This patience and precision are key aspects of his successful boatbuilding methods.Step 4: Finishing Touches
Once the flange is fully dried, Sven removes the clamps carefully, ensuring no damage occurs during this process. He then moves on to attaching four more pieces onto these main frames, completing two pairs of flanges for the bulkhead hatches.The Final Touches
While two flanges form the primary support structure around the hatches, Sven mentions there are two additional pieces required at each end to ensure comprehensive protection. This attention to detail highlights his commitment to producing a durable and reliable design. “Sailing is about finding your path, whether it’s across an ocean or within yourself.” – Sven Yrvind In conclusion, making flanges around bulkhead hatches may seem complex at first glance, but by following Sven Yrvind’s meticulous process, enthusiasts can achieve professional-level results. Remember that the journey of boatbuilding is as rewarding as reaching your destination; it tests one’s patience and dedication. For those seeking to embark on this adventure or simply gain more insight into marine craftsmanship, Sven’s wisdom is invaluable.Sven proceeds to apply glue along one edge of the flange, ensuring a secure bond when clamped into place. He emphasizes that this stage is crucial for maintaining the structural integrity of the flange, which in turn safeguards the living area beneath the canvas when hatches are open.Step 3: Allowing Time to Dry
After securely attaching the first portion of the flange, Sven allows ample time for it to dry before moving forward with additional steps. This patience and precision are key aspects of his successful boatbuilding methods.Step 4: Finishing Touches
Once the flange is fully dried, Sven removes the clamps carefully, ensuring no damage occurs during this process. He then moves on to attaching four more pieces onto these main frames, completing two pairs of flanges for the bulkhead hatches.The Final Touches
While two flanges form the primary support structure around the hatches, Sven mentions there are two additional pieces required at each end to ensure comprehensive protection. This attention to detail highlights his commitment to producing a durable and reliable design. “Sailing is about finding your path, whether it’s across an ocean or within yourself.” – Sven Yrvind In conclusion, making flanges around bulkhead hatches may seem complex at first glance, but by following Sven Yrvind’s meticulous process, enthusiasts can achieve professional-level results. Remember that the journey of boatbuilding is as rewarding as reaching your destination; it tests one’s patience and dedication. For those seeking to embark on this adventure or simply gain more insight into marine craftsmanship, Sven’s wisdom is invaluable.Sven Yrvind, a renowned yacht designer and sailor, shares valuable insights on creating flanges around bulkhead hatches for canvas protection in this enlightening video. By following his expert guidance, boat enthusiasts can ensure their living areas remain secure while allowing unhindered access through the hatches.Step 1: Starting with the Flange
Sven begins by explaining that working on flanges vertically and horizontally is significantly easier than doing so in a flat position. To simplify the process further, he divides the task into two or three steps as suggested by fellow expert “for for.” This approach not only makes it more manageable but also allows for greater precision in crafting each component.Step 2: Applying Glue and Securing
Sven proceeds to apply glue along one edge of the flange, ensuring a secure bond when clamped into place. He emphasizes that this stage is crucial for maintaining the structural integrity of the flange, which in turn safeguards the living area beneath the canvas when hatches are open.Step 3: Allowing Time to Dry
After securely attaching the first portion of the flange, Sven allows ample time for it to dry before moving forward with additional steps. This patience and precision are key aspects of his successful boatbuilding methods.Step 4: Finishing Touches
Once the flange is fully dried, Sven removes the clamps carefully, ensuring no damage occurs during this process. He then moves on to attaching four more pieces onto these main frames, completing two pairs of flanges for the bulkhead hatches.The Final Touches
While two flanges form the primary support structure around the hatches, Sven mentions there are two additional pieces required at each end to ensure comprehensive protection. This attention to detail highlights his commitment to producing a durable and reliable design. “Sailing is about finding your path, whether it’s across an ocean or within yourself.” – Sven Yrvind In conclusion, making flanges around bulkhead hatches may seem complex at first glance, but by following Sven Yrvind’s meticulous process, enthusiasts can achieve professional-level results. Remember that the journey of boatbuilding is as rewarding as reaching your destination; it tests one’s patience and dedication. For those seeking to embark on this adventure or simply gain more insight into marine craftsmanship, Sven’s wisdom is invaluable.Making Flanges Around Bulkhead Hatches for Canvas
Sven Yrvind, a renowned yacht designer and sailor, shares valuable insights on creating flanges around bulkhead hatches for canvas protection in this enlightening video. By following his expert guidance, boat enthusiasts can ensure their living areas remain secure while allowing unhindered access through the hatches.Step 1: Starting with the Flange
Sven begins by explaining that working on flanges vertically and horizontally is significantly easier than doing so in a flat position. To simplify the process further, he divides the task into two or three steps as suggested by fellow expert “for for.” This approach not only makes it more manageable but also allows for greater precision in crafting each component.Step 2: Applying Glue and Securing
Sven proceeds to apply glue along one edge of the flange, ensuring a secure bond when clamped into place. He emphasizes that this stage is crucial for maintaining the structural integrity of the flange, which in turn safeguards the living area beneath the canvas when hatches are open.Step 3: Allowing Time to Dry
After securely attaching the first portion of the flange, Sven allows ample time for it to dry before moving forward with additional steps. This patience and precision are key aspects of his successful boatbuilding methods.Step 4: Finishing Touches
Once the flange is fully dried, Sven removes the clamps carefully, ensuring no damage occurs during this process. He then moves on to attaching four more pieces onto these main frames, completing two pairs of flanges for the bulkhead hatches.The Final Touches
While two flanges form the primary support structure around the hatches, Sven mentions there are two additional pieces required at each end to ensure comprehensive protection. This attention to detail highlights his commitment to producing a durable and reliable design. “Sailing is about finding your path, whether it’s across an ocean or within yourself.” – Sven Yrvind In conclusion, making flanges around bulkhead hatches may seem complex at first glance, but by following Sven Yrvind’s meticulous process, enthusiasts can achieve professional-level results. Remember that the journey of boatbuilding is as rewarding as reaching your destination; it tests one’s patience and dedication. For those seeking to embark on this adventure or simply gain more insight into marine craftsmanship, Sven’s wisdom is invaluable.Once the flange is fully dried, Sven removes the clamps carefully, ensuring no damage occurs during this process. He then moves on to attaching four more pieces onto these main frames, completing two pairs of flanges for the bulkhead hatches.The Final Touches
While two flanges form the primary support structure around the hatches, Sven mentions there are two additional pieces required at each end to ensure comprehensive protection. This attention to detail highlights his commitment to producing a durable and reliable design. “Sailing is about finding your path, whether it’s across an ocean or within yourself.” – Sven Yrvind In conclusion, making flanges around bulkhead hatches may seem complex at first glance, but by following Sven Yrvind’s meticulous process, enthusiasts can achieve professional-level results. Remember that the journey of boatbuilding is as rewarding as reaching your destination; it tests one’s patience and dedication. For those seeking to embark on this adventure or simply gain more insight into marine craftsmanship, Sven’s wisdom is invaluable.Making Flanges Around Bulkhead Hatches for Canvas
Sven Yrvind, a renowned yacht designer and sailor, shares valuable insights on creating flanges around bulkhead hatches for canvas protection in this enlightening video. By following his expert guidance, boat enthusiasts can ensure their living areas remain secure while allowing unhindered access through the hatches.Step 1: Starting with the Flange
Sven begins by explaining that working on flanges vertically and horizontally is significantly easier than doing so in a flat position. To simplify the process further, he divides the task into two or three steps as suggested by fellow expert “for for.” This approach not only makes it more manageable but also allows for greater precision in crafting each component.Step 2: Applying Glue and Securing
Sven proceeds to apply glue along one edge of the flange, ensuring a secure bond when clamped into place. He emphasizes that this stage is crucial for maintaining the structural integrity of the flange, which in turn safeguards the living area beneath the canvas when hatches are open.Step 3: Allowing Time to Dry
After securely attaching the first portion of the flange, Sven allows ample time for it to dry before moving forward with additional steps. This patience and precision are key aspects of his successful boatbuilding methods.Step 4: Finishing Touches
Once the flange is fully dried, Sven removes the clamps carefully, ensuring no damage occurs during this process. He then moves on to attaching four more pieces onto these main frames, completing two pairs of flanges for the bulkhead hatches.The Final Touches
While two flanges form the primary support structure around the hatches, Sven mentions there are two additional pieces required at each end to ensure comprehensive protection. This attention to detail highlights his commitment to producing a durable and reliable design. “Sailing is about finding your path, whether it’s across an ocean or within yourself.” – Sven Yrvind In conclusion, making flanges around bulkhead hatches may seem complex at first glance, but by following Sven Yrvind’s meticulous process, enthusiasts can achieve professional-level results. Remember that the journey of boatbuilding is as rewarding as reaching your destination; it tests one’s patience and dedication. For those seeking to embark on this adventure or simply gain more insight into marine craftsmanship, Sven’s wisdom is invaluable.After securely attaching the first portion of the flange, Sven allows ample time for it to dry before moving forward with additional steps. This patience and precision are key aspects of his successful boatbuilding methods.Step 4: Finishing Touches
Once the flange is fully dried, Sven removes the clamps carefully, ensuring no damage occurs during this process. He then moves on to attaching four more pieces onto these main frames, completing two pairs of flanges for the bulkhead hatches.The Final Touches
While two flanges form the primary support structure around the hatches, Sven mentions there are two additional pieces required at each end to ensure comprehensive protection. This attention to detail highlights his commitment to producing a durable and reliable design. “Sailing is about finding your path, whether it’s across an ocean or within yourself.” – Sven Yrvind In conclusion, making flanges around bulkhead hatches may seem complex at first glance, but by following Sven Yrvind’s meticulous process, enthusiasts can achieve professional-level results. Remember that the journey of boatbuilding is as rewarding as reaching your destination; it tests one’s patience and dedication. For those seeking to embark on this adventure or simply gain more insight into marine craftsmanship, Sven’s wisdom is invaluable.Making Flanges Around Bulkhead Hatches for Canvas
Sven Yrvind, a renowned yacht designer and sailor, shares valuable insights on creating flanges around bulkhead hatches for canvas protection in this enlightening video. By following his expert guidance, boat enthusiasts can ensure their living areas remain secure while allowing unhindered access through the hatches.Step 1: Starting with the Flange
Sven begins by explaining that working on flanges vertically and horizontally is significantly easier than doing so in a flat position. To simplify the process further, he divides the task into two or three steps as suggested by fellow expert “for for.” This approach not only makes it more manageable but also allows for greater precision in crafting each component.Step 2: Applying Glue and Securing
Sven proceeds to apply glue along one edge of the flange, ensuring a secure bond when clamped into place. He emphasizes that this stage is crucial for maintaining the structural integrity of the flange, which in turn safeguards the living area beneath the canvas when hatches are open.Step 3: Allowing Time to Dry
After securely attaching the first portion of the flange, Sven allows ample time for it to dry before moving forward with additional steps. This patience and precision are key aspects of his successful boatbuilding methods.Step 4: Finishing Touches
Once the flange is fully dried, Sven removes the clamps carefully, ensuring no damage occurs during this process. He then moves on to attaching four more pieces onto these main frames, completing two pairs of flanges for the bulkhead hatches.The Final Touches
While two flanges form the primary support structure around the hatches, Sven mentions there are two additional pieces required at each end to ensure comprehensive protection. This attention to detail highlights his commitment to producing a durable and reliable design. “Sailing is about finding your path, whether it’s across an ocean or within yourself.” – Sven Yrvind In conclusion, making flanges around bulkhead hatches may seem complex at first glance, but by following Sven Yrvind’s meticulous process, enthusiasts can achieve professional-level results. Remember that the journey of boatbuilding is as rewarding as reaching your destination; it tests one’s patience and dedication. For those seeking to embark on this adventure or simply gain more insight into marine craftsmanship, Sven’s wisdom is invaluable.Sven proceeds to apply glue along one edge of the flange, ensuring a secure bond when clamped into place. He emphasizes that this stage is crucial for maintaining the structural integrity of the flange, which in turn safeguards the living area beneath the canvas when hatches are open.Step 3: Allowing Time to Dry
After securely attaching the first portion of the flange, Sven allows ample time for it to dry before moving forward with additional steps. This patience and precision are key aspects of his successful boatbuilding methods.Step 4: Finishing Touches
Once the flange is fully dried, Sven removes the clamps carefully, ensuring no damage occurs during this process. He then moves on to attaching four more pieces onto these main frames, completing two pairs of flanges for the bulkhead hatches.The Final Touches
While two flanges form the primary support structure around the hatches, Sven mentions there are two additional pieces required at each end to ensure comprehensive protection. This attention to detail highlights his commitment to producing a durable and reliable design. “Sailing is about finding your path, whether it’s across an ocean or within yourself.” – Sven Yrvind In conclusion, making flanges around bulkhead hatches may seem complex at first glance, but by following Sven Yrvind’s meticulous process, enthusiasts can achieve professional-level results. Remember that the journey of boatbuilding is as rewarding as reaching your destination; it tests one’s patience and dedication. For those seeking to embark on this adventure or simply gain more insight into marine craftsmanship, Sven’s wisdom is invaluable.Making Flanges Around Bulkhead Hatches for Canvas
Sven Yrvind, a renowned yacht designer and sailor, shares valuable insights on creating flanges around bulkhead hatches for canvas protection in this enlightening video. By following his expert guidance, boat enthusiasts can ensure their living areas remain secure while allowing unhindered access through the hatches.Step 1: Starting with the Flange
Sven begins by explaining that working on flanges vertically and horizontally is significantly easier than doing so in a flat position. To simplify the process further, he divides the task into two or three steps as suggested by fellow expert “for for.” This approach not only makes it more manageable but also allows for greater precision in crafting each component.Step 2: Applying Glue and Securing
Sven proceeds to apply glue along one edge of the flange, ensuring a secure bond when clamped into place. He emphasizes that this stage is crucial for maintaining the structural integrity of the flange, which in turn safeguards the living area beneath the canvas when hatches are open.Step 3: Allowing Time to Dry
After securely attaching the first portion of the flange, Sven allows ample time for it to dry before moving forward with additional steps. This patience and precision are key aspects of his successful boatbuilding methods.Step 4: Finishing Touches
Once the flange is fully dried, Sven removes the clamps carefully, ensuring no damage occurs during this process. He then moves on to attaching four more pieces onto these main frames, completing two pairs of flanges for the bulkhead hatches.The Final Touches
While two flanges form the primary support structure around the hatches, Sven mentions there are two additional pieces required at each end to ensure comprehensive protection. This attention to detail highlights his commitment to producing a durable and reliable design. “Sailing is about finding your path, whether it’s across an ocean or within yourself.” – Sven Yrvind In conclusion, making flanges around bulkhead hatches may seem complex at first glance, but by following Sven Yrvind’s meticulous process, enthusiasts can achieve professional-level results. Remember that the journey of boatbuilding is as rewarding as reaching your destination; it tests one’s patience and dedication. For those seeking to embark on this adventure or simply gain more insight into marine craftsmanship, Sven’s wisdom is invaluable.Sven begins by explaining that working on flanges vertically and horizontally is significantly easier than doing so in a flat position. To simplify the process further, he divides the task into two or three steps as suggested by fellow expert “for for.” This approach not only makes it more manageable but also allows for greater precision in crafting each component.Step 2: Applying Glue and Securing
Sven proceeds to apply glue along one edge of the flange, ensuring a secure bond when clamped into place. He emphasizes that this stage is crucial for maintaining the structural integrity of the flange, which in turn safeguards the living area beneath the canvas when hatches are open.Step 3: Allowing Time to Dry
After securely attaching the first portion of the flange, Sven allows ample time for it to dry before moving forward with additional steps. This patience and precision are key aspects of his successful boatbuilding methods.Step 4: Finishing Touches
Once the flange is fully dried, Sven removes the clamps carefully, ensuring no damage occurs during this process. He then moves on to attaching four more pieces onto these main frames, completing two pairs of flanges for the bulkhead hatches.The Final Touches
While two flanges form the primary support structure around the hatches, Sven mentions there are two additional pieces required at each end to ensure comprehensive protection. This attention to detail highlights his commitment to producing a durable and reliable design. “Sailing is about finding your path, whether it’s across an ocean or within yourself.” – Sven Yrvind In conclusion, making flanges around bulkhead hatches may seem complex at first glance, but by following Sven Yrvind’s meticulous process, enthusiasts can achieve professional-level results. Remember that the journey of boatbuilding is as rewarding as reaching your destination; it tests one’s patience and dedication. For those seeking to embark on this adventure or simply gain more insight into marine craftsmanship, Sven’s wisdom is invaluable.Making Flanges Around Bulkhead Hatches for Canvas
Sven Yrvind, a renowned yacht designer and sailor, shares valuable insights on creating flanges around bulkhead hatches for canvas protection in this enlightening video. By following his expert guidance, boat enthusiasts can ensure their living areas remain secure while allowing unhindered access through the hatches.Step 1: Starting with the Flange
Sven begins by explaining that working on flanges vertically and horizontally is significantly easier than doing so in a flat position. To simplify the process further, he divides the task into two or three steps as suggested by fellow expert “for for.” This approach not only makes it more manageable but also allows for greater precision in crafting each component.Step 2: Applying Glue and Securing
Sven proceeds to apply glue along one edge of the flange, ensuring a secure bond when clamped into place. He emphasizes that this stage is crucial for maintaining the structural integrity of the flange, which in turn safeguards the living area beneath the canvas when hatches are open.Step 3: Allowing Time to Dry
After securely attaching the first portion of the flange, Sven allows ample time for it to dry before moving forward with additional steps. This patience and precision are key aspects of his successful boatbuilding methods.Step 4: Finishing Touches
Once the flange is fully dried, Sven removes the clamps carefully, ensuring no damage occurs during this process. He then moves on to attaching four more pieces onto these main frames, completing two pairs of flanges for the bulkhead hatches.The Final Touches
While two flanges form the primary support structure around the hatches, Sven mentions there are two additional pieces required at each end to ensure comprehensive protection. This attention to detail highlights his commitment to producing a durable and reliable design. “Sailing is about finding your path, whether it’s across an ocean or within yourself.” – Sven Yrvind In conclusion, making flanges around bulkhead hatches may seem complex at first glance, but by following Sven Yrvind’s meticulous process, enthusiasts can achieve professional-level results. Remember that the journey of boatbuilding is as rewarding as reaching your destination; it tests one’s patience and dedication. For those seeking to embark on this adventure or simply gain more insight into marine craftsmanship, Sven’s wisdom is invaluable.Sven Yrvind, a renowned yacht designer and sailor, shares valuable insights on creating flanges around bulkhead hatches for canvas protection in this enlightening video. By following his expert guidance, boat enthusiasts can ensure their living areas remain secure while allowing unhindered access through the hatches.Step 1: Starting with the Flange
Sven begins by explaining that working on flanges vertically and horizontally is significantly easier than doing so in a flat position. To simplify the process further, he divides the task into two or three steps as suggested by fellow expert “for for.” This approach not only makes it more manageable but also allows for greater precision in crafting each component.Step 2: Applying Glue and Securing
Sven proceeds to apply glue along one edge of the flange, ensuring a secure bond when clamped into place. He emphasizes that this stage is crucial for maintaining the structural integrity of the flange, which in turn safeguards the living area beneath the canvas when hatches are open.Step 3: Allowing Time to Dry
After securely attaching the first portion of the flange, Sven allows ample time for it to dry before moving forward with additional steps. This patience and precision are key aspects of his successful boatbuilding methods.Step 4: Finishing Touches
Once the flange is fully dried, Sven removes the clamps carefully, ensuring no damage occurs during this process. He then moves on to attaching four more pieces onto these main frames, completing two pairs of flanges for the bulkhead hatches.The Final Touches
While two flanges form the primary support structure around the hatches, Sven mentions there are two additional pieces required at each end to ensure comprehensive protection. This attention to detail highlights his commitment to producing a durable and reliable design. “Sailing is about finding your path, whether it’s across an ocean or within yourself.” – Sven Yrvind In conclusion, making flanges around bulkhead hatches may seem complex at first glance, but by following Sven Yrvind’s meticulous process, enthusiasts can achieve professional-level results. Remember that the journey of boatbuilding is as rewarding as reaching your destination; it tests one’s patience and dedication. For those seeking to embark on this adventure or simply gain more insight into marine craftsmanship, Sven’s wisdom is invaluable.Making Flanges Around Bulkhead Hatches for Canvas
Sven Yrvind, a renowned yacht designer and sailor, shares valuable insights on creating flanges around bulkhead hatches for canvas protection in this enlightening video. By following his expert guidance, boat enthusiasts can ensure their living areas remain secure while allowing unhindered access through the hatches.Step 1: Starting with the Flange
Sven begins by explaining that working on flanges vertically and horizontally is significantly easier than doing so in a flat position. To simplify the process further, he divides the task into two or three steps as suggested by fellow expert “for for.” This approach not only makes it more manageable but also allows for greater precision in crafting each component.Step 2: Applying Glue and Securing
Sven proceeds to apply glue along one edge of the flange, ensuring a secure bond when clamped into place. He emphasizes that this stage is crucial for maintaining the structural integrity of the flange, which in turn safeguards the living area beneath the canvas when hatches are open.Step 3: Allowing Time to Dry
After securely attaching the first portion of the flange, Sven allows ample time for it to dry before moving forward with additional steps. This patience and precision are key aspects of his successful boatbuilding methods.Step 4: Finishing Touches
Once the flange is fully dried, Sven removes the clamps carefully, ensuring no damage occurs during this process. He then moves on to attaching four more pieces onto these main frames, completing two pairs of flanges for the bulkhead hatches.The Final Touches
While two flanges form the primary support structure around the hatches, Sven mentions there are two additional pieces required at each end to ensure comprehensive protection. This attention to detail highlights his commitment to producing a durable and reliable design. “Sailing is about finding your path, whether it’s across an ocean or within yourself.” – Sven Yrvind In conclusion, making flanges around bulkhead hatches may seem complex at first glance, but by following Sven Yrvind’s meticulous process, enthusiasts can achieve professional-level results. Remember that the journey of boatbuilding is as rewarding as reaching your destination; it tests one’s patience and dedication. For those seeking to embark on this adventure or simply gain more insight into marine craftsmanship, Sven’s wisdom is invaluable.Once the flange is fully dried, Sven removes the clamps carefully, ensuring no damage occurs during this process. He then moves on to attaching four more pieces onto these main frames, completing two pairs of flanges for the bulkhead hatches.The Final Touches
While two flanges form the primary support structure around the hatches, Sven mentions there are two additional pieces required at each end to ensure comprehensive protection. This attention to detail highlights his commitment to producing a durable and reliable design. “Sailing is about finding your path, whether it’s across an ocean or within yourself.” – Sven Yrvind In conclusion, making flanges around bulkhead hatches may seem complex at first glance, but by following Sven Yrvind’s meticulous process, enthusiasts can achieve professional-level results. Remember that the journey of boatbuilding is as rewarding as reaching your destination; it tests one’s patience and dedication. For those seeking to embark on this adventure or simply gain more insight into marine craftsmanship, Sven’s wisdom is invaluable.Sven Yrvind, a renowned yacht designer and sailor, shares valuable insights on creating flanges around bulkhead hatches for canvas protection in this enlightening video. By following his expert guidance, boat enthusiasts can ensure their living areas remain secure while allowing unhindered access through the hatches.Step 1: Starting with the Flange
Sven begins by explaining that working on flanges vertically and horizontally is significantly easier than doing so in a flat position. To simplify the process further, he divides the task into two or three steps as suggested by fellow expert “for for.” This approach not only makes it more manageable but also allows for greater precision in crafting each component.Step 2: Applying Glue and Securing
Sven proceeds to apply glue along one edge of the flange, ensuring a secure bond when clamped into place. He emphasizes that this stage is crucial for maintaining the structural integrity of the flange, which in turn safeguards the living area beneath the canvas when hatches are open.Step 3: Allowing Time to Dry
After securely attaching the first portion of the flange, Sven allows ample time for it to dry before moving forward with additional steps. This patience and precision are key aspects of his successful boatbuilding methods.Step 4: Finishing Touches
Once the flange is fully dried, Sven removes the clamps carefully, ensuring no damage occurs during this process. He then moves on to attaching four more pieces onto these main frames, completing two pairs of flanges for the bulkhead hatches.The Final Touches
While two flanges form the primary support structure around the hatches, Sven mentions there are two additional pieces required at each end to ensure comprehensive protection. This attention to detail highlights his commitment to producing a durable and reliable design. “Sailing is about finding your path, whether it’s across an ocean or within yourself.” – Sven Yrvind In conclusion, making flanges around bulkhead hatches may seem complex at first glance, but by following Sven Yrvind’s meticulous process, enthusiasts can achieve professional-level results. Remember that the journey of boatbuilding is as rewarding as reaching your destination; it tests one’s patience and dedication. For those seeking to embark on this adventure or simply gain more insight into marine craftsmanship, Sven’s wisdom is invaluable.Making Flanges Around Bulkhead Hatches for Canvas
Sven Yrvind, a renowned yacht designer and sailor, shares valuable insights on creating flanges around bulkhead hatches for canvas protection in this enlightening video. By following his expert guidance, boat enthusiasts can ensure their living areas remain secure while allowing unhindered access through the hatches.Step 1: Starting with the Flange
Sven begins by explaining that working on flanges vertically and horizontally is significantly easier than doing so in a flat position. To simplify the process further, he divides the task into two or three steps as suggested by fellow expert “for for.” This approach not only makes it more manageable but also allows for greater precision in crafting each component.Step 2: Applying Glue and Securing
Sven proceeds to apply glue along one edge of the flange, ensuring a secure bond when clamped into place. He emphasizes that this stage is crucial for maintaining the structural integrity of the flange, which in turn safeguards the living area beneath the canvas when hatches are open.Step 3: Allowing Time to Dry
After securely attaching the first portion of the flange, Sven allows ample time for it to dry before moving forward with additional steps. This patience and precision are key aspects of his successful boatbuilding methods.Step 4: Finishing Touches
Once the flange is fully dried, Sven removes the clamps carefully, ensuring no damage occurs during this process. He then moves on to attaching four more pieces onto these main frames, completing two pairs of flanges for the bulkhead hatches.The Final Touches
While two flanges form the primary support structure around the hatches, Sven mentions there are two additional pieces required at each end to ensure comprehensive protection. This attention to detail highlights his commitment to producing a durable and reliable design. “Sailing is about finding your path, whether it’s across an ocean or within yourself.” – Sven Yrvind In conclusion, making flanges around bulkhead hatches may seem complex at first glance, but by following Sven Yrvind’s meticulous process, enthusiasts can achieve professional-level results. Remember that the journey of boatbuilding is as rewarding as reaching your destination; it tests one’s patience and dedication. For those seeking to embark on this adventure or simply gain more insight into marine craftsmanship, Sven’s wisdom is invaluable.After securely attaching the first portion of the flange, Sven allows ample time for it to dry before moving forward with additional steps. This patience and precision are key aspects of his successful boatbuilding methods.Step 4: Finishing Touches
Once the flange is fully dried, Sven removes the clamps carefully, ensuring no damage occurs during this process. He then moves on to attaching four more pieces onto these main frames, completing two pairs of flanges for the bulkhead hatches.The Final Touches
While two flanges form the primary support structure around the hatches, Sven mentions there are two additional pieces required at each end to ensure comprehensive protection. This attention to detail highlights his commitment to producing a durable and reliable design. “Sailing is about finding your path, whether it’s across an ocean or within yourself.” – Sven Yrvind In conclusion, making flanges around bulkhead hatches may seem complex at first glance, but by following Sven Yrvind’s meticulous process, enthusiasts can achieve professional-level results. Remember that the journey of boatbuilding is as rewarding as reaching your destination; it tests one’s patience and dedication. For those seeking to embark on this adventure or simply gain more insight into marine craftsmanship, Sven’s wisdom is invaluable.Sven Yrvind, a renowned yacht designer and sailor, shares valuable insights on creating flanges around bulkhead hatches for canvas protection in this enlightening video. By following his expert guidance, boat enthusiasts can ensure their living areas remain secure while allowing unhindered access through the hatches.Step 1: Starting with the Flange
Sven begins by explaining that working on flanges vertically and horizontally is significantly easier than doing so in a flat position. To simplify the process further, he divides the task into two or three steps as suggested by fellow expert “for for.” This approach not only makes it more manageable but also allows for greater precision in crafting each component.Step 2: Applying Glue and Securing
Sven proceeds to apply glue along one edge of the flange, ensuring a secure bond when clamped into place. He emphasizes that this stage is crucial for maintaining the structural integrity of the flange, which in turn safeguards the living area beneath the canvas when hatches are open.Step 3: Allowing Time to Dry
After securely attaching the first portion of the flange, Sven allows ample time for it to dry before moving forward with additional steps. This patience and precision are key aspects of his successful boatbuilding methods.Step 4: Finishing Touches
Once the flange is fully dried, Sven removes the clamps carefully, ensuring no damage occurs during this process. He then moves on to attaching four more pieces onto these main frames, completing two pairs of flanges for the bulkhead hatches.The Final Touches
While two flanges form the primary support structure around the hatches, Sven mentions there are two additional pieces required at each end to ensure comprehensive protection. This attention to detail highlights his commitment to producing a durable and reliable design. “Sailing is about finding your path, whether it’s across an ocean or within yourself.” – Sven Yrvind In conclusion, making flanges around bulkhead hatches may seem complex at first glance, but by following Sven Yrvind’s meticulous process, enthusiasts can achieve professional-level results. Remember that the journey of boatbuilding is as rewarding as reaching your destination; it tests one’s patience and dedication. For those seeking to embark on this adventure or simply gain more insight into marine craftsmanship, Sven’s wisdom is invaluable.Making Flanges Around Bulkhead Hatches for Canvas
Sven Yrvind, a renowned yacht designer and sailor, shares valuable insights on creating flanges around bulkhead hatches for canvas protection in this enlightening video. By following his expert guidance, boat enthusiasts can ensure their living areas remain secure while allowing unhindered access through the hatches.Step 1: Starting with the Flange
Sven begins by explaining that working on flanges vertically and horizontally is significantly easier than doing so in a flat position. To simplify the process further, he divides the task into two or three steps as suggested by fellow expert “for for.” This approach not only makes it more manageable but also allows for greater precision in crafting each component.Step 2: Applying Glue and Securing
Sven proceeds to apply glue along one edge of the flange, ensuring a secure bond when clamped into place. He emphasizes that this stage is crucial for maintaining the structural integrity of the flange, which in turn safeguards the living area beneath the canvas when hatches are open.Step 3: Allowing Time to Dry
After securely attaching the first portion of the flange, Sven allows ample time for it to dry before moving forward with additional steps. This patience and precision are key aspects of his successful boatbuilding methods.Step 4: Finishing Touches
Once the flange is fully dried, Sven removes the clamps carefully, ensuring no damage occurs during this process. He then moves on to attaching four more pieces onto these main frames, completing two pairs of flanges for the bulkhead hatches.The Final Touches
While two flanges form the primary support structure around the hatches, Sven mentions there are two additional pieces required at each end to ensure comprehensive protection. This attention to detail highlights his commitment to producing a durable and reliable design. “Sailing is about finding your path, whether it’s across an ocean or within yourself.” – Sven Yrvind In conclusion, making flanges around bulkhead hatches may seem complex at first glance, but by following Sven Yrvind’s meticulous process, enthusiasts can achieve professional-level results. Remember that the journey of boatbuilding is as rewarding as reaching your destination; it tests one’s patience and dedication. For those seeking to embark on this adventure or simply gain more insight into marine craftsmanship, Sven’s wisdom is invaluable.Sven proceeds to apply glue along one edge of the flange, ensuring a secure bond when clamped into place. He emphasizes that this stage is crucial for maintaining the structural integrity of the flange, which in turn safeguards the living area beneath the canvas when hatches are open.Step 3: Allowing Time to Dry
After securely attaching the first portion of the flange, Sven allows ample time for it to dry before moving forward with additional steps. This patience and precision are key aspects of his successful boatbuilding methods.Step 4: Finishing Touches
Once the flange is fully dried, Sven removes the clamps carefully, ensuring no damage occurs during this process. He then moves on to attaching four more pieces onto these main frames, completing two pairs of flanges for the bulkhead hatches.The Final Touches
While two flanges form the primary support structure around the hatches, Sven mentions there are two additional pieces required at each end to ensure comprehensive protection. This attention to detail highlights his commitment to producing a durable and reliable design. “Sailing is about finding your path, whether it’s across an ocean or within yourself.” – Sven Yrvind In conclusion, making flanges around bulkhead hatches may seem complex at first glance, but by following Sven Yrvind’s meticulous process, enthusiasts can achieve professional-level results. Remember that the journey of boatbuilding is as rewarding as reaching your destination; it tests one’s patience and dedication. For those seeking to embark on this adventure or simply gain more insight into marine craftsmanship, Sven’s wisdom is invaluable.Sven Yrvind, a renowned yacht designer and sailor, shares valuable insights on creating flanges around bulkhead hatches for canvas protection in this enlightening video. By following his expert guidance, boat enthusiasts can ensure their living areas remain secure while allowing unhindered access through the hatches.Step 1: Starting with the Flange
Sven begins by explaining that working on flanges vertically and horizontally is significantly easier than doing so in a flat position. To simplify the process further, he divides the task into two or three steps as suggested by fellow expert “for for.” This approach not only makes it more manageable but also allows for greater precision in crafting each component.Step 2: Applying Glue and Securing
Sven proceeds to apply glue along one edge of the flange, ensuring a secure bond when clamped into place. He emphasizes that this stage is crucial for maintaining the structural integrity of the flange, which in turn safeguards the living area beneath the canvas when hatches are open.Step 3: Allowing Time to Dry
After securely attaching the first portion of the flange, Sven allows ample time for it to dry before moving forward with additional steps. This patience and precision are key aspects of his successful boatbuilding methods.Step 4: Finishing Touches
Once the flange is fully dried, Sven removes the clamps carefully, ensuring no damage occurs during this process. He then moves on to attaching four more pieces onto these main frames, completing two pairs of flanges for the bulkhead hatches.The Final Touches
While two flanges form the primary support structure around the hatches, Sven mentions there are two additional pieces required at each end to ensure comprehensive protection. This attention to detail highlights his commitment to producing a durable and reliable design. “Sailing is about finding your path, whether it’s across an ocean or within yourself.” – Sven Yrvind In conclusion, making flanges around bulkhead hatches may seem complex at first glance, but by following Sven Yrvind’s meticulous process, enthusiasts can achieve professional-level results. Remember that the journey of boatbuilding is as rewarding as reaching your destination; it tests one’s patience and dedication. For those seeking to embark on this adventure or simply gain more insight into marine craftsmanship, Sven’s wisdom is invaluable.Making Flanges Around Bulkhead Hatches for Canvas
Sven Yrvind, a renowned yacht designer and sailor, shares valuable insights on creating flanges around bulkhead hatches for canvas protection in this enlightening video. By following his expert guidance, boat enthusiasts can ensure their living areas remain secure while allowing unhindered access through the hatches.Step 1: Starting with the Flange
Sven begins by explaining that working on flanges vertically and horizontally is significantly easier than doing so in a flat position. To simplify the process further, he divides the task into two or three steps as suggested by fellow expert “for for.” This approach not only makes it more manageable but also allows for greater precision in crafting each component.Step 2: Applying Glue and Securing
Sven proceeds to apply glue along one edge of the flange, ensuring a secure bond when clamped into place. He emphasizes that this stage is crucial for maintaining the structural integrity of the flange, which in turn safeguards the living area beneath the canvas when hatches are open.Step 3: Allowing Time to Dry
After securely attaching the first portion of the flange, Sven allows ample time for it to dry before moving forward with additional steps. This patience and precision are key aspects of his successful boatbuilding methods.Step 4: Finishing Touches
Once the flange is fully dried, Sven removes the clamps carefully, ensuring no damage occurs during this process. He then moves on to attaching four more pieces onto these main frames, completing two pairs of flanges for the bulkhead hatches.The Final Touches
While two flanges form the primary support structure around the hatches, Sven mentions there are two additional pieces required at each end to ensure comprehensive protection. This attention to detail highlights his commitment to producing a durable and reliable design. “Sailing is about finding your path, whether it’s across an ocean or within yourself.” – Sven Yrvind In conclusion, making flanges around bulkhead hatches may seem complex at first glance, but by following Sven Yrvind’s meticulous process, enthusiasts can achieve professional-level results. Remember that the journey of boatbuilding is as rewarding as reaching your destination; it tests one’s patience and dedication. For those seeking to embark on this adventure or simply gain more insight into marine craftsmanship, Sven’s wisdom is invaluable.Sven begins by explaining that working on flanges vertically and horizontally is significantly easier than doing so in a flat position. To simplify the process further, he divides the task into two or three steps as suggested by fellow expert “for for.” This approach not only makes it more manageable but also allows for greater precision in crafting each component.Step 2: Applying Glue and Securing
Sven proceeds to apply glue along one edge of the flange, ensuring a secure bond when clamped into place. He emphasizes that this stage is crucial for maintaining the structural integrity of the flange, which in turn safeguards the living area beneath the canvas when hatches are open.Step 3: Allowing Time to Dry
After securely attaching the first portion of the flange, Sven allows ample time for it to dry before moving forward with additional steps. This patience and precision are key aspects of his successful boatbuilding methods.Step 4: Finishing Touches
Once the flange is fully dried, Sven removes the clamps carefully, ensuring no damage occurs during this process. He then moves on to attaching four more pieces onto these main frames, completing two pairs of flanges for the bulkhead hatches.The Final Touches
While two flanges form the primary support structure around the hatches, Sven mentions there are two additional pieces required at each end to ensure comprehensive protection. This attention to detail highlights his commitment to producing a durable and reliable design. “Sailing is about finding your path, whether it’s across an ocean or within yourself.” – Sven Yrvind In conclusion, making flanges around bulkhead hatches may seem complex at first glance, but by following Sven Yrvind’s meticulous process, enthusiasts can achieve professional-level results. Remember that the journey of boatbuilding is as rewarding as reaching your destination; it tests one’s patience and dedication. For those seeking to embark on this adventure or simply gain more insight into marine craftsmanship, Sven’s wisdom is invaluable.Sven Yrvind, a renowned yacht designer and sailor, shares valuable insights on creating flanges around bulkhead hatches for canvas protection in this enlightening video. By following his expert guidance, boat enthusiasts can ensure their living areas remain secure while allowing unhindered access through the hatches.Step 1: Starting with the Flange
Sven begins by explaining that working on flanges vertically and horizontally is significantly easier than doing so in a flat position. To simplify the process further, he divides the task into two or three steps as suggested by fellow expert “for for.” This approach not only makes it more manageable but also allows for greater precision in crafting each component.Step 2: Applying Glue and Securing
Sven proceeds to apply glue along one edge of the flange, ensuring a secure bond when clamped into place. He emphasizes that this stage is crucial for maintaining the structural integrity of the flange, which in turn safeguards the living area beneath the canvas when hatches are open.Step 3: Allowing Time to Dry
After securely attaching the first portion of the flange, Sven allows ample time for it to dry before moving forward with additional steps. This patience and precision are key aspects of his successful boatbuilding methods.Step 4: Finishing Touches
Once the flange is fully dried, Sven removes the clamps carefully, ensuring no damage occurs during this process. He then moves on to attaching four more pieces onto these main frames, completing two pairs of flanges for the bulkhead hatches.The Final Touches
While two flanges form the primary support structure around the hatches, Sven mentions there are two additional pieces required at each end to ensure comprehensive protection. This attention to detail highlights his commitment to producing a durable and reliable design. “Sailing is about finding your path, whether it’s across an ocean or within yourself.” – Sven Yrvind In conclusion, making flanges around bulkhead hatches may seem complex at first glance, but by following Sven Yrvind’s meticulous process, enthusiasts can achieve professional-level results. Remember that the journey of boatbuilding is as rewarding as reaching your destination; it tests one’s patience and dedication. For those seeking to embark on this adventure or simply gain more insight into marine craftsmanship, Sven’s wisdom is invaluable.Making Flanges Around Bulkhead Hatches for Canvas
Sven Yrvind, a renowned yacht designer and sailor, shares valuable insights on creating flanges around bulkhead hatches for canvas protection in this enlightening video. By following his expert guidance, boat enthusiasts can ensure their living areas remain secure while allowing unhindered access through the hatches.Step 1: Starting with the Flange
Sven begins by explaining that working on flanges vertically and horizontally is significantly easier than doing so in a flat position. To simplify the process further, he divides the task into two or three steps as suggested by fellow expert “for for.” This approach not only makes it more manageable but also allows for greater precision in crafting each component.Step 2: Applying Glue and Securing
Sven proceeds to apply glue along one edge of the flange, ensuring a secure bond when clamped into place. He emphasizes that this stage is crucial for maintaining the structural integrity of the flange, which in turn safeguards the living area beneath the canvas when hatches are open.Step 3: Allowing Time to Dry
After securely attaching the first portion of the flange, Sven allows ample time for it to dry before moving forward with additional steps. This patience and precision are key aspects of his successful boatbuilding methods.Step 4: Finishing Touches
Once the flange is fully dried, Sven removes the clamps carefully, ensuring no damage occurs during this process. He then moves on to attaching four more pieces onto these main frames, completing two pairs of flanges for the bulkhead hatches.The Final Touches
While two flanges form the primary support structure around the hatches, Sven mentions there are two additional pieces required at each end to ensure comprehensive protection. This attention to detail highlights his commitment to producing a durable and reliable design. “Sailing is about finding your path, whether it’s across an ocean or within yourself.” – Sven Yrvind In conclusion, making flanges around bulkhead hatches may seem complex at first glance, but by following Sven Yrvind’s meticulous process, enthusiasts can achieve professional-level results. Remember that the journey of boatbuilding is as rewarding as reaching your destination; it tests one’s patience and dedication. For those seeking to embark on this adventure or simply gain more insight into marine craftsmanship, Sven’s wisdom is invaluable.Once the flange is fully dried, Sven removes the clamps carefully, ensuring no damage occurs during this process. He then moves on to attaching four more pieces onto these main frames, completing two pairs of flanges for the bulkhead hatches.The Final Touches
While two flanges form the primary support structure around the hatches, Sven mentions there are two additional pieces required at each end to ensure comprehensive protection. This attention to detail highlights his commitment to producing a durable and reliable design. “Sailing is about finding your path, whether it’s across an ocean or within yourself.” – Sven Yrvind In conclusion, making flanges around bulkhead hatches may seem complex at first glance, but by following Sven Yrvind’s meticulous process, enthusiasts can achieve professional-level results. Remember that the journey of boatbuilding is as rewarding as reaching your destination; it tests one’s patience and dedication. For those seeking to embark on this adventure or simply gain more insight into marine craftsmanship, Sven’s wisdom is invaluable.Sven begins by explaining that working on flanges vertically and horizontally is significantly easier than doing so in a flat position. To simplify the process further, he divides the task into two or three steps as suggested by fellow expert “for for.” This approach not only makes it more manageable but also allows for greater precision in crafting each component.Step 2: Applying Glue and Securing
Sven proceeds to apply glue along one edge of the flange, ensuring a secure bond when clamped into place. He emphasizes that this stage is crucial for maintaining the structural integrity of the flange, which in turn safeguards the living area beneath the canvas when hatches are open.Step 3: Allowing Time to Dry
After securely attaching the first portion of the flange, Sven allows ample time for it to dry before moving forward with additional steps. This patience and precision are key aspects of his successful boatbuilding methods.Step 4: Finishing Touches
Once the flange is fully dried, Sven removes the clamps carefully, ensuring no damage occurs during this process. He then moves on to attaching four more pieces onto these main frames, completing two pairs of flanges for the bulkhead hatches.The Final Touches
While two flanges form the primary support structure around the hatches, Sven mentions there are two additional pieces required at each end to ensure comprehensive protection. This attention to detail highlights his commitment to producing a durable and reliable design. “Sailing is about finding your path, whether it’s across an ocean or within yourself.” – Sven Yrvind In conclusion, making flanges around bulkhead hatches may seem complex at first glance, but by following Sven Yrvind’s meticulous process, enthusiasts can achieve professional-level results. Remember that the journey of boatbuilding is as rewarding as reaching your destination; it tests one’s patience and dedication. For those seeking to embark on this adventure or simply gain more insight into marine craftsmanship, Sven’s wisdom is invaluable.Sven Yrvind, a renowned yacht designer and sailor, shares valuable insights on creating flanges around bulkhead hatches for canvas protection in this enlightening video. By following his expert guidance, boat enthusiasts can ensure their living areas remain secure while allowing unhindered access through the hatches.Step 1: Starting with the Flange
Sven begins by explaining that working on flanges vertically and horizontally is significantly easier than doing so in a flat position. To simplify the process further, he divides the task into two or three steps as suggested by fellow expert “for for.” This approach not only makes it more manageable but also allows for greater precision in crafting each component.Step 2: Applying Glue and Securing
Sven proceeds to apply glue along one edge of the flange, ensuring a secure bond when clamped into place. He emphasizes that this stage is crucial for maintaining the structural integrity of the flange, which in turn safeguards the living area beneath the canvas when hatches are open.Step 3: Allowing Time to Dry
After securely attaching the first portion of the flange, Sven allows ample time for it to dry before moving forward with additional steps. This patience and precision are key aspects of his successful boatbuilding methods.Step 4: Finishing Touches
Once the flange is fully dried, Sven removes the clamps carefully, ensuring no damage occurs during this process. He then moves on to attaching four more pieces onto these main frames, completing two pairs of flanges for the bulkhead hatches.The Final Touches
While two flanges form the primary support structure around the hatches, Sven mentions there are two additional pieces required at each end to ensure comprehensive protection. This attention to detail highlights his commitment to producing a durable and reliable design. “Sailing is about finding your path, whether it’s across an ocean or within yourself.” – Sven Yrvind In conclusion, making flanges around bulkhead hatches may seem complex at first glance, but by following Sven Yrvind’s meticulous process, enthusiasts can achieve professional-level results. Remember that the journey of boatbuilding is as rewarding as reaching your destination; it tests one’s patience and dedication. For those seeking to embark on this adventure or simply gain more insight into marine craftsmanship, Sven’s wisdom is invaluable.Making Flanges Around Bulkhead Hatches for Canvas
Sven Yrvind, a renowned yacht designer and sailor, shares valuable insights on creating flanges around bulkhead hatches for canvas protection in this enlightening video. By following his expert guidance, boat enthusiasts can ensure their living areas remain secure while allowing unhindered access through the hatches.Step 1: Starting with the Flange
Sven begins by explaining that working on flanges vertically and horizontally is significantly easier than doing so in a flat position. To simplify the process further, he divides the task into two or three steps as suggested by fellow expert “for for.” This approach not only makes it more manageable but also allows for greater precision in crafting each component.Step 2: Applying Glue and Securing
Sven proceeds to apply glue along one edge of the flange, ensuring a secure bond when clamped into place. He emphasizes that this stage is crucial for maintaining the structural integrity of the flange, which in turn safeguards the living area beneath the canvas when hatches are open.Step 3: Allowing Time to Dry
After securely attaching the first portion of the flange, Sven allows ample time for it to dry before moving forward with additional steps. This patience and precision are key aspects of his successful boatbuilding methods.Step 4: Finishing Touches
Once the flange is fully dried, Sven removes the clamps carefully, ensuring no damage occurs during this process. He then moves on to attaching four more pieces onto these main frames, completing two pairs of flanges for the bulkhead hatches.The Final Touches
While two flanges form the primary support structure around the hatches, Sven mentions there are two additional pieces required at each end to ensure comprehensive protection. This attention to detail highlights his commitment to producing a durable and reliable design. “Sailing is about finding your path, whether it’s across an ocean or within yourself.” – Sven Yrvind In conclusion, making flanges around bulkhead hatches may seem complex at first glance, but by following Sven Yrvind’s meticulous process, enthusiasts can achieve professional-level results. Remember that the journey of boatbuilding is as rewarding as reaching your destination; it tests one’s patience and dedication. For those seeking to embark on this adventure or simply gain more insight into marine craftsmanship, Sven’s wisdom is invaluable.After securely attaching the first portion of the flange, Sven allows ample time for it to dry before moving forward with additional steps. This patience and precision are key aspects of his successful boatbuilding methods.Step 4: Finishing Touches
Once the flange is fully dried, Sven removes the clamps carefully, ensuring no damage occurs during this process. He then moves on to attaching four more pieces onto these main frames, completing two pairs of flanges for the bulkhead hatches.The Final Touches
While two flanges form the primary support structure around the hatches, Sven mentions there are two additional pieces required at each end to ensure comprehensive protection. This attention to detail highlights his commitment to producing a durable and reliable design. “Sailing is about finding your path, whether it’s across an ocean or within yourself.” – Sven Yrvind In conclusion, making flanges around bulkhead hatches may seem complex at first glance, but by following Sven Yrvind’s meticulous process, enthusiasts can achieve professional-level results. Remember that the journey of boatbuilding is as rewarding as reaching your destination; it tests one’s patience and dedication. For those seeking to embark on this adventure or simply gain more insight into marine craftsmanship, Sven’s wisdom is invaluable.Sven begins by explaining that working on flanges vertically and horizontally is significantly easier than doing so in a flat position. To simplify the process further, he divides the task into two or three steps as suggested by fellow expert “for for.” This approach not only makes it more manageable but also allows for greater precision in crafting each component.Step 2: Applying Glue and Securing
Sven proceeds to apply glue along one edge of the flange, ensuring a secure bond when clamped into place. He emphasizes that this stage is crucial for maintaining the structural integrity of the flange, which in turn safeguards the living area beneath the canvas when hatches are open.Step 3: Allowing Time to Dry
After securely attaching the first portion of the flange, Sven allows ample time for it to dry before moving forward with additional steps. This patience and precision are key aspects of his successful boatbuilding methods.Step 4: Finishing Touches
Once the flange is fully dried, Sven removes the clamps carefully, ensuring no damage occurs during this process. He then moves on to attaching four more pieces onto these main frames, completing two pairs of flanges for the bulkhead hatches.The Final Touches
While two flanges form the primary support structure around the hatches, Sven mentions there are two additional pieces required at each end to ensure comprehensive protection. This attention to detail highlights his commitment to producing a durable and reliable design. “Sailing is about finding your path, whether it’s across an ocean or within yourself.” – Sven Yrvind In conclusion, making flanges around bulkhead hatches may seem complex at first glance, but by following Sven Yrvind’s meticulous process, enthusiasts can achieve professional-level results. Remember that the journey of boatbuilding is as rewarding as reaching your destination; it tests one’s patience and dedication. For those seeking to embark on this adventure or simply gain more insight into marine craftsmanship, Sven’s wisdom is invaluable.Sven Yrvind, a renowned yacht designer and sailor, shares valuable insights on creating flanges around bulkhead hatches for canvas protection in this enlightening video. By following his expert guidance, boat enthusiasts can ensure their living areas remain secure while allowing unhindered access through the hatches.Step 1: Starting with the Flange
Sven begins by explaining that working on flanges vertically and horizontally is significantly easier than doing so in a flat position. To simplify the process further, he divides the task into two or three steps as suggested by fellow expert “for for.” This approach not only makes it more manageable but also allows for greater precision in crafting each component.Step 2: Applying Glue and Securing
Sven proceeds to apply glue along one edge of the flange, ensuring a secure bond when clamped into place. He emphasizes that this stage is crucial for maintaining the structural integrity of the flange, which in turn safeguards the living area beneath the canvas when hatches are open.Step 3: Allowing Time to Dry
After securely attaching the first portion of the flange, Sven allows ample time for it to dry before moving forward with additional steps. This patience and precision are key aspects of his successful boatbuilding methods.Step 4: Finishing Touches
Once the flange is fully dried, Sven removes the clamps carefully, ensuring no damage occurs during this process. He then moves on to attaching four more pieces onto these main frames, completing two pairs of flanges for the bulkhead hatches.The Final Touches
While two flanges form the primary support structure around the hatches, Sven mentions there are two additional pieces required at each end to ensure comprehensive protection. This attention to detail highlights his commitment to producing a durable and reliable design. “Sailing is about finding your path, whether it’s across an ocean or within yourself.” – Sven Yrvind In conclusion, making flanges around bulkhead hatches may seem complex at first glance, but by following Sven Yrvind’s meticulous process, enthusiasts can achieve professional-level results. Remember that the journey of boatbuilding is as rewarding as reaching your destination; it tests one’s patience and dedication. For those seeking to embark on this adventure or simply gain more insight into marine craftsmanship, Sven’s wisdom is invaluable.Making Flanges Around Bulkhead Hatches for Canvas
Sven Yrvind, a renowned yacht designer and sailor, shares valuable insights on creating flanges around bulkhead hatches for canvas protection in this enlightening video. By following his expert guidance, boat enthusiasts can ensure their living areas remain secure while allowing unhindered access through the hatches.Step 1: Starting with the Flange
Sven begins by explaining that working on flanges vertically and horizontally is significantly easier than doing so in a flat position. To simplify the process further, he divides the task into two or three steps as suggested by fellow expert “for for.” This approach not only makes it more manageable but also allows for greater precision in crafting each component.Step 2: Applying Glue and Securing
Sven proceeds to apply glue along one edge of the flange, ensuring a secure bond when clamped into place. He emphasizes that this stage is crucial for maintaining the structural integrity of the flange, which in turn safeguards the living area beneath the canvas when hatches are open.Step 3: Allowing Time to Dry
After securely attaching the first portion of the flange, Sven allows ample time for it to dry before moving forward with additional steps. This patience and precision are key aspects of his successful boatbuilding methods.Step 4: Finishing Touches
Once the flange is fully dried, Sven removes the clamps carefully, ensuring no damage occurs during this process. He then moves on to attaching four more pieces onto these main frames, completing two pairs of flanges for the bulkhead hatches.The Final Touches
While two flanges form the primary support structure around the hatches, Sven mentions there are two additional pieces required at each end to ensure comprehensive protection. This attention to detail highlights his commitment to producing a durable and reliable design. “Sailing is about finding your path, whether it’s across an ocean or within yourself.” – Sven Yrvind In conclusion, making flanges around bulkhead hatches may seem complex at first glance, but by following Sven Yrvind’s meticulous process, enthusiasts can achieve professional-level results. Remember that the journey of boatbuilding is as rewarding as reaching your destination; it tests one’s patience and dedication. For those seeking to embark on this adventure or simply gain more insight into marine craftsmanship, Sven’s wisdom is invaluable.Sven proceeds to apply glue along one edge of the flange, ensuring a secure bond when clamped into place. He emphasizes that this stage is crucial for maintaining the structural integrity of the flange, which in turn safeguards the living area beneath the canvas when hatches are open.Step 3: Allowing Time to Dry
After securely attaching the first portion of the flange, Sven allows ample time for it to dry before moving forward with additional steps. This patience and precision are key aspects of his successful boatbuilding methods.Step 4: Finishing Touches
Once the flange is fully dried, Sven removes the clamps carefully, ensuring no damage occurs during this process. He then moves on to attaching four more pieces onto these main frames, completing two pairs of flanges for the bulkhead hatches.The Final Touches
While two flanges form the primary support structure around the hatches, Sven mentions there are two additional pieces required at each end to ensure comprehensive protection. This attention to detail highlights his commitment to producing a durable and reliable design. “Sailing is about finding your path, whether it’s across an ocean or within yourself.” – Sven Yrvind In conclusion, making flanges around bulkhead hatches may seem complex at first glance, but by following Sven Yrvind’s meticulous process, enthusiasts can achieve professional-level results. Remember that the journey of boatbuilding is as rewarding as reaching your destination; it tests one’s patience and dedication. For those seeking to embark on this adventure or simply gain more insight into marine craftsmanship, Sven’s wisdom is invaluable.Sven begins by explaining that working on flanges vertically and horizontally is significantly easier than doing so in a flat position. To simplify the process further, he divides the task into two or three steps as suggested by fellow expert “for for.” This approach not only makes it more manageable but also allows for greater precision in crafting each component.Step 2: Applying Glue and Securing
Sven proceeds to apply glue along one edge of the flange, ensuring a secure bond when clamped into place. He emphasizes that this stage is crucial for maintaining the structural integrity of the flange, which in turn safeguards the living area beneath the canvas when hatches are open.Step 3: Allowing Time to Dry
After securely attaching the first portion of the flange, Sven allows ample time for it to dry before moving forward with additional steps. This patience and precision are key aspects of his successful boatbuilding methods.Step 4: Finishing Touches
Once the flange is fully dried, Sven removes the clamps carefully, ensuring no damage occurs during this process. He then moves on to attaching four more pieces onto these main frames, completing two pairs of flanges for the bulkhead hatches.The Final Touches
While two flanges form the primary support structure around the hatches, Sven mentions there are two additional pieces required at each end to ensure comprehensive protection. This attention to detail highlights his commitment to producing a durable and reliable design. “Sailing is about finding your path, whether it’s across an ocean or within yourself.” – Sven Yrvind In conclusion, making flanges around bulkhead hatches may seem complex at first glance, but by following Sven Yrvind’s meticulous process, enthusiasts can achieve professional-level results. Remember that the journey of boatbuilding is as rewarding as reaching your destination; it tests one’s patience and dedication. For those seeking to embark on this adventure or simply gain more insight into marine craftsmanship, Sven’s wisdom is invaluable.Sven Yrvind, a renowned yacht designer and sailor, shares valuable insights on creating flanges around bulkhead hatches for canvas protection in this enlightening video. By following his expert guidance, boat enthusiasts can ensure their living areas remain secure while allowing unhindered access through the hatches.Step 1: Starting with the Flange
Sven begins by explaining that working on flanges vertically and horizontally is significantly easier than doing so in a flat position. To simplify the process further, he divides the task into two or three steps as suggested by fellow expert “for for.” This approach not only makes it more manageable but also allows for greater precision in crafting each component.Step 2: Applying Glue and Securing
Sven proceeds to apply glue along one edge of the flange, ensuring a secure bond when clamped into place. He emphasizes that this stage is crucial for maintaining the structural integrity of the flange, which in turn safeguards the living area beneath the canvas when hatches are open.Step 3: Allowing Time to Dry
After securely attaching the first portion of the flange, Sven allows ample time for it to dry before moving forward with additional steps. This patience and precision are key aspects of his successful boatbuilding methods.Step 4: Finishing Touches
Once the flange is fully dried, Sven removes the clamps carefully, ensuring no damage occurs during this process. He then moves on to attaching four more pieces onto these main frames, completing two pairs of flanges for the bulkhead hatches.The Final Touches
While two flanges form the primary support structure around the hatches, Sven mentions there are two additional pieces required at each end to ensure comprehensive protection. This attention to detail highlights his commitment to producing a durable and reliable design. “Sailing is about finding your path, whether it’s across an ocean or within yourself.” – Sven Yrvind In conclusion, making flanges around bulkhead hatches may seem complex at first glance, but by following Sven Yrvind’s meticulous process, enthusiasts can achieve professional-level results. Remember that the journey of boatbuilding is as rewarding as reaching your destination; it tests one’s patience and dedication. For those seeking to embark on this adventure or simply gain more insight into marine craftsmanship, Sven’s wisdom is invaluable.Making Flanges Around Bulkhead Hatches for Canvas
Sven Yrvind, a renowned yacht designer and sailor, shares valuable insights on creating flanges around bulkhead hatches for canvas protection in this enlightening video. By following his expert guidance, boat enthusiasts can ensure their living areas remain secure while allowing unhindered access through the hatches.Step 1: Starting with the Flange
Sven begins by explaining that working on flanges vertically and horizontally is significantly easier than doing so in a flat position. To simplify the process further, he divides the task into two or three steps as suggested by fellow expert “for for.” This approach not only makes it more manageable but also allows for greater precision in crafting each component.Step 2: Applying Glue and Securing
Sven proceeds to apply glue along one edge of the flange, ensuring a secure bond when clamped into place. He emphasizes that this stage is crucial for maintaining the structural integrity of the flange, which in turn safeguards the living area beneath the canvas when hatches are open.Step 3: Allowing Time to Dry
After securely attaching the first portion of the flange, Sven allows ample time for it to dry before moving forward with additional steps. This patience and precision are key aspects of his successful boatbuilding methods.Step 4: Finishing Touches
Once the flange is fully dried, Sven removes the clamps carefully, ensuring no damage occurs during this process. He then moves on to attaching four more pieces onto these main frames, completing two pairs of flanges for the bulkhead hatches.The Final Touches
While two flanges form the primary support structure around the hatches, Sven mentions there are two additional pieces required at each end to ensure comprehensive protection. This attention to detail highlights his commitment to producing a durable and reliable design. “Sailing is about finding your path, whether it’s across an ocean or within yourself.” – Sven Yrvind In conclusion, making flanges around bulkhead hatches may seem complex at first glance, but by following Sven Yrvind’s meticulous process, enthusiasts can achieve professional-level results. Remember that the journey of boatbuilding is as rewarding as reaching your destination; it tests one’s patience and dedication. For those seeking to embark on this adventure or simply gain more insight into marine craftsmanship, Sven’s wisdom is invaluable.Once the flange is fully dried, Sven removes the clamps carefully, ensuring no damage occurs during this process. He then moves on to attaching four more pieces onto these main frames, completing two pairs of flanges for the bulkhead hatches.The Final Touches
While two flanges form the primary support structure around the hatches, Sven mentions there are two additional pieces required at each end to ensure comprehensive protection. This attention to detail highlights his commitment to producing a durable and reliable design. “Sailing is about finding your path, whether it’s across an ocean or within yourself.” – Sven Yrvind In conclusion, making flanges around bulkhead hatches may seem complex at first glance, but by following Sven Yrvind’s meticulous process, enthusiasts can achieve professional-level results. Remember that the journey of boatbuilding is as rewarding as reaching your destination; it tests one’s patience and dedication. For those seeking to embark on this adventure or simply gain more insight into marine craftsmanship, Sven’s wisdom is invaluable.Sven proceeds to apply glue along one edge of the flange, ensuring a secure bond when clamped into place. He emphasizes that this stage is crucial for maintaining the structural integrity of the flange, which in turn safeguards the living area beneath the canvas when hatches are open.Step 3: Allowing Time to Dry
After securely attaching the first portion of the flange, Sven allows ample time for it to dry before moving forward with additional steps. This patience and precision are key aspects of his successful boatbuilding methods.Step 4: Finishing Touches
Once the flange is fully dried, Sven removes the clamps carefully, ensuring no damage occurs during this process. He then moves on to attaching four more pieces onto these main frames, completing two pairs of flanges for the bulkhead hatches.The Final Touches
While two flanges form the primary support structure around the hatches, Sven mentions there are two additional pieces required at each end to ensure comprehensive protection. This attention to detail highlights his commitment to producing a durable and reliable design. “Sailing is about finding your path, whether it’s across an ocean or within yourself.” – Sven Yrvind In conclusion, making flanges around bulkhead hatches may seem complex at first glance, but by following Sven Yrvind’s meticulous process, enthusiasts can achieve professional-level results. Remember that the journey of boatbuilding is as rewarding as reaching your destination; it tests one’s patience and dedication. For those seeking to embark on this adventure or simply gain more insight into marine craftsmanship, Sven’s wisdom is invaluable.Sven begins by explaining that working on flanges vertically and horizontally is significantly easier than doing so in a flat position. To simplify the process further, he divides the task into two or three steps as suggested by fellow expert “for for.” This approach not only makes it more manageable but also allows for greater precision in crafting each component.Step 2: Applying Glue and Securing
Sven proceeds to apply glue along one edge of the flange, ensuring a secure bond when clamped into place. He emphasizes that this stage is crucial for maintaining the structural integrity of the flange, which in turn safeguards the living area beneath the canvas when hatches are open.Step 3: Allowing Time to Dry
After securely attaching the first portion of the flange, Sven allows ample time for it to dry before moving forward with additional steps. This patience and precision are key aspects of his successful boatbuilding methods.Step 4: Finishing Touches
Once the flange is fully dried, Sven removes the clamps carefully, ensuring no damage occurs during this process. He then moves on to attaching four more pieces onto these main frames, completing two pairs of flanges for the bulkhead hatches.The Final Touches
While two flanges form the primary support structure around the hatches, Sven mentions there are two additional pieces required at each end to ensure comprehensive protection. This attention to detail highlights his commitment to producing a durable and reliable design. “Sailing is about finding your path, whether it’s across an ocean or within yourself.” – Sven Yrvind In conclusion, making flanges around bulkhead hatches may seem complex at first glance, but by following Sven Yrvind’s meticulous process, enthusiasts can achieve professional-level results. Remember that the journey of boatbuilding is as rewarding as reaching your destination; it tests one’s patience and dedication. For those seeking to embark on this adventure or simply gain more insight into marine craftsmanship, Sven’s wisdom is invaluable.Sven Yrvind, a renowned yacht designer and sailor, shares valuable insights on creating flanges around bulkhead hatches for canvas protection in this enlightening video. By following his expert guidance, boat enthusiasts can ensure their living areas remain secure while allowing unhindered access through the hatches.Step 1: Starting with the Flange
Sven begins by explaining that working on flanges vertically and horizontally is significantly easier than doing so in a flat position. To simplify the process further, he divides the task into two or three steps as suggested by fellow expert “for for.” This approach not only makes it more manageable but also allows for greater precision in crafting each component.Step 2: Applying Glue and Securing
Sven proceeds to apply glue along one edge of the flange, ensuring a secure bond when clamped into place. He emphasizes that this stage is crucial for maintaining the structural integrity of the flange, which in turn safeguards the living area beneath the canvas when hatches are open.Step 3: Allowing Time to Dry
After securely attaching the first portion of the flange, Sven allows ample time for it to dry before moving forward with additional steps. This patience and precision are key aspects of his successful boatbuilding methods.Step 4: Finishing Touches
Once the flange is fully dried, Sven removes the clamps carefully, ensuring no damage occurs during this process. He then moves on to attaching four more pieces onto these main frames, completing two pairs of flanges for the bulkhead hatches.The Final Touches
While two flanges form the primary support structure around the hatches, Sven mentions there are two additional pieces required at each end to ensure comprehensive protection. This attention to detail highlights his commitment to producing a durable and reliable design. “Sailing is about finding your path, whether it’s across an ocean or within yourself.” – Sven Yrvind In conclusion, making flanges around bulkhead hatches may seem complex at first glance, but by following Sven Yrvind’s meticulous process, enthusiasts can achieve professional-level results. Remember that the journey of boatbuilding is as rewarding as reaching your destination; it tests one’s patience and dedication. For those seeking to embark on this adventure or simply gain more insight into marine craftsmanship, Sven’s wisdom is invaluable.Making Flanges Around Bulkhead Hatches for Canvas
Sven Yrvind, a renowned yacht designer and sailor, shares valuable insights on creating flanges around bulkhead hatches for canvas protection in this enlightening video. By following his expert guidance, boat enthusiasts can ensure their living areas remain secure while allowing unhindered access through the hatches.Step 1: Starting with the Flange
Sven begins by explaining that working on flanges vertically and horizontally is significantly easier than doing so in a flat position. To simplify the process further, he divides the task into two or three steps as suggested by fellow expert “for for.” This approach not only makes it more manageable but also allows for greater precision in crafting each component.Step 2: Applying Glue and Securing
Sven proceeds to apply glue along one edge of the flange, ensuring a secure bond when clamped into place. He emphasizes that this stage is crucial for maintaining the structural integrity of the flange, which in turn safeguards the living area beneath the canvas when hatches are open.Step 3: Allowing Time to Dry
After securely attaching the first portion of the flange, Sven allows ample time for it to dry before moving forward with additional steps. This patience and precision are key aspects of his successful boatbuilding methods.Step 4: Finishing Touches
Once the flange is fully dried, Sven removes the clamps carefully, ensuring no damage occurs during this process. He then moves on to attaching four more pieces onto these main frames, completing two pairs of flanges for the bulkhead hatches.The Final Touches
While two flanges form the primary support structure around the hatches, Sven mentions there are two additional pieces required at each end to ensure comprehensive protection. This attention to detail highlights his commitment to producing a durable and reliable design. “Sailing is about finding your path, whether it’s across an ocean or within yourself.” – Sven Yrvind In conclusion, making flanges around bulkhead hatches may seem complex at first glance, but by following Sven Yrvind’s meticulous process, enthusiasts can achieve professional-level results. Remember that the journey of boatbuilding is as rewarding as reaching your destination; it tests one’s patience and dedication. For those seeking to embark on this adventure or simply gain more insight into marine craftsmanship, Sven’s wisdom is invaluable.After securely attaching the first portion of the flange, Sven allows ample time for it to dry before moving forward with additional steps. This patience and precision are key aspects of his successful boatbuilding methods.Step 4: Finishing Touches
Once the flange is fully dried, Sven removes the clamps carefully, ensuring no damage occurs during this process. He then moves on to attaching four more pieces onto these main frames, completing two pairs of flanges for the bulkhead hatches.The Final Touches
While two flanges form the primary support structure around the hatches, Sven mentions there are two additional pieces required at each end to ensure comprehensive protection. This attention to detail highlights his commitment to producing a durable and reliable design. “Sailing is about finding your path, whether it’s across an ocean or within yourself.” – Sven Yrvind In conclusion, making flanges around bulkhead hatches may seem complex at first glance, but by following Sven Yrvind’s meticulous process, enthusiasts can achieve professional-level results. Remember that the journey of boatbuilding is as rewarding as reaching your destination; it tests one’s patience and dedication. For those seeking to embark on this adventure or simply gain more insight into marine craftsmanship, Sven’s wisdom is invaluable.Sven proceeds to apply glue along one edge of the flange, ensuring a secure bond when clamped into place. He emphasizes that this stage is crucial for maintaining the structural integrity of the flange, which in turn safeguards the living area beneath the canvas when hatches are open.Step 3: Allowing Time to Dry
After securely attaching the first portion of the flange, Sven allows ample time for it to dry before moving forward with additional steps. This patience and precision are key aspects of his successful boatbuilding methods.Step 4: Finishing Touches
Once the flange is fully dried, Sven removes the clamps carefully, ensuring no damage occurs during this process. He then moves on to attaching four more pieces onto these main frames, completing two pairs of flanges for the bulkhead hatches.The Final Touches
While two flanges form the primary support structure around the hatches, Sven mentions there are two additional pieces required at each end to ensure comprehensive protection. This attention to detail highlights his commitment to producing a durable and reliable design. “Sailing is about finding your path, whether it’s across an ocean or within yourself.” – Sven Yrvind In conclusion, making flanges around bulkhead hatches may seem complex at first glance, but by following Sven Yrvind’s meticulous process, enthusiasts can achieve professional-level results. Remember that the journey of boatbuilding is as rewarding as reaching your destination; it tests one’s patience and dedication. For those seeking to embark on this adventure or simply gain more insight into marine craftsmanship, Sven’s wisdom is invaluable.Sven begins by explaining that working on flanges vertically and horizontally is significantly easier than doing so in a flat position. To simplify the process further, he divides the task into two or three steps as suggested by fellow expert “for for.” This approach not only makes it more manageable but also allows for greater precision in crafting each component.Step 2: Applying Glue and Securing
Sven proceeds to apply glue along one edge of the flange, ensuring a secure bond when clamped into place. He emphasizes that this stage is crucial for maintaining the structural integrity of the flange, which in turn safeguards the living area beneath the canvas when hatches are open.Step 3: Allowing Time to Dry
After securely attaching the first portion of the flange, Sven allows ample time for it to dry before moving forward with additional steps. This patience and precision are key aspects of his successful boatbuilding methods.Step 4: Finishing Touches
Once the flange is fully dried, Sven removes the clamps carefully, ensuring no damage occurs during this process. He then moves on to attaching four more pieces onto these main frames, completing two pairs of flanges for the bulkhead hatches.The Final Touches
While two flanges form the primary support structure around the hatches, Sven mentions there are two additional pieces required at each end to ensure comprehensive protection. This attention to detail highlights his commitment to producing a durable and reliable design. “Sailing is about finding your path, whether it’s across an ocean or within yourself.” – Sven Yrvind In conclusion, making flanges around bulkhead hatches may seem complex at first glance, but by following Sven Yrvind’s meticulous process, enthusiasts can achieve professional-level results. Remember that the journey of boatbuilding is as rewarding as reaching your destination; it tests one’s patience and dedication. For those seeking to embark on this adventure or simply gain more insight into marine craftsmanship, Sven’s wisdom is invaluable.Sven Yrvind, a renowned yacht designer and sailor, shares valuable insights on creating flanges around bulkhead hatches for canvas protection in this enlightening video. By following his expert guidance, boat enthusiasts can ensure their living areas remain secure while allowing unhindered access through the hatches.Step 1: Starting with the Flange
Sven begins by explaining that working on flanges vertically and horizontally is significantly easier than doing so in a flat position. To simplify the process further, he divides the task into two or three steps as suggested by fellow expert “for for.” This approach not only makes it more manageable but also allows for greater precision in crafting each component.Step 2: Applying Glue and Securing
Sven proceeds to apply glue along one edge of the flange, ensuring a secure bond when clamped into place. He emphasizes that this stage is crucial for maintaining the structural integrity of the flange, which in turn safeguards the living area beneath the canvas when hatches are open.Step 3: Allowing Time to Dry
After securely attaching the first portion of the flange, Sven allows ample time for it to dry before moving forward with additional steps. This patience and precision are key aspects of his successful boatbuilding methods.Step 4: Finishing Touches
Once the flange is fully dried, Sven removes the clamps carefully, ensuring no damage occurs during this process. He then moves on to attaching four more pieces onto these main frames, completing two pairs of flanges for the bulkhead hatches.The Final Touches
While two flanges form the primary support structure around the hatches, Sven mentions there are two additional pieces required at each end to ensure comprehensive protection. This attention to detail highlights his commitment to producing a durable and reliable design. “Sailing is about finding your path, whether it’s across an ocean or within yourself.” – Sven Yrvind In conclusion, making flanges around bulkhead hatches may seem complex at first glance, but by following Sven Yrvind’s meticulous process, enthusiasts can achieve professional-level results. Remember that the journey of boatbuilding is as rewarding as reaching your destination; it tests one’s patience and dedication. For those seeking to embark on this adventure or simply gain more insight into marine craftsmanship, Sven’s wisdom is invaluable.Making Flanges Around Bulkhead Hatches for Canvas
Sven Yrvind, a renowned yacht designer and sailor, shares valuable insights on creating flanges around bulkhead hatches for canvas protection in this enlightening video. By following his expert guidance, boat enthusiasts can ensure their living areas remain secure while allowing unhindered access through the hatches.Step 1: Starting with the Flange
Sven begins by explaining that working on flanges vertically and horizontally is significantly easier than doing so in a flat position. To simplify the process further, he divides the task into two or three steps as suggested by fellow expert “for for.” This approach not only makes it more manageable but also allows for greater precision in crafting each component.Step 2: Applying Glue and Securing
Sven proceeds to apply glue along one edge of the flange, ensuring a secure bond when clamped into place. He emphasizes that this stage is crucial for maintaining the structural integrity of the flange, which in turn safeguards the living area beneath the canvas when hatches are open.Step 3: Allowing Time to Dry
After securely attaching the first portion of the flange, Sven allows ample time for it to dry before moving forward with additional steps. This patience and precision are key aspects of his successful boatbuilding methods.Step 4: Finishing Touches
Once the flange is fully dried, Sven removes the clamps carefully, ensuring no damage occurs during this process. He then moves on to attaching four more pieces onto these main frames, completing two pairs of flanges for the bulkhead hatches.The Final Touches
While two flanges form the primary support structure around the hatches, Sven mentions there are two additional pieces required at each end to ensure comprehensive protection. This attention to detail highlights his commitment to producing a durable and reliable design. “Sailing is about finding your path, whether it’s across an ocean or within yourself.” – Sven Yrvind In conclusion, making flanges around bulkhead hatches may seem complex at first glance, but by following Sven Yrvind’s meticulous process, enthusiasts can achieve professional-level results. Remember that the journey of boatbuilding is as rewarding as reaching your destination; it tests one’s patience and dedication. For those seeking to embark on this adventure or simply gain more insight into marine craftsmanship, Sven’s wisdom is invaluable.Once the flange is fully dried, Sven removes the clamps carefully, ensuring no damage occurs during this process. He then moves on to attaching four more pieces onto these main frames, completing two pairs of flanges for the bulkhead hatches.The Final Touches
While two flanges form the primary support structure around the hatches, Sven mentions there are two additional pieces required at each end to ensure comprehensive protection. This attention to detail highlights his commitment to producing a durable and reliable design. “Sailing is about finding your path, whether it’s across an ocean or within yourself.” – Sven Yrvind In conclusion, making flanges around bulkhead hatches may seem complex at first glance, but by following Sven Yrvind’s meticulous process, enthusiasts can achieve professional-level results. Remember that the journey of boatbuilding is as rewarding as reaching your destination; it tests one’s patience and dedication. For those seeking to embark on this adventure or simply gain more insight into marine craftsmanship, Sven’s wisdom is invaluable.After securely attaching the first portion of the flange, Sven allows ample time for it to dry before moving forward with additional steps. This patience and precision are key aspects of his successful boatbuilding methods.Step 4: Finishing Touches
Once the flange is fully dried, Sven removes the clamps carefully, ensuring no damage occurs during this process. He then moves on to attaching four more pieces onto these main frames, completing two pairs of flanges for the bulkhead hatches.The Final Touches
While two flanges form the primary support structure around the hatches, Sven mentions there are two additional pieces required at each end to ensure comprehensive protection. This attention to detail highlights his commitment to producing a durable and reliable design. “Sailing is about finding your path, whether it’s across an ocean or within yourself.” – Sven Yrvind In conclusion, making flanges around bulkhead hatches may seem complex at first glance, but by following Sven Yrvind’s meticulous process, enthusiasts can achieve professional-level results. Remember that the journey of boatbuilding is as rewarding as reaching your destination; it tests one’s patience and dedication. For those seeking to embark on this adventure or simply gain more insight into marine craftsmanship, Sven’s wisdom is invaluable.Sven proceeds to apply glue along one edge of the flange, ensuring a secure bond when clamped into place. He emphasizes that this stage is crucial for maintaining the structural integrity of the flange, which in turn safeguards the living area beneath the canvas when hatches are open.Step 3: Allowing Time to Dry
After securely attaching the first portion of the flange, Sven allows ample time for it to dry before moving forward with additional steps. This patience and precision are key aspects of his successful boatbuilding methods.Step 4: Finishing Touches
Once the flange is fully dried, Sven removes the clamps carefully, ensuring no damage occurs during this process. He then moves on to attaching four more pieces onto these main frames, completing two pairs of flanges for the bulkhead hatches.The Final Touches
While two flanges form the primary support structure around the hatches, Sven mentions there are two additional pieces required at each end to ensure comprehensive protection. This attention to detail highlights his commitment to producing a durable and reliable design. “Sailing is about finding your path, whether it’s across an ocean or within yourself.” – Sven Yrvind In conclusion, making flanges around bulkhead hatches may seem complex at first glance, but by following Sven Yrvind’s meticulous process, enthusiasts can achieve professional-level results. Remember that the journey of boatbuilding is as rewarding as reaching your destination; it tests one’s patience and dedication. For those seeking to embark on this adventure or simply gain more insight into marine craftsmanship, Sven’s wisdom is invaluable.Sven begins by explaining that working on flanges vertically and horizontally is significantly easier than doing so in a flat position. To simplify the process further, he divides the task into two or three steps as suggested by fellow expert “for for.” This approach not only makes it more manageable but also allows for greater precision in crafting each component.Step 2: Applying Glue and Securing
Sven proceeds to apply glue along one edge of the flange, ensuring a secure bond when clamped into place. He emphasizes that this stage is crucial for maintaining the structural integrity of the flange, which in turn safeguards the living area beneath the canvas when hatches are open.Step 3: Allowing Time to Dry
After securely attaching the first portion of the flange, Sven allows ample time for it to dry before moving forward with additional steps. This patience and precision are key aspects of his successful boatbuilding methods.Step 4: Finishing Touches
Once the flange is fully dried, Sven removes the clamps carefully, ensuring no damage occurs during this process. He then moves on to attaching four more pieces onto these main frames, completing two pairs of flanges for the bulkhead hatches.The Final Touches
While two flanges form the primary support structure around the hatches, Sven mentions there are two additional pieces required at each end to ensure comprehensive protection. This attention to detail highlights his commitment to producing a durable and reliable design. “Sailing is about finding your path, whether it’s across an ocean or within yourself.” – Sven Yrvind In conclusion, making flanges around bulkhead hatches may seem complex at first glance, but by following Sven Yrvind’s meticulous process, enthusiasts can achieve professional-level results. Remember that the journey of boatbuilding is as rewarding as reaching your destination; it tests one’s patience and dedication. For those seeking to embark on this adventure or simply gain more insight into marine craftsmanship, Sven’s wisdom is invaluable.Sven Yrvind, a renowned yacht designer and sailor, shares valuable insights on creating flanges around bulkhead hatches for canvas protection in this enlightening video. By following his expert guidance, boat enthusiasts can ensure their living areas remain secure while allowing unhindered access through the hatches.Step 1: Starting with the Flange
Sven begins by explaining that working on flanges vertically and horizontally is significantly easier than doing so in a flat position. To simplify the process further, he divides the task into two or three steps as suggested by fellow expert “for for.” This approach not only makes it more manageable but also allows for greater precision in crafting each component.Step 2: Applying Glue and Securing
Sven proceeds to apply glue along one edge of the flange, ensuring a secure bond when clamped into place. He emphasizes that this stage is crucial for maintaining the structural integrity of the flange, which in turn safeguards the living area beneath the canvas when hatches are open.Step 3: Allowing Time to Dry
After securely attaching the first portion of the flange, Sven allows ample time for it to dry before moving forward with additional steps. This patience and precision are key aspects of his successful boatbuilding methods.Step 4: Finishing Touches
Once the flange is fully dried, Sven removes the clamps carefully, ensuring no damage occurs during this process. He then moves on to attaching four more pieces onto these main frames, completing two pairs of flanges for the bulkhead hatches.The Final Touches
While two flanges form the primary support structure around the hatches, Sven mentions there are two additional pieces required at each end to ensure comprehensive protection. This attention to detail highlights his commitment to producing a durable and reliable design. “Sailing is about finding your path, whether it’s across an ocean or within yourself.” – Sven Yrvind In conclusion, making flanges around bulkhead hatches may seem complex at first glance, but by following Sven Yrvind’s meticulous process, enthusiasts can achieve professional-level results. Remember that the journey of boatbuilding is as rewarding as reaching your destination; it tests one’s patience and dedication. For those seeking to embark on this adventure or simply gain more insight into marine craftsmanship, Sven’s wisdom is invaluable.Making Flanges Around Bulkhead Hatches for Canvas
Sven Yrvind, a renowned yacht designer and sailor, shares valuable insights on creating flanges around bulkhead hatches for canvas protection in this enlightening video. By following his expert guidance, boat enthusiasts can ensure their living areas remain secure while allowing unhindered access through the hatches.Step 1: Starting with the Flange
Sven begins by explaining that working on flanges vertically and horizontally is significantly easier than doing so in a flat position. To simplify the process further, he divides the task into two or three steps as suggested by fellow expert “for for.” This approach not only makes it more manageable but also allows for greater precision in crafting each component.Step 2: Applying Glue and Securing
Sven proceeds to apply glue along one edge of the flange, ensuring a secure bond when clamped into place. He emphasizes that this stage is crucial for maintaining the structural integrity of the flange, which in turn safeguards the living area beneath the canvas when hatches are open.Step 3: Allowing Time to Dry
After securely attaching the first portion of the flange, Sven allows ample time for it to dry before moving forward with additional steps. This patience and precision are key aspects of his successful boatbuilding methods.Step 4: Finishing Touches
Once the flange is fully dried, Sven removes the clamps carefully, ensuring no damage occurs during this process. He then moves on to attaching four more pieces onto these main frames, completing two pairs of flanges for the bulkhead hatches.The Final Touches
While two flanges form the primary support structure around the hatches, Sven mentions there are two additional pieces required at each end to ensure comprehensive protection. This attention to detail highlights his commitment to producing a durable and reliable design. “Sailing is about finding your path, whether it’s across an ocean or within yourself.” – Sven Yrvind In conclusion, making flanges around bulkhead hatches may seem complex at first glance, but by following Sven Yrvind’s meticulous process, enthusiasts can achieve professional-level results. Remember that the journey of boatbuilding is as rewarding as reaching your destination; it tests one’s patience and dedication. For those seeking to embark on this adventure or simply gain more insight into marine craftsmanship, Sven’s wisdom is invaluable.Sven begins by explaining that working on flanges vertically and horizontally is significantly easier than doing so in a flat position. To simplify the process further, he divides the task into two or three steps as suggested by fellow expert “for for.” This approach not only makes it more manageable but also allows for greater precision in crafting each component.Step 2: Applying Glue and Securing
Sven proceeds to apply glue along one edge of the flange, ensuring a secure bond when clamped into place. He emphasizes that this stage is crucial for maintaining the structural integrity of the flange, which in turn safeguards the living area beneath the canvas when hatches are open.Step 3: Allowing Time to Dry
After securely attaching the first portion of the flange, Sven allows ample time for it to dry before moving forward with additional steps. This patience and precision are key aspects of his successful boatbuilding methods.Step 4: Finishing Touches
Once the flange is fully dried, Sven removes the clamps carefully, ensuring no damage occurs during this process. He then moves on to attaching four more pieces onto these main frames, completing two pairs of flanges for the bulkhead hatches.The Final Touches
While two flanges form the primary support structure around the hatches, Sven mentions there are two additional pieces required at each end to ensure comprehensive protection. This attention to detail highlights his commitment to producing a durable and reliable design. “Sailing is about finding your path, whether it’s across an ocean or within yourself.” – Sven Yrvind In conclusion, making flanges around bulkhead hatches may seem complex at first glance, but by following Sven Yrvind’s meticulous process, enthusiasts can achieve professional-level results. Remember that the journey of boatbuilding is as rewarding as reaching your destination; it tests one’s patience and dedication. For those seeking to embark on this adventure or simply gain more insight into marine craftsmanship, Sven’s wisdom is invaluable.Sven Yrvind, a renowned yacht designer and sailor, shares valuable insights on creating flanges around bulkhead hatches for canvas protection in this enlightening video. By following his expert guidance, boat enthusiasts can ensure their living areas remain secure while allowing unhindered access through the hatches.Step 1: Starting with the Flange
Sven begins by explaining that working on flanges vertically and horizontally is significantly easier than doing so in a flat position. To simplify the process further, he divides the task into two or three steps as suggested by fellow expert “for for.” This approach not only makes it more manageable but also allows for greater precision in crafting each component.Step 2: Applying Glue and Securing
Sven proceeds to apply glue along one edge of the flange, ensuring a secure bond when clamped into place. He emphasizes that this stage is crucial for maintaining the structural integrity of the flange, which in turn safeguards the living area beneath the canvas when hatches are open.Step 3: Allowing Time to Dry
After securely attaching the first portion of the flange, Sven allows ample time for it to dry before moving forward with additional steps. This patience and precision are key aspects of his successful boatbuilding methods.Step 4: Finishing Touches
Once the flange is fully dried, Sven removes the clamps carefully, ensuring no damage occurs during this process. He then moves on to attaching four more pieces onto these main frames, completing two pairs of flanges for the bulkhead hatches.The Final Touches
While two flanges form the primary support structure around the hatches, Sven mentions there are two additional pieces required at each end to ensure comprehensive protection. This attention to detail highlights his commitment to producing a durable and reliable design. “Sailing is about finding your path, whether it’s across an ocean or within yourself.” – Sven Yrvind In conclusion, making flanges around bulkhead hatches may seem complex at first glance, but by following Sven Yrvind’s meticulous process, enthusiasts can achieve professional-level results. Remember that the journey of boatbuilding is as rewarding as reaching your destination; it tests one’s patience and dedication. For those seeking to embark on this adventure or simply gain more insight into marine craftsmanship, Sven’s wisdom is invaluable.Making Flanges Around Bulkhead Hatches for Canvas
Sven Yrvind, a renowned yacht designer and sailor, shares valuable insights on creating flanges around bulkhead hatches for canvas protection in this enlightening video. By following his expert guidance, boat enthusiasts can ensure their living areas remain secure while allowing unhindered access through the hatches.Step 1: Starting with the Flange
Sven begins by explaining that working on flanges vertically and horizontally is significantly easier than doing so in a flat position. To simplify the process further, he divides the task into two or three steps as suggested by fellow expert “for for.” This approach not only makes it more manageable but also allows for greater precision in crafting each component.Step 2: Applying Glue and Securing
Sven proceeds to apply glue along one edge of the flange, ensuring a secure bond when clamped into place. He emphasizes that this stage is crucial for maintaining the structural integrity of the flange, which in turn safeguards the living area beneath the canvas when hatches are open.Step 3: Allowing Time to Dry
After securely attaching the first portion of the flange, Sven allows ample time for it to dry before moving forward with additional steps. This patience and precision are key aspects of his successful boatbuilding methods.Step 4: Finishing Touches
Once the flange is fully dried, Sven removes the clamps carefully, ensuring no damage occurs during this process. He then moves on to attaching four more pieces onto these main frames, completing two pairs of flanges for the bulkhead hatches.The Final Touches
While two flanges form the primary support structure around the hatches, Sven mentions there are two additional pieces required at each end to ensure comprehensive protection. This attention to detail highlights his commitment to producing a durable and reliable design. “Sailing is about finding your path, whether it’s across an ocean or within yourself.” – Sven Yrvind In conclusion, making flanges around bulkhead hatches may seem complex at first glance, but by following Sven Yrvind’s meticulous process, enthusiasts can achieve professional-level results. Remember that the journey of boatbuilding is as rewarding as reaching your destination; it tests one’s patience and dedication. For those seeking to embark on this adventure or simply gain more insight into marine craftsmanship, Sven’s wisdom is invaluable.Once the flange is fully dried, Sven removes the clamps carefully, ensuring no damage occurs during this process. He then moves on to attaching four more pieces onto these main frames, completing two pairs of flanges for the bulkhead hatches.The Final Touches
While two flanges form the primary support structure around the hatches, Sven mentions there are two additional pieces required at each end to ensure comprehensive protection. This attention to detail highlights his commitment to producing a durable and reliable design. “Sailing is about finding your path, whether it’s across an ocean or within yourself.” – Sven Yrvind In conclusion, making flanges around bulkhead hatches may seem complex at first glance, but by following Sven Yrvind’s meticulous process, enthusiasts can achieve professional-level results. Remember that the journey of boatbuilding is as rewarding as reaching your destination; it tests one’s patience and dedication. For those seeking to embark on this adventure or simply gain more insight into marine craftsmanship, Sven’s wisdom is invaluable.Making Flanges Around Bulkhead Hatches for Canvas
Sven Yrvind, a renowned yacht designer and sailor, shares valuable insights on creating flanges around bulkhead hatches for canvas protection in this enlightening video. By following his expert guidance, boat enthusiasts can ensure their living areas remain secure while allowing unhindered access through the hatches.Step 1: Starting with the Flange
Sven begins by explaining that working on flanges vertically and horizontally is significantly easier than doing so in a flat position. To simplify the process further, he divides the task into two or three steps as suggested by fellow expert “for for.” This approach not only makes it more manageable but also allows for greater precision in crafting each component.Step 2: Applying Glue and Securing
Sven proceeds to apply glue along one edge of the flange, ensuring a secure bond when clamped into place. He emphasizes that this stage is crucial for maintaining the structural integrity of the flange, which in turn safeguards the living area beneath the canvas when hatches are open.Step 3: Allowing Time to Dry
After securely attaching the first portion of the flange, Sven allows ample time for it to dry before moving forward with additional steps. This patience and precision are key aspects of his successful boatbuilding methods.Step 4: Finishing Touches
Once the flange is fully dried, Sven removes the clamps carefully, ensuring no damage occurs during this process. He then moves on to attaching four more pieces onto these main frames, completing two pairs of flanges for the bulkhead hatches.The Final Touches
While two flanges form the primary support structure around the hatches, Sven mentions there are two additional pieces required at each end to ensure comprehensive protection. This attention to detail highlights his commitment to producing a durable and reliable design. “Sailing is about finding your path, whether it’s across an ocean or within yourself.” – Sven Yrvind In conclusion, making flanges around bulkhead hatches may seem complex at first glance, but by following Sven Yrvind’s meticulous process, enthusiasts can achieve professional-level results. Remember that the journey of boatbuilding is as rewarding as reaching your destination; it tests one’s patience and dedication. For those seeking to embark on this adventure or simply gain more insight into marine craftsmanship, Sven’s wisdom is invaluable.After securely attaching the first portion of the flange, Sven allows ample time for it to dry before moving forward with additional steps. This patience and precision are key aspects of his successful boatbuilding methods.Step 4: Finishing Touches
Once the flange is fully dried, Sven removes the clamps carefully, ensuring no damage occurs during this process. He then moves on to attaching four more pieces onto these main frames, completing two pairs of flanges for the bulkhead hatches.The Final Touches
While two flanges form the primary support structure around the hatches, Sven mentions there are two additional pieces required at each end to ensure comprehensive protection. This attention to detail highlights his commitment to producing a durable and reliable design. “Sailing is about finding your path, whether it’s across an ocean or within yourself.” – Sven Yrvind In conclusion, making flanges around bulkhead hatches may seem complex at first glance, but by following Sven Yrvind’s meticulous process, enthusiasts can achieve professional-level results. Remember that the journey of boatbuilding is as rewarding as reaching your destination; it tests one’s patience and dedication. For those seeking to embark on this adventure or simply gain more insight into marine craftsmanship, Sven’s wisdom is invaluable.Making Flanges Around Bulkhead Hatches for Canvas
Sven Yrvind, a renowned yacht designer and sailor, shares valuable insights on creating flanges around bulkhead hatches for canvas protection in this enlightening video. By following his expert guidance, boat enthusiasts can ensure their living areas remain secure while allowing unhindered access through the hatches.Step 1: Starting with the Flange
Sven begins by explaining that working on flanges vertically and horizontally is significantly easier than doing so in a flat position. To simplify the process further, he divides the task into two or three steps as suggested by fellow expert “for for.” This approach not only makes it more manageable but also allows for greater precision in crafting each component.Step 2: Applying Glue and Securing
Sven proceeds to apply glue along one edge of the flange, ensuring a secure bond when clamped into place. He emphasizes that this stage is crucial for maintaining the structural integrity of the flange, which in turn safeguards the living area beneath the canvas when hatches are open.Step 3: Allowing Time to Dry
After securely attaching the first portion of the flange, Sven allows ample time for it to dry before moving forward with additional steps. This patience and precision are key aspects of his successful boatbuilding methods.Step 4: Finishing Touches
Once the flange is fully dried, Sven removes the clamps carefully, ensuring no damage occurs during this process. He then moves on to attaching four more pieces onto these main frames, completing two pairs of flanges for the bulkhead hatches.The Final Touches
While two flanges form the primary support structure around the hatches, Sven mentions there are two additional pieces required at each end to ensure comprehensive protection. This attention to detail highlights his commitment to producing a durable and reliable design. “Sailing is about finding your path, whether it’s across an ocean or within yourself.” – Sven Yrvind In conclusion, making flanges around bulkhead hatches may seem complex at first glance, but by following Sven Yrvind’s meticulous process, enthusiasts can achieve professional-level results. Remember that the journey of boatbuilding is as rewarding as reaching your destination; it tests one’s patience and dedication. For those seeking to embark on this adventure or simply gain more insight into marine craftsmanship, Sven’s wisdom is invaluable.Sven proceeds to apply glue along one edge of the flange, ensuring a secure bond when clamped into place. He emphasizes that this stage is crucial for maintaining the structural integrity of the flange, which in turn safeguards the living area beneath the canvas when hatches are open.Step 3: Allowing Time to Dry
After securely attaching the first portion of the flange, Sven allows ample time for it to dry before moving forward with additional steps. This patience and precision are key aspects of his successful boatbuilding methods.Step 4: Finishing Touches
Once the flange is fully dried, Sven removes the clamps carefully, ensuring no damage occurs during this process. He then moves on to attaching four more pieces onto these main frames, completing two pairs of flanges for the bulkhead hatches.The Final Touches
While two flanges form the primary support structure around the hatches, Sven mentions there are two additional pieces required at each end to ensure comprehensive protection. This attention to detail highlights his commitment to producing a durable and reliable design. “Sailing is about finding your path, whether it’s across an ocean or within yourself.” – Sven Yrvind In conclusion, making flanges around bulkhead hatches may seem complex at first glance, but by following Sven Yrvind’s meticulous process, enthusiasts can achieve professional-level results. Remember that the journey of boatbuilding is as rewarding as reaching your destination; it tests one’s patience and dedication. For those seeking to embark on this adventure or simply gain more insight into marine craftsmanship, Sven’s wisdom is invaluable.Making Flanges Around Bulkhead Hatches for Canvas
Sven Yrvind, a renowned yacht designer and sailor, shares valuable insights on creating flanges around bulkhead hatches for canvas protection in this enlightening video. By following his expert guidance, boat enthusiasts can ensure their living areas remain secure while allowing unhindered access through the hatches.Step 1: Starting with the Flange
Sven begins by explaining that working on flanges vertically and horizontally is significantly easier than doing so in a flat position. To simplify the process further, he divides the task into two or three steps as suggested by fellow expert “for for.” This approach not only makes it more manageable but also allows for greater precision in crafting each component.Step 2: Applying Glue and Securing
Sven proceeds to apply glue along one edge of the flange, ensuring a secure bond when clamped into place. He emphasizes that this stage is crucial for maintaining the structural integrity of the flange, which in turn safeguards the living area beneath the canvas when hatches are open.Step 3: Allowing Time to Dry
After securely attaching the first portion of the flange, Sven allows ample time for it to dry before moving forward with additional steps. This patience and precision are key aspects of his successful boatbuilding methods.Step 4: Finishing Touches
Once the flange is fully dried, Sven removes the clamps carefully, ensuring no damage occurs during this process. He then moves on to attaching four more pieces onto these main frames, completing two pairs of flanges for the bulkhead hatches.The Final Touches
While two flanges form the primary support structure around the hatches, Sven mentions there are two additional pieces required at each end to ensure comprehensive protection. This attention to detail highlights his commitment to producing a durable and reliable design. “Sailing is about finding your path, whether it’s across an ocean or within yourself.” – Sven Yrvind In conclusion, making flanges around bulkhead hatches may seem complex at first glance, but by following Sven Yrvind’s meticulous process, enthusiasts can achieve professional-level results. Remember that the journey of boatbuilding is as rewarding as reaching your destination; it tests one’s patience and dedication. For those seeking to embark on this adventure or simply gain more insight into marine craftsmanship, Sven’s wisdom is invaluable.Sven begins by explaining that working on flanges vertically and horizontally is significantly easier than doing so in a flat position. To simplify the process further, he divides the task into two or three steps as suggested by fellow expert “for for.” This approach not only makes it more manageable but also allows for greater precision in crafting each component.Step 2: Applying Glue and Securing
Sven proceeds to apply glue along one edge of the flange, ensuring a secure bond when clamped into place. He emphasizes that this stage is crucial for maintaining the structural integrity of the flange, which in turn safeguards the living area beneath the canvas when hatches are open.Step 3: Allowing Time to Dry
After securely attaching the first portion of the flange, Sven allows ample time for it to dry before moving forward with additional steps. This patience and precision are key aspects of his successful boatbuilding methods.Step 4: Finishing Touches
Once the flange is fully dried, Sven removes the clamps carefully, ensuring no damage occurs during this process. He then moves on to attaching four more pieces onto these main frames, completing two pairs of flanges for the bulkhead hatches.The Final Touches
While two flanges form the primary support structure around the hatches, Sven mentions there are two additional pieces required at each end to ensure comprehensive protection. This attention to detail highlights his commitment to producing a durable and reliable design. “Sailing is about finding your path, whether it’s across an ocean or within yourself.” – Sven Yrvind In conclusion, making flanges around bulkhead hatches may seem complex at first glance, but by following Sven Yrvind’s meticulous process, enthusiasts can achieve professional-level results. Remember that the journey of boatbuilding is as rewarding as reaching your destination; it tests one’s patience and dedication. For those seeking to embark on this adventure or simply gain more insight into marine craftsmanship, Sven’s wisdom is invaluable.Making Flanges Around Bulkhead Hatches for Canvas
Sven Yrvind, a renowned yacht designer and sailor, shares valuable insights on creating flanges around bulkhead hatches for canvas protection in this enlightening video. By following his expert guidance, boat enthusiasts can ensure their living areas remain secure while allowing unhindered access through the hatches.Step 1: Starting with the Flange
Sven begins by explaining that working on flanges vertically and horizontally is significantly easier than doing so in a flat position. To simplify the process further, he divides the task into two or three steps as suggested by fellow expert “for for.” This approach not only makes it more manageable but also allows for greater precision in crafting each component.Step 2: Applying Glue and Securing
Sven proceeds to apply glue along one edge of the flange, ensuring a secure bond when clamped into place. He emphasizes that this stage is crucial for maintaining the structural integrity of the flange, which in turn safeguards the living area beneath the canvas when hatches are open.Step 3: Allowing Time to Dry
After securely attaching the first portion of the flange, Sven allows ample time for it to dry before moving forward with additional steps. This patience and precision are key aspects of his successful boatbuilding methods.Step 4: Finishing Touches
Once the flange is fully dried, Sven removes the clamps carefully, ensuring no damage occurs during this process. He then moves on to attaching four more pieces onto these main frames, completing two pairs of flanges for the bulkhead hatches.The Final Touches
While two flanges form the primary support structure around the hatches, Sven mentions there are two additional pieces required at each end to ensure comprehensive protection. This attention to detail highlights his commitment to producing a durable and reliable design. “Sailing is about finding your path, whether it’s across an ocean or within yourself.” – Sven Yrvind In conclusion, making flanges around bulkhead hatches may seem complex at first glance, but by following Sven Yrvind’s meticulous process, enthusiasts can achieve professional-level results. Remember that the journey of boatbuilding is as rewarding as reaching your destination; it tests one’s patience and dedication. For those seeking to embark on this adventure or simply gain more insight into marine craftsmanship, Sven’s wisdom is invaluable.Sven Yrvind, a renowned yacht designer and sailor, shares valuable insights on creating flanges around bulkhead hatches for canvas protection in this enlightening video. By following his expert guidance, boat enthusiasts can ensure their living areas remain secure while allowing unhindered access through the hatches.Step 1: Starting with the Flange
Sven begins by explaining that working on flanges vertically and horizontally is significantly easier than doing so in a flat position. To simplify the process further, he divides the task into two or three steps as suggested by fellow expert “for for.” This approach not only makes it more manageable but also allows for greater precision in crafting each component.Step 2: Applying Glue and Securing
Sven proceeds to apply glue along one edge of the flange, ensuring a secure bond when clamped into place. He emphasizes that this stage is crucial for maintaining the structural integrity of the flange, which in turn safeguards the living area beneath the canvas when hatches are open.Step 3: Allowing Time to Dry
After securely attaching the first portion of the flange, Sven allows ample time for it to dry before moving forward with additional steps. This patience and precision are key aspects of his successful boatbuilding methods.Step 4: Finishing Touches
Once the flange is fully dried, Sven removes the clamps carefully, ensuring no damage occurs during this process. He then moves on to attaching four more pieces onto these main frames, completing two pairs of flanges for the bulkhead hatches.The Final Touches
While two flanges form the primary support structure around the hatches, Sven mentions there are two additional pieces required at each end to ensure comprehensive protection. This attention to detail highlights his commitment to producing a durable and reliable design. “Sailing is about finding your path, whether it’s across an ocean or within yourself.” – Sven Yrvind In conclusion, making flanges around bulkhead hatches may seem complex at first glance, but by following Sven Yrvind’s meticulous process, enthusiasts can achieve professional-level results. Remember that the journey of boatbuilding is as rewarding as reaching your destination; it tests one’s patience and dedication. For those seeking to embark on this adventure or simply gain more insight into marine craftsmanship, Sven’s wisdom is invaluable.Making Flanges Around Bulkhead Hatches for Canvas
Sven Yrvind, a renowned yacht designer and sailor, shares valuable insights on creating flanges around bulkhead hatches for canvas protection in this enlightening video. By following his expert guidance, boat enthusiasts can ensure their living areas remain secure while allowing unhindered access through the hatches.Step 1: Starting with the Flange
Sven begins by explaining that working on flanges vertically and horizontally is significantly easier than doing so in a flat position. To simplify the process further, he divides the task into two or three steps as suggested by fellow expert “for for.” This approach not only makes it more manageable but also allows for greater precision in crafting each component.Step 2: Applying Glue and Securing
Sven proceeds to apply glue along one edge of the flange, ensuring a secure bond when clamped into place. He emphasizes that this stage is crucial for maintaining the structural integrity of the flange, which in turn safeguards the living area beneath the canvas when hatches are open.Step 3: Allowing Time to Dry
After securely attaching the first portion of the flange, Sven allows ample time for it to dry before moving forward with additional steps. This patience and precision are key aspects of his successful boatbuilding methods.Step 4: Finishing Touches
Once the flange is fully dried, Sven removes the clamps carefully, ensuring no damage occurs during this process. He then moves on to attaching four more pieces onto these main frames, completing two pairs of flanges for the bulkhead hatches.The Final Touches
While two flanges form the primary support structure around the hatches, Sven mentions there are two additional pieces required at each end to ensure comprehensive protection. This attention to detail highlights his commitment to producing a durable and reliable design. “Sailing is about finding your path, whether it’s across an ocean or within yourself.” – Sven Yrvind In conclusion, making flanges around bulkhead hatches may seem complex at first glance, but by following Sven Yrvind’s meticulous process, enthusiasts can achieve professional-level results. Remember that the journey of boatbuilding is as rewarding as reaching your destination; it tests one’s patience and dedication. For those seeking to embark on this adventure or simply gain more insight into marine craftsmanship, Sven’s wisdom is invaluable.Once the flange is fully dried, Sven removes the clamps carefully, ensuring no damage occurs during this process. He then moves on to attaching four more pieces onto these main frames, completing two pairs of flanges for the bulkhead hatches.The Final Touches
While two flanges form the primary support structure around the hatches, Sven mentions there are two additional pieces required at each end to ensure comprehensive protection. This attention to detail highlights his commitment to producing a durable and reliable design. “Sailing is about finding your path, whether it’s across an ocean or within yourself.” – Sven Yrvind In conclusion, making flanges around bulkhead hatches may seem complex at first glance, but by following Sven Yrvind’s meticulous process, enthusiasts can achieve professional-level results. Remember that the journey of boatbuilding is as rewarding as reaching your destination; it tests one’s patience and dedication. For those seeking to embark on this adventure or simply gain more insight into marine craftsmanship, Sven’s wisdom is invaluable.Sven Yrvind, a renowned yacht designer and sailor, shares valuable insights on creating flanges around bulkhead hatches for canvas protection in this enlightening video. By following his expert guidance, boat enthusiasts can ensure their living areas remain secure while allowing unhindered access through the hatches.Step 1: Starting with the Flange
Sven begins by explaining that working on flanges vertically and horizontally is significantly easier than doing so in a flat position. To simplify the process further, he divides the task into two or three steps as suggested by fellow expert “for for.” This approach not only makes it more manageable but also allows for greater precision in crafting each component.Step 2: Applying Glue and Securing
Sven proceeds to apply glue along one edge of the flange, ensuring a secure bond when clamped into place. He emphasizes that this stage is crucial for maintaining the structural integrity of the flange, which in turn safeguards the living area beneath the canvas when hatches are open.Step 3: Allowing Time to Dry
After securely attaching the first portion of the flange, Sven allows ample time for it to dry before moving forward with additional steps. This patience and precision are key aspects of his successful boatbuilding methods.Step 4: Finishing Touches
Once the flange is fully dried, Sven removes the clamps carefully, ensuring no damage occurs during this process. He then moves on to attaching four more pieces onto these main frames, completing two pairs of flanges for the bulkhead hatches.The Final Touches
While two flanges form the primary support structure around the hatches, Sven mentions there are two additional pieces required at each end to ensure comprehensive protection. This attention to detail highlights his commitment to producing a durable and reliable design. “Sailing is about finding your path, whether it’s across an ocean or within yourself.” – Sven Yrvind In conclusion, making flanges around bulkhead hatches may seem complex at first glance, but by following Sven Yrvind’s meticulous process, enthusiasts can achieve professional-level results. Remember that the journey of boatbuilding is as rewarding as reaching your destination; it tests one’s patience and dedication. For those seeking to embark on this adventure or simply gain more insight into marine craftsmanship, Sven’s wisdom is invaluable.Making Flanges Around Bulkhead Hatches for Canvas
Sven Yrvind, a renowned yacht designer and sailor, shares valuable insights on creating flanges around bulkhead hatches for canvas protection in this enlightening video. By following his expert guidance, boat enthusiasts can ensure their living areas remain secure while allowing unhindered access through the hatches.Step 1: Starting with the Flange
Sven begins by explaining that working on flanges vertically and horizontally is significantly easier than doing so in a flat position. To simplify the process further, he divides the task into two or three steps as suggested by fellow expert “for for.” This approach not only makes it more manageable but also allows for greater precision in crafting each component.Step 2: Applying Glue and Securing
Sven proceeds to apply glue along one edge of the flange, ensuring a secure bond when clamped into place. He emphasizes that this stage is crucial for maintaining the structural integrity of the flange, which in turn safeguards the living area beneath the canvas when hatches are open.Step 3: Allowing Time to Dry
After securely attaching the first portion of the flange, Sven allows ample time for it to dry before moving forward with additional steps. This patience and precision are key aspects of his successful boatbuilding methods.Step 4: Finishing Touches
Once the flange is fully dried, Sven removes the clamps carefully, ensuring no damage occurs during this process. He then moves on to attaching four more pieces onto these main frames, completing two pairs of flanges for the bulkhead hatches.The Final Touches
While two flanges form the primary support structure around the hatches, Sven mentions there are two additional pieces required at each end to ensure comprehensive protection. This attention to detail highlights his commitment to producing a durable and reliable design. “Sailing is about finding your path, whether it’s across an ocean or within yourself.” – Sven Yrvind In conclusion, making flanges around bulkhead hatches may seem complex at first glance, but by following Sven Yrvind’s meticulous process, enthusiasts can achieve professional-level results. Remember that the journey of boatbuilding is as rewarding as reaching your destination; it tests one’s patience and dedication. For those seeking to embark on this adventure or simply gain more insight into marine craftsmanship, Sven’s wisdom is invaluable.After securely attaching the first portion of the flange, Sven allows ample time for it to dry before moving forward with additional steps. This patience and precision are key aspects of his successful boatbuilding methods.Step 4: Finishing Touches
Once the flange is fully dried, Sven removes the clamps carefully, ensuring no damage occurs during this process. He then moves on to attaching four more pieces onto these main frames, completing two pairs of flanges for the bulkhead hatches.The Final Touches
While two flanges form the primary support structure around the hatches, Sven mentions there are two additional pieces required at each end to ensure comprehensive protection. This attention to detail highlights his commitment to producing a durable and reliable design. “Sailing is about finding your path, whether it’s across an ocean or within yourself.” – Sven Yrvind In conclusion, making flanges around bulkhead hatches may seem complex at first glance, but by following Sven Yrvind’s meticulous process, enthusiasts can achieve professional-level results. Remember that the journey of boatbuilding is as rewarding as reaching your destination; it tests one’s patience and dedication. For those seeking to embark on this adventure or simply gain more insight into marine craftsmanship, Sven’s wisdom is invaluable.Sven Yrvind, a renowned yacht designer and sailor, shares valuable insights on creating flanges around bulkhead hatches for canvas protection in this enlightening video. By following his expert guidance, boat enthusiasts can ensure their living areas remain secure while allowing unhindered access through the hatches.Step 1: Starting with the Flange
Sven begins by explaining that working on flanges vertically and horizontally is significantly easier than doing so in a flat position. To simplify the process further, he divides the task into two or three steps as suggested by fellow expert “for for.” This approach not only makes it more manageable but also allows for greater precision in crafting each component.Step 2: Applying Glue and Securing
Sven proceeds to apply glue along one edge of the flange, ensuring a secure bond when clamped into place. He emphasizes that this stage is crucial for maintaining the structural integrity of the flange, which in turn safeguards the living area beneath the canvas when hatches are open.Step 3: Allowing Time to Dry
After securely attaching the first portion of the flange, Sven allows ample time for it to dry before moving forward with additional steps. This patience and precision are key aspects of his successful boatbuilding methods.Step 4: Finishing Touches
Once the flange is fully dried, Sven removes the clamps carefully, ensuring no damage occurs during this process. He then moves on to attaching four more pieces onto these main frames, completing two pairs of flanges for the bulkhead hatches.The Final Touches
While two flanges form the primary support structure around the hatches, Sven mentions there are two additional pieces required at each end to ensure comprehensive protection. This attention to detail highlights his commitment to producing a durable and reliable design. “Sailing is about finding your path, whether it’s across an ocean or within yourself.” – Sven Yrvind In conclusion, making flanges around bulkhead hatches may seem complex at first glance, but by following Sven Yrvind’s meticulous process, enthusiasts can achieve professional-level results. Remember that the journey of boatbuilding is as rewarding as reaching your destination; it tests one’s patience and dedication. For those seeking to embark on this adventure or simply gain more insight into marine craftsmanship, Sven’s wisdom is invaluable.Making Flanges Around Bulkhead Hatches for Canvas
Sven Yrvind, a renowned yacht designer and sailor, shares valuable insights on creating flanges around bulkhead hatches for canvas protection in this enlightening video. By following his expert guidance, boat enthusiasts can ensure their living areas remain secure while allowing unhindered access through the hatches.Step 1: Starting with the Flange
Sven begins by explaining that working on flanges vertically and horizontally is significantly easier than doing so in a flat position. To simplify the process further, he divides the task into two or three steps as suggested by fellow expert “for for.” This approach not only makes it more manageable but also allows for greater precision in crafting each component.Step 2: Applying Glue and Securing
Sven proceeds to apply glue along one edge of the flange, ensuring a secure bond when clamped into place. He emphasizes that this stage is crucial for maintaining the structural integrity of the flange, which in turn safeguards the living area beneath the canvas when hatches are open.Step 3: Allowing Time to Dry
After securely attaching the first portion of the flange, Sven allows ample time for it to dry before moving forward with additional steps. This patience and precision are key aspects of his successful boatbuilding methods.Step 4: Finishing Touches
Once the flange is fully dried, Sven removes the clamps carefully, ensuring no damage occurs during this process. He then moves on to attaching four more pieces onto these main frames, completing two pairs of flanges for the bulkhead hatches.The Final Touches
While two flanges form the primary support structure around the hatches, Sven mentions there are two additional pieces required at each end to ensure comprehensive protection. This attention to detail highlights his commitment to producing a durable and reliable design. “Sailing is about finding your path, whether it’s across an ocean or within yourself.” – Sven Yrvind In conclusion, making flanges around bulkhead hatches may seem complex at first glance, but by following Sven Yrvind’s meticulous process, enthusiasts can achieve professional-level results. Remember that the journey of boatbuilding is as rewarding as reaching your destination; it tests one’s patience and dedication. For those seeking to embark on this adventure or simply gain more insight into marine craftsmanship, Sven’s wisdom is invaluable.Sven proceeds to apply glue along one edge of the flange, ensuring a secure bond when clamped into place. He emphasizes that this stage is crucial for maintaining the structural integrity of the flange, which in turn safeguards the living area beneath the canvas when hatches are open.Step 3: Allowing Time to Dry
After securely attaching the first portion of the flange, Sven allows ample time for it to dry before moving forward with additional steps. This patience and precision are key aspects of his successful boatbuilding methods.Step 4: Finishing Touches
Once the flange is fully dried, Sven removes the clamps carefully, ensuring no damage occurs during this process. He then moves on to attaching four more pieces onto these main frames, completing two pairs of flanges for the bulkhead hatches.The Final Touches
While two flanges form the primary support structure around the hatches, Sven mentions there are two additional pieces required at each end to ensure comprehensive protection. This attention to detail highlights his commitment to producing a durable and reliable design. “Sailing is about finding your path, whether it’s across an ocean or within yourself.” – Sven Yrvind In conclusion, making flanges around bulkhead hatches may seem complex at first glance, but by following Sven Yrvind’s meticulous process, enthusiasts can achieve professional-level results. Remember that the journey of boatbuilding is as rewarding as reaching your destination; it tests one’s patience and dedication. For those seeking to embark on this adventure or simply gain more insight into marine craftsmanship, Sven’s wisdom is invaluable.Sven Yrvind, a renowned yacht designer and sailor, shares valuable insights on creating flanges around bulkhead hatches for canvas protection in this enlightening video. By following his expert guidance, boat enthusiasts can ensure their living areas remain secure while allowing unhindered access through the hatches.Step 1: Starting with the Flange
Sven begins by explaining that working on flanges vertically and horizontally is significantly easier than doing so in a flat position. To simplify the process further, he divides the task into two or three steps as suggested by fellow expert “for for.” This approach not only makes it more manageable but also allows for greater precision in crafting each component.Step 2: Applying Glue and Securing
Sven proceeds to apply glue along one edge of the flange, ensuring a secure bond when clamped into place. He emphasizes that this stage is crucial for maintaining the structural integrity of the flange, which in turn safeguards the living area beneath the canvas when hatches are open.Step 3: Allowing Time to Dry
After securely attaching the first portion of the flange, Sven allows ample time for it to dry before moving forward with additional steps. This patience and precision are key aspects of his successful boatbuilding methods.Step 4: Finishing Touches
Once the flange is fully dried, Sven removes the clamps carefully, ensuring no damage occurs during this process. He then moves on to attaching four more pieces onto these main frames, completing two pairs of flanges for the bulkhead hatches.The Final Touches
While two flanges form the primary support structure around the hatches, Sven mentions there are two additional pieces required at each end to ensure comprehensive protection. This attention to detail highlights his commitment to producing a durable and reliable design. “Sailing is about finding your path, whether it’s across an ocean or within yourself.” – Sven Yrvind In conclusion, making flanges around bulkhead hatches may seem complex at first glance, but by following Sven Yrvind’s meticulous process, enthusiasts can achieve professional-level results. Remember that the journey of boatbuilding is as rewarding as reaching your destination; it tests one’s patience and dedication. For those seeking to embark on this adventure or simply gain more insight into marine craftsmanship, Sven’s wisdom is invaluable.Making Flanges Around Bulkhead Hatches for Canvas
Sven Yrvind, a renowned yacht designer and sailor, shares valuable insights on creating flanges around bulkhead hatches for canvas protection in this enlightening video. By following his expert guidance, boat enthusiasts can ensure their living areas remain secure while allowing unhindered access through the hatches.Step 1: Starting with the Flange
Sven begins by explaining that working on flanges vertically and horizontally is significantly easier than doing so in a flat position. To simplify the process further, he divides the task into two or three steps as suggested by fellow expert “for for.” This approach not only makes it more manageable but also allows for greater precision in crafting each component.Step 2: Applying Glue and Securing
Sven proceeds to apply glue along one edge of the flange, ensuring a secure bond when clamped into place. He emphasizes that this stage is crucial for maintaining the structural integrity of the flange, which in turn safeguards the living area beneath the canvas when hatches are open.Step 3: Allowing Time to Dry
After securely attaching the first portion of the flange, Sven allows ample time for it to dry before moving forward with additional steps. This patience and precision are key aspects of his successful boatbuilding methods.Step 4: Finishing Touches
Once the flange is fully dried, Sven removes the clamps carefully, ensuring no damage occurs during this process. He then moves on to attaching four more pieces onto these main frames, completing two pairs of flanges for the bulkhead hatches.The Final Touches
While two flanges form the primary support structure around the hatches, Sven mentions there are two additional pieces required at each end to ensure comprehensive protection. This attention to detail highlights his commitment to producing a durable and reliable design. “Sailing is about finding your path, whether it’s across an ocean or within yourself.” – Sven Yrvind In conclusion, making flanges around bulkhead hatches may seem complex at first glance, but by following Sven Yrvind’s meticulous process, enthusiasts can achieve professional-level results. Remember that the journey of boatbuilding is as rewarding as reaching your destination; it tests one’s patience and dedication. For those seeking to embark on this adventure or simply gain more insight into marine craftsmanship, Sven’s wisdom is invaluable.Sven begins by explaining that working on flanges vertically and horizontally is significantly easier than doing so in a flat position. To simplify the process further, he divides the task into two or three steps as suggested by fellow expert “for for.” This approach not only makes it more manageable but also allows for greater precision in crafting each component.Step 2: Applying Glue and Securing
Sven proceeds to apply glue along one edge of the flange, ensuring a secure bond when clamped into place. He emphasizes that this stage is crucial for maintaining the structural integrity of the flange, which in turn safeguards the living area beneath the canvas when hatches are open.Step 3: Allowing Time to Dry
After securely attaching the first portion of the flange, Sven allows ample time for it to dry before moving forward with additional steps. This patience and precision are key aspects of his successful boatbuilding methods.Step 4: Finishing Touches
Once the flange is fully dried, Sven removes the clamps carefully, ensuring no damage occurs during this process. He then moves on to attaching four more pieces onto these main frames, completing two pairs of flanges for the bulkhead hatches.The Final Touches
While two flanges form the primary support structure around the hatches, Sven mentions there are two additional pieces required at each end to ensure comprehensive protection. This attention to detail highlights his commitment to producing a durable and reliable design. “Sailing is about finding your path, whether it’s across an ocean or within yourself.” – Sven Yrvind In conclusion, making flanges around bulkhead hatches may seem complex at first glance, but by following Sven Yrvind’s meticulous process, enthusiasts can achieve professional-level results. Remember that the journey of boatbuilding is as rewarding as reaching your destination; it tests one’s patience and dedication. For those seeking to embark on this adventure or simply gain more insight into marine craftsmanship, Sven’s wisdom is invaluable.Sven Yrvind, a renowned yacht designer and sailor, shares valuable insights on creating flanges around bulkhead hatches for canvas protection in this enlightening video. By following his expert guidance, boat enthusiasts can ensure their living areas remain secure while allowing unhindered access through the hatches.Step 1: Starting with the Flange
Sven begins by explaining that working on flanges vertically and horizontally is significantly easier than doing so in a flat position. To simplify the process further, he divides the task into two or three steps as suggested by fellow expert “for for.” This approach not only makes it more manageable but also allows for greater precision in crafting each component.Step 2: Applying Glue and Securing
Sven proceeds to apply glue along one edge of the flange, ensuring a secure bond when clamped into place. He emphasizes that this stage is crucial for maintaining the structural integrity of the flange, which in turn safeguards the living area beneath the canvas when hatches are open.Step 3: Allowing Time to Dry
After securely attaching the first portion of the flange, Sven allows ample time for it to dry before moving forward with additional steps. This patience and precision are key aspects of his successful boatbuilding methods.Step 4: Finishing Touches
Once the flange is fully dried, Sven removes the clamps carefully, ensuring no damage occurs during this process. He then moves on to attaching four more pieces onto these main frames, completing two pairs of flanges for the bulkhead hatches.The Final Touches
While two flanges form the primary support structure around the hatches, Sven mentions there are two additional pieces required at each end to ensure comprehensive protection. This attention to detail highlights his commitment to producing a durable and reliable design. “Sailing is about finding your path, whether it’s across an ocean or within yourself.” – Sven Yrvind In conclusion, making flanges around bulkhead hatches may seem complex at first glance, but by following Sven Yrvind’s meticulous process, enthusiasts can achieve professional-level results. Remember that the journey of boatbuilding is as rewarding as reaching your destination; it tests one’s patience and dedication. For those seeking to embark on this adventure or simply gain more insight into marine craftsmanship, Sven’s wisdom is invaluable.Making Flanges Around Bulkhead Hatches for Canvas
Sven Yrvind, a renowned yacht designer and sailor, shares valuable insights on creating flanges around bulkhead hatches for canvas protection in this enlightening video. By following his expert guidance, boat enthusiasts can ensure their living areas remain secure while allowing unhindered access through the hatches.Step 1: Starting with the Flange
Sven begins by explaining that working on flanges vertically and horizontally is significantly easier than doing so in a flat position. To simplify the process further, he divides the task into two or three steps as suggested by fellow expert “for for.” This approach not only makes it more manageable but also allows for greater precision in crafting each component.Step 2: Applying Glue and Securing
Sven proceeds to apply glue along one edge of the flange, ensuring a secure bond when clamped into place. He emphasizes that this stage is crucial for maintaining the structural integrity of the flange, which in turn safeguards the living area beneath the canvas when hatches are open.Step 3: Allowing Time to Dry
After securely attaching the first portion of the flange, Sven allows ample time for it to dry before moving forward with additional steps. This patience and precision are key aspects of his successful boatbuilding methods.Step 4: Finishing Touches
Once the flange is fully dried, Sven removes the clamps carefully, ensuring no damage occurs during this process. He then moves on to attaching four more pieces onto these main frames, completing two pairs of flanges for the bulkhead hatches.The Final Touches
While two flanges form the primary support structure around the hatches, Sven mentions there are two additional pieces required at each end to ensure comprehensive protection. This attention to detail highlights his commitment to producing a durable and reliable design. “Sailing is about finding your path, whether it’s across an ocean or within yourself.” – Sven Yrvind In conclusion, making flanges around bulkhead hatches may seem complex at first glance, but by following Sven Yrvind’s meticulous process, enthusiasts can achieve professional-level results. Remember that the journey of boatbuilding is as rewarding as reaching your destination; it tests one’s patience and dedication. For those seeking to embark on this adventure or simply gain more insight into marine craftsmanship, Sven’s wisdom is invaluable.Once the flange is fully dried, Sven removes the clamps carefully, ensuring no damage occurs during this process. He then moves on to attaching four more pieces onto these main frames, completing two pairs of flanges for the bulkhead hatches.The Final Touches
While two flanges form the primary support structure around the hatches, Sven mentions there are two additional pieces required at each end to ensure comprehensive protection. This attention to detail highlights his commitment to producing a durable and reliable design. “Sailing is about finding your path, whether it’s across an ocean or within yourself.” – Sven Yrvind In conclusion, making flanges around bulkhead hatches may seem complex at first glance, but by following Sven Yrvind’s meticulous process, enthusiasts can achieve professional-level results. Remember that the journey of boatbuilding is as rewarding as reaching your destination; it tests one’s patience and dedication. For those seeking to embark on this adventure or simply gain more insight into marine craftsmanship, Sven’s wisdom is invaluable.Sven begins by explaining that working on flanges vertically and horizontally is significantly easier than doing so in a flat position. To simplify the process further, he divides the task into two or three steps as suggested by fellow expert “for for.” This approach not only makes it more manageable but also allows for greater precision in crafting each component.Step 2: Applying Glue and Securing
Sven proceeds to apply glue along one edge of the flange, ensuring a secure bond when clamped into place. He emphasizes that this stage is crucial for maintaining the structural integrity of the flange, which in turn safeguards the living area beneath the canvas when hatches are open.Step 3: Allowing Time to Dry
After securely attaching the first portion of the flange, Sven allows ample time for it to dry before moving forward with additional steps. This patience and precision are key aspects of his successful boatbuilding methods.Step 4: Finishing Touches
Once the flange is fully dried, Sven removes the clamps carefully, ensuring no damage occurs during this process. He then moves on to attaching four more pieces onto these main frames, completing two pairs of flanges for the bulkhead hatches.The Final Touches
While two flanges form the primary support structure around the hatches, Sven mentions there are two additional pieces required at each end to ensure comprehensive protection. This attention to detail highlights his commitment to producing a durable and reliable design. “Sailing is about finding your path, whether it’s across an ocean or within yourself.” – Sven Yrvind In conclusion, making flanges around bulkhead hatches may seem complex at first glance, but by following Sven Yrvind’s meticulous process, enthusiasts can achieve professional-level results. Remember that the journey of boatbuilding is as rewarding as reaching your destination; it tests one’s patience and dedication. For those seeking to embark on this adventure or simply gain more insight into marine craftsmanship, Sven’s wisdom is invaluable.Sven Yrvind, a renowned yacht designer and sailor, shares valuable insights on creating flanges around bulkhead hatches for canvas protection in this enlightening video. By following his expert guidance, boat enthusiasts can ensure their living areas remain secure while allowing unhindered access through the hatches.Step 1: Starting with the Flange
Sven begins by explaining that working on flanges vertically and horizontally is significantly easier than doing so in a flat position. To simplify the process further, he divides the task into two or three steps as suggested by fellow expert “for for.” This approach not only makes it more manageable but also allows for greater precision in crafting each component.Step 2: Applying Glue and Securing
Sven proceeds to apply glue along one edge of the flange, ensuring a secure bond when clamped into place. He emphasizes that this stage is crucial for maintaining the structural integrity of the flange, which in turn safeguards the living area beneath the canvas when hatches are open.Step 3: Allowing Time to Dry
After securely attaching the first portion of the flange, Sven allows ample time for it to dry before moving forward with additional steps. This patience and precision are key aspects of his successful boatbuilding methods.Step 4: Finishing Touches
Once the flange is fully dried, Sven removes the clamps carefully, ensuring no damage occurs during this process. He then moves on to attaching four more pieces onto these main frames, completing two pairs of flanges for the bulkhead hatches.The Final Touches
While two flanges form the primary support structure around the hatches, Sven mentions there are two additional pieces required at each end to ensure comprehensive protection. This attention to detail highlights his commitment to producing a durable and reliable design. “Sailing is about finding your path, whether it’s across an ocean or within yourself.” – Sven Yrvind In conclusion, making flanges around bulkhead hatches may seem complex at first glance, but by following Sven Yrvind’s meticulous process, enthusiasts can achieve professional-level results. Remember that the journey of boatbuilding is as rewarding as reaching your destination; it tests one’s patience and dedication. For those seeking to embark on this adventure or simply gain more insight into marine craftsmanship, Sven’s wisdom is invaluable.Making Flanges Around Bulkhead Hatches for Canvas
Sven Yrvind, a renowned yacht designer and sailor, shares valuable insights on creating flanges around bulkhead hatches for canvas protection in this enlightening video. By following his expert guidance, boat enthusiasts can ensure their living areas remain secure while allowing unhindered access through the hatches.Step 1: Starting with the Flange
Sven begins by explaining that working on flanges vertically and horizontally is significantly easier than doing so in a flat position. To simplify the process further, he divides the task into two or three steps as suggested by fellow expert “for for.” This approach not only makes it more manageable but also allows for greater precision in crafting each component.Step 2: Applying Glue and Securing
Sven proceeds to apply glue along one edge of the flange, ensuring a secure bond when clamped into place. He emphasizes that this stage is crucial for maintaining the structural integrity of the flange, which in turn safeguards the living area beneath the canvas when hatches are open.Step 3: Allowing Time to Dry
After securely attaching the first portion of the flange, Sven allows ample time for it to dry before moving forward with additional steps. This patience and precision are key aspects of his successful boatbuilding methods.Step 4: Finishing Touches
Once the flange is fully dried, Sven removes the clamps carefully, ensuring no damage occurs during this process. He then moves on to attaching four more pieces onto these main frames, completing two pairs of flanges for the bulkhead hatches.The Final Touches
While two flanges form the primary support structure around the hatches, Sven mentions there are two additional pieces required at each end to ensure comprehensive protection. This attention to detail highlights his commitment to producing a durable and reliable design. “Sailing is about finding your path, whether it’s across an ocean or within yourself.” – Sven Yrvind In conclusion, making flanges around bulkhead hatches may seem complex at first glance, but by following Sven Yrvind’s meticulous process, enthusiasts can achieve professional-level results. Remember that the journey of boatbuilding is as rewarding as reaching your destination; it tests one’s patience and dedication. For those seeking to embark on this adventure or simply gain more insight into marine craftsmanship, Sven’s wisdom is invaluable.After securely attaching the first portion of the flange, Sven allows ample time for it to dry before moving forward with additional steps. This patience and precision are key aspects of his successful boatbuilding methods.Step 4: Finishing Touches
Once the flange is fully dried, Sven removes the clamps carefully, ensuring no damage occurs during this process. He then moves on to attaching four more pieces onto these main frames, completing two pairs of flanges for the bulkhead hatches.The Final Touches
While two flanges form the primary support structure around the hatches, Sven mentions there are two additional pieces required at each end to ensure comprehensive protection. This attention to detail highlights his commitment to producing a durable and reliable design. “Sailing is about finding your path, whether it’s across an ocean or within yourself.” – Sven Yrvind In conclusion, making flanges around bulkhead hatches may seem complex at first glance, but by following Sven Yrvind’s meticulous process, enthusiasts can achieve professional-level results. Remember that the journey of boatbuilding is as rewarding as reaching your destination; it tests one’s patience and dedication. For those seeking to embark on this adventure or simply gain more insight into marine craftsmanship, Sven’s wisdom is invaluable.Sven begins by explaining that working on flanges vertically and horizontally is significantly easier than doing so in a flat position. To simplify the process further, he divides the task into two or three steps as suggested by fellow expert “for for.” This approach not only makes it more manageable but also allows for greater precision in crafting each component.Step 2: Applying Glue and Securing
Sven proceeds to apply glue along one edge of the flange, ensuring a secure bond when clamped into place. He emphasizes that this stage is crucial for maintaining the structural integrity of the flange, which in turn safeguards the living area beneath the canvas when hatches are open.Step 3: Allowing Time to Dry
After securely attaching the first portion of the flange, Sven allows ample time for it to dry before moving forward with additional steps. This patience and precision are key aspects of his successful boatbuilding methods.Step 4: Finishing Touches
Once the flange is fully dried, Sven removes the clamps carefully, ensuring no damage occurs during this process. He then moves on to attaching four more pieces onto these main frames, completing two pairs of flanges for the bulkhead hatches.The Final Touches
While two flanges form the primary support structure around the hatches, Sven mentions there are two additional pieces required at each end to ensure comprehensive protection. This attention to detail highlights his commitment to producing a durable and reliable design. “Sailing is about finding your path, whether it’s across an ocean or within yourself.” – Sven Yrvind In conclusion, making flanges around bulkhead hatches may seem complex at first glance, but by following Sven Yrvind’s meticulous process, enthusiasts can achieve professional-level results. Remember that the journey of boatbuilding is as rewarding as reaching your destination; it tests one’s patience and dedication. For those seeking to embark on this adventure or simply gain more insight into marine craftsmanship, Sven’s wisdom is invaluable.Sven Yrvind, a renowned yacht designer and sailor, shares valuable insights on creating flanges around bulkhead hatches for canvas protection in this enlightening video. By following his expert guidance, boat enthusiasts can ensure their living areas remain secure while allowing unhindered access through the hatches.Step 1: Starting with the Flange
Sven begins by explaining that working on flanges vertically and horizontally is significantly easier than doing so in a flat position. To simplify the process further, he divides the task into two or three steps as suggested by fellow expert “for for.” This approach not only makes it more manageable but also allows for greater precision in crafting each component.Step 2: Applying Glue and Securing
Sven proceeds to apply glue along one edge of the flange, ensuring a secure bond when clamped into place. He emphasizes that this stage is crucial for maintaining the structural integrity of the flange, which in turn safeguards the living area beneath the canvas when hatches are open.Step 3: Allowing Time to Dry
After securely attaching the first portion of the flange, Sven allows ample time for it to dry before moving forward with additional steps. This patience and precision are key aspects of his successful boatbuilding methods.Step 4: Finishing Touches
Once the flange is fully dried, Sven removes the clamps carefully, ensuring no damage occurs during this process. He then moves on to attaching four more pieces onto these main frames, completing two pairs of flanges for the bulkhead hatches.The Final Touches
While two flanges form the primary support structure around the hatches, Sven mentions there are two additional pieces required at each end to ensure comprehensive protection. This attention to detail highlights his commitment to producing a durable and reliable design. “Sailing is about finding your path, whether it’s across an ocean or within yourself.” – Sven Yrvind In conclusion, making flanges around bulkhead hatches may seem complex at first glance, but by following Sven Yrvind’s meticulous process, enthusiasts can achieve professional-level results. Remember that the journey of boatbuilding is as rewarding as reaching your destination; it tests one’s patience and dedication. For those seeking to embark on this adventure or simply gain more insight into marine craftsmanship, Sven’s wisdom is invaluable.Making Flanges Around Bulkhead Hatches for Canvas
Sven Yrvind, a renowned yacht designer and sailor, shares valuable insights on creating flanges around bulkhead hatches for canvas protection in this enlightening video. By following his expert guidance, boat enthusiasts can ensure their living areas remain secure while allowing unhindered access through the hatches.Step 1: Starting with the Flange
Sven begins by explaining that working on flanges vertically and horizontally is significantly easier than doing so in a flat position. To simplify the process further, he divides the task into two or three steps as suggested by fellow expert “for for.” This approach not only makes it more manageable but also allows for greater precision in crafting each component.Step 2: Applying Glue and Securing
Sven proceeds to apply glue along one edge of the flange, ensuring a secure bond when clamped into place. He emphasizes that this stage is crucial for maintaining the structural integrity of the flange, which in turn safeguards the living area beneath the canvas when hatches are open.Step 3: Allowing Time to Dry
After securely attaching the first portion of the flange, Sven allows ample time for it to dry before moving forward with additional steps. This patience and precision are key aspects of his successful boatbuilding methods.Step 4: Finishing Touches
Once the flange is fully dried, Sven removes the clamps carefully, ensuring no damage occurs during this process. He then moves on to attaching four more pieces onto these main frames, completing two pairs of flanges for the bulkhead hatches.The Final Touches
While two flanges form the primary support structure around the hatches, Sven mentions there are two additional pieces required at each end to ensure comprehensive protection. This attention to detail highlights his commitment to producing a durable and reliable design. “Sailing is about finding your path, whether it’s across an ocean or within yourself.” – Sven Yrvind In conclusion, making flanges around bulkhead hatches may seem complex at first glance, but by following Sven Yrvind’s meticulous process, enthusiasts can achieve professional-level results. Remember that the journey of boatbuilding is as rewarding as reaching your destination; it tests one’s patience and dedication. For those seeking to embark on this adventure or simply gain more insight into marine craftsmanship, Sven’s wisdom is invaluable.Sven proceeds to apply glue along one edge of the flange, ensuring a secure bond when clamped into place. He emphasizes that this stage is crucial for maintaining the structural integrity of the flange, which in turn safeguards the living area beneath the canvas when hatches are open.Step 3: Allowing Time to Dry
After securely attaching the first portion of the flange, Sven allows ample time for it to dry before moving forward with additional steps. This patience and precision are key aspects of his successful boatbuilding methods.Step 4: Finishing Touches
Once the flange is fully dried, Sven removes the clamps carefully, ensuring no damage occurs during this process. He then moves on to attaching four more pieces onto these main frames, completing two pairs of flanges for the bulkhead hatches.The Final Touches
While two flanges form the primary support structure around the hatches, Sven mentions there are two additional pieces required at each end to ensure comprehensive protection. This attention to detail highlights his commitment to producing a durable and reliable design. “Sailing is about finding your path, whether it’s across an ocean or within yourself.” – Sven Yrvind In conclusion, making flanges around bulkhead hatches may seem complex at first glance, but by following Sven Yrvind’s meticulous process, enthusiasts can achieve professional-level results. Remember that the journey of boatbuilding is as rewarding as reaching your destination; it tests one’s patience and dedication. For those seeking to embark on this adventure or simply gain more insight into marine craftsmanship, Sven’s wisdom is invaluable.Sven begins by explaining that working on flanges vertically and horizontally is significantly easier than doing so in a flat position. To simplify the process further, he divides the task into two or three steps as suggested by fellow expert “for for.” This approach not only makes it more manageable but also allows for greater precision in crafting each component.Step 2: Applying Glue and Securing
Sven proceeds to apply glue along one edge of the flange, ensuring a secure bond when clamped into place. He emphasizes that this stage is crucial for maintaining the structural integrity of the flange, which in turn safeguards the living area beneath the canvas when hatches are open.Step 3: Allowing Time to Dry
After securely attaching the first portion of the flange, Sven allows ample time for it to dry before moving forward with additional steps. This patience and precision are key aspects of his successful boatbuilding methods.Step 4: Finishing Touches
Once the flange is fully dried, Sven removes the clamps carefully, ensuring no damage occurs during this process. He then moves on to attaching four more pieces onto these main frames, completing two pairs of flanges for the bulkhead hatches.The Final Touches
While two flanges form the primary support structure around the hatches, Sven mentions there are two additional pieces required at each end to ensure comprehensive protection. This attention to detail highlights his commitment to producing a durable and reliable design. “Sailing is about finding your path, whether it’s across an ocean or within yourself.” – Sven Yrvind In conclusion, making flanges around bulkhead hatches may seem complex at first glance, but by following Sven Yrvind’s meticulous process, enthusiasts can achieve professional-level results. Remember that the journey of boatbuilding is as rewarding as reaching your destination; it tests one’s patience and dedication. For those seeking to embark on this adventure or simply gain more insight into marine craftsmanship, Sven’s wisdom is invaluable.Sven Yrvind, a renowned yacht designer and sailor, shares valuable insights on creating flanges around bulkhead hatches for canvas protection in this enlightening video. By following his expert guidance, boat enthusiasts can ensure their living areas remain secure while allowing unhindered access through the hatches.Step 1: Starting with the Flange
Sven begins by explaining that working on flanges vertically and horizontally is significantly easier than doing so in a flat position. To simplify the process further, he divides the task into two or three steps as suggested by fellow expert “for for.” This approach not only makes it more manageable but also allows for greater precision in crafting each component.Step 2: Applying Glue and Securing
Sven proceeds to apply glue along one edge of the flange, ensuring a secure bond when clamped into place. He emphasizes that this stage is crucial for maintaining the structural integrity of the flange, which in turn safeguards the living area beneath the canvas when hatches are open.Step 3: Allowing Time to Dry
After securely attaching the first portion of the flange, Sven allows ample time for it to dry before moving forward with additional steps. This patience and precision are key aspects of his successful boatbuilding methods.Step 4: Finishing Touches
Once the flange is fully dried, Sven removes the clamps carefully, ensuring no damage occurs during this process. He then moves on to attaching four more pieces onto these main frames, completing two pairs of flanges for the bulkhead hatches.The Final Touches
While two flanges form the primary support structure around the hatches, Sven mentions there are two additional pieces required at each end to ensure comprehensive protection. This attention to detail highlights his commitment to producing a durable and reliable design. “Sailing is about finding your path, whether it’s across an ocean or within yourself.” – Sven Yrvind In conclusion, making flanges around bulkhead hatches may seem complex at first glance, but by following Sven Yrvind’s meticulous process, enthusiasts can achieve professional-level results. Remember that the journey of boatbuilding is as rewarding as reaching your destination; it tests one’s patience and dedication. For those seeking to embark on this adventure or simply gain more insight into marine craftsmanship, Sven’s wisdom is invaluable.Making Flanges Around Bulkhead Hatches for Canvas
Sven Yrvind, a renowned yacht designer and sailor, shares valuable insights on creating flanges around bulkhead hatches for canvas protection in this enlightening video. By following his expert guidance, boat enthusiasts can ensure their living areas remain secure while allowing unhindered access through the hatches.Step 1: Starting with the Flange
Sven begins by explaining that working on flanges vertically and horizontally is significantly easier than doing so in a flat position. To simplify the process further, he divides the task into two or three steps as suggested by fellow expert “for for.” This approach not only makes it more manageable but also allows for greater precision in crafting each component.Step 2: Applying Glue and Securing
Sven proceeds to apply glue along one edge of the flange, ensuring a secure bond when clamped into place. He emphasizes that this stage is crucial for maintaining the structural integrity of the flange, which in turn safeguards the living area beneath the canvas when hatches are open.Step 3: Allowing Time to Dry
After securely attaching the first portion of the flange, Sven allows ample time for it to dry before moving forward with additional steps. This patience and precision are key aspects of his successful boatbuilding methods.Step 4: Finishing Touches
Once the flange is fully dried, Sven removes the clamps carefully, ensuring no damage occurs during this process. He then moves on to attaching four more pieces onto these main frames, completing two pairs of flanges for the bulkhead hatches.The Final Touches
While two flanges form the primary support structure around the hatches, Sven mentions there are two additional pieces required at each end to ensure comprehensive protection. This attention to detail highlights his commitment to producing a durable and reliable design. “Sailing is about finding your path, whether it’s across an ocean or within yourself.” – Sven Yrvind In conclusion, making flanges around bulkhead hatches may seem complex at first glance, but by following Sven Yrvind’s meticulous process, enthusiasts can achieve professional-level results. Remember that the journey of boatbuilding is as rewarding as reaching your destination; it tests one’s patience and dedication. For those seeking to embark on this adventure or simply gain more insight into marine craftsmanship, Sven’s wisdom is invaluable.Once the flange is fully dried, Sven removes the clamps carefully, ensuring no damage occurs during this process. He then moves on to attaching four more pieces onto these main frames, completing two pairs of flanges for the bulkhead hatches.The Final Touches
While two flanges form the primary support structure around the hatches, Sven mentions there are two additional pieces required at each end to ensure comprehensive protection. This attention to detail highlights his commitment to producing a durable and reliable design. “Sailing is about finding your path, whether it’s across an ocean or within yourself.” – Sven Yrvind In conclusion, making flanges around bulkhead hatches may seem complex at first glance, but by following Sven Yrvind’s meticulous process, enthusiasts can achieve professional-level results. Remember that the journey of boatbuilding is as rewarding as reaching your destination; it tests one’s patience and dedication. For those seeking to embark on this adventure or simply gain more insight into marine craftsmanship, Sven’s wisdom is invaluable.Sven proceeds to apply glue along one edge of the flange, ensuring a secure bond when clamped into place. He emphasizes that this stage is crucial for maintaining the structural integrity of the flange, which in turn safeguards the living area beneath the canvas when hatches are open.Step 3: Allowing Time to Dry
After securely attaching the first portion of the flange, Sven allows ample time for it to dry before moving forward with additional steps. This patience and precision are key aspects of his successful boatbuilding methods.Step 4: Finishing Touches
Once the flange is fully dried, Sven removes the clamps carefully, ensuring no damage occurs during this process. He then moves on to attaching four more pieces onto these main frames, completing two pairs of flanges for the bulkhead hatches.The Final Touches
While two flanges form the primary support structure around the hatches, Sven mentions there are two additional pieces required at each end to ensure comprehensive protection. This attention to detail highlights his commitment to producing a durable and reliable design. “Sailing is about finding your path, whether it’s across an ocean or within yourself.” – Sven Yrvind In conclusion, making flanges around bulkhead hatches may seem complex at first glance, but by following Sven Yrvind’s meticulous process, enthusiasts can achieve professional-level results. Remember that the journey of boatbuilding is as rewarding as reaching your destination; it tests one’s patience and dedication. For those seeking to embark on this adventure or simply gain more insight into marine craftsmanship, Sven’s wisdom is invaluable.Sven begins by explaining that working on flanges vertically and horizontally is significantly easier than doing so in a flat position. To simplify the process further, he divides the task into two or three steps as suggested by fellow expert “for for.” This approach not only makes it more manageable but also allows for greater precision in crafting each component.Step 2: Applying Glue and Securing
Sven proceeds to apply glue along one edge of the flange, ensuring a secure bond when clamped into place. He emphasizes that this stage is crucial for maintaining the structural integrity of the flange, which in turn safeguards the living area beneath the canvas when hatches are open.Step 3: Allowing Time to Dry
After securely attaching the first portion of the flange, Sven allows ample time for it to dry before moving forward with additional steps. This patience and precision are key aspects of his successful boatbuilding methods.Step 4: Finishing Touches
Once the flange is fully dried, Sven removes the clamps carefully, ensuring no damage occurs during this process. He then moves on to attaching four more pieces onto these main frames, completing two pairs of flanges for the bulkhead hatches.The Final Touches
While two flanges form the primary support structure around the hatches, Sven mentions there are two additional pieces required at each end to ensure comprehensive protection. This attention to detail highlights his commitment to producing a durable and reliable design. “Sailing is about finding your path, whether it’s across an ocean or within yourself.” – Sven Yrvind In conclusion, making flanges around bulkhead hatches may seem complex at first glance, but by following Sven Yrvind’s meticulous process, enthusiasts can achieve professional-level results. Remember that the journey of boatbuilding is as rewarding as reaching your destination; it tests one’s patience and dedication. For those seeking to embark on this adventure or simply gain more insight into marine craftsmanship, Sven’s wisdom is invaluable.Sven Yrvind, a renowned yacht designer and sailor, shares valuable insights on creating flanges around bulkhead hatches for canvas protection in this enlightening video. By following his expert guidance, boat enthusiasts can ensure their living areas remain secure while allowing unhindered access through the hatches.Step 1: Starting with the Flange
Sven begins by explaining that working on flanges vertically and horizontally is significantly easier than doing so in a flat position. To simplify the process further, he divides the task into two or three steps as suggested by fellow expert “for for.” This approach not only makes it more manageable but also allows for greater precision in crafting each component.Step 2: Applying Glue and Securing
Sven proceeds to apply glue along one edge of the flange, ensuring a secure bond when clamped into place. He emphasizes that this stage is crucial for maintaining the structural integrity of the flange, which in turn safeguards the living area beneath the canvas when hatches are open.Step 3: Allowing Time to Dry
After securely attaching the first portion of the flange, Sven allows ample time for it to dry before moving forward with additional steps. This patience and precision are key aspects of his successful boatbuilding methods.Step 4: Finishing Touches
Once the flange is fully dried, Sven removes the clamps carefully, ensuring no damage occurs during this process. He then moves on to attaching four more pieces onto these main frames, completing two pairs of flanges for the bulkhead hatches.The Final Touches
While two flanges form the primary support structure around the hatches, Sven mentions there are two additional pieces required at each end to ensure comprehensive protection. This attention to detail highlights his commitment to producing a durable and reliable design. “Sailing is about finding your path, whether it’s across an ocean or within yourself.” – Sven Yrvind In conclusion, making flanges around bulkhead hatches may seem complex at first glance, but by following Sven Yrvind’s meticulous process, enthusiasts can achieve professional-level results. Remember that the journey of boatbuilding is as rewarding as reaching your destination; it tests one’s patience and dedication. For those seeking to embark on this adventure or simply gain more insight into marine craftsmanship, Sven’s wisdom is invaluable.Making Flanges Around Bulkhead Hatches for Canvas
Sven Yrvind, a renowned yacht designer and sailor, shares valuable insights on creating flanges around bulkhead hatches for canvas protection in this enlightening video. By following his expert guidance, boat enthusiasts can ensure their living areas remain secure while allowing unhindered access through the hatches.Step 1: Starting with the Flange
Sven begins by explaining that working on flanges vertically and horizontally is significantly easier than doing so in a flat position. To simplify the process further, he divides the task into two or three steps as suggested by fellow expert “for for.” This approach not only makes it more manageable but also allows for greater precision in crafting each component.Step 2: Applying Glue and Securing
Sven proceeds to apply glue along one edge of the flange, ensuring a secure bond when clamped into place. He emphasizes that this stage is crucial for maintaining the structural integrity of the flange, which in turn safeguards the living area beneath the canvas when hatches are open.Step 3: Allowing Time to Dry
After securely attaching the first portion of the flange, Sven allows ample time for it to dry before moving forward with additional steps. This patience and precision are key aspects of his successful boatbuilding methods.Step 4: Finishing Touches
Once the flange is fully dried, Sven removes the clamps carefully, ensuring no damage occurs during this process. He then moves on to attaching four more pieces onto these main frames, completing two pairs of flanges for the bulkhead hatches.The Final Touches
While two flanges form the primary support structure around the hatches, Sven mentions there are two additional pieces required at each end to ensure comprehensive protection. This attention to detail highlights his commitment to producing a durable and reliable design. “Sailing is about finding your path, whether it’s across an ocean or within yourself.” – Sven Yrvind In conclusion, making flanges around bulkhead hatches may seem complex at first glance, but by following Sven Yrvind’s meticulous process, enthusiasts can achieve professional-level results. Remember that the journey of boatbuilding is as rewarding as reaching your destination; it tests one’s patience and dedication. For those seeking to embark on this adventure or simply gain more insight into marine craftsmanship, Sven’s wisdom is invaluable.After securely attaching the first portion of the flange, Sven allows ample time for it to dry before moving forward with additional steps. This patience and precision are key aspects of his successful boatbuilding methods.Step 4: Finishing Touches
Once the flange is fully dried, Sven removes the clamps carefully, ensuring no damage occurs during this process. He then moves on to attaching four more pieces onto these main frames, completing two pairs of flanges for the bulkhead hatches.The Final Touches
While two flanges form the primary support structure around the hatches, Sven mentions there are two additional pieces required at each end to ensure comprehensive protection. This attention to detail highlights his commitment to producing a durable and reliable design. “Sailing is about finding your path, whether it’s across an ocean or within yourself.” – Sven Yrvind In conclusion, making flanges around bulkhead hatches may seem complex at first glance, but by following Sven Yrvind’s meticulous process, enthusiasts can achieve professional-level results. Remember that the journey of boatbuilding is as rewarding as reaching your destination; it tests one’s patience and dedication. For those seeking to embark on this adventure or simply gain more insight into marine craftsmanship, Sven’s wisdom is invaluable.Sven proceeds to apply glue along one edge of the flange, ensuring a secure bond when clamped into place. He emphasizes that this stage is crucial for maintaining the structural integrity of the flange, which in turn safeguards the living area beneath the canvas when hatches are open.Step 3: Allowing Time to Dry
After securely attaching the first portion of the flange, Sven allows ample time for it to dry before moving forward with additional steps. This patience and precision are key aspects of his successful boatbuilding methods.Step 4: Finishing Touches
Once the flange is fully dried, Sven removes the clamps carefully, ensuring no damage occurs during this process. He then moves on to attaching four more pieces onto these main frames, completing two pairs of flanges for the bulkhead hatches.The Final Touches
While two flanges form the primary support structure around the hatches, Sven mentions there are two additional pieces required at each end to ensure comprehensive protection. This attention to detail highlights his commitment to producing a durable and reliable design. “Sailing is about finding your path, whether it’s across an ocean or within yourself.” – Sven Yrvind In conclusion, making flanges around bulkhead hatches may seem complex at first glance, but by following Sven Yrvind’s meticulous process, enthusiasts can achieve professional-level results. Remember that the journey of boatbuilding is as rewarding as reaching your destination; it tests one’s patience and dedication. For those seeking to embark on this adventure or simply gain more insight into marine craftsmanship, Sven’s wisdom is invaluable.Sven begins by explaining that working on flanges vertically and horizontally is significantly easier than doing so in a flat position. To simplify the process further, he divides the task into two or three steps as suggested by fellow expert “for for.” This approach not only makes it more manageable but also allows for greater precision in crafting each component.Step 2: Applying Glue and Securing
Sven proceeds to apply glue along one edge of the flange, ensuring a secure bond when clamped into place. He emphasizes that this stage is crucial for maintaining the structural integrity of the flange, which in turn safeguards the living area beneath the canvas when hatches are open.Step 3: Allowing Time to Dry
After securely attaching the first portion of the flange, Sven allows ample time for it to dry before moving forward with additional steps. This patience and precision are key aspects of his successful boatbuilding methods.Step 4: Finishing Touches
Once the flange is fully dried, Sven removes the clamps carefully, ensuring no damage occurs during this process. He then moves on to attaching four more pieces onto these main frames, completing two pairs of flanges for the bulkhead hatches.The Final Touches
While two flanges form the primary support structure around the hatches, Sven mentions there are two additional pieces required at each end to ensure comprehensive protection. This attention to detail highlights his commitment to producing a durable and reliable design. “Sailing is about finding your path, whether it’s across an ocean or within yourself.” – Sven Yrvind In conclusion, making flanges around bulkhead hatches may seem complex at first glance, but by following Sven Yrvind’s meticulous process, enthusiasts can achieve professional-level results. Remember that the journey of boatbuilding is as rewarding as reaching your destination; it tests one’s patience and dedication. For those seeking to embark on this adventure or simply gain more insight into marine craftsmanship, Sven’s wisdom is invaluable.Sven Yrvind, a renowned yacht designer and sailor, shares valuable insights on creating flanges around bulkhead hatches for canvas protection in this enlightening video. By following his expert guidance, boat enthusiasts can ensure their living areas remain secure while allowing unhindered access through the hatches.Step 1: Starting with the Flange
Sven begins by explaining that working on flanges vertically and horizontally is significantly easier than doing so in a flat position. To simplify the process further, he divides the task into two or three steps as suggested by fellow expert “for for.” This approach not only makes it more manageable but also allows for greater precision in crafting each component.Step 2: Applying Glue and Securing
Sven proceeds to apply glue along one edge of the flange, ensuring a secure bond when clamped into place. He emphasizes that this stage is crucial for maintaining the structural integrity of the flange, which in turn safeguards the living area beneath the canvas when hatches are open.Step 3: Allowing Time to Dry
After securely attaching the first portion of the flange, Sven allows ample time for it to dry before moving forward with additional steps. This patience and precision are key aspects of his successful boatbuilding methods.Step 4: Finishing Touches
Once the flange is fully dried, Sven removes the clamps carefully, ensuring no damage occurs during this process. He then moves on to attaching four more pieces onto these main frames, completing two pairs of flanges for the bulkhead hatches.The Final Touches
While two flanges form the primary support structure around the hatches, Sven mentions there are two additional pieces required at each end to ensure comprehensive protection. This attention to detail highlights his commitment to producing a durable and reliable design. “Sailing is about finding your path, whether it’s across an ocean or within yourself.” – Sven Yrvind In conclusion, making flanges around bulkhead hatches may seem complex at first glance, but by following Sven Yrvind’s meticulous process, enthusiasts can achieve professional-level results. Remember that the journey of boatbuilding is as rewarding as reaching your destination; it tests one’s patience and dedication. For those seeking to embark on this adventure or simply gain more insight into marine craftsmanship, Sven’s wisdom is invaluable.Making Flanges Around Bulkhead Hatches for Canvas
Sven Yrvind, a renowned yacht designer and sailor, shares valuable insights on creating flanges around bulkhead hatches for canvas protection in this enlightening video. By following his expert guidance, boat enthusiasts can ensure their living areas remain secure while allowing unhindered access through the hatches.Step 1: Starting with the Flange
Sven begins by explaining that working on flanges vertically and horizontally is significantly easier than doing so in a flat position. To simplify the process further, he divides the task into two or three steps as suggested by fellow expert “for for.” This approach not only makes it more manageable but also allows for greater precision in crafting each component.Step 2: Applying Glue and Securing
Sven proceeds to apply glue along one edge of the flange, ensuring a secure bond when clamped into place. He emphasizes that this stage is crucial for maintaining the structural integrity of the flange, which in turn safeguards the living area beneath the canvas when hatches are open.Step 3: Allowing Time to Dry
After securely attaching the first portion of the flange, Sven allows ample time for it to dry before moving forward with additional steps. This patience and precision are key aspects of his successful boatbuilding methods.Step 4: Finishing Touches
Once the flange is fully dried, Sven removes the clamps carefully, ensuring no damage occurs during this process. He then moves on to attaching four more pieces onto these main frames, completing two pairs of flanges for the bulkhead hatches.The Final Touches
While two flanges form the primary support structure around the hatches, Sven mentions there are two additional pieces required at each end to ensure comprehensive protection. This attention to detail highlights his commitment to producing a durable and reliable design. “Sailing is about finding your path, whether it’s across an ocean or within yourself.” – Sven Yrvind In conclusion, making flanges around bulkhead hatches may seem complex at first glance, but by following Sven Yrvind’s meticulous process, enthusiasts can achieve professional-level results. Remember that the journey of boatbuilding is as rewarding as reaching your destination; it tests one’s patience and dedication. For those seeking to embark on this adventure or simply gain more insight into marine craftsmanship, Sven’s wisdom is invaluable.Once the flange is fully dried, Sven removes the clamps carefully, ensuring no damage occurs during this process. He then moves on to attaching four more pieces onto these main frames, completing two pairs of flanges for the bulkhead hatches.The Final Touches
While two flanges form the primary support structure around the hatches, Sven mentions there are two additional pieces required at each end to ensure comprehensive protection. This attention to detail highlights his commitment to producing a durable and reliable design. “Sailing is about finding your path, whether it’s across an ocean or within yourself.” – Sven Yrvind In conclusion, making flanges around bulkhead hatches may seem complex at first glance, but by following Sven Yrvind’s meticulous process, enthusiasts can achieve professional-level results. Remember that the journey of boatbuilding is as rewarding as reaching your destination; it tests one’s patience and dedication. For those seeking to embark on this adventure or simply gain more insight into marine craftsmanship, Sven’s wisdom is invaluable.After securely attaching the first portion of the flange, Sven allows ample time for it to dry before moving forward with additional steps. This patience and precision are key aspects of his successful boatbuilding methods.Step 4: Finishing Touches
Once the flange is fully dried, Sven removes the clamps carefully, ensuring no damage occurs during this process. He then moves on to attaching four more pieces onto these main frames, completing two pairs of flanges for the bulkhead hatches.The Final Touches
While two flanges form the primary support structure around the hatches, Sven mentions there are two additional pieces required at each end to ensure comprehensive protection. This attention to detail highlights his commitment to producing a durable and reliable design. “Sailing is about finding your path, whether it’s across an ocean or within yourself.” – Sven Yrvind In conclusion, making flanges around bulkhead hatches may seem complex at first glance, but by following Sven Yrvind’s meticulous process, enthusiasts can achieve professional-level results. Remember that the journey of boatbuilding is as rewarding as reaching your destination; it tests one’s patience and dedication. For those seeking to embark on this adventure or simply gain more insight into marine craftsmanship, Sven’s wisdom is invaluable.Sven proceeds to apply glue along one edge of the flange, ensuring a secure bond when clamped into place. He emphasizes that this stage is crucial for maintaining the structural integrity of the flange, which in turn safeguards the living area beneath the canvas when hatches are open.Step 3: Allowing Time to Dry
After securely attaching the first portion of the flange, Sven allows ample time for it to dry before moving forward with additional steps. This patience and precision are key aspects of his successful boatbuilding methods.Step 4: Finishing Touches
Once the flange is fully dried, Sven removes the clamps carefully, ensuring no damage occurs during this process. He then moves on to attaching four more pieces onto these main frames, completing two pairs of flanges for the bulkhead hatches.The Final Touches
While two flanges form the primary support structure around the hatches, Sven mentions there are two additional pieces required at each end to ensure comprehensive protection. This attention to detail highlights his commitment to producing a durable and reliable design. “Sailing is about finding your path, whether it’s across an ocean or within yourself.” – Sven Yrvind In conclusion, making flanges around bulkhead hatches may seem complex at first glance, but by following Sven Yrvind’s meticulous process, enthusiasts can achieve professional-level results. Remember that the journey of boatbuilding is as rewarding as reaching your destination; it tests one’s patience and dedication. For those seeking to embark on this adventure or simply gain more insight into marine craftsmanship, Sven’s wisdom is invaluable.Sven begins by explaining that working on flanges vertically and horizontally is significantly easier than doing so in a flat position. To simplify the process further, he divides the task into two or three steps as suggested by fellow expert “for for.” This approach not only makes it more manageable but also allows for greater precision in crafting each component.Step 2: Applying Glue and Securing
Sven proceeds to apply glue along one edge of the flange, ensuring a secure bond when clamped into place. He emphasizes that this stage is crucial for maintaining the structural integrity of the flange, which in turn safeguards the living area beneath the canvas when hatches are open.Step 3: Allowing Time to Dry
After securely attaching the first portion of the flange, Sven allows ample time for it to dry before moving forward with additional steps. This patience and precision are key aspects of his successful boatbuilding methods.Step 4: Finishing Touches
Once the flange is fully dried, Sven removes the clamps carefully, ensuring no damage occurs during this process. He then moves on to attaching four more pieces onto these main frames, completing two pairs of flanges for the bulkhead hatches.The Final Touches
While two flanges form the primary support structure around the hatches, Sven mentions there are two additional pieces required at each end to ensure comprehensive protection. This attention to detail highlights his commitment to producing a durable and reliable design. “Sailing is about finding your path, whether it’s across an ocean or within yourself.” – Sven Yrvind In conclusion, making flanges around bulkhead hatches may seem complex at first glance, but by following Sven Yrvind’s meticulous process, enthusiasts can achieve professional-level results. Remember that the journey of boatbuilding is as rewarding as reaching your destination; it tests one’s patience and dedication. For those seeking to embark on this adventure or simply gain more insight into marine craftsmanship, Sven’s wisdom is invaluable.Sven Yrvind, a renowned yacht designer and sailor, shares valuable insights on creating flanges around bulkhead hatches for canvas protection in this enlightening video. By following his expert guidance, boat enthusiasts can ensure their living areas remain secure while allowing unhindered access through the hatches.Step 1: Starting with the Flange
Sven begins by explaining that working on flanges vertically and horizontally is significantly easier than doing so in a flat position. To simplify the process further, he divides the task into two or three steps as suggested by fellow expert “for for.” This approach not only makes it more manageable but also allows for greater precision in crafting each component.Step 2: Applying Glue and Securing
Sven proceeds to apply glue along one edge of the flange, ensuring a secure bond when clamped into place. He emphasizes that this stage is crucial for maintaining the structural integrity of the flange, which in turn safeguards the living area beneath the canvas when hatches are open.Step 3: Allowing Time to Dry
After securely attaching the first portion of the flange, Sven allows ample time for it to dry before moving forward with additional steps. This patience and precision are key aspects of his successful boatbuilding methods.Step 4: Finishing Touches
Once the flange is fully dried, Sven removes the clamps carefully, ensuring no damage occurs during this process. He then moves on to attaching four more pieces onto these main frames, completing two pairs of flanges for the bulkhead hatches.The Final Touches
While two flanges form the primary support structure around the hatches, Sven mentions there are two additional pieces required at each end to ensure comprehensive protection. This attention to detail highlights his commitment to producing a durable and reliable design. “Sailing is about finding your path, whether it’s across an ocean or within yourself.” – Sven Yrvind In conclusion, making flanges around bulkhead hatches may seem complex at first glance, but by following Sven Yrvind’s meticulous process, enthusiasts can achieve professional-level results. Remember that the journey of boatbuilding is as rewarding as reaching your destination; it tests one’s patience and dedication. For those seeking to embark on this adventure or simply gain more insight into marine craftsmanship, Sven’s wisdom is invaluable.Making Flanges Around Bulkhead Hatches for Canvas
Sven Yrvind, a renowned yacht designer and sailor, shares valuable insights on creating flanges around bulkhead hatches for canvas protection in this enlightening video. By following his expert guidance, boat enthusiasts can ensure their living areas remain secure while allowing unhindered access through the hatches.Step 1: Starting with the Flange
Sven begins by explaining that working on flanges vertically and horizontally is significantly easier than doing so in a flat position. To simplify the process further, he divides the task into two or three steps as suggested by fellow expert “for for.” This approach not only makes it more manageable but also allows for greater precision in crafting each component.Step 2: Applying Glue and Securing
Sven proceeds to apply glue along one edge of the flange, ensuring a secure bond when clamped into place. He emphasizes that this stage is crucial for maintaining the structural integrity of the flange, which in turn safeguards the living area beneath the canvas when hatches are open.Step 3: Allowing Time to Dry
After securely attaching the first portion of the flange, Sven allows ample time for it to dry before moving forward with additional steps. This patience and precision are key aspects of his successful boatbuilding methods.Step 4: Finishing Touches
Once the flange is fully dried, Sven removes the clamps carefully, ensuring no damage occurs during this process. He then moves on to attaching four more pieces onto these main frames, completing two pairs of flanges for the bulkhead hatches.The Final Touches
While two flanges form the primary support structure around the hatches, Sven mentions there are two additional pieces required at each end to ensure comprehensive protection. This attention to detail highlights his commitment to producing a durable and reliable design. “Sailing is about finding your path, whether it’s across an ocean or within yourself.” – Sven Yrvind In conclusion, making flanges around bulkhead hatches may seem complex at first glance, but by following Sven Yrvind’s meticulous process, enthusiasts can achieve professional-level results. Remember that the journey of boatbuilding is as rewarding as reaching your destination; it tests one’s patience and dedication. For those seeking to embark on this adventure or simply gain more insight into marine craftsmanship, Sven’s wisdom is invaluable.After securely attaching the first portion of the flange, Sven allows ample time for it to dry before moving forward with additional steps. This patience and precision are key aspects of his successful boatbuilding methods.Step 4: Finishing Touches
Once the flange is fully dried, Sven removes the clamps carefully, ensuring no damage occurs during this process. He then moves on to attaching four more pieces onto these main frames, completing two pairs of flanges for the bulkhead hatches.The Final Touches
While two flanges form the primary support structure around the hatches, Sven mentions there are two additional pieces required at each end to ensure comprehensive protection. This attention to detail highlights his commitment to producing a durable and reliable design. “Sailing is about finding your path, whether it’s across an ocean or within yourself.” – Sven Yrvind In conclusion, making flanges around bulkhead hatches may seem complex at first glance, but by following Sven Yrvind’s meticulous process, enthusiasts can achieve professional-level results. Remember that the journey of boatbuilding is as rewarding as reaching your destination; it tests one’s patience and dedication. For those seeking to embark on this adventure or simply gain more insight into marine craftsmanship, Sven’s wisdom is invaluable.Sven begins by explaining that working on flanges vertically and horizontally is significantly easier than doing so in a flat position. To simplify the process further, he divides the task into two or three steps as suggested by fellow expert “for for.” This approach not only makes it more manageable but also allows for greater precision in crafting each component.Step 2: Applying Glue and Securing
Sven proceeds to apply glue along one edge of the flange, ensuring a secure bond when clamped into place. He emphasizes that this stage is crucial for maintaining the structural integrity of the flange, which in turn safeguards the living area beneath the canvas when hatches are open.Step 3: Allowing Time to Dry
After securely attaching the first portion of the flange, Sven allows ample time for it to dry before moving forward with additional steps. This patience and precision are key aspects of his successful boatbuilding methods.Step 4: Finishing Touches
Once the flange is fully dried, Sven removes the clamps carefully, ensuring no damage occurs during this process. He then moves on to attaching four more pieces onto these main frames, completing two pairs of flanges for the bulkhead hatches.The Final Touches
While two flanges form the primary support structure around the hatches, Sven mentions there are two additional pieces required at each end to ensure comprehensive protection. This attention to detail highlights his commitment to producing a durable and reliable design. “Sailing is about finding your path, whether it’s across an ocean or within yourself.” – Sven Yrvind In conclusion, making flanges around bulkhead hatches may seem complex at first glance, but by following Sven Yrvind’s meticulous process, enthusiasts can achieve professional-level results. Remember that the journey of boatbuilding is as rewarding as reaching your destination; it tests one’s patience and dedication. For those seeking to embark on this adventure or simply gain more insight into marine craftsmanship, Sven’s wisdom is invaluable.Sven Yrvind, a renowned yacht designer and sailor, shares valuable insights on creating flanges around bulkhead hatches for canvas protection in this enlightening video. By following his expert guidance, boat enthusiasts can ensure their living areas remain secure while allowing unhindered access through the hatches.Step 1: Starting with the Flange
Sven begins by explaining that working on flanges vertically and horizontally is significantly easier than doing so in a flat position. To simplify the process further, he divides the task into two or three steps as suggested by fellow expert “for for.” This approach not only makes it more manageable but also allows for greater precision in crafting each component.Step 2: Applying Glue and Securing
Sven proceeds to apply glue along one edge of the flange, ensuring a secure bond when clamped into place. He emphasizes that this stage is crucial for maintaining the structural integrity of the flange, which in turn safeguards the living area beneath the canvas when hatches are open.Step 3: Allowing Time to Dry
After securely attaching the first portion of the flange, Sven allows ample time for it to dry before moving forward with additional steps. This patience and precision are key aspects of his successful boatbuilding methods.Step 4: Finishing Touches
Once the flange is fully dried, Sven removes the clamps carefully, ensuring no damage occurs during this process. He then moves on to attaching four more pieces onto these main frames, completing two pairs of flanges for the bulkhead hatches.The Final Touches
While two flanges form the primary support structure around the hatches, Sven mentions there are two additional pieces required at each end to ensure comprehensive protection. This attention to detail highlights his commitment to producing a durable and reliable design. “Sailing is about finding your path, whether it’s across an ocean or within yourself.” – Sven Yrvind In conclusion, making flanges around bulkhead hatches may seem complex at first glance, but by following Sven Yrvind’s meticulous process, enthusiasts can achieve professional-level results. Remember that the journey of boatbuilding is as rewarding as reaching your destination; it tests one’s patience and dedication. For those seeking to embark on this adventure or simply gain more insight into marine craftsmanship, Sven’s wisdom is invaluable.Making Flanges Around Bulkhead Hatches for Canvas
Sven Yrvind, a renowned yacht designer and sailor, shares valuable insights on creating flanges around bulkhead hatches for canvas protection in this enlightening video. By following his expert guidance, boat enthusiasts can ensure their living areas remain secure while allowing unhindered access through the hatches.Step 1: Starting with the Flange
Sven begins by explaining that working on flanges vertically and horizontally is significantly easier than doing so in a flat position. To simplify the process further, he divides the task into two or three steps as suggested by fellow expert “for for.” This approach not only makes it more manageable but also allows for greater precision in crafting each component.Step 2: Applying Glue and Securing
Sven proceeds to apply glue along one edge of the flange, ensuring a secure bond when clamped into place. He emphasizes that this stage is crucial for maintaining the structural integrity of the flange, which in turn safeguards the living area beneath the canvas when hatches are open.Step 3: Allowing Time to Dry
After securely attaching the first portion of the flange, Sven allows ample time for it to dry before moving forward with additional steps. This patience and precision are key aspects of his successful boatbuilding methods.Step 4: Finishing Touches
Once the flange is fully dried, Sven removes the clamps carefully, ensuring no damage occurs during this process. He then moves on to attaching four more pieces onto these main frames, completing two pairs of flanges for the bulkhead hatches.The Final Touches
While two flanges form the primary support structure around the hatches, Sven mentions there are two additional pieces required at each end to ensure comprehensive protection. This attention to detail highlights his commitment to producing a durable and reliable design. “Sailing is about finding your path, whether it’s across an ocean or within yourself.” – Sven Yrvind In conclusion, making flanges around bulkhead hatches may seem complex at first glance, but by following Sven Yrvind’s meticulous process, enthusiasts can achieve professional-level results. Remember that the journey of boatbuilding is as rewarding as reaching your destination; it tests one’s patience and dedication. For those seeking to embark on this adventure or simply gain more insight into marine craftsmanship, Sven’s wisdom is invaluable.Once the flange is fully dried, Sven removes the clamps carefully, ensuring no damage occurs during this process. He then moves on to attaching four more pieces onto these main frames, completing two pairs of flanges for the bulkhead hatches.The Final Touches
While two flanges form the primary support structure around the hatches, Sven mentions there are two additional pieces required at each end to ensure comprehensive protection. This attention to detail highlights his commitment to producing a durable and reliable design. “Sailing is about finding your path, whether it’s across an ocean or within yourself.” – Sven Yrvind In conclusion, making flanges around bulkhead hatches may seem complex at first glance, but by following Sven Yrvind’s meticulous process, enthusiasts can achieve professional-level results. Remember that the journey of boatbuilding is as rewarding as reaching your destination; it tests one’s patience and dedication. For those seeking to embark on this adventure or simply gain more insight into marine craftsmanship, Sven’s wisdom is invaluable.Making Flanges Around Bulkhead Hatches for Canvas
Sven Yrvind, a renowned yacht designer and sailor, shares valuable insights on creating flanges around bulkhead hatches for canvas protection in this enlightening video. By following his expert guidance, boat enthusiasts can ensure their living areas remain secure while allowing unhindered access through the hatches.Step 1: Starting with the Flange
Sven begins by explaining that working on flanges vertically and horizontally is significantly easier than doing so in a flat position. To simplify the process further, he divides the task into two or three steps as suggested by fellow expert “for for.” This approach not only makes it more manageable but also allows for greater precision in crafting each component.Step 2: Applying Glue and Securing
Sven proceeds to apply glue along one edge of the flange, ensuring a secure bond when clamped into place. He emphasizes that this stage is crucial for maintaining the structural integrity of the flange, which in turn safeguards the living area beneath the canvas when hatches are open.Step 3: Allowing Time to Dry
After securely attaching the first portion of the flange, Sven allows ample time for it to dry before moving forward with additional steps. This patience and precision are key aspects of his successful boatbuilding methods.Step 4: Finishing Touches
Once the flange is fully dried, Sven removes the clamps carefully, ensuring no damage occurs during this process. He then moves on to attaching four more pieces onto these main frames, completing two pairs of flanges for the bulkhead hatches.The Final Touches
While two flanges form the primary support structure around the hatches, Sven mentions there are two additional pieces required at each end to ensure comprehensive protection. This attention to detail highlights his commitment to producing a durable and reliable design. “Sailing is about finding your path, whether it’s across an ocean or within yourself.” – Sven Yrvind In conclusion, making flanges around bulkhead hatches may seem complex at first glance, but by following Sven Yrvind’s meticulous process, enthusiasts can achieve professional-level results. Remember that the journey of boatbuilding is as rewarding as reaching your destination; it tests one’s patience and dedication. For those seeking to embark on this adventure or simply gain more insight into marine craftsmanship, Sven’s wisdom is invaluable.After securely attaching the first portion of the flange, Sven allows ample time for it to dry before moving forward with additional steps. This patience and precision are key aspects of his successful boatbuilding methods.Step 4: Finishing Touches
Once the flange is fully dried, Sven removes the clamps carefully, ensuring no damage occurs during this process. He then moves on to attaching four more pieces onto these main frames, completing two pairs of flanges for the bulkhead hatches.The Final Touches
While two flanges form the primary support structure around the hatches, Sven mentions there are two additional pieces required at each end to ensure comprehensive protection. This attention to detail highlights his commitment to producing a durable and reliable design. “Sailing is about finding your path, whether it’s across an ocean or within yourself.” – Sven Yrvind In conclusion, making flanges around bulkhead hatches may seem complex at first glance, but by following Sven Yrvind’s meticulous process, enthusiasts can achieve professional-level results. Remember that the journey of boatbuilding is as rewarding as reaching your destination; it tests one’s patience and dedication. For those seeking to embark on this adventure or simply gain more insight into marine craftsmanship, Sven’s wisdom is invaluable.Making Flanges Around Bulkhead Hatches for Canvas
Sven Yrvind, a renowned yacht designer and sailor, shares valuable insights on creating flanges around bulkhead hatches for canvas protection in this enlightening video. By following his expert guidance, boat enthusiasts can ensure their living areas remain secure while allowing unhindered access through the hatches.Step 1: Starting with the Flange
Sven begins by explaining that working on flanges vertically and horizontally is significantly easier than doing so in a flat position. To simplify the process further, he divides the task into two or three steps as suggested by fellow expert “for for.” This approach not only makes it more manageable but also allows for greater precision in crafting each component.Step 2: Applying Glue and Securing
Sven proceeds to apply glue along one edge of the flange, ensuring a secure bond when clamped into place. He emphasizes that this stage is crucial for maintaining the structural integrity of the flange, which in turn safeguards the living area beneath the canvas when hatches are open.Step 3: Allowing Time to Dry
After securely attaching the first portion of the flange, Sven allows ample time for it to dry before moving forward with additional steps. This patience and precision are key aspects of his successful boatbuilding methods.Step 4: Finishing Touches
Once the flange is fully dried, Sven removes the clamps carefully, ensuring no damage occurs during this process. He then moves on to attaching four more pieces onto these main frames, completing two pairs of flanges for the bulkhead hatches.The Final Touches
While two flanges form the primary support structure around the hatches, Sven mentions there are two additional pieces required at each end to ensure comprehensive protection. This attention to detail highlights his commitment to producing a durable and reliable design. “Sailing is about finding your path, whether it’s across an ocean or within yourself.” – Sven Yrvind In conclusion, making flanges around bulkhead hatches may seem complex at first glance, but by following Sven Yrvind’s meticulous process, enthusiasts can achieve professional-level results. Remember that the journey of boatbuilding is as rewarding as reaching your destination; it tests one’s patience and dedication. For those seeking to embark on this adventure or simply gain more insight into marine craftsmanship, Sven’s wisdom is invaluable.Sven proceeds to apply glue along one edge of the flange, ensuring a secure bond when clamped into place. He emphasizes that this stage is crucial for maintaining the structural integrity of the flange, which in turn safeguards the living area beneath the canvas when hatches are open.Step 3: Allowing Time to Dry
After securely attaching the first portion of the flange, Sven allows ample time for it to dry before moving forward with additional steps. This patience and precision are key aspects of his successful boatbuilding methods.Step 4: Finishing Touches
Once the flange is fully dried, Sven removes the clamps carefully, ensuring no damage occurs during this process. He then moves on to attaching four more pieces onto these main frames, completing two pairs of flanges for the bulkhead hatches.The Final Touches
While two flanges form the primary support structure around the hatches, Sven mentions there are two additional pieces required at each end to ensure comprehensive protection. This attention to detail highlights his commitment to producing a durable and reliable design. “Sailing is about finding your path, whether it’s across an ocean or within yourself.” – Sven Yrvind In conclusion, making flanges around bulkhead hatches may seem complex at first glance, but by following Sven Yrvind’s meticulous process, enthusiasts can achieve professional-level results. Remember that the journey of boatbuilding is as rewarding as reaching your destination; it tests one’s patience and dedication. For those seeking to embark on this adventure or simply gain more insight into marine craftsmanship, Sven’s wisdom is invaluable.Making Flanges Around Bulkhead Hatches for Canvas
Sven Yrvind, a renowned yacht designer and sailor, shares valuable insights on creating flanges around bulkhead hatches for canvas protection in this enlightening video. By following his expert guidance, boat enthusiasts can ensure their living areas remain secure while allowing unhindered access through the hatches.Step 1: Starting with the Flange
Sven begins by explaining that working on flanges vertically and horizontally is significantly easier than doing so in a flat position. To simplify the process further, he divides the task into two or three steps as suggested by fellow expert “for for.” This approach not only makes it more manageable but also allows for greater precision in crafting each component.Step 2: Applying Glue and Securing
Sven proceeds to apply glue along one edge of the flange, ensuring a secure bond when clamped into place. He emphasizes that this stage is crucial for maintaining the structural integrity of the flange, which in turn safeguards the living area beneath the canvas when hatches are open.Step 3: Allowing Time to Dry
After securely attaching the first portion of the flange, Sven allows ample time for it to dry before moving forward with additional steps. This patience and precision are key aspects of his successful boatbuilding methods.Step 4: Finishing Touches
Once the flange is fully dried, Sven removes the clamps carefully, ensuring no damage occurs during this process. He then moves on to attaching four more pieces onto these main frames, completing two pairs of flanges for the bulkhead hatches.The Final Touches
While two flanges form the primary support structure around the hatches, Sven mentions there are two additional pieces required at each end to ensure comprehensive protection. This attention to detail highlights his commitment to producing a durable and reliable design. “Sailing is about finding your path, whether it’s across an ocean or within yourself.” – Sven Yrvind In conclusion, making flanges around bulkhead hatches may seem complex at first glance, but by following Sven Yrvind’s meticulous process, enthusiasts can achieve professional-level results. Remember that the journey of boatbuilding is as rewarding as reaching your destination; it tests one’s patience and dedication. For those seeking to embark on this adventure or simply gain more insight into marine craftsmanship, Sven’s wisdom is invaluable.Sven begins by explaining that working on flanges vertically and horizontally is significantly easier than doing so in a flat position. To simplify the process further, he divides the task into two or three steps as suggested by fellow expert “for for.” This approach not only makes it more manageable but also allows for greater precision in crafting each component.Step 2: Applying Glue and Securing
Sven proceeds to apply glue along one edge of the flange, ensuring a secure bond when clamped into place. He emphasizes that this stage is crucial for maintaining the structural integrity of the flange, which in turn safeguards the living area beneath the canvas when hatches are open.Step 3: Allowing Time to Dry
After securely attaching the first portion of the flange, Sven allows ample time for it to dry before moving forward with additional steps. This patience and precision are key aspects of his successful boatbuilding methods.Step 4: Finishing Touches
Once the flange is fully dried, Sven removes the clamps carefully, ensuring no damage occurs during this process. He then moves on to attaching four more pieces onto these main frames, completing two pairs of flanges for the bulkhead hatches.The Final Touches
While two flanges form the primary support structure around the hatches, Sven mentions there are two additional pieces required at each end to ensure comprehensive protection. This attention to detail highlights his commitment to producing a durable and reliable design. “Sailing is about finding your path, whether it’s across an ocean or within yourself.” – Sven Yrvind In conclusion, making flanges around bulkhead hatches may seem complex at first glance, but by following Sven Yrvind’s meticulous process, enthusiasts can achieve professional-level results. Remember that the journey of boatbuilding is as rewarding as reaching your destination; it tests one’s patience and dedication. For those seeking to embark on this adventure or simply gain more insight into marine craftsmanship, Sven’s wisdom is invaluable.Making Flanges Around Bulkhead Hatches for Canvas
Sven Yrvind, a renowned yacht designer and sailor, shares valuable insights on creating flanges around bulkhead hatches for canvas protection in this enlightening video. By following his expert guidance, boat enthusiasts can ensure their living areas remain secure while allowing unhindered access through the hatches.Step 1: Starting with the Flange
Sven begins by explaining that working on flanges vertically and horizontally is significantly easier than doing so in a flat position. To simplify the process further, he divides the task into two or three steps as suggested by fellow expert “for for.” This approach not only makes it more manageable but also allows for greater precision in crafting each component.Step 2: Applying Glue and Securing
Sven proceeds to apply glue along one edge of the flange, ensuring a secure bond when clamped into place. He emphasizes that this stage is crucial for maintaining the structural integrity of the flange, which in turn safeguards the living area beneath the canvas when hatches are open.Step 3: Allowing Time to Dry
After securely attaching the first portion of the flange, Sven allows ample time for it to dry before moving forward with additional steps. This patience and precision are key aspects of his successful boatbuilding methods.Step 4: Finishing Touches
Once the flange is fully dried, Sven removes the clamps carefully, ensuring no damage occurs during this process. He then moves on to attaching four more pieces onto these main frames, completing two pairs of flanges for the bulkhead hatches.The Final Touches
While two flanges form the primary support structure around the hatches, Sven mentions there are two additional pieces required at each end to ensure comprehensive protection. This attention to detail highlights his commitment to producing a durable and reliable design. “Sailing is about finding your path, whether it’s across an ocean or within yourself.” – Sven Yrvind In conclusion, making flanges around bulkhead hatches may seem complex at first glance, but by following Sven Yrvind’s meticulous process, enthusiasts can achieve professional-level results. Remember that the journey of boatbuilding is as rewarding as reaching your destination; it tests one’s patience and dedication. For those seeking to embark on this adventure or simply gain more insight into marine craftsmanship, Sven’s wisdom is invaluable.Sven Yrvind, a renowned yacht designer and sailor, shares valuable insights on creating flanges around bulkhead hatches for canvas protection in this enlightening video. By following his expert guidance, boat enthusiasts can ensure their living areas remain secure while allowing unhindered access through the hatches.Step 1: Starting with the Flange
Sven begins by explaining that working on flanges vertically and horizontally is significantly easier than doing so in a flat position. To simplify the process further, he divides the task into two or three steps as suggested by fellow expert “for for.” This approach not only makes it more manageable but also allows for greater precision in crafting each component.Step 2: Applying Glue and Securing
Sven proceeds to apply glue along one edge of the flange, ensuring a secure bond when clamped into place. He emphasizes that this stage is crucial for maintaining the structural integrity of the flange, which in turn safeguards the living area beneath the canvas when hatches are open.Step 3: Allowing Time to Dry
After securely attaching the first portion of the flange, Sven allows ample time for it to dry before moving forward with additional steps. This patience and precision are key aspects of his successful boatbuilding methods.Step 4: Finishing Touches
Once the flange is fully dried, Sven removes the clamps carefully, ensuring no damage occurs during this process. He then moves on to attaching four more pieces onto these main frames, completing two pairs of flanges for the bulkhead hatches.The Final Touches
While two flanges form the primary support structure around the hatches, Sven mentions there are two additional pieces required at each end to ensure comprehensive protection. This attention to detail highlights his commitment to producing a durable and reliable design. “Sailing is about finding your path, whether it’s across an ocean or within yourself.” – Sven Yrvind In conclusion, making flanges around bulkhead hatches may seem complex at first glance, but by following Sven Yrvind’s meticulous process, enthusiasts can achieve professional-level results. Remember that the journey of boatbuilding is as rewarding as reaching your destination; it tests one’s patience and dedication. For those seeking to embark on this adventure or simply gain more insight into marine craftsmanship, Sven’s wisdom is invaluable.Making Flanges Around Bulkhead Hatches for Canvas
Sven Yrvind, a renowned yacht designer and sailor, shares valuable insights on creating flanges around bulkhead hatches for canvas protection in this enlightening video. By following his expert guidance, boat enthusiasts can ensure their living areas remain secure while allowing unhindered access through the hatches.Step 1: Starting with the Flange
Sven begins by explaining that working on flanges vertically and horizontally is significantly easier than doing so in a flat position. To simplify the process further, he divides the task into two or three steps as suggested by fellow expert “for for.” This approach not only makes it more manageable but also allows for greater precision in crafting each component.Step 2: Applying Glue and Securing
Sven proceeds to apply glue along one edge of the flange, ensuring a secure bond when clamped into place. He emphasizes that this stage is crucial for maintaining the structural integrity of the flange, which in turn safeguards the living area beneath the canvas when hatches are open.Step 3: Allowing Time to Dry
After securely attaching the first portion of the flange, Sven allows ample time for it to dry before moving forward with additional steps. This patience and precision are key aspects of his successful boatbuilding methods.Step 4: Finishing Touches
Once the flange is fully dried, Sven removes the clamps carefully, ensuring no damage occurs during this process. He then moves on to attaching four more pieces onto these main frames, completing two pairs of flanges for the bulkhead hatches.The Final Touches
While two flanges form the primary support structure around the hatches, Sven mentions there are two additional pieces required at each end to ensure comprehensive protection. This attention to detail highlights his commitment to producing a durable and reliable design. “Sailing is about finding your path, whether it’s across an ocean or within yourself.” – Sven Yrvind In conclusion, making flanges around bulkhead hatches may seem complex at first glance, but by following Sven Yrvind’s meticulous process, enthusiasts can achieve professional-level results. Remember that the journey of boatbuilding is as rewarding as reaching your destination; it tests one’s patience and dedication. For those seeking to embark on this adventure or simply gain more insight into marine craftsmanship, Sven’s wisdom is invaluable.Once the flange is fully dried, Sven removes the clamps carefully, ensuring no damage occurs during this process. He then moves on to attaching four more pieces onto these main frames, completing two pairs of flanges for the bulkhead hatches.The Final Touches
While two flanges form the primary support structure around the hatches, Sven mentions there are two additional pieces required at each end to ensure comprehensive protection. This attention to detail highlights his commitment to producing a durable and reliable design. “Sailing is about finding your path, whether it’s across an ocean or within yourself.” – Sven Yrvind In conclusion, making flanges around bulkhead hatches may seem complex at first glance, but by following Sven Yrvind’s meticulous process, enthusiasts can achieve professional-level results. Remember that the journey of boatbuilding is as rewarding as reaching your destination; it tests one’s patience and dedication. For those seeking to embark on this adventure or simply gain more insight into marine craftsmanship, Sven’s wisdom is invaluable.Sven Yrvind, a renowned yacht designer and sailor, shares valuable insights on creating flanges around bulkhead hatches for canvas protection in this enlightening video. By following his expert guidance, boat enthusiasts can ensure their living areas remain secure while allowing unhindered access through the hatches.Step 1: Starting with the Flange
Sven begins by explaining that working on flanges vertically and horizontally is significantly easier than doing so in a flat position. To simplify the process further, he divides the task into two or three steps as suggested by fellow expert “for for.” This approach not only makes it more manageable but also allows for greater precision in crafting each component.Step 2: Applying Glue and Securing
Sven proceeds to apply glue along one edge of the flange, ensuring a secure bond when clamped into place. He emphasizes that this stage is crucial for maintaining the structural integrity of the flange, which in turn safeguards the living area beneath the canvas when hatches are open.Step 3: Allowing Time to Dry
After securely attaching the first portion of the flange, Sven allows ample time for it to dry before moving forward with additional steps. This patience and precision are key aspects of his successful boatbuilding methods.Step 4: Finishing Touches
Once the flange is fully dried, Sven removes the clamps carefully, ensuring no damage occurs during this process. He then moves on to attaching four more pieces onto these main frames, completing two pairs of flanges for the bulkhead hatches.The Final Touches
While two flanges form the primary support structure around the hatches, Sven mentions there are two additional pieces required at each end to ensure comprehensive protection. This attention to detail highlights his commitment to producing a durable and reliable design. “Sailing is about finding your path, whether it’s across an ocean or within yourself.” – Sven Yrvind In conclusion, making flanges around bulkhead hatches may seem complex at first glance, but by following Sven Yrvind’s meticulous process, enthusiasts can achieve professional-level results. Remember that the journey of boatbuilding is as rewarding as reaching your destination; it tests one’s patience and dedication. For those seeking to embark on this adventure or simply gain more insight into marine craftsmanship, Sven’s wisdom is invaluable.Making Flanges Around Bulkhead Hatches for Canvas
Sven Yrvind, a renowned yacht designer and sailor, shares valuable insights on creating flanges around bulkhead hatches for canvas protection in this enlightening video. By following his expert guidance, boat enthusiasts can ensure their living areas remain secure while allowing unhindered access through the hatches.Step 1: Starting with the Flange
Sven begins by explaining that working on flanges vertically and horizontally is significantly easier than doing so in a flat position. To simplify the process further, he divides the task into two or three steps as suggested by fellow expert “for for.” This approach not only makes it more manageable but also allows for greater precision in crafting each component.Step 2: Applying Glue and Securing
Sven proceeds to apply glue along one edge of the flange, ensuring a secure bond when clamped into place. He emphasizes that this stage is crucial for maintaining the structural integrity of the flange, which in turn safeguards the living area beneath the canvas when hatches are open.Step 3: Allowing Time to Dry
After securely attaching the first portion of the flange, Sven allows ample time for it to dry before moving forward with additional steps. This patience and precision are key aspects of his successful boatbuilding methods.Step 4: Finishing Touches
Once the flange is fully dried, Sven removes the clamps carefully, ensuring no damage occurs during this process. He then moves on to attaching four more pieces onto these main frames, completing two pairs of flanges for the bulkhead hatches.The Final Touches
While two flanges form the primary support structure around the hatches, Sven mentions there are two additional pieces required at each end to ensure comprehensive protection. This attention to detail highlights his commitment to producing a durable and reliable design. “Sailing is about finding your path, whether it’s across an ocean or within yourself.” – Sven Yrvind In conclusion, making flanges around bulkhead hatches may seem complex at first glance, but by following Sven Yrvind’s meticulous process, enthusiasts can achieve professional-level results. Remember that the journey of boatbuilding is as rewarding as reaching your destination; it tests one’s patience and dedication. For those seeking to embark on this adventure or simply gain more insight into marine craftsmanship, Sven’s wisdom is invaluable.After securely attaching the first portion of the flange, Sven allows ample time for it to dry before moving forward with additional steps. This patience and precision are key aspects of his successful boatbuilding methods.Step 4: Finishing Touches
Once the flange is fully dried, Sven removes the clamps carefully, ensuring no damage occurs during this process. He then moves on to attaching four more pieces onto these main frames, completing two pairs of flanges for the bulkhead hatches.The Final Touches
While two flanges form the primary support structure around the hatches, Sven mentions there are two additional pieces required at each end to ensure comprehensive protection. This attention to detail highlights his commitment to producing a durable and reliable design. “Sailing is about finding your path, whether it’s across an ocean or within yourself.” – Sven Yrvind In conclusion, making flanges around bulkhead hatches may seem complex at first glance, but by following Sven Yrvind’s meticulous process, enthusiasts can achieve professional-level results. Remember that the journey of boatbuilding is as rewarding as reaching your destination; it tests one’s patience and dedication. For those seeking to embark on this adventure or simply gain more insight into marine craftsmanship, Sven’s wisdom is invaluable.Sven Yrvind, a renowned yacht designer and sailor, shares valuable insights on creating flanges around bulkhead hatches for canvas protection in this enlightening video. By following his expert guidance, boat enthusiasts can ensure their living areas remain secure while allowing unhindered access through the hatches.Step 1: Starting with the Flange
Sven begins by explaining that working on flanges vertically and horizontally is significantly easier than doing so in a flat position. To simplify the process further, he divides the task into two or three steps as suggested by fellow expert “for for.” This approach not only makes it more manageable but also allows for greater precision in crafting each component.Step 2: Applying Glue and Securing
Sven proceeds to apply glue along one edge of the flange, ensuring a secure bond when clamped into place. He emphasizes that this stage is crucial for maintaining the structural integrity of the flange, which in turn safeguards the living area beneath the canvas when hatches are open.Step 3: Allowing Time to Dry
After securely attaching the first portion of the flange, Sven allows ample time for it to dry before moving forward with additional steps. This patience and precision are key aspects of his successful boatbuilding methods.Step 4: Finishing Touches
Once the flange is fully dried, Sven removes the clamps carefully, ensuring no damage occurs during this process. He then moves on to attaching four more pieces onto these main frames, completing two pairs of flanges for the bulkhead hatches.The Final Touches
While two flanges form the primary support structure around the hatches, Sven mentions there are two additional pieces required at each end to ensure comprehensive protection. This attention to detail highlights his commitment to producing a durable and reliable design. “Sailing is about finding your path, whether it’s across an ocean or within yourself.” – Sven Yrvind In conclusion, making flanges around bulkhead hatches may seem complex at first glance, but by following Sven Yrvind’s meticulous process, enthusiasts can achieve professional-level results. Remember that the journey of boatbuilding is as rewarding as reaching your destination; it tests one’s patience and dedication. For those seeking to embark on this adventure or simply gain more insight into marine craftsmanship, Sven’s wisdom is invaluable.Making Flanges Around Bulkhead Hatches for Canvas
Sven Yrvind, a renowned yacht designer and sailor, shares valuable insights on creating flanges around bulkhead hatches for canvas protection in this enlightening video. By following his expert guidance, boat enthusiasts can ensure their living areas remain secure while allowing unhindered access through the hatches.Step 1: Starting with the Flange
Sven begins by explaining that working on flanges vertically and horizontally is significantly easier than doing so in a flat position. To simplify the process further, he divides the task into two or three steps as suggested by fellow expert “for for.” This approach not only makes it more manageable but also allows for greater precision in crafting each component.Step 2: Applying Glue and Securing
Sven proceeds to apply glue along one edge of the flange, ensuring a secure bond when clamped into place. He emphasizes that this stage is crucial for maintaining the structural integrity of the flange, which in turn safeguards the living area beneath the canvas when hatches are open.Step 3: Allowing Time to Dry
After securely attaching the first portion of the flange, Sven allows ample time for it to dry before moving forward with additional steps. This patience and precision are key aspects of his successful boatbuilding methods.Step 4: Finishing Touches
Once the flange is fully dried, Sven removes the clamps carefully, ensuring no damage occurs during this process. He then moves on to attaching four more pieces onto these main frames, completing two pairs of flanges for the bulkhead hatches.The Final Touches
While two flanges form the primary support structure around the hatches, Sven mentions there are two additional pieces required at each end to ensure comprehensive protection. This attention to detail highlights his commitment to producing a durable and reliable design. “Sailing is about finding your path, whether it’s across an ocean or within yourself.” – Sven Yrvind In conclusion, making flanges around bulkhead hatches may seem complex at first glance, but by following Sven Yrvind’s meticulous process, enthusiasts can achieve professional-level results. Remember that the journey of boatbuilding is as rewarding as reaching your destination; it tests one’s patience and dedication. For those seeking to embark on this adventure or simply gain more insight into marine craftsmanship, Sven’s wisdom is invaluable.Sven proceeds to apply glue along one edge of the flange, ensuring a secure bond when clamped into place. He emphasizes that this stage is crucial for maintaining the structural integrity of the flange, which in turn safeguards the living area beneath the canvas when hatches are open.Step 3: Allowing Time to Dry
After securely attaching the first portion of the flange, Sven allows ample time for it to dry before moving forward with additional steps. This patience and precision are key aspects of his successful boatbuilding methods.Step 4: Finishing Touches
Once the flange is fully dried, Sven removes the clamps carefully, ensuring no damage occurs during this process. He then moves on to attaching four more pieces onto these main frames, completing two pairs of flanges for the bulkhead hatches.The Final Touches
While two flanges form the primary support structure around the hatches, Sven mentions there are two additional pieces required at each end to ensure comprehensive protection. This attention to detail highlights his commitment to producing a durable and reliable design. “Sailing is about finding your path, whether it’s across an ocean or within yourself.” – Sven Yrvind In conclusion, making flanges around bulkhead hatches may seem complex at first glance, but by following Sven Yrvind’s meticulous process, enthusiasts can achieve professional-level results. Remember that the journey of boatbuilding is as rewarding as reaching your destination; it tests one’s patience and dedication. For those seeking to embark on this adventure or simply gain more insight into marine craftsmanship, Sven’s wisdom is invaluable.Sven Yrvind, a renowned yacht designer and sailor, shares valuable insights on creating flanges around bulkhead hatches for canvas protection in this enlightening video. By following his expert guidance, boat enthusiasts can ensure their living areas remain secure while allowing unhindered access through the hatches.Step 1: Starting with the Flange
Sven begins by explaining that working on flanges vertically and horizontally is significantly easier than doing so in a flat position. To simplify the process further, he divides the task into two or three steps as suggested by fellow expert “for for.” This approach not only makes it more manageable but also allows for greater precision in crafting each component.Step 2: Applying Glue and Securing
Sven proceeds to apply glue along one edge of the flange, ensuring a secure bond when clamped into place. He emphasizes that this stage is crucial for maintaining the structural integrity of the flange, which in turn safeguards the living area beneath the canvas when hatches are open.Step 3: Allowing Time to Dry
After securely attaching the first portion of the flange, Sven allows ample time for it to dry before moving forward with additional steps. This patience and precision are key aspects of his successful boatbuilding methods.Step 4: Finishing Touches
Once the flange is fully dried, Sven removes the clamps carefully, ensuring no damage occurs during this process. He then moves on to attaching four more pieces onto these main frames, completing two pairs of flanges for the bulkhead hatches.The Final Touches
While two flanges form the primary support structure around the hatches, Sven mentions there are two additional pieces required at each end to ensure comprehensive protection. This attention to detail highlights his commitment to producing a durable and reliable design. “Sailing is about finding your path, whether it’s across an ocean or within yourself.” – Sven Yrvind In conclusion, making flanges around bulkhead hatches may seem complex at first glance, but by following Sven Yrvind’s meticulous process, enthusiasts can achieve professional-level results. Remember that the journey of boatbuilding is as rewarding as reaching your destination; it tests one’s patience and dedication. For those seeking to embark on this adventure or simply gain more insight into marine craftsmanship, Sven’s wisdom is invaluable.Making Flanges Around Bulkhead Hatches for Canvas
Sven Yrvind, a renowned yacht designer and sailor, shares valuable insights on creating flanges around bulkhead hatches for canvas protection in this enlightening video. By following his expert guidance, boat enthusiasts can ensure their living areas remain secure while allowing unhindered access through the hatches.Step 1: Starting with the Flange
Sven begins by explaining that working on flanges vertically and horizontally is significantly easier than doing so in a flat position. To simplify the process further, he divides the task into two or three steps as suggested by fellow expert “for for.” This approach not only makes it more manageable but also allows for greater precision in crafting each component.Step 2: Applying Glue and Securing
Sven proceeds to apply glue along one edge of the flange, ensuring a secure bond when clamped into place. He emphasizes that this stage is crucial for maintaining the structural integrity of the flange, which in turn safeguards the living area beneath the canvas when hatches are open.Step 3: Allowing Time to Dry
After securely attaching the first portion of the flange, Sven allows ample time for it to dry before moving forward with additional steps. This patience and precision are key aspects of his successful boatbuilding methods.Step 4: Finishing Touches
Once the flange is fully dried, Sven removes the clamps carefully, ensuring no damage occurs during this process. He then moves on to attaching four more pieces onto these main frames, completing two pairs of flanges for the bulkhead hatches.The Final Touches
While two flanges form the primary support structure around the hatches, Sven mentions there are two additional pieces required at each end to ensure comprehensive protection. This attention to detail highlights his commitment to producing a durable and reliable design. “Sailing is about finding your path, whether it’s across an ocean or within yourself.” – Sven Yrvind In conclusion, making flanges around bulkhead hatches may seem complex at first glance, but by following Sven Yrvind’s meticulous process, enthusiasts can achieve professional-level results. Remember that the journey of boatbuilding is as rewarding as reaching your destination; it tests one’s patience and dedication. For those seeking to embark on this adventure or simply gain more insight into marine craftsmanship, Sven’s wisdom is invaluable.Sven begins by explaining that working on flanges vertically and horizontally is significantly easier than doing so in a flat position. To simplify the process further, he divides the task into two or three steps as suggested by fellow expert “for for.” This approach not only makes it more manageable but also allows for greater precision in crafting each component.Step 2: Applying Glue and Securing
Sven proceeds to apply glue along one edge of the flange, ensuring a secure bond when clamped into place. He emphasizes that this stage is crucial for maintaining the structural integrity of the flange, which in turn safeguards the living area beneath the canvas when hatches are open.Step 3: Allowing Time to Dry
After securely attaching the first portion of the flange, Sven allows ample time for it to dry before moving forward with additional steps. This patience and precision are key aspects of his successful boatbuilding methods.Step 4: Finishing Touches
Once the flange is fully dried, Sven removes the clamps carefully, ensuring no damage occurs during this process. He then moves on to attaching four more pieces onto these main frames, completing two pairs of flanges for the bulkhead hatches.The Final Touches
While two flanges form the primary support structure around the hatches, Sven mentions there are two additional pieces required at each end to ensure comprehensive protection. This attention to detail highlights his commitment to producing a durable and reliable design. “Sailing is about finding your path, whether it’s across an ocean or within yourself.” – Sven Yrvind In conclusion, making flanges around bulkhead hatches may seem complex at first glance, but by following Sven Yrvind’s meticulous process, enthusiasts can achieve professional-level results. Remember that the journey of boatbuilding is as rewarding as reaching your destination; it tests one’s patience and dedication. For those seeking to embark on this adventure or simply gain more insight into marine craftsmanship, Sven’s wisdom is invaluable.Sven Yrvind, a renowned yacht designer and sailor, shares valuable insights on creating flanges around bulkhead hatches for canvas protection in this enlightening video. By following his expert guidance, boat enthusiasts can ensure their living areas remain secure while allowing unhindered access through the hatches.Step 1: Starting with the Flange
Sven begins by explaining that working on flanges vertically and horizontally is significantly easier than doing so in a flat position. To simplify the process further, he divides the task into two or three steps as suggested by fellow expert “for for.” This approach not only makes it more manageable but also allows for greater precision in crafting each component.Step 2: Applying Glue and Securing
Sven proceeds to apply glue along one edge of the flange, ensuring a secure bond when clamped into place. He emphasizes that this stage is crucial for maintaining the structural integrity of the flange, which in turn safeguards the living area beneath the canvas when hatches are open.Step 3: Allowing Time to Dry
After securely attaching the first portion of the flange, Sven allows ample time for it to dry before moving forward with additional steps. This patience and precision are key aspects of his successful boatbuilding methods.Step 4: Finishing Touches
Once the flange is fully dried, Sven removes the clamps carefully, ensuring no damage occurs during this process. He then moves on to attaching four more pieces onto these main frames, completing two pairs of flanges for the bulkhead hatches.The Final Touches
While two flanges form the primary support structure around the hatches, Sven mentions there are two additional pieces required at each end to ensure comprehensive protection. This attention to detail highlights his commitment to producing a durable and reliable design. “Sailing is about finding your path, whether it’s across an ocean or within yourself.” – Sven Yrvind In conclusion, making flanges around bulkhead hatches may seem complex at first glance, but by following Sven Yrvind’s meticulous process, enthusiasts can achieve professional-level results. Remember that the journey of boatbuilding is as rewarding as reaching your destination; it tests one’s patience and dedication. For those seeking to embark on this adventure or simply gain more insight into marine craftsmanship, Sven’s wisdom is invaluable.Making Flanges Around Bulkhead Hatches for Canvas
Sven Yrvind, a renowned yacht designer and sailor, shares valuable insights on creating flanges around bulkhead hatches for canvas protection in this enlightening video. By following his expert guidance, boat enthusiasts can ensure their living areas remain secure while allowing unhindered access through the hatches.Step 1: Starting with the Flange
Sven begins by explaining that working on flanges vertically and horizontally is significantly easier than doing so in a flat position. To simplify the process further, he divides the task into two or three steps as suggested by fellow expert “for for.” This approach not only makes it more manageable but also allows for greater precision in crafting each component.Step 2: Applying Glue and Securing
Sven proceeds to apply glue along one edge of the flange, ensuring a secure bond when clamped into place. He emphasizes that this stage is crucial for maintaining the structural integrity of the flange, which in turn safeguards the living area beneath the canvas when hatches are open.Step 3: Allowing Time to Dry
After securely attaching the first portion of the flange, Sven allows ample time for it to dry before moving forward with additional steps. This patience and precision are key aspects of his successful boatbuilding methods.Step 4: Finishing Touches
Once the flange is fully dried, Sven removes the clamps carefully, ensuring no damage occurs during this process. He then moves on to attaching four more pieces onto these main frames, completing two pairs of flanges for the bulkhead hatches.The Final Touches
While two flanges form the primary support structure around the hatches, Sven mentions there are two additional pieces required at each end to ensure comprehensive protection. This attention to detail highlights his commitment to producing a durable and reliable design. “Sailing is about finding your path, whether it’s across an ocean or within yourself.” – Sven Yrvind In conclusion, making flanges around bulkhead hatches may seem complex at first glance, but by following Sven Yrvind’s meticulous process, enthusiasts can achieve professional-level results. Remember that the journey of boatbuilding is as rewarding as reaching your destination; it tests one’s patience and dedication. For those seeking to embark on this adventure or simply gain more insight into marine craftsmanship, Sven’s wisdom is invaluable.Once the flange is fully dried, Sven removes the clamps carefully, ensuring no damage occurs during this process. He then moves on to attaching four more pieces onto these main frames, completing two pairs of flanges for the bulkhead hatches.The Final Touches
While two flanges form the primary support structure around the hatches, Sven mentions there are two additional pieces required at each end to ensure comprehensive protection. This attention to detail highlights his commitment to producing a durable and reliable design. “Sailing is about finding your path, whether it’s across an ocean or within yourself.” – Sven Yrvind In conclusion, making flanges around bulkhead hatches may seem complex at first glance, but by following Sven Yrvind’s meticulous process, enthusiasts can achieve professional-level results. Remember that the journey of boatbuilding is as rewarding as reaching your destination; it tests one’s patience and dedication. For those seeking to embark on this adventure or simply gain more insight into marine craftsmanship, Sven’s wisdom is invaluable.Sven begins by explaining that working on flanges vertically and horizontally is significantly easier than doing so in a flat position. To simplify the process further, he divides the task into two or three steps as suggested by fellow expert “for for.” This approach not only makes it more manageable but also allows for greater precision in crafting each component.Step 2: Applying Glue and Securing
Sven proceeds to apply glue along one edge of the flange, ensuring a secure bond when clamped into place. He emphasizes that this stage is crucial for maintaining the structural integrity of the flange, which in turn safeguards the living area beneath the canvas when hatches are open.Step 3: Allowing Time to Dry
After securely attaching the first portion of the flange, Sven allows ample time for it to dry before moving forward with additional steps. This patience and precision are key aspects of his successful boatbuilding methods.Step 4: Finishing Touches
Once the flange is fully dried, Sven removes the clamps carefully, ensuring no damage occurs during this process. He then moves on to attaching four more pieces onto these main frames, completing two pairs of flanges for the bulkhead hatches.The Final Touches
While two flanges form the primary support structure around the hatches, Sven mentions there are two additional pieces required at each end to ensure comprehensive protection. This attention to detail highlights his commitment to producing a durable and reliable design. “Sailing is about finding your path, whether it’s across an ocean or within yourself.” – Sven Yrvind In conclusion, making flanges around bulkhead hatches may seem complex at first glance, but by following Sven Yrvind’s meticulous process, enthusiasts can achieve professional-level results. Remember that the journey of boatbuilding is as rewarding as reaching your destination; it tests one’s patience and dedication. For those seeking to embark on this adventure or simply gain more insight into marine craftsmanship, Sven’s wisdom is invaluable.Sven Yrvind, a renowned yacht designer and sailor, shares valuable insights on creating flanges around bulkhead hatches for canvas protection in this enlightening video. By following his expert guidance, boat enthusiasts can ensure their living areas remain secure while allowing unhindered access through the hatches.Step 1: Starting with the Flange
Sven begins by explaining that working on flanges vertically and horizontally is significantly easier than doing so in a flat position. To simplify the process further, he divides the task into two or three steps as suggested by fellow expert “for for.” This approach not only makes it more manageable but also allows for greater precision in crafting each component.Step 2: Applying Glue and Securing
Sven proceeds to apply glue along one edge of the flange, ensuring a secure bond when clamped into place. He emphasizes that this stage is crucial for maintaining the structural integrity of the flange, which in turn safeguards the living area beneath the canvas when hatches are open.Step 3: Allowing Time to Dry
After securely attaching the first portion of the flange, Sven allows ample time for it to dry before moving forward with additional steps. This patience and precision are key aspects of his successful boatbuilding methods.Step 4: Finishing Touches
Once the flange is fully dried, Sven removes the clamps carefully, ensuring no damage occurs during this process. He then moves on to attaching four more pieces onto these main frames, completing two pairs of flanges for the bulkhead hatches.The Final Touches
While two flanges form the primary support structure around the hatches, Sven mentions there are two additional pieces required at each end to ensure comprehensive protection. This attention to detail highlights his commitment to producing a durable and reliable design. “Sailing is about finding your path, whether it’s across an ocean or within yourself.” – Sven Yrvind In conclusion, making flanges around bulkhead hatches may seem complex at first glance, but by following Sven Yrvind’s meticulous process, enthusiasts can achieve professional-level results. Remember that the journey of boatbuilding is as rewarding as reaching your destination; it tests one’s patience and dedication. For those seeking to embark on this adventure or simply gain more insight into marine craftsmanship, Sven’s wisdom is invaluable.Making Flanges Around Bulkhead Hatches for Canvas
Sven Yrvind, a renowned yacht designer and sailor, shares valuable insights on creating flanges around bulkhead hatches for canvas protection in this enlightening video. By following his expert guidance, boat enthusiasts can ensure their living areas remain secure while allowing unhindered access through the hatches.Step 1: Starting with the Flange
Sven begins by explaining that working on flanges vertically and horizontally is significantly easier than doing so in a flat position. To simplify the process further, he divides the task into two or three steps as suggested by fellow expert “for for.” This approach not only makes it more manageable but also allows for greater precision in crafting each component.Step 2: Applying Glue and Securing
Sven proceeds to apply glue along one edge of the flange, ensuring a secure bond when clamped into place. He emphasizes that this stage is crucial for maintaining the structural integrity of the flange, which in turn safeguards the living area beneath the canvas when hatches are open.Step 3: Allowing Time to Dry
After securely attaching the first portion of the flange, Sven allows ample time for it to dry before moving forward with additional steps. This patience and precision are key aspects of his successful boatbuilding methods.Step 4: Finishing Touches
Once the flange is fully dried, Sven removes the clamps carefully, ensuring no damage occurs during this process. He then moves on to attaching four more pieces onto these main frames, completing two pairs of flanges for the bulkhead hatches.The Final Touches
While two flanges form the primary support structure around the hatches, Sven mentions there are two additional pieces required at each end to ensure comprehensive protection. This attention to detail highlights his commitment to producing a durable and reliable design. “Sailing is about finding your path, whether it’s across an ocean or within yourself.” – Sven Yrvind In conclusion, making flanges around bulkhead hatches may seem complex at first glance, but by following Sven Yrvind’s meticulous process, enthusiasts can achieve professional-level results. Remember that the journey of boatbuilding is as rewarding as reaching your destination; it tests one’s patience and dedication. For those seeking to embark on this adventure or simply gain more insight into marine craftsmanship, Sven’s wisdom is invaluable.After securely attaching the first portion of the flange, Sven allows ample time for it to dry before moving forward with additional steps. This patience and precision are key aspects of his successful boatbuilding methods.Step 4: Finishing Touches
Once the flange is fully dried, Sven removes the clamps carefully, ensuring no damage occurs during this process. He then moves on to attaching four more pieces onto these main frames, completing two pairs of flanges for the bulkhead hatches.The Final Touches
While two flanges form the primary support structure around the hatches, Sven mentions there are two additional pieces required at each end to ensure comprehensive protection. This attention to detail highlights his commitment to producing a durable and reliable design. “Sailing is about finding your path, whether it’s across an ocean or within yourself.” – Sven Yrvind In conclusion, making flanges around bulkhead hatches may seem complex at first glance, but by following Sven Yrvind’s meticulous process, enthusiasts can achieve professional-level results. Remember that the journey of boatbuilding is as rewarding as reaching your destination; it tests one’s patience and dedication. For those seeking to embark on this adventure or simply gain more insight into marine craftsmanship, Sven’s wisdom is invaluable.Sven begins by explaining that working on flanges vertically and horizontally is significantly easier than doing so in a flat position. To simplify the process further, he divides the task into two or three steps as suggested by fellow expert “for for.” This approach not only makes it more manageable but also allows for greater precision in crafting each component.Step 2: Applying Glue and Securing
Sven proceeds to apply glue along one edge of the flange, ensuring a secure bond when clamped into place. He emphasizes that this stage is crucial for maintaining the structural integrity of the flange, which in turn safeguards the living area beneath the canvas when hatches are open.Step 3: Allowing Time to Dry
After securely attaching the first portion of the flange, Sven allows ample time for it to dry before moving forward with additional steps. This patience and precision are key aspects of his successful boatbuilding methods.Step 4: Finishing Touches
Once the flange is fully dried, Sven removes the clamps carefully, ensuring no damage occurs during this process. He then moves on to attaching four more pieces onto these main frames, completing two pairs of flanges for the bulkhead hatches.The Final Touches
While two flanges form the primary support structure around the hatches, Sven mentions there are two additional pieces required at each end to ensure comprehensive protection. This attention to detail highlights his commitment to producing a durable and reliable design. “Sailing is about finding your path, whether it’s across an ocean or within yourself.” – Sven Yrvind In conclusion, making flanges around bulkhead hatches may seem complex at first glance, but by following Sven Yrvind’s meticulous process, enthusiasts can achieve professional-level results. Remember that the journey of boatbuilding is as rewarding as reaching your destination; it tests one’s patience and dedication. For those seeking to embark on this adventure or simply gain more insight into marine craftsmanship, Sven’s wisdom is invaluable.Sven Yrvind, a renowned yacht designer and sailor, shares valuable insights on creating flanges around bulkhead hatches for canvas protection in this enlightening video. By following his expert guidance, boat enthusiasts can ensure their living areas remain secure while allowing unhindered access through the hatches.Step 1: Starting with the Flange
Sven begins by explaining that working on flanges vertically and horizontally is significantly easier than doing so in a flat position. To simplify the process further, he divides the task into two or three steps as suggested by fellow expert “for for.” This approach not only makes it more manageable but also allows for greater precision in crafting each component.Step 2: Applying Glue and Securing
Sven proceeds to apply glue along one edge of the flange, ensuring a secure bond when clamped into place. He emphasizes that this stage is crucial for maintaining the structural integrity of the flange, which in turn safeguards the living area beneath the canvas when hatches are open.Step 3: Allowing Time to Dry
After securely attaching the first portion of the flange, Sven allows ample time for it to dry before moving forward with additional steps. This patience and precision are key aspects of his successful boatbuilding methods.Step 4: Finishing Touches
Once the flange is fully dried, Sven removes the clamps carefully, ensuring no damage occurs during this process. He then moves on to attaching four more pieces onto these main frames, completing two pairs of flanges for the bulkhead hatches.The Final Touches
While two flanges form the primary support structure around the hatches, Sven mentions there are two additional pieces required at each end to ensure comprehensive protection. This attention to detail highlights his commitment to producing a durable and reliable design. “Sailing is about finding your path, whether it’s across an ocean or within yourself.” – Sven Yrvind In conclusion, making flanges around bulkhead hatches may seem complex at first glance, but by following Sven Yrvind’s meticulous process, enthusiasts can achieve professional-level results. Remember that the journey of boatbuilding is as rewarding as reaching your destination; it tests one’s patience and dedication. For those seeking to embark on this adventure or simply gain more insight into marine craftsmanship, Sven’s wisdom is invaluable.Making Flanges Around Bulkhead Hatches for Canvas
Sven Yrvind, a renowned yacht designer and sailor, shares valuable insights on creating flanges around bulkhead hatches for canvas protection in this enlightening video. By following his expert guidance, boat enthusiasts can ensure their living areas remain secure while allowing unhindered access through the hatches.Step 1: Starting with the Flange
Sven begins by explaining that working on flanges vertically and horizontally is significantly easier than doing so in a flat position. To simplify the process further, he divides the task into two or three steps as suggested by fellow expert “for for.” This approach not only makes it more manageable but also allows for greater precision in crafting each component.Step 2: Applying Glue and Securing
Sven proceeds to apply glue along one edge of the flange, ensuring a secure bond when clamped into place. He emphasizes that this stage is crucial for maintaining the structural integrity of the flange, which in turn safeguards the living area beneath the canvas when hatches are open.Step 3: Allowing Time to Dry
After securely attaching the first portion of the flange, Sven allows ample time for it to dry before moving forward with additional steps. This patience and precision are key aspects of his successful boatbuilding methods.Step 4: Finishing Touches
Once the flange is fully dried, Sven removes the clamps carefully, ensuring no damage occurs during this process. He then moves on to attaching four more pieces onto these main frames, completing two pairs of flanges for the bulkhead hatches.The Final Touches
While two flanges form the primary support structure around the hatches, Sven mentions there are two additional pieces required at each end to ensure comprehensive protection. This attention to detail highlights his commitment to producing a durable and reliable design. “Sailing is about finding your path, whether it’s across an ocean or within yourself.” – Sven Yrvind In conclusion, making flanges around bulkhead hatches may seem complex at first glance, but by following Sven Yrvind’s meticulous process, enthusiasts can achieve professional-level results. Remember that the journey of boatbuilding is as rewarding as reaching your destination; it tests one’s patience and dedication. For those seeking to embark on this adventure or simply gain more insight into marine craftsmanship, Sven’s wisdom is invaluable.Sven proceeds to apply glue along one edge of the flange, ensuring a secure bond when clamped into place. He emphasizes that this stage is crucial for maintaining the structural integrity of the flange, which in turn safeguards the living area beneath the canvas when hatches are open.Step 3: Allowing Time to Dry
After securely attaching the first portion of the flange, Sven allows ample time for it to dry before moving forward with additional steps. This patience and precision are key aspects of his successful boatbuilding methods.Step 4: Finishing Touches
Once the flange is fully dried, Sven removes the clamps carefully, ensuring no damage occurs during this process. He then moves on to attaching four more pieces onto these main frames, completing two pairs of flanges for the bulkhead hatches.The Final Touches
While two flanges form the primary support structure around the hatches, Sven mentions there are two additional pieces required at each end to ensure comprehensive protection. This attention to detail highlights his commitment to producing a durable and reliable design. “Sailing is about finding your path, whether it’s across an ocean or within yourself.” – Sven Yrvind In conclusion, making flanges around bulkhead hatches may seem complex at first glance, but by following Sven Yrvind’s meticulous process, enthusiasts can achieve professional-level results. Remember that the journey of boatbuilding is as rewarding as reaching your destination; it tests one’s patience and dedication. For those seeking to embark on this adventure or simply gain more insight into marine craftsmanship, Sven’s wisdom is invaluable.Sven begins by explaining that working on flanges vertically and horizontally is significantly easier than doing so in a flat position. To simplify the process further, he divides the task into two or three steps as suggested by fellow expert “for for.” This approach not only makes it more manageable but also allows for greater precision in crafting each component.Step 2: Applying Glue and Securing
Sven proceeds to apply glue along one edge of the flange, ensuring a secure bond when clamped into place. He emphasizes that this stage is crucial for maintaining the structural integrity of the flange, which in turn safeguards the living area beneath the canvas when hatches are open.Step 3: Allowing Time to Dry
After securely attaching the first portion of the flange, Sven allows ample time for it to dry before moving forward with additional steps. This patience and precision are key aspects of his successful boatbuilding methods.Step 4: Finishing Touches
Once the flange is fully dried, Sven removes the clamps carefully, ensuring no damage occurs during this process. He then moves on to attaching four more pieces onto these main frames, completing two pairs of flanges for the bulkhead hatches.The Final Touches
While two flanges form the primary support structure around the hatches, Sven mentions there are two additional pieces required at each end to ensure comprehensive protection. This attention to detail highlights his commitment to producing a durable and reliable design. “Sailing is about finding your path, whether it’s across an ocean or within yourself.” – Sven Yrvind In conclusion, making flanges around bulkhead hatches may seem complex at first glance, but by following Sven Yrvind’s meticulous process, enthusiasts can achieve professional-level results. Remember that the journey of boatbuilding is as rewarding as reaching your destination; it tests one’s patience and dedication. For those seeking to embark on this adventure or simply gain more insight into marine craftsmanship, Sven’s wisdom is invaluable.Sven Yrvind, a renowned yacht designer and sailor, shares valuable insights on creating flanges around bulkhead hatches for canvas protection in this enlightening video. By following his expert guidance, boat enthusiasts can ensure their living areas remain secure while allowing unhindered access through the hatches.Step 1: Starting with the Flange
Sven begins by explaining that working on flanges vertically and horizontally is significantly easier than doing so in a flat position. To simplify the process further, he divides the task into two or three steps as suggested by fellow expert “for for.” This approach not only makes it more manageable but also allows for greater precision in crafting each component.Step 2: Applying Glue and Securing
Sven proceeds to apply glue along one edge of the flange, ensuring a secure bond when clamped into place. He emphasizes that this stage is crucial for maintaining the structural integrity of the flange, which in turn safeguards the living area beneath the canvas when hatches are open.Step 3: Allowing Time to Dry
After securely attaching the first portion of the flange, Sven allows ample time for it to dry before moving forward with additional steps. This patience and precision are key aspects of his successful boatbuilding methods.Step 4: Finishing Touches
Once the flange is fully dried, Sven removes the clamps carefully, ensuring no damage occurs during this process. He then moves on to attaching four more pieces onto these main frames, completing two pairs of flanges for the bulkhead hatches.The Final Touches
While two flanges form the primary support structure around the hatches, Sven mentions there are two additional pieces required at each end to ensure comprehensive protection. This attention to detail highlights his commitment to producing a durable and reliable design. “Sailing is about finding your path, whether it’s across an ocean or within yourself.” – Sven Yrvind In conclusion, making flanges around bulkhead hatches may seem complex at first glance, but by following Sven Yrvind’s meticulous process, enthusiasts can achieve professional-level results. Remember that the journey of boatbuilding is as rewarding as reaching your destination; it tests one’s patience and dedication. For those seeking to embark on this adventure or simply gain more insight into marine craftsmanship, Sven’s wisdom is invaluable.Making Flanges Around Bulkhead Hatches for Canvas
Sven Yrvind, a renowned yacht designer and sailor, shares valuable insights on creating flanges around bulkhead hatches for canvas protection in this enlightening video. By following his expert guidance, boat enthusiasts can ensure their living areas remain secure while allowing unhindered access through the hatches.Step 1: Starting with the Flange
Sven begins by explaining that working on flanges vertically and horizontally is significantly easier than doing so in a flat position. To simplify the process further, he divides the task into two or three steps as suggested by fellow expert “for for.” This approach not only makes it more manageable but also allows for greater precision in crafting each component.Step 2: Applying Glue and Securing
Sven proceeds to apply glue along one edge of the flange, ensuring a secure bond when clamped into place. He emphasizes that this stage is crucial for maintaining the structural integrity of the flange, which in turn safeguards the living area beneath the canvas when hatches are open.Step 3: Allowing Time to Dry
After securely attaching the first portion of the flange, Sven allows ample time for it to dry before moving forward with additional steps. This patience and precision are key aspects of his successful boatbuilding methods.Step 4: Finishing Touches
Once the flange is fully dried, Sven removes the clamps carefully, ensuring no damage occurs during this process. He then moves on to attaching four more pieces onto these main frames, completing two pairs of flanges for the bulkhead hatches.The Final Touches
While two flanges form the primary support structure around the hatches, Sven mentions there are two additional pieces required at each end to ensure comprehensive protection. This attention to detail highlights his commitment to producing a durable and reliable design. “Sailing is about finding your path, whether it’s across an ocean or within yourself.” – Sven Yrvind In conclusion, making flanges around bulkhead hatches may seem complex at first glance, but by following Sven Yrvind’s meticulous process, enthusiasts can achieve professional-level results. Remember that the journey of boatbuilding is as rewarding as reaching your destination; it tests one’s patience and dedication. For those seeking to embark on this adventure or simply gain more insight into marine craftsmanship, Sven’s wisdom is invaluable.Once the flange is fully dried, Sven removes the clamps carefully, ensuring no damage occurs during this process. He then moves on to attaching four more pieces onto these main frames, completing two pairs of flanges for the bulkhead hatches.The Final Touches
While two flanges form the primary support structure around the hatches, Sven mentions there are two additional pieces required at each end to ensure comprehensive protection. This attention to detail highlights his commitment to producing a durable and reliable design. “Sailing is about finding your path, whether it’s across an ocean or within yourself.” – Sven Yrvind In conclusion, making flanges around bulkhead hatches may seem complex at first glance, but by following Sven Yrvind’s meticulous process, enthusiasts can achieve professional-level results. Remember that the journey of boatbuilding is as rewarding as reaching your destination; it tests one’s patience and dedication. For those seeking to embark on this adventure or simply gain more insight into marine craftsmanship, Sven’s wisdom is invaluable.Sven proceeds to apply glue along one edge of the flange, ensuring a secure bond when clamped into place. He emphasizes that this stage is crucial for maintaining the structural integrity of the flange, which in turn safeguards the living area beneath the canvas when hatches are open.Step 3: Allowing Time to Dry
After securely attaching the first portion of the flange, Sven allows ample time for it to dry before moving forward with additional steps. This patience and precision are key aspects of his successful boatbuilding methods.Step 4: Finishing Touches
Once the flange is fully dried, Sven removes the clamps carefully, ensuring no damage occurs during this process. He then moves on to attaching four more pieces onto these main frames, completing two pairs of flanges for the bulkhead hatches.The Final Touches
While two flanges form the primary support structure around the hatches, Sven mentions there are two additional pieces required at each end to ensure comprehensive protection. This attention to detail highlights his commitment to producing a durable and reliable design. “Sailing is about finding your path, whether it’s across an ocean or within yourself.” – Sven Yrvind In conclusion, making flanges around bulkhead hatches may seem complex at first glance, but by following Sven Yrvind’s meticulous process, enthusiasts can achieve professional-level results. Remember that the journey of boatbuilding is as rewarding as reaching your destination; it tests one’s patience and dedication. For those seeking to embark on this adventure or simply gain more insight into marine craftsmanship, Sven’s wisdom is invaluable.Sven begins by explaining that working on flanges vertically and horizontally is significantly easier than doing so in a flat position. To simplify the process further, he divides the task into two or three steps as suggested by fellow expert “for for.” This approach not only makes it more manageable but also allows for greater precision in crafting each component.Step 2: Applying Glue and Securing
Sven proceeds to apply glue along one edge of the flange, ensuring a secure bond when clamped into place. He emphasizes that this stage is crucial for maintaining the structural integrity of the flange, which in turn safeguards the living area beneath the canvas when hatches are open.Step 3: Allowing Time to Dry
After securely attaching the first portion of the flange, Sven allows ample time for it to dry before moving forward with additional steps. This patience and precision are key aspects of his successful boatbuilding methods.Step 4: Finishing Touches
Once the flange is fully dried, Sven removes the clamps carefully, ensuring no damage occurs during this process. He then moves on to attaching four more pieces onto these main frames, completing two pairs of flanges for the bulkhead hatches.The Final Touches
While two flanges form the primary support structure around the hatches, Sven mentions there are two additional pieces required at each end to ensure comprehensive protection. This attention to detail highlights his commitment to producing a durable and reliable design. “Sailing is about finding your path, whether it’s across an ocean or within yourself.” – Sven Yrvind In conclusion, making flanges around bulkhead hatches may seem complex at first glance, but by following Sven Yrvind’s meticulous process, enthusiasts can achieve professional-level results. Remember that the journey of boatbuilding is as rewarding as reaching your destination; it tests one’s patience and dedication. For those seeking to embark on this adventure or simply gain more insight into marine craftsmanship, Sven’s wisdom is invaluable.Sven Yrvind, a renowned yacht designer and sailor, shares valuable insights on creating flanges around bulkhead hatches for canvas protection in this enlightening video. By following his expert guidance, boat enthusiasts can ensure their living areas remain secure while allowing unhindered access through the hatches.Step 1: Starting with the Flange
Sven begins by explaining that working on flanges vertically and horizontally is significantly easier than doing so in a flat position. To simplify the process further, he divides the task into two or three steps as suggested by fellow expert “for for.” This approach not only makes it more manageable but also allows for greater precision in crafting each component.Step 2: Applying Glue and Securing
Sven proceeds to apply glue along one edge of the flange, ensuring a secure bond when clamped into place. He emphasizes that this stage is crucial for maintaining the structural integrity of the flange, which in turn safeguards the living area beneath the canvas when hatches are open.Step 3: Allowing Time to Dry
After securely attaching the first portion of the flange, Sven allows ample time for it to dry before moving forward with additional steps. This patience and precision are key aspects of his successful boatbuilding methods.Step 4: Finishing Touches
Once the flange is fully dried, Sven removes the clamps carefully, ensuring no damage occurs during this process. He then moves on to attaching four more pieces onto these main frames, completing two pairs of flanges for the bulkhead hatches.The Final Touches
While two flanges form the primary support structure around the hatches, Sven mentions there are two additional pieces required at each end to ensure comprehensive protection. This attention to detail highlights his commitment to producing a durable and reliable design. “Sailing is about finding your path, whether it’s across an ocean or within yourself.” – Sven Yrvind In conclusion, making flanges around bulkhead hatches may seem complex at first glance, but by following Sven Yrvind’s meticulous process, enthusiasts can achieve professional-level results. Remember that the journey of boatbuilding is as rewarding as reaching your destination; it tests one’s patience and dedication. For those seeking to embark on this adventure or simply gain more insight into marine craftsmanship, Sven’s wisdom is invaluable.Making Flanges Around Bulkhead Hatches for Canvas
Sven Yrvind, a renowned yacht designer and sailor, shares valuable insights on creating flanges around bulkhead hatches for canvas protection in this enlightening video. By following his expert guidance, boat enthusiasts can ensure their living areas remain secure while allowing unhindered access through the hatches.Step 1: Starting with the Flange
Sven begins by explaining that working on flanges vertically and horizontally is significantly easier than doing so in a flat position. To simplify the process further, he divides the task into two or three steps as suggested by fellow expert “for for.” This approach not only makes it more manageable but also allows for greater precision in crafting each component.Step 2: Applying Glue and Securing
Sven proceeds to apply glue along one edge of the flange, ensuring a secure bond when clamped into place. He emphasizes that this stage is crucial for maintaining the structural integrity of the flange, which in turn safeguards the living area beneath the canvas when hatches are open.Step 3: Allowing Time to Dry
After securely attaching the first portion of the flange, Sven allows ample time for it to dry before moving forward with additional steps. This patience and precision are key aspects of his successful boatbuilding methods.Step 4: Finishing Touches
Once the flange is fully dried, Sven removes the clamps carefully, ensuring no damage occurs during this process. He then moves on to attaching four more pieces onto these main frames, completing two pairs of flanges for the bulkhead hatches.The Final Touches
While two flanges form the primary support structure around the hatches, Sven mentions there are two additional pieces required at each end to ensure comprehensive protection. This attention to detail highlights his commitment to producing a durable and reliable design. “Sailing is about finding your path, whether it’s across an ocean or within yourself.” – Sven Yrvind In conclusion, making flanges around bulkhead hatches may seem complex at first glance, but by following Sven Yrvind’s meticulous process, enthusiasts can achieve professional-level results. Remember that the journey of boatbuilding is as rewarding as reaching your destination; it tests one’s patience and dedication. For those seeking to embark on this adventure or simply gain more insight into marine craftsmanship, Sven’s wisdom is invaluable.After securely attaching the first portion of the flange, Sven allows ample time for it to dry before moving forward with additional steps. This patience and precision are key aspects of his successful boatbuilding methods.Step 4: Finishing Touches
Once the flange is fully dried, Sven removes the clamps carefully, ensuring no damage occurs during this process. He then moves on to attaching four more pieces onto these main frames, completing two pairs of flanges for the bulkhead hatches.The Final Touches
While two flanges form the primary support structure around the hatches, Sven mentions there are two additional pieces required at each end to ensure comprehensive protection. This attention to detail highlights his commitment to producing a durable and reliable design. “Sailing is about finding your path, whether it’s across an ocean or within yourself.” – Sven Yrvind In conclusion, making flanges around bulkhead hatches may seem complex at first glance, but by following Sven Yrvind’s meticulous process, enthusiasts can achieve professional-level results. Remember that the journey of boatbuilding is as rewarding as reaching your destination; it tests one’s patience and dedication. For those seeking to embark on this adventure or simply gain more insight into marine craftsmanship, Sven’s wisdom is invaluable.Sven proceeds to apply glue along one edge of the flange, ensuring a secure bond when clamped into place. He emphasizes that this stage is crucial for maintaining the structural integrity of the flange, which in turn safeguards the living area beneath the canvas when hatches are open.Step 3: Allowing Time to Dry
After securely attaching the first portion of the flange, Sven allows ample time for it to dry before moving forward with additional steps. This patience and precision are key aspects of his successful boatbuilding methods.Step 4: Finishing Touches
Once the flange is fully dried, Sven removes the clamps carefully, ensuring no damage occurs during this process. He then moves on to attaching four more pieces onto these main frames, completing two pairs of flanges for the bulkhead hatches.The Final Touches
While two flanges form the primary support structure around the hatches, Sven mentions there are two additional pieces required at each end to ensure comprehensive protection. This attention to detail highlights his commitment to producing a durable and reliable design. “Sailing is about finding your path, whether it’s across an ocean or within yourself.” – Sven Yrvind In conclusion, making flanges around bulkhead hatches may seem complex at first glance, but by following Sven Yrvind’s meticulous process, enthusiasts can achieve professional-level results. Remember that the journey of boatbuilding is as rewarding as reaching your destination; it tests one’s patience and dedication. For those seeking to embark on this adventure or simply gain more insight into marine craftsmanship, Sven’s wisdom is invaluable.Sven begins by explaining that working on flanges vertically and horizontally is significantly easier than doing so in a flat position. To simplify the process further, he divides the task into two or three steps as suggested by fellow expert “for for.” This approach not only makes it more manageable but also allows for greater precision in crafting each component.Step 2: Applying Glue and Securing
Sven proceeds to apply glue along one edge of the flange, ensuring a secure bond when clamped into place. He emphasizes that this stage is crucial for maintaining the structural integrity of the flange, which in turn safeguards the living area beneath the canvas when hatches are open.Step 3: Allowing Time to Dry
After securely attaching the first portion of the flange, Sven allows ample time for it to dry before moving forward with additional steps. This patience and precision are key aspects of his successful boatbuilding methods.Step 4: Finishing Touches
Once the flange is fully dried, Sven removes the clamps carefully, ensuring no damage occurs during this process. He then moves on to attaching four more pieces onto these main frames, completing two pairs of flanges for the bulkhead hatches.The Final Touches
While two flanges form the primary support structure around the hatches, Sven mentions there are two additional pieces required at each end to ensure comprehensive protection. This attention to detail highlights his commitment to producing a durable and reliable design. “Sailing is about finding your path, whether it’s across an ocean or within yourself.” – Sven Yrvind In conclusion, making flanges around bulkhead hatches may seem complex at first glance, but by following Sven Yrvind’s meticulous process, enthusiasts can achieve professional-level results. Remember that the journey of boatbuilding is as rewarding as reaching your destination; it tests one’s patience and dedication. For those seeking to embark on this adventure or simply gain more insight into marine craftsmanship, Sven’s wisdom is invaluable.Sven Yrvind, a renowned yacht designer and sailor, shares valuable insights on creating flanges around bulkhead hatches for canvas protection in this enlightening video. By following his expert guidance, boat enthusiasts can ensure their living areas remain secure while allowing unhindered access through the hatches.Step 1: Starting with the Flange
Sven begins by explaining that working on flanges vertically and horizontally is significantly easier than doing so in a flat position. To simplify the process further, he divides the task into two or three steps as suggested by fellow expert “for for.” This approach not only makes it more manageable but also allows for greater precision in crafting each component.Step 2: Applying Glue and Securing
Sven proceeds to apply glue along one edge of the flange, ensuring a secure bond when clamped into place. He emphasizes that this stage is crucial for maintaining the structural integrity of the flange, which in turn safeguards the living area beneath the canvas when hatches are open.Step 3: Allowing Time to Dry
After securely attaching the first portion of the flange, Sven allows ample time for it to dry before moving forward with additional steps. This patience and precision are key aspects of his successful boatbuilding methods.Step 4: Finishing Touches
Once the flange is fully dried, Sven removes the clamps carefully, ensuring no damage occurs during this process. He then moves on to attaching four more pieces onto these main frames, completing two pairs of flanges for the bulkhead hatches.The Final Touches
While two flanges form the primary support structure around the hatches, Sven mentions there are two additional pieces required at each end to ensure comprehensive protection. This attention to detail highlights his commitment to producing a durable and reliable design. “Sailing is about finding your path, whether it’s across an ocean or within yourself.” – Sven Yrvind In conclusion, making flanges around bulkhead hatches may seem complex at first glance, but by following Sven Yrvind’s meticulous process, enthusiasts can achieve professional-level results. Remember that the journey of boatbuilding is as rewarding as reaching your destination; it tests one’s patience and dedication. For those seeking to embark on this adventure or simply gain more insight into marine craftsmanship, Sven’s wisdom is invaluable.Making Flanges Around Bulkhead Hatches for Canvas
Sven Yrvind, a renowned yacht designer and sailor, shares valuable insights on creating flanges around bulkhead hatches for canvas protection in this enlightening video. By following his expert guidance, boat enthusiasts can ensure their living areas remain secure while allowing unhindered access through the hatches.Step 1: Starting with the Flange
Sven begins by explaining that working on flanges vertically and horizontally is significantly easier than doing so in a flat position. To simplify the process further, he divides the task into two or three steps as suggested by fellow expert “for for.” This approach not only makes it more manageable but also allows for greater precision in crafting each component.Step 2: Applying Glue and Securing
Sven proceeds to apply glue along one edge of the flange, ensuring a secure bond when clamped into place. He emphasizes that this stage is crucial for maintaining the structural integrity of the flange, which in turn safeguards the living area beneath the canvas when hatches are open.Step 3: Allowing Time to Dry
After securely attaching the first portion of the flange, Sven allows ample time for it to dry before moving forward with additional steps. This patience and precision are key aspects of his successful boatbuilding methods.Step 4: Finishing Touches
Once the flange is fully dried, Sven removes the clamps carefully, ensuring no damage occurs during this process. He then moves on to attaching four more pieces onto these main frames, completing two pairs of flanges for the bulkhead hatches.The Final Touches
While two flanges form the primary support structure around the hatches, Sven mentions there are two additional pieces required at each end to ensure comprehensive protection. This attention to detail highlights his commitment to producing a durable and reliable design. “Sailing is about finding your path, whether it’s across an ocean or within yourself.” – Sven Yrvind In conclusion, making flanges around bulkhead hatches may seem complex at first glance, but by following Sven Yrvind’s meticulous process, enthusiasts can achieve professional-level results. Remember that the journey of boatbuilding is as rewarding as reaching your destination; it tests one’s patience and dedication. For those seeking to embark on this adventure or simply gain more insight into marine craftsmanship, Sven’s wisdom is invaluable.Once the flange is fully dried, Sven removes the clamps carefully, ensuring no damage occurs during this process. He then moves on to attaching four more pieces onto these main frames, completing two pairs of flanges for the bulkhead hatches.The Final Touches
While two flanges form the primary support structure around the hatches, Sven mentions there are two additional pieces required at each end to ensure comprehensive protection. This attention to detail highlights his commitment to producing a durable and reliable design. “Sailing is about finding your path, whether it’s across an ocean or within yourself.” – Sven Yrvind In conclusion, making flanges around bulkhead hatches may seem complex at first glance, but by following Sven Yrvind’s meticulous process, enthusiasts can achieve professional-level results. Remember that the journey of boatbuilding is as rewarding as reaching your destination; it tests one’s patience and dedication. For those seeking to embark on this adventure or simply gain more insight into marine craftsmanship, Sven’s wisdom is invaluable.After securely attaching the first portion of the flange, Sven allows ample time for it to dry before moving forward with additional steps. This patience and precision are key aspects of his successful boatbuilding methods.Step 4: Finishing Touches
Once the flange is fully dried, Sven removes the clamps carefully, ensuring no damage occurs during this process. He then moves on to attaching four more pieces onto these main frames, completing two pairs of flanges for the bulkhead hatches.The Final Touches
While two flanges form the primary support structure around the hatches, Sven mentions there are two additional pieces required at each end to ensure comprehensive protection. This attention to detail highlights his commitment to producing a durable and reliable design. “Sailing is about finding your path, whether it’s across an ocean or within yourself.” – Sven Yrvind In conclusion, making flanges around bulkhead hatches may seem complex at first glance, but by following Sven Yrvind’s meticulous process, enthusiasts can achieve professional-level results. Remember that the journey of boatbuilding is as rewarding as reaching your destination; it tests one’s patience and dedication. For those seeking to embark on this adventure or simply gain more insight into marine craftsmanship, Sven’s wisdom is invaluable.Sven proceeds to apply glue along one edge of the flange, ensuring a secure bond when clamped into place. He emphasizes that this stage is crucial for maintaining the structural integrity of the flange, which in turn safeguards the living area beneath the canvas when hatches are open.Step 3: Allowing Time to Dry
After securely attaching the first portion of the flange, Sven allows ample time for it to dry before moving forward with additional steps. This patience and precision are key aspects of his successful boatbuilding methods.Step 4: Finishing Touches
Once the flange is fully dried, Sven removes the clamps carefully, ensuring no damage occurs during this process. He then moves on to attaching four more pieces onto these main frames, completing two pairs of flanges for the bulkhead hatches.The Final Touches
While two flanges form the primary support structure around the hatches, Sven mentions there are two additional pieces required at each end to ensure comprehensive protection. This attention to detail highlights his commitment to producing a durable and reliable design. “Sailing is about finding your path, whether it’s across an ocean or within yourself.” – Sven Yrvind In conclusion, making flanges around bulkhead hatches may seem complex at first glance, but by following Sven Yrvind’s meticulous process, enthusiasts can achieve professional-level results. Remember that the journey of boatbuilding is as rewarding as reaching your destination; it tests one’s patience and dedication. For those seeking to embark on this adventure or simply gain more insight into marine craftsmanship, Sven’s wisdom is invaluable.Sven begins by explaining that working on flanges vertically and horizontally is significantly easier than doing so in a flat position. To simplify the process further, he divides the task into two or three steps as suggested by fellow expert “for for.” This approach not only makes it more manageable but also allows for greater precision in crafting each component.Step 2: Applying Glue and Securing
Sven proceeds to apply glue along one edge of the flange, ensuring a secure bond when clamped into place. He emphasizes that this stage is crucial for maintaining the structural integrity of the flange, which in turn safeguards the living area beneath the canvas when hatches are open.Step 3: Allowing Time to Dry
After securely attaching the first portion of the flange, Sven allows ample time for it to dry before moving forward with additional steps. This patience and precision are key aspects of his successful boatbuilding methods.Step 4: Finishing Touches
Once the flange is fully dried, Sven removes the clamps carefully, ensuring no damage occurs during this process. He then moves on to attaching four more pieces onto these main frames, completing two pairs of flanges for the bulkhead hatches.The Final Touches
While two flanges form the primary support structure around the hatches, Sven mentions there are two additional pieces required at each end to ensure comprehensive protection. This attention to detail highlights his commitment to producing a durable and reliable design. “Sailing is about finding your path, whether it’s across an ocean or within yourself.” – Sven Yrvind In conclusion, making flanges around bulkhead hatches may seem complex at first glance, but by following Sven Yrvind’s meticulous process, enthusiasts can achieve professional-level results. Remember that the journey of boatbuilding is as rewarding as reaching your destination; it tests one’s patience and dedication. For those seeking to embark on this adventure or simply gain more insight into marine craftsmanship, Sven’s wisdom is invaluable.Sven Yrvind, a renowned yacht designer and sailor, shares valuable insights on creating flanges around bulkhead hatches for canvas protection in this enlightening video. By following his expert guidance, boat enthusiasts can ensure their living areas remain secure while allowing unhindered access through the hatches.Step 1: Starting with the Flange
Sven begins by explaining that working on flanges vertically and horizontally is significantly easier than doing so in a flat position. To simplify the process further, he divides the task into two or three steps as suggested by fellow expert “for for.” This approach not only makes it more manageable but also allows for greater precision in crafting each component.Step 2: Applying Glue and Securing
Sven proceeds to apply glue along one edge of the flange, ensuring a secure bond when clamped into place. He emphasizes that this stage is crucial for maintaining the structural integrity of the flange, which in turn safeguards the living area beneath the canvas when hatches are open.Step 3: Allowing Time to Dry
After securely attaching the first portion of the flange, Sven allows ample time for it to dry before moving forward with additional steps. This patience and precision are key aspects of his successful boatbuilding methods.Step 4: Finishing Touches
Once the flange is fully dried, Sven removes the clamps carefully, ensuring no damage occurs during this process. He then moves on to attaching four more pieces onto these main frames, completing two pairs of flanges for the bulkhead hatches.The Final Touches
While two flanges form the primary support structure around the hatches, Sven mentions there are two additional pieces required at each end to ensure comprehensive protection. This attention to detail highlights his commitment to producing a durable and reliable design. “Sailing is about finding your path, whether it’s across an ocean or within yourself.” – Sven Yrvind In conclusion, making flanges around bulkhead hatches may seem complex at first glance, but by following Sven Yrvind’s meticulous process, enthusiasts can achieve professional-level results. Remember that the journey of boatbuilding is as rewarding as reaching your destination; it tests one’s patience and dedication. For those seeking to embark on this adventure or simply gain more insight into marine craftsmanship, Sven’s wisdom is invaluable.Making Flanges Around Bulkhead Hatches for Canvas
Sven Yrvind, a renowned yacht designer and sailor, shares valuable insights on creating flanges around bulkhead hatches for canvas protection in this enlightening video. By following his expert guidance, boat enthusiasts can ensure their living areas remain secure while allowing unhindered access through the hatches.Step 1: Starting with the Flange
Sven begins by explaining that working on flanges vertically and horizontally is significantly easier than doing so in a flat position. To simplify the process further, he divides the task into two or three steps as suggested by fellow expert “for for.” This approach not only makes it more manageable but also allows for greater precision in crafting each component.Step 2: Applying Glue and Securing
Sven proceeds to apply glue along one edge of the flange, ensuring a secure bond when clamped into place. He emphasizes that this stage is crucial for maintaining the structural integrity of the flange, which in turn safeguards the living area beneath the canvas when hatches are open.Step 3: Allowing Time to Dry
After securely attaching the first portion of the flange, Sven allows ample time for it to dry before moving forward with additional steps. This patience and precision are key aspects of his successful boatbuilding methods.Step 4: Finishing Touches
Once the flange is fully dried, Sven removes the clamps carefully, ensuring no damage occurs during this process. He then moves on to attaching four more pieces onto these main frames, completing two pairs of flanges for the bulkhead hatches.The Final Touches
While two flanges form the primary support structure around the hatches, Sven mentions there are two additional pieces required at each end to ensure comprehensive protection. This attention to detail highlights his commitment to producing a durable and reliable design. “Sailing is about finding your path, whether it’s across an ocean or within yourself.” – Sven Yrvind In conclusion, making flanges around bulkhead hatches may seem complex at first glance, but by following Sven Yrvind’s meticulous process, enthusiasts can achieve professional-level results. Remember that the journey of boatbuilding is as rewarding as reaching your destination; it tests one’s patience and dedication. For those seeking to embark on this adventure or simply gain more insight into marine craftsmanship, Sven’s wisdom is invaluable.Sven proceeds to apply glue along one edge of the flange, ensuring a secure bond when clamped into place. He emphasizes that this stage is crucial for maintaining the structural integrity of the flange, which in turn safeguards the living area beneath the canvas when hatches are open.Step 3: Allowing Time to Dry
After securely attaching the first portion of the flange, Sven allows ample time for it to dry before moving forward with additional steps. This patience and precision are key aspects of his successful boatbuilding methods.Step 4: Finishing Touches
Once the flange is fully dried, Sven removes the clamps carefully, ensuring no damage occurs during this process. He then moves on to attaching four more pieces onto these main frames, completing two pairs of flanges for the bulkhead hatches.The Final Touches
While two flanges form the primary support structure around the hatches, Sven mentions there are two additional pieces required at each end to ensure comprehensive protection. This attention to detail highlights his commitment to producing a durable and reliable design. “Sailing is about finding your path, whether it’s across an ocean or within yourself.” – Sven Yrvind In conclusion, making flanges around bulkhead hatches may seem complex at first glance, but by following Sven Yrvind’s meticulous process, enthusiasts can achieve professional-level results. Remember that the journey of boatbuilding is as rewarding as reaching your destination; it tests one’s patience and dedication. For those seeking to embark on this adventure or simply gain more insight into marine craftsmanship, Sven’s wisdom is invaluable.Sven begins by explaining that working on flanges vertically and horizontally is significantly easier than doing so in a flat position. To simplify the process further, he divides the task into two or three steps as suggested by fellow expert “for for.” This approach not only makes it more manageable but also allows for greater precision in crafting each component.Step 2: Applying Glue and Securing
Sven proceeds to apply glue along one edge of the flange, ensuring a secure bond when clamped into place. He emphasizes that this stage is crucial for maintaining the structural integrity of the flange, which in turn safeguards the living area beneath the canvas when hatches are open.Step 3: Allowing Time to Dry
After securely attaching the first portion of the flange, Sven allows ample time for it to dry before moving forward with additional steps. This patience and precision are key aspects of his successful boatbuilding methods.Step 4: Finishing Touches
Once the flange is fully dried, Sven removes the clamps carefully, ensuring no damage occurs during this process. He then moves on to attaching four more pieces onto these main frames, completing two pairs of flanges for the bulkhead hatches.The Final Touches
While two flanges form the primary support structure around the hatches, Sven mentions there are two additional pieces required at each end to ensure comprehensive protection. This attention to detail highlights his commitment to producing a durable and reliable design. “Sailing is about finding your path, whether it’s across an ocean or within yourself.” – Sven Yrvind In conclusion, making flanges around bulkhead hatches may seem complex at first glance, but by following Sven Yrvind’s meticulous process, enthusiasts can achieve professional-level results. Remember that the journey of boatbuilding is as rewarding as reaching your destination; it tests one’s patience and dedication. For those seeking to embark on this adventure or simply gain more insight into marine craftsmanship, Sven’s wisdom is invaluable.Sven Yrvind, a renowned yacht designer and sailor, shares valuable insights on creating flanges around bulkhead hatches for canvas protection in this enlightening video. By following his expert guidance, boat enthusiasts can ensure their living areas remain secure while allowing unhindered access through the hatches.Step 1: Starting with the Flange
Sven begins by explaining that working on flanges vertically and horizontally is significantly easier than doing so in a flat position. To simplify the process further, he divides the task into two or three steps as suggested by fellow expert “for for.” This approach not only makes it more manageable but also allows for greater precision in crafting each component.Step 2: Applying Glue and Securing
Sven proceeds to apply glue along one edge of the flange, ensuring a secure bond when clamped into place. He emphasizes that this stage is crucial for maintaining the structural integrity of the flange, which in turn safeguards the living area beneath the canvas when hatches are open.Step 3: Allowing Time to Dry
After securely attaching the first portion of the flange, Sven allows ample time for it to dry before moving forward with additional steps. This patience and precision are key aspects of his successful boatbuilding methods.Step 4: Finishing Touches
Once the flange is fully dried, Sven removes the clamps carefully, ensuring no damage occurs during this process. He then moves on to attaching four more pieces onto these main frames, completing two pairs of flanges for the bulkhead hatches.The Final Touches
While two flanges form the primary support structure around the hatches, Sven mentions there are two additional pieces required at each end to ensure comprehensive protection. This attention to detail highlights his commitment to producing a durable and reliable design. “Sailing is about finding your path, whether it’s across an ocean or within yourself.” – Sven Yrvind In conclusion, making flanges around bulkhead hatches may seem complex at first glance, but by following Sven Yrvind’s meticulous process, enthusiasts can achieve professional-level results. Remember that the journey of boatbuilding is as rewarding as reaching your destination; it tests one’s patience and dedication. For those seeking to embark on this adventure or simply gain more insight into marine craftsmanship, Sven’s wisdom is invaluable.Making Flanges Around Bulkhead Hatches for Canvas
Sven Yrvind, a renowned yacht designer and sailor, shares valuable insights on creating flanges around bulkhead hatches for canvas protection in this enlightening video. By following his expert guidance, boat enthusiasts can ensure their living areas remain secure while allowing unhindered access through the hatches.Step 1: Starting with the Flange
Sven begins by explaining that working on flanges vertically and horizontally is significantly easier than doing so in a flat position. To simplify the process further, he divides the task into two or three steps as suggested by fellow expert “for for.” This approach not only makes it more manageable but also allows for greater precision in crafting each component.Step 2: Applying Glue and Securing
Sven proceeds to apply glue along one edge of the flange, ensuring a secure bond when clamped into place. He emphasizes that this stage is crucial for maintaining the structural integrity of the flange, which in turn safeguards the living area beneath the canvas when hatches are open.Step 3: Allowing Time to Dry
After securely attaching the first portion of the flange, Sven allows ample time for it to dry before moving forward with additional steps. This patience and precision are key aspects of his successful boatbuilding methods.Step 4: Finishing Touches
Once the flange is fully dried, Sven removes the clamps carefully, ensuring no damage occurs during this process. He then moves on to attaching four more pieces onto these main frames, completing two pairs of flanges for the bulkhead hatches.The Final Touches
While two flanges form the primary support structure around the hatches, Sven mentions there are two additional pieces required at each end to ensure comprehensive protection. This attention to detail highlights his commitment to producing a durable and reliable design. “Sailing is about finding your path, whether it’s across an ocean or within yourself.” – Sven Yrvind In conclusion, making flanges around bulkhead hatches may seem complex at first glance, but by following Sven Yrvind’s meticulous process, enthusiasts can achieve professional-level results. Remember that the journey of boatbuilding is as rewarding as reaching your destination; it tests one’s patience and dedication. For those seeking to embark on this adventure or simply gain more insight into marine craftsmanship, Sven’s wisdom is invaluable.Once the flange is fully dried, Sven removes the clamps carefully, ensuring no damage occurs during this process. He then moves on to attaching four more pieces onto these main frames, completing two pairs of flanges for the bulkhead hatches.The Final Touches
While two flanges form the primary support structure around the hatches, Sven mentions there are two additional pieces required at each end to ensure comprehensive protection. This attention to detail highlights his commitment to producing a durable and reliable design. “Sailing is about finding your path, whether it’s across an ocean or within yourself.” – Sven Yrvind In conclusion, making flanges around bulkhead hatches may seem complex at first glance, but by following Sven Yrvind’s meticulous process, enthusiasts can achieve professional-level results. Remember that the journey of boatbuilding is as rewarding as reaching your destination; it tests one’s patience and dedication. For those seeking to embark on this adventure or simply gain more insight into marine craftsmanship, Sven’s wisdom is invaluable.Making Flanges Around Bulkhead Hatches for Canvas
Sven Yrvind, a renowned yacht designer and sailor, shares valuable insights on creating flanges around bulkhead hatches for canvas protection in this enlightening video. By following his expert guidance, boat enthusiasts can ensure their living areas remain secure while allowing unhindered access through the hatches.Step 1: Starting with the Flange
Sven begins by explaining that working on flanges vertically and horizontally is significantly easier than doing so in a flat position. To simplify the process further, he divides the task into two or three steps as suggested by fellow expert “for for.” This approach not only makes it more manageable but also allows for greater precision in crafting each component.Step 2: Applying Glue and Securing
Sven proceeds to apply glue along one edge of the flange, ensuring a secure bond when clamped into place. He emphasizes that this stage is crucial for maintaining the structural integrity of the flange, which in turn safeguards the living area beneath the canvas when hatches are open.Step 3: Allowing Time to Dry
After securely attaching the first portion of the flange, Sven allows ample time for it to dry before moving forward with additional steps. This patience and precision are key aspects of his successful boatbuilding methods.Step 4: Finishing Touches
Once the flange is fully dried, Sven removes the clamps carefully, ensuring no damage occurs during this process. He then moves on to attaching four more pieces onto these main frames, completing two pairs of flanges for the bulkhead hatches.The Final Touches
While two flanges form the primary support structure around the hatches, Sven mentions there are two additional pieces required at each end to ensure comprehensive protection. This attention to detail highlights his commitment to producing a durable and reliable design. “Sailing is about finding your path, whether it’s across an ocean or within yourself.” – Sven Yrvind In conclusion, making flanges around bulkhead hatches may seem complex at first glance, but by following Sven Yrvind’s meticulous process, enthusiasts can achieve professional-level results. Remember that the journey of boatbuilding is as rewarding as reaching your destination; it tests one’s patience and dedication. For those seeking to embark on this adventure or simply gain more insight into marine craftsmanship, Sven’s wisdom is invaluable.After securely attaching the first portion of the flange, Sven allows ample time for it to dry before moving forward with additional steps. This patience and precision are key aspects of his successful boatbuilding methods.Step 4: Finishing Touches
Once the flange is fully dried, Sven removes the clamps carefully, ensuring no damage occurs during this process. He then moves on to attaching four more pieces onto these main frames, completing two pairs of flanges for the bulkhead hatches.The Final Touches
While two flanges form the primary support structure around the hatches, Sven mentions there are two additional pieces required at each end to ensure comprehensive protection. This attention to detail highlights his commitment to producing a durable and reliable design. “Sailing is about finding your path, whether it’s across an ocean or within yourself.” – Sven Yrvind In conclusion, making flanges around bulkhead hatches may seem complex at first glance, but by following Sven Yrvind’s meticulous process, enthusiasts can achieve professional-level results. Remember that the journey of boatbuilding is as rewarding as reaching your destination; it tests one’s patience and dedication. For those seeking to embark on this adventure or simply gain more insight into marine craftsmanship, Sven’s wisdom is invaluable.Making Flanges Around Bulkhead Hatches for Canvas
Sven Yrvind, a renowned yacht designer and sailor, shares valuable insights on creating flanges around bulkhead hatches for canvas protection in this enlightening video. By following his expert guidance, boat enthusiasts can ensure their living areas remain secure while allowing unhindered access through the hatches.Step 1: Starting with the Flange
Sven begins by explaining that working on flanges vertically and horizontally is significantly easier than doing so in a flat position. To simplify the process further, he divides the task into two or three steps as suggested by fellow expert “for for.” This approach not only makes it more manageable but also allows for greater precision in crafting each component.Step 2: Applying Glue and Securing
Sven proceeds to apply glue along one edge of the flange, ensuring a secure bond when clamped into place. He emphasizes that this stage is crucial for maintaining the structural integrity of the flange, which in turn safeguards the living area beneath the canvas when hatches are open.Step 3: Allowing Time to Dry
After securely attaching the first portion of the flange, Sven allows ample time for it to dry before moving forward with additional steps. This patience and precision are key aspects of his successful boatbuilding methods.Step 4: Finishing Touches
Once the flange is fully dried, Sven removes the clamps carefully, ensuring no damage occurs during this process. He then moves on to attaching four more pieces onto these main frames, completing two pairs of flanges for the bulkhead hatches.The Final Touches
While two flanges form the primary support structure around the hatches, Sven mentions there are two additional pieces required at each end to ensure comprehensive protection. This attention to detail highlights his commitment to producing a durable and reliable design. “Sailing is about finding your path, whether it’s across an ocean or within yourself.” – Sven Yrvind In conclusion, making flanges around bulkhead hatches may seem complex at first glance, but by following Sven Yrvind’s meticulous process, enthusiasts can achieve professional-level results. Remember that the journey of boatbuilding is as rewarding as reaching your destination; it tests one’s patience and dedication. For those seeking to embark on this adventure or simply gain more insight into marine craftsmanship, Sven’s wisdom is invaluable.Sven proceeds to apply glue along one edge of the flange, ensuring a secure bond when clamped into place. He emphasizes that this stage is crucial for maintaining the structural integrity of the flange, which in turn safeguards the living area beneath the canvas when hatches are open.Step 3: Allowing Time to Dry
After securely attaching the first portion of the flange, Sven allows ample time for it to dry before moving forward with additional steps. This patience and precision are key aspects of his successful boatbuilding methods.Step 4: Finishing Touches
Once the flange is fully dried, Sven removes the clamps carefully, ensuring no damage occurs during this process. He then moves on to attaching four more pieces onto these main frames, completing two pairs of flanges for the bulkhead hatches.The Final Touches
While two flanges form the primary support structure around the hatches, Sven mentions there are two additional pieces required at each end to ensure comprehensive protection. This attention to detail highlights his commitment to producing a durable and reliable design. “Sailing is about finding your path, whether it’s across an ocean or within yourself.” – Sven Yrvind In conclusion, making flanges around bulkhead hatches may seem complex at first glance, but by following Sven Yrvind’s meticulous process, enthusiasts can achieve professional-level results. Remember that the journey of boatbuilding is as rewarding as reaching your destination; it tests one’s patience and dedication. For those seeking to embark on this adventure or simply gain more insight into marine craftsmanship, Sven’s wisdom is invaluable.Making Flanges Around Bulkhead Hatches for Canvas
Sven Yrvind, a renowned yacht designer and sailor, shares valuable insights on creating flanges around bulkhead hatches for canvas protection in this enlightening video. By following his expert guidance, boat enthusiasts can ensure their living areas remain secure while allowing unhindered access through the hatches.Step 1: Starting with the Flange
Sven begins by explaining that working on flanges vertically and horizontally is significantly easier than doing so in a flat position. To simplify the process further, he divides the task into two or three steps as suggested by fellow expert “for for.” This approach not only makes it more manageable but also allows for greater precision in crafting each component.Step 2: Applying Glue and Securing
Sven proceeds to apply glue along one edge of the flange, ensuring a secure bond when clamped into place. He emphasizes that this stage is crucial for maintaining the structural integrity of the flange, which in turn safeguards the living area beneath the canvas when hatches are open.Step 3: Allowing Time to Dry
After securely attaching the first portion of the flange, Sven allows ample time for it to dry before moving forward with additional steps. This patience and precision are key aspects of his successful boatbuilding methods.Step 4: Finishing Touches
Once the flange is fully dried, Sven removes the clamps carefully, ensuring no damage occurs during this process. He then moves on to attaching four more pieces onto these main frames, completing two pairs of flanges for the bulkhead hatches.The Final Touches
While two flanges form the primary support structure around the hatches, Sven mentions there are two additional pieces required at each end to ensure comprehensive protection. This attention to detail highlights his commitment to producing a durable and reliable design. “Sailing is about finding your path, whether it’s across an ocean or within yourself.” – Sven Yrvind In conclusion, making flanges around bulkhead hatches may seem complex at first glance, but by following Sven Yrvind’s meticulous process, enthusiasts can achieve professional-level results. Remember that the journey of boatbuilding is as rewarding as reaching your destination; it tests one’s patience and dedication. For those seeking to embark on this adventure or simply gain more insight into marine craftsmanship, Sven’s wisdom is invaluable.Sven begins by explaining that working on flanges vertically and horizontally is significantly easier than doing so in a flat position. To simplify the process further, he divides the task into two or three steps as suggested by fellow expert “for for.” This approach not only makes it more manageable but also allows for greater precision in crafting each component.Step 2: Applying Glue and Securing
Sven proceeds to apply glue along one edge of the flange, ensuring a secure bond when clamped into place. He emphasizes that this stage is crucial for maintaining the structural integrity of the flange, which in turn safeguards the living area beneath the canvas when hatches are open.Step 3: Allowing Time to Dry
After securely attaching the first portion of the flange, Sven allows ample time for it to dry before moving forward with additional steps. This patience and precision are key aspects of his successful boatbuilding methods.Step 4: Finishing Touches
Once the flange is fully dried, Sven removes the clamps carefully, ensuring no damage occurs during this process. He then moves on to attaching four more pieces onto these main frames, completing two pairs of flanges for the bulkhead hatches.The Final Touches
While two flanges form the primary support structure around the hatches, Sven mentions there are two additional pieces required at each end to ensure comprehensive protection. This attention to detail highlights his commitment to producing a durable and reliable design. “Sailing is about finding your path, whether it’s across an ocean or within yourself.” – Sven Yrvind In conclusion, making flanges around bulkhead hatches may seem complex at first glance, but by following Sven Yrvind’s meticulous process, enthusiasts can achieve professional-level results. Remember that the journey of boatbuilding is as rewarding as reaching your destination; it tests one’s patience and dedication. For those seeking to embark on this adventure or simply gain more insight into marine craftsmanship, Sven’s wisdom is invaluable.Making Flanges Around Bulkhead Hatches for Canvas
Sven Yrvind, a renowned yacht designer and sailor, shares valuable insights on creating flanges around bulkhead hatches for canvas protection in this enlightening video. By following his expert guidance, boat enthusiasts can ensure their living areas remain secure while allowing unhindered access through the hatches.Step 1: Starting with the Flange
Sven begins by explaining that working on flanges vertically and horizontally is significantly easier than doing so in a flat position. To simplify the process further, he divides the task into two or three steps as suggested by fellow expert “for for.” This approach not only makes it more manageable but also allows for greater precision in crafting each component.Step 2: Applying Glue and Securing
Sven proceeds to apply glue along one edge of the flange, ensuring a secure bond when clamped into place. He emphasizes that this stage is crucial for maintaining the structural integrity of the flange, which in turn safeguards the living area beneath the canvas when hatches are open.Step 3: Allowing Time to Dry
After securely attaching the first portion of the flange, Sven allows ample time for it to dry before moving forward with additional steps. This patience and precision are key aspects of his successful boatbuilding methods.Step 4: Finishing Touches
Once the flange is fully dried, Sven removes the clamps carefully, ensuring no damage occurs during this process. He then moves on to attaching four more pieces onto these main frames, completing two pairs of flanges for the bulkhead hatches.The Final Touches
While two flanges form the primary support structure around the hatches, Sven mentions there are two additional pieces required at each end to ensure comprehensive protection. This attention to detail highlights his commitment to producing a durable and reliable design. “Sailing is about finding your path, whether it’s across an ocean or within yourself.” – Sven Yrvind In conclusion, making flanges around bulkhead hatches may seem complex at first glance, but by following Sven Yrvind’s meticulous process, enthusiasts can achieve professional-level results. Remember that the journey of boatbuilding is as rewarding as reaching your destination; it tests one’s patience and dedication. For those seeking to embark on this adventure or simply gain more insight into marine craftsmanship, Sven’s wisdom is invaluable.Sven Yrvind, a renowned yacht designer and sailor, shares valuable insights on creating flanges around bulkhead hatches for canvas protection in this enlightening video. By following his expert guidance, boat enthusiasts can ensure their living areas remain secure while allowing unhindered access through the hatches.Step 1: Starting with the Flange
Sven begins by explaining that working on flanges vertically and horizontally is significantly easier than doing so in a flat position. To simplify the process further, he divides the task into two or three steps as suggested by fellow expert “for for.” This approach not only makes it more manageable but also allows for greater precision in crafting each component.Step 2: Applying Glue and Securing
Sven proceeds to apply glue along one edge of the flange, ensuring a secure bond when clamped into place. He emphasizes that this stage is crucial for maintaining the structural integrity of the flange, which in turn safeguards the living area beneath the canvas when hatches are open.Step 3: Allowing Time to Dry
After securely attaching the first portion of the flange, Sven allows ample time for it to dry before moving forward with additional steps. This patience and precision are key aspects of his successful boatbuilding methods.Step 4: Finishing Touches
Once the flange is fully dried, Sven removes the clamps carefully, ensuring no damage occurs during this process. He then moves on to attaching four more pieces onto these main frames, completing two pairs of flanges for the bulkhead hatches.The Final Touches
While two flanges form the primary support structure around the hatches, Sven mentions there are two additional pieces required at each end to ensure comprehensive protection. This attention to detail highlights his commitment to producing a durable and reliable design. “Sailing is about finding your path, whether it’s across an ocean or within yourself.” – Sven Yrvind In conclusion, making flanges around bulkhead hatches may seem complex at first glance, but by following Sven Yrvind’s meticulous process, enthusiasts can achieve professional-level results. Remember that the journey of boatbuilding is as rewarding as reaching your destination; it tests one’s patience and dedication. For those seeking to embark on this adventure or simply gain more insight into marine craftsmanship, Sven’s wisdom is invaluable.Making Flanges Around Bulkhead Hatches for Canvas
Sven Yrvind, a renowned yacht designer and sailor, shares valuable insights on creating flanges around bulkhead hatches for canvas protection in this enlightening video. By following his expert guidance, boat enthusiasts can ensure their living areas remain secure while allowing unhindered access through the hatches.Step 1: Starting with the Flange
Sven begins by explaining that working on flanges vertically and horizontally is significantly easier than doing so in a flat position. To simplify the process further, he divides the task into two or three steps as suggested by fellow expert “for for.” This approach not only makes it more manageable but also allows for greater precision in crafting each component.Step 2: Applying Glue and Securing
Sven proceeds to apply glue along one edge of the flange, ensuring a secure bond when clamped into place. He emphasizes that this stage is crucial for maintaining the structural integrity of the flange, which in turn safeguards the living area beneath the canvas when hatches are open.Step 3: Allowing Time to Dry
After securely attaching the first portion of the flange, Sven allows ample time for it to dry before moving forward with additional steps. This patience and precision are key aspects of his successful boatbuilding methods.Step 4: Finishing Touches
Once the flange is fully dried, Sven removes the clamps carefully, ensuring no damage occurs during this process. He then moves on to attaching four more pieces onto these main frames, completing two pairs of flanges for the bulkhead hatches.The Final Touches
While two flanges form the primary support structure around the hatches, Sven mentions there are two additional pieces required at each end to ensure comprehensive protection. This attention to detail highlights his commitment to producing a durable and reliable design. “Sailing is about finding your path, whether it’s across an ocean or within yourself.” – Sven Yrvind In conclusion, making flanges around bulkhead hatches may seem complex at first glance, but by following Sven Yrvind’s meticulous process, enthusiasts can achieve professional-level results. Remember that the journey of boatbuilding is as rewarding as reaching your destination; it tests one’s patience and dedication. For those seeking to embark on this adventure or simply gain more insight into marine craftsmanship, Sven’s wisdom is invaluable.Once the flange is fully dried, Sven removes the clamps carefully, ensuring no damage occurs during this process. He then moves on to attaching four more pieces onto these main frames, completing two pairs of flanges for the bulkhead hatches.The Final Touches
While two flanges form the primary support structure around the hatches, Sven mentions there are two additional pieces required at each end to ensure comprehensive protection. This attention to detail highlights his commitment to producing a durable and reliable design. “Sailing is about finding your path, whether it’s across an ocean or within yourself.” – Sven Yrvind In conclusion, making flanges around bulkhead hatches may seem complex at first glance, but by following Sven Yrvind’s meticulous process, enthusiasts can achieve professional-level results. Remember that the journey of boatbuilding is as rewarding as reaching your destination; it tests one’s patience and dedication. For those seeking to embark on this adventure or simply gain more insight into marine craftsmanship, Sven’s wisdom is invaluable.Sven Yrvind, a renowned yacht designer and sailor, shares valuable insights on creating flanges around bulkhead hatches for canvas protection in this enlightening video. By following his expert guidance, boat enthusiasts can ensure their living areas remain secure while allowing unhindered access through the hatches.Step 1: Starting with the Flange
Sven begins by explaining that working on flanges vertically and horizontally is significantly easier than doing so in a flat position. To simplify the process further, he divides the task into two or three steps as suggested by fellow expert “for for.” This approach not only makes it more manageable but also allows for greater precision in crafting each component.Step 2: Applying Glue and Securing
Sven proceeds to apply glue along one edge of the flange, ensuring a secure bond when clamped into place. He emphasizes that this stage is crucial for maintaining the structural integrity of the flange, which in turn safeguards the living area beneath the canvas when hatches are open.Step 3: Allowing Time to Dry
After securely attaching the first portion of the flange, Sven allows ample time for it to dry before moving forward with additional steps. This patience and precision are key aspects of his successful boatbuilding methods.Step 4: Finishing Touches
Once the flange is fully dried, Sven removes the clamps carefully, ensuring no damage occurs during this process. He then moves on to attaching four more pieces onto these main frames, completing two pairs of flanges for the bulkhead hatches.The Final Touches
While two flanges form the primary support structure around the hatches, Sven mentions there are two additional pieces required at each end to ensure comprehensive protection. This attention to detail highlights his commitment to producing a durable and reliable design. “Sailing is about finding your path, whether it’s across an ocean or within yourself.” – Sven Yrvind In conclusion, making flanges around bulkhead hatches may seem complex at first glance, but by following Sven Yrvind’s meticulous process, enthusiasts can achieve professional-level results. Remember that the journey of boatbuilding is as rewarding as reaching your destination; it tests one’s patience and dedication. For those seeking to embark on this adventure or simply gain more insight into marine craftsmanship, Sven’s wisdom is invaluable.Making Flanges Around Bulkhead Hatches for Canvas
Sven Yrvind, a renowned yacht designer and sailor, shares valuable insights on creating flanges around bulkhead hatches for canvas protection in this enlightening video. By following his expert guidance, boat enthusiasts can ensure their living areas remain secure while allowing unhindered access through the hatches.Step 1: Starting with the Flange
Sven begins by explaining that working on flanges vertically and horizontally is significantly easier than doing so in a flat position. To simplify the process further, he divides the task into two or three steps as suggested by fellow expert “for for.” This approach not only makes it more manageable but also allows for greater precision in crafting each component.Step 2: Applying Glue and Securing
Sven proceeds to apply glue along one edge of the flange, ensuring a secure bond when clamped into place. He emphasizes that this stage is crucial for maintaining the structural integrity of the flange, which in turn safeguards the living area beneath the canvas when hatches are open.Step 3: Allowing Time to Dry
After securely attaching the first portion of the flange, Sven allows ample time for it to dry before moving forward with additional steps. This patience and precision are key aspects of his successful boatbuilding methods.Step 4: Finishing Touches
Once the flange is fully dried, Sven removes the clamps carefully, ensuring no damage occurs during this process. He then moves on to attaching four more pieces onto these main frames, completing two pairs of flanges for the bulkhead hatches.The Final Touches
While two flanges form the primary support structure around the hatches, Sven mentions there are two additional pieces required at each end to ensure comprehensive protection. This attention to detail highlights his commitment to producing a durable and reliable design. “Sailing is about finding your path, whether it’s across an ocean or within yourself.” – Sven Yrvind In conclusion, making flanges around bulkhead hatches may seem complex at first glance, but by following Sven Yrvind’s meticulous process, enthusiasts can achieve professional-level results. Remember that the journey of boatbuilding is as rewarding as reaching your destination; it tests one’s patience and dedication. For those seeking to embark on this adventure or simply gain more insight into marine craftsmanship, Sven’s wisdom is invaluable.After securely attaching the first portion of the flange, Sven allows ample time for it to dry before moving forward with additional steps. This patience and precision are key aspects of his successful boatbuilding methods.Step 4: Finishing Touches
Once the flange is fully dried, Sven removes the clamps carefully, ensuring no damage occurs during this process. He then moves on to attaching four more pieces onto these main frames, completing two pairs of flanges for the bulkhead hatches.The Final Touches
While two flanges form the primary support structure around the hatches, Sven mentions there are two additional pieces required at each end to ensure comprehensive protection. This attention to detail highlights his commitment to producing a durable and reliable design. “Sailing is about finding your path, whether it’s across an ocean or within yourself.” – Sven Yrvind In conclusion, making flanges around bulkhead hatches may seem complex at first glance, but by following Sven Yrvind’s meticulous process, enthusiasts can achieve professional-level results. Remember that the journey of boatbuilding is as rewarding as reaching your destination; it tests one’s patience and dedication. For those seeking to embark on this adventure or simply gain more insight into marine craftsmanship, Sven’s wisdom is invaluable.Sven Yrvind, a renowned yacht designer and sailor, shares valuable insights on creating flanges around bulkhead hatches for canvas protection in this enlightening video. By following his expert guidance, boat enthusiasts can ensure their living areas remain secure while allowing unhindered access through the hatches.Step 1: Starting with the Flange
Sven begins by explaining that working on flanges vertically and horizontally is significantly easier than doing so in a flat position. To simplify the process further, he divides the task into two or three steps as suggested by fellow expert “for for.” This approach not only makes it more manageable but also allows for greater precision in crafting each component.Step 2: Applying Glue and Securing
Sven proceeds to apply glue along one edge of the flange, ensuring a secure bond when clamped into place. He emphasizes that this stage is crucial for maintaining the structural integrity of the flange, which in turn safeguards the living area beneath the canvas when hatches are open.Step 3: Allowing Time to Dry
After securely attaching the first portion of the flange, Sven allows ample time for it to dry before moving forward with additional steps. This patience and precision are key aspects of his successful boatbuilding methods.Step 4: Finishing Touches
Once the flange is fully dried, Sven removes the clamps carefully, ensuring no damage occurs during this process. He then moves on to attaching four more pieces onto these main frames, completing two pairs of flanges for the bulkhead hatches.The Final Touches
While two flanges form the primary support structure around the hatches, Sven mentions there are two additional pieces required at each end to ensure comprehensive protection. This attention to detail highlights his commitment to producing a durable and reliable design. “Sailing is about finding your path, whether it’s across an ocean or within yourself.” – Sven Yrvind In conclusion, making flanges around bulkhead hatches may seem complex at first glance, but by following Sven Yrvind’s meticulous process, enthusiasts can achieve professional-level results. Remember that the journey of boatbuilding is as rewarding as reaching your destination; it tests one’s patience and dedication. For those seeking to embark on this adventure or simply gain more insight into marine craftsmanship, Sven’s wisdom is invaluable.Making Flanges Around Bulkhead Hatches for Canvas
Sven Yrvind, a renowned yacht designer and sailor, shares valuable insights on creating flanges around bulkhead hatches for canvas protection in this enlightening video. By following his expert guidance, boat enthusiasts can ensure their living areas remain secure while allowing unhindered access through the hatches.Step 1: Starting with the Flange
Sven begins by explaining that working on flanges vertically and horizontally is significantly easier than doing so in a flat position. To simplify the process further, he divides the task into two or three steps as suggested by fellow expert “for for.” This approach not only makes it more manageable but also allows for greater precision in crafting each component.Step 2: Applying Glue and Securing
Sven proceeds to apply glue along one edge of the flange, ensuring a secure bond when clamped into place. He emphasizes that this stage is crucial for maintaining the structural integrity of the flange, which in turn safeguards the living area beneath the canvas when hatches are open.Step 3: Allowing Time to Dry
After securely attaching the first portion of the flange, Sven allows ample time for it to dry before moving forward with additional steps. This patience and precision are key aspects of his successful boatbuilding methods.Step 4: Finishing Touches
Once the flange is fully dried, Sven removes the clamps carefully, ensuring no damage occurs during this process. He then moves on to attaching four more pieces onto these main frames, completing two pairs of flanges for the bulkhead hatches.The Final Touches
While two flanges form the primary support structure around the hatches, Sven mentions there are two additional pieces required at each end to ensure comprehensive protection. This attention to detail highlights his commitment to producing a durable and reliable design. “Sailing is about finding your path, whether it’s across an ocean or within yourself.” – Sven Yrvind In conclusion, making flanges around bulkhead hatches may seem complex at first glance, but by following Sven Yrvind’s meticulous process, enthusiasts can achieve professional-level results. Remember that the journey of boatbuilding is as rewarding as reaching your destination; it tests one’s patience and dedication. For those seeking to embark on this adventure or simply gain more insight into marine craftsmanship, Sven’s wisdom is invaluable.Sven proceeds to apply glue along one edge of the flange, ensuring a secure bond when clamped into place. He emphasizes that this stage is crucial for maintaining the structural integrity of the flange, which in turn safeguards the living area beneath the canvas when hatches are open.Step 3: Allowing Time to Dry
After securely attaching the first portion of the flange, Sven allows ample time for it to dry before moving forward with additional steps. This patience and precision are key aspects of his successful boatbuilding methods.Step 4: Finishing Touches
Once the flange is fully dried, Sven removes the clamps carefully, ensuring no damage occurs during this process. He then moves on to attaching four more pieces onto these main frames, completing two pairs of flanges for the bulkhead hatches.The Final Touches
While two flanges form the primary support structure around the hatches, Sven mentions there are two additional pieces required at each end to ensure comprehensive protection. This attention to detail highlights his commitment to producing a durable and reliable design. “Sailing is about finding your path, whether it’s across an ocean or within yourself.” – Sven Yrvind In conclusion, making flanges around bulkhead hatches may seem complex at first glance, but by following Sven Yrvind’s meticulous process, enthusiasts can achieve professional-level results. Remember that the journey of boatbuilding is as rewarding as reaching your destination; it tests one’s patience and dedication. For those seeking to embark on this adventure or simply gain more insight into marine craftsmanship, Sven’s wisdom is invaluable.Sven Yrvind, a renowned yacht designer and sailor, shares valuable insights on creating flanges around bulkhead hatches for canvas protection in this enlightening video. By following his expert guidance, boat enthusiasts can ensure their living areas remain secure while allowing unhindered access through the hatches.Step 1: Starting with the Flange
Sven begins by explaining that working on flanges vertically and horizontally is significantly easier than doing so in a flat position. To simplify the process further, he divides the task into two or three steps as suggested by fellow expert “for for.” This approach not only makes it more manageable but also allows for greater precision in crafting each component.Step 2: Applying Glue and Securing
Sven proceeds to apply glue along one edge of the flange, ensuring a secure bond when clamped into place. He emphasizes that this stage is crucial for maintaining the structural integrity of the flange, which in turn safeguards the living area beneath the canvas when hatches are open.Step 3: Allowing Time to Dry
After securely attaching the first portion of the flange, Sven allows ample time for it to dry before moving forward with additional steps. This patience and precision are key aspects of his successful boatbuilding methods.Step 4: Finishing Touches
Once the flange is fully dried, Sven removes the clamps carefully, ensuring no damage occurs during this process. He then moves on to attaching four more pieces onto these main frames, completing two pairs of flanges for the bulkhead hatches.The Final Touches
While two flanges form the primary support structure around the hatches, Sven mentions there are two additional pieces required at each end to ensure comprehensive protection. This attention to detail highlights his commitment to producing a durable and reliable design. “Sailing is about finding your path, whether it’s across an ocean or within yourself.” – Sven Yrvind In conclusion, making flanges around bulkhead hatches may seem complex at first glance, but by following Sven Yrvind’s meticulous process, enthusiasts can achieve professional-level results. Remember that the journey of boatbuilding is as rewarding as reaching your destination; it tests one’s patience and dedication. For those seeking to embark on this adventure or simply gain more insight into marine craftsmanship, Sven’s wisdom is invaluable.Making Flanges Around Bulkhead Hatches for Canvas
Sven Yrvind, a renowned yacht designer and sailor, shares valuable insights on creating flanges around bulkhead hatches for canvas protection in this enlightening video. By following his expert guidance, boat enthusiasts can ensure their living areas remain secure while allowing unhindered access through the hatches.Step 1: Starting with the Flange
Sven begins by explaining that working on flanges vertically and horizontally is significantly easier than doing so in a flat position. To simplify the process further, he divides the task into two or three steps as suggested by fellow expert “for for.” This approach not only makes it more manageable but also allows for greater precision in crafting each component.Step 2: Applying Glue and Securing
Sven proceeds to apply glue along one edge of the flange, ensuring a secure bond when clamped into place. He emphasizes that this stage is crucial for maintaining the structural integrity of the flange, which in turn safeguards the living area beneath the canvas when hatches are open.Step 3: Allowing Time to Dry
After securely attaching the first portion of the flange, Sven allows ample time for it to dry before moving forward with additional steps. This patience and precision are key aspects of his successful boatbuilding methods.Step 4: Finishing Touches
Once the flange is fully dried, Sven removes the clamps carefully, ensuring no damage occurs during this process. He then moves on to attaching four more pieces onto these main frames, completing two pairs of flanges for the bulkhead hatches.The Final Touches
While two flanges form the primary support structure around the hatches, Sven mentions there are two additional pieces required at each end to ensure comprehensive protection. This attention to detail highlights his commitment to producing a durable and reliable design. “Sailing is about finding your path, whether it’s across an ocean or within yourself.” – Sven Yrvind In conclusion, making flanges around bulkhead hatches may seem complex at first glance, but by following Sven Yrvind’s meticulous process, enthusiasts can achieve professional-level results. Remember that the journey of boatbuilding is as rewarding as reaching your destination; it tests one’s patience and dedication. For those seeking to embark on this adventure or simply gain more insight into marine craftsmanship, Sven’s wisdom is invaluable.Sven begins by explaining that working on flanges vertically and horizontally is significantly easier than doing so in a flat position. To simplify the process further, he divides the task into two or three steps as suggested by fellow expert “for for.” This approach not only makes it more manageable but also allows for greater precision in crafting each component.Step 2: Applying Glue and Securing
Sven proceeds to apply glue along one edge of the flange, ensuring a secure bond when clamped into place. He emphasizes that this stage is crucial for maintaining the structural integrity of the flange, which in turn safeguards the living area beneath the canvas when hatches are open.Step 3: Allowing Time to Dry
After securely attaching the first portion of the flange, Sven allows ample time for it to dry before moving forward with additional steps. This patience and precision are key aspects of his successful boatbuilding methods.Step 4: Finishing Touches
Once the flange is fully dried, Sven removes the clamps carefully, ensuring no damage occurs during this process. He then moves on to attaching four more pieces onto these main frames, completing two pairs of flanges for the bulkhead hatches.The Final Touches
While two flanges form the primary support structure around the hatches, Sven mentions there are two additional pieces required at each end to ensure comprehensive protection. This attention to detail highlights his commitment to producing a durable and reliable design. “Sailing is about finding your path, whether it’s across an ocean or within yourself.” – Sven Yrvind In conclusion, making flanges around bulkhead hatches may seem complex at first glance, but by following Sven Yrvind’s meticulous process, enthusiasts can achieve professional-level results. Remember that the journey of boatbuilding is as rewarding as reaching your destination; it tests one’s patience and dedication. For those seeking to embark on this adventure or simply gain more insight into marine craftsmanship, Sven’s wisdom is invaluable.Sven Yrvind, a renowned yacht designer and sailor, shares valuable insights on creating flanges around bulkhead hatches for canvas protection in this enlightening video. By following his expert guidance, boat enthusiasts can ensure their living areas remain secure while allowing unhindered access through the hatches.Step 1: Starting with the Flange
Sven begins by explaining that working on flanges vertically and horizontally is significantly easier than doing so in a flat position. To simplify the process further, he divides the task into two or three steps as suggested by fellow expert “for for.” This approach not only makes it more manageable but also allows for greater precision in crafting each component.Step 2: Applying Glue and Securing
Sven proceeds to apply glue along one edge of the flange, ensuring a secure bond when clamped into place. He emphasizes that this stage is crucial for maintaining the structural integrity of the flange, which in turn safeguards the living area beneath the canvas when hatches are open.Step 3: Allowing Time to Dry
After securely attaching the first portion of the flange, Sven allows ample time for it to dry before moving forward with additional steps. This patience and precision are key aspects of his successful boatbuilding methods.Step 4: Finishing Touches
Once the flange is fully dried, Sven removes the clamps carefully, ensuring no damage occurs during this process. He then moves on to attaching four more pieces onto these main frames, completing two pairs of flanges for the bulkhead hatches.The Final Touches
While two flanges form the primary support structure around the hatches, Sven mentions there are two additional pieces required at each end to ensure comprehensive protection. This attention to detail highlights his commitment to producing a durable and reliable design. “Sailing is about finding your path, whether it’s across an ocean or within yourself.” – Sven Yrvind In conclusion, making flanges around bulkhead hatches may seem complex at first glance, but by following Sven Yrvind’s meticulous process, enthusiasts can achieve professional-level results. Remember that the journey of boatbuilding is as rewarding as reaching your destination; it tests one’s patience and dedication. For those seeking to embark on this adventure or simply gain more insight into marine craftsmanship, Sven’s wisdom is invaluable.Making Flanges Around Bulkhead Hatches for Canvas
Sven Yrvind, a renowned yacht designer and sailor, shares valuable insights on creating flanges around bulkhead hatches for canvas protection in this enlightening video. By following his expert guidance, boat enthusiasts can ensure their living areas remain secure while allowing unhindered access through the hatches.Step 1: Starting with the Flange
Sven begins by explaining that working on flanges vertically and horizontally is significantly easier than doing so in a flat position. To simplify the process further, he divides the task into two or three steps as suggested by fellow expert “for for.” This approach not only makes it more manageable but also allows for greater precision in crafting each component.Step 2: Applying Glue and Securing
Sven proceeds to apply glue along one edge of the flange, ensuring a secure bond when clamped into place. He emphasizes that this stage is crucial for maintaining the structural integrity of the flange, which in turn safeguards the living area beneath the canvas when hatches are open.Step 3: Allowing Time to Dry
After securely attaching the first portion of the flange, Sven allows ample time for it to dry before moving forward with additional steps. This patience and precision are key aspects of his successful boatbuilding methods.Step 4: Finishing Touches
Once the flange is fully dried, Sven removes the clamps carefully, ensuring no damage occurs during this process. He then moves on to attaching four more pieces onto these main frames, completing two pairs of flanges for the bulkhead hatches.The Final Touches
While two flanges form the primary support structure around the hatches, Sven mentions there are two additional pieces required at each end to ensure comprehensive protection. This attention to detail highlights his commitment to producing a durable and reliable design. “Sailing is about finding your path, whether it’s across an ocean or within yourself.” – Sven Yrvind In conclusion, making flanges around bulkhead hatches may seem complex at first glance, but by following Sven Yrvind’s meticulous process, enthusiasts can achieve professional-level results. Remember that the journey of boatbuilding is as rewarding as reaching your destination; it tests one’s patience and dedication. For those seeking to embark on this adventure or simply gain more insight into marine craftsmanship, Sven’s wisdom is invaluable.Once the flange is fully dried, Sven removes the clamps carefully, ensuring no damage occurs during this process. He then moves on to attaching four more pieces onto these main frames, completing two pairs of flanges for the bulkhead hatches.The Final Touches
While two flanges form the primary support structure around the hatches, Sven mentions there are two additional pieces required at each end to ensure comprehensive protection. This attention to detail highlights his commitment to producing a durable and reliable design. “Sailing is about finding your path, whether it’s across an ocean or within yourself.” – Sven Yrvind In conclusion, making flanges around bulkhead hatches may seem complex at first glance, but by following Sven Yrvind’s meticulous process, enthusiasts can achieve professional-level results. Remember that the journey of boatbuilding is as rewarding as reaching your destination; it tests one’s patience and dedication. For those seeking to embark on this adventure or simply gain more insight into marine craftsmanship, Sven’s wisdom is invaluable.Sven begins by explaining that working on flanges vertically and horizontally is significantly easier than doing so in a flat position. To simplify the process further, he divides the task into two or three steps as suggested by fellow expert “for for.” This approach not only makes it more manageable but also allows for greater precision in crafting each component.Step 2: Applying Glue and Securing
Sven proceeds to apply glue along one edge of the flange, ensuring a secure bond when clamped into place. He emphasizes that this stage is crucial for maintaining the structural integrity of the flange, which in turn safeguards the living area beneath the canvas when hatches are open.Step 3: Allowing Time to Dry
After securely attaching the first portion of the flange, Sven allows ample time for it to dry before moving forward with additional steps. This patience and precision are key aspects of his successful boatbuilding methods.Step 4: Finishing Touches
Once the flange is fully dried, Sven removes the clamps carefully, ensuring no damage occurs during this process. He then moves on to attaching four more pieces onto these main frames, completing two pairs of flanges for the bulkhead hatches.The Final Touches
While two flanges form the primary support structure around the hatches, Sven mentions there are two additional pieces required at each end to ensure comprehensive protection. This attention to detail highlights his commitment to producing a durable and reliable design. “Sailing is about finding your path, whether it’s across an ocean or within yourself.” – Sven Yrvind In conclusion, making flanges around bulkhead hatches may seem complex at first glance, but by following Sven Yrvind’s meticulous process, enthusiasts can achieve professional-level results. Remember that the journey of boatbuilding is as rewarding as reaching your destination; it tests one’s patience and dedication. For those seeking to embark on this adventure or simply gain more insight into marine craftsmanship, Sven’s wisdom is invaluable.Sven Yrvind, a renowned yacht designer and sailor, shares valuable insights on creating flanges around bulkhead hatches for canvas protection in this enlightening video. By following his expert guidance, boat enthusiasts can ensure their living areas remain secure while allowing unhindered access through the hatches.Step 1: Starting with the Flange
Sven begins by explaining that working on flanges vertically and horizontally is significantly easier than doing so in a flat position. To simplify the process further, he divides the task into two or three steps as suggested by fellow expert “for for.” This approach not only makes it more manageable but also allows for greater precision in crafting each component.Step 2: Applying Glue and Securing
Sven proceeds to apply glue along one edge of the flange, ensuring a secure bond when clamped into place. He emphasizes that this stage is crucial for maintaining the structural integrity of the flange, which in turn safeguards the living area beneath the canvas when hatches are open.Step 3: Allowing Time to Dry
After securely attaching the first portion of the flange, Sven allows ample time for it to dry before moving forward with additional steps. This patience and precision are key aspects of his successful boatbuilding methods.Step 4: Finishing Touches
Once the flange is fully dried, Sven removes the clamps carefully, ensuring no damage occurs during this process. He then moves on to attaching four more pieces onto these main frames, completing two pairs of flanges for the bulkhead hatches.The Final Touches
While two flanges form the primary support structure around the hatches, Sven mentions there are two additional pieces required at each end to ensure comprehensive protection. This attention to detail highlights his commitment to producing a durable and reliable design. “Sailing is about finding your path, whether it’s across an ocean or within yourself.” – Sven Yrvind In conclusion, making flanges around bulkhead hatches may seem complex at first glance, but by following Sven Yrvind’s meticulous process, enthusiasts can achieve professional-level results. Remember that the journey of boatbuilding is as rewarding as reaching your destination; it tests one’s patience and dedication. For those seeking to embark on this adventure or simply gain more insight into marine craftsmanship, Sven’s wisdom is invaluable.Making Flanges Around Bulkhead Hatches for Canvas
Sven Yrvind, a renowned yacht designer and sailor, shares valuable insights on creating flanges around bulkhead hatches for canvas protection in this enlightening video. By following his expert guidance, boat enthusiasts can ensure their living areas remain secure while allowing unhindered access through the hatches.Step 1: Starting with the Flange
Sven begins by explaining that working on flanges vertically and horizontally is significantly easier than doing so in a flat position. To simplify the process further, he divides the task into two or three steps as suggested by fellow expert “for for.” This approach not only makes it more manageable but also allows for greater precision in crafting each component.Step 2: Applying Glue and Securing
Sven proceeds to apply glue along one edge of the flange, ensuring a secure bond when clamped into place. He emphasizes that this stage is crucial for maintaining the structural integrity of the flange, which in turn safeguards the living area beneath the canvas when hatches are open.Step 3: Allowing Time to Dry
After securely attaching the first portion of the flange, Sven allows ample time for it to dry before moving forward with additional steps. This patience and precision are key aspects of his successful boatbuilding methods.Step 4: Finishing Touches
Once the flange is fully dried, Sven removes the clamps carefully, ensuring no damage occurs during this process. He then moves on to attaching four more pieces onto these main frames, completing two pairs of flanges for the bulkhead hatches.The Final Touches
While two flanges form the primary support structure around the hatches, Sven mentions there are two additional pieces required at each end to ensure comprehensive protection. This attention to detail highlights his commitment to producing a durable and reliable design. “Sailing is about finding your path, whether it’s across an ocean or within yourself.” – Sven Yrvind In conclusion, making flanges around bulkhead hatches may seem complex at first glance, but by following Sven Yrvind’s meticulous process, enthusiasts can achieve professional-level results. Remember that the journey of boatbuilding is as rewarding as reaching your destination; it tests one’s patience and dedication. For those seeking to embark on this adventure or simply gain more insight into marine craftsmanship, Sven’s wisdom is invaluable.After securely attaching the first portion of the flange, Sven allows ample time for it to dry before moving forward with additional steps. This patience and precision are key aspects of his successful boatbuilding methods.Step 4: Finishing Touches
Once the flange is fully dried, Sven removes the clamps carefully, ensuring no damage occurs during this process. He then moves on to attaching four more pieces onto these main frames, completing two pairs of flanges for the bulkhead hatches.The Final Touches
While two flanges form the primary support structure around the hatches, Sven mentions there are two additional pieces required at each end to ensure comprehensive protection. This attention to detail highlights his commitment to producing a durable and reliable design. “Sailing is about finding your path, whether it’s across an ocean or within yourself.” – Sven Yrvind In conclusion, making flanges around bulkhead hatches may seem complex at first glance, but by following Sven Yrvind’s meticulous process, enthusiasts can achieve professional-level results. Remember that the journey of boatbuilding is as rewarding as reaching your destination; it tests one’s patience and dedication. For those seeking to embark on this adventure or simply gain more insight into marine craftsmanship, Sven’s wisdom is invaluable.Sven begins by explaining that working on flanges vertically and horizontally is significantly easier than doing so in a flat position. To simplify the process further, he divides the task into two or three steps as suggested by fellow expert “for for.” This approach not only makes it more manageable but also allows for greater precision in crafting each component.Step 2: Applying Glue and Securing
Sven proceeds to apply glue along one edge of the flange, ensuring a secure bond when clamped into place. He emphasizes that this stage is crucial for maintaining the structural integrity of the flange, which in turn safeguards the living area beneath the canvas when hatches are open.Step 3: Allowing Time to Dry
After securely attaching the first portion of the flange, Sven allows ample time for it to dry before moving forward with additional steps. This patience and precision are key aspects of his successful boatbuilding methods.Step 4: Finishing Touches
Once the flange is fully dried, Sven removes the clamps carefully, ensuring no damage occurs during this process. He then moves on to attaching four more pieces onto these main frames, completing two pairs of flanges for the bulkhead hatches.The Final Touches
While two flanges form the primary support structure around the hatches, Sven mentions there are two additional pieces required at each end to ensure comprehensive protection. This attention to detail highlights his commitment to producing a durable and reliable design. “Sailing is about finding your path, whether it’s across an ocean or within yourself.” – Sven Yrvind In conclusion, making flanges around bulkhead hatches may seem complex at first glance, but by following Sven Yrvind’s meticulous process, enthusiasts can achieve professional-level results. Remember that the journey of boatbuilding is as rewarding as reaching your destination; it tests one’s patience and dedication. For those seeking to embark on this adventure or simply gain more insight into marine craftsmanship, Sven’s wisdom is invaluable.Sven Yrvind, a renowned yacht designer and sailor, shares valuable insights on creating flanges around bulkhead hatches for canvas protection in this enlightening video. By following his expert guidance, boat enthusiasts can ensure their living areas remain secure while allowing unhindered access through the hatches.Step 1: Starting with the Flange
Sven begins by explaining that working on flanges vertically and horizontally is significantly easier than doing so in a flat position. To simplify the process further, he divides the task into two or three steps as suggested by fellow expert “for for.” This approach not only makes it more manageable but also allows for greater precision in crafting each component.Step 2: Applying Glue and Securing
Sven proceeds to apply glue along one edge of the flange, ensuring a secure bond when clamped into place. He emphasizes that this stage is crucial for maintaining the structural integrity of the flange, which in turn safeguards the living area beneath the canvas when hatches are open.Step 3: Allowing Time to Dry
After securely attaching the first portion of the flange, Sven allows ample time for it to dry before moving forward with additional steps. This patience and precision are key aspects of his successful boatbuilding methods.Step 4: Finishing Touches
Once the flange is fully dried, Sven removes the clamps carefully, ensuring no damage occurs during this process. He then moves on to attaching four more pieces onto these main frames, completing two pairs of flanges for the bulkhead hatches.The Final Touches
While two flanges form the primary support structure around the hatches, Sven mentions there are two additional pieces required at each end to ensure comprehensive protection. This attention to detail highlights his commitment to producing a durable and reliable design. “Sailing is about finding your path, whether it’s across an ocean or within yourself.” – Sven Yrvind In conclusion, making flanges around bulkhead hatches may seem complex at first glance, but by following Sven Yrvind’s meticulous process, enthusiasts can achieve professional-level results. Remember that the journey of boatbuilding is as rewarding as reaching your destination; it tests one’s patience and dedication. For those seeking to embark on this adventure or simply gain more insight into marine craftsmanship, Sven’s wisdom is invaluable.Making Flanges Around Bulkhead Hatches for Canvas
Sven Yrvind, a renowned yacht designer and sailor, shares valuable insights on creating flanges around bulkhead hatches for canvas protection in this enlightening video. By following his expert guidance, boat enthusiasts can ensure their living areas remain secure while allowing unhindered access through the hatches.Step 1: Starting with the Flange
Sven begins by explaining that working on flanges vertically and horizontally is significantly easier than doing so in a flat position. To simplify the process further, he divides the task into two or three steps as suggested by fellow expert “for for.” This approach not only makes it more manageable but also allows for greater precision in crafting each component.Step 2: Applying Glue and Securing
Sven proceeds to apply glue along one edge of the flange, ensuring a secure bond when clamped into place. He emphasizes that this stage is crucial for maintaining the structural integrity of the flange, which in turn safeguards the living area beneath the canvas when hatches are open.Step 3: Allowing Time to Dry
After securely attaching the first portion of the flange, Sven allows ample time for it to dry before moving forward with additional steps. This patience and precision are key aspects of his successful boatbuilding methods.Step 4: Finishing Touches
Once the flange is fully dried, Sven removes the clamps carefully, ensuring no damage occurs during this process. He then moves on to attaching four more pieces onto these main frames, completing two pairs of flanges for the bulkhead hatches.The Final Touches
While two flanges form the primary support structure around the hatches, Sven mentions there are two additional pieces required at each end to ensure comprehensive protection. This attention to detail highlights his commitment to producing a durable and reliable design. “Sailing is about finding your path, whether it’s across an ocean or within yourself.” – Sven Yrvind In conclusion, making flanges around bulkhead hatches may seem complex at first glance, but by following Sven Yrvind’s meticulous process, enthusiasts can achieve professional-level results. Remember that the journey of boatbuilding is as rewarding as reaching your destination; it tests one’s patience and dedication. For those seeking to embark on this adventure or simply gain more insight into marine craftsmanship, Sven’s wisdom is invaluable.Sven proceeds to apply glue along one edge of the flange, ensuring a secure bond when clamped into place. He emphasizes that this stage is crucial for maintaining the structural integrity of the flange, which in turn safeguards the living area beneath the canvas when hatches are open.Step 3: Allowing Time to Dry
After securely attaching the first portion of the flange, Sven allows ample time for it to dry before moving forward with additional steps. This patience and precision are key aspects of his successful boatbuilding methods.Step 4: Finishing Touches
Once the flange is fully dried, Sven removes the clamps carefully, ensuring no damage occurs during this process. He then moves on to attaching four more pieces onto these main frames, completing two pairs of flanges for the bulkhead hatches.The Final Touches
While two flanges form the primary support structure around the hatches, Sven mentions there are two additional pieces required at each end to ensure comprehensive protection. This attention to detail highlights his commitment to producing a durable and reliable design. “Sailing is about finding your path, whether it’s across an ocean or within yourself.” – Sven Yrvind In conclusion, making flanges around bulkhead hatches may seem complex at first glance, but by following Sven Yrvind’s meticulous process, enthusiasts can achieve professional-level results. Remember that the journey of boatbuilding is as rewarding as reaching your destination; it tests one’s patience and dedication. For those seeking to embark on this adventure or simply gain more insight into marine craftsmanship, Sven’s wisdom is invaluable.Sven begins by explaining that working on flanges vertically and horizontally is significantly easier than doing so in a flat position. To simplify the process further, he divides the task into two or three steps as suggested by fellow expert “for for.” This approach not only makes it more manageable but also allows for greater precision in crafting each component.Step 2: Applying Glue and Securing
Sven proceeds to apply glue along one edge of the flange, ensuring a secure bond when clamped into place. He emphasizes that this stage is crucial for maintaining the structural integrity of the flange, which in turn safeguards the living area beneath the canvas when hatches are open.Step 3: Allowing Time to Dry
After securely attaching the first portion of the flange, Sven allows ample time for it to dry before moving forward with additional steps. This patience and precision are key aspects of his successful boatbuilding methods.Step 4: Finishing Touches
Once the flange is fully dried, Sven removes the clamps carefully, ensuring no damage occurs during this process. He then moves on to attaching four more pieces onto these main frames, completing two pairs of flanges for the bulkhead hatches.The Final Touches
While two flanges form the primary support structure around the hatches, Sven mentions there are two additional pieces required at each end to ensure comprehensive protection. This attention to detail highlights his commitment to producing a durable and reliable design. “Sailing is about finding your path, whether it’s across an ocean or within yourself.” – Sven Yrvind In conclusion, making flanges around bulkhead hatches may seem complex at first glance, but by following Sven Yrvind’s meticulous process, enthusiasts can achieve professional-level results. Remember that the journey of boatbuilding is as rewarding as reaching your destination; it tests one’s patience and dedication. For those seeking to embark on this adventure or simply gain more insight into marine craftsmanship, Sven’s wisdom is invaluable.Sven Yrvind, a renowned yacht designer and sailor, shares valuable insights on creating flanges around bulkhead hatches for canvas protection in this enlightening video. By following his expert guidance, boat enthusiasts can ensure their living areas remain secure while allowing unhindered access through the hatches.Step 1: Starting with the Flange
Sven begins by explaining that working on flanges vertically and horizontally is significantly easier than doing so in a flat position. To simplify the process further, he divides the task into two or three steps as suggested by fellow expert “for for.” This approach not only makes it more manageable but also allows for greater precision in crafting each component.Step 2: Applying Glue and Securing
Sven proceeds to apply glue along one edge of the flange, ensuring a secure bond when clamped into place. He emphasizes that this stage is crucial for maintaining the structural integrity of the flange, which in turn safeguards the living area beneath the canvas when hatches are open.Step 3: Allowing Time to Dry
After securely attaching the first portion of the flange, Sven allows ample time for it to dry before moving forward with additional steps. This patience and precision are key aspects of his successful boatbuilding methods.Step 4: Finishing Touches
Once the flange is fully dried, Sven removes the clamps carefully, ensuring no damage occurs during this process. He then moves on to attaching four more pieces onto these main frames, completing two pairs of flanges for the bulkhead hatches.The Final Touches
While two flanges form the primary support structure around the hatches, Sven mentions there are two additional pieces required at each end to ensure comprehensive protection. This attention to detail highlights his commitment to producing a durable and reliable design. “Sailing is about finding your path, whether it’s across an ocean or within yourself.” – Sven Yrvind In conclusion, making flanges around bulkhead hatches may seem complex at first glance, but by following Sven Yrvind’s meticulous process, enthusiasts can achieve professional-level results. Remember that the journey of boatbuilding is as rewarding as reaching your destination; it tests one’s patience and dedication. For those seeking to embark on this adventure or simply gain more insight into marine craftsmanship, Sven’s wisdom is invaluable.Making Flanges Around Bulkhead Hatches for Canvas
Sven Yrvind, a renowned yacht designer and sailor, shares valuable insights on creating flanges around bulkhead hatches for canvas protection in this enlightening video. By following his expert guidance, boat enthusiasts can ensure their living areas remain secure while allowing unhindered access through the hatches.Step 1: Starting with the Flange
Sven begins by explaining that working on flanges vertically and horizontally is significantly easier than doing so in a flat position. To simplify the process further, he divides the task into two or three steps as suggested by fellow expert “for for.” This approach not only makes it more manageable but also allows for greater precision in crafting each component.Step 2: Applying Glue and Securing
Sven proceeds to apply glue along one edge of the flange, ensuring a secure bond when clamped into place. He emphasizes that this stage is crucial for maintaining the structural integrity of the flange, which in turn safeguards the living area beneath the canvas when hatches are open.Step 3: Allowing Time to Dry
After securely attaching the first portion of the flange, Sven allows ample time for it to dry before moving forward with additional steps. This patience and precision are key aspects of his successful boatbuilding methods.Step 4: Finishing Touches
Once the flange is fully dried, Sven removes the clamps carefully, ensuring no damage occurs during this process. He then moves on to attaching four more pieces onto these main frames, completing two pairs of flanges for the bulkhead hatches.The Final Touches
While two flanges form the primary support structure around the hatches, Sven mentions there are two additional pieces required at each end to ensure comprehensive protection. This attention to detail highlights his commitment to producing a durable and reliable design. “Sailing is about finding your path, whether it’s across an ocean or within yourself.” – Sven Yrvind In conclusion, making flanges around bulkhead hatches may seem complex at first glance, but by following Sven Yrvind’s meticulous process, enthusiasts can achieve professional-level results. Remember that the journey of boatbuilding is as rewarding as reaching your destination; it tests one’s patience and dedication. For those seeking to embark on this adventure or simply gain more insight into marine craftsmanship, Sven’s wisdom is invaluable.Once the flange is fully dried, Sven removes the clamps carefully, ensuring no damage occurs during this process. He then moves on to attaching four more pieces onto these main frames, completing two pairs of flanges for the bulkhead hatches.The Final Touches
While two flanges form the primary support structure around the hatches, Sven mentions there are two additional pieces required at each end to ensure comprehensive protection. This attention to detail highlights his commitment to producing a durable and reliable design. “Sailing is about finding your path, whether it’s across an ocean or within yourself.” – Sven Yrvind In conclusion, making flanges around bulkhead hatches may seem complex at first glance, but by following Sven Yrvind’s meticulous process, enthusiasts can achieve professional-level results. Remember that the journey of boatbuilding is as rewarding as reaching your destination; it tests one’s patience and dedication. For those seeking to embark on this adventure or simply gain more insight into marine craftsmanship, Sven’s wisdom is invaluable.Sven proceeds to apply glue along one edge of the flange, ensuring a secure bond when clamped into place. He emphasizes that this stage is crucial for maintaining the structural integrity of the flange, which in turn safeguards the living area beneath the canvas when hatches are open.Step 3: Allowing Time to Dry
After securely attaching the first portion of the flange, Sven allows ample time for it to dry before moving forward with additional steps. This patience and precision are key aspects of his successful boatbuilding methods.Step 4: Finishing Touches
Once the flange is fully dried, Sven removes the clamps carefully, ensuring no damage occurs during this process. He then moves on to attaching four more pieces onto these main frames, completing two pairs of flanges for the bulkhead hatches.The Final Touches
While two flanges form the primary support structure around the hatches, Sven mentions there are two additional pieces required at each end to ensure comprehensive protection. This attention to detail highlights his commitment to producing a durable and reliable design. “Sailing is about finding your path, whether it’s across an ocean or within yourself.” – Sven Yrvind In conclusion, making flanges around bulkhead hatches may seem complex at first glance, but by following Sven Yrvind’s meticulous process, enthusiasts can achieve professional-level results. Remember that the journey of boatbuilding is as rewarding as reaching your destination; it tests one’s patience and dedication. For those seeking to embark on this adventure or simply gain more insight into marine craftsmanship, Sven’s wisdom is invaluable.Sven begins by explaining that working on flanges vertically and horizontally is significantly easier than doing so in a flat position. To simplify the process further, he divides the task into two or three steps as suggested by fellow expert “for for.” This approach not only makes it more manageable but also allows for greater precision in crafting each component.Step 2: Applying Glue and Securing
Sven proceeds to apply glue along one edge of the flange, ensuring a secure bond when clamped into place. He emphasizes that this stage is crucial for maintaining the structural integrity of the flange, which in turn safeguards the living area beneath the canvas when hatches are open.Step 3: Allowing Time to Dry
After securely attaching the first portion of the flange, Sven allows ample time for it to dry before moving forward with additional steps. This patience and precision are key aspects of his successful boatbuilding methods.Step 4: Finishing Touches
Once the flange is fully dried, Sven removes the clamps carefully, ensuring no damage occurs during this process. He then moves on to attaching four more pieces onto these main frames, completing two pairs of flanges for the bulkhead hatches.The Final Touches
While two flanges form the primary support structure around the hatches, Sven mentions there are two additional pieces required at each end to ensure comprehensive protection. This attention to detail highlights his commitment to producing a durable and reliable design. “Sailing is about finding your path, whether it’s across an ocean or within yourself.” – Sven Yrvind In conclusion, making flanges around bulkhead hatches may seem complex at first glance, but by following Sven Yrvind’s meticulous process, enthusiasts can achieve professional-level results. Remember that the journey of boatbuilding is as rewarding as reaching your destination; it tests one’s patience and dedication. For those seeking to embark on this adventure or simply gain more insight into marine craftsmanship, Sven’s wisdom is invaluable.Sven Yrvind, a renowned yacht designer and sailor, shares valuable insights on creating flanges around bulkhead hatches for canvas protection in this enlightening video. By following his expert guidance, boat enthusiasts can ensure their living areas remain secure while allowing unhindered access through the hatches.Step 1: Starting with the Flange
Sven begins by explaining that working on flanges vertically and horizontally is significantly easier than doing so in a flat position. To simplify the process further, he divides the task into two or three steps as suggested by fellow expert “for for.” This approach not only makes it more manageable but also allows for greater precision in crafting each component.Step 2: Applying Glue and Securing
Sven proceeds to apply glue along one edge of the flange, ensuring a secure bond when clamped into place. He emphasizes that this stage is crucial for maintaining the structural integrity of the flange, which in turn safeguards the living area beneath the canvas when hatches are open.Step 3: Allowing Time to Dry
After securely attaching the first portion of the flange, Sven allows ample time for it to dry before moving forward with additional steps. This patience and precision are key aspects of his successful boatbuilding methods.Step 4: Finishing Touches
Once the flange is fully dried, Sven removes the clamps carefully, ensuring no damage occurs during this process. He then moves on to attaching four more pieces onto these main frames, completing two pairs of flanges for the bulkhead hatches.The Final Touches
While two flanges form the primary support structure around the hatches, Sven mentions there are two additional pieces required at each end to ensure comprehensive protection. This attention to detail highlights his commitment to producing a durable and reliable design. “Sailing is about finding your path, whether it’s across an ocean or within yourself.” – Sven Yrvind In conclusion, making flanges around bulkhead hatches may seem complex at first glance, but by following Sven Yrvind’s meticulous process, enthusiasts can achieve professional-level results. Remember that the journey of boatbuilding is as rewarding as reaching your destination; it tests one’s patience and dedication. For those seeking to embark on this adventure or simply gain more insight into marine craftsmanship, Sven’s wisdom is invaluable.Making Flanges Around Bulkhead Hatches for Canvas
Sven Yrvind, a renowned yacht designer and sailor, shares valuable insights on creating flanges around bulkhead hatches for canvas protection in this enlightening video. By following his expert guidance, boat enthusiasts can ensure their living areas remain secure while allowing unhindered access through the hatches.Step 1: Starting with the Flange
Sven begins by explaining that working on flanges vertically and horizontally is significantly easier than doing so in a flat position. To simplify the process further, he divides the task into two or three steps as suggested by fellow expert “for for.” This approach not only makes it more manageable but also allows for greater precision in crafting each component.Step 2: Applying Glue and Securing
Sven proceeds to apply glue along one edge of the flange, ensuring a secure bond when clamped into place. He emphasizes that this stage is crucial for maintaining the structural integrity of the flange, which in turn safeguards the living area beneath the canvas when hatches are open.Step 3: Allowing Time to Dry
After securely attaching the first portion of the flange, Sven allows ample time for it to dry before moving forward with additional steps. This patience and precision are key aspects of his successful boatbuilding methods.Step 4: Finishing Touches
Once the flange is fully dried, Sven removes the clamps carefully, ensuring no damage occurs during this process. He then moves on to attaching four more pieces onto these main frames, completing two pairs of flanges for the bulkhead hatches.The Final Touches
While two flanges form the primary support structure around the hatches, Sven mentions there are two additional pieces required at each end to ensure comprehensive protection. This attention to detail highlights his commitment to producing a durable and reliable design. “Sailing is about finding your path, whether it’s across an ocean or within yourself.” – Sven Yrvind In conclusion, making flanges around bulkhead hatches may seem complex at first glance, but by following Sven Yrvind’s meticulous process, enthusiasts can achieve professional-level results. Remember that the journey of boatbuilding is as rewarding as reaching your destination; it tests one’s patience and dedication. For those seeking to embark on this adventure or simply gain more insight into marine craftsmanship, Sven’s wisdom is invaluable.After securely attaching the first portion of the flange, Sven allows ample time for it to dry before moving forward with additional steps. This patience and precision are key aspects of his successful boatbuilding methods.Step 4: Finishing Touches
Once the flange is fully dried, Sven removes the clamps carefully, ensuring no damage occurs during this process. He then moves on to attaching four more pieces onto these main frames, completing two pairs of flanges for the bulkhead hatches.The Final Touches
While two flanges form the primary support structure around the hatches, Sven mentions there are two additional pieces required at each end to ensure comprehensive protection. This attention to detail highlights his commitment to producing a durable and reliable design. “Sailing is about finding your path, whether it’s across an ocean or within yourself.” – Sven Yrvind In conclusion, making flanges around bulkhead hatches may seem complex at first glance, but by following Sven Yrvind’s meticulous process, enthusiasts can achieve professional-level results. Remember that the journey of boatbuilding is as rewarding as reaching your destination; it tests one’s patience and dedication. For those seeking to embark on this adventure or simply gain more insight into marine craftsmanship, Sven’s wisdom is invaluable.Sven proceeds to apply glue along one edge of the flange, ensuring a secure bond when clamped into place. He emphasizes that this stage is crucial for maintaining the structural integrity of the flange, which in turn safeguards the living area beneath the canvas when hatches are open.Step 3: Allowing Time to Dry
After securely attaching the first portion of the flange, Sven allows ample time for it to dry before moving forward with additional steps. This patience and precision are key aspects of his successful boatbuilding methods.Step 4: Finishing Touches
Once the flange is fully dried, Sven removes the clamps carefully, ensuring no damage occurs during this process. He then moves on to attaching four more pieces onto these main frames, completing two pairs of flanges for the bulkhead hatches.The Final Touches
While two flanges form the primary support structure around the hatches, Sven mentions there are two additional pieces required at each end to ensure comprehensive protection. This attention to detail highlights his commitment to producing a durable and reliable design. “Sailing is about finding your path, whether it’s across an ocean or within yourself.” – Sven Yrvind In conclusion, making flanges around bulkhead hatches may seem complex at first glance, but by following Sven Yrvind’s meticulous process, enthusiasts can achieve professional-level results. Remember that the journey of boatbuilding is as rewarding as reaching your destination; it tests one’s patience and dedication. For those seeking to embark on this adventure or simply gain more insight into marine craftsmanship, Sven’s wisdom is invaluable.Sven begins by explaining that working on flanges vertically and horizontally is significantly easier than doing so in a flat position. To simplify the process further, he divides the task into two or three steps as suggested by fellow expert “for for.” This approach not only makes it more manageable but also allows for greater precision in crafting each component.Step 2: Applying Glue and Securing
Sven proceeds to apply glue along one edge of the flange, ensuring a secure bond when clamped into place. He emphasizes that this stage is crucial for maintaining the structural integrity of the flange, which in turn safeguards the living area beneath the canvas when hatches are open.Step 3: Allowing Time to Dry
After securely attaching the first portion of the flange, Sven allows ample time for it to dry before moving forward with additional steps. This patience and precision are key aspects of his successful boatbuilding methods.Step 4: Finishing Touches
Once the flange is fully dried, Sven removes the clamps carefully, ensuring no damage occurs during this process. He then moves on to attaching four more pieces onto these main frames, completing two pairs of flanges for the bulkhead hatches.The Final Touches
While two flanges form the primary support structure around the hatches, Sven mentions there are two additional pieces required at each end to ensure comprehensive protection. This attention to detail highlights his commitment to producing a durable and reliable design. “Sailing is about finding your path, whether it’s across an ocean or within yourself.” – Sven Yrvind In conclusion, making flanges around bulkhead hatches may seem complex at first glance, but by following Sven Yrvind’s meticulous process, enthusiasts can achieve professional-level results. Remember that the journey of boatbuilding is as rewarding as reaching your destination; it tests one’s patience and dedication. For those seeking to embark on this adventure or simply gain more insight into marine craftsmanship, Sven’s wisdom is invaluable.Sven Yrvind, a renowned yacht designer and sailor, shares valuable insights on creating flanges around bulkhead hatches for canvas protection in this enlightening video. By following his expert guidance, boat enthusiasts can ensure their living areas remain secure while allowing unhindered access through the hatches.Step 1: Starting with the Flange
Sven begins by explaining that working on flanges vertically and horizontally is significantly easier than doing so in a flat position. To simplify the process further, he divides the task into two or three steps as suggested by fellow expert “for for.” This approach not only makes it more manageable but also allows for greater precision in crafting each component.Step 2: Applying Glue and Securing
Sven proceeds to apply glue along one edge of the flange, ensuring a secure bond when clamped into place. He emphasizes that this stage is crucial for maintaining the structural integrity of the flange, which in turn safeguards the living area beneath the canvas when hatches are open.Step 3: Allowing Time to Dry
After securely attaching the first portion of the flange, Sven allows ample time for it to dry before moving forward with additional steps. This patience and precision are key aspects of his successful boatbuilding methods.Step 4: Finishing Touches
Once the flange is fully dried, Sven removes the clamps carefully, ensuring no damage occurs during this process. He then moves on to attaching four more pieces onto these main frames, completing two pairs of flanges for the bulkhead hatches.The Final Touches
While two flanges form the primary support structure around the hatches, Sven mentions there are two additional pieces required at each end to ensure comprehensive protection. This attention to detail highlights his commitment to producing a durable and reliable design. “Sailing is about finding your path, whether it’s across an ocean or within yourself.” – Sven Yrvind In conclusion, making flanges around bulkhead hatches may seem complex at first glance, but by following Sven Yrvind’s meticulous process, enthusiasts can achieve professional-level results. Remember that the journey of boatbuilding is as rewarding as reaching your destination; it tests one’s patience and dedication. For those seeking to embark on this adventure or simply gain more insight into marine craftsmanship, Sven’s wisdom is invaluable.Making Flanges Around Bulkhead Hatches for Canvas
Sven Yrvind, a renowned yacht designer and sailor, shares valuable insights on creating flanges around bulkhead hatches for canvas protection in this enlightening video. By following his expert guidance, boat enthusiasts can ensure their living areas remain secure while allowing unhindered access through the hatches.Step 1: Starting with the Flange
Sven begins by explaining that working on flanges vertically and horizontally is significantly easier than doing so in a flat position. To simplify the process further, he divides the task into two or three steps as suggested by fellow expert “for for.” This approach not only makes it more manageable but also allows for greater precision in crafting each component.Step 2: Applying Glue and Securing
Sven proceeds to apply glue along one edge of the flange, ensuring a secure bond when clamped into place. He emphasizes that this stage is crucial for maintaining the structural integrity of the flange, which in turn safeguards the living area beneath the canvas when hatches are open.Step 3: Allowing Time to Dry
After securely attaching the first portion of the flange, Sven allows ample time for it to dry before moving forward with additional steps. This patience and precision are key aspects of his successful boatbuilding methods.Step 4: Finishing Touches
Once the flange is fully dried, Sven removes the clamps carefully, ensuring no damage occurs during this process. He then moves on to attaching four more pieces onto these main frames, completing two pairs of flanges for the bulkhead hatches.The Final Touches
While two flanges form the primary support structure around the hatches, Sven mentions there are two additional pieces required at each end to ensure comprehensive protection. This attention to detail highlights his commitment to producing a durable and reliable design. “Sailing is about finding your path, whether it’s across an ocean or within yourself.” – Sven Yrvind In conclusion, making flanges around bulkhead hatches may seem complex at first glance, but by following Sven Yrvind’s meticulous process, enthusiasts can achieve professional-level results. Remember that the journey of boatbuilding is as rewarding as reaching your destination; it tests one’s patience and dedication. For those seeking to embark on this adventure or simply gain more insight into marine craftsmanship, Sven’s wisdom is invaluable.Once the flange is fully dried, Sven removes the clamps carefully, ensuring no damage occurs during this process. He then moves on to attaching four more pieces onto these main frames, completing two pairs of flanges for the bulkhead hatches.The Final Touches
While two flanges form the primary support structure around the hatches, Sven mentions there are two additional pieces required at each end to ensure comprehensive protection. This attention to detail highlights his commitment to producing a durable and reliable design. “Sailing is about finding your path, whether it’s across an ocean or within yourself.” – Sven Yrvind In conclusion, making flanges around bulkhead hatches may seem complex at first glance, but by following Sven Yrvind’s meticulous process, enthusiasts can achieve professional-level results. Remember that the journey of boatbuilding is as rewarding as reaching your destination; it tests one’s patience and dedication. For those seeking to embark on this adventure or simply gain more insight into marine craftsmanship, Sven’s wisdom is invaluable.After securely attaching the first portion of the flange, Sven allows ample time for it to dry before moving forward with additional steps. This patience and precision are key aspects of his successful boatbuilding methods.Step 4: Finishing Touches
Once the flange is fully dried, Sven removes the clamps carefully, ensuring no damage occurs during this process. He then moves on to attaching four more pieces onto these main frames, completing two pairs of flanges for the bulkhead hatches.The Final Touches
While two flanges form the primary support structure around the hatches, Sven mentions there are two additional pieces required at each end to ensure comprehensive protection. This attention to detail highlights his commitment to producing a durable and reliable design. “Sailing is about finding your path, whether it’s across an ocean or within yourself.” – Sven Yrvind In conclusion, making flanges around bulkhead hatches may seem complex at first glance, but by following Sven Yrvind’s meticulous process, enthusiasts can achieve professional-level results. Remember that the journey of boatbuilding is as rewarding as reaching your destination; it tests one’s patience and dedication. For those seeking to embark on this adventure or simply gain more insight into marine craftsmanship, Sven’s wisdom is invaluable.Sven proceeds to apply glue along one edge of the flange, ensuring a secure bond when clamped into place. He emphasizes that this stage is crucial for maintaining the structural integrity of the flange, which in turn safeguards the living area beneath the canvas when hatches are open.Step 3: Allowing Time to Dry
After securely attaching the first portion of the flange, Sven allows ample time for it to dry before moving forward with additional steps. This patience and precision are key aspects of his successful boatbuilding methods.Step 4: Finishing Touches
Once the flange is fully dried, Sven removes the clamps carefully, ensuring no damage occurs during this process. He then moves on to attaching four more pieces onto these main frames, completing two pairs of flanges for the bulkhead hatches.The Final Touches
While two flanges form the primary support structure around the hatches, Sven mentions there are two additional pieces required at each end to ensure comprehensive protection. This attention to detail highlights his commitment to producing a durable and reliable design. “Sailing is about finding your path, whether it’s across an ocean or within yourself.” – Sven Yrvind In conclusion, making flanges around bulkhead hatches may seem complex at first glance, but by following Sven Yrvind’s meticulous process, enthusiasts can achieve professional-level results. Remember that the journey of boatbuilding is as rewarding as reaching your destination; it tests one’s patience and dedication. For those seeking to embark on this adventure or simply gain more insight into marine craftsmanship, Sven’s wisdom is invaluable.Sven begins by explaining that working on flanges vertically and horizontally is significantly easier than doing so in a flat position. To simplify the process further, he divides the task into two or three steps as suggested by fellow expert “for for.” This approach not only makes it more manageable but also allows for greater precision in crafting each component.Step 2: Applying Glue and Securing
Sven proceeds to apply glue along one edge of the flange, ensuring a secure bond when clamped into place. He emphasizes that this stage is crucial for maintaining the structural integrity of the flange, which in turn safeguards the living area beneath the canvas when hatches are open.Step 3: Allowing Time to Dry
After securely attaching the first portion of the flange, Sven allows ample time for it to dry before moving forward with additional steps. This patience and precision are key aspects of his successful boatbuilding methods.Step 4: Finishing Touches
Once the flange is fully dried, Sven removes the clamps carefully, ensuring no damage occurs during this process. He then moves on to attaching four more pieces onto these main frames, completing two pairs of flanges for the bulkhead hatches.The Final Touches
While two flanges form the primary support structure around the hatches, Sven mentions there are two additional pieces required at each end to ensure comprehensive protection. This attention to detail highlights his commitment to producing a durable and reliable design. “Sailing is about finding your path, whether it’s across an ocean or within yourself.” – Sven Yrvind In conclusion, making flanges around bulkhead hatches may seem complex at first glance, but by following Sven Yrvind’s meticulous process, enthusiasts can achieve professional-level results. Remember that the journey of boatbuilding is as rewarding as reaching your destination; it tests one’s patience and dedication. For those seeking to embark on this adventure or simply gain more insight into marine craftsmanship, Sven’s wisdom is invaluable.Sven Yrvind, a renowned yacht designer and sailor, shares valuable insights on creating flanges around bulkhead hatches for canvas protection in this enlightening video. By following his expert guidance, boat enthusiasts can ensure their living areas remain secure while allowing unhindered access through the hatches.Step 1: Starting with the Flange
Sven begins by explaining that working on flanges vertically and horizontally is significantly easier than doing so in a flat position. To simplify the process further, he divides the task into two or three steps as suggested by fellow expert “for for.” This approach not only makes it more manageable but also allows for greater precision in crafting each component.Step 2: Applying Glue and Securing
Sven proceeds to apply glue along one edge of the flange, ensuring a secure bond when clamped into place. He emphasizes that this stage is crucial for maintaining the structural integrity of the flange, which in turn safeguards the living area beneath the canvas when hatches are open.Step 3: Allowing Time to Dry
After securely attaching the first portion of the flange, Sven allows ample time for it to dry before moving forward with additional steps. This patience and precision are key aspects of his successful boatbuilding methods.Step 4: Finishing Touches
Once the flange is fully dried, Sven removes the clamps carefully, ensuring no damage occurs during this process. He then moves on to attaching four more pieces onto these main frames, completing two pairs of flanges for the bulkhead hatches.The Final Touches
While two flanges form the primary support structure around the hatches, Sven mentions there are two additional pieces required at each end to ensure comprehensive protection. This attention to detail highlights his commitment to producing a durable and reliable design. “Sailing is about finding your path, whether it’s across an ocean or within yourself.” – Sven Yrvind In conclusion, making flanges around bulkhead hatches may seem complex at first glance, but by following Sven Yrvind’s meticulous process, enthusiasts can achieve professional-level results. Remember that the journey of boatbuilding is as rewarding as reaching your destination; it tests one’s patience and dedication. For those seeking to embark on this adventure or simply gain more insight into marine craftsmanship, Sven’s wisdom is invaluable.Making Flanges Around Bulkhead Hatches for Canvas
Sven Yrvind, a renowned yacht designer and sailor, shares valuable insights on creating flanges around bulkhead hatches for canvas protection in this enlightening video. By following his expert guidance, boat enthusiasts can ensure their living areas remain secure while allowing unhindered access through the hatches.Step 1: Starting with the Flange
Sven begins by explaining that working on flanges vertically and horizontally is significantly easier than doing so in a flat position. To simplify the process further, he divides the task into two or three steps as suggested by fellow expert “for for.” This approach not only makes it more manageable but also allows for greater precision in crafting each component.Step 2: Applying Glue and Securing
Sven proceeds to apply glue along one edge of the flange, ensuring a secure bond when clamped into place. He emphasizes that this stage is crucial for maintaining the structural integrity of the flange, which in turn safeguards the living area beneath the canvas when hatches are open.Step 3: Allowing Time to Dry
After securely attaching the first portion of the flange, Sven allows ample time for it to dry before moving forward with additional steps. This patience and precision are key aspects of his successful boatbuilding methods.Step 4: Finishing Touches
Once the flange is fully dried, Sven removes the clamps carefully, ensuring no damage occurs during this process. He then moves on to attaching four more pieces onto these main frames, completing two pairs of flanges for the bulkhead hatches.The Final Touches
While two flanges form the primary support structure around the hatches, Sven mentions there are two additional pieces required at each end to ensure comprehensive protection. This attention to detail highlights his commitment to producing a durable and reliable design. “Sailing is about finding your path, whether it’s across an ocean or within yourself.” – Sven Yrvind In conclusion, making flanges around bulkhead hatches may seem complex at first glance, but by following Sven Yrvind’s meticulous process, enthusiasts can achieve professional-level results. Remember that the journey of boatbuilding is as rewarding as reaching your destination; it tests one’s patience and dedication. For those seeking to embark on this adventure or simply gain more insight into marine craftsmanship, Sven’s wisdom is invaluable.After securely attaching the first portion of the flange, Sven allows ample time for it to dry before moving forward with additional steps. This patience and precision are key aspects of his successful boatbuilding methods.Step 4: Finishing Touches
Once the flange is fully dried, Sven removes the clamps carefully, ensuring no damage occurs during this process. He then moves on to attaching four more pieces onto these main frames, completing two pairs of flanges for the bulkhead hatches.The Final Touches
While two flanges form the primary support structure around the hatches, Sven mentions there are two additional pieces required at each end to ensure comprehensive protection. This attention to detail highlights his commitment to producing a durable and reliable design. “Sailing is about finding your path, whether it’s across an ocean or within yourself.” – Sven Yrvind In conclusion, making flanges around bulkhead hatches may seem complex at first glance, but by following Sven Yrvind’s meticulous process, enthusiasts can achieve professional-level results. Remember that the journey of boatbuilding is as rewarding as reaching your destination; it tests one’s patience and dedication. For those seeking to embark on this adventure or simply gain more insight into marine craftsmanship, Sven’s wisdom is invaluable.Sven proceeds to apply glue along one edge of the flange, ensuring a secure bond when clamped into place. He emphasizes that this stage is crucial for maintaining the structural integrity of the flange, which in turn safeguards the living area beneath the canvas when hatches are open.Step 3: Allowing Time to Dry
After securely attaching the first portion of the flange, Sven allows ample time for it to dry before moving forward with additional steps. This patience and precision are key aspects of his successful boatbuilding methods.Step 4: Finishing Touches
Once the flange is fully dried, Sven removes the clamps carefully, ensuring no damage occurs during this process. He then moves on to attaching four more pieces onto these main frames, completing two pairs of flanges for the bulkhead hatches.The Final Touches
While two flanges form the primary support structure around the hatches, Sven mentions there are two additional pieces required at each end to ensure comprehensive protection. This attention to detail highlights his commitment to producing a durable and reliable design. “Sailing is about finding your path, whether it’s across an ocean or within yourself.” – Sven Yrvind In conclusion, making flanges around bulkhead hatches may seem complex at first glance, but by following Sven Yrvind’s meticulous process, enthusiasts can achieve professional-level results. Remember that the journey of boatbuilding is as rewarding as reaching your destination; it tests one’s patience and dedication. For those seeking to embark on this adventure or simply gain more insight into marine craftsmanship, Sven’s wisdom is invaluable.Sven begins by explaining that working on flanges vertically and horizontally is significantly easier than doing so in a flat position. To simplify the process further, he divides the task into two or three steps as suggested by fellow expert “for for.” This approach not only makes it more manageable but also allows for greater precision in crafting each component.Step 2: Applying Glue and Securing
Sven proceeds to apply glue along one edge of the flange, ensuring a secure bond when clamped into place. He emphasizes that this stage is crucial for maintaining the structural integrity of the flange, which in turn safeguards the living area beneath the canvas when hatches are open.Step 3: Allowing Time to Dry
After securely attaching the first portion of the flange, Sven allows ample time for it to dry before moving forward with additional steps. This patience and precision are key aspects of his successful boatbuilding methods.Step 4: Finishing Touches
Once the flange is fully dried, Sven removes the clamps carefully, ensuring no damage occurs during this process. He then moves on to attaching four more pieces onto these main frames, completing two pairs of flanges for the bulkhead hatches.The Final Touches
While two flanges form the primary support structure around the hatches, Sven mentions there are two additional pieces required at each end to ensure comprehensive protection. This attention to detail highlights his commitment to producing a durable and reliable design. “Sailing is about finding your path, whether it’s across an ocean or within yourself.” – Sven Yrvind In conclusion, making flanges around bulkhead hatches may seem complex at first glance, but by following Sven Yrvind’s meticulous process, enthusiasts can achieve professional-level results. Remember that the journey of boatbuilding is as rewarding as reaching your destination; it tests one’s patience and dedication. For those seeking to embark on this adventure or simply gain more insight into marine craftsmanship, Sven’s wisdom is invaluable.Sven Yrvind, a renowned yacht designer and sailor, shares valuable insights on creating flanges around bulkhead hatches for canvas protection in this enlightening video. By following his expert guidance, boat enthusiasts can ensure their living areas remain secure while allowing unhindered access through the hatches.Step 1: Starting with the Flange
Sven begins by explaining that working on flanges vertically and horizontally is significantly easier than doing so in a flat position. To simplify the process further, he divides the task into two or three steps as suggested by fellow expert “for for.” This approach not only makes it more manageable but also allows for greater precision in crafting each component.Step 2: Applying Glue and Securing
Sven proceeds to apply glue along one edge of the flange, ensuring a secure bond when clamped into place. He emphasizes that this stage is crucial for maintaining the structural integrity of the flange, which in turn safeguards the living area beneath the canvas when hatches are open.Step 3: Allowing Time to Dry
After securely attaching the first portion of the flange, Sven allows ample time for it to dry before moving forward with additional steps. This patience and precision are key aspects of his successful boatbuilding methods.Step 4: Finishing Touches
Once the flange is fully dried, Sven removes the clamps carefully, ensuring no damage occurs during this process. He then moves on to attaching four more pieces onto these main frames, completing two pairs of flanges for the bulkhead hatches.The Final Touches
While two flanges form the primary support structure around the hatches, Sven mentions there are two additional pieces required at each end to ensure comprehensive protection. This attention to detail highlights his commitment to producing a durable and reliable design. “Sailing is about finding your path, whether it’s across an ocean or within yourself.” – Sven Yrvind In conclusion, making flanges around bulkhead hatches may seem complex at first glance, but by following Sven Yrvind’s meticulous process, enthusiasts can achieve professional-level results. Remember that the journey of boatbuilding is as rewarding as reaching your destination; it tests one’s patience and dedication. For those seeking to embark on this adventure or simply gain more insight into marine craftsmanship, Sven’s wisdom is invaluable.Making Flanges Around Bulkhead Hatches for Canvas
Sven Yrvind, a renowned yacht designer and sailor, shares valuable insights on creating flanges around bulkhead hatches for canvas protection in this enlightening video. By following his expert guidance, boat enthusiasts can ensure their living areas remain secure while allowing unhindered access through the hatches.Step 1: Starting with the Flange
Sven begins by explaining that working on flanges vertically and horizontally is significantly easier than doing so in a flat position. To simplify the process further, he divides the task into two or three steps as suggested by fellow expert “for for.” This approach not only makes it more manageable but also allows for greater precision in crafting each component.Step 2: Applying Glue and Securing
Sven proceeds to apply glue along one edge of the flange, ensuring a secure bond when clamped into place. He emphasizes that this stage is crucial for maintaining the structural integrity of the flange, which in turn safeguards the living area beneath the canvas when hatches are open.Step 3: Allowing Time to Dry
After securely attaching the first portion of the flange, Sven allows ample time for it to dry before moving forward with additional steps. This patience and precision are key aspects of his successful boatbuilding methods.Step 4: Finishing Touches
Once the flange is fully dried, Sven removes the clamps carefully, ensuring no damage occurs during this process. He then moves on to attaching four more pieces onto these main frames, completing two pairs of flanges for the bulkhead hatches.The Final Touches
While two flanges form the primary support structure around the hatches, Sven mentions there are two additional pieces required at each end to ensure comprehensive protection. This attention to detail highlights his commitment to producing a durable and reliable design. “Sailing is about finding your path, whether it’s across an ocean or within yourself.” – Sven Yrvind In conclusion, making flanges around bulkhead hatches may seem complex at first glance, but by following Sven Yrvind’s meticulous process, enthusiasts can achieve professional-level results. Remember that the journey of boatbuilding is as rewarding as reaching your destination; it tests one’s patience and dedication. For those seeking to embark on this adventure or simply gain more insight into marine craftsmanship, Sven’s wisdom is invaluable.Once the flange is fully dried, Sven removes the clamps carefully, ensuring no damage occurs during this process. He then moves on to attaching four more pieces onto these main frames, completing two pairs of flanges for the bulkhead hatches.The Final Touches
While two flanges form the primary support structure around the hatches, Sven mentions there are two additional pieces required at each end to ensure comprehensive protection. This attention to detail highlights his commitment to producing a durable and reliable design. “Sailing is about finding your path, whether it’s across an ocean or within yourself.” – Sven Yrvind In conclusion, making flanges around bulkhead hatches may seem complex at first glance, but by following Sven Yrvind’s meticulous process, enthusiasts can achieve professional-level results. Remember that the journey of boatbuilding is as rewarding as reaching your destination; it tests one’s patience and dedication. For those seeking to embark on this adventure or simply gain more insight into marine craftsmanship, Sven’s wisdom is invaluable.Making Flanges Around Bulkhead Hatches for Canvas
Sven Yrvind, a renowned yacht designer and sailor, shares valuable insights on creating flanges around bulkhead hatches for canvas protection in this enlightening video. By following his expert guidance, boat enthusiasts can ensure their living areas remain secure while allowing unhindered access through the hatches.Step 1: Starting with the Flange
Sven begins by explaining that working on flanges vertically and horizontally is significantly easier than doing so in a flat position. To simplify the process further, he divides the task into two or three steps as suggested by fellow expert “for for.” This approach not only makes it more manageable but also allows for greater precision in crafting each component.Step 2: Applying Glue and Securing
Sven proceeds to apply glue along one edge of the flange, ensuring a secure bond when clamped into place. He emphasizes that this stage is crucial for maintaining the structural integrity of the flange, which in turn safeguards the living area beneath the canvas when hatches are open.Step 3: Allowing Time to Dry
After securely attaching the first portion of the flange, Sven allows ample time for it to dry before moving forward with additional steps. This patience and precision are key aspects of his successful boatbuilding methods.Step 4: Finishing Touches
Once the flange is fully dried, Sven removes the clamps carefully, ensuring no damage occurs during this process. He then moves on to attaching four more pieces onto these main frames, completing two pairs of flanges for the bulkhead hatches.The Final Touches
While two flanges form the primary support structure around the hatches, Sven mentions there are two additional pieces required at each end to ensure comprehensive protection. This attention to detail highlights his commitment to producing a durable and reliable design. “Sailing is about finding your path, whether it’s across an ocean or within yourself.” – Sven Yrvind In conclusion, making flanges around bulkhead hatches may seem complex at first glance, but by following Sven Yrvind’s meticulous process, enthusiasts can achieve professional-level results. Remember that the journey of boatbuilding is as rewarding as reaching your destination; it tests one’s patience and dedication. For those seeking to embark on this adventure or simply gain more insight into marine craftsmanship, Sven’s wisdom is invaluable.After securely attaching the first portion of the flange, Sven allows ample time for it to dry before moving forward with additional steps. This patience and precision are key aspects of his successful boatbuilding methods.Step 4: Finishing Touches
Once the flange is fully dried, Sven removes the clamps carefully, ensuring no damage occurs during this process. He then moves on to attaching four more pieces onto these main frames, completing two pairs of flanges for the bulkhead hatches.The Final Touches
While two flanges form the primary support structure around the hatches, Sven mentions there are two additional pieces required at each end to ensure comprehensive protection. This attention to detail highlights his commitment to producing a durable and reliable design. “Sailing is about finding your path, whether it’s across an ocean or within yourself.” – Sven Yrvind In conclusion, making flanges around bulkhead hatches may seem complex at first glance, but by following Sven Yrvind’s meticulous process, enthusiasts can achieve professional-level results. Remember that the journey of boatbuilding is as rewarding as reaching your destination; it tests one’s patience and dedication. For those seeking to embark on this adventure or simply gain more insight into marine craftsmanship, Sven’s wisdom is invaluable.Making Flanges Around Bulkhead Hatches for Canvas
Sven Yrvind, a renowned yacht designer and sailor, shares valuable insights on creating flanges around bulkhead hatches for canvas protection in this enlightening video. By following his expert guidance, boat enthusiasts can ensure their living areas remain secure while allowing unhindered access through the hatches.Step 1: Starting with the Flange
Sven begins by explaining that working on flanges vertically and horizontally is significantly easier than doing so in a flat position. To simplify the process further, he divides the task into two or three steps as suggested by fellow expert “for for.” This approach not only makes it more manageable but also allows for greater precision in crafting each component.Step 2: Applying Glue and Securing
Sven proceeds to apply glue along one edge of the flange, ensuring a secure bond when clamped into place. He emphasizes that this stage is crucial for maintaining the structural integrity of the flange, which in turn safeguards the living area beneath the canvas when hatches are open.Step 3: Allowing Time to Dry
After securely attaching the first portion of the flange, Sven allows ample time for it to dry before moving forward with additional steps. This patience and precision are key aspects of his successful boatbuilding methods.Step 4: Finishing Touches
Once the flange is fully dried, Sven removes the clamps carefully, ensuring no damage occurs during this process. He then moves on to attaching four more pieces onto these main frames, completing two pairs of flanges for the bulkhead hatches.The Final Touches
While two flanges form the primary support structure around the hatches, Sven mentions there are two additional pieces required at each end to ensure comprehensive protection. This attention to detail highlights his commitment to producing a durable and reliable design. “Sailing is about finding your path, whether it’s across an ocean or within yourself.” – Sven Yrvind In conclusion, making flanges around bulkhead hatches may seem complex at first glance, but by following Sven Yrvind’s meticulous process, enthusiasts can achieve professional-level results. Remember that the journey of boatbuilding is as rewarding as reaching your destination; it tests one’s patience and dedication. For those seeking to embark on this adventure or simply gain more insight into marine craftsmanship, Sven’s wisdom is invaluable.Sven proceeds to apply glue along one edge of the flange, ensuring a secure bond when clamped into place. He emphasizes that this stage is crucial for maintaining the structural integrity of the flange, which in turn safeguards the living area beneath the canvas when hatches are open.Step 3: Allowing Time to Dry
After securely attaching the first portion of the flange, Sven allows ample time for it to dry before moving forward with additional steps. This patience and precision are key aspects of his successful boatbuilding methods.Step 4: Finishing Touches
Once the flange is fully dried, Sven removes the clamps carefully, ensuring no damage occurs during this process. He then moves on to attaching four more pieces onto these main frames, completing two pairs of flanges for the bulkhead hatches.The Final Touches
While two flanges form the primary support structure around the hatches, Sven mentions there are two additional pieces required at each end to ensure comprehensive protection. This attention to detail highlights his commitment to producing a durable and reliable design. “Sailing is about finding your path, whether it’s across an ocean or within yourself.” – Sven Yrvind In conclusion, making flanges around bulkhead hatches may seem complex at first glance, but by following Sven Yrvind’s meticulous process, enthusiasts can achieve professional-level results. Remember that the journey of boatbuilding is as rewarding as reaching your destination; it tests one’s patience and dedication. For those seeking to embark on this adventure or simply gain more insight into marine craftsmanship, Sven’s wisdom is invaluable.Making Flanges Around Bulkhead Hatches for Canvas
Sven Yrvind, a renowned yacht designer and sailor, shares valuable insights on creating flanges around bulkhead hatches for canvas protection in this enlightening video. By following his expert guidance, boat enthusiasts can ensure their living areas remain secure while allowing unhindered access through the hatches.Step 1: Starting with the Flange
Sven begins by explaining that working on flanges vertically and horizontally is significantly easier than doing so in a flat position. To simplify the process further, he divides the task into two or three steps as suggested by fellow expert “for for.” This approach not only makes it more manageable but also allows for greater precision in crafting each component.Step 2: Applying Glue and Securing
Sven proceeds to apply glue along one edge of the flange, ensuring a secure bond when clamped into place. He emphasizes that this stage is crucial for maintaining the structural integrity of the flange, which in turn safeguards the living area beneath the canvas when hatches are open.Step 3: Allowing Time to Dry
After securely attaching the first portion of the flange, Sven allows ample time for it to dry before moving forward with additional steps. This patience and precision are key aspects of his successful boatbuilding methods.Step 4: Finishing Touches
Once the flange is fully dried, Sven removes the clamps carefully, ensuring no damage occurs during this process. He then moves on to attaching four more pieces onto these main frames, completing two pairs of flanges for the bulkhead hatches.The Final Touches
While two flanges form the primary support structure around the hatches, Sven mentions there are two additional pieces required at each end to ensure comprehensive protection. This attention to detail highlights his commitment to producing a durable and reliable design. “Sailing is about finding your path, whether it’s across an ocean or within yourself.” – Sven Yrvind In conclusion, making flanges around bulkhead hatches may seem complex at first glance, but by following Sven Yrvind’s meticulous process, enthusiasts can achieve professional-level results. Remember that the journey of boatbuilding is as rewarding as reaching your destination; it tests one’s patience and dedication. For those seeking to embark on this adventure or simply gain more insight into marine craftsmanship, Sven’s wisdom is invaluable.Sven begins by explaining that working on flanges vertically and horizontally is significantly easier than doing so in a flat position. To simplify the process further, he divides the task into two or three steps as suggested by fellow expert “for for.” This approach not only makes it more manageable but also allows for greater precision in crafting each component.Step 2: Applying Glue and Securing
Sven proceeds to apply glue along one edge of the flange, ensuring a secure bond when clamped into place. He emphasizes that this stage is crucial for maintaining the structural integrity of the flange, which in turn safeguards the living area beneath the canvas when hatches are open.Step 3: Allowing Time to Dry
After securely attaching the first portion of the flange, Sven allows ample time for it to dry before moving forward with additional steps. This patience and precision are key aspects of his successful boatbuilding methods.Step 4: Finishing Touches
Once the flange is fully dried, Sven removes the clamps carefully, ensuring no damage occurs during this process. He then moves on to attaching four more pieces onto these main frames, completing two pairs of flanges for the bulkhead hatches.The Final Touches
While two flanges form the primary support structure around the hatches, Sven mentions there are two additional pieces required at each end to ensure comprehensive protection. This attention to detail highlights his commitment to producing a durable and reliable design. “Sailing is about finding your path, whether it’s across an ocean or within yourself.” – Sven Yrvind In conclusion, making flanges around bulkhead hatches may seem complex at first glance, but by following Sven Yrvind’s meticulous process, enthusiasts can achieve professional-level results. Remember that the journey of boatbuilding is as rewarding as reaching your destination; it tests one’s patience and dedication. For those seeking to embark on this adventure or simply gain more insight into marine craftsmanship, Sven’s wisdom is invaluable.Making Flanges Around Bulkhead Hatches for Canvas
Sven Yrvind, a renowned yacht designer and sailor, shares valuable insights on creating flanges around bulkhead hatches for canvas protection in this enlightening video. By following his expert guidance, boat enthusiasts can ensure their living areas remain secure while allowing unhindered access through the hatches.Step 1: Starting with the Flange
Sven begins by explaining that working on flanges vertically and horizontally is significantly easier than doing so in a flat position. To simplify the process further, he divides the task into two or three steps as suggested by fellow expert “for for.” This approach not only makes it more manageable but also allows for greater precision in crafting each component.Step 2: Applying Glue and Securing
Sven proceeds to apply glue along one edge of the flange, ensuring a secure bond when clamped into place. He emphasizes that this stage is crucial for maintaining the structural integrity of the flange, which in turn safeguards the living area beneath the canvas when hatches are open.Step 3: Allowing Time to Dry
After securely attaching the first portion of the flange, Sven allows ample time for it to dry before moving forward with additional steps. This patience and precision are key aspects of his successful boatbuilding methods.Step 4: Finishing Touches
Once the flange is fully dried, Sven removes the clamps carefully, ensuring no damage occurs during this process. He then moves on to attaching four more pieces onto these main frames, completing two pairs of flanges for the bulkhead hatches.The Final Touches
While two flanges form the primary support structure around the hatches, Sven mentions there are two additional pieces required at each end to ensure comprehensive protection. This attention to detail highlights his commitment to producing a durable and reliable design. “Sailing is about finding your path, whether it’s across an ocean or within yourself.” – Sven Yrvind In conclusion, making flanges around bulkhead hatches may seem complex at first glance, but by following Sven Yrvind’s meticulous process, enthusiasts can achieve professional-level results. Remember that the journey of boatbuilding is as rewarding as reaching your destination; it tests one’s patience and dedication. For those seeking to embark on this adventure or simply gain more insight into marine craftsmanship, Sven’s wisdom is invaluable.Sven Yrvind, a renowned yacht designer and sailor, shares valuable insights on creating flanges around bulkhead hatches for canvas protection in this enlightening video. By following his expert guidance, boat enthusiasts can ensure their living areas remain secure while allowing unhindered access through the hatches.Step 1: Starting with the Flange
Sven begins by explaining that working on flanges vertically and horizontally is significantly easier than doing so in a flat position. To simplify the process further, he divides the task into two or three steps as suggested by fellow expert “for for.” This approach not only makes it more manageable but also allows for greater precision in crafting each component.Step 2: Applying Glue and Securing
Sven proceeds to apply glue along one edge of the flange, ensuring a secure bond when clamped into place. He emphasizes that this stage is crucial for maintaining the structural integrity of the flange, which in turn safeguards the living area beneath the canvas when hatches are open.Step 3: Allowing Time to Dry
After securely attaching the first portion of the flange, Sven allows ample time for it to dry before moving forward with additional steps. This patience and precision are key aspects of his successful boatbuilding methods.Step 4: Finishing Touches
Once the flange is fully dried, Sven removes the clamps carefully, ensuring no damage occurs during this process. He then moves on to attaching four more pieces onto these main frames, completing two pairs of flanges for the bulkhead hatches.The Final Touches
While two flanges form the primary support structure around the hatches, Sven mentions there are two additional pieces required at each end to ensure comprehensive protection. This attention to detail highlights his commitment to producing a durable and reliable design. “Sailing is about finding your path, whether it’s across an ocean or within yourself.” – Sven Yrvind In conclusion, making flanges around bulkhead hatches may seem complex at first glance, but by following Sven Yrvind’s meticulous process, enthusiasts can achieve professional-level results. Remember that the journey of boatbuilding is as rewarding as reaching your destination; it tests one’s patience and dedication. For those seeking to embark on this adventure or simply gain more insight into marine craftsmanship, Sven’s wisdom is invaluable.Making Flanges Around Bulkhead Hatches for Canvas
Sven Yrvind, a renowned yacht designer and sailor, shares valuable insights on creating flanges around bulkhead hatches for canvas protection in this enlightening video. By following his expert guidance, boat enthusiasts can ensure their living areas remain secure while allowing unhindered access through the hatches.Step 1: Starting with the Flange
Sven begins by explaining that working on flanges vertically and horizontally is significantly easier than doing so in a flat position. To simplify the process further, he divides the task into two or three steps as suggested by fellow expert “for for.” This approach not only makes it more manageable but also allows for greater precision in crafting each component.Step 2: Applying Glue and Securing
Sven proceeds to apply glue along one edge of the flange, ensuring a secure bond when clamped into place. He emphasizes that this stage is crucial for maintaining the structural integrity of the flange, which in turn safeguards the living area beneath the canvas when hatches are open.Step 3: Allowing Time to Dry
After securely attaching the first portion of the flange, Sven allows ample time for it to dry before moving forward with additional steps. This patience and precision are key aspects of his successful boatbuilding methods.Step 4: Finishing Touches
Once the flange is fully dried, Sven removes the clamps carefully, ensuring no damage occurs during this process. He then moves on to attaching four more pieces onto these main frames, completing two pairs of flanges for the bulkhead hatches.The Final Touches
While two flanges form the primary support structure around the hatches, Sven mentions there are two additional pieces required at each end to ensure comprehensive protection. This attention to detail highlights his commitment to producing a durable and reliable design. “Sailing is about finding your path, whether it’s across an ocean or within yourself.” – Sven Yrvind In conclusion, making flanges around bulkhead hatches may seem complex at first glance, but by following Sven Yrvind’s meticulous process, enthusiasts can achieve professional-level results. Remember that the journey of boatbuilding is as rewarding as reaching your destination; it tests one’s patience and dedication. For those seeking to embark on this adventure or simply gain more insight into marine craftsmanship, Sven’s wisdom is invaluable.Once the flange is fully dried, Sven removes the clamps carefully, ensuring no damage occurs during this process. He then moves on to attaching four more pieces onto these main frames, completing two pairs of flanges for the bulkhead hatches.The Final Touches
While two flanges form the primary support structure around the hatches, Sven mentions there are two additional pieces required at each end to ensure comprehensive protection. This attention to detail highlights his commitment to producing a durable and reliable design. “Sailing is about finding your path, whether it’s across an ocean or within yourself.” – Sven Yrvind In conclusion, making flanges around bulkhead hatches may seem complex at first glance, but by following Sven Yrvind’s meticulous process, enthusiasts can achieve professional-level results. Remember that the journey of boatbuilding is as rewarding as reaching your destination; it tests one’s patience and dedication. For those seeking to embark on this adventure or simply gain more insight into marine craftsmanship, Sven’s wisdom is invaluable.Sven Yrvind, a renowned yacht designer and sailor, shares valuable insights on creating flanges around bulkhead hatches for canvas protection in this enlightening video. By following his expert guidance, boat enthusiasts can ensure their living areas remain secure while allowing unhindered access through the hatches.Step 1: Starting with the Flange
Sven begins by explaining that working on flanges vertically and horizontally is significantly easier than doing so in a flat position. To simplify the process further, he divides the task into two or three steps as suggested by fellow expert “for for.” This approach not only makes it more manageable but also allows for greater precision in crafting each component.Step 2: Applying Glue and Securing
Sven proceeds to apply glue along one edge of the flange, ensuring a secure bond when clamped into place. He emphasizes that this stage is crucial for maintaining the structural integrity of the flange, which in turn safeguards the living area beneath the canvas when hatches are open.Step 3: Allowing Time to Dry
After securely attaching the first portion of the flange, Sven allows ample time for it to dry before moving forward with additional steps. This patience and precision are key aspects of his successful boatbuilding methods.Step 4: Finishing Touches
Once the flange is fully dried, Sven removes the clamps carefully, ensuring no damage occurs during this process. He then moves on to attaching four more pieces onto these main frames, completing two pairs of flanges for the bulkhead hatches.The Final Touches
While two flanges form the primary support structure around the hatches, Sven mentions there are two additional pieces required at each end to ensure comprehensive protection. This attention to detail highlights his commitment to producing a durable and reliable design. “Sailing is about finding your path, whether it’s across an ocean or within yourself.” – Sven Yrvind In conclusion, making flanges around bulkhead hatches may seem complex at first glance, but by following Sven Yrvind’s meticulous process, enthusiasts can achieve professional-level results. Remember that the journey of boatbuilding is as rewarding as reaching your destination; it tests one’s patience and dedication. For those seeking to embark on this adventure or simply gain more insight into marine craftsmanship, Sven’s wisdom is invaluable.Making Flanges Around Bulkhead Hatches for Canvas
Sven Yrvind, a renowned yacht designer and sailor, shares valuable insights on creating flanges around bulkhead hatches for canvas protection in this enlightening video. By following his expert guidance, boat enthusiasts can ensure their living areas remain secure while allowing unhindered access through the hatches.Step 1: Starting with the Flange
Sven begins by explaining that working on flanges vertically and horizontally is significantly easier than doing so in a flat position. To simplify the process further, he divides the task into two or three steps as suggested by fellow expert “for for.” This approach not only makes it more manageable but also allows for greater precision in crafting each component.Step 2: Applying Glue and Securing
Sven proceeds to apply glue along one edge of the flange, ensuring a secure bond when clamped into place. He emphasizes that this stage is crucial for maintaining the structural integrity of the flange, which in turn safeguards the living area beneath the canvas when hatches are open.Step 3: Allowing Time to Dry
After securely attaching the first portion of the flange, Sven allows ample time for it to dry before moving forward with additional steps. This patience and precision are key aspects of his successful boatbuilding methods.Step 4: Finishing Touches
Once the flange is fully dried, Sven removes the clamps carefully, ensuring no damage occurs during this process. He then moves on to attaching four more pieces onto these main frames, completing two pairs of flanges for the bulkhead hatches.The Final Touches
While two flanges form the primary support structure around the hatches, Sven mentions there are two additional pieces required at each end to ensure comprehensive protection. This attention to detail highlights his commitment to producing a durable and reliable design. “Sailing is about finding your path, whether it’s across an ocean or within yourself.” – Sven Yrvind In conclusion, making flanges around bulkhead hatches may seem complex at first glance, but by following Sven Yrvind’s meticulous process, enthusiasts can achieve professional-level results. Remember that the journey of boatbuilding is as rewarding as reaching your destination; it tests one’s patience and dedication. For those seeking to embark on this adventure or simply gain more insight into marine craftsmanship, Sven’s wisdom is invaluable.After securely attaching the first portion of the flange, Sven allows ample time for it to dry before moving forward with additional steps. This patience and precision are key aspects of his successful boatbuilding methods.Step 4: Finishing Touches
Once the flange is fully dried, Sven removes the clamps carefully, ensuring no damage occurs during this process. He then moves on to attaching four more pieces onto these main frames, completing two pairs of flanges for the bulkhead hatches.The Final Touches
While two flanges form the primary support structure around the hatches, Sven mentions there are two additional pieces required at each end to ensure comprehensive protection. This attention to detail highlights his commitment to producing a durable and reliable design. “Sailing is about finding your path, whether it’s across an ocean or within yourself.” – Sven Yrvind In conclusion, making flanges around bulkhead hatches may seem complex at first glance, but by following Sven Yrvind’s meticulous process, enthusiasts can achieve professional-level results. Remember that the journey of boatbuilding is as rewarding as reaching your destination; it tests one’s patience and dedication. For those seeking to embark on this adventure or simply gain more insight into marine craftsmanship, Sven’s wisdom is invaluable.Sven Yrvind, a renowned yacht designer and sailor, shares valuable insights on creating flanges around bulkhead hatches for canvas protection in this enlightening video. By following his expert guidance, boat enthusiasts can ensure their living areas remain secure while allowing unhindered access through the hatches.Step 1: Starting with the Flange
Sven begins by explaining that working on flanges vertically and horizontally is significantly easier than doing so in a flat position. To simplify the process further, he divides the task into two or three steps as suggested by fellow expert “for for.” This approach not only makes it more manageable but also allows for greater precision in crafting each component.Step 2: Applying Glue and Securing
Sven proceeds to apply glue along one edge of the flange, ensuring a secure bond when clamped into place. He emphasizes that this stage is crucial for maintaining the structural integrity of the flange, which in turn safeguards the living area beneath the canvas when hatches are open.Step 3: Allowing Time to Dry
After securely attaching the first portion of the flange, Sven allows ample time for it to dry before moving forward with additional steps. This patience and precision are key aspects of his successful boatbuilding methods.Step 4: Finishing Touches
Once the flange is fully dried, Sven removes the clamps carefully, ensuring no damage occurs during this process. He then moves on to attaching four more pieces onto these main frames, completing two pairs of flanges for the bulkhead hatches.The Final Touches
While two flanges form the primary support structure around the hatches, Sven mentions there are two additional pieces required at each end to ensure comprehensive protection. This attention to detail highlights his commitment to producing a durable and reliable design. “Sailing is about finding your path, whether it’s across an ocean or within yourself.” – Sven Yrvind In conclusion, making flanges around bulkhead hatches may seem complex at first glance, but by following Sven Yrvind’s meticulous process, enthusiasts can achieve professional-level results. Remember that the journey of boatbuilding is as rewarding as reaching your destination; it tests one’s patience and dedication. For those seeking to embark on this adventure or simply gain more insight into marine craftsmanship, Sven’s wisdom is invaluable.Making Flanges Around Bulkhead Hatches for Canvas
Sven Yrvind, a renowned yacht designer and sailor, shares valuable insights on creating flanges around bulkhead hatches for canvas protection in this enlightening video. By following his expert guidance, boat enthusiasts can ensure their living areas remain secure while allowing unhindered access through the hatches.Step 1: Starting with the Flange
Sven begins by explaining that working on flanges vertically and horizontally is significantly easier than doing so in a flat position. To simplify the process further, he divides the task into two or three steps as suggested by fellow expert “for for.” This approach not only makes it more manageable but also allows for greater precision in crafting each component.Step 2: Applying Glue and Securing
Sven proceeds to apply glue along one edge of the flange, ensuring a secure bond when clamped into place. He emphasizes that this stage is crucial for maintaining the structural integrity of the flange, which in turn safeguards the living area beneath the canvas when hatches are open.Step 3: Allowing Time to Dry
After securely attaching the first portion of the flange, Sven allows ample time for it to dry before moving forward with additional steps. This patience and precision are key aspects of his successful boatbuilding methods.Step 4: Finishing Touches
Once the flange is fully dried, Sven removes the clamps carefully, ensuring no damage occurs during this process. He then moves on to attaching four more pieces onto these main frames, completing two pairs of flanges for the bulkhead hatches.The Final Touches
While two flanges form the primary support structure around the hatches, Sven mentions there are two additional pieces required at each end to ensure comprehensive protection. This attention to detail highlights his commitment to producing a durable and reliable design. “Sailing is about finding your path, whether it’s across an ocean or within yourself.” – Sven Yrvind In conclusion, making flanges around bulkhead hatches may seem complex at first glance, but by following Sven Yrvind’s meticulous process, enthusiasts can achieve professional-level results. Remember that the journey of boatbuilding is as rewarding as reaching your destination; it tests one’s patience and dedication. For those seeking to embark on this adventure or simply gain more insight into marine craftsmanship, Sven’s wisdom is invaluable.Sven proceeds to apply glue along one edge of the flange, ensuring a secure bond when clamped into place. He emphasizes that this stage is crucial for maintaining the structural integrity of the flange, which in turn safeguards the living area beneath the canvas when hatches are open.Step 3: Allowing Time to Dry
After securely attaching the first portion of the flange, Sven allows ample time for it to dry before moving forward with additional steps. This patience and precision are key aspects of his successful boatbuilding methods.Step 4: Finishing Touches
Once the flange is fully dried, Sven removes the clamps carefully, ensuring no damage occurs during this process. He then moves on to attaching four more pieces onto these main frames, completing two pairs of flanges for the bulkhead hatches.The Final Touches
While two flanges form the primary support structure around the hatches, Sven mentions there are two additional pieces required at each end to ensure comprehensive protection. This attention to detail highlights his commitment to producing a durable and reliable design. “Sailing is about finding your path, whether it’s across an ocean or within yourself.” – Sven Yrvind In conclusion, making flanges around bulkhead hatches may seem complex at first glance, but by following Sven Yrvind’s meticulous process, enthusiasts can achieve professional-level results. Remember that the journey of boatbuilding is as rewarding as reaching your destination; it tests one’s patience and dedication. For those seeking to embark on this adventure or simply gain more insight into marine craftsmanship, Sven’s wisdom is invaluable.Sven Yrvind, a renowned yacht designer and sailor, shares valuable insights on creating flanges around bulkhead hatches for canvas protection in this enlightening video. By following his expert guidance, boat enthusiasts can ensure their living areas remain secure while allowing unhindered access through the hatches.Step 1: Starting with the Flange
Sven begins by explaining that working on flanges vertically and horizontally is significantly easier than doing so in a flat position. To simplify the process further, he divides the task into two or three steps as suggested by fellow expert “for for.” This approach not only makes it more manageable but also allows for greater precision in crafting each component.Step 2: Applying Glue and Securing
Sven proceeds to apply glue along one edge of the flange, ensuring a secure bond when clamped into place. He emphasizes that this stage is crucial for maintaining the structural integrity of the flange, which in turn safeguards the living area beneath the canvas when hatches are open.Step 3: Allowing Time to Dry
After securely attaching the first portion of the flange, Sven allows ample time for it to dry before moving forward with additional steps. This patience and precision are key aspects of his successful boatbuilding methods.Step 4: Finishing Touches
Once the flange is fully dried, Sven removes the clamps carefully, ensuring no damage occurs during this process. He then moves on to attaching four more pieces onto these main frames, completing two pairs of flanges for the bulkhead hatches.The Final Touches
While two flanges form the primary support structure around the hatches, Sven mentions there are two additional pieces required at each end to ensure comprehensive protection. This attention to detail highlights his commitment to producing a durable and reliable design. “Sailing is about finding your path, whether it’s across an ocean or within yourself.” – Sven Yrvind In conclusion, making flanges around bulkhead hatches may seem complex at first glance, but by following Sven Yrvind’s meticulous process, enthusiasts can achieve professional-level results. Remember that the journey of boatbuilding is as rewarding as reaching your destination; it tests one’s patience and dedication. For those seeking to embark on this adventure or simply gain more insight into marine craftsmanship, Sven’s wisdom is invaluable.Making Flanges Around Bulkhead Hatches for Canvas
Sven Yrvind, a renowned yacht designer and sailor, shares valuable insights on creating flanges around bulkhead hatches for canvas protection in this enlightening video. By following his expert guidance, boat enthusiasts can ensure their living areas remain secure while allowing unhindered access through the hatches.Step 1: Starting with the Flange
Sven begins by explaining that working on flanges vertically and horizontally is significantly easier than doing so in a flat position. To simplify the process further, he divides the task into two or three steps as suggested by fellow expert “for for.” This approach not only makes it more manageable but also allows for greater precision in crafting each component.Step 2: Applying Glue and Securing
Sven proceeds to apply glue along one edge of the flange, ensuring a secure bond when clamped into place. He emphasizes that this stage is crucial for maintaining the structural integrity of the flange, which in turn safeguards the living area beneath the canvas when hatches are open.Step 3: Allowing Time to Dry
After securely attaching the first portion of the flange, Sven allows ample time for it to dry before moving forward with additional steps. This patience and precision are key aspects of his successful boatbuilding methods.Step 4: Finishing Touches
Once the flange is fully dried, Sven removes the clamps carefully, ensuring no damage occurs during this process. He then moves on to attaching four more pieces onto these main frames, completing two pairs of flanges for the bulkhead hatches.The Final Touches
While two flanges form the primary support structure around the hatches, Sven mentions there are two additional pieces required at each end to ensure comprehensive protection. This attention to detail highlights his commitment to producing a durable and reliable design. “Sailing is about finding your path, whether it’s across an ocean or within yourself.” – Sven Yrvind In conclusion, making flanges around bulkhead hatches may seem complex at first glance, but by following Sven Yrvind’s meticulous process, enthusiasts can achieve professional-level results. Remember that the journey of boatbuilding is as rewarding as reaching your destination; it tests one’s patience and dedication. For those seeking to embark on this adventure or simply gain more insight into marine craftsmanship, Sven’s wisdom is invaluable.Sven begins by explaining that working on flanges vertically and horizontally is significantly easier than doing so in a flat position. To simplify the process further, he divides the task into two or three steps as suggested by fellow expert “for for.” This approach not only makes it more manageable but also allows for greater precision in crafting each component.Step 2: Applying Glue and Securing
Sven proceeds to apply glue along one edge of the flange, ensuring a secure bond when clamped into place. He emphasizes that this stage is crucial for maintaining the structural integrity of the flange, which in turn safeguards the living area beneath the canvas when hatches are open.Step 3: Allowing Time to Dry
After securely attaching the first portion of the flange, Sven allows ample time for it to dry before moving forward with additional steps. This patience and precision are key aspects of his successful boatbuilding methods.Step 4: Finishing Touches
Once the flange is fully dried, Sven removes the clamps carefully, ensuring no damage occurs during this process. He then moves on to attaching four more pieces onto these main frames, completing two pairs of flanges for the bulkhead hatches.The Final Touches
While two flanges form the primary support structure around the hatches, Sven mentions there are two additional pieces required at each end to ensure comprehensive protection. This attention to detail highlights his commitment to producing a durable and reliable design. “Sailing is about finding your path, whether it’s across an ocean or within yourself.” – Sven Yrvind In conclusion, making flanges around bulkhead hatches may seem complex at first glance, but by following Sven Yrvind’s meticulous process, enthusiasts can achieve professional-level results. Remember that the journey of boatbuilding is as rewarding as reaching your destination; it tests one’s patience and dedication. For those seeking to embark on this adventure or simply gain more insight into marine craftsmanship, Sven’s wisdom is invaluable.Sven Yrvind, a renowned yacht designer and sailor, shares valuable insights on creating flanges around bulkhead hatches for canvas protection in this enlightening video. By following his expert guidance, boat enthusiasts can ensure their living areas remain secure while allowing unhindered access through the hatches.Step 1: Starting with the Flange
Sven begins by explaining that working on flanges vertically and horizontally is significantly easier than doing so in a flat position. To simplify the process further, he divides the task into two or three steps as suggested by fellow expert “for for.” This approach not only makes it more manageable but also allows for greater precision in crafting each component.Step 2: Applying Glue and Securing
Sven proceeds to apply glue along one edge of the flange, ensuring a secure bond when clamped into place. He emphasizes that this stage is crucial for maintaining the structural integrity of the flange, which in turn safeguards the living area beneath the canvas when hatches are open.Step 3: Allowing Time to Dry
After securely attaching the first portion of the flange, Sven allows ample time for it to dry before moving forward with additional steps. This patience and precision are key aspects of his successful boatbuilding methods.Step 4: Finishing Touches
Once the flange is fully dried, Sven removes the clamps carefully, ensuring no damage occurs during this process. He then moves on to attaching four more pieces onto these main frames, completing two pairs of flanges for the bulkhead hatches.The Final Touches
While two flanges form the primary support structure around the hatches, Sven mentions there are two additional pieces required at each end to ensure comprehensive protection. This attention to detail highlights his commitment to producing a durable and reliable design. “Sailing is about finding your path, whether it’s across an ocean or within yourself.” – Sven Yrvind In conclusion, making flanges around bulkhead hatches may seem complex at first glance, but by following Sven Yrvind’s meticulous process, enthusiasts can achieve professional-level results. Remember that the journey of boatbuilding is as rewarding as reaching your destination; it tests one’s patience and dedication. For those seeking to embark on this adventure or simply gain more insight into marine craftsmanship, Sven’s wisdom is invaluable.Making Flanges Around Bulkhead Hatches for Canvas
Sven Yrvind, a renowned yacht designer and sailor, shares valuable insights on creating flanges around bulkhead hatches for canvas protection in this enlightening video. By following his expert guidance, boat enthusiasts can ensure their living areas remain secure while allowing unhindered access through the hatches.Step 1: Starting with the Flange
Sven begins by explaining that working on flanges vertically and horizontally is significantly easier than doing so in a flat position. To simplify the process further, he divides the task into two or three steps as suggested by fellow expert “for for.” This approach not only makes it more manageable but also allows for greater precision in crafting each component.Step 2: Applying Glue and Securing
Sven proceeds to apply glue along one edge of the flange, ensuring a secure bond when clamped into place. He emphasizes that this stage is crucial for maintaining the structural integrity of the flange, which in turn safeguards the living area beneath the canvas when hatches are open.Step 3: Allowing Time to Dry
After securely attaching the first portion of the flange, Sven allows ample time for it to dry before moving forward with additional steps. This patience and precision are key aspects of his successful boatbuilding methods.Step 4: Finishing Touches
Once the flange is fully dried, Sven removes the clamps carefully, ensuring no damage occurs during this process. He then moves on to attaching four more pieces onto these main frames, completing two pairs of flanges for the bulkhead hatches.The Final Touches
While two flanges form the primary support structure around the hatches, Sven mentions there are two additional pieces required at each end to ensure comprehensive protection. This attention to detail highlights his commitment to producing a durable and reliable design. “Sailing is about finding your path, whether it’s across an ocean or within yourself.” – Sven Yrvind In conclusion, making flanges around bulkhead hatches may seem complex at first glance, but by following Sven Yrvind’s meticulous process, enthusiasts can achieve professional-level results. Remember that the journey of boatbuilding is as rewarding as reaching your destination; it tests one’s patience and dedication. For those seeking to embark on this adventure or simply gain more insight into marine craftsmanship, Sven’s wisdom is invaluable.Once the flange is fully dried, Sven removes the clamps carefully, ensuring no damage occurs during this process. He then moves on to attaching four more pieces onto these main frames, completing two pairs of flanges for the bulkhead hatches.The Final Touches
While two flanges form the primary support structure around the hatches, Sven mentions there are two additional pieces required at each end to ensure comprehensive protection. This attention to detail highlights his commitment to producing a durable and reliable design. “Sailing is about finding your path, whether it’s across an ocean or within yourself.” – Sven Yrvind In conclusion, making flanges around bulkhead hatches may seem complex at first glance, but by following Sven Yrvind’s meticulous process, enthusiasts can achieve professional-level results. Remember that the journey of boatbuilding is as rewarding as reaching your destination; it tests one’s patience and dedication. For those seeking to embark on this adventure or simply gain more insight into marine craftsmanship, Sven’s wisdom is invaluable.Sven begins by explaining that working on flanges vertically and horizontally is significantly easier than doing so in a flat position. To simplify the process further, he divides the task into two or three steps as suggested by fellow expert “for for.” This approach not only makes it more manageable but also allows for greater precision in crafting each component.Step 2: Applying Glue and Securing
Sven proceeds to apply glue along one edge of the flange, ensuring a secure bond when clamped into place. He emphasizes that this stage is crucial for maintaining the structural integrity of the flange, which in turn safeguards the living area beneath the canvas when hatches are open.Step 3: Allowing Time to Dry
After securely attaching the first portion of the flange, Sven allows ample time for it to dry before moving forward with additional steps. This patience and precision are key aspects of his successful boatbuilding methods.Step 4: Finishing Touches
Once the flange is fully dried, Sven removes the clamps carefully, ensuring no damage occurs during this process. He then moves on to attaching four more pieces onto these main frames, completing two pairs of flanges for the bulkhead hatches.The Final Touches
While two flanges form the primary support structure around the hatches, Sven mentions there are two additional pieces required at each end to ensure comprehensive protection. This attention to detail highlights his commitment to producing a durable and reliable design. “Sailing is about finding your path, whether it’s across an ocean or within yourself.” – Sven Yrvind In conclusion, making flanges around bulkhead hatches may seem complex at first glance, but by following Sven Yrvind’s meticulous process, enthusiasts can achieve professional-level results. Remember that the journey of boatbuilding is as rewarding as reaching your destination; it tests one’s patience and dedication. For those seeking to embark on this adventure or simply gain more insight into marine craftsmanship, Sven’s wisdom is invaluable.Sven Yrvind, a renowned yacht designer and sailor, shares valuable insights on creating flanges around bulkhead hatches for canvas protection in this enlightening video. By following his expert guidance, boat enthusiasts can ensure their living areas remain secure while allowing unhindered access through the hatches.Step 1: Starting with the Flange
Sven begins by explaining that working on flanges vertically and horizontally is significantly easier than doing so in a flat position. To simplify the process further, he divides the task into two or three steps as suggested by fellow expert “for for.” This approach not only makes it more manageable but also allows for greater precision in crafting each component.Step 2: Applying Glue and Securing
Sven proceeds to apply glue along one edge of the flange, ensuring a secure bond when clamped into place. He emphasizes that this stage is crucial for maintaining the structural integrity of the flange, which in turn safeguards the living area beneath the canvas when hatches are open.Step 3: Allowing Time to Dry
After securely attaching the first portion of the flange, Sven allows ample time for it to dry before moving forward with additional steps. This patience and precision are key aspects of his successful boatbuilding methods.Step 4: Finishing Touches
Once the flange is fully dried, Sven removes the clamps carefully, ensuring no damage occurs during this process. He then moves on to attaching four more pieces onto these main frames, completing two pairs of flanges for the bulkhead hatches.The Final Touches
While two flanges form the primary support structure around the hatches, Sven mentions there are two additional pieces required at each end to ensure comprehensive protection. This attention to detail highlights his commitment to producing a durable and reliable design. “Sailing is about finding your path, whether it’s across an ocean or within yourself.” – Sven Yrvind In conclusion, making flanges around bulkhead hatches may seem complex at first glance, but by following Sven Yrvind’s meticulous process, enthusiasts can achieve professional-level results. Remember that the journey of boatbuilding is as rewarding as reaching your destination; it tests one’s patience and dedication. For those seeking to embark on this adventure or simply gain more insight into marine craftsmanship, Sven’s wisdom is invaluable.Making Flanges Around Bulkhead Hatches for Canvas
Sven Yrvind, a renowned yacht designer and sailor, shares valuable insights on creating flanges around bulkhead hatches for canvas protection in this enlightening video. By following his expert guidance, boat enthusiasts can ensure their living areas remain secure while allowing unhindered access through the hatches.Step 1: Starting with the Flange
Sven begins by explaining that working on flanges vertically and horizontally is significantly easier than doing so in a flat position. To simplify the process further, he divides the task into two or three steps as suggested by fellow expert “for for.” This approach not only makes it more manageable but also allows for greater precision in crafting each component.Step 2: Applying Glue and Securing
Sven proceeds to apply glue along one edge of the flange, ensuring a secure bond when clamped into place. He emphasizes that this stage is crucial for maintaining the structural integrity of the flange, which in turn safeguards the living area beneath the canvas when hatches are open.Step 3: Allowing Time to Dry
After securely attaching the first portion of the flange, Sven allows ample time for it to dry before moving forward with additional steps. This patience and precision are key aspects of his successful boatbuilding methods.Step 4: Finishing Touches
Once the flange is fully dried, Sven removes the clamps carefully, ensuring no damage occurs during this process. He then moves on to attaching four more pieces onto these main frames, completing two pairs of flanges for the bulkhead hatches.The Final Touches
While two flanges form the primary support structure around the hatches, Sven mentions there are two additional pieces required at each end to ensure comprehensive protection. This attention to detail highlights his commitment to producing a durable and reliable design. “Sailing is about finding your path, whether it’s across an ocean or within yourself.” – Sven Yrvind In conclusion, making flanges around bulkhead hatches may seem complex at first glance, but by following Sven Yrvind’s meticulous process, enthusiasts can achieve professional-level results. Remember that the journey of boatbuilding is as rewarding as reaching your destination; it tests one’s patience and dedication. For those seeking to embark on this adventure or simply gain more insight into marine craftsmanship, Sven’s wisdom is invaluable.After securely attaching the first portion of the flange, Sven allows ample time for it to dry before moving forward with additional steps. This patience and precision are key aspects of his successful boatbuilding methods.Step 4: Finishing Touches
Once the flange is fully dried, Sven removes the clamps carefully, ensuring no damage occurs during this process. He then moves on to attaching four more pieces onto these main frames, completing two pairs of flanges for the bulkhead hatches.The Final Touches
While two flanges form the primary support structure around the hatches, Sven mentions there are two additional pieces required at each end to ensure comprehensive protection. This attention to detail highlights his commitment to producing a durable and reliable design. “Sailing is about finding your path, whether it’s across an ocean or within yourself.” – Sven Yrvind In conclusion, making flanges around bulkhead hatches may seem complex at first glance, but by following Sven Yrvind’s meticulous process, enthusiasts can achieve professional-level results. Remember that the journey of boatbuilding is as rewarding as reaching your destination; it tests one’s patience and dedication. For those seeking to embark on this adventure or simply gain more insight into marine craftsmanship, Sven’s wisdom is invaluable.Sven begins by explaining that working on flanges vertically and horizontally is significantly easier than doing so in a flat position. To simplify the process further, he divides the task into two or three steps as suggested by fellow expert “for for.” This approach not only makes it more manageable but also allows for greater precision in crafting each component.Step 2: Applying Glue and Securing
Sven proceeds to apply glue along one edge of the flange, ensuring a secure bond when clamped into place. He emphasizes that this stage is crucial for maintaining the structural integrity of the flange, which in turn safeguards the living area beneath the canvas when hatches are open.Step 3: Allowing Time to Dry
After securely attaching the first portion of the flange, Sven allows ample time for it to dry before moving forward with additional steps. This patience and precision are key aspects of his successful boatbuilding methods.Step 4: Finishing Touches
Once the flange is fully dried, Sven removes the clamps carefully, ensuring no damage occurs during this process. He then moves on to attaching four more pieces onto these main frames, completing two pairs of flanges for the bulkhead hatches.The Final Touches
While two flanges form the primary support structure around the hatches, Sven mentions there are two additional pieces required at each end to ensure comprehensive protection. This attention to detail highlights his commitment to producing a durable and reliable design. “Sailing is about finding your path, whether it’s across an ocean or within yourself.” – Sven Yrvind In conclusion, making flanges around bulkhead hatches may seem complex at first glance, but by following Sven Yrvind’s meticulous process, enthusiasts can achieve professional-level results. Remember that the journey of boatbuilding is as rewarding as reaching your destination; it tests one’s patience and dedication. For those seeking to embark on this adventure or simply gain more insight into marine craftsmanship, Sven’s wisdom is invaluable.Sven Yrvind, a renowned yacht designer and sailor, shares valuable insights on creating flanges around bulkhead hatches for canvas protection in this enlightening video. By following his expert guidance, boat enthusiasts can ensure their living areas remain secure while allowing unhindered access through the hatches.Step 1: Starting with the Flange
Sven begins by explaining that working on flanges vertically and horizontally is significantly easier than doing so in a flat position. To simplify the process further, he divides the task into two or three steps as suggested by fellow expert “for for.” This approach not only makes it more manageable but also allows for greater precision in crafting each component.Step 2: Applying Glue and Securing
Sven proceeds to apply glue along one edge of the flange, ensuring a secure bond when clamped into place. He emphasizes that this stage is crucial for maintaining the structural integrity of the flange, which in turn safeguards the living area beneath the canvas when hatches are open.Step 3: Allowing Time to Dry
After securely attaching the first portion of the flange, Sven allows ample time for it to dry before moving forward with additional steps. This patience and precision are key aspects of his successful boatbuilding methods.Step 4: Finishing Touches
Once the flange is fully dried, Sven removes the clamps carefully, ensuring no damage occurs during this process. He then moves on to attaching four more pieces onto these main frames, completing two pairs of flanges for the bulkhead hatches.The Final Touches
While two flanges form the primary support structure around the hatches, Sven mentions there are two additional pieces required at each end to ensure comprehensive protection. This attention to detail highlights his commitment to producing a durable and reliable design. “Sailing is about finding your path, whether it’s across an ocean or within yourself.” – Sven Yrvind In conclusion, making flanges around bulkhead hatches may seem complex at first glance, but by following Sven Yrvind’s meticulous process, enthusiasts can achieve professional-level results. Remember that the journey of boatbuilding is as rewarding as reaching your destination; it tests one’s patience and dedication. For those seeking to embark on this adventure or simply gain more insight into marine craftsmanship, Sven’s wisdom is invaluable.Making Flanges Around Bulkhead Hatches for Canvas
Sven Yrvind, a renowned yacht designer and sailor, shares valuable insights on creating flanges around bulkhead hatches for canvas protection in this enlightening video. By following his expert guidance, boat enthusiasts can ensure their living areas remain secure while allowing unhindered access through the hatches.Step 1: Starting with the Flange
Sven begins by explaining that working on flanges vertically and horizontally is significantly easier than doing so in a flat position. To simplify the process further, he divides the task into two or three steps as suggested by fellow expert “for for.” This approach not only makes it more manageable but also allows for greater precision in crafting each component.Step 2: Applying Glue and Securing
Sven proceeds to apply glue along one edge of the flange, ensuring a secure bond when clamped into place. He emphasizes that this stage is crucial for maintaining the structural integrity of the flange, which in turn safeguards the living area beneath the canvas when hatches are open.Step 3: Allowing Time to Dry
After securely attaching the first portion of the flange, Sven allows ample time for it to dry before moving forward with additional steps. This patience and precision are key aspects of his successful boatbuilding methods.Step 4: Finishing Touches
Once the flange is fully dried, Sven removes the clamps carefully, ensuring no damage occurs during this process. He then moves on to attaching four more pieces onto these main frames, completing two pairs of flanges for the bulkhead hatches.The Final Touches
While two flanges form the primary support structure around the hatches, Sven mentions there are two additional pieces required at each end to ensure comprehensive protection. This attention to detail highlights his commitment to producing a durable and reliable design. “Sailing is about finding your path, whether it’s across an ocean or within yourself.” – Sven Yrvind In conclusion, making flanges around bulkhead hatches may seem complex at first glance, but by following Sven Yrvind’s meticulous process, enthusiasts can achieve professional-level results. Remember that the journey of boatbuilding is as rewarding as reaching your destination; it tests one’s patience and dedication. For those seeking to embark on this adventure or simply gain more insight into marine craftsmanship, Sven’s wisdom is invaluable.Sven proceeds to apply glue along one edge of the flange, ensuring a secure bond when clamped into place. He emphasizes that this stage is crucial for maintaining the structural integrity of the flange, which in turn safeguards the living area beneath the canvas when hatches are open.Step 3: Allowing Time to Dry
After securely attaching the first portion of the flange, Sven allows ample time for it to dry before moving forward with additional steps. This patience and precision are key aspects of his successful boatbuilding methods.Step 4: Finishing Touches
Once the flange is fully dried, Sven removes the clamps carefully, ensuring no damage occurs during this process. He then moves on to attaching four more pieces onto these main frames, completing two pairs of flanges for the bulkhead hatches.The Final Touches
While two flanges form the primary support structure around the hatches, Sven mentions there are two additional pieces required at each end to ensure comprehensive protection. This attention to detail highlights his commitment to producing a durable and reliable design. “Sailing is about finding your path, whether it’s across an ocean or within yourself.” – Sven Yrvind In conclusion, making flanges around bulkhead hatches may seem complex at first glance, but by following Sven Yrvind’s meticulous process, enthusiasts can achieve professional-level results. Remember that the journey of boatbuilding is as rewarding as reaching your destination; it tests one’s patience and dedication. For those seeking to embark on this adventure or simply gain more insight into marine craftsmanship, Sven’s wisdom is invaluable.Sven begins by explaining that working on flanges vertically and horizontally is significantly easier than doing so in a flat position. To simplify the process further, he divides the task into two or three steps as suggested by fellow expert “for for.” This approach not only makes it more manageable but also allows for greater precision in crafting each component.Step 2: Applying Glue and Securing
Sven proceeds to apply glue along one edge of the flange, ensuring a secure bond when clamped into place. He emphasizes that this stage is crucial for maintaining the structural integrity of the flange, which in turn safeguards the living area beneath the canvas when hatches are open.Step 3: Allowing Time to Dry
After securely attaching the first portion of the flange, Sven allows ample time for it to dry before moving forward with additional steps. This patience and precision are key aspects of his successful boatbuilding methods.Step 4: Finishing Touches
Once the flange is fully dried, Sven removes the clamps carefully, ensuring no damage occurs during this process. He then moves on to attaching four more pieces onto these main frames, completing two pairs of flanges for the bulkhead hatches.The Final Touches
While two flanges form the primary support structure around the hatches, Sven mentions there are two additional pieces required at each end to ensure comprehensive protection. This attention to detail highlights his commitment to producing a durable and reliable design. “Sailing is about finding your path, whether it’s across an ocean or within yourself.” – Sven Yrvind In conclusion, making flanges around bulkhead hatches may seem complex at first glance, but by following Sven Yrvind’s meticulous process, enthusiasts can achieve professional-level results. Remember that the journey of boatbuilding is as rewarding as reaching your destination; it tests one’s patience and dedication. For those seeking to embark on this adventure or simply gain more insight into marine craftsmanship, Sven’s wisdom is invaluable.Sven Yrvind, a renowned yacht designer and sailor, shares valuable insights on creating flanges around bulkhead hatches for canvas protection in this enlightening video. By following his expert guidance, boat enthusiasts can ensure their living areas remain secure while allowing unhindered access through the hatches.Step 1: Starting with the Flange
Sven begins by explaining that working on flanges vertically and horizontally is significantly easier than doing so in a flat position. To simplify the process further, he divides the task into two or three steps as suggested by fellow expert “for for.” This approach not only makes it more manageable but also allows for greater precision in crafting each component.Step 2: Applying Glue and Securing
Sven proceeds to apply glue along one edge of the flange, ensuring a secure bond when clamped into place. He emphasizes that this stage is crucial for maintaining the structural integrity of the flange, which in turn safeguards the living area beneath the canvas when hatches are open.Step 3: Allowing Time to Dry
After securely attaching the first portion of the flange, Sven allows ample time for it to dry before moving forward with additional steps. This patience and precision are key aspects of his successful boatbuilding methods.Step 4: Finishing Touches
Once the flange is fully dried, Sven removes the clamps carefully, ensuring no damage occurs during this process. He then moves on to attaching four more pieces onto these main frames, completing two pairs of flanges for the bulkhead hatches.The Final Touches
While two flanges form the primary support structure around the hatches, Sven mentions there are two additional pieces required at each end to ensure comprehensive protection. This attention to detail highlights his commitment to producing a durable and reliable design. “Sailing is about finding your path, whether it’s across an ocean or within yourself.” – Sven Yrvind In conclusion, making flanges around bulkhead hatches may seem complex at first glance, but by following Sven Yrvind’s meticulous process, enthusiasts can achieve professional-level results. Remember that the journey of boatbuilding is as rewarding as reaching your destination; it tests one’s patience and dedication. For those seeking to embark on this adventure or simply gain more insight into marine craftsmanship, Sven’s wisdom is invaluable.Making Flanges Around Bulkhead Hatches for Canvas
Sven Yrvind, a renowned yacht designer and sailor, shares valuable insights on creating flanges around bulkhead hatches for canvas protection in this enlightening video. By following his expert guidance, boat enthusiasts can ensure their living areas remain secure while allowing unhindered access through the hatches.Step 1: Starting with the Flange
Sven begins by explaining that working on flanges vertically and horizontally is significantly easier than doing so in a flat position. To simplify the process further, he divides the task into two or three steps as suggested by fellow expert “for for.” This approach not only makes it more manageable but also allows for greater precision in crafting each component.Step 2: Applying Glue and Securing
Sven proceeds to apply glue along one edge of the flange, ensuring a secure bond when clamped into place. He emphasizes that this stage is crucial for maintaining the structural integrity of the flange, which in turn safeguards the living area beneath the canvas when hatches are open.Step 3: Allowing Time to Dry
After securely attaching the first portion of the flange, Sven allows ample time for it to dry before moving forward with additional steps. This patience and precision are key aspects of his successful boatbuilding methods.Step 4: Finishing Touches
Once the flange is fully dried, Sven removes the clamps carefully, ensuring no damage occurs during this process. He then moves on to attaching four more pieces onto these main frames, completing two pairs of flanges for the bulkhead hatches.The Final Touches
While two flanges form the primary support structure around the hatches, Sven mentions there are two additional pieces required at each end to ensure comprehensive protection. This attention to detail highlights his commitment to producing a durable and reliable design. “Sailing is about finding your path, whether it’s across an ocean or within yourself.” – Sven Yrvind In conclusion, making flanges around bulkhead hatches may seem complex at first glance, but by following Sven Yrvind’s meticulous process, enthusiasts can achieve professional-level results. Remember that the journey of boatbuilding is as rewarding as reaching your destination; it tests one’s patience and dedication. For those seeking to embark on this adventure or simply gain more insight into marine craftsmanship, Sven’s wisdom is invaluable.Once the flange is fully dried, Sven removes the clamps carefully, ensuring no damage occurs during this process. He then moves on to attaching four more pieces onto these main frames, completing two pairs of flanges for the bulkhead hatches.The Final Touches
While two flanges form the primary support structure around the hatches, Sven mentions there are two additional pieces required at each end to ensure comprehensive protection. This attention to detail highlights his commitment to producing a durable and reliable design. “Sailing is about finding your path, whether it’s across an ocean or within yourself.” – Sven Yrvind In conclusion, making flanges around bulkhead hatches may seem complex at first glance, but by following Sven Yrvind’s meticulous process, enthusiasts can achieve professional-level results. Remember that the journey of boatbuilding is as rewarding as reaching your destination; it tests one’s patience and dedication. For those seeking to embark on this adventure or simply gain more insight into marine craftsmanship, Sven’s wisdom is invaluable.Sven proceeds to apply glue along one edge of the flange, ensuring a secure bond when clamped into place. He emphasizes that this stage is crucial for maintaining the structural integrity of the flange, which in turn safeguards the living area beneath the canvas when hatches are open.Step 3: Allowing Time to Dry
After securely attaching the first portion of the flange, Sven allows ample time for it to dry before moving forward with additional steps. This patience and precision are key aspects of his successful boatbuilding methods.Step 4: Finishing Touches
Once the flange is fully dried, Sven removes the clamps carefully, ensuring no damage occurs during this process. He then moves on to attaching four more pieces onto these main frames, completing two pairs of flanges for the bulkhead hatches.The Final Touches
While two flanges form the primary support structure around the hatches, Sven mentions there are two additional pieces required at each end to ensure comprehensive protection. This attention to detail highlights his commitment to producing a durable and reliable design. “Sailing is about finding your path, whether it’s across an ocean or within yourself.” – Sven Yrvind In conclusion, making flanges around bulkhead hatches may seem complex at first glance, but by following Sven Yrvind’s meticulous process, enthusiasts can achieve professional-level results. Remember that the journey of boatbuilding is as rewarding as reaching your destination; it tests one’s patience and dedication. For those seeking to embark on this adventure or simply gain more insight into marine craftsmanship, Sven’s wisdom is invaluable.Sven begins by explaining that working on flanges vertically and horizontally is significantly easier than doing so in a flat position. To simplify the process further, he divides the task into two or three steps as suggested by fellow expert “for for.” This approach not only makes it more manageable but also allows for greater precision in crafting each component.Step 2: Applying Glue and Securing
Sven proceeds to apply glue along one edge of the flange, ensuring a secure bond when clamped into place. He emphasizes that this stage is crucial for maintaining the structural integrity of the flange, which in turn safeguards the living area beneath the canvas when hatches are open.Step 3: Allowing Time to Dry
After securely attaching the first portion of the flange, Sven allows ample time for it to dry before moving forward with additional steps. This patience and precision are key aspects of his successful boatbuilding methods.Step 4: Finishing Touches
Once the flange is fully dried, Sven removes the clamps carefully, ensuring no damage occurs during this process. He then moves on to attaching four more pieces onto these main frames, completing two pairs of flanges for the bulkhead hatches.The Final Touches
While two flanges form the primary support structure around the hatches, Sven mentions there are two additional pieces required at each end to ensure comprehensive protection. This attention to detail highlights his commitment to producing a durable and reliable design. “Sailing is about finding your path, whether it’s across an ocean or within yourself.” – Sven Yrvind In conclusion, making flanges around bulkhead hatches may seem complex at first glance, but by following Sven Yrvind’s meticulous process, enthusiasts can achieve professional-level results. Remember that the journey of boatbuilding is as rewarding as reaching your destination; it tests one’s patience and dedication. For those seeking to embark on this adventure or simply gain more insight into marine craftsmanship, Sven’s wisdom is invaluable.Sven Yrvind, a renowned yacht designer and sailor, shares valuable insights on creating flanges around bulkhead hatches for canvas protection in this enlightening video. By following his expert guidance, boat enthusiasts can ensure their living areas remain secure while allowing unhindered access through the hatches.Step 1: Starting with the Flange
Sven begins by explaining that working on flanges vertically and horizontally is significantly easier than doing so in a flat position. To simplify the process further, he divides the task into two or three steps as suggested by fellow expert “for for.” This approach not only makes it more manageable but also allows for greater precision in crafting each component.Step 2: Applying Glue and Securing
Sven proceeds to apply glue along one edge of the flange, ensuring a secure bond when clamped into place. He emphasizes that this stage is crucial for maintaining the structural integrity of the flange, which in turn safeguards the living area beneath the canvas when hatches are open.Step 3: Allowing Time to Dry
After securely attaching the first portion of the flange, Sven allows ample time for it to dry before moving forward with additional steps. This patience and precision are key aspects of his successful boatbuilding methods.Step 4: Finishing Touches
Once the flange is fully dried, Sven removes the clamps carefully, ensuring no damage occurs during this process. He then moves on to attaching four more pieces onto these main frames, completing two pairs of flanges for the bulkhead hatches.The Final Touches
While two flanges form the primary support structure around the hatches, Sven mentions there are two additional pieces required at each end to ensure comprehensive protection. This attention to detail highlights his commitment to producing a durable and reliable design. “Sailing is about finding your path, whether it’s across an ocean or within yourself.” – Sven Yrvind In conclusion, making flanges around bulkhead hatches may seem complex at first glance, but by following Sven Yrvind’s meticulous process, enthusiasts can achieve professional-level results. Remember that the journey of boatbuilding is as rewarding as reaching your destination; it tests one’s patience and dedication. For those seeking to embark on this adventure or simply gain more insight into marine craftsmanship, Sven’s wisdom is invaluable.Making Flanges Around Bulkhead Hatches for Canvas
Sven Yrvind, a renowned yacht designer and sailor, shares valuable insights on creating flanges around bulkhead hatches for canvas protection in this enlightening video. By following his expert guidance, boat enthusiasts can ensure their living areas remain secure while allowing unhindered access through the hatches.Step 1: Starting with the Flange
Sven begins by explaining that working on flanges vertically and horizontally is significantly easier than doing so in a flat position. To simplify the process further, he divides the task into two or three steps as suggested by fellow expert “for for.” This approach not only makes it more manageable but also allows for greater precision in crafting each component.Step 2: Applying Glue and Securing
Sven proceeds to apply glue along one edge of the flange, ensuring a secure bond when clamped into place. He emphasizes that this stage is crucial for maintaining the structural integrity of the flange, which in turn safeguards the living area beneath the canvas when hatches are open.Step 3: Allowing Time to Dry
After securely attaching the first portion of the flange, Sven allows ample time for it to dry before moving forward with additional steps. This patience and precision are key aspects of his successful boatbuilding methods.Step 4: Finishing Touches
Once the flange is fully dried, Sven removes the clamps carefully, ensuring no damage occurs during this process. He then moves on to attaching four more pieces onto these main frames, completing two pairs of flanges for the bulkhead hatches.The Final Touches
While two flanges form the primary support structure around the hatches, Sven mentions there are two additional pieces required at each end to ensure comprehensive protection. This attention to detail highlights his commitment to producing a durable and reliable design. “Sailing is about finding your path, whether it’s across an ocean or within yourself.” – Sven Yrvind In conclusion, making flanges around bulkhead hatches may seem complex at first glance, but by following Sven Yrvind’s meticulous process, enthusiasts can achieve professional-level results. Remember that the journey of boatbuilding is as rewarding as reaching your destination; it tests one’s patience and dedication. For those seeking to embark on this adventure or simply gain more insight into marine craftsmanship, Sven’s wisdom is invaluable.After securely attaching the first portion of the flange, Sven allows ample time for it to dry before moving forward with additional steps. This patience and precision are key aspects of his successful boatbuilding methods.Step 4: Finishing Touches
Once the flange is fully dried, Sven removes the clamps carefully, ensuring no damage occurs during this process. He then moves on to attaching four more pieces onto these main frames, completing two pairs of flanges for the bulkhead hatches.The Final Touches
While two flanges form the primary support structure around the hatches, Sven mentions there are two additional pieces required at each end to ensure comprehensive protection. This attention to detail highlights his commitment to producing a durable and reliable design. “Sailing is about finding your path, whether it’s across an ocean or within yourself.” – Sven Yrvind In conclusion, making flanges around bulkhead hatches may seem complex at first glance, but by following Sven Yrvind’s meticulous process, enthusiasts can achieve professional-level results. Remember that the journey of boatbuilding is as rewarding as reaching your destination; it tests one’s patience and dedication. For those seeking to embark on this adventure or simply gain more insight into marine craftsmanship, Sven’s wisdom is invaluable.Sven proceeds to apply glue along one edge of the flange, ensuring a secure bond when clamped into place. He emphasizes that this stage is crucial for maintaining the structural integrity of the flange, which in turn safeguards the living area beneath the canvas when hatches are open.Step 3: Allowing Time to Dry
After securely attaching the first portion of the flange, Sven allows ample time for it to dry before moving forward with additional steps. This patience and precision are key aspects of his successful boatbuilding methods.Step 4: Finishing Touches
Once the flange is fully dried, Sven removes the clamps carefully, ensuring no damage occurs during this process. He then moves on to attaching four more pieces onto these main frames, completing two pairs of flanges for the bulkhead hatches.The Final Touches
While two flanges form the primary support structure around the hatches, Sven mentions there are two additional pieces required at each end to ensure comprehensive protection. This attention to detail highlights his commitment to producing a durable and reliable design. “Sailing is about finding your path, whether it’s across an ocean or within yourself.” – Sven Yrvind In conclusion, making flanges around bulkhead hatches may seem complex at first glance, but by following Sven Yrvind’s meticulous process, enthusiasts can achieve professional-level results. Remember that the journey of boatbuilding is as rewarding as reaching your destination; it tests one’s patience and dedication. For those seeking to embark on this adventure or simply gain more insight into marine craftsmanship, Sven’s wisdom is invaluable.Sven begins by explaining that working on flanges vertically and horizontally is significantly easier than doing so in a flat position. To simplify the process further, he divides the task into two or three steps as suggested by fellow expert “for for.” This approach not only makes it more manageable but also allows for greater precision in crafting each component.Step 2: Applying Glue and Securing
Sven proceeds to apply glue along one edge of the flange, ensuring a secure bond when clamped into place. He emphasizes that this stage is crucial for maintaining the structural integrity of the flange, which in turn safeguards the living area beneath the canvas when hatches are open.Step 3: Allowing Time to Dry
After securely attaching the first portion of the flange, Sven allows ample time for it to dry before moving forward with additional steps. This patience and precision are key aspects of his successful boatbuilding methods.Step 4: Finishing Touches
Once the flange is fully dried, Sven removes the clamps carefully, ensuring no damage occurs during this process. He then moves on to attaching four more pieces onto these main frames, completing two pairs of flanges for the bulkhead hatches.The Final Touches
While two flanges form the primary support structure around the hatches, Sven mentions there are two additional pieces required at each end to ensure comprehensive protection. This attention to detail highlights his commitment to producing a durable and reliable design. “Sailing is about finding your path, whether it’s across an ocean or within yourself.” – Sven Yrvind In conclusion, making flanges around bulkhead hatches may seem complex at first glance, but by following Sven Yrvind’s meticulous process, enthusiasts can achieve professional-level results. Remember that the journey of boatbuilding is as rewarding as reaching your destination; it tests one’s patience and dedication. For those seeking to embark on this adventure or simply gain more insight into marine craftsmanship, Sven’s wisdom is invaluable.Sven Yrvind, a renowned yacht designer and sailor, shares valuable insights on creating flanges around bulkhead hatches for canvas protection in this enlightening video. By following his expert guidance, boat enthusiasts can ensure their living areas remain secure while allowing unhindered access through the hatches.Step 1: Starting with the Flange
Sven begins by explaining that working on flanges vertically and horizontally is significantly easier than doing so in a flat position. To simplify the process further, he divides the task into two or three steps as suggested by fellow expert “for for.” This approach not only makes it more manageable but also allows for greater precision in crafting each component.Step 2: Applying Glue and Securing
Sven proceeds to apply glue along one edge of the flange, ensuring a secure bond when clamped into place. He emphasizes that this stage is crucial for maintaining the structural integrity of the flange, which in turn safeguards the living area beneath the canvas when hatches are open.Step 3: Allowing Time to Dry
After securely attaching the first portion of the flange, Sven allows ample time for it to dry before moving forward with additional steps. This patience and precision are key aspects of his successful boatbuilding methods.Step 4: Finishing Touches
Once the flange is fully dried, Sven removes the clamps carefully, ensuring no damage occurs during this process. He then moves on to attaching four more pieces onto these main frames, completing two pairs of flanges for the bulkhead hatches.The Final Touches
While two flanges form the primary support structure around the hatches, Sven mentions there are two additional pieces required at each end to ensure comprehensive protection. This attention to detail highlights his commitment to producing a durable and reliable design. “Sailing is about finding your path, whether it’s across an ocean or within yourself.” – Sven Yrvind In conclusion, making flanges around bulkhead hatches may seem complex at first glance, but by following Sven Yrvind’s meticulous process, enthusiasts can achieve professional-level results. Remember that the journey of boatbuilding is as rewarding as reaching your destination; it tests one’s patience and dedication. For those seeking to embark on this adventure or simply gain more insight into marine craftsmanship, Sven’s wisdom is invaluable.Making Flanges Around Bulkhead Hatches for Canvas
Sven Yrvind, a renowned yacht designer and sailor, shares valuable insights on creating flanges around bulkhead hatches for canvas protection in this enlightening video. By following his expert guidance, boat enthusiasts can ensure their living areas remain secure while allowing unhindered access through the hatches.Step 1: Starting with the Flange
Sven begins by explaining that working on flanges vertically and horizontally is significantly easier than doing so in a flat position. To simplify the process further, he divides the task into two or three steps as suggested by fellow expert “for for.” This approach not only makes it more manageable but also allows for greater precision in crafting each component.Step 2: Applying Glue and Securing
Sven proceeds to apply glue along one edge of the flange, ensuring a secure bond when clamped into place. He emphasizes that this stage is crucial for maintaining the structural integrity of the flange, which in turn safeguards the living area beneath the canvas when hatches are open.Step 3: Allowing Time to Dry
After securely attaching the first portion of the flange, Sven allows ample time for it to dry before moving forward with additional steps. This patience and precision are key aspects of his successful boatbuilding methods.Step 4: Finishing Touches
Once the flange is fully dried, Sven removes the clamps carefully, ensuring no damage occurs during this process. He then moves on to attaching four more pieces onto these main frames, completing two pairs of flanges for the bulkhead hatches.The Final Touches
While two flanges form the primary support structure around the hatches, Sven mentions there are two additional pieces required at each end to ensure comprehensive protection. This attention to detail highlights his commitment to producing a durable and reliable design. “Sailing is about finding your path, whether it’s across an ocean or within yourself.” – Sven Yrvind In conclusion, making flanges around bulkhead hatches may seem complex at first glance, but by following Sven Yrvind’s meticulous process, enthusiasts can achieve professional-level results. Remember that the journey of boatbuilding is as rewarding as reaching your destination; it tests one’s patience and dedication. For those seeking to embark on this adventure or simply gain more insight into marine craftsmanship, Sven’s wisdom is invaluable.Once the flange is fully dried, Sven removes the clamps carefully, ensuring no damage occurs during this process. He then moves on to attaching four more pieces onto these main frames, completing two pairs of flanges for the bulkhead hatches.The Final Touches
While two flanges form the primary support structure around the hatches, Sven mentions there are two additional pieces required at each end to ensure comprehensive protection. This attention to detail highlights his commitment to producing a durable and reliable design. “Sailing is about finding your path, whether it’s across an ocean or within yourself.” – Sven Yrvind In conclusion, making flanges around bulkhead hatches may seem complex at first glance, but by following Sven Yrvind’s meticulous process, enthusiasts can achieve professional-level results. Remember that the journey of boatbuilding is as rewarding as reaching your destination; it tests one’s patience and dedication. For those seeking to embark on this adventure or simply gain more insight into marine craftsmanship, Sven’s wisdom is invaluable.After securely attaching the first portion of the flange, Sven allows ample time for it to dry before moving forward with additional steps. This patience and precision are key aspects of his successful boatbuilding methods.Step 4: Finishing Touches
Once the flange is fully dried, Sven removes the clamps carefully, ensuring no damage occurs during this process. He then moves on to attaching four more pieces onto these main frames, completing two pairs of flanges for the bulkhead hatches.The Final Touches
While two flanges form the primary support structure around the hatches, Sven mentions there are two additional pieces required at each end to ensure comprehensive protection. This attention to detail highlights his commitment to producing a durable and reliable design. “Sailing is about finding your path, whether it’s across an ocean or within yourself.” – Sven Yrvind In conclusion, making flanges around bulkhead hatches may seem complex at first glance, but by following Sven Yrvind’s meticulous process, enthusiasts can achieve professional-level results. Remember that the journey of boatbuilding is as rewarding as reaching your destination; it tests one’s patience and dedication. For those seeking to embark on this adventure or simply gain more insight into marine craftsmanship, Sven’s wisdom is invaluable.Sven proceeds to apply glue along one edge of the flange, ensuring a secure bond when clamped into place. He emphasizes that this stage is crucial for maintaining the structural integrity of the flange, which in turn safeguards the living area beneath the canvas when hatches are open.Step 3: Allowing Time to Dry
After securely attaching the first portion of the flange, Sven allows ample time for it to dry before moving forward with additional steps. This patience and precision are key aspects of his successful boatbuilding methods.Step 4: Finishing Touches
Once the flange is fully dried, Sven removes the clamps carefully, ensuring no damage occurs during this process. He then moves on to attaching four more pieces onto these main frames, completing two pairs of flanges for the bulkhead hatches.The Final Touches
While two flanges form the primary support structure around the hatches, Sven mentions there are two additional pieces required at each end to ensure comprehensive protection. This attention to detail highlights his commitment to producing a durable and reliable design. “Sailing is about finding your path, whether it’s across an ocean or within yourself.” – Sven Yrvind In conclusion, making flanges around bulkhead hatches may seem complex at first glance, but by following Sven Yrvind’s meticulous process, enthusiasts can achieve professional-level results. Remember that the journey of boatbuilding is as rewarding as reaching your destination; it tests one’s patience and dedication. For those seeking to embark on this adventure or simply gain more insight into marine craftsmanship, Sven’s wisdom is invaluable.Sven begins by explaining that working on flanges vertically and horizontally is significantly easier than doing so in a flat position. To simplify the process further, he divides the task into two or three steps as suggested by fellow expert “for for.” This approach not only makes it more manageable but also allows for greater precision in crafting each component.Step 2: Applying Glue and Securing
Sven proceeds to apply glue along one edge of the flange, ensuring a secure bond when clamped into place. He emphasizes that this stage is crucial for maintaining the structural integrity of the flange, which in turn safeguards the living area beneath the canvas when hatches are open.Step 3: Allowing Time to Dry
After securely attaching the first portion of the flange, Sven allows ample time for it to dry before moving forward with additional steps. This patience and precision are key aspects of his successful boatbuilding methods.Step 4: Finishing Touches
Once the flange is fully dried, Sven removes the clamps carefully, ensuring no damage occurs during this process. He then moves on to attaching four more pieces onto these main frames, completing two pairs of flanges for the bulkhead hatches.The Final Touches
While two flanges form the primary support structure around the hatches, Sven mentions there are two additional pieces required at each end to ensure comprehensive protection. This attention to detail highlights his commitment to producing a durable and reliable design. “Sailing is about finding your path, whether it’s across an ocean or within yourself.” – Sven Yrvind In conclusion, making flanges around bulkhead hatches may seem complex at first glance, but by following Sven Yrvind’s meticulous process, enthusiasts can achieve professional-level results. Remember that the journey of boatbuilding is as rewarding as reaching your destination; it tests one’s patience and dedication. For those seeking to embark on this adventure or simply gain more insight into marine craftsmanship, Sven’s wisdom is invaluable.Sven Yrvind, a renowned yacht designer and sailor, shares valuable insights on creating flanges around bulkhead hatches for canvas protection in this enlightening video. By following his expert guidance, boat enthusiasts can ensure their living areas remain secure while allowing unhindered access through the hatches.Step 1: Starting with the Flange
Sven begins by explaining that working on flanges vertically and horizontally is significantly easier than doing so in a flat position. To simplify the process further, he divides the task into two or three steps as suggested by fellow expert “for for.” This approach not only makes it more manageable but also allows for greater precision in crafting each component.Step 2: Applying Glue and Securing
Sven proceeds to apply glue along one edge of the flange, ensuring a secure bond when clamped into place. He emphasizes that this stage is crucial for maintaining the structural integrity of the flange, which in turn safeguards the living area beneath the canvas when hatches are open.Step 3: Allowing Time to Dry
After securely attaching the first portion of the flange, Sven allows ample time for it to dry before moving forward with additional steps. This patience and precision are key aspects of his successful boatbuilding methods.Step 4: Finishing Touches
Once the flange is fully dried, Sven removes the clamps carefully, ensuring no damage occurs during this process. He then moves on to attaching four more pieces onto these main frames, completing two pairs of flanges for the bulkhead hatches.The Final Touches
While two flanges form the primary support structure around the hatches, Sven mentions there are two additional pieces required at each end to ensure comprehensive protection. This attention to detail highlights his commitment to producing a durable and reliable design. “Sailing is about finding your path, whether it’s across an ocean or within yourself.” – Sven Yrvind In conclusion, making flanges around bulkhead hatches may seem complex at first glance, but by following Sven Yrvind’s meticulous process, enthusiasts can achieve professional-level results. Remember that the journey of boatbuilding is as rewarding as reaching your destination; it tests one’s patience and dedication. For those seeking to embark on this adventure or simply gain more insight into marine craftsmanship, Sven’s wisdom is invaluable.Making Flanges Around Bulkhead Hatches for Canvas
Sven Yrvind, a renowned yacht designer and sailor, shares valuable insights on creating flanges around bulkhead hatches for canvas protection in this enlightening video. By following his expert guidance, boat enthusiasts can ensure their living areas remain secure while allowing unhindered access through the hatches.Step 1: Starting with the Flange
Sven begins by explaining that working on flanges vertically and horizontally is significantly easier than doing so in a flat position. To simplify the process further, he divides the task into two or three steps as suggested by fellow expert “for for.” This approach not only makes it more manageable but also allows for greater precision in crafting each component.Step 2: Applying Glue and Securing
Sven proceeds to apply glue along one edge of the flange, ensuring a secure bond when clamped into place. He emphasizes that this stage is crucial for maintaining the structural integrity of the flange, which in turn safeguards the living area beneath the canvas when hatches are open.Step 3: Allowing Time to Dry
After securely attaching the first portion of the flange, Sven allows ample time for it to dry before moving forward with additional steps. This patience and precision are key aspects of his successful boatbuilding methods.Step 4: Finishing Touches
Once the flange is fully dried, Sven removes the clamps carefully, ensuring no damage occurs during this process. He then moves on to attaching four more pieces onto these main frames, completing two pairs of flanges for the bulkhead hatches.The Final Touches
While two flanges form the primary support structure around the hatches, Sven mentions there are two additional pieces required at each end to ensure comprehensive protection. This attention to detail highlights his commitment to producing a durable and reliable design. “Sailing is about finding your path, whether it’s across an ocean or within yourself.” – Sven Yrvind In conclusion, making flanges around bulkhead hatches may seem complex at first glance, but by following Sven Yrvind’s meticulous process, enthusiasts can achieve professional-level results. Remember that the journey of boatbuilding is as rewarding as reaching your destination; it tests one’s patience and dedication. For those seeking to embark on this adventure or simply gain more insight into marine craftsmanship, Sven’s wisdom is invaluable.While two flanges form the primary support structure around the hatches, Sven mentions there are two additional pieces required at each end to ensure comprehensive protection. This attention to detail highlights his commitment to producing a durable and reliable design. “Sailing is about finding your path, whether it’s across an ocean or within yourself.” – Sven Yrvind In conclusion, making flanges around bulkhead hatches may seem complex at first glance, but by following Sven Yrvind’s meticulous process, enthusiasts can achieve professional-level results. Remember that the journey of boatbuilding is as rewarding as reaching your destination; it tests one’s patience and dedication. For those seeking to embark on this adventure or simply gain more insight into marine craftsmanship, Sven’s wisdom is invaluable.Once the flange is fully dried, Sven removes the clamps carefully, ensuring no damage occurs during this process. He then moves on to attaching four more pieces onto these main frames, completing two pairs of flanges for the bulkhead hatches.The Final Touches
While two flanges form the primary support structure around the hatches, Sven mentions there are two additional pieces required at each end to ensure comprehensive protection. This attention to detail highlights his commitment to producing a durable and reliable design. “Sailing is about finding your path, whether it’s across an ocean or within yourself.” – Sven Yrvind In conclusion, making flanges around bulkhead hatches may seem complex at first glance, but by following Sven Yrvind’s meticulous process, enthusiasts can achieve professional-level results. Remember that the journey of boatbuilding is as rewarding as reaching your destination; it tests one’s patience and dedication. For those seeking to embark on this adventure or simply gain more insight into marine craftsmanship, Sven’s wisdom is invaluable.After securely attaching the first portion of the flange, Sven allows ample time for it to dry before moving forward with additional steps. This patience and precision are key aspects of his successful boatbuilding methods.Step 4: Finishing Touches
Once the flange is fully dried, Sven removes the clamps carefully, ensuring no damage occurs during this process. He then moves on to attaching four more pieces onto these main frames, completing two pairs of flanges for the bulkhead hatches.The Final Touches
While two flanges form the primary support structure around the hatches, Sven mentions there are two additional pieces required at each end to ensure comprehensive protection. This attention to detail highlights his commitment to producing a durable and reliable design. “Sailing is about finding your path, whether it’s across an ocean or within yourself.” – Sven Yrvind In conclusion, making flanges around bulkhead hatches may seem complex at first glance, but by following Sven Yrvind’s meticulous process, enthusiasts can achieve professional-level results. Remember that the journey of boatbuilding is as rewarding as reaching your destination; it tests one’s patience and dedication. For those seeking to embark on this adventure or simply gain more insight into marine craftsmanship, Sven’s wisdom is invaluable.Sven proceeds to apply glue along one edge of the flange, ensuring a secure bond when clamped into place. He emphasizes that this stage is crucial for maintaining the structural integrity of the flange, which in turn safeguards the living area beneath the canvas when hatches are open.Step 3: Allowing Time to Dry
After securely attaching the first portion of the flange, Sven allows ample time for it to dry before moving forward with additional steps. This patience and precision are key aspects of his successful boatbuilding methods.Step 4: Finishing Touches
Once the flange is fully dried, Sven removes the clamps carefully, ensuring no damage occurs during this process. He then moves on to attaching four more pieces onto these main frames, completing two pairs of flanges for the bulkhead hatches.The Final Touches
While two flanges form the primary support structure around the hatches, Sven mentions there are two additional pieces required at each end to ensure comprehensive protection. This attention to detail highlights his commitment to producing a durable and reliable design. “Sailing is about finding your path, whether it’s across an ocean or within yourself.” – Sven Yrvind In conclusion, making flanges around bulkhead hatches may seem complex at first glance, but by following Sven Yrvind’s meticulous process, enthusiasts can achieve professional-level results. Remember that the journey of boatbuilding is as rewarding as reaching your destination; it tests one’s patience and dedication. For those seeking to embark on this adventure or simply gain more insight into marine craftsmanship, Sven’s wisdom is invaluable.Sven begins by explaining that working on flanges vertically and horizontally is significantly easier than doing so in a flat position. To simplify the process further, he divides the task into two or three steps as suggested by fellow expert “for for.” This approach not only makes it more manageable but also allows for greater precision in crafting each component.Step 2: Applying Glue and Securing
Sven proceeds to apply glue along one edge of the flange, ensuring a secure bond when clamped into place. He emphasizes that this stage is crucial for maintaining the structural integrity of the flange, which in turn safeguards the living area beneath the canvas when hatches are open.Step 3: Allowing Time to Dry
After securely attaching the first portion of the flange, Sven allows ample time for it to dry before moving forward with additional steps. This patience and precision are key aspects of his successful boatbuilding methods.Step 4: Finishing Touches
Once the flange is fully dried, Sven removes the clamps carefully, ensuring no damage occurs during this process. He then moves on to attaching four more pieces onto these main frames, completing two pairs of flanges for the bulkhead hatches.The Final Touches
While two flanges form the primary support structure around the hatches, Sven mentions there are two additional pieces required at each end to ensure comprehensive protection. This attention to detail highlights his commitment to producing a durable and reliable design. “Sailing is about finding your path, whether it’s across an ocean or within yourself.” – Sven Yrvind In conclusion, making flanges around bulkhead hatches may seem complex at first glance, but by following Sven Yrvind’s meticulous process, enthusiasts can achieve professional-level results. Remember that the journey of boatbuilding is as rewarding as reaching your destination; it tests one’s patience and dedication. For those seeking to embark on this adventure or simply gain more insight into marine craftsmanship, Sven’s wisdom is invaluable.Sven Yrvind, a renowned yacht designer and sailor, shares valuable insights on creating flanges around bulkhead hatches for canvas protection in this enlightening video. By following his expert guidance, boat enthusiasts can ensure their living areas remain secure while allowing unhindered access through the hatches.Step 1: Starting with the Flange
Sven begins by explaining that working on flanges vertically and horizontally is significantly easier than doing so in a flat position. To simplify the process further, he divides the task into two or three steps as suggested by fellow expert “for for.” This approach not only makes it more manageable but also allows for greater precision in crafting each component.Step 2: Applying Glue and Securing
Sven proceeds to apply glue along one edge of the flange, ensuring a secure bond when clamped into place. He emphasizes that this stage is crucial for maintaining the structural integrity of the flange, which in turn safeguards the living area beneath the canvas when hatches are open.Step 3: Allowing Time to Dry
After securely attaching the first portion of the flange, Sven allows ample time for it to dry before moving forward with additional steps. This patience and precision are key aspects of his successful boatbuilding methods.Step 4: Finishing Touches
Once the flange is fully dried, Sven removes the clamps carefully, ensuring no damage occurs during this process. He then moves on to attaching four more pieces onto these main frames, completing two pairs of flanges for the bulkhead hatches.The Final Touches
While two flanges form the primary support structure around the hatches, Sven mentions there are two additional pieces required at each end to ensure comprehensive protection. This attention to detail highlights his commitment to producing a durable and reliable design. “Sailing is about finding your path, whether it’s across an ocean or within yourself.” – Sven Yrvind In conclusion, making flanges around bulkhead hatches may seem complex at first glance, but by following Sven Yrvind’s meticulous process, enthusiasts can achieve professional-level results. Remember that the journey of boatbuilding is as rewarding as reaching your destination; it tests one’s patience and dedication. For those seeking to embark on this adventure or simply gain more insight into marine craftsmanship, Sven’s wisdom is invaluable.Making Flanges Around Bulkhead Hatches for Canvas
Sven Yrvind, a renowned yacht designer and sailor, shares valuable insights on creating flanges around bulkhead hatches for canvas protection in this enlightening video. By following his expert guidance, boat enthusiasts can ensure their living areas remain secure while allowing unhindered access through the hatches.Step 1: Starting with the Flange
Sven begins by explaining that working on flanges vertically and horizontally is significantly easier than doing so in a flat position. To simplify the process further, he divides the task into two or three steps as suggested by fellow expert “for for.” This approach not only makes it more manageable but also allows for greater precision in crafting each component.Step 2: Applying Glue and Securing
Sven proceeds to apply glue along one edge of the flange, ensuring a secure bond when clamped into place. He emphasizes that this stage is crucial for maintaining the structural integrity of the flange, which in turn safeguards the living area beneath the canvas when hatches are open.Step 3: Allowing Time to Dry
After securely attaching the first portion of the flange, Sven allows ample time for it to dry before moving forward with additional steps. This patience and precision are key aspects of his successful boatbuilding methods.Step 4: Finishing Touches
Once the flange is fully dried, Sven removes the clamps carefully, ensuring no damage occurs during this process. He then moves on to attaching four more pieces onto these main frames, completing two pairs of flanges for the bulkhead hatches.The Final Touches
While two flanges form the primary support structure around the hatches, Sven mentions there are two additional pieces required at each end to ensure comprehensive protection. This attention to detail highlights his commitment to producing a durable and reliable design. “Sailing is about finding your path, whether it’s across an ocean or within yourself.” – Sven Yrvind In conclusion, making flanges around bulkhead hatches may seem complex at first glance, but by following Sven Yrvind’s meticulous process, enthusiasts can achieve professional-level results. Remember that the journey of boatbuilding is as rewarding as reaching your destination; it tests one’s patience and dedication. For those seeking to embark on this adventure or simply gain more insight into marine craftsmanship, Sven’s wisdom is invaluable.Once the flange is fully dried, Sven removes the clamps carefully, ensuring no damage occurs during this process. He then moves on to attaching four more pieces onto these main frames, completing two pairs of flanges for the bulkhead hatches.The Final Touches
While two flanges form the primary support structure around the hatches, Sven mentions there are two additional pieces required at each end to ensure comprehensive protection. This attention to detail highlights his commitment to producing a durable and reliable design. “Sailing is about finding your path, whether it’s across an ocean or within yourself.” – Sven Yrvind In conclusion, making flanges around bulkhead hatches may seem complex at first glance, but by following Sven Yrvind’s meticulous process, enthusiasts can achieve professional-level results. Remember that the journey of boatbuilding is as rewarding as reaching your destination; it tests one’s patience and dedication. For those seeking to embark on this adventure or simply gain more insight into marine craftsmanship, Sven’s wisdom is invaluable.Making Flanges Around Bulkhead Hatches for Canvas
Sven Yrvind, a renowned yacht designer and sailor, shares valuable insights on creating flanges around bulkhead hatches for canvas protection in this enlightening video. By following his expert guidance, boat enthusiasts can ensure their living areas remain secure while allowing unhindered access through the hatches.Step 1: Starting with the Flange
Sven begins by explaining that working on flanges vertically and horizontally is significantly easier than doing so in a flat position. To simplify the process further, he divides the task into two or three steps as suggested by fellow expert “for for.” This approach not only makes it more manageable but also allows for greater precision in crafting each component.Step 2: Applying Glue and Securing
Sven proceeds to apply glue along one edge of the flange, ensuring a secure bond when clamped into place. He emphasizes that this stage is crucial for maintaining the structural integrity of the flange, which in turn safeguards the living area beneath the canvas when hatches are open.Step 3: Allowing Time to Dry
After securely attaching the first portion of the flange, Sven allows ample time for it to dry before moving forward with additional steps. This patience and precision are key aspects of his successful boatbuilding methods.Step 4: Finishing Touches
Once the flange is fully dried, Sven removes the clamps carefully, ensuring no damage occurs during this process. He then moves on to attaching four more pieces onto these main frames, completing two pairs of flanges for the bulkhead hatches.The Final Touches
While two flanges form the primary support structure around the hatches, Sven mentions there are two additional pieces required at each end to ensure comprehensive protection. This attention to detail highlights his commitment to producing a durable and reliable design. “Sailing is about finding your path, whether it’s across an ocean or within yourself.” – Sven Yrvind In conclusion, making flanges around bulkhead hatches may seem complex at first glance, but by following Sven Yrvind’s meticulous process, enthusiasts can achieve professional-level results. Remember that the journey of boatbuilding is as rewarding as reaching your destination; it tests one’s patience and dedication. For those seeking to embark on this adventure or simply gain more insight into marine craftsmanship, Sven’s wisdom is invaluable.After securely attaching the first portion of the flange, Sven allows ample time for it to dry before moving forward with additional steps. This patience and precision are key aspects of his successful boatbuilding methods.Step 4: Finishing Touches
Once the flange is fully dried, Sven removes the clamps carefully, ensuring no damage occurs during this process. He then moves on to attaching four more pieces onto these main frames, completing two pairs of flanges for the bulkhead hatches.The Final Touches
While two flanges form the primary support structure around the hatches, Sven mentions there are two additional pieces required at each end to ensure comprehensive protection. This attention to detail highlights his commitment to producing a durable and reliable design. “Sailing is about finding your path, whether it’s across an ocean or within yourself.” – Sven Yrvind In conclusion, making flanges around bulkhead hatches may seem complex at first glance, but by following Sven Yrvind’s meticulous process, enthusiasts can achieve professional-level results. Remember that the journey of boatbuilding is as rewarding as reaching your destination; it tests one’s patience and dedication. For those seeking to embark on this adventure or simply gain more insight into marine craftsmanship, Sven’s wisdom is invaluable.Making Flanges Around Bulkhead Hatches for Canvas
Sven Yrvind, a renowned yacht designer and sailor, shares valuable insights on creating flanges around bulkhead hatches for canvas protection in this enlightening video. By following his expert guidance, boat enthusiasts can ensure their living areas remain secure while allowing unhindered access through the hatches.Step 1: Starting with the Flange
Sven begins by explaining that working on flanges vertically and horizontally is significantly easier than doing so in a flat position. To simplify the process further, he divides the task into two or three steps as suggested by fellow expert “for for.” This approach not only makes it more manageable but also allows for greater precision in crafting each component.Step 2: Applying Glue and Securing
Sven proceeds to apply glue along one edge of the flange, ensuring a secure bond when clamped into place. He emphasizes that this stage is crucial for maintaining the structural integrity of the flange, which in turn safeguards the living area beneath the canvas when hatches are open.Step 3: Allowing Time to Dry
After securely attaching the first portion of the flange, Sven allows ample time for it to dry before moving forward with additional steps. This patience and precision are key aspects of his successful boatbuilding methods.Step 4: Finishing Touches
Once the flange is fully dried, Sven removes the clamps carefully, ensuring no damage occurs during this process. He then moves on to attaching four more pieces onto these main frames, completing two pairs of flanges for the bulkhead hatches.The Final Touches
While two flanges form the primary support structure around the hatches, Sven mentions there are two additional pieces required at each end to ensure comprehensive protection. This attention to detail highlights his commitment to producing a durable and reliable design. “Sailing is about finding your path, whether it’s across an ocean or within yourself.” – Sven Yrvind In conclusion, making flanges around bulkhead hatches may seem complex at first glance, but by following Sven Yrvind’s meticulous process, enthusiasts can achieve professional-level results. Remember that the journey of boatbuilding is as rewarding as reaching your destination; it tests one’s patience and dedication. For those seeking to embark on this adventure or simply gain more insight into marine craftsmanship, Sven’s wisdom is invaluable.Sven proceeds to apply glue along one edge of the flange, ensuring a secure bond when clamped into place. He emphasizes that this stage is crucial for maintaining the structural integrity of the flange, which in turn safeguards the living area beneath the canvas when hatches are open.Step 3: Allowing Time to Dry
After securely attaching the first portion of the flange, Sven allows ample time for it to dry before moving forward with additional steps. This patience and precision are key aspects of his successful boatbuilding methods.Step 4: Finishing Touches
Once the flange is fully dried, Sven removes the clamps carefully, ensuring no damage occurs during this process. He then moves on to attaching four more pieces onto these main frames, completing two pairs of flanges for the bulkhead hatches.The Final Touches
While two flanges form the primary support structure around the hatches, Sven mentions there are two additional pieces required at each end to ensure comprehensive protection. This attention to detail highlights his commitment to producing a durable and reliable design. “Sailing is about finding your path, whether it’s across an ocean or within yourself.” – Sven Yrvind In conclusion, making flanges around bulkhead hatches may seem complex at first glance, but by following Sven Yrvind’s meticulous process, enthusiasts can achieve professional-level results. Remember that the journey of boatbuilding is as rewarding as reaching your destination; it tests one’s patience and dedication. For those seeking to embark on this adventure or simply gain more insight into marine craftsmanship, Sven’s wisdom is invaluable.Making Flanges Around Bulkhead Hatches for Canvas
Sven Yrvind, a renowned yacht designer and sailor, shares valuable insights on creating flanges around bulkhead hatches for canvas protection in this enlightening video. By following his expert guidance, boat enthusiasts can ensure their living areas remain secure while allowing unhindered access through the hatches.Step 1: Starting with the Flange
Sven begins by explaining that working on flanges vertically and horizontally is significantly easier than doing so in a flat position. To simplify the process further, he divides the task into two or three steps as suggested by fellow expert “for for.” This approach not only makes it more manageable but also allows for greater precision in crafting each component.Step 2: Applying Glue and Securing
Sven proceeds to apply glue along one edge of the flange, ensuring a secure bond when clamped into place. He emphasizes that this stage is crucial for maintaining the structural integrity of the flange, which in turn safeguards the living area beneath the canvas when hatches are open.Step 3: Allowing Time to Dry
After securely attaching the first portion of the flange, Sven allows ample time for it to dry before moving forward with additional steps. This patience and precision are key aspects of his successful boatbuilding methods.Step 4: Finishing Touches
Once the flange is fully dried, Sven removes the clamps carefully, ensuring no damage occurs during this process. He then moves on to attaching four more pieces onto these main frames, completing two pairs of flanges for the bulkhead hatches.The Final Touches
While two flanges form the primary support structure around the hatches, Sven mentions there are two additional pieces required at each end to ensure comprehensive protection. This attention to detail highlights his commitment to producing a durable and reliable design. “Sailing is about finding your path, whether it’s across an ocean or within yourself.” – Sven Yrvind In conclusion, making flanges around bulkhead hatches may seem complex at first glance, but by following Sven Yrvind’s meticulous process, enthusiasts can achieve professional-level results. Remember that the journey of boatbuilding is as rewarding as reaching your destination; it tests one’s patience and dedication. For those seeking to embark on this adventure or simply gain more insight into marine craftsmanship, Sven’s wisdom is invaluable.Sven begins by explaining that working on flanges vertically and horizontally is significantly easier than doing so in a flat position. To simplify the process further, he divides the task into two or three steps as suggested by fellow expert “for for.” This approach not only makes it more manageable but also allows for greater precision in crafting each component.Step 2: Applying Glue and Securing
Sven proceeds to apply glue along one edge of the flange, ensuring a secure bond when clamped into place. He emphasizes that this stage is crucial for maintaining the structural integrity of the flange, which in turn safeguards the living area beneath the canvas when hatches are open.Step 3: Allowing Time to Dry
After securely attaching the first portion of the flange, Sven allows ample time for it to dry before moving forward with additional steps. This patience and precision are key aspects of his successful boatbuilding methods.Step 4: Finishing Touches
Once the flange is fully dried, Sven removes the clamps carefully, ensuring no damage occurs during this process. He then moves on to attaching four more pieces onto these main frames, completing two pairs of flanges for the bulkhead hatches.The Final Touches
While two flanges form the primary support structure around the hatches, Sven mentions there are two additional pieces required at each end to ensure comprehensive protection. This attention to detail highlights his commitment to producing a durable and reliable design. “Sailing is about finding your path, whether it’s across an ocean or within yourself.” – Sven Yrvind In conclusion, making flanges around bulkhead hatches may seem complex at first glance, but by following Sven Yrvind’s meticulous process, enthusiasts can achieve professional-level results. Remember that the journey of boatbuilding is as rewarding as reaching your destination; it tests one’s patience and dedication. For those seeking to embark on this adventure or simply gain more insight into marine craftsmanship, Sven’s wisdom is invaluable.Making Flanges Around Bulkhead Hatches for Canvas
Sven Yrvind, a renowned yacht designer and sailor, shares valuable insights on creating flanges around bulkhead hatches for canvas protection in this enlightening video. By following his expert guidance, boat enthusiasts can ensure their living areas remain secure while allowing unhindered access through the hatches.Step 1: Starting with the Flange
Sven begins by explaining that working on flanges vertically and horizontally is significantly easier than doing so in a flat position. To simplify the process further, he divides the task into two or three steps as suggested by fellow expert “for for.” This approach not only makes it more manageable but also allows for greater precision in crafting each component.Step 2: Applying Glue and Securing
Sven proceeds to apply glue along one edge of the flange, ensuring a secure bond when clamped into place. He emphasizes that this stage is crucial for maintaining the structural integrity of the flange, which in turn safeguards the living area beneath the canvas when hatches are open.Step 3: Allowing Time to Dry
After securely attaching the first portion of the flange, Sven allows ample time for it to dry before moving forward with additional steps. This patience and precision are key aspects of his successful boatbuilding methods.Step 4: Finishing Touches
Once the flange is fully dried, Sven removes the clamps carefully, ensuring no damage occurs during this process. He then moves on to attaching four more pieces onto these main frames, completing two pairs of flanges for the bulkhead hatches.The Final Touches
While two flanges form the primary support structure around the hatches, Sven mentions there are two additional pieces required at each end to ensure comprehensive protection. This attention to detail highlights his commitment to producing a durable and reliable design. “Sailing is about finding your path, whether it’s across an ocean or within yourself.” – Sven Yrvind In conclusion, making flanges around bulkhead hatches may seem complex at first glance, but by following Sven Yrvind’s meticulous process, enthusiasts can achieve professional-level results. Remember that the journey of boatbuilding is as rewarding as reaching your destination; it tests one’s patience and dedication. For those seeking to embark on this adventure or simply gain more insight into marine craftsmanship, Sven’s wisdom is invaluable.Sven Yrvind, a renowned yacht designer and sailor, shares valuable insights on creating flanges around bulkhead hatches for canvas protection in this enlightening video. By following his expert guidance, boat enthusiasts can ensure their living areas remain secure while allowing unhindered access through the hatches.Step 1: Starting with the Flange
Sven begins by explaining that working on flanges vertically and horizontally is significantly easier than doing so in a flat position. To simplify the process further, he divides the task into two or three steps as suggested by fellow expert “for for.” This approach not only makes it more manageable but also allows for greater precision in crafting each component.Step 2: Applying Glue and Securing
Sven proceeds to apply glue along one edge of the flange, ensuring a secure bond when clamped into place. He emphasizes that this stage is crucial for maintaining the structural integrity of the flange, which in turn safeguards the living area beneath the canvas when hatches are open.Step 3: Allowing Time to Dry
After securely attaching the first portion of the flange, Sven allows ample time for it to dry before moving forward with additional steps. This patience and precision are key aspects of his successful boatbuilding methods.Step 4: Finishing Touches
Once the flange is fully dried, Sven removes the clamps carefully, ensuring no damage occurs during this process. He then moves on to attaching four more pieces onto these main frames, completing two pairs of flanges for the bulkhead hatches.The Final Touches
While two flanges form the primary support structure around the hatches, Sven mentions there are two additional pieces required at each end to ensure comprehensive protection. This attention to detail highlights his commitment to producing a durable and reliable design. “Sailing is about finding your path, whether it’s across an ocean or within yourself.” – Sven Yrvind In conclusion, making flanges around bulkhead hatches may seem complex at first glance, but by following Sven Yrvind’s meticulous process, enthusiasts can achieve professional-level results. Remember that the journey of boatbuilding is as rewarding as reaching your destination; it tests one’s patience and dedication. For those seeking to embark on this adventure or simply gain more insight into marine craftsmanship, Sven’s wisdom is invaluable.Making Flanges Around Bulkhead Hatches for Canvas
Sven Yrvind, a renowned yacht designer and sailor, shares valuable insights on creating flanges around bulkhead hatches for canvas protection in this enlightening video. By following his expert guidance, boat enthusiasts can ensure their living areas remain secure while allowing unhindered access through the hatches.Step 1: Starting with the Flange
Sven begins by explaining that working on flanges vertically and horizontally is significantly easier than doing so in a flat position. To simplify the process further, he divides the task into two or three steps as suggested by fellow expert “for for.” This approach not only makes it more manageable but also allows for greater precision in crafting each component.Step 2: Applying Glue and Securing
Sven proceeds to apply glue along one edge of the flange, ensuring a secure bond when clamped into place. He emphasizes that this stage is crucial for maintaining the structural integrity of the flange, which in turn safeguards the living area beneath the canvas when hatches are open.Step 3: Allowing Time to Dry
After securely attaching the first portion of the flange, Sven allows ample time for it to dry before moving forward with additional steps. This patience and precision are key aspects of his successful boatbuilding methods.Step 4: Finishing Touches
Once the flange is fully dried, Sven removes the clamps carefully, ensuring no damage occurs during this process. He then moves on to attaching four more pieces onto these main frames, completing two pairs of flanges for the bulkhead hatches.The Final Touches
While two flanges form the primary support structure around the hatches, Sven mentions there are two additional pieces required at each end to ensure comprehensive protection. This attention to detail highlights his commitment to producing a durable and reliable design. “Sailing is about finding your path, whether it’s across an ocean or within yourself.” – Sven Yrvind In conclusion, making flanges around bulkhead hatches may seem complex at first glance, but by following Sven Yrvind’s meticulous process, enthusiasts can achieve professional-level results. Remember that the journey of boatbuilding is as rewarding as reaching your destination; it tests one’s patience and dedication. For those seeking to embark on this adventure or simply gain more insight into marine craftsmanship, Sven’s wisdom is invaluable.Once the flange is fully dried, Sven removes the clamps carefully, ensuring no damage occurs during this process. He then moves on to attaching four more pieces onto these main frames, completing two pairs of flanges for the bulkhead hatches.The Final Touches
While two flanges form the primary support structure around the hatches, Sven mentions there are two additional pieces required at each end to ensure comprehensive protection. This attention to detail highlights his commitment to producing a durable and reliable design. “Sailing is about finding your path, whether it’s across an ocean or within yourself.” – Sven Yrvind In conclusion, making flanges around bulkhead hatches may seem complex at first glance, but by following Sven Yrvind’s meticulous process, enthusiasts can achieve professional-level results. Remember that the journey of boatbuilding is as rewarding as reaching your destination; it tests one’s patience and dedication. For those seeking to embark on this adventure or simply gain more insight into marine craftsmanship, Sven’s wisdom is invaluable.Sven Yrvind, a renowned yacht designer and sailor, shares valuable insights on creating flanges around bulkhead hatches for canvas protection in this enlightening video. By following his expert guidance, boat enthusiasts can ensure their living areas remain secure while allowing unhindered access through the hatches.Step 1: Starting with the Flange
Sven begins by explaining that working on flanges vertically and horizontally is significantly easier than doing so in a flat position. To simplify the process further, he divides the task into two or three steps as suggested by fellow expert “for for.” This approach not only makes it more manageable but also allows for greater precision in crafting each component.Step 2: Applying Glue and Securing
Sven proceeds to apply glue along one edge of the flange, ensuring a secure bond when clamped into place. He emphasizes that this stage is crucial for maintaining the structural integrity of the flange, which in turn safeguards the living area beneath the canvas when hatches are open.Step 3: Allowing Time to Dry
After securely attaching the first portion of the flange, Sven allows ample time for it to dry before moving forward with additional steps. This patience and precision are key aspects of his successful boatbuilding methods.Step 4: Finishing Touches
Once the flange is fully dried, Sven removes the clamps carefully, ensuring no damage occurs during this process. He then moves on to attaching four more pieces onto these main frames, completing two pairs of flanges for the bulkhead hatches.The Final Touches
While two flanges form the primary support structure around the hatches, Sven mentions there are two additional pieces required at each end to ensure comprehensive protection. This attention to detail highlights his commitment to producing a durable and reliable design. “Sailing is about finding your path, whether it’s across an ocean or within yourself.” – Sven Yrvind In conclusion, making flanges around bulkhead hatches may seem complex at first glance, but by following Sven Yrvind’s meticulous process, enthusiasts can achieve professional-level results. Remember that the journey of boatbuilding is as rewarding as reaching your destination; it tests one’s patience and dedication. For those seeking to embark on this adventure or simply gain more insight into marine craftsmanship, Sven’s wisdom is invaluable.Making Flanges Around Bulkhead Hatches for Canvas
Sven Yrvind, a renowned yacht designer and sailor, shares valuable insights on creating flanges around bulkhead hatches for canvas protection in this enlightening video. By following his expert guidance, boat enthusiasts can ensure their living areas remain secure while allowing unhindered access through the hatches.Step 1: Starting with the Flange
Sven begins by explaining that working on flanges vertically and horizontally is significantly easier than doing so in a flat position. To simplify the process further, he divides the task into two or three steps as suggested by fellow expert “for for.” This approach not only makes it more manageable but also allows for greater precision in crafting each component.Step 2: Applying Glue and Securing
Sven proceeds to apply glue along one edge of the flange, ensuring a secure bond when clamped into place. He emphasizes that this stage is crucial for maintaining the structural integrity of the flange, which in turn safeguards the living area beneath the canvas when hatches are open.Step 3: Allowing Time to Dry
After securely attaching the first portion of the flange, Sven allows ample time for it to dry before moving forward with additional steps. This patience and precision are key aspects of his successful boatbuilding methods.Step 4: Finishing Touches
Once the flange is fully dried, Sven removes the clamps carefully, ensuring no damage occurs during this process. He then moves on to attaching four more pieces onto these main frames, completing two pairs of flanges for the bulkhead hatches.The Final Touches
While two flanges form the primary support structure around the hatches, Sven mentions there are two additional pieces required at each end to ensure comprehensive protection. This attention to detail highlights his commitment to producing a durable and reliable design. “Sailing is about finding your path, whether it’s across an ocean or within yourself.” – Sven Yrvind In conclusion, making flanges around bulkhead hatches may seem complex at first glance, but by following Sven Yrvind’s meticulous process, enthusiasts can achieve professional-level results. Remember that the journey of boatbuilding is as rewarding as reaching your destination; it tests one’s patience and dedication. For those seeking to embark on this adventure or simply gain more insight into marine craftsmanship, Sven’s wisdom is invaluable.After securely attaching the first portion of the flange, Sven allows ample time for it to dry before moving forward with additional steps. This patience and precision are key aspects of his successful boatbuilding methods.Step 4: Finishing Touches
Once the flange is fully dried, Sven removes the clamps carefully, ensuring no damage occurs during this process. He then moves on to attaching four more pieces onto these main frames, completing two pairs of flanges for the bulkhead hatches.The Final Touches
While two flanges form the primary support structure around the hatches, Sven mentions there are two additional pieces required at each end to ensure comprehensive protection. This attention to detail highlights his commitment to producing a durable and reliable design. “Sailing is about finding your path, whether it’s across an ocean or within yourself.” – Sven Yrvind In conclusion, making flanges around bulkhead hatches may seem complex at first glance, but by following Sven Yrvind’s meticulous process, enthusiasts can achieve professional-level results. Remember that the journey of boatbuilding is as rewarding as reaching your destination; it tests one’s patience and dedication. For those seeking to embark on this adventure or simply gain more insight into marine craftsmanship, Sven’s wisdom is invaluable.Sven Yrvind, a renowned yacht designer and sailor, shares valuable insights on creating flanges around bulkhead hatches for canvas protection in this enlightening video. By following his expert guidance, boat enthusiasts can ensure their living areas remain secure while allowing unhindered access through the hatches.Step 1: Starting with the Flange
Sven begins by explaining that working on flanges vertically and horizontally is significantly easier than doing so in a flat position. To simplify the process further, he divides the task into two or three steps as suggested by fellow expert “for for.” This approach not only makes it more manageable but also allows for greater precision in crafting each component.Step 2: Applying Glue and Securing
Sven proceeds to apply glue along one edge of the flange, ensuring a secure bond when clamped into place. He emphasizes that this stage is crucial for maintaining the structural integrity of the flange, which in turn safeguards the living area beneath the canvas when hatches are open.Step 3: Allowing Time to Dry
After securely attaching the first portion of the flange, Sven allows ample time for it to dry before moving forward with additional steps. This patience and precision are key aspects of his successful boatbuilding methods.Step 4: Finishing Touches
Once the flange is fully dried, Sven removes the clamps carefully, ensuring no damage occurs during this process. He then moves on to attaching four more pieces onto these main frames, completing two pairs of flanges for the bulkhead hatches.The Final Touches
While two flanges form the primary support structure around the hatches, Sven mentions there are two additional pieces required at each end to ensure comprehensive protection. This attention to detail highlights his commitment to producing a durable and reliable design. “Sailing is about finding your path, whether it’s across an ocean or within yourself.” – Sven Yrvind In conclusion, making flanges around bulkhead hatches may seem complex at first glance, but by following Sven Yrvind’s meticulous process, enthusiasts can achieve professional-level results. Remember that the journey of boatbuilding is as rewarding as reaching your destination; it tests one’s patience and dedication. For those seeking to embark on this adventure or simply gain more insight into marine craftsmanship, Sven’s wisdom is invaluable.Making Flanges Around Bulkhead Hatches for Canvas
Sven Yrvind, a renowned yacht designer and sailor, shares valuable insights on creating flanges around bulkhead hatches for canvas protection in this enlightening video. By following his expert guidance, boat enthusiasts can ensure their living areas remain secure while allowing unhindered access through the hatches.Step 1: Starting with the Flange
Sven begins by explaining that working on flanges vertically and horizontally is significantly easier than doing so in a flat position. To simplify the process further, he divides the task into two or three steps as suggested by fellow expert “for for.” This approach not only makes it more manageable but also allows for greater precision in crafting each component.Step 2: Applying Glue and Securing
Sven proceeds to apply glue along one edge of the flange, ensuring a secure bond when clamped into place. He emphasizes that this stage is crucial for maintaining the structural integrity of the flange, which in turn safeguards the living area beneath the canvas when hatches are open.Step 3: Allowing Time to Dry
After securely attaching the first portion of the flange, Sven allows ample time for it to dry before moving forward with additional steps. This patience and precision are key aspects of his successful boatbuilding methods.Step 4: Finishing Touches
Once the flange is fully dried, Sven removes the clamps carefully, ensuring no damage occurs during this process. He then moves on to attaching four more pieces onto these main frames, completing two pairs of flanges for the bulkhead hatches.The Final Touches
While two flanges form the primary support structure around the hatches, Sven mentions there are two additional pieces required at each end to ensure comprehensive protection. This attention to detail highlights his commitment to producing a durable and reliable design. “Sailing is about finding your path, whether it’s across an ocean or within yourself.” – Sven Yrvind In conclusion, making flanges around bulkhead hatches may seem complex at first glance, but by following Sven Yrvind’s meticulous process, enthusiasts can achieve professional-level results. Remember that the journey of boatbuilding is as rewarding as reaching your destination; it tests one’s patience and dedication. For those seeking to embark on this adventure or simply gain more insight into marine craftsmanship, Sven’s wisdom is invaluable.Sven proceeds to apply glue along one edge of the flange, ensuring a secure bond when clamped into place. He emphasizes that this stage is crucial for maintaining the structural integrity of the flange, which in turn safeguards the living area beneath the canvas when hatches are open.Step 3: Allowing Time to Dry
After securely attaching the first portion of the flange, Sven allows ample time for it to dry before moving forward with additional steps. This patience and precision are key aspects of his successful boatbuilding methods.Step 4: Finishing Touches
Once the flange is fully dried, Sven removes the clamps carefully, ensuring no damage occurs during this process. He then moves on to attaching four more pieces onto these main frames, completing two pairs of flanges for the bulkhead hatches.The Final Touches
While two flanges form the primary support structure around the hatches, Sven mentions there are two additional pieces required at each end to ensure comprehensive protection. This attention to detail highlights his commitment to producing a durable and reliable design. “Sailing is about finding your path, whether it’s across an ocean or within yourself.” – Sven Yrvind In conclusion, making flanges around bulkhead hatches may seem complex at first glance, but by following Sven Yrvind’s meticulous process, enthusiasts can achieve professional-level results. Remember that the journey of boatbuilding is as rewarding as reaching your destination; it tests one’s patience and dedication. For those seeking to embark on this adventure or simply gain more insight into marine craftsmanship, Sven’s wisdom is invaluable.Sven Yrvind, a renowned yacht designer and sailor, shares valuable insights on creating flanges around bulkhead hatches for canvas protection in this enlightening video. By following his expert guidance, boat enthusiasts can ensure their living areas remain secure while allowing unhindered access through the hatches.Step 1: Starting with the Flange
Sven begins by explaining that working on flanges vertically and horizontally is significantly easier than doing so in a flat position. To simplify the process further, he divides the task into two or three steps as suggested by fellow expert “for for.” This approach not only makes it more manageable but also allows for greater precision in crafting each component.Step 2: Applying Glue and Securing
Sven proceeds to apply glue along one edge of the flange, ensuring a secure bond when clamped into place. He emphasizes that this stage is crucial for maintaining the structural integrity of the flange, which in turn safeguards the living area beneath the canvas when hatches are open.Step 3: Allowing Time to Dry
After securely attaching the first portion of the flange, Sven allows ample time for it to dry before moving forward with additional steps. This patience and precision are key aspects of his successful boatbuilding methods.Step 4: Finishing Touches
Once the flange is fully dried, Sven removes the clamps carefully, ensuring no damage occurs during this process. He then moves on to attaching four more pieces onto these main frames, completing two pairs of flanges for the bulkhead hatches.The Final Touches
While two flanges form the primary support structure around the hatches, Sven mentions there are two additional pieces required at each end to ensure comprehensive protection. This attention to detail highlights his commitment to producing a durable and reliable design. “Sailing is about finding your path, whether it’s across an ocean or within yourself.” – Sven Yrvind In conclusion, making flanges around bulkhead hatches may seem complex at first glance, but by following Sven Yrvind’s meticulous process, enthusiasts can achieve professional-level results. Remember that the journey of boatbuilding is as rewarding as reaching your destination; it tests one’s patience and dedication. For those seeking to embark on this adventure or simply gain more insight into marine craftsmanship, Sven’s wisdom is invaluable.Making Flanges Around Bulkhead Hatches for Canvas
Sven Yrvind, a renowned yacht designer and sailor, shares valuable insights on creating flanges around bulkhead hatches for canvas protection in this enlightening video. By following his expert guidance, boat enthusiasts can ensure their living areas remain secure while allowing unhindered access through the hatches.Step 1: Starting with the Flange
Sven begins by explaining that working on flanges vertically and horizontally is significantly easier than doing so in a flat position. To simplify the process further, he divides the task into two or three steps as suggested by fellow expert “for for.” This approach not only makes it more manageable but also allows for greater precision in crafting each component.Step 2: Applying Glue and Securing
Sven proceeds to apply glue along one edge of the flange, ensuring a secure bond when clamped into place. He emphasizes that this stage is crucial for maintaining the structural integrity of the flange, which in turn safeguards the living area beneath the canvas when hatches are open.Step 3: Allowing Time to Dry
After securely attaching the first portion of the flange, Sven allows ample time for it to dry before moving forward with additional steps. This patience and precision are key aspects of his successful boatbuilding methods.Step 4: Finishing Touches
Once the flange is fully dried, Sven removes the clamps carefully, ensuring no damage occurs during this process. He then moves on to attaching four more pieces onto these main frames, completing two pairs of flanges for the bulkhead hatches.The Final Touches
While two flanges form the primary support structure around the hatches, Sven mentions there are two additional pieces required at each end to ensure comprehensive protection. This attention to detail highlights his commitment to producing a durable and reliable design. “Sailing is about finding your path, whether it’s across an ocean or within yourself.” – Sven Yrvind In conclusion, making flanges around bulkhead hatches may seem complex at first glance, but by following Sven Yrvind’s meticulous process, enthusiasts can achieve professional-level results. Remember that the journey of boatbuilding is as rewarding as reaching your destination; it tests one’s patience and dedication. For those seeking to embark on this adventure or simply gain more insight into marine craftsmanship, Sven’s wisdom is invaluable.Sven begins by explaining that working on flanges vertically and horizontally is significantly easier than doing so in a flat position. To simplify the process further, he divides the task into two or three steps as suggested by fellow expert “for for.” This approach not only makes it more manageable but also allows for greater precision in crafting each component.Step 2: Applying Glue and Securing
Sven proceeds to apply glue along one edge of the flange, ensuring a secure bond when clamped into place. He emphasizes that this stage is crucial for maintaining the structural integrity of the flange, which in turn safeguards the living area beneath the canvas when hatches are open.Step 3: Allowing Time to Dry
After securely attaching the first portion of the flange, Sven allows ample time for it to dry before moving forward with additional steps. This patience and precision are key aspects of his successful boatbuilding methods.Step 4: Finishing Touches
Once the flange is fully dried, Sven removes the clamps carefully, ensuring no damage occurs during this process. He then moves on to attaching four more pieces onto these main frames, completing two pairs of flanges for the bulkhead hatches.The Final Touches
While two flanges form the primary support structure around the hatches, Sven mentions there are two additional pieces required at each end to ensure comprehensive protection. This attention to detail highlights his commitment to producing a durable and reliable design. “Sailing is about finding your path, whether it’s across an ocean or within yourself.” – Sven Yrvind In conclusion, making flanges around bulkhead hatches may seem complex at first glance, but by following Sven Yrvind’s meticulous process, enthusiasts can achieve professional-level results. Remember that the journey of boatbuilding is as rewarding as reaching your destination; it tests one’s patience and dedication. For those seeking to embark on this adventure or simply gain more insight into marine craftsmanship, Sven’s wisdom is invaluable.Sven Yrvind, a renowned yacht designer and sailor, shares valuable insights on creating flanges around bulkhead hatches for canvas protection in this enlightening video. By following his expert guidance, boat enthusiasts can ensure their living areas remain secure while allowing unhindered access through the hatches.Step 1: Starting with the Flange
Sven begins by explaining that working on flanges vertically and horizontally is significantly easier than doing so in a flat position. To simplify the process further, he divides the task into two or three steps as suggested by fellow expert “for for.” This approach not only makes it more manageable but also allows for greater precision in crafting each component.Step 2: Applying Glue and Securing
Sven proceeds to apply glue along one edge of the flange, ensuring a secure bond when clamped into place. He emphasizes that this stage is crucial for maintaining the structural integrity of the flange, which in turn safeguards the living area beneath the canvas when hatches are open.Step 3: Allowing Time to Dry
After securely attaching the first portion of the flange, Sven allows ample time for it to dry before moving forward with additional steps. This patience and precision are key aspects of his successful boatbuilding methods.Step 4: Finishing Touches
Once the flange is fully dried, Sven removes the clamps carefully, ensuring no damage occurs during this process. He then moves on to attaching four more pieces onto these main frames, completing two pairs of flanges for the bulkhead hatches.The Final Touches
While two flanges form the primary support structure around the hatches, Sven mentions there are two additional pieces required at each end to ensure comprehensive protection. This attention to detail highlights his commitment to producing a durable and reliable design. “Sailing is about finding your path, whether it’s across an ocean or within yourself.” – Sven Yrvind In conclusion, making flanges around bulkhead hatches may seem complex at first glance, but by following Sven Yrvind’s meticulous process, enthusiasts can achieve professional-level results. Remember that the journey of boatbuilding is as rewarding as reaching your destination; it tests one’s patience and dedication. For those seeking to embark on this adventure or simply gain more insight into marine craftsmanship, Sven’s wisdom is invaluable.Making Flanges Around Bulkhead Hatches for Canvas
Sven Yrvind, a renowned yacht designer and sailor, shares valuable insights on creating flanges around bulkhead hatches for canvas protection in this enlightening video. By following his expert guidance, boat enthusiasts can ensure their living areas remain secure while allowing unhindered access through the hatches.Step 1: Starting with the Flange
Sven begins by explaining that working on flanges vertically and horizontally is significantly easier than doing so in a flat position. To simplify the process further, he divides the task into two or three steps as suggested by fellow expert “for for.” This approach not only makes it more manageable but also allows for greater precision in crafting each component.Step 2: Applying Glue and Securing
Sven proceeds to apply glue along one edge of the flange, ensuring a secure bond when clamped into place. He emphasizes that this stage is crucial for maintaining the structural integrity of the flange, which in turn safeguards the living area beneath the canvas when hatches are open.Step 3: Allowing Time to Dry
After securely attaching the first portion of the flange, Sven allows ample time for it to dry before moving forward with additional steps. This patience and precision are key aspects of his successful boatbuilding methods.Step 4: Finishing Touches
Once the flange is fully dried, Sven removes the clamps carefully, ensuring no damage occurs during this process. He then moves on to attaching four more pieces onto these main frames, completing two pairs of flanges for the bulkhead hatches.The Final Touches
While two flanges form the primary support structure around the hatches, Sven mentions there are two additional pieces required at each end to ensure comprehensive protection. This attention to detail highlights his commitment to producing a durable and reliable design. “Sailing is about finding your path, whether it’s across an ocean or within yourself.” – Sven Yrvind In conclusion, making flanges around bulkhead hatches may seem complex at first glance, but by following Sven Yrvind’s meticulous process, enthusiasts can achieve professional-level results. Remember that the journey of boatbuilding is as rewarding as reaching your destination; it tests one’s patience and dedication. For those seeking to embark on this adventure or simply gain more insight into marine craftsmanship, Sven’s wisdom is invaluable.Once the flange is fully dried, Sven removes the clamps carefully, ensuring no damage occurs during this process. He then moves on to attaching four more pieces onto these main frames, completing two pairs of flanges for the bulkhead hatches.The Final Touches
While two flanges form the primary support structure around the hatches, Sven mentions there are two additional pieces required at each end to ensure comprehensive protection. This attention to detail highlights his commitment to producing a durable and reliable design. “Sailing is about finding your path, whether it’s across an ocean or within yourself.” – Sven Yrvind In conclusion, making flanges around bulkhead hatches may seem complex at first glance, but by following Sven Yrvind’s meticulous process, enthusiasts can achieve professional-level results. Remember that the journey of boatbuilding is as rewarding as reaching your destination; it tests one’s patience and dedication. For those seeking to embark on this adventure or simply gain more insight into marine craftsmanship, Sven’s wisdom is invaluable.Sven begins by explaining that working on flanges vertically and horizontally is significantly easier than doing so in a flat position. To simplify the process further, he divides the task into two or three steps as suggested by fellow expert “for for.” This approach not only makes it more manageable but also allows for greater precision in crafting each component.Step 2: Applying Glue and Securing
Sven proceeds to apply glue along one edge of the flange, ensuring a secure bond when clamped into place. He emphasizes that this stage is crucial for maintaining the structural integrity of the flange, which in turn safeguards the living area beneath the canvas when hatches are open.Step 3: Allowing Time to Dry
After securely attaching the first portion of the flange, Sven allows ample time for it to dry before moving forward with additional steps. This patience and precision are key aspects of his successful boatbuilding methods.Step 4: Finishing Touches
Once the flange is fully dried, Sven removes the clamps carefully, ensuring no damage occurs during this process. He then moves on to attaching four more pieces onto these main frames, completing two pairs of flanges for the bulkhead hatches.The Final Touches
While two flanges form the primary support structure around the hatches, Sven mentions there are two additional pieces required at each end to ensure comprehensive protection. This attention to detail highlights his commitment to producing a durable and reliable design. “Sailing is about finding your path, whether it’s across an ocean or within yourself.” – Sven Yrvind In conclusion, making flanges around bulkhead hatches may seem complex at first glance, but by following Sven Yrvind’s meticulous process, enthusiasts can achieve professional-level results. Remember that the journey of boatbuilding is as rewarding as reaching your destination; it tests one’s patience and dedication. For those seeking to embark on this adventure or simply gain more insight into marine craftsmanship, Sven’s wisdom is invaluable.Sven Yrvind, a renowned yacht designer and sailor, shares valuable insights on creating flanges around bulkhead hatches for canvas protection in this enlightening video. By following his expert guidance, boat enthusiasts can ensure their living areas remain secure while allowing unhindered access through the hatches.Step 1: Starting with the Flange
Sven begins by explaining that working on flanges vertically and horizontally is significantly easier than doing so in a flat position. To simplify the process further, he divides the task into two or three steps as suggested by fellow expert “for for.” This approach not only makes it more manageable but also allows for greater precision in crafting each component.Step 2: Applying Glue and Securing
Sven proceeds to apply glue along one edge of the flange, ensuring a secure bond when clamped into place. He emphasizes that this stage is crucial for maintaining the structural integrity of the flange, which in turn safeguards the living area beneath the canvas when hatches are open.Step 3: Allowing Time to Dry
After securely attaching the first portion of the flange, Sven allows ample time for it to dry before moving forward with additional steps. This patience and precision are key aspects of his successful boatbuilding methods.Step 4: Finishing Touches
Once the flange is fully dried, Sven removes the clamps carefully, ensuring no damage occurs during this process. He then moves on to attaching four more pieces onto these main frames, completing two pairs of flanges for the bulkhead hatches.The Final Touches
While two flanges form the primary support structure around the hatches, Sven mentions there are two additional pieces required at each end to ensure comprehensive protection. This attention to detail highlights his commitment to producing a durable and reliable design. “Sailing is about finding your path, whether it’s across an ocean or within yourself.” – Sven Yrvind In conclusion, making flanges around bulkhead hatches may seem complex at first glance, but by following Sven Yrvind’s meticulous process, enthusiasts can achieve professional-level results. Remember that the journey of boatbuilding is as rewarding as reaching your destination; it tests one’s patience and dedication. For those seeking to embark on this adventure or simply gain more insight into marine craftsmanship, Sven’s wisdom is invaluable.Making Flanges Around Bulkhead Hatches for Canvas
Sven Yrvind, a renowned yacht designer and sailor, shares valuable insights on creating flanges around bulkhead hatches for canvas protection in this enlightening video. By following his expert guidance, boat enthusiasts can ensure their living areas remain secure while allowing unhindered access through the hatches.Step 1: Starting with the Flange
Sven begins by explaining that working on flanges vertically and horizontally is significantly easier than doing so in a flat position. To simplify the process further, he divides the task into two or three steps as suggested by fellow expert “for for.” This approach not only makes it more manageable but also allows for greater precision in crafting each component.Step 2: Applying Glue and Securing
Sven proceeds to apply glue along one edge of the flange, ensuring a secure bond when clamped into place. He emphasizes that this stage is crucial for maintaining the structural integrity of the flange, which in turn safeguards the living area beneath the canvas when hatches are open.Step 3: Allowing Time to Dry
After securely attaching the first portion of the flange, Sven allows ample time for it to dry before moving forward with additional steps. This patience and precision are key aspects of his successful boatbuilding methods.Step 4: Finishing Touches
Once the flange is fully dried, Sven removes the clamps carefully, ensuring no damage occurs during this process. He then moves on to attaching four more pieces onto these main frames, completing two pairs of flanges for the bulkhead hatches.The Final Touches
While two flanges form the primary support structure around the hatches, Sven mentions there are two additional pieces required at each end to ensure comprehensive protection. This attention to detail highlights his commitment to producing a durable and reliable design. “Sailing is about finding your path, whether it’s across an ocean or within yourself.” – Sven Yrvind In conclusion, making flanges around bulkhead hatches may seem complex at first glance, but by following Sven Yrvind’s meticulous process, enthusiasts can achieve professional-level results. Remember that the journey of boatbuilding is as rewarding as reaching your destination; it tests one’s patience and dedication. For those seeking to embark on this adventure or simply gain more insight into marine craftsmanship, Sven’s wisdom is invaluable.After securely attaching the first portion of the flange, Sven allows ample time for it to dry before moving forward with additional steps. This patience and precision are key aspects of his successful boatbuilding methods.Step 4: Finishing Touches
Once the flange is fully dried, Sven removes the clamps carefully, ensuring no damage occurs during this process. He then moves on to attaching four more pieces onto these main frames, completing two pairs of flanges for the bulkhead hatches.The Final Touches
While two flanges form the primary support structure around the hatches, Sven mentions there are two additional pieces required at each end to ensure comprehensive protection. This attention to detail highlights his commitment to producing a durable and reliable design. “Sailing is about finding your path, whether it’s across an ocean or within yourself.” – Sven Yrvind In conclusion, making flanges around bulkhead hatches may seem complex at first glance, but by following Sven Yrvind’s meticulous process, enthusiasts can achieve professional-level results. Remember that the journey of boatbuilding is as rewarding as reaching your destination; it tests one’s patience and dedication. For those seeking to embark on this adventure or simply gain more insight into marine craftsmanship, Sven’s wisdom is invaluable.Sven begins by explaining that working on flanges vertically and horizontally is significantly easier than doing so in a flat position. To simplify the process further, he divides the task into two or three steps as suggested by fellow expert “for for.” This approach not only makes it more manageable but also allows for greater precision in crafting each component.Step 2: Applying Glue and Securing
Sven proceeds to apply glue along one edge of the flange, ensuring a secure bond when clamped into place. He emphasizes that this stage is crucial for maintaining the structural integrity of the flange, which in turn safeguards the living area beneath the canvas when hatches are open.Step 3: Allowing Time to Dry
After securely attaching the first portion of the flange, Sven allows ample time for it to dry before moving forward with additional steps. This patience and precision are key aspects of his successful boatbuilding methods.Step 4: Finishing Touches
Once the flange is fully dried, Sven removes the clamps carefully, ensuring no damage occurs during this process. He then moves on to attaching four more pieces onto these main frames, completing two pairs of flanges for the bulkhead hatches.The Final Touches
While two flanges form the primary support structure around the hatches, Sven mentions there are two additional pieces required at each end to ensure comprehensive protection. This attention to detail highlights his commitment to producing a durable and reliable design. “Sailing is about finding your path, whether it’s across an ocean or within yourself.” – Sven Yrvind In conclusion, making flanges around bulkhead hatches may seem complex at first glance, but by following Sven Yrvind’s meticulous process, enthusiasts can achieve professional-level results. Remember that the journey of boatbuilding is as rewarding as reaching your destination; it tests one’s patience and dedication. For those seeking to embark on this adventure or simply gain more insight into marine craftsmanship, Sven’s wisdom is invaluable.Sven Yrvind, a renowned yacht designer and sailor, shares valuable insights on creating flanges around bulkhead hatches for canvas protection in this enlightening video. By following his expert guidance, boat enthusiasts can ensure their living areas remain secure while allowing unhindered access through the hatches.Step 1: Starting with the Flange
Sven begins by explaining that working on flanges vertically and horizontally is significantly easier than doing so in a flat position. To simplify the process further, he divides the task into two or three steps as suggested by fellow expert “for for.” This approach not only makes it more manageable but also allows for greater precision in crafting each component.Step 2: Applying Glue and Securing
Sven proceeds to apply glue along one edge of the flange, ensuring a secure bond when clamped into place. He emphasizes that this stage is crucial for maintaining the structural integrity of the flange, which in turn safeguards the living area beneath the canvas when hatches are open.Step 3: Allowing Time to Dry
After securely attaching the first portion of the flange, Sven allows ample time for it to dry before moving forward with additional steps. This patience and precision are key aspects of his successful boatbuilding methods.Step 4: Finishing Touches
Once the flange is fully dried, Sven removes the clamps carefully, ensuring no damage occurs during this process. He then moves on to attaching four more pieces onto these main frames, completing two pairs of flanges for the bulkhead hatches.The Final Touches
While two flanges form the primary support structure around the hatches, Sven mentions there are two additional pieces required at each end to ensure comprehensive protection. This attention to detail highlights his commitment to producing a durable and reliable design. “Sailing is about finding your path, whether it’s across an ocean or within yourself.” – Sven Yrvind In conclusion, making flanges around bulkhead hatches may seem complex at first glance, but by following Sven Yrvind’s meticulous process, enthusiasts can achieve professional-level results. Remember that the journey of boatbuilding is as rewarding as reaching your destination; it tests one’s patience and dedication. For those seeking to embark on this adventure or simply gain more insight into marine craftsmanship, Sven’s wisdom is invaluable.Making Flanges Around Bulkhead Hatches for Canvas
Sven Yrvind, a renowned yacht designer and sailor, shares valuable insights on creating flanges around bulkhead hatches for canvas protection in this enlightening video. By following his expert guidance, boat enthusiasts can ensure their living areas remain secure while allowing unhindered access through the hatches.Step 1: Starting with the Flange
Sven begins by explaining that working on flanges vertically and horizontally is significantly easier than doing so in a flat position. To simplify the process further, he divides the task into two or three steps as suggested by fellow expert “for for.” This approach not only makes it more manageable but also allows for greater precision in crafting each component.Step 2: Applying Glue and Securing
Sven proceeds to apply glue along one edge of the flange, ensuring a secure bond when clamped into place. He emphasizes that this stage is crucial for maintaining the structural integrity of the flange, which in turn safeguards the living area beneath the canvas when hatches are open.Step 3: Allowing Time to Dry
After securely attaching the first portion of the flange, Sven allows ample time for it to dry before moving forward with additional steps. This patience and precision are key aspects of his successful boatbuilding methods.Step 4: Finishing Touches
Once the flange is fully dried, Sven removes the clamps carefully, ensuring no damage occurs during this process. He then moves on to attaching four more pieces onto these main frames, completing two pairs of flanges for the bulkhead hatches.The Final Touches
While two flanges form the primary support structure around the hatches, Sven mentions there are two additional pieces required at each end to ensure comprehensive protection. This attention to detail highlights his commitment to producing a durable and reliable design. “Sailing is about finding your path, whether it’s across an ocean or within yourself.” – Sven Yrvind In conclusion, making flanges around bulkhead hatches may seem complex at first glance, but by following Sven Yrvind’s meticulous process, enthusiasts can achieve professional-level results. Remember that the journey of boatbuilding is as rewarding as reaching your destination; it tests one’s patience and dedication. For those seeking to embark on this adventure or simply gain more insight into marine craftsmanship, Sven’s wisdom is invaluable.Sven proceeds to apply glue along one edge of the flange, ensuring a secure bond when clamped into place. He emphasizes that this stage is crucial for maintaining the structural integrity of the flange, which in turn safeguards the living area beneath the canvas when hatches are open.Step 3: Allowing Time to Dry
After securely attaching the first portion of the flange, Sven allows ample time for it to dry before moving forward with additional steps. This patience and precision are key aspects of his successful boatbuilding methods.Step 4: Finishing Touches
Once the flange is fully dried, Sven removes the clamps carefully, ensuring no damage occurs during this process. He then moves on to attaching four more pieces onto these main frames, completing two pairs of flanges for the bulkhead hatches.The Final Touches
While two flanges form the primary support structure around the hatches, Sven mentions there are two additional pieces required at each end to ensure comprehensive protection. This attention to detail highlights his commitment to producing a durable and reliable design. “Sailing is about finding your path, whether it’s across an ocean or within yourself.” – Sven Yrvind In conclusion, making flanges around bulkhead hatches may seem complex at first glance, but by following Sven Yrvind’s meticulous process, enthusiasts can achieve professional-level results. Remember that the journey of boatbuilding is as rewarding as reaching your destination; it tests one’s patience and dedication. For those seeking to embark on this adventure or simply gain more insight into marine craftsmanship, Sven’s wisdom is invaluable.Sven begins by explaining that working on flanges vertically and horizontally is significantly easier than doing so in a flat position. To simplify the process further, he divides the task into two or three steps as suggested by fellow expert “for for.” This approach not only makes it more manageable but also allows for greater precision in crafting each component.Step 2: Applying Glue and Securing
Sven proceeds to apply glue along one edge of the flange, ensuring a secure bond when clamped into place. He emphasizes that this stage is crucial for maintaining the structural integrity of the flange, which in turn safeguards the living area beneath the canvas when hatches are open.Step 3: Allowing Time to Dry
After securely attaching the first portion of the flange, Sven allows ample time for it to dry before moving forward with additional steps. This patience and precision are key aspects of his successful boatbuilding methods.Step 4: Finishing Touches
Once the flange is fully dried, Sven removes the clamps carefully, ensuring no damage occurs during this process. He then moves on to attaching four more pieces onto these main frames, completing two pairs of flanges for the bulkhead hatches.The Final Touches
While two flanges form the primary support structure around the hatches, Sven mentions there are two additional pieces required at each end to ensure comprehensive protection. This attention to detail highlights his commitment to producing a durable and reliable design. “Sailing is about finding your path, whether it’s across an ocean or within yourself.” – Sven Yrvind In conclusion, making flanges around bulkhead hatches may seem complex at first glance, but by following Sven Yrvind’s meticulous process, enthusiasts can achieve professional-level results. Remember that the journey of boatbuilding is as rewarding as reaching your destination; it tests one’s patience and dedication. For those seeking to embark on this adventure or simply gain more insight into marine craftsmanship, Sven’s wisdom is invaluable.Sven Yrvind, a renowned yacht designer and sailor, shares valuable insights on creating flanges around bulkhead hatches for canvas protection in this enlightening video. By following his expert guidance, boat enthusiasts can ensure their living areas remain secure while allowing unhindered access through the hatches.Step 1: Starting with the Flange
Sven begins by explaining that working on flanges vertically and horizontally is significantly easier than doing so in a flat position. To simplify the process further, he divides the task into two or three steps as suggested by fellow expert “for for.” This approach not only makes it more manageable but also allows for greater precision in crafting each component.Step 2: Applying Glue and Securing
Sven proceeds to apply glue along one edge of the flange, ensuring a secure bond when clamped into place. He emphasizes that this stage is crucial for maintaining the structural integrity of the flange, which in turn safeguards the living area beneath the canvas when hatches are open.Step 3: Allowing Time to Dry
After securely attaching the first portion of the flange, Sven allows ample time for it to dry before moving forward with additional steps. This patience and precision are key aspects of his successful boatbuilding methods.Step 4: Finishing Touches
Once the flange is fully dried, Sven removes the clamps carefully, ensuring no damage occurs during this process. He then moves on to attaching four more pieces onto these main frames, completing two pairs of flanges for the bulkhead hatches.The Final Touches
While two flanges form the primary support structure around the hatches, Sven mentions there are two additional pieces required at each end to ensure comprehensive protection. This attention to detail highlights his commitment to producing a durable and reliable design. “Sailing is about finding your path, whether it’s across an ocean or within yourself.” – Sven Yrvind In conclusion, making flanges around bulkhead hatches may seem complex at first glance, but by following Sven Yrvind’s meticulous process, enthusiasts can achieve professional-level results. Remember that the journey of boatbuilding is as rewarding as reaching your destination; it tests one’s patience and dedication. For those seeking to embark on this adventure or simply gain more insight into marine craftsmanship, Sven’s wisdom is invaluable.Making Flanges Around Bulkhead Hatches for Canvas
Sven Yrvind, a renowned yacht designer and sailor, shares valuable insights on creating flanges around bulkhead hatches for canvas protection in this enlightening video. By following his expert guidance, boat enthusiasts can ensure their living areas remain secure while allowing unhindered access through the hatches.Step 1: Starting with the Flange
Sven begins by explaining that working on flanges vertically and horizontally is significantly easier than doing so in a flat position. To simplify the process further, he divides the task into two or three steps as suggested by fellow expert “for for.” This approach not only makes it more manageable but also allows for greater precision in crafting each component.Step 2: Applying Glue and Securing
Sven proceeds to apply glue along one edge of the flange, ensuring a secure bond when clamped into place. He emphasizes that this stage is crucial for maintaining the structural integrity of the flange, which in turn safeguards the living area beneath the canvas when hatches are open.Step 3: Allowing Time to Dry
After securely attaching the first portion of the flange, Sven allows ample time for it to dry before moving forward with additional steps. This patience and precision are key aspects of his successful boatbuilding methods.Step 4: Finishing Touches
Once the flange is fully dried, Sven removes the clamps carefully, ensuring no damage occurs during this process. He then moves on to attaching four more pieces onto these main frames, completing two pairs of flanges for the bulkhead hatches.The Final Touches
While two flanges form the primary support structure around the hatches, Sven mentions there are two additional pieces required at each end to ensure comprehensive protection. This attention to detail highlights his commitment to producing a durable and reliable design. “Sailing is about finding your path, whether it’s across an ocean or within yourself.” – Sven Yrvind In conclusion, making flanges around bulkhead hatches may seem complex at first glance, but by following Sven Yrvind’s meticulous process, enthusiasts can achieve professional-level results. Remember that the journey of boatbuilding is as rewarding as reaching your destination; it tests one’s patience and dedication. For those seeking to embark on this adventure or simply gain more insight into marine craftsmanship, Sven’s wisdom is invaluable.Once the flange is fully dried, Sven removes the clamps carefully, ensuring no damage occurs during this process. He then moves on to attaching four more pieces onto these main frames, completing two pairs of flanges for the bulkhead hatches.The Final Touches
While two flanges form the primary support structure around the hatches, Sven mentions there are two additional pieces required at each end to ensure comprehensive protection. This attention to detail highlights his commitment to producing a durable and reliable design. “Sailing is about finding your path, whether it’s across an ocean or within yourself.” – Sven Yrvind In conclusion, making flanges around bulkhead hatches may seem complex at first glance, but by following Sven Yrvind’s meticulous process, enthusiasts can achieve professional-level results. Remember that the journey of boatbuilding is as rewarding as reaching your destination; it tests one’s patience and dedication. For those seeking to embark on this adventure or simply gain more insight into marine craftsmanship, Sven’s wisdom is invaluable.Sven proceeds to apply glue along one edge of the flange, ensuring a secure bond when clamped into place. He emphasizes that this stage is crucial for maintaining the structural integrity of the flange, which in turn safeguards the living area beneath the canvas when hatches are open.Step 3: Allowing Time to Dry
After securely attaching the first portion of the flange, Sven allows ample time for it to dry before moving forward with additional steps. This patience and precision are key aspects of his successful boatbuilding methods.Step 4: Finishing Touches
Once the flange is fully dried, Sven removes the clamps carefully, ensuring no damage occurs during this process. He then moves on to attaching four more pieces onto these main frames, completing two pairs of flanges for the bulkhead hatches.The Final Touches
While two flanges form the primary support structure around the hatches, Sven mentions there are two additional pieces required at each end to ensure comprehensive protection. This attention to detail highlights his commitment to producing a durable and reliable design. “Sailing is about finding your path, whether it’s across an ocean or within yourself.” – Sven Yrvind In conclusion, making flanges around bulkhead hatches may seem complex at first glance, but by following Sven Yrvind’s meticulous process, enthusiasts can achieve professional-level results. Remember that the journey of boatbuilding is as rewarding as reaching your destination; it tests one’s patience and dedication. For those seeking to embark on this adventure or simply gain more insight into marine craftsmanship, Sven’s wisdom is invaluable.Sven begins by explaining that working on flanges vertically and horizontally is significantly easier than doing so in a flat position. To simplify the process further, he divides the task into two or three steps as suggested by fellow expert “for for.” This approach not only makes it more manageable but also allows for greater precision in crafting each component.Step 2: Applying Glue and Securing
Sven proceeds to apply glue along one edge of the flange, ensuring a secure bond when clamped into place. He emphasizes that this stage is crucial for maintaining the structural integrity of the flange, which in turn safeguards the living area beneath the canvas when hatches are open.Step 3: Allowing Time to Dry
After securely attaching the first portion of the flange, Sven allows ample time for it to dry before moving forward with additional steps. This patience and precision are key aspects of his successful boatbuilding methods.Step 4: Finishing Touches
Once the flange is fully dried, Sven removes the clamps carefully, ensuring no damage occurs during this process. He then moves on to attaching four more pieces onto these main frames, completing two pairs of flanges for the bulkhead hatches.The Final Touches
While two flanges form the primary support structure around the hatches, Sven mentions there are two additional pieces required at each end to ensure comprehensive protection. This attention to detail highlights his commitment to producing a durable and reliable design. “Sailing is about finding your path, whether it’s across an ocean or within yourself.” – Sven Yrvind In conclusion, making flanges around bulkhead hatches may seem complex at first glance, but by following Sven Yrvind’s meticulous process, enthusiasts can achieve professional-level results. Remember that the journey of boatbuilding is as rewarding as reaching your destination; it tests one’s patience and dedication. For those seeking to embark on this adventure or simply gain more insight into marine craftsmanship, Sven’s wisdom is invaluable.Sven Yrvind, a renowned yacht designer and sailor, shares valuable insights on creating flanges around bulkhead hatches for canvas protection in this enlightening video. By following his expert guidance, boat enthusiasts can ensure their living areas remain secure while allowing unhindered access through the hatches.Step 1: Starting with the Flange
Sven begins by explaining that working on flanges vertically and horizontally is significantly easier than doing so in a flat position. To simplify the process further, he divides the task into two or three steps as suggested by fellow expert “for for.” This approach not only makes it more manageable but also allows for greater precision in crafting each component.Step 2: Applying Glue and Securing
Sven proceeds to apply glue along one edge of the flange, ensuring a secure bond when clamped into place. He emphasizes that this stage is crucial for maintaining the structural integrity of the flange, which in turn safeguards the living area beneath the canvas when hatches are open.Step 3: Allowing Time to Dry
After securely attaching the first portion of the flange, Sven allows ample time for it to dry before moving forward with additional steps. This patience and precision are key aspects of his successful boatbuilding methods.Step 4: Finishing Touches
Once the flange is fully dried, Sven removes the clamps carefully, ensuring no damage occurs during this process. He then moves on to attaching four more pieces onto these main frames, completing two pairs of flanges for the bulkhead hatches.The Final Touches
While two flanges form the primary support structure around the hatches, Sven mentions there are two additional pieces required at each end to ensure comprehensive protection. This attention to detail highlights his commitment to producing a durable and reliable design. “Sailing is about finding your path, whether it’s across an ocean or within yourself.” – Sven Yrvind In conclusion, making flanges around bulkhead hatches may seem complex at first glance, but by following Sven Yrvind’s meticulous process, enthusiasts can achieve professional-level results. Remember that the journey of boatbuilding is as rewarding as reaching your destination; it tests one’s patience and dedication. For those seeking to embark on this adventure or simply gain more insight into marine craftsmanship, Sven’s wisdom is invaluable.Making Flanges Around Bulkhead Hatches for Canvas
Sven Yrvind, a renowned yacht designer and sailor, shares valuable insights on creating flanges around bulkhead hatches for canvas protection in this enlightening video. By following his expert guidance, boat enthusiasts can ensure their living areas remain secure while allowing unhindered access through the hatches.Step 1: Starting with the Flange
Sven begins by explaining that working on flanges vertically and horizontally is significantly easier than doing so in a flat position. To simplify the process further, he divides the task into two or three steps as suggested by fellow expert “for for.” This approach not only makes it more manageable but also allows for greater precision in crafting each component.Step 2: Applying Glue and Securing
Sven proceeds to apply glue along one edge of the flange, ensuring a secure bond when clamped into place. He emphasizes that this stage is crucial for maintaining the structural integrity of the flange, which in turn safeguards the living area beneath the canvas when hatches are open.Step 3: Allowing Time to Dry
After securely attaching the first portion of the flange, Sven allows ample time for it to dry before moving forward with additional steps. This patience and precision are key aspects of his successful boatbuilding methods.Step 4: Finishing Touches
Once the flange is fully dried, Sven removes the clamps carefully, ensuring no damage occurs during this process. He then moves on to attaching four more pieces onto these main frames, completing two pairs of flanges for the bulkhead hatches.The Final Touches
While two flanges form the primary support structure around the hatches, Sven mentions there are two additional pieces required at each end to ensure comprehensive protection. This attention to detail highlights his commitment to producing a durable and reliable design. “Sailing is about finding your path, whether it’s across an ocean or within yourself.” – Sven Yrvind In conclusion, making flanges around bulkhead hatches may seem complex at first glance, but by following Sven Yrvind’s meticulous process, enthusiasts can achieve professional-level results. Remember that the journey of boatbuilding is as rewarding as reaching your destination; it tests one’s patience and dedication. For those seeking to embark on this adventure or simply gain more insight into marine craftsmanship, Sven’s wisdom is invaluable.After securely attaching the first portion of the flange, Sven allows ample time for it to dry before moving forward with additional steps. This patience and precision are key aspects of his successful boatbuilding methods.Step 4: Finishing Touches
Once the flange is fully dried, Sven removes the clamps carefully, ensuring no damage occurs during this process. He then moves on to attaching four more pieces onto these main frames, completing two pairs of flanges for the bulkhead hatches.The Final Touches
While two flanges form the primary support structure around the hatches, Sven mentions there are two additional pieces required at each end to ensure comprehensive protection. This attention to detail highlights his commitment to producing a durable and reliable design. “Sailing is about finding your path, whether it’s across an ocean or within yourself.” – Sven Yrvind In conclusion, making flanges around bulkhead hatches may seem complex at first glance, but by following Sven Yrvind’s meticulous process, enthusiasts can achieve professional-level results. Remember that the journey of boatbuilding is as rewarding as reaching your destination; it tests one’s patience and dedication. For those seeking to embark on this adventure or simply gain more insight into marine craftsmanship, Sven’s wisdom is invaluable.Sven proceeds to apply glue along one edge of the flange, ensuring a secure bond when clamped into place. He emphasizes that this stage is crucial for maintaining the structural integrity of the flange, which in turn safeguards the living area beneath the canvas when hatches are open.Step 3: Allowing Time to Dry
After securely attaching the first portion of the flange, Sven allows ample time for it to dry before moving forward with additional steps. This patience and precision are key aspects of his successful boatbuilding methods.Step 4: Finishing Touches
Once the flange is fully dried, Sven removes the clamps carefully, ensuring no damage occurs during this process. He then moves on to attaching four more pieces onto these main frames, completing two pairs of flanges for the bulkhead hatches.The Final Touches
While two flanges form the primary support structure around the hatches, Sven mentions there are two additional pieces required at each end to ensure comprehensive protection. This attention to detail highlights his commitment to producing a durable and reliable design. “Sailing is about finding your path, whether it’s across an ocean or within yourself.” – Sven Yrvind In conclusion, making flanges around bulkhead hatches may seem complex at first glance, but by following Sven Yrvind’s meticulous process, enthusiasts can achieve professional-level results. Remember that the journey of boatbuilding is as rewarding as reaching your destination; it tests one’s patience and dedication. For those seeking to embark on this adventure or simply gain more insight into marine craftsmanship, Sven’s wisdom is invaluable.Sven begins by explaining that working on flanges vertically and horizontally is significantly easier than doing so in a flat position. To simplify the process further, he divides the task into two or three steps as suggested by fellow expert “for for.” This approach not only makes it more manageable but also allows for greater precision in crafting each component.Step 2: Applying Glue and Securing
Sven proceeds to apply glue along one edge of the flange, ensuring a secure bond when clamped into place. He emphasizes that this stage is crucial for maintaining the structural integrity of the flange, which in turn safeguards the living area beneath the canvas when hatches are open.Step 3: Allowing Time to Dry
After securely attaching the first portion of the flange, Sven allows ample time for it to dry before moving forward with additional steps. This patience and precision are key aspects of his successful boatbuilding methods.Step 4: Finishing Touches
Once the flange is fully dried, Sven removes the clamps carefully, ensuring no damage occurs during this process. He then moves on to attaching four more pieces onto these main frames, completing two pairs of flanges for the bulkhead hatches.The Final Touches
While two flanges form the primary support structure around the hatches, Sven mentions there are two additional pieces required at each end to ensure comprehensive protection. This attention to detail highlights his commitment to producing a durable and reliable design. “Sailing is about finding your path, whether it’s across an ocean or within yourself.” – Sven Yrvind In conclusion, making flanges around bulkhead hatches may seem complex at first glance, but by following Sven Yrvind’s meticulous process, enthusiasts can achieve professional-level results. Remember that the journey of boatbuilding is as rewarding as reaching your destination; it tests one’s patience and dedication. For those seeking to embark on this adventure or simply gain more insight into marine craftsmanship, Sven’s wisdom is invaluable.Sven Yrvind, a renowned yacht designer and sailor, shares valuable insights on creating flanges around bulkhead hatches for canvas protection in this enlightening video. By following his expert guidance, boat enthusiasts can ensure their living areas remain secure while allowing unhindered access through the hatches.Step 1: Starting with the Flange
Sven begins by explaining that working on flanges vertically and horizontally is significantly easier than doing so in a flat position. To simplify the process further, he divides the task into two or three steps as suggested by fellow expert “for for.” This approach not only makes it more manageable but also allows for greater precision in crafting each component.Step 2: Applying Glue and Securing
Sven proceeds to apply glue along one edge of the flange, ensuring a secure bond when clamped into place. He emphasizes that this stage is crucial for maintaining the structural integrity of the flange, which in turn safeguards the living area beneath the canvas when hatches are open.Step 3: Allowing Time to Dry
After securely attaching the first portion of the flange, Sven allows ample time for it to dry before moving forward with additional steps. This patience and precision are key aspects of his successful boatbuilding methods.Step 4: Finishing Touches
Once the flange is fully dried, Sven removes the clamps carefully, ensuring no damage occurs during this process. He then moves on to attaching four more pieces onto these main frames, completing two pairs of flanges for the bulkhead hatches.The Final Touches
While two flanges form the primary support structure around the hatches, Sven mentions there are two additional pieces required at each end to ensure comprehensive protection. This attention to detail highlights his commitment to producing a durable and reliable design. “Sailing is about finding your path, whether it’s across an ocean or within yourself.” – Sven Yrvind In conclusion, making flanges around bulkhead hatches may seem complex at first glance, but by following Sven Yrvind’s meticulous process, enthusiasts can achieve professional-level results. Remember that the journey of boatbuilding is as rewarding as reaching your destination; it tests one’s patience and dedication. For those seeking to embark on this adventure or simply gain more insight into marine craftsmanship, Sven’s wisdom is invaluable.Making Flanges Around Bulkhead Hatches for Canvas
Sven Yrvind, a renowned yacht designer and sailor, shares valuable insights on creating flanges around bulkhead hatches for canvas protection in this enlightening video. By following his expert guidance, boat enthusiasts can ensure their living areas remain secure while allowing unhindered access through the hatches.Step 1: Starting with the Flange
Sven begins by explaining that working on flanges vertically and horizontally is significantly easier than doing so in a flat position. To simplify the process further, he divides the task into two or three steps as suggested by fellow expert “for for.” This approach not only makes it more manageable but also allows for greater precision in crafting each component.Step 2: Applying Glue and Securing
Sven proceeds to apply glue along one edge of the flange, ensuring a secure bond when clamped into place. He emphasizes that this stage is crucial for maintaining the structural integrity of the flange, which in turn safeguards the living area beneath the canvas when hatches are open.Step 3: Allowing Time to Dry
After securely attaching the first portion of the flange, Sven allows ample time for it to dry before moving forward with additional steps. This patience and precision are key aspects of his successful boatbuilding methods.Step 4: Finishing Touches
Once the flange is fully dried, Sven removes the clamps carefully, ensuring no damage occurs during this process. He then moves on to attaching four more pieces onto these main frames, completing two pairs of flanges for the bulkhead hatches.The Final Touches
While two flanges form the primary support structure around the hatches, Sven mentions there are two additional pieces required at each end to ensure comprehensive protection. This attention to detail highlights his commitment to producing a durable and reliable design. “Sailing is about finding your path, whether it’s across an ocean or within yourself.” – Sven Yrvind In conclusion, making flanges around bulkhead hatches may seem complex at first glance, but by following Sven Yrvind’s meticulous process, enthusiasts can achieve professional-level results. Remember that the journey of boatbuilding is as rewarding as reaching your destination; it tests one’s patience and dedication. For those seeking to embark on this adventure or simply gain more insight into marine craftsmanship, Sven’s wisdom is invaluable.Once the flange is fully dried, Sven removes the clamps carefully, ensuring no damage occurs during this process. He then moves on to attaching four more pieces onto these main frames, completing two pairs of flanges for the bulkhead hatches.The Final Touches
While two flanges form the primary support structure around the hatches, Sven mentions there are two additional pieces required at each end to ensure comprehensive protection. This attention to detail highlights his commitment to producing a durable and reliable design. “Sailing is about finding your path, whether it’s across an ocean or within yourself.” – Sven Yrvind In conclusion, making flanges around bulkhead hatches may seem complex at first glance, but by following Sven Yrvind’s meticulous process, enthusiasts can achieve professional-level results. Remember that the journey of boatbuilding is as rewarding as reaching your destination; it tests one’s patience and dedication. For those seeking to embark on this adventure or simply gain more insight into marine craftsmanship, Sven’s wisdom is invaluable.After securely attaching the first portion of the flange, Sven allows ample time for it to dry before moving forward with additional steps. This patience and precision are key aspects of his successful boatbuilding methods.Step 4: Finishing Touches
Once the flange is fully dried, Sven removes the clamps carefully, ensuring no damage occurs during this process. He then moves on to attaching four more pieces onto these main frames, completing two pairs of flanges for the bulkhead hatches.The Final Touches
While two flanges form the primary support structure around the hatches, Sven mentions there are two additional pieces required at each end to ensure comprehensive protection. This attention to detail highlights his commitment to producing a durable and reliable design. “Sailing is about finding your path, whether it’s across an ocean or within yourself.” – Sven Yrvind In conclusion, making flanges around bulkhead hatches may seem complex at first glance, but by following Sven Yrvind’s meticulous process, enthusiasts can achieve professional-level results. Remember that the journey of boatbuilding is as rewarding as reaching your destination; it tests one’s patience and dedication. For those seeking to embark on this adventure or simply gain more insight into marine craftsmanship, Sven’s wisdom is invaluable.Sven proceeds to apply glue along one edge of the flange, ensuring a secure bond when clamped into place. He emphasizes that this stage is crucial for maintaining the structural integrity of the flange, which in turn safeguards the living area beneath the canvas when hatches are open.Step 3: Allowing Time to Dry
After securely attaching the first portion of the flange, Sven allows ample time for it to dry before moving forward with additional steps. This patience and precision are key aspects of his successful boatbuilding methods.Step 4: Finishing Touches
Once the flange is fully dried, Sven removes the clamps carefully, ensuring no damage occurs during this process. He then moves on to attaching four more pieces onto these main frames, completing two pairs of flanges for the bulkhead hatches.The Final Touches
While two flanges form the primary support structure around the hatches, Sven mentions there are two additional pieces required at each end to ensure comprehensive protection. This attention to detail highlights his commitment to producing a durable and reliable design. “Sailing is about finding your path, whether it’s across an ocean or within yourself.” – Sven Yrvind In conclusion, making flanges around bulkhead hatches may seem complex at first glance, but by following Sven Yrvind’s meticulous process, enthusiasts can achieve professional-level results. Remember that the journey of boatbuilding is as rewarding as reaching your destination; it tests one’s patience and dedication. For those seeking to embark on this adventure or simply gain more insight into marine craftsmanship, Sven’s wisdom is invaluable.Sven begins by explaining that working on flanges vertically and horizontally is significantly easier than doing so in a flat position. To simplify the process further, he divides the task into two or three steps as suggested by fellow expert “for for.” This approach not only makes it more manageable but also allows for greater precision in crafting each component.Step 2: Applying Glue and Securing
Sven proceeds to apply glue along one edge of the flange, ensuring a secure bond when clamped into place. He emphasizes that this stage is crucial for maintaining the structural integrity of the flange, which in turn safeguards the living area beneath the canvas when hatches are open.Step 3: Allowing Time to Dry
After securely attaching the first portion of the flange, Sven allows ample time for it to dry before moving forward with additional steps. This patience and precision are key aspects of his successful boatbuilding methods.Step 4: Finishing Touches
Once the flange is fully dried, Sven removes the clamps carefully, ensuring no damage occurs during this process. He then moves on to attaching four more pieces onto these main frames, completing two pairs of flanges for the bulkhead hatches.The Final Touches
While two flanges form the primary support structure around the hatches, Sven mentions there are two additional pieces required at each end to ensure comprehensive protection. This attention to detail highlights his commitment to producing a durable and reliable design. “Sailing is about finding your path, whether it’s across an ocean or within yourself.” – Sven Yrvind In conclusion, making flanges around bulkhead hatches may seem complex at first glance, but by following Sven Yrvind’s meticulous process, enthusiasts can achieve professional-level results. Remember that the journey of boatbuilding is as rewarding as reaching your destination; it tests one’s patience and dedication. For those seeking to embark on this adventure or simply gain more insight into marine craftsmanship, Sven’s wisdom is invaluable.Sven Yrvind, a renowned yacht designer and sailor, shares valuable insights on creating flanges around bulkhead hatches for canvas protection in this enlightening video. By following his expert guidance, boat enthusiasts can ensure their living areas remain secure while allowing unhindered access through the hatches.Step 1: Starting with the Flange
Sven begins by explaining that working on flanges vertically and horizontally is significantly easier than doing so in a flat position. To simplify the process further, he divides the task into two or three steps as suggested by fellow expert “for for.” This approach not only makes it more manageable but also allows for greater precision in crafting each component.Step 2: Applying Glue and Securing
Sven proceeds to apply glue along one edge of the flange, ensuring a secure bond when clamped into place. He emphasizes that this stage is crucial for maintaining the structural integrity of the flange, which in turn safeguards the living area beneath the canvas when hatches are open.Step 3: Allowing Time to Dry
After securely attaching the first portion of the flange, Sven allows ample time for it to dry before moving forward with additional steps. This patience and precision are key aspects of his successful boatbuilding methods.Step 4: Finishing Touches
Once the flange is fully dried, Sven removes the clamps carefully, ensuring no damage occurs during this process. He then moves on to attaching four more pieces onto these main frames, completing two pairs of flanges for the bulkhead hatches.The Final Touches
While two flanges form the primary support structure around the hatches, Sven mentions there are two additional pieces required at each end to ensure comprehensive protection. This attention to detail highlights his commitment to producing a durable and reliable design. “Sailing is about finding your path, whether it’s across an ocean or within yourself.” – Sven Yrvind In conclusion, making flanges around bulkhead hatches may seem complex at first glance, but by following Sven Yrvind’s meticulous process, enthusiasts can achieve professional-level results. Remember that the journey of boatbuilding is as rewarding as reaching your destination; it tests one’s patience and dedication. For those seeking to embark on this adventure or simply gain more insight into marine craftsmanship, Sven’s wisdom is invaluable.Making Flanges Around Bulkhead Hatches for Canvas
Sven Yrvind, a renowned yacht designer and sailor, shares valuable insights on creating flanges around bulkhead hatches for canvas protection in this enlightening video. By following his expert guidance, boat enthusiasts can ensure their living areas remain secure while allowing unhindered access through the hatches.Step 1: Starting with the Flange
Sven begins by explaining that working on flanges vertically and horizontally is significantly easier than doing so in a flat position. To simplify the process further, he divides the task into two or three steps as suggested by fellow expert “for for.” This approach not only makes it more manageable but also allows for greater precision in crafting each component.Step 2: Applying Glue and Securing
Sven proceeds to apply glue along one edge of the flange, ensuring a secure bond when clamped into place. He emphasizes that this stage is crucial for maintaining the structural integrity of the flange, which in turn safeguards the living area beneath the canvas when hatches are open.Step 3: Allowing Time to Dry
After securely attaching the first portion of the flange, Sven allows ample time for it to dry before moving forward with additional steps. This patience and precision are key aspects of his successful boatbuilding methods.Step 4: Finishing Touches
Once the flange is fully dried, Sven removes the clamps carefully, ensuring no damage occurs during this process. He then moves on to attaching four more pieces onto these main frames, completing two pairs of flanges for the bulkhead hatches.The Final Touches
While two flanges form the primary support structure around the hatches, Sven mentions there are two additional pieces required at each end to ensure comprehensive protection. This attention to detail highlights his commitment to producing a durable and reliable design. “Sailing is about finding your path, whether it’s across an ocean or within yourself.” – Sven Yrvind In conclusion, making flanges around bulkhead hatches may seem complex at first glance, but by following Sven Yrvind’s meticulous process, enthusiasts can achieve professional-level results. Remember that the journey of boatbuilding is as rewarding as reaching your destination; it tests one’s patience and dedication. For those seeking to embark on this adventure or simply gain more insight into marine craftsmanship, Sven’s wisdom is invaluable.Latest Episodes from Sven Yrvind
Explore the most recent voyages. Subscribe to the channel to never miss an update!

One Daggerboard, Two Bilgeboards and One Rudder.
This Youtube channel is about me Sven Yrvind. I am87 year and 5 months old dyslectic solo sailor. I am building a high-latitude cruiser. She is 5.6 meter 18 feet 4 inches long. Her beam is 1.45 meter. She is a three masted lugger with a total sail area of 9 square meter. She has a bow centerboard...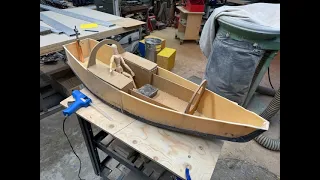
Starting the Interior – 1/5 Scale Model.
This Youtube channel is about me Sven Yrvind. I am87 year and 5 months old dyslectic solo sailor. I am building a high-latitude cruiser. She is 5.6 meter 18 feet 4 inches long. Her beam is 1.45 meter. She is a three masted lugger with a total sail area of 9 square meter. She has a bow centerboard...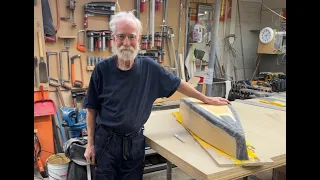
Why I Added 40 cm.
This Youtube channel is about me Sven Yrvind. I am87 year and 5 months old dyslectic solo sailor. I am building a high-latitude cruiser. She is 5.6 meter 18 feet 4 inches long. Her beam is 1.45 meter. She is a three masted lugger with a total sail area of 9 square meter. She has a bow centerboard...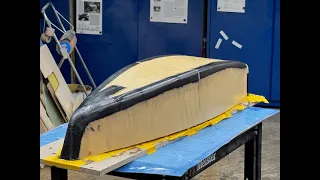
Shaping the 1/5 Scale Model.
This Youtube channel is about me Sven Yrvind. I am87 year and 5 months old dyslectic solo sailor. I am building a high-latitude cruiser. She is 5.6 meter 18 feet 4 inches long. Her beam is 1.45 meter. She is a three masted lugger with a total sail area of 9 square meter. She has a bow centerboard...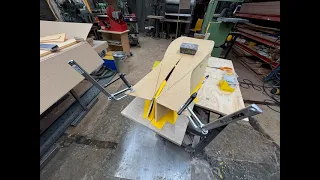
The Model Is Planked – It Was Easy.
This Youtube channel is about me Sven Yrvind. I am87 year and 5 months old dyslectic solo sailor. I am building a high-latitude cruiser. She is 5.2 meter 17 feet long. Her beam is 1.45 meter. She is a three masted lugger with a total sail area of 9 square meter. She has a bow centerboard. I am p...